DIY V-Neck batwing sleeve bustier midi dress | I made a dress for my Mother in law | Sewing tutorial

DIY V-Neck batwing sleeve bustier midi dress | I made a dress for my Mother in law | Sewing tutorial
Welcome or welcome back to my channel!
In today's tutorial, I'm going to share with you how I made a dress for my mother in law. This dress has a V- neck batwing sleeve and bustier design in midi length.
So I hope you can get come inspiration out of it. Let’s get started!
WHAT YOU’LL NEED
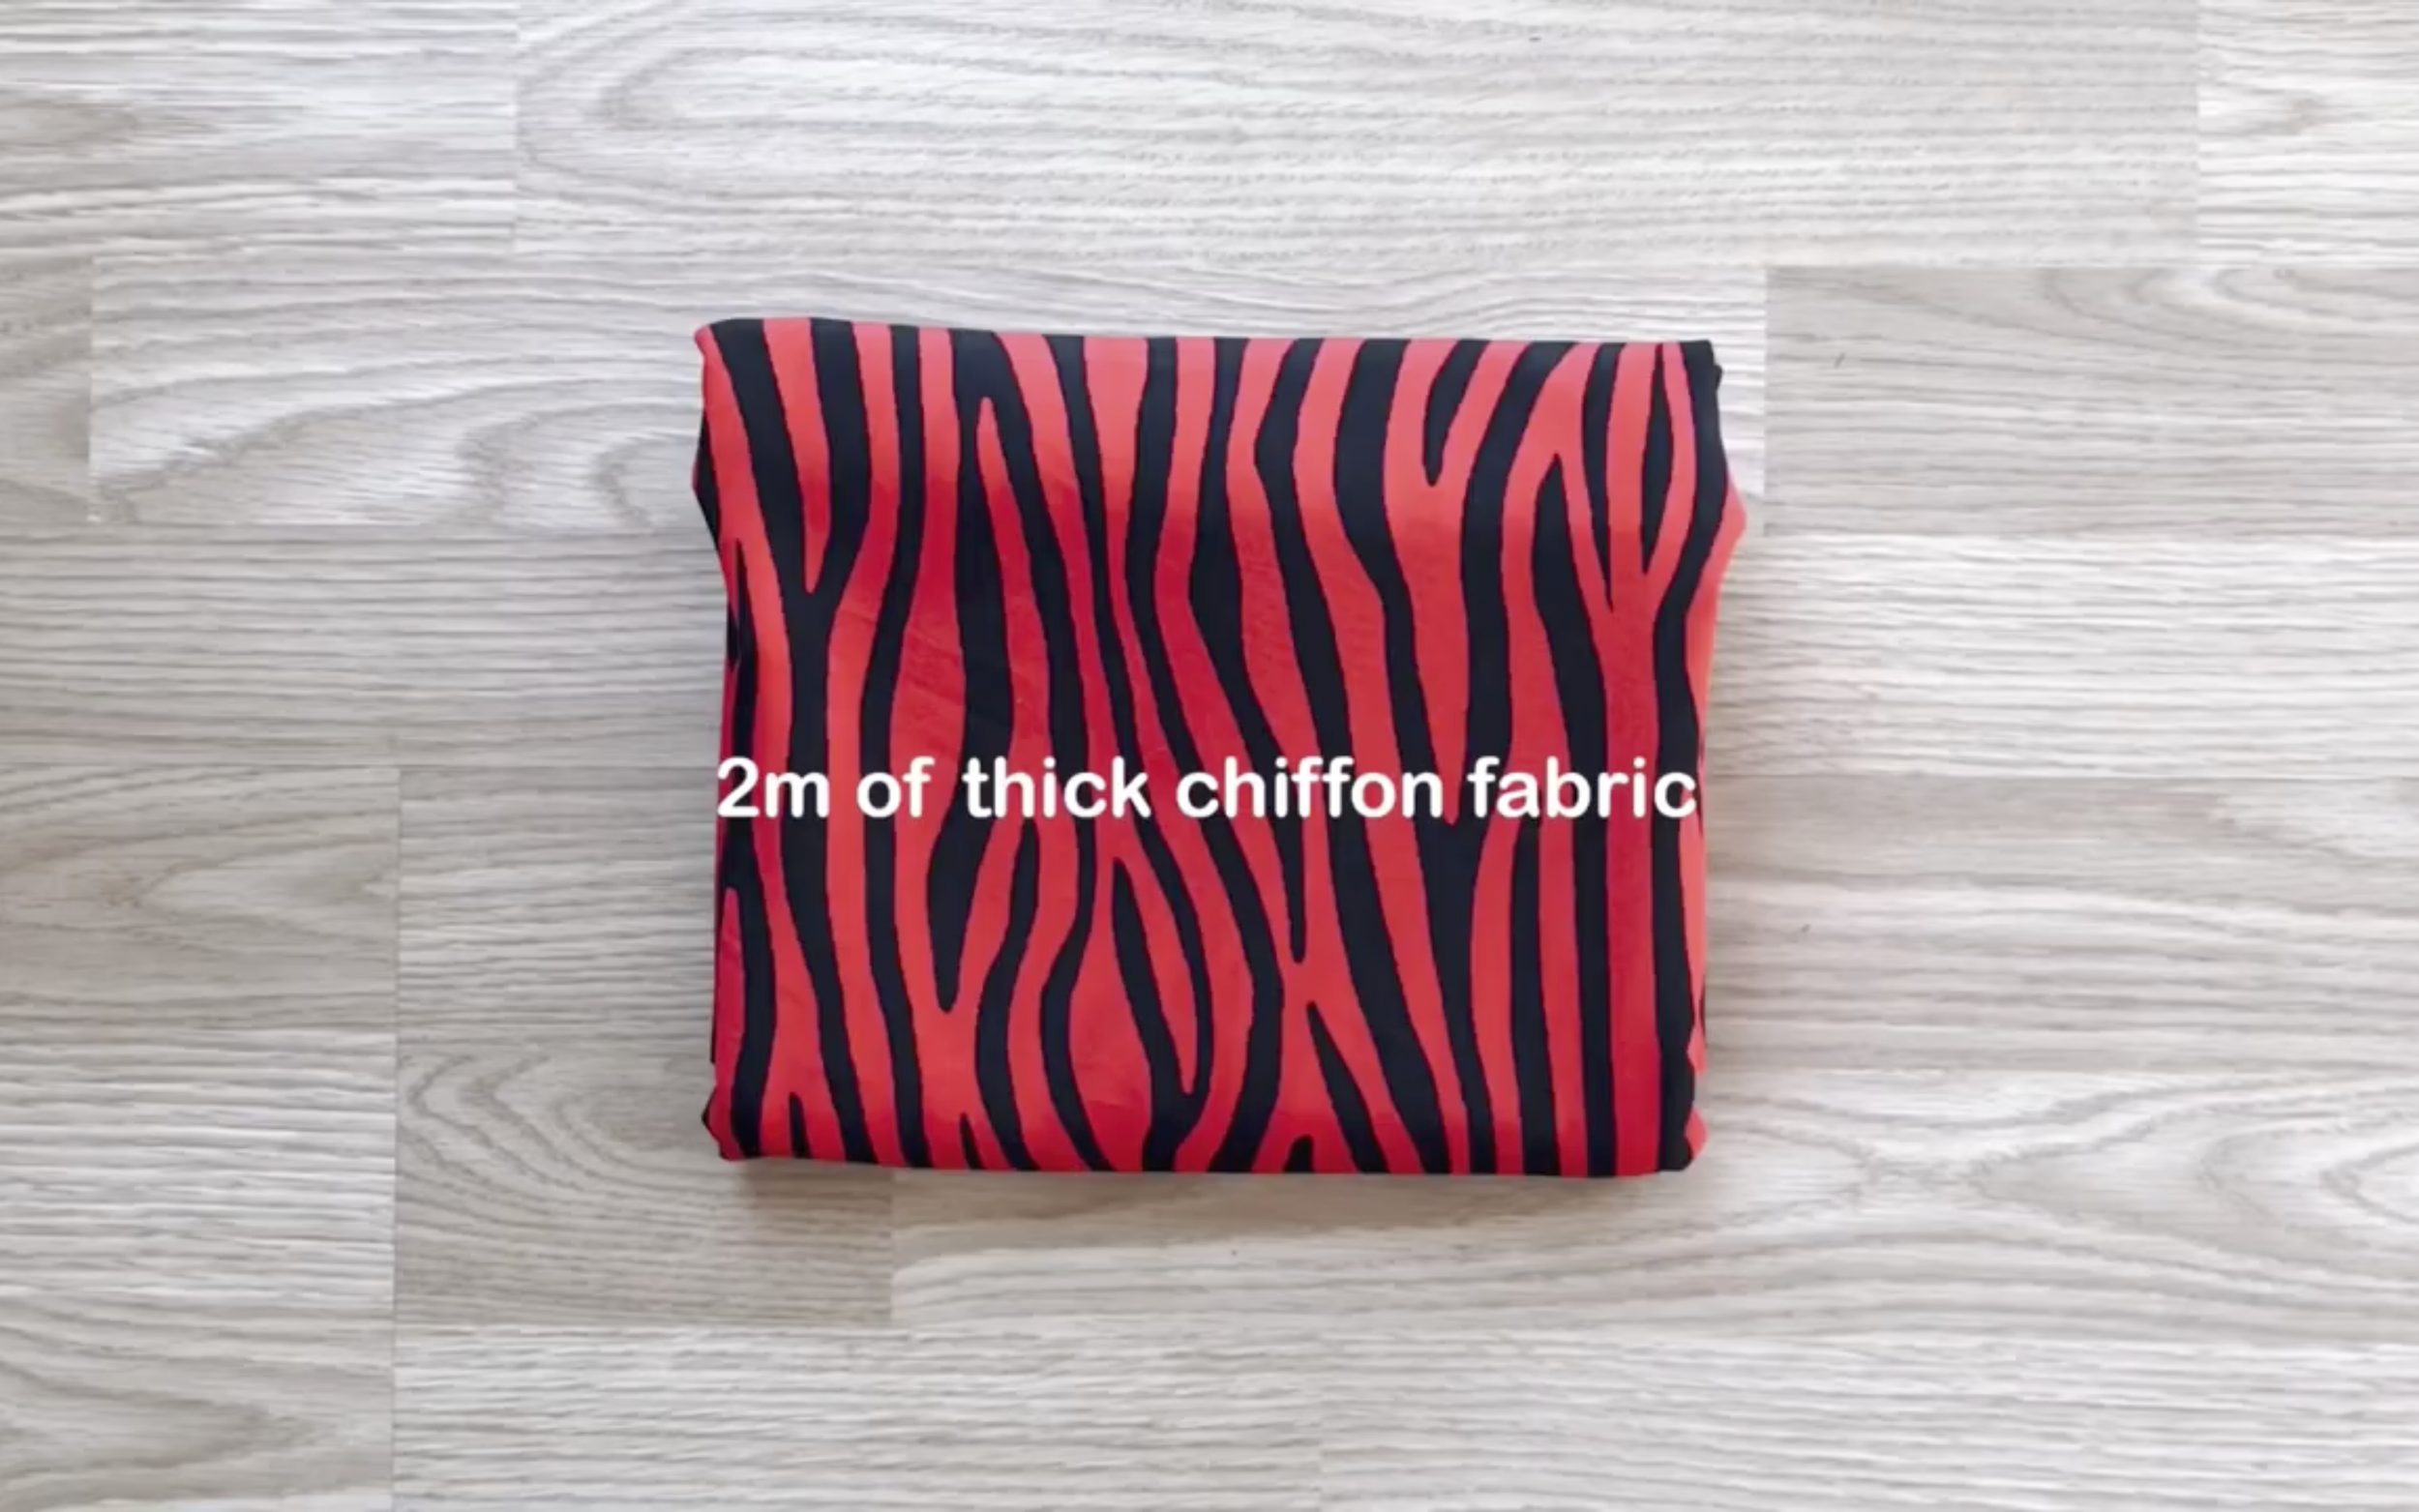
2m of thick chiffon fabric
Pattern paper
Sewing machine
Pins
Scissors
Ruler
Long stick
Zipper
Buttons
MAKING THE PATTERNS
Here’s the pattern for the project. To get a clear understanding of all the measurements needed for the pattern, watch the video from 0:38 to 7:30.
Remember, you can adjust these measurements to fit your own dimensions!
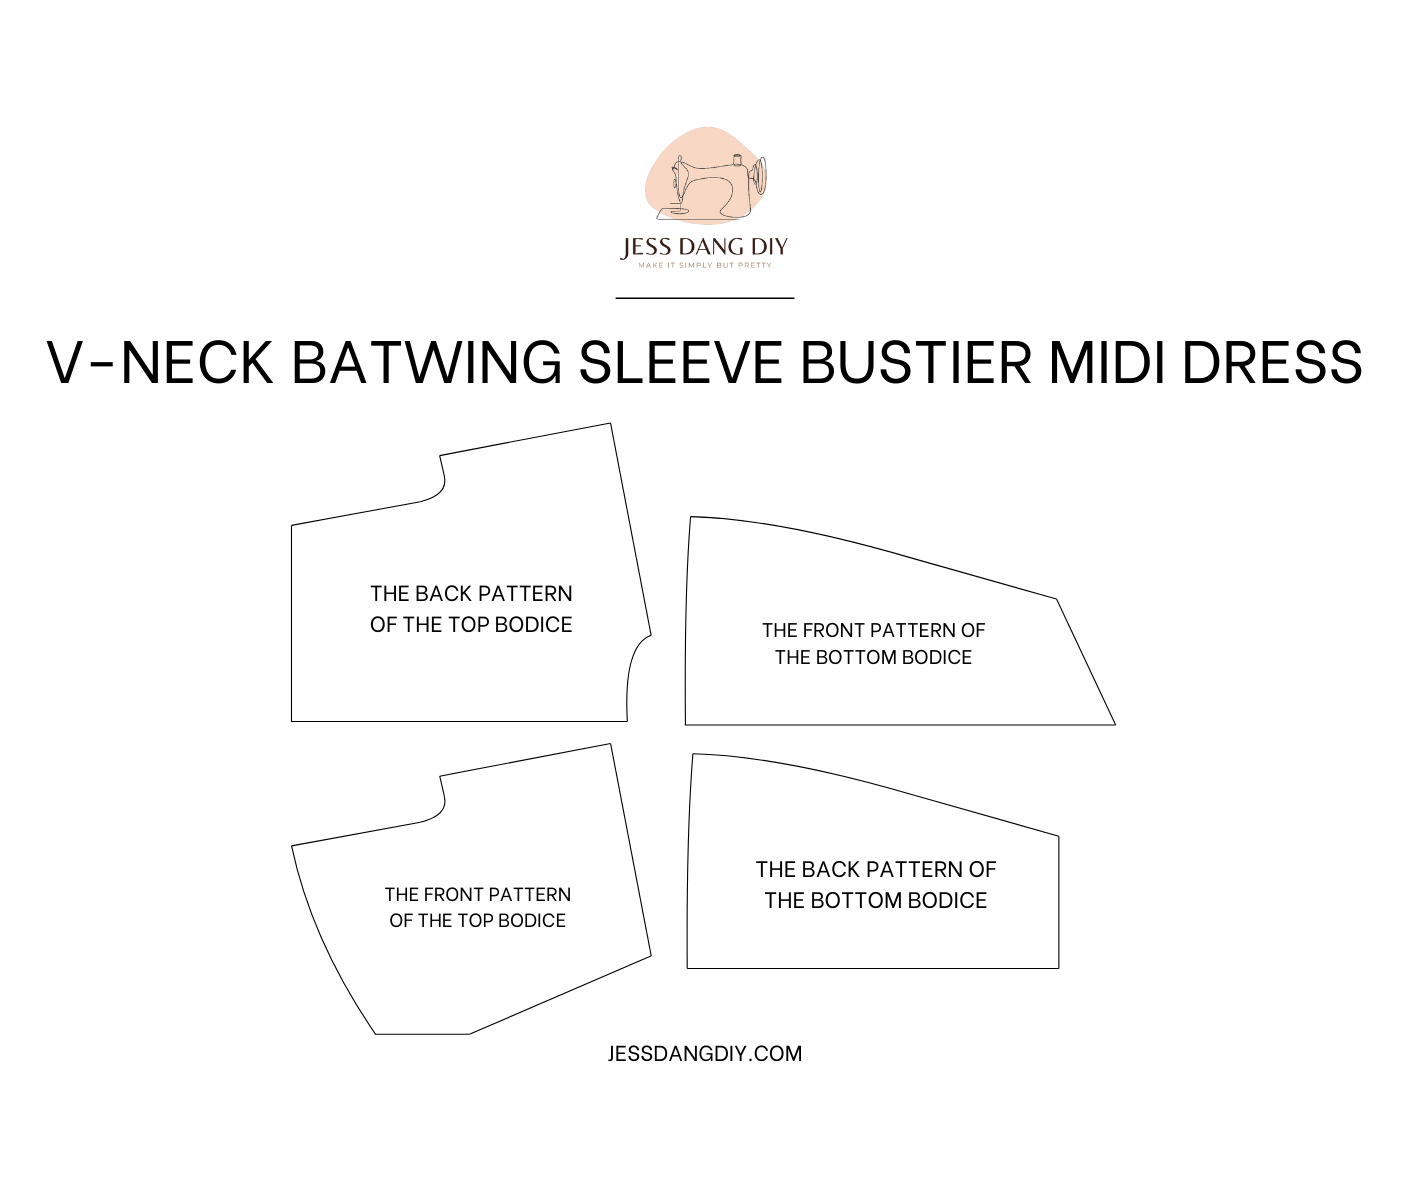
THE TOP BODICE
THE BACK PATTERN
Start by drawing two lines that cross each other.
From the corner where they meet, mark 2.5 cm along the horizontal line for the back neck depth and draw a line.
Then, mark 9 cm up along the vertical line for half the neck width and draw another line.
Connect these two points with a line, and mark the middle of this line.
From this middle mark, draw another line that meets the first one at an angle.
Smoothly connect these lines into a curve to finish the back neckline.
From the neckline’s end, mark 21 cm out for the sleeve length (including 10 cm past the shoulder).
At this mark, draw a short perpendicular line that is 4 cm wide (1/10 of the shoulder width).
Connect the end of this short line to the neckline to create the shoulder slope.
Next, draw a straight line from the shoulder slope to meet the horizontal line.
Draw another straight line 18 cm below it and another one 3 cm lower to create the bust line.
Measure 39 cm down from the shoulder slope for the under-bust line, which is about 3 cm above the belly button.
Draw a line straight down from the shoulder slope to create the sleeve edge.
Then, measure and mark 23.5 cm up from the bust line (a quarter of the bust size plus 1 cm) and 21 cm up from the under-bust line (a quarter of the under-bust size plus 1 cm).
Connect these two marks and extend the line to meet the sleeve edge to finish the side of the back pattern.
Add a slight curve at the sleeve to make it smooth
Finally, add a 1 cm seam allowance all around except for 3 cm at the sleeve edge.
Cut out the back pattern of the top bodice.
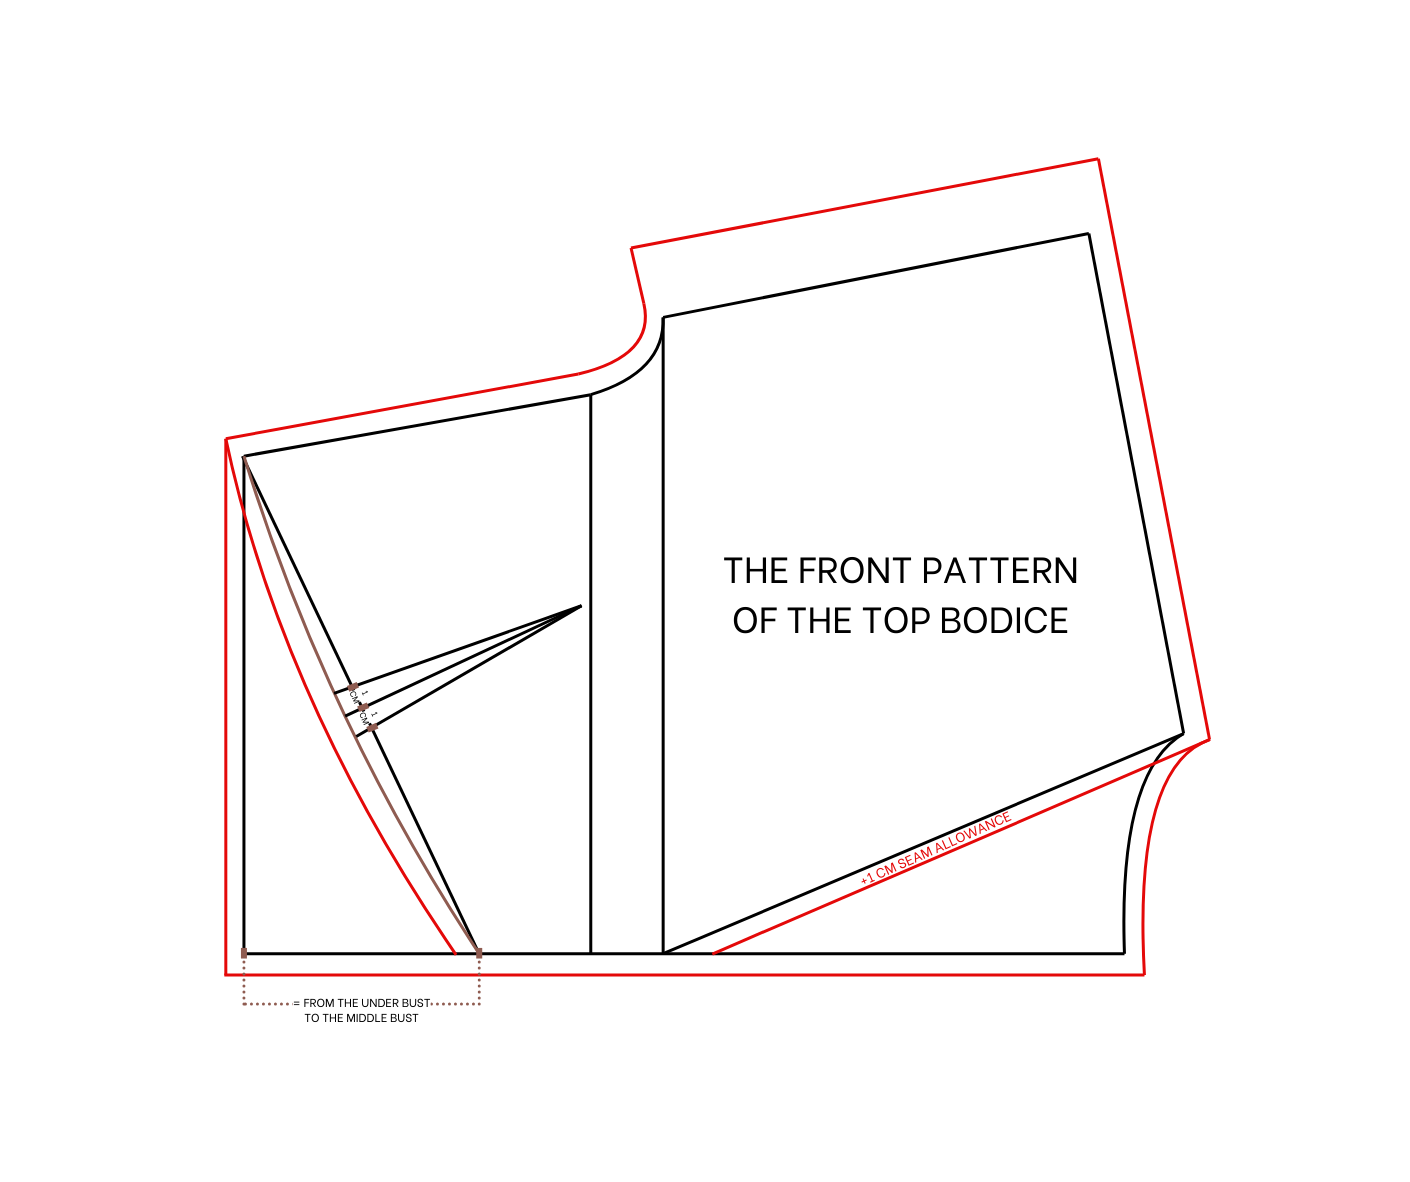
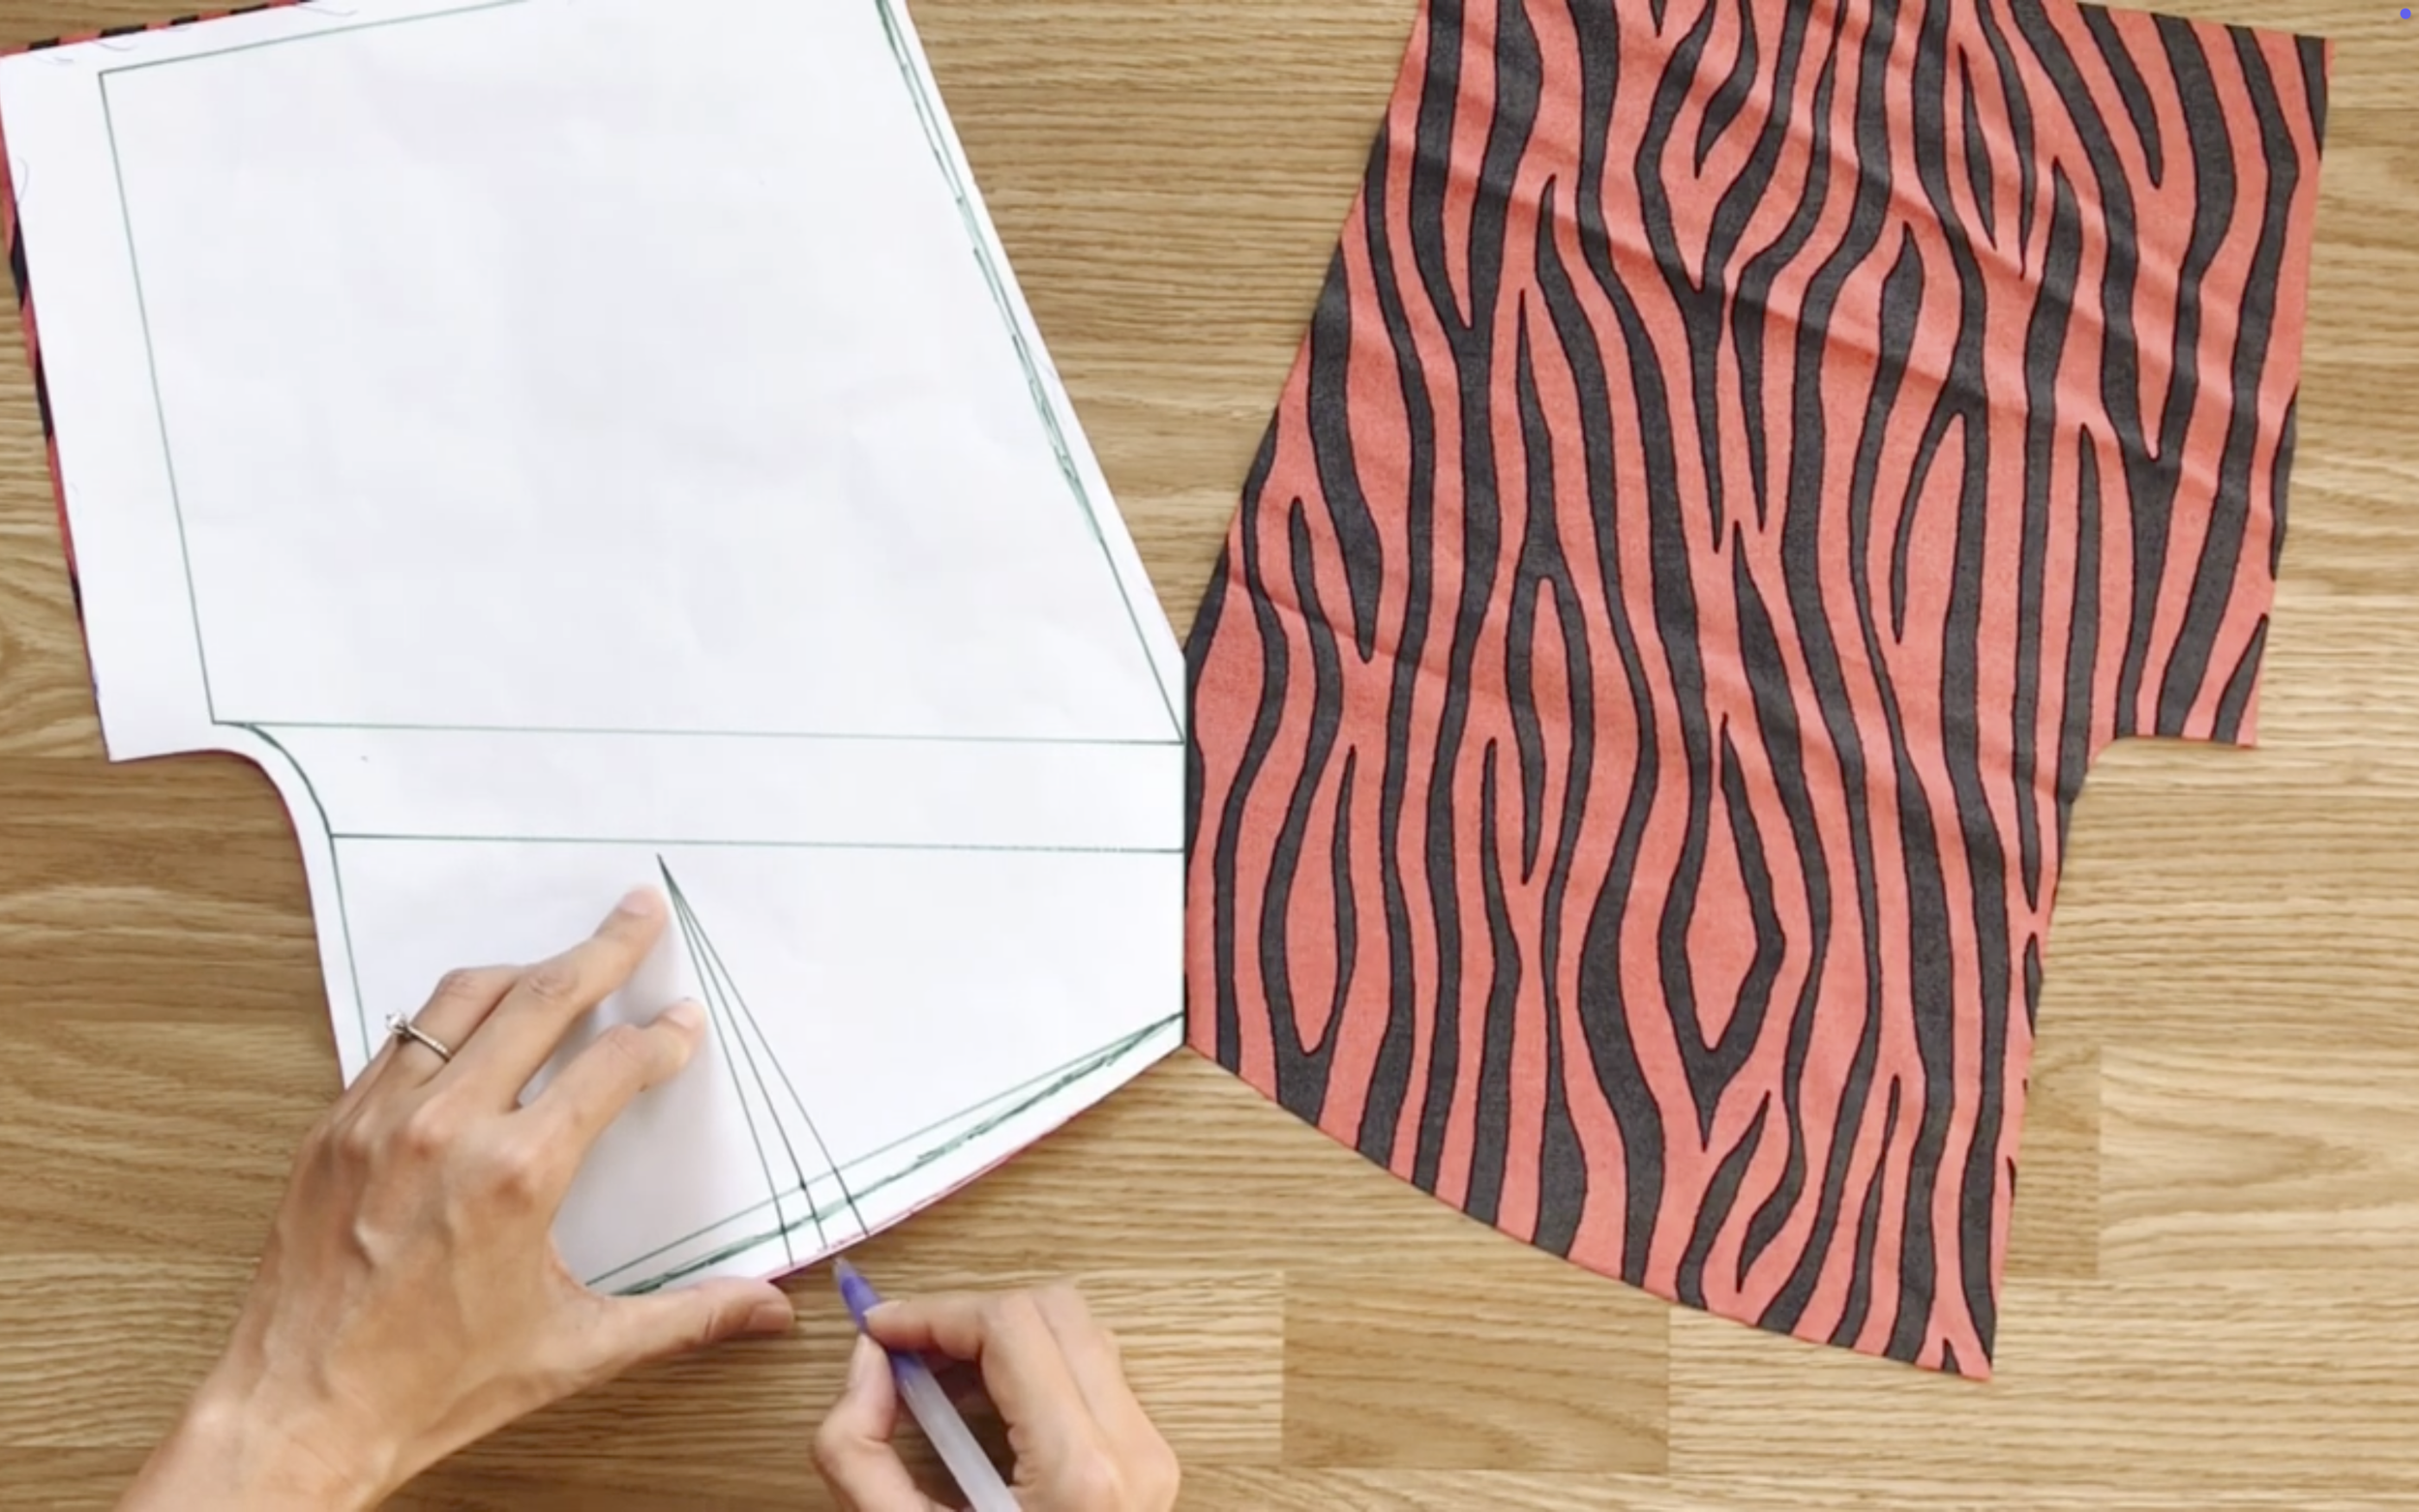
THE FRONT PATTERN
Copy the back pattern first.
Adjust the neckline by connecting the end of the neckline to the bust line in a curve.
From the bottom of the pattern, measure 10 cm up for the middle of the bust and connect it to the side.
Shape this connection into a curve to create room for the bust. If a larger bust is needed, make the curve deeper.
Draw a line from the middle of this curve straight down to the under-bust line.
Measure the curve and the straight line to find any difference, then add a dart here to fix the gap.
Add a 1 cm seam allowance to the new lines and cut out the front pattern.
THE BOTTOM DRESS
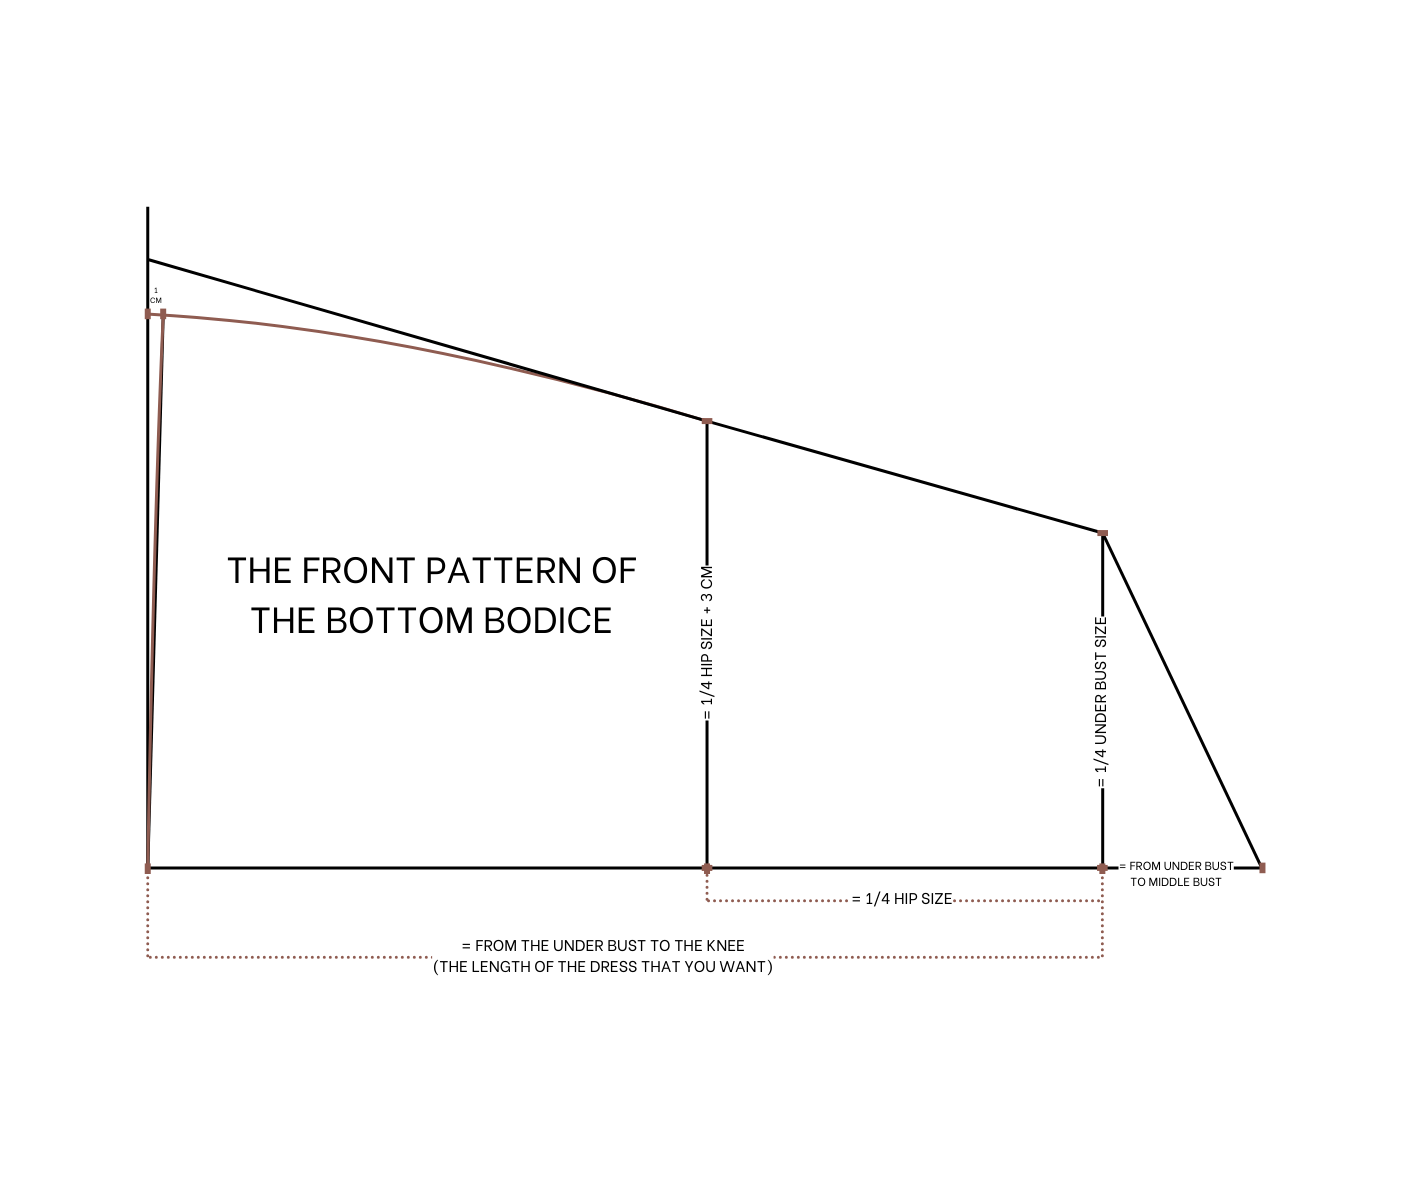
THE FRONT PATTERN
Start by drawing a horizontal line, then a straight vertical line at one end to form the top of the pattern.
From this top line, mark 25 cm down for the hip line (a quarter of the hip size).
Measure 60 cm down for the length from under the bust to the knee.
Mark 21 cm out at the top line (a quarter of the under-bust size plus 1 cm) and 28 cm out at the hip line (a quarter of the hip size plus 3 cm).
Connect these marks with a line, then slightly curve the bottom of the line to taper the dress.
To finish, measure 10 cm out from the top line to represent the middle bust length and connect this point to the bottom edge.
Add a 1 cm seam allowance (except for 3 cm at the bottom edge) and cut out the pattern.
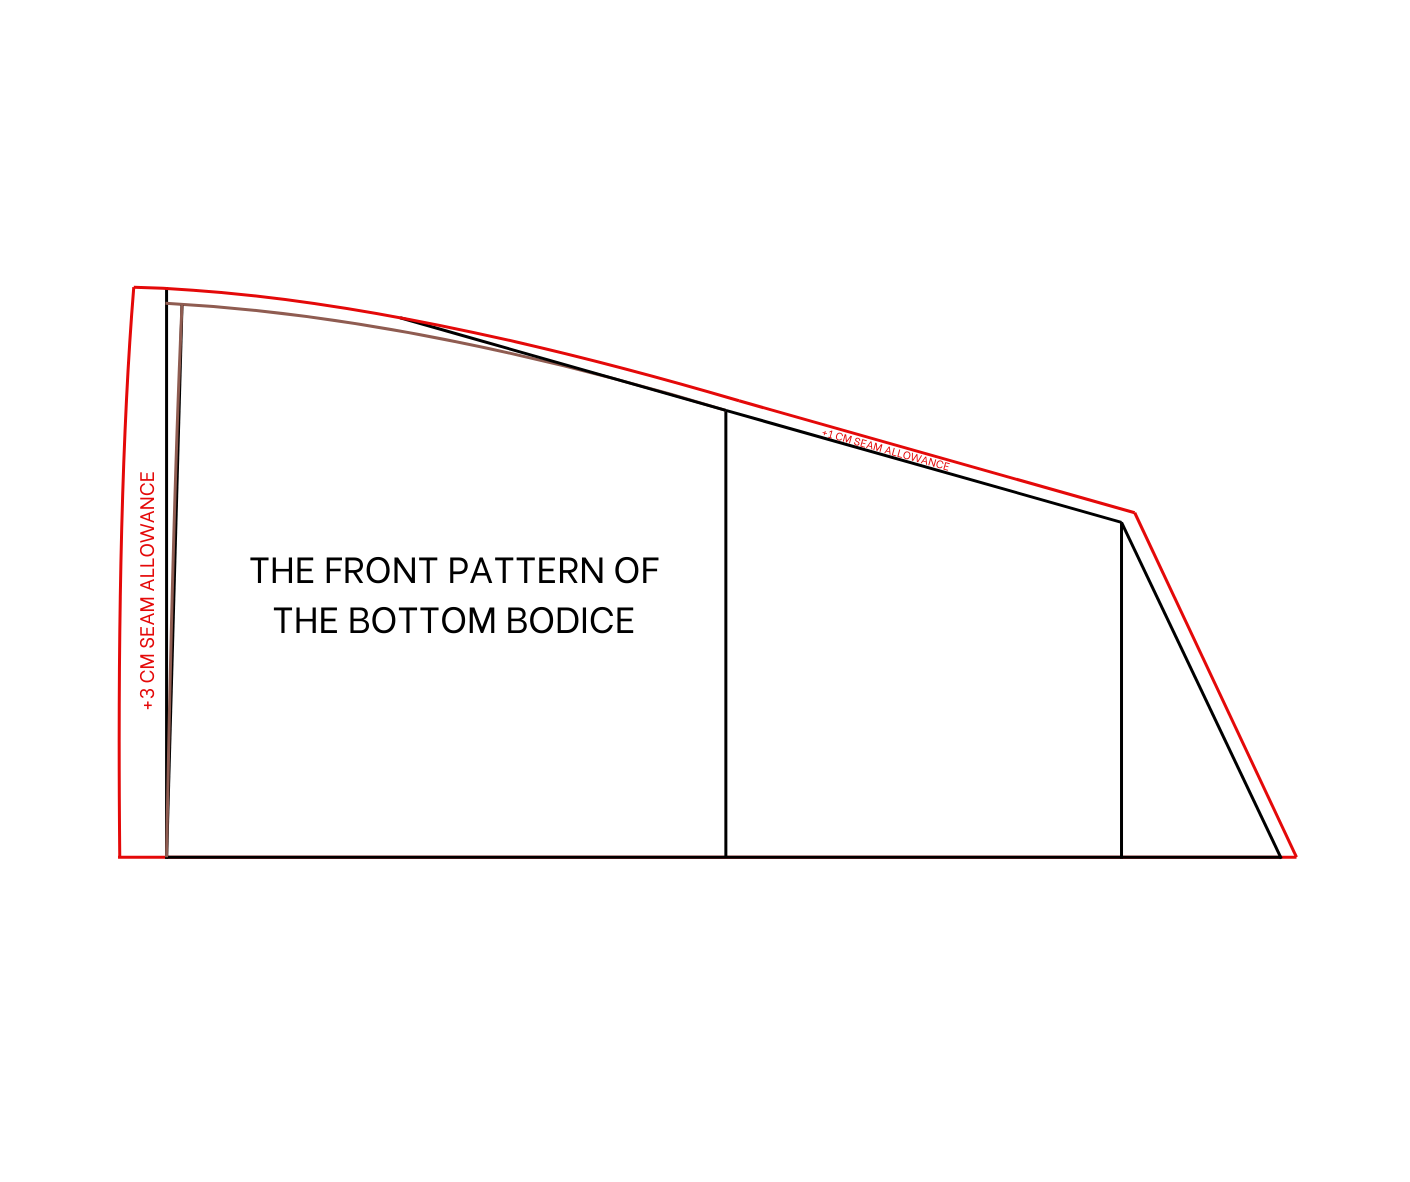
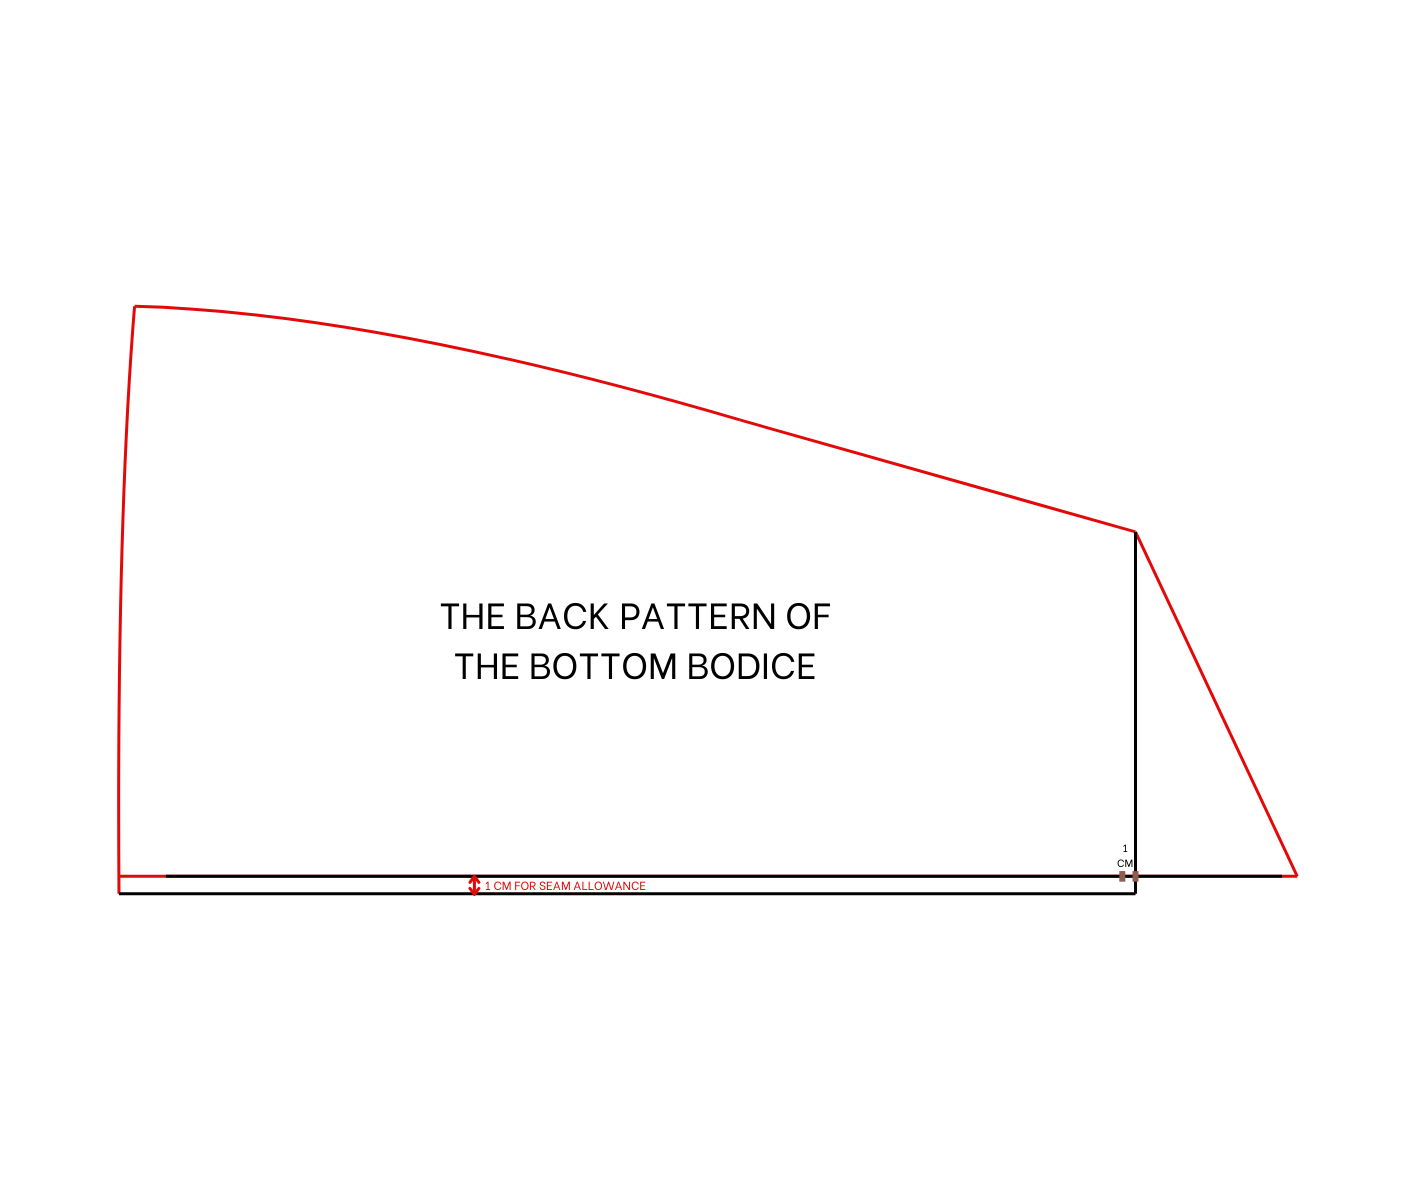
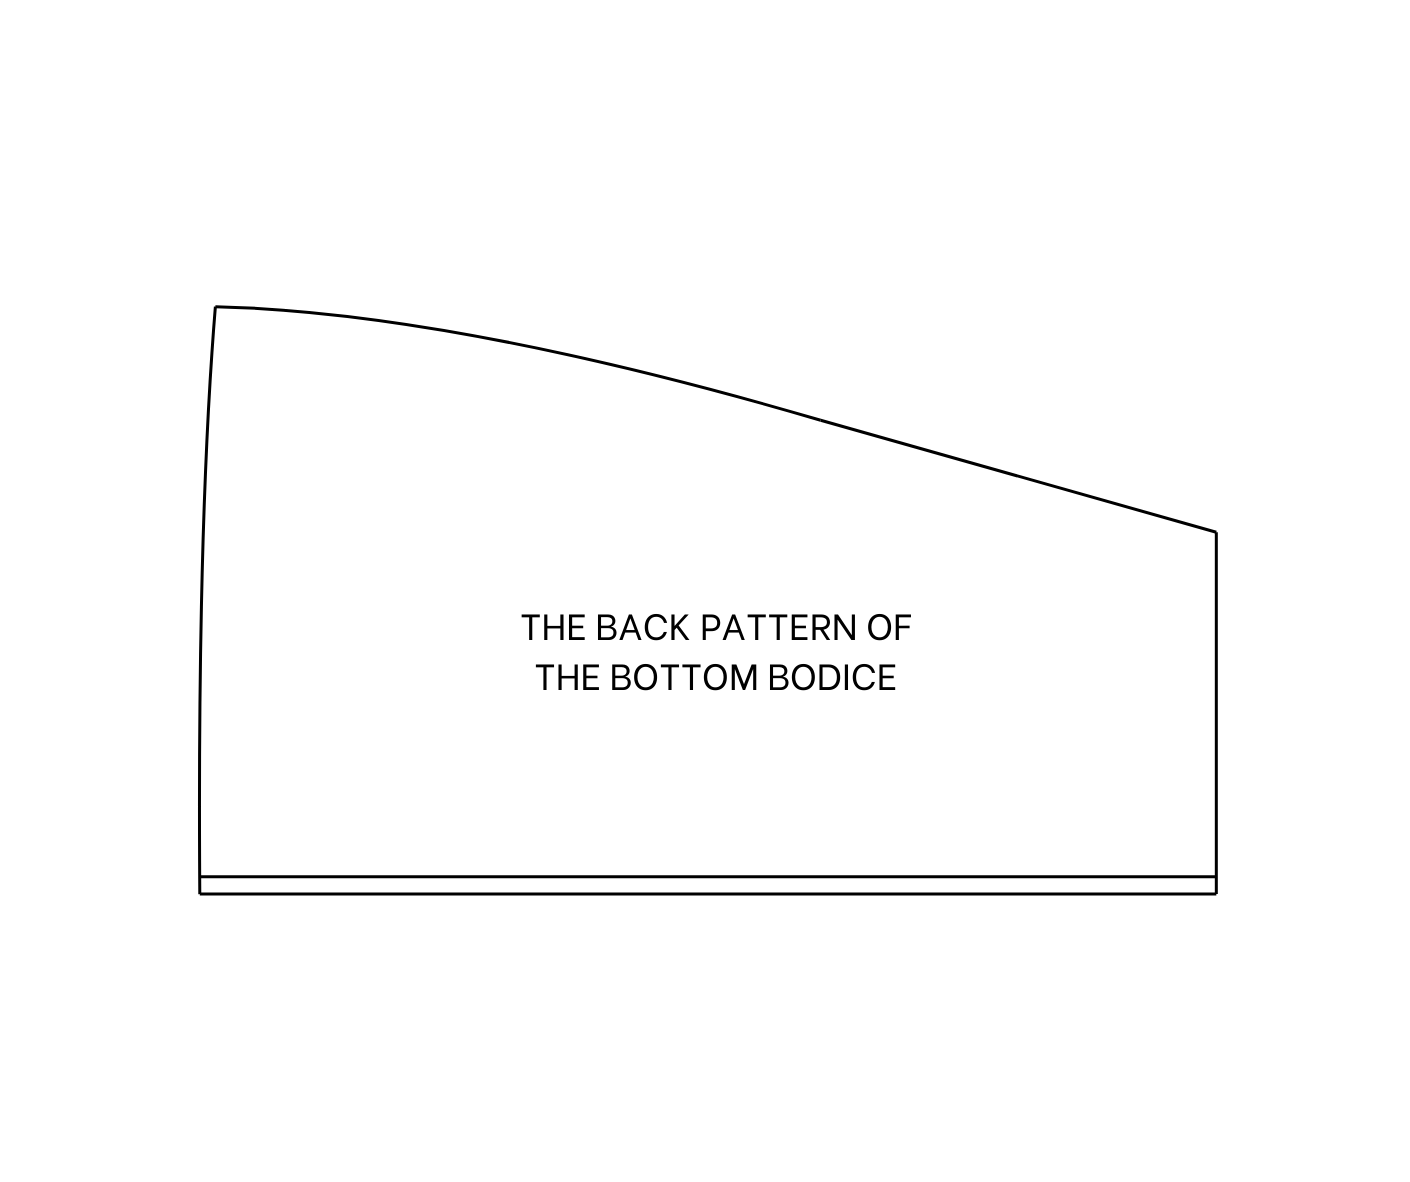
THE BACK PATTERN
Copy the front pattern for the back.
Add a 1 cm seam allowance along the center since the back will have two pieces.
Cut out the pattern.
SEWING THE DRESS
THE TOP BODICE OF THE DRESS
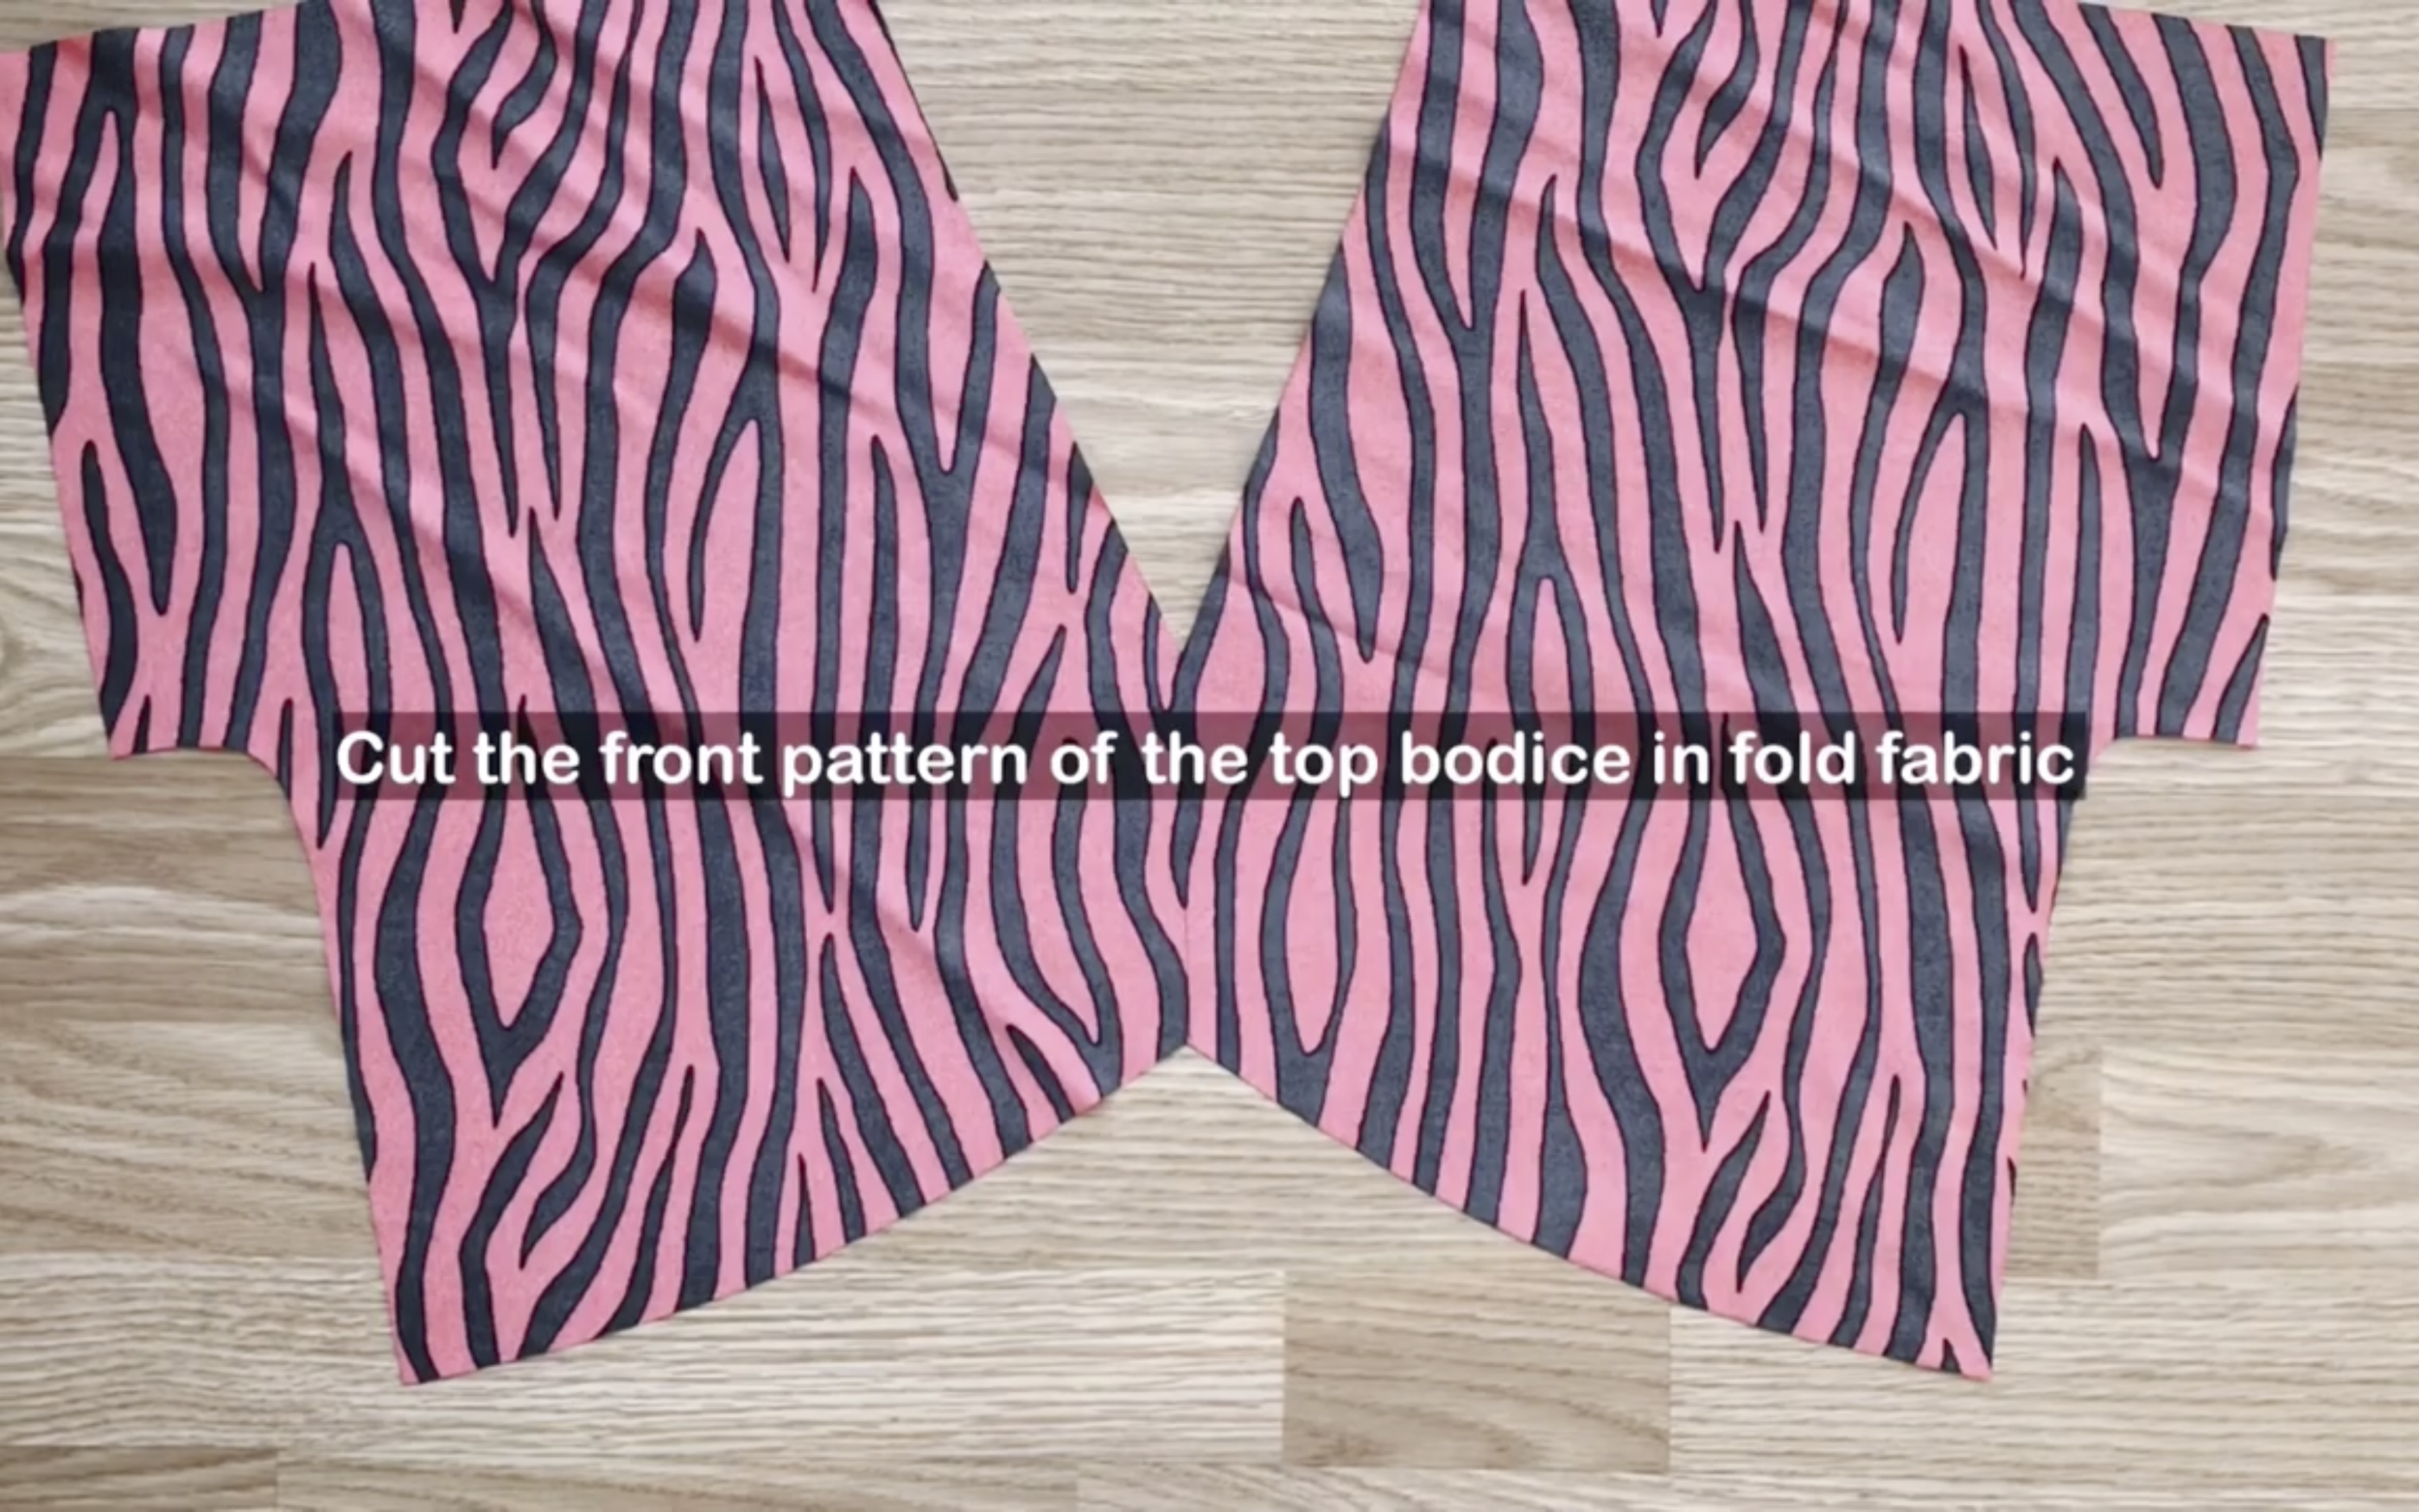
Start with the top bodice of the dress. When cutting, ensure the front pattern of the top bodice is cut on folded fabric.
Mark the dart from the pattern onto the fabric.
Then sew to create the dart.
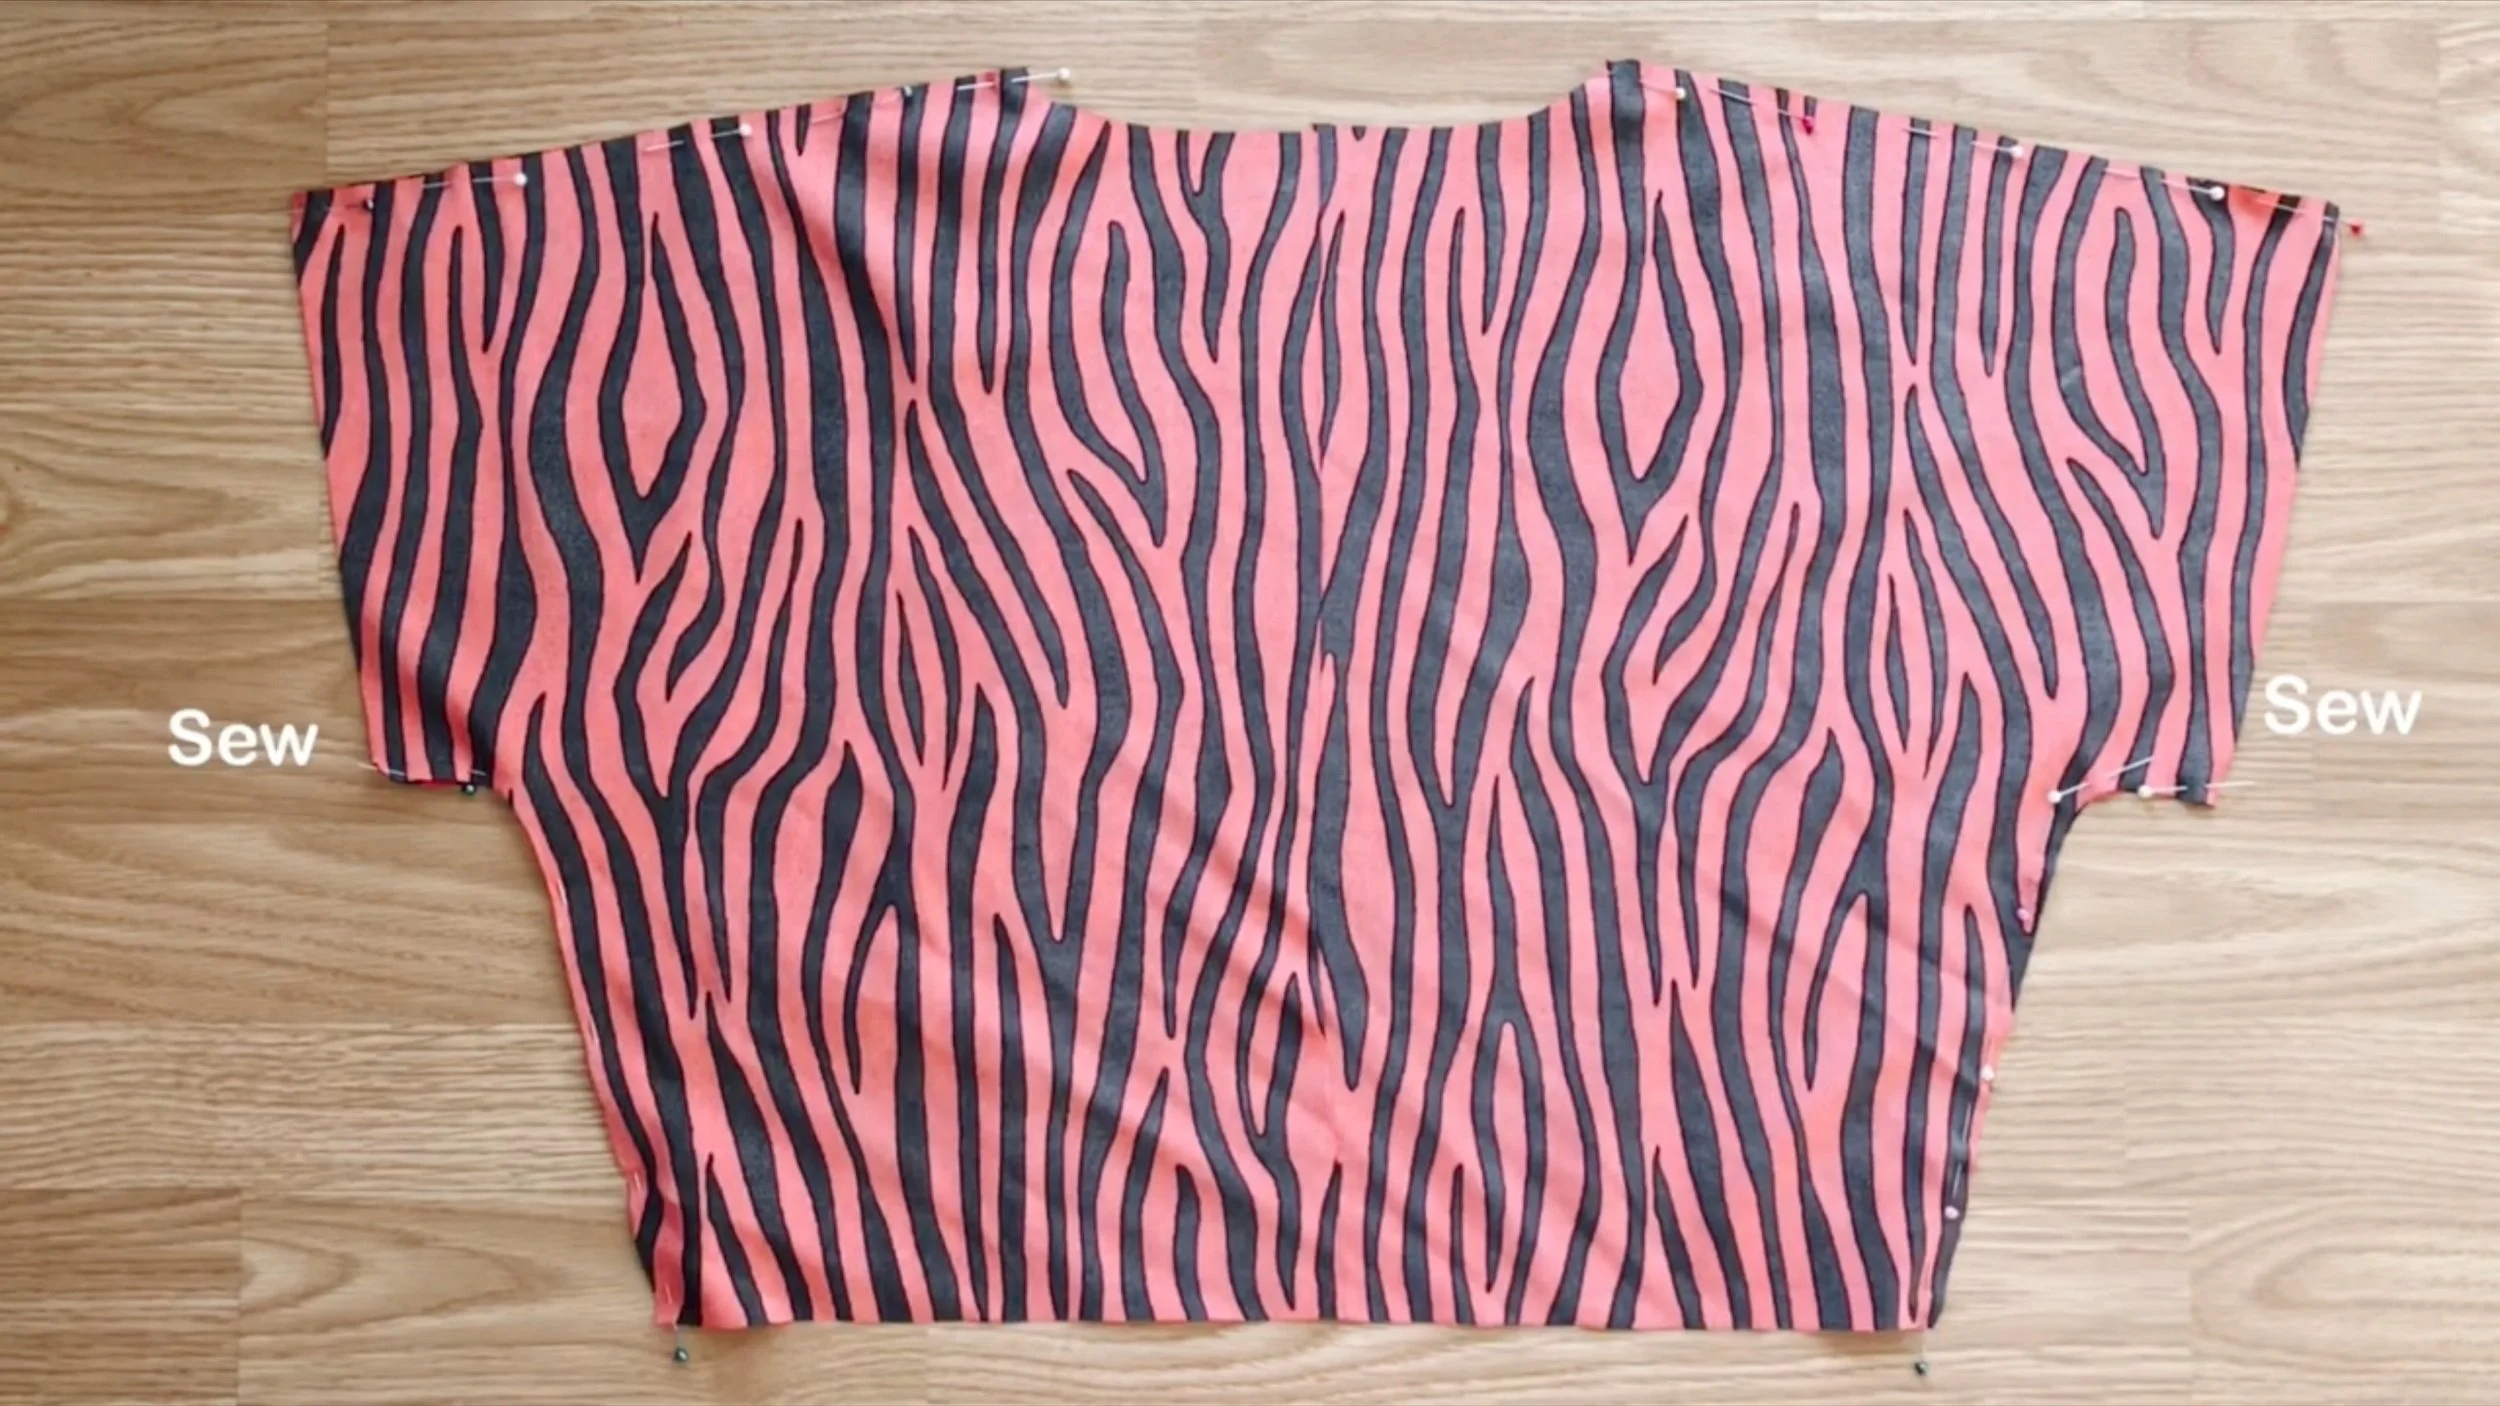
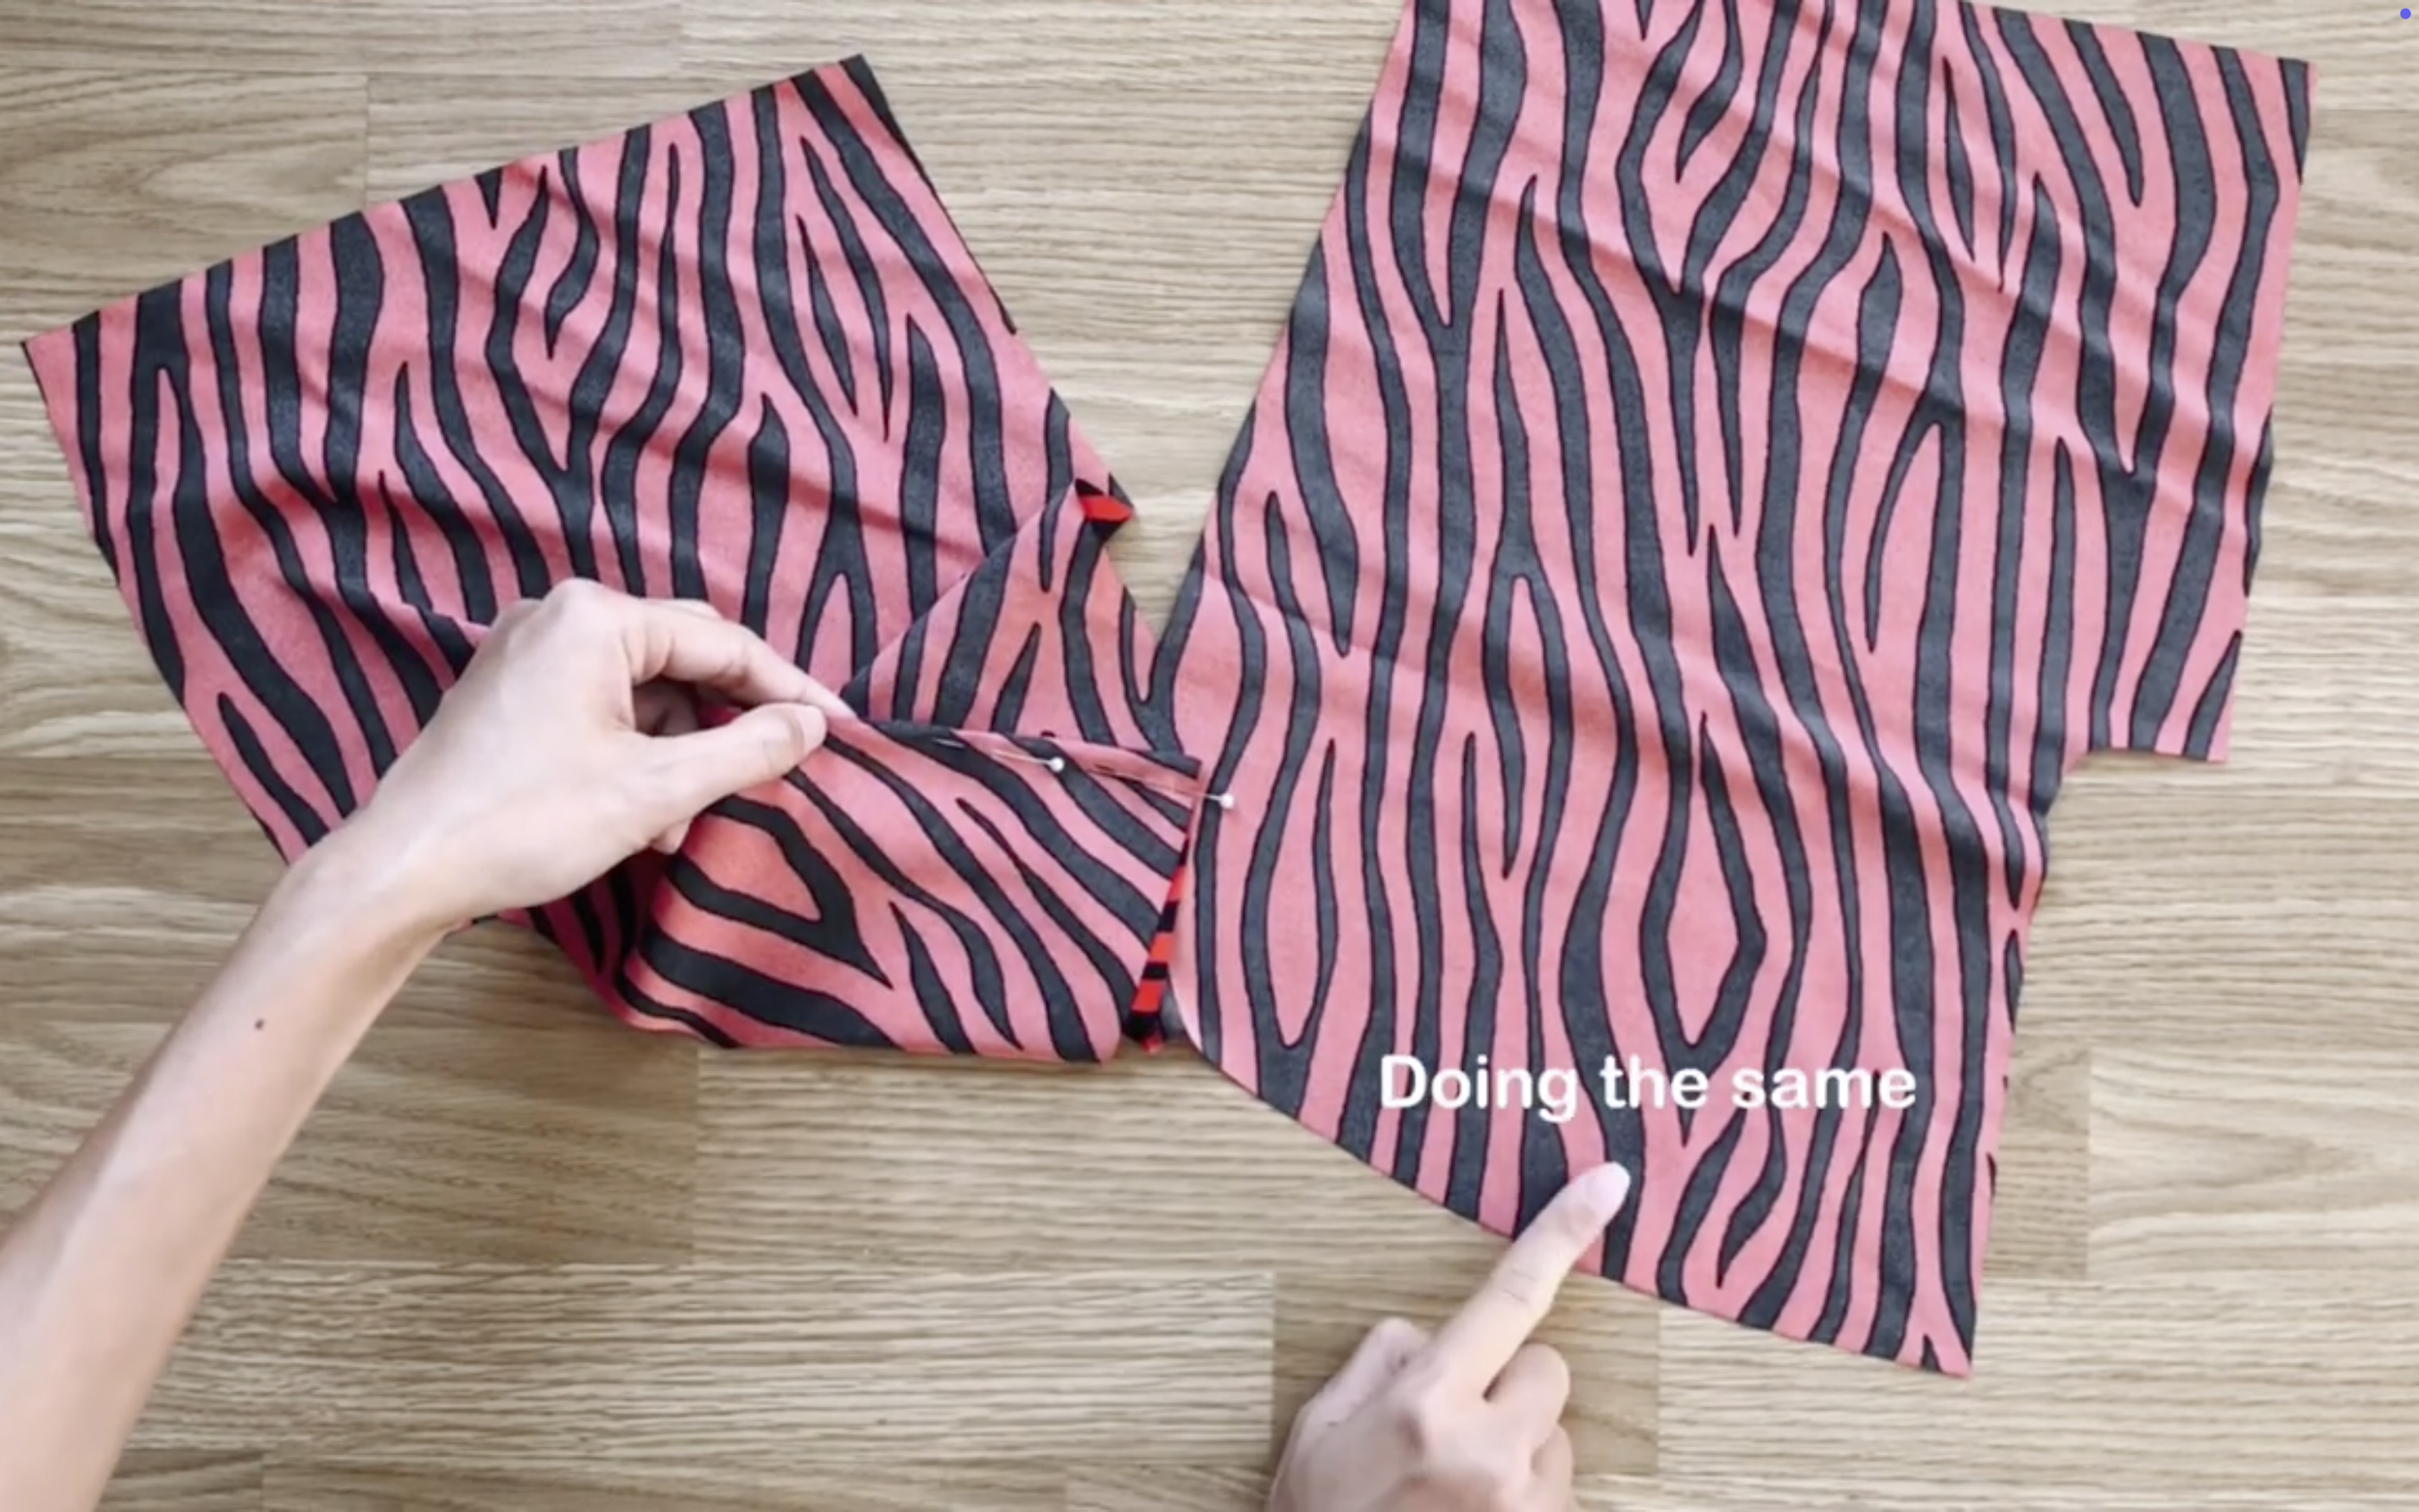
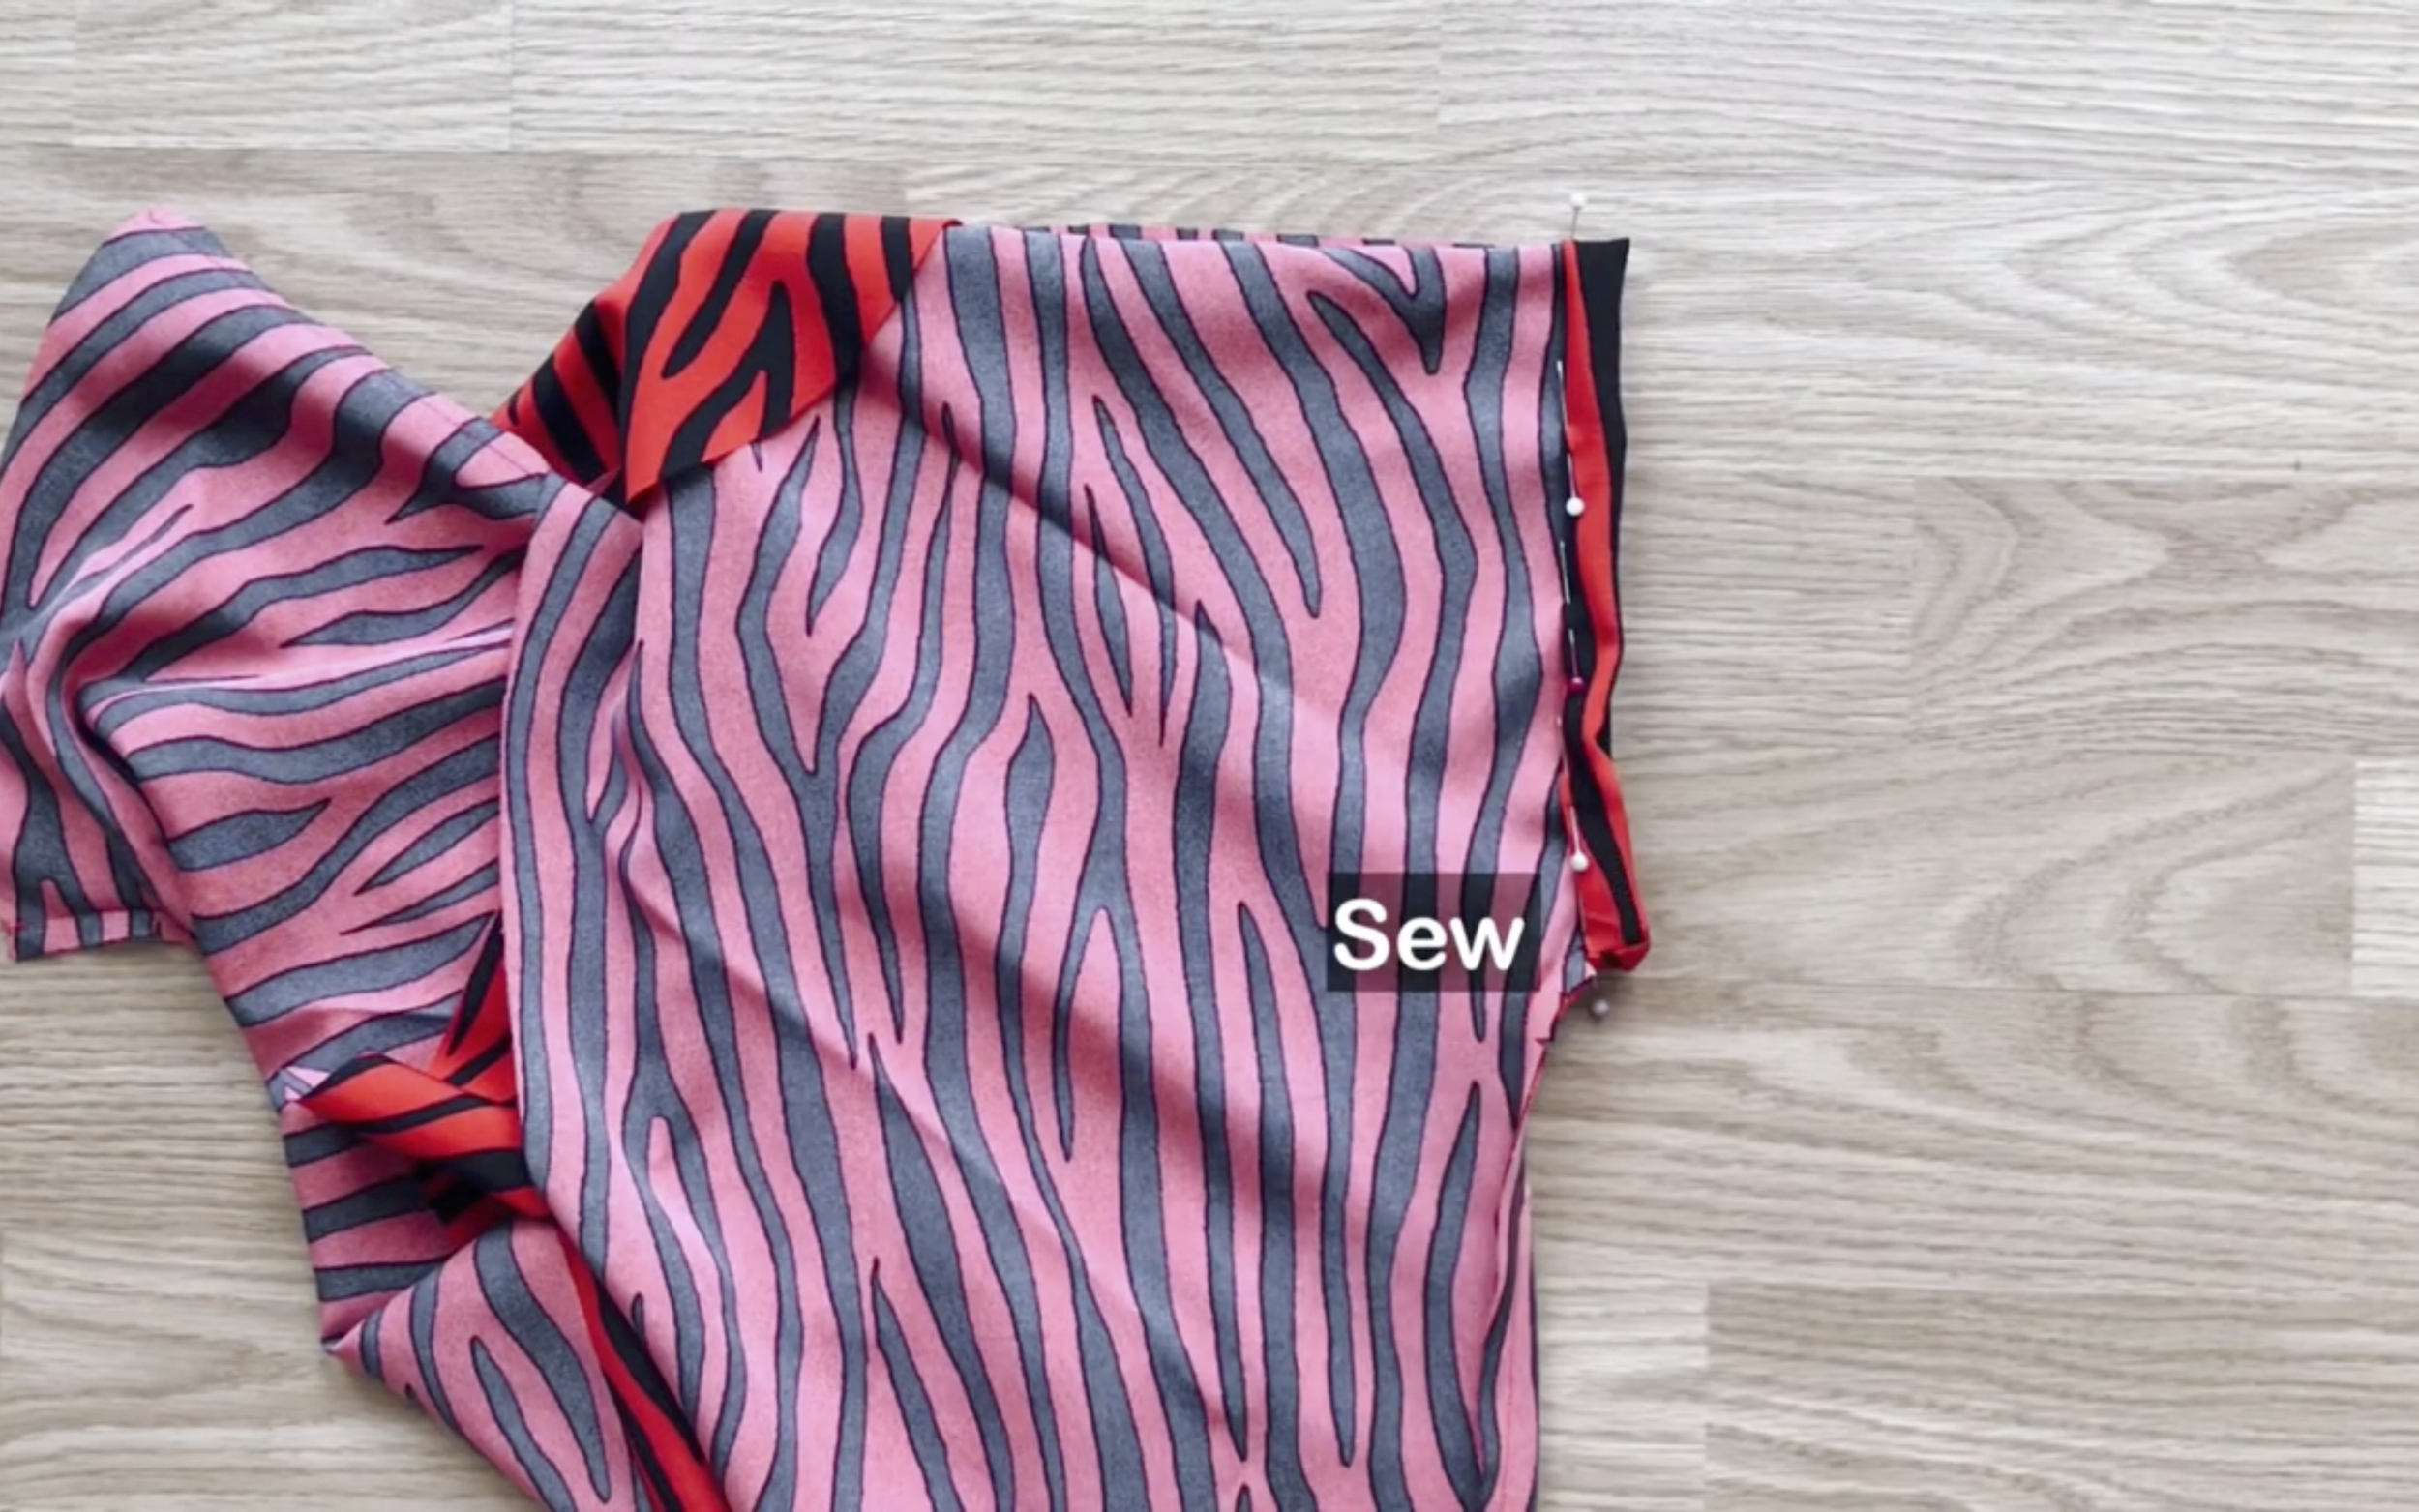
After sewing, connect the front and back of the top bodice at the shoulders and sides.
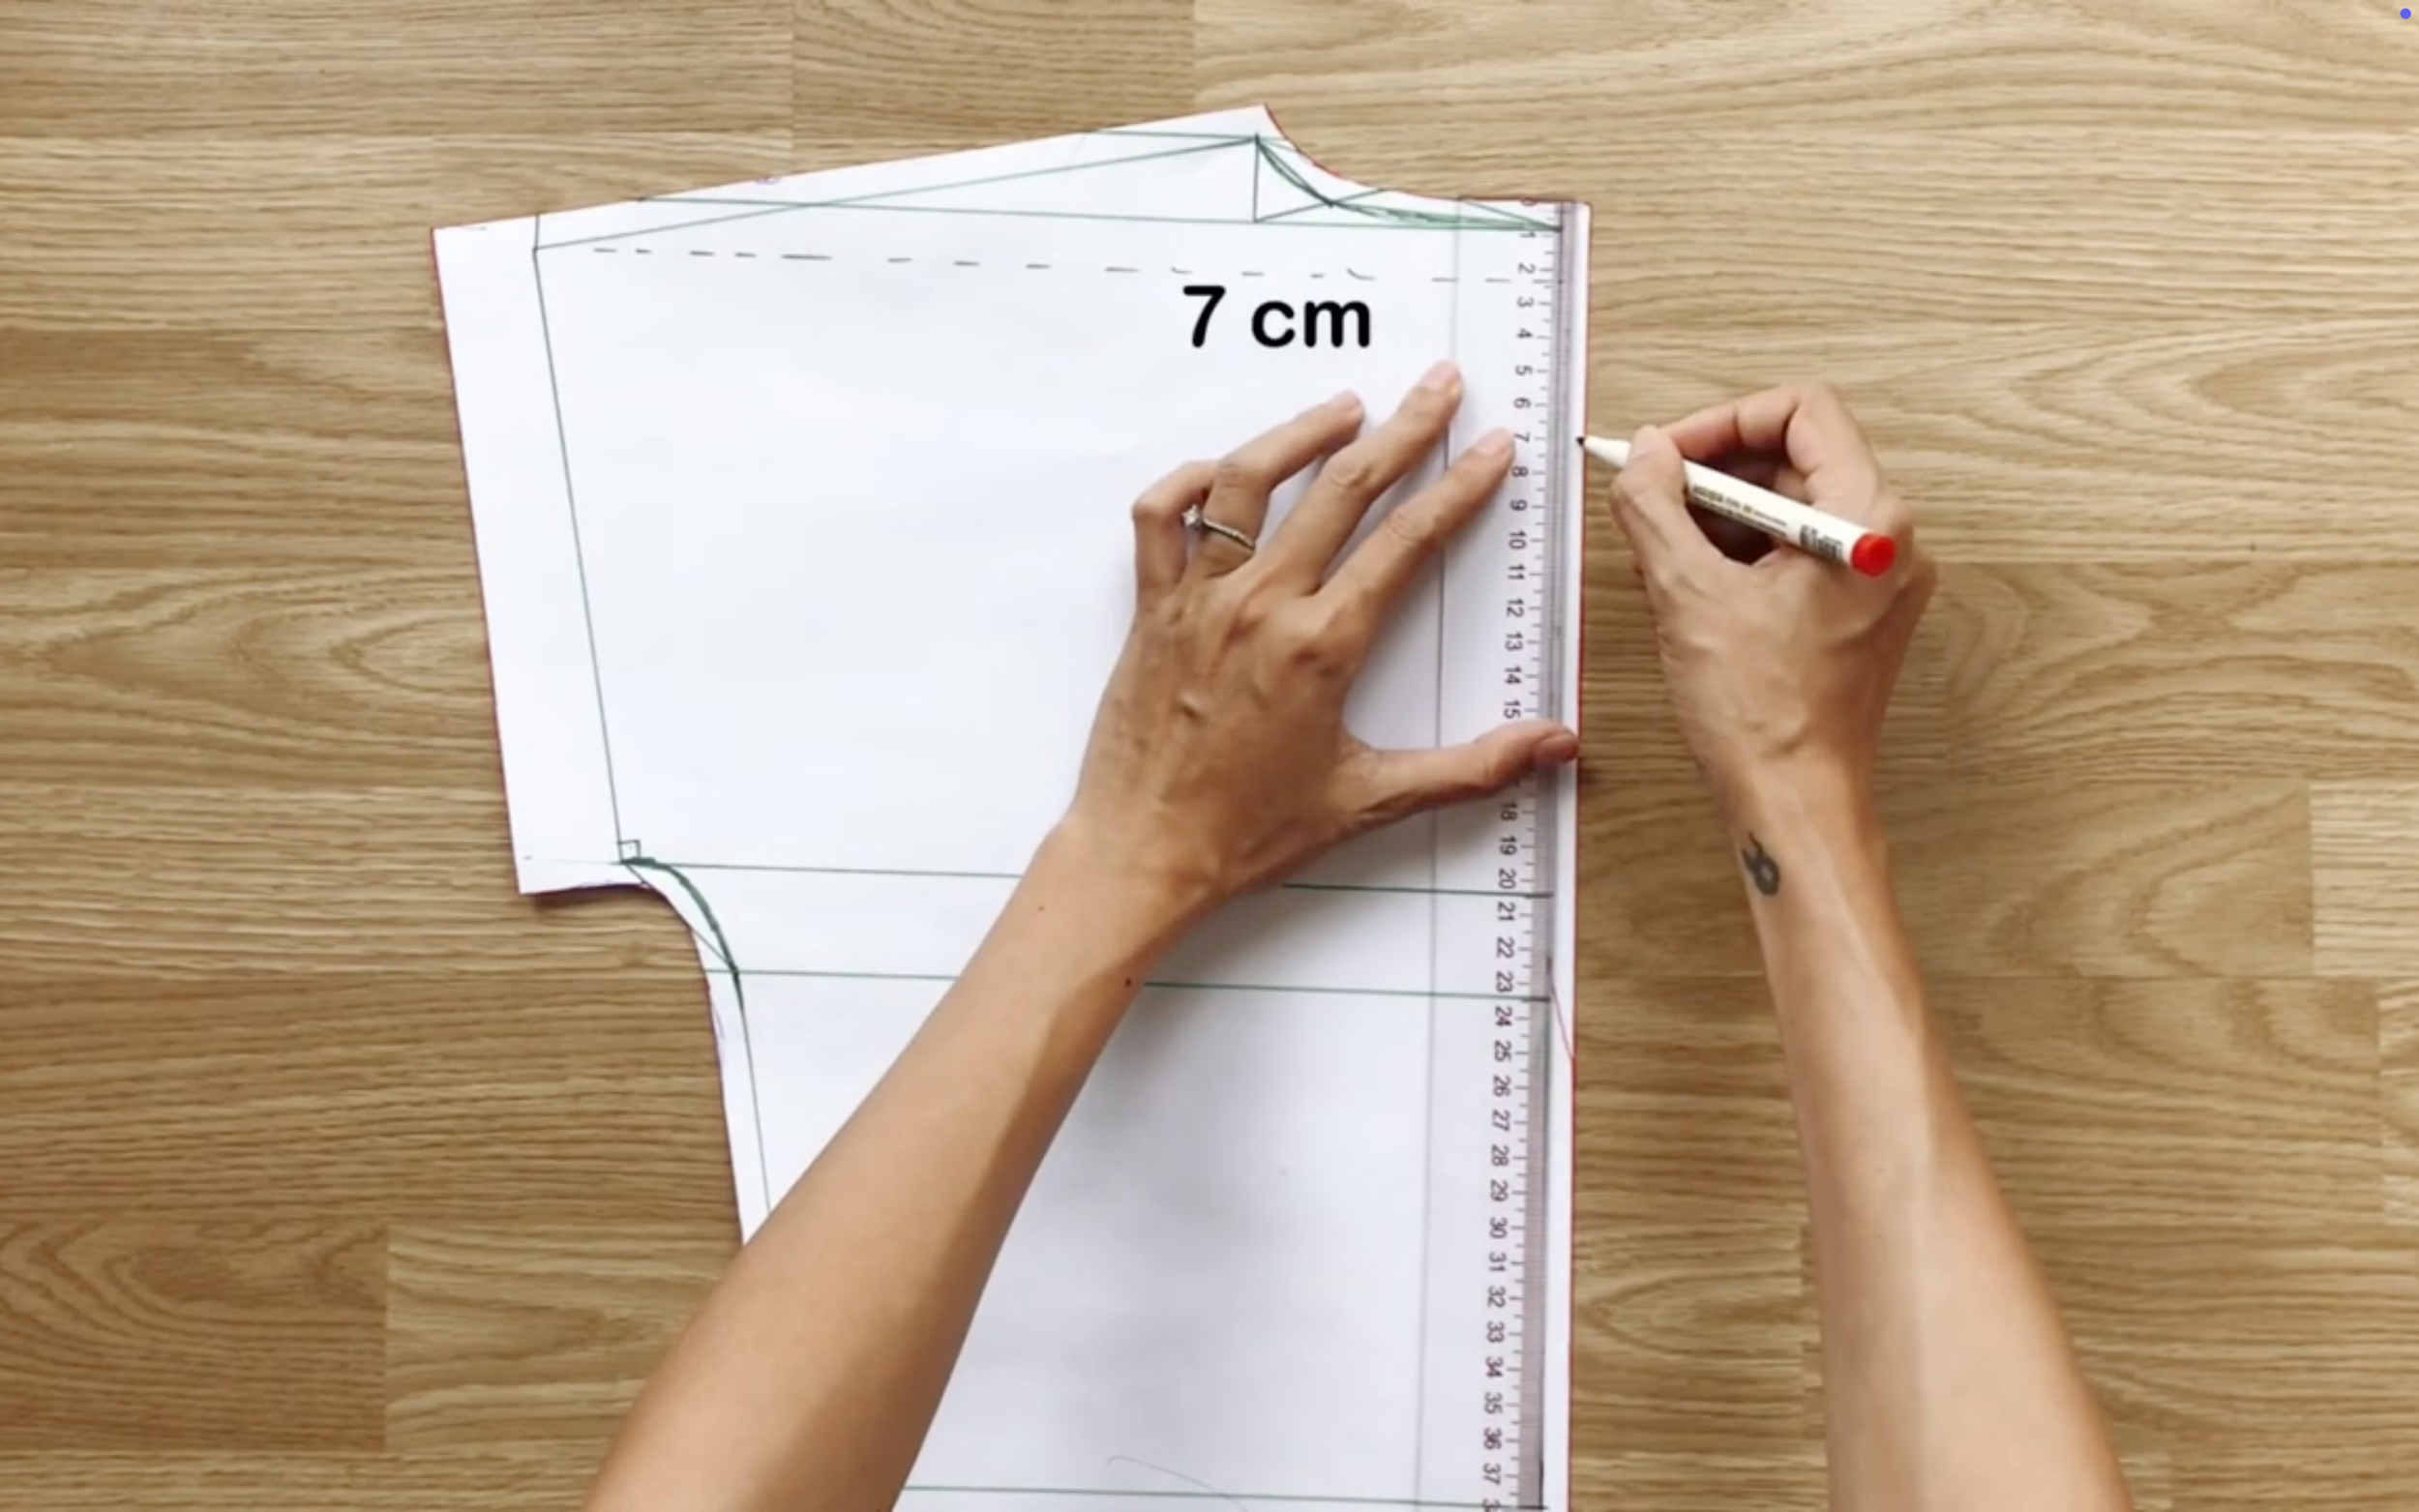
To create the inside part for the neckline, draw a curved line 7 cm inside the neckline of the front…
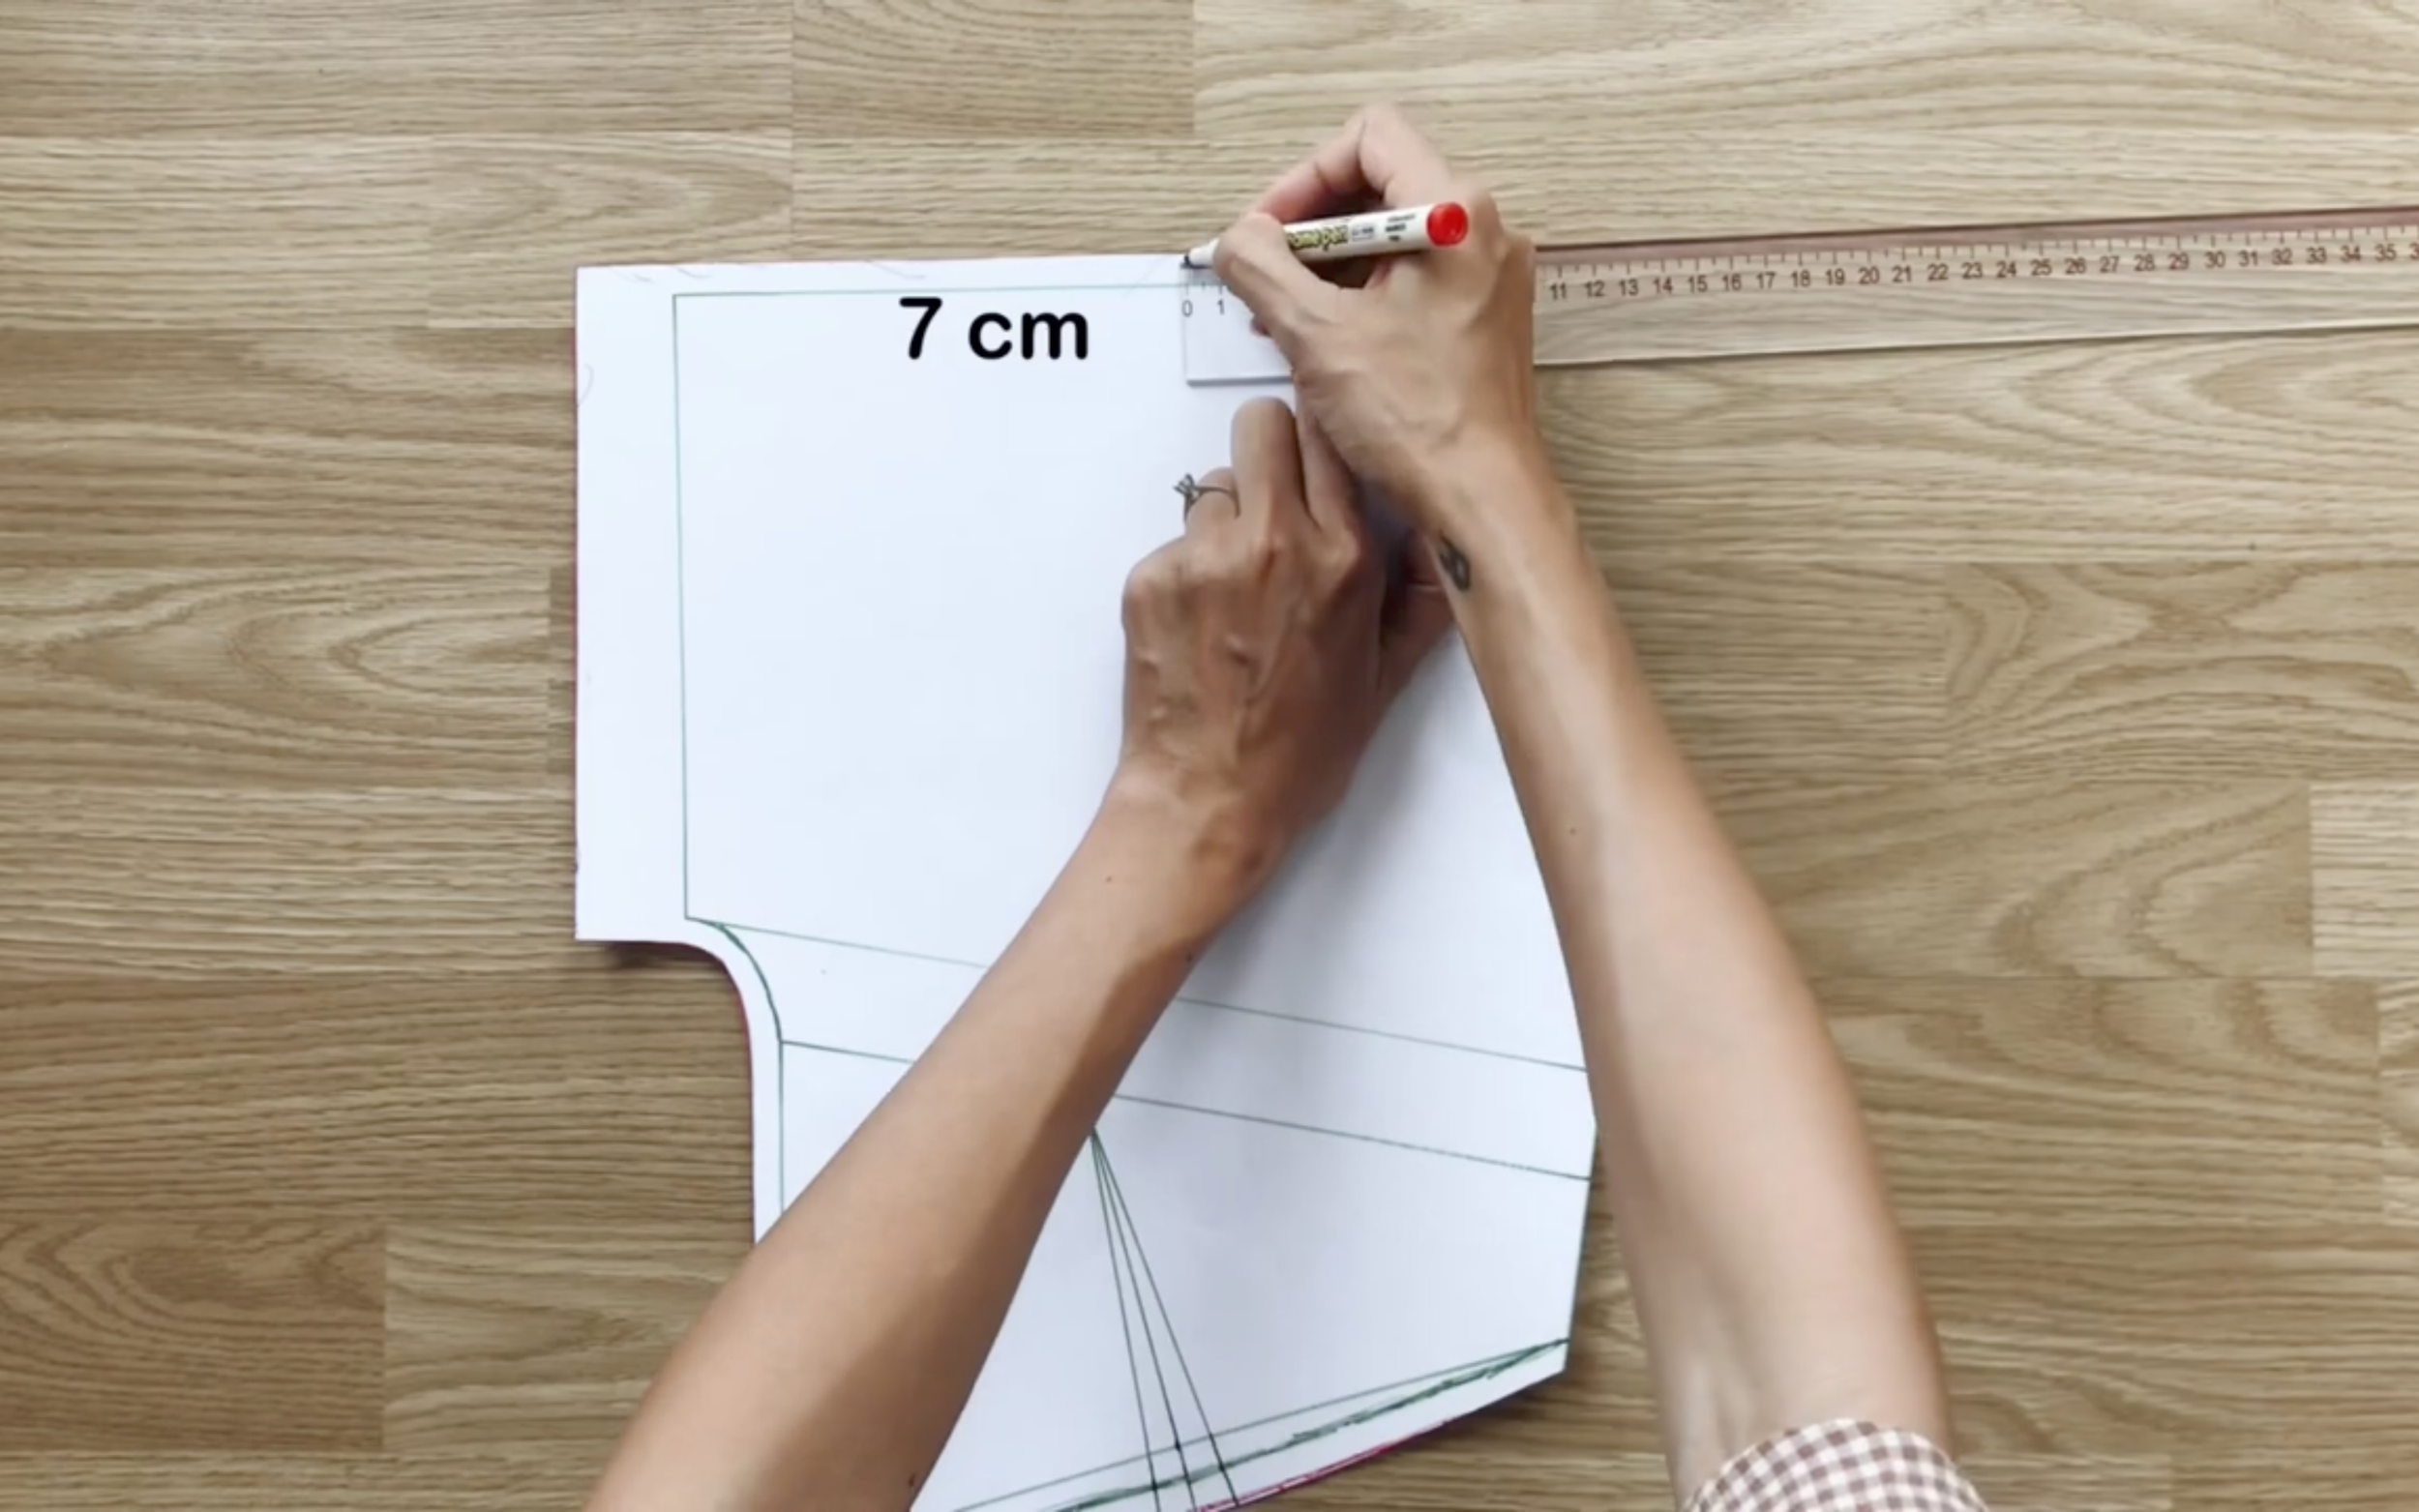
… and back pattern.
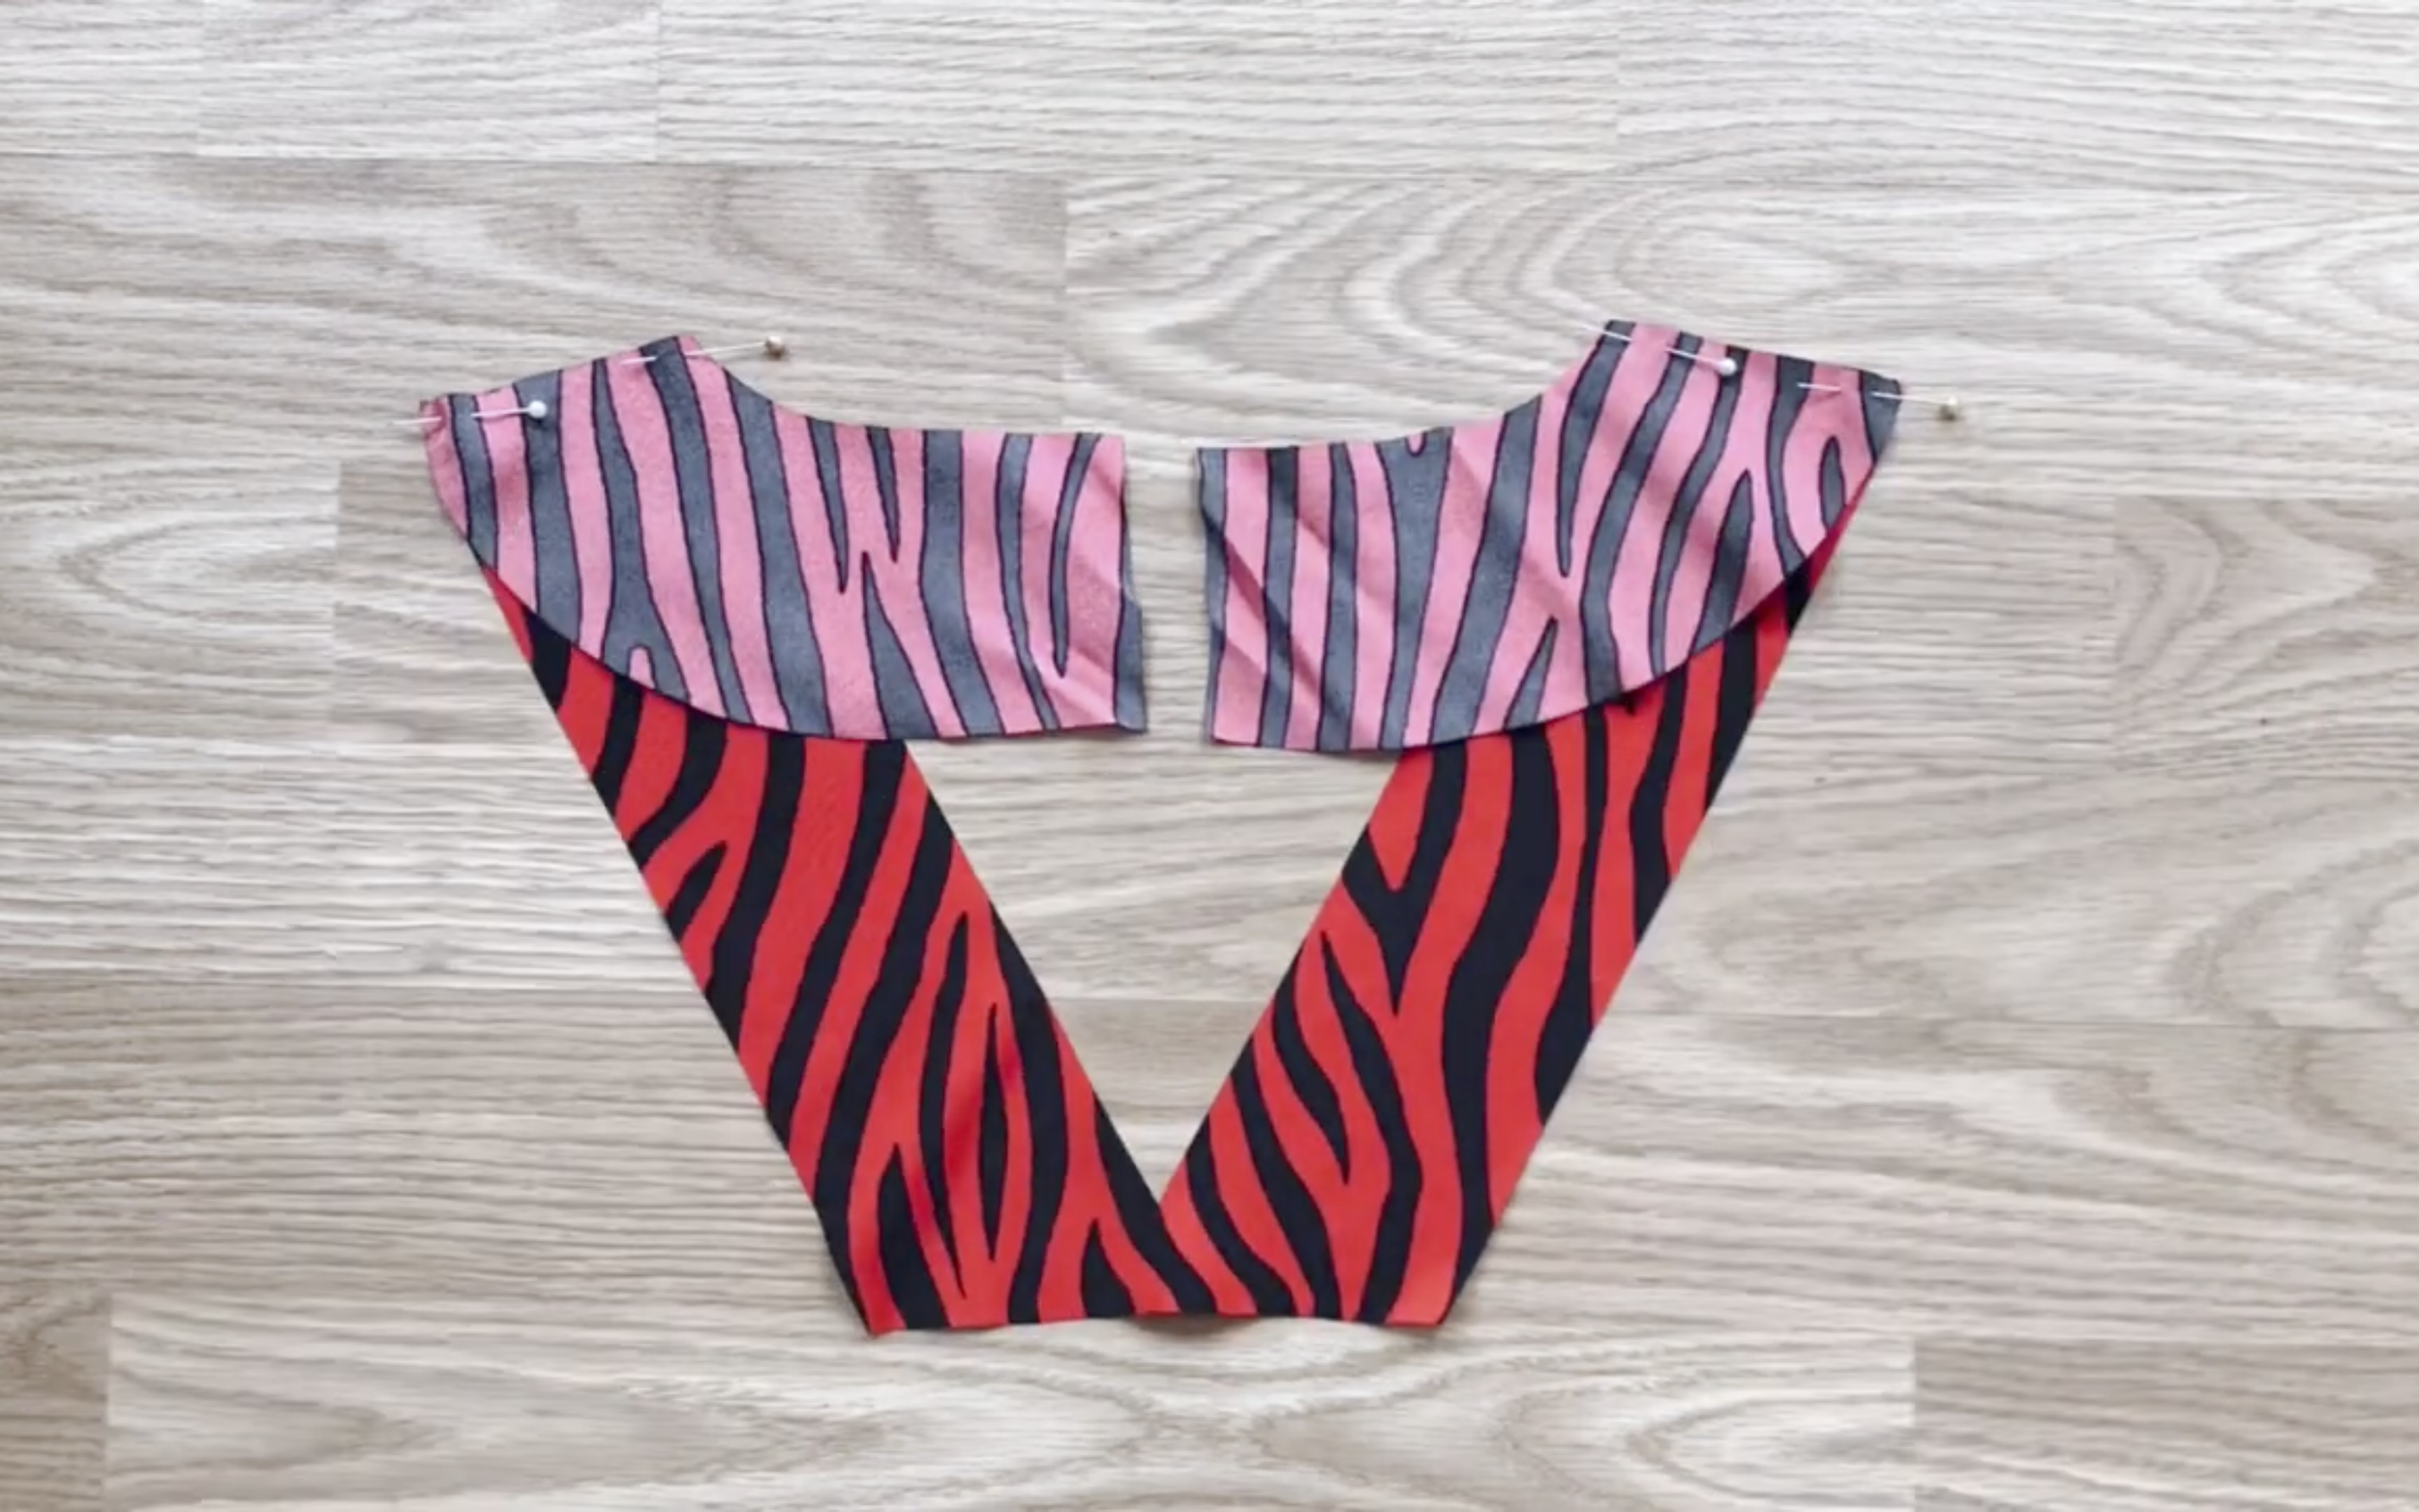
After cutting, connect the front and back of the inside part at the shoulders and sew.
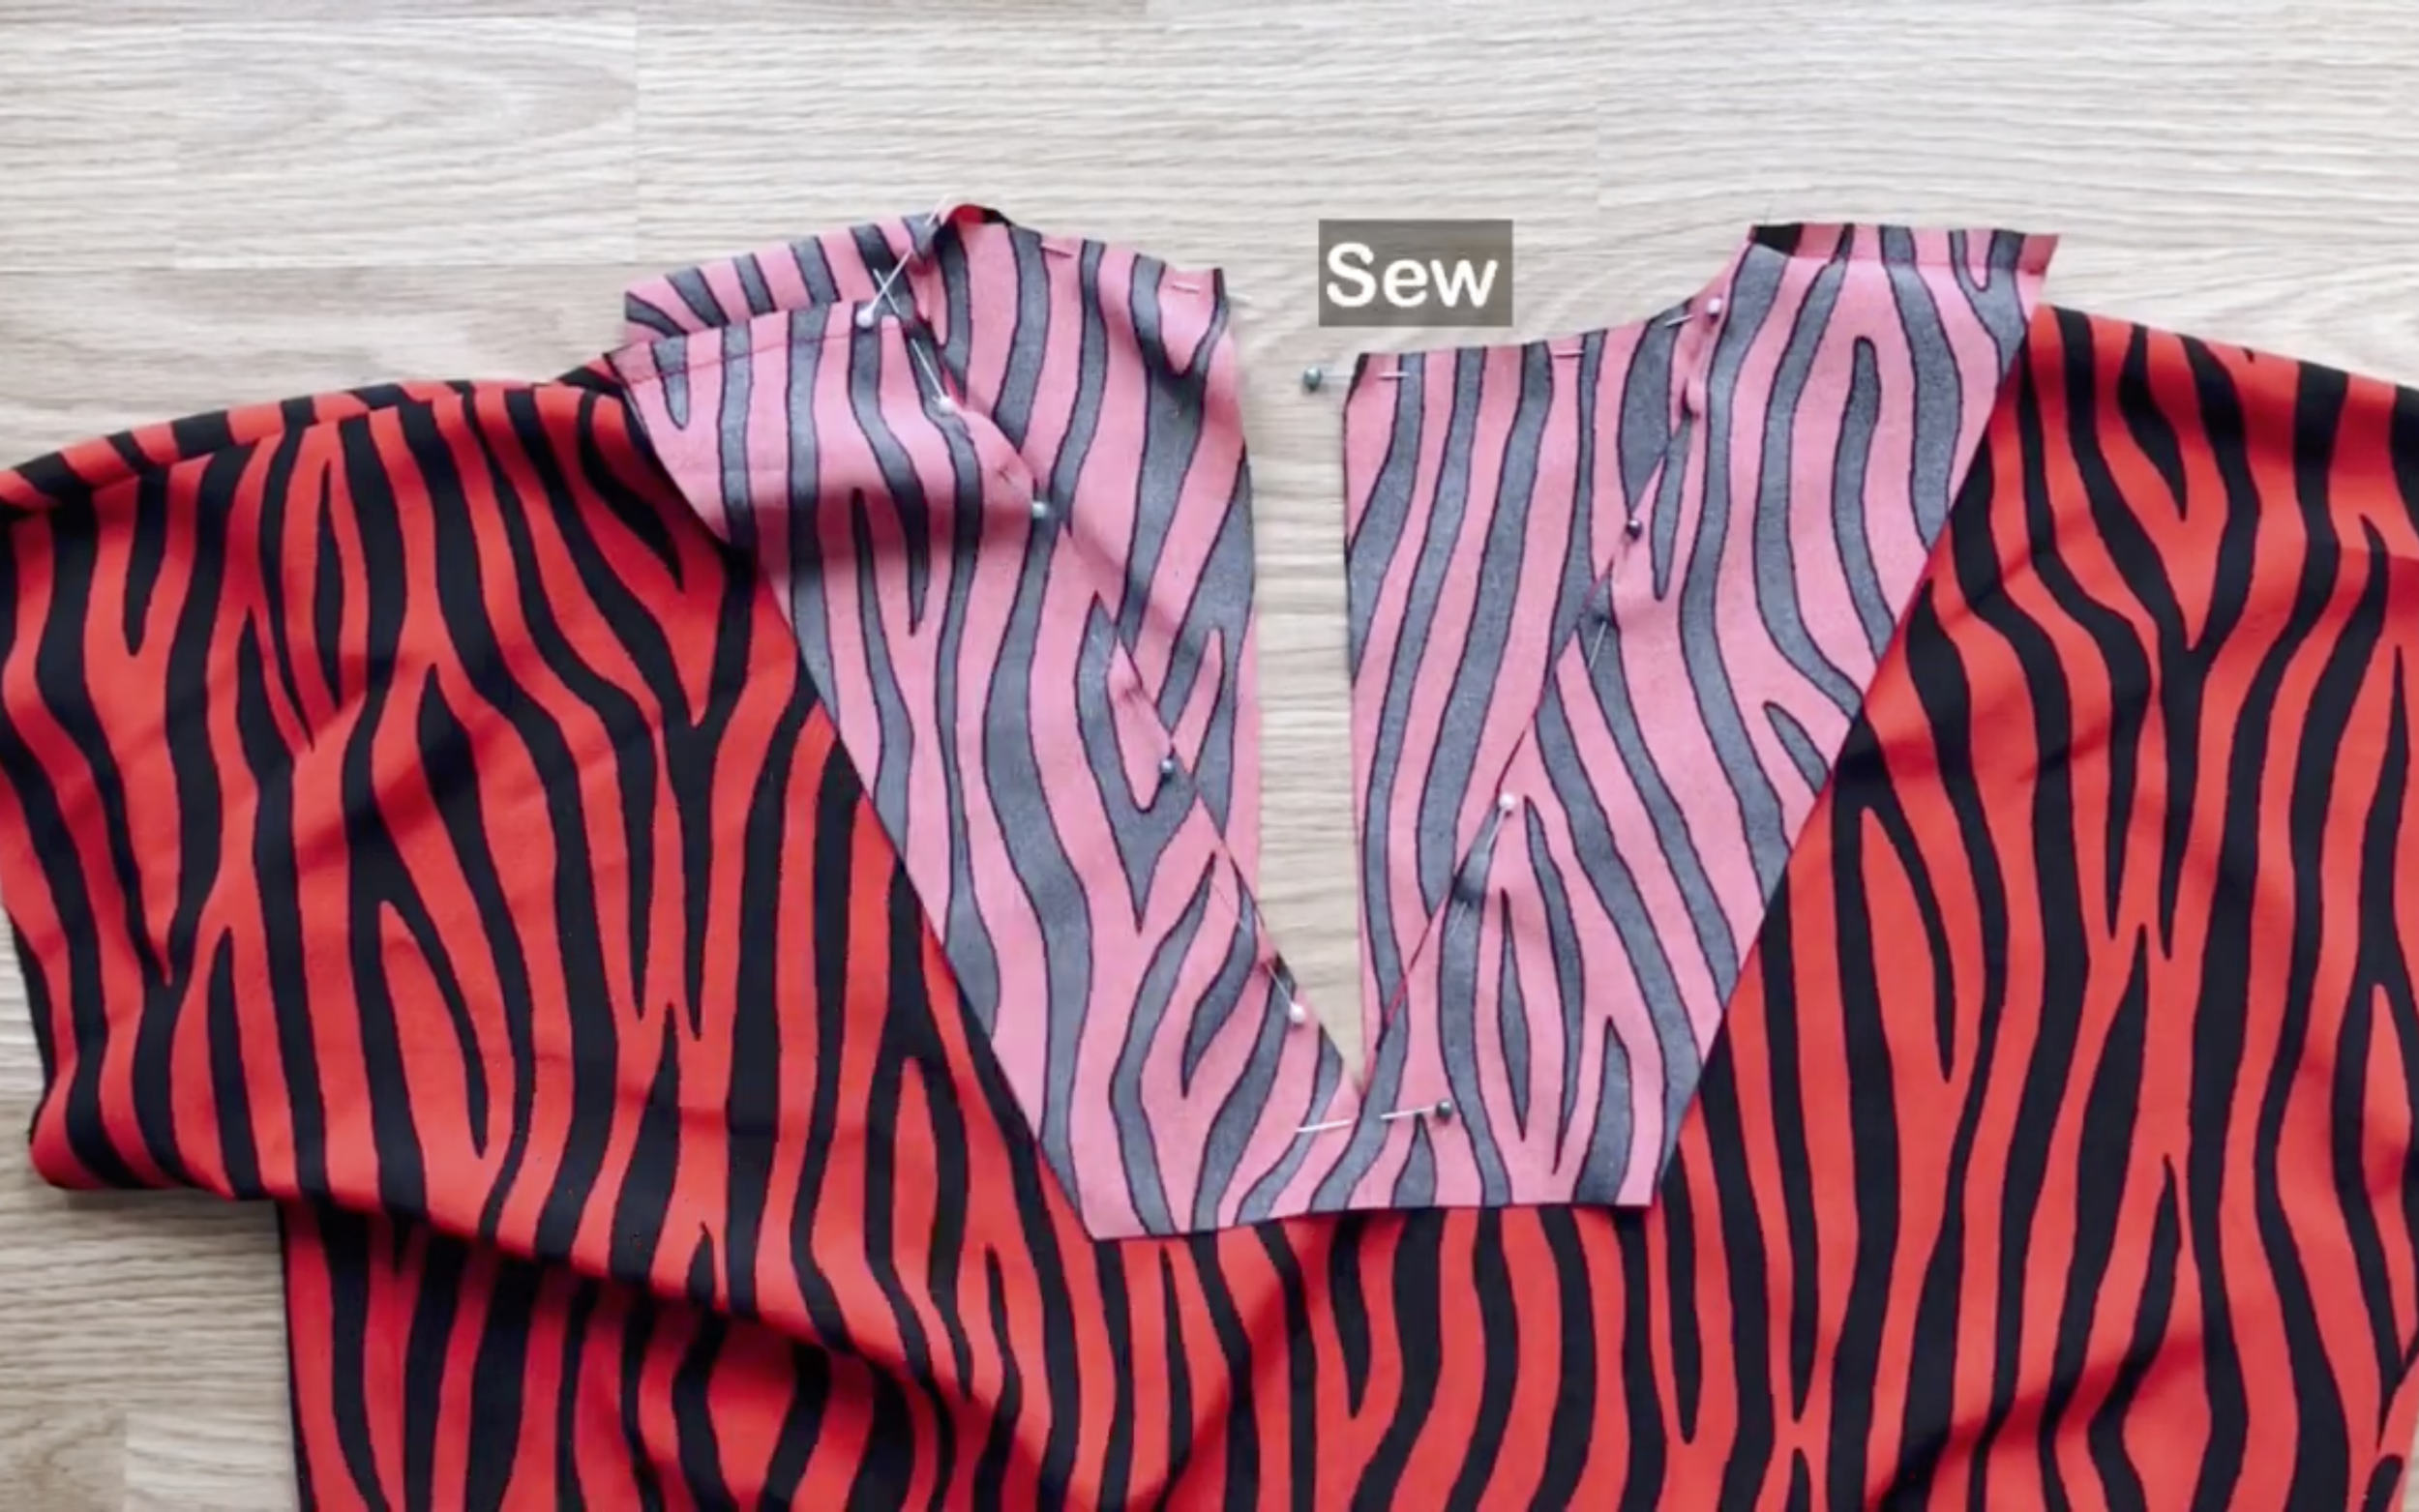
Attach the inside part to the neckline and sew.
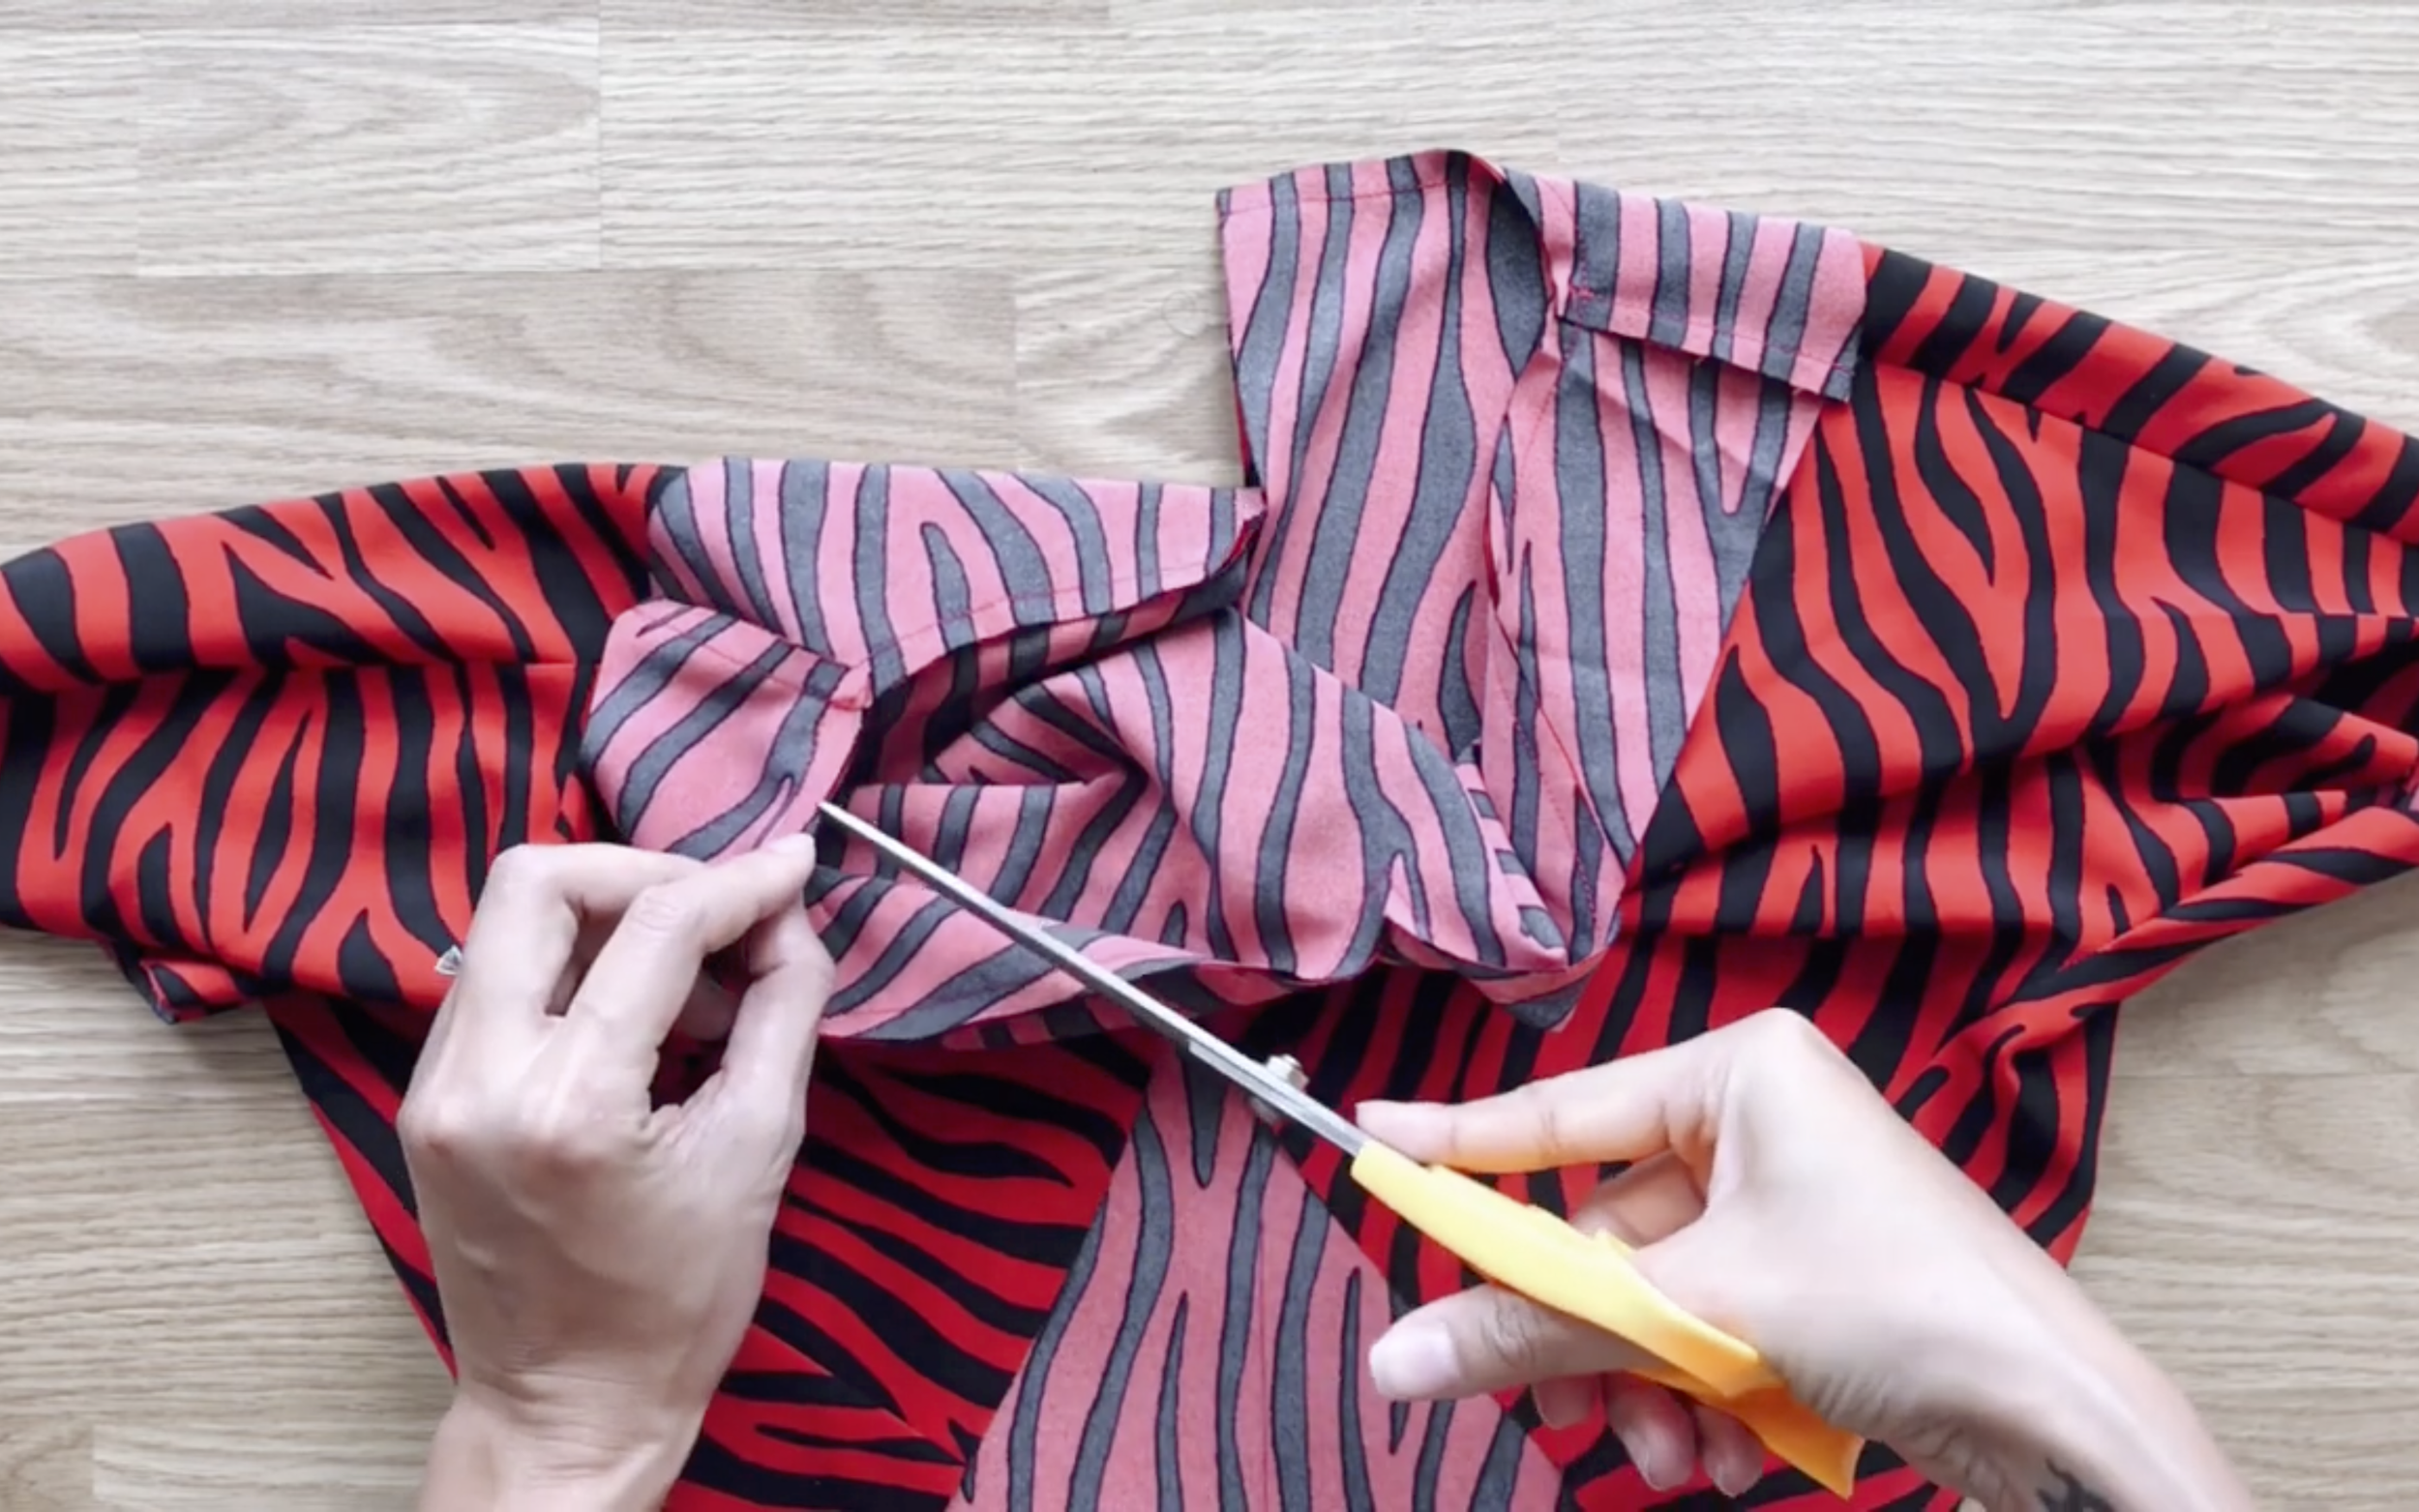
After the first seam, make small cuts at the end of the neck curve to turn the inside part inward.
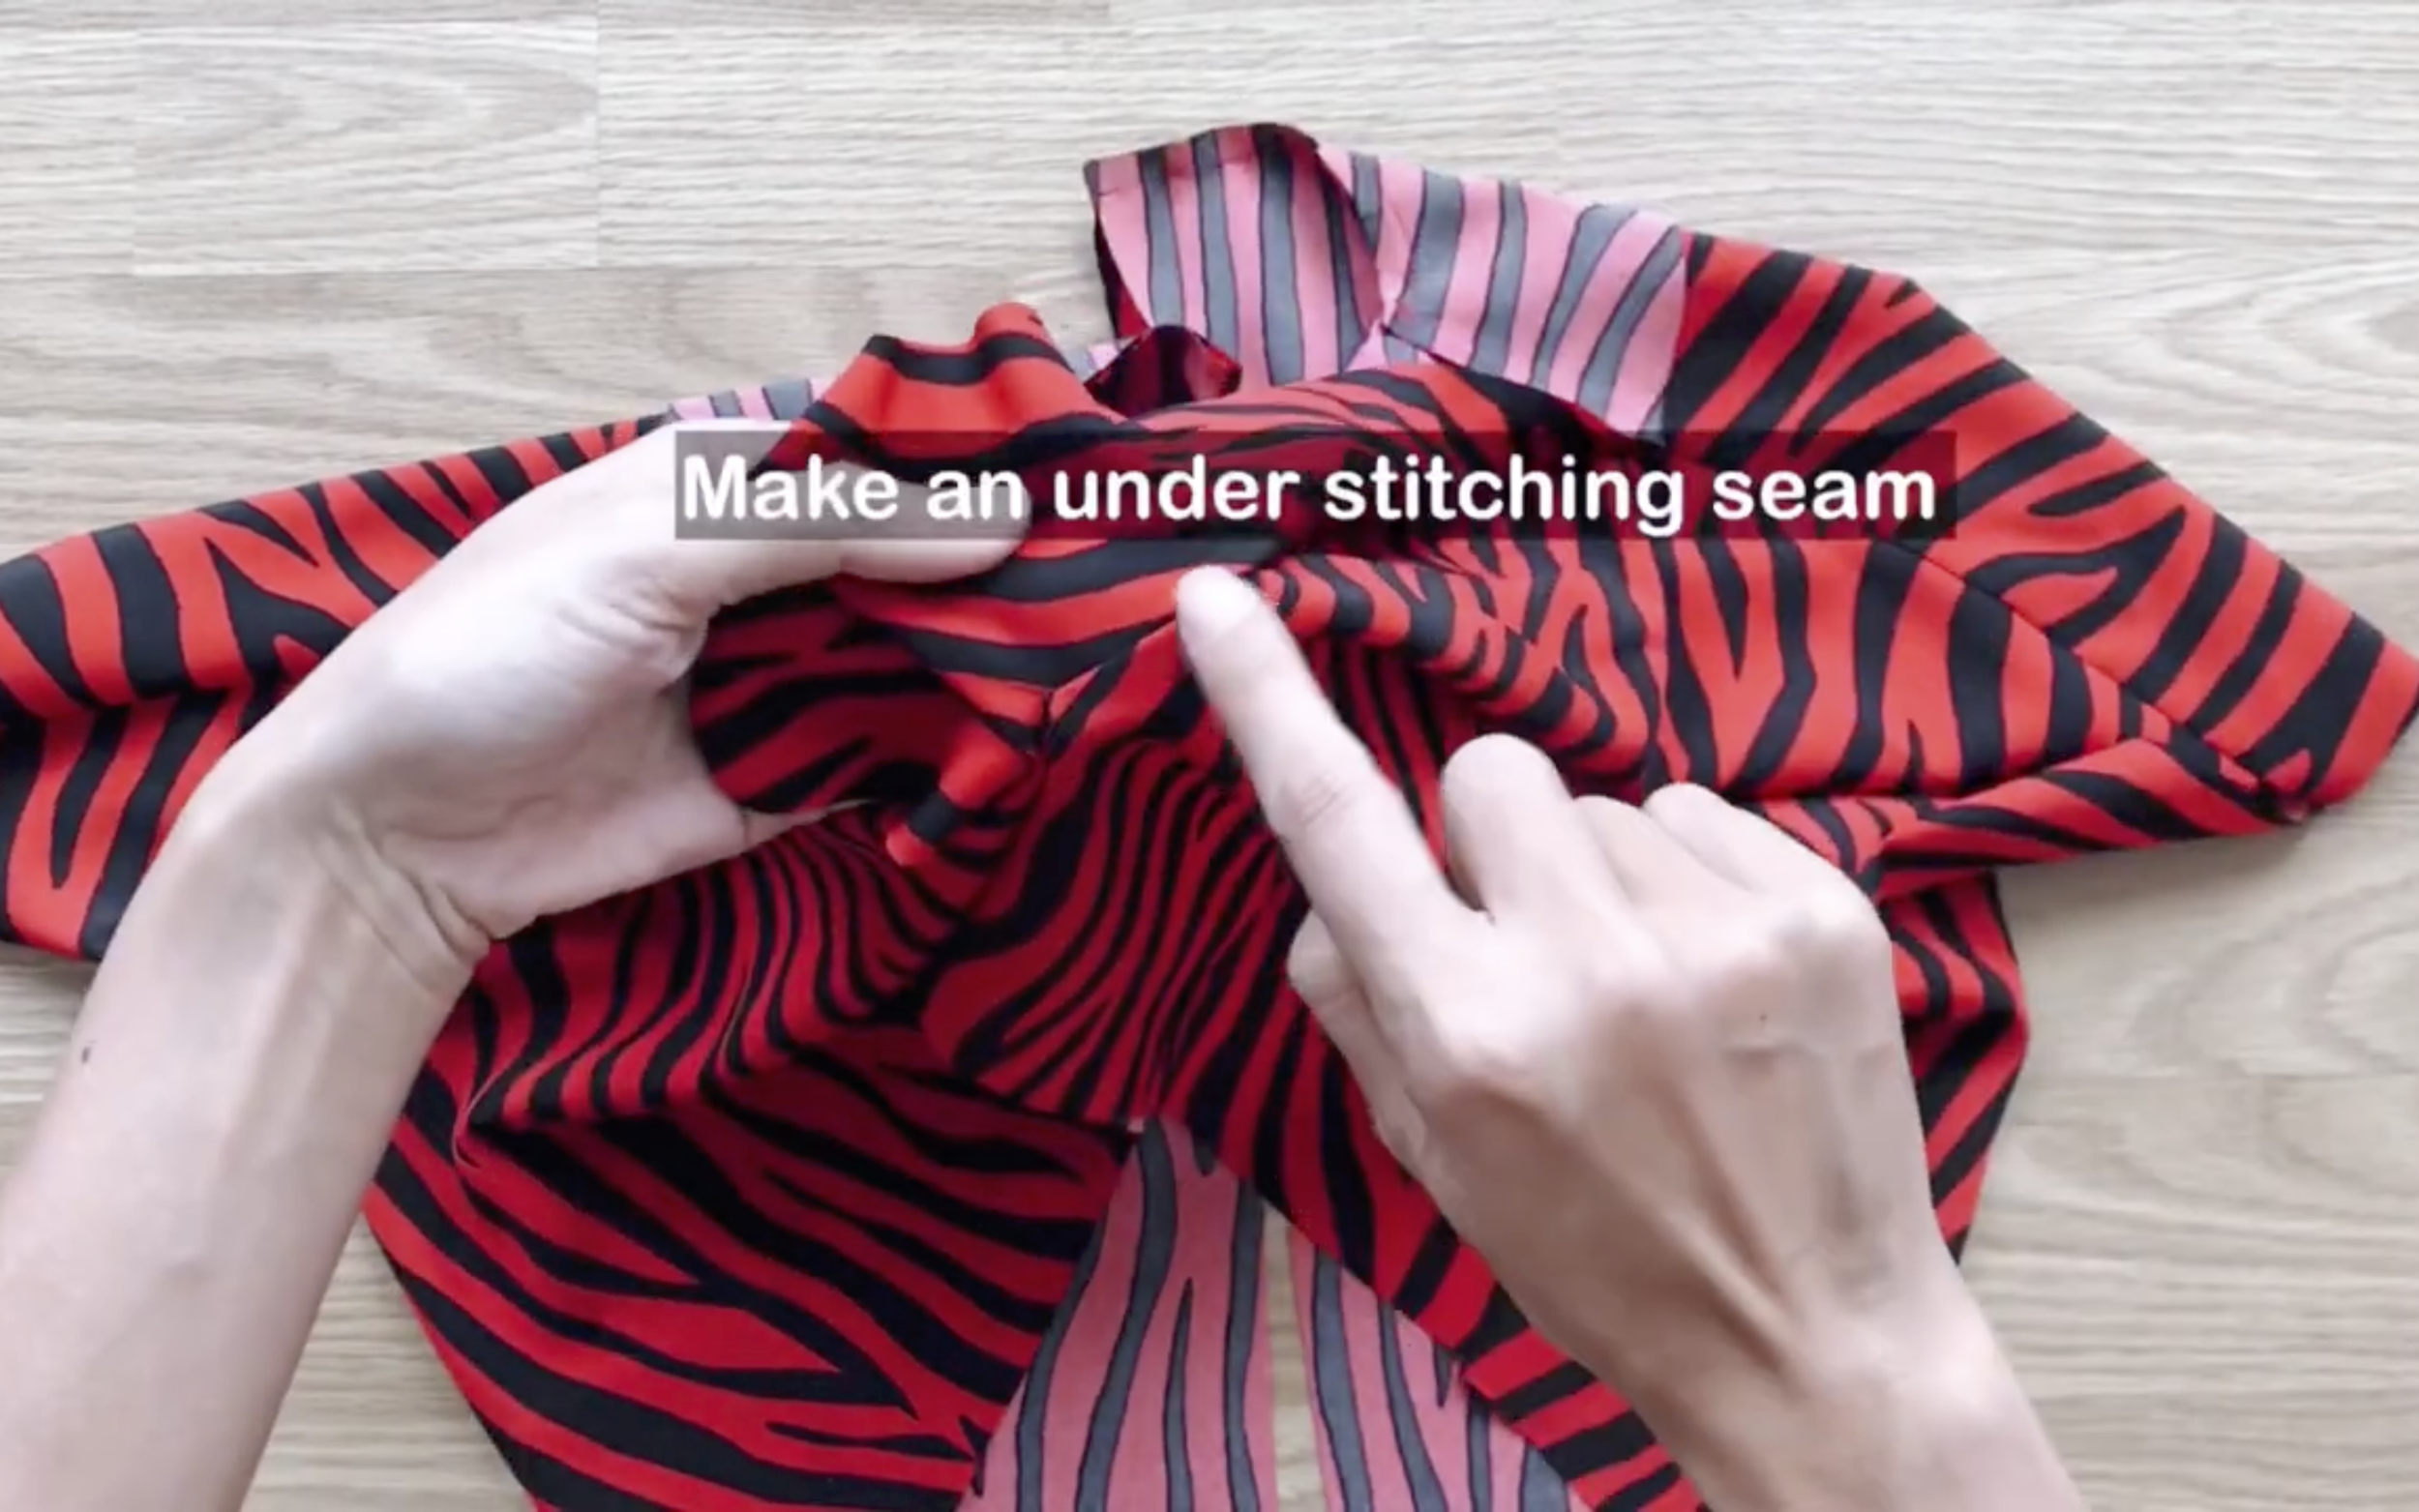
Make an understitching seam on the folded fabric to secure it to one side.
Iron the neckline for a clean finish.
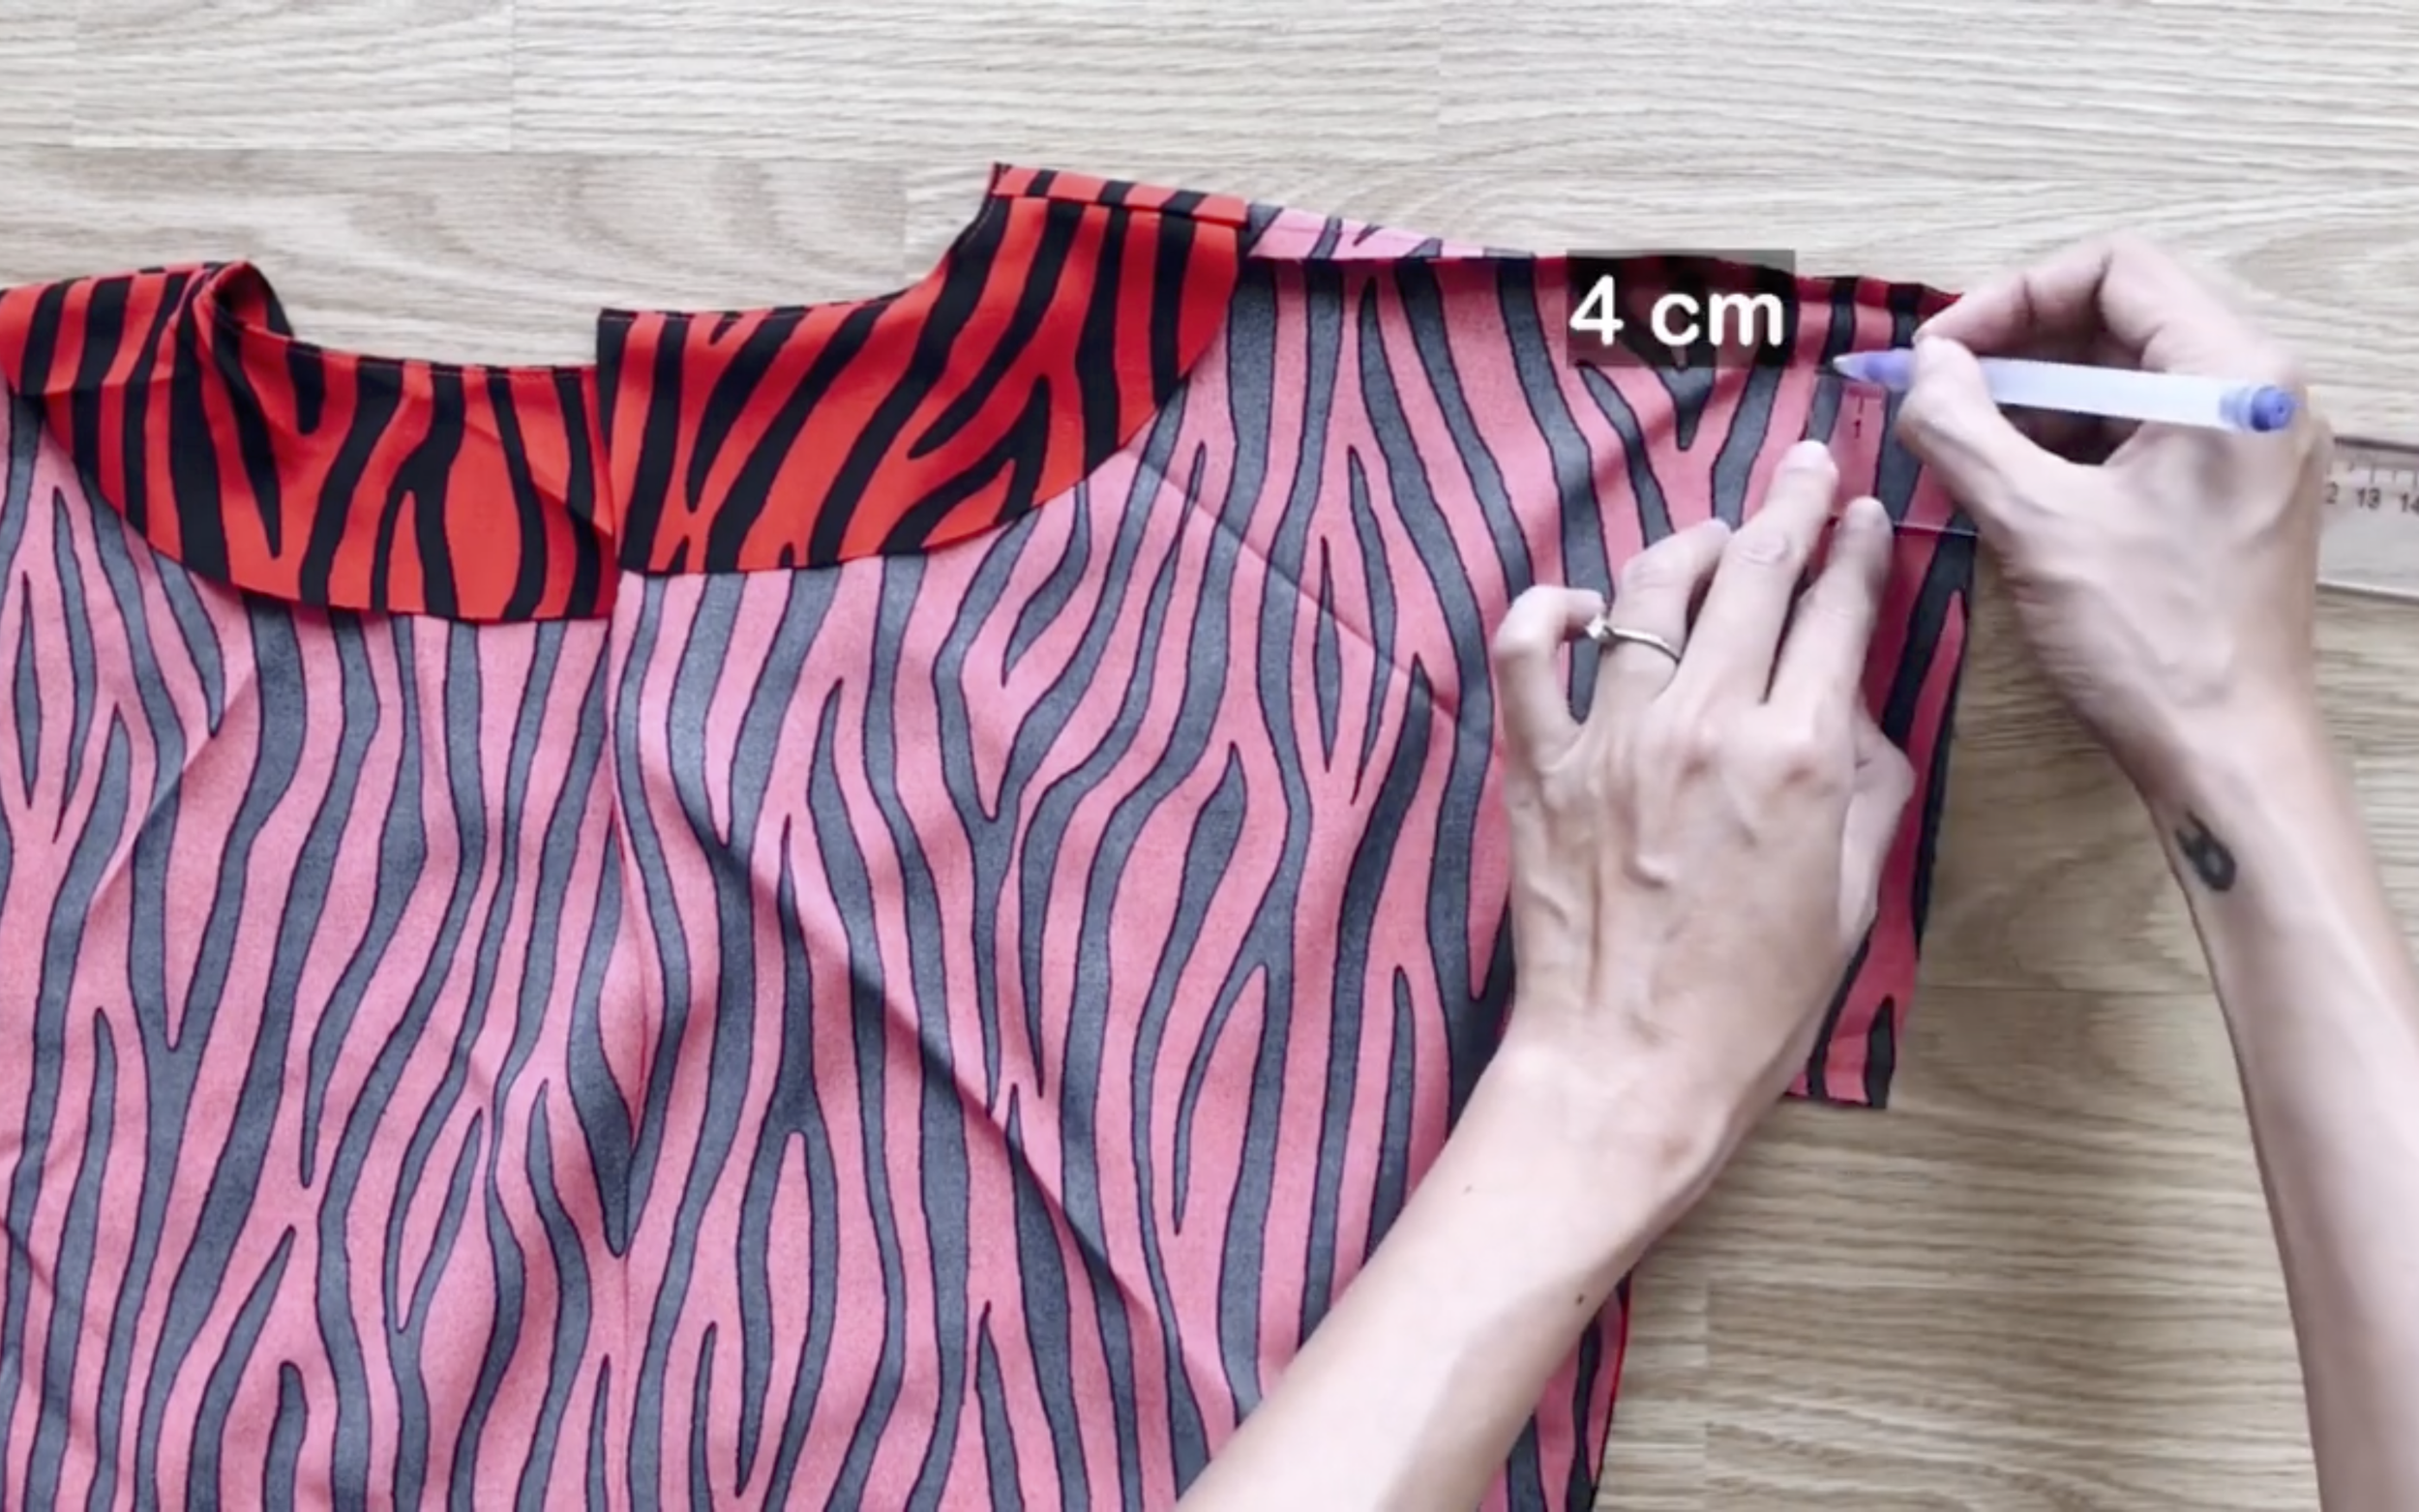
At the end of the sleeve, draw a line 4 cm inside.
Fold the sleeve end inward by 1 cm first, then fold it again to meet the line and sew.
THE BOTTOM PART OF THE DRESS
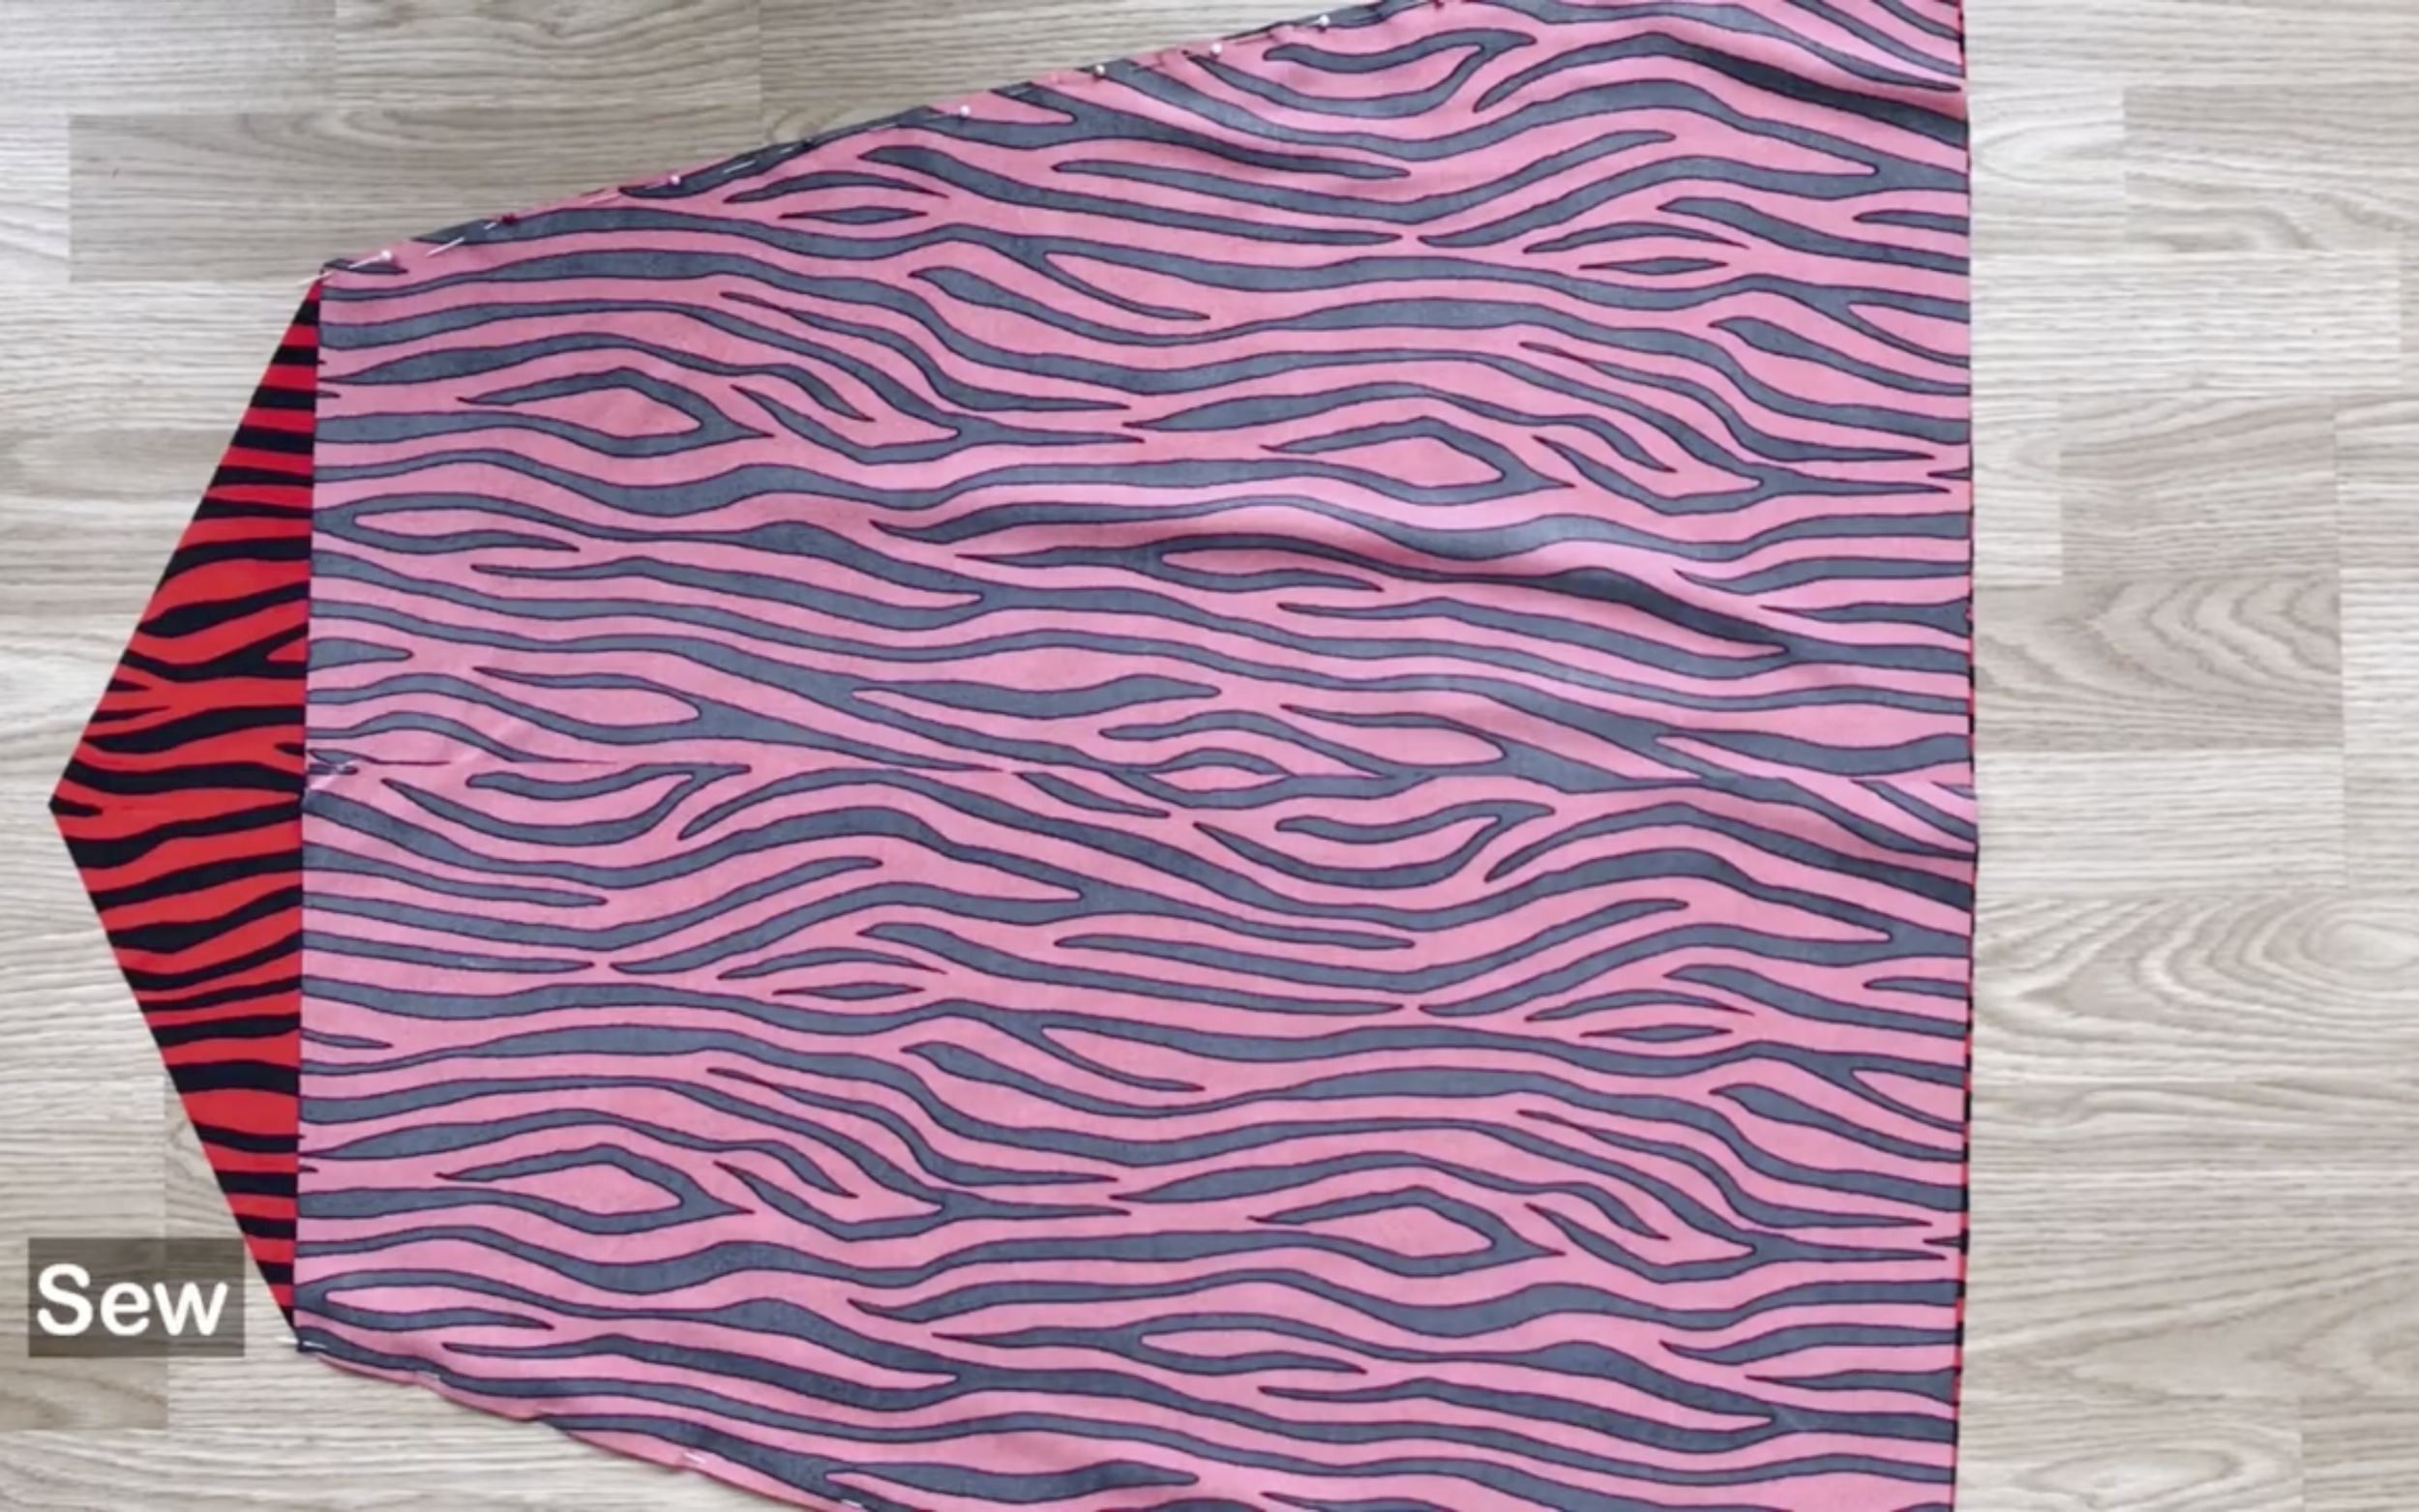
For the bottom of the dress, connect the front and back pieces at the sides.
CONNECT THE TOP AND THE BOTTOM OF THE DRESS TOGETHER
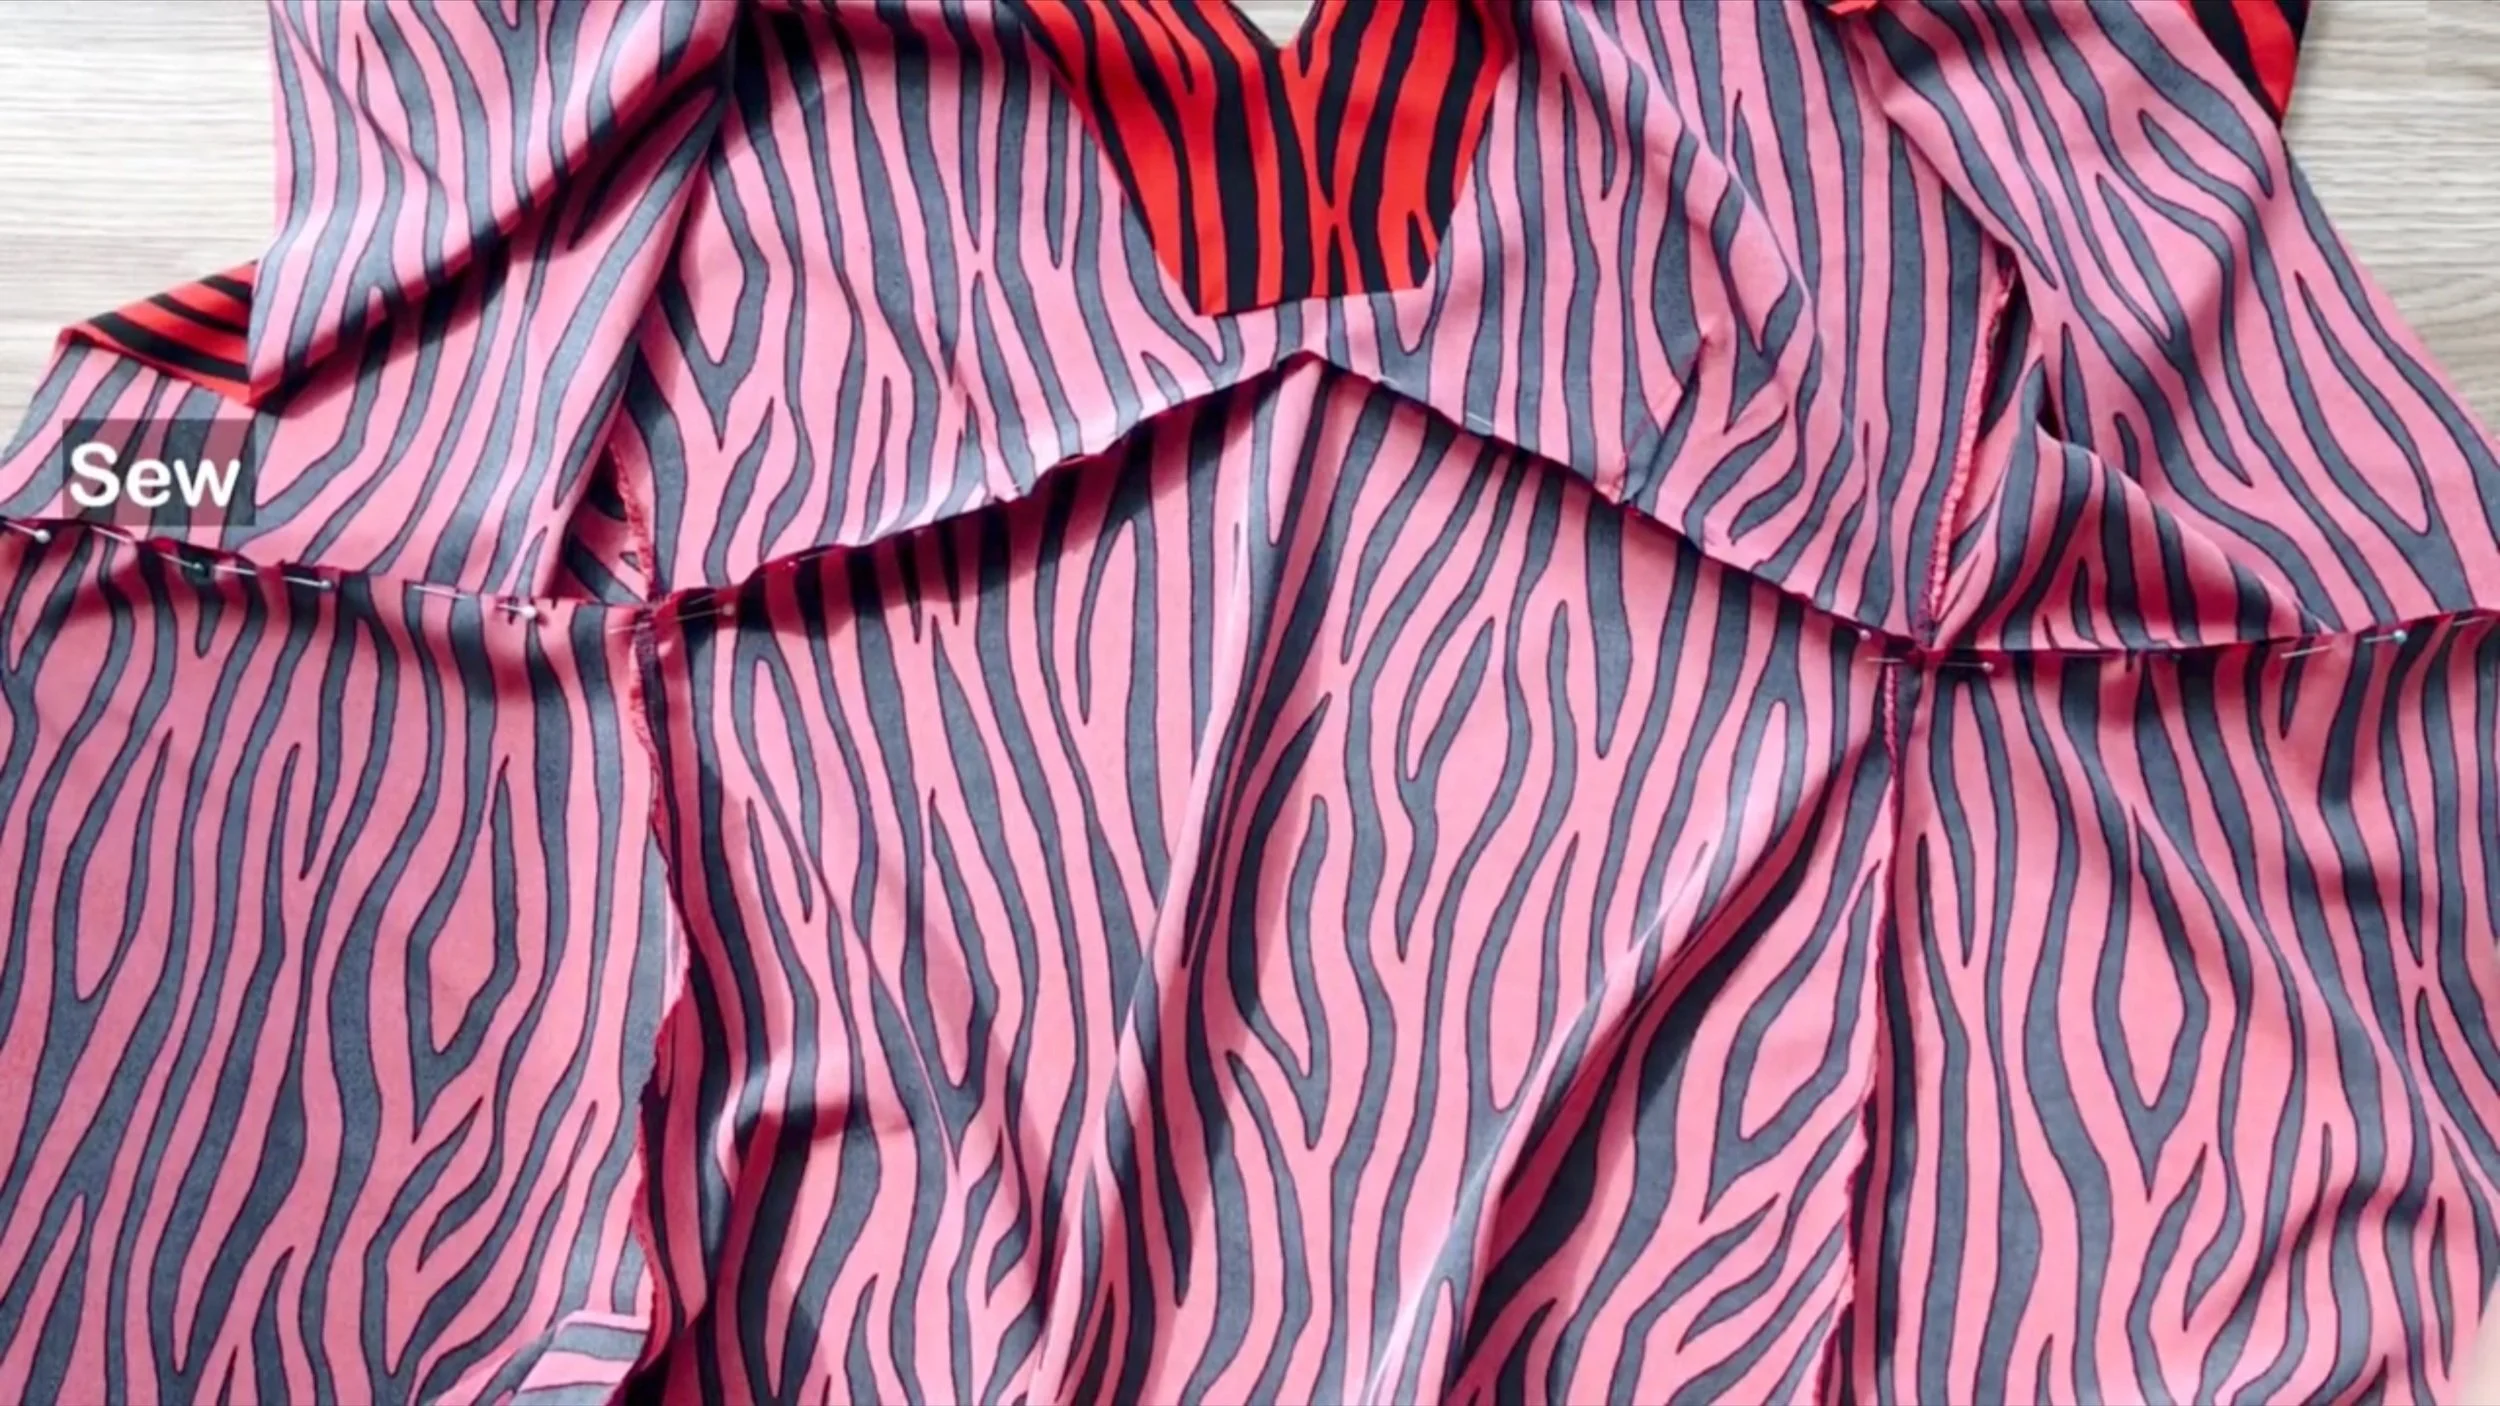
Then, attach the top and bottom sections of the dress.

Add a zipper to the middle of the back using a 30 cm invisible zipper in the same color as the fabric.
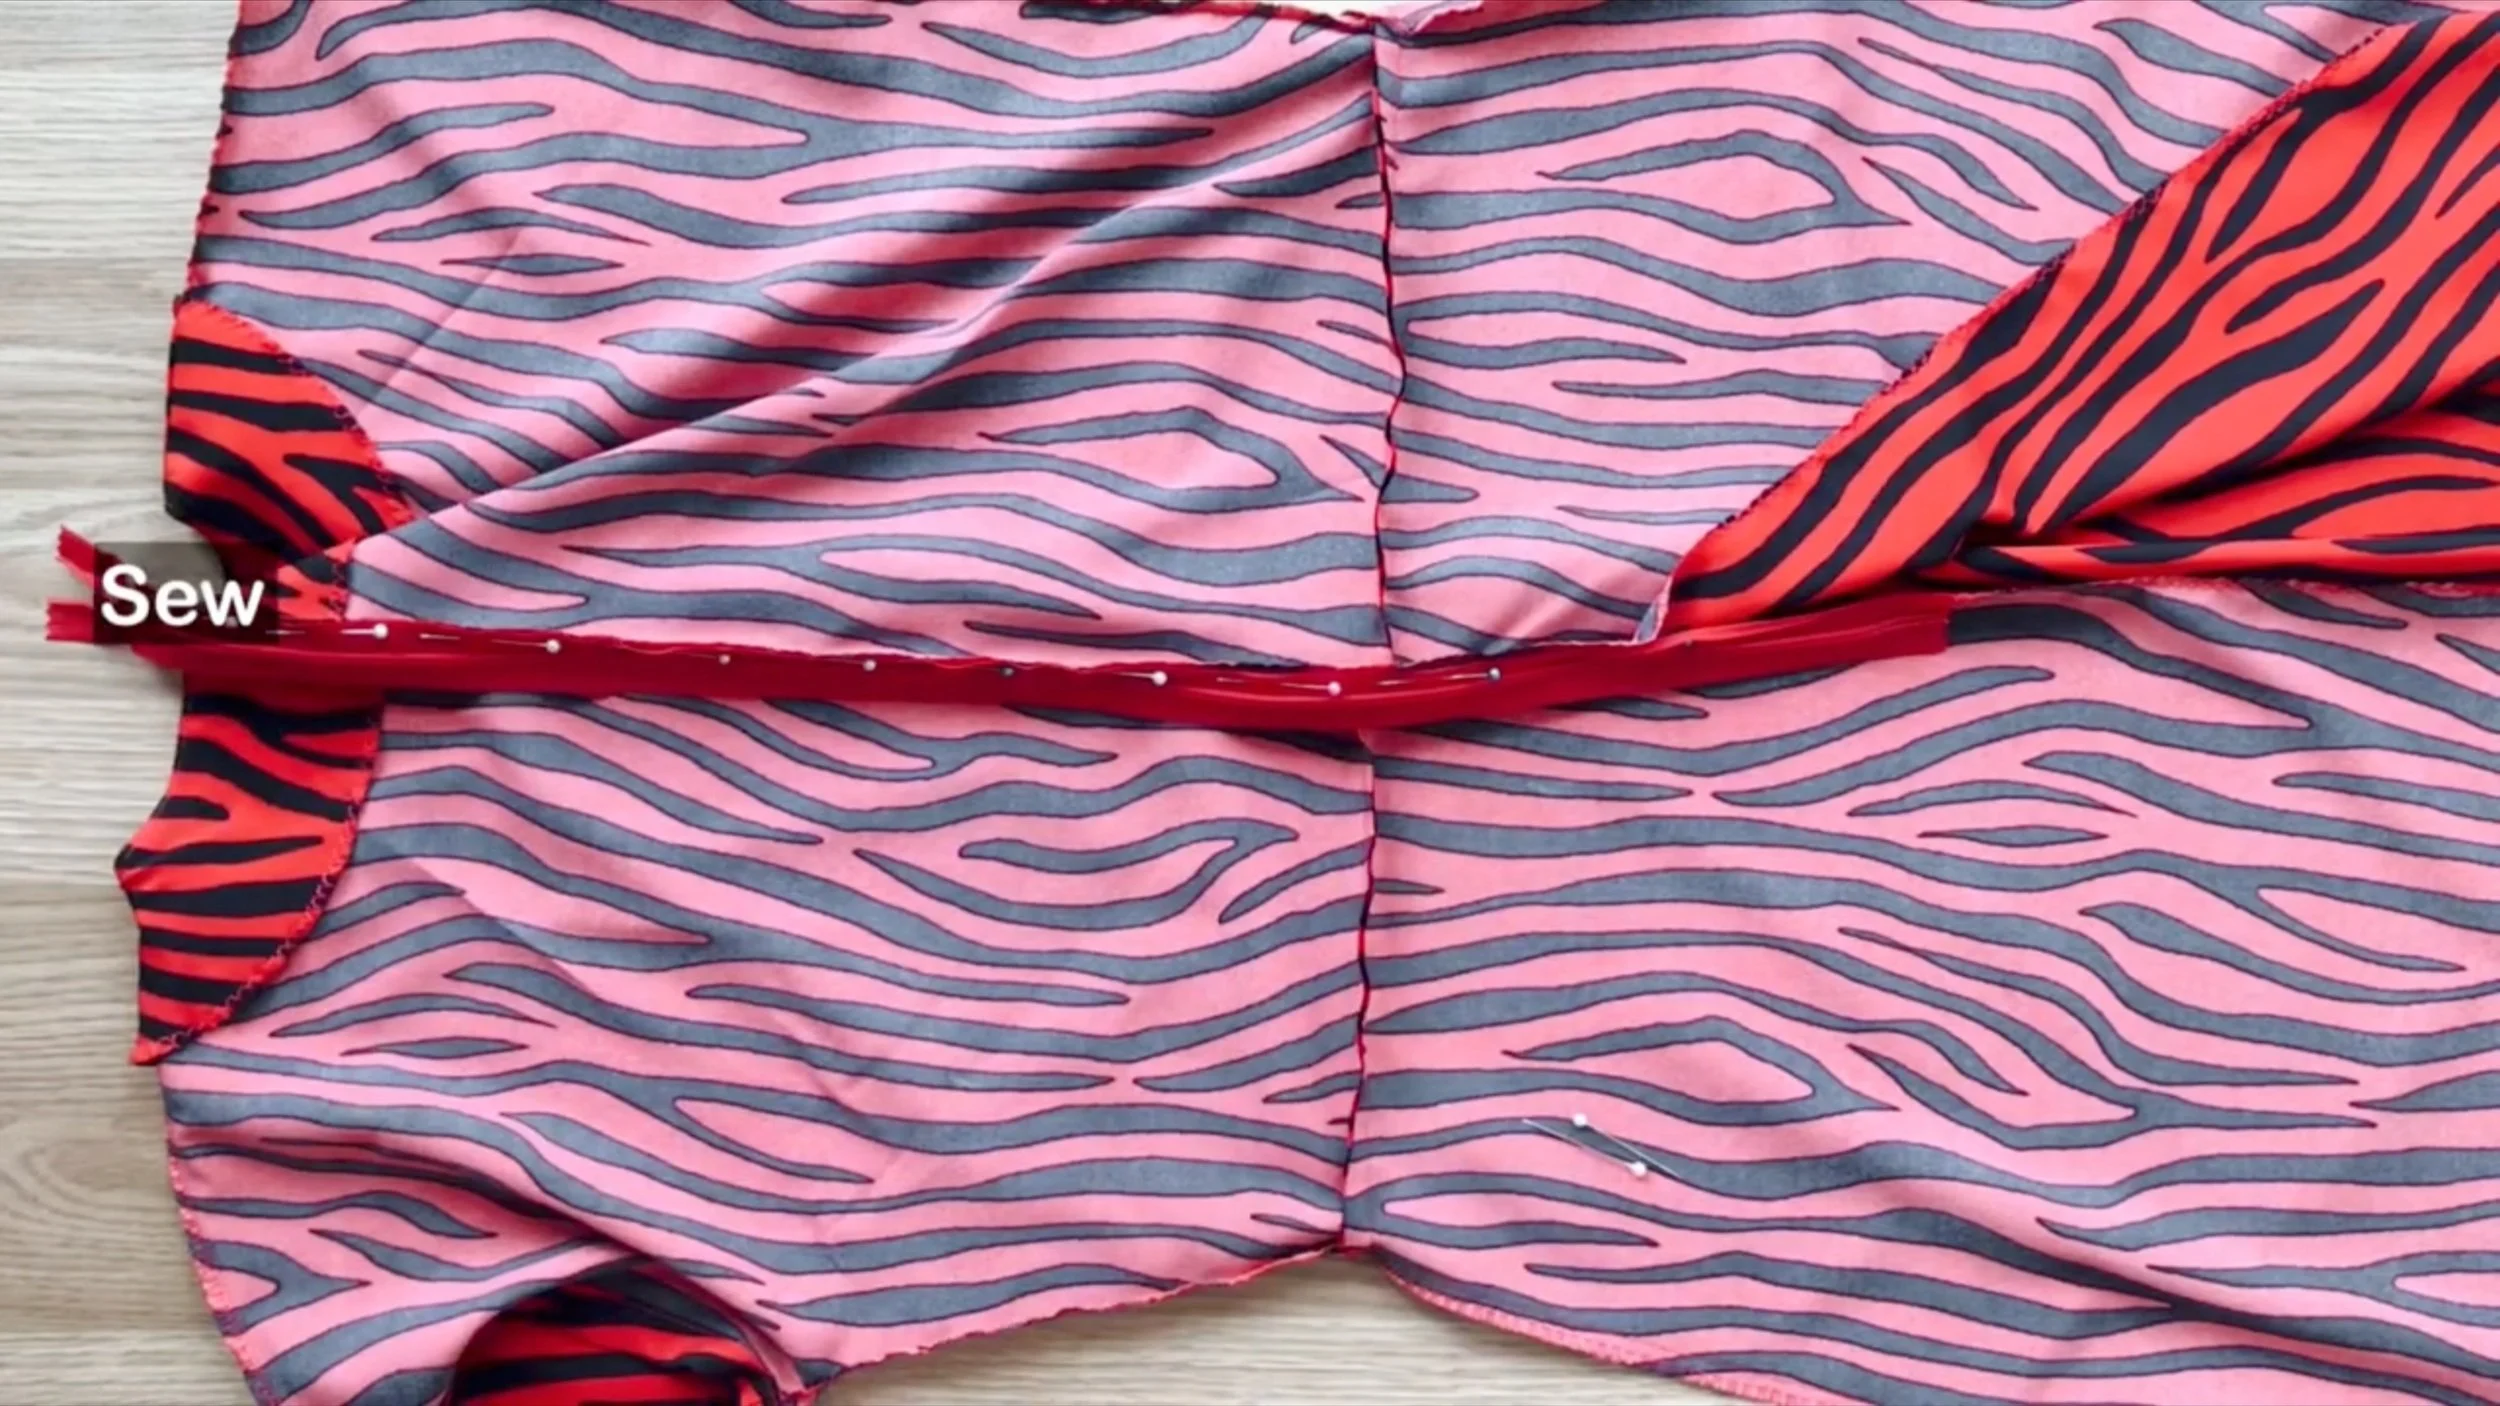
Then sewing the zipper.
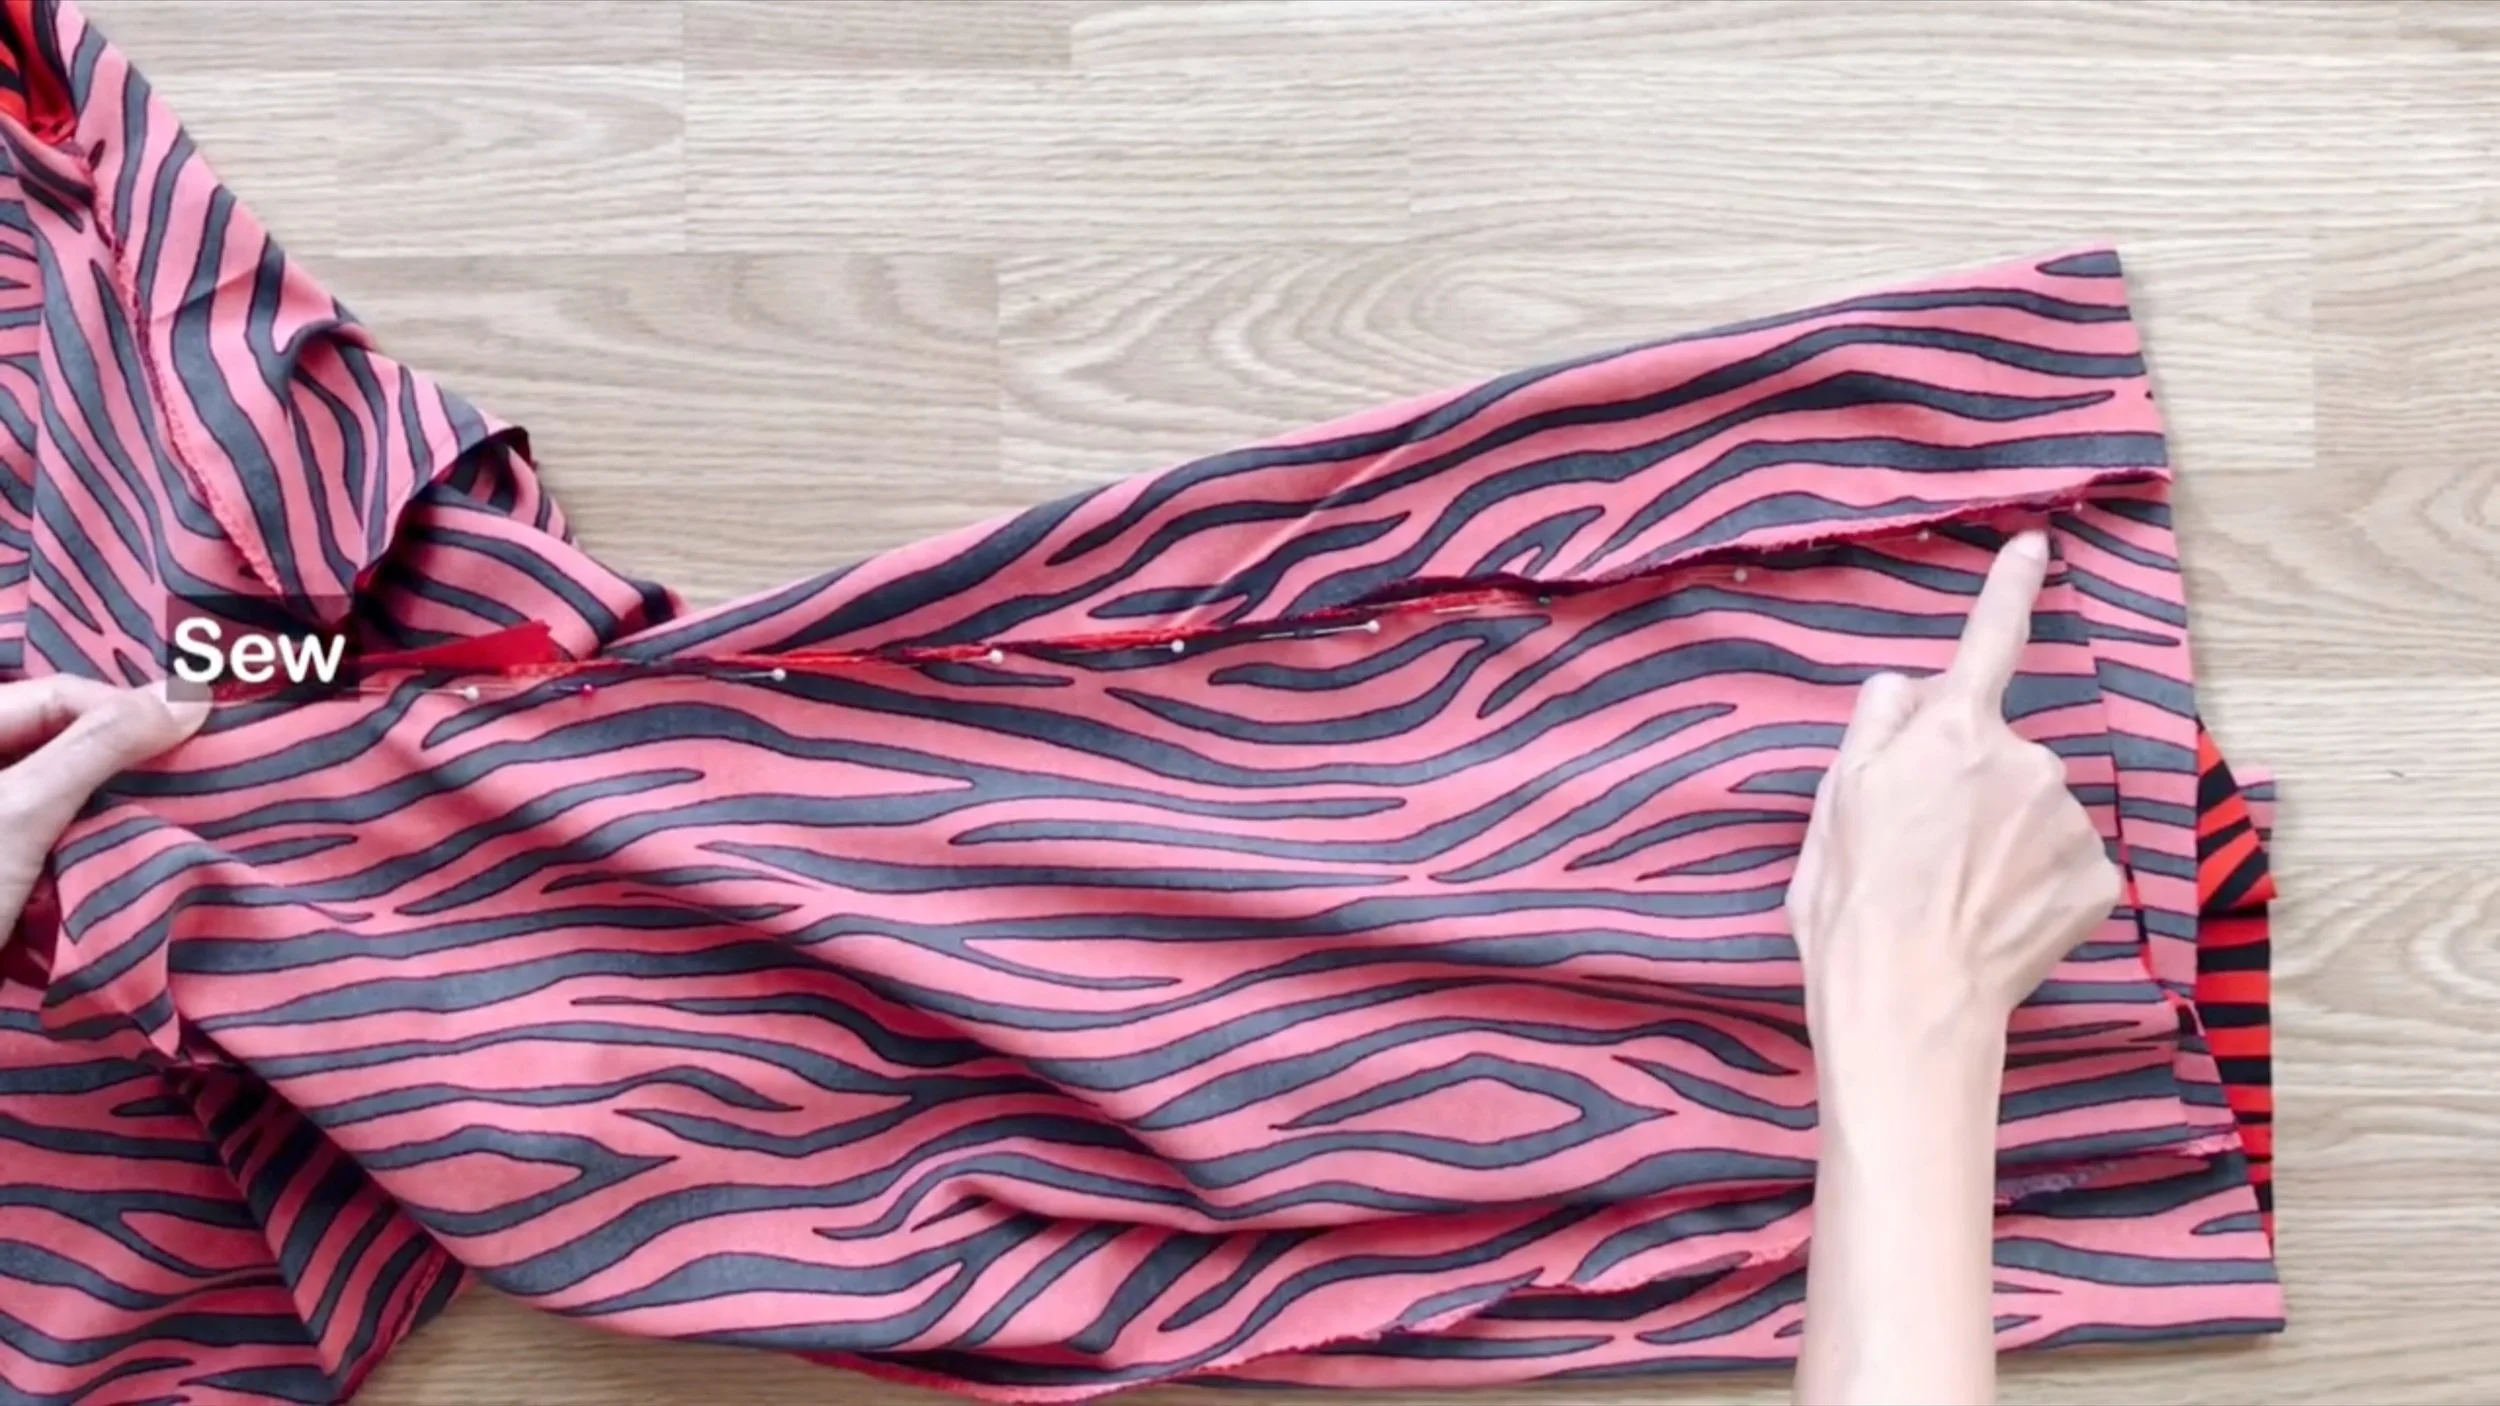
After that connect the back ends below the zipper.
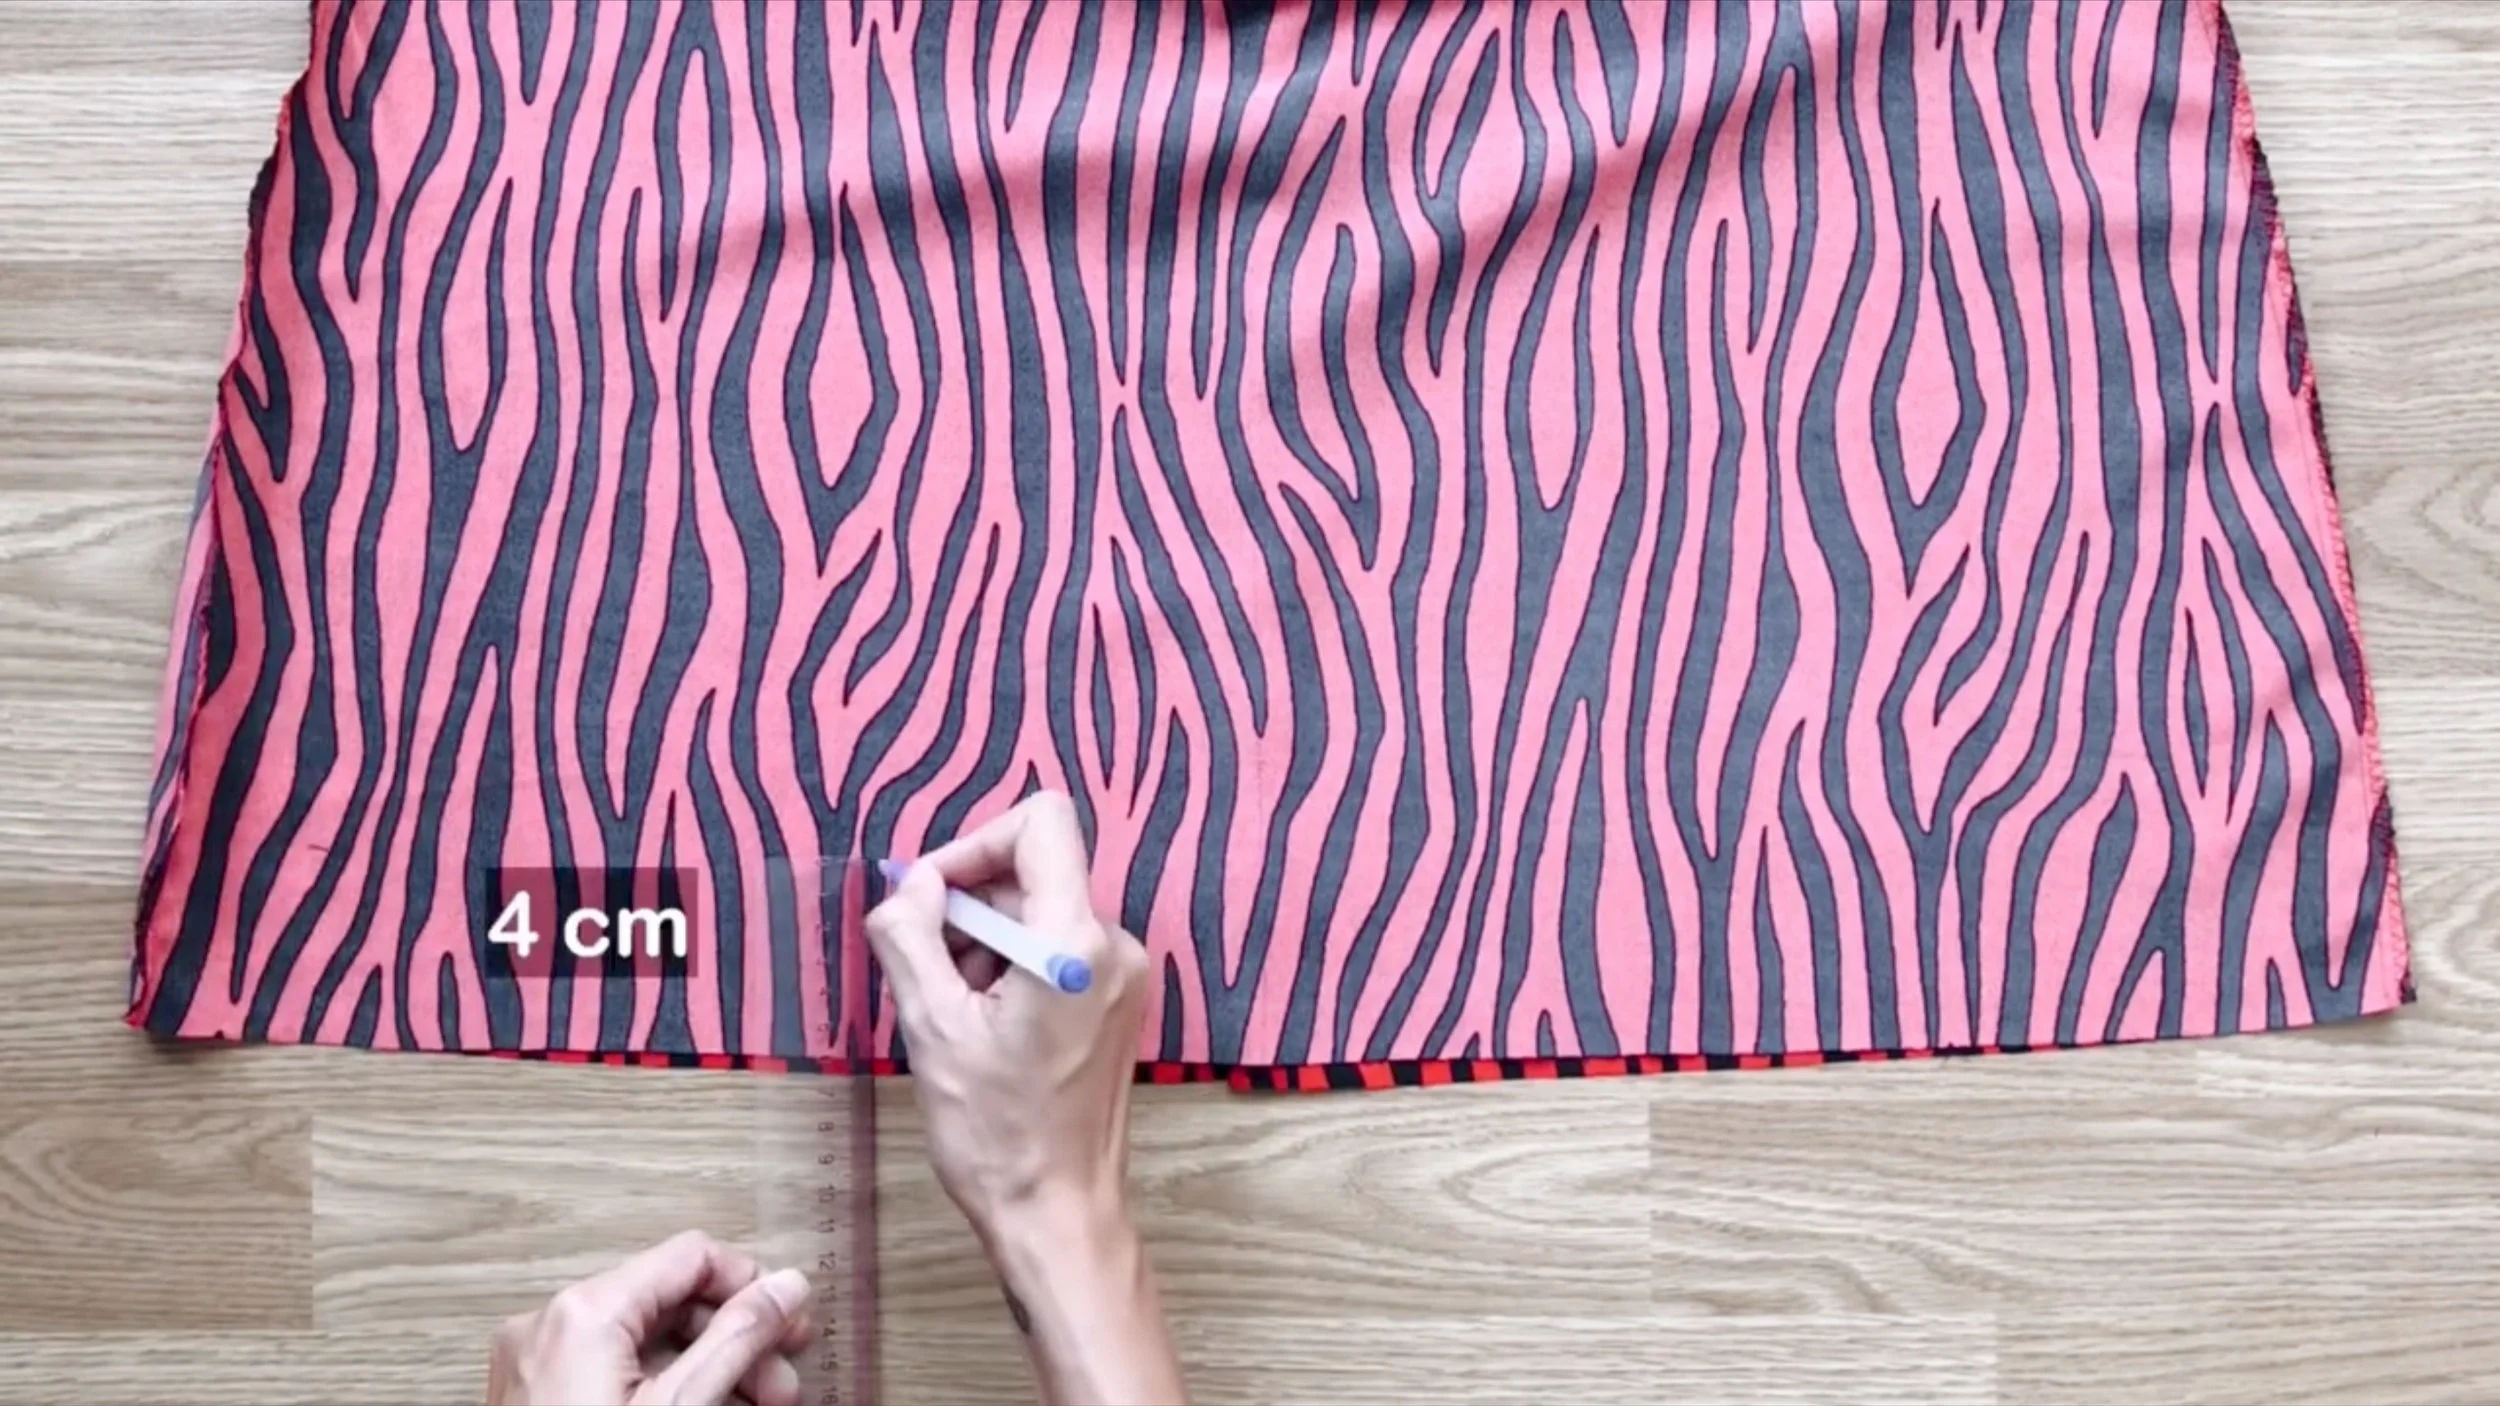
Finish the dress by drawing a line 4 cm from the bottom edge.

Fold the edge inward by 1 cm, then fold again to meet the line and sew.

DIY V-Neck batwing sleeve bustier midi dress | I made a dress for my Mother in law | Sewing tutorial
And that’s a wrap on this DIY!
Here’s the final result—the batwing sleeves paired with the bustier design create such a stunning look for this dress.
I hope you found my step-by-step guide helpful and inspiring.
If you’re interested in making your own, give it a try and let me know how it goes!
Until then, happy sewing!