DIY Bump friendly dress for my Summer wardrobe | Step by step sewing tutorial

DIY Bump friendly dress for my Summer wardrobe | Step by step sewing tutorial
Welcome or welcome back to my channel. My name is Jess and I love doing DIY, making clothes in a "simply but pretty" way.
In today's tutorial, I'm going to share with you how I made a bump friendly dress for my summer wardrobe. Yes, I'm pregnant. So I prefer to make loose and comfy clothes. But I still want to look pretty and can wear my clothes after that. And this dress is just perfect for me.
That's why I hope you like it and try it out soon. Let’s get started!
WHAT YOU’LL NEED
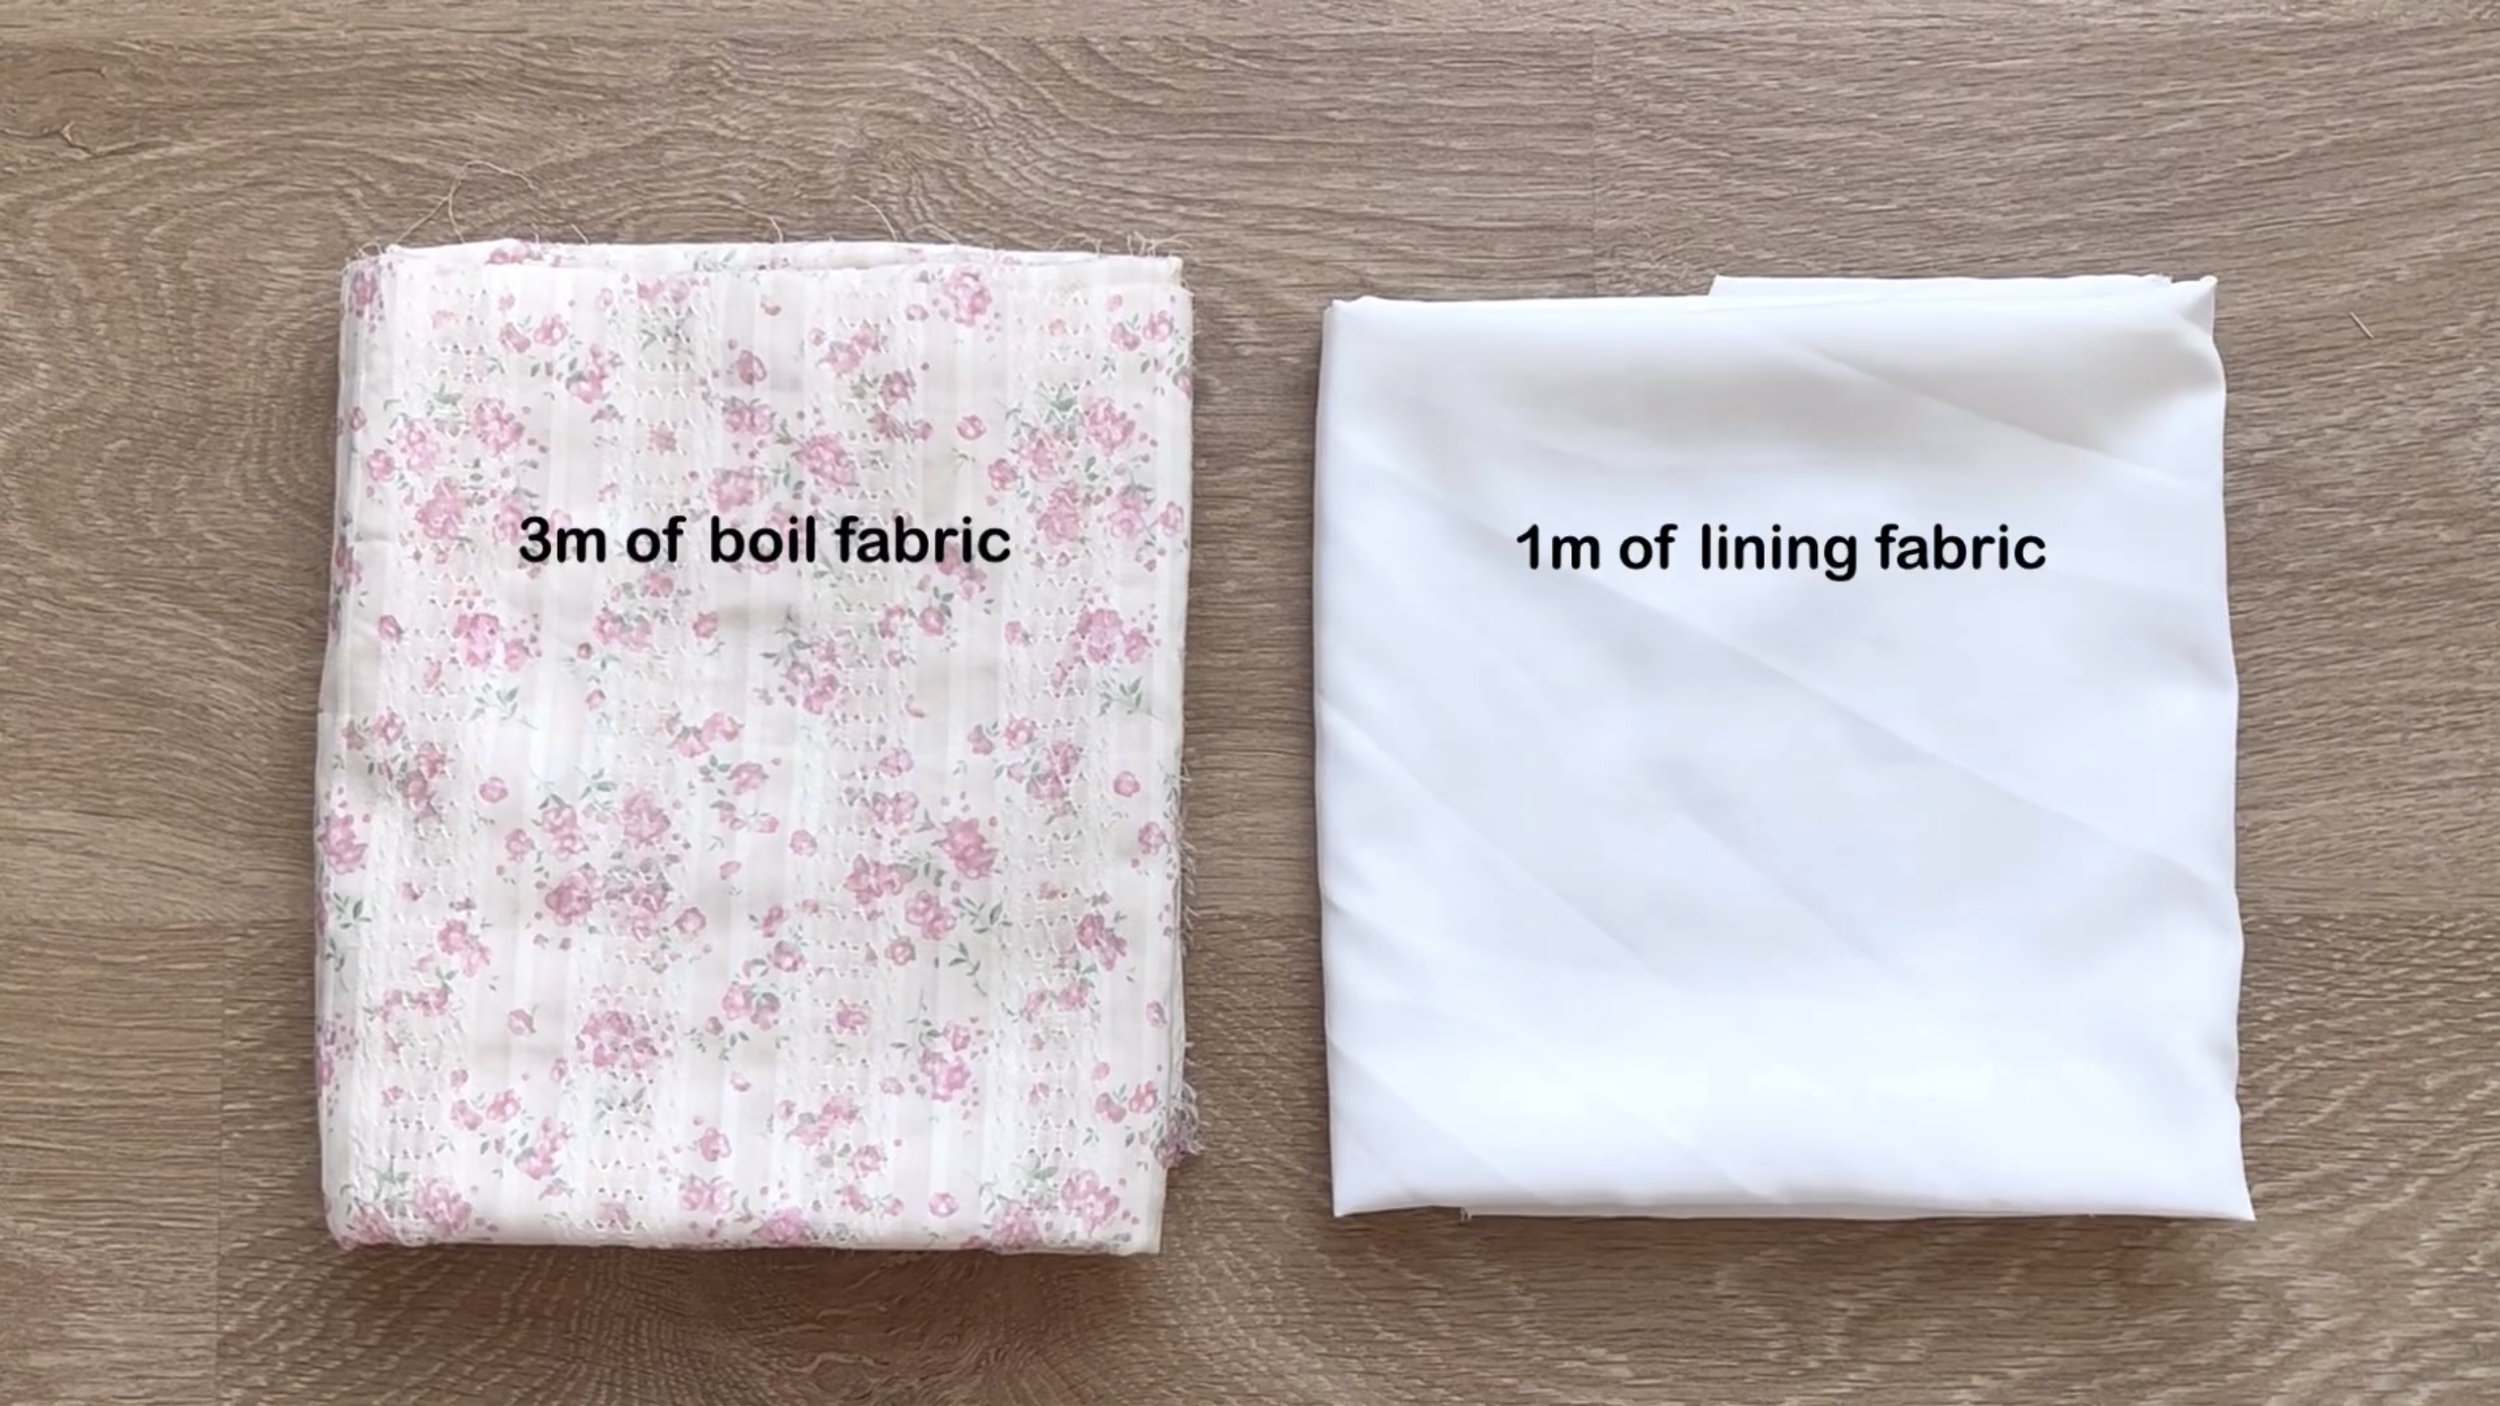
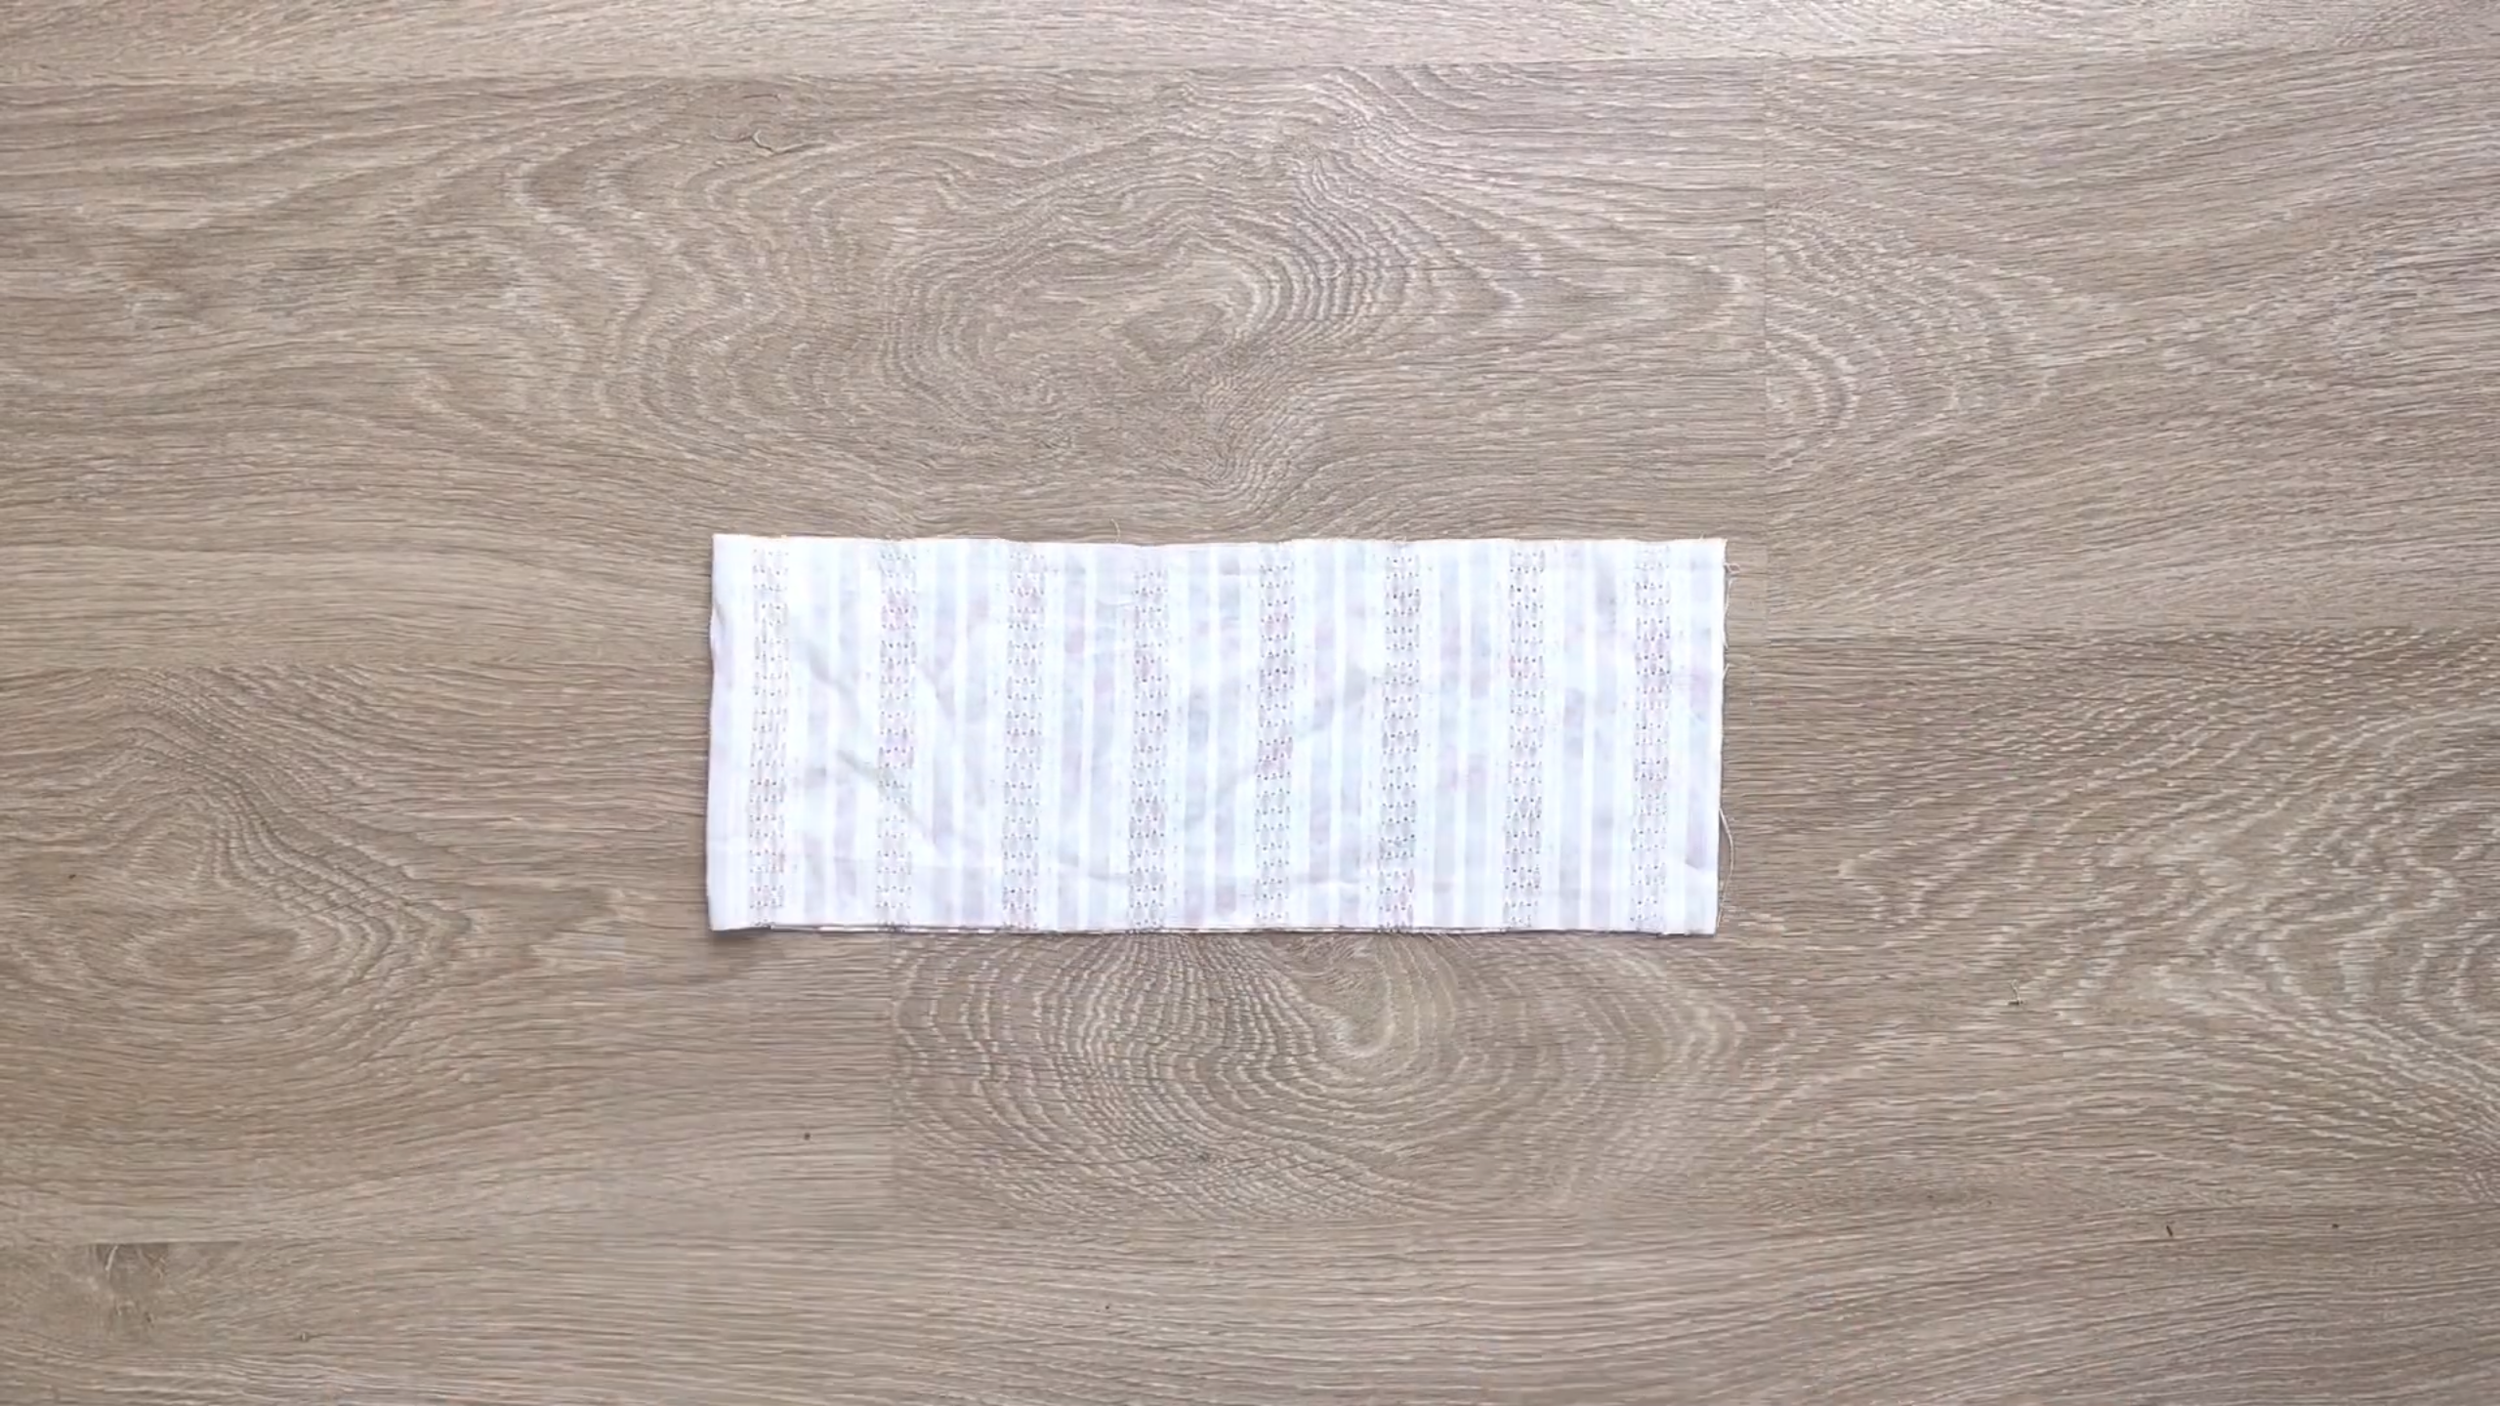
3m of boil fabric
1m of soft cotton fabric for the lining
Pattern paper
Sewing machine
Pins
Scissors
Ruler
Long stick
Elastic band
MAKING THE PATTERNS
Here’s the pattern for the project. To get a clear understanding of all the measurements needed for the pattern, watch the video from 0:34 to 2:37.
Remember, you can adjust these measurements to fit your own dimensions!

THE BACK BODICE PATTERN


Draw a rectangle with 30 cm width, which is 1.5 times a quarter of your bust size, and 50 cm length, which is the length from above the breast to over the belly button.
From one width line, draw another line inside the rectangle at 19 cm away from it. It's the length from above the breast to under the breast.
From the top width line, mark down 10 cm, which is the width from the underarm to the middle of the breast. This will be the position for the shoulder strap later.
From the top width line, mark at 8 cm on the length line next to it. It is the width from above the breast to the middle of the breast.
Then, connect two marks together by a slightly curved line.
Add 1 cm for seam allowance after that, and the back bodice pattern will be ready after cutting.
You will need to cut this pattern in folded fabric at the edge horizontal line.
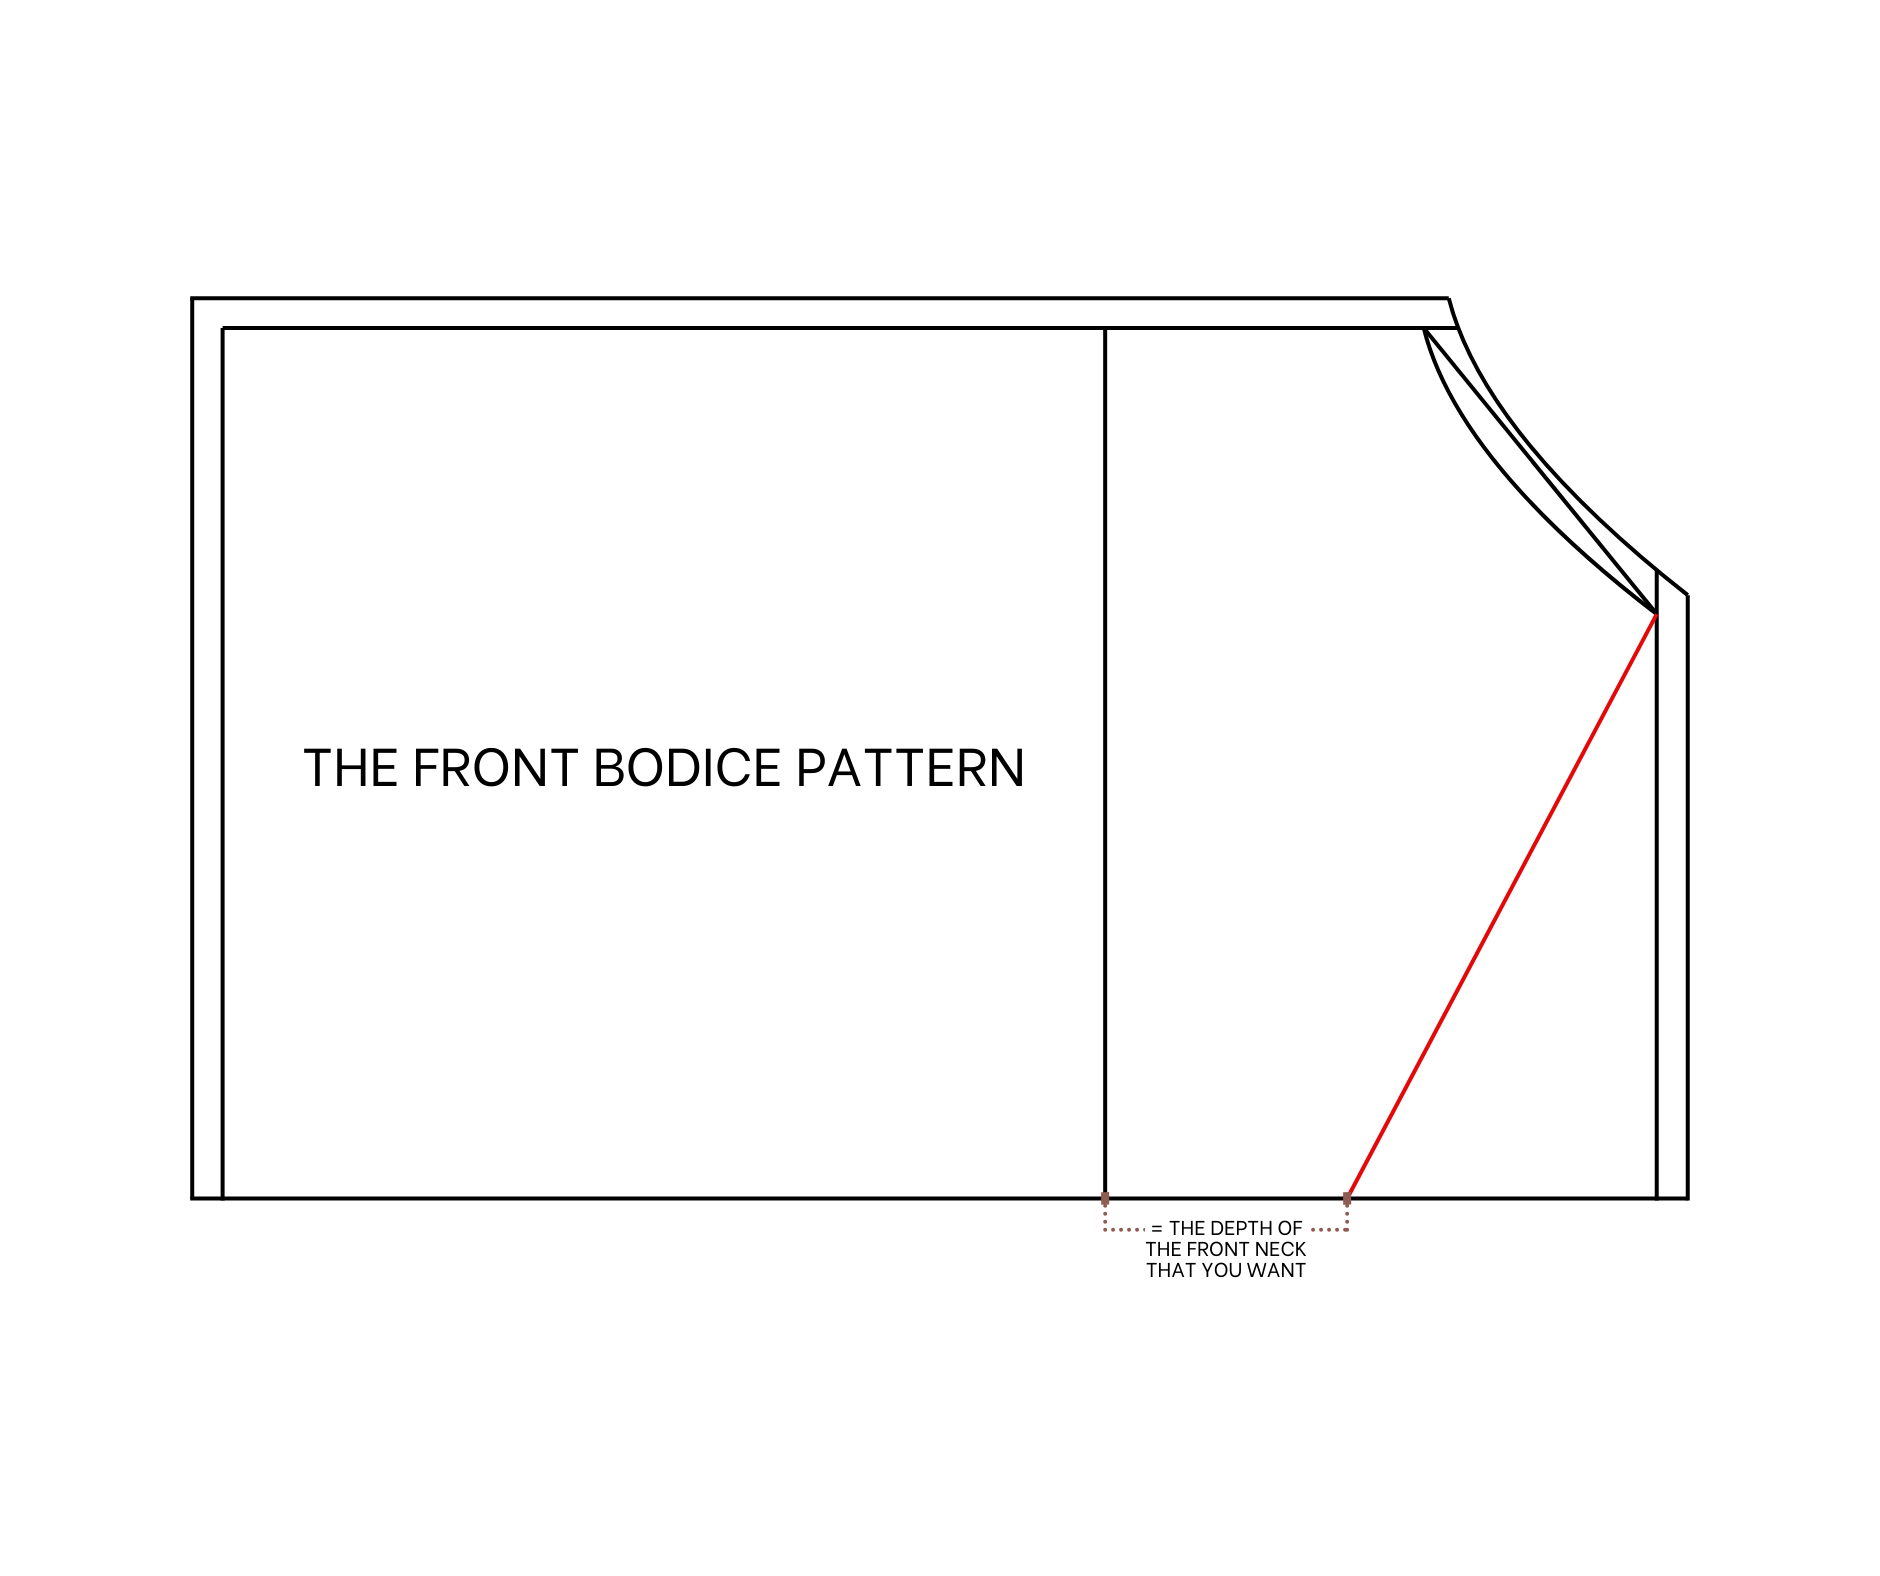
THE FRONT BODICE PATTERN
Use the back bodice to make it. From the end of the underbust line, mark 8 cm on the length line next to it. It's the depth of the front neck that is wanted.
Then, connect this mark to the one on the top width line to create a front neckline for the front bodice.
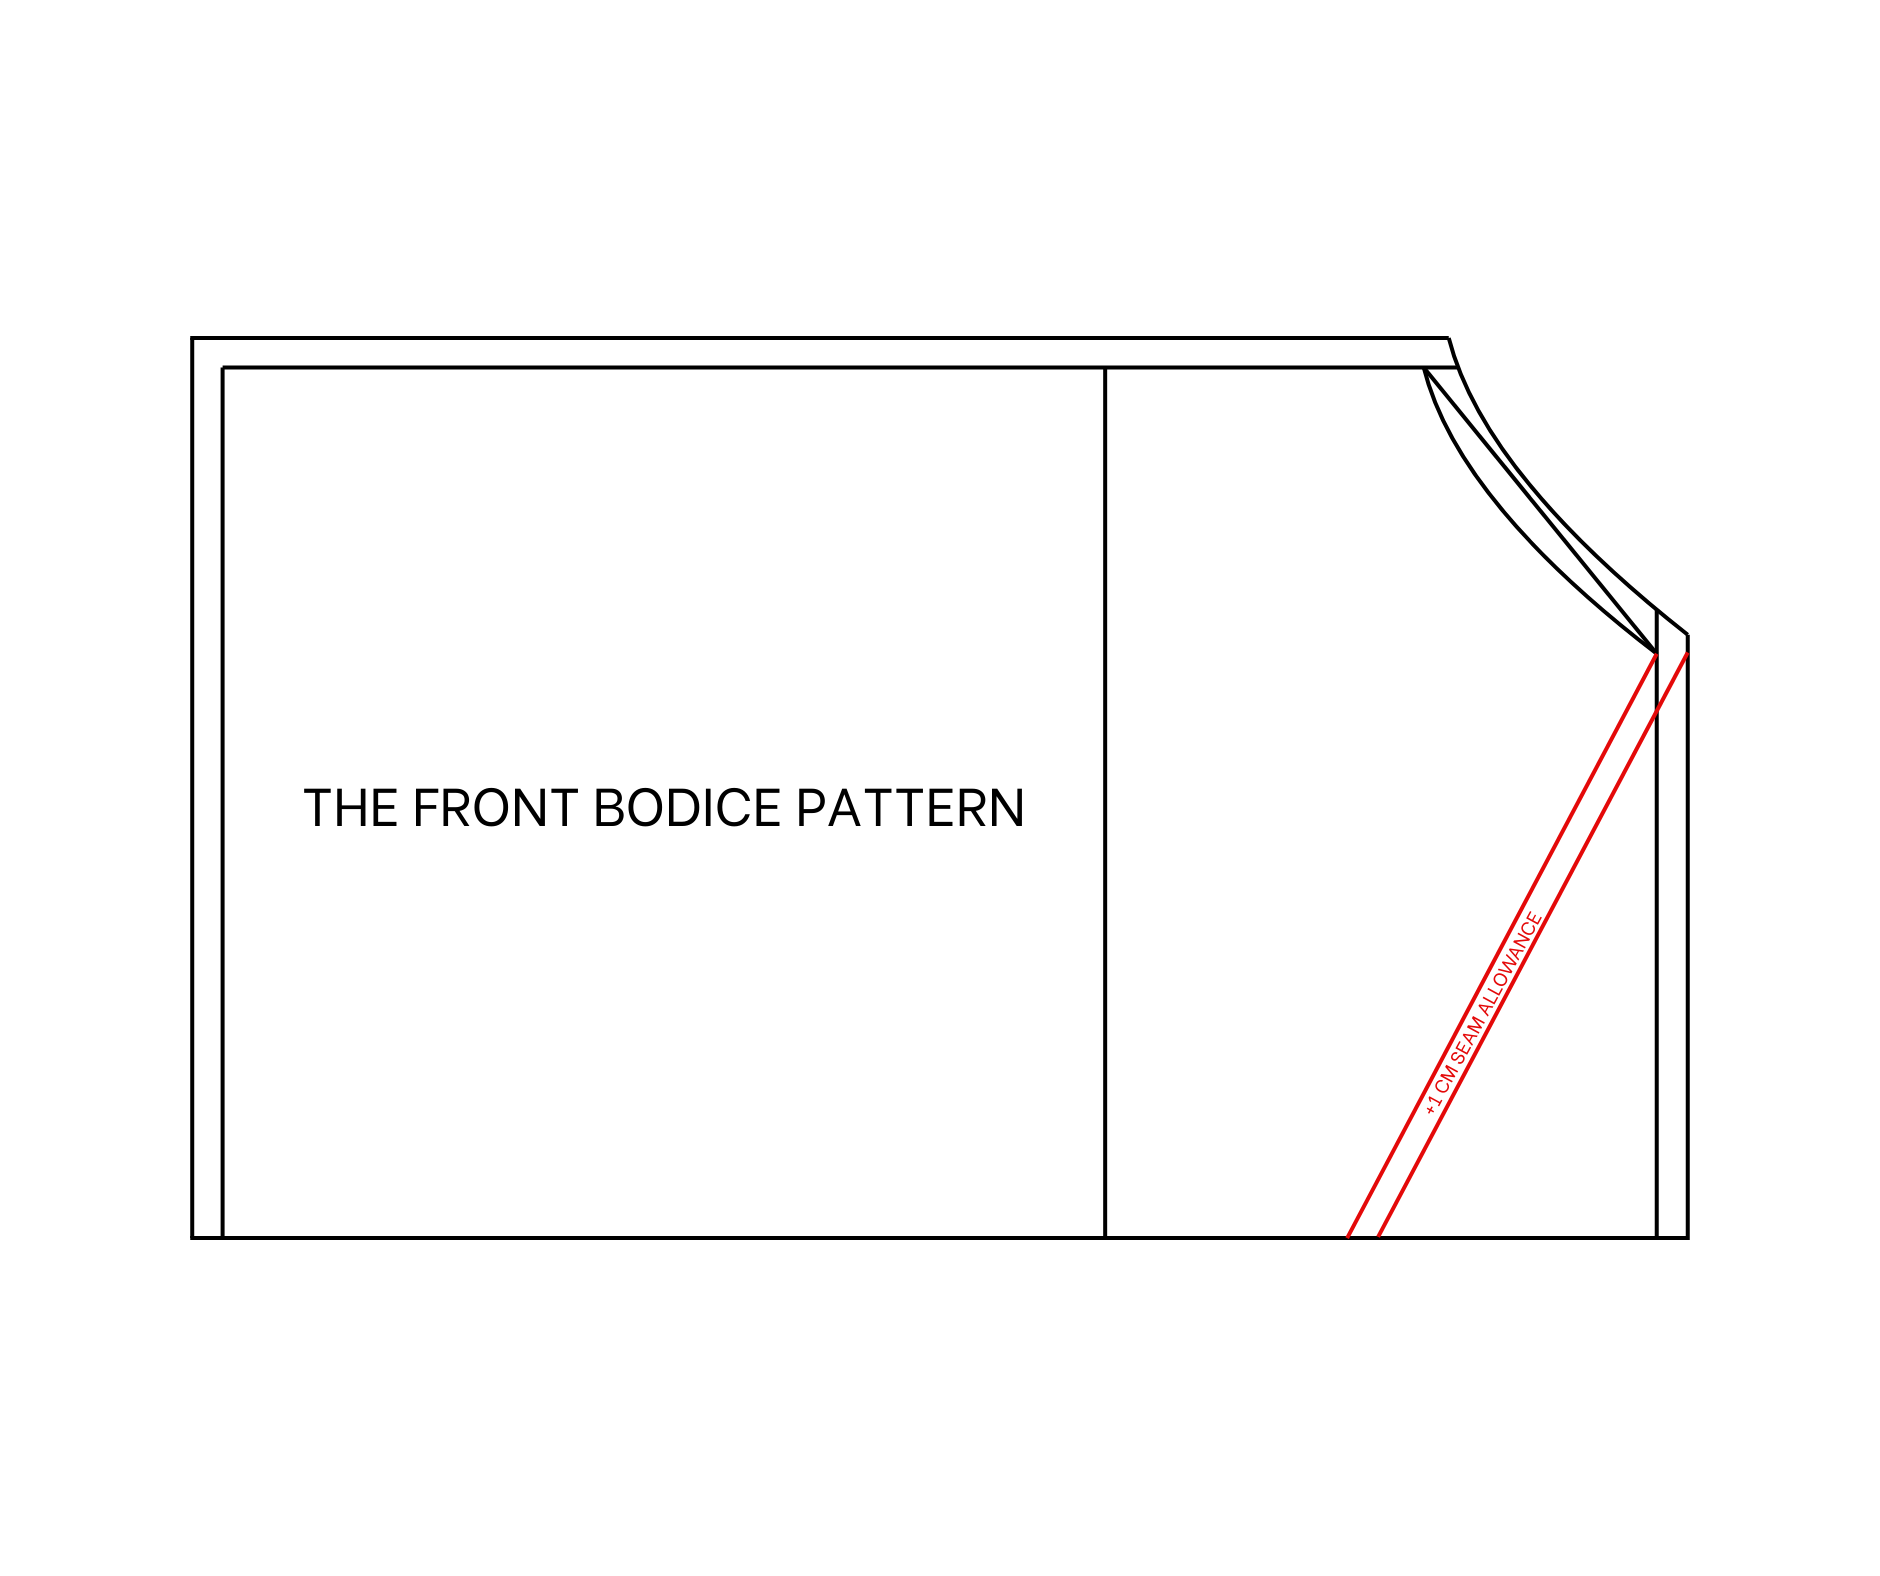
Add 1 cm for seam allowance at a new line. The front bodice pattern will be ready after cutting.
You will need to cut this pattern in folded fabric at the edge horizontal line.
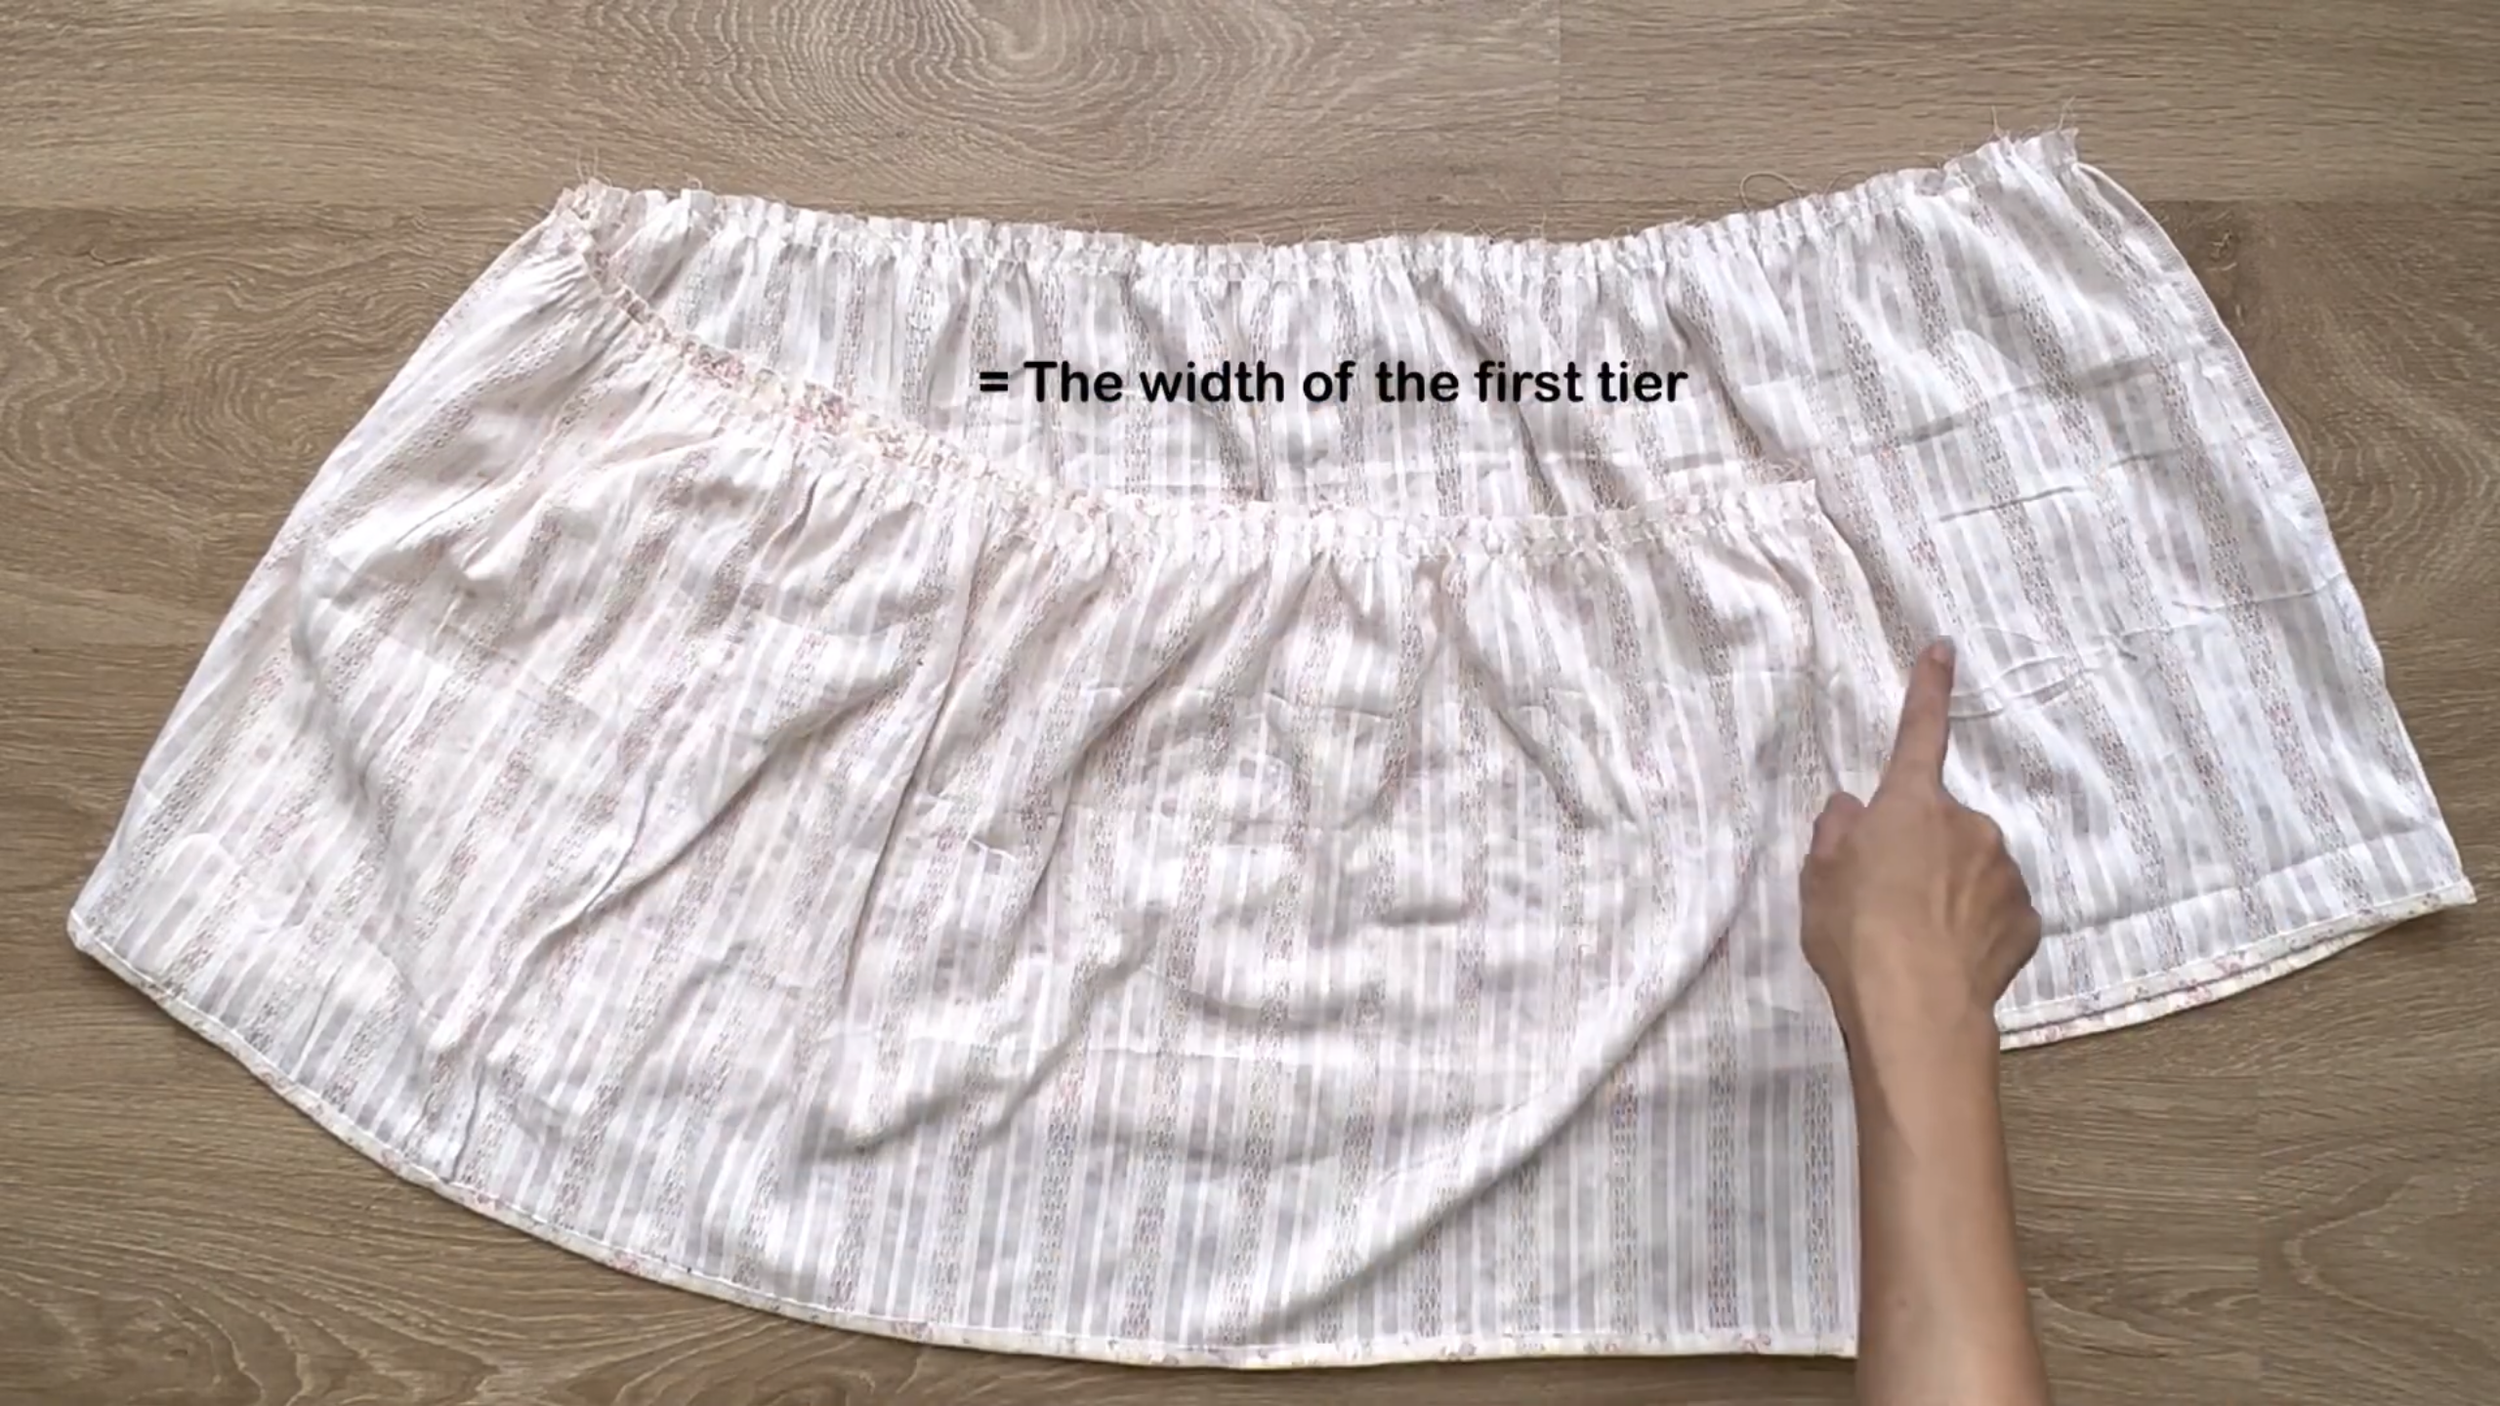
THE SKIRT PATTERN
The skirt pattern of the dress is quite simple, with two tiers made by rectangles. Here are the measurements for your reference.

SEWING THE DRESS
THE SHOULDER STRAP PART
Cut a long rectangle with 15 cm width, which is the width of the shoulder strap that is wanted, and 64 cm length, which is 4 times the length from the shoulder to above the breast.
Fold the rectangle in half by the length line first.
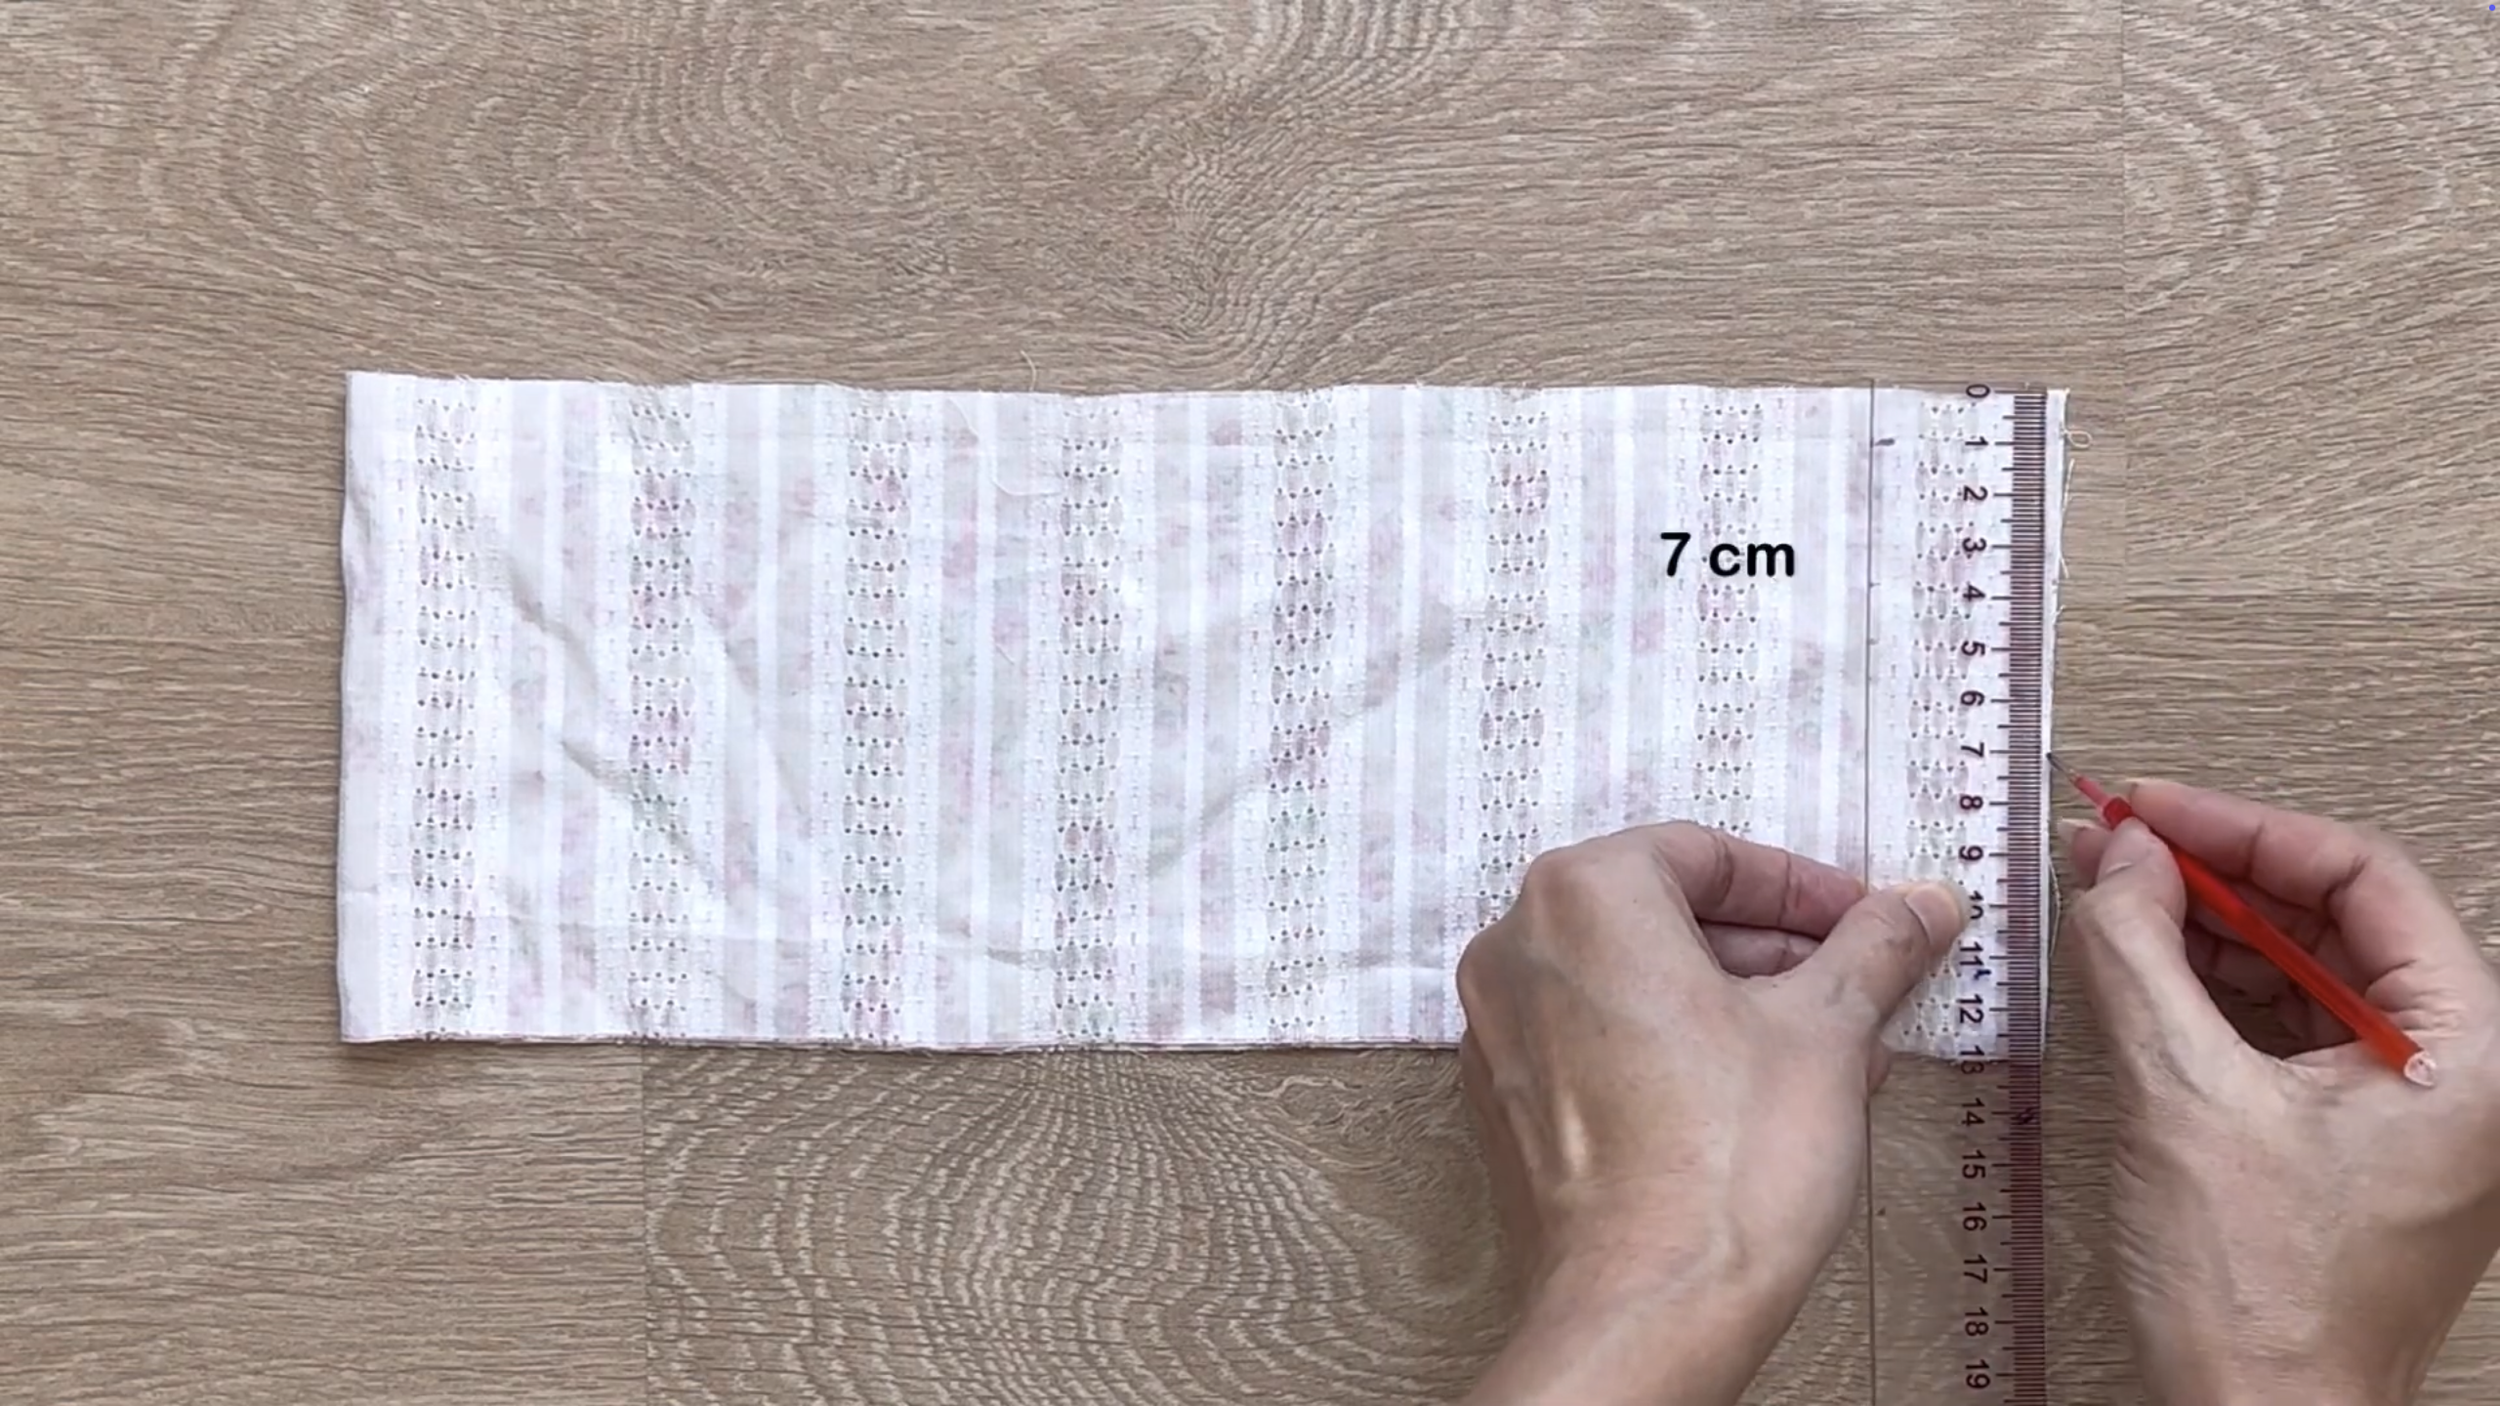
At the top of the width line, mark down around 7 cm.
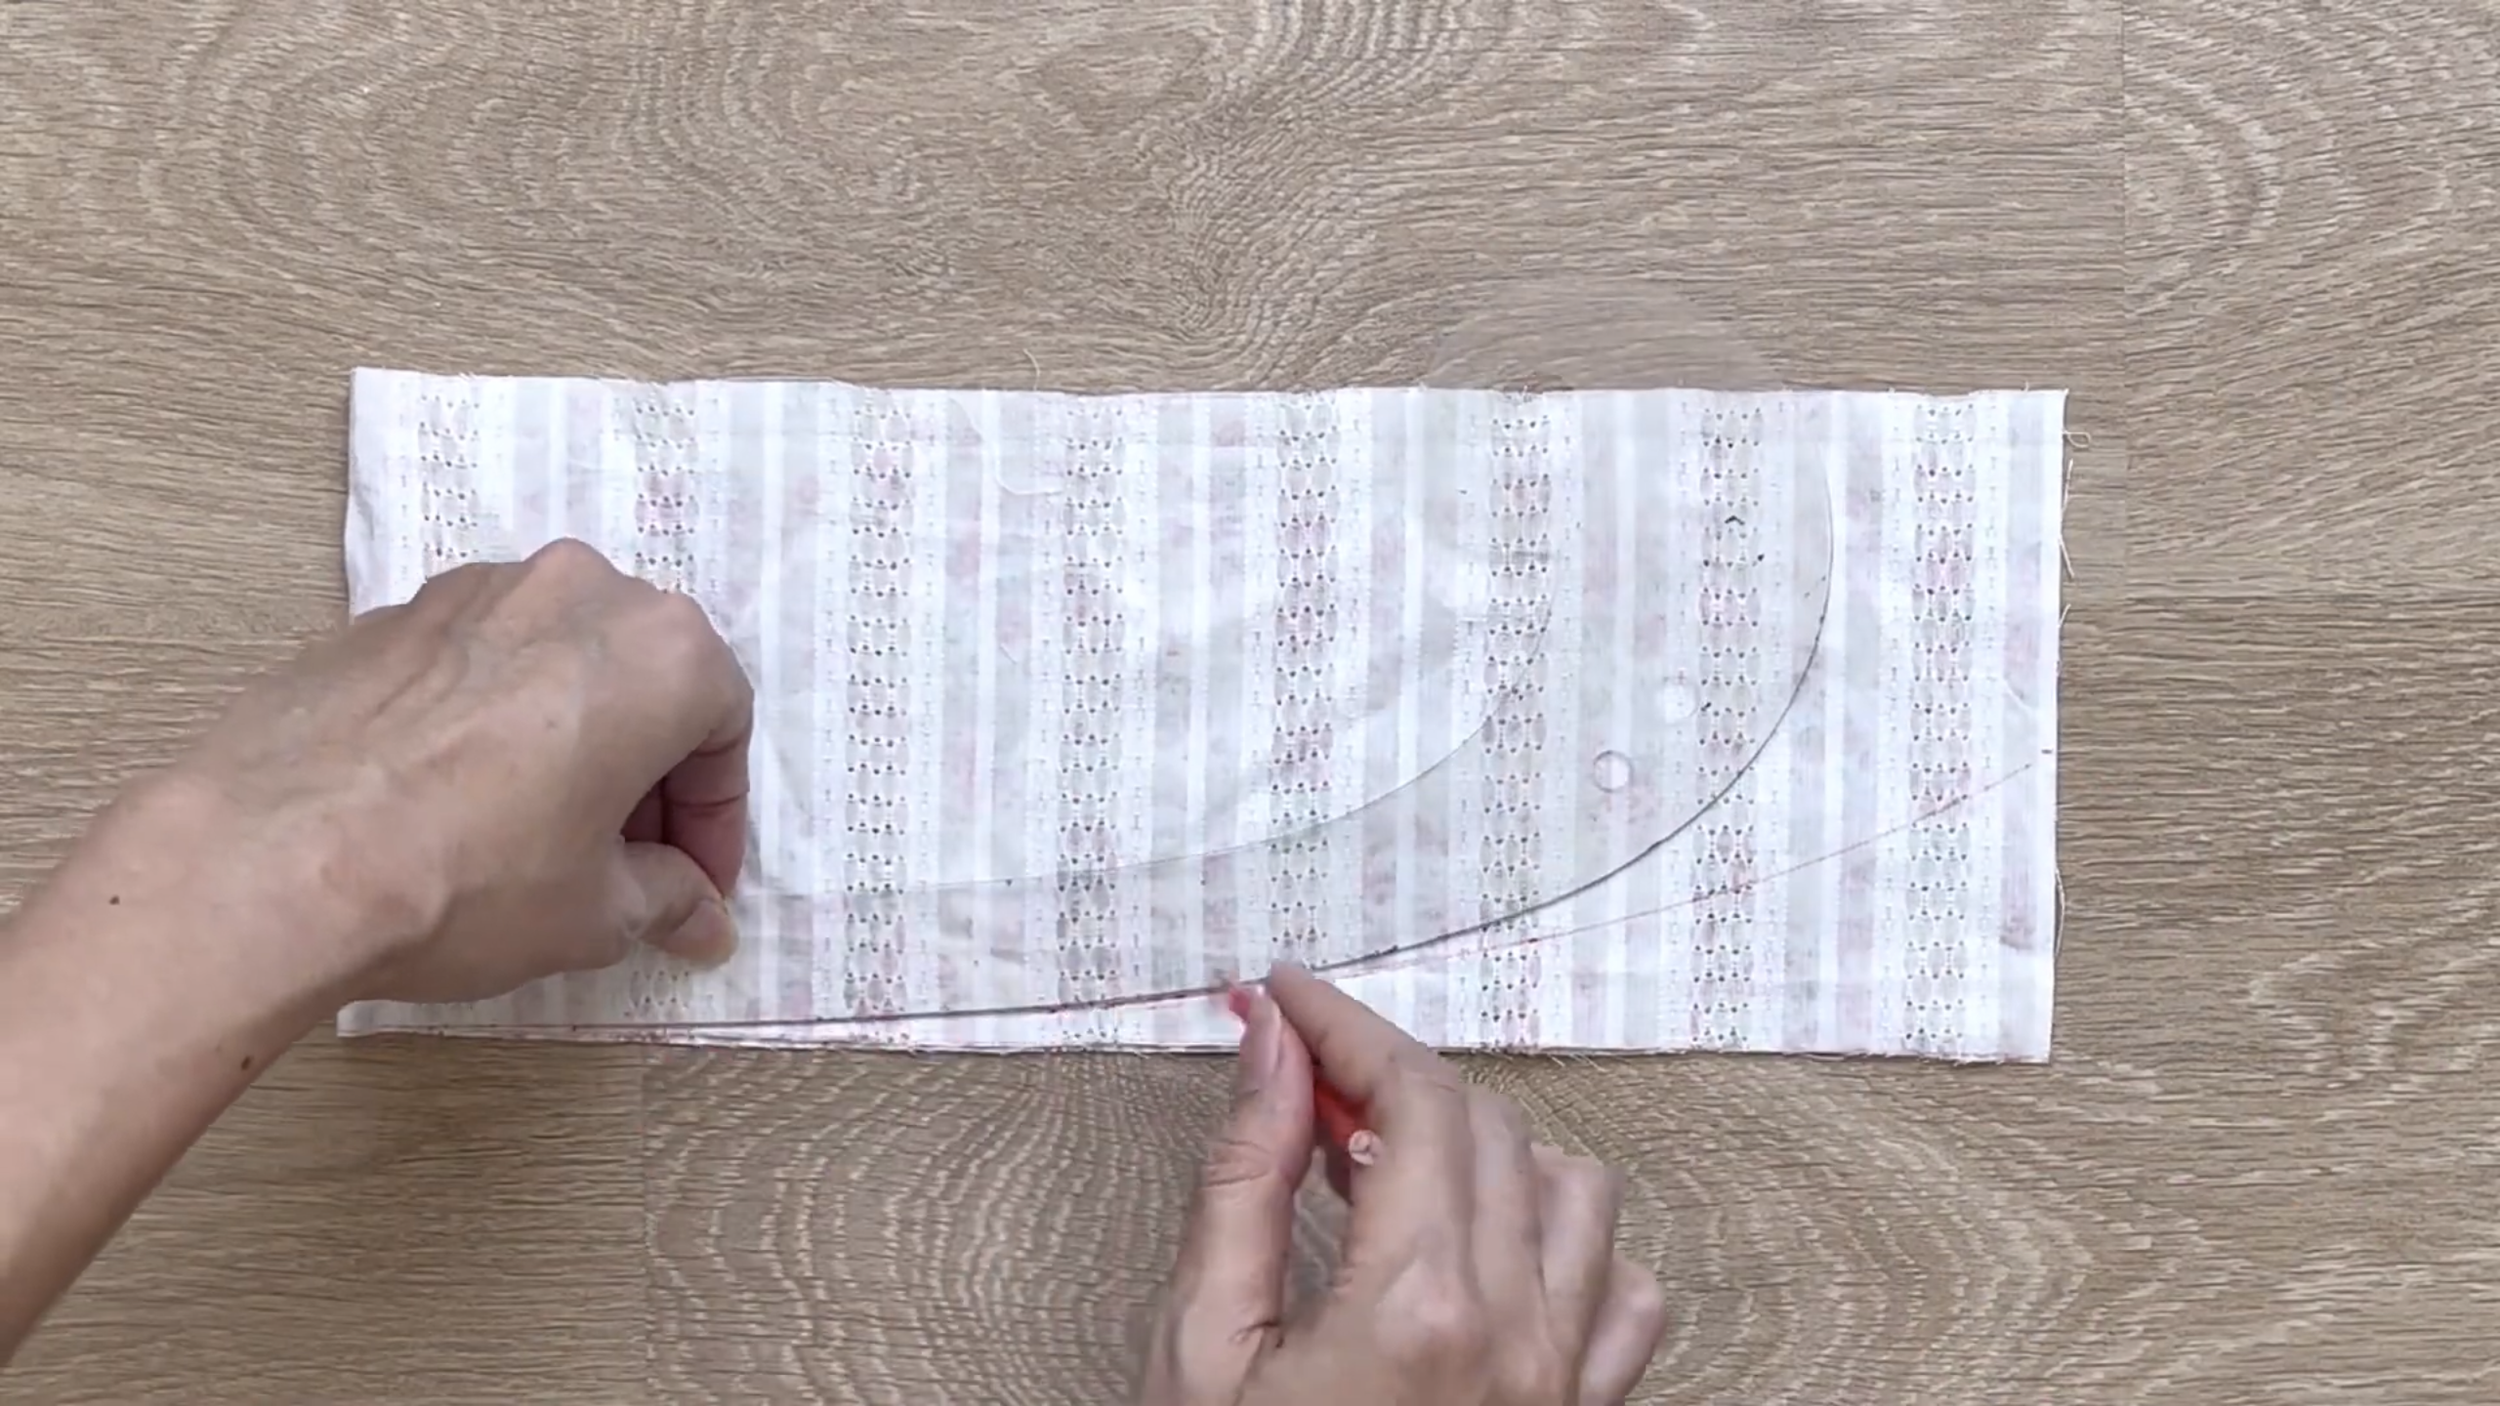
Then, connect this mark to the end of the folding line by a curved line.
After cutting, finish that curved line by folding the end fabric inside two times with 0.5 cm each time and sewing.
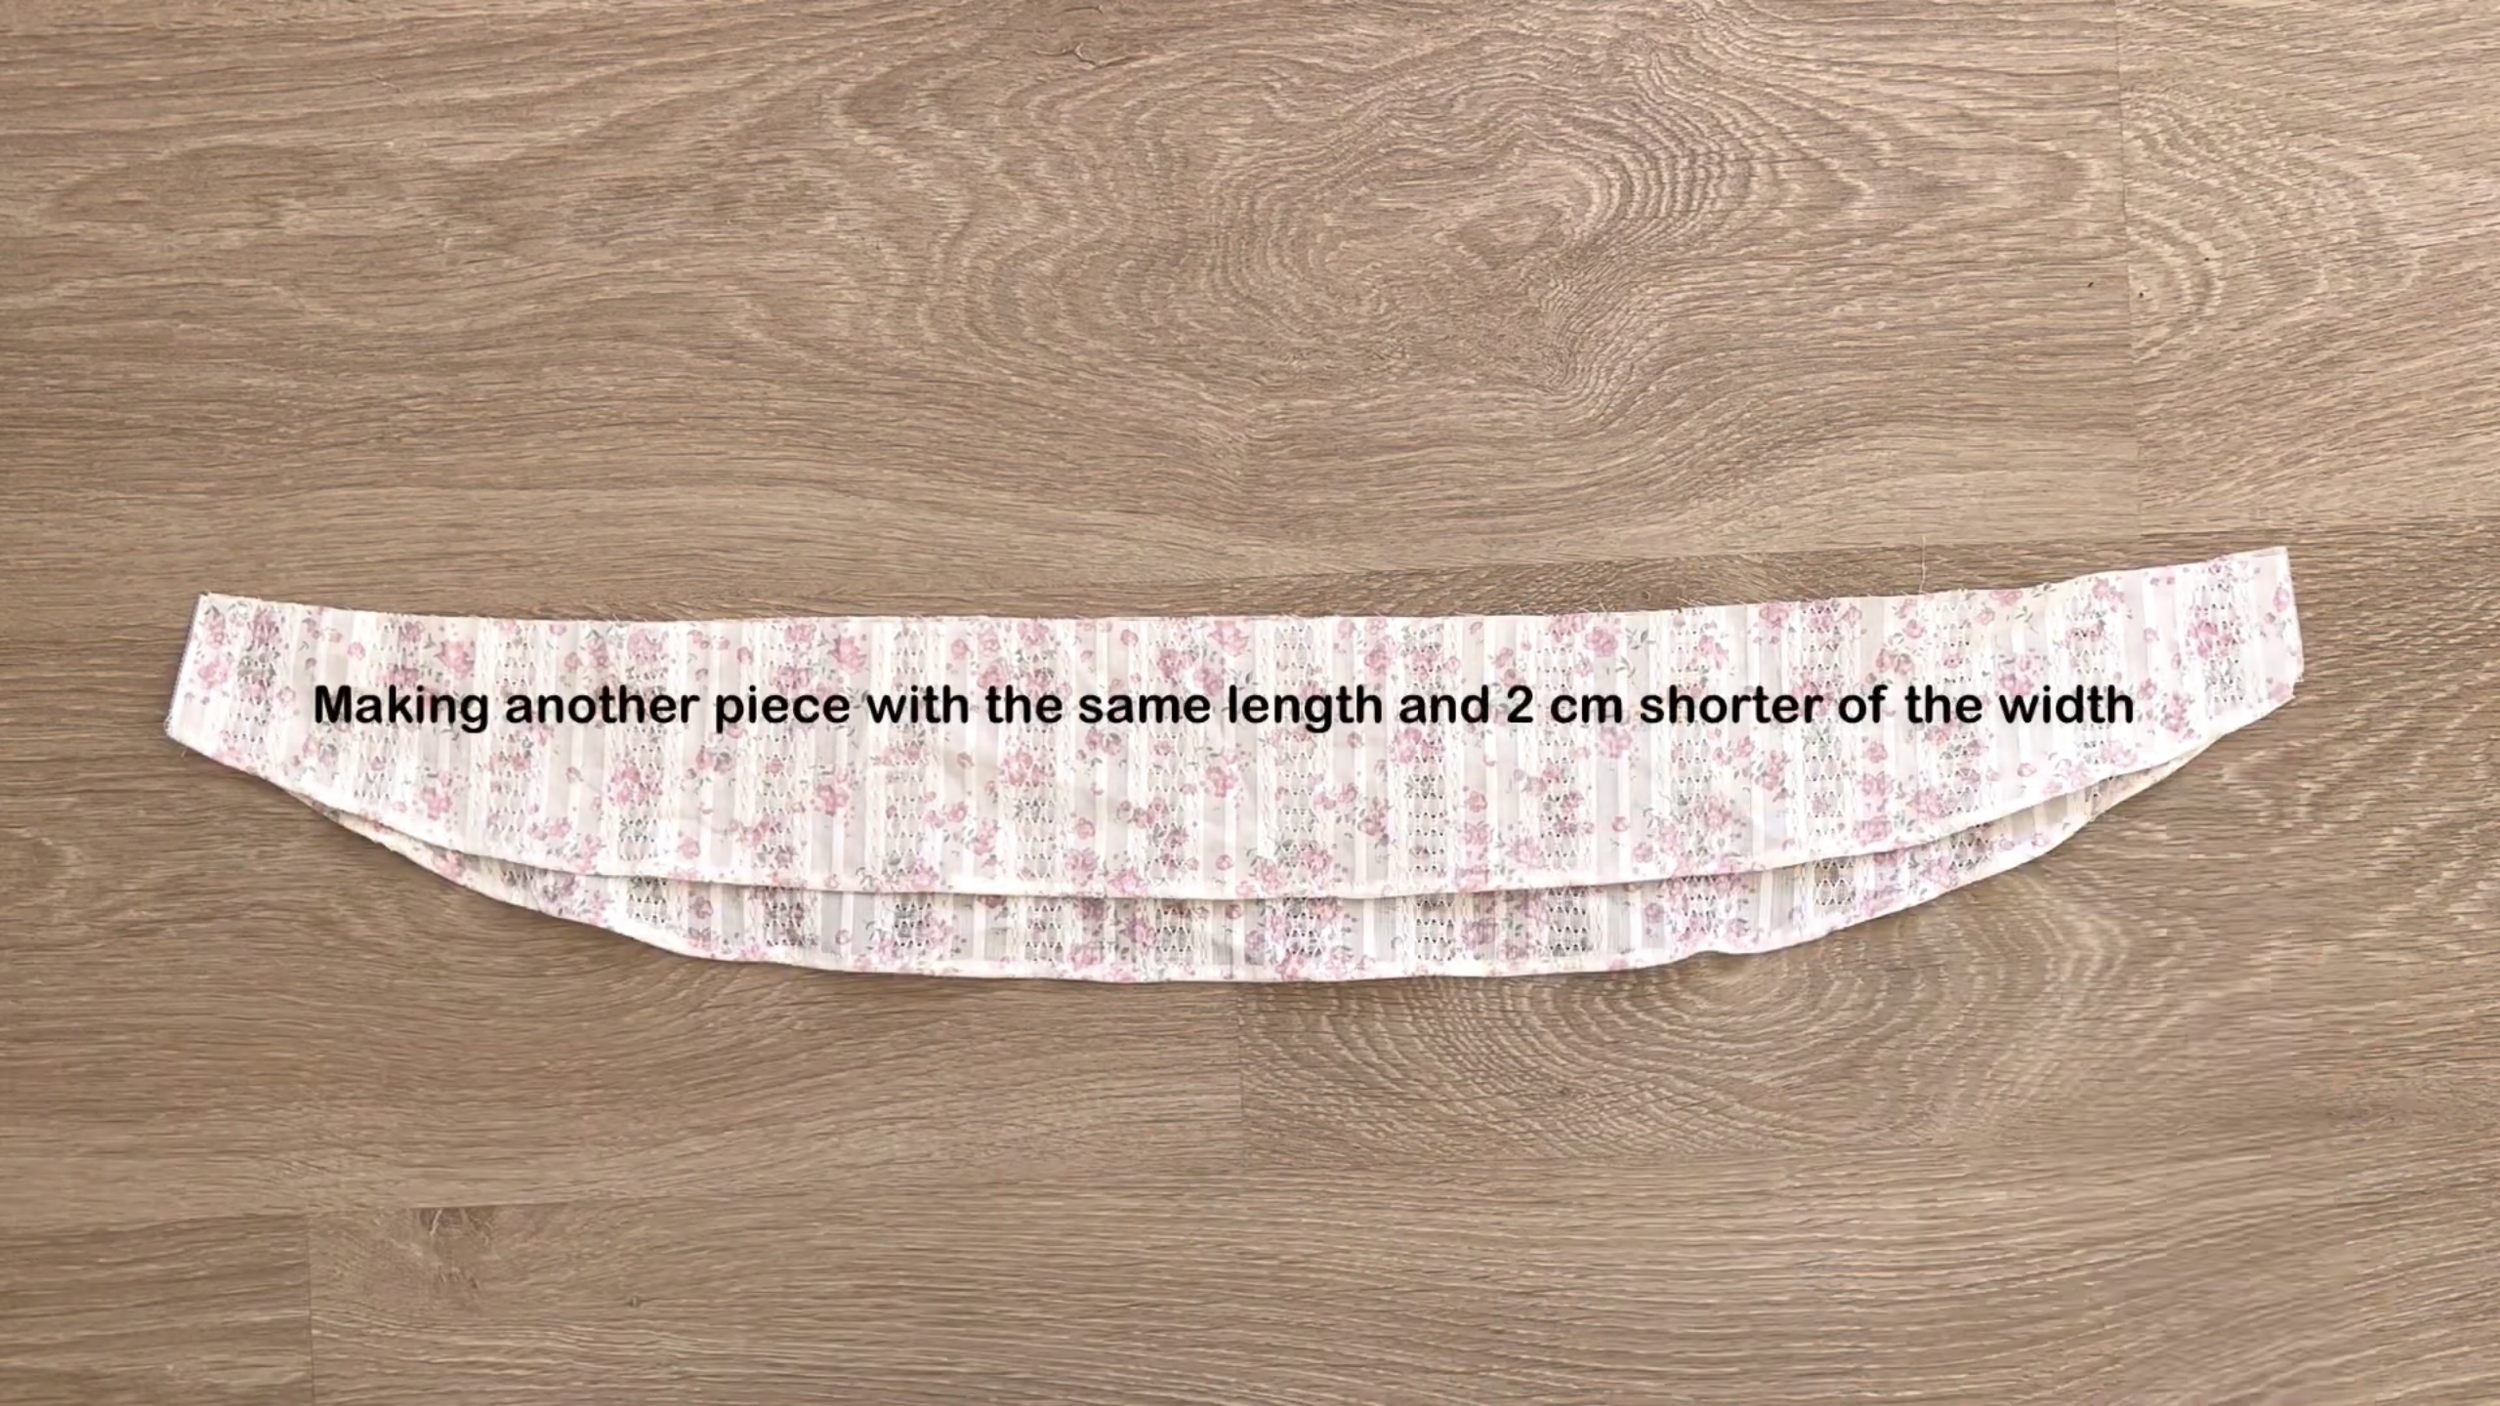
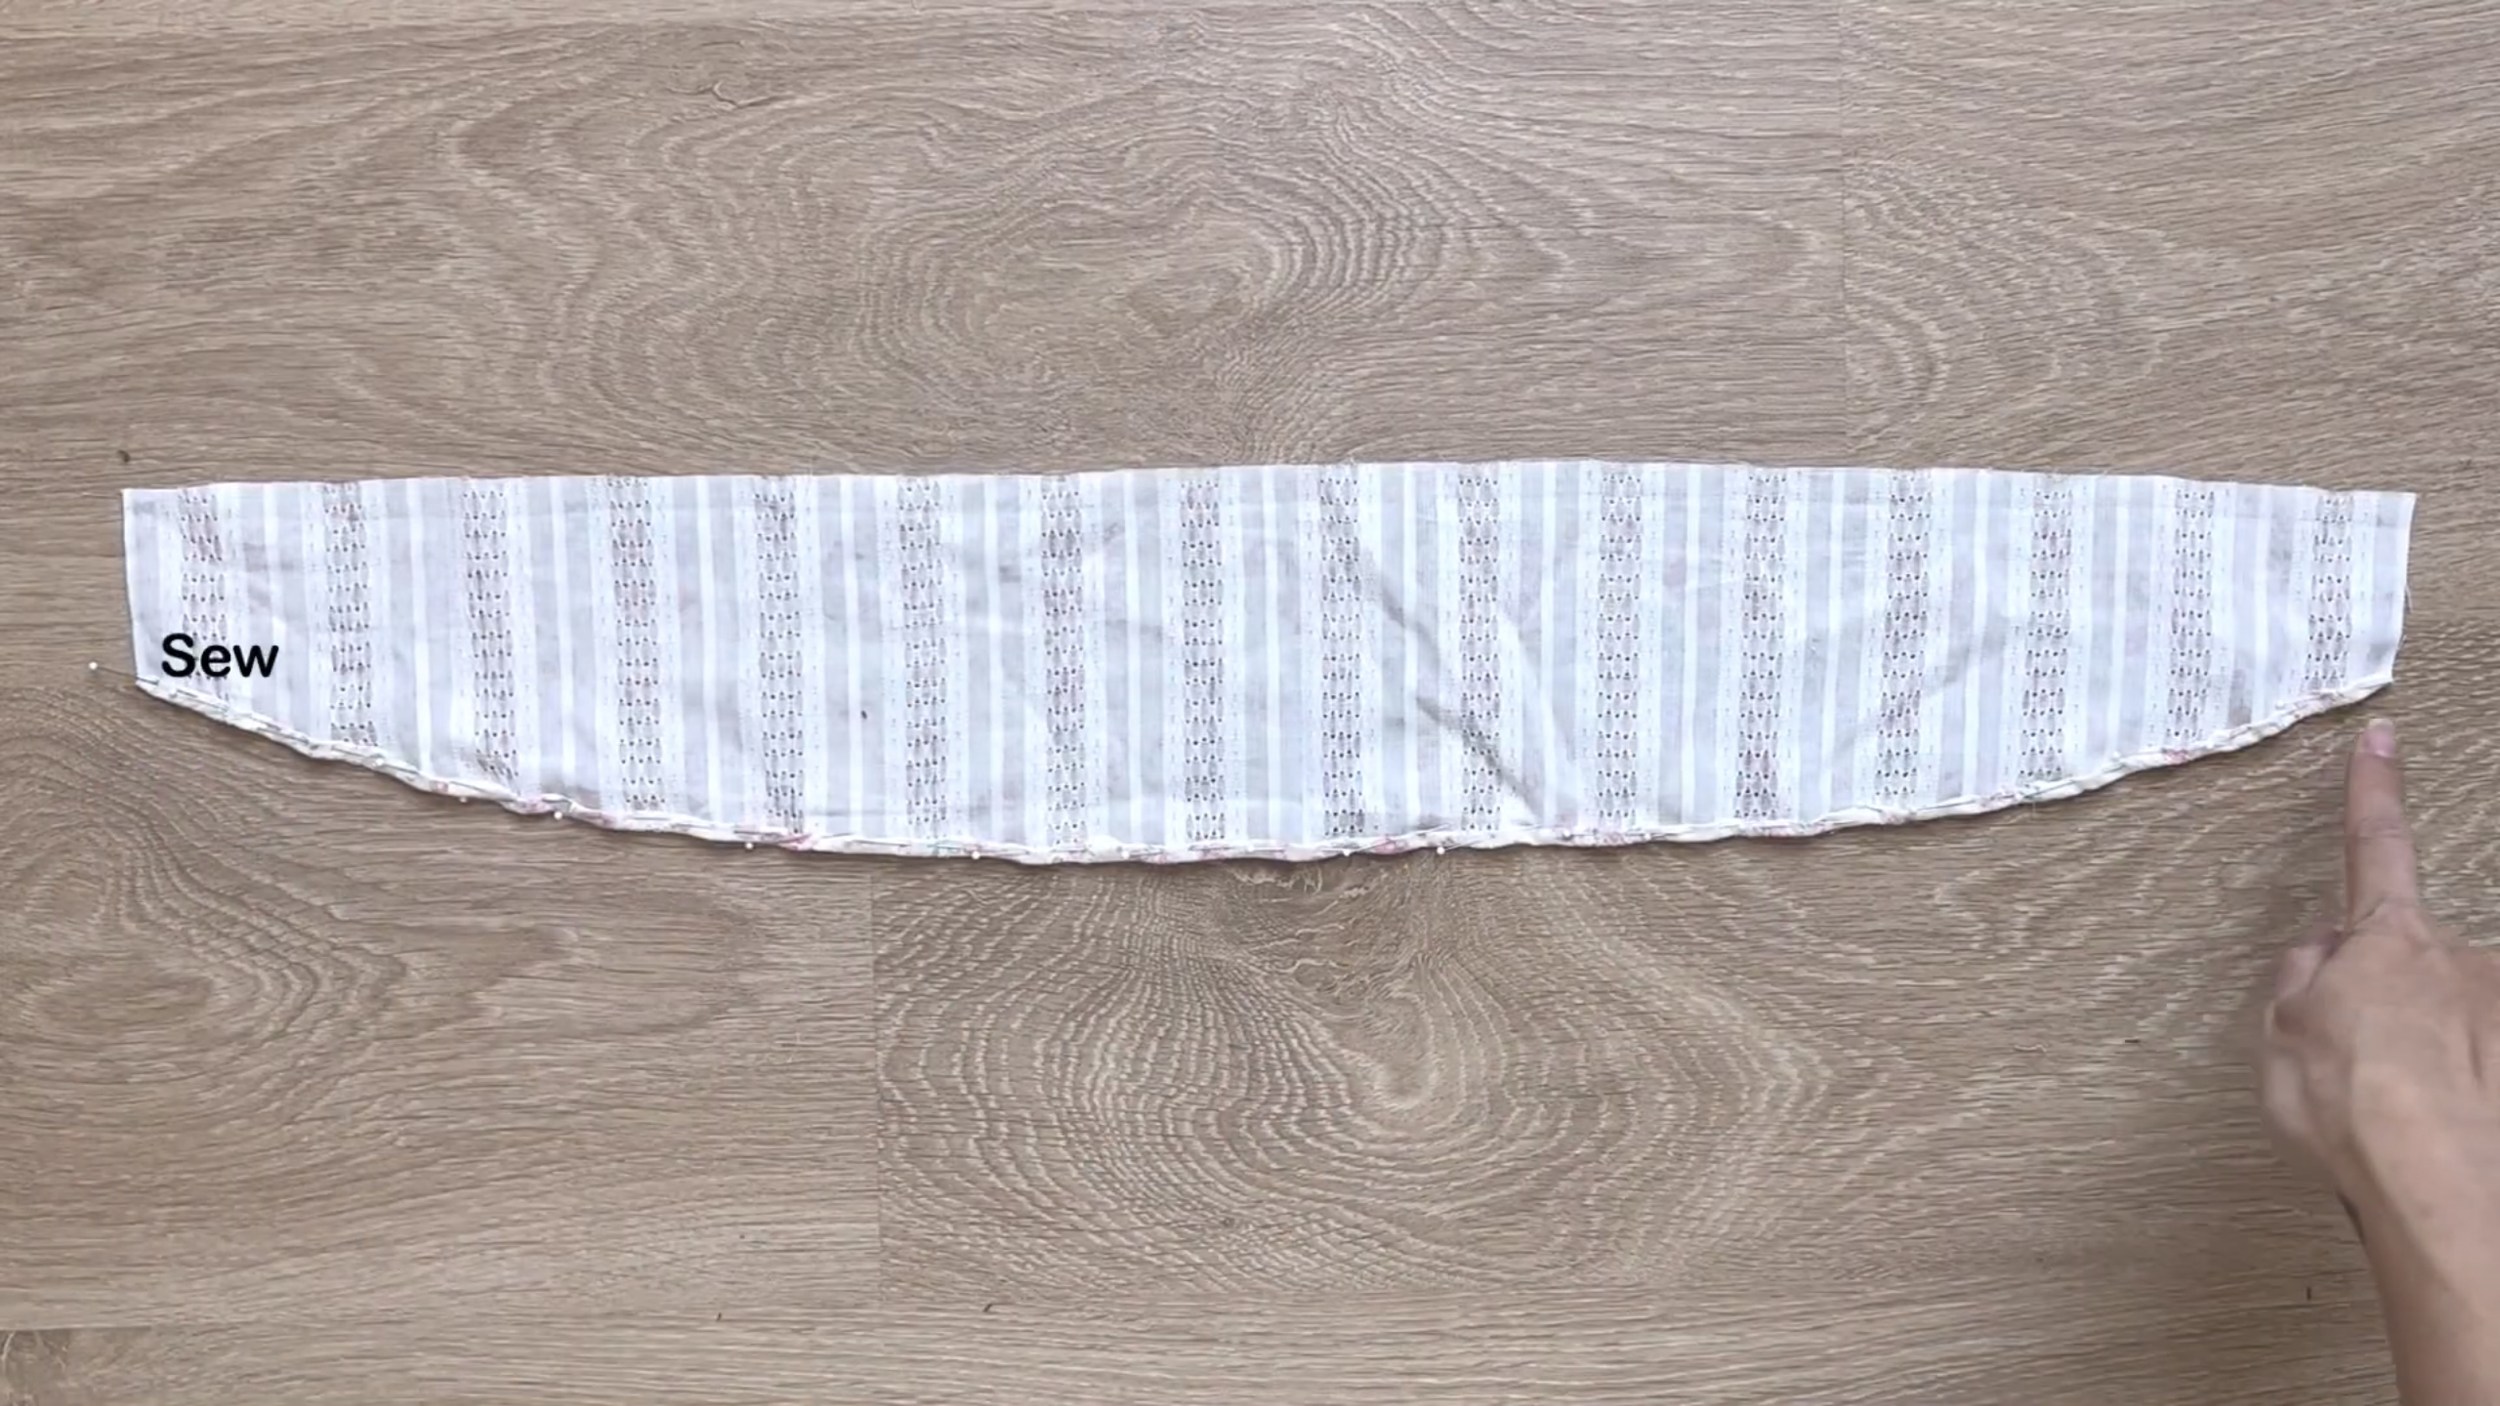
Make another one like that, but with 2 cm shorter than the width of the rectangle.
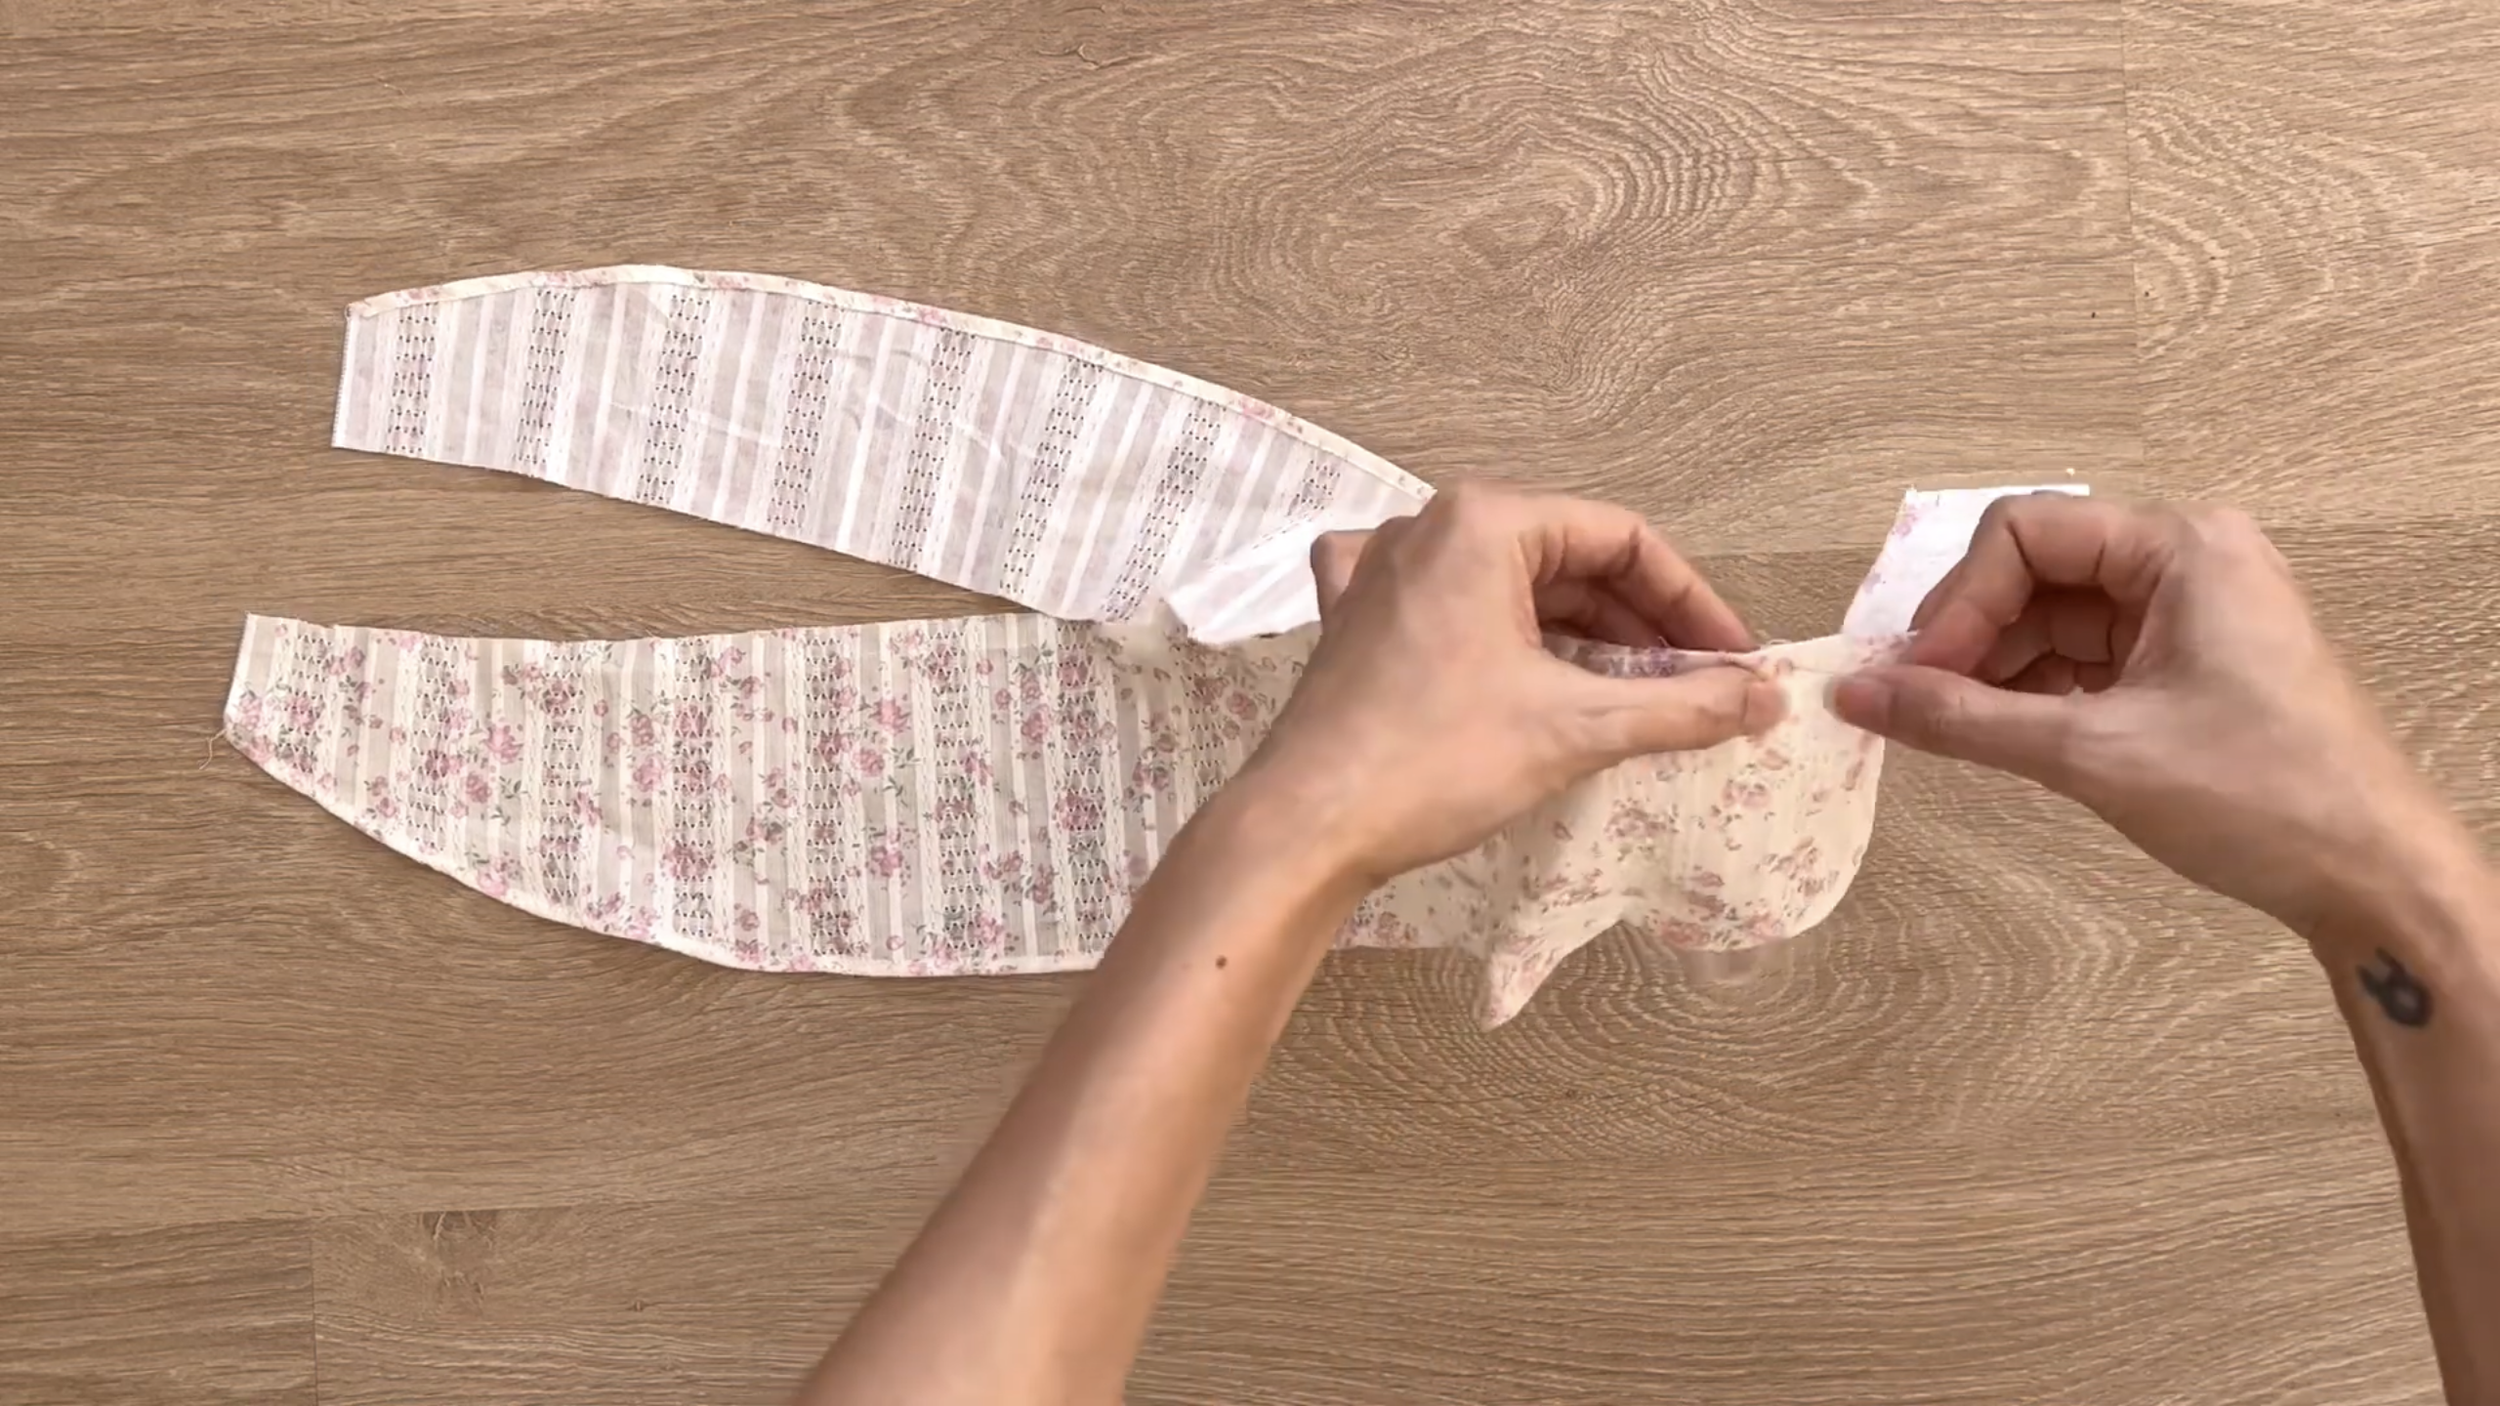
After that, connect them together at their length line first.
Make sure to connect them in the different face of their fabric.
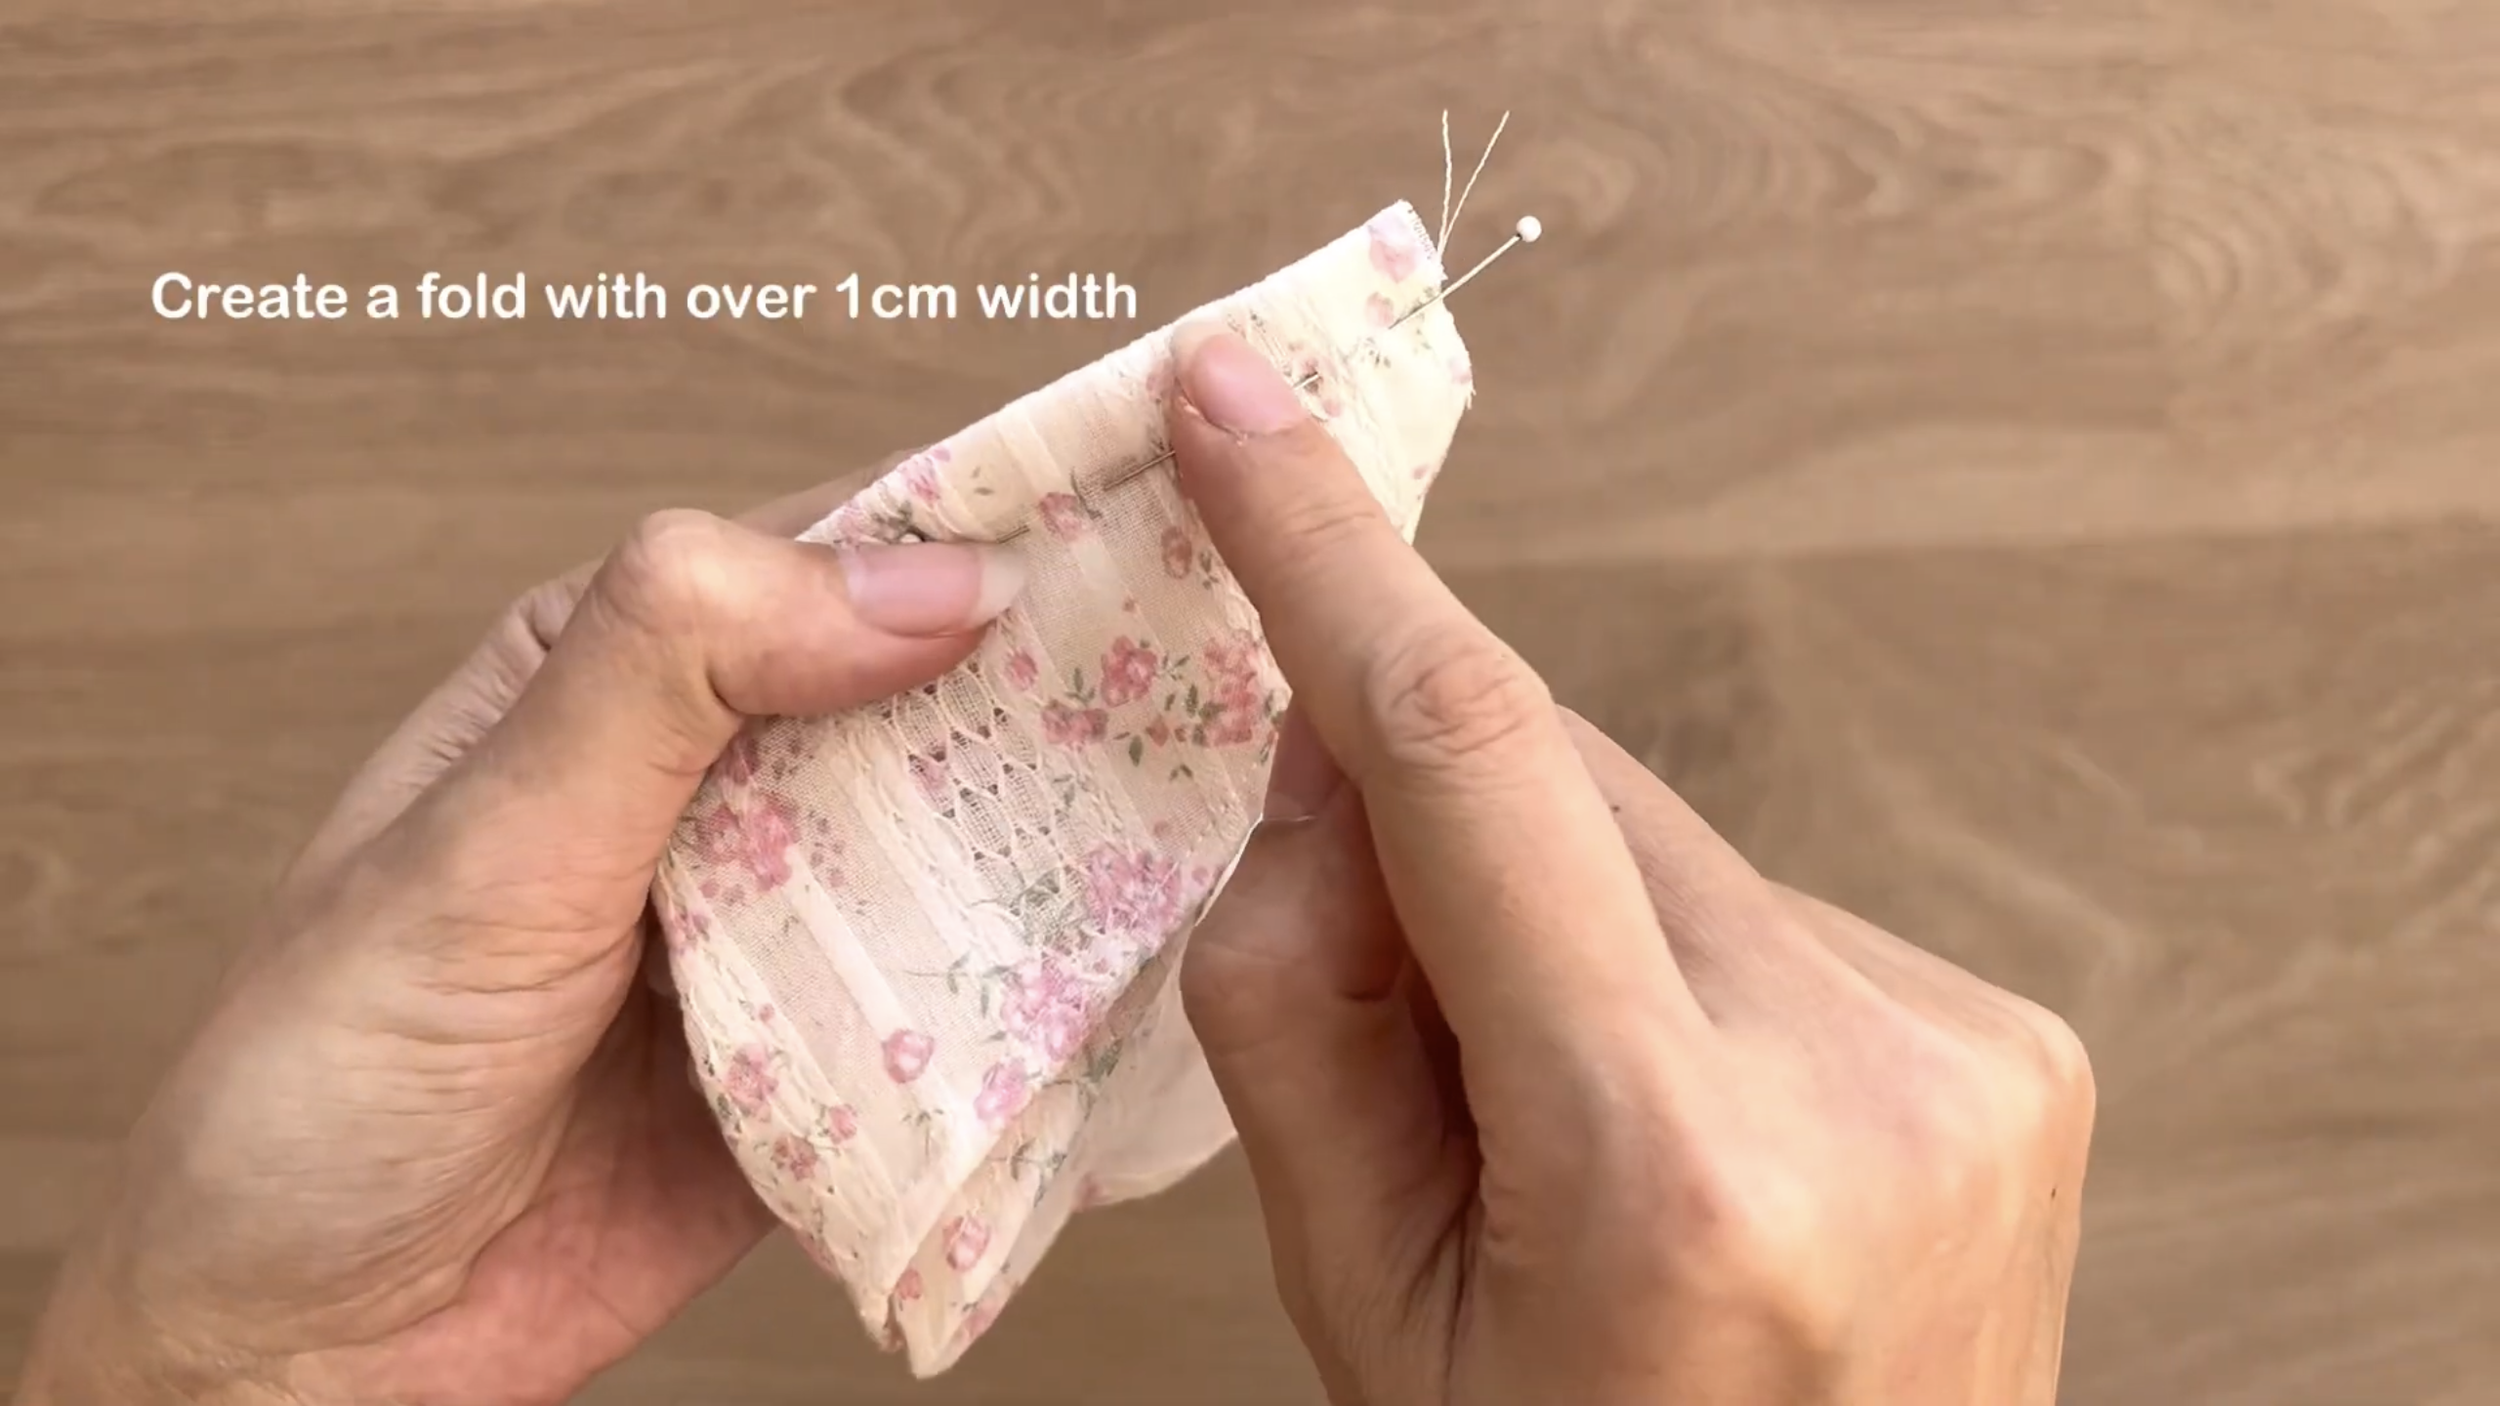
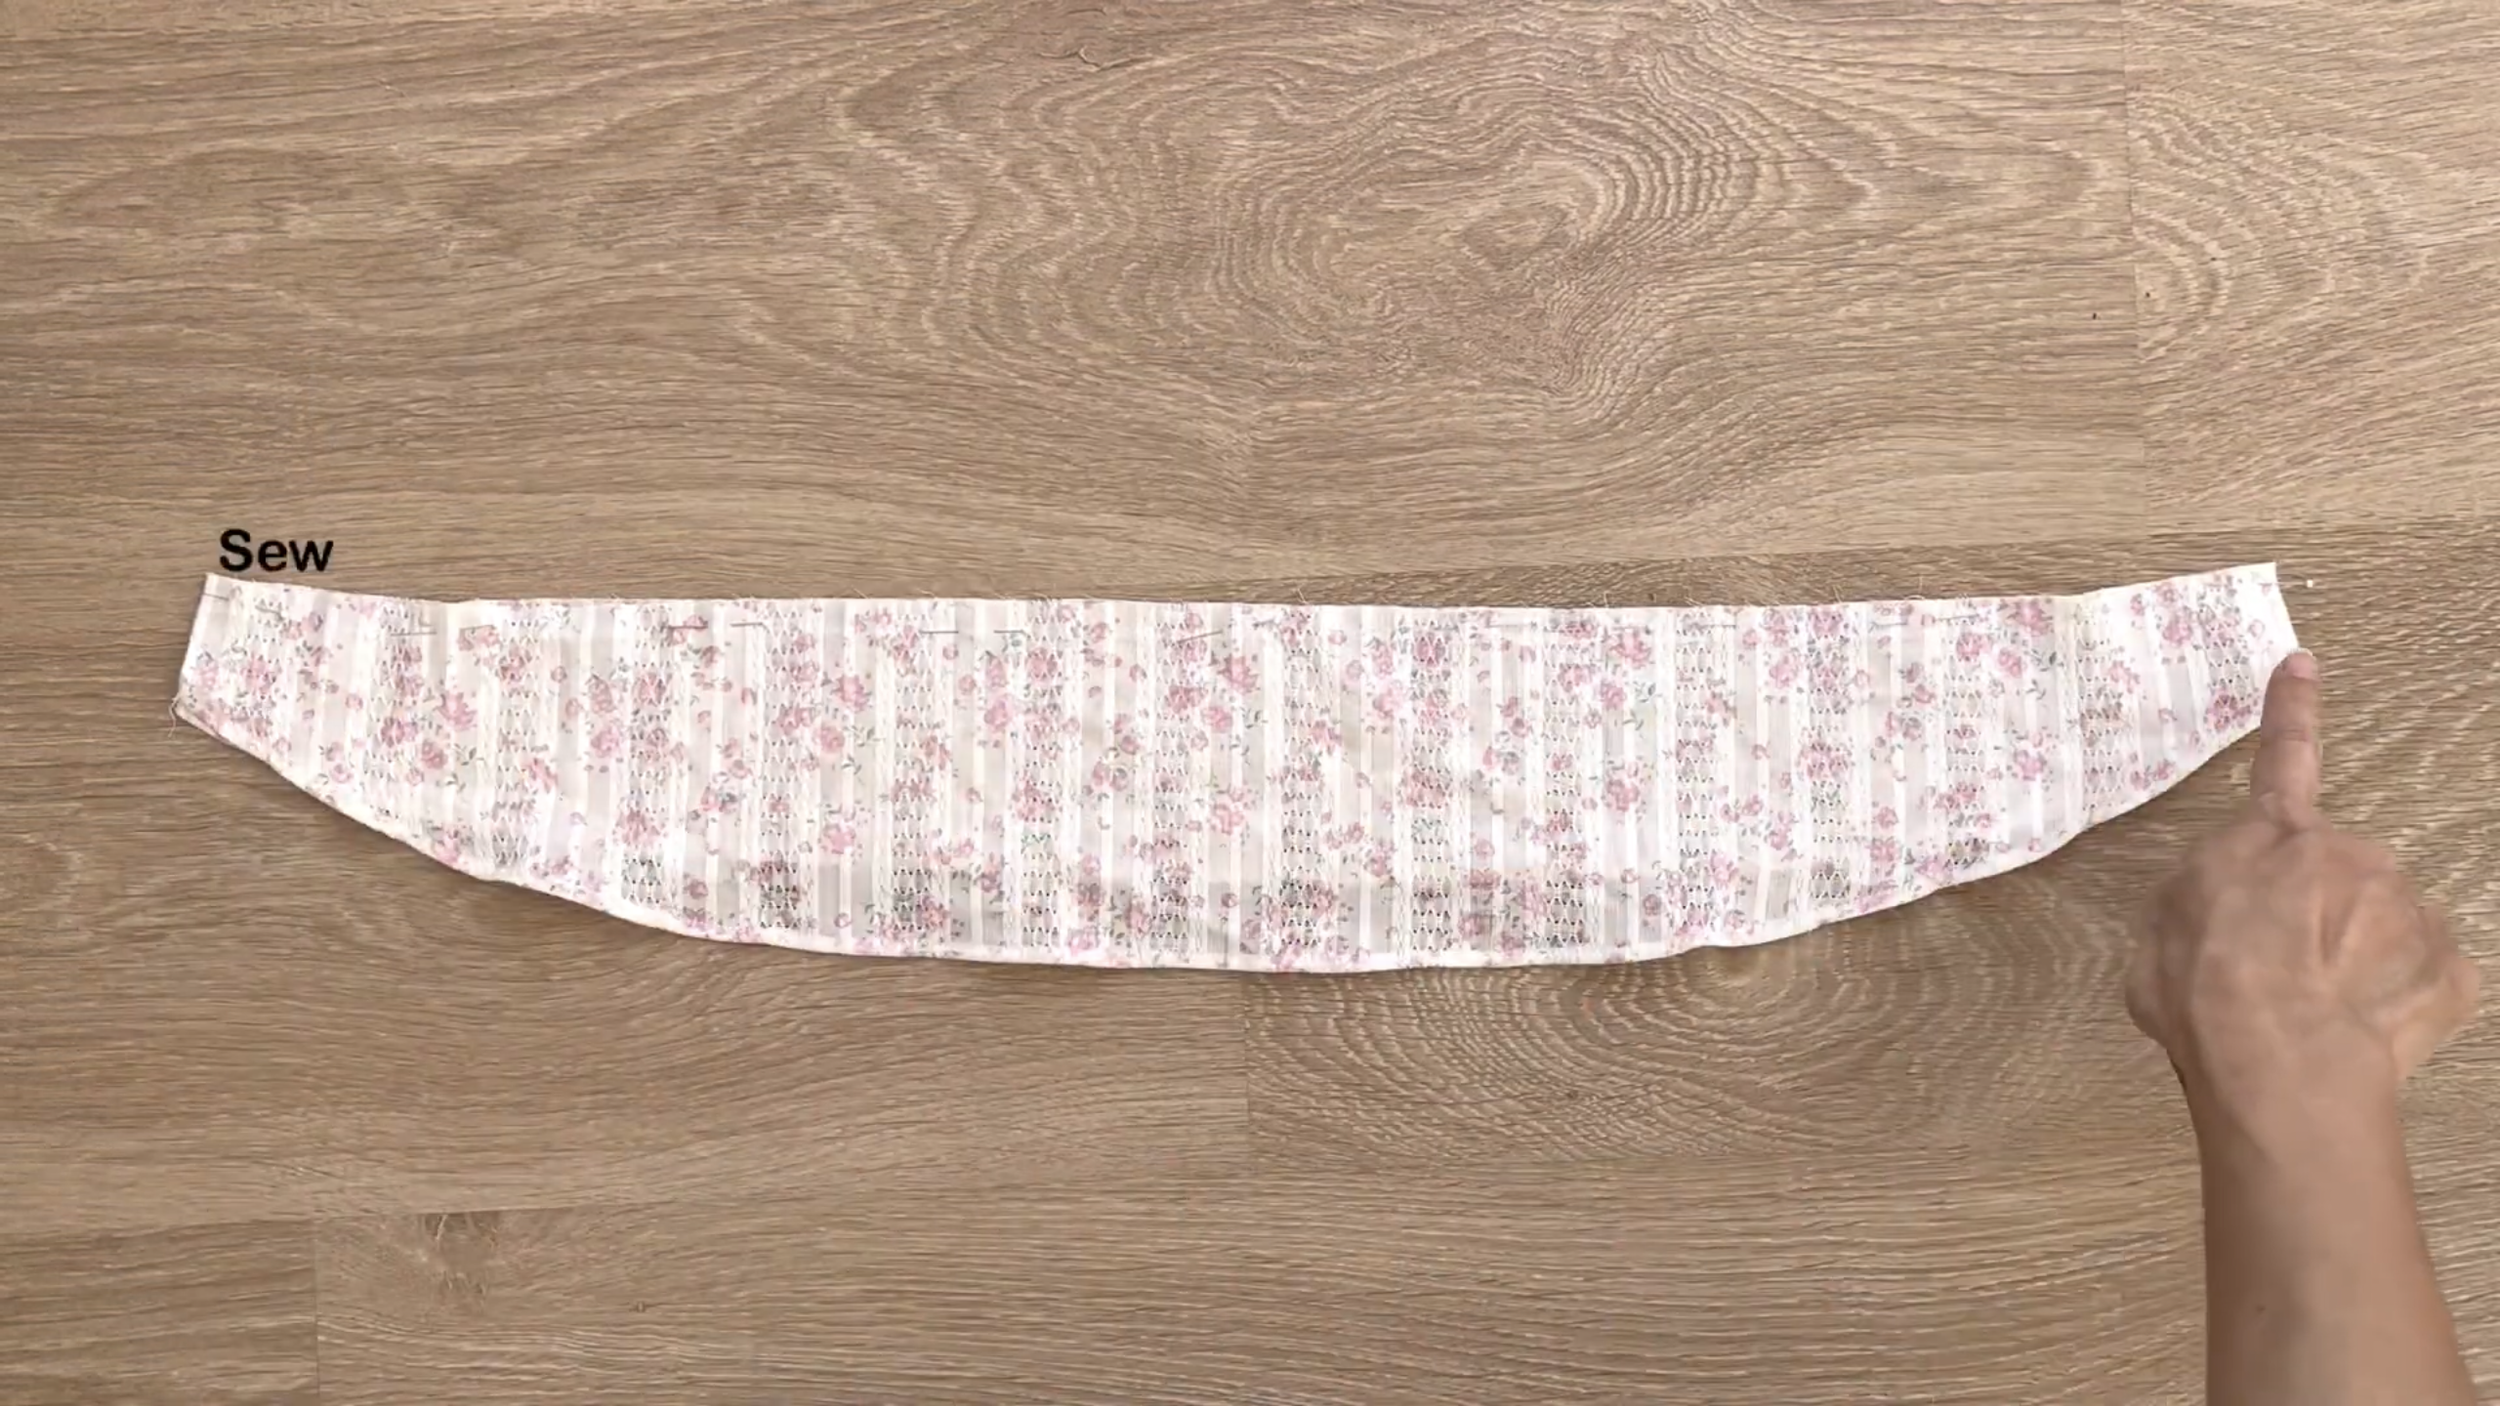
After sewing, fold one rectangle over the end of the fabric to the other one and make the second seam to create a fabric hole with over 1 cm width.

Cut an elastic band with 1 cm width and 32 cm length, which is two times the length from the shoulder to above the breast. It's also the length of the shoulder strap as well.
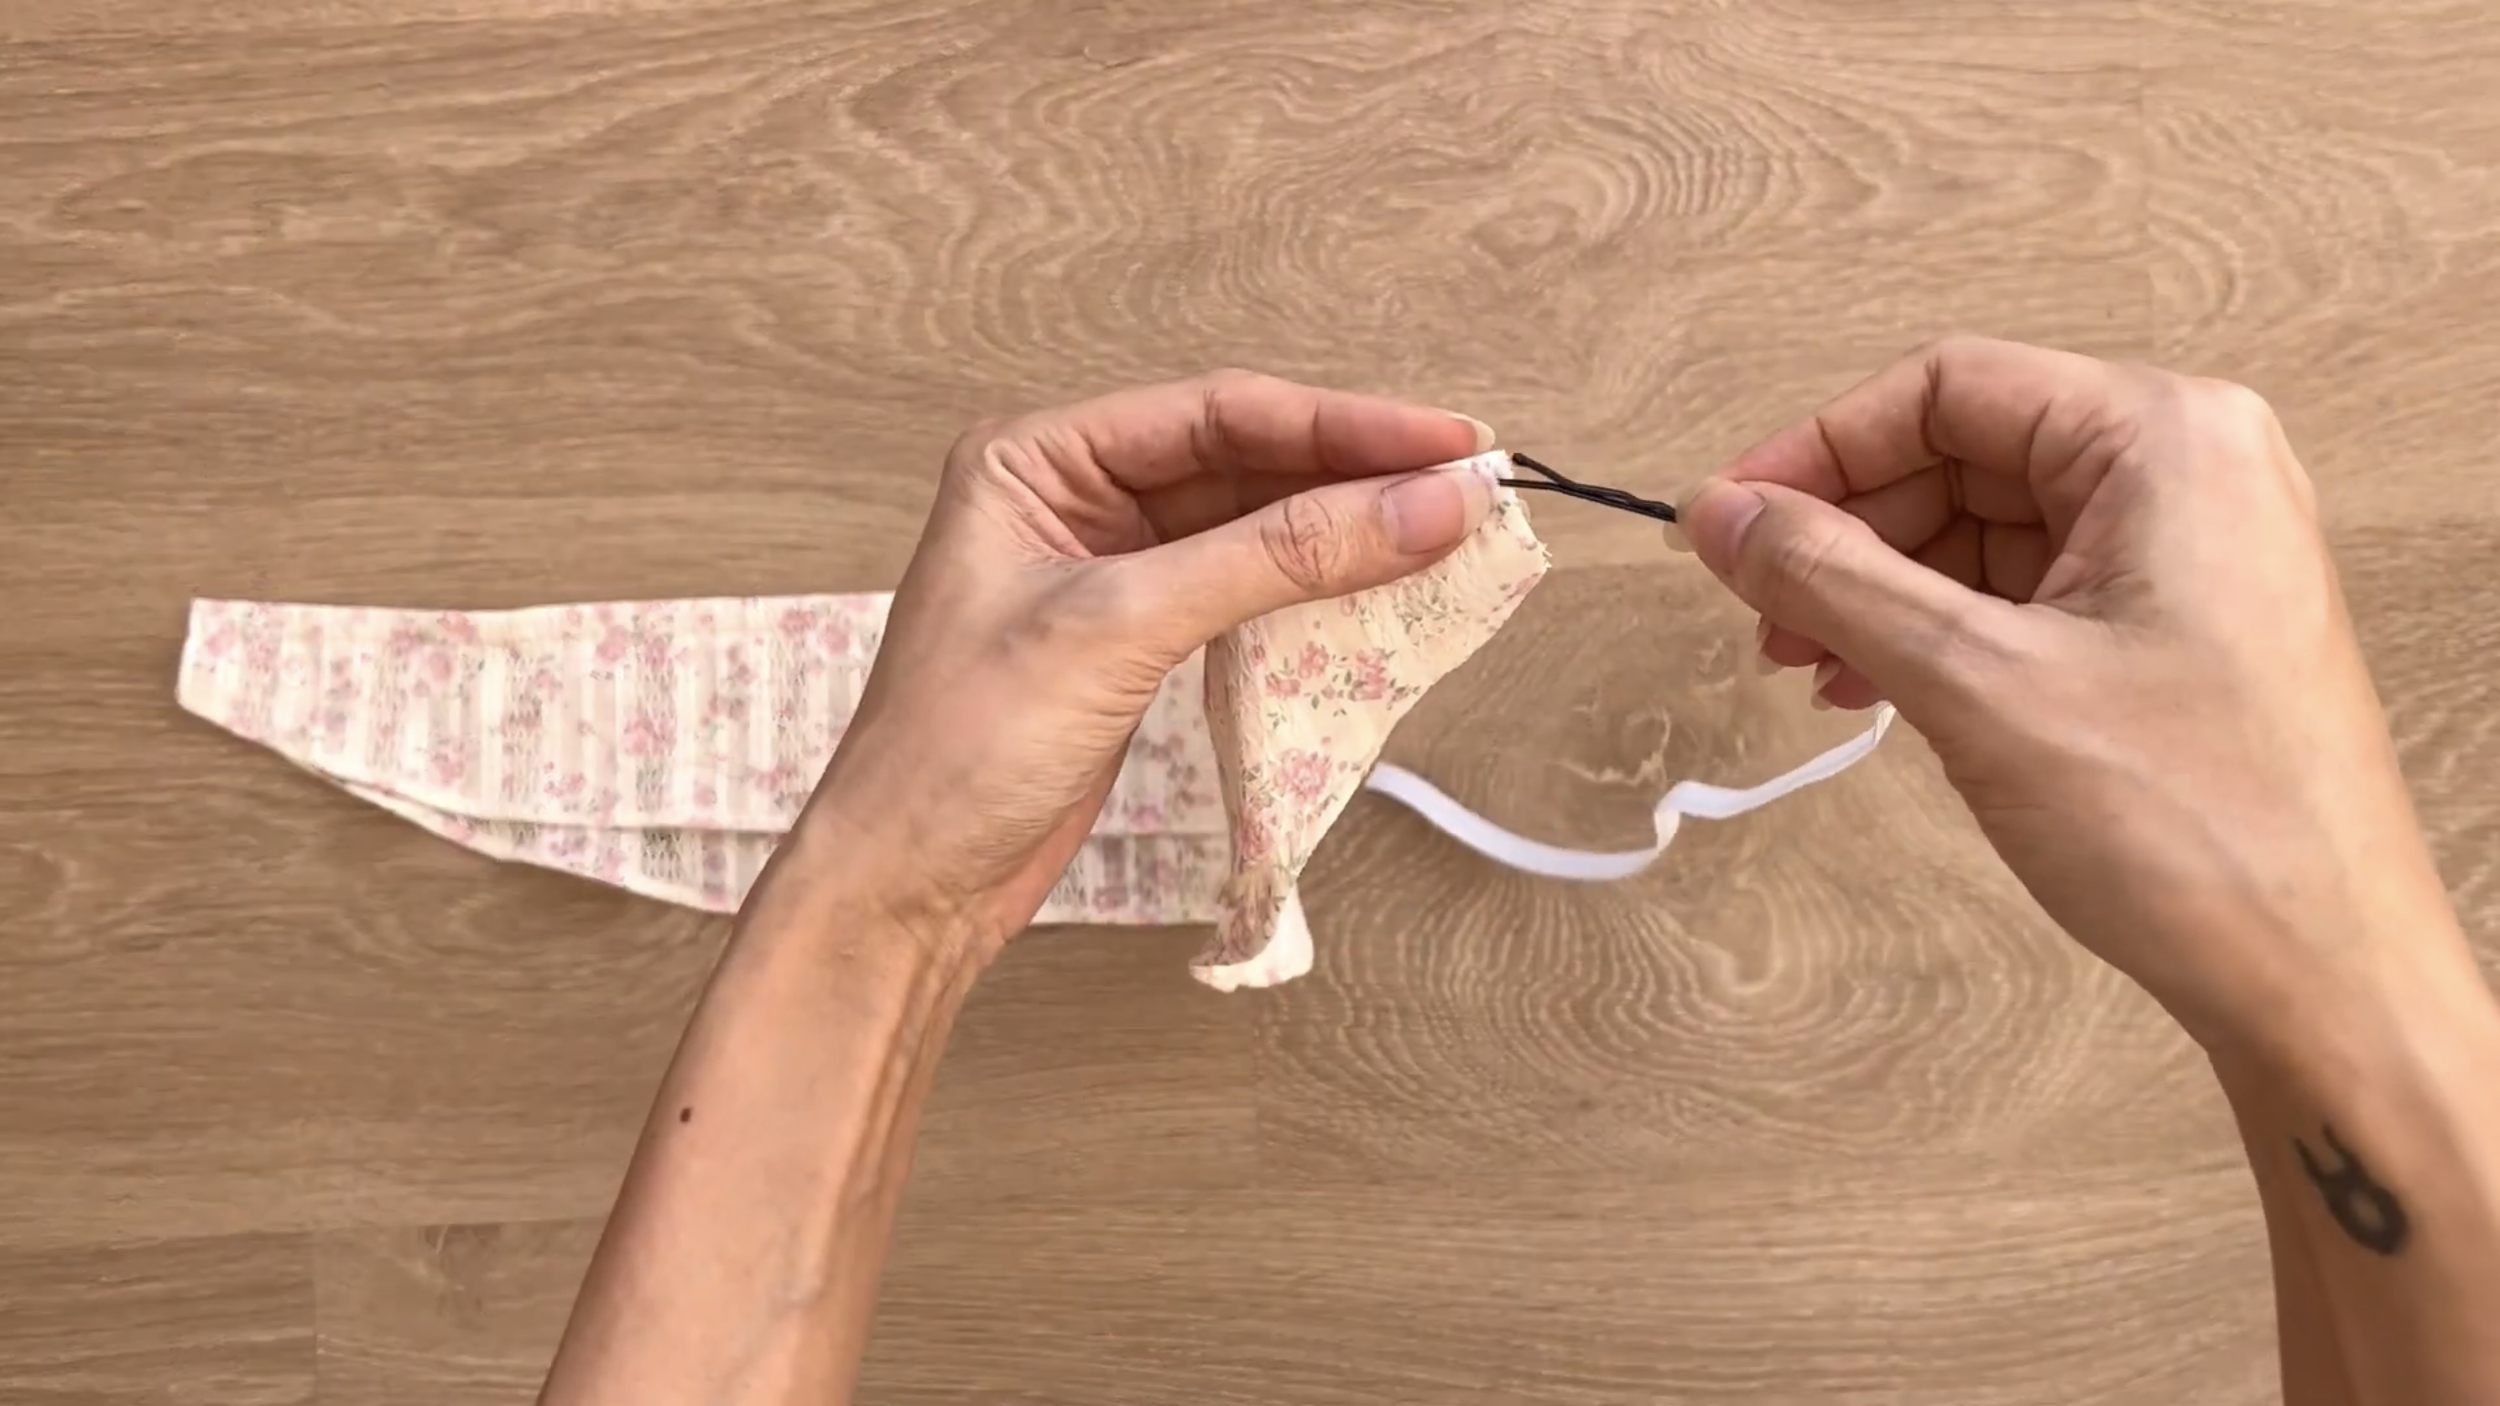
Use a small pin to help the elastic band go through the fabric hole.
Then, sew two ends of the elastic band to two ends of the shoulder strap to keep them from moving.
THE BODICE PART
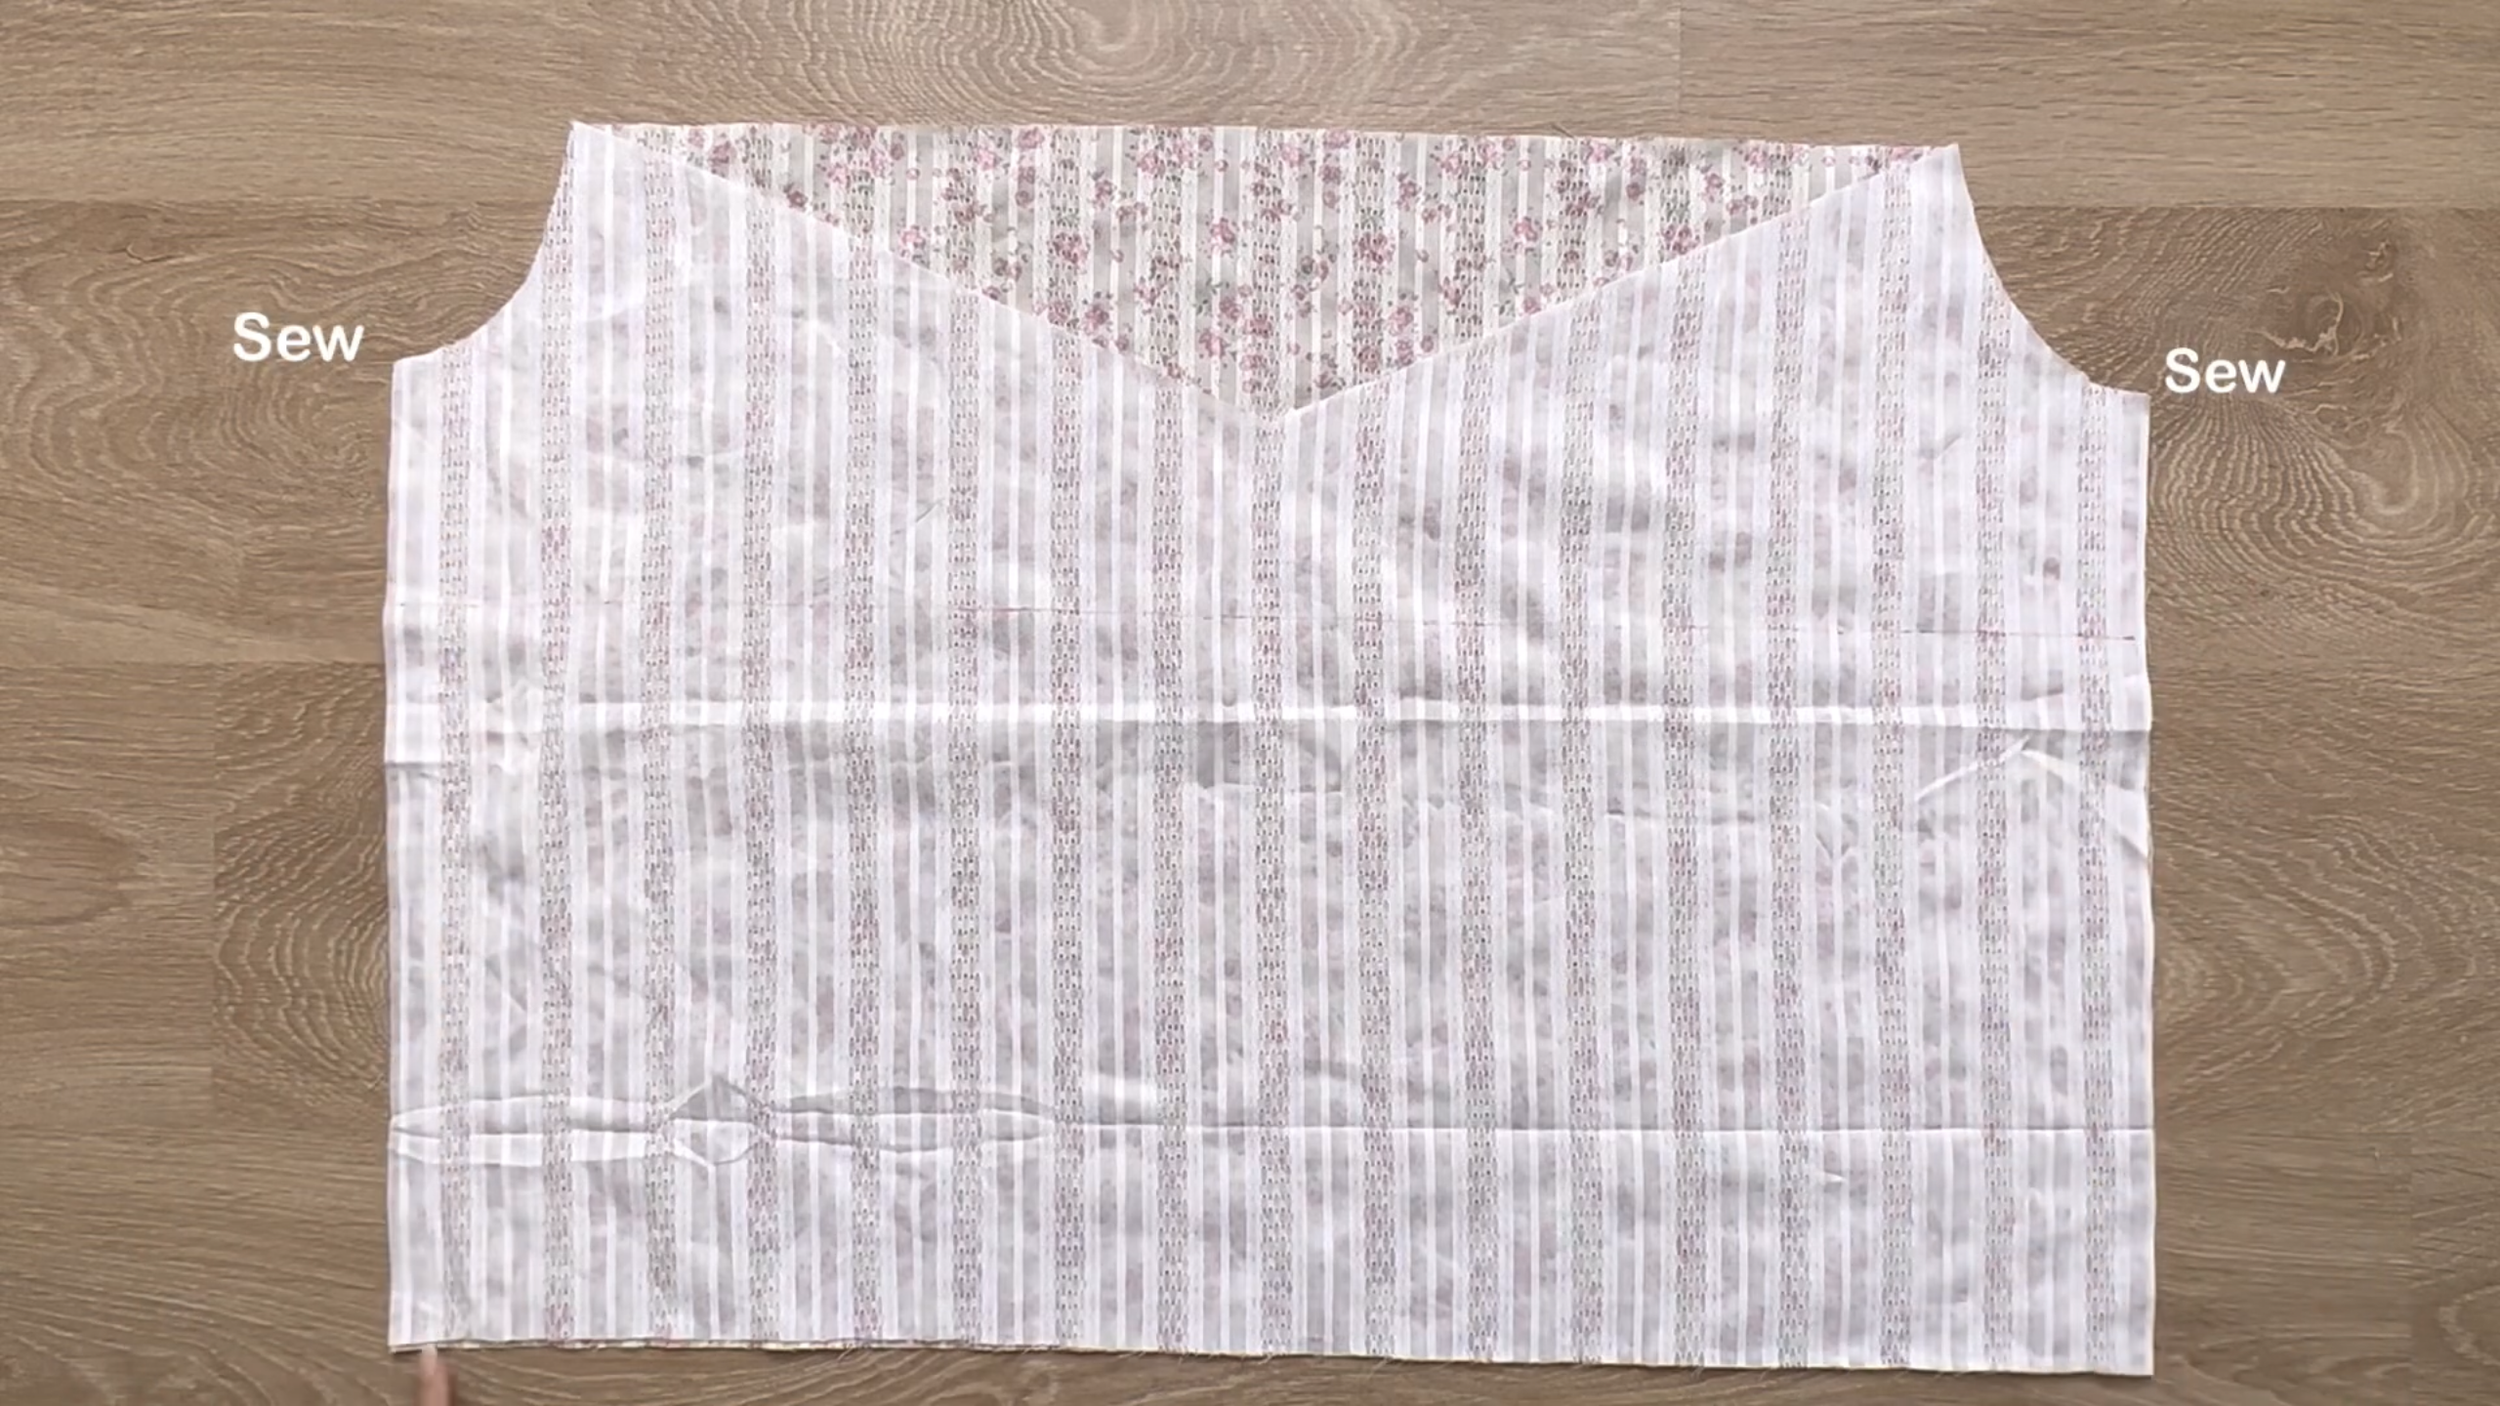
Moving to the bodice part, connect the front and the back bodice together at the side line first.
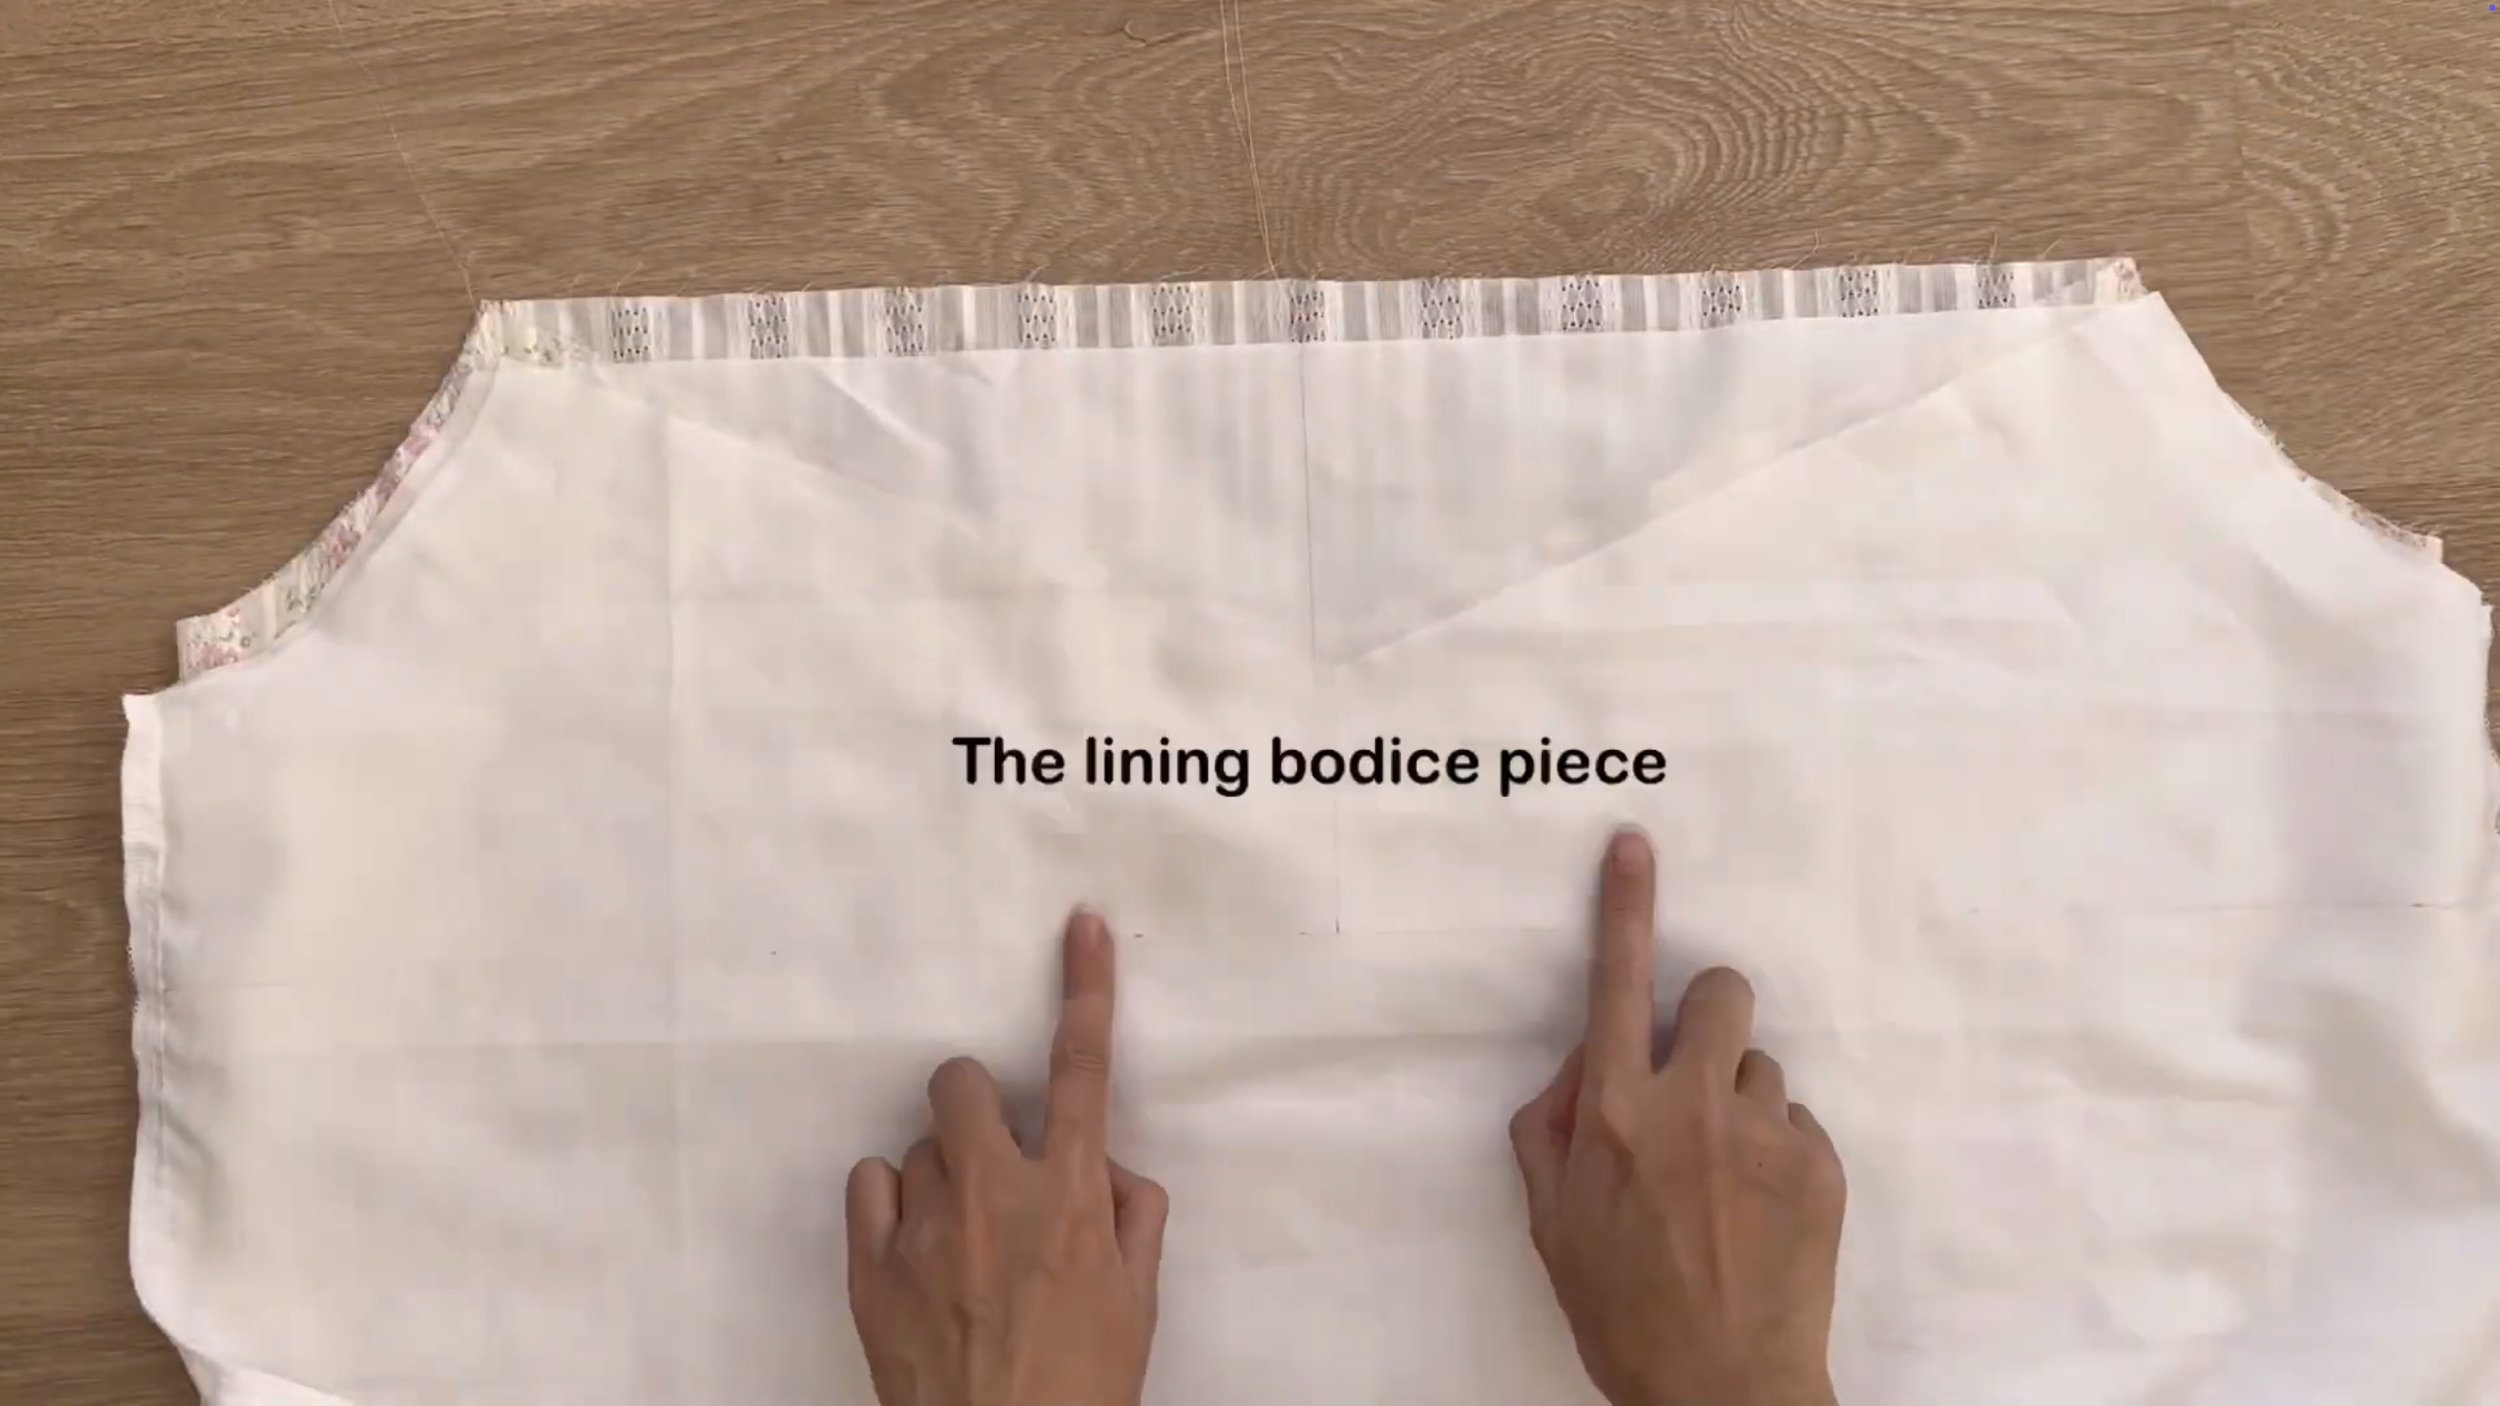
Also, do the same for the lining fabric.
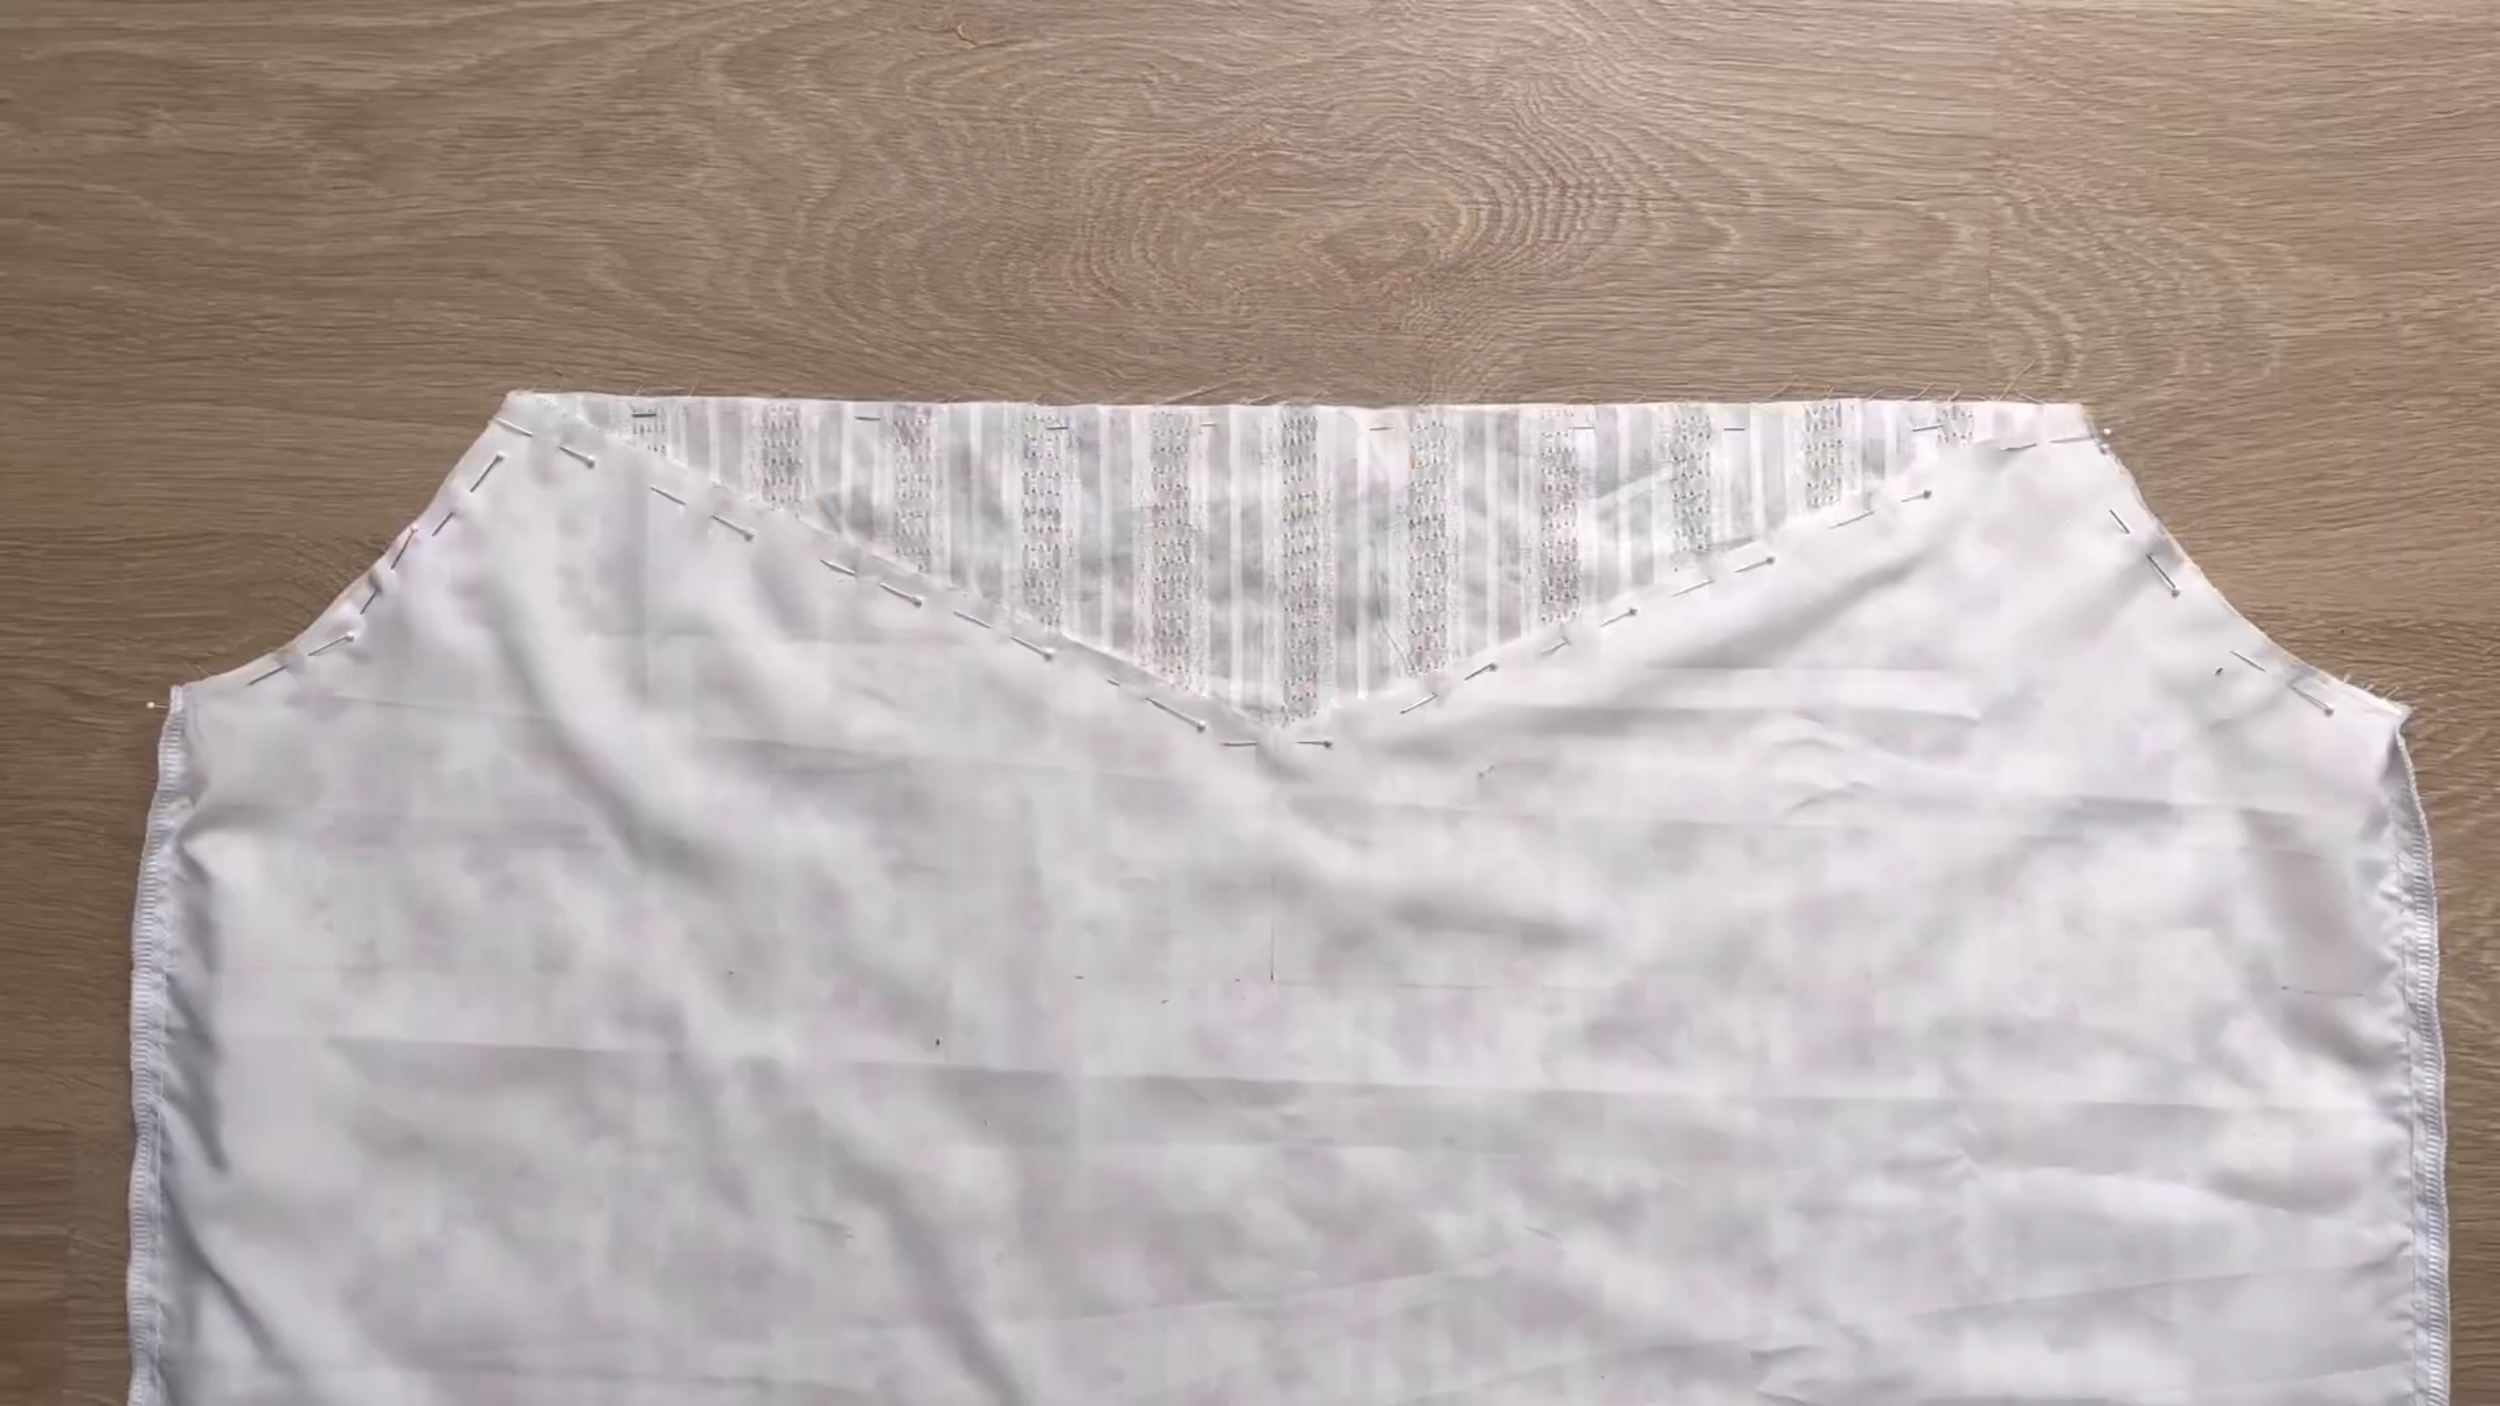
Then, connect them together at the sleeve line and the neckline with pins.
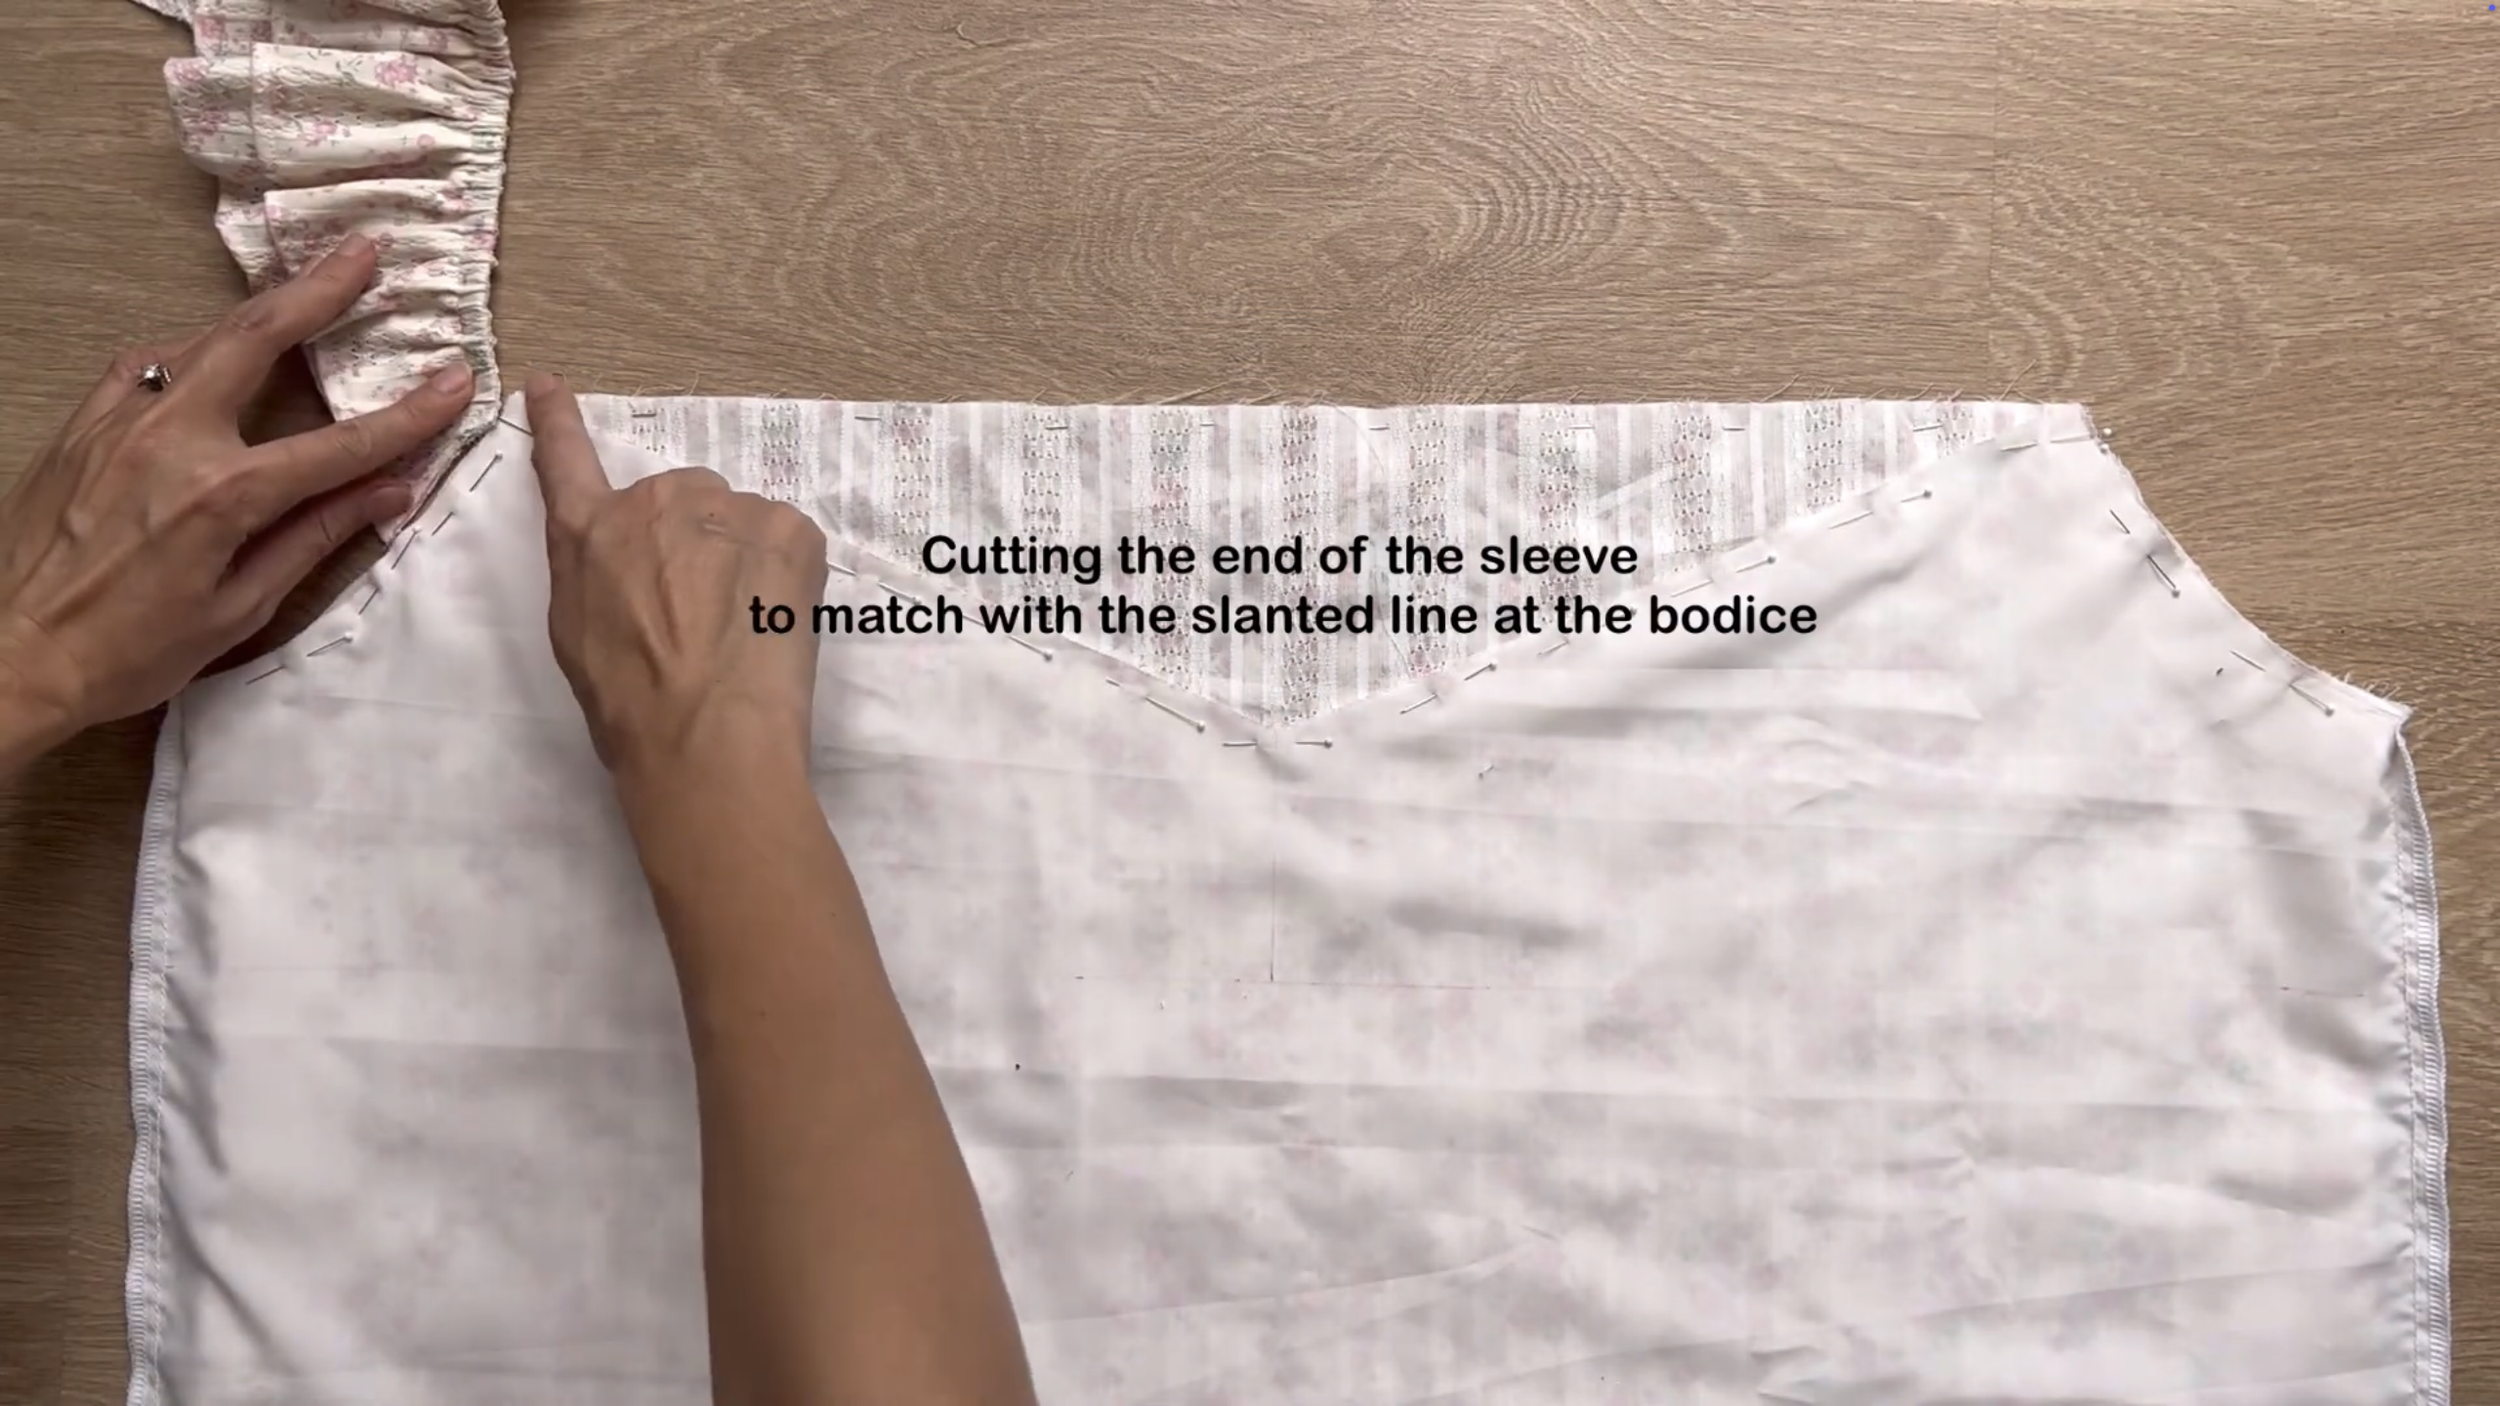
Before sewing, add two ends of the shoulder strap that were just finished before to two tops of the sleeve line. Make sure to cut two ends of the shoulder strap to make a slanted line at the sleeve line before doing it.
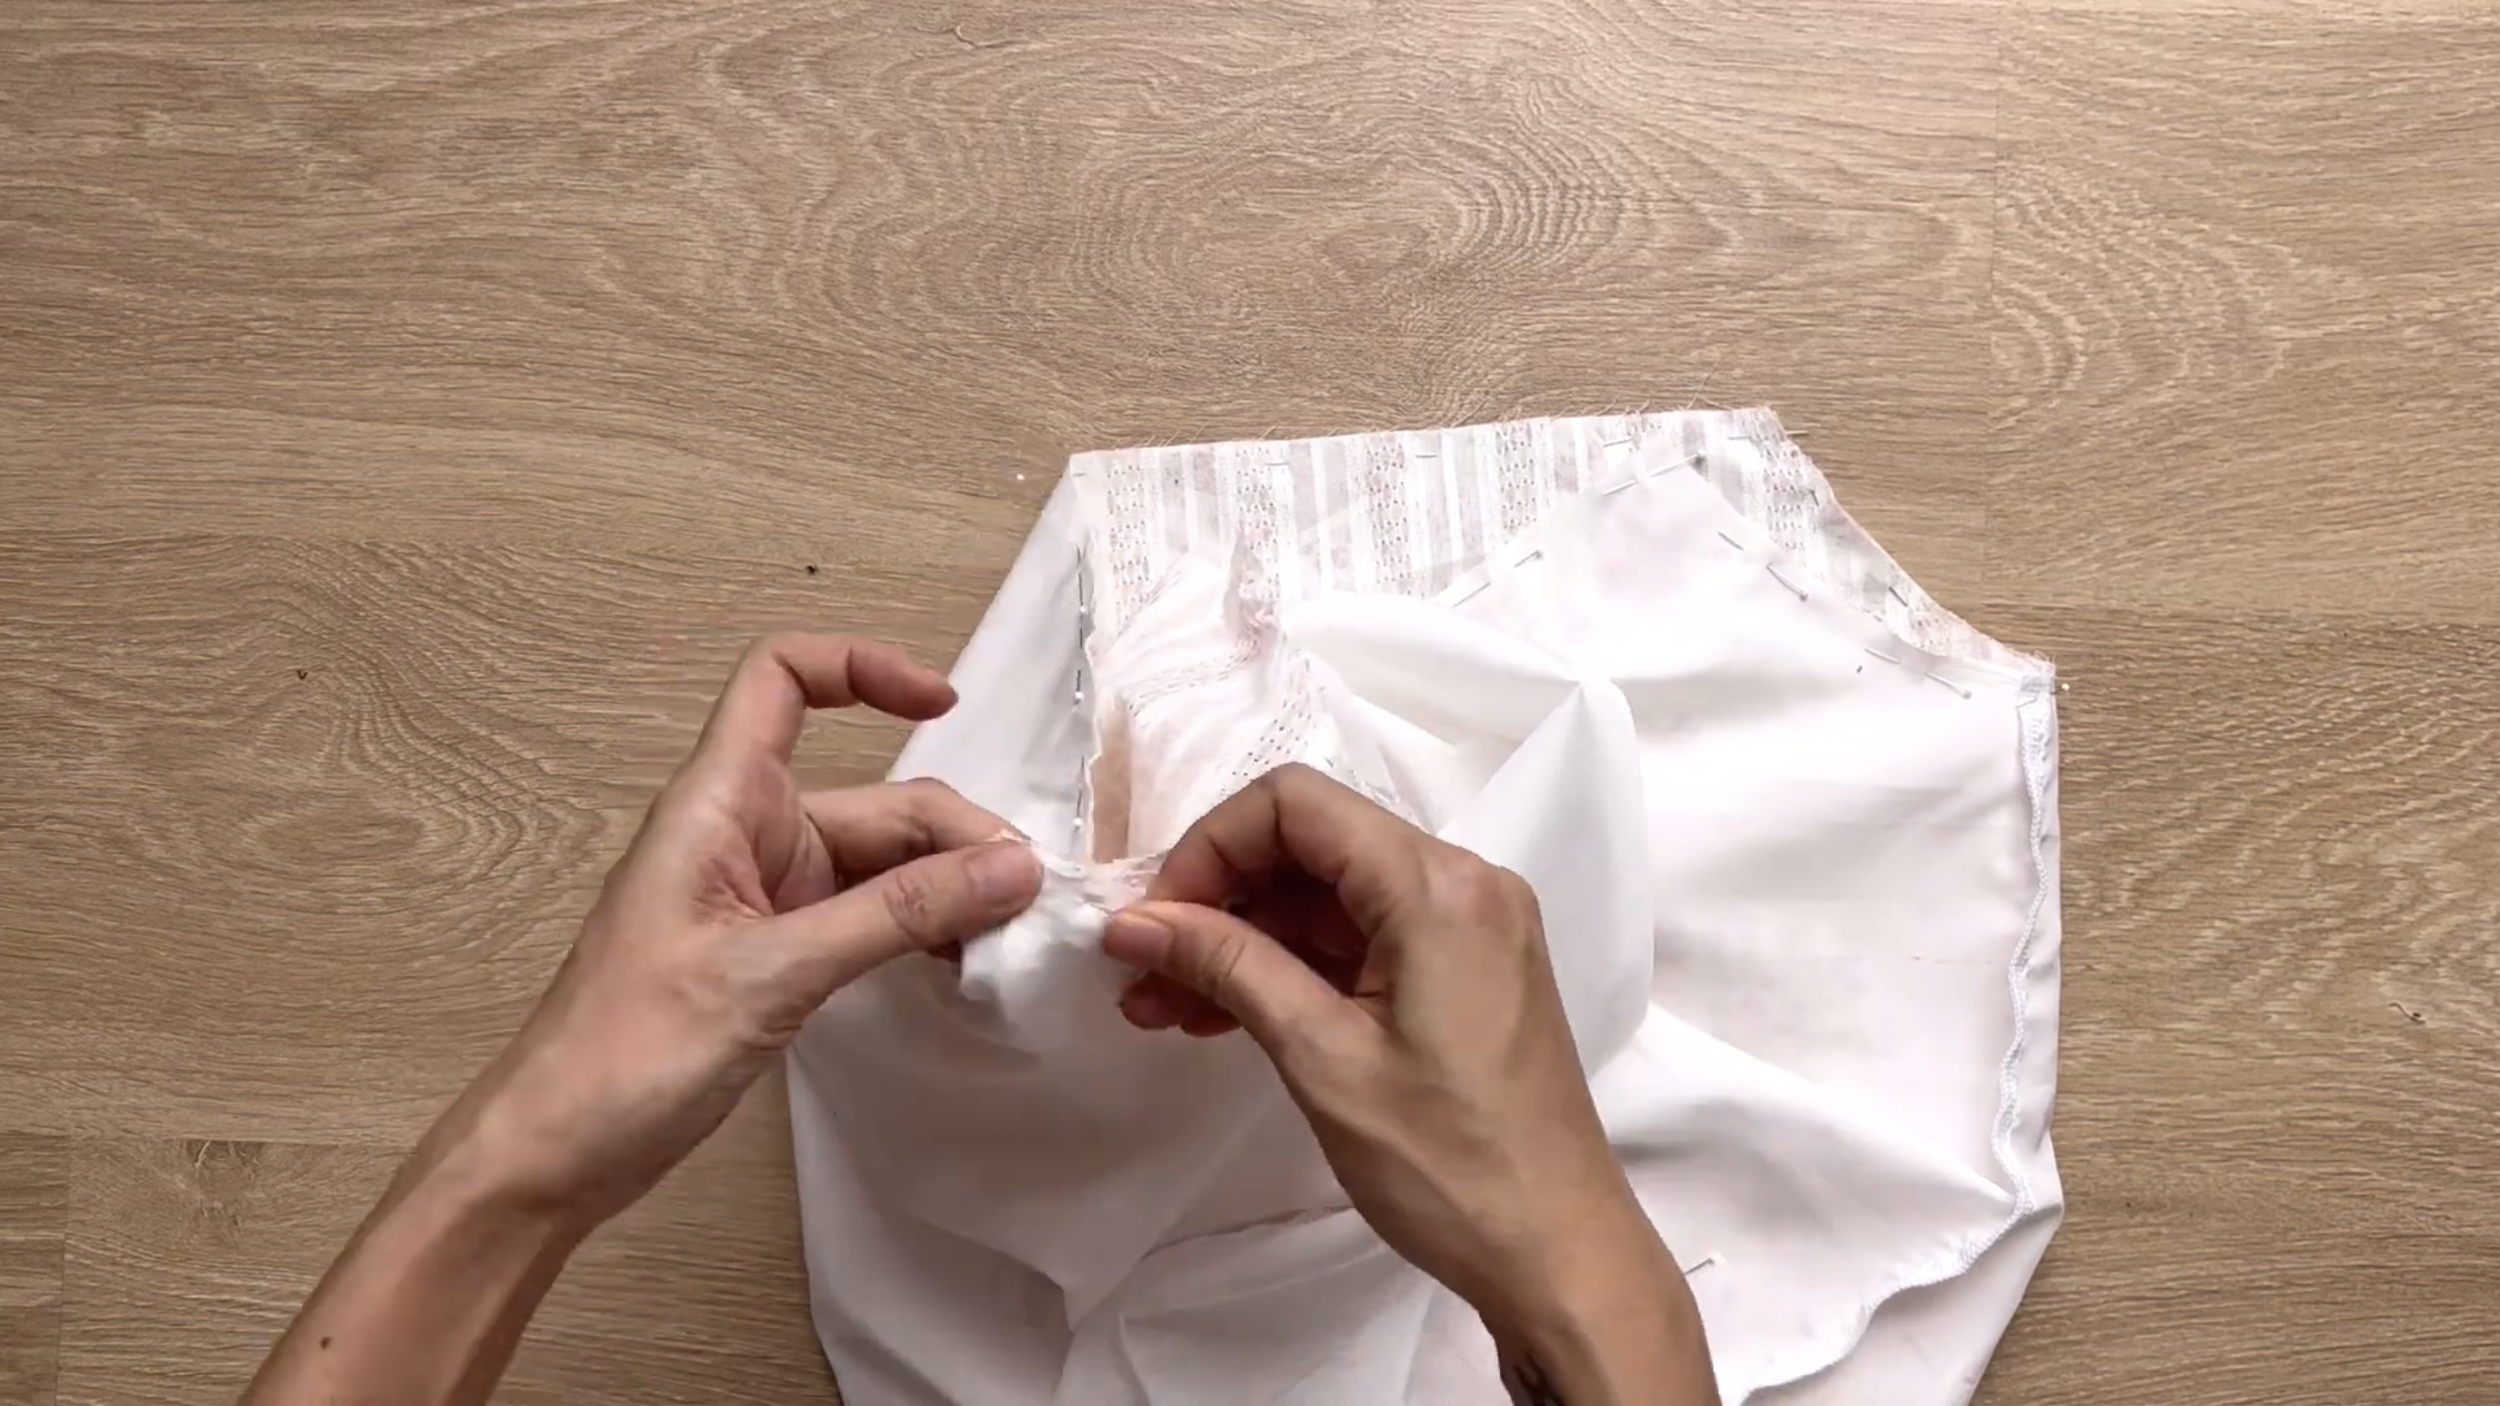
The shoulder strap should be in the middle between the main fabric and the lining fabric of the bodice part. And sew to connect them all together.
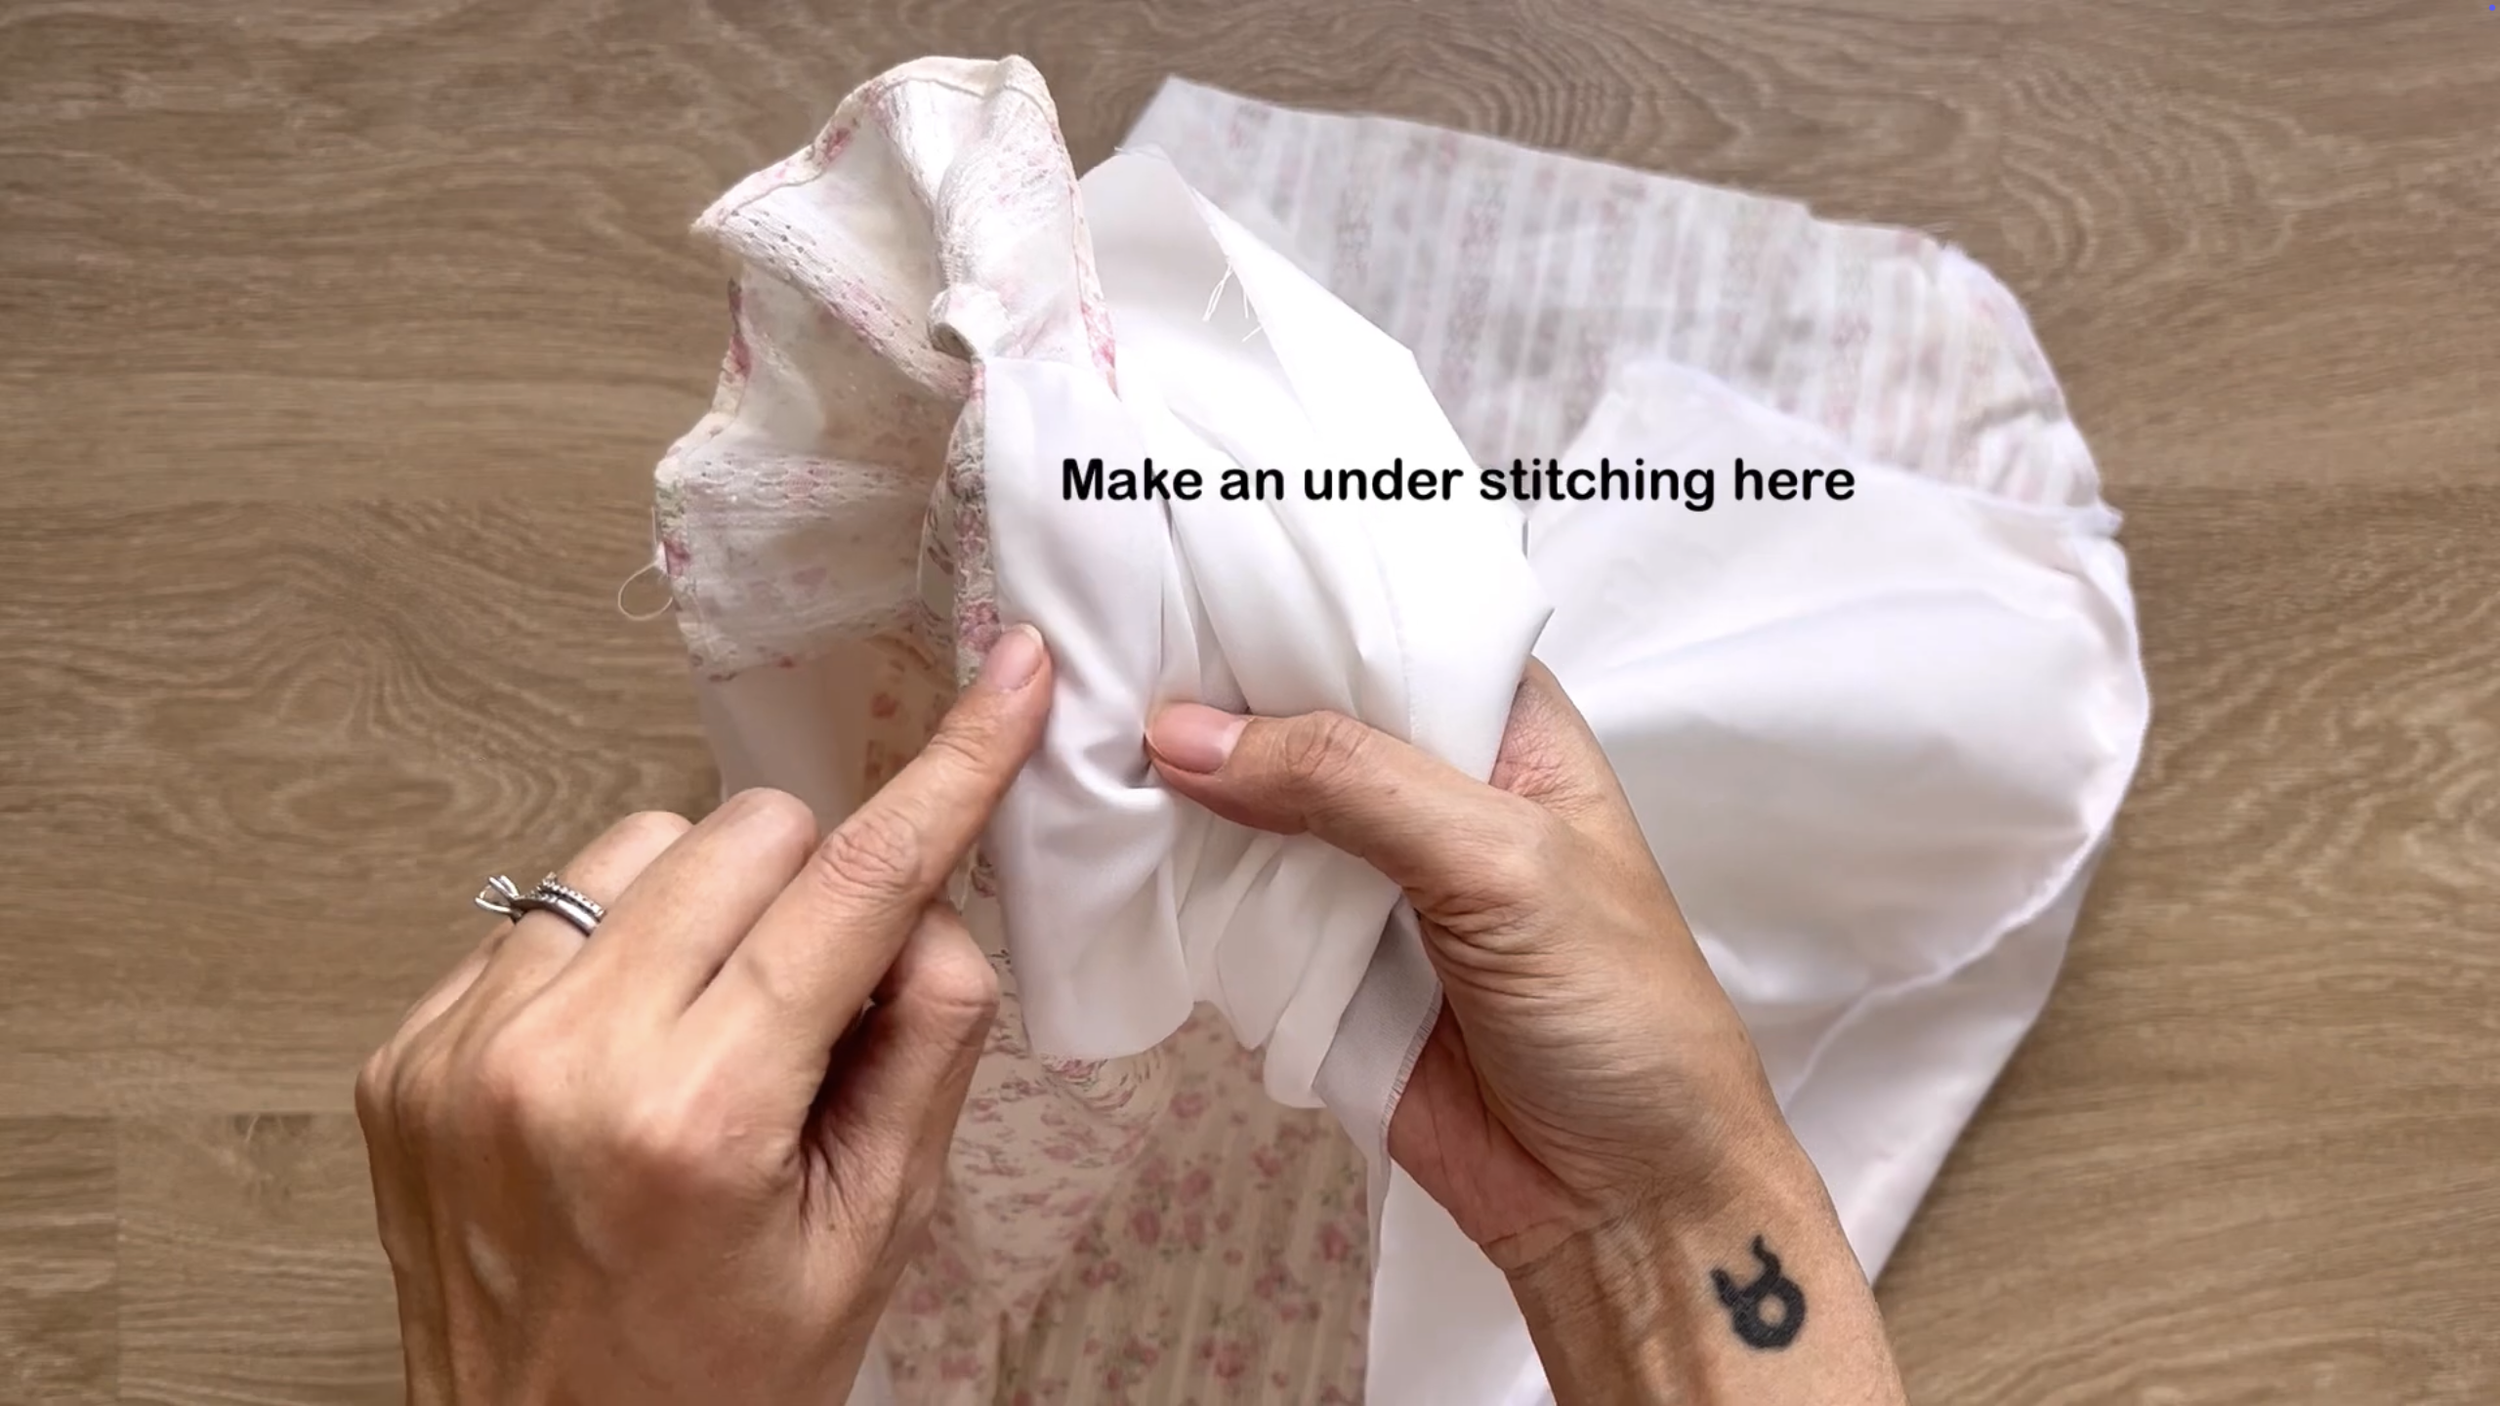
After sewing, make an understitching seam at the lining fabric, together on the end fabric to one side.
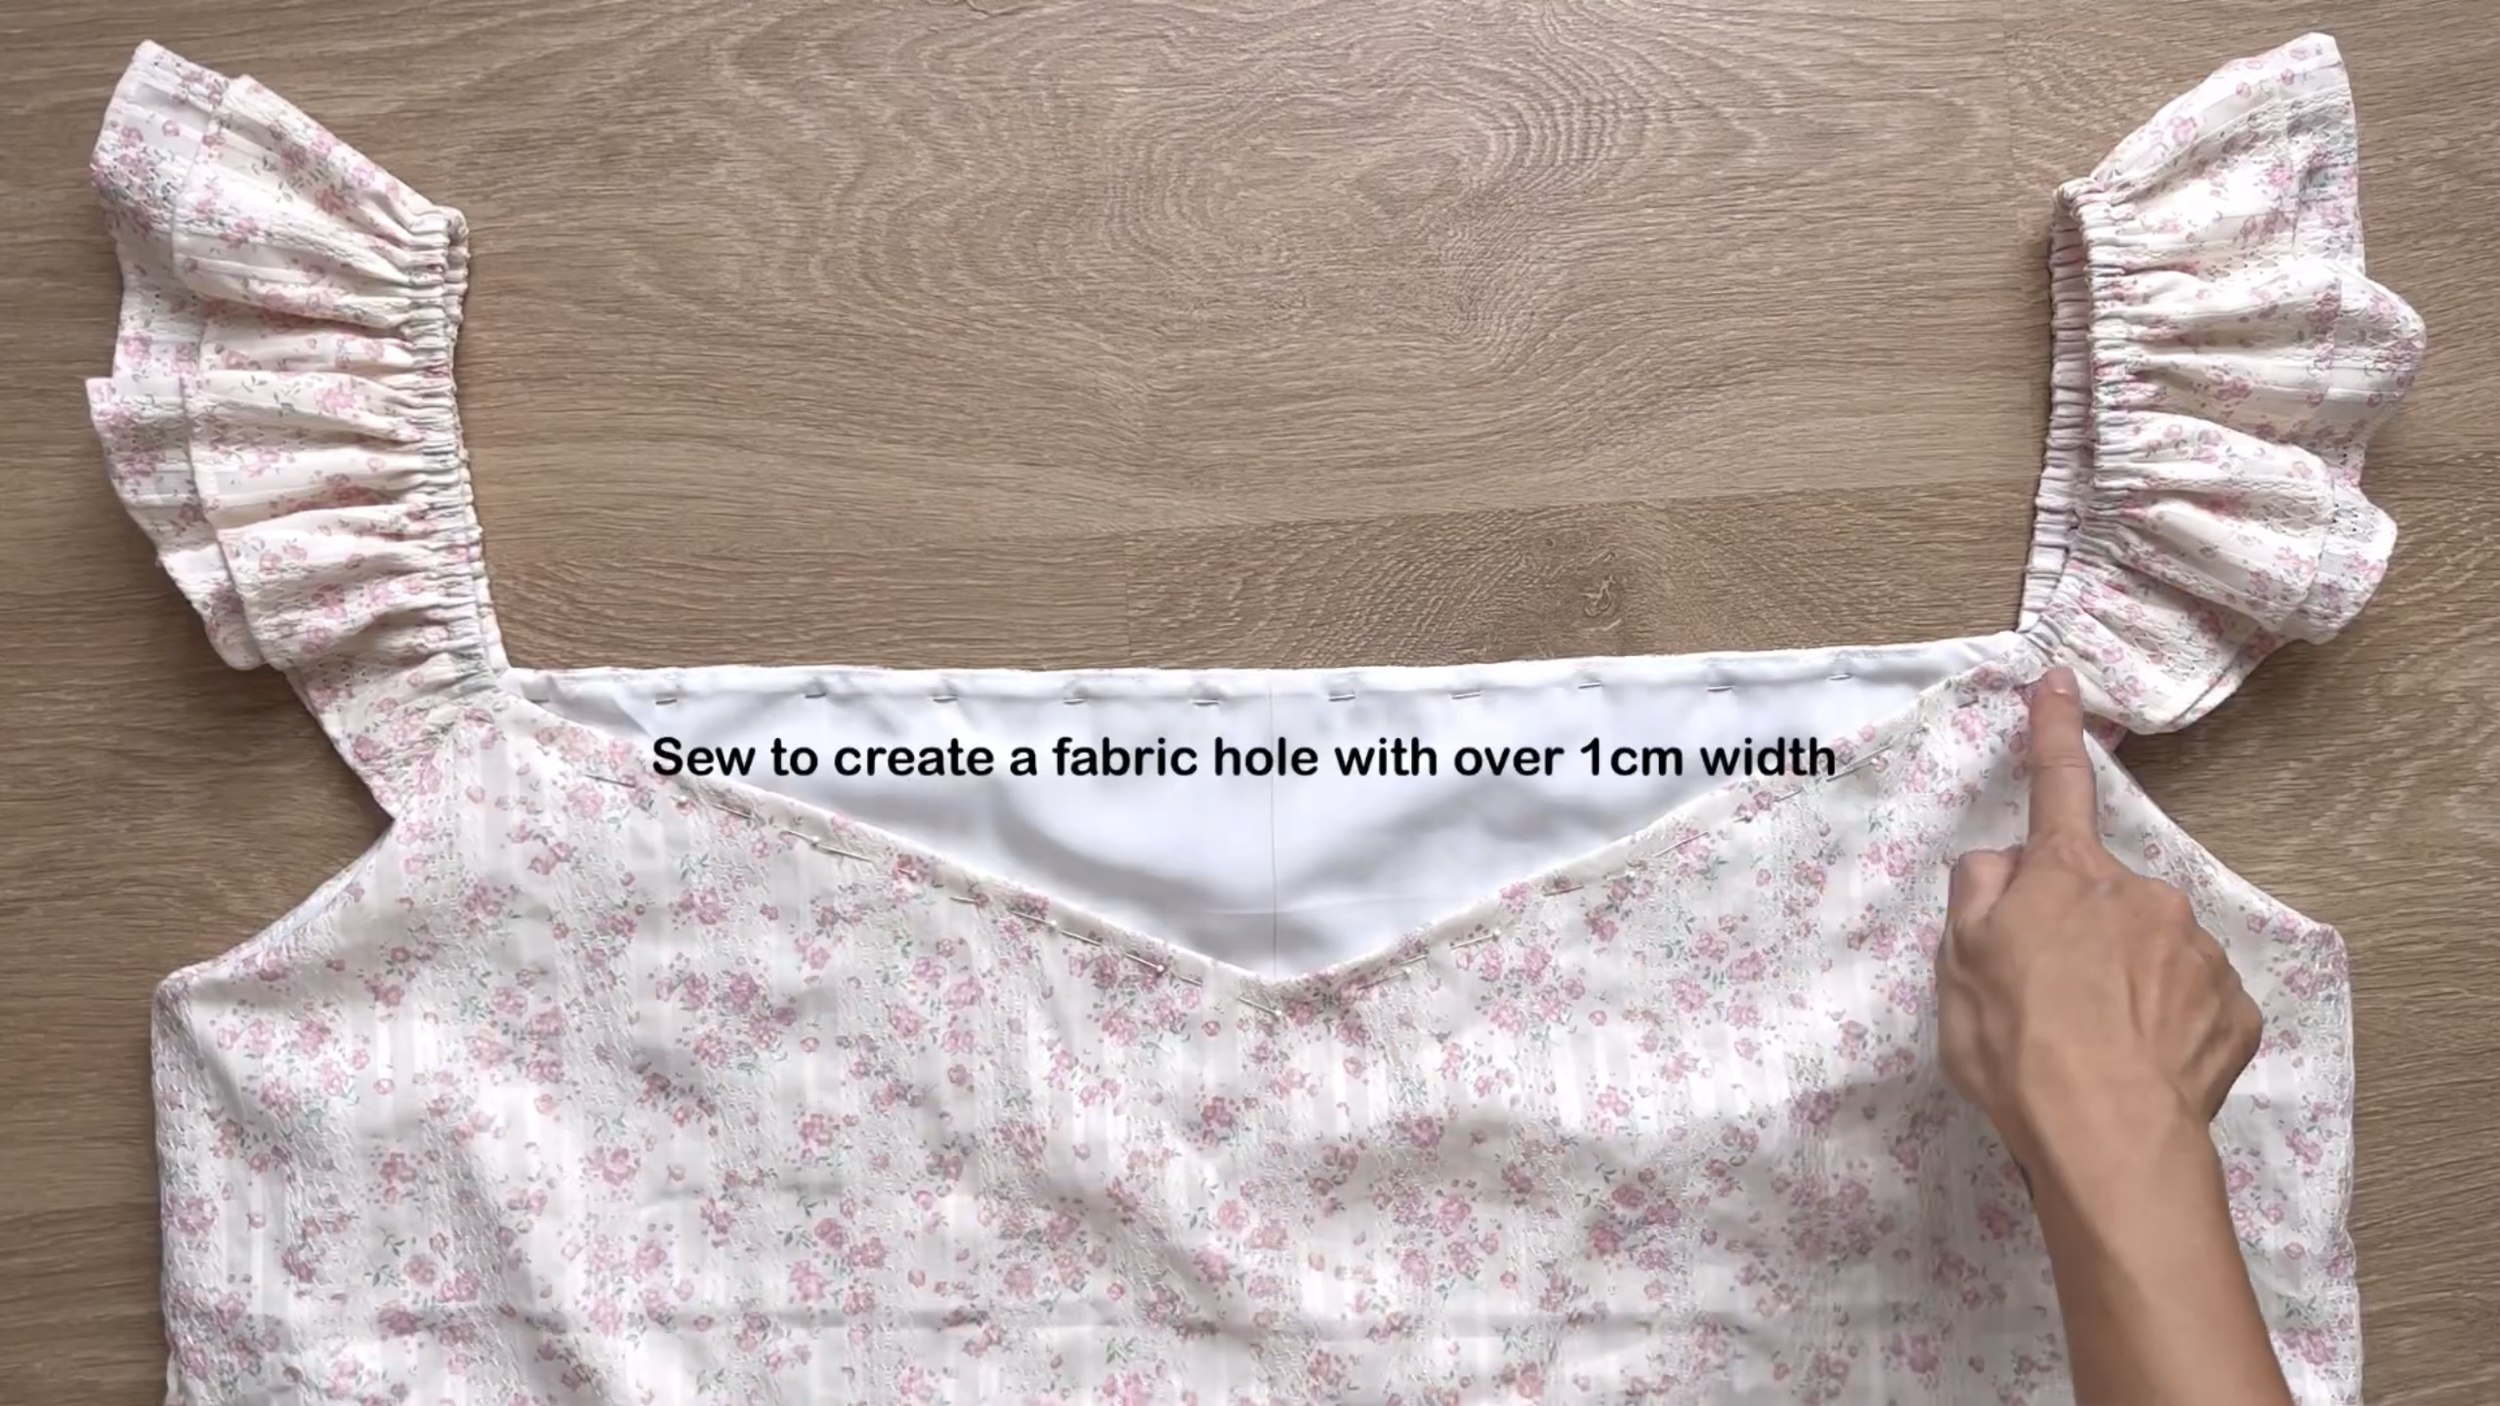
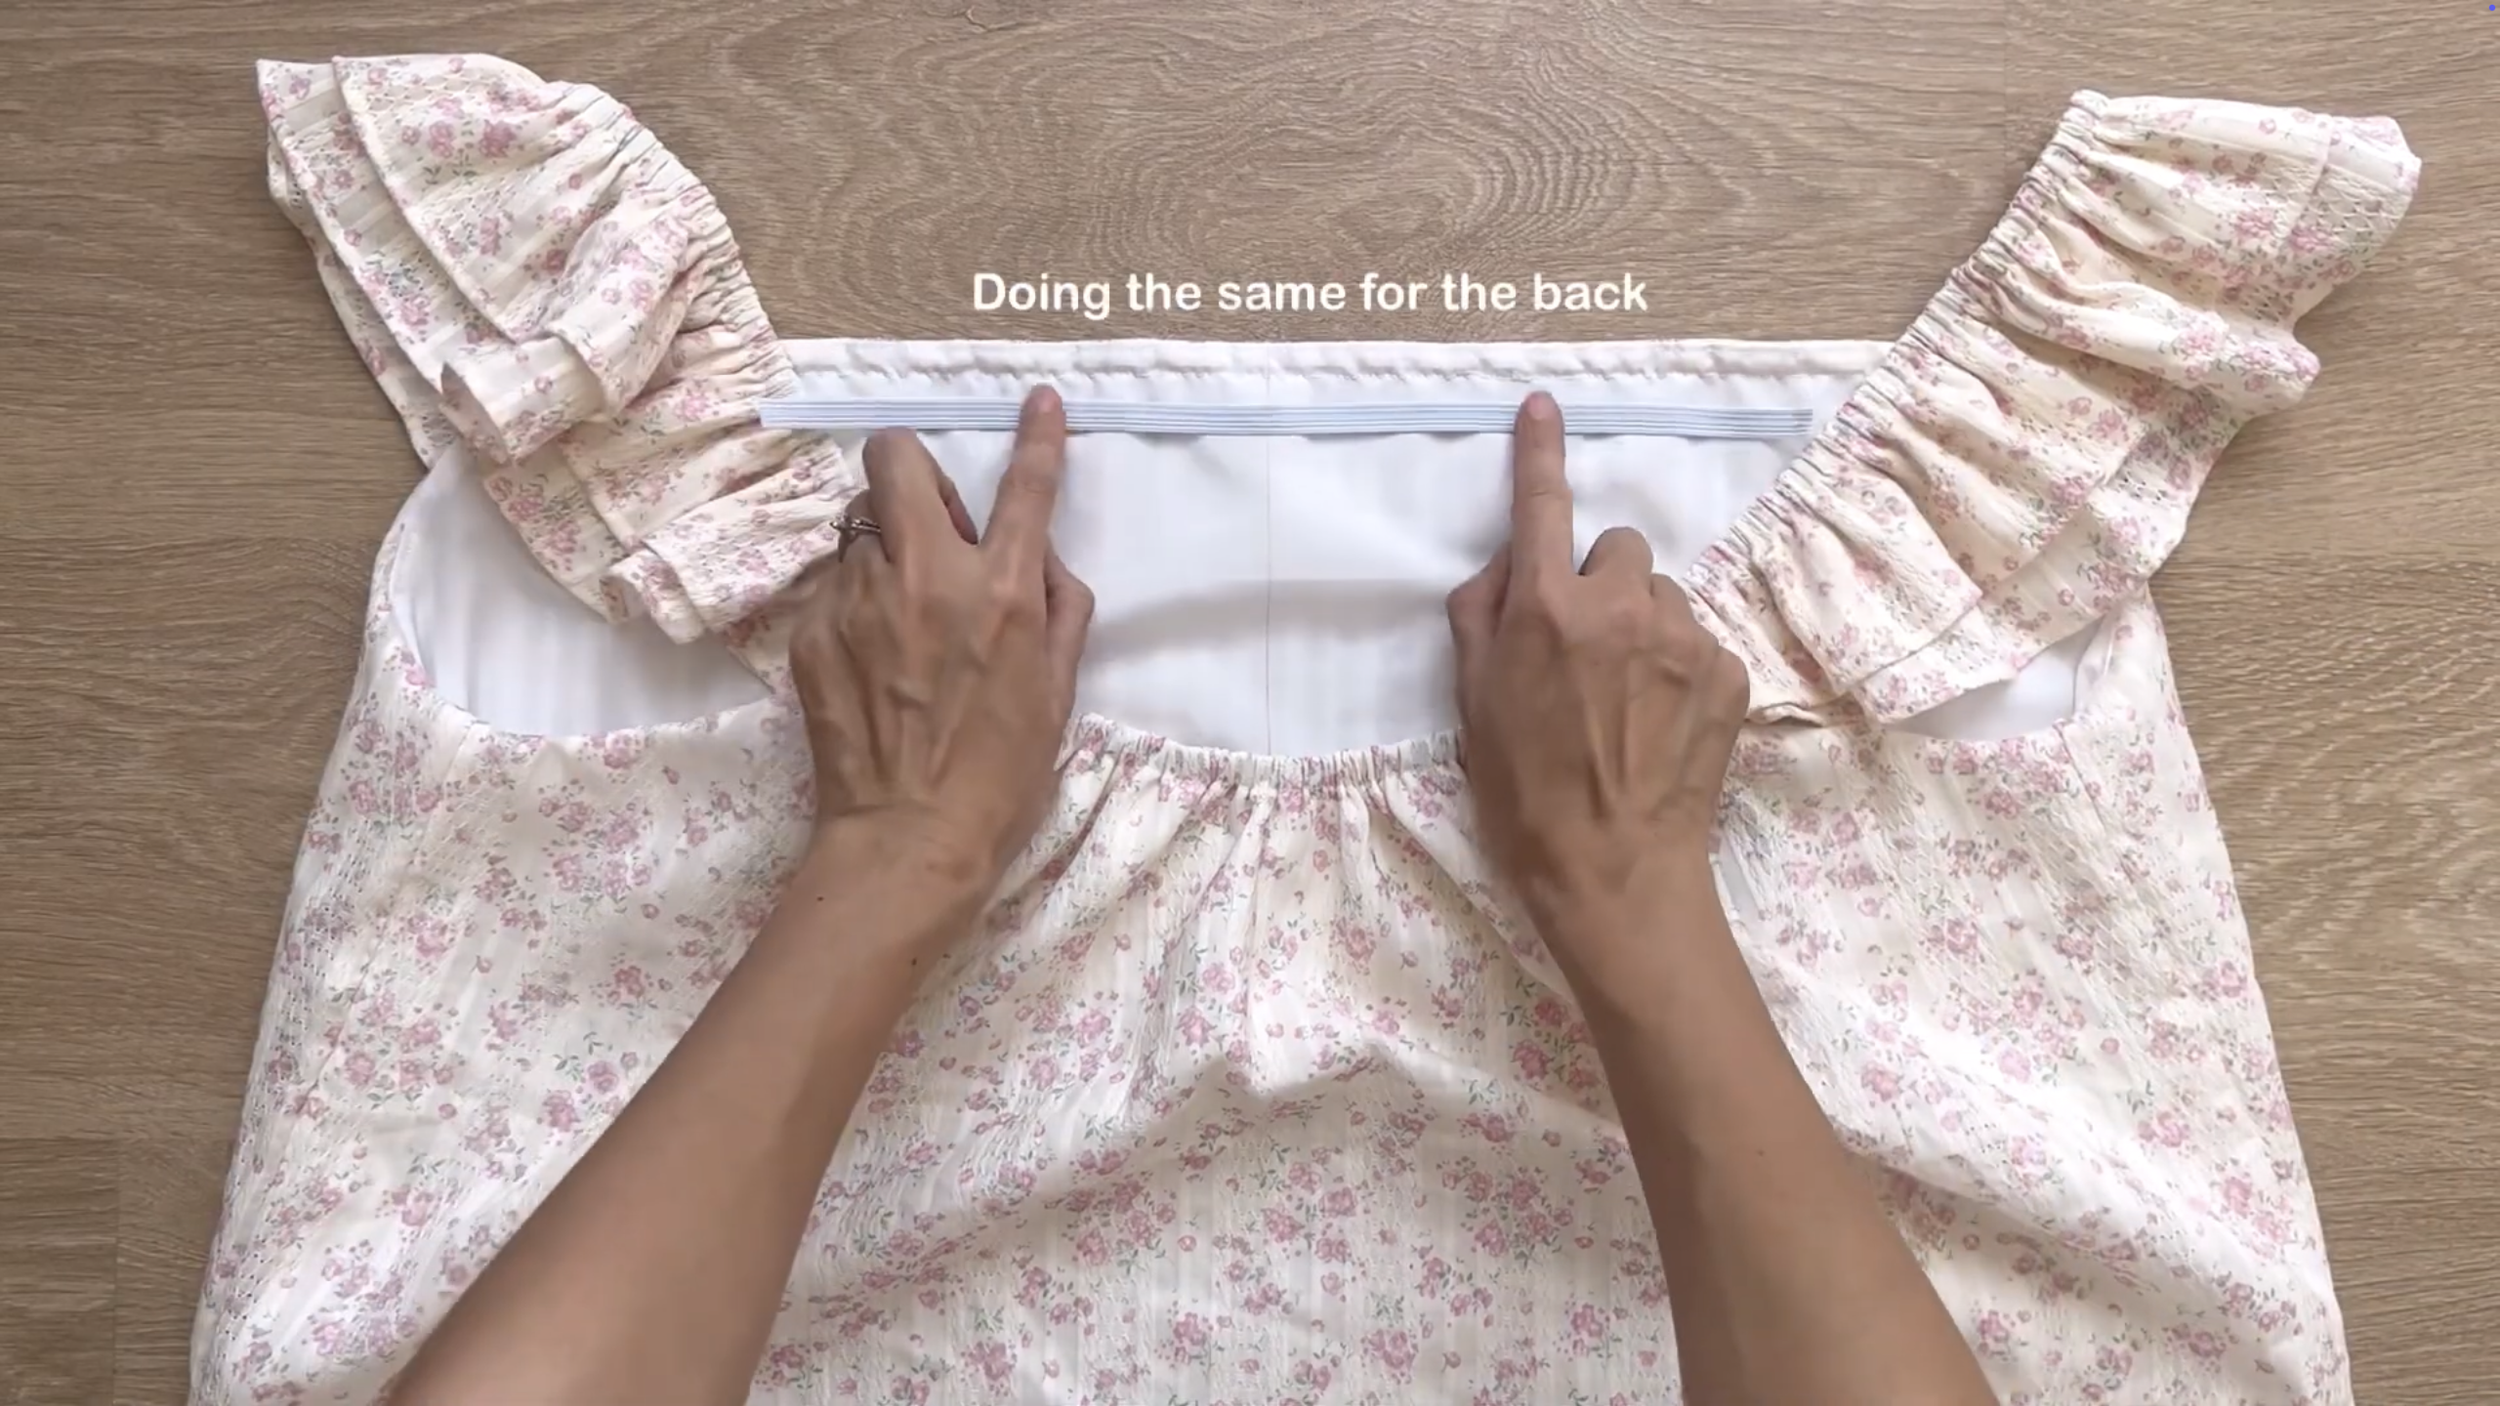
Then, make a fabric hole with over 1 cm width at the front and the back neck of the bodice part.
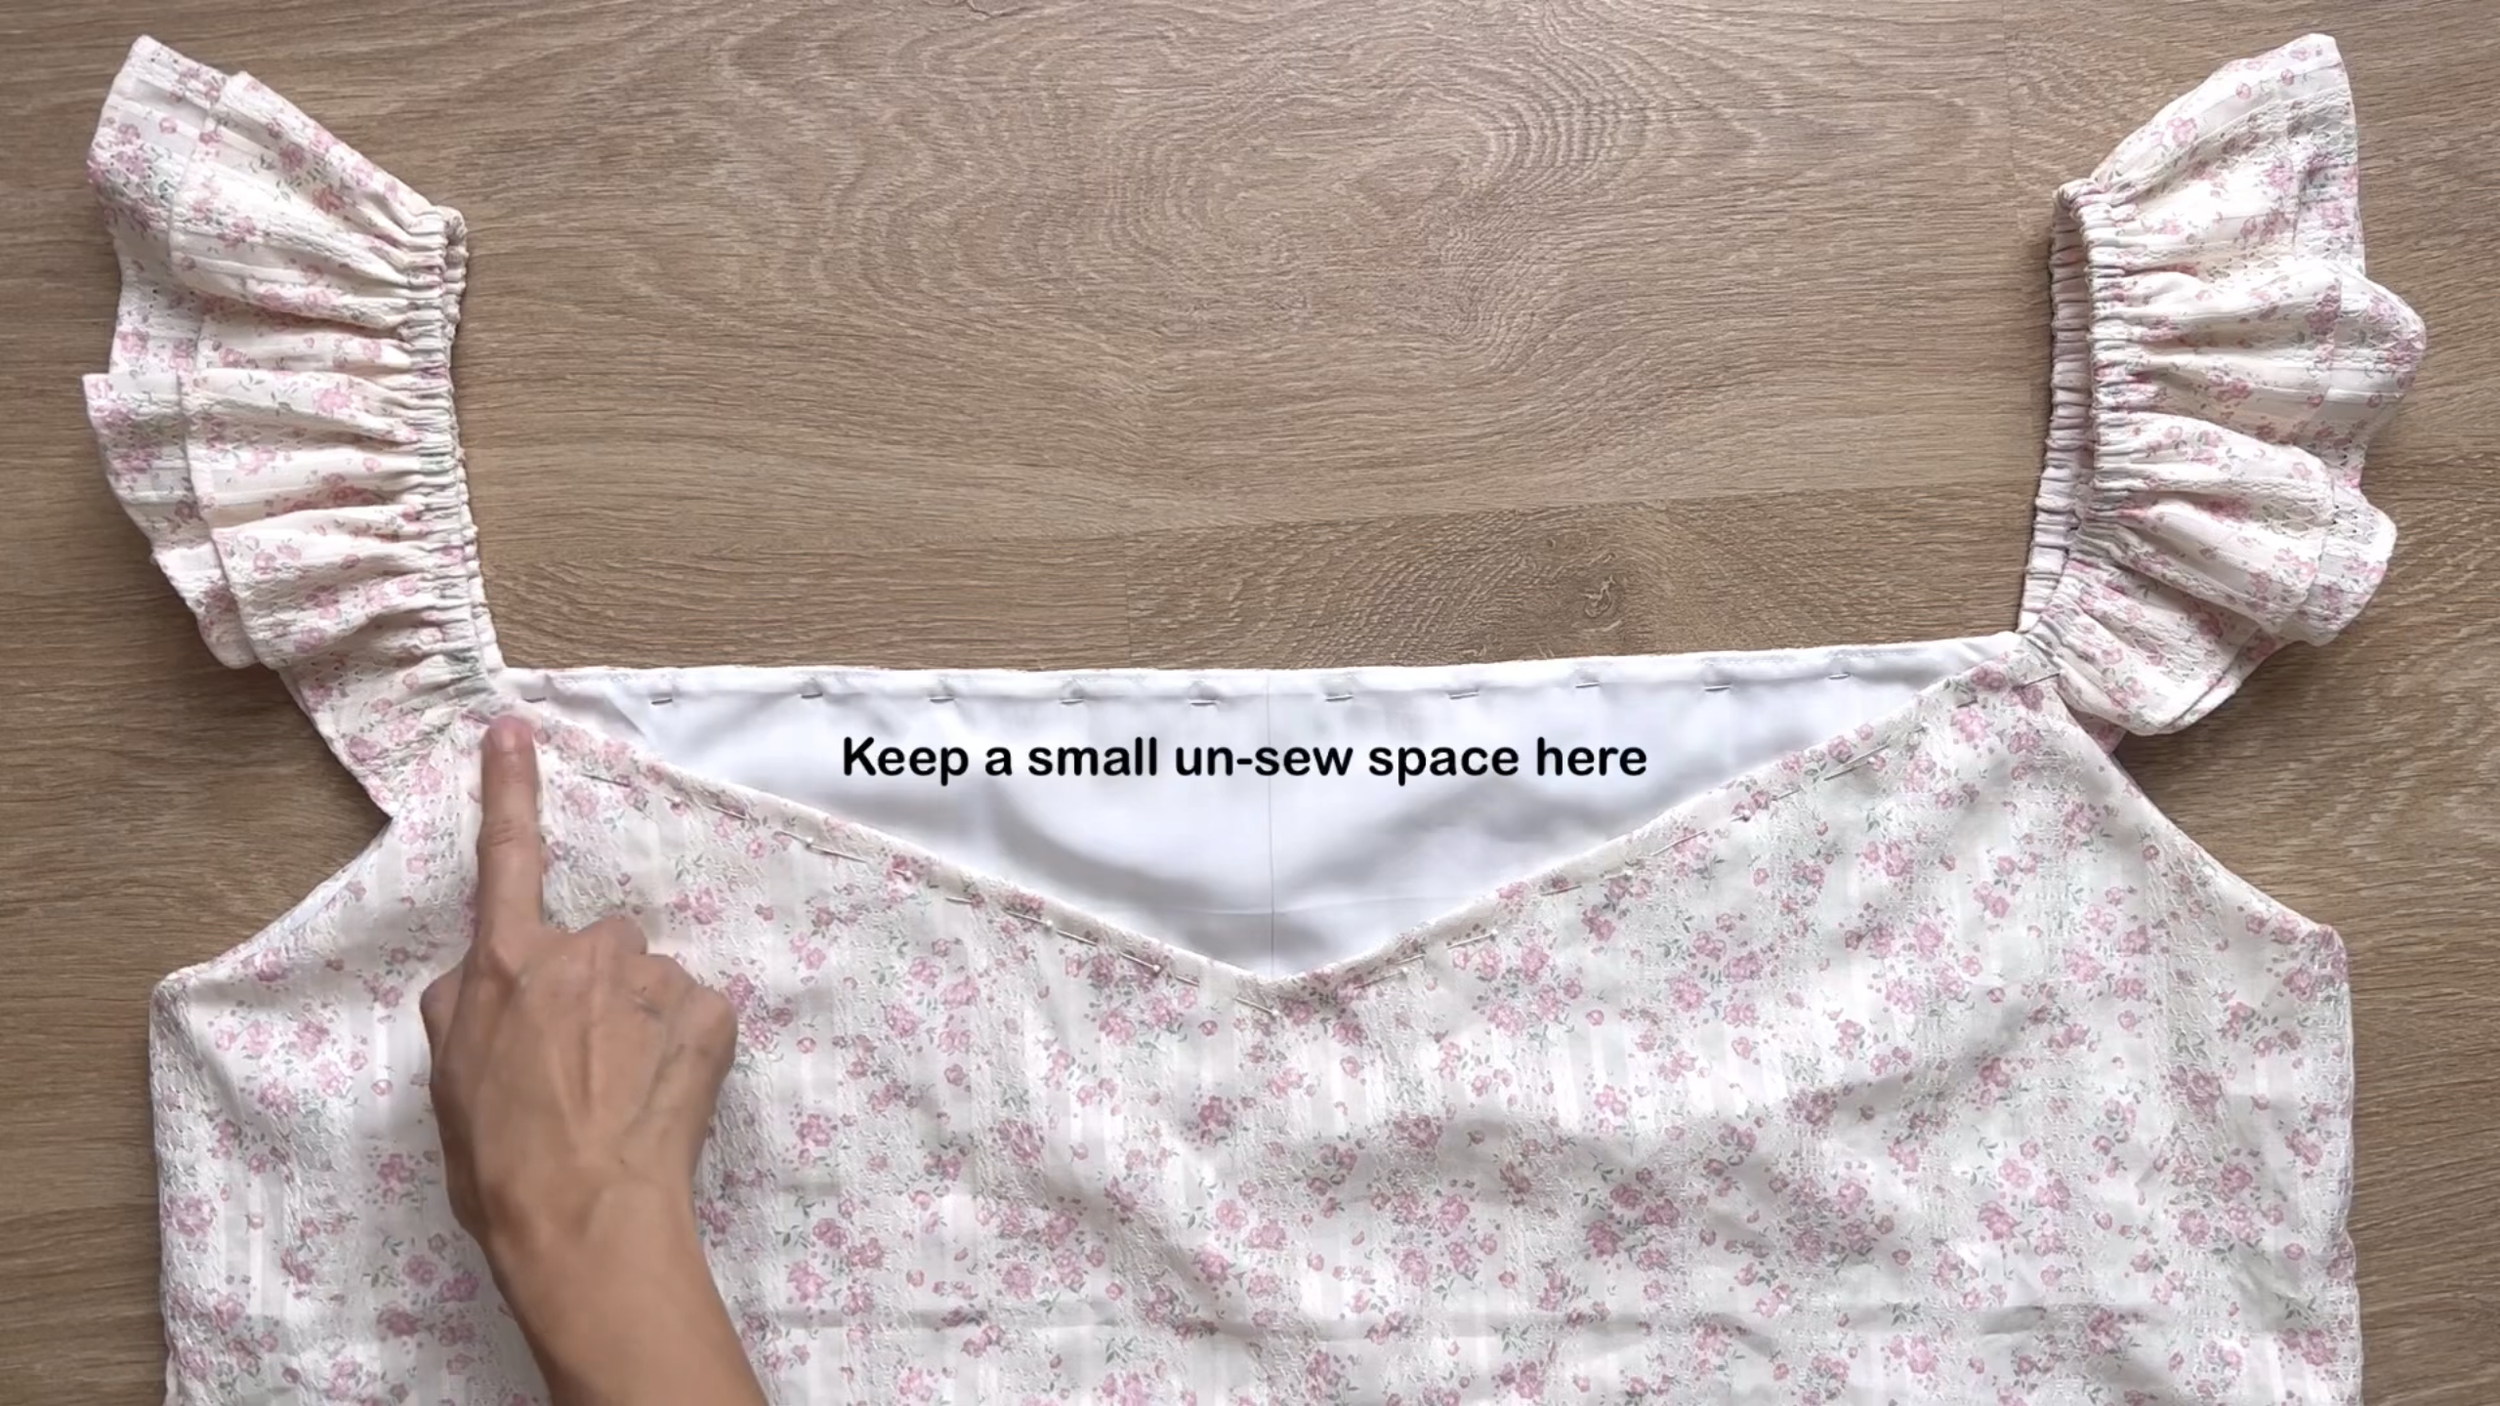
Make sure to keep a small unsewn space at two ends of the fabric hole for the elastic band to go through later.
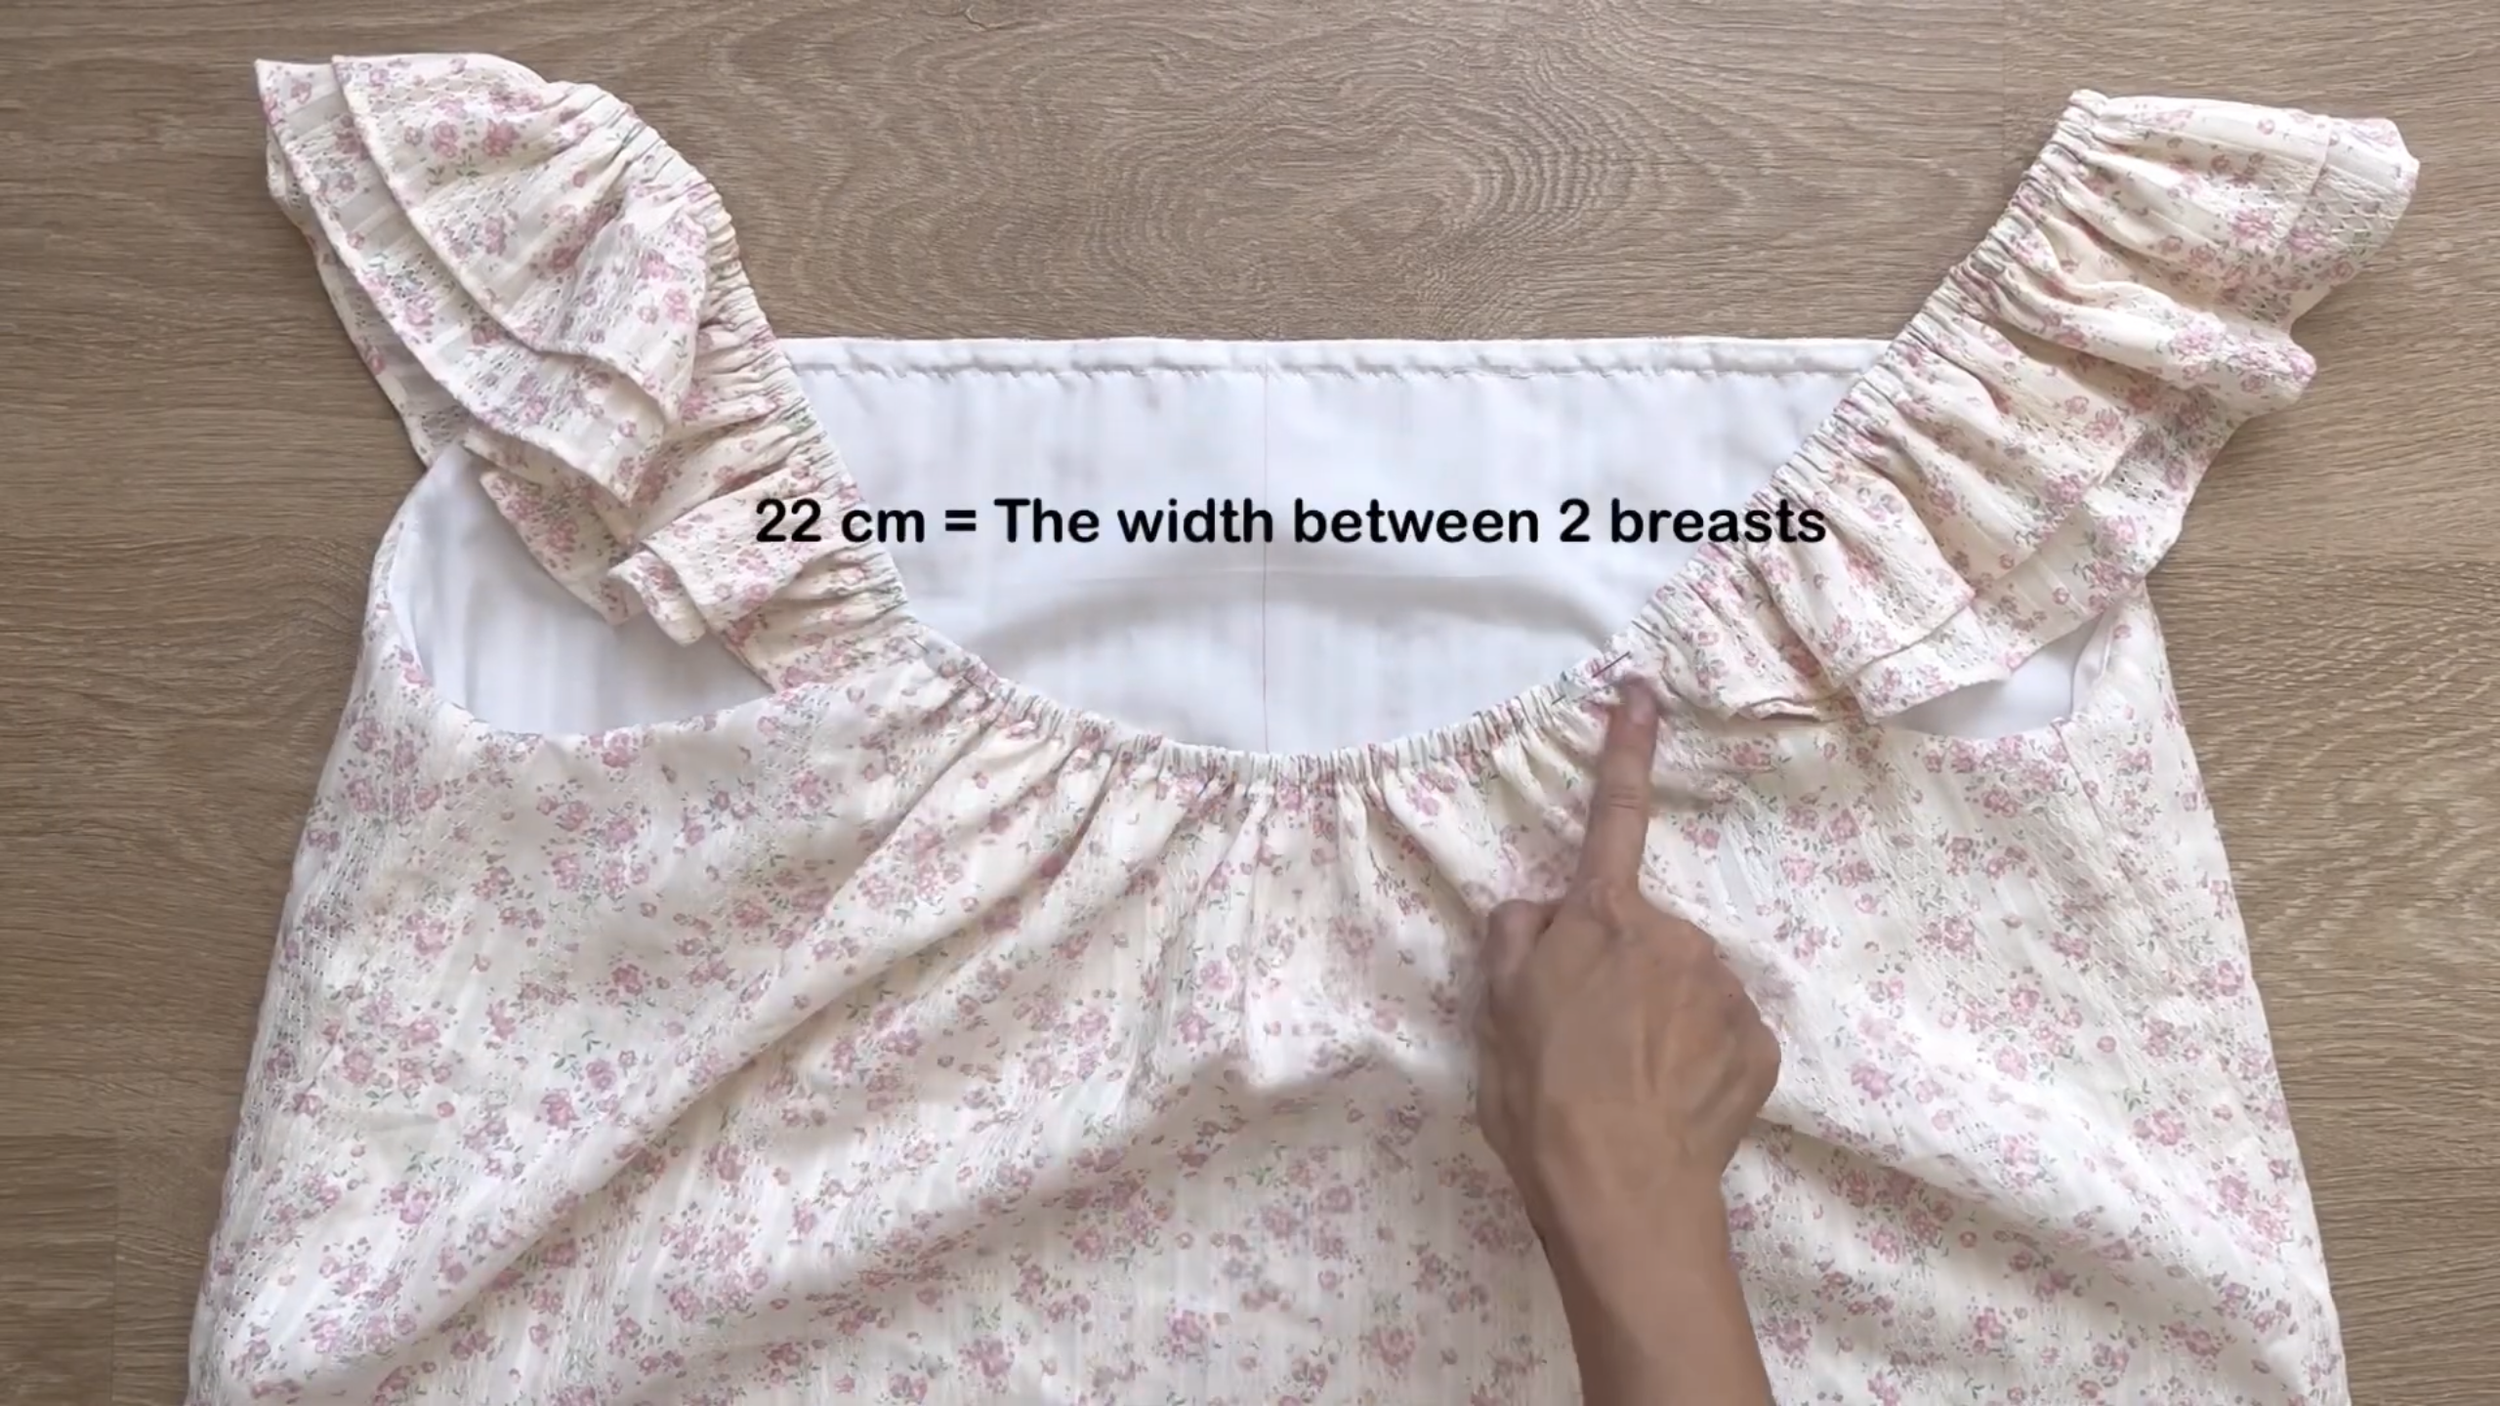
The length of the elastic band will be 22 cm, which is the width between two breasts or two shoulder straps.
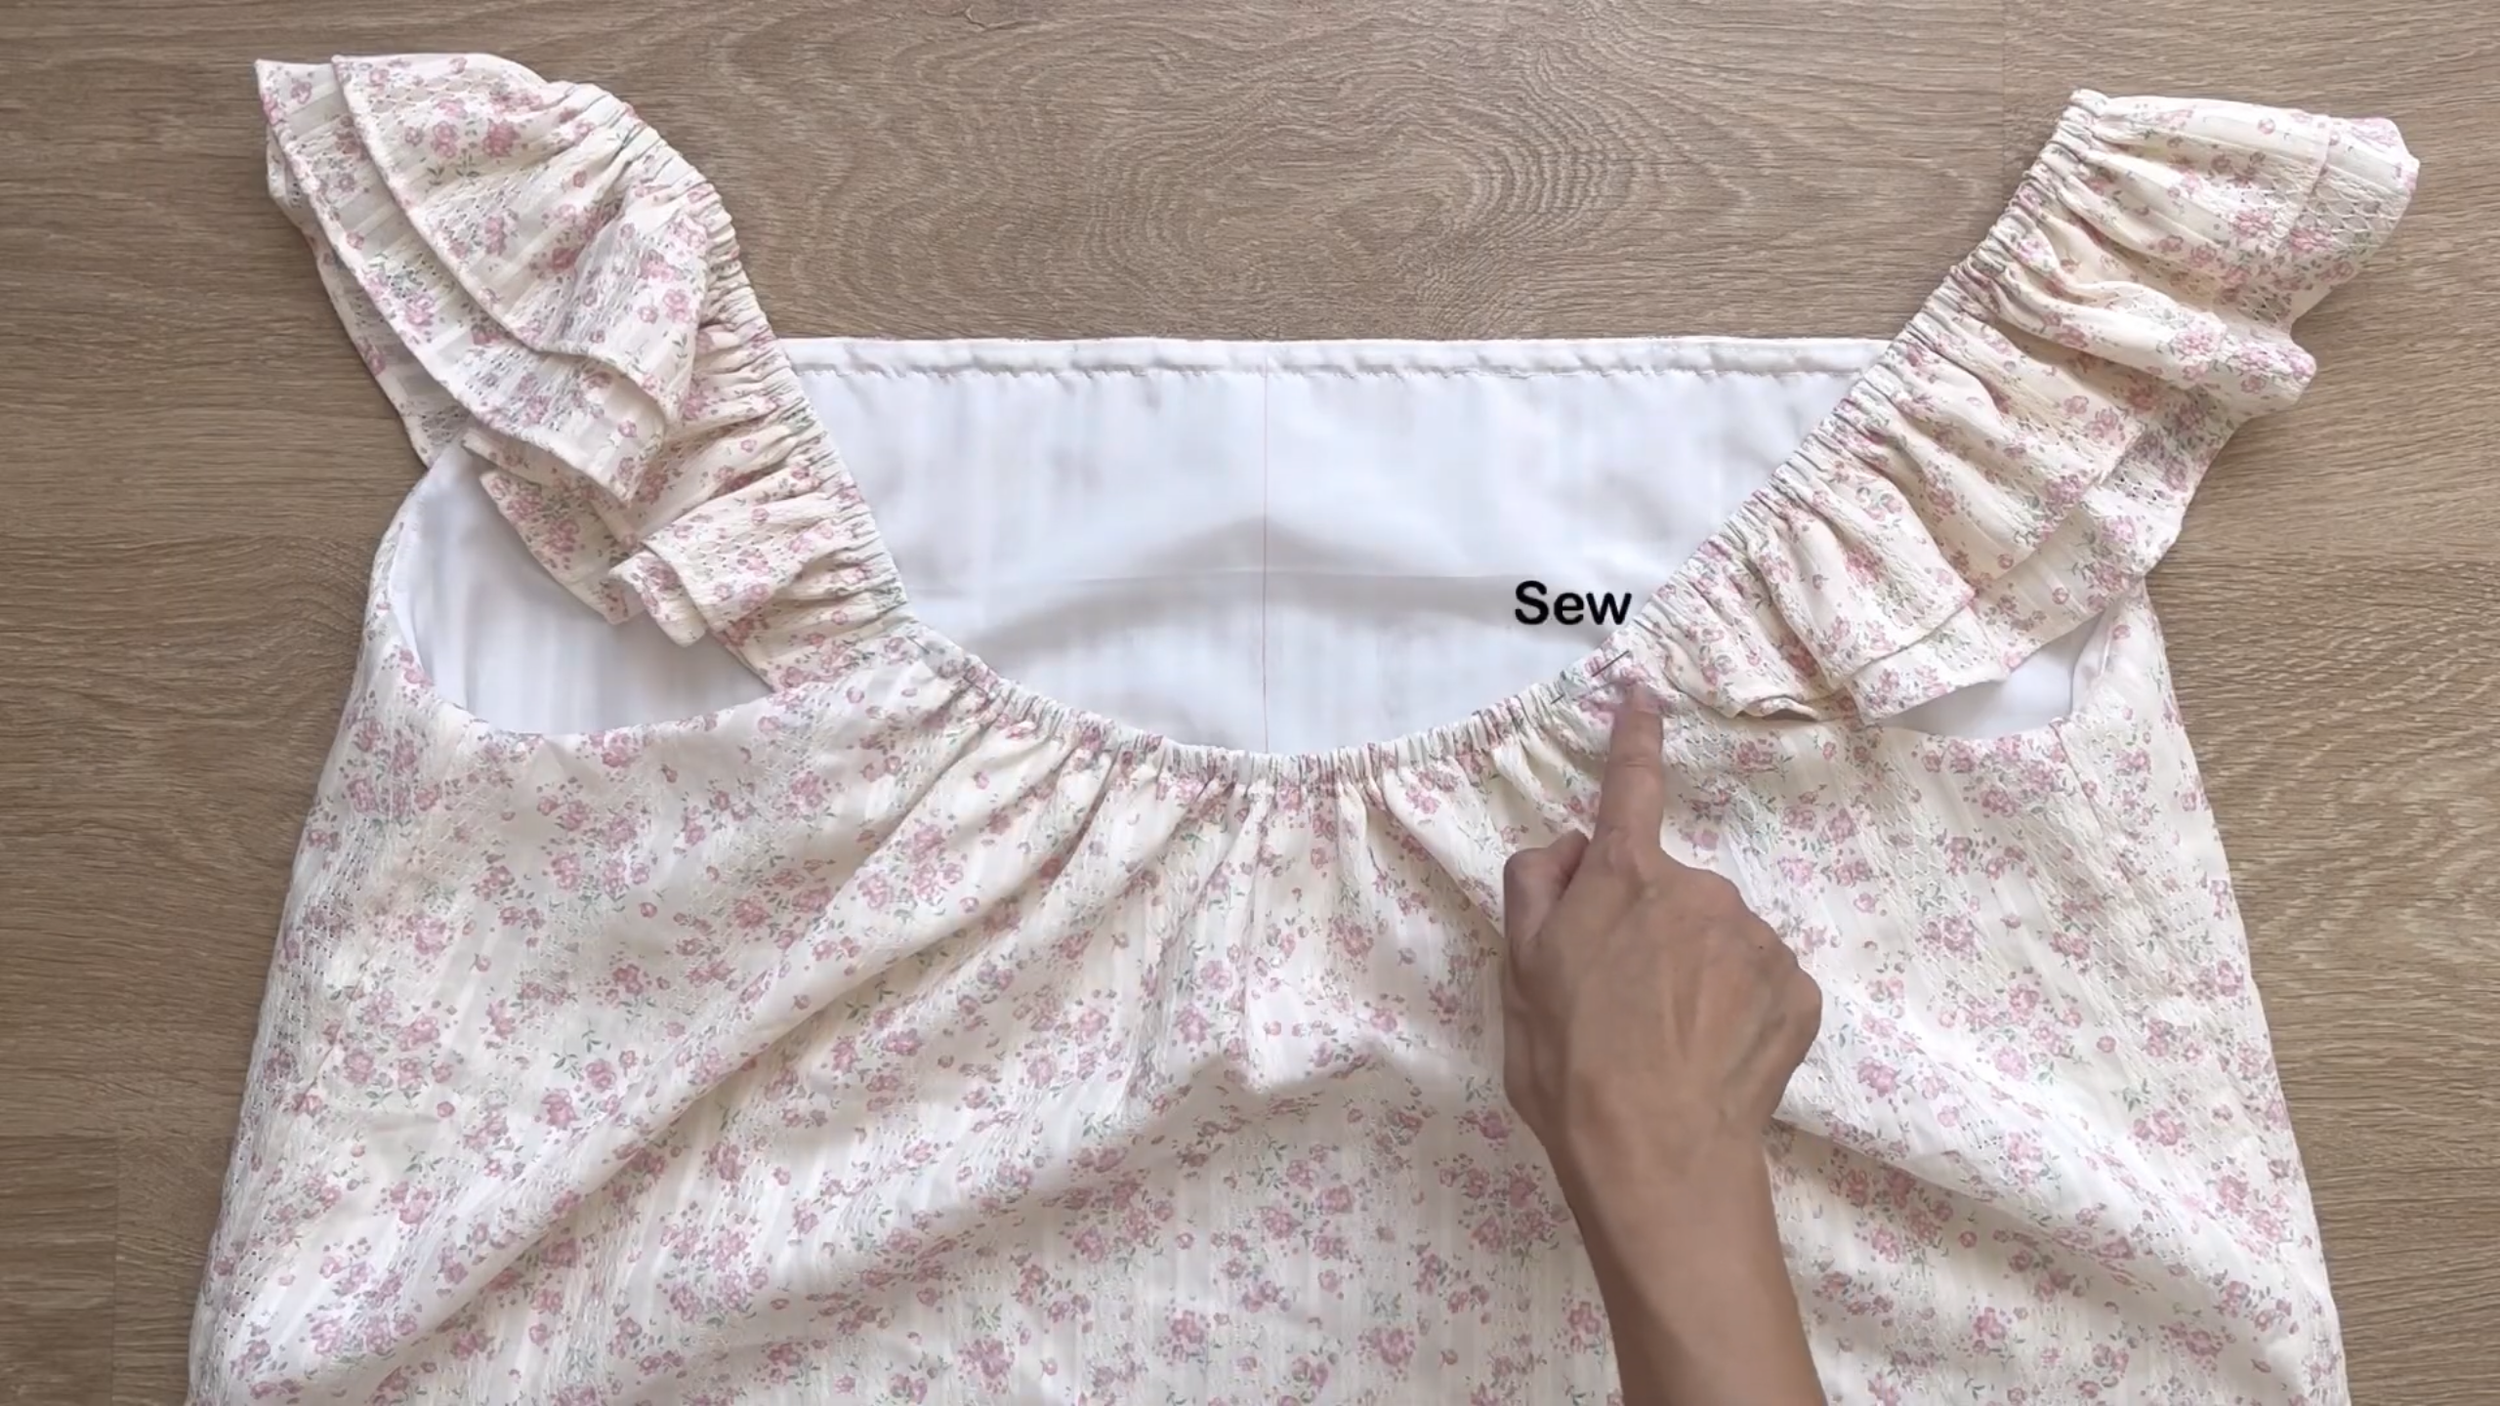
Sew two ends of the elastic band to two ends of the fabric hole to keep them from moving.
Don't forget to close the unsewn space that was kept before.
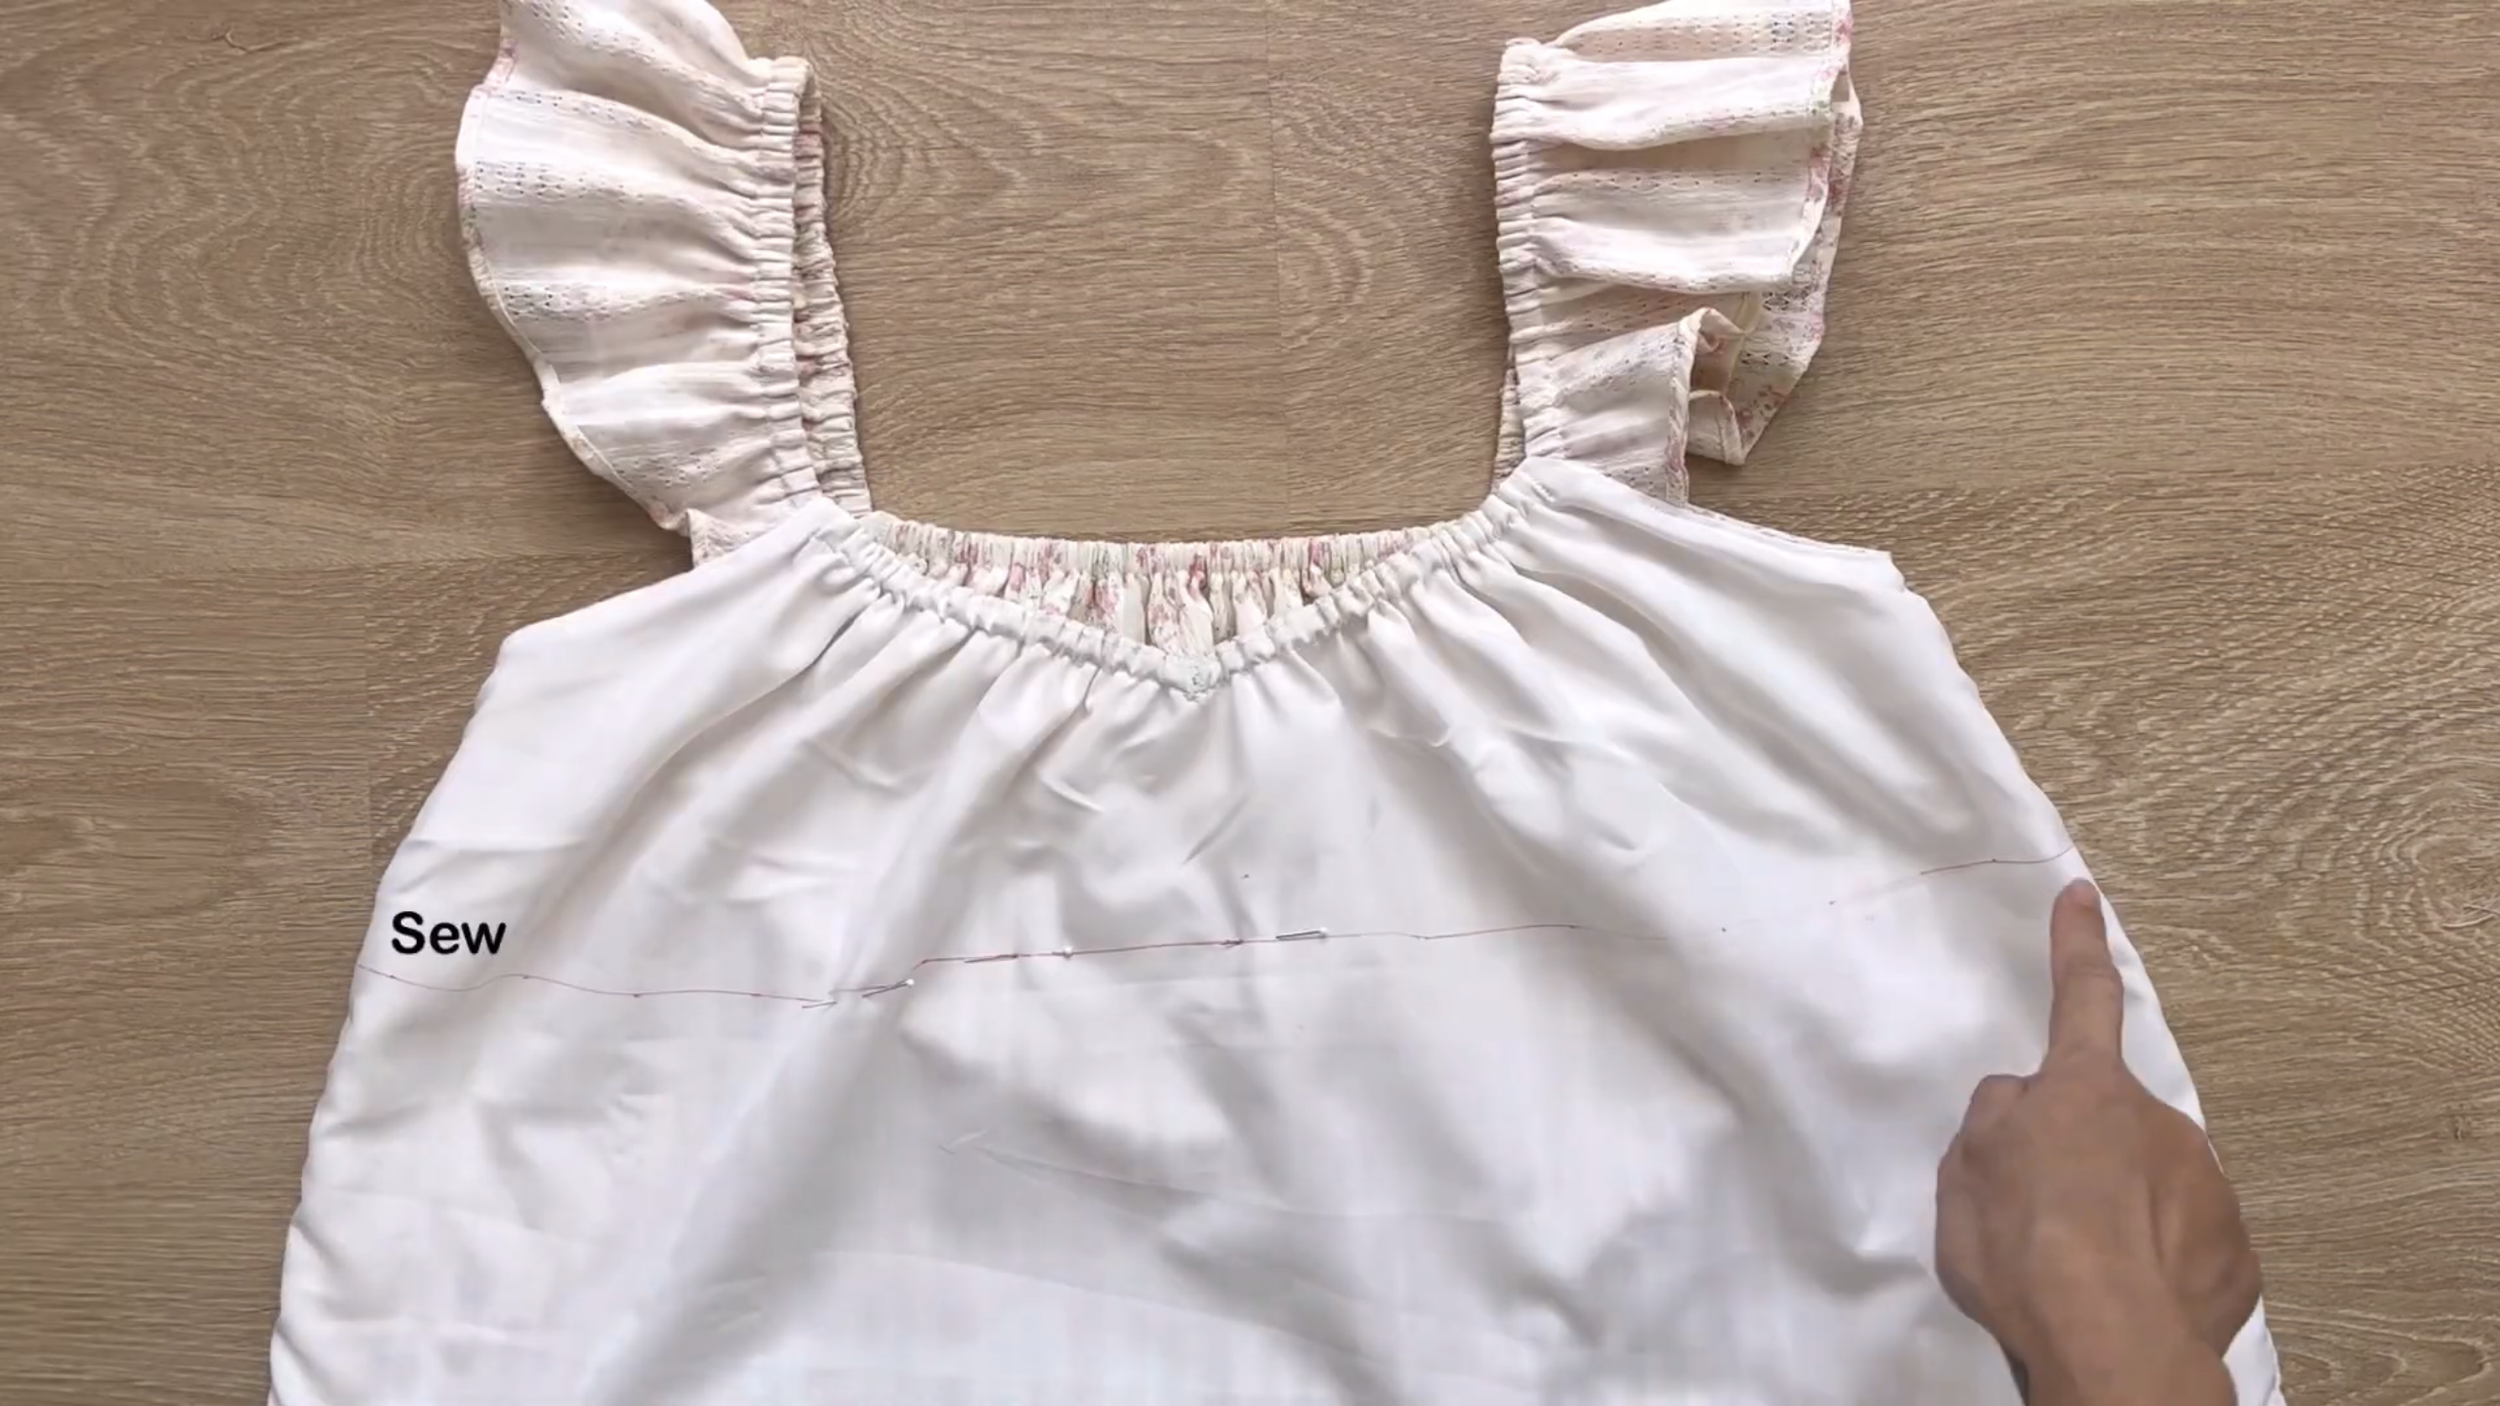
After that, sew to connect the main fabric and the lining fabric of the bodice part at the underbust line.
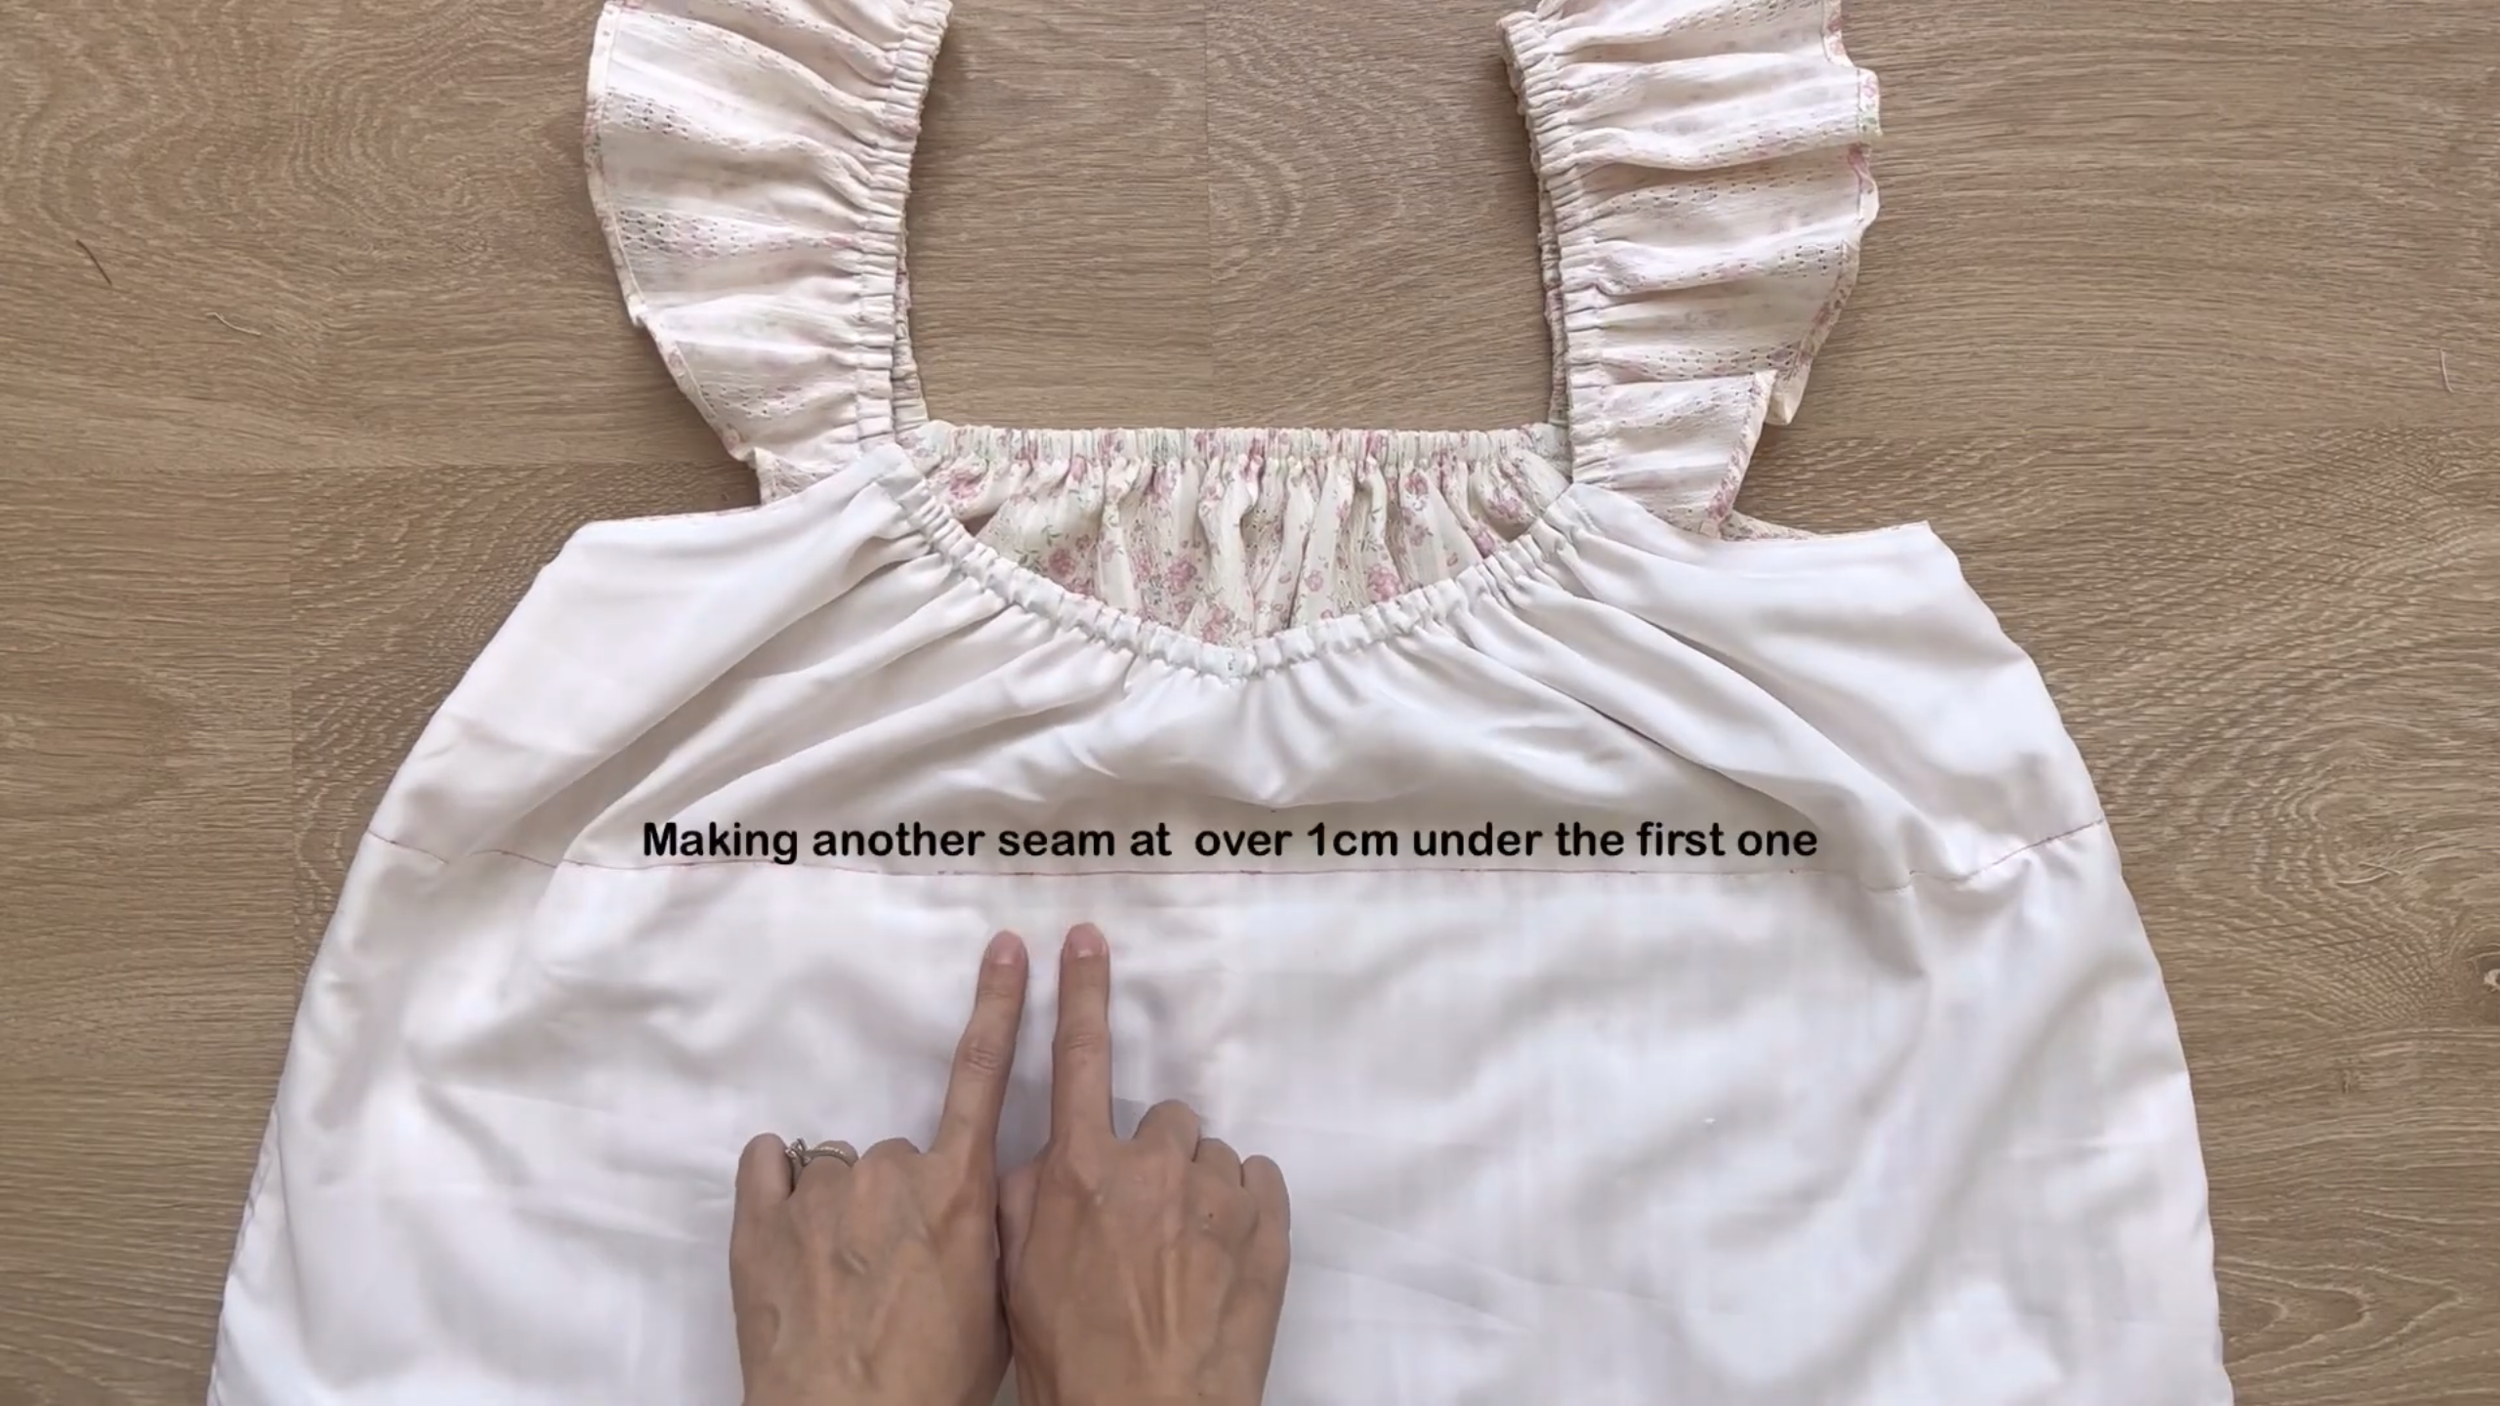
After the first seam, make another seam at over 1 cm under it.
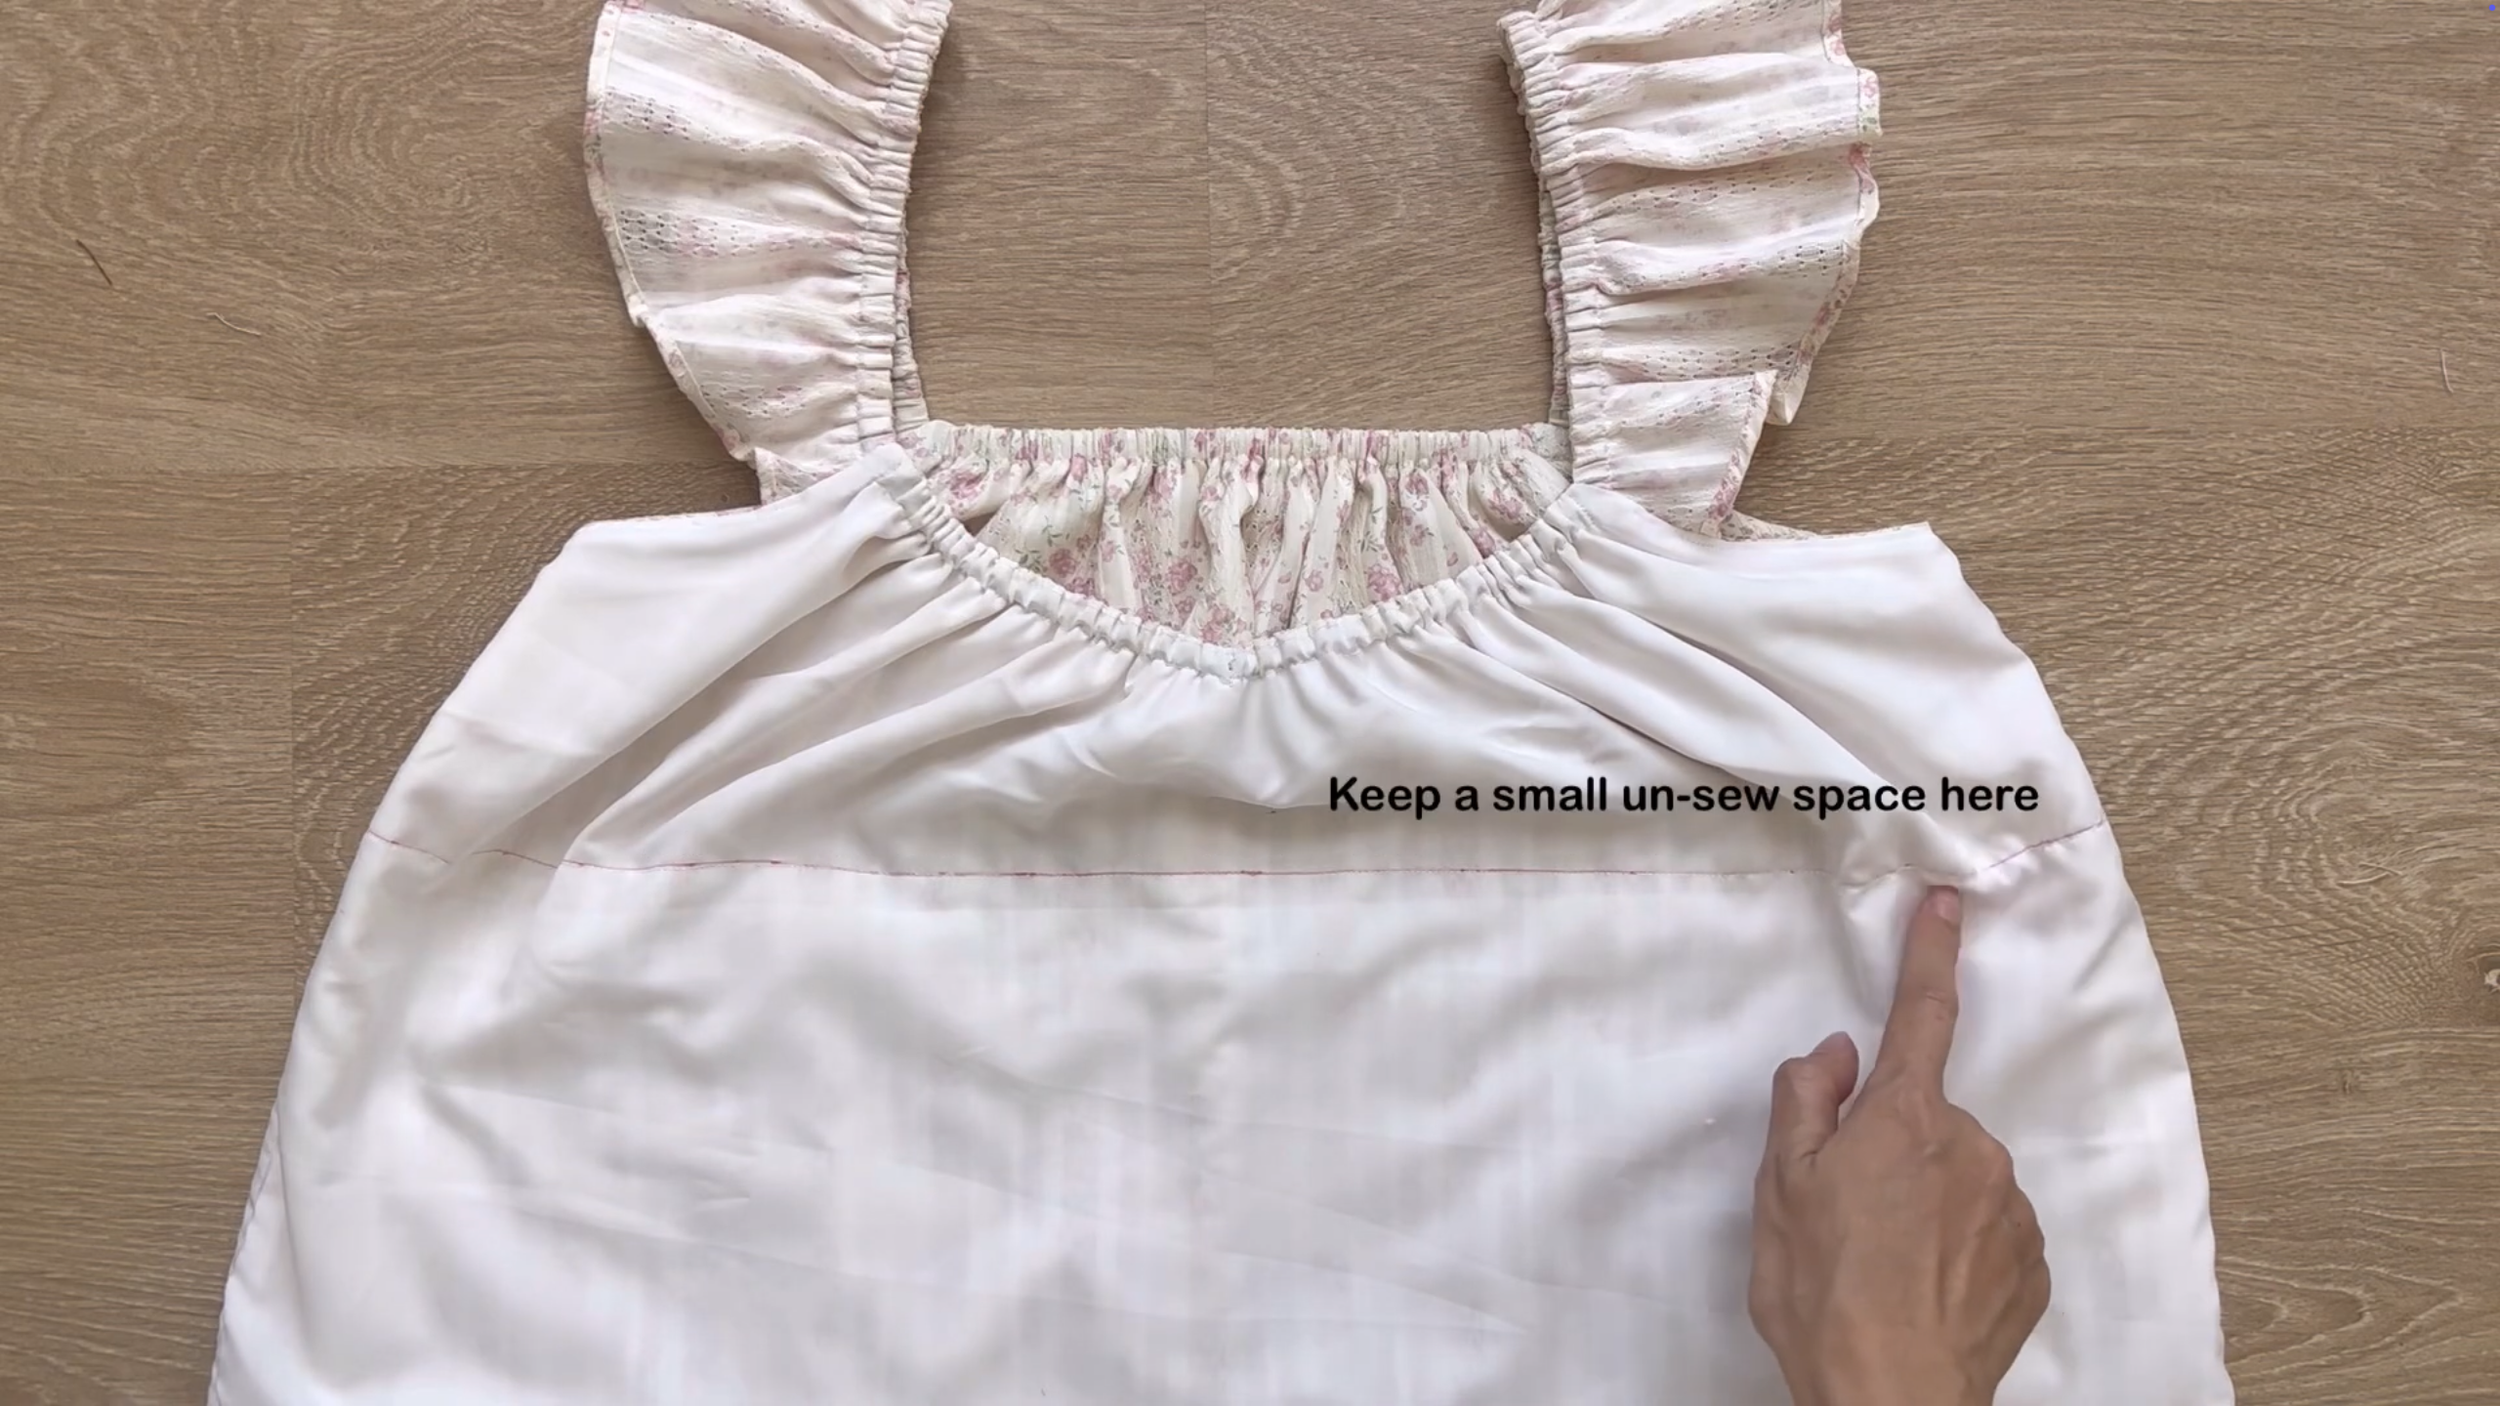
Remember to keep a small unsewn space for the elastic band to go through later.
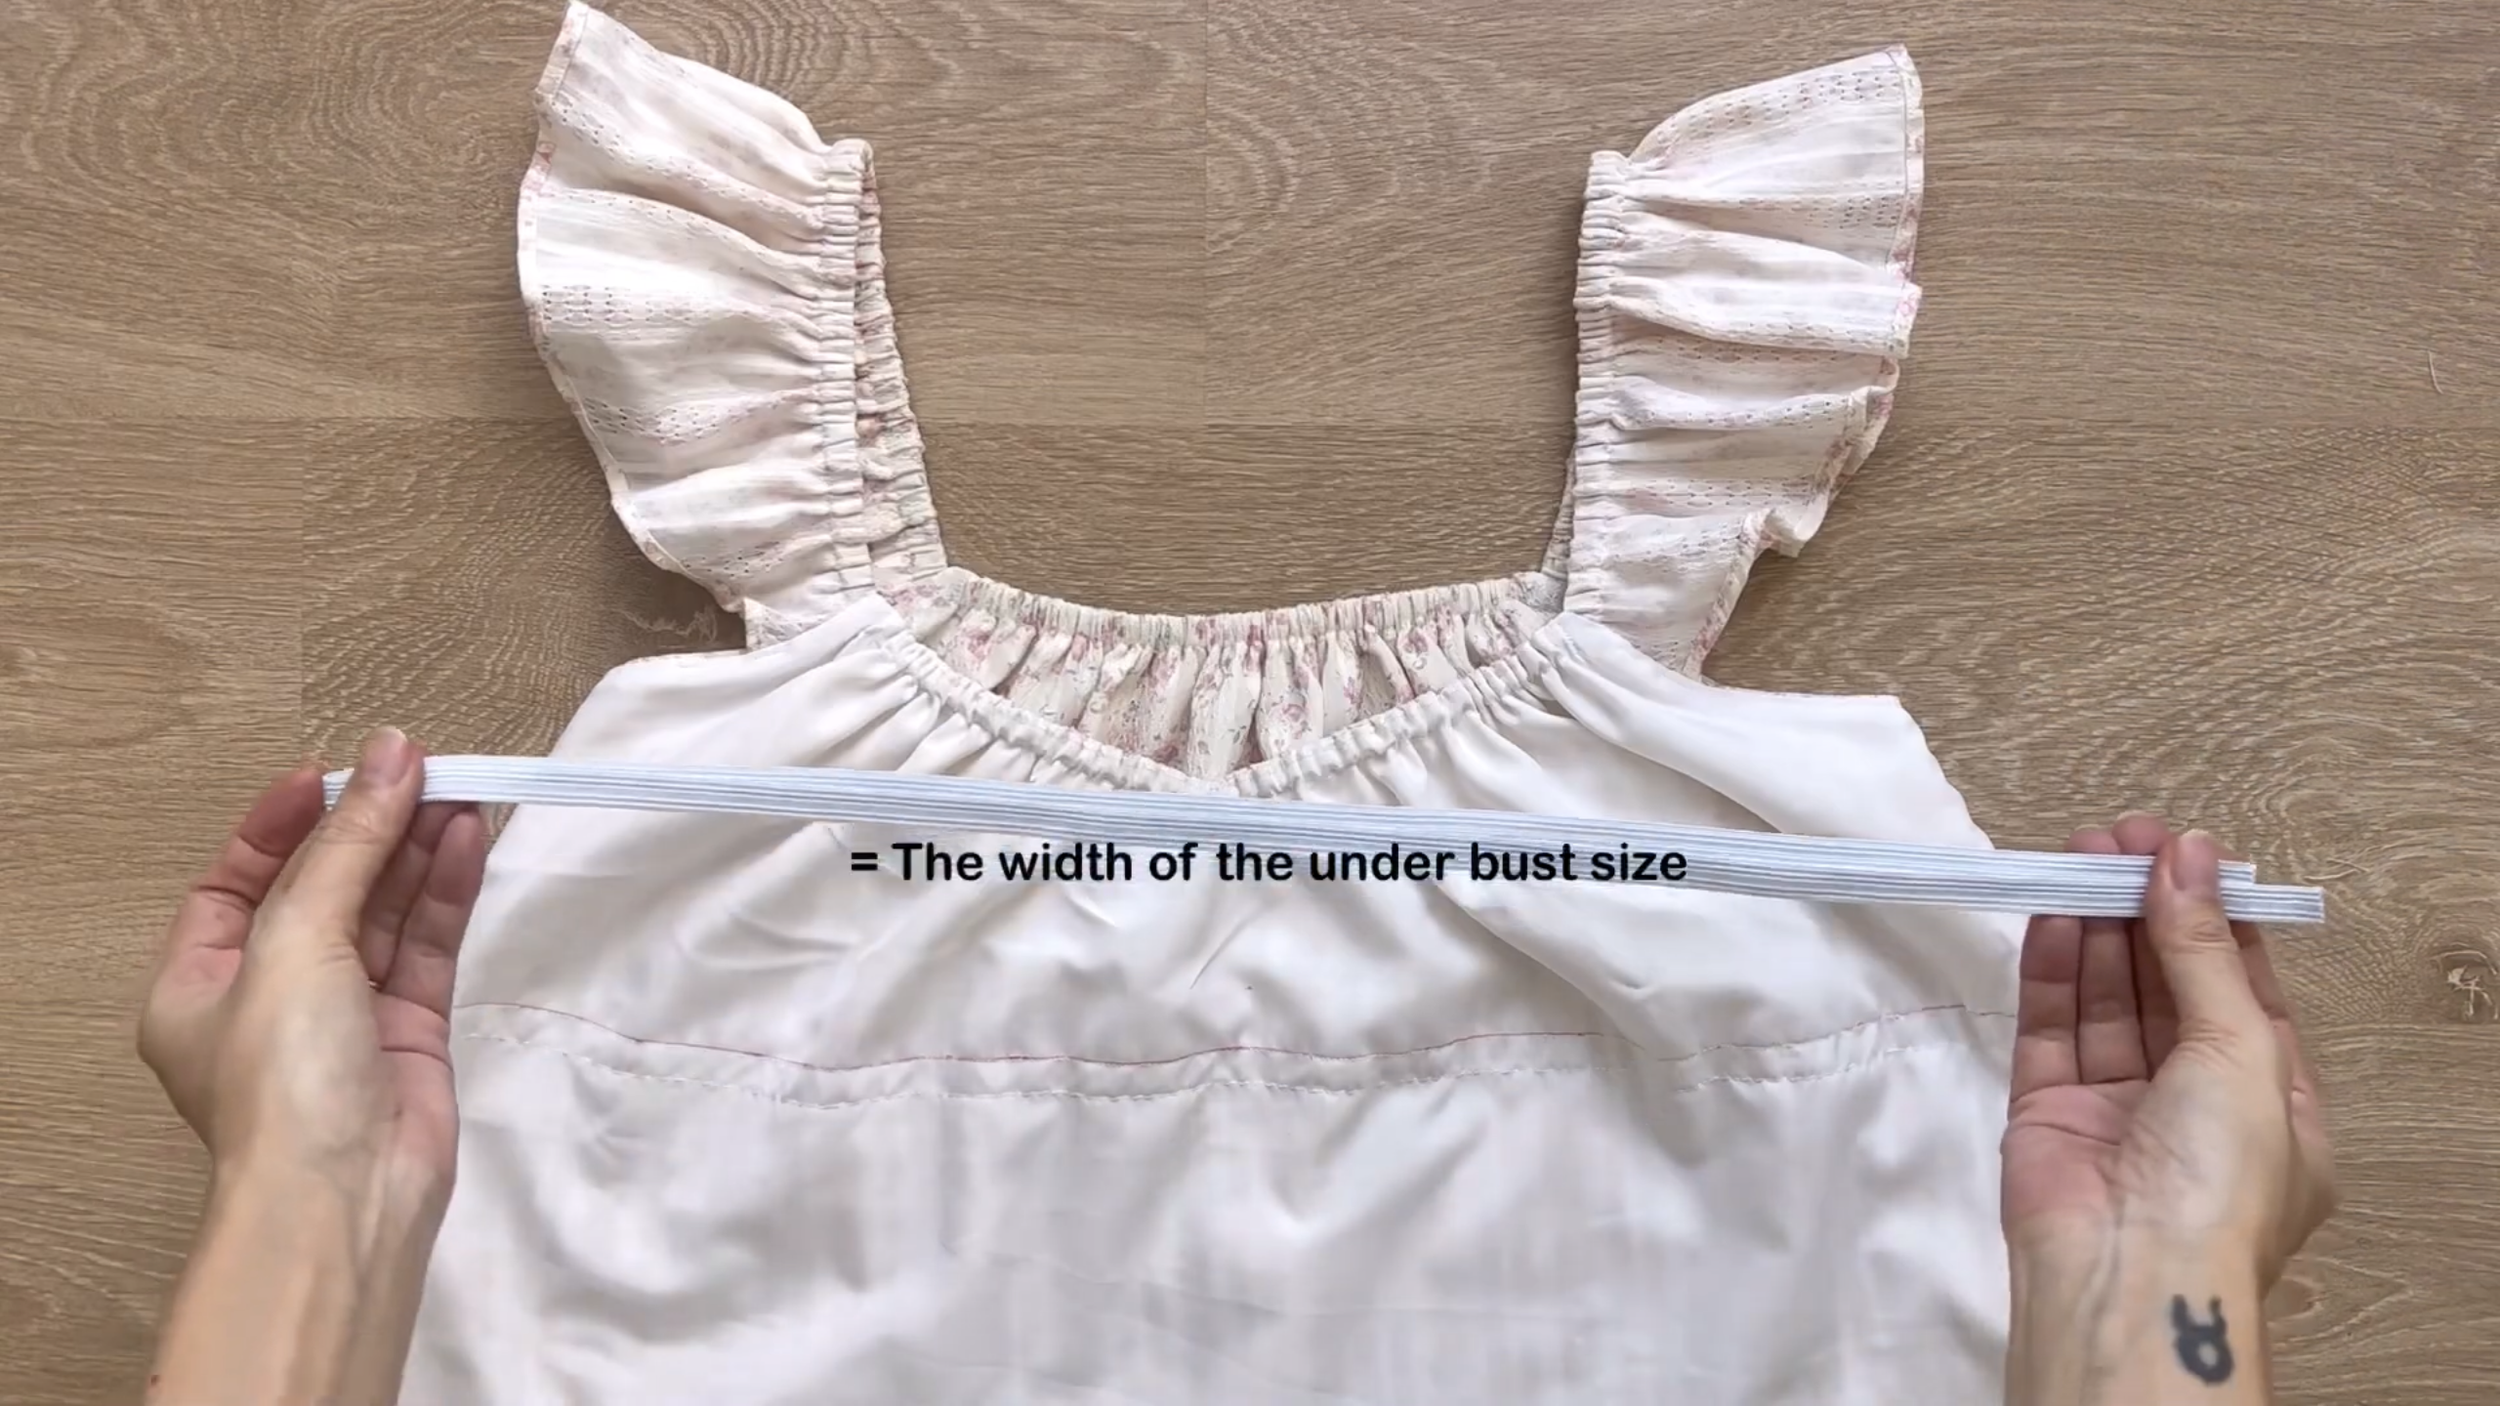
The length of the elastic band will be the width of your underbust line.

Sew two ends of the elastic band together and close the unsewn space that was kept before.
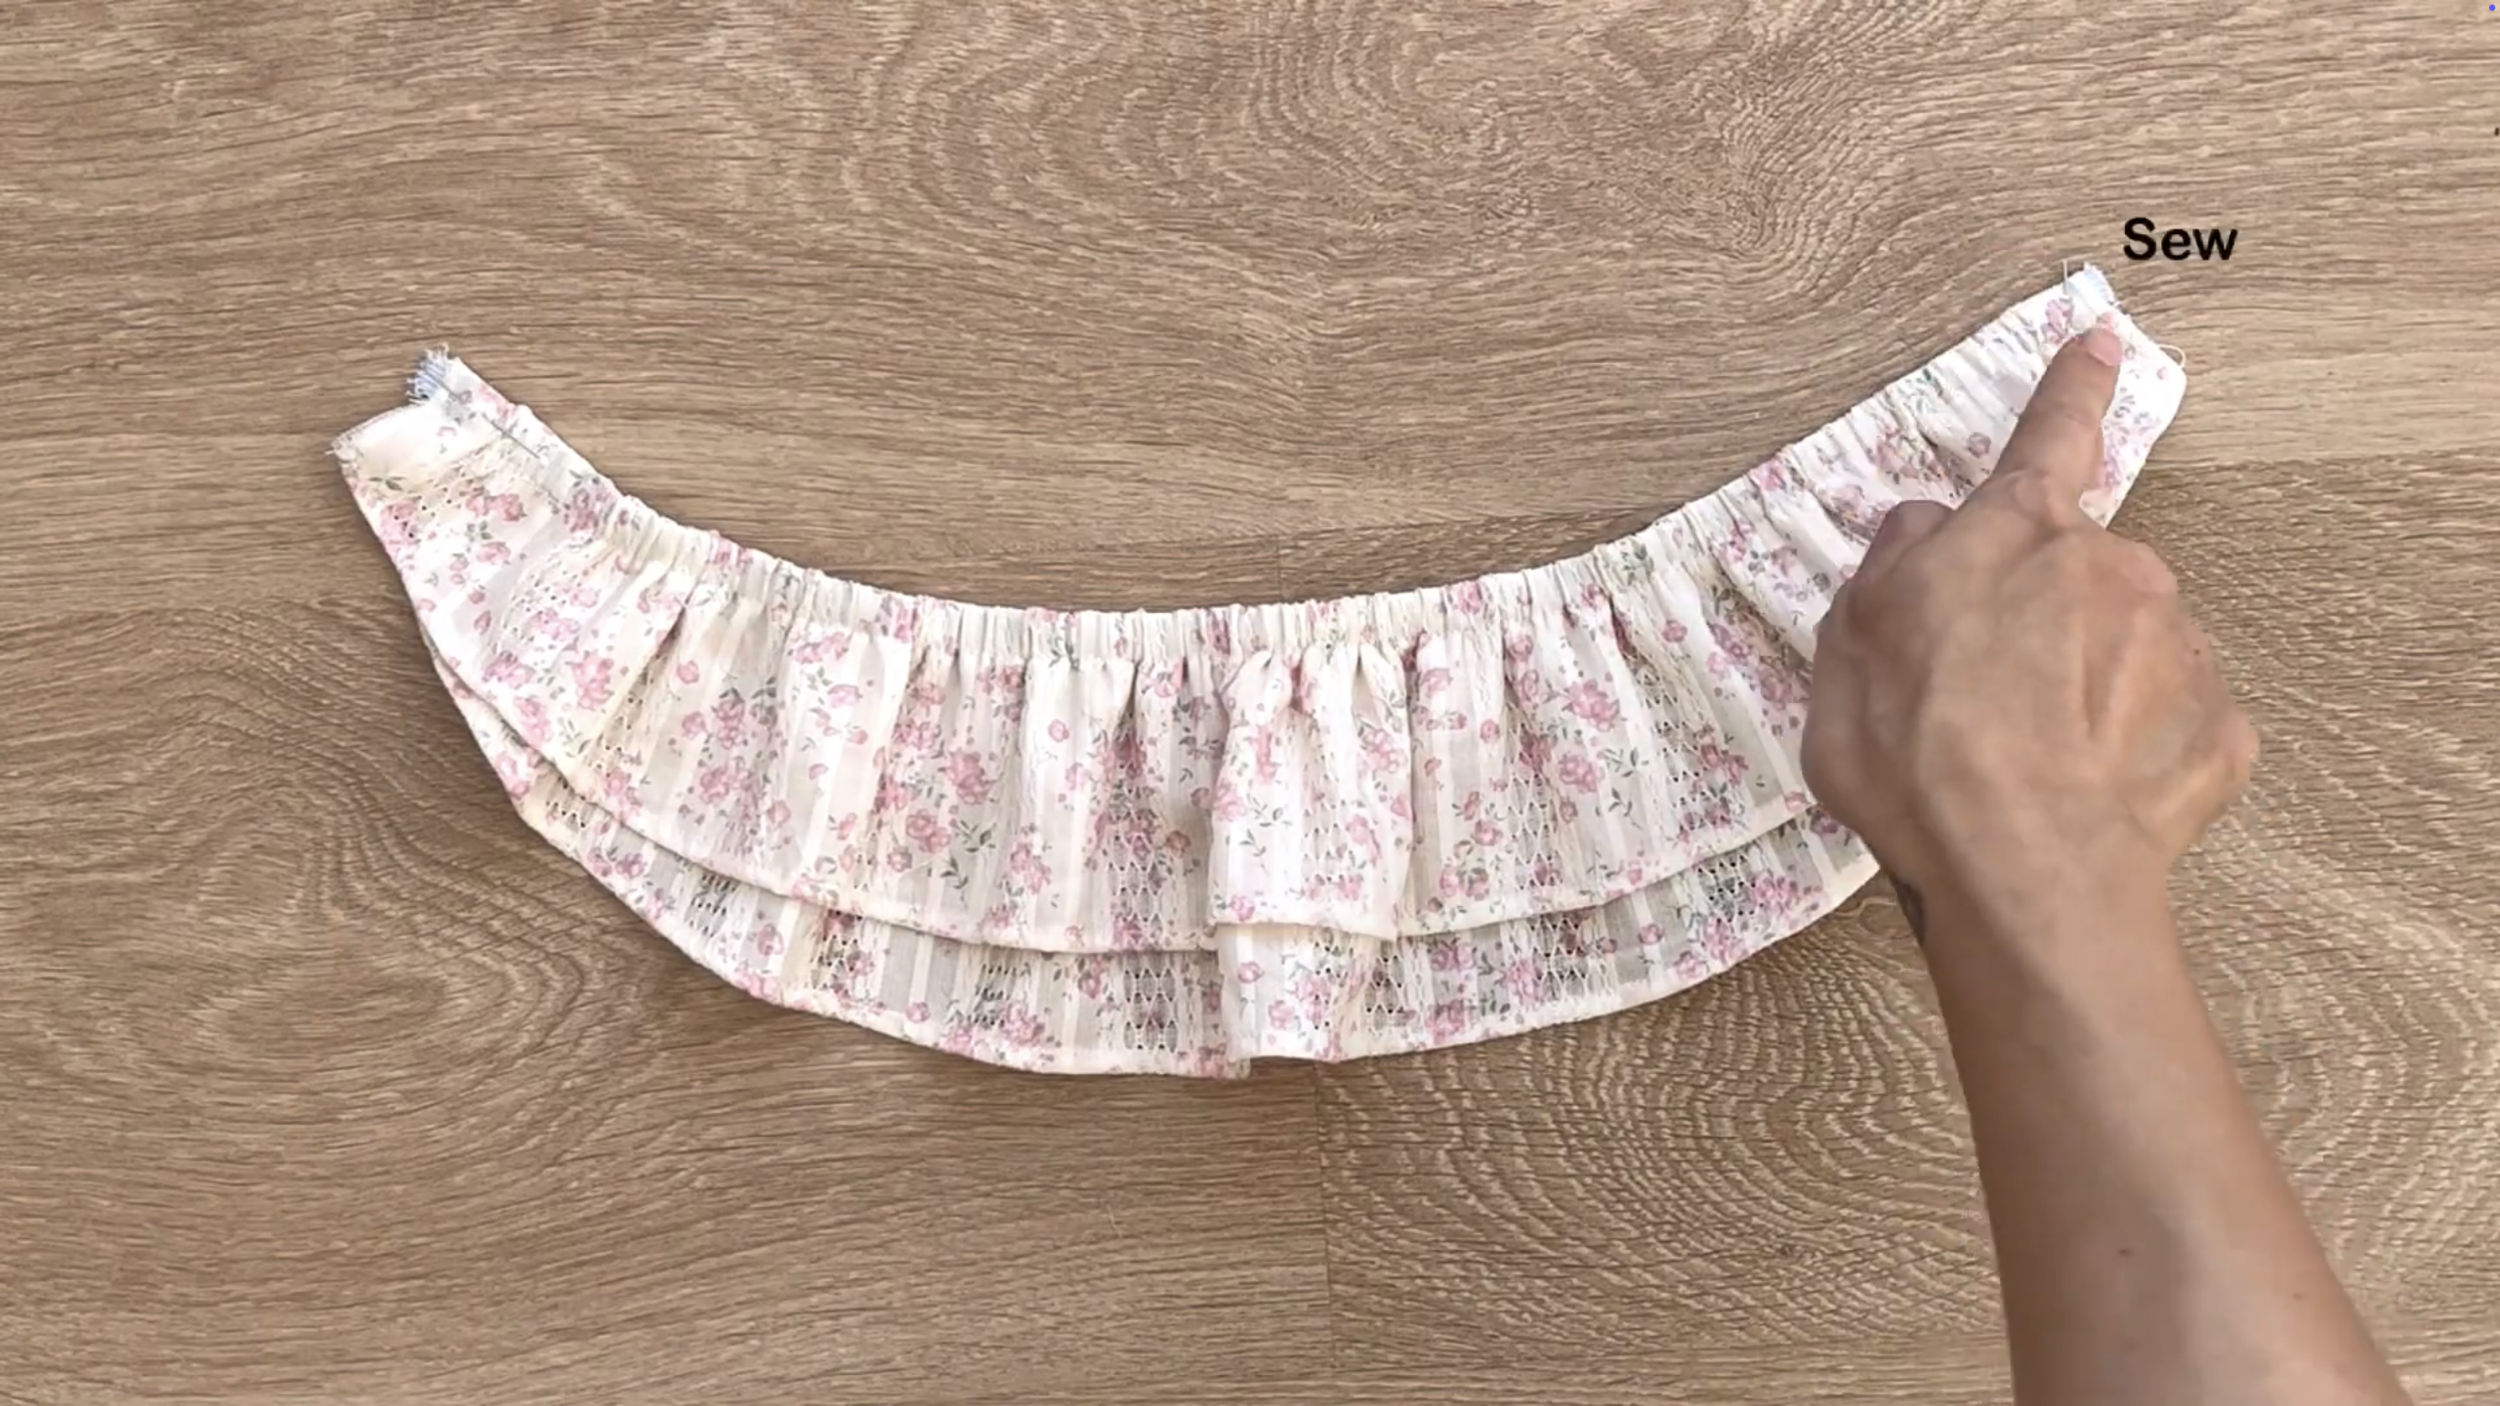
THE SKIRT PART
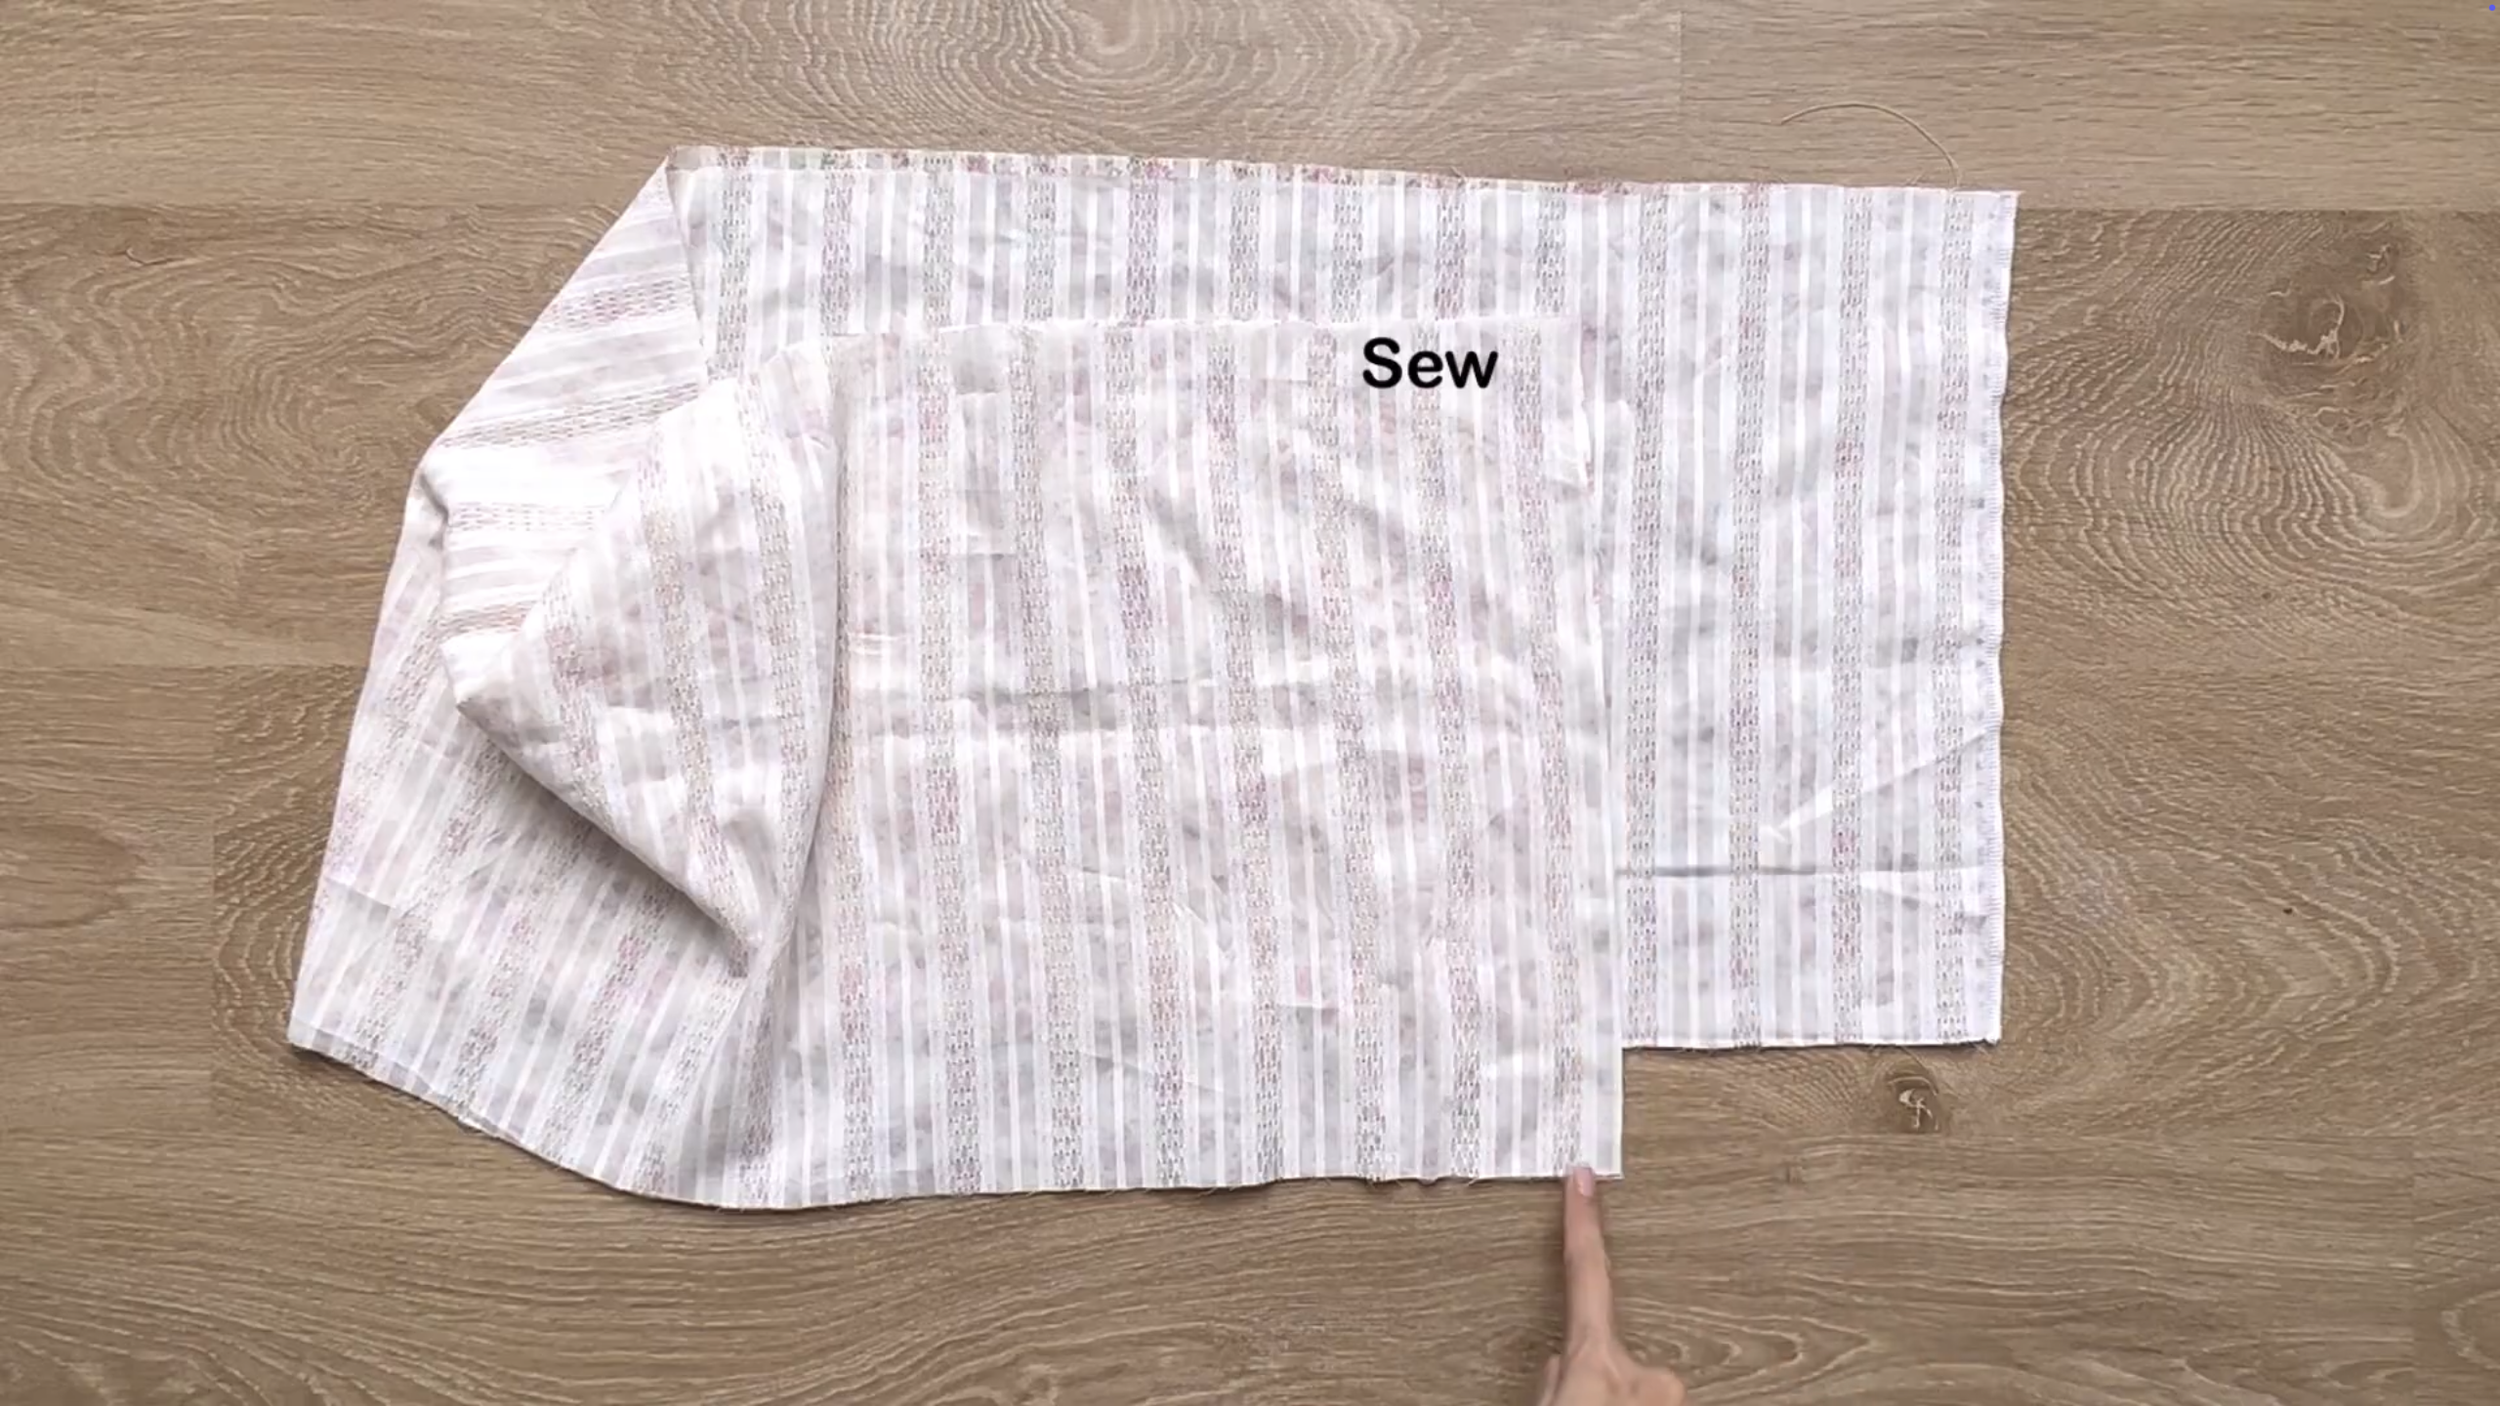
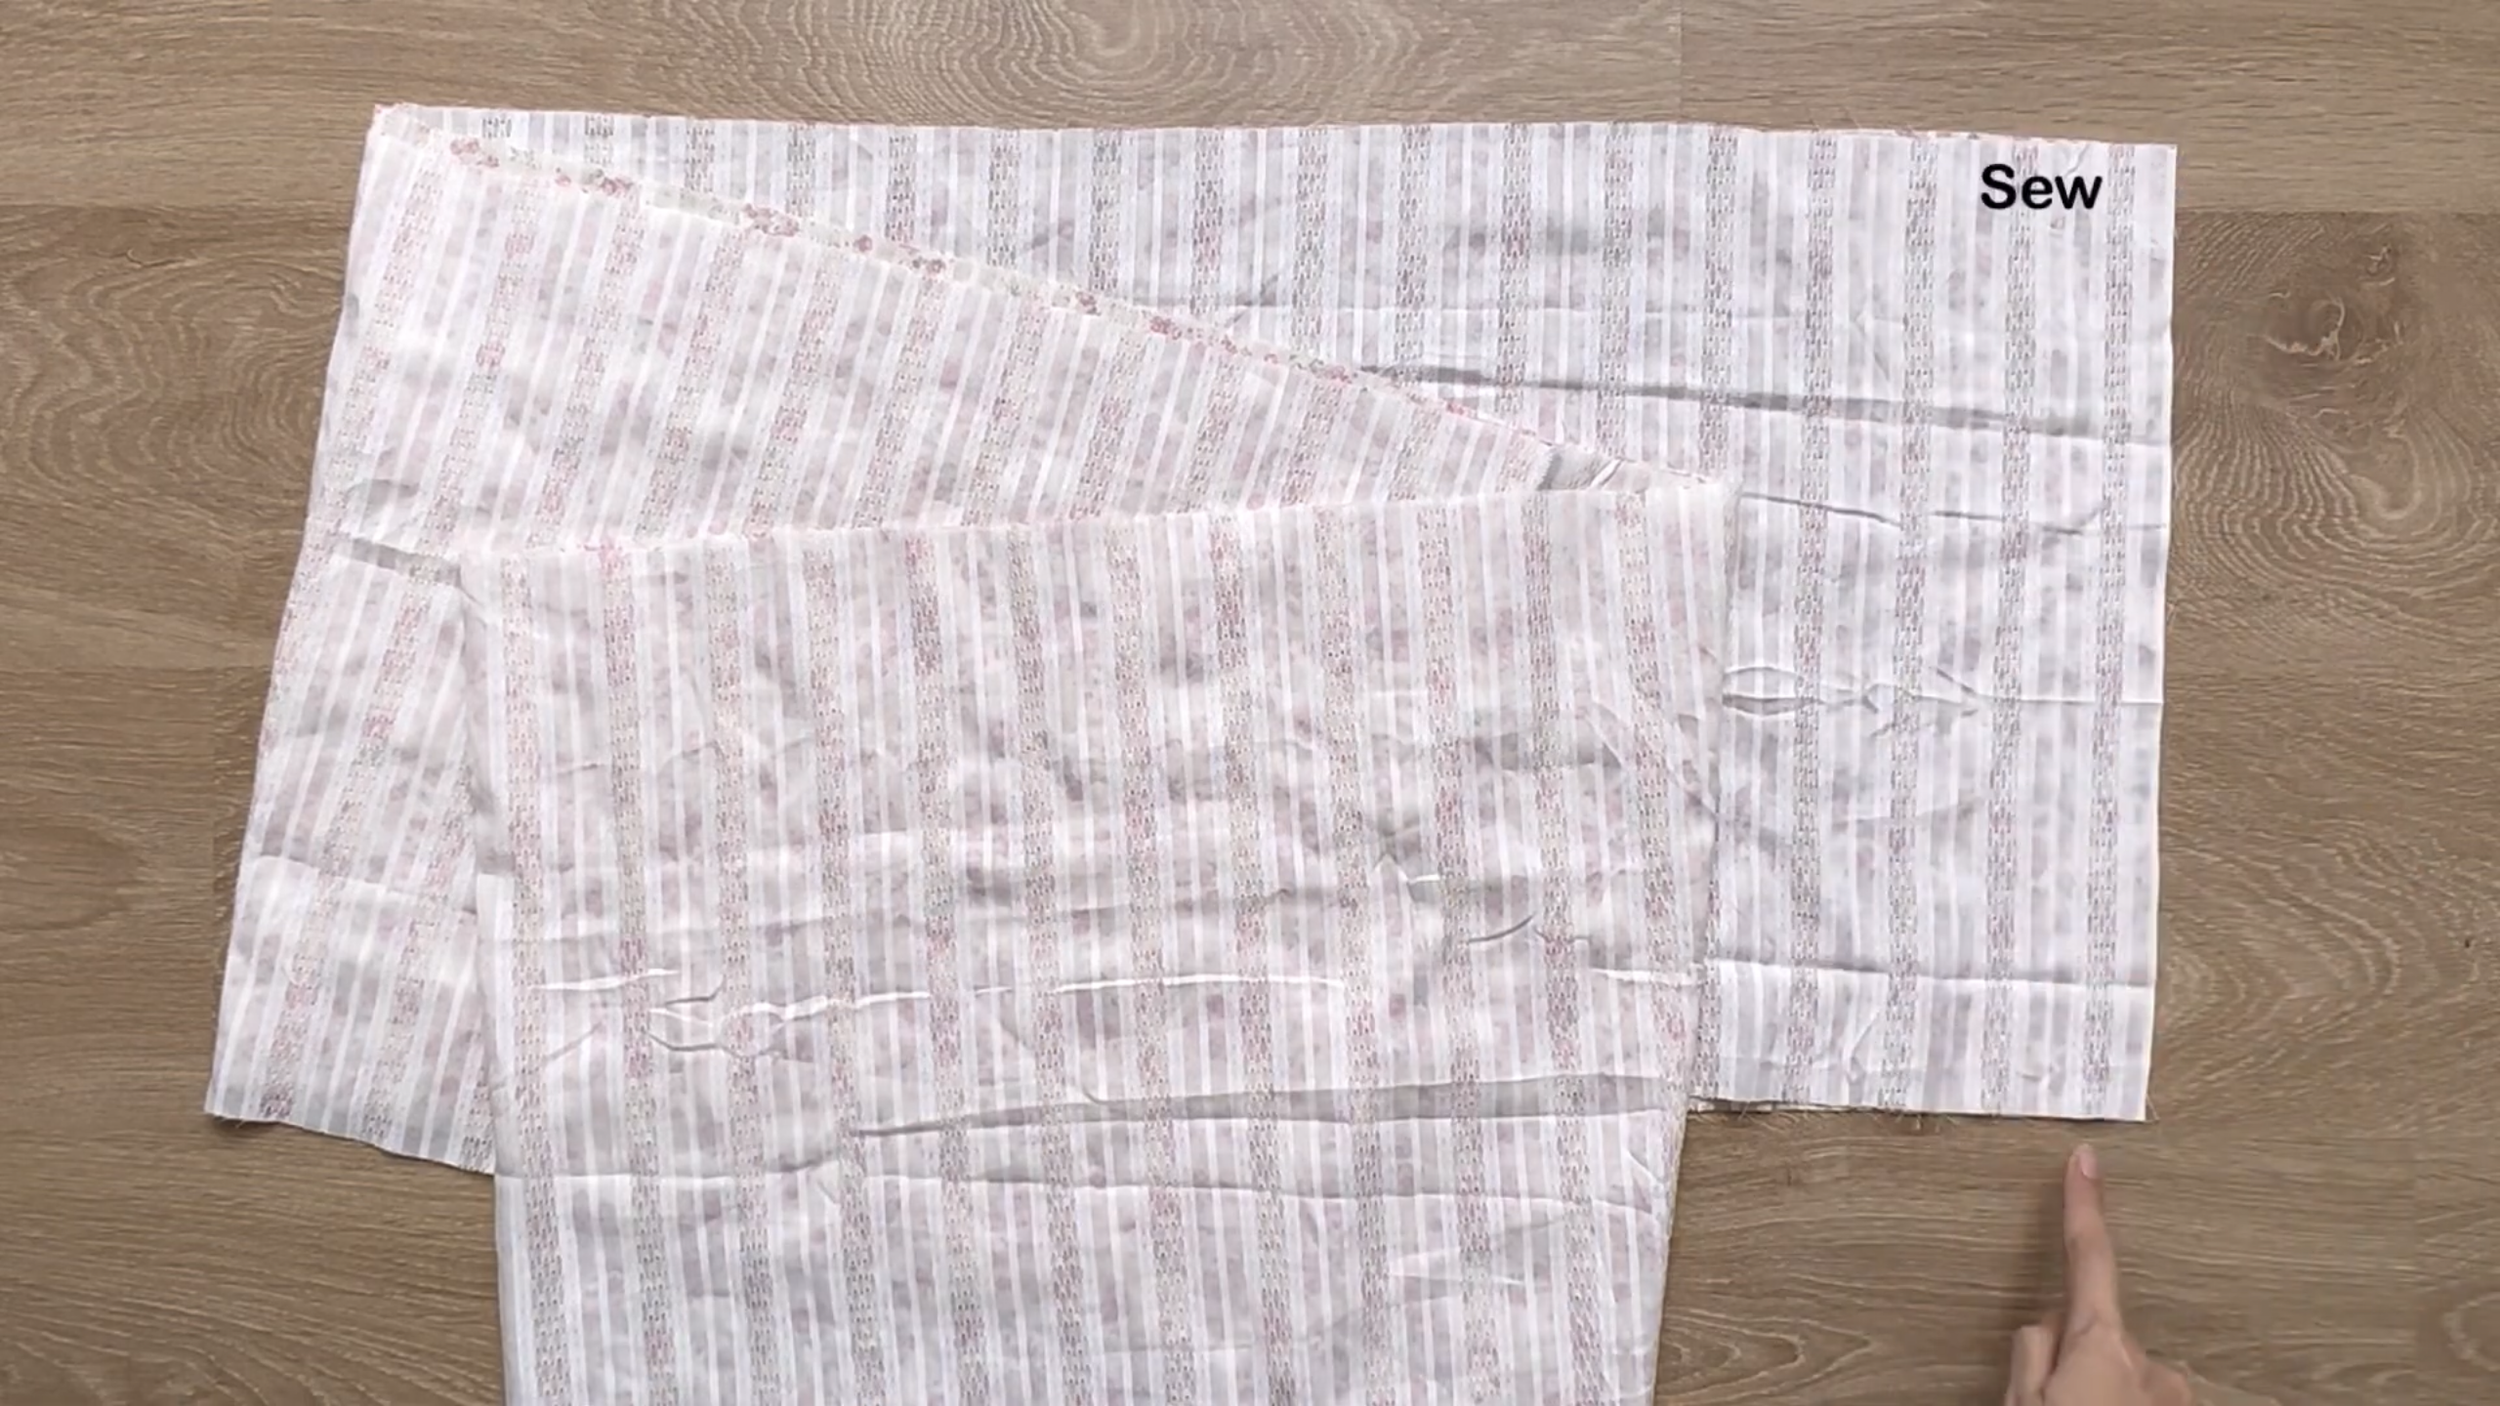
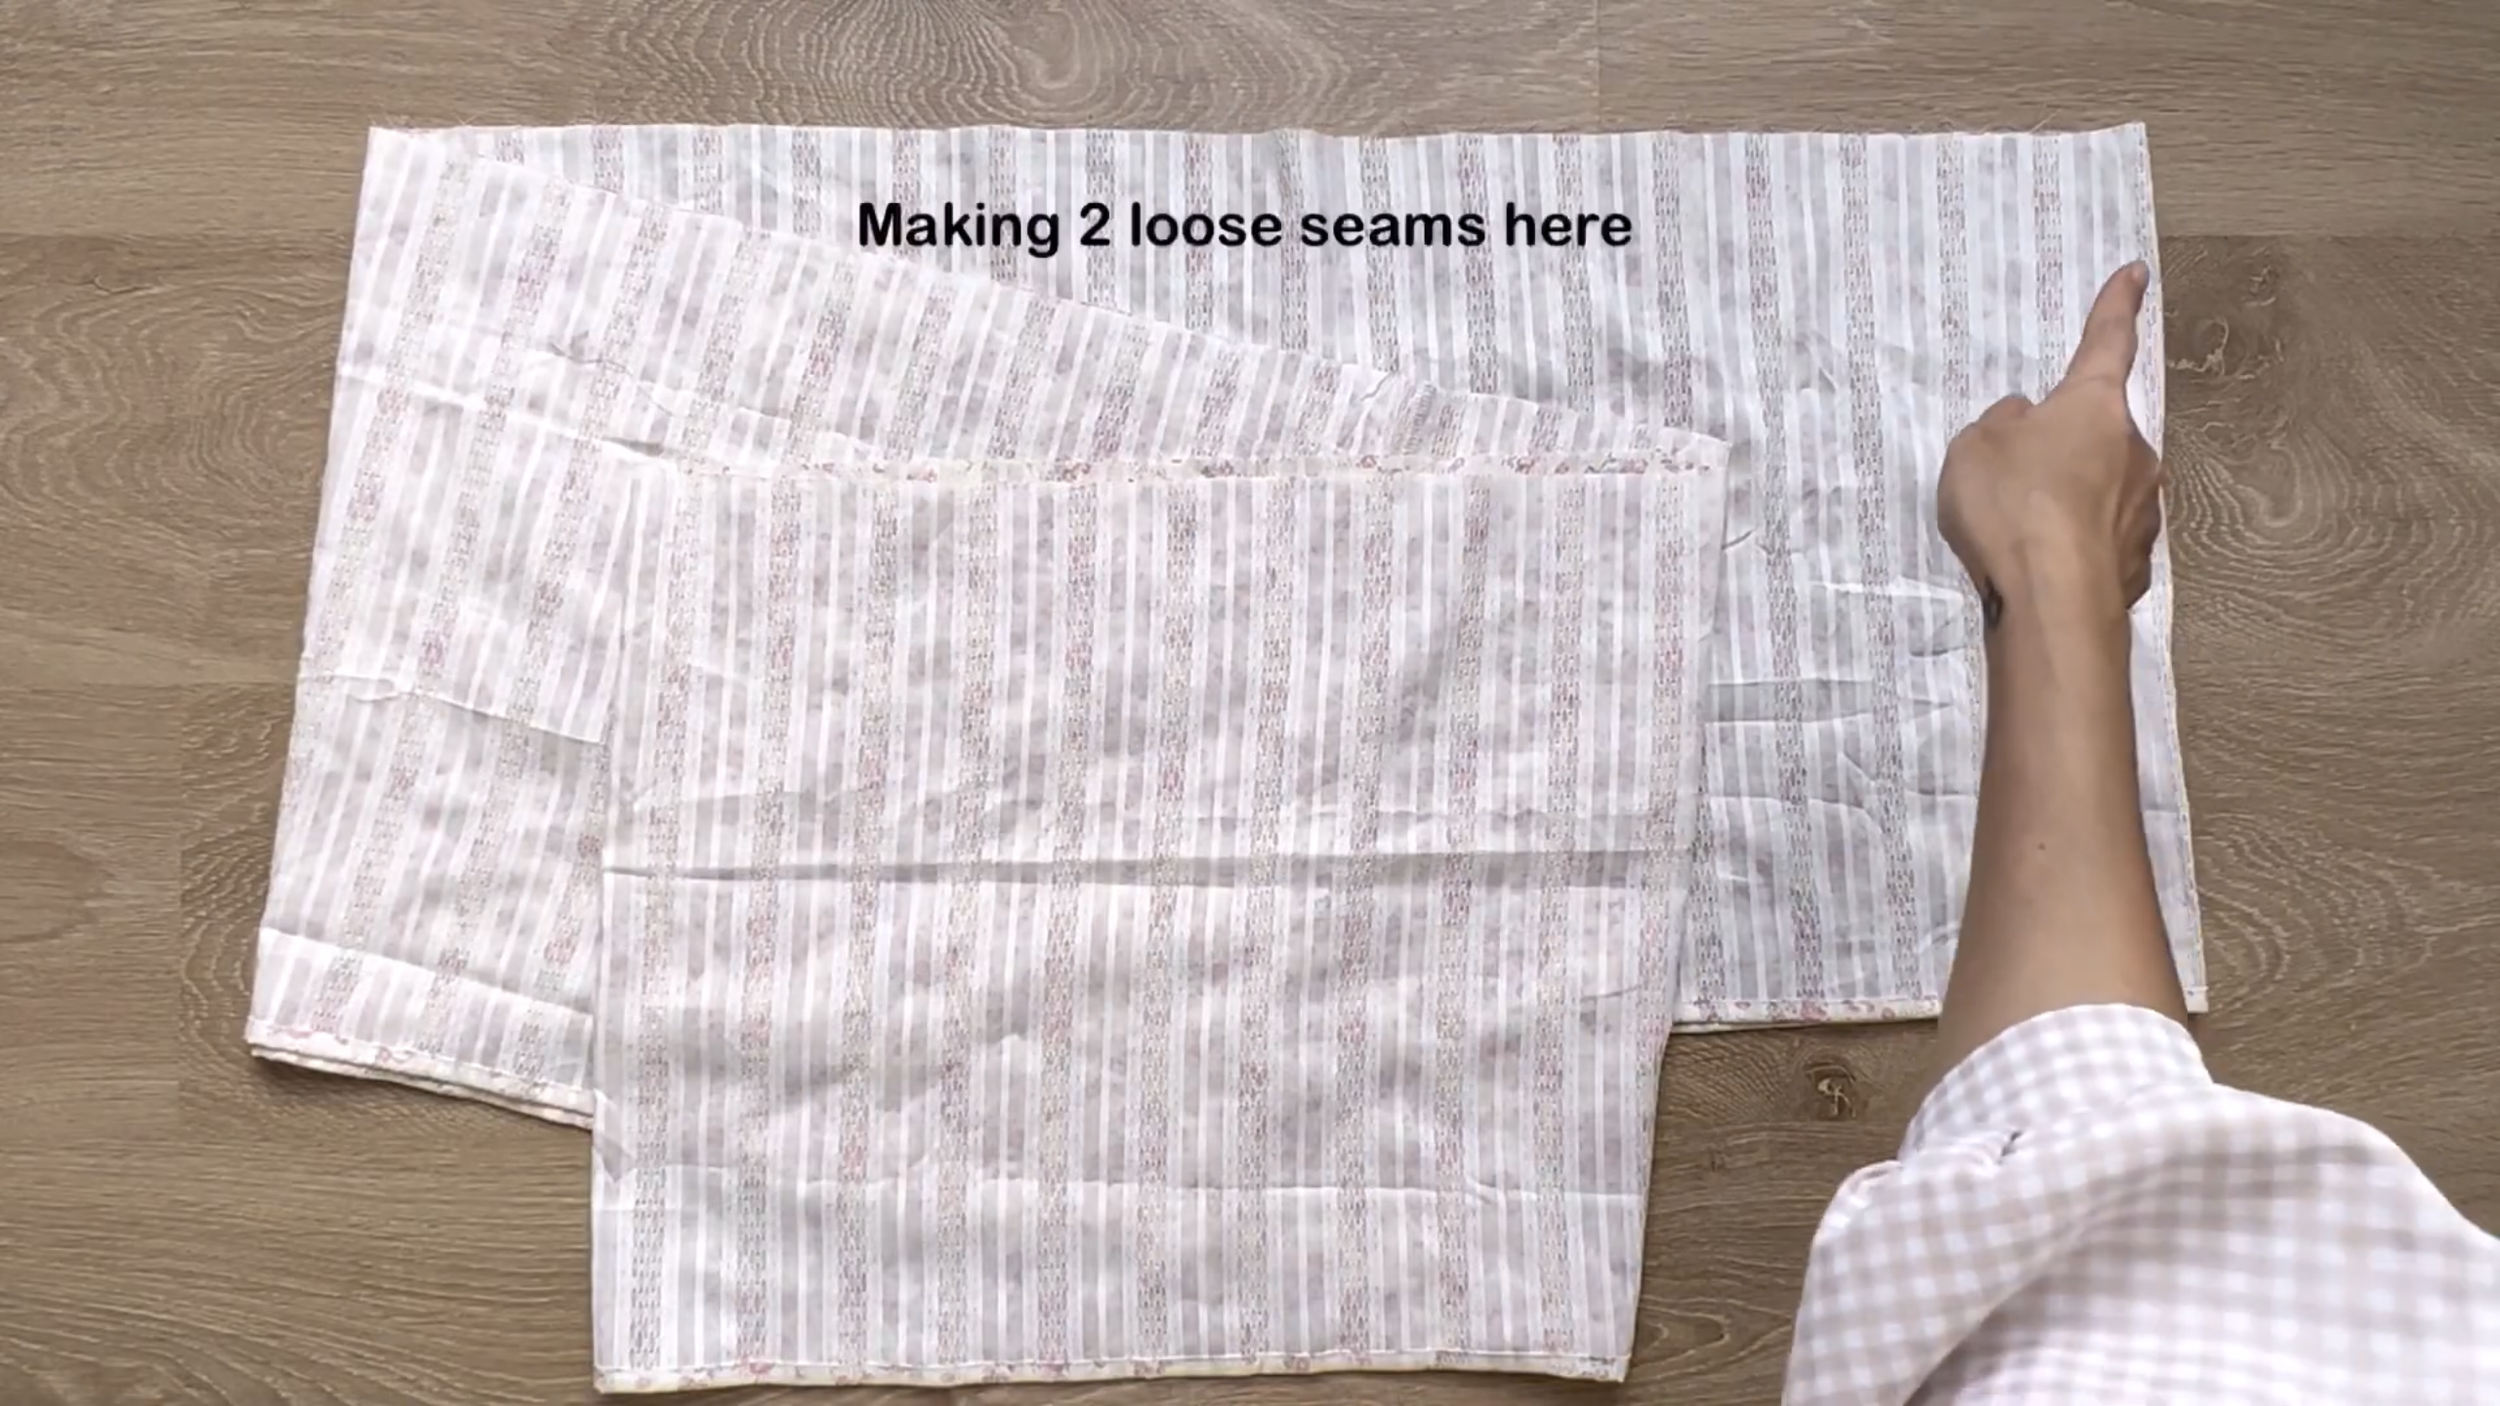
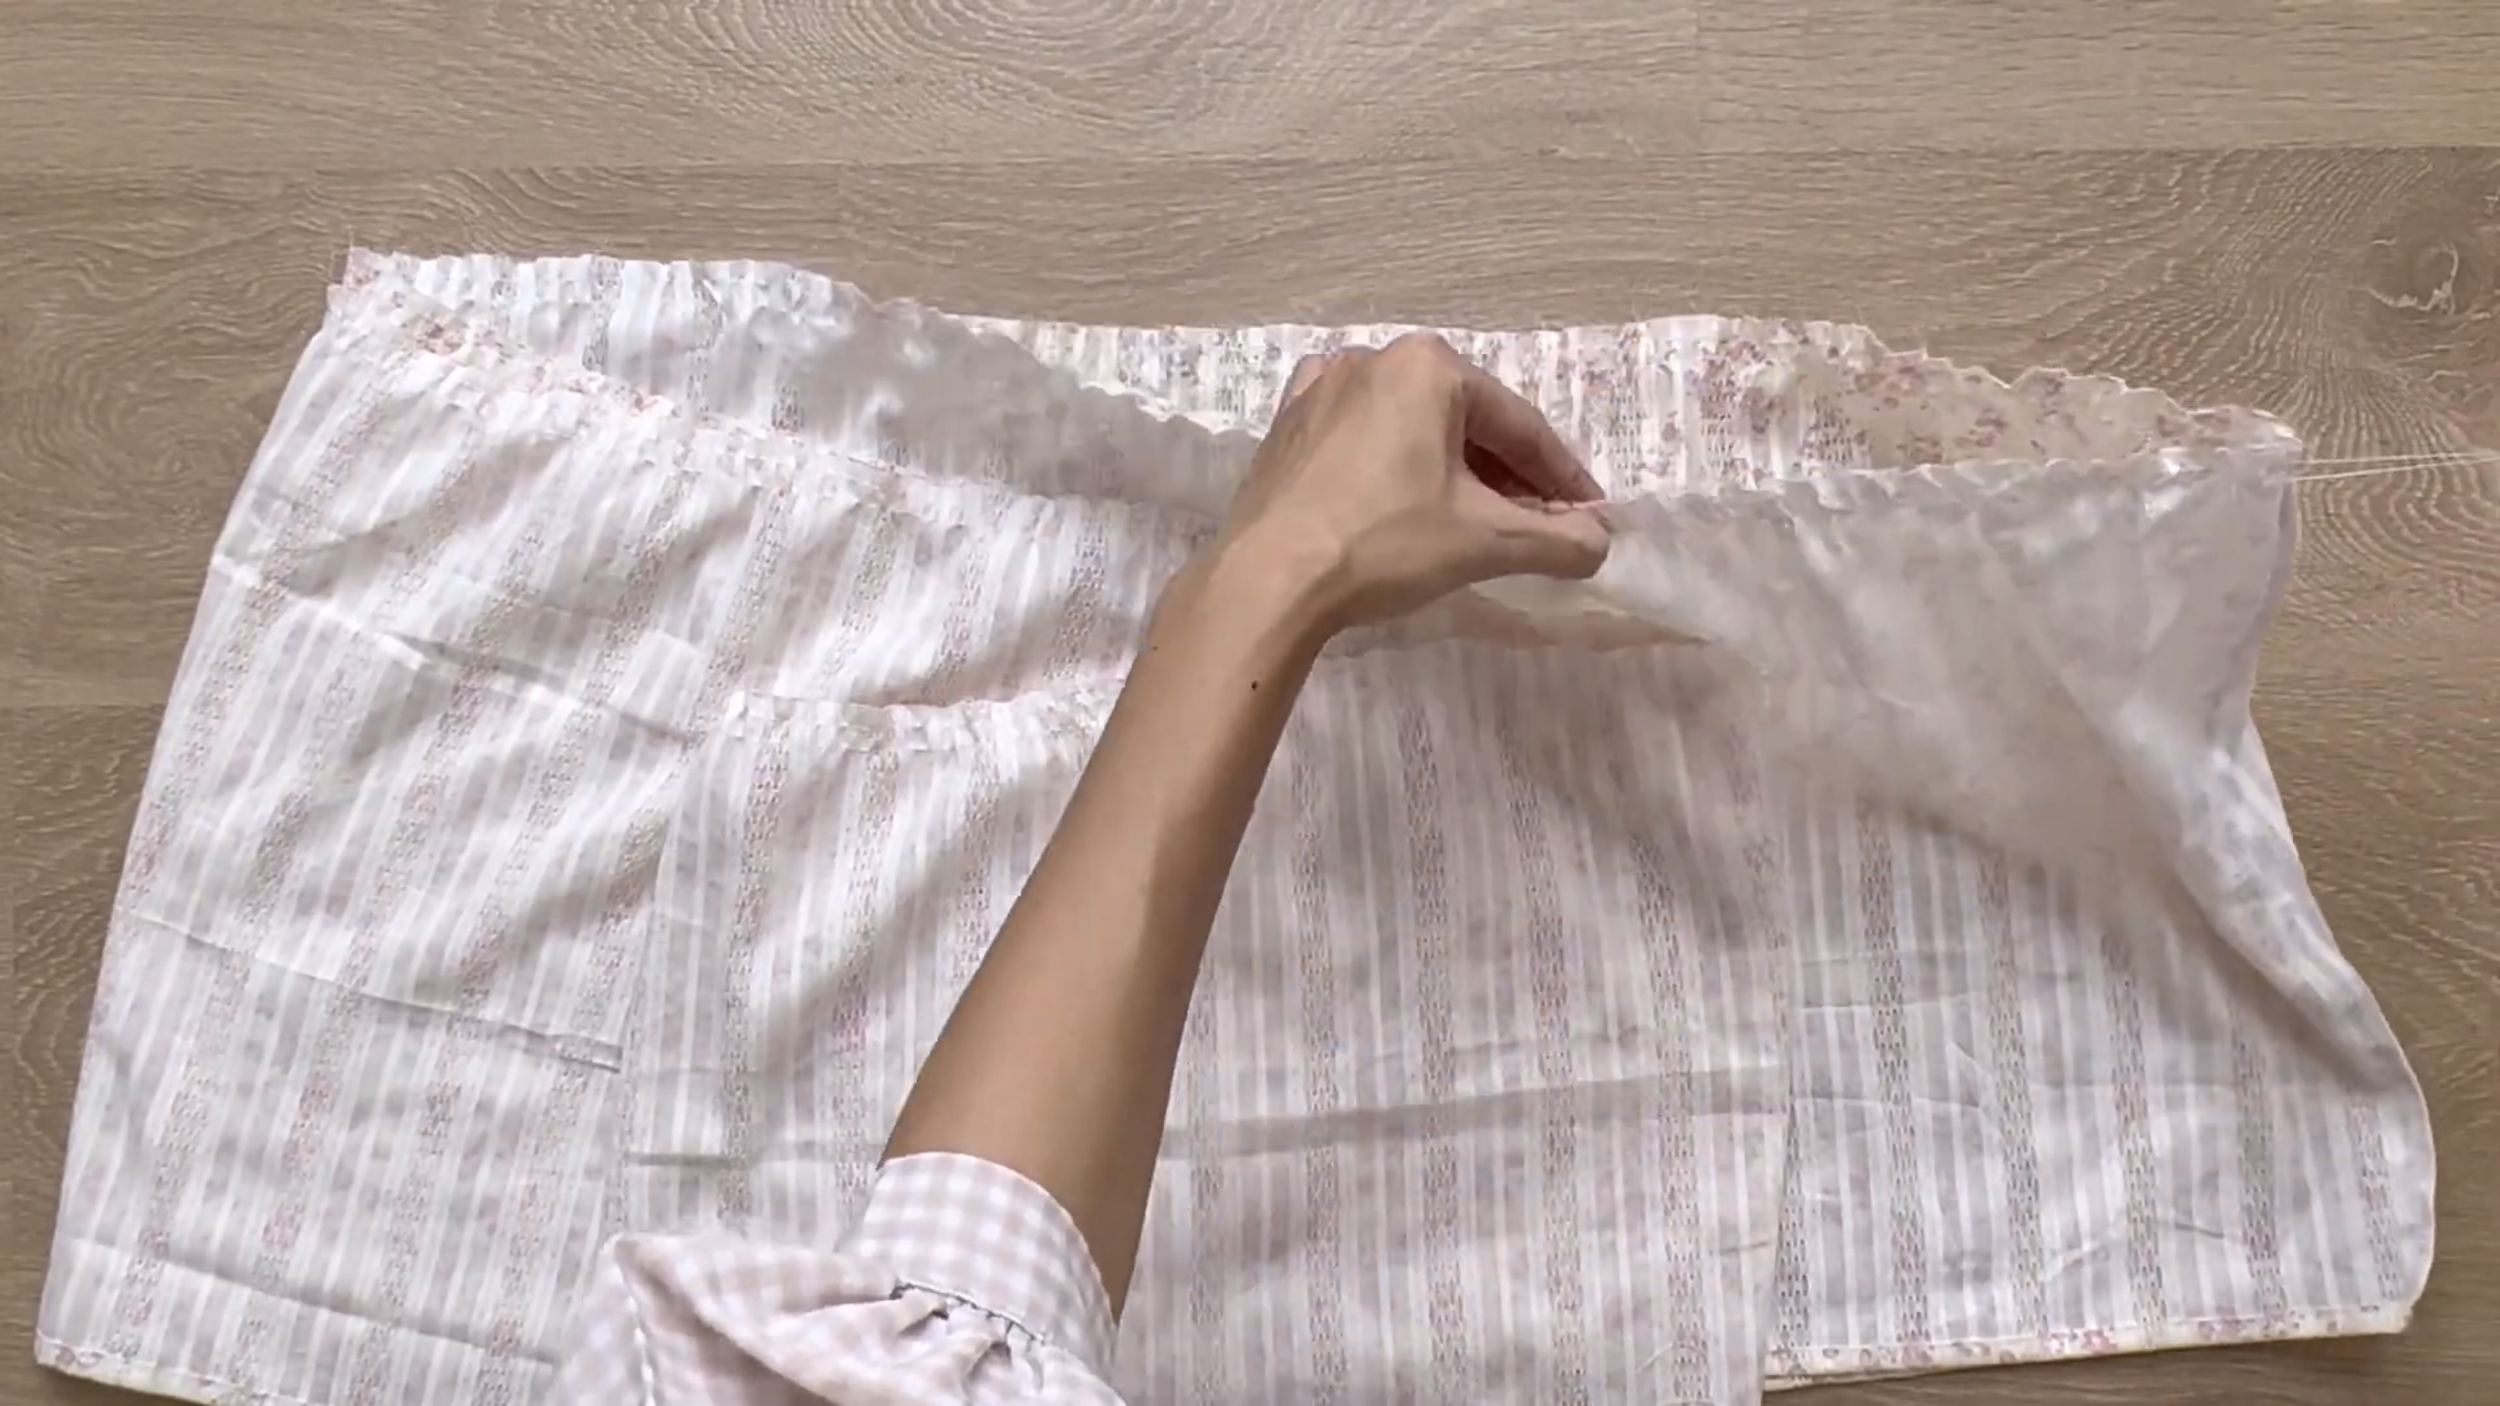
At the first tier, connect two length lines of the rectangle together to create a circle fabric first.
After that, make two loose seams at the top of the first tier to create the gathering fabric there later.
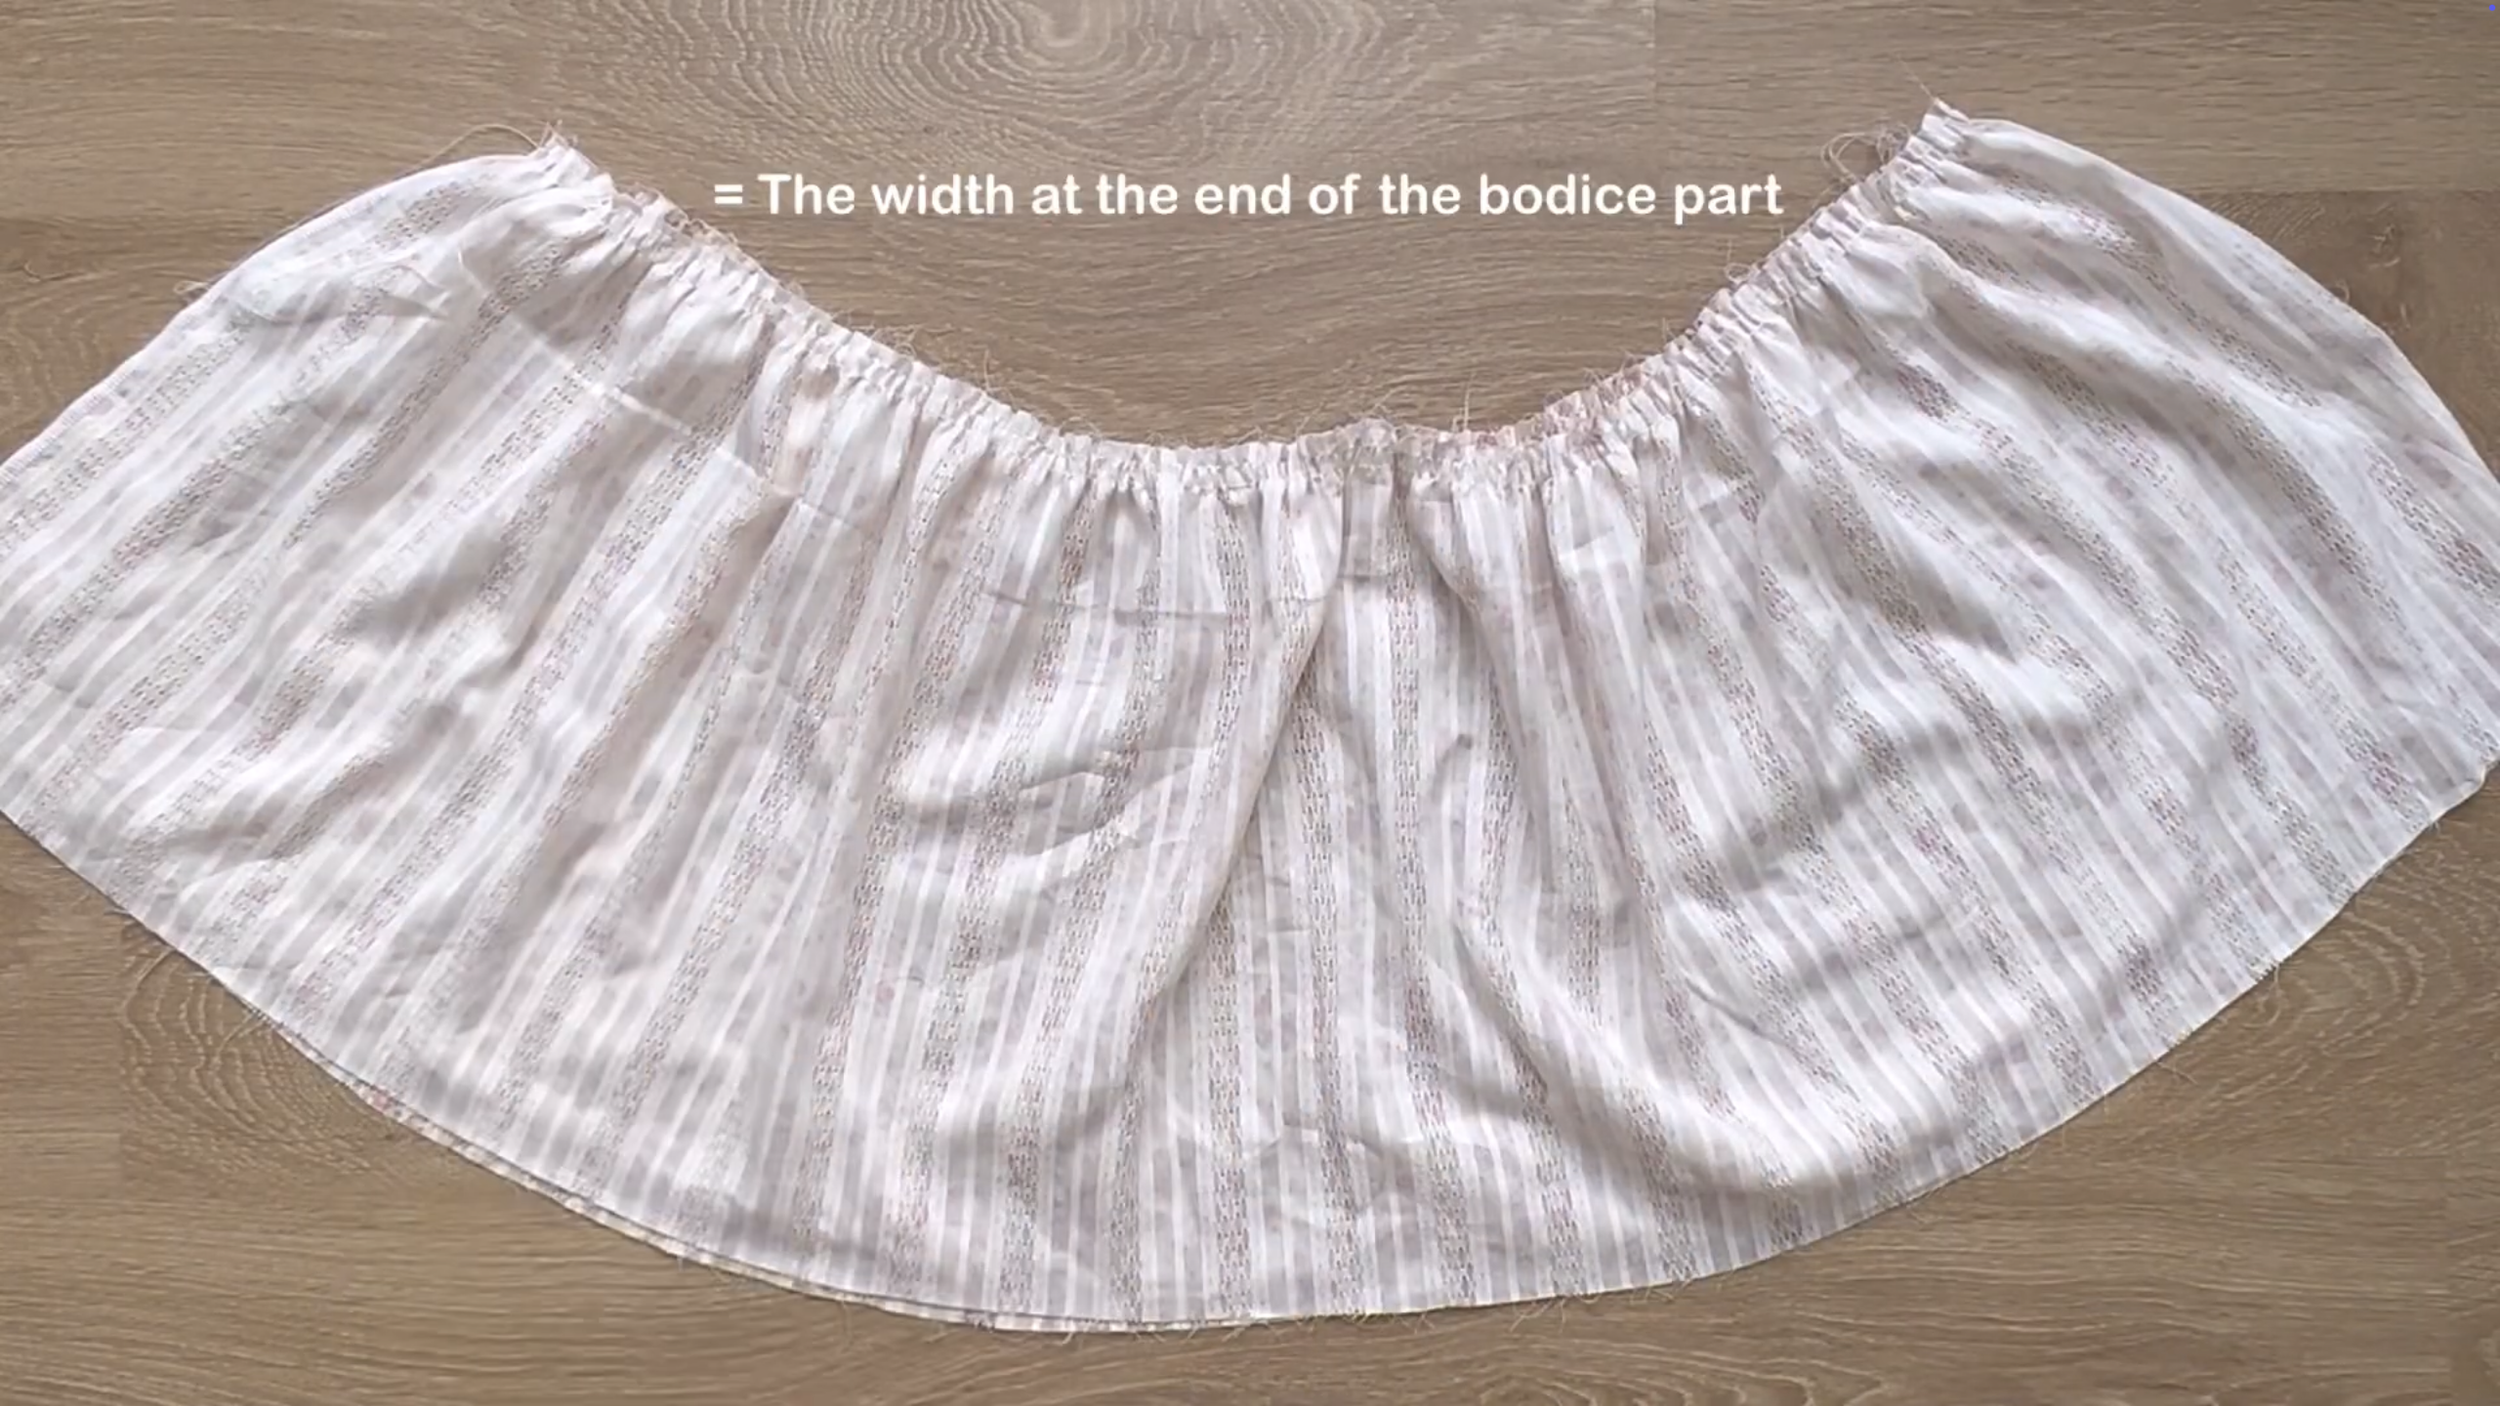
The final width of the gathering fabric will be the same as the bodice part, so they can be connected together later.
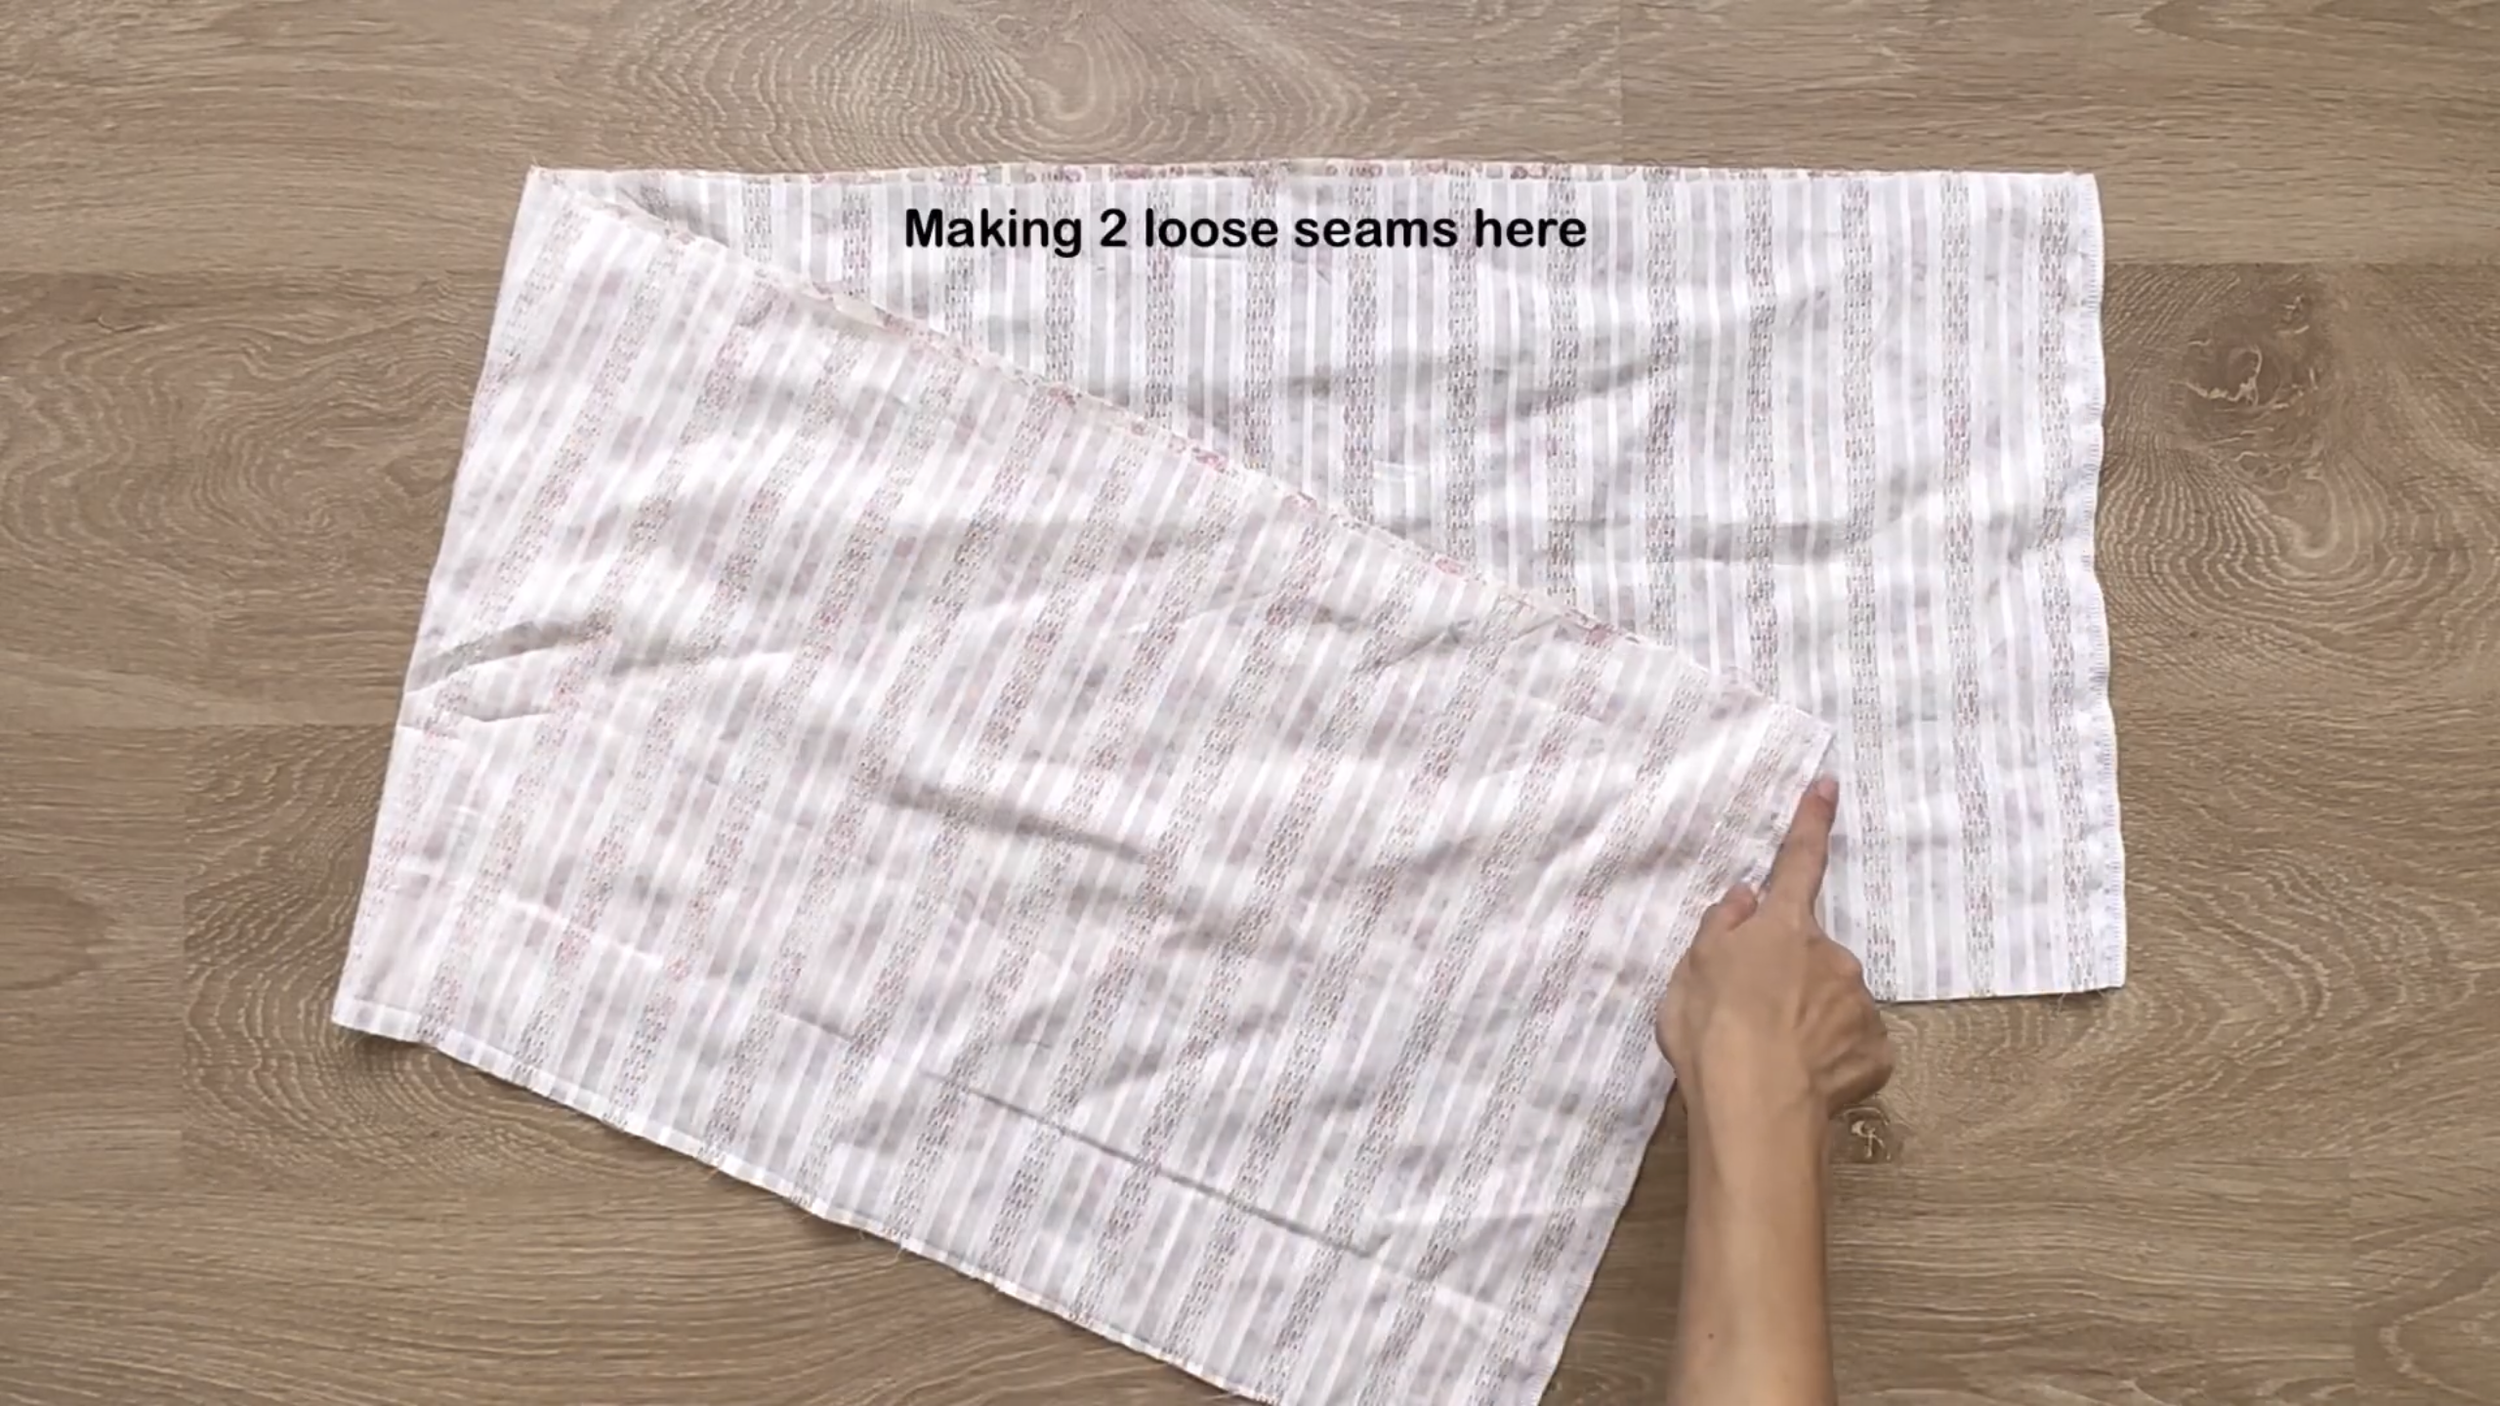
At the second tier, connect two length lines of the rectangle together to create a circle fabric first.
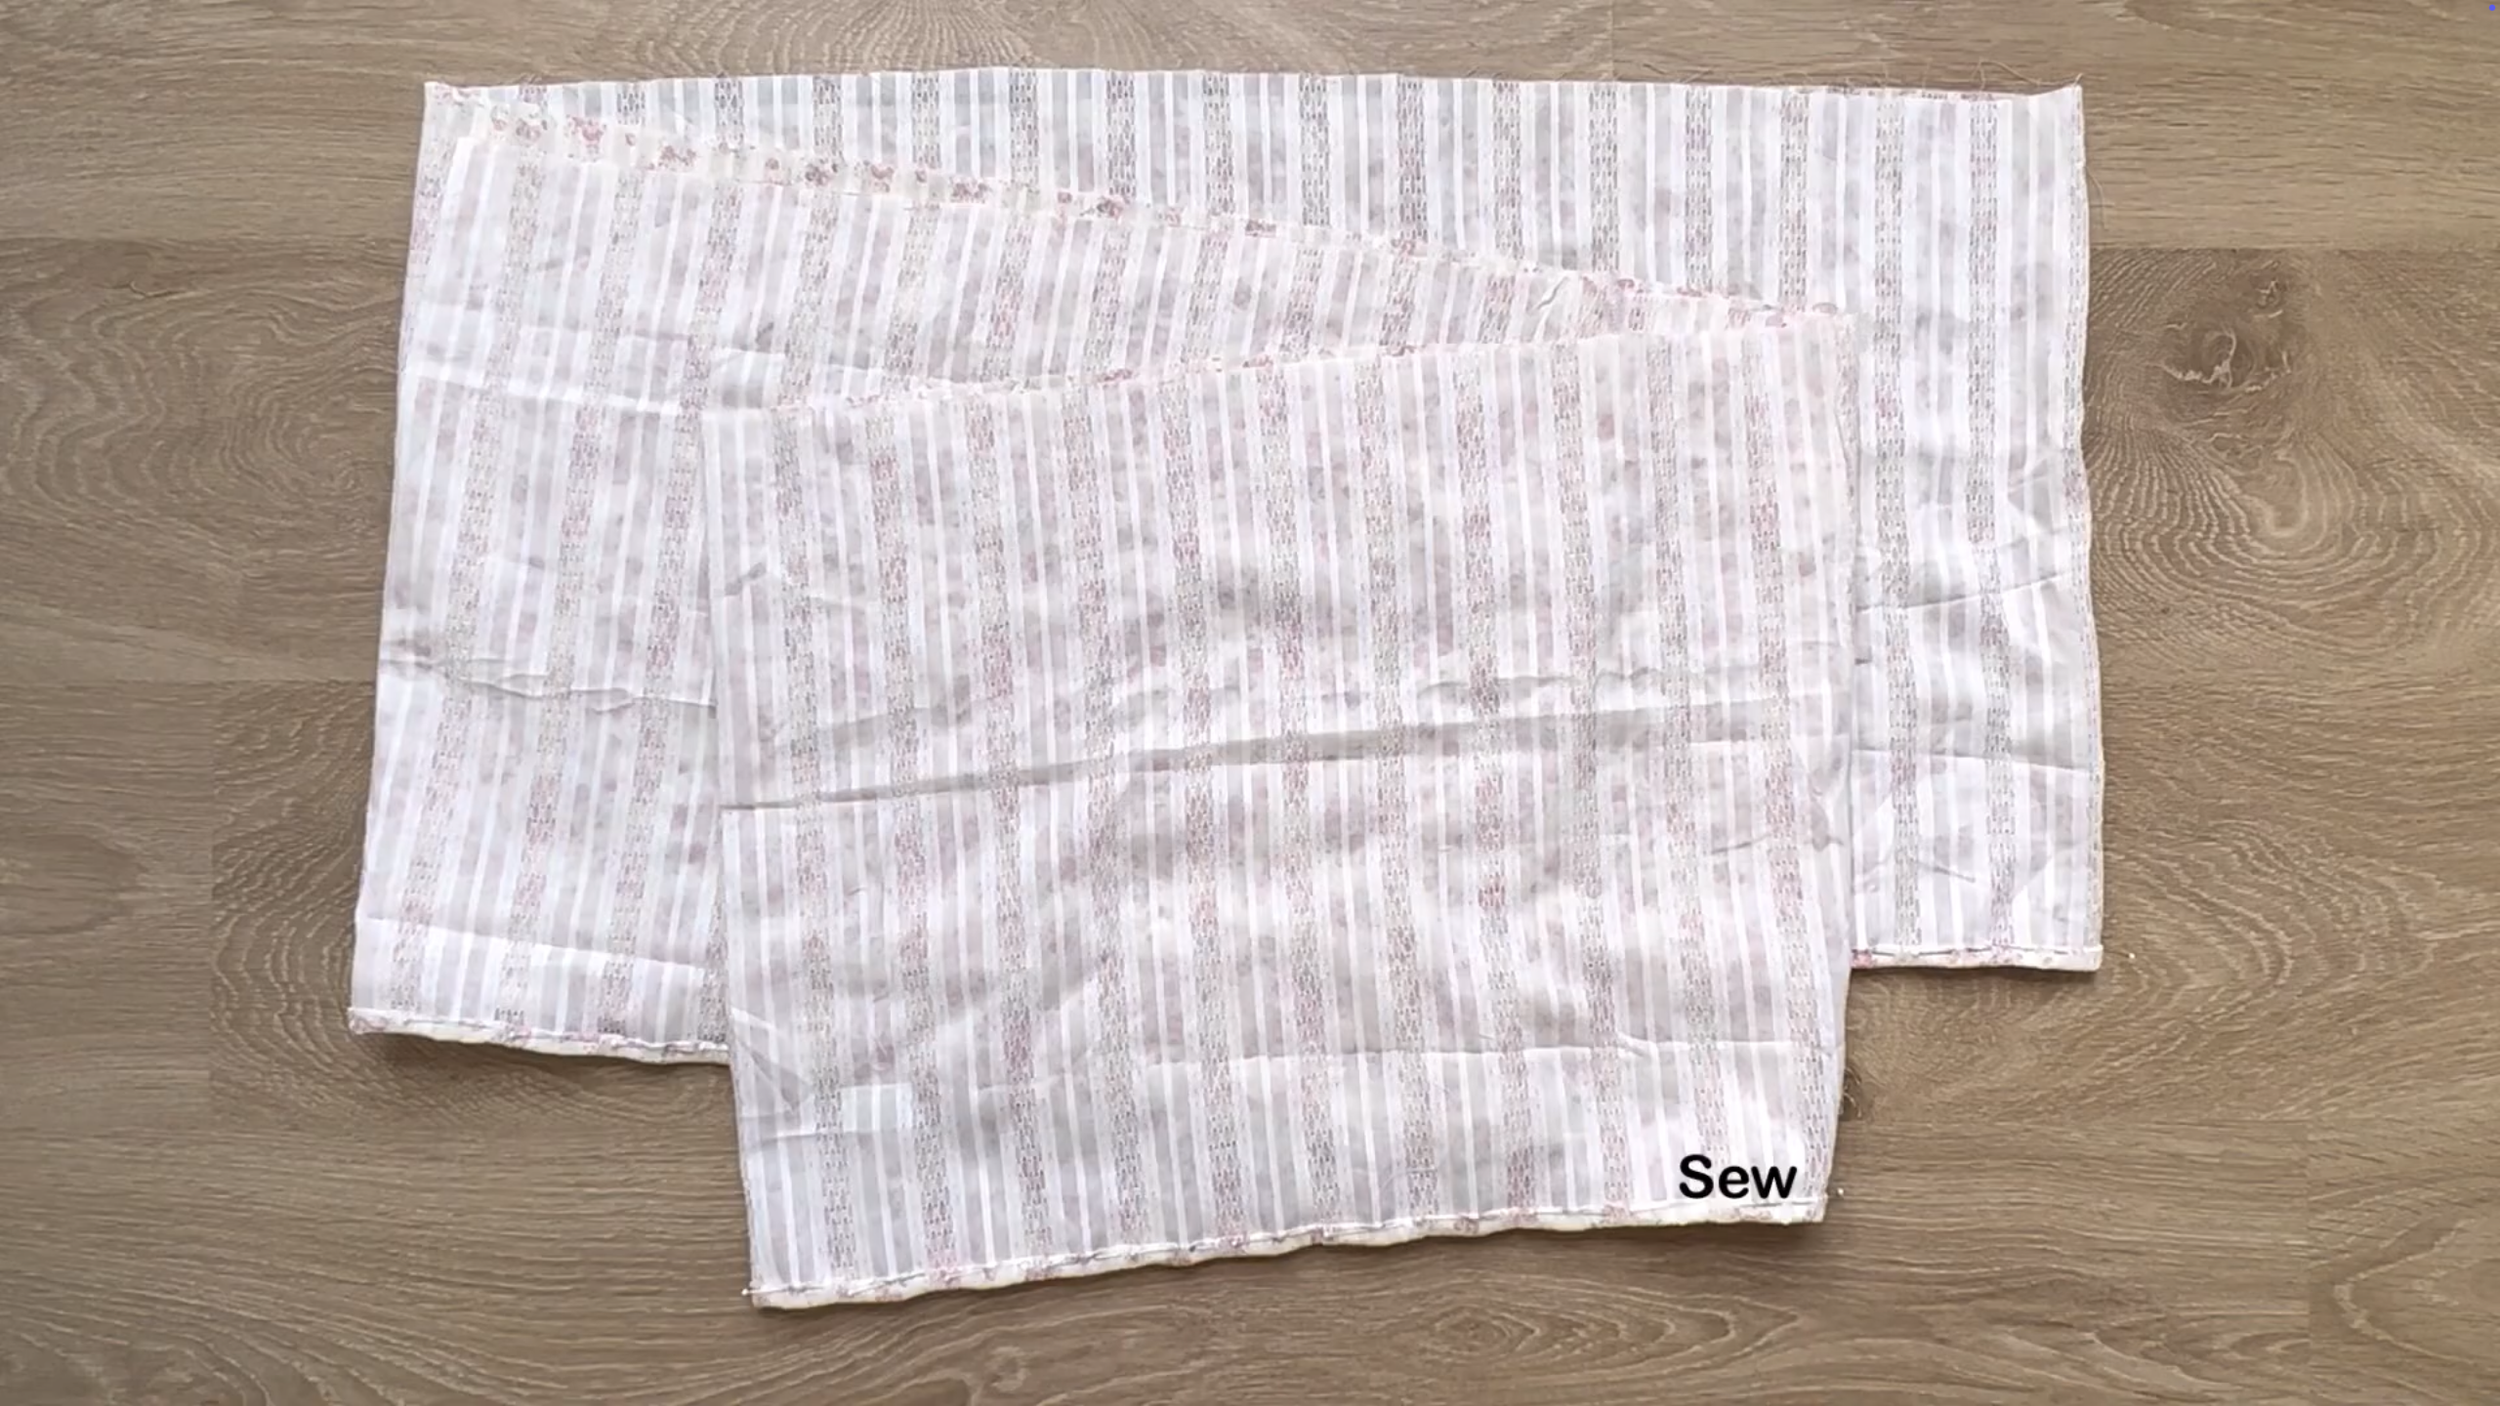
Then, finish one width line of the circle fabric by folding the end fabric inside two times with 1 cm each time and sewing.
At the other width line of the circle fabric, make two loose seams first.
Then, create a gathering fabric there later.
The final width of the gathering fabric will be the same as the first tier.
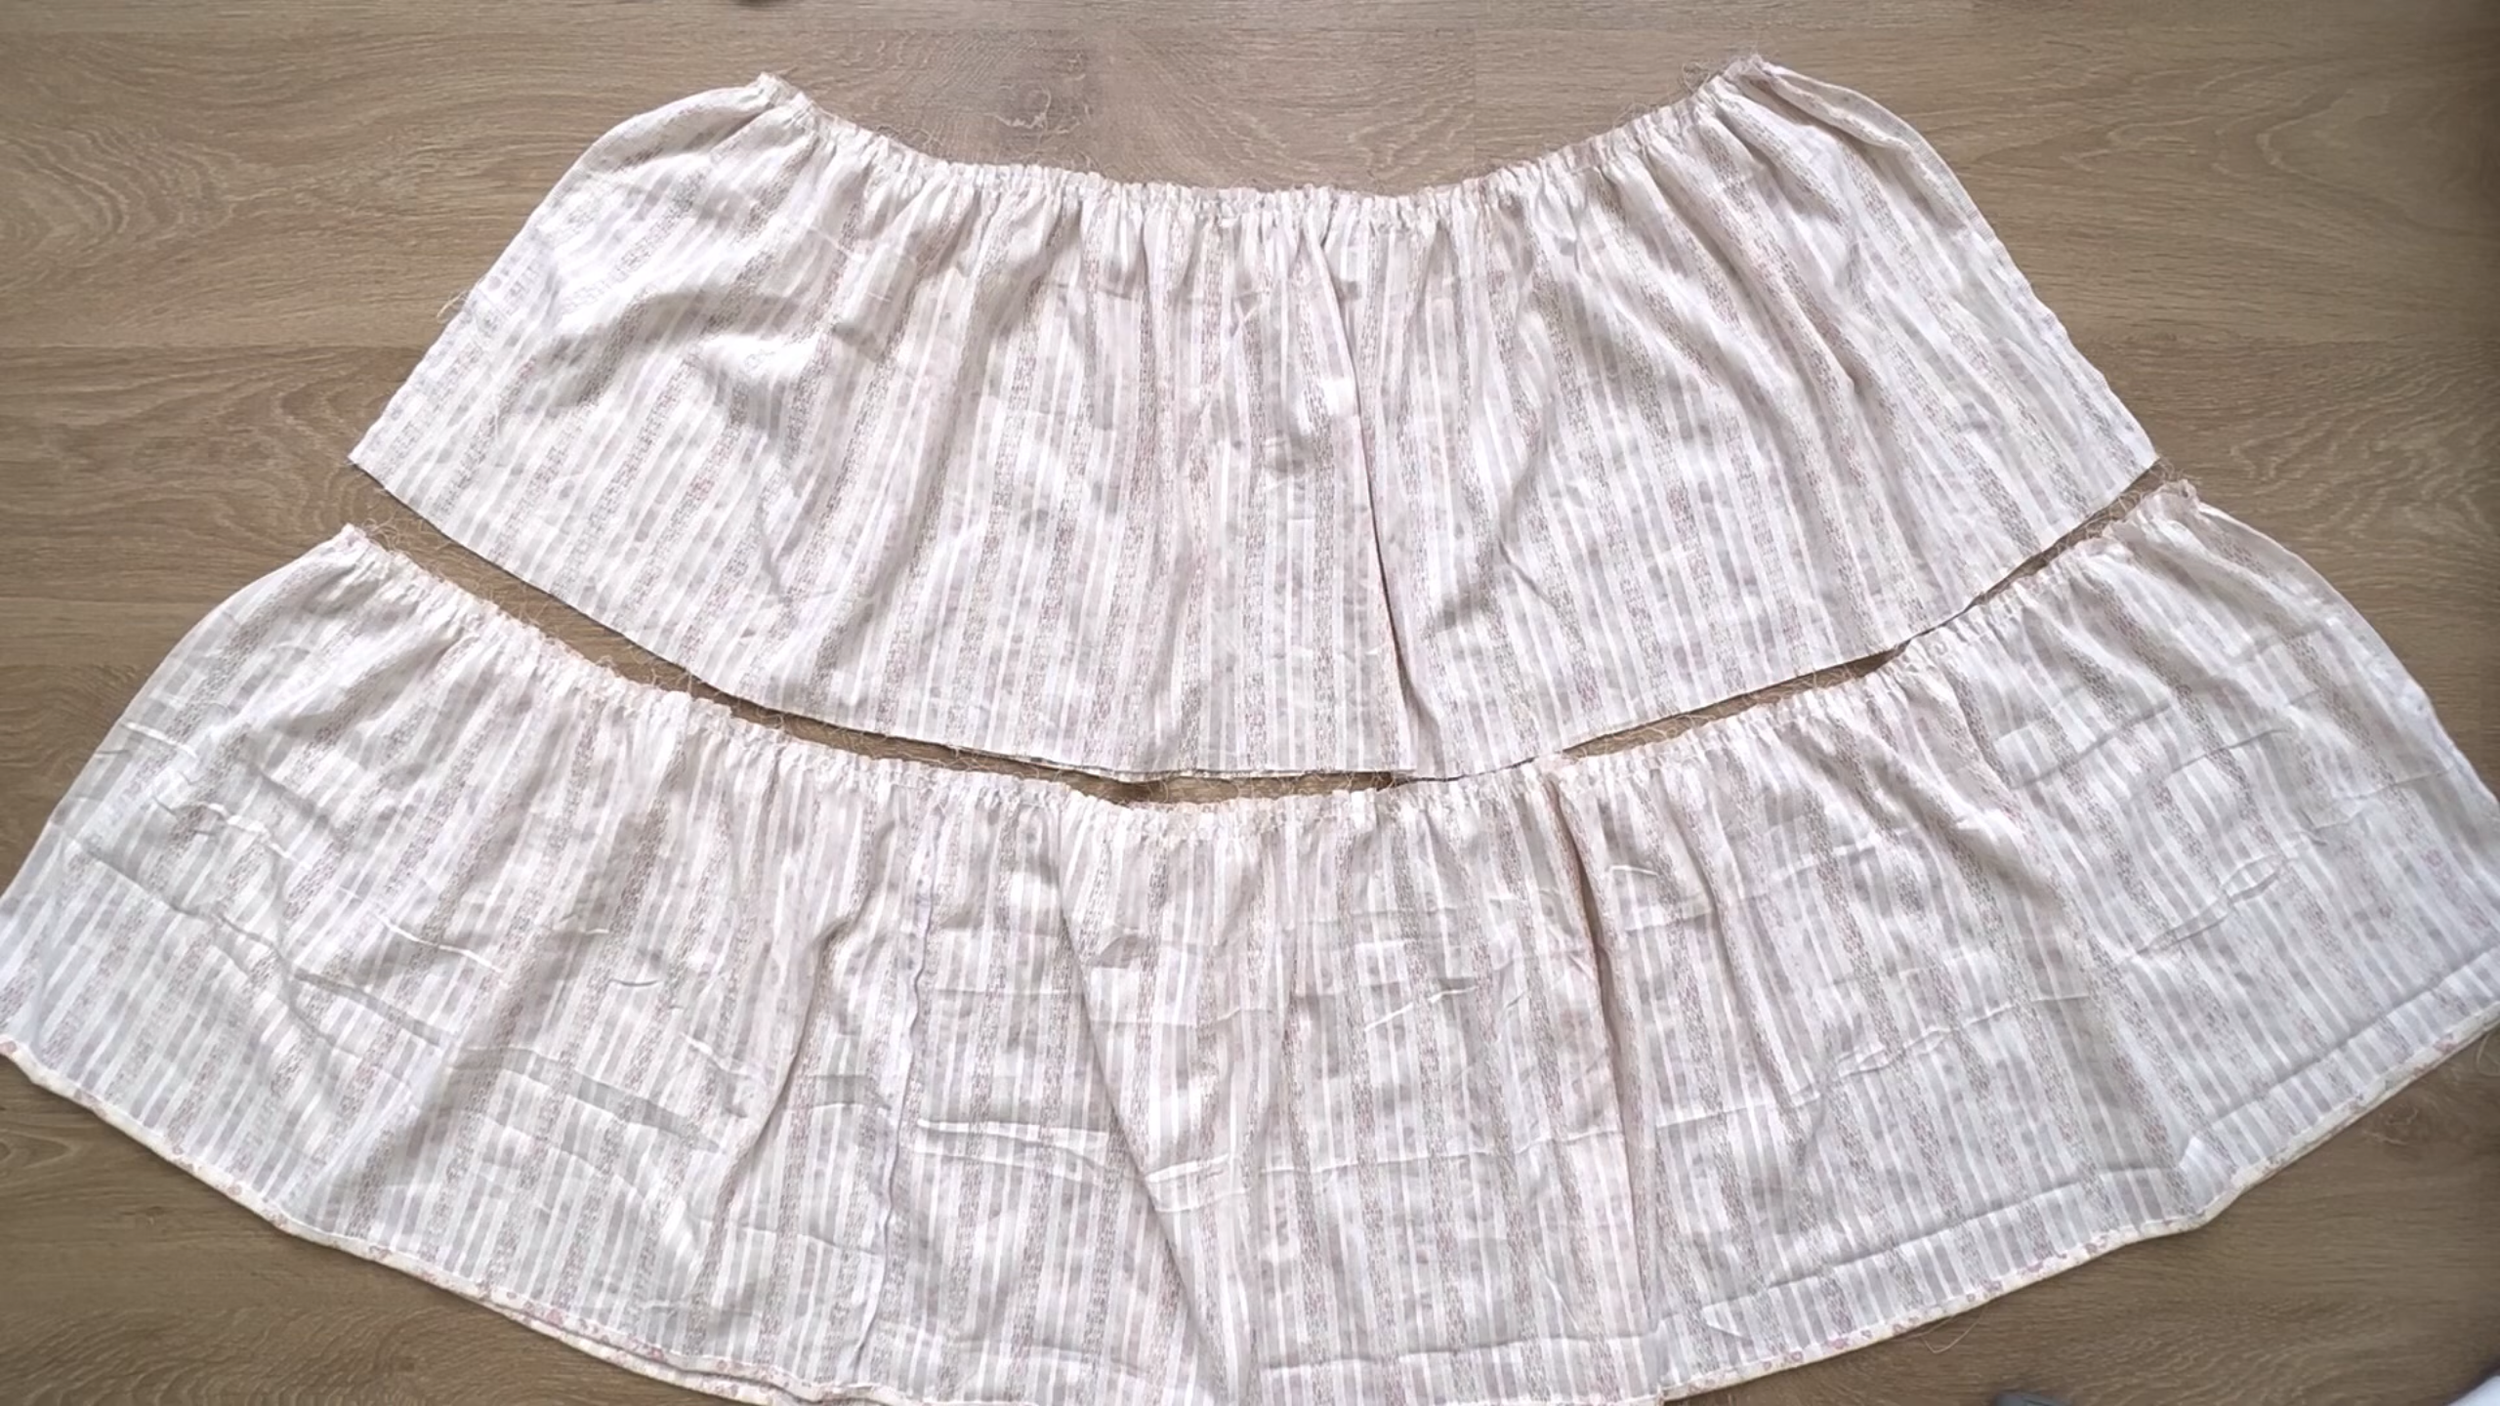
Then, connect them together.
CONNECT THE BODICE AND THE SKIRT TOGETHER
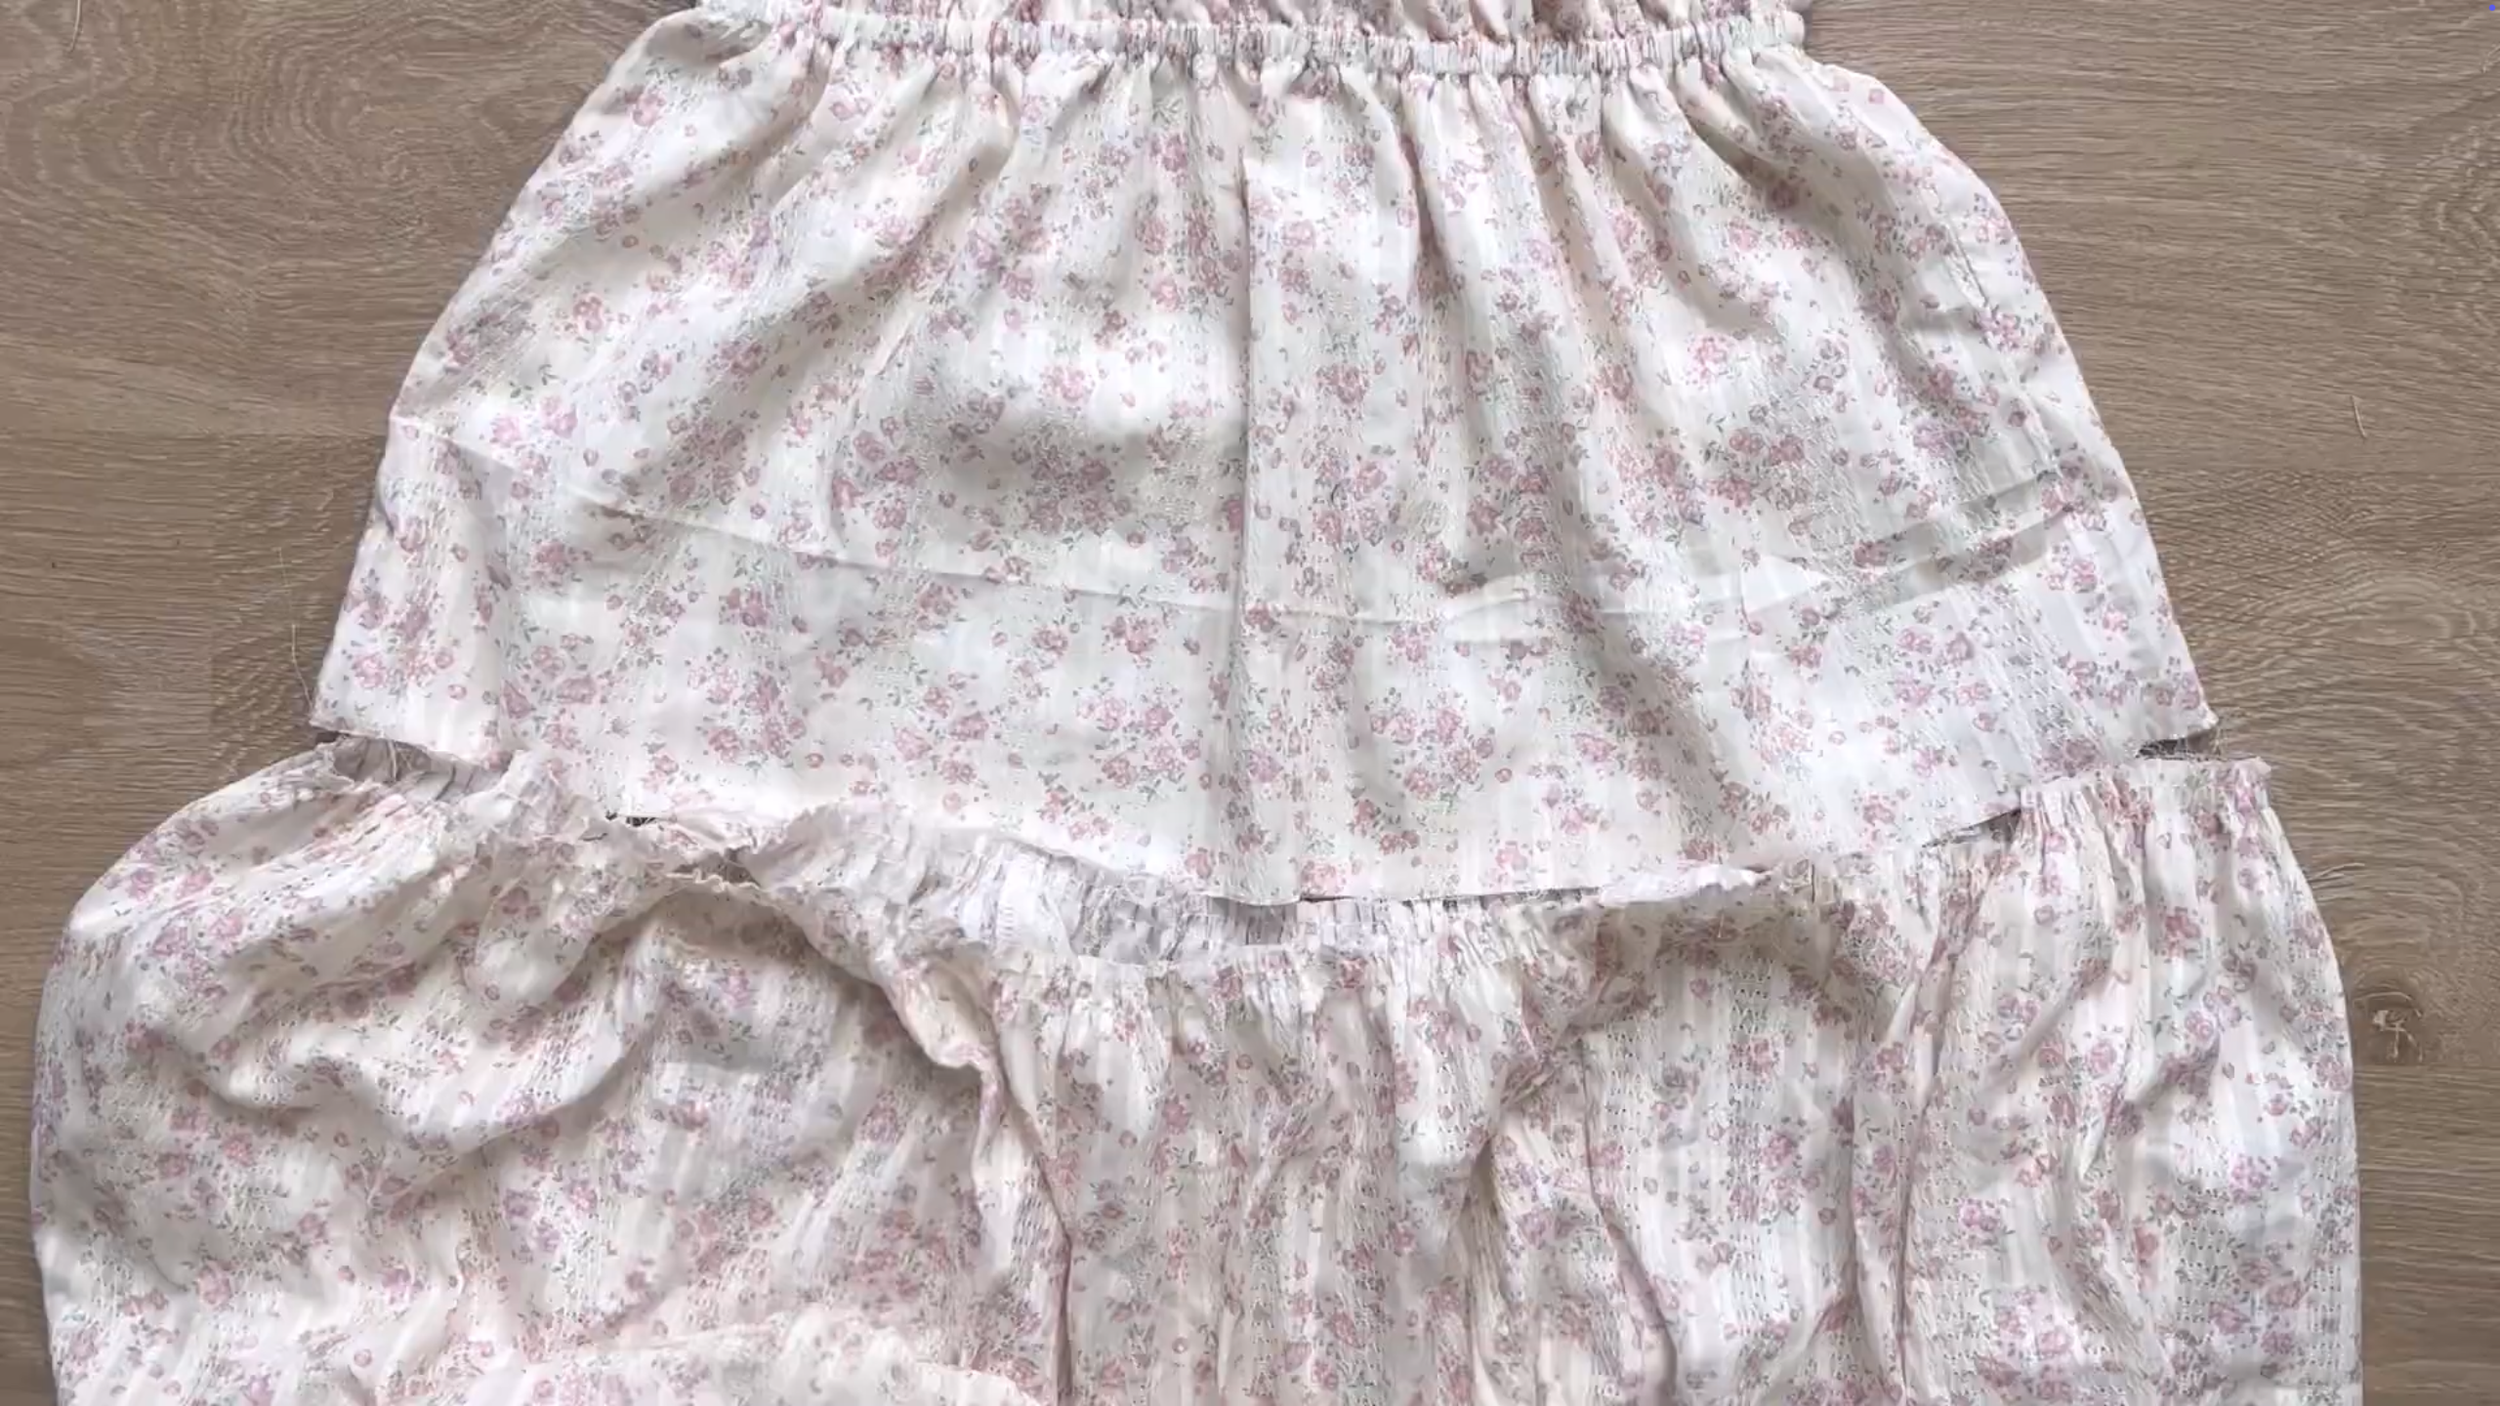
The last step is connecting the skirt and the bodice part together.

DIY Bump friendly dress for my Summer wardrobe | Step by step sewing tutorial
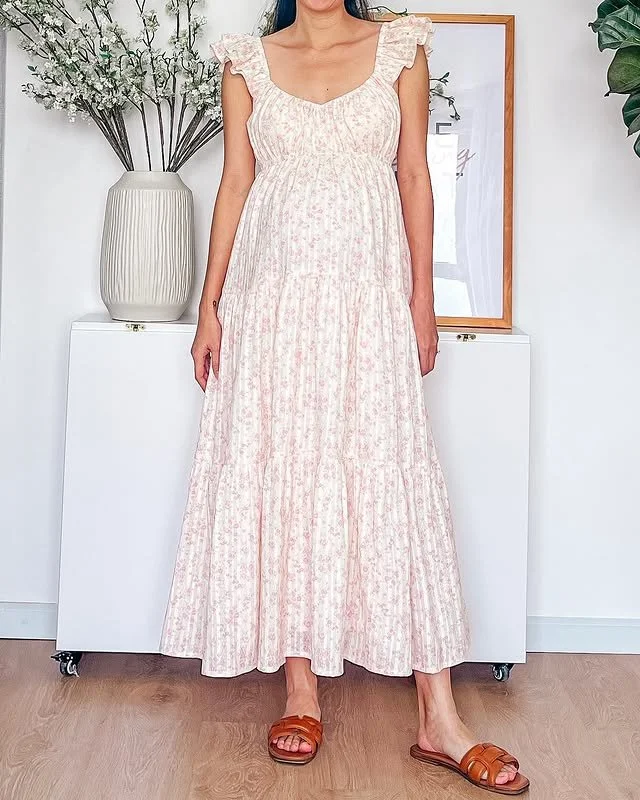
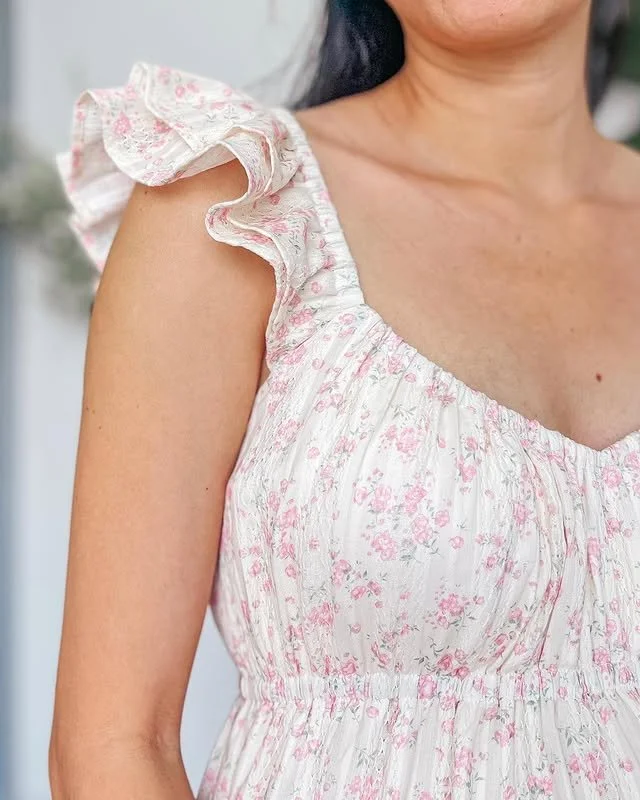
And I finished this DIY — here’s my final result!
This dress is super cute for summertime. The elastic band under the bust makes it really bump-friendly, but it’s also very comfortable for anyone to wear.

I hope you found my step-by-step guide helpful and inspiring.
If you’re interested in making your own, give it a try and let me know how it goes!
Until then, happy sewing!