DIY Button front skirt in 2 different ways | Sewing project to make in a day

DIY Button front skirt in 2 different ways | Sewing project to make in a day
Welcome or welcome back to my sewing blog!
In today's tutorial, I'm going to share with you how to make a button front skirt in 2 different ways. One way with a pattern. And another way without a pattern. So whatever sewing level you are, you still can make them. That's why I hope you will like it and try it out.
So let's get started!
WHAT YOU’LL NEED
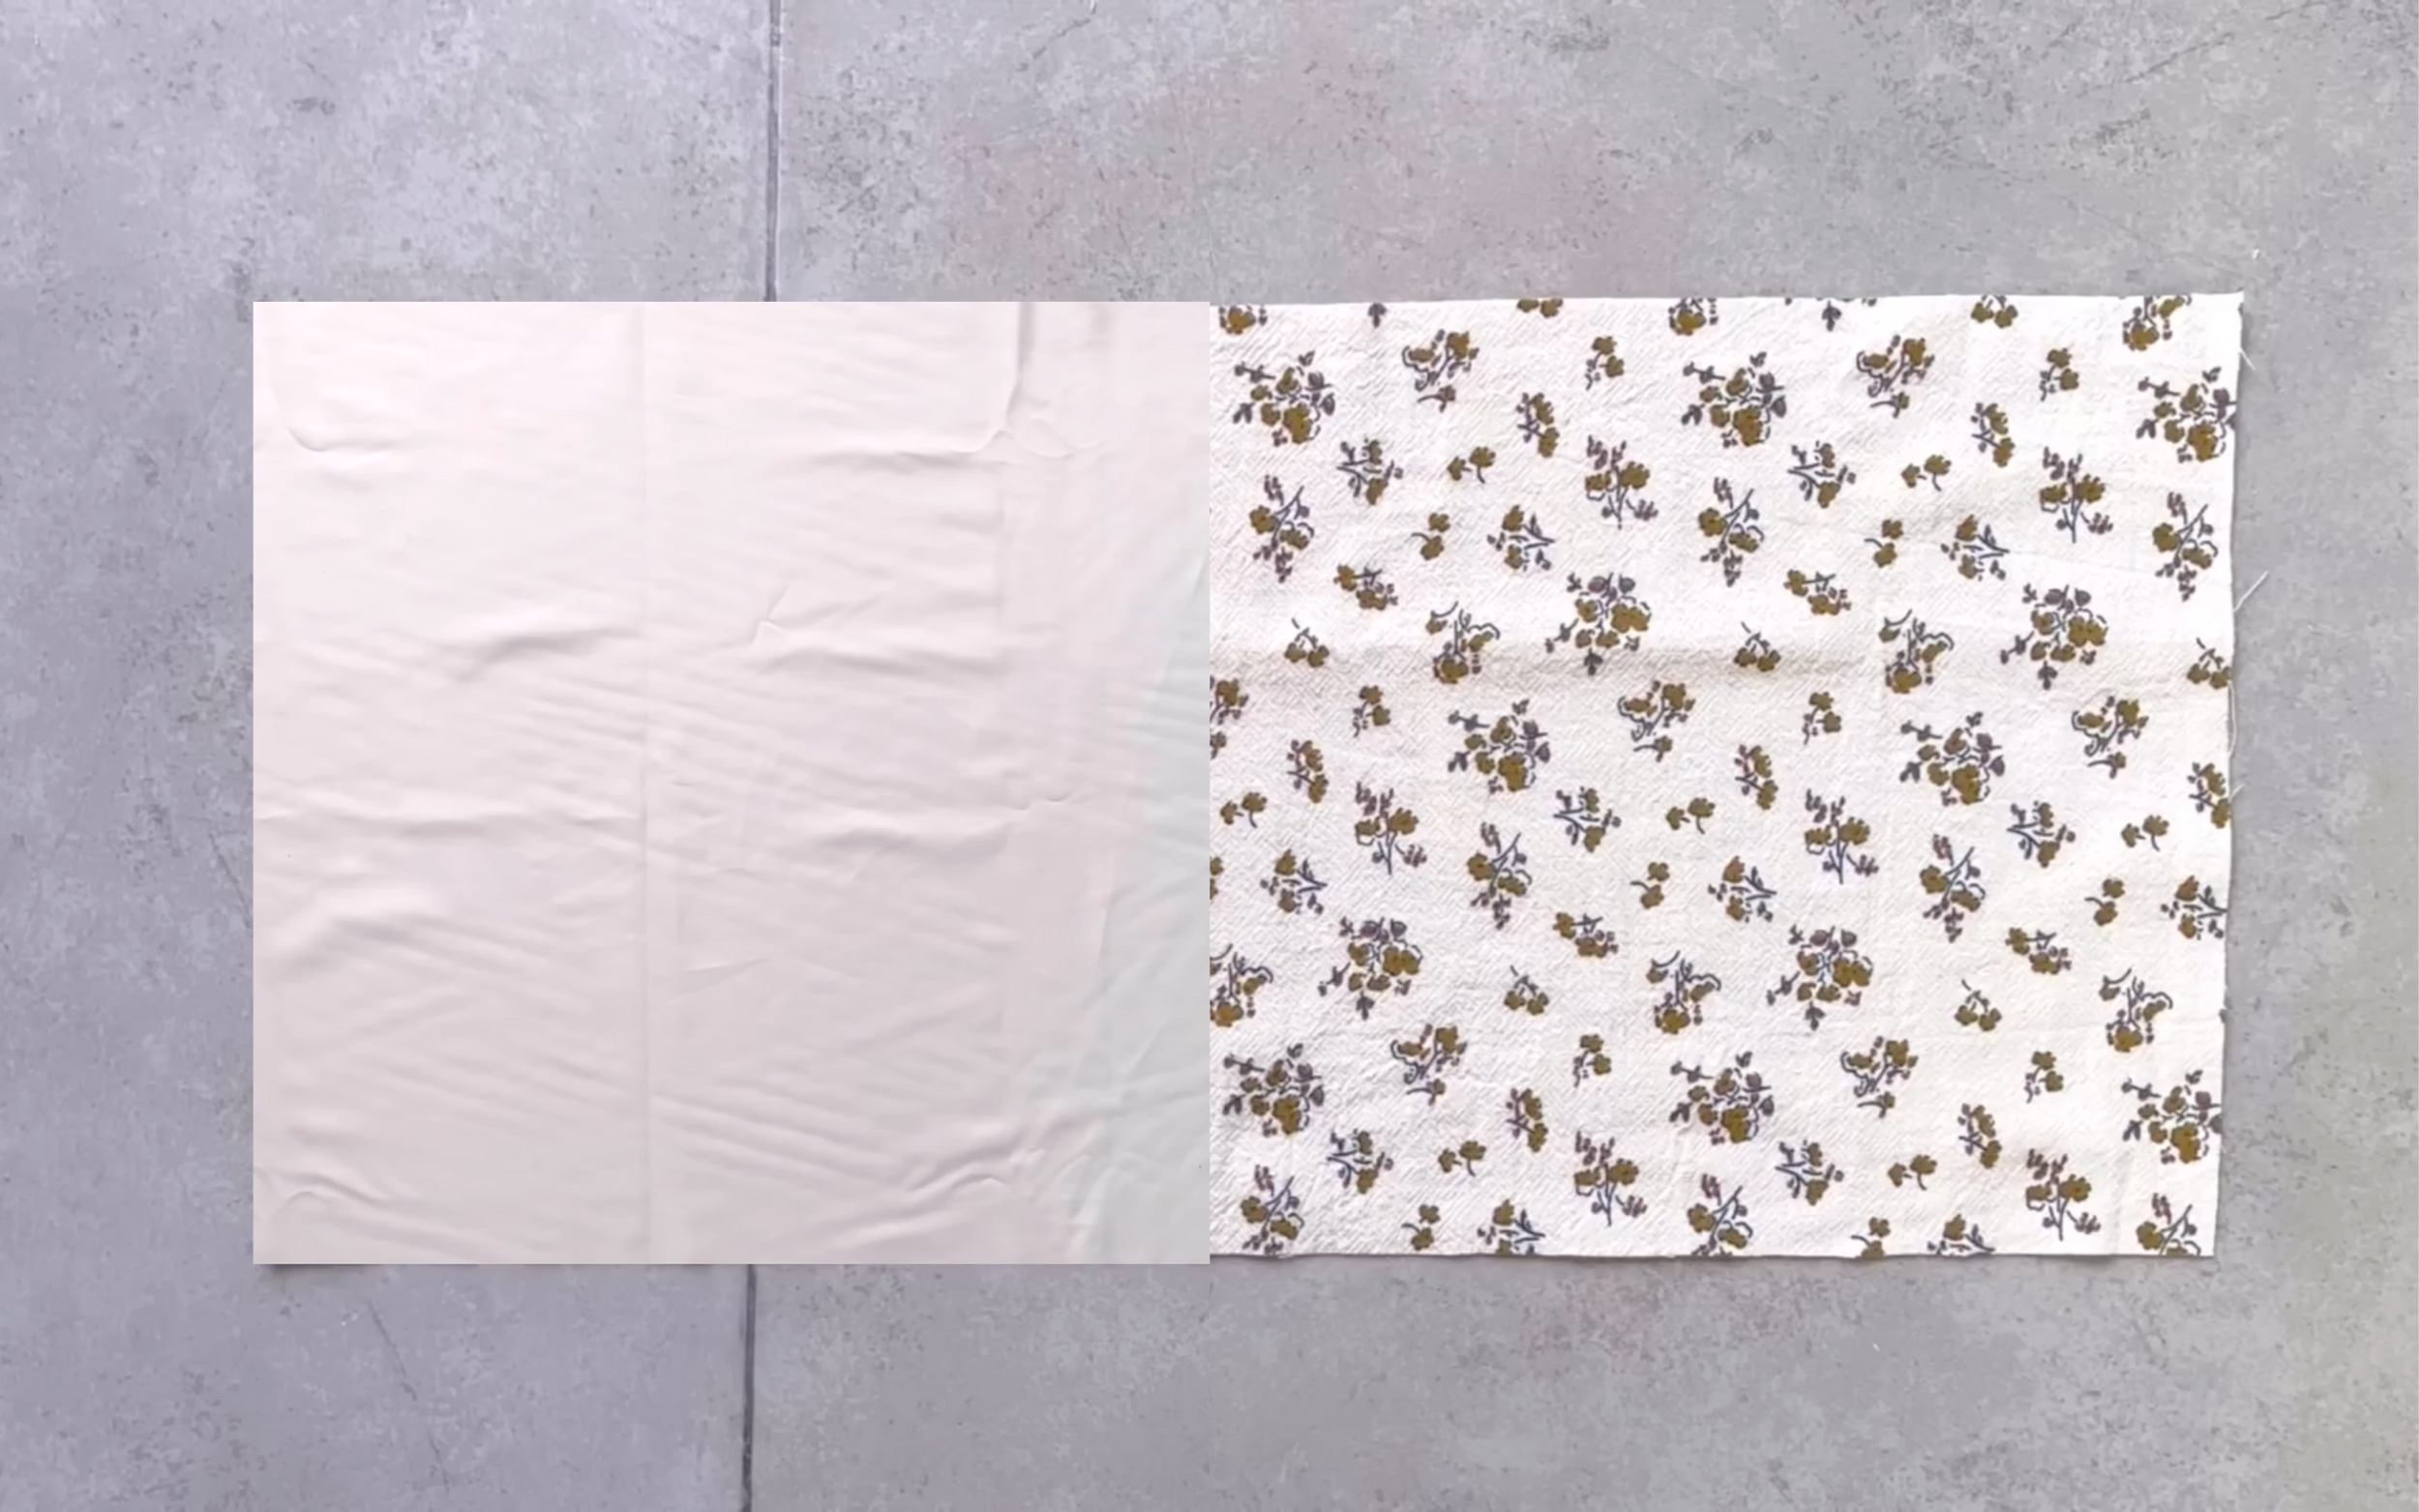
Gathered midi button front skirt: 2m of cotton fabric
Fitted mini button front skirt: 1m of corduroy fabric
Pattern paper
Sewing machine
Pins
Scissors
Ruler
Long stick
GATHERED WAIST MIDI SKIRT (With side pockets)
THE PATTERN
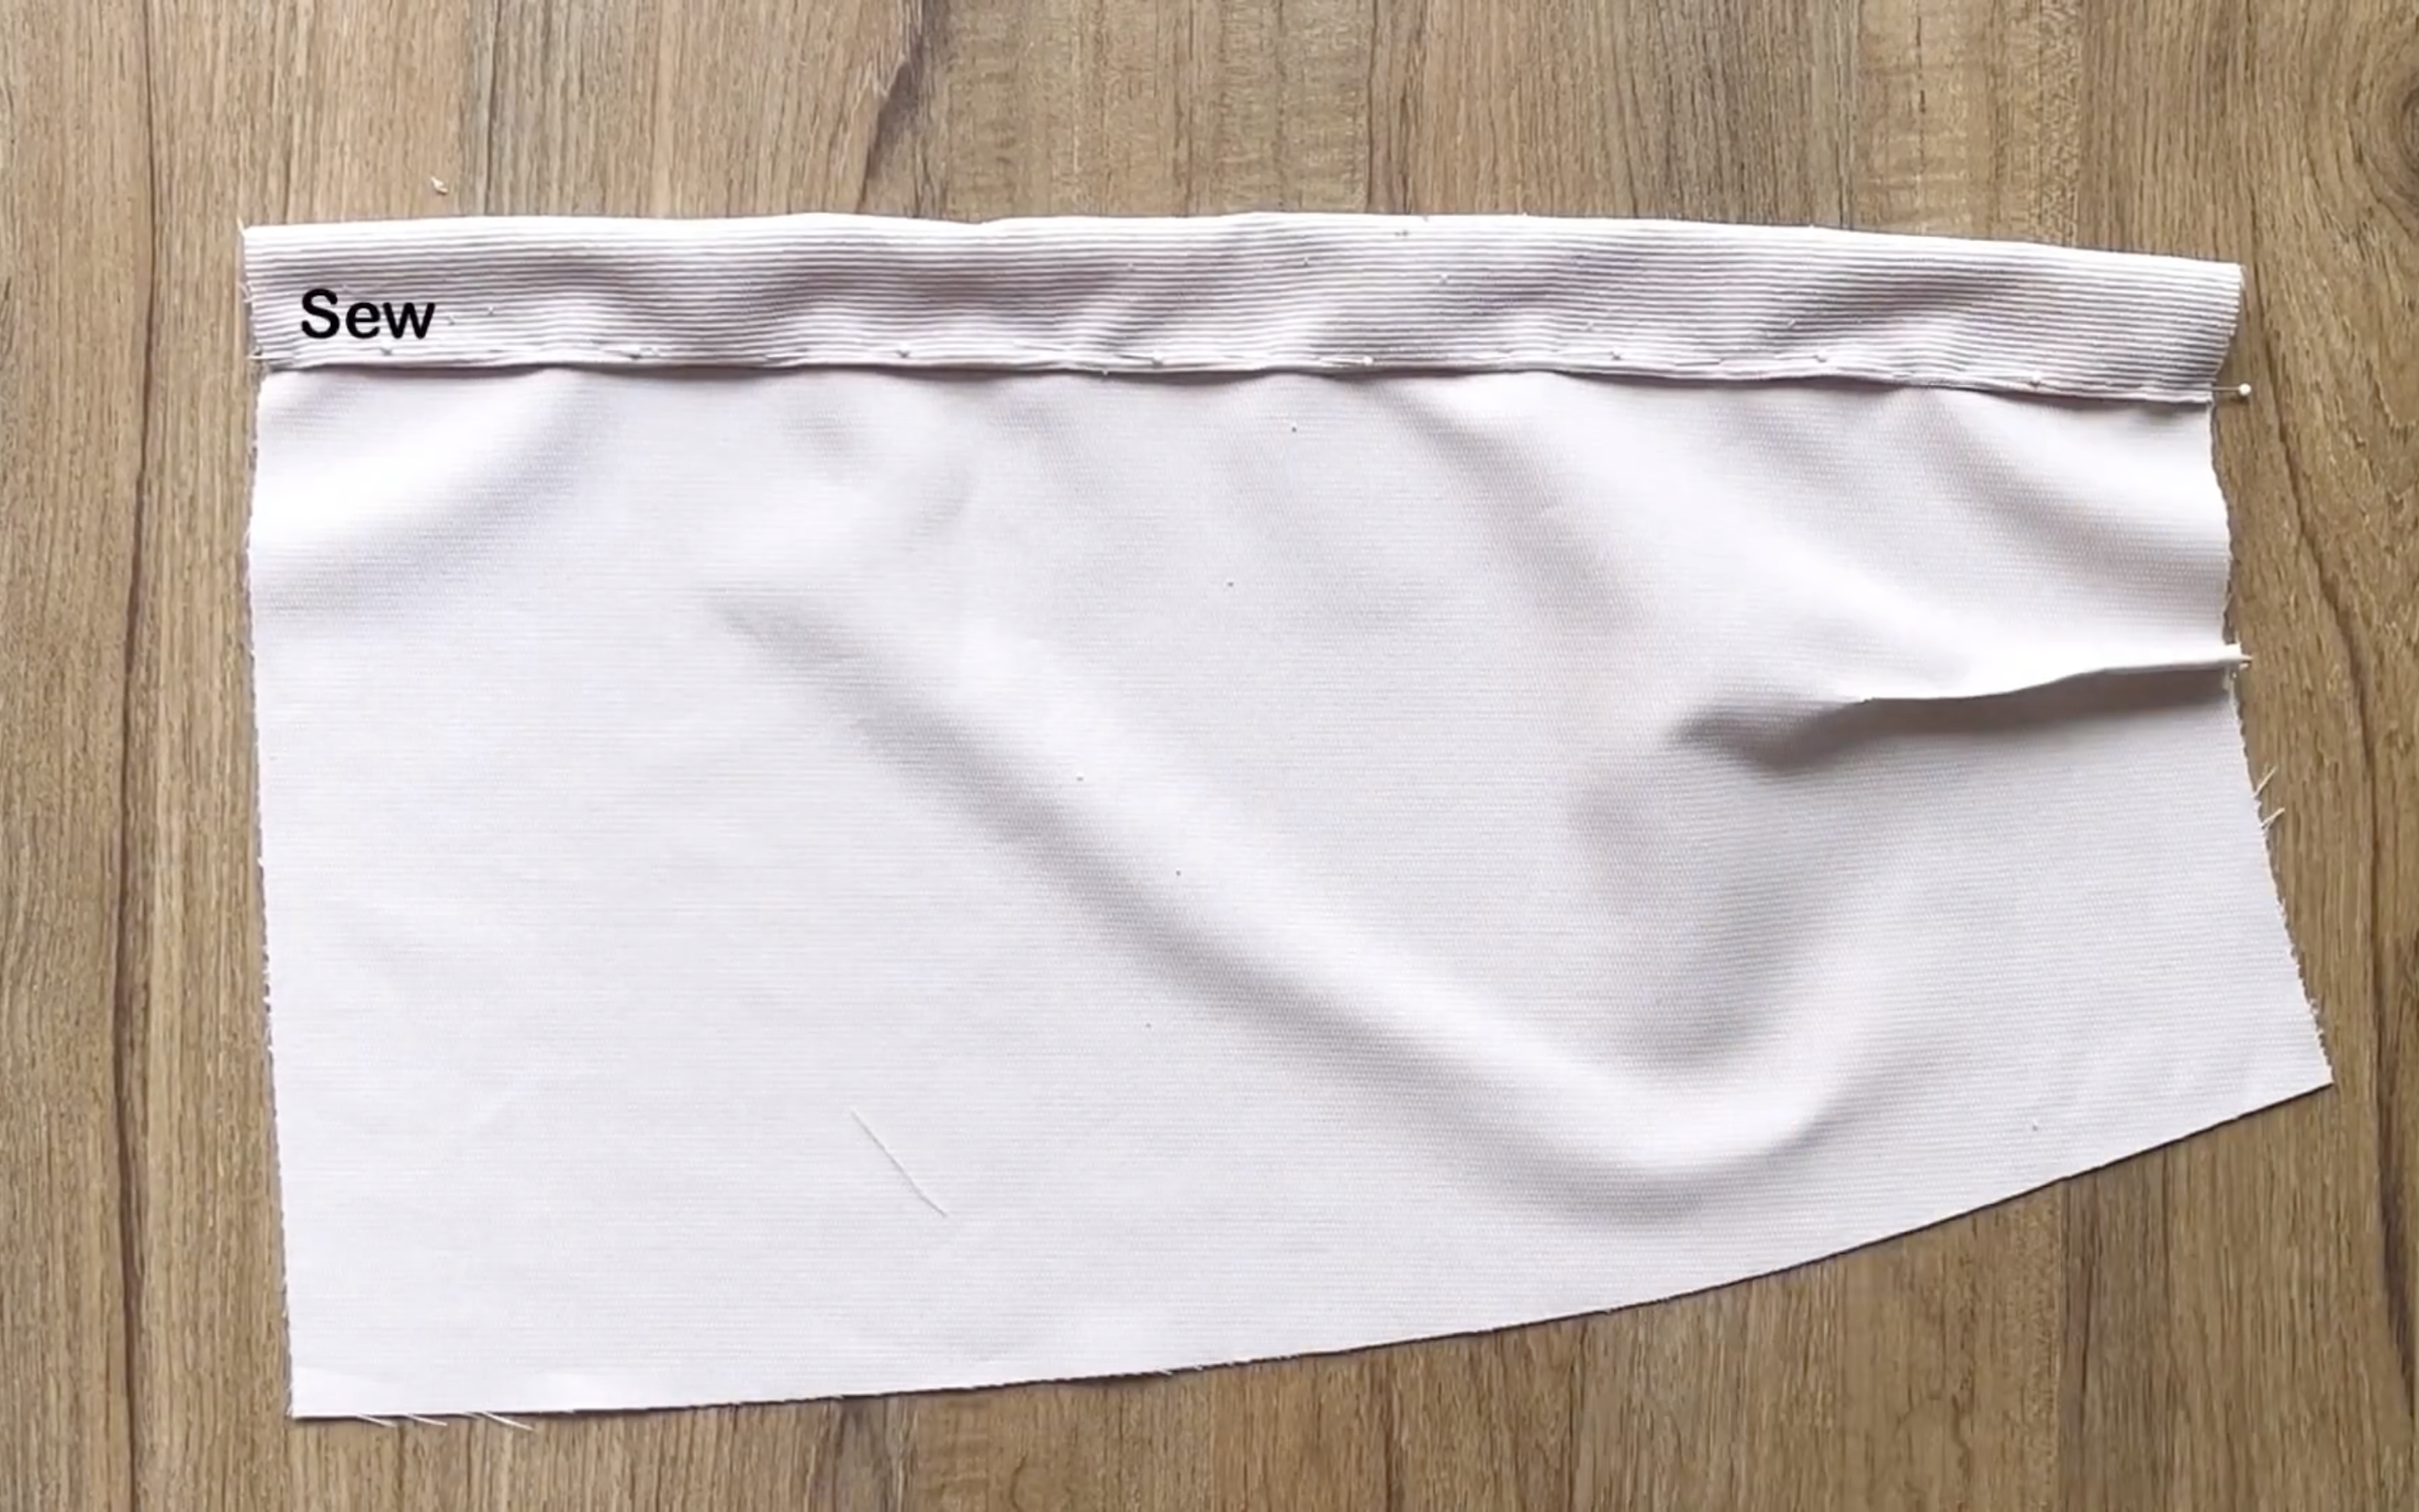
Here are all the pieces of the skirt with the measurements you need to prepare. They aren’t rectangular, so you don’t need to create a pattern for this DIY.
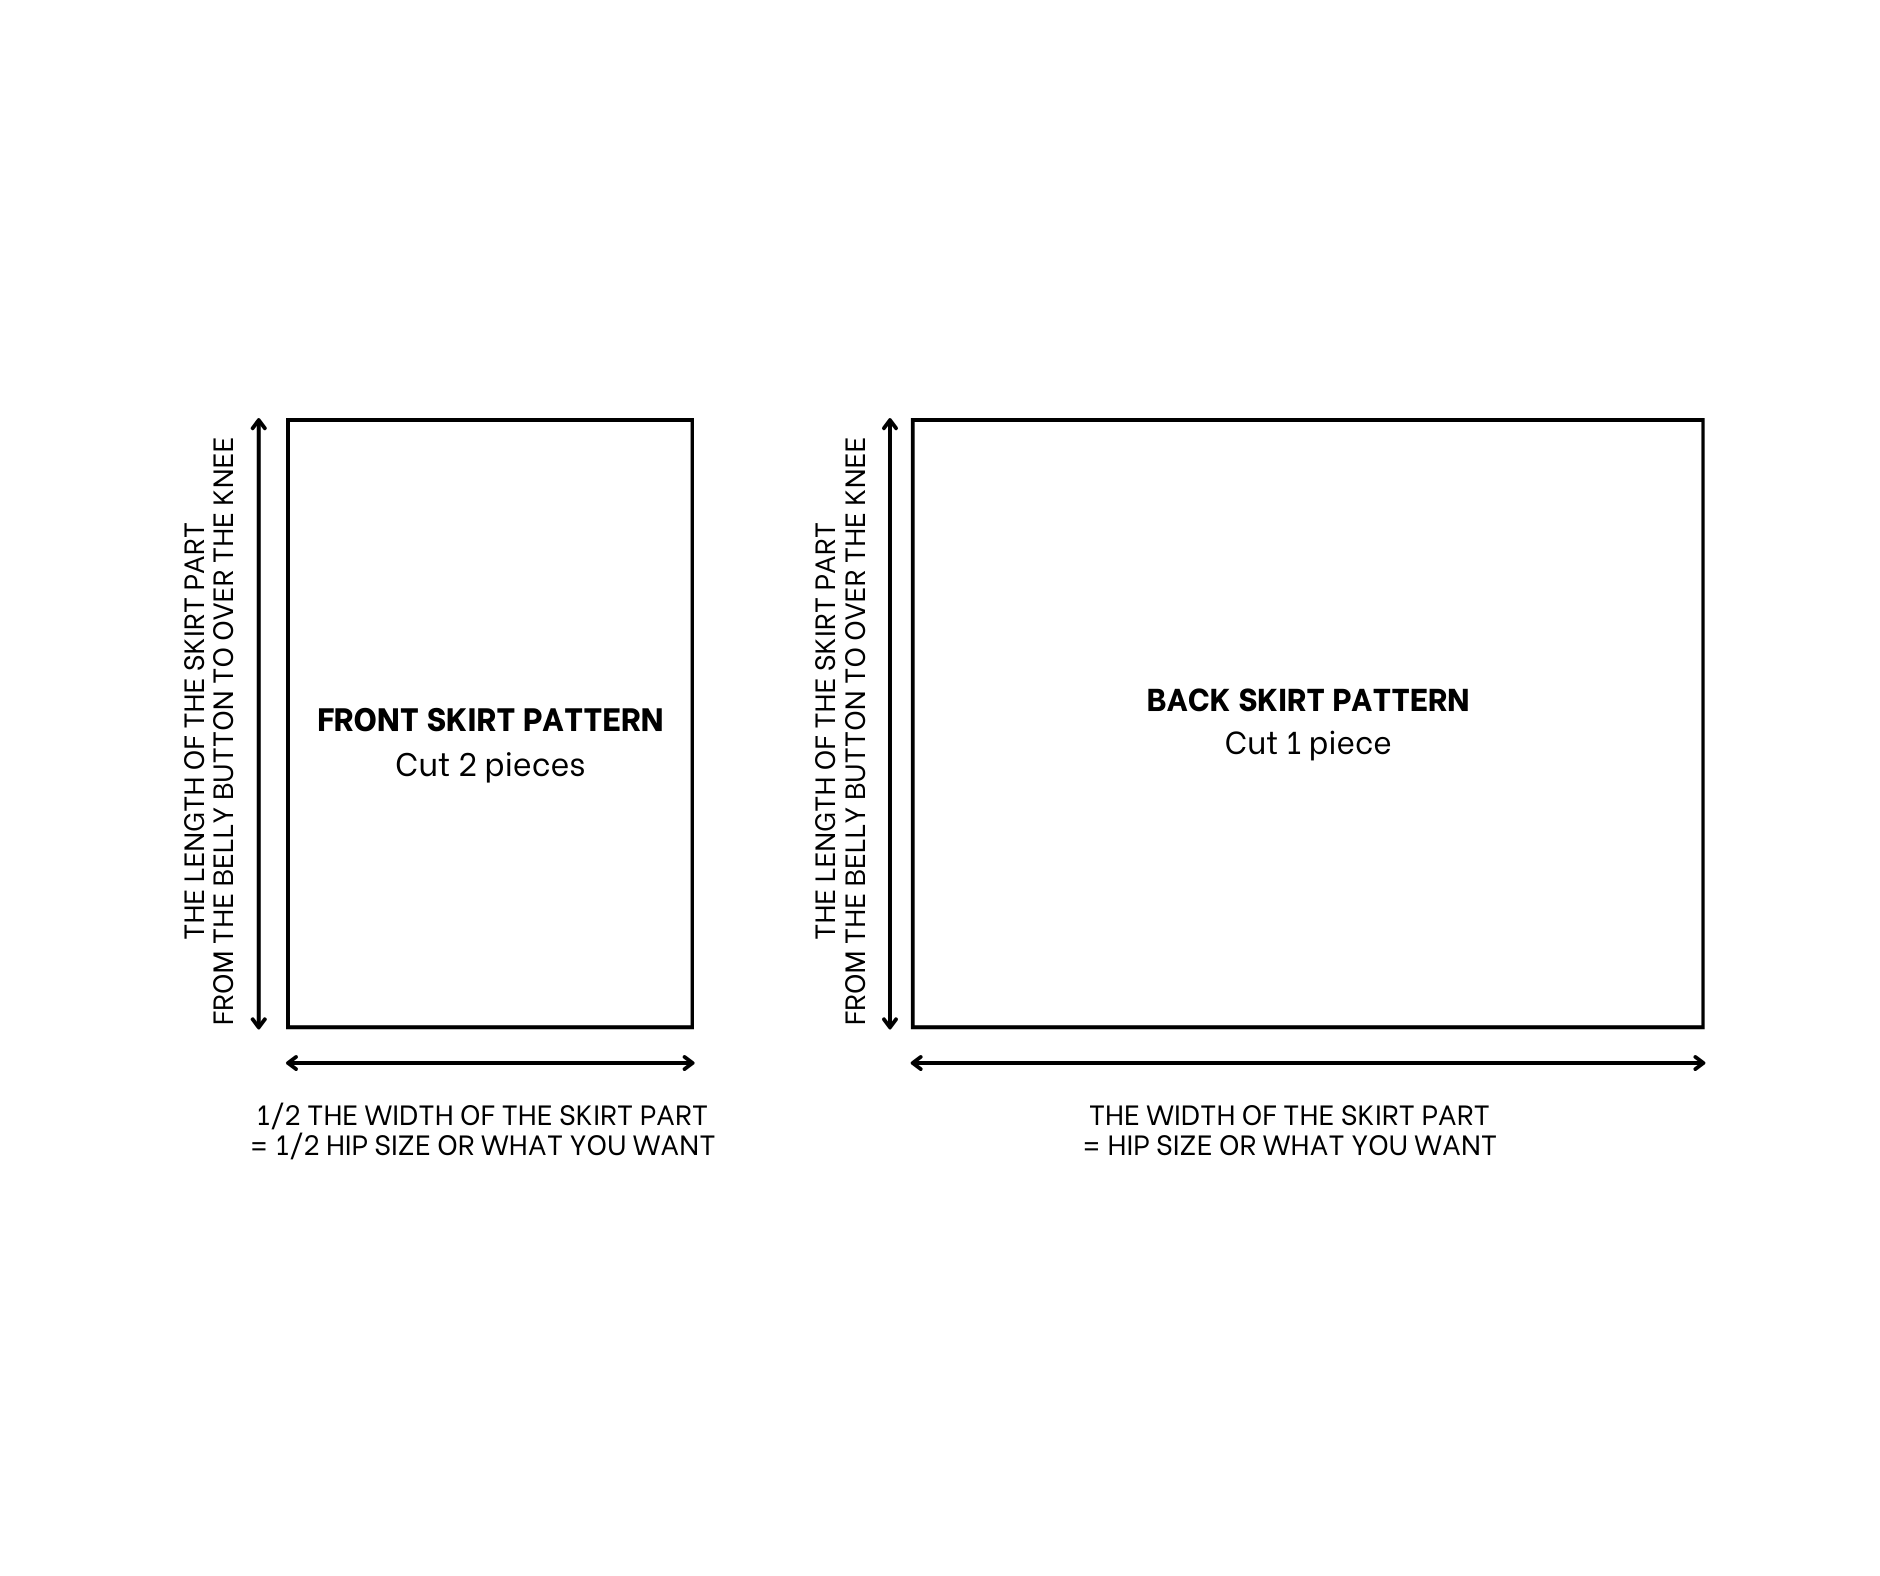
THE BODICE
Started with the back of the skirt.
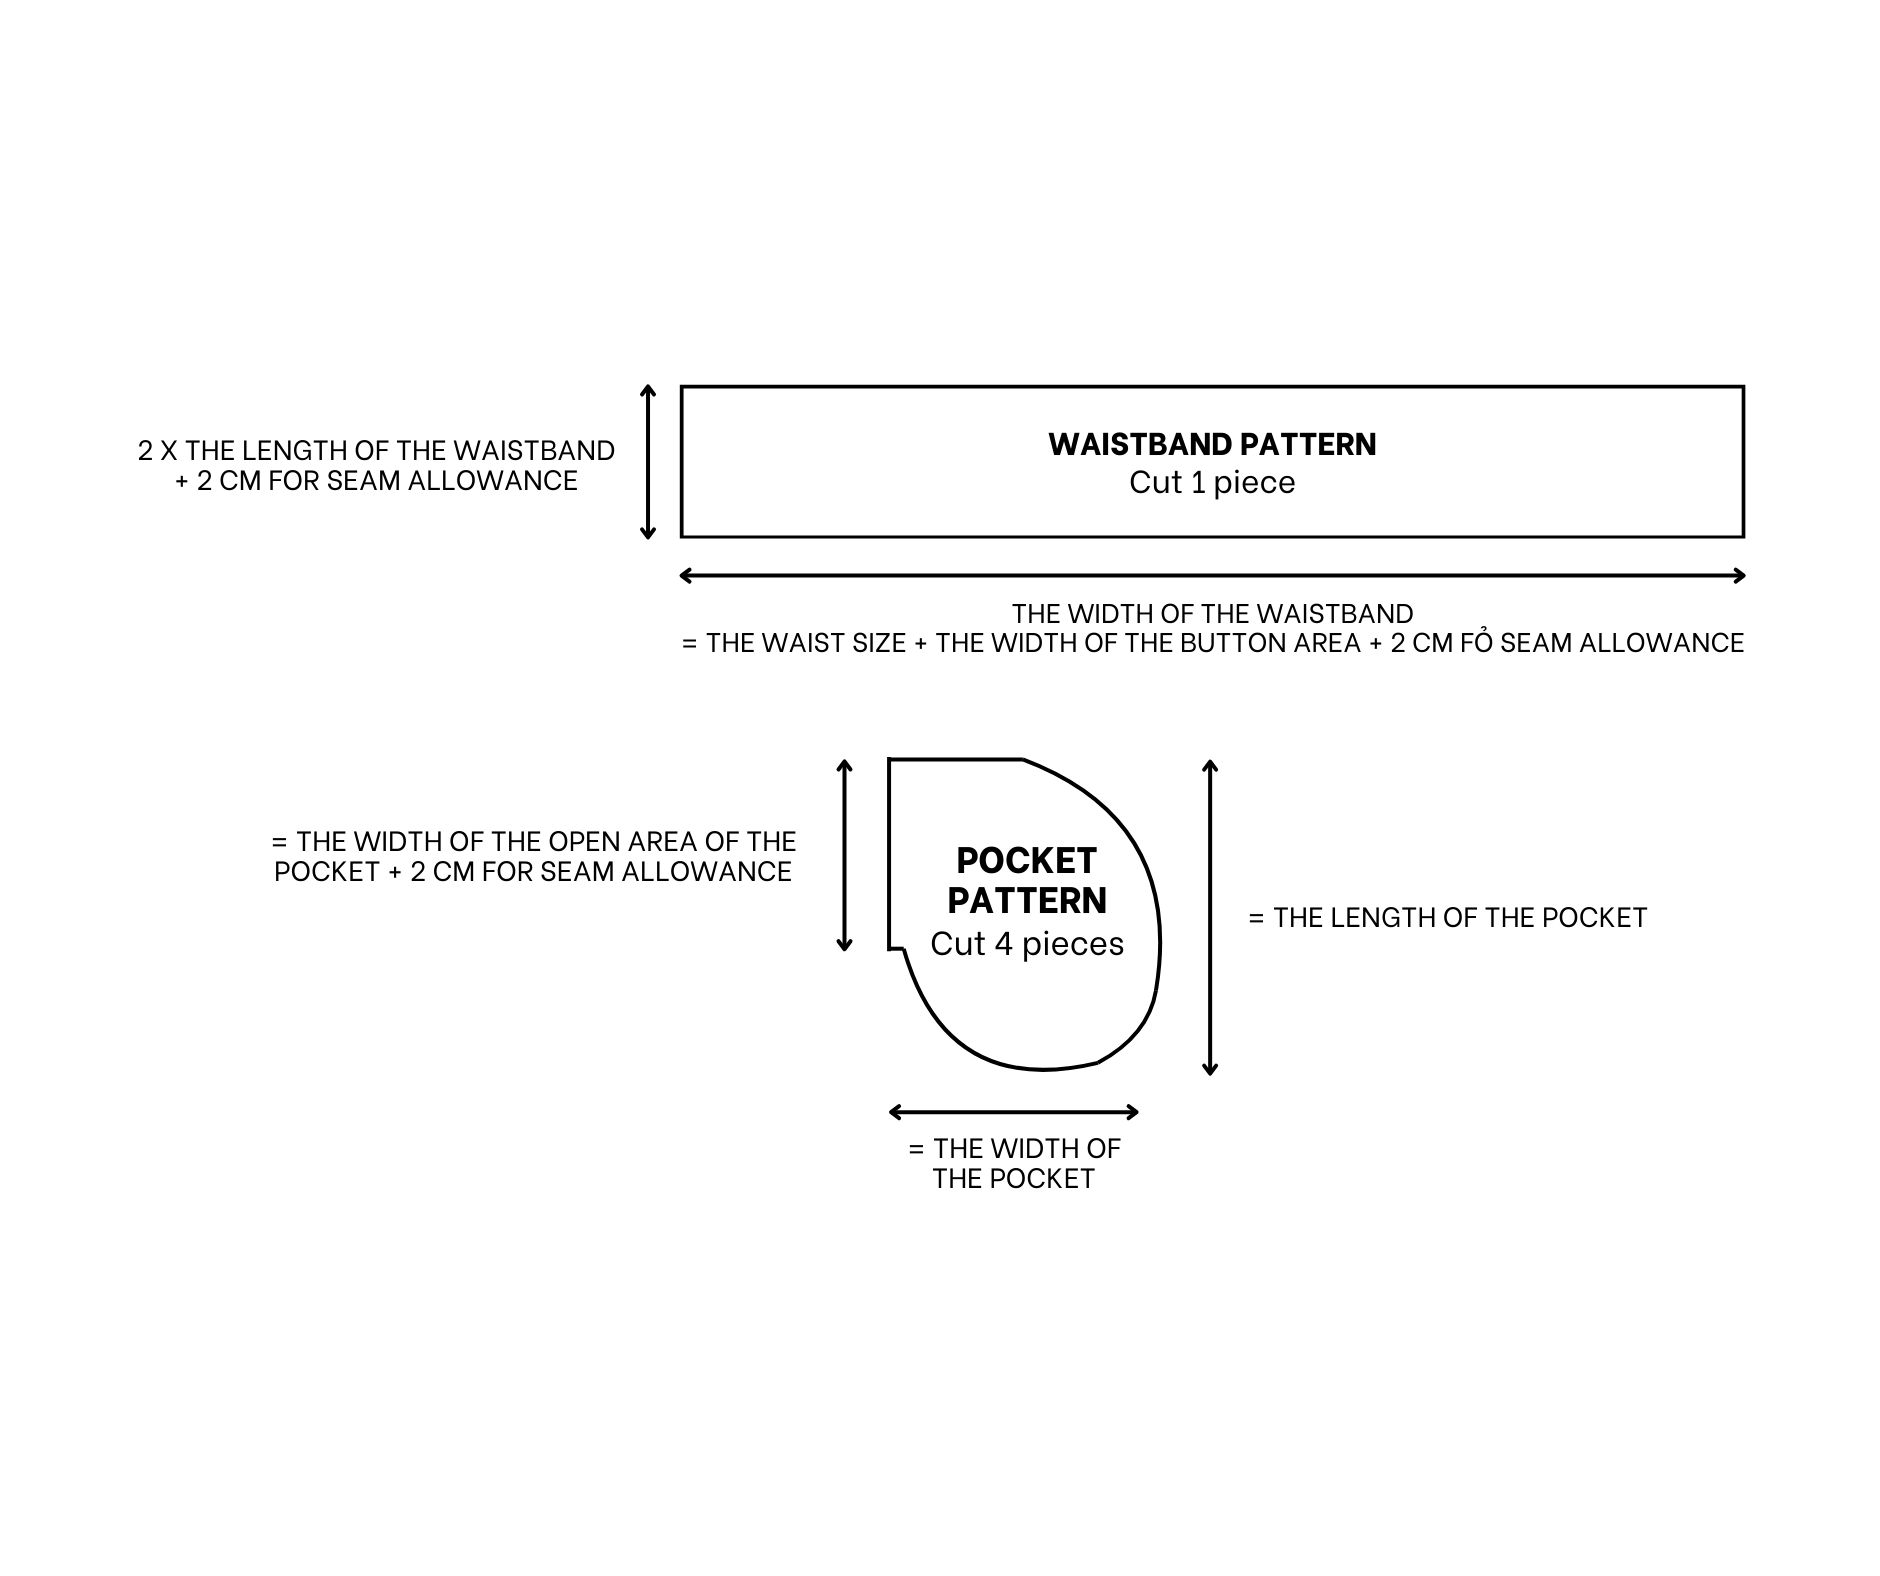
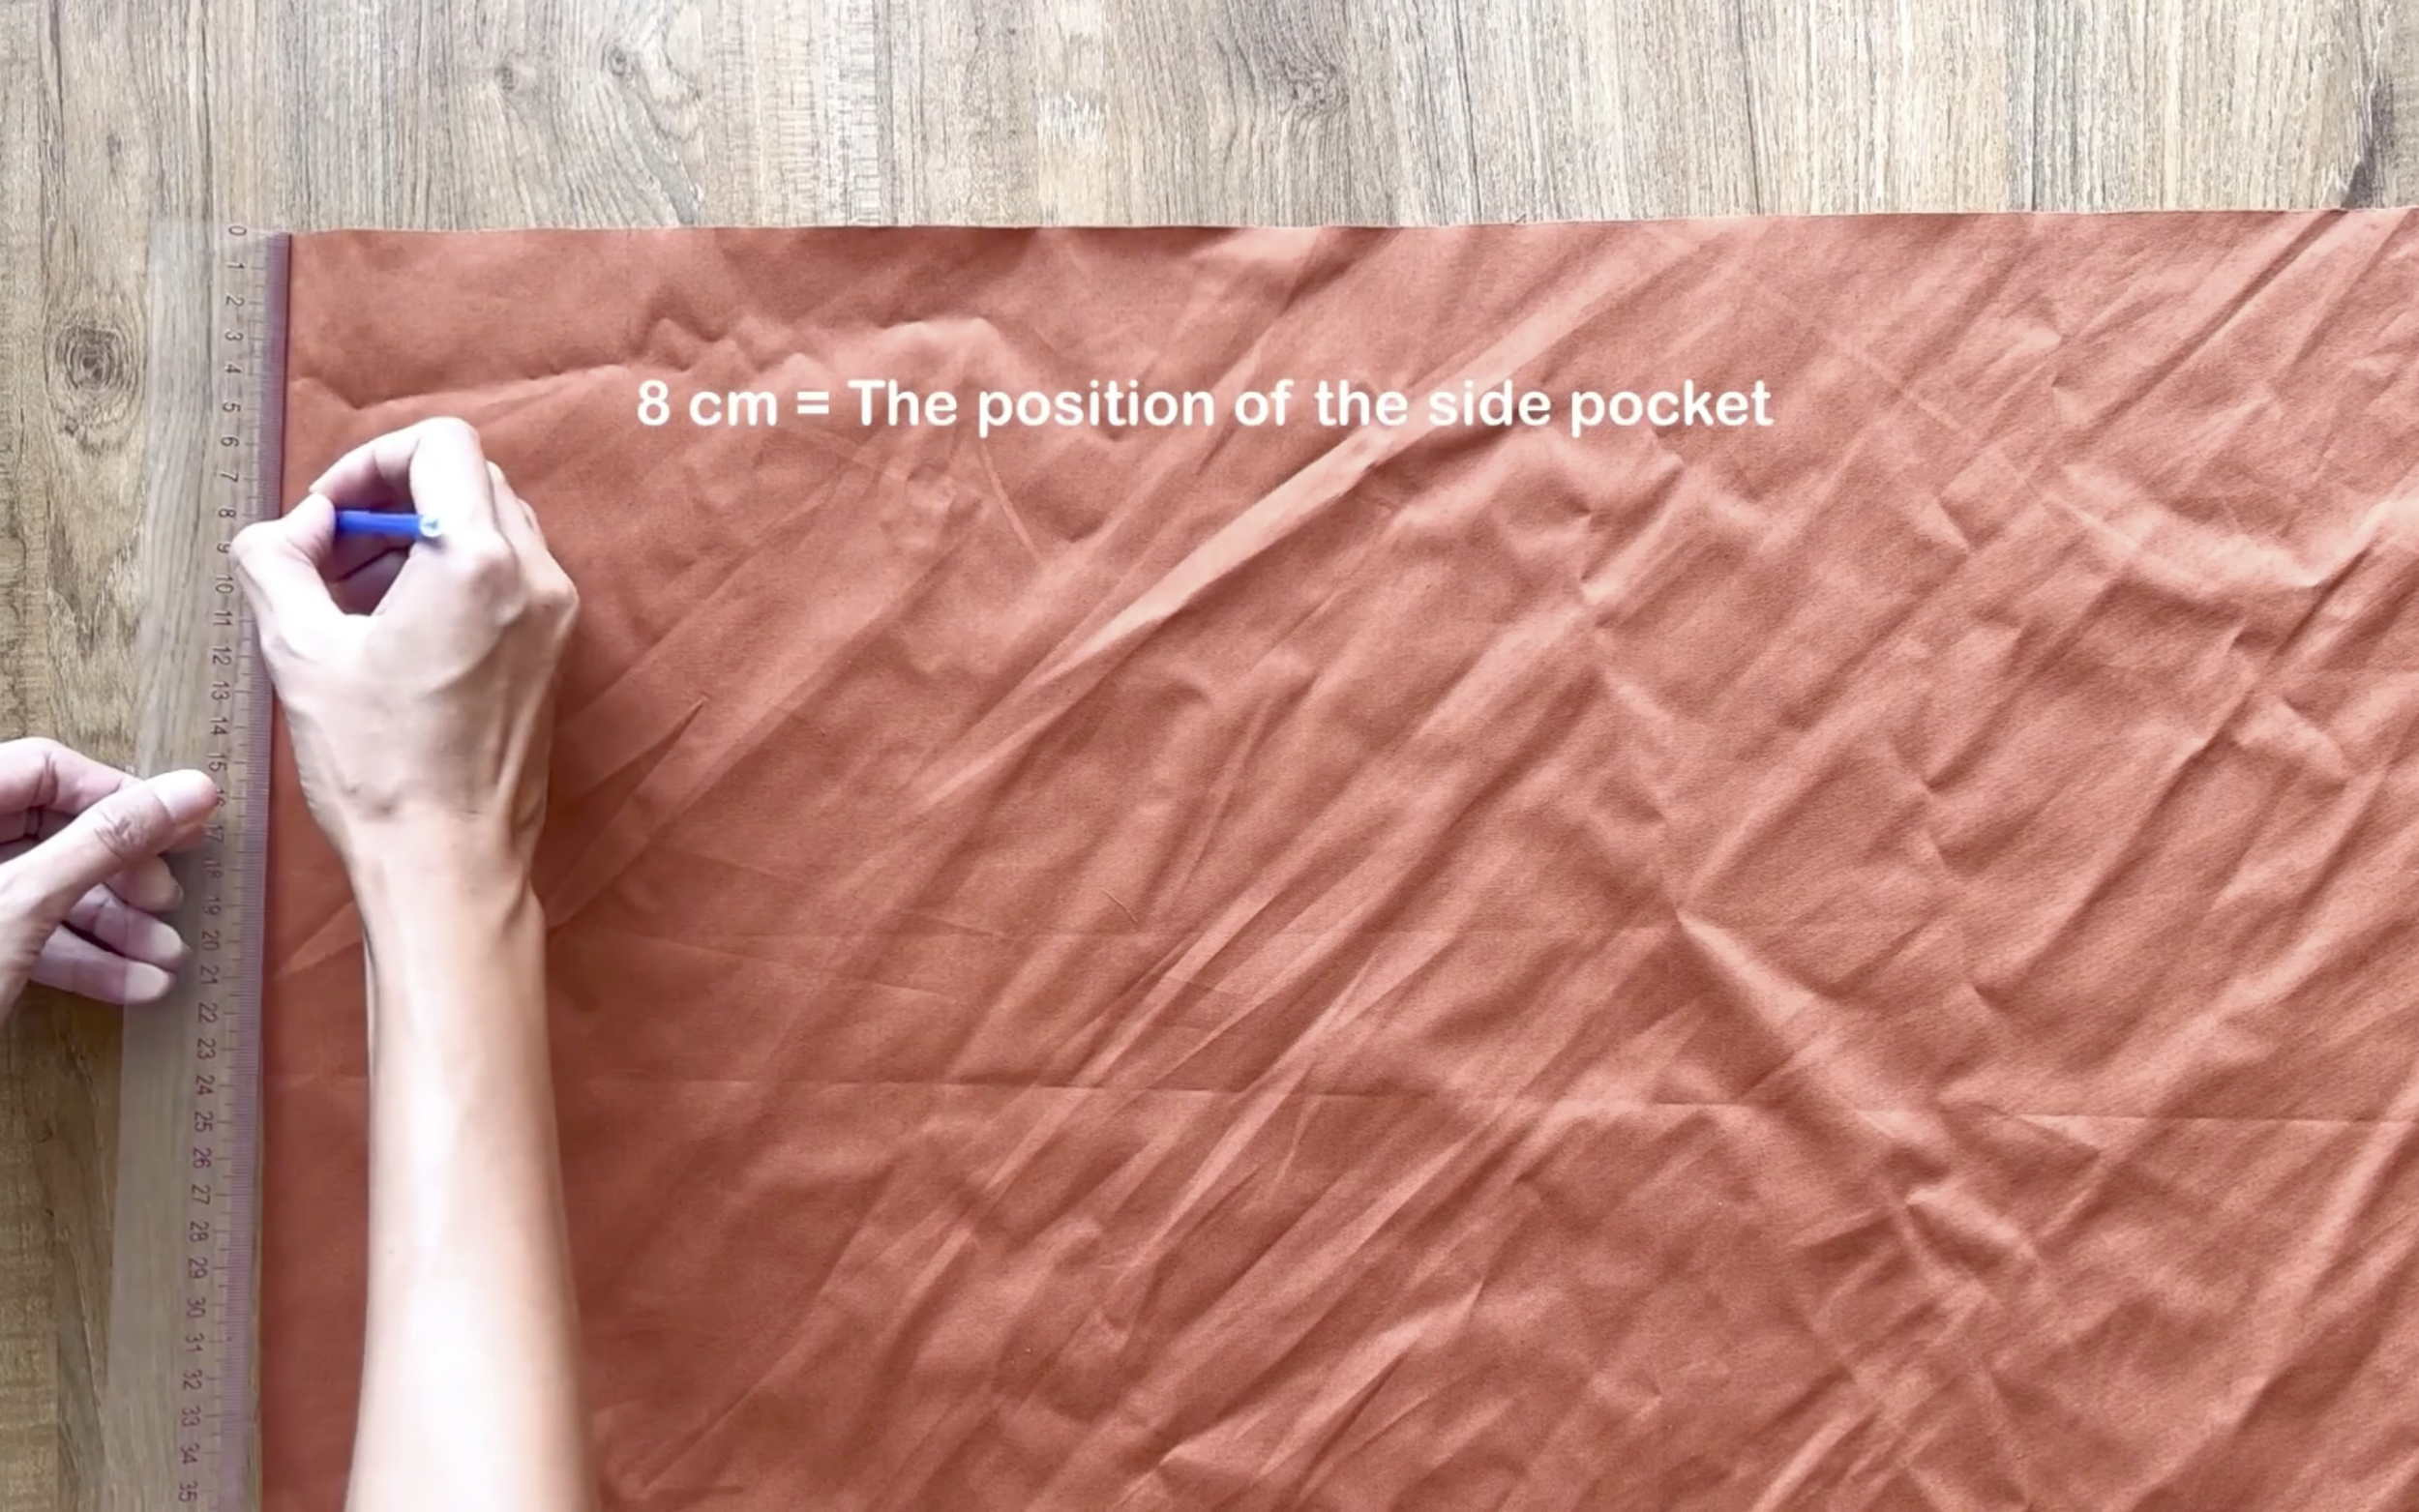
From the top of the back piece, mark down 8 cm on the lane line of the rectangle for the side pocket position.

Then add the pocket piece.
Repeat this on the other lane line of the rectangle.
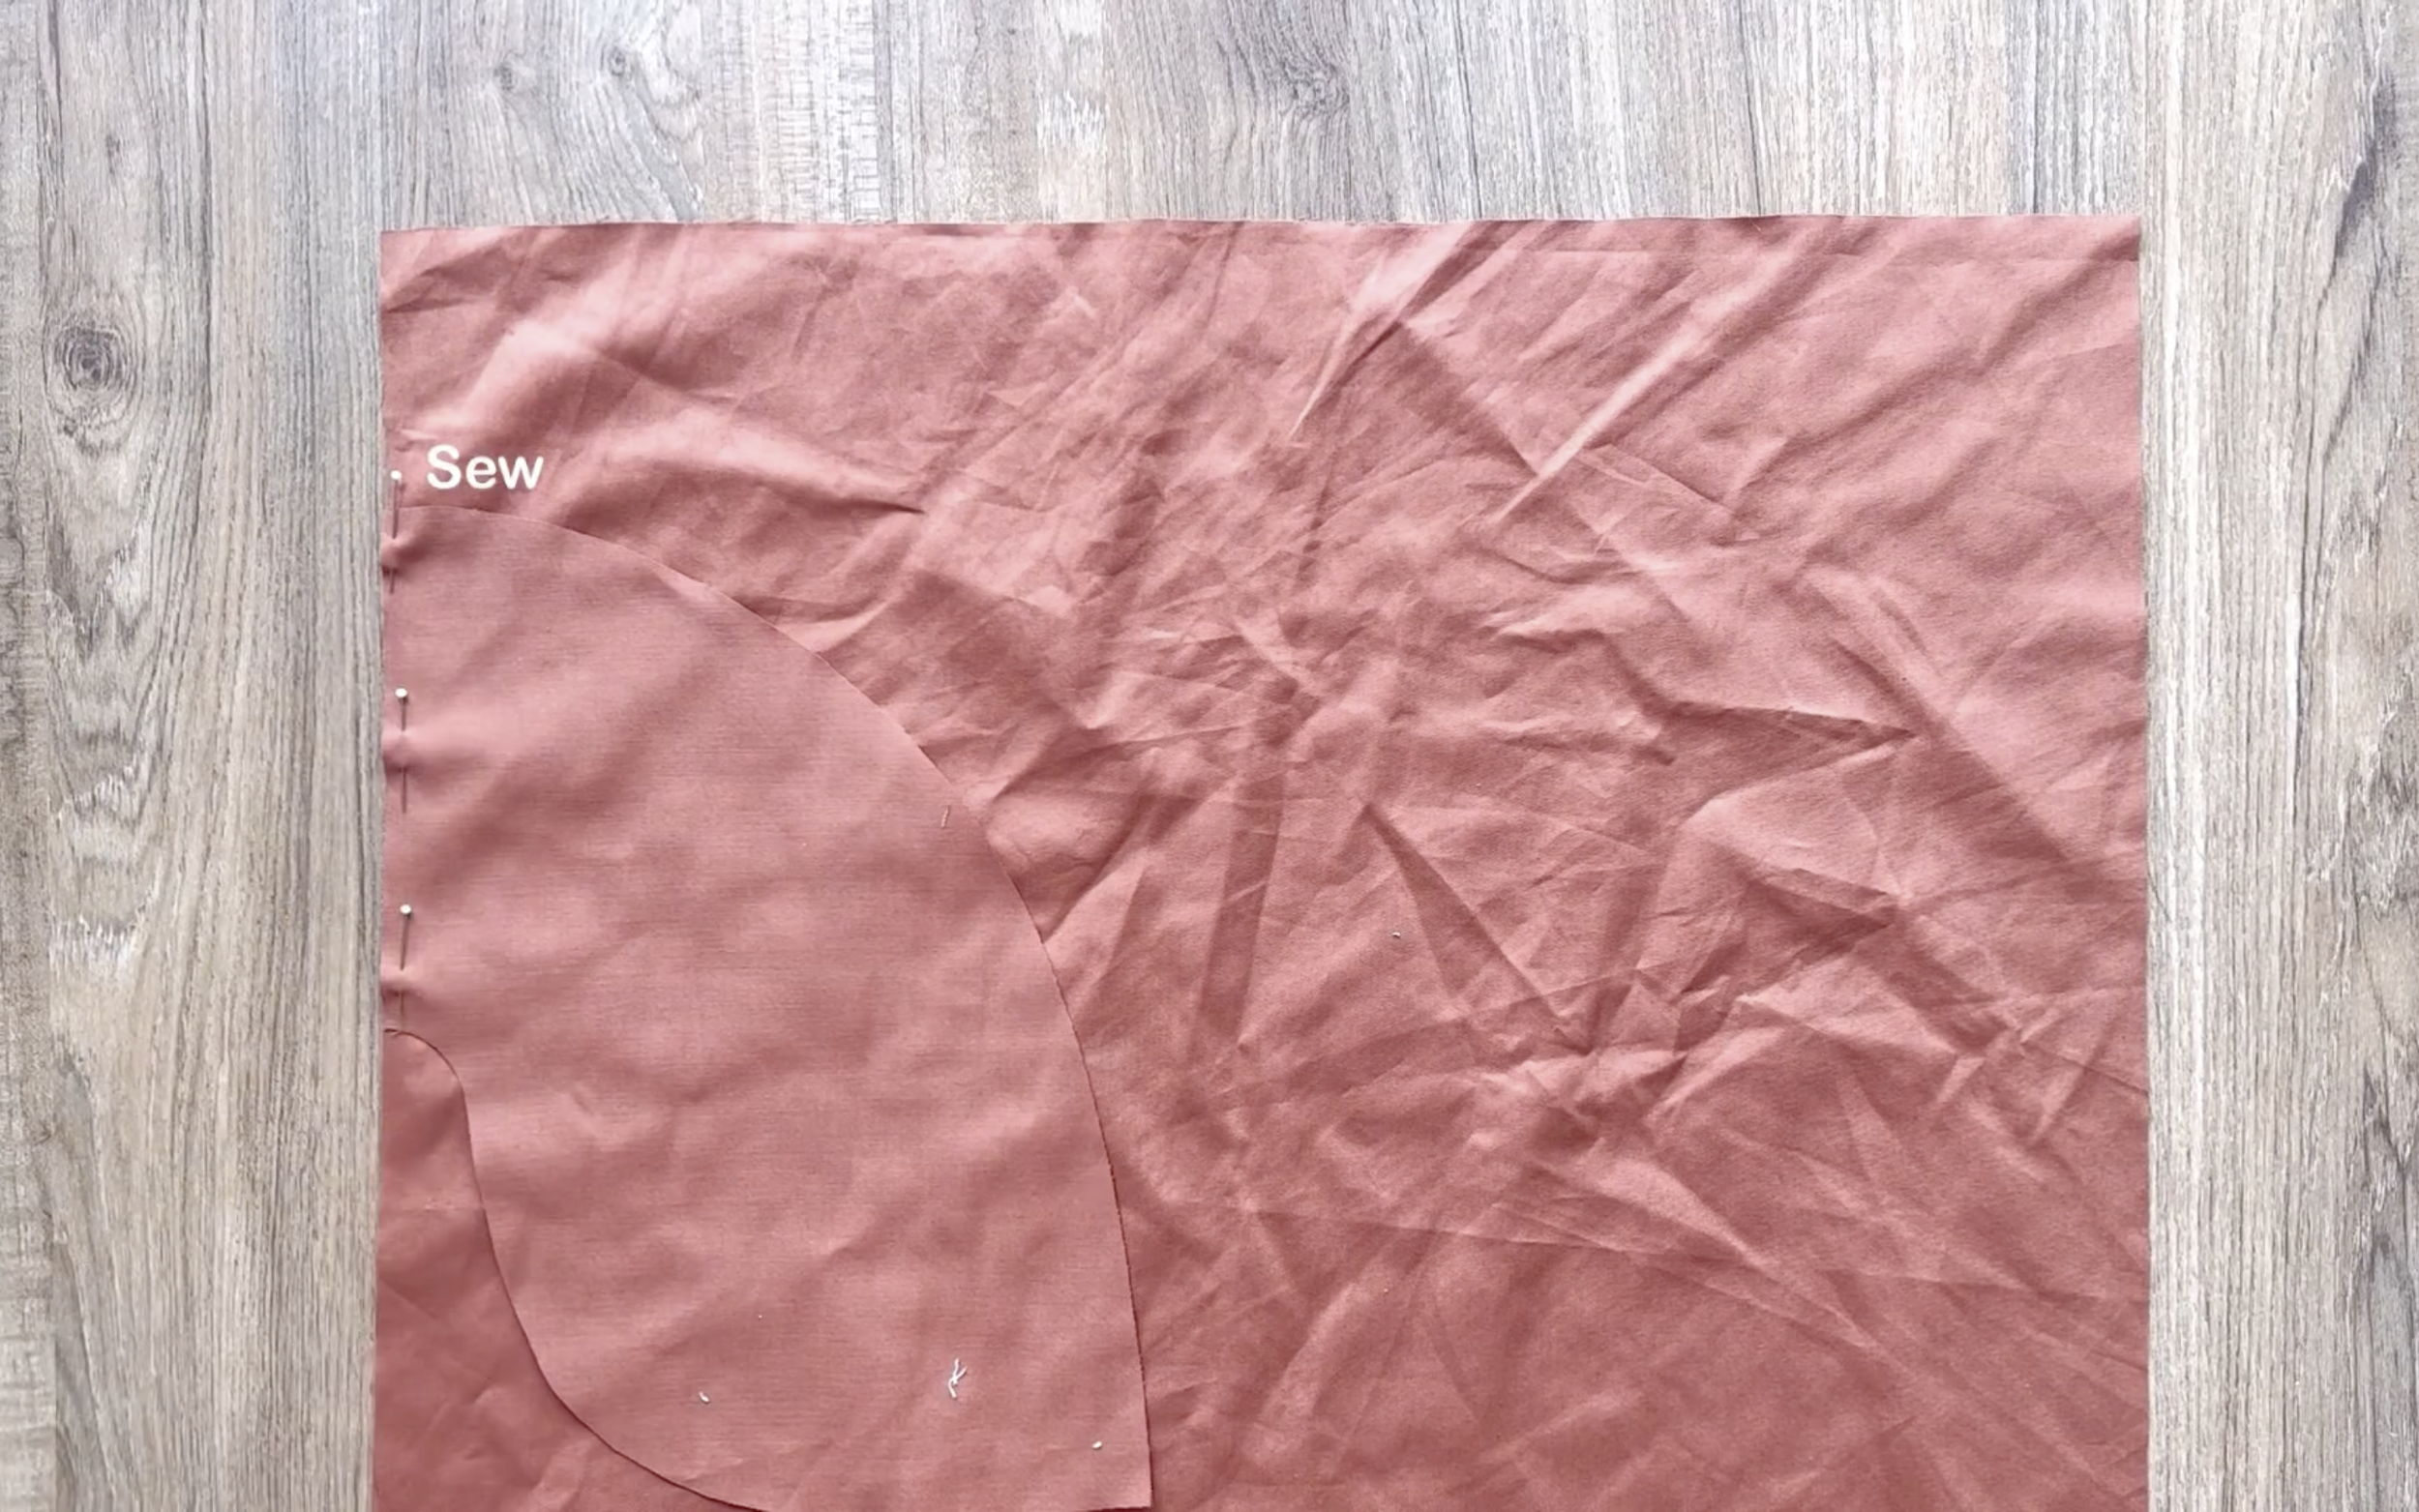
Make sure the back piece of the skirt is on the right side of the fabric and the pocket piece on the wrong side, so the right side of the back piece faces the right side of the pocket.
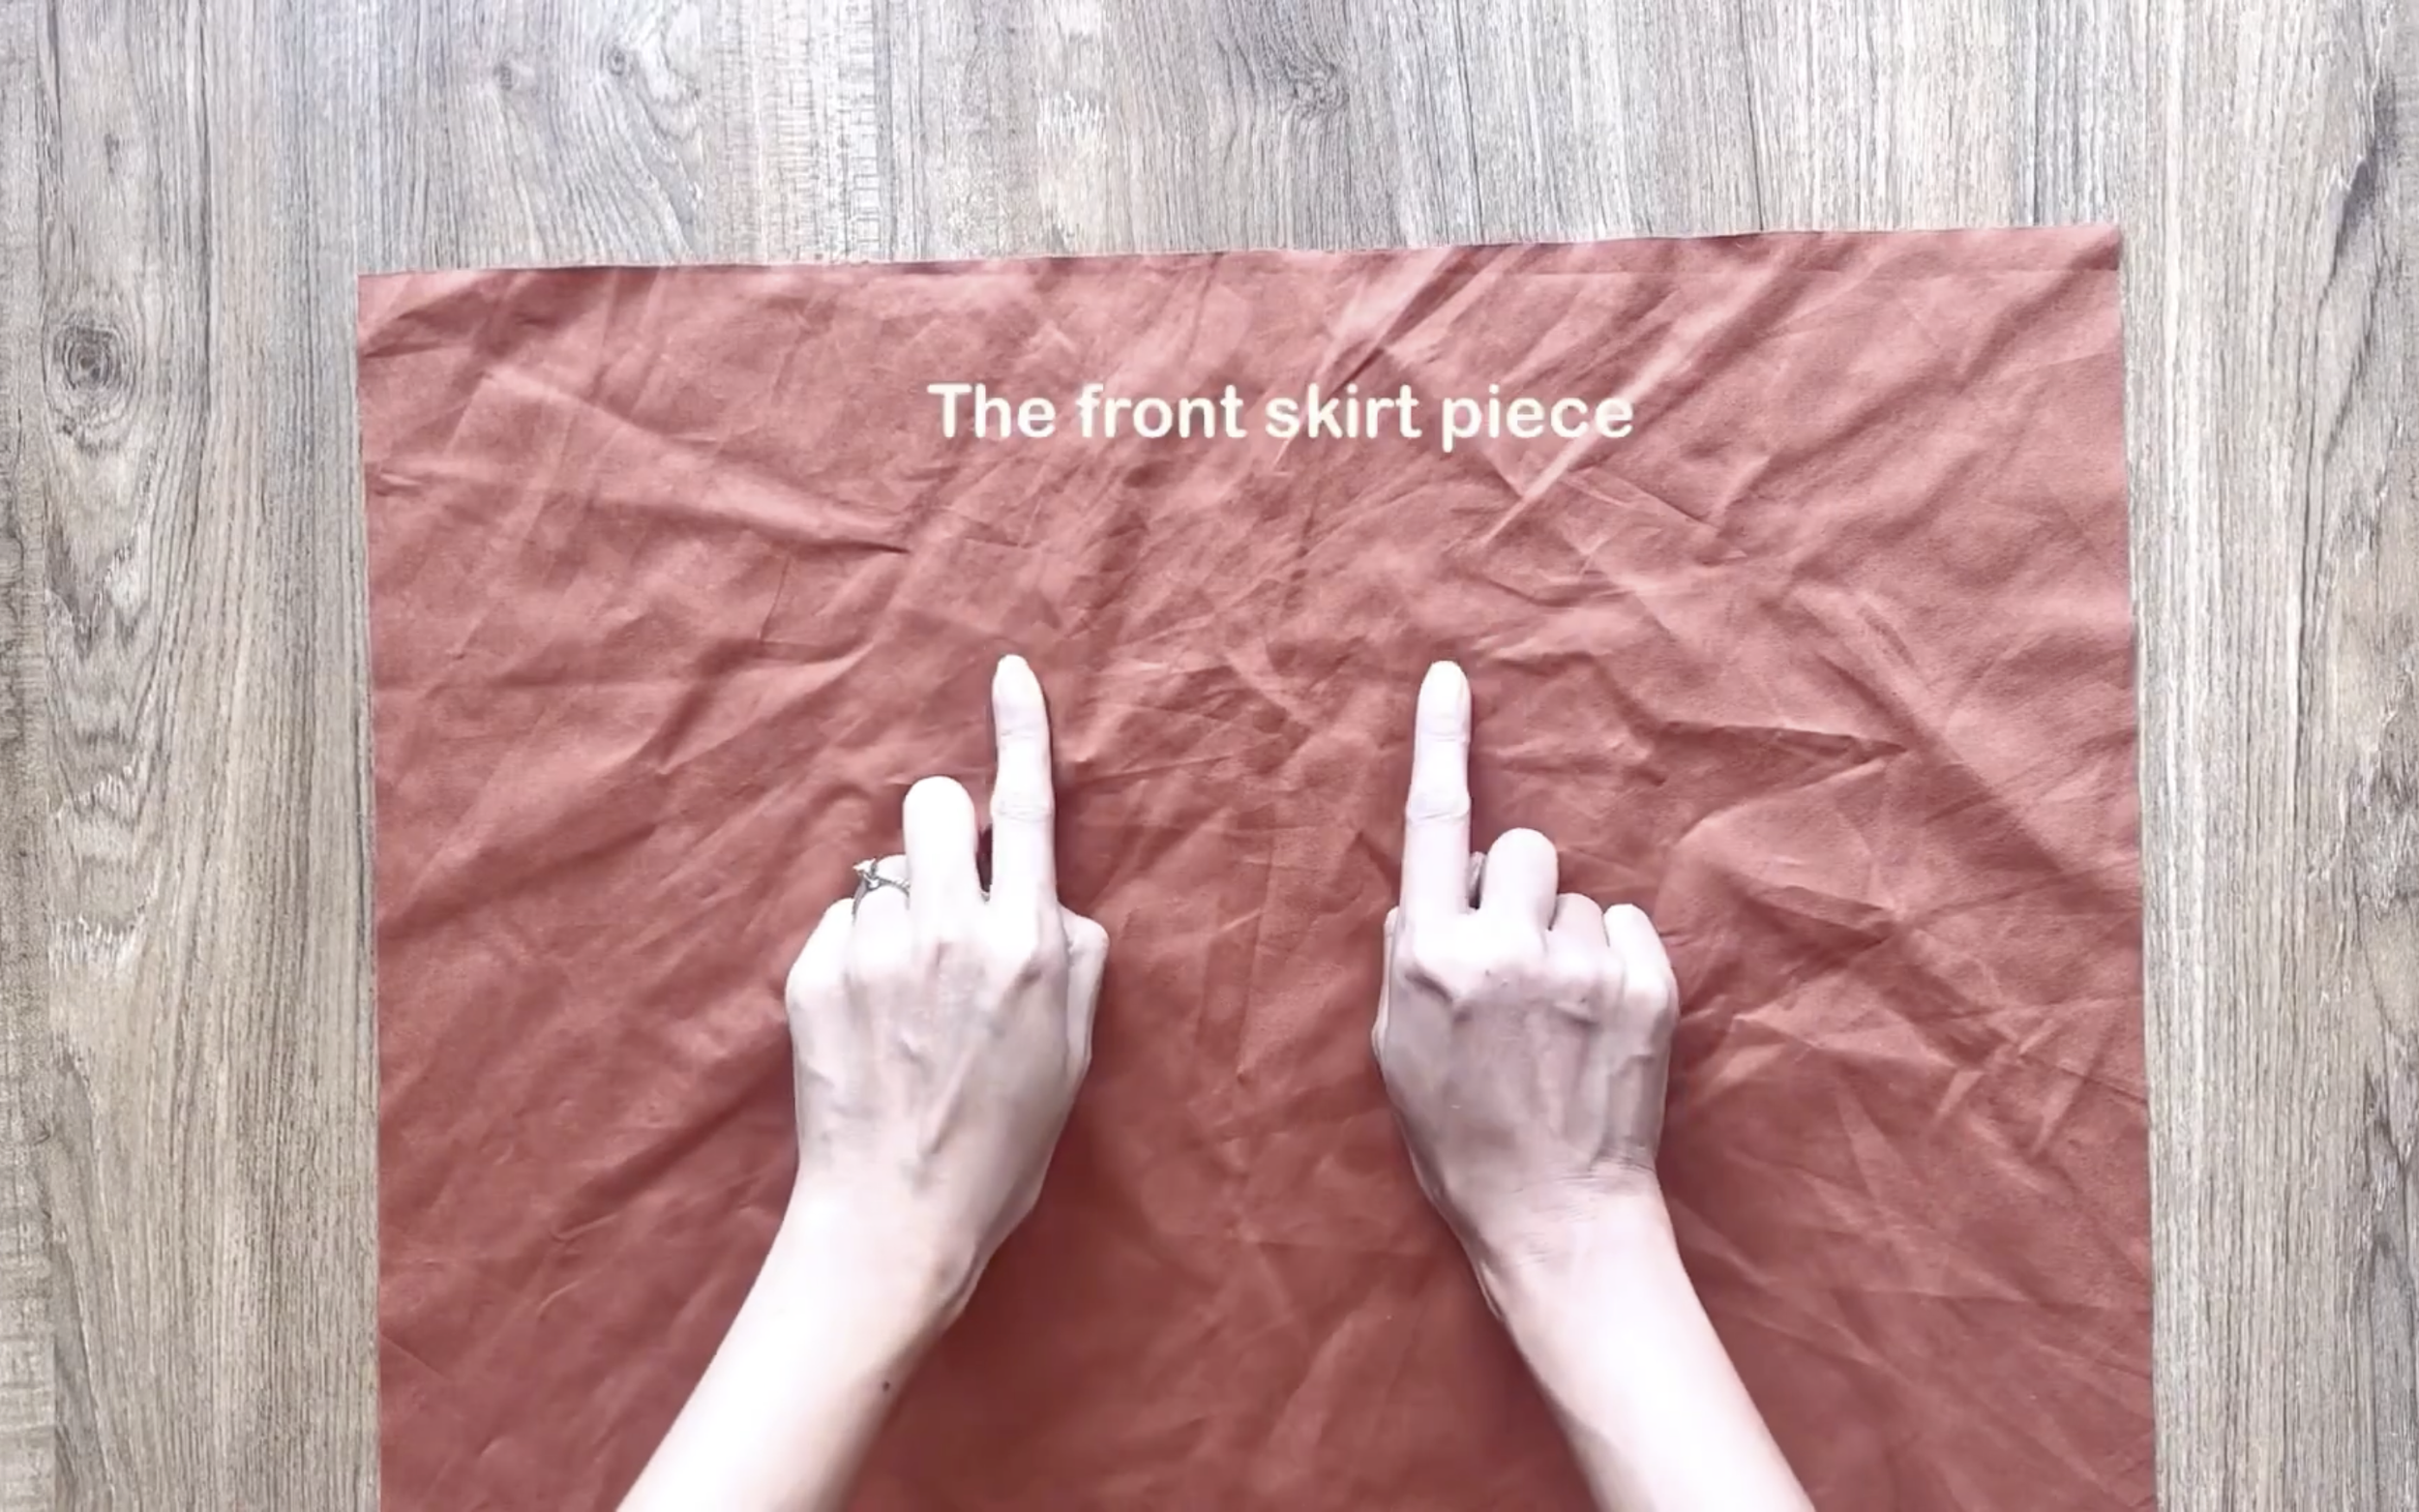
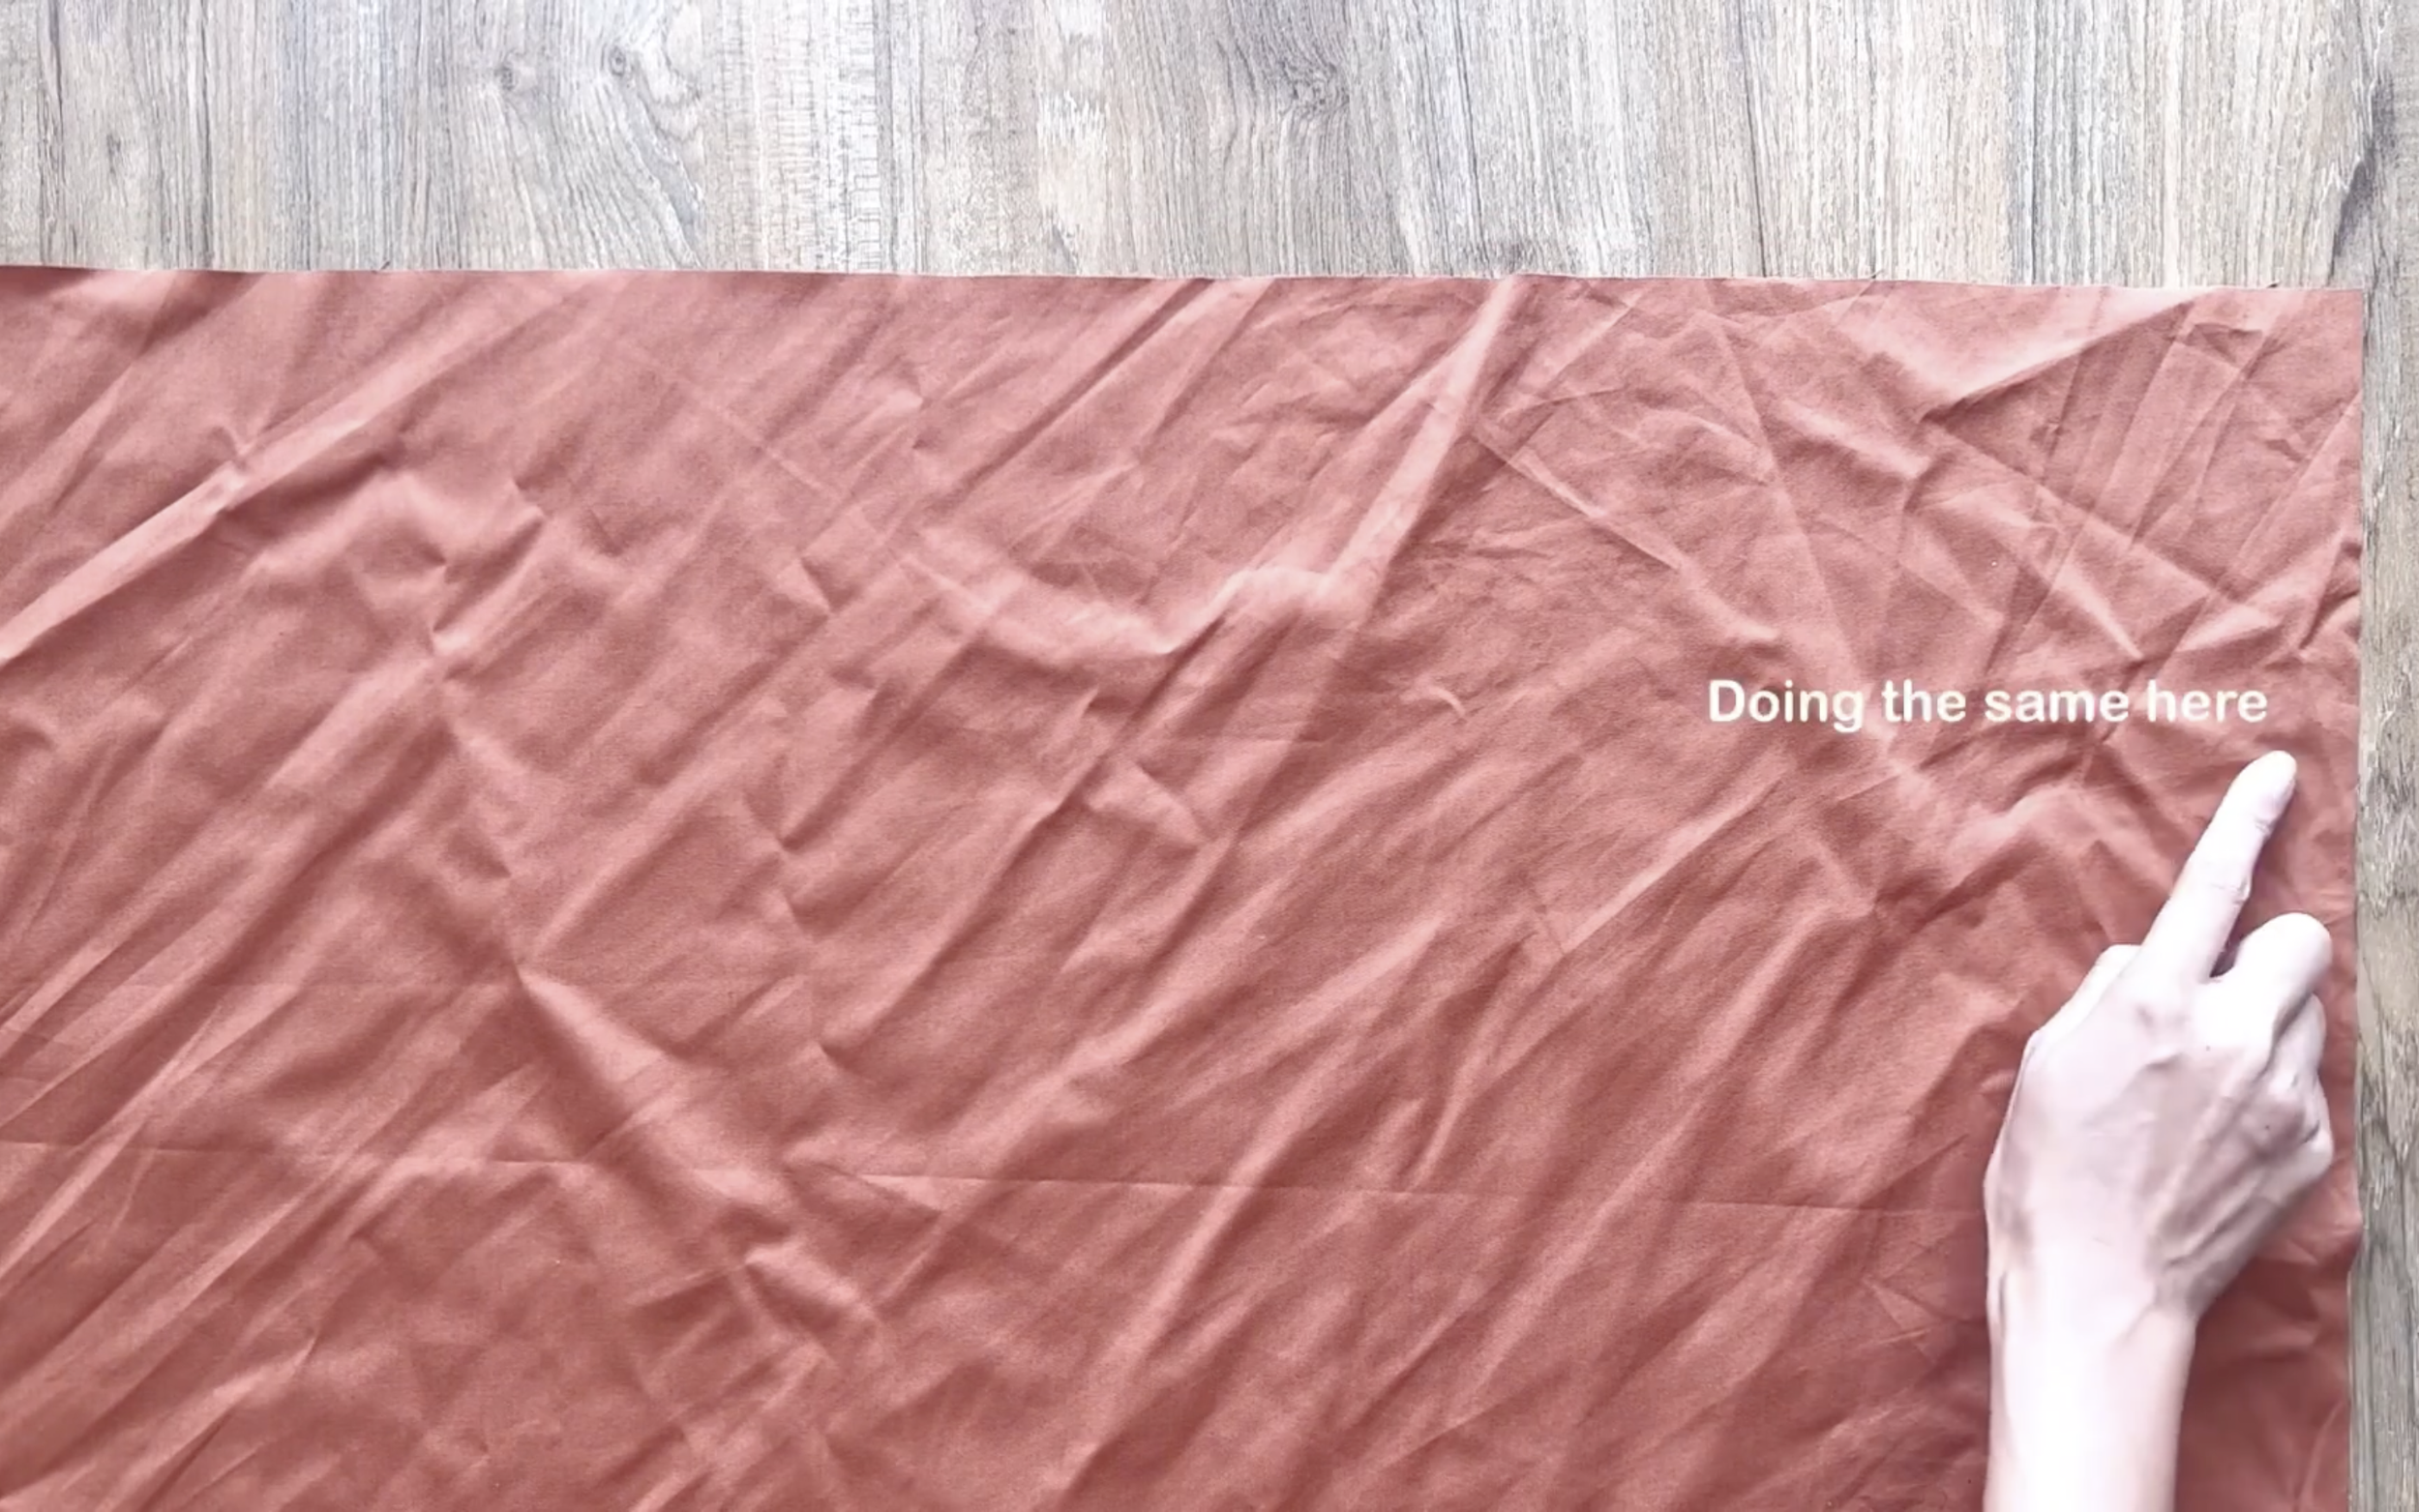
Use the same method to add pocket pieces to the front skirt pieces, but only add to one lane line of each front piece.
Each pocket on the front pieces will be on opposite sides, allowing the front and back pieces to be connected at the sides.
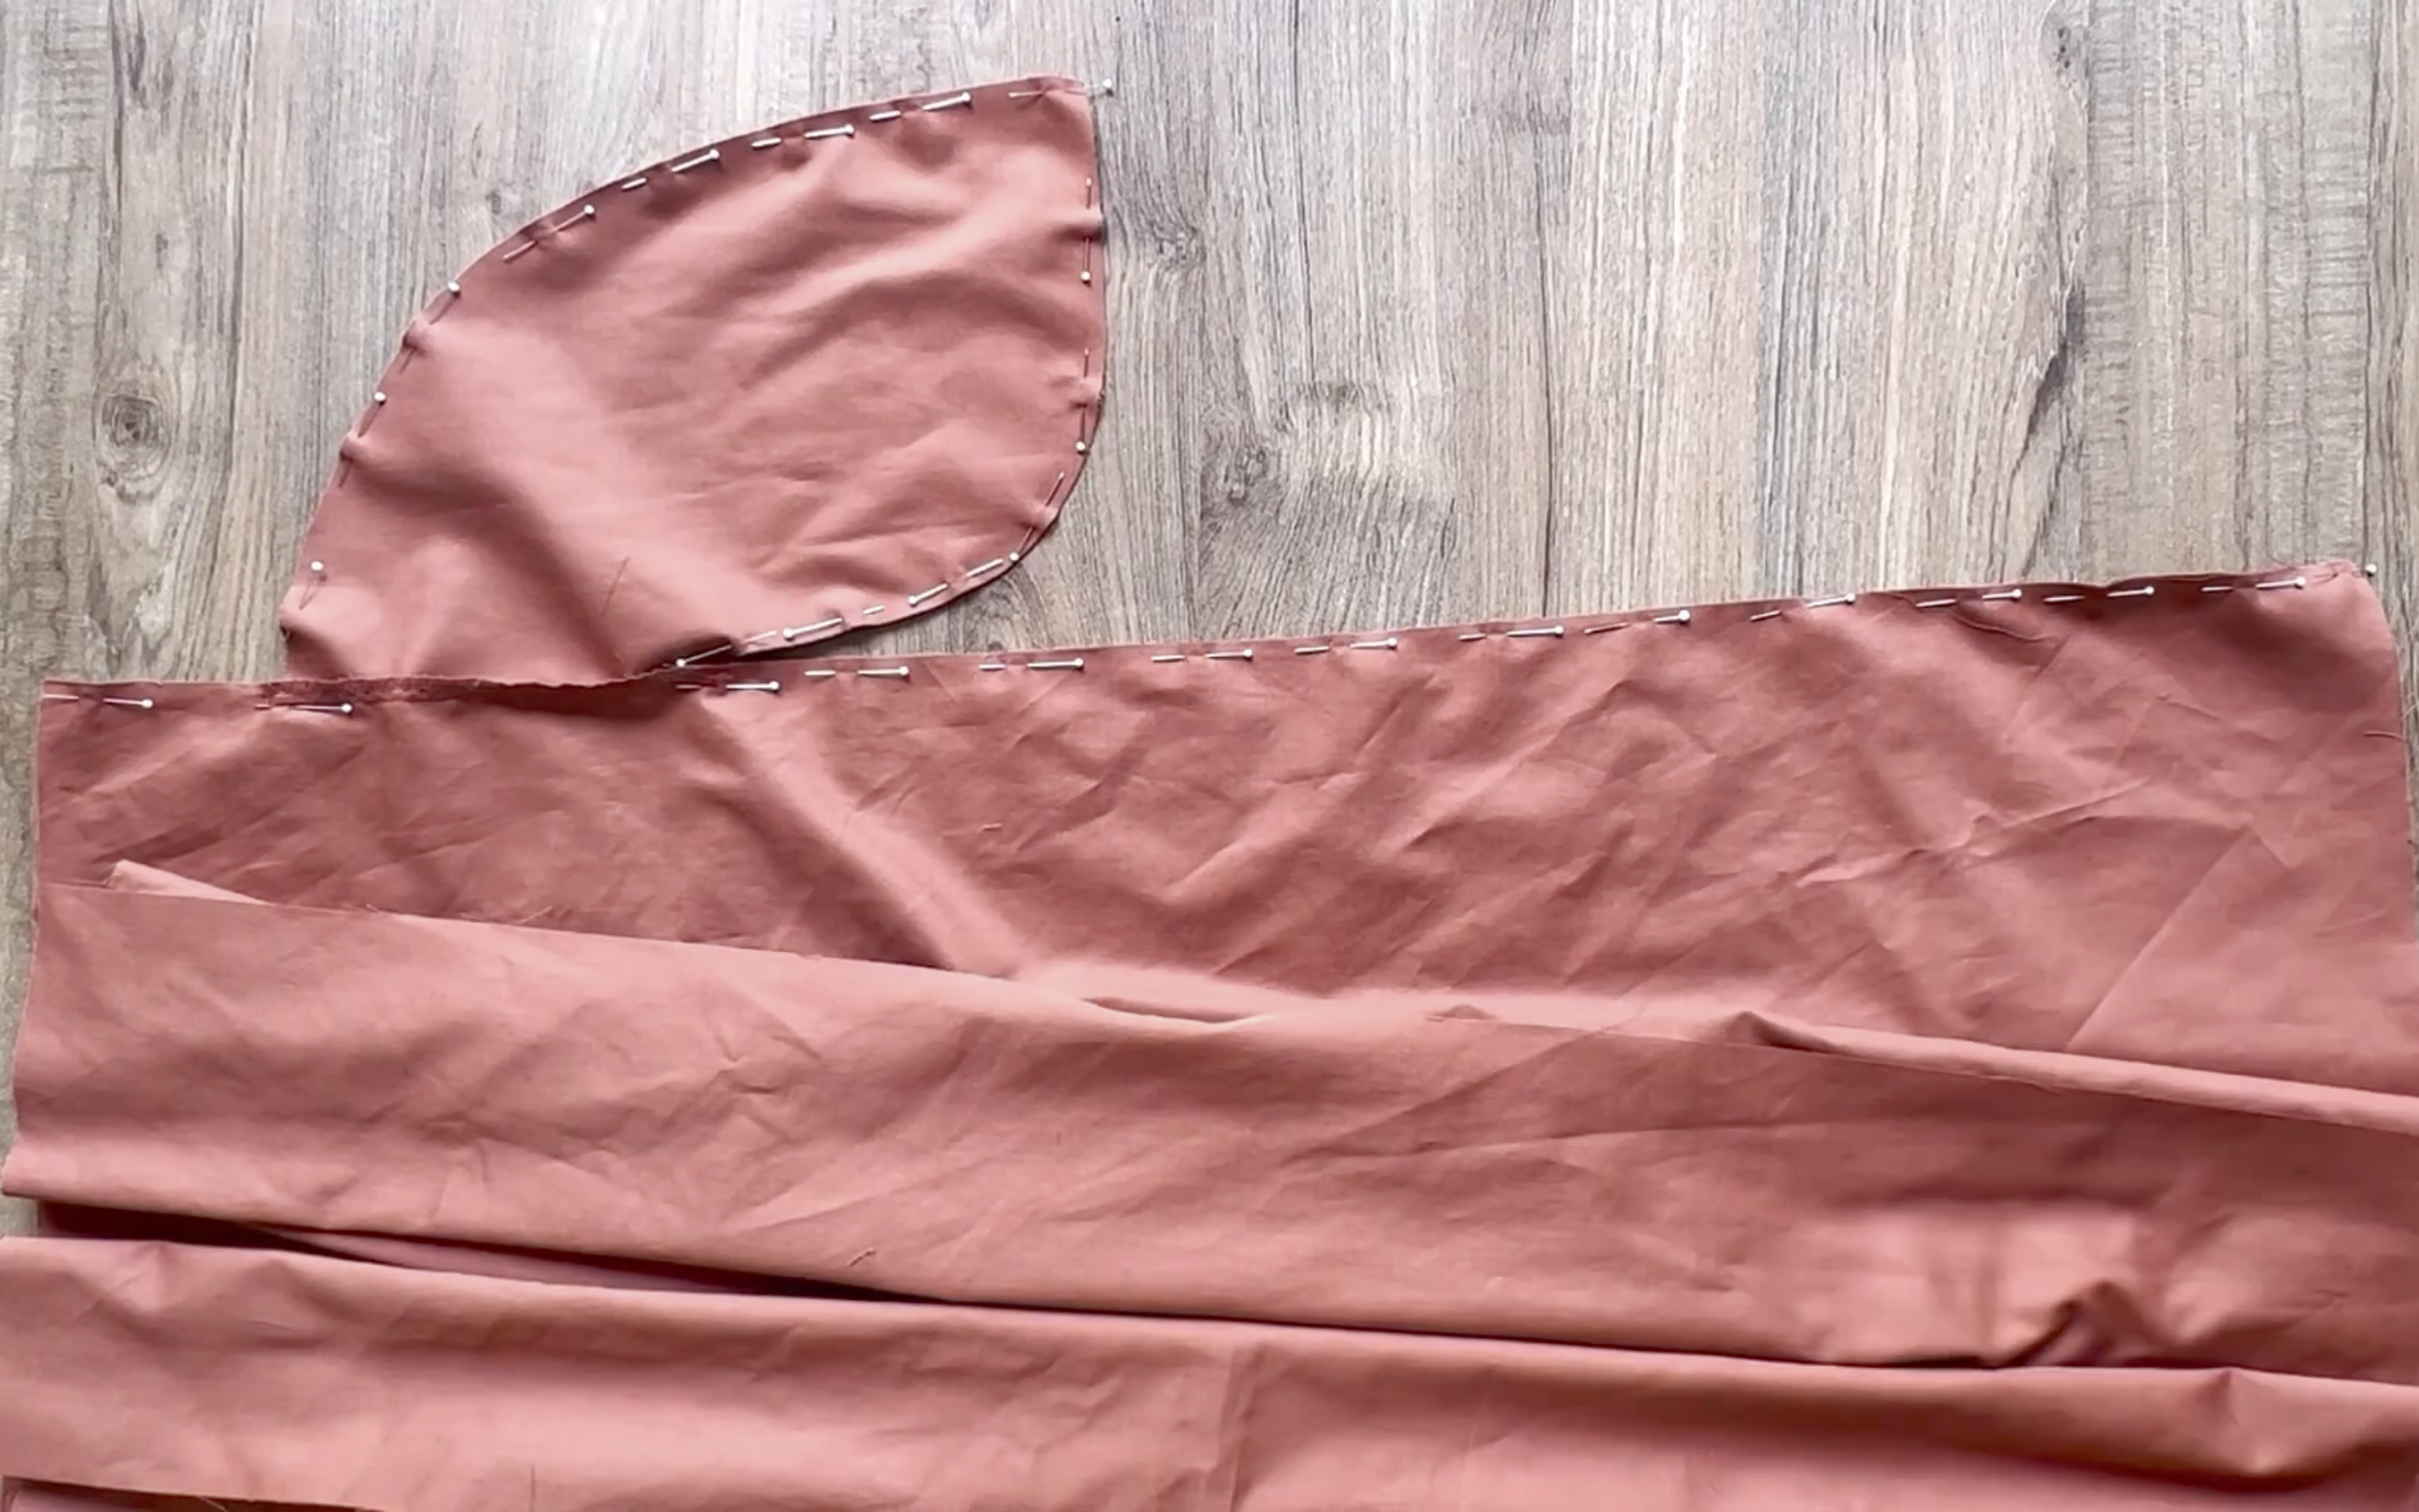
After sewing, overlock the fabric edge to give the skirt a clean line.
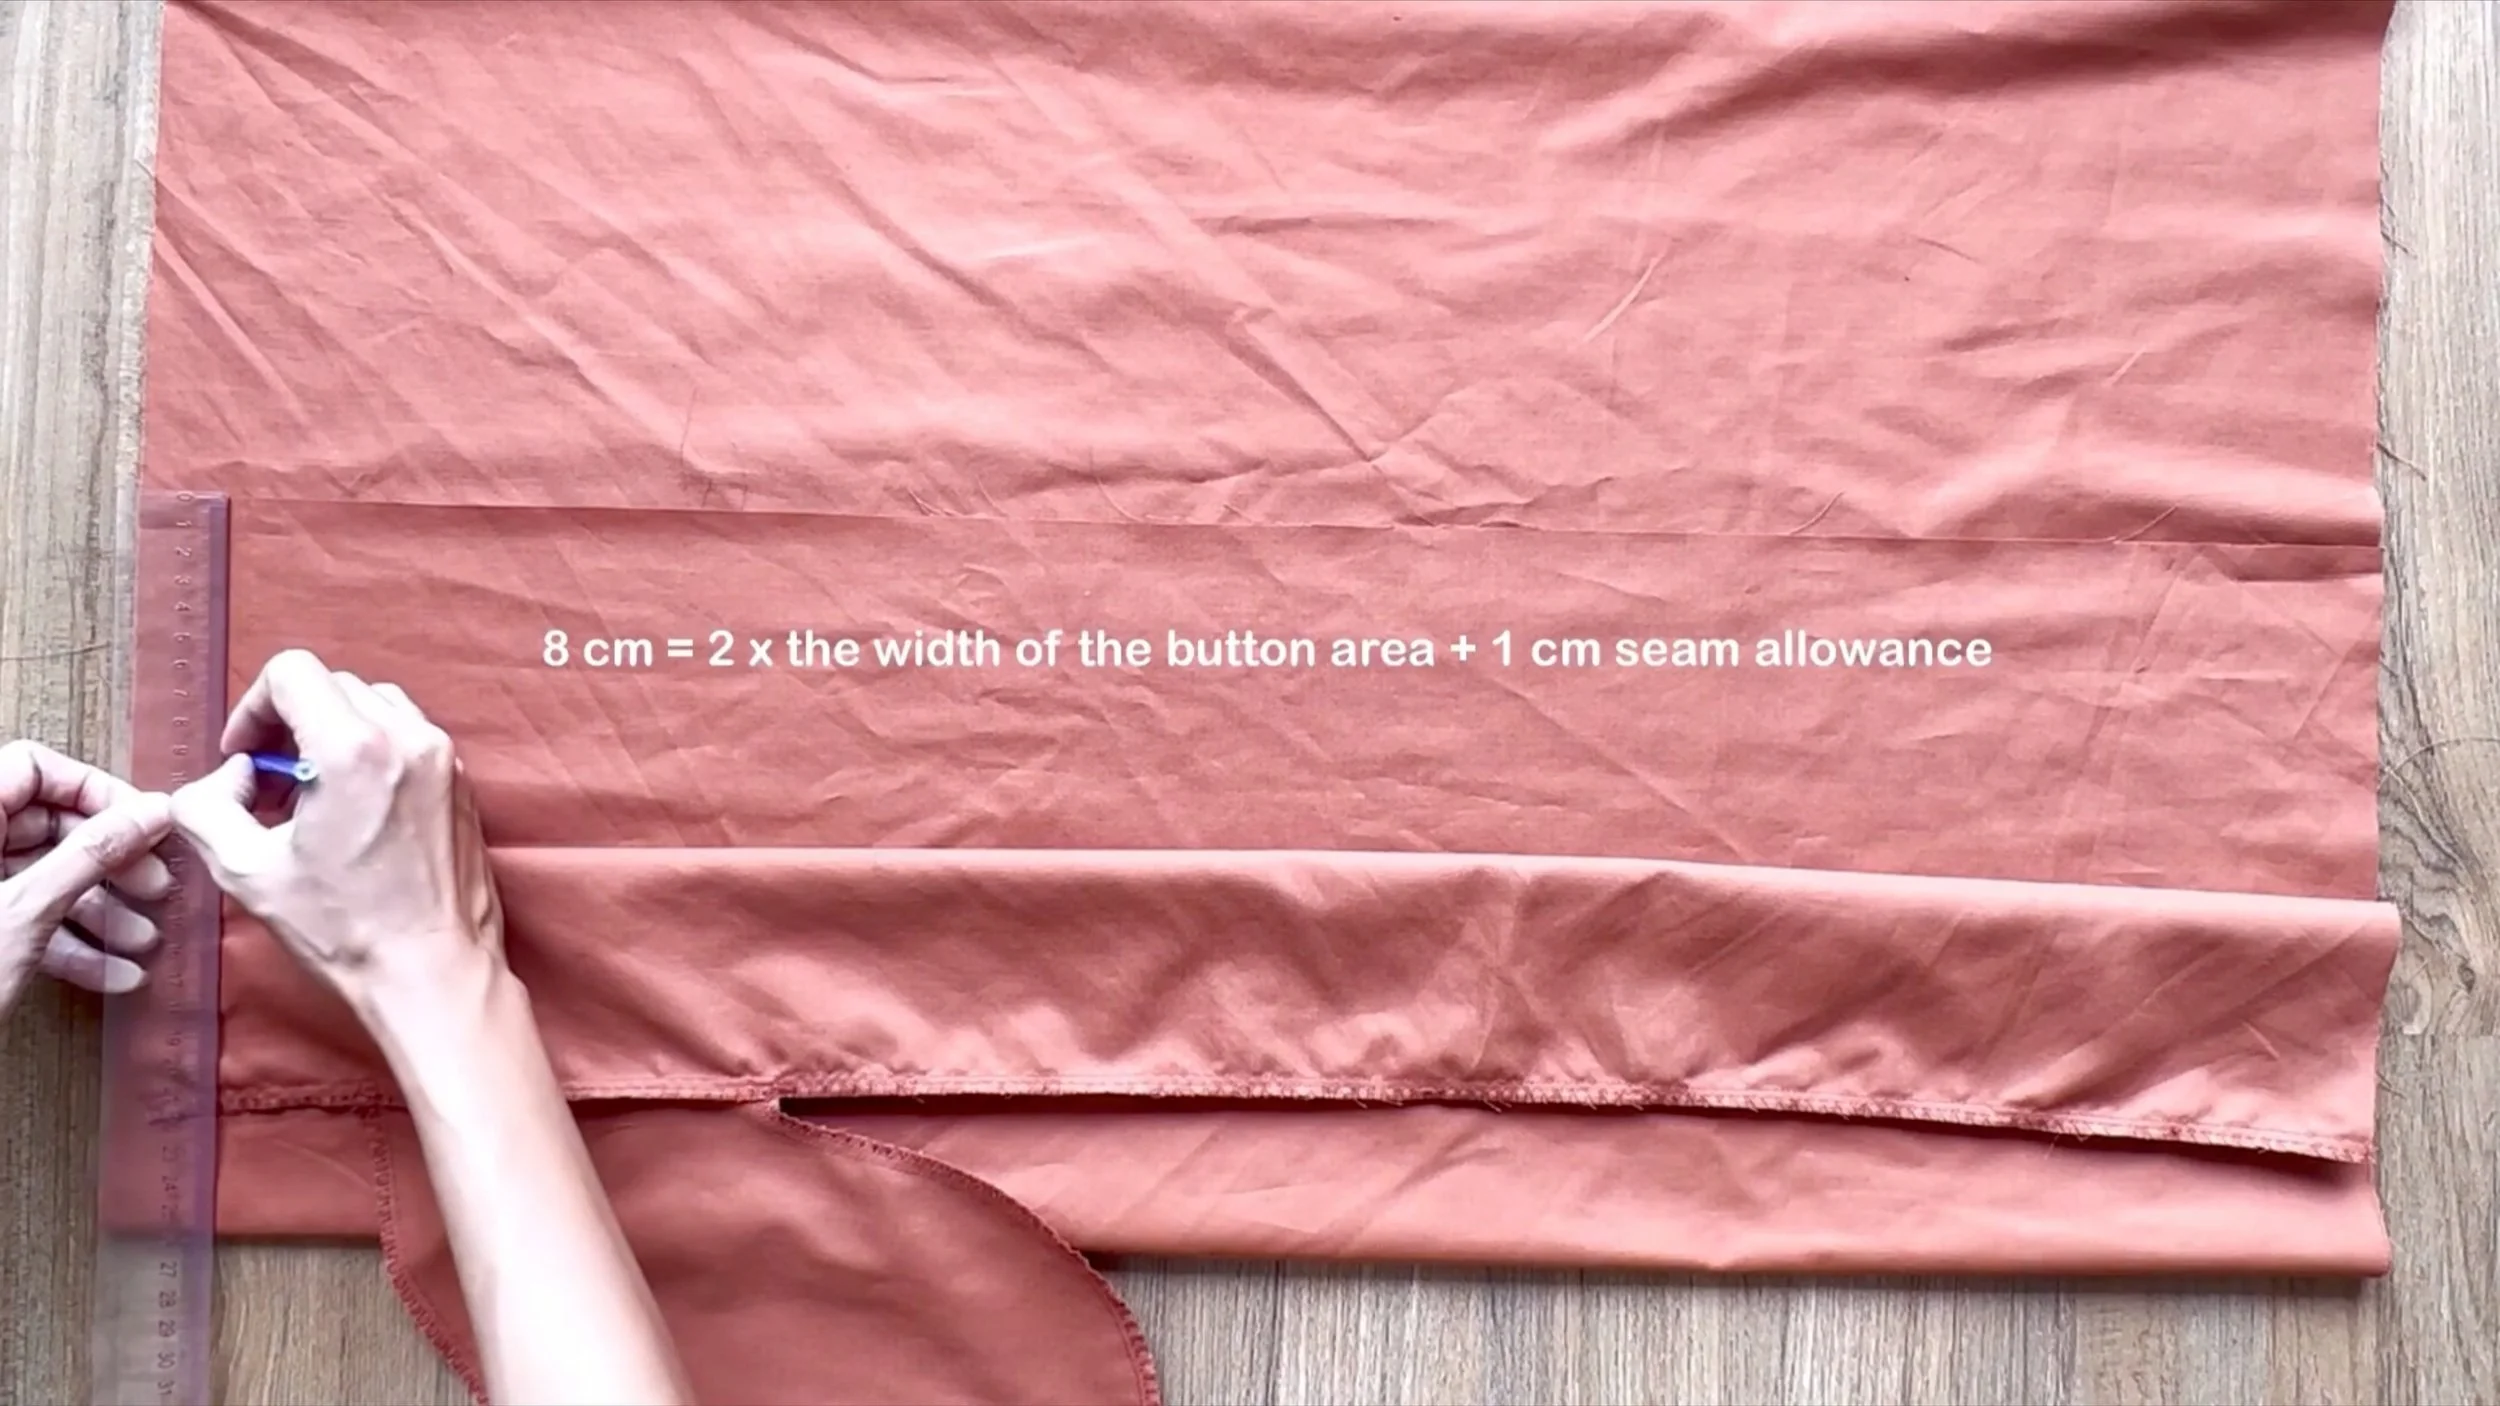
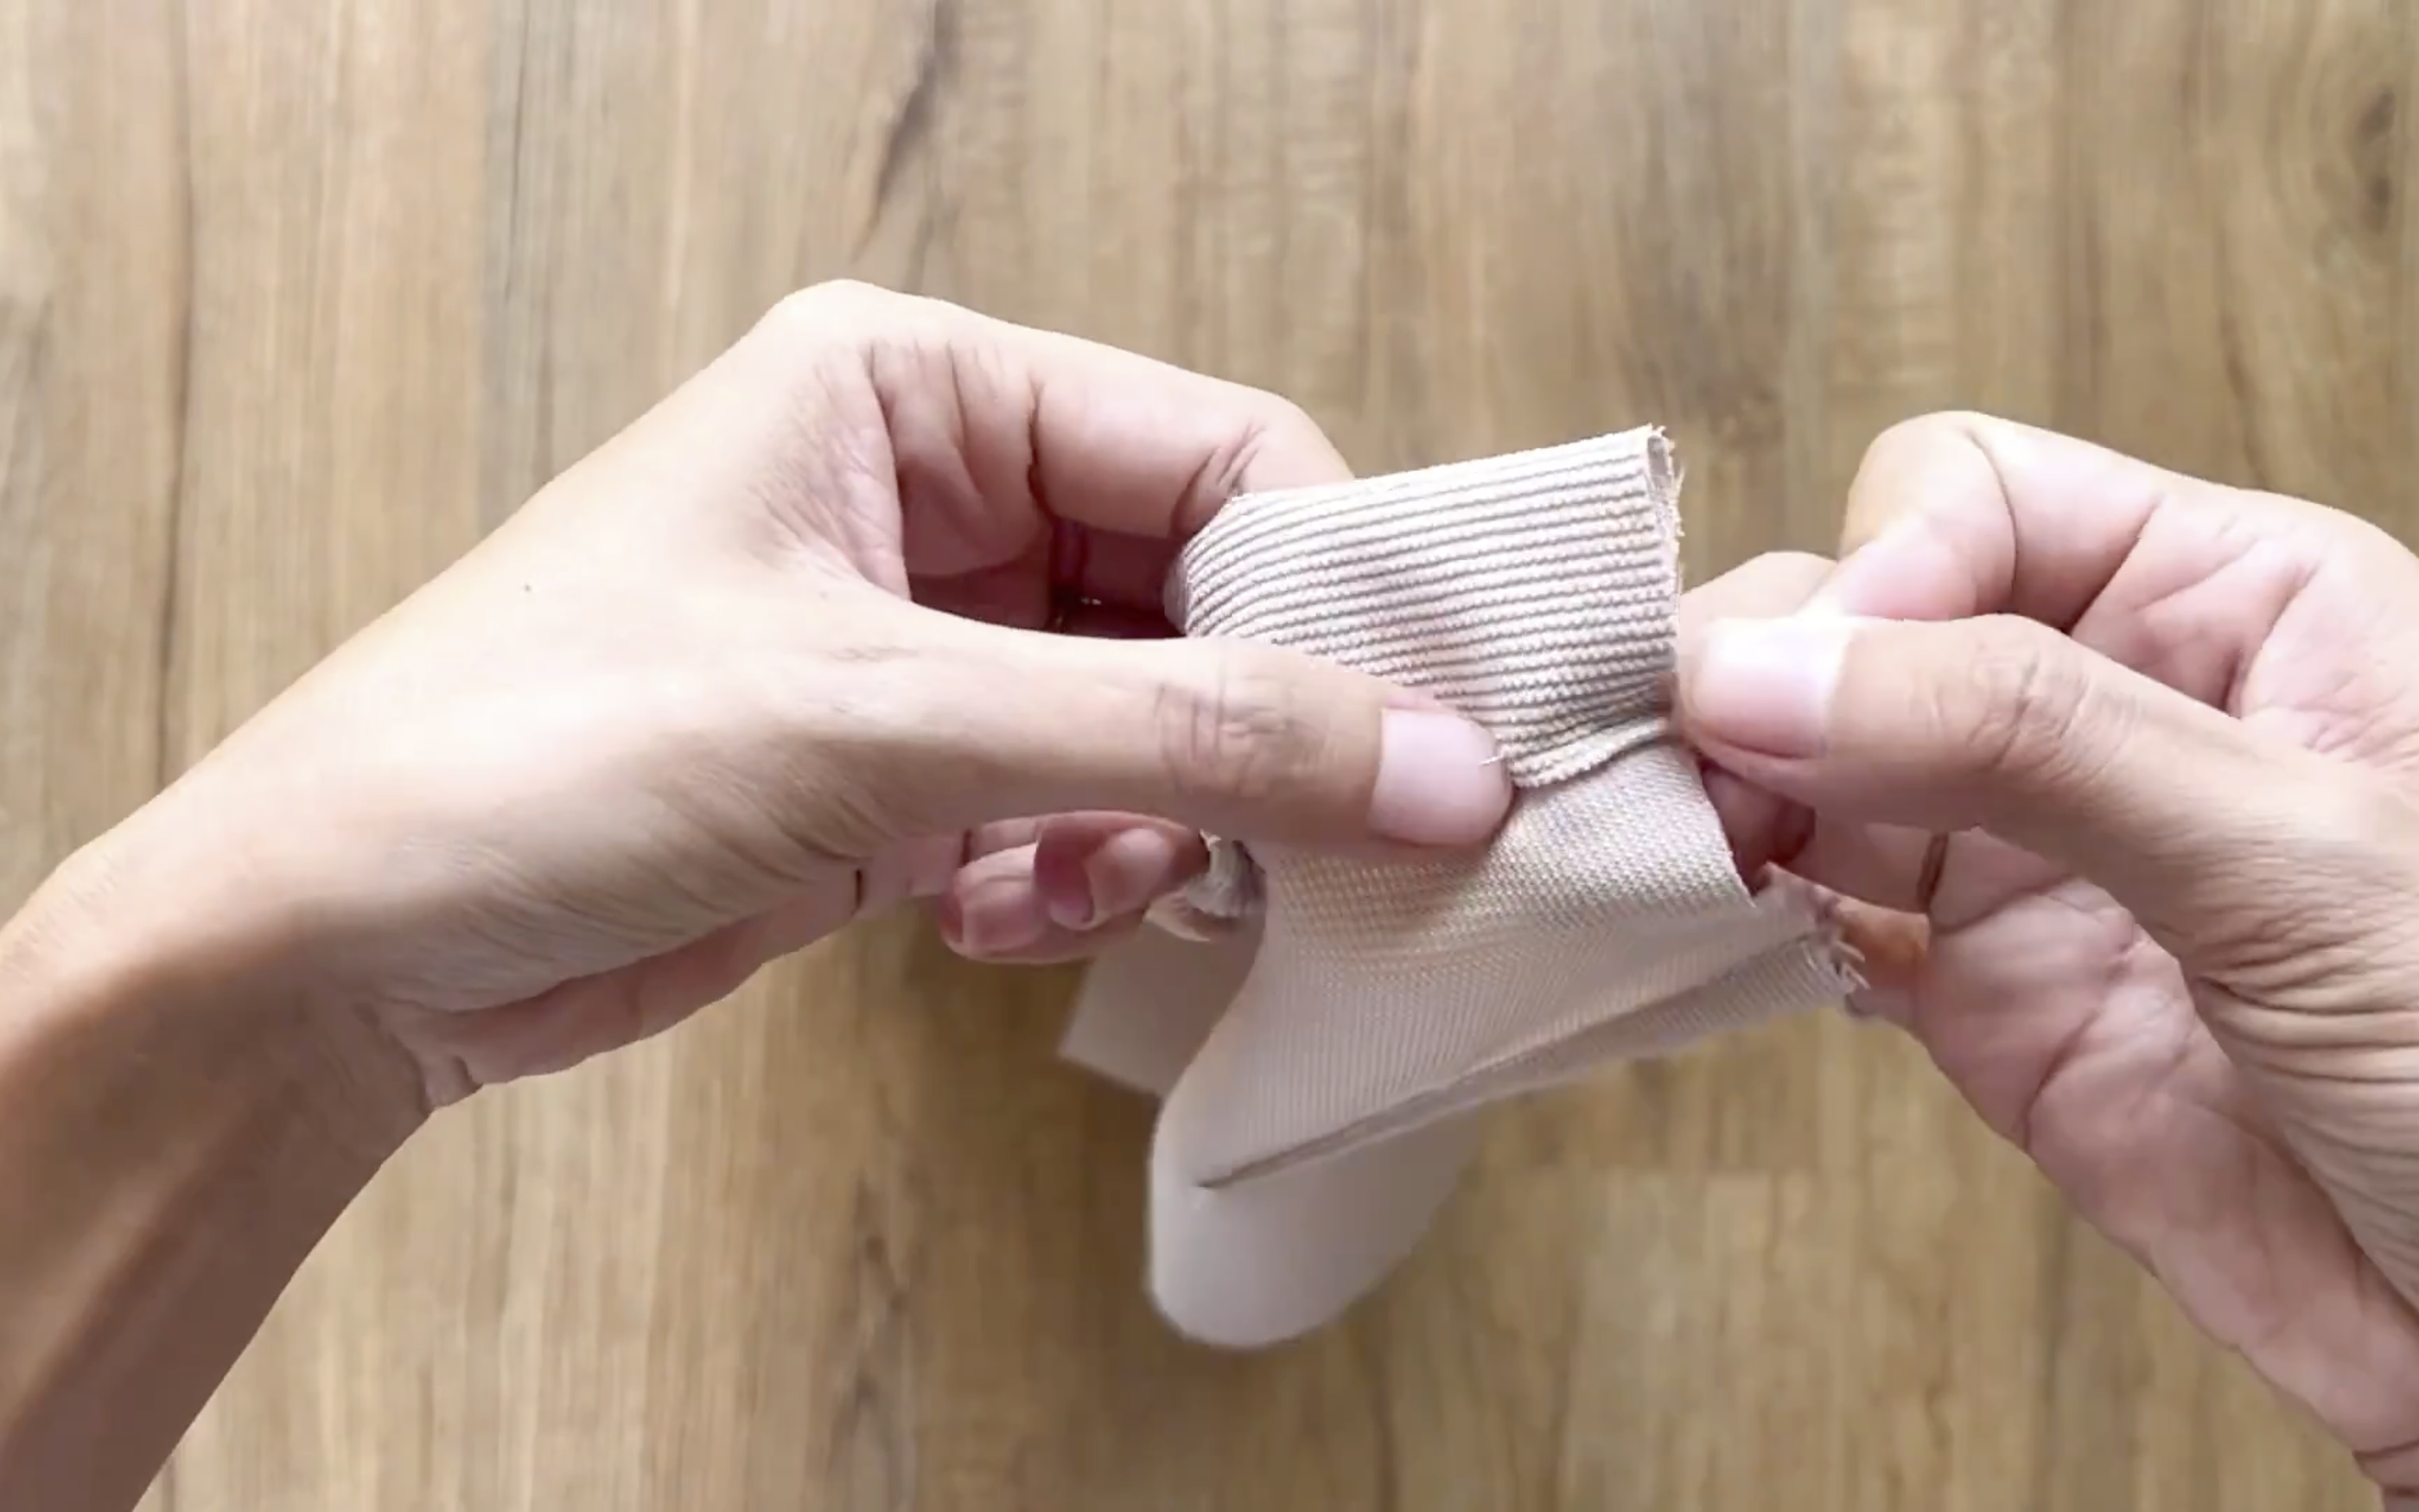
For the button and buttonhole area, draw a line 8 cm below the lane line on the front skirt piece.
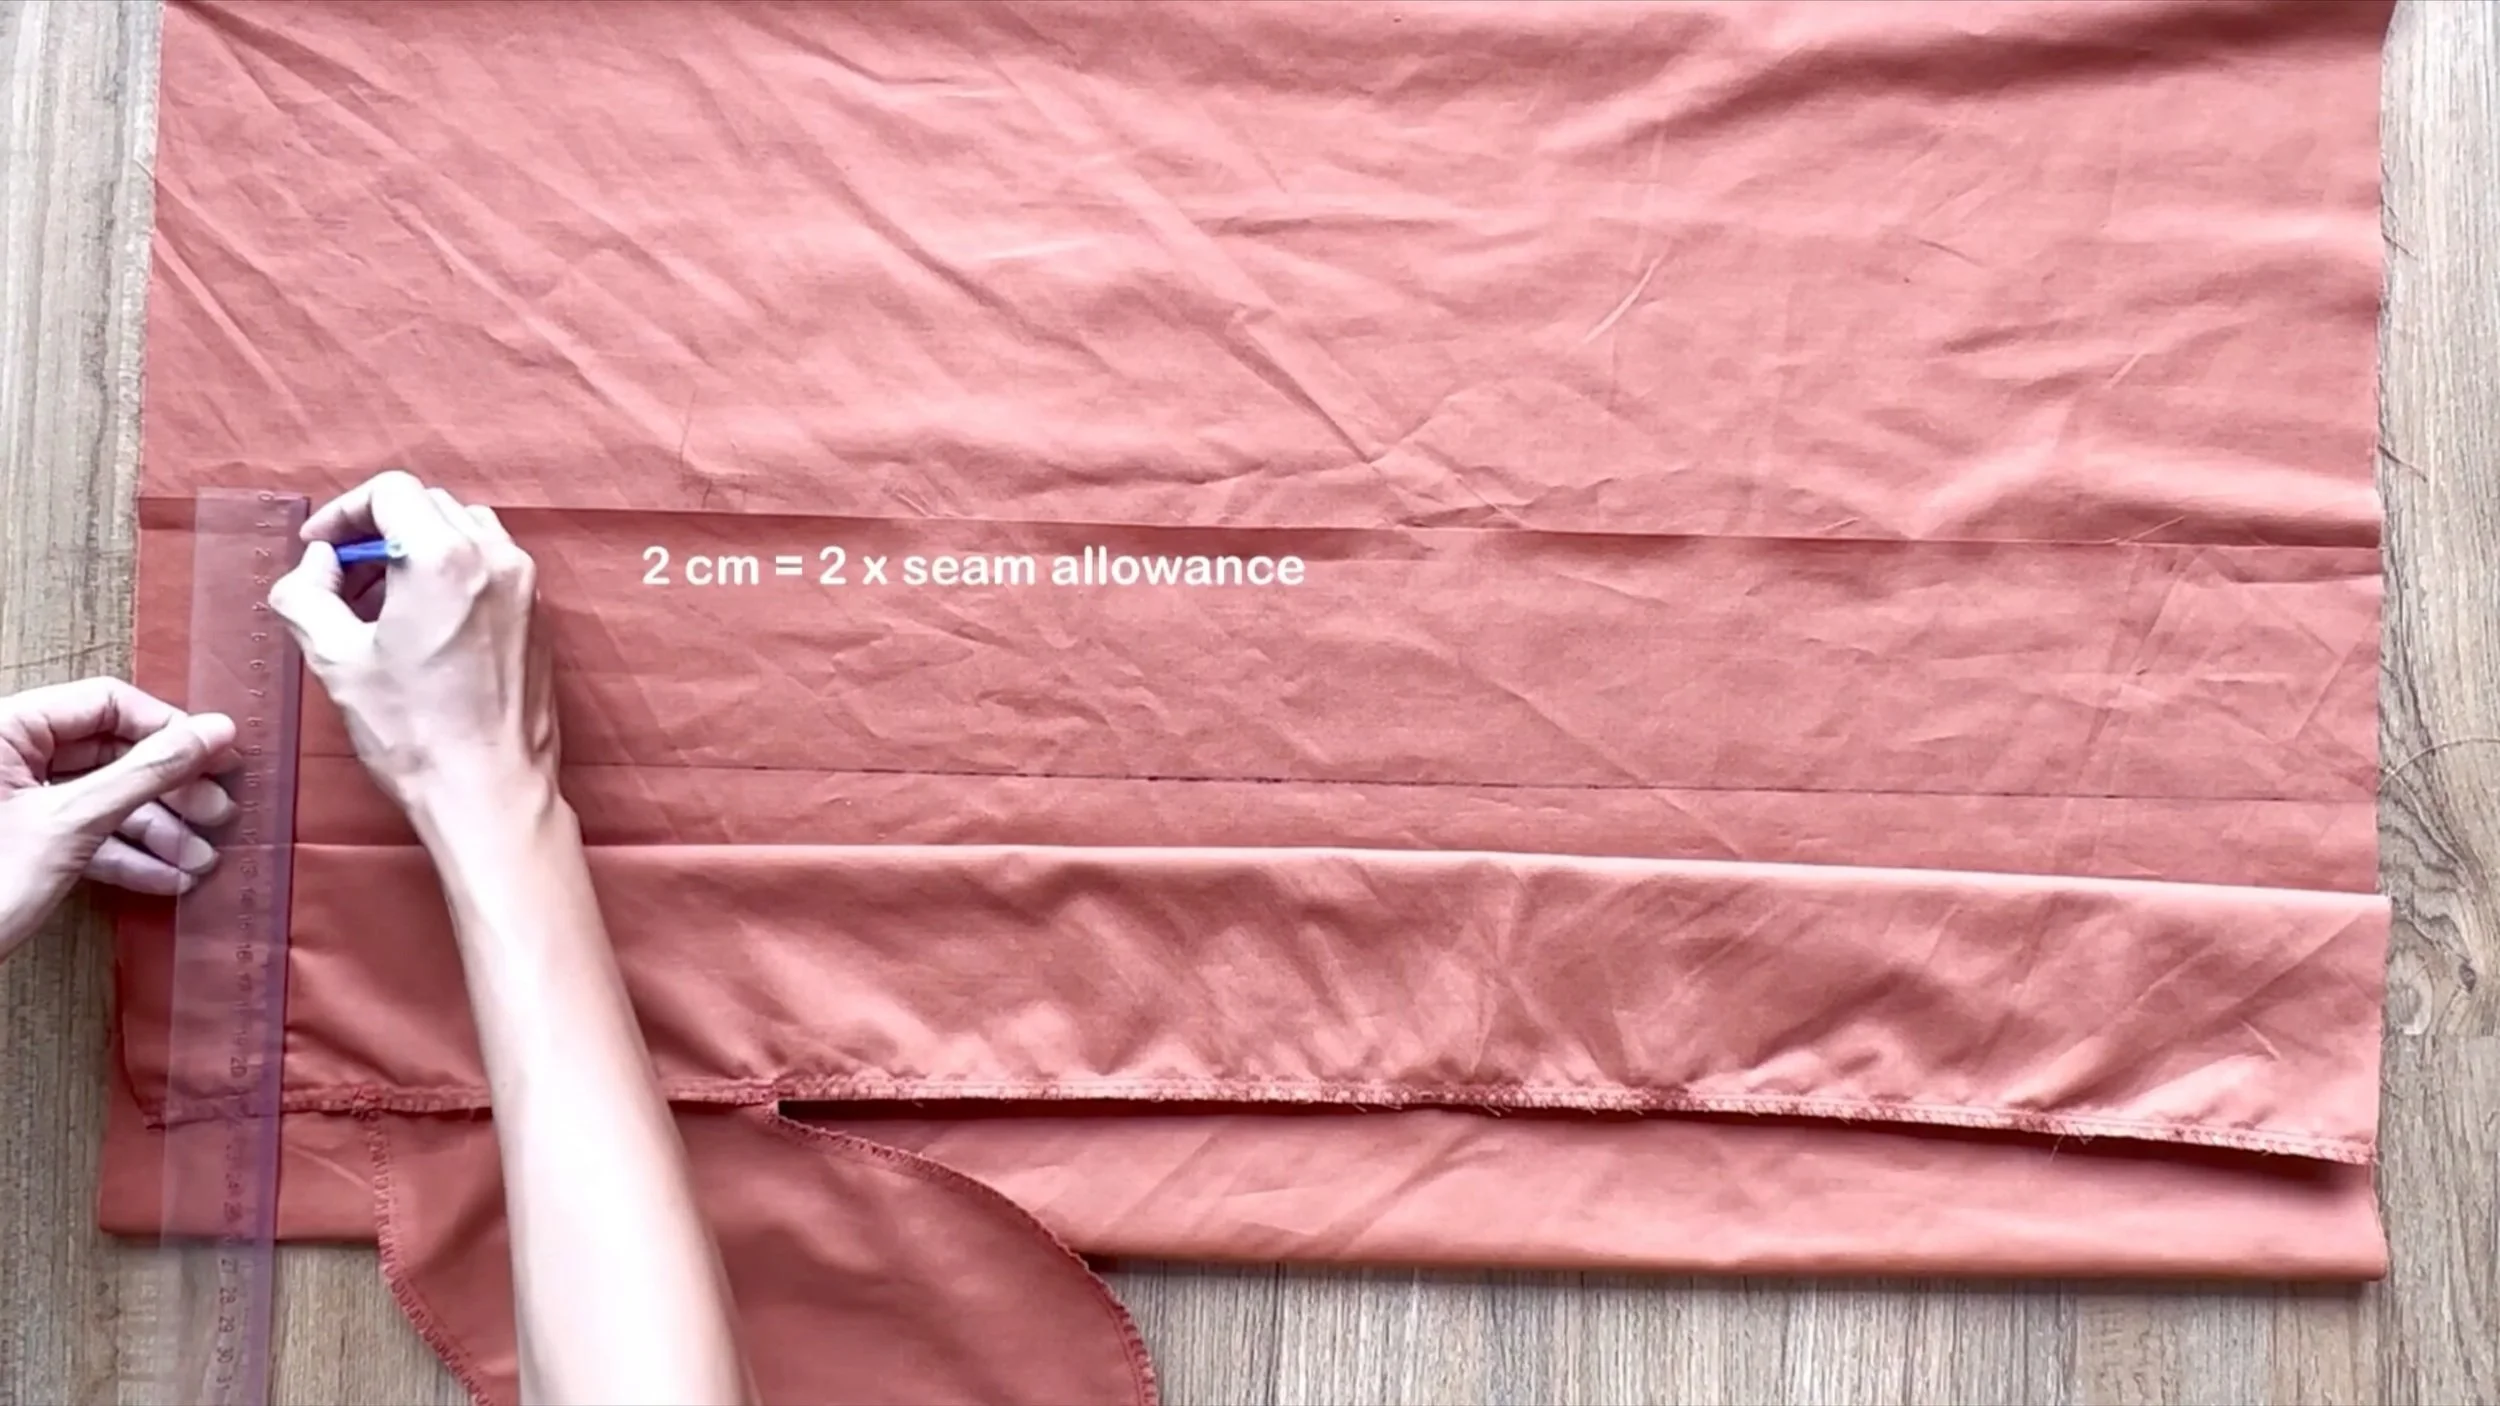
Fold each lane line inward by 1 cm, then draw another line 2 cm below the initial line to guide the fold.
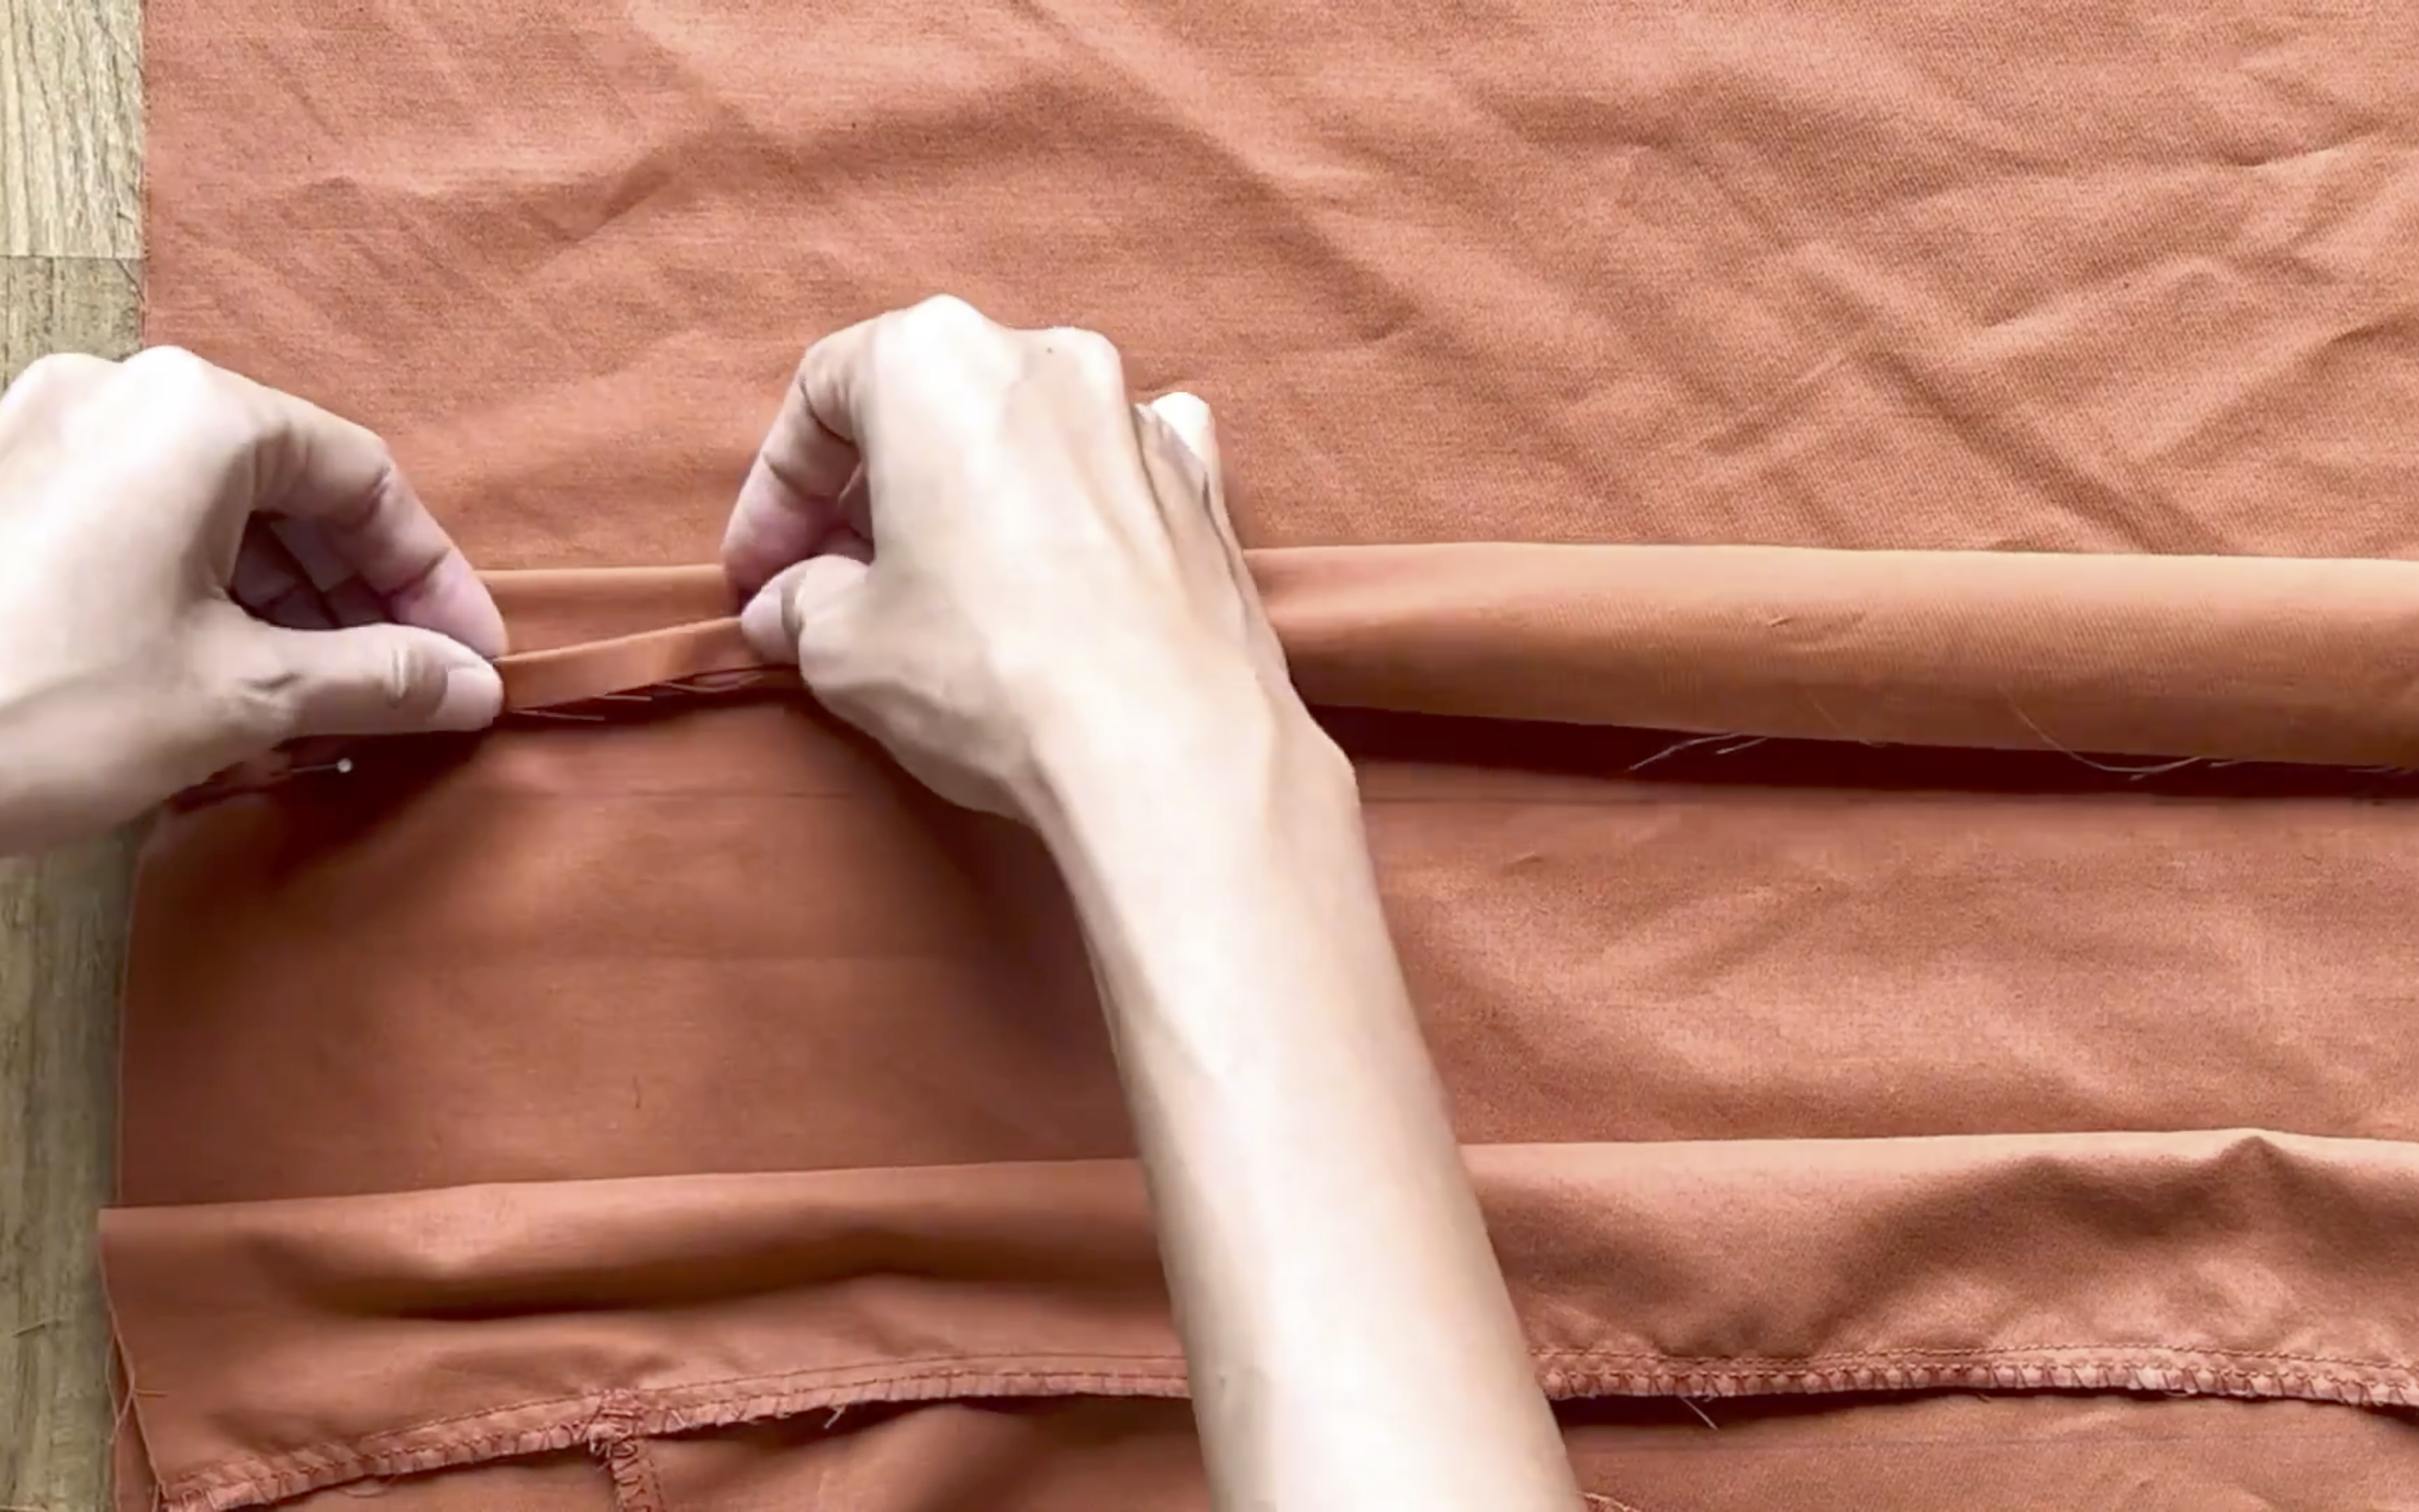
Fold the edge of the front piece fabric along the line, then fold it again to the original line.

Then sew.
Repeat this on the other lane line of the rectangle.
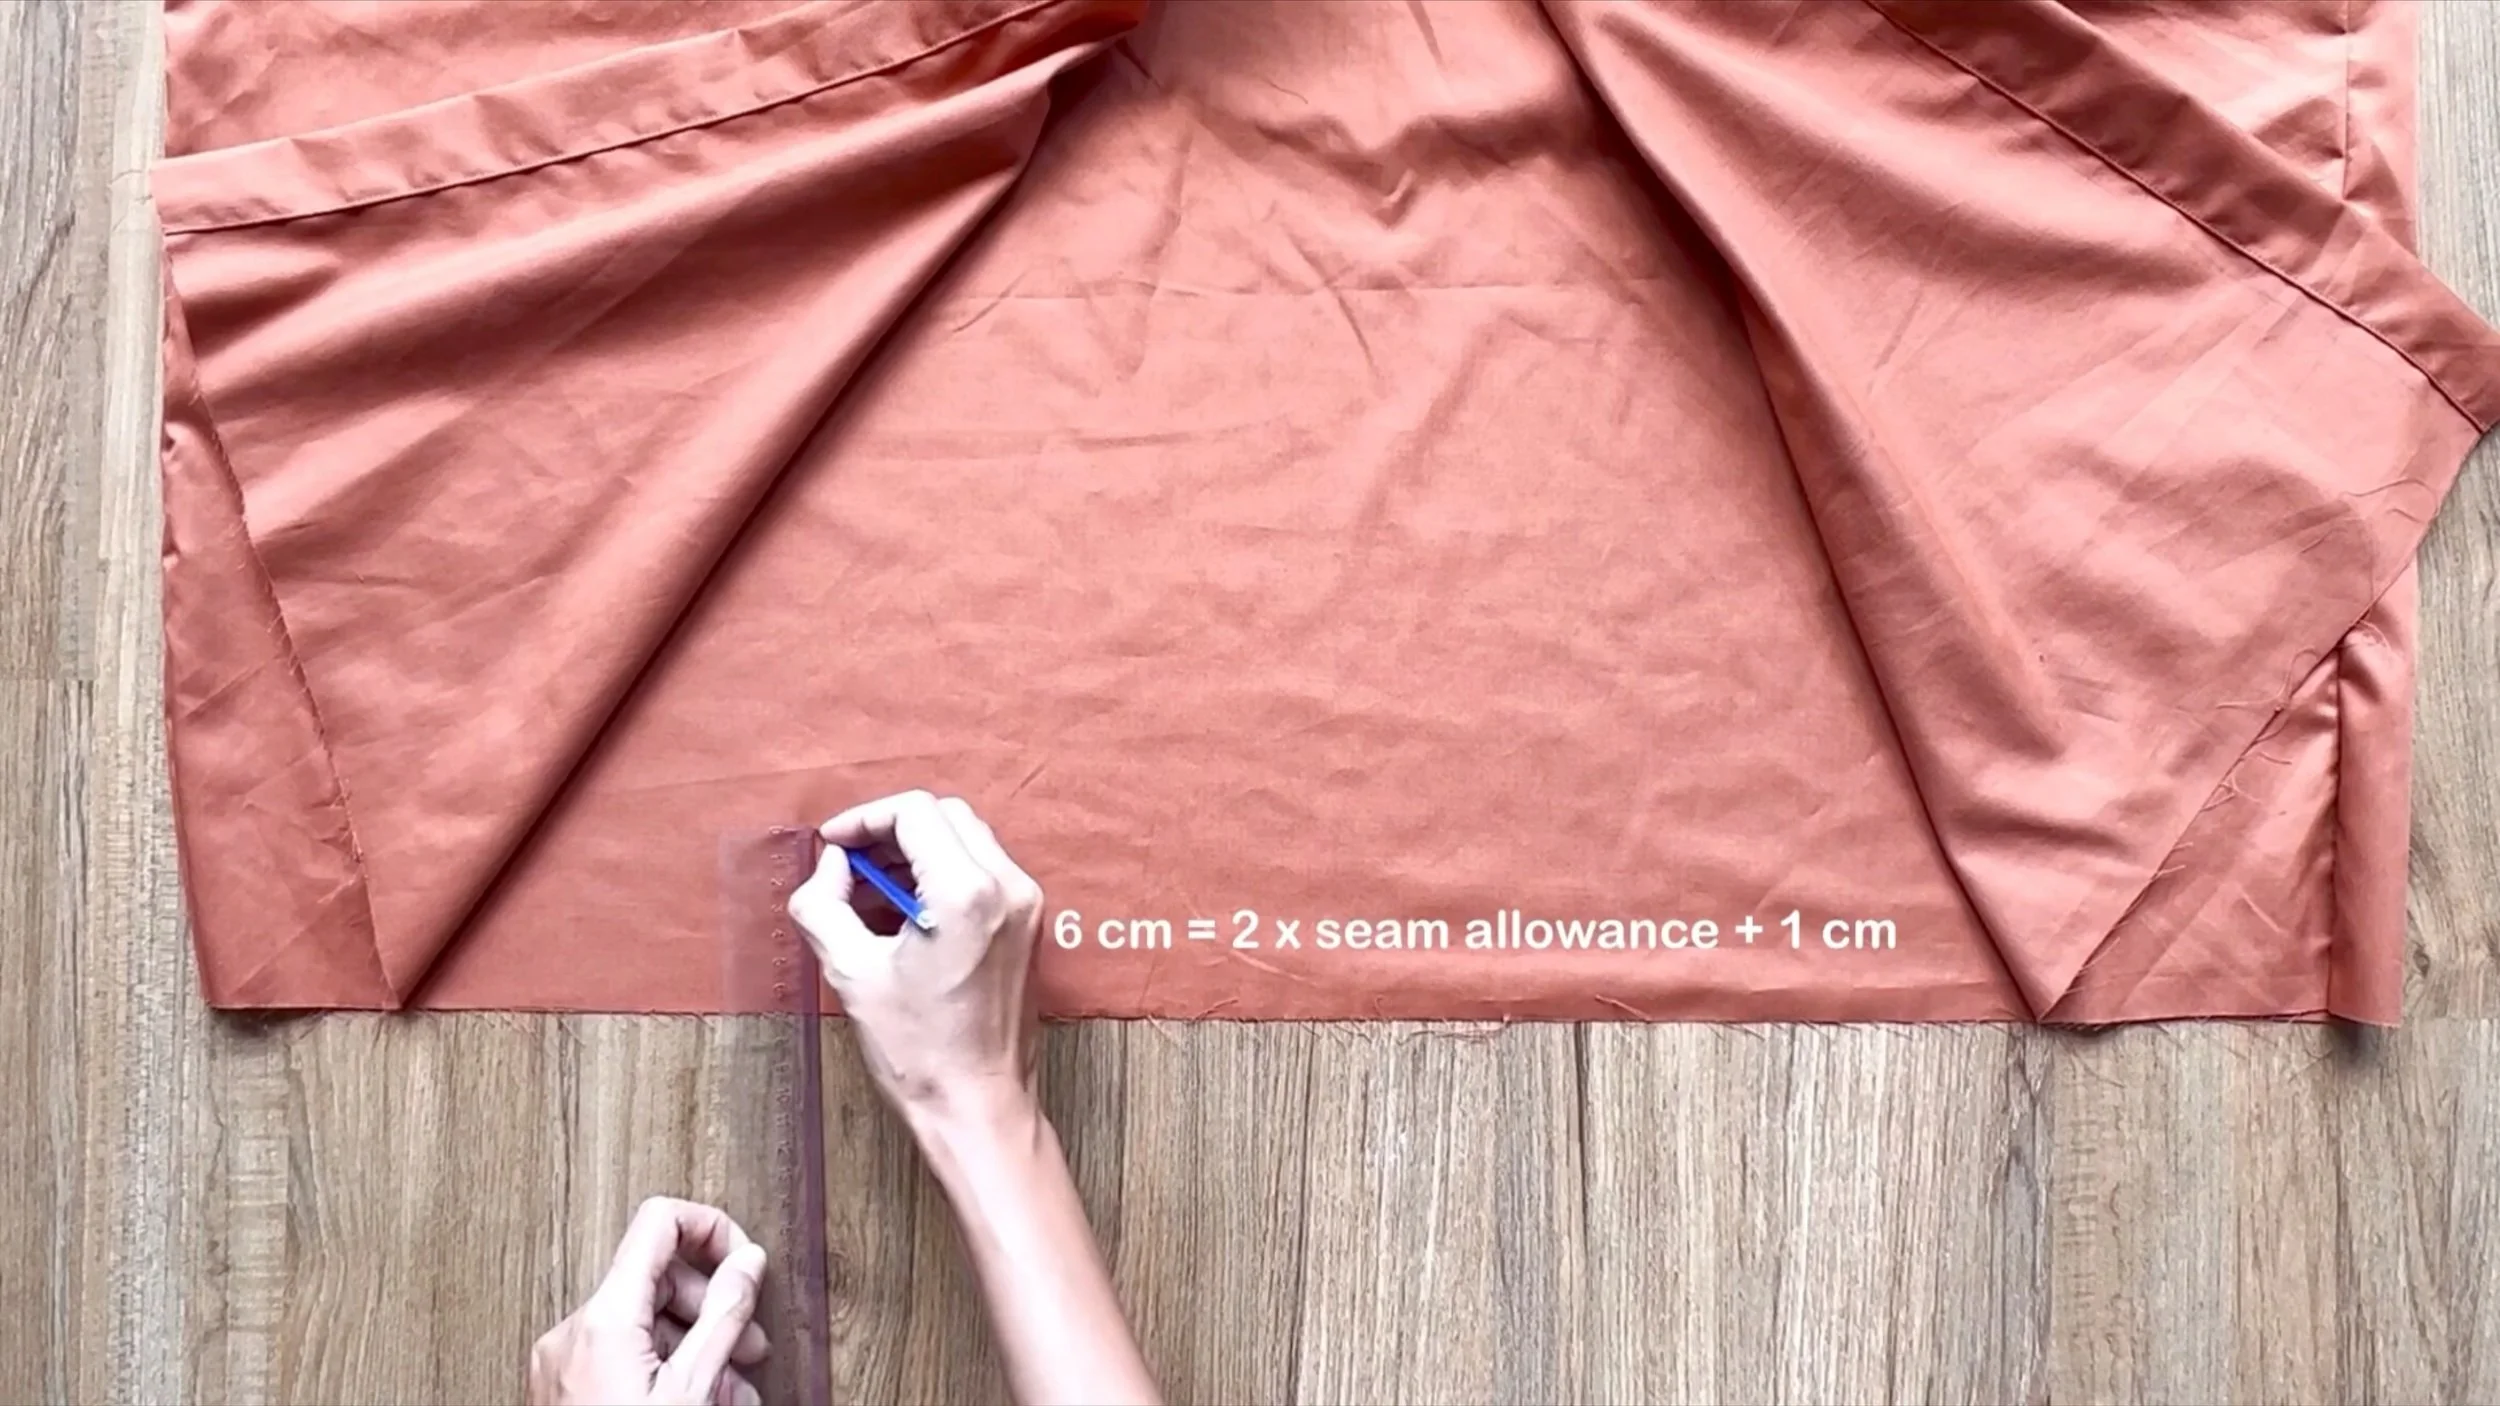
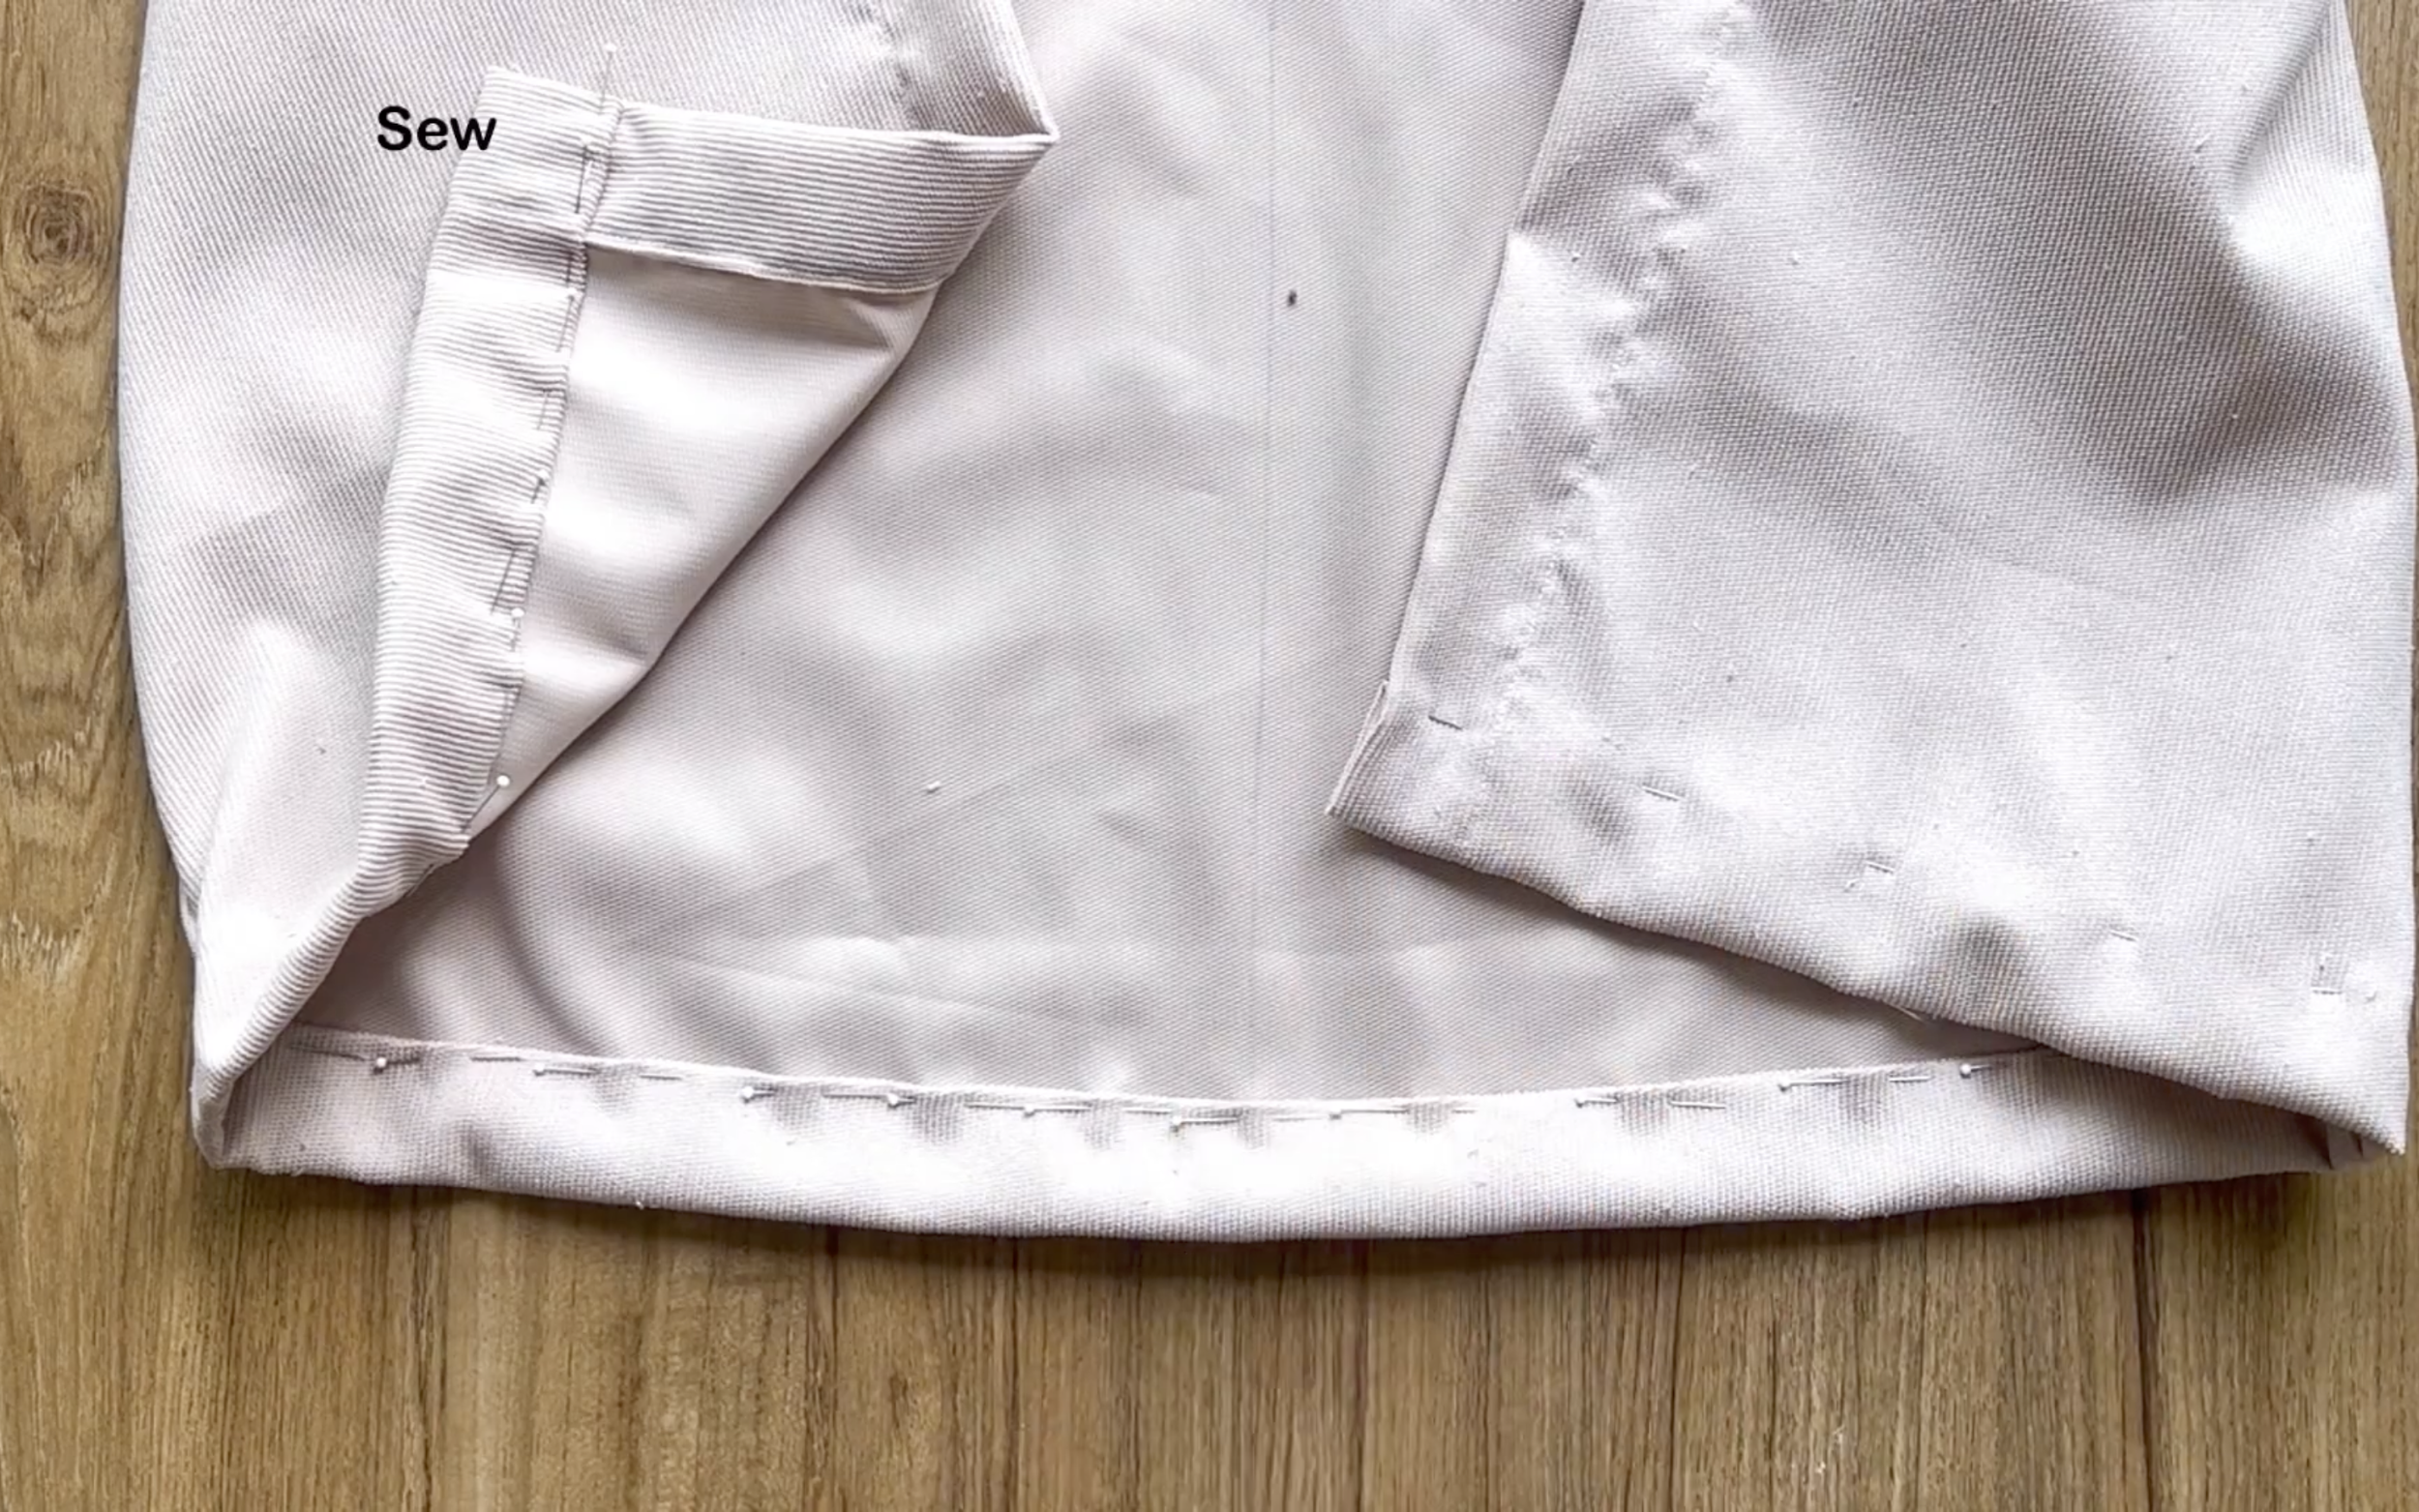
At the skirt’s hem, draw a line 6 cm above the bottom edge.
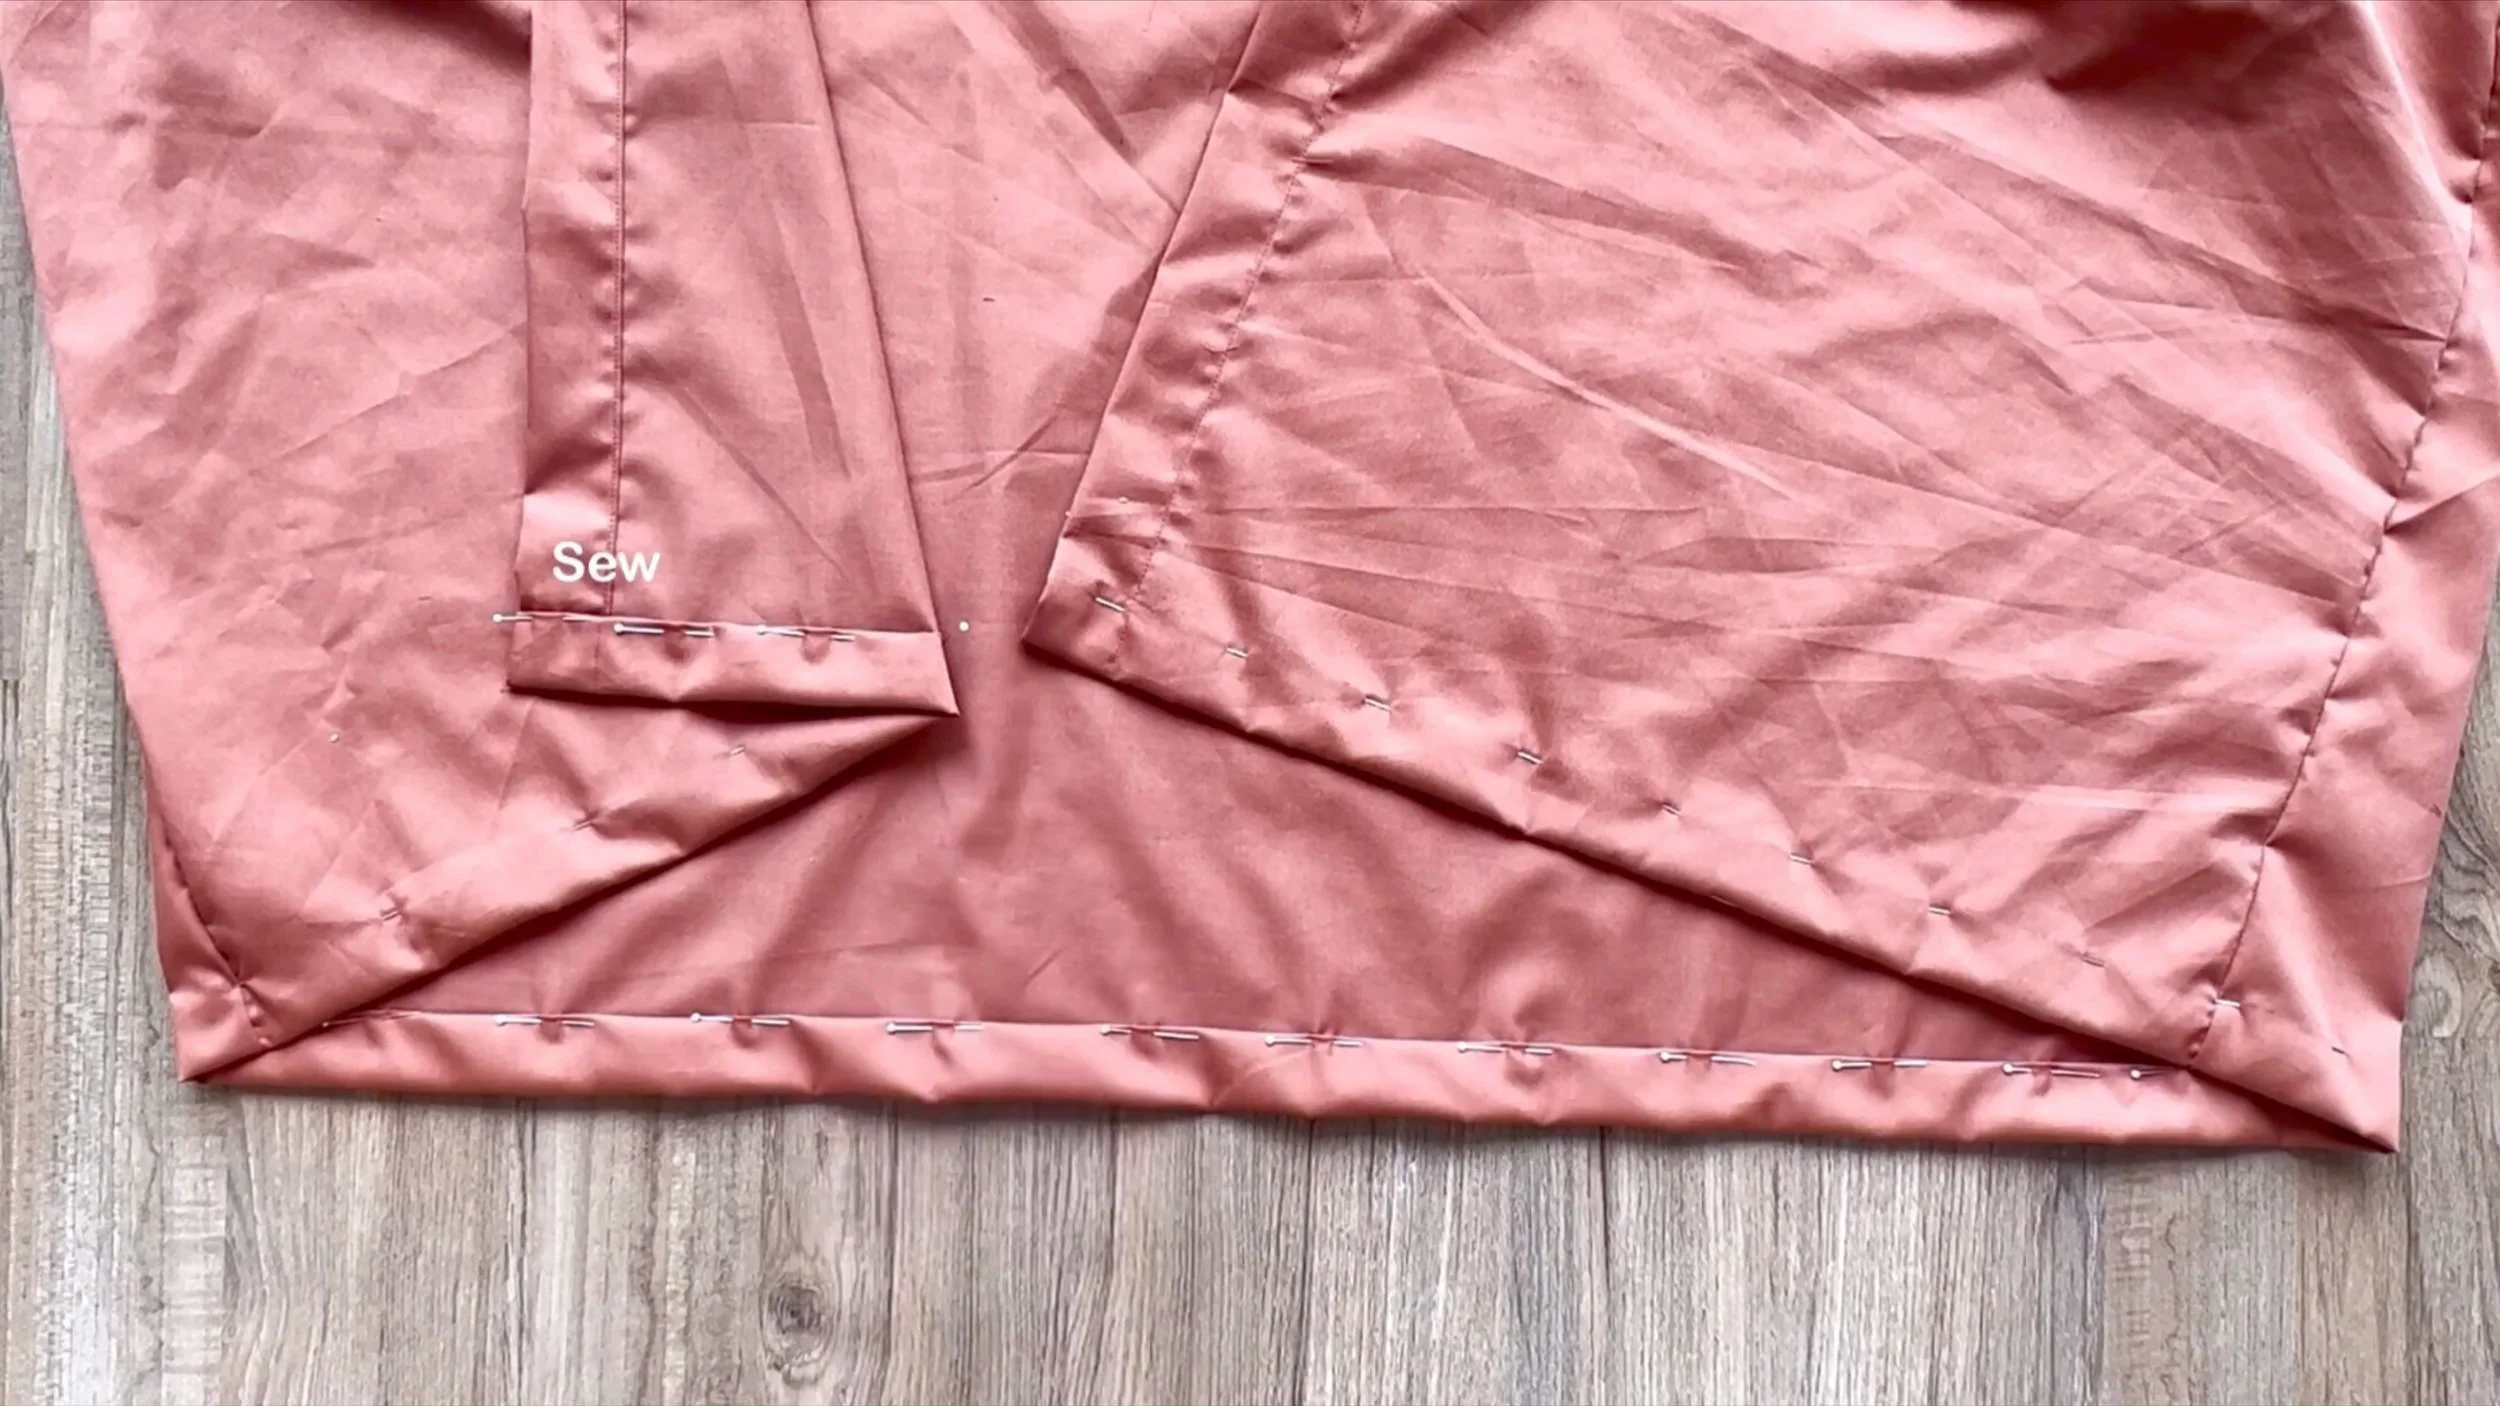
Fold the fabric inward by 1 cm, then fold it to the drawn line and sew to finish the hem.

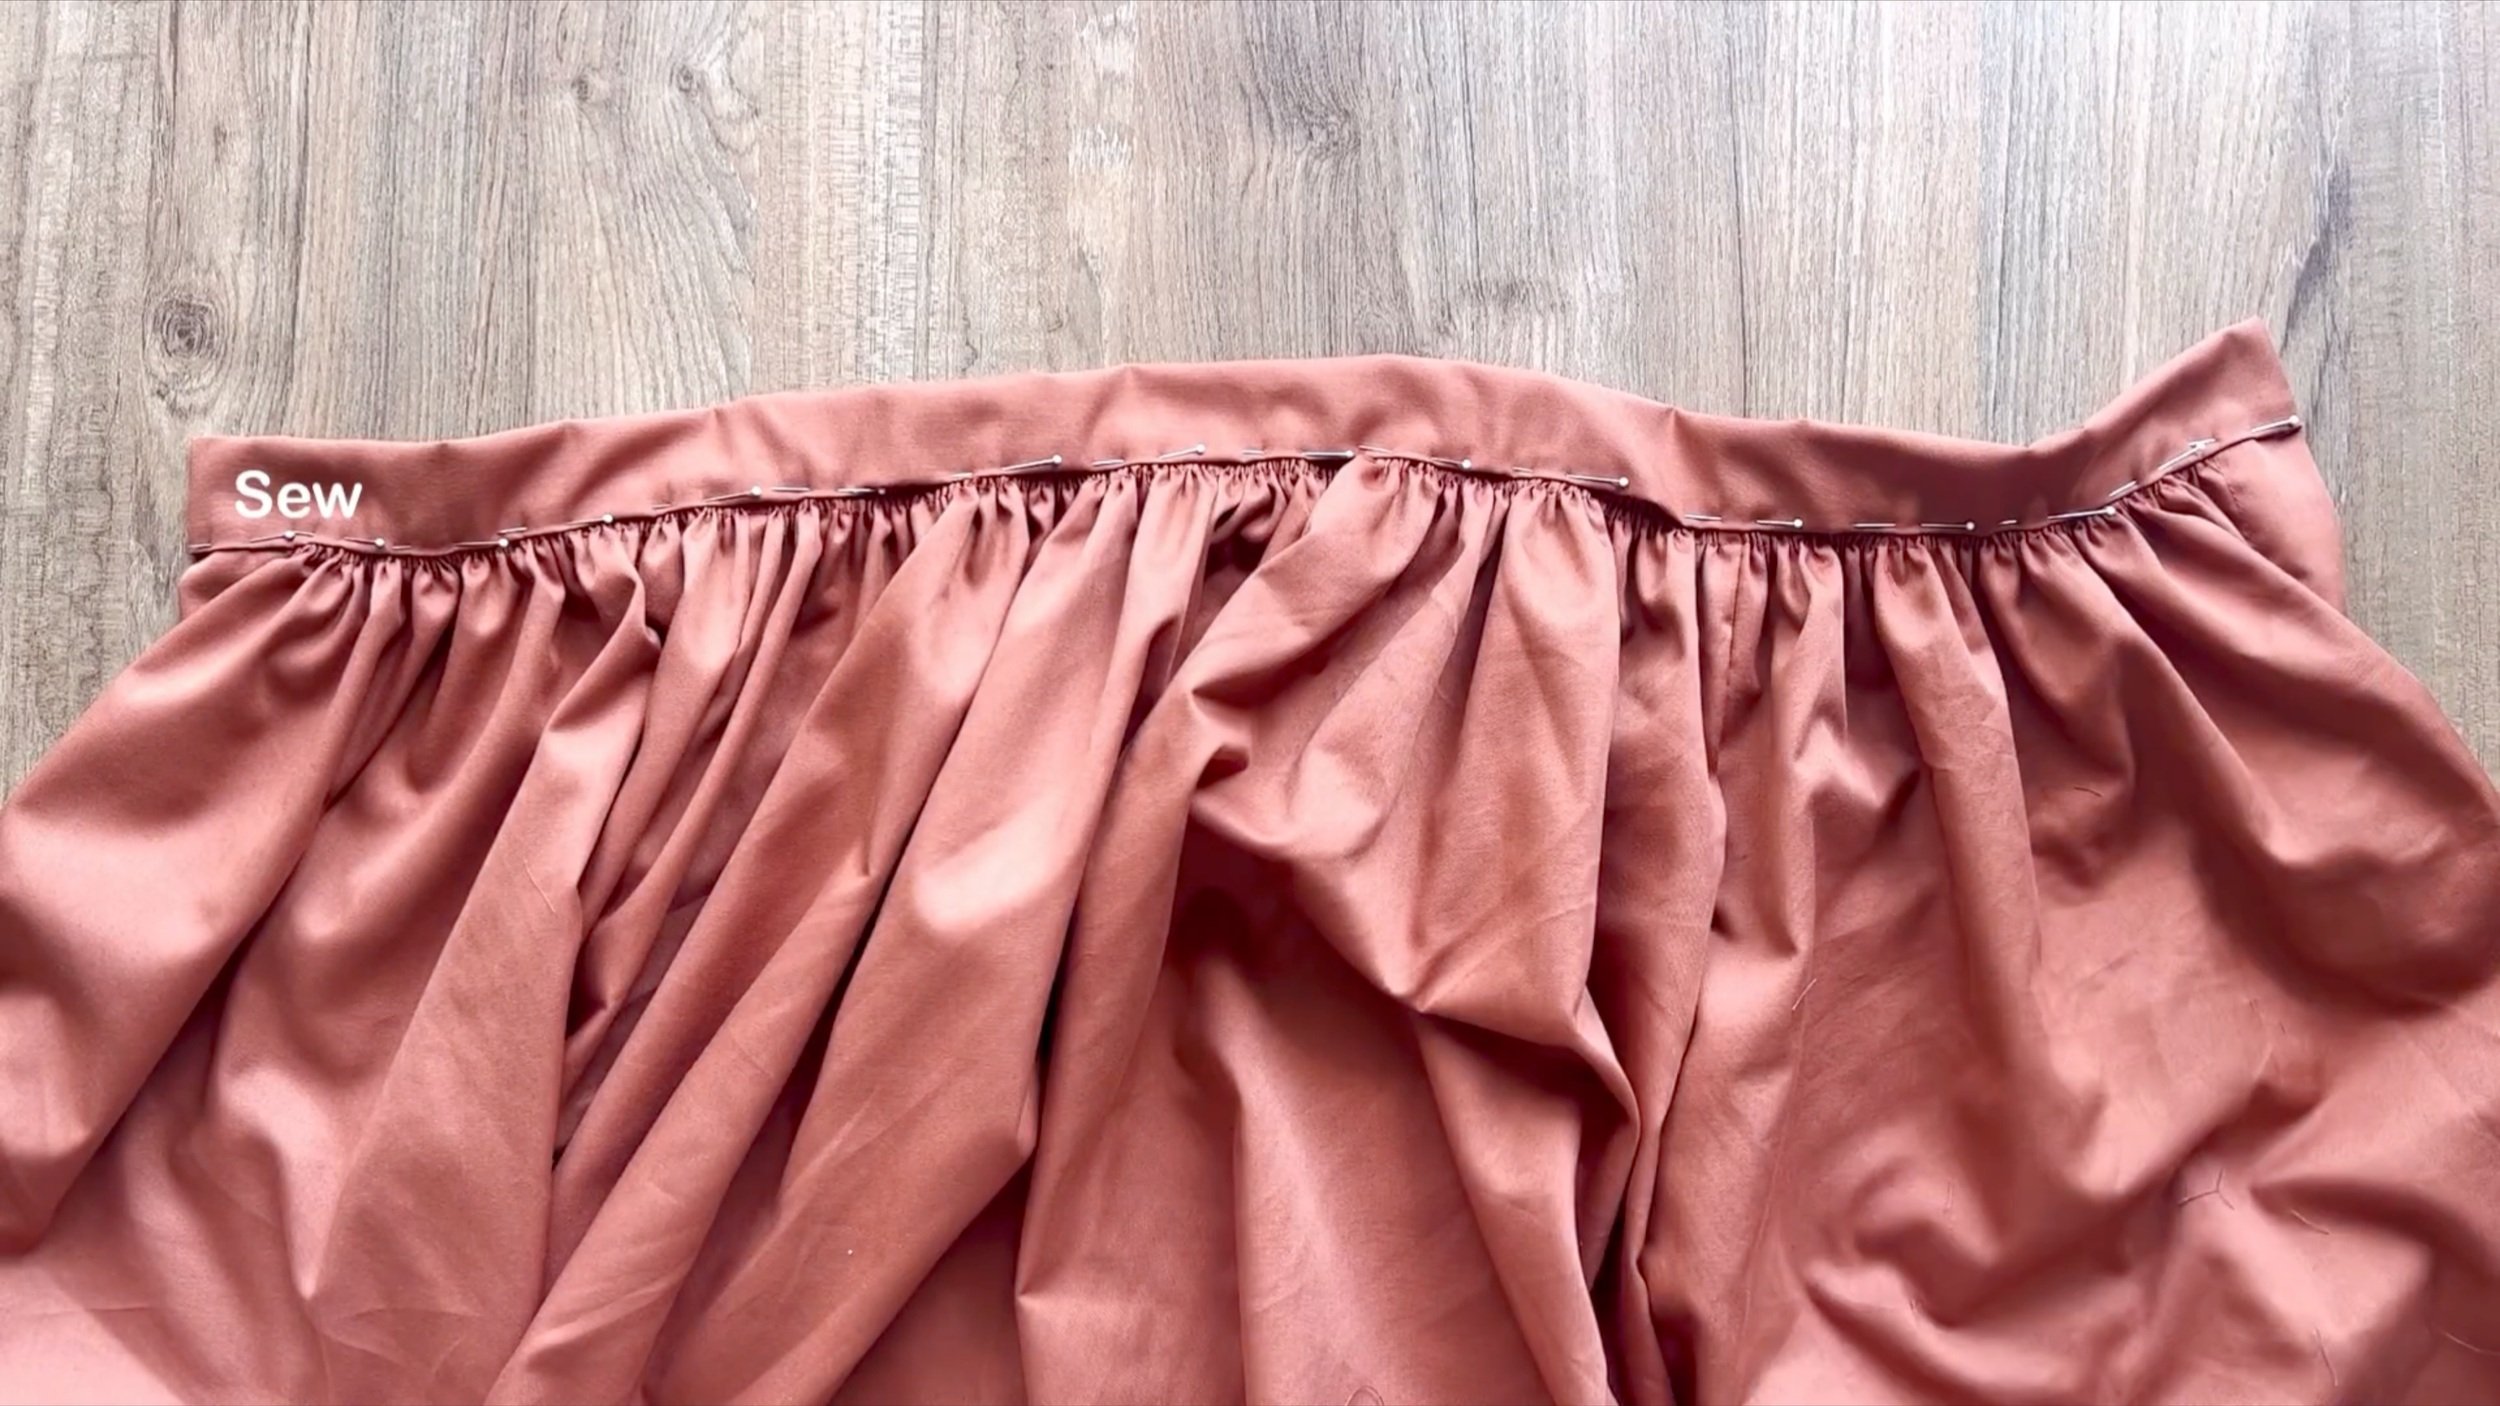
At the top of the skirt, make two loose seams using straight stitching and the maximum thread length.
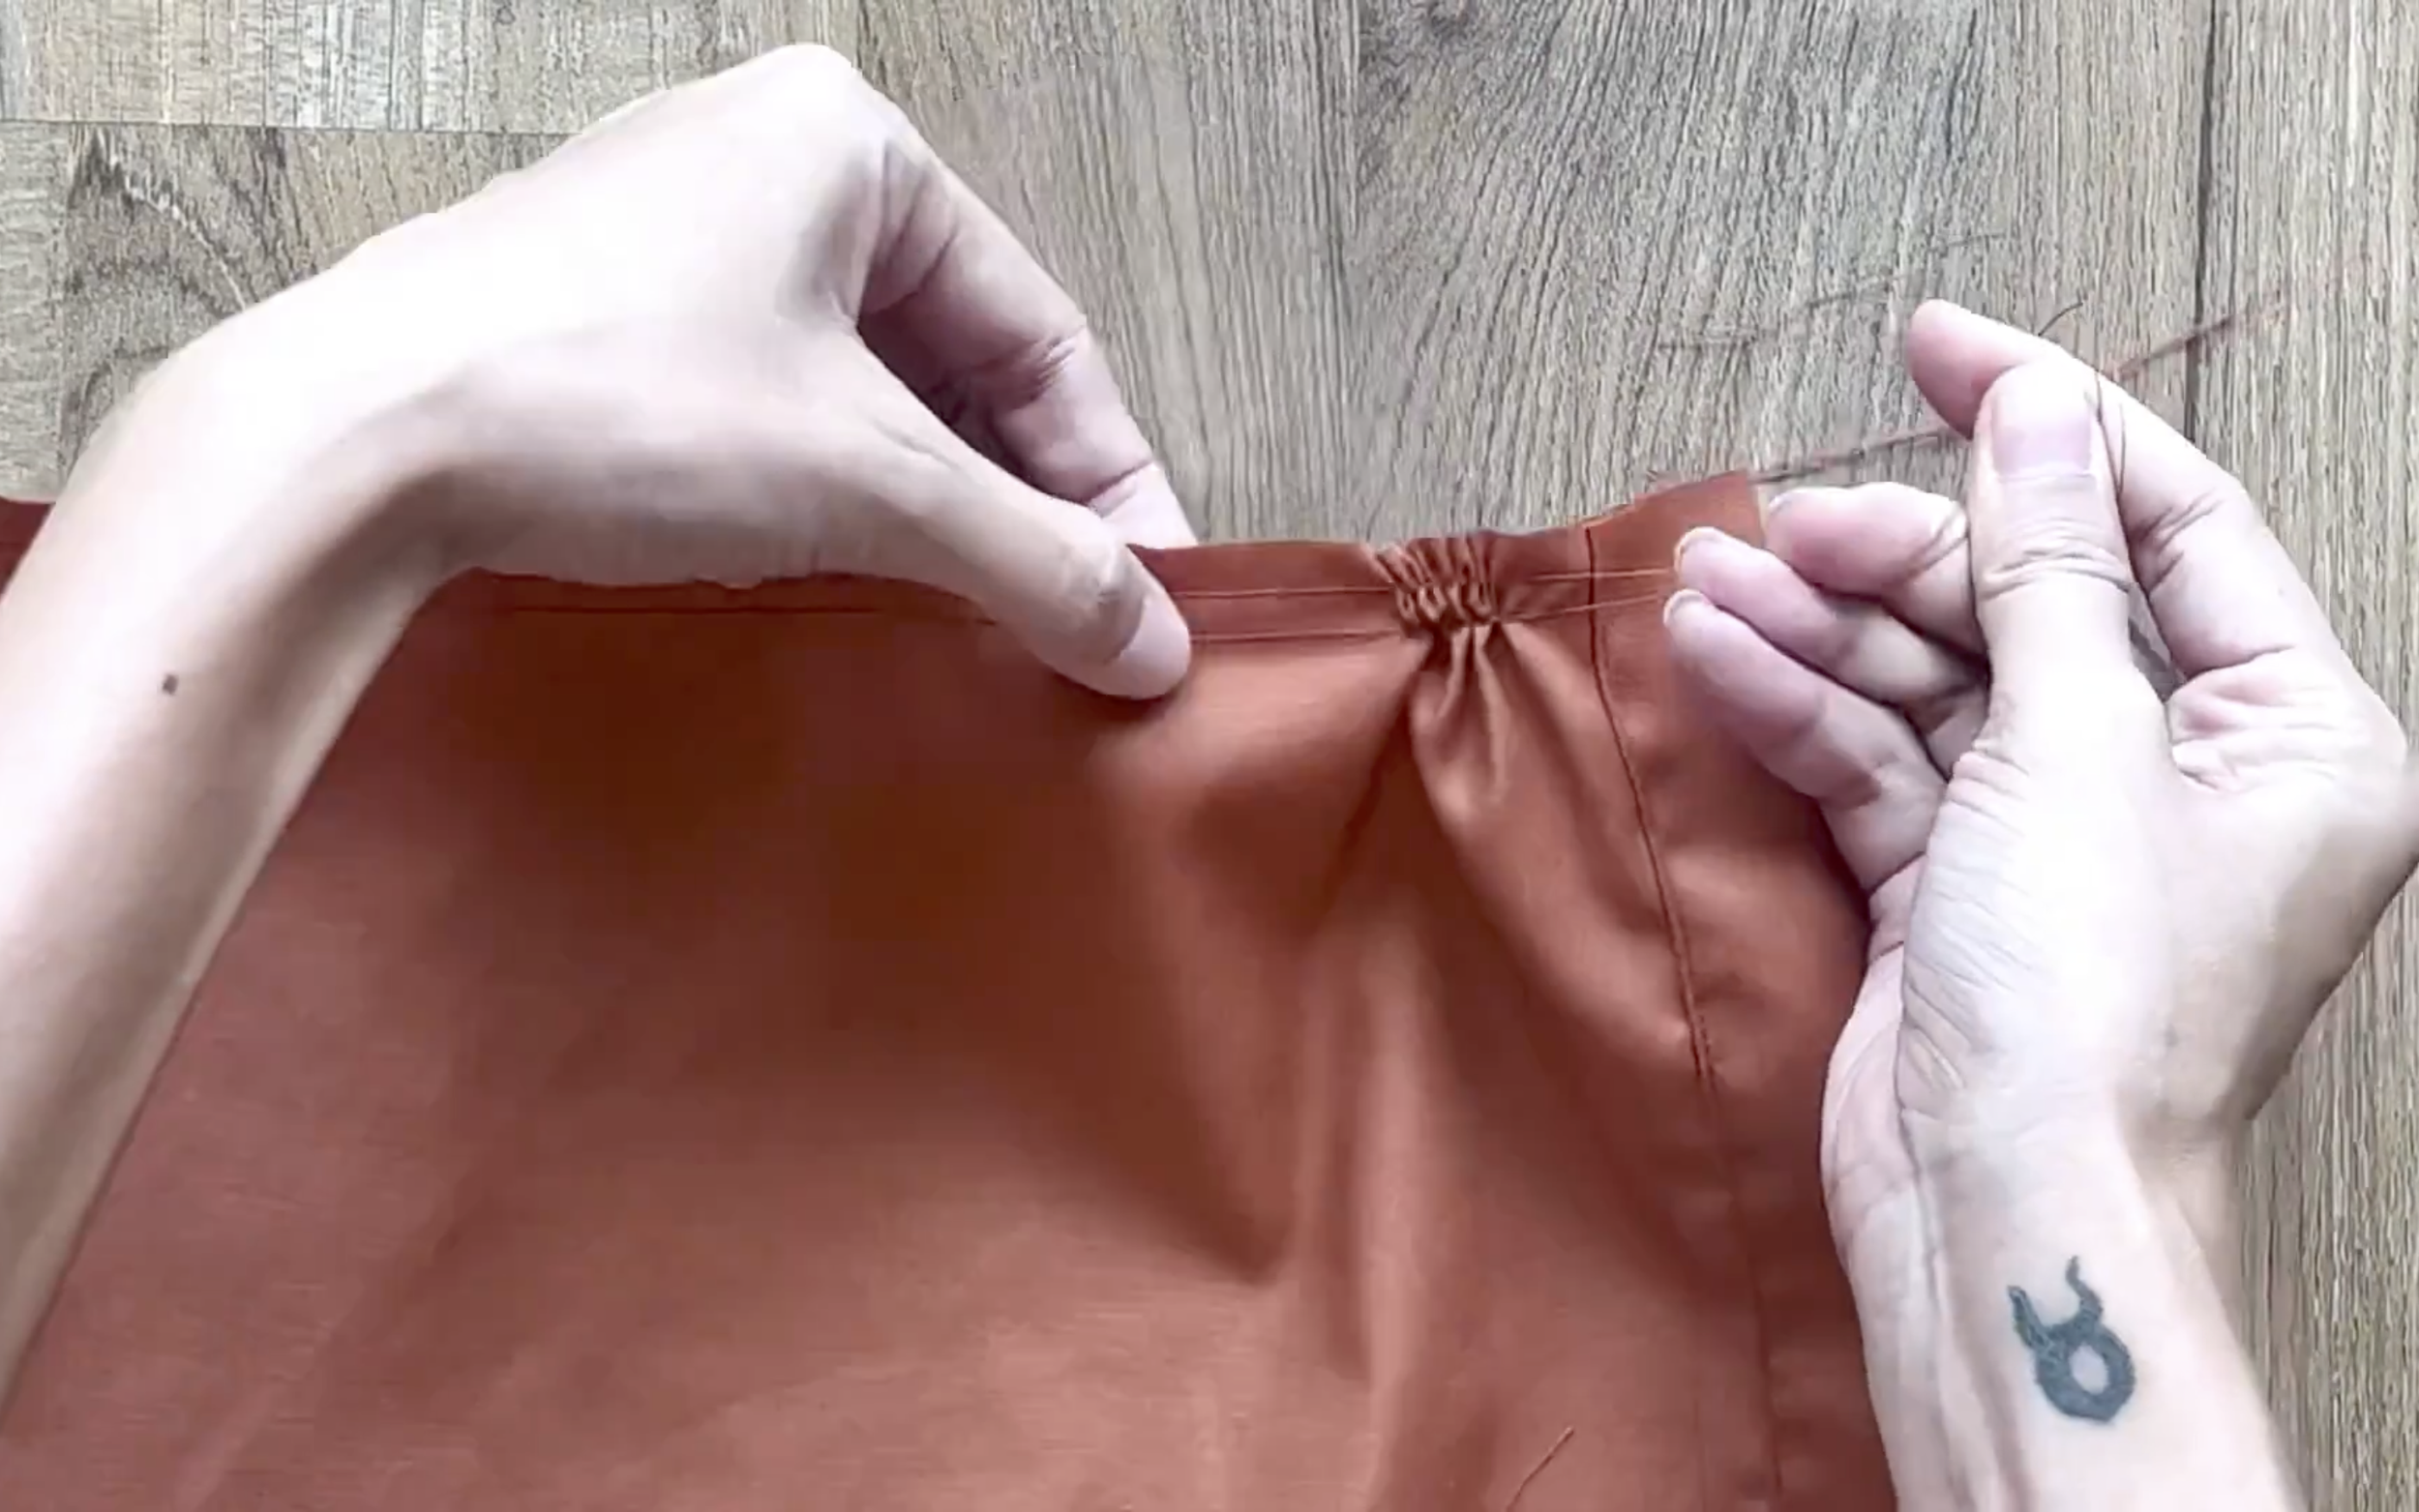
Create gathers at the top by holding the bottom thread of each loose seam and pulling the top thread.
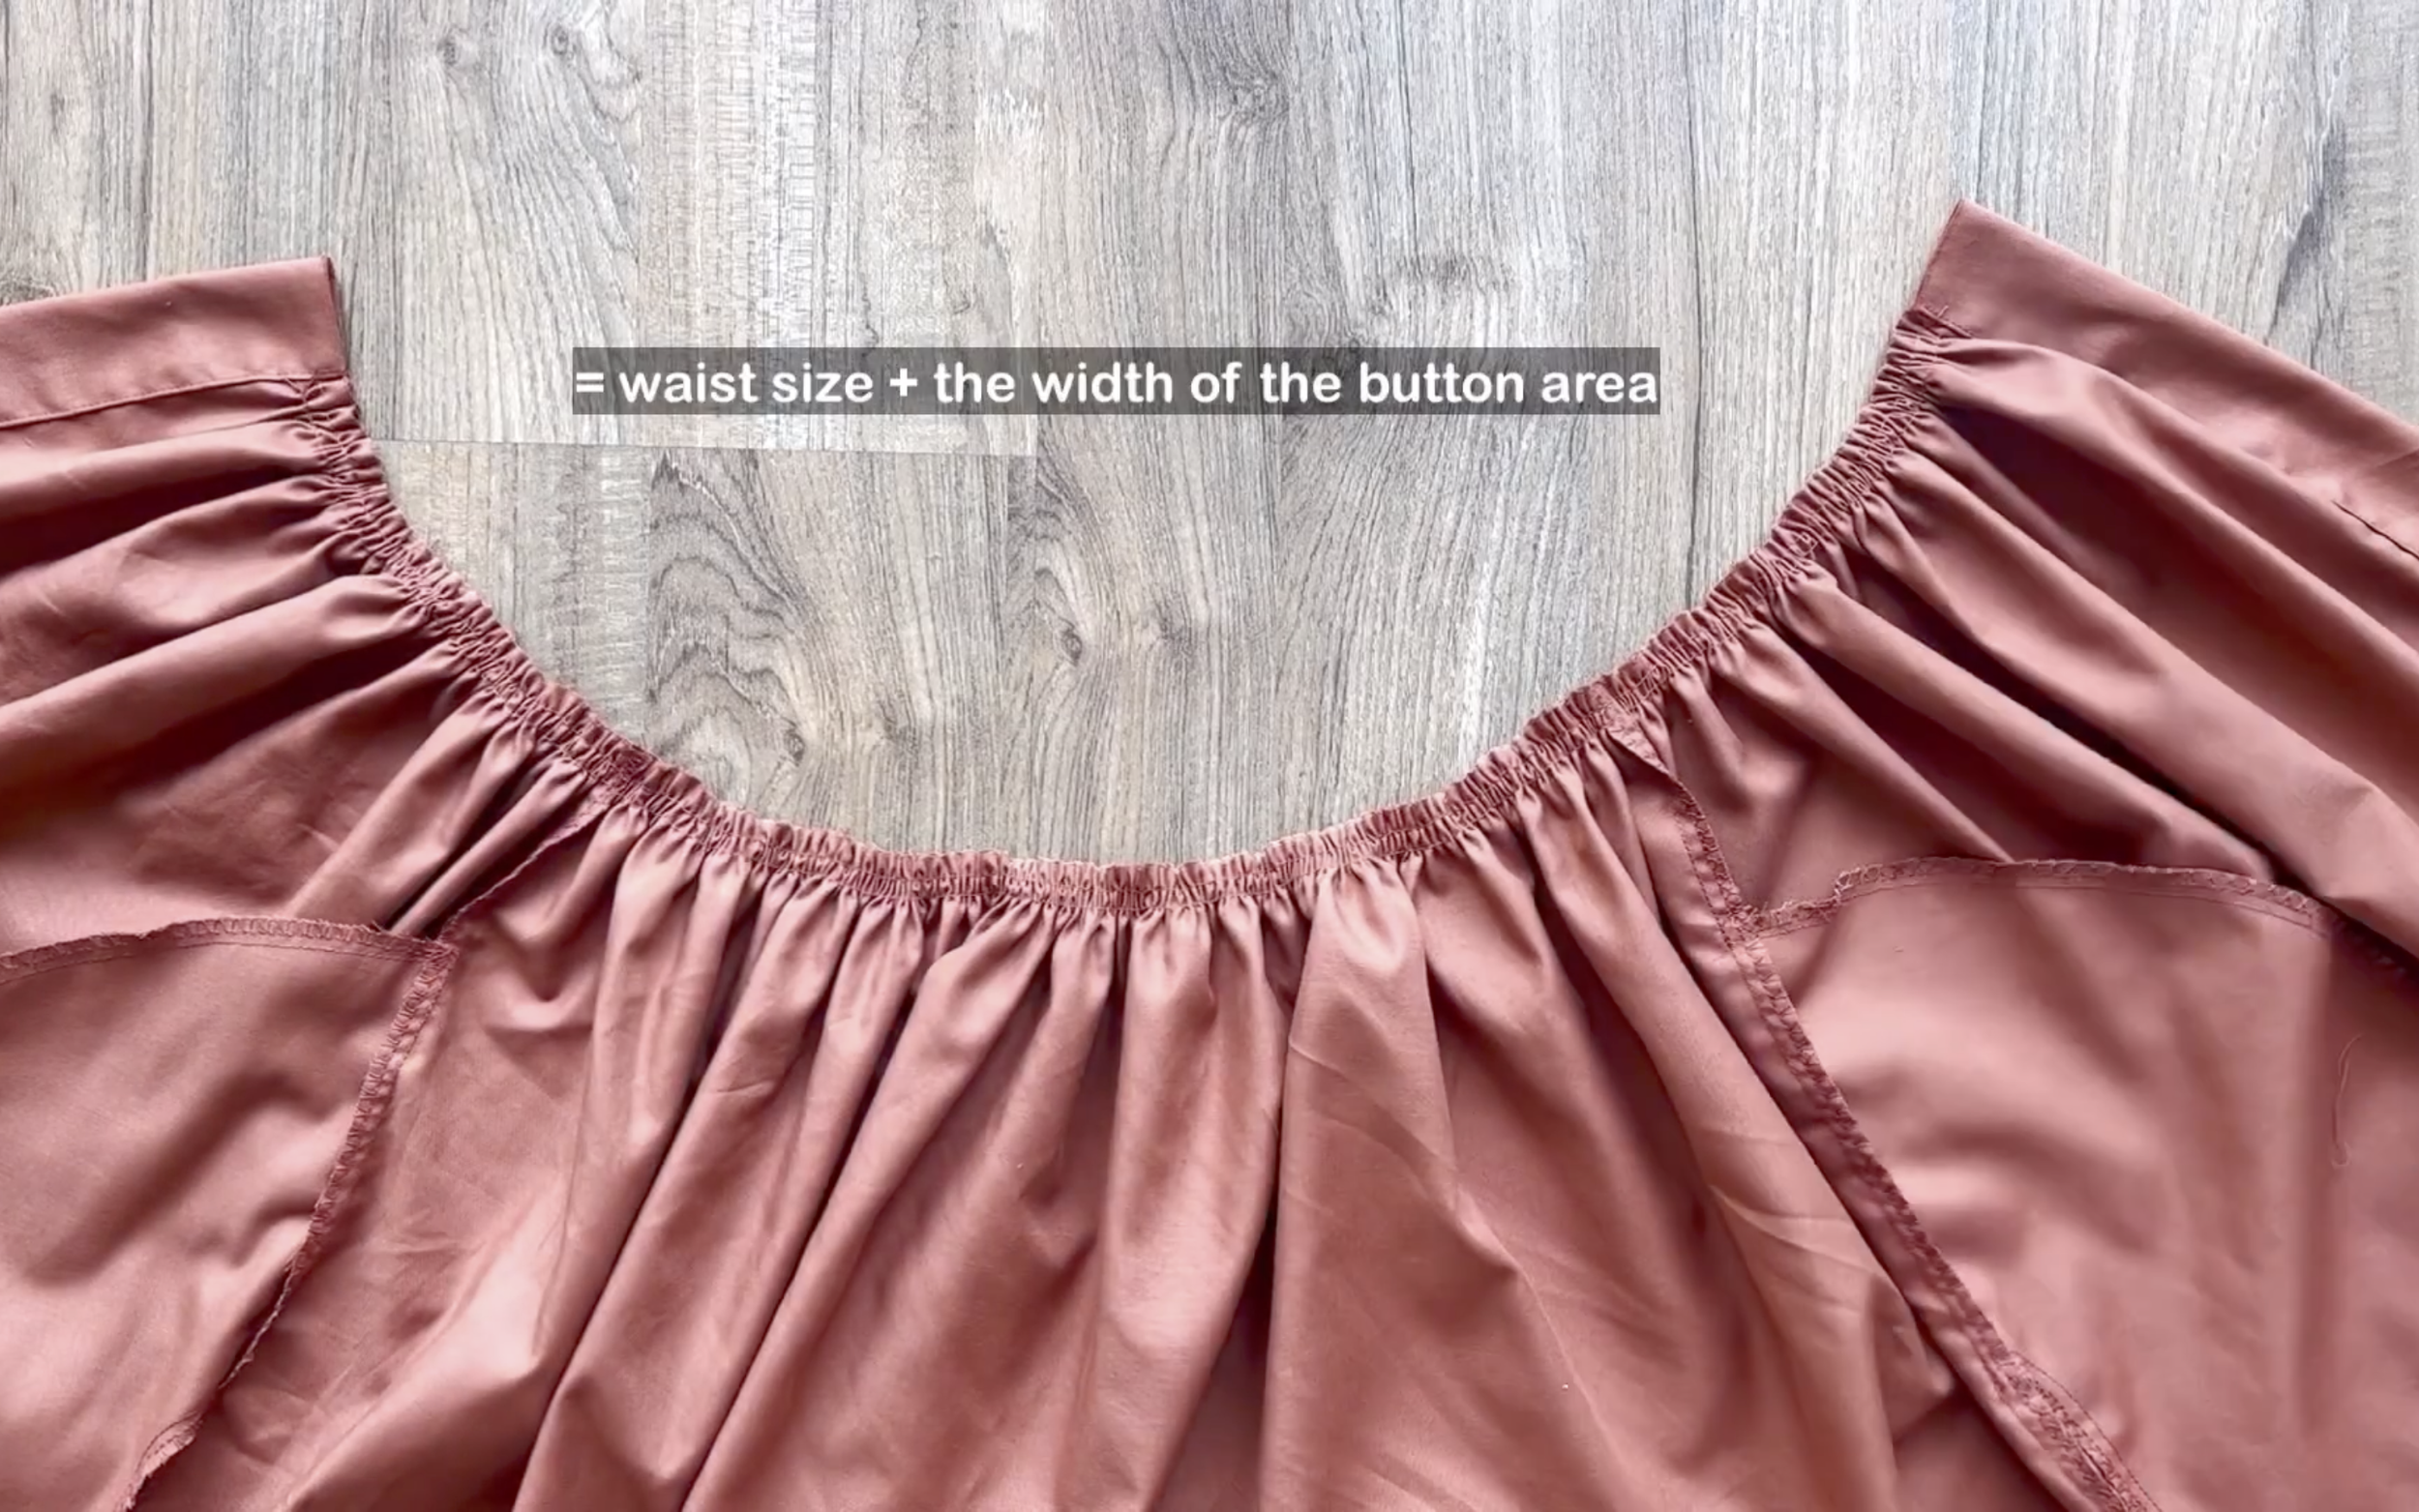
The final width of the gathered fabric should equal waist size plus 4 cm (the width of the button and buttonhole area).
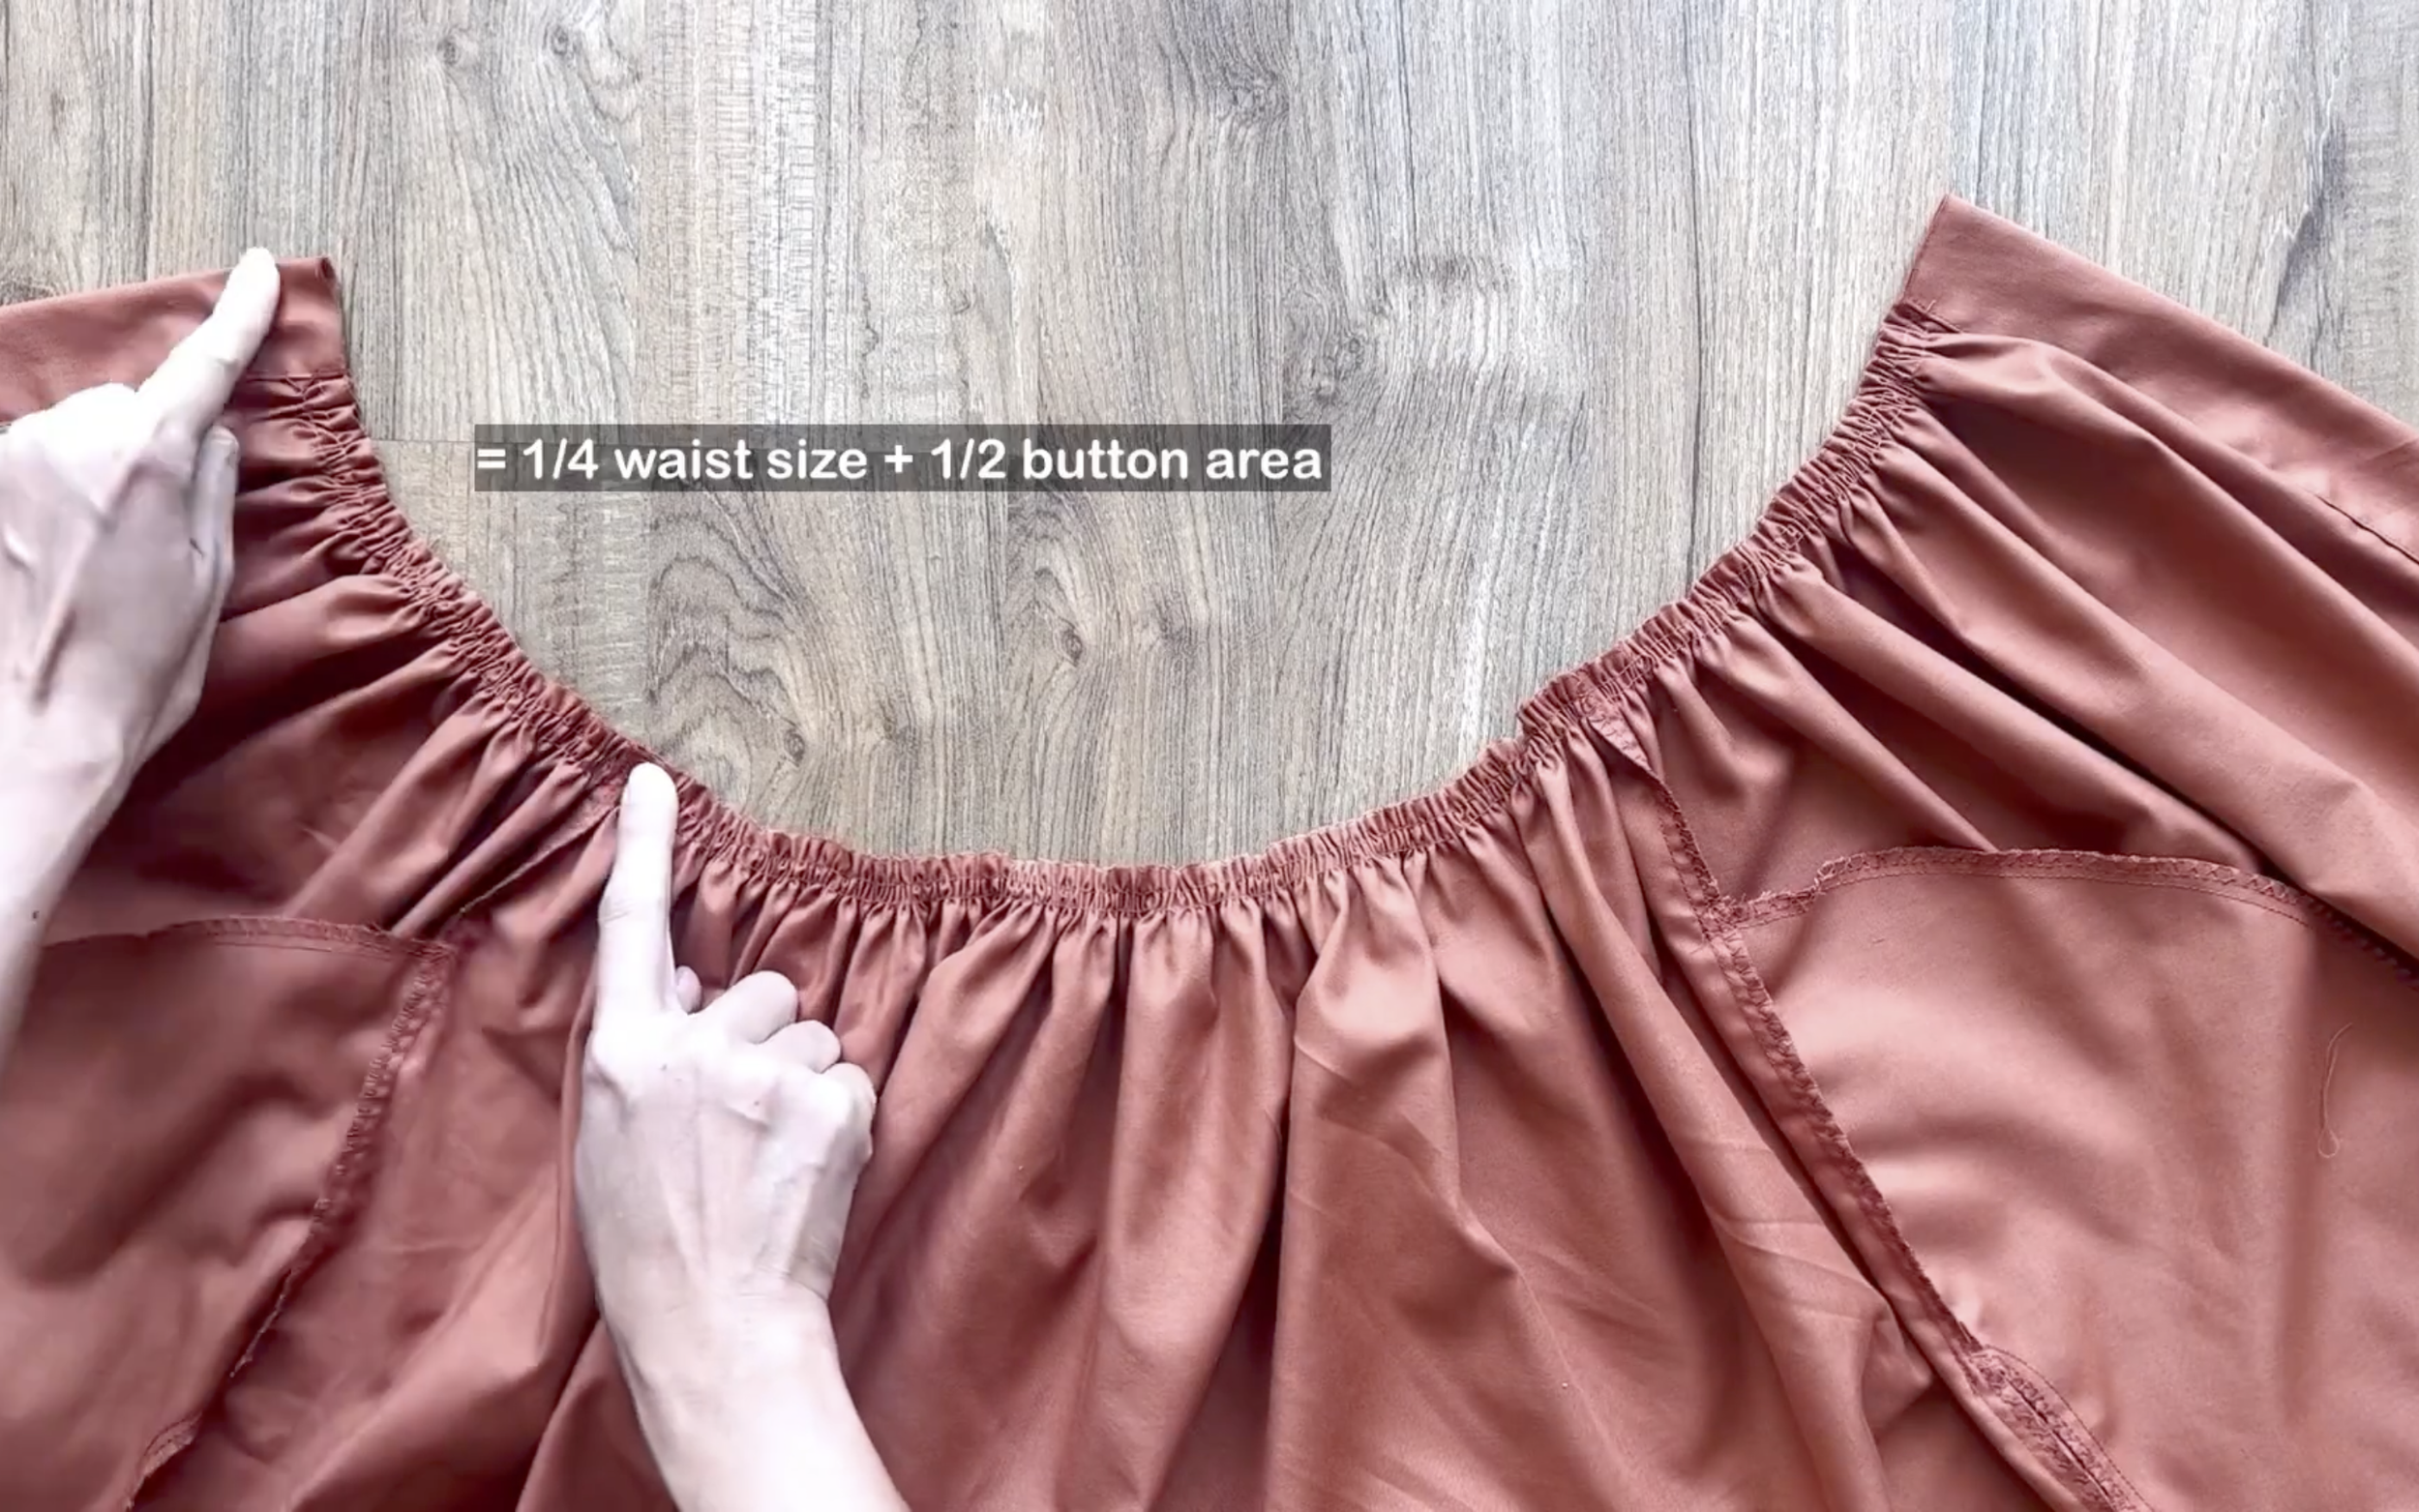
The gathered fabric width at the back of each front piece should be a 1/4 the waist size plus 1/2 the width of the button area.
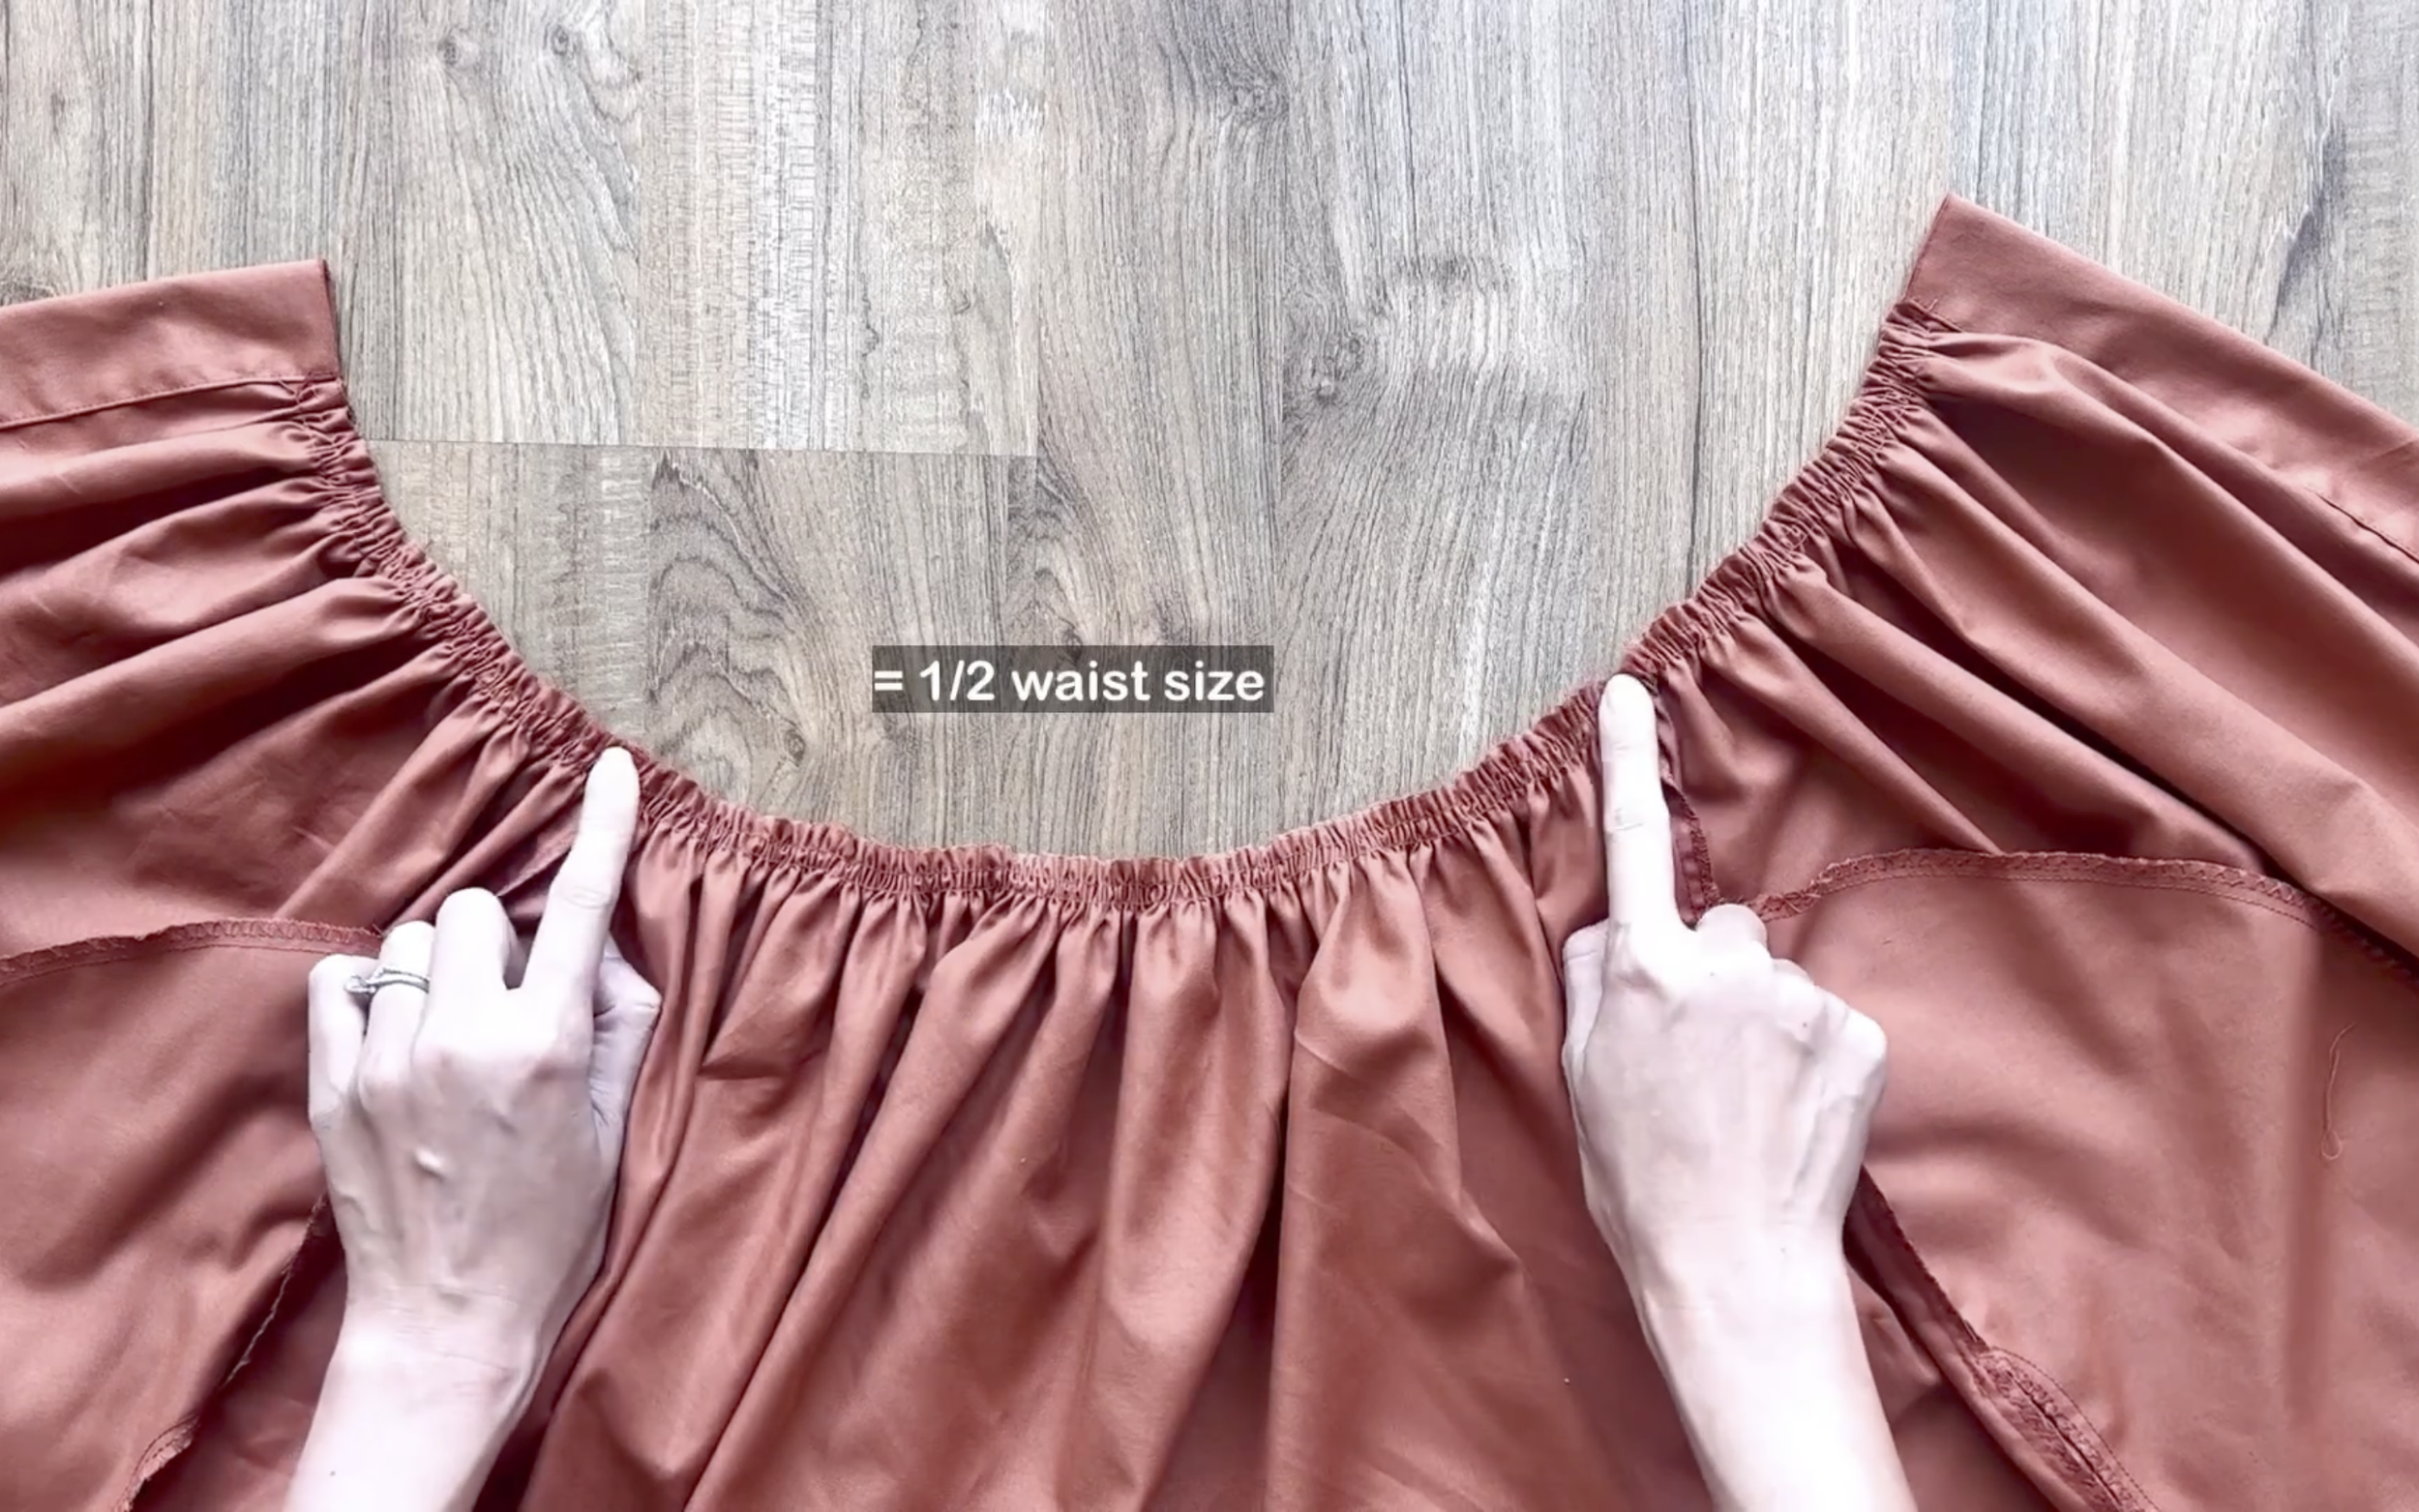
And the gathered fabric width at the back should be 1/2 the waist size.
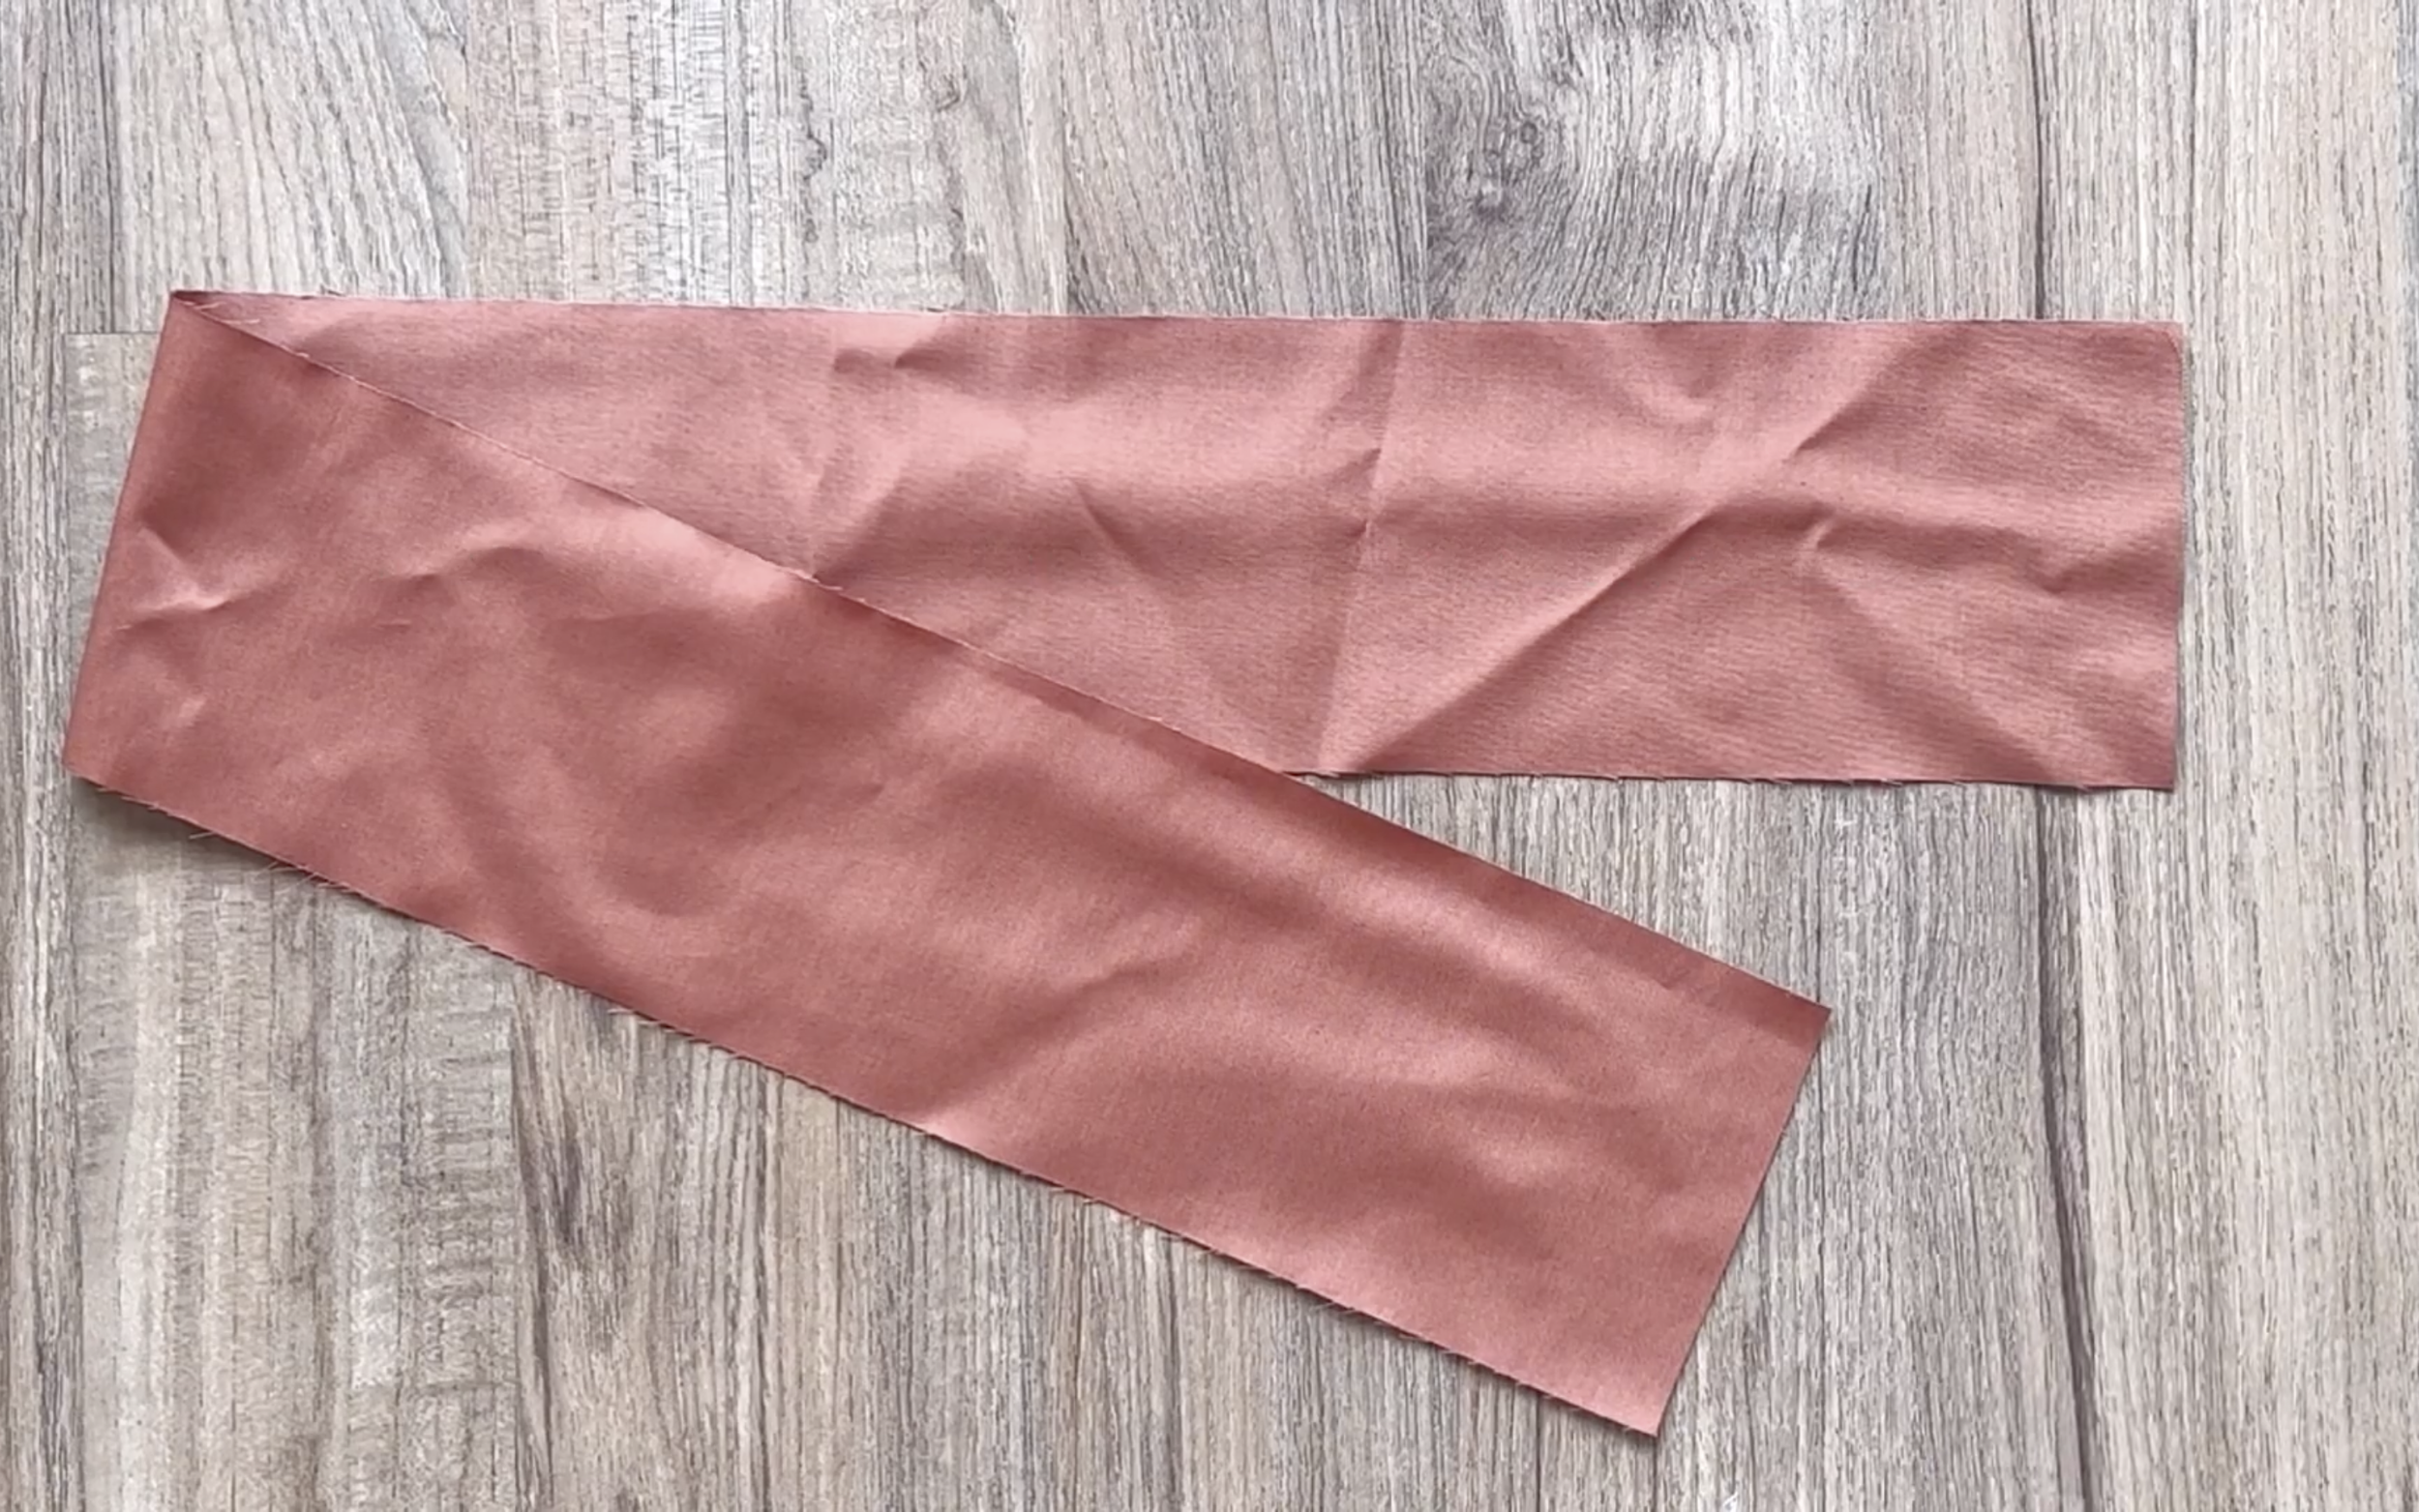
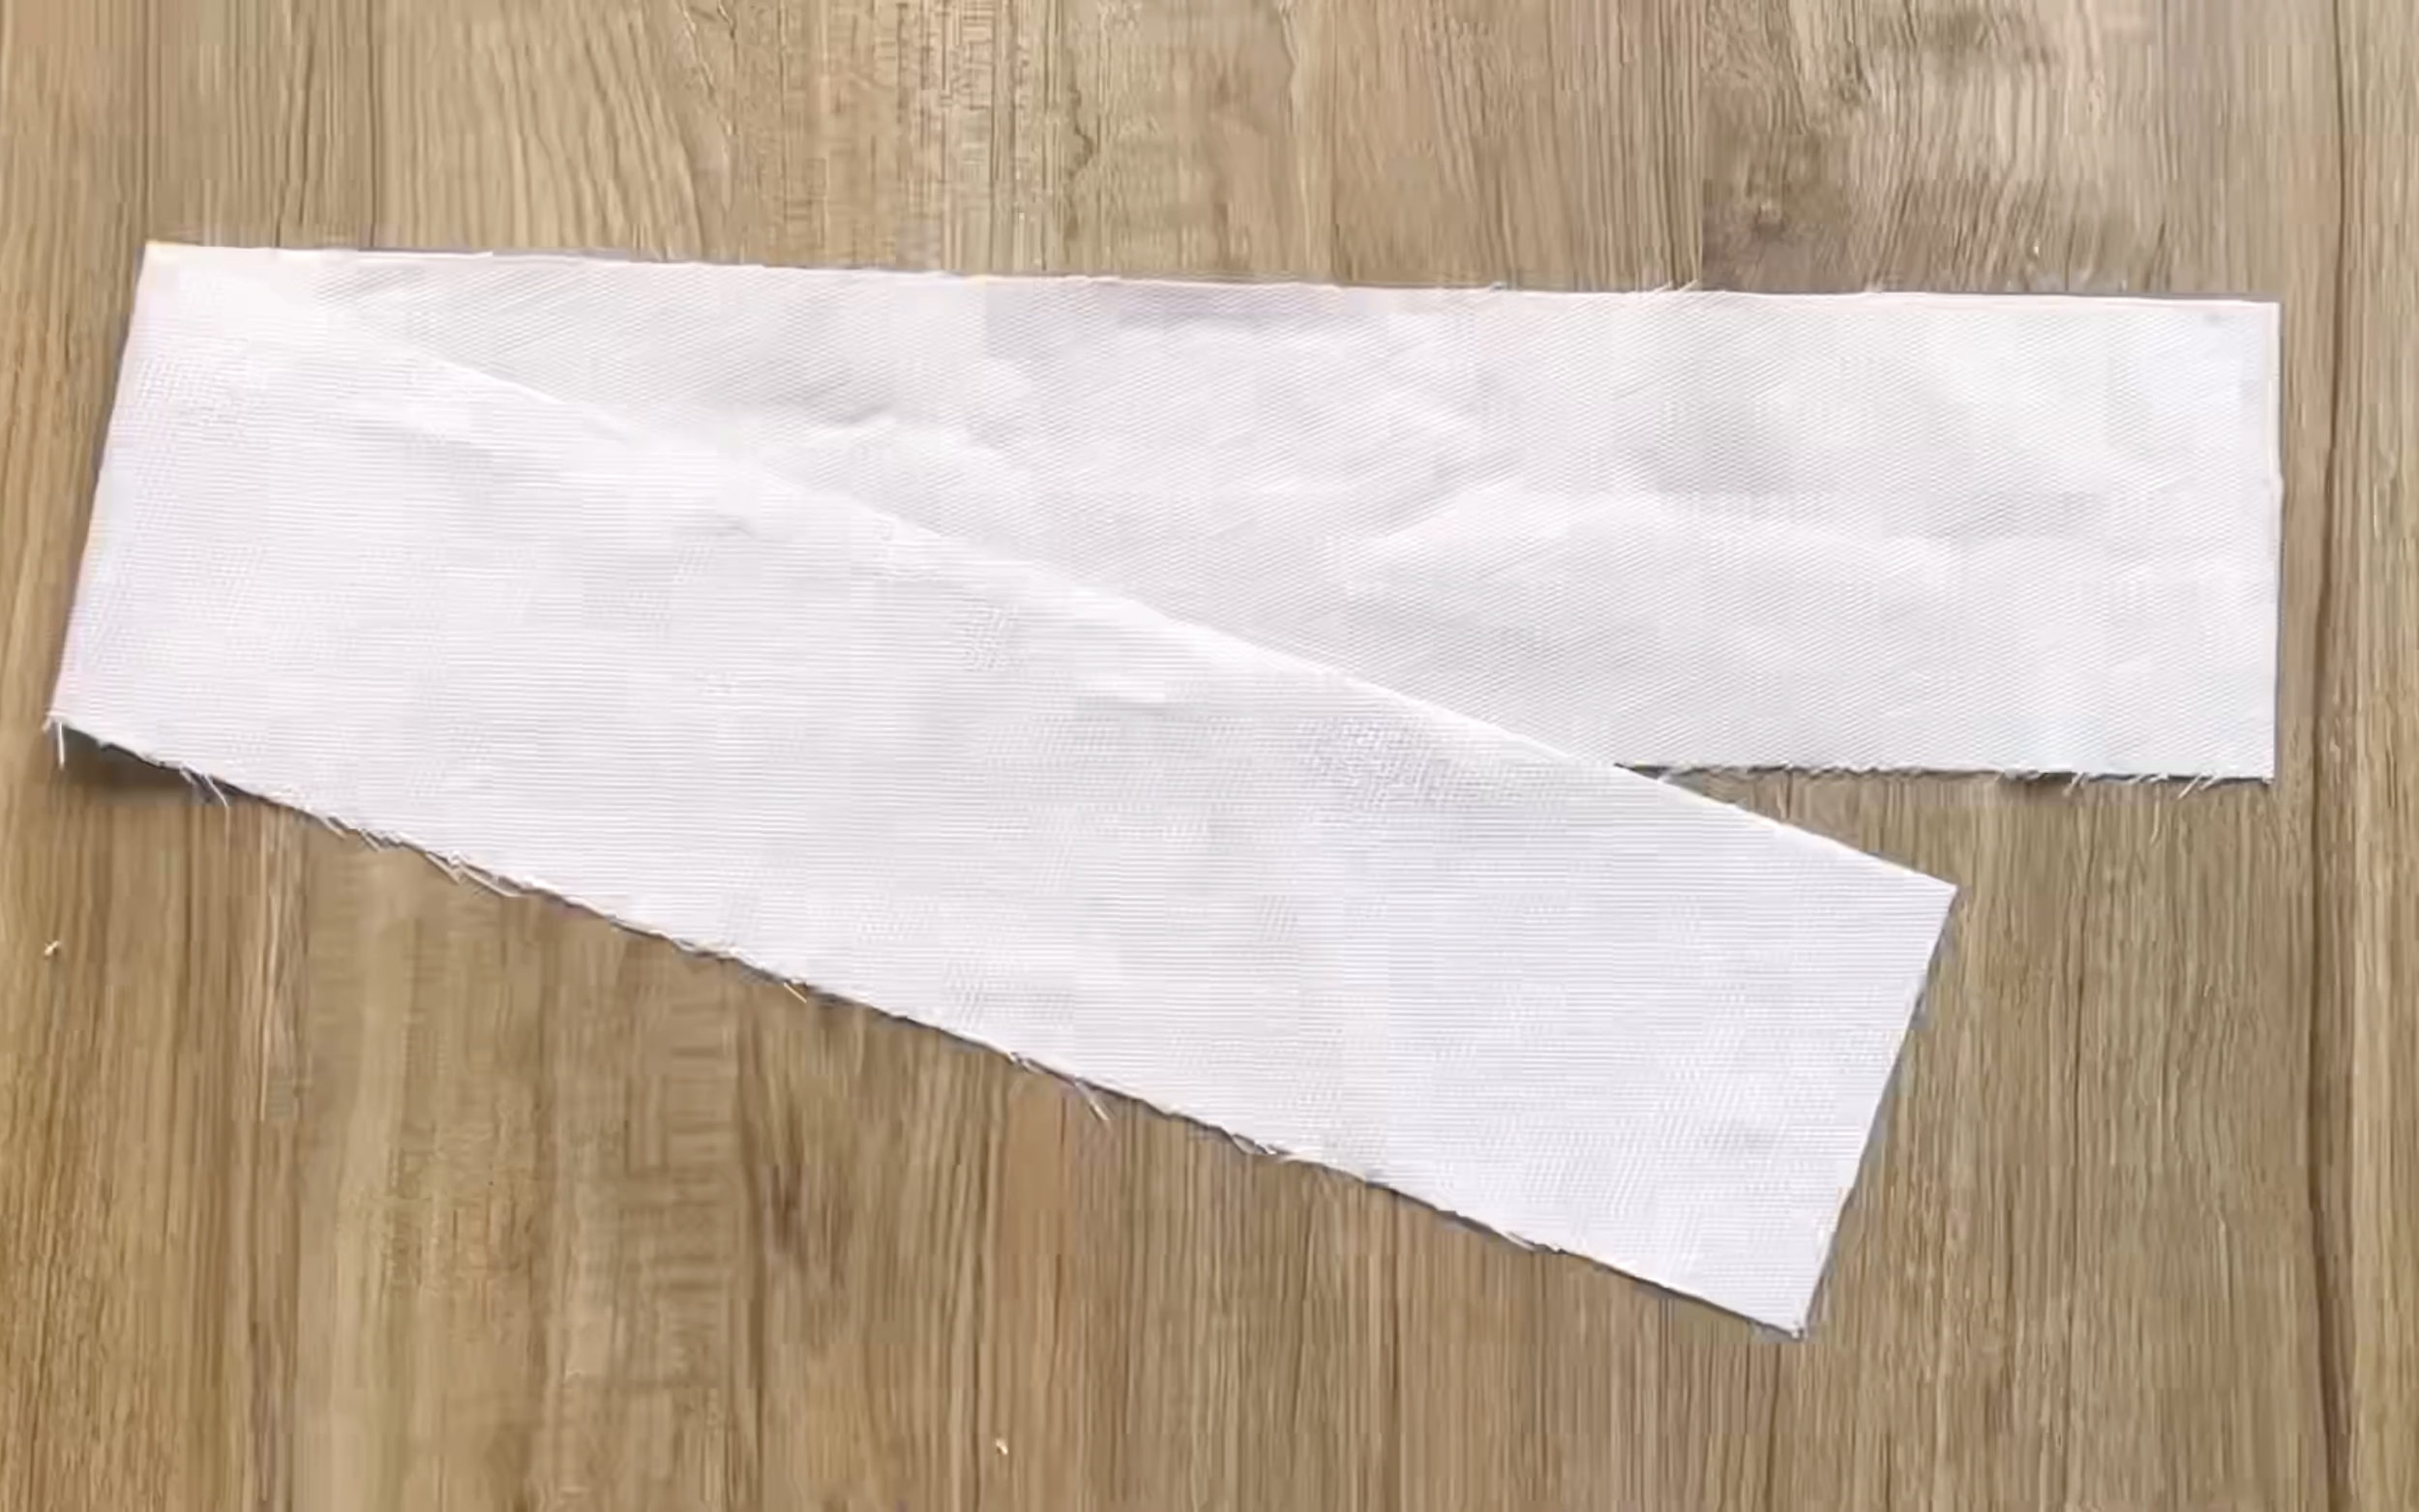
Cut a long fabric strip 9 cm wide (twice the waistband width plus 2 cm seam allowance) and 2 cm longer than the gathered fabric width.
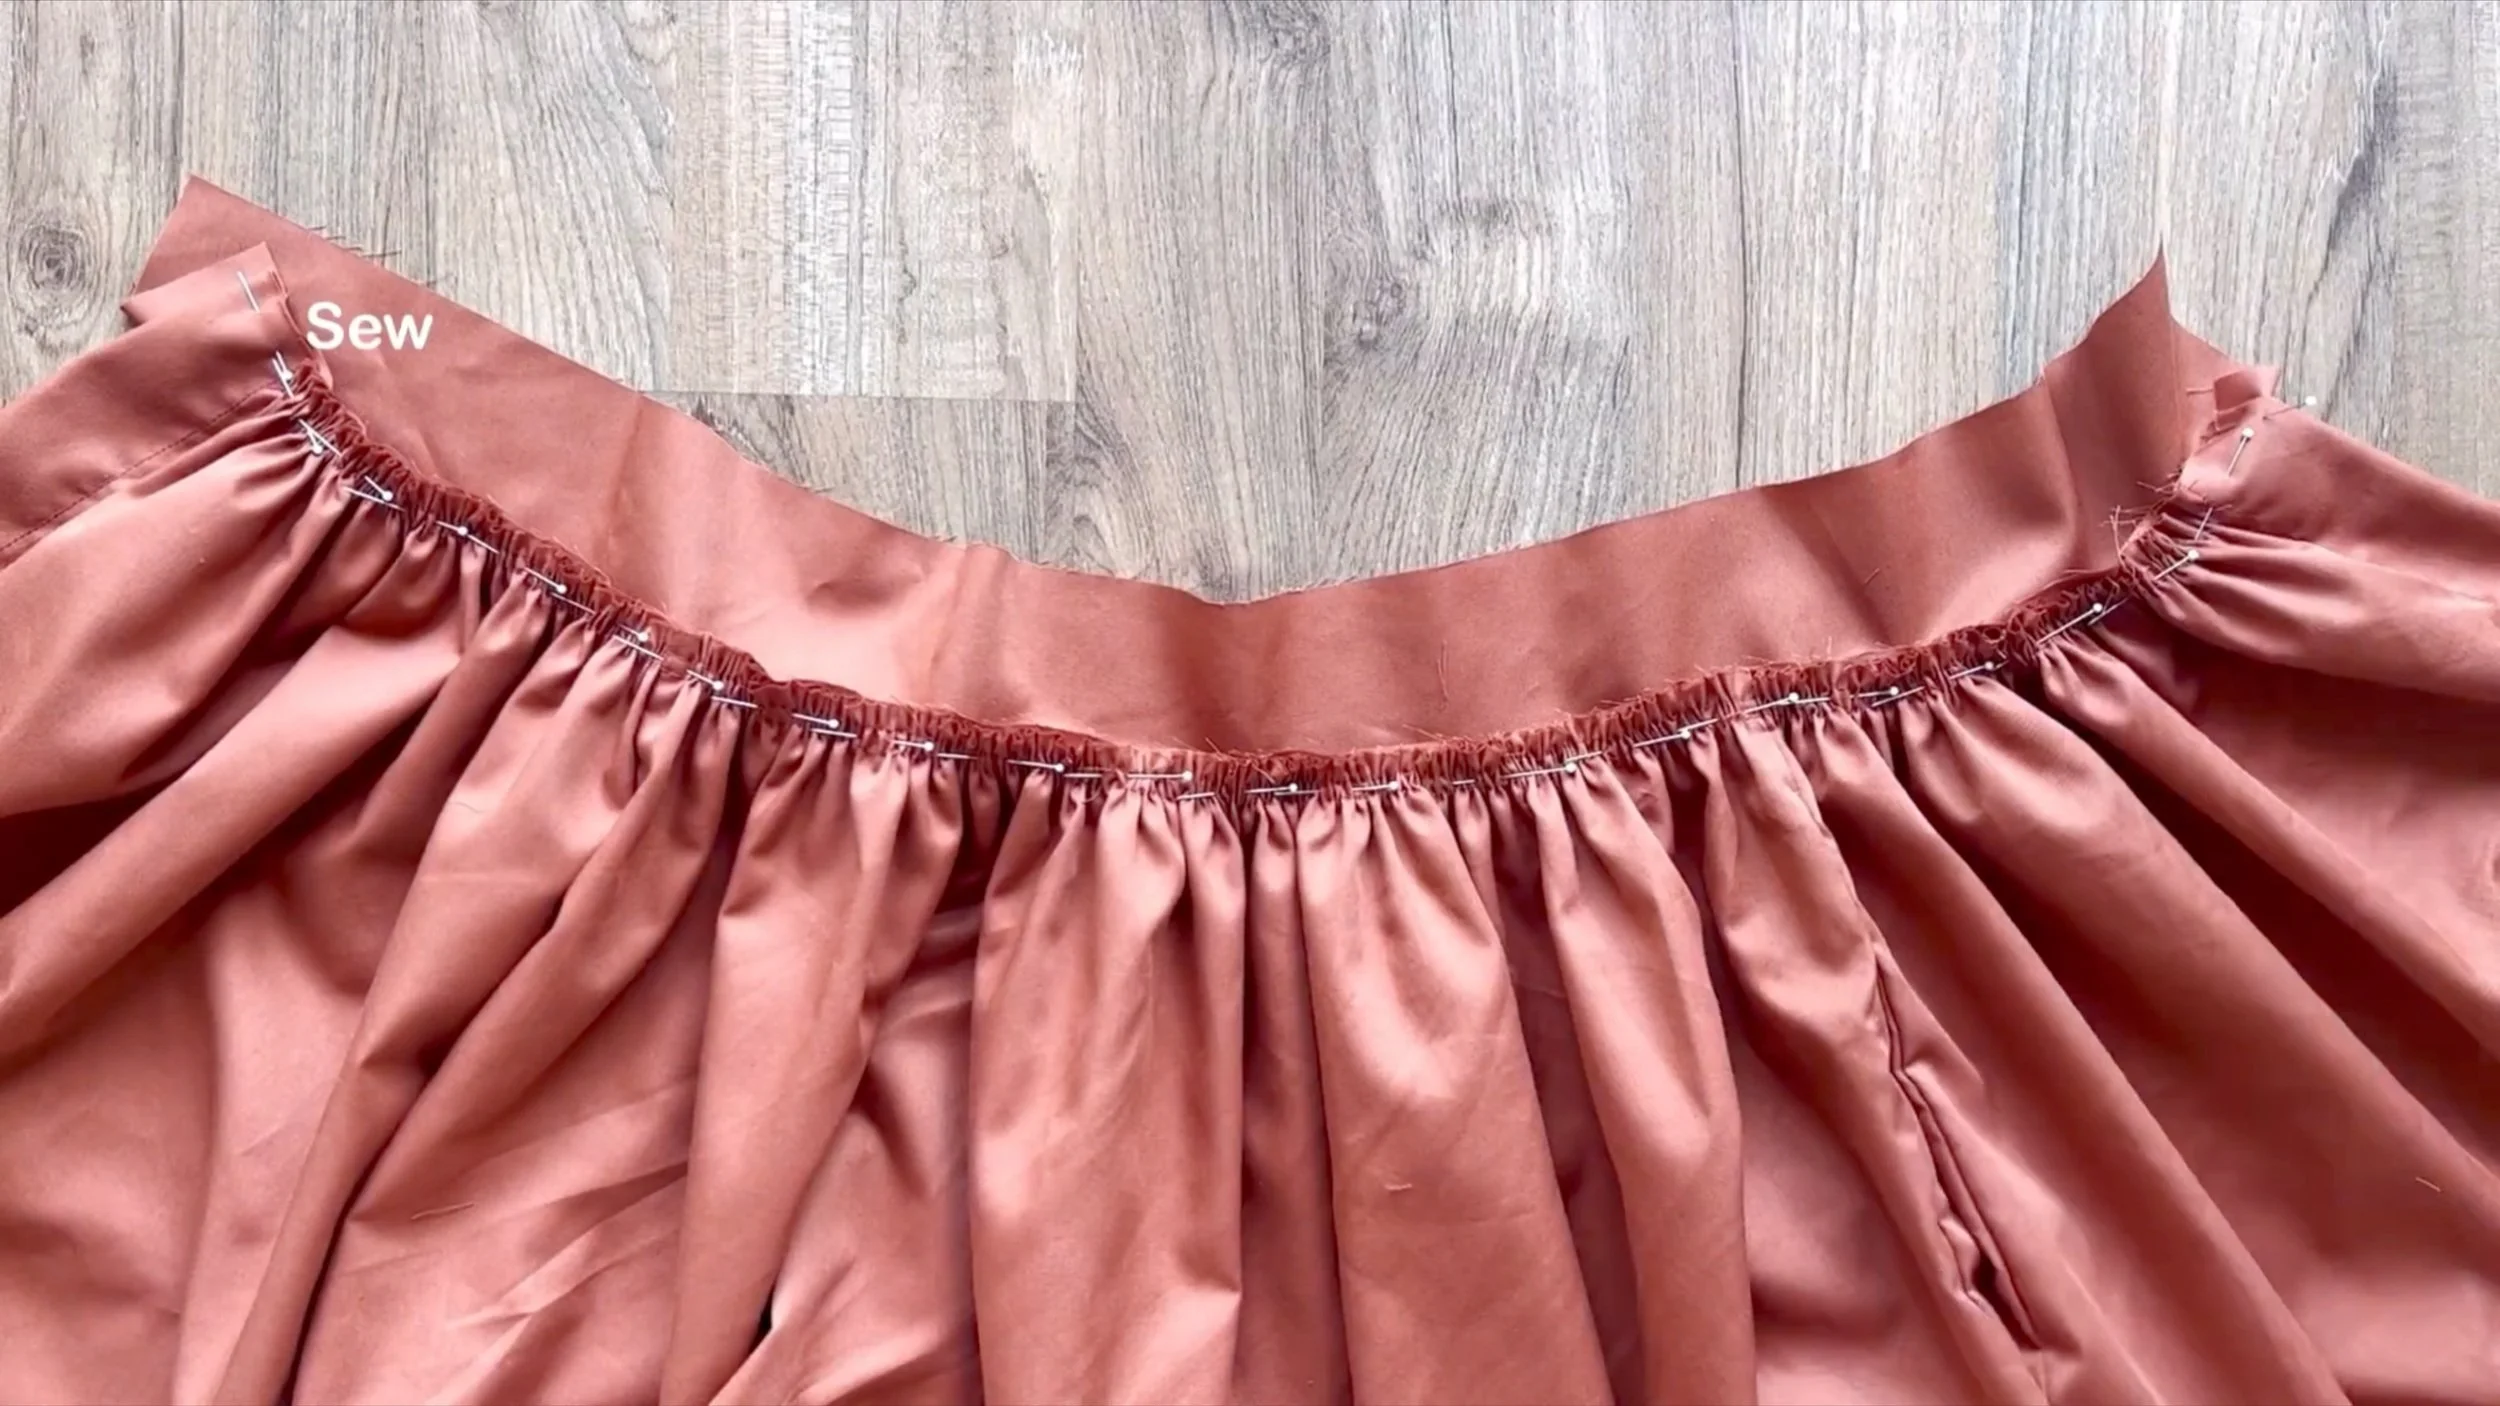
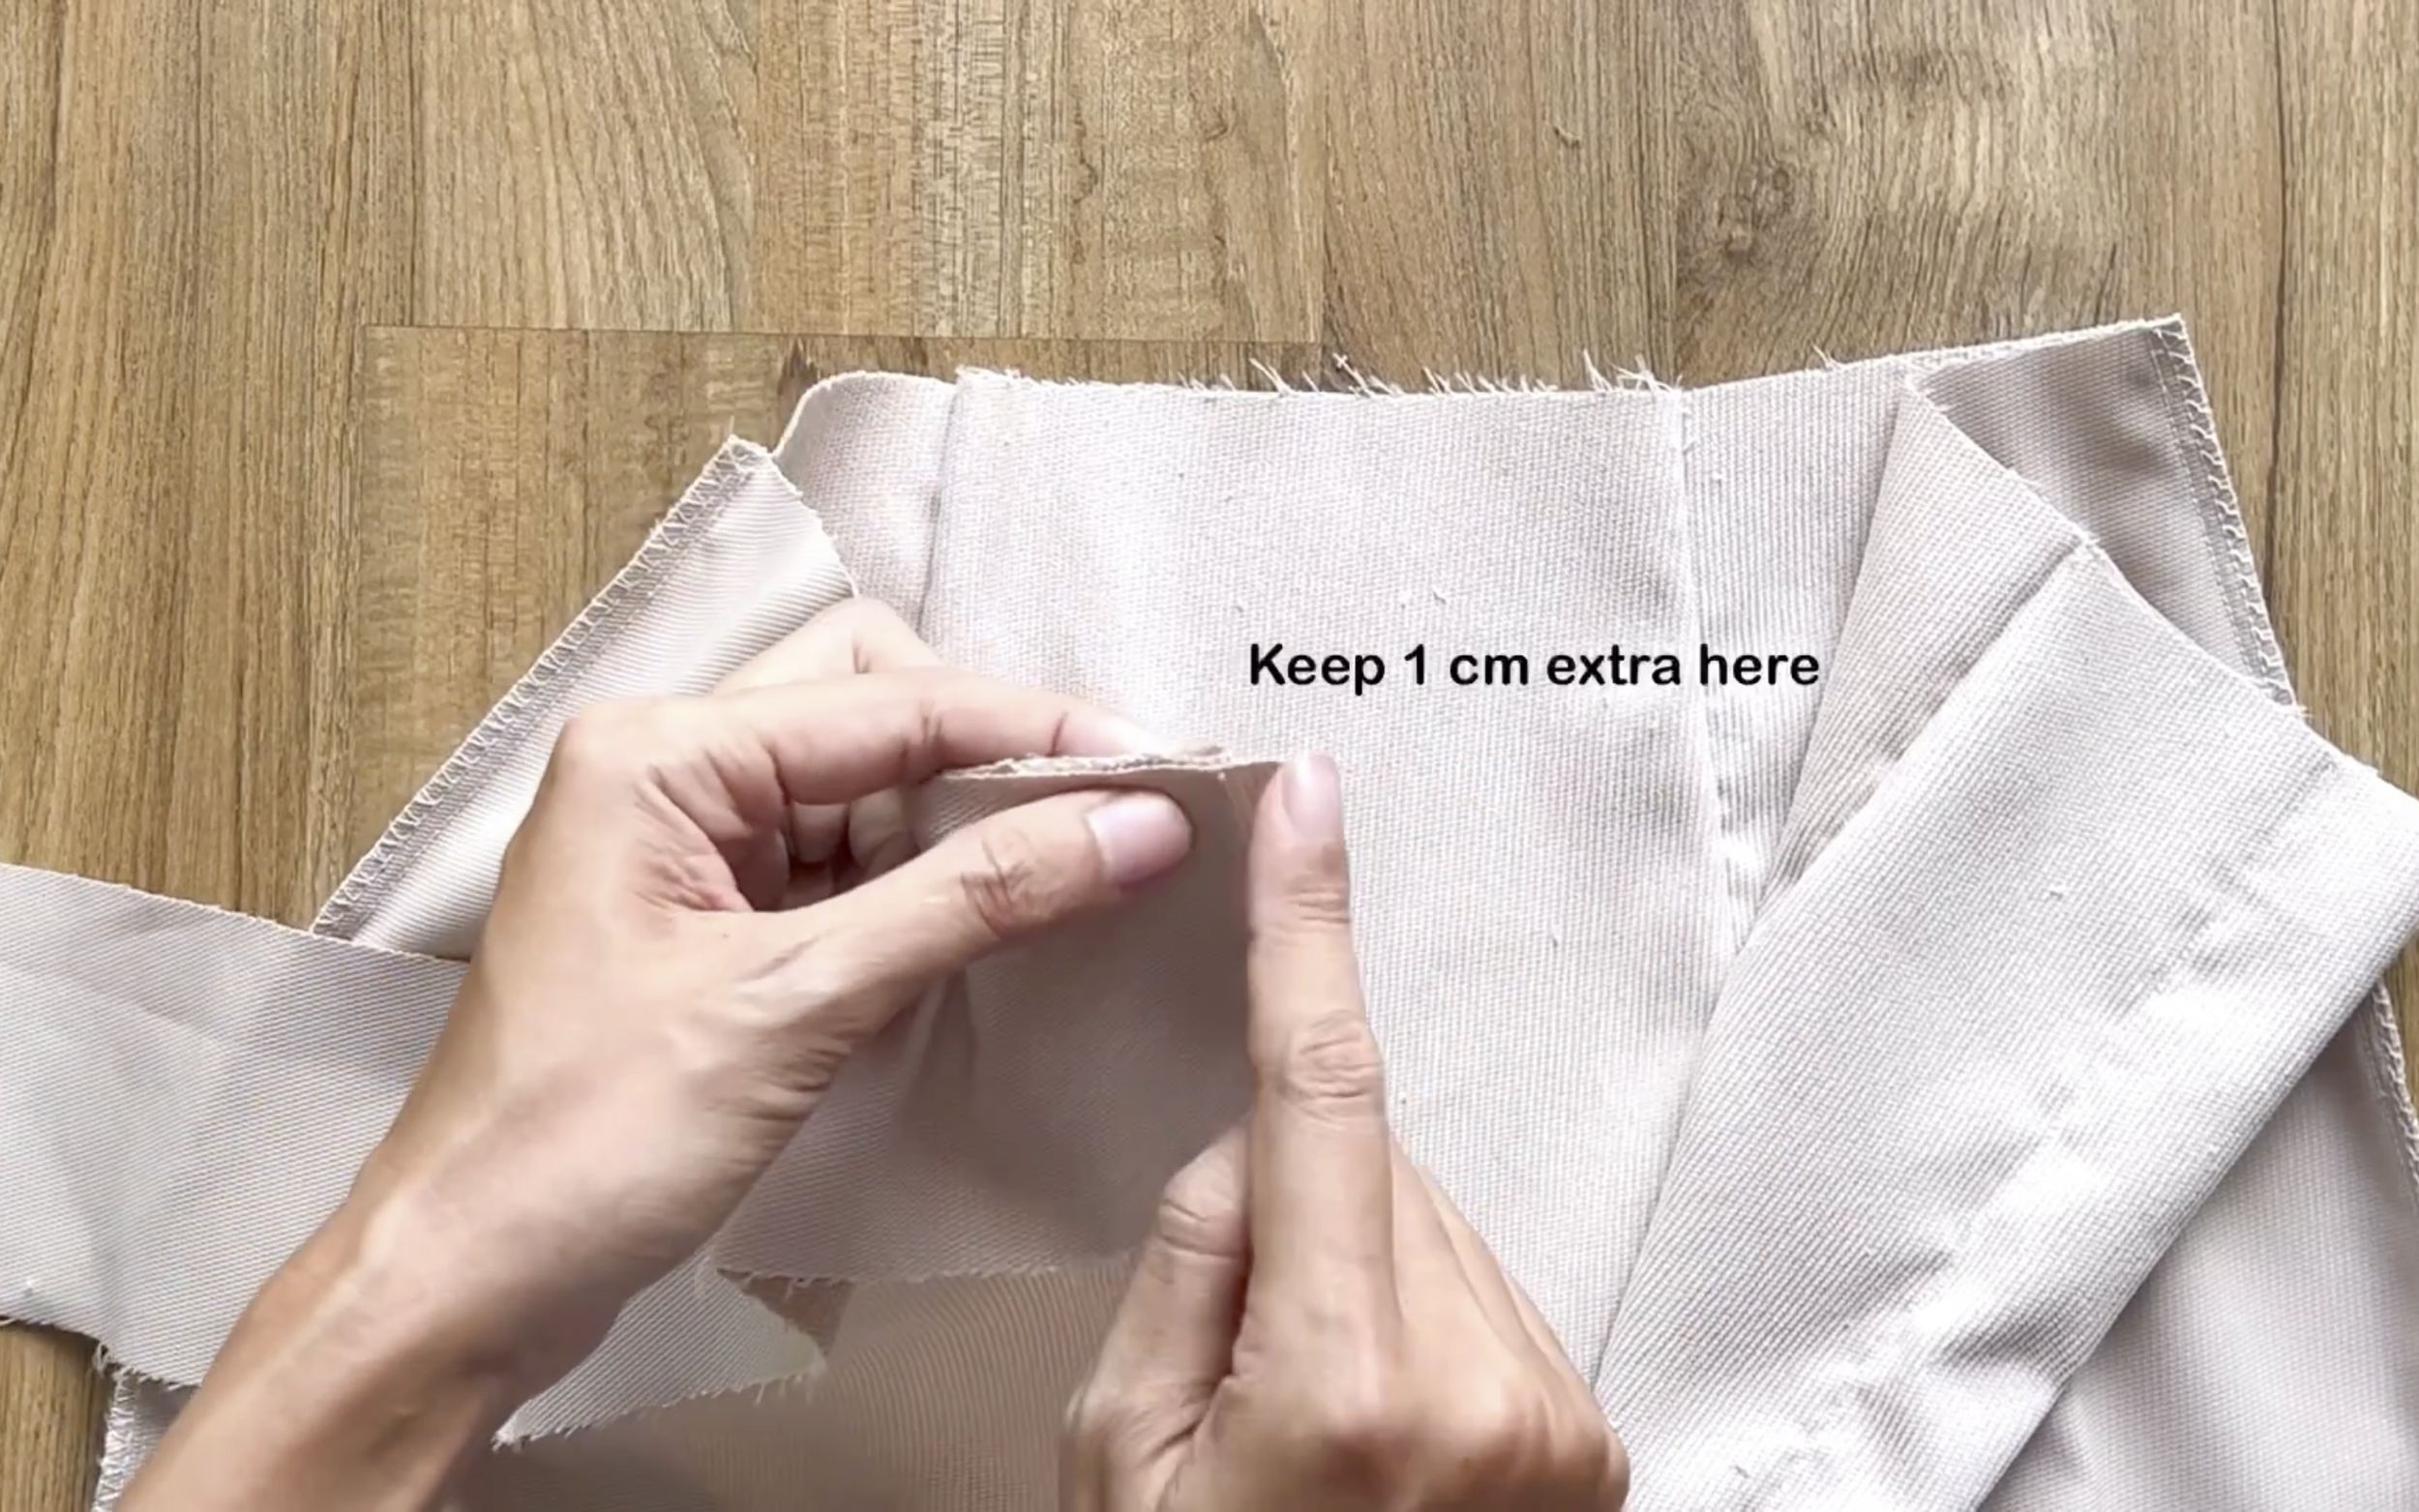
Attach one side of the fabric strip to the skirt, leaving 1 cm extra at each end
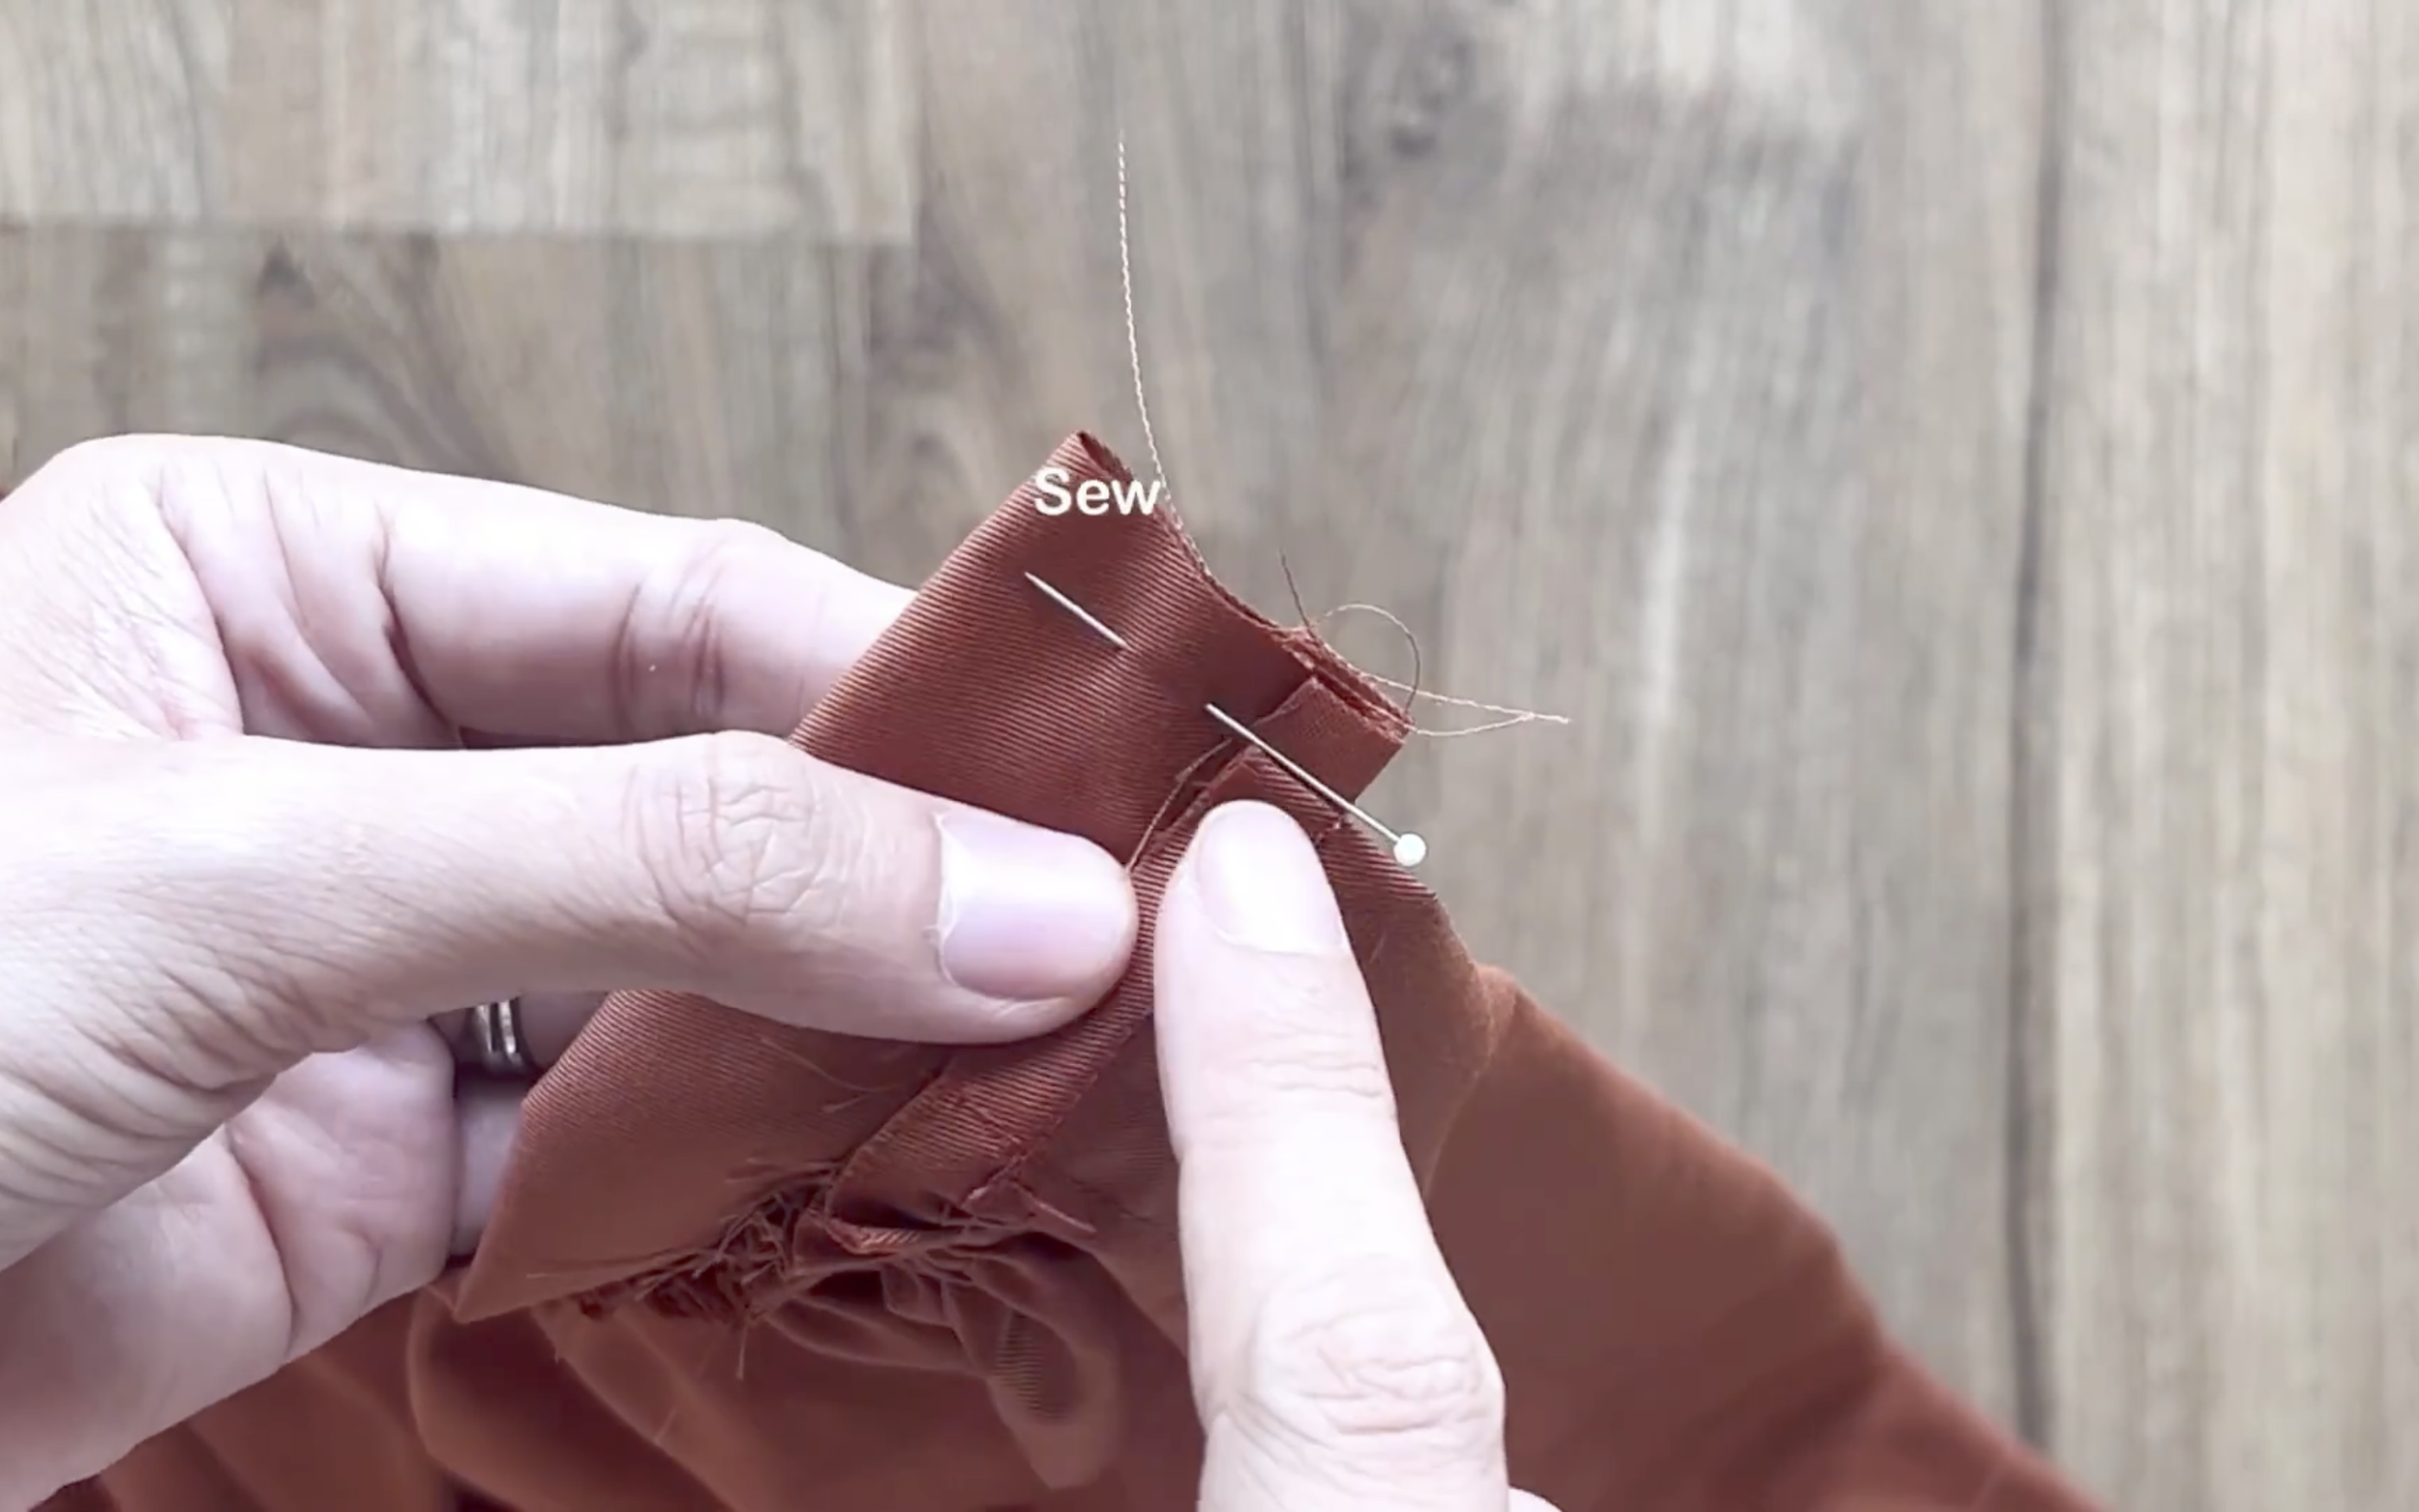
After sewing, fold the other edge of the fabric strip inward by 1 cm, fold it over the first seam, and sew to finish the ends of the waistband.

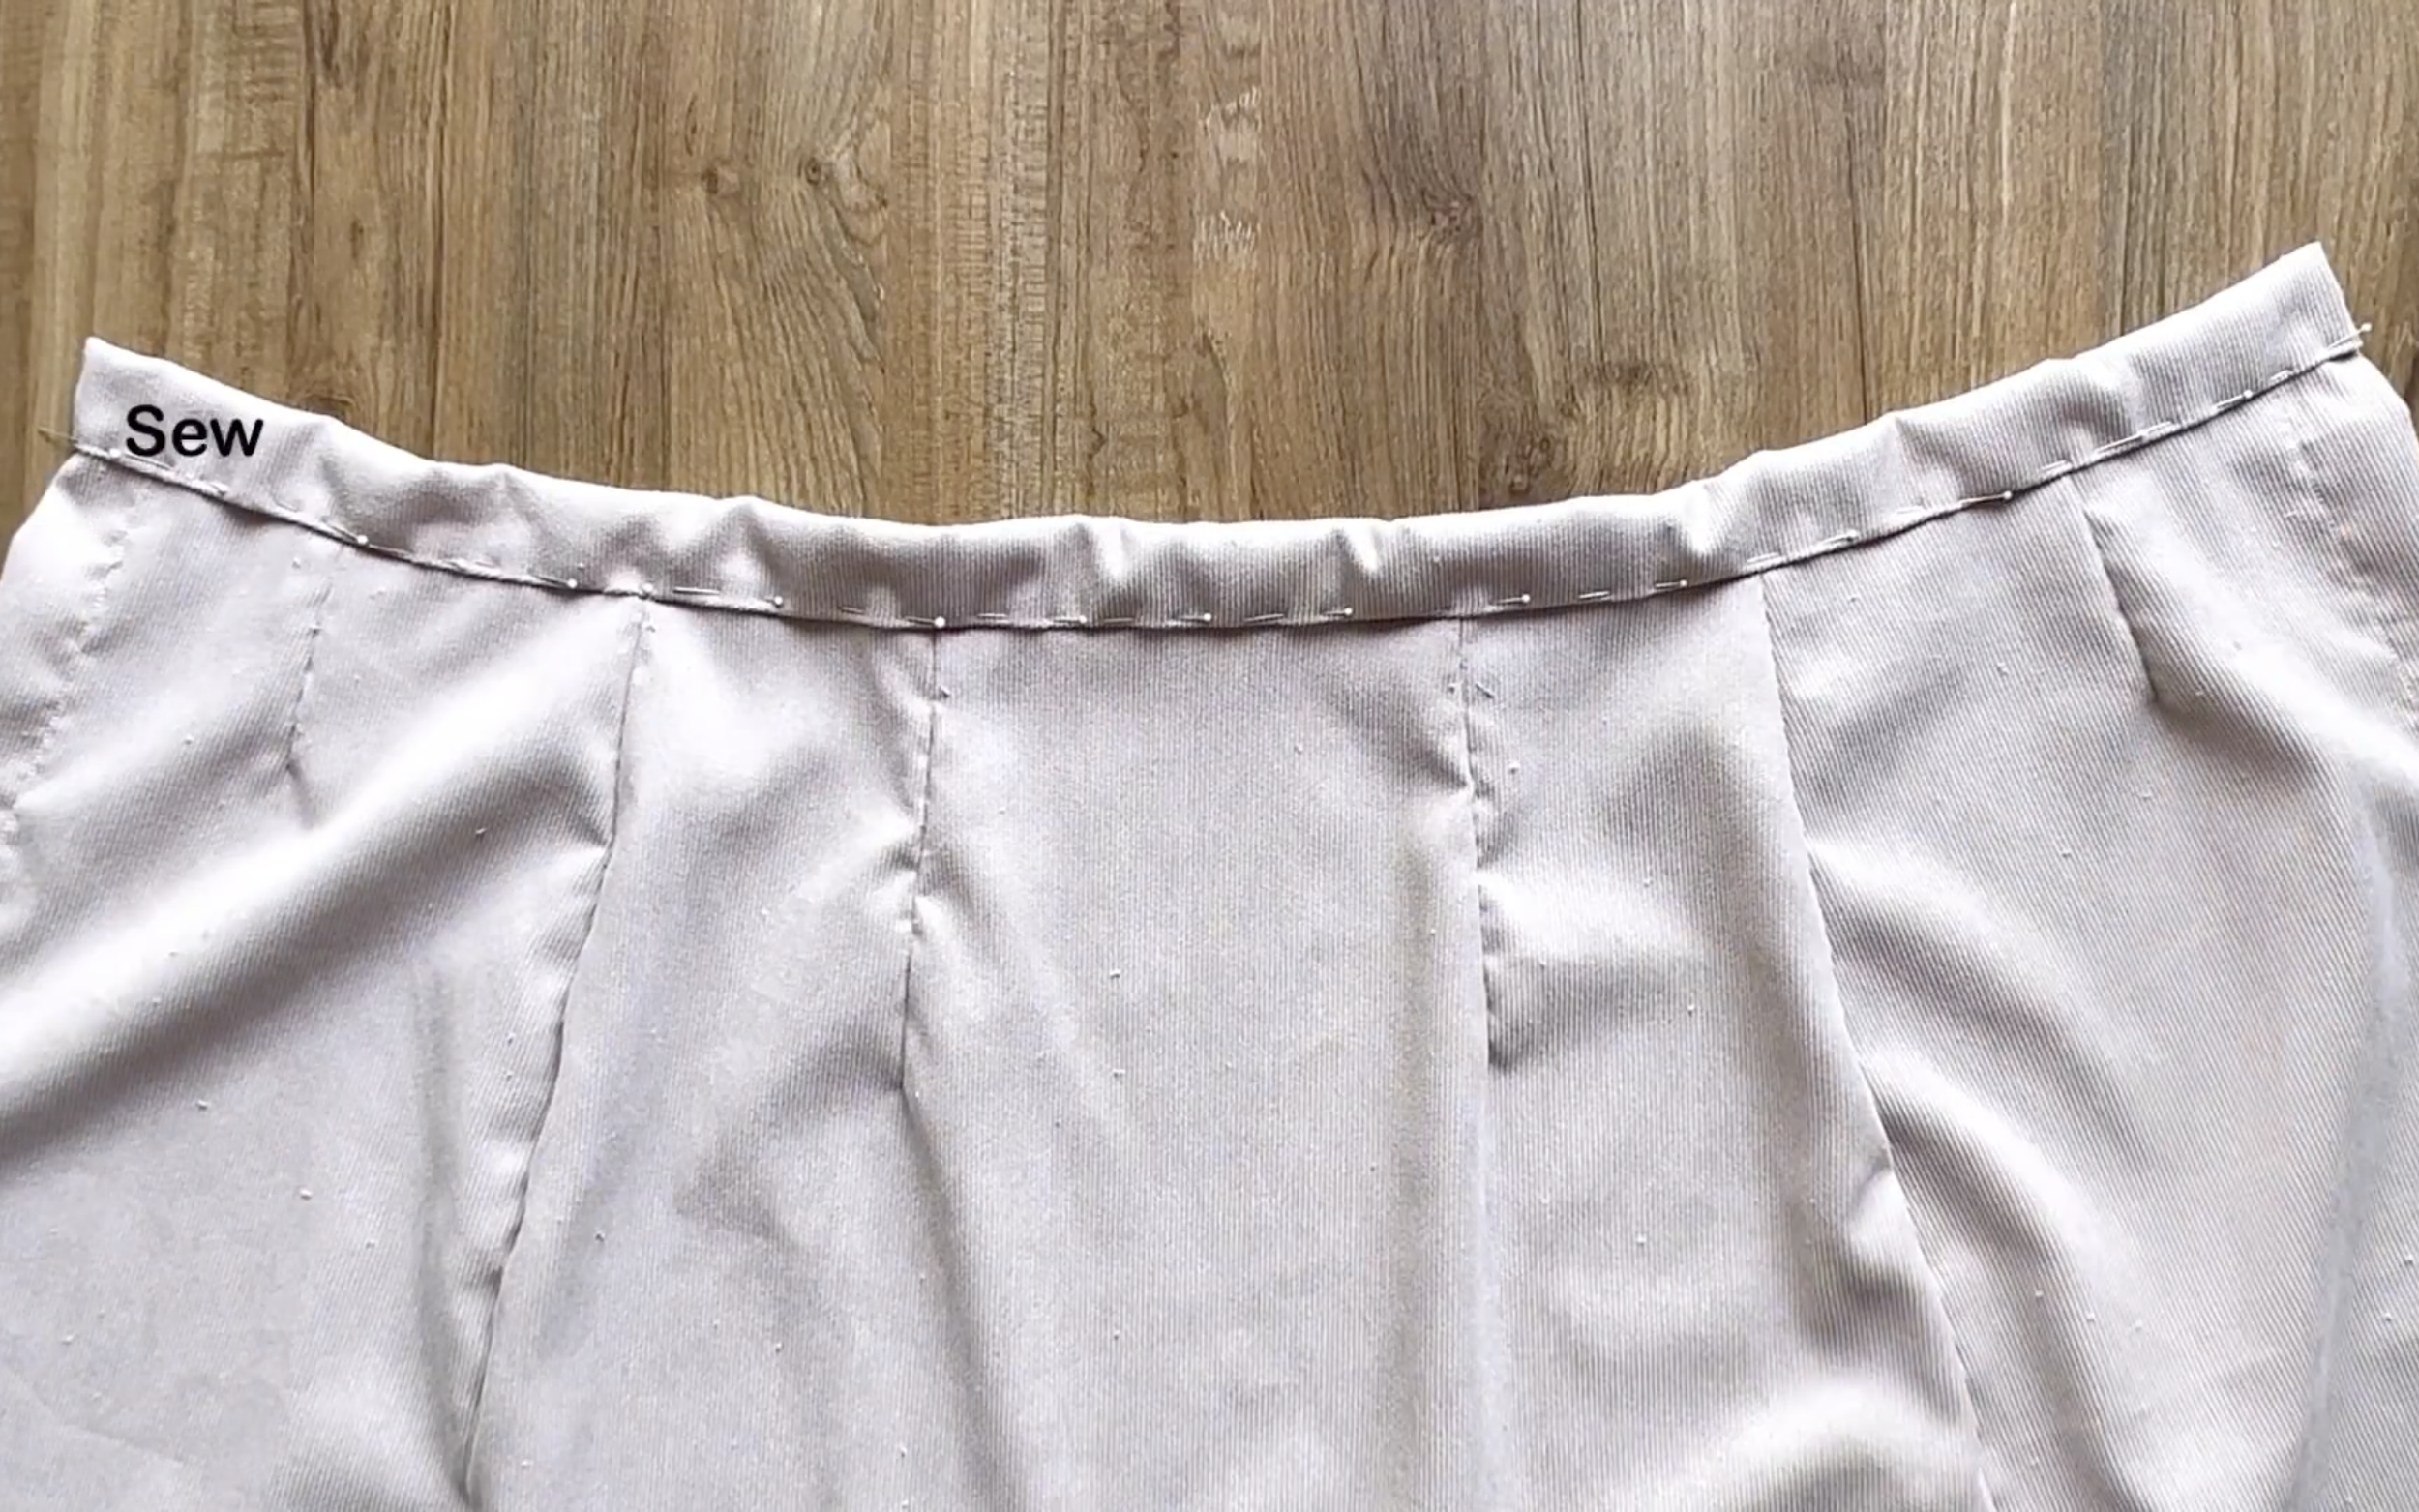
Turn the waistband inward to hide the edges.
Pin the rest, fold the other edge of the fabric inward by 1 cm, fold it over the first seam, and make the second seam.
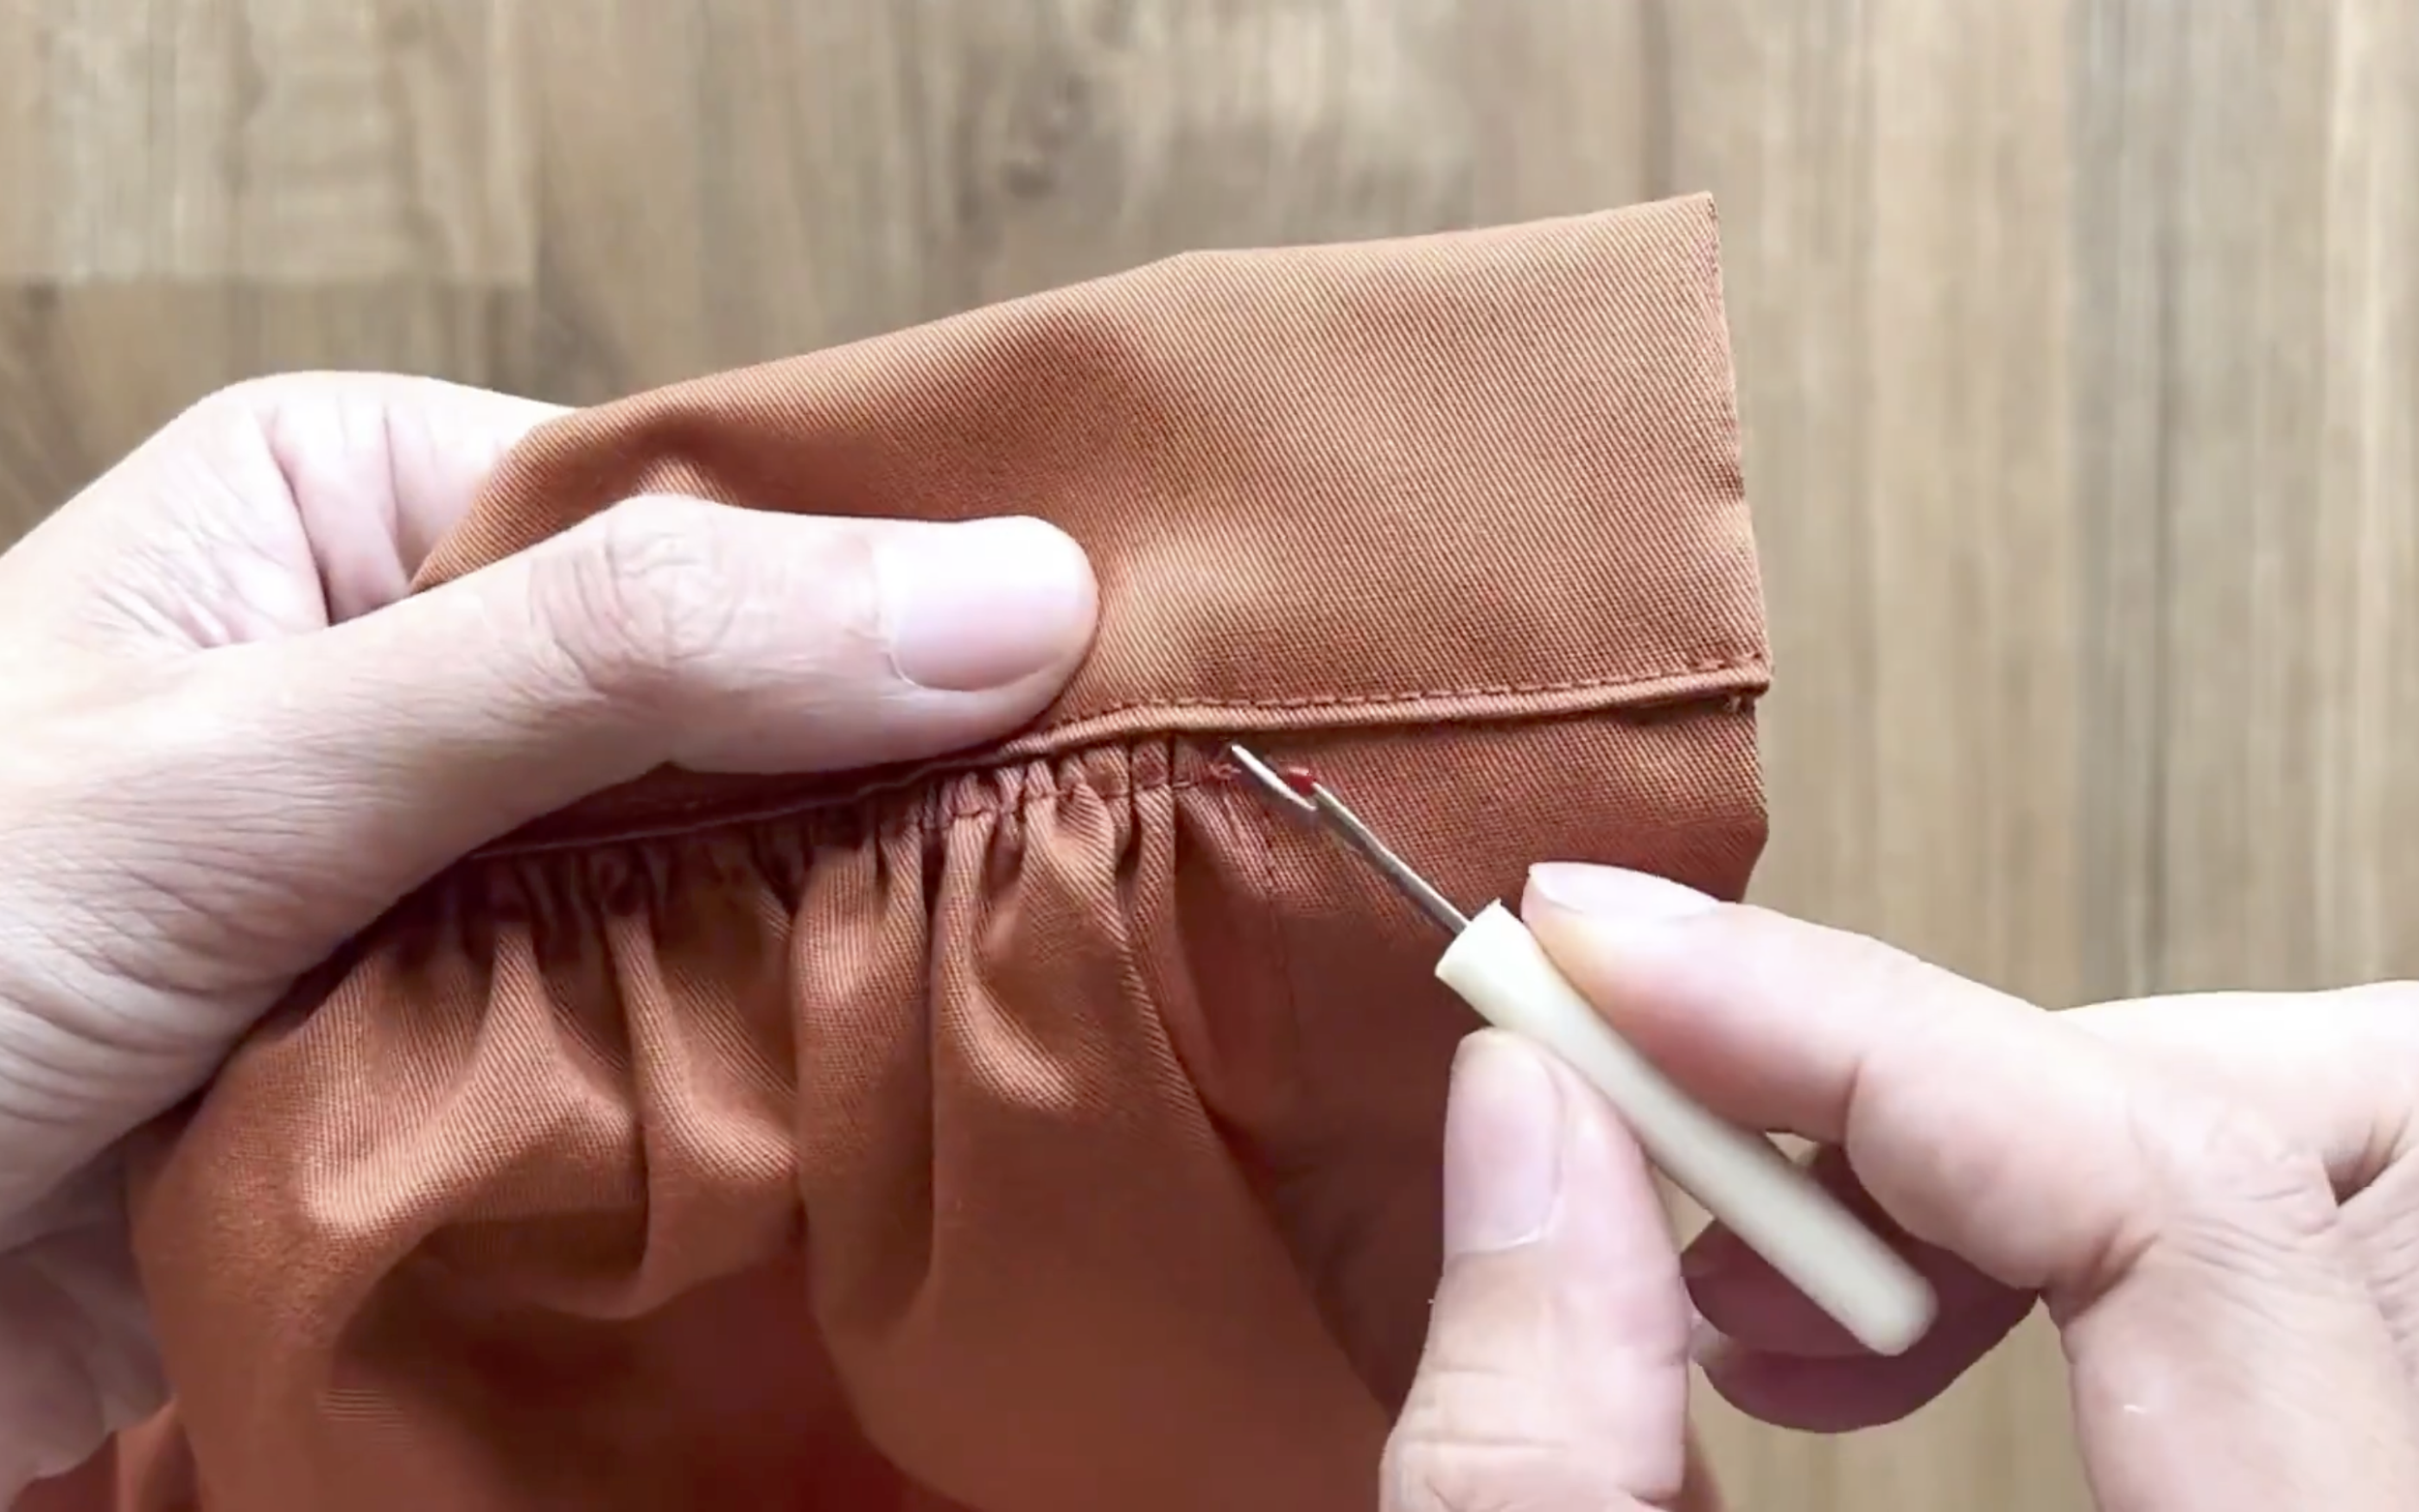
Remove the loose seam threads from the gathered fabric under the waistband.
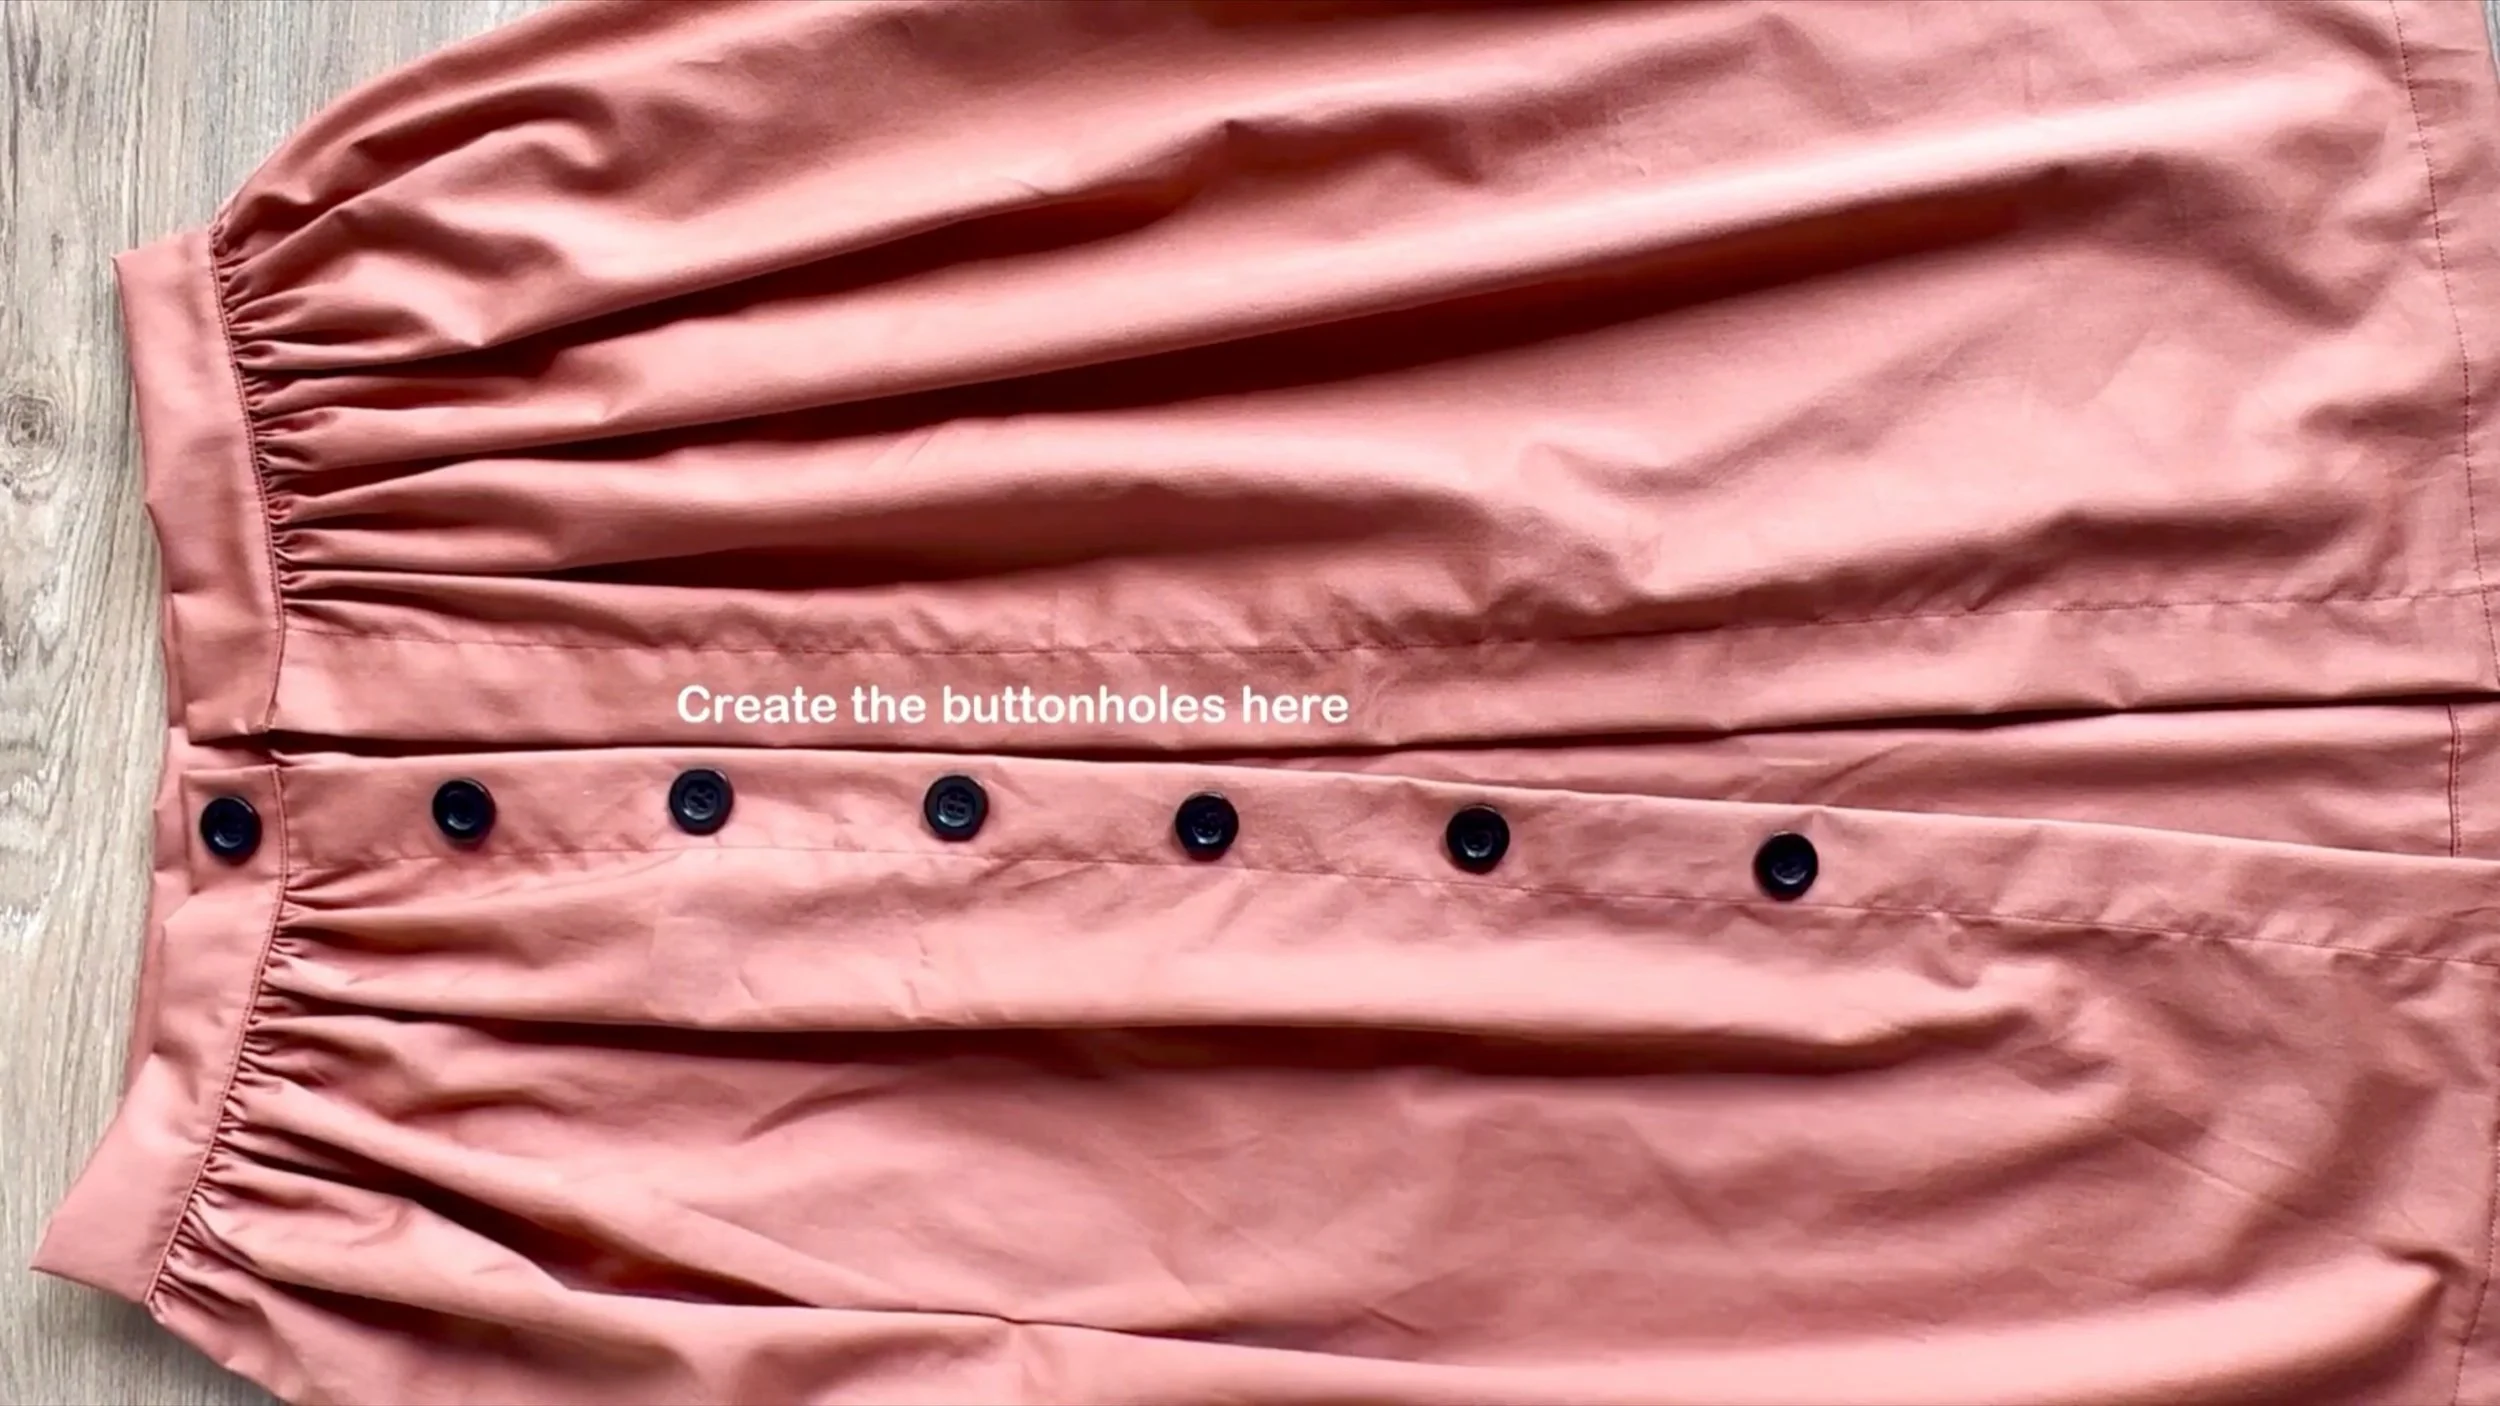
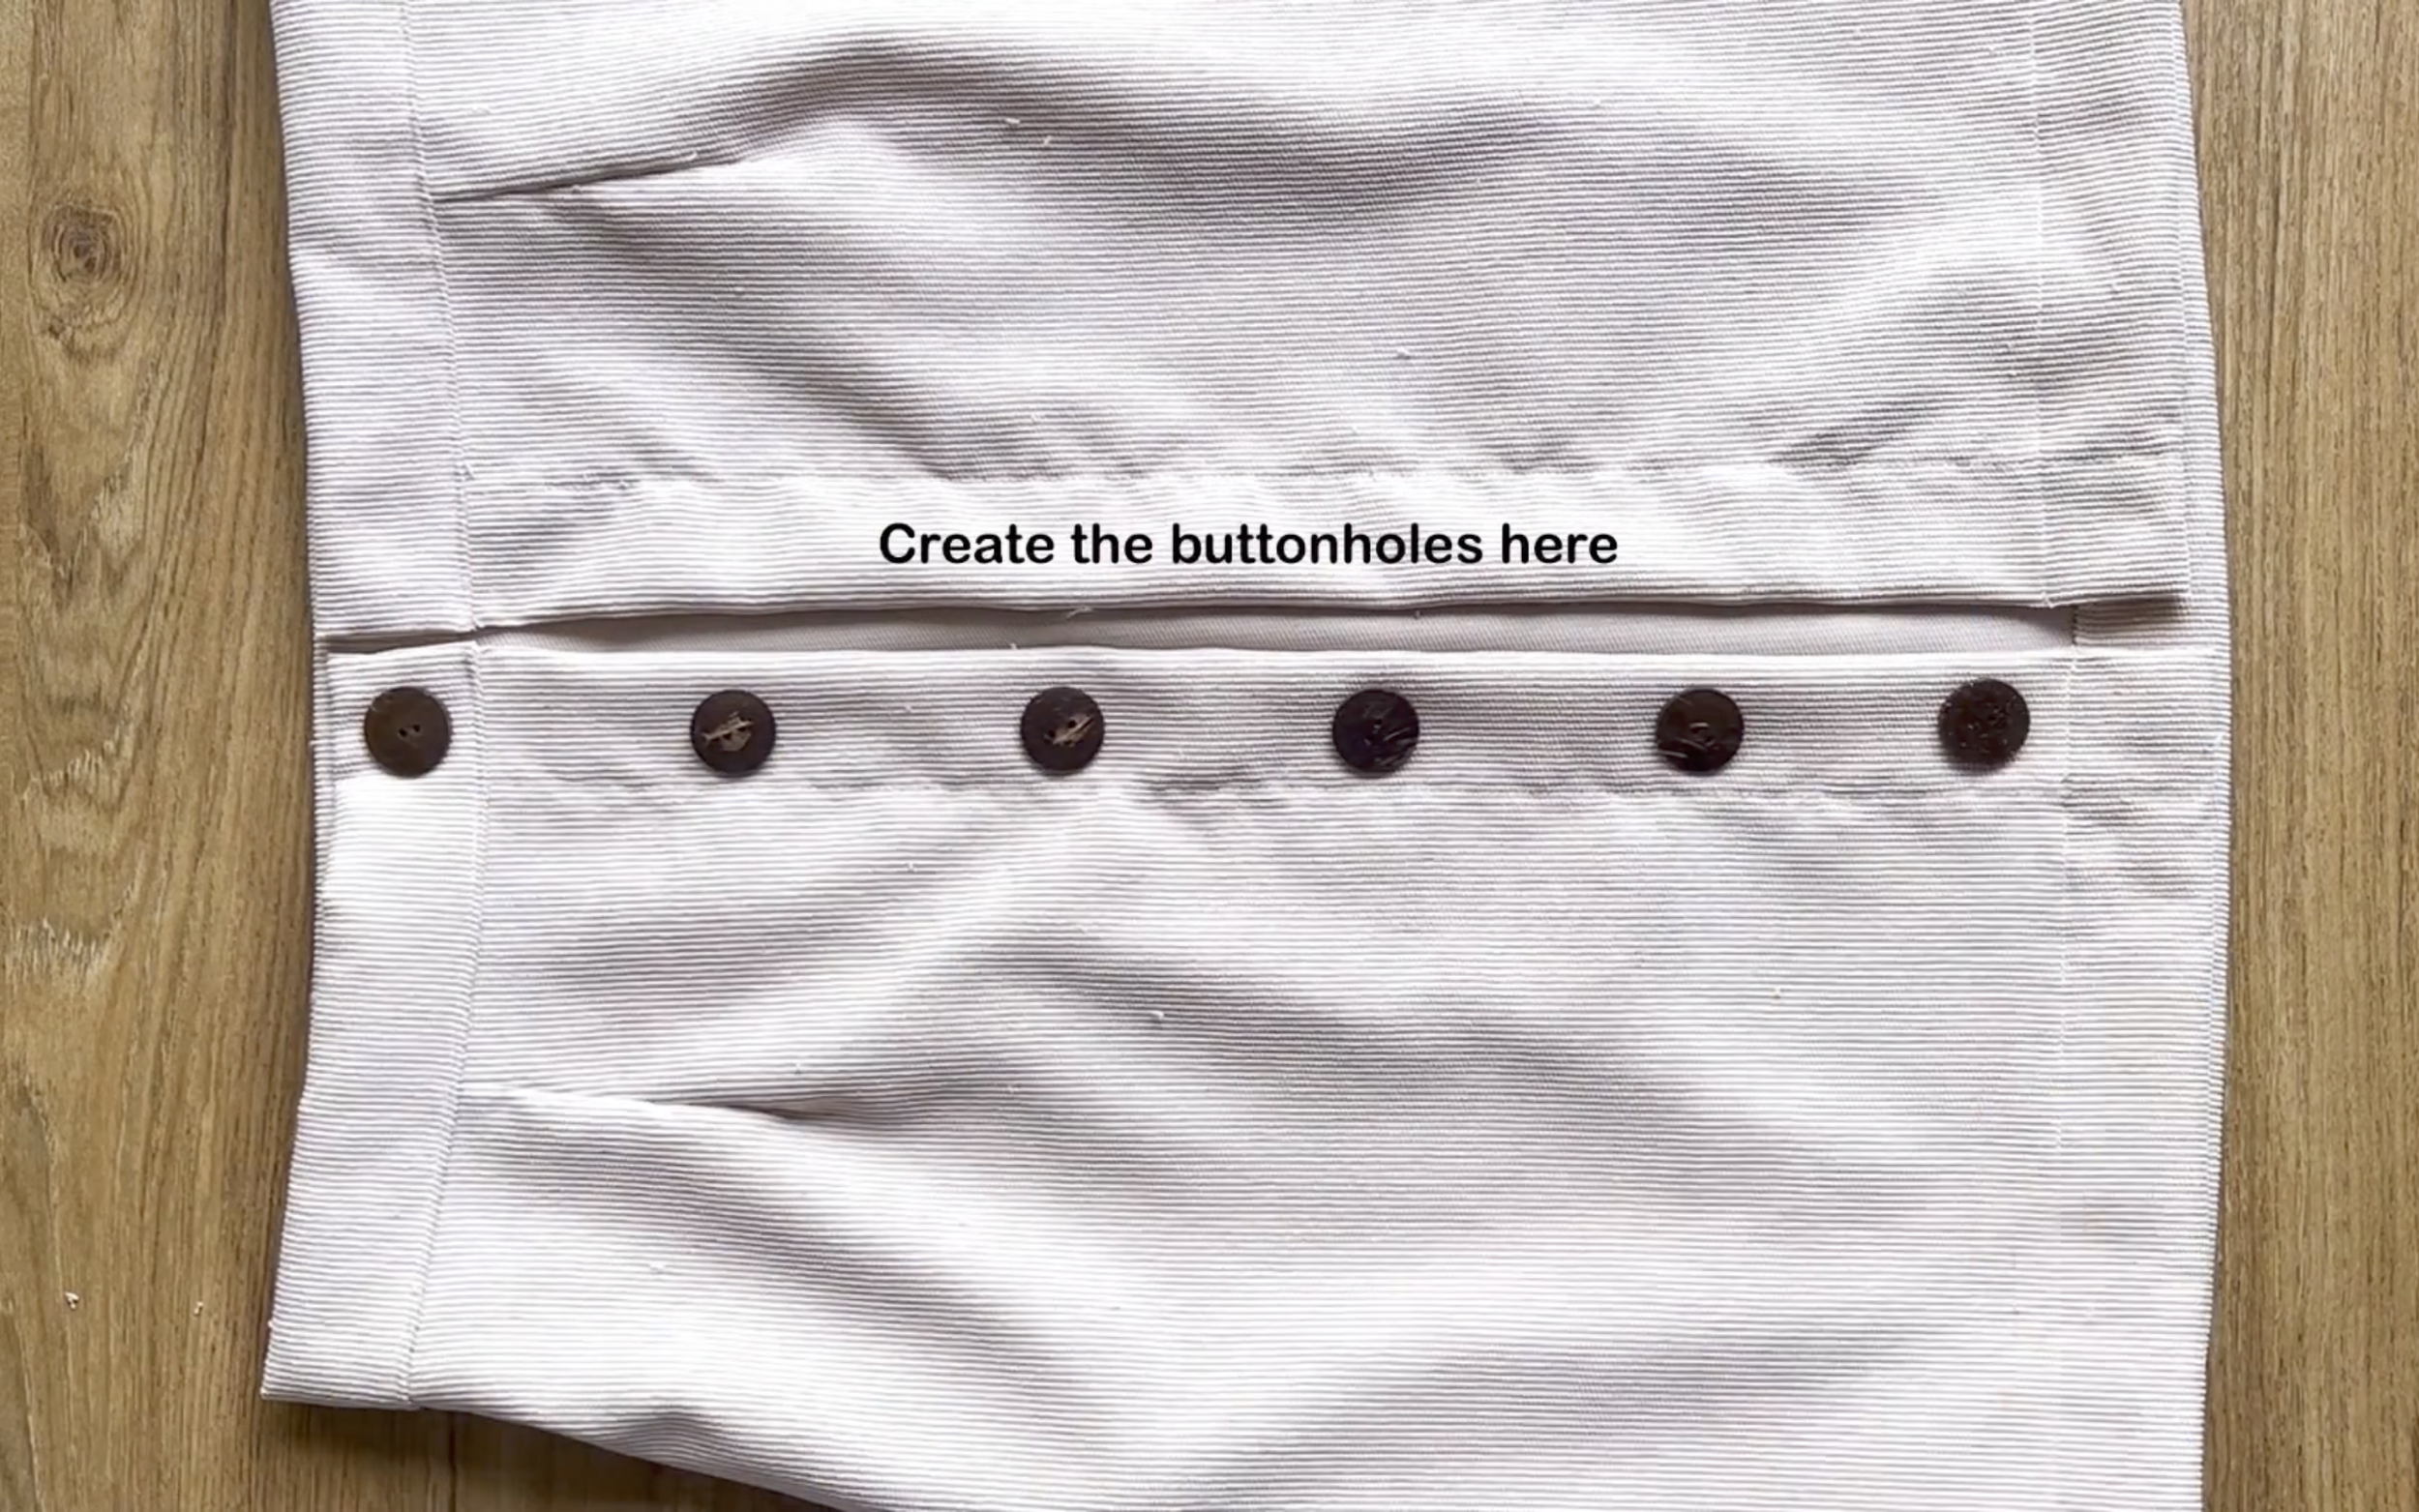
The final step is to add the button and create the buttonhole.
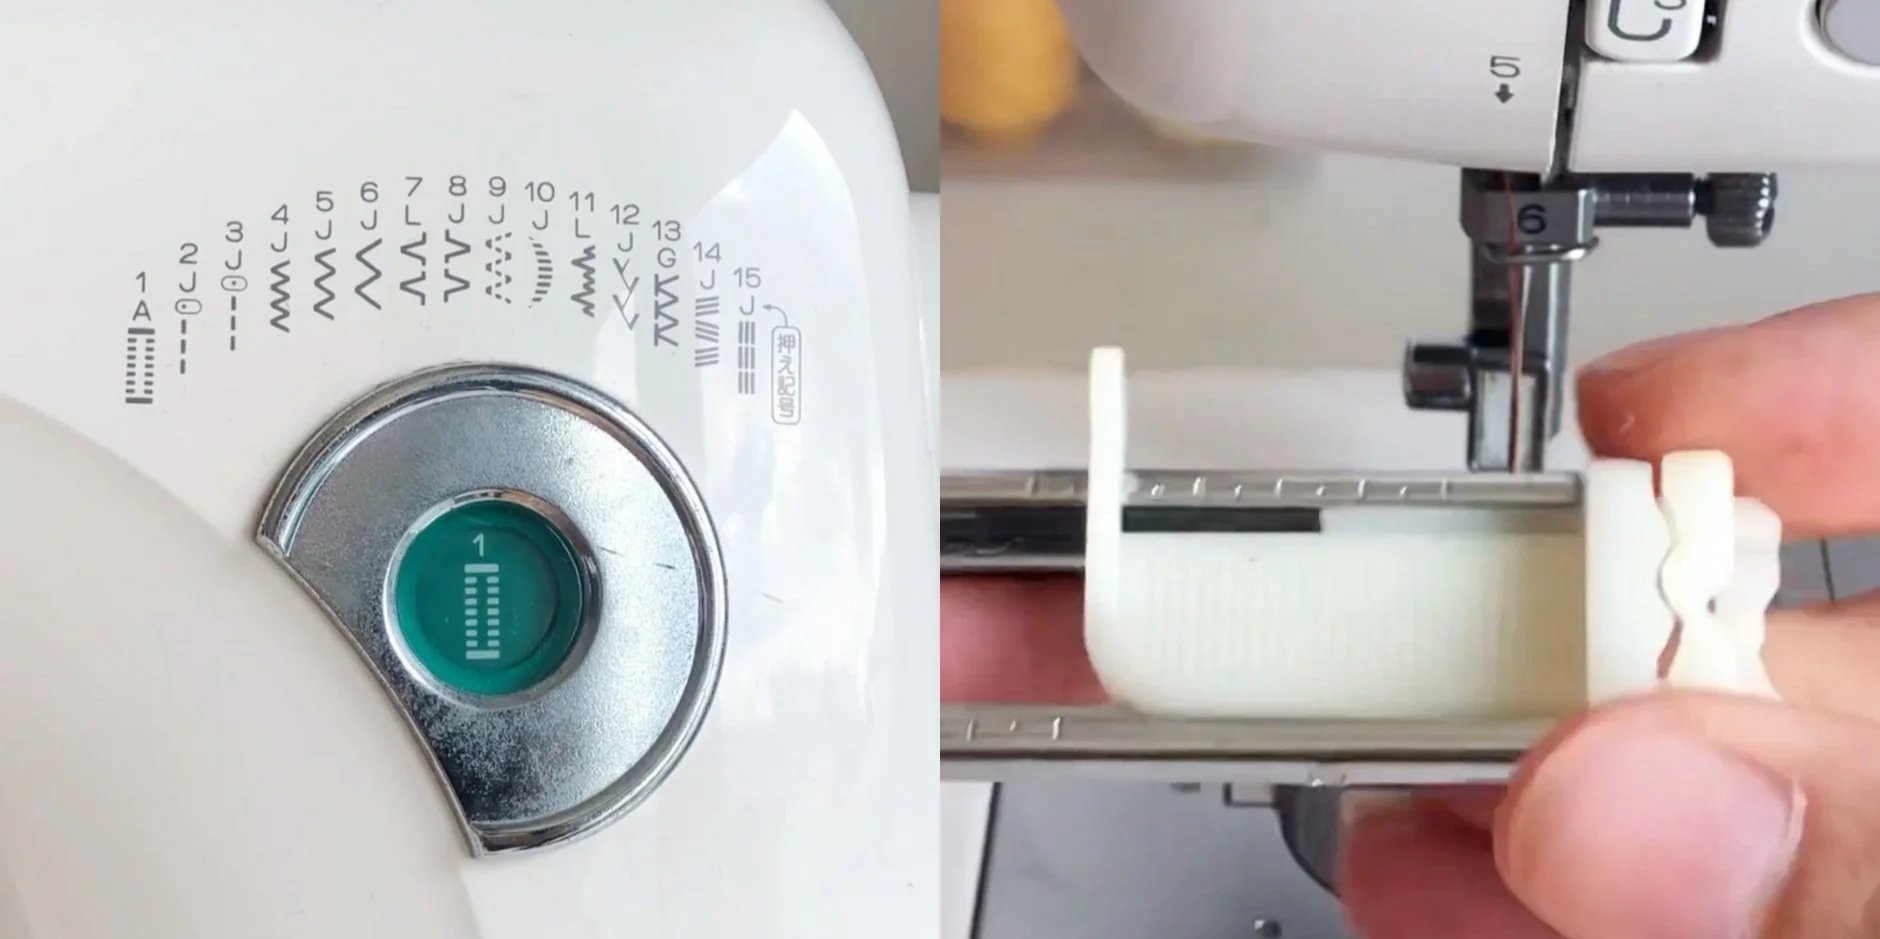
Use the button stitching and presser foot for buttonholes, or hand-sew if the machine doesn’t have this feature.

DIY Button front skirt in 2 different ways | Gathered waist midi skirt
And here’s the final look at my gathered button-front skirt!
It’s an easy project, but the result turned out so well. This skirt is perfect to pair with a turtleneck for the season, don’t you think?
2. FITTED MINI SKIRT
THE PATTERN
THE BACK SKIRT PATTERN
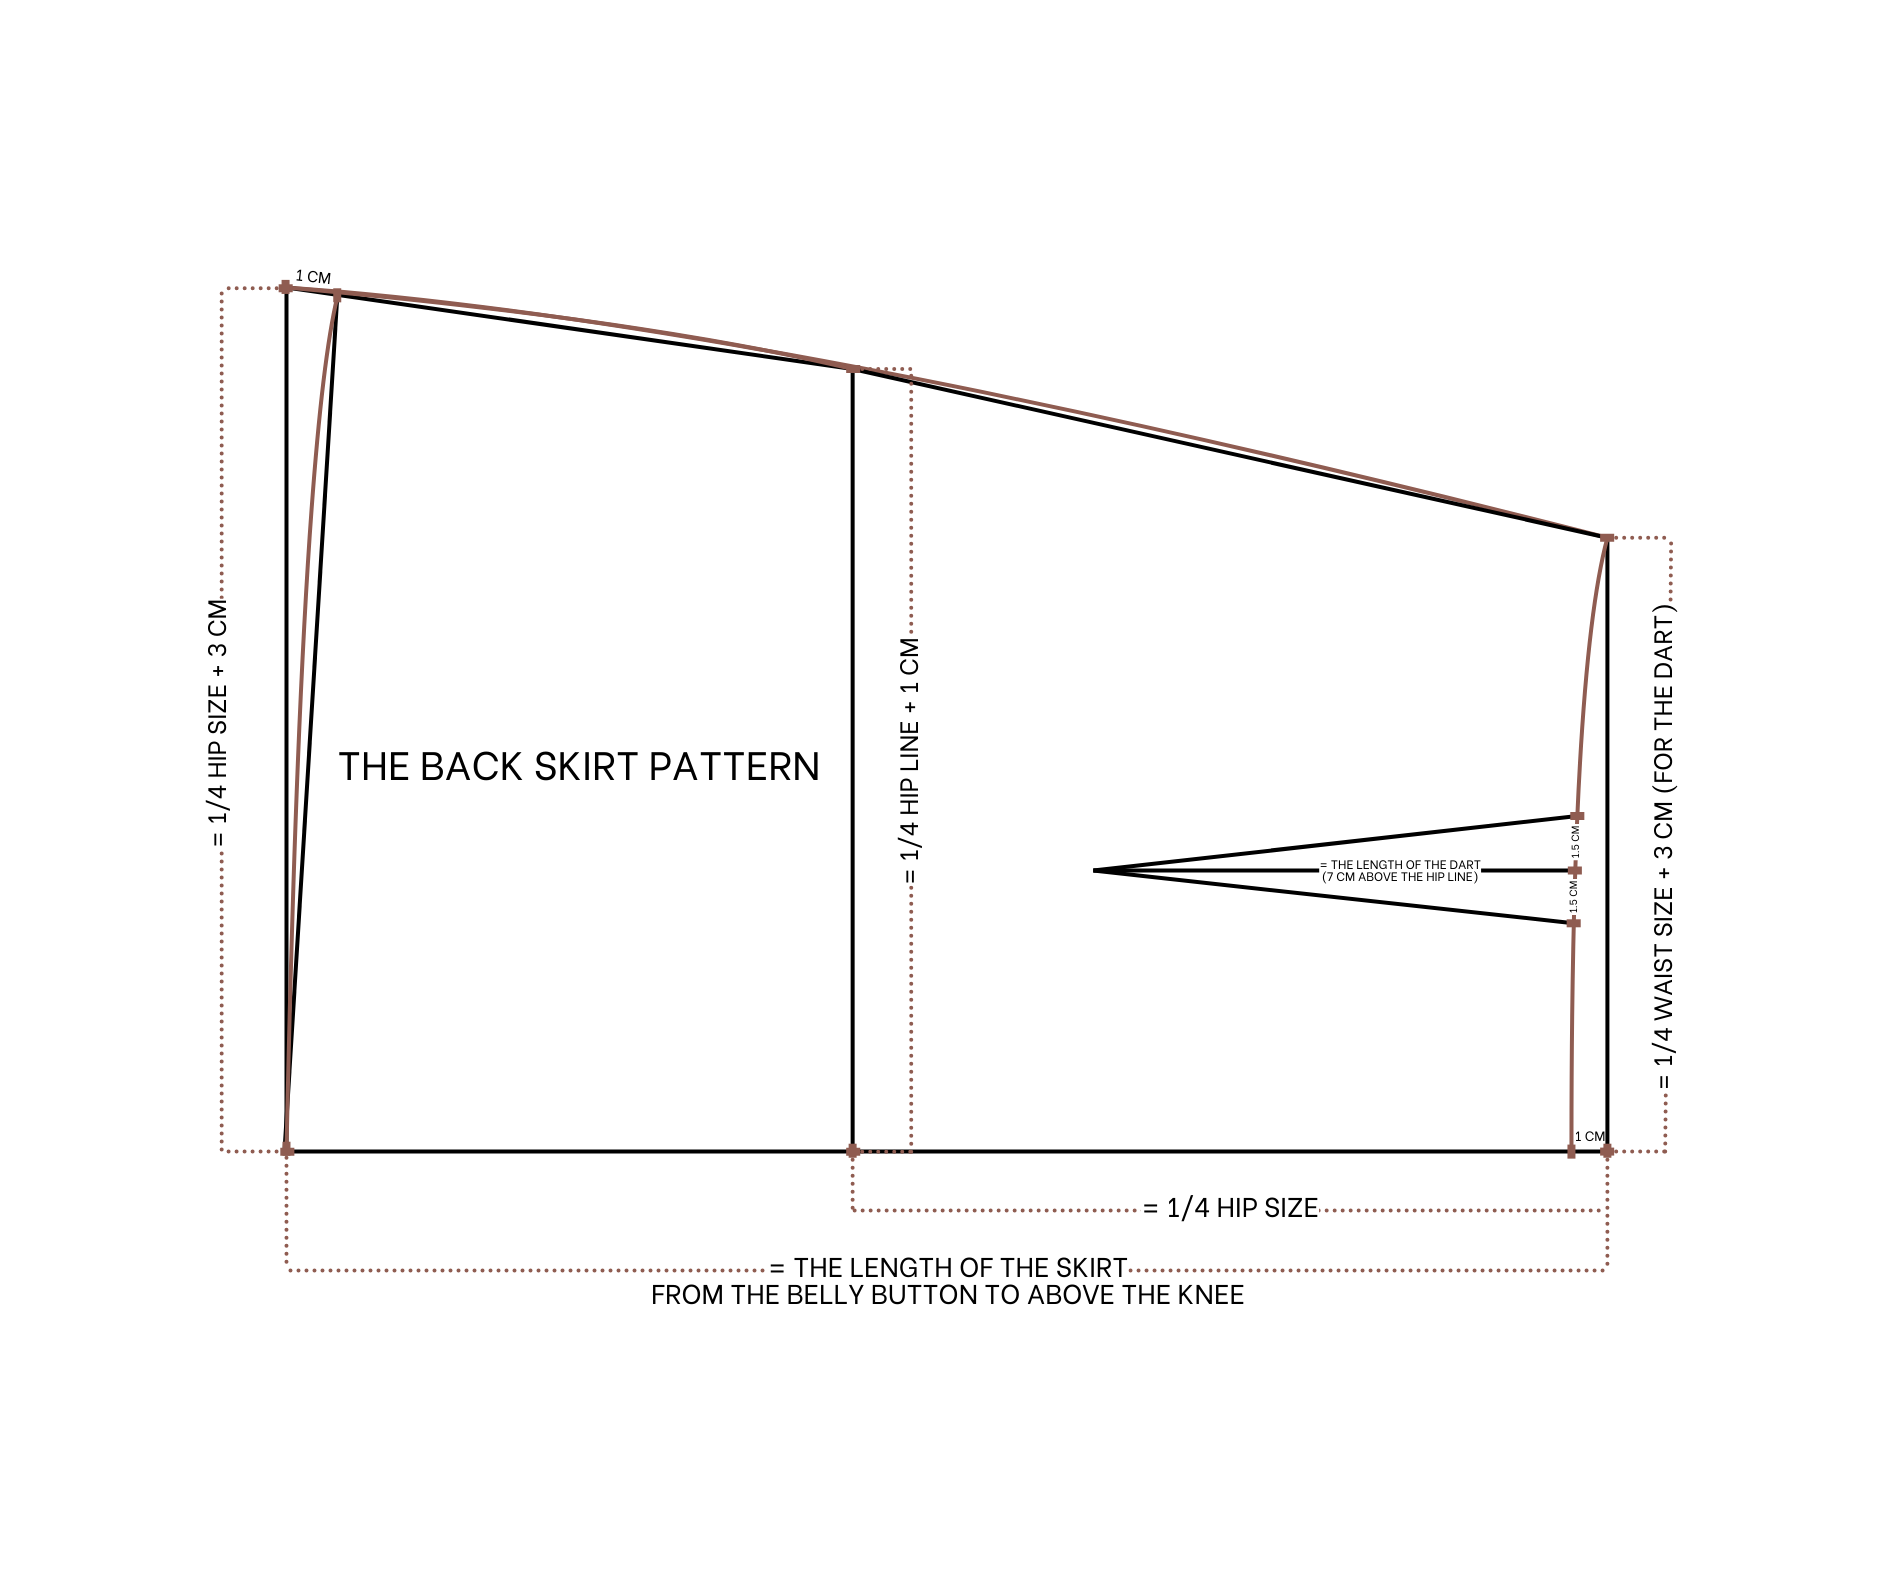
The back skirt pattern
To make the back skirt pattern, start by drawing a straight line and a horizontal line intersecting each other.
From the first straight line, draw another one 23 cm next to it—this represents a quarter of hip size and marks the position of the largest part of the hip.
Then, draw another straight line 40 cm from the first one, which will be the skirt's length from the belly button to just above the knee.
At the end of the first straight line, which is the waistline, mark up 19 cm, which is a quarter of the waist size plus 3 cm for a dart.
At the end of the second line (the hip line), mark up 24 cm, which is a quarter of the hip size plus 1 cm.
For the ending line, mark up 26 cm, 2 cm longer than the hip line mark.
Connect these three marks to form a curved sideline for the skirt.
At the waistline's end, mark 1 cm on the horizontal line and connect it to the waistline mark with a gentle curve.
Mark the middle of this waistline and draw a perpendicular line for the dart. The width is 15 cm, from the waistline to 7 cm above the hip line, representing the dart length.
Add two marks 1.5 cm on either side and connect them to the perpendicular line's end to form the dart. Make sure the waistline's remaining width without the dart is 16 cm, which is a quarter of the waist size.
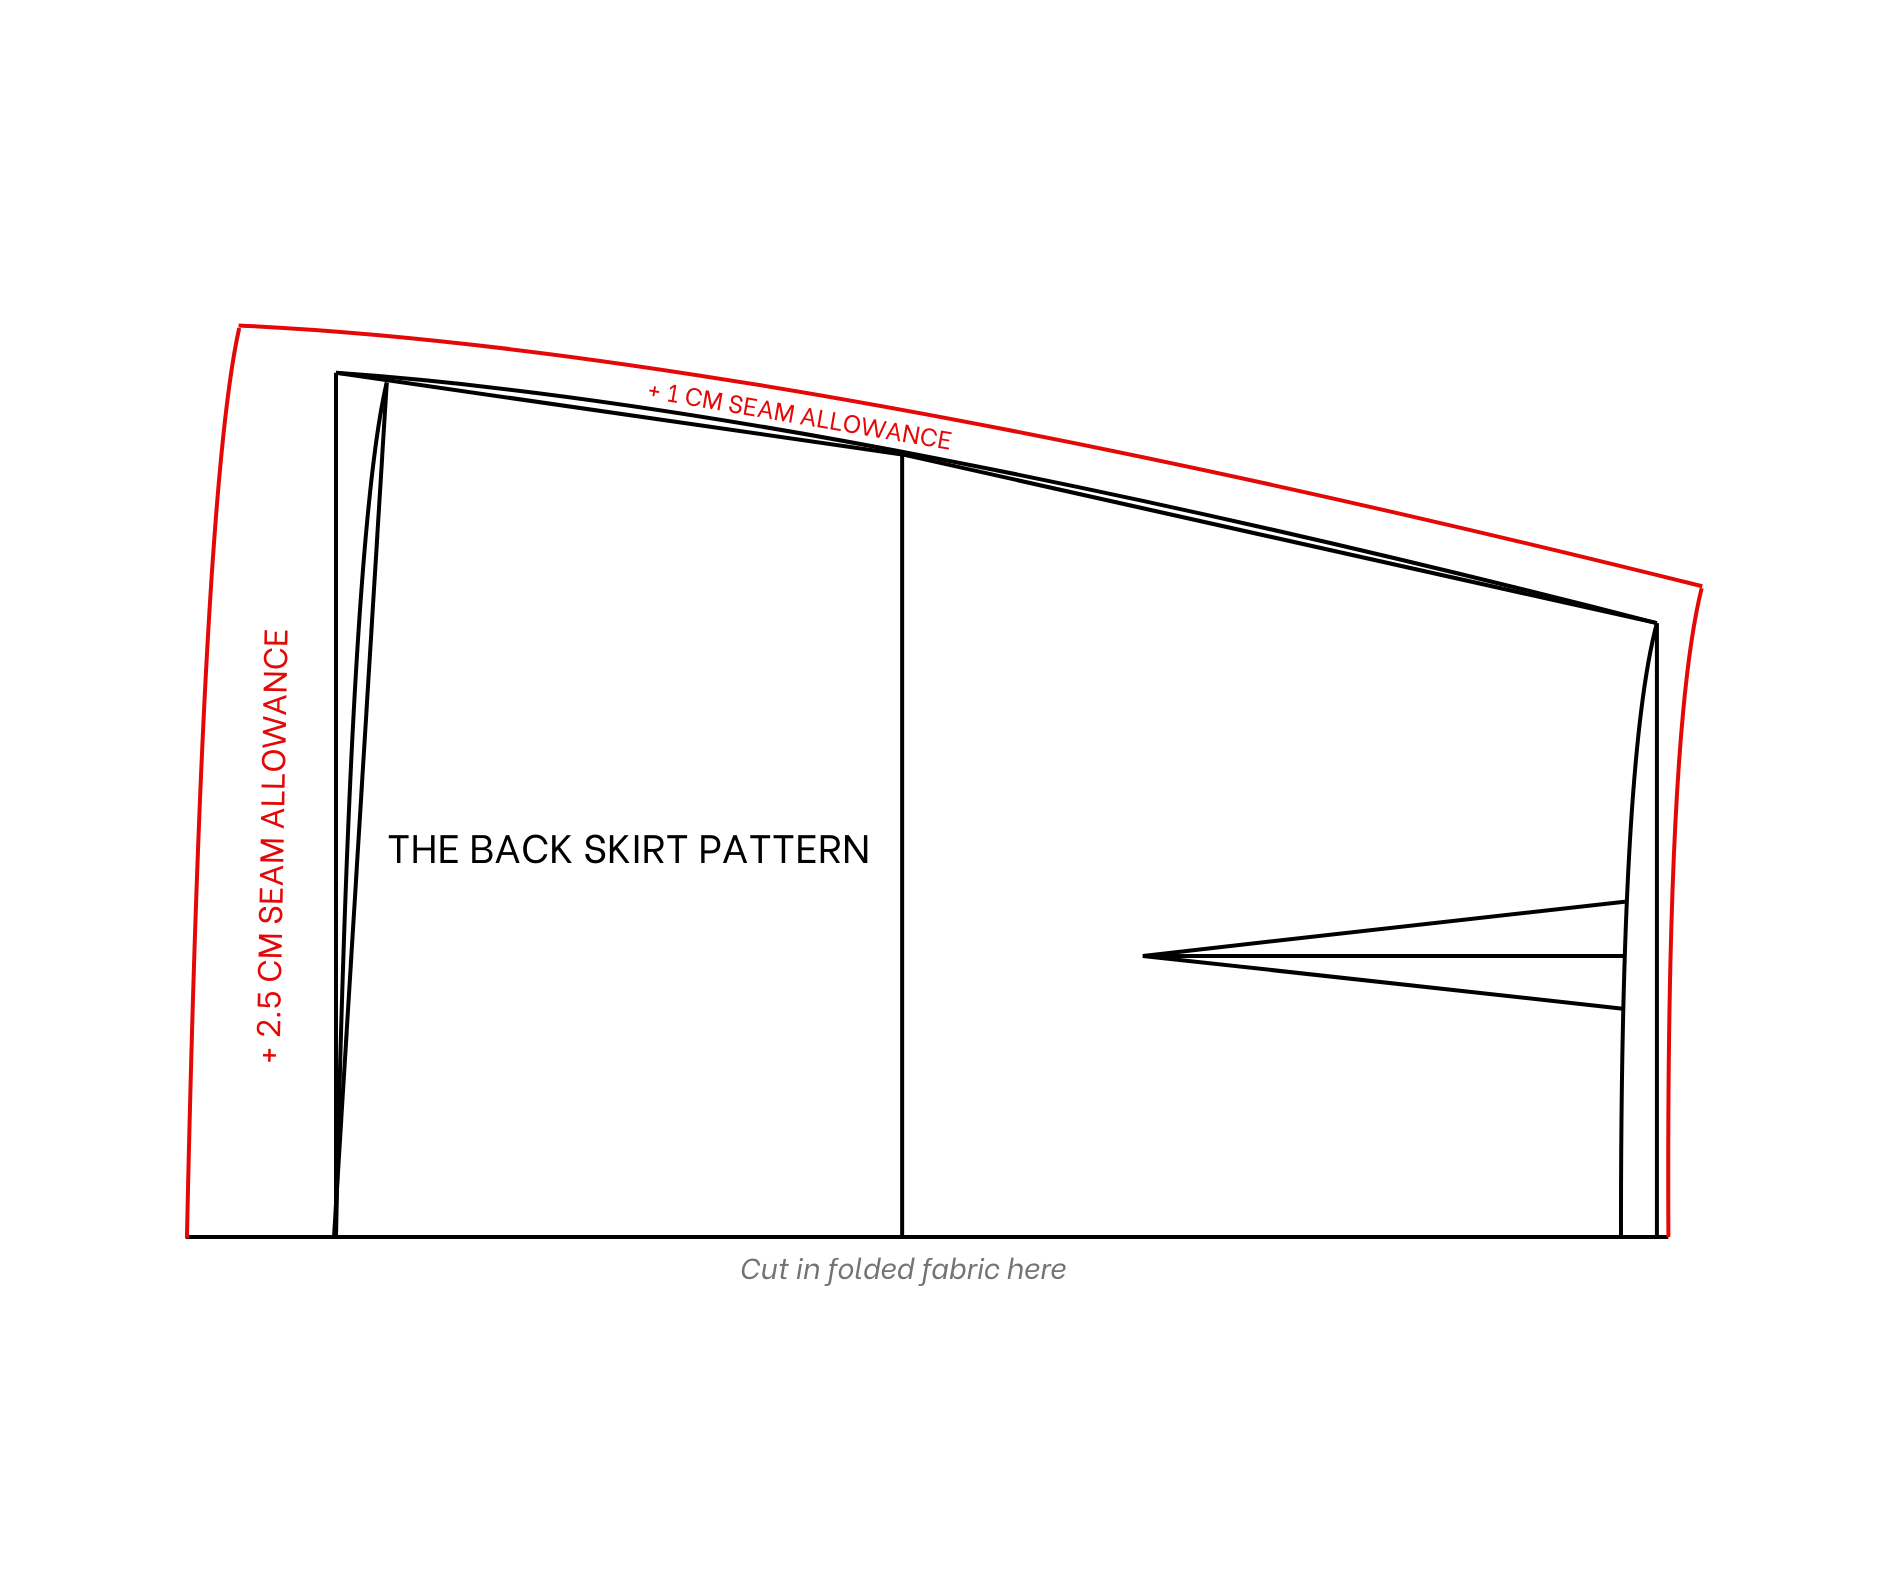
Add 1 cm seam allowance, excluding 3.5 cm at the end line and none at the horizontal line.
Cut this pattern on folded fabric to create the back skirt pattern.
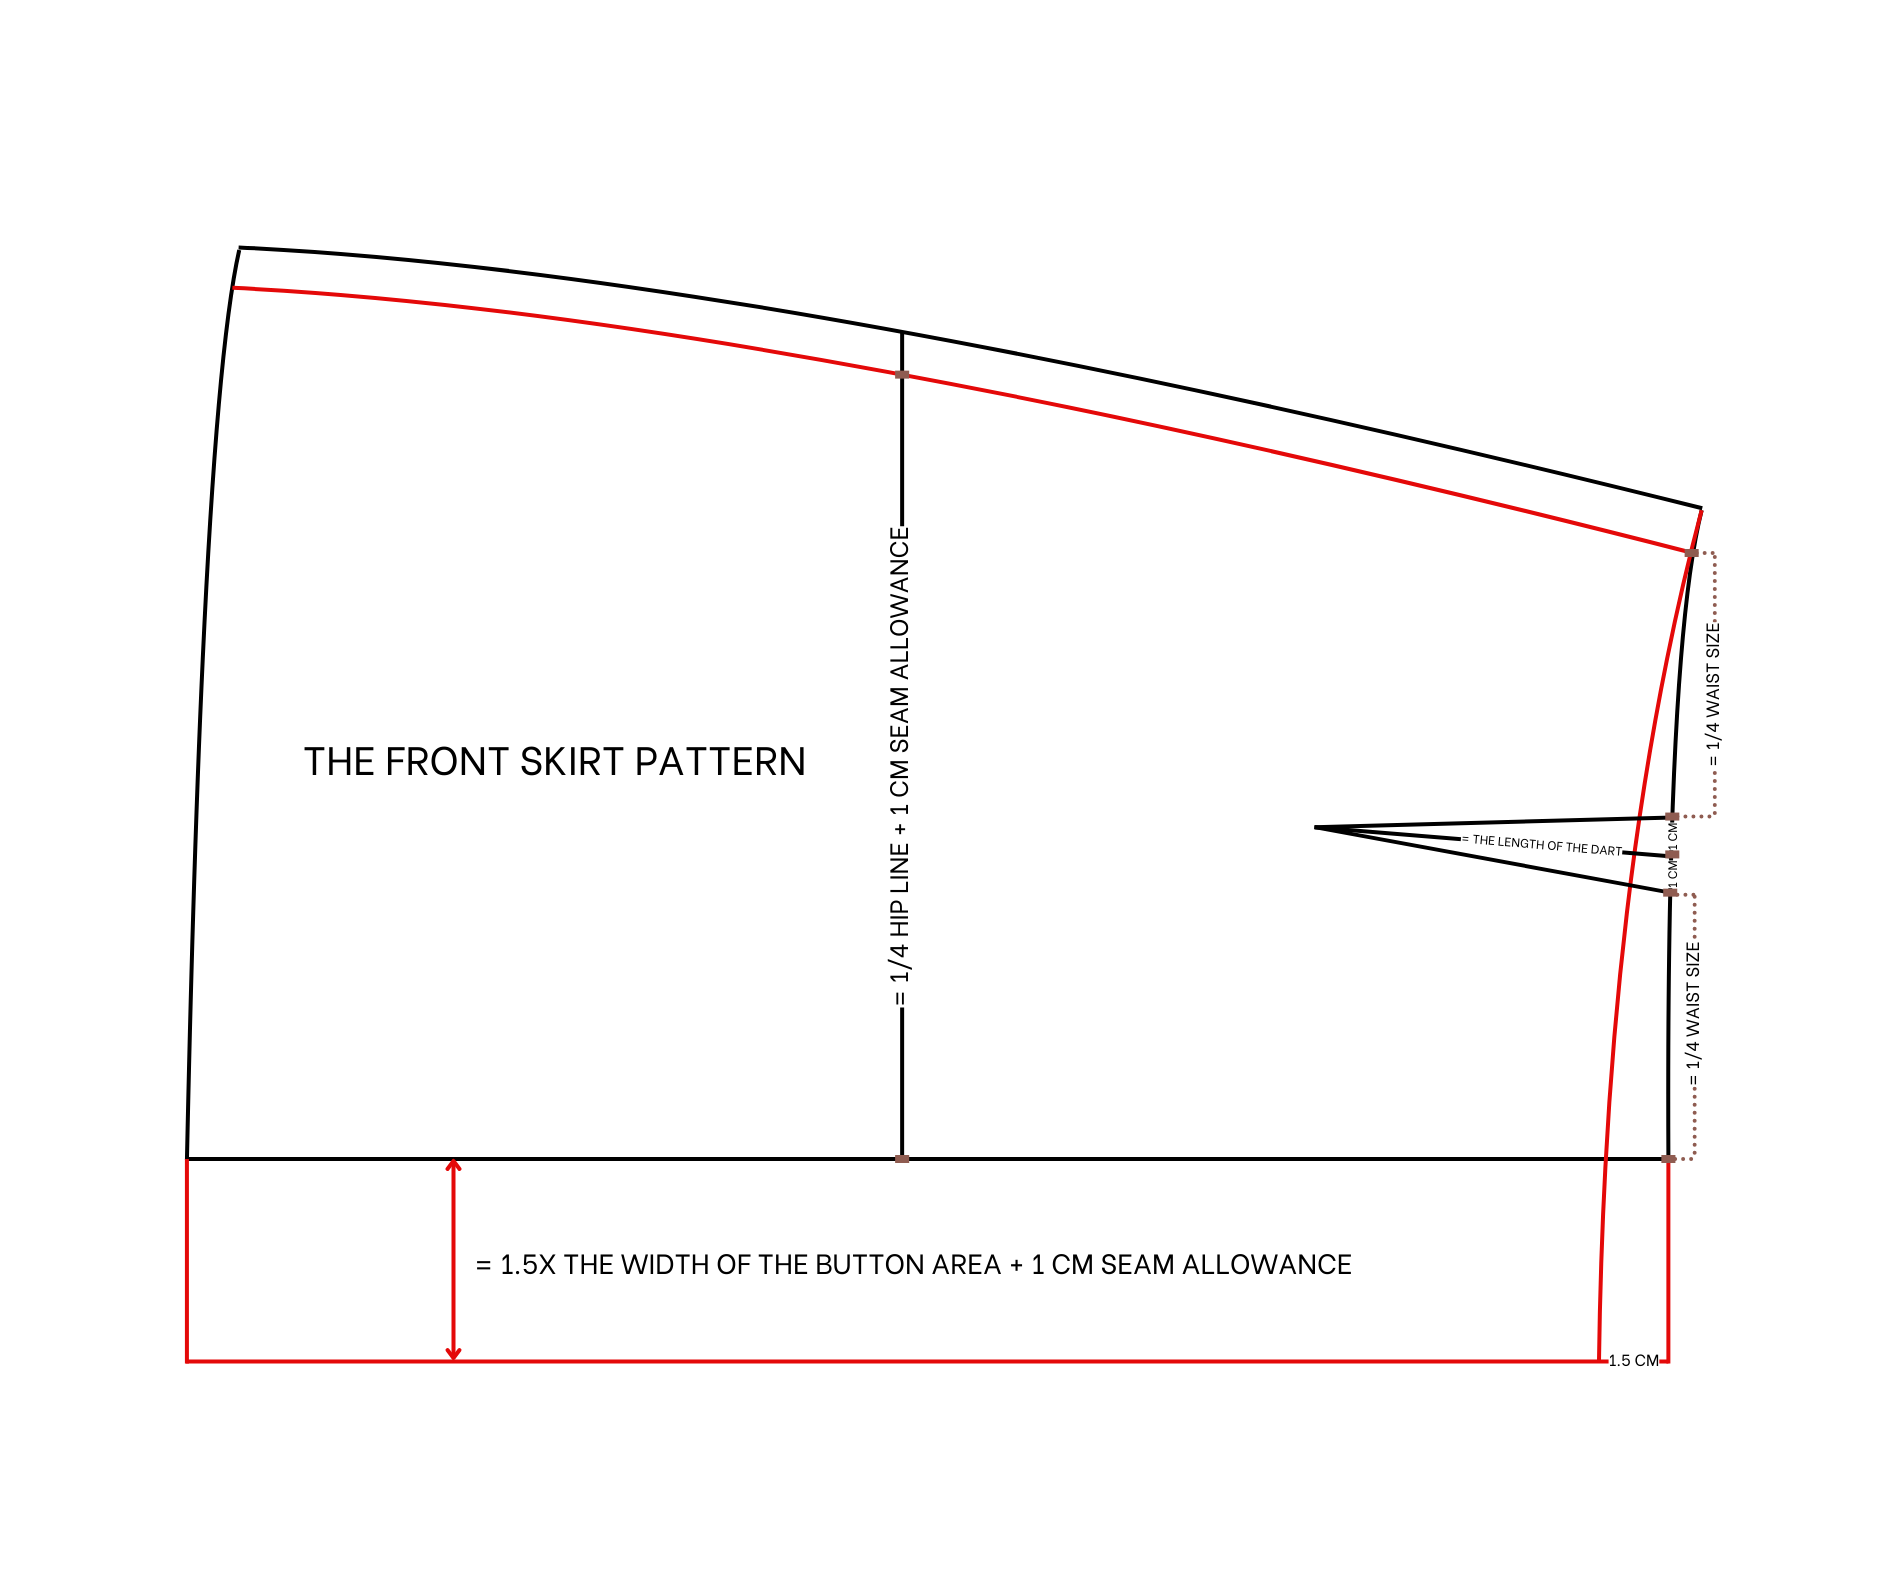
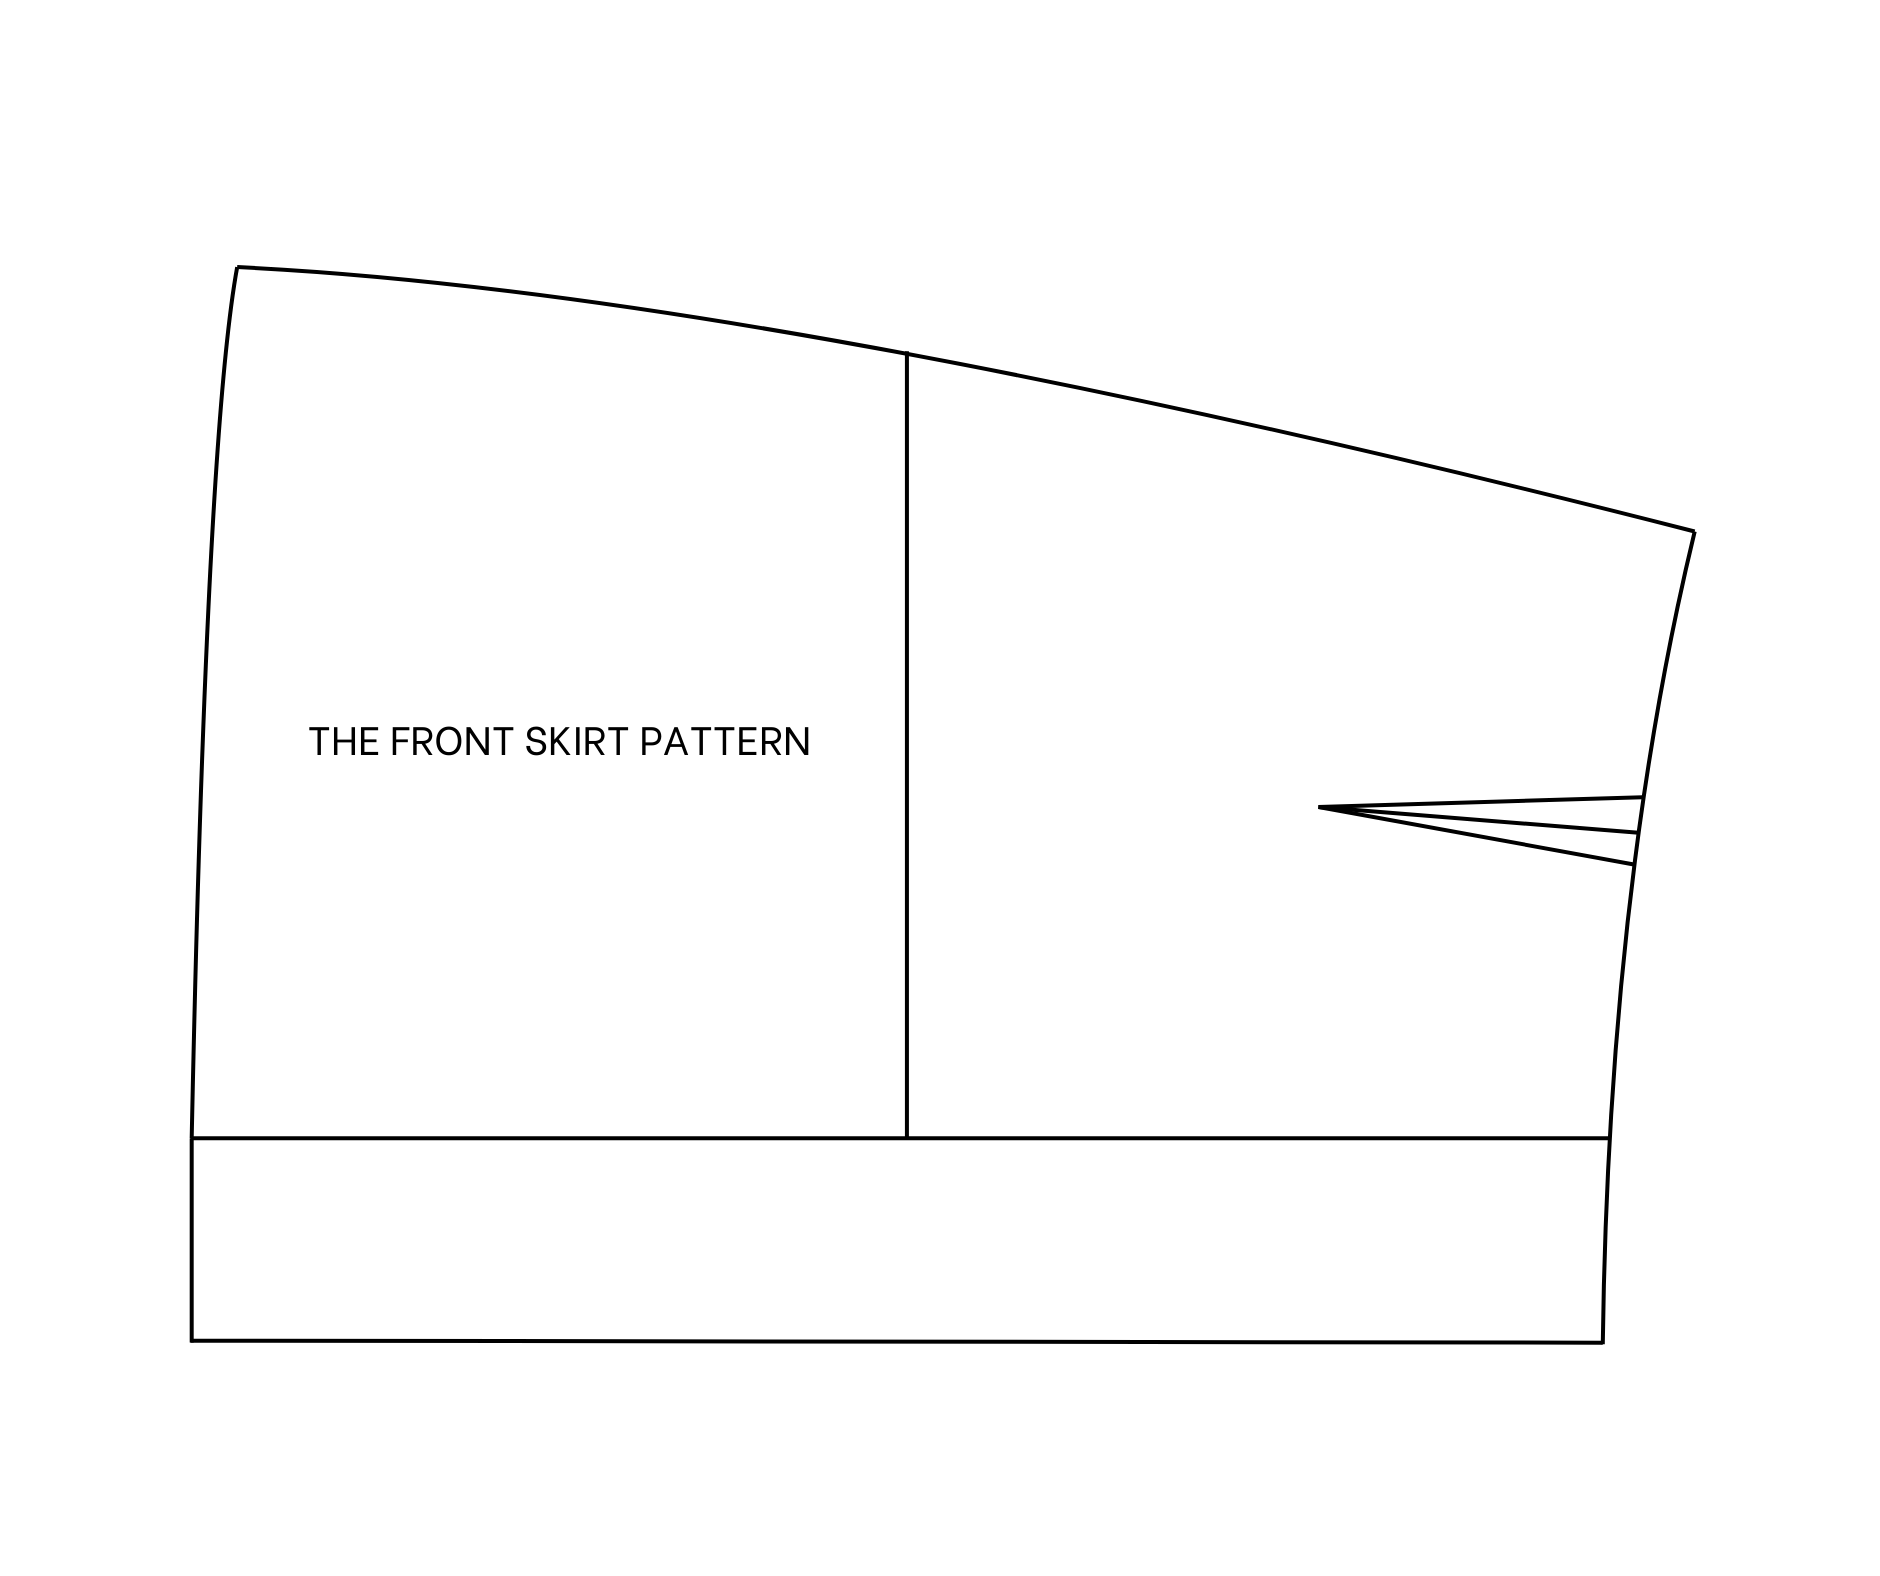
THE FRONT SKIRT PATTERN
For the front skirt pattern, start by copying the back pattern.
Mark 1 cm inside the sideline on the hip line, leaving a 23 cm width (a quarter of hip size), then copy the sideline again.
Create a smaller dart on the waistline, 10 cm in length and 2 cm wide.
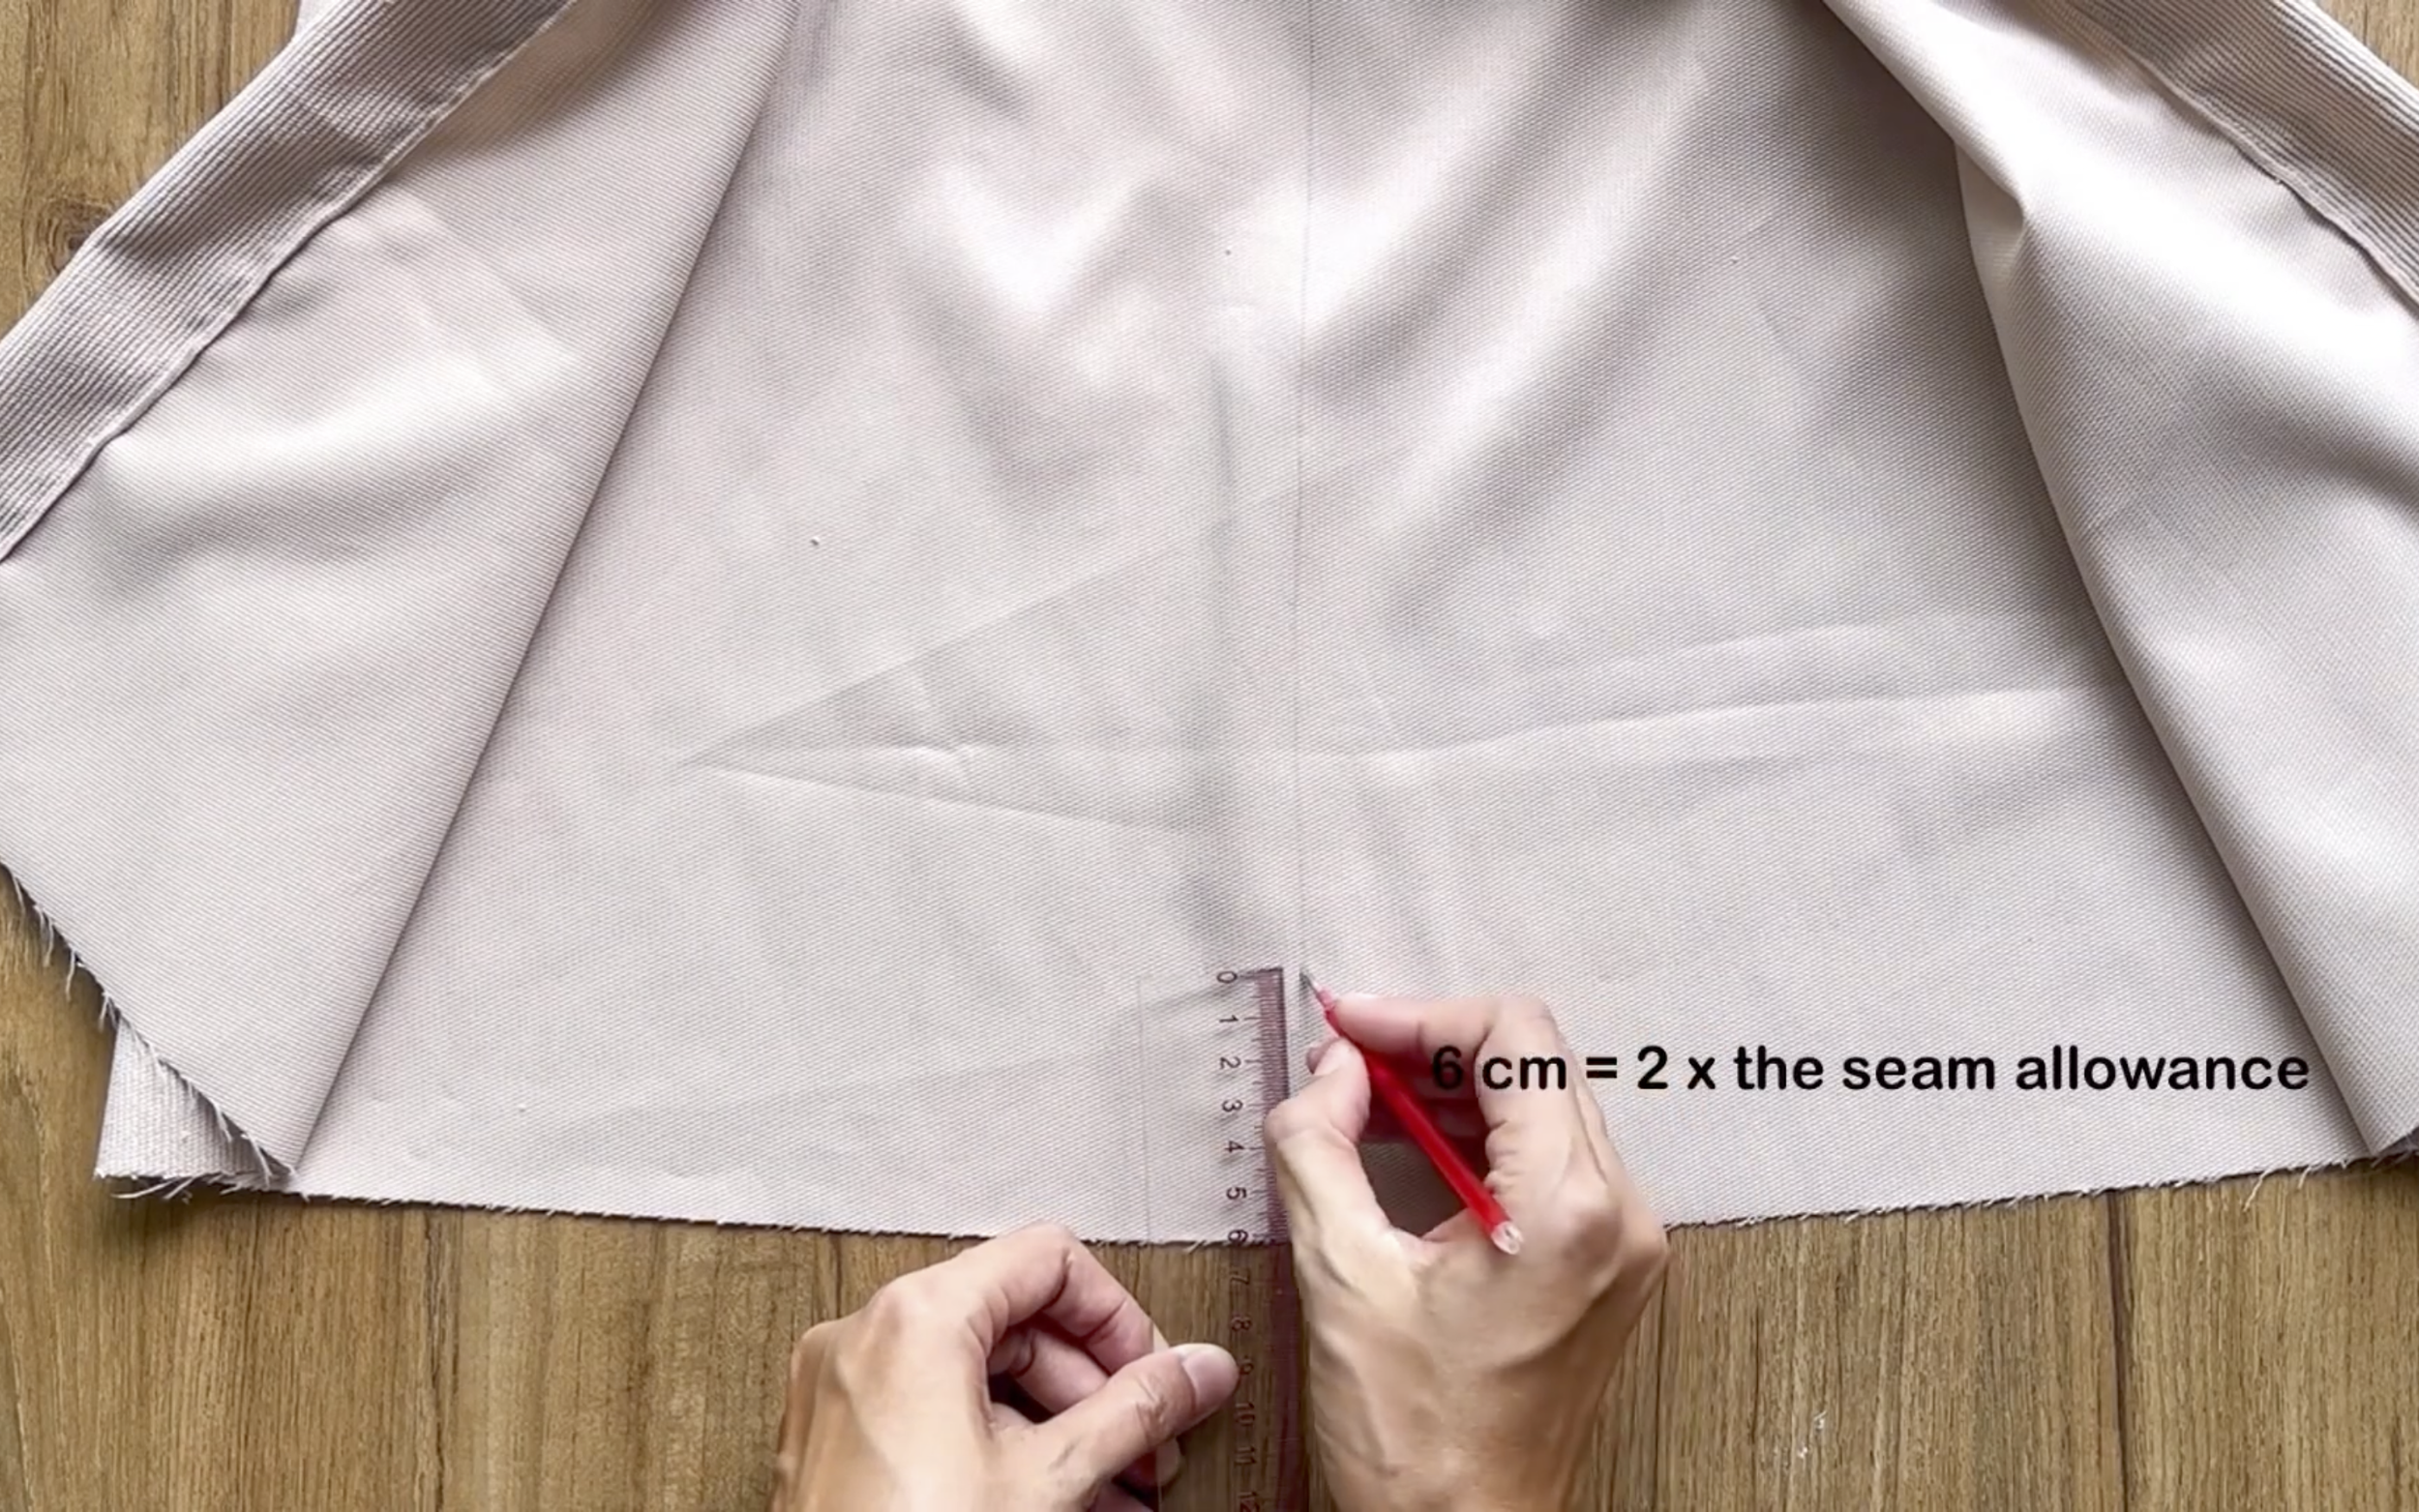
To form the button and buttonhole area, draw a horizontal line 6.25 cm outside the current one, representing 1/2 times the button and buttonhole width plus 1 cm seam allowance.
From the top of this line, mark down 1.5 cm, then connect it to the waistline's end with a curved line for the new front waistline.
Cut two opposite pieces of this pattern for the skirt.
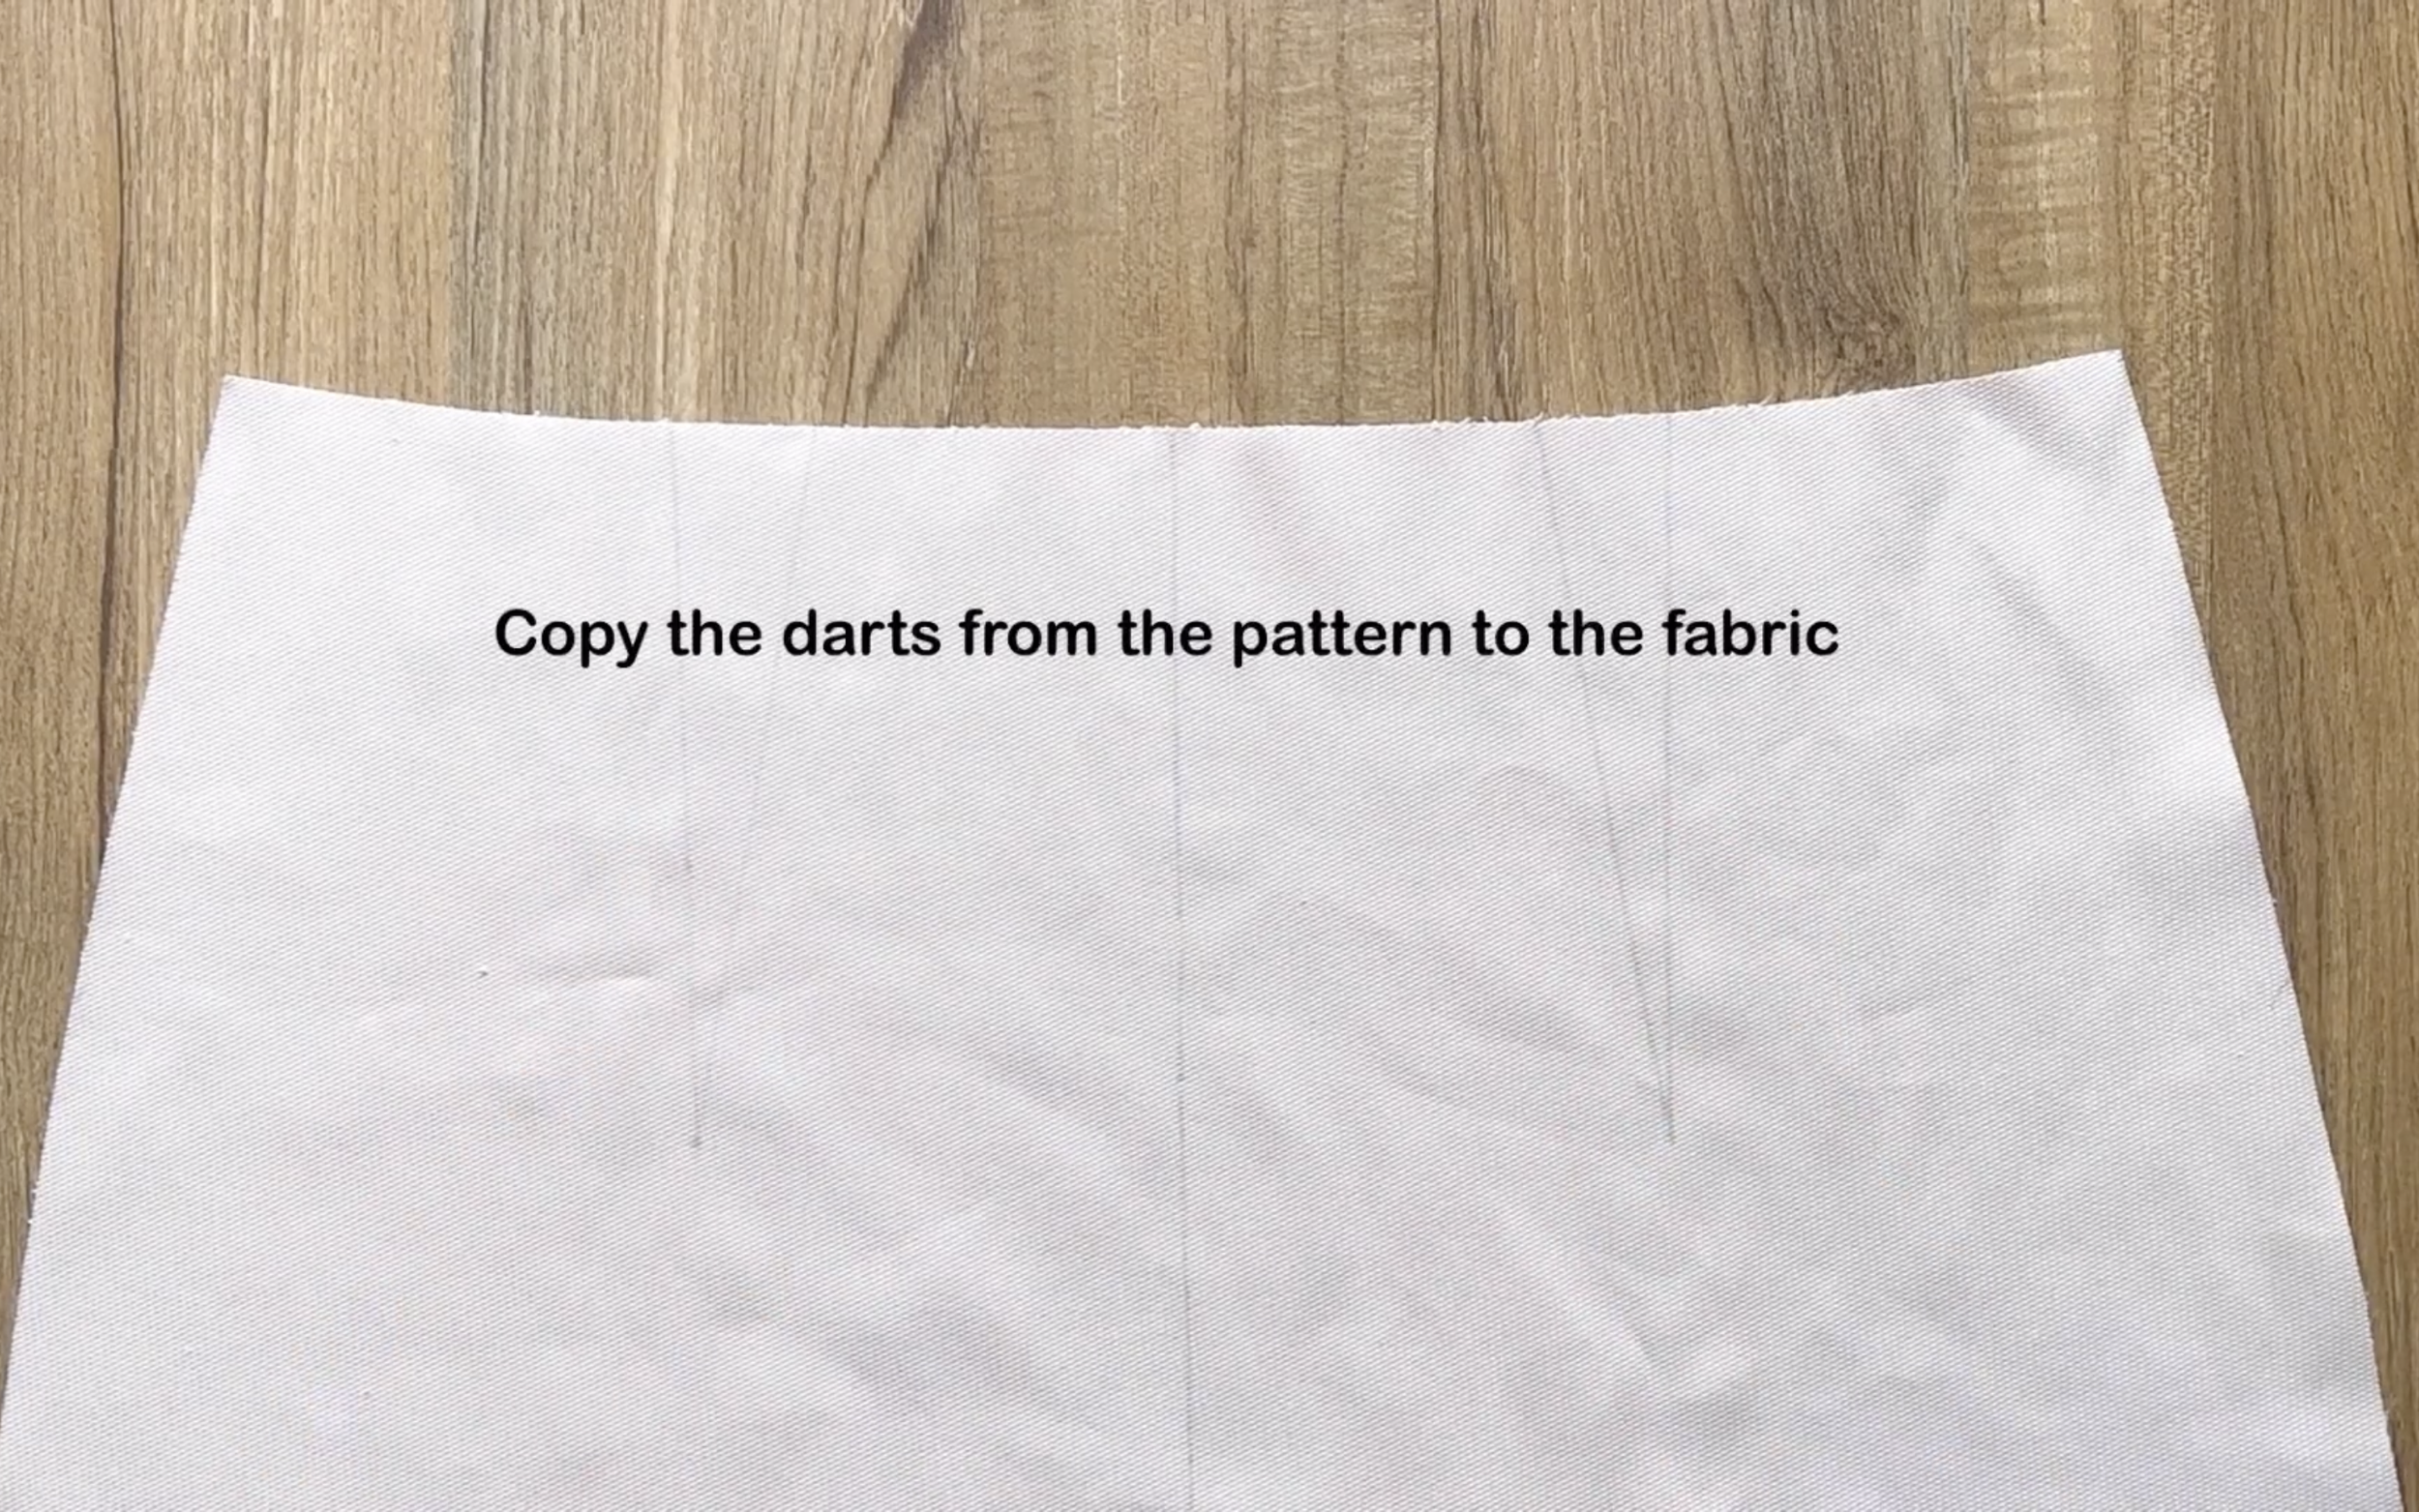
Now, to start sewing, transfer the dart from the pattern onto the back skirt piece and sew it, then repeat for the front.
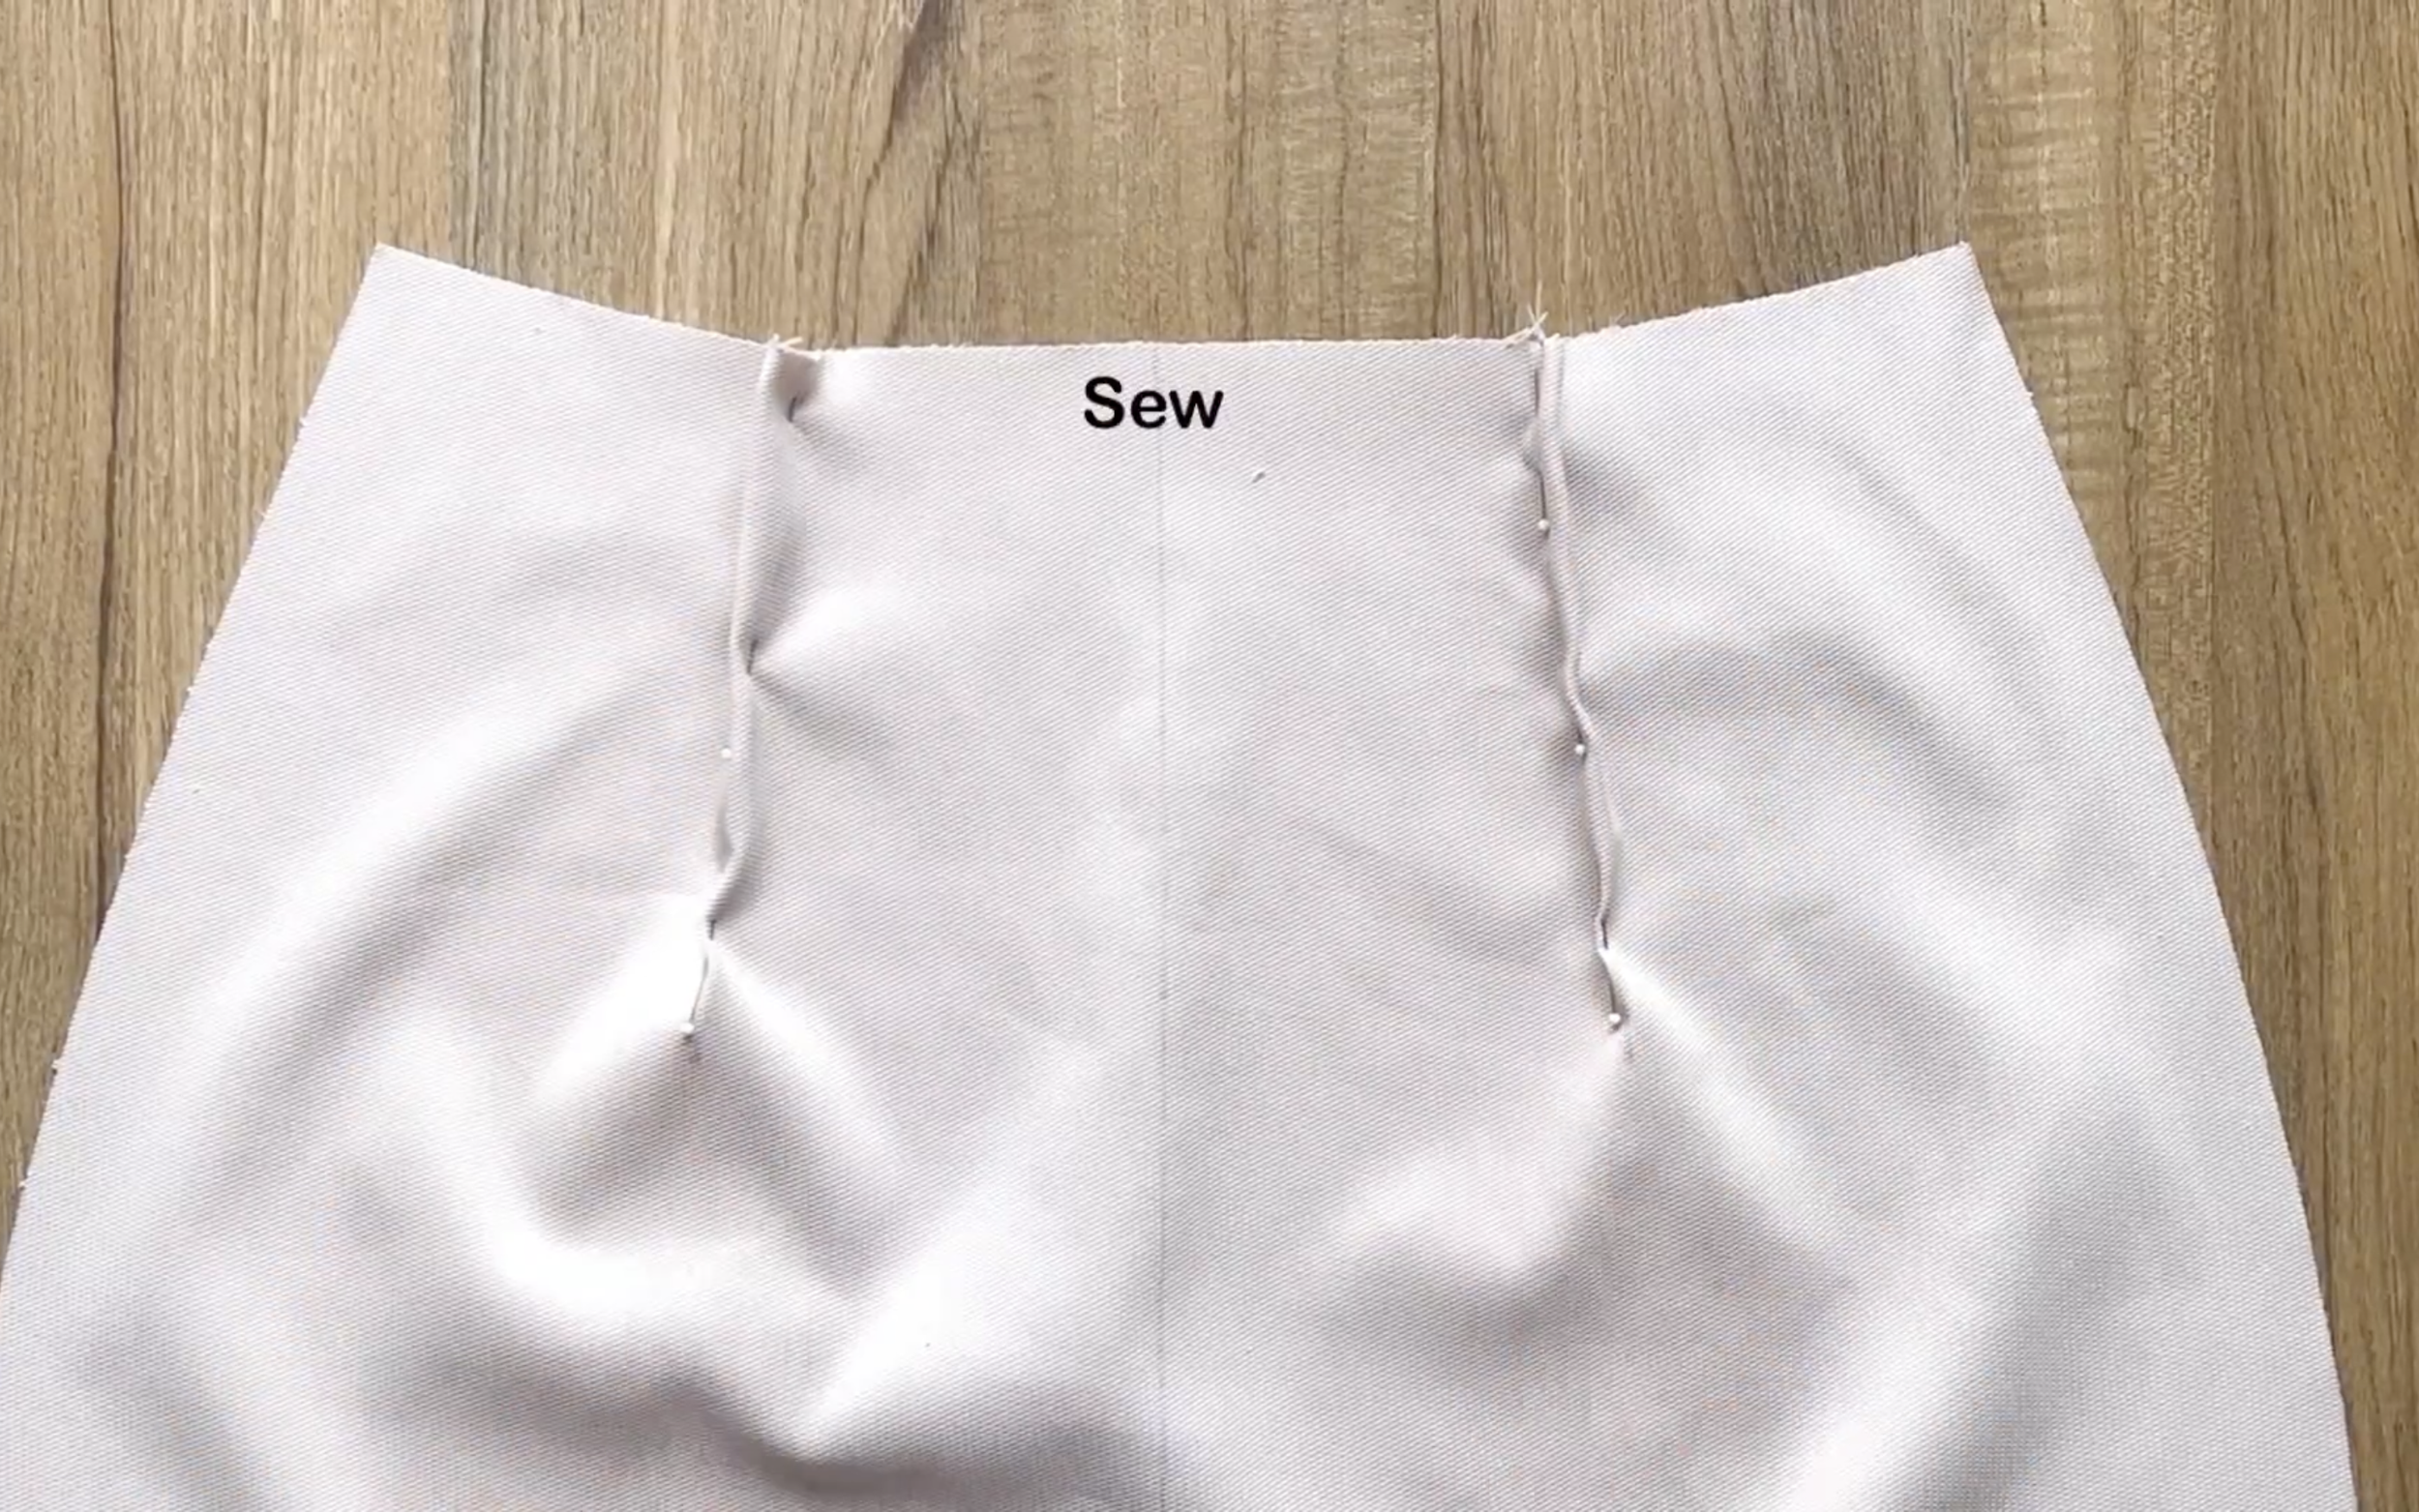
And sew it.
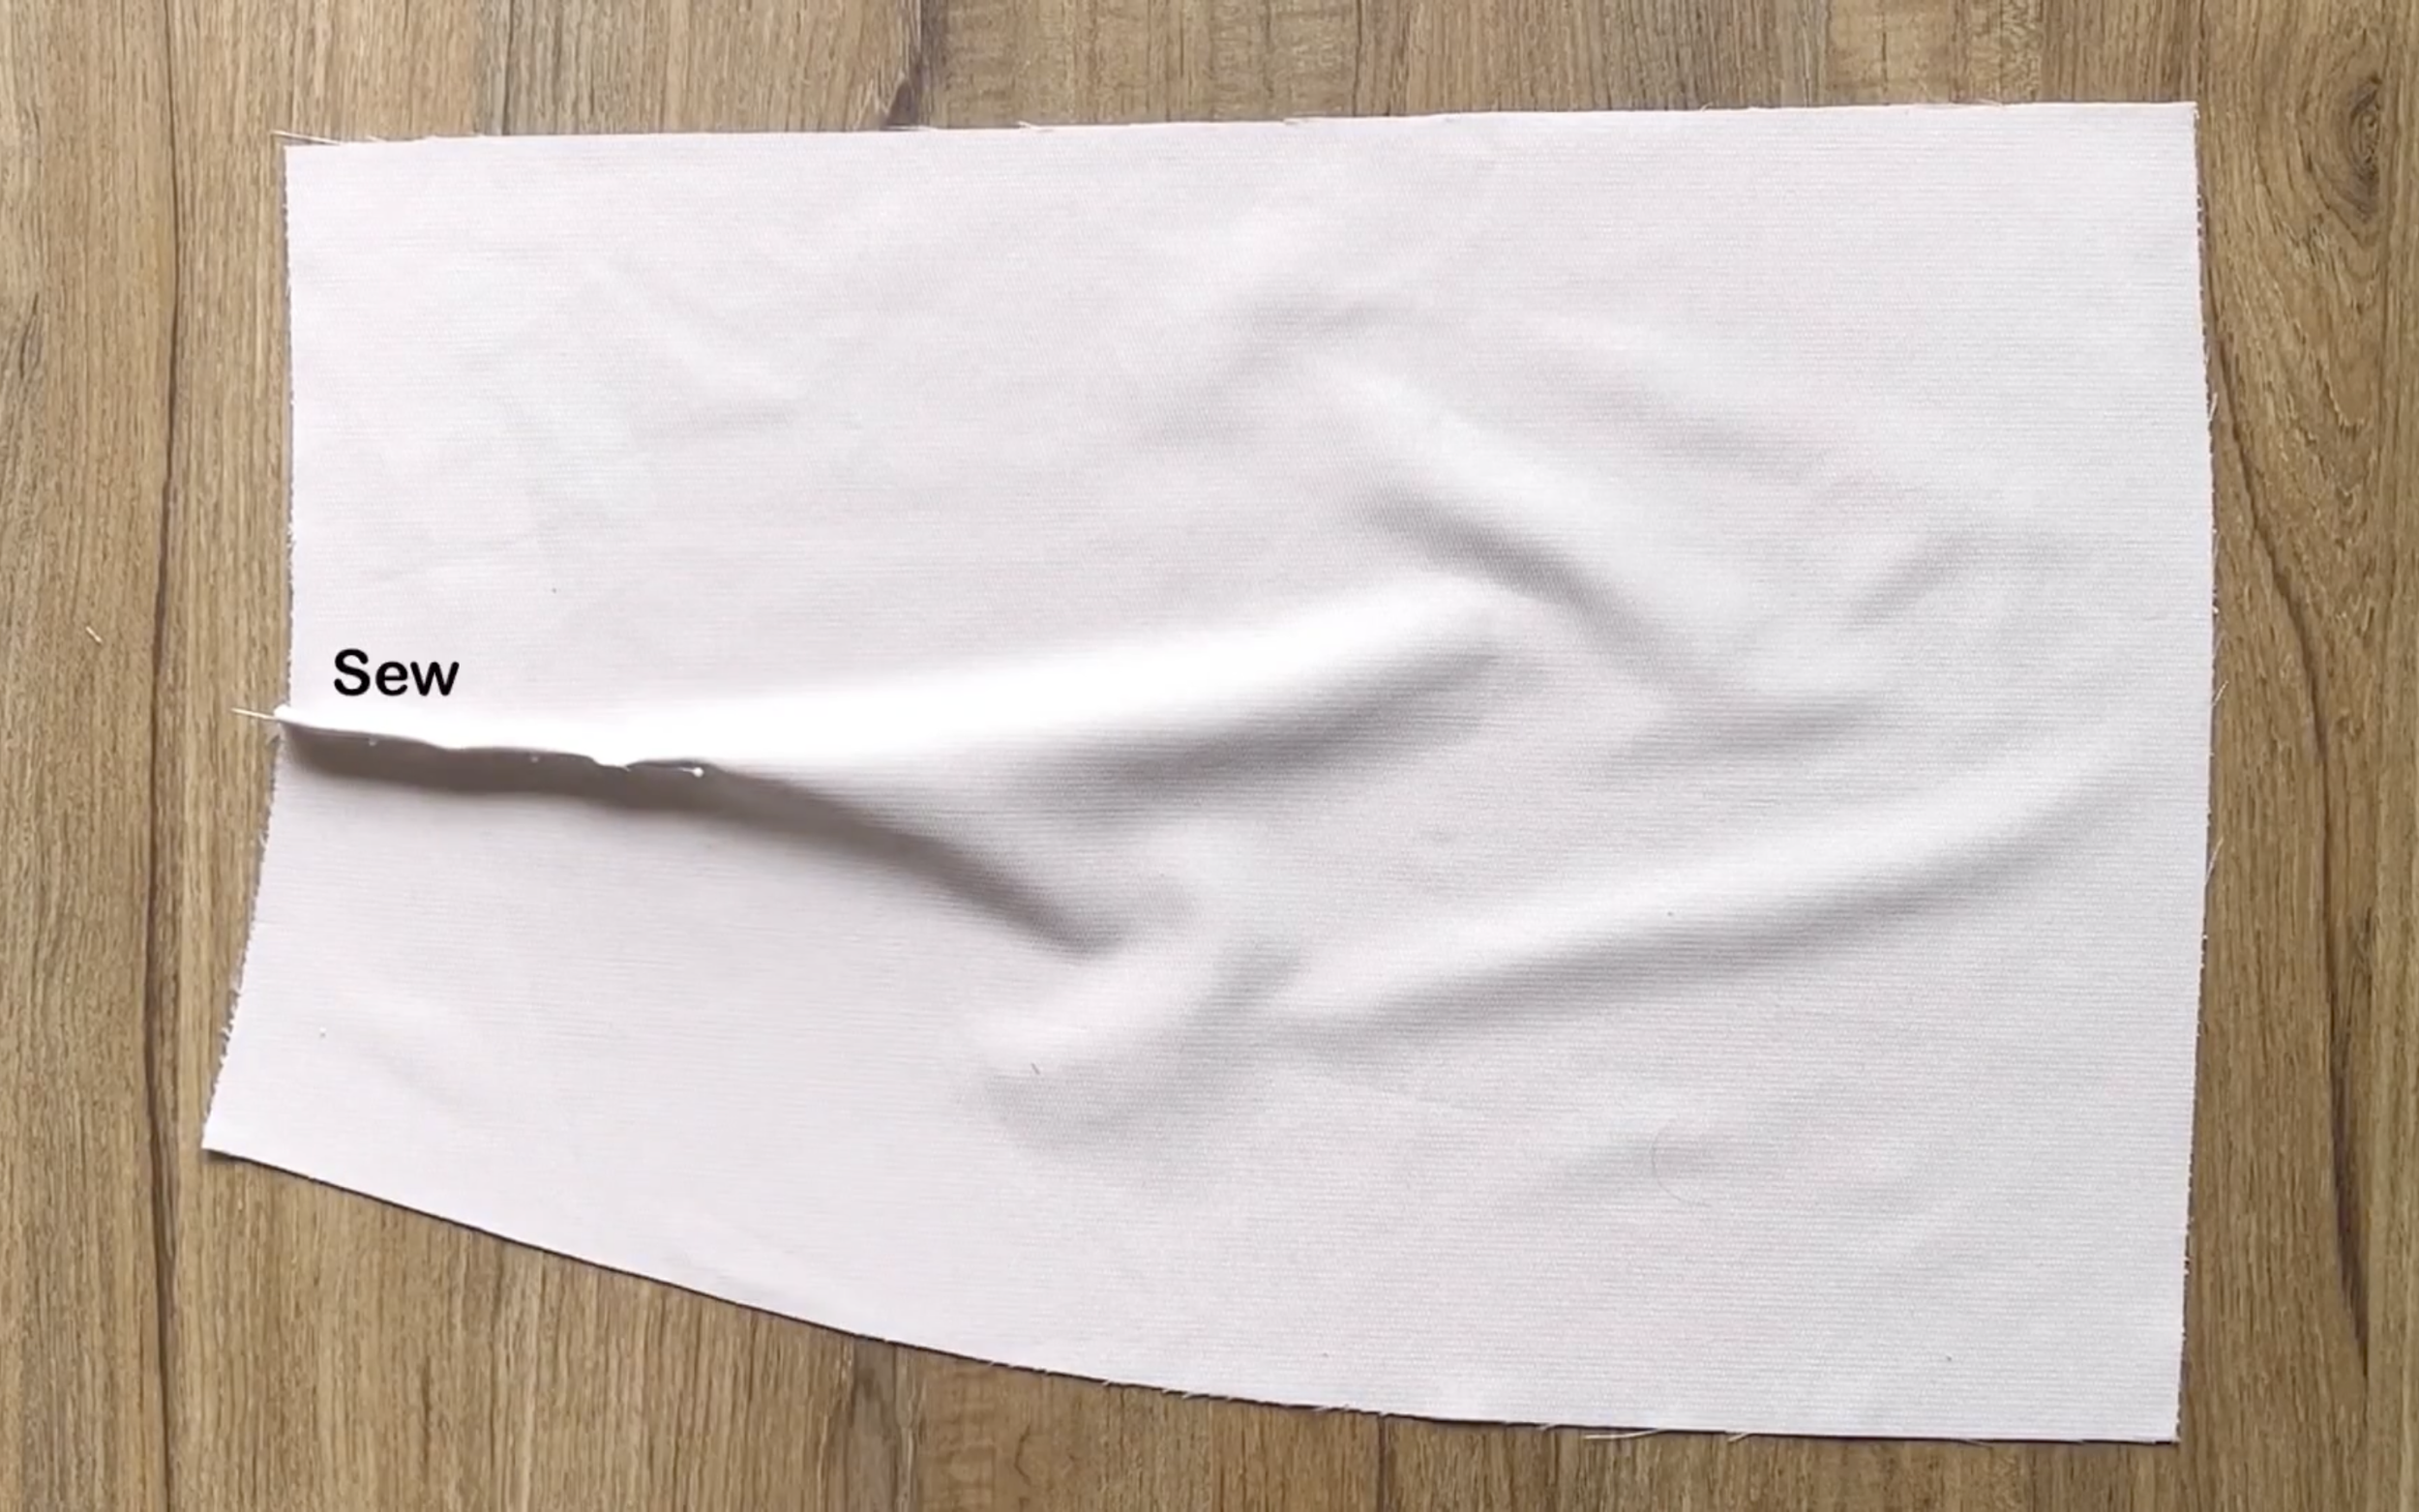
Then repeat for the front.
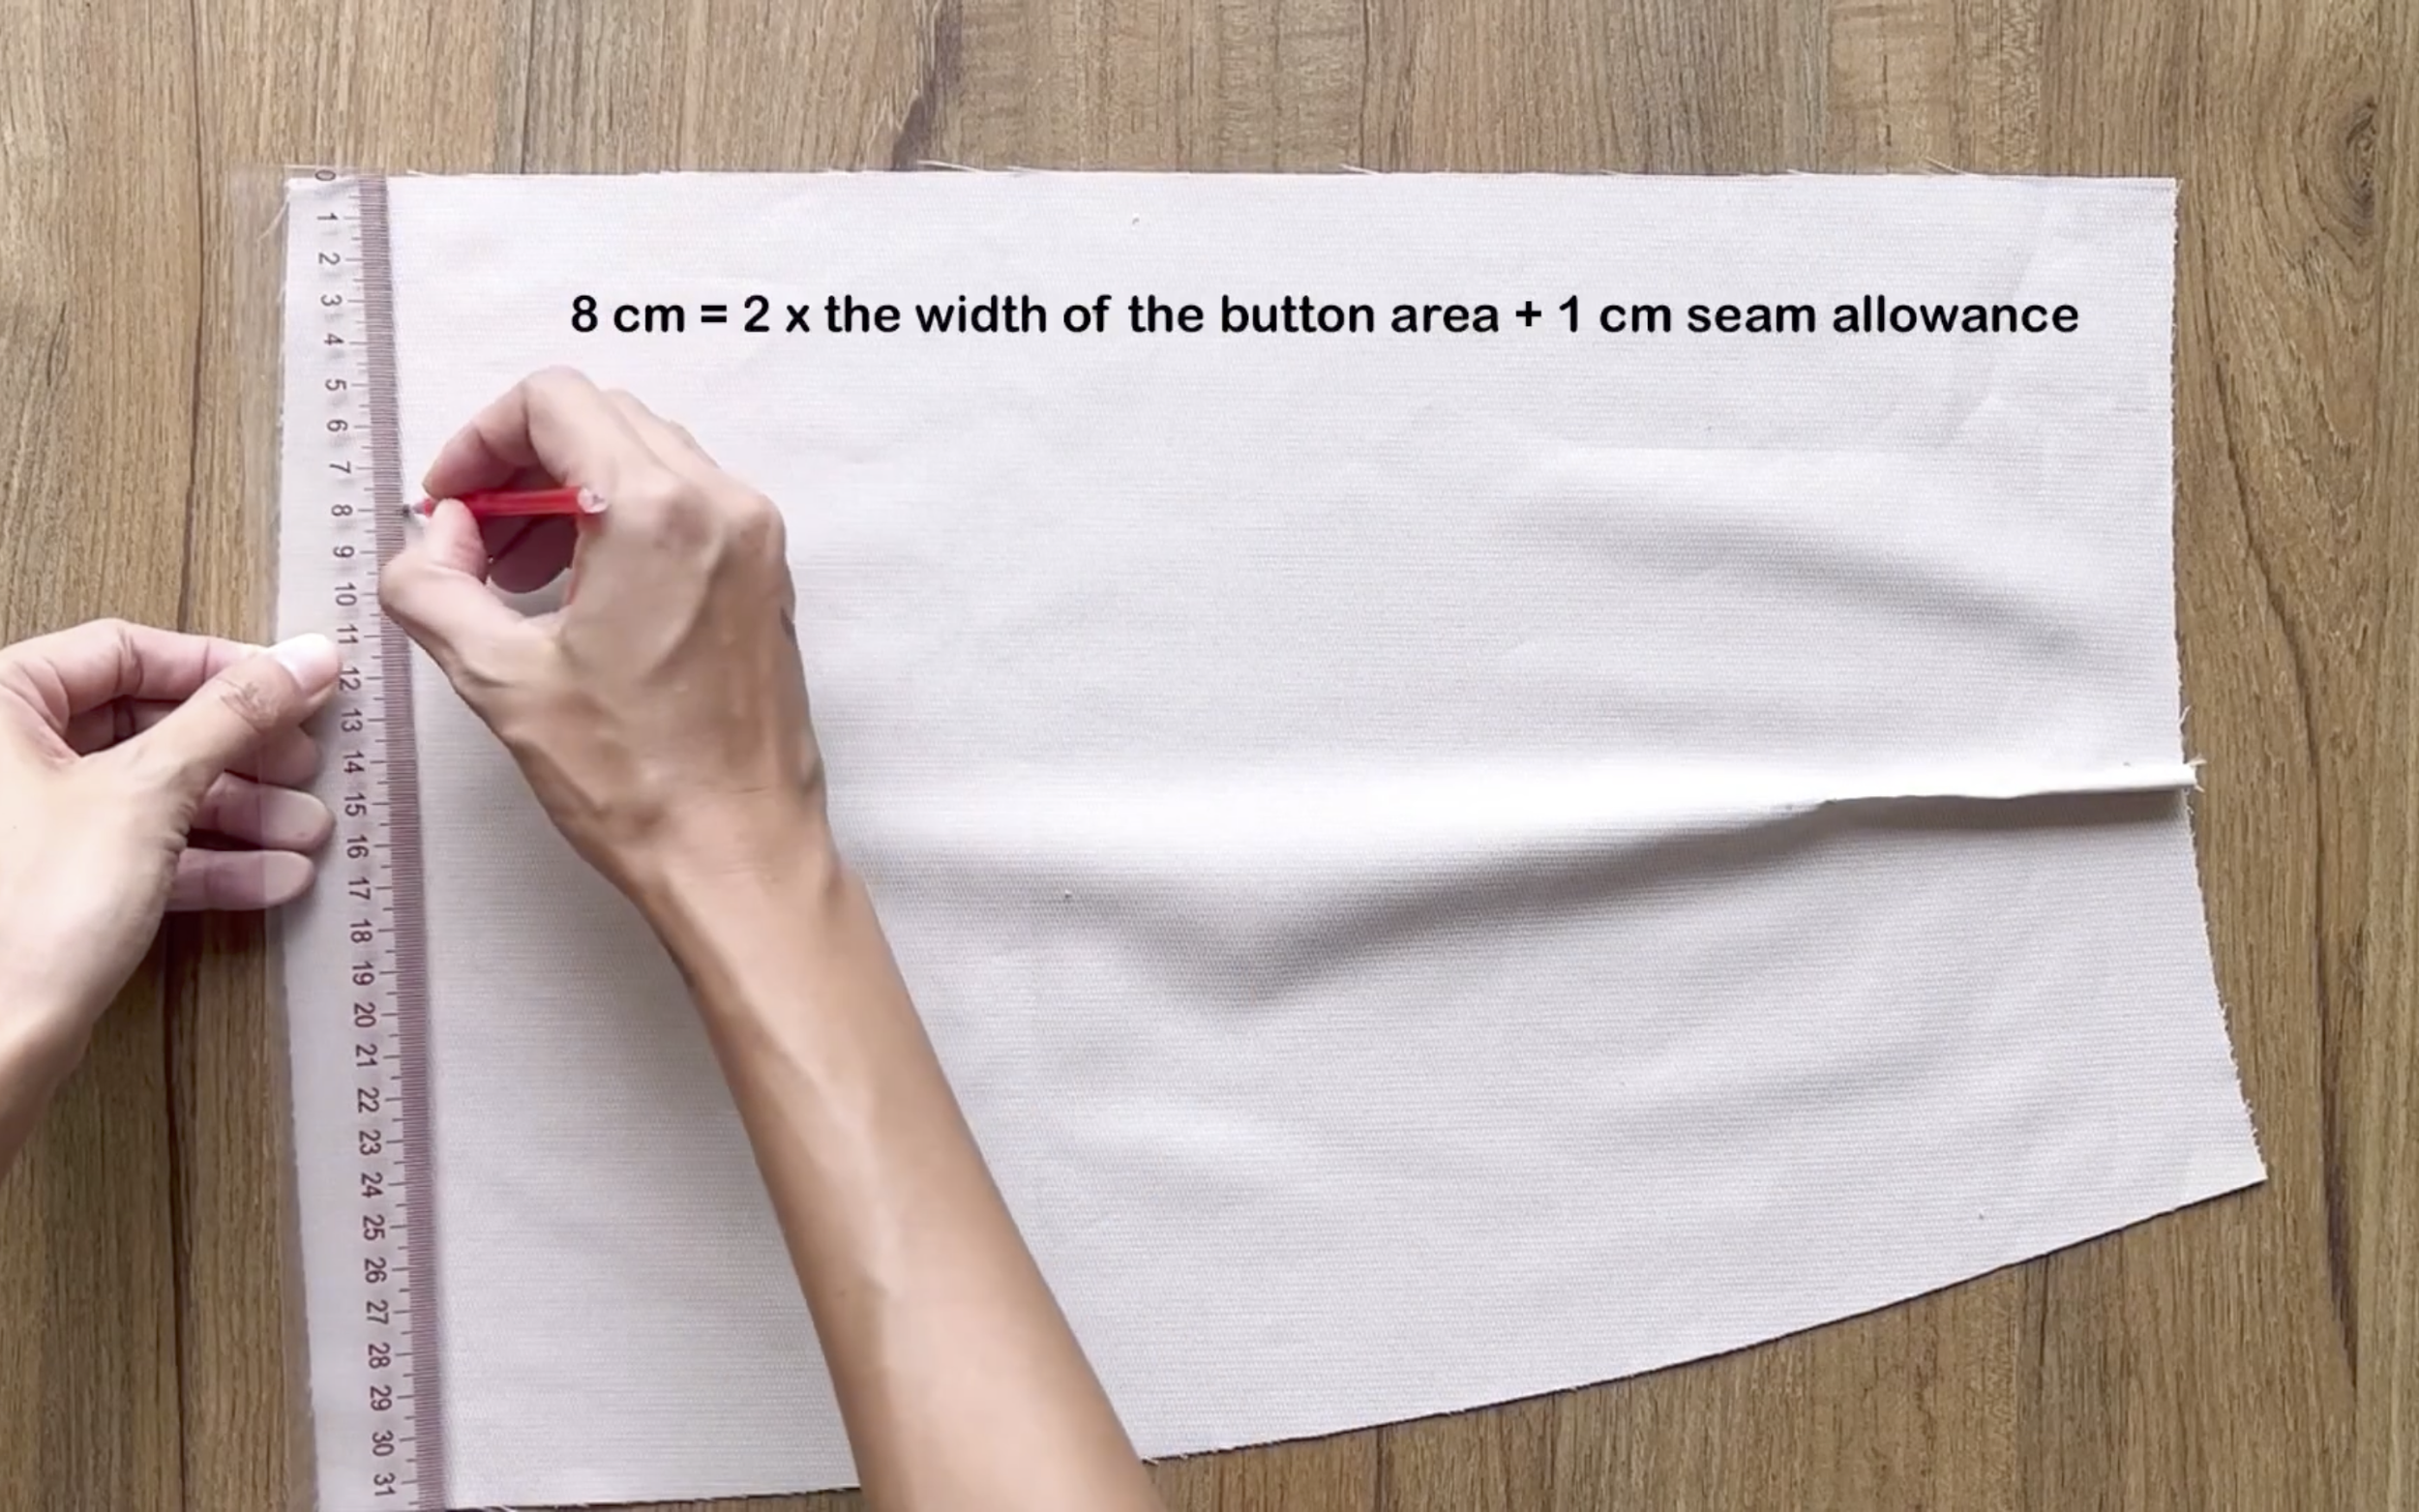
On the middle line of the front piece, draw a line 8 cm inside the edge.
Then fold in the fabric edge 1 cm and fold again to the line to create the button and buttonhole area on both front pieces.
Make sure this area is 3.5 cm wide, with a final waistline of 17 cm per front piece, which is a quarter of waist size plus 1 cm seam allowance.
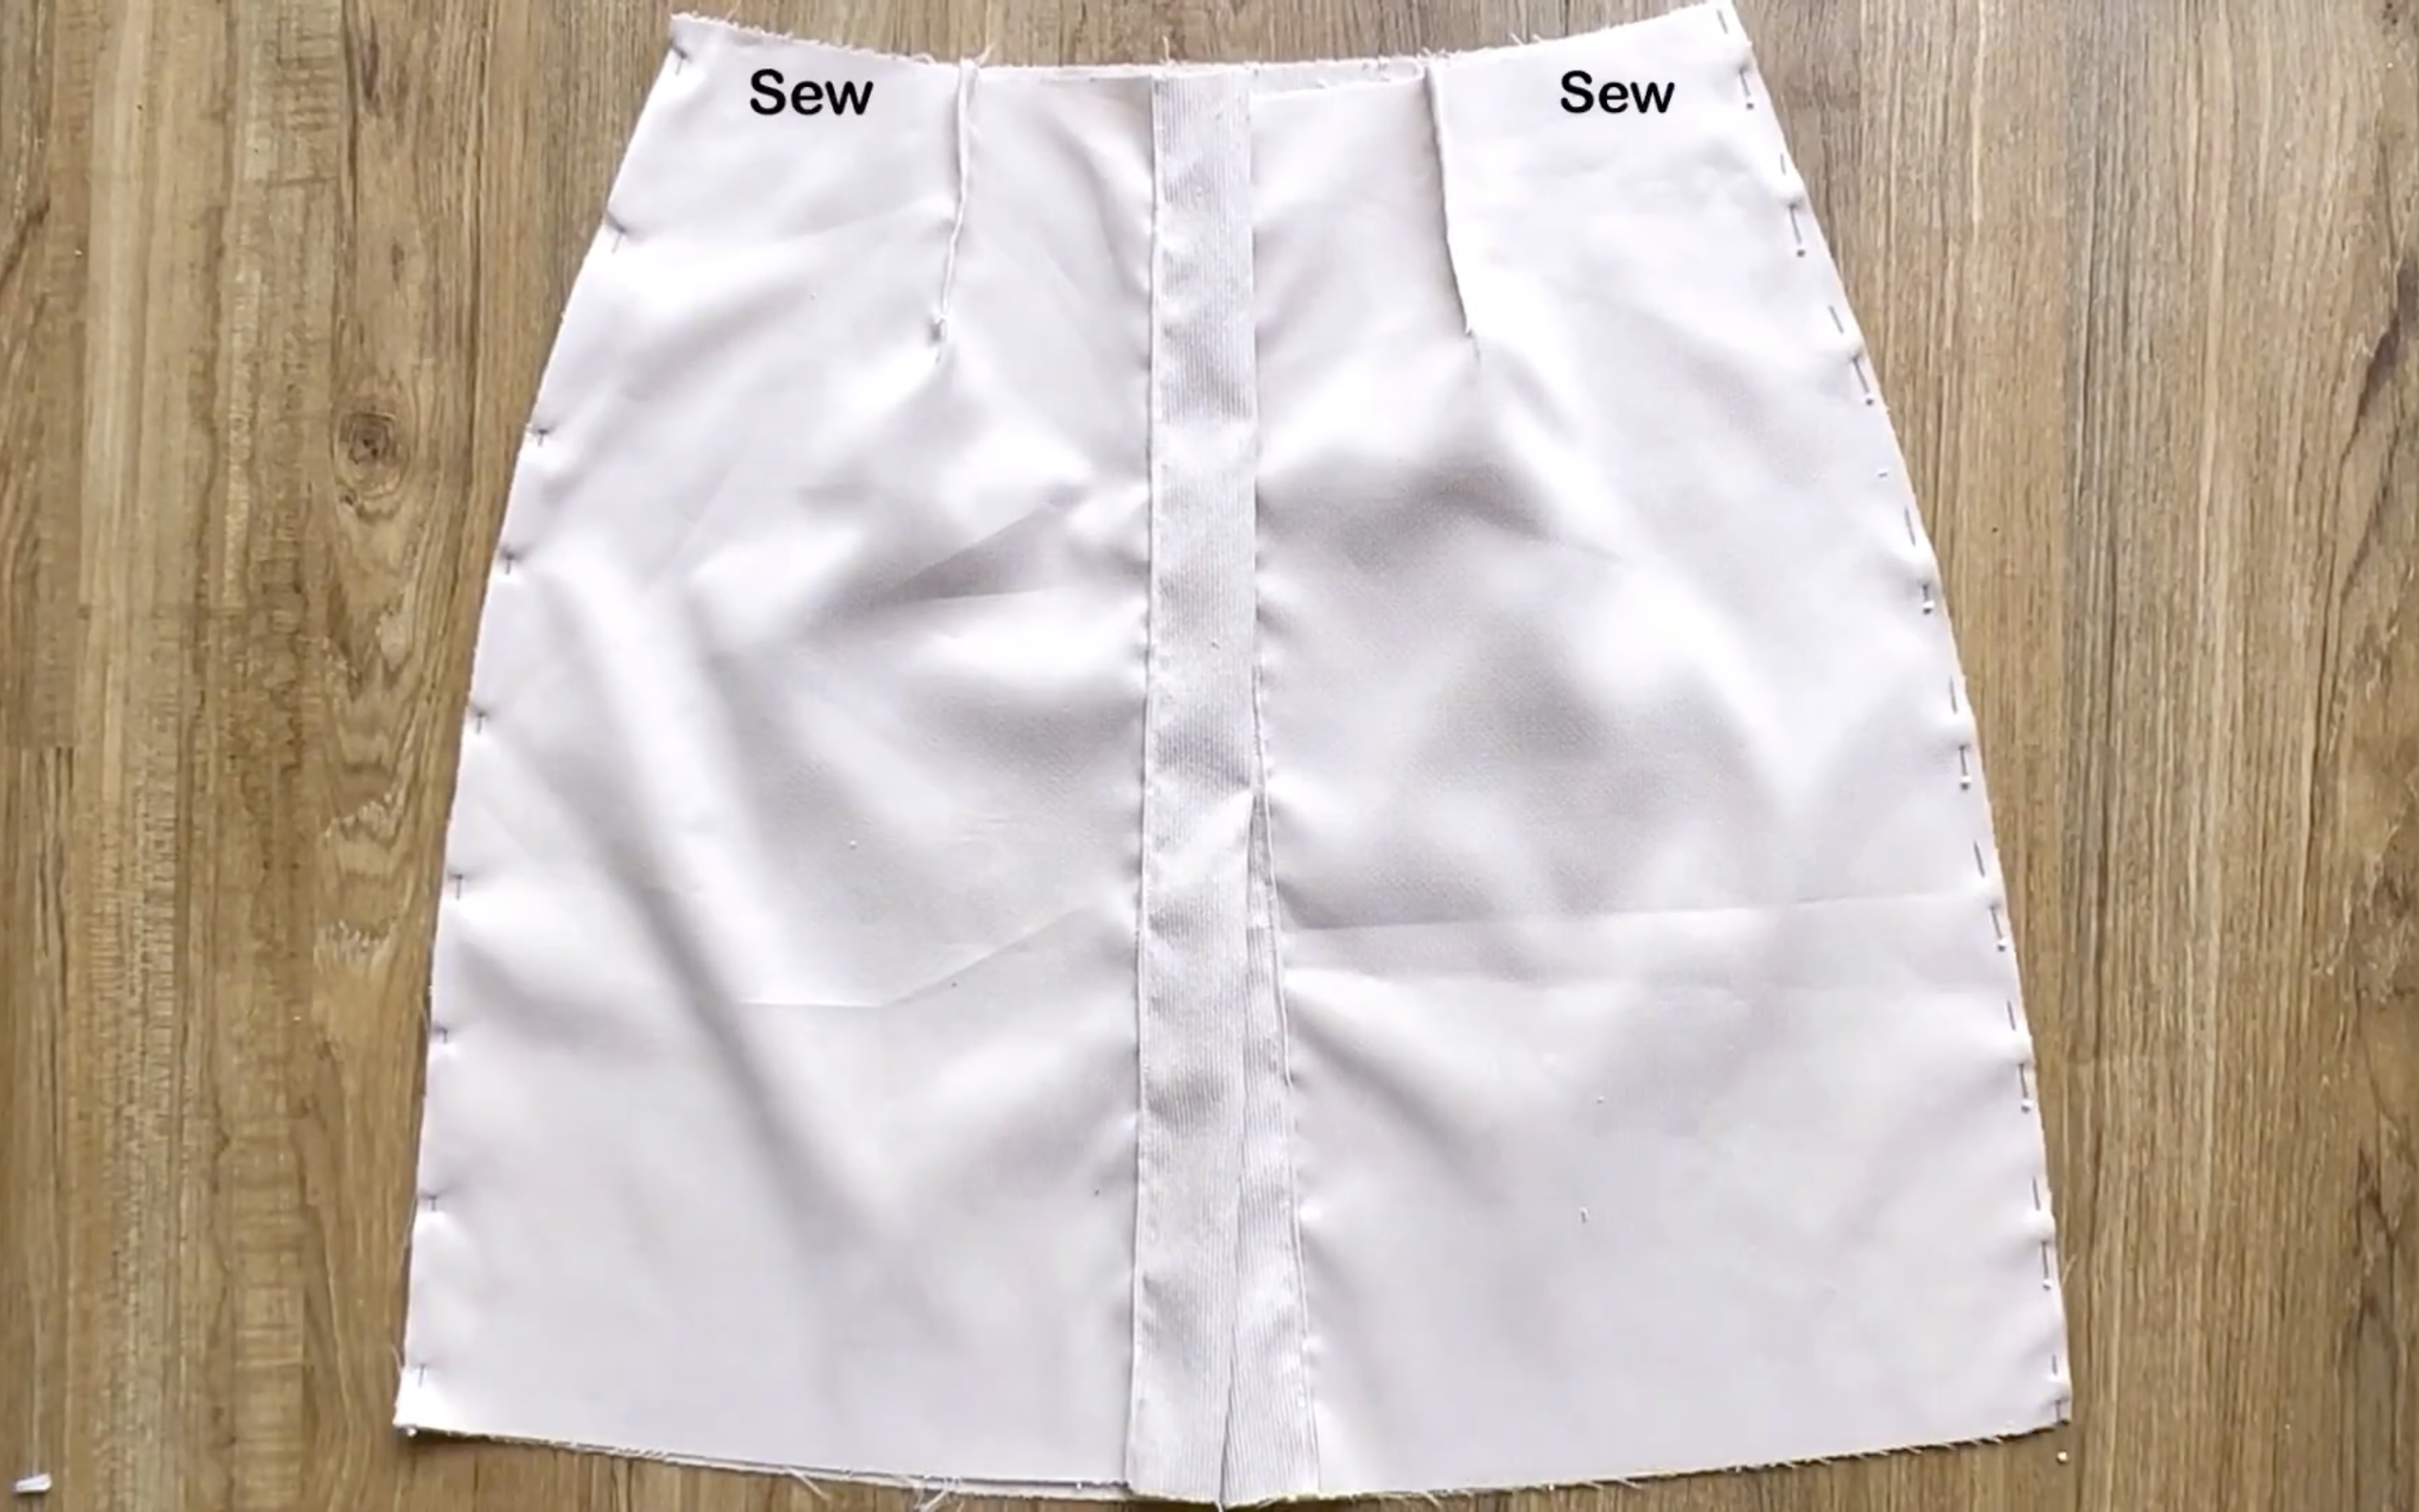
Connect the two front and back pieces at the sides and sew.
To finish the skirt’s hem, draw a line 6 cm above the end.
Then fold in the fabric edge 1 cm, fold again to the line, and sew.
For the waistband, cut a fabric strip 9 cm wide, twice the waistband width plus 2 cm seam allowance, and 2 cm longer than the skirt waistline.
Attach one side of the fabric strip to the waistline, leaving 1 cm extra on each end.
Finish both ends and the rest of the waistband as done previously.
Lastly, add the button and create the buttonhole.

DIY Button front skirt in 2 different ways | Fitted mini skirt
And that’s a wrap on this DIY! Here’s the final result—a pretty yet slightly sexy skirt that fits just right.
I hope you’ll give both of these tops a try! They’re fun to make and so versatile.
See you next time!