DIY Mini skirt with inside shorts | Step by step sewing tutorial (with pattern making process)

DIY Mini skirt with inside shorts

Welcome or welcome back to my channel!
In today's tutorial, I'm going to share with you how I made a mini skirt with inside shorts. This is the combination between a mini skirt and a shorts. It helps for one who is not comfortable when wearing the short skirt.
So that I hope you will enjoy the tutorial and try it out soon. Let’s get started!
WHAT YOU’LL NEED

1m of khaki fabric
Pattern paper
Sewing machine
Pins
Scissors
Ruler
Long stick
Zipper
Buttons
MAKING THE PATTERNS
Here’s the pattern for the project. To get a clear understanding of all the measurements needed for the pattern, watch the video from 1:05 to 19:06.
Remember, you can adjust these measurements to fit your own dimensions!
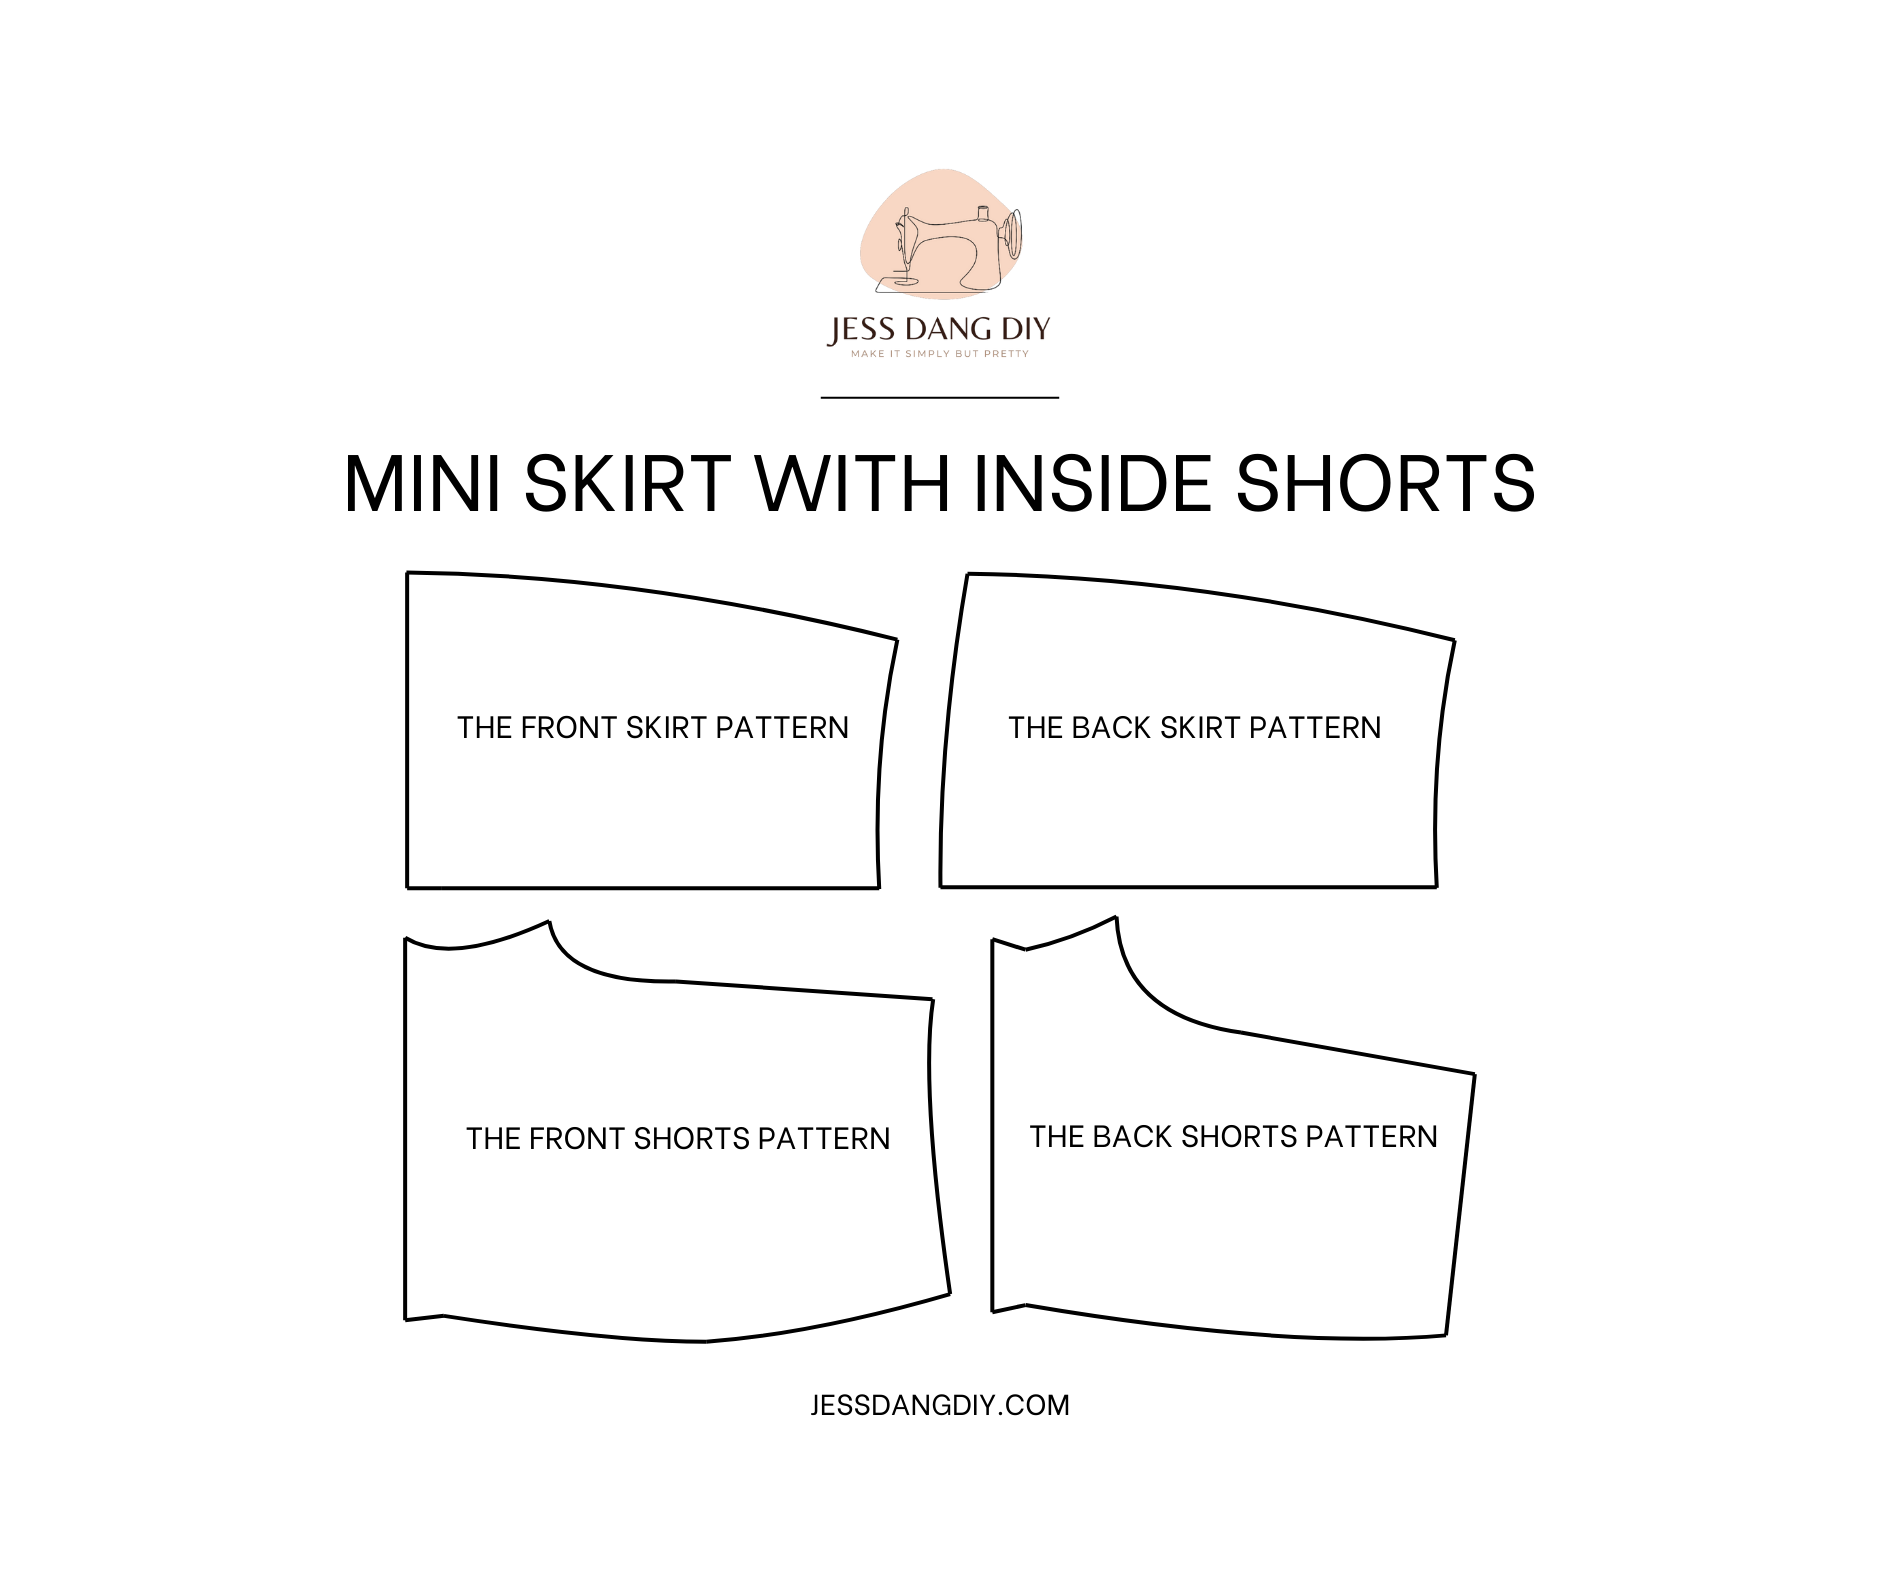
THE SKIRT PATTERN
THE FRONT SKIRT
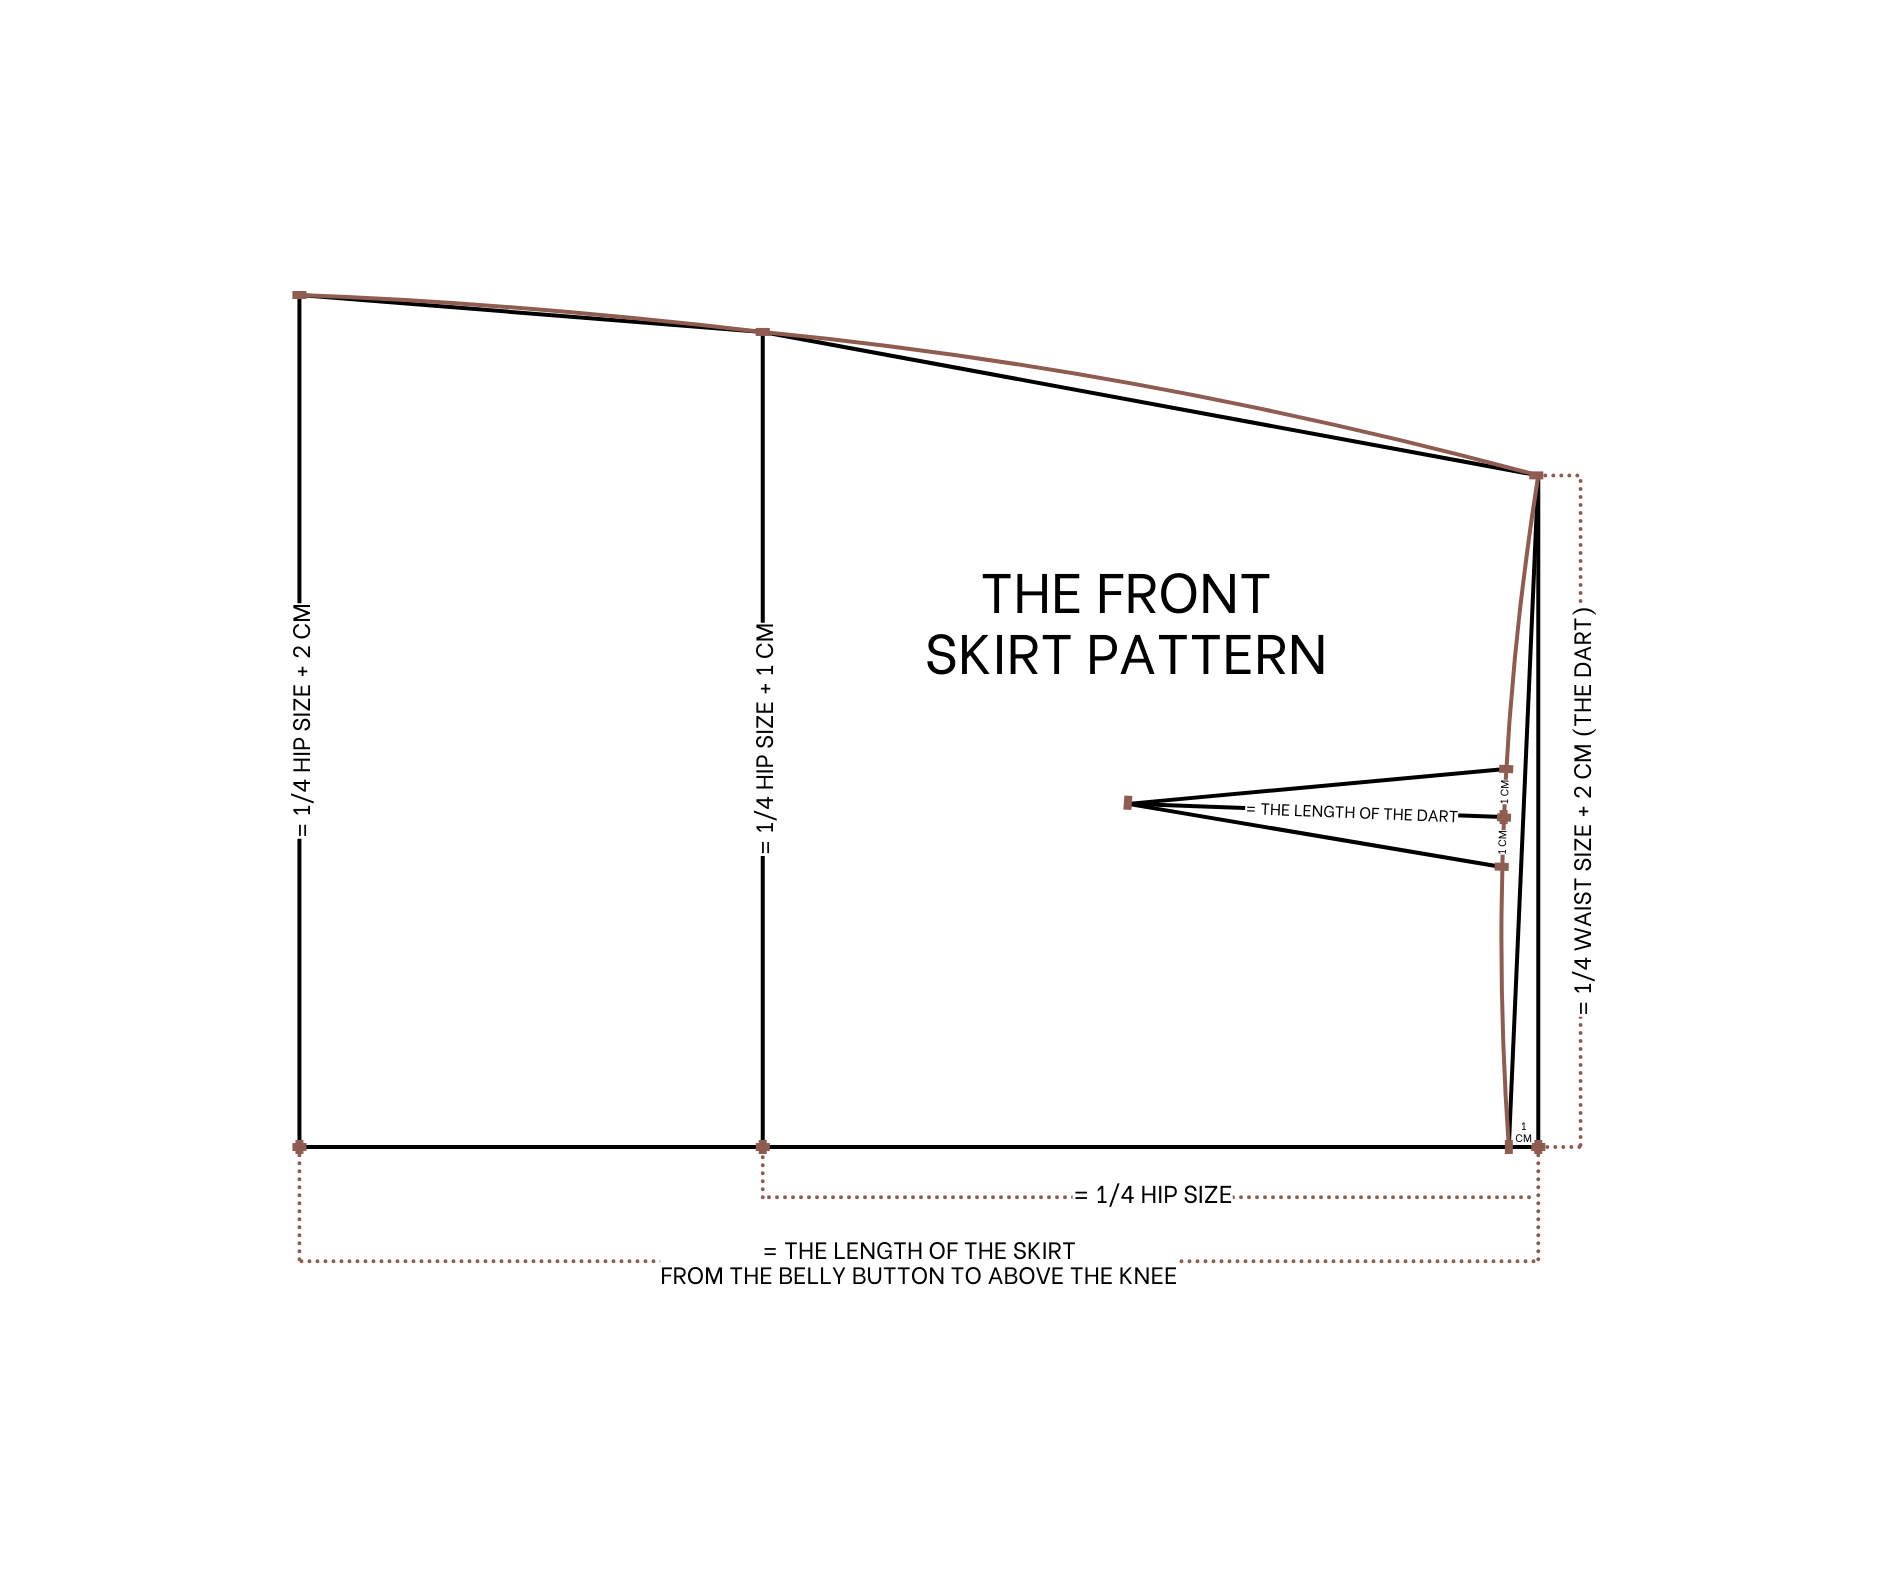

The front skirt pattern
Draw a straight line cutting at the edge horizontal line of the paper. This will be the waistline of the skirt.
From the first straight line, draw another one 23 cm below. This is a quarter of the hip size and will be the hip line.
From the first straight line, draw another line 38 cm below it. This is the length of the skirt and the ending line.
From the end of the waistline, mark up 19 cm, which is a quarter of the waist size plus 2 cm for the dart.
From the end of the hip line, mark up 24 cm, which is a quarter of the hip size plus 1 cm.
From the end of the ending line, mark up 25 cm, which is a quarter of the hip size plus 2 cm.
Connect these marks to create the sideline of the skirt. Redraw the straight line to smooth the sideline.
From the end of the waistline, mark 1 cm on the edge horizontal line, then connect that mark to the waistline mark. Draw a curved line to create a new waistline.
Mark the middle of the new waistline, then draw a perpendicular line through the mark. The length of this line is 7 cm, which is the dart length.
Make two additional marks 1 cm to each side of the center mark, then connect them to the end of the perpendicular line to create the dart.
Add seam allowances: 1 cm at the waistline, 1.5 cm at the sideline, and 3 cm at the ending line.
Cut the pattern from folded fabric at the edge horizontal line to complete the front pattern.
THE BACK SKIRT
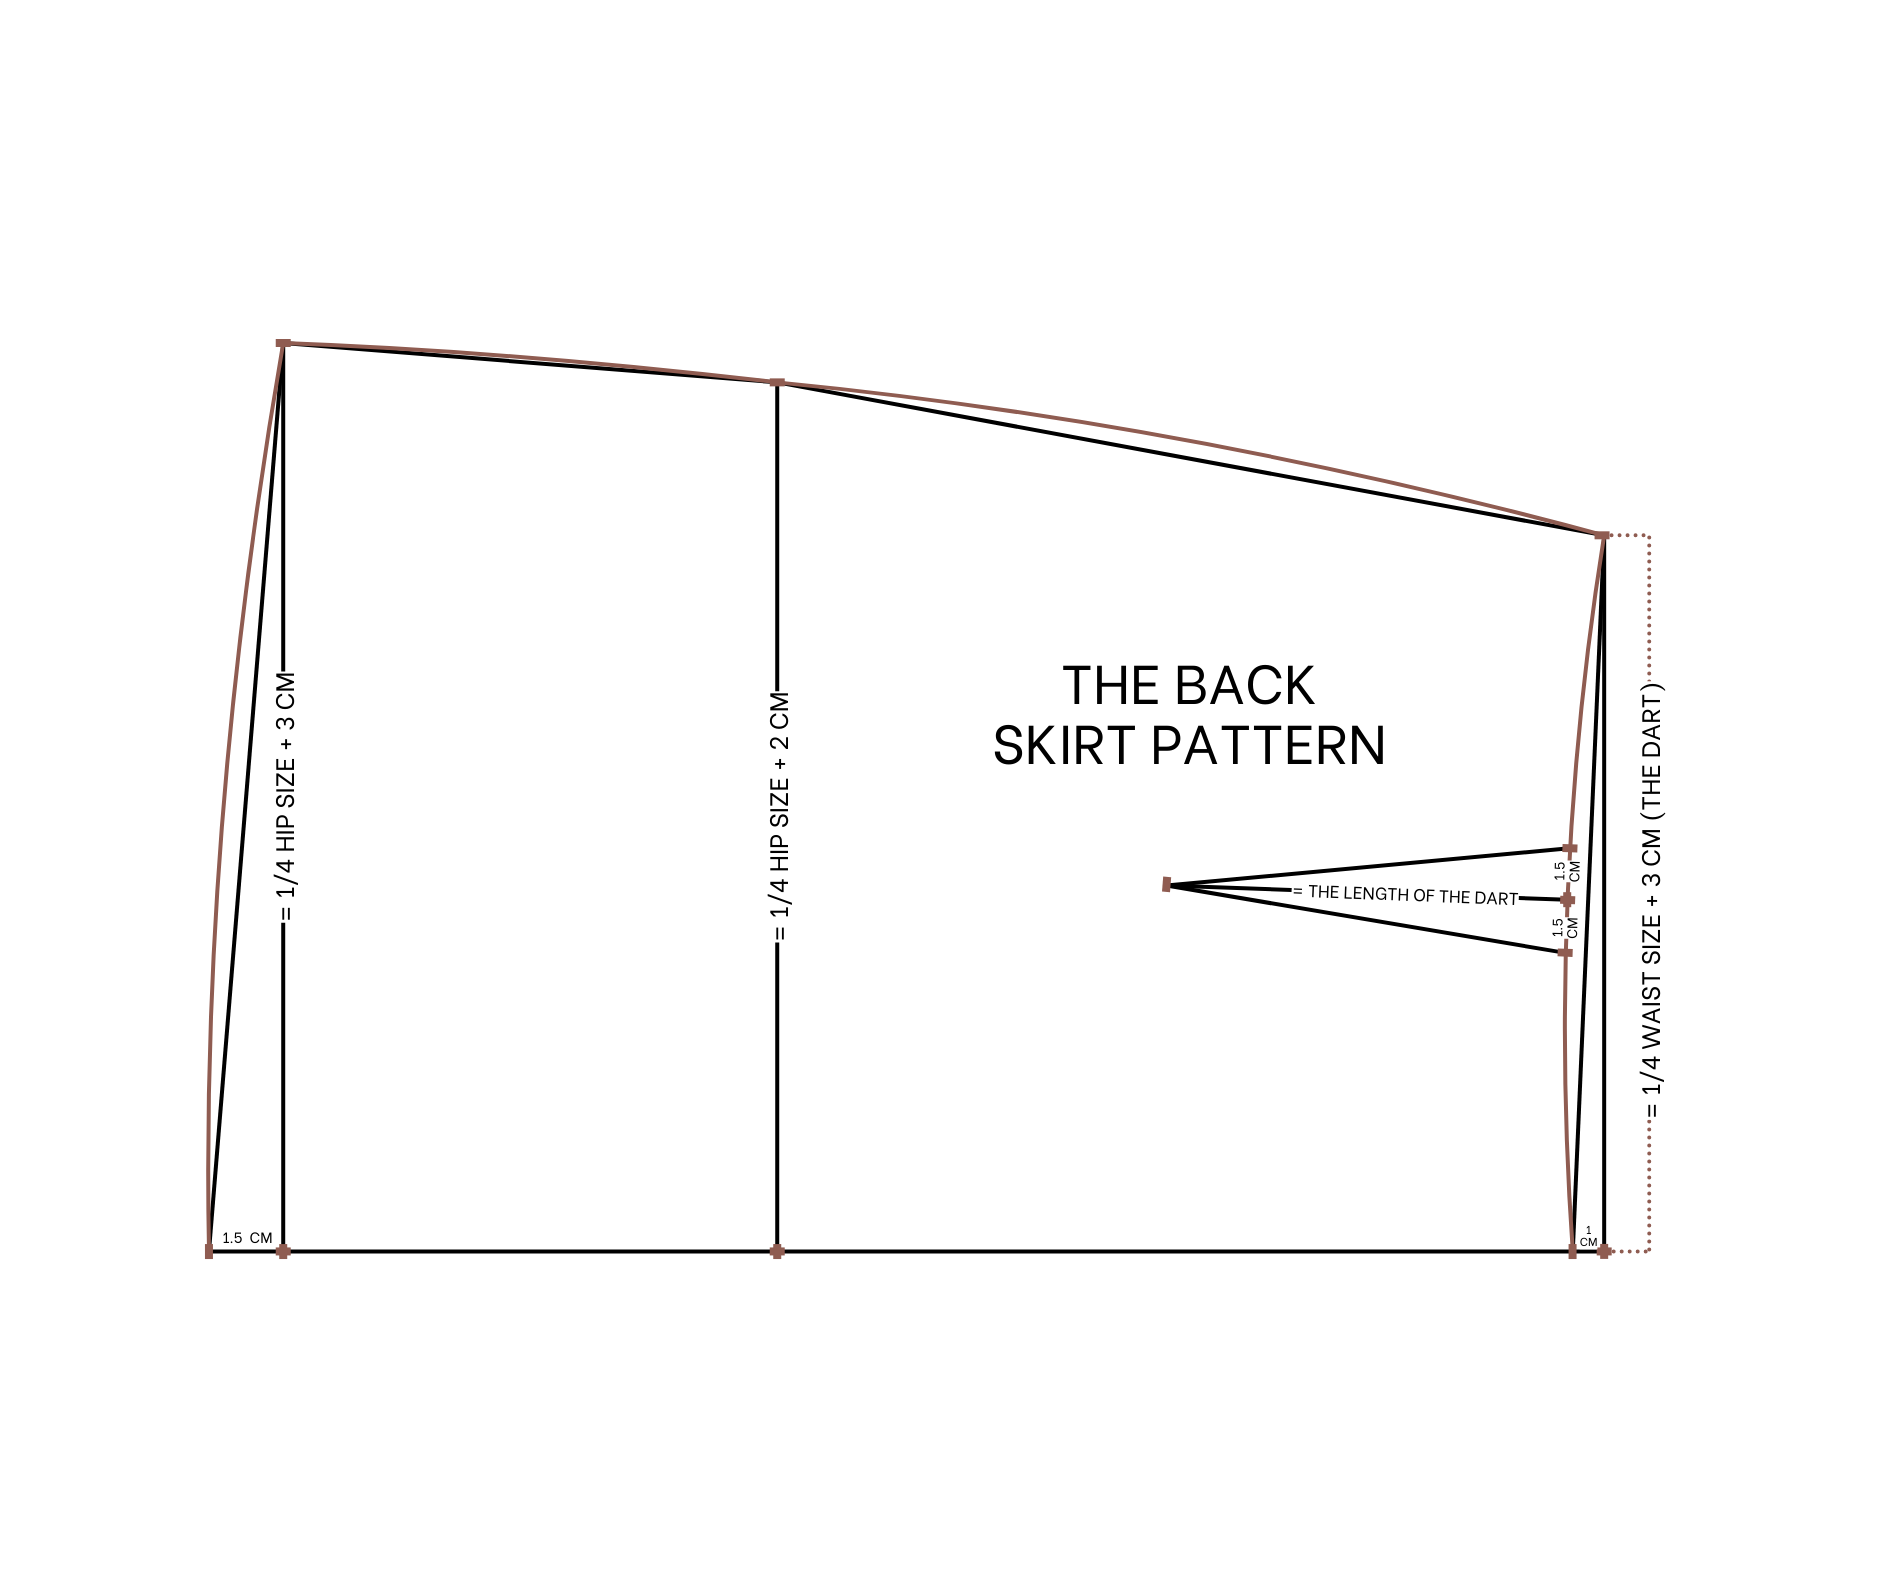

The back skirt pattern
Draw the waistline, hip line, and ending line as done for the front skirt.
From the end of the waistline, mark up 20 cm, which is a quarter of the waist size plus 3 cm for the dart.
From the end of the hip line, mark up 25 cm, which is a quarter of the hip size plus 2 cm.
From the end of the ending line, mark up 26 cm, which is a quarter of the hip size plus 3 cm.
These measurements are 1 cm extra compared to the front pattern. Connect these marks to create the sideline.
From the end of the waistline, mark 1 cm on the edge horizontal line, then connect this mark to the top sideline mark. Draw a curved line to create a new waistline.
From the end of the ending line, mark 1.5 cm outward, then connect it to the sideline to create a new curved ending line. Smooth the sideline for consistency.
Mark the middle of the waistline, then draw a perpendicular line through this mark. The length is 11 cm, which is the dart length.
Make two additional marks 1.5 cm to each side of the center mark, then connect them to the end of the perpendicular line to create the dart.
Add seam allowances in the same way as the front pattern. Cut the pattern to complete the back pattern.
THE SHORTS PATTERN
THE FRONT SHORTS

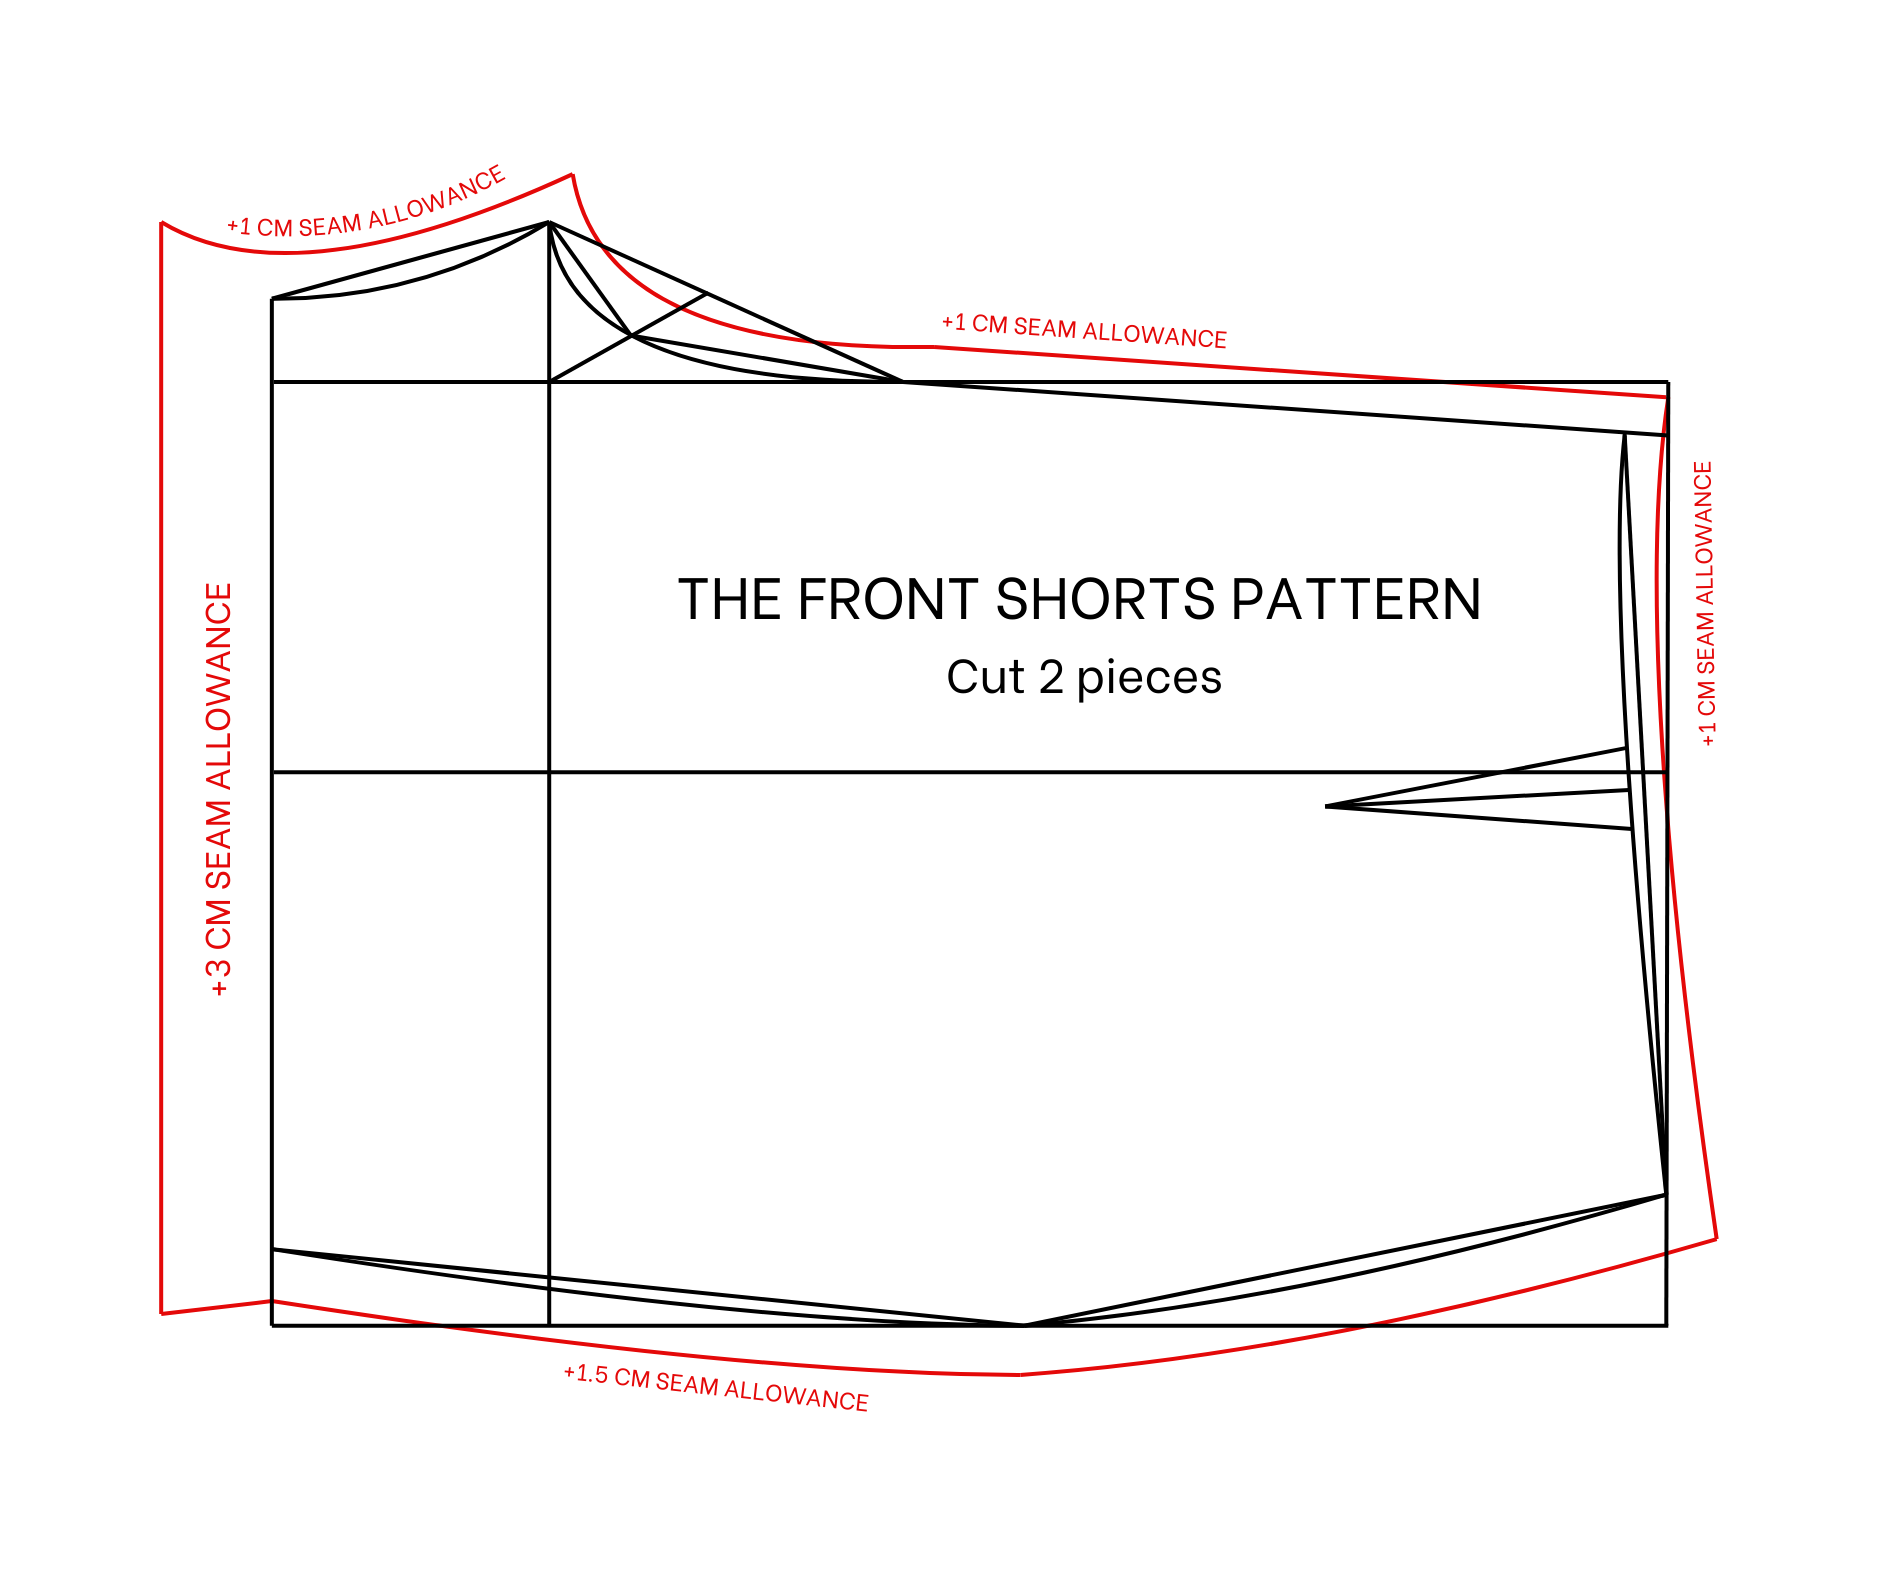
The front shorts pattern
Draw a rectangle 24 cm wide (a quarter of the hip size plus 1 cm) and 35 cm long (3 cm shorter than the skirt).
From the top of the rectangle, draw a line 28 cm below, which is a quarter of the hip size plus 5 cm for the crotch depth.
Mark 4.1 cm outward from one end of this line (1/20 of the hip size minus 0.5 cm), then mark the midpoint of this new line.
Draw a perpendicular line through the midpoint to cut the rectangle’s width. From the cutting point on the top line, mark 8.5 cm (1/8 of the waist size minus 1 cm plus 1 cm for the dart) on one side and 10.5 cm (1/8 of the waist size plus 1 cm plus 1 cm for the dart) on the other.
The width between these marks is 19 cm (a quarter of the waist size plus 2 cm for the dart). Connect these marks to the crotch line and waistline to form the crotch line.
Mark 16 cm from one end of the top line on the lane line below, representing 1/5 of the hip size.
At the bottom, mark 12 cm on each side of the cutting point (a quarter of the thigh size minus 1 cm). The width between these marks is half the thigh size minus 2 cm.
Connect these points to form the inside leg line, sideline, and ending line of the shorts.
At the top of the crotch line, mark down 1 cm, then connect to the waistline end to create a new waistline. Mark the middle of this line and draw a perpendicular line of 7 cm for the dart. Create the dart by marking 1 cm on each side and connecting to the perpendicular line’s end.
Add seam allowances: 1 cm at the waistline, crotch line, and inside leg line; 1.5 cm at the sideline; and 3 cm at the ending line.
THE BACK SHORTS
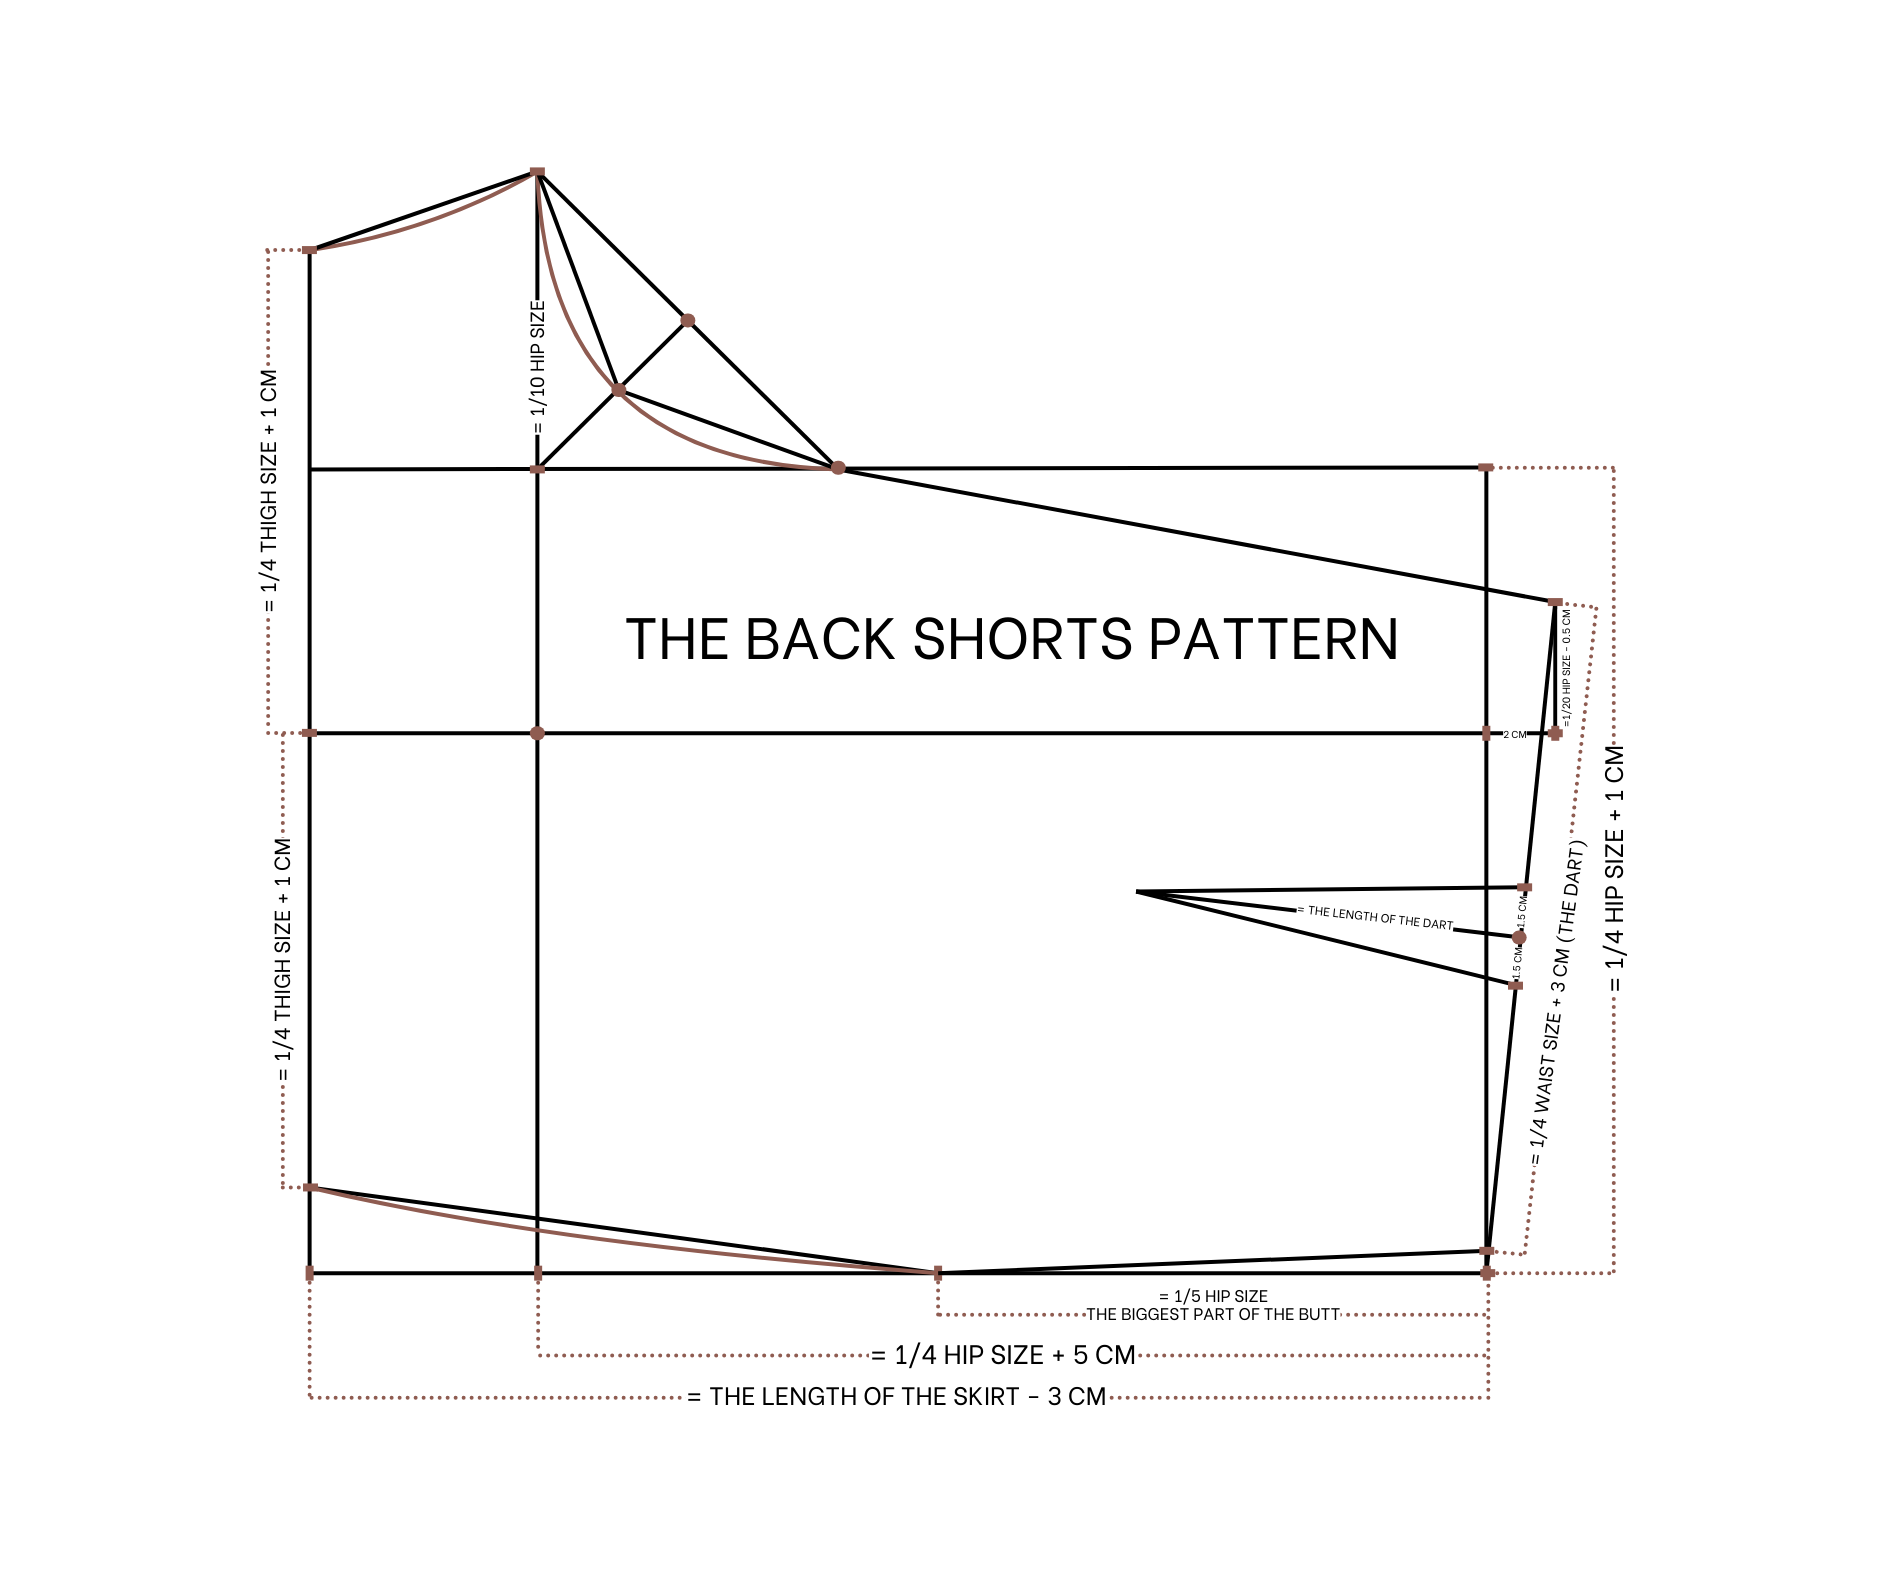

The back shorts pattern
Draw a rectangle and the hip line similar to the front pattern.
Extend the hip line by 9.2 cm (1/10 of the hip size) and mark the midpoint. Draw a perpendicular line through this mark to cut the rectangle width.
Extend the perpendicular line by 2 cm, then draw another perpendicular line 4.1 cm wide (1/20 of the hip size - 0.5 cm). Draw a line to the top end and cut.
Mark 20 cm from the top, representing a quarter of the waist size plus 3 cm for the dart.
On the line between the top and hip lines, mark 1/3 of its length. Connect this point to the hip and waistline ends to create the crotch line.
At the bottom, mark 14 cm on each side of the cutting point (a quarter of the thigh size plus 1 cm). The width is half the thigh size plus 2 cm. Connect these points to form the inside leg line, sideline, and ending line.
Mark the middle of the waistline and draw a perpendicular line of 11 cm for the dart. Mark 1.5 cm on each side of the center and connect to the line’s end to complete the dart.
Make sure the inside leg line and sideline are the same length as the front shorts for easy connection.
Add seam allowances as with the front pattern.
SEWING THE SKIRT
THE SKIRT PART
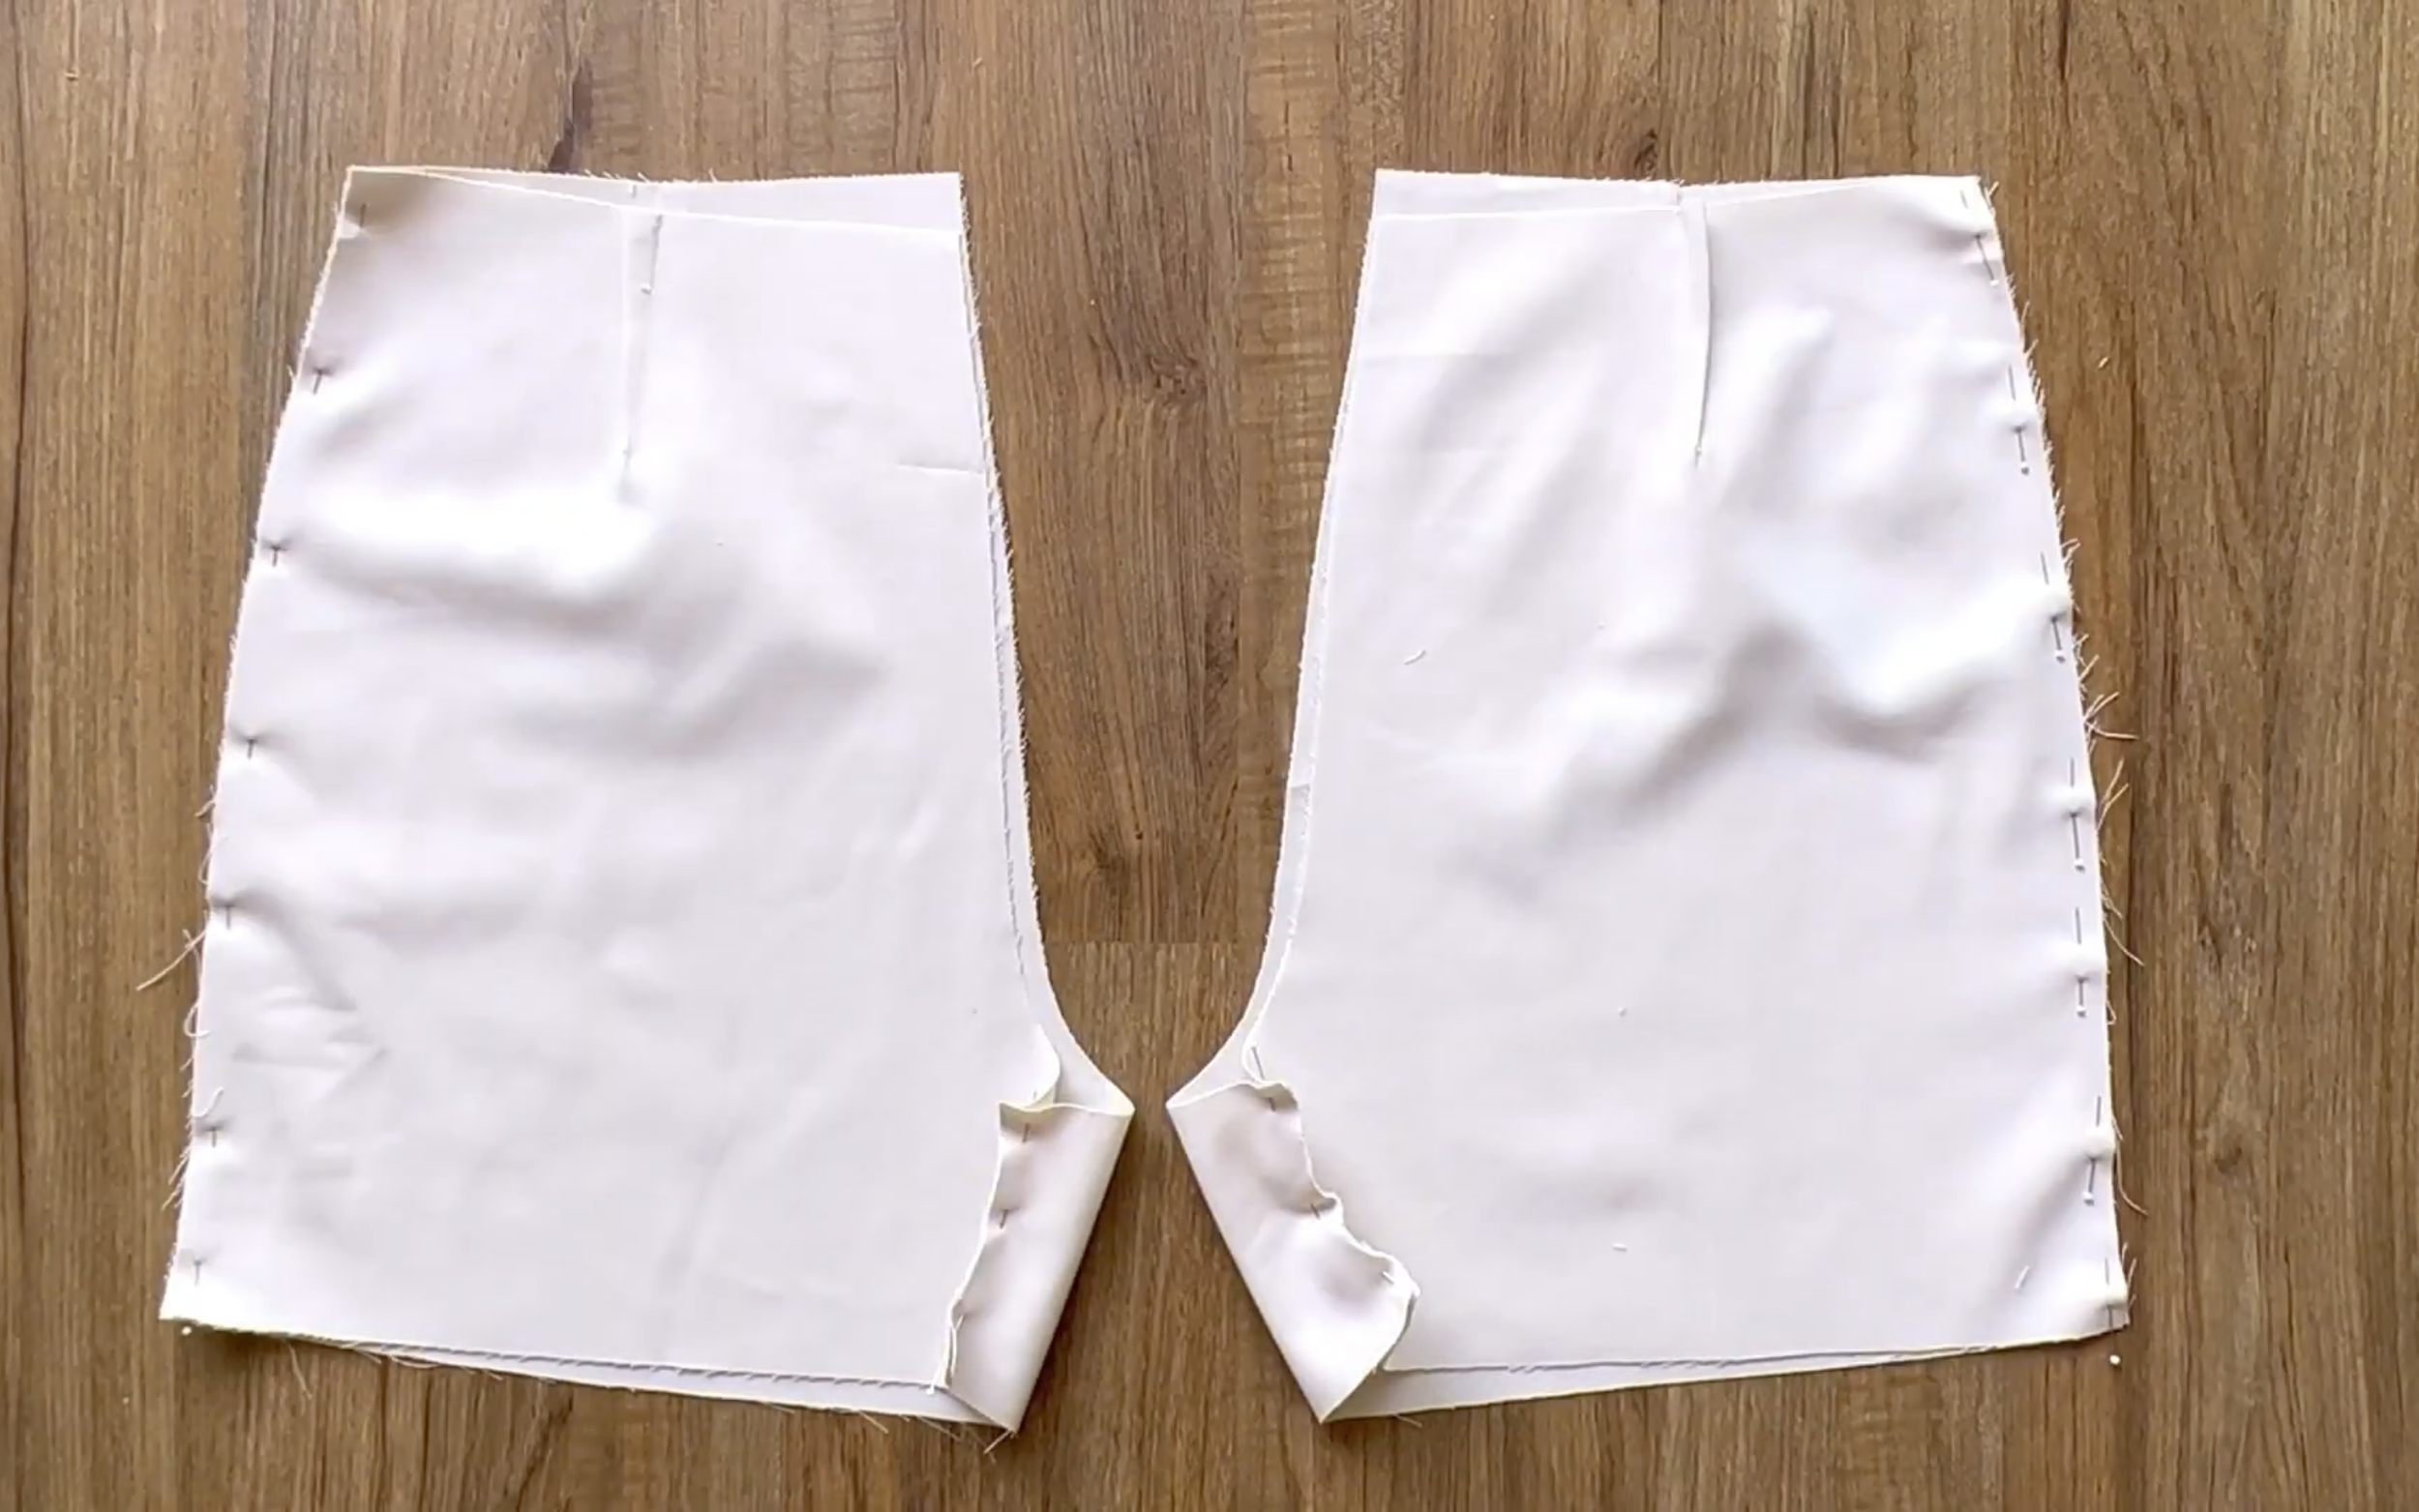
After cutting the front and back pieces of the skirt, copy the darts and finish them.
After sewing, use an iron to make the darts neater.
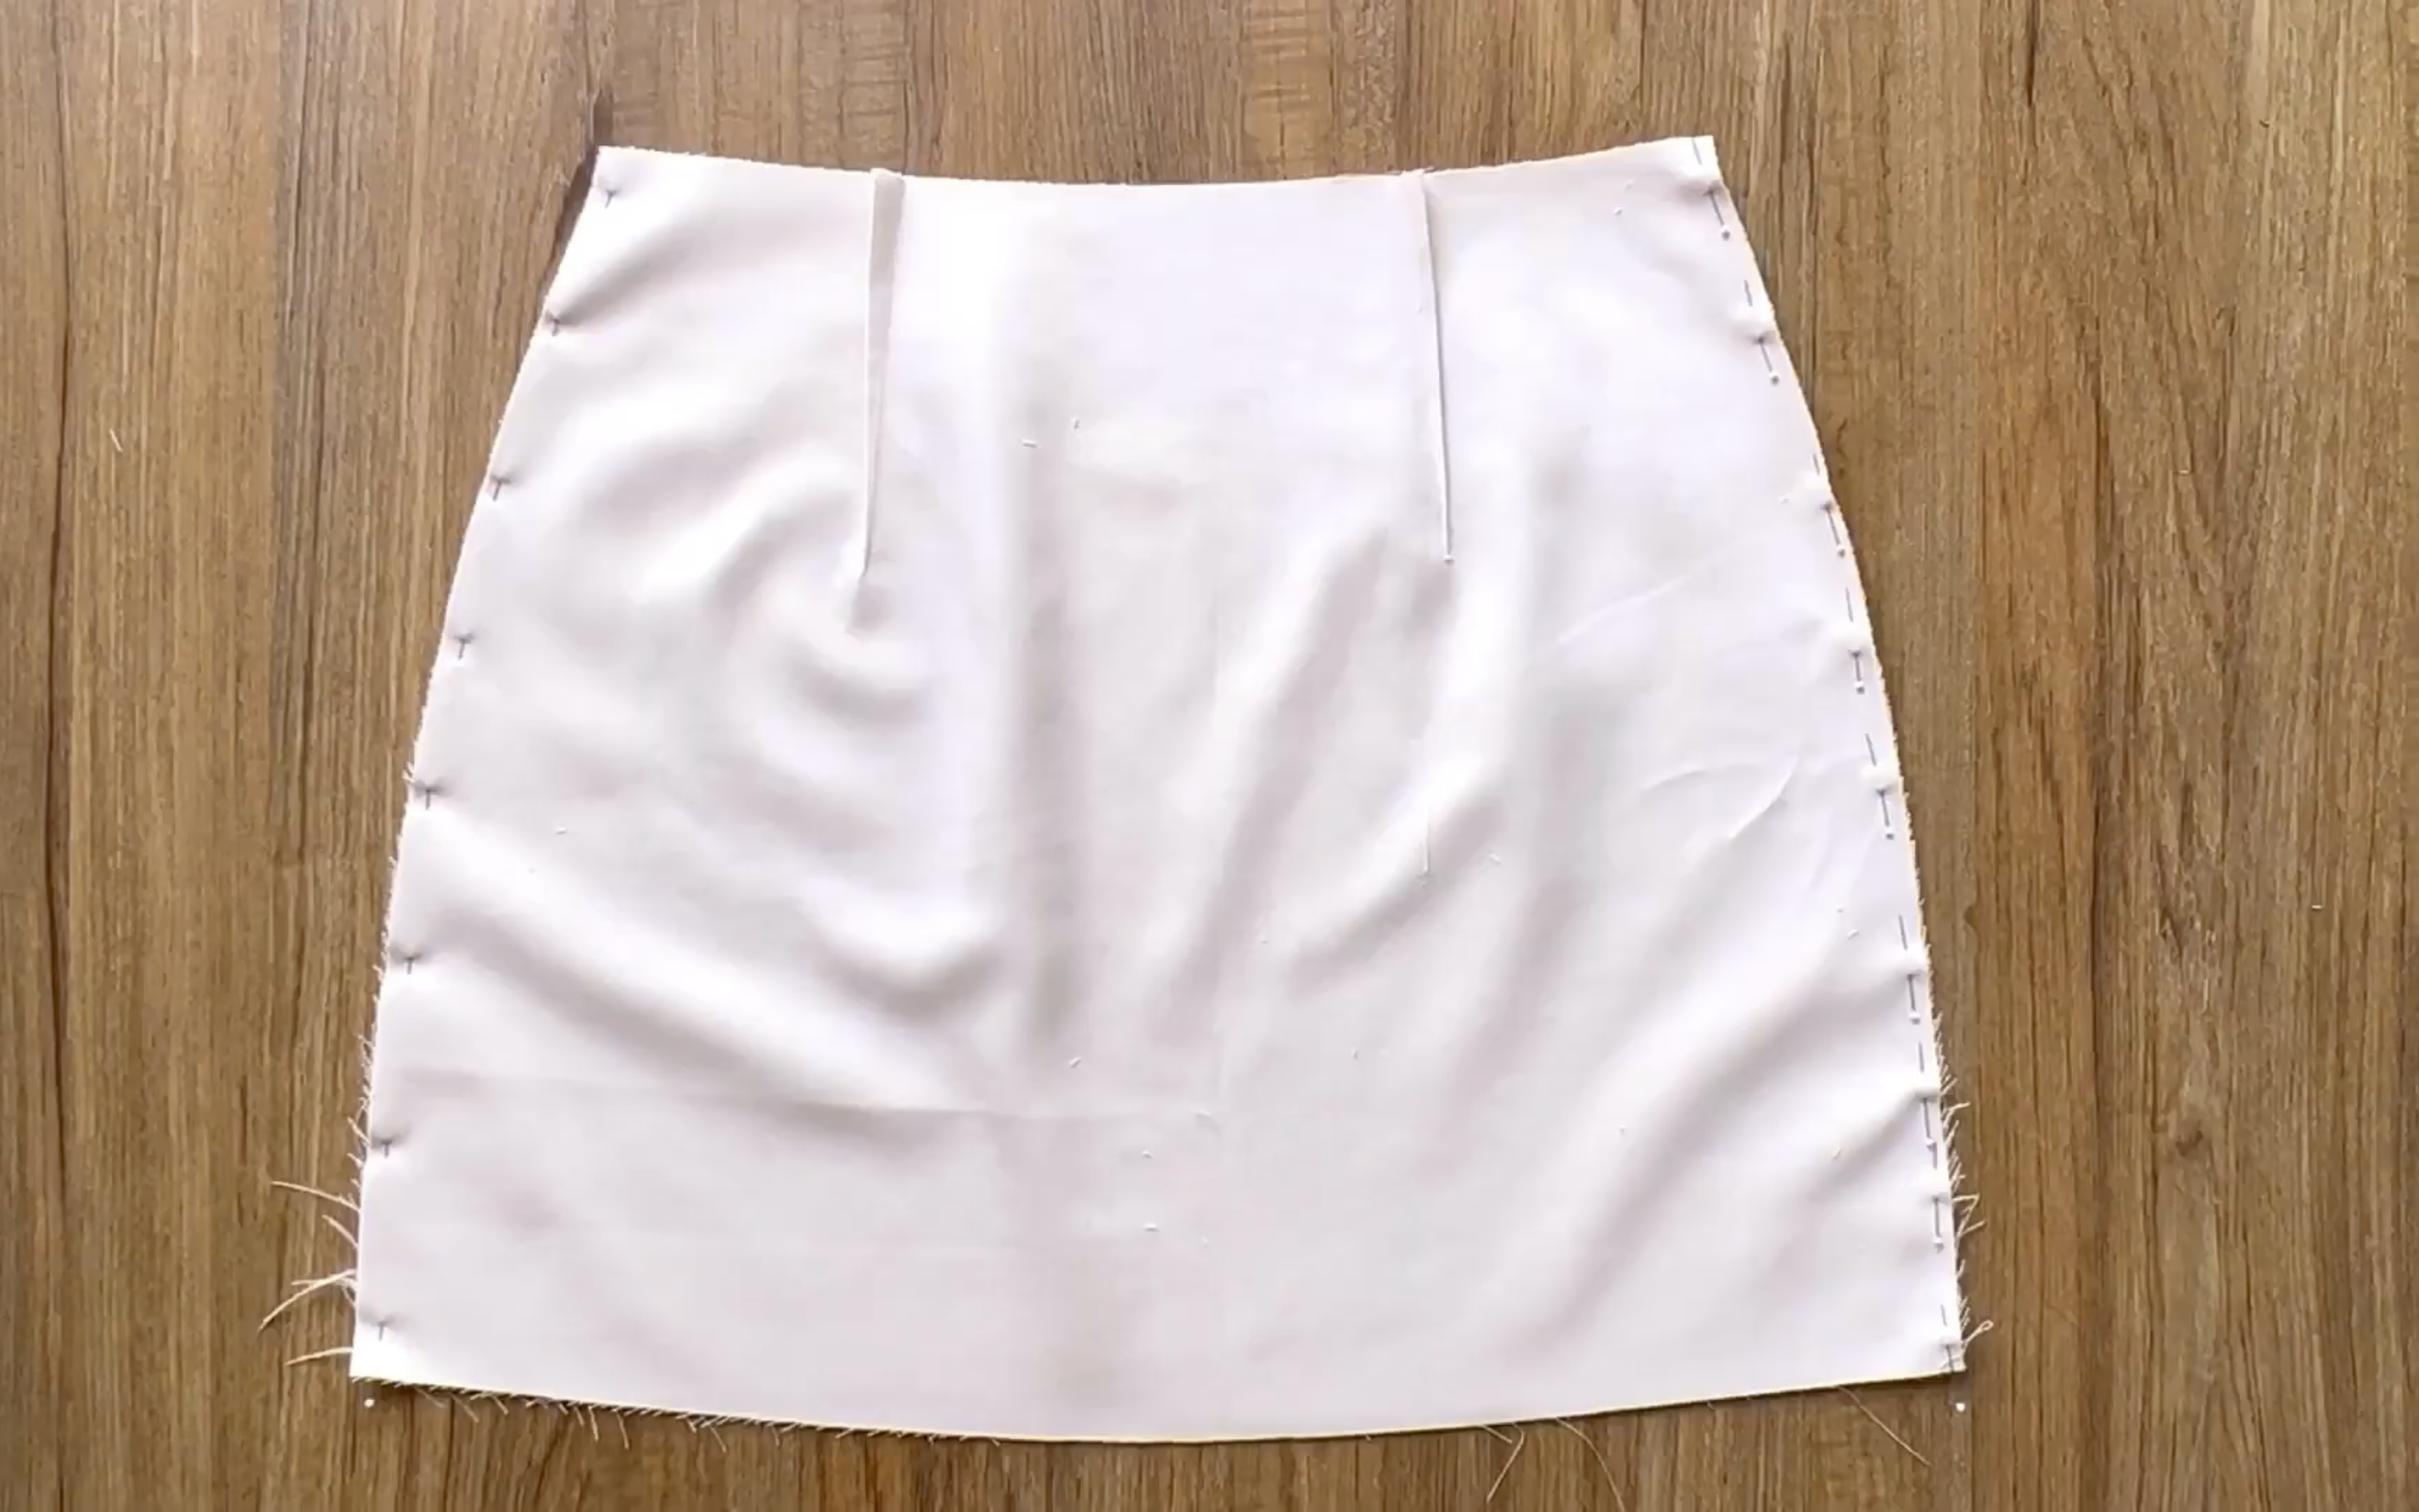
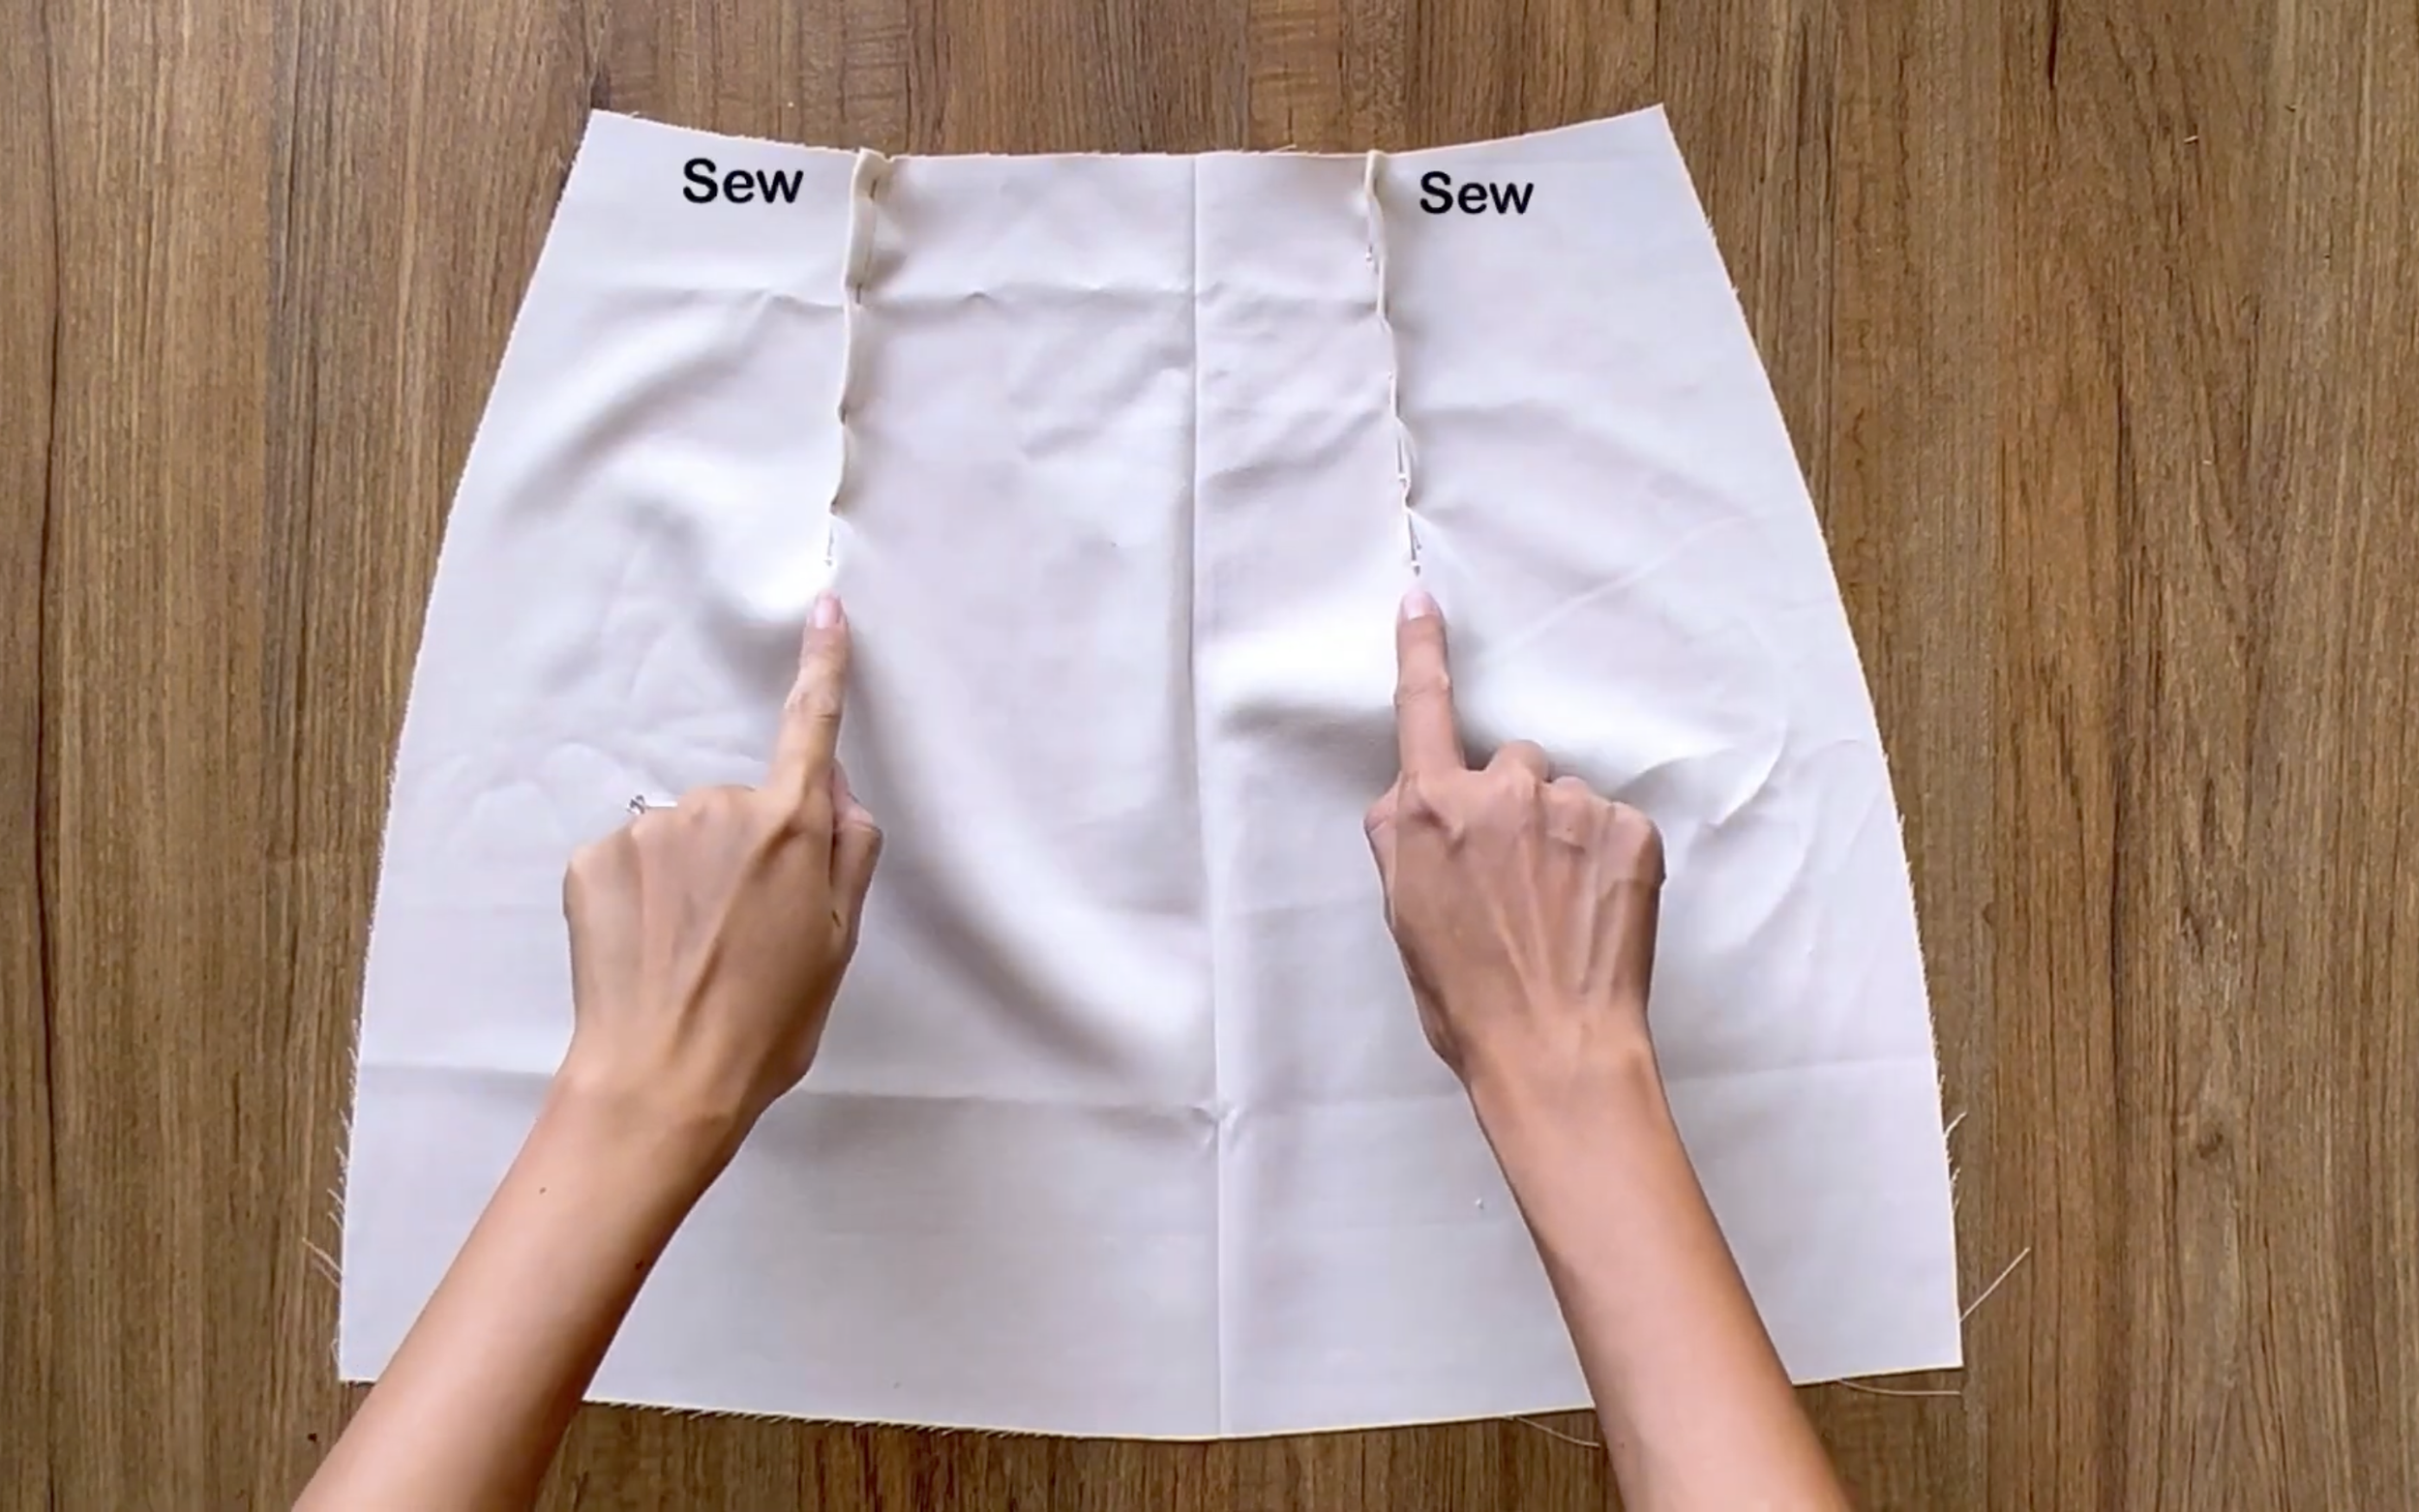
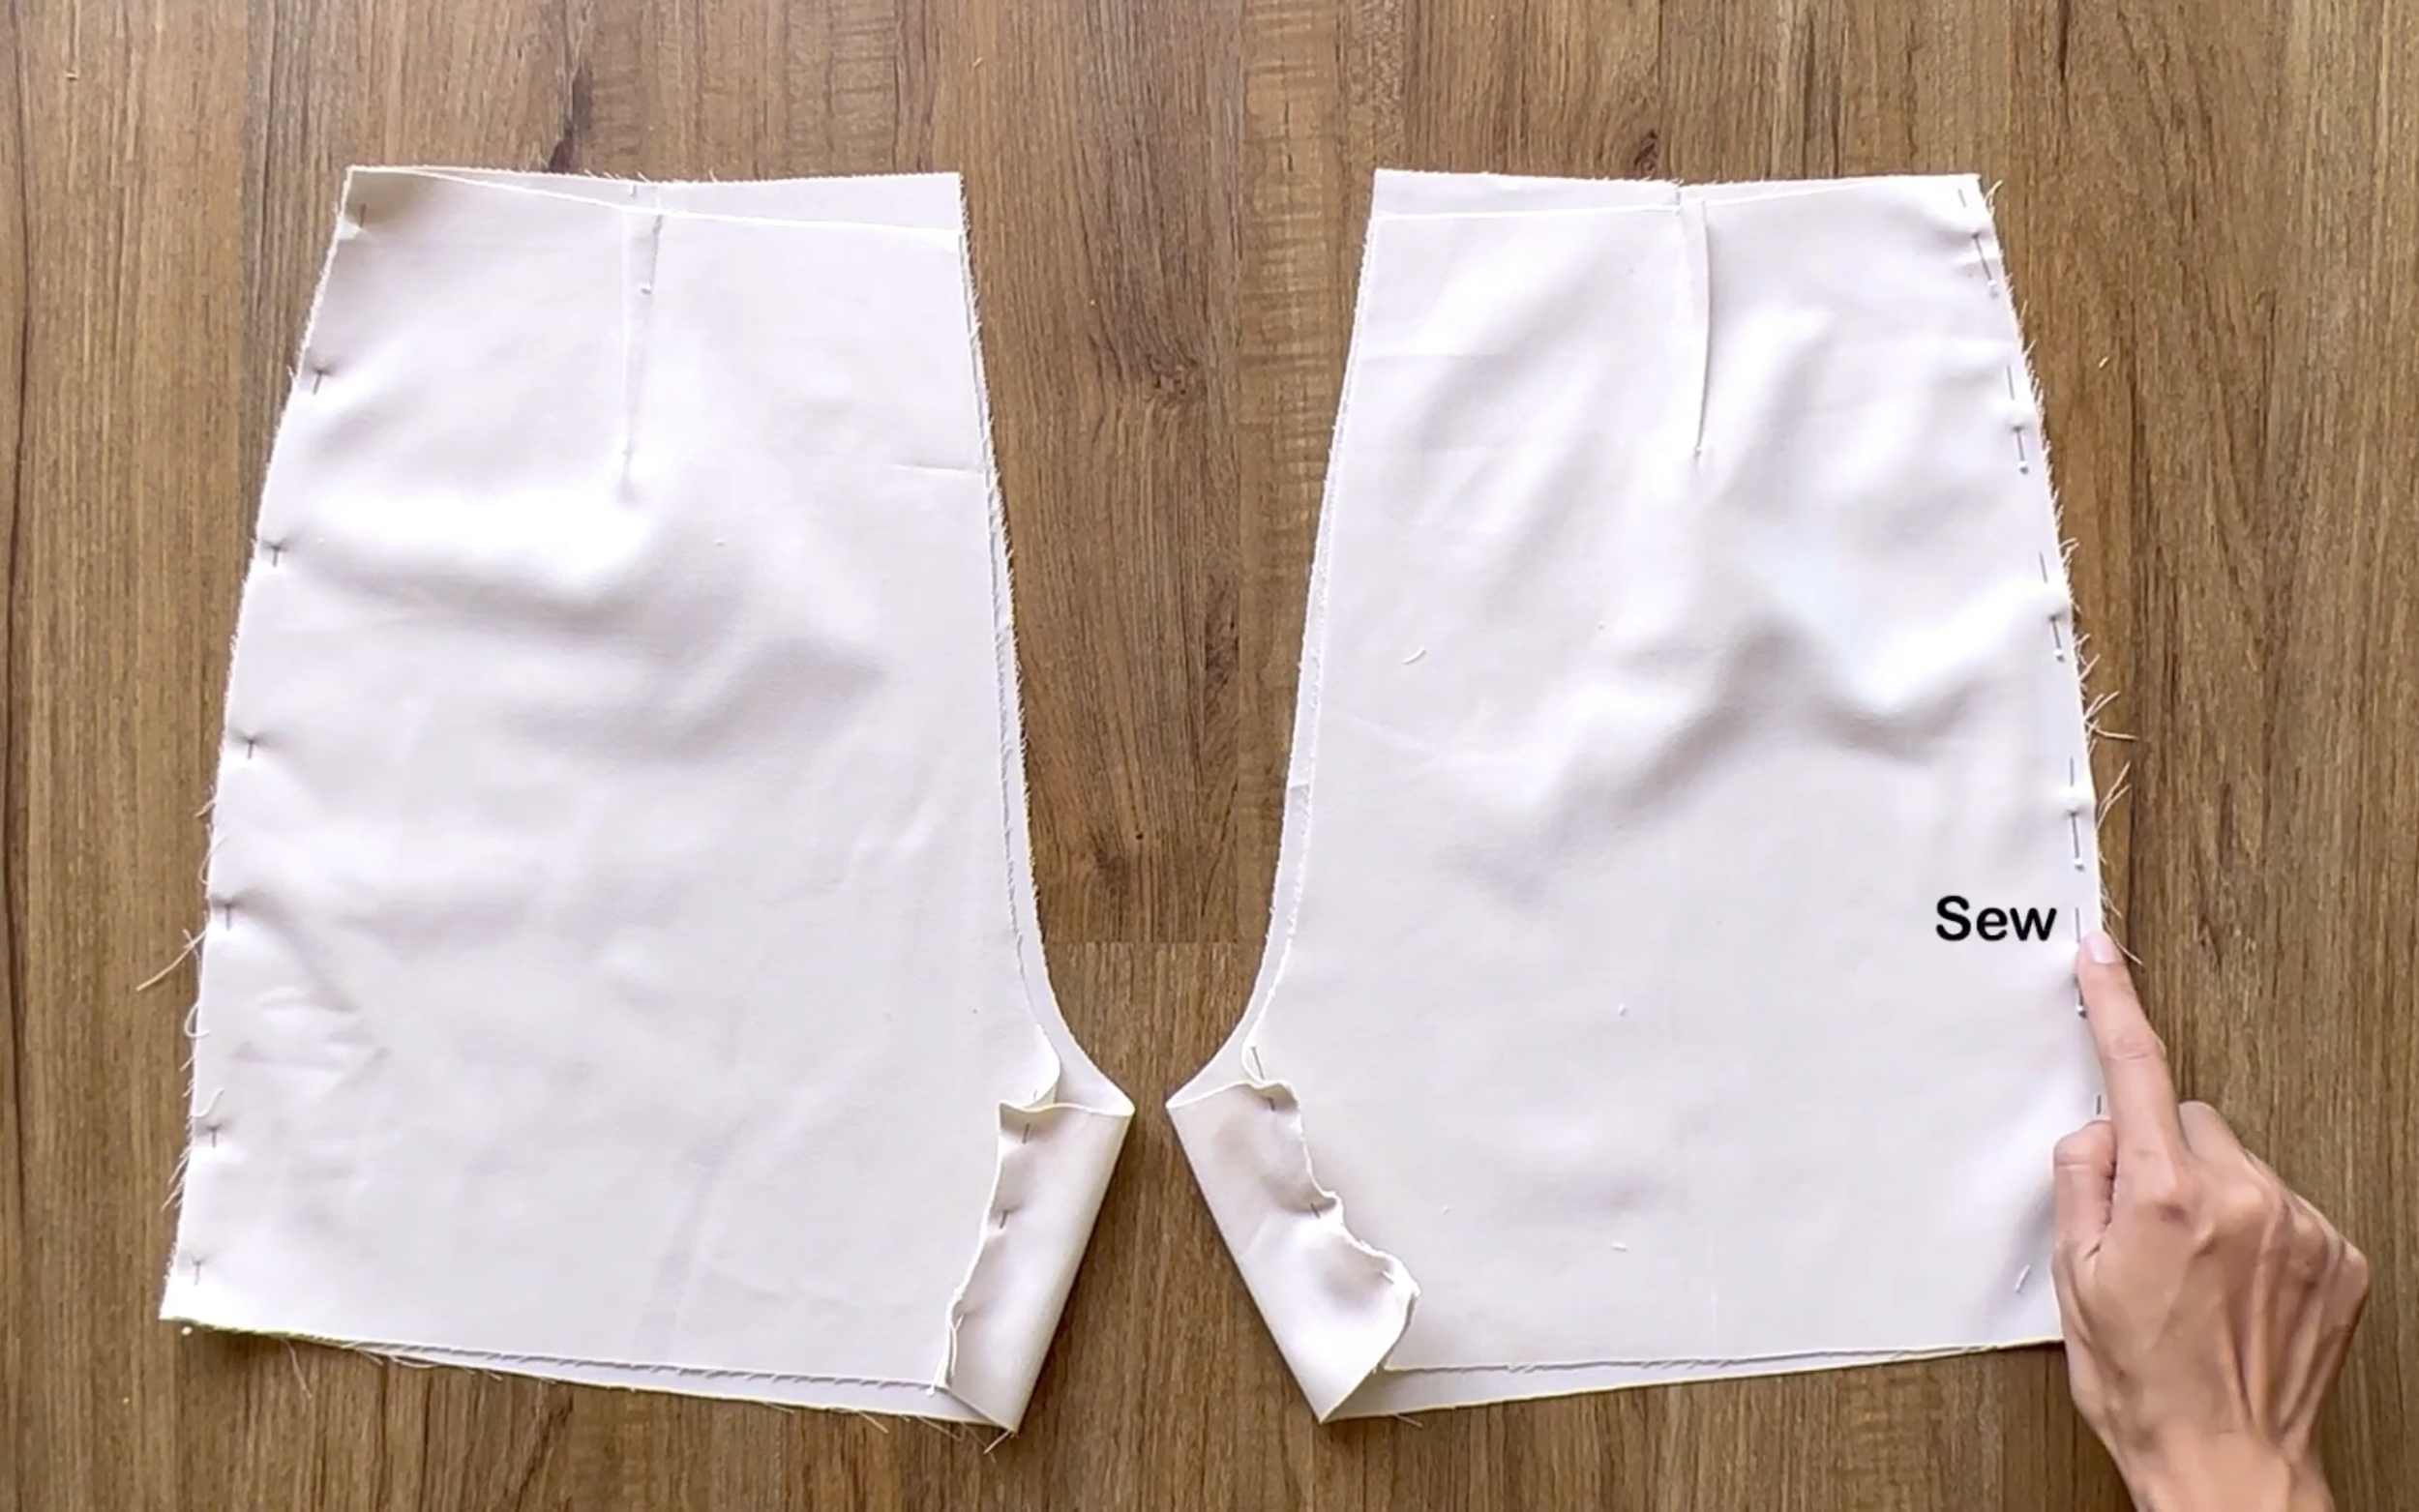
Connect the front and back pieces of the skirt together at the two sidelines.
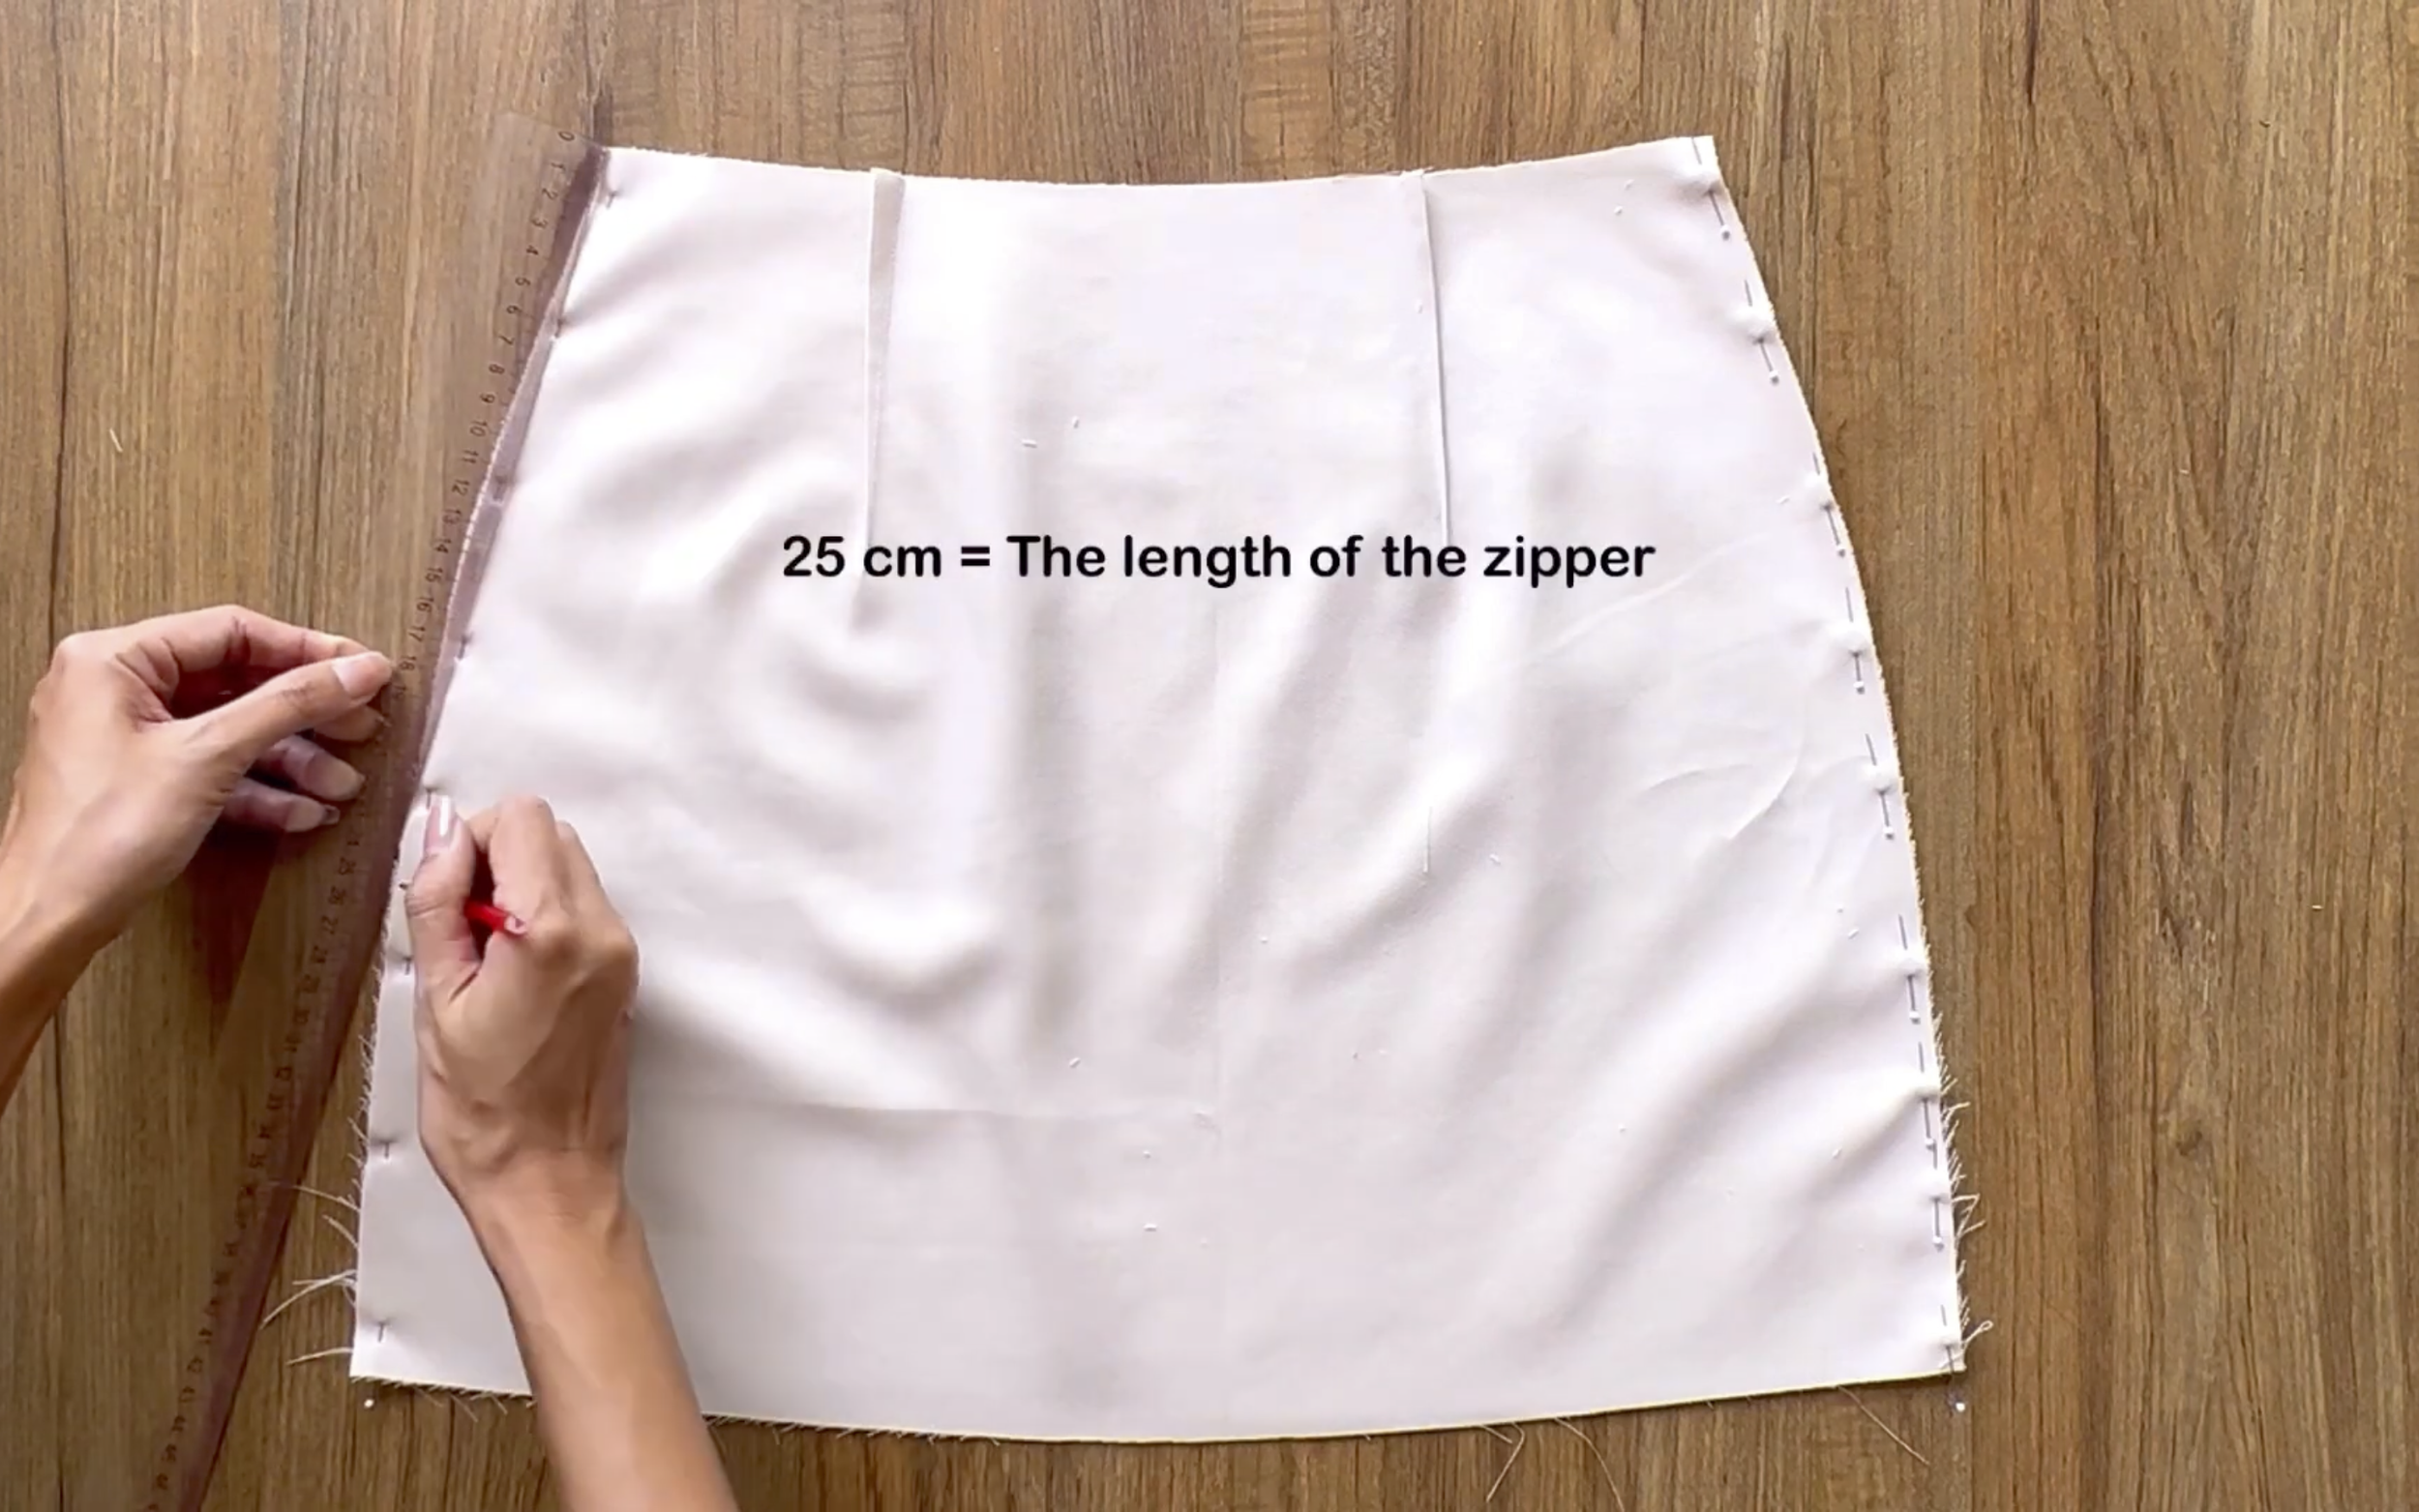
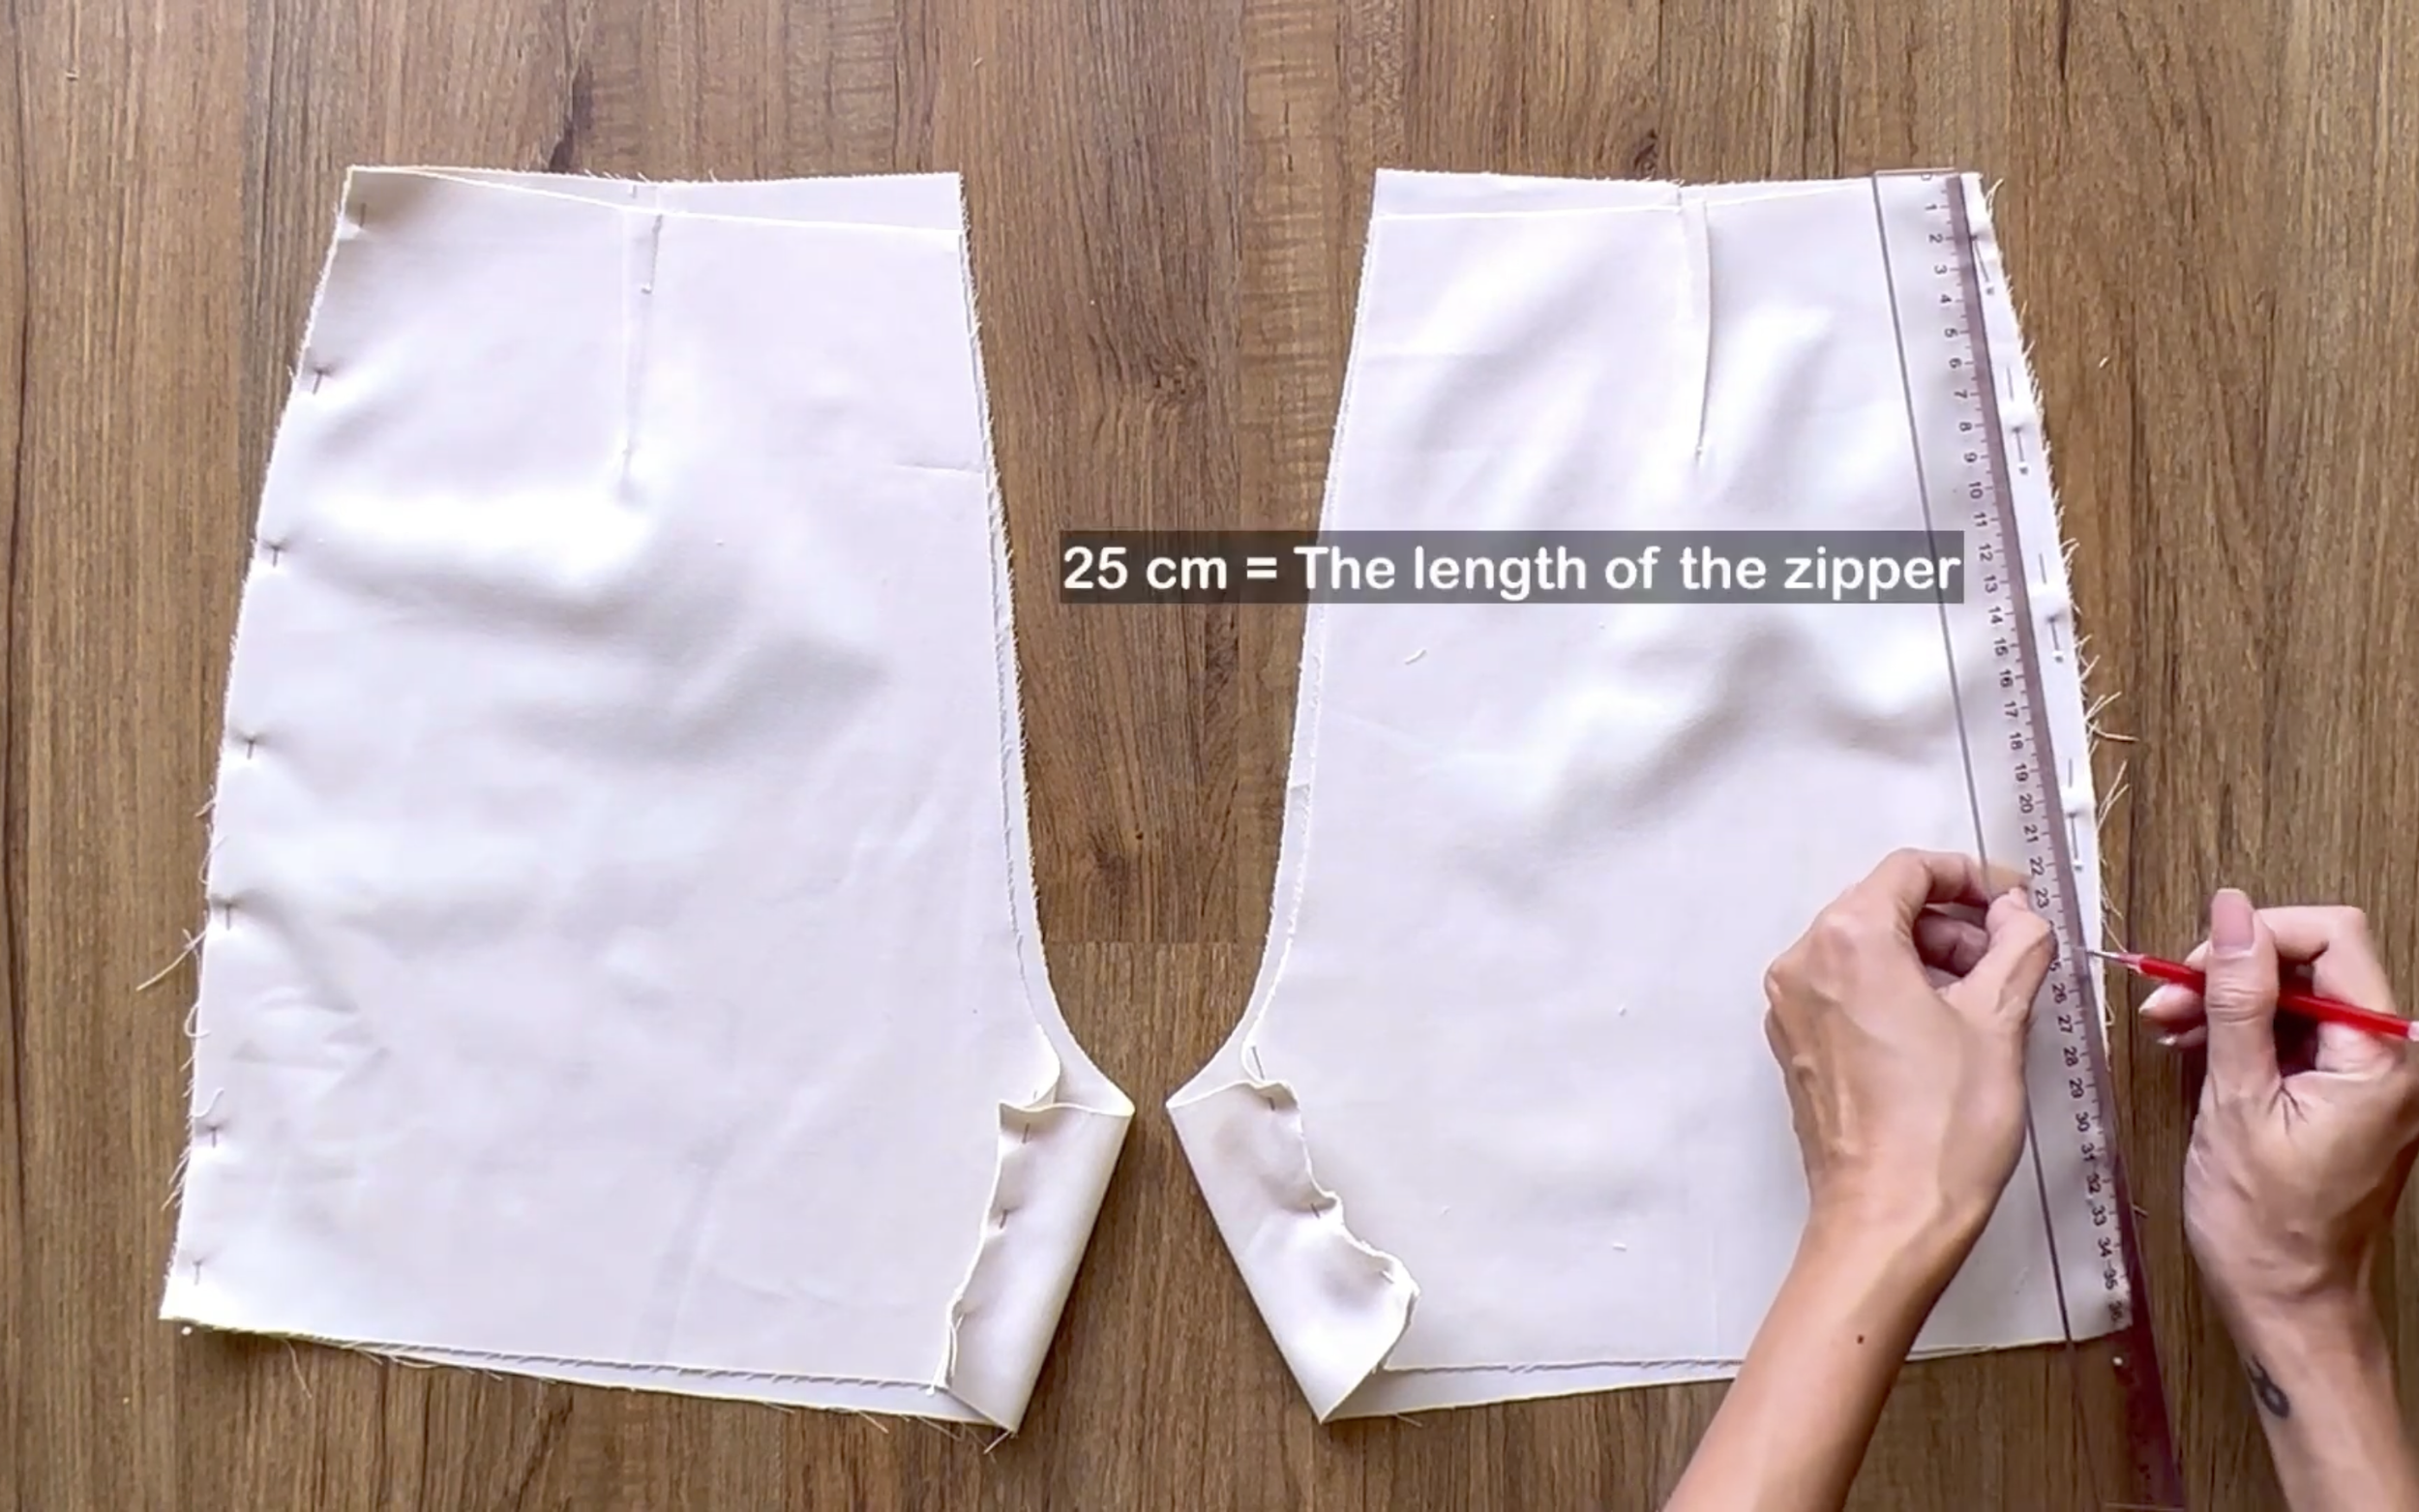
Choose one sideline to be the zipper side and mark 25 cm from the top of that sideline. This is the length of the zipper to be used.

Sew the rest of the chosen sideline and the other sideline together.
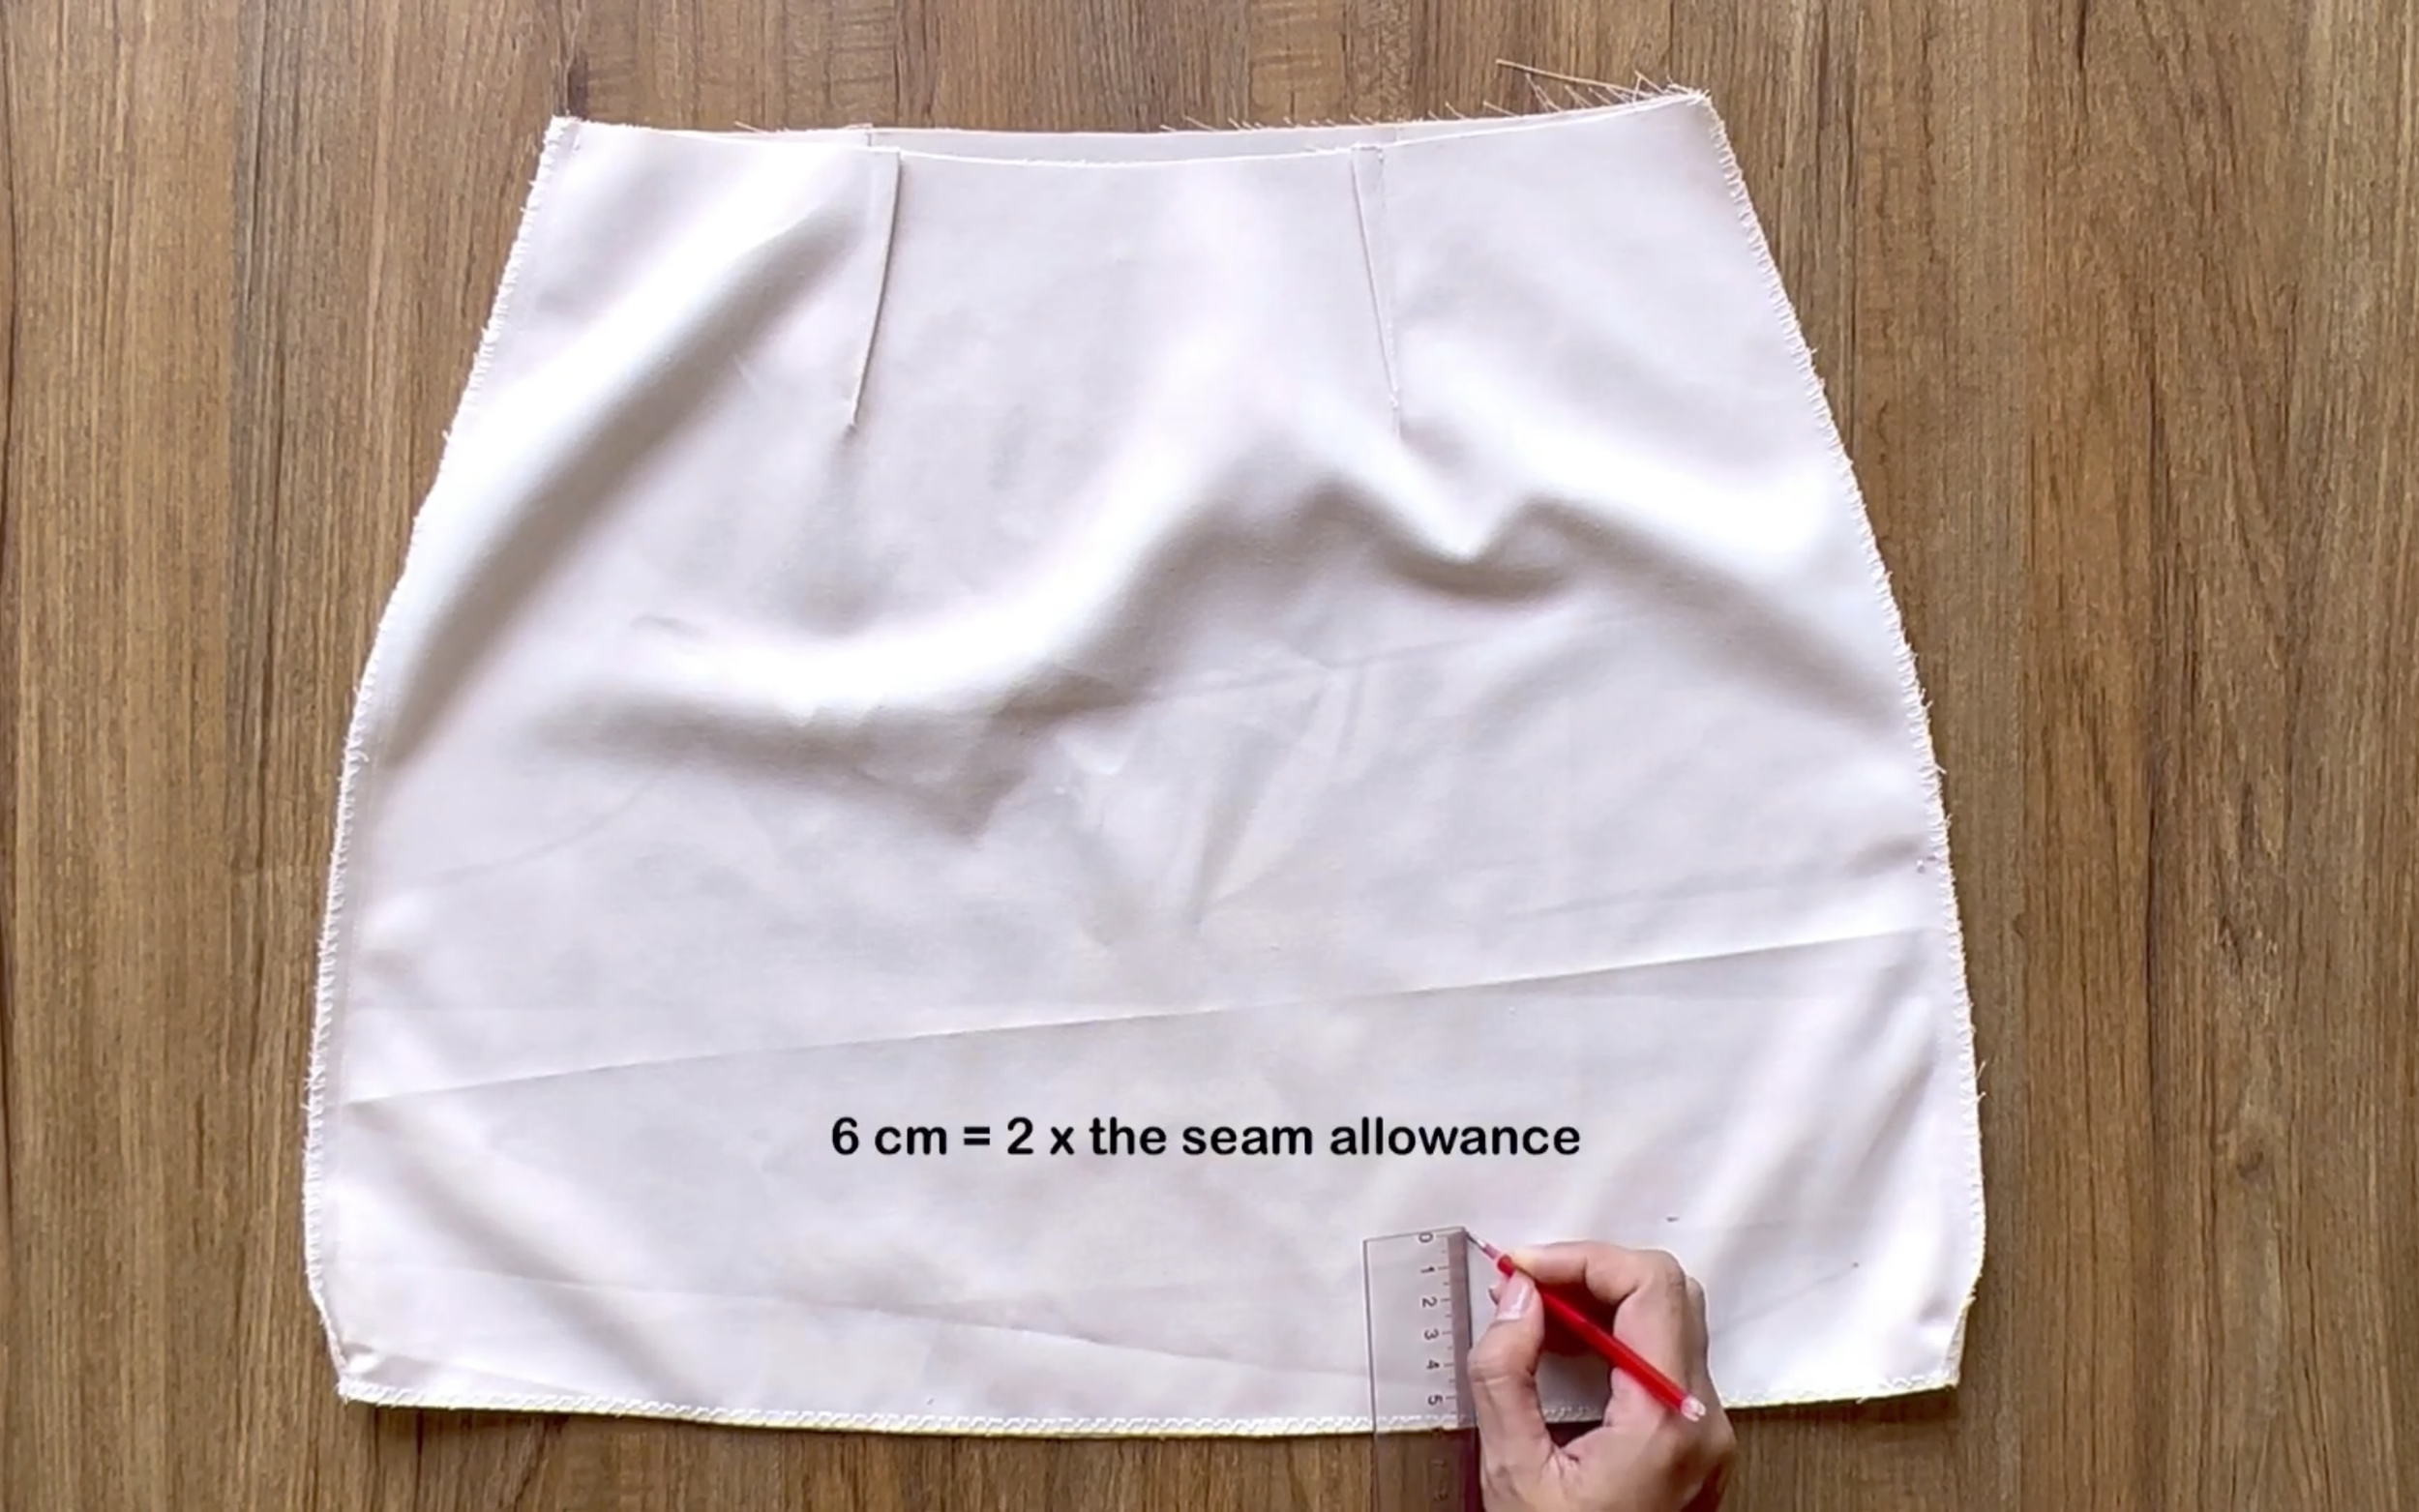
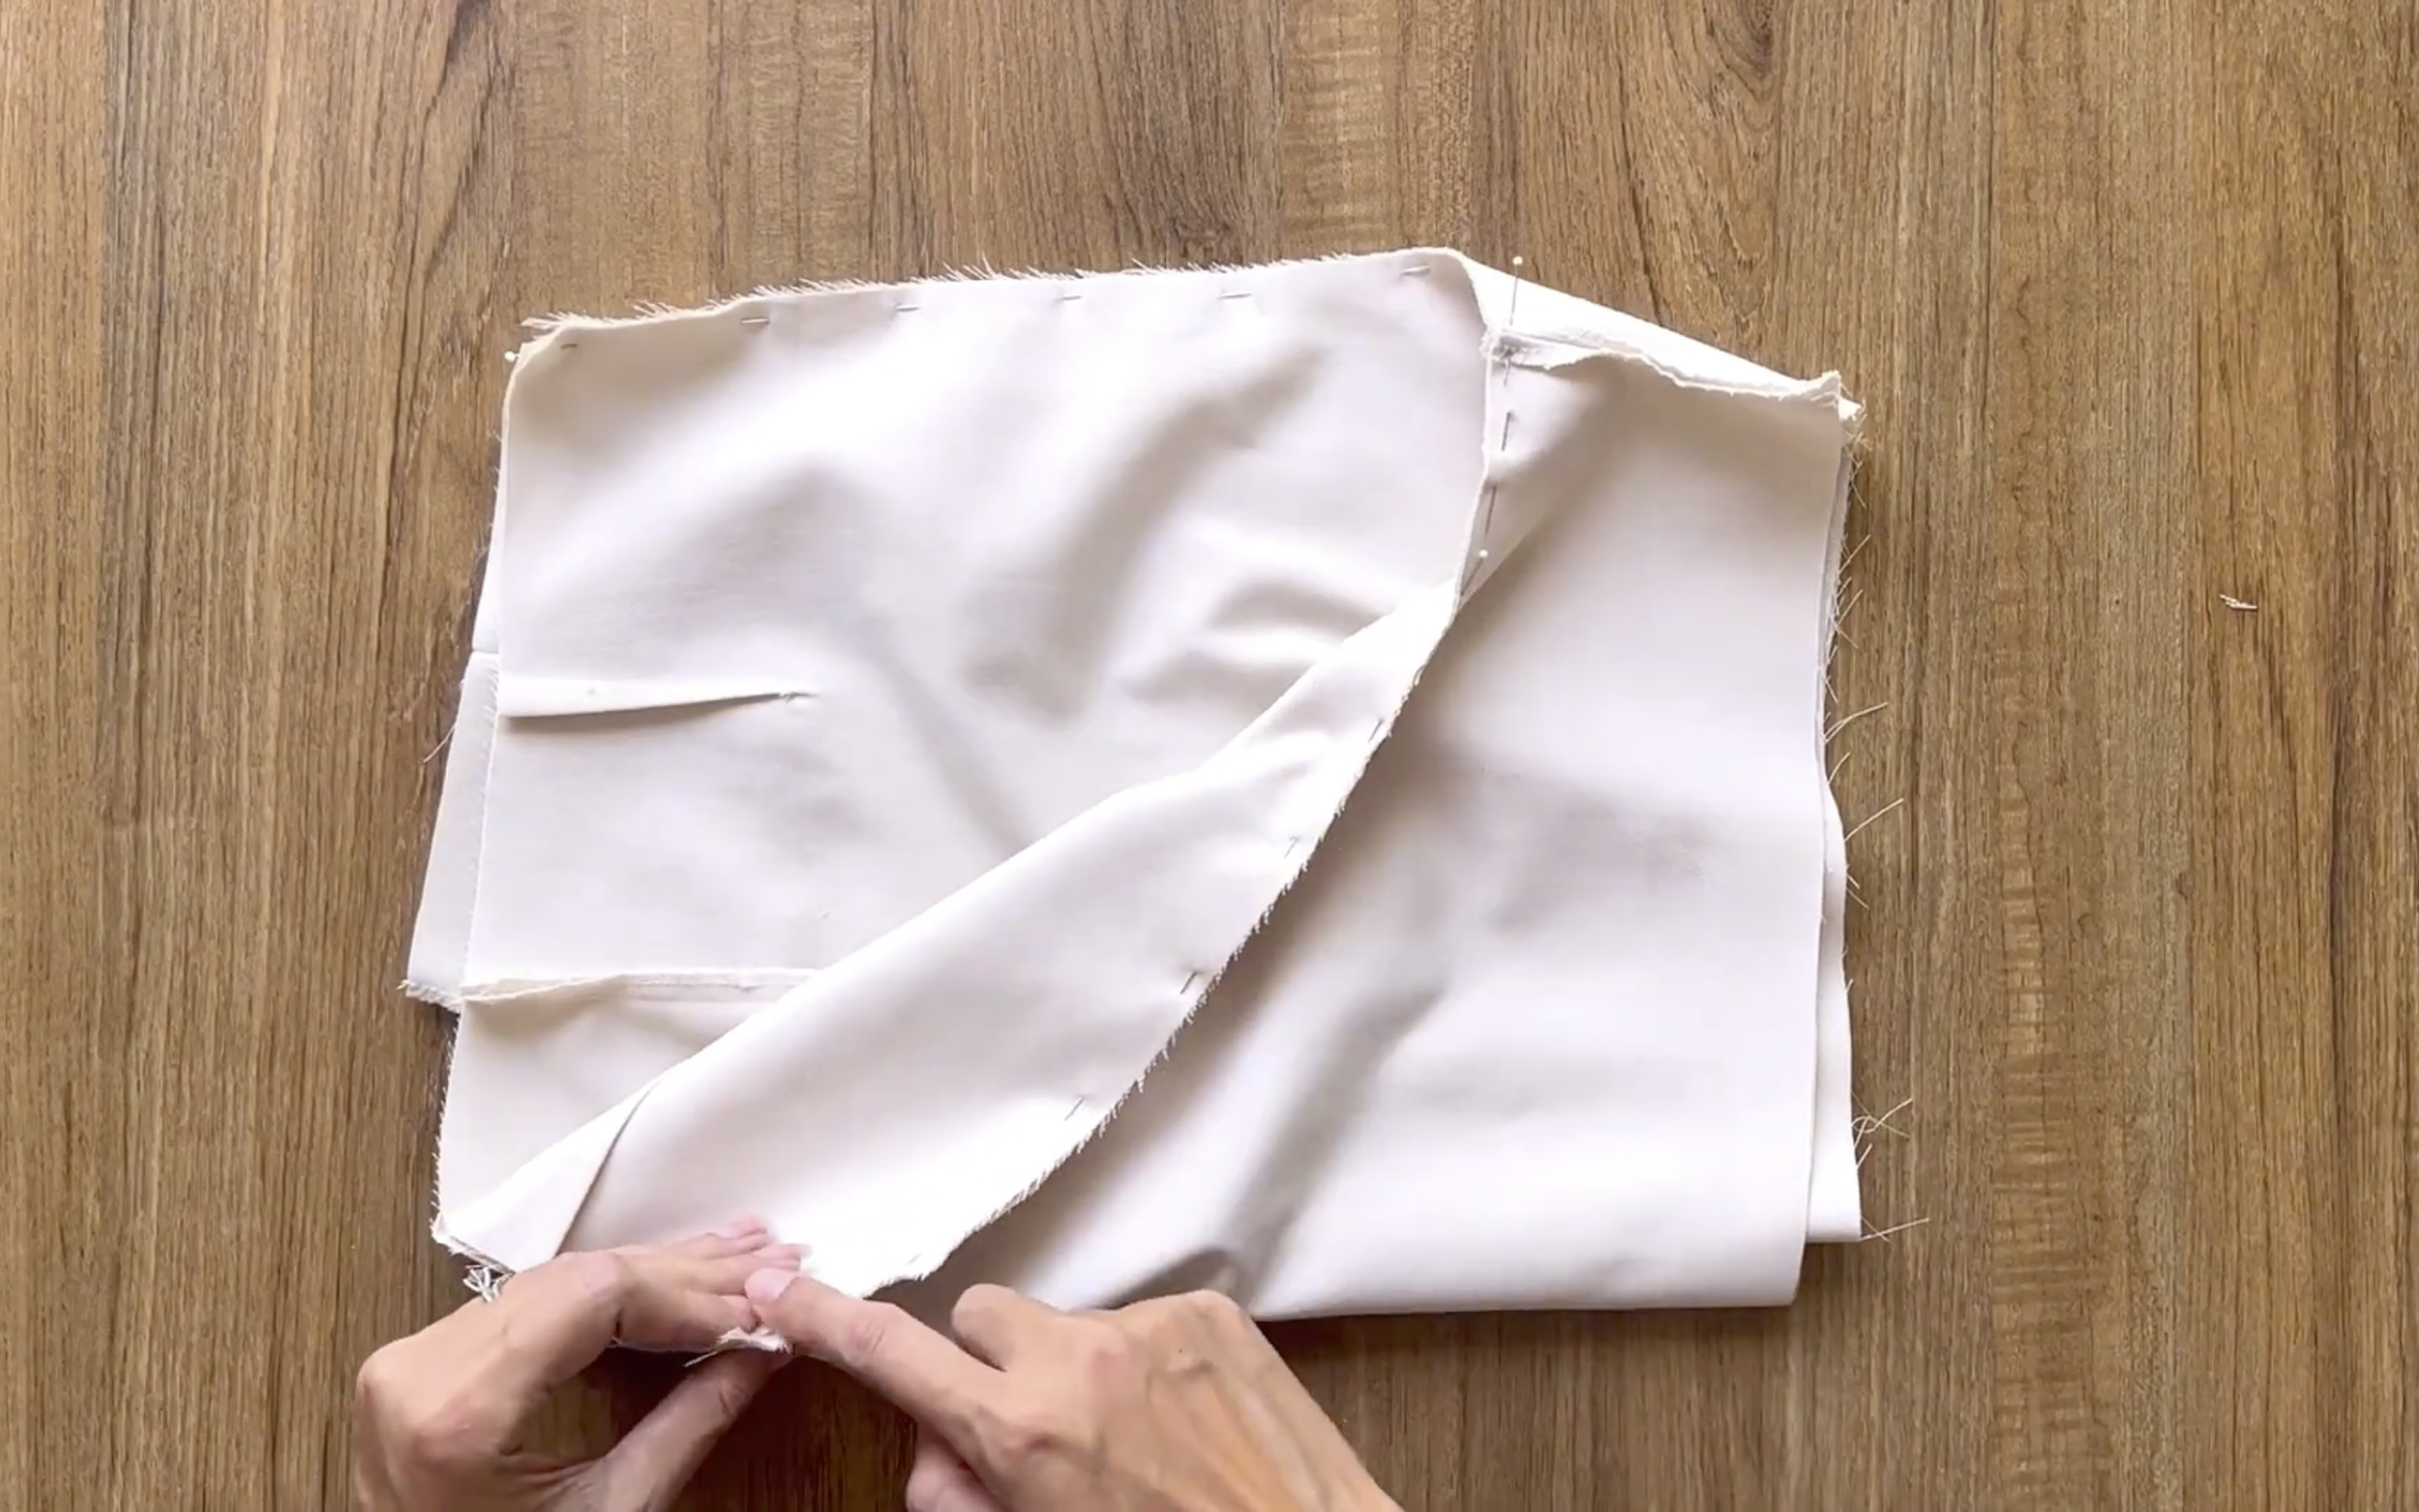
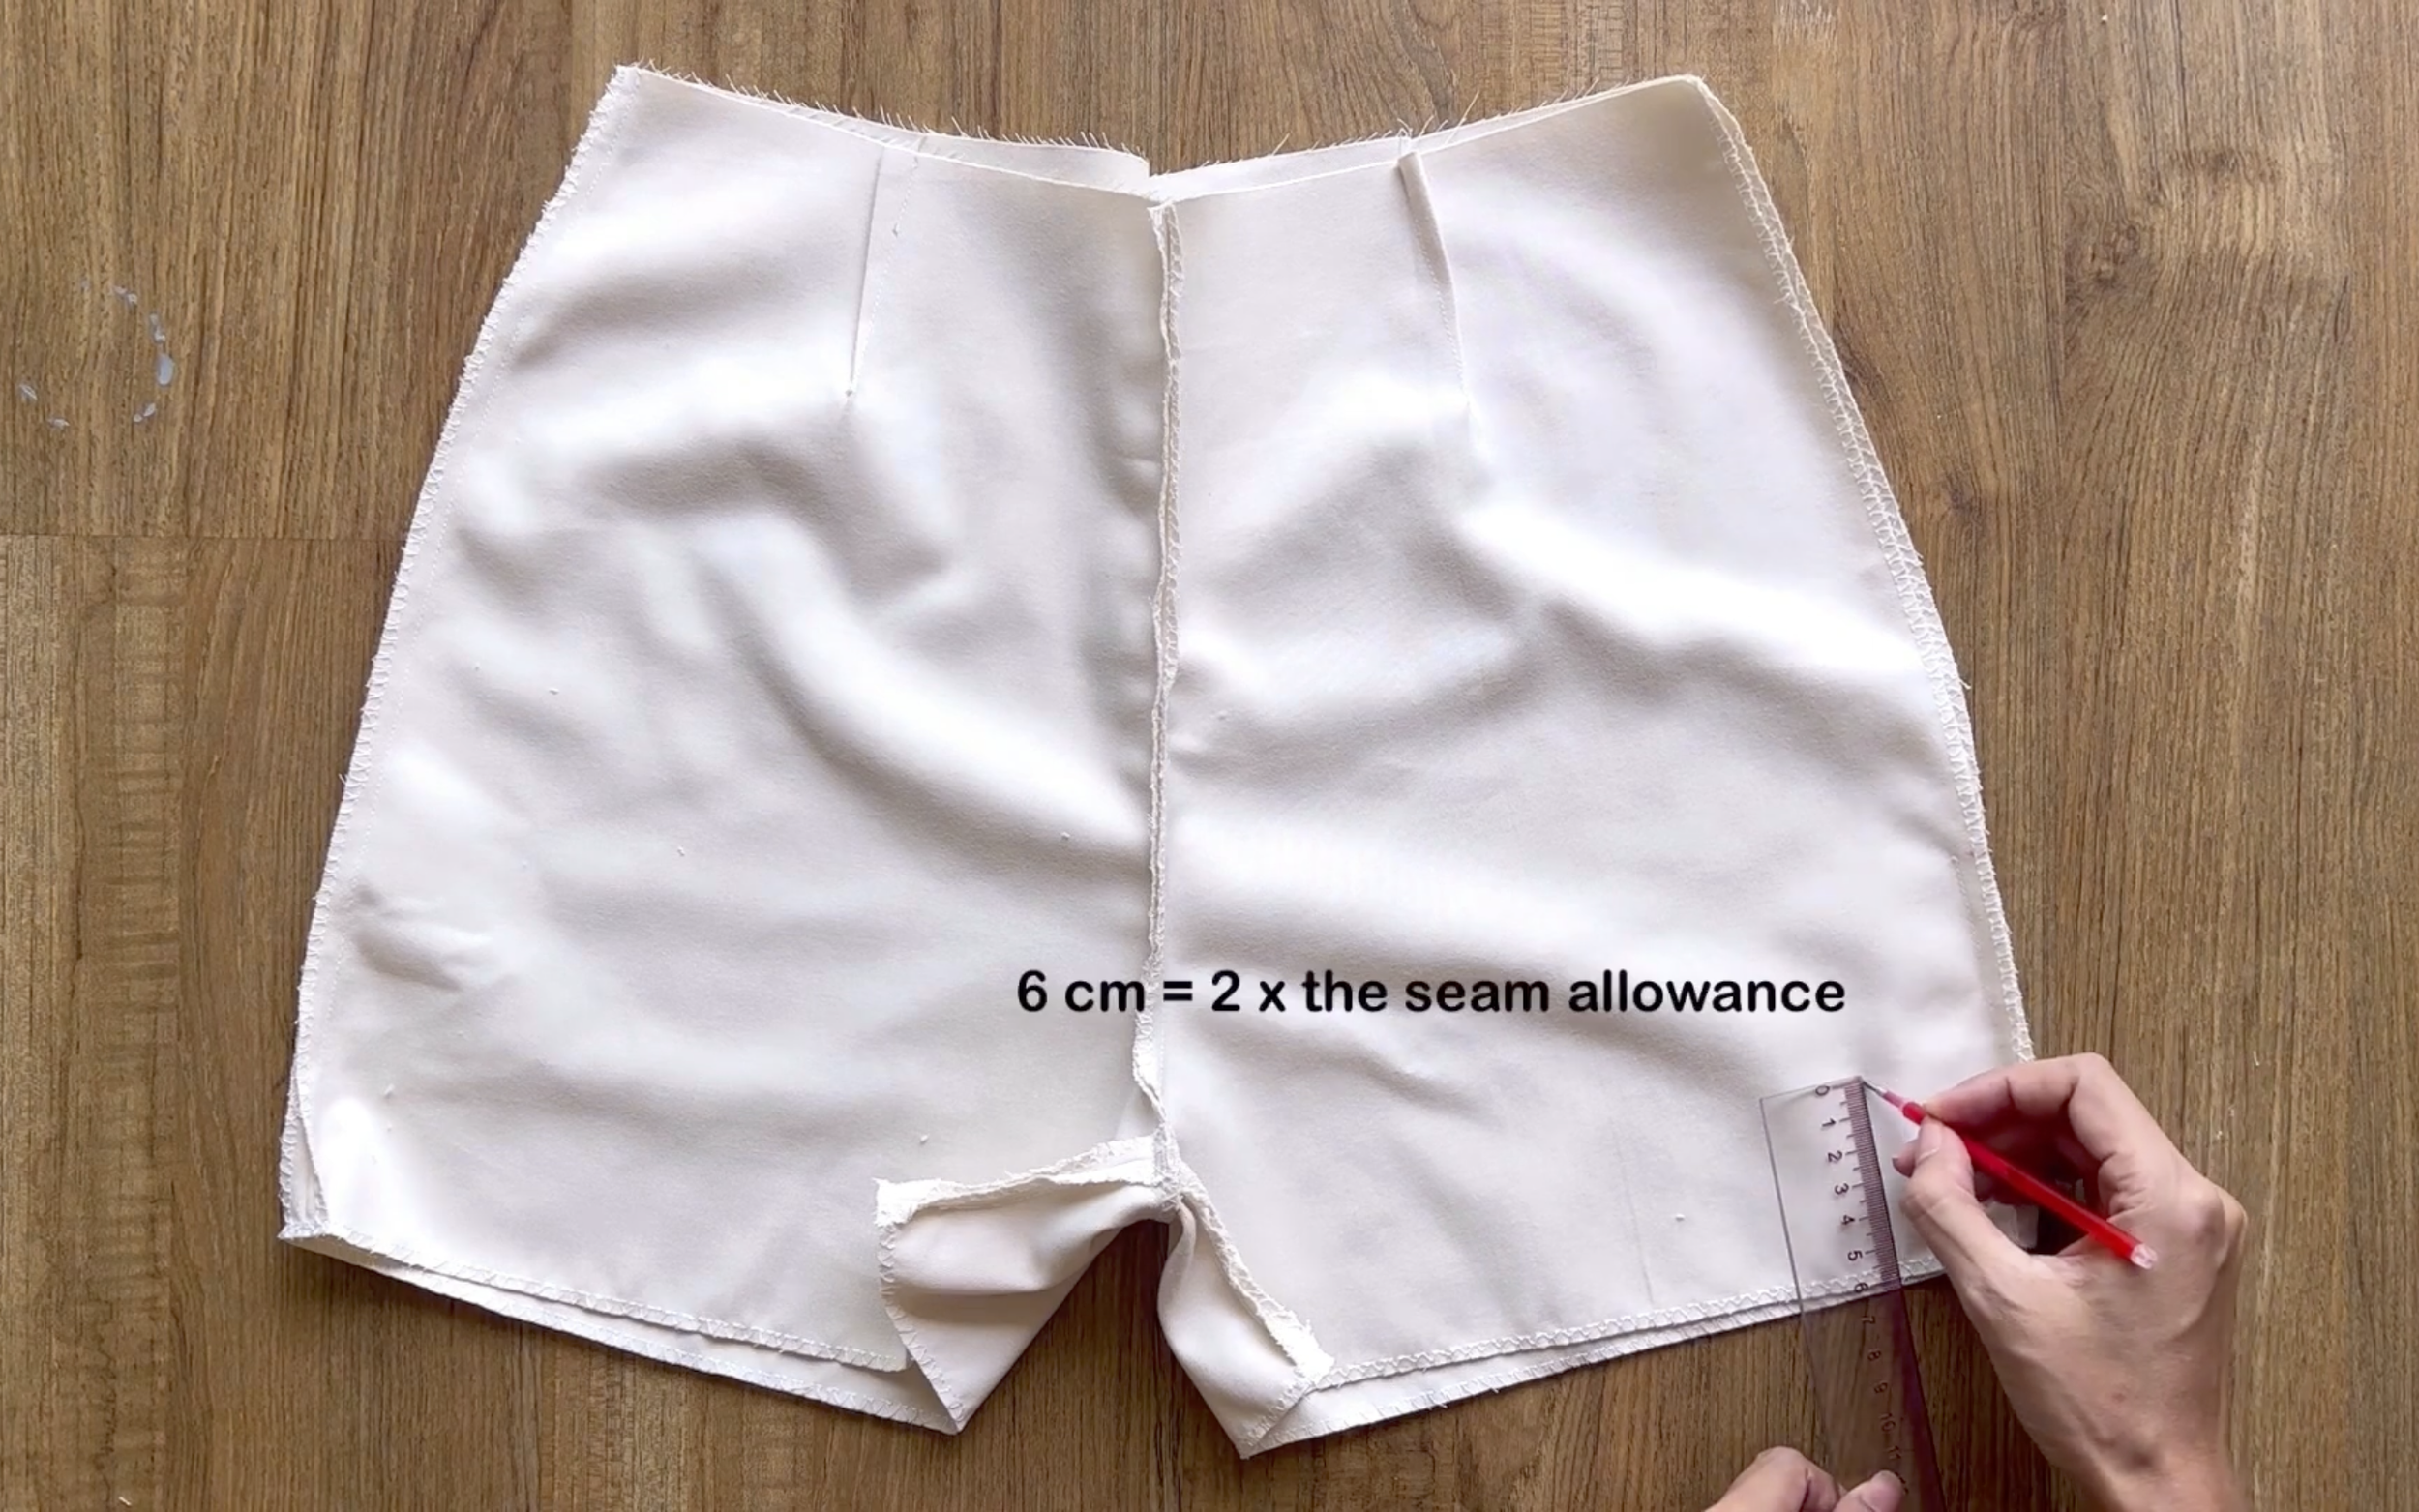
At the ending line, draw a line 6 cm above it. This is twice the seam allowance added when making the pattern.
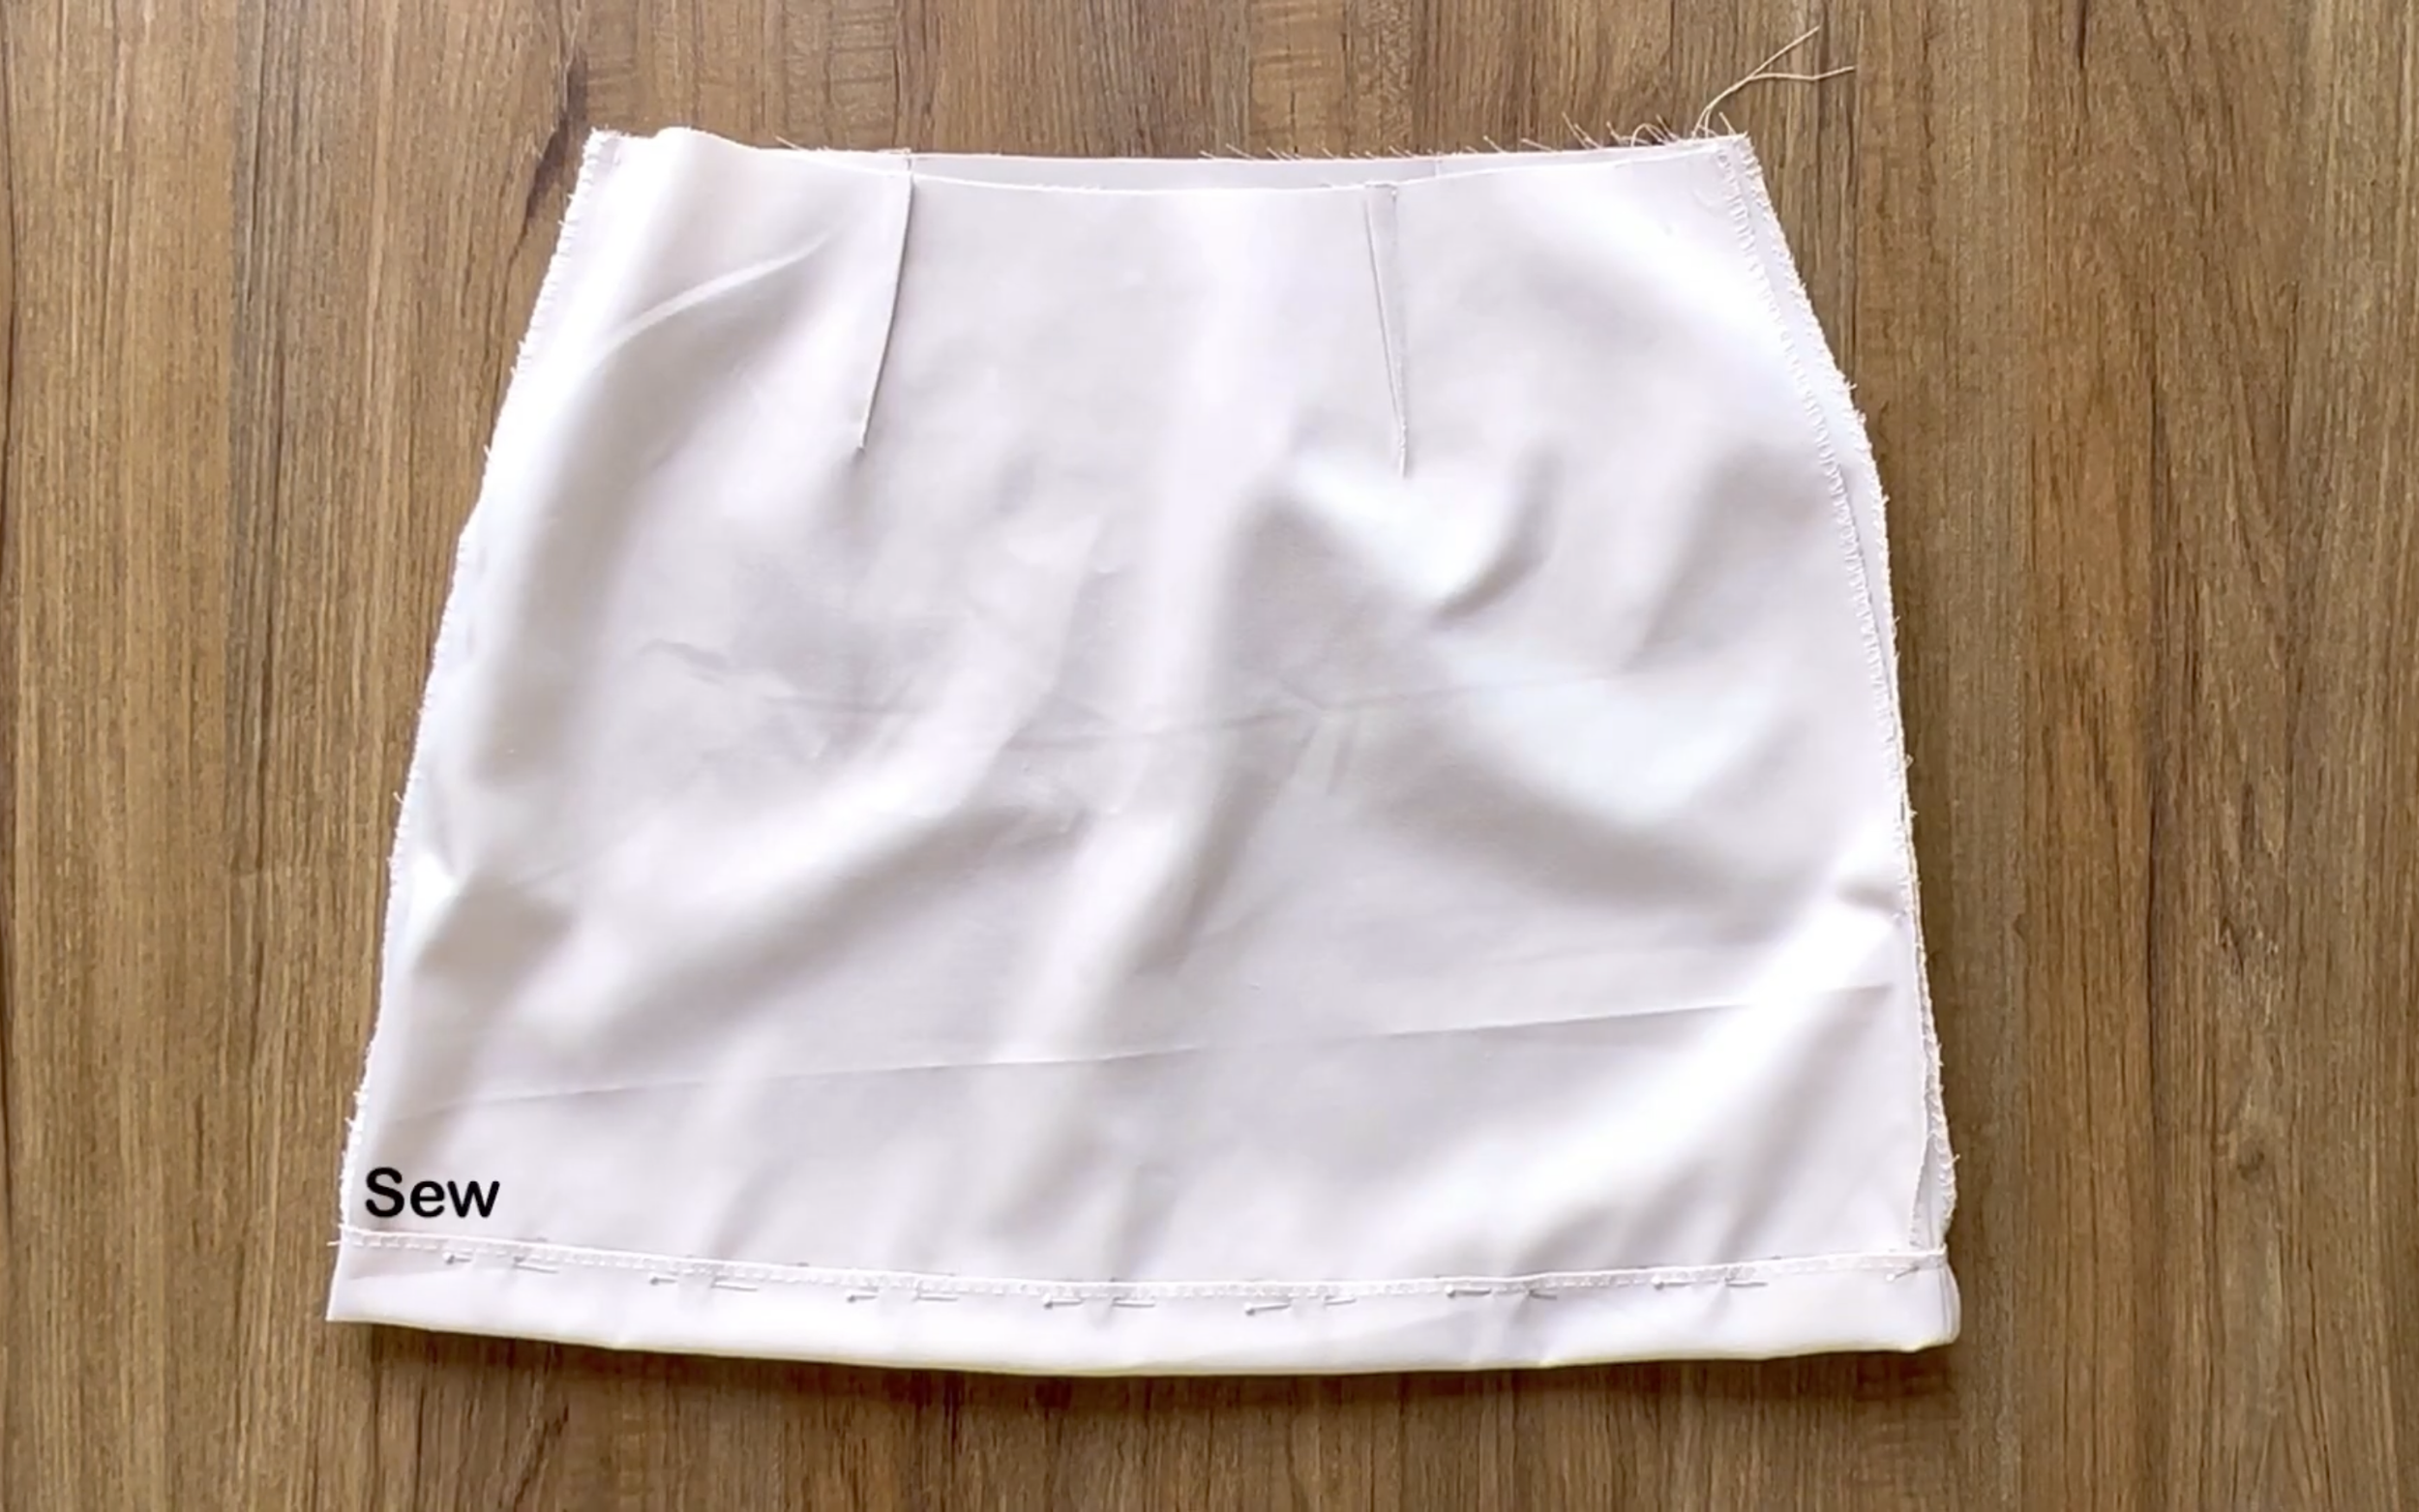
Fold the fabric end to this line and sew to finish the skirt's hem.
Add the 25 cm invisible zipper at the marked position and sew with a zipper foot.
Sew the remaining sideline below the zipper to finish the skirt.
THE SHORTS PART

Copy the darts to the front and back of the shorts after cutting, then sew and finish them.
Connect the front and back pieces of the shorts together at the sidelines and inside leg lines.
Before sewing, mark the position for the zipper on one sideline, ensuring the zipper side matches the skirt.
Sew the remaining seams.
Connect the crotch line of the shorts by sewing the pieces together.
At the end of the shorts, draw a line 6 cm above the ending line.
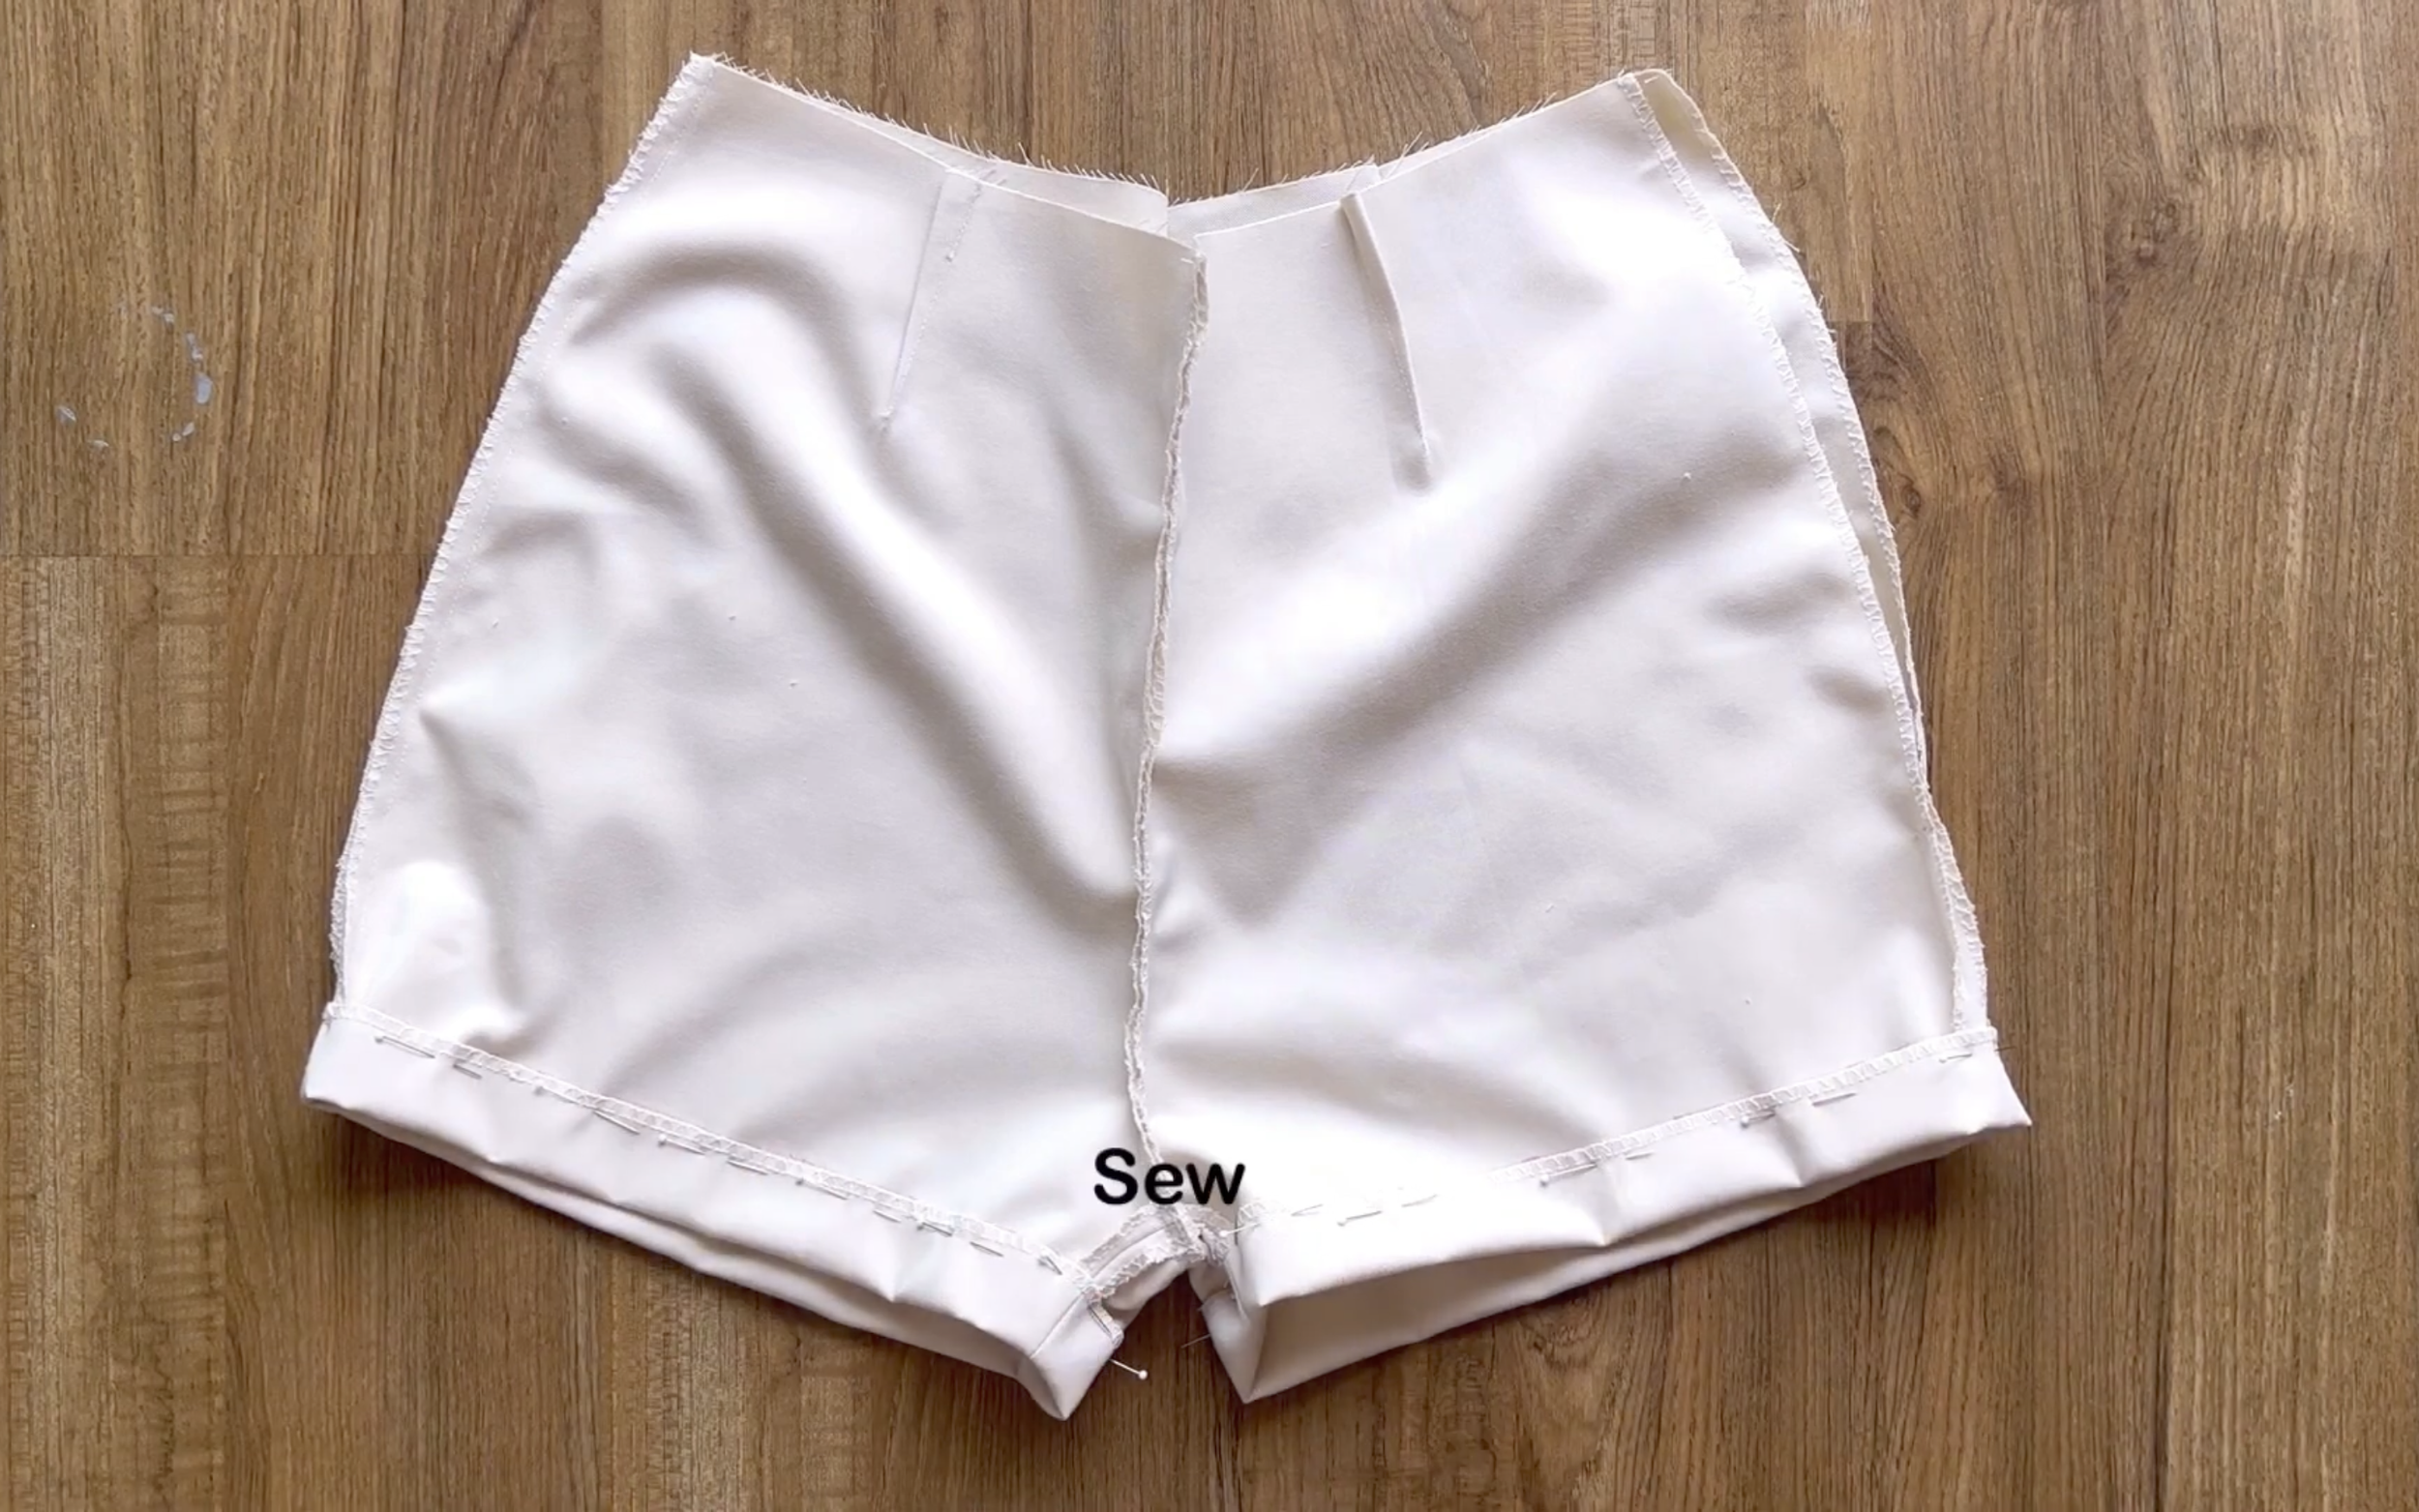
Then fold the fabric to this line, and sew to finish the hem of the shorts.
CONNECT THE SKIRT AND THE SHORTS
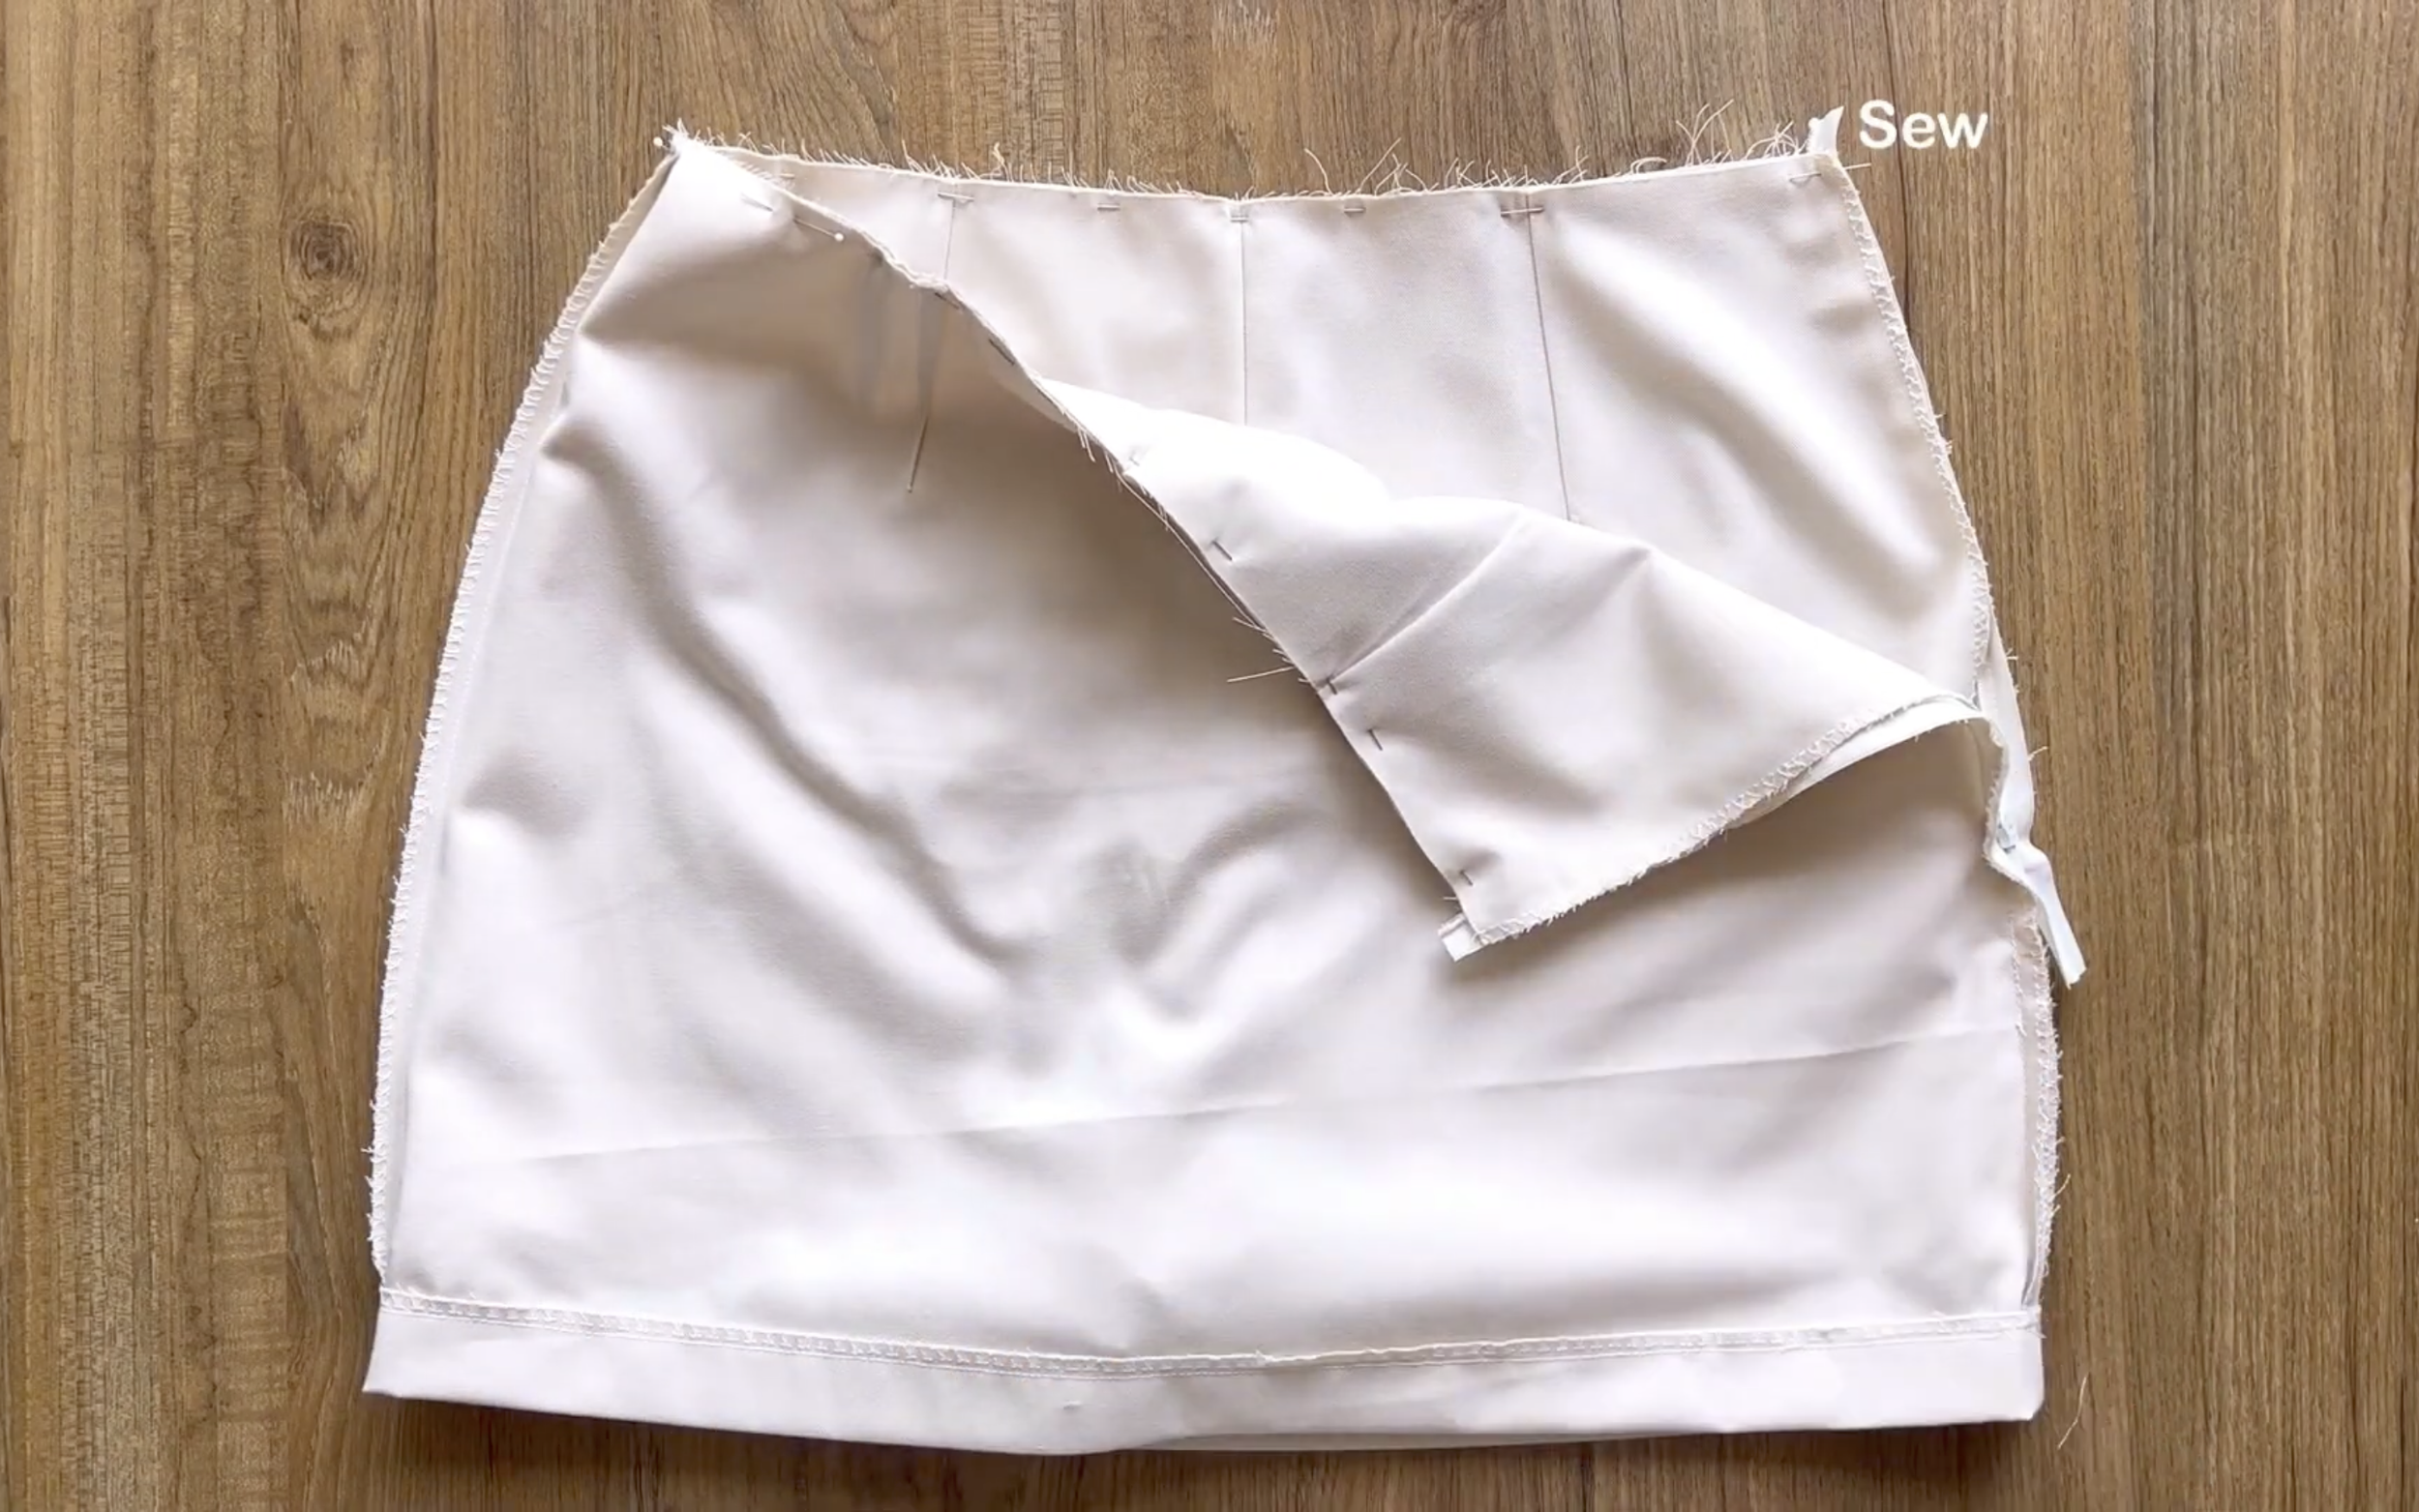
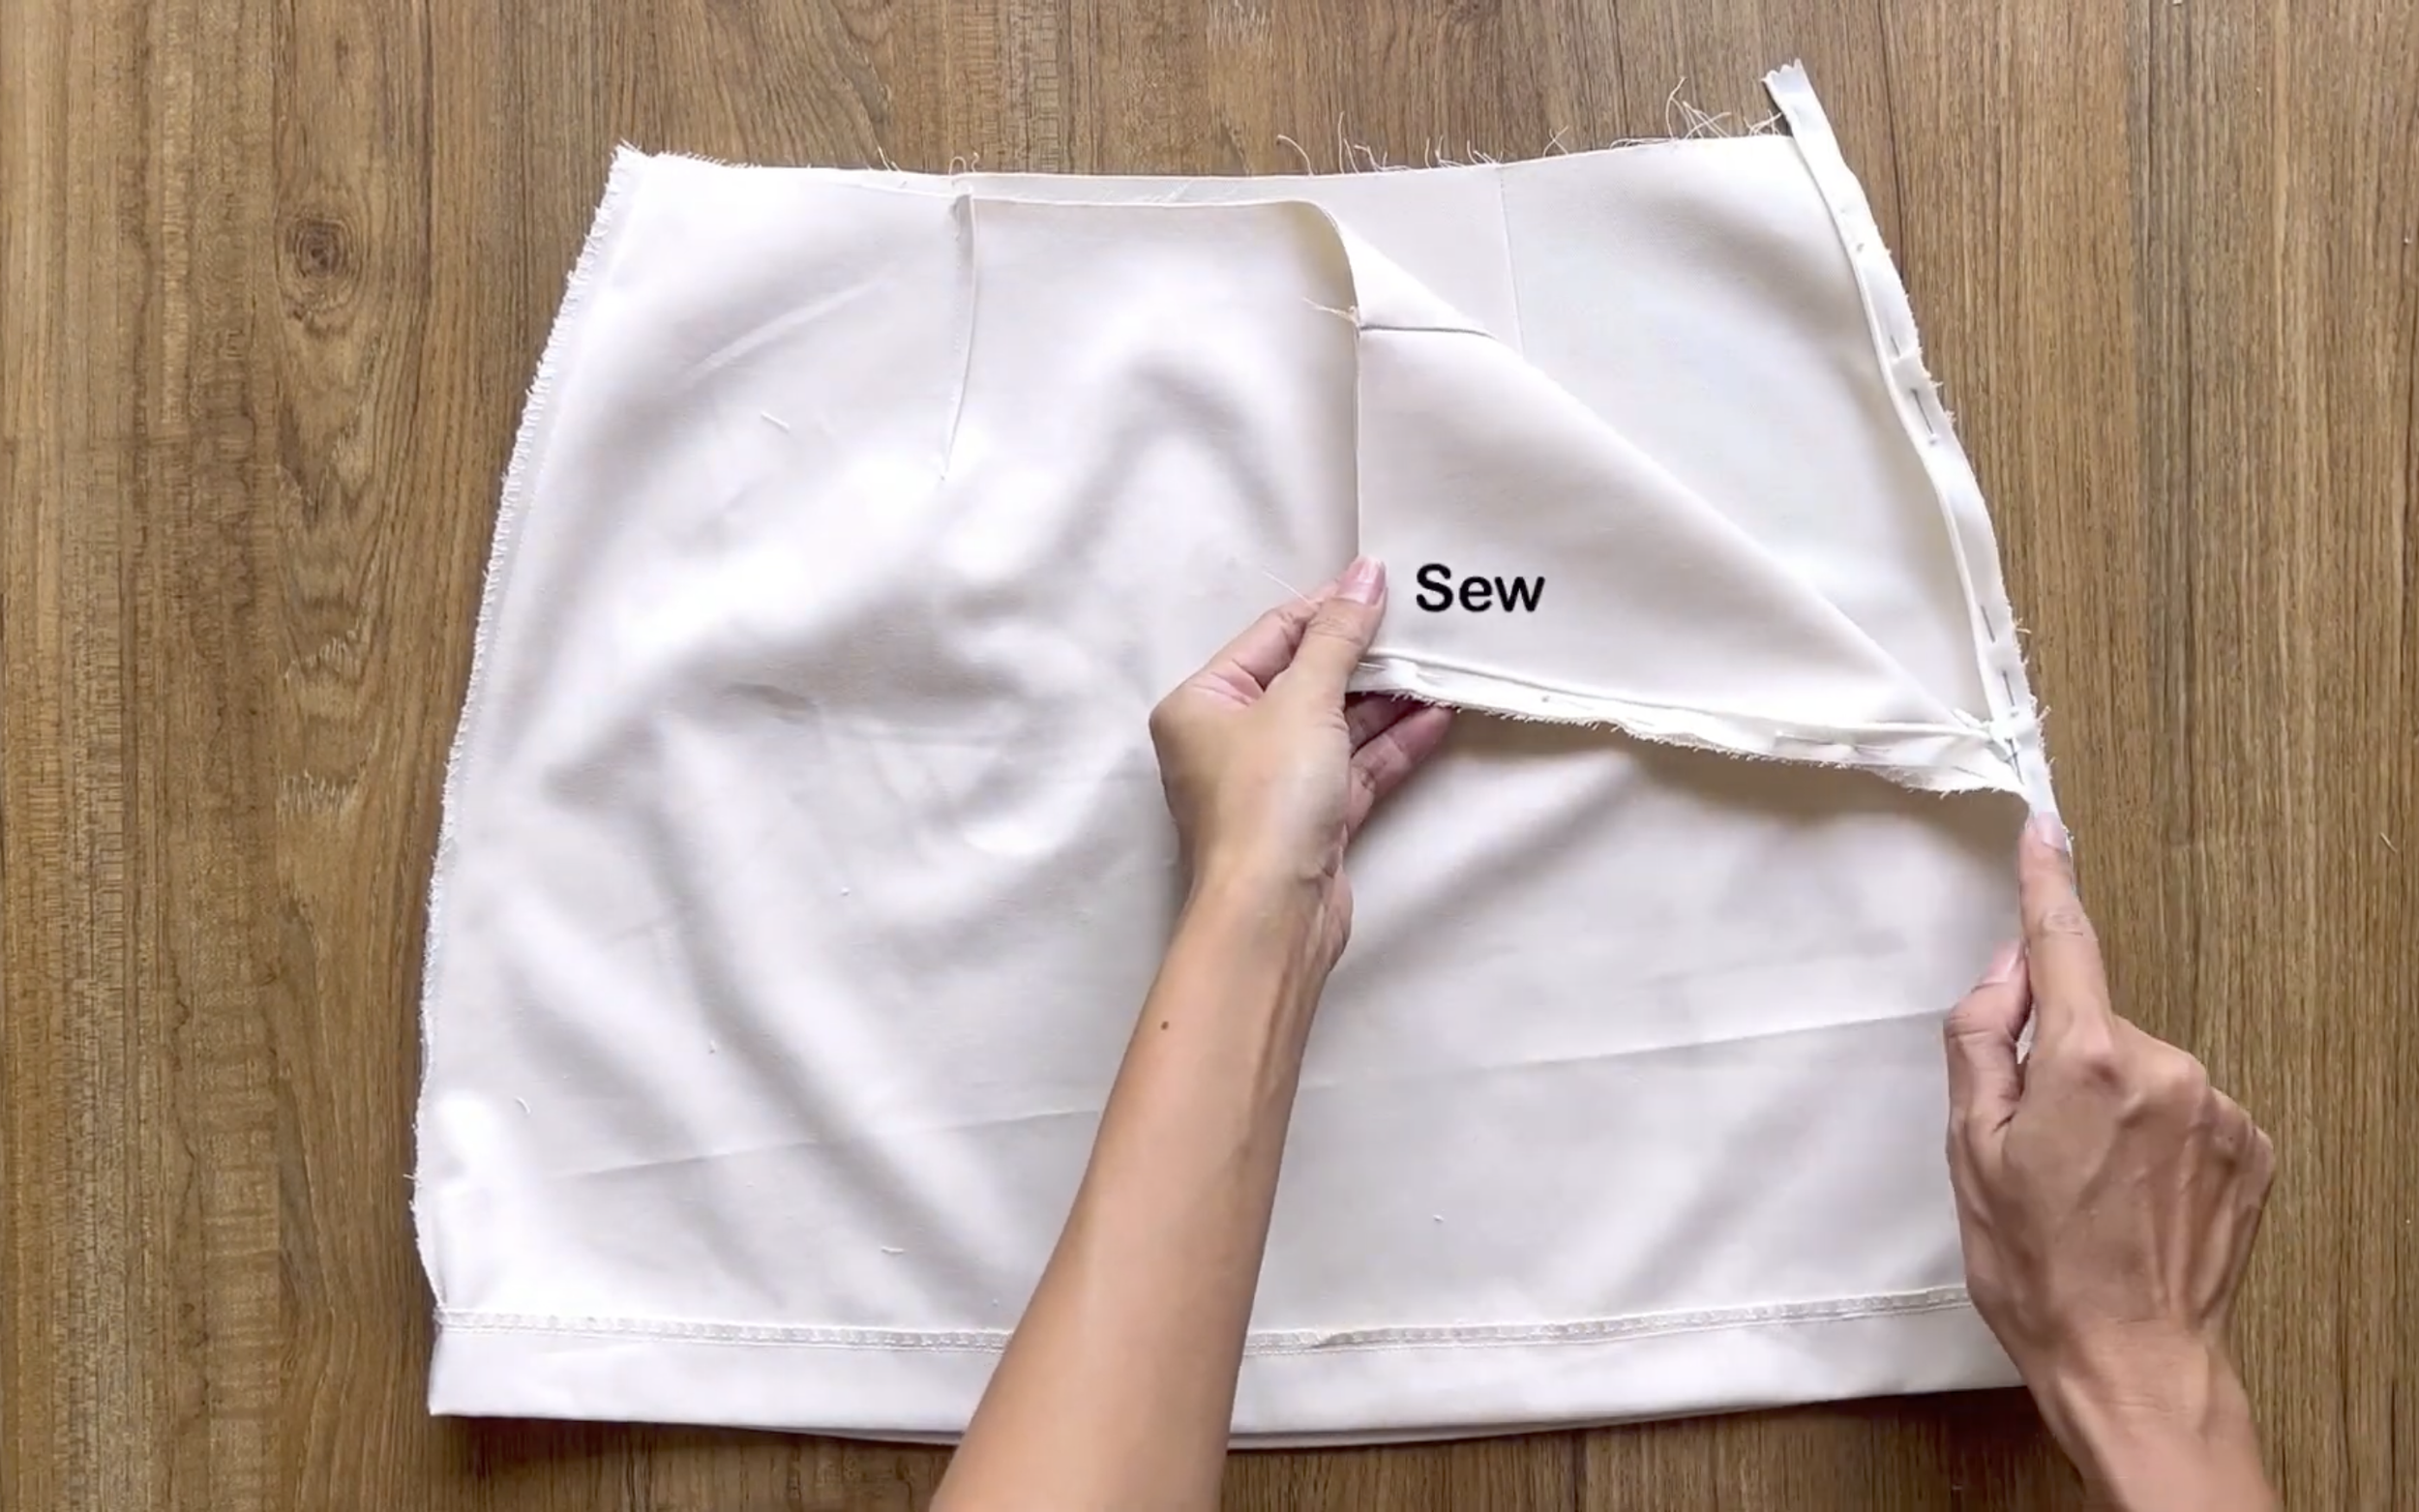
Now, connect the shorts to the skirt at the waistline, ensuring the zipper areas align.
After sewing, connect the zipper area of the shorts to the skirt.
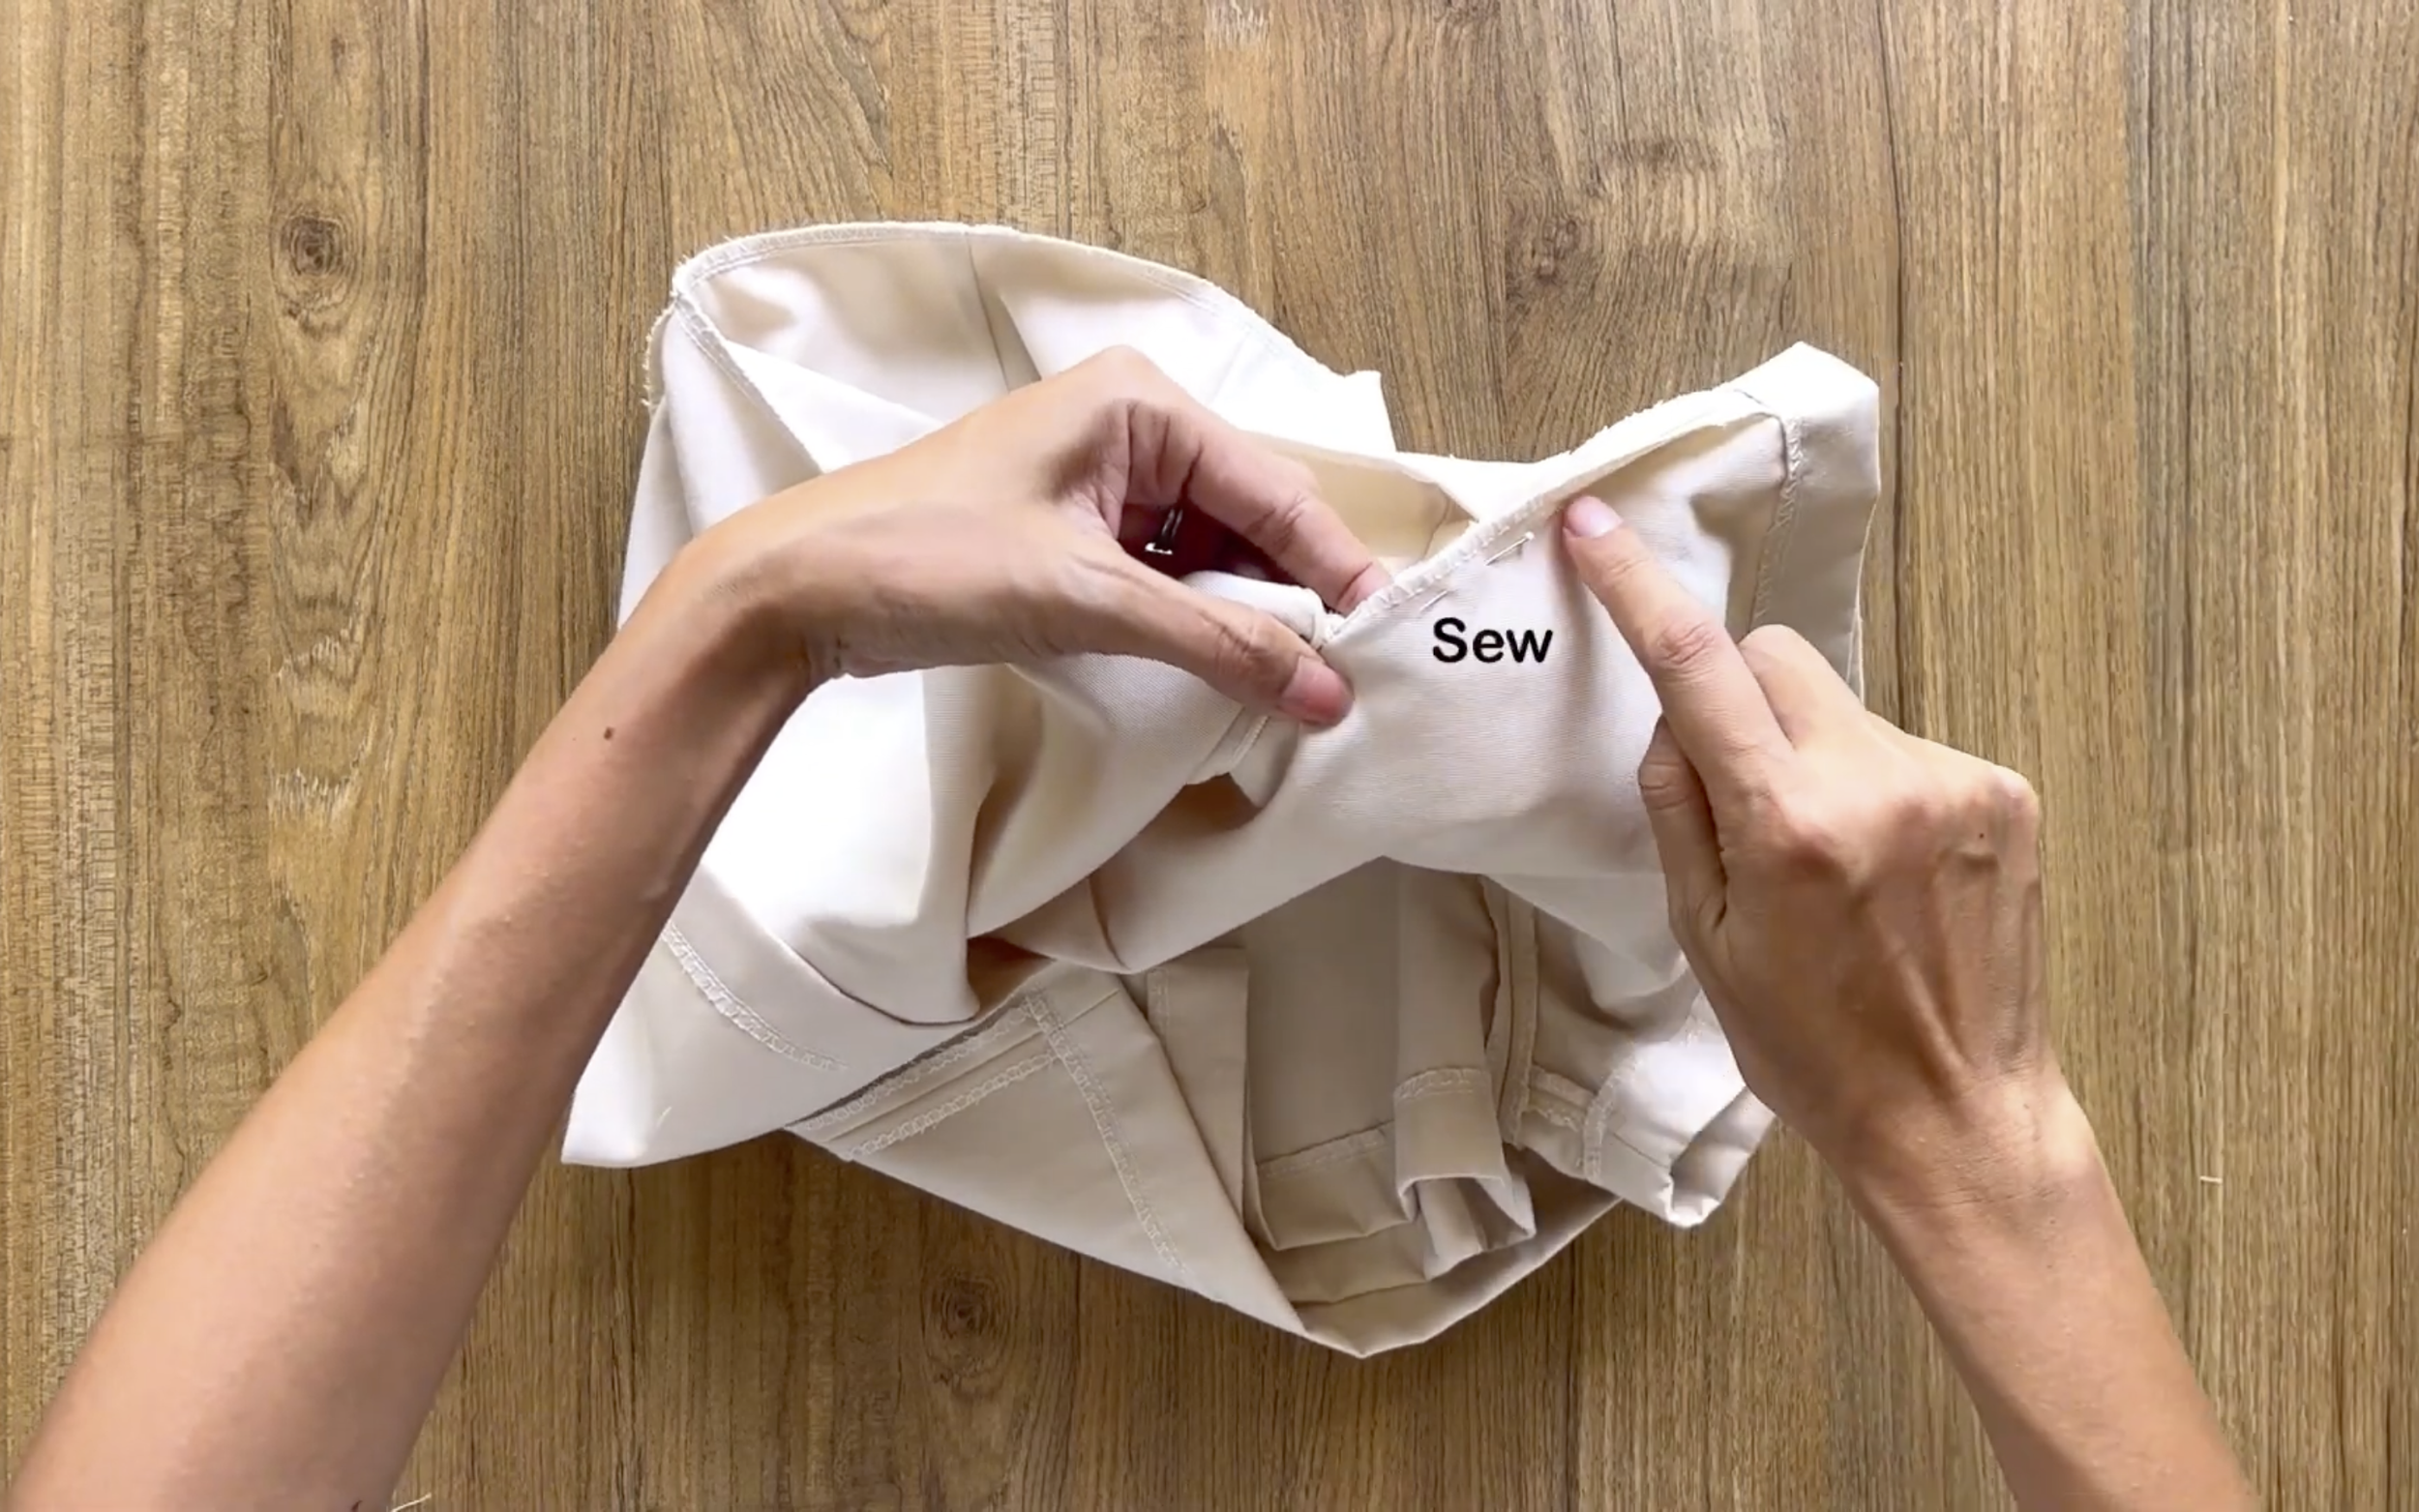
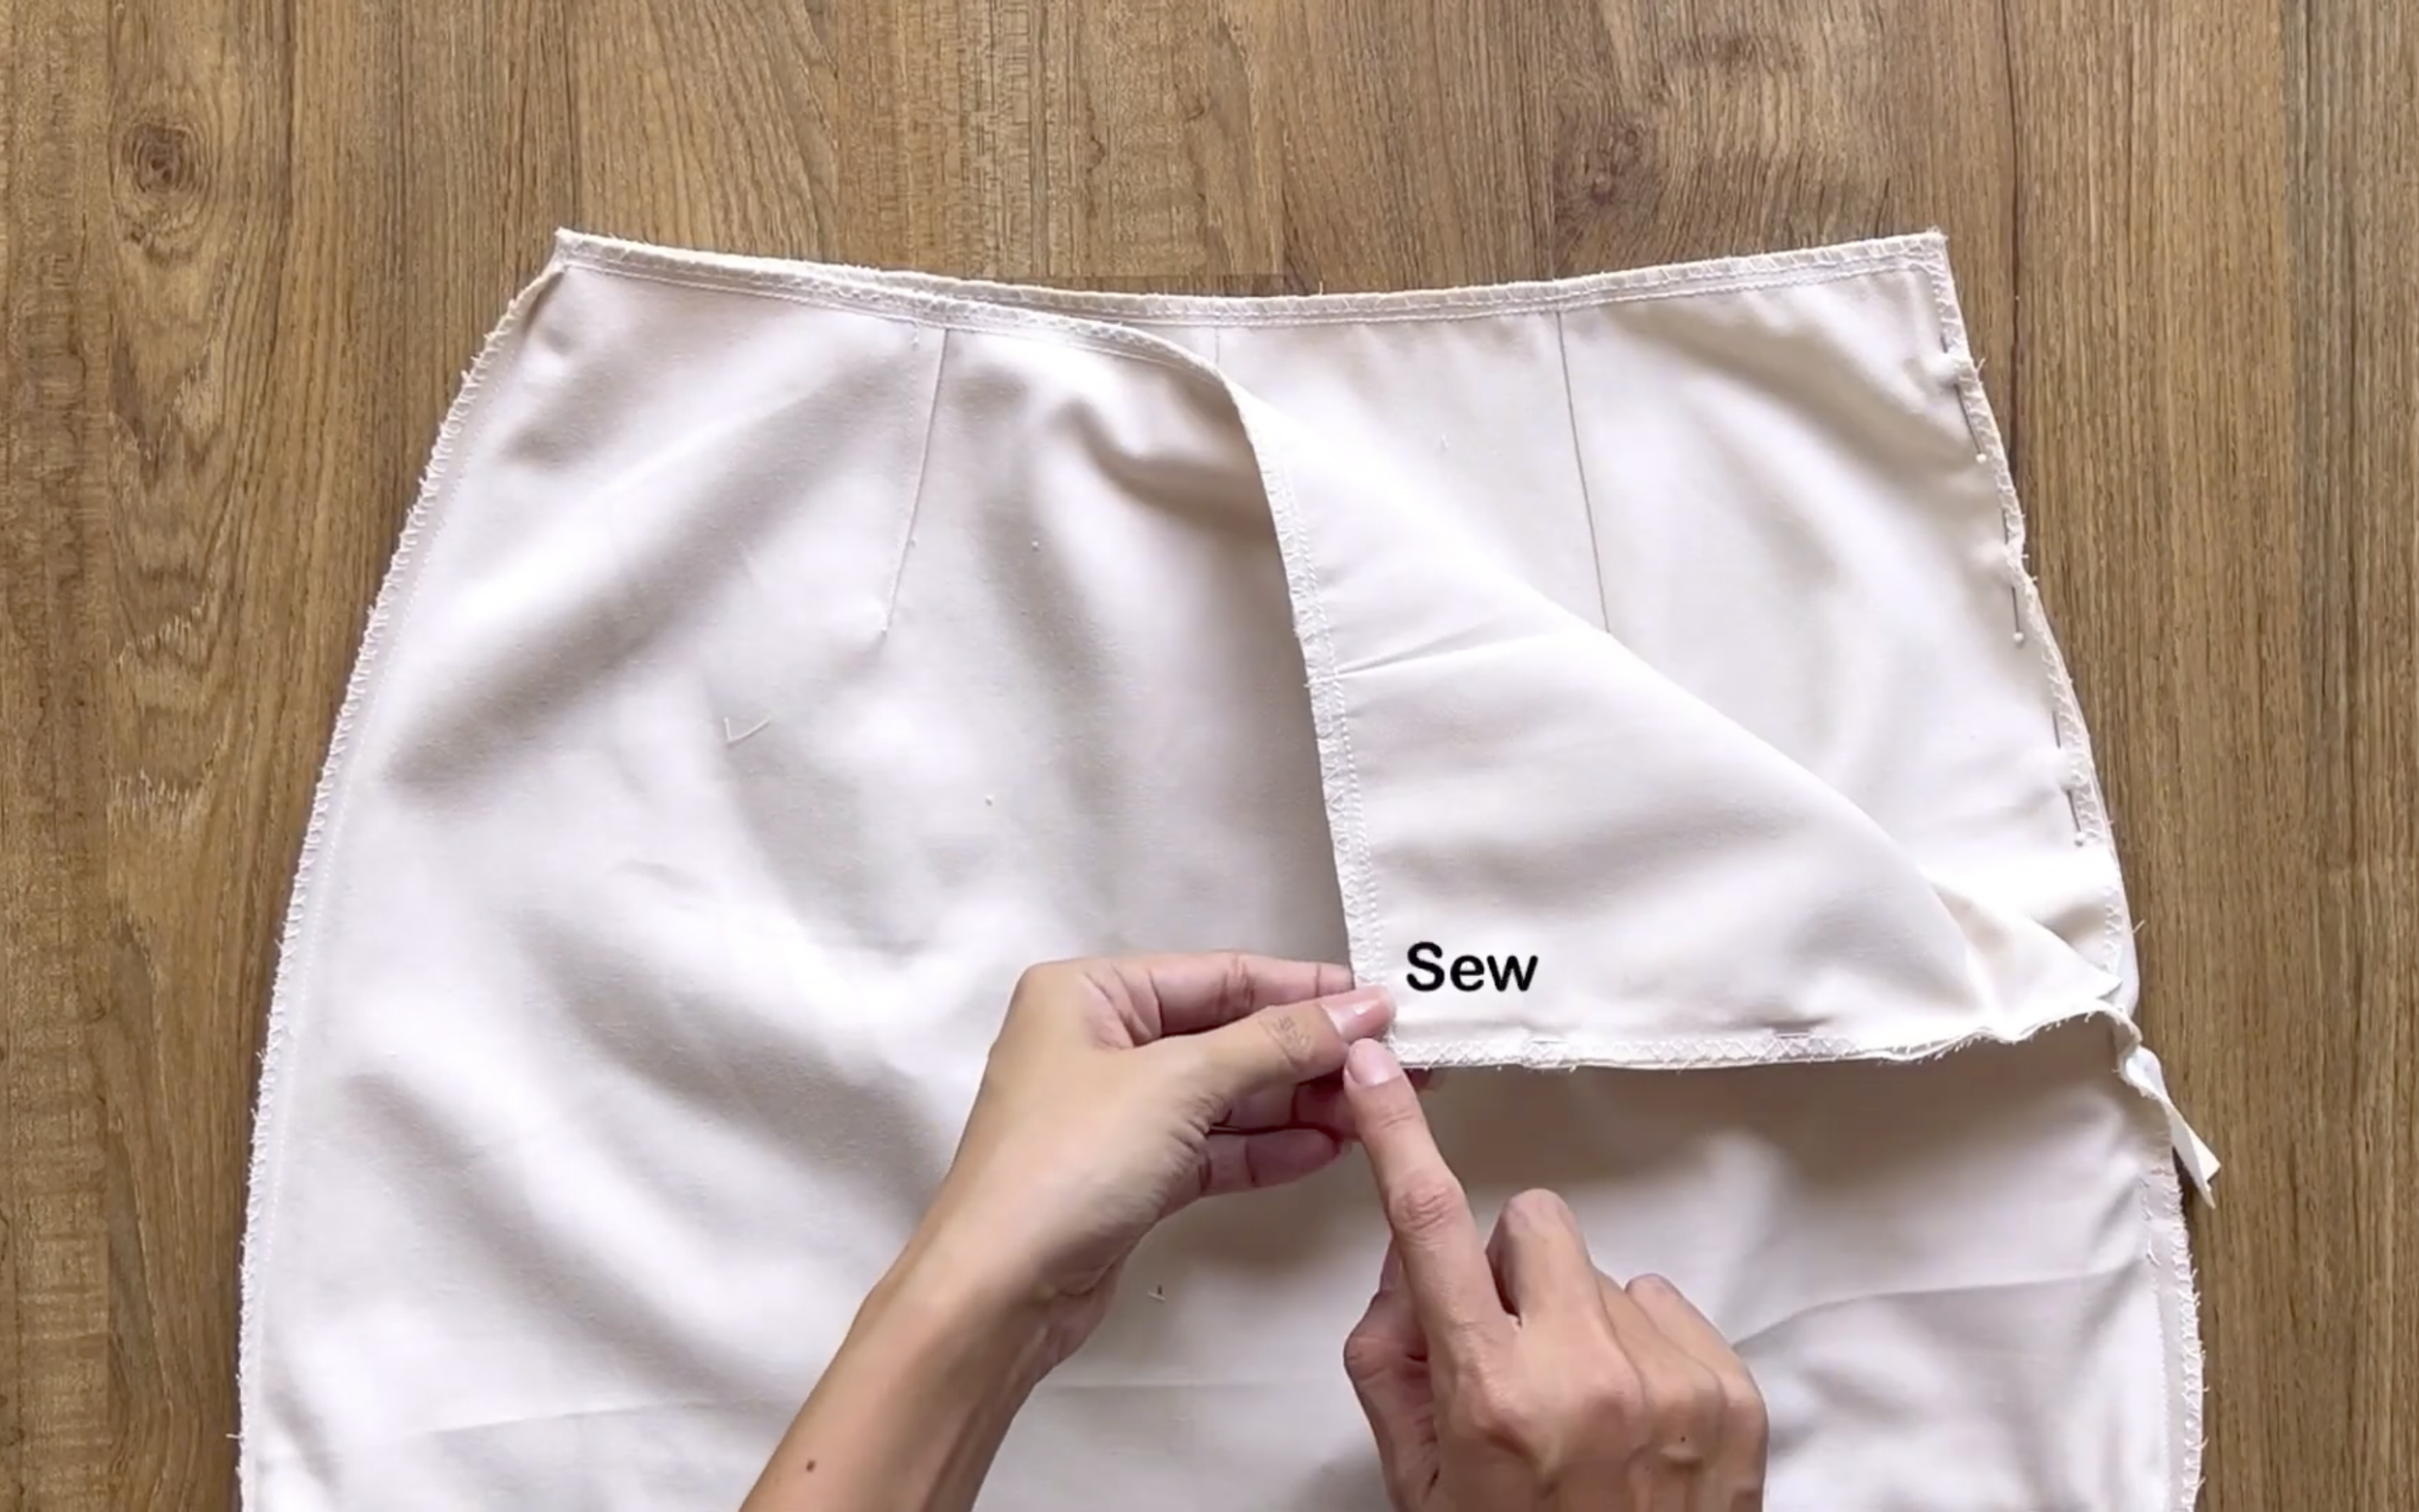
And finish the sideline of the shorts under the zipper.
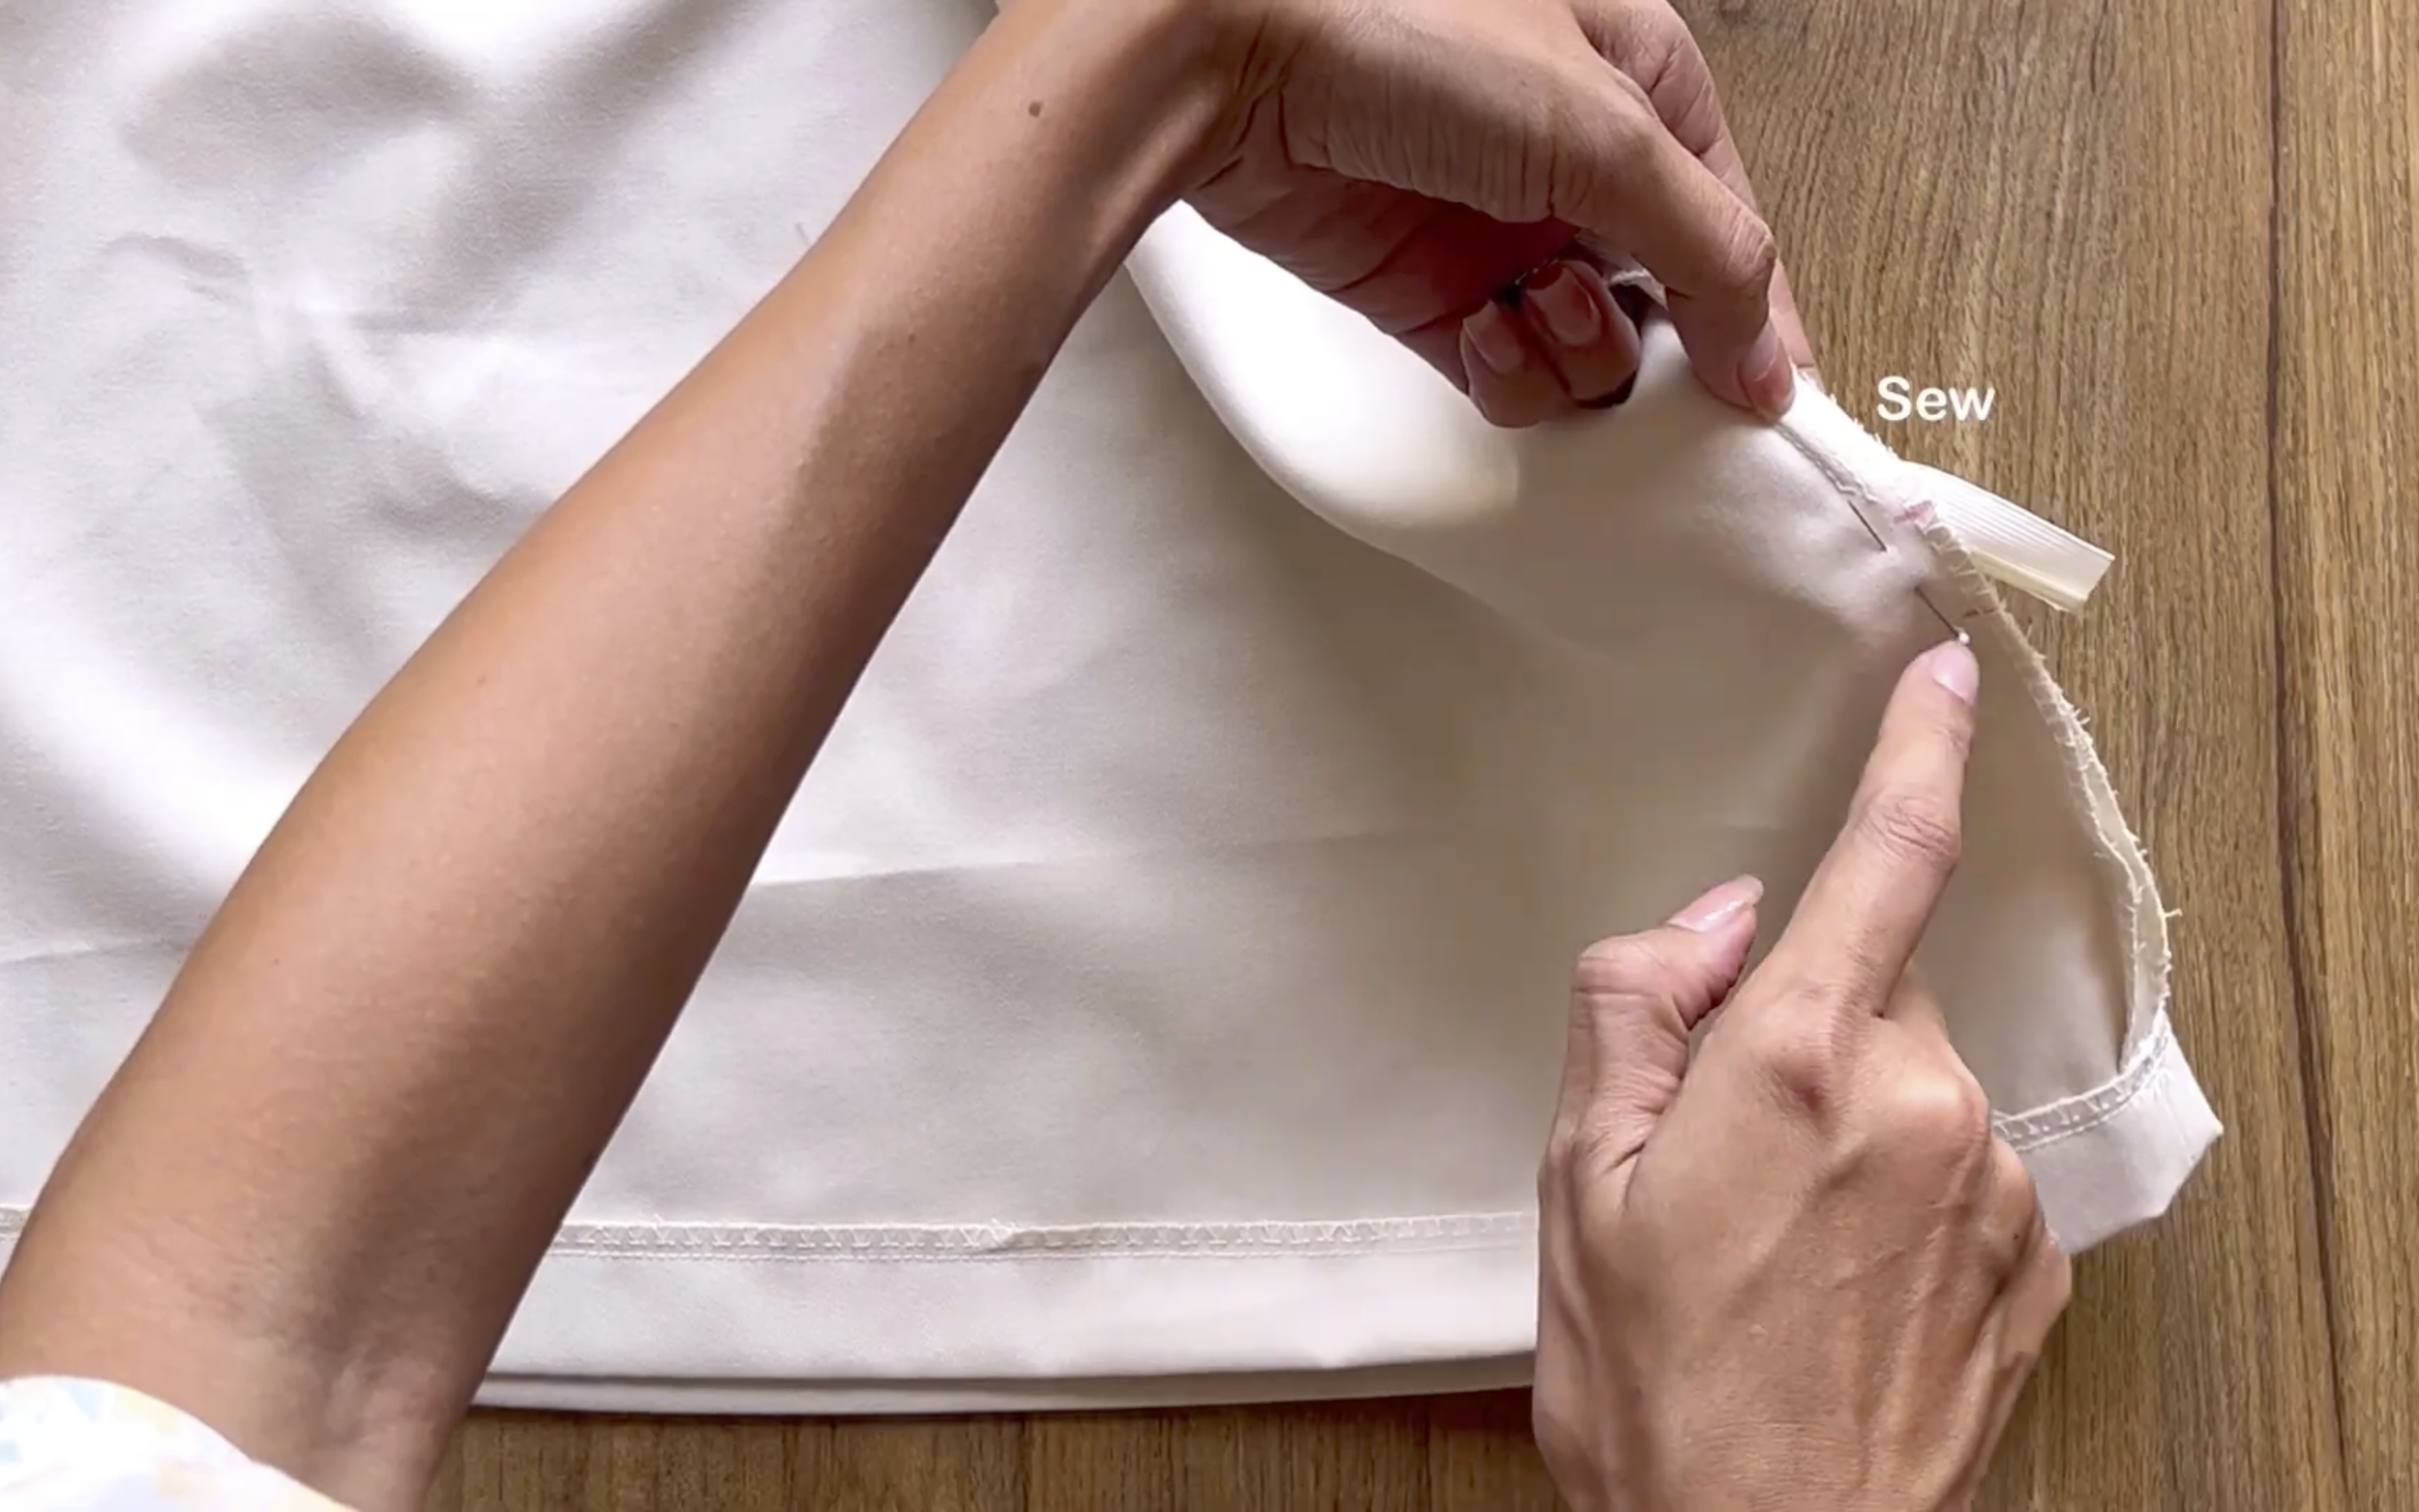
Make a small cut at the top of the zipper before turning the shorts inside the skirt.
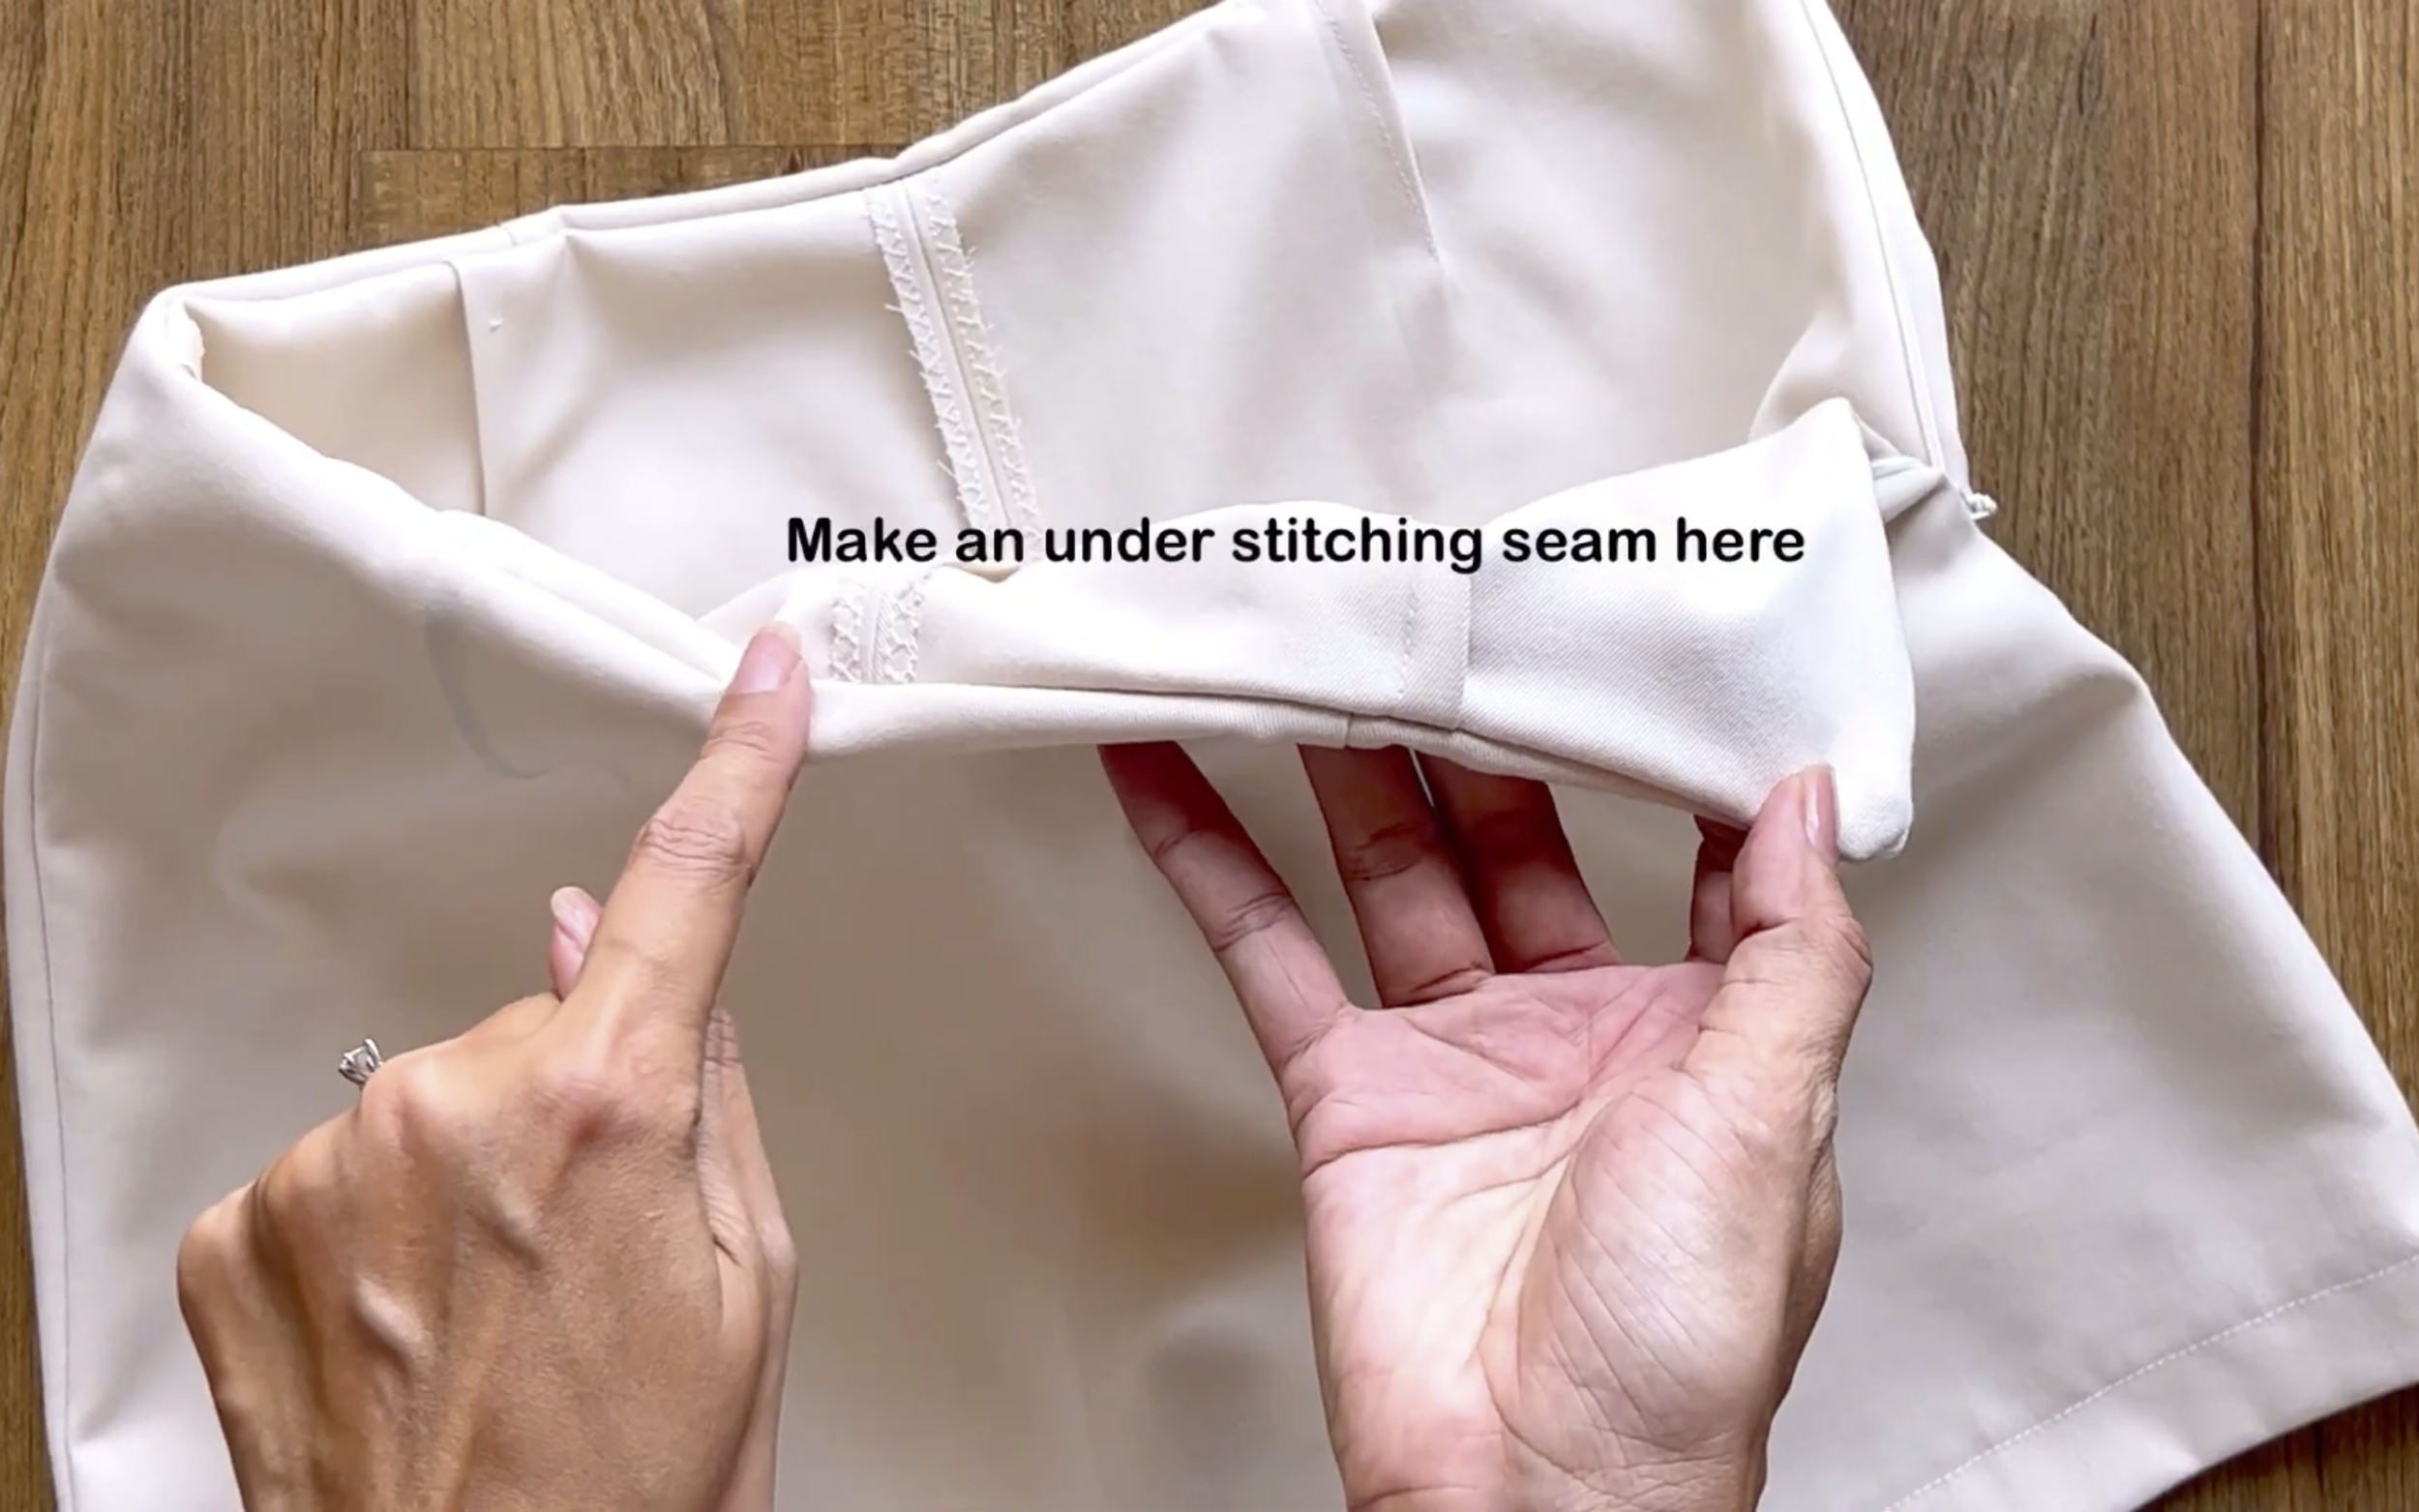
Make an understitching seam to secure the fabric on one side.

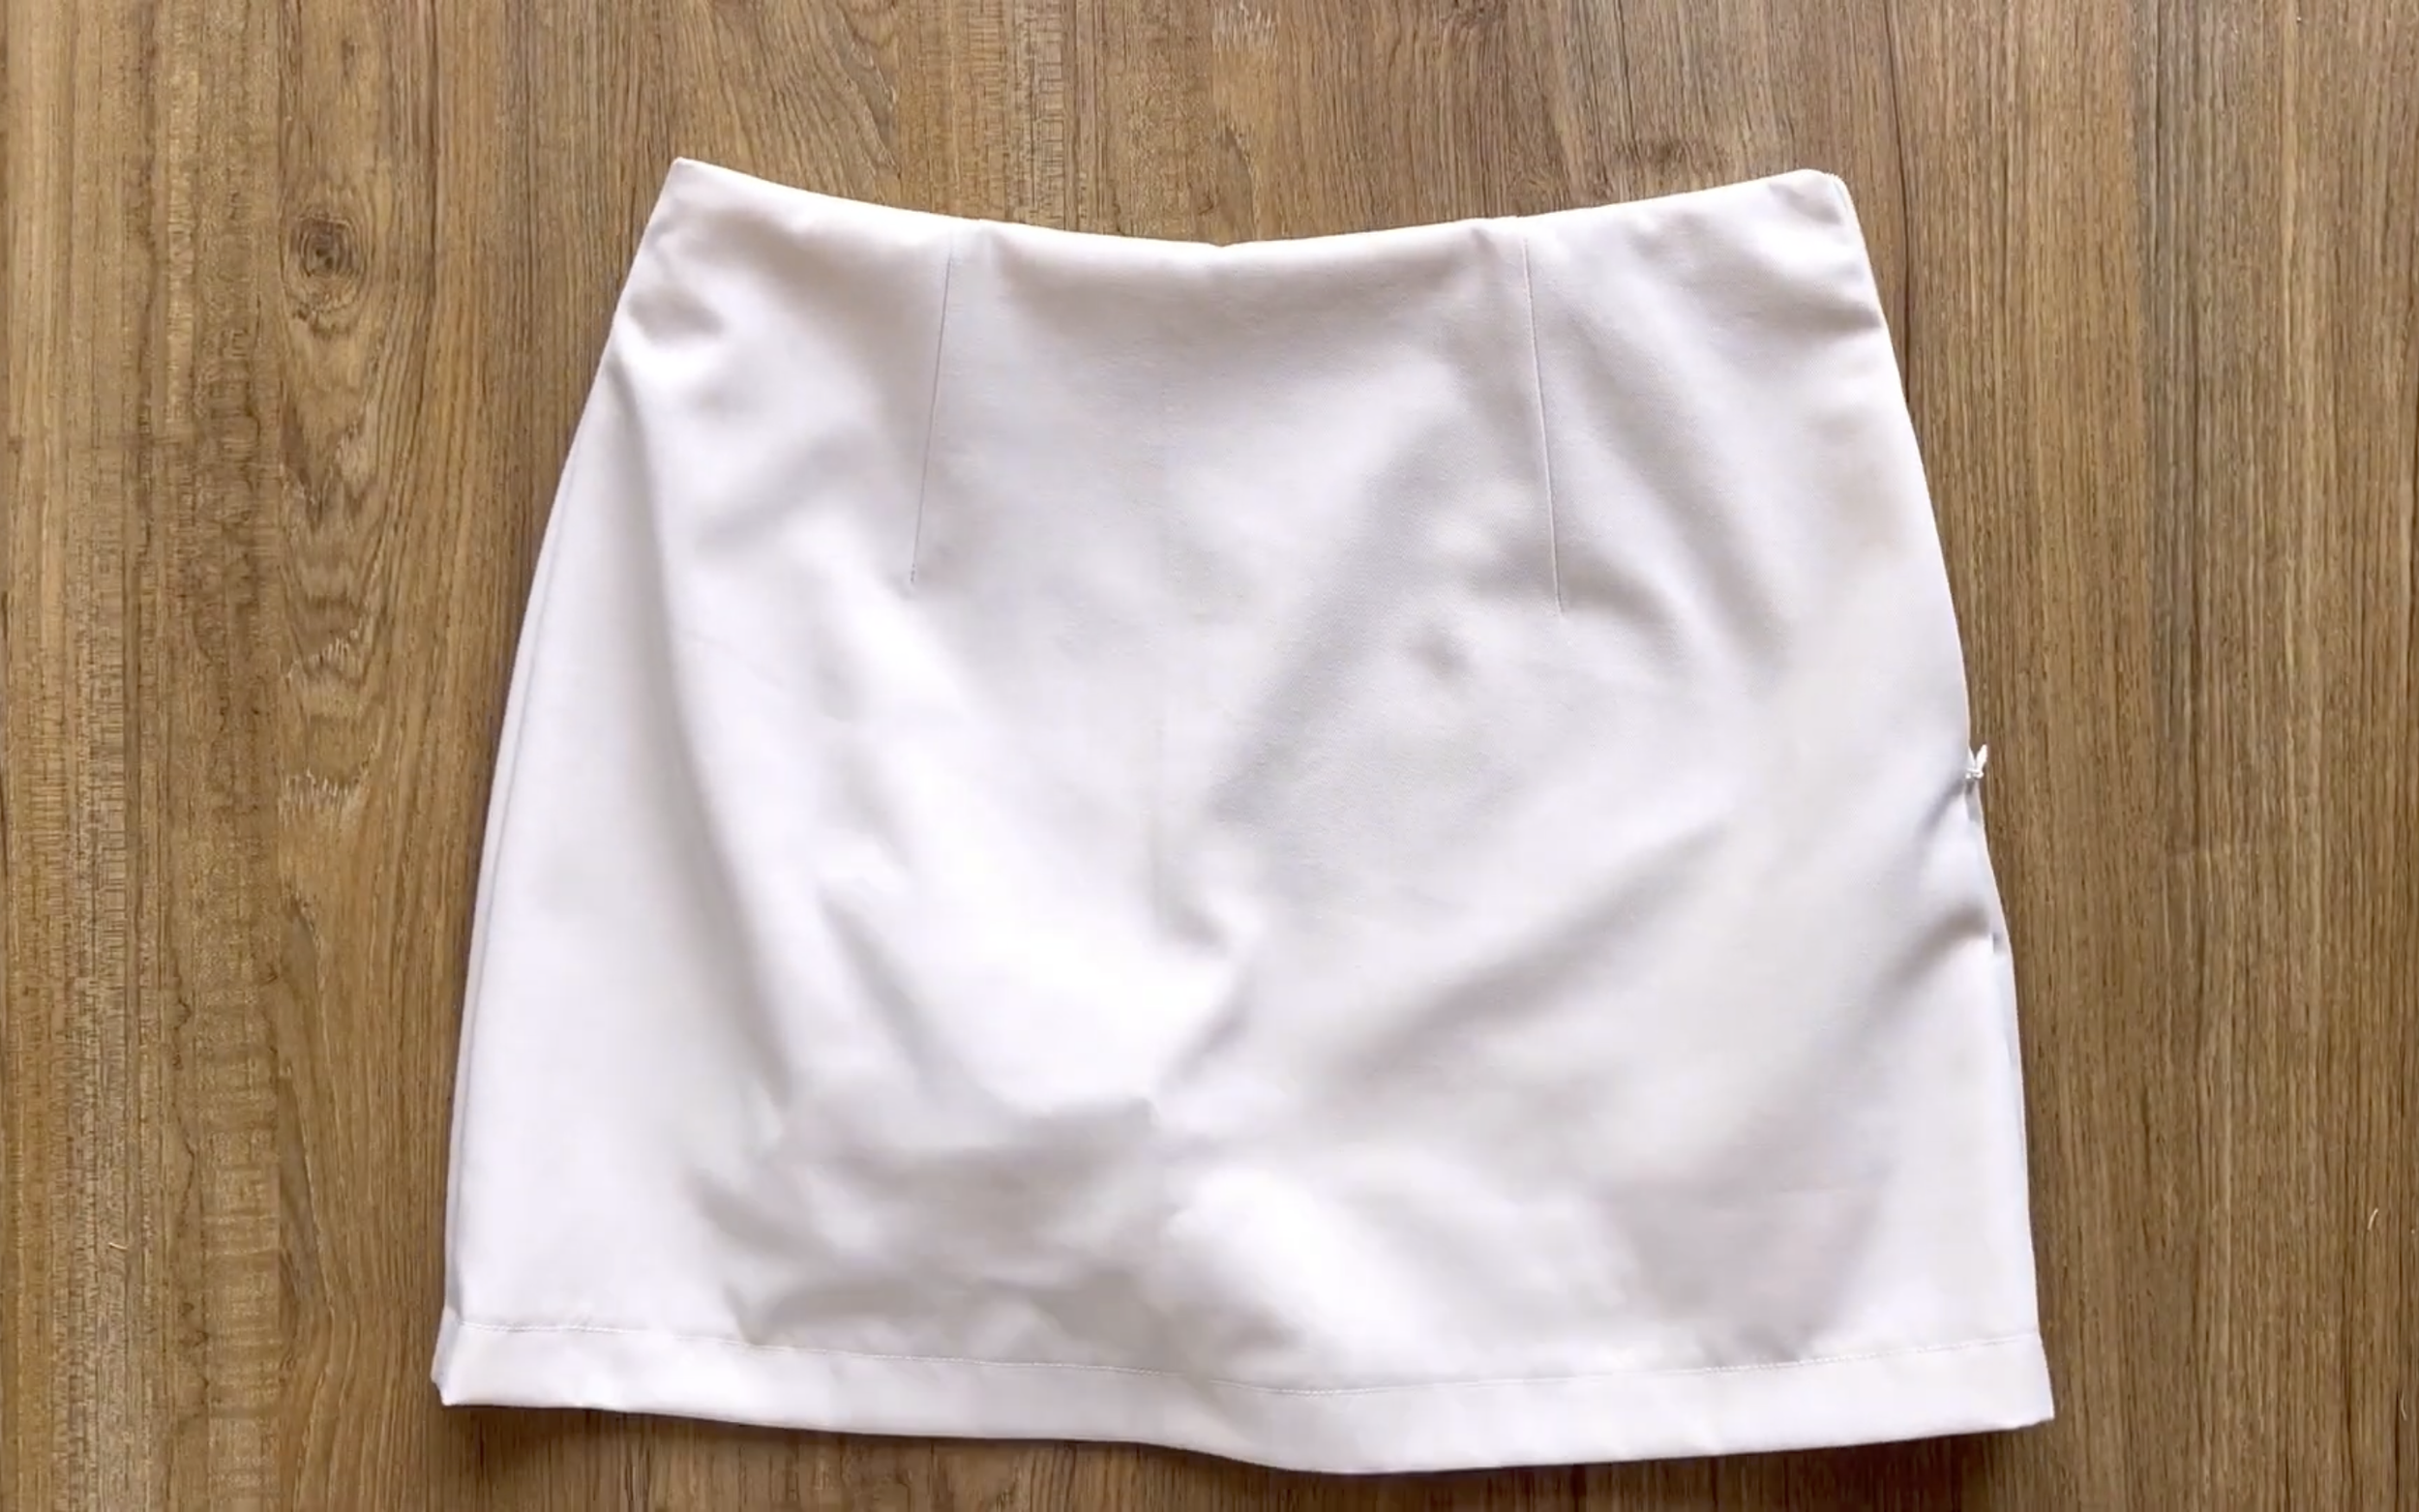
DIY Mini skirt with inside shorts
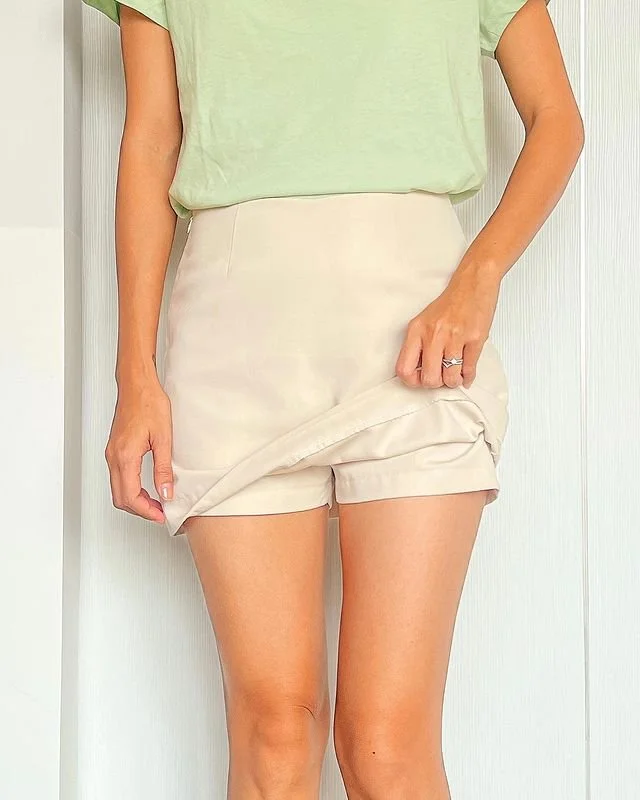
And that’s the finished DIY! Here’s the final result.
This skirt may look like a regular mini skirt, but now it’s much more comfortable with built-in shorts. Plus, the adjustable length lets it highlight your legs perfectly.
I hope you found my step-by-step guide helpful and inspiring.
If you’re interested in making your own, give it a try and let me know how it goes!
Until then, happy sewing!