DIY RUCHED CUT OUT DRESS | Vacation wardrobe (Ep 1) | Step by step sewing tutorial

DIY RUCHED CUT OUT DRESS | Vacation wardrobe (Ep 1) | Step by step sewing tutorial

Welcome or welcome back to my channel. My name is Jess and I love doing DIY, making clothes in a "simply but pretty" way.
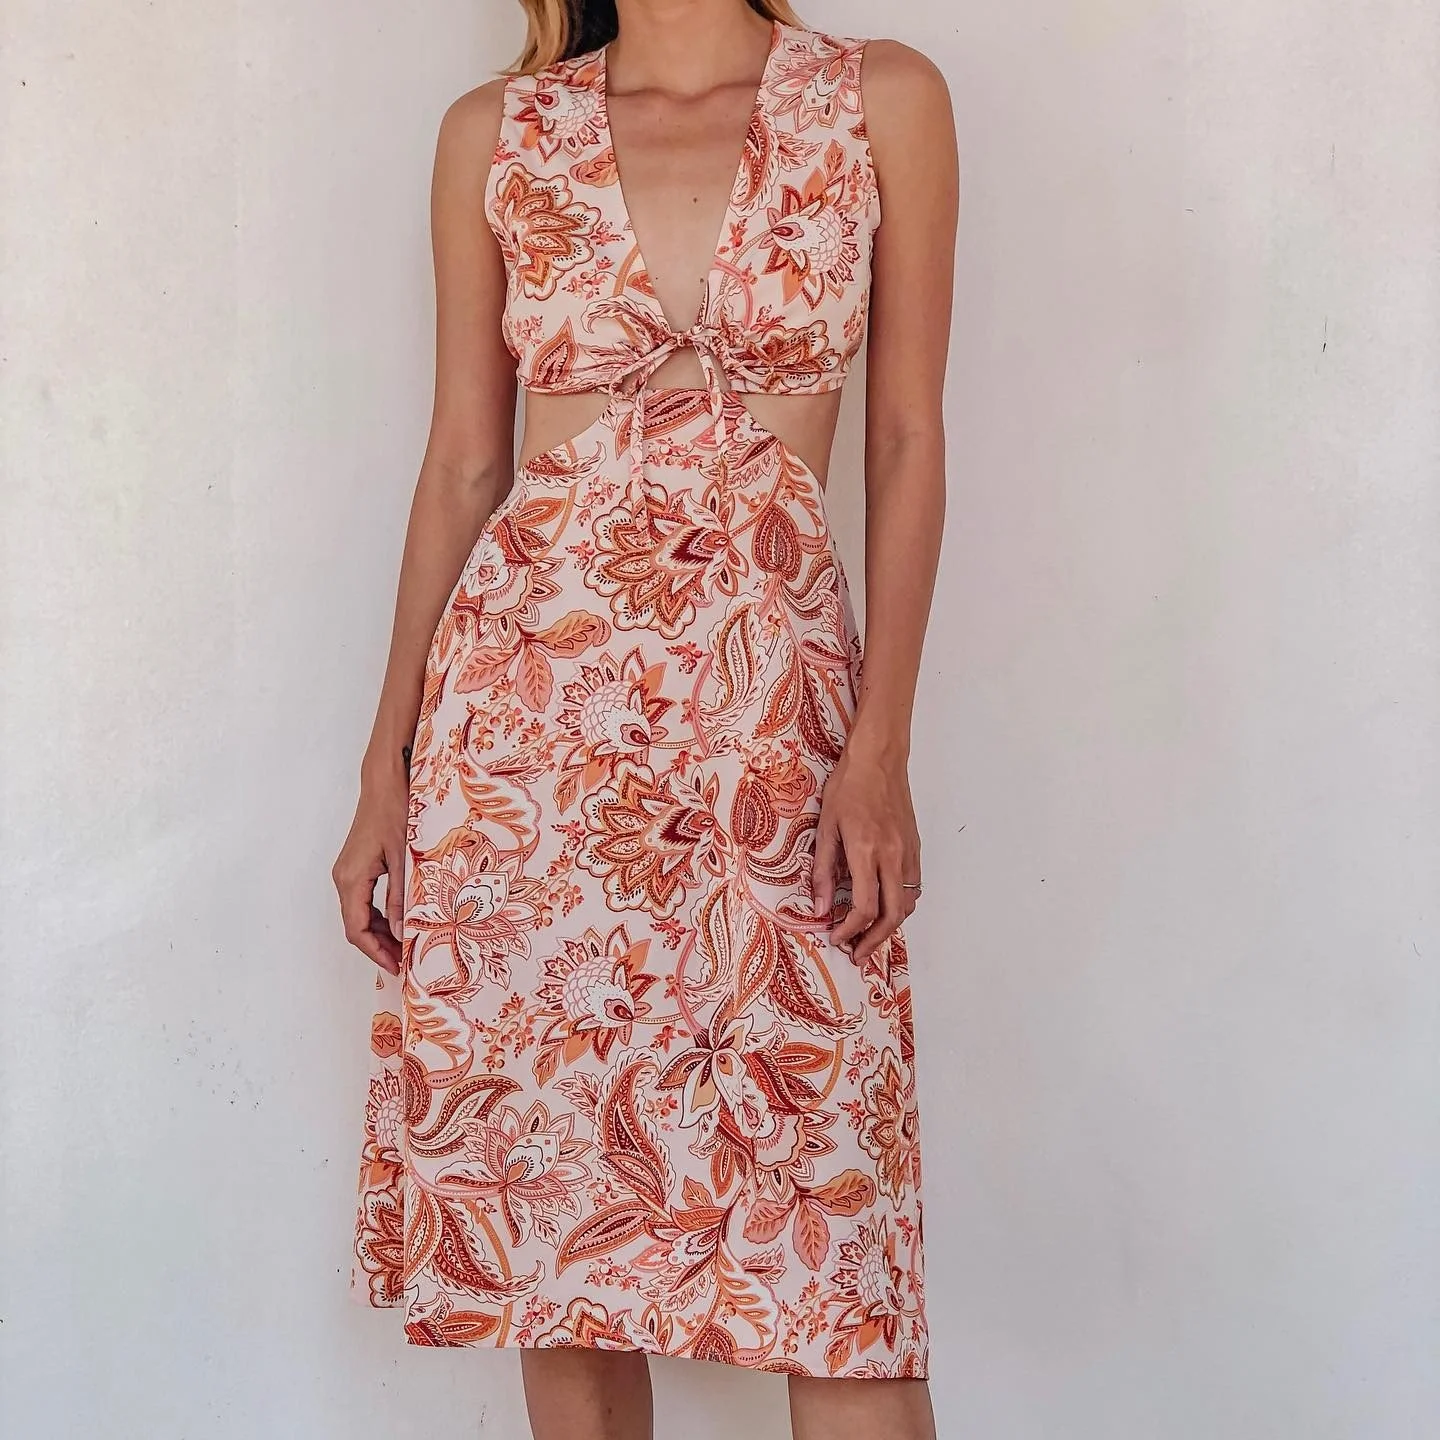
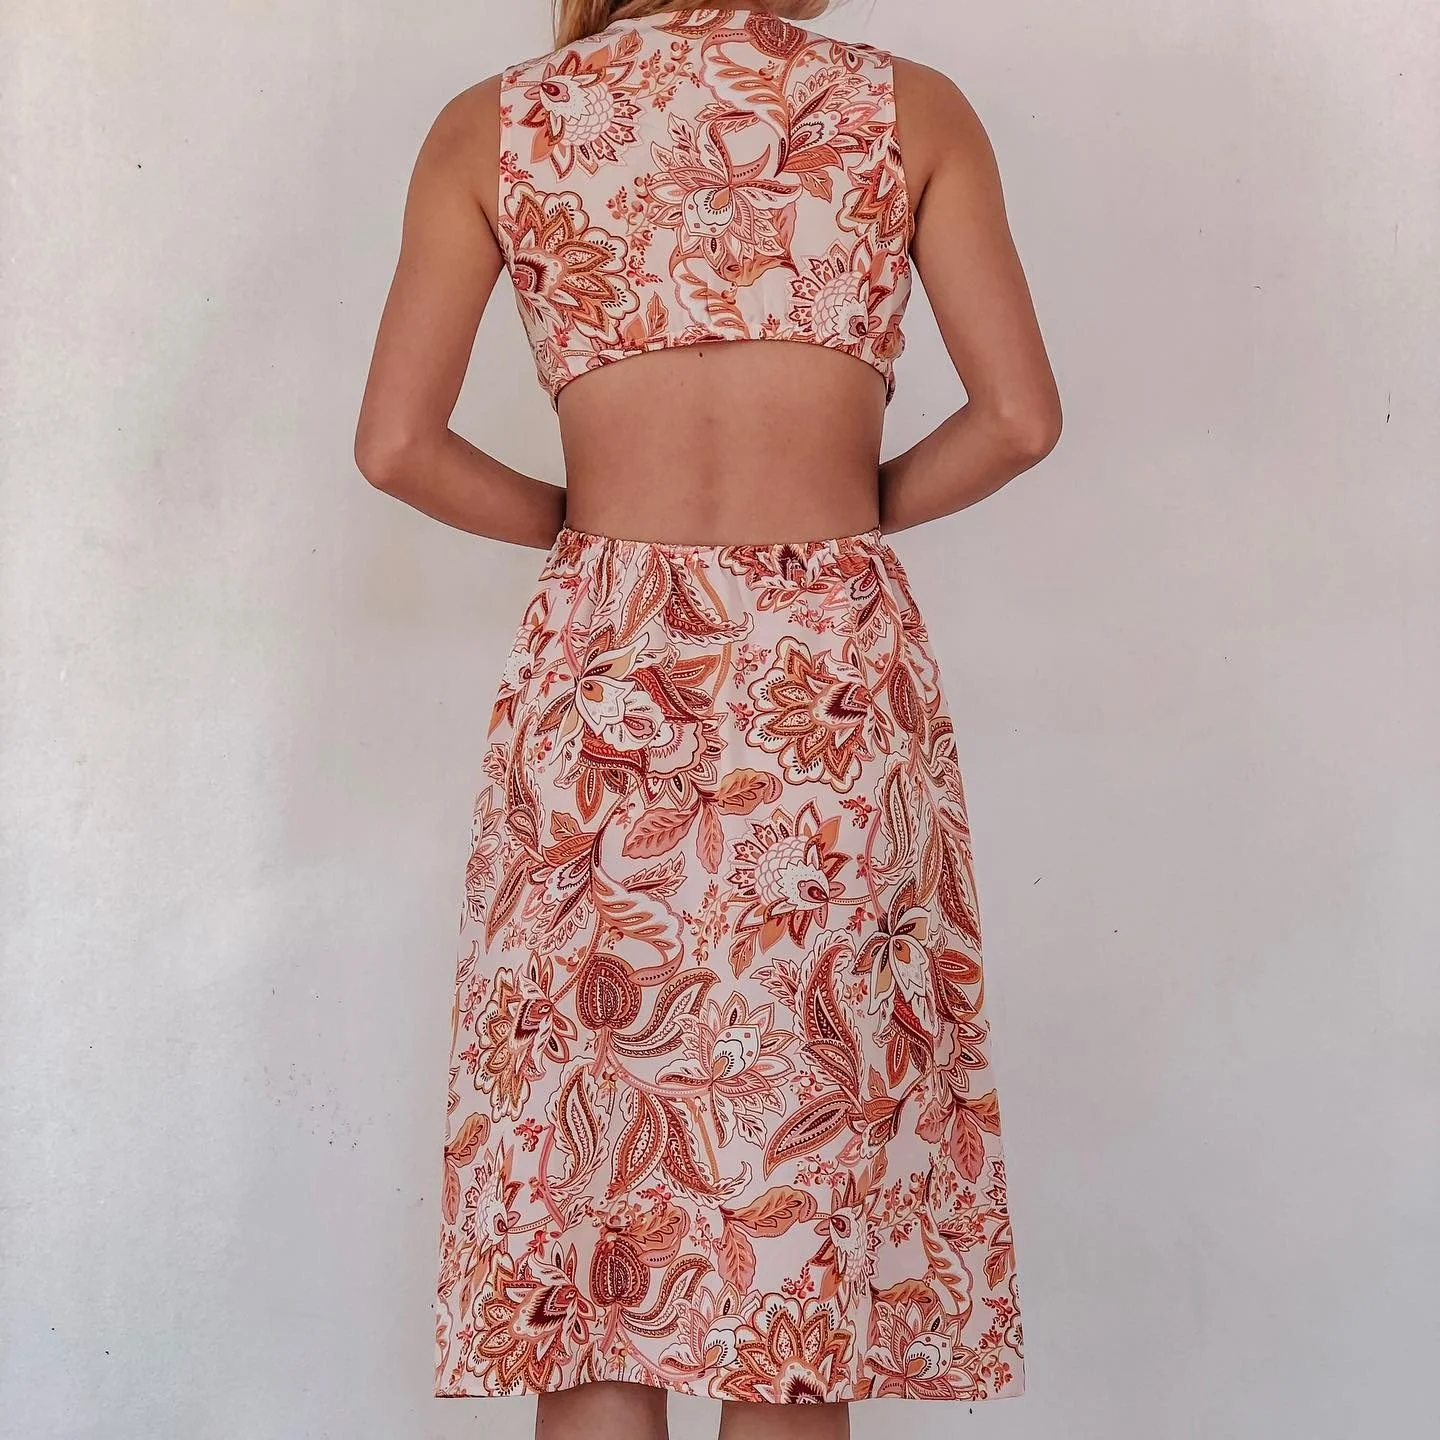
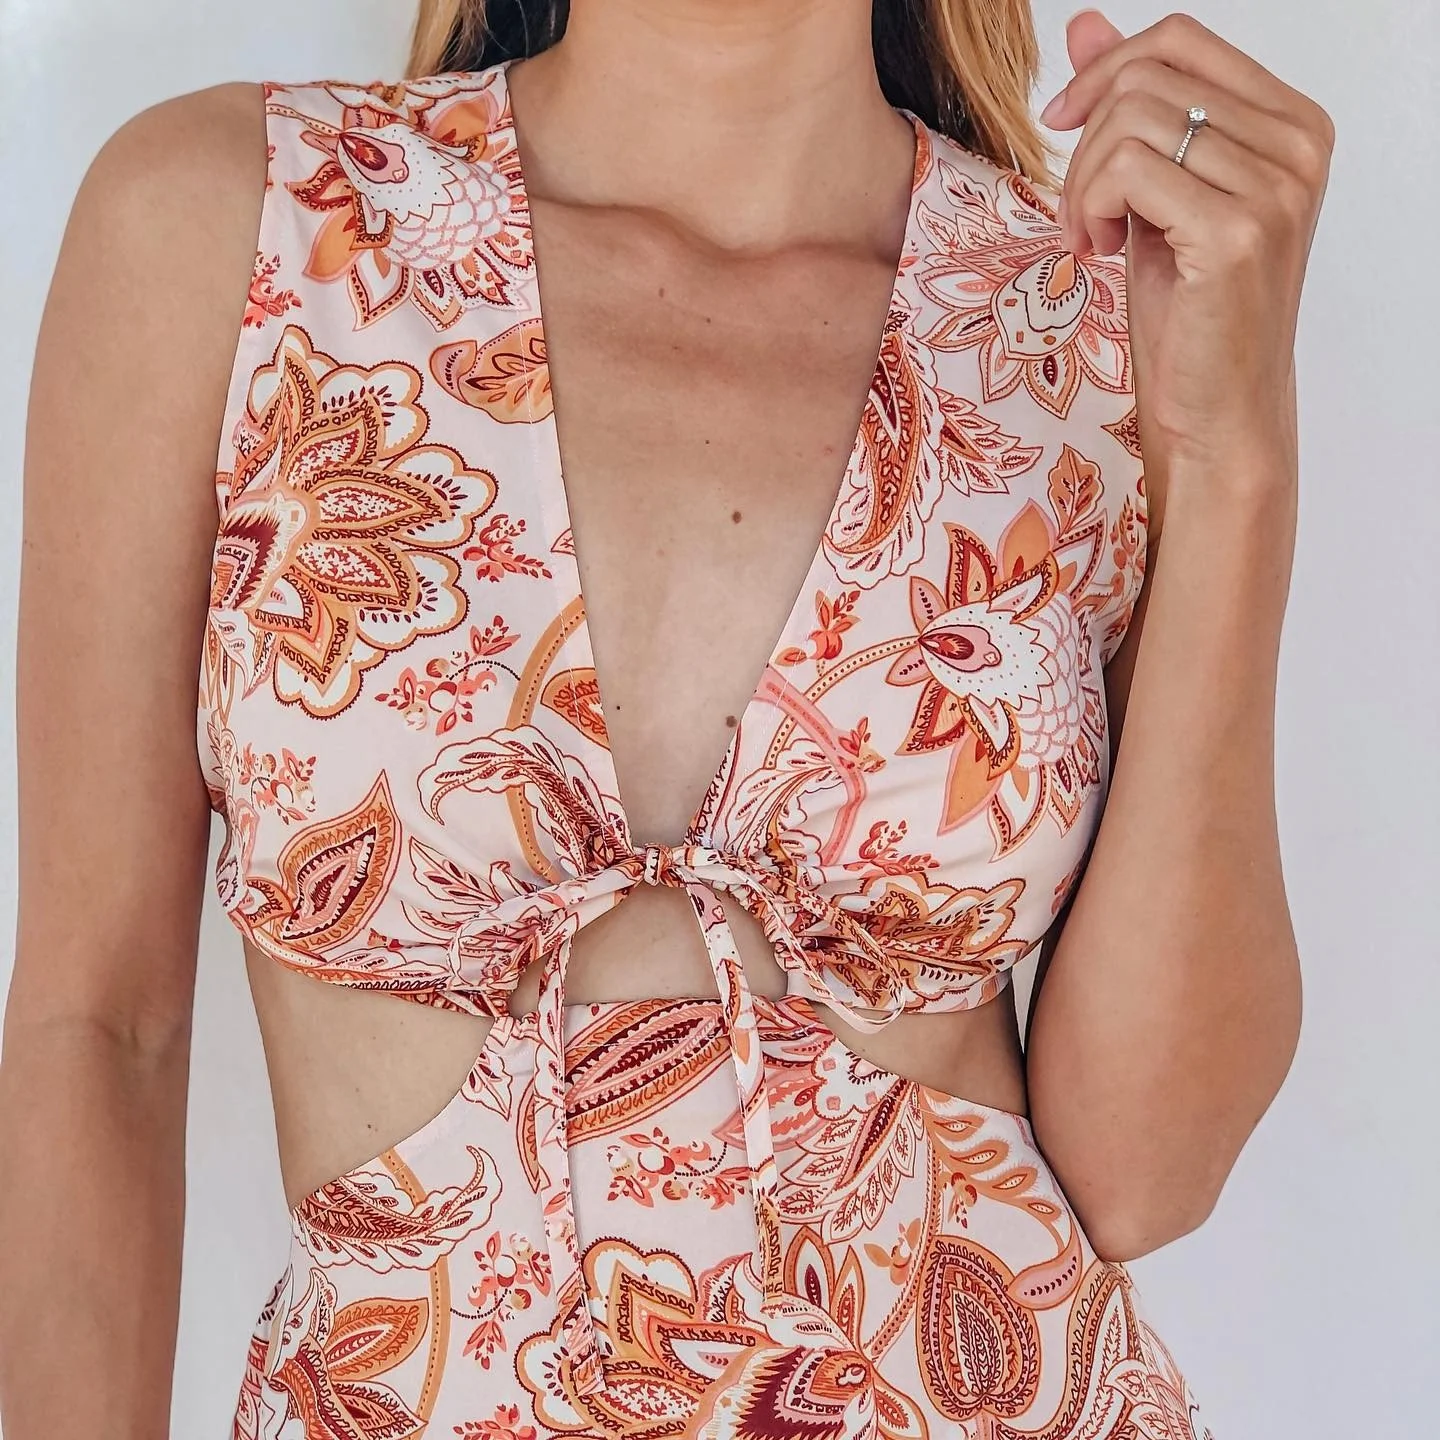
In today's tutorial, I'm going to share with you how I made my Ruched cut out dress. This dress has the ruched design at the front and the cut out design at 2 sides that goes along to the open back. It's quite a sexy dress. That's why it's perfect for a vacation outfit.
I hope you like it and try it out. Let’s get started!
WHAT YOU’LL NEED
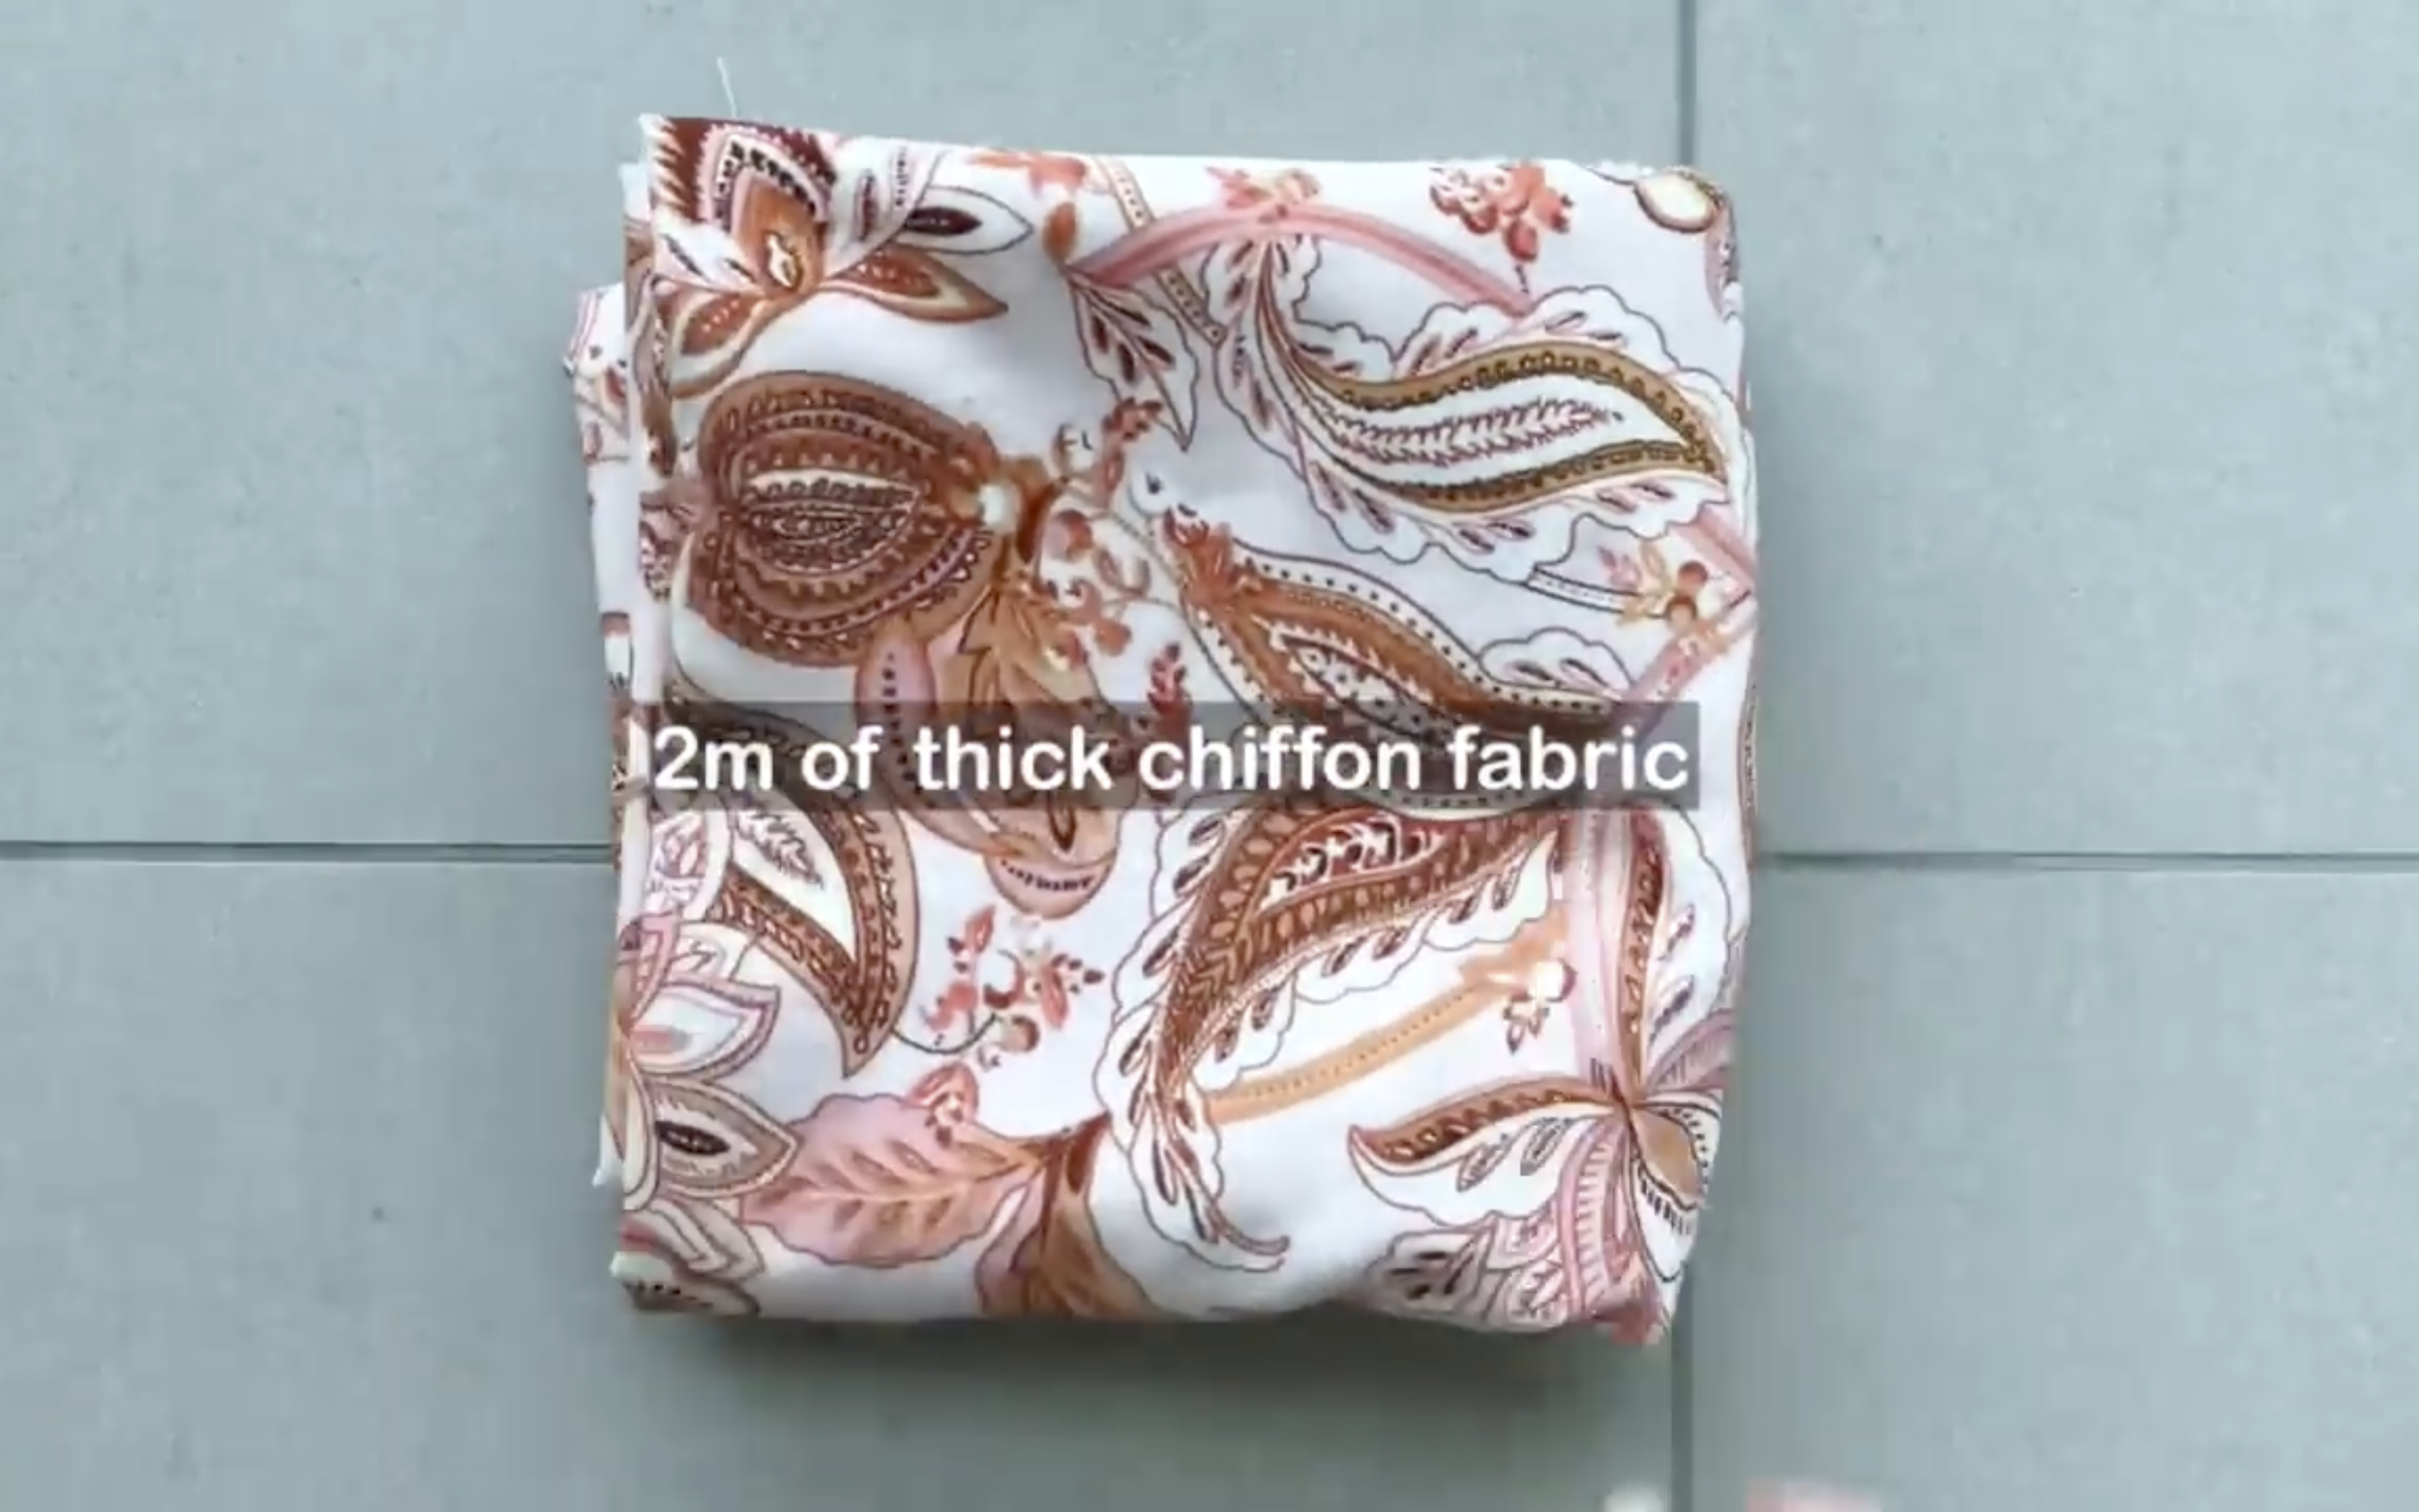
2m of thick chiffon fabric
Pattern paper
Sewing machine
Pins
Scissors
Ruler
Long stick
Zipper
Buttons
MAKING THE PATTERNS
Here’s the pattern for the project. To get a clear understanding of all the measurements needed for the pattern, watch the video from 0:31 to 3:29.
Remember, you can adjust these measurements to fit your own dimensions!

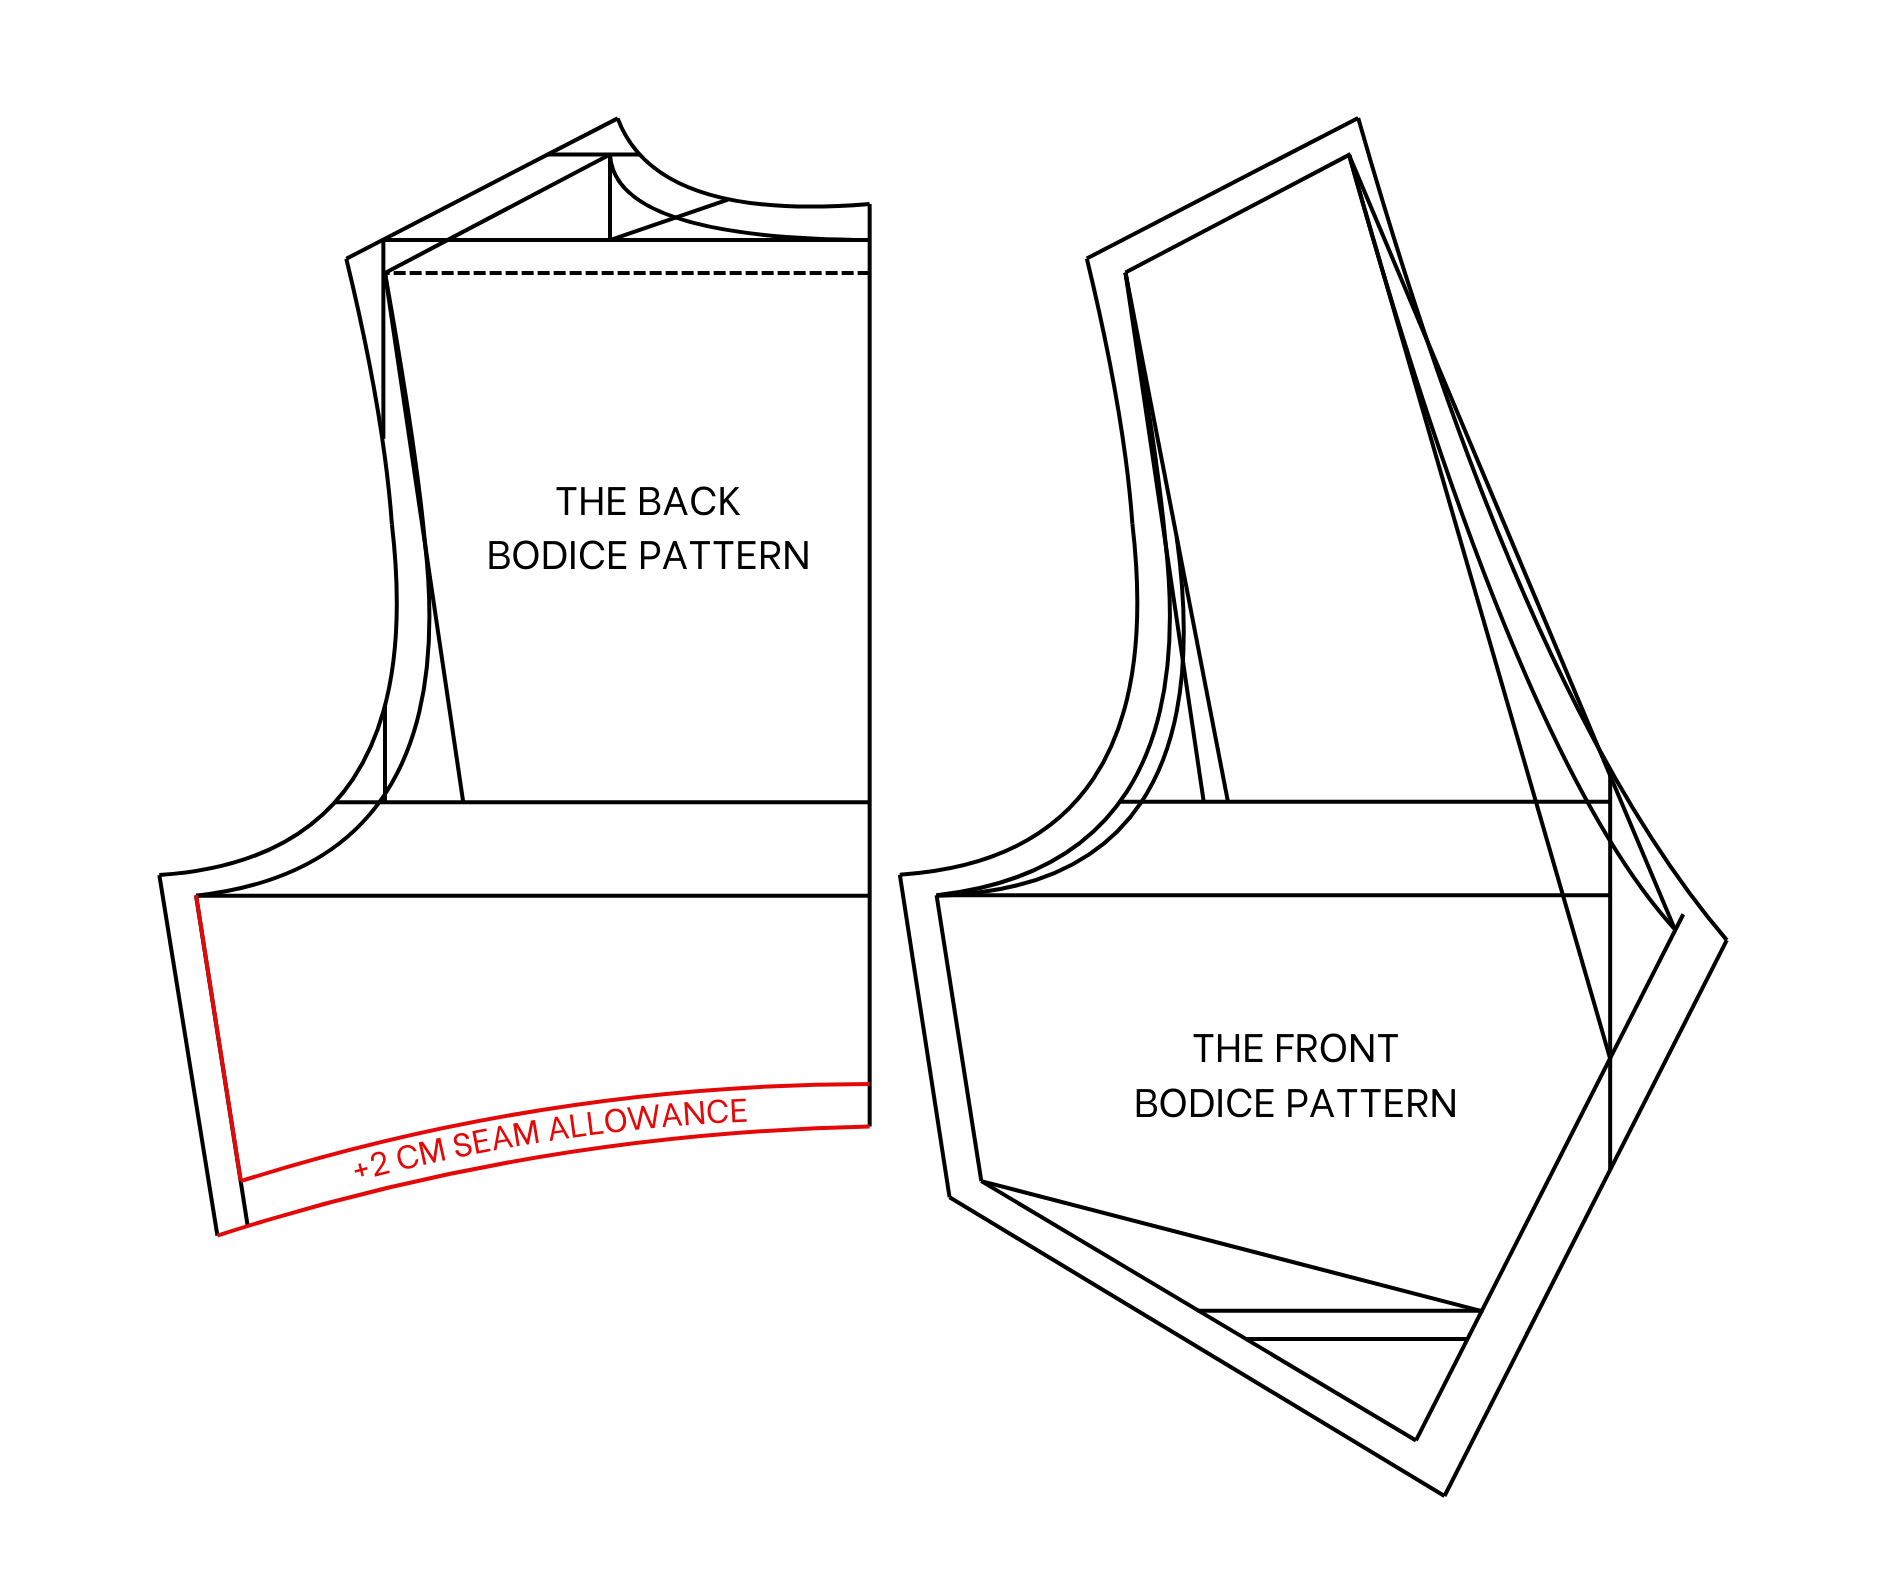
THE BACK BODICE PATTERN


To make the top bodice pattern, draw two perpendicular lines first.
At the cutting point between two lines, mark out on the horizontal line 2.5 cm, then draw a straight line from that mark.
After that, mark up at 8 cm, which is half of the neck size of the dress that is wanted.
On that line, draw a horizontal line from this mark to the straight line next to it.
After that, draw another line to connect this mark to the first cutting point.
From the middle of this new line, draw a new one connected to the mark on the first straight line.
Then, draw a curved line going to the middle of this new line to the cutting point and to the neck mark to create a neckline for the back bodice.
From the end of the neck, mark out 15 cm, which is half of the inside shoulder.
Then, draw a perpendicular line after that. The length of this line will be 3.6 cm, which is 1/10 of the shoulder size. Then, connect the end of this line to the neck to finish the shoulder line for the back bodice.
After that, draw a straight line from the end of the shoulder line to cut the horizontal line.
From this cutting point, mark out 16.5 cm, which is 1/5 of the bust size.
Then, draw a straight line based on that mark.
After that, keep drawing another straight line at 3 cm from the previous one. This will be the bust line of the back bodice. The width of the bust line will be 22 cm, which is a quarter of the bust size plus 1 cm.
From the end of the shoulder line, draw a horizontal line to cut the upper bust line.
From this cutting point, mark it at 2.5 cm inside. Then, connect this mark to the end of the shoulder line with a new line.
After that, draw a curved line from the end of the bust line, going through the middle of this line to the end of the shoulder line. This will be the sleeve line of the back bodice.
From the top of the back bodice, mark down at 36 cm, which is the length from the shoulder to over the breast. It is around 5 cm above the belly button.
Then, draw a straight line from that mark. The length of this straight line is 19 cm, which is a quarter of the under-bust size. Then, connect the end of this line to the end of the bust line to create a sideline for the back bodice.
After adding 1 cm for seam allowance.
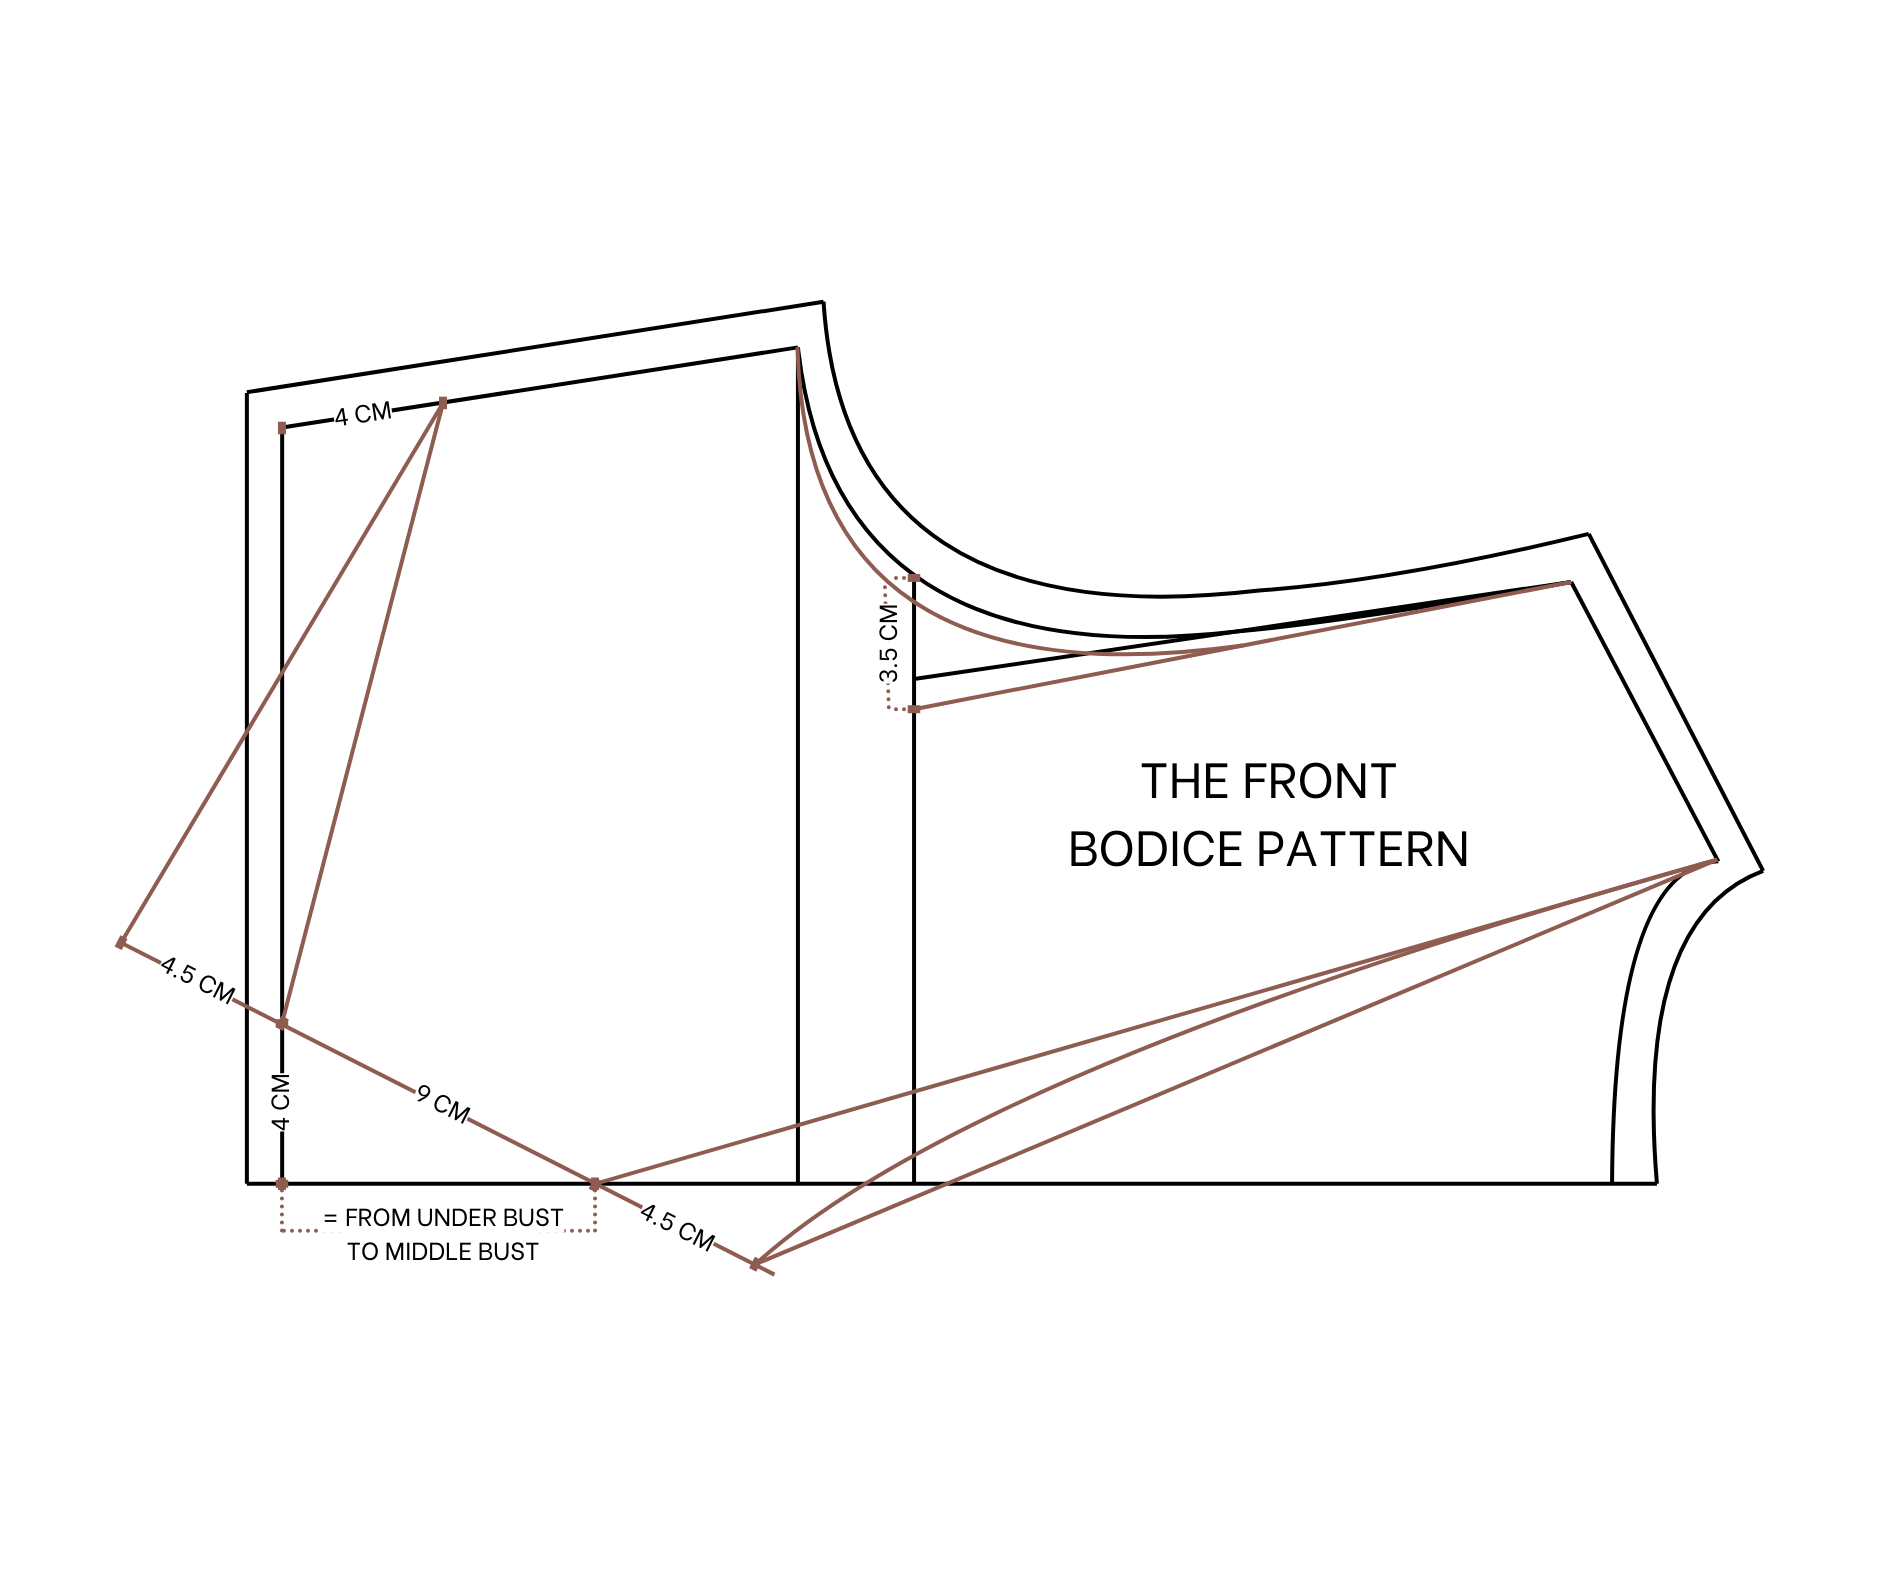
THE FRONT BODICE PATTERN
To make the front pattern, copy the back pattern first.
From the end of the pattern, mark up 8 cm, which is the width from the under-bust to the middle bust. This will be the depth of the neck that is wanted.
Then, connect this mark to the top of the neckline.
From the end of the pattern, mark out 4 cm, which is half of the hole of the bust area that will be created later.
From the end of the sideline, mark up 4 cm, which is the height of the cut-out at the front of the dress that is wanted.Don't make it too high, as this can't cover the breast.
Then, connect all the marks together. This will be the breast area of the dress, and fabric will need to be gathered there to cover the breast and also the bust part. That's why the width of this area was increased a bit on both sides.
Because the new front neckline is shorter than the previous one, a big curve is made to match the previous neckline length. The sleeve line of the front pattern is also re-drawn slightly.
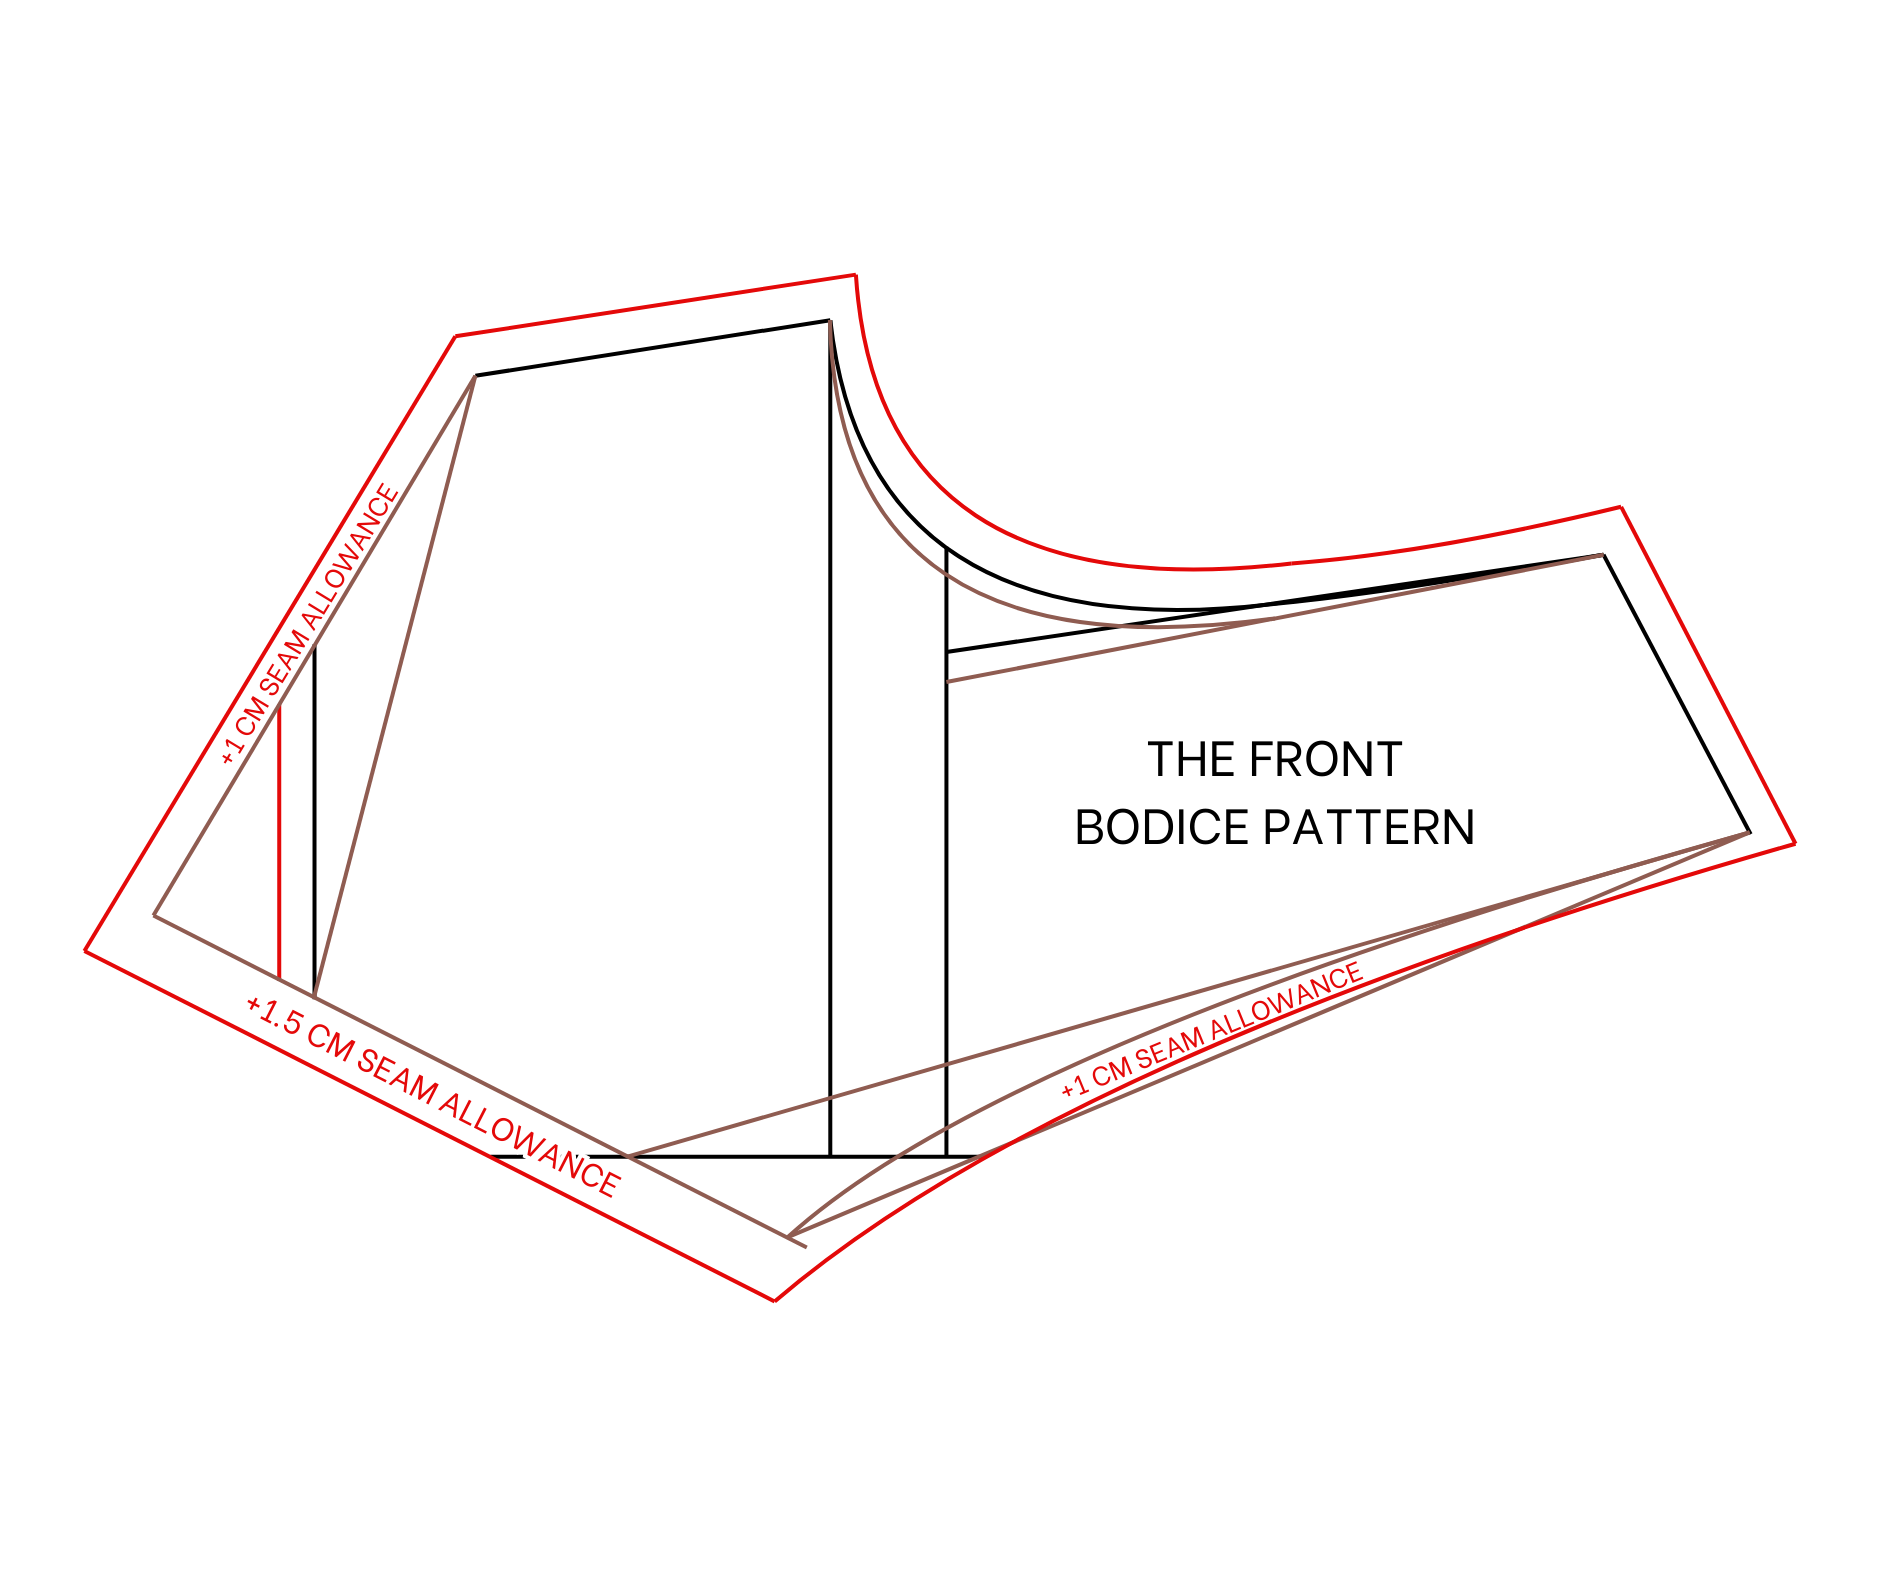
Then, add 1 cm for seam allowance, except 1.5 cm at the bust area.
And here is the front pattern of the top bodice.
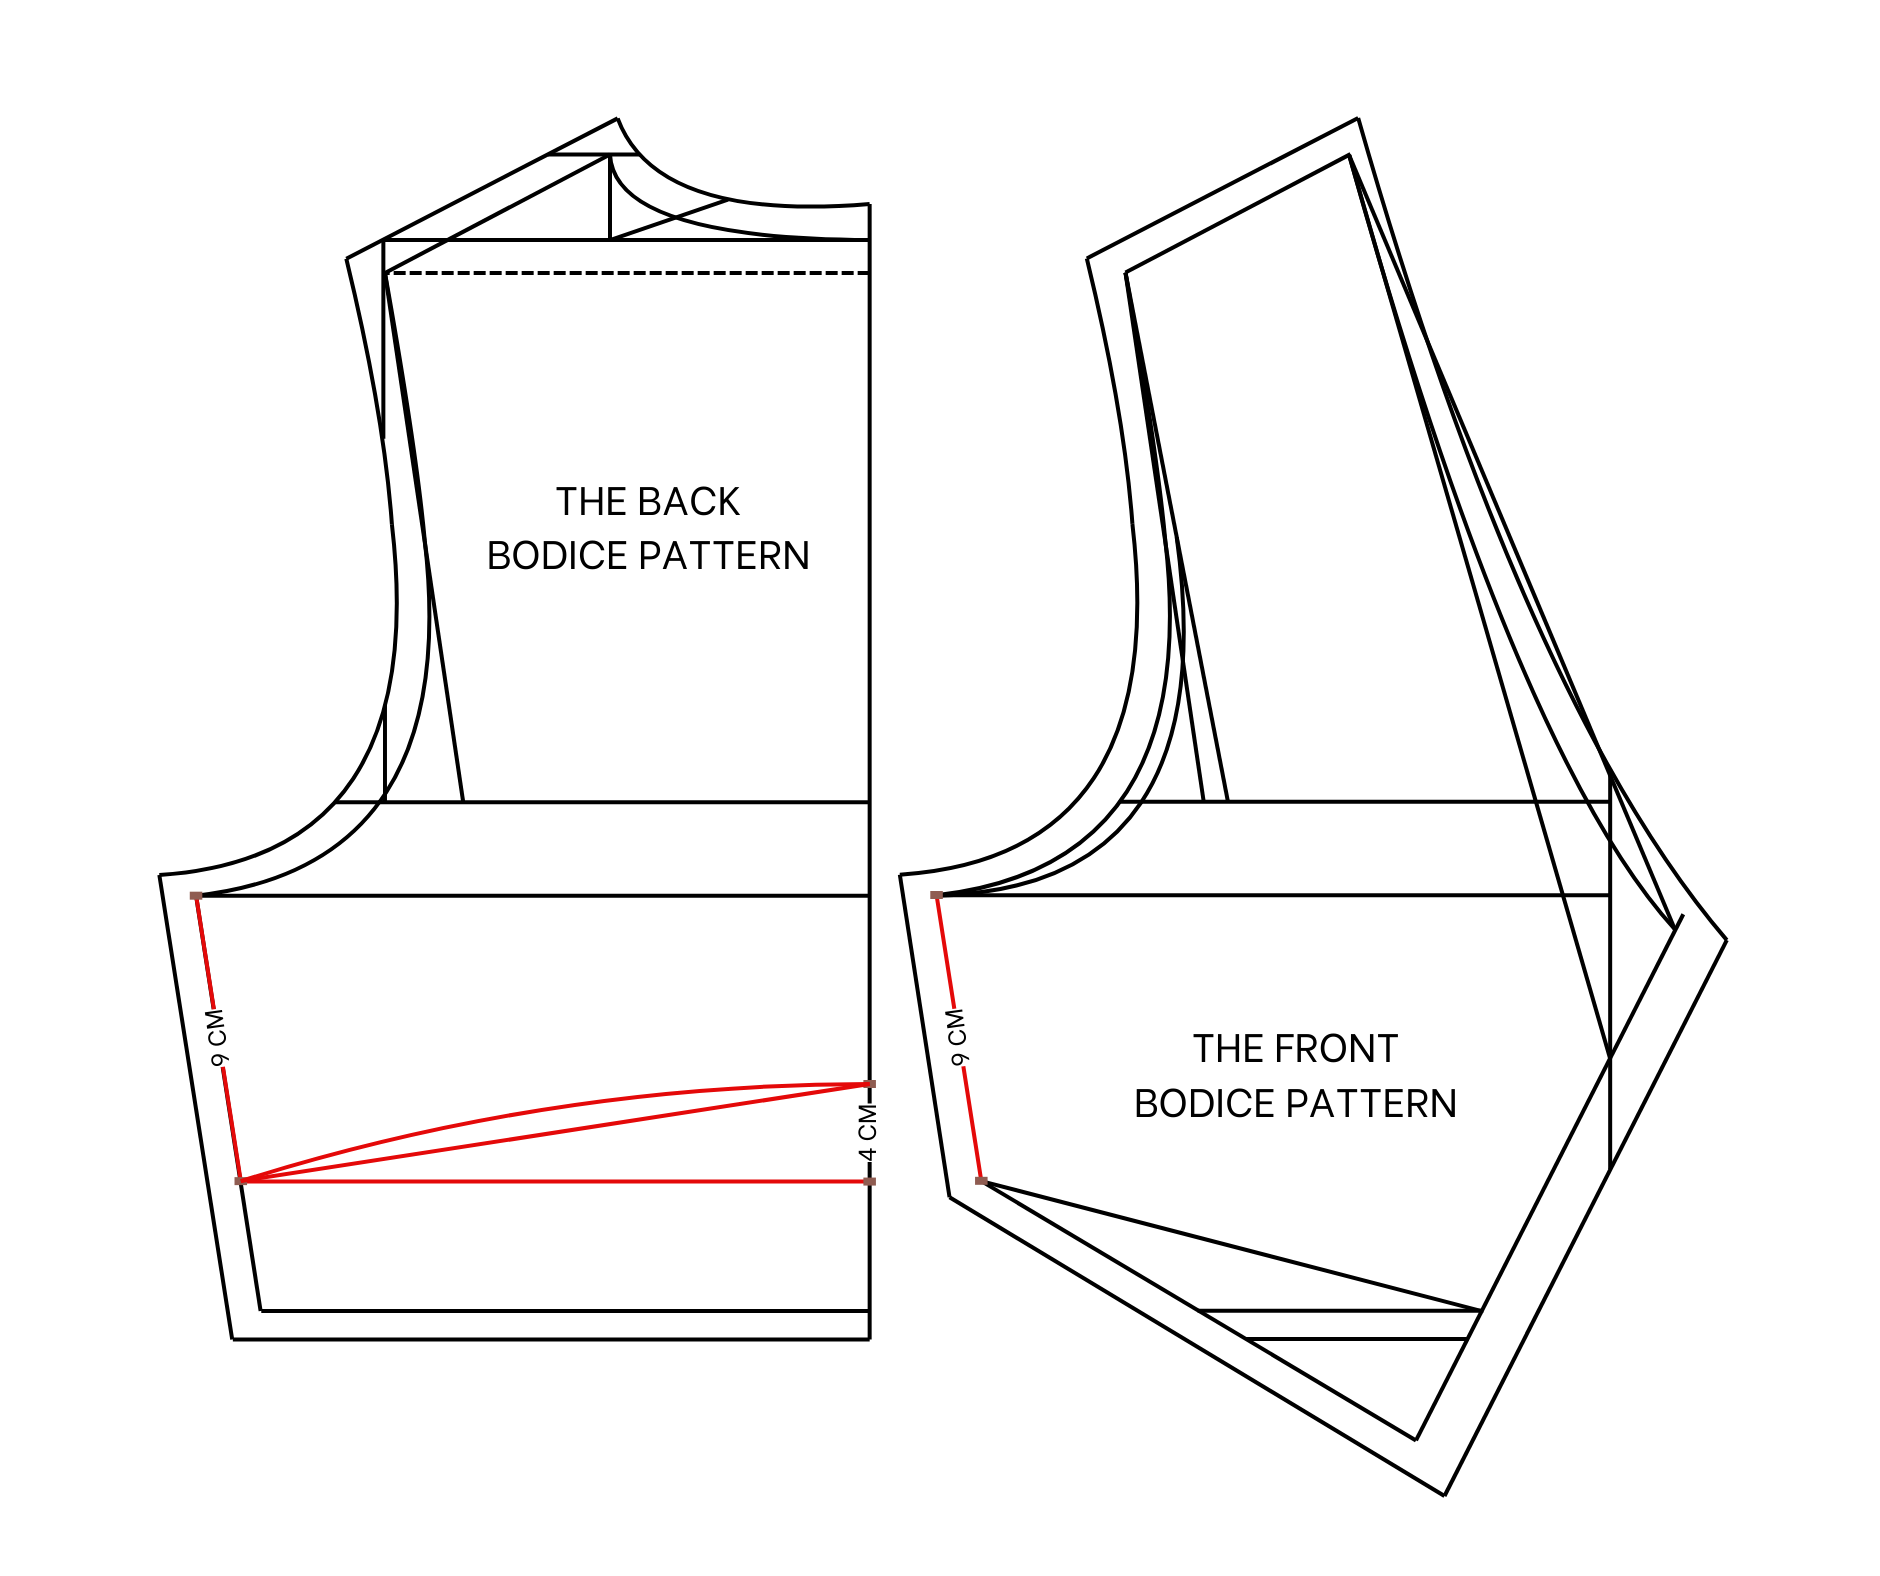
Because the cut design is at the side of the front pattern, the back pattern needs to be revised a bit.
Copy the length of the sideline from the front pattern to the back pattern first.
Then, draw a slightly curved line from the sideline to make the open back part of the dress bigger, but it can be kept straight if a smaller open back is preferred.
Don't forget to add 2 cm for seam allowance for the curved line after that.
And here is the back and front pattern of the top bodice.
THE FRONT PATTERN OF THE BOTTOM DRESS


Moving to the bottom dress pattern, draw two perpendicular lines first.
From the cutting point between two lines, mark out at 4 cm on the horizontal line. This is the length of the cutting part that is wanted.
Then, draw a straight line based on that mark. The length of this line will be 6 cm, which is 1.5 times the width of the top bodice made before that.
From the cutting point, mark up at 16 cm on the straight line, which is a quarter of the waist size.
Then, connect this mark to the end of the other straight line drawn before to create a cutting line of the front bottom dress.
From the straight line, mark down on the horizontal line 23 cm, which is a quarter of the hip size.
Then, draw another straight line from it. The length of this line will be 23 cm, which is a quarter of the hip size. Then, connect the end of this line to the end of the waistline to create a sideline for the front bottom dress.
From the top of the pattern, keep marking down 73 cm, which is the length from the under-bust to over the knee. This is the dress length that is wanted.
Then, draw a straight line based on that mark. This line will cut the sideline at one point.
From the end of the sideline, mark up 1.5 cm. Then, connect this mark to the other end of the ending line.
Based on this new line, draw a slightly curved line to finish the ending line of the bottom dress.
At the top of the front bottom dress, draw another straight line at 4 cm next to it. It's twice the width of the fabric hole that will be created there later.
Then, slightly re-draw the cutting line of the front bottom dress.
Adding 1 cm for seam allowance at the ending line, the sideline, and the cutting line.
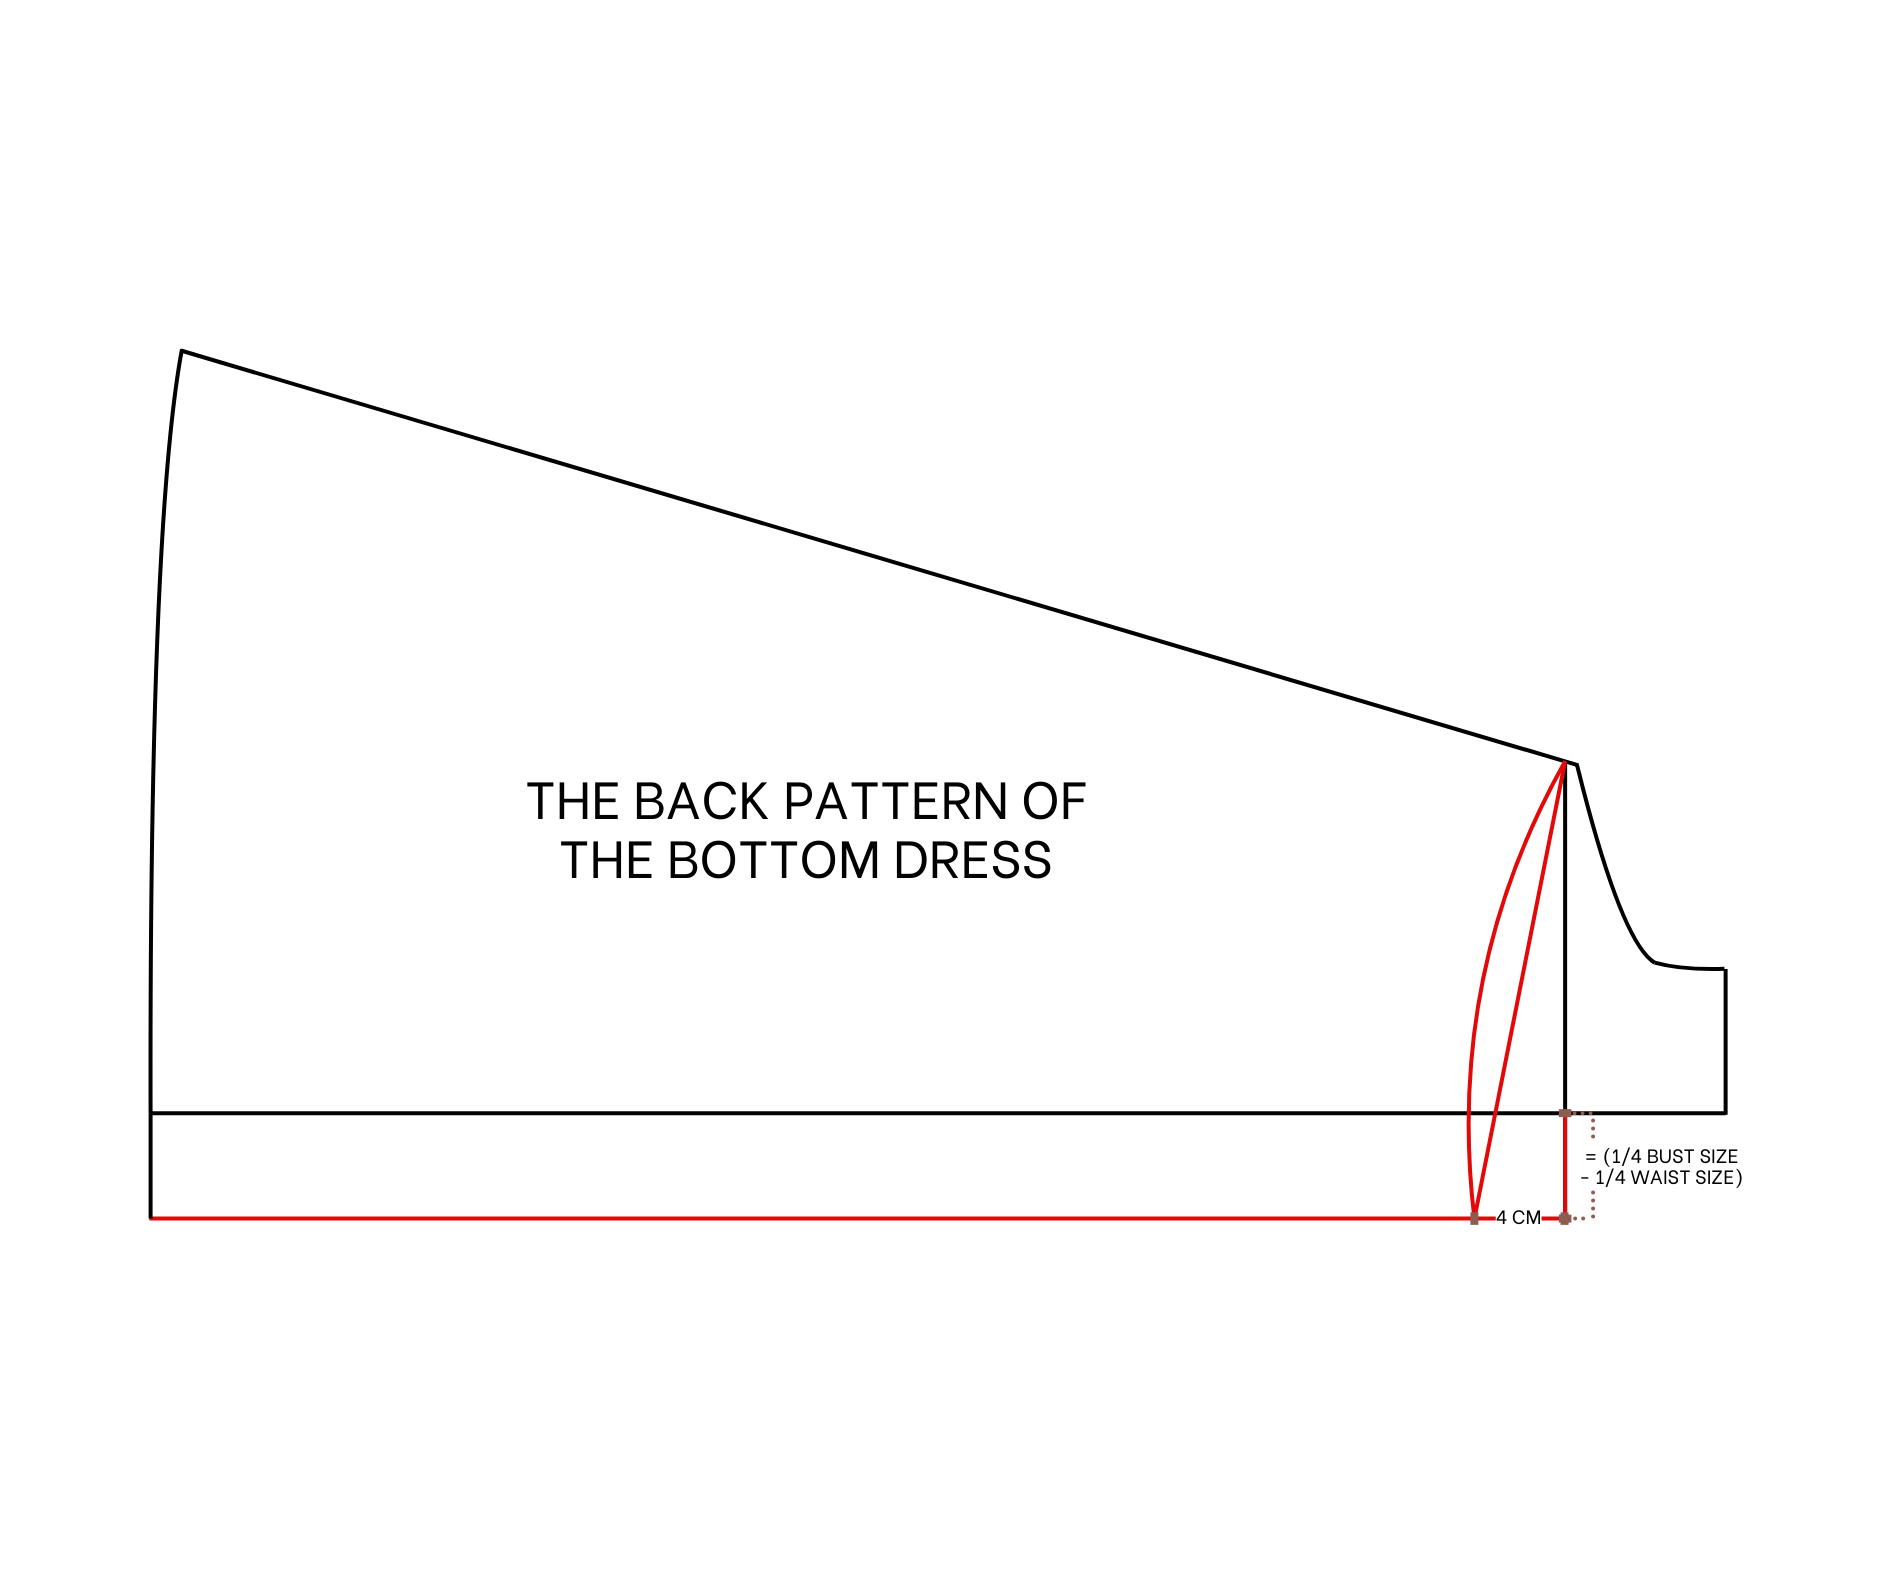
THE BACK PATTERN OF THE BOTTOM DRESS
To make the back pattern of the bottom dress, copy the front pattern first.
Then, increase the width of the waistline by 4.5 cm, which is the gap between a quarter of the bust size minus a quarter of the waist size. That means the total waist width from the front to the back will match the bust size, allowing the dress to be worn later.
To make the open back of the dress slightly bigger, the waistline and back bottom dress are made slightly curved, but it can be kept straight if a smaller open back is preferred.
Adding 2 cm for seam allowance for the curved line.

SEWING THE DRESS
THE FRONT BODICE PART
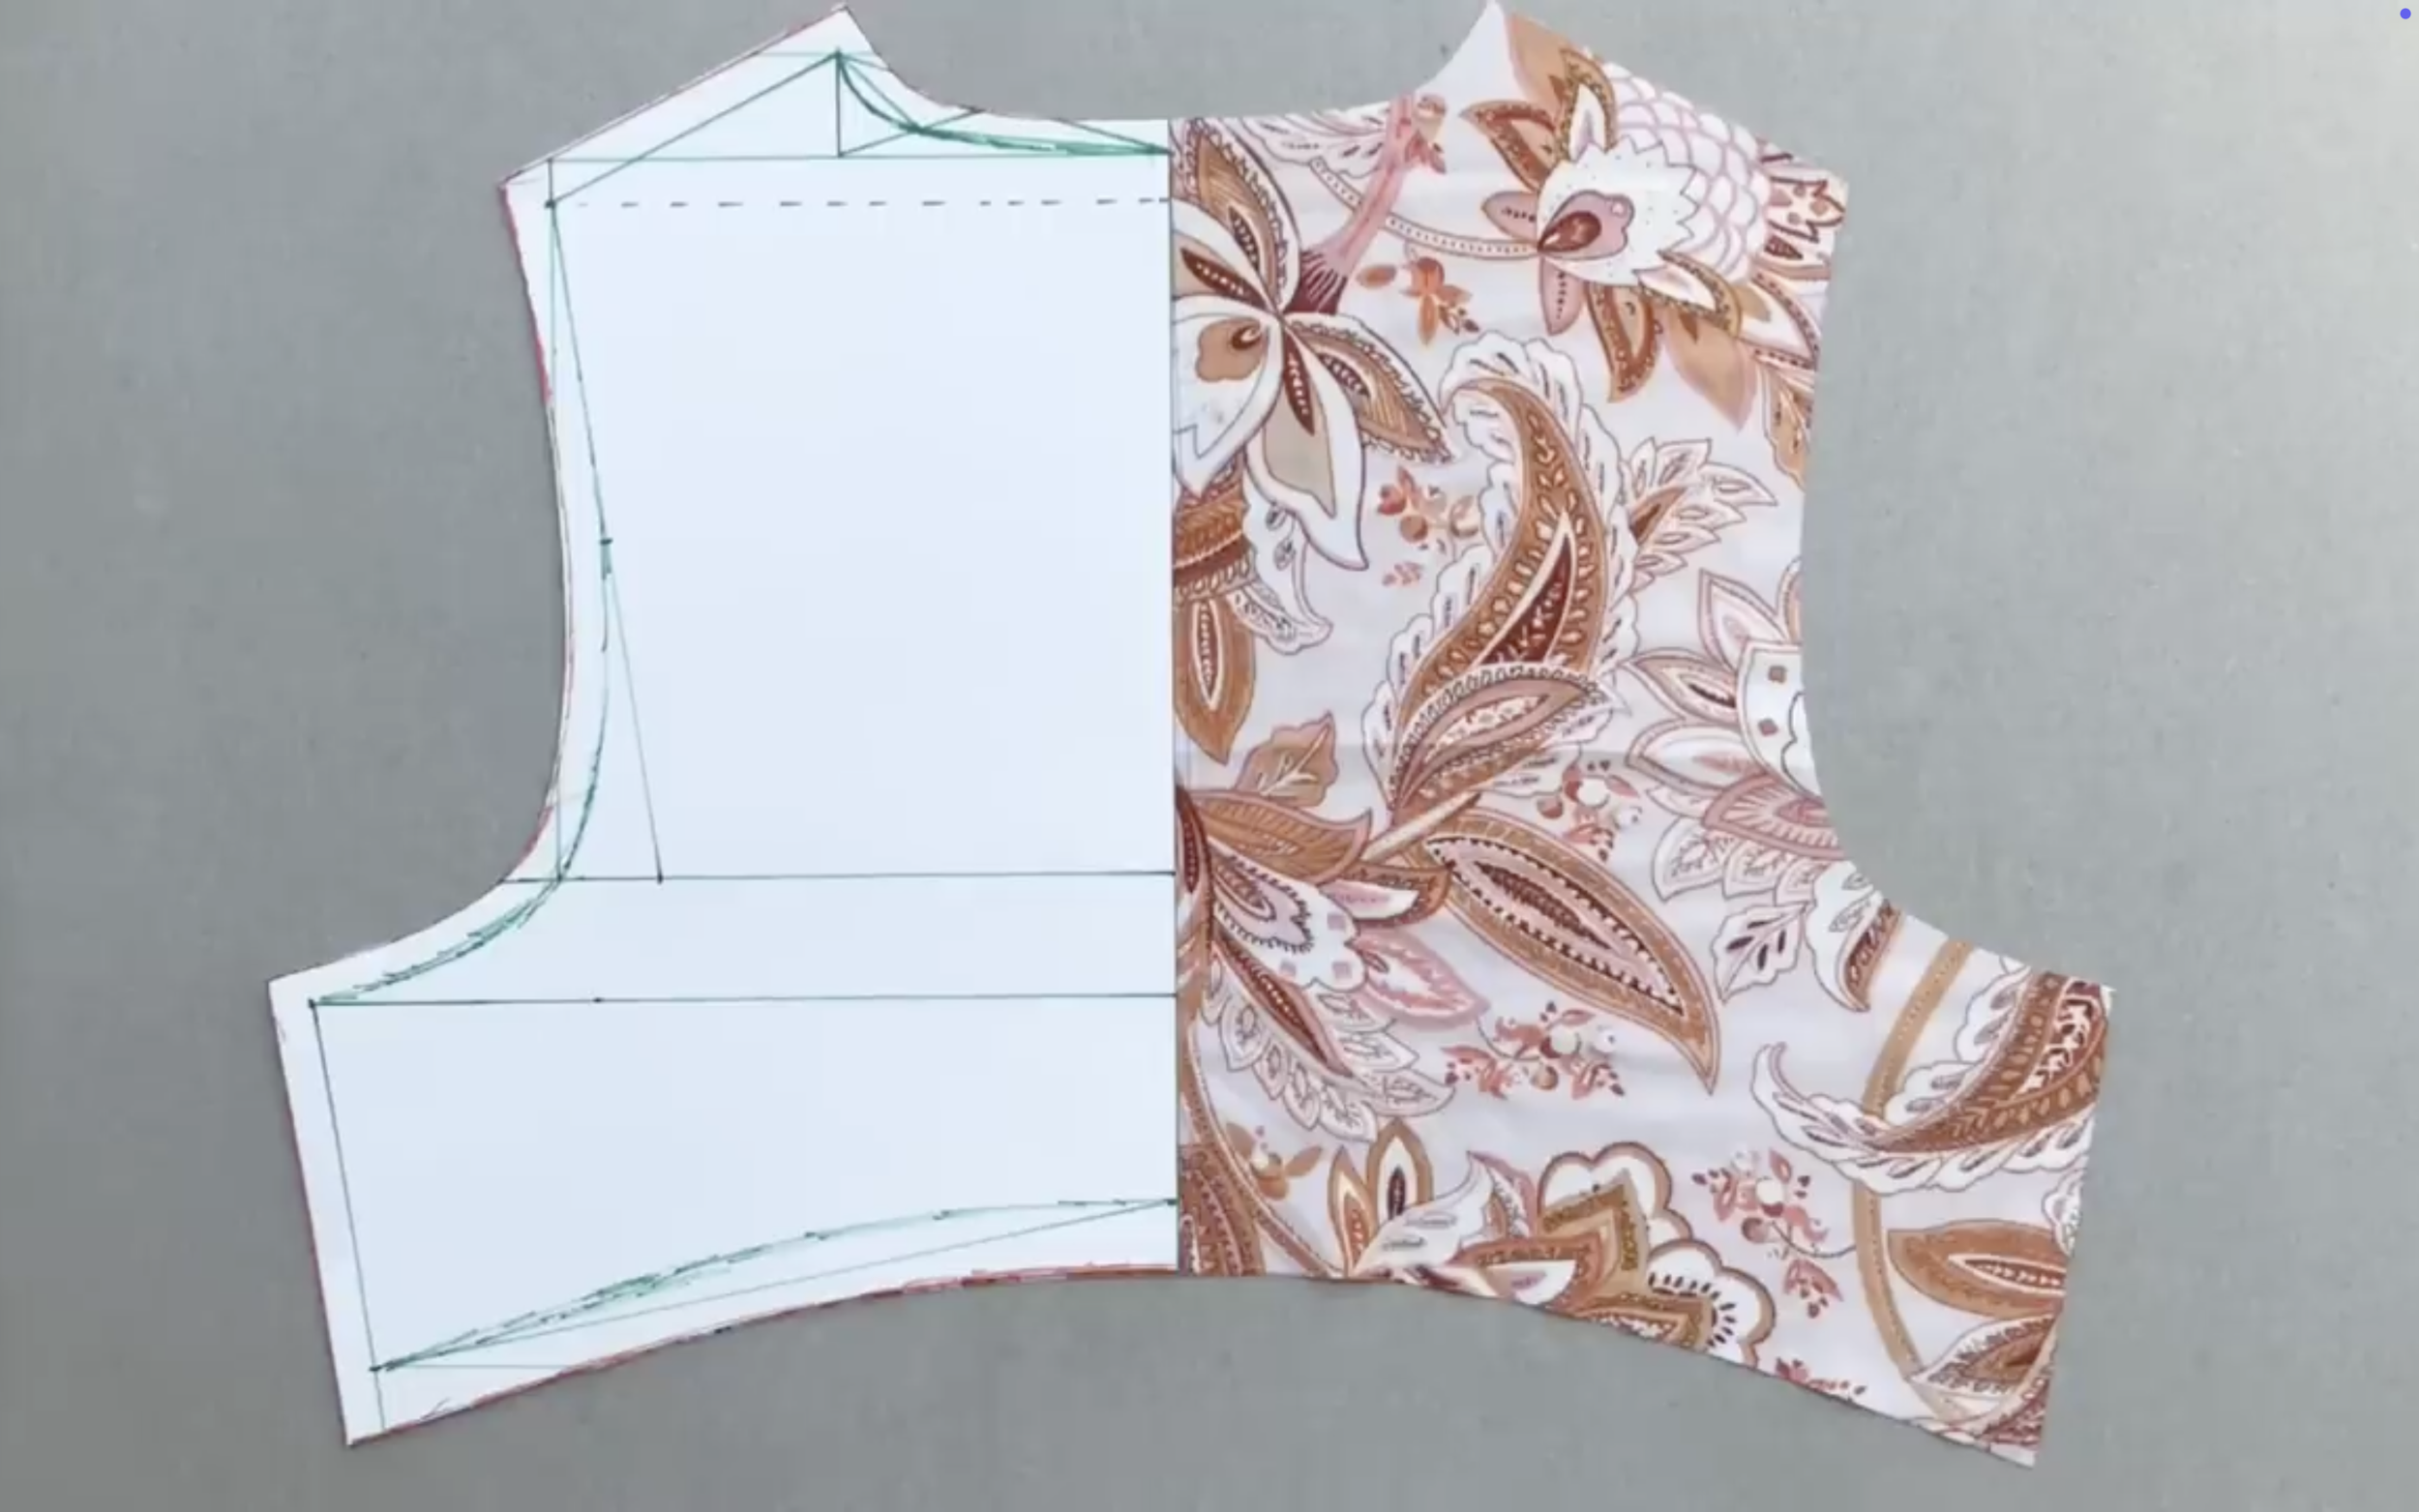
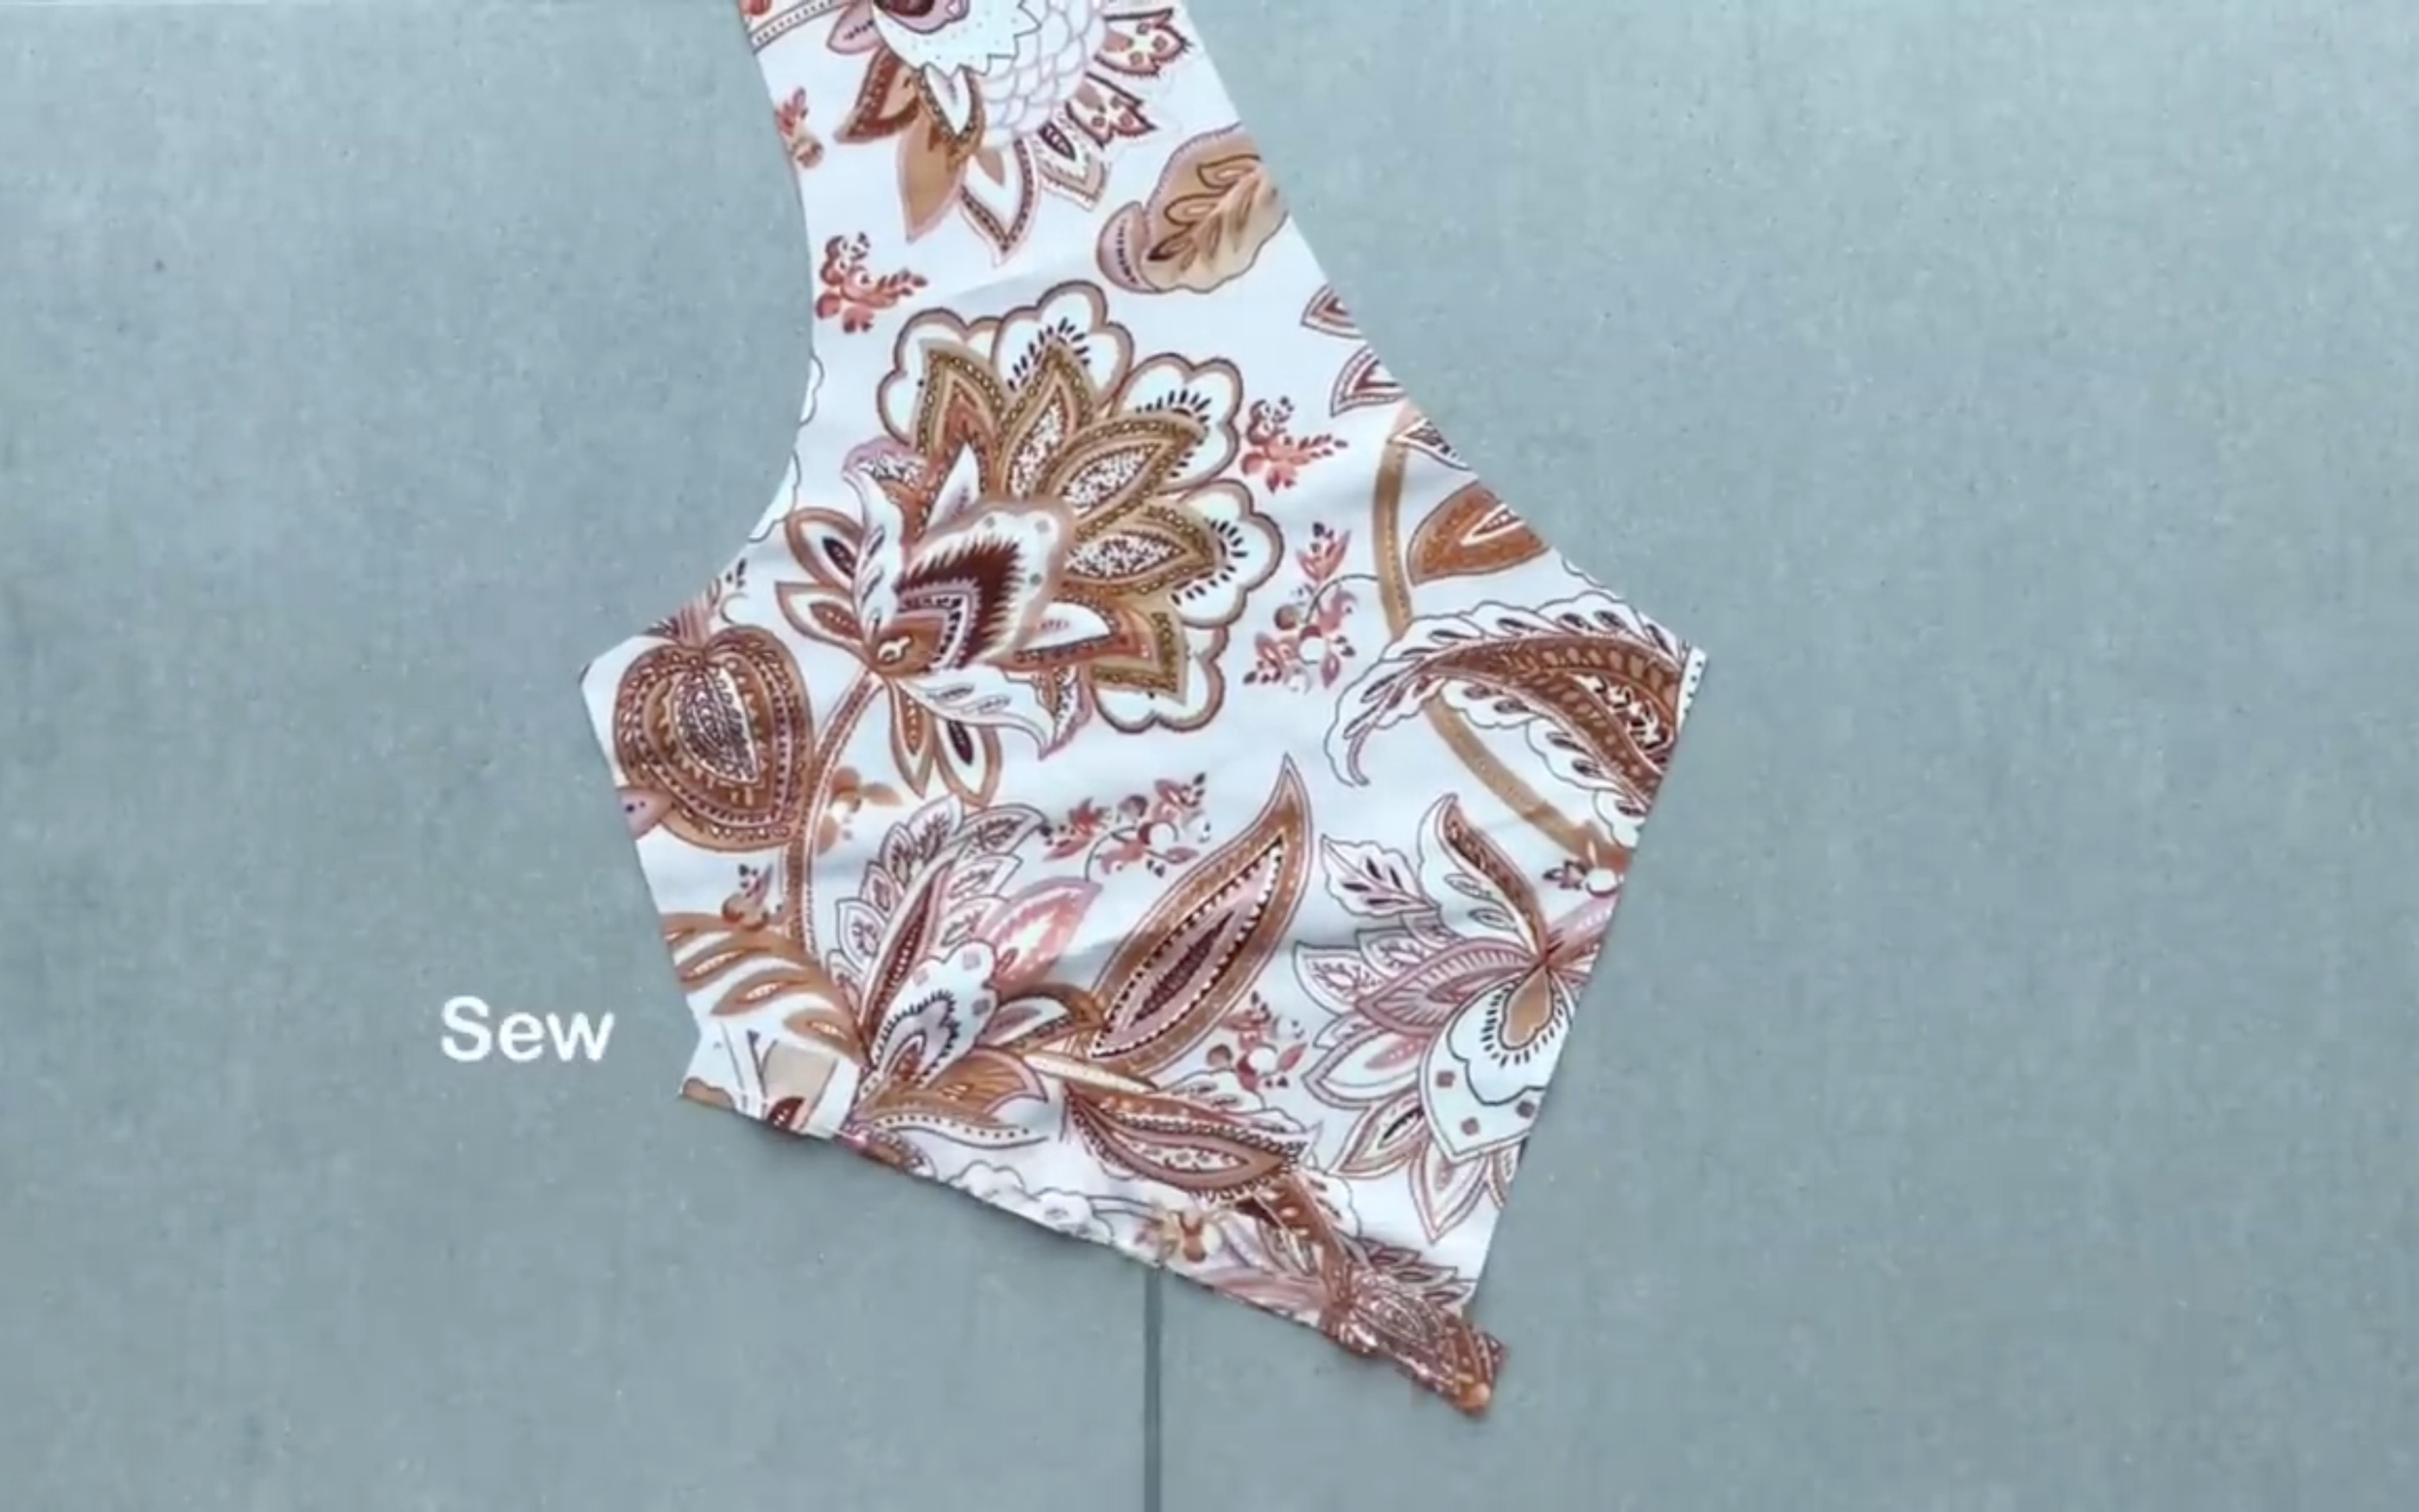
Cut the back pattern of the top pattern in folded fabric.
From the end of the back bodice, draw a curved line 3.5 cm away from the ending line.

After that, fold the end fabric inside around 0.5 cm first, then keep folding it to the line just drawn before. This will create a fabric hole with over 1 cm width to put the elastic band through later.
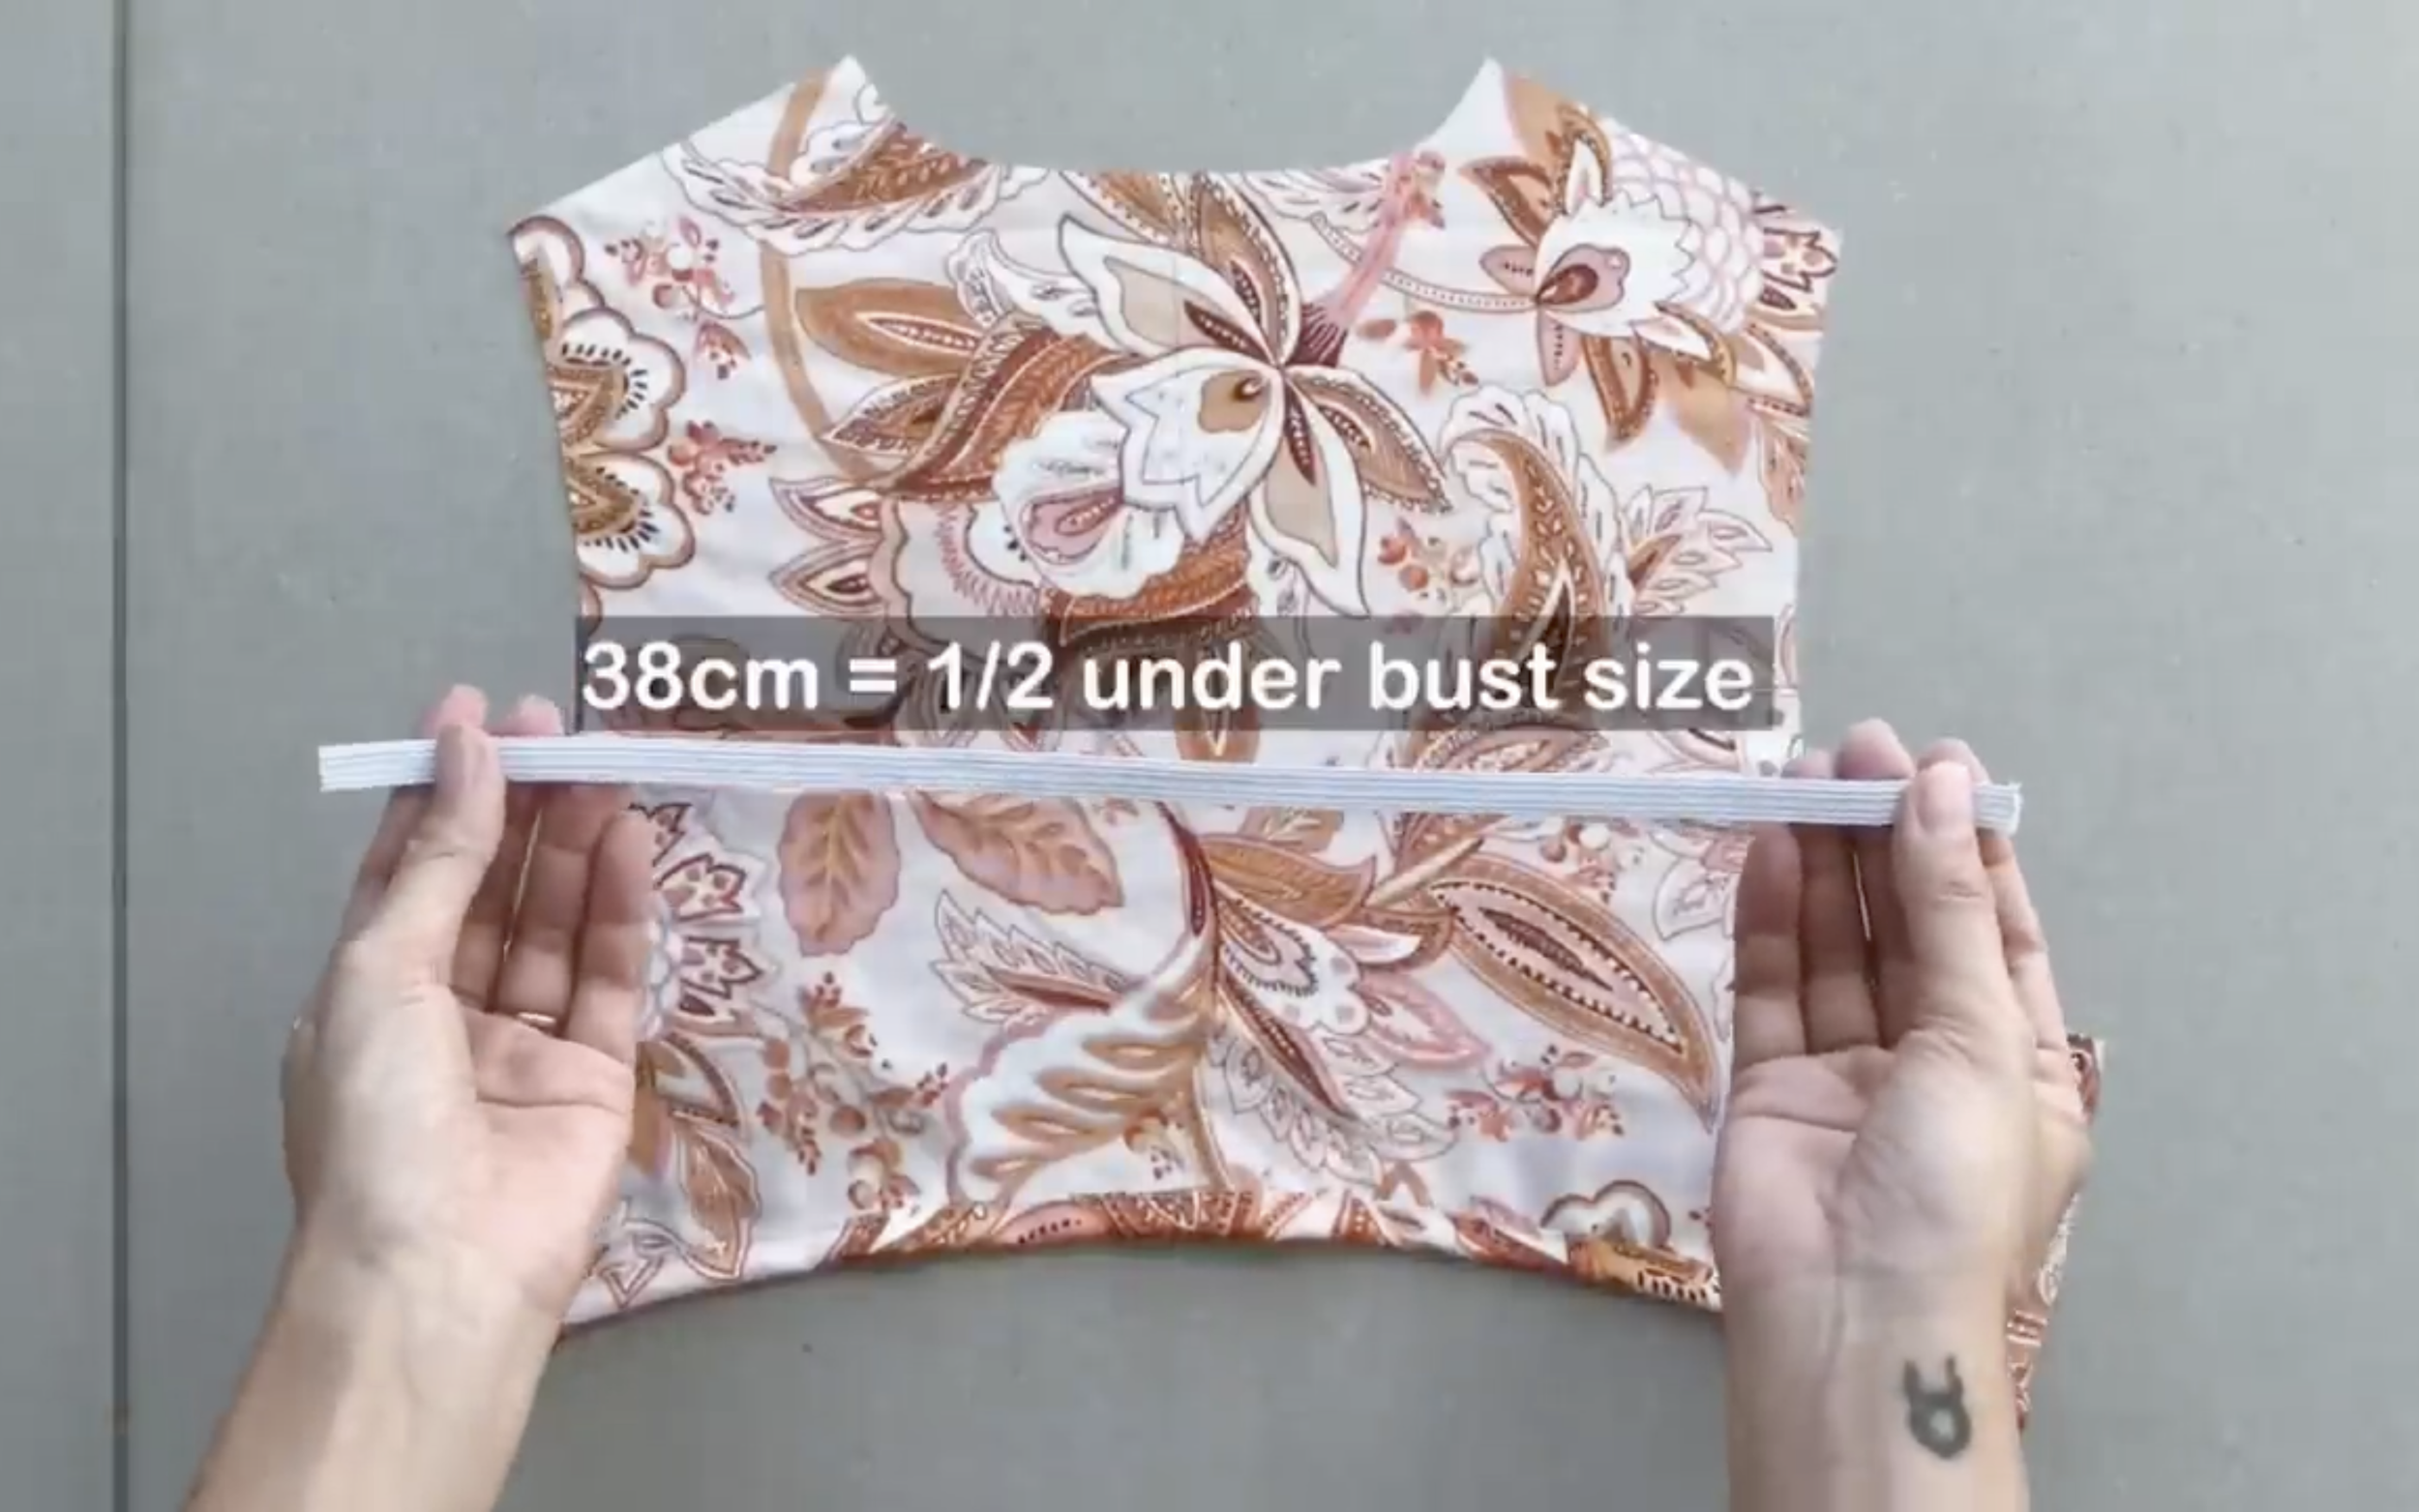
Cut a 38 cm length of 1 cm wide elastic band. It is half of the under-bust size.
Then put the elastic band through the fabric hole.
Then, sew the two ends of the elastic band to the fabric to keep them from moving.
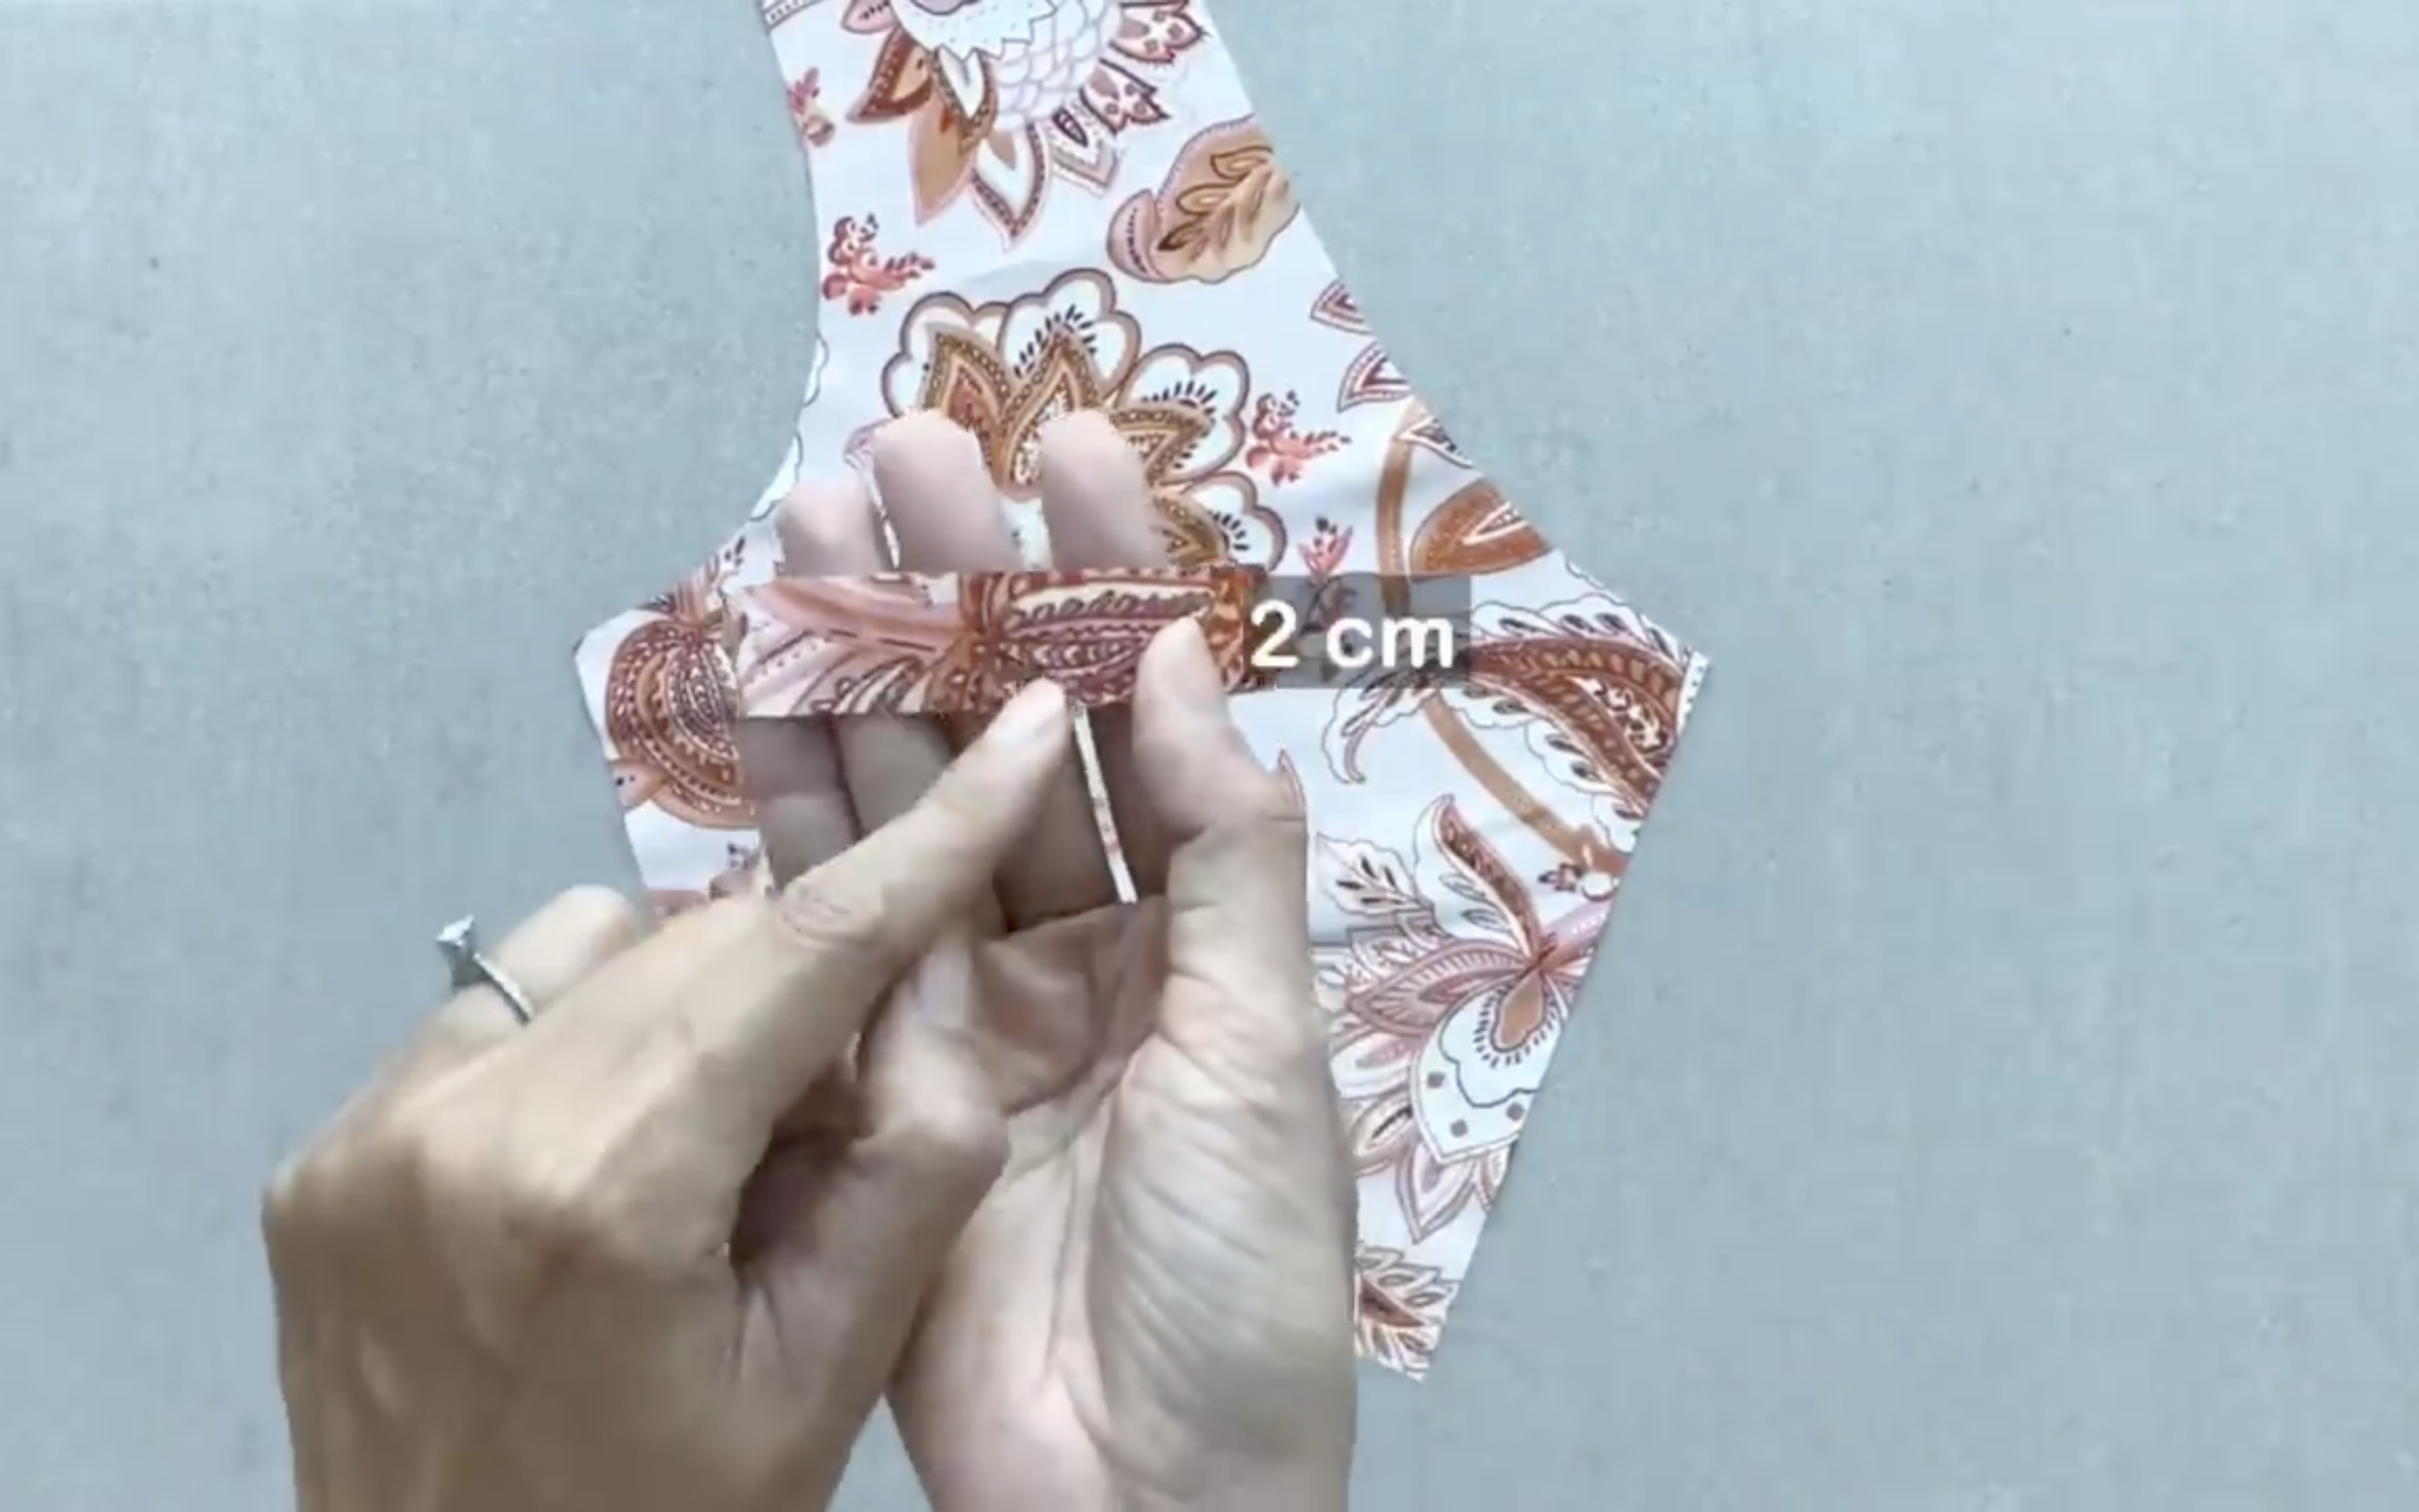
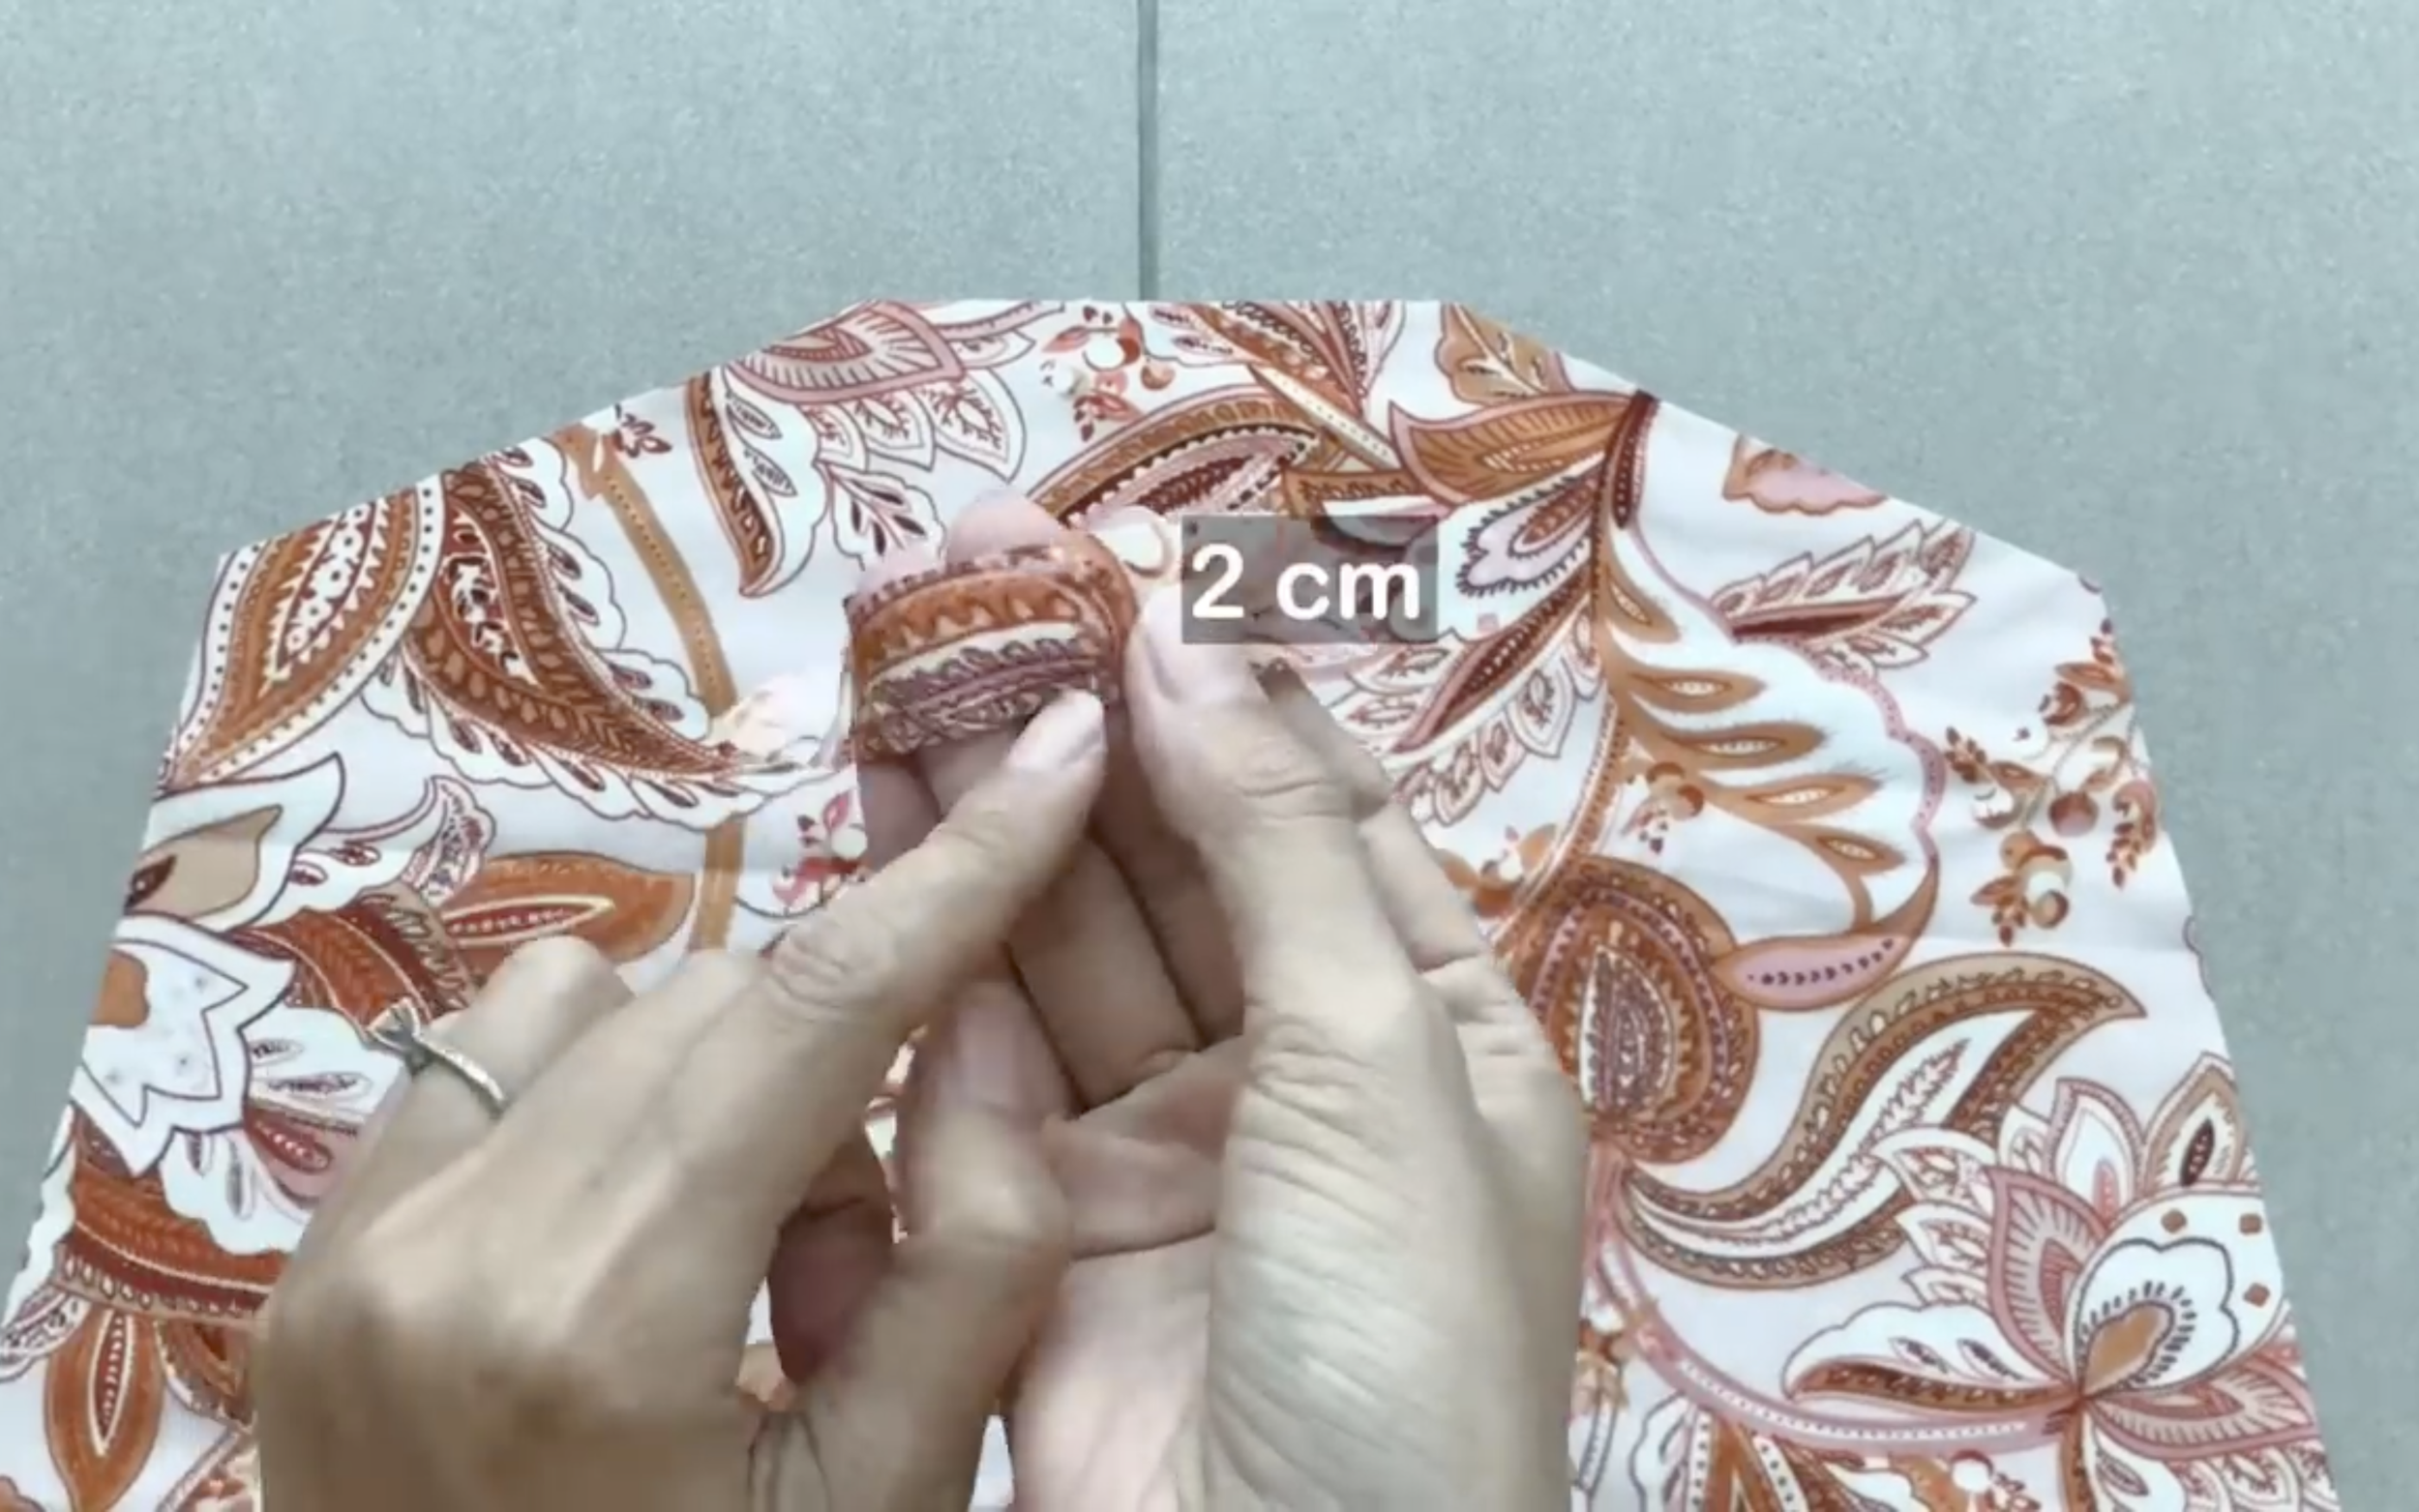
Moving to the front bodice, cut a fabric strip with a width of 2 cm.
Connect to the cutting line of the front bodice.
After that, fold the end fabric inside around 0.5 cm first, then keep folding it again. This will create a fabric hole with over 1 cm width to put the elastic band through later.

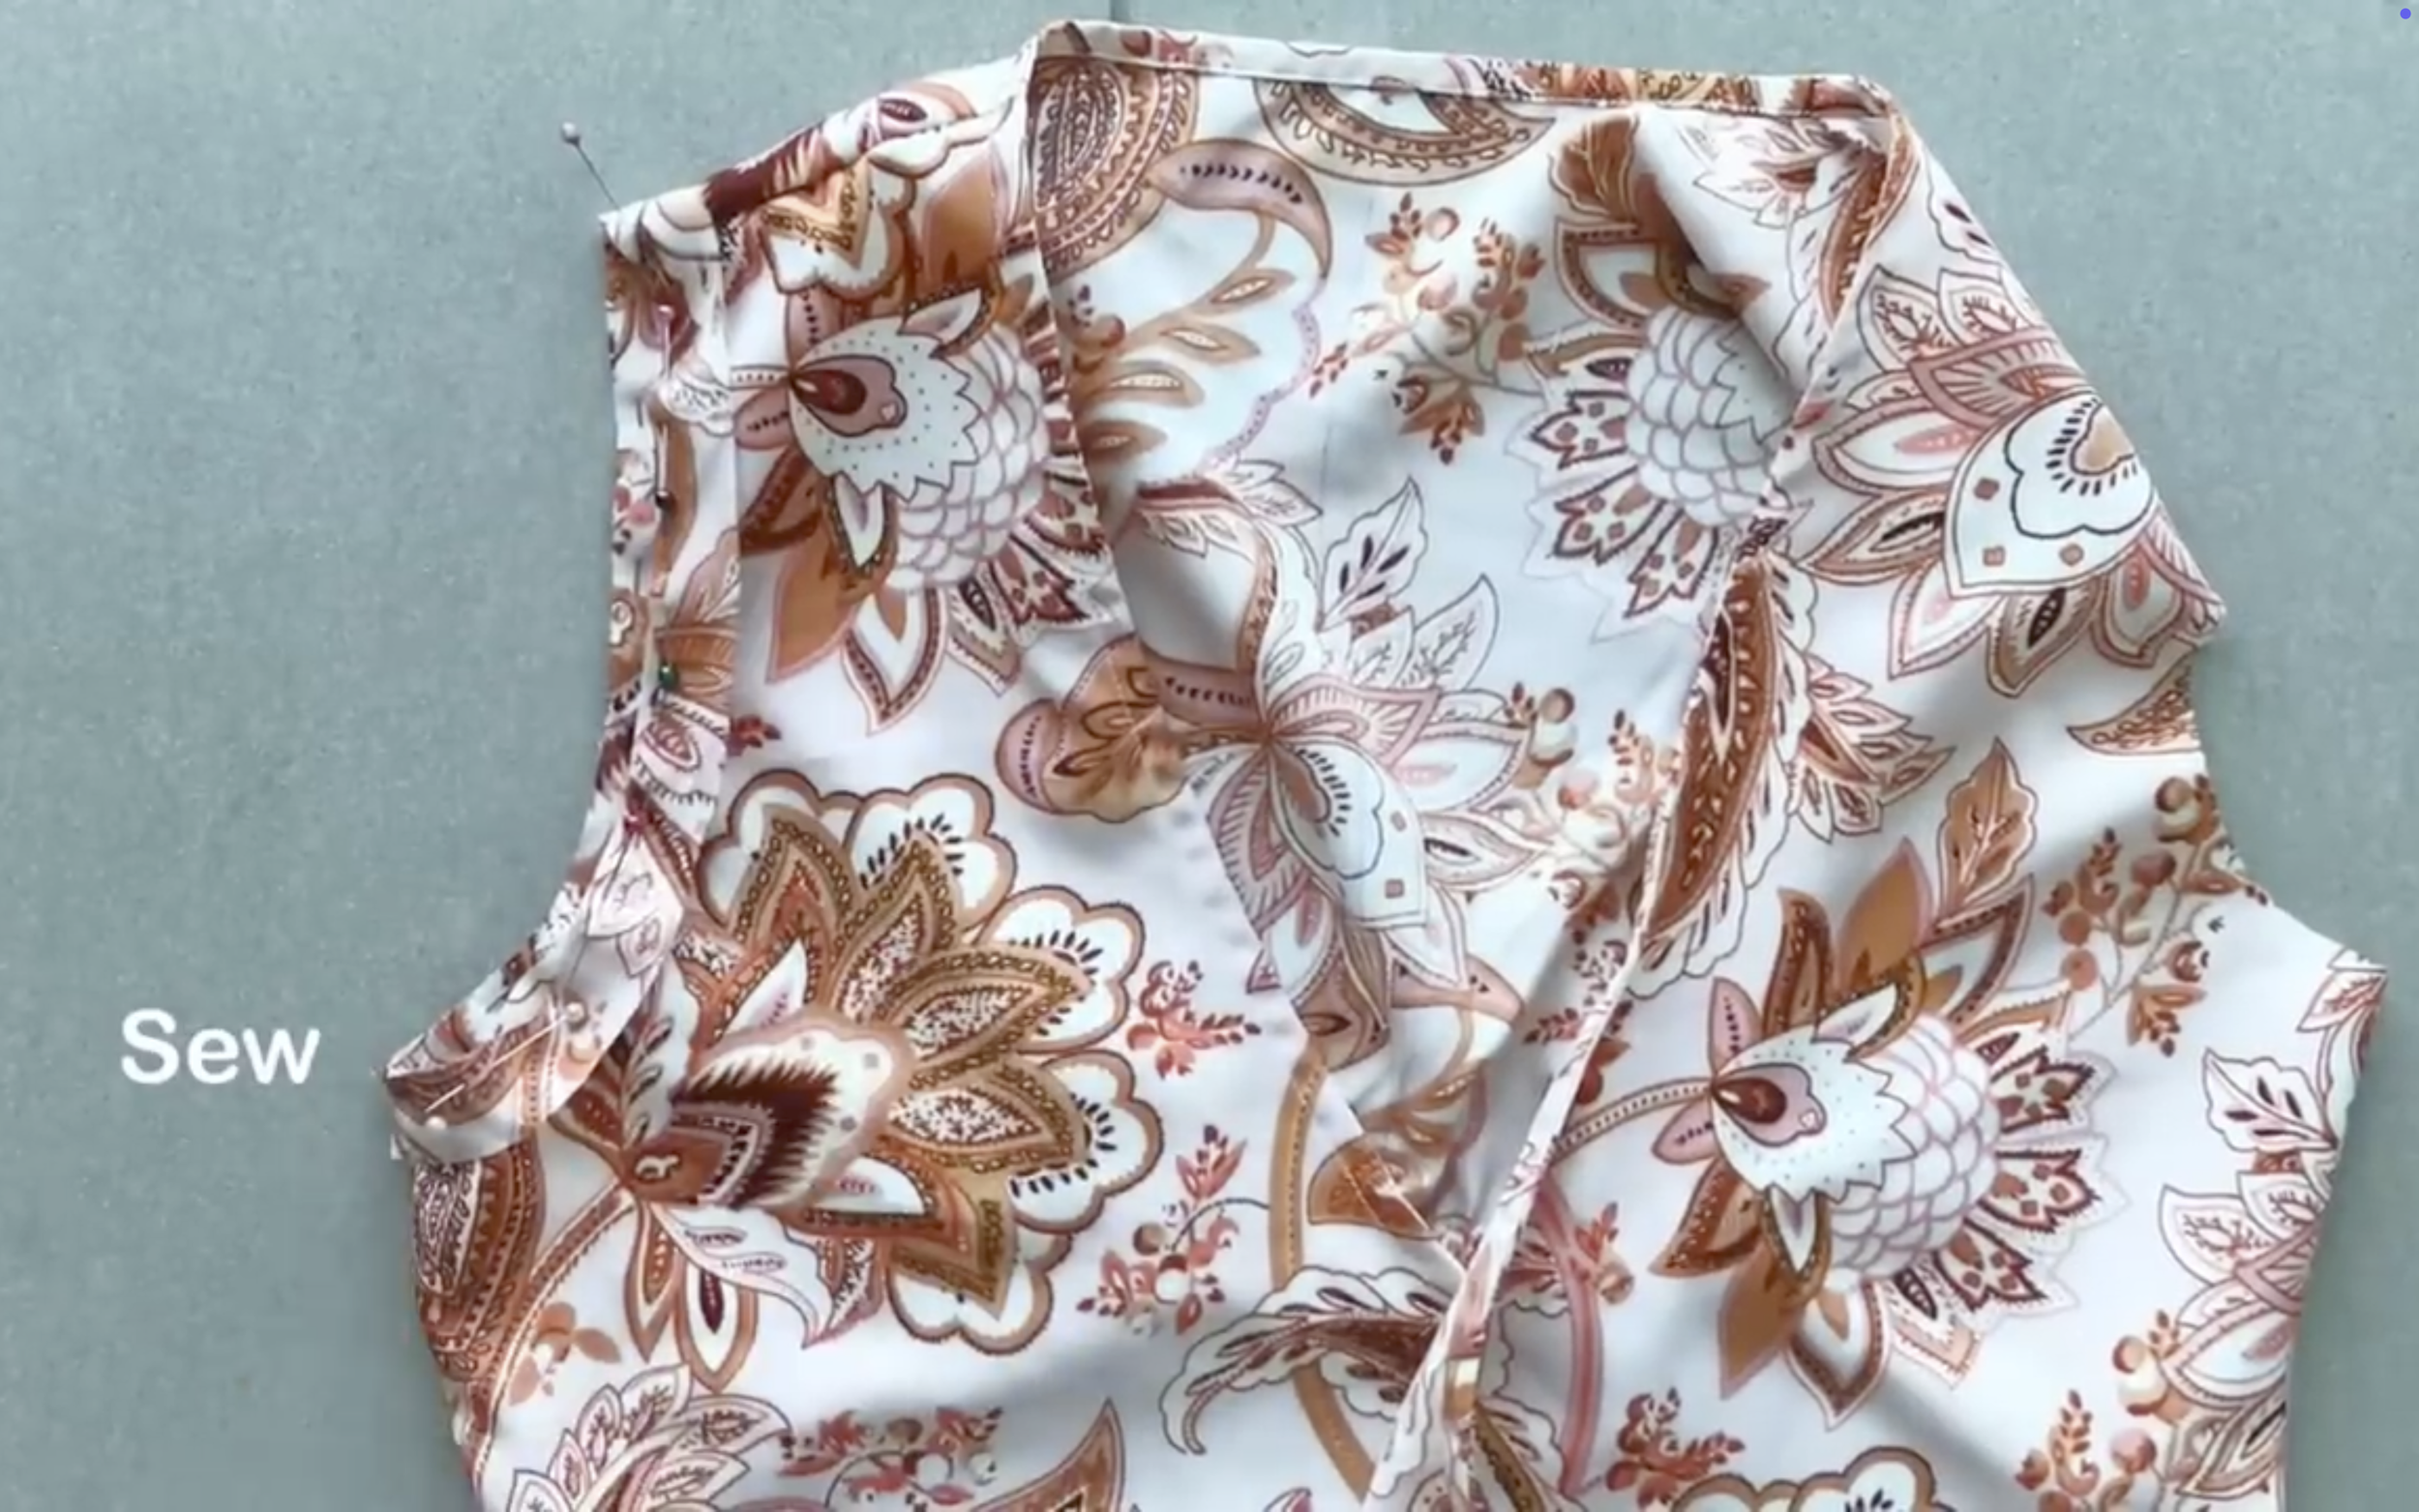
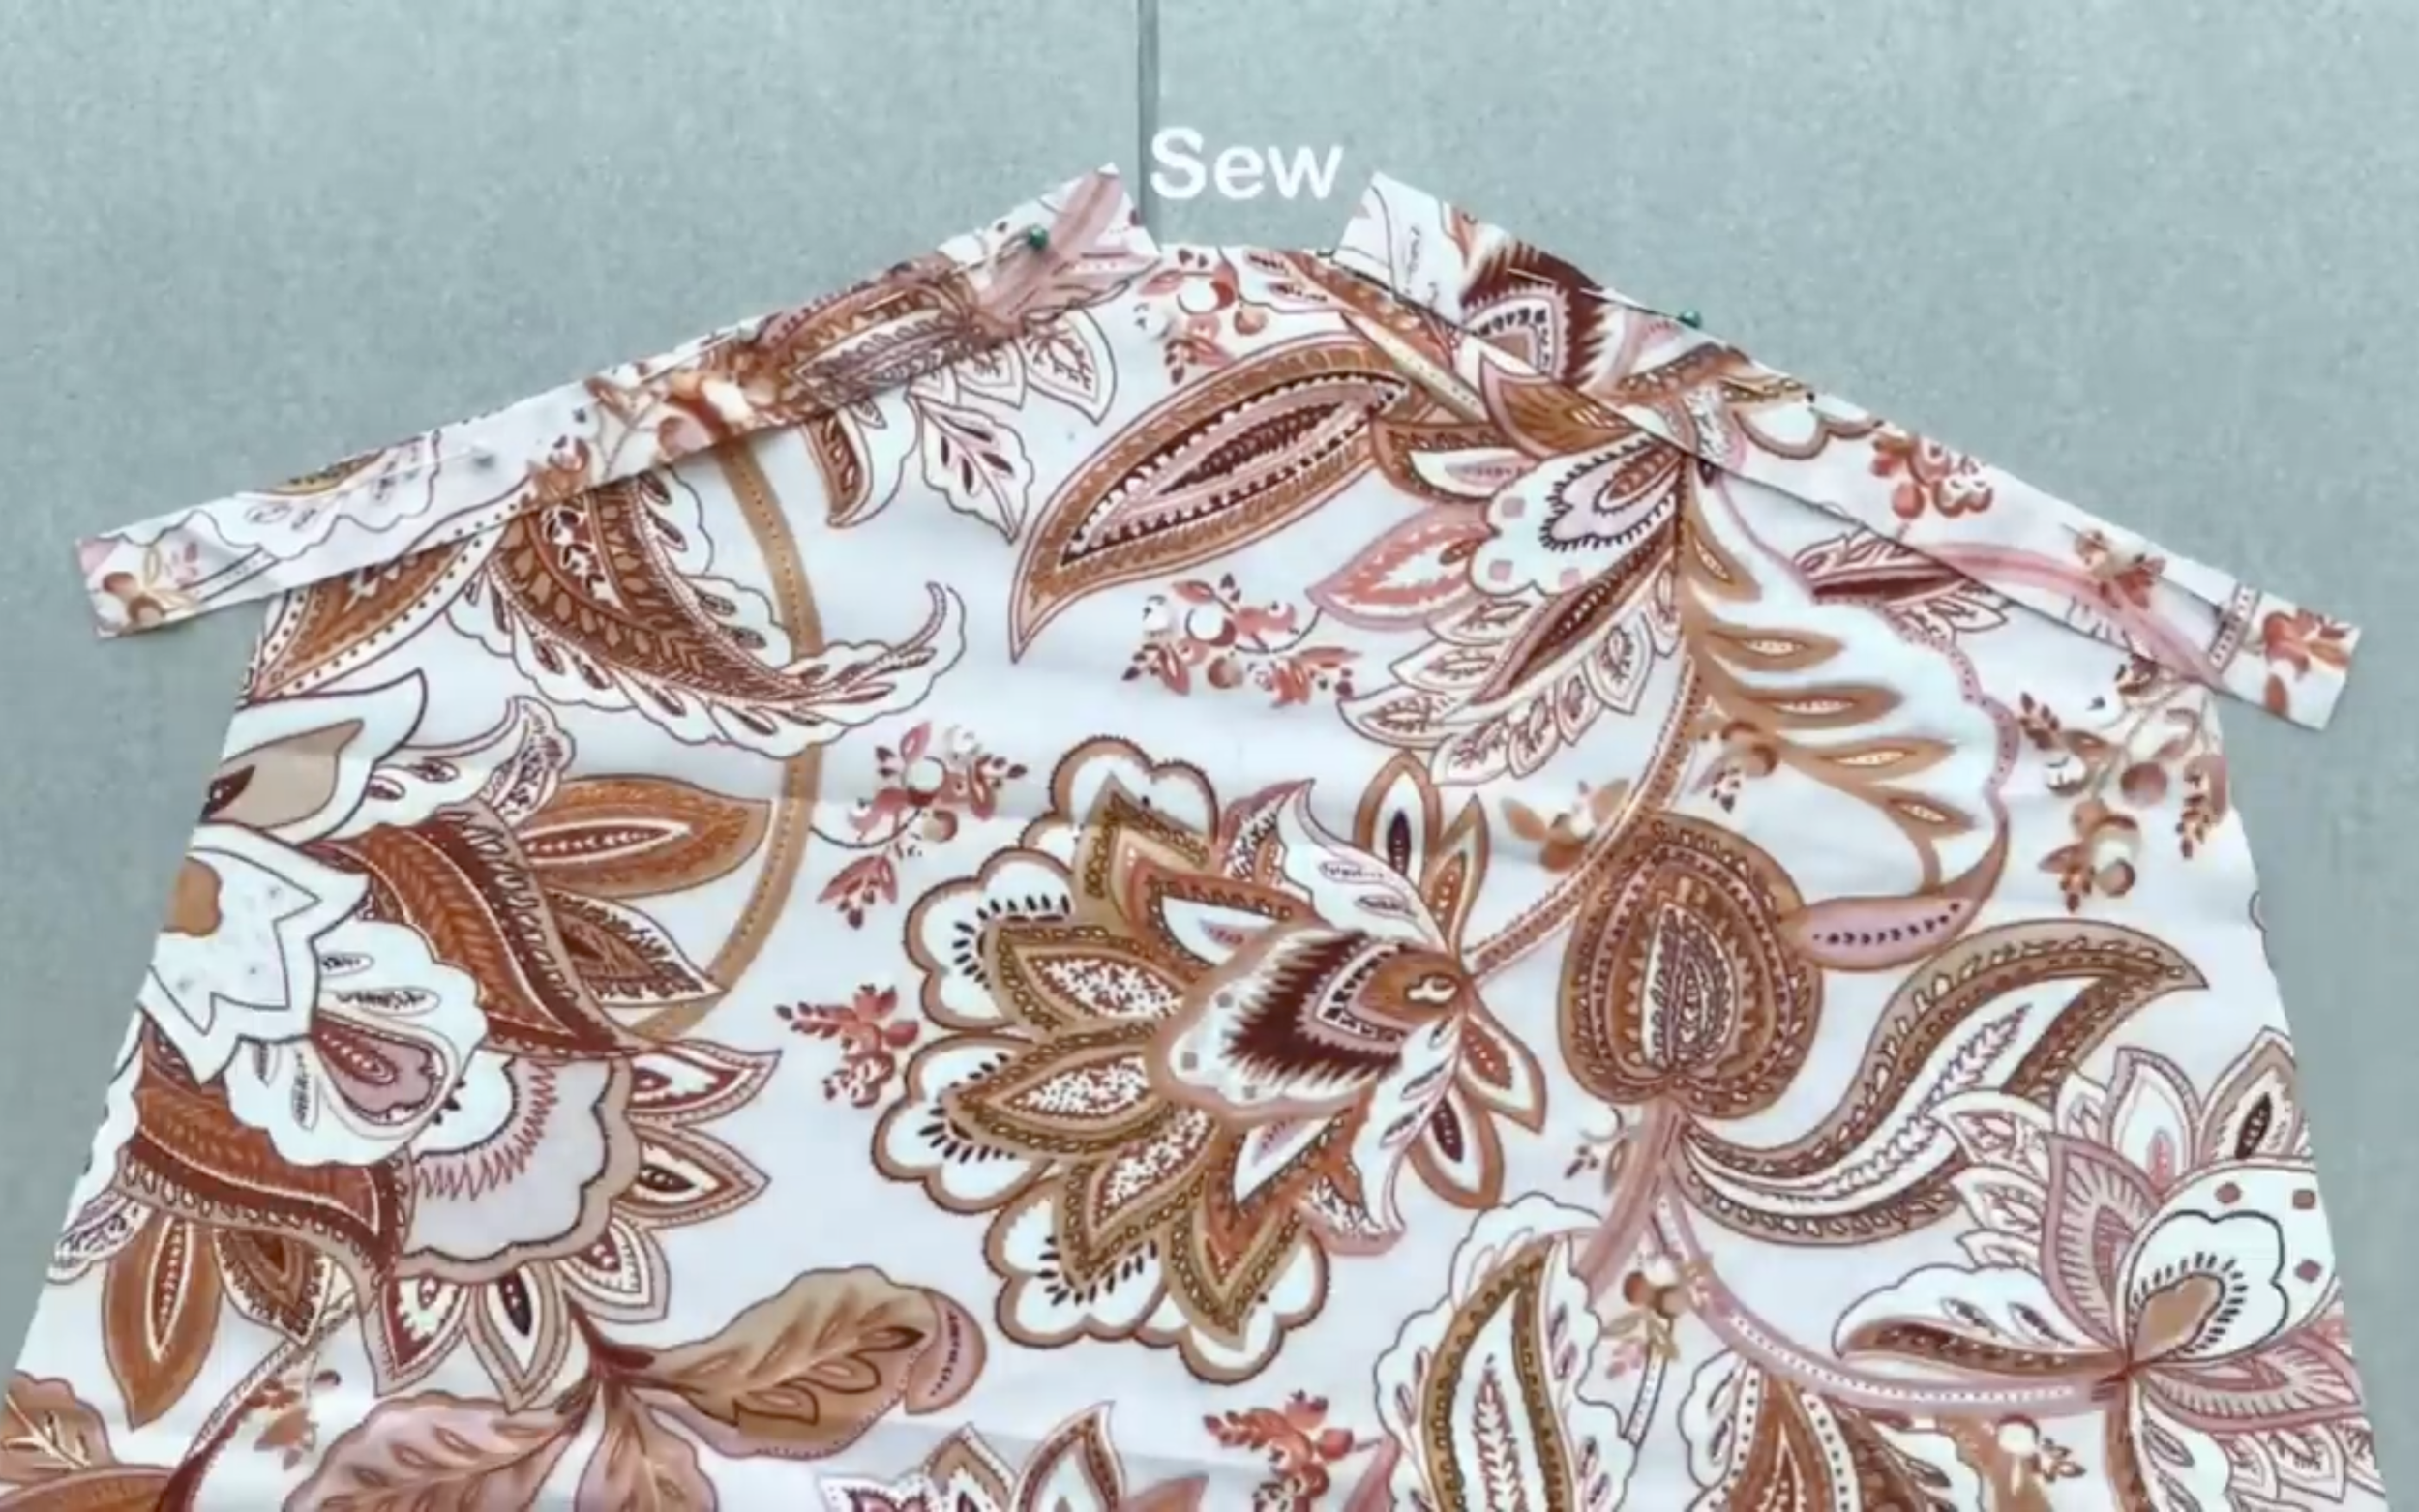
Now, connect the front and back of the top at the shoulder lines and side seams.
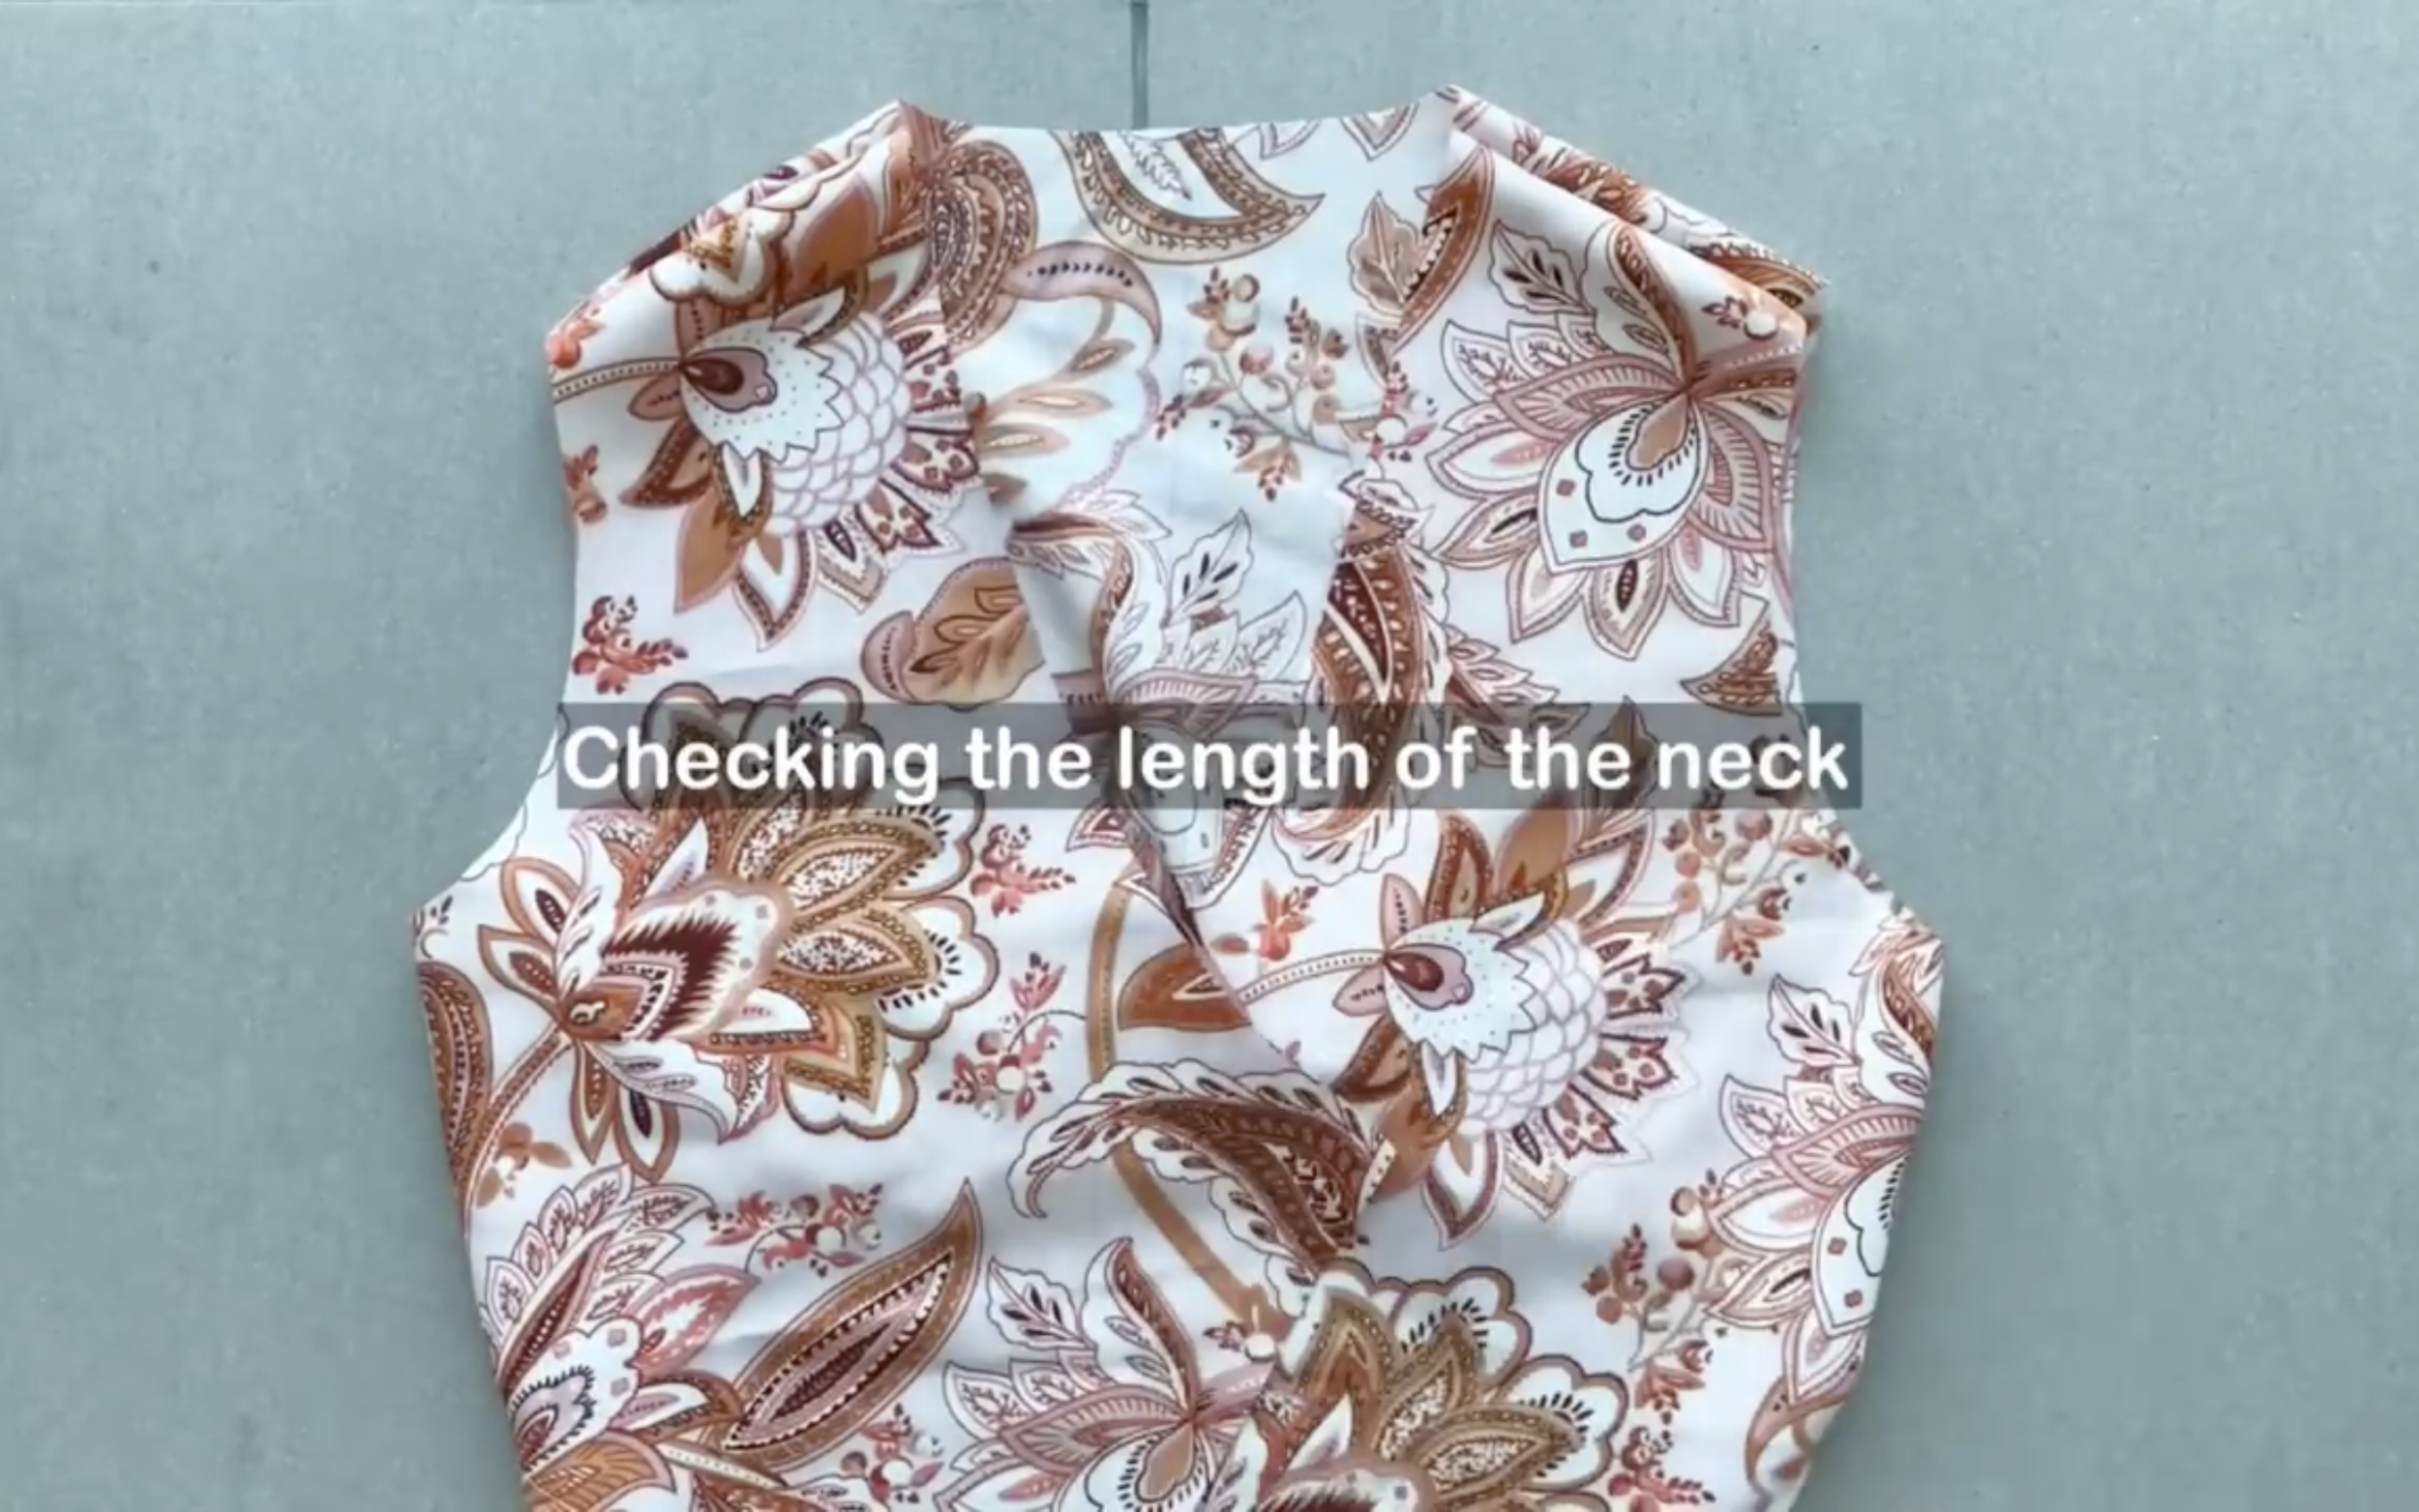
At the neck of the top part, measure the total length of the neckline first.
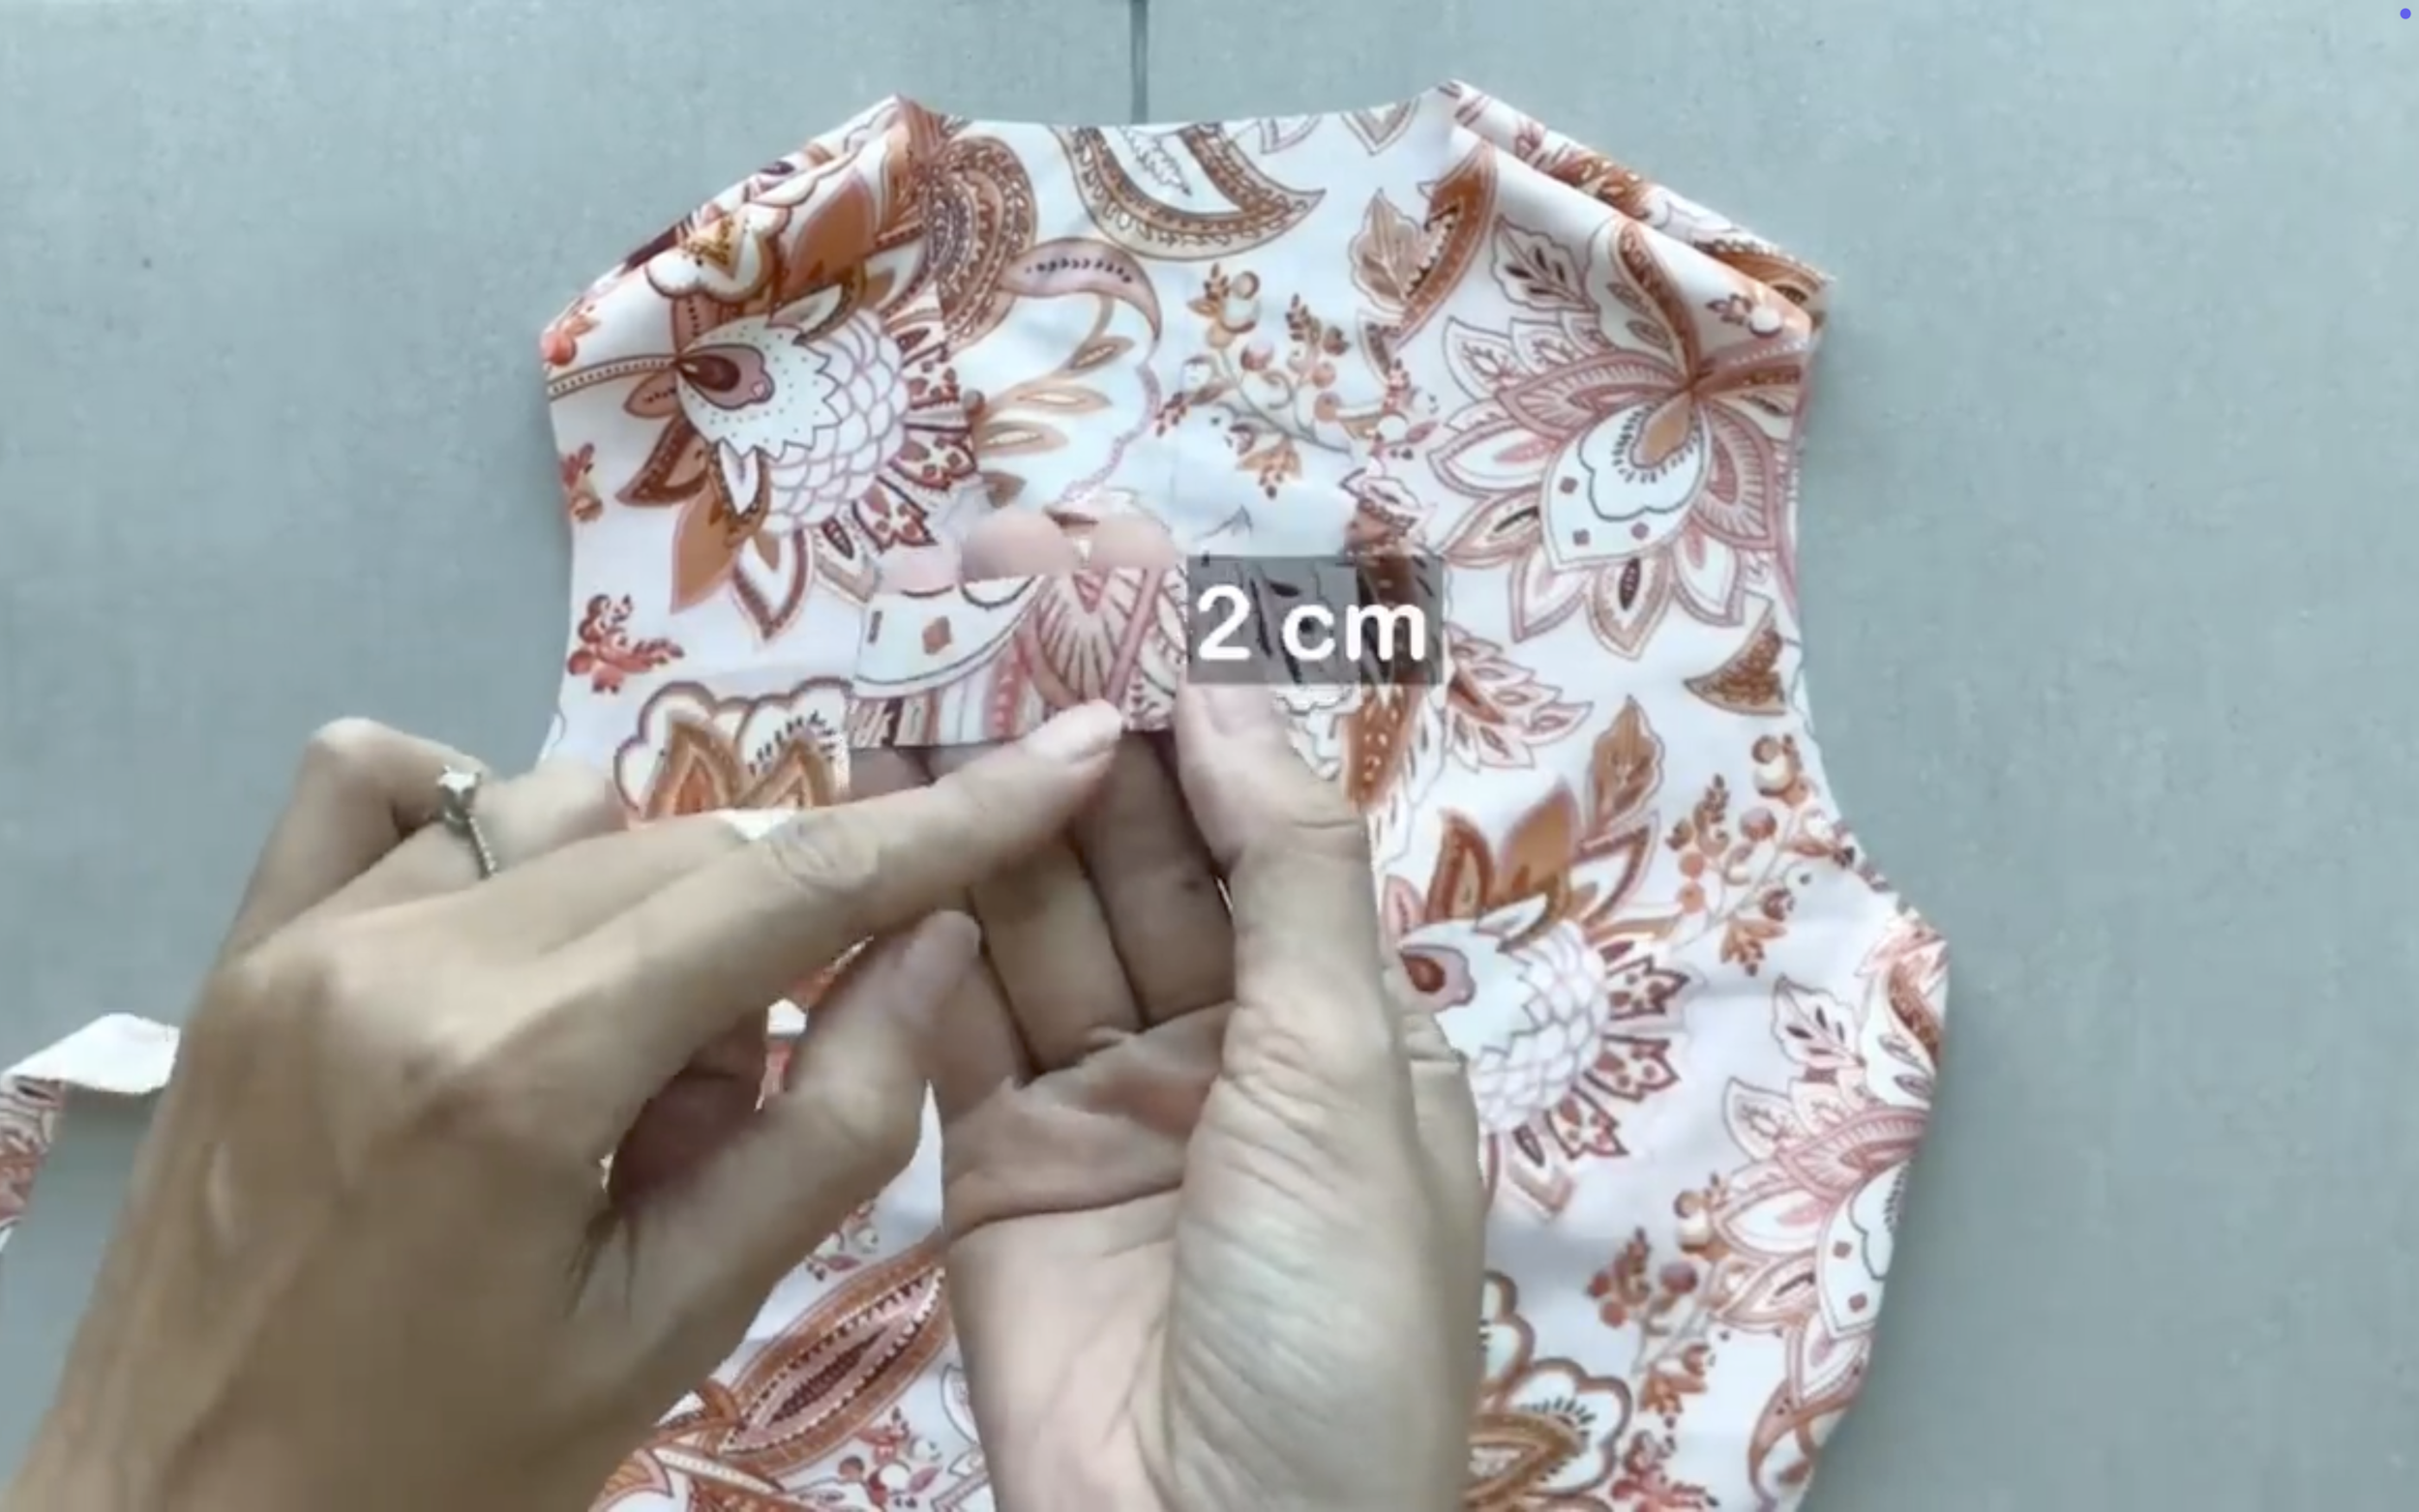
Then, cut a fabric strip with a width of 2 cm and the same length as the neckline.
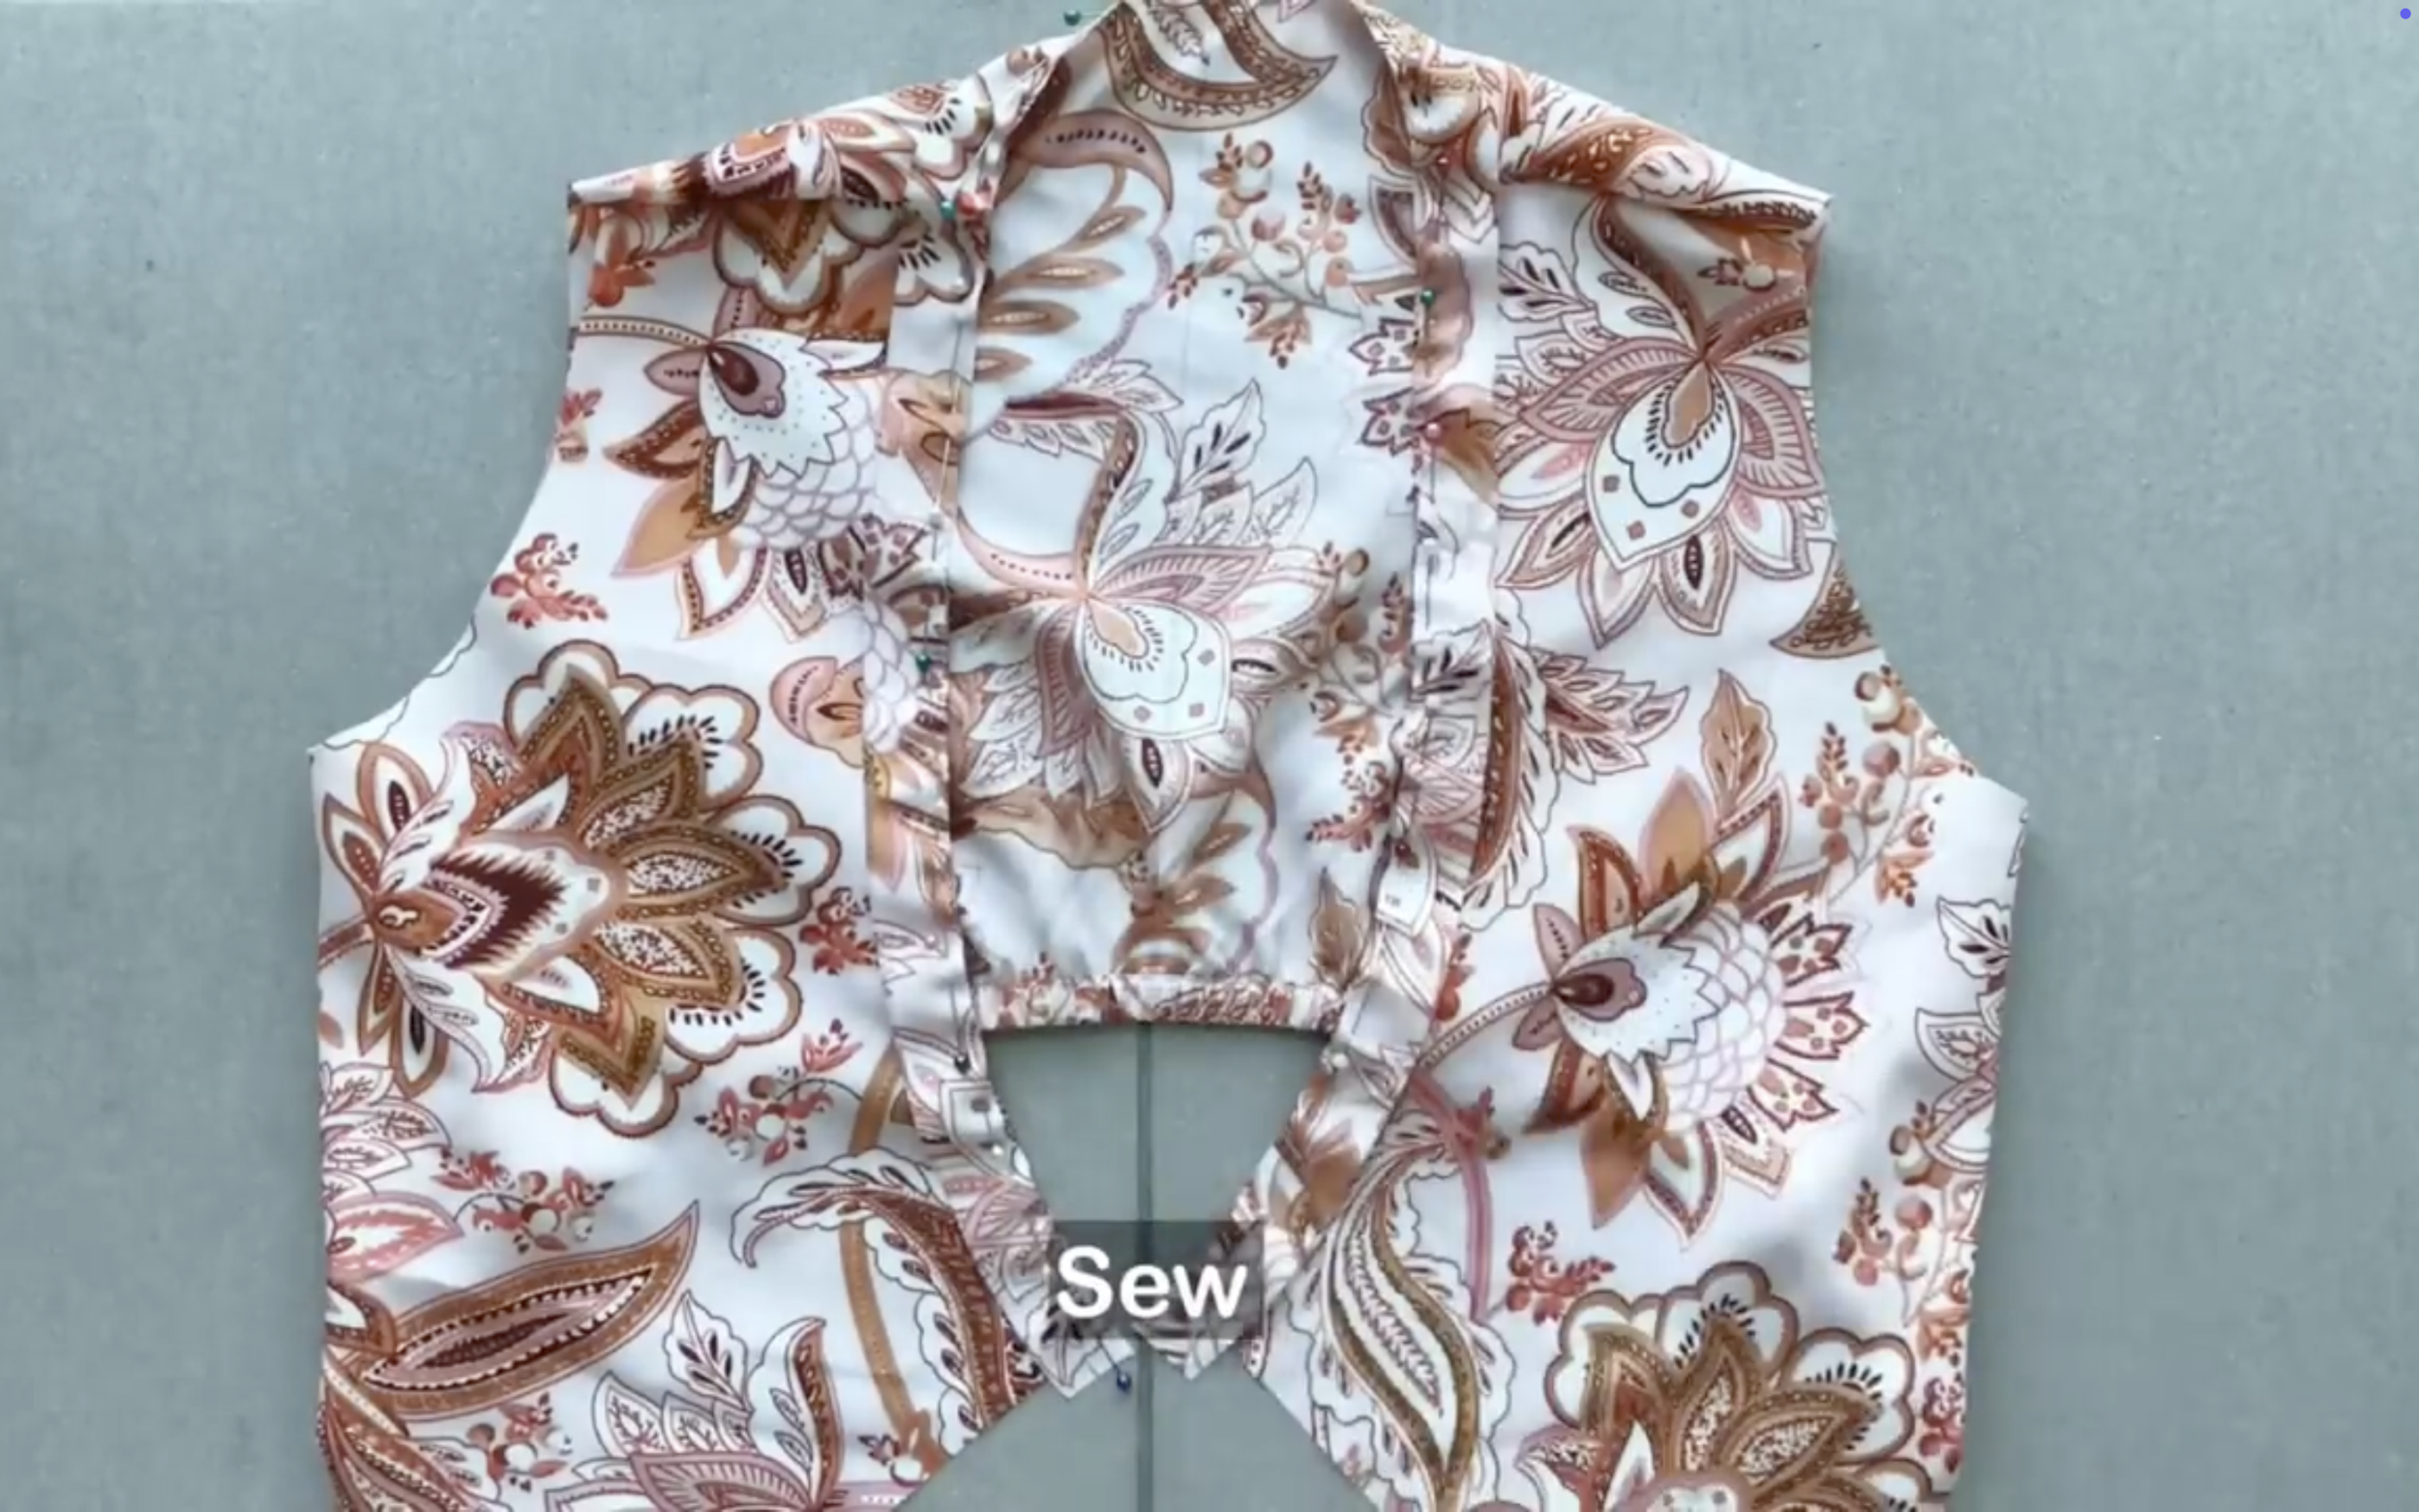
Connect one side of the fabric strip to the right side of the neckline first.
After that, fold the other side of the fabric strip into the first seam, then keep folding it again to hide the end fabric inside and sew.
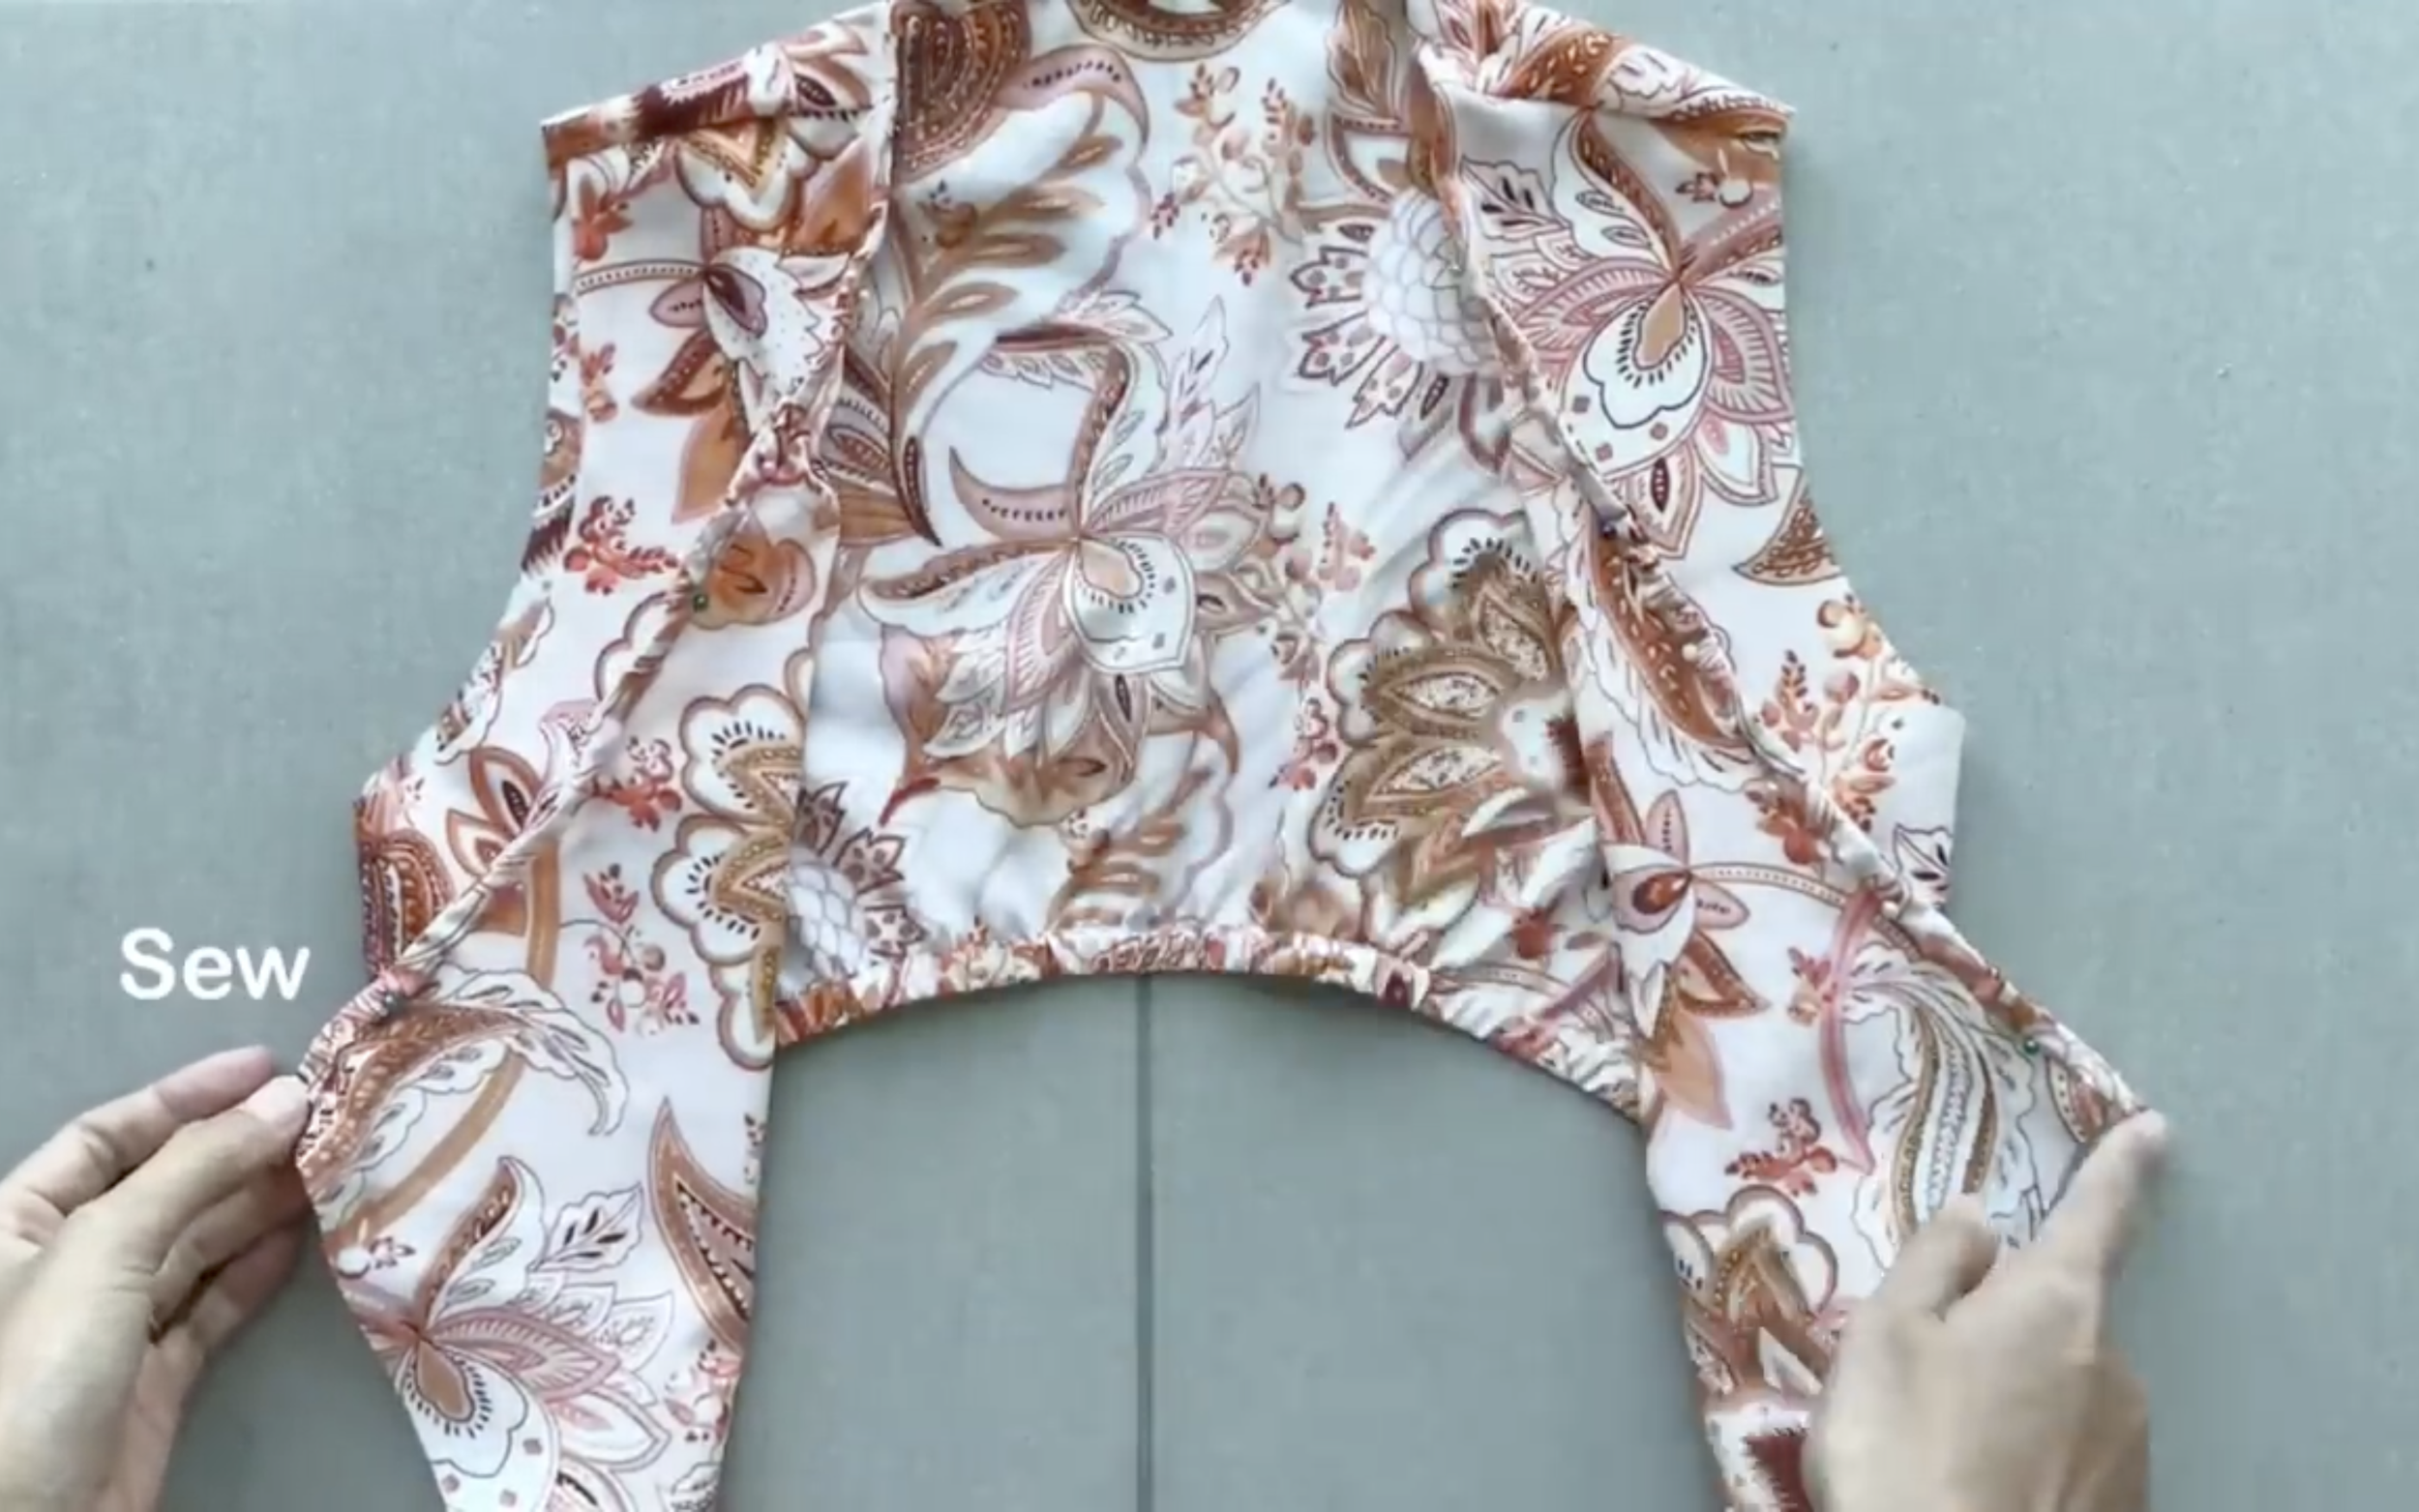
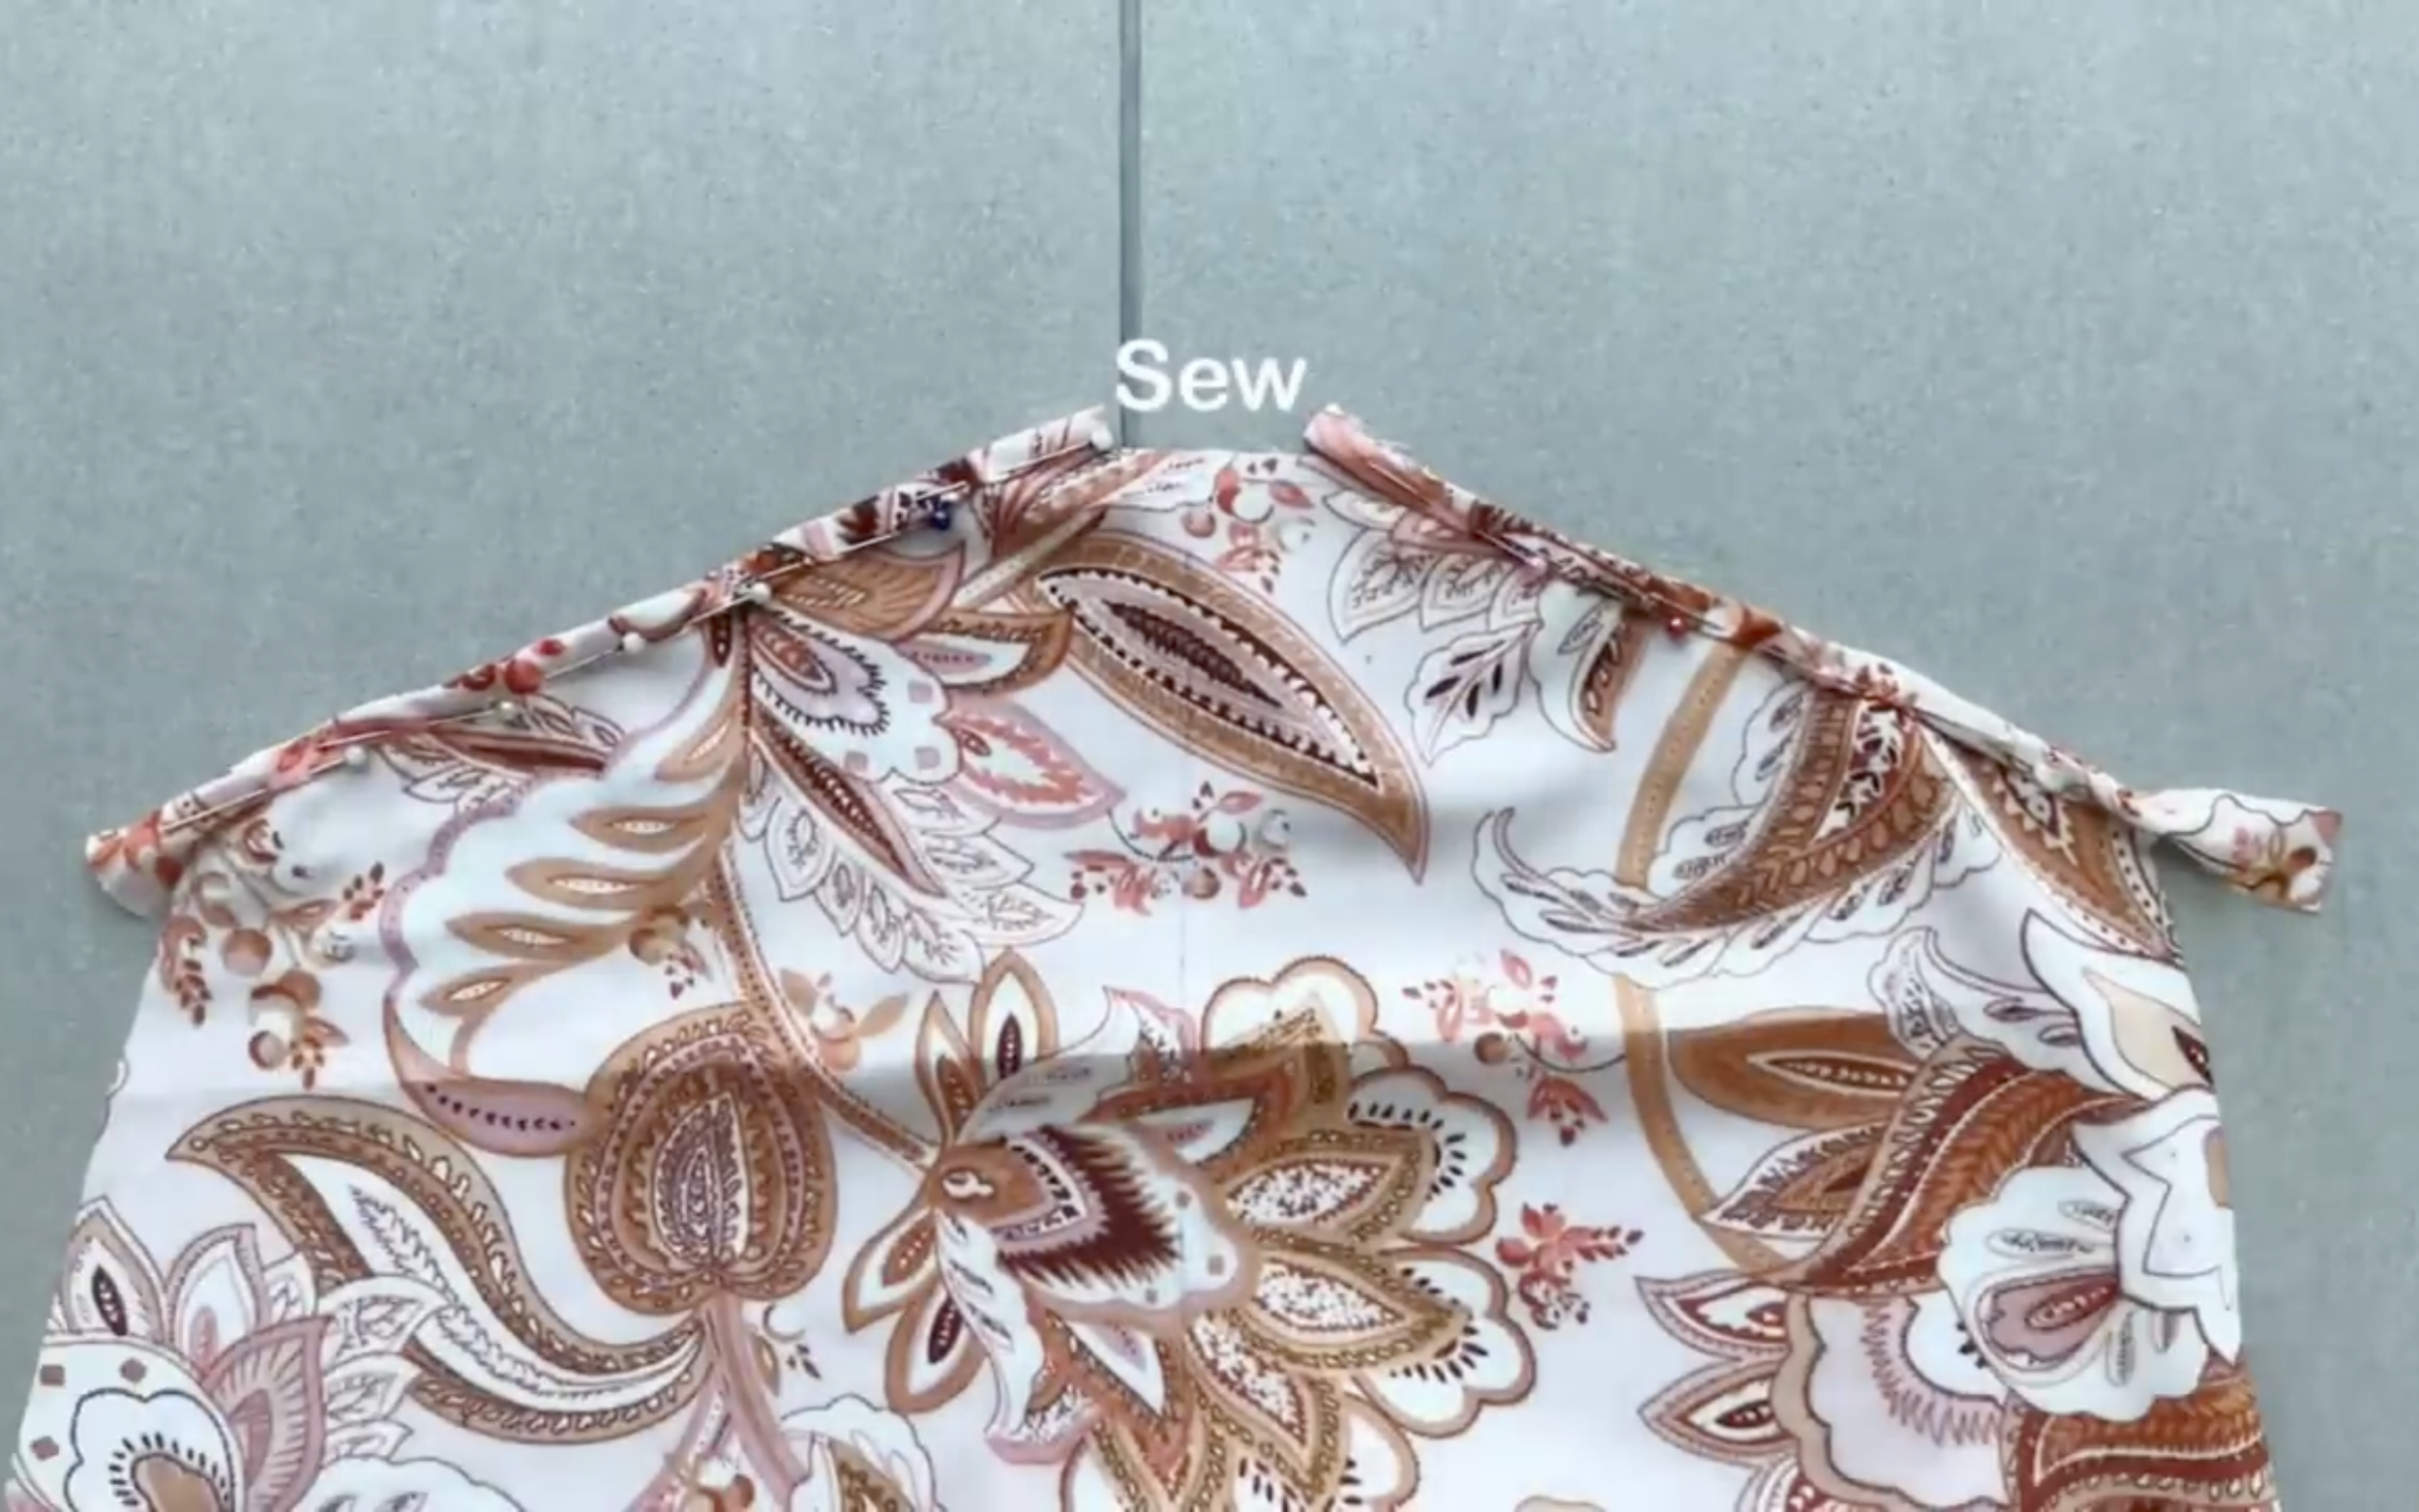
At the sleeve, measure the total length of the sleeve first.
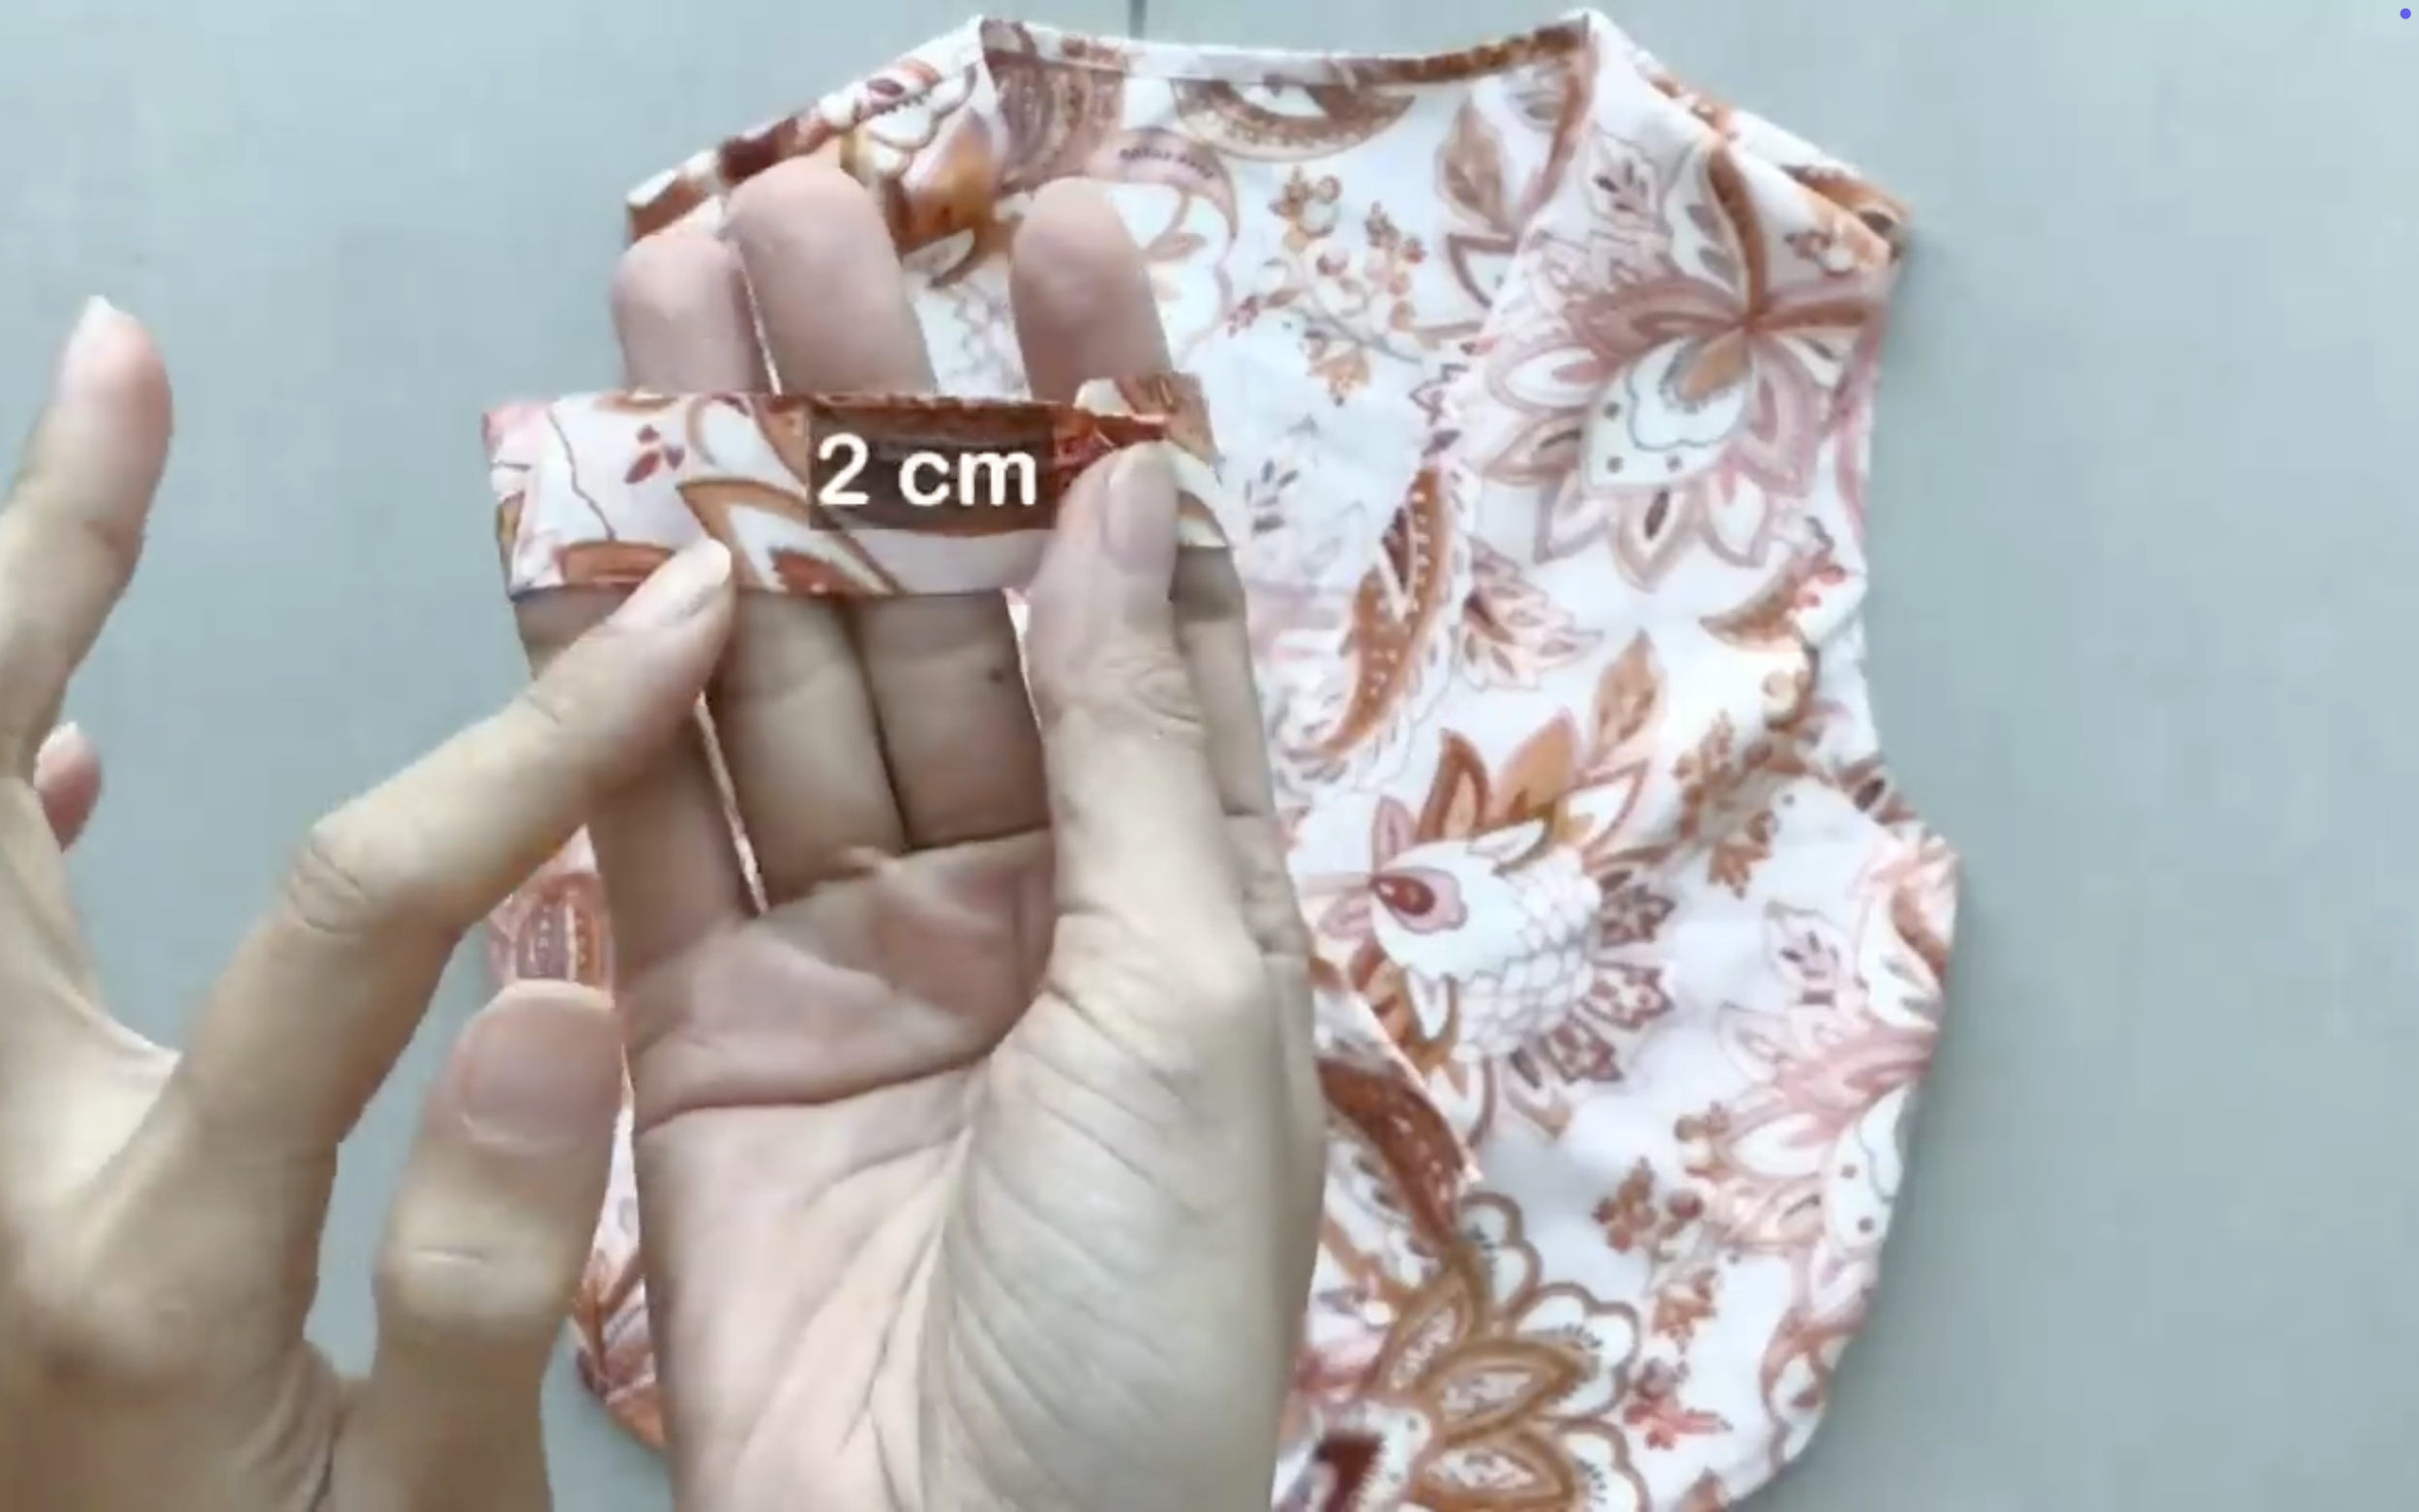
Then, cut a fabric strip with a width of 2 cm and the same length as the sleeve length.
After that, connect one side of the fabric strip to the sleeve.
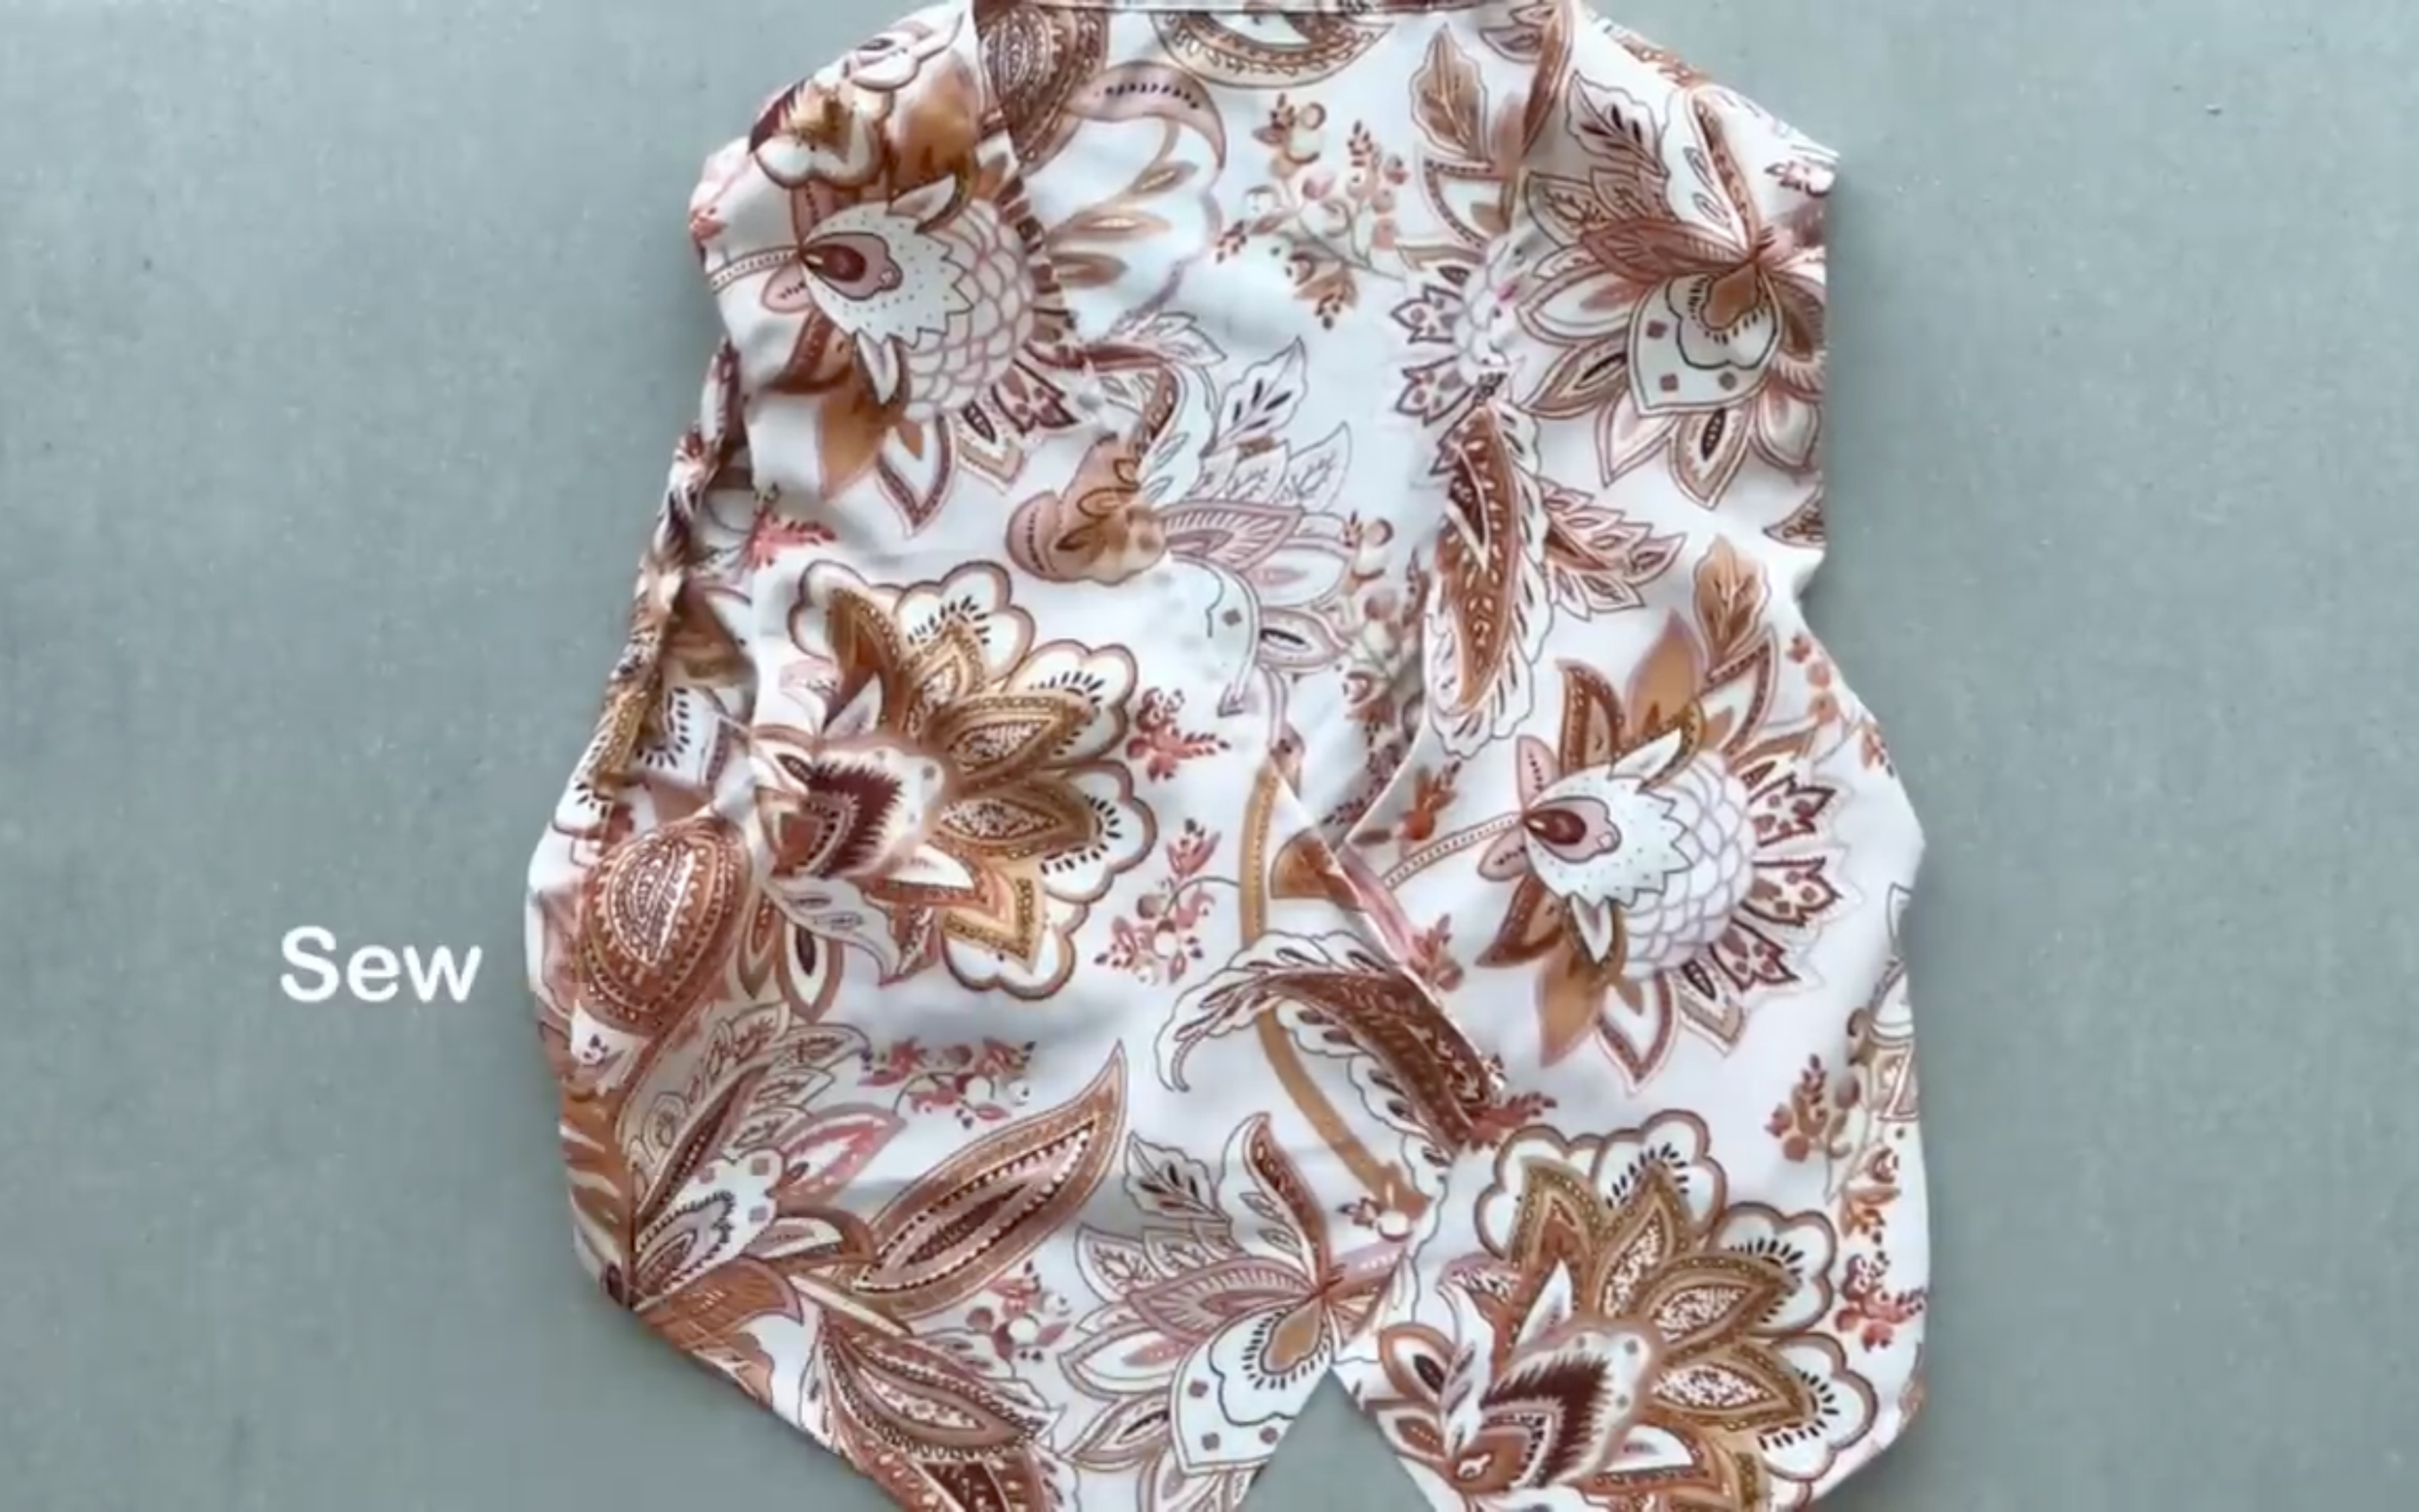
To finish the sleeve of the top part, fold the end fabric inside around 0.5 cm first, then keep folding it again and sew.
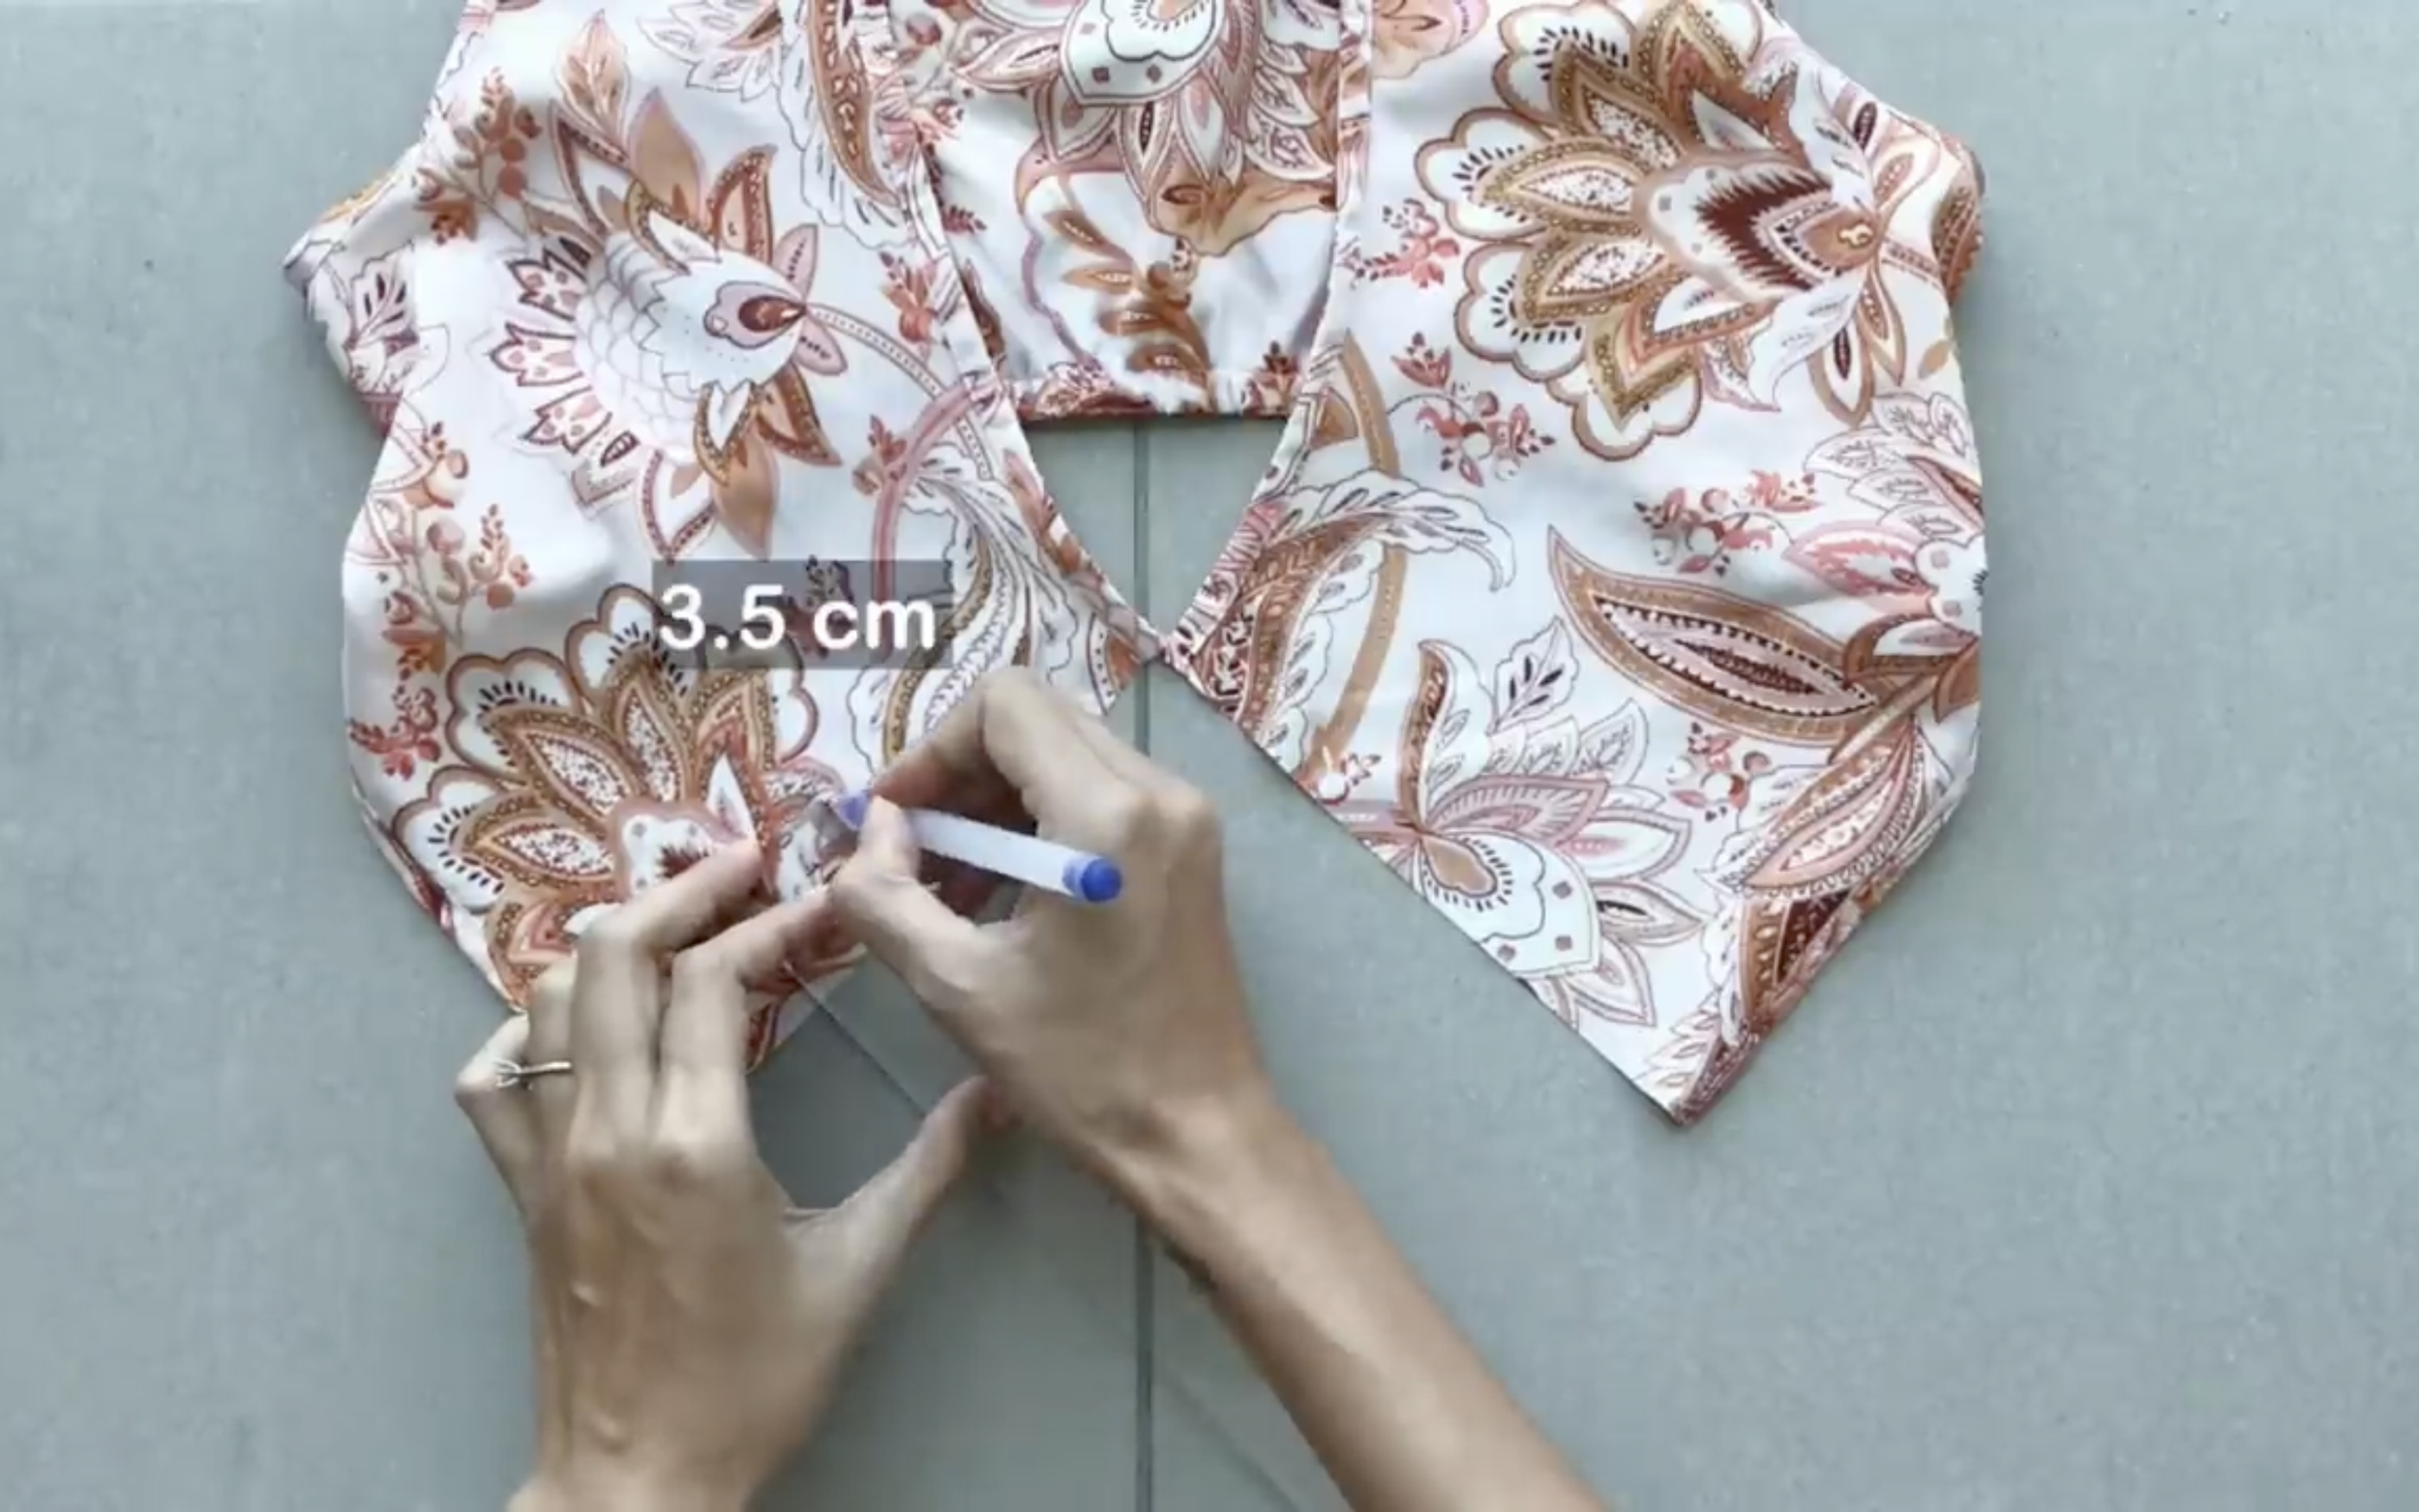
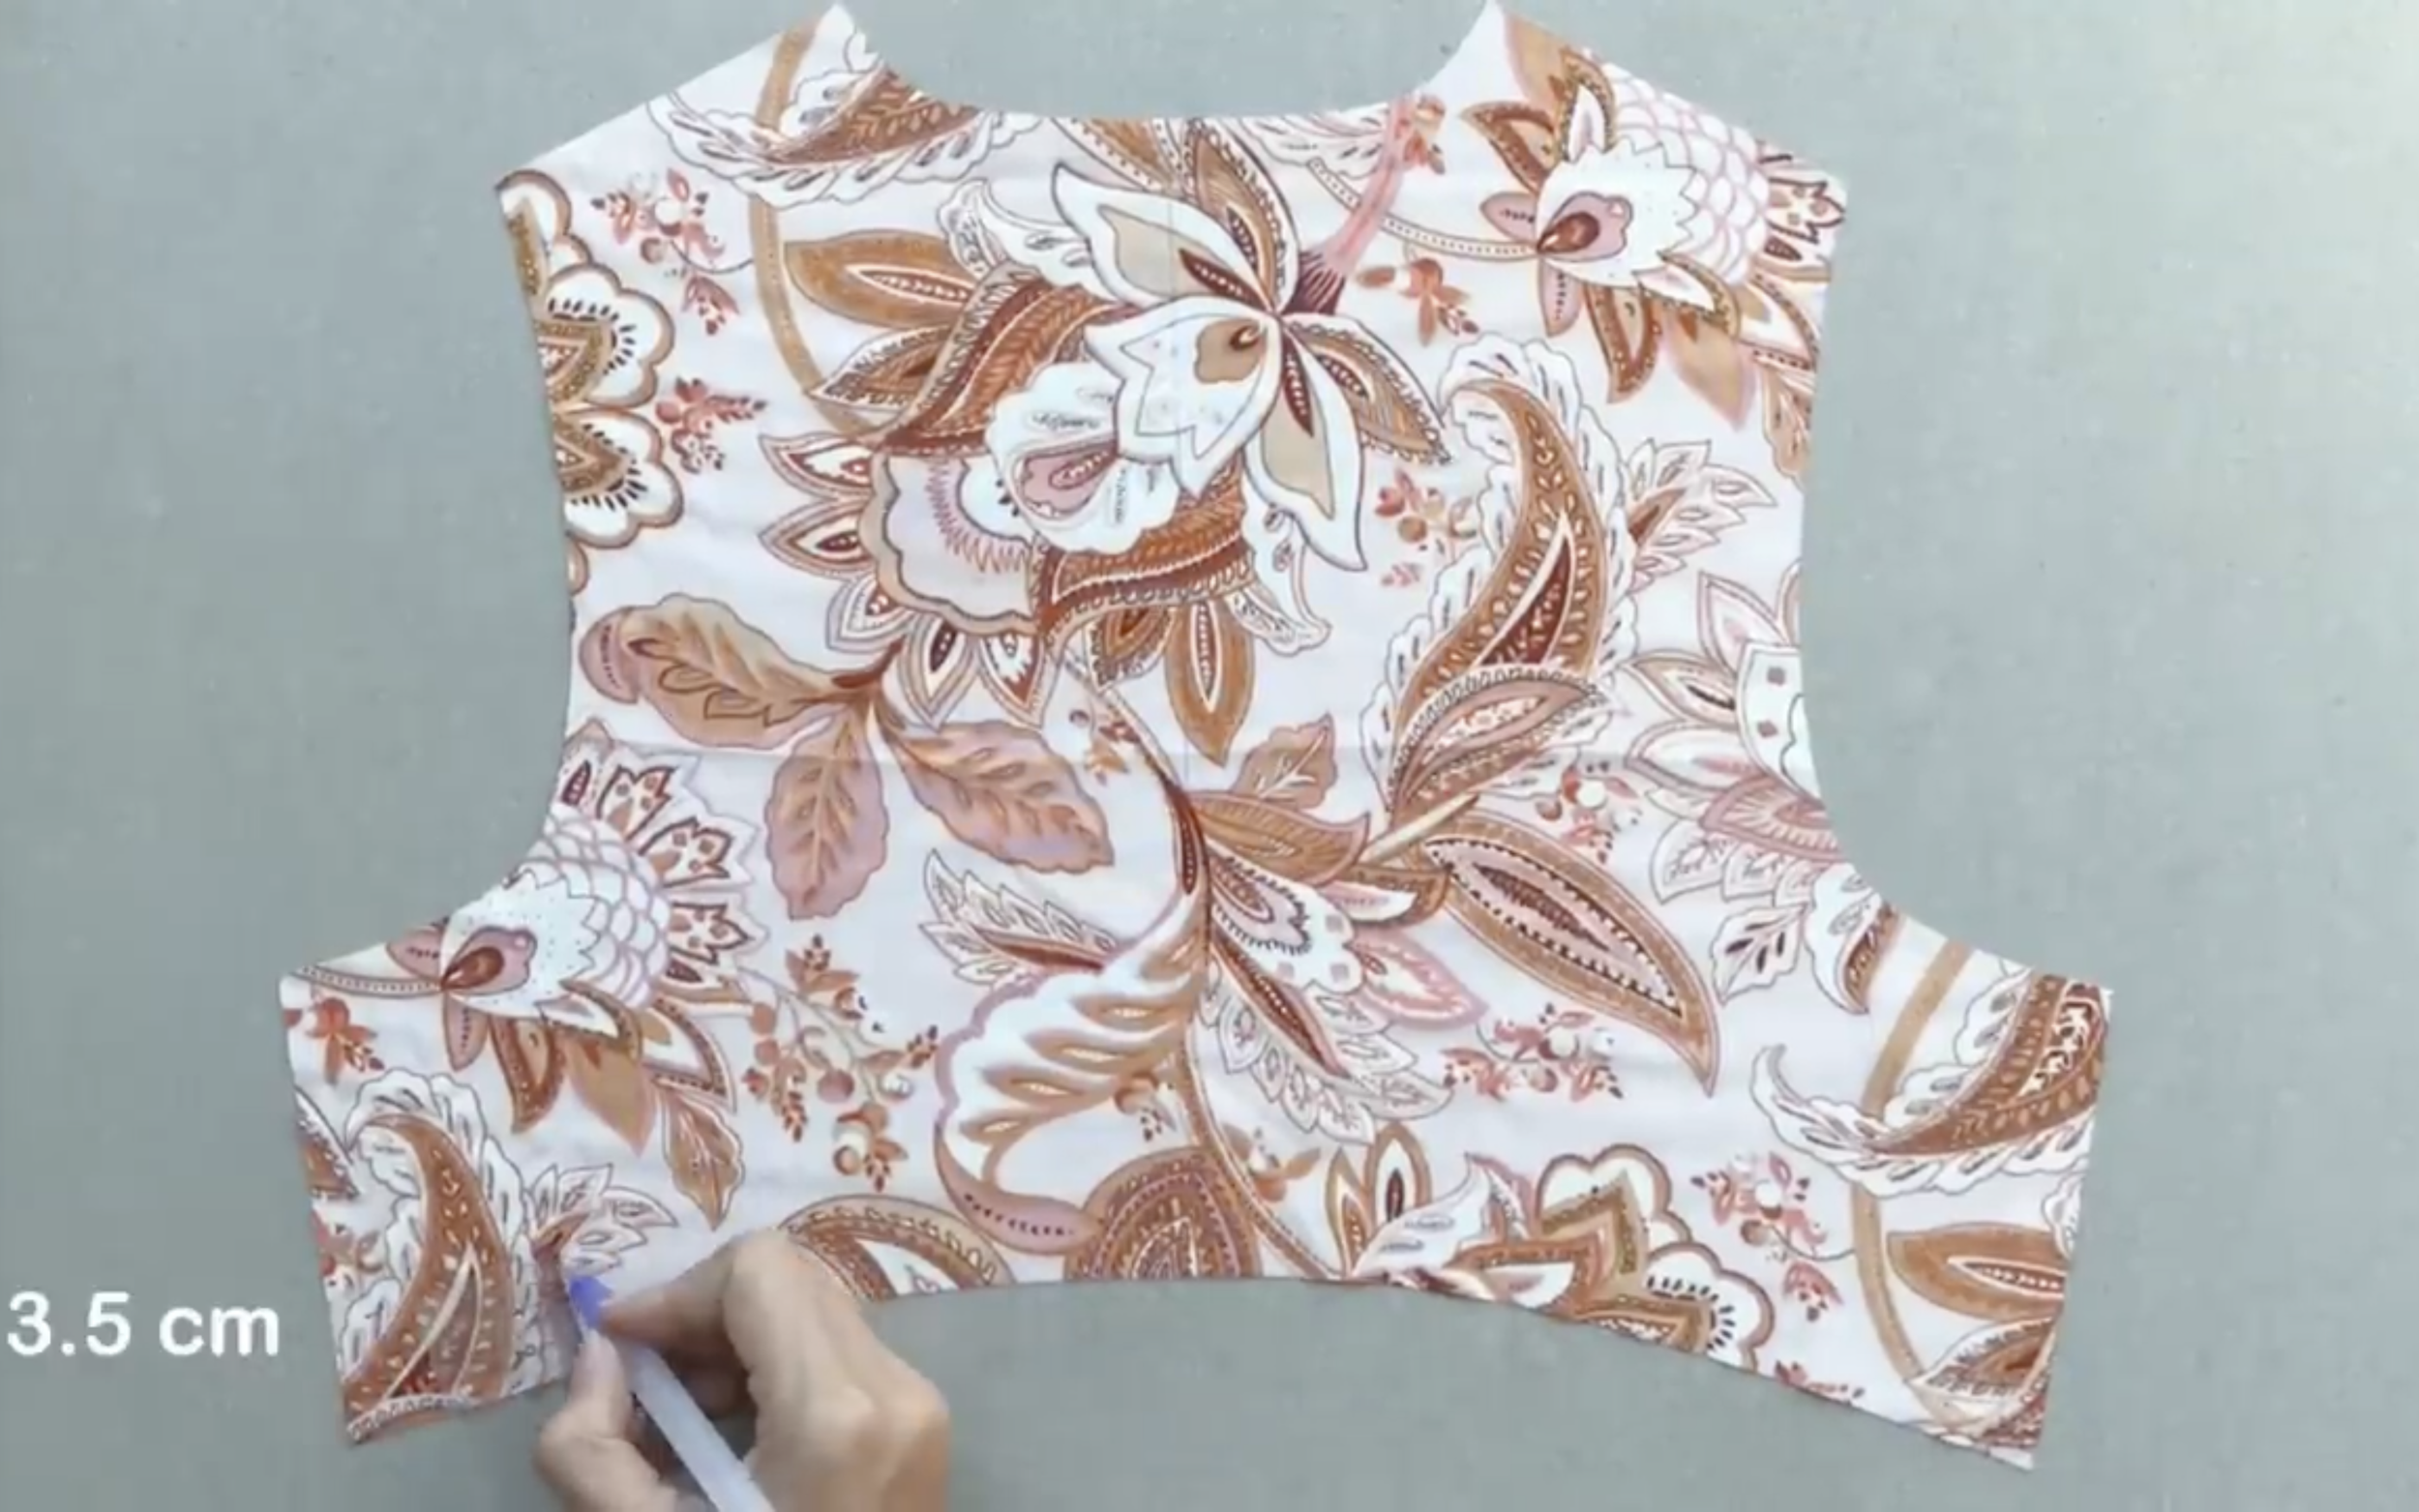
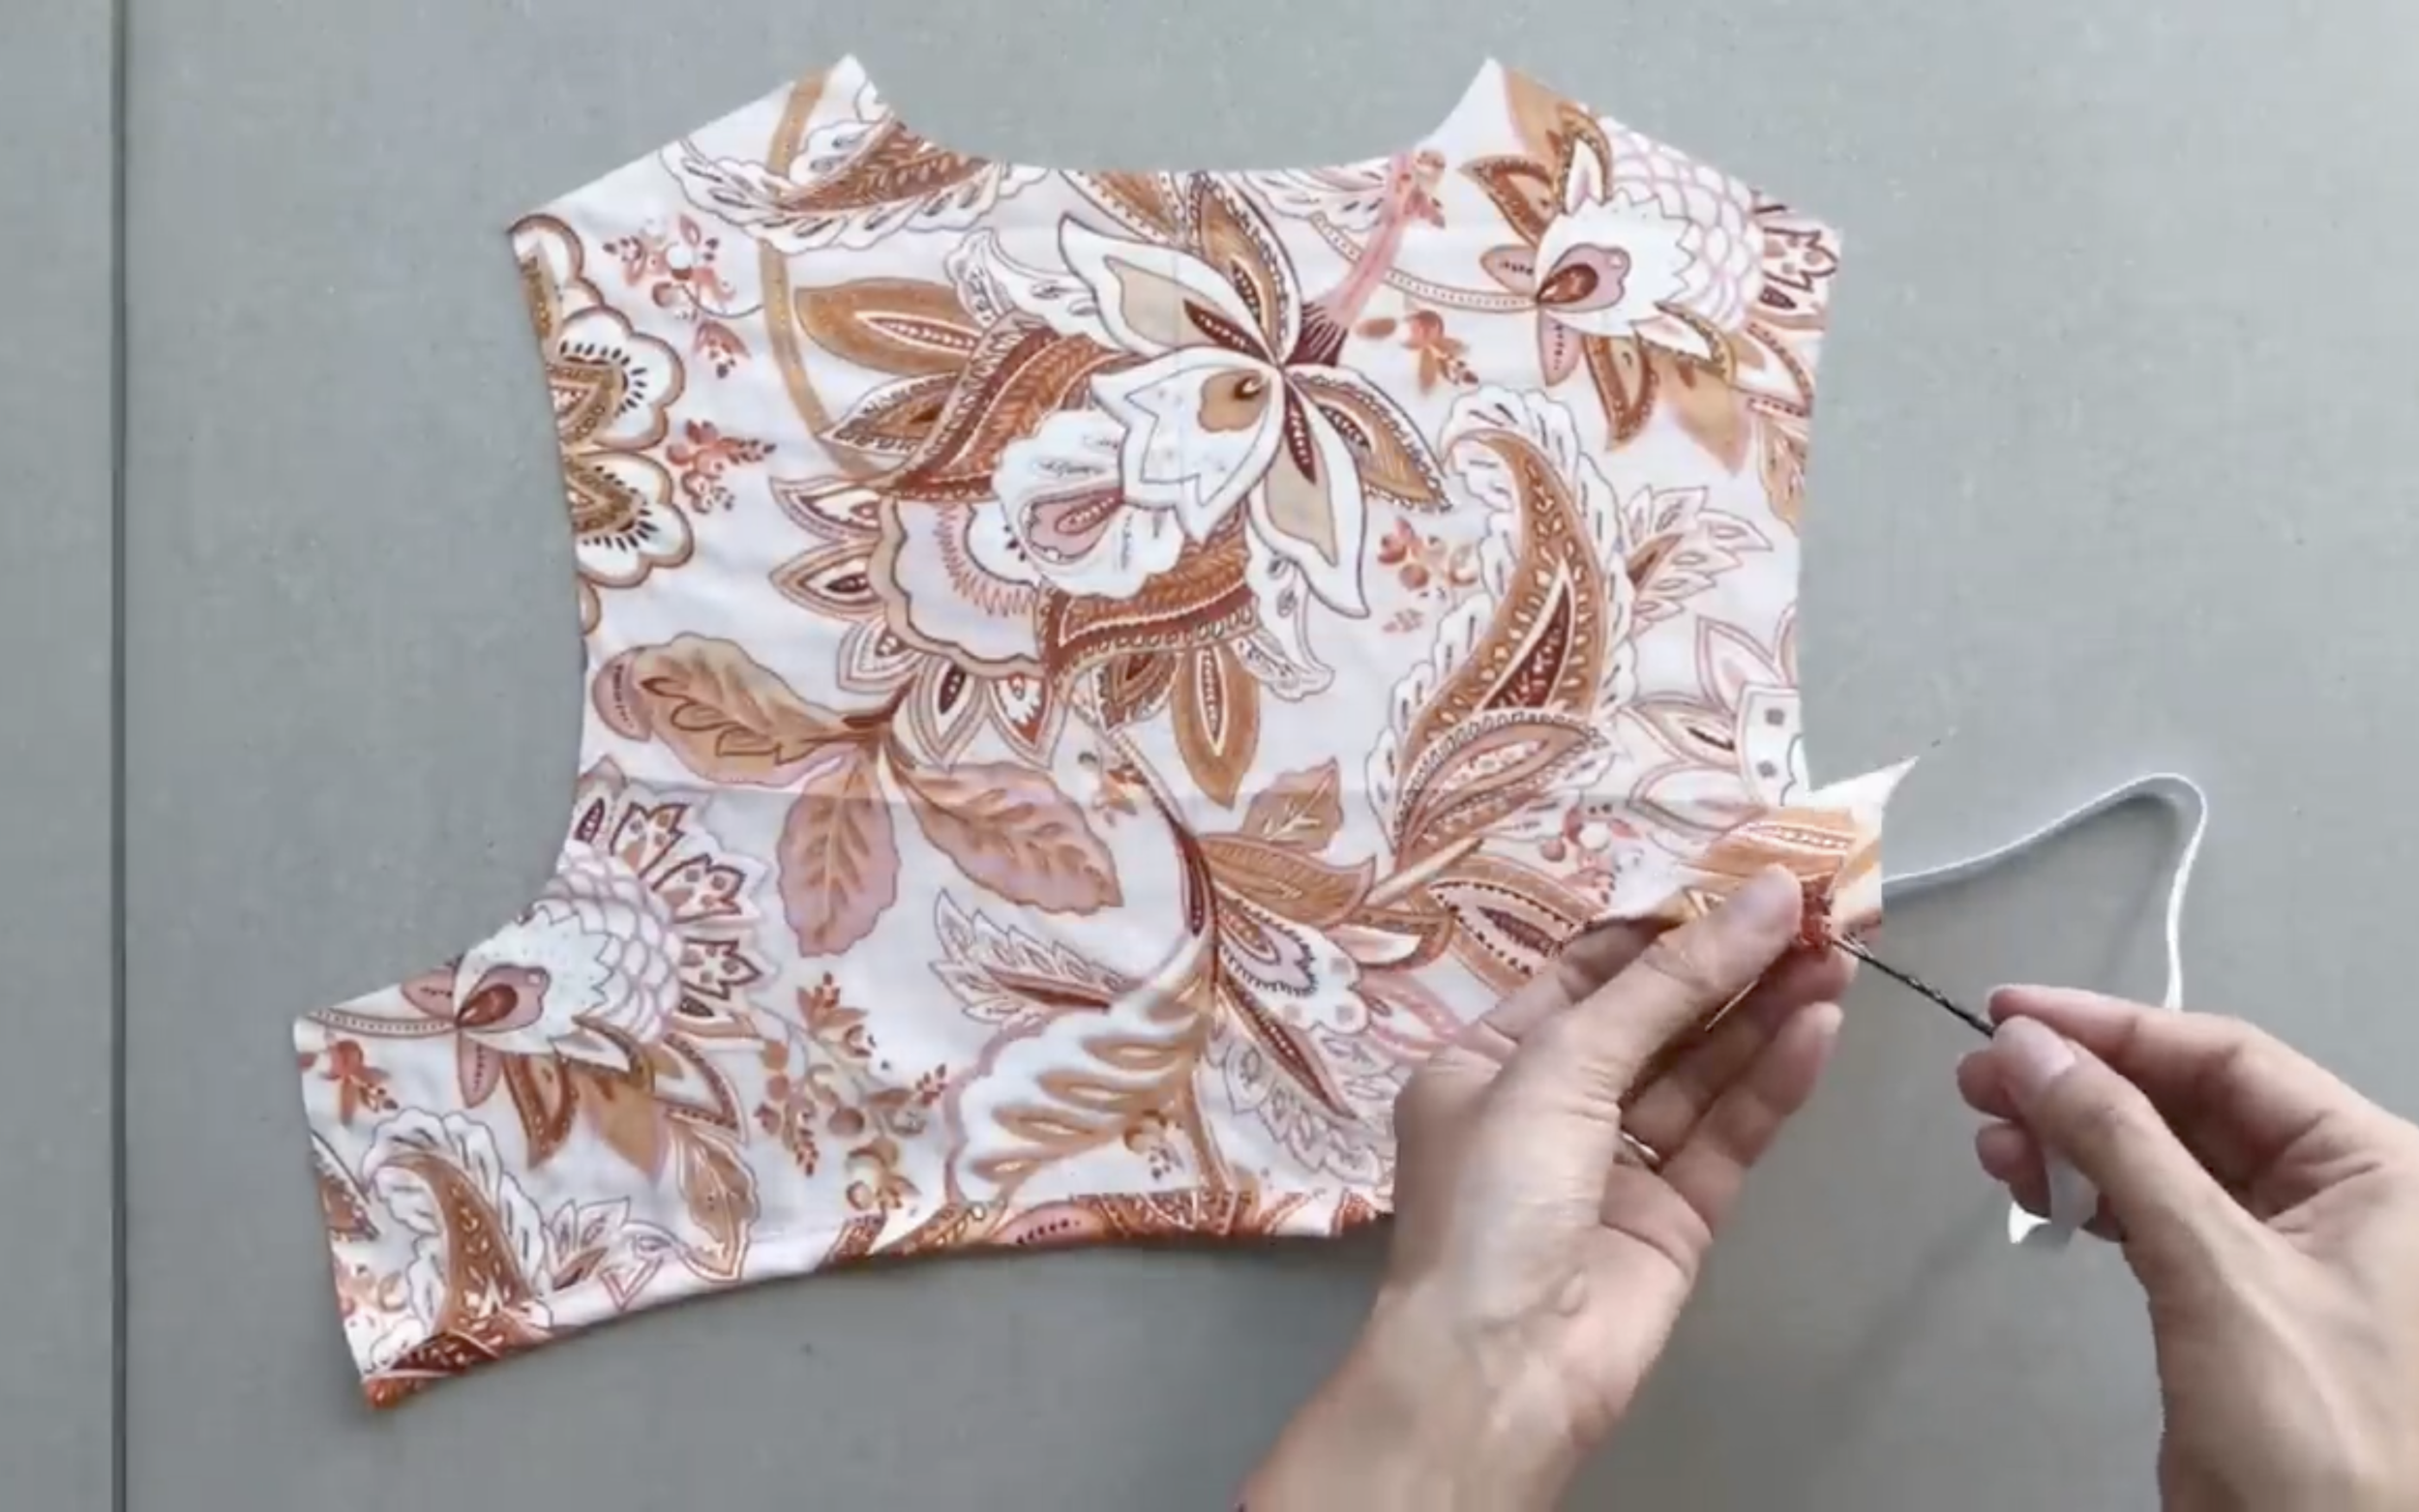
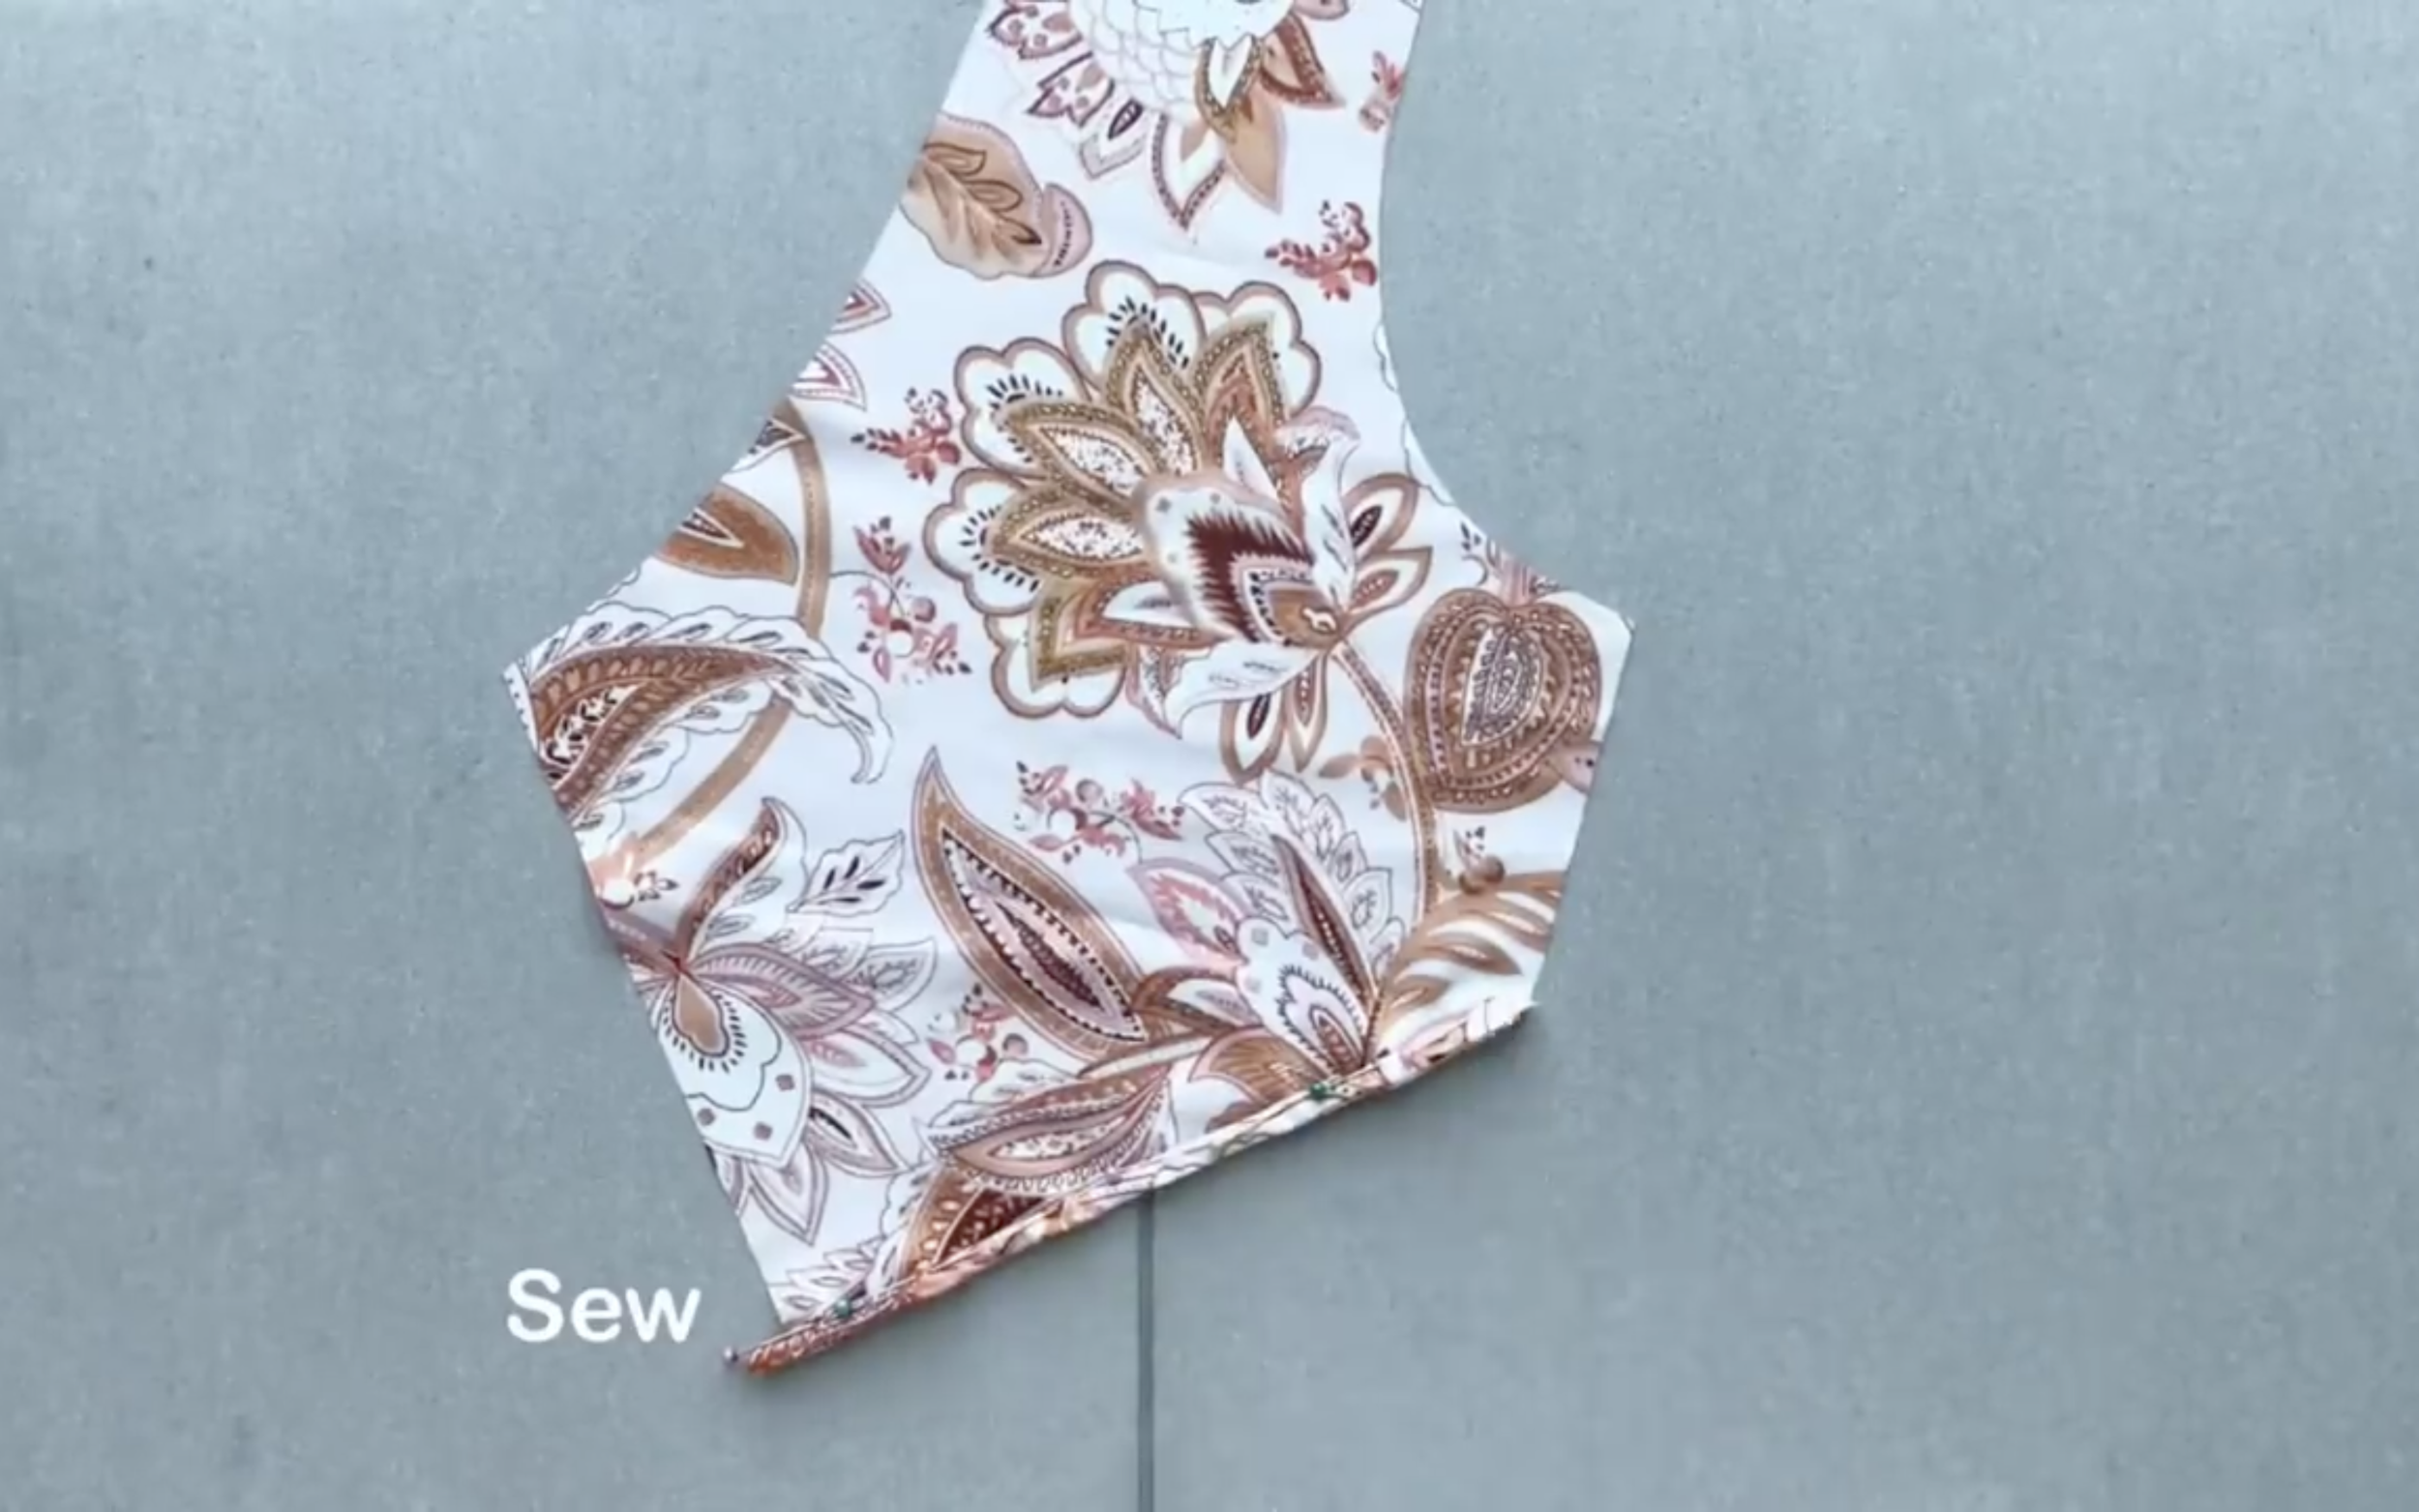
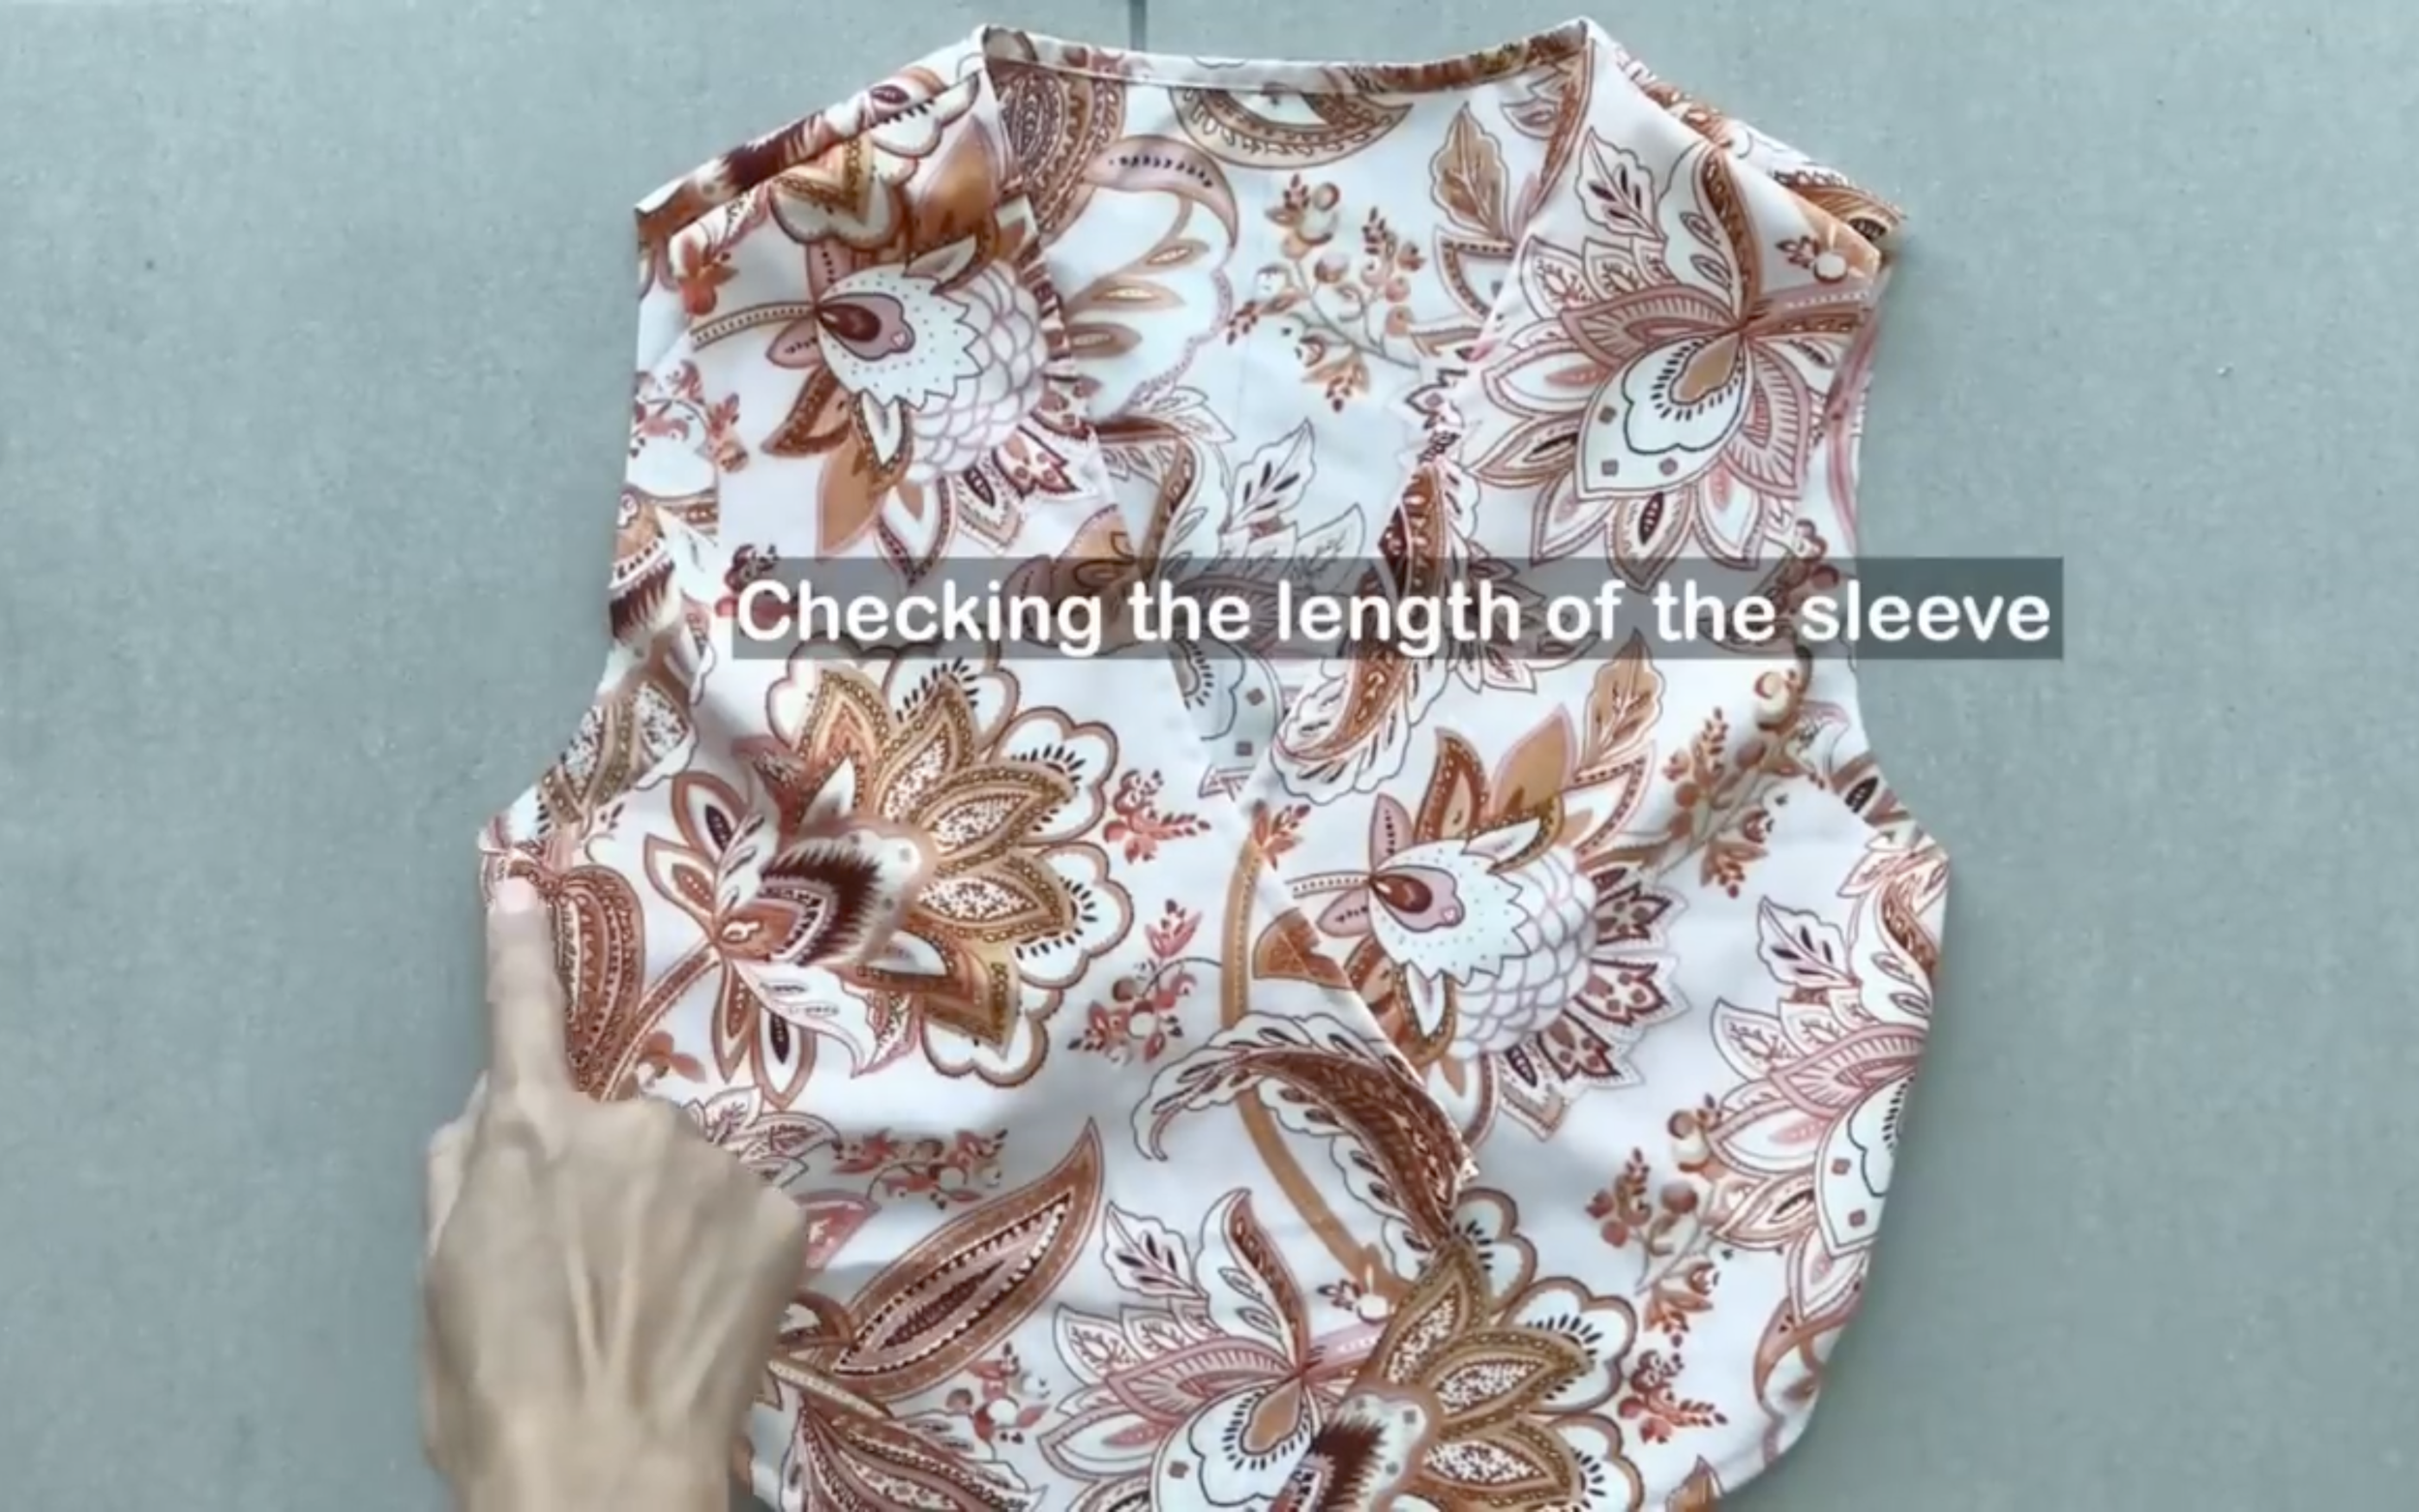
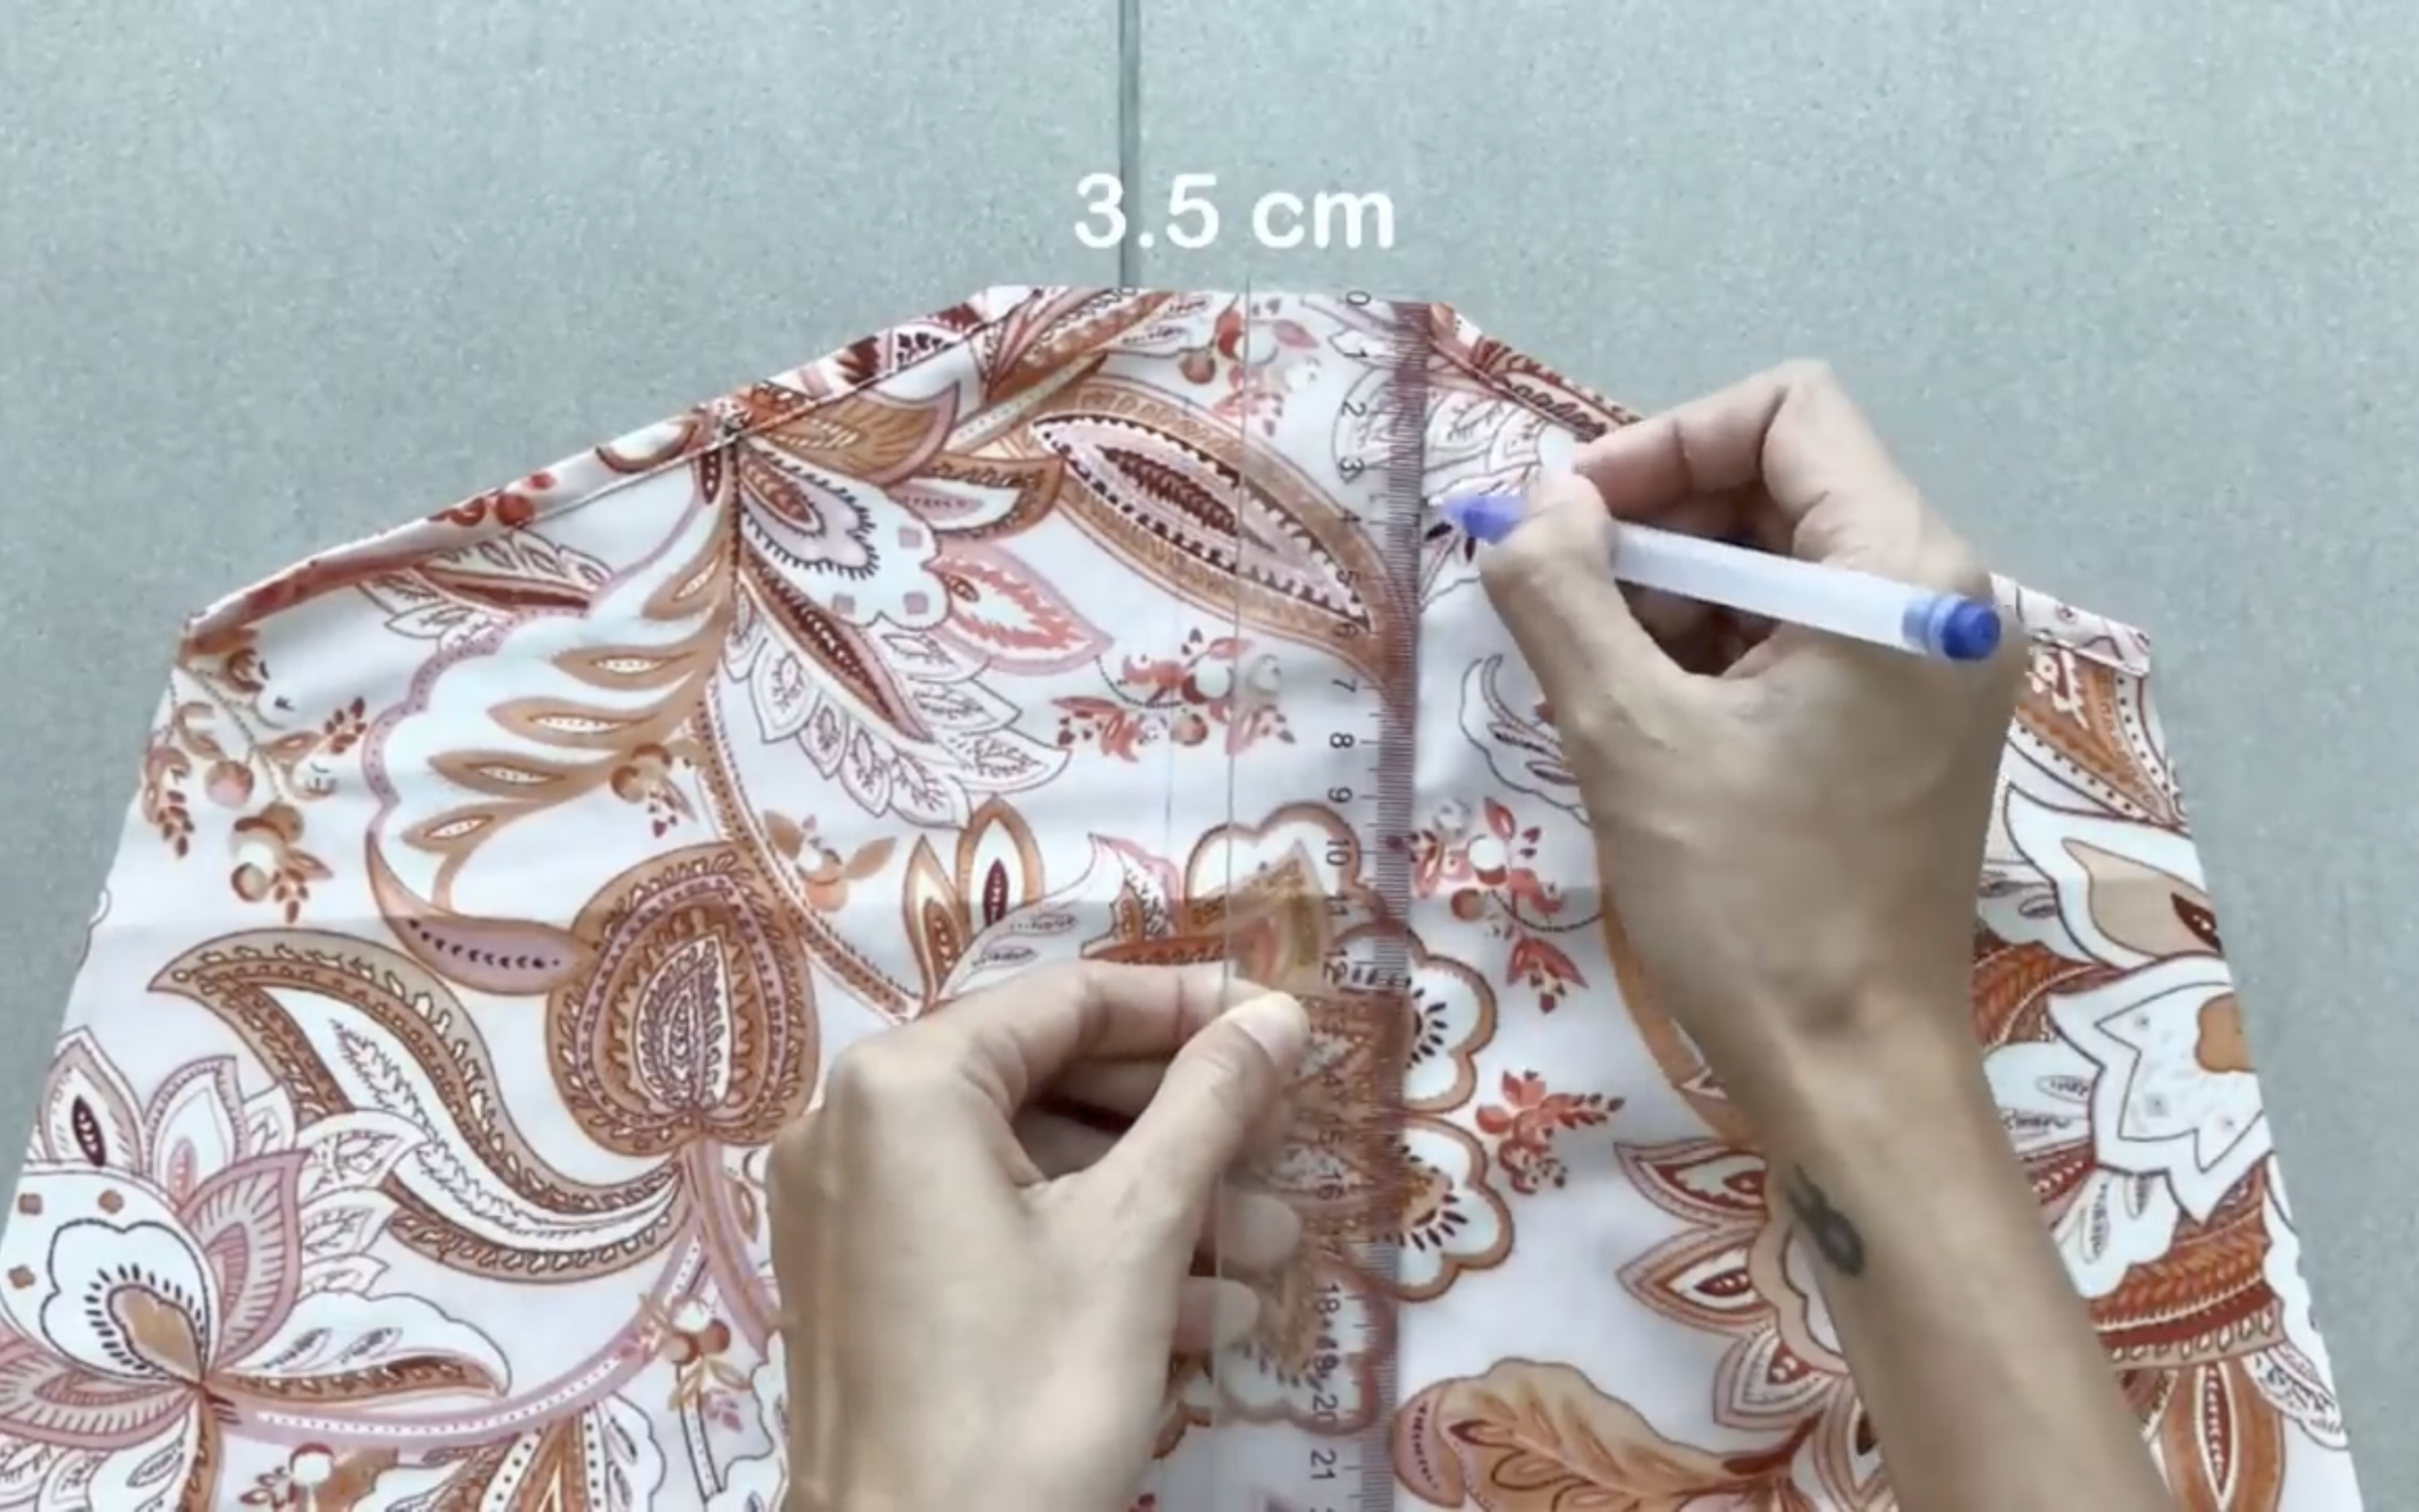
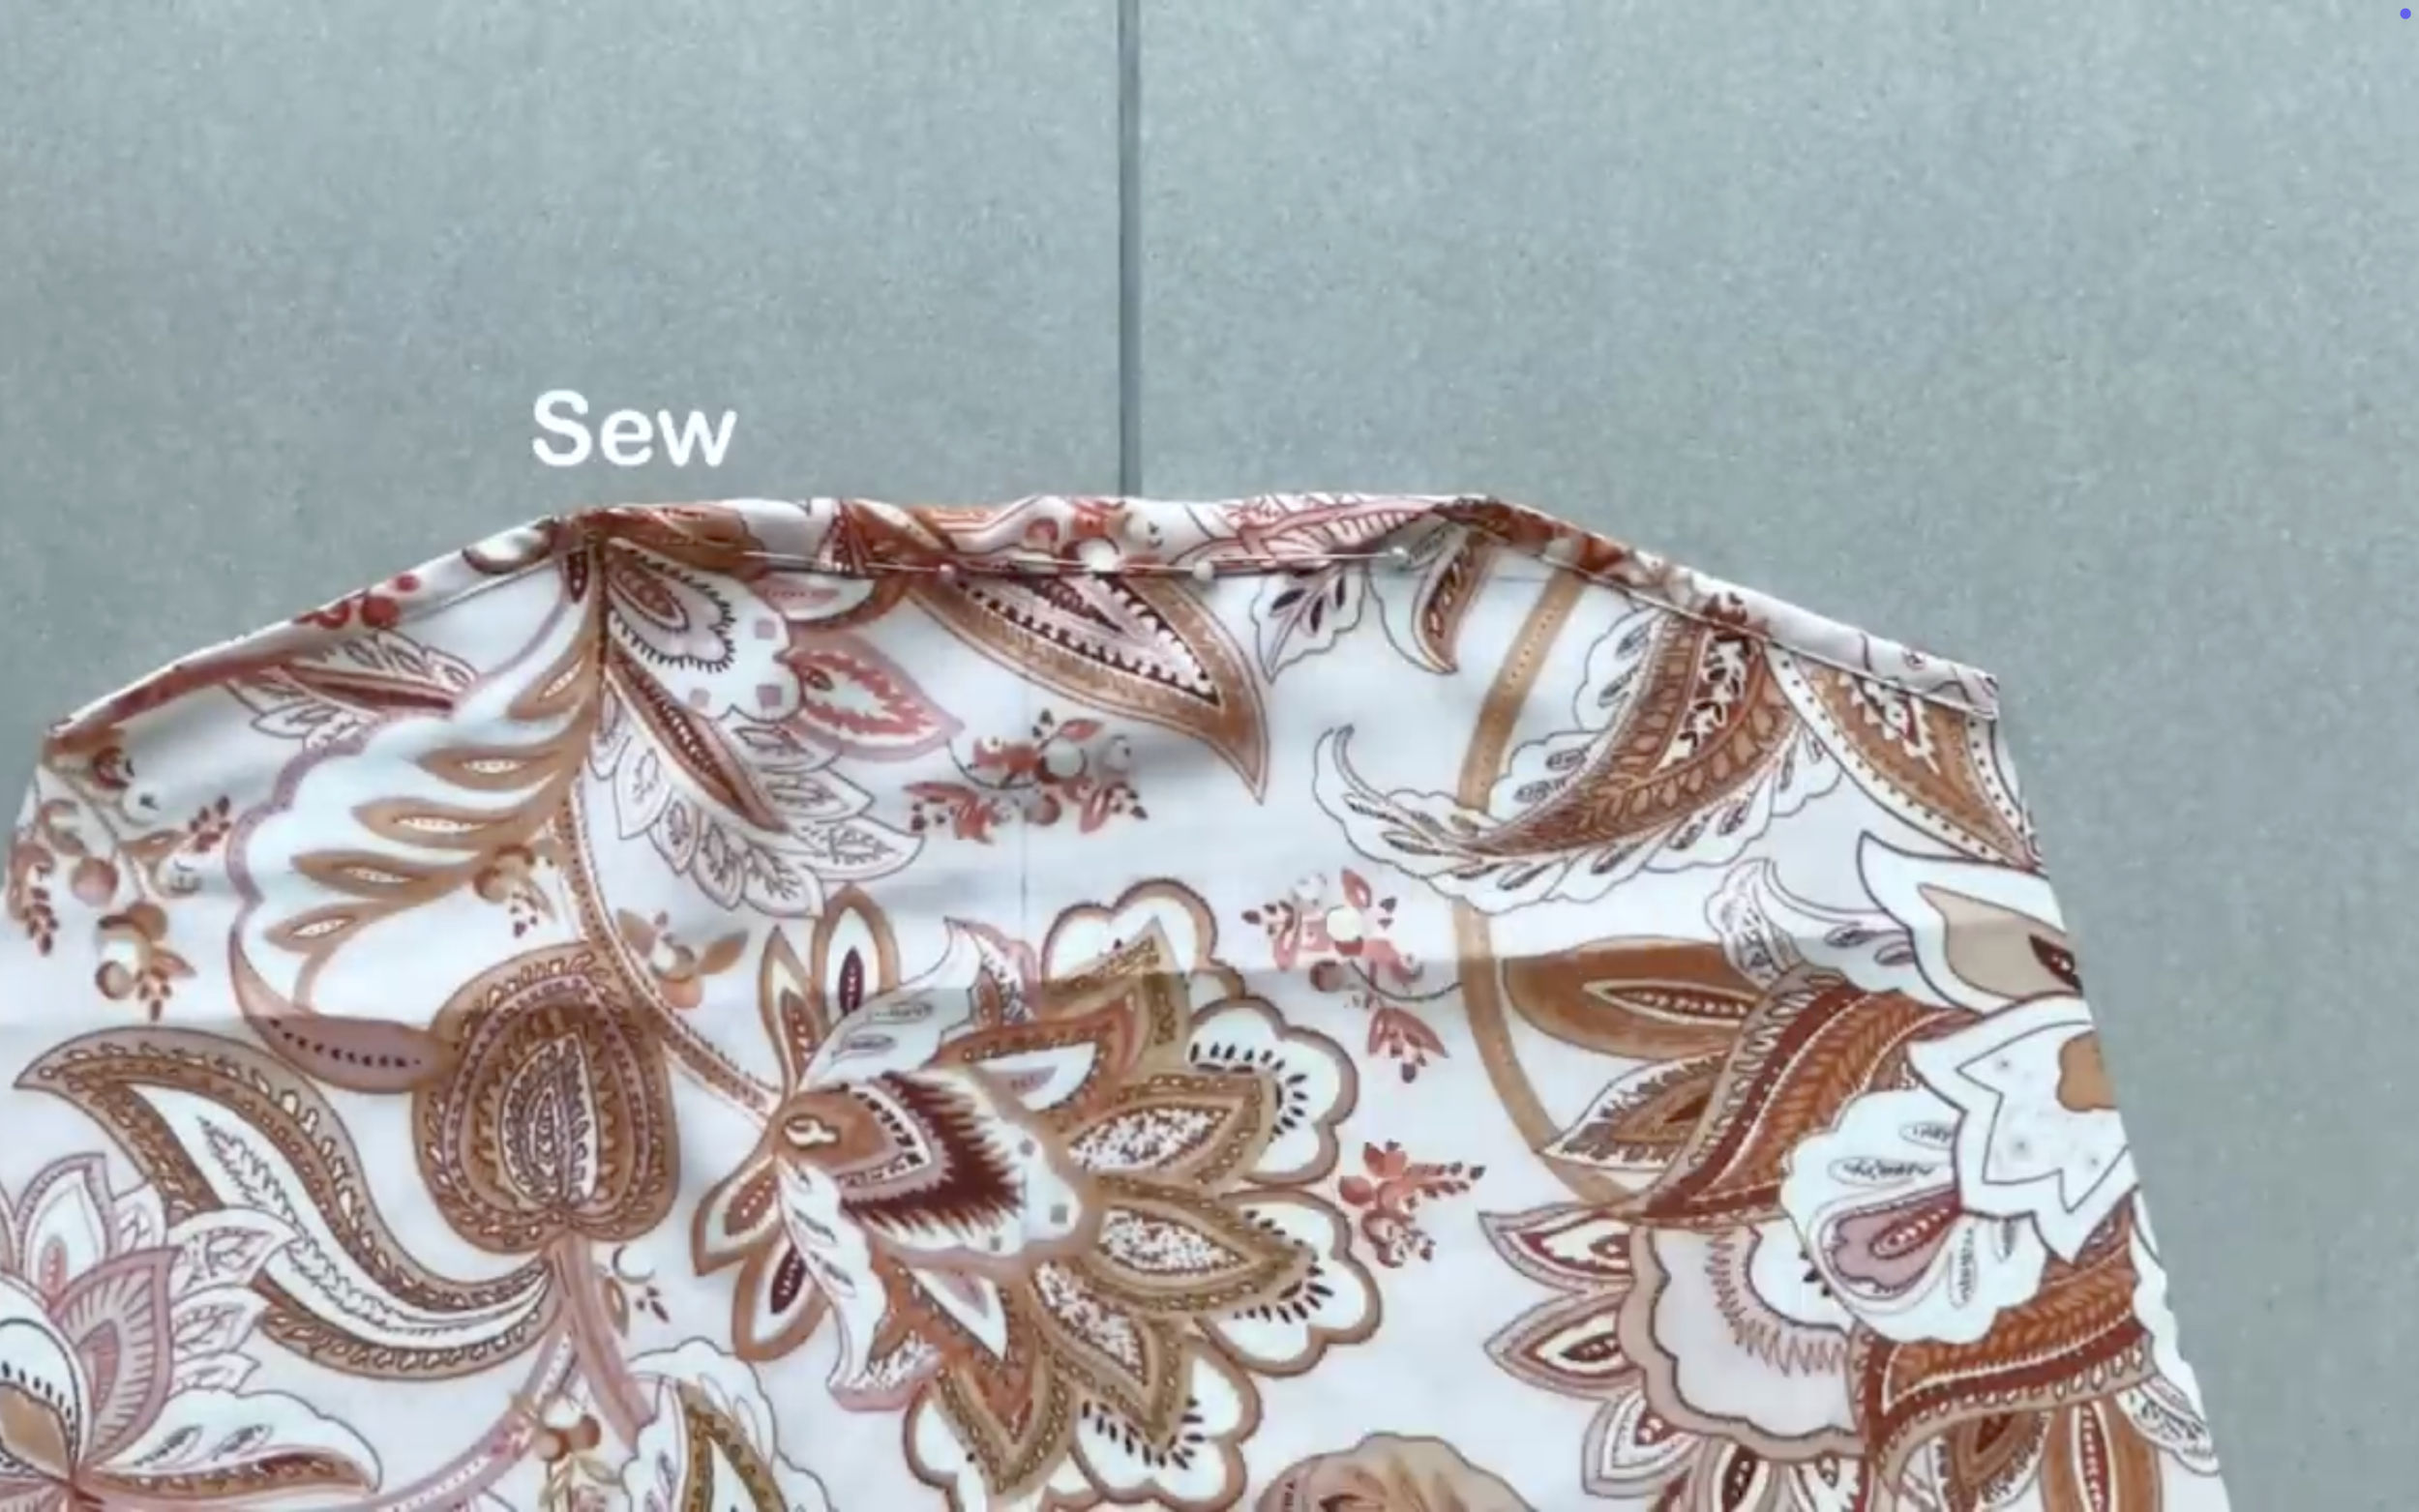
From the end of the top bodice, draw a line 3.5 cm away from the ending line.
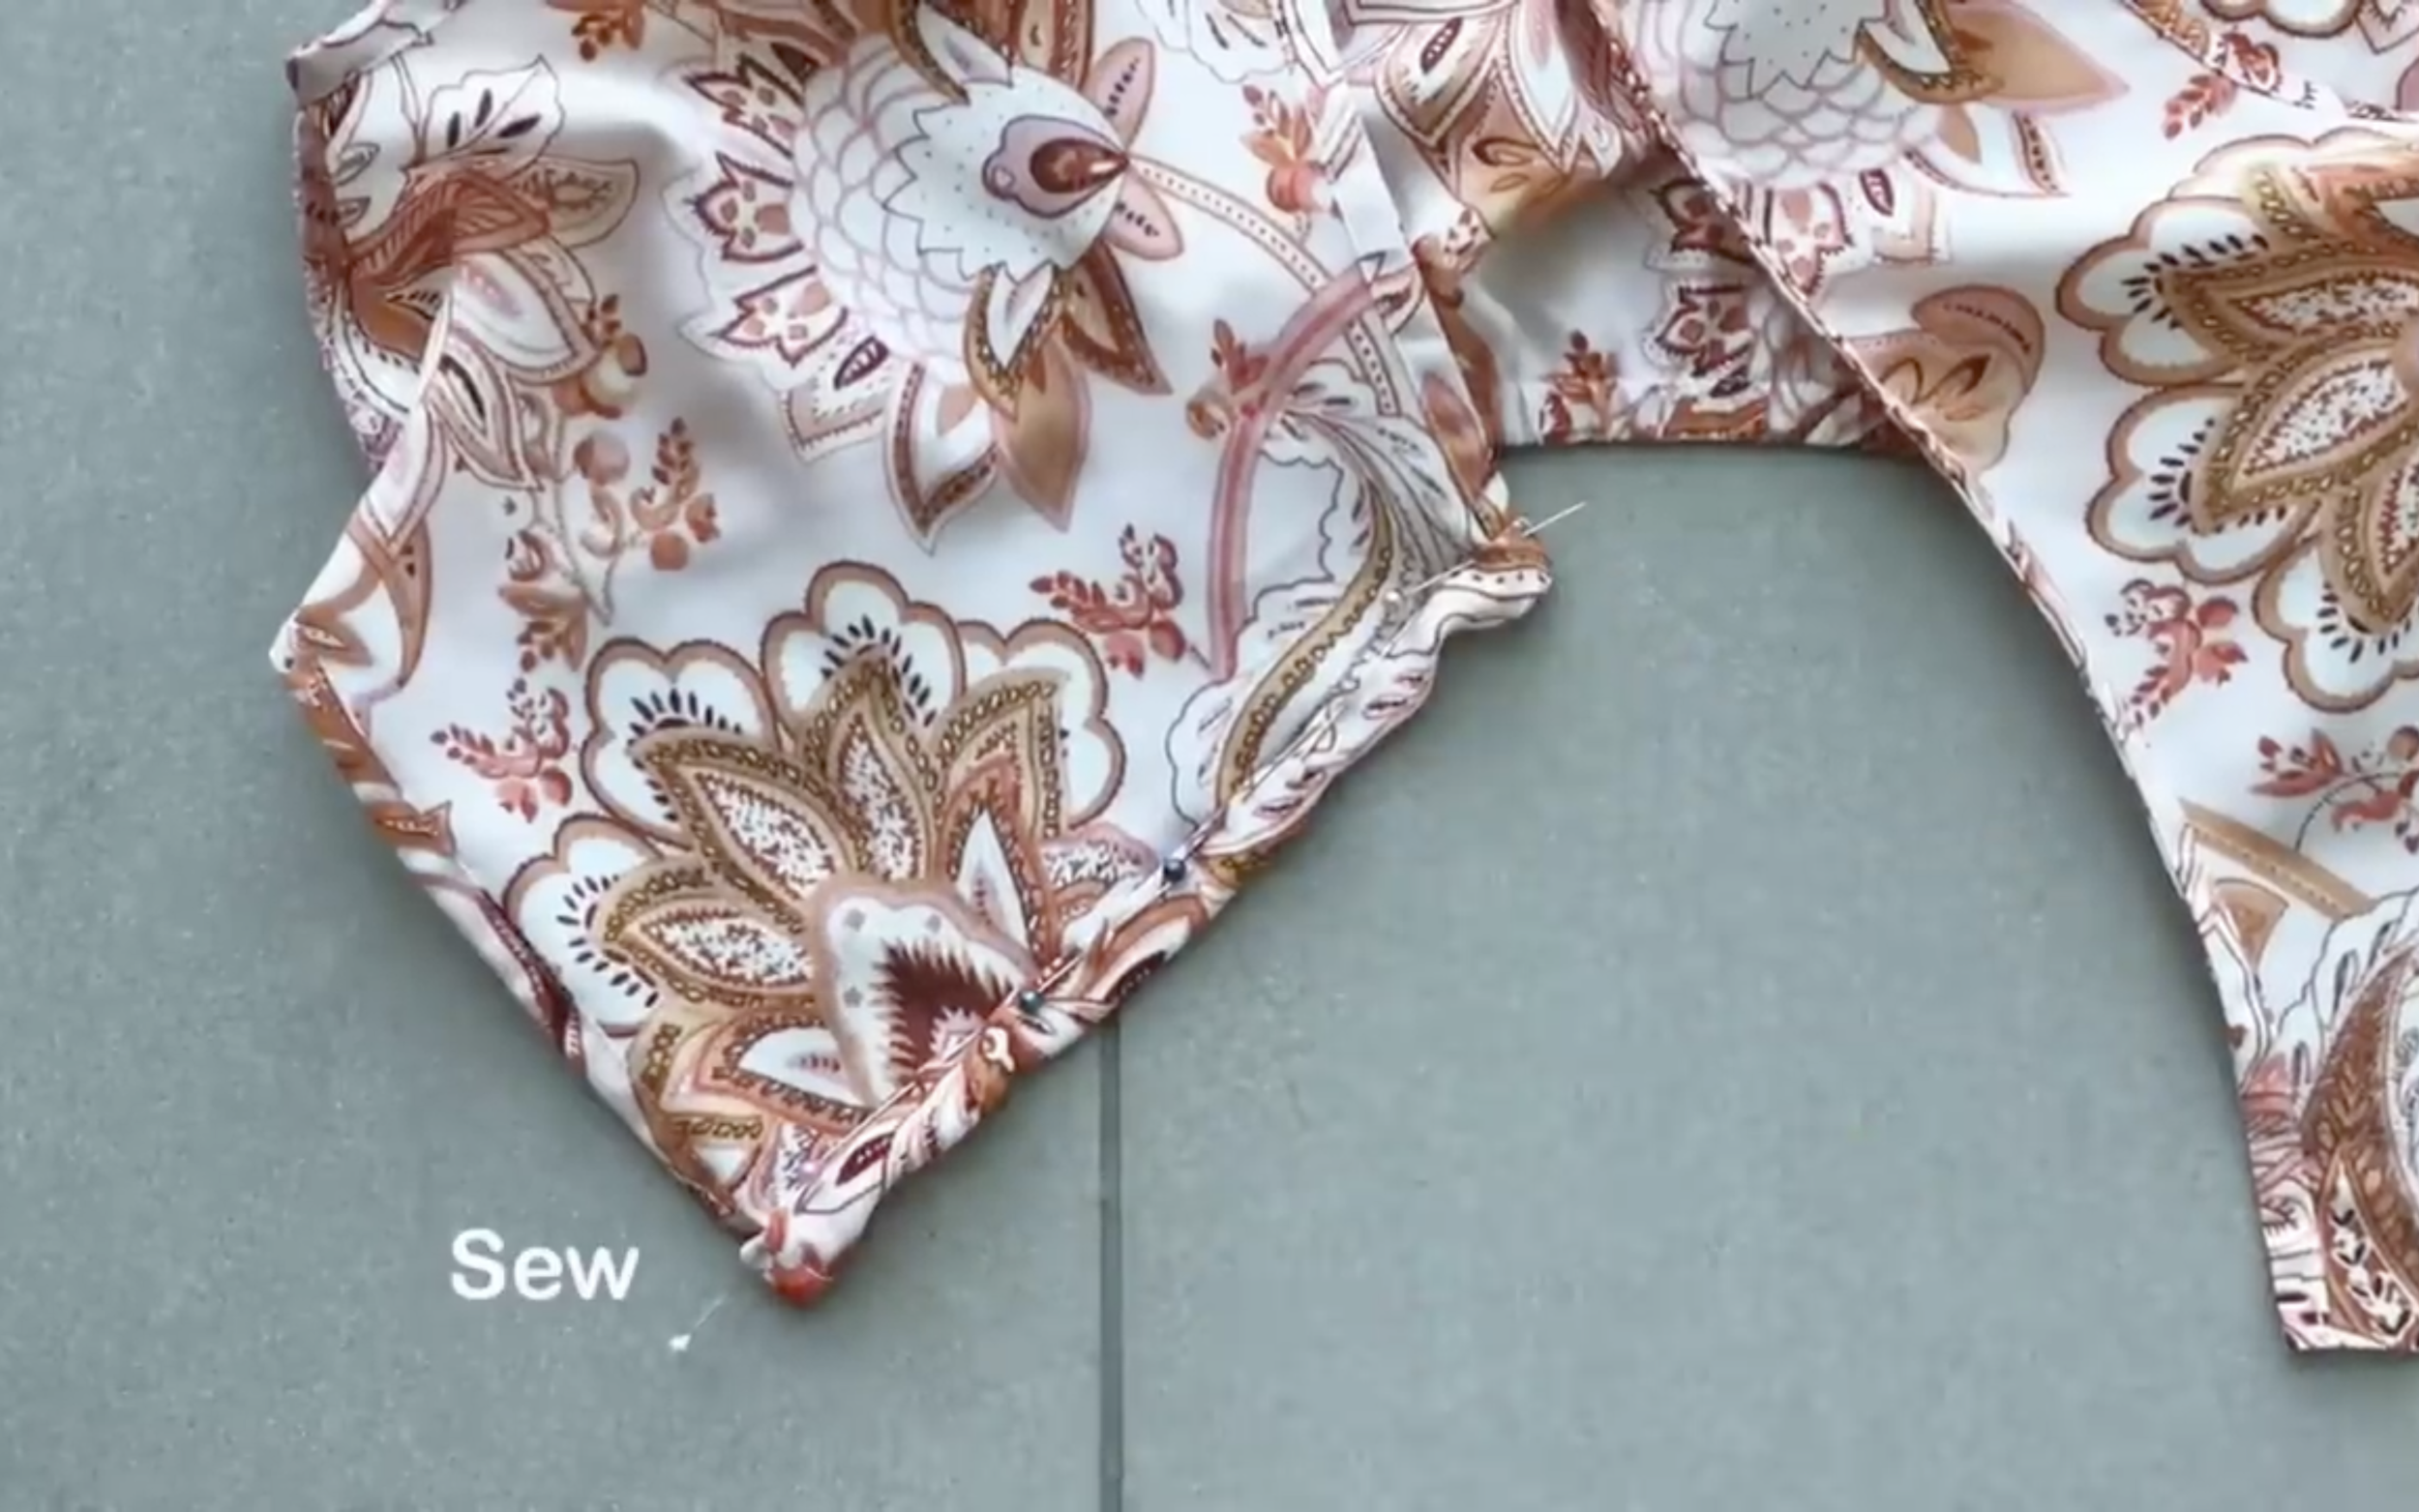
Fold the end fabric inside around 0.5 cm, then keep folding it to the line just drawn before that and sew to create a fabric hole and finish the top bodice after that.
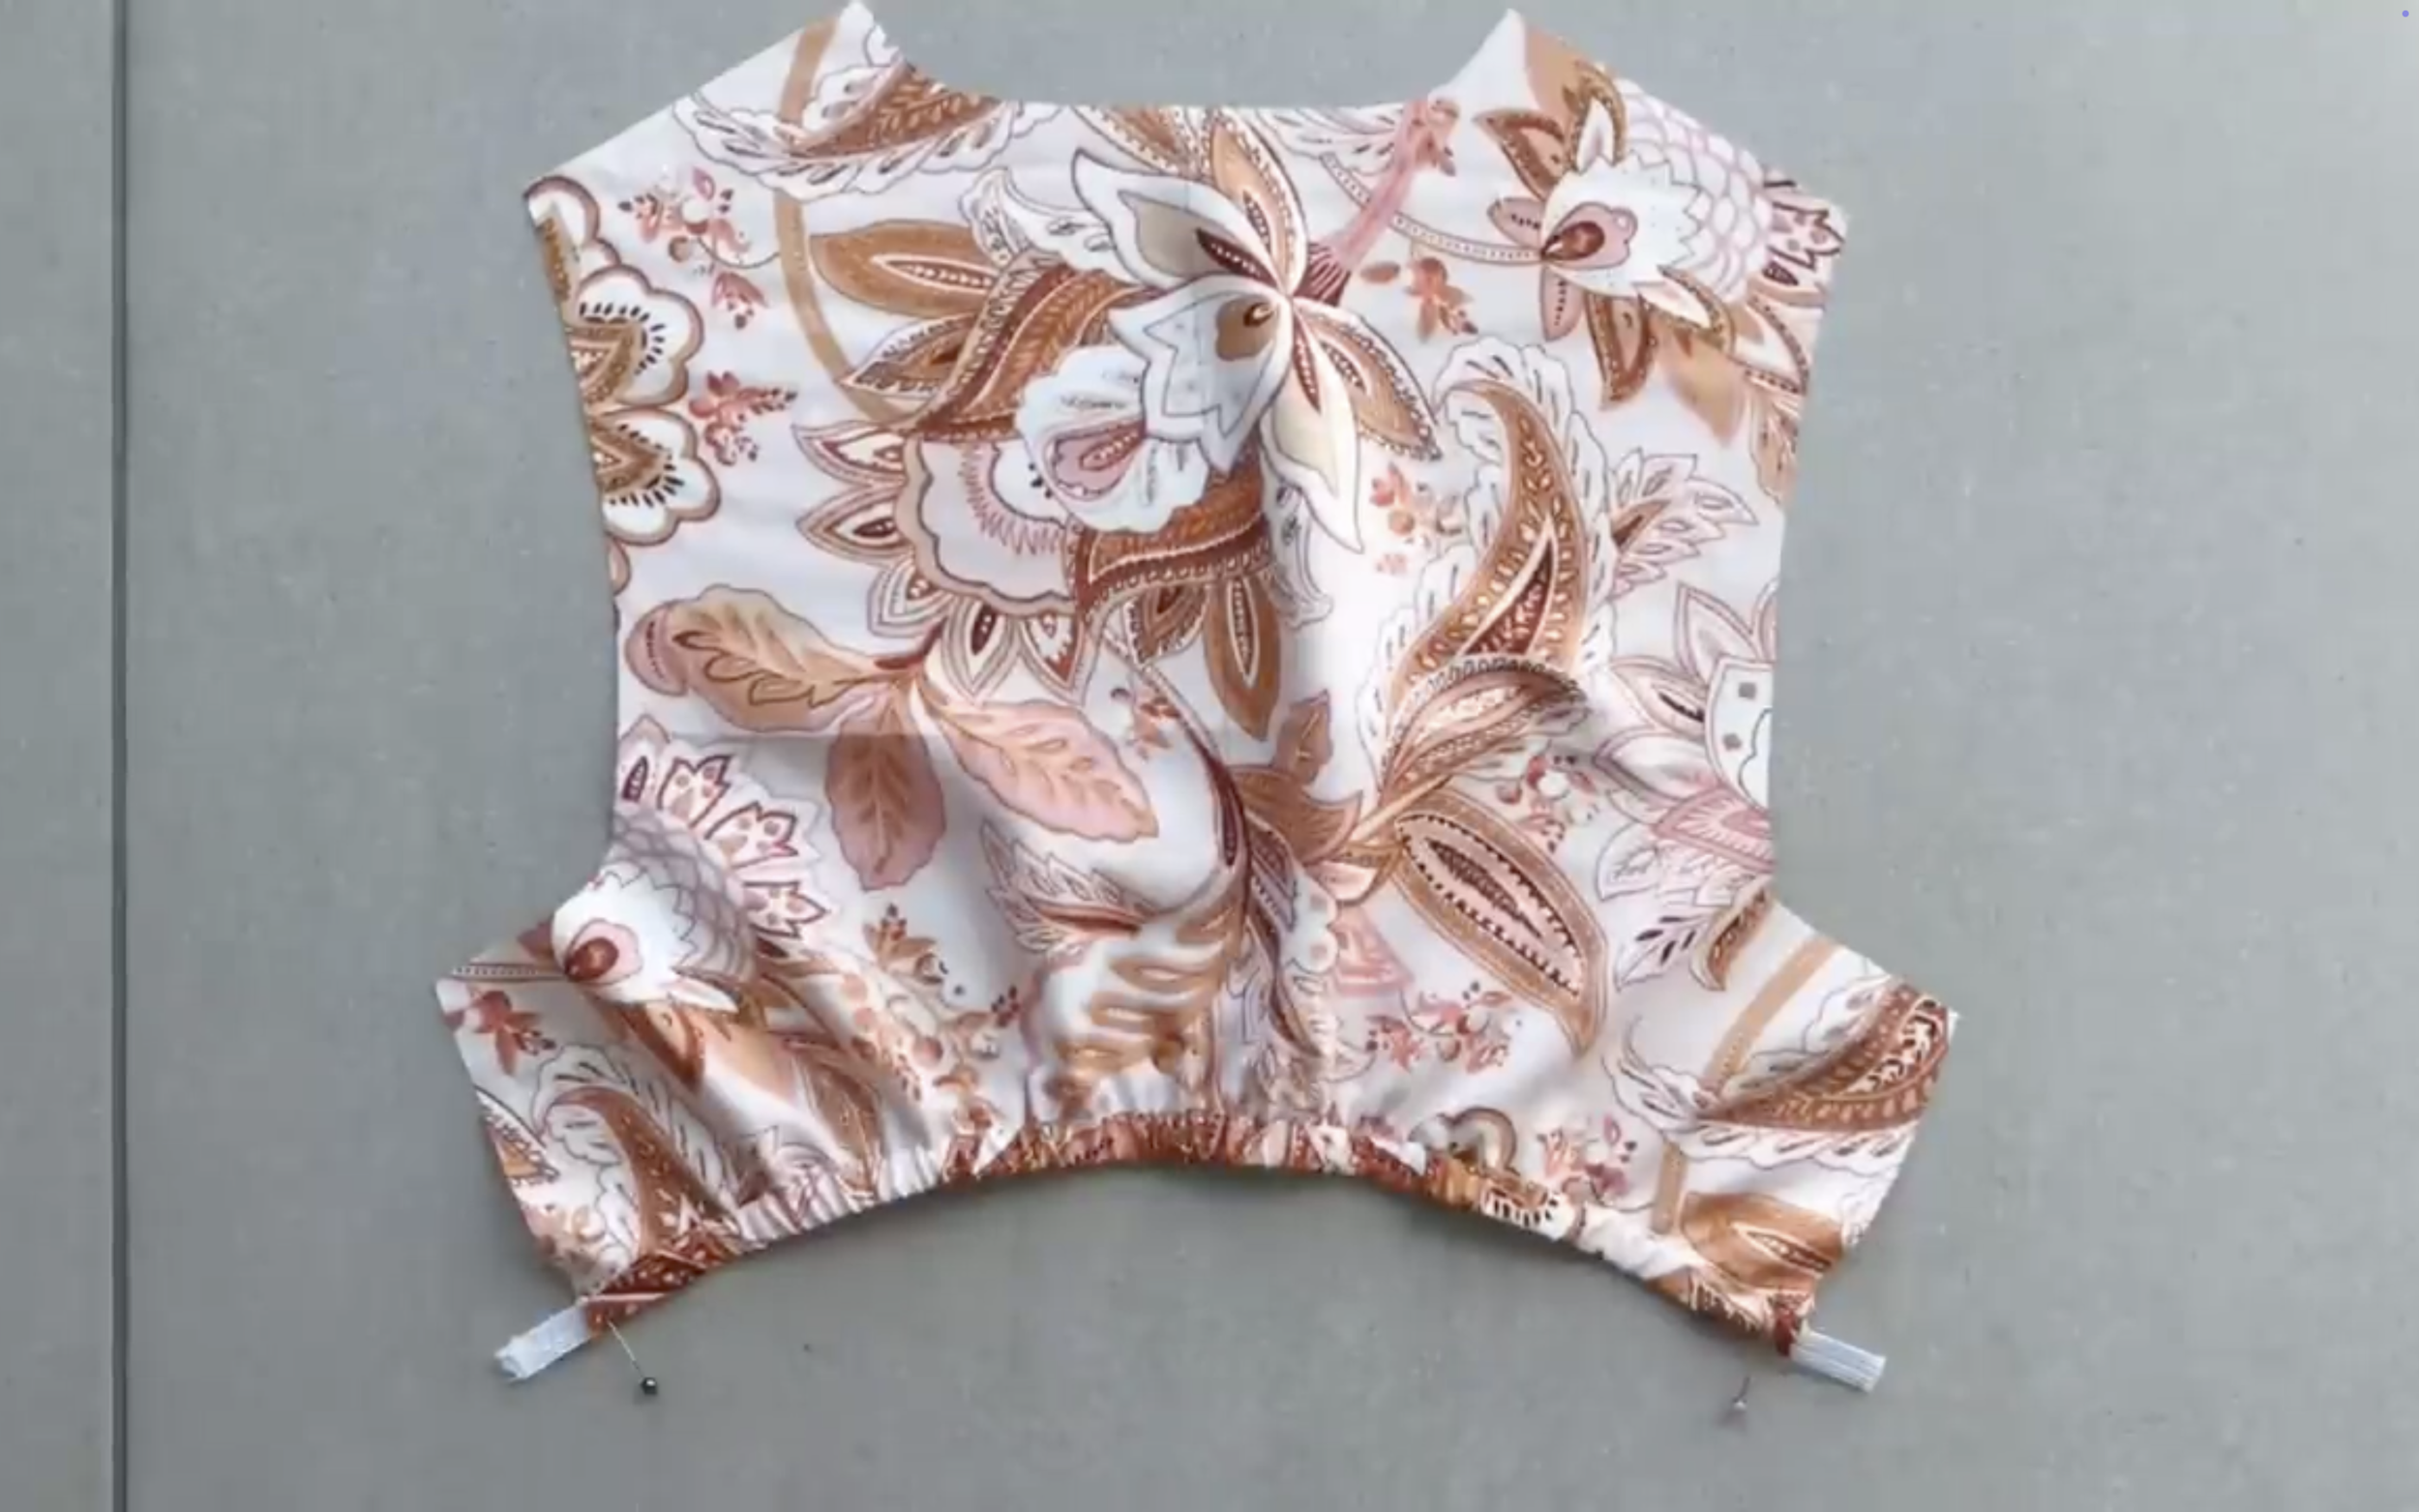
THE BOTTOM PART OF THE DRESS
Moving the front part of the bottom dress, cut a fabric strip with a width of 2 cm.
Place the 2 cm fabric strip along the top edge of the front part of the bottom dress and sew it in place.
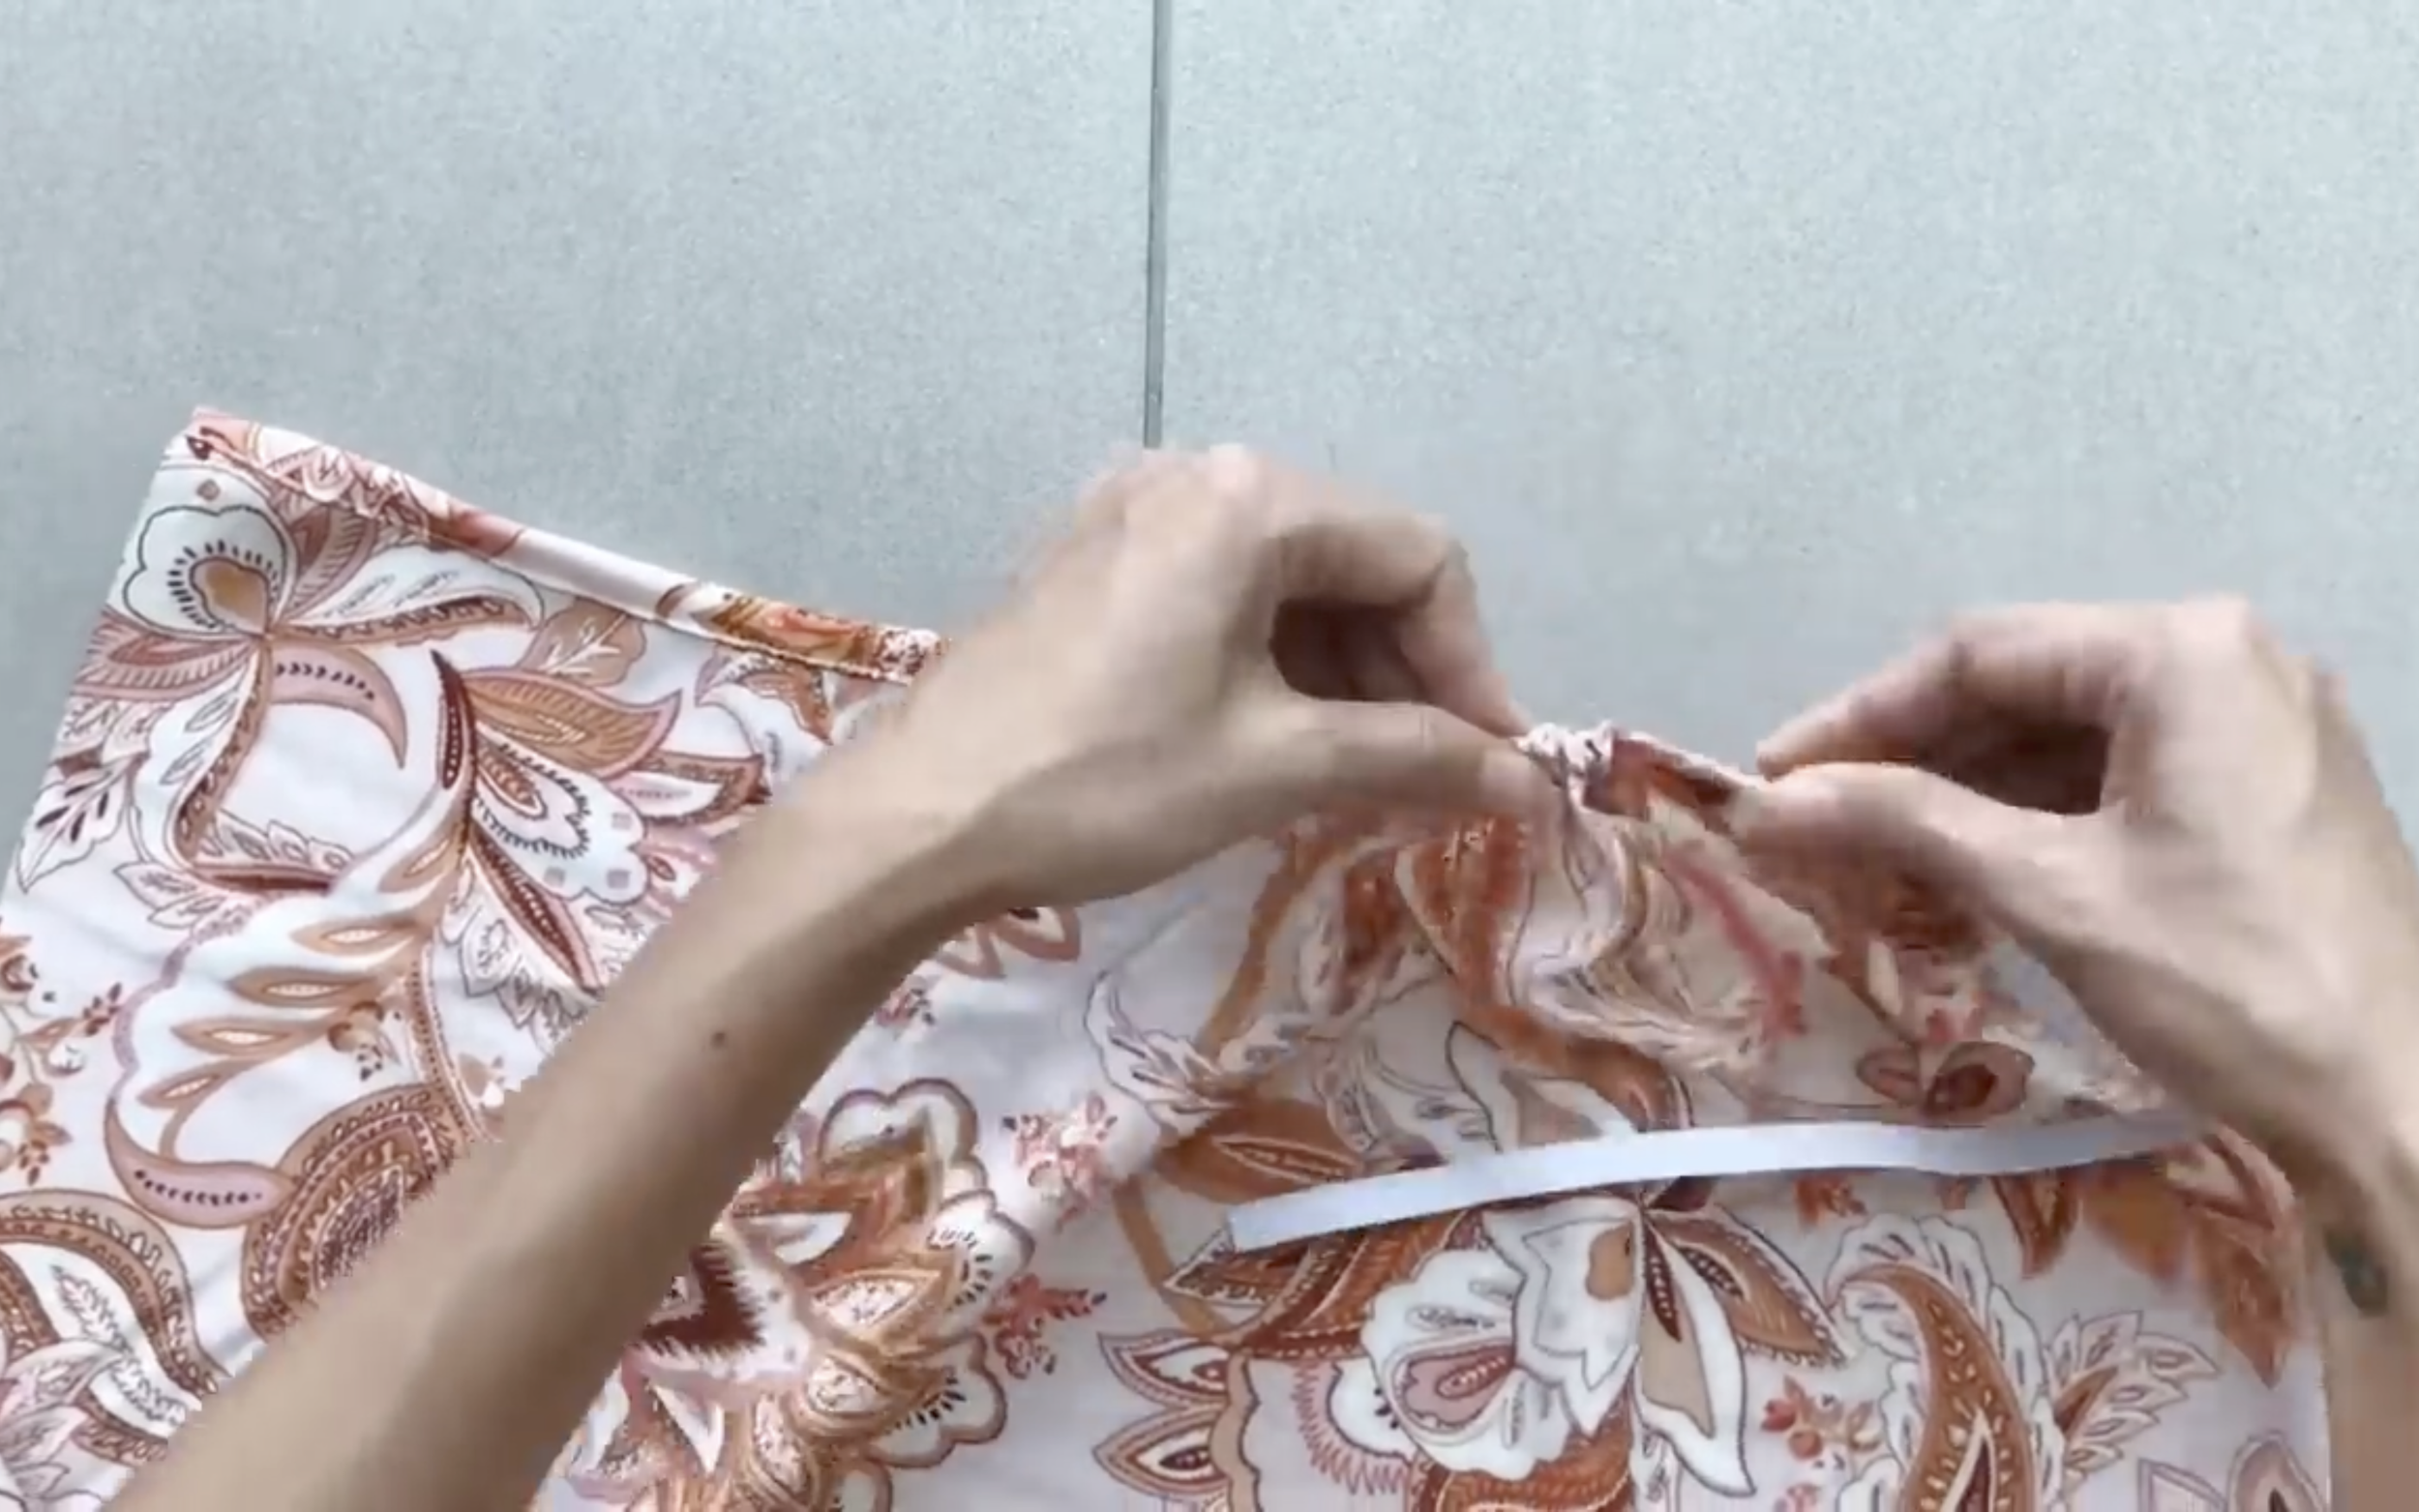
Then, fold the fabric inside around 0.5 cm, then keep folding it again and sew to create a fabric hole to put the elastic band to go through later.
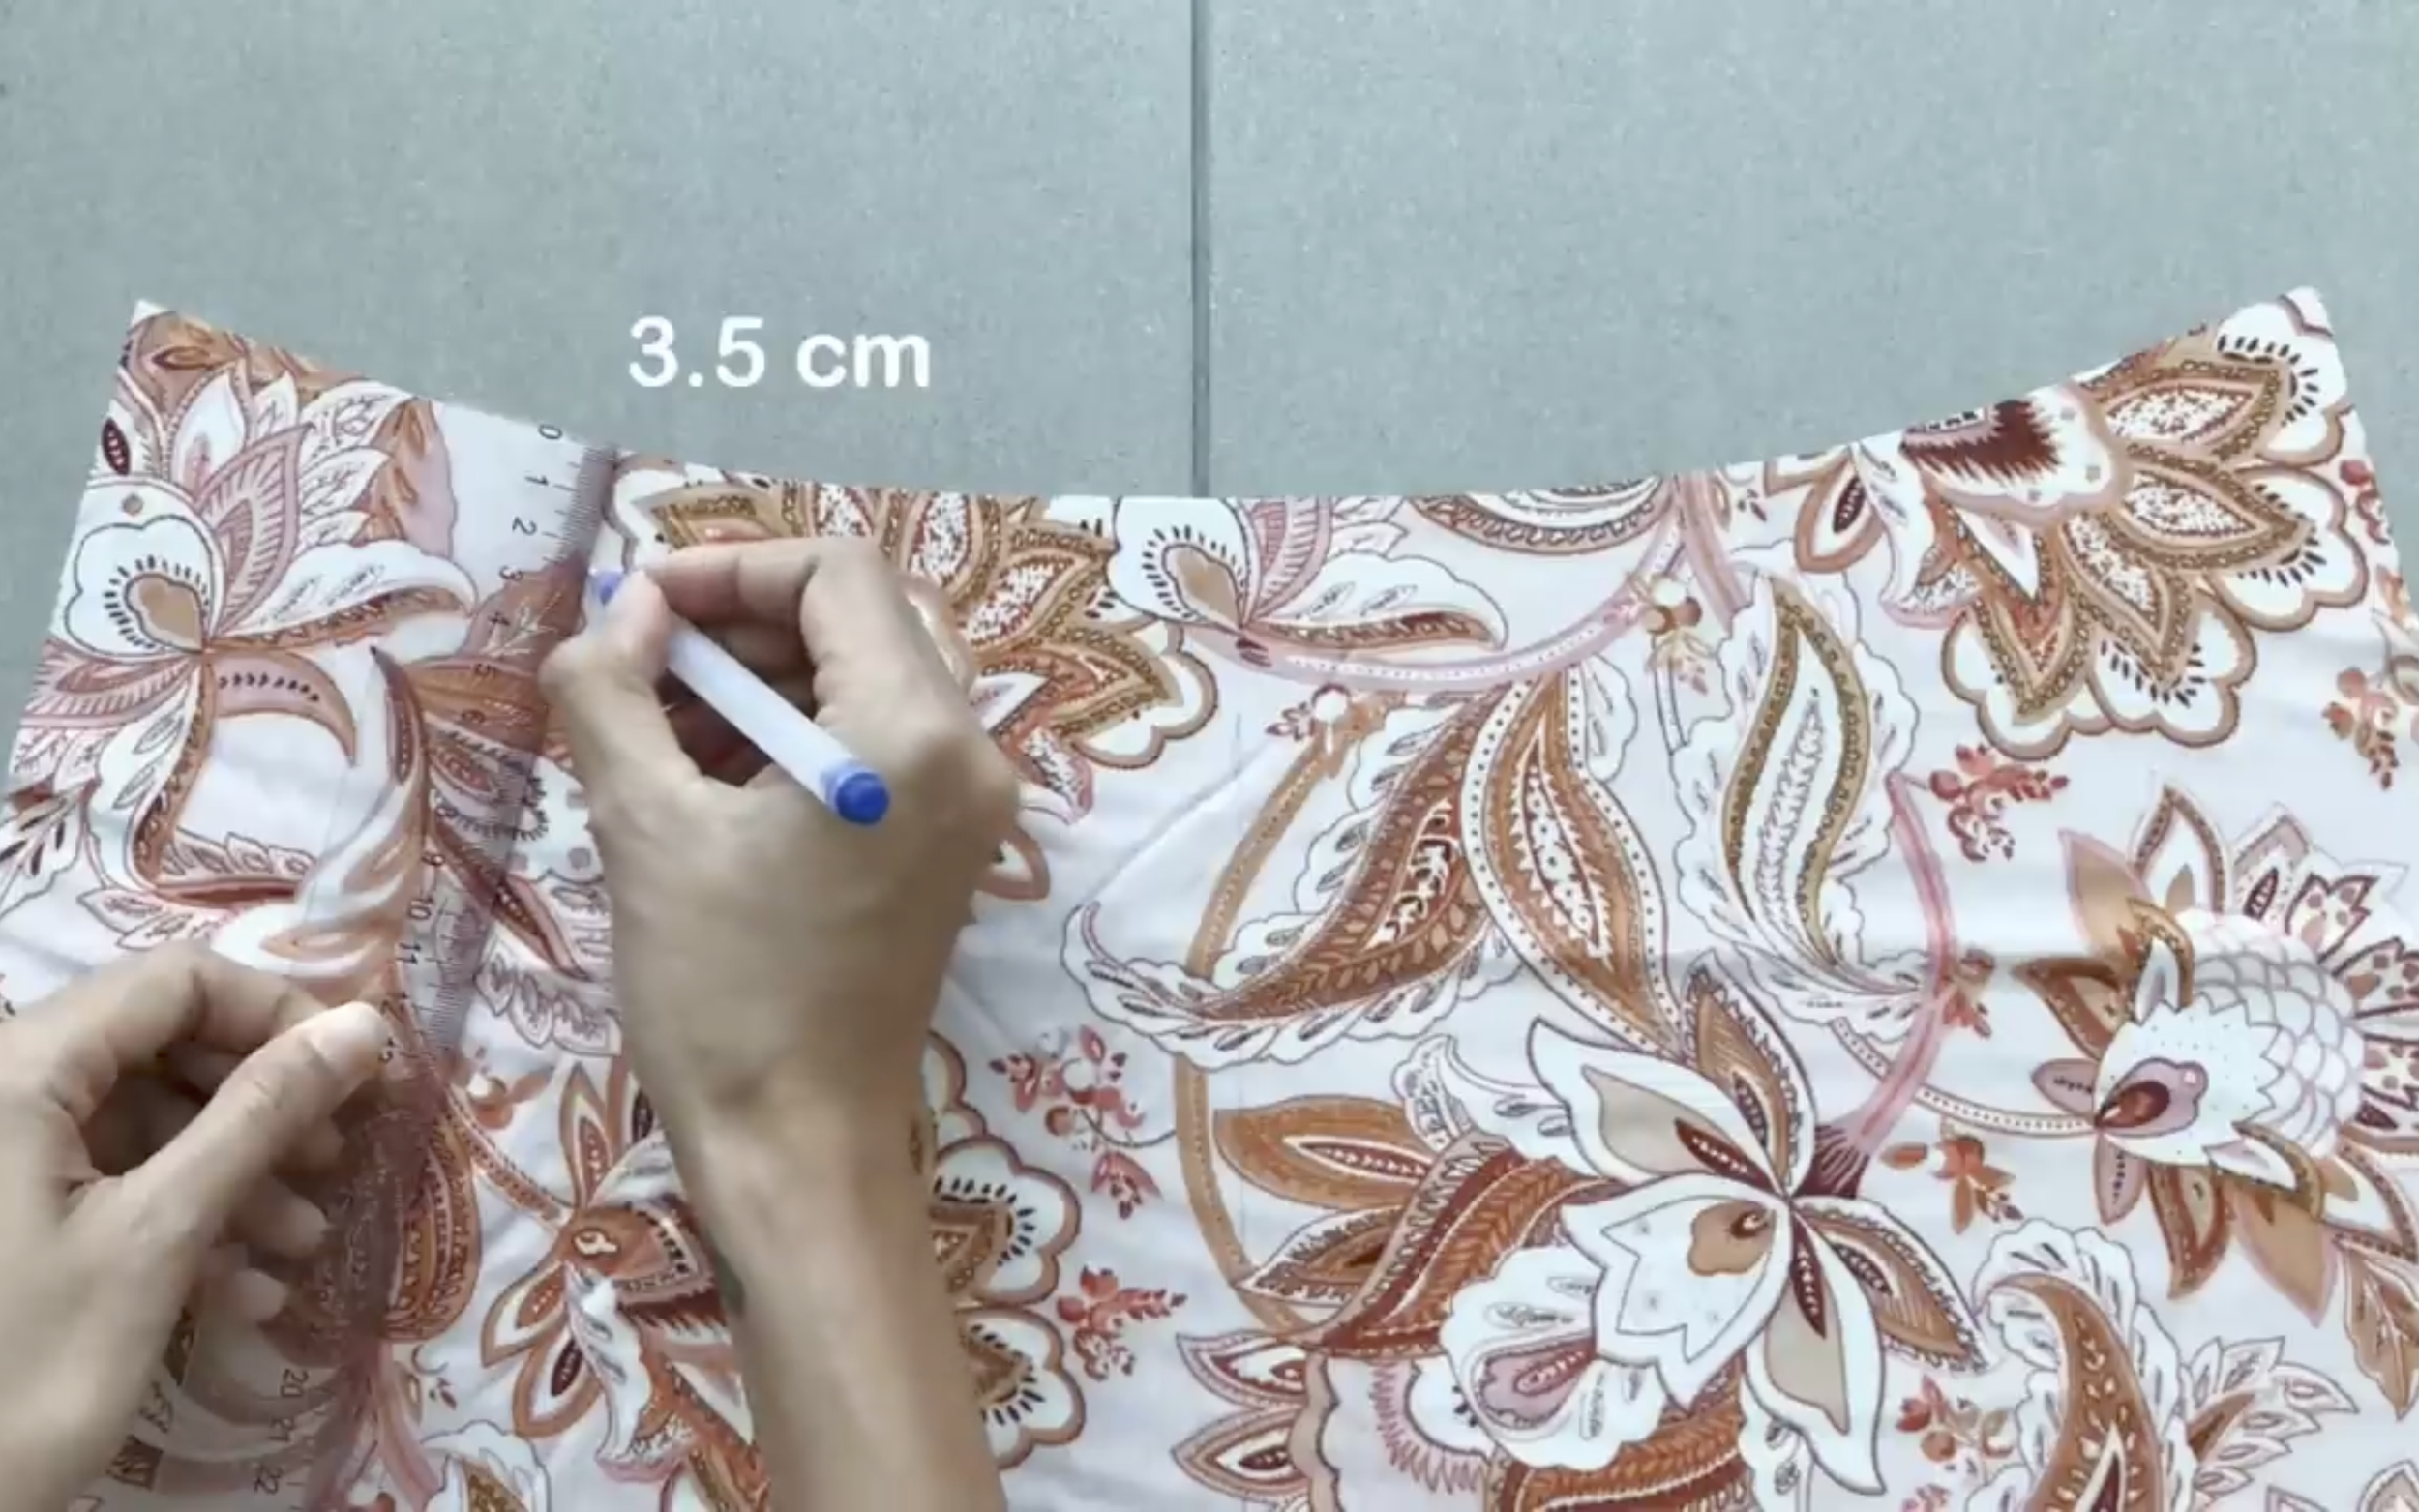
Measure and draw a line 3.5 cm from the top edge of the front part of the bottom dress.
Then, fold it to the line just drawn before that and sew.
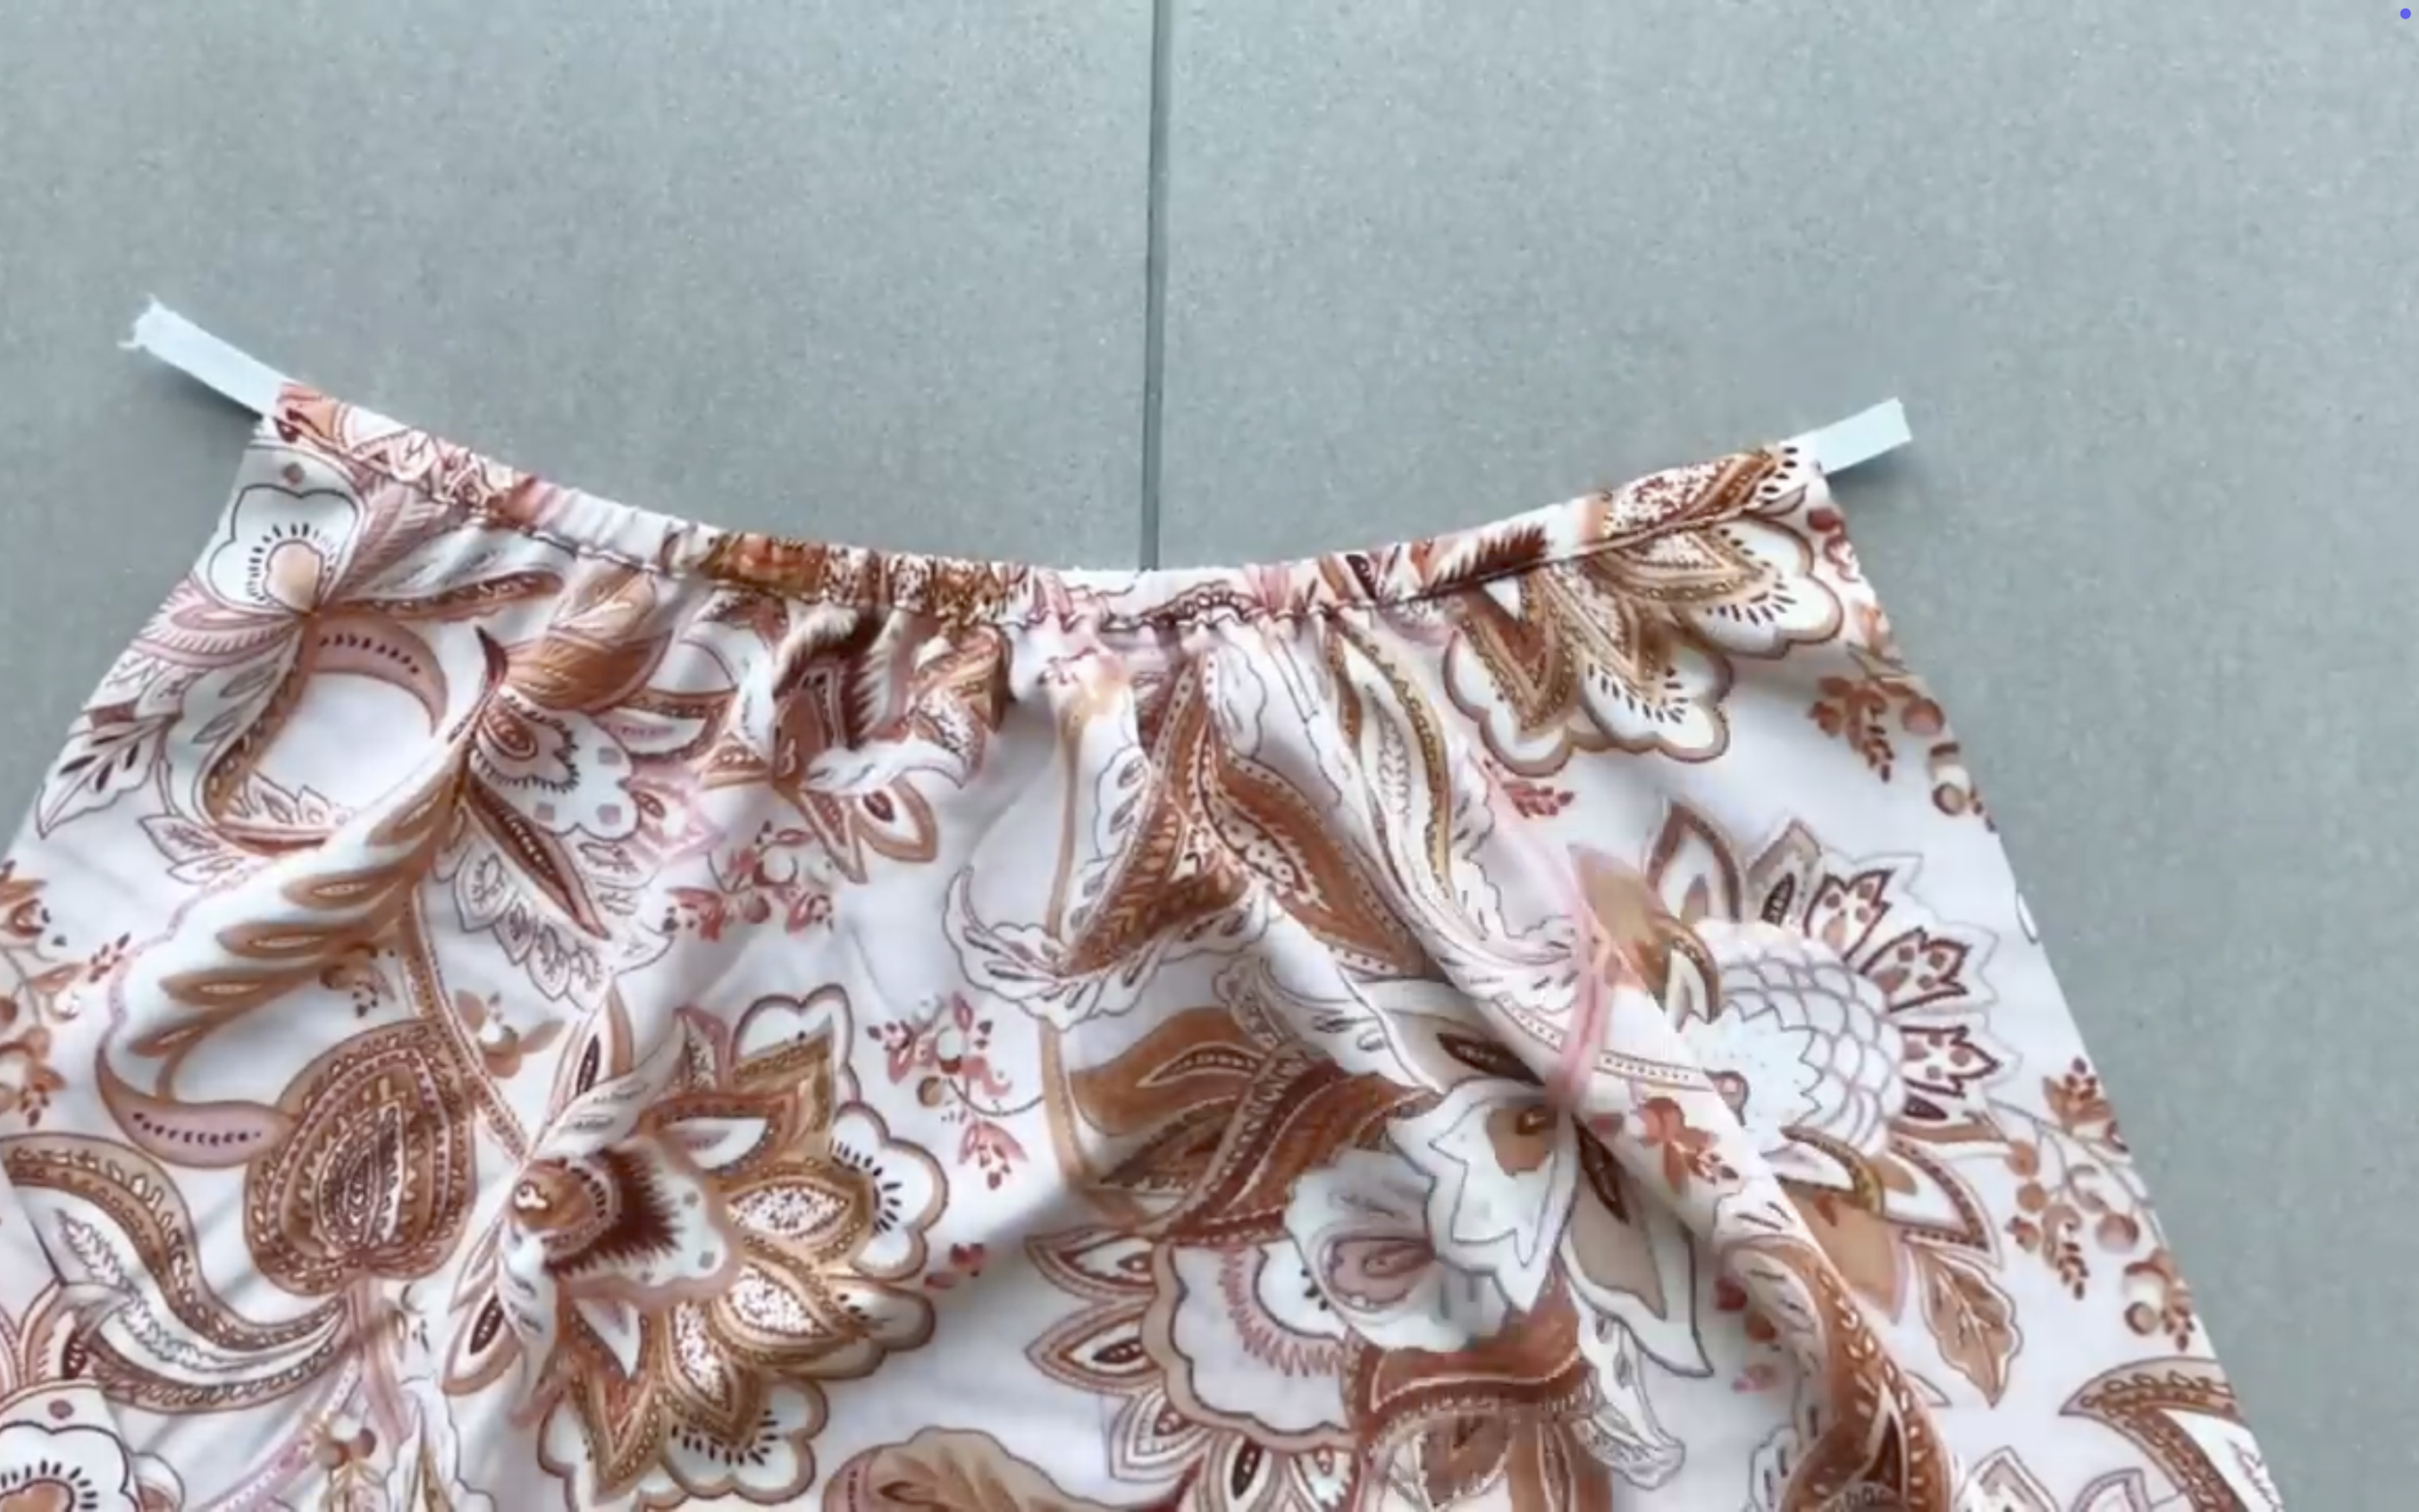
From the top of the back part of the bottom dress, mark a line 3.5 cm below.
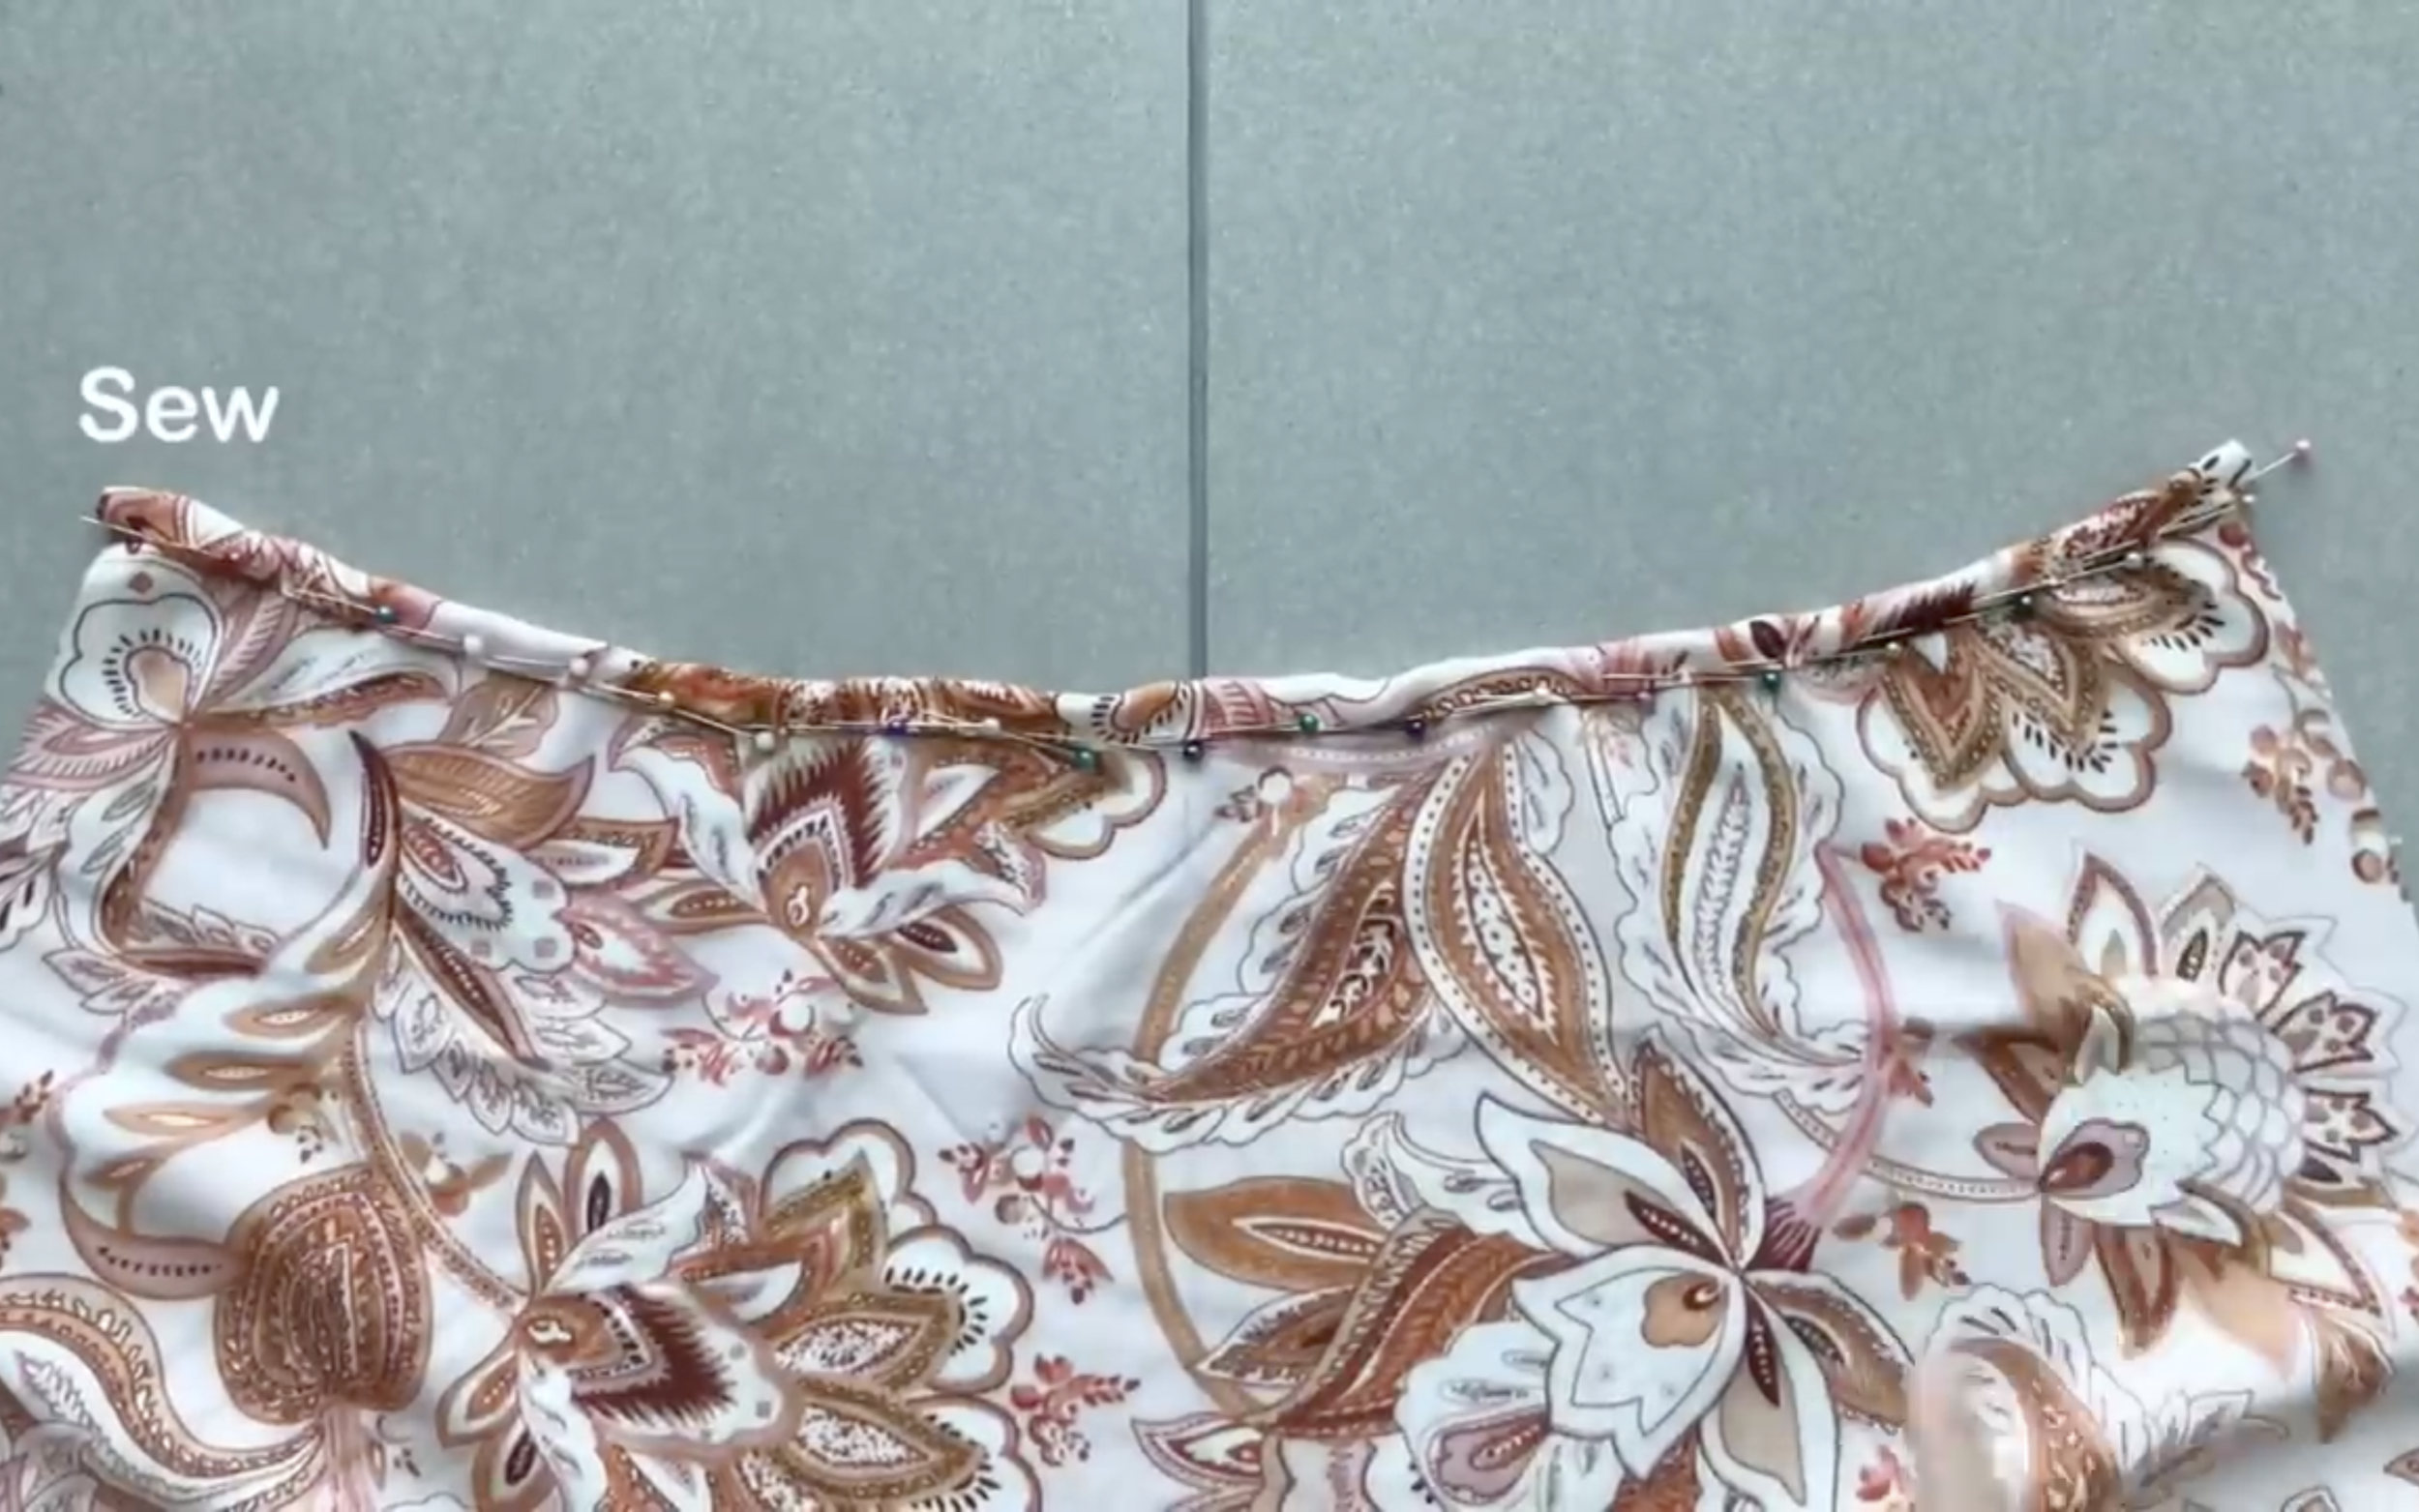
After that, fold the end fabric inside around 0.5 cm first, then keep folding it to the line just drawn before that to create a fabric hole for the elastic band to go through later.
Make sure the width of the fabric hole is slightly bigger than the width of the elastic band being used.
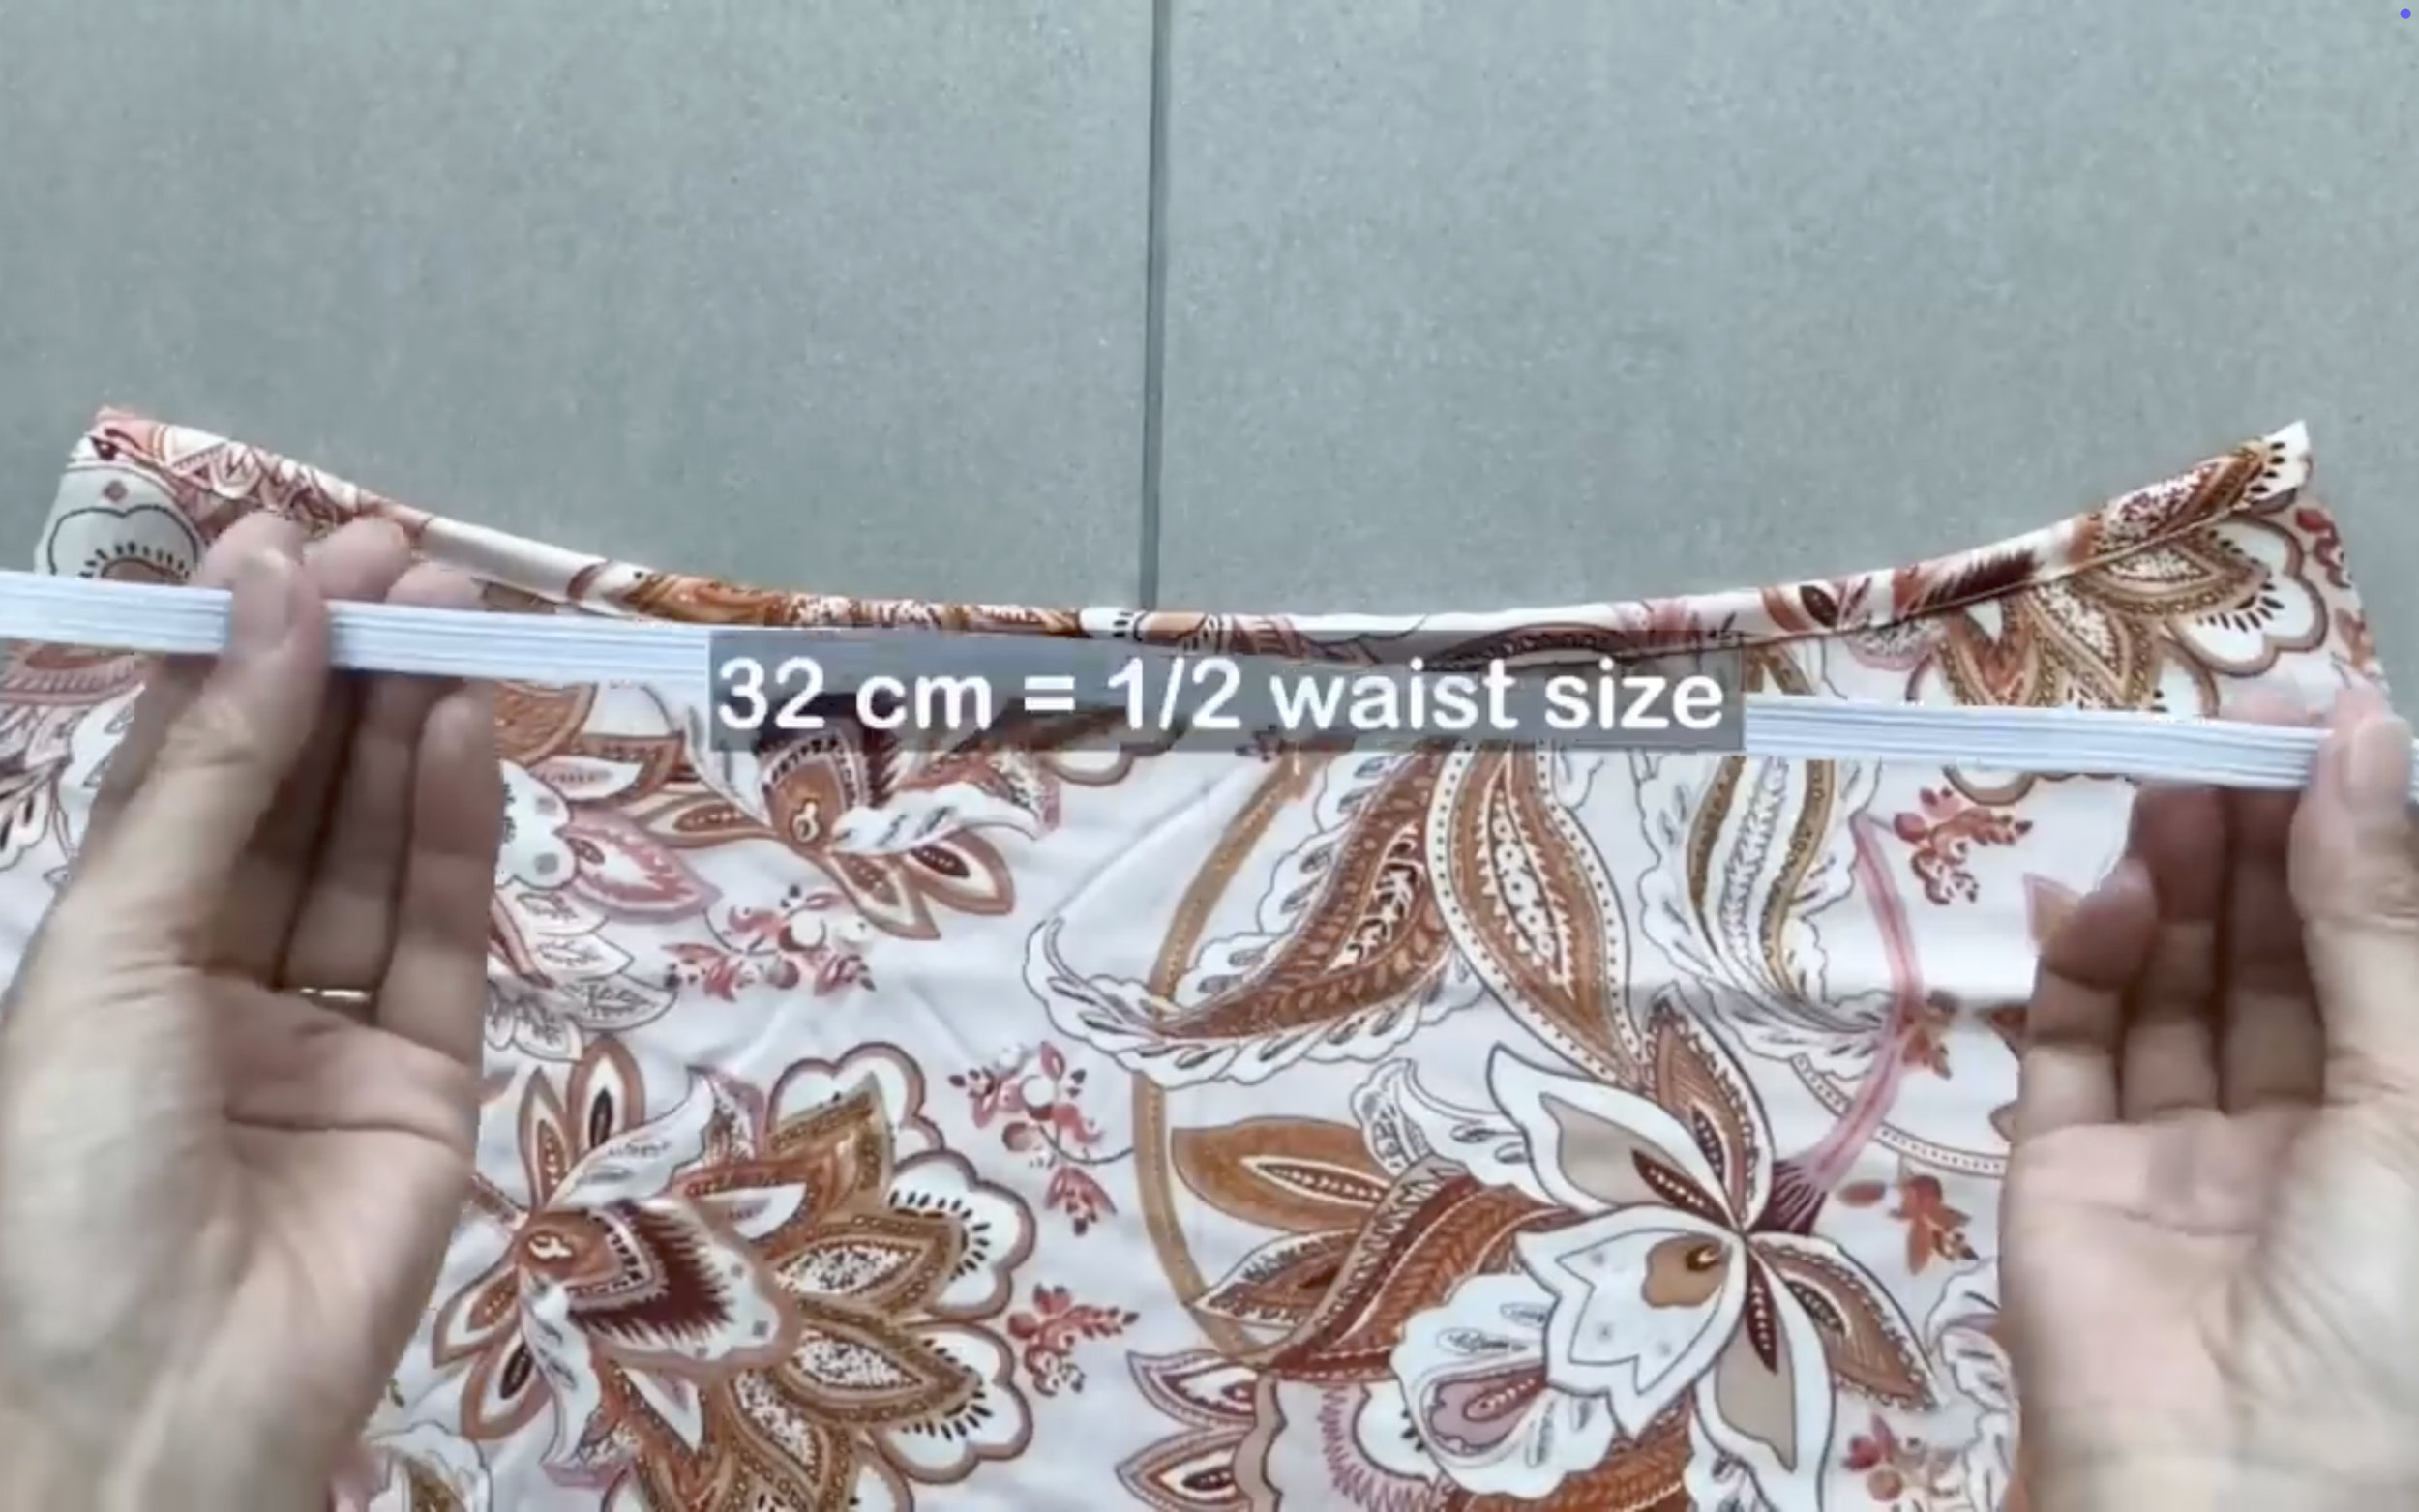
Cut a 32 cm elastic band, which is half of the waist size.
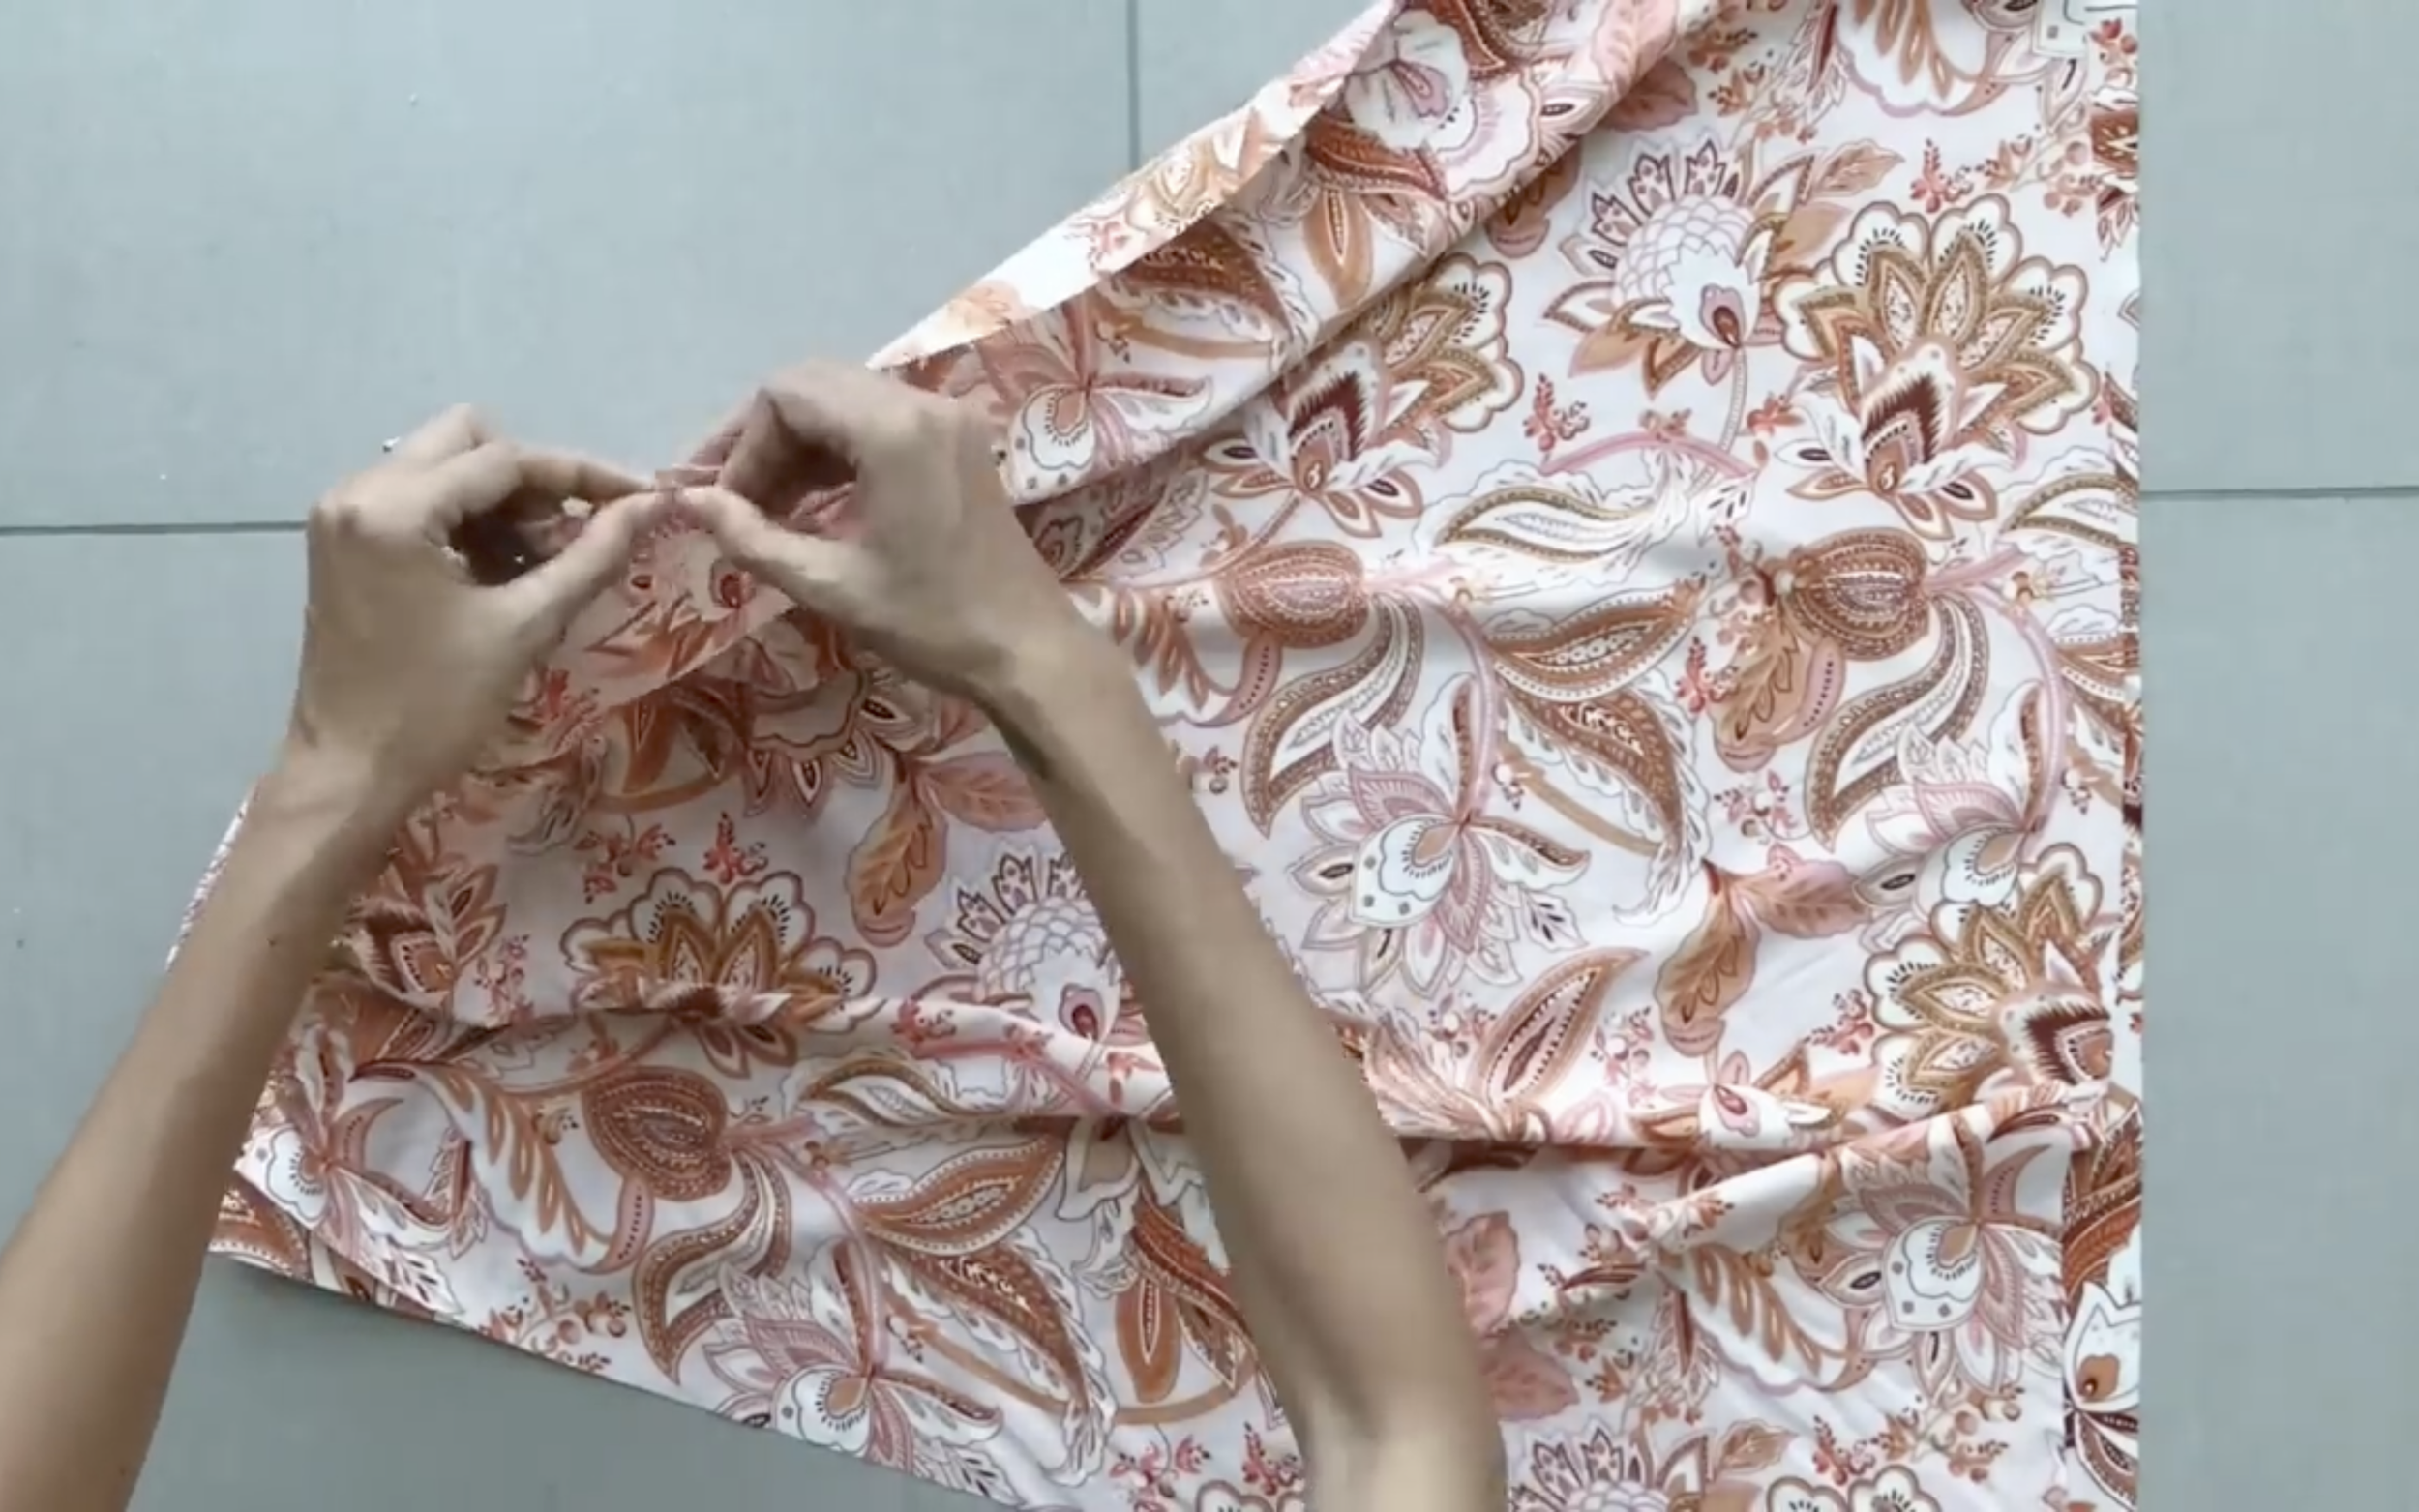
Use a hair clip to put the elastic band to go through the fabric hole.
Then, sew the two ends of the elastic band to the fabric to keep them from moving.
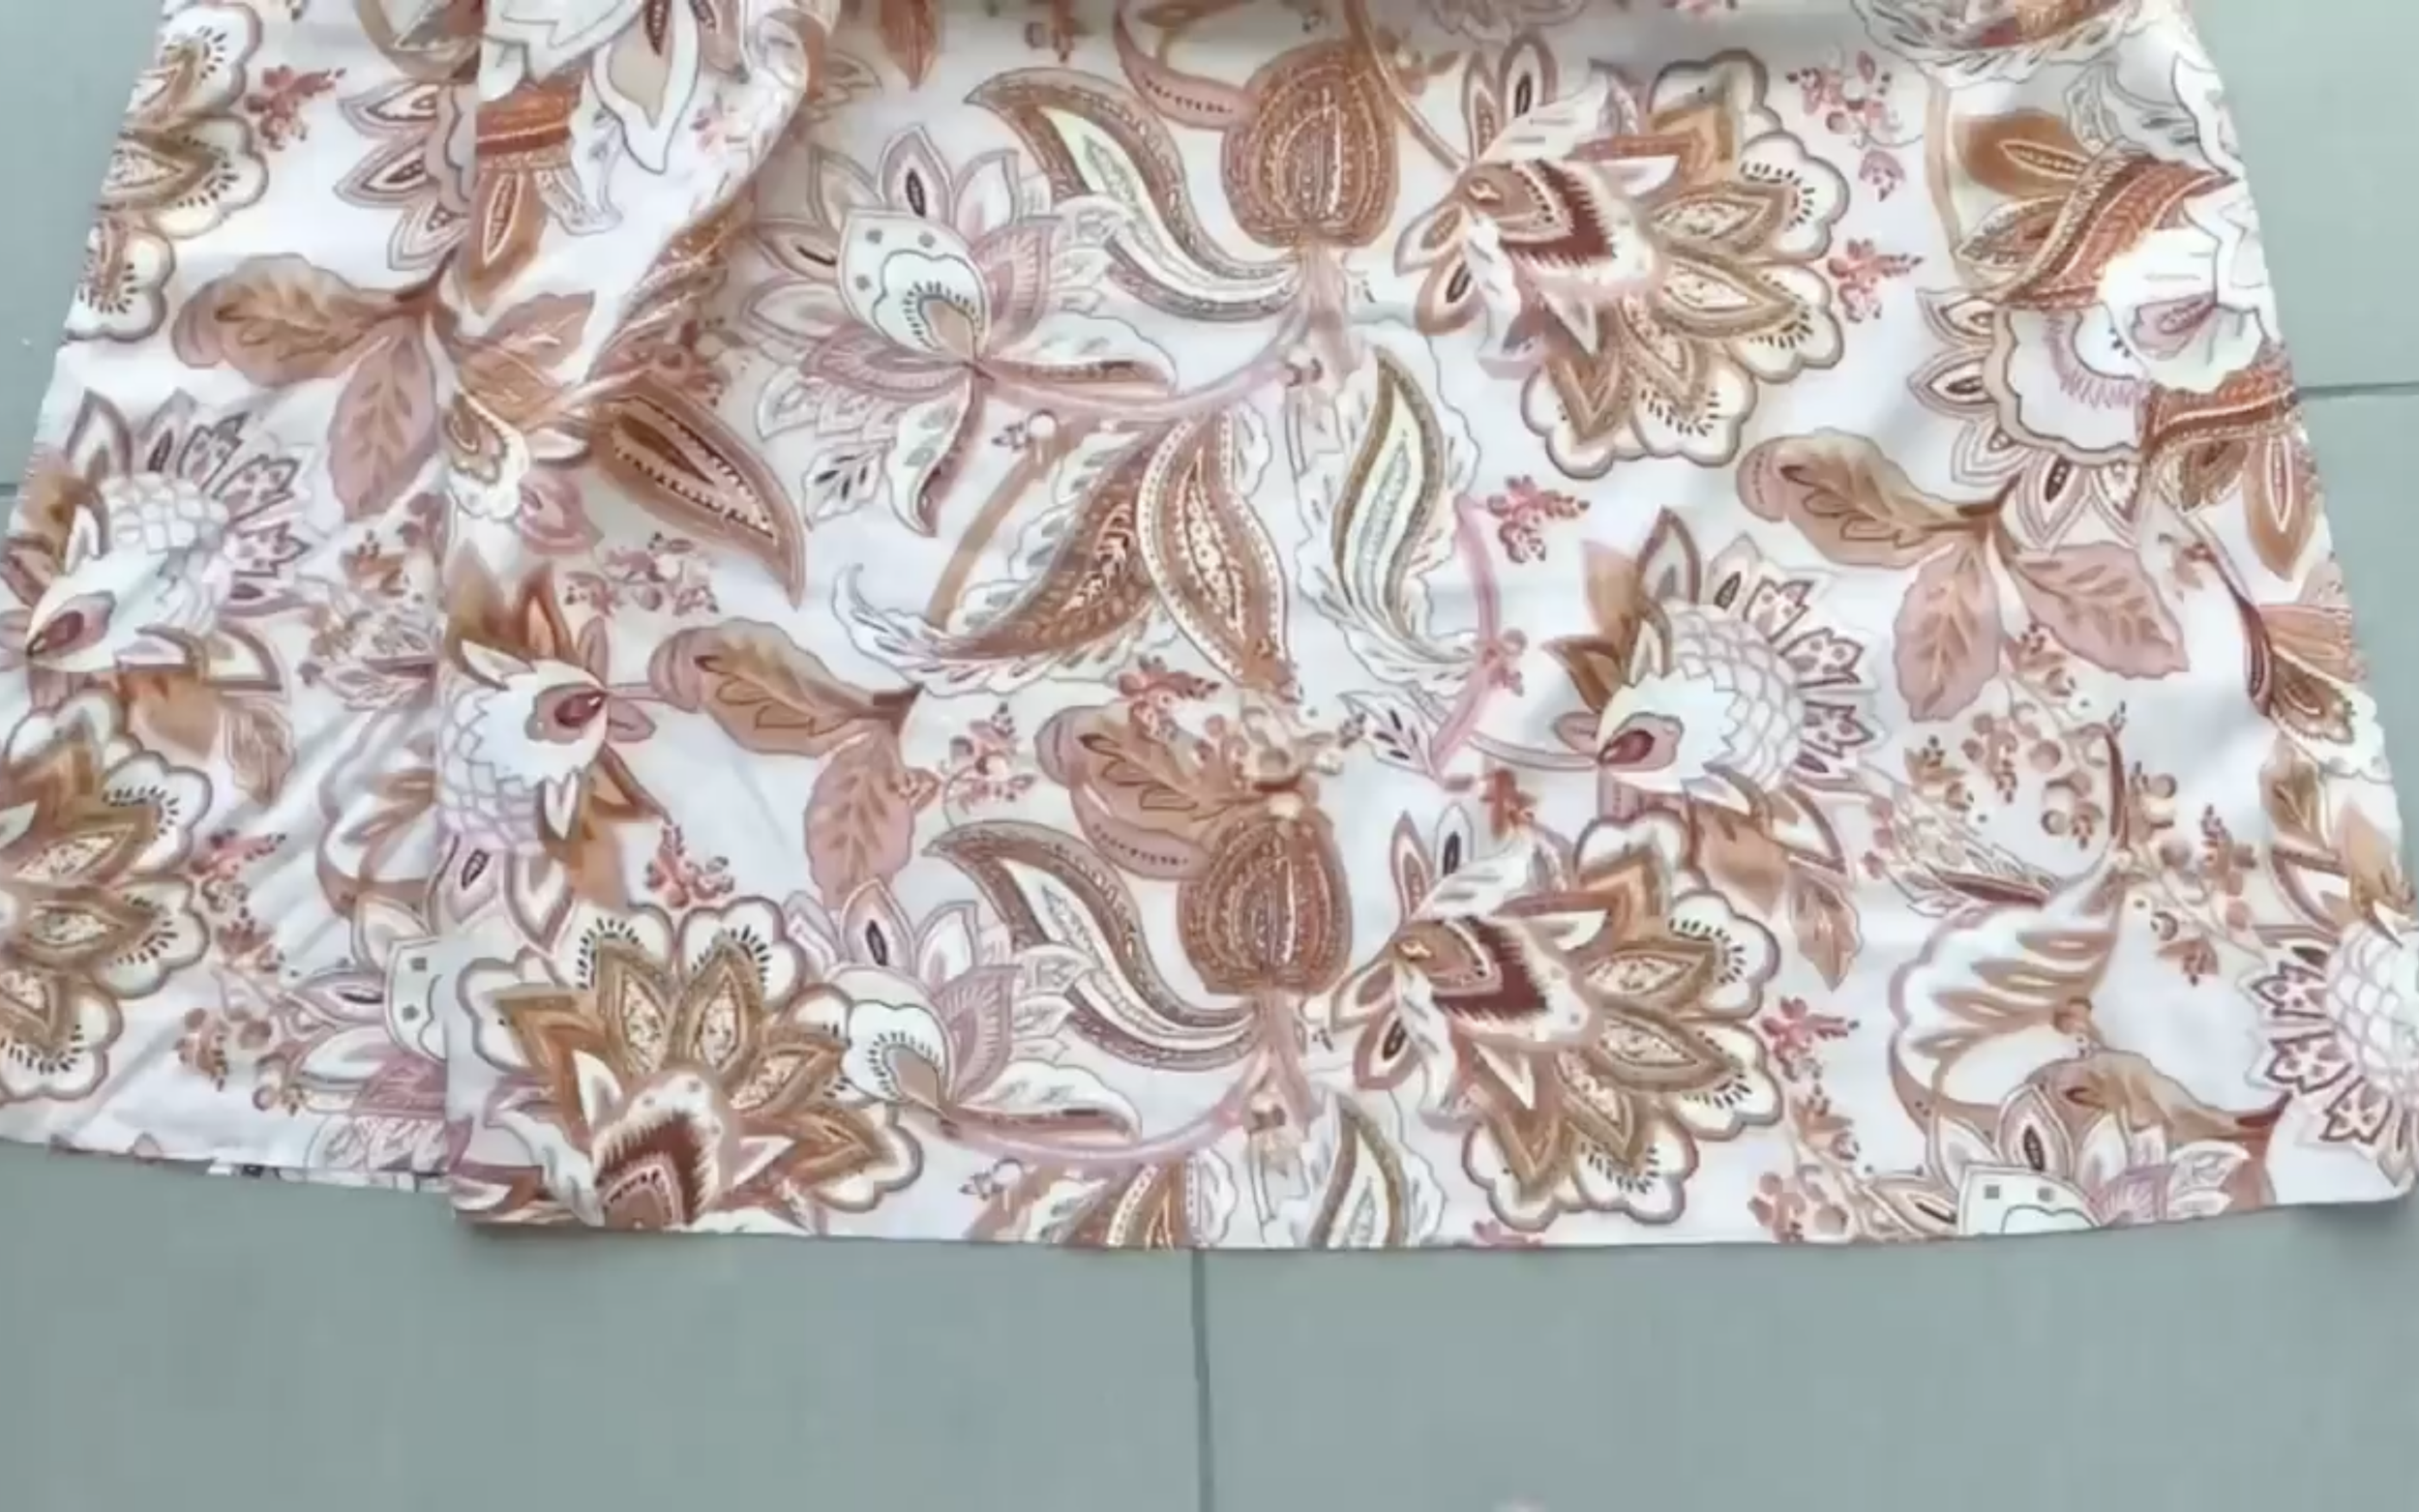
After that, connect the front and the back of the bottom dress together at two sides.
To finish the end of the bottom dress, fold the end fabric inside twice.

Then, sew.
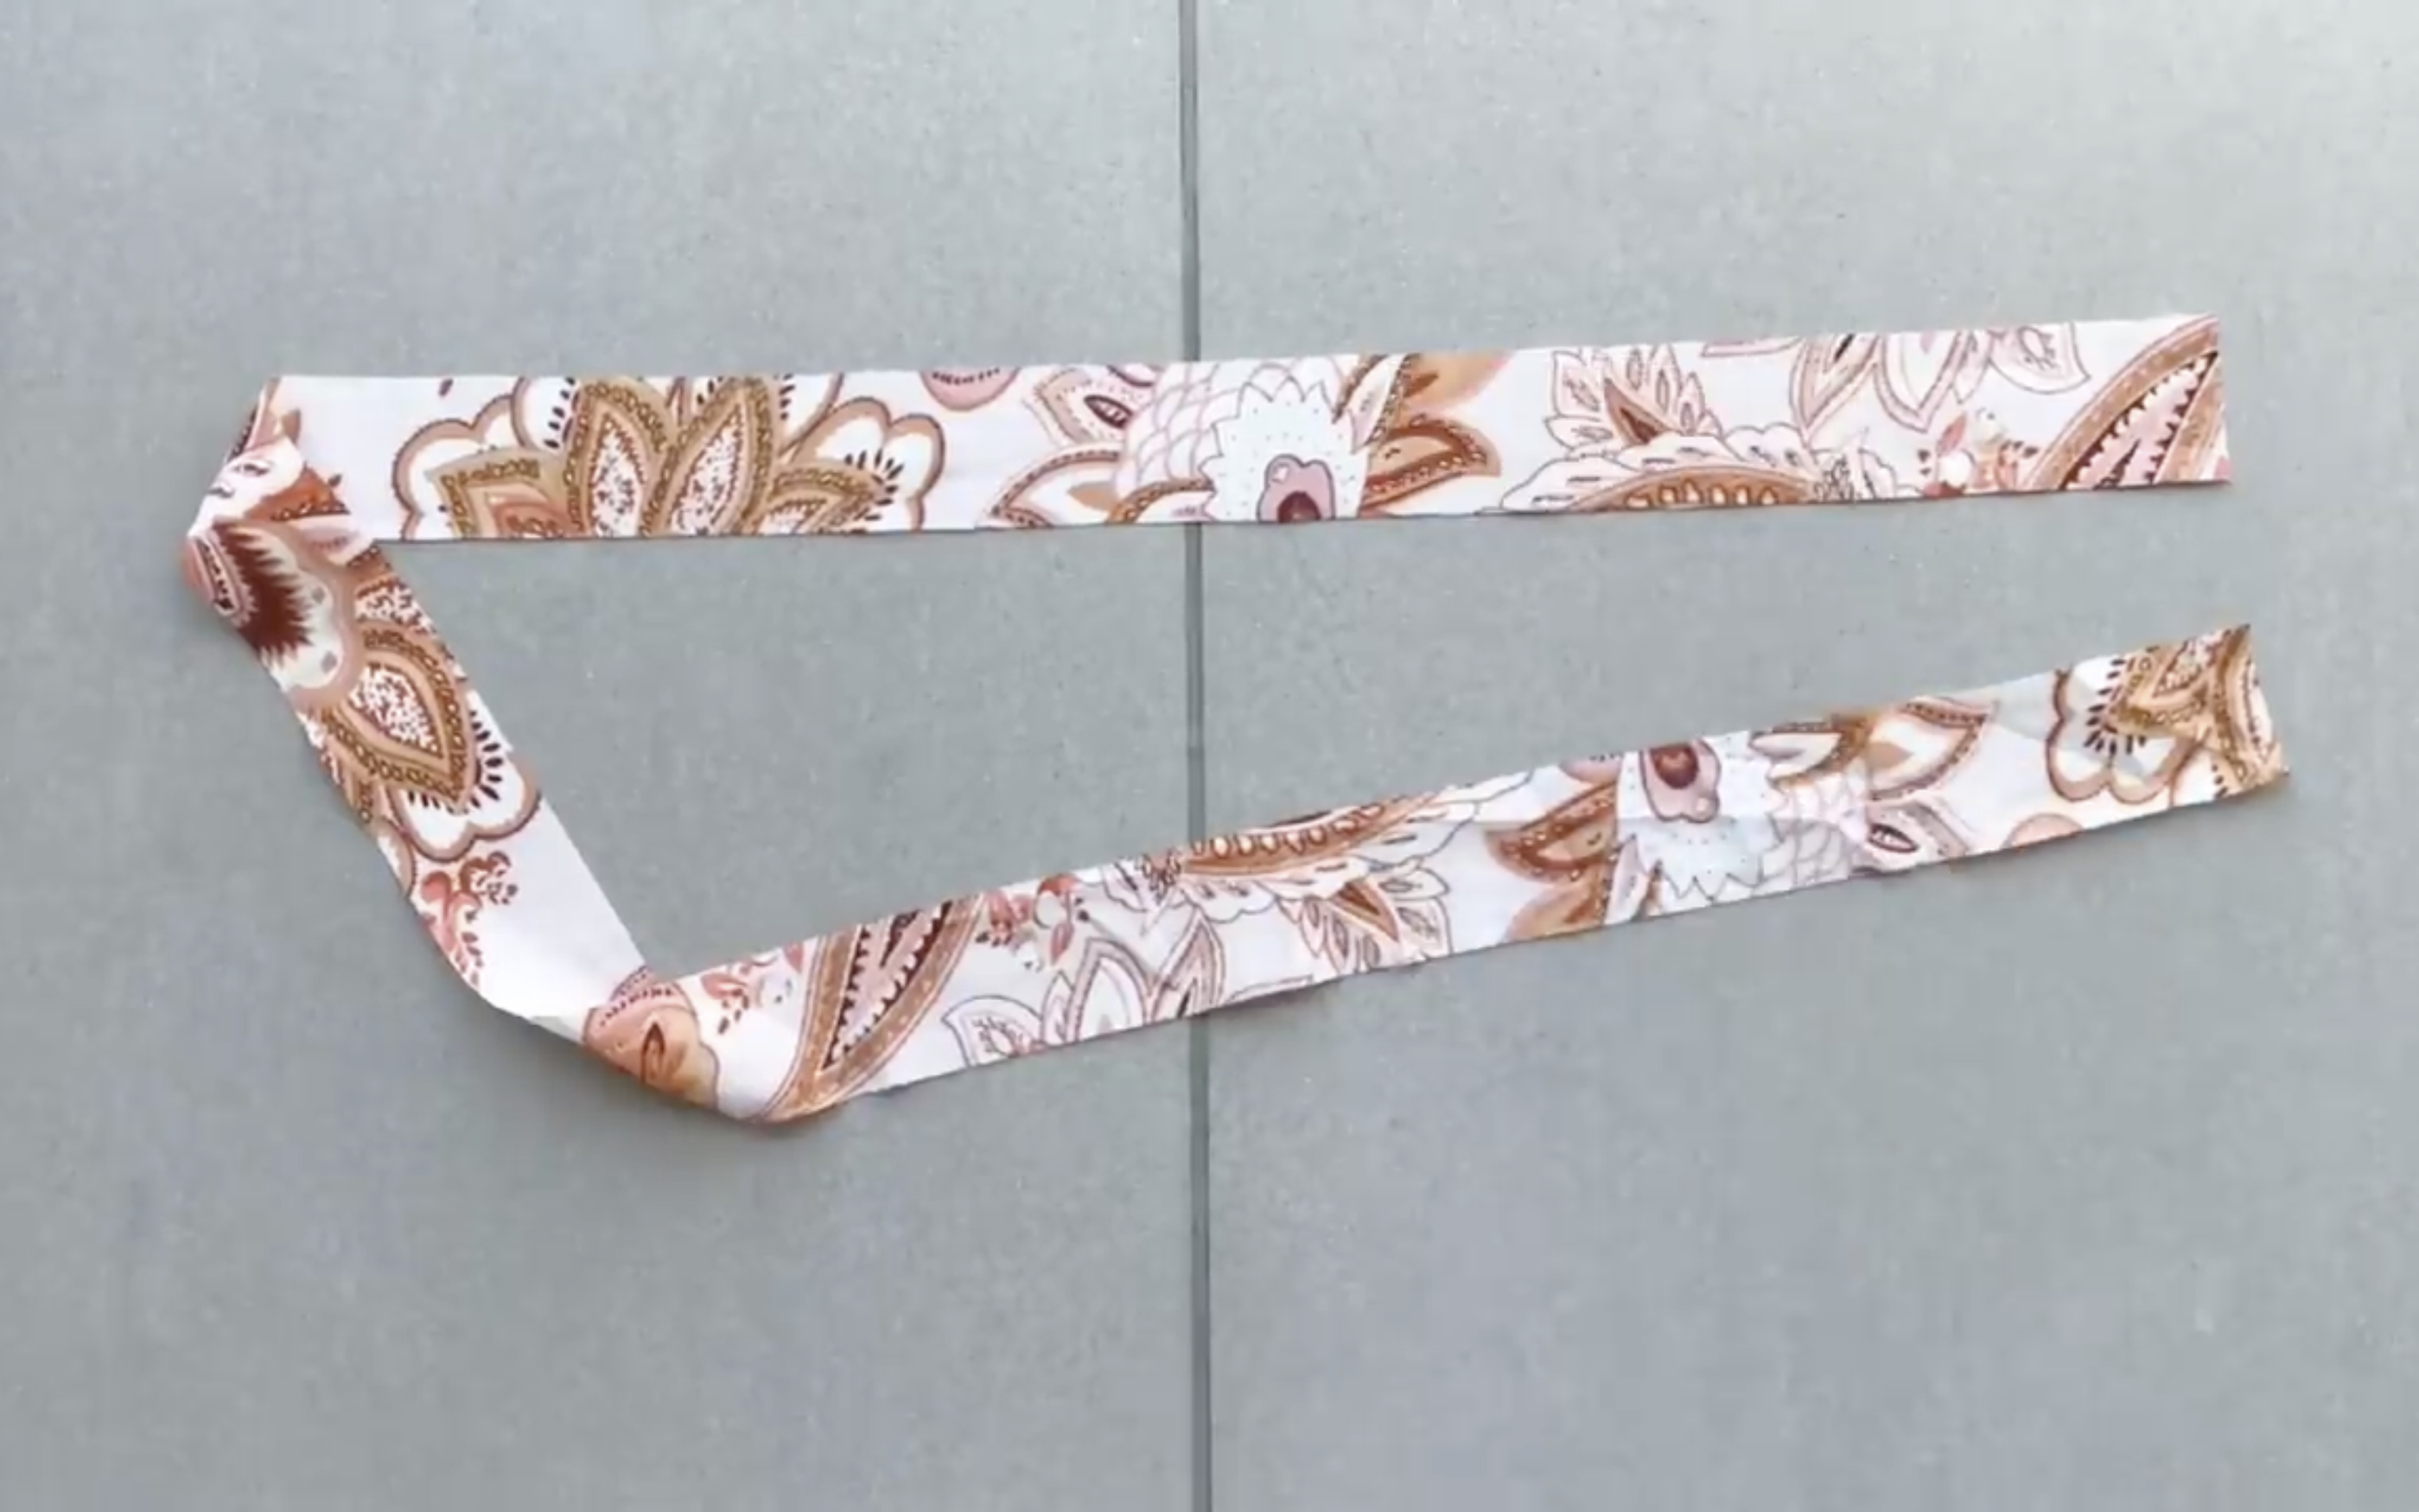
To make the tie, cut a long fabric with 3.5 cm width and around 60 cm length.
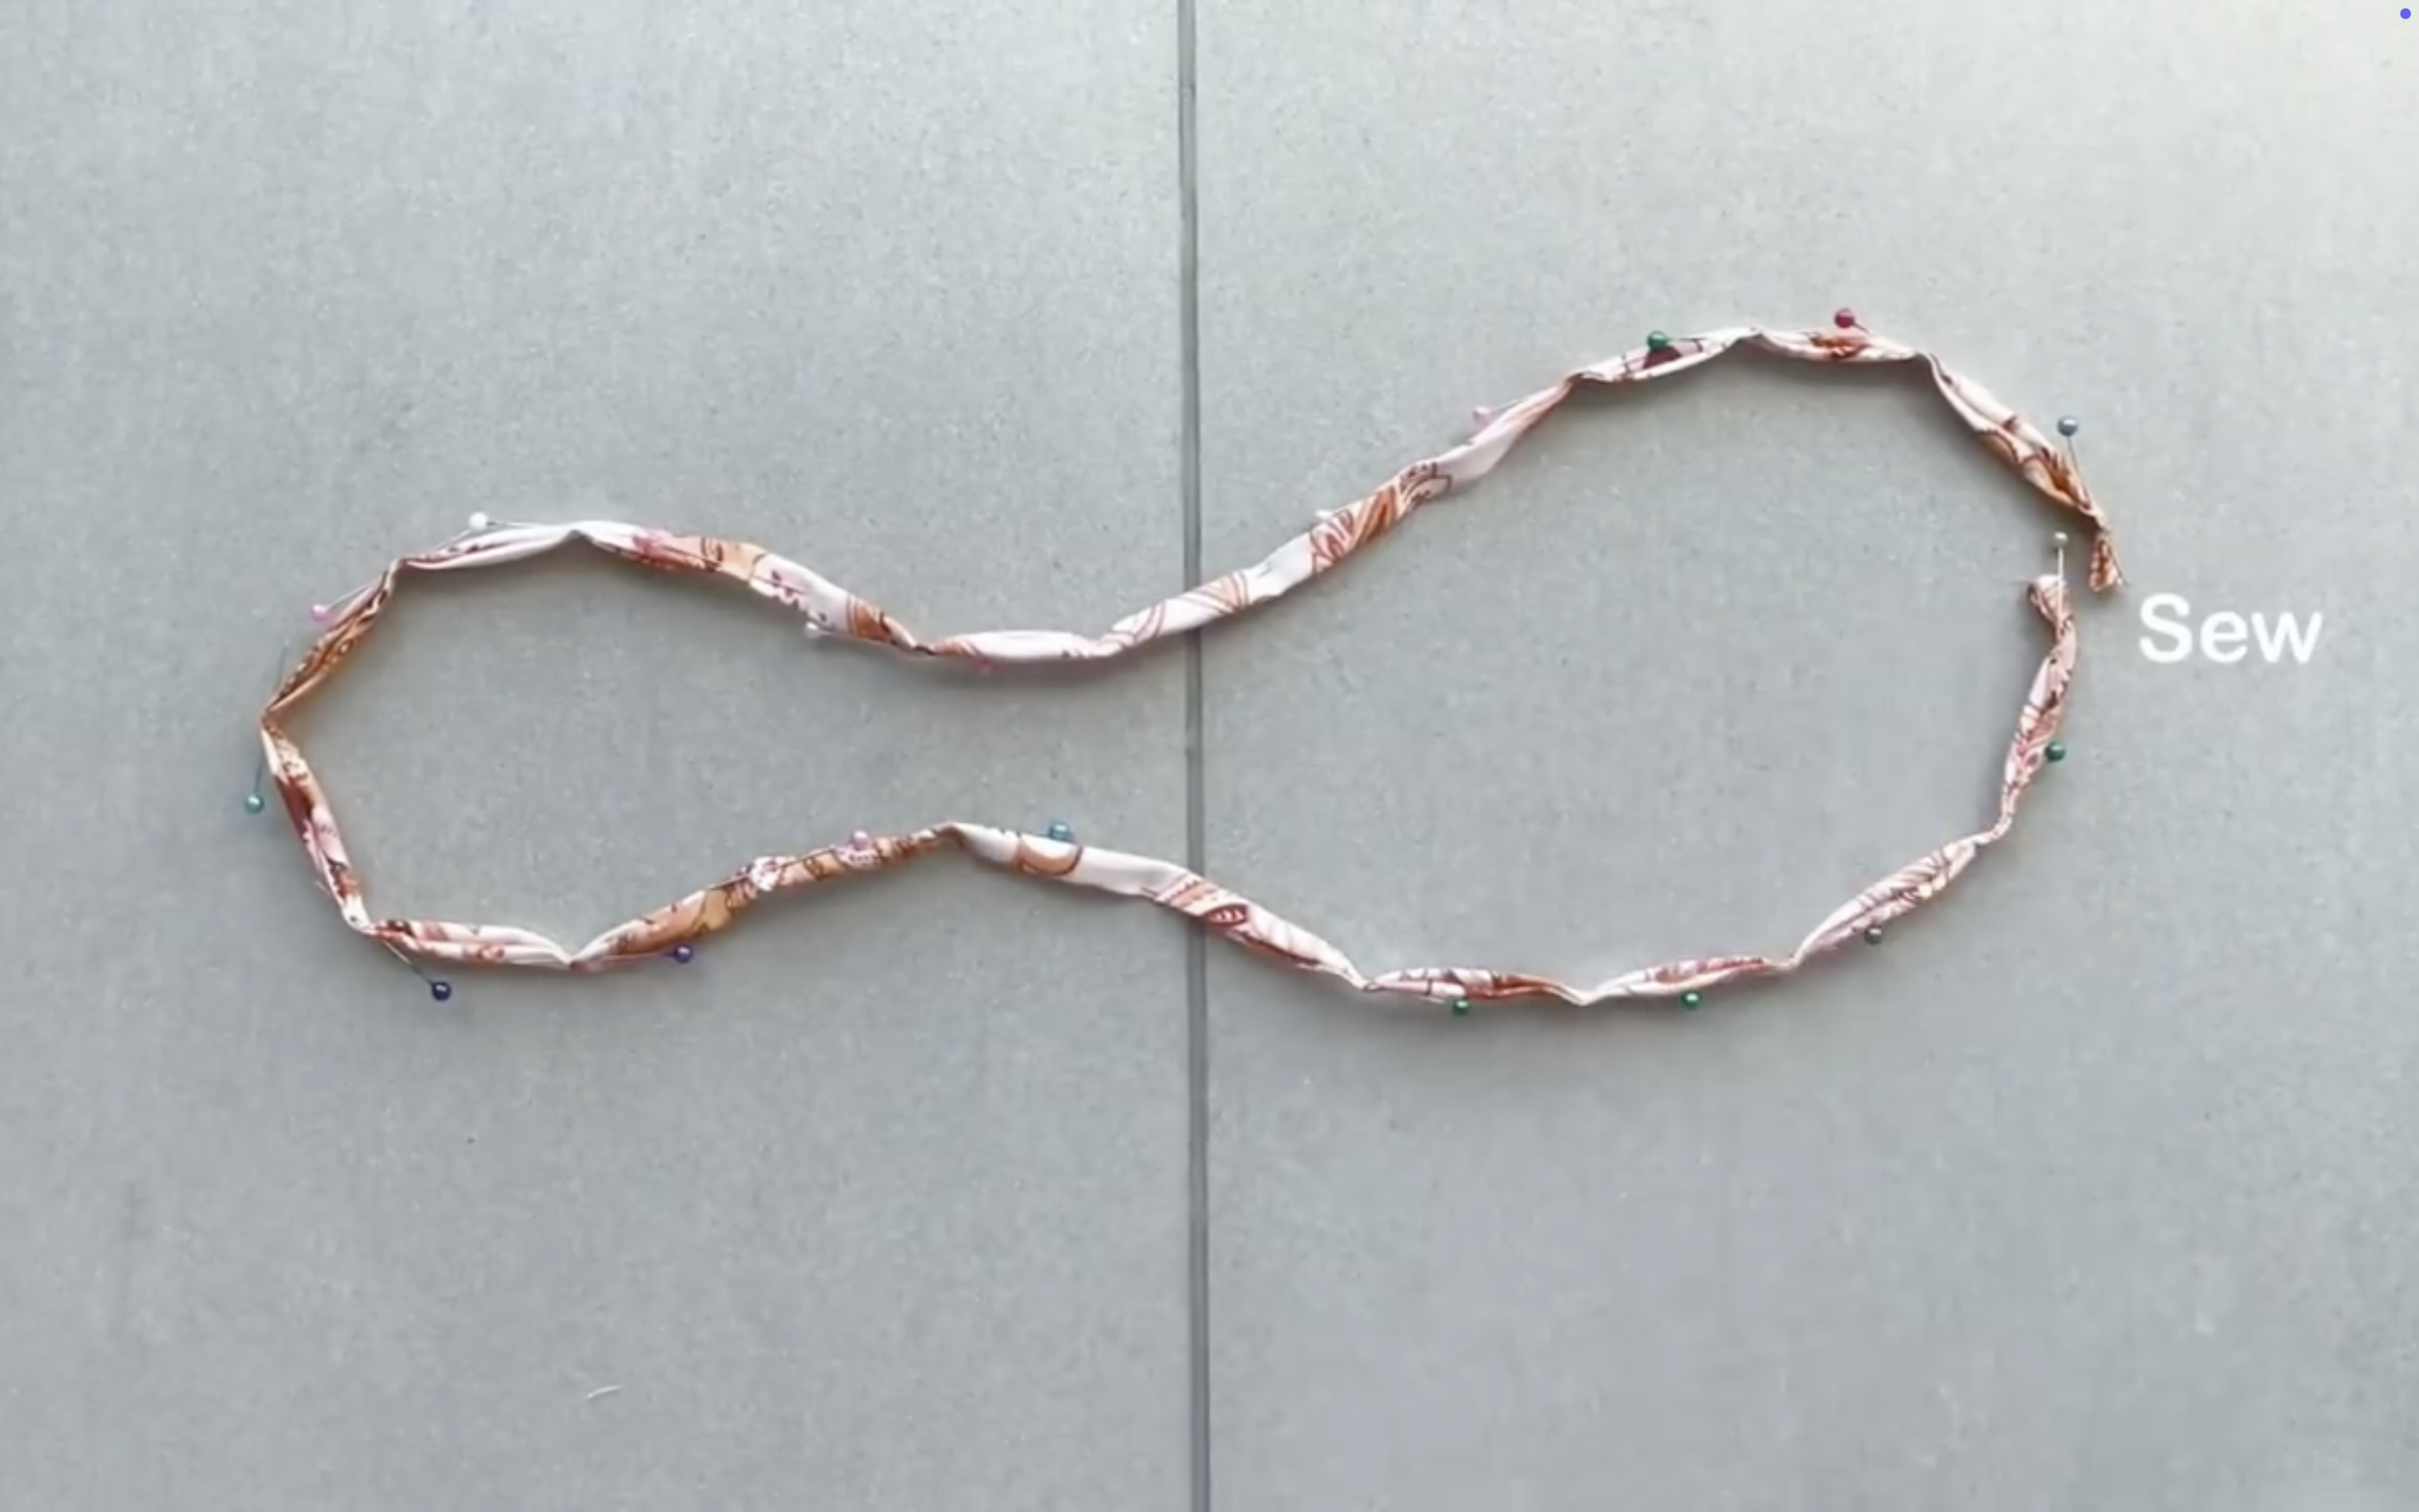
Fold the two length sides of the fabric to the middle first, then keep folding it again and sew.
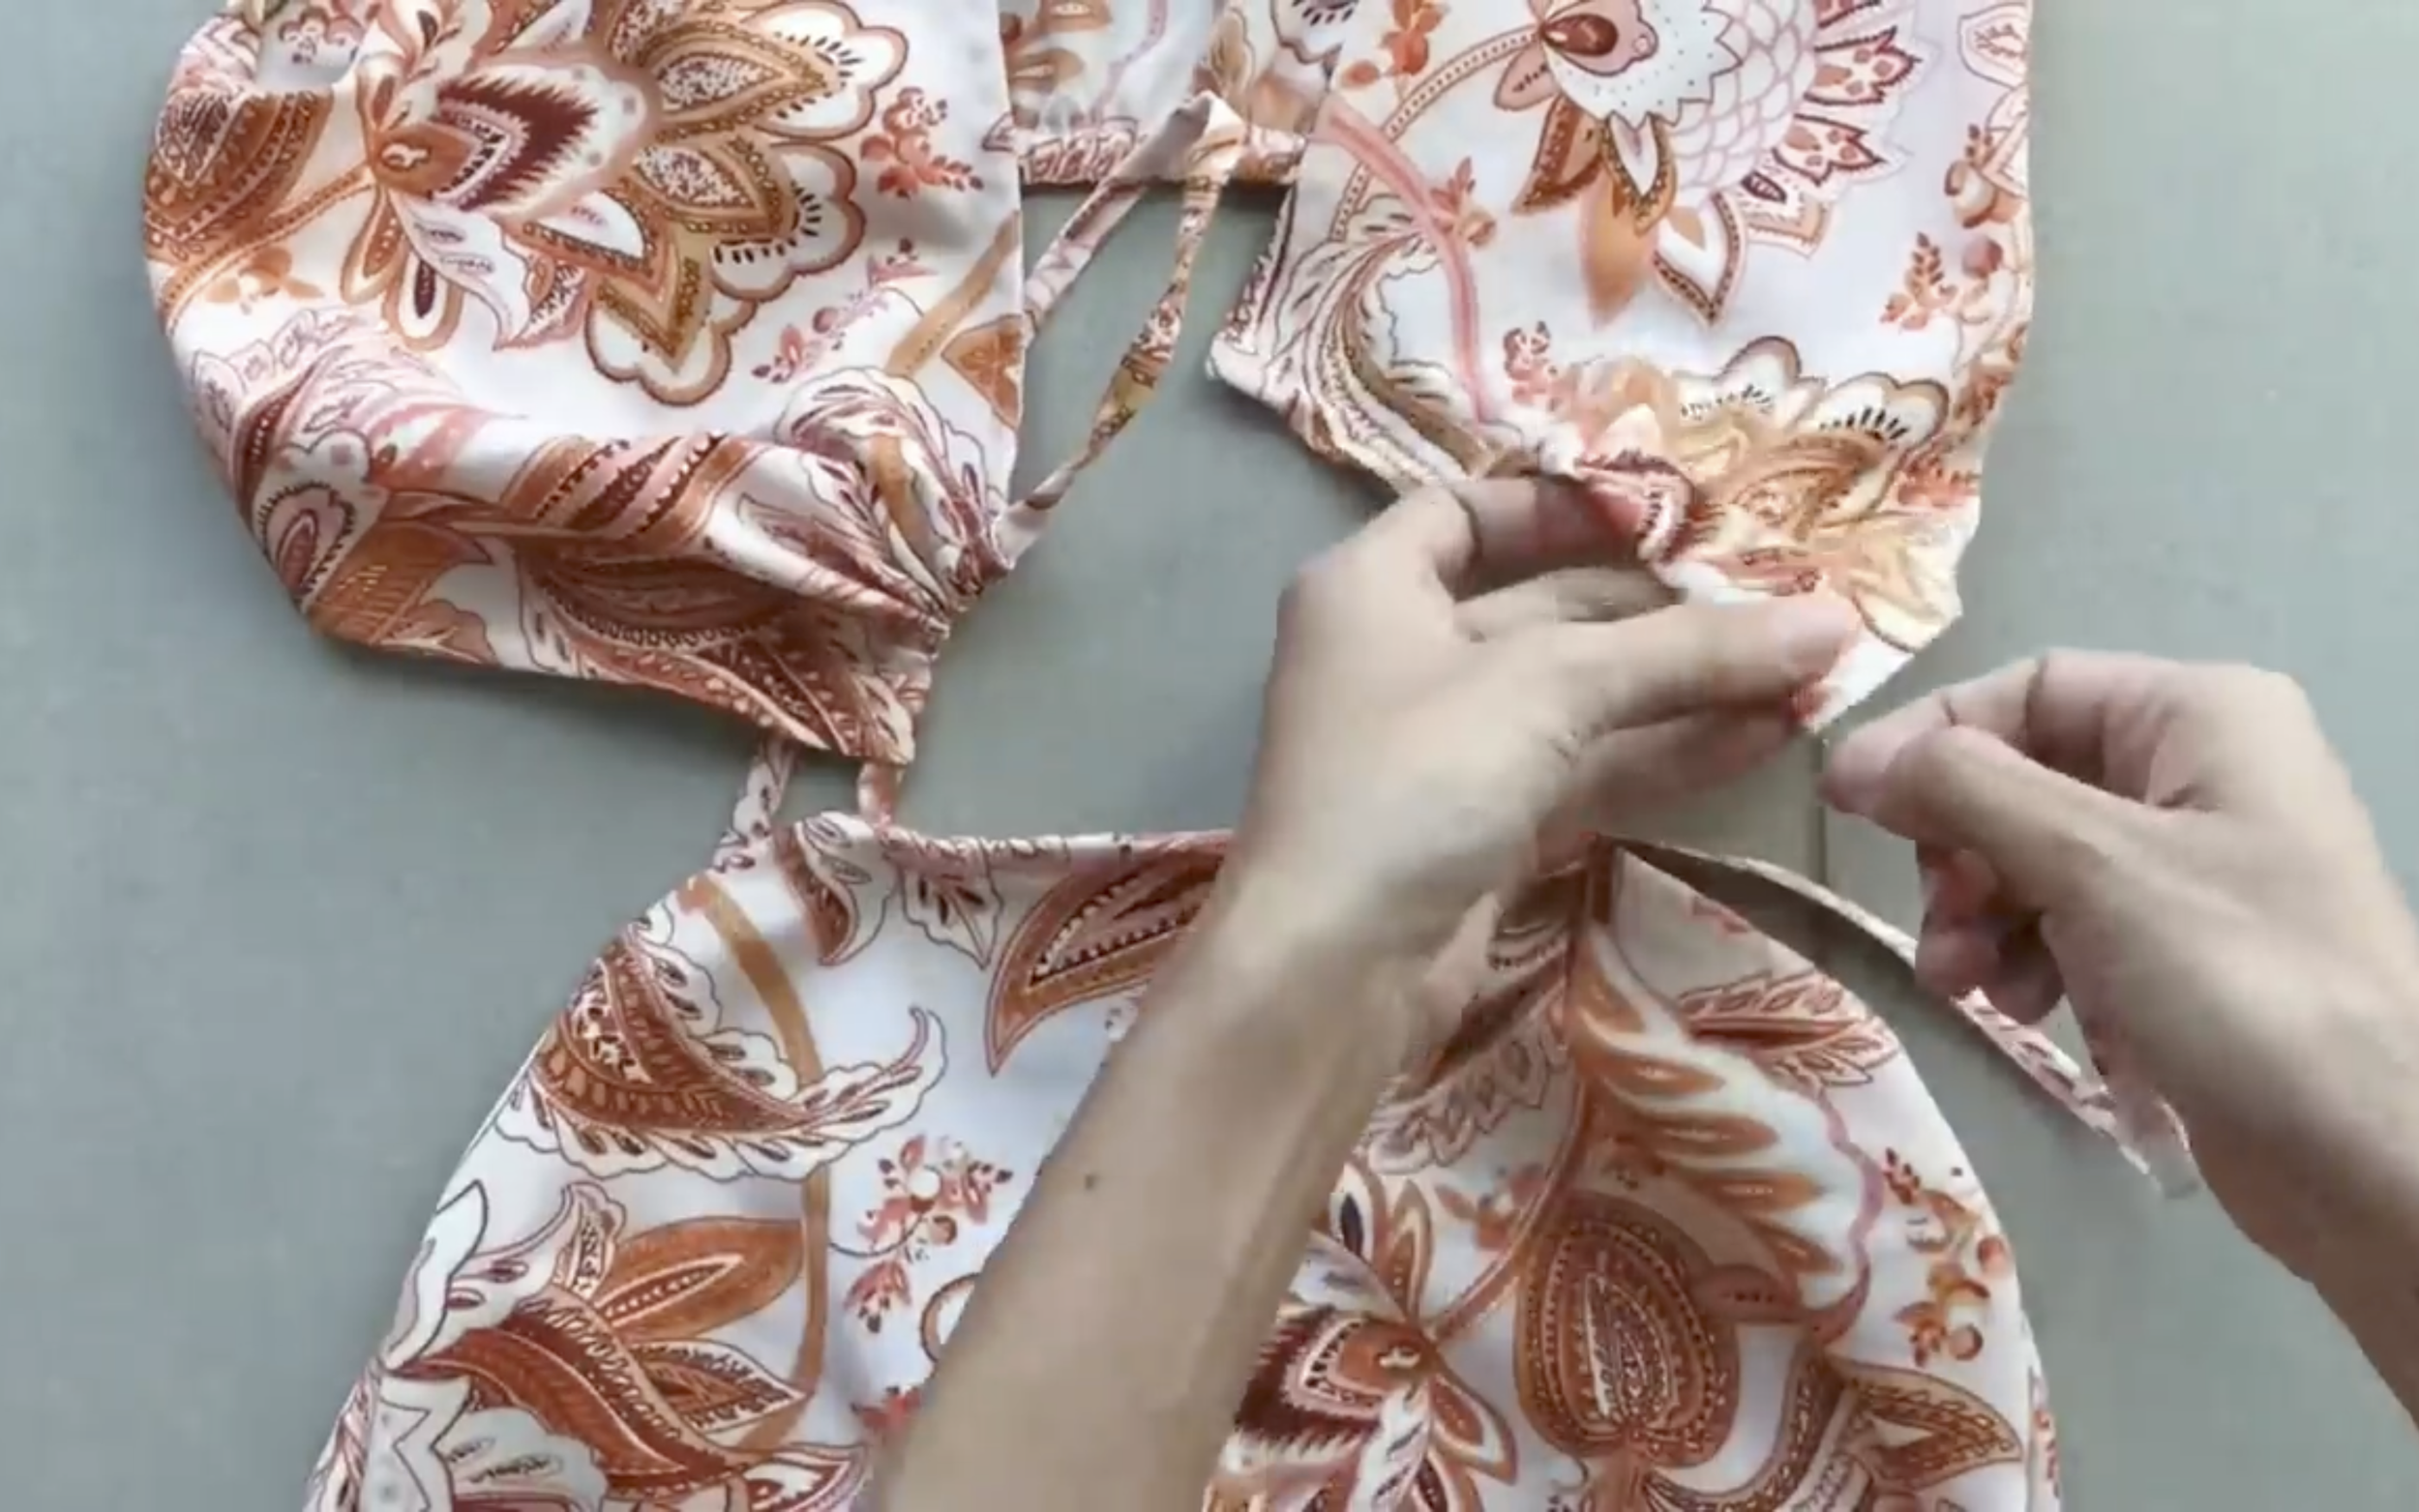
Then put the tie to go through the fabric hole to connect the top and the bottom dress together.
DIY RUCHED CUT OUT DRESS | Vacation wardrobe (Ep 1) | Step by step sewing tutorial
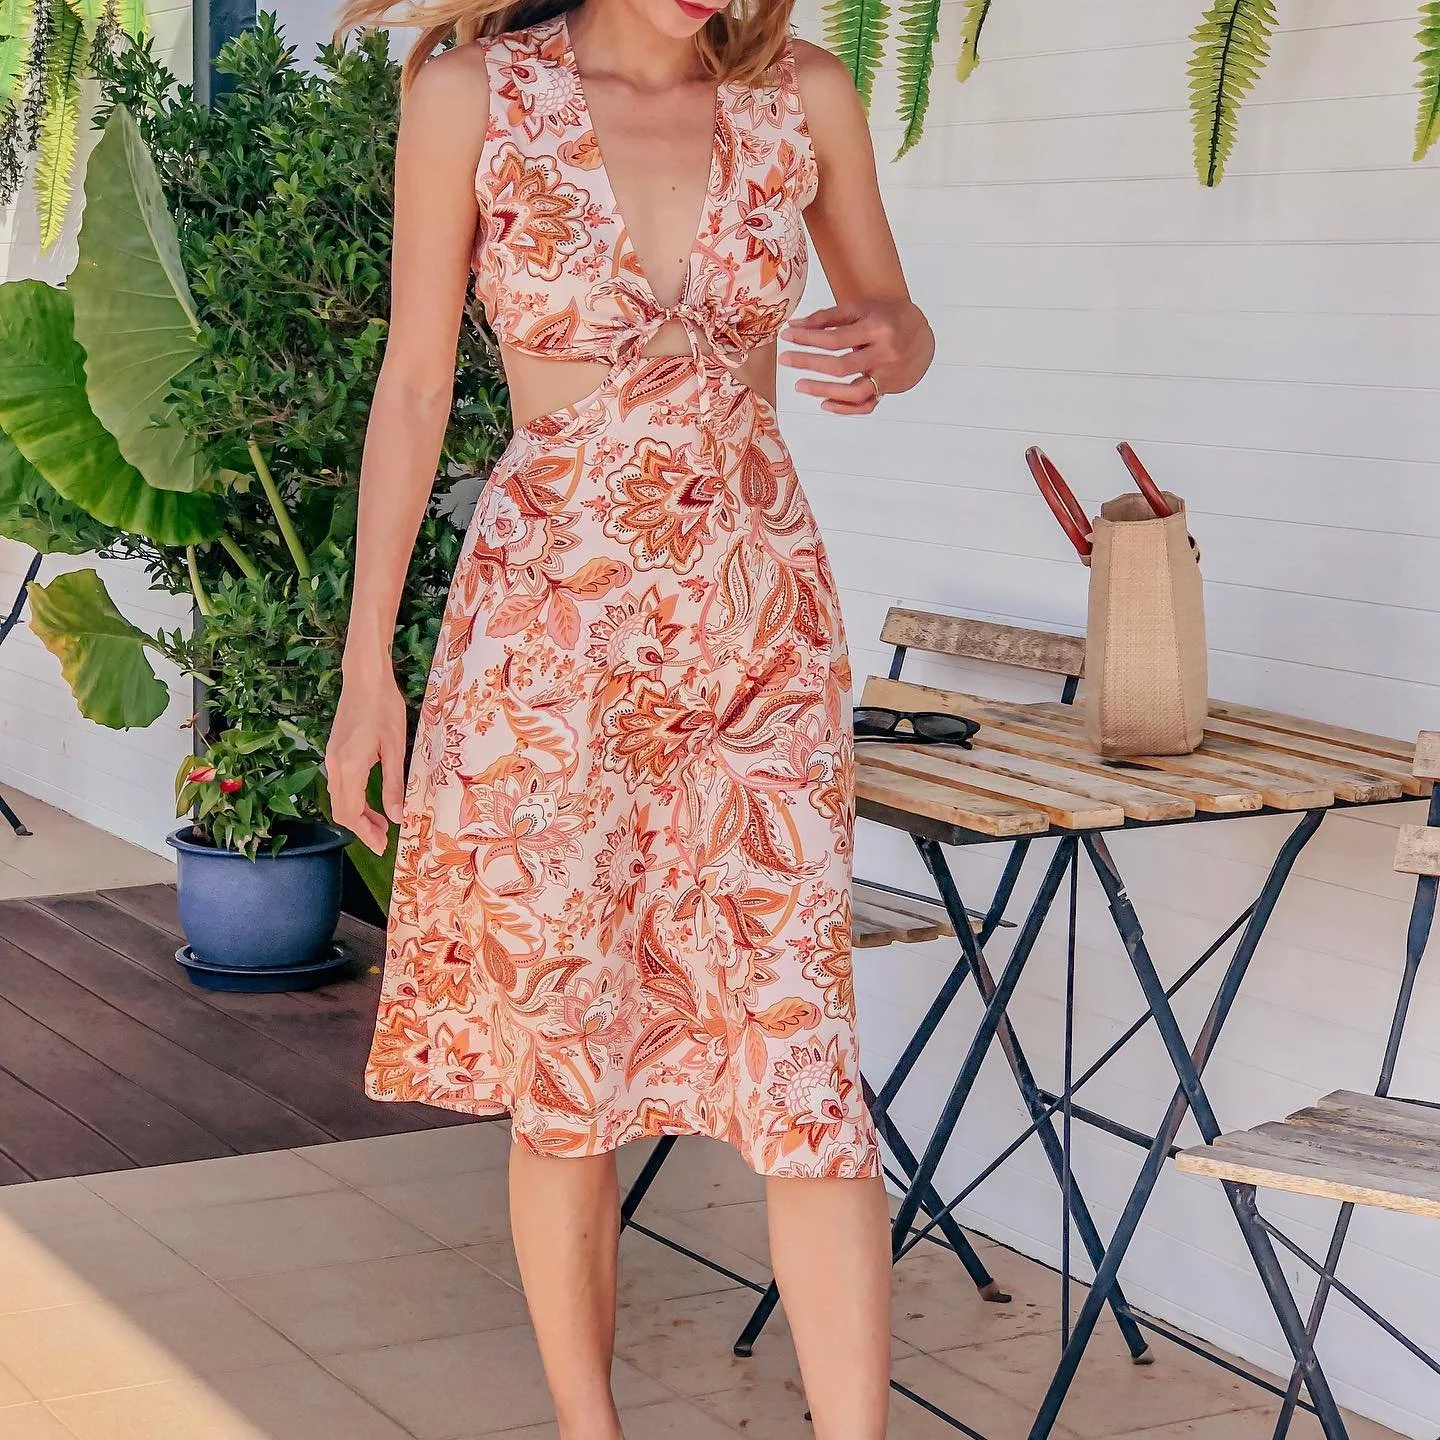
And that’s the final look!
This cut-out dress turned out just as stunning as I imagined—chic, a little sexy, and perfect for a casual yet stylish outfit.
I hope you found my step-by-step guide helpful and inspiring.
If you’re interested in making your own, give it a try and let me know how it goes!
Until then, happy sewing!