DIY Tie behind open back dress from old dress - Thrift flip - Vintage dress vibe

DIY Tie behind open back dress from old dress - Thrift flip - Vintage dress vibe
Welcome or welcome back to my sewing blog. My name is Jess and I love doing DIY, making clothes in a "simply but pretty" way.
Today's tutorial is about this Vintage tie behind open back dress that I refashioned from my sister's old dress. I got the idea for this dress when I saw some vintage dresses on my Pinterest home feed. And was looking for the best thrifted clothes to make this dress.
Let's get started!
WHAT YOU’LL NEED

Old dress in 2 size bigger than your size
Sewing machine
Pins
Scissors
Ruler
Long stick
SEWING THE TOP

The first step is cutting off two hands of the dress and also two sides of the shoulder to the neck area.
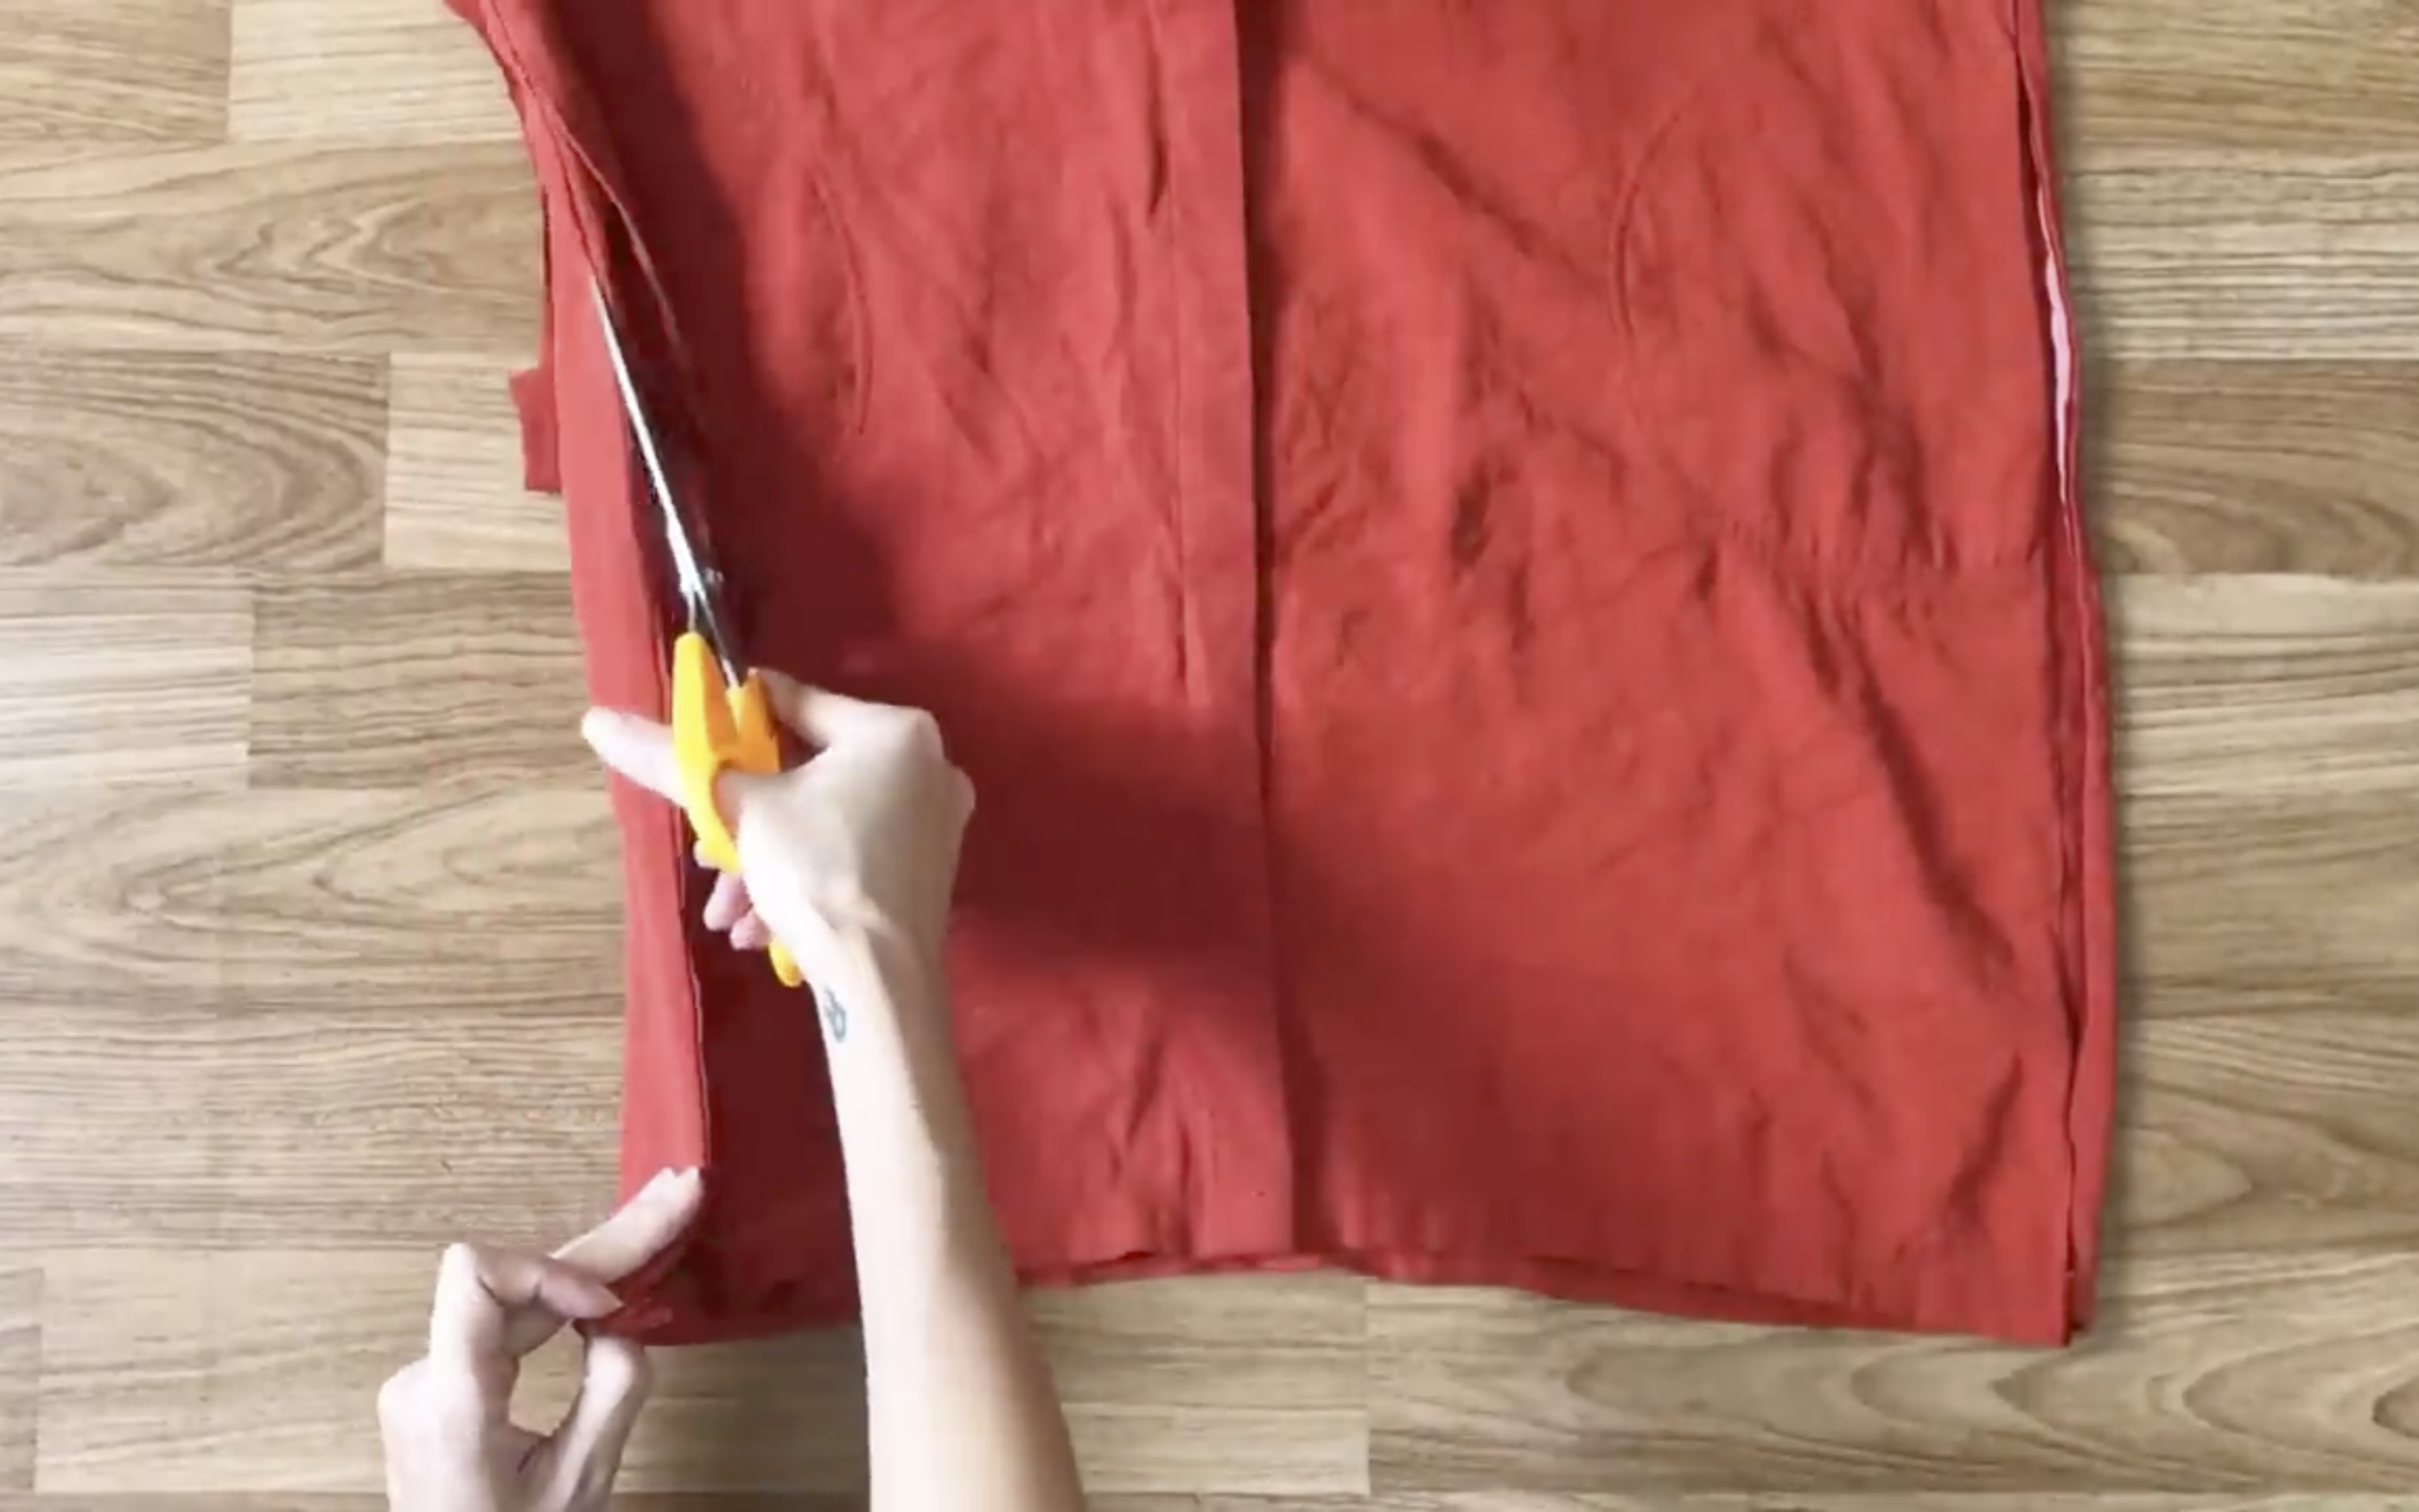
After that, cut two sides of the dress from under the armpit to the end of the dress.
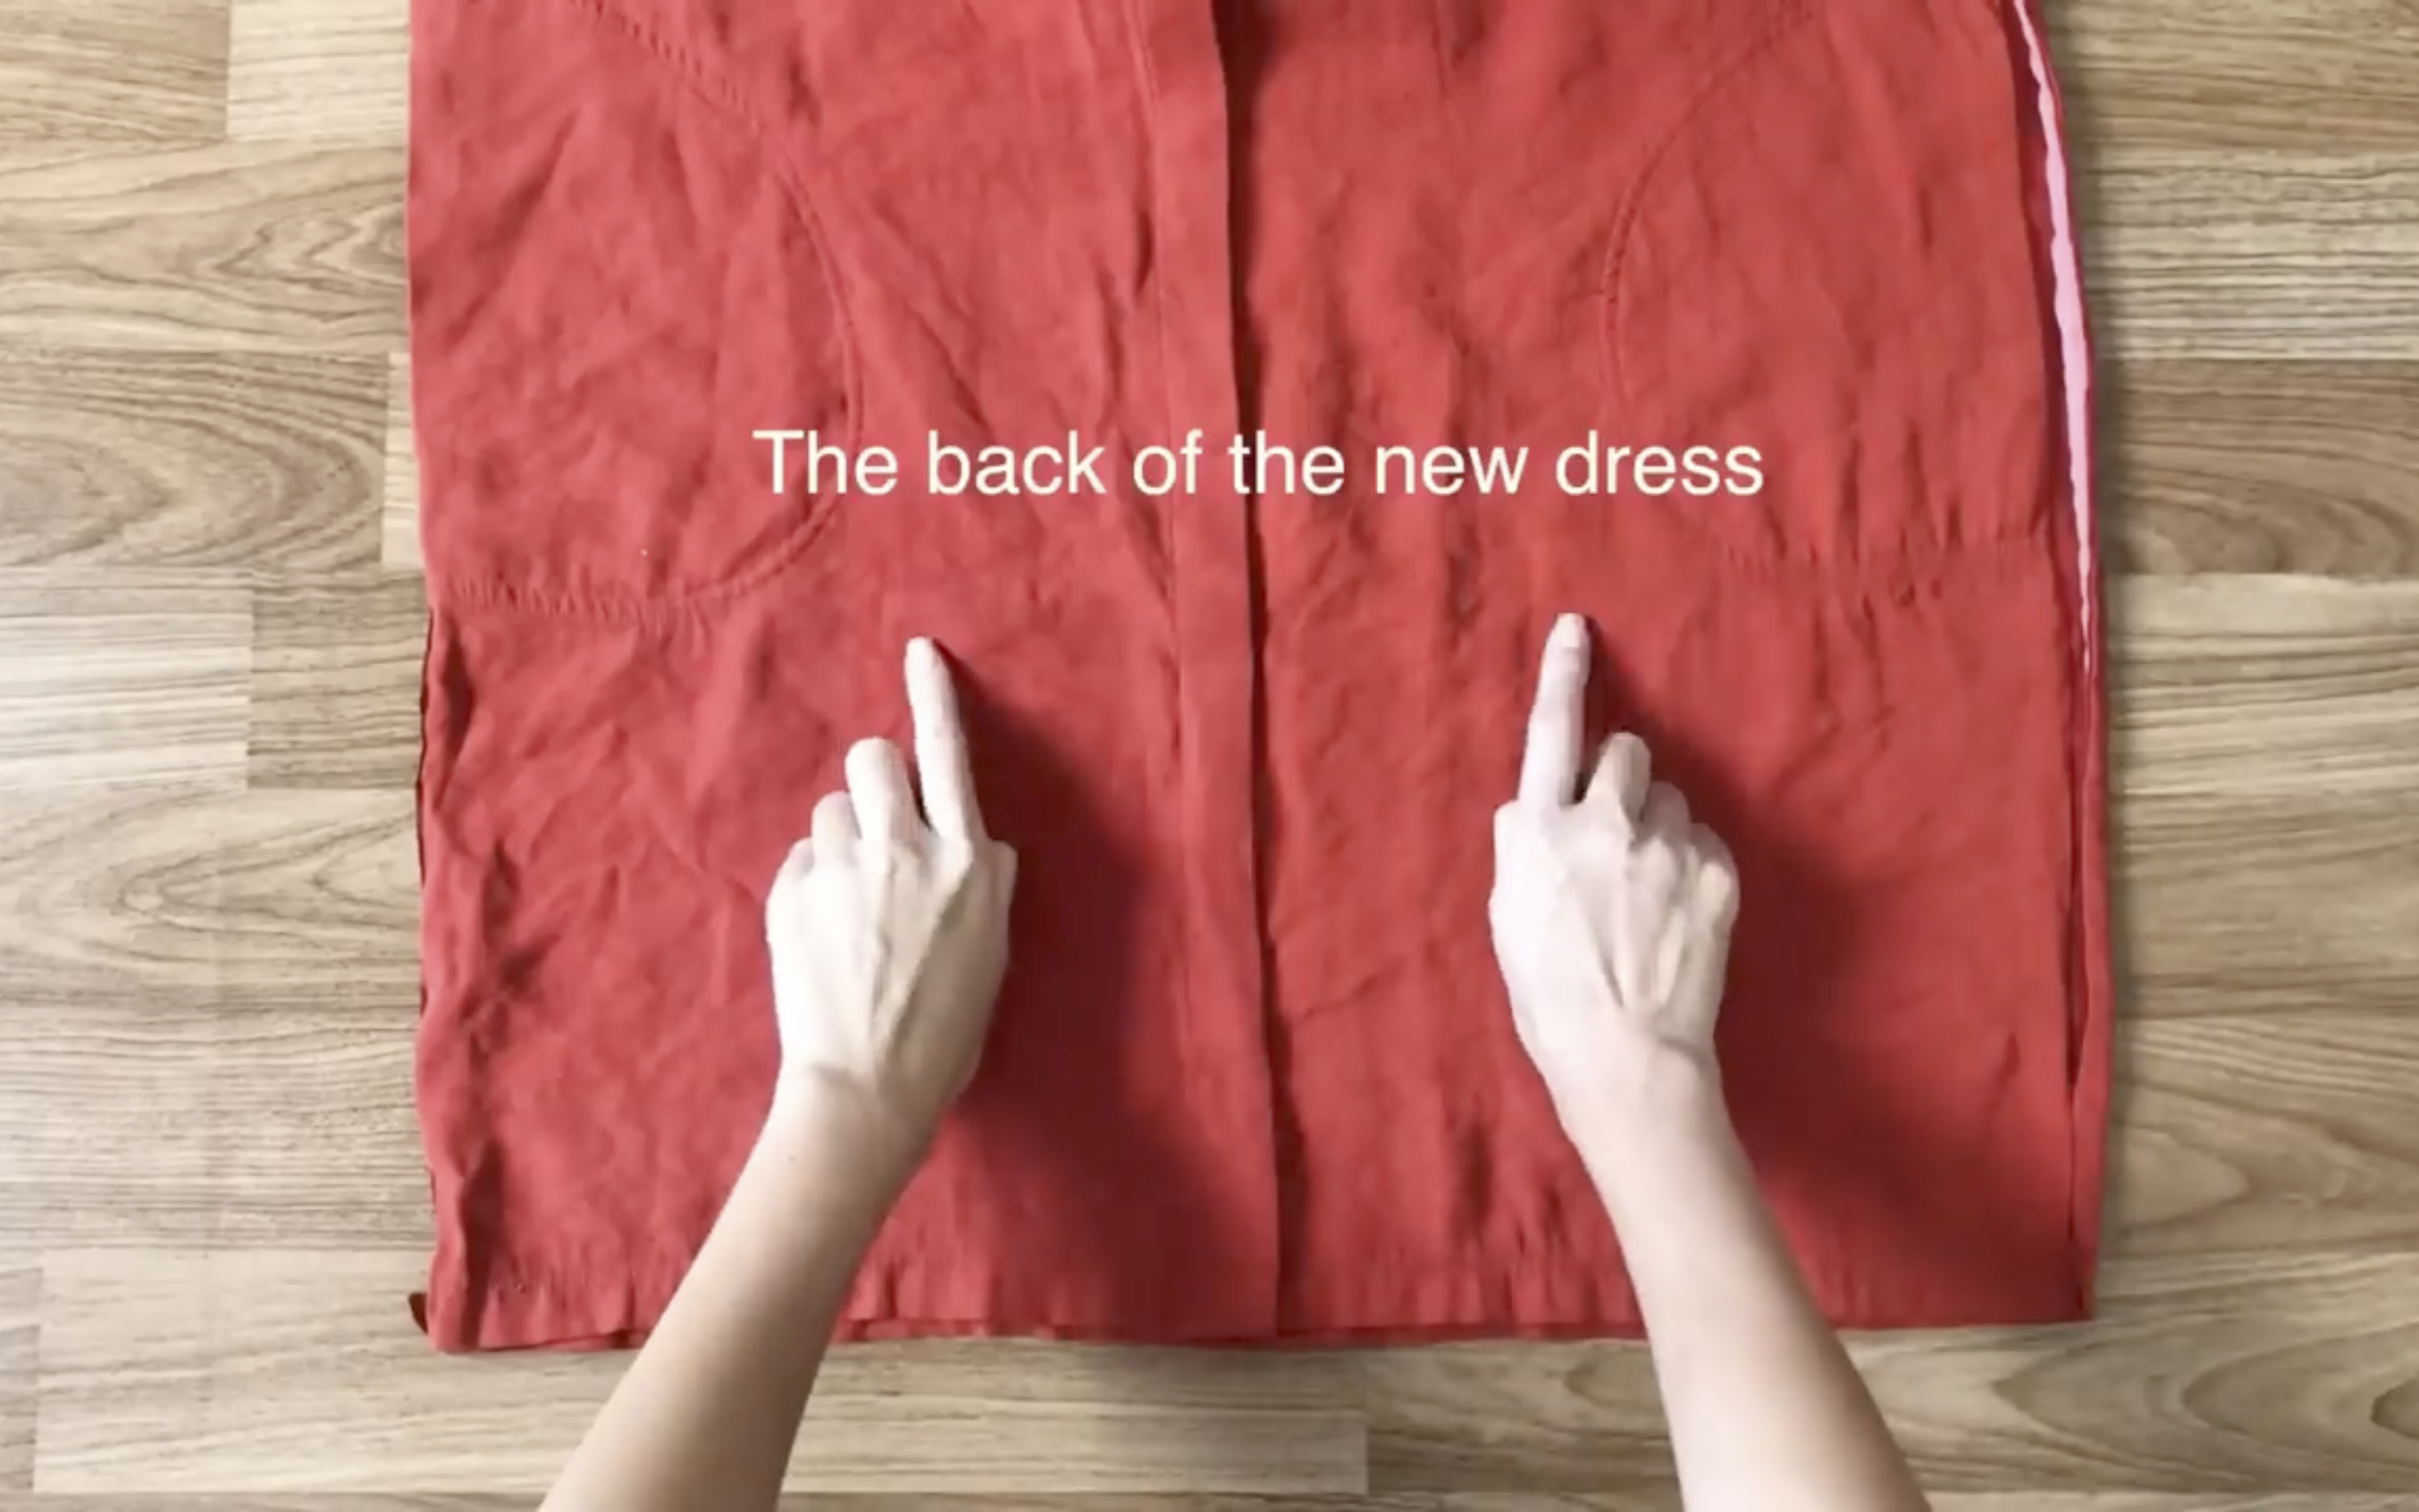
The front of the original dress will be the back of the new dress.
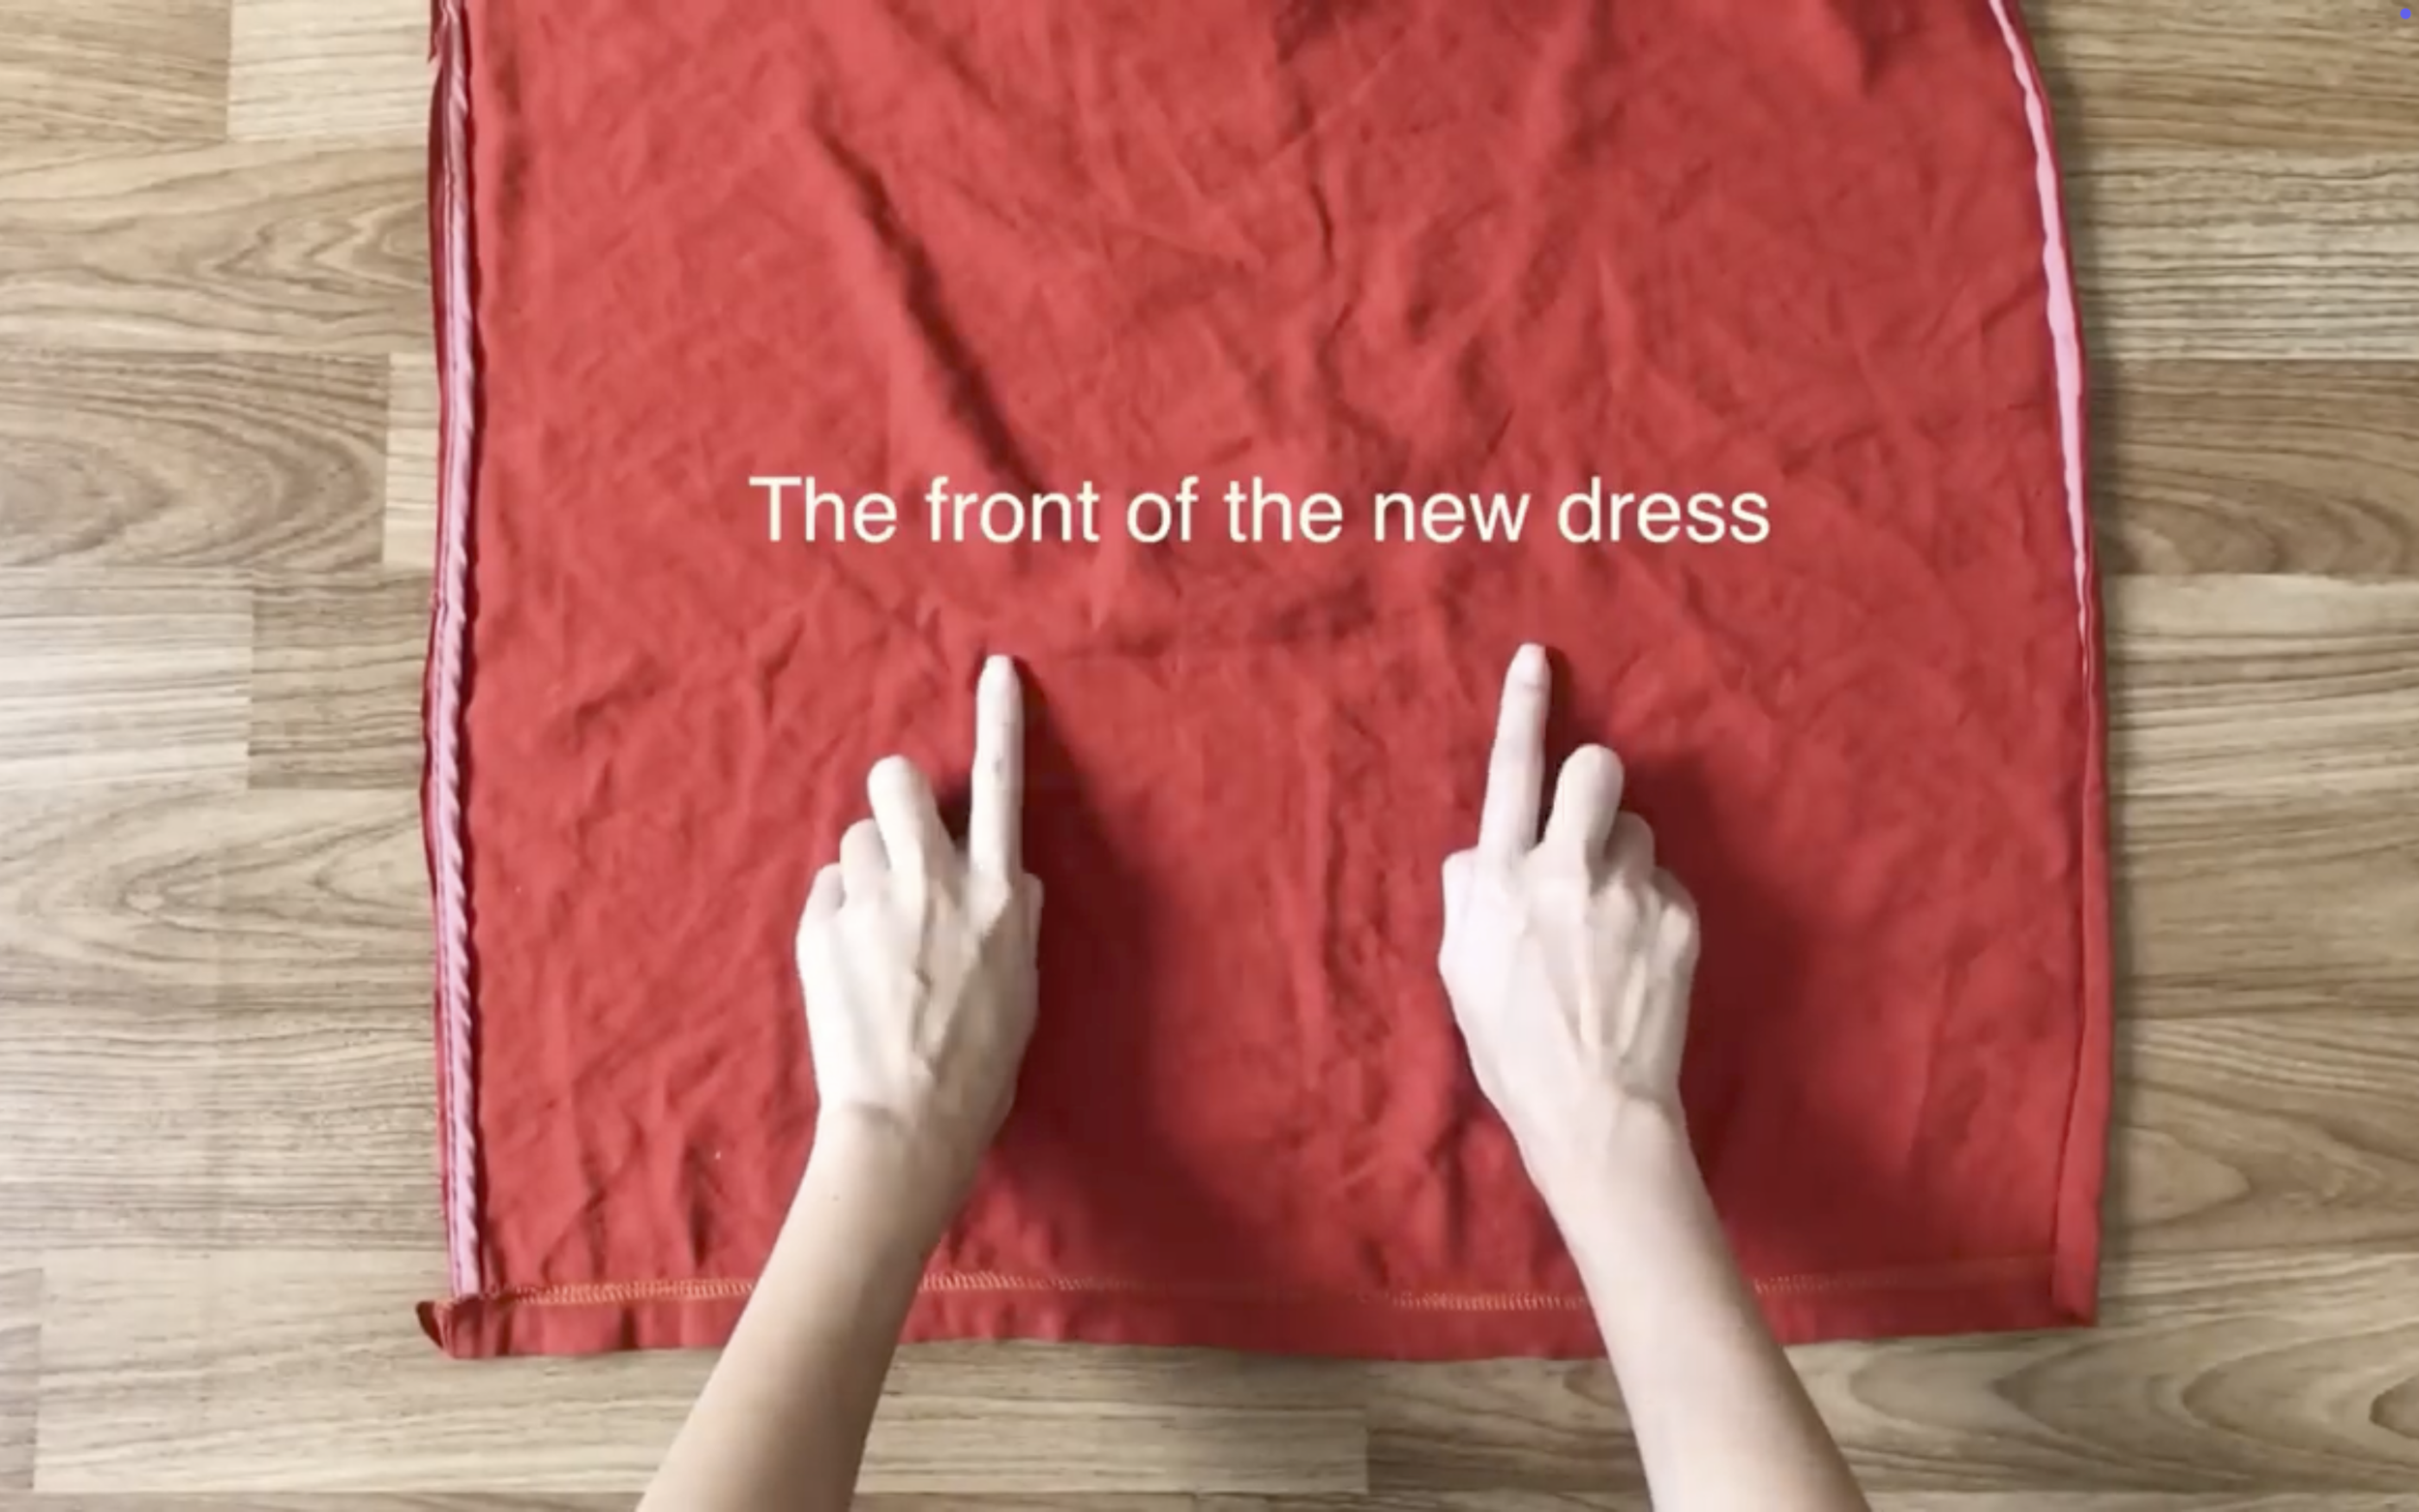
And the back of the original dress will be the front of the new dress.
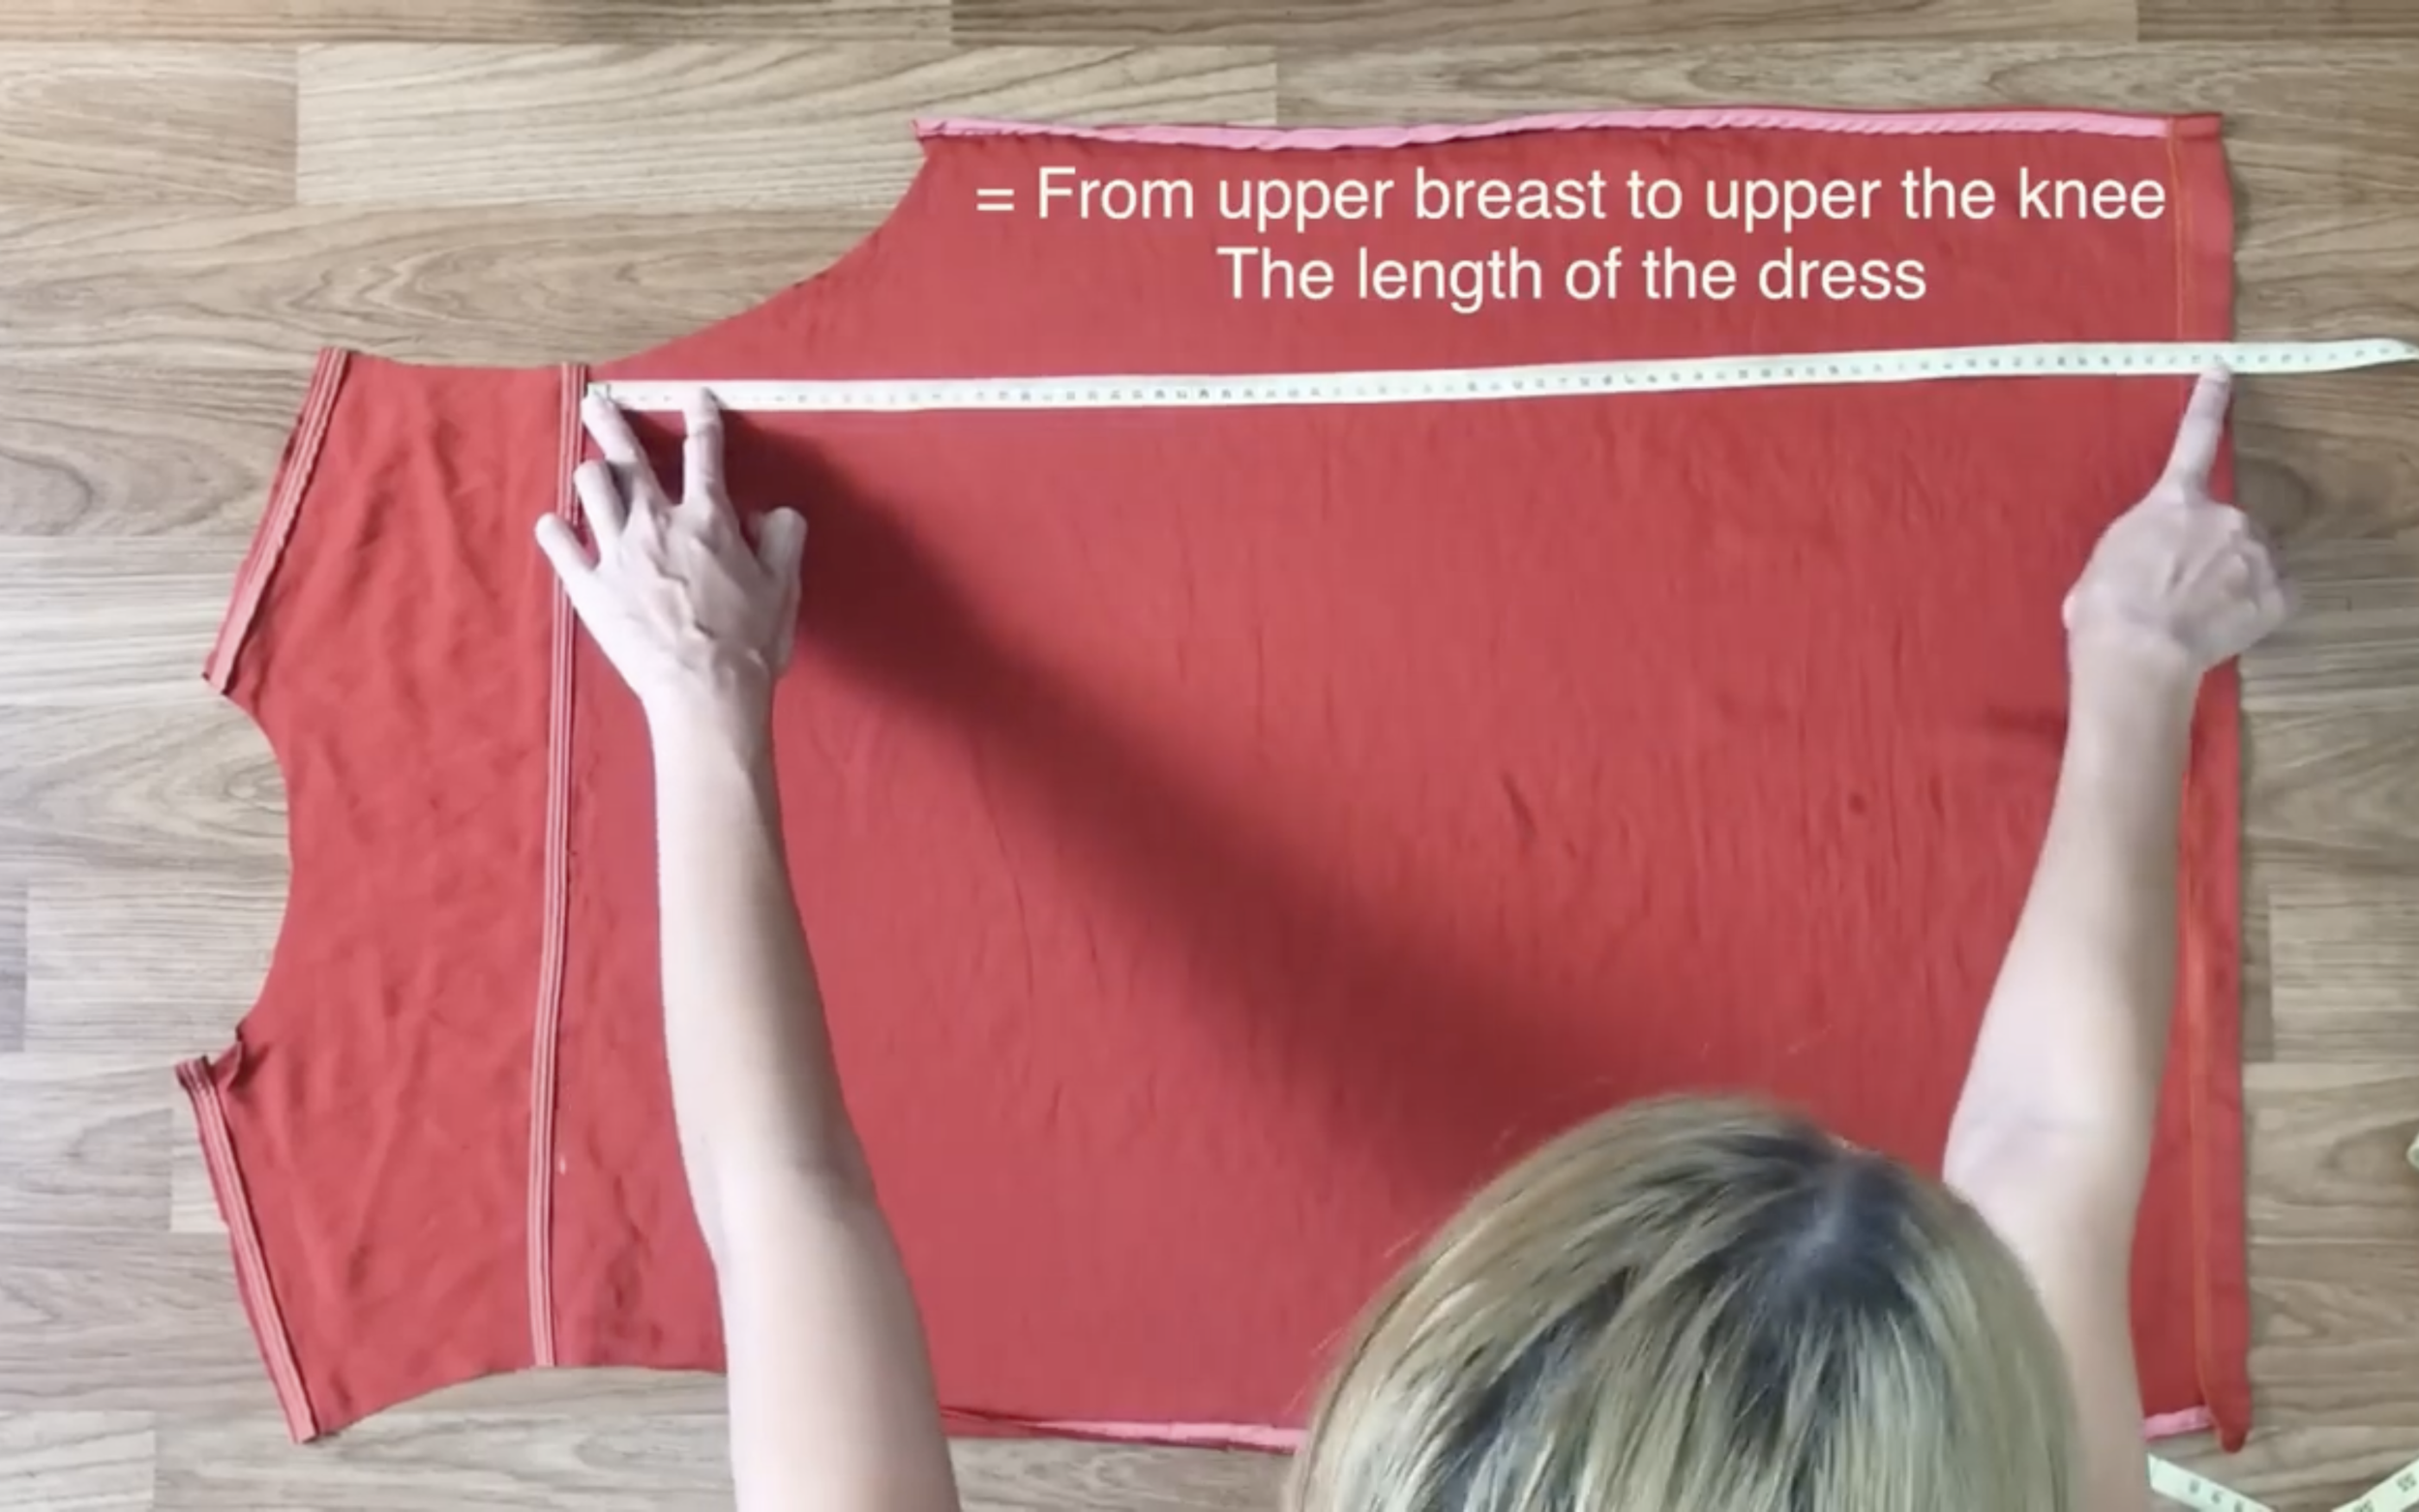
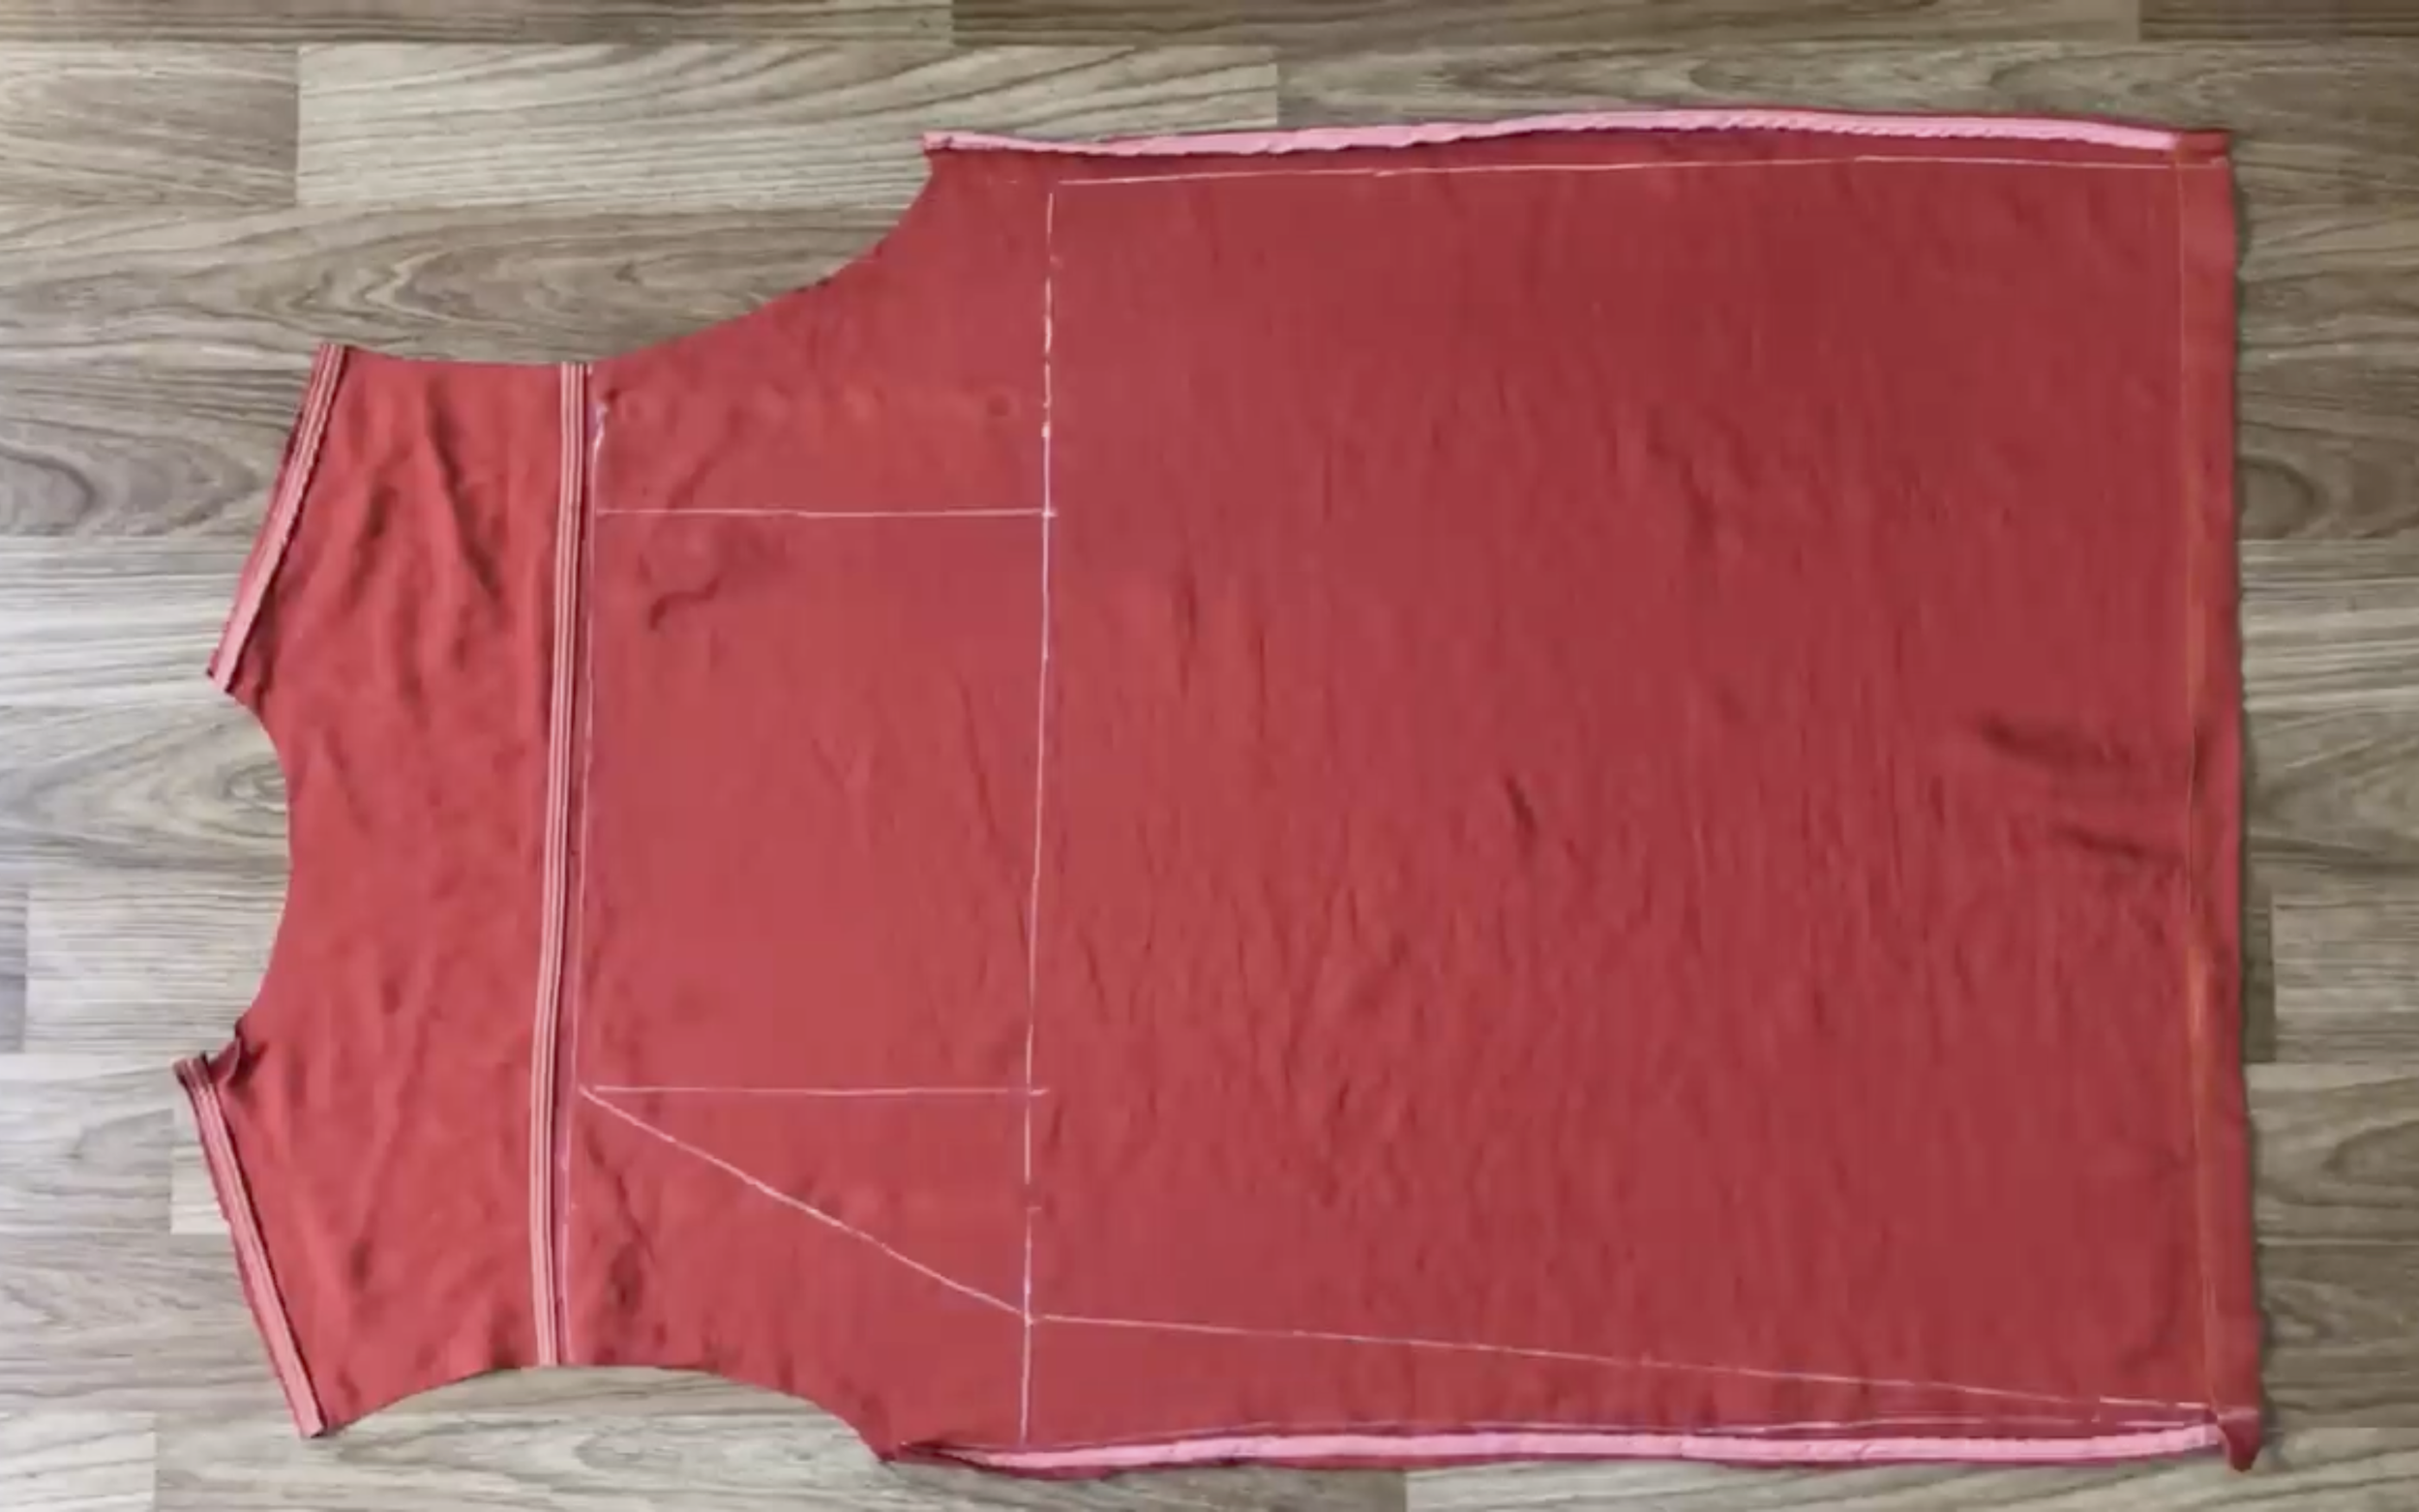
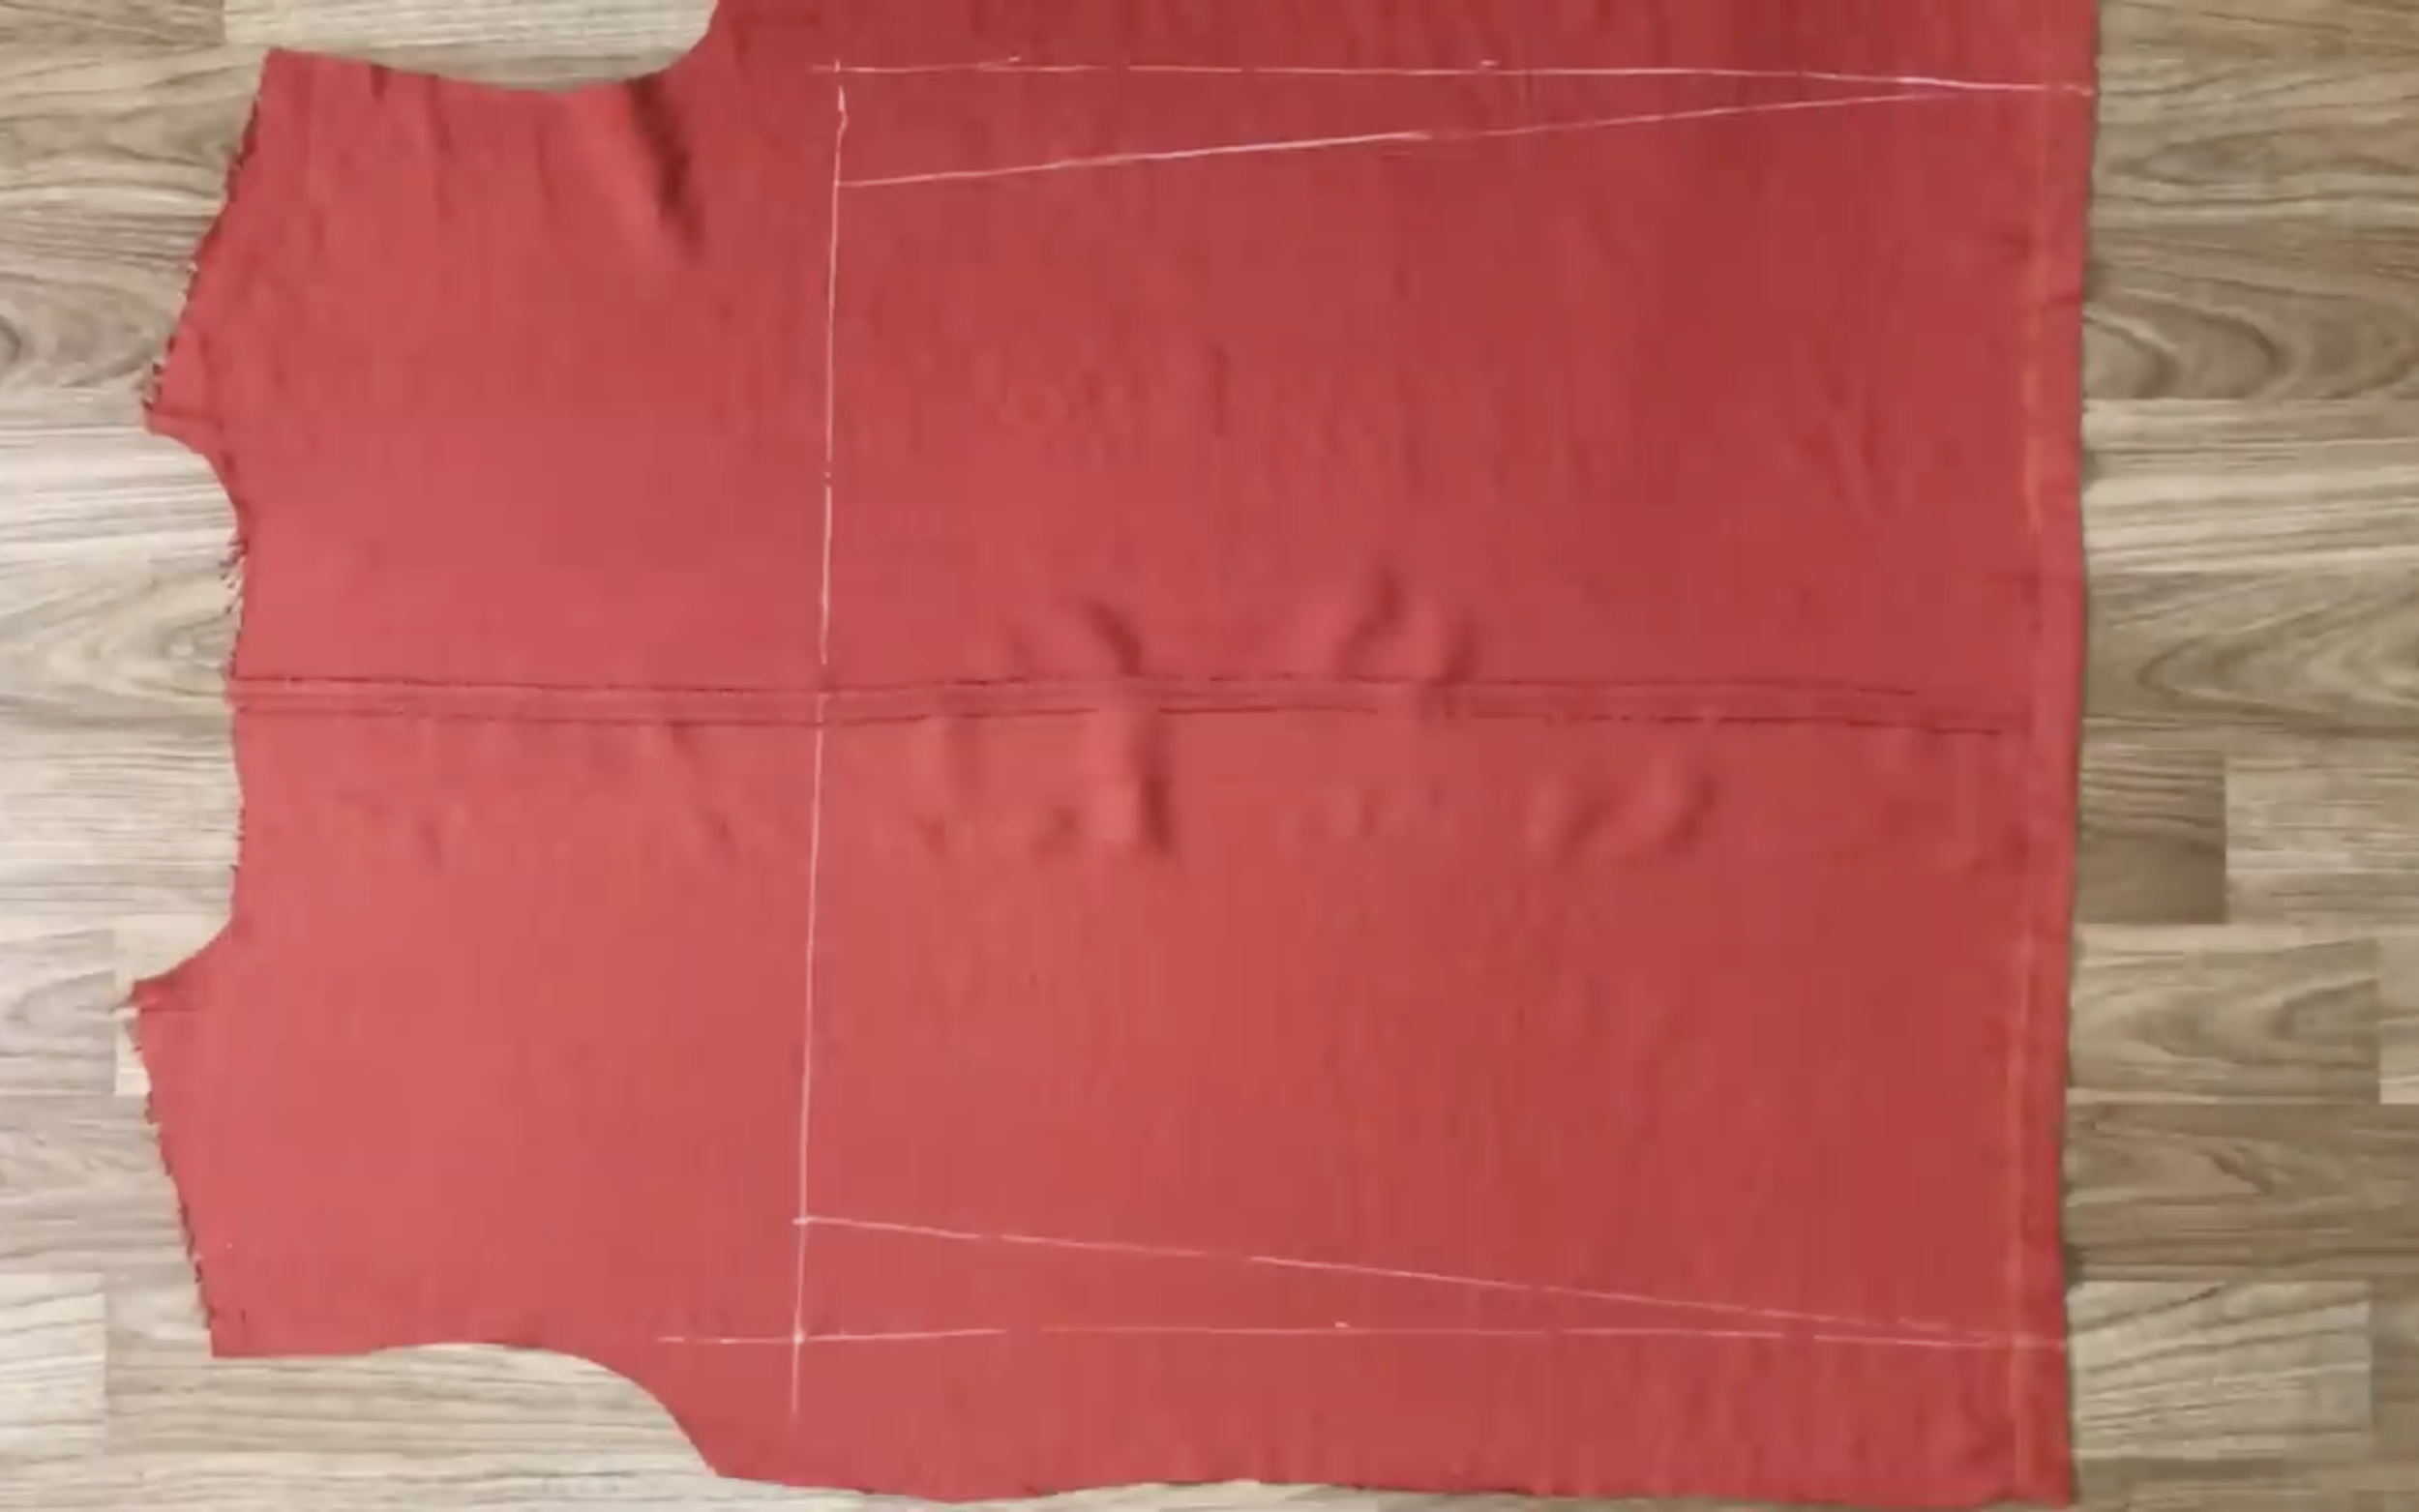
Make the front pattern for the new dress first.
Check the maximum length of the dress that can be obtained—it is 73 cm, which is from upper breast to upper the knee. It’s also the length of the dress.
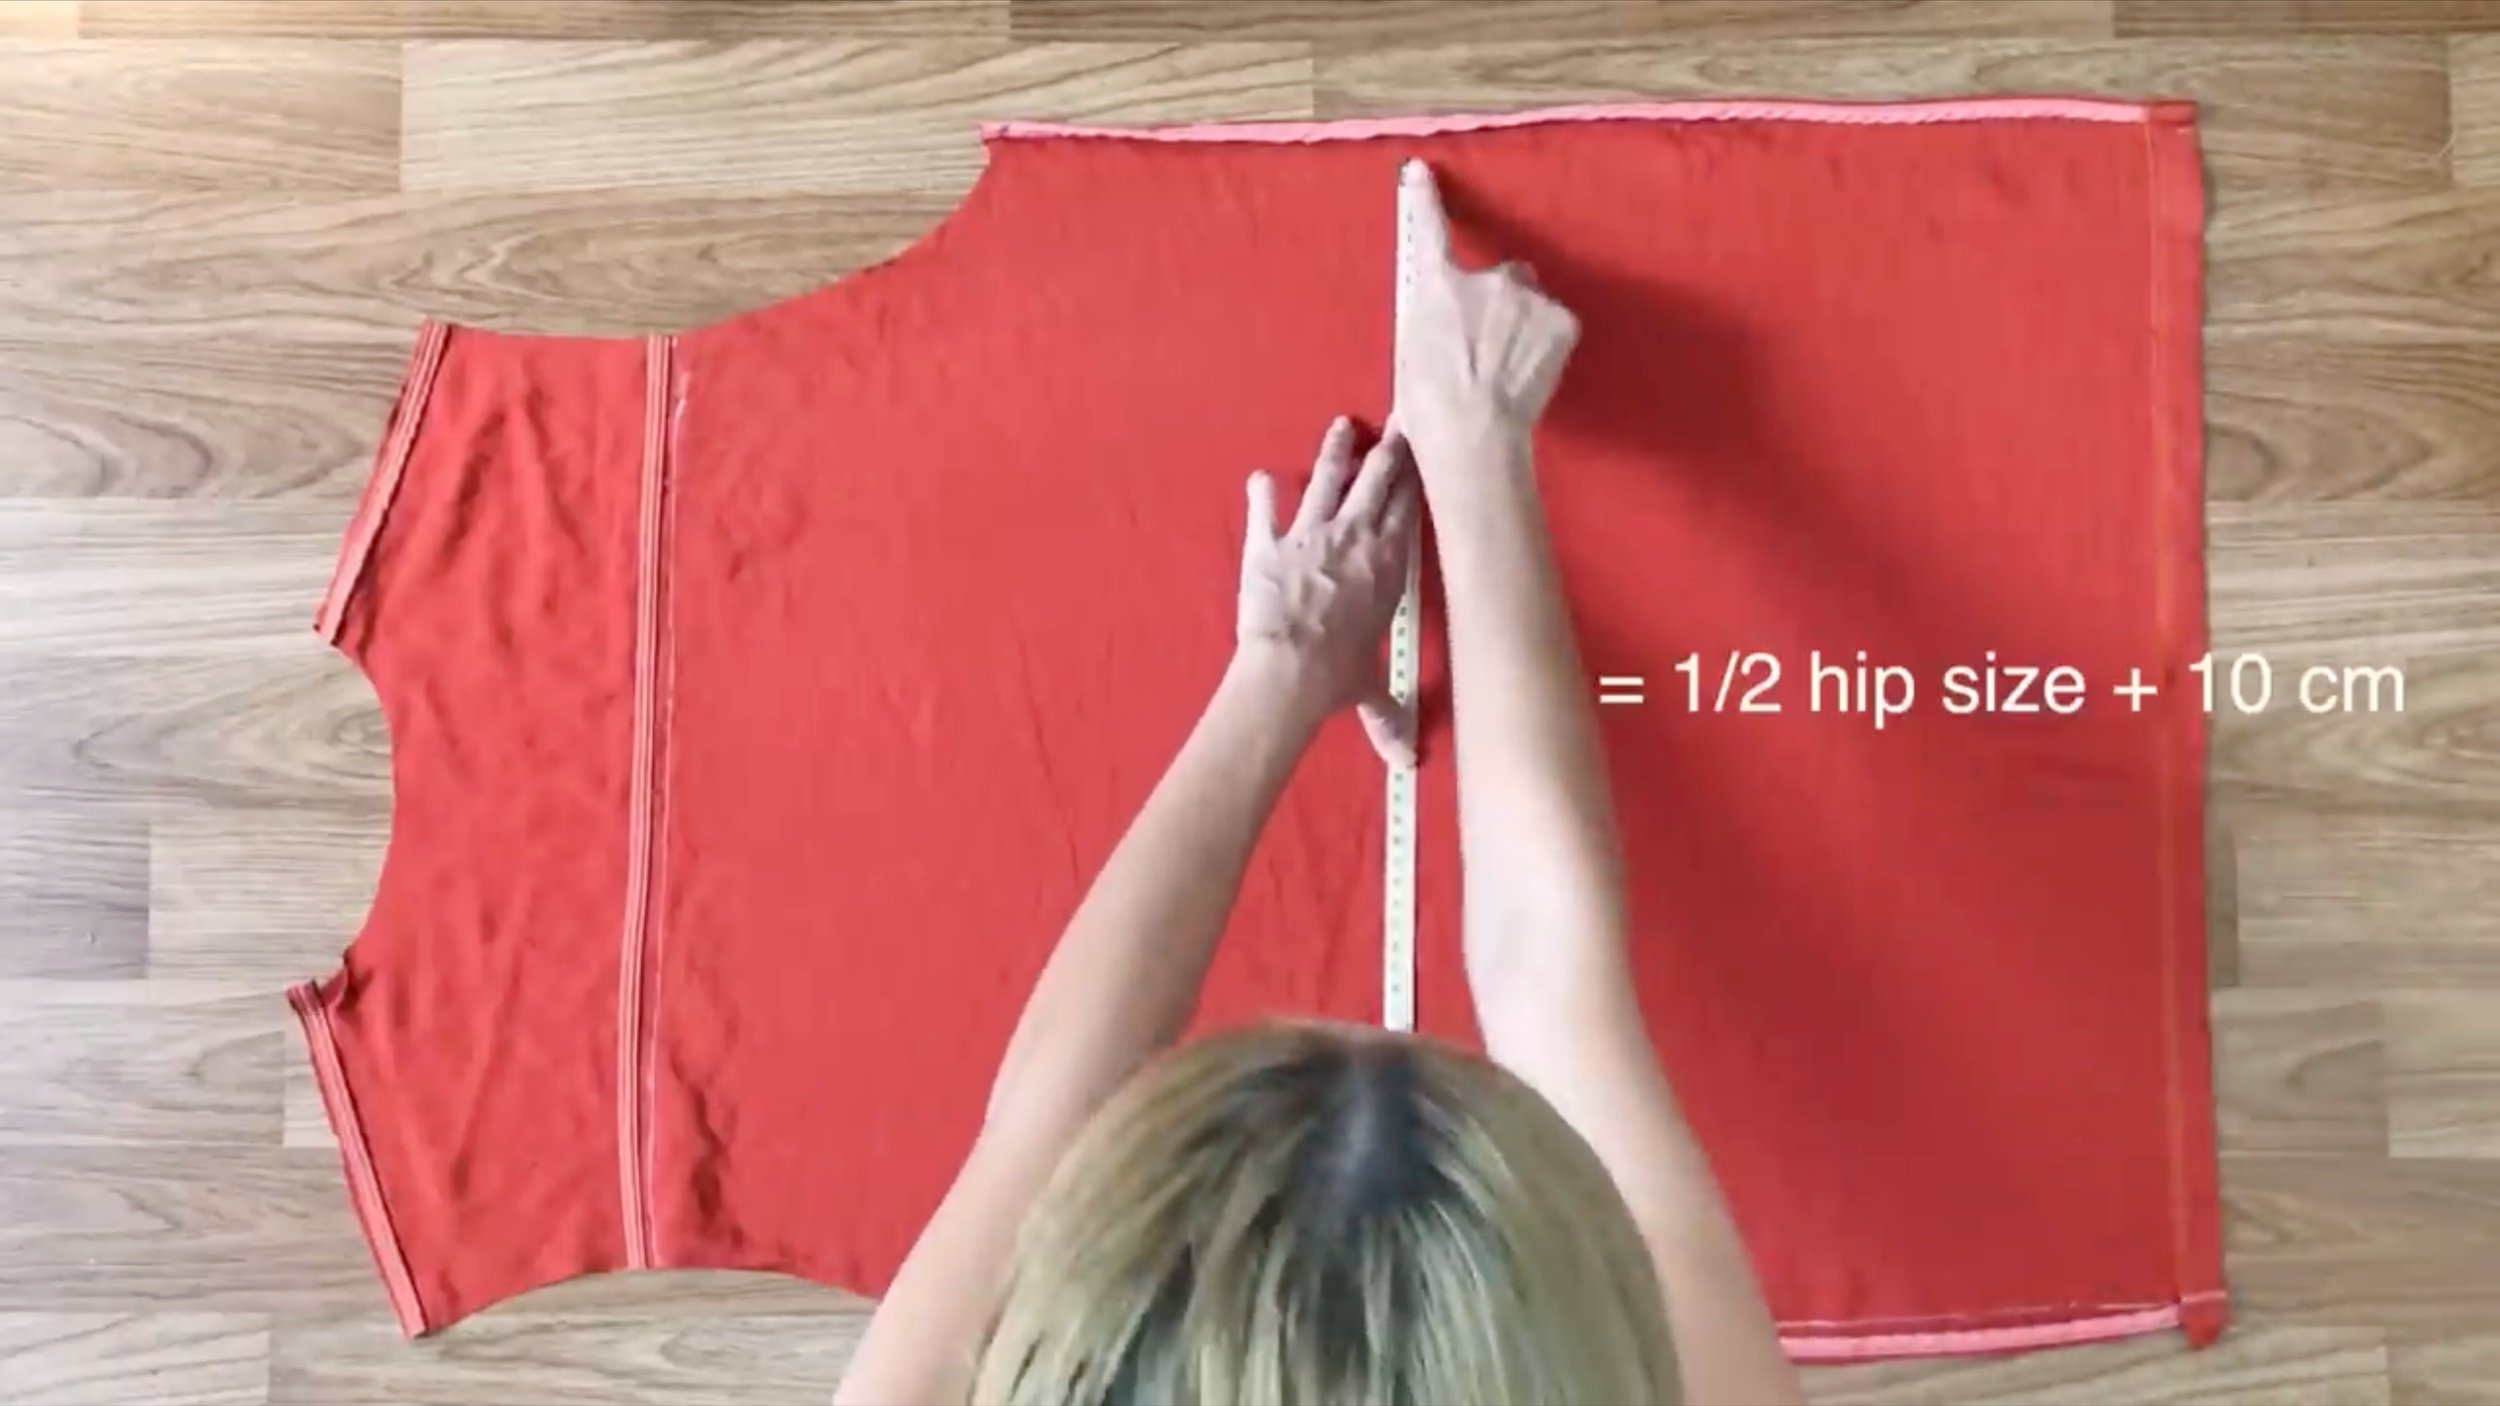
And the width is 56 cm, which is 1/2 of the hip size + 10 cm.
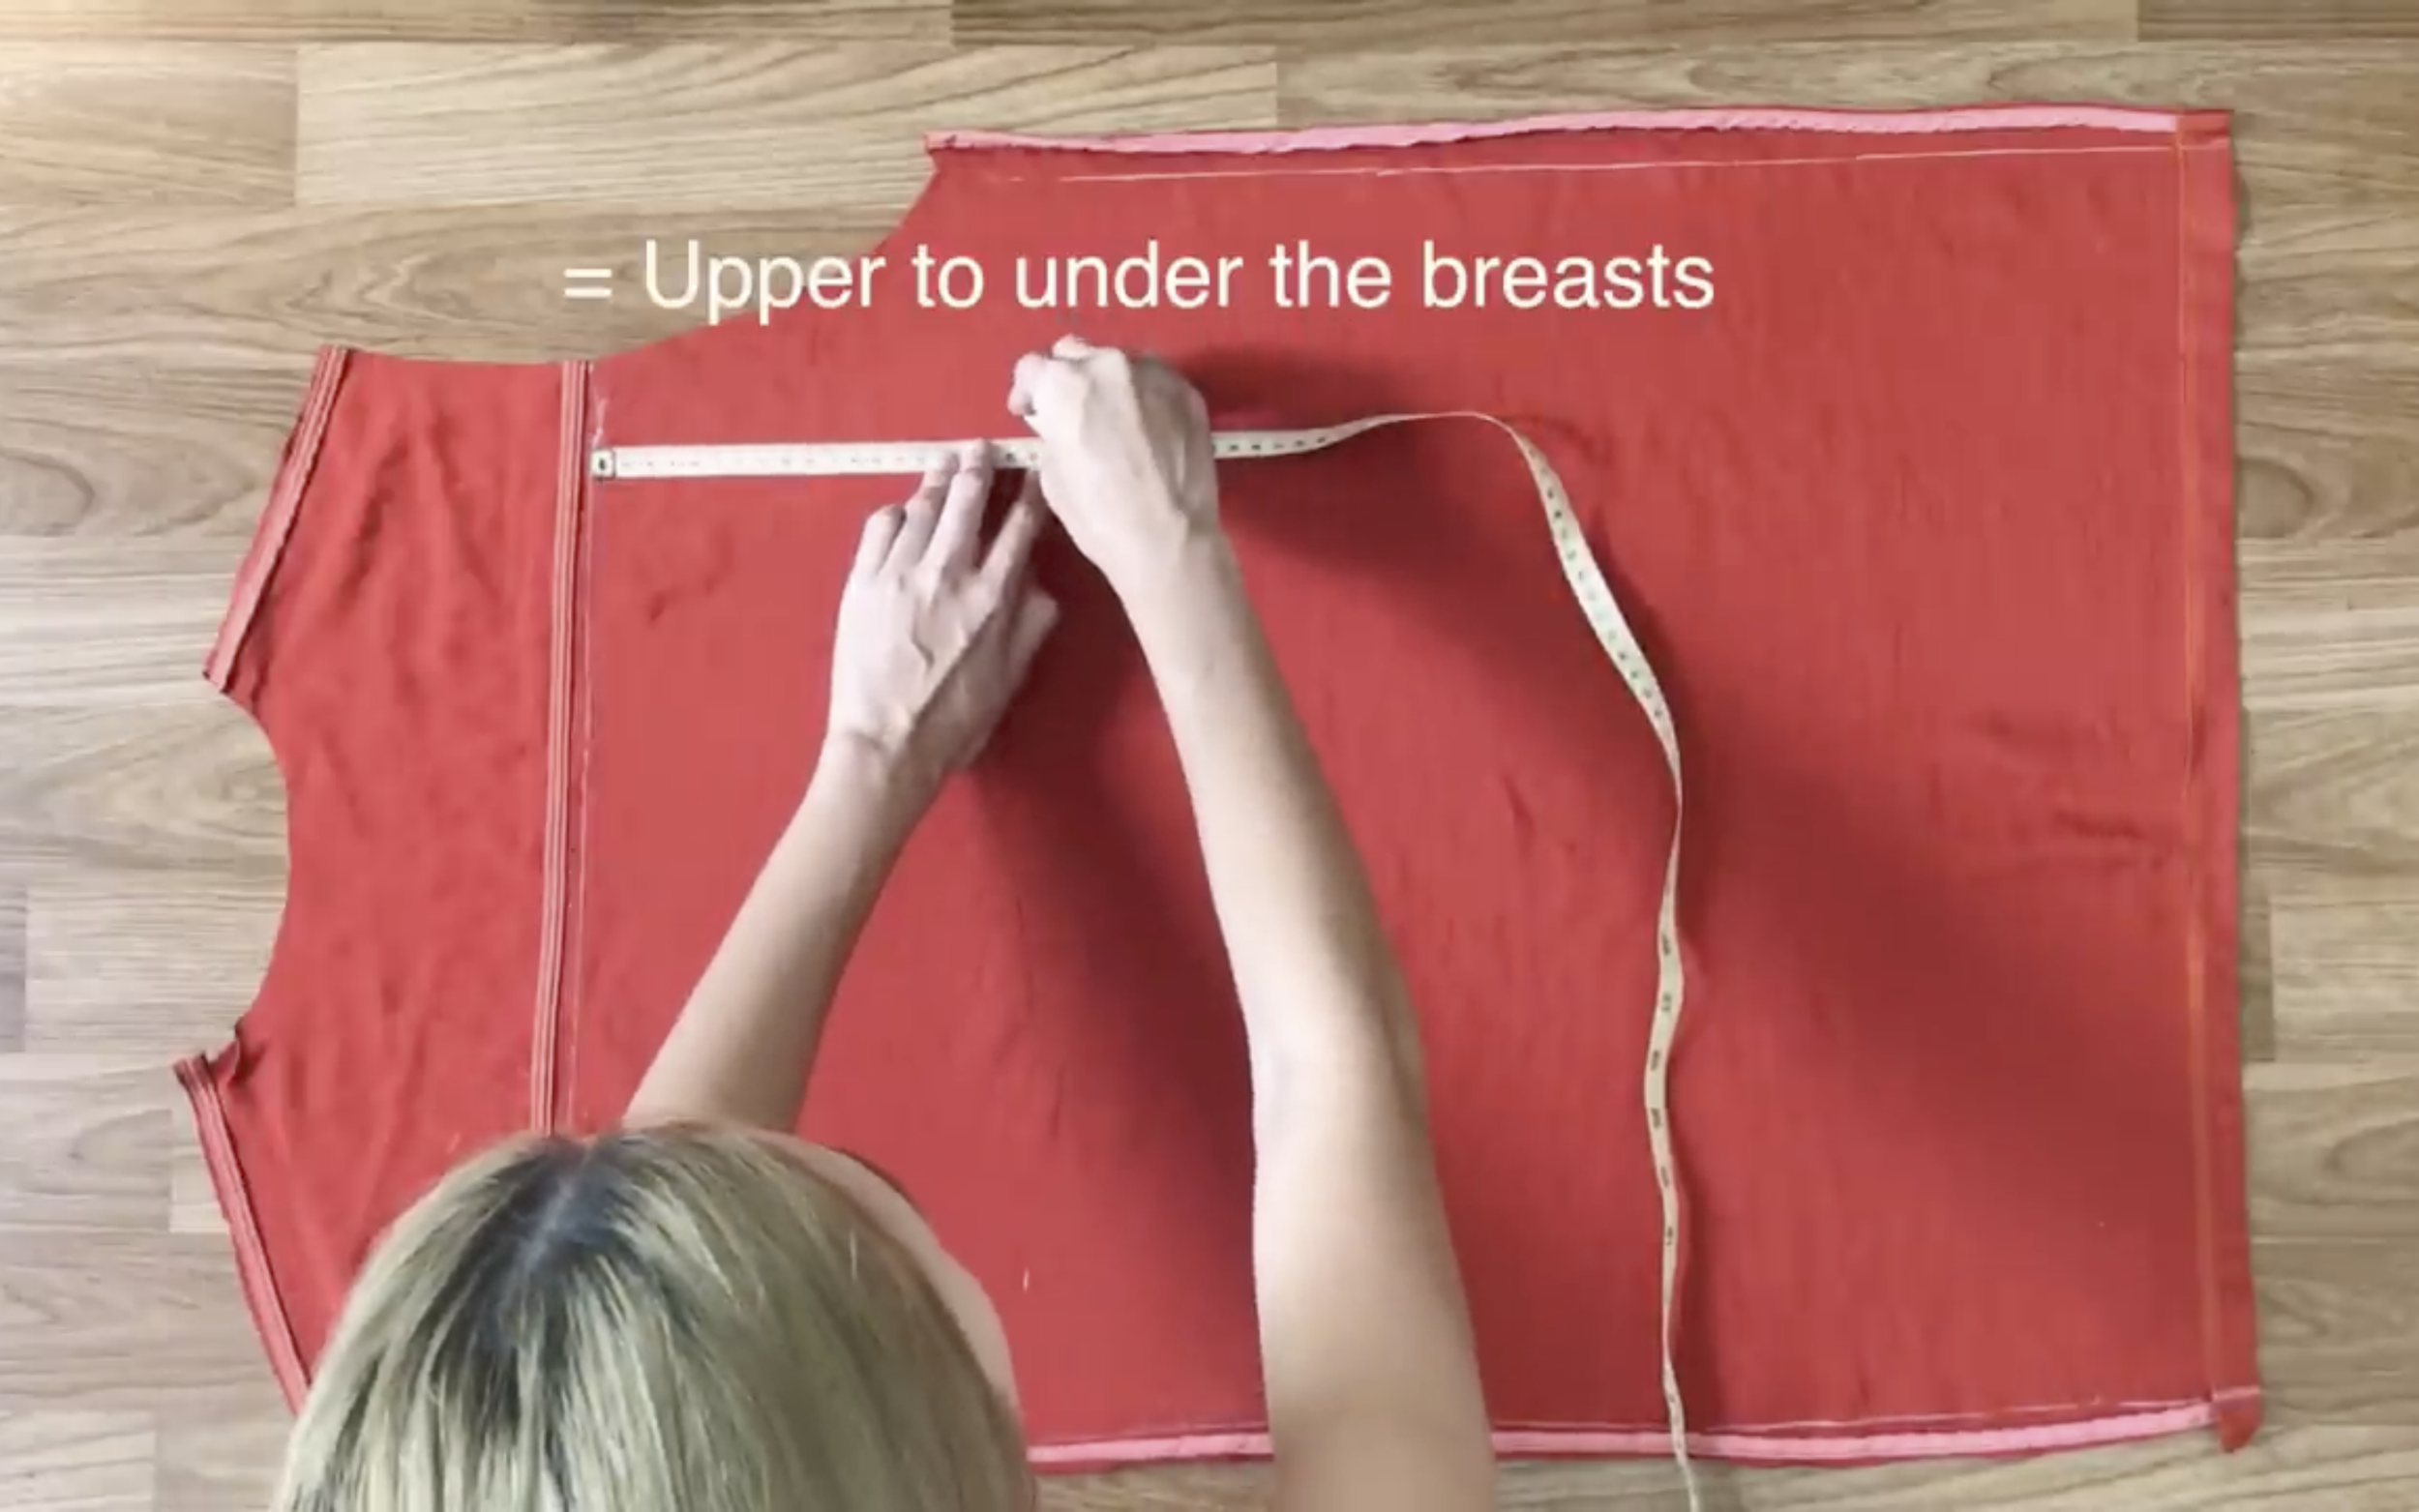
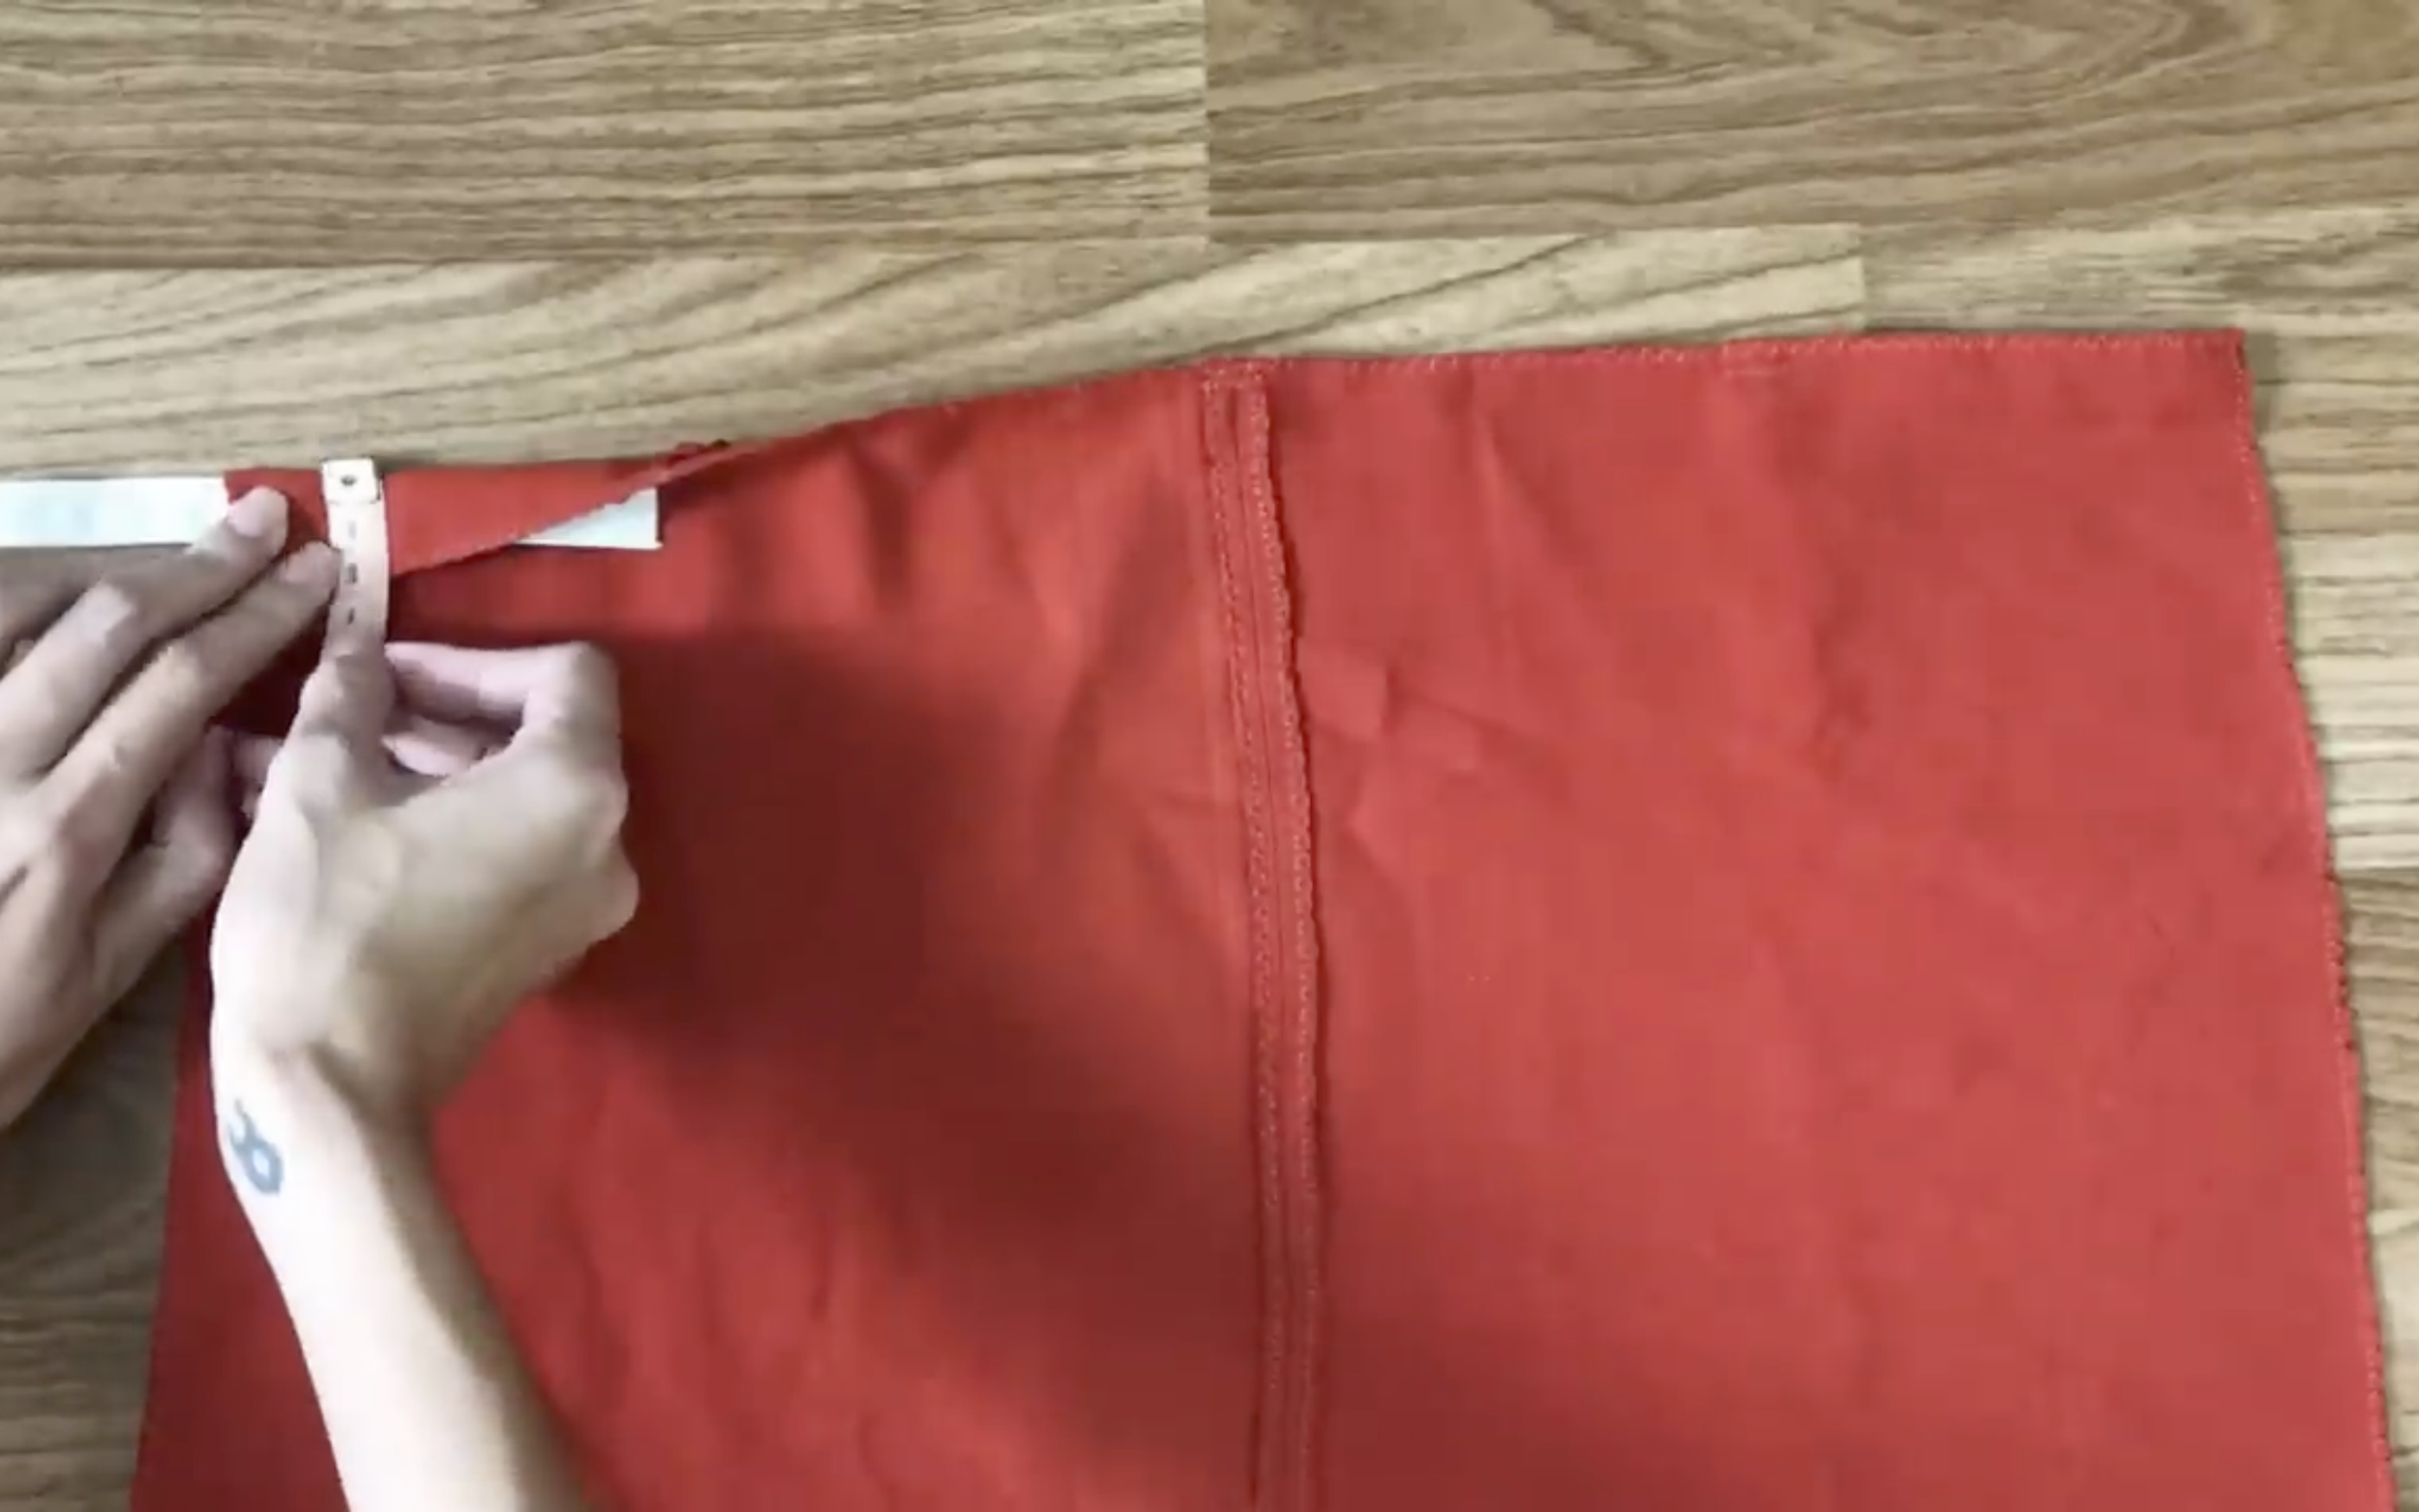
Measure 20 cm down from the top edge at the left seam (near the shoulder) to mark the spot under the bust.
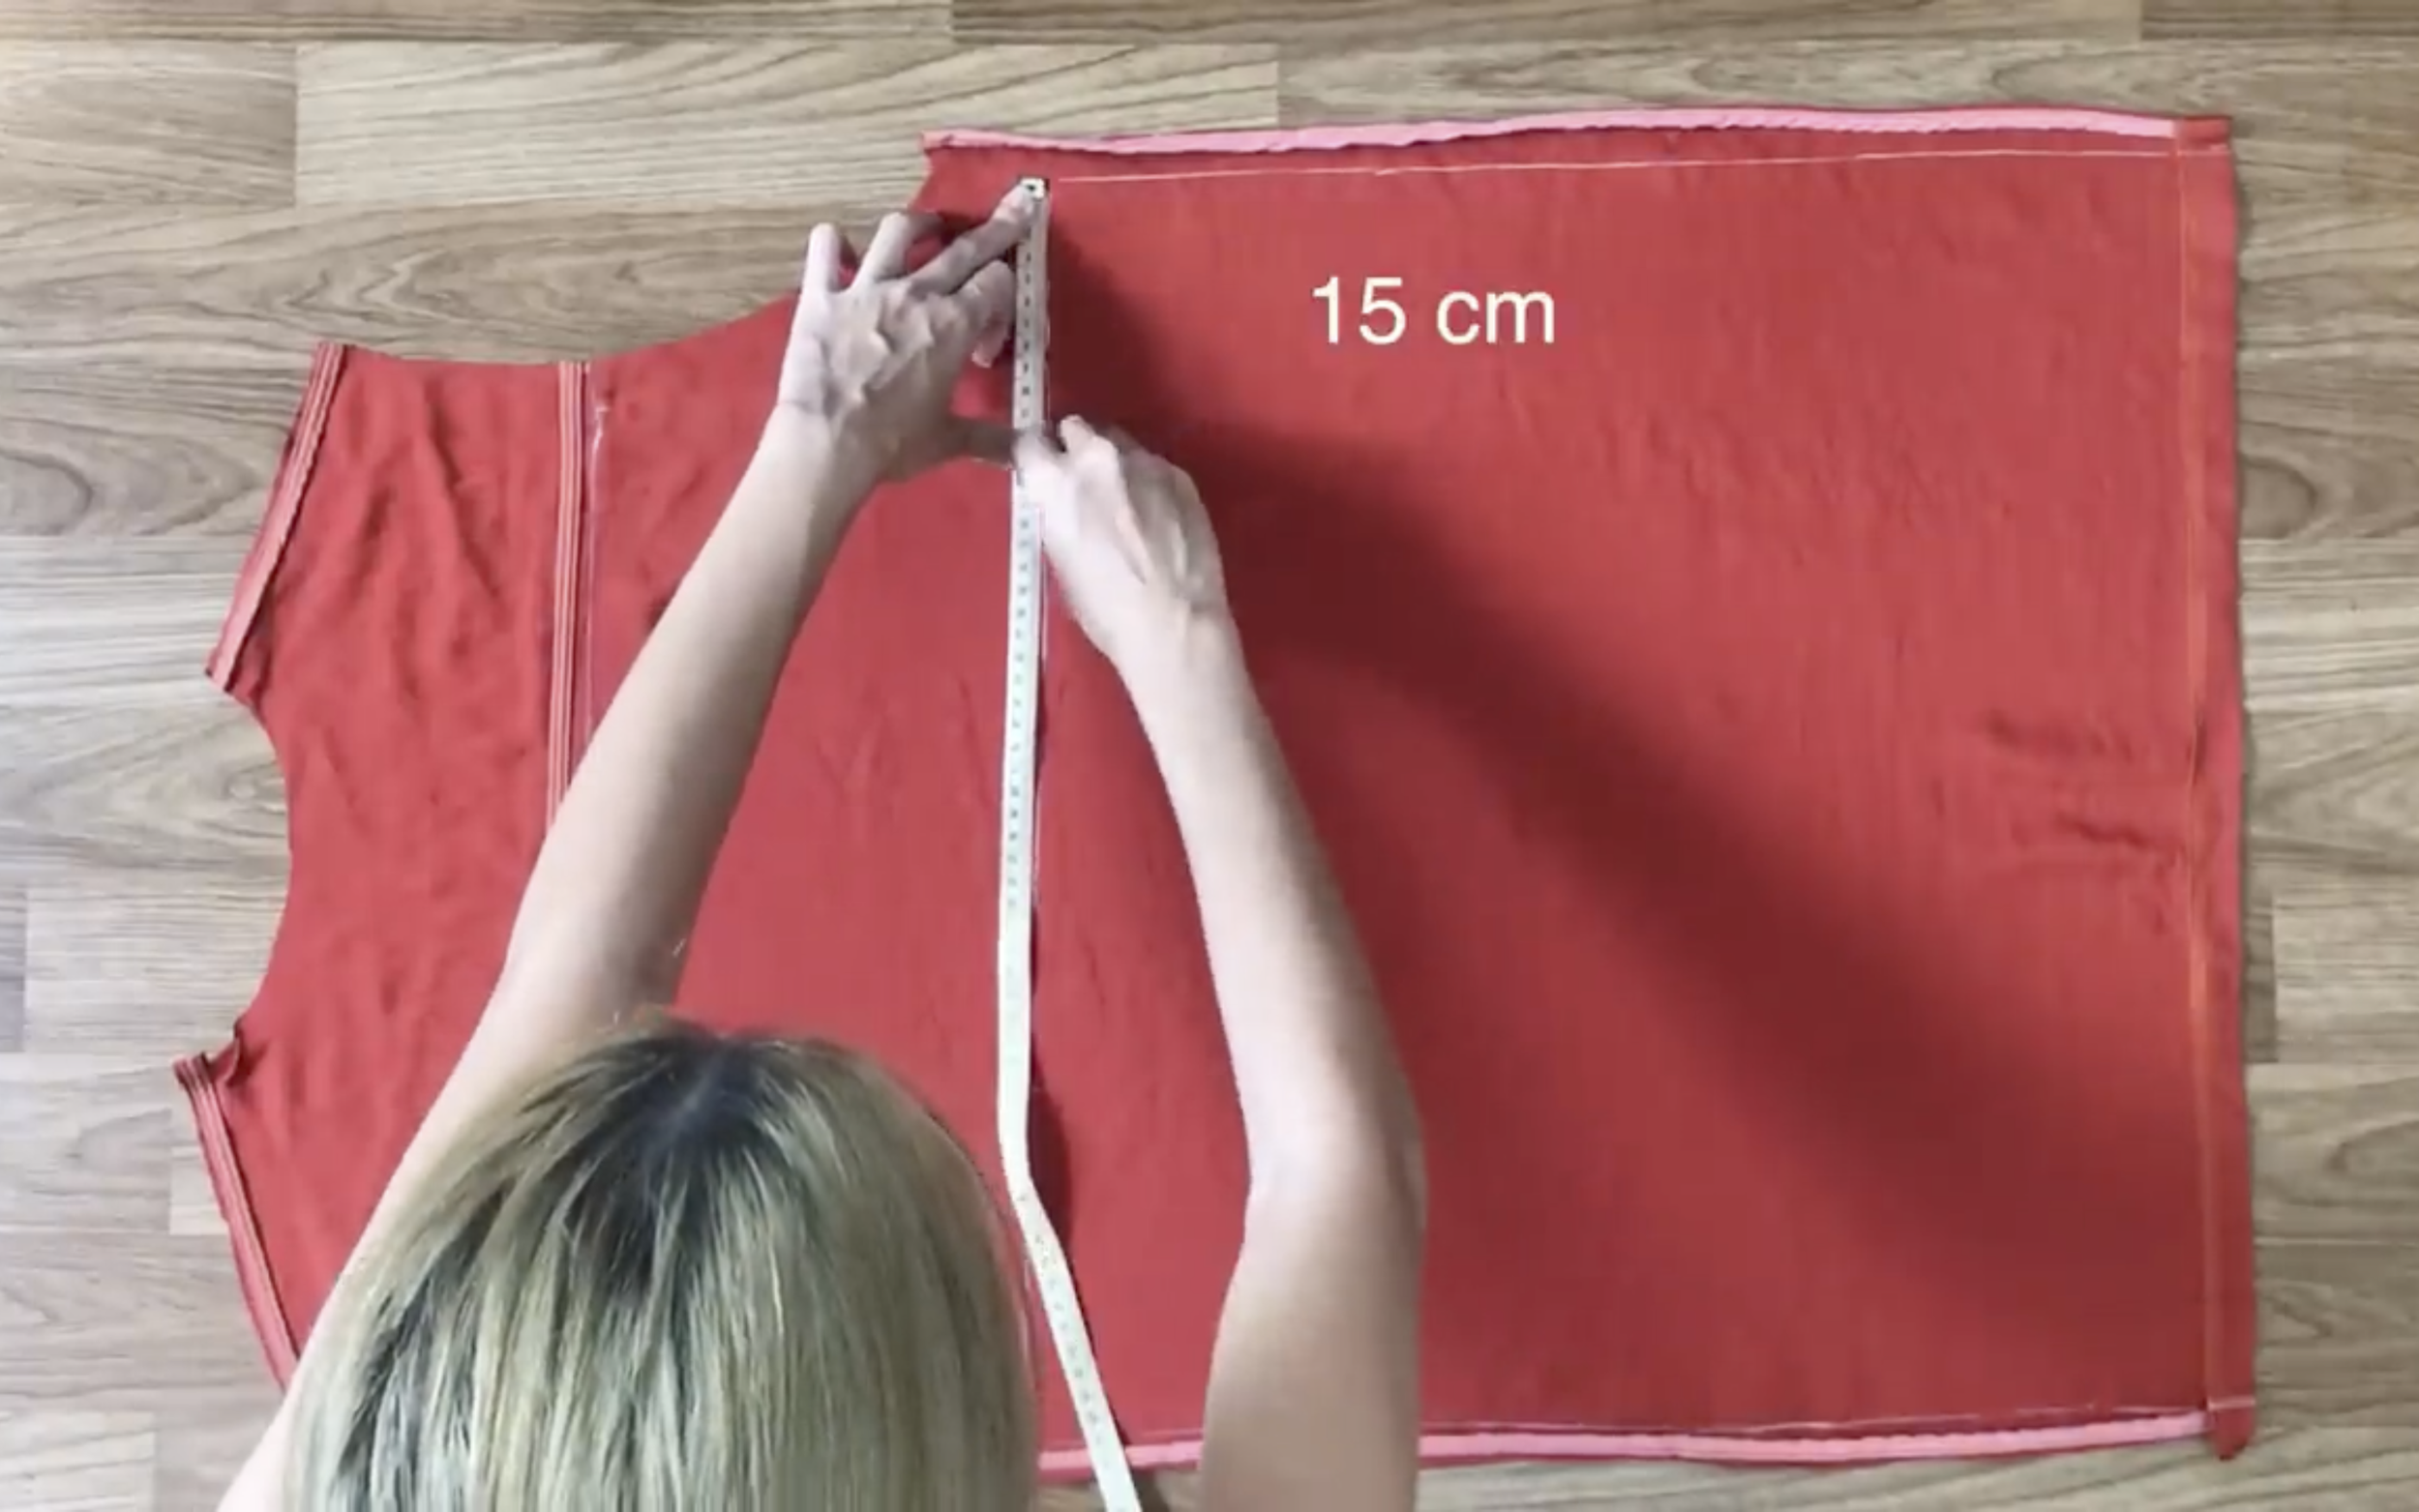
From that line, measure 15 cm in on both sides and mark it.
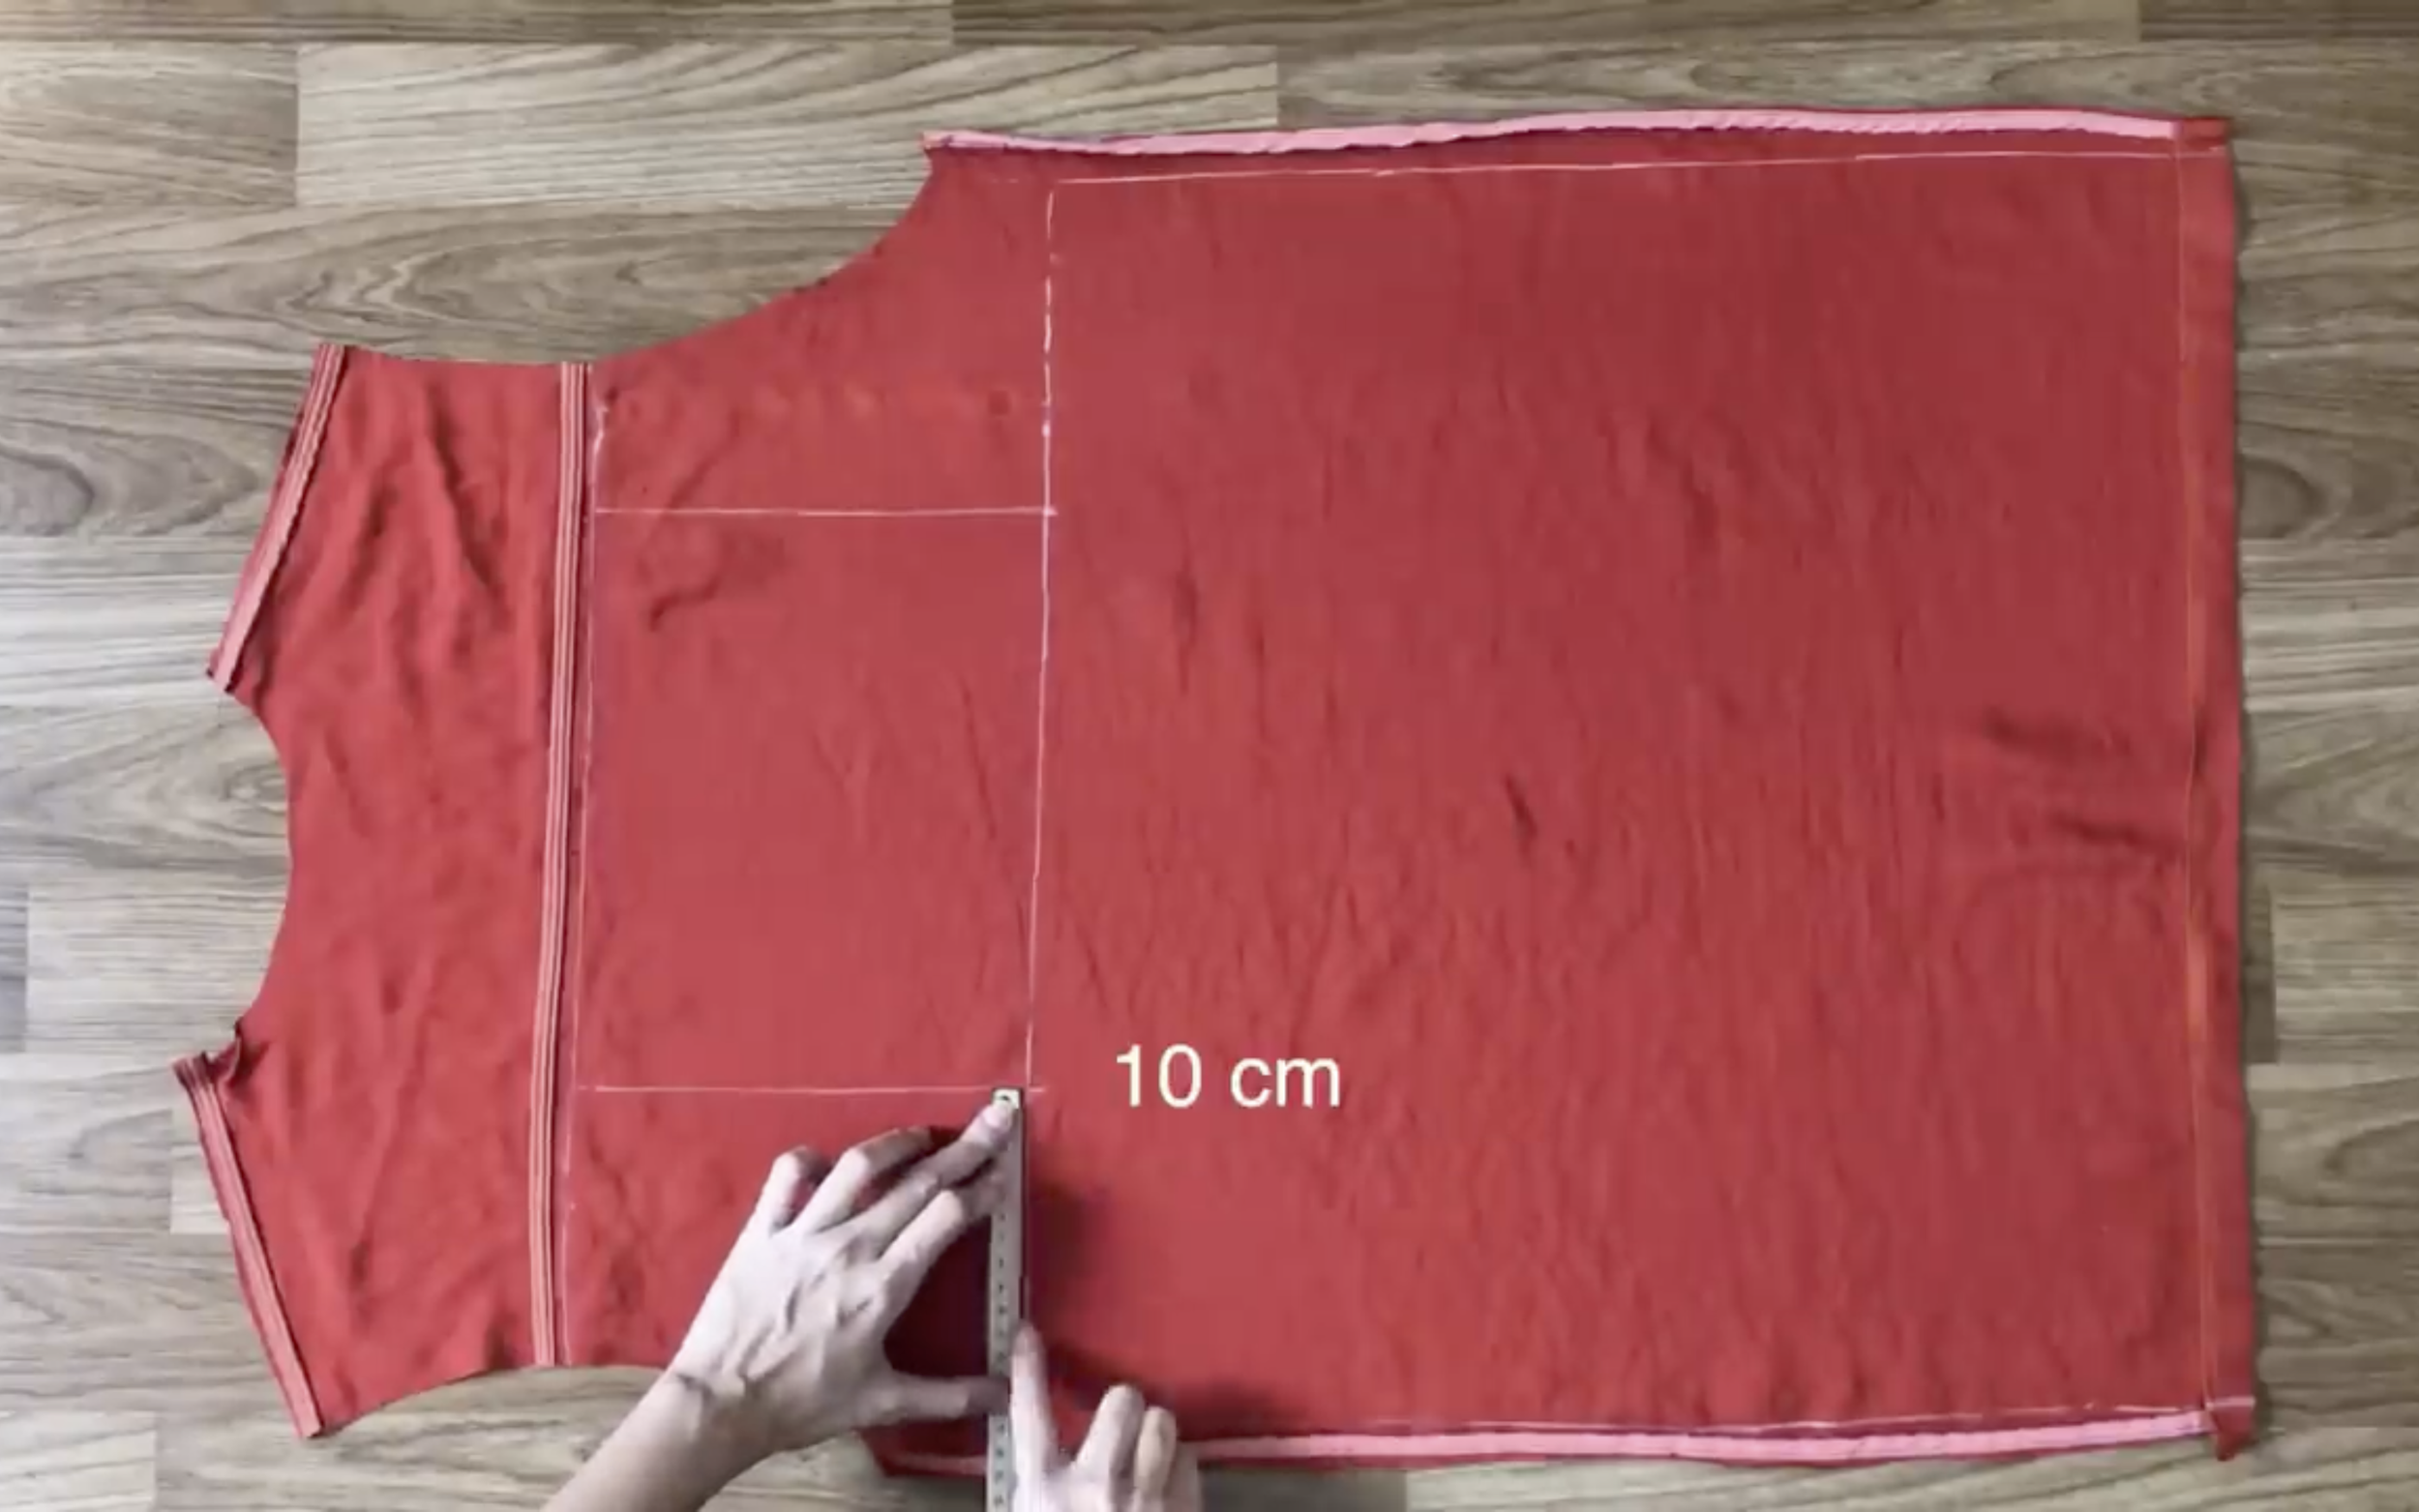
At the meeting of the straight line and the horizontal line, go out on the horizontal line 10 cm and mark there.
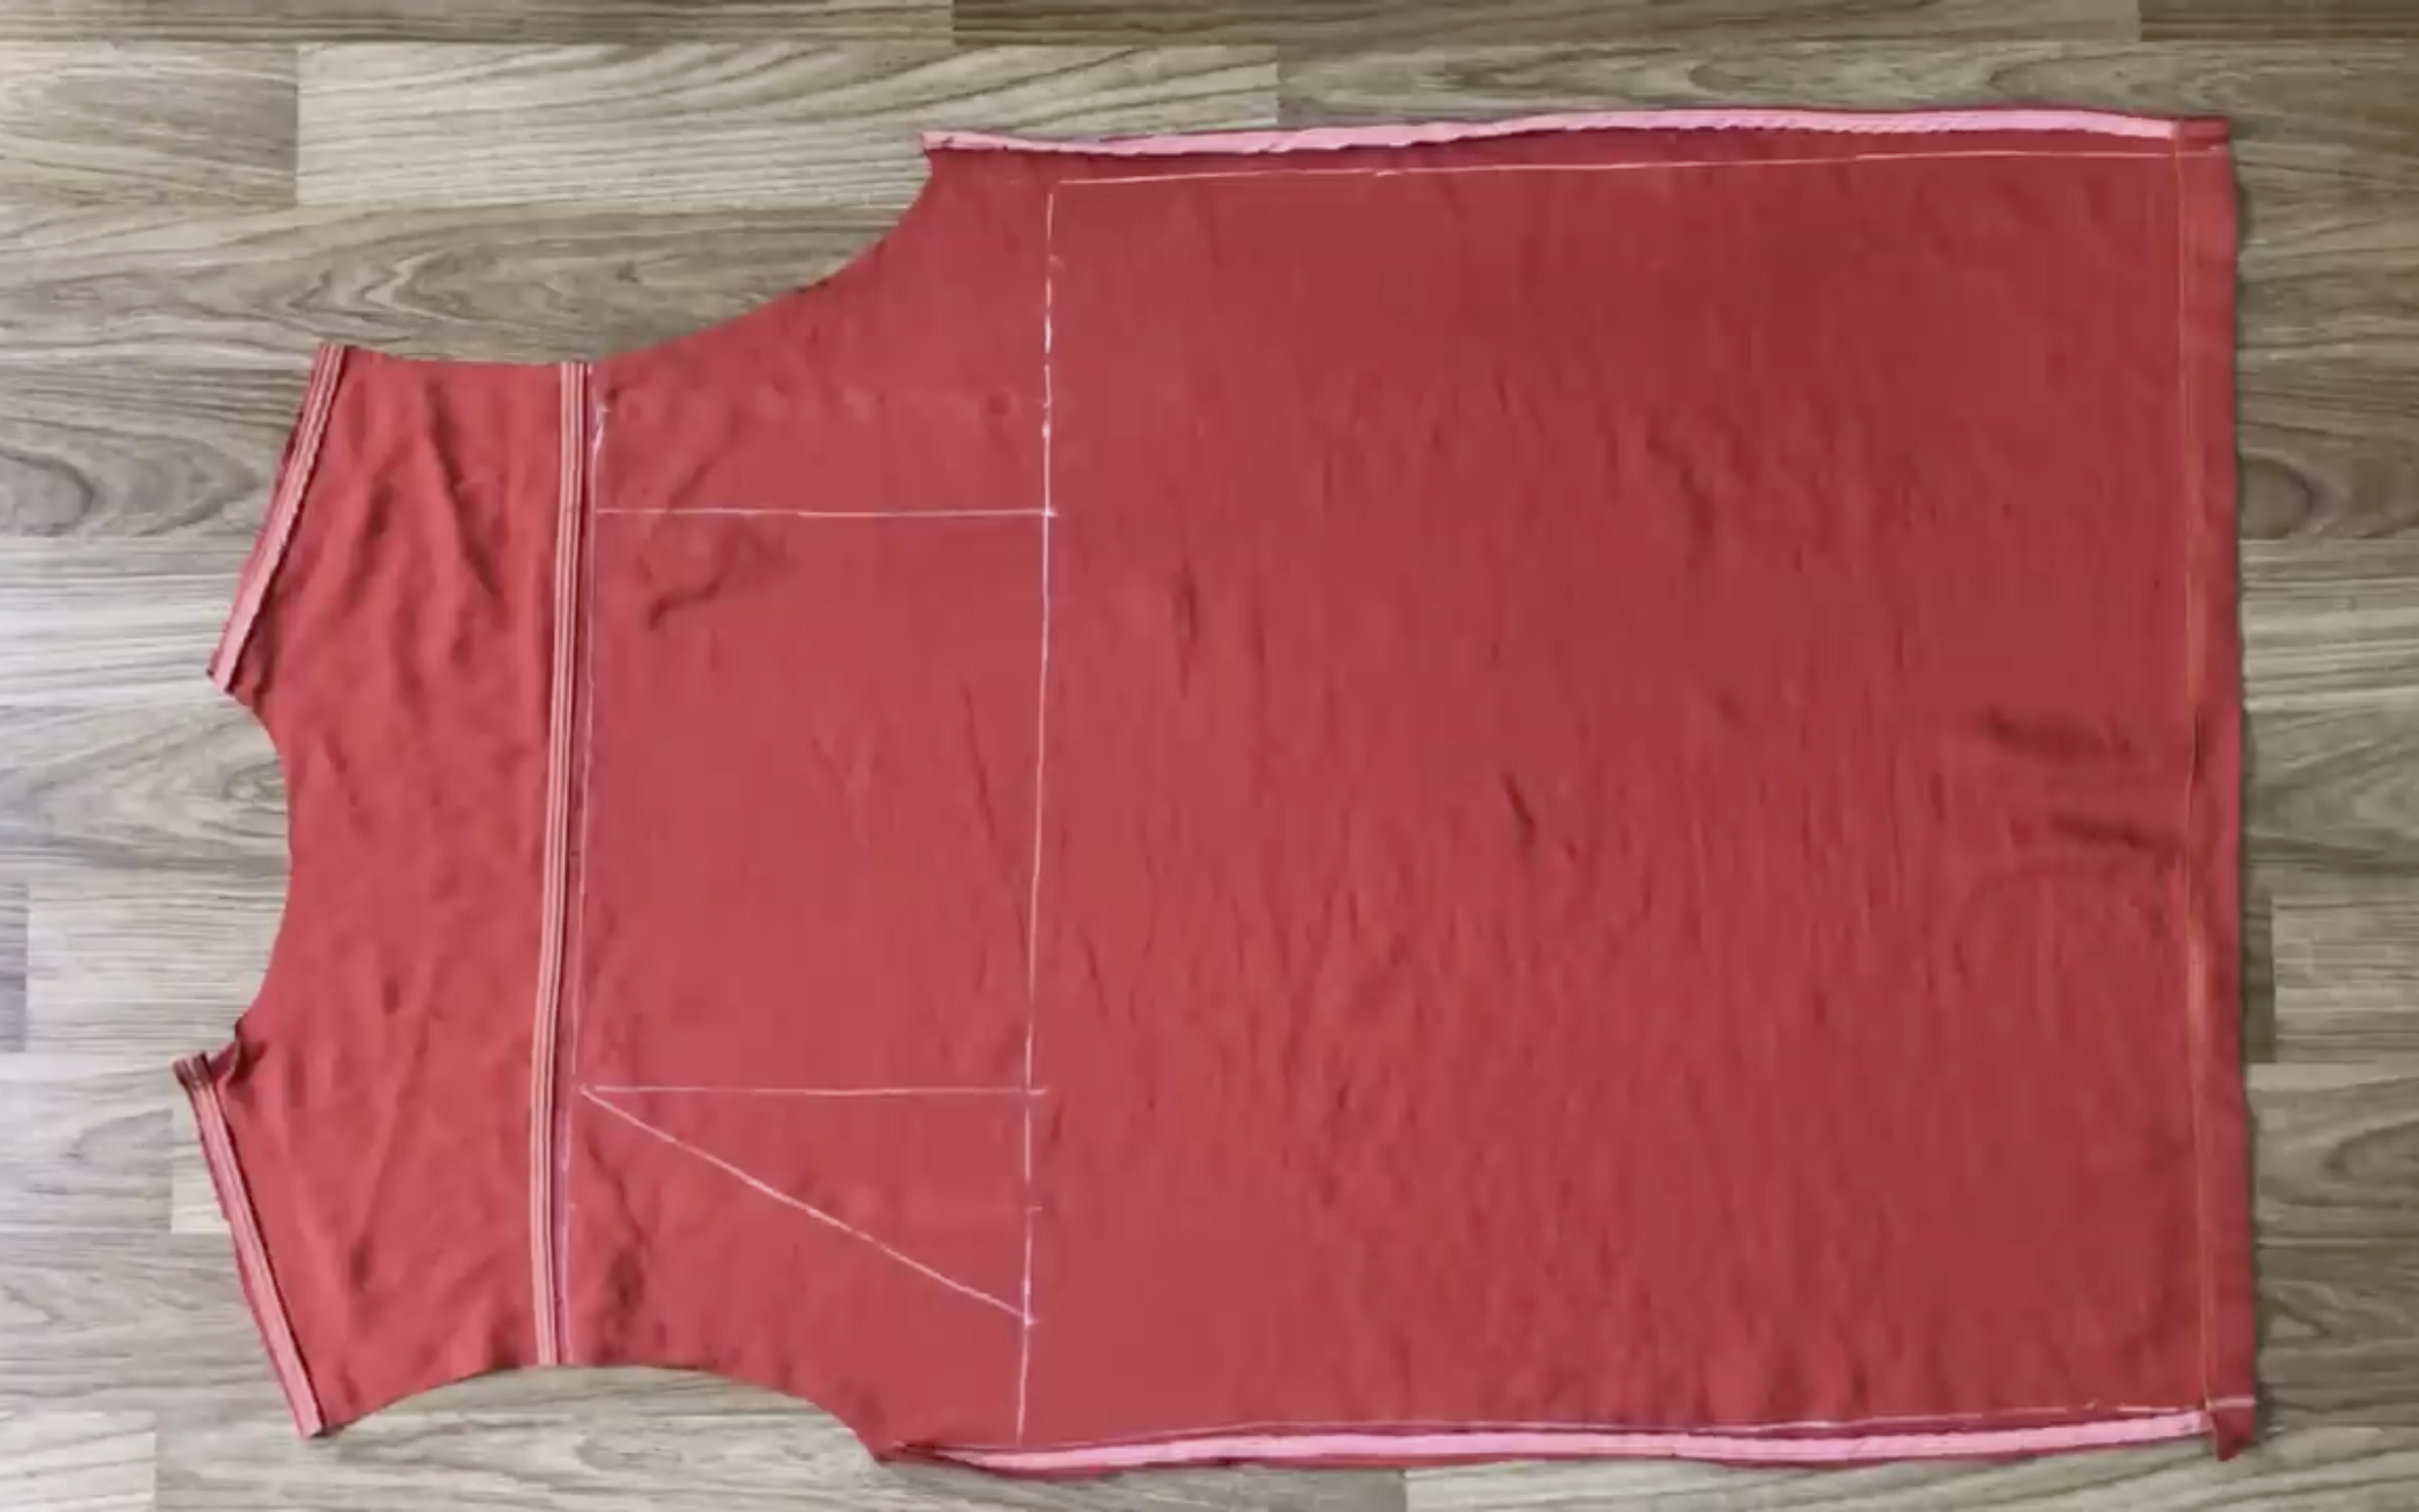
Then, connect these marks to the two ends of the top line.
Also, connect these marks to the end of the dress.
This forms the pattern of the front dress.
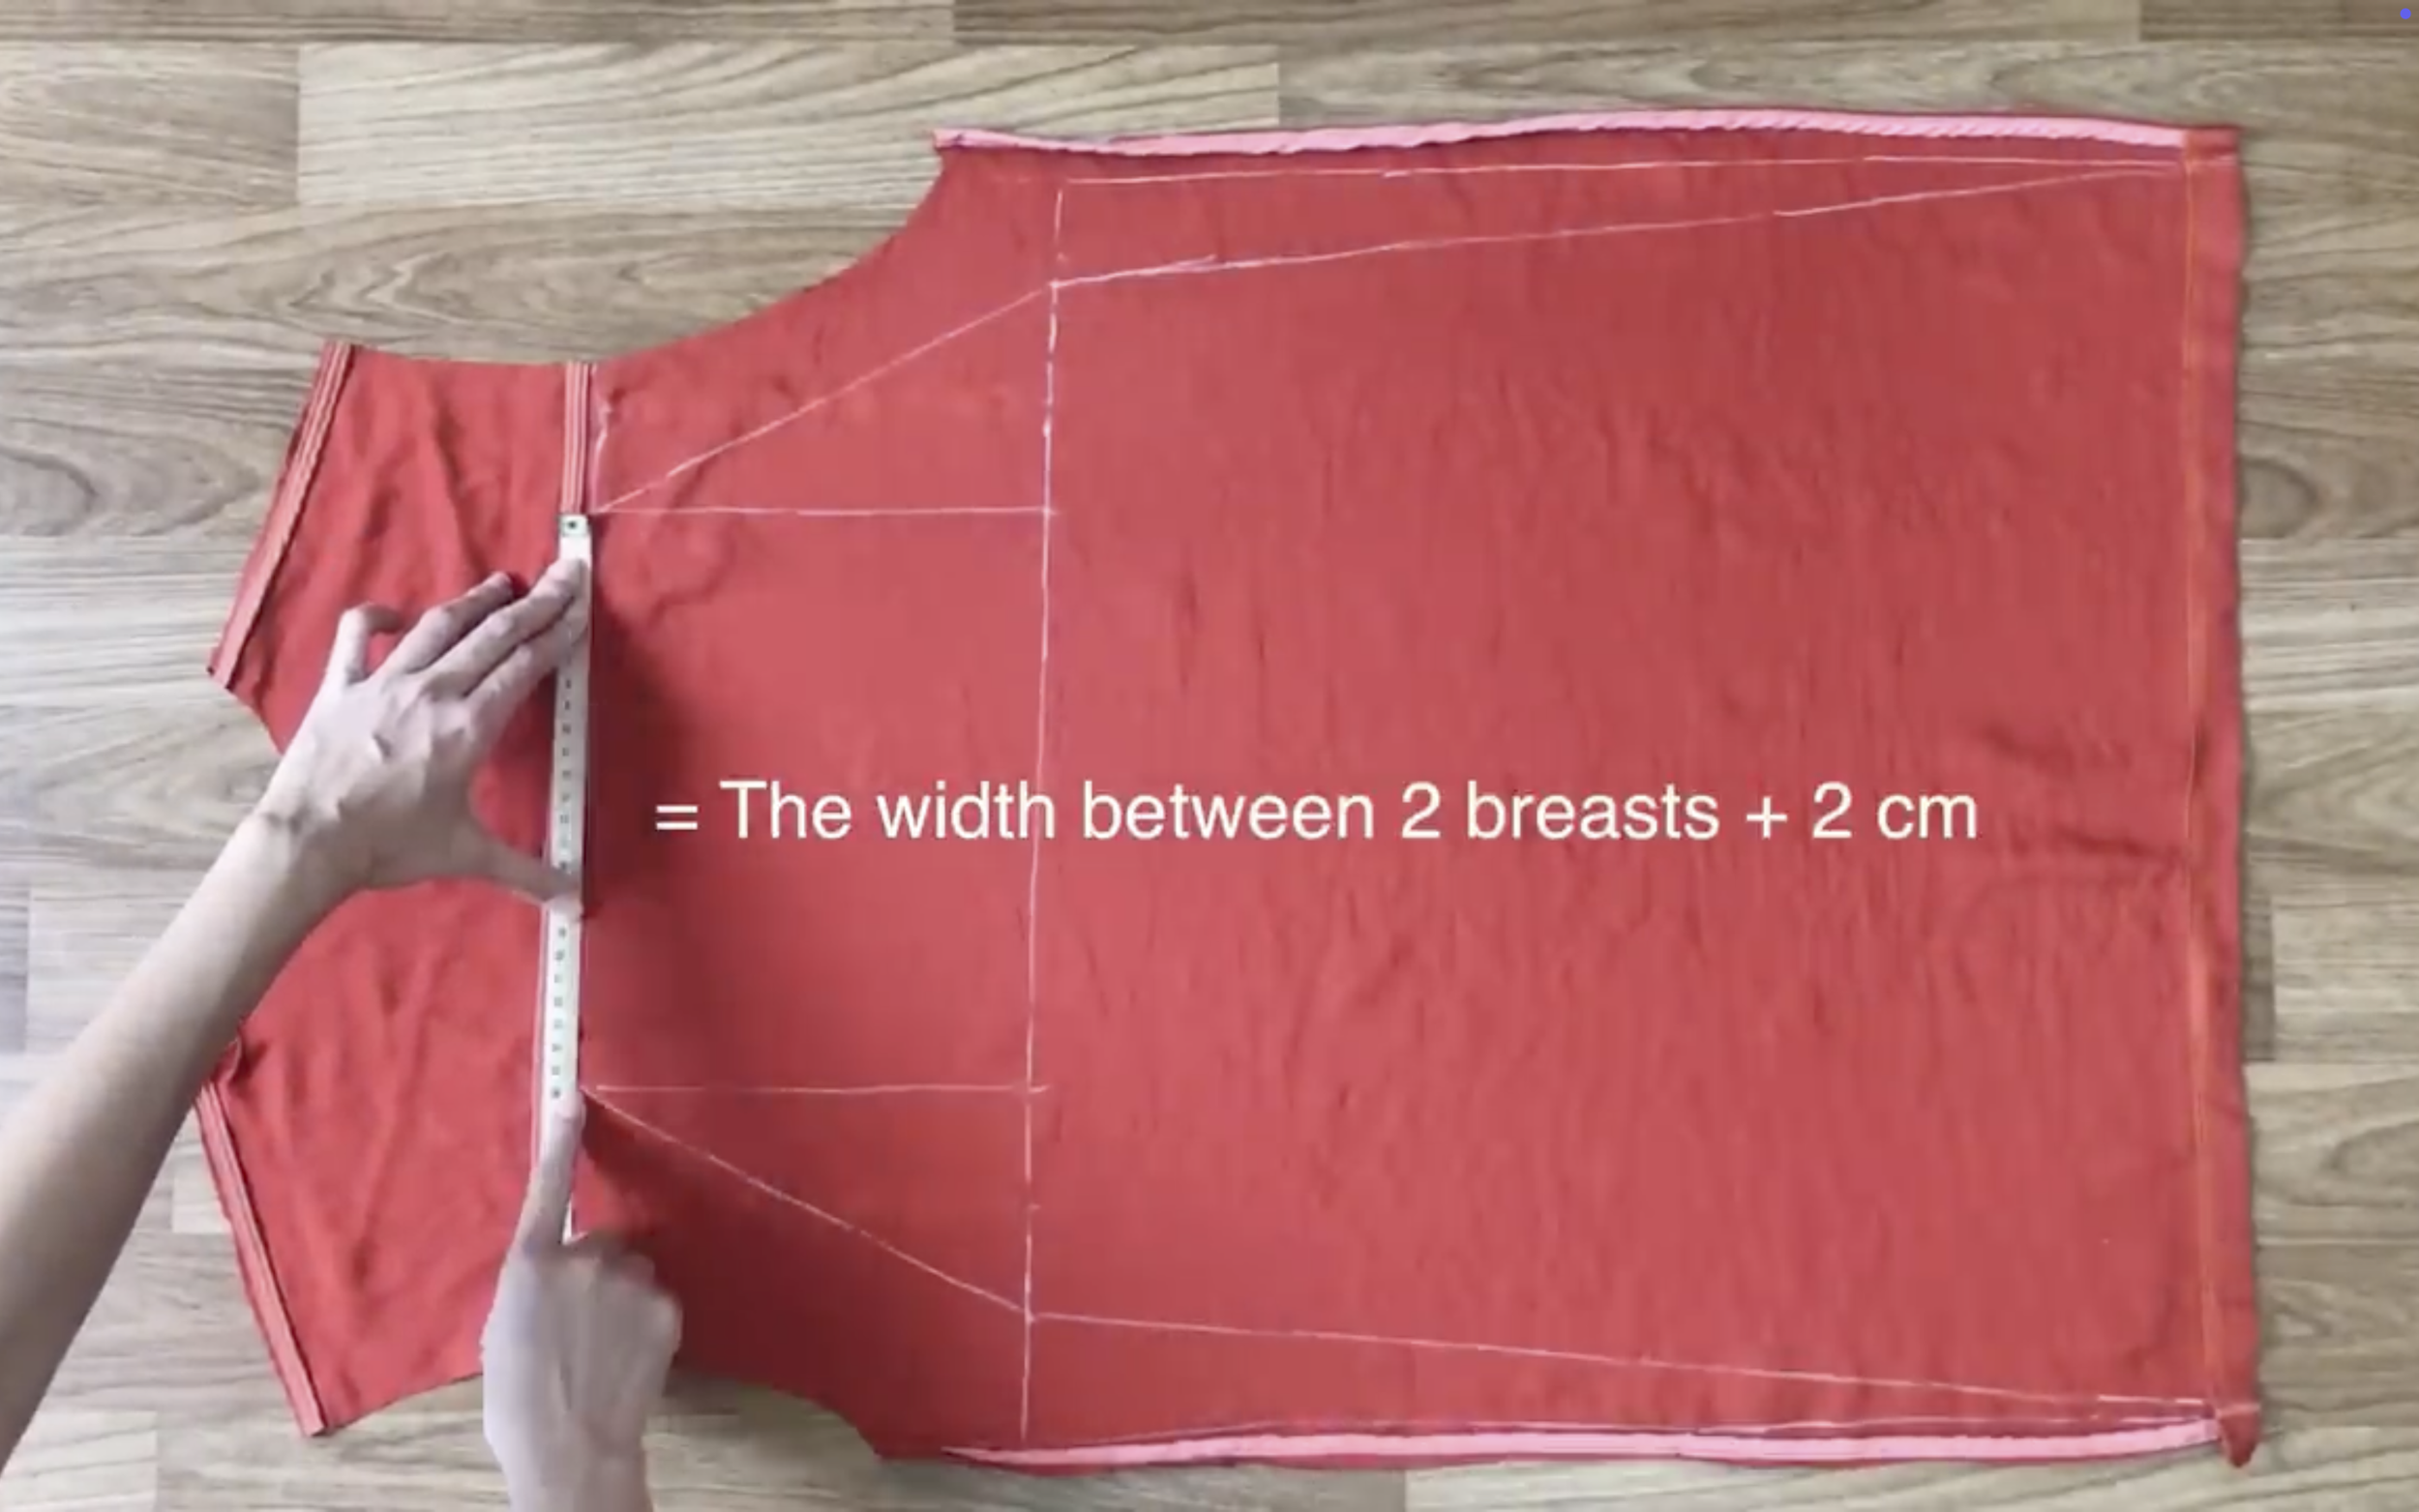
Make sure the width of the top line is the width between two breasts + 2 cm.
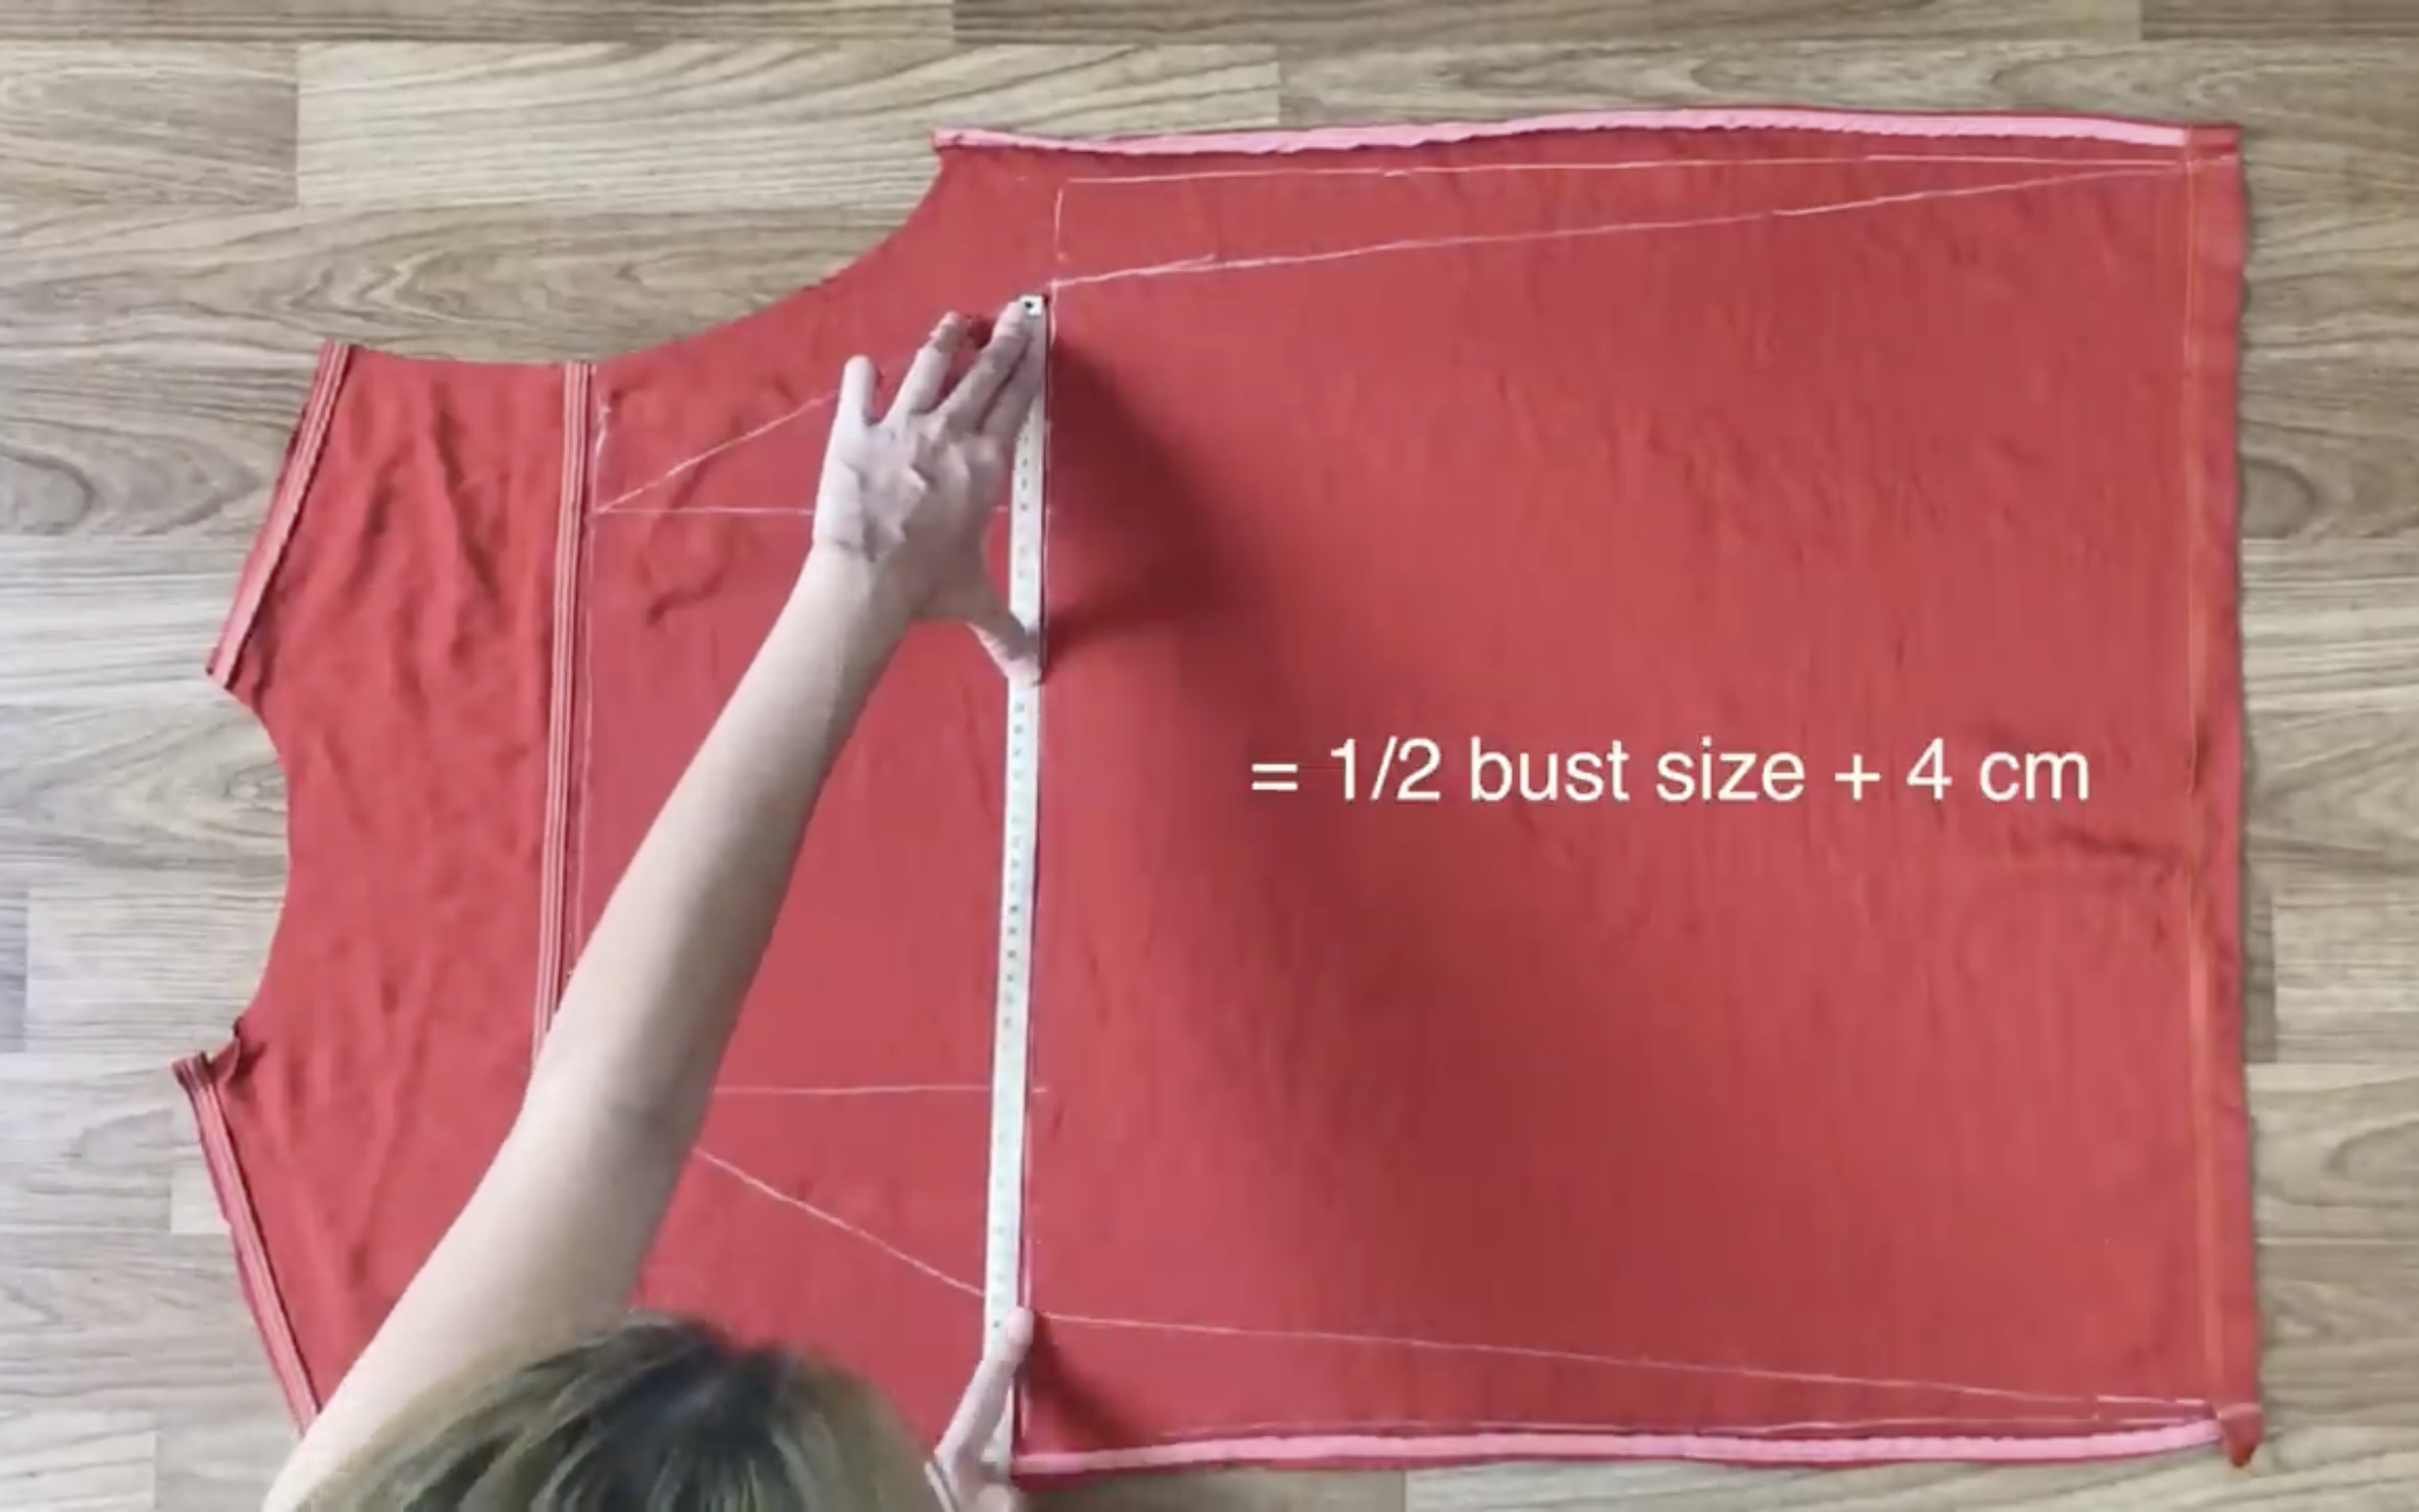
The width of the horizontal line must be half of the bust size + 4 cm.
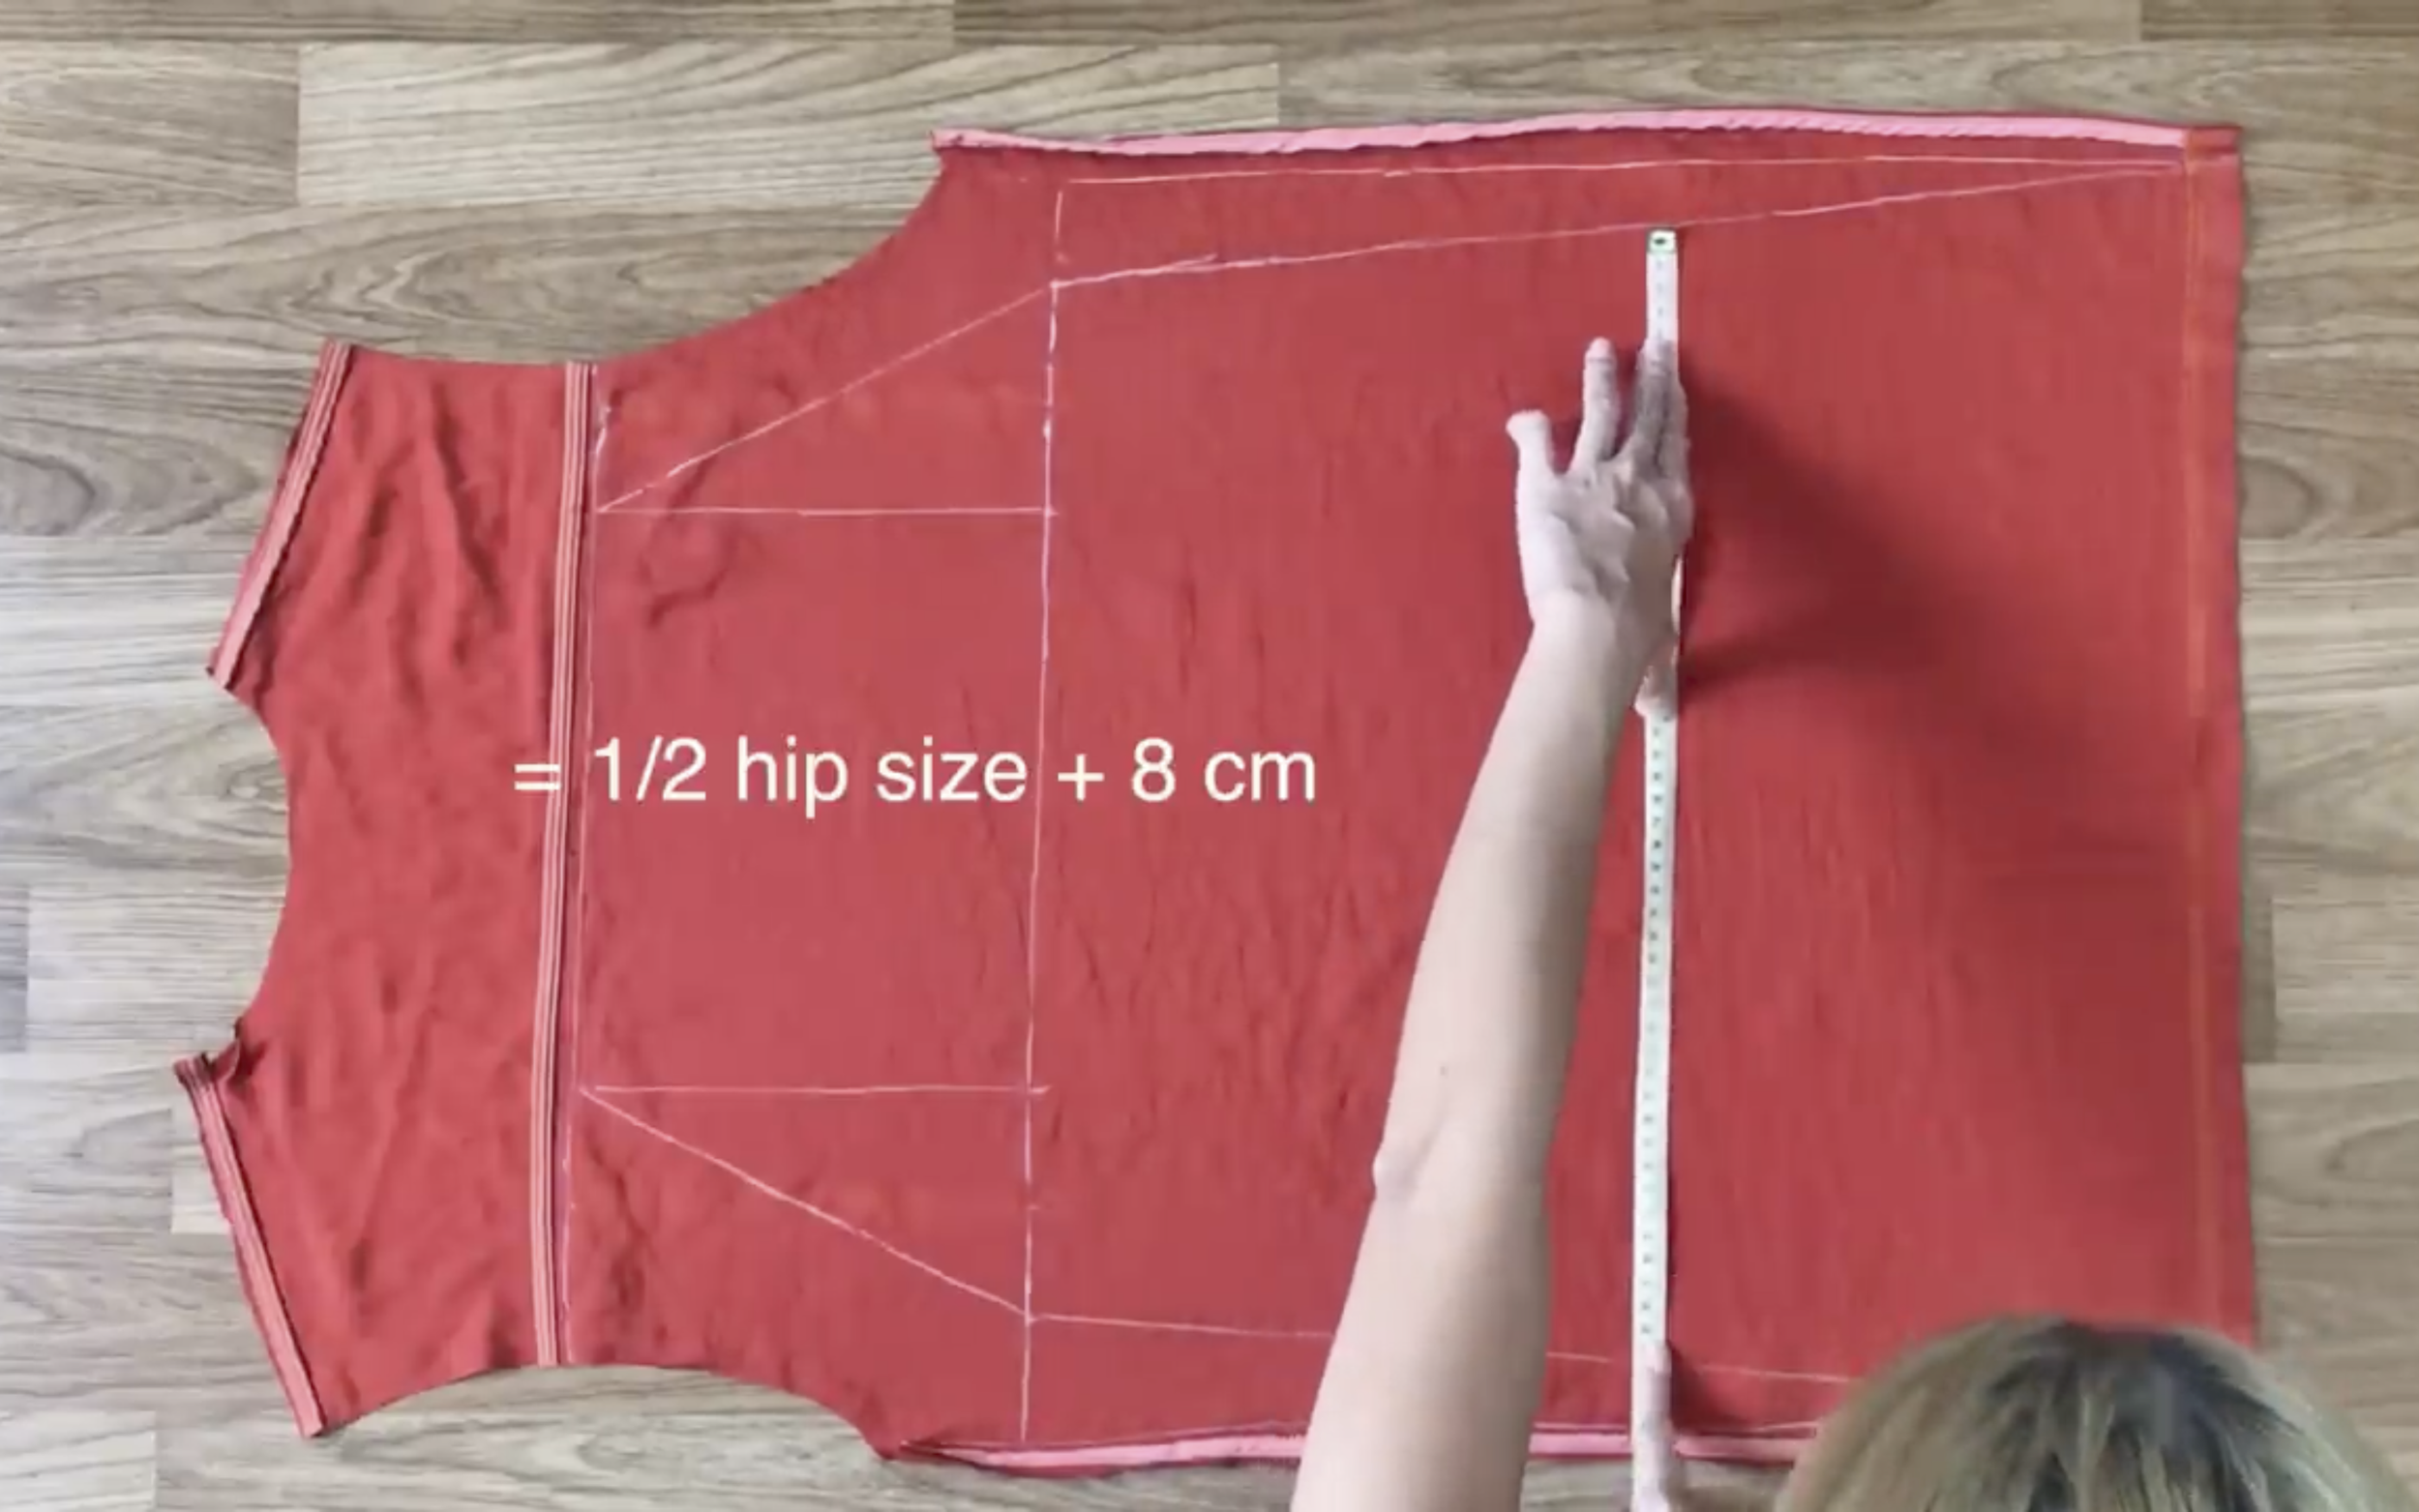
And the width at the middle of the horizontal line and the end of the dress must be half of the hip size + 8 cm.
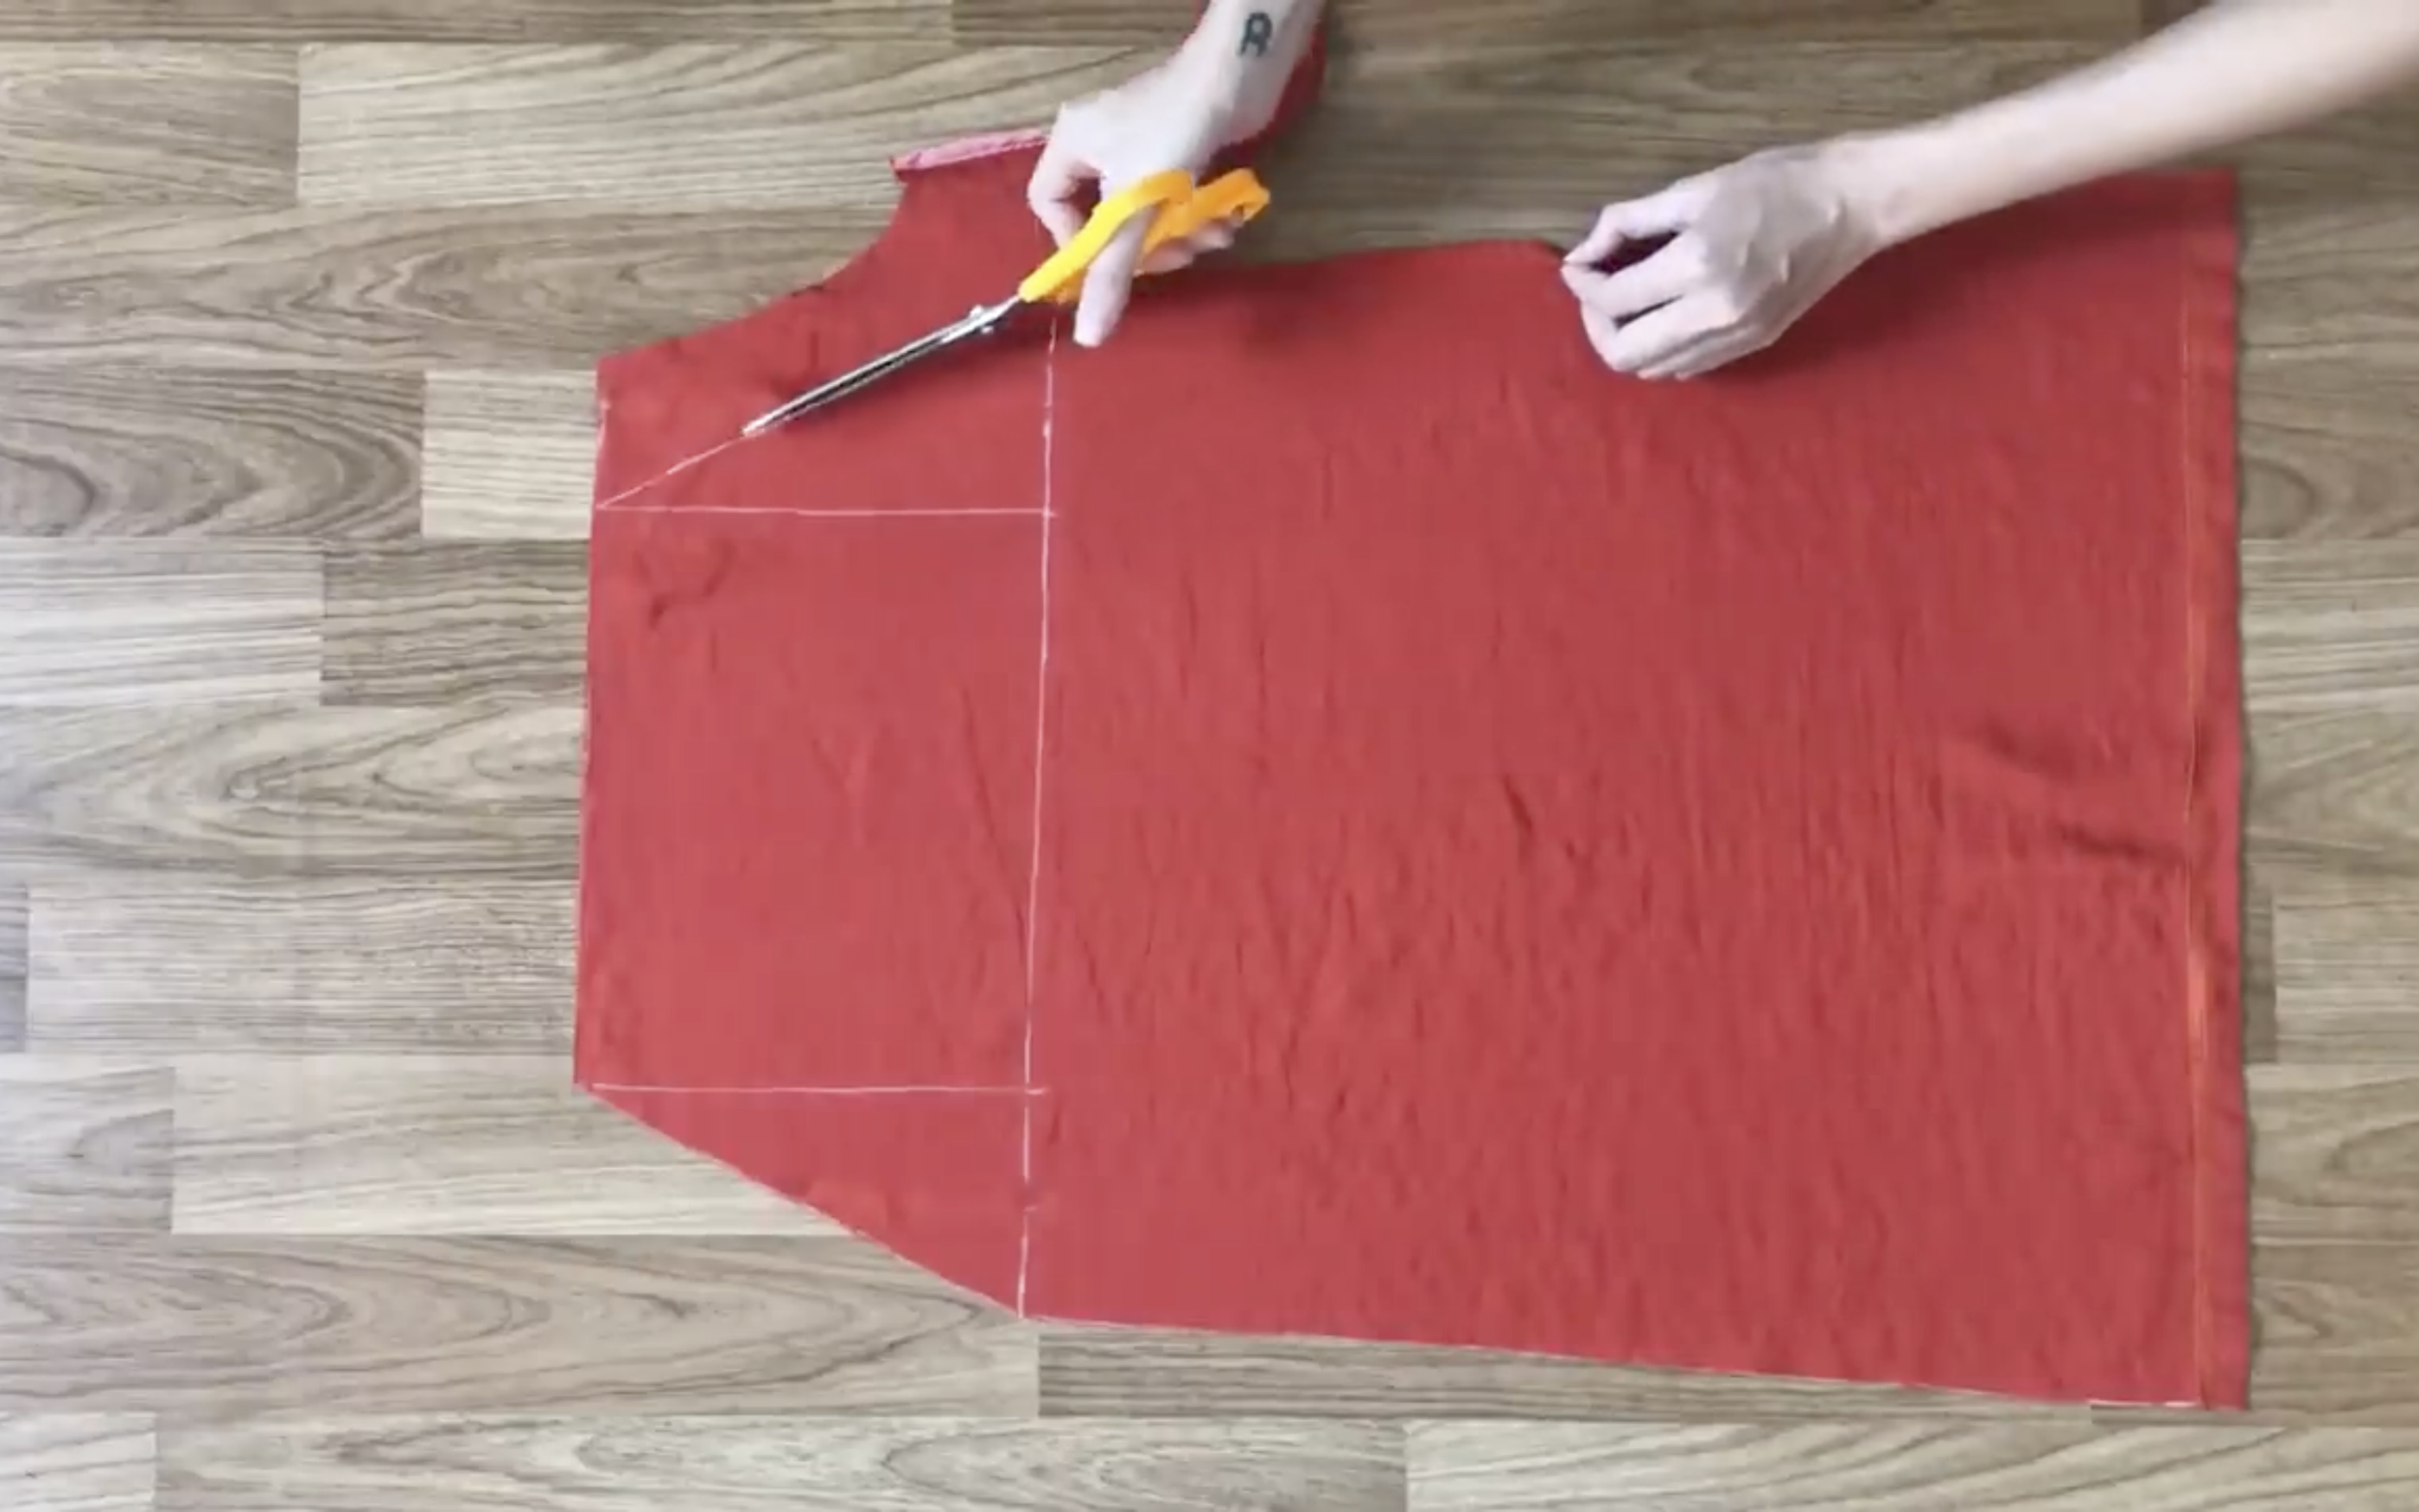
Then, cut along the drawing lines.
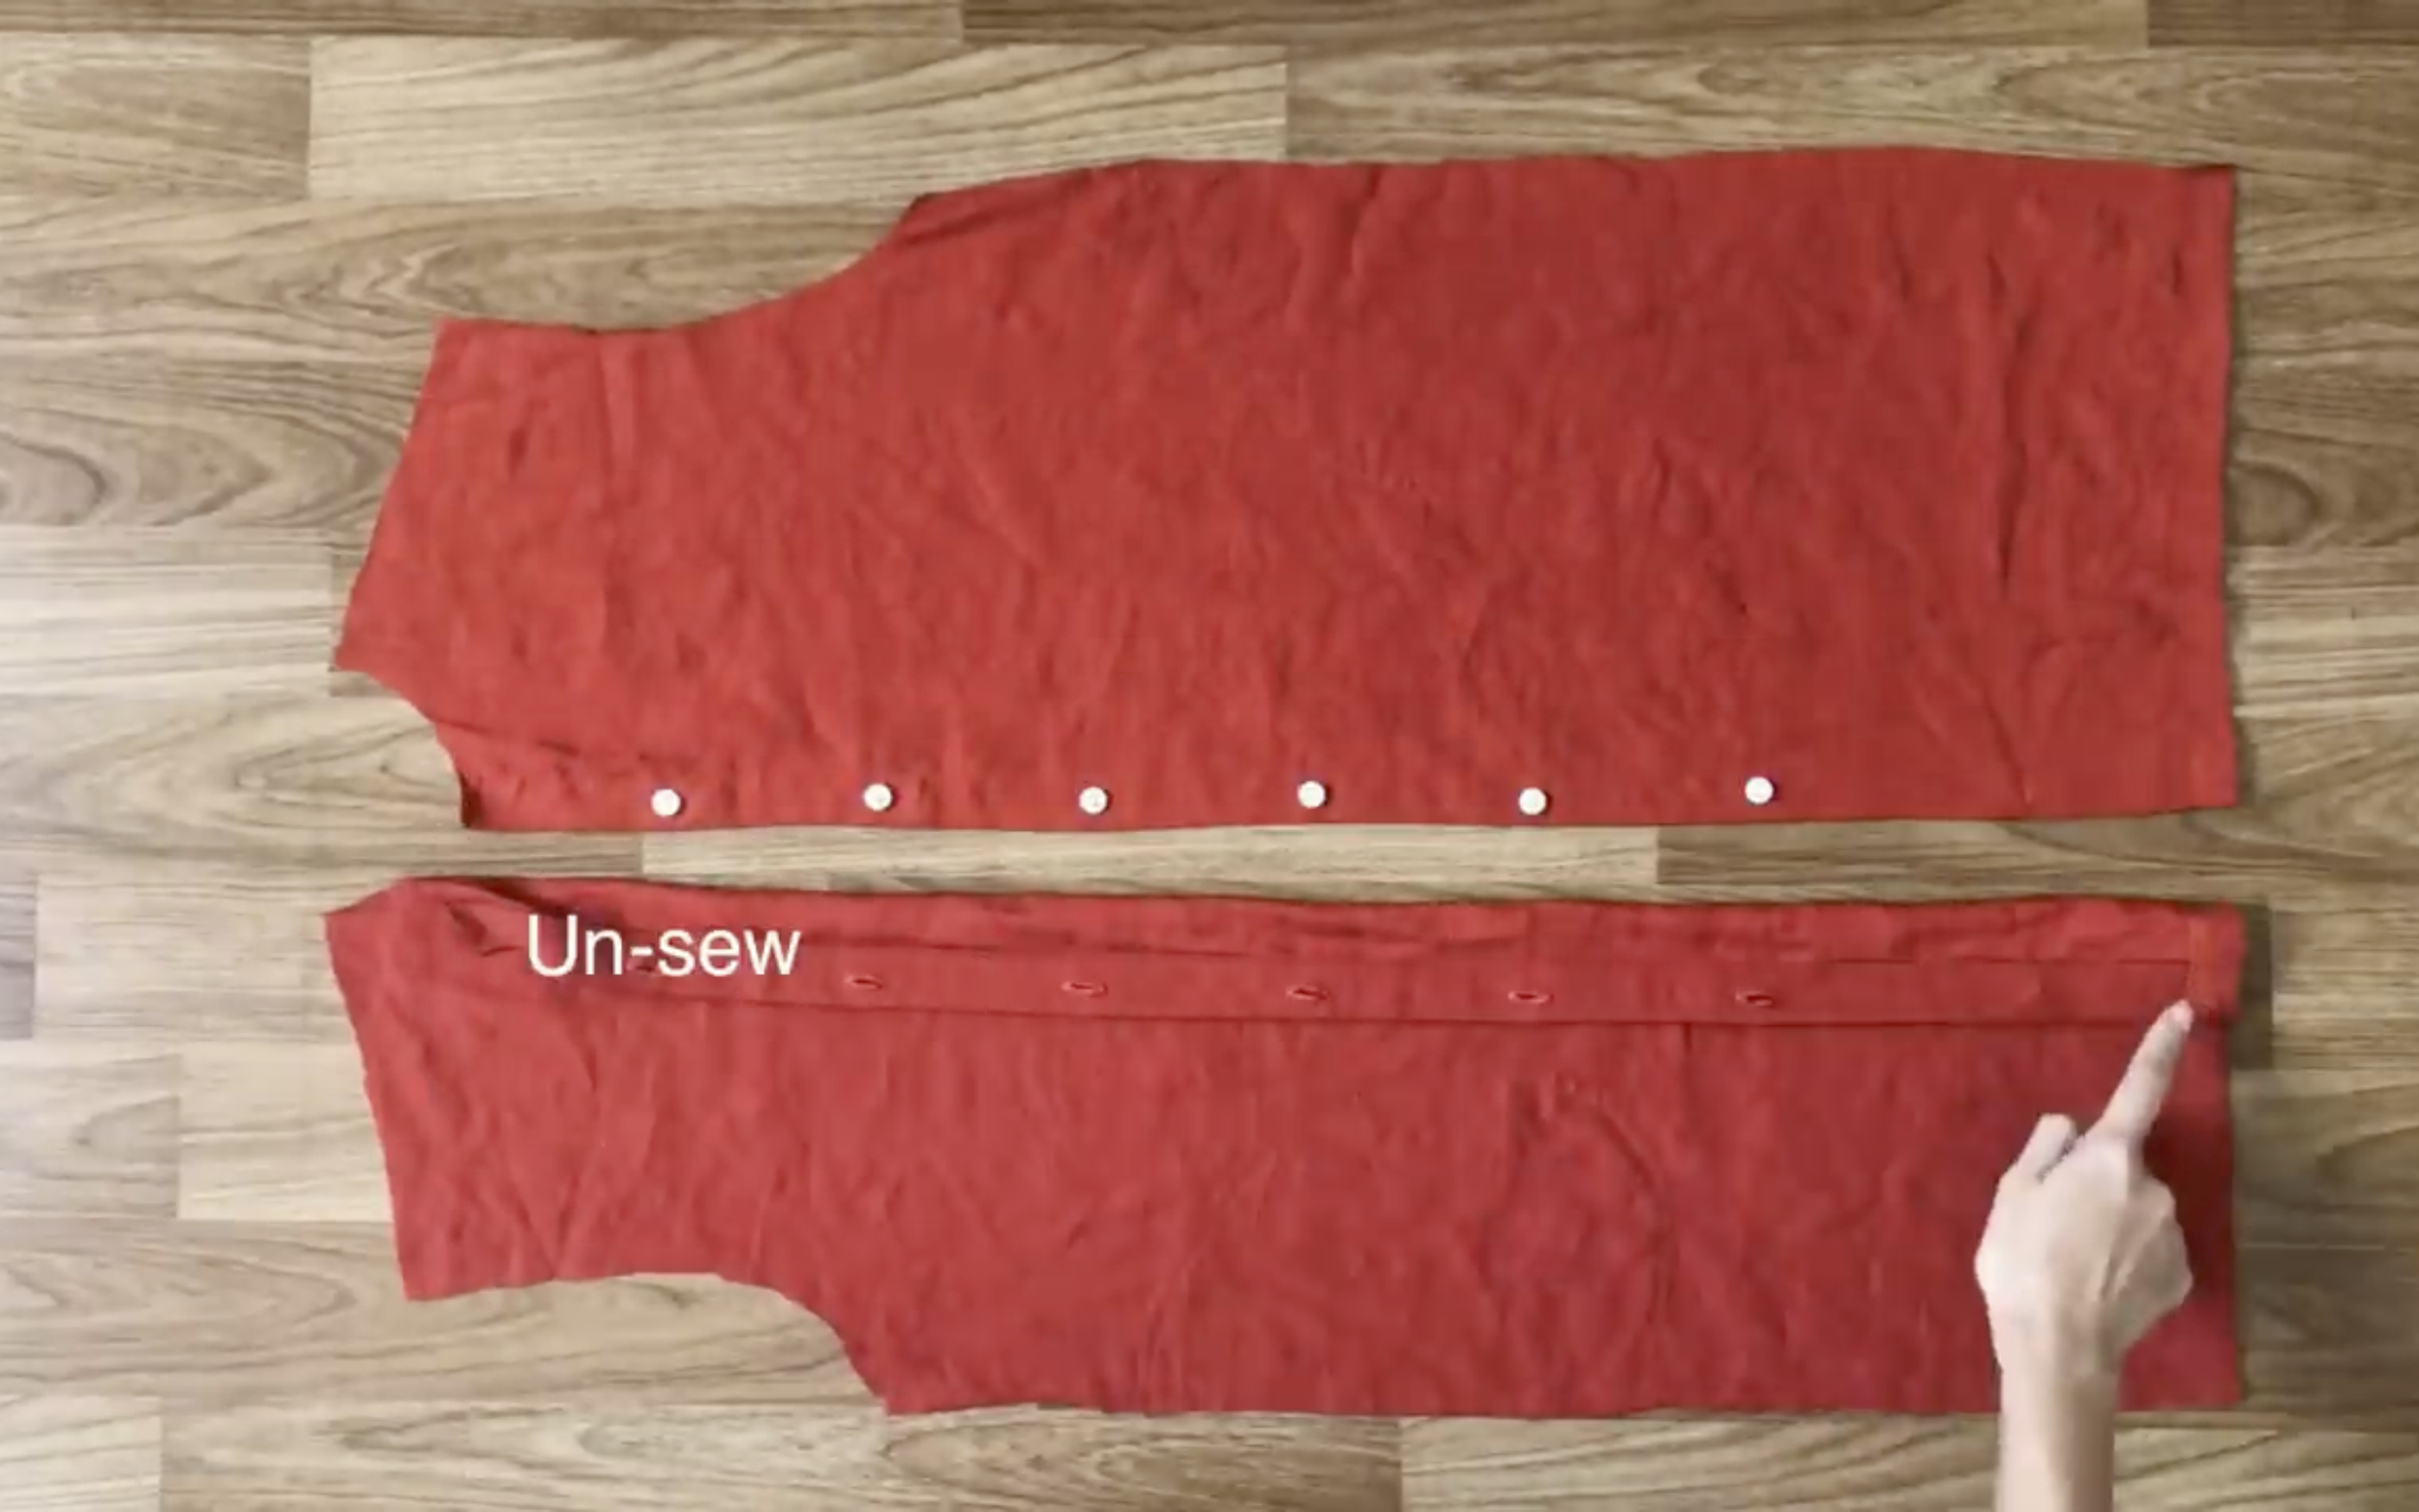
Moving to the back pattern of the dress, remove the button and unsew the seam at the button area.
Then, connect two sides of the button area together.
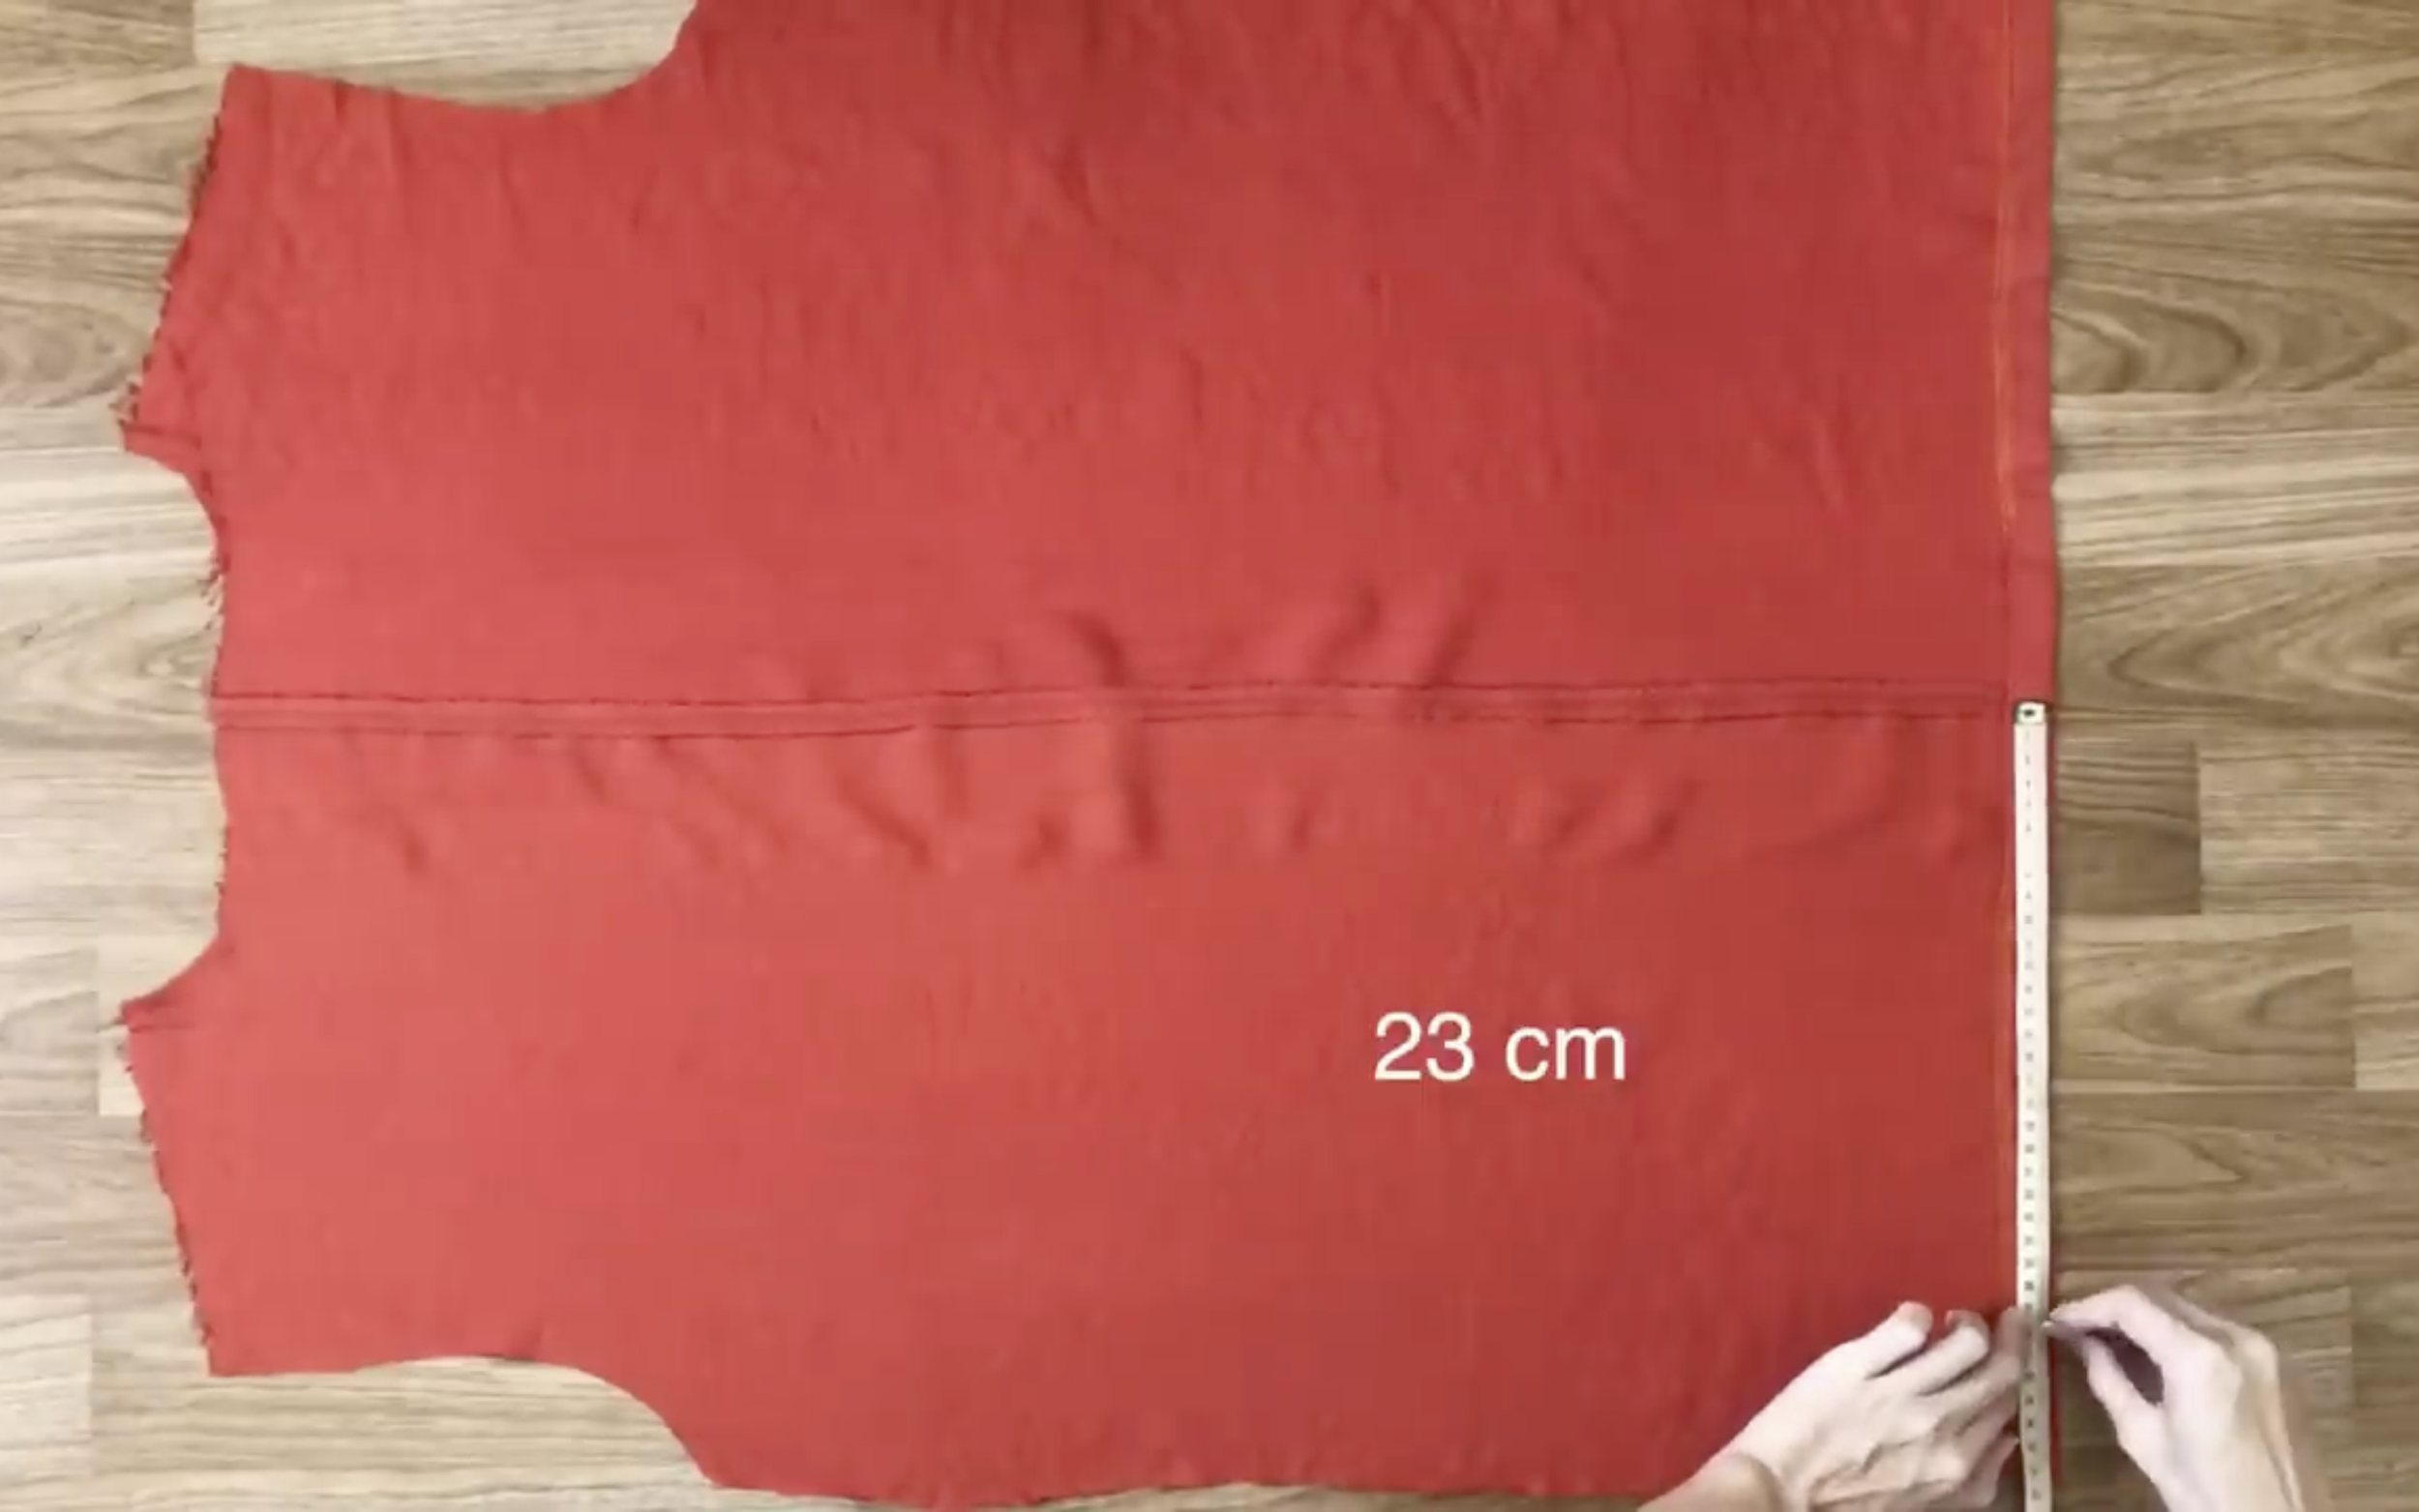
From the seam line, go to both sides by 23 cm.
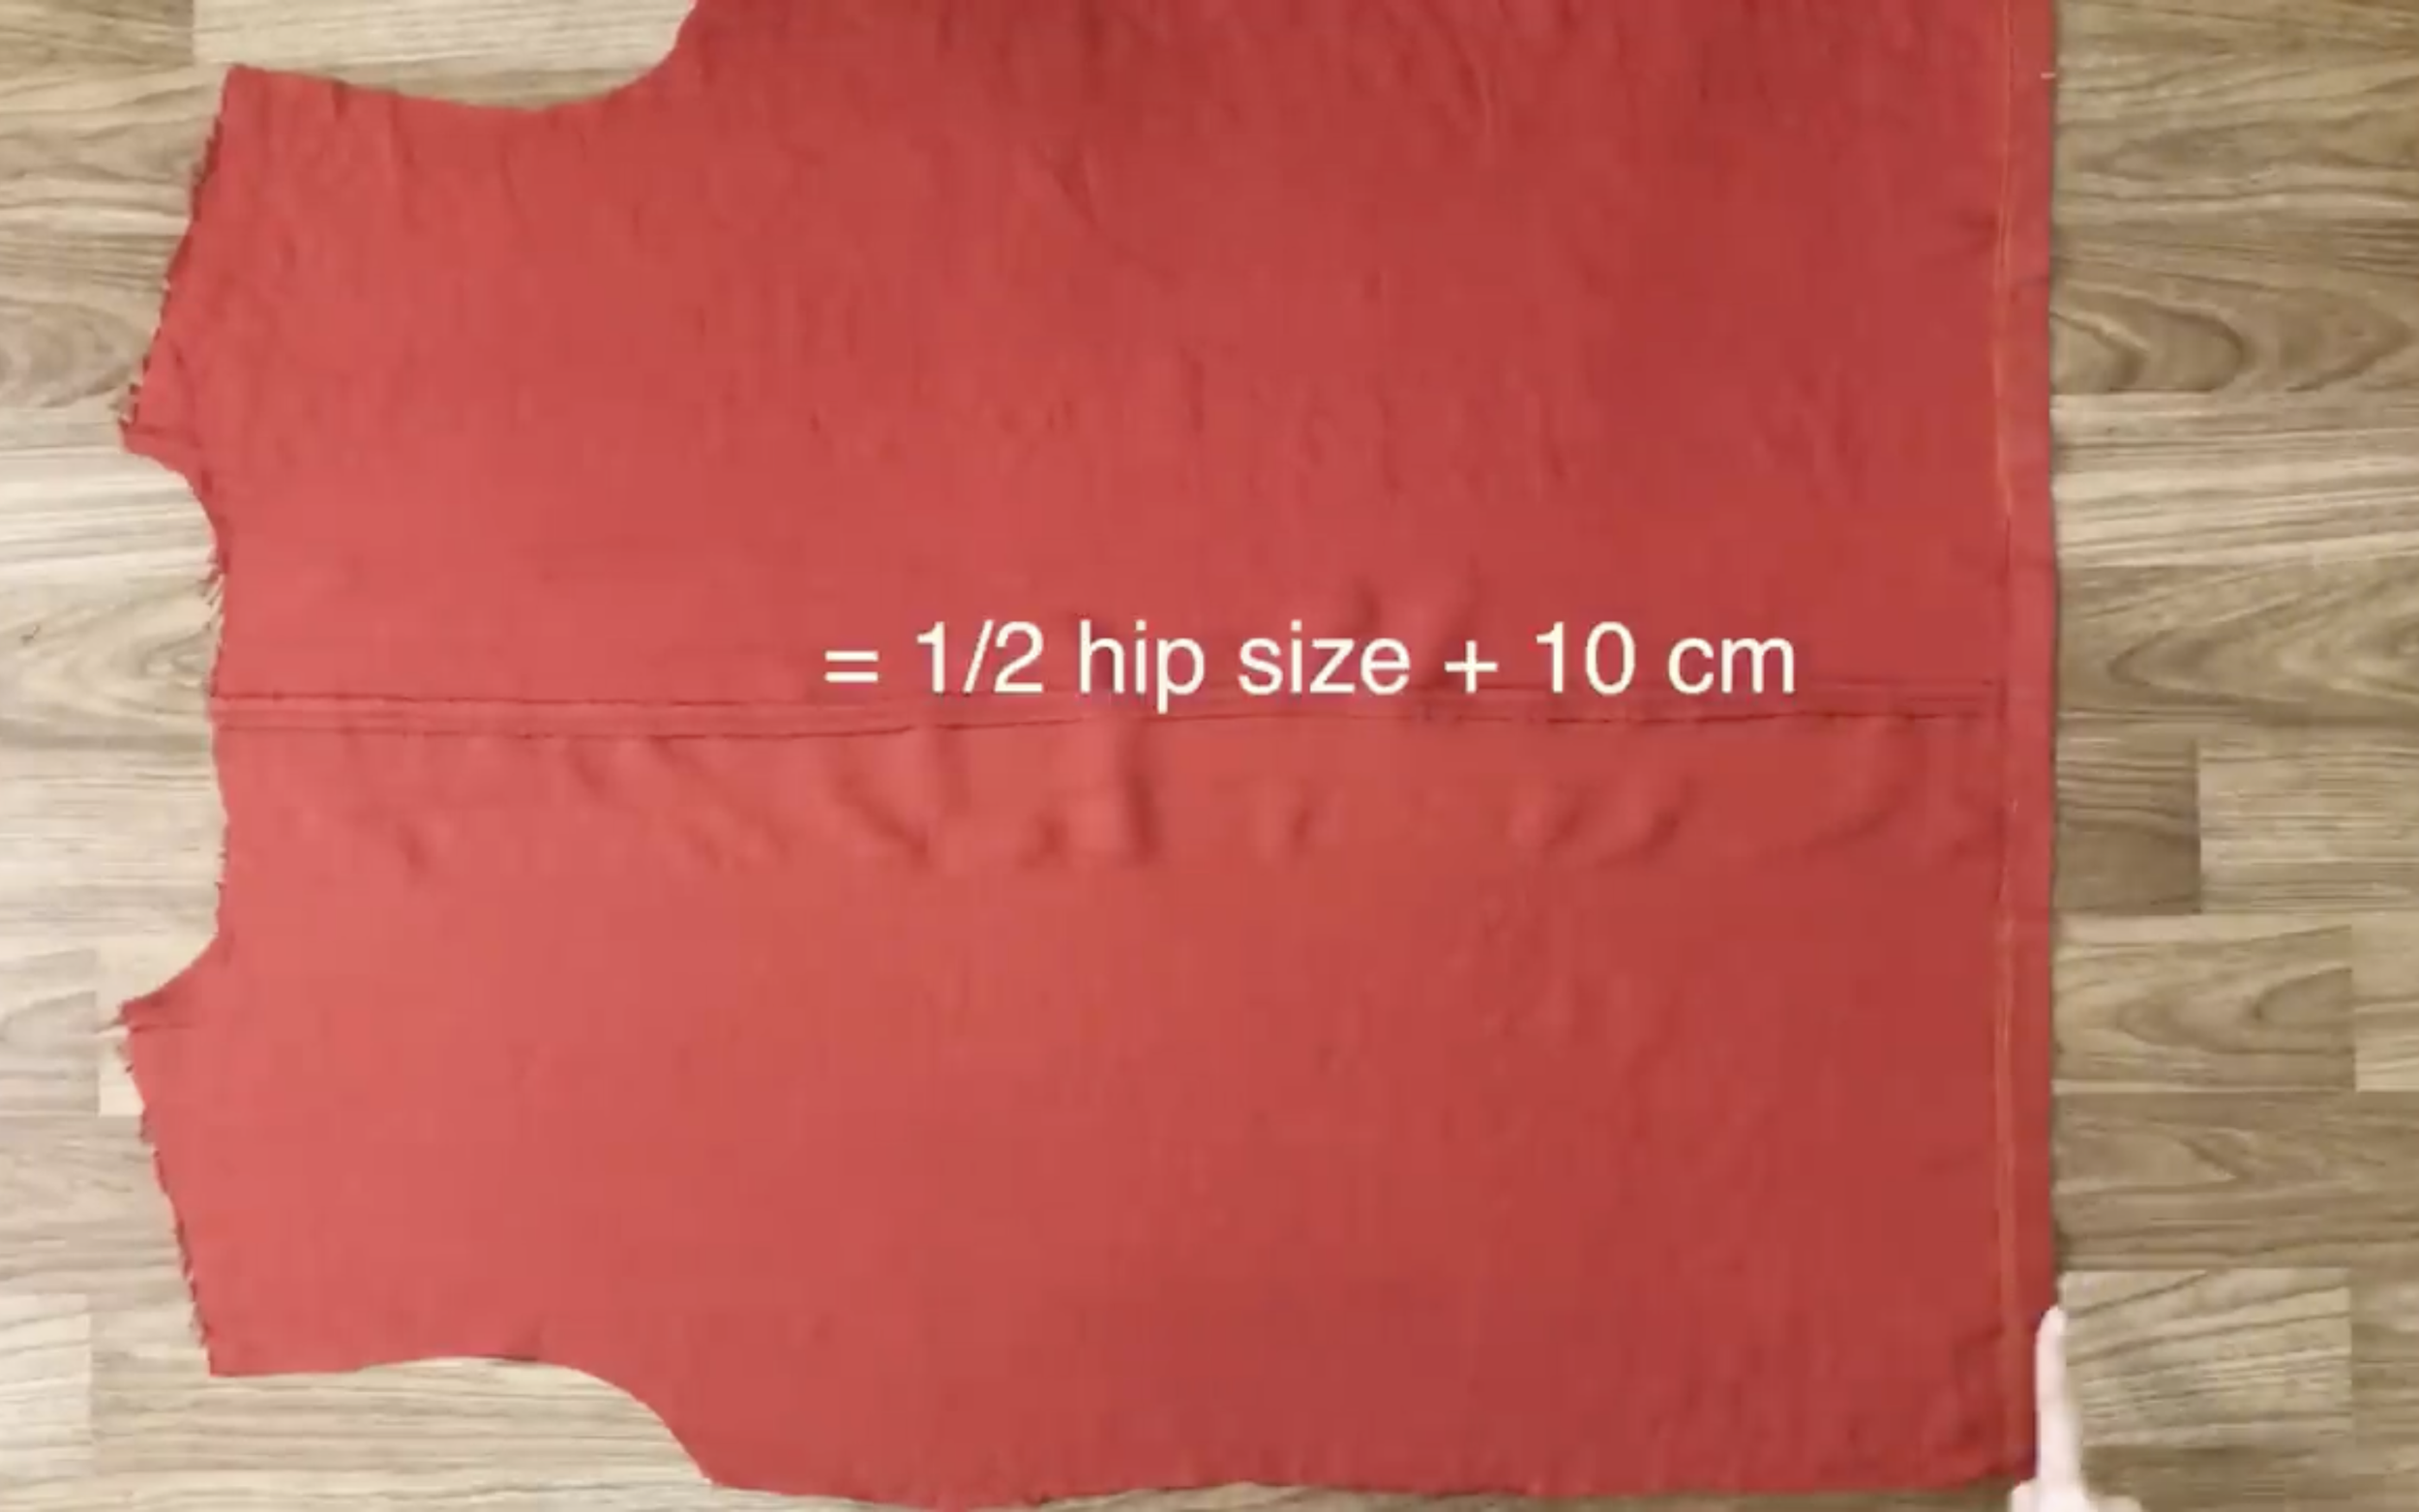
So, the width between the two ends will be half of the hip size + 10 cm. This is the same as the front pattern just made.
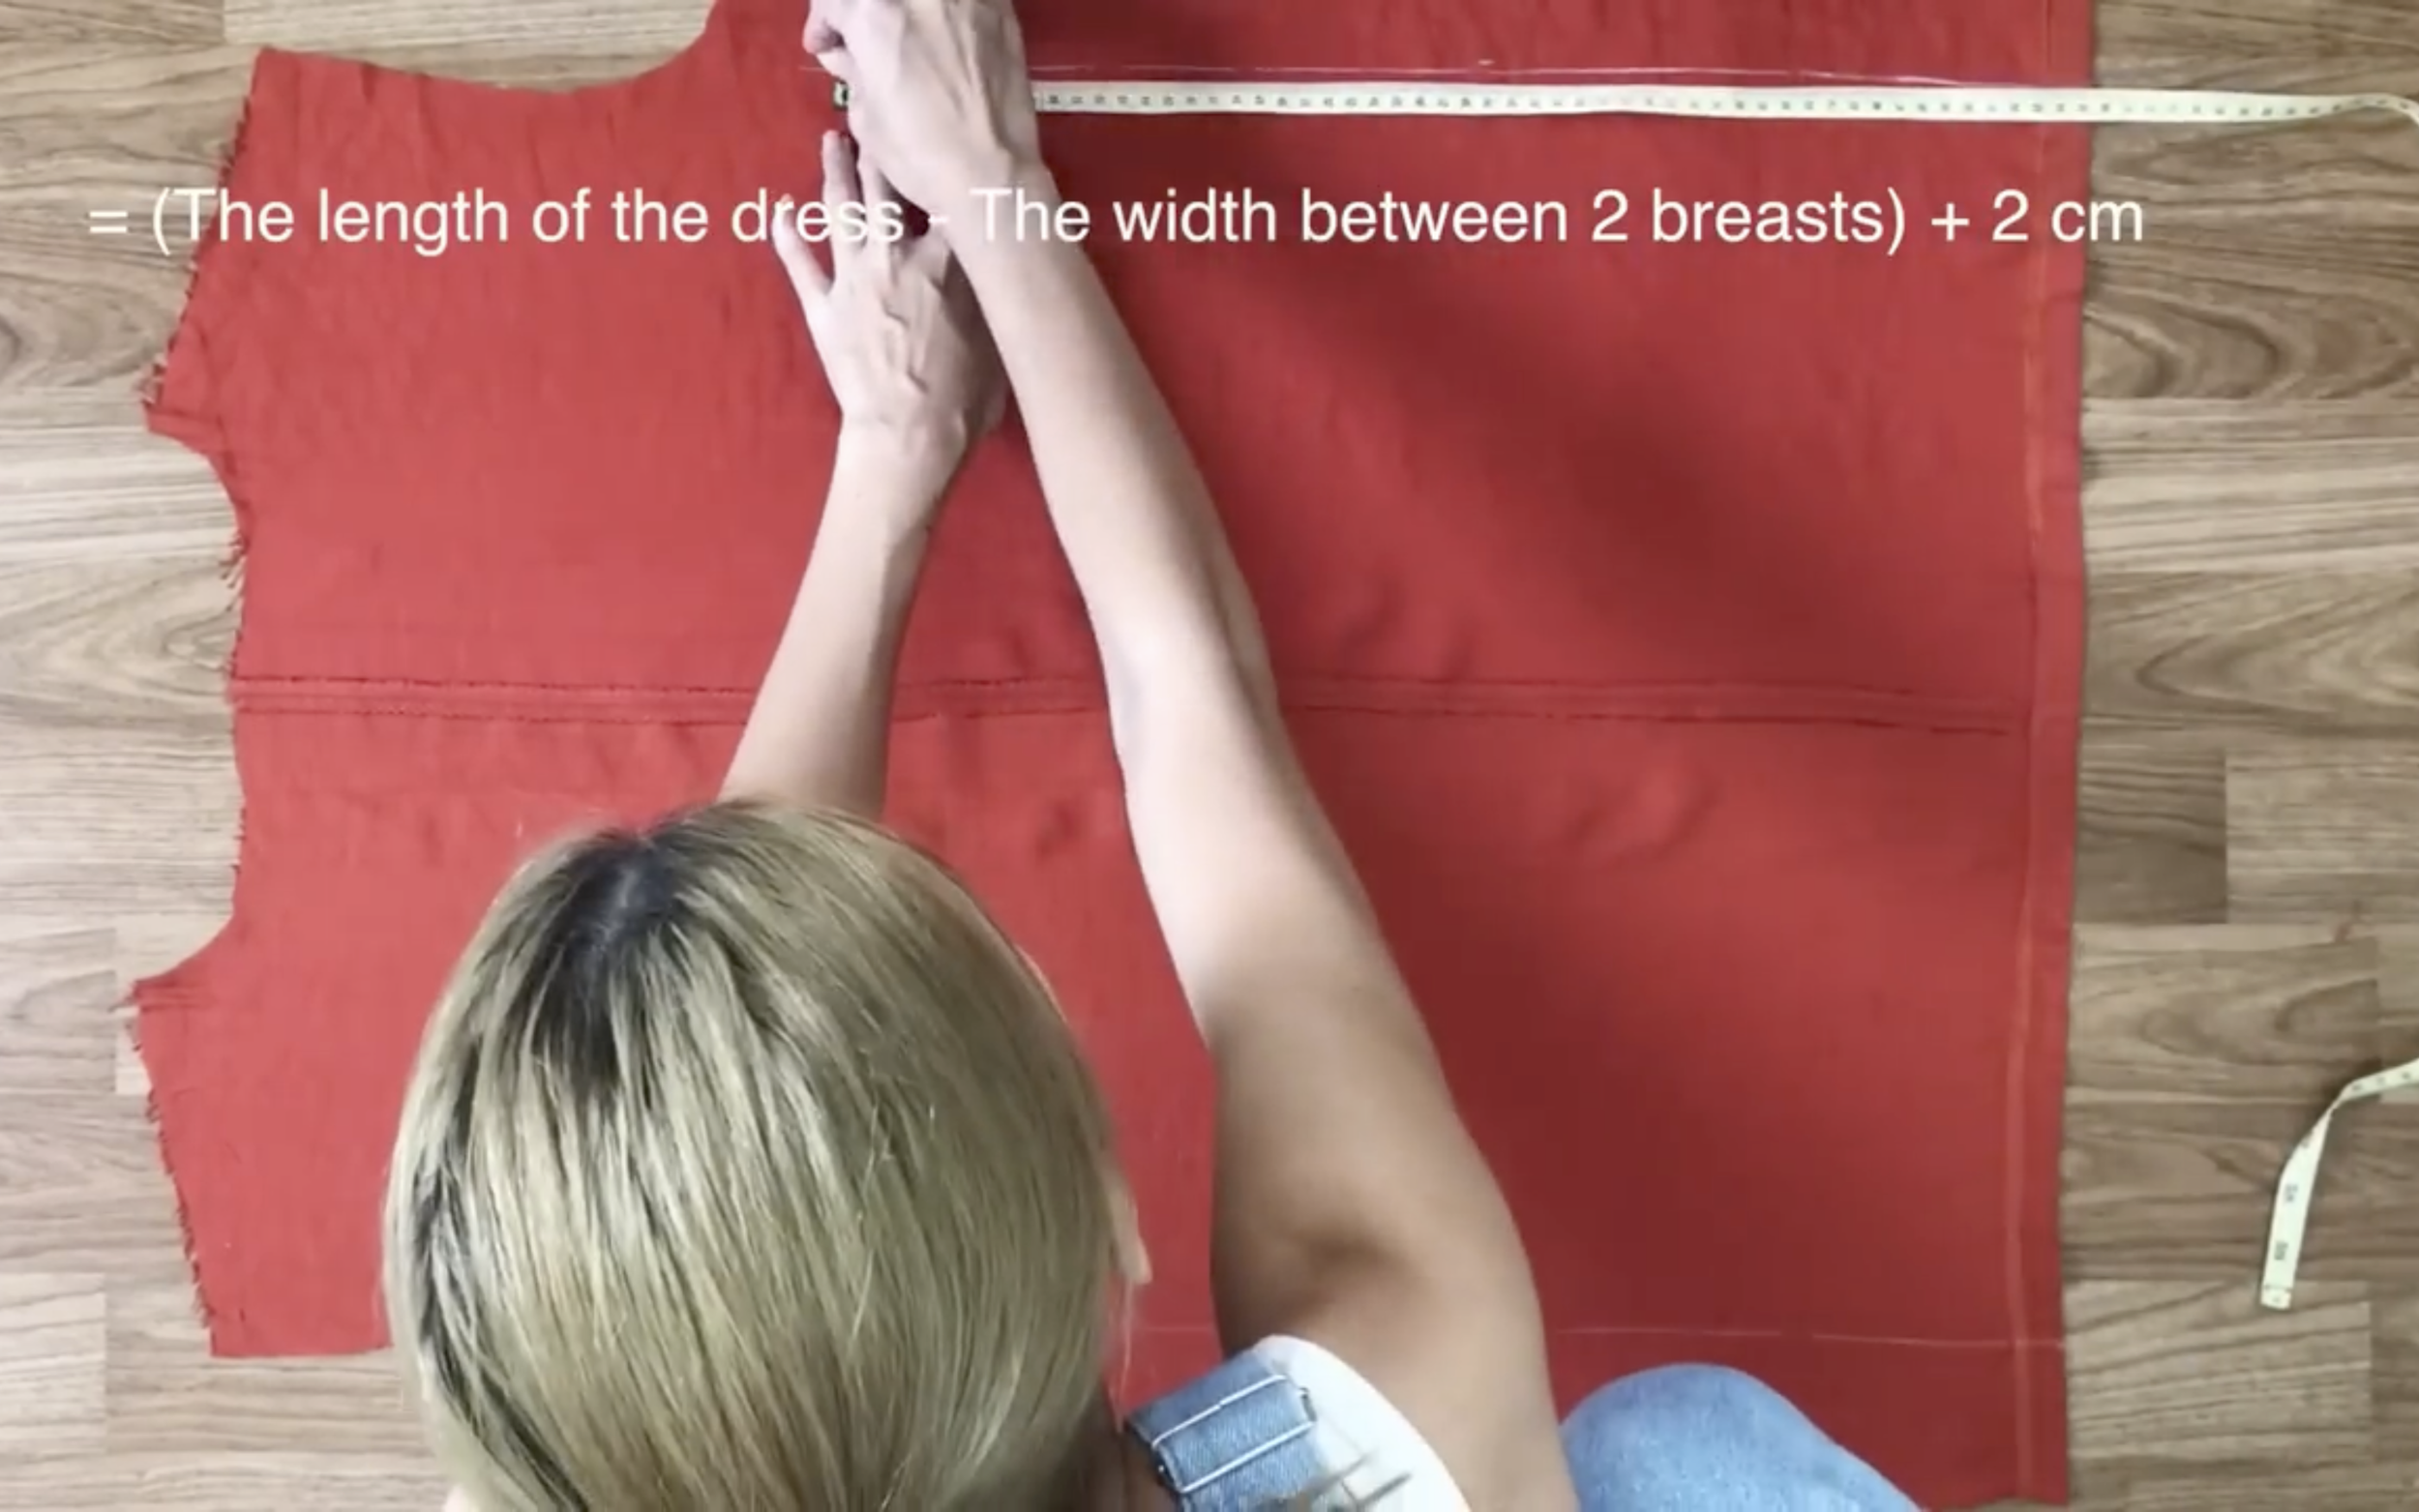
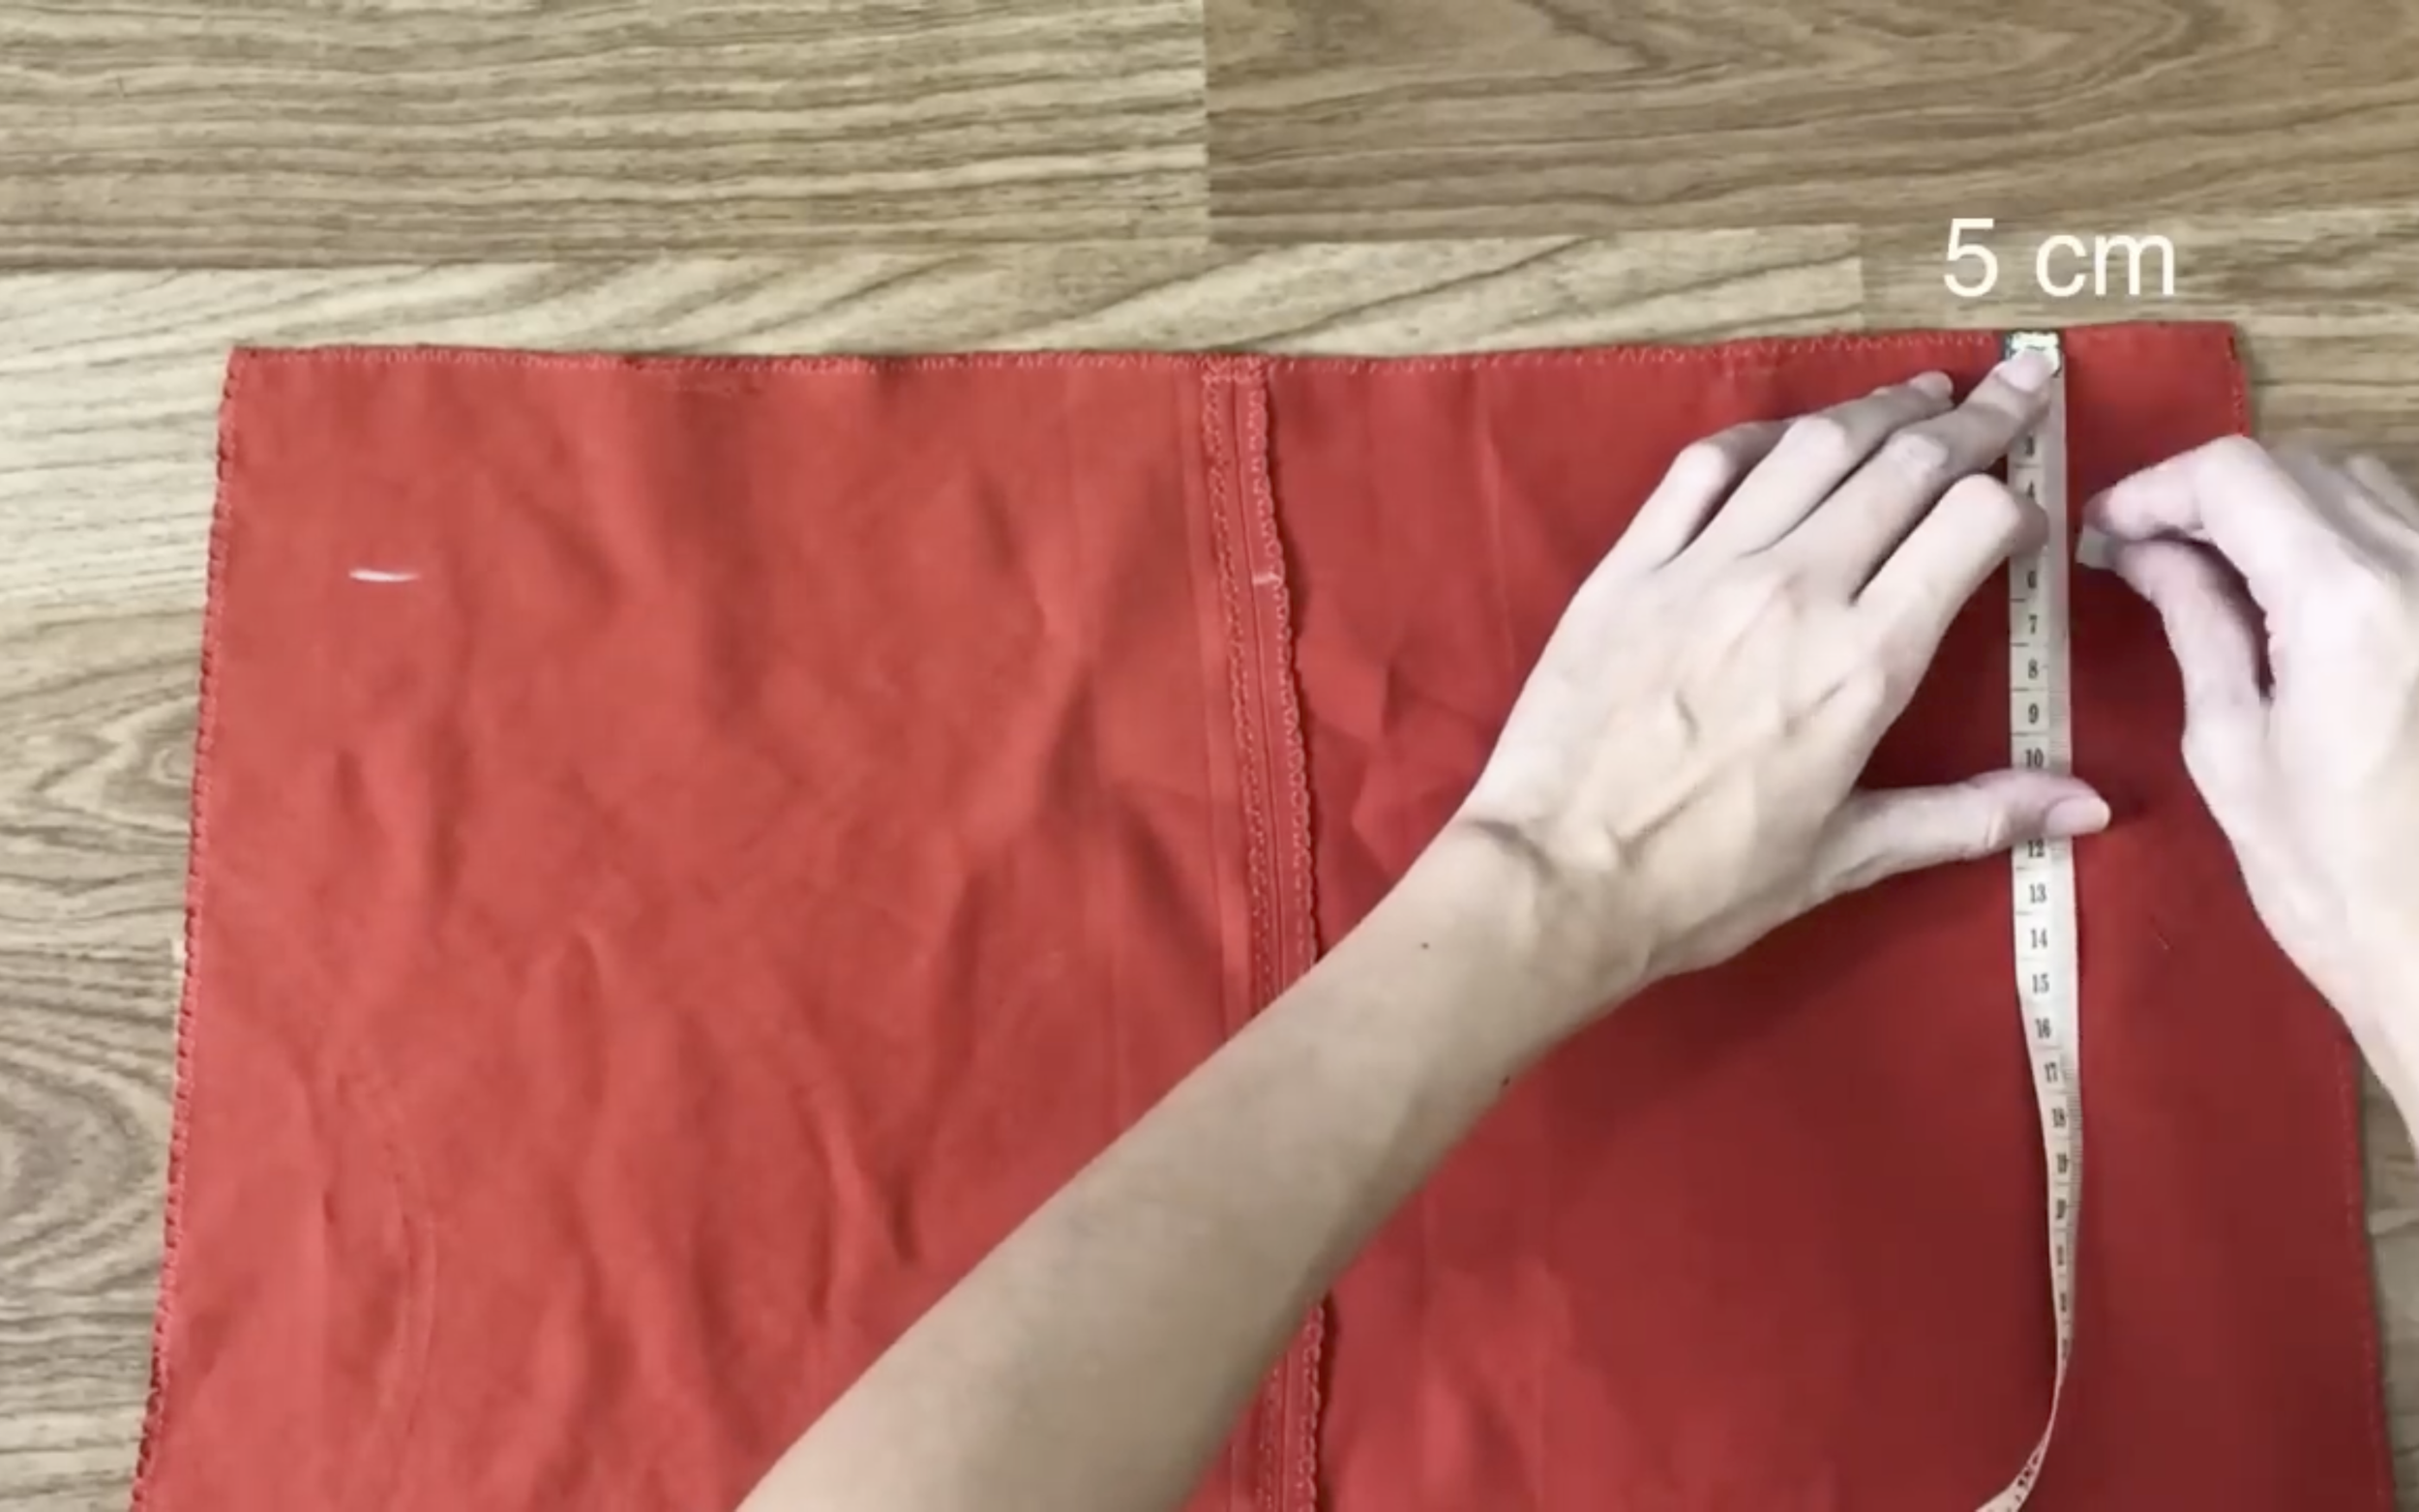
Measure a length of 55 cm from the top edge down to a marked point on the fabric. 55 cm is the length of the dress minus the width between two breasts plus 2 cm.
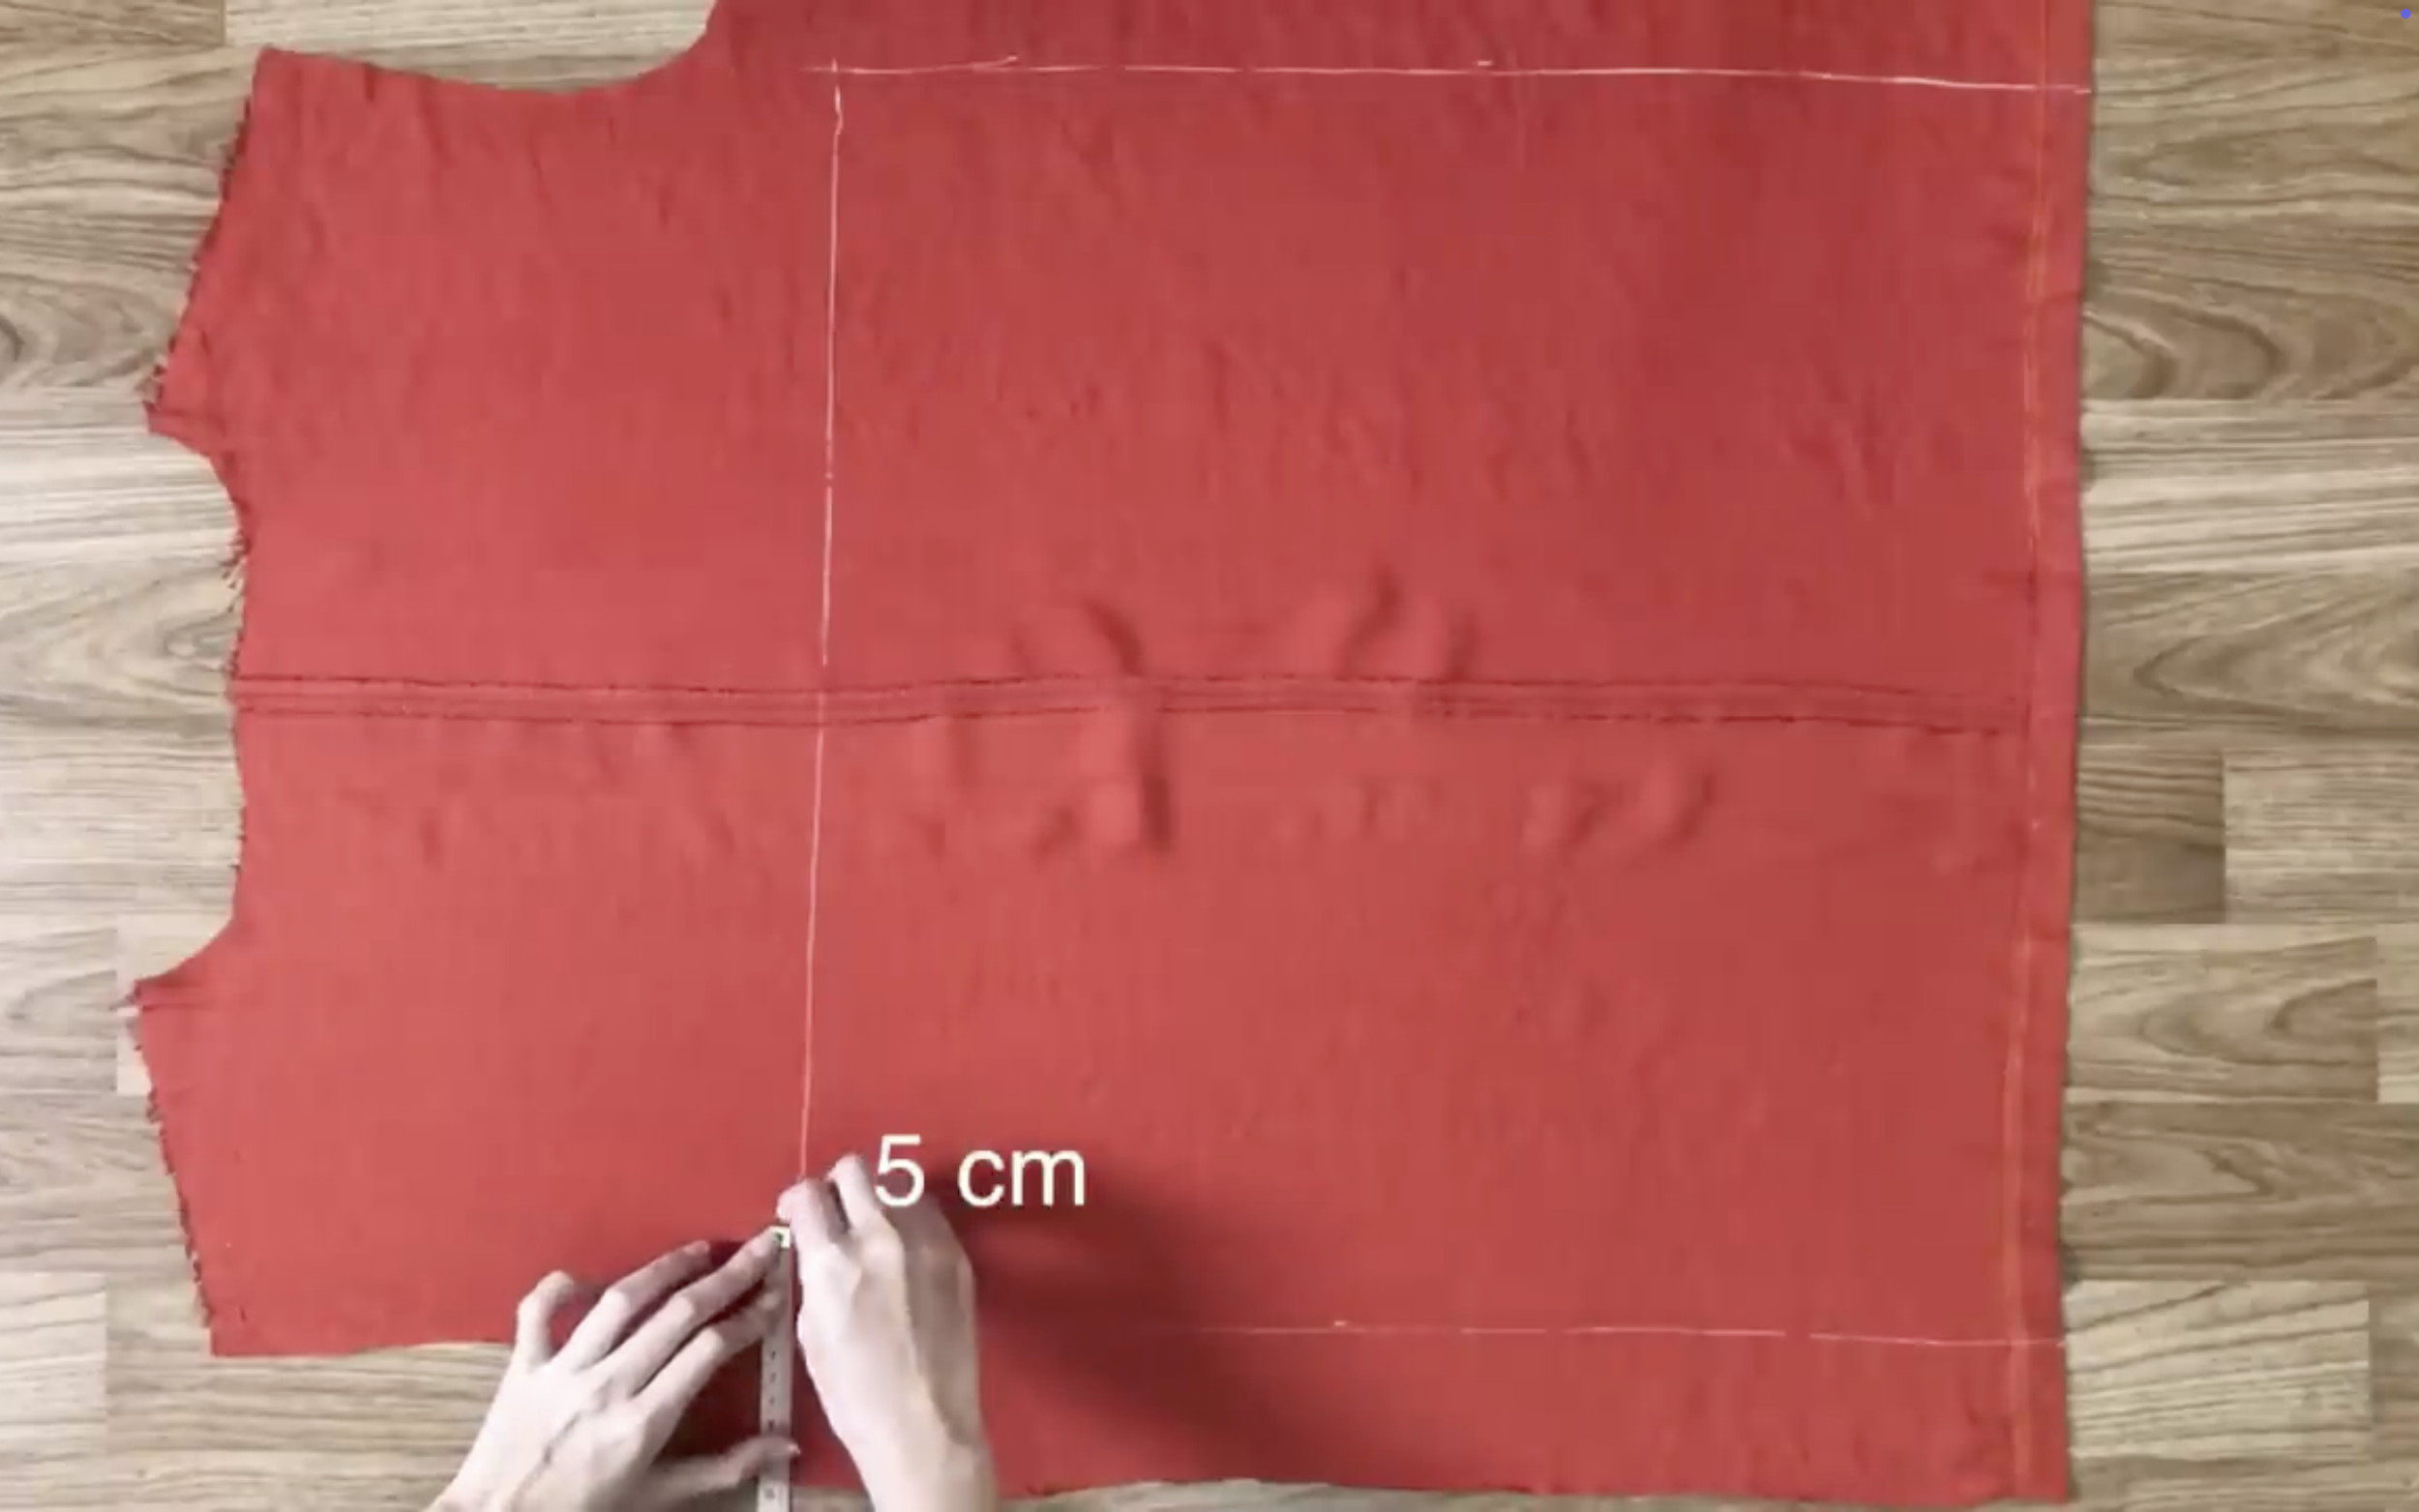
From the two sides of the top line, mark 5 cm inside.
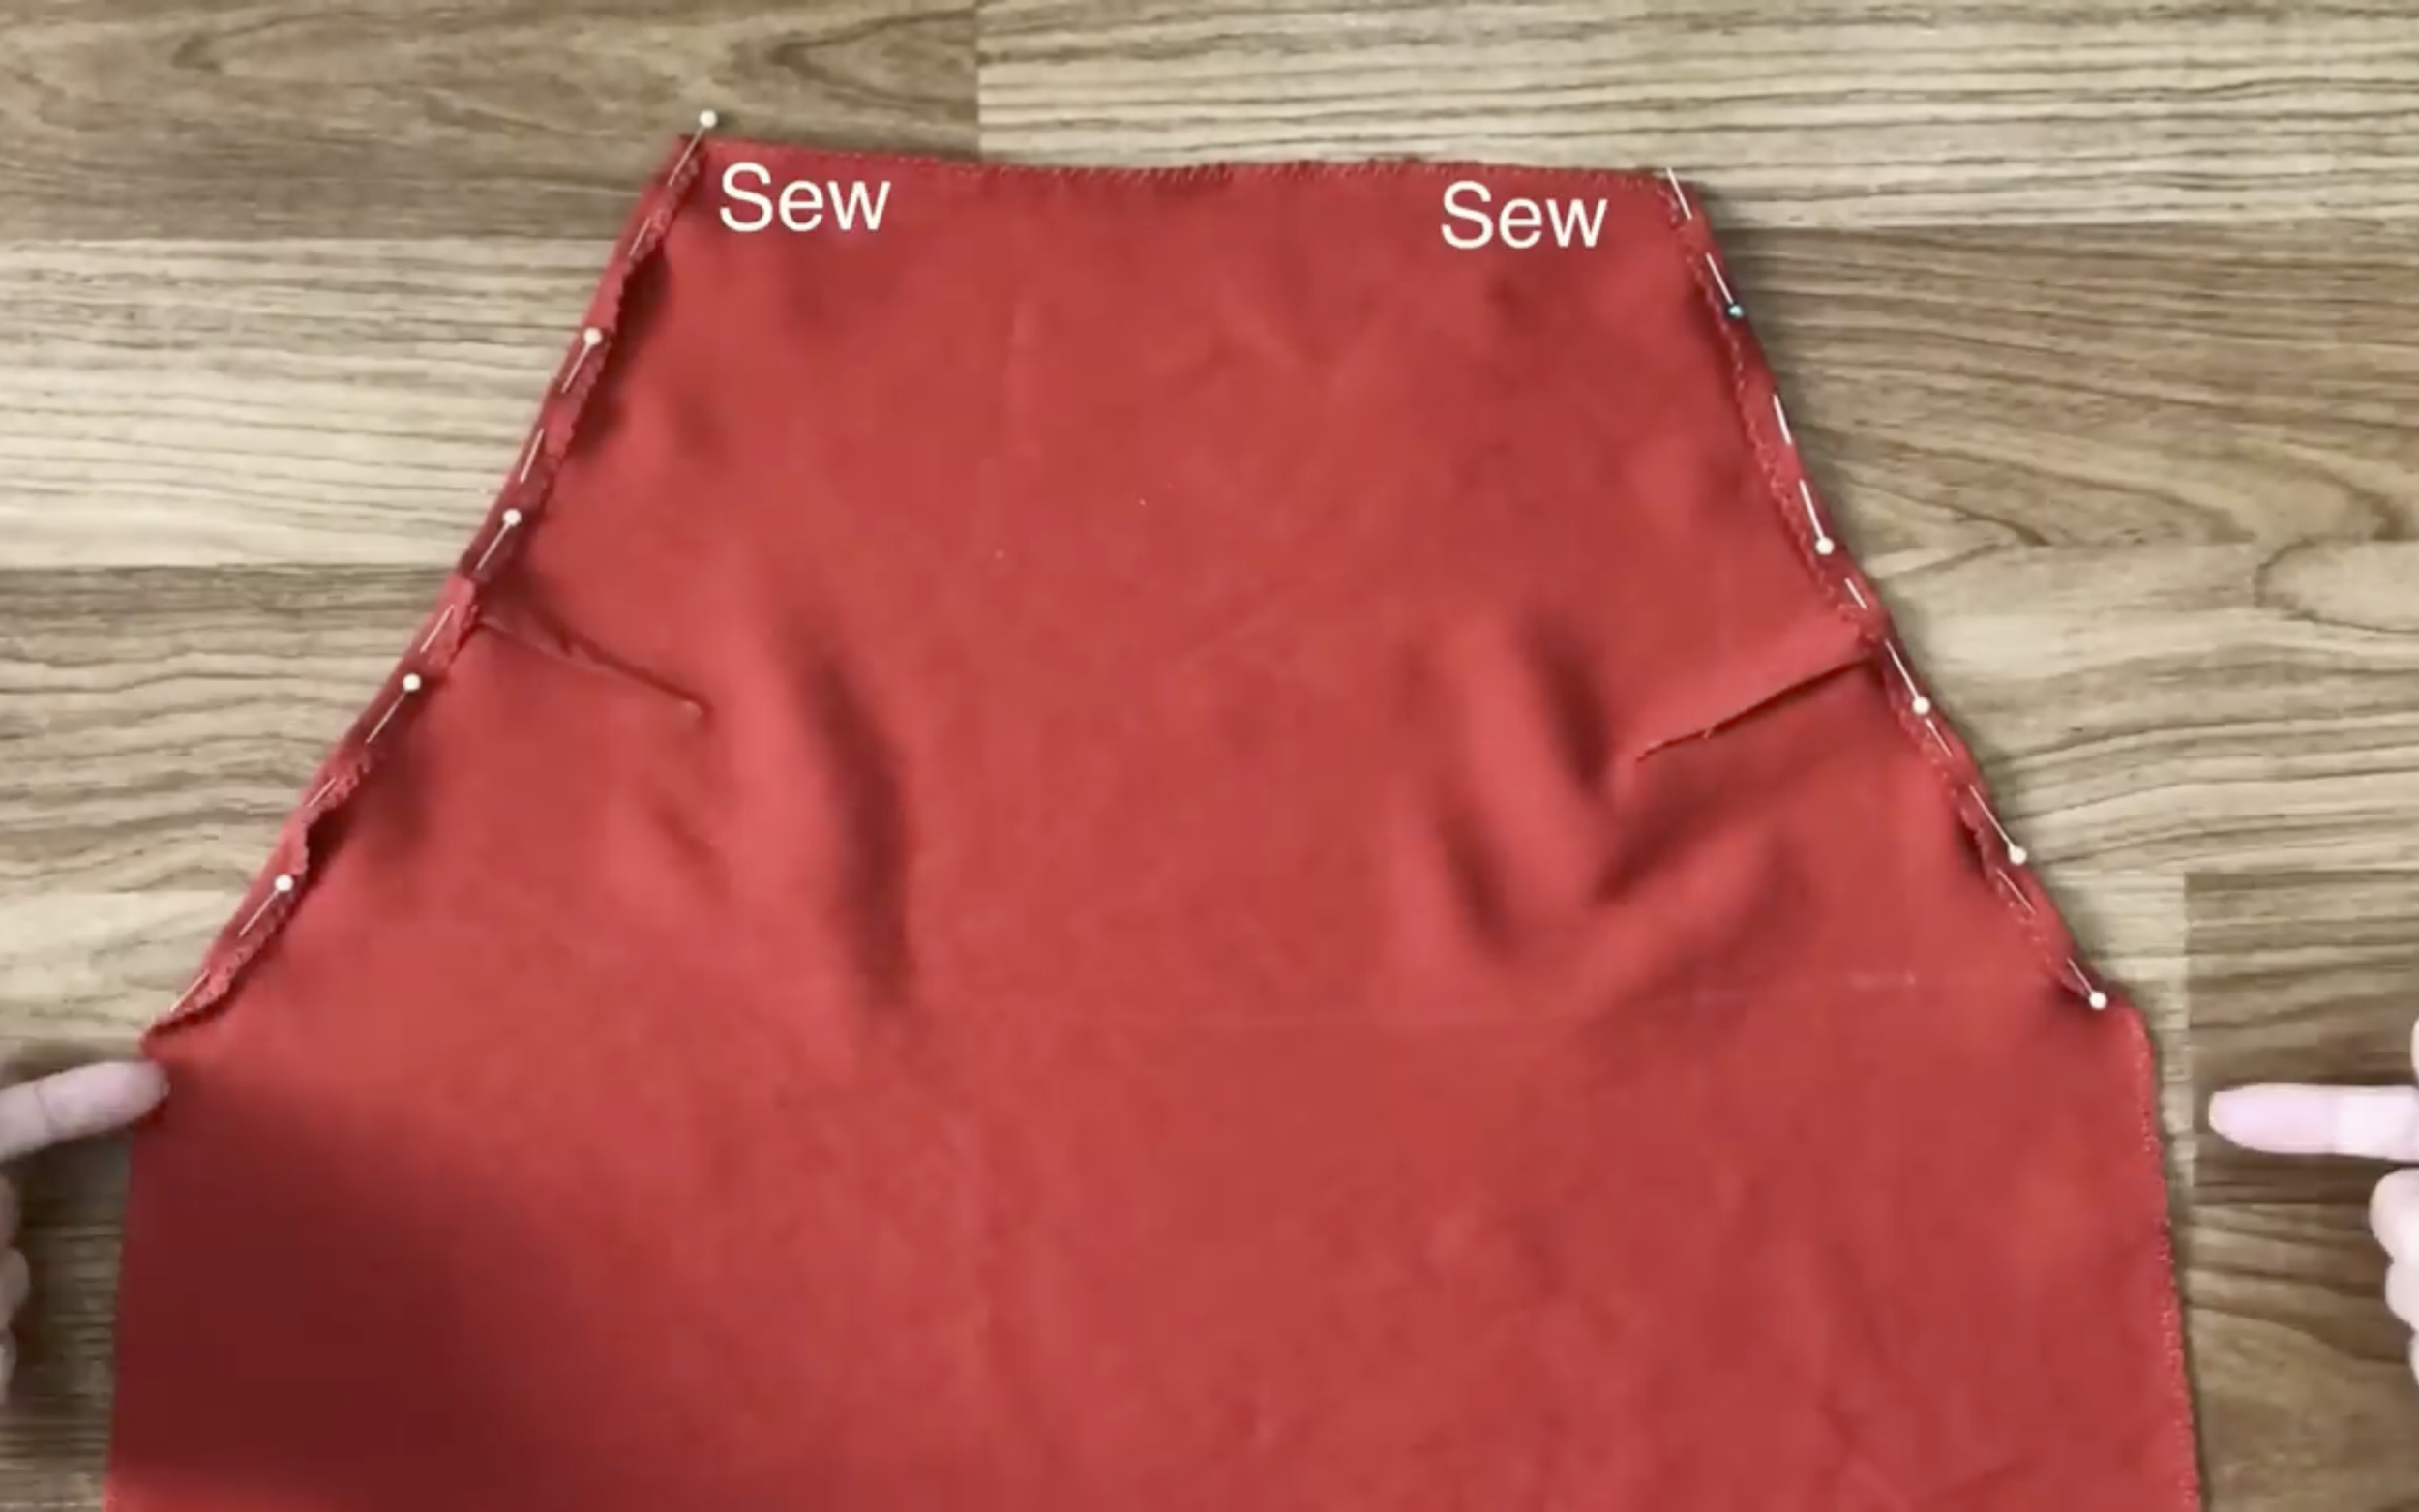
Then connect these marks to the end of the dress on both sides. This forms the pattern of the back of the new dress.
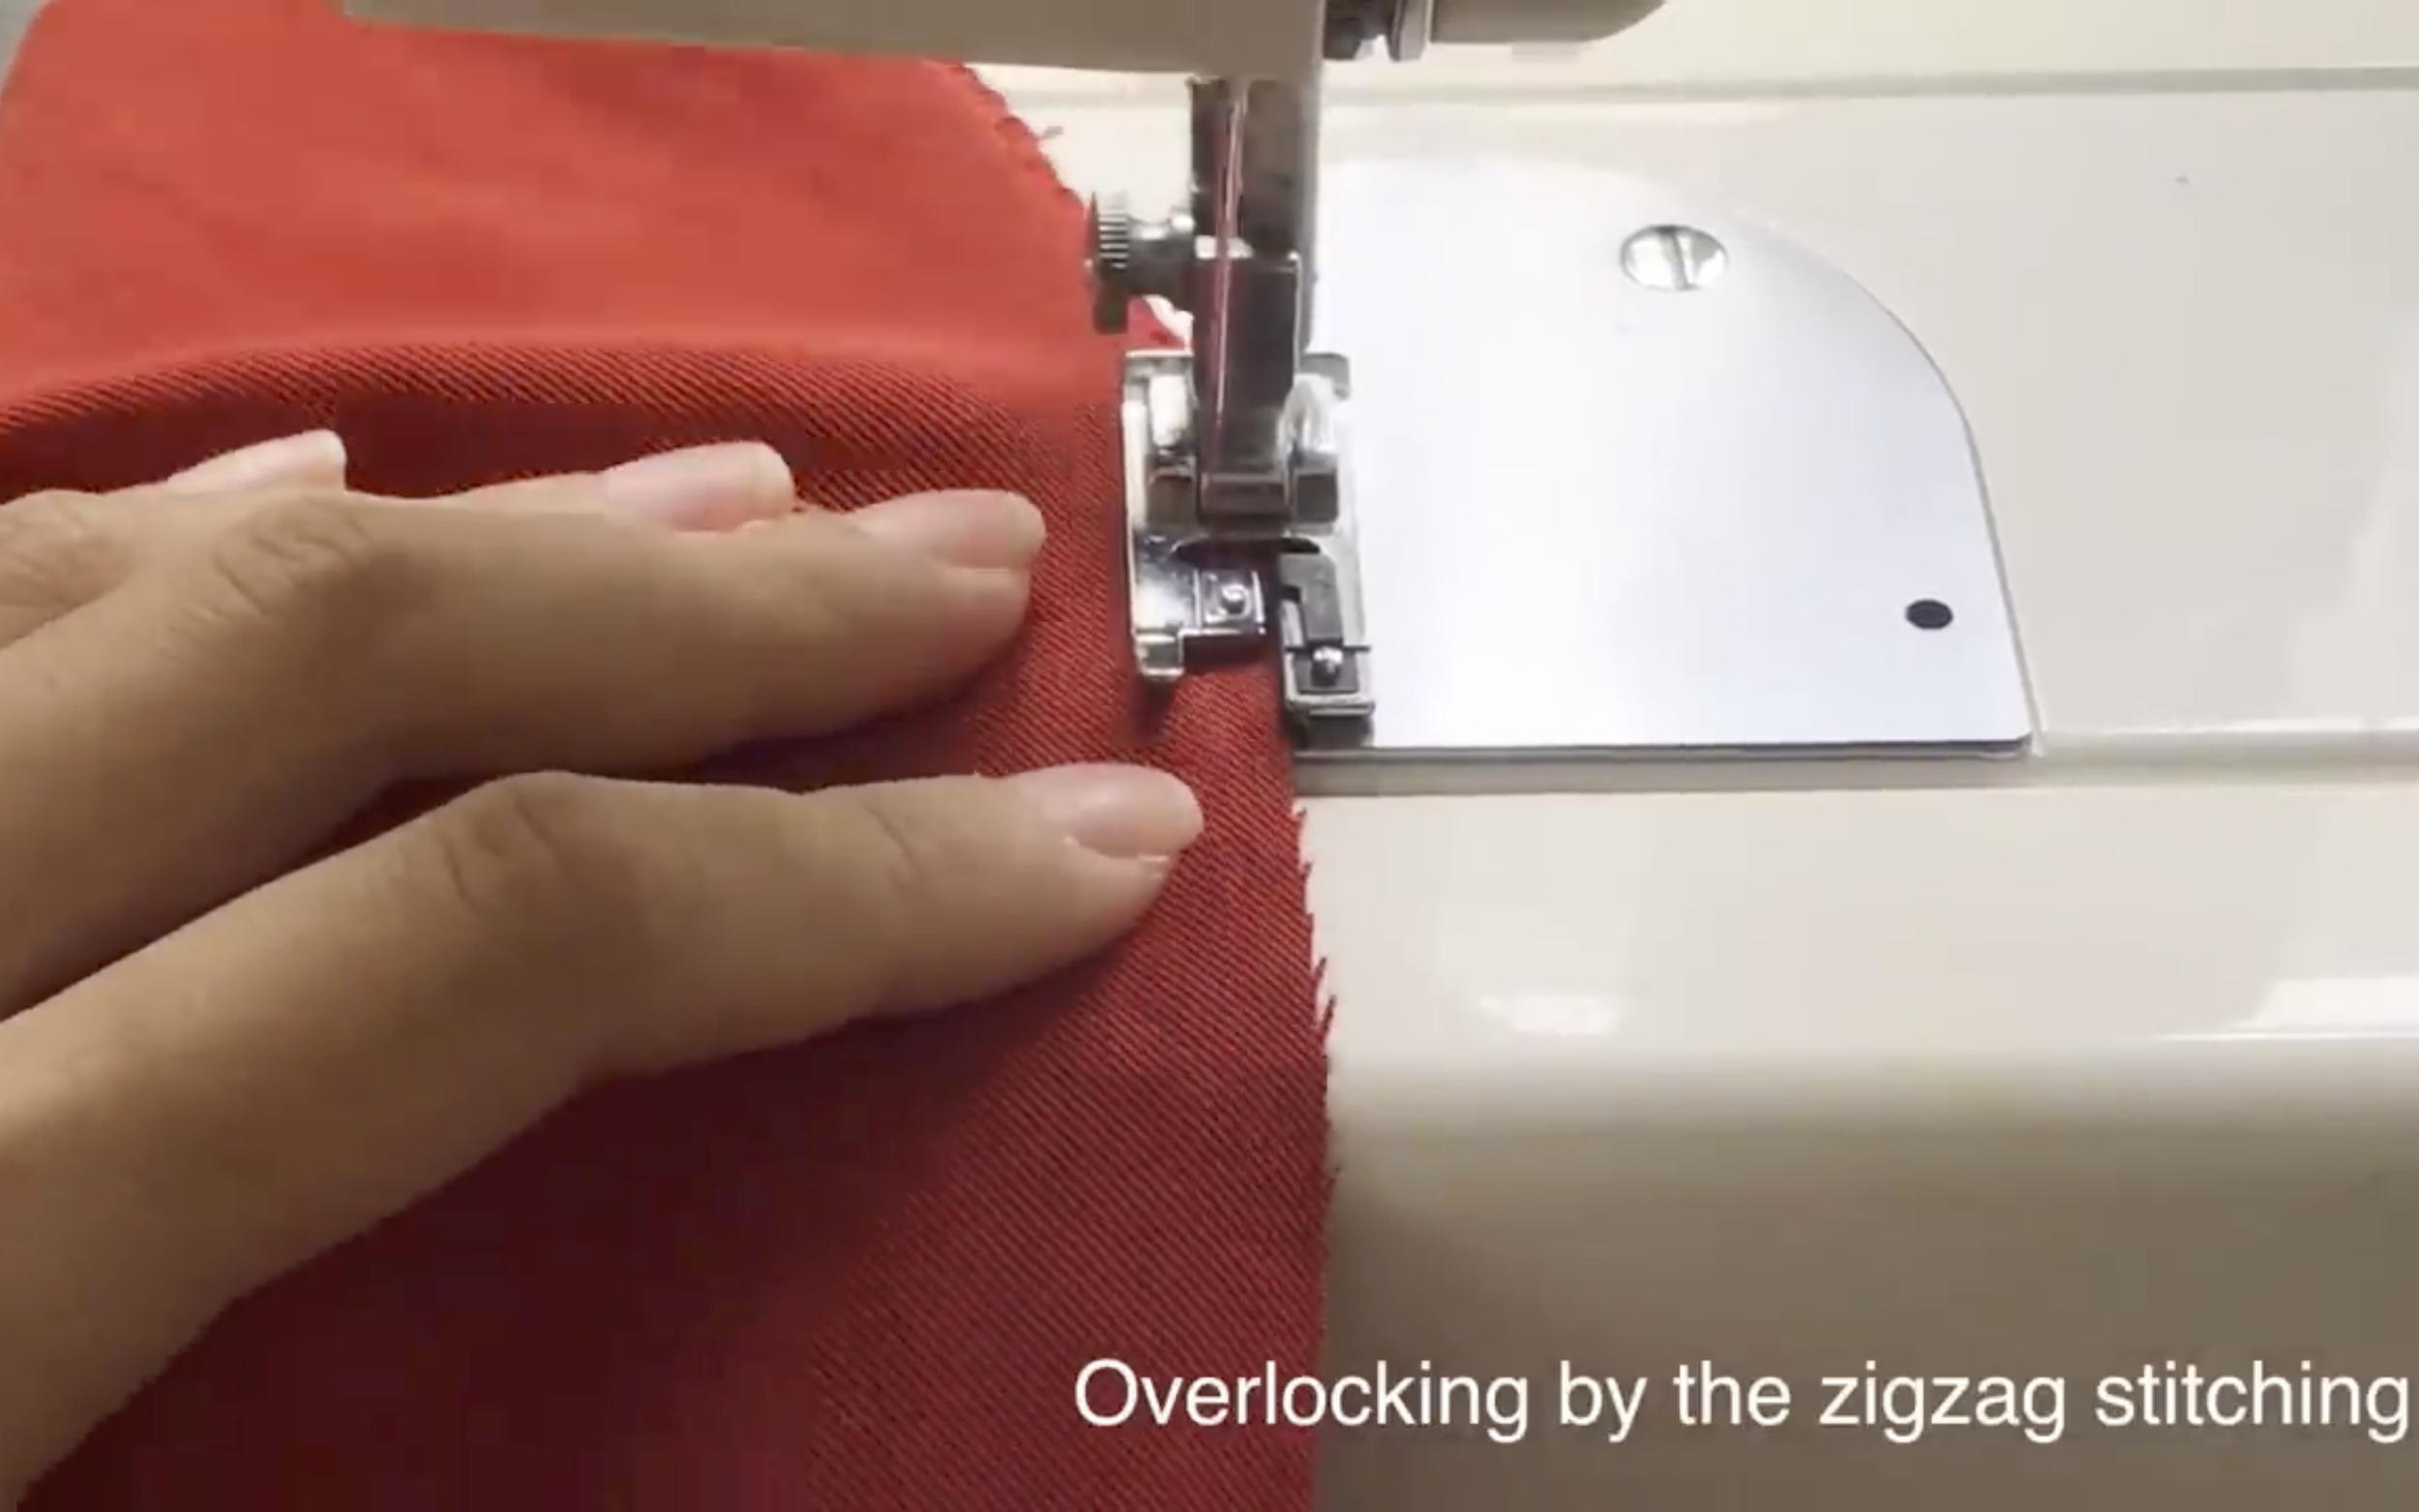
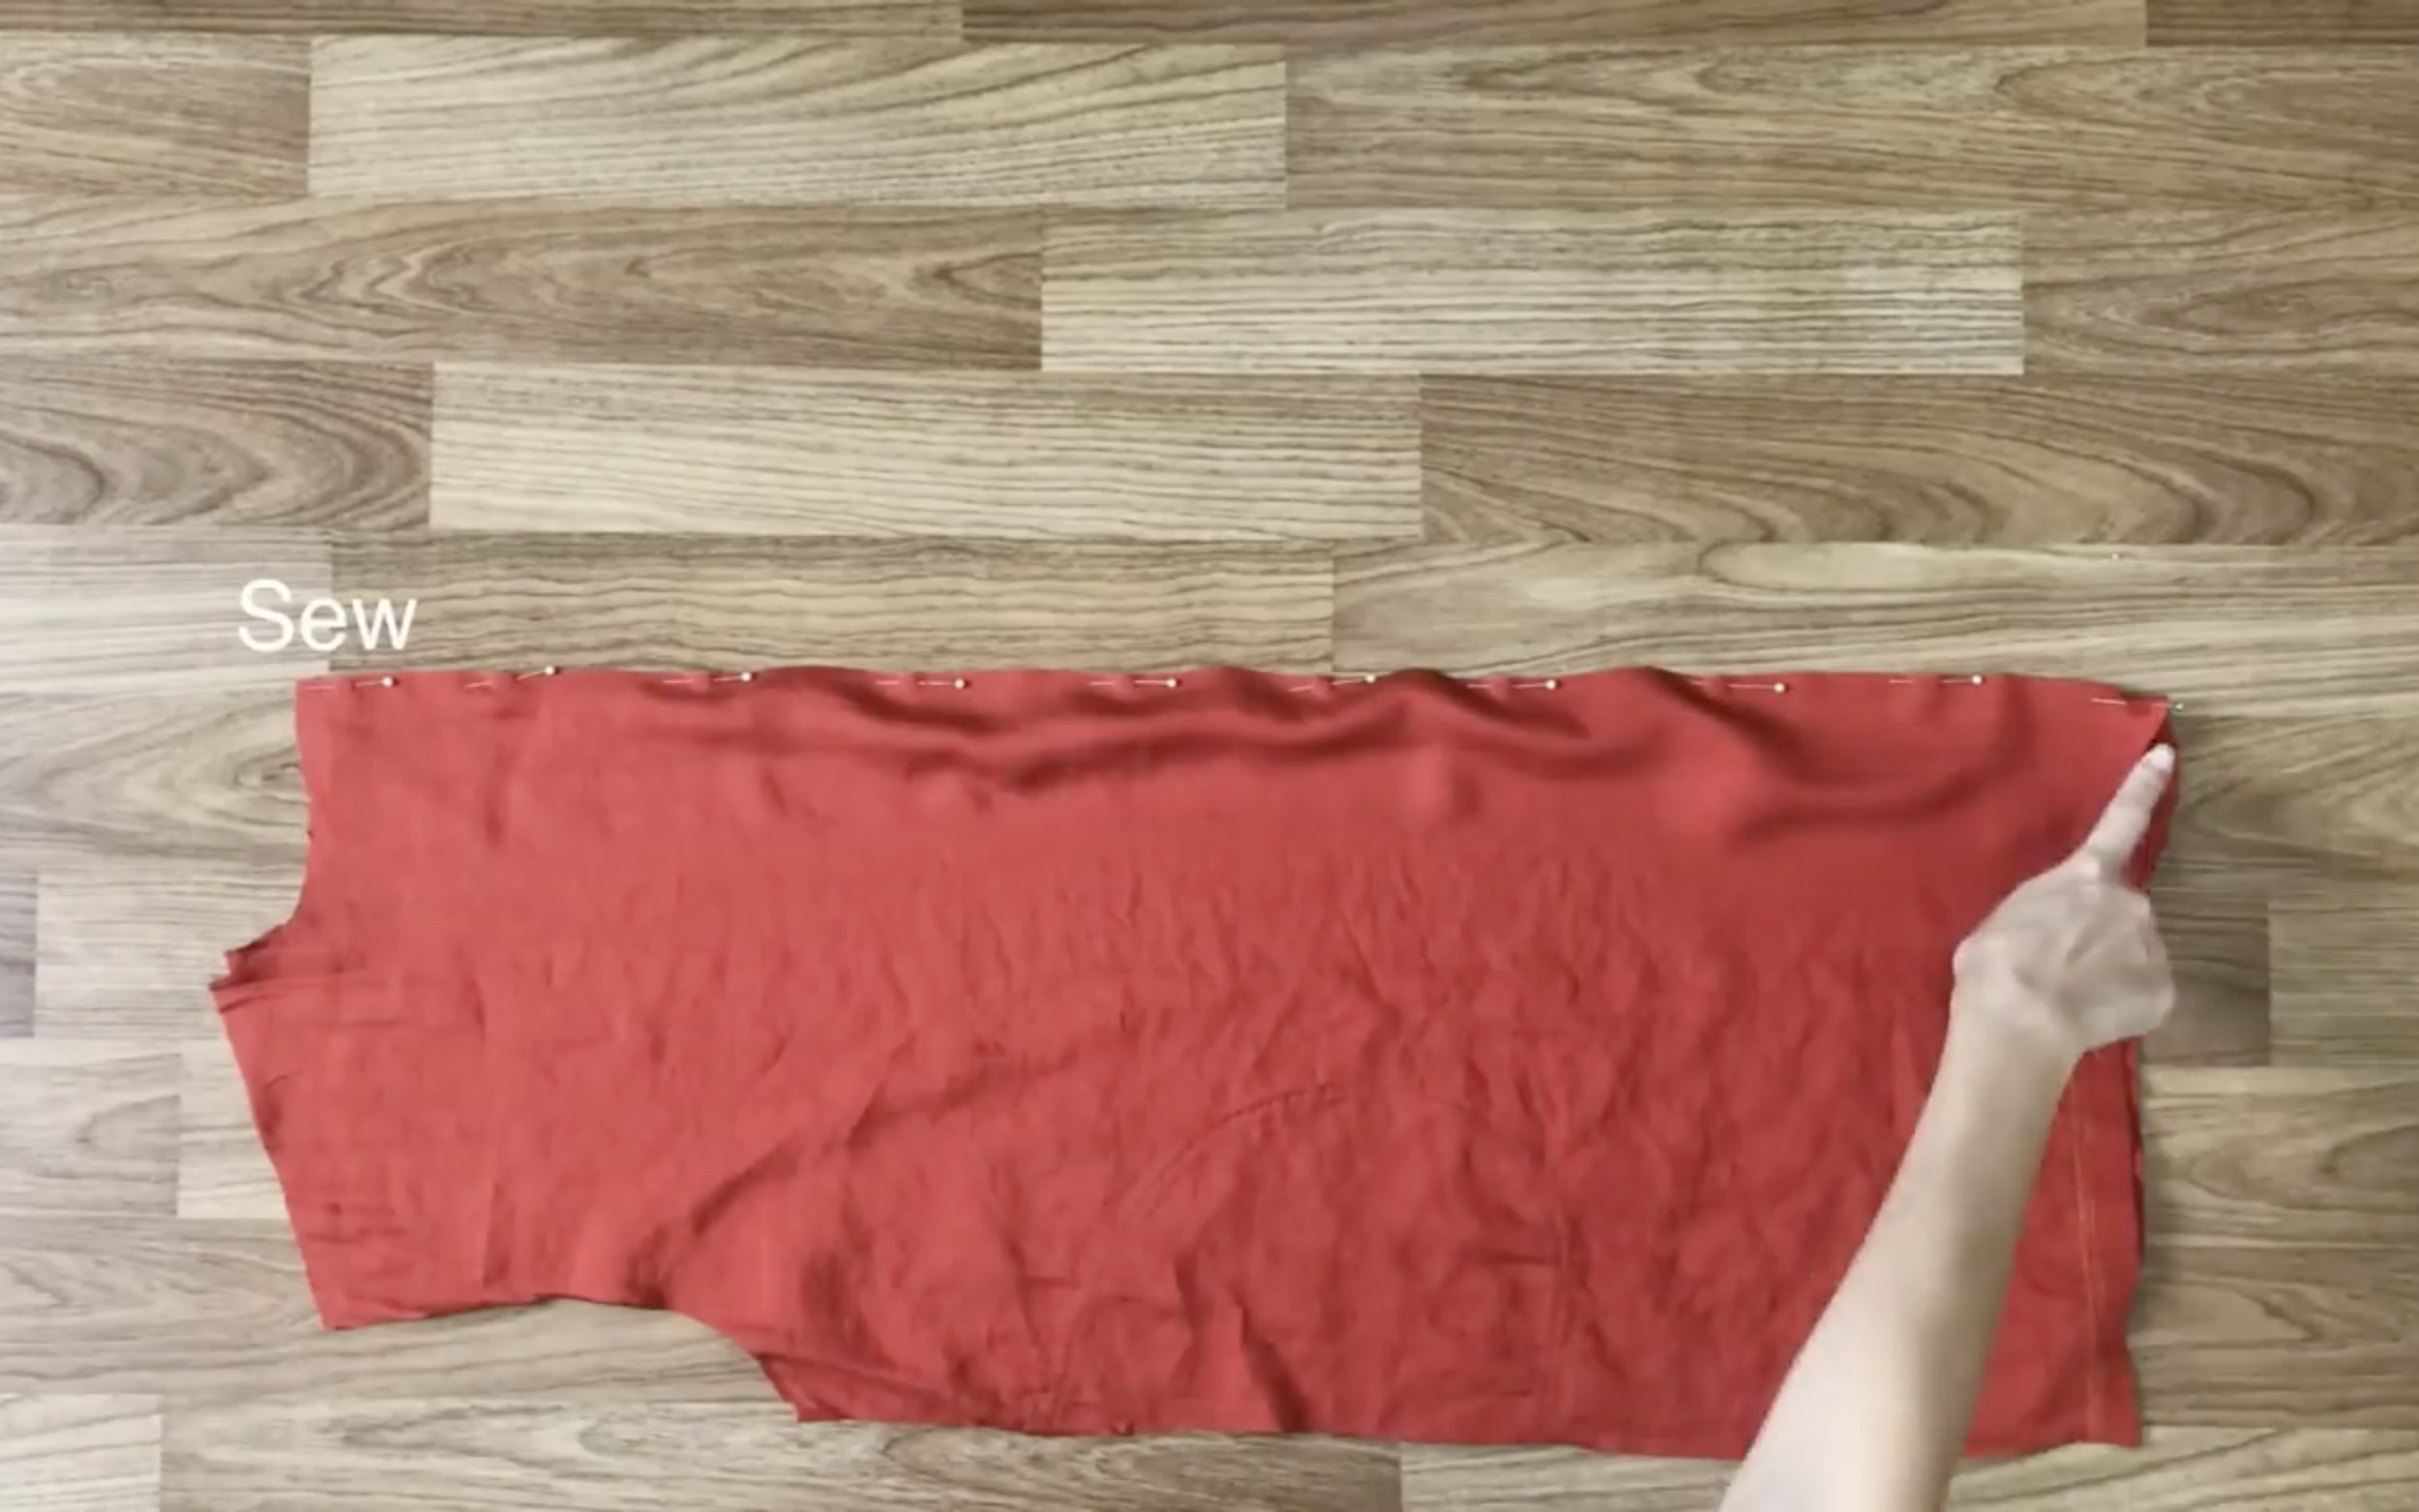
After cutting, overlock the patterns using the zigzag stitch on a sewing machine.
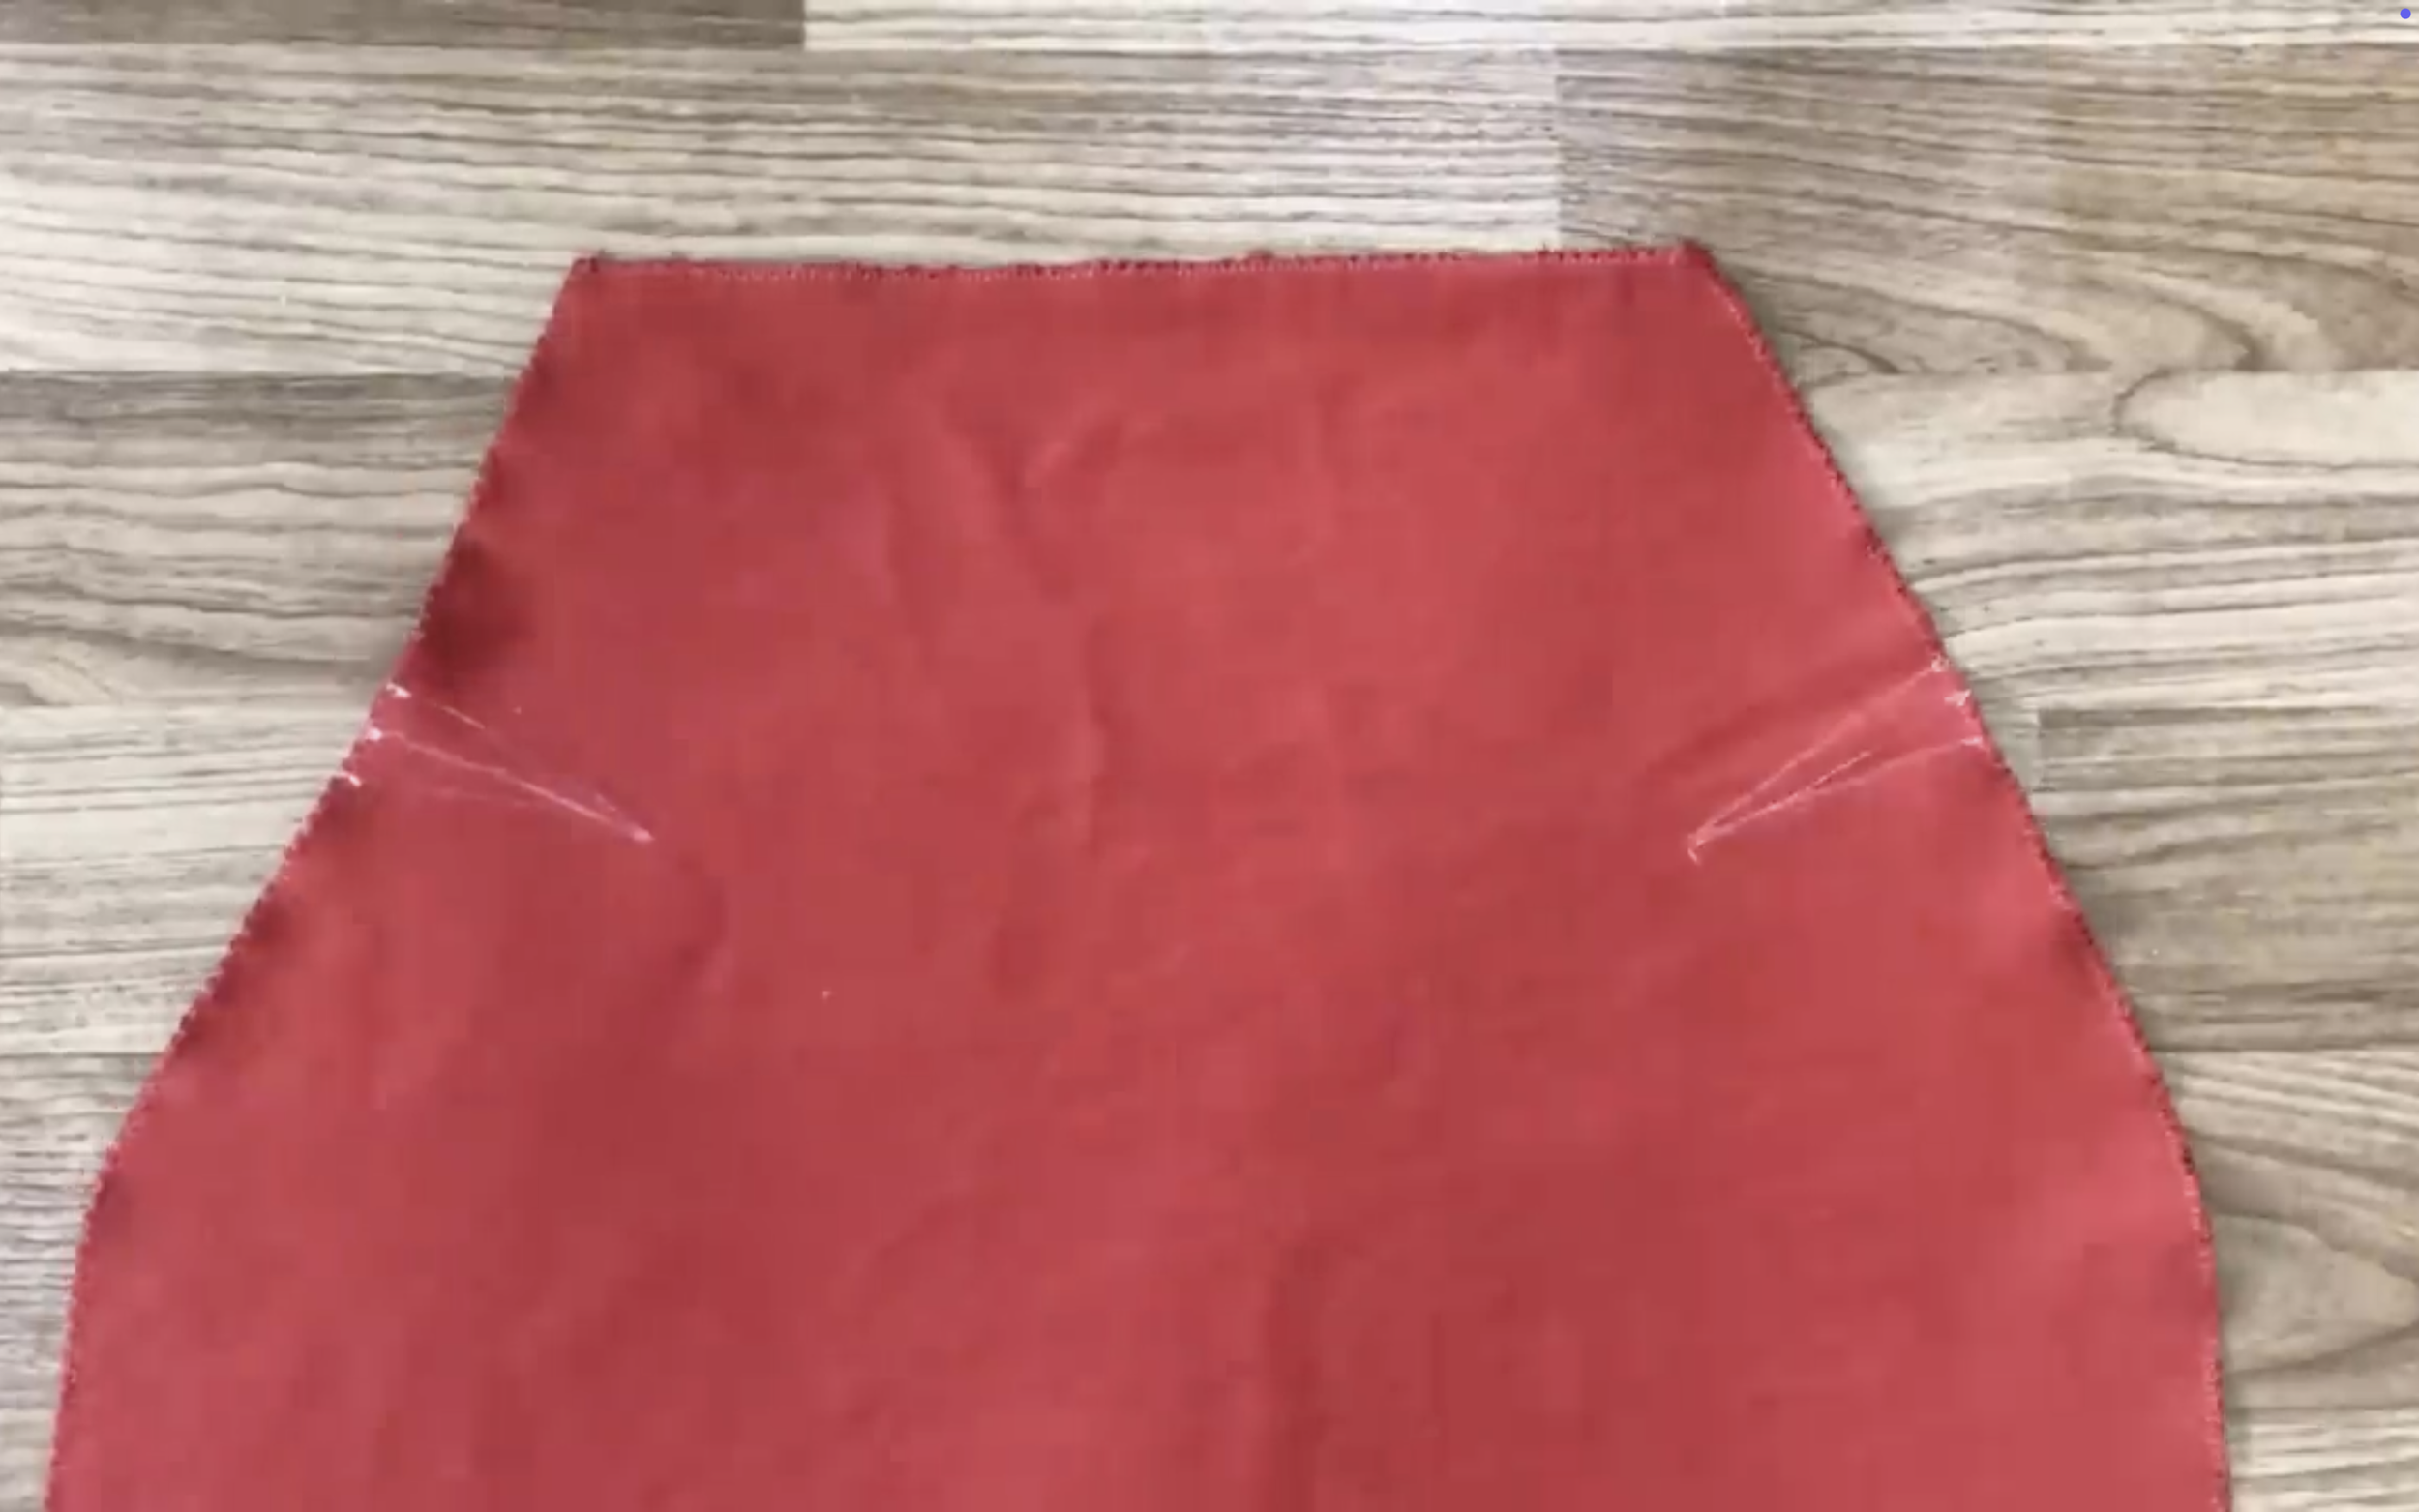
At two sides of the front dress, create space for the breast by drawing two triangles facing each other with 1 cm height and 7 cm length.
If a larger breast size is needed, increase the height and length of the triangles.
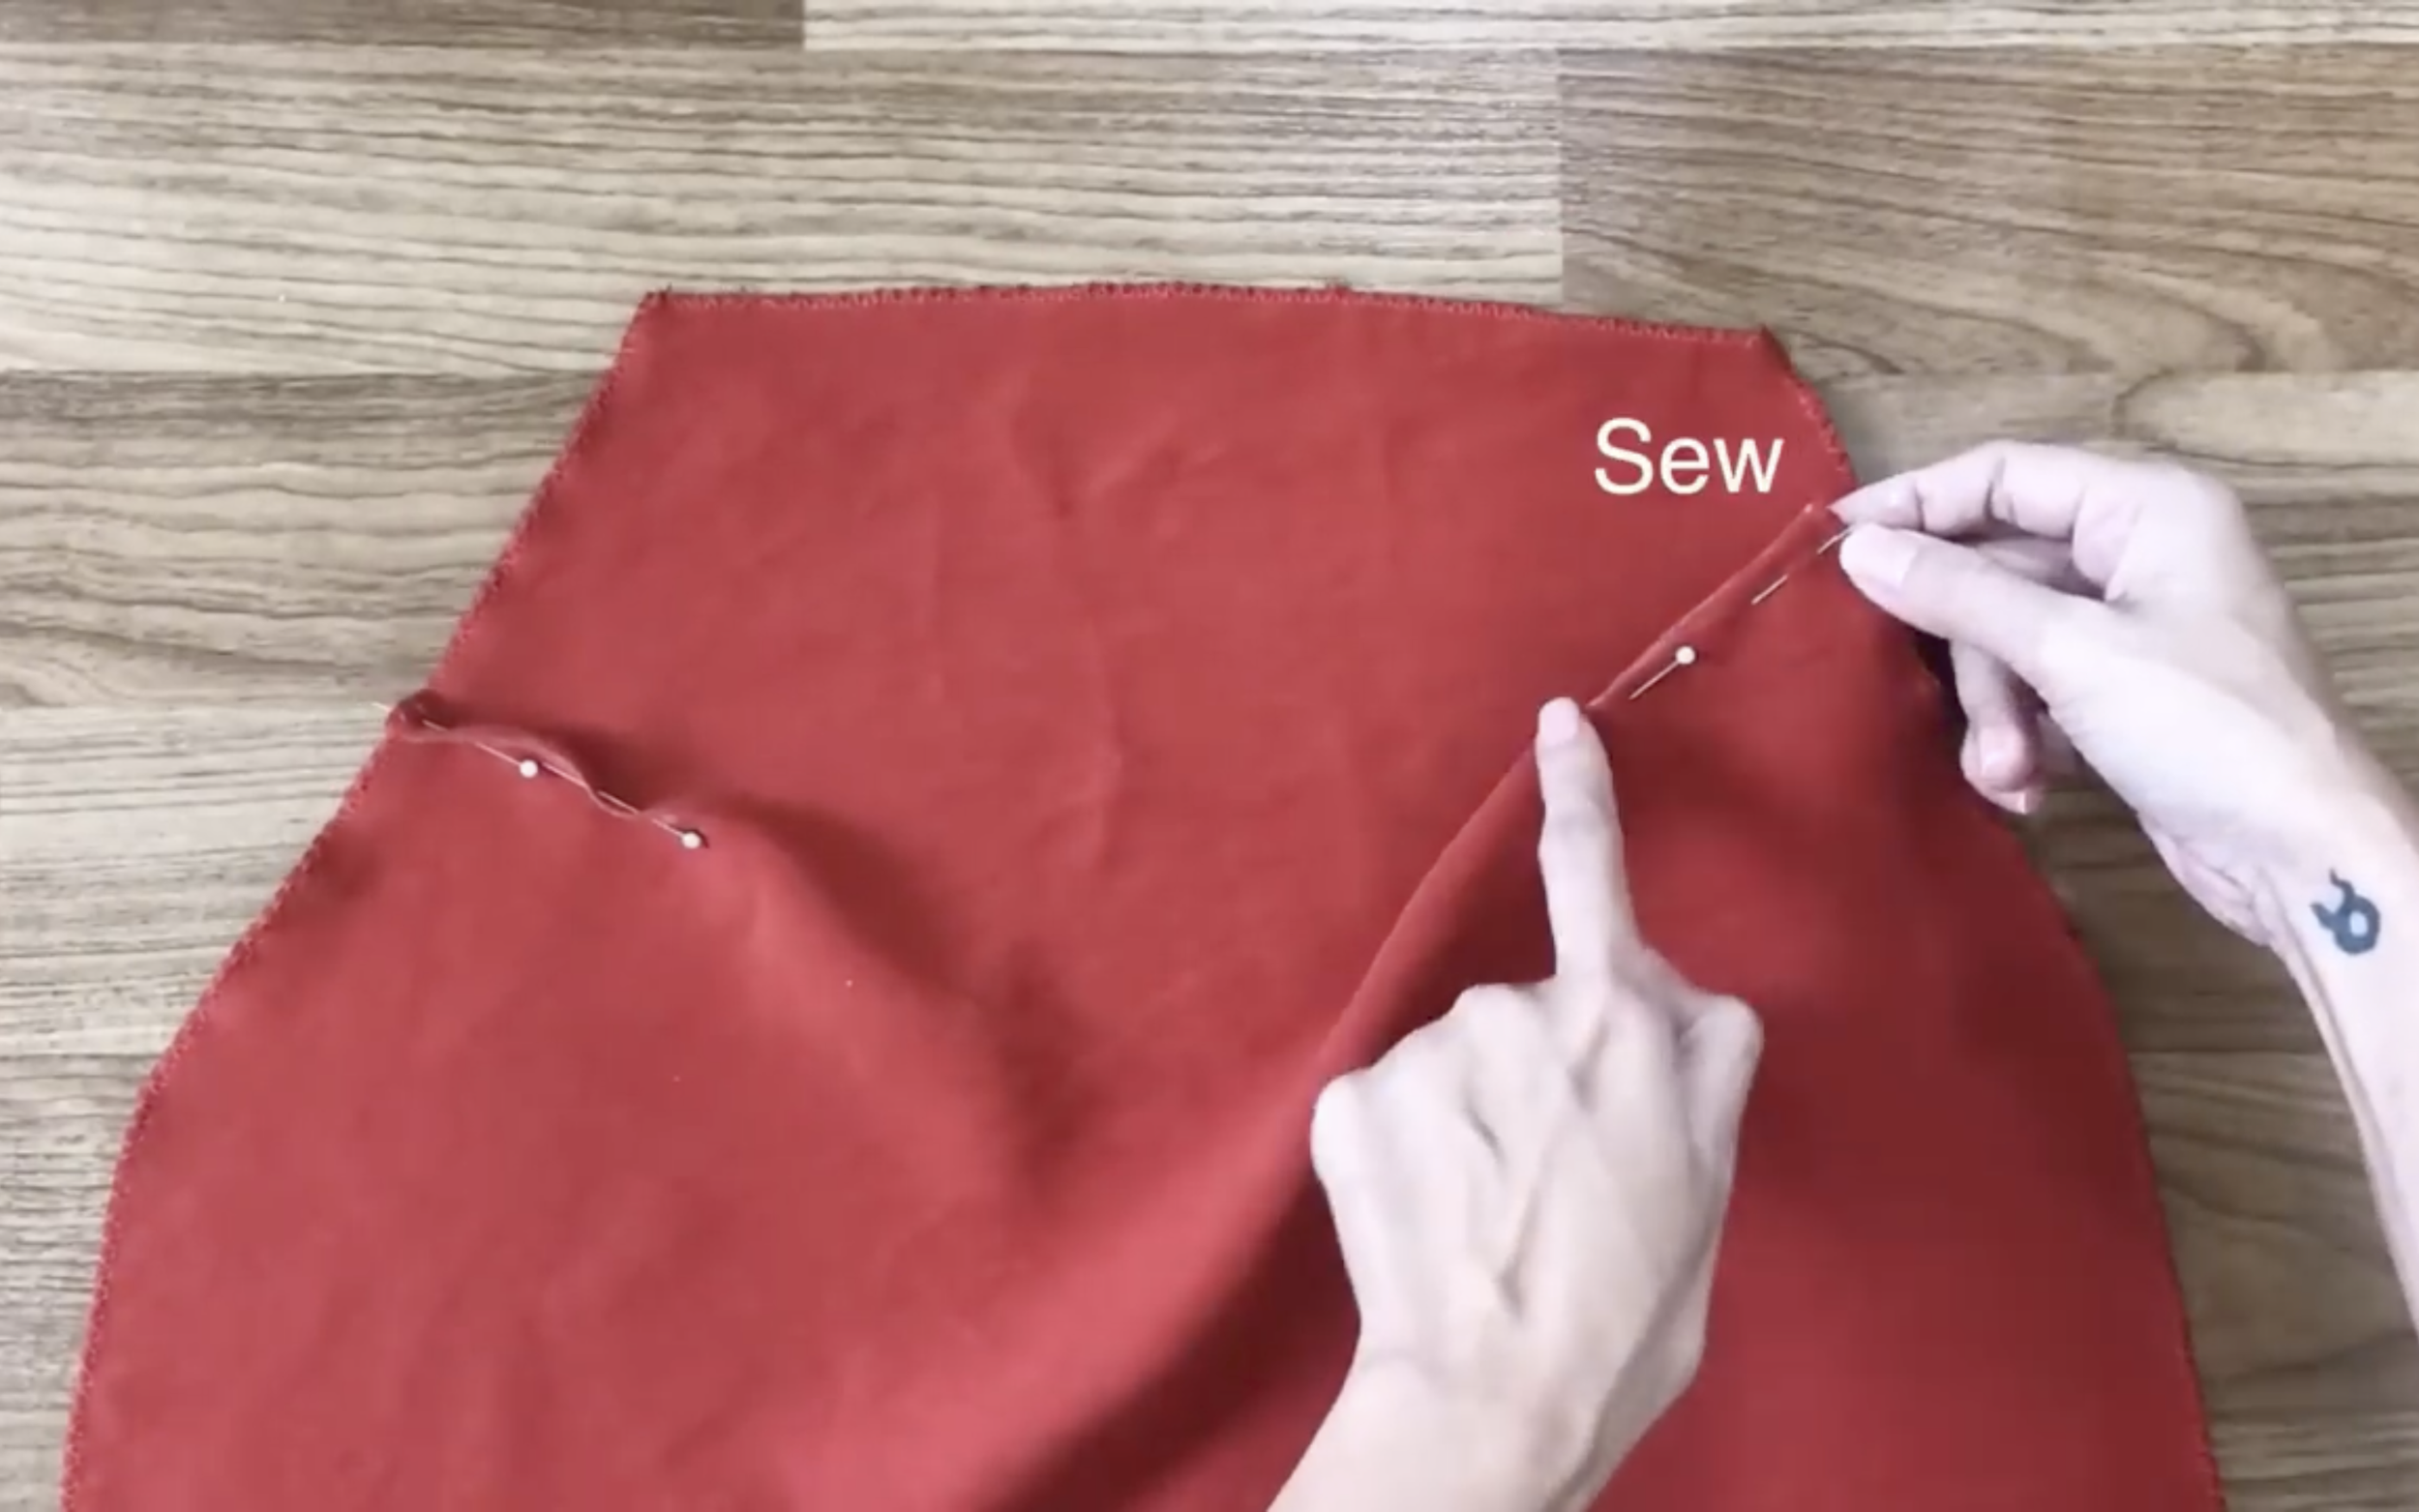
Fold the two triangles together, then sew.
After that, fold two sides of the front dress inside to hide the cutting, then sew.
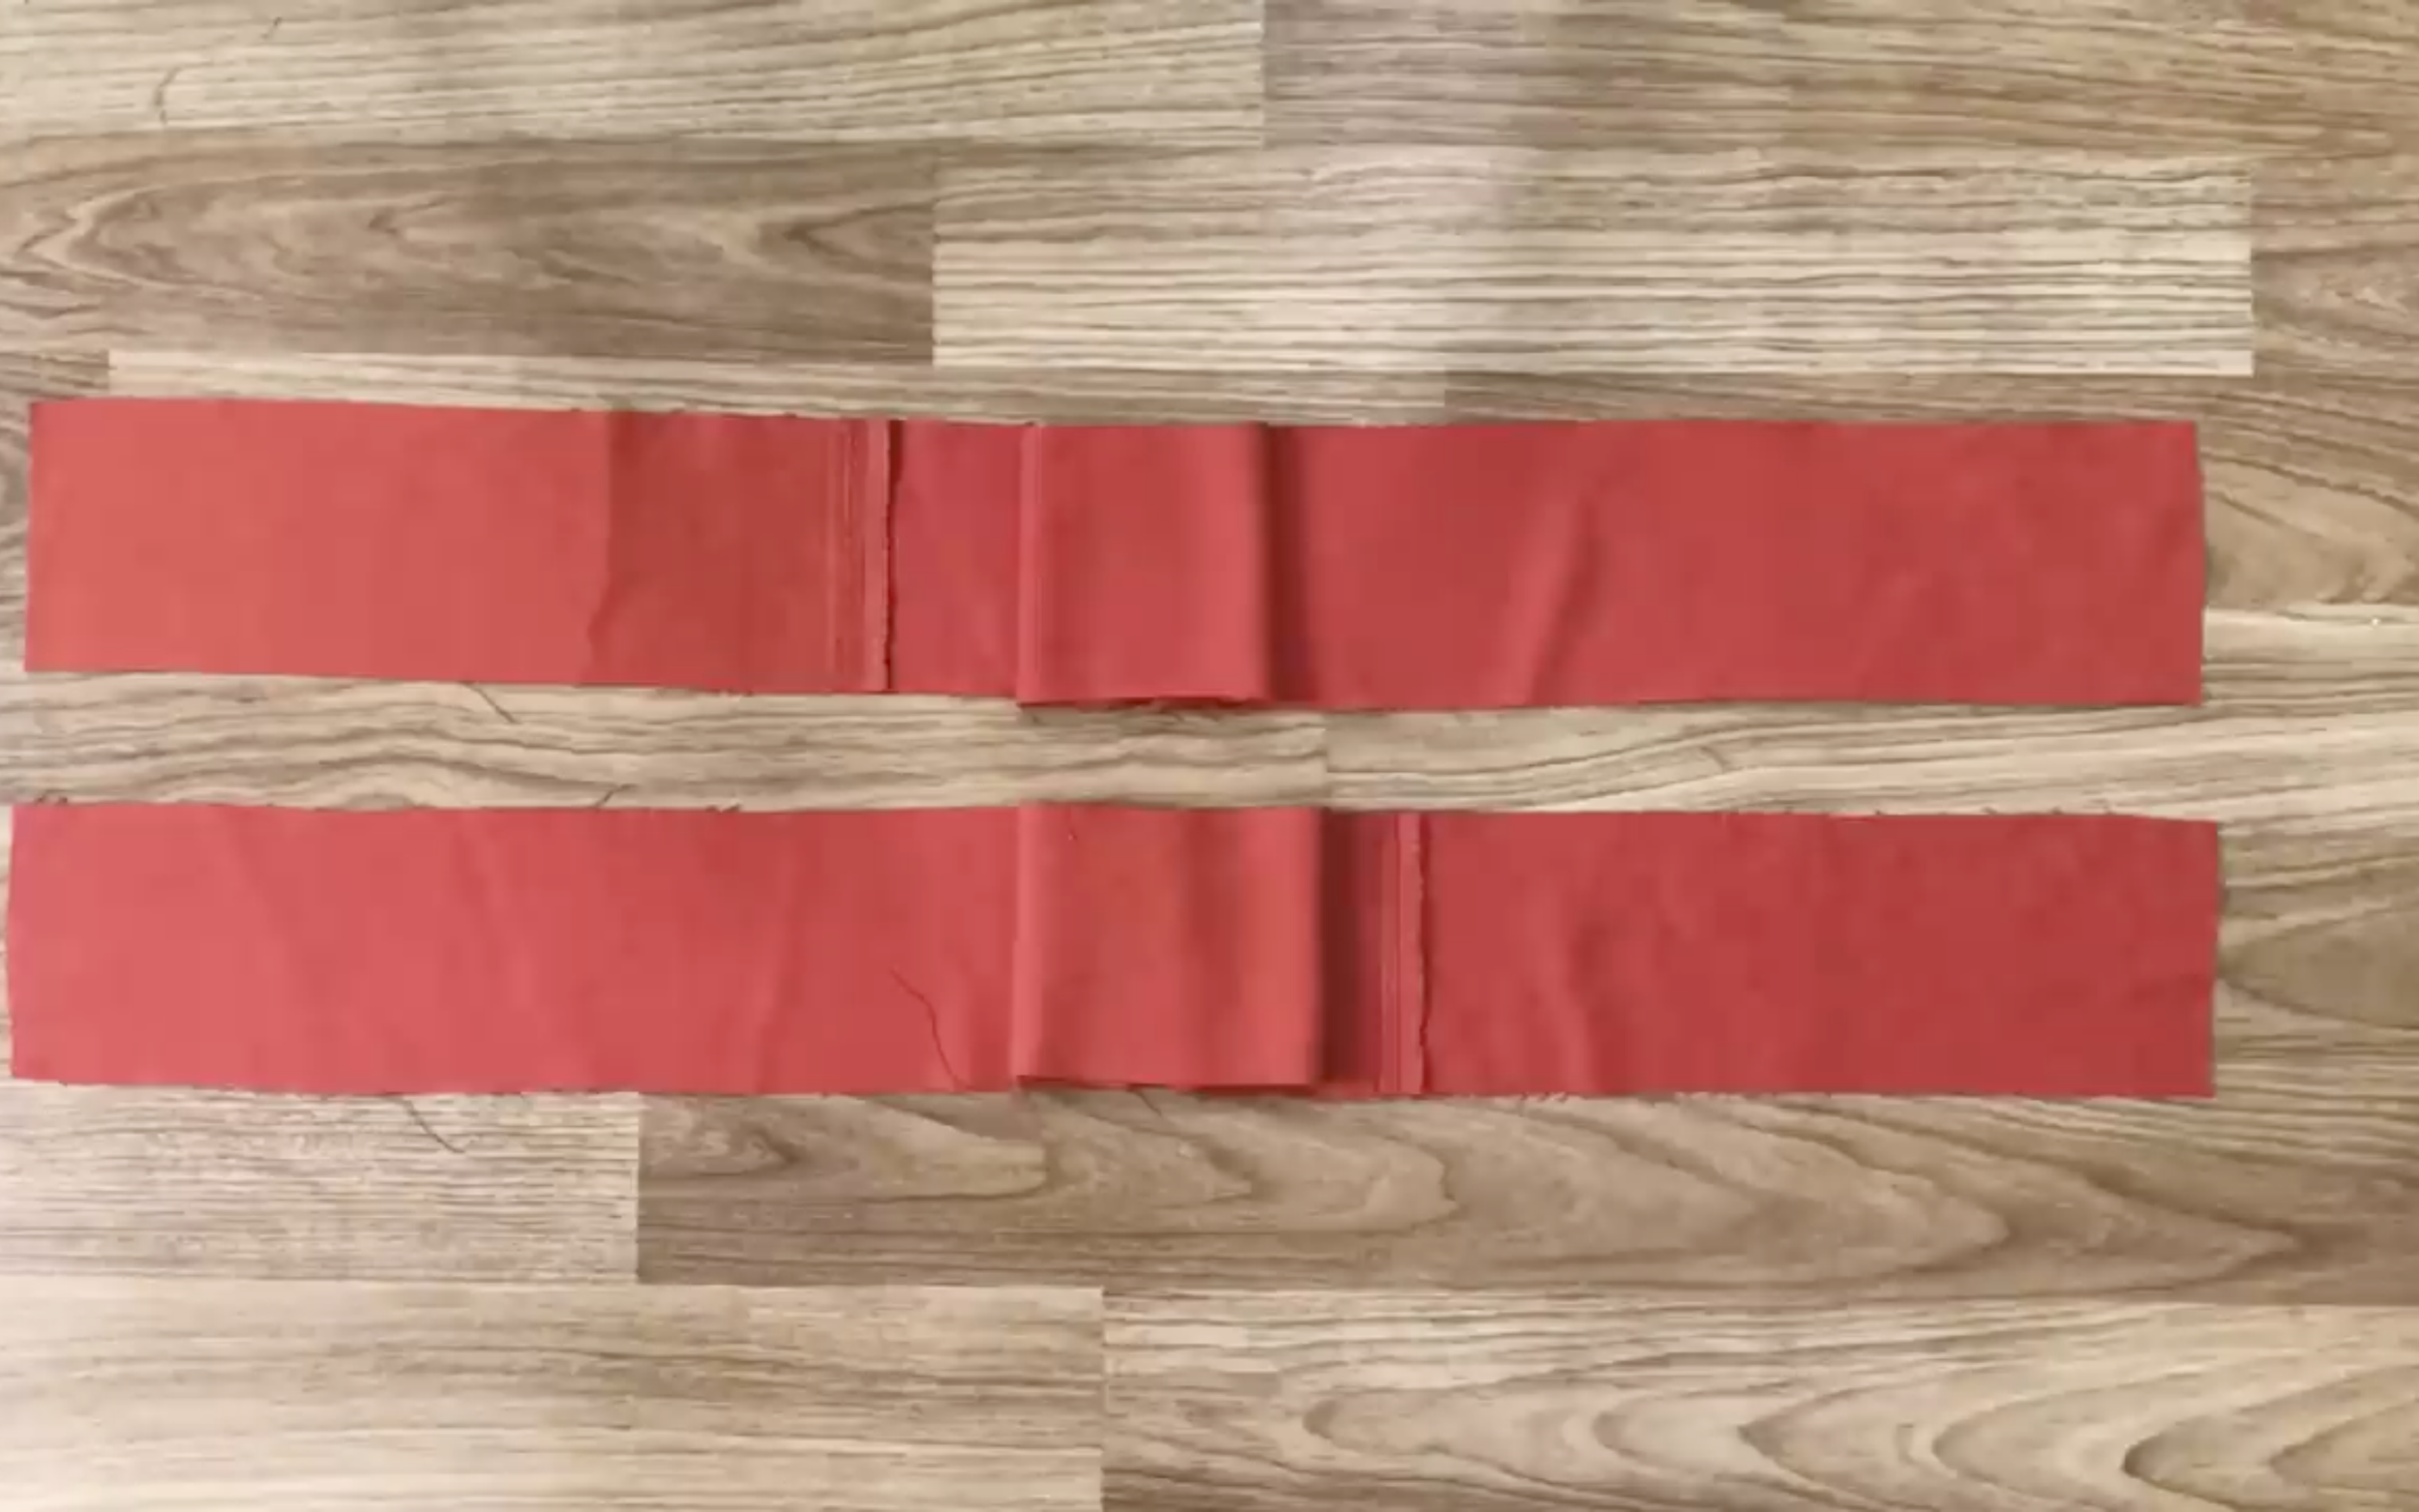
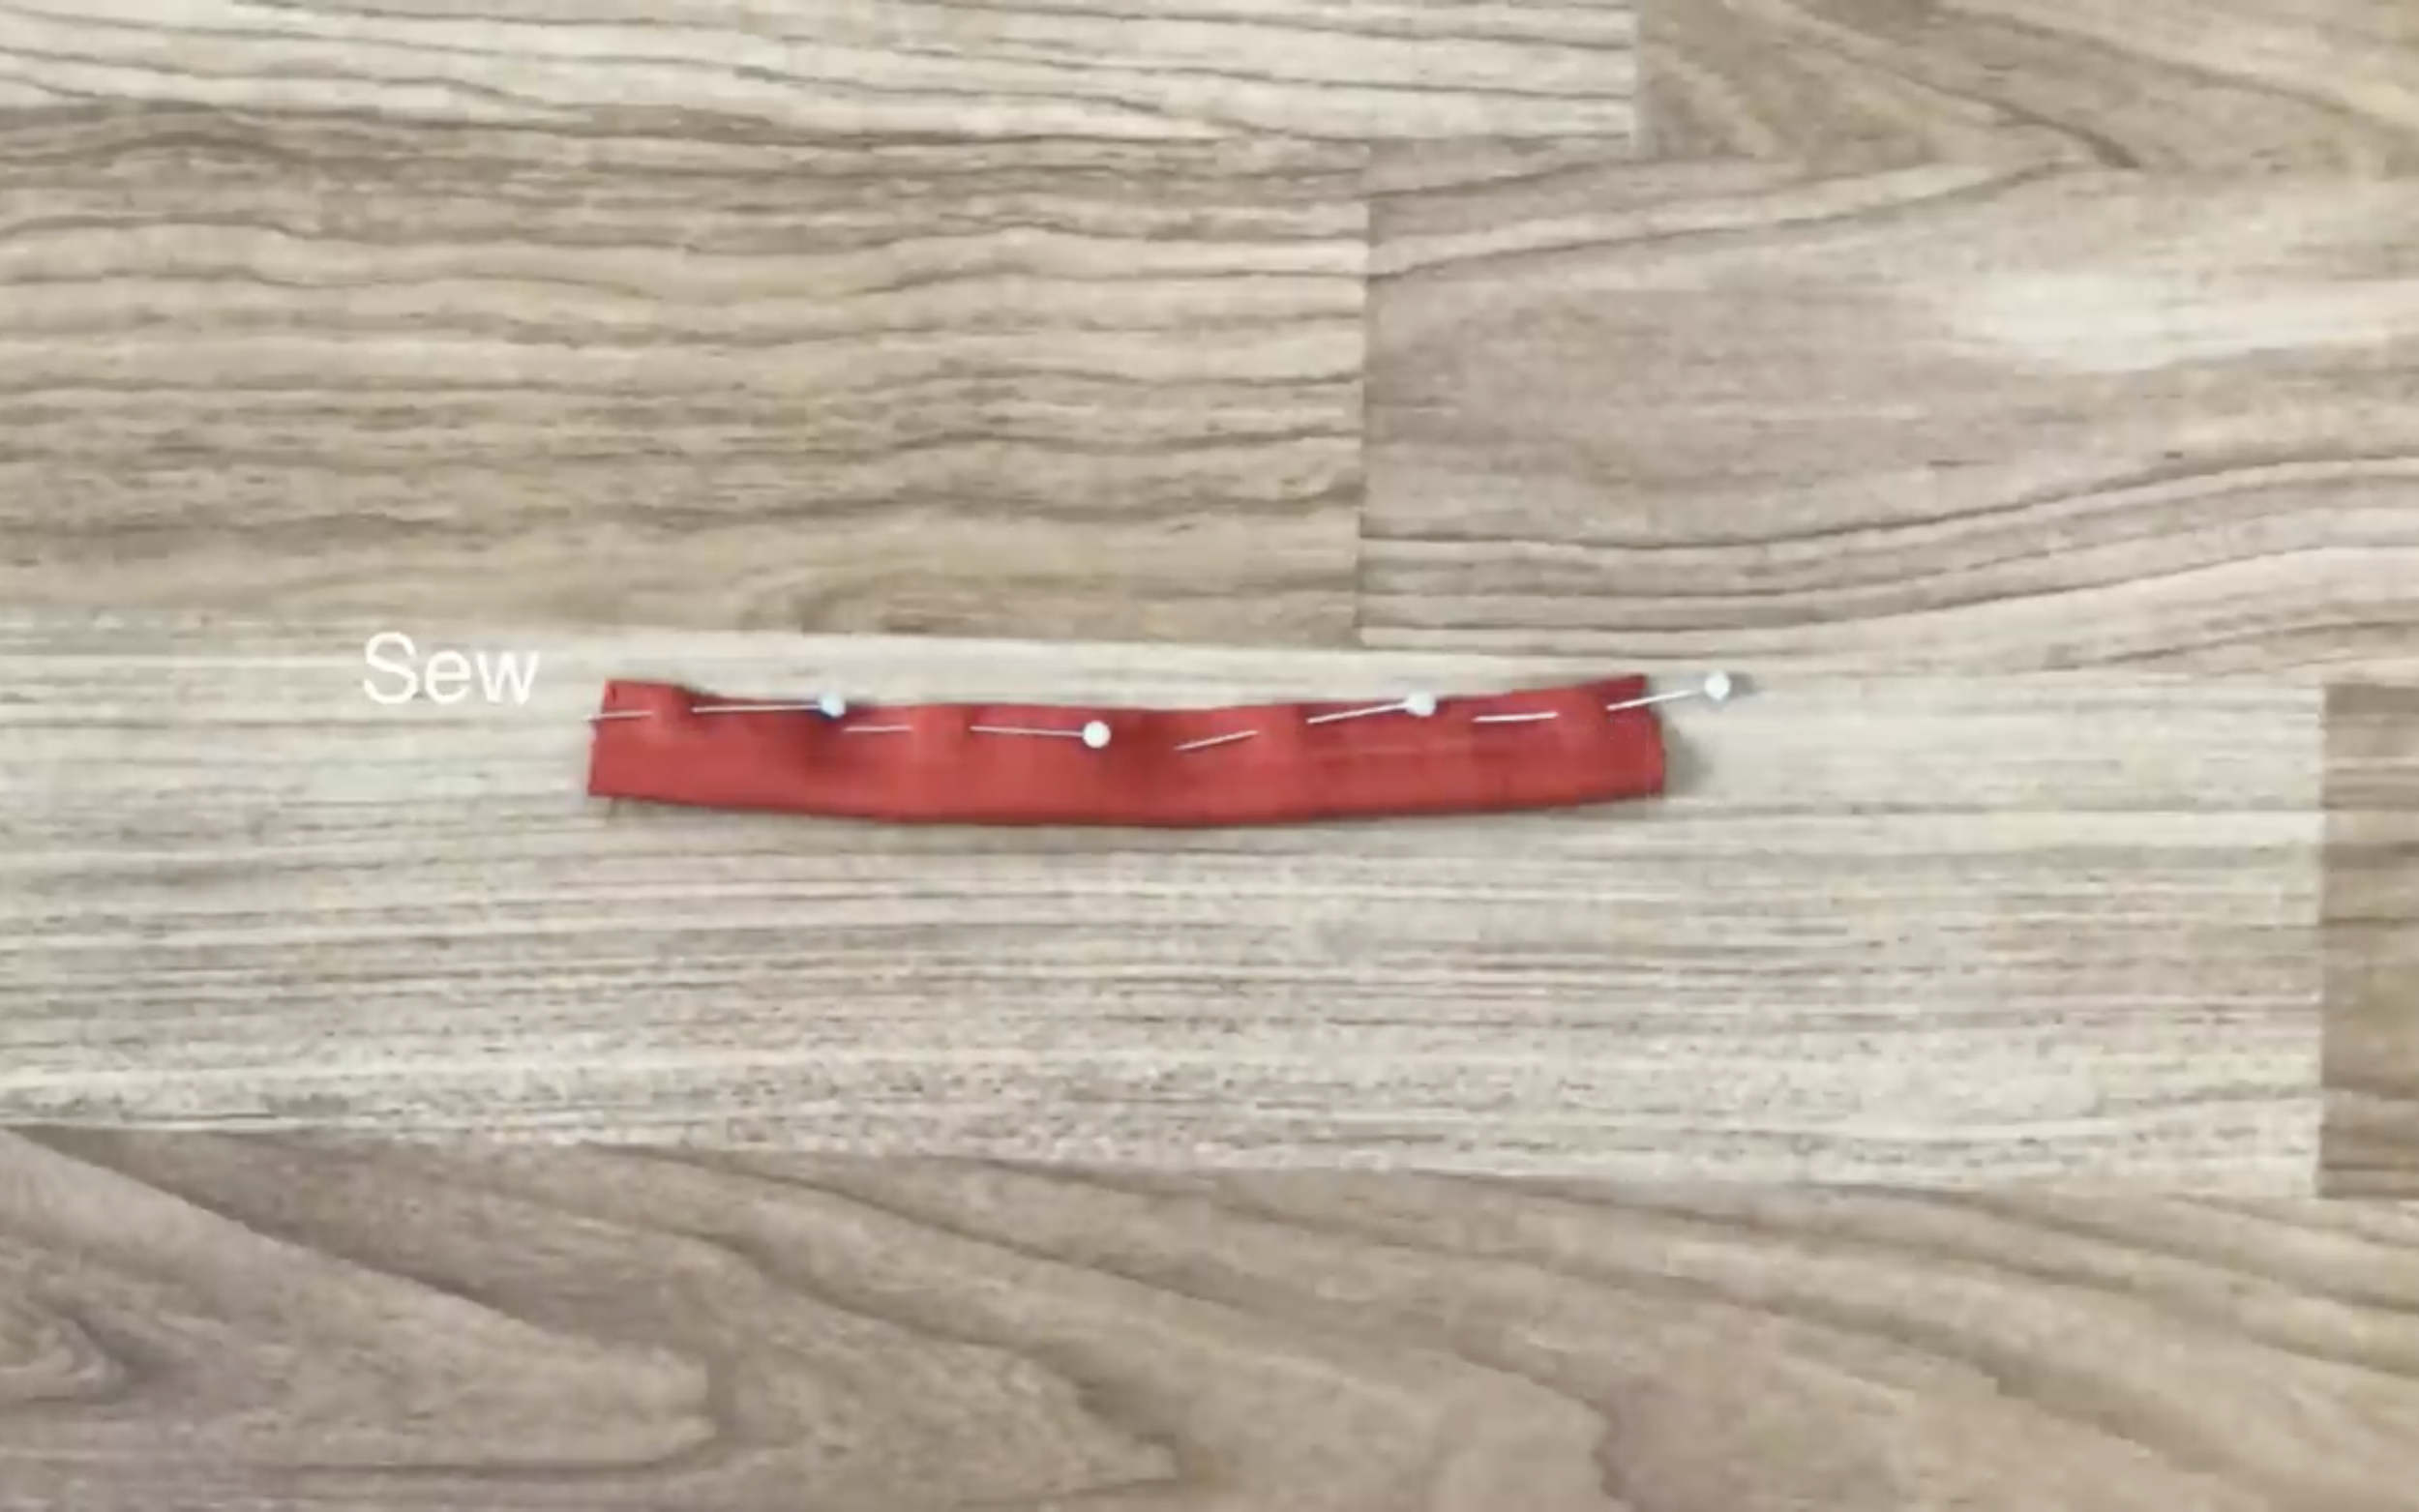
Make two long fabric pieces with 9 cm width and around 70 cm length from the leftover fabric to create the ties for the dress.
Fold both sides of the length together, then sew.
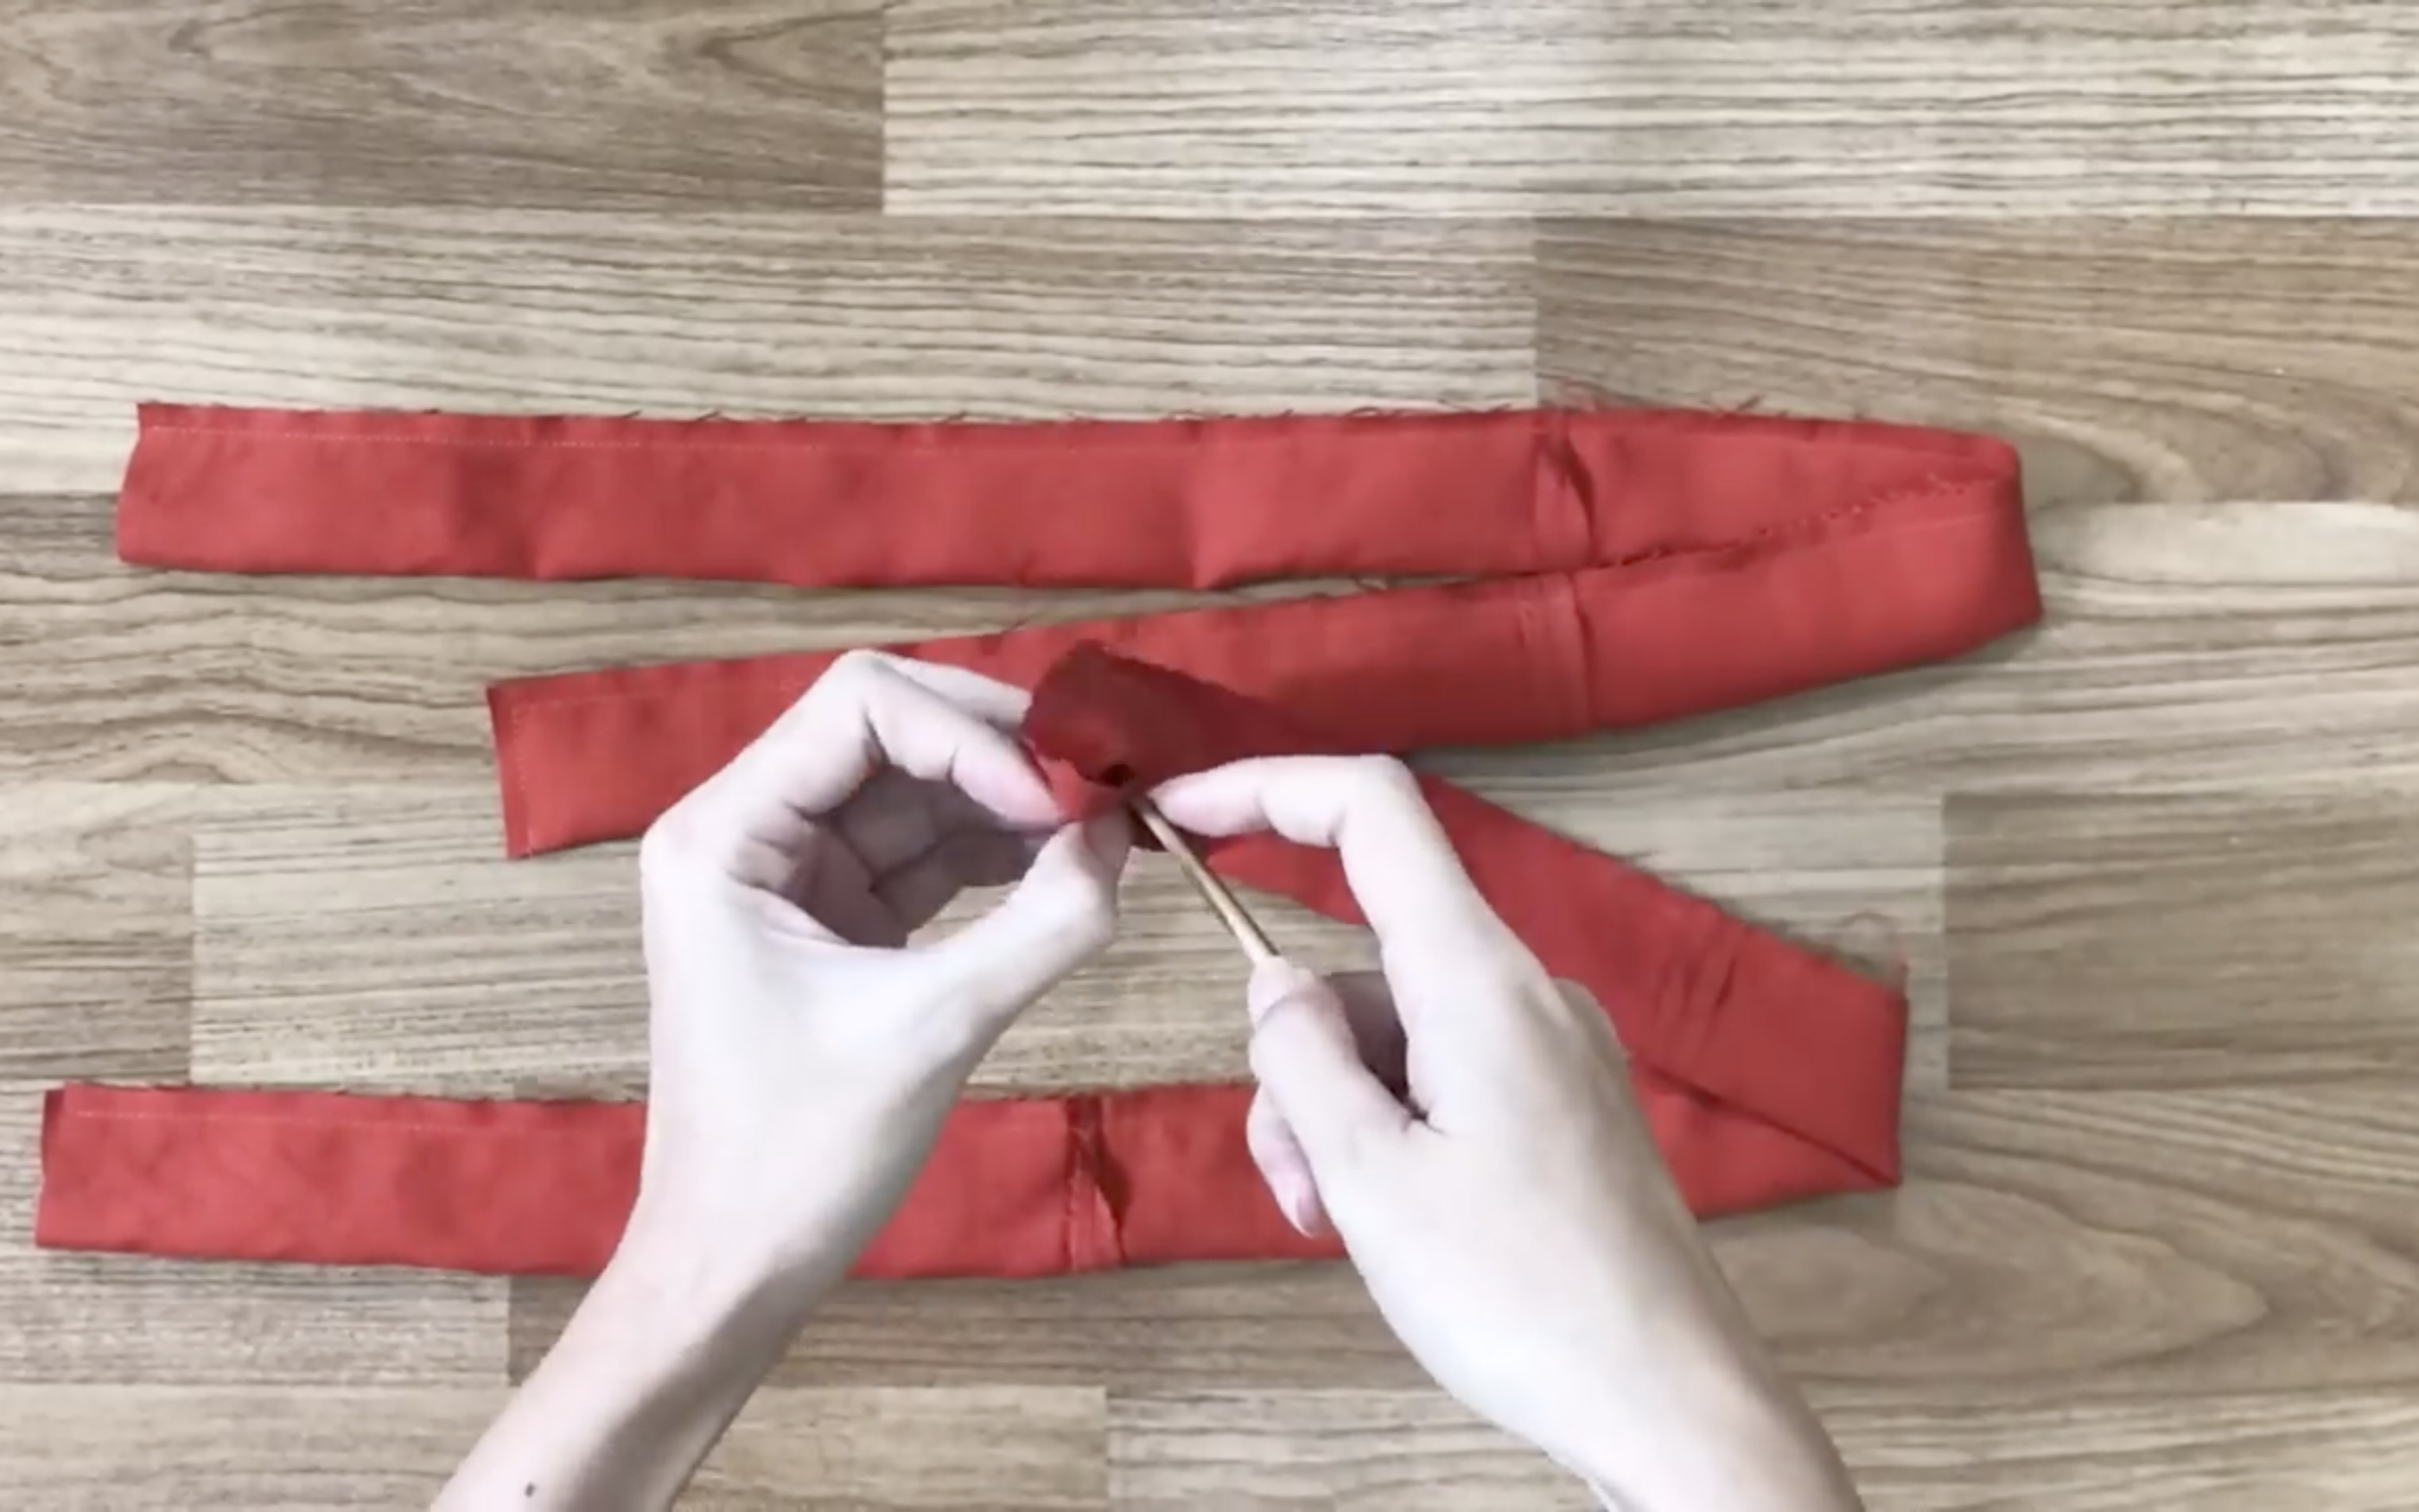
Then use a stick to turn them inside out.
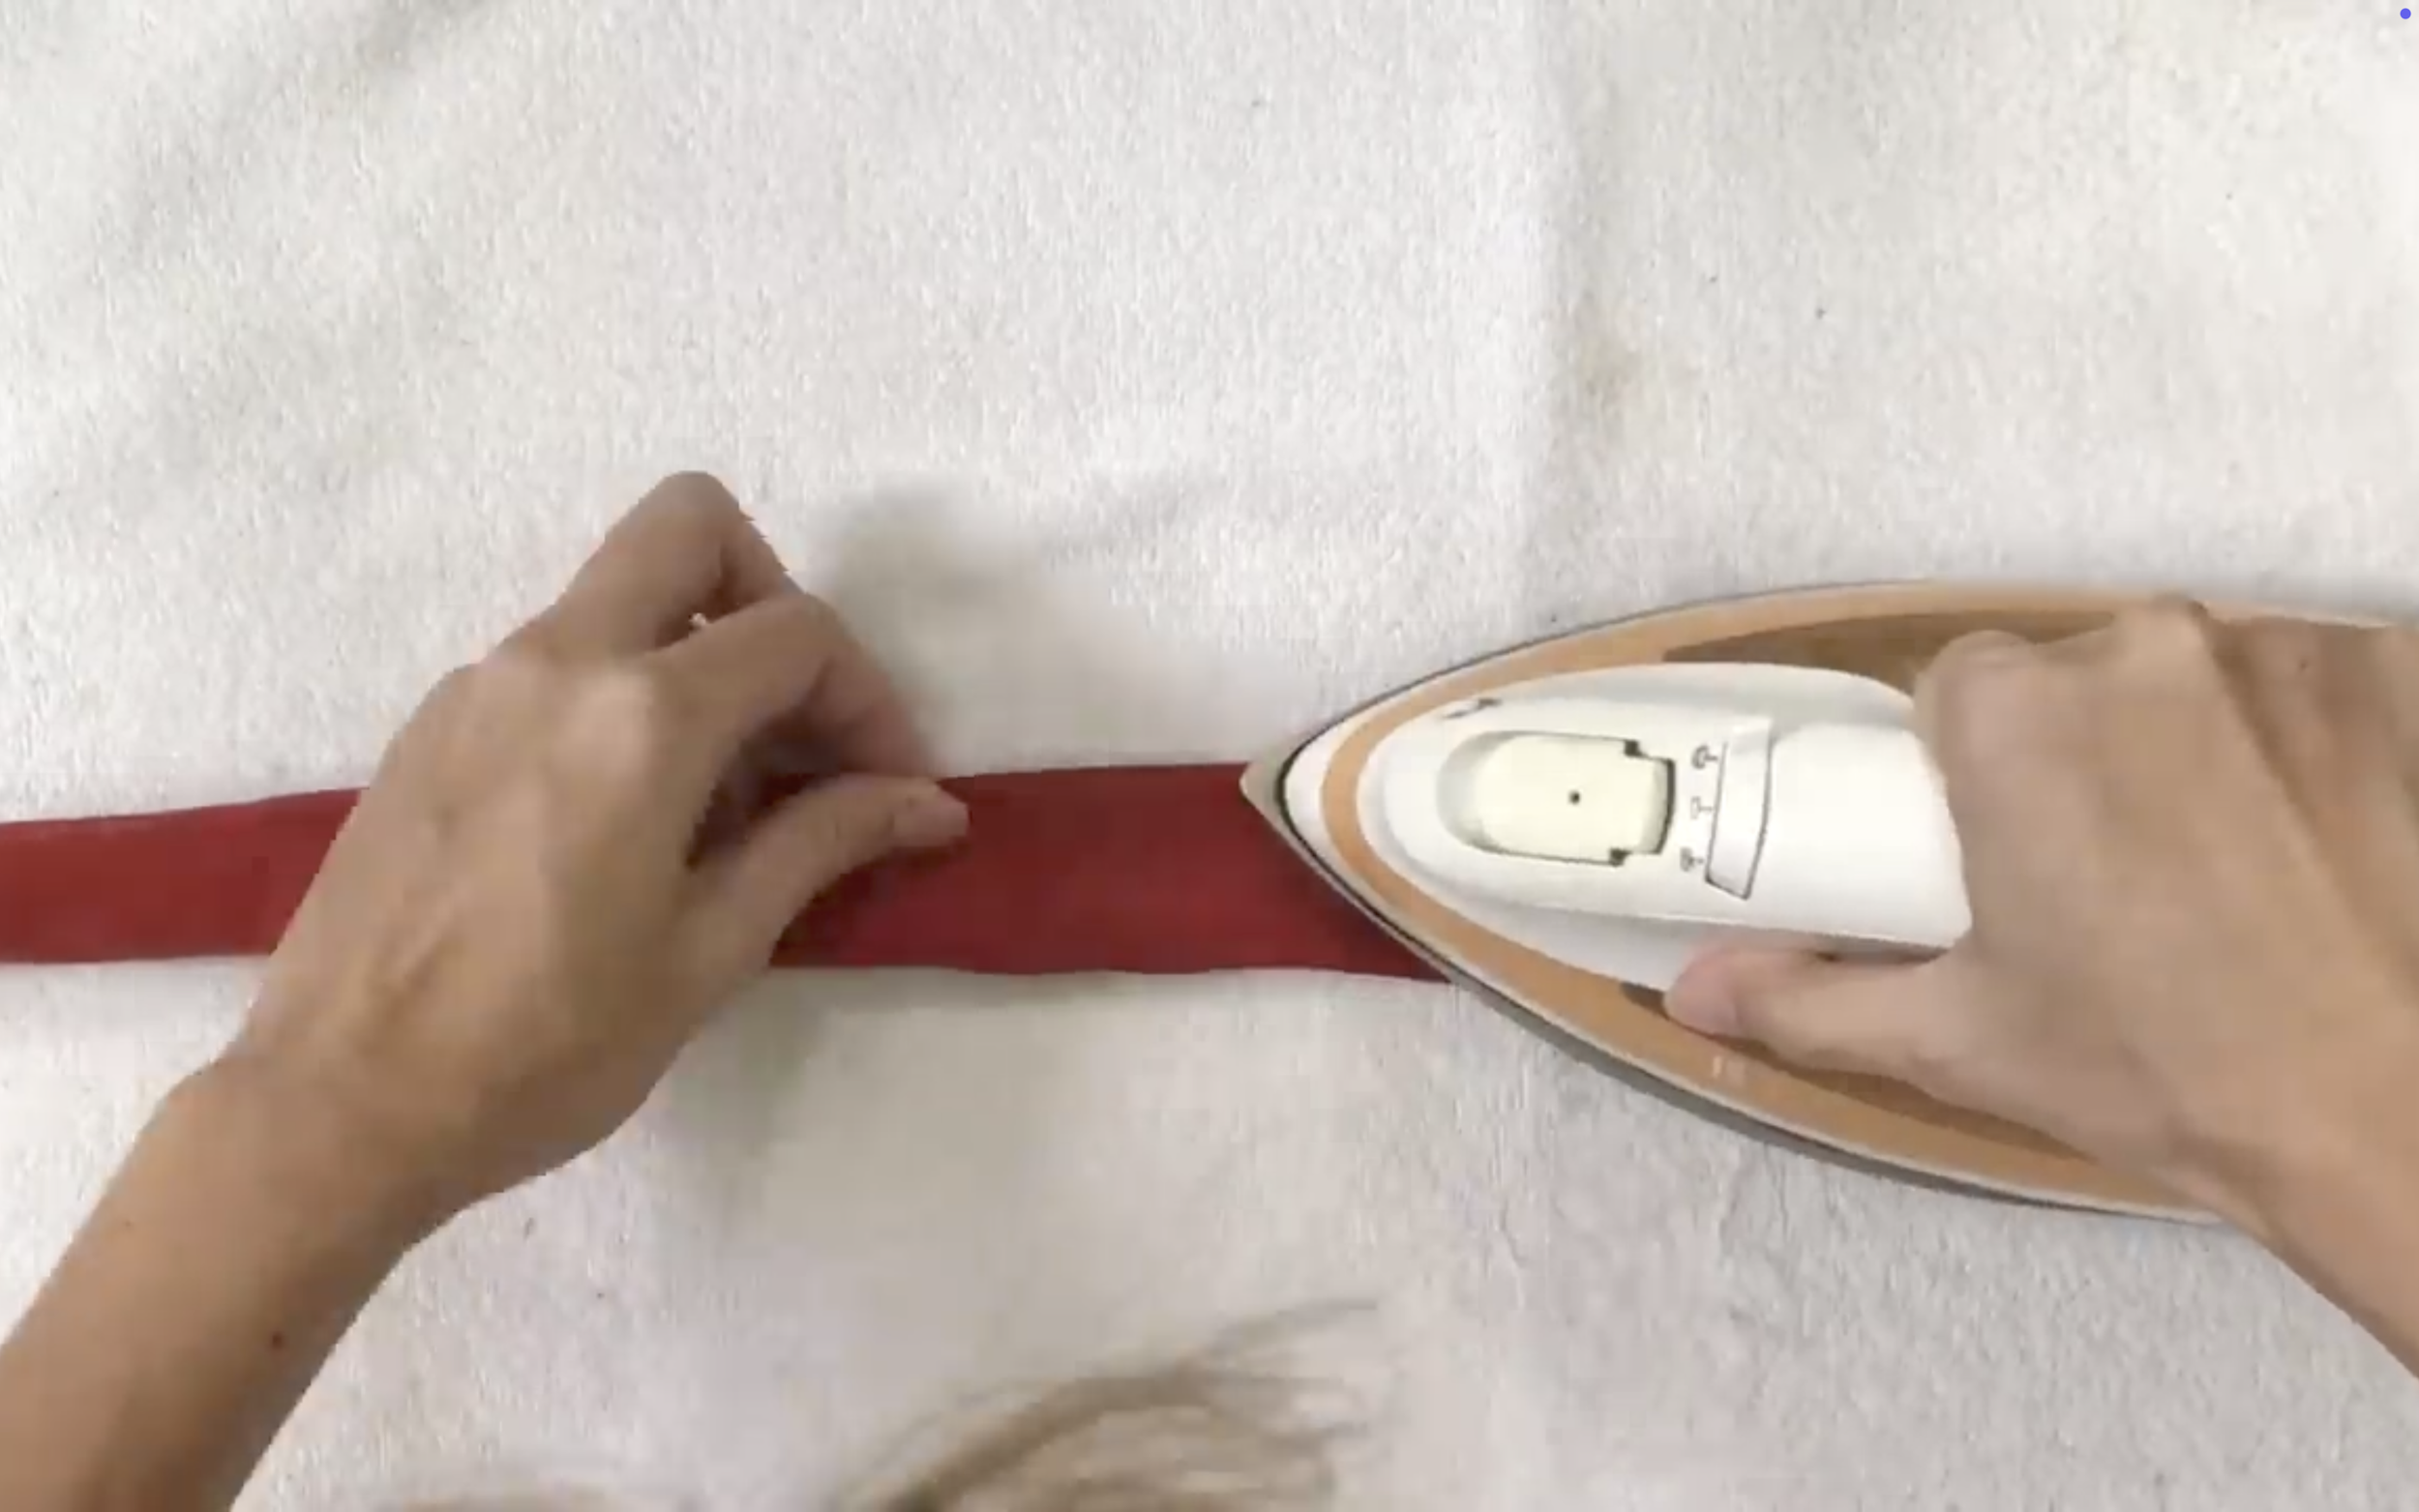
Iron it to keep them straight.
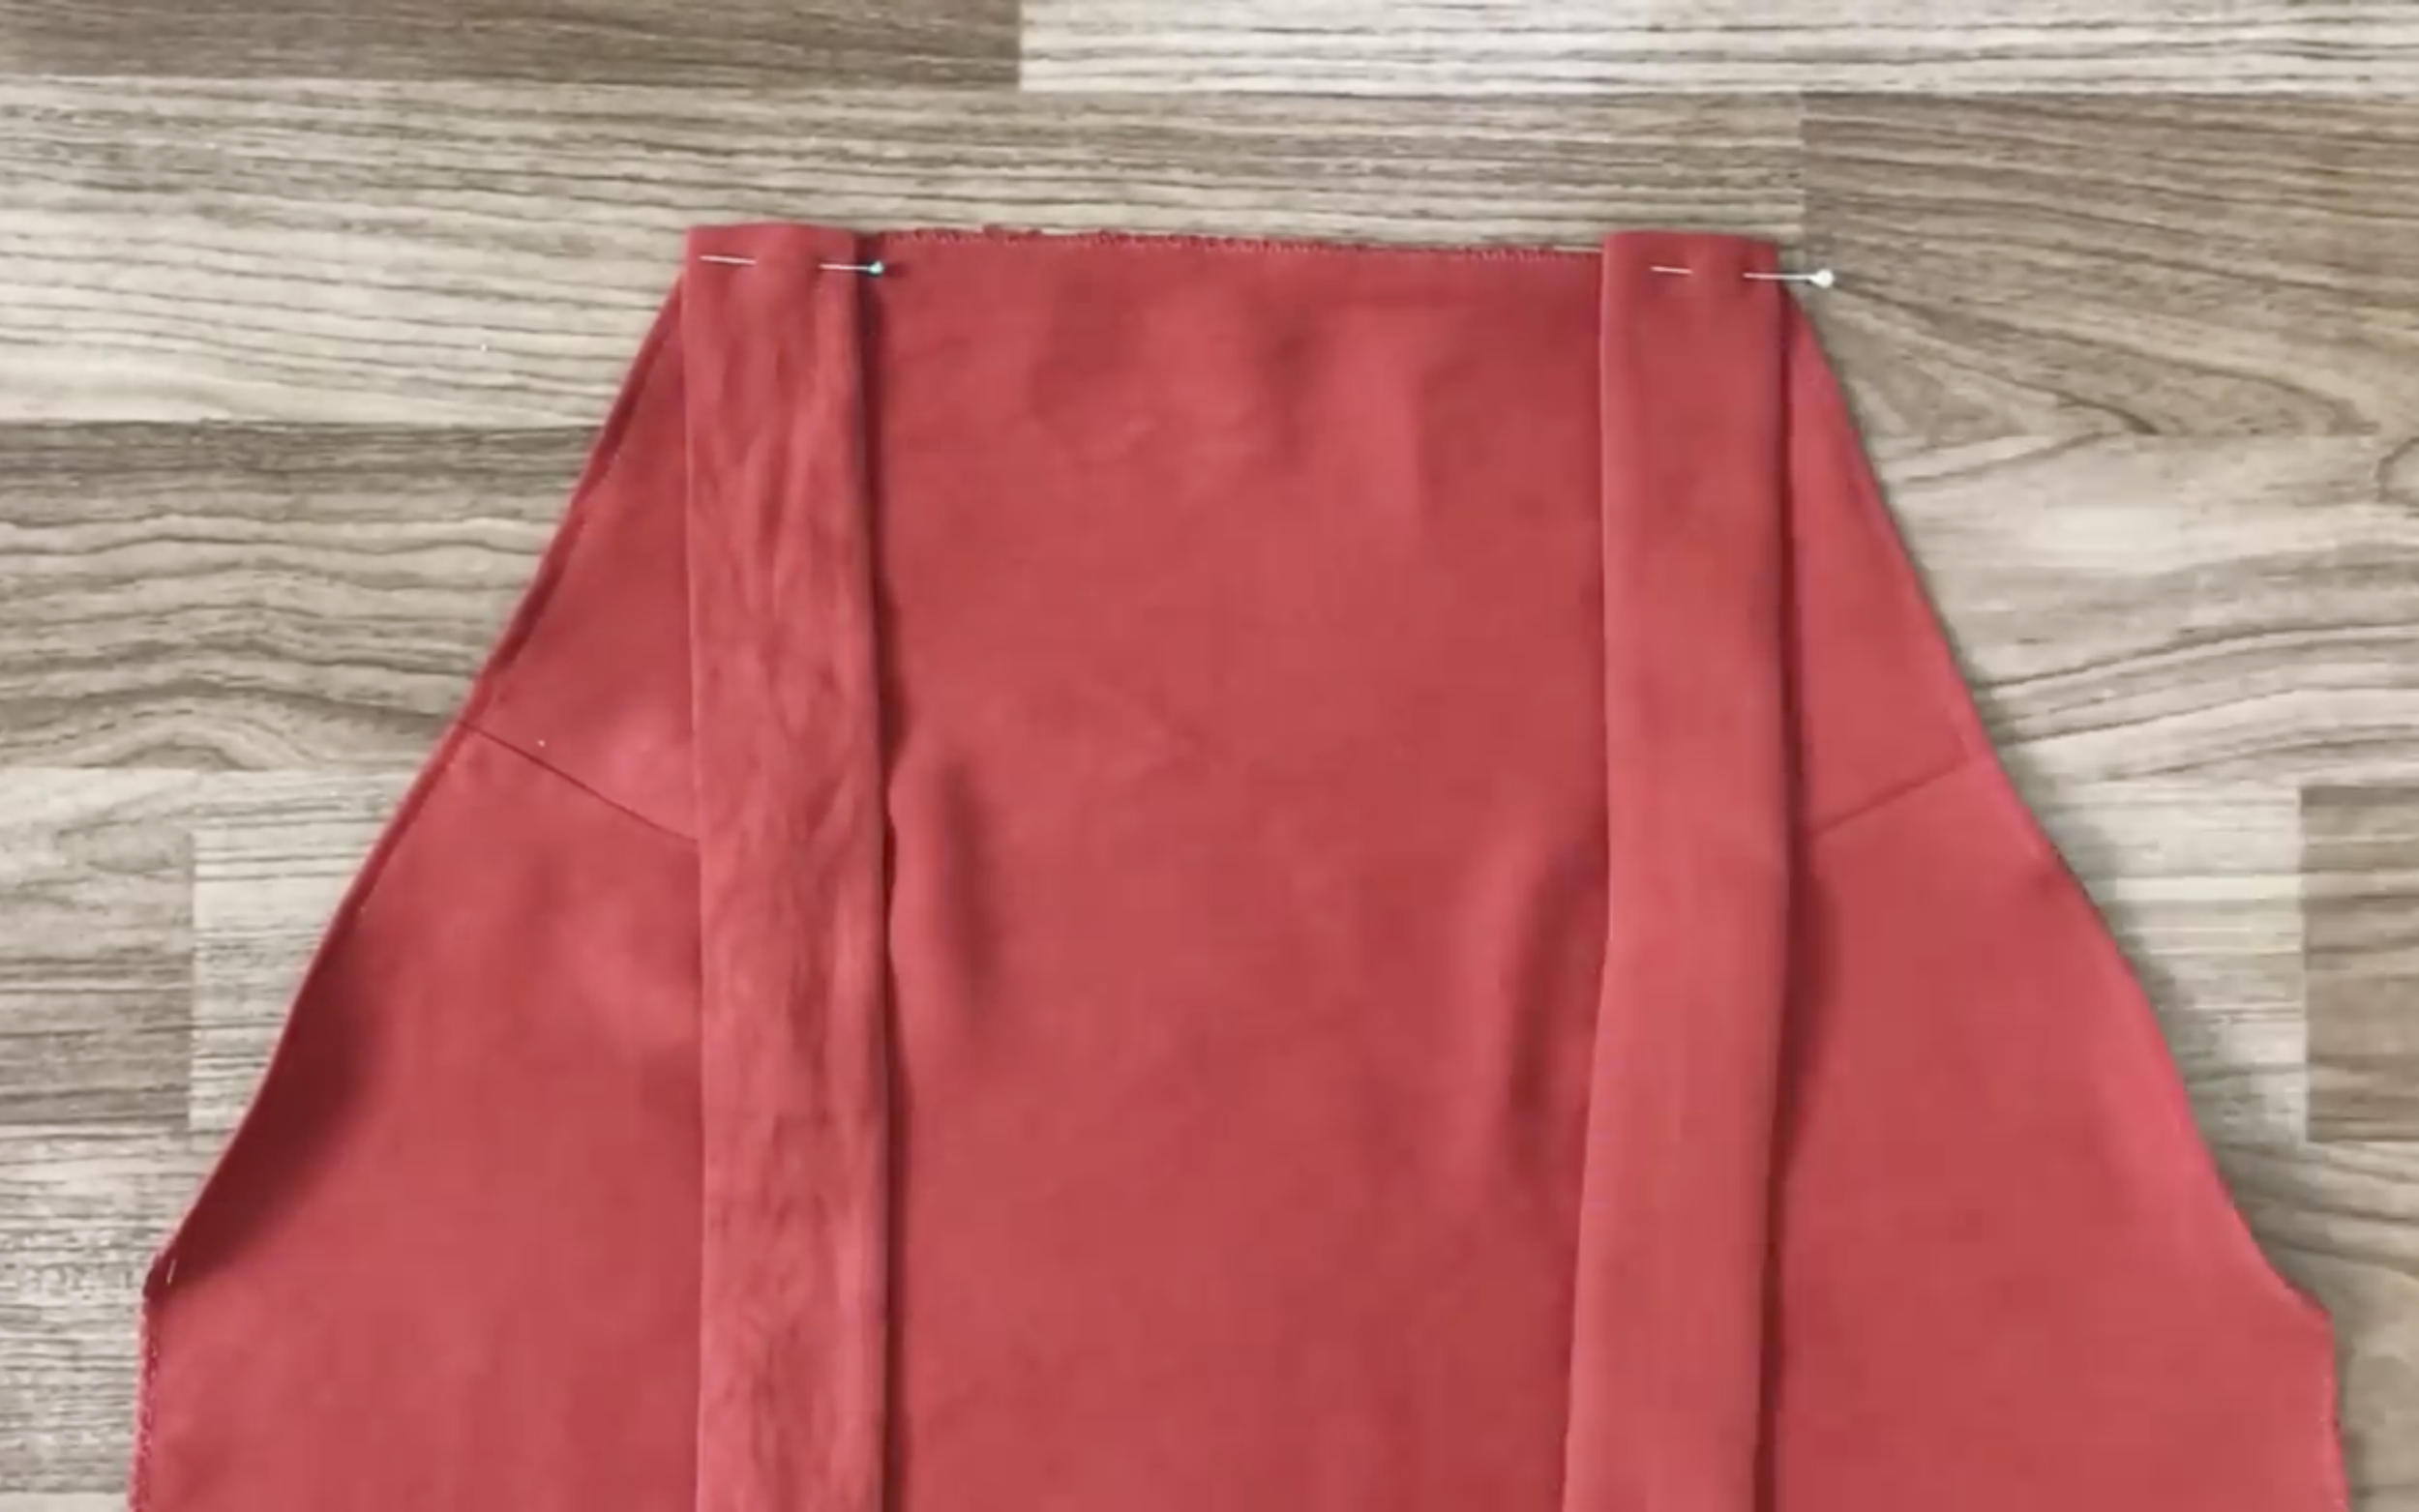
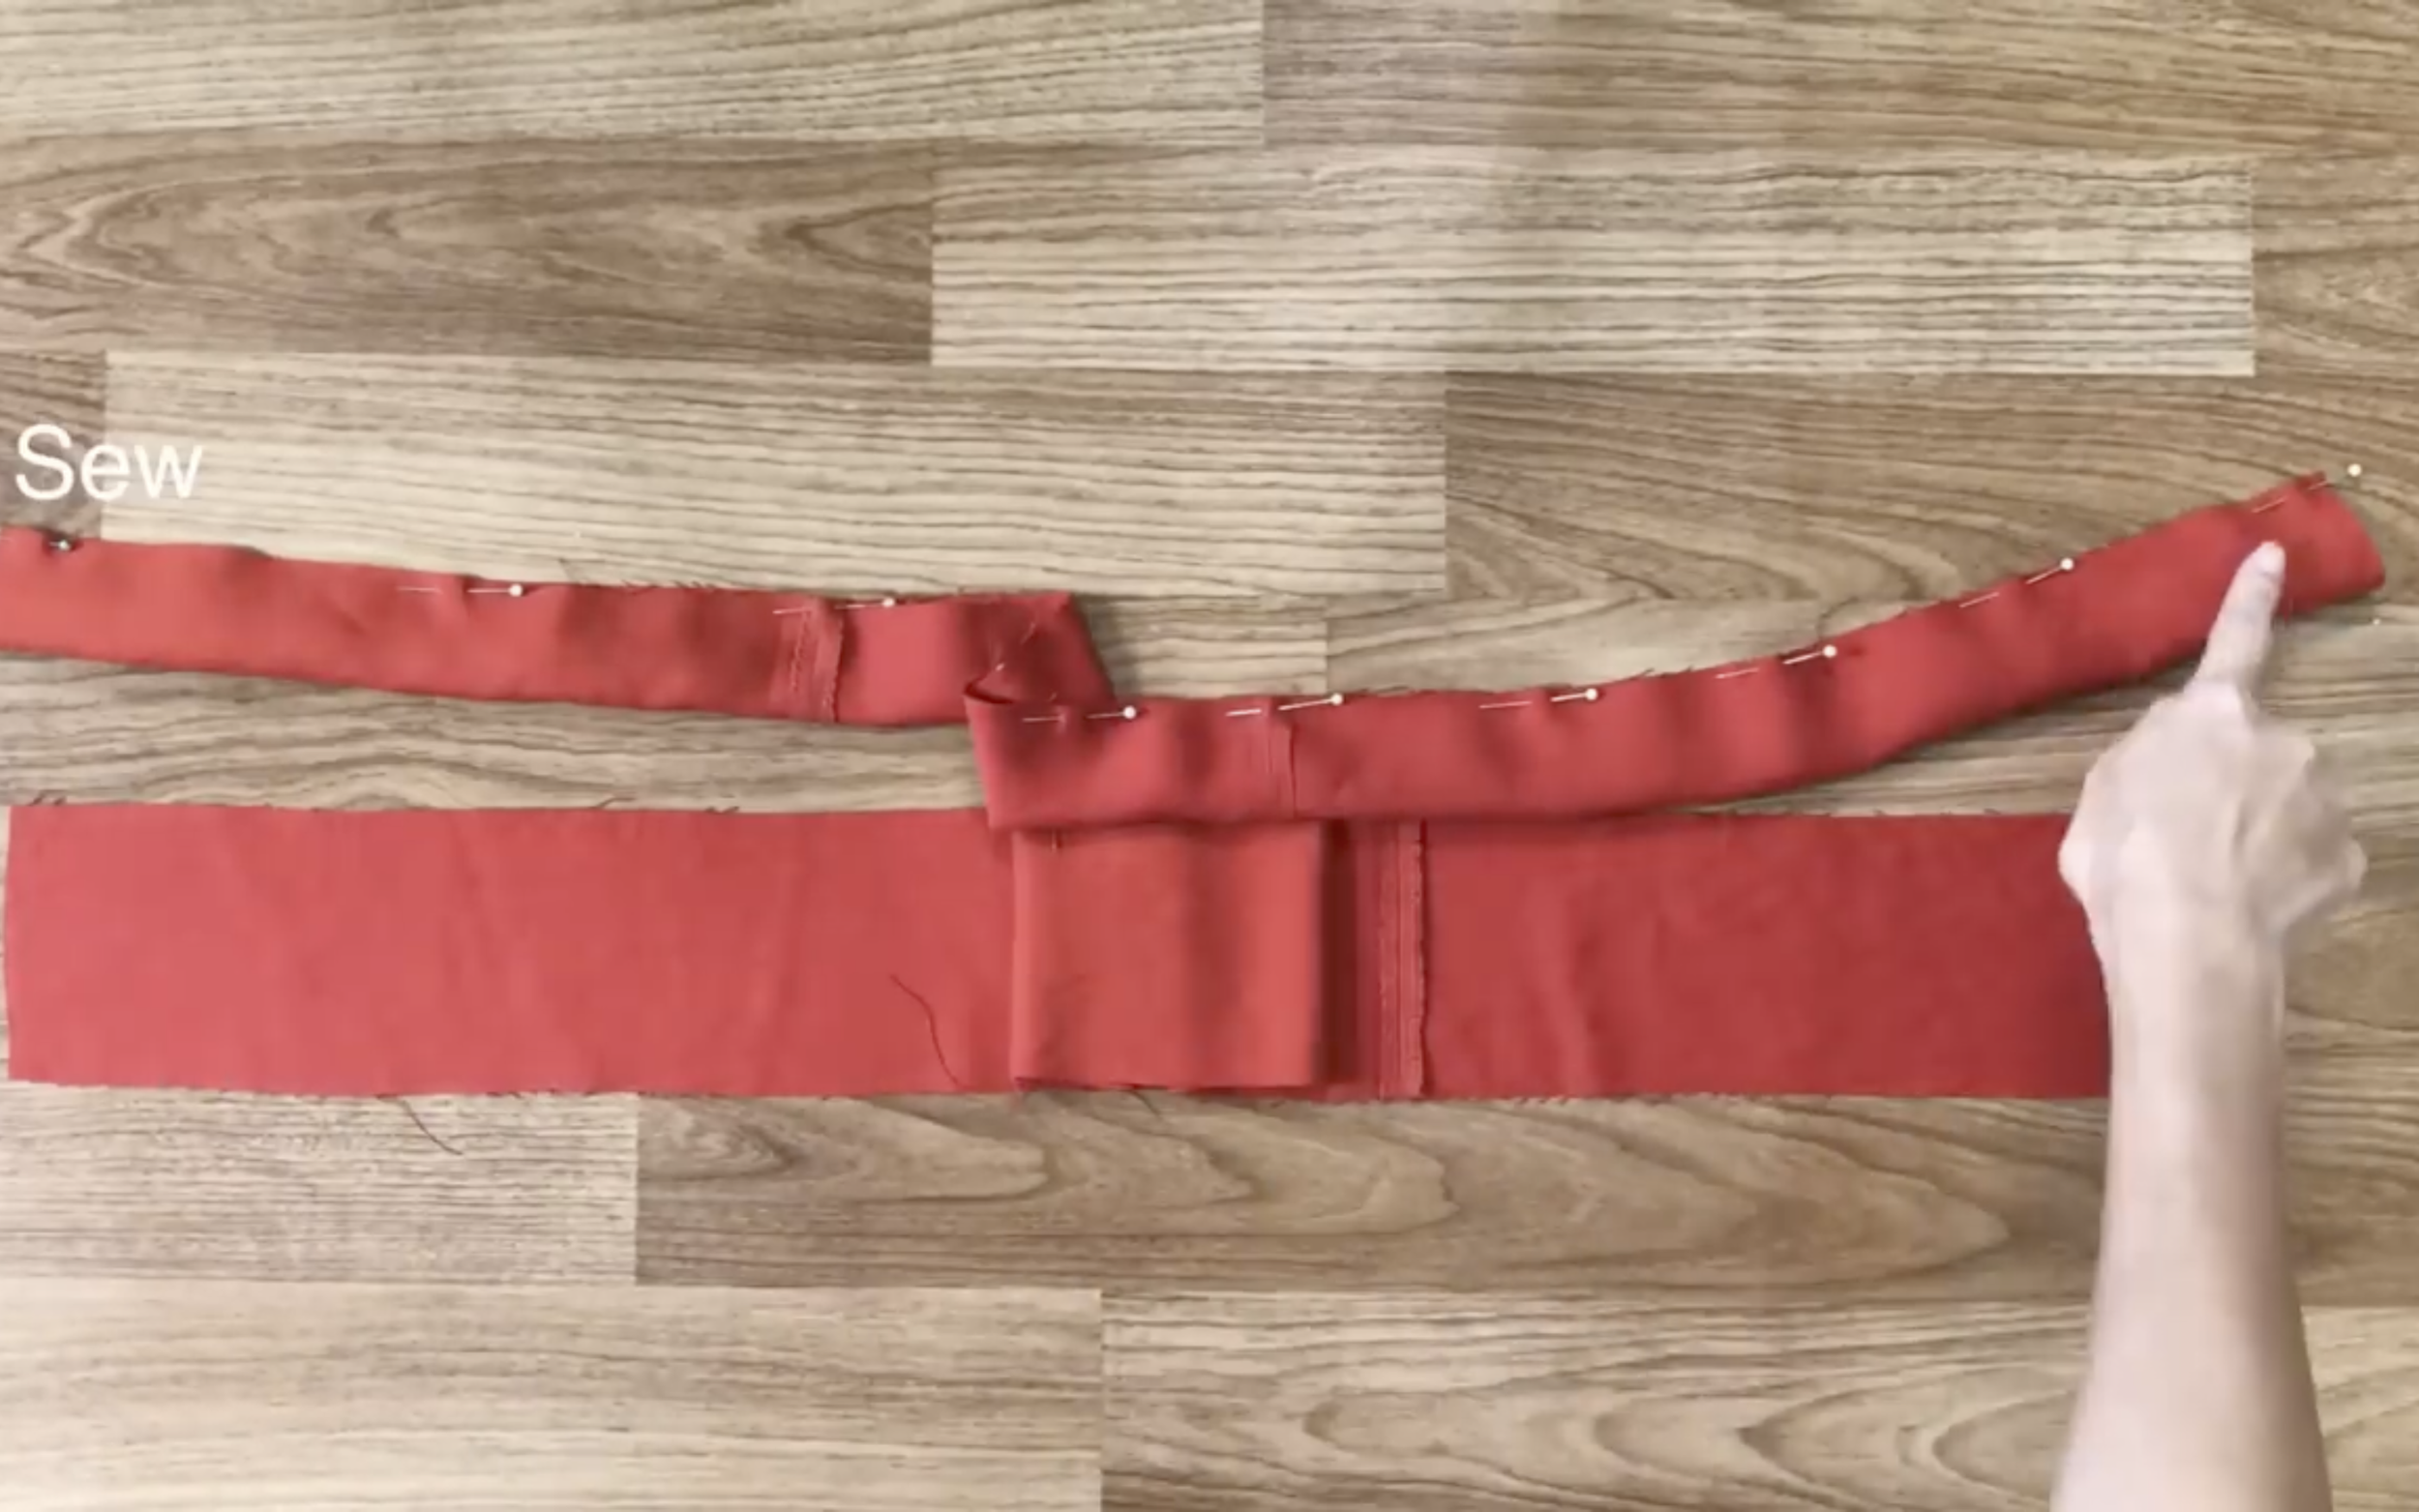
After that, fold the top of the front inside with the tie, then sew.
Doing this will keep the tie connected strongly to the top of the front.
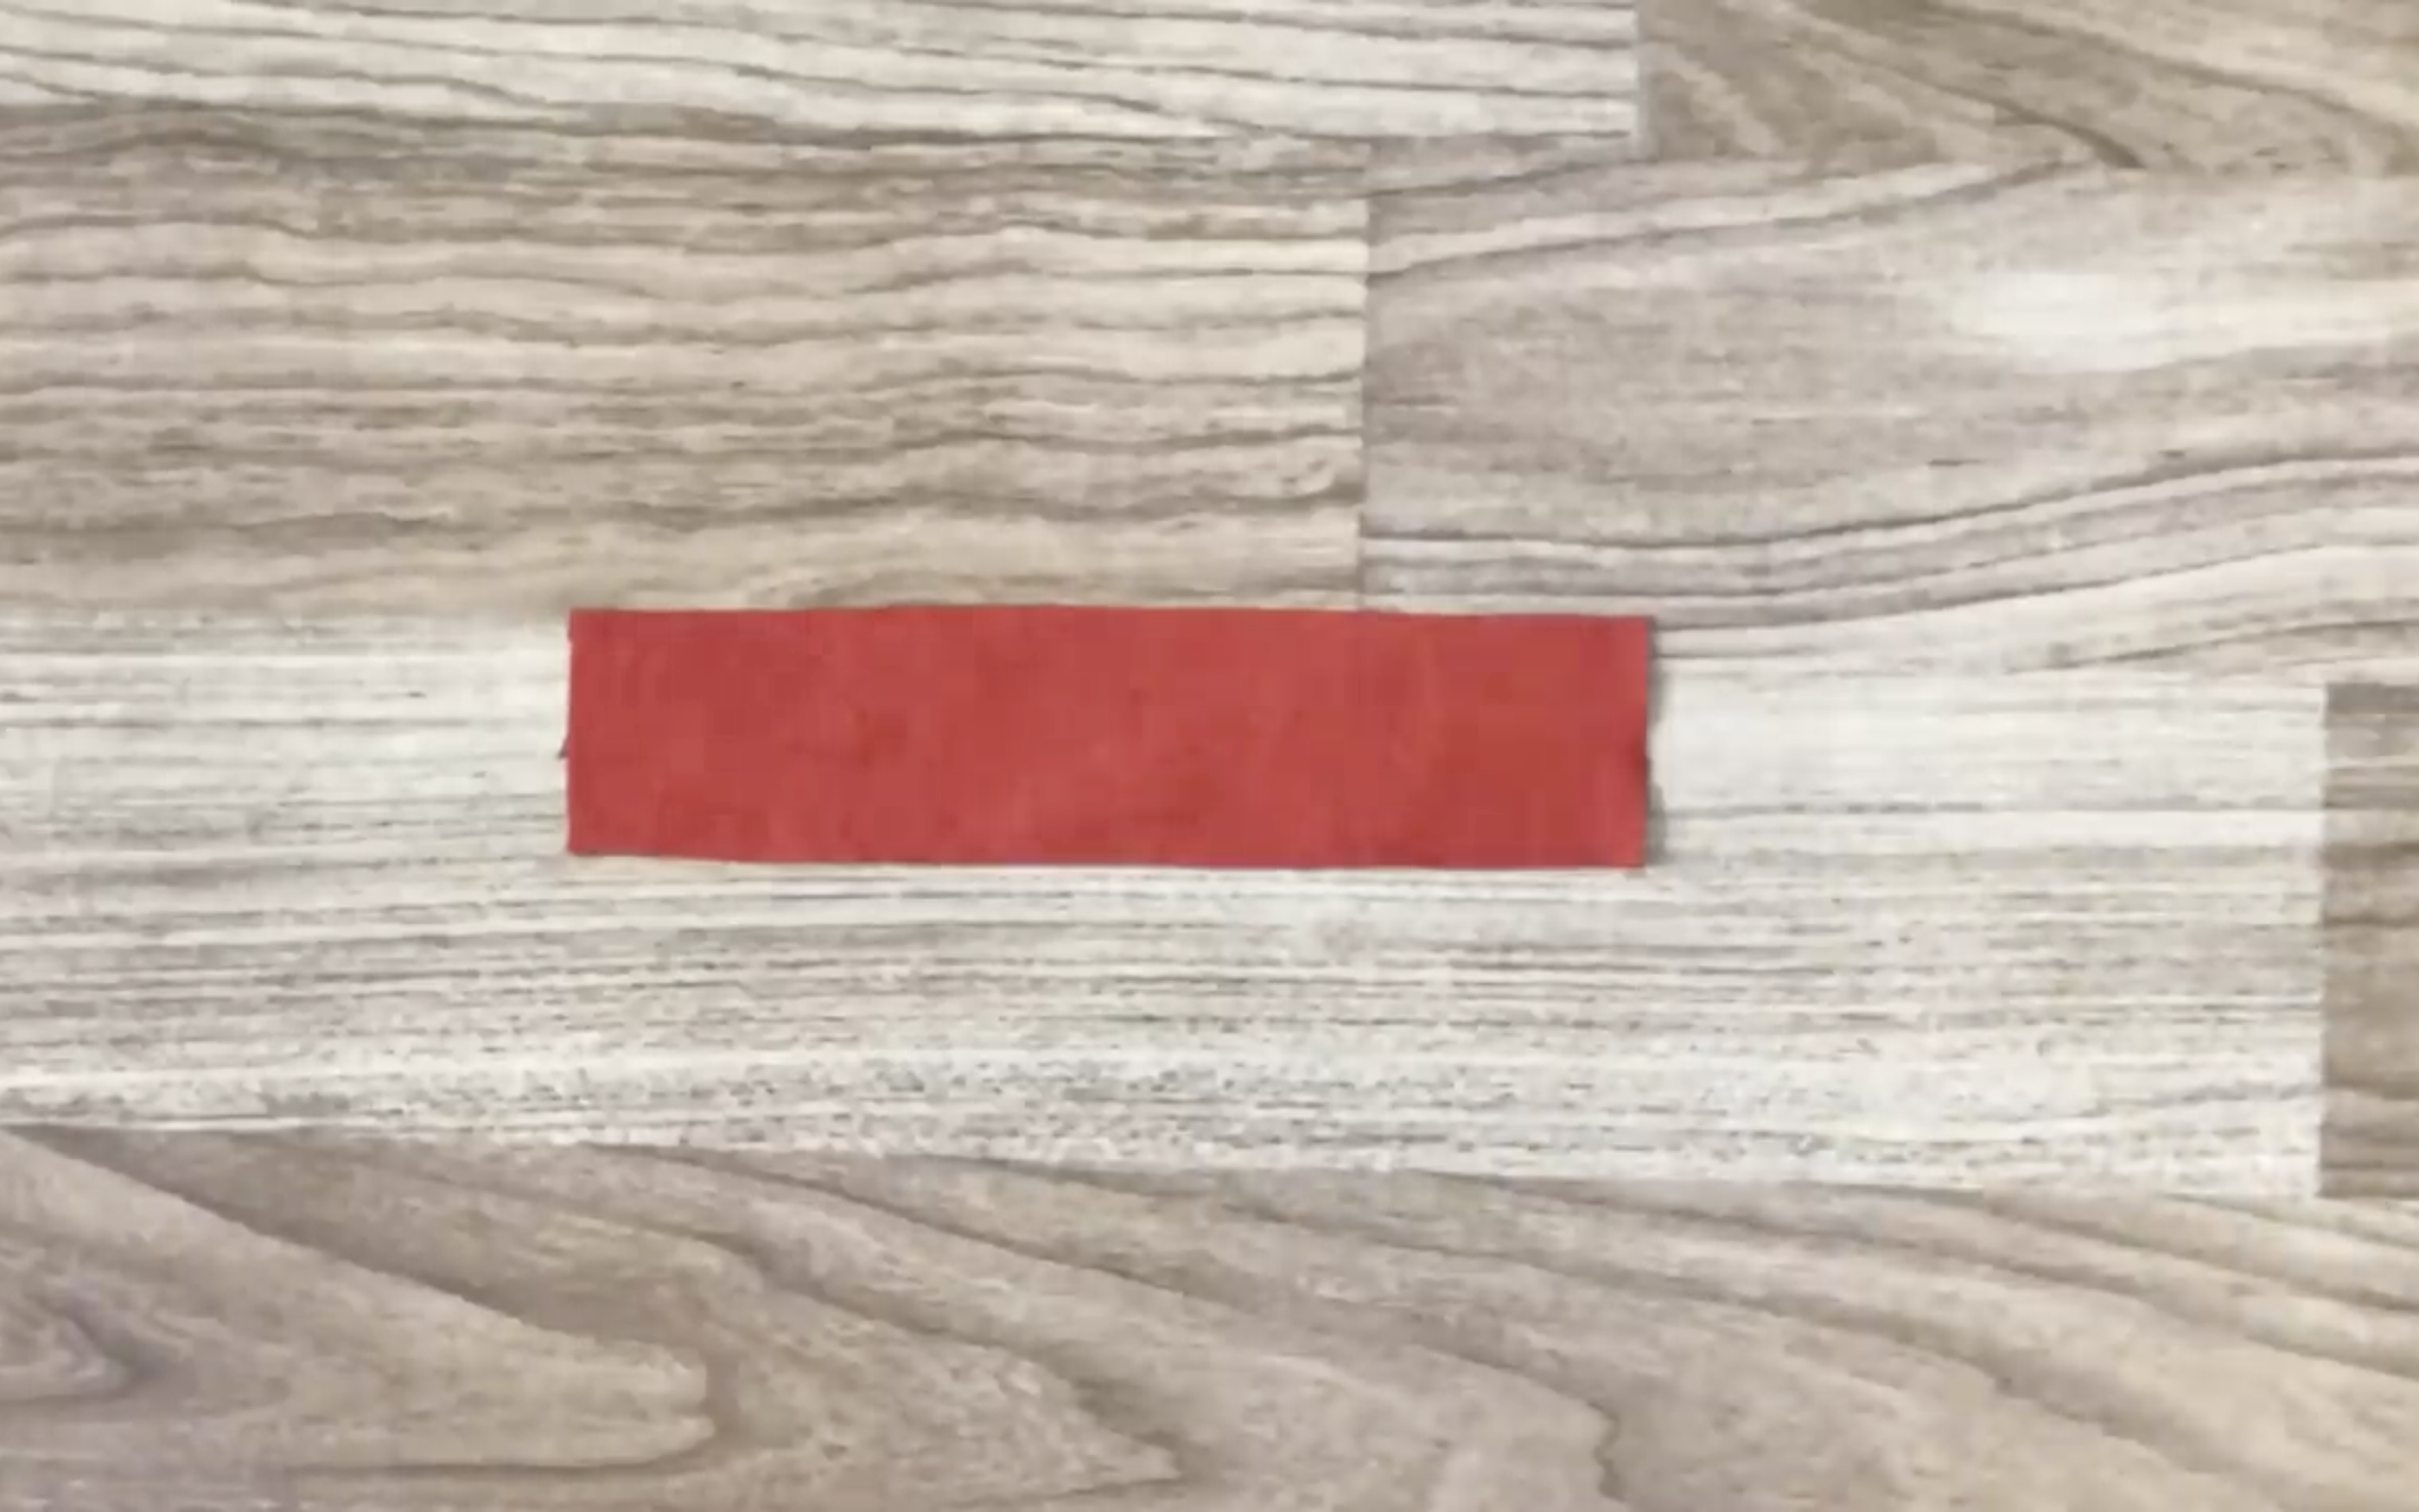
The next step is cutting a small rectangle with 3 cm width and 14 cm length.
Fold both sides of the length together, then sew first.
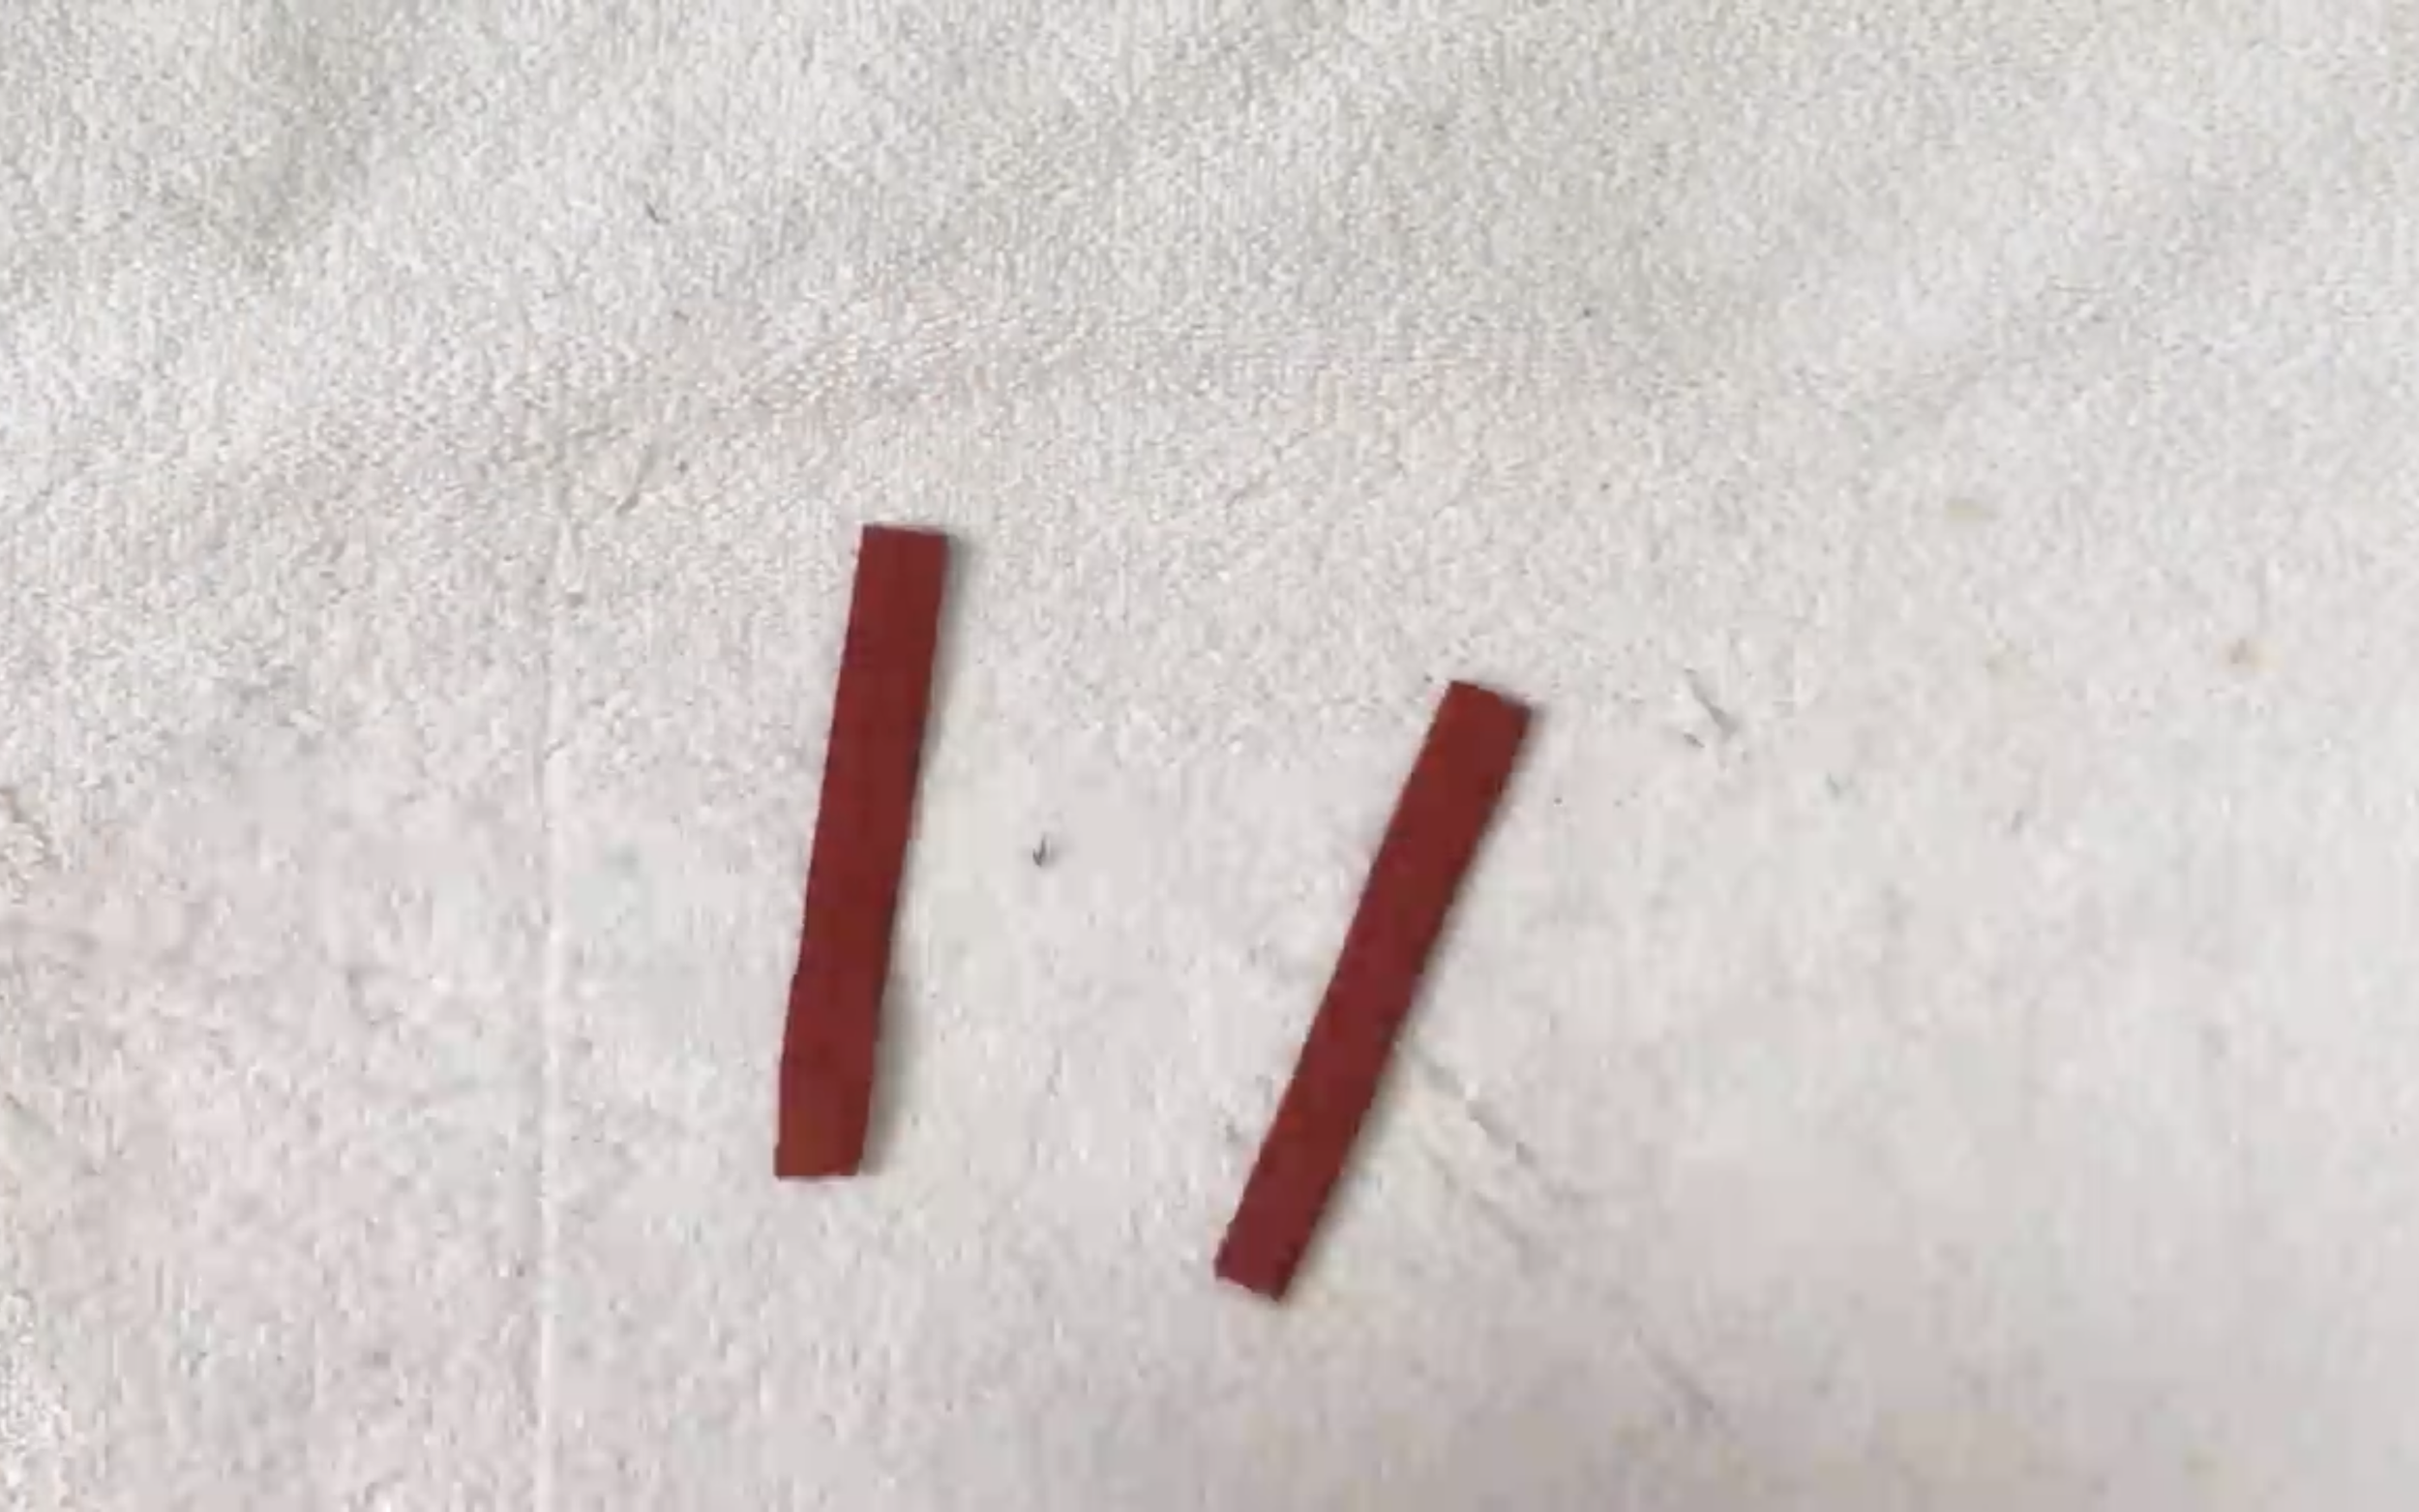
After turning it inside out and ironing it, cut it in half to create two small pieces. These will be the waist loops of the dress.
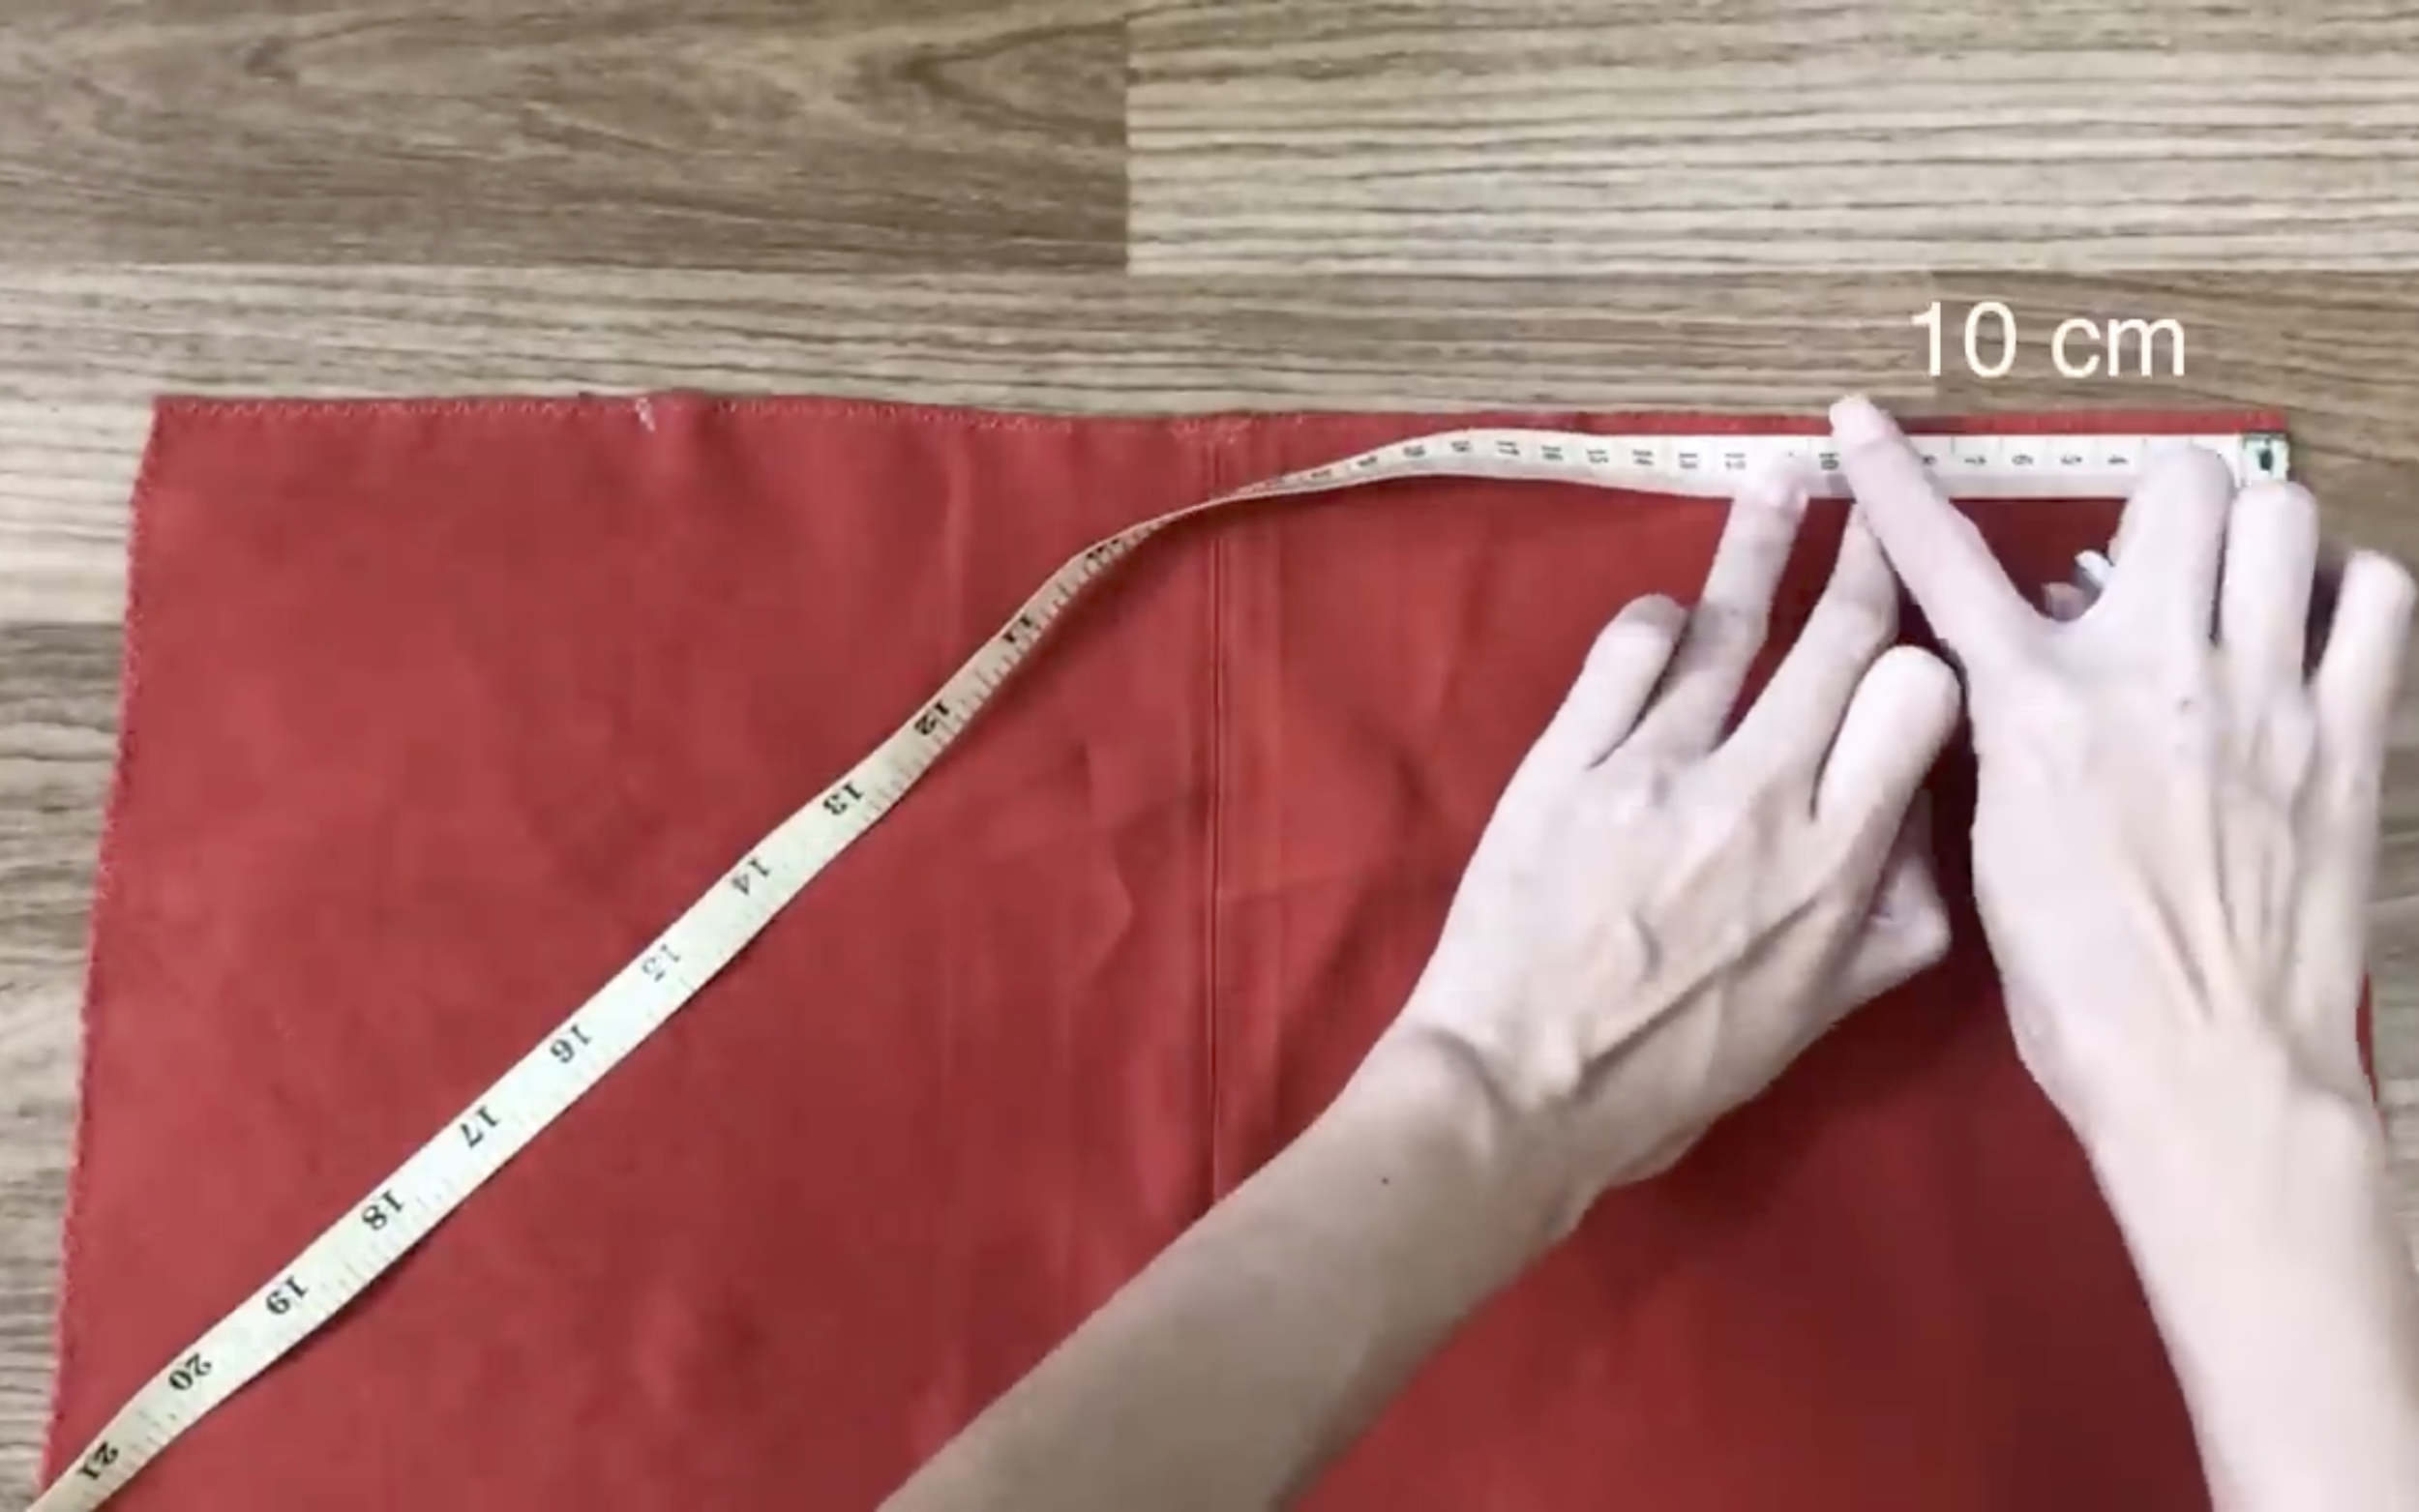
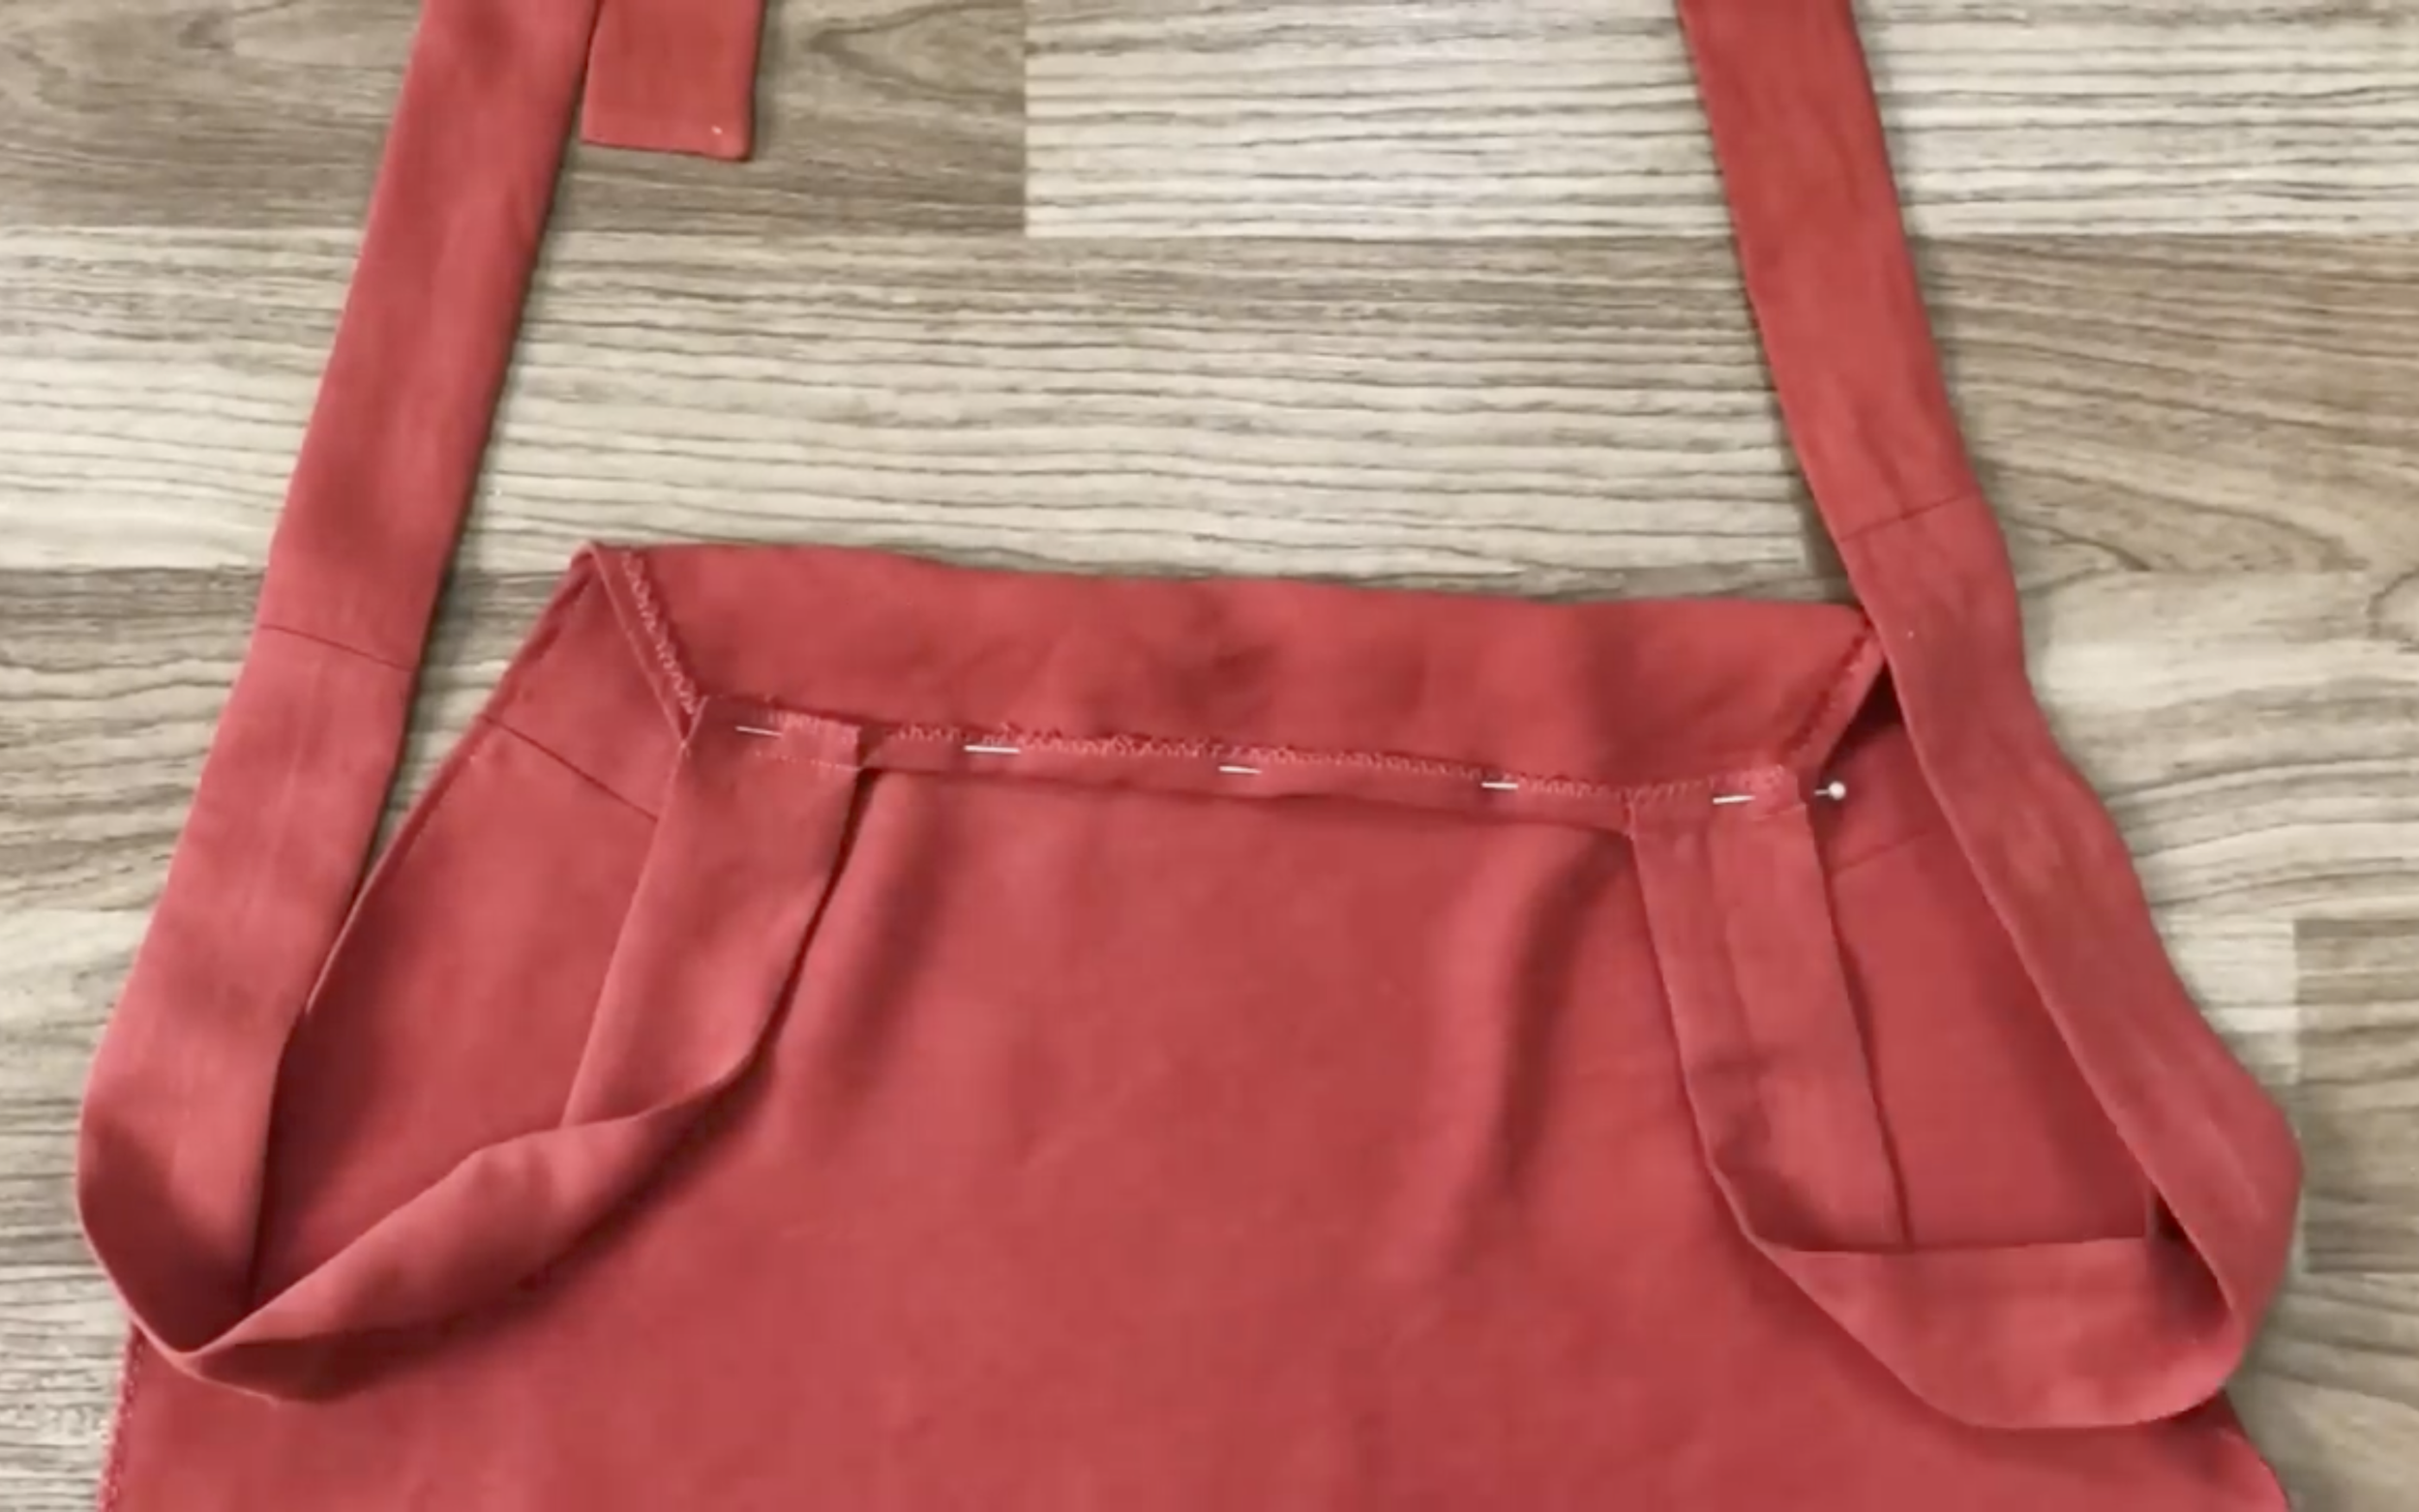
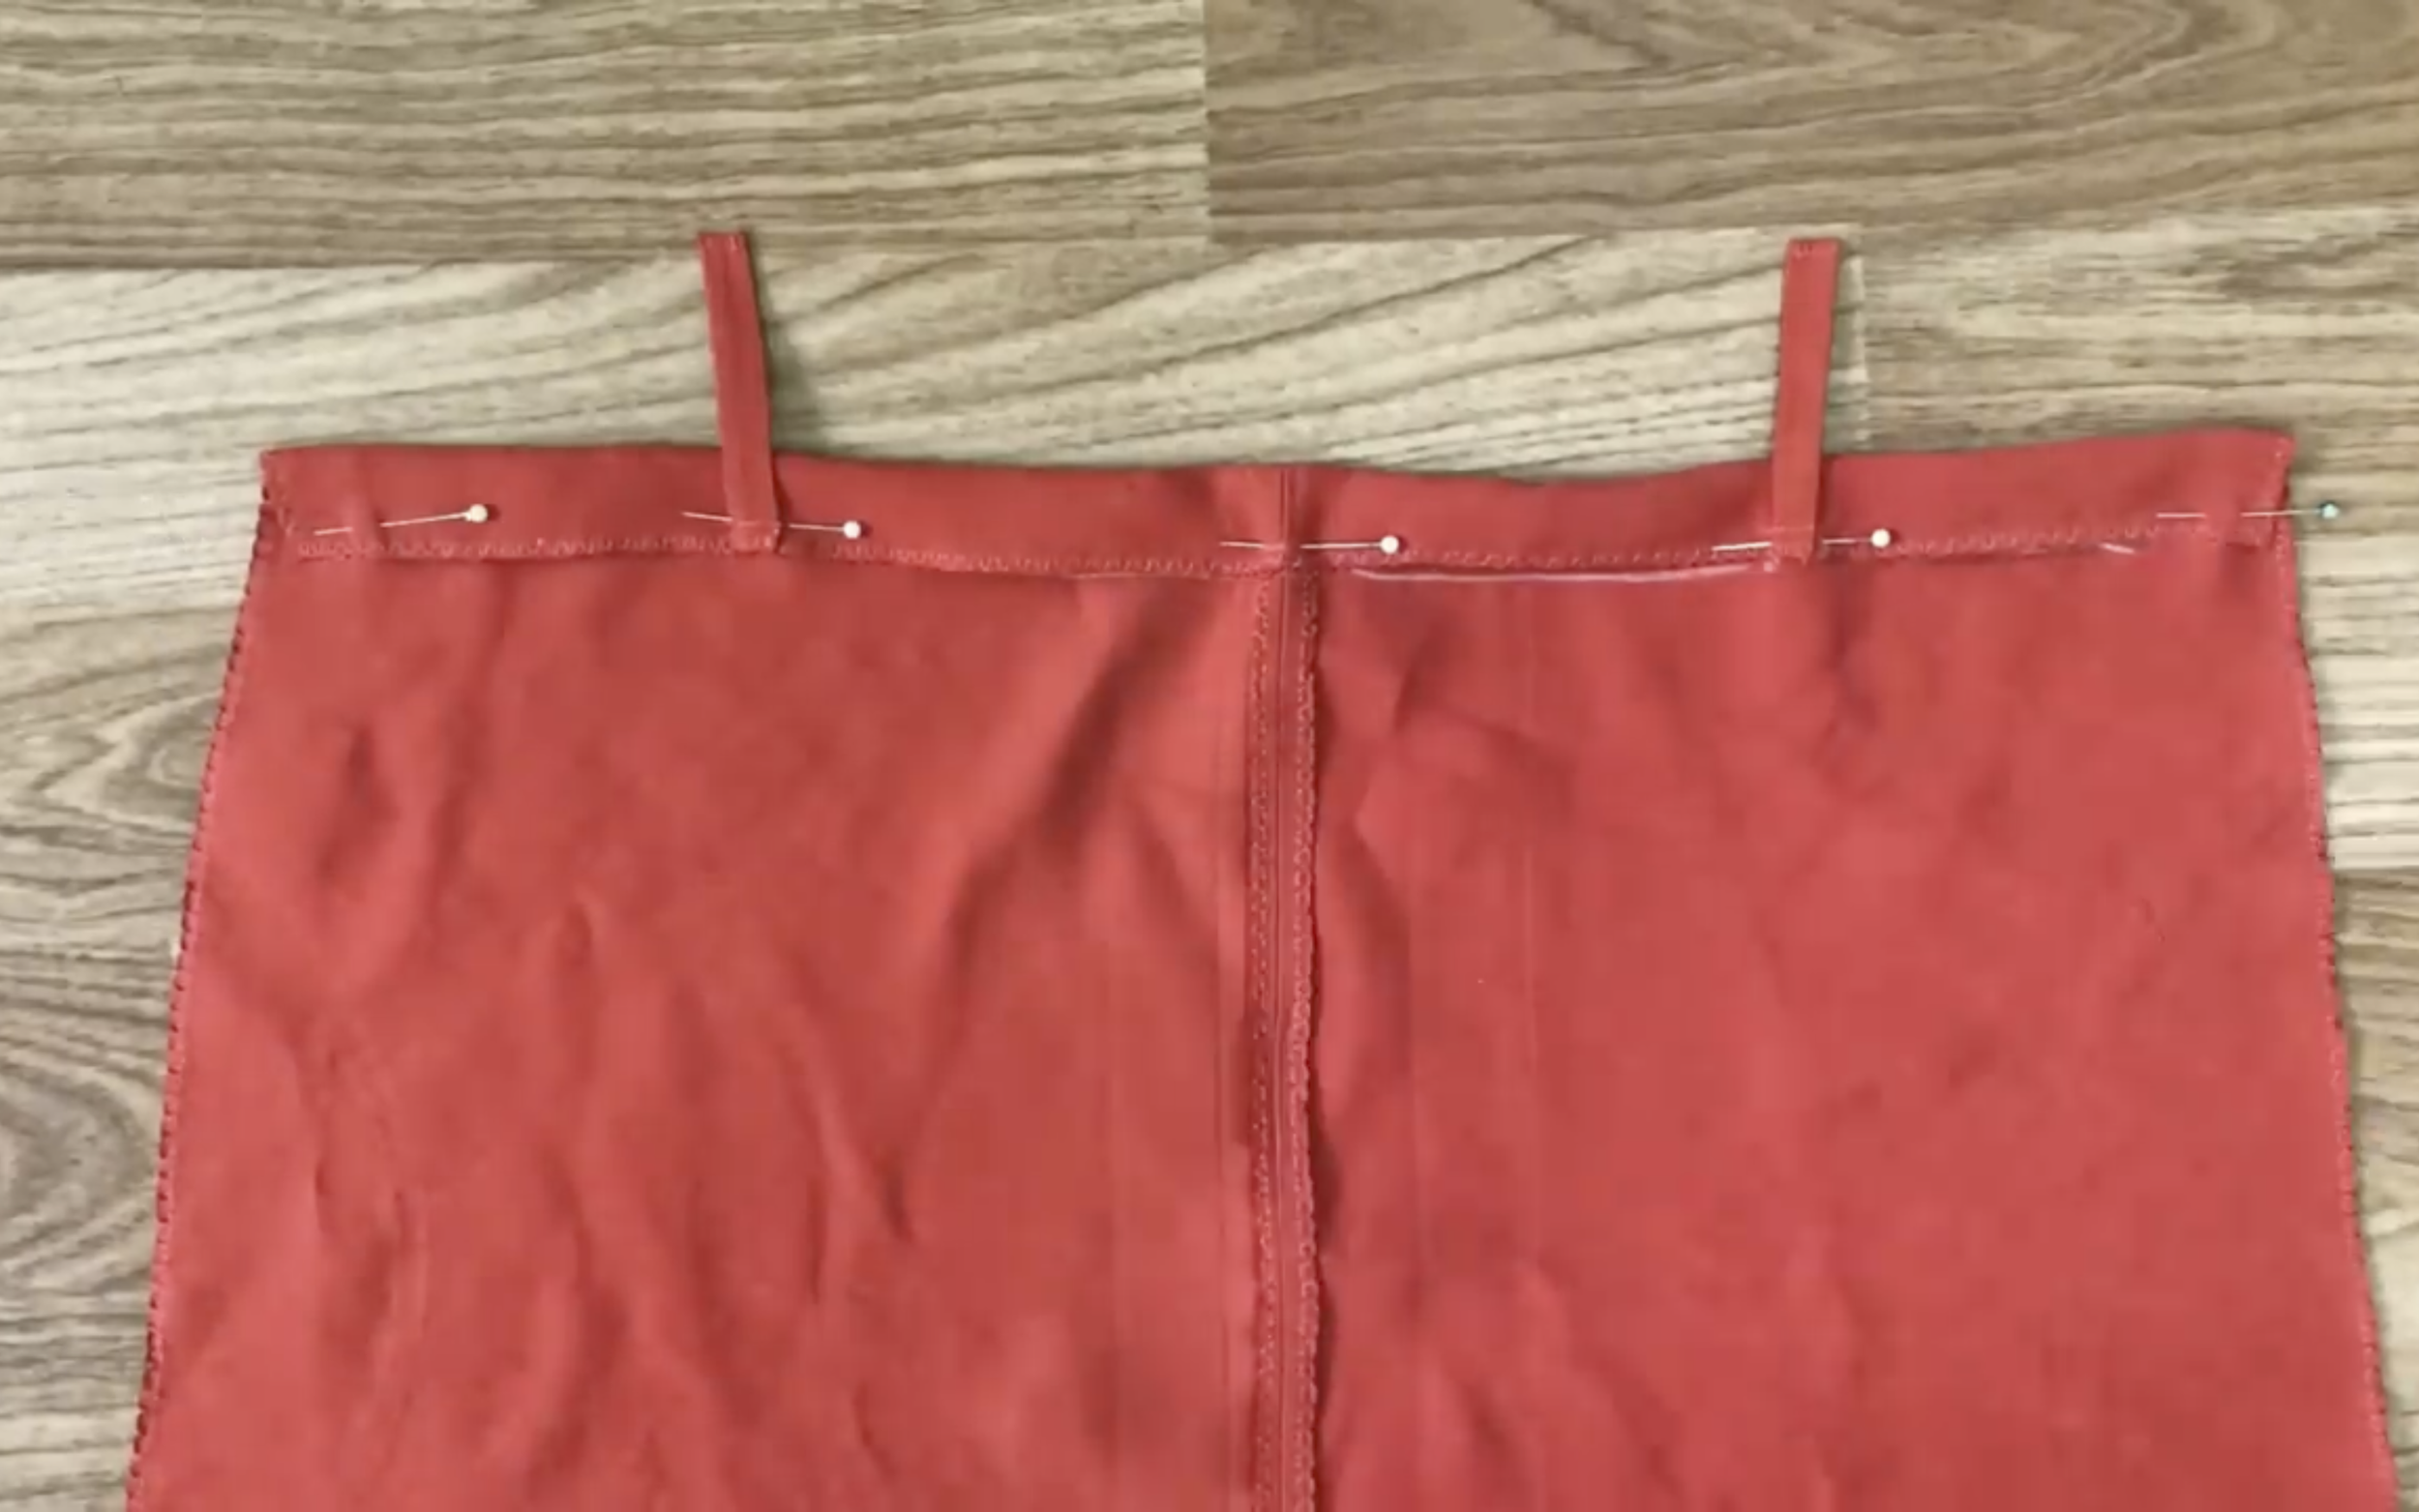
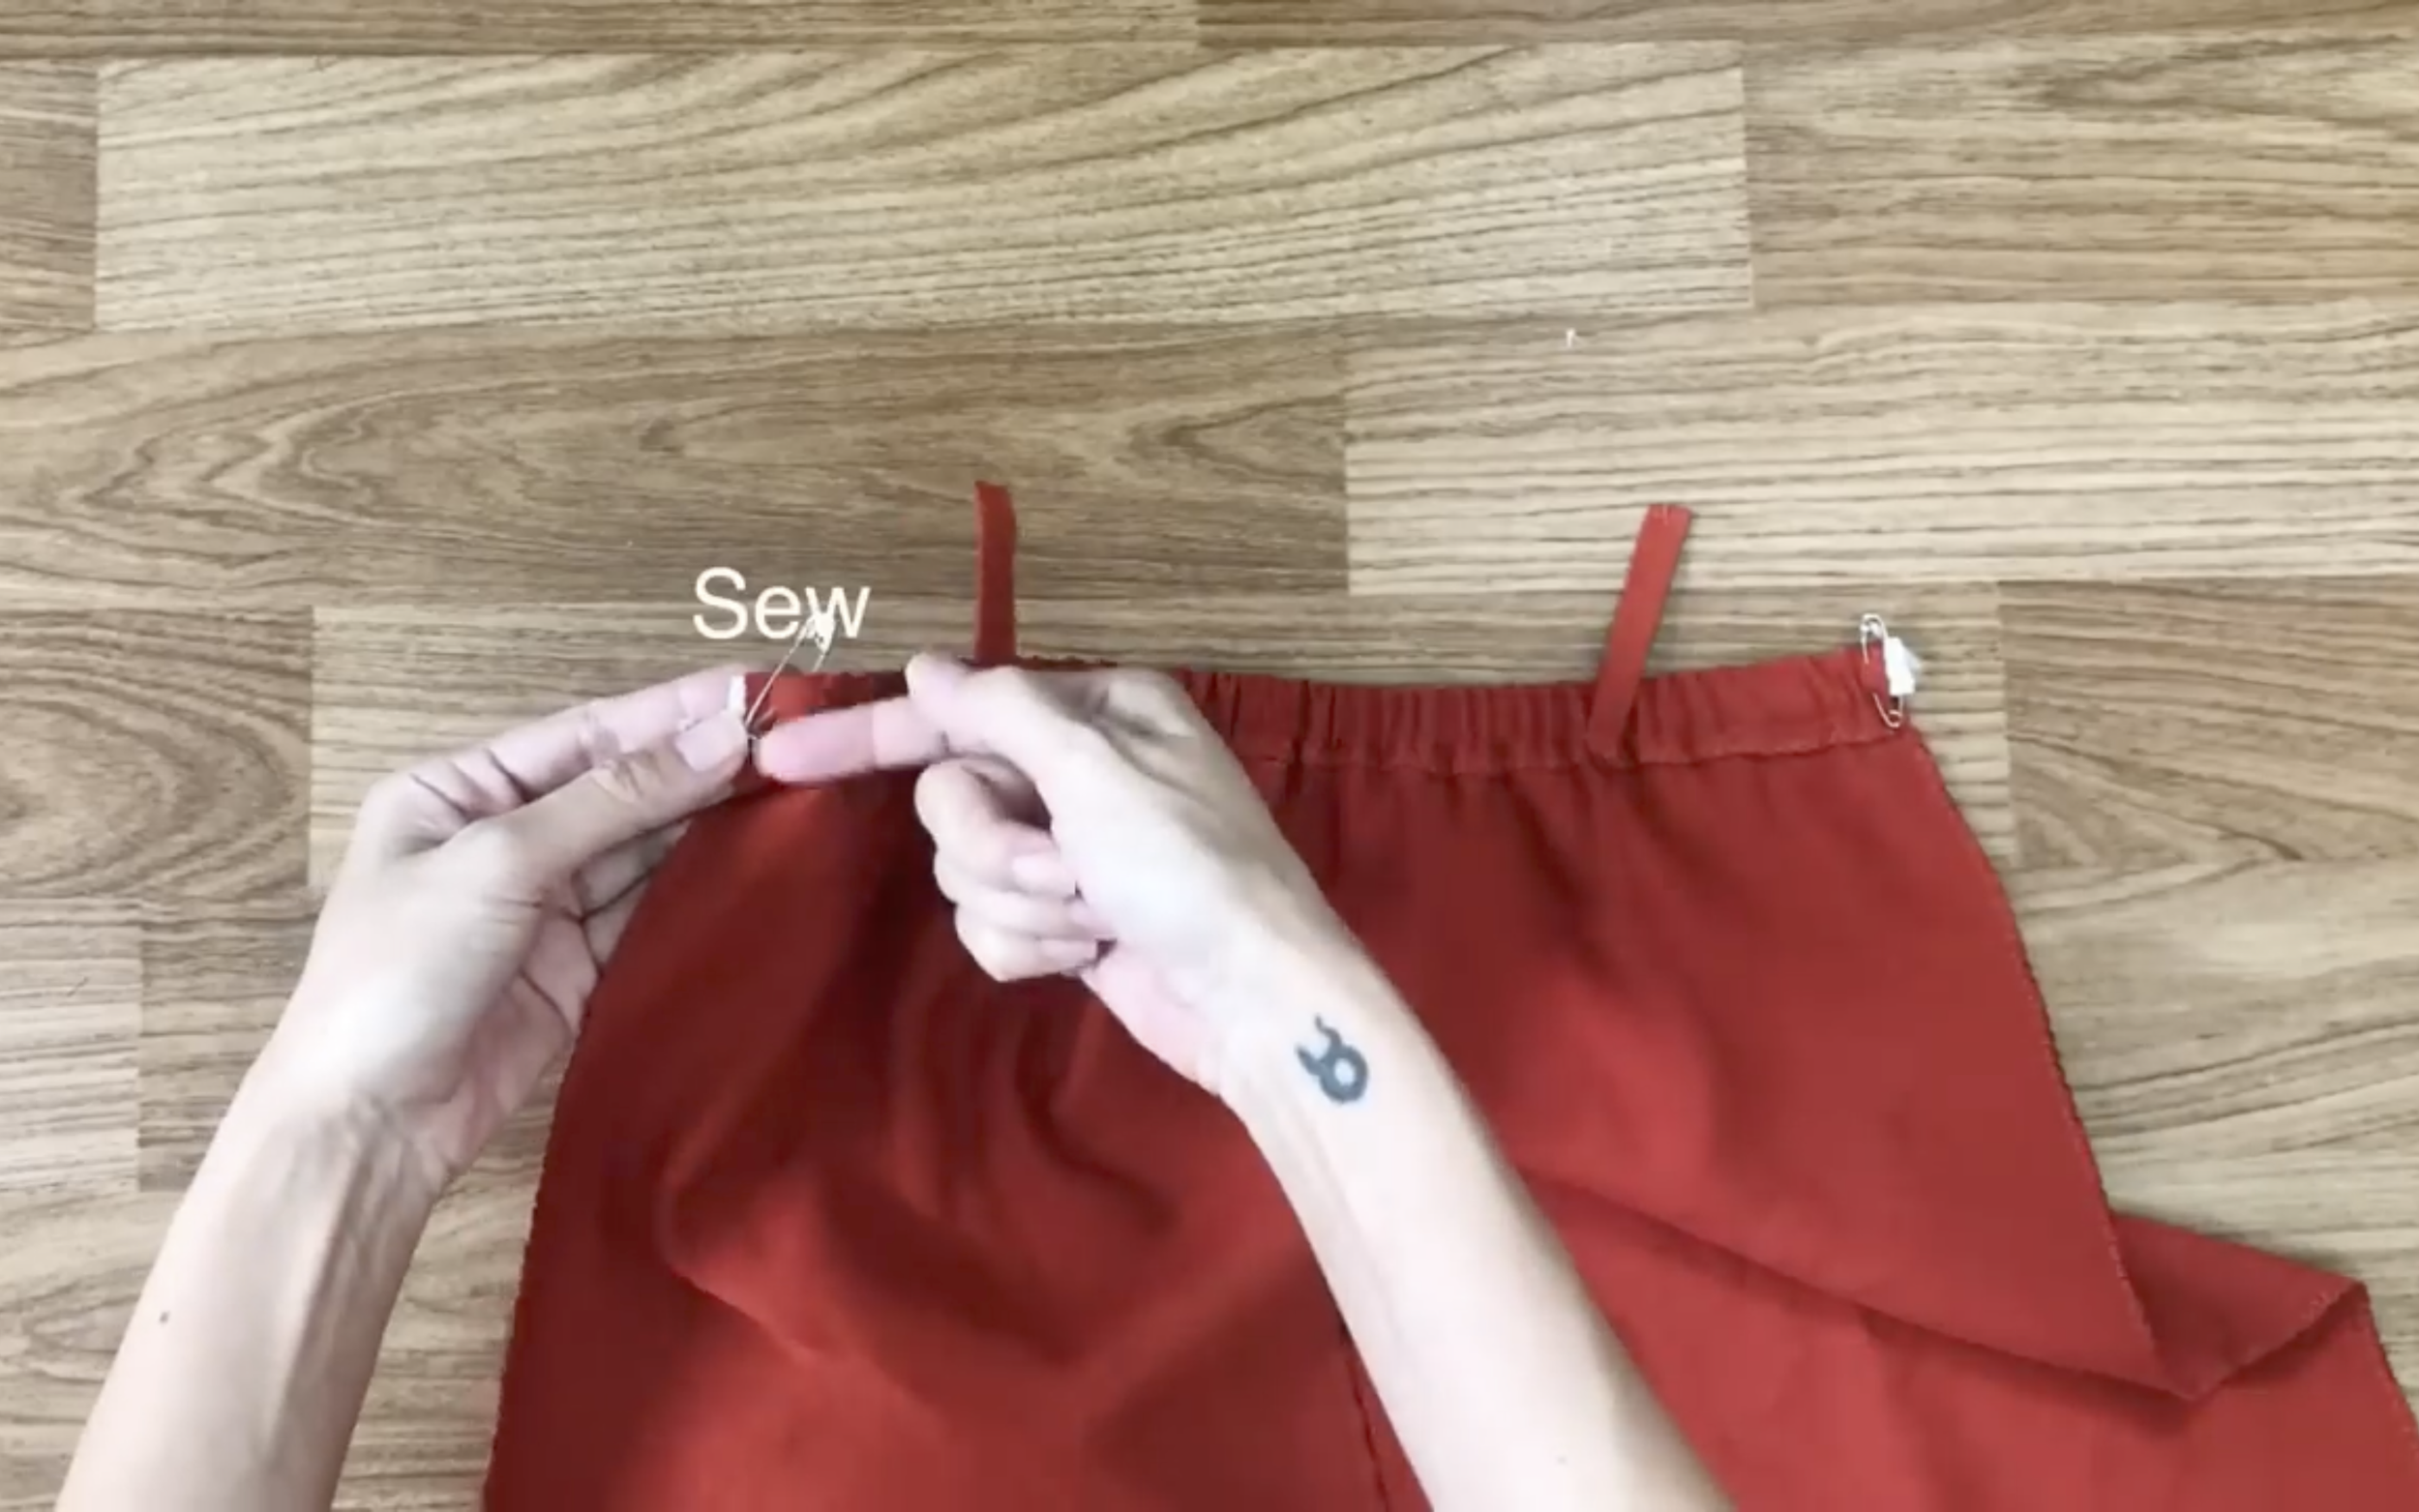
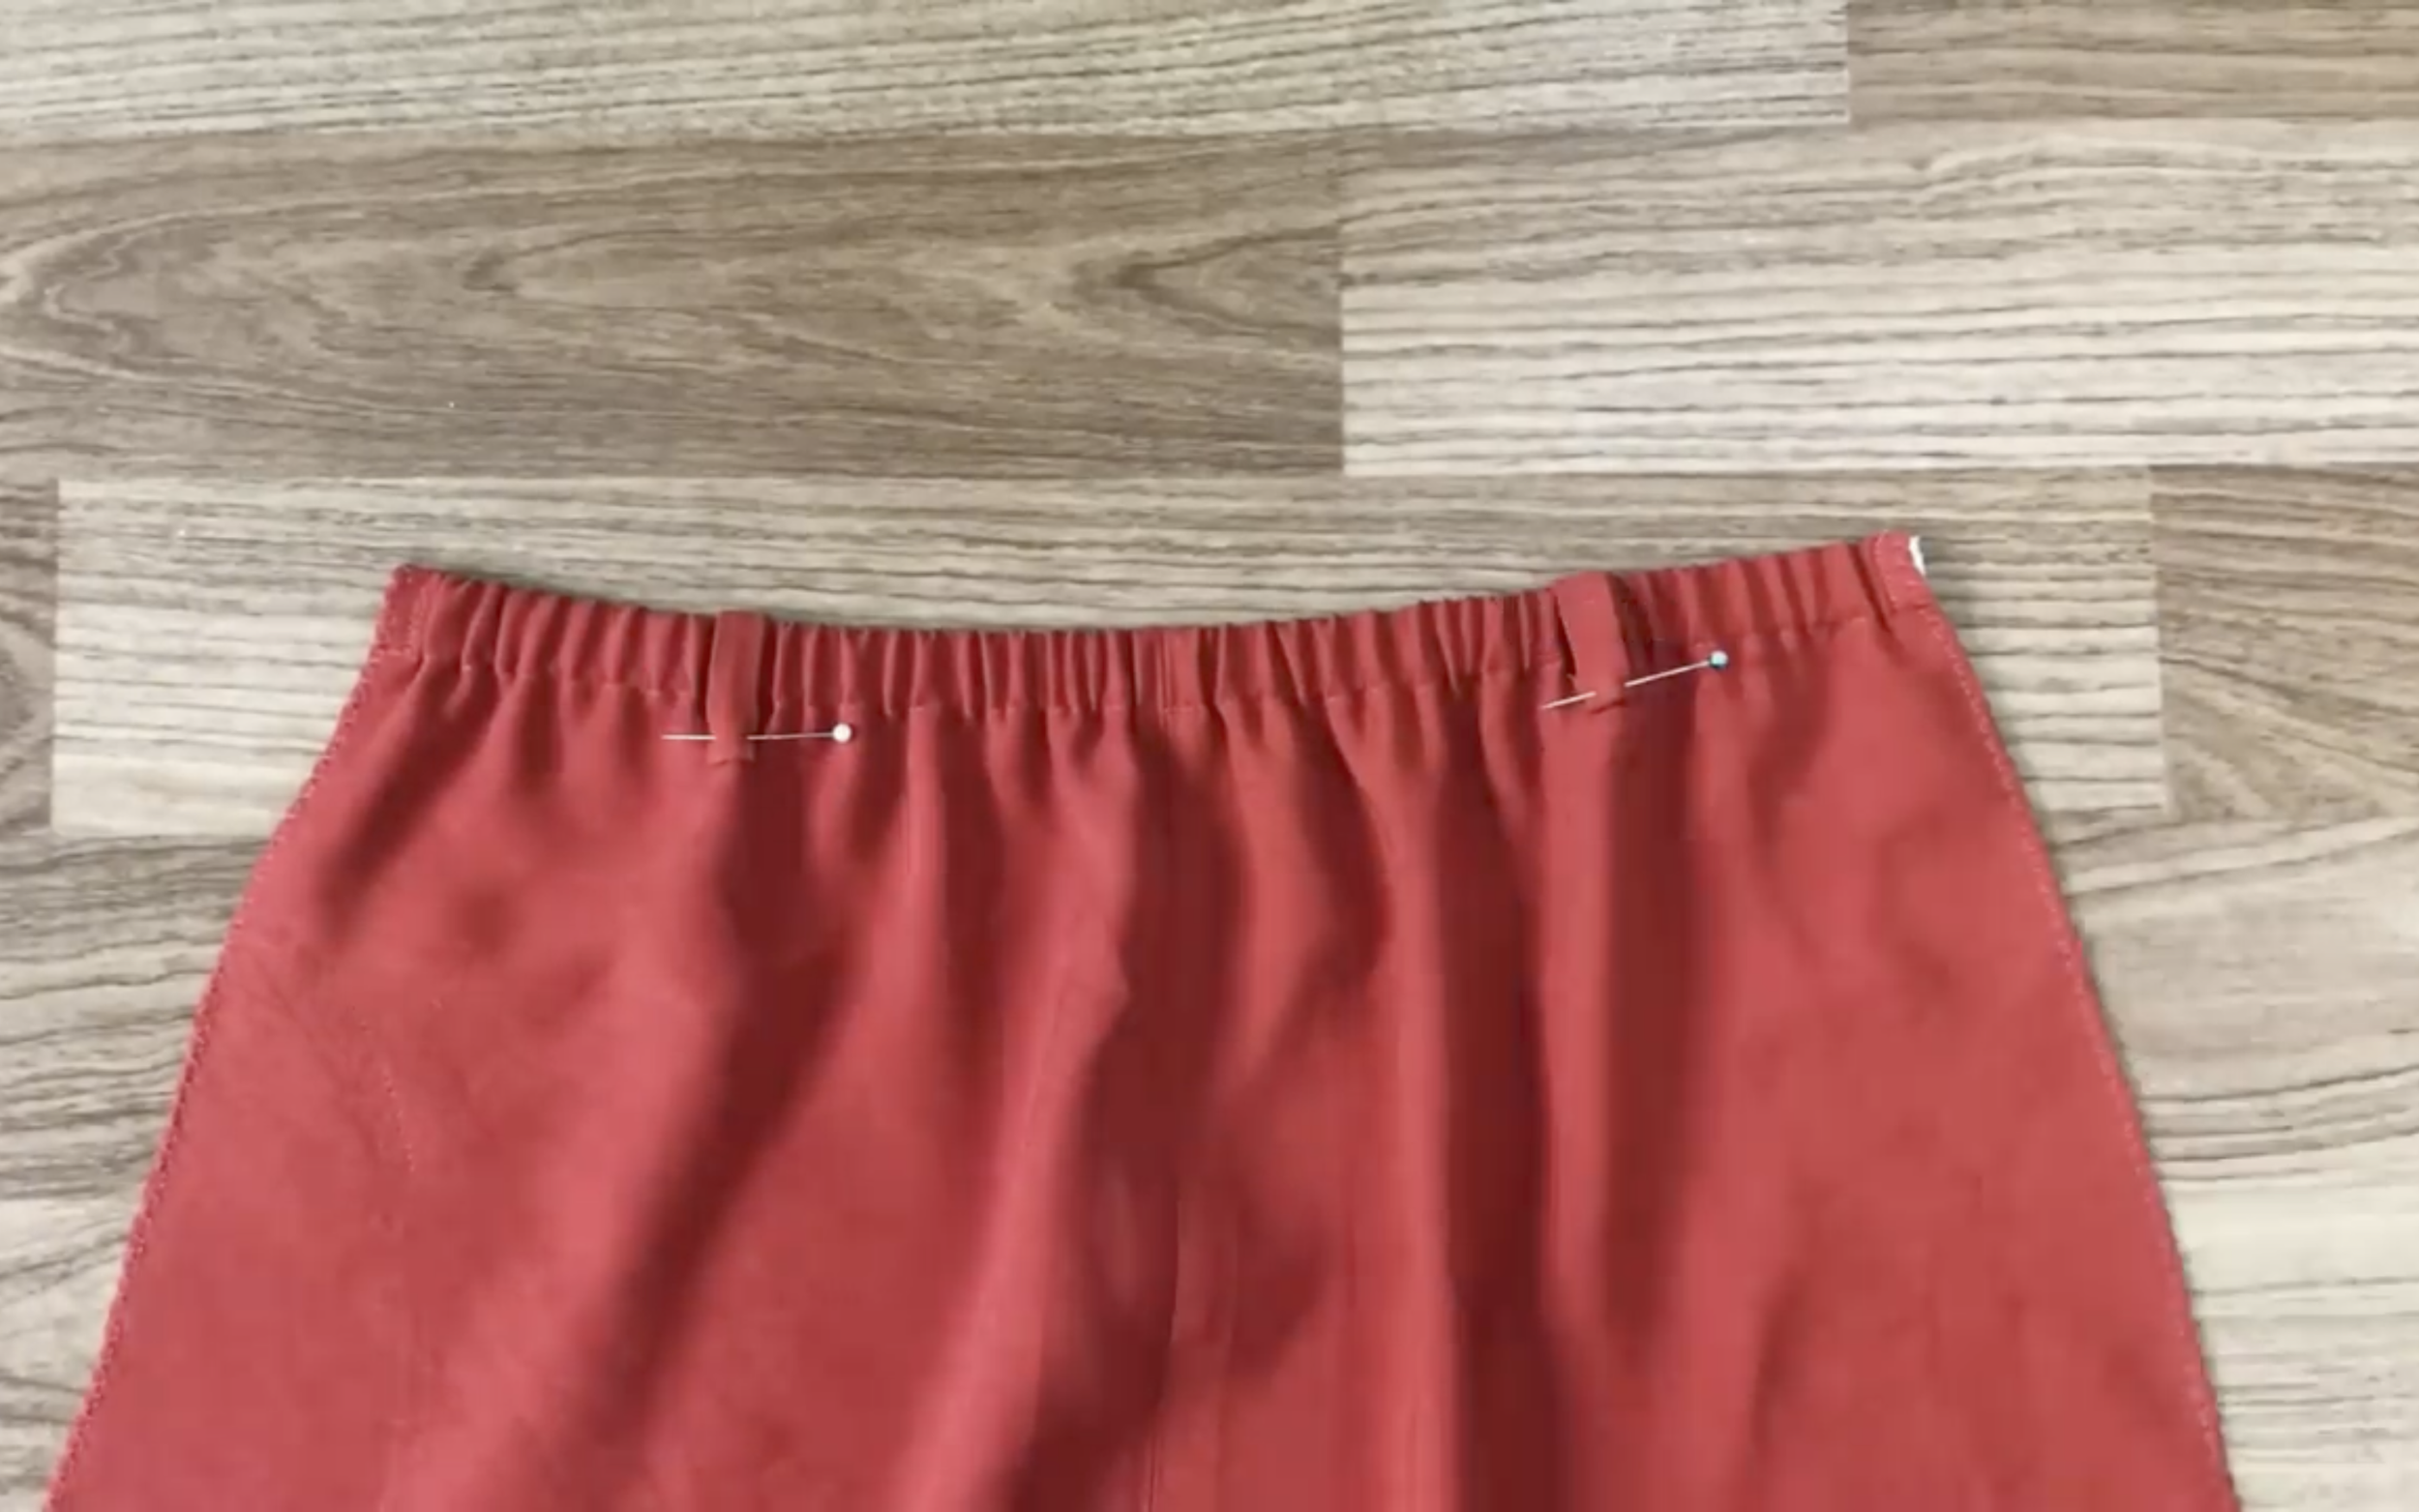
At the top of the back, mark 10 cm inside, then connect the two belt loops to these marks.
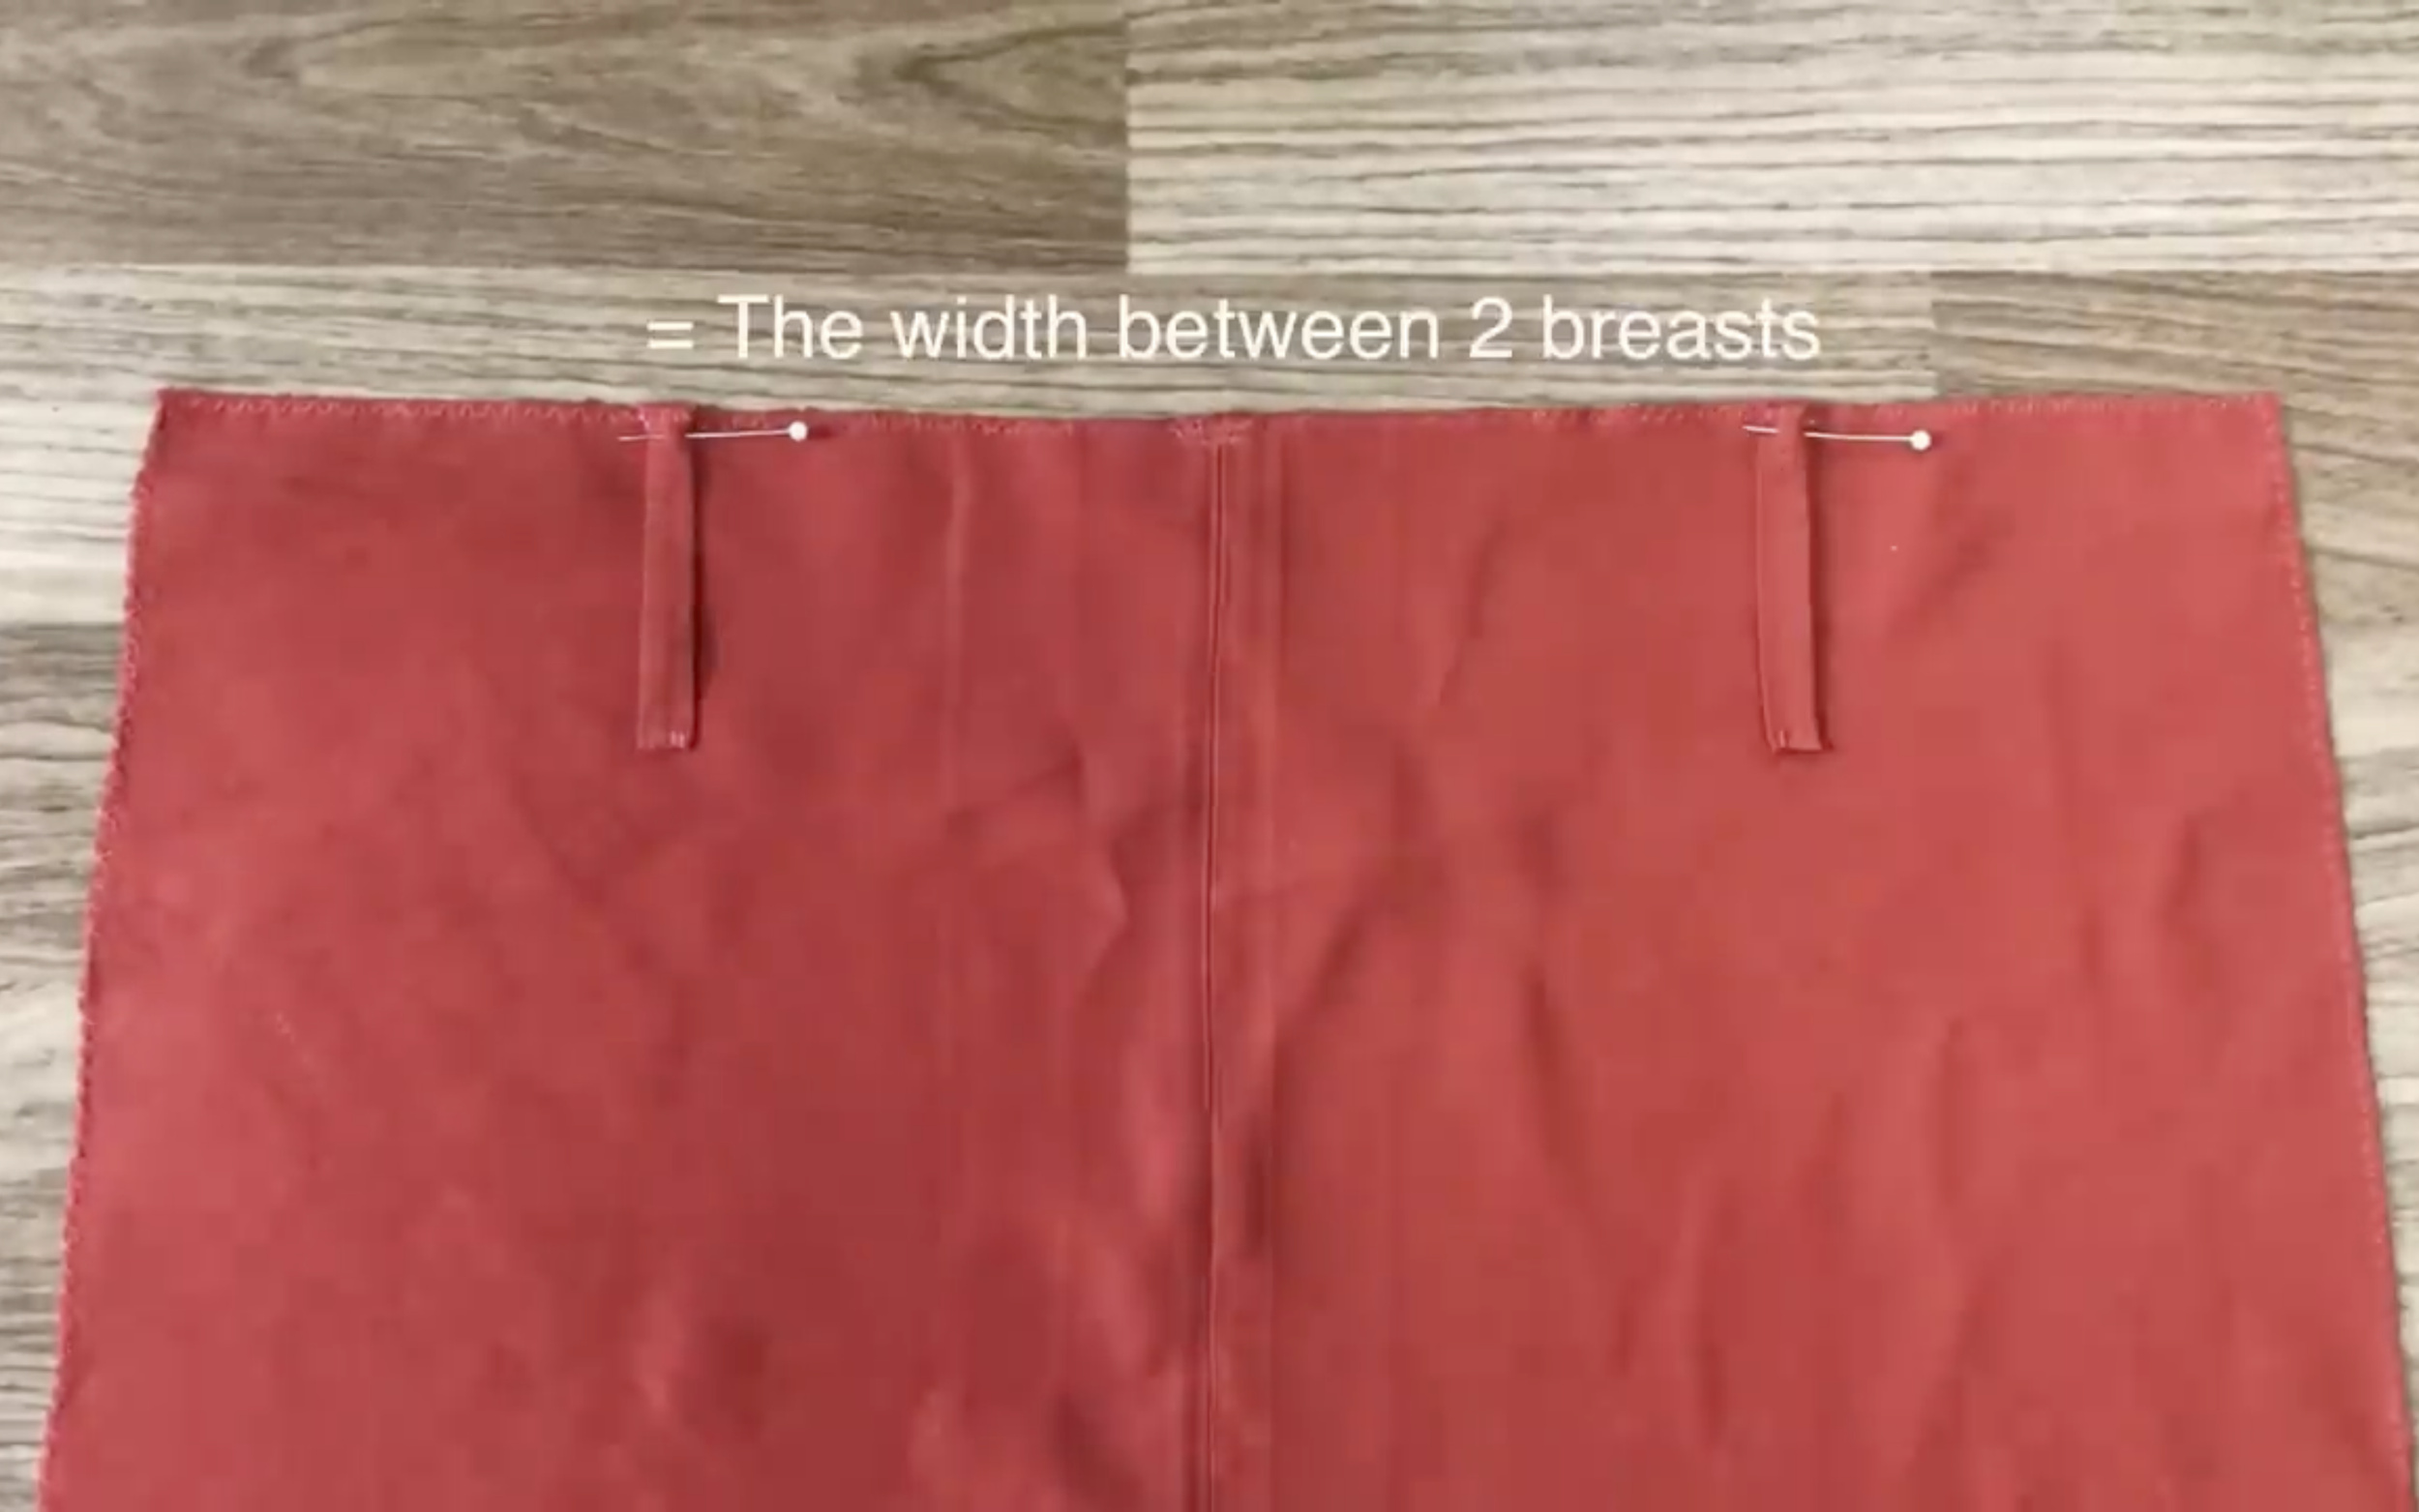
Make sure the width between the two belt loops matches the width between two breasts, then sew.
Measure the width of the top fabric to fold in, ensuring enough space for the elastic band to go through later. The measurement is 2.5 cm.
Draw a horizontal line 5 cm under the top line, then fold the top fabric to that line.
Then fold the top fabric to that line.
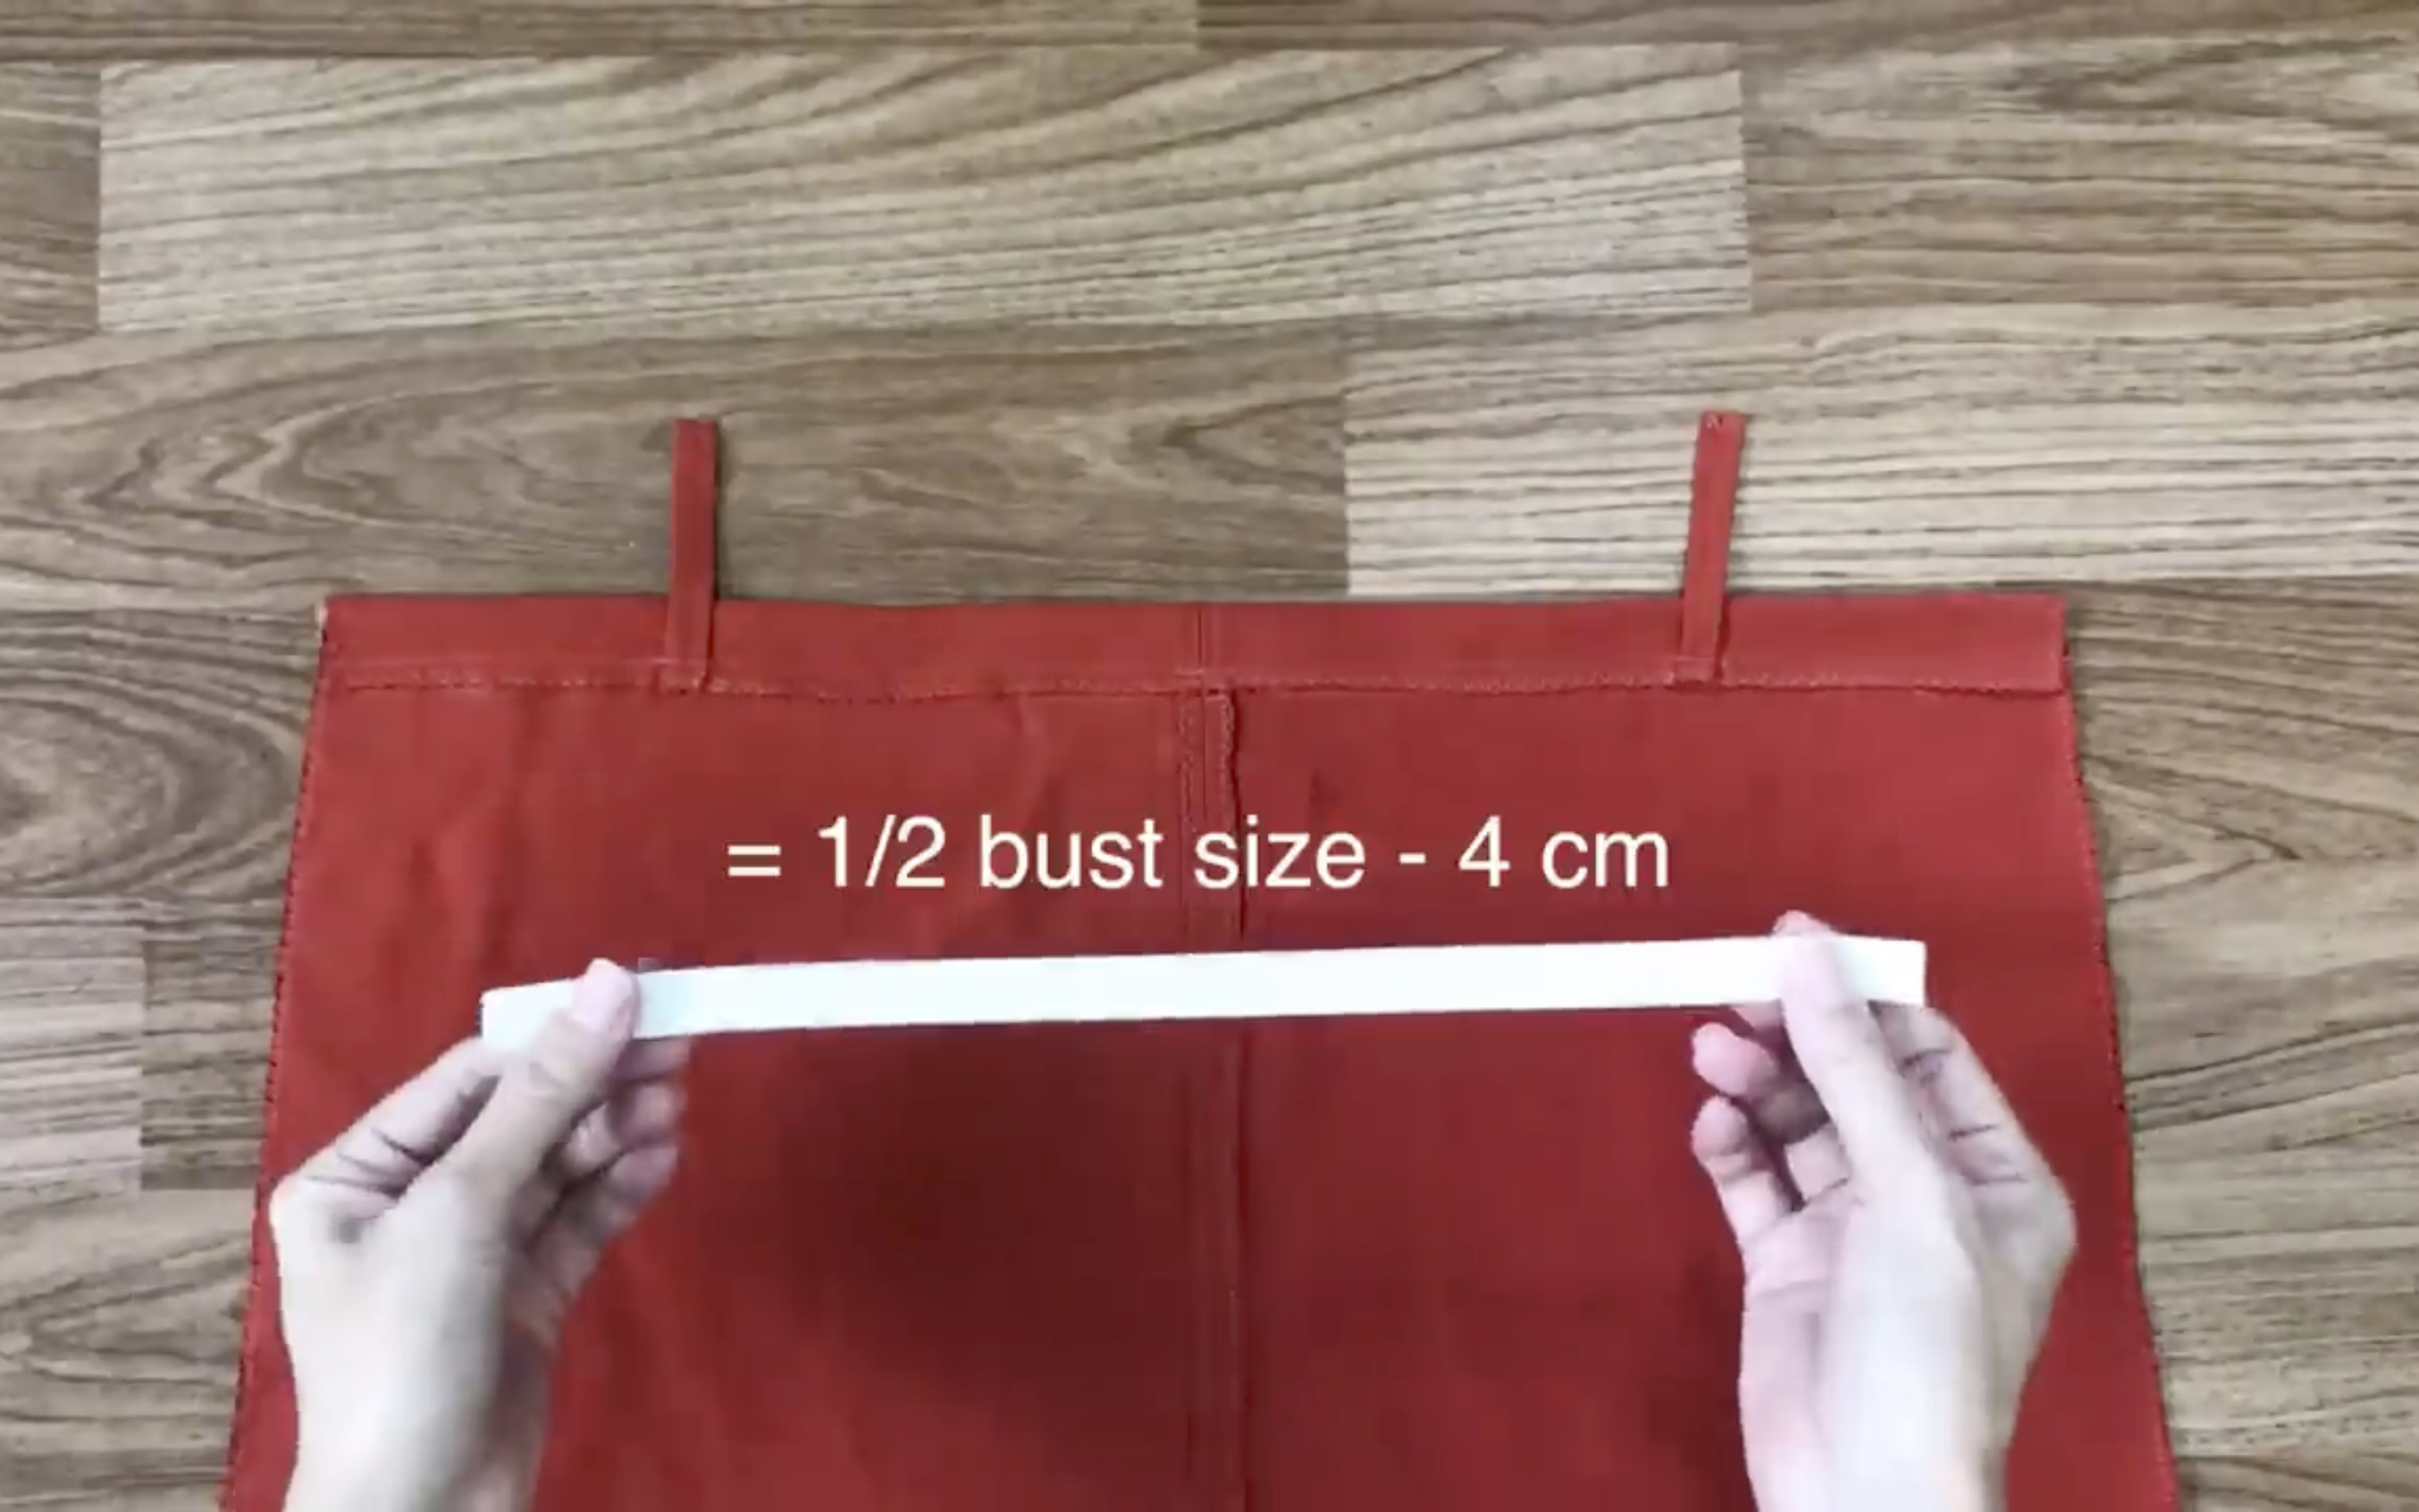
Cut an elastic band to half of the bust size minus 4 cm.
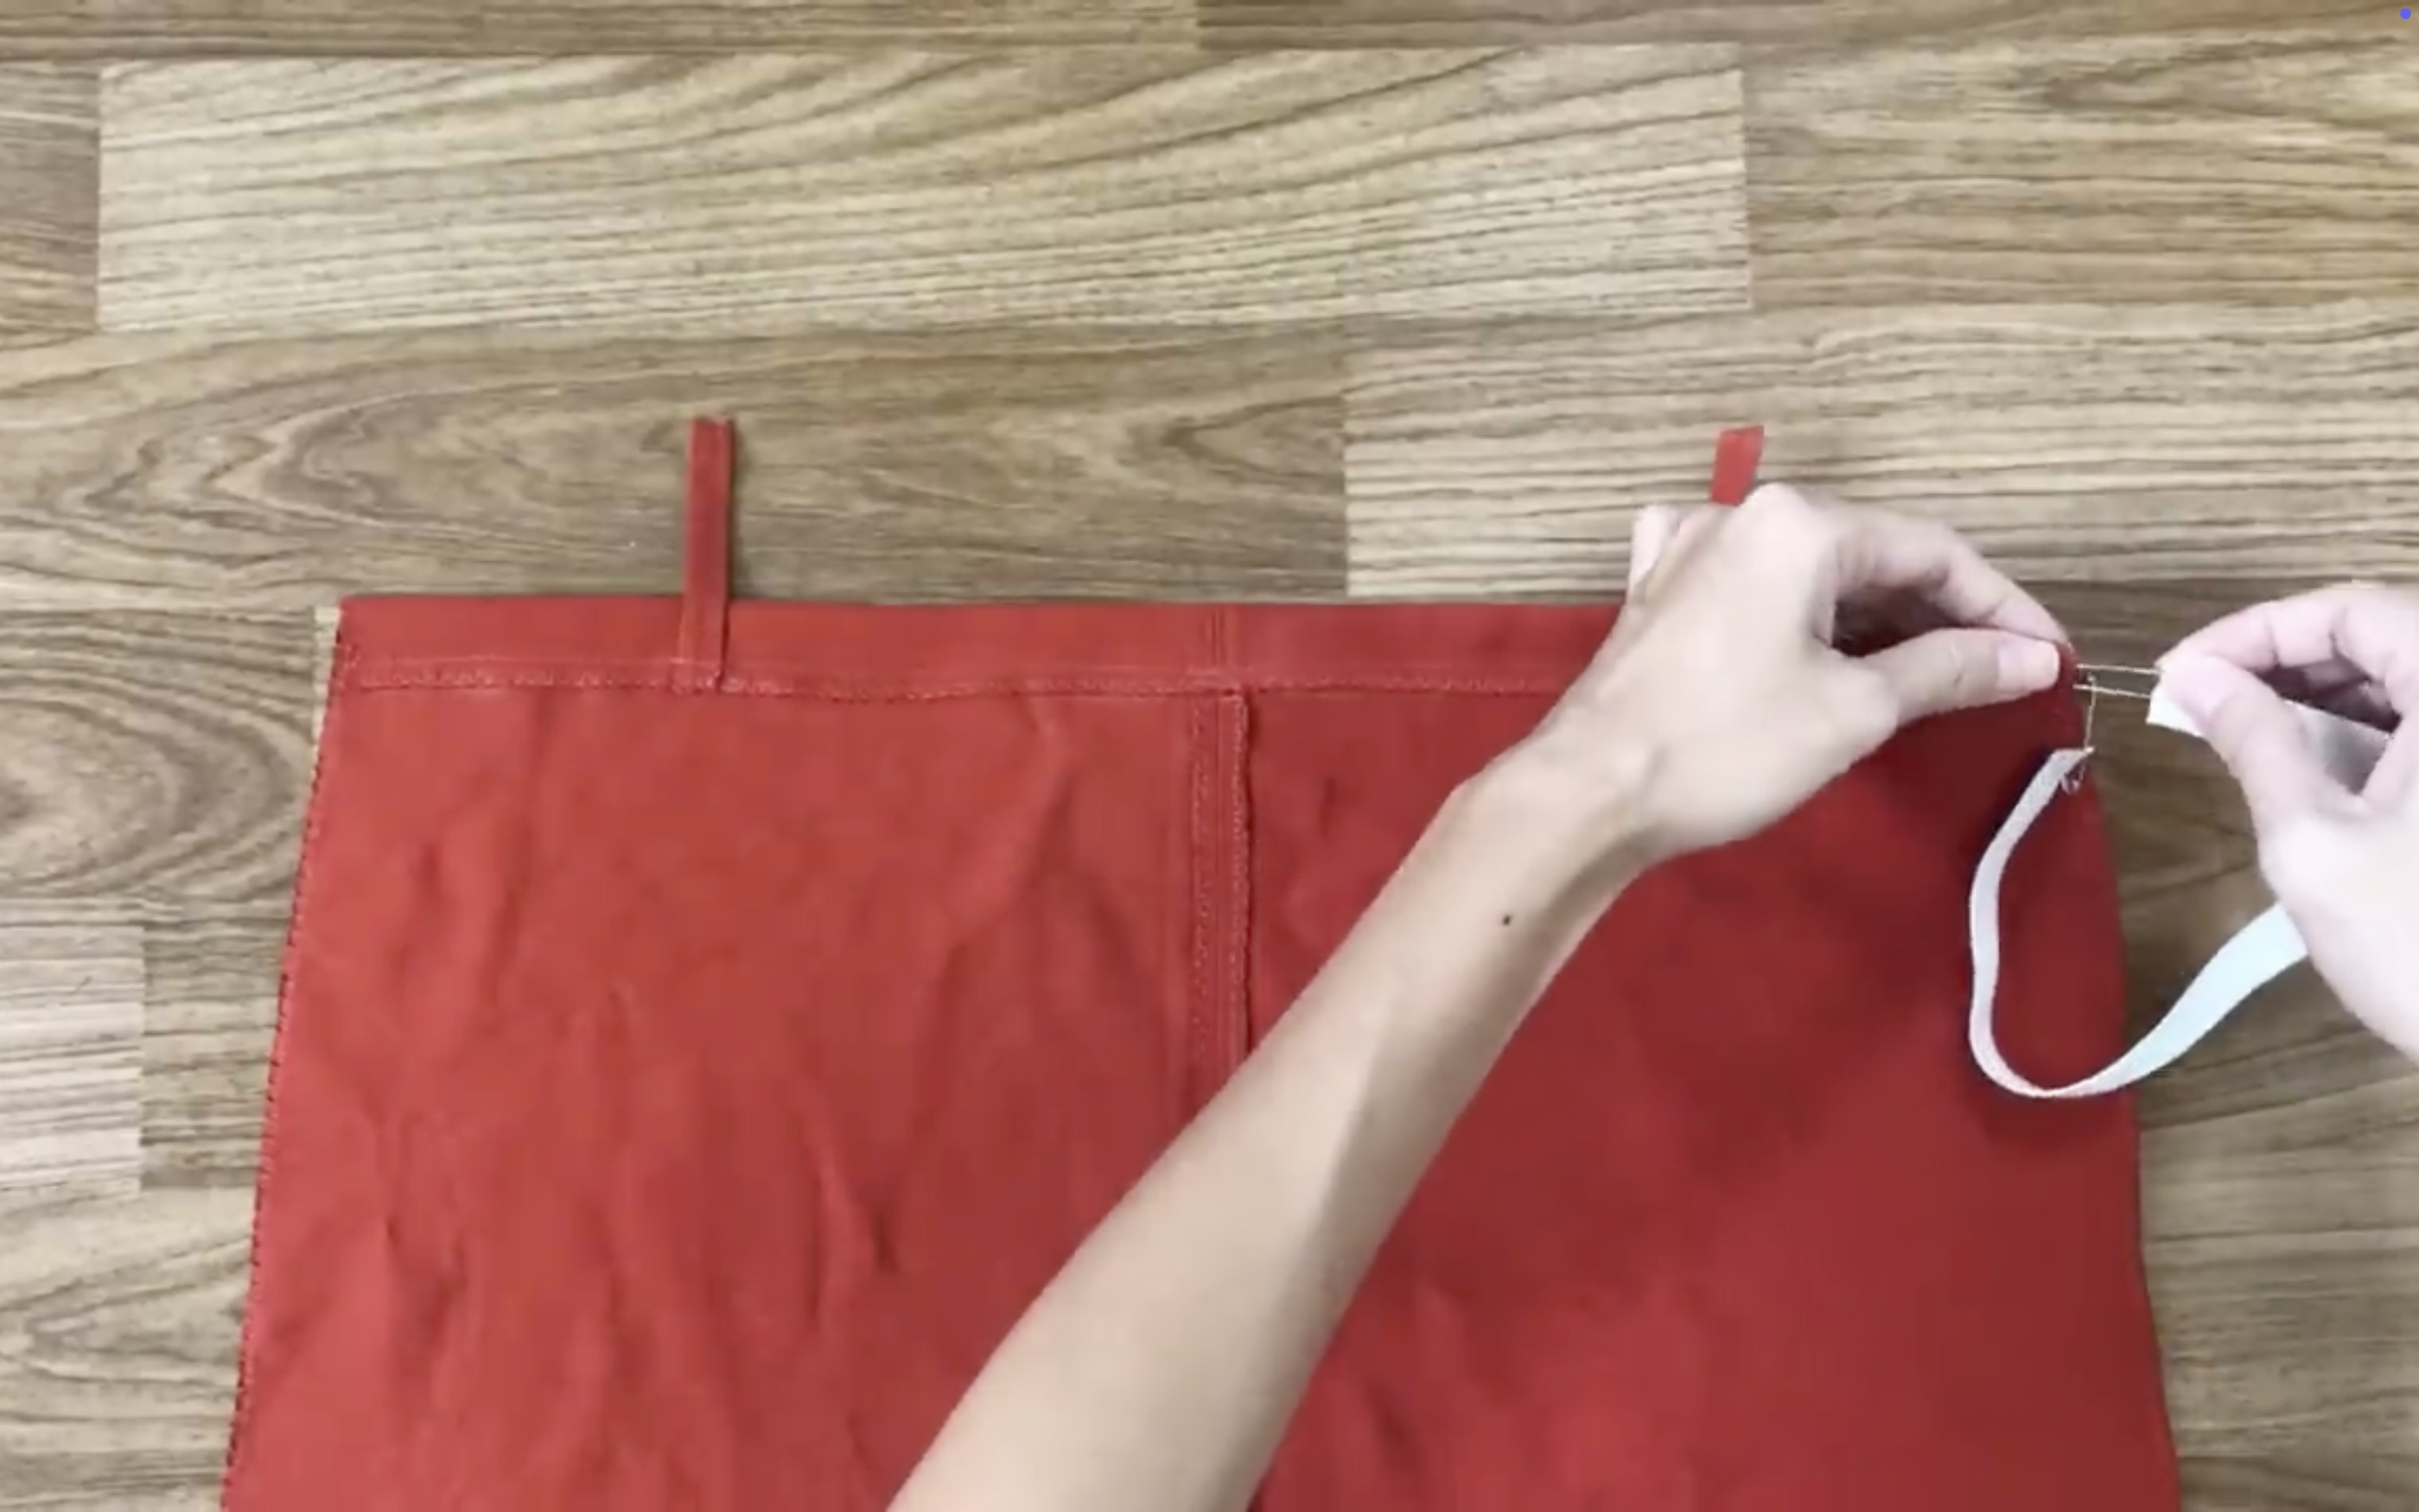
Use two safety pins to thread the elastic band through the fabric hole.
Then sew both ends of the elastic band.
Sew the belt loops onto the waistband.
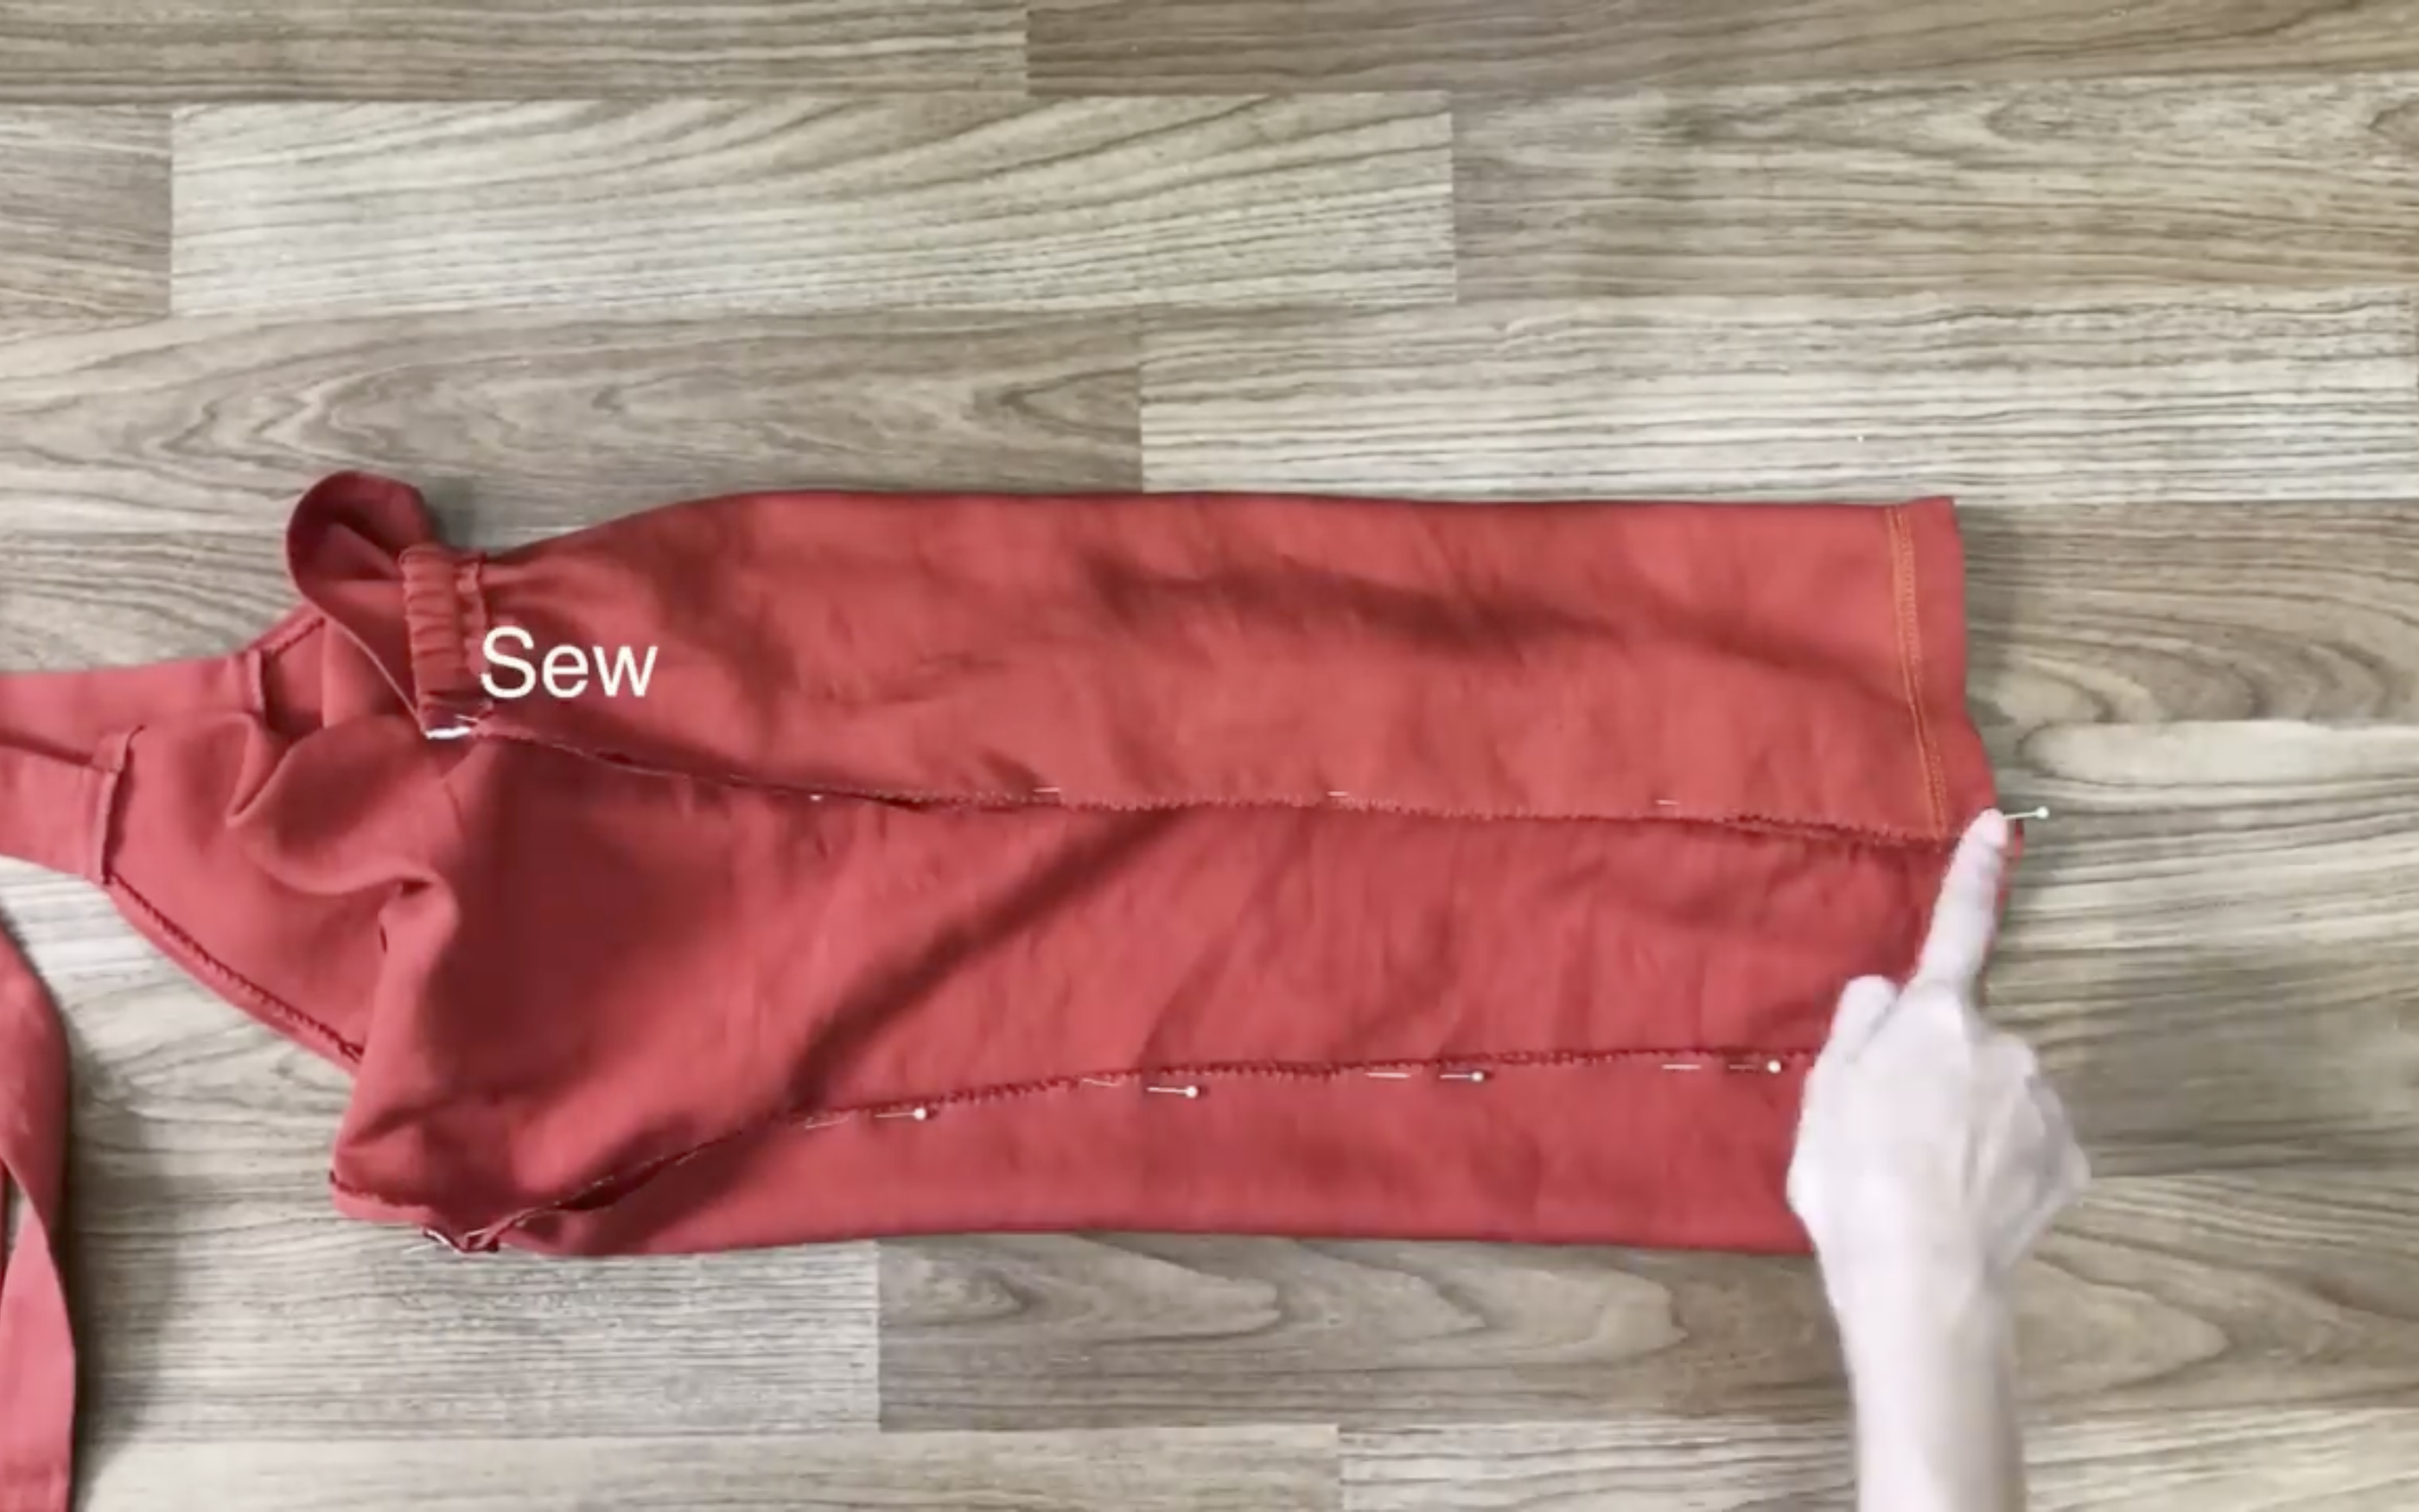
Now, connect the front and back of the dress by sewing the sides.

DIY Tie behind open back dress from old dress - Thrift flip - Vintage dress vibe
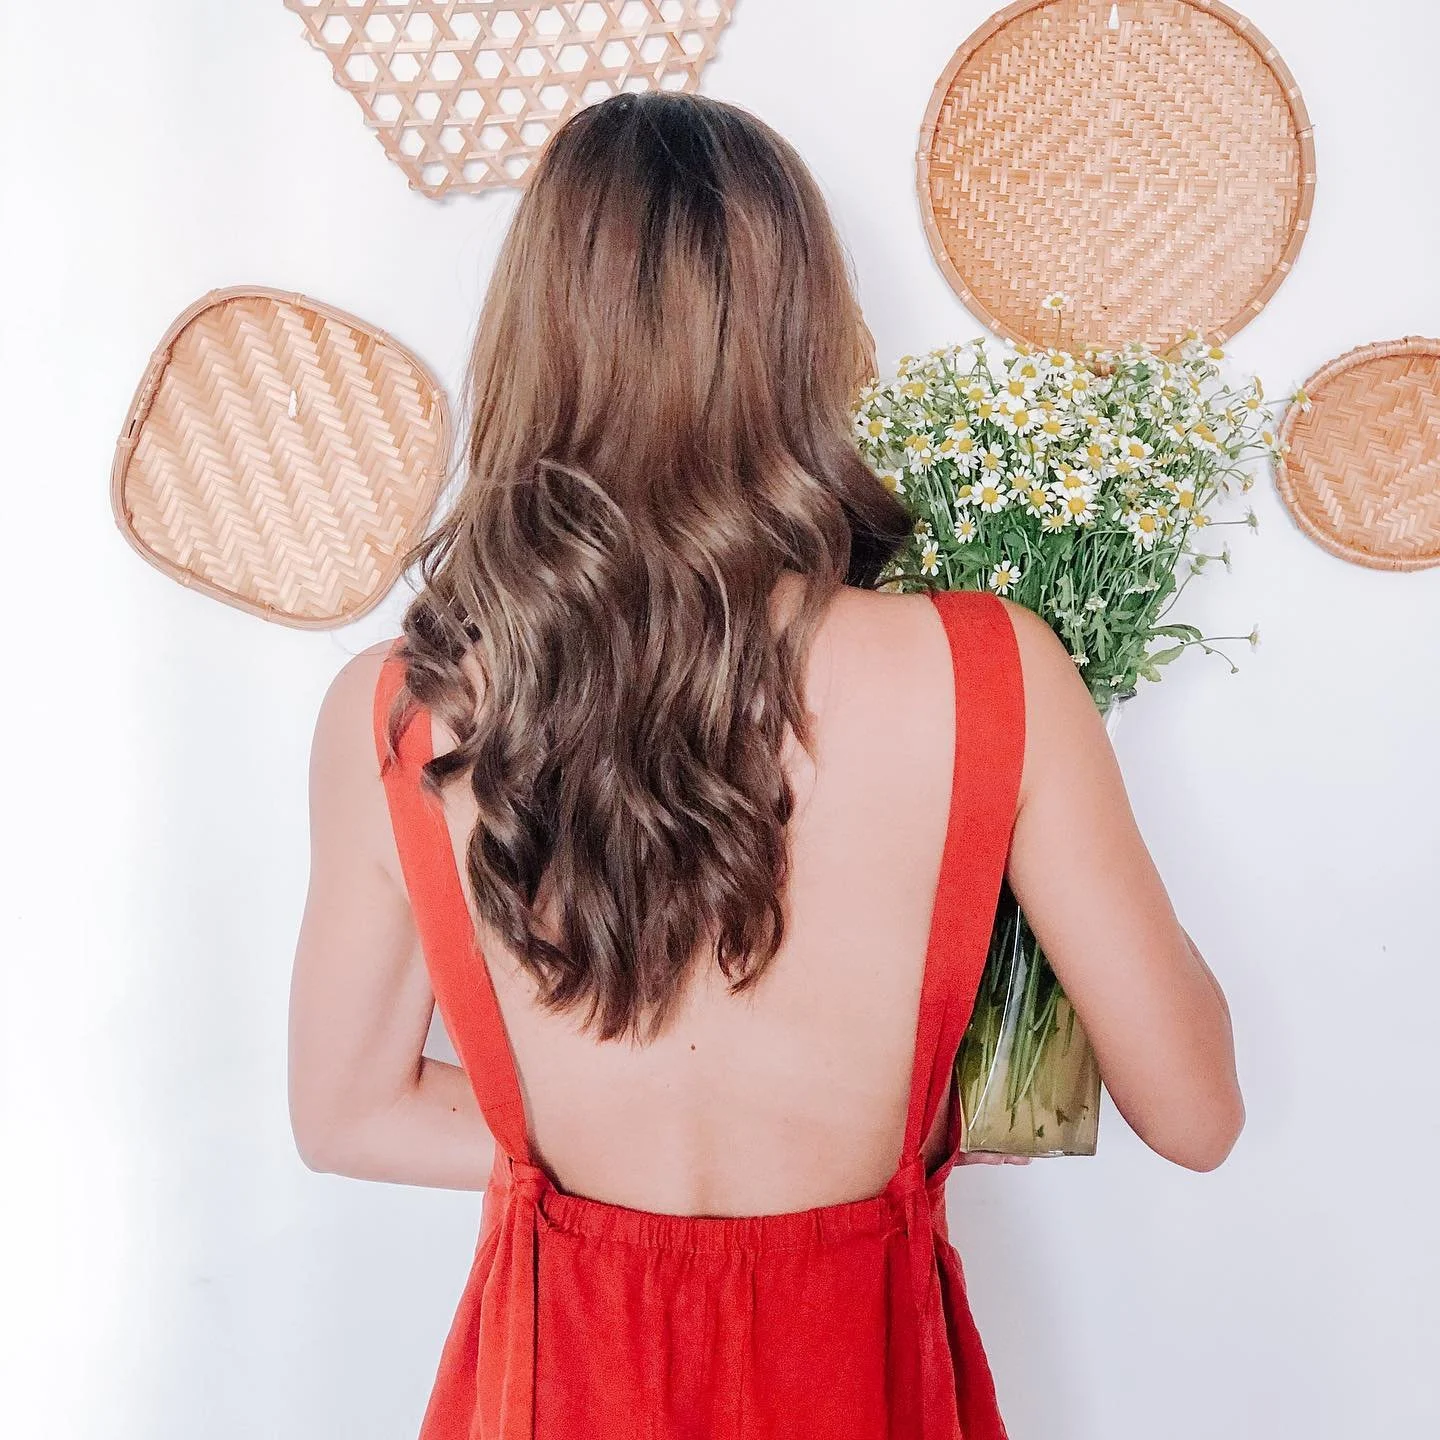
And that’s the final look for this outfit!
This dress has such a lovely vintage vibe, and I’m so happy with how it turned out! The adjustable ties make it easy to fit any body shape.

I hope you found my step-by-step guide helpful and inspiring.
If you’re interested in making your own, give it a try and let me know how it goes!
Until then, happy sewing!