Making a Denim patchwork jumpsuit from old jeans | Thrifted transformation idea | Sewing tutorial
Making a Denim patchwork jumpsuit from old jeans | Thrifted transformation idea | Sewing tutorial
Welcome or welcome back to my channel!
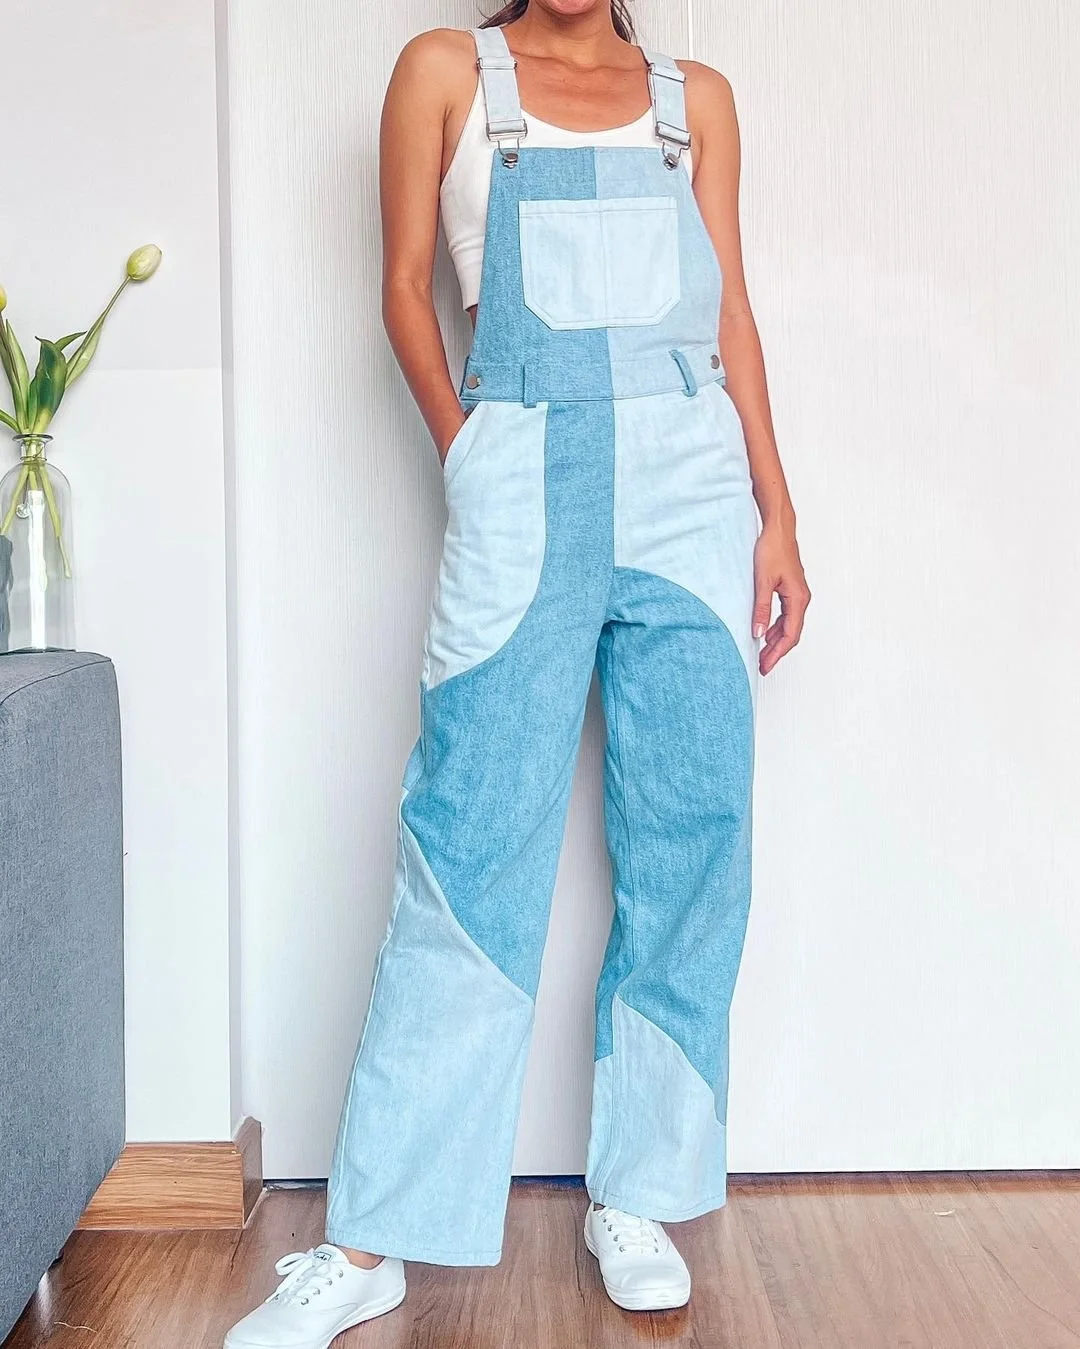
In today's tutorial, I'll guide you through the process of transforming worn-out denim into a trendy and sustainable fashion piece. Learn how to cut, sew, and assemble the different denim patches to create a unique and personalized jumpsuit. It's a super cool jumpsuit and perfect to challenge your creativity.
So I hope you can get come inspiration out of it. Let’s get started!
WHAT YOU’LL NEED
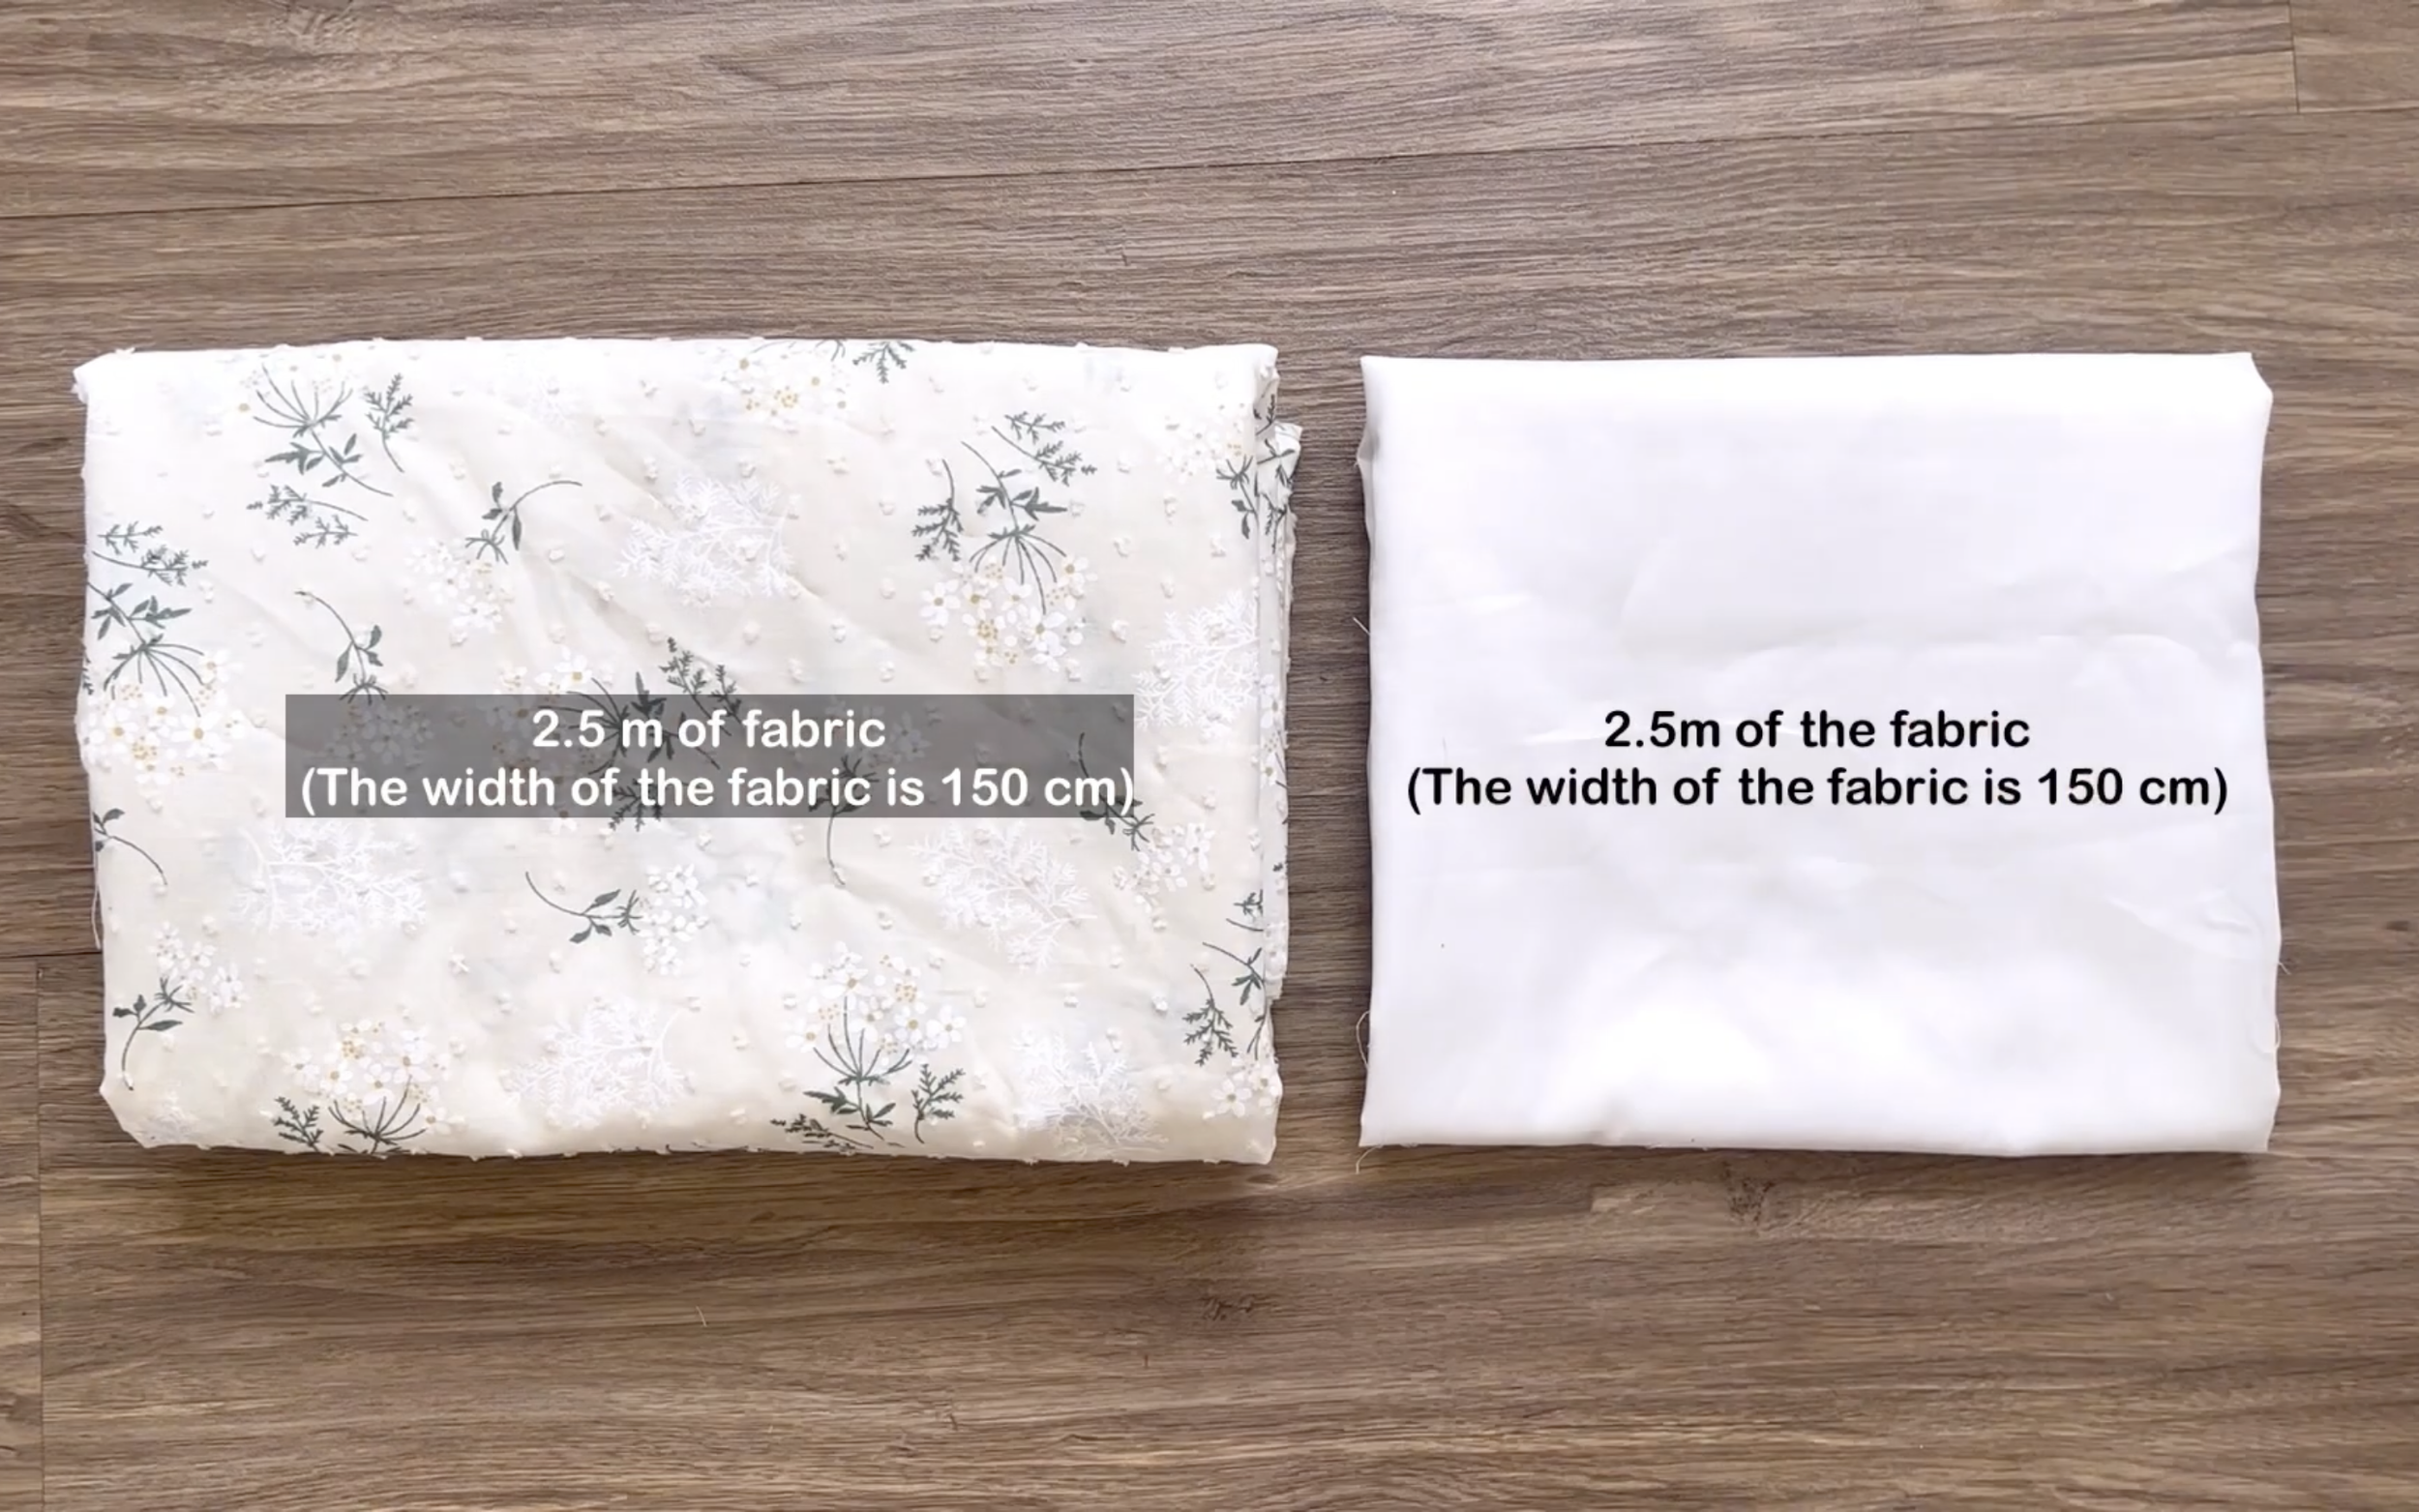
3 pairs of jeans in big size to get the most of the fabrics
Pattern paper
Sewing machine
Pins
Scissors
Ruler
Long stick
Zipper
Buttons
MAKING THE PATTERNS
Here’s the pattern for the project. To get a clear understanding of all the measurements needed for the pattern, watch the video from 0:30 to 12:00.
Remember, you can adjust these measurements to fit your own dimensions!
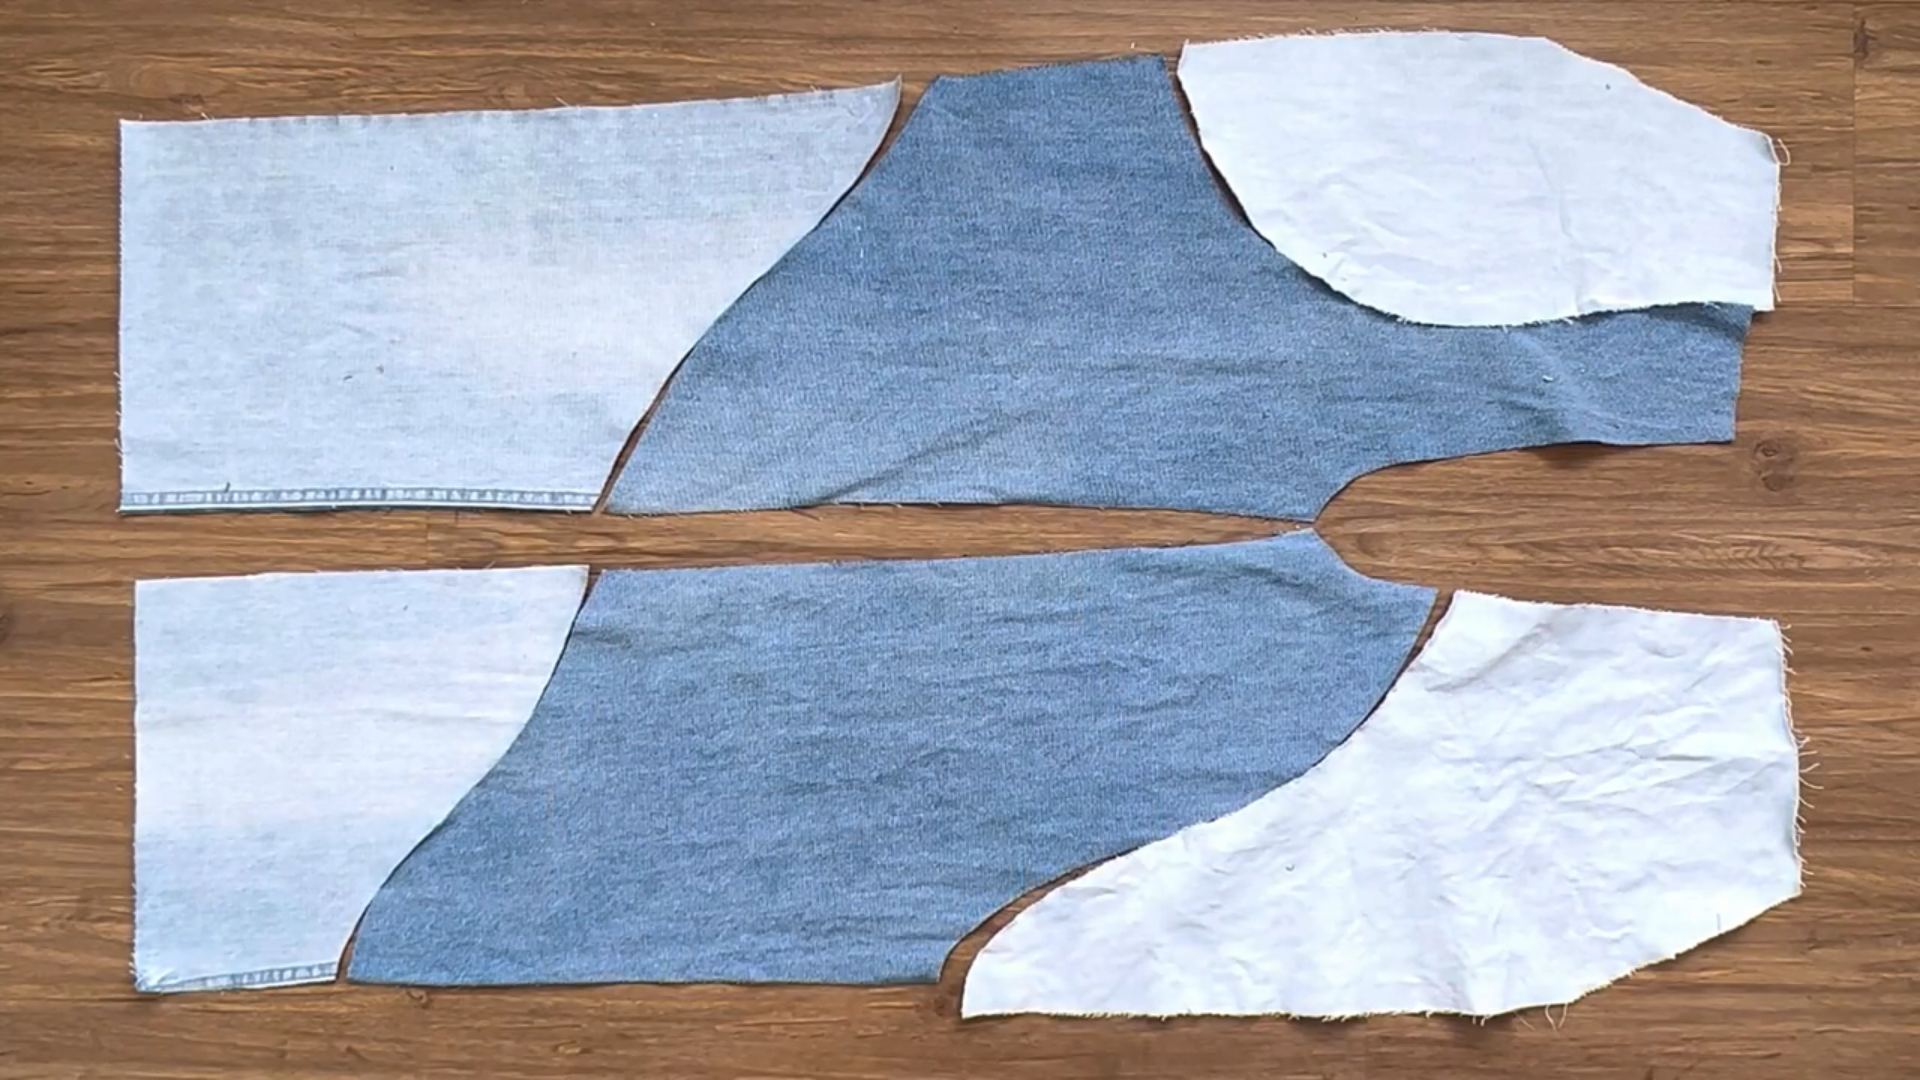
THE FRONT PANTS PATTERN
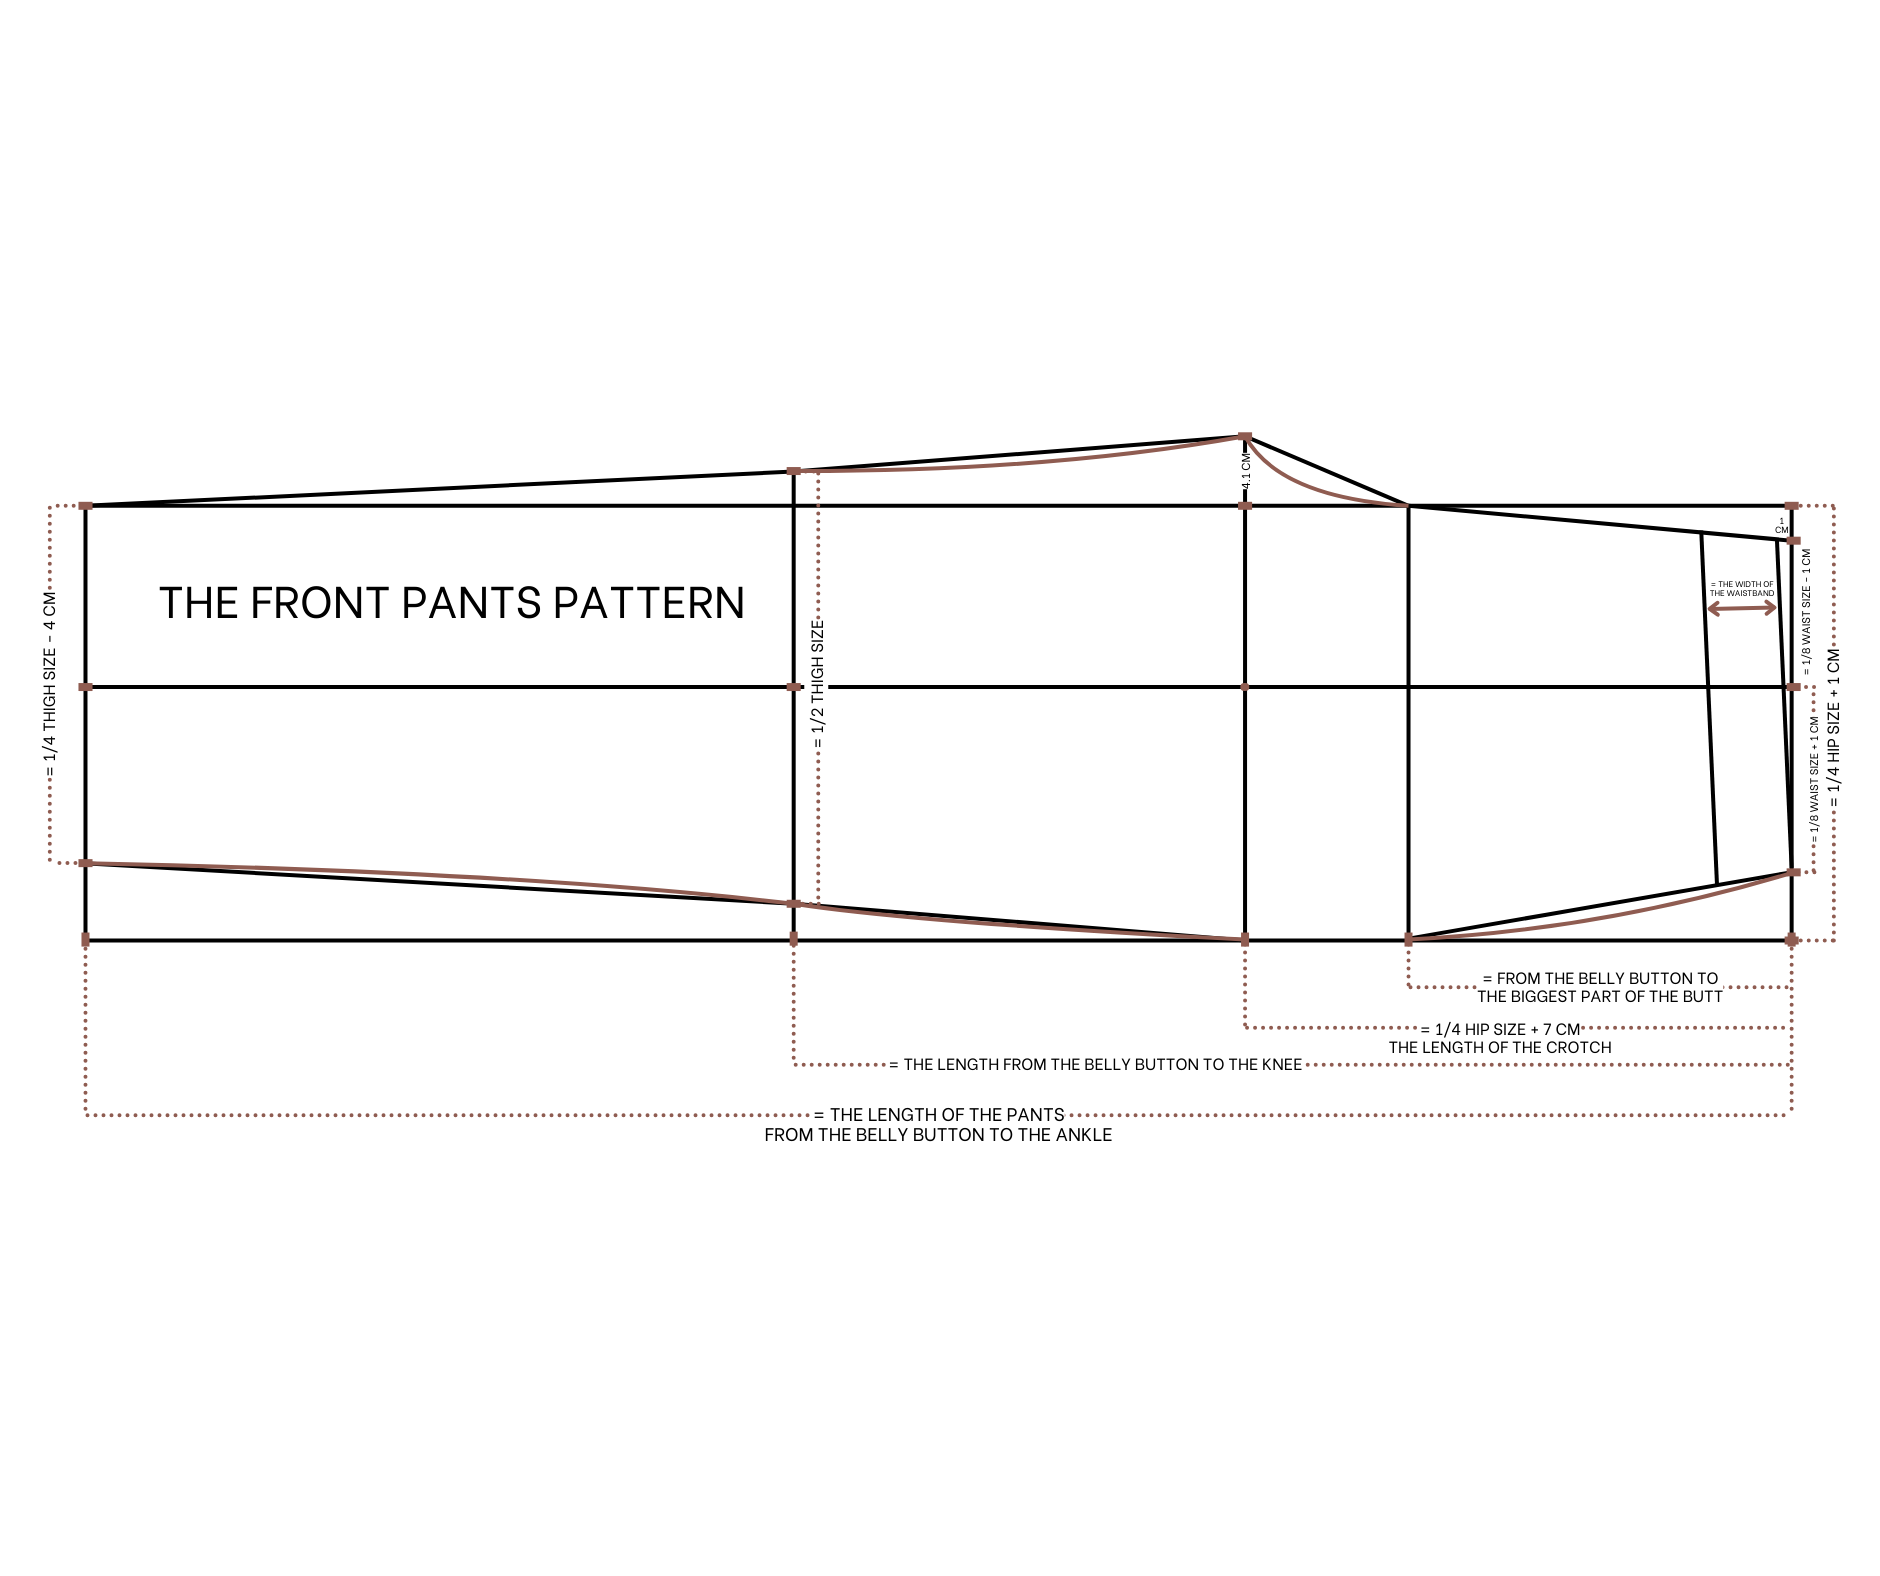

To make the front pants pattern, draw rectangle with 24 cm width, which is a quarter of your hip size plus 1 cm, and 95 cm length, which is the length from the belly button to the ankle and also the length of the pant that you want.
From the top width line, draw another straight line at 30 cm next to it, it's a quarter of your hip size plus 7 cm, it's also the length of the crotch of the pant that you want.
From one end of this new line, extend it 4.1 cm which is 1 per 20 your hip size minus 0.5 cm. After that, mark in the middle of this line before drawing a horizontal line through it and cut two width lines of the rectangle.
From the top width line, draw another straight line at 21 cm next to it, it's the length from the belly button to the biggest part of the butt.
From the cutting point between the horizontal line and the top width line, mark to inside 8 cm, which is 1 per 8 your waist size minus 1 cm. Mark to the outside 10 cm which is 1 per 8 your waist size plus 1 cm.
So the width between two marks will be 18 cm, which is a quarter of your waist size, make sure the waist size here is bigger than your actual waist size to keep the comfy feeling for the jumpsuit.
Then connect the inside mark to one end of the second straight line and one end of the first straight line. After that, draw a curve line at the end to create the crotch line for the front pants.
Connect the outside mark to the other end of the second straight line, then we redraw it a bit after that. From the top of the crotch line, mark down 1 cm then connect that mark to the outside mark to create a new waistline for the front pants.
From the top width line, draw another straight line at 55 cm from it, it's the length from the belly button to the knee.
From the cutting point between this line and the horizontal line, mark to two sides of it 12 cm, which is a quarter of your thigh, so the width between 2 marks will be 24 cm, which is a half of your thigh size.
From the cutting point between the bottom width line and the horizontal line, mark to two sides of it 10 cm which is 2 cm shorter than two marks you make on the knee line before.
Then connect the inside mark on the bottom width line to the inside mark on the knee line and finish at the end of the crotch line as we create the inside leg line for the front pants.
Connect the outside mark on the bottom width line to the outside mark on the knee line and finish at the end of the first straight line. This will create a side line of the front pants. After that, redraw these lines a bit to make them nicer.
At the top of the waistline, draw another line at 4 cm and parallel with it, 4 cm is the width of the waistband of the jumpsuit that you want.
Add 1 cm for seam allowance after that except 3 cm seam allowance at the ending line and we will have the front pants pattern after cutting.
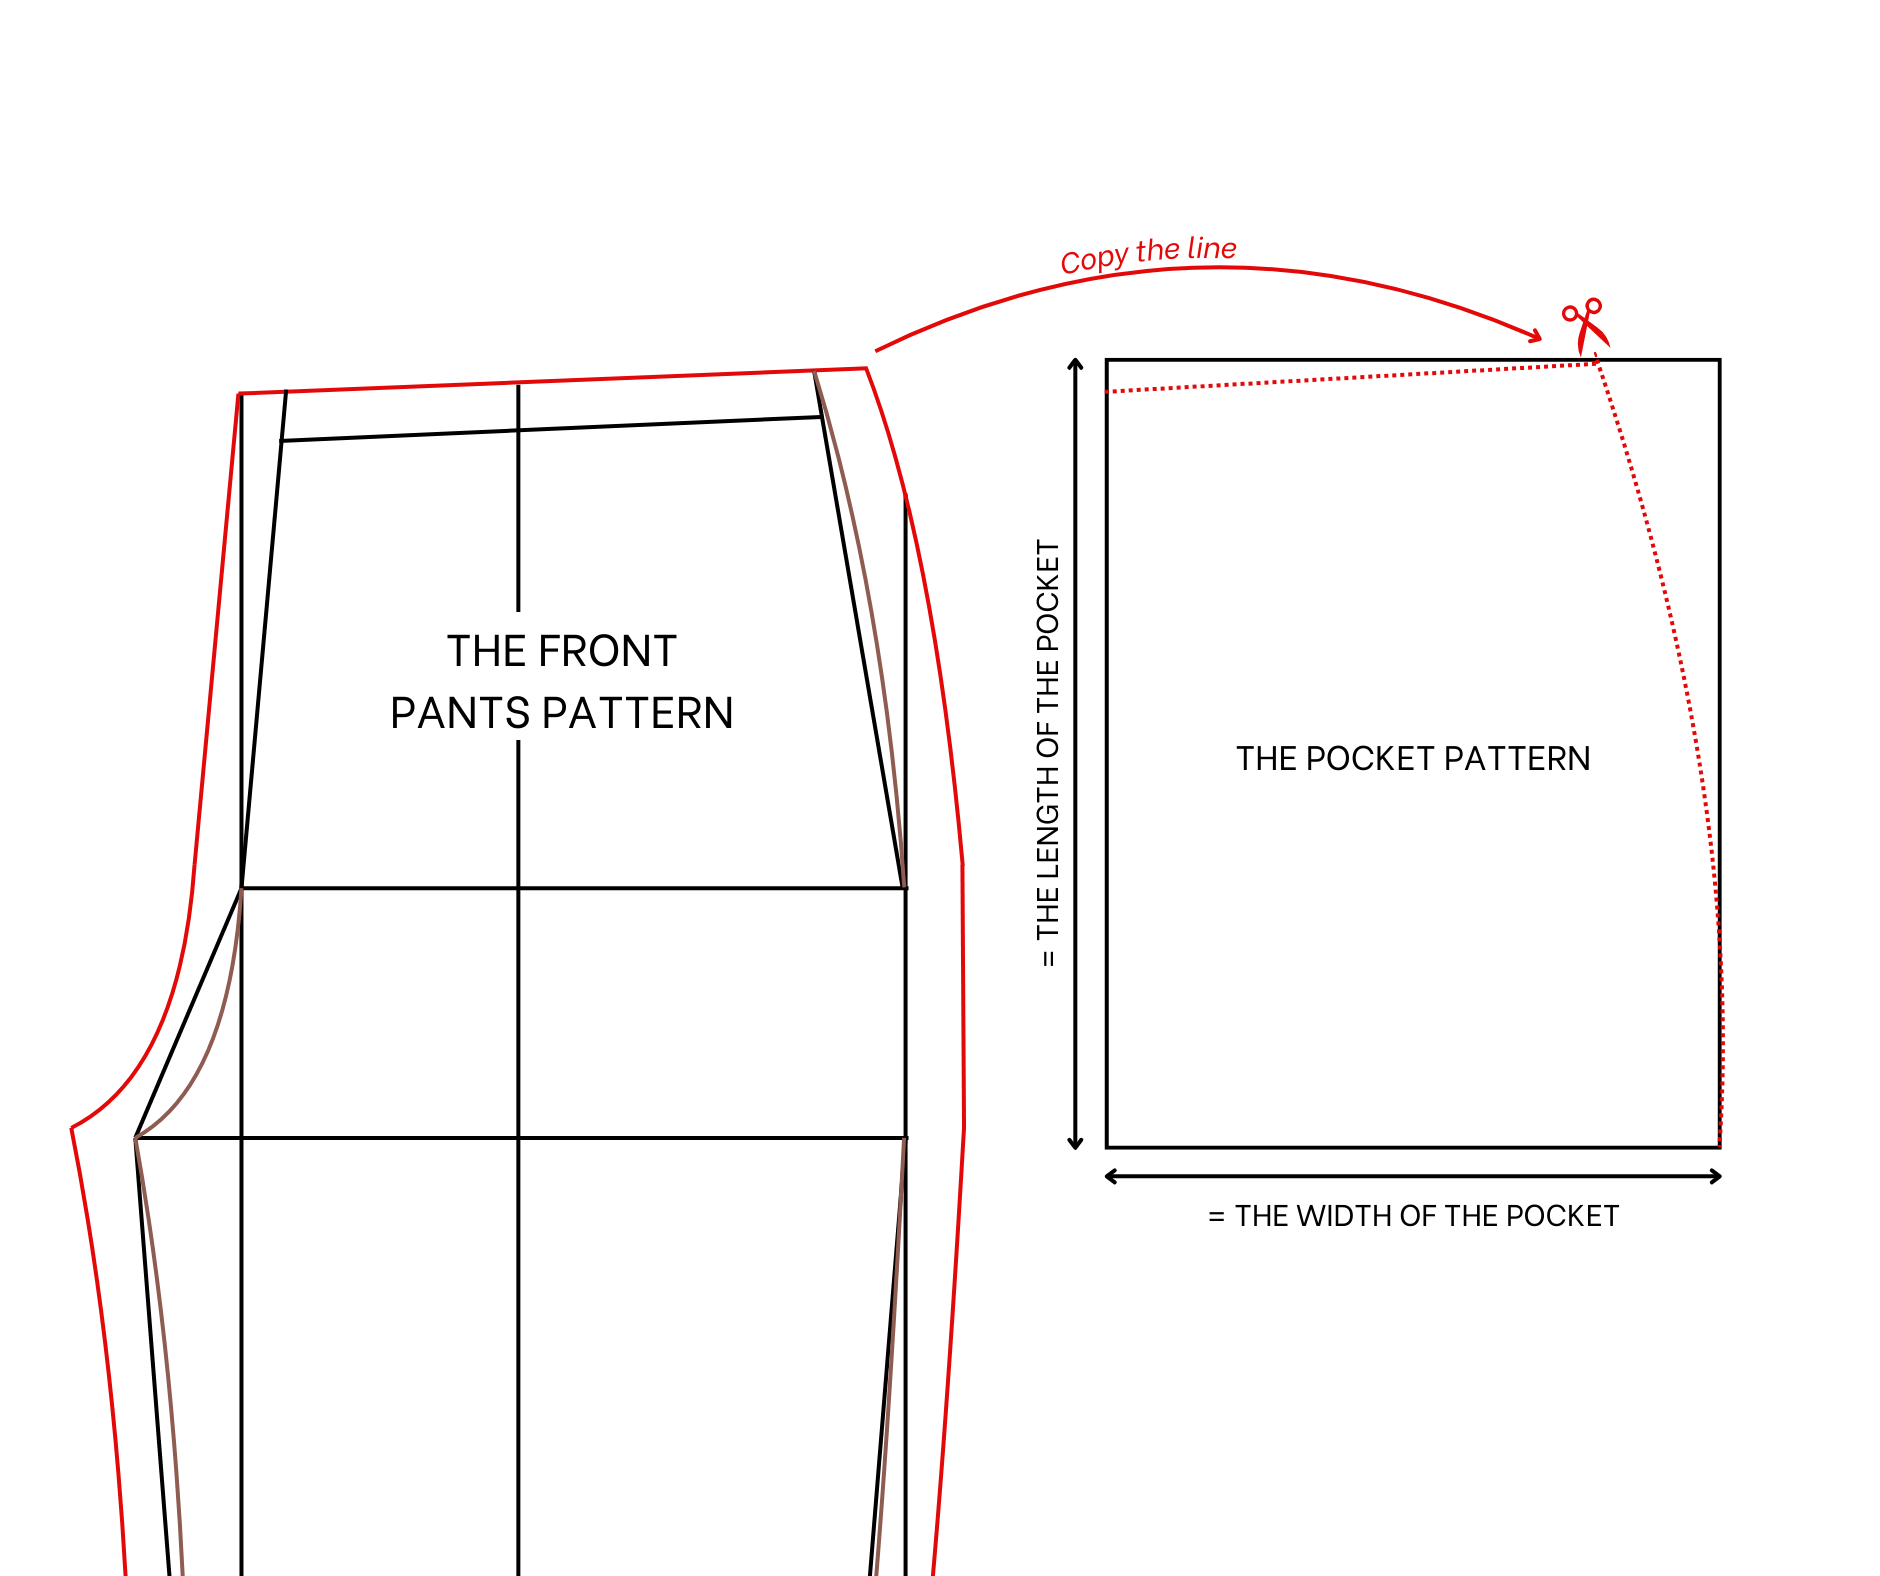
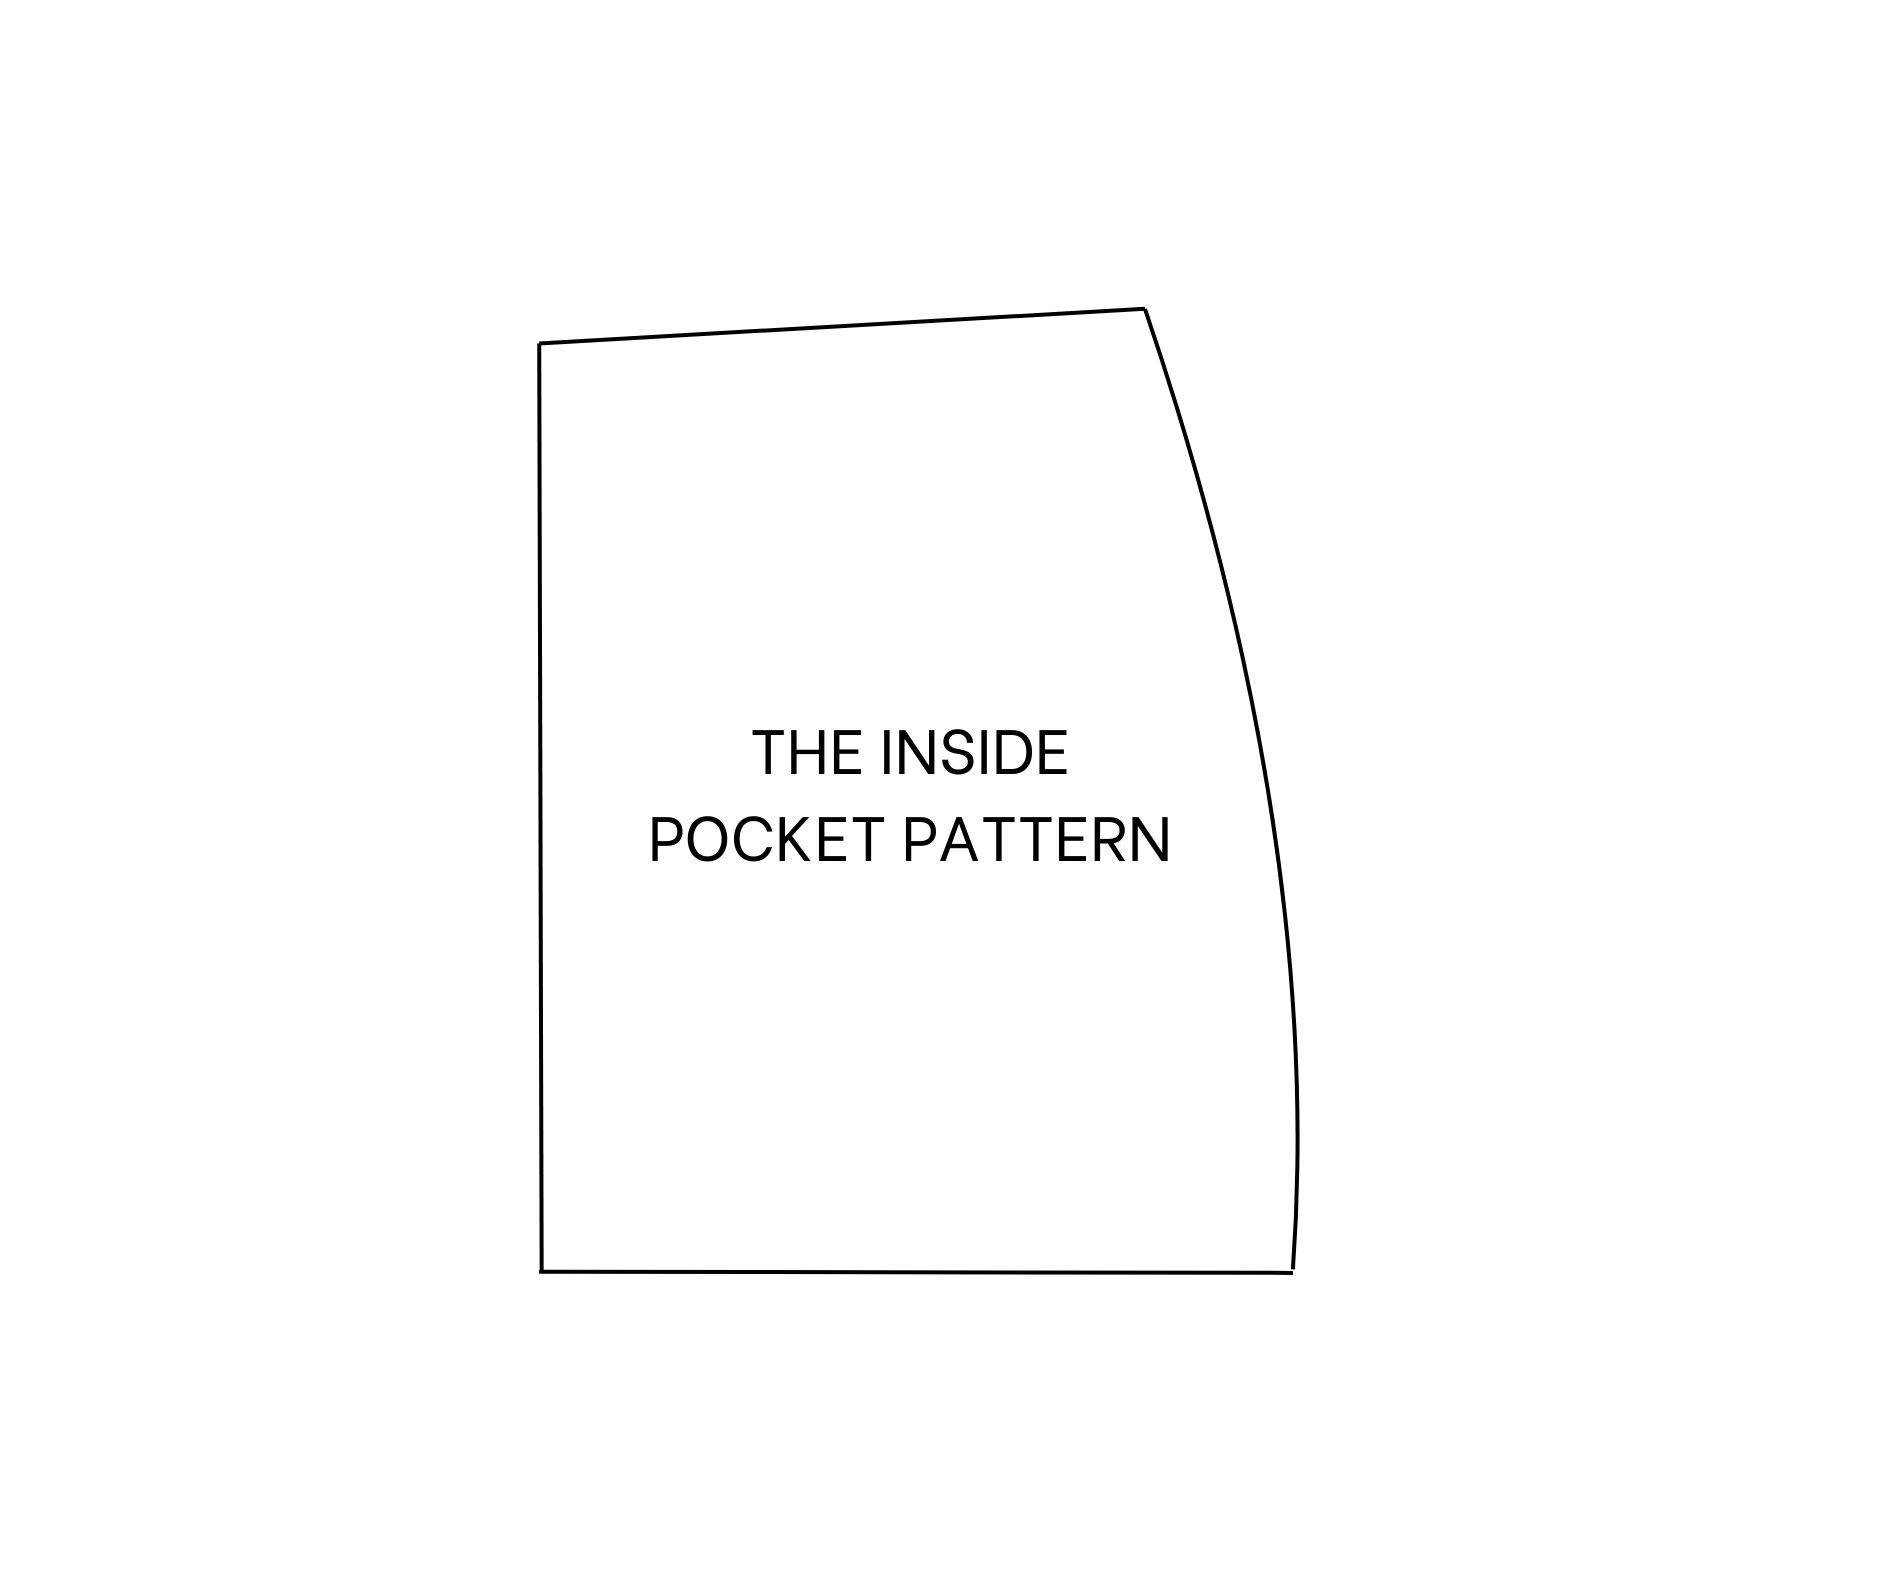
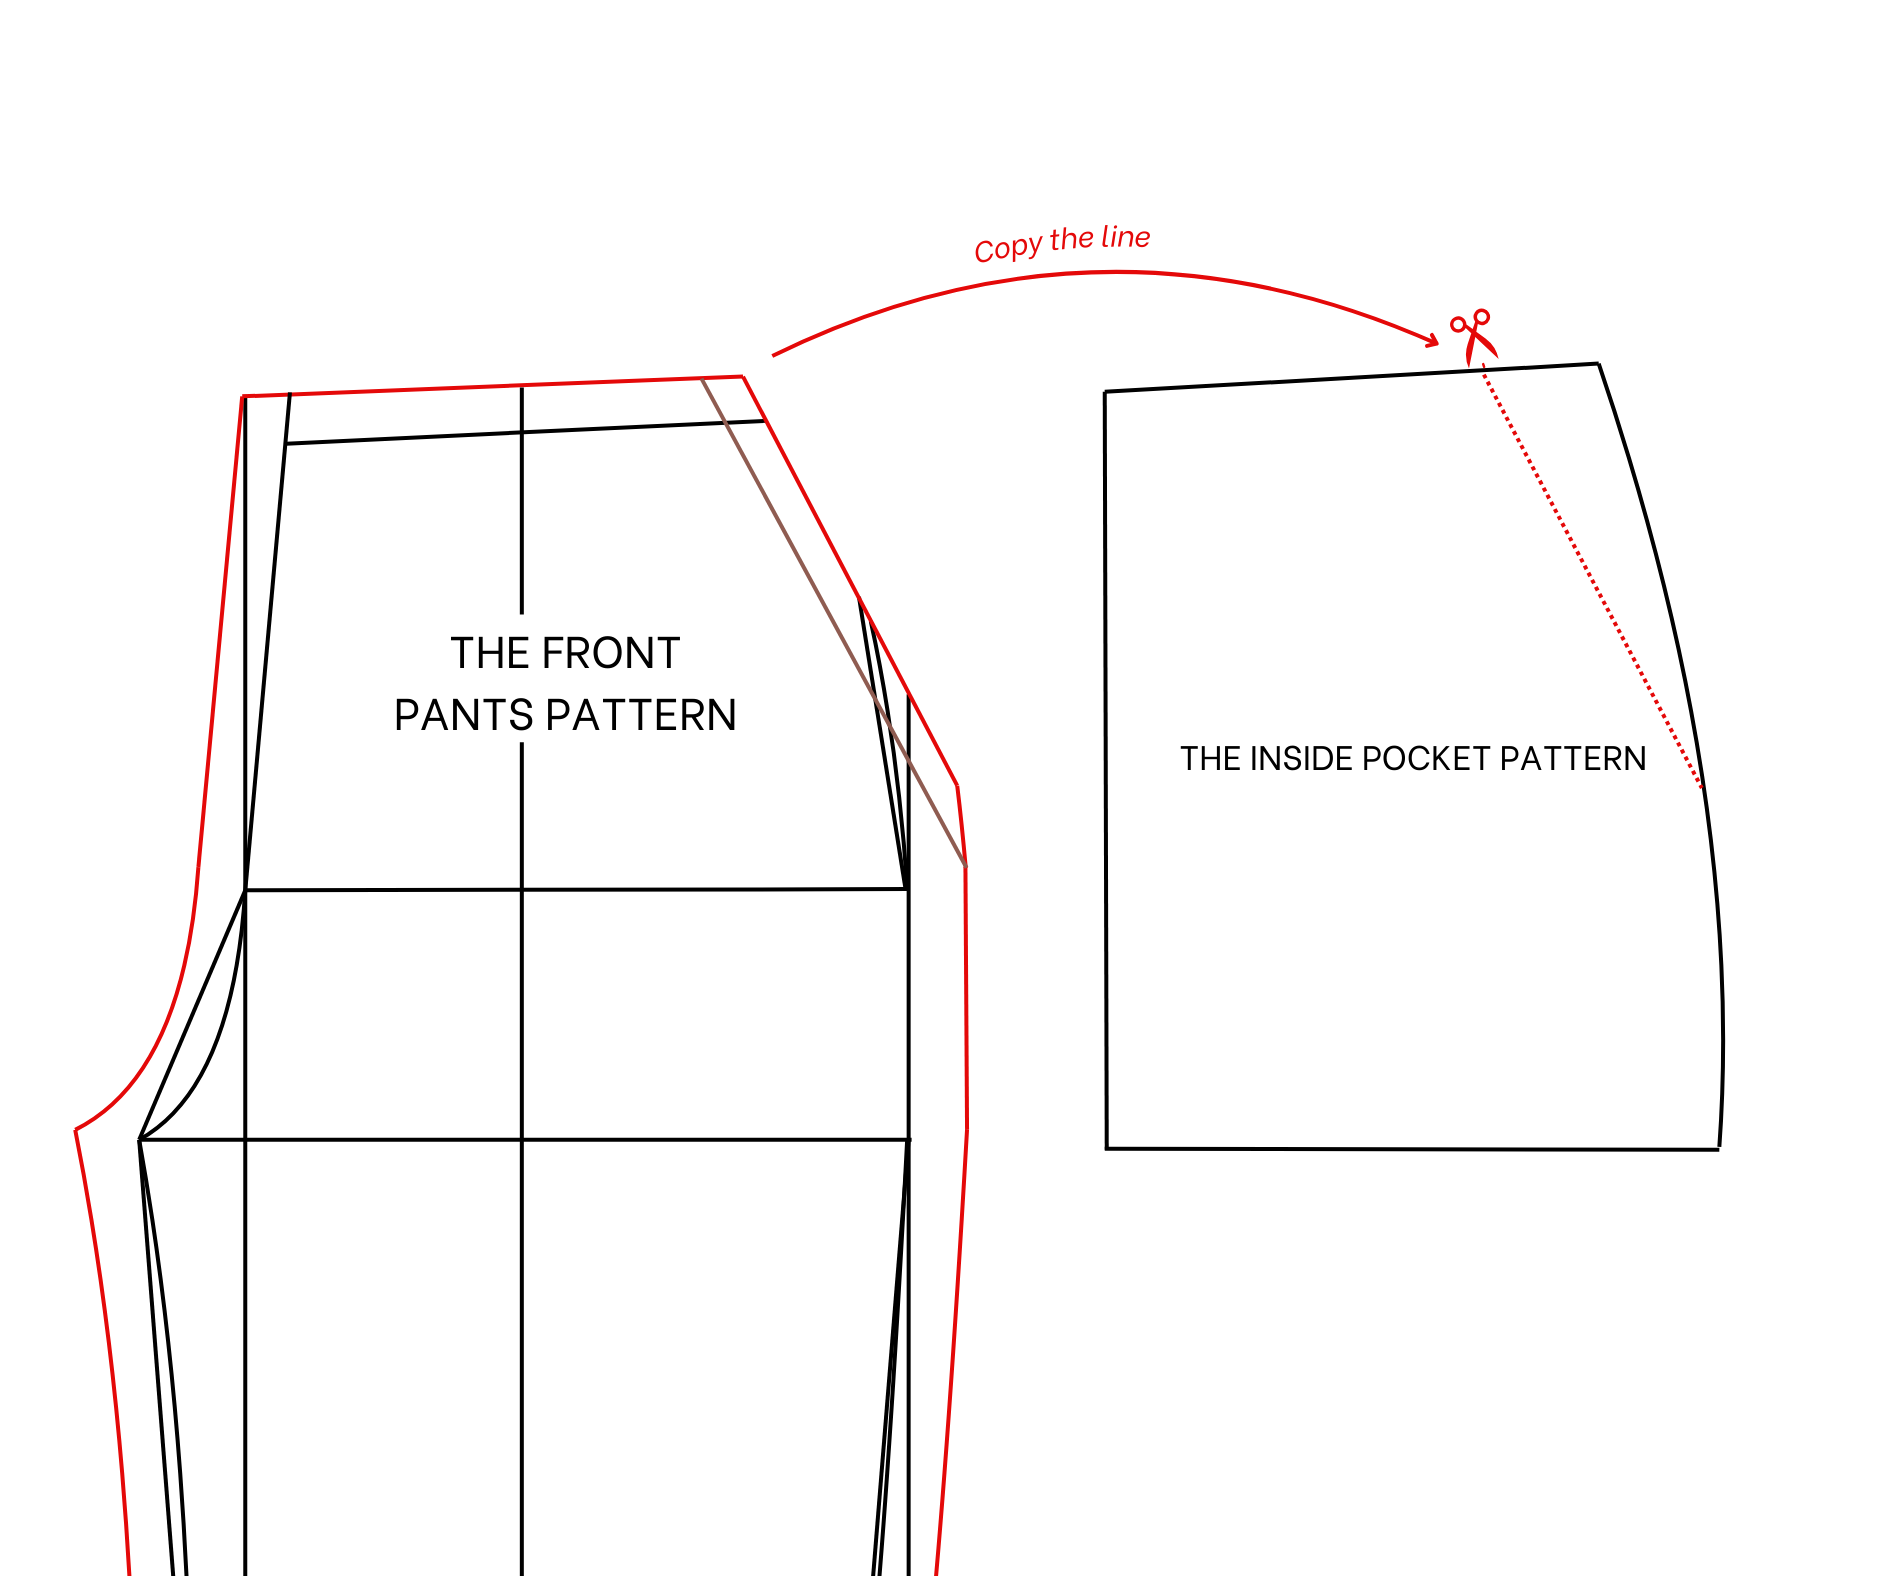
THE INSIDE POCKET PATTERN
To make the inside pocket, cut a rectangle with 18 cm width, which is the width of the pocket, and 28 cm length, which is the length of the pocket that you want.
Use the front pants pattern to copy the sideline and the waistline to the rectangle so we will have the inside pattern of the pocket after that.
THE FRONT PANTS PATTERN (Continue)
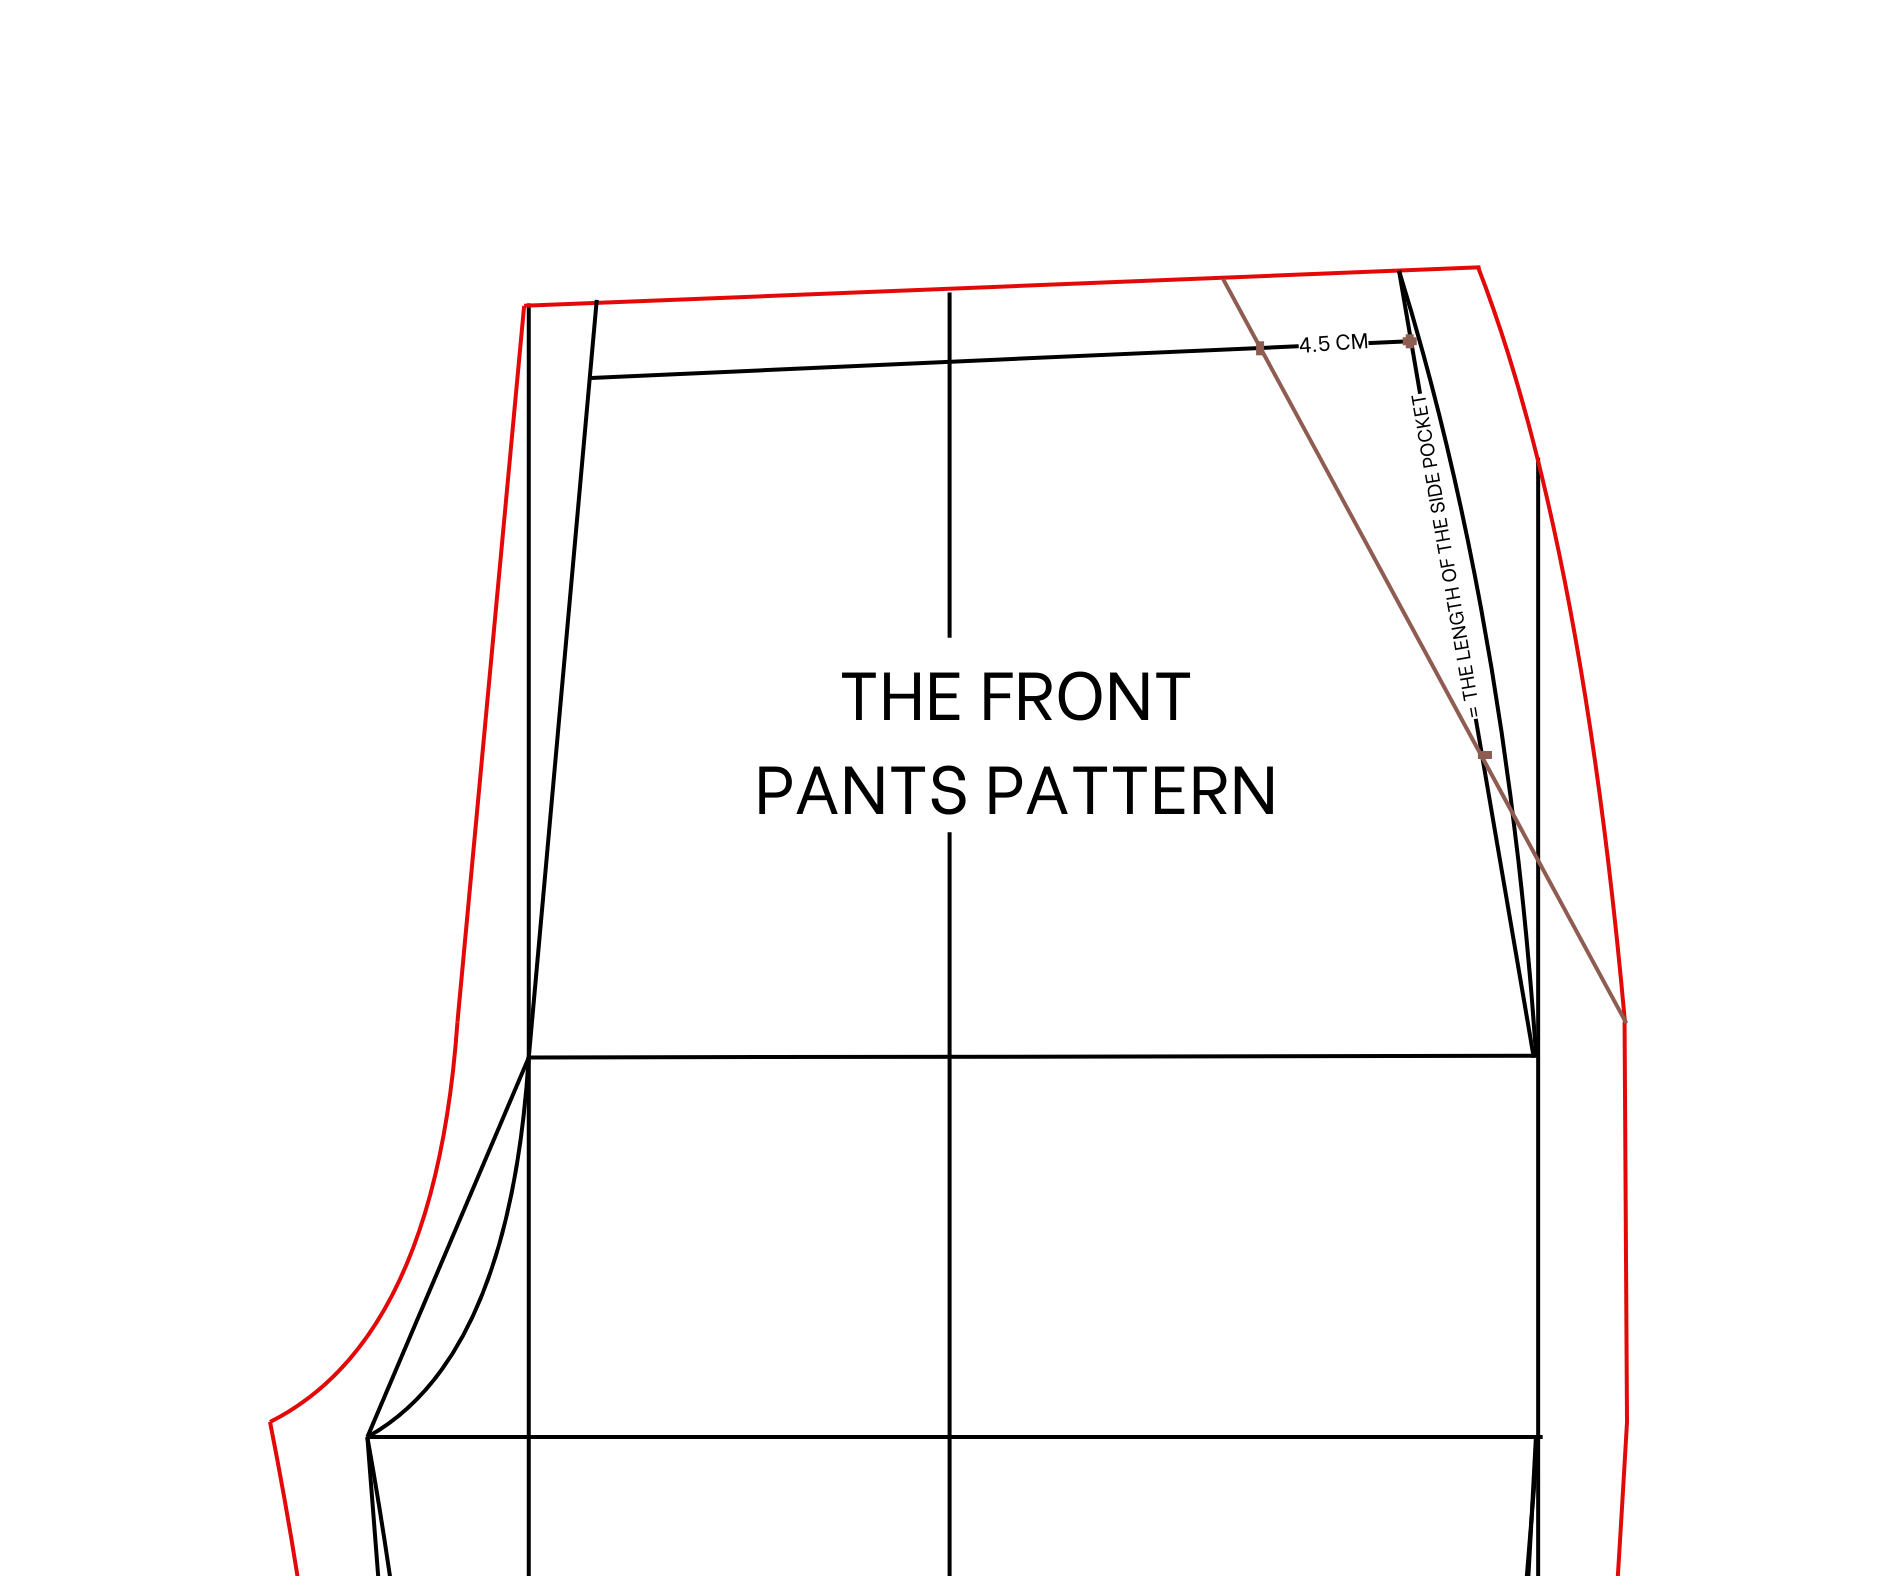
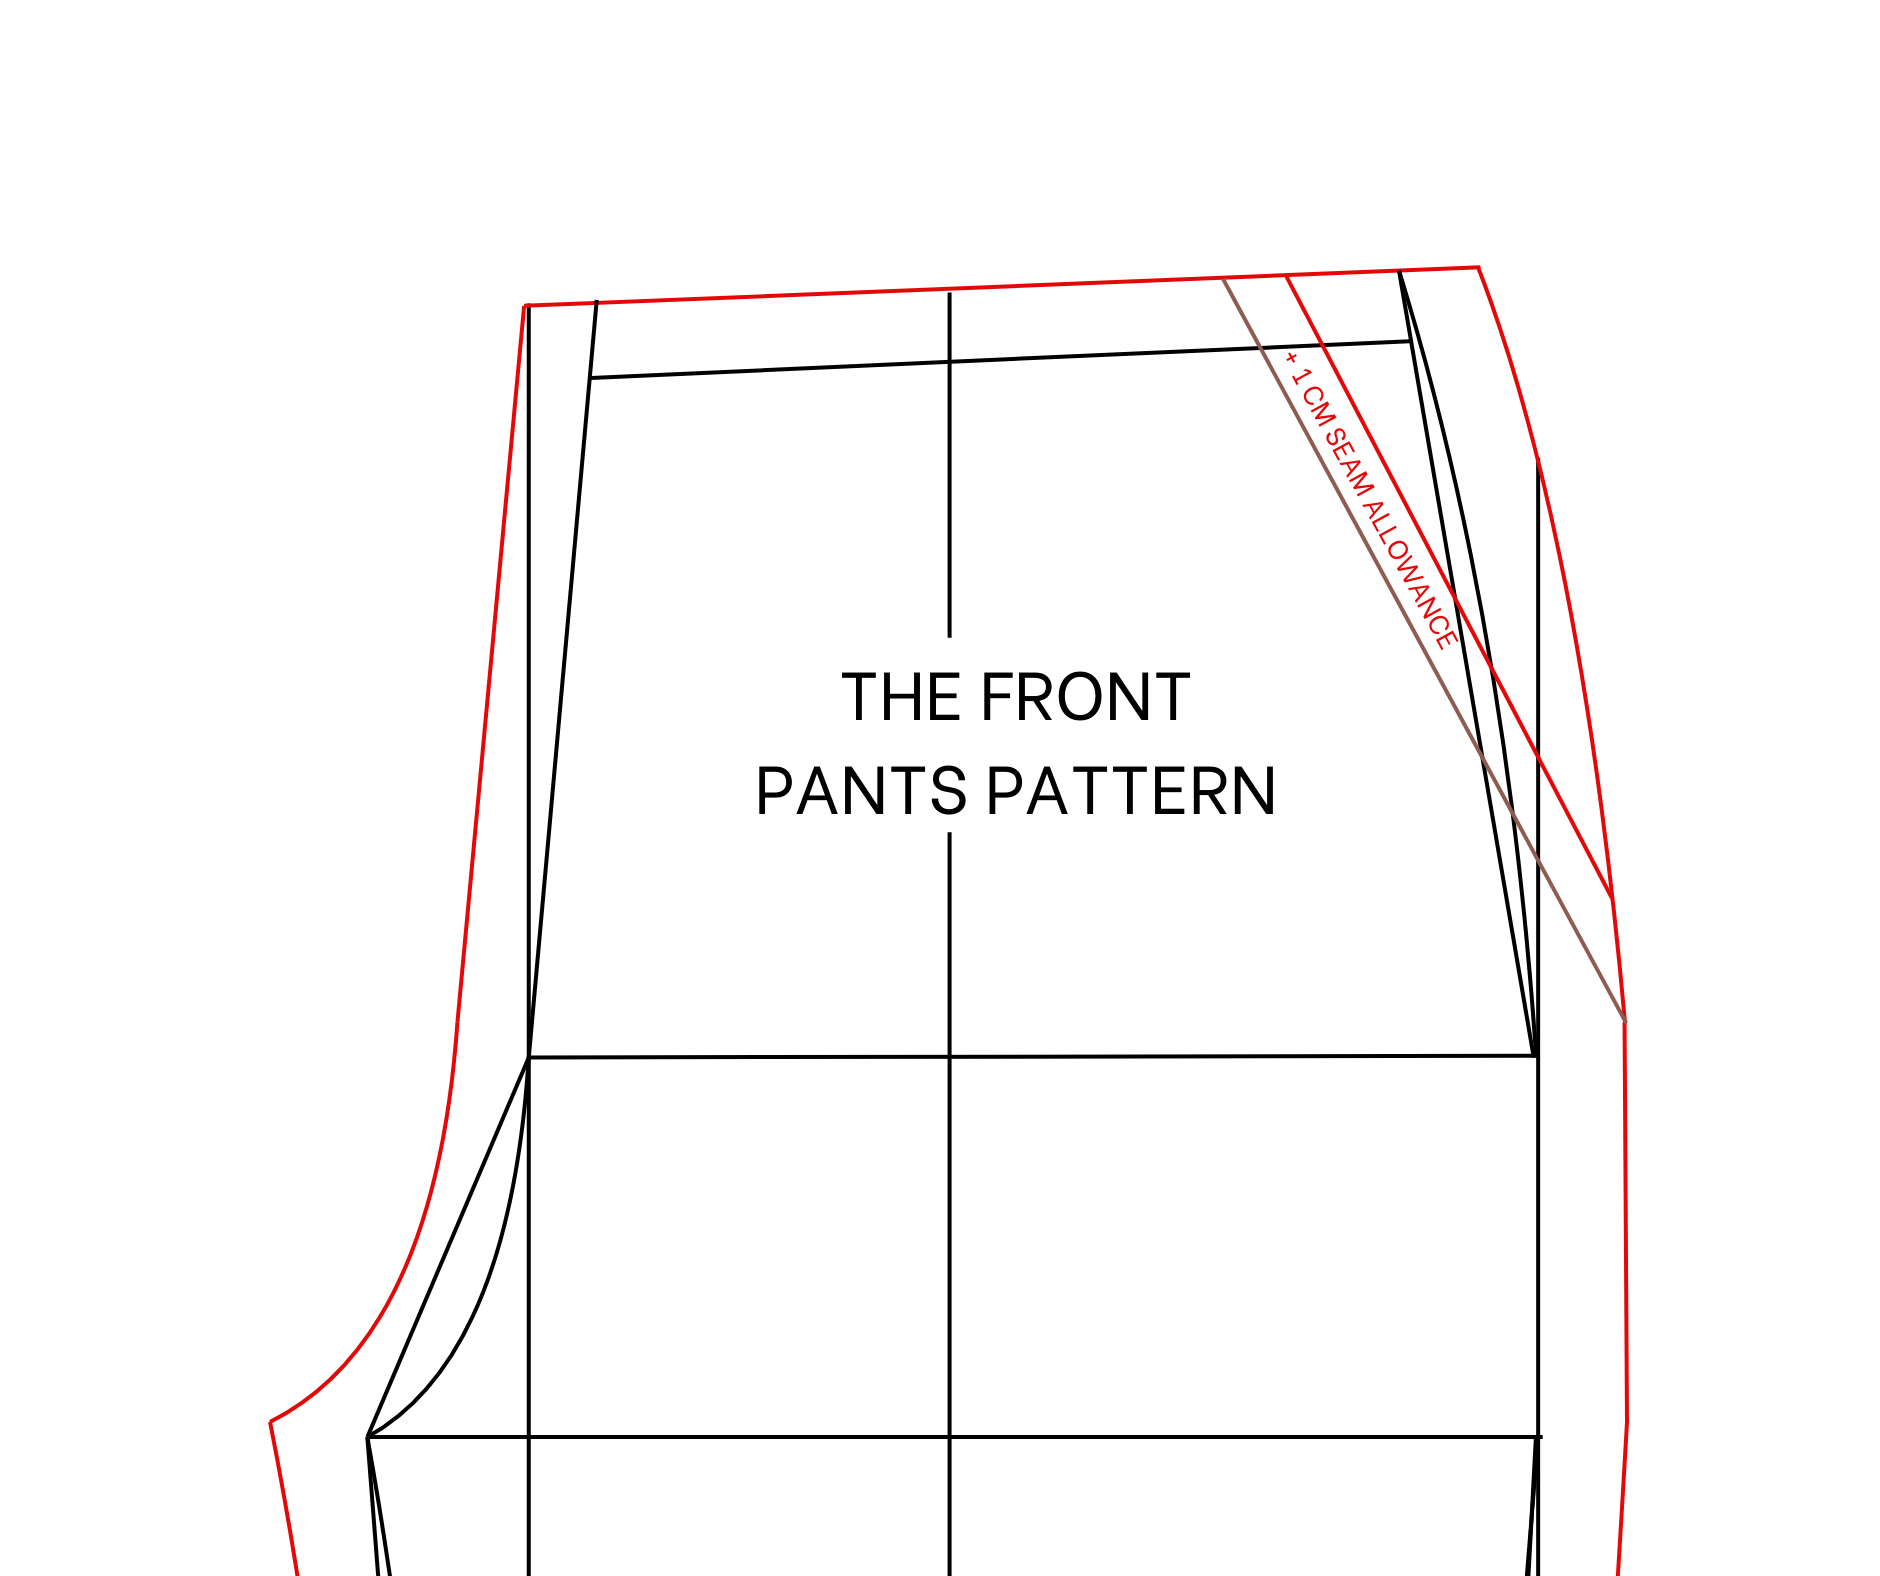
At the top of the sideline, mark at 4 cm on the waistline and 13 cm on the sideline then connect two marks together.
Add 1 cm seam allowance for that line before cutting.
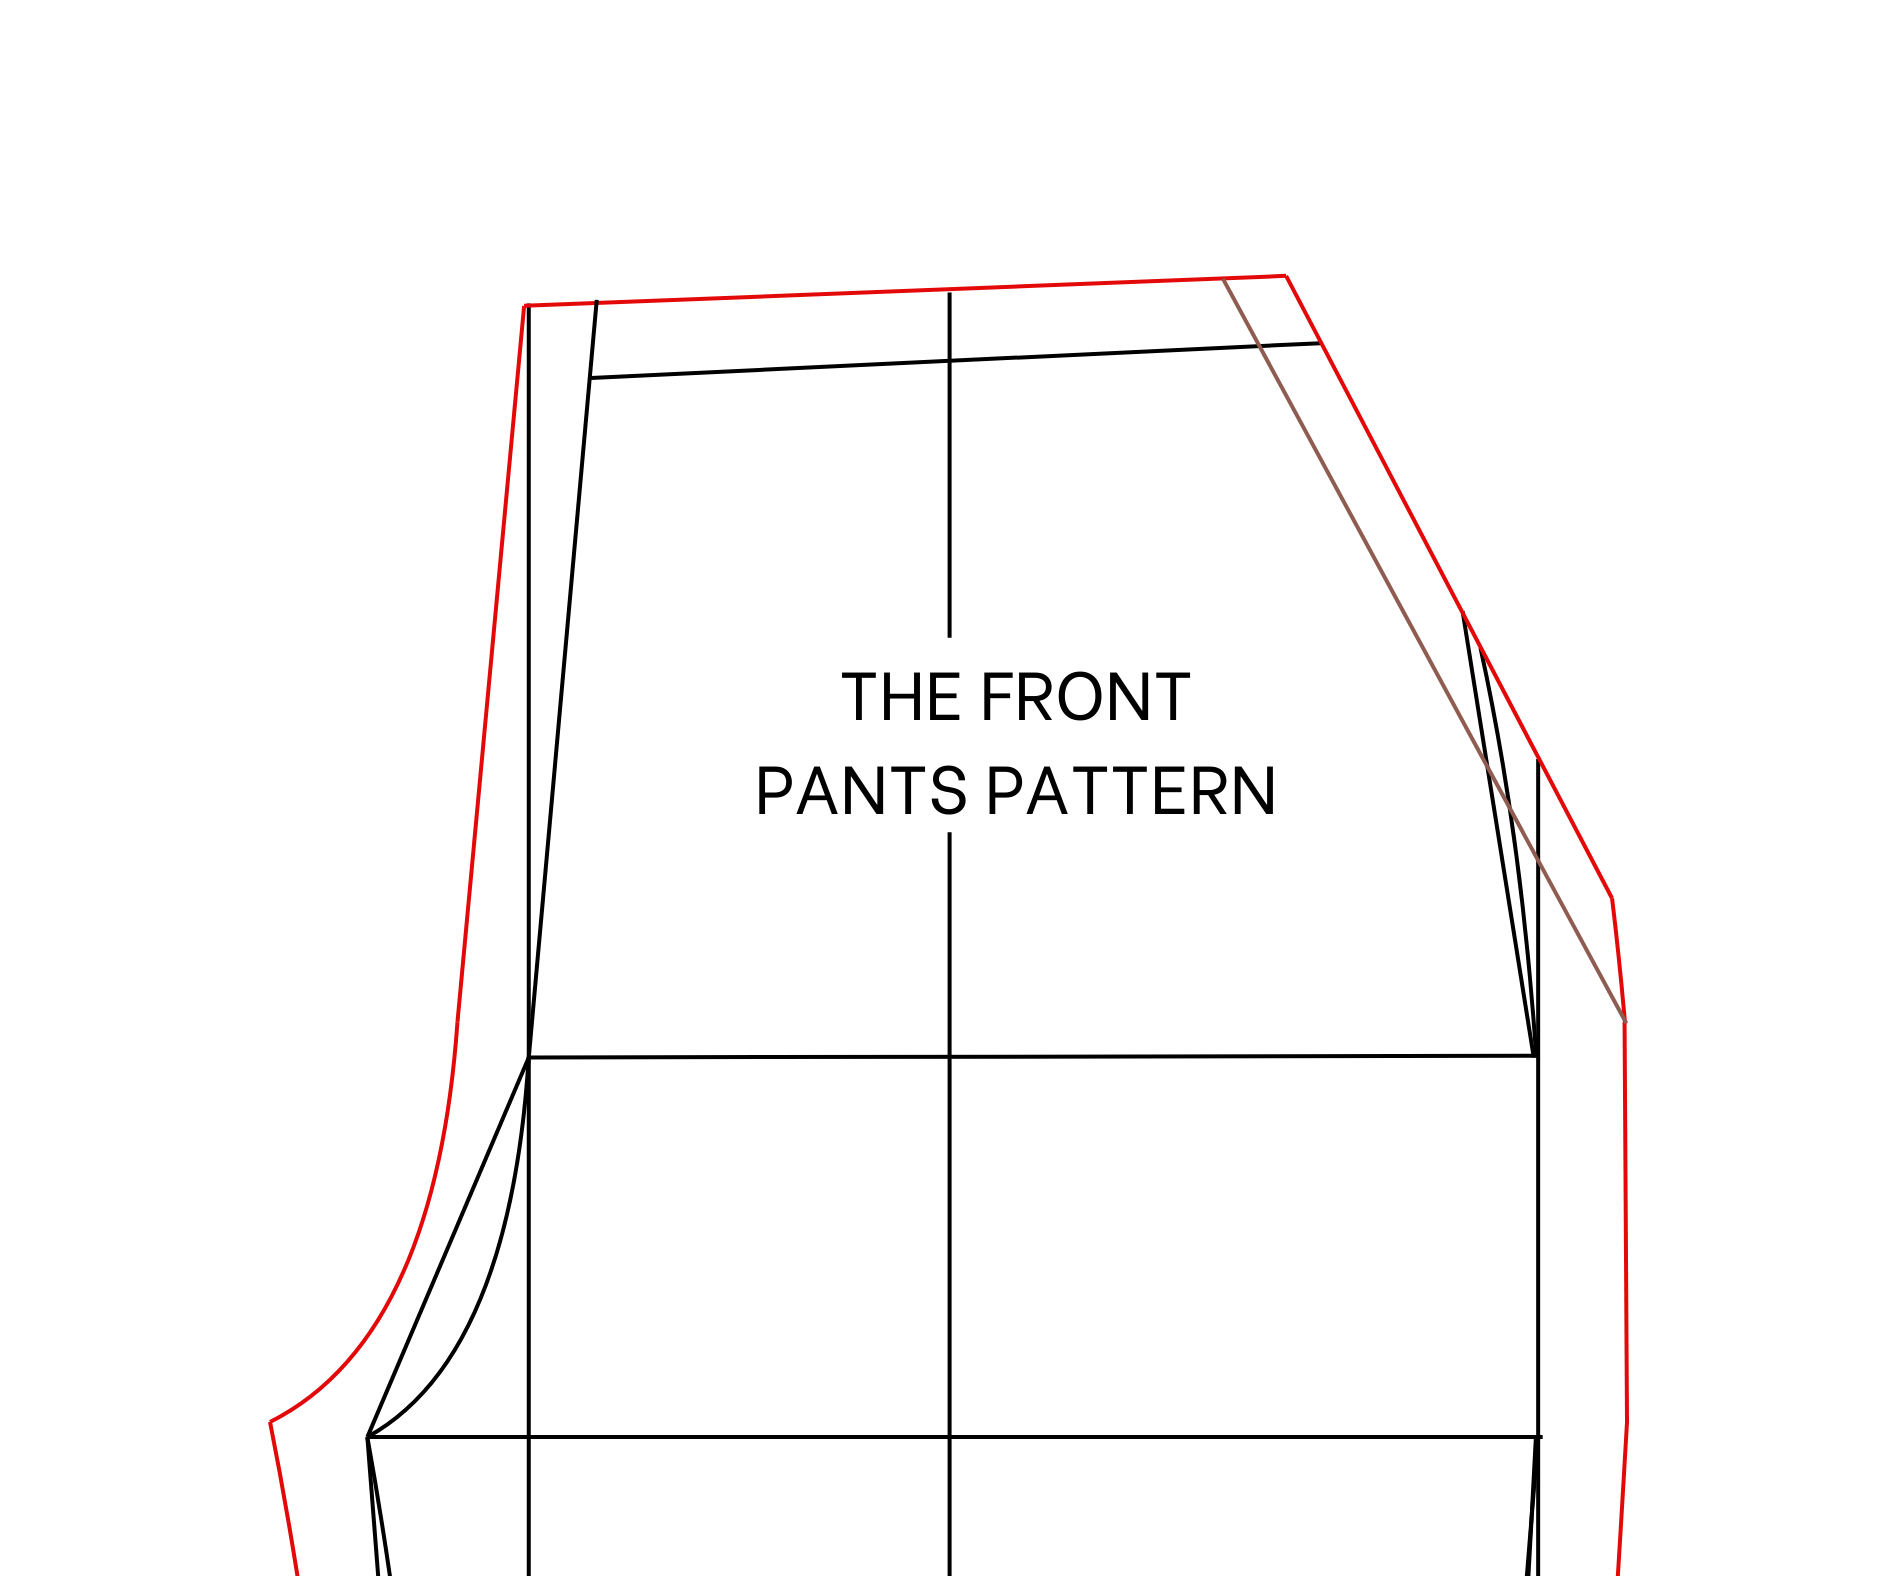
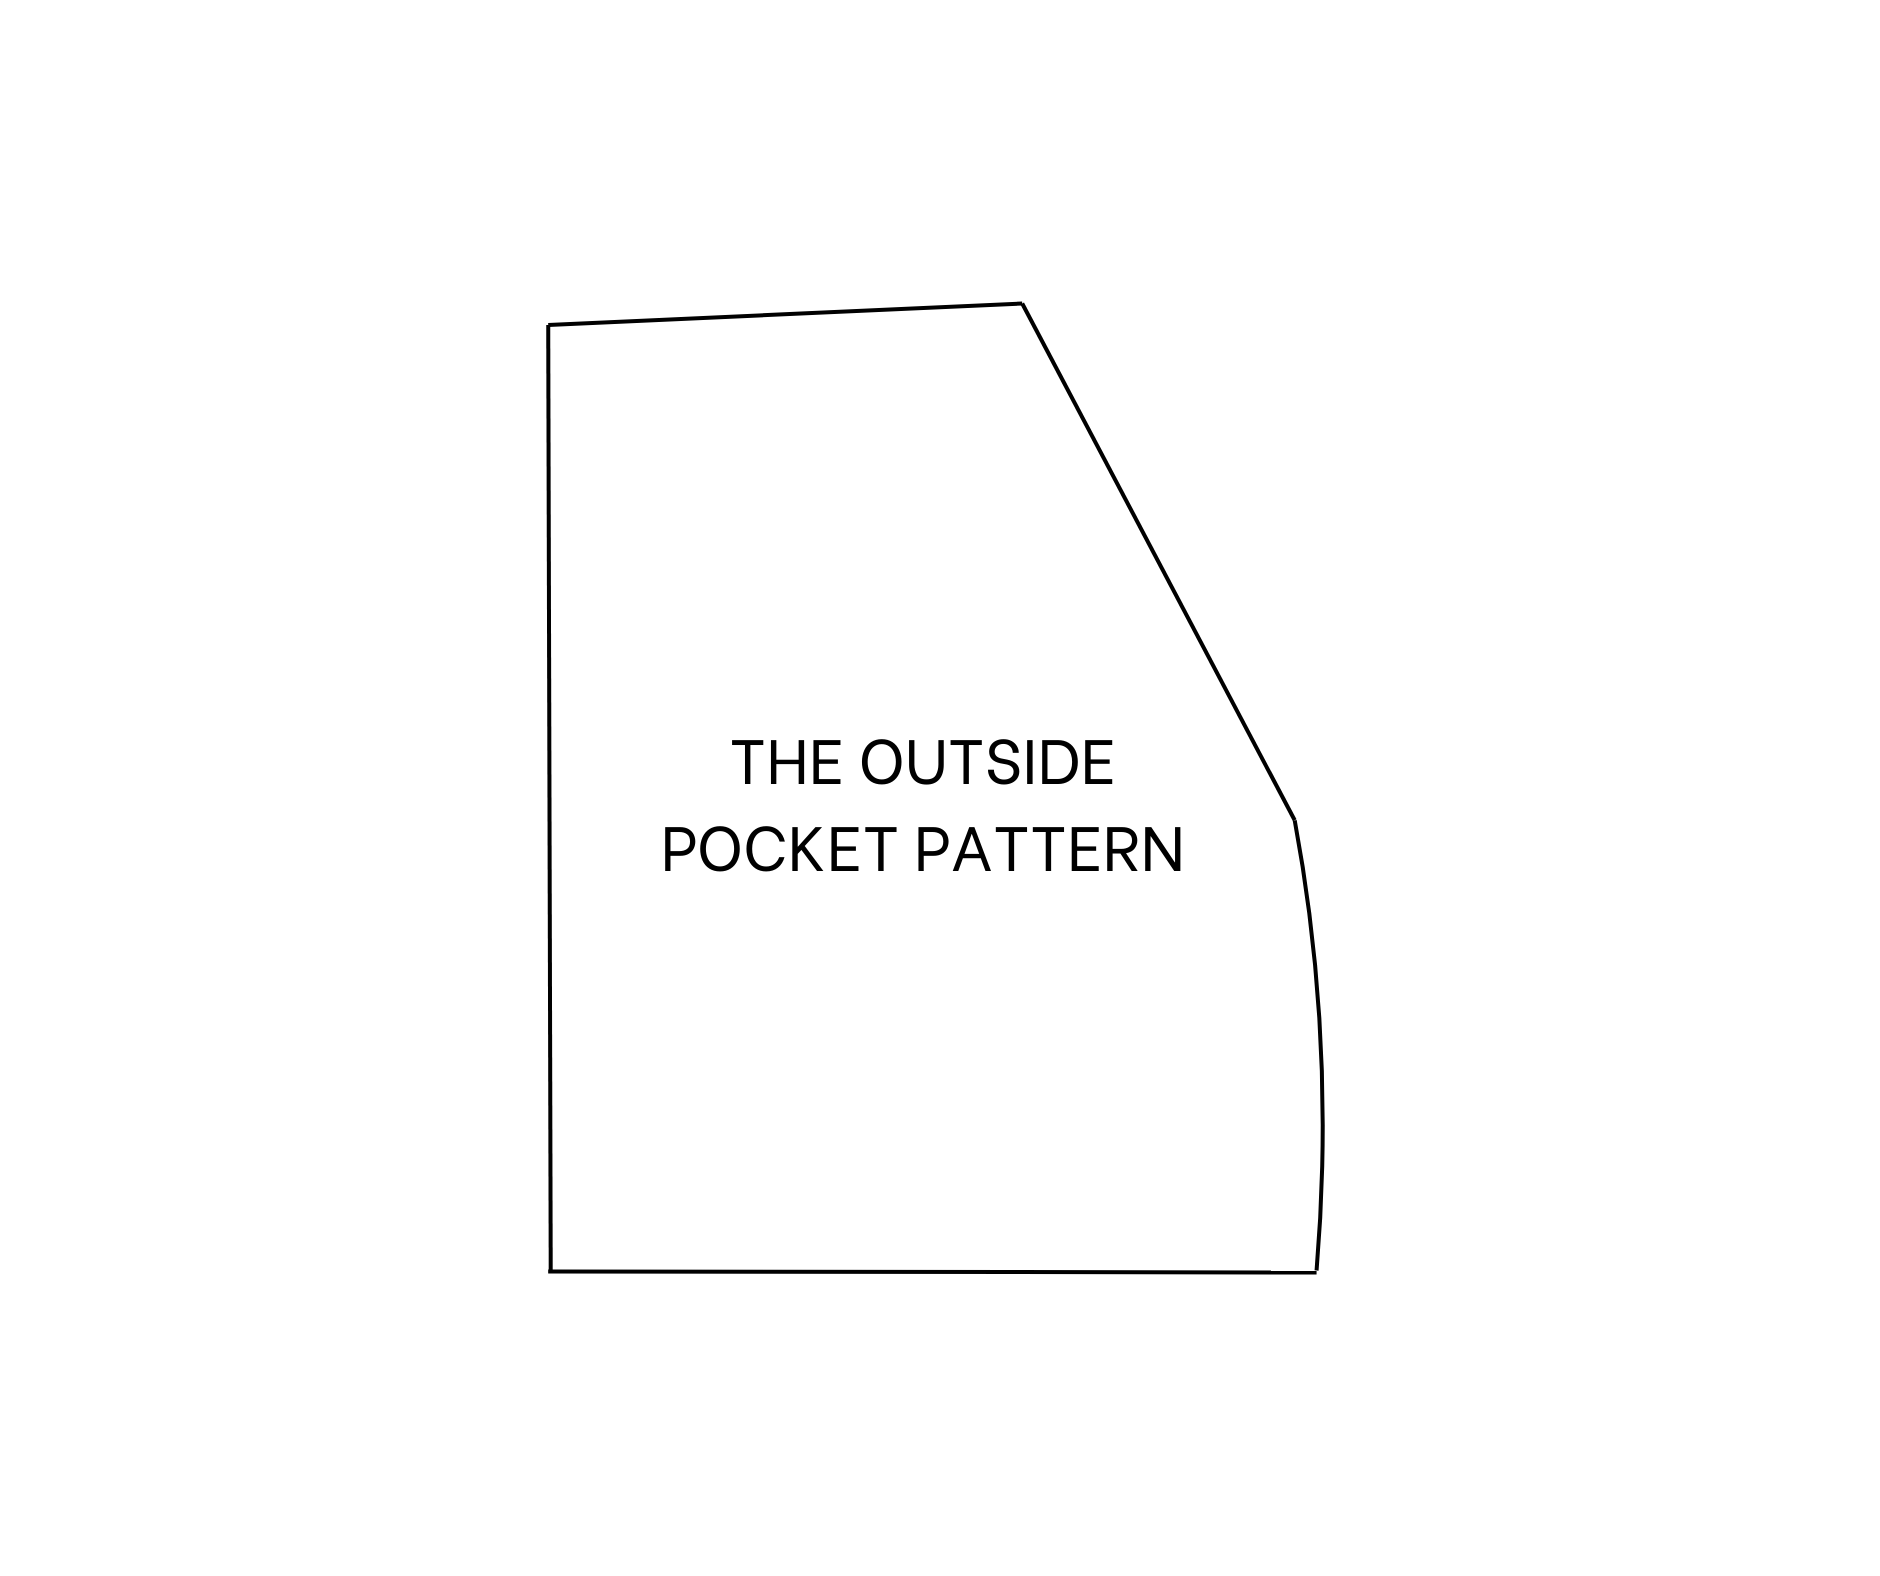
THE OUTSIDE POCKET PATTERN
Use the inside pocket pattern to copy the new slanted line at the front pants pattern you just created.
So we will have the outside pocket pattern after that.
THE FRONT PANTS PATTERN (Continue)
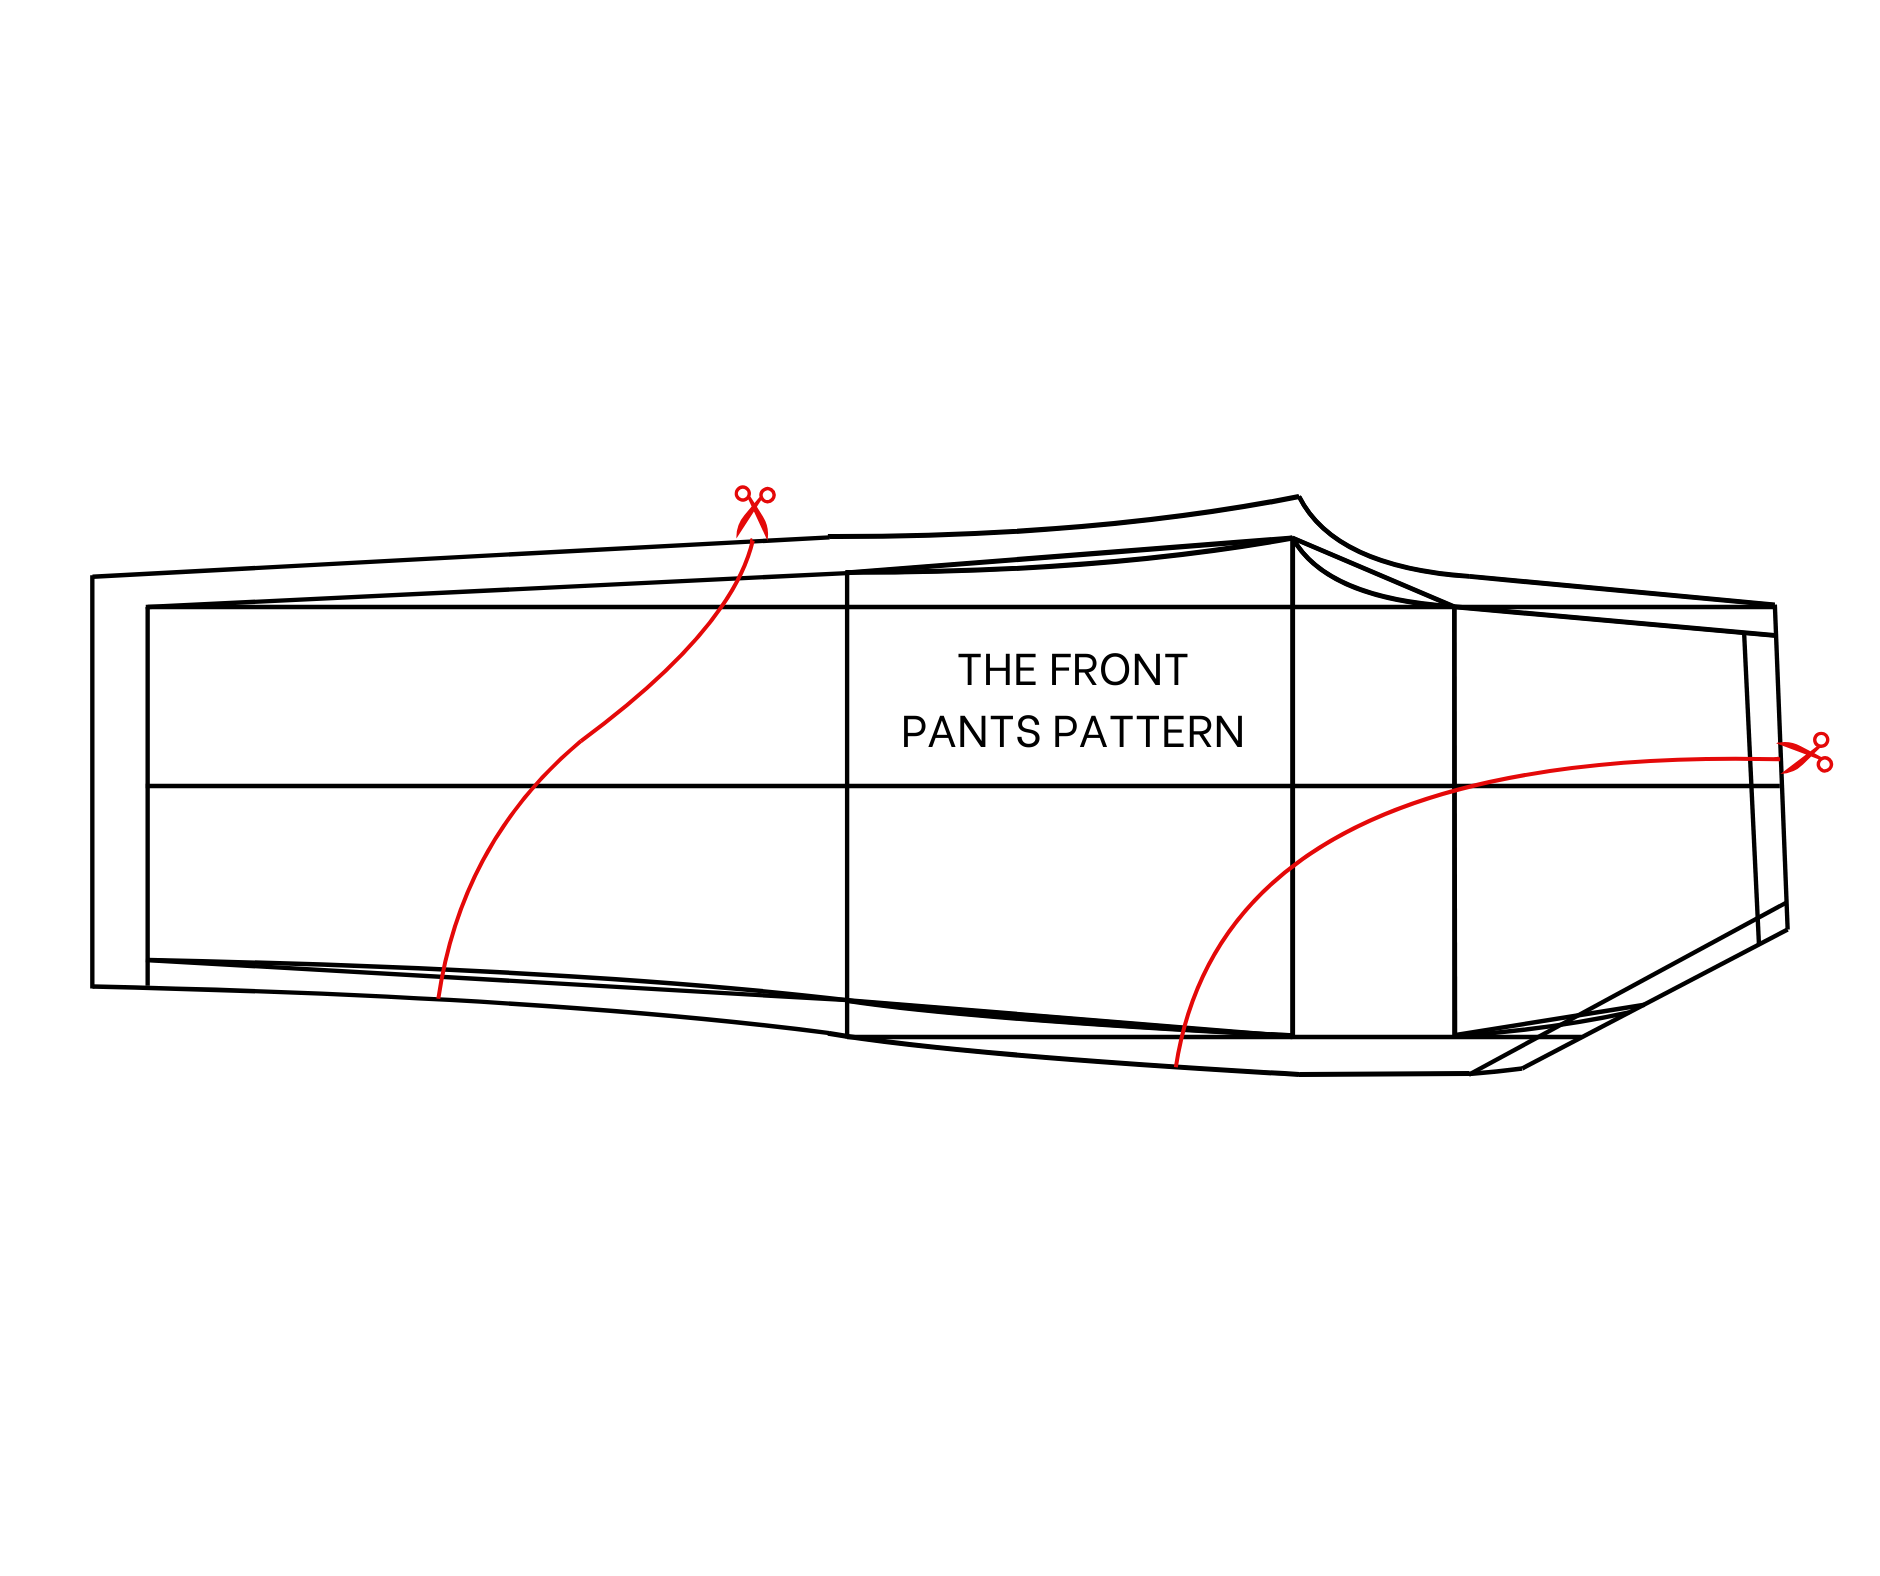
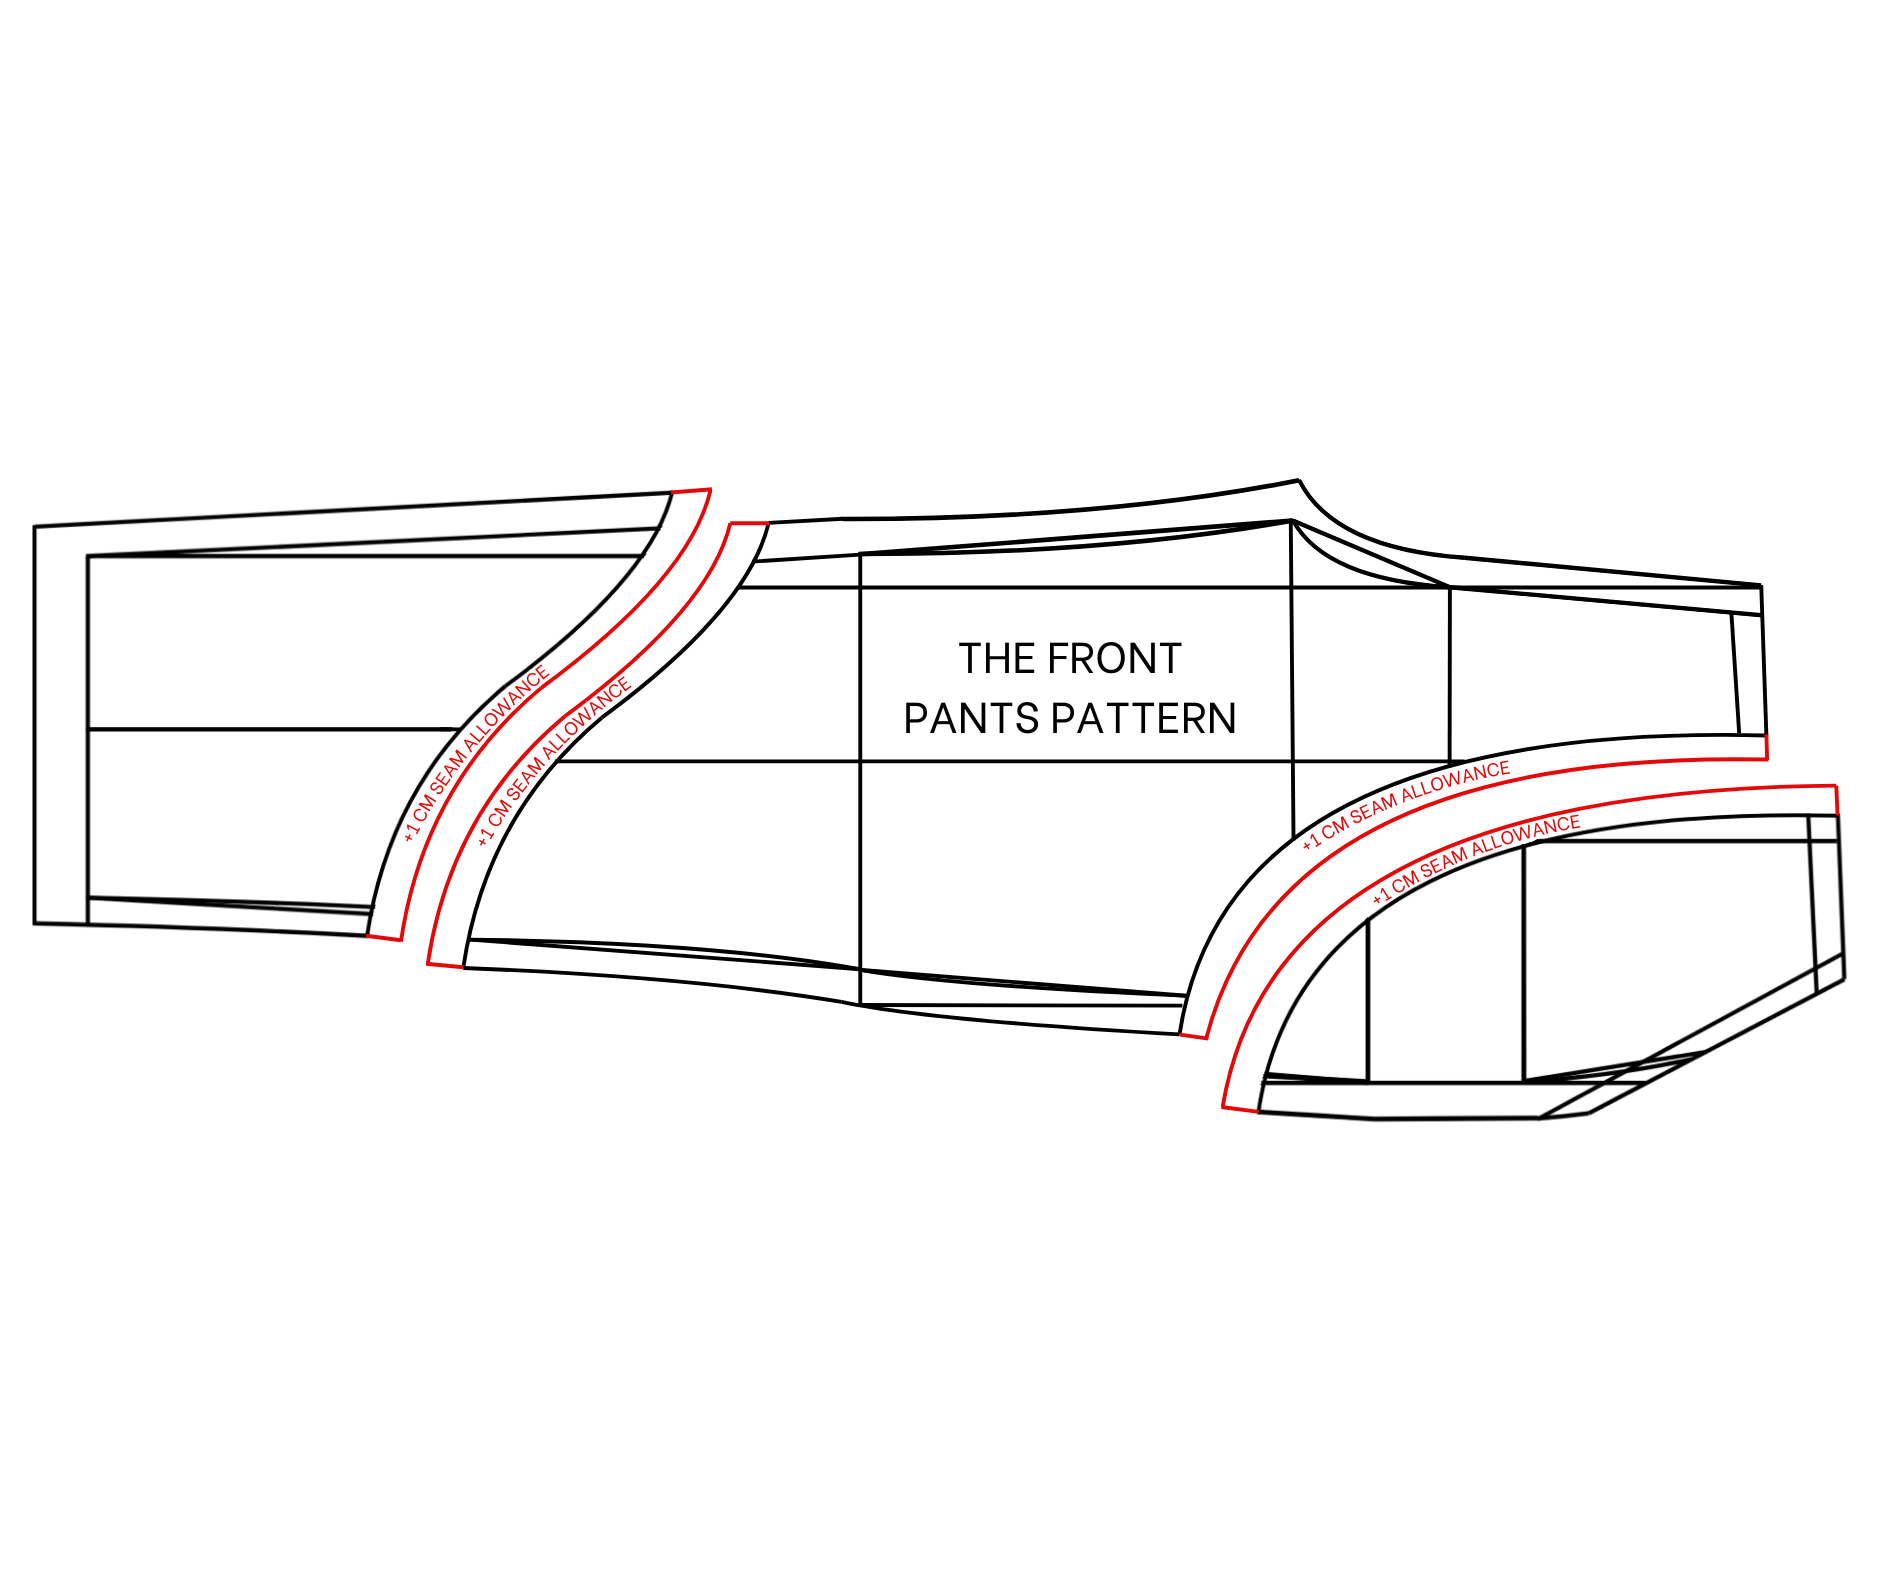
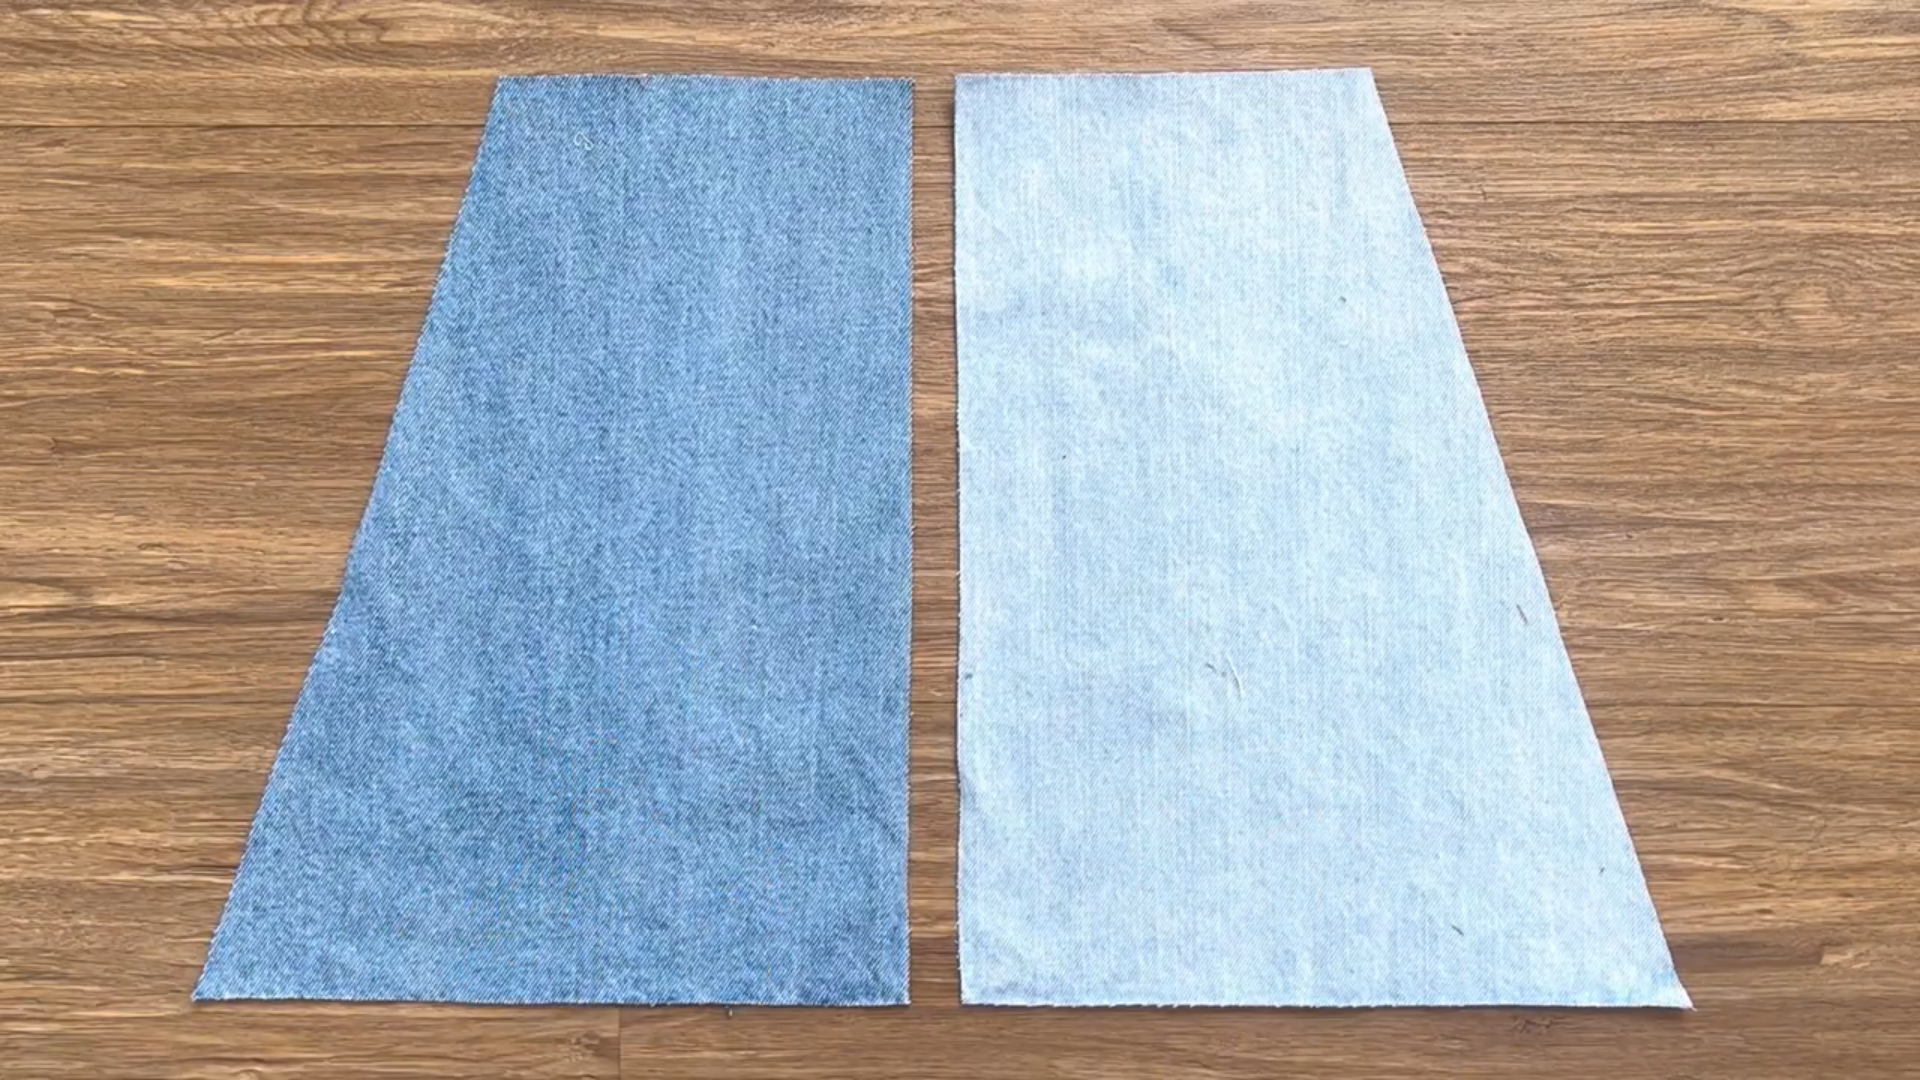
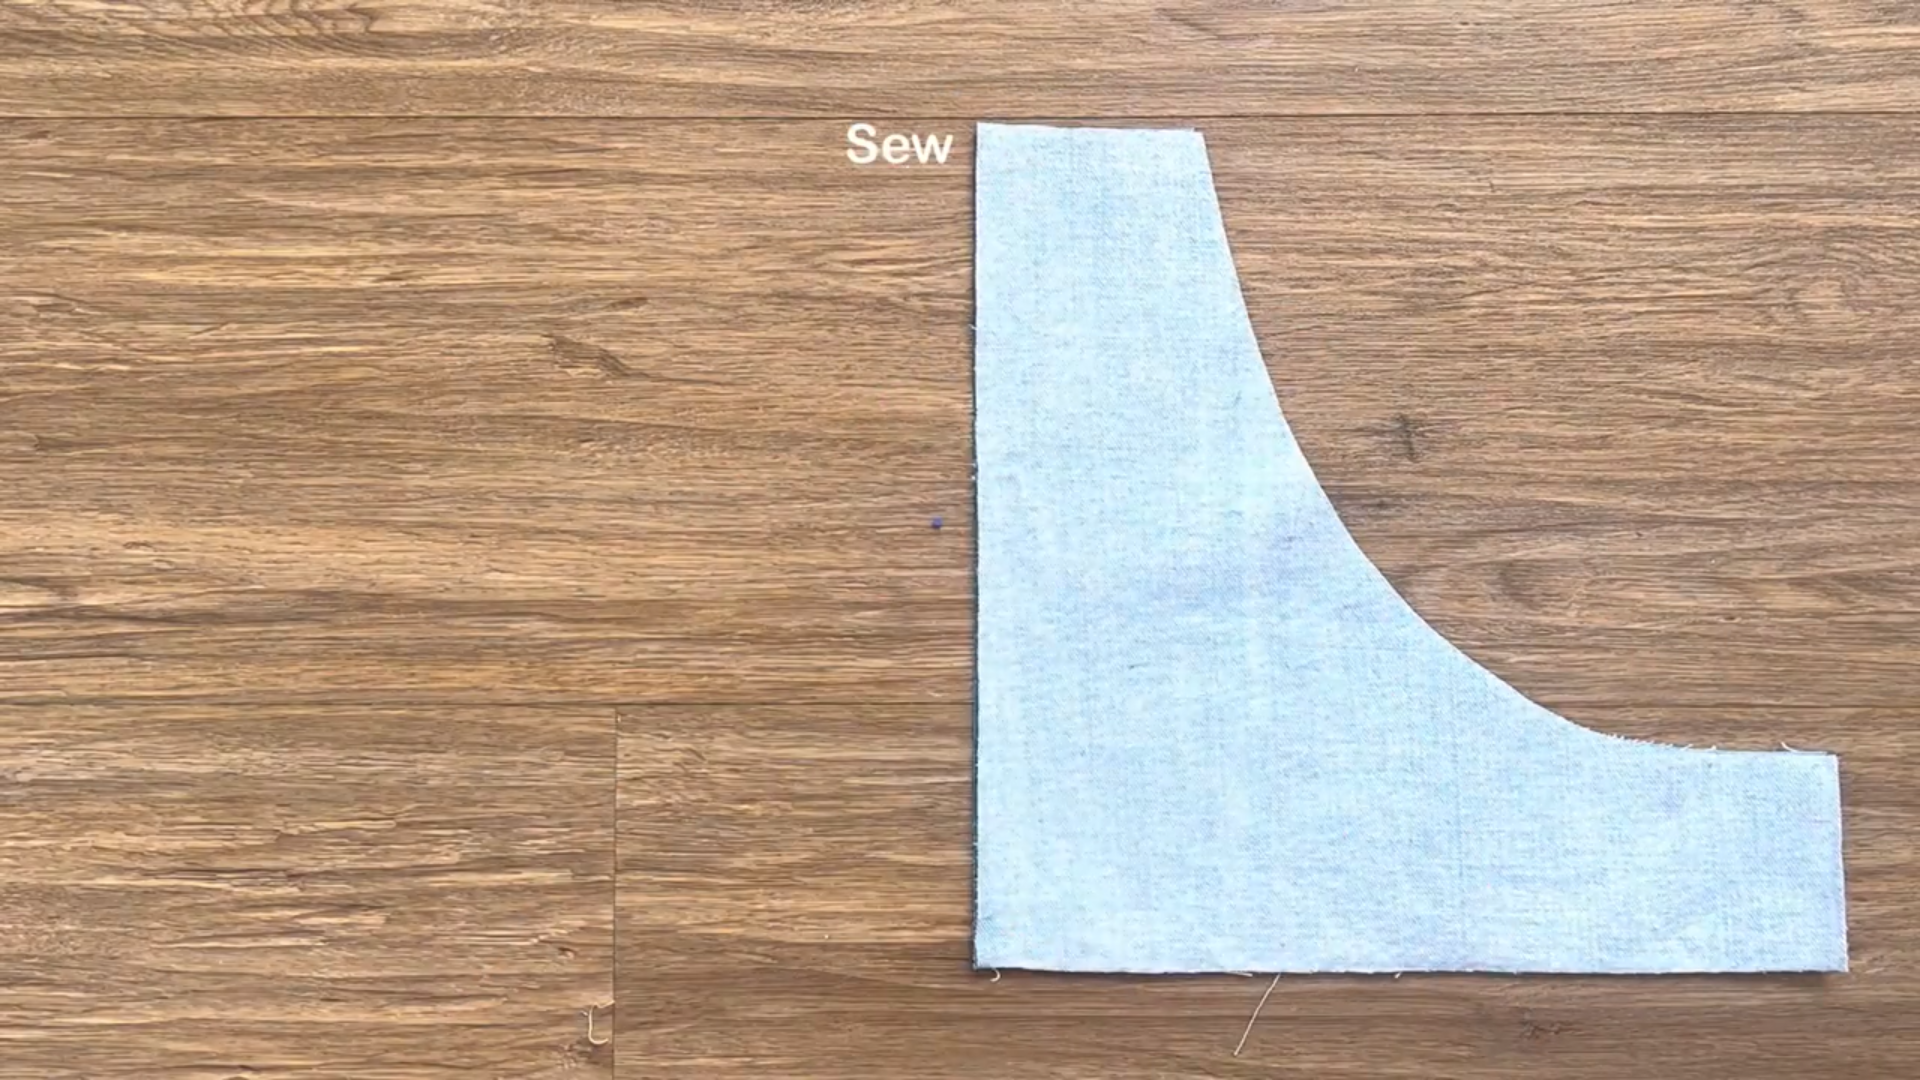
At the front pants, draw some curved lines to create a patchwork look for the jumpsuit.
Don't forget to add seam allowance at the curve lines after cutting.
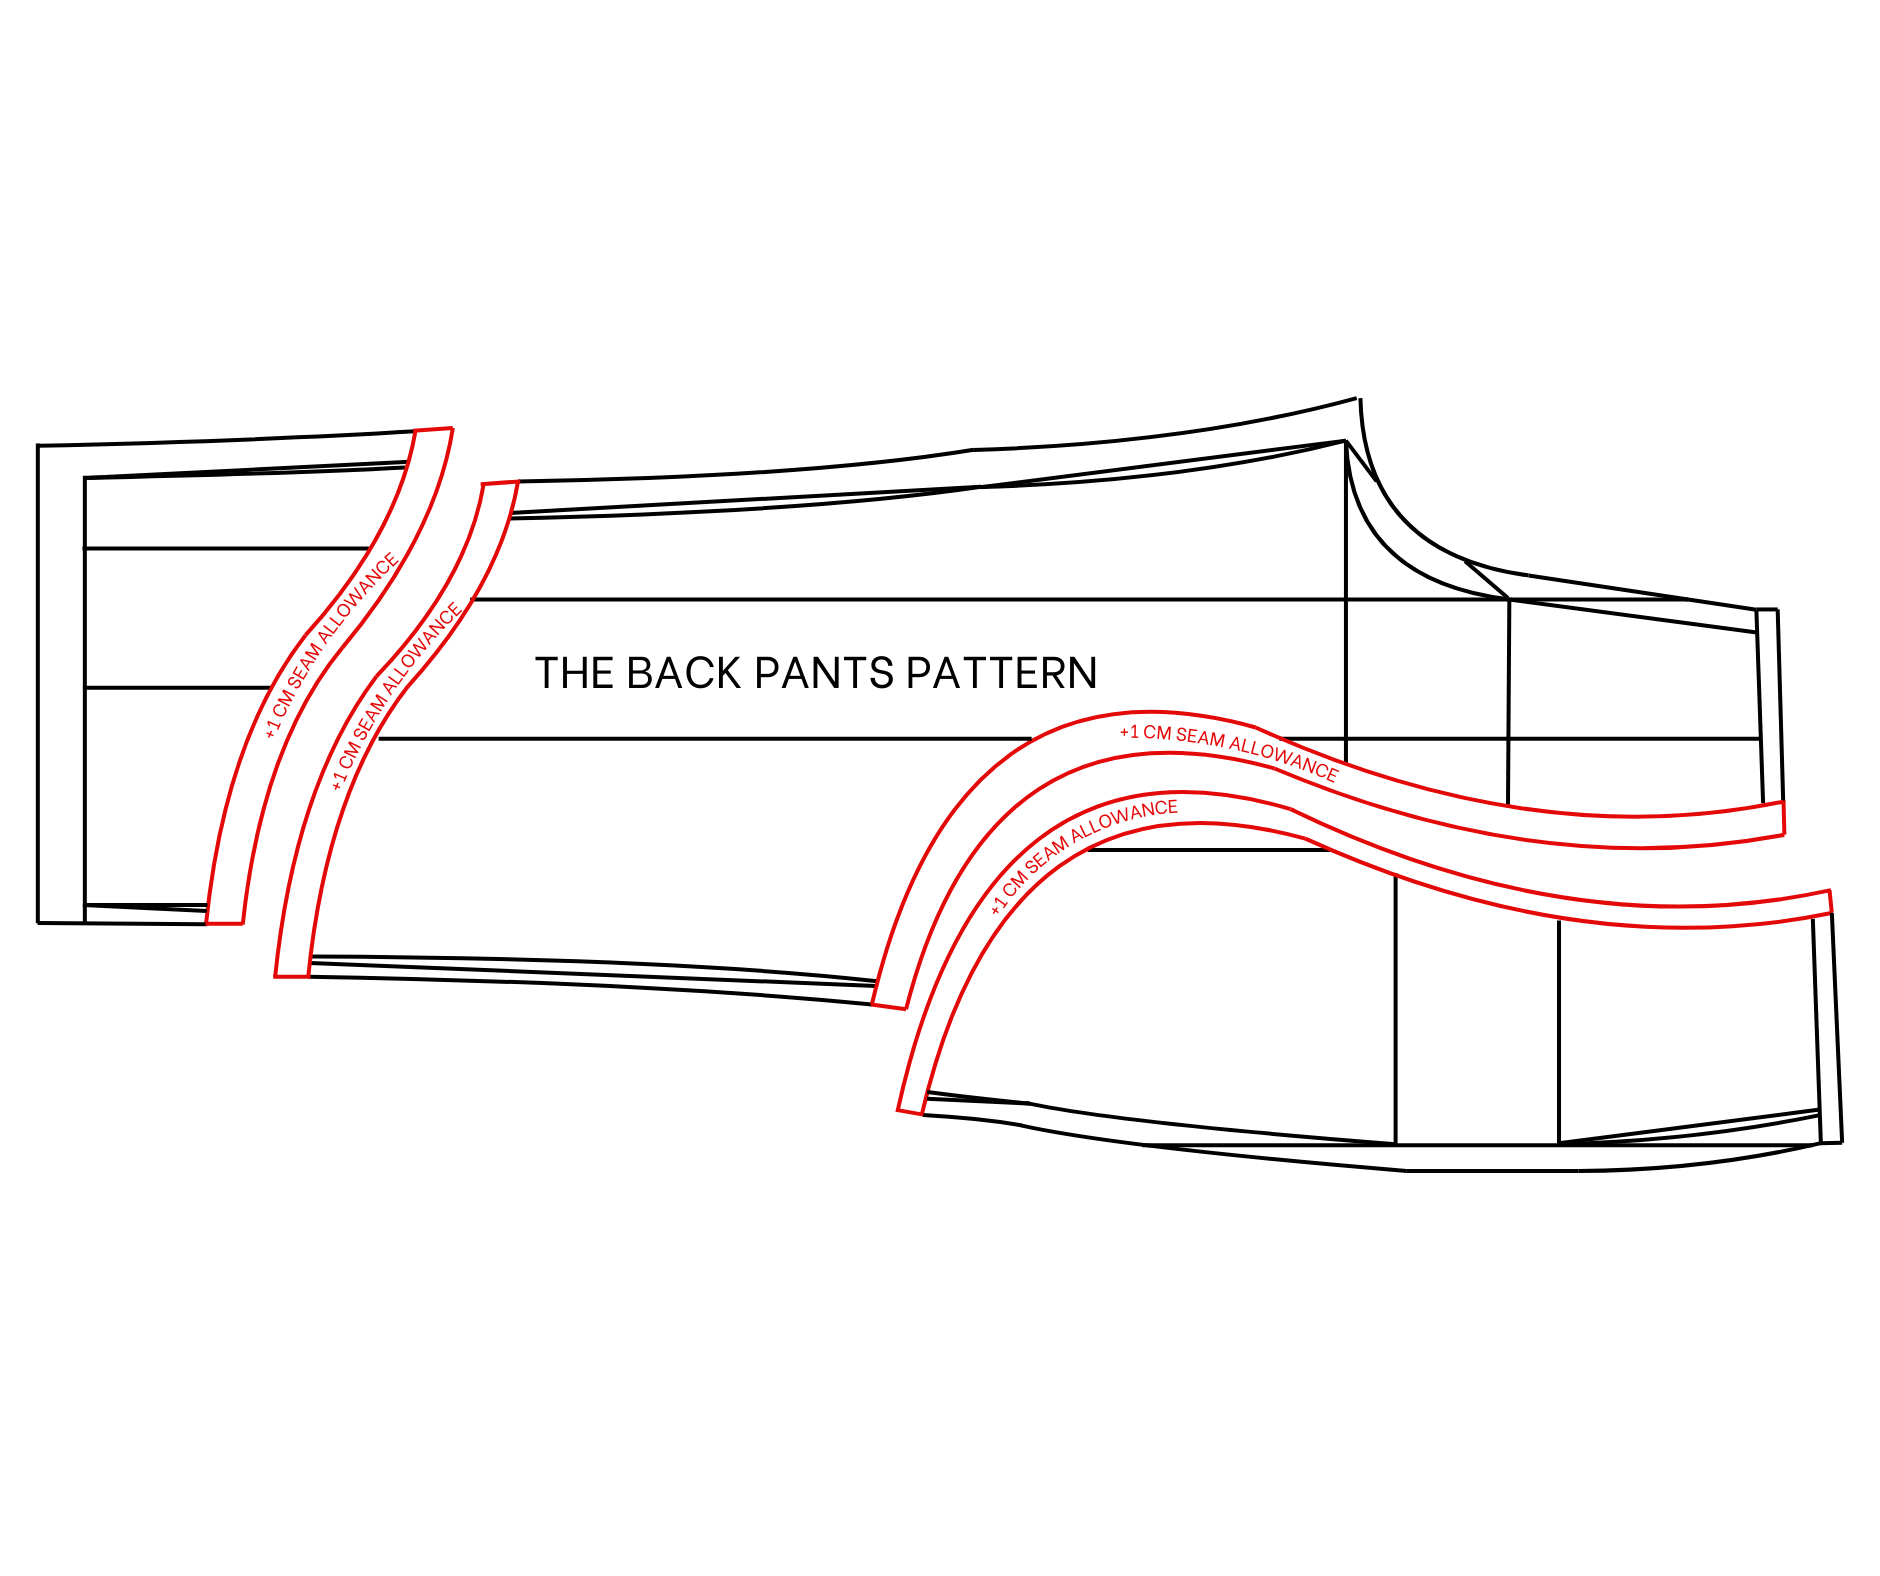
THE BACK PANTS PATTERN
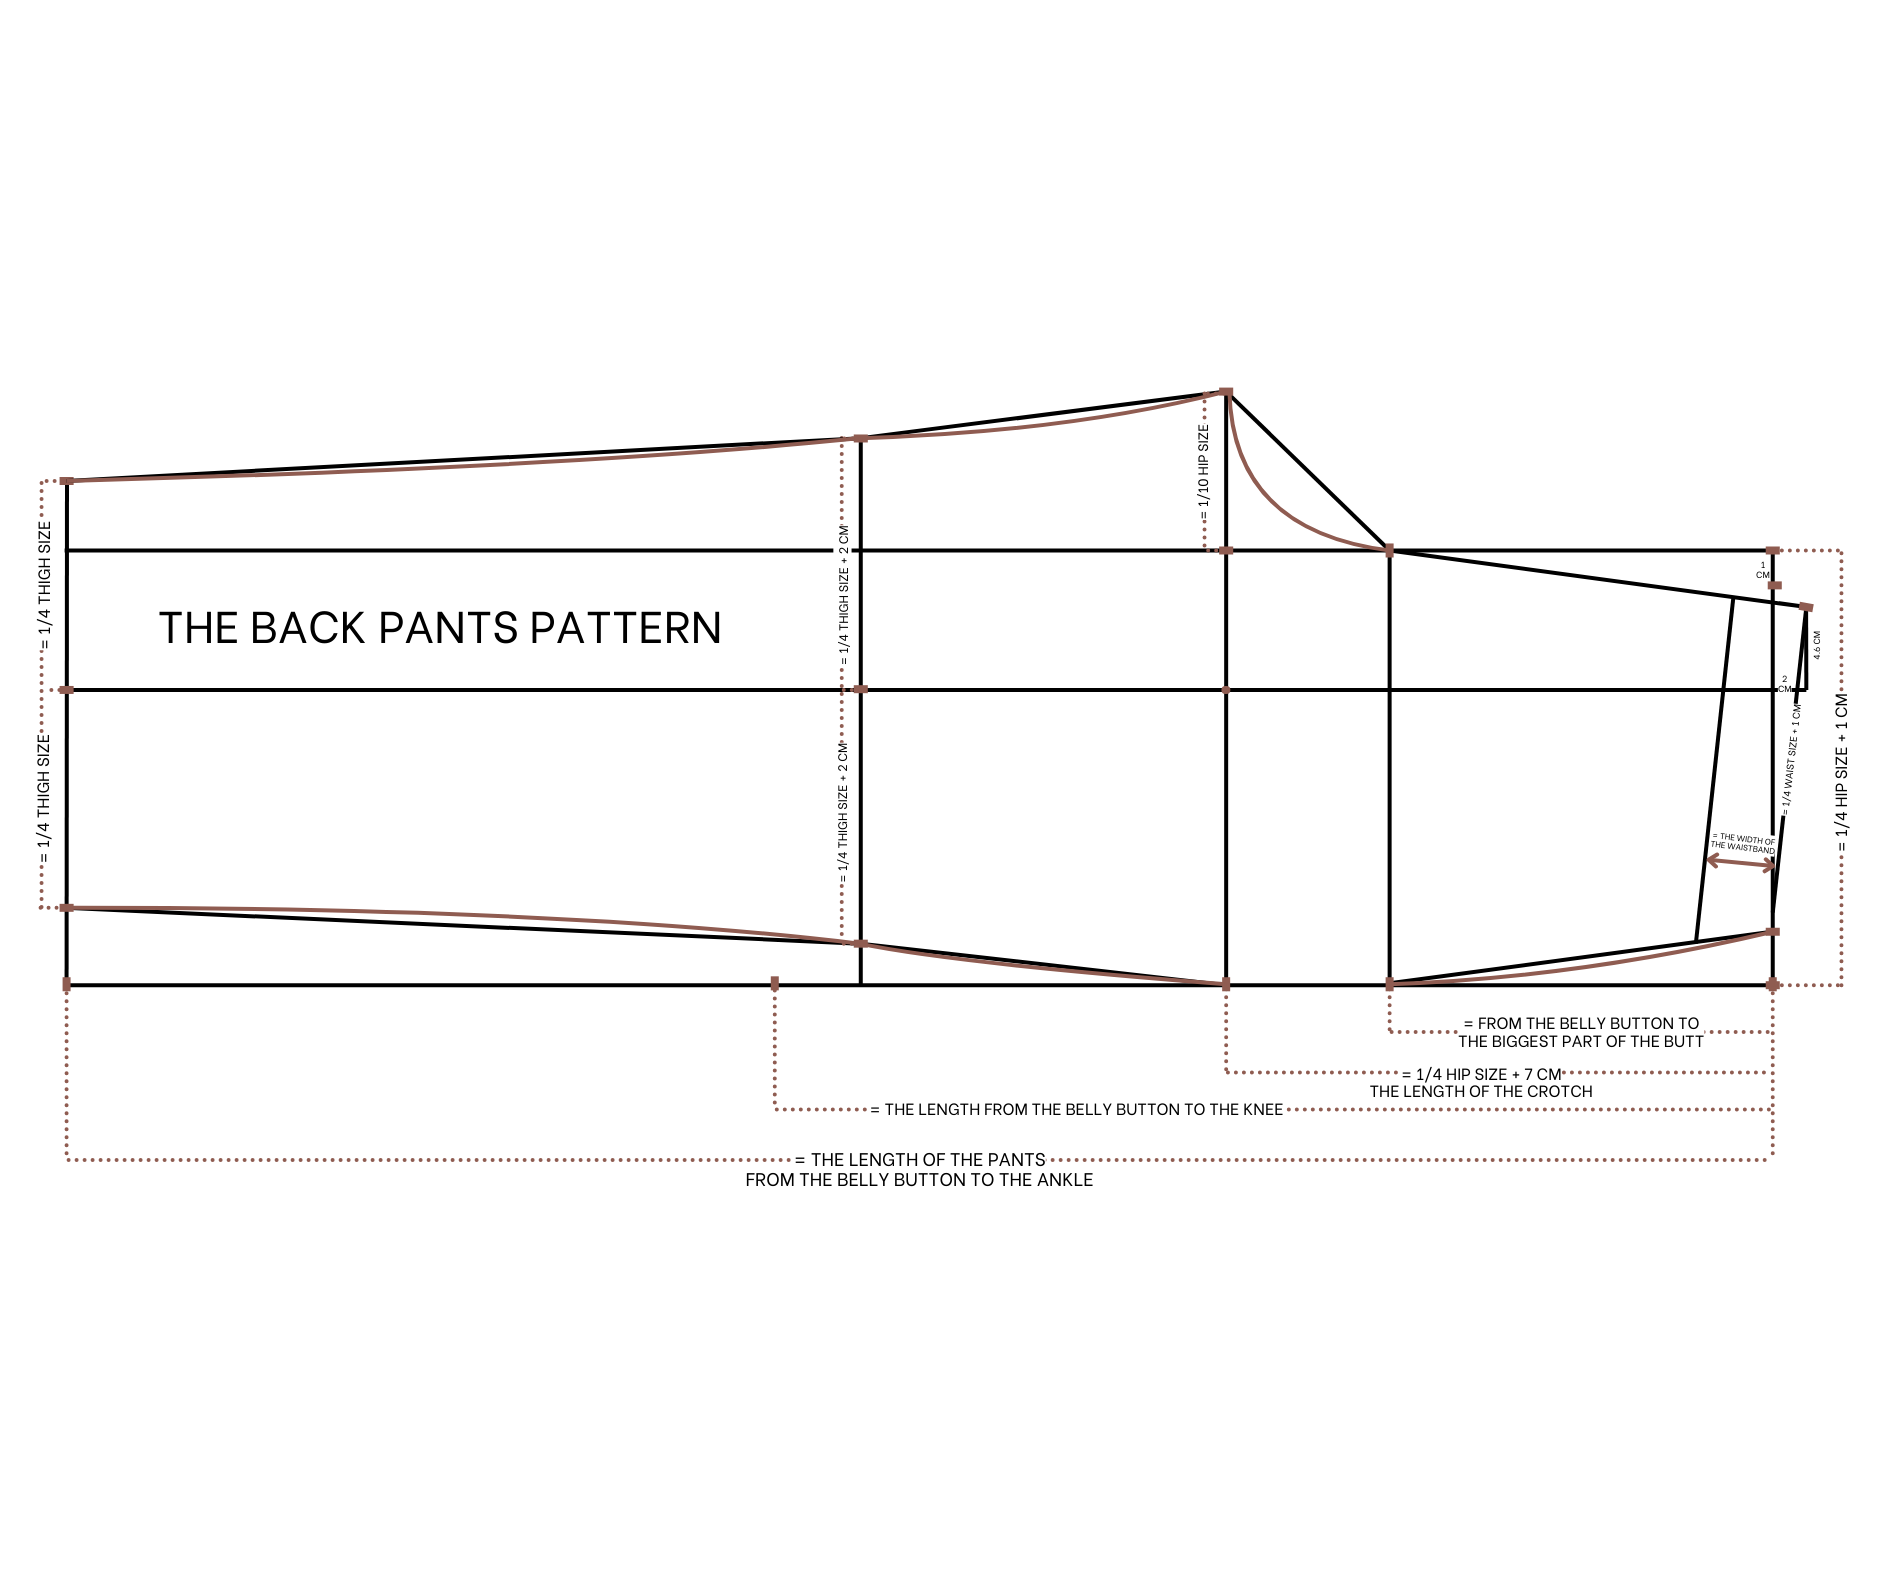
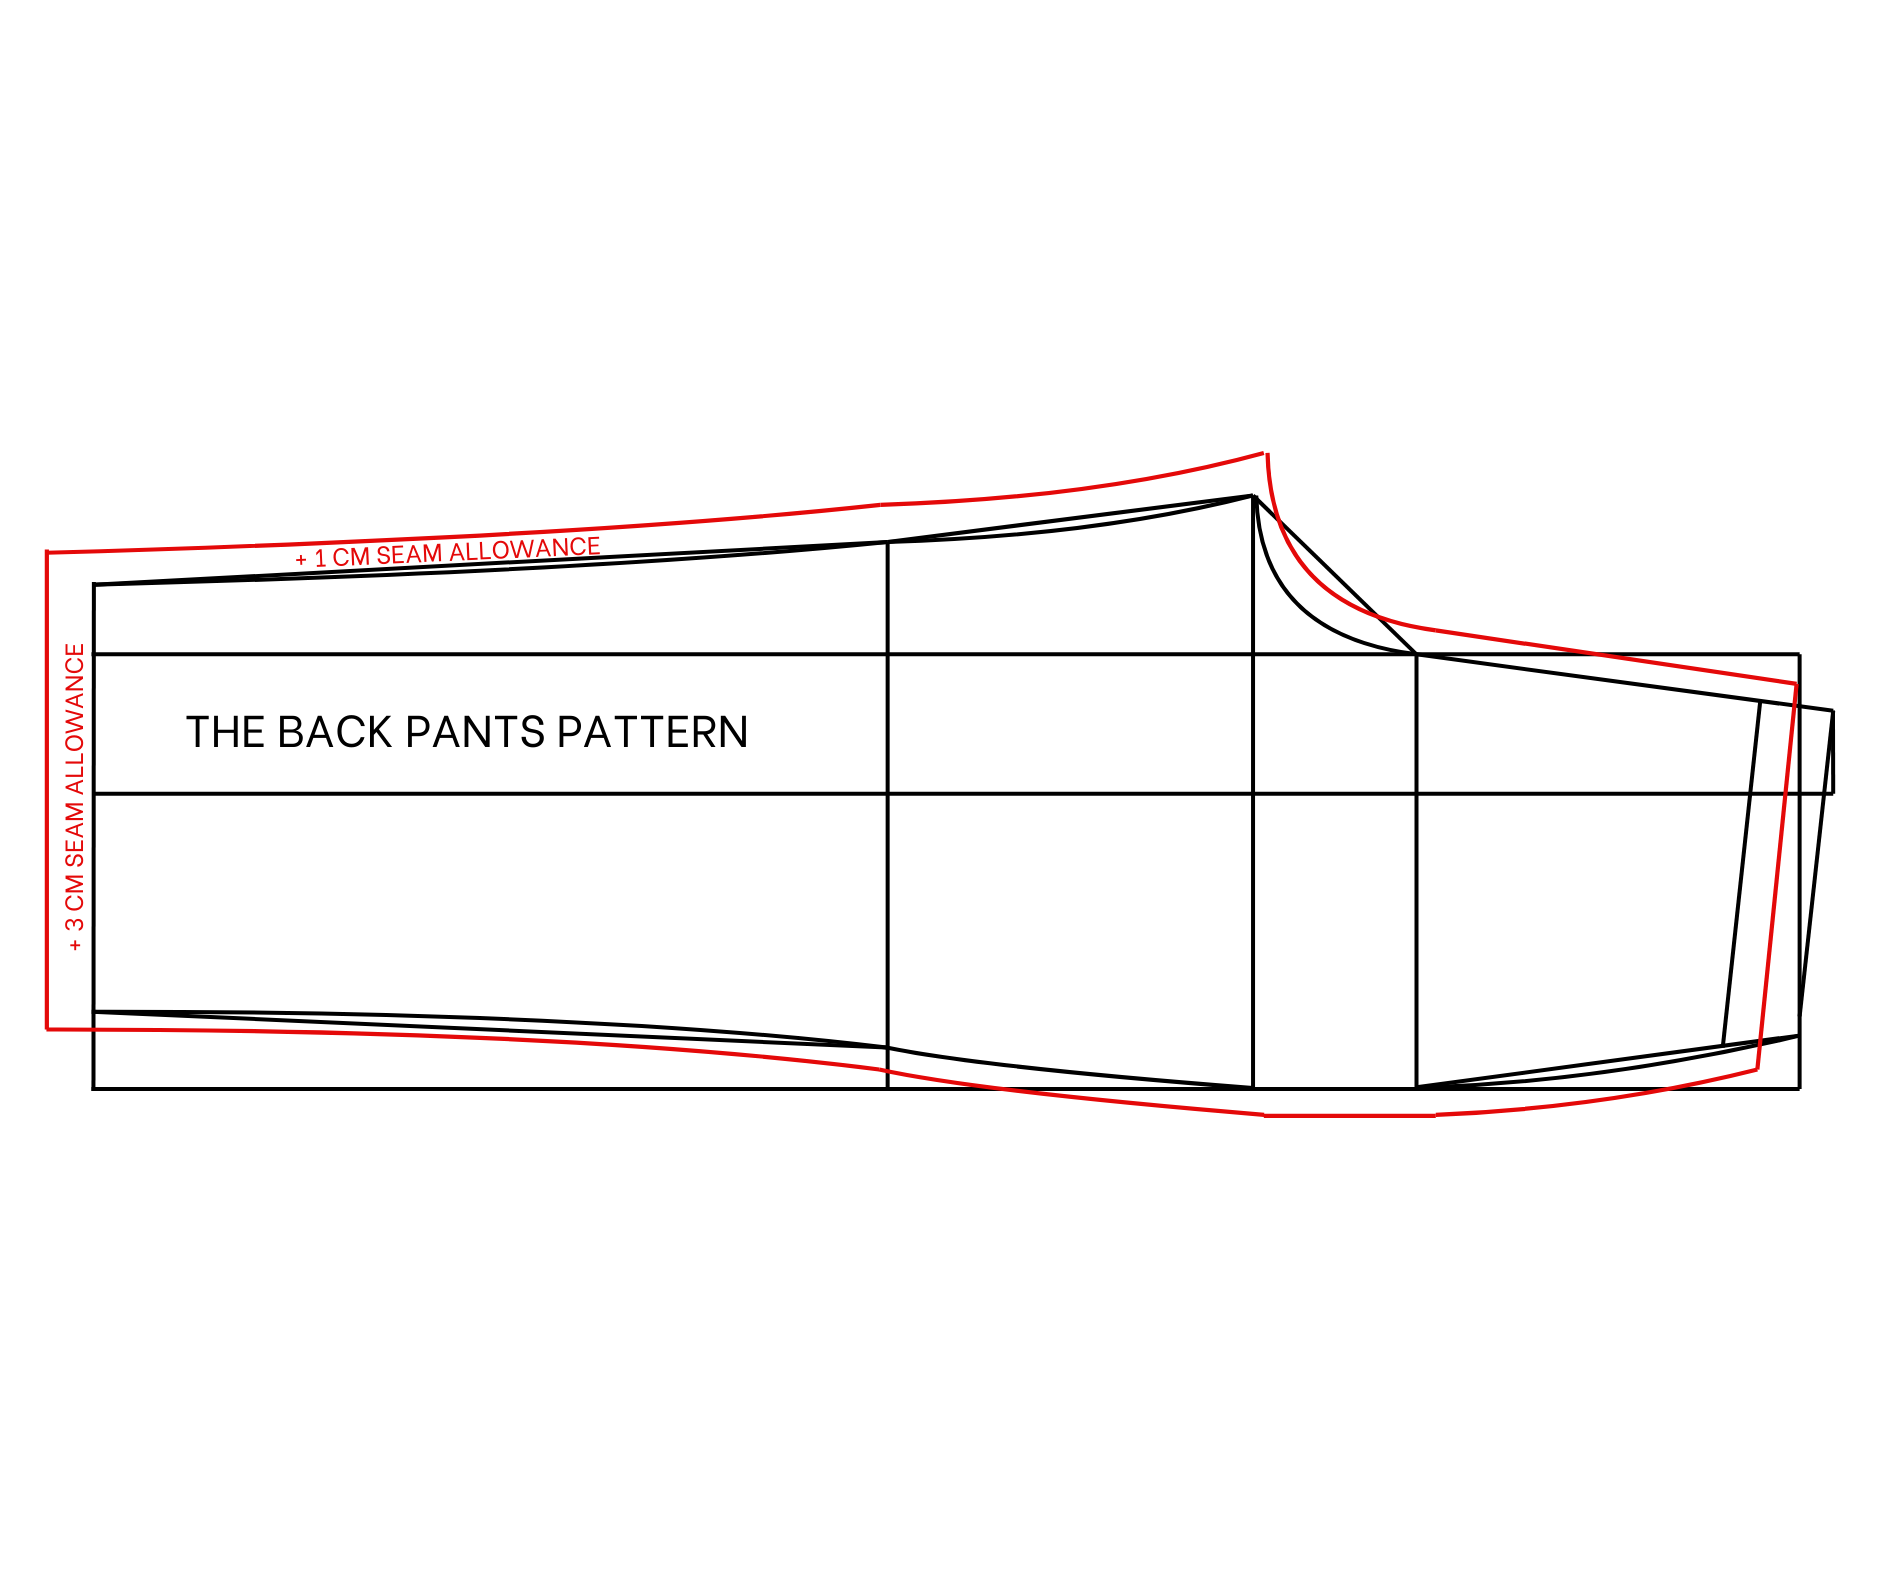
Moving to the back pants pattern, draw the same rectangle that you did at the front pants which is 24 cm width and 95 cm length.
From the top width line, draw another straight line at 30 cm next to it, which is a quarter of your hip size plus 7 cm. From one end of this line, extend it 9.2 cm which is 1 per 10 your hip size.
From the top width line, draw another straight line at 21 cm from it, it's the length from the belly button to the biggest part of the butt.
Mark in the middle of the first straight line then draw a horizontal line to that mark and cut 2 width lines of the rectangle later.
From the cutting point between the horizontal line and the top width line, draw a 2-cm line outside it. From the top of this one, draw a perpendicular line with 4.6 centimeter length, it's 1 per 20 your hip size.
Then connect one end of this new line to one end of the second straight line and finish at one end of the first straight line. After that, draw a curved line at the end to create a crotch line for the back pants.
From the top of the crotch line, draw a slanted line with 19 cm width which is a quarter of your waist size plus 1 cm.
This slanted line will finish at the top width line, then connect the end of the slanted line to the end of the second straight line. after that, redraw it a bit to make it nicer.
From the top width line, draw the third straight line at 55 cm next to it, it's the length from the belly button to the knee.
From the cutting point between this line and the horizontal line, mark to two sides of it 14 cm, which is a quarter of your thigh size plus 2 cm. So the width between two marks will be 28 cm which is a half of your thigh size plus 4 cm.
From the mark between the bottom width line and the horizontal line, mark to two sides of it 12 cm, which is 2 cm shorter than the marks you make on the knee line before.
Then connect the inside mark of the bottom width line to the inside mark on the knee line and finish at the end of the crotch line to create inside leg line for the back pants.
Connect the outside mark on the bottom width line to the outside mark on the knee line and finish at the end of the first straight line to create the side line of the back pants. Redraw them a bit after that to make them nicer.
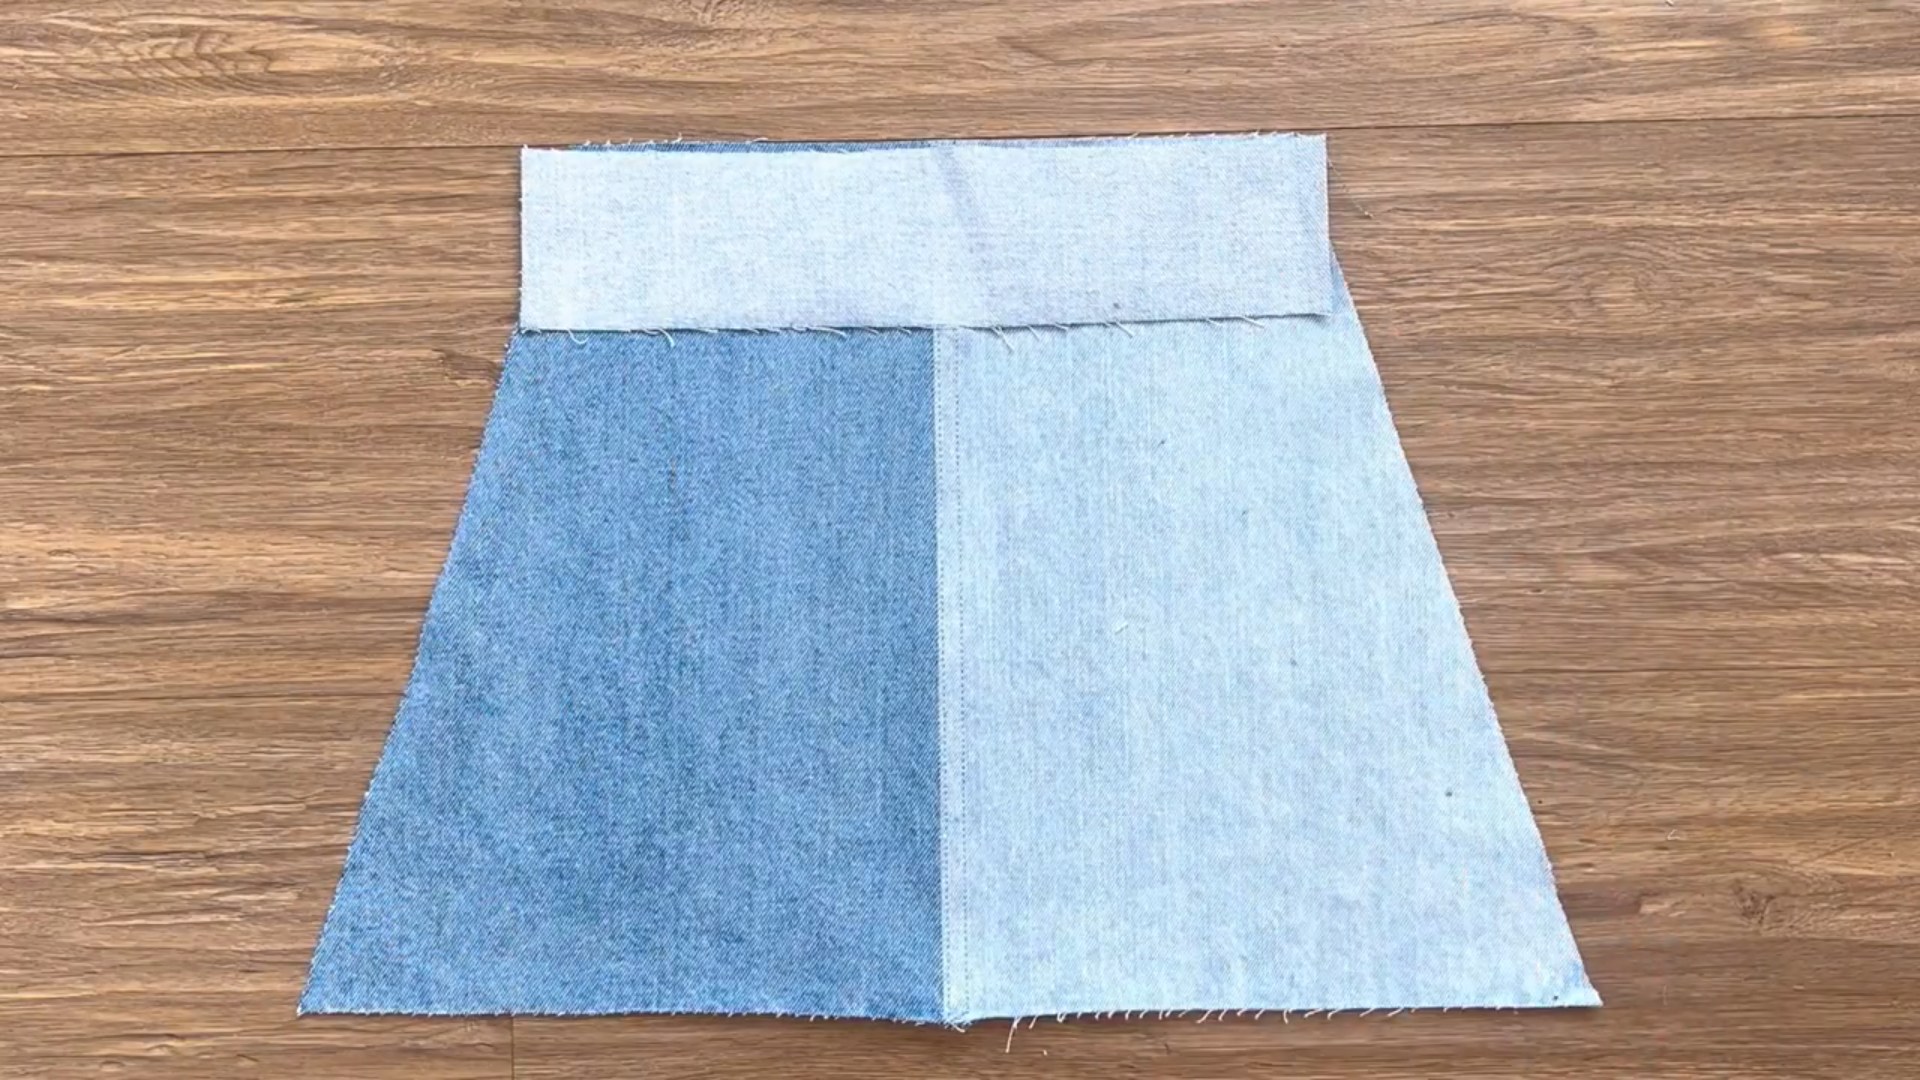
From the waistline, draw another line at 4 cm and parallel with it, it's the width of the waistband that you want. Add 1 cm for seam allowance after that except 3 cm at the ending line and we will have the back pants pattern after cutting.
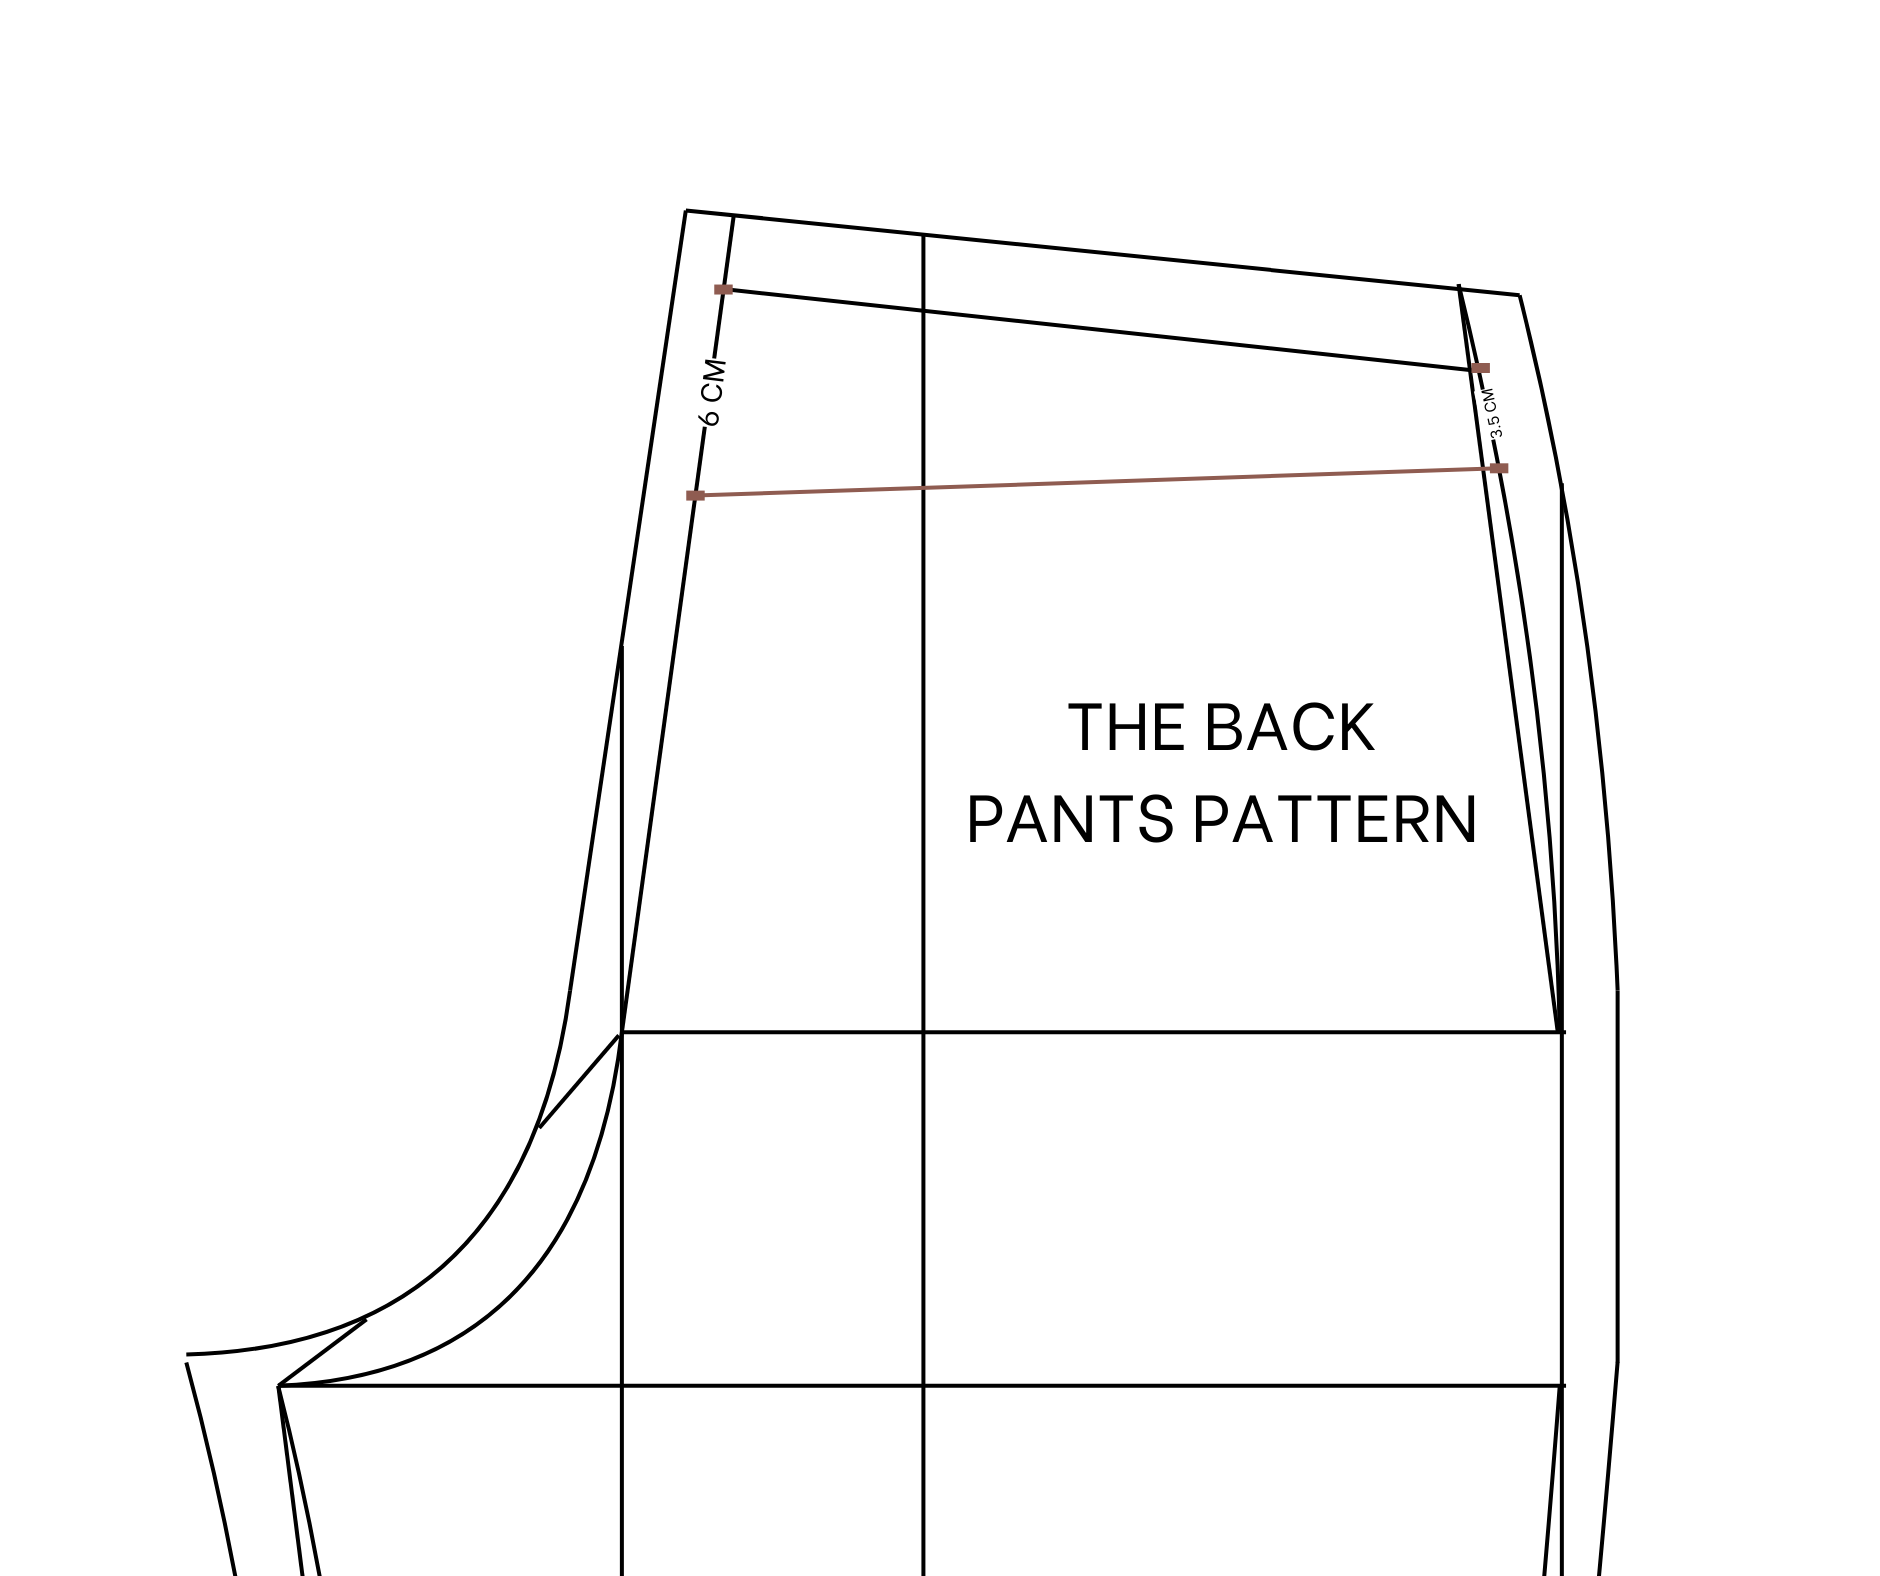
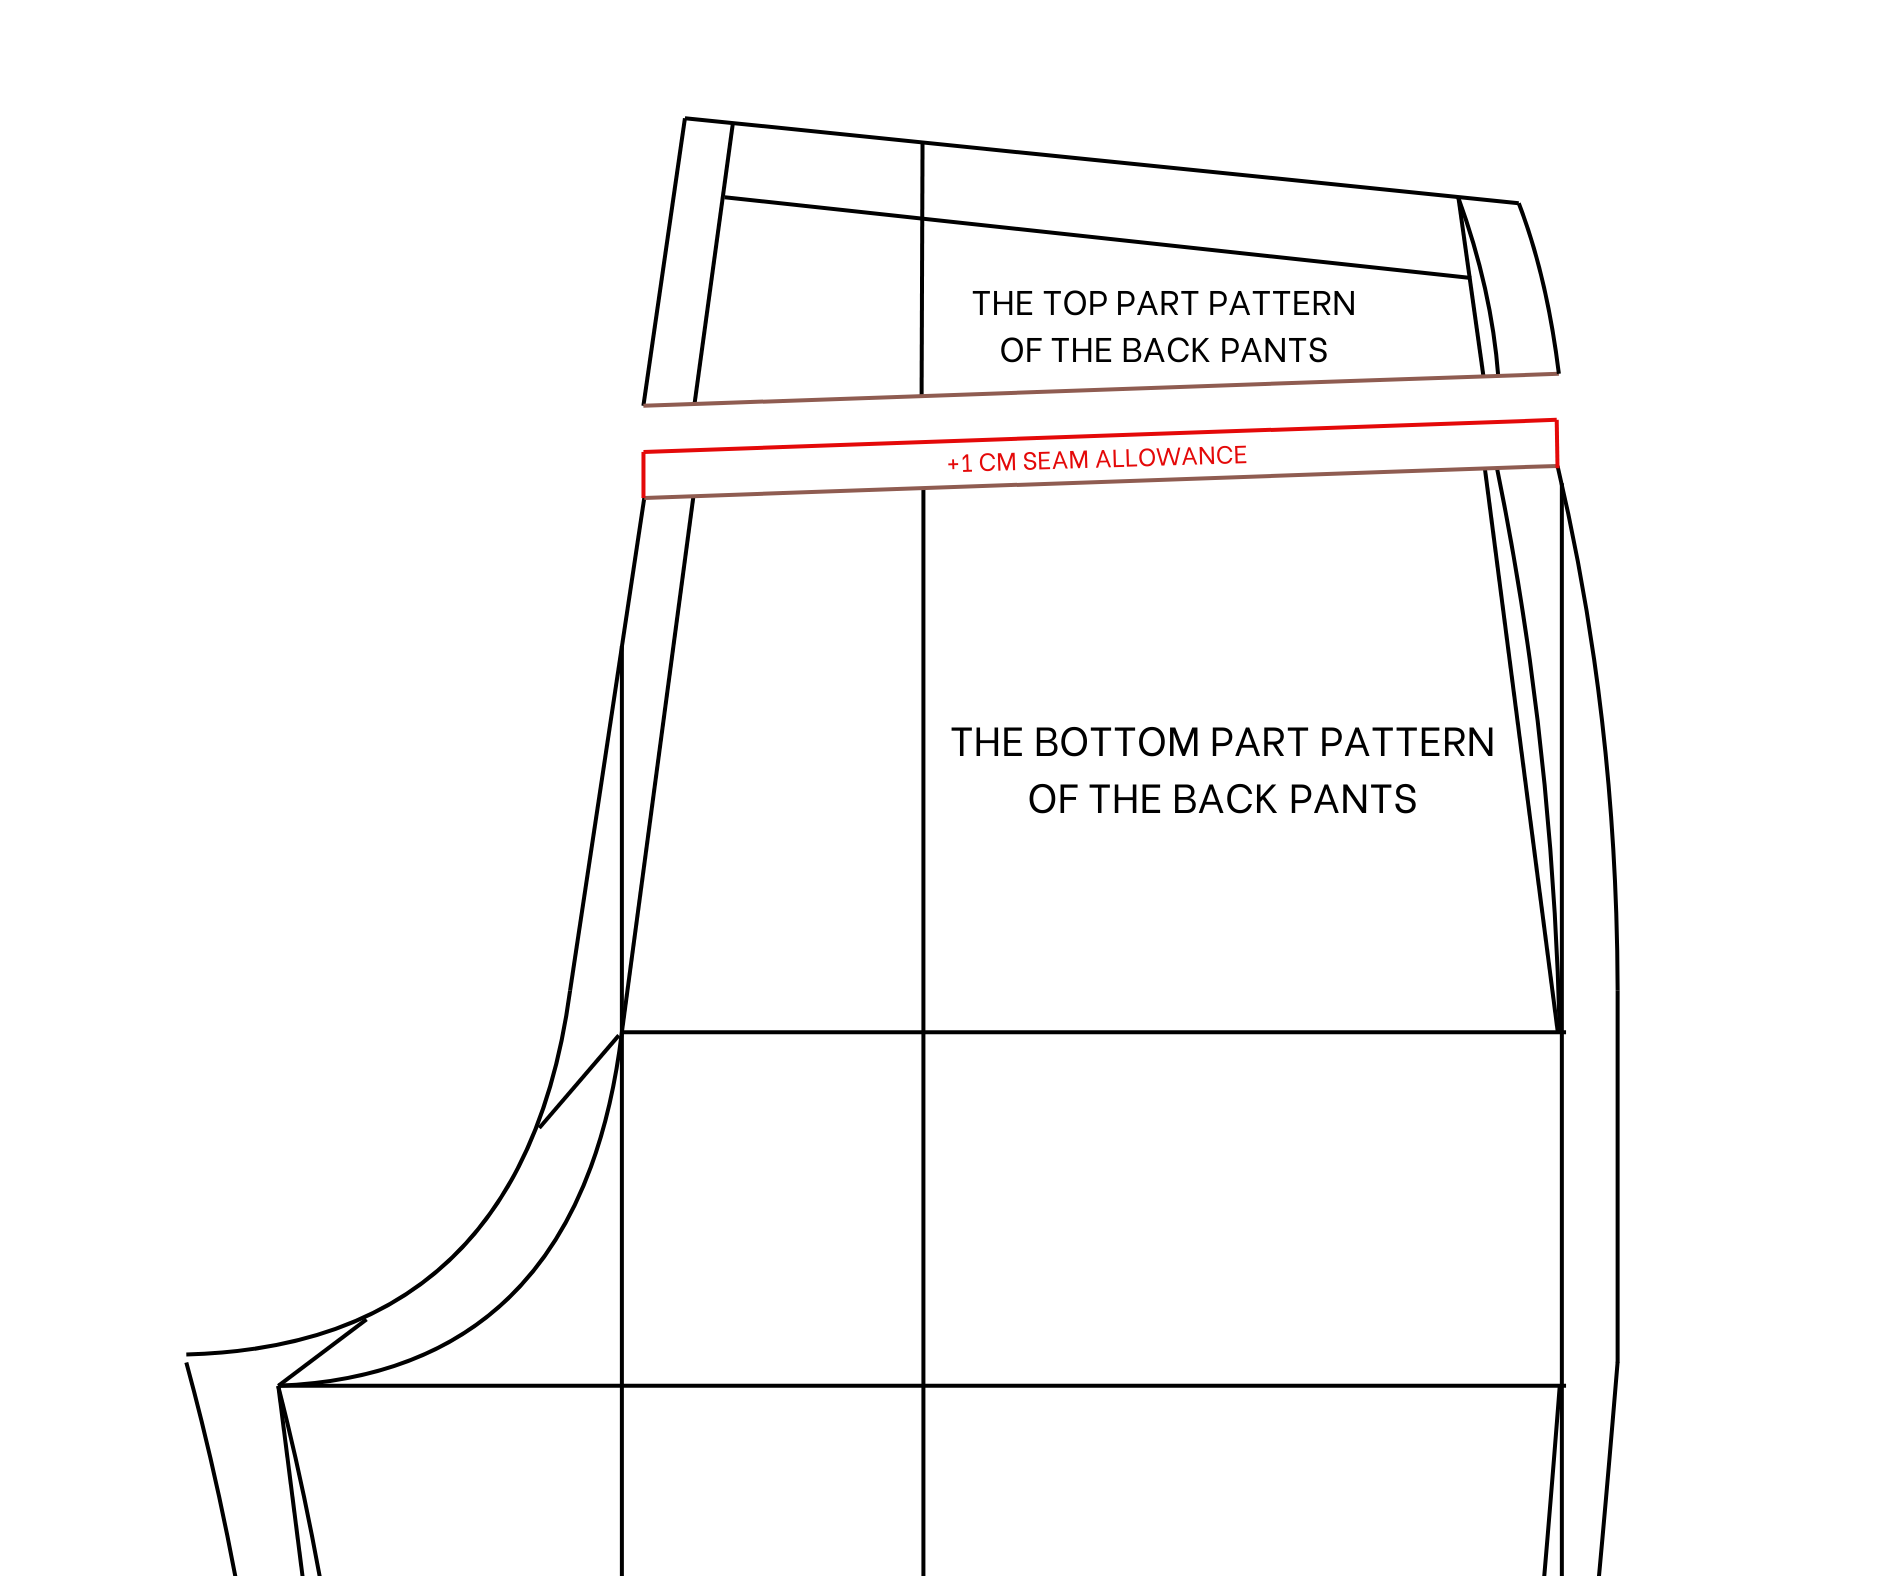
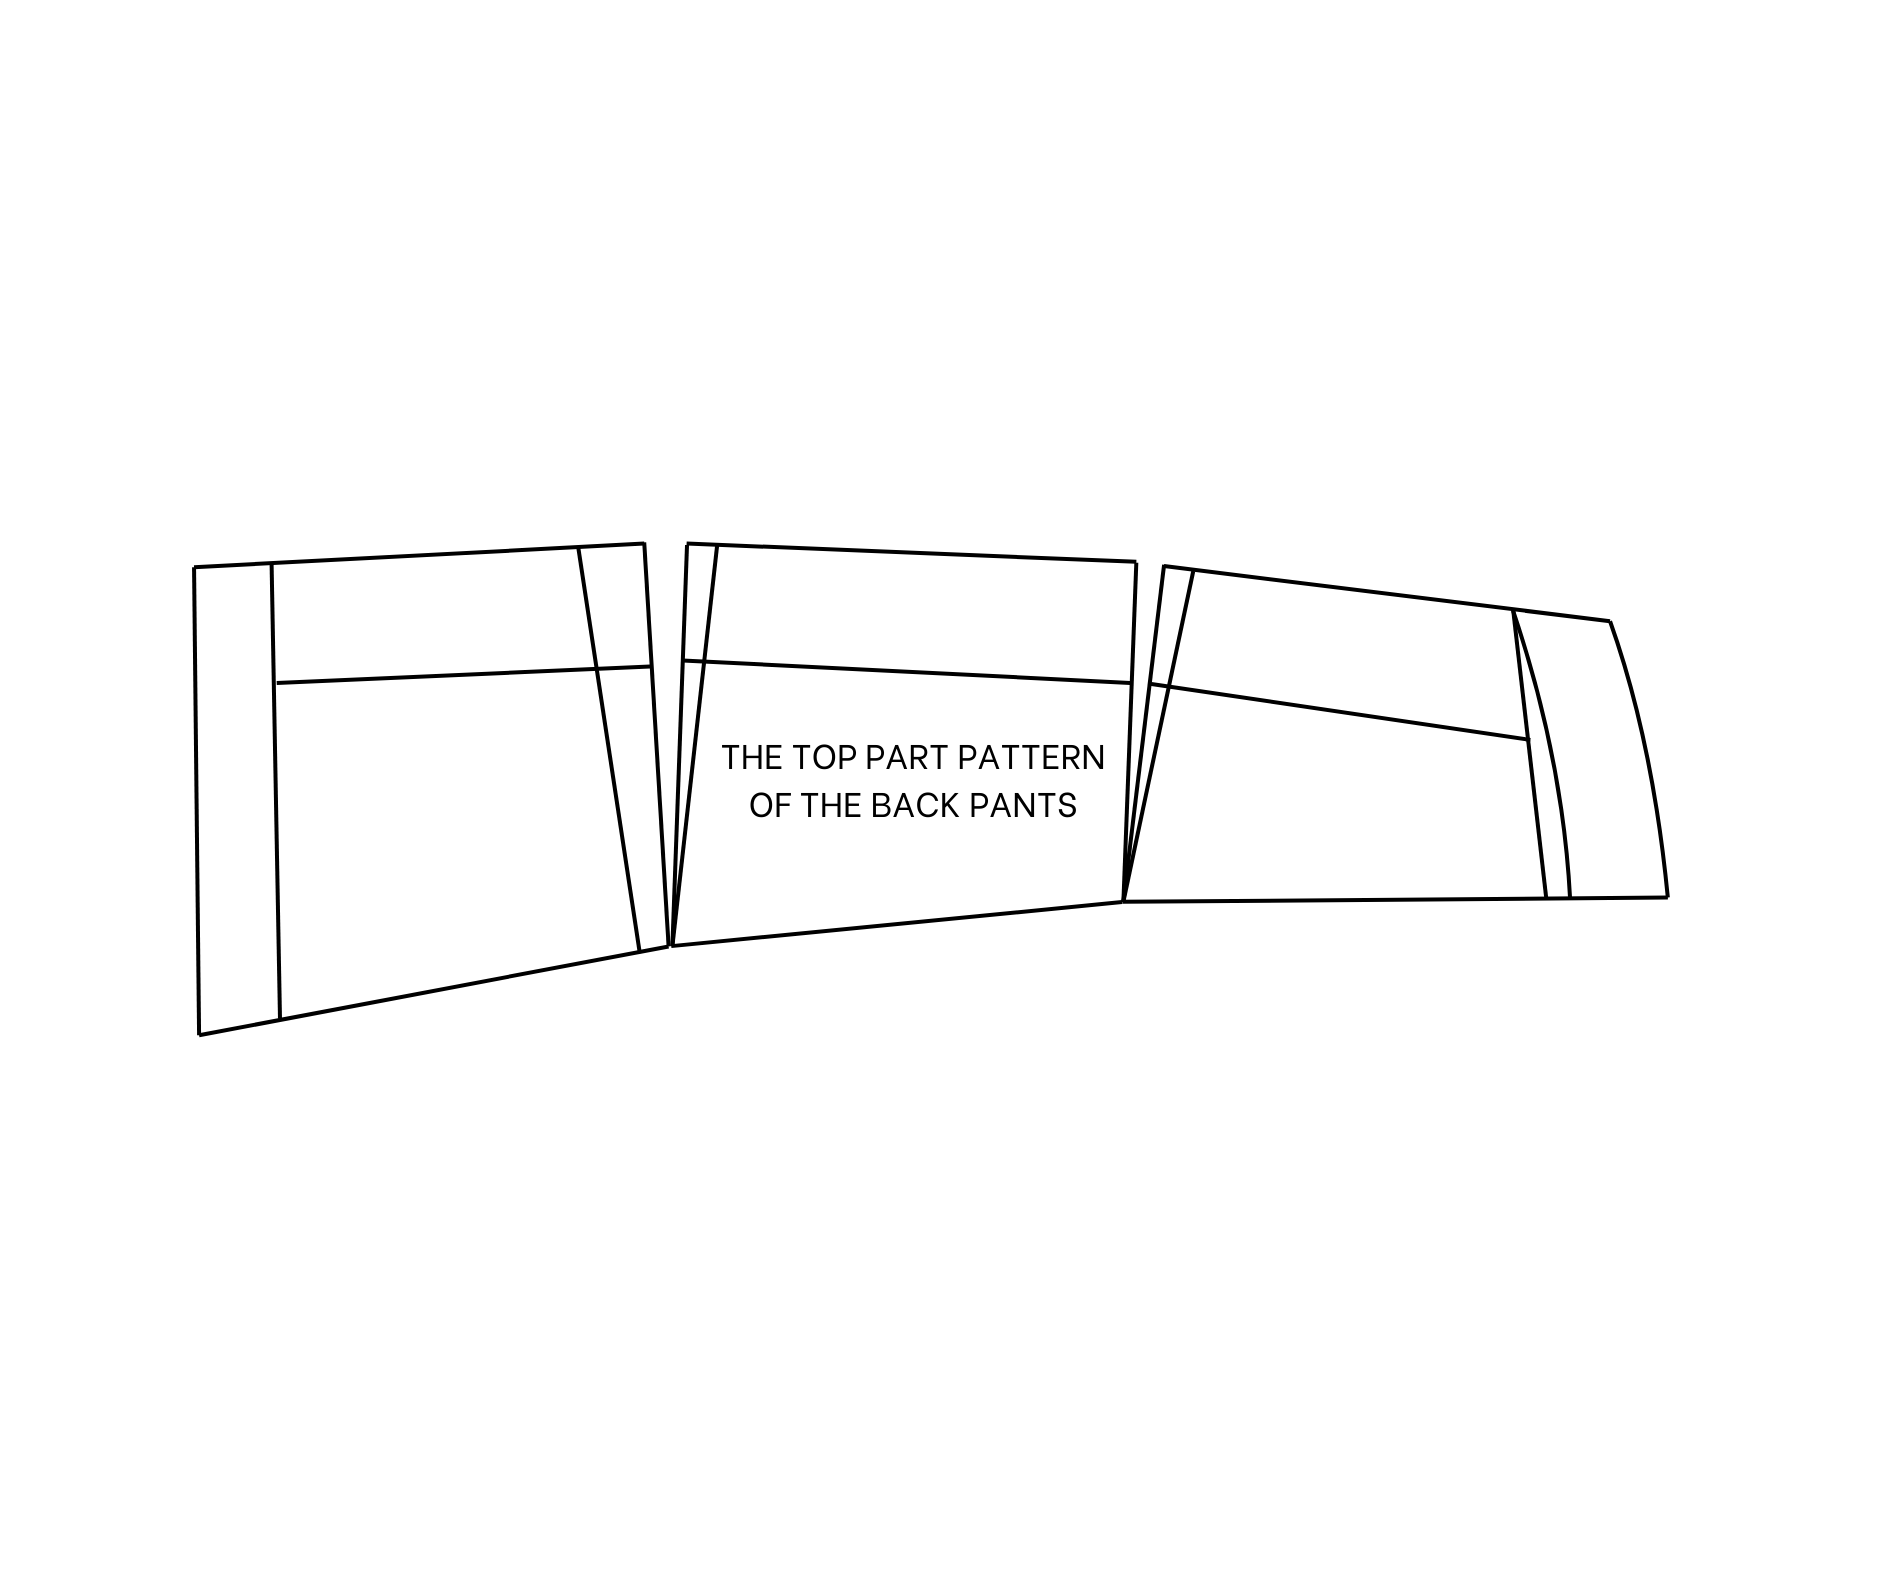
THE TOP PART WAISTBAND OF THE BACK PANTS
At the top of the back pants pattern, mark at 6 cm from the top of the crotch line and 3.5 cm from the top of the sideline then connect two marks together.
After cutting by that line, don't forget to add 1 cm for seam allowance at the bottom part of the back pants pattern.
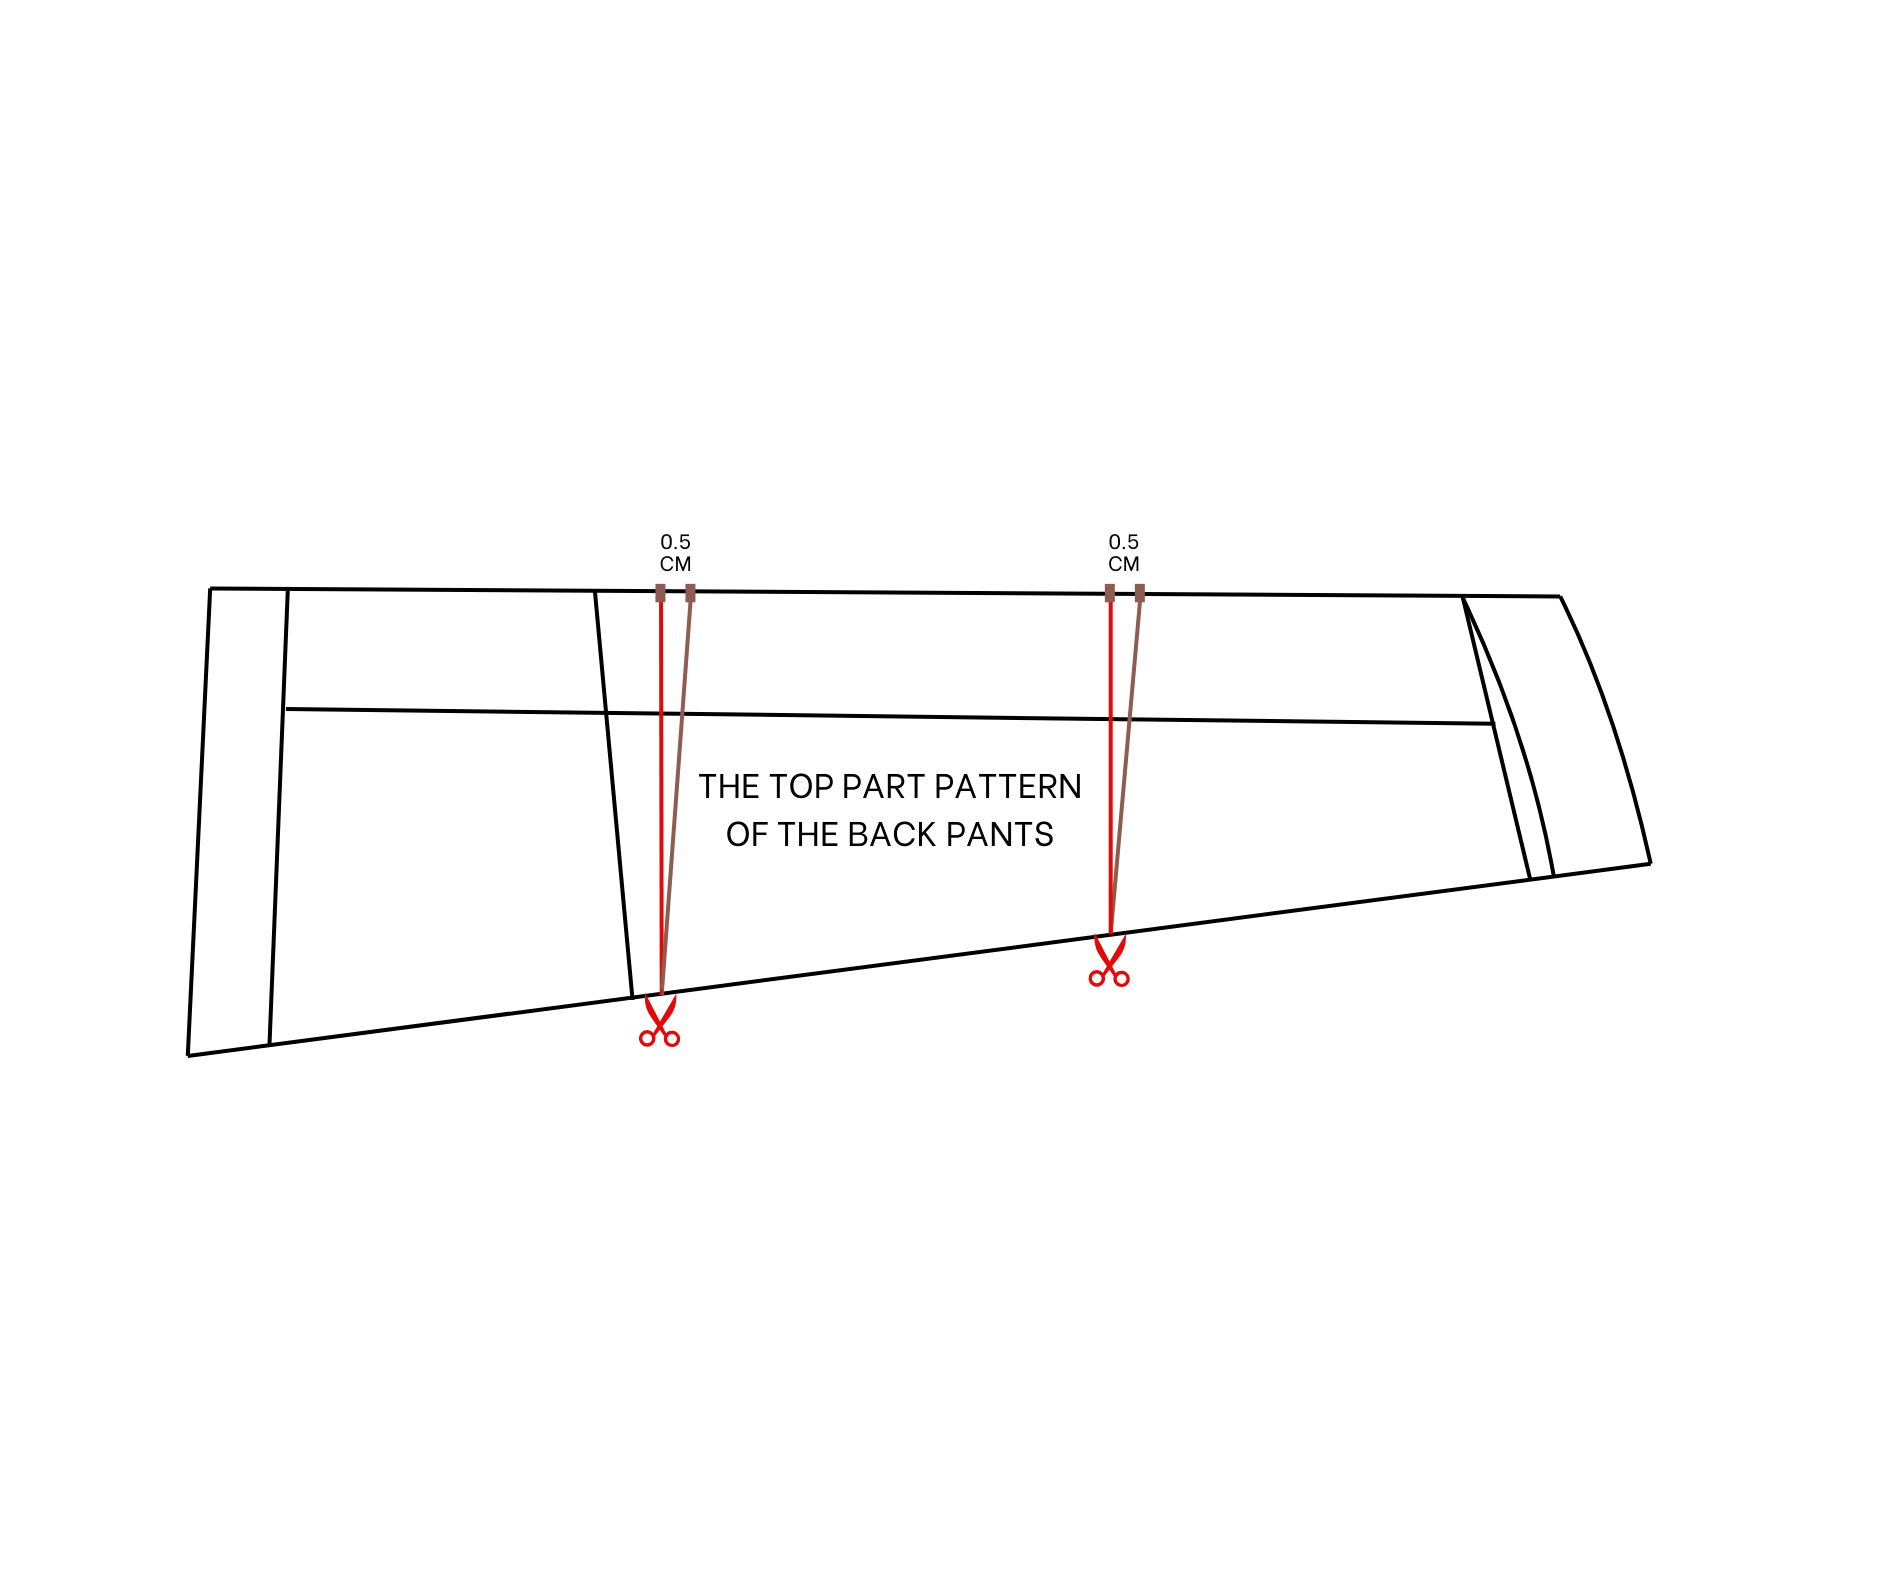
Keep working on the top part of the back pants pattern, divide the waistline into three equal parts first then draw straight lines through them later.
From the marks on the waistline, make two more marks at 0.5 cm next to them then connect these marks to the end of the straight lines you just make before.
Cut the straight lines after that but don't cut them totally off and keep a bit at the end. Move the cutting lines to the lines next to them so the width of the new waistline will be 18 cm, which is a quarter of your waist size.
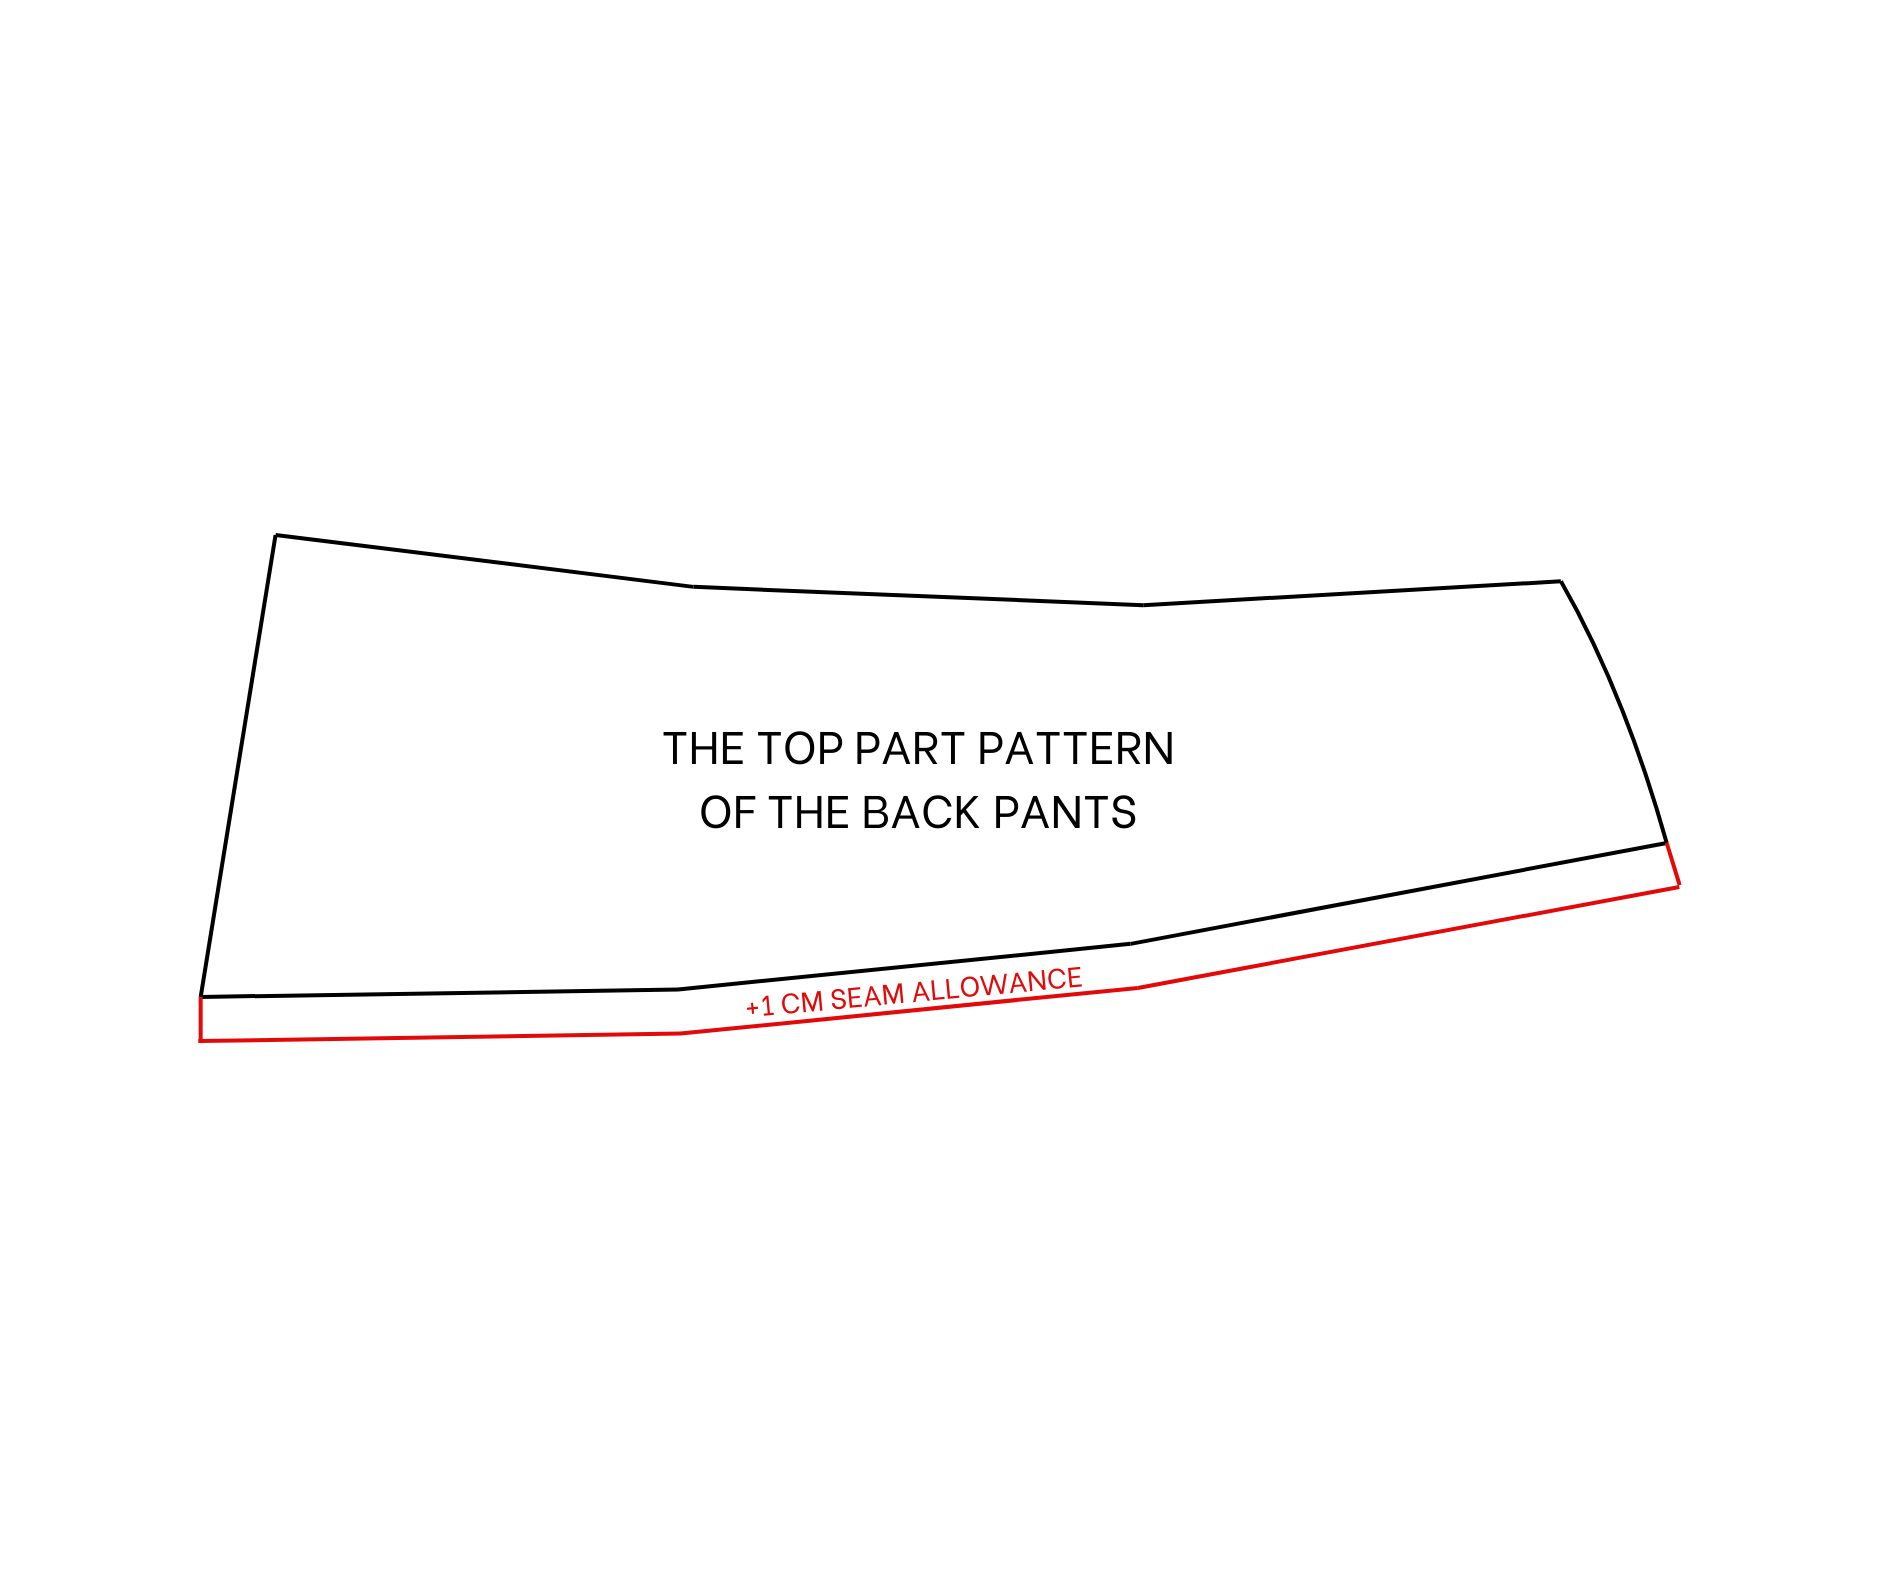
After that, draw a new pattern for the top part of the back pants then add 1 cm for seam allowance at the ending line before cutting. And we'll have the pattern of the top and the bottom part of the back pants after all.
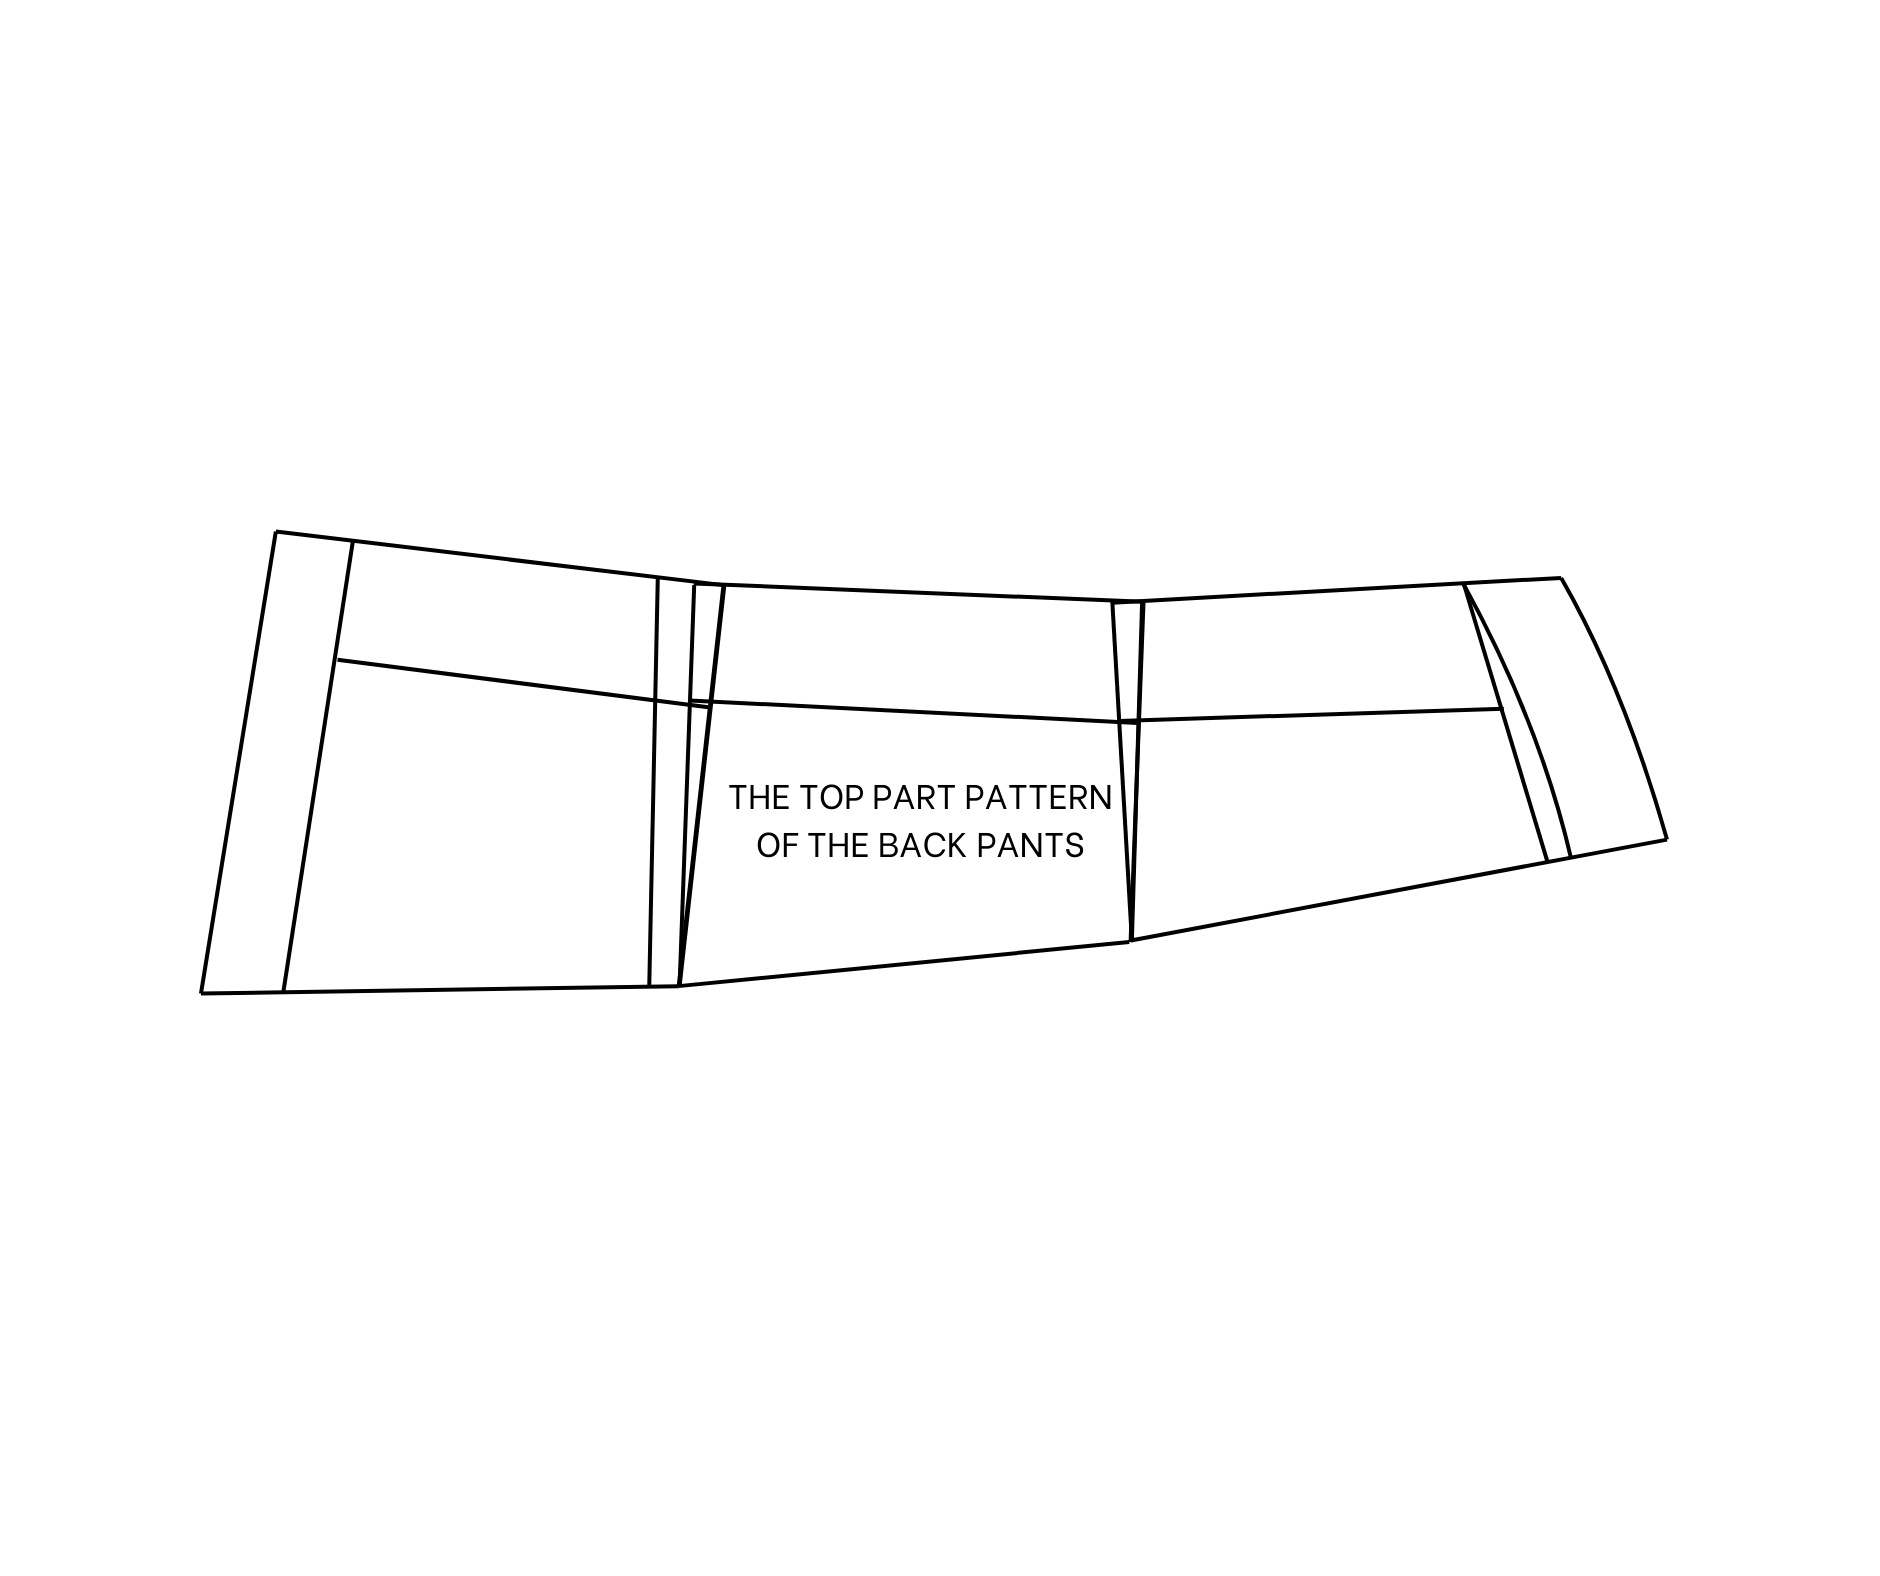
THE BACK PANTS PATTERN (Continue)
At the back pants, draw some curved lines to create a patchwork look for the jumpsuit.
Don't forget to add seam allowance at the curve lines after cutting.

THE FRONT BODICE PATTERN
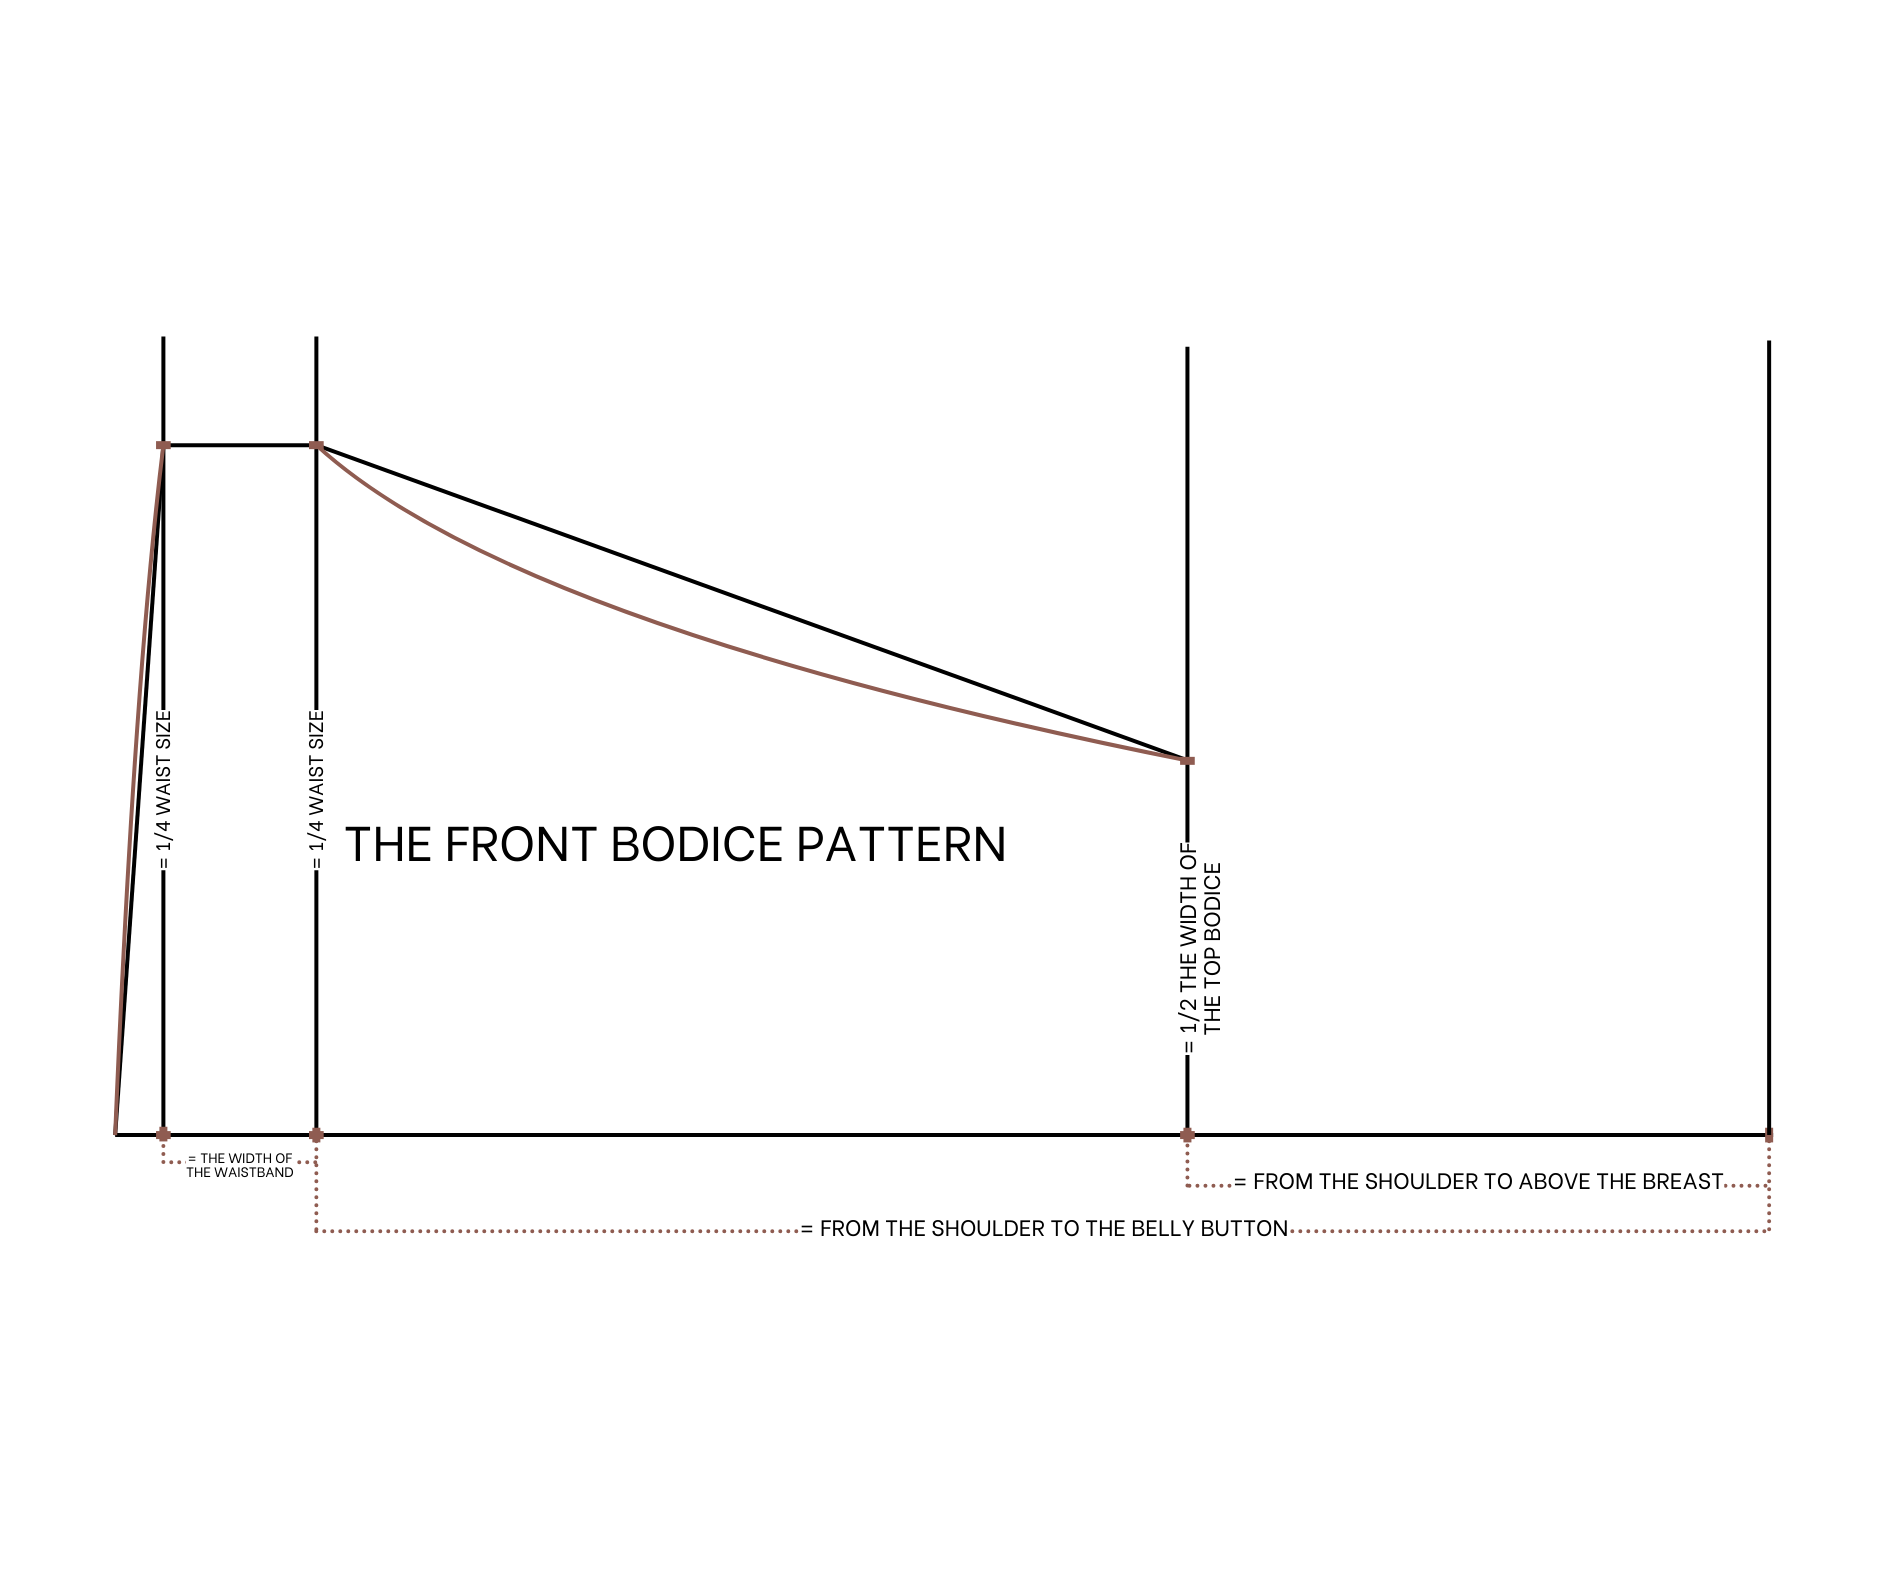
Moving to the bodice pattern, draw a straight line cutting the edge horizontal line first.
From the first straight line, draw another one at 38 cm next to it, it's the length from the shoulder to the belly button. From the second straight line, keep drawing another one at 4 cm next to it, it's the waistband of the jumpsuit.
From the first straight line, draw a new line at 15 cm next to it, it's the length from the shoulder to above your breast, it's the top line of the front bodice that you want.
From the end of this line, mark up 10 cm which is a half width of the top line of the front bodice. From the end of the second straight line, mark up 18 cm which is a quarter of your waist size. Also make the same mark at the third straight line then connect these marks together. At the slanted line, redraw it a bit to make it nicer.
From the end of the third straight line, mark down 1cm then connect that mark to the mark on the third straight line that you make before by a curved line.
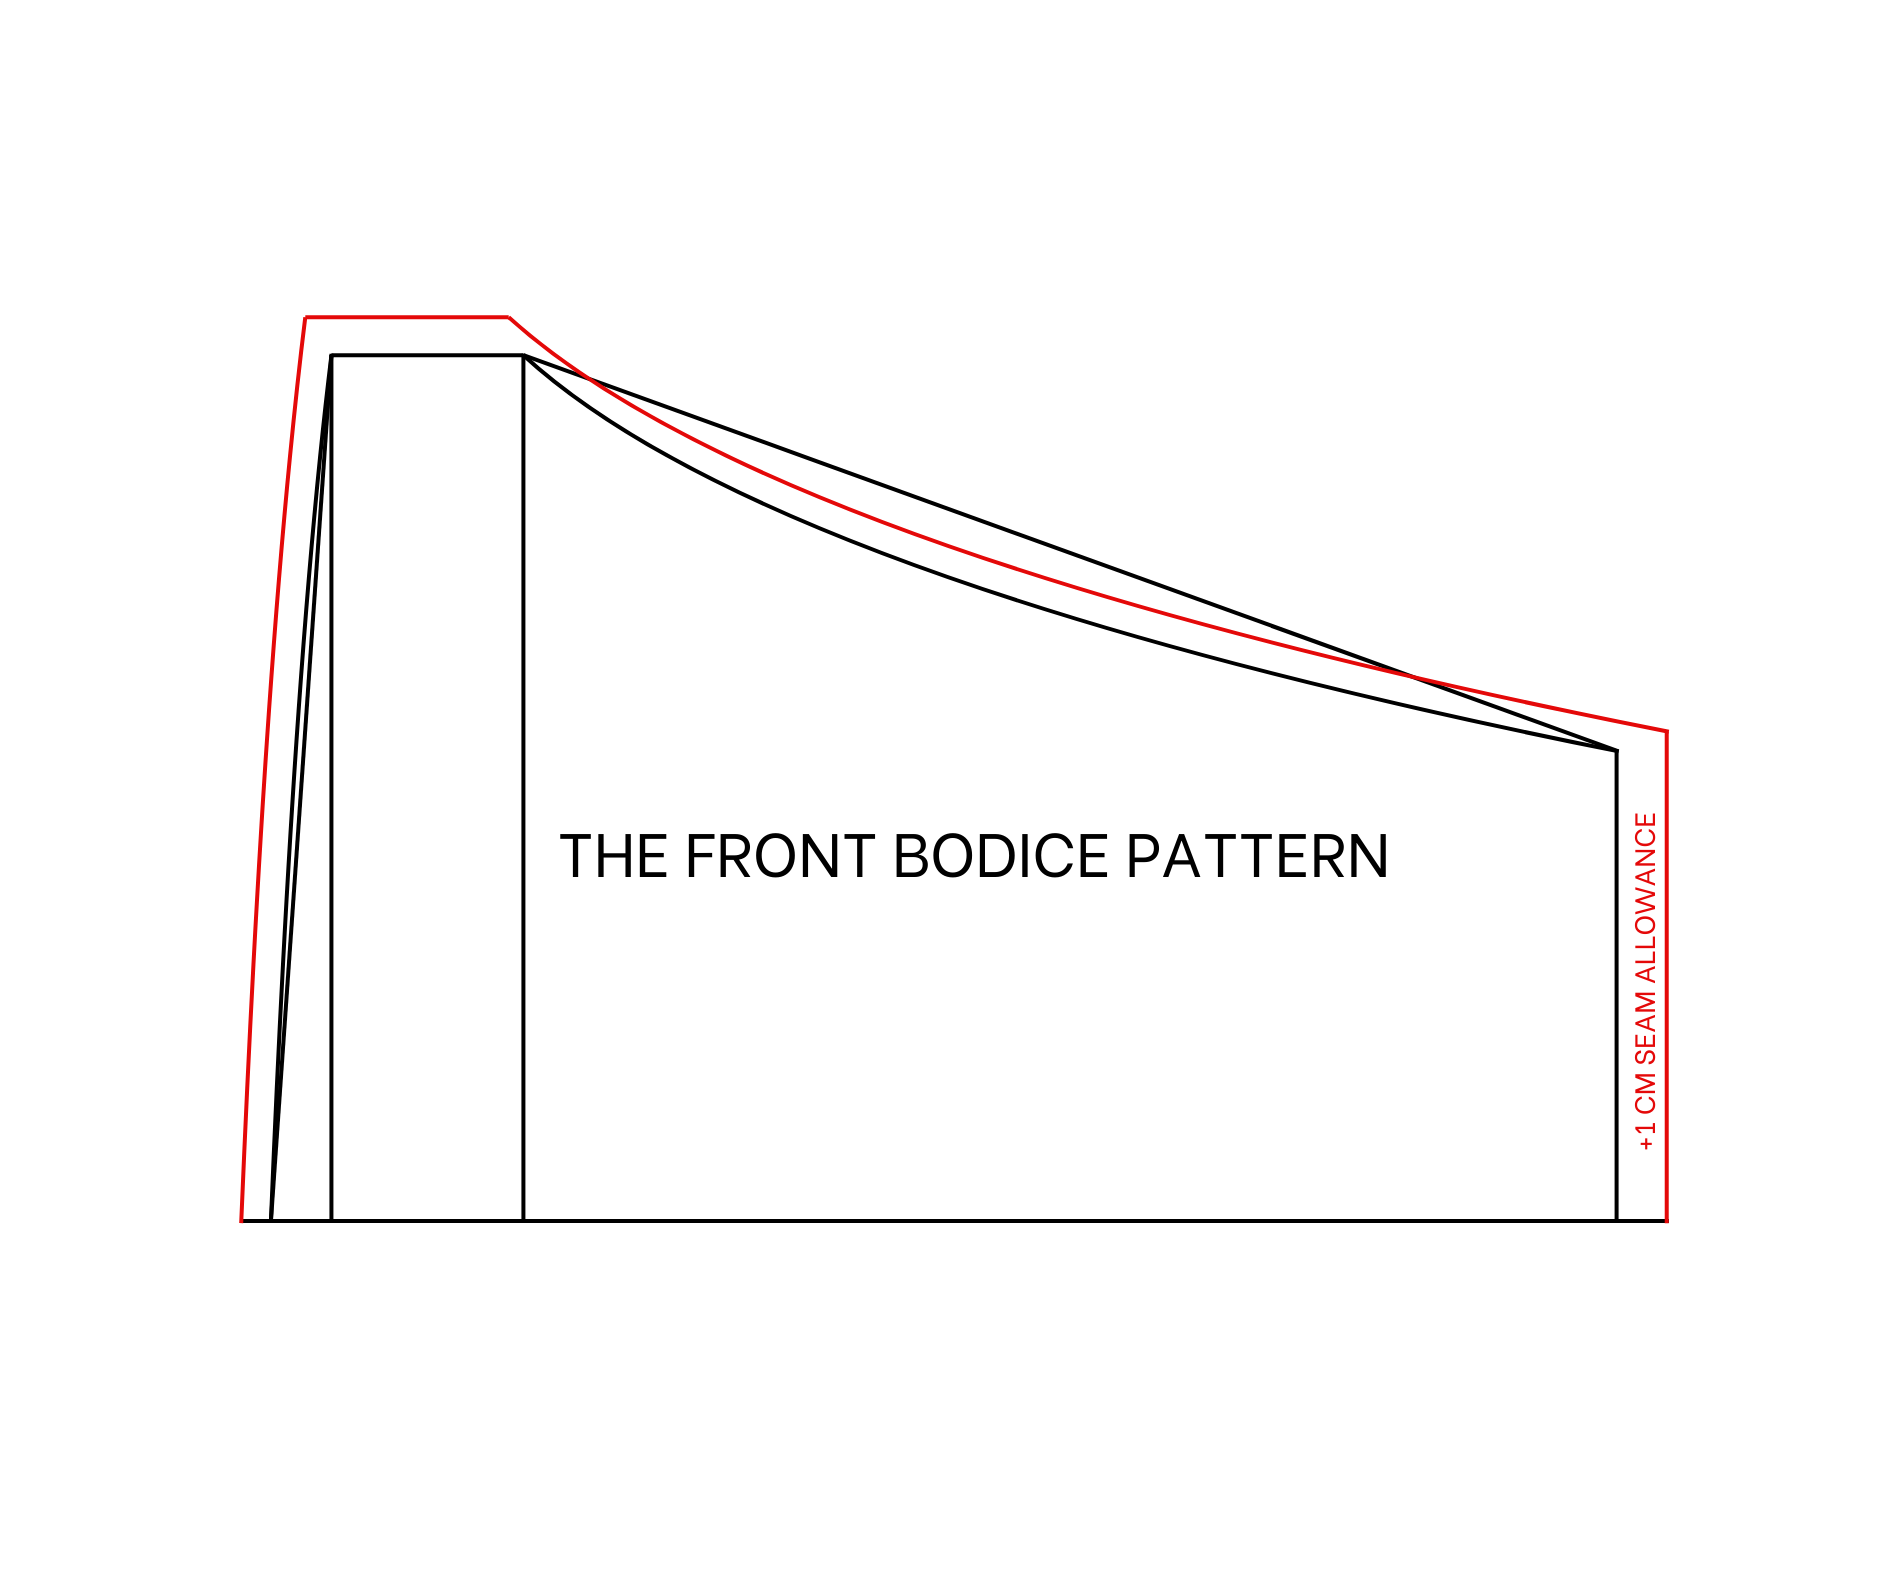
Add 1 cm for seam allowance after that and we will have the front bodice pattern after cutting. You will need to cut this pattern in folded fabric at the edge horizontal line.
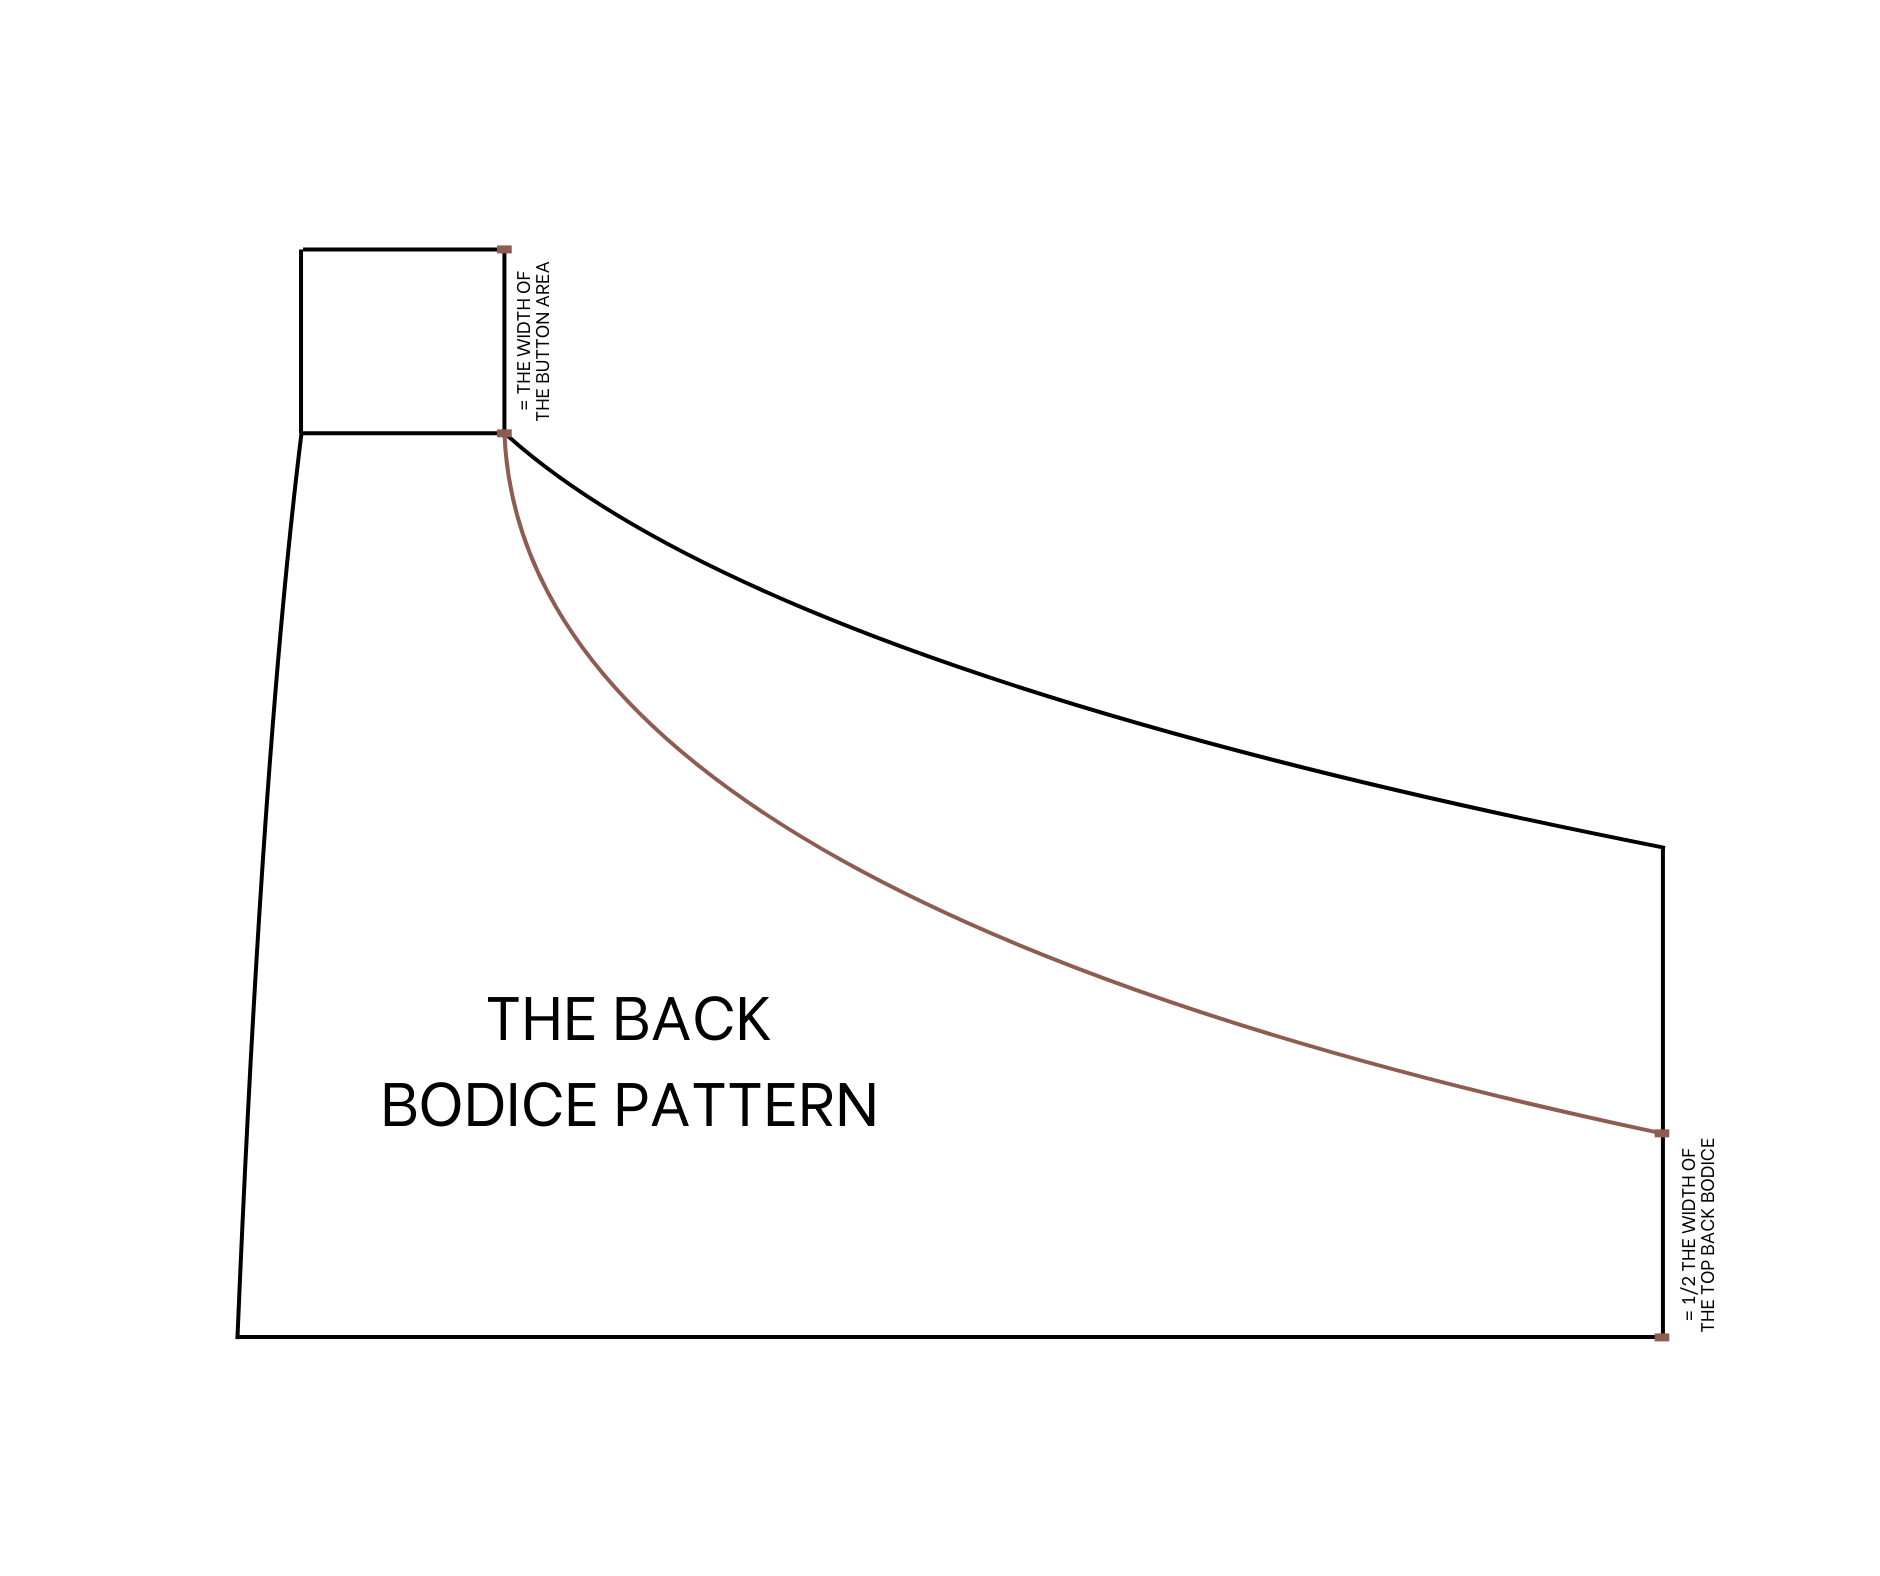
THE BACK BODICE PATTERN
To make the back bodice pattern, copy the front bodice pattern first. From the end of the top line, mark up 4 cm which is a half width of the top part of the back bodice that you want.
At the sideline of the front bodice, extend it 4 cm to create the button area for the jumpsuit. Then redraw the sideline a bit after that.
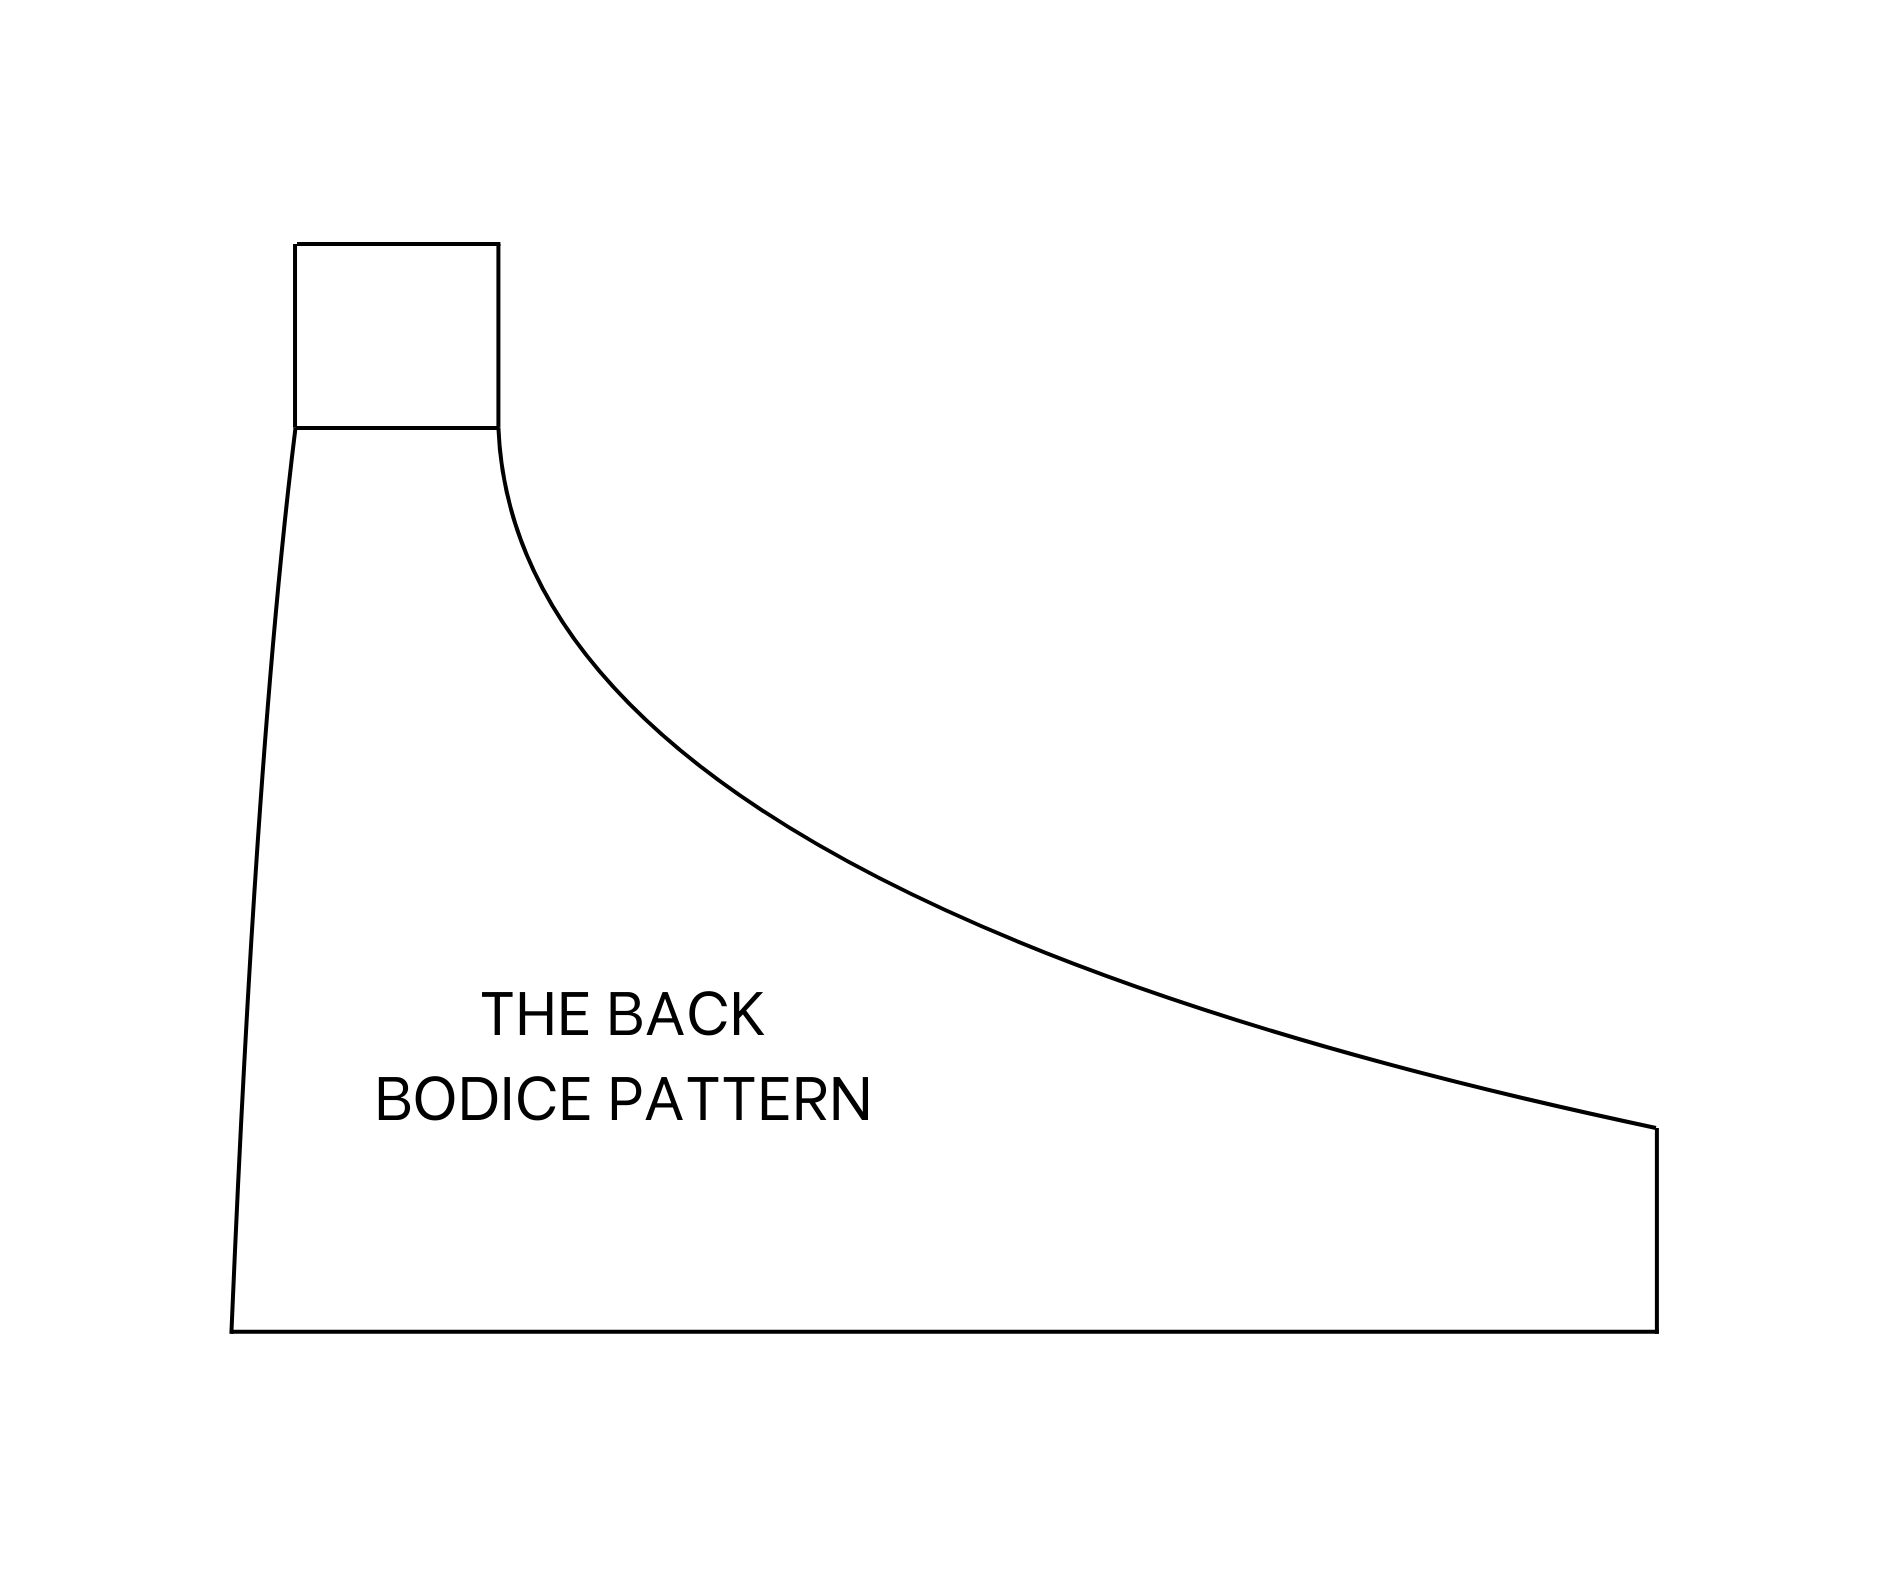
We'll have the back bodice pattern after cutting. You will need to cut this pattern in folded fabric at the edge horizontal line.
SEWING THE JUMPSUIT
THE FRONT PANTS
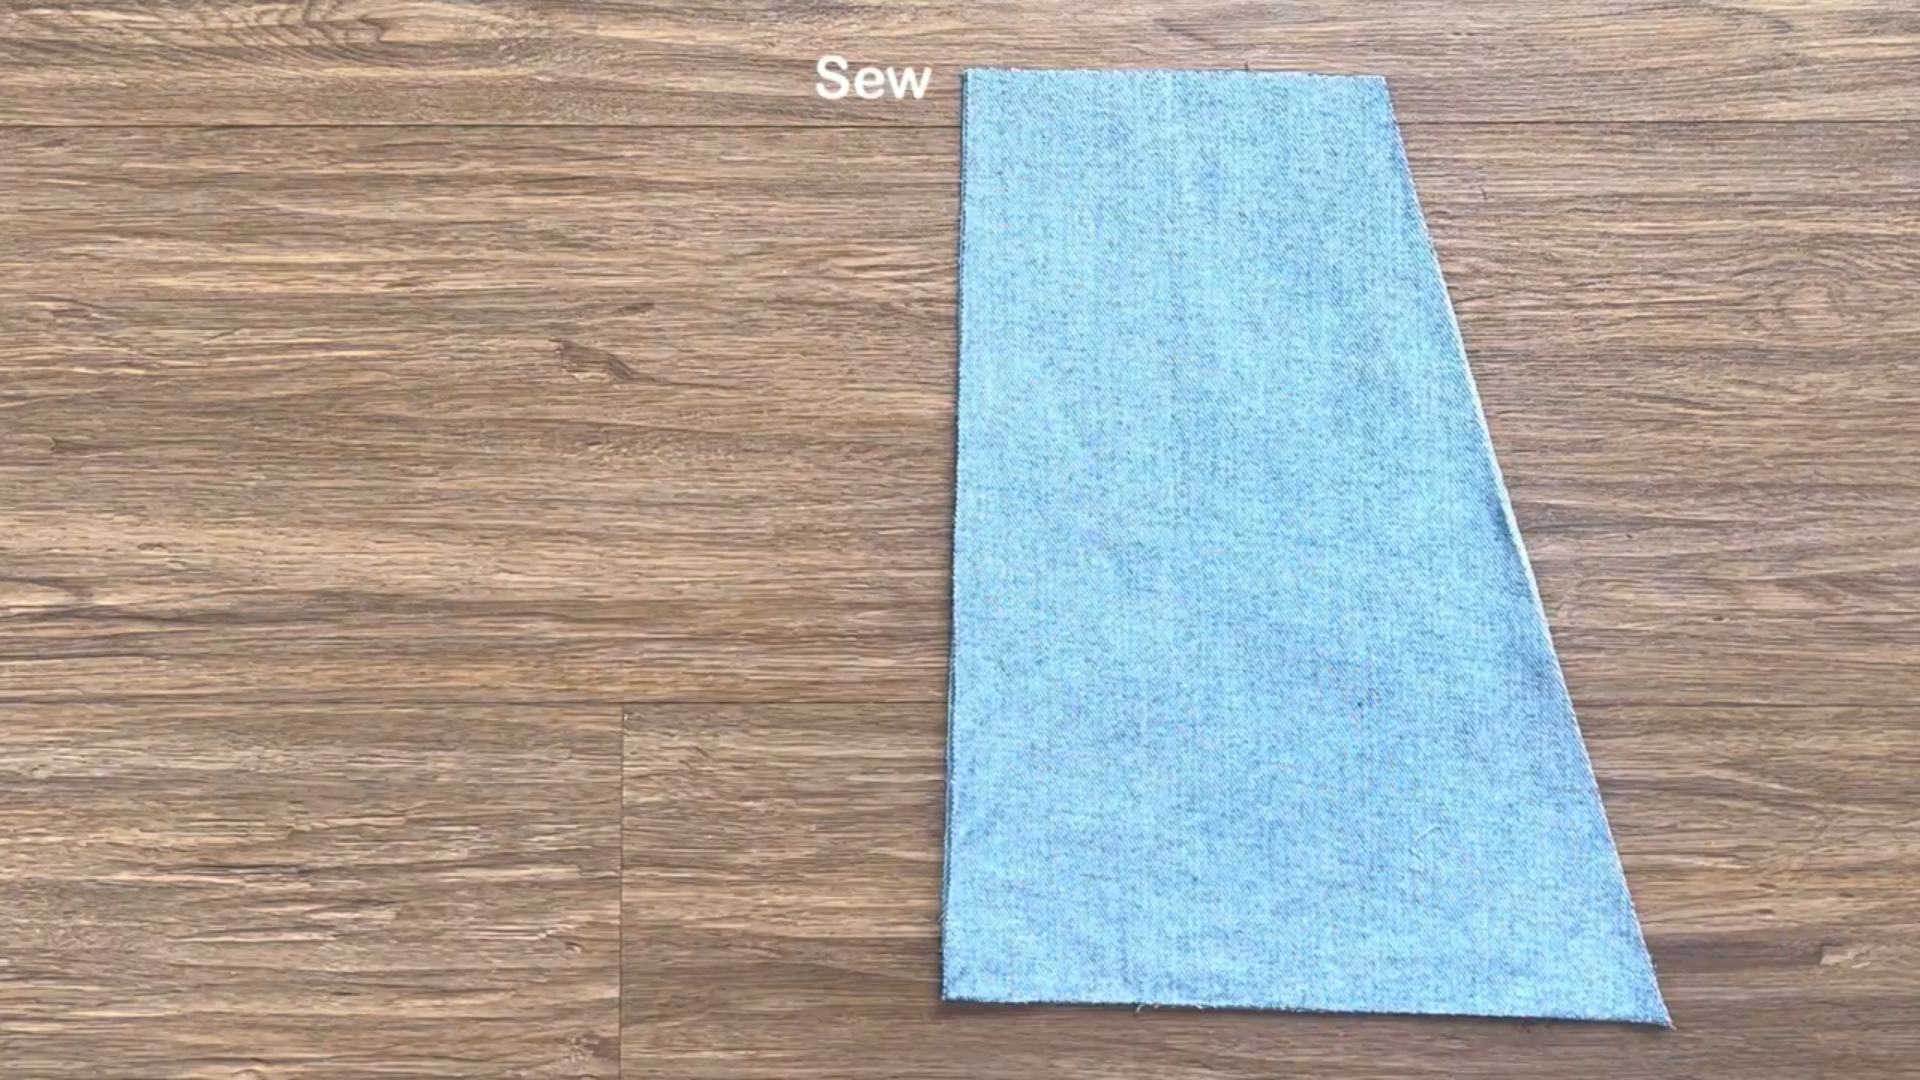
Cut out the pieces for the front pants and stitch them together.
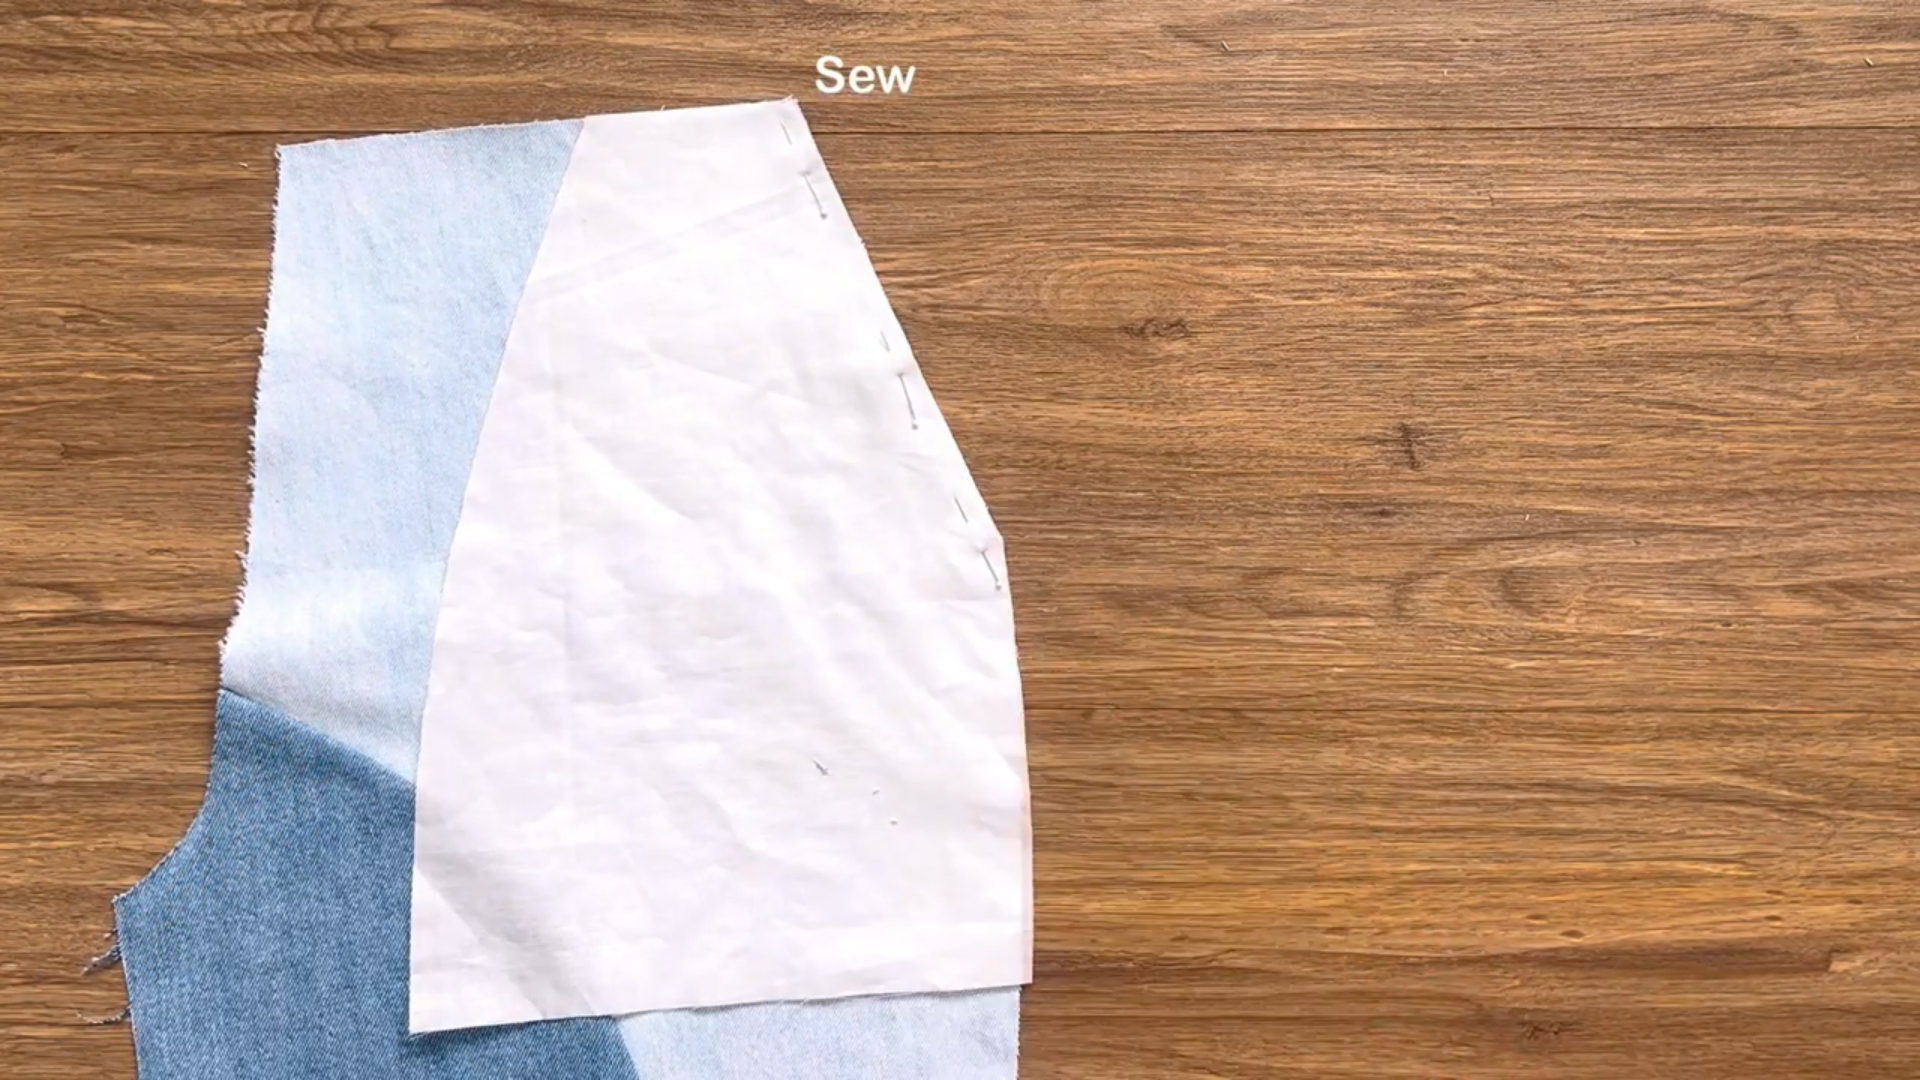
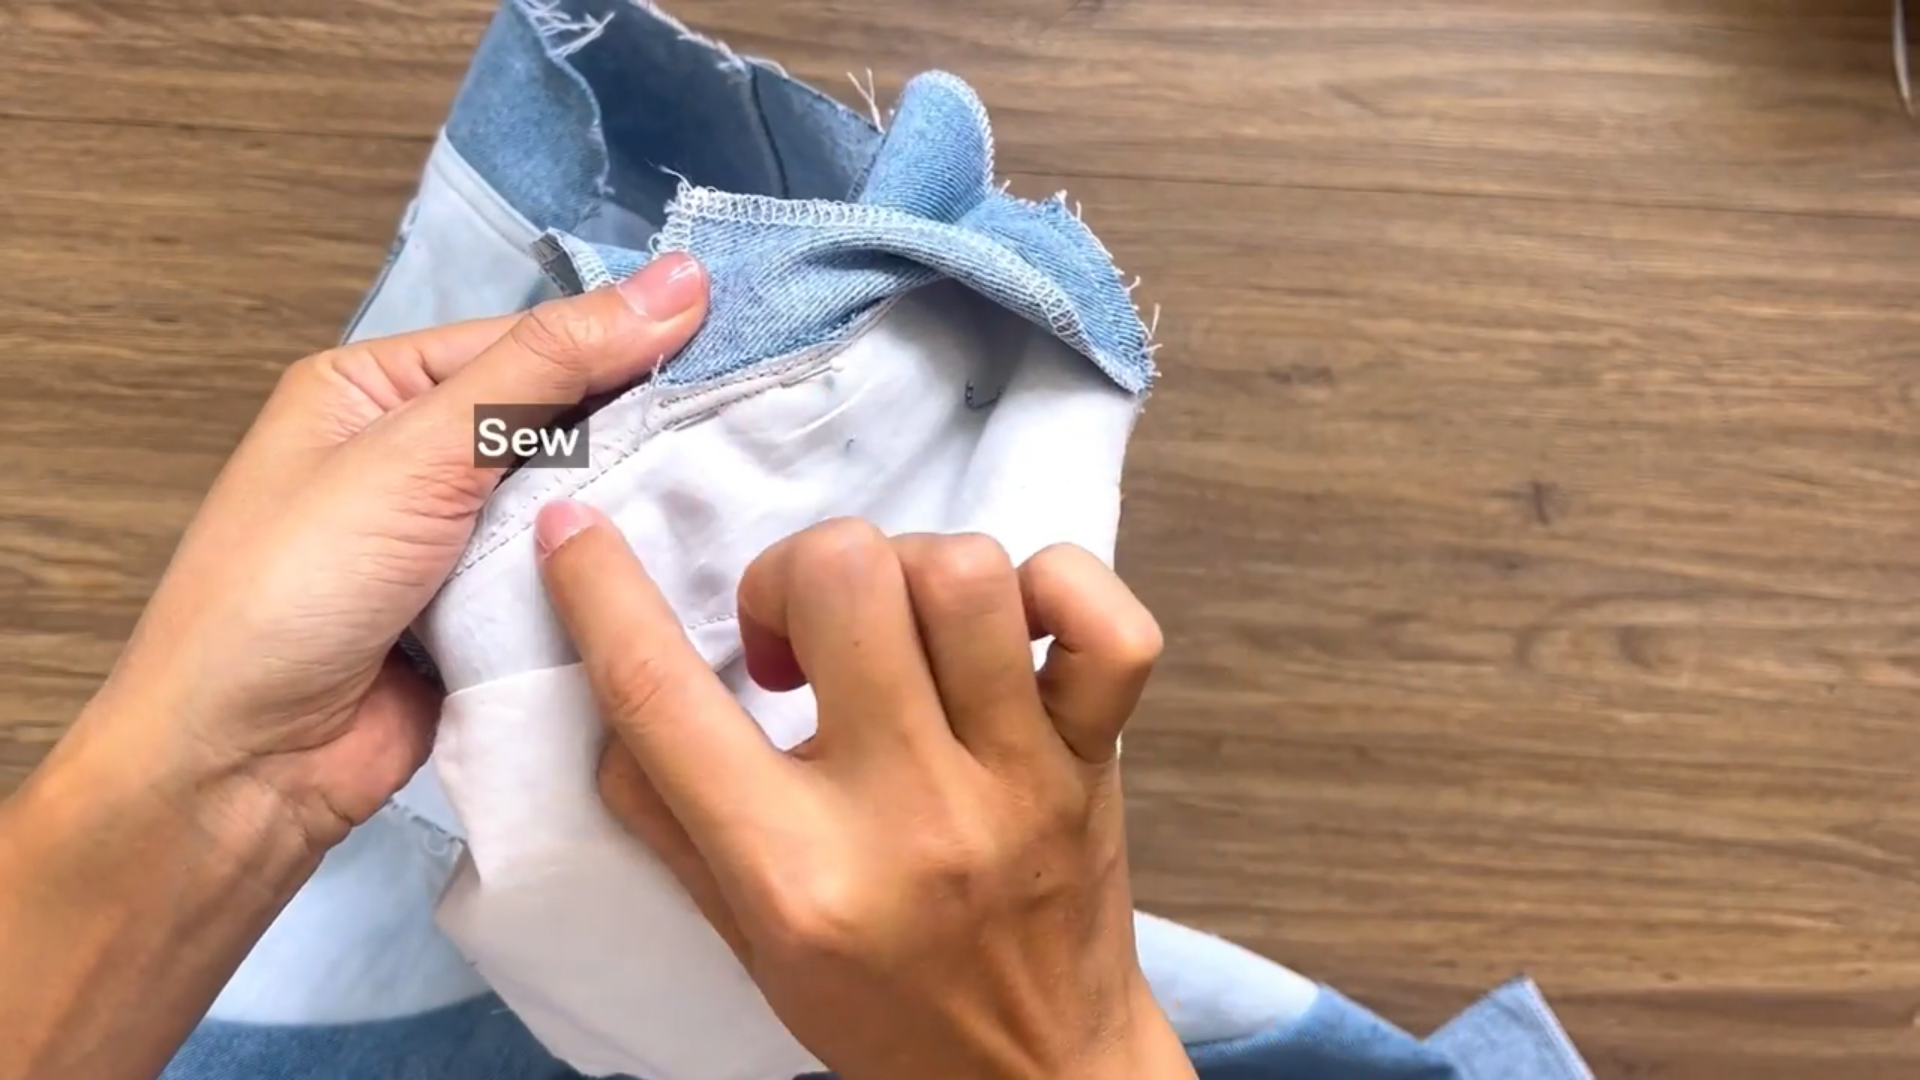
Attach the outside pocket to the front pants at the top of the pants and sew it in place.
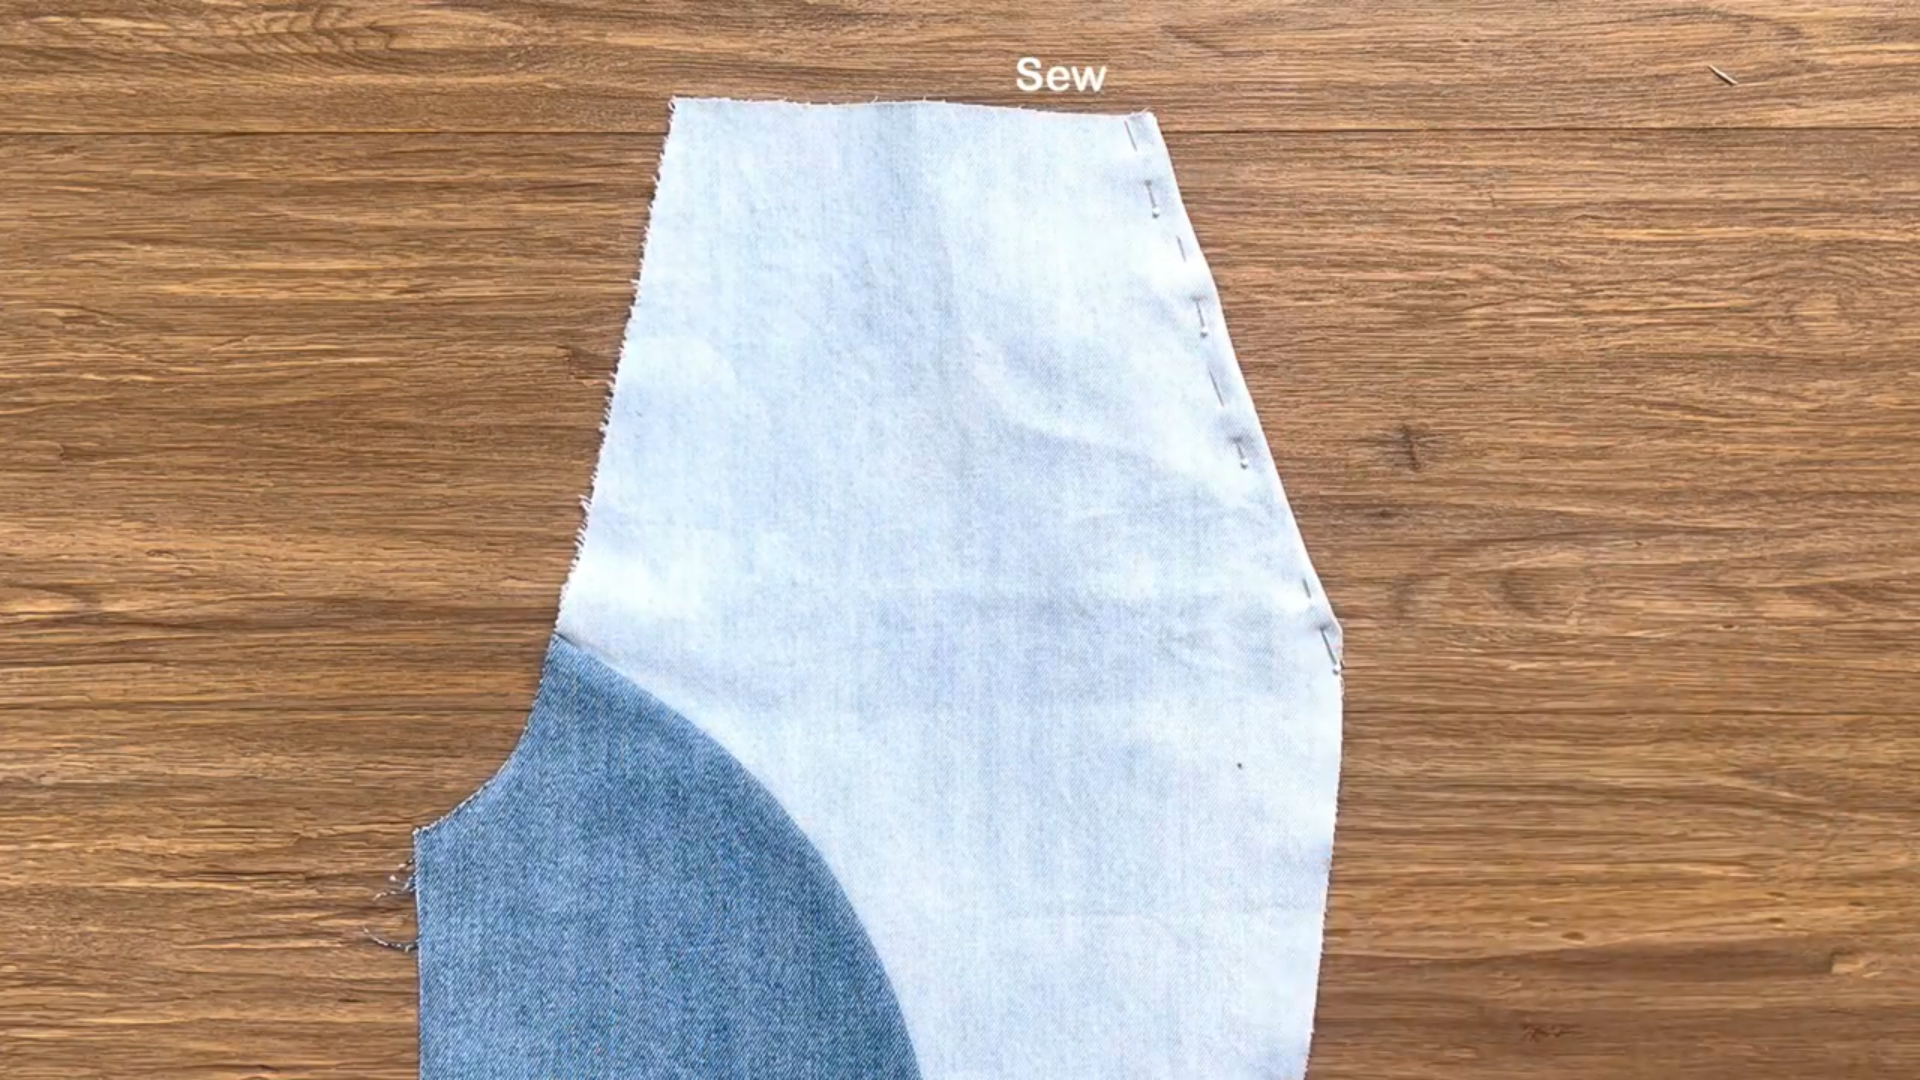
Fold the outside pocket inward and pin it to the inside of the pants and sew.
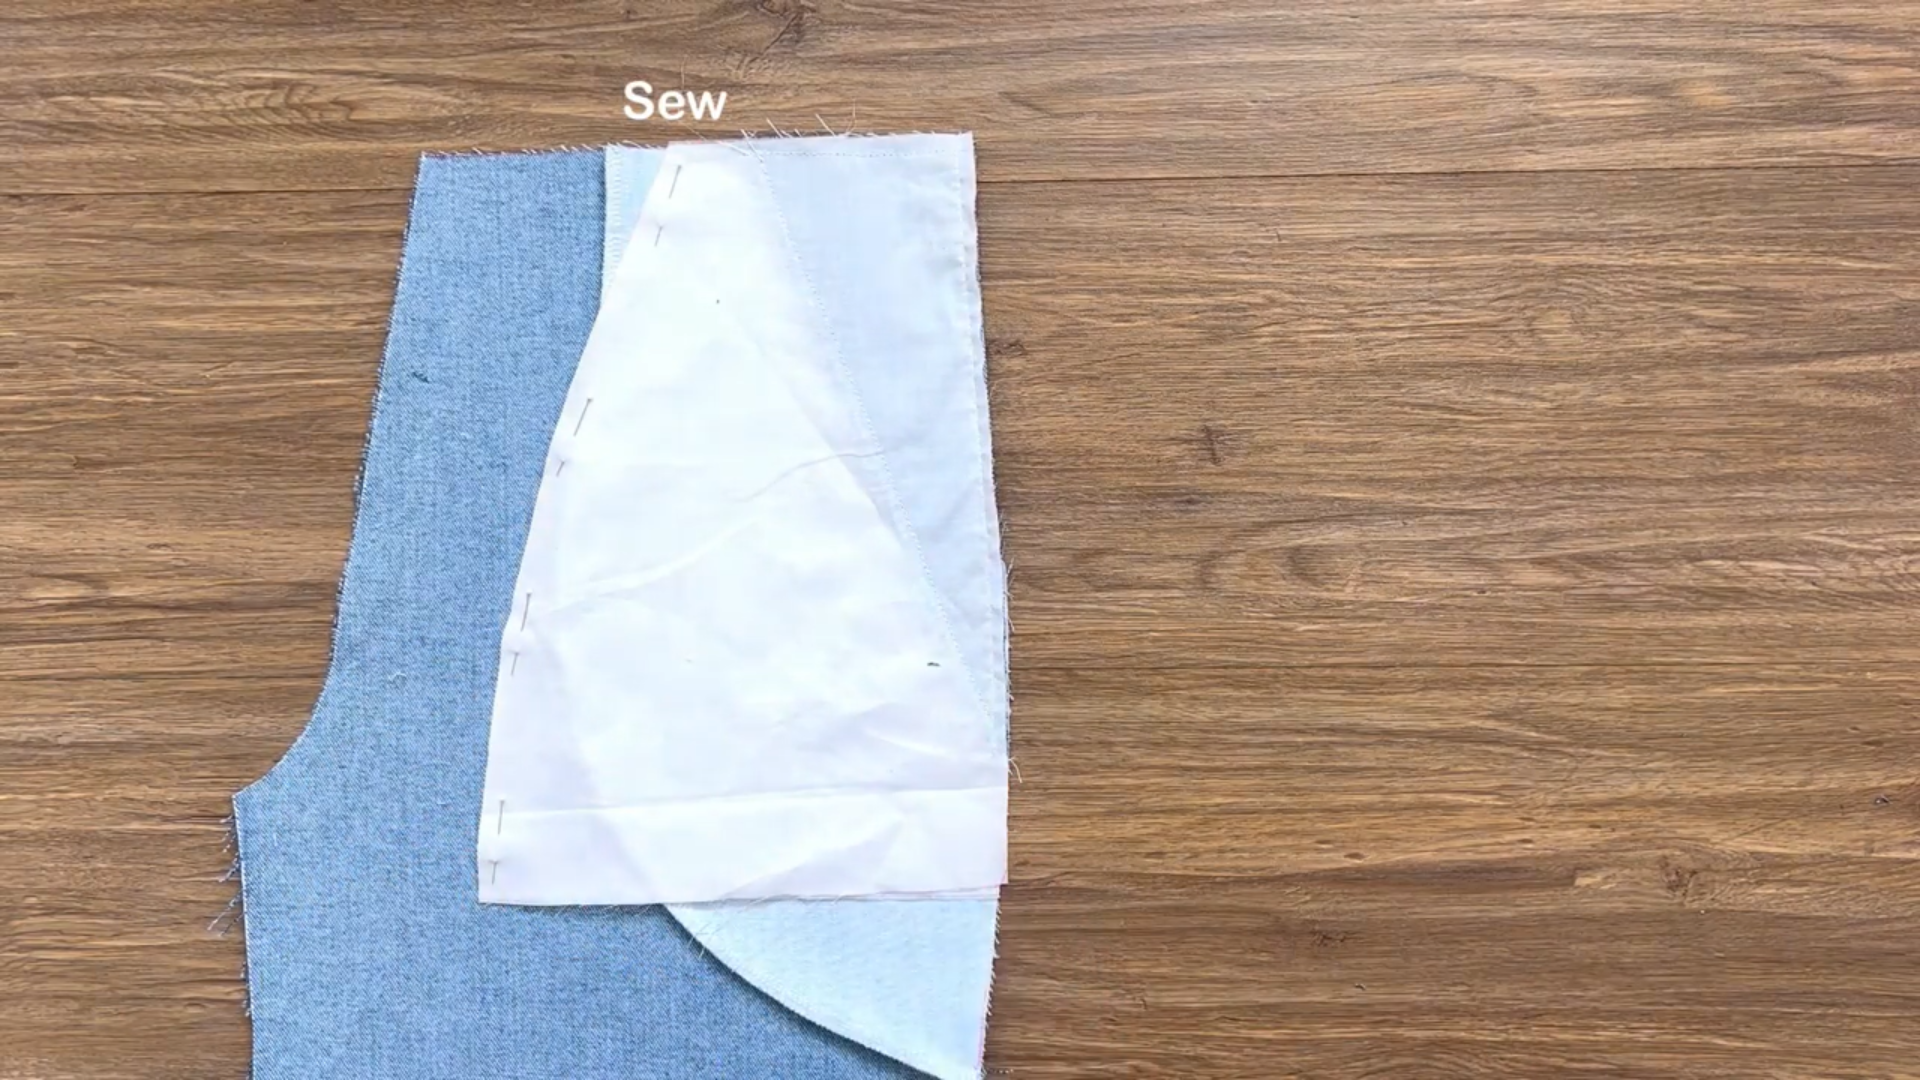
Attach the inside pocket to the outside pocket and sew along the edge to connect them.
Repeat steps 1-3 for the other front pant piece.
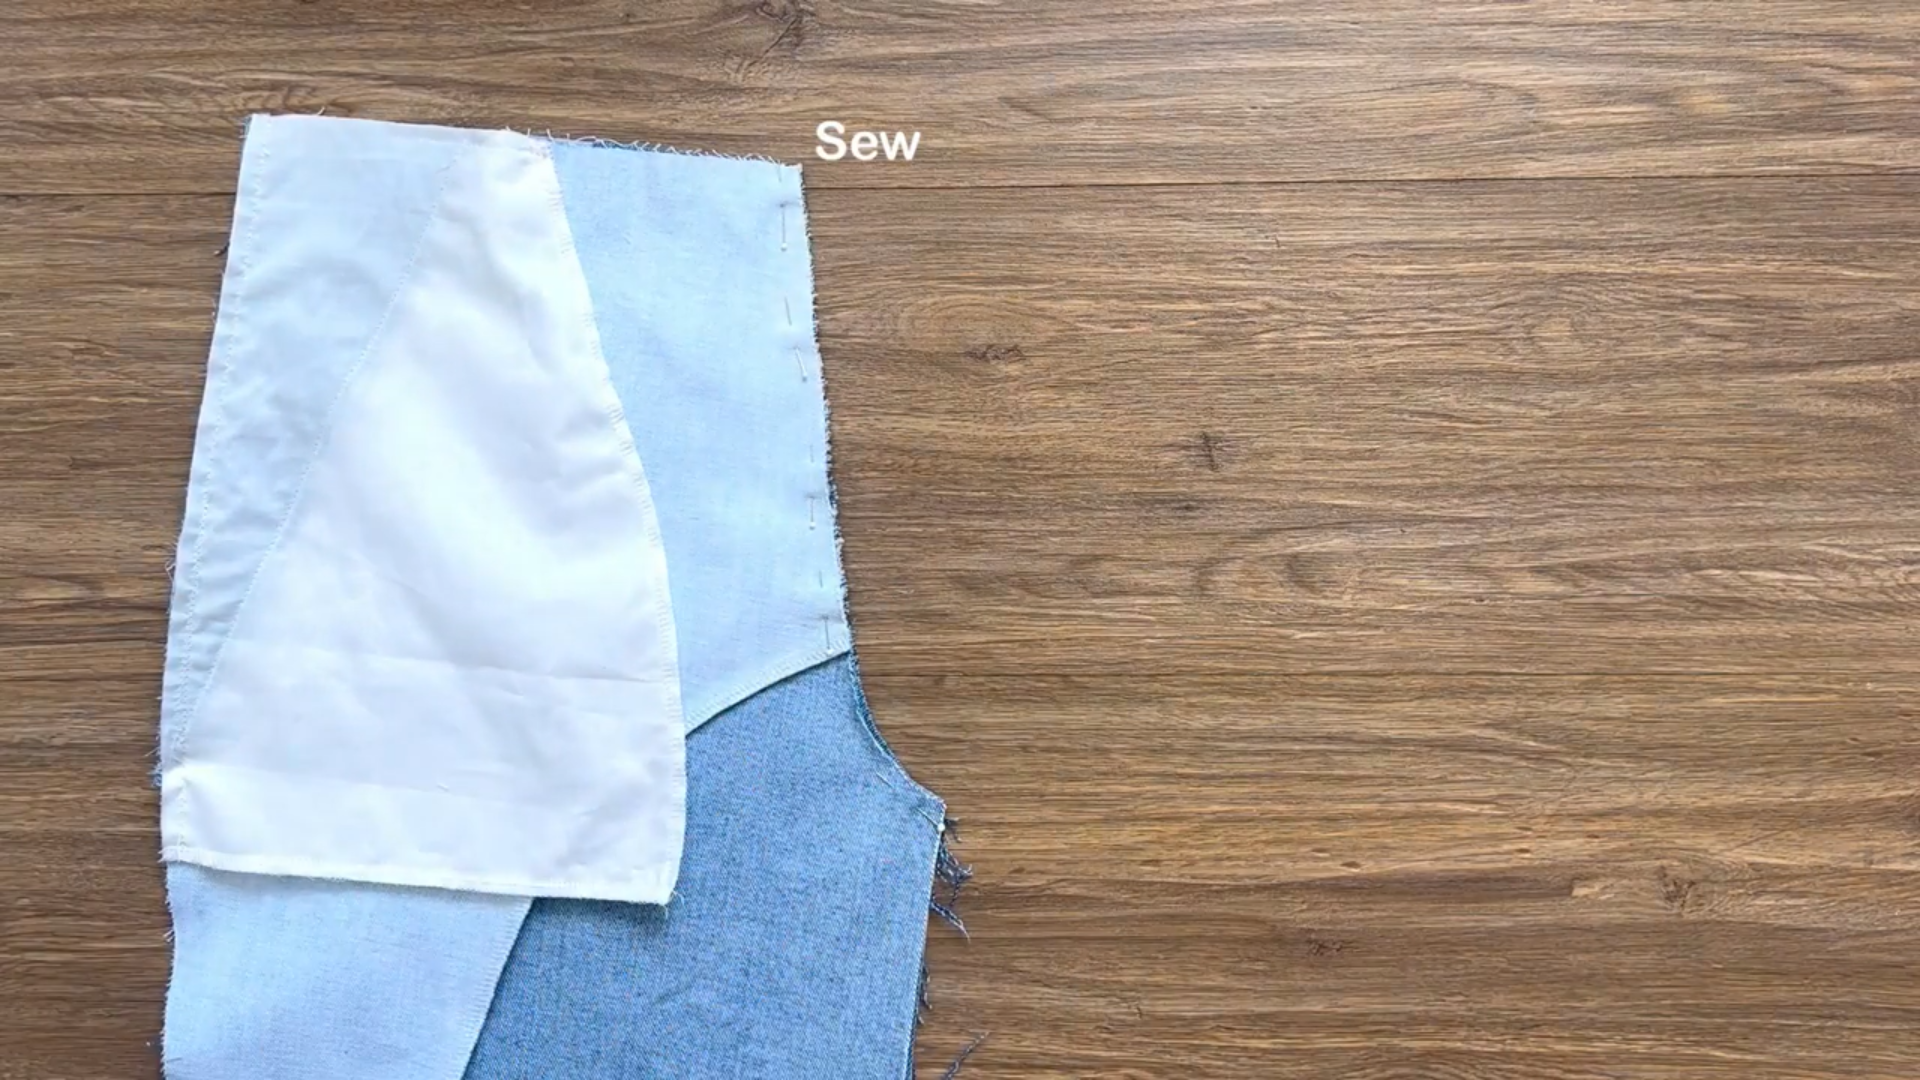
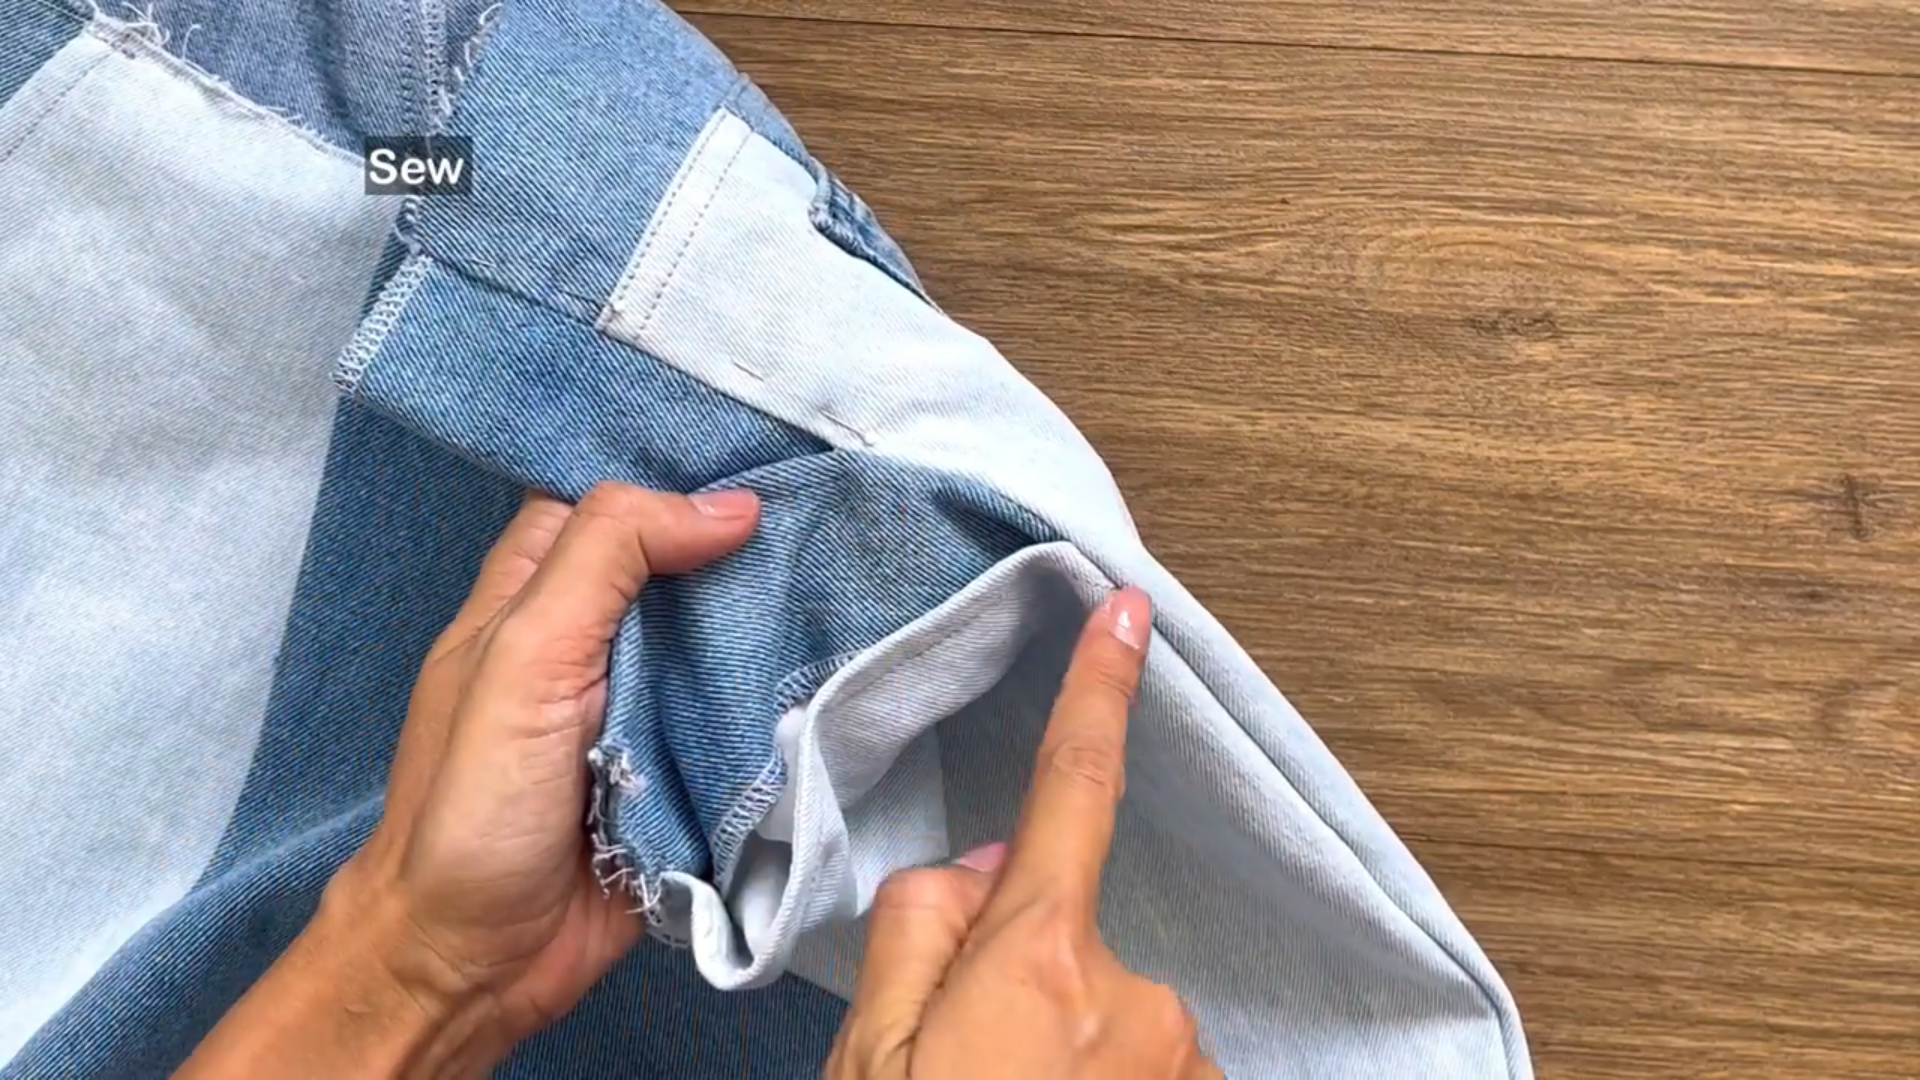
Once both front panels are complete, pin them together at the crotch seam and sew them up.
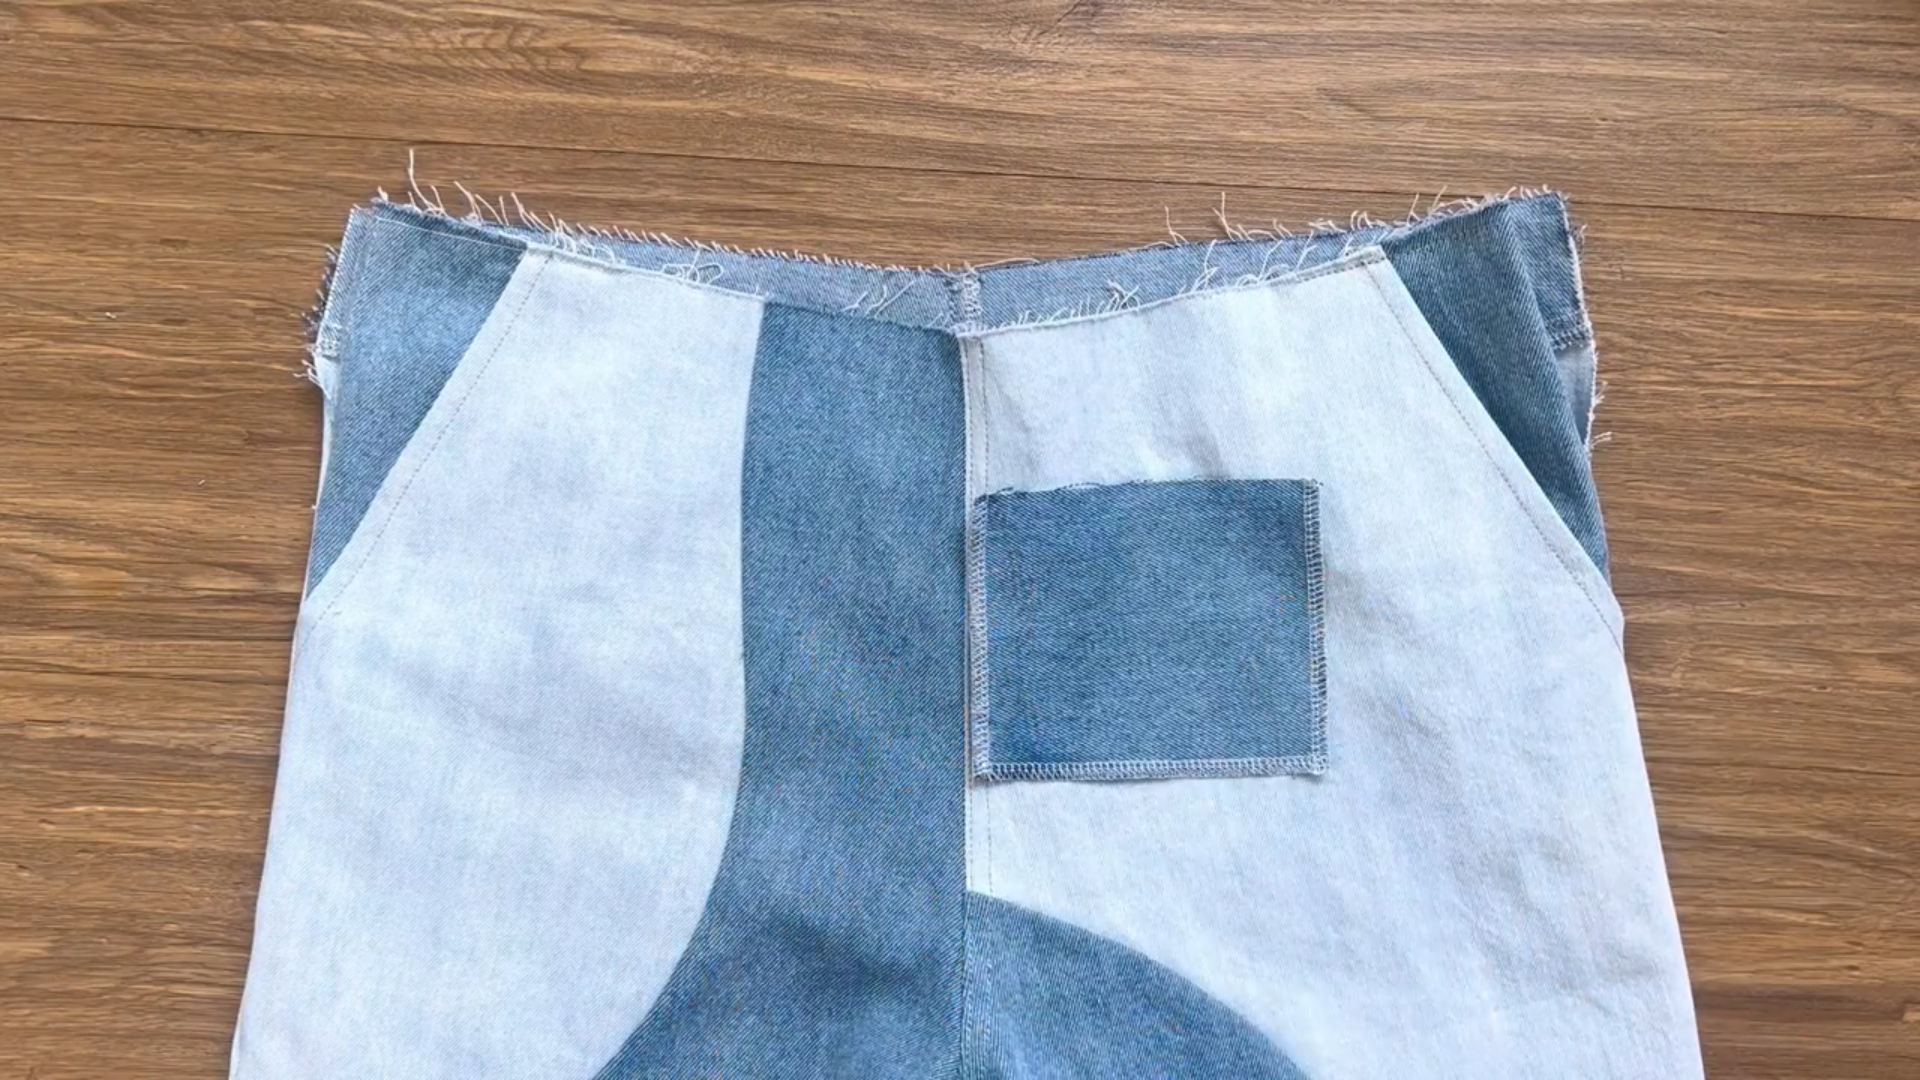
THE BACK PANTS

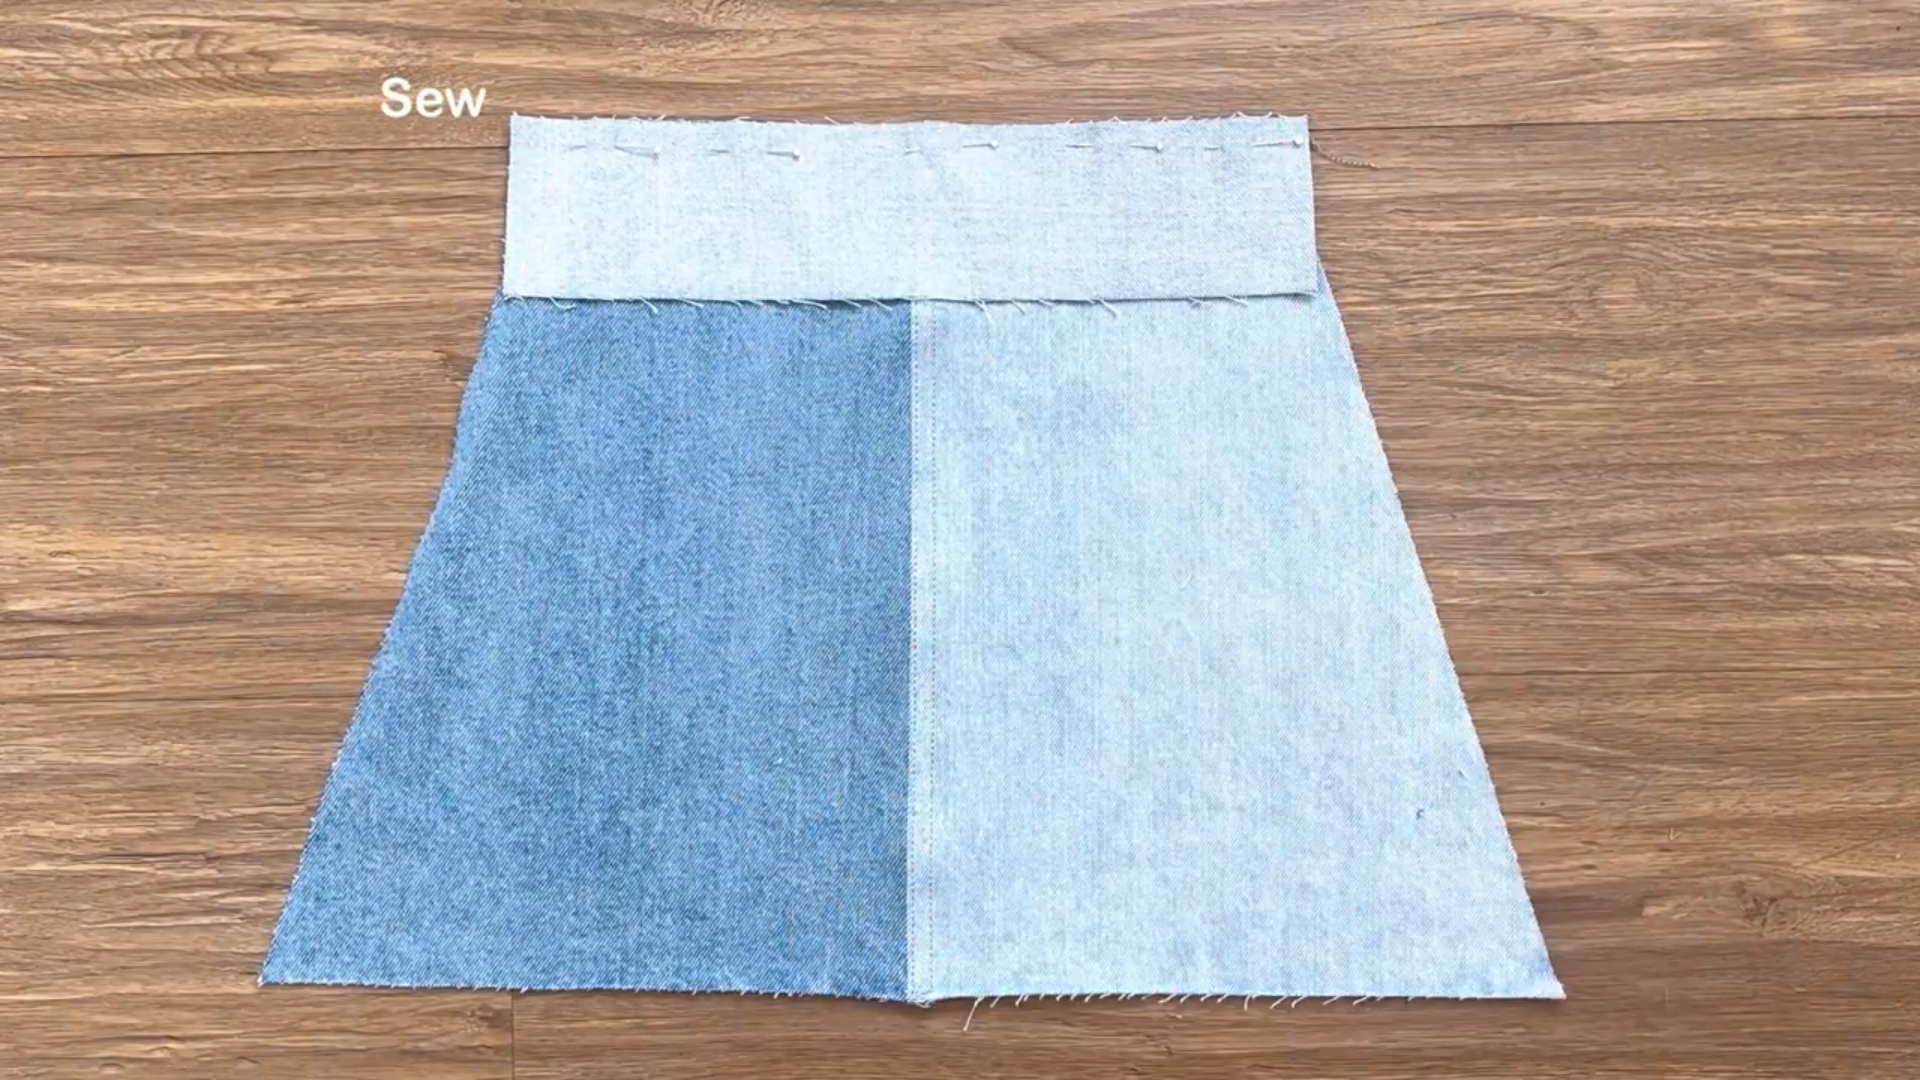
Cut out the pieces for the back pants and stitch them together.
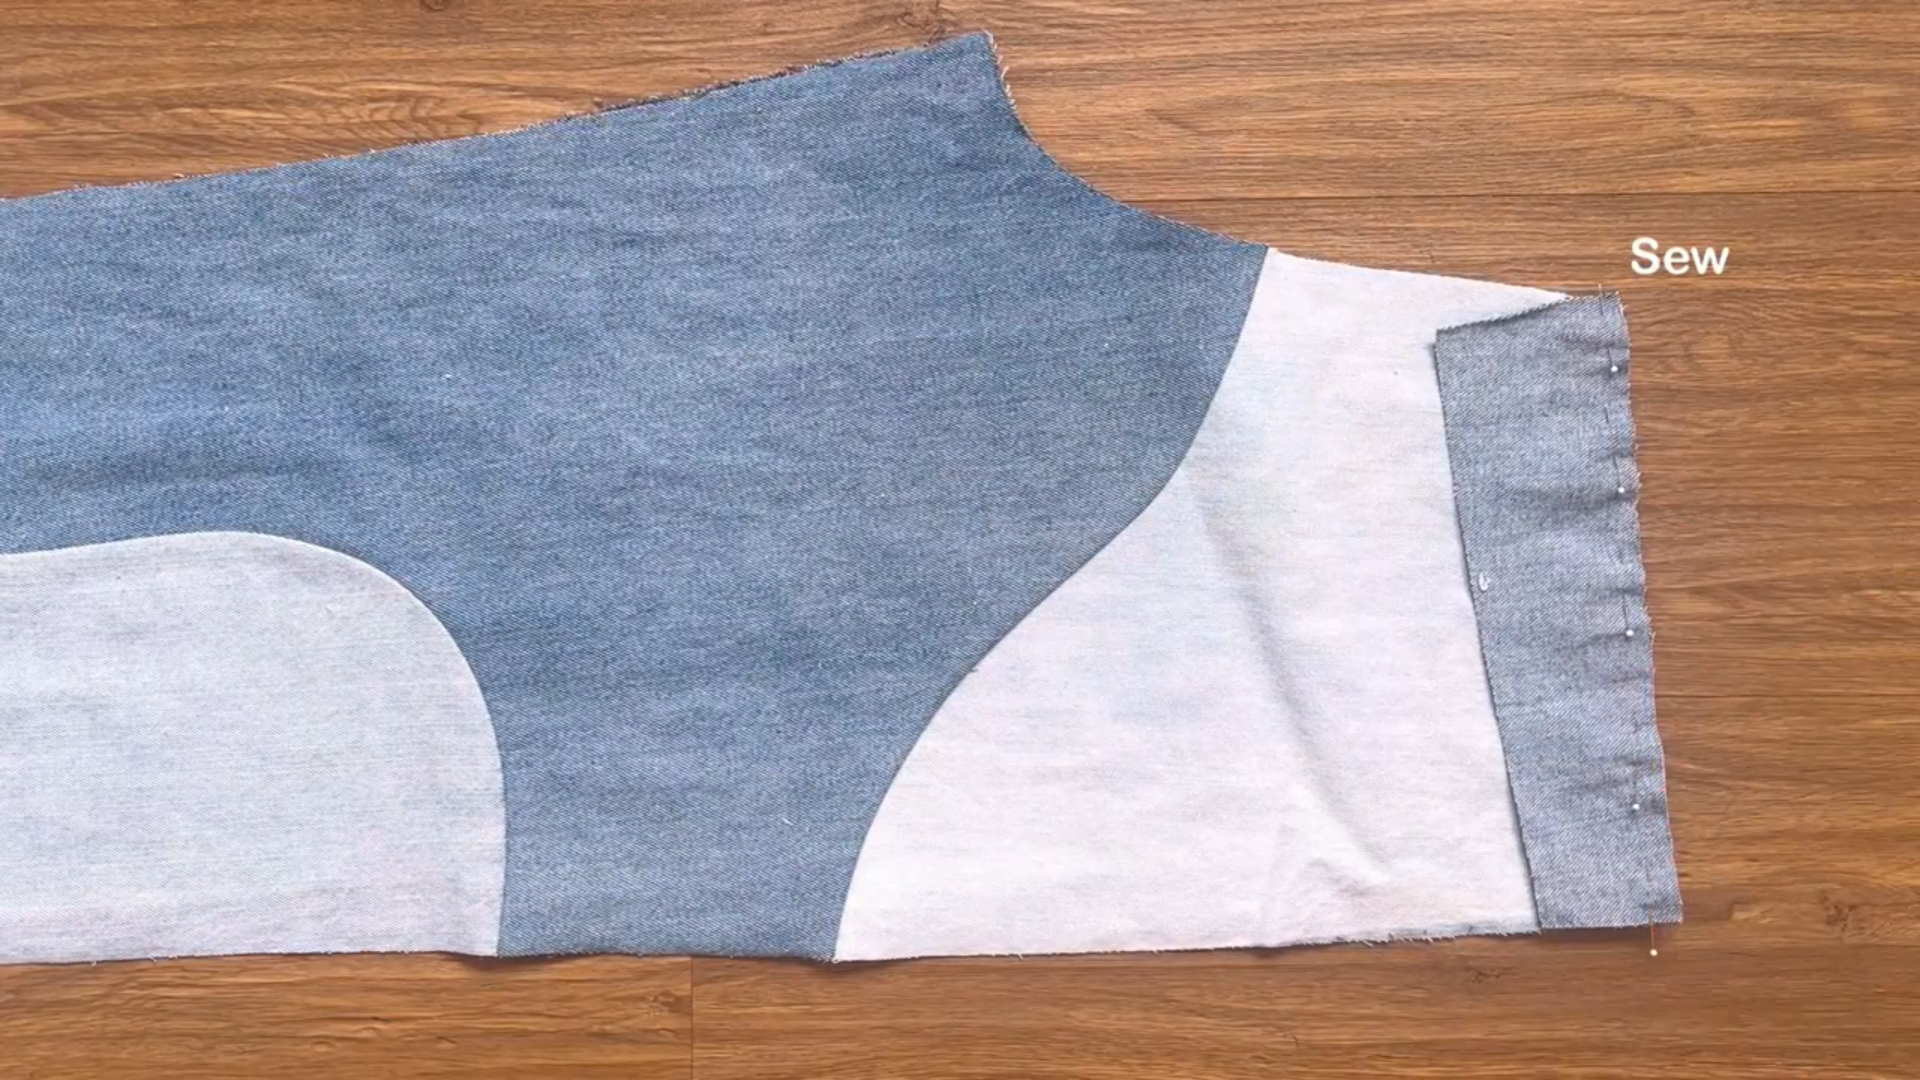
Attach the top parts of the back pants to the bottom parts
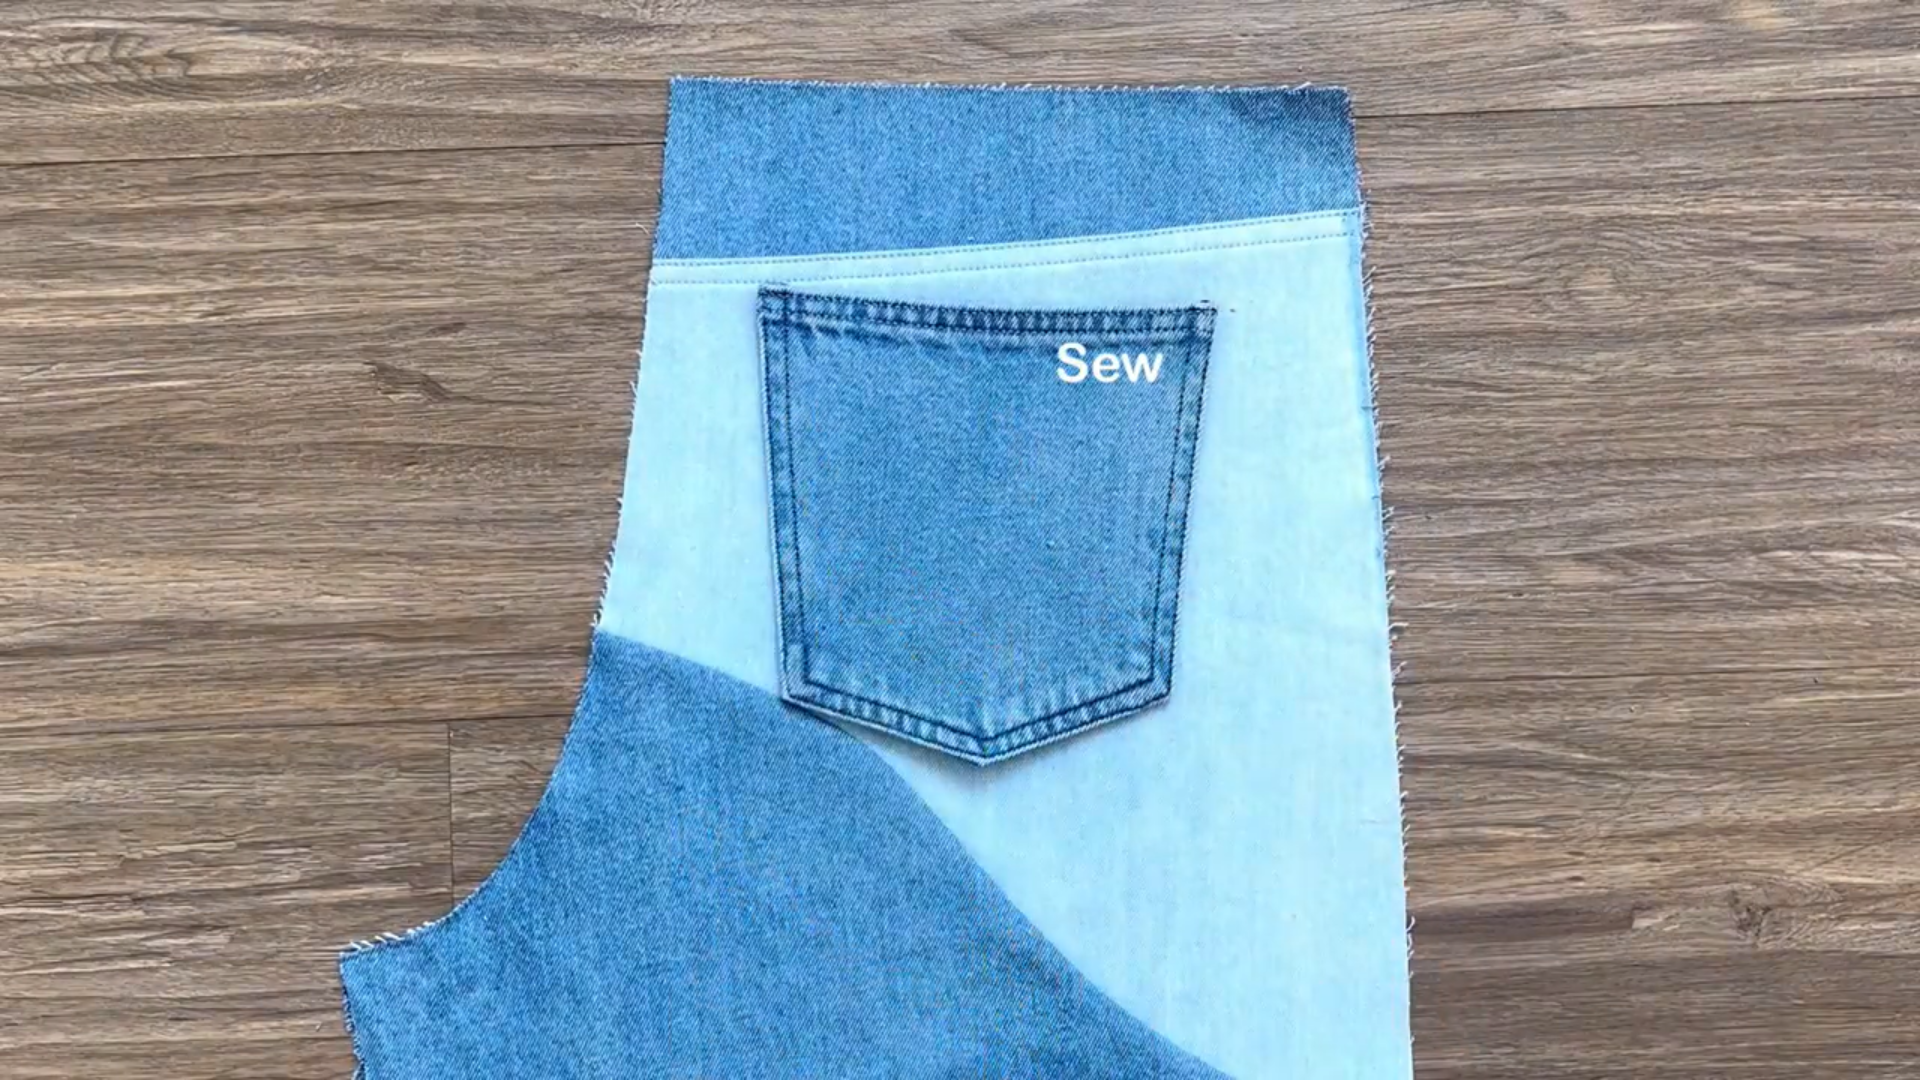
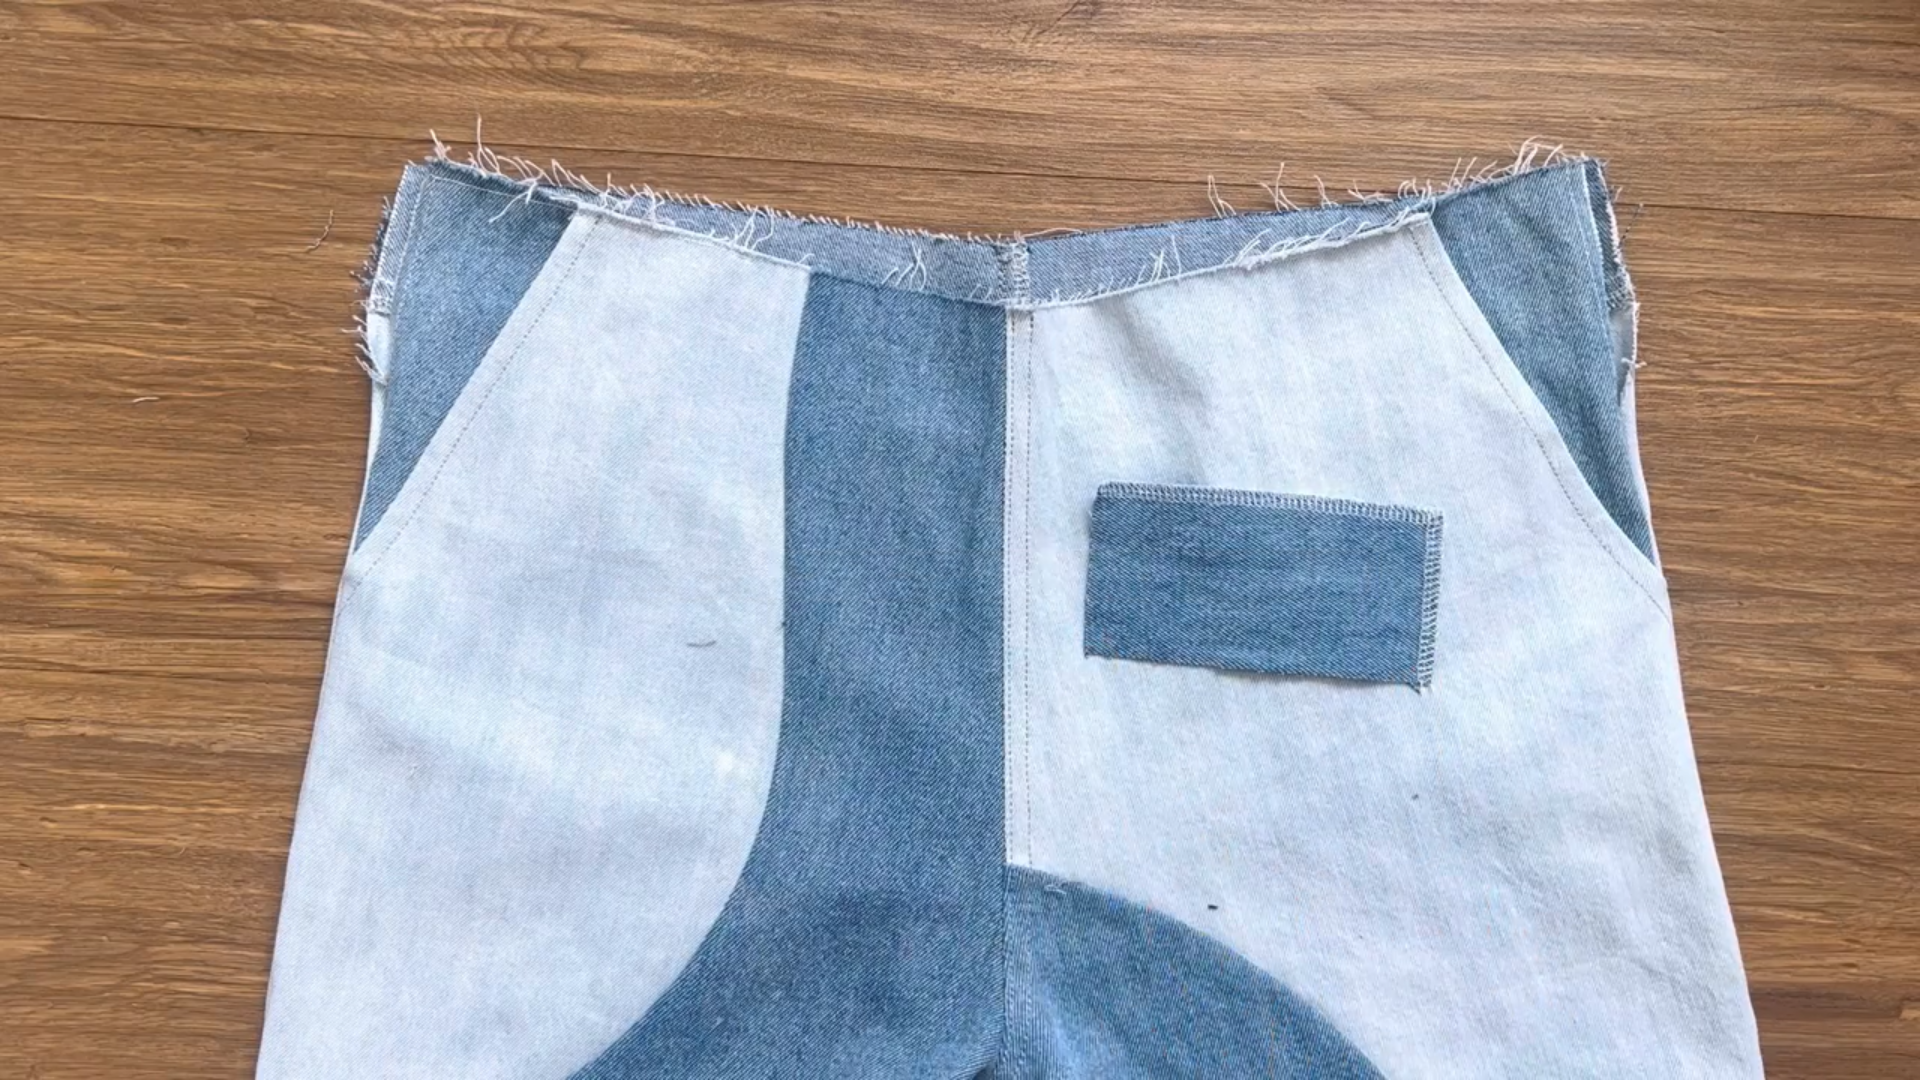
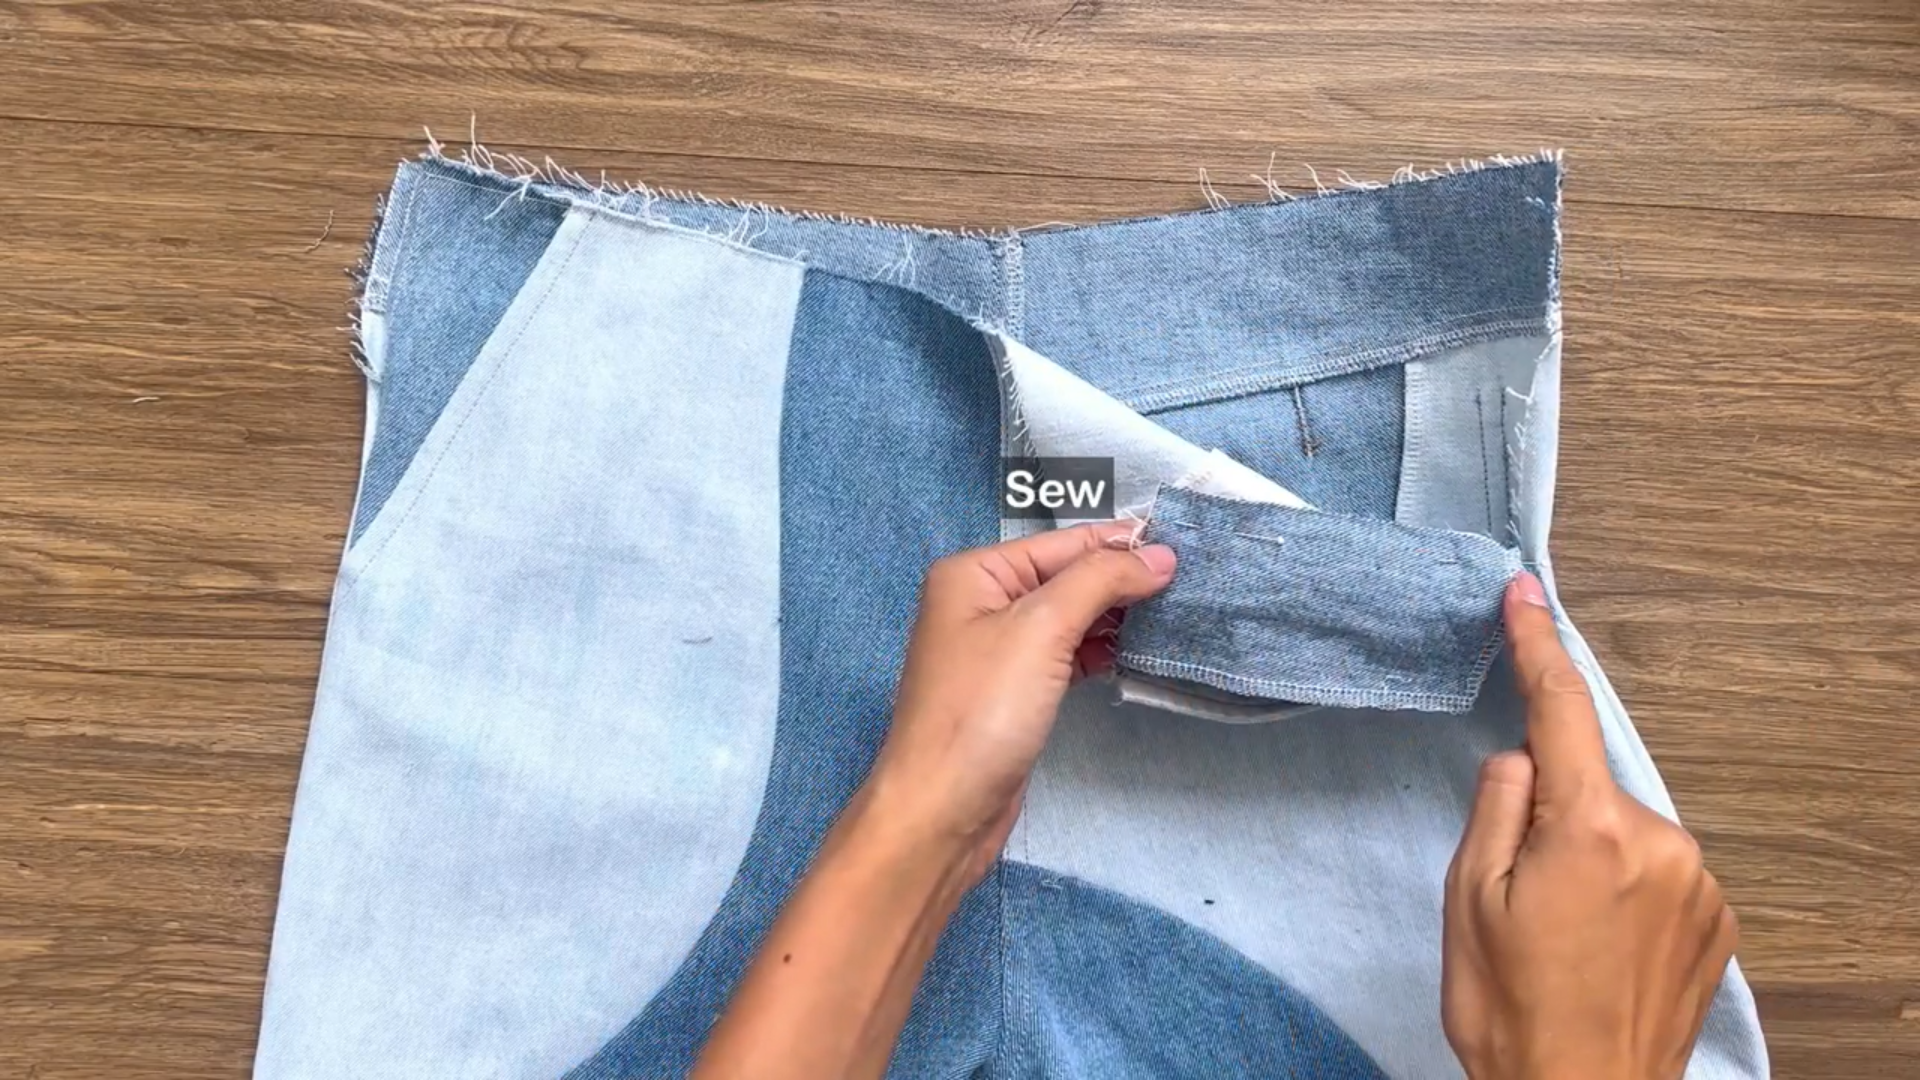
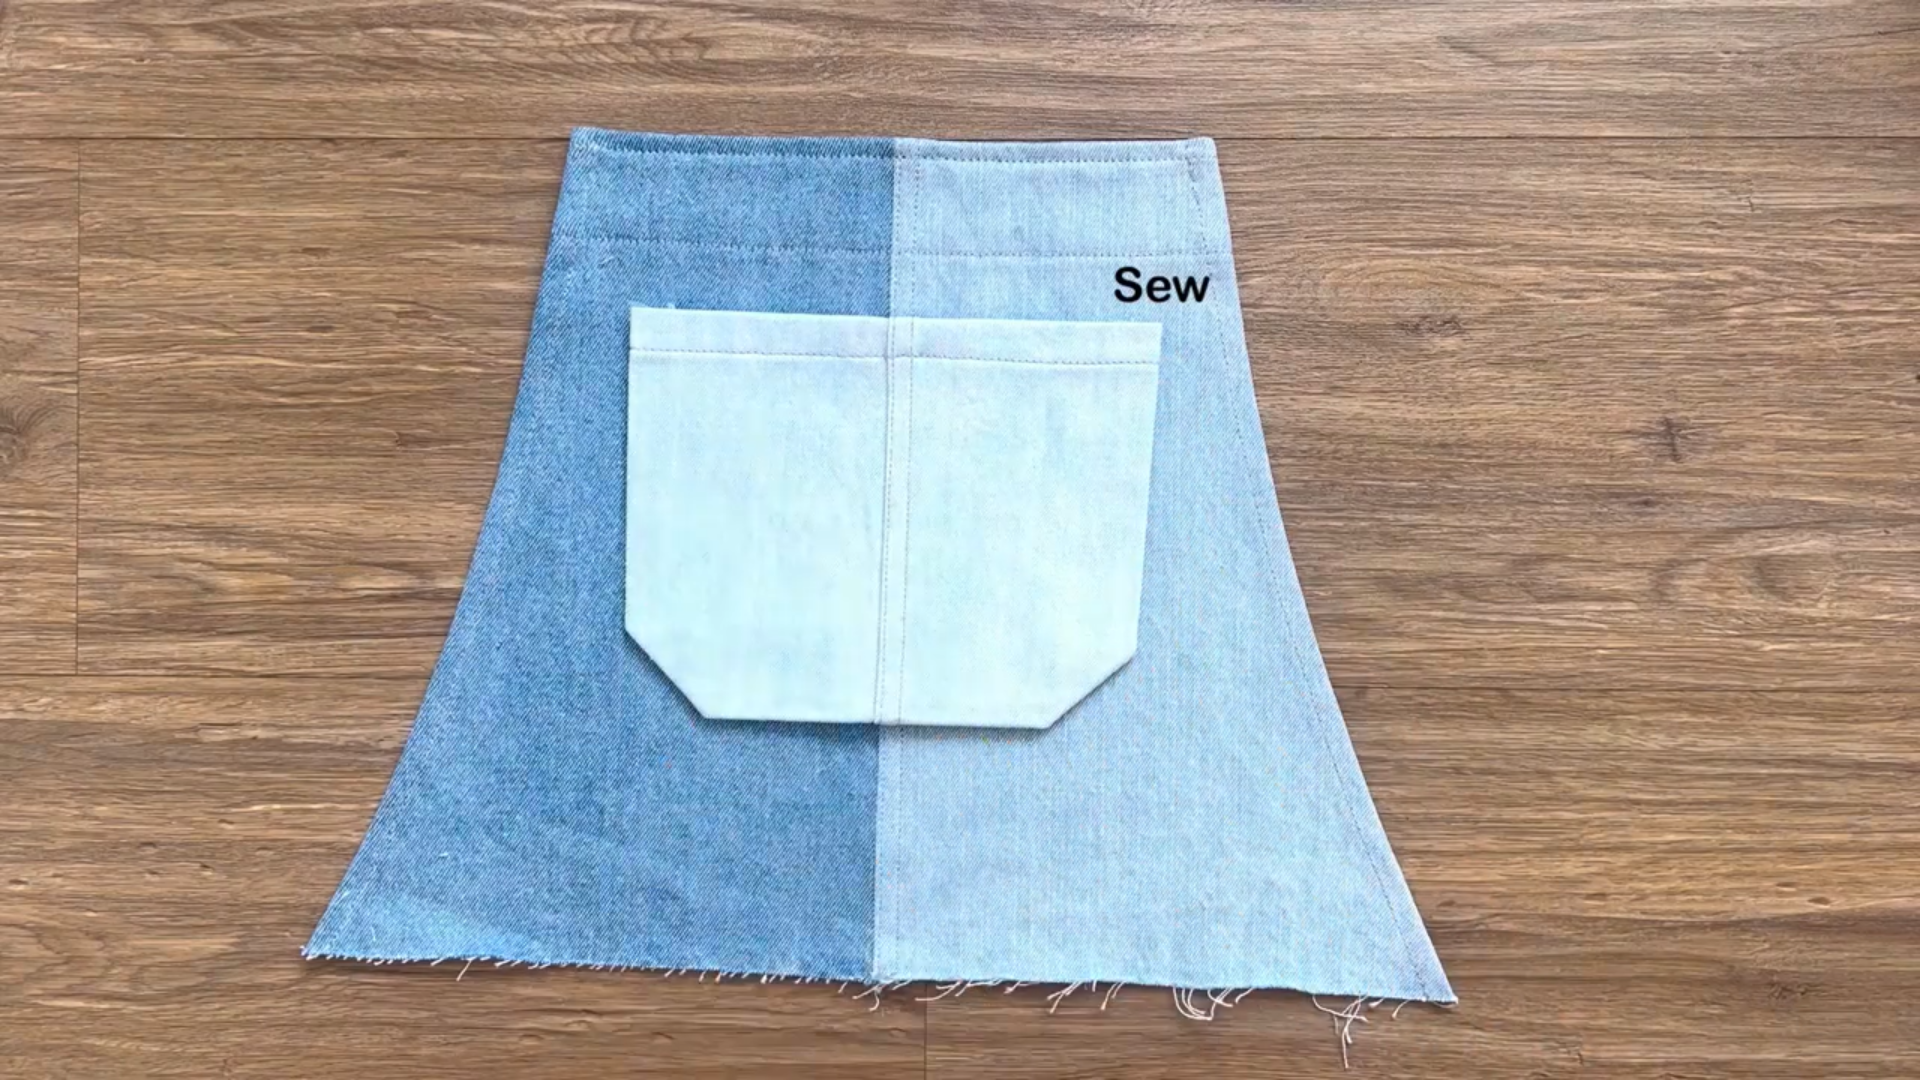
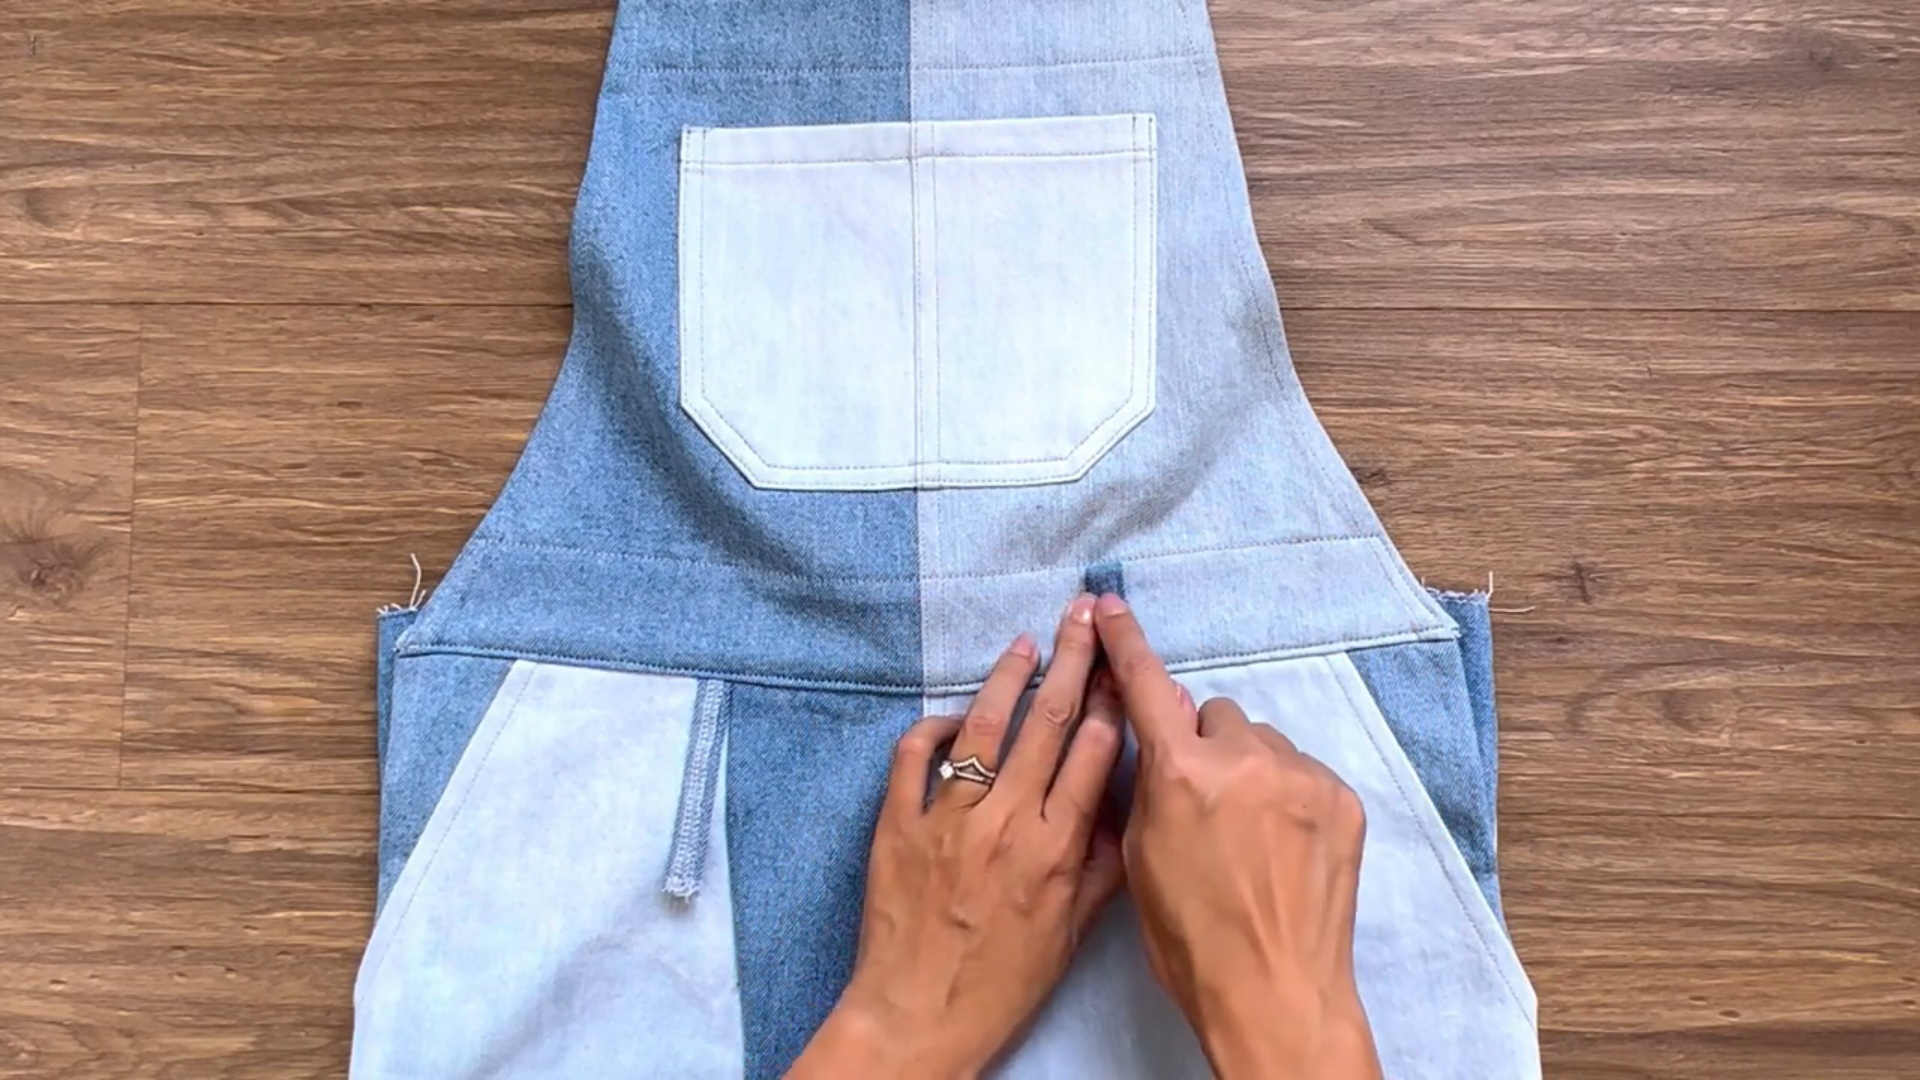
Repurpose the pocket of the jeans to serve as the back pocket for our jumpsuit. Sew it in place.
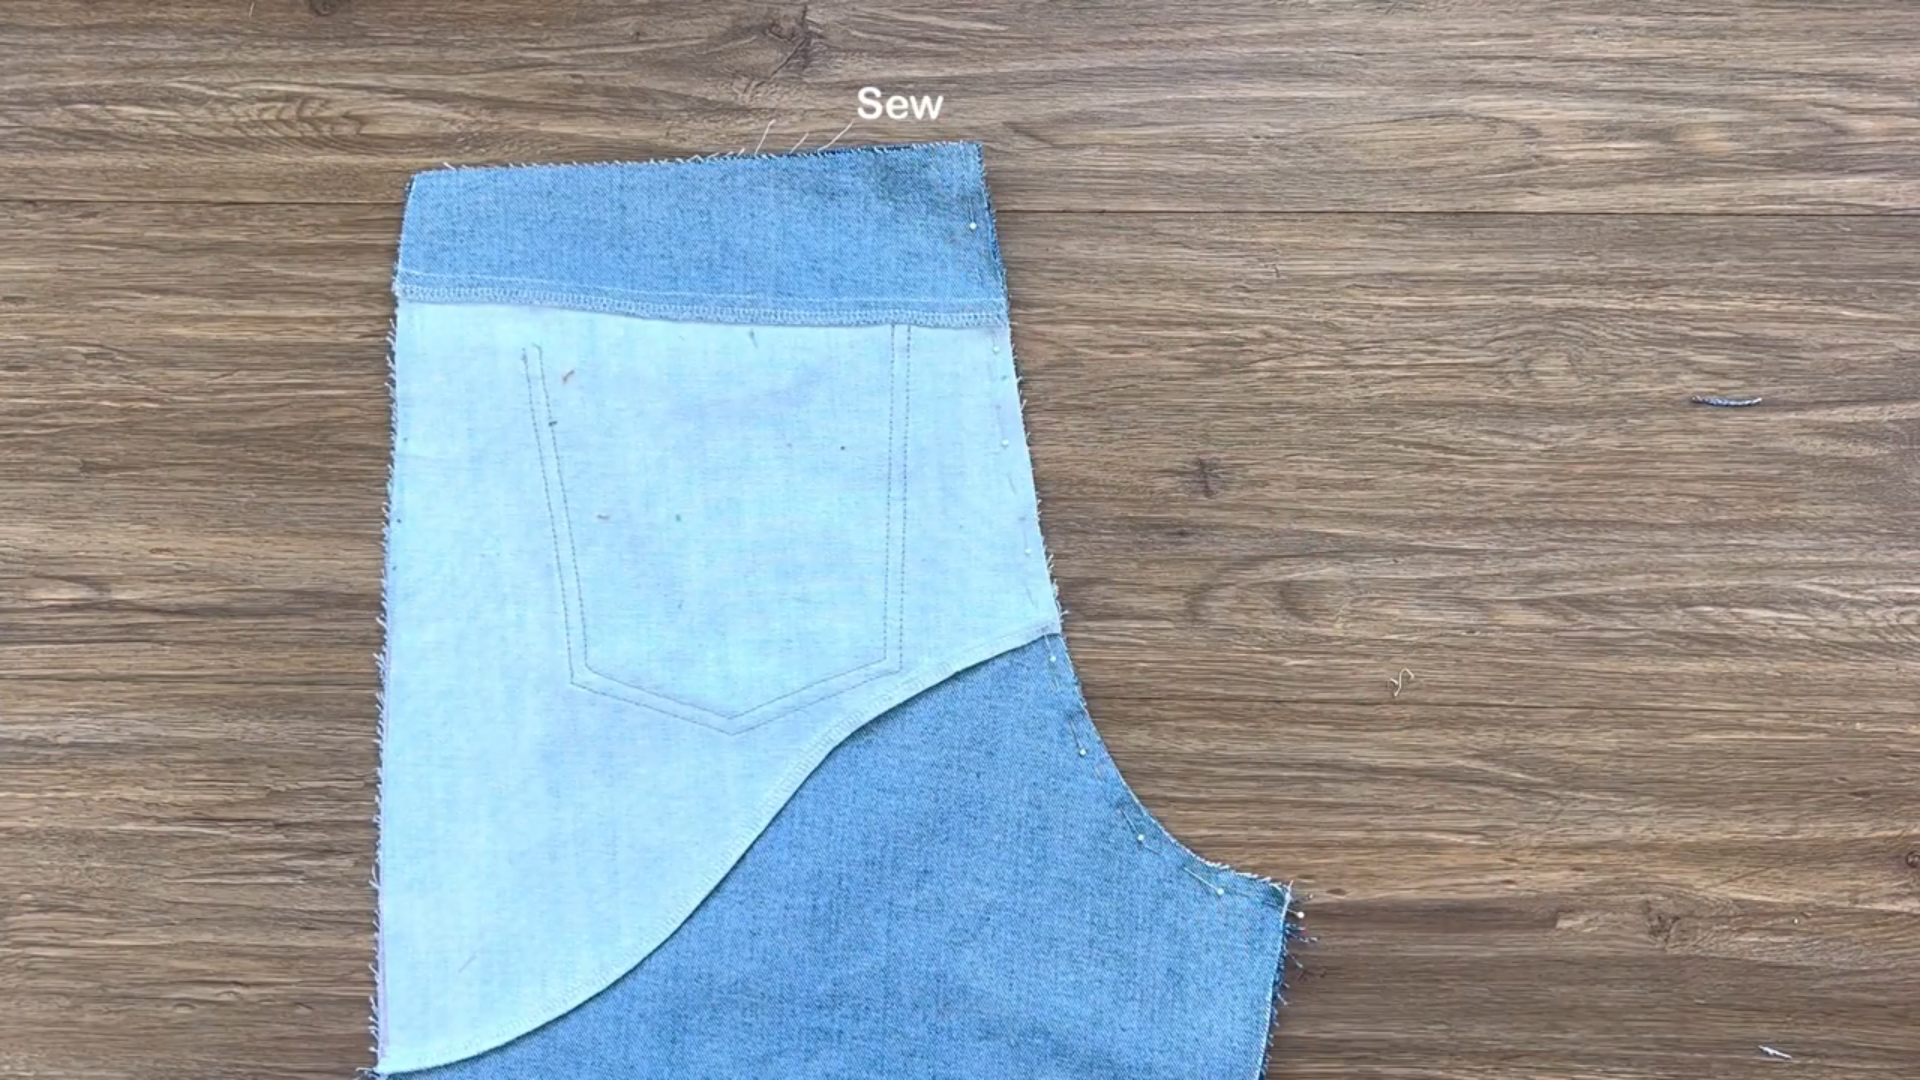
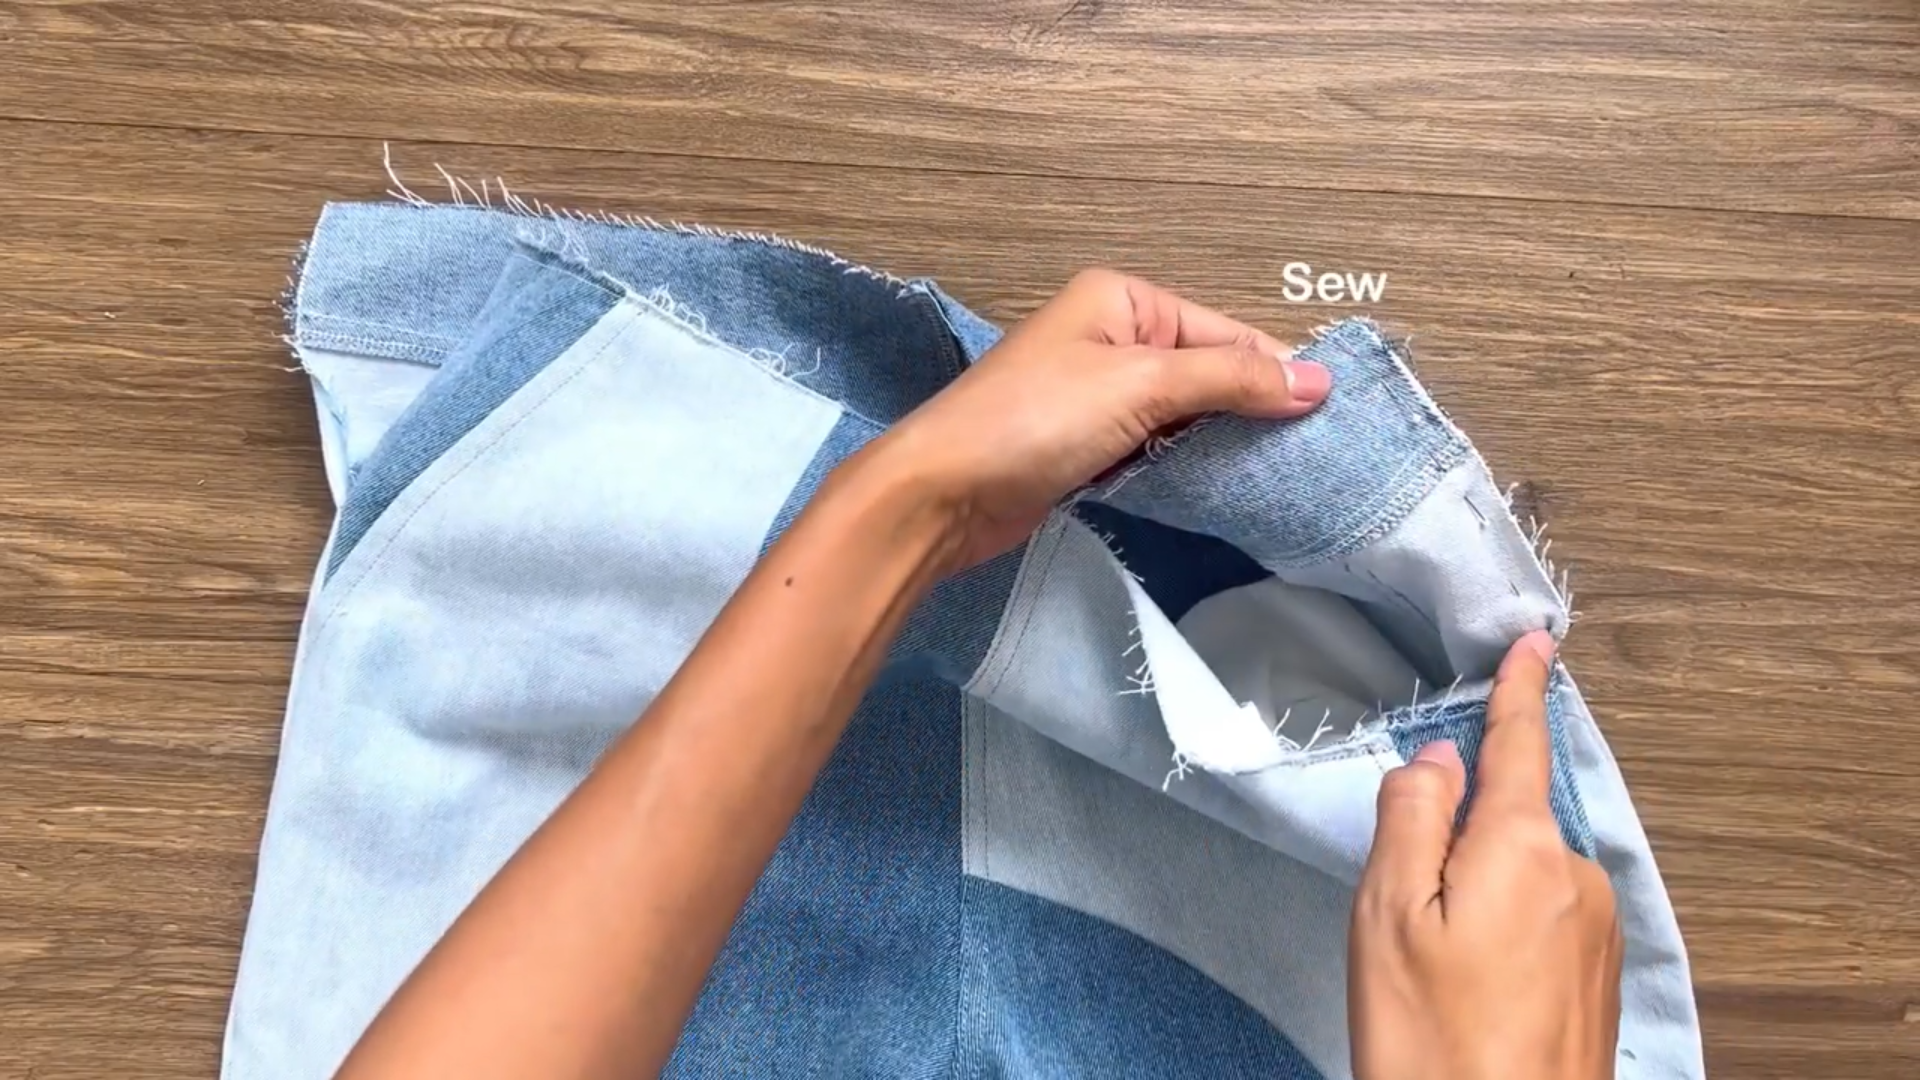
Join the two main sections of the back pants at the crotch seam.
CONNECT THE FRONT AND THE BACK PANTS
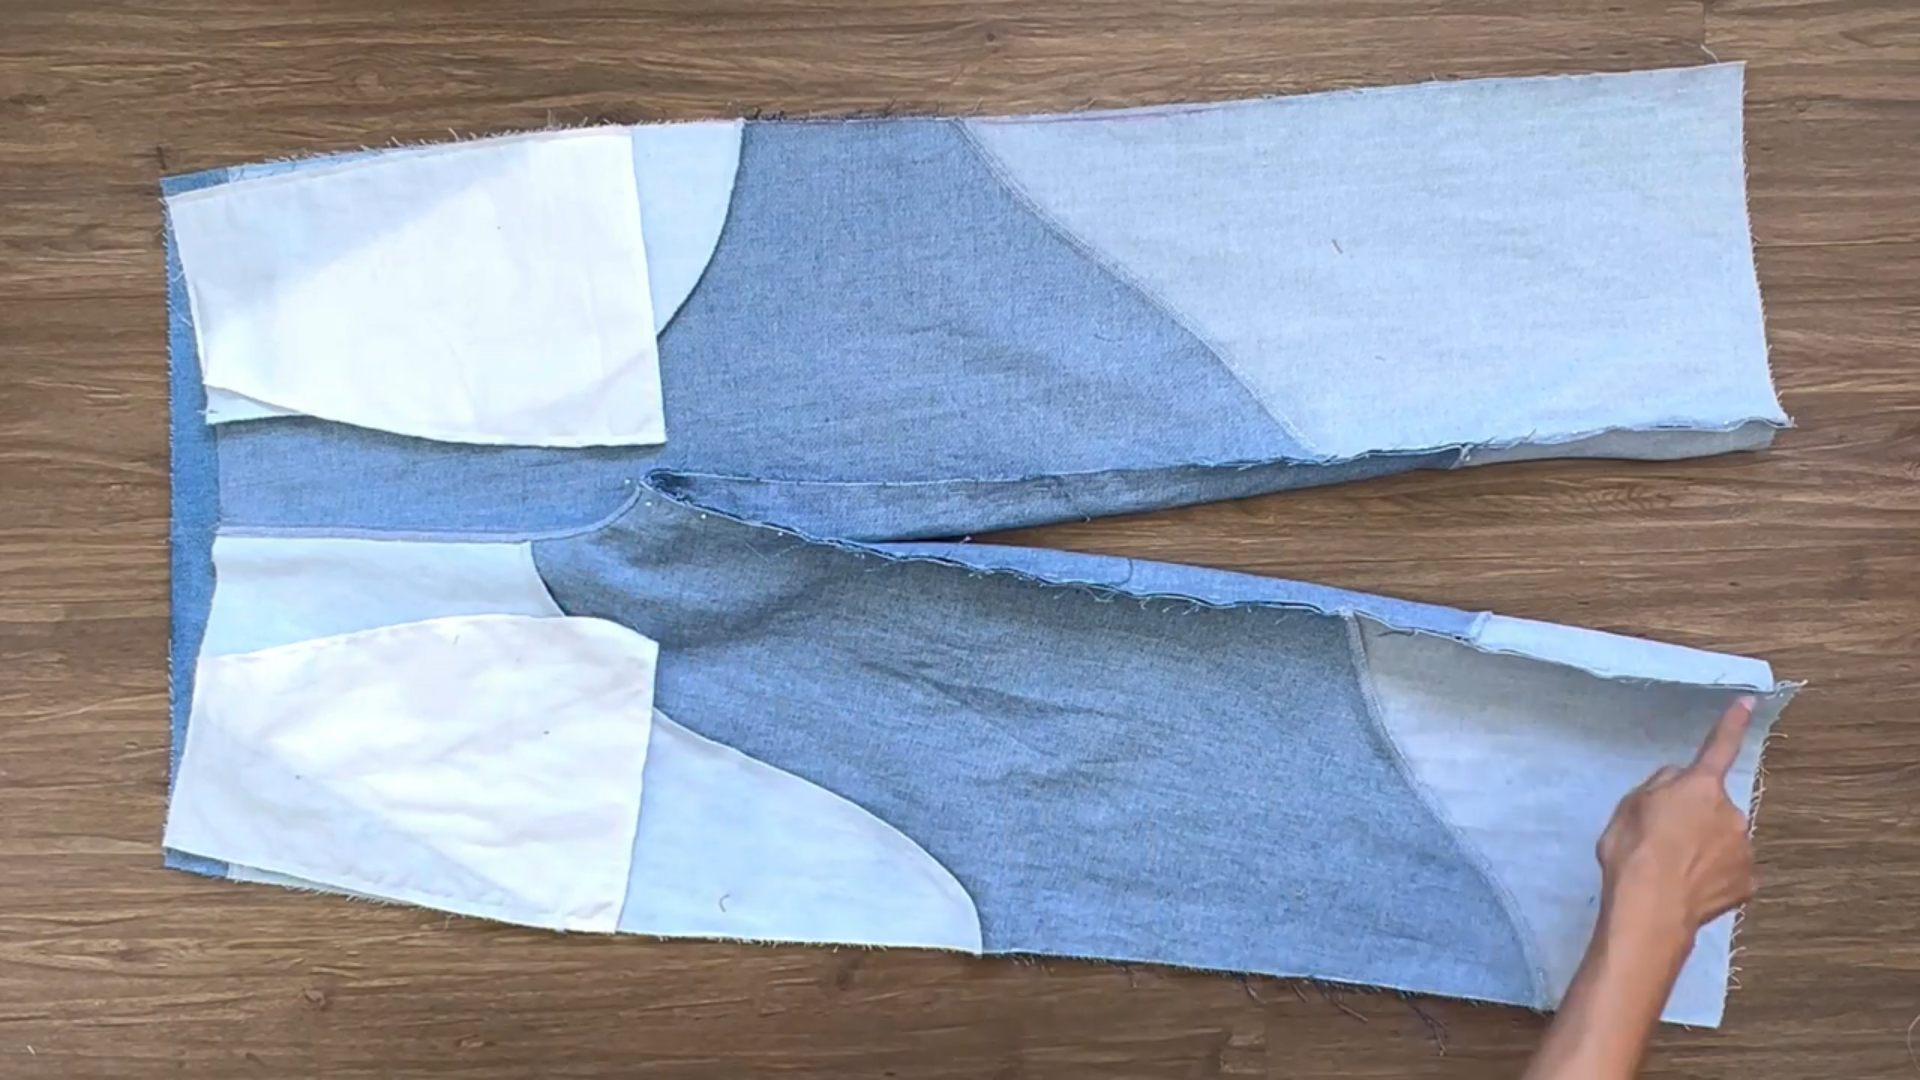
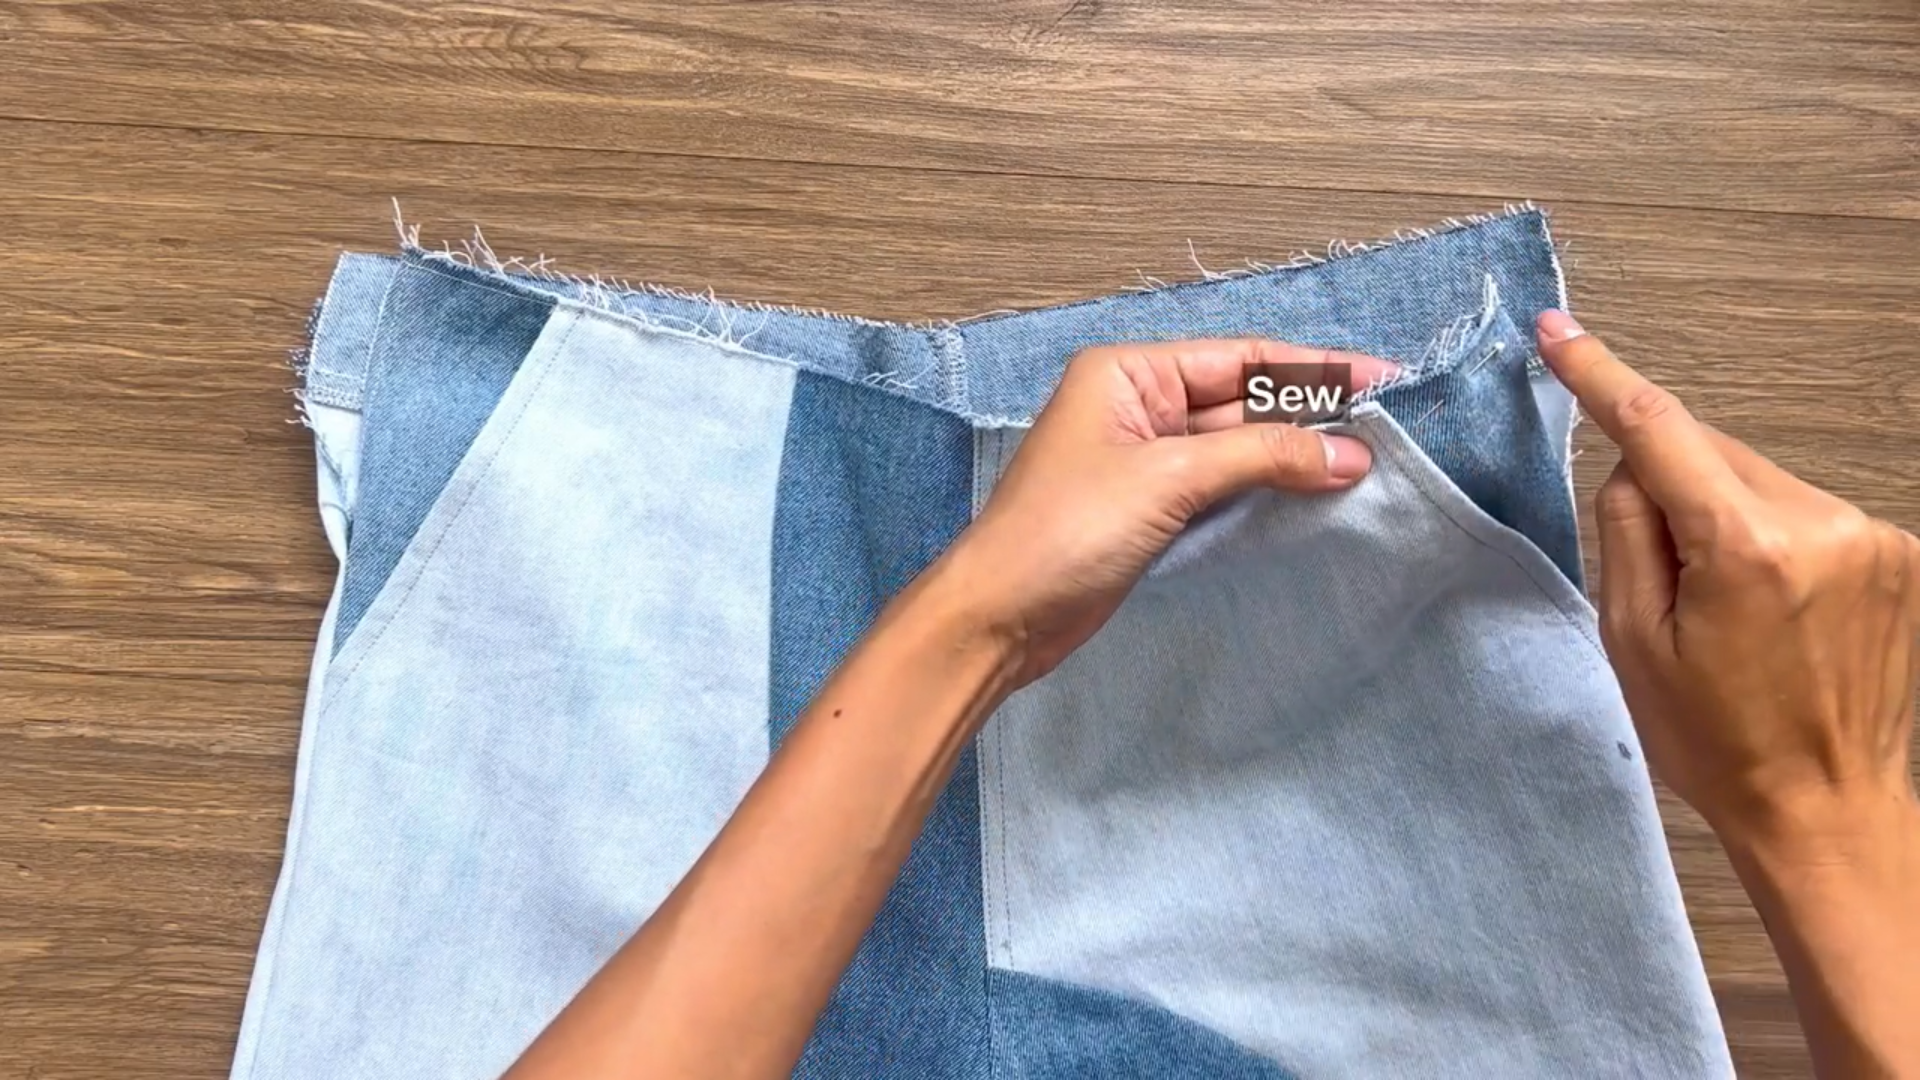
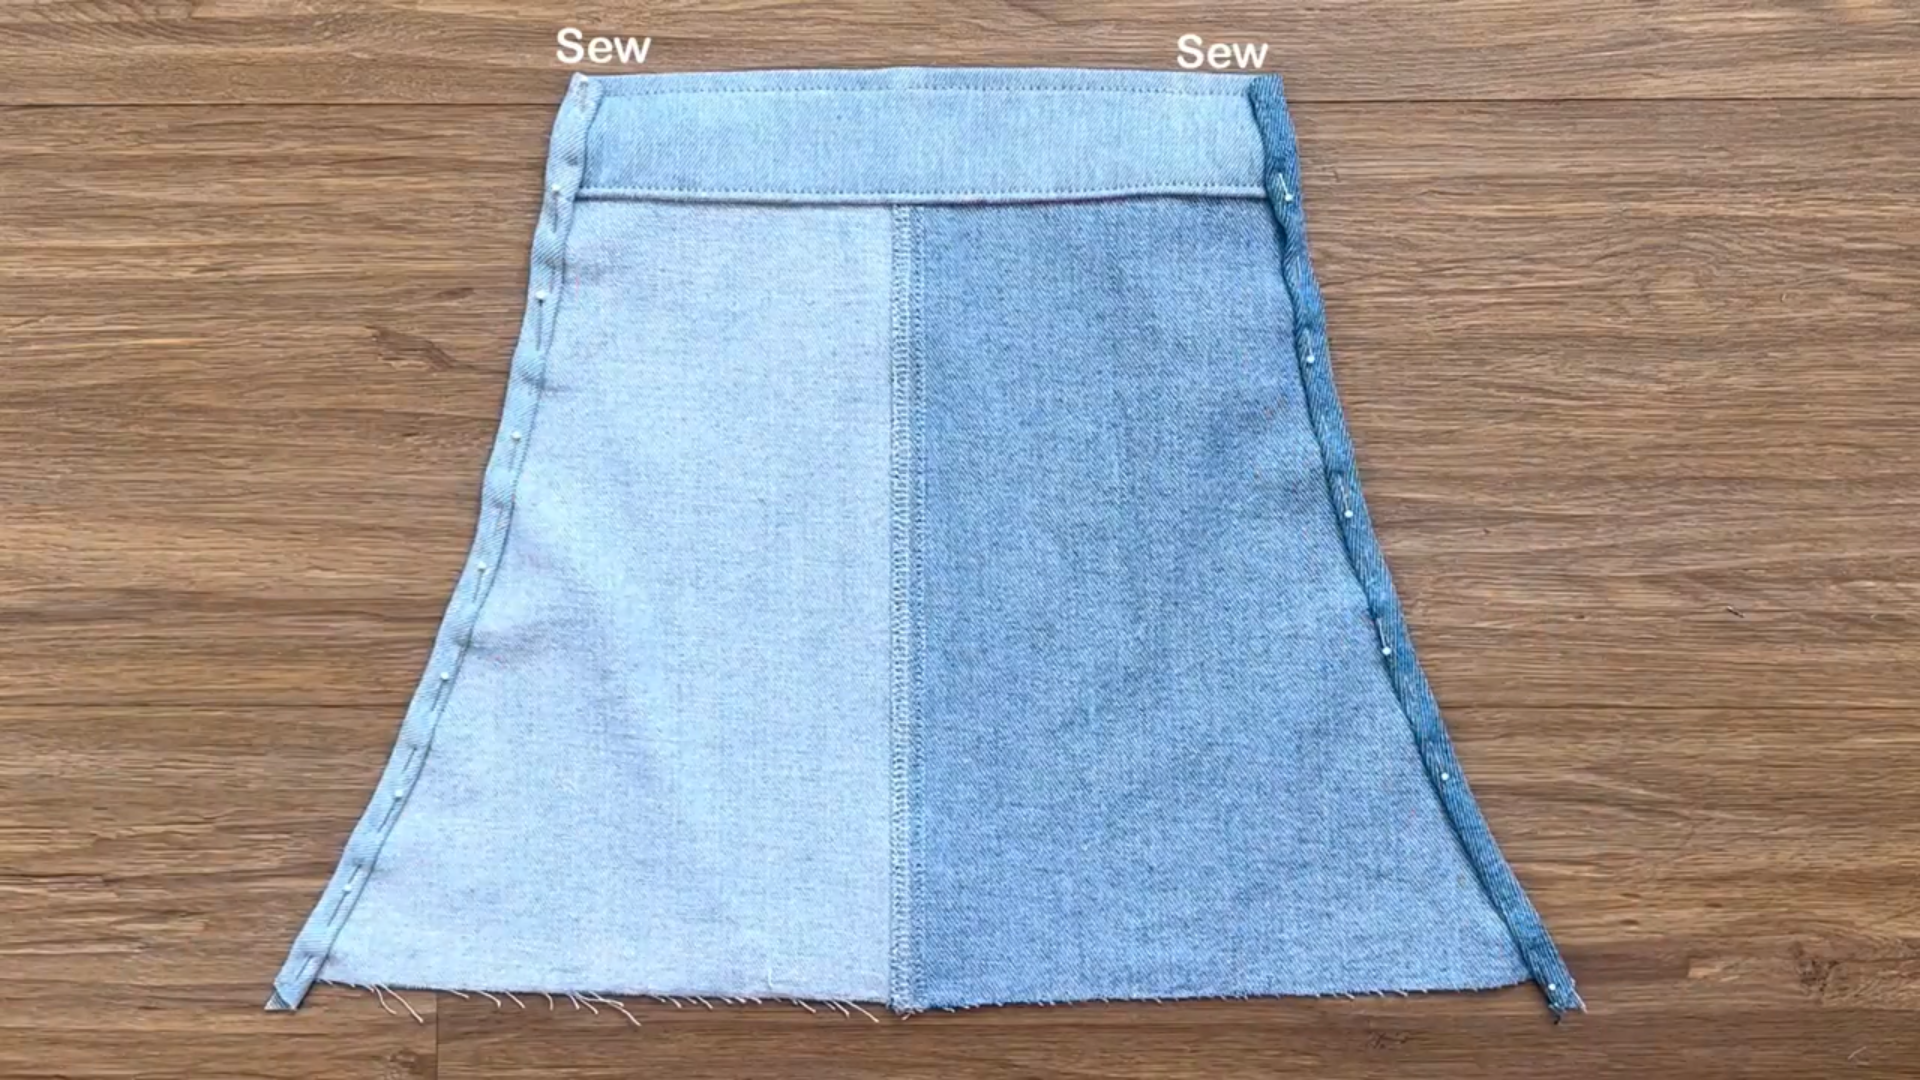
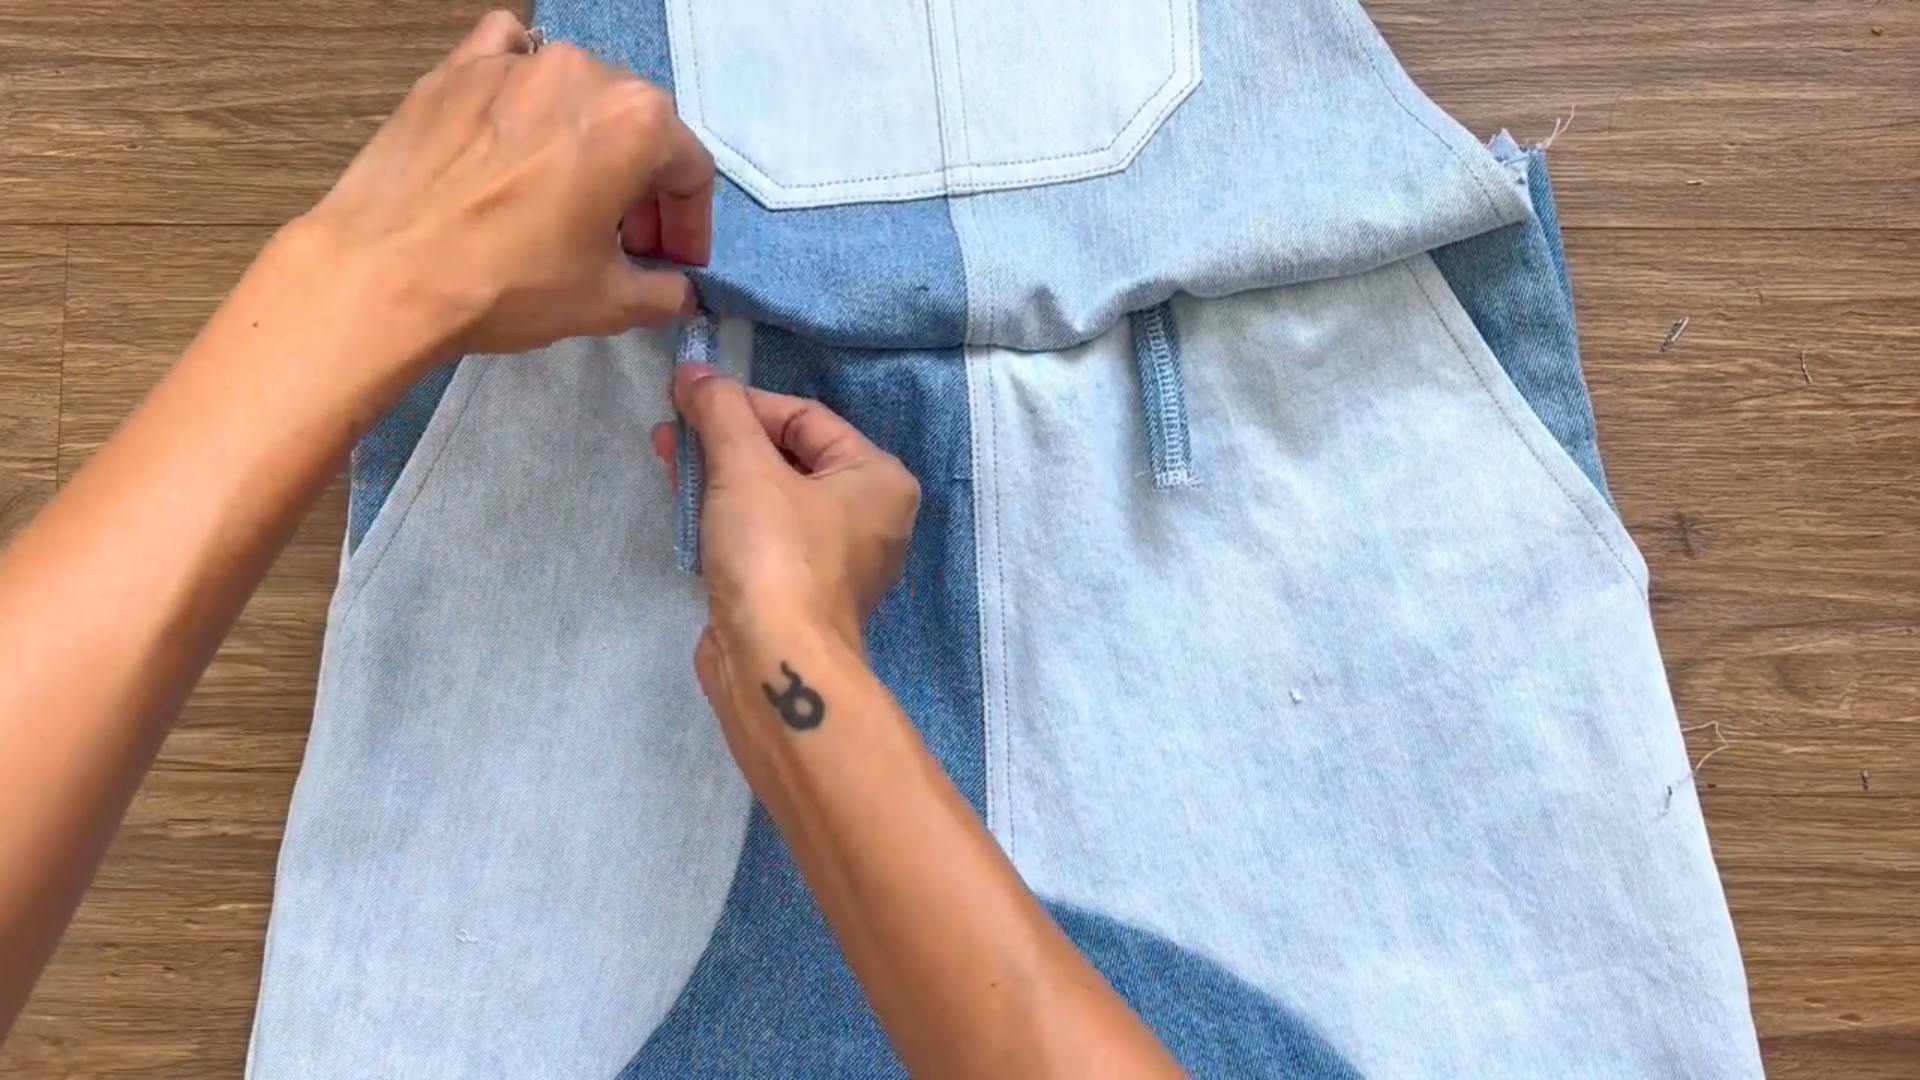
Pin the front and back pants together along the two side seams and the two inseam lines.
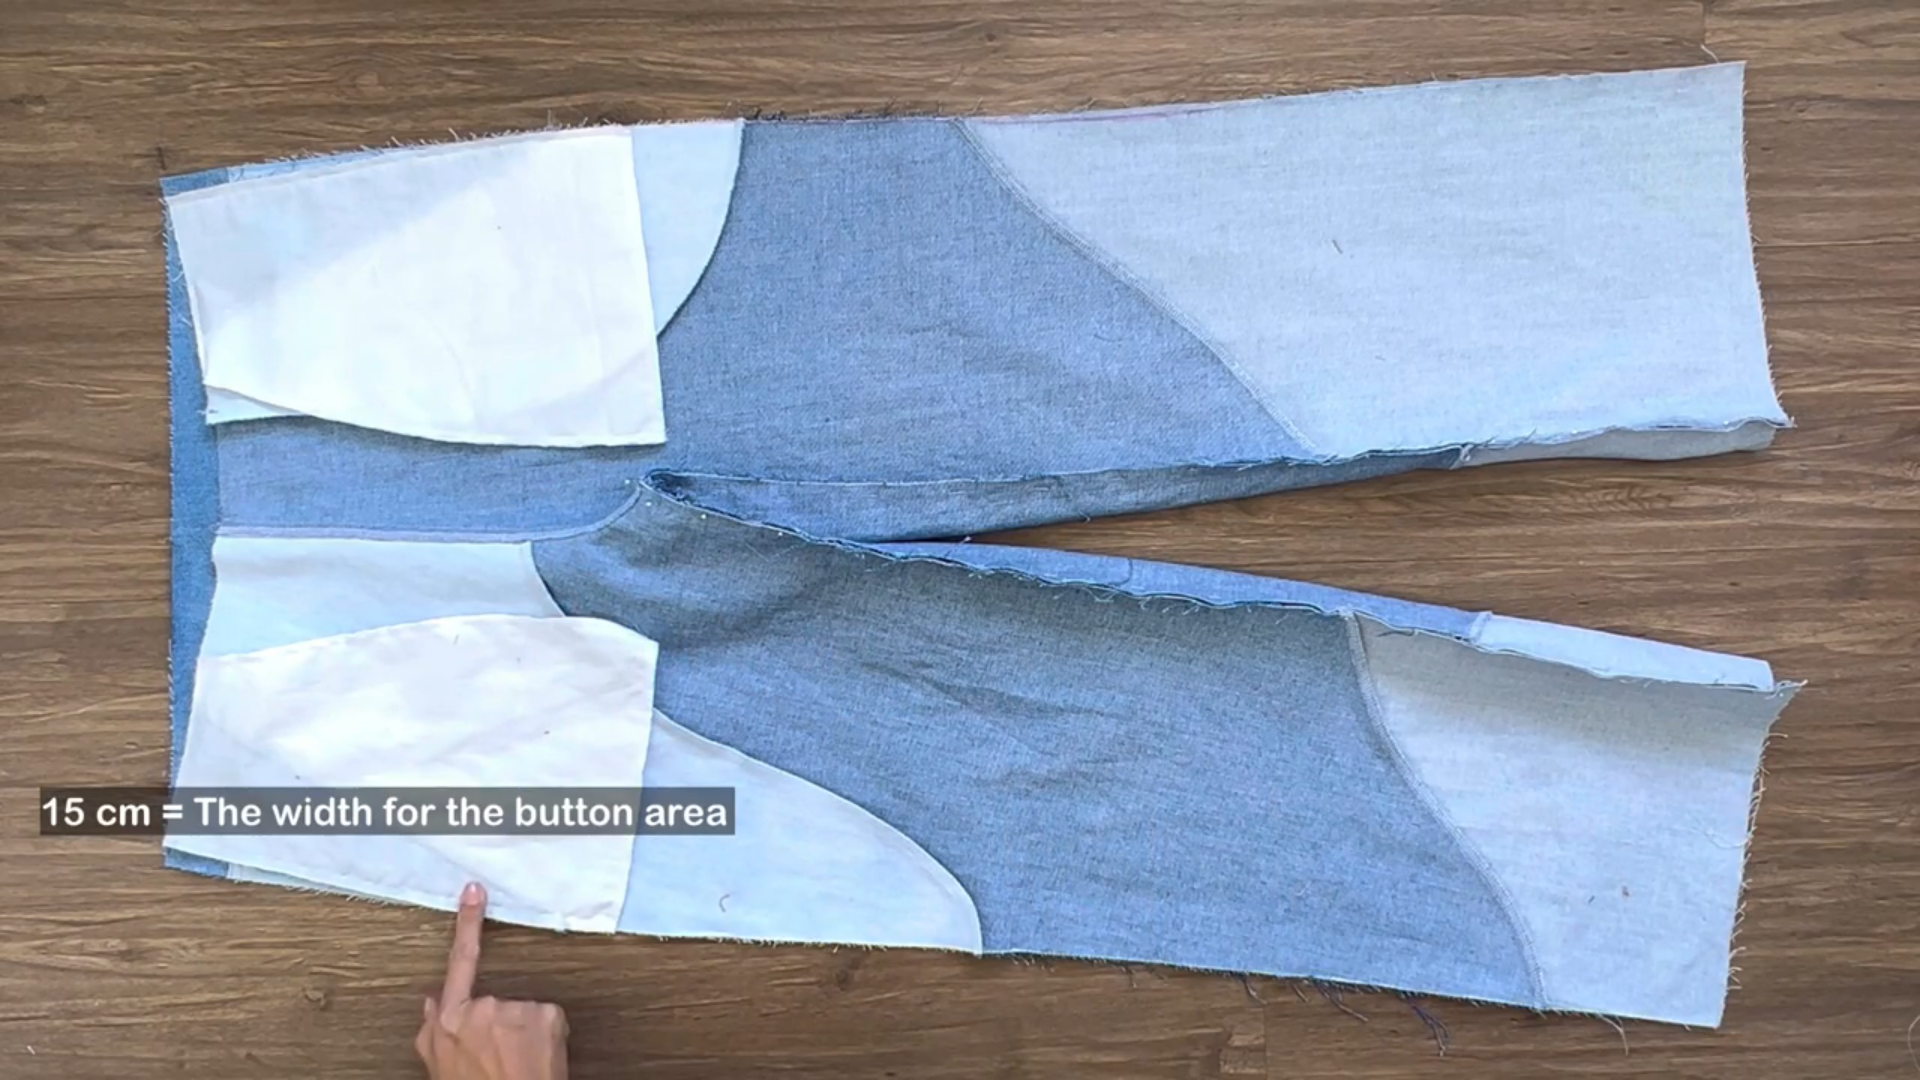
Remember to leave a 15-cm gap at the top of the side seams for the button and buttonhole.
Sew the rest of the seam together.
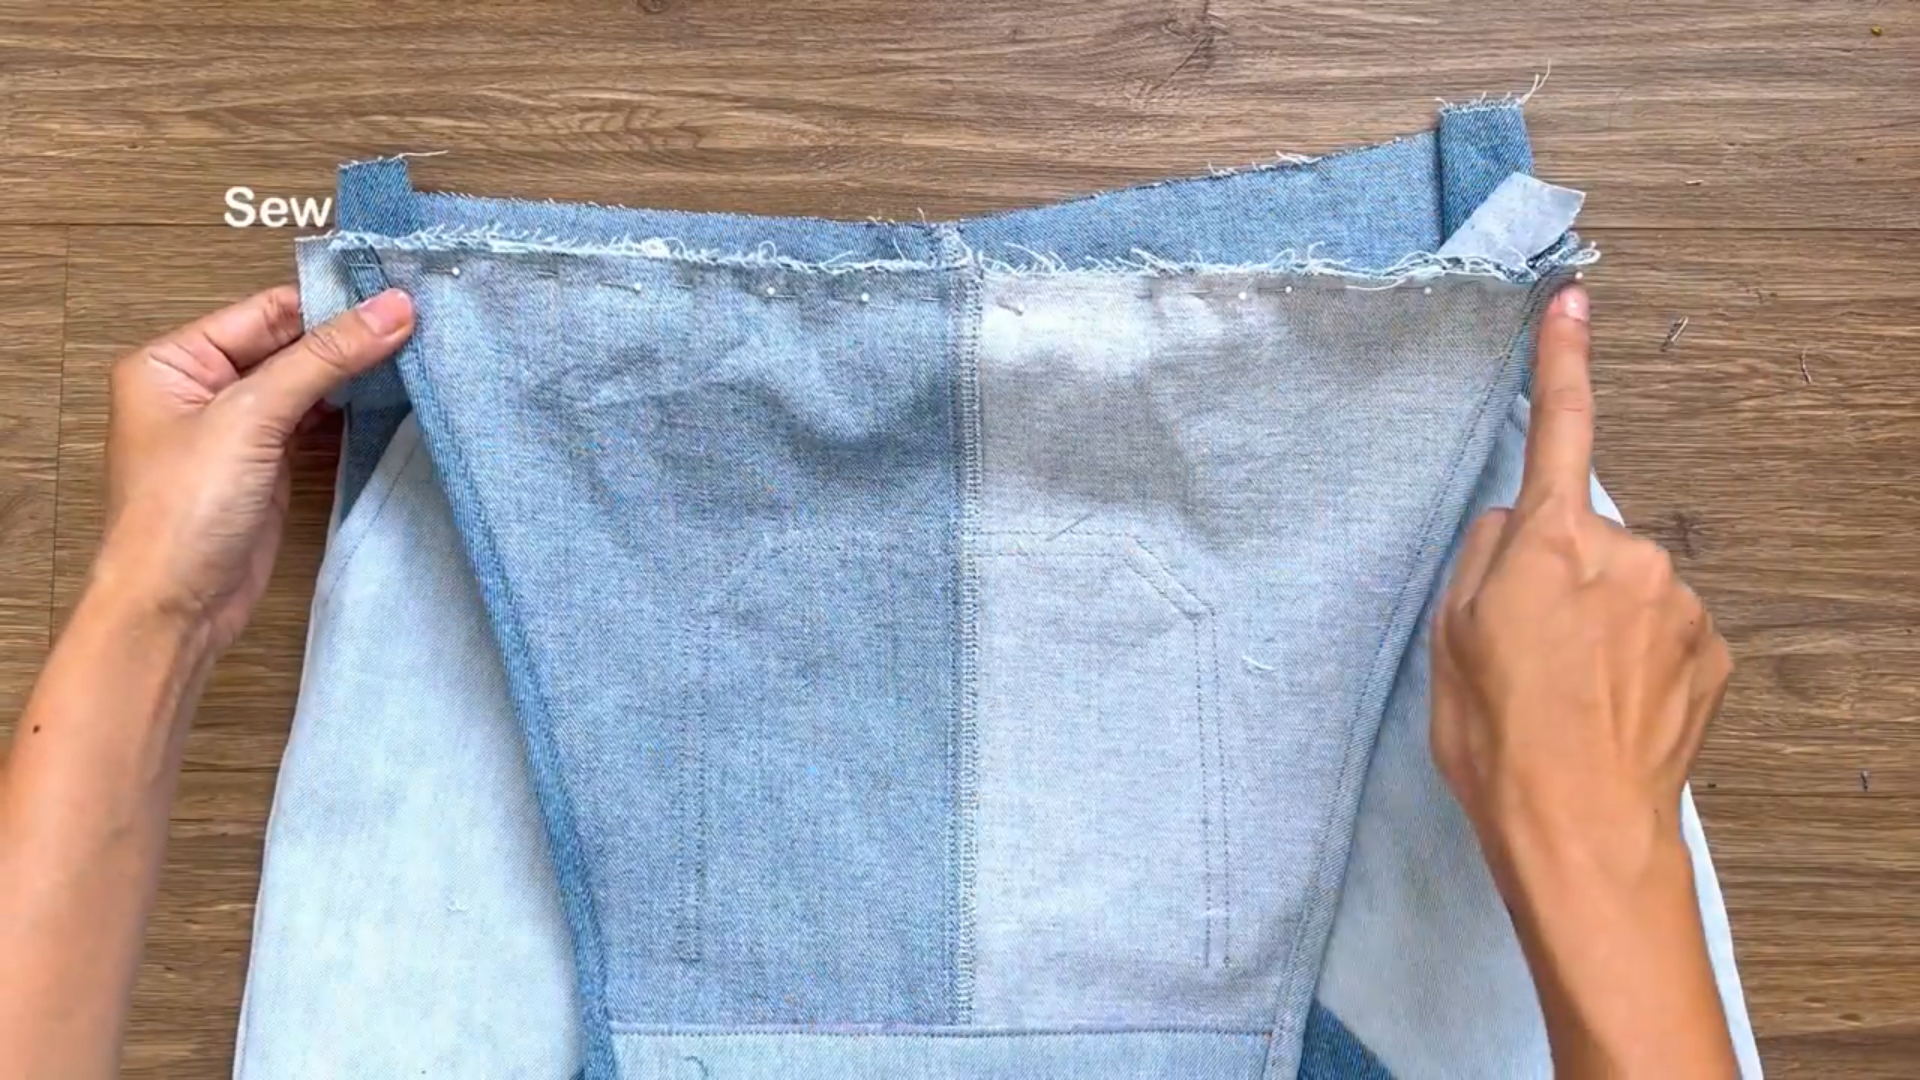
Cut a rectangular strip of fabric. The strip should be 5 cm wide and 15 cm long.
Pin the strip to the top edge of the front pants along the sideline and sew.
To prevent the strip from rolling to the outside, understitch the seam allowance.
Stitch the top of the strip and the top of the front pants together.
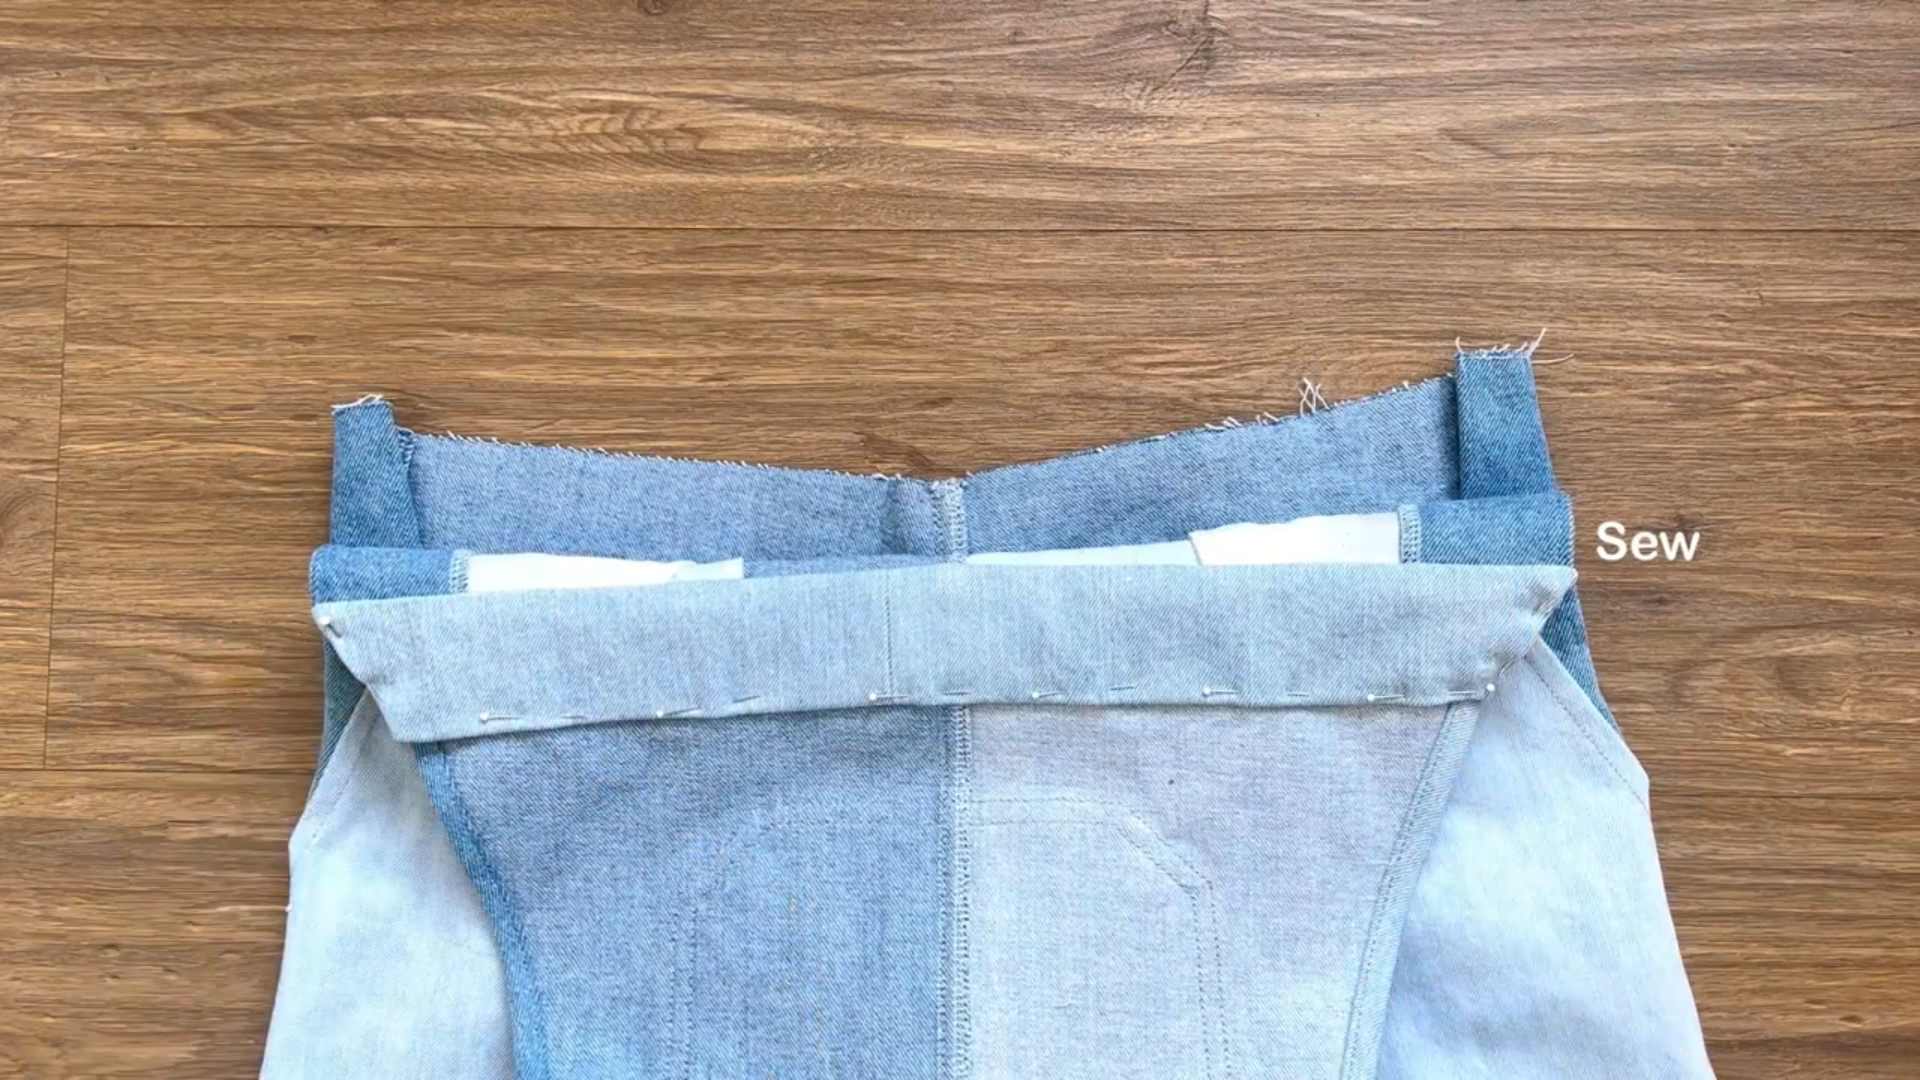
Cut a second strip which is 10 cm wide and 15 cm long.
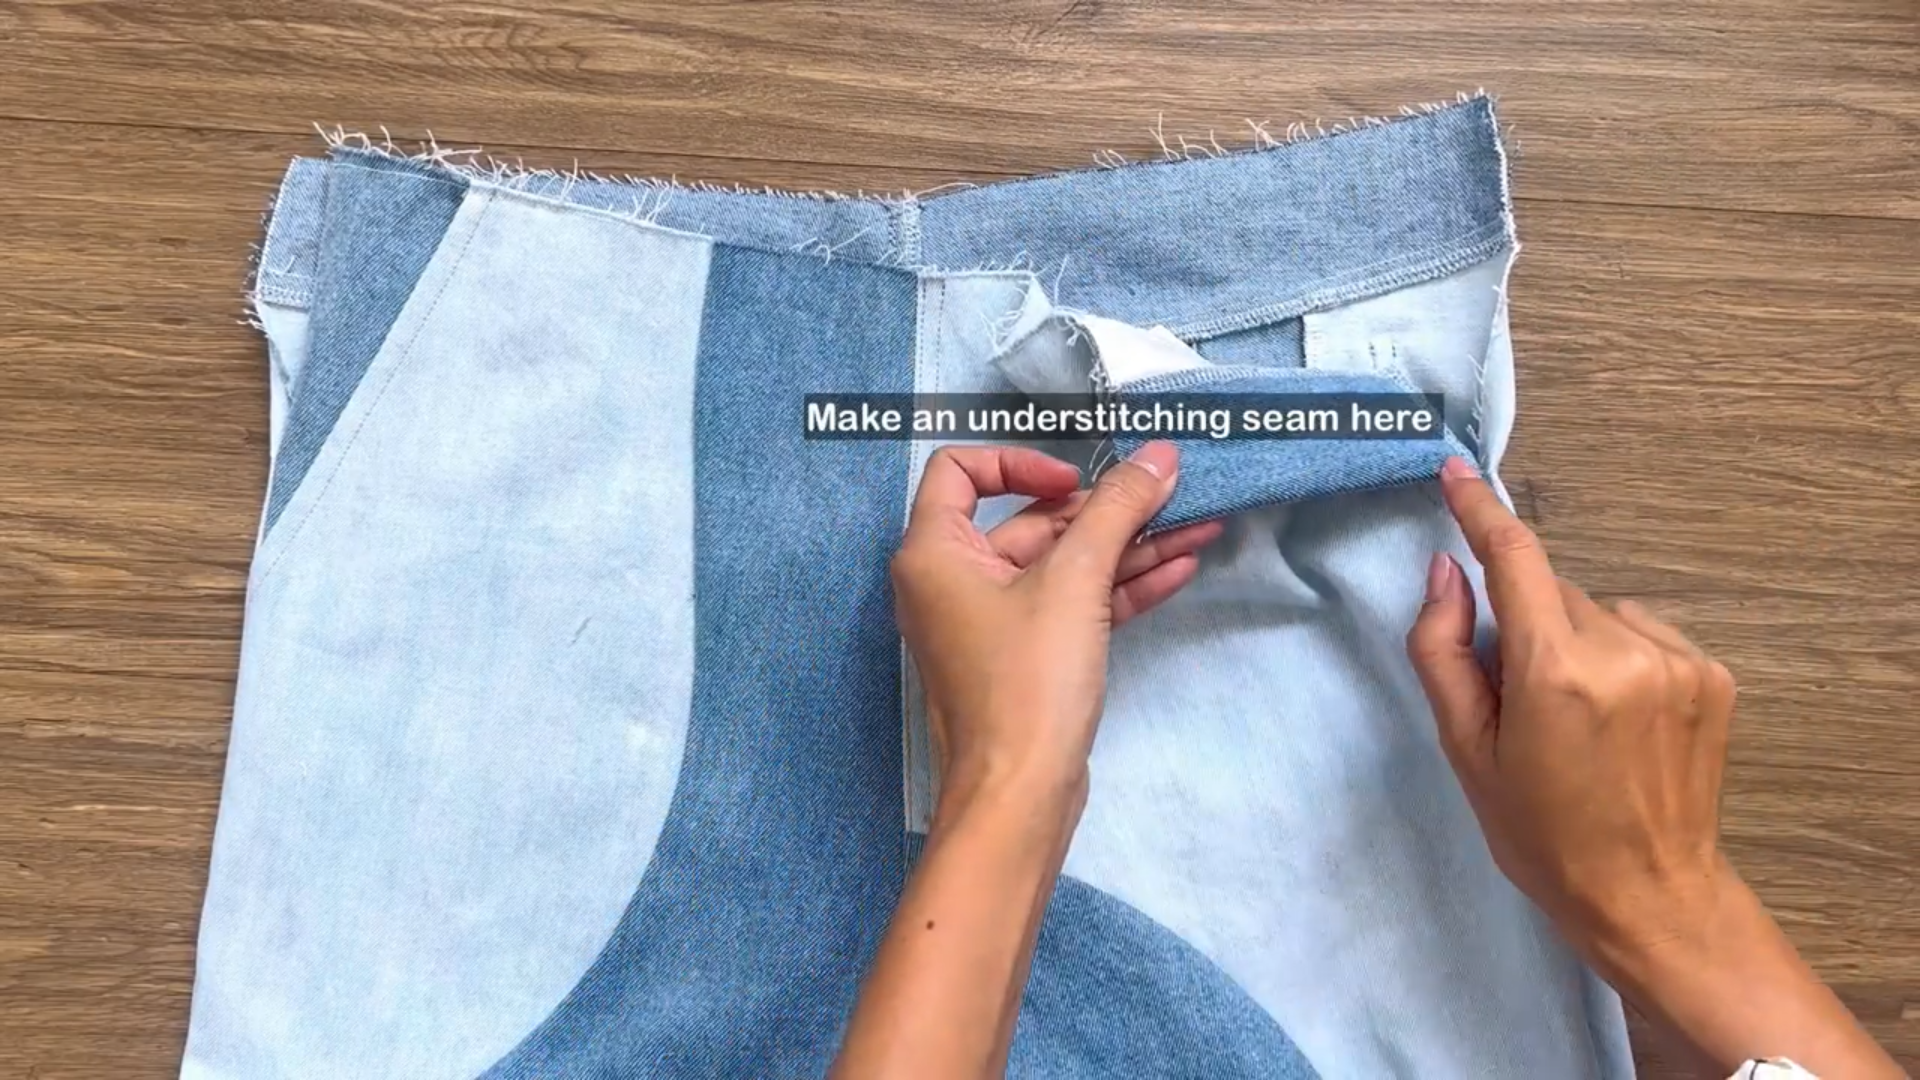
Pin the second strip to the top edge of the back pants and sew.
Make an understitching seam along the first seam.
Fold the raw edge of the waistband inward and pin it to the first layer.
Sew a seam to secure the folded edge.
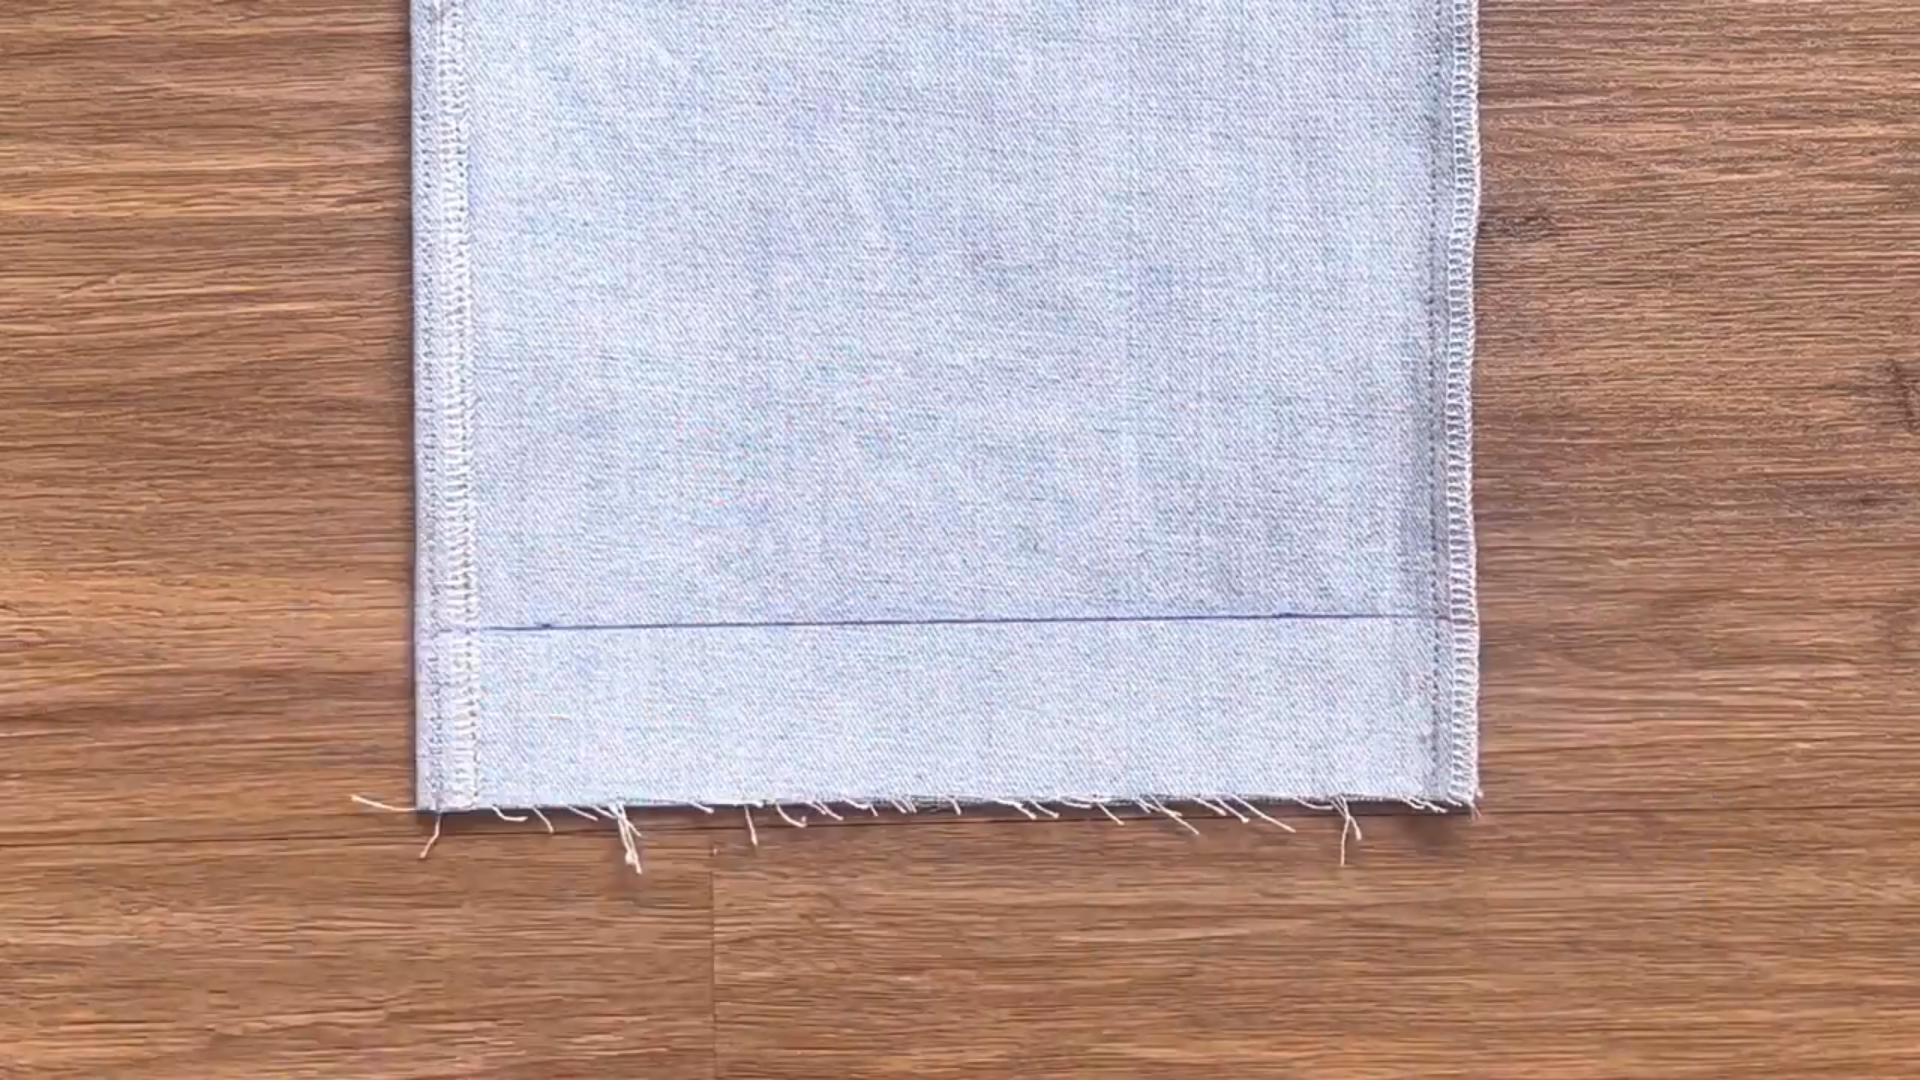
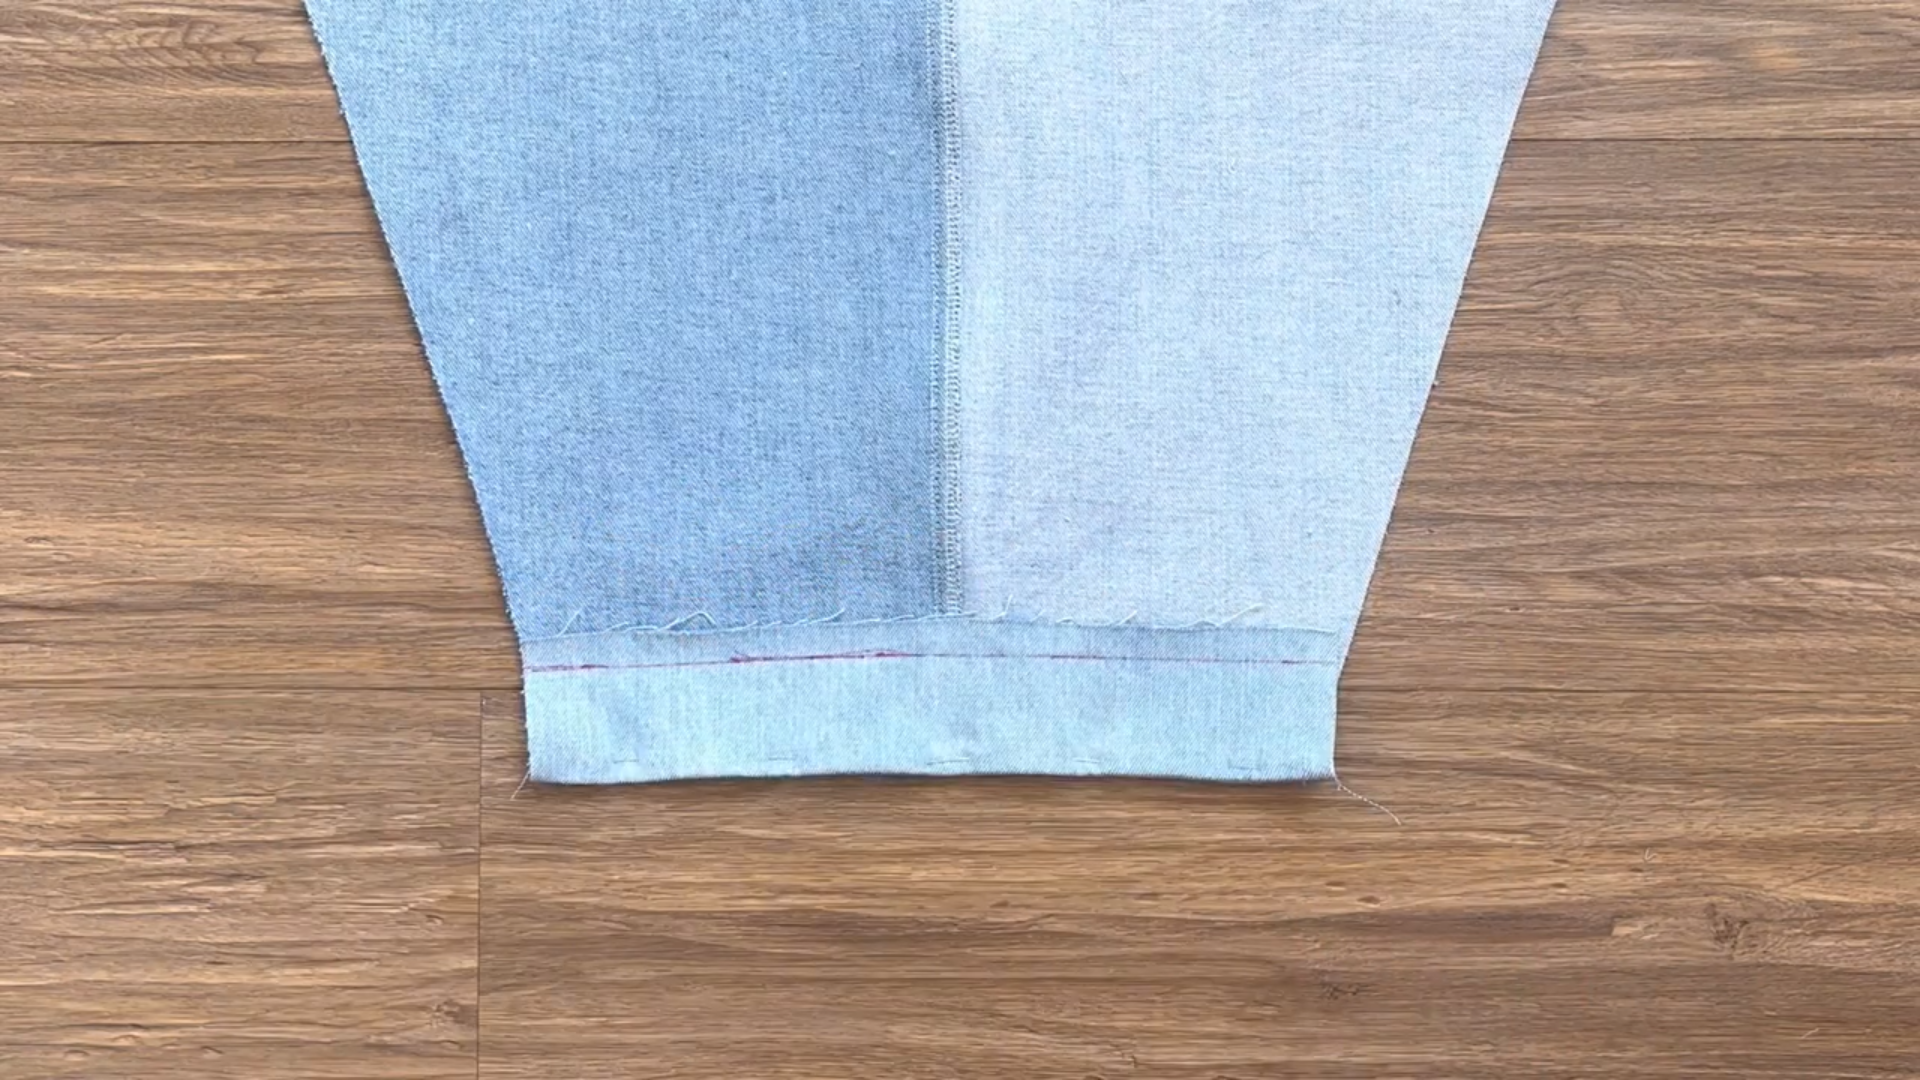
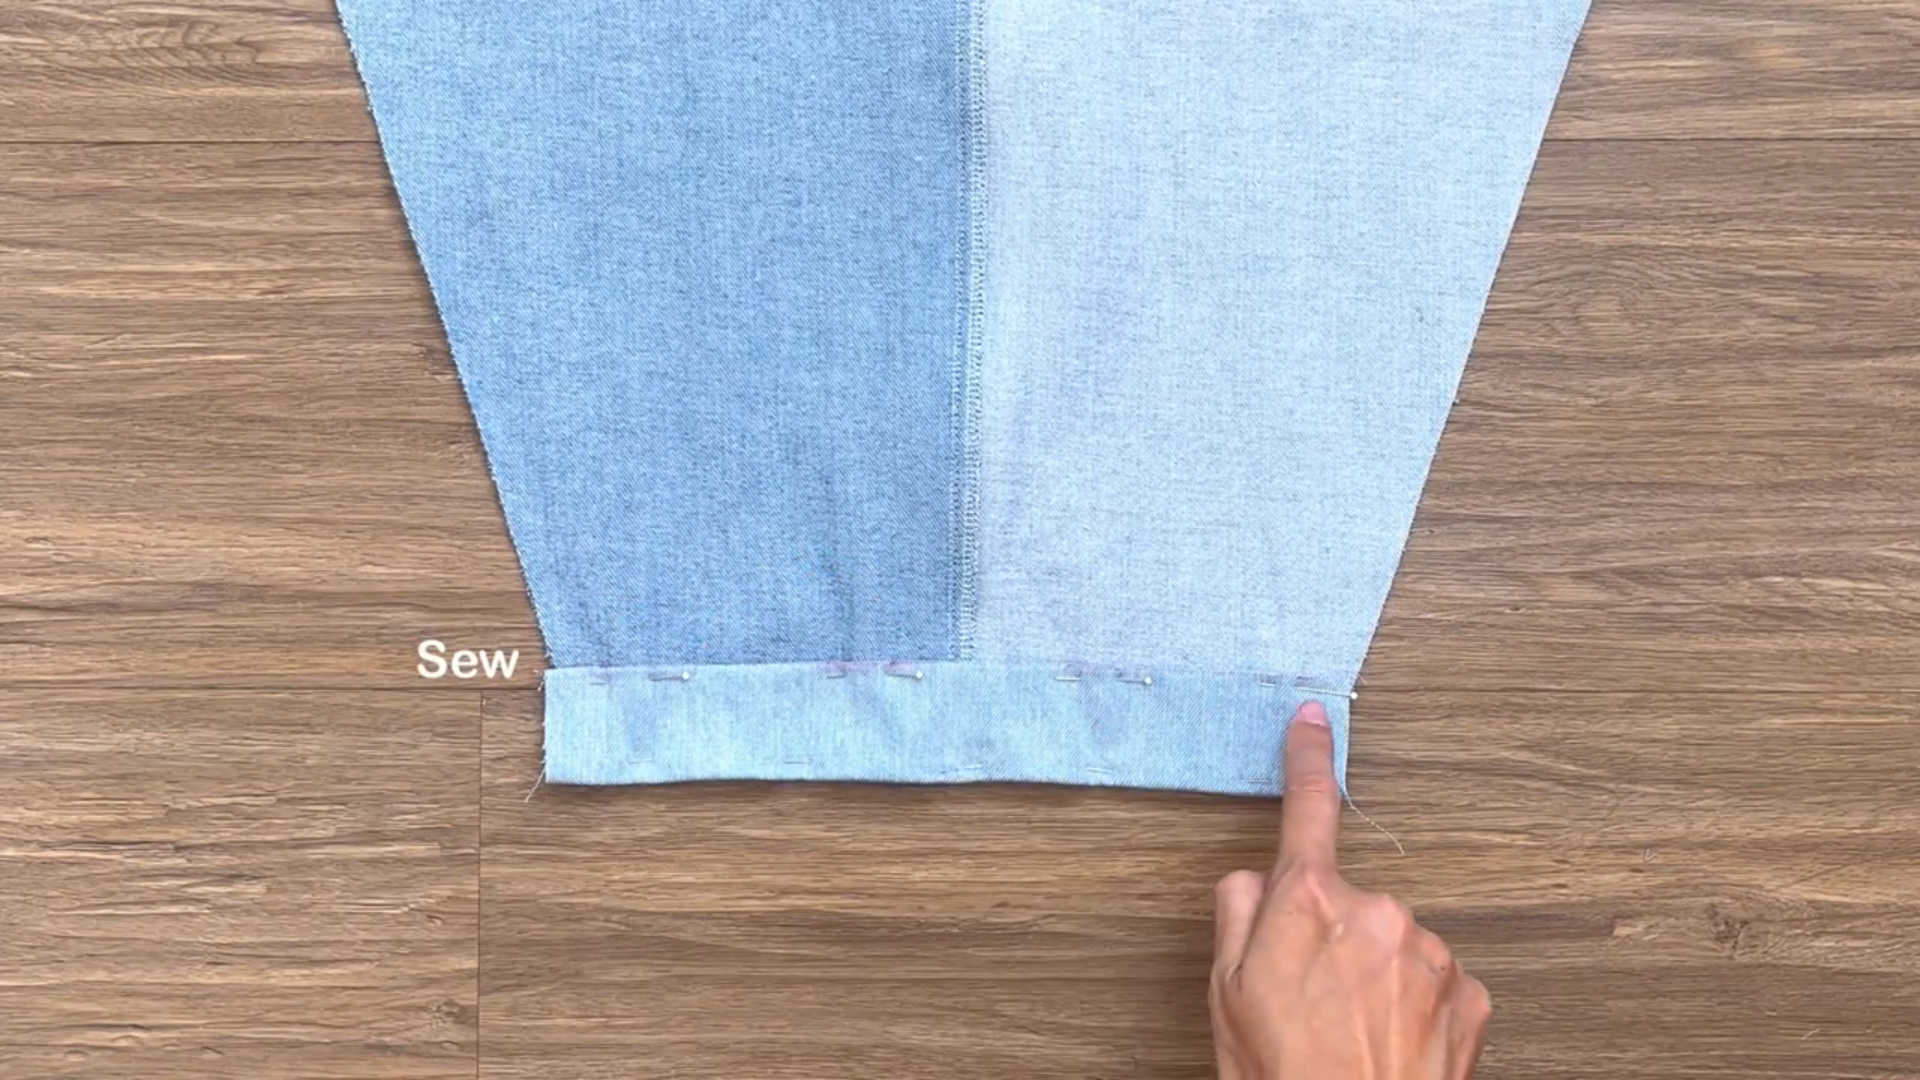
Draw a line 3 centimeters above the bottom edge of the pants legs.
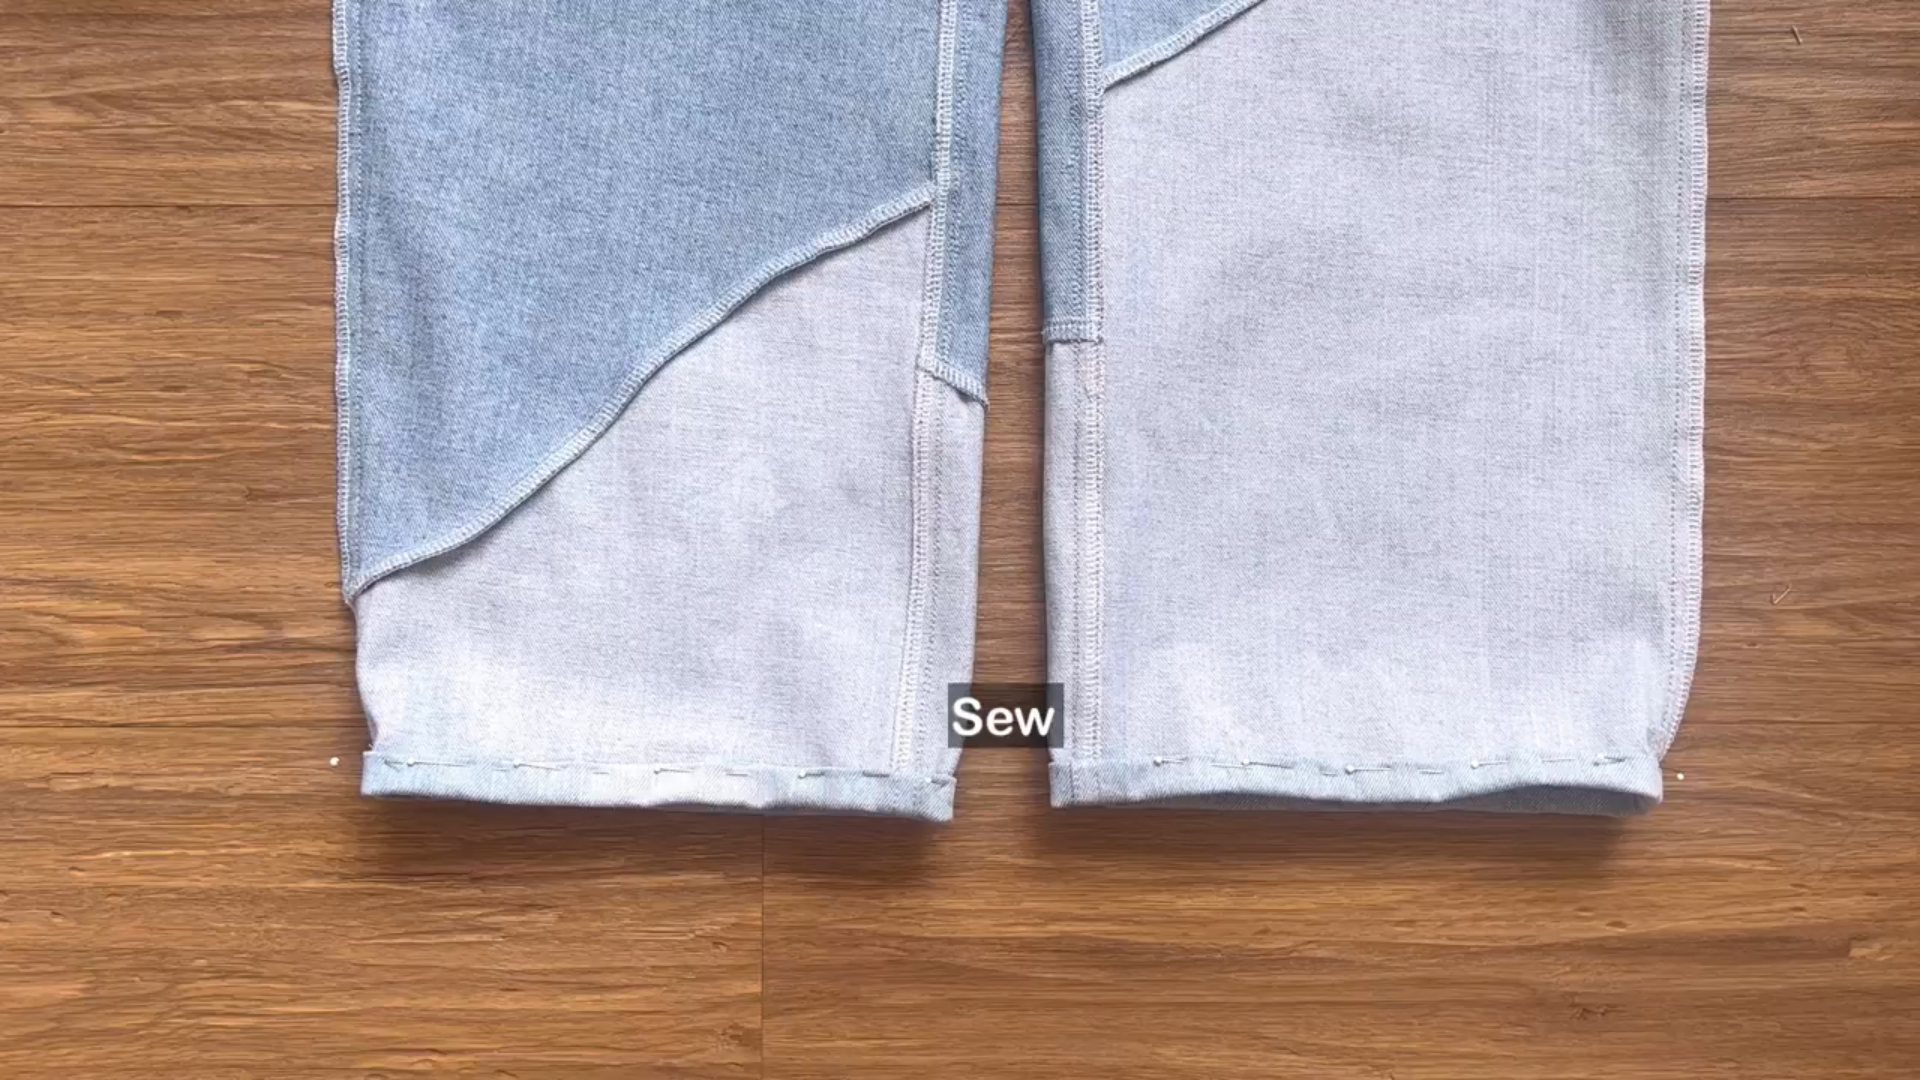
Fold the fabric twice, following the marked line. Pin the hem in place. Sew to secure the hem.
THE FRONT BODICE
Cut out the front bodice pieces.
Connect the two main pieces of the front bodice by the middle line.
Cut a rectangular strip of fabric that's 6 centimeters wide and 22 cm long.
Attach one end of this strip to the top edge of the bodice.
Fold the raw edge of the binding strip inward and sew it down to create a clean finish.
Mark a line 1 centimeter below the folded edge of the binding.
Fold the fabric along this line and sew it down to complete the top line.

Make another seam over the first seam to secure the fabric in place.
To neaten the side seams of the bodice, fold the raw edge inward twice and sew the folded edge.
Add a small pocket to the center of the front bodice.
THE BACK BODICE

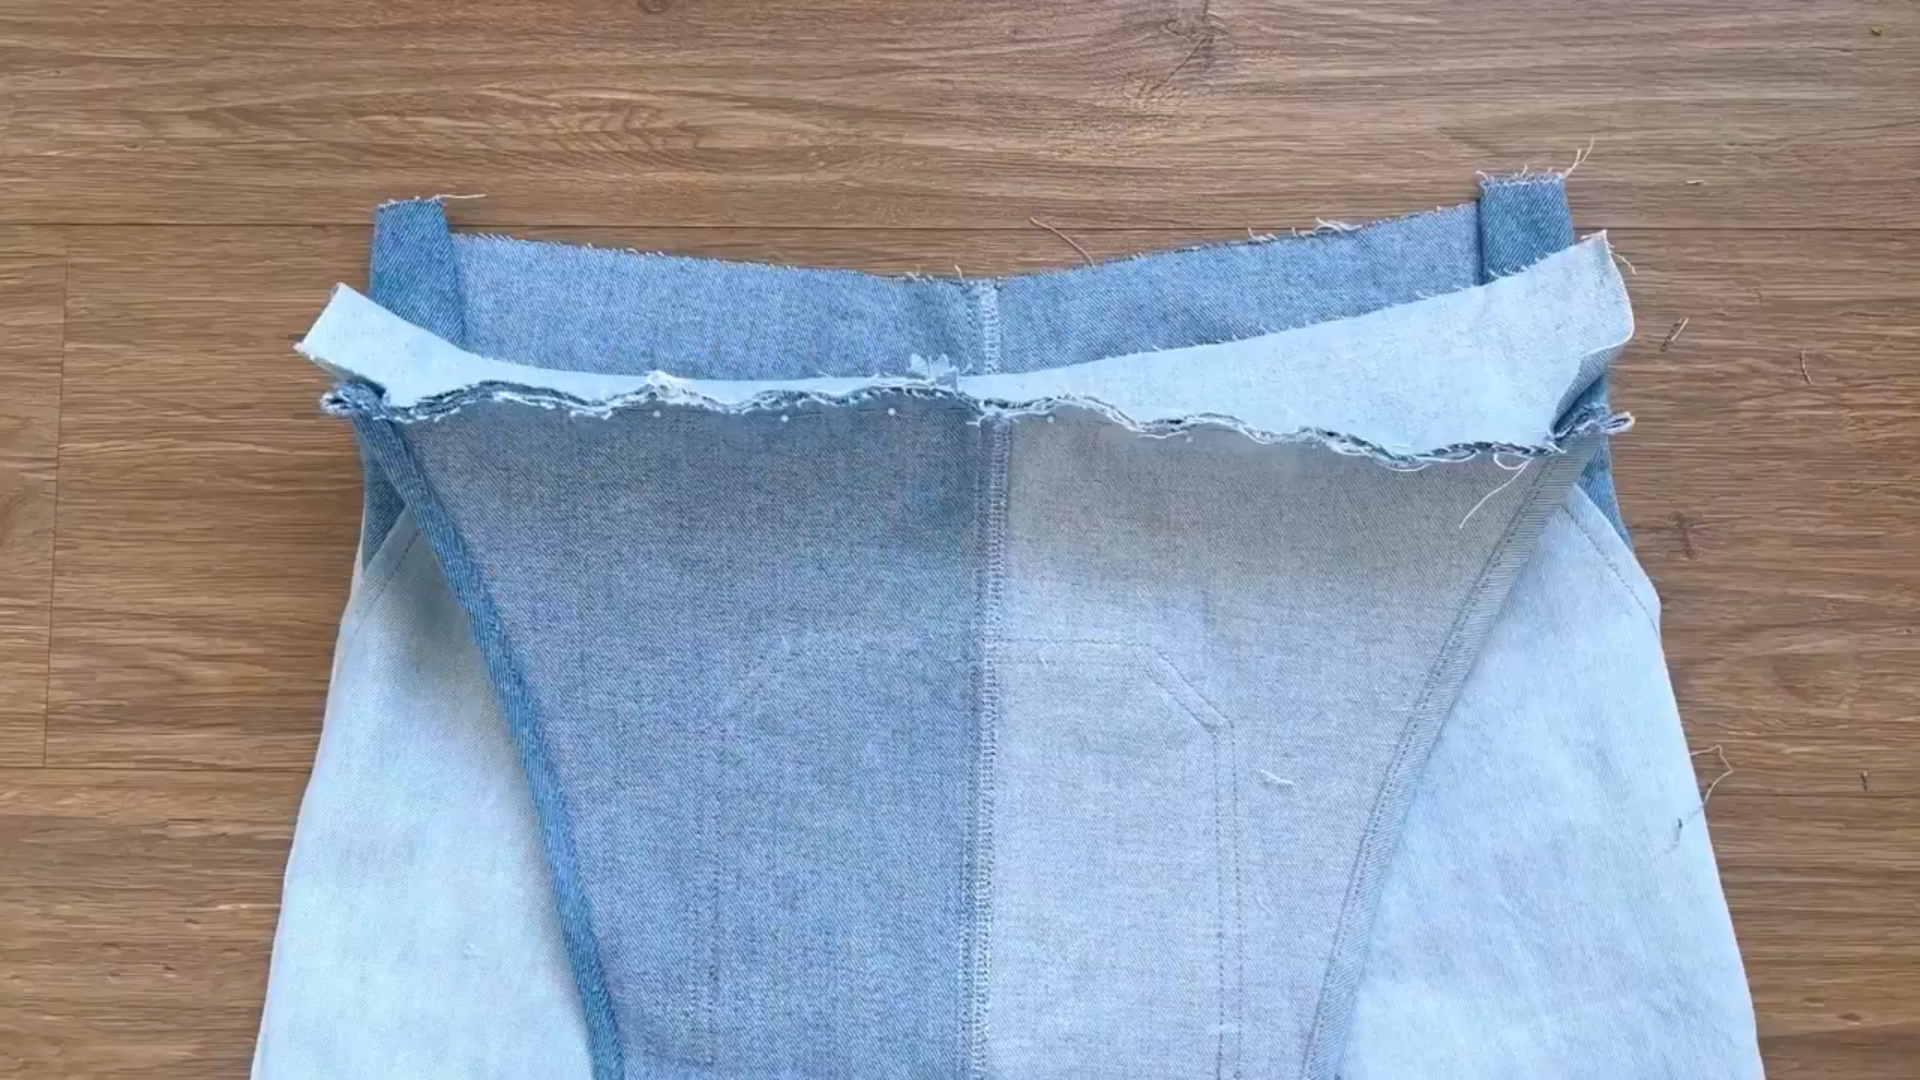
Cut out the pieces for the back bodice.
Connect the two main pieces of the back bodice by the middle line.
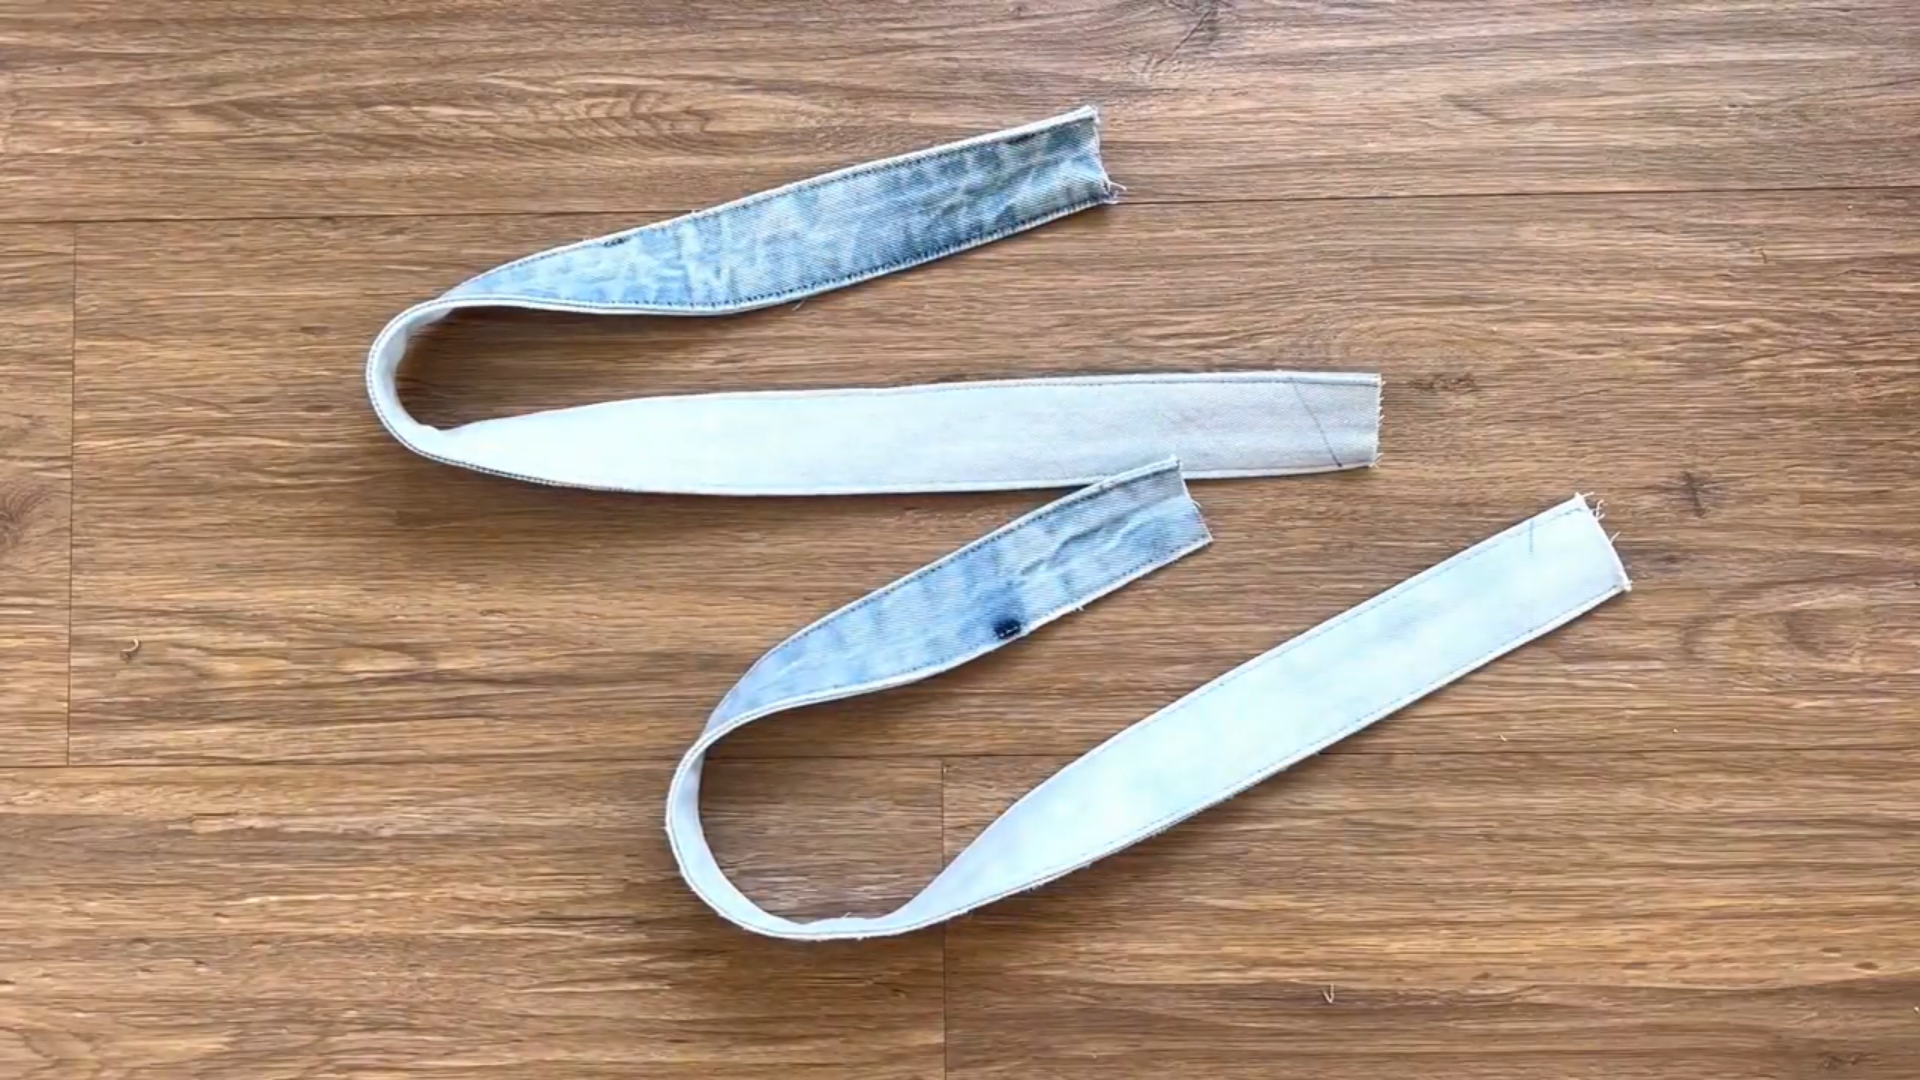
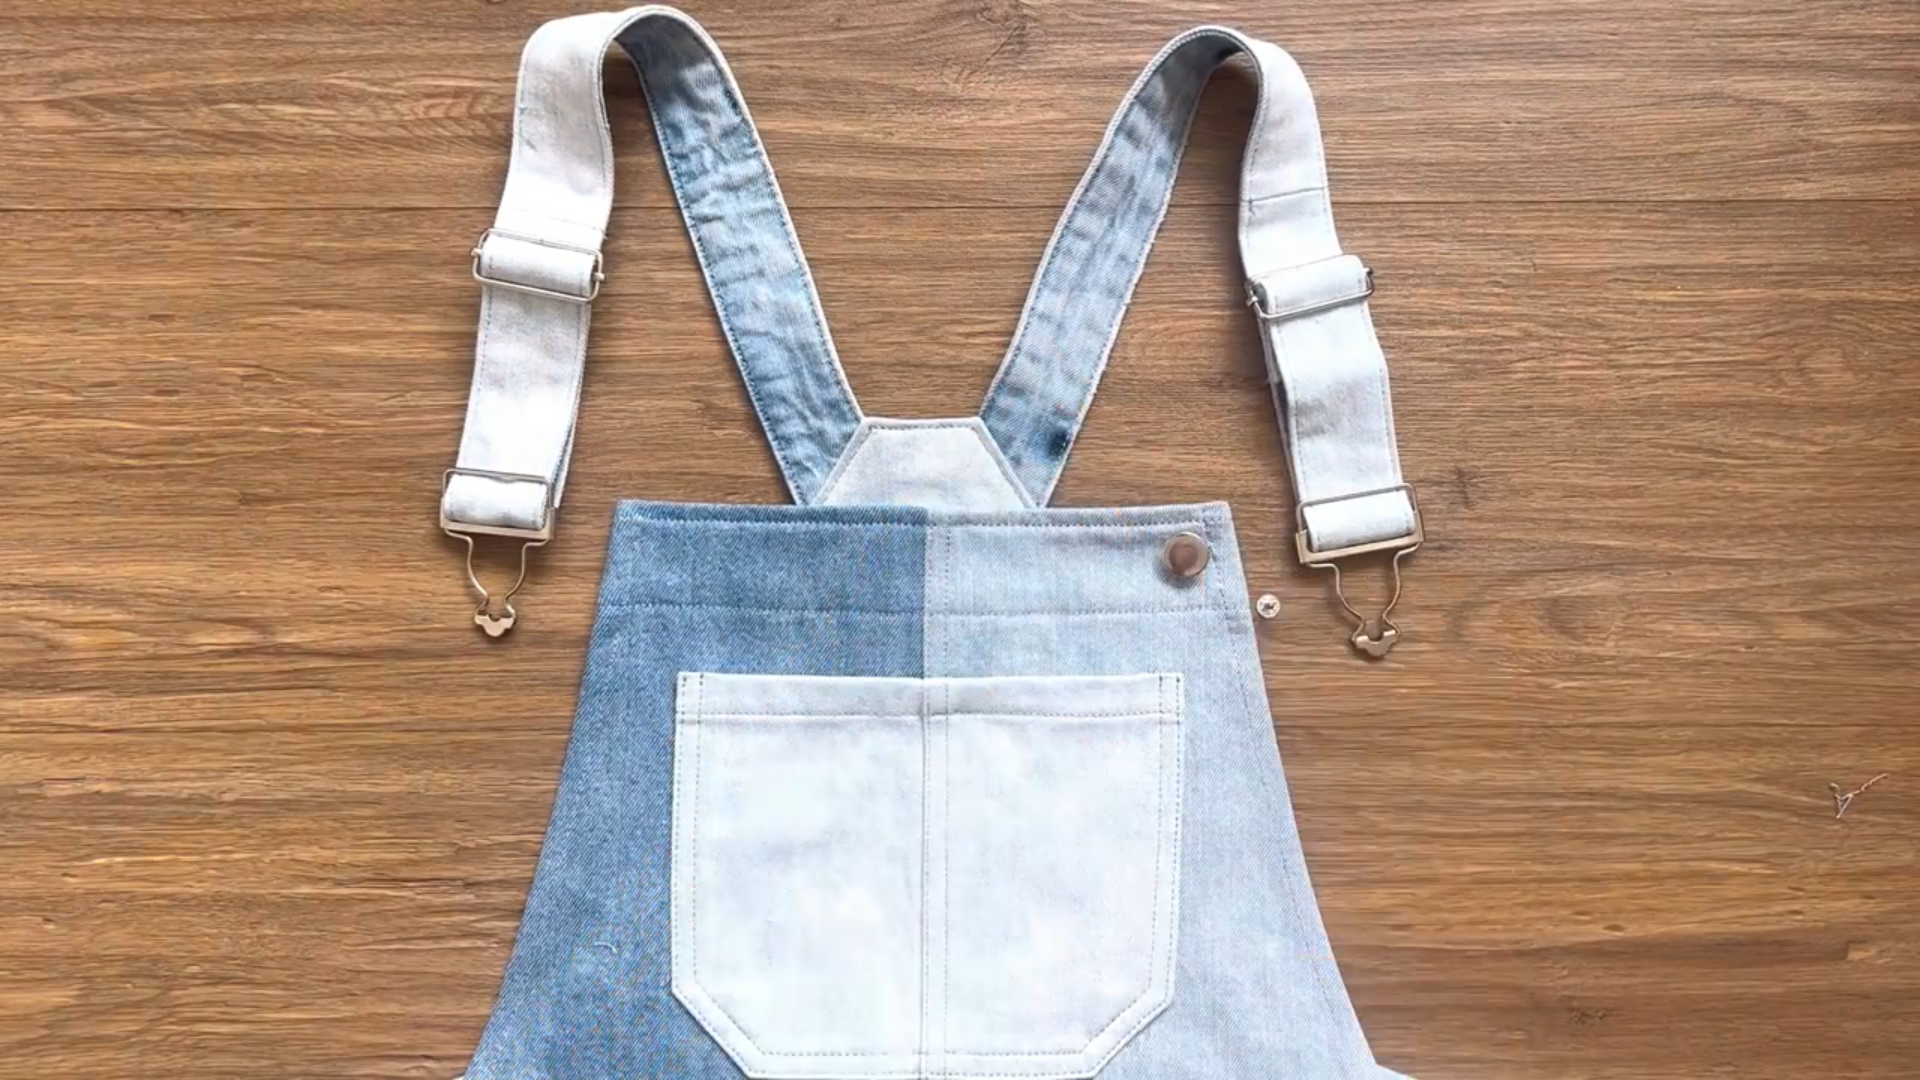
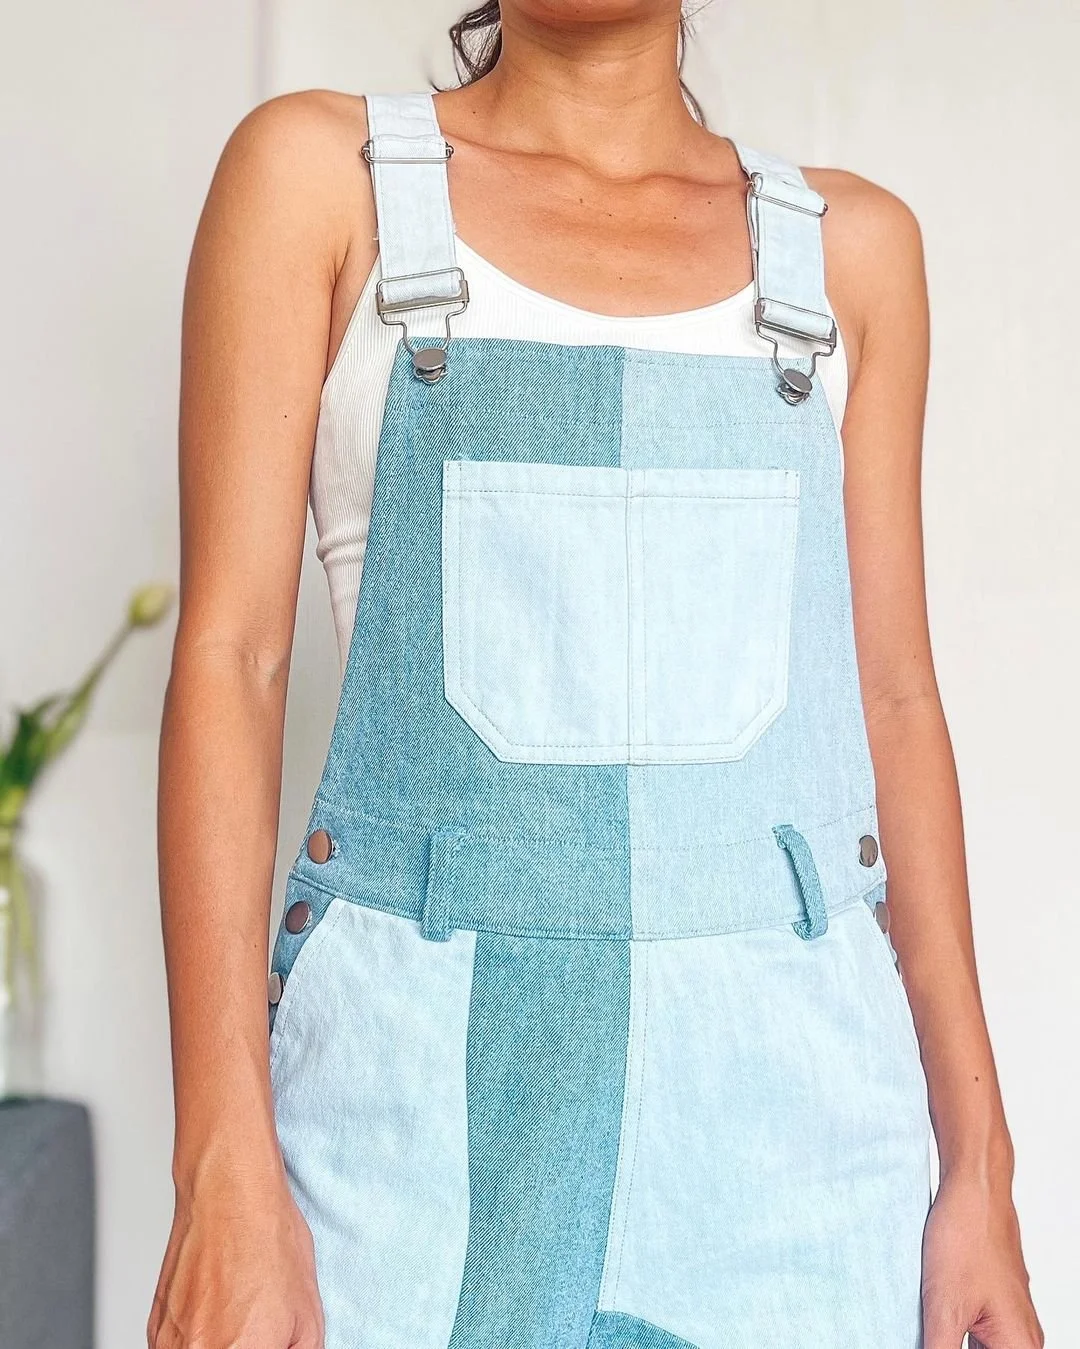
Use the waistband from the jeans to create the shoulder straps for our jumpsuit.
Similar to the front bodice, fold the raw edges of the side seams inward twice and sew them in place to create a clean finish.
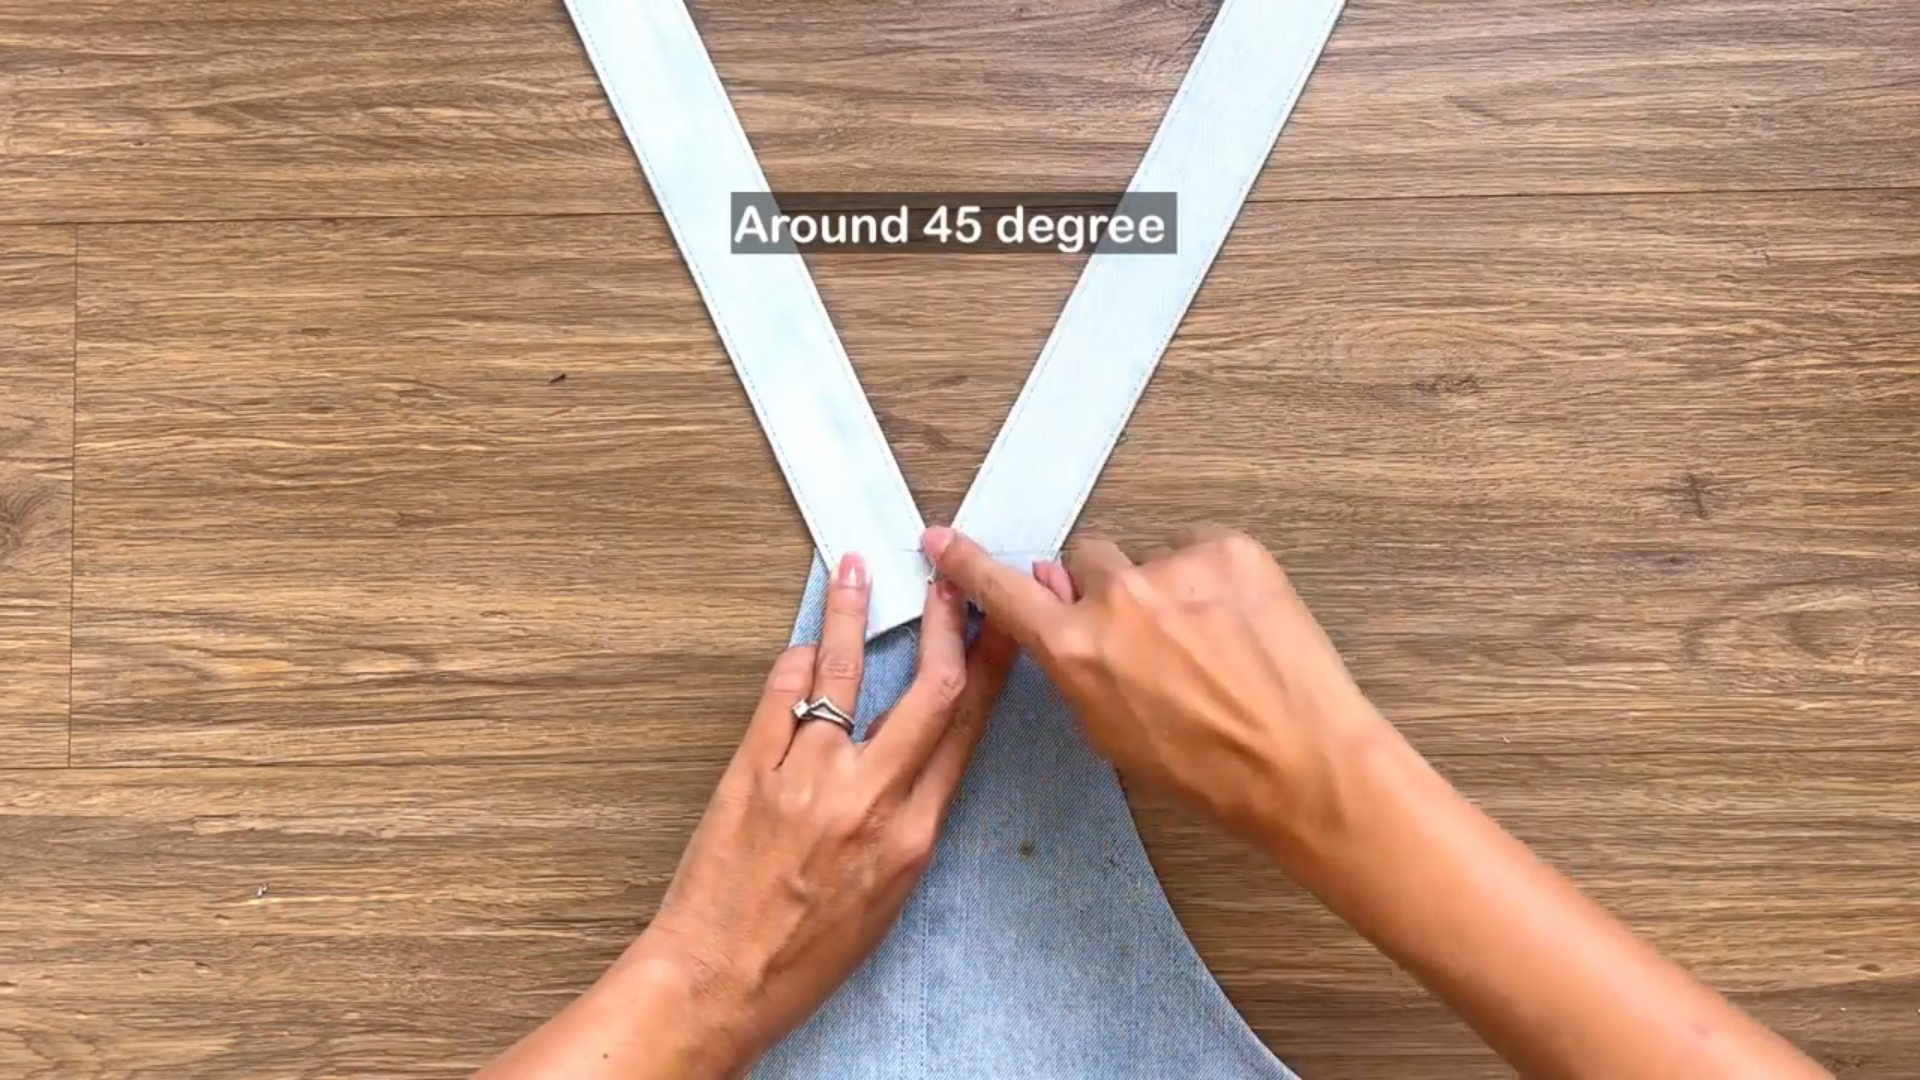
Attach one end of each strap to the top edge of the back bodice.
Ensure that the angle between the two straps forms a 45-degree angle.
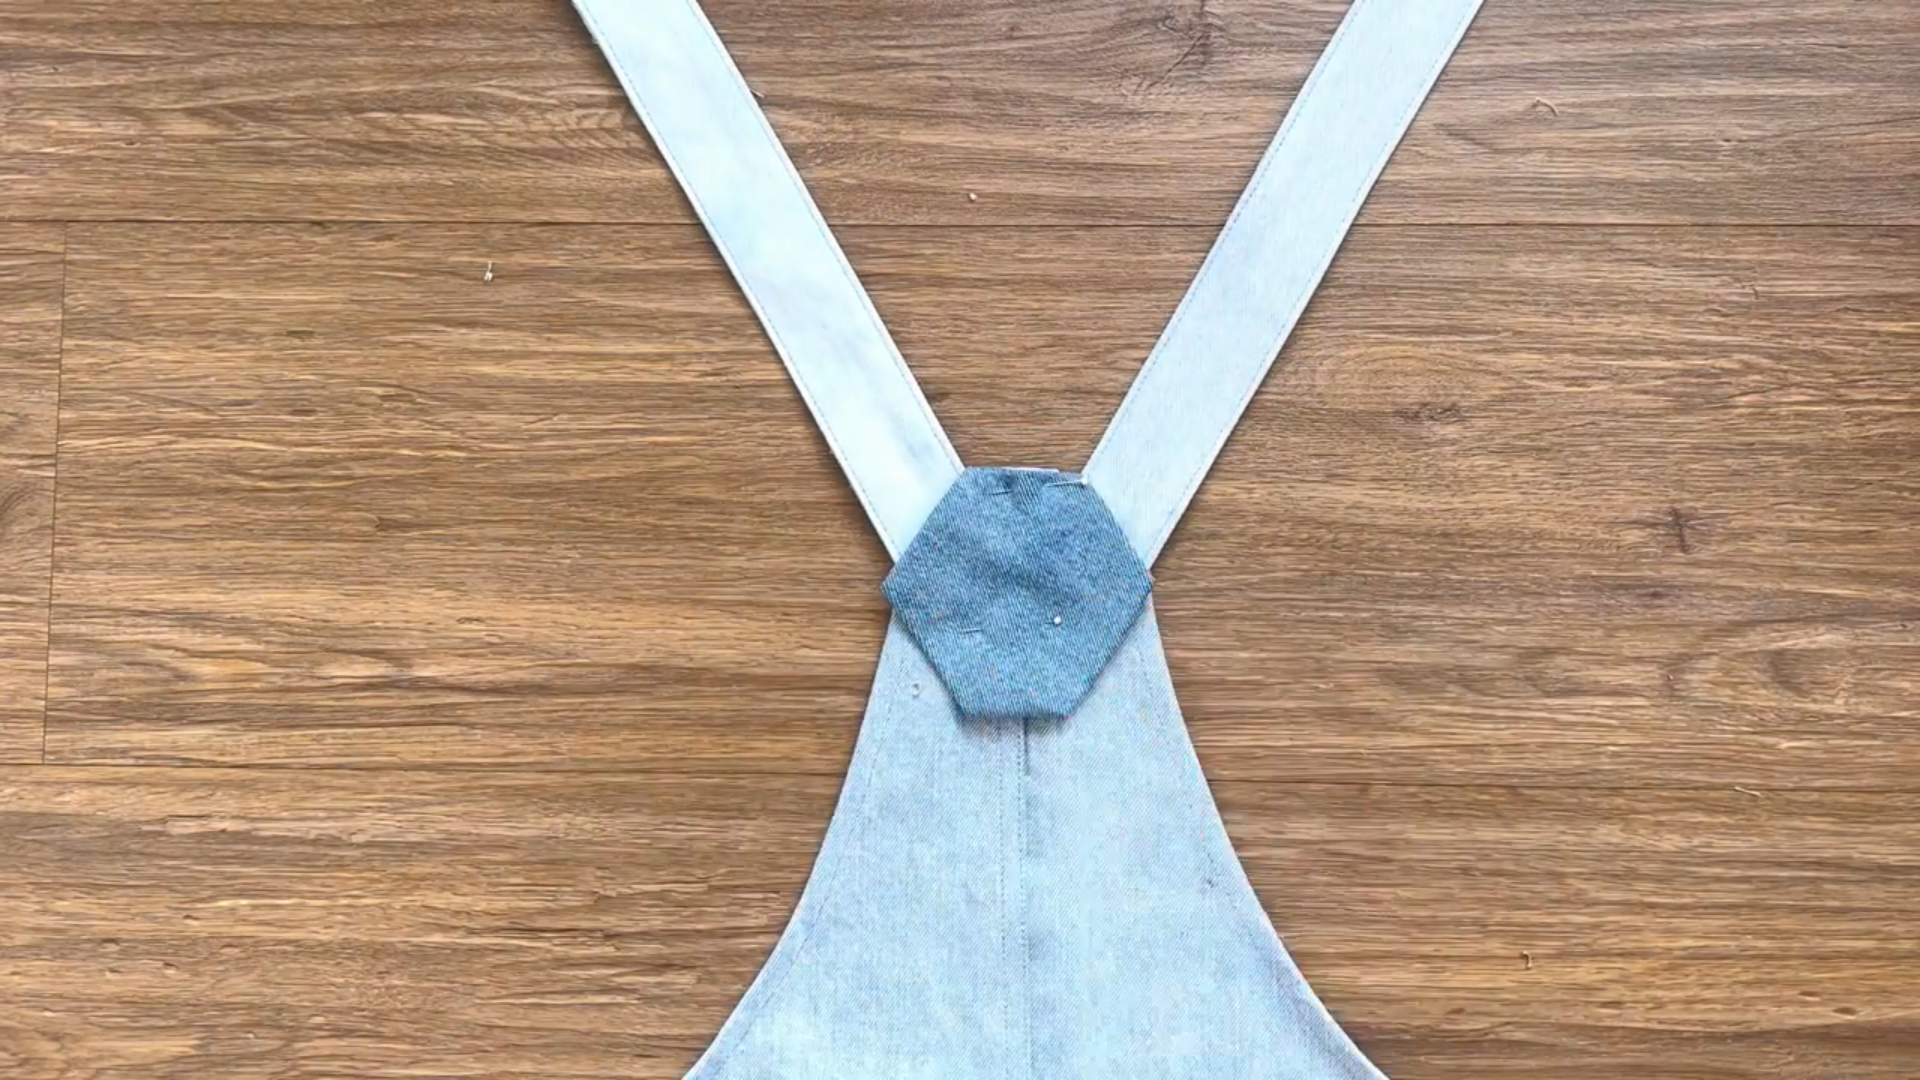
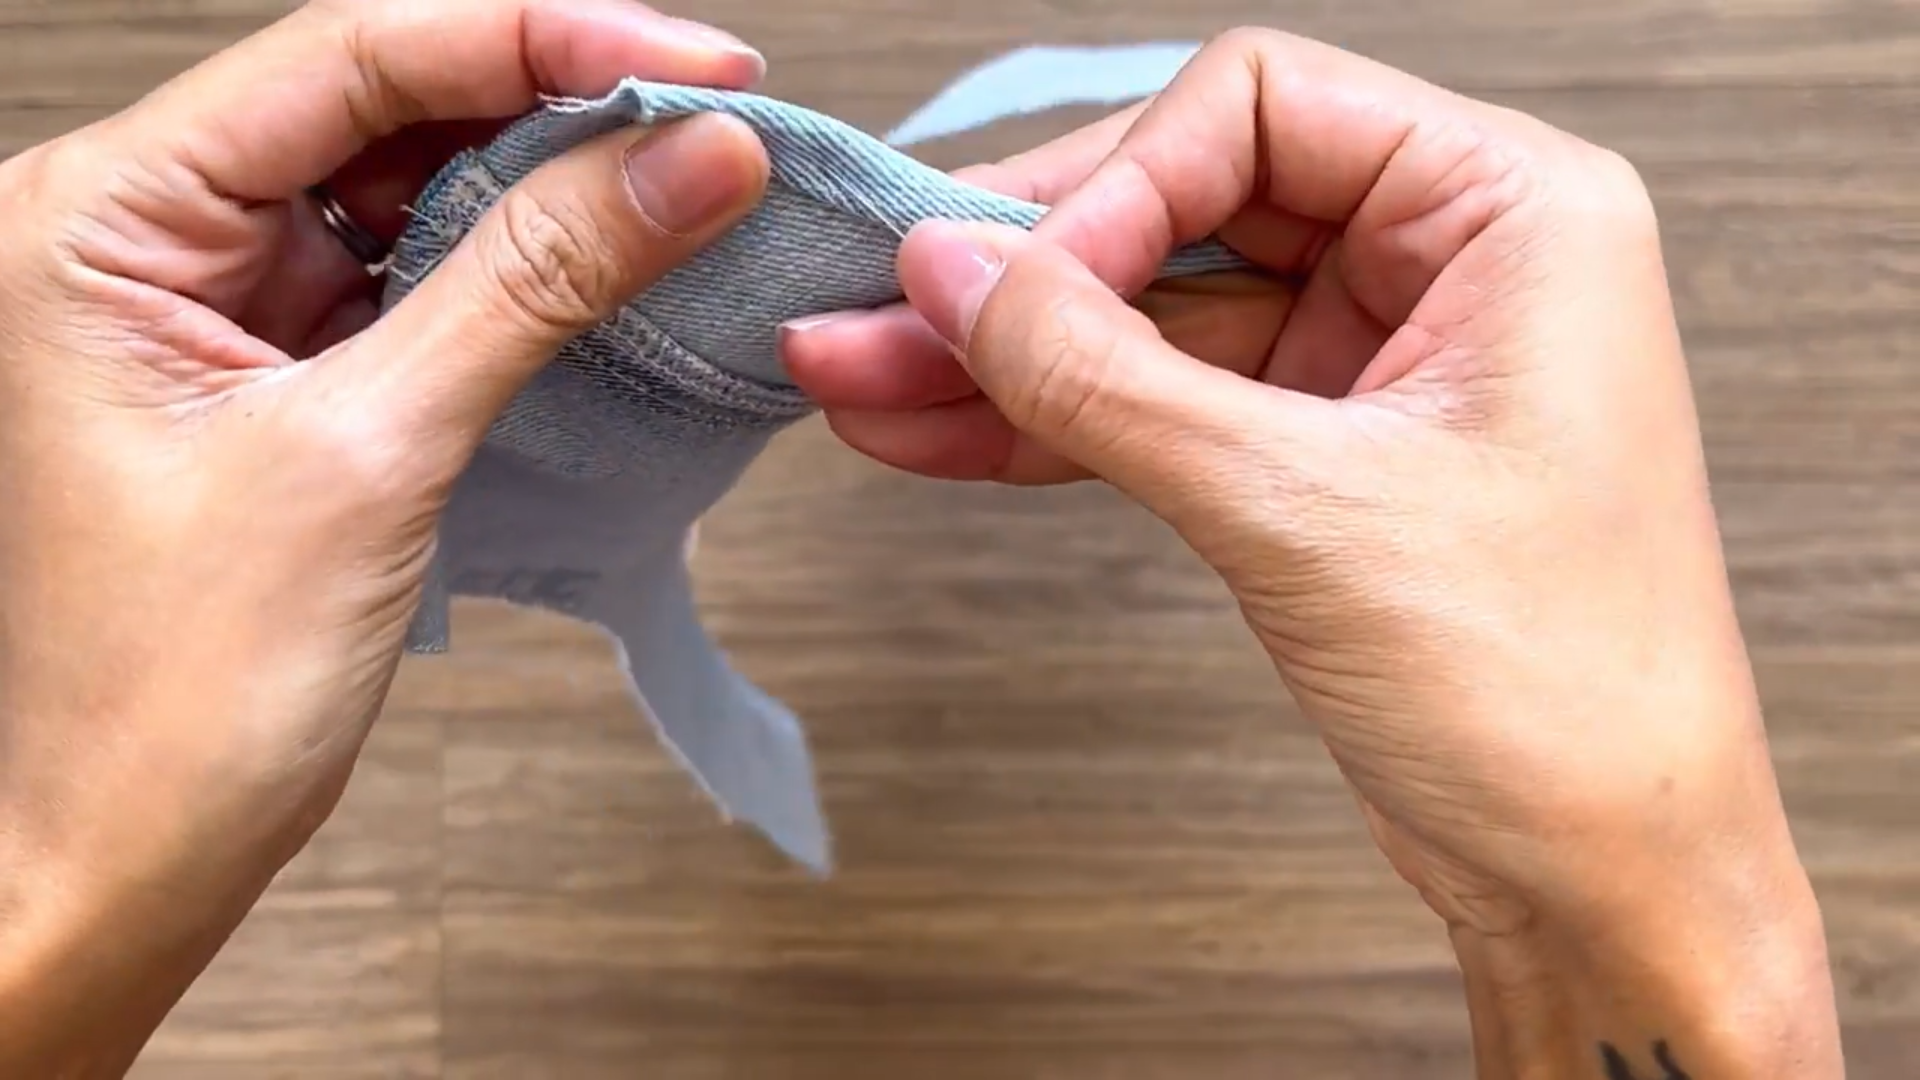
To conceal the raw ends of the shoulder straps, we'll use two pentagon-shaped fabric pieces.
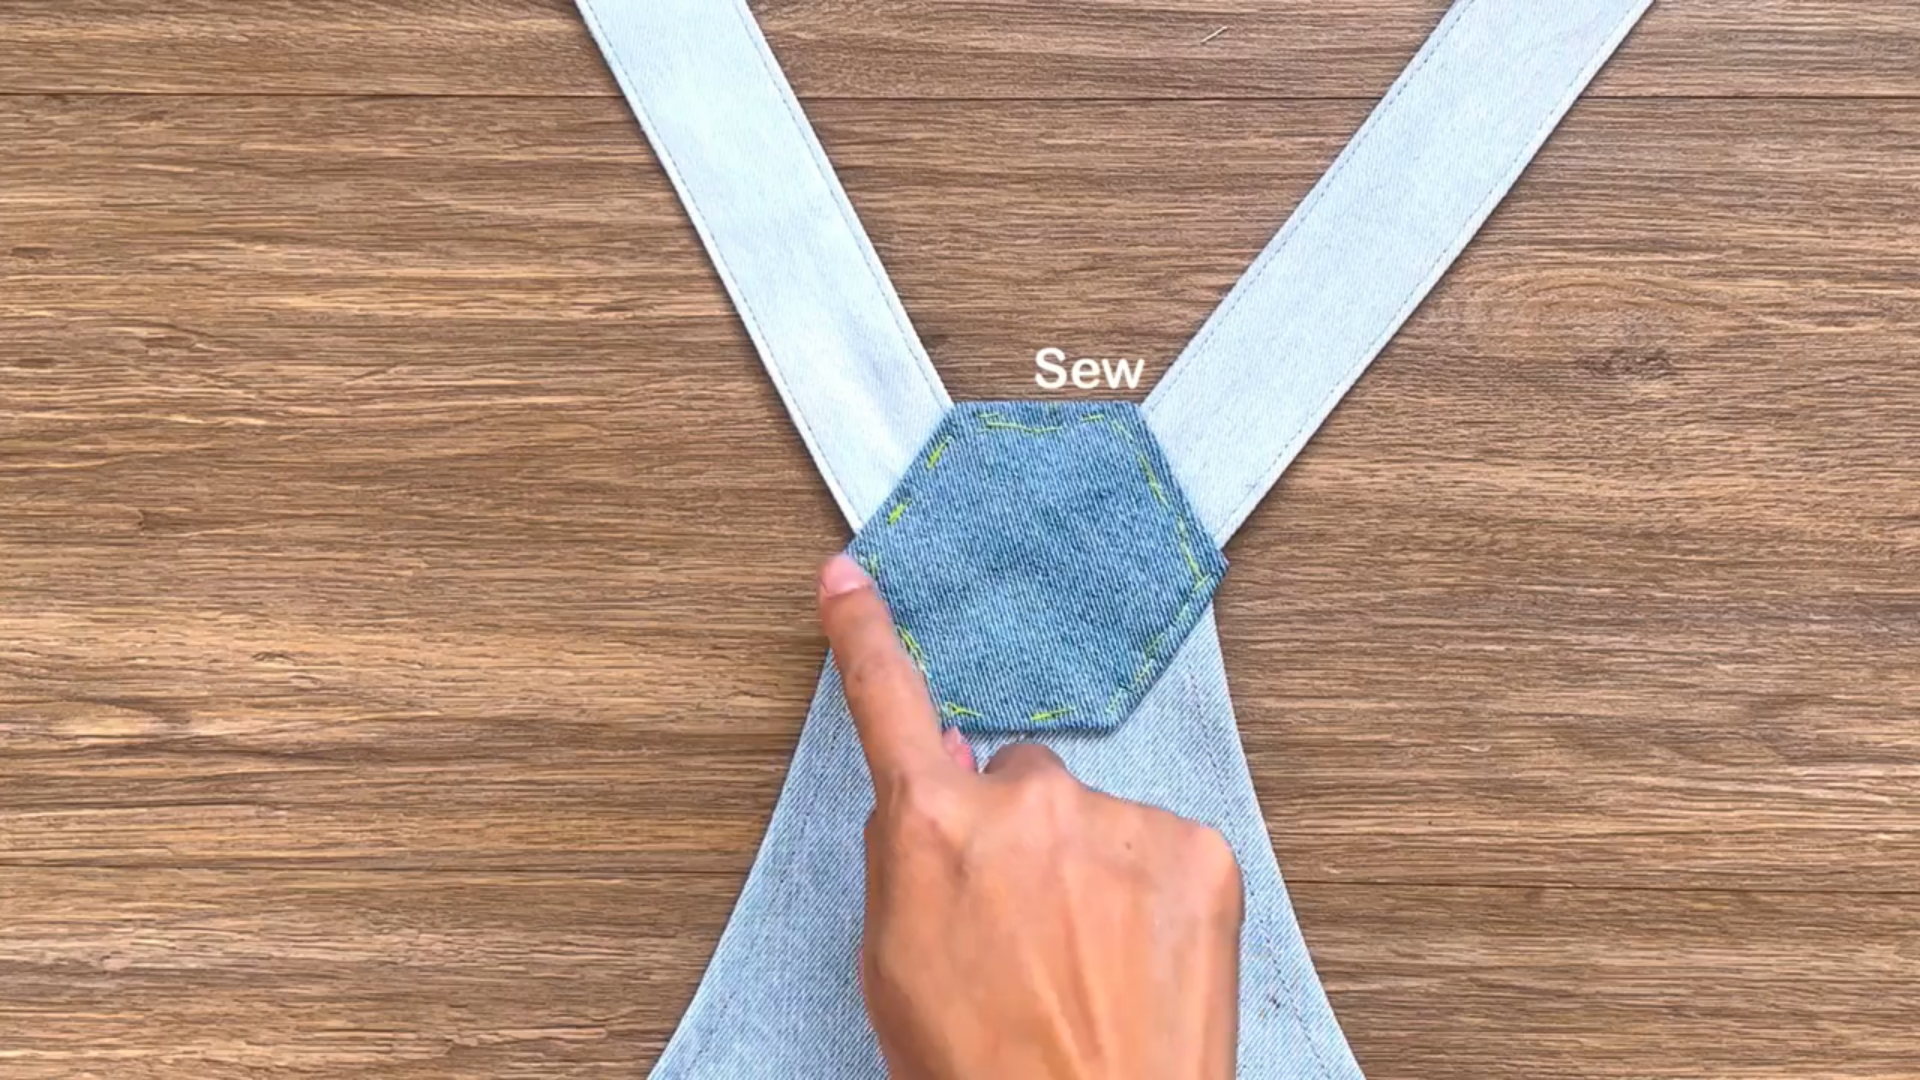
These pieces will be sewn over the ends of the straps, providing a clean finish.
CONNECT THE BODICE TO THE PANTS
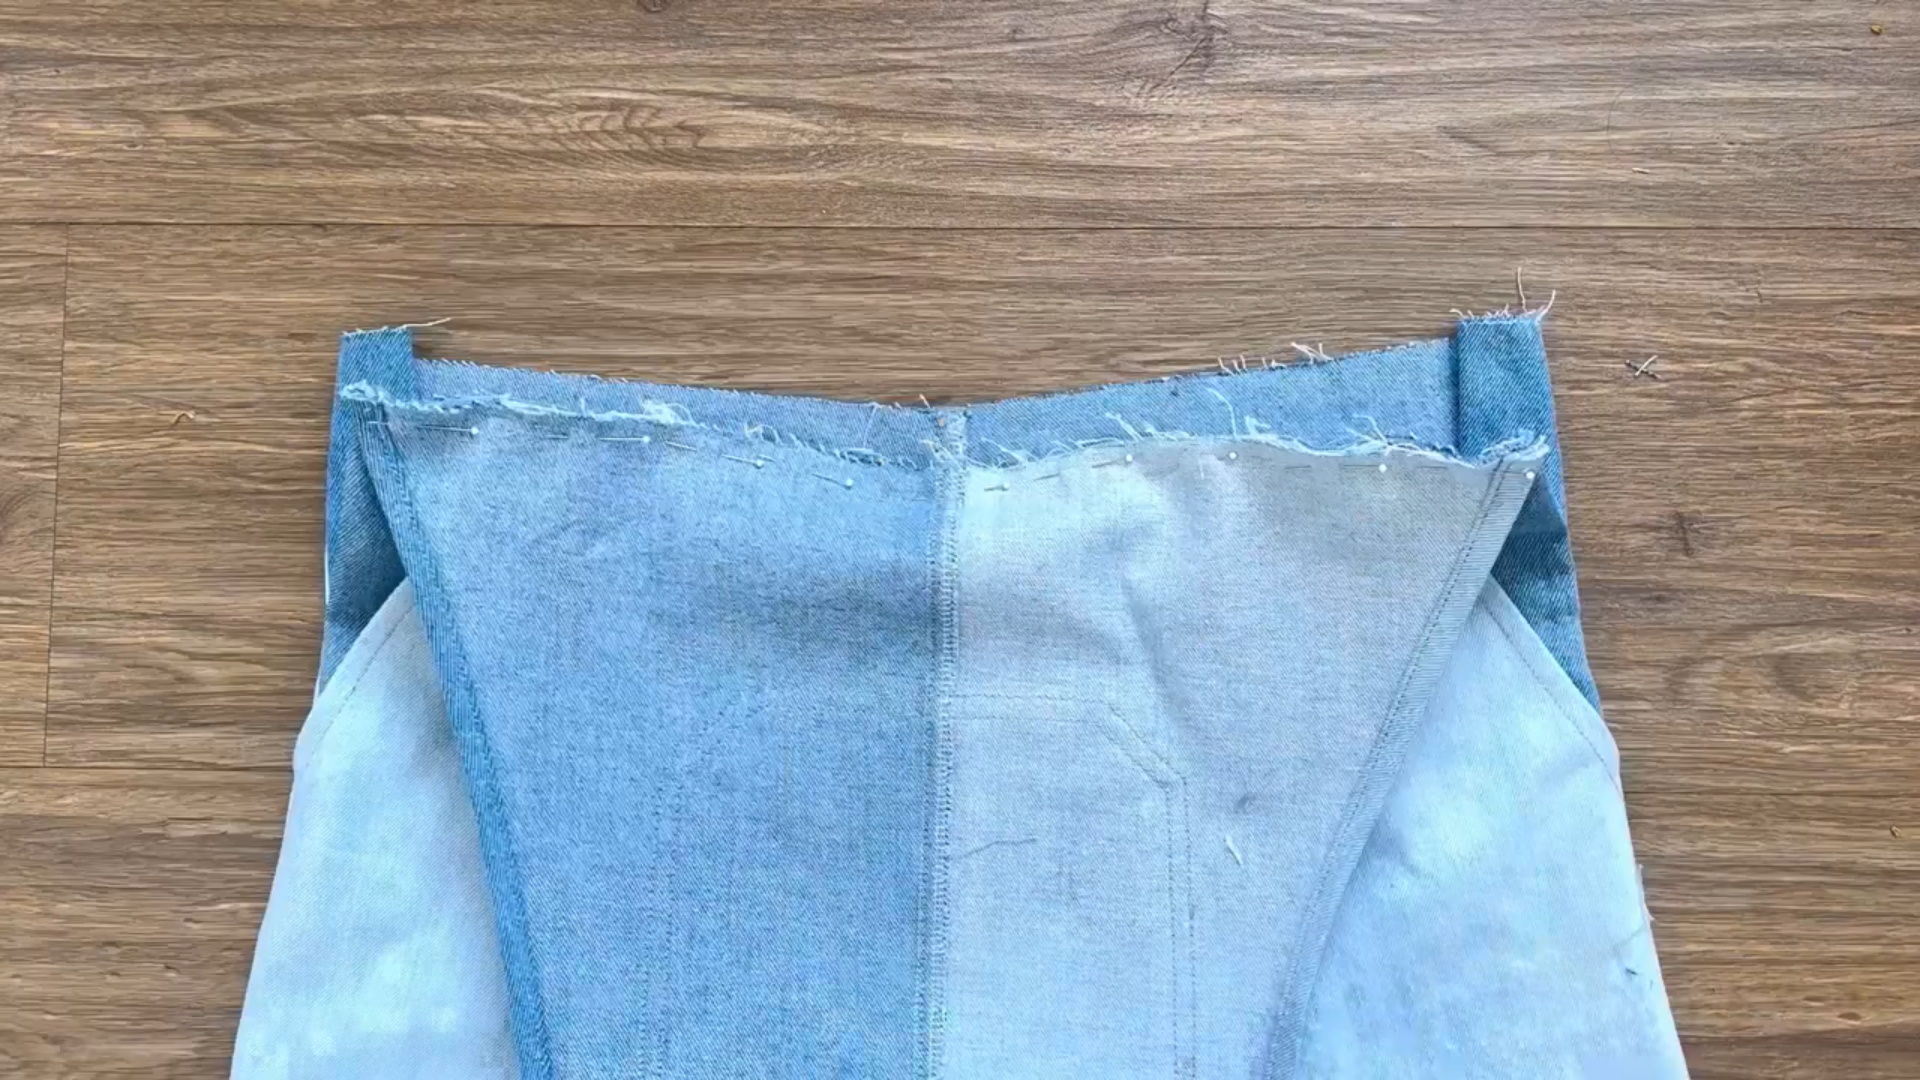
Pin the front bodice to the front pants, ensuring they align correctly.

Cut a rectangular strip of fabric that's 6 cm wide and 38 cm long (adjust the length to fit your waist).
Pin one long edge of the waistband to the top edge of the bodice and pants.
Before sewing the waistband, attach a belt loop to the center front of the waistband.
Sew the waistband to the bodice and pants, ensuring a strong and secure connection.
Fold the raw edge of the waistband inward and sew it down to create a clean finish.
Sew the other ends of the belt loops in place.
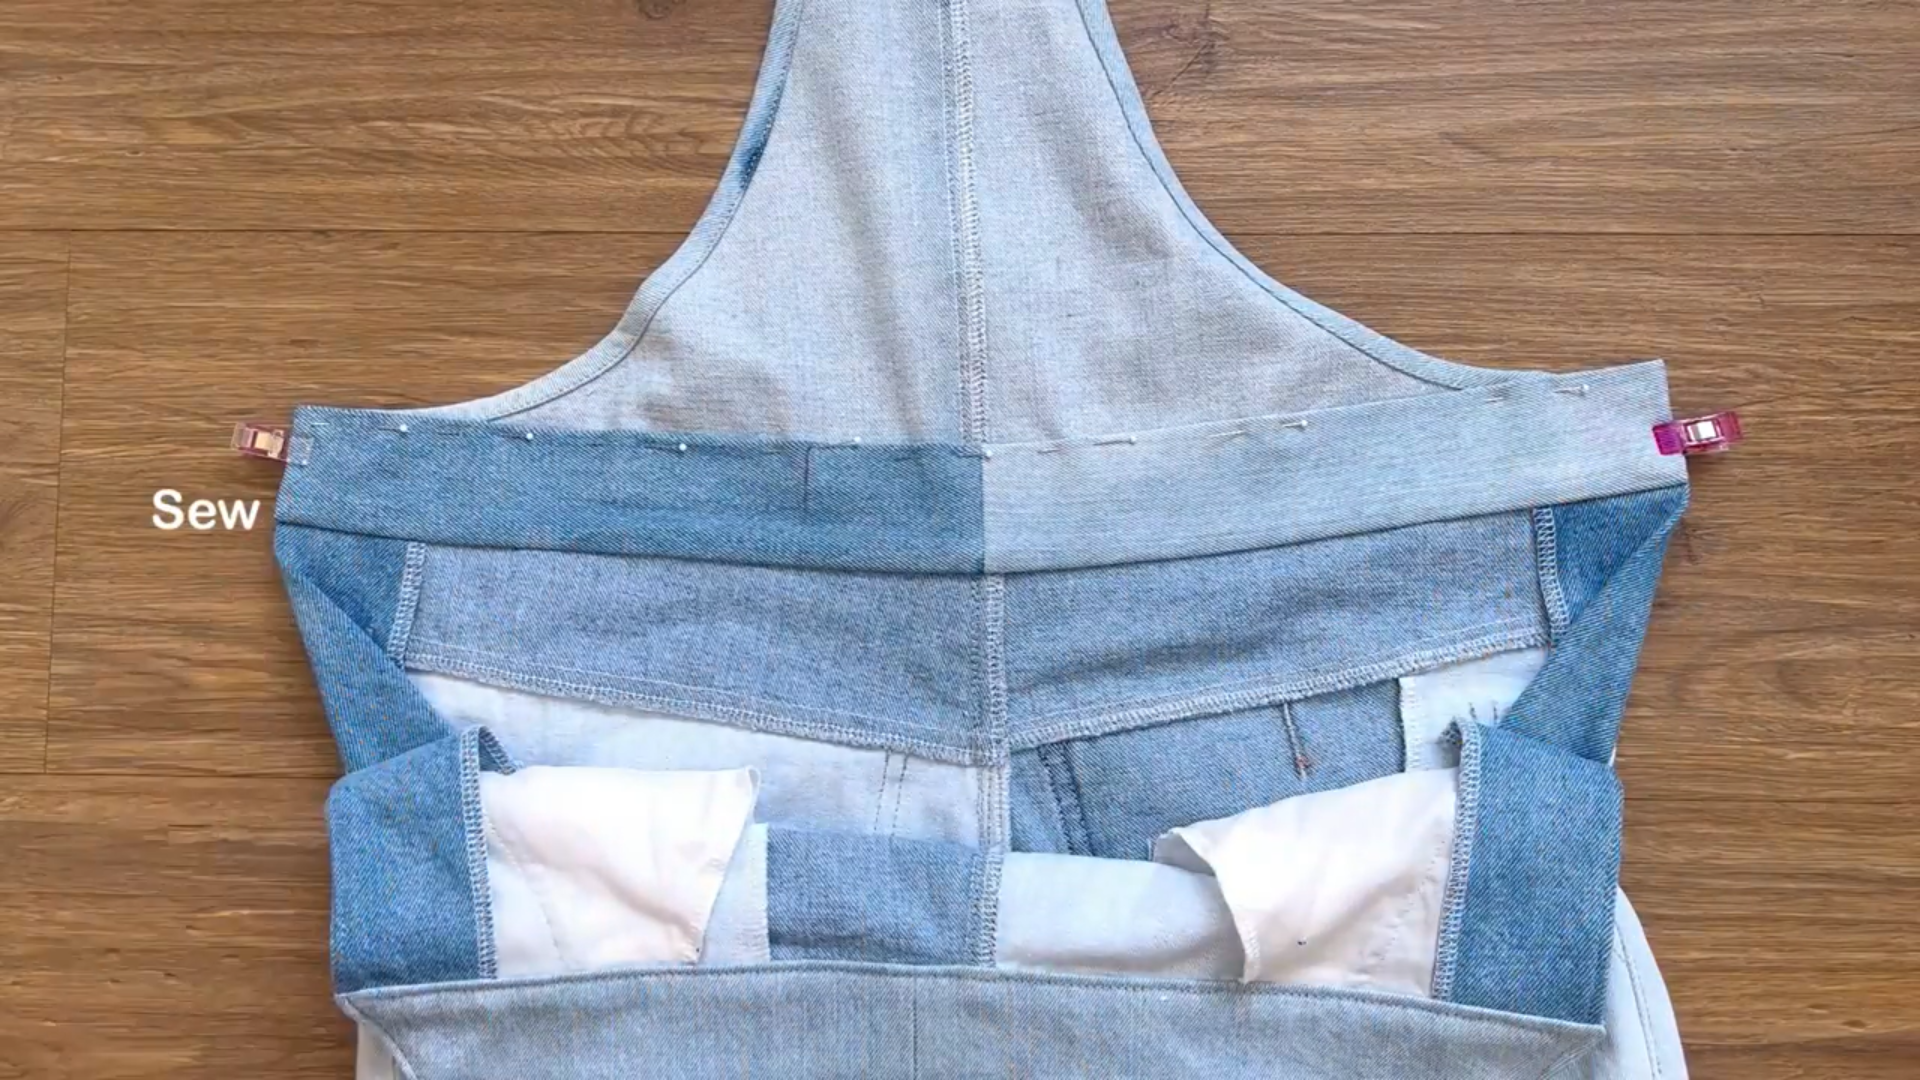
Repeat the same process for the back bodice and back pants.
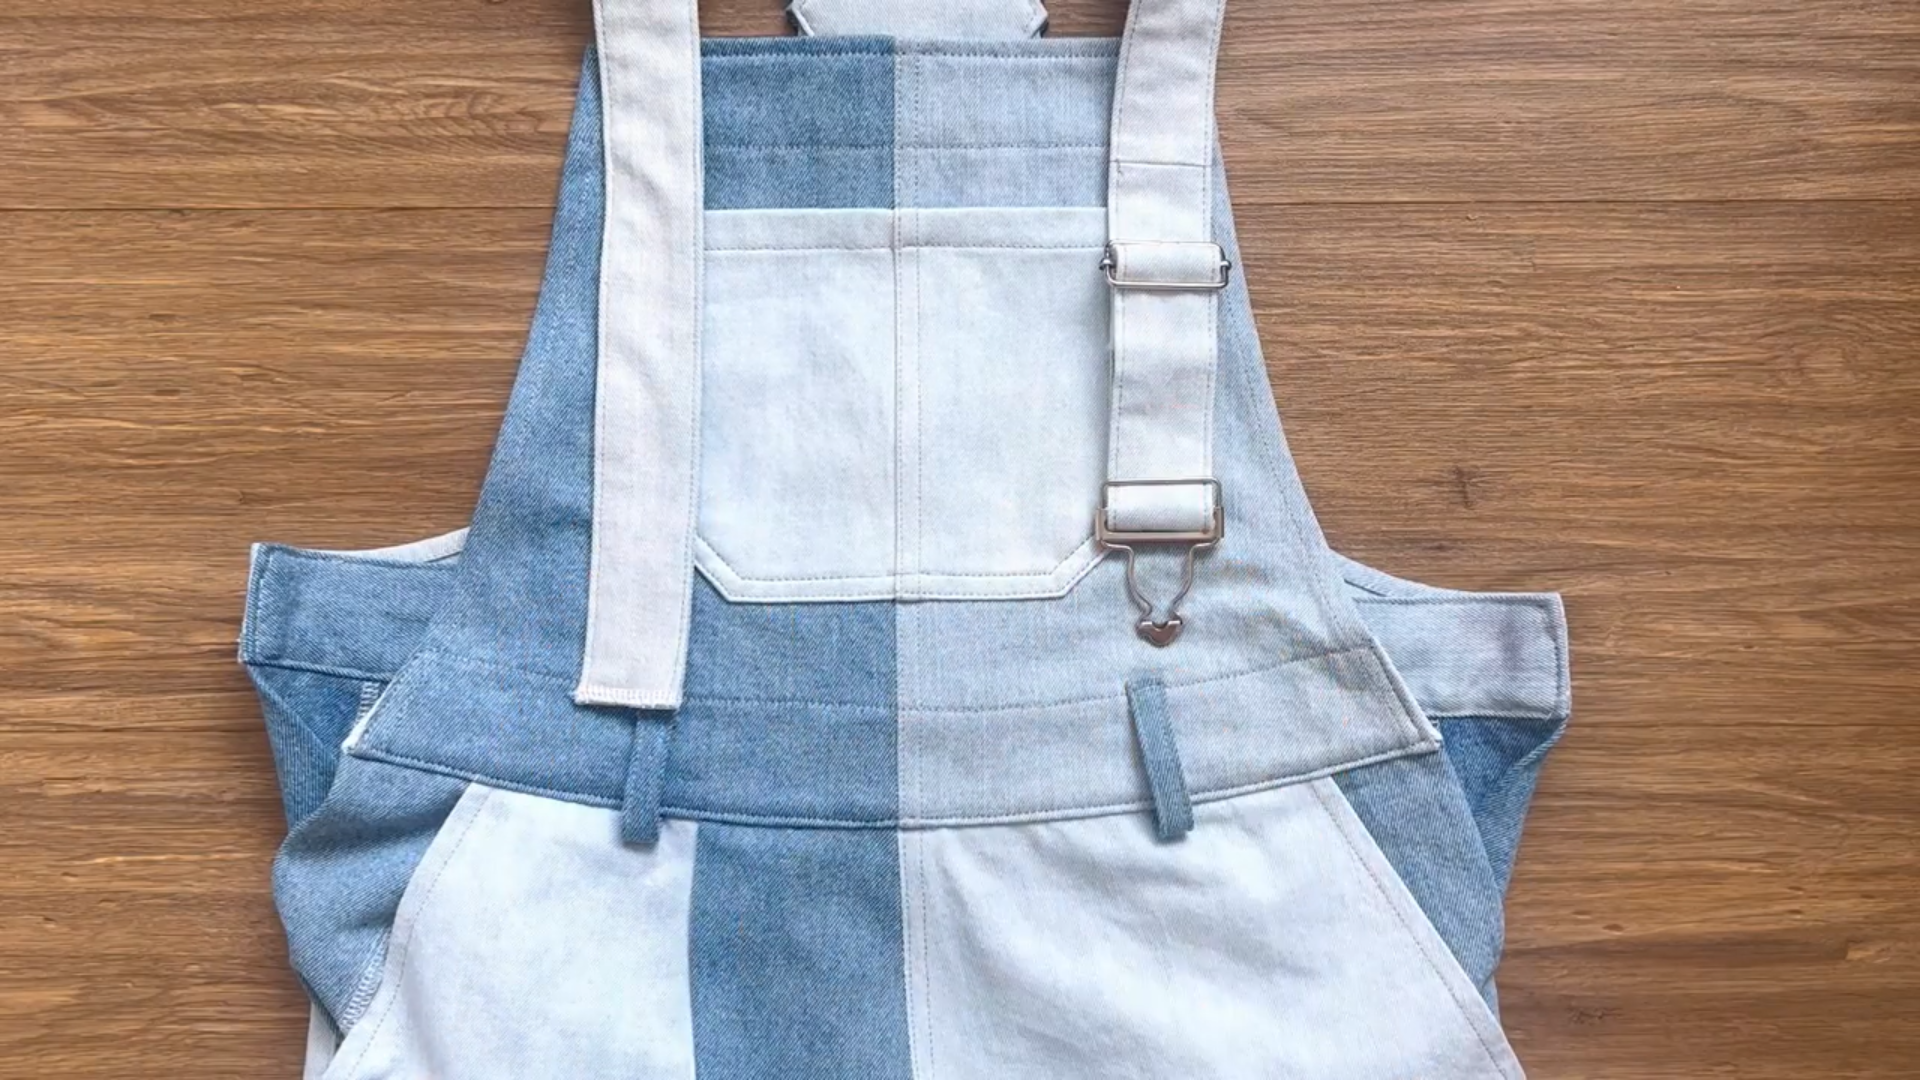
Attach adjustable buckles to the ends of the shoulder straps.
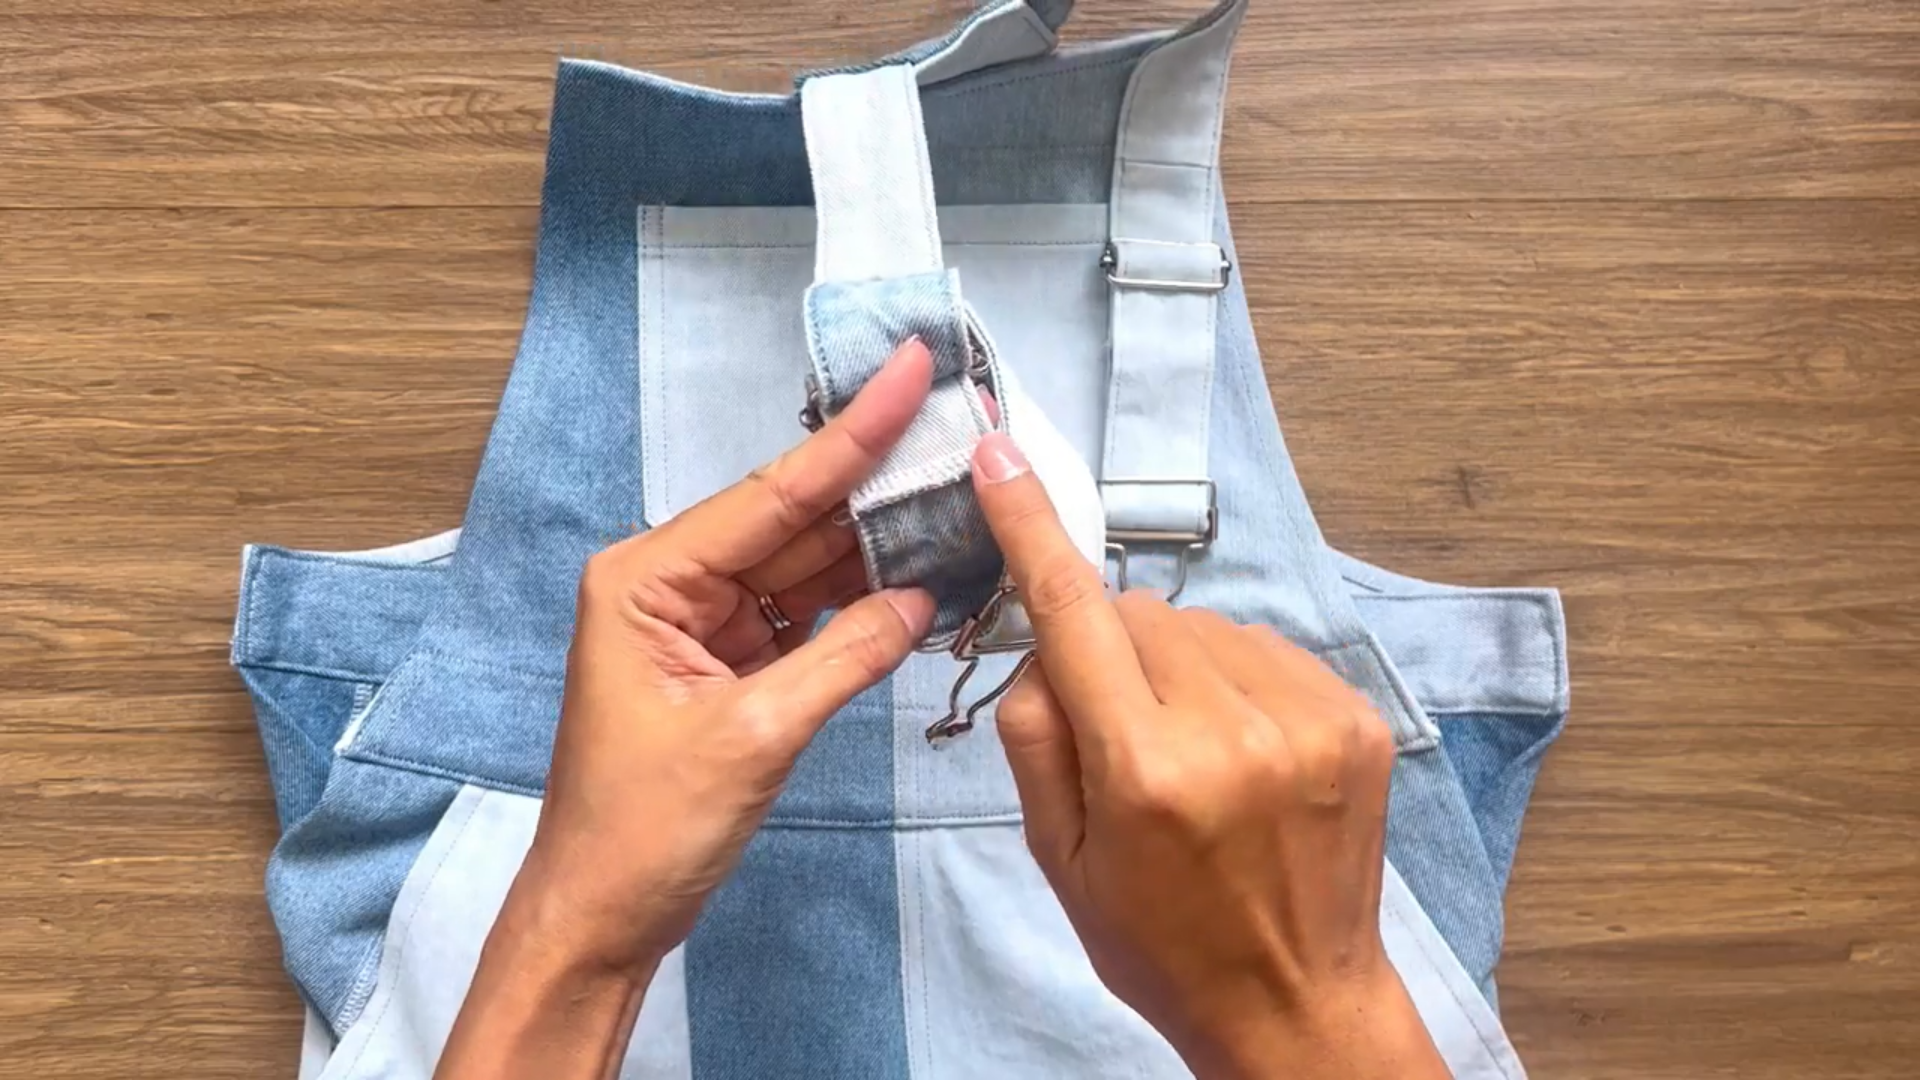
Stitch the ends of the straps to ensure the buckles stay in place.
Sew buttons to the sides of the bodice.
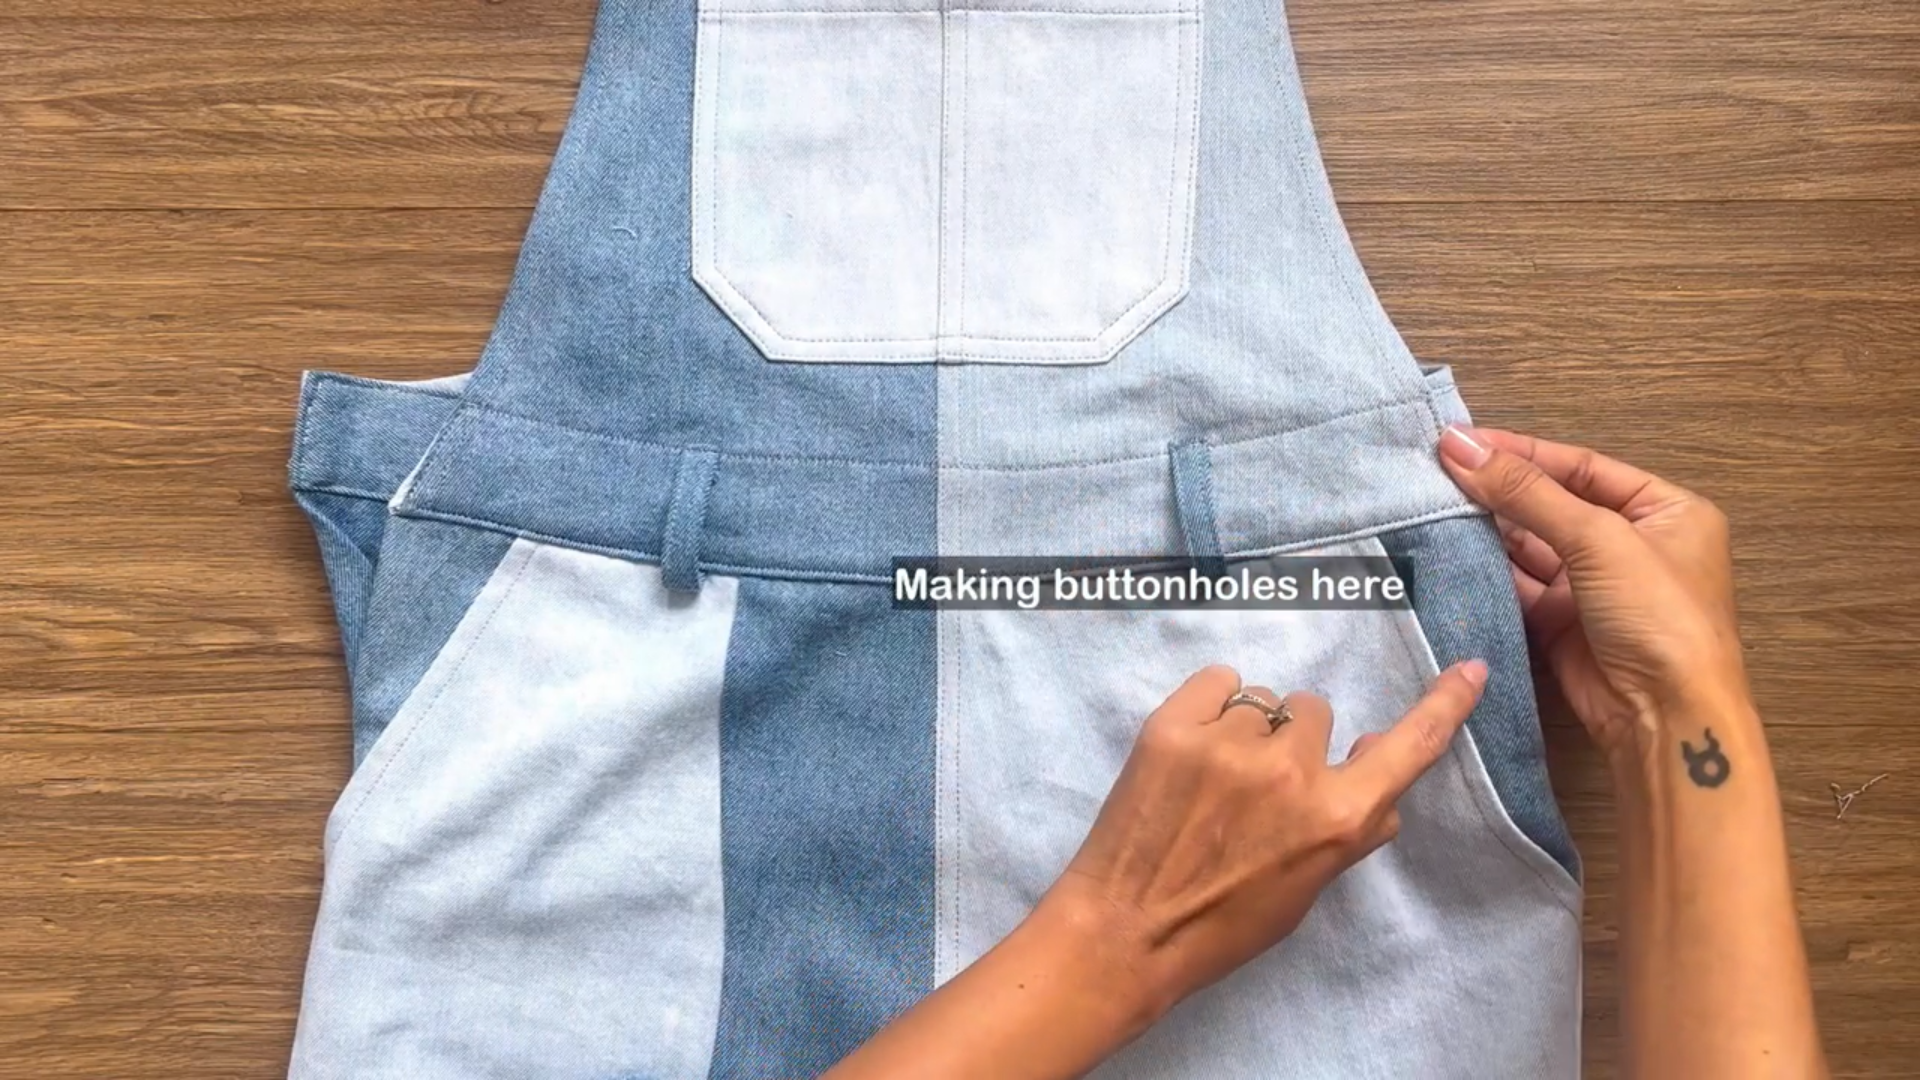
Add buttons and button holes to the button areas at the pants.
Making a Denim patchwork jumpsuit from old jeans | Thrifted transformation idea | Sewing tutorial
And there you have it!
Your very own denim patchwork jumpsuit, crafted with love and creativity. This project is not only a fun way to upcycle your old jeans but also a fantastic opportunity to express your creaticity.

I hope you found my step-by-step guide helpful and inspiring.
If you’re interested in making your own, give it a try and let me know how it goes!
Until then, happy sewing!