Making my dream jumpsuit (high waisted, wide leg pants, side pocket, side zipper) | Sewing tutorial

Making my dream jumpsuit (high waisted, wide leg pants, side pocket, side zipper)
Welcome or welcome back to my channel!
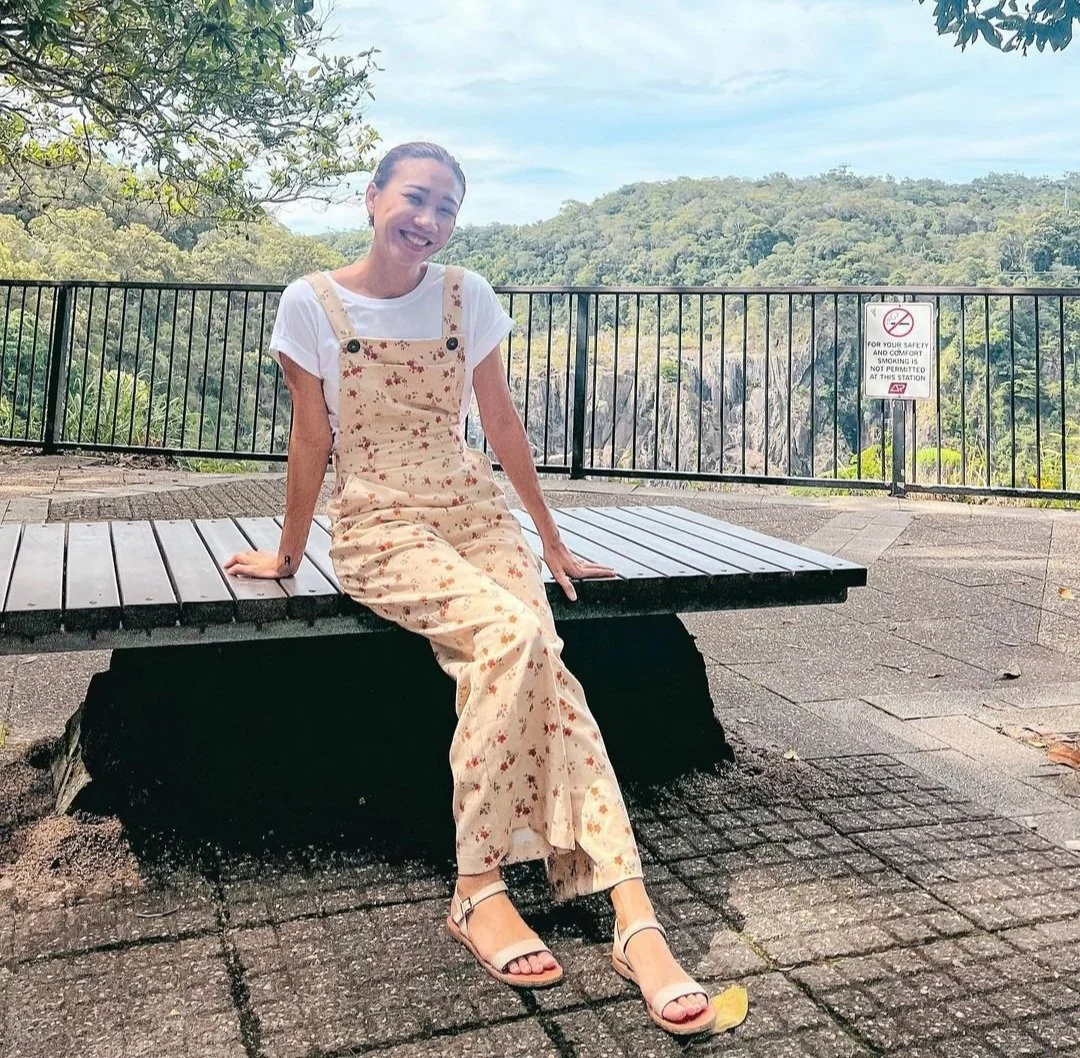
In today's video, I'm going to share with you how I made my dream jumpsuit. This jumpsuit is the combination of high waisted, wide leg pants, side pocket in beautiful light weight corduroy fabric.
Let’s get started!
WHAT YOU’LL NEED
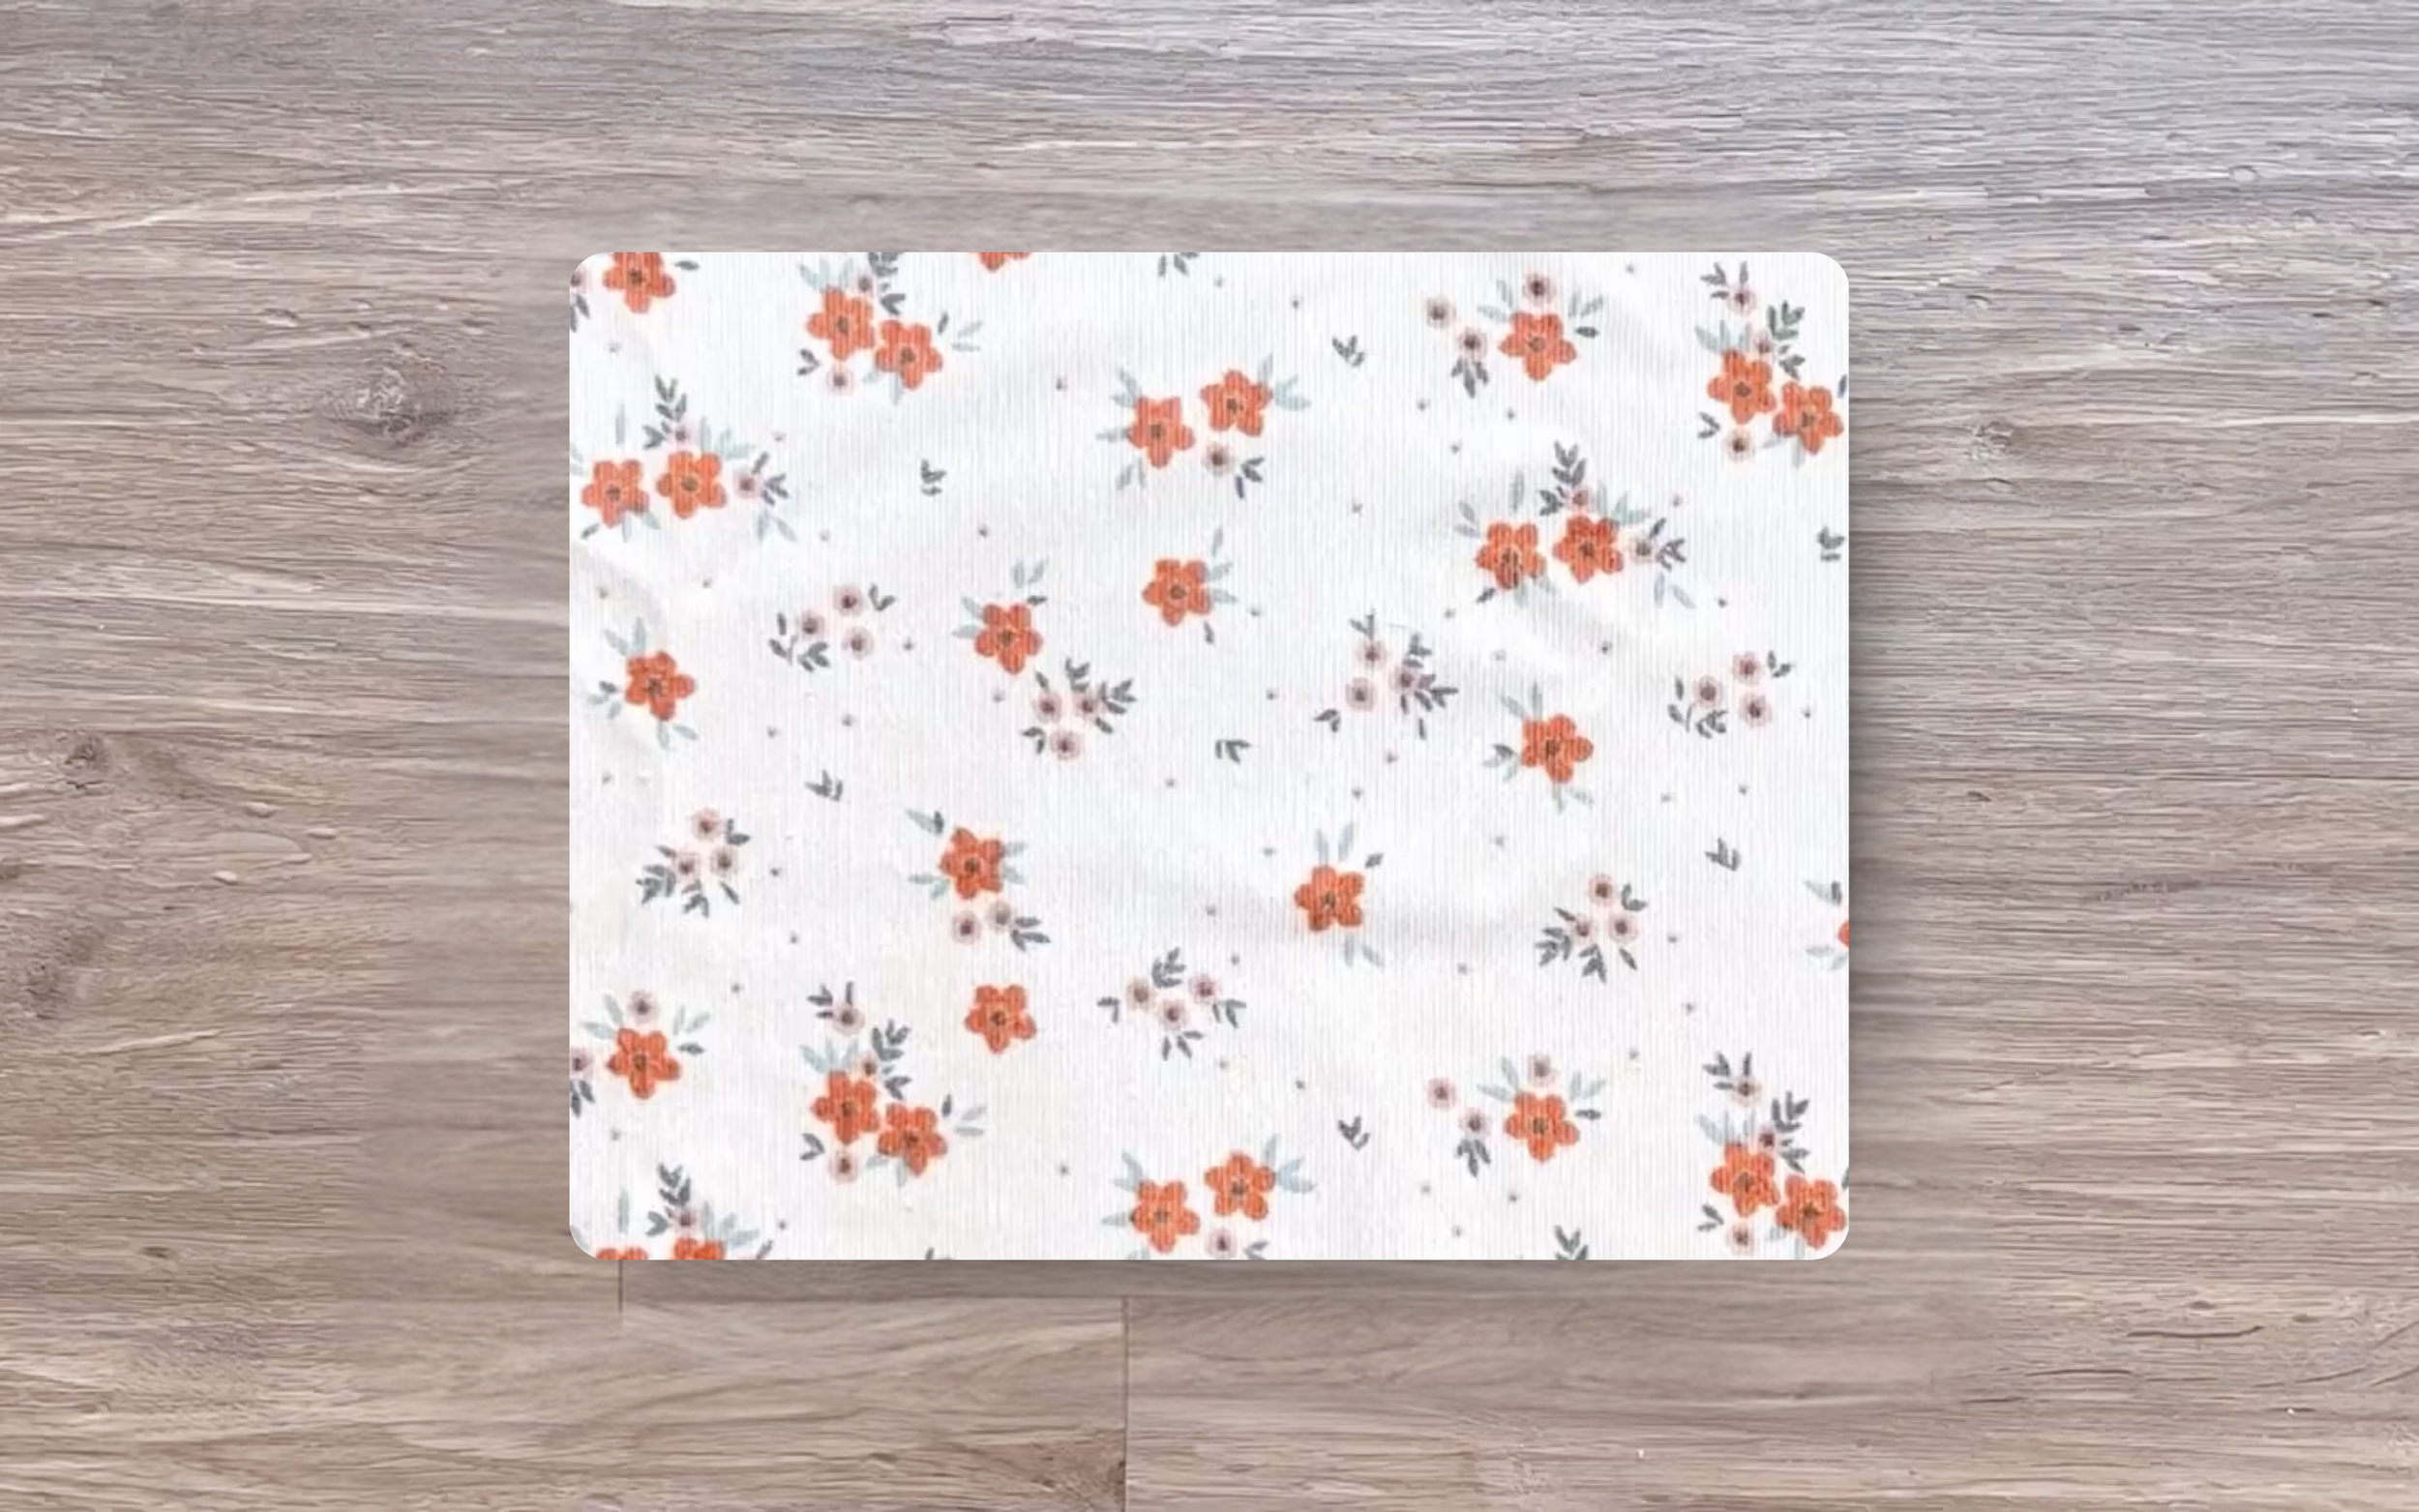
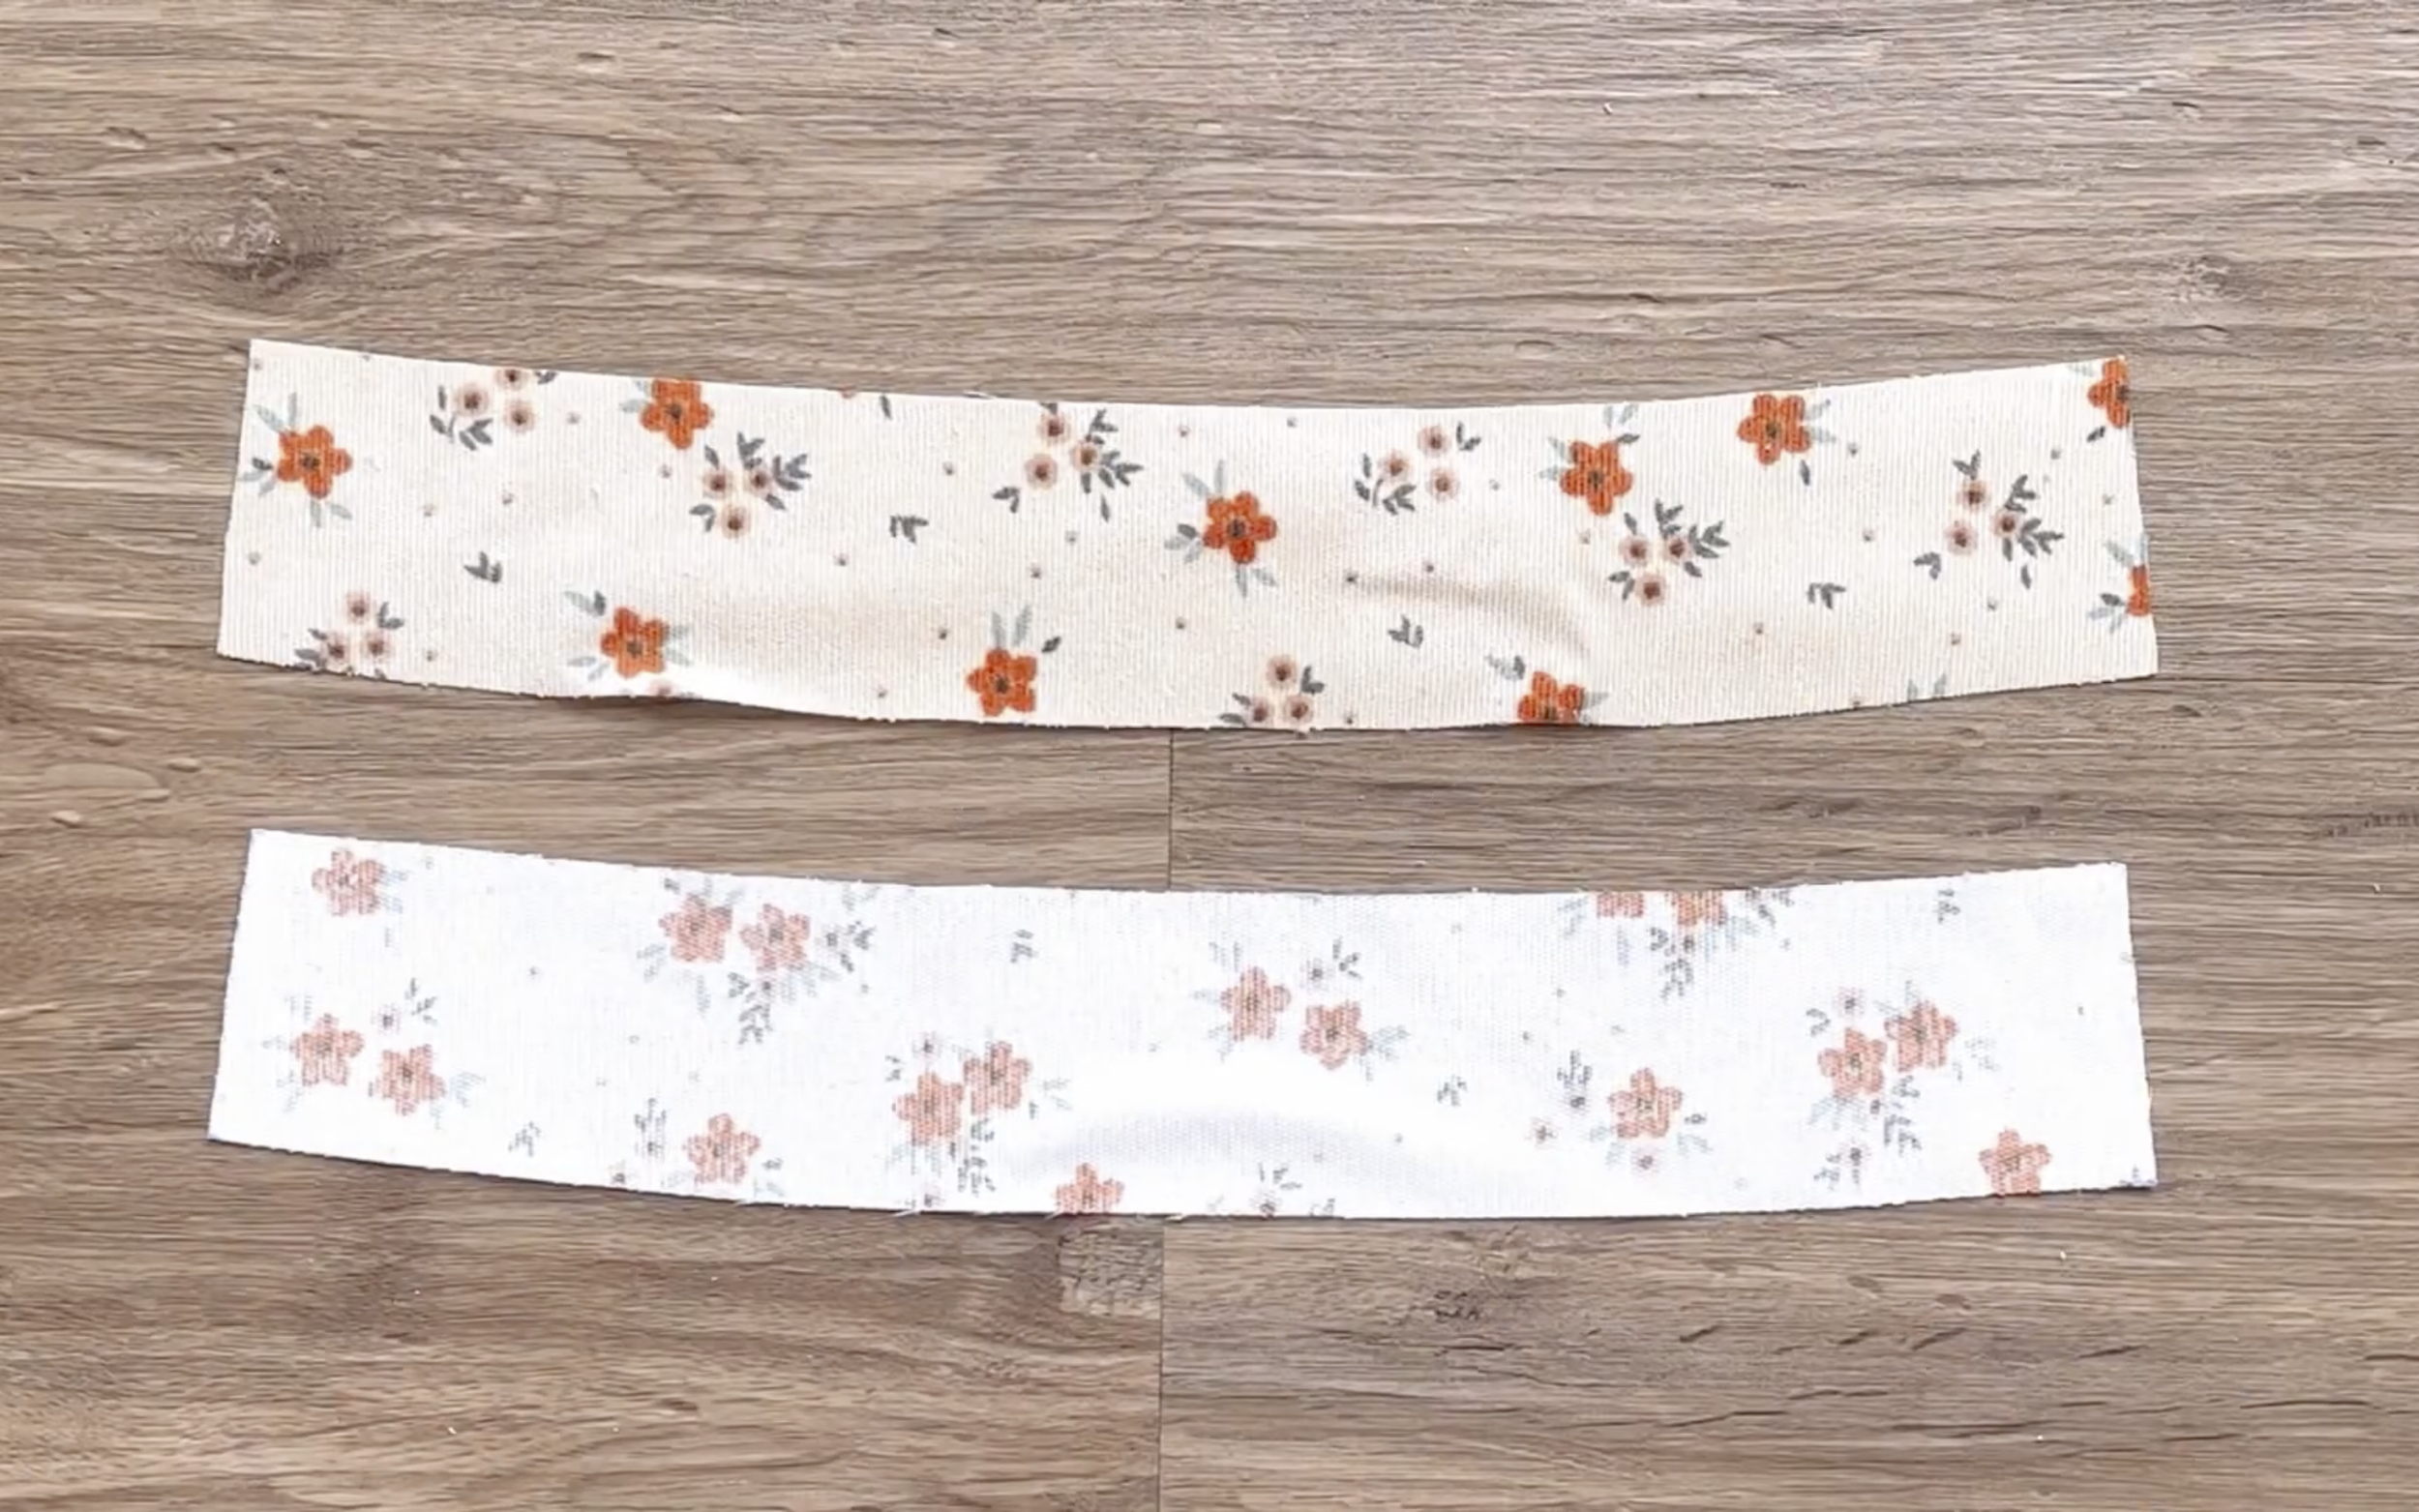
1.5m of light weight corduroy fabric in floral printing
Pattern paper
Sewing machine
Pins
Scissors
Ruler
Long stick
Zipper
Buttons
MAKING THE PATTERNS
Here’s the pattern for the project. To get a clear understanding of all the measurements needed for the pattern, watch the video from 0:42 to 10:45.
Remember, you can adjust these measurements to fit your own dimensions!

THE FRONT PANTS PATTERN
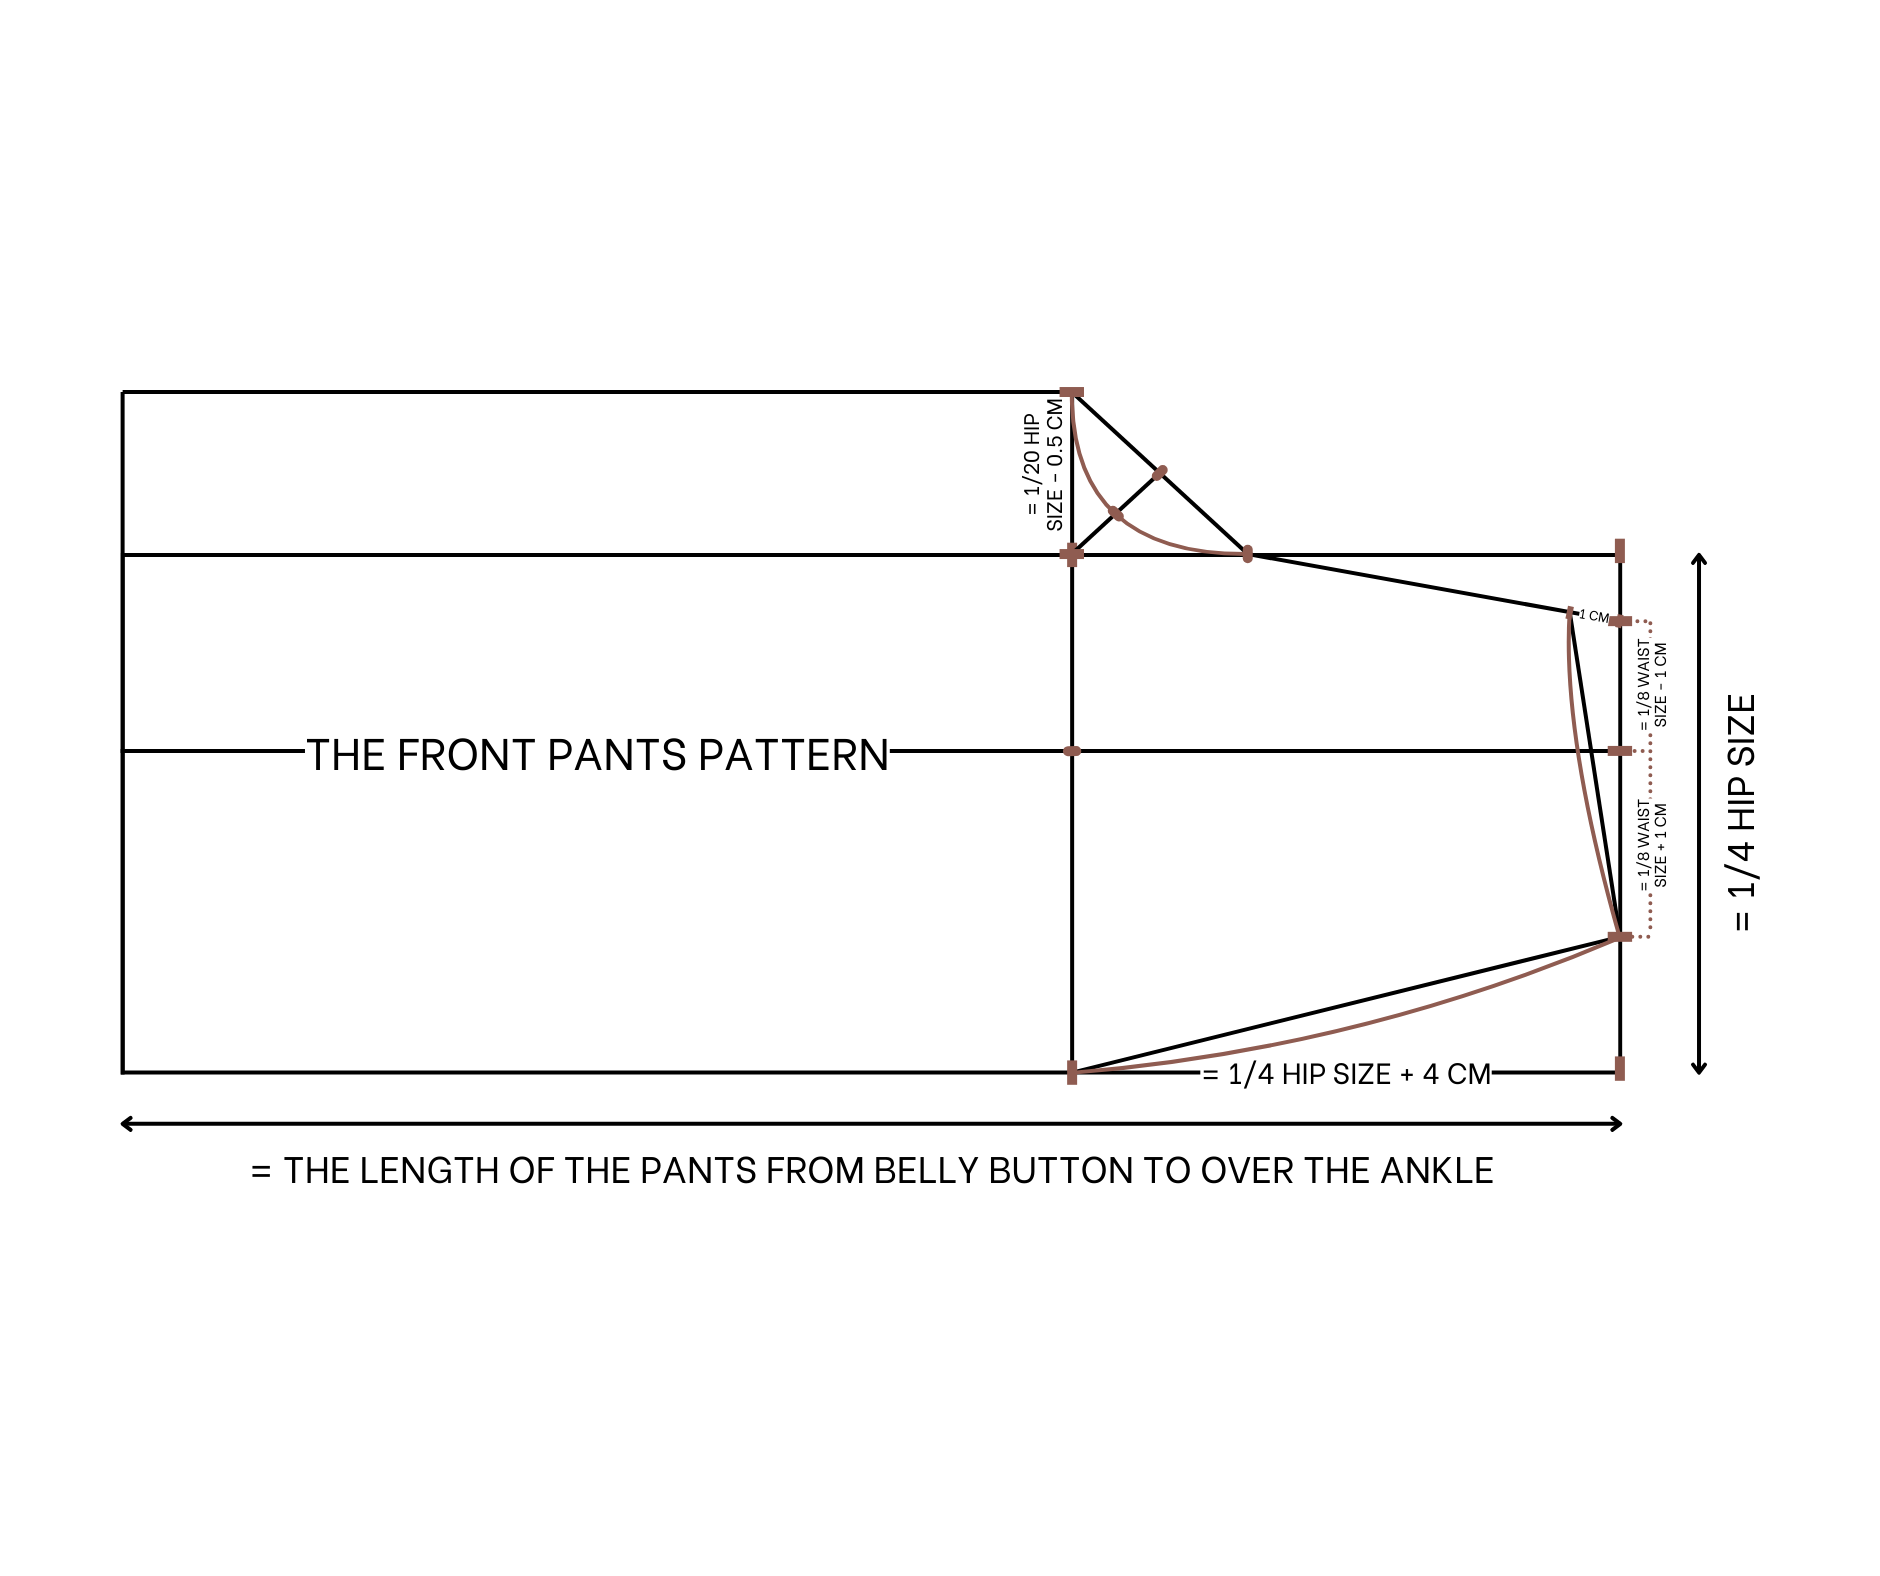
The front pants pattern
Draw a rectangle with 23 cm width, which is a quarter of hip size, and 90 cm length, which is the length of the jumpsuit from the belly button to over the ankle.
From the top width line, draw another width line at 27 cm next to it, which is a quarter of hip size plus 4 cm. This will be the hip line of the front pants.
Draw an extra 4.1 cm outside of it, which is 1/20 of hip size minus half a centimeter.
Then mark in the middle of the new line before drawing a horizontal line to go through that mark.
This will be the center line of the front pants.Mark 1/3 of the distance between the top width line and the hip line, then connect it to the end of the new width line.
From the cutting point between the top width line and the center line, mark 7.5 cm inside, which is ⅛ of waist size minus 1 cm. Also mark 9.5 cm outside, which is ⅛ of waist size plus 1 cm. So the width between the two marks will be 17 cm, which is a quarter of waist size.
Then connect the inside mark to the mark on the line next to it.
After that, draw a curved line at the end to create the crotch line of the front pants. Connect the outside mark to the other end of the hip line first, then make it a big curve to create the sideline of the front pants.
From the top of the crotch line, mark down 1 cm, then connect it to the top of the sideline. Based on this, draw a slightly curved line to create the waistline of the front pants. Draw a straight line down from the end of the crotch line to finish the inside leg line of the front pants.
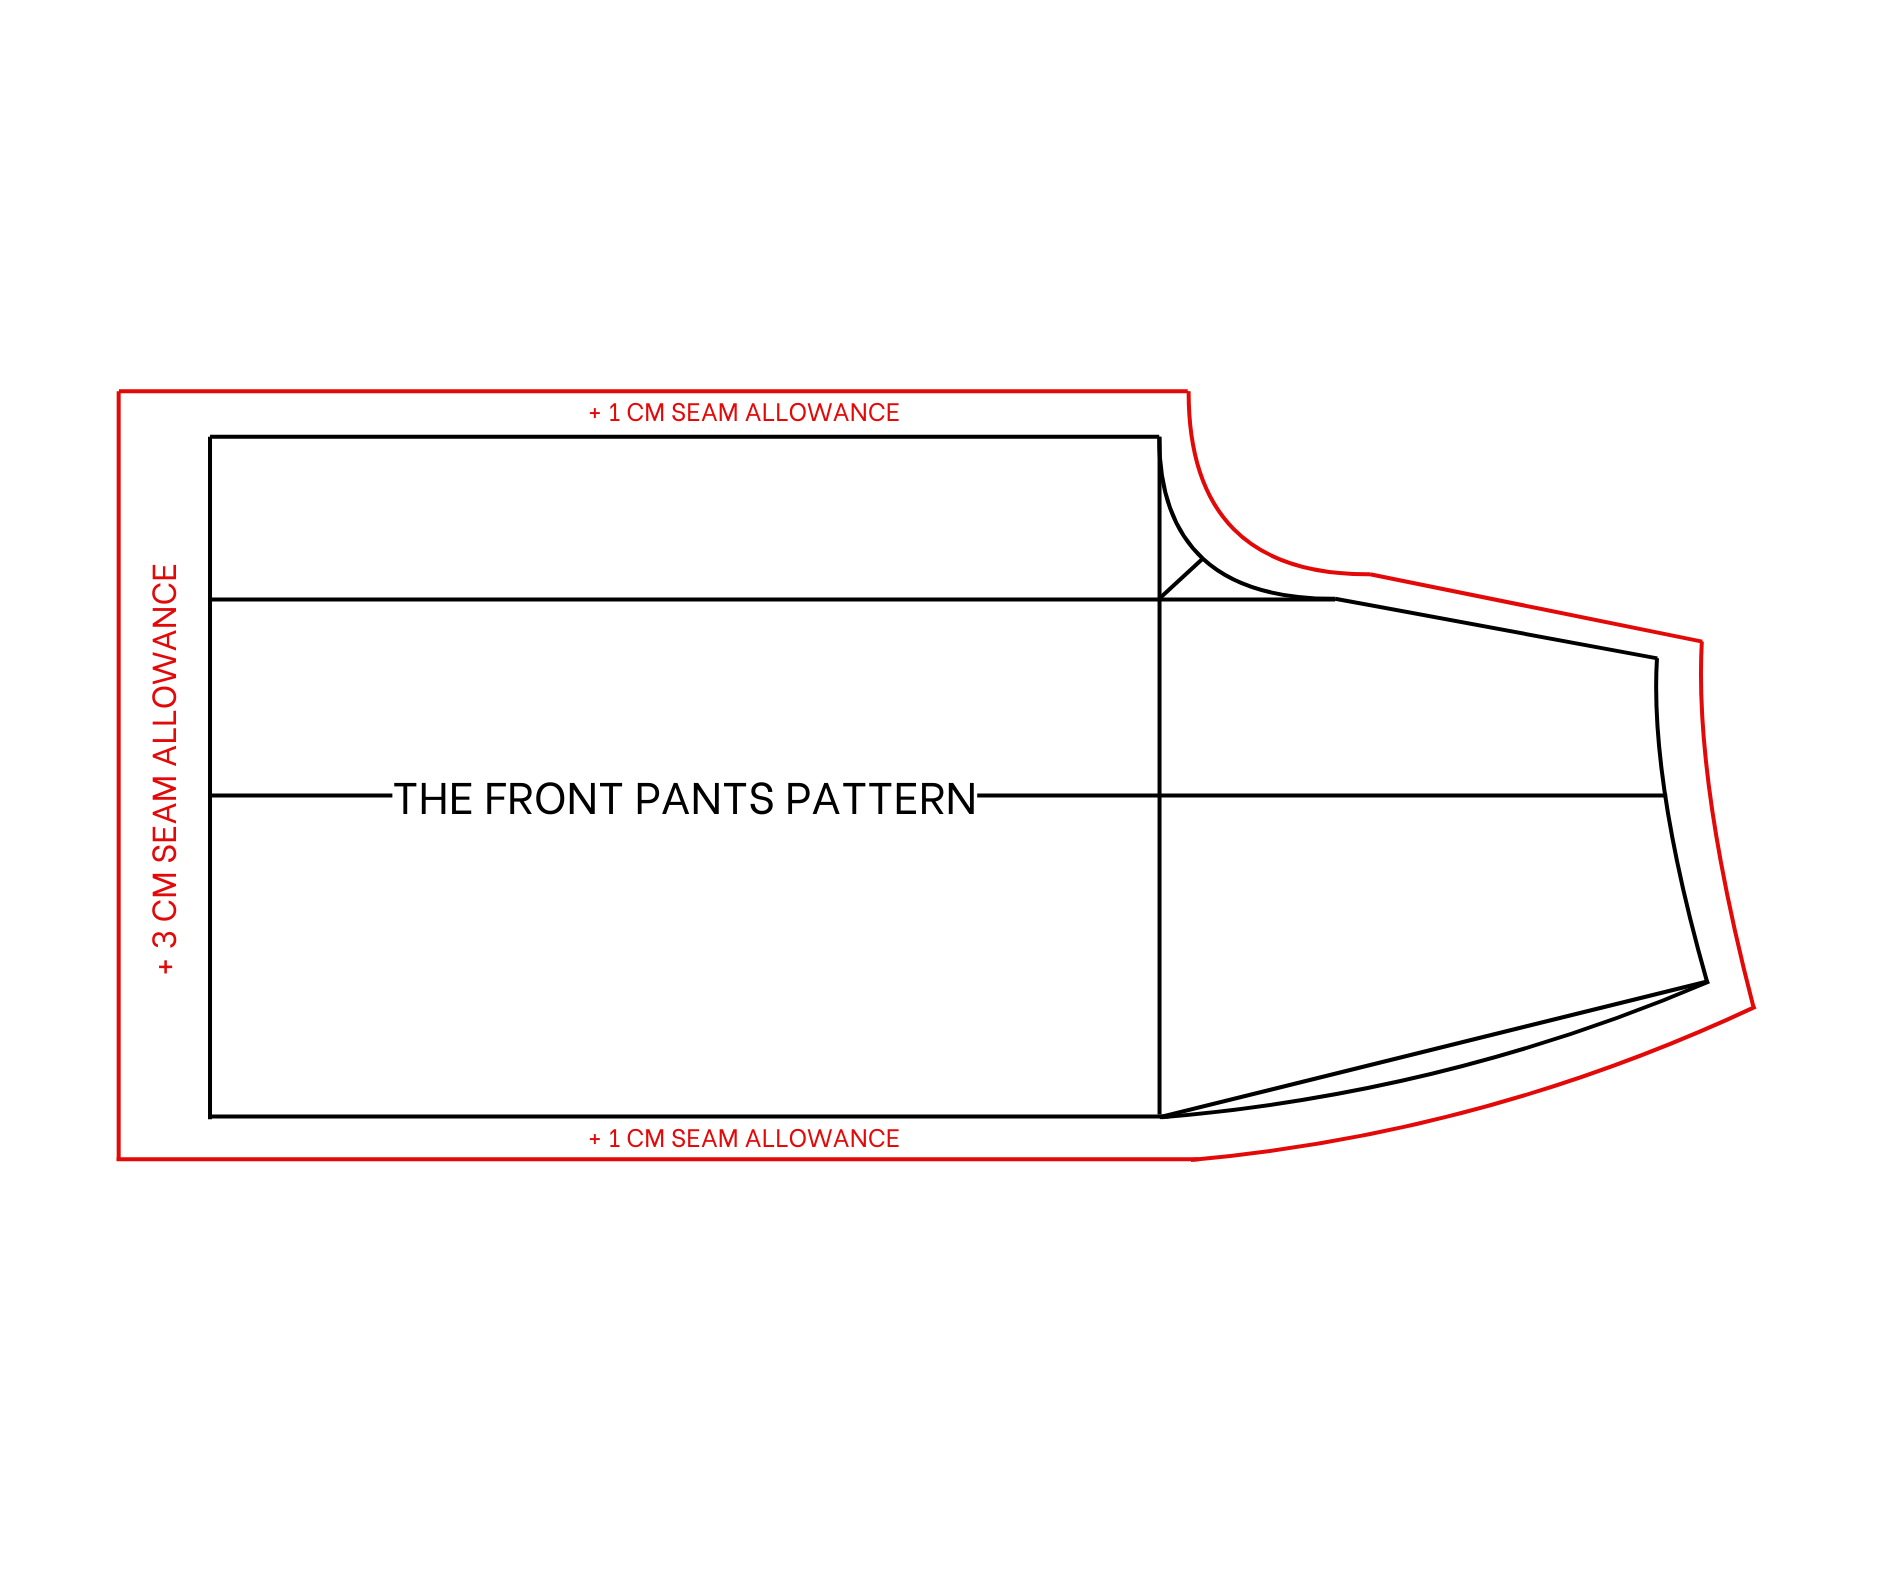
After that, add 1 cm for seam allowance, except for 3 cm seam allowance at the ending line.
And the front pants pattern will be ready after cutting.
THE BACK PANTS PATTERN
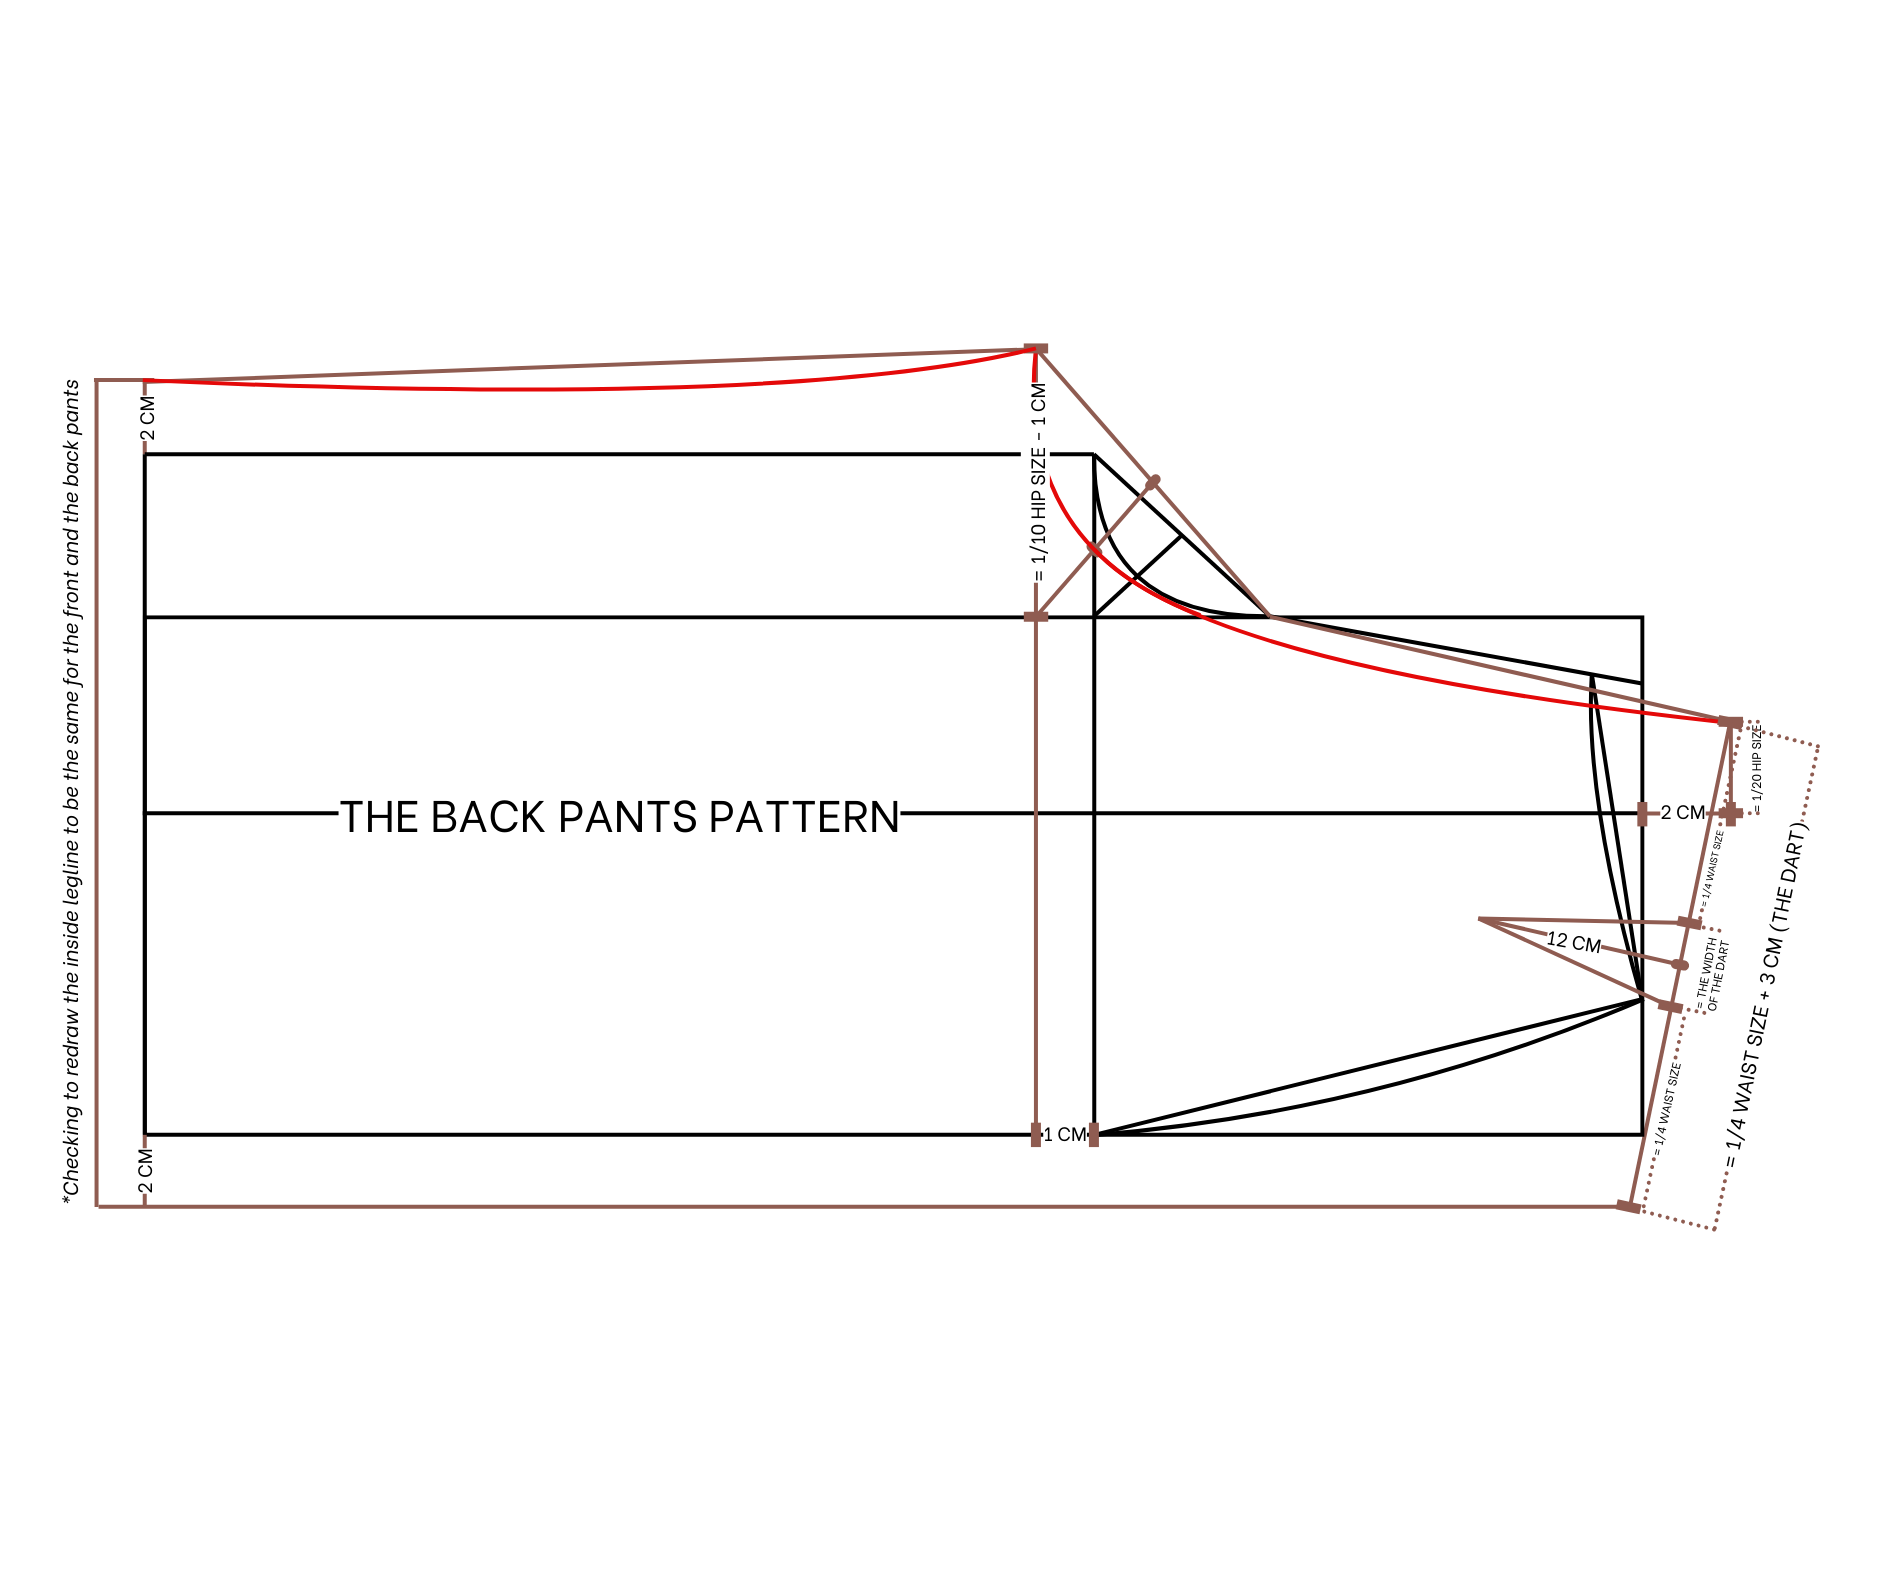
The back pants pattern
To make the back pants pattern, start from the front pants pattern.
Move the hip line down 1 cm from the current one.
From the cutting point between this line and the lane line of the rectangle, mark 8.2 cm outside, which is 1/10 of hip size minus 1 cm.
From the cutting point between the center line and the top width line, mark 2 cm outside, then draw a straight line through that mark.
After that, mark 4.6 cm on that line, which is 1/20 of hip size, then connect it to the mark on the line next to it.
Based on this, draw a curved line to finish the crotch line of the back pants.From the top of the crotch line, draw a slanted line to cut the top width line. The width of this line will be 20 cm, which is a quarter of waist size plus 3 cm for the dart that will be created there later. This will be the waistline of the back pants.
At one end of the ending line, mark 2 cm outside, then connect it to the end of the waistline to create the sideline for the back pants. Do the same for the other end of the ending line before connecting it to the end of the crotch line to create the inside leg line of the back pants.
Make this line straight at the leg and a big curve at the end before connecting it to the crotch line.
After that, check the side line and the inside leg line at the front pants to make sure they match the back pants so they can be connected later.
At the waistline, mark the middle first, then draw a perpendicular line from that mark. The width of this line will be 12 cm, which is the length of the dart at the back pants.From the middle part on the waistline, mark 1.5 cm on both sides. So the width between the two new marks will be 3 cm, which is the width of the dart at the back pants. That means the leftover width of the waistline will be 17 cm, which is a quarter of waist size.
Then connect the two marks to the end of the perpendicular line to finish the dart.
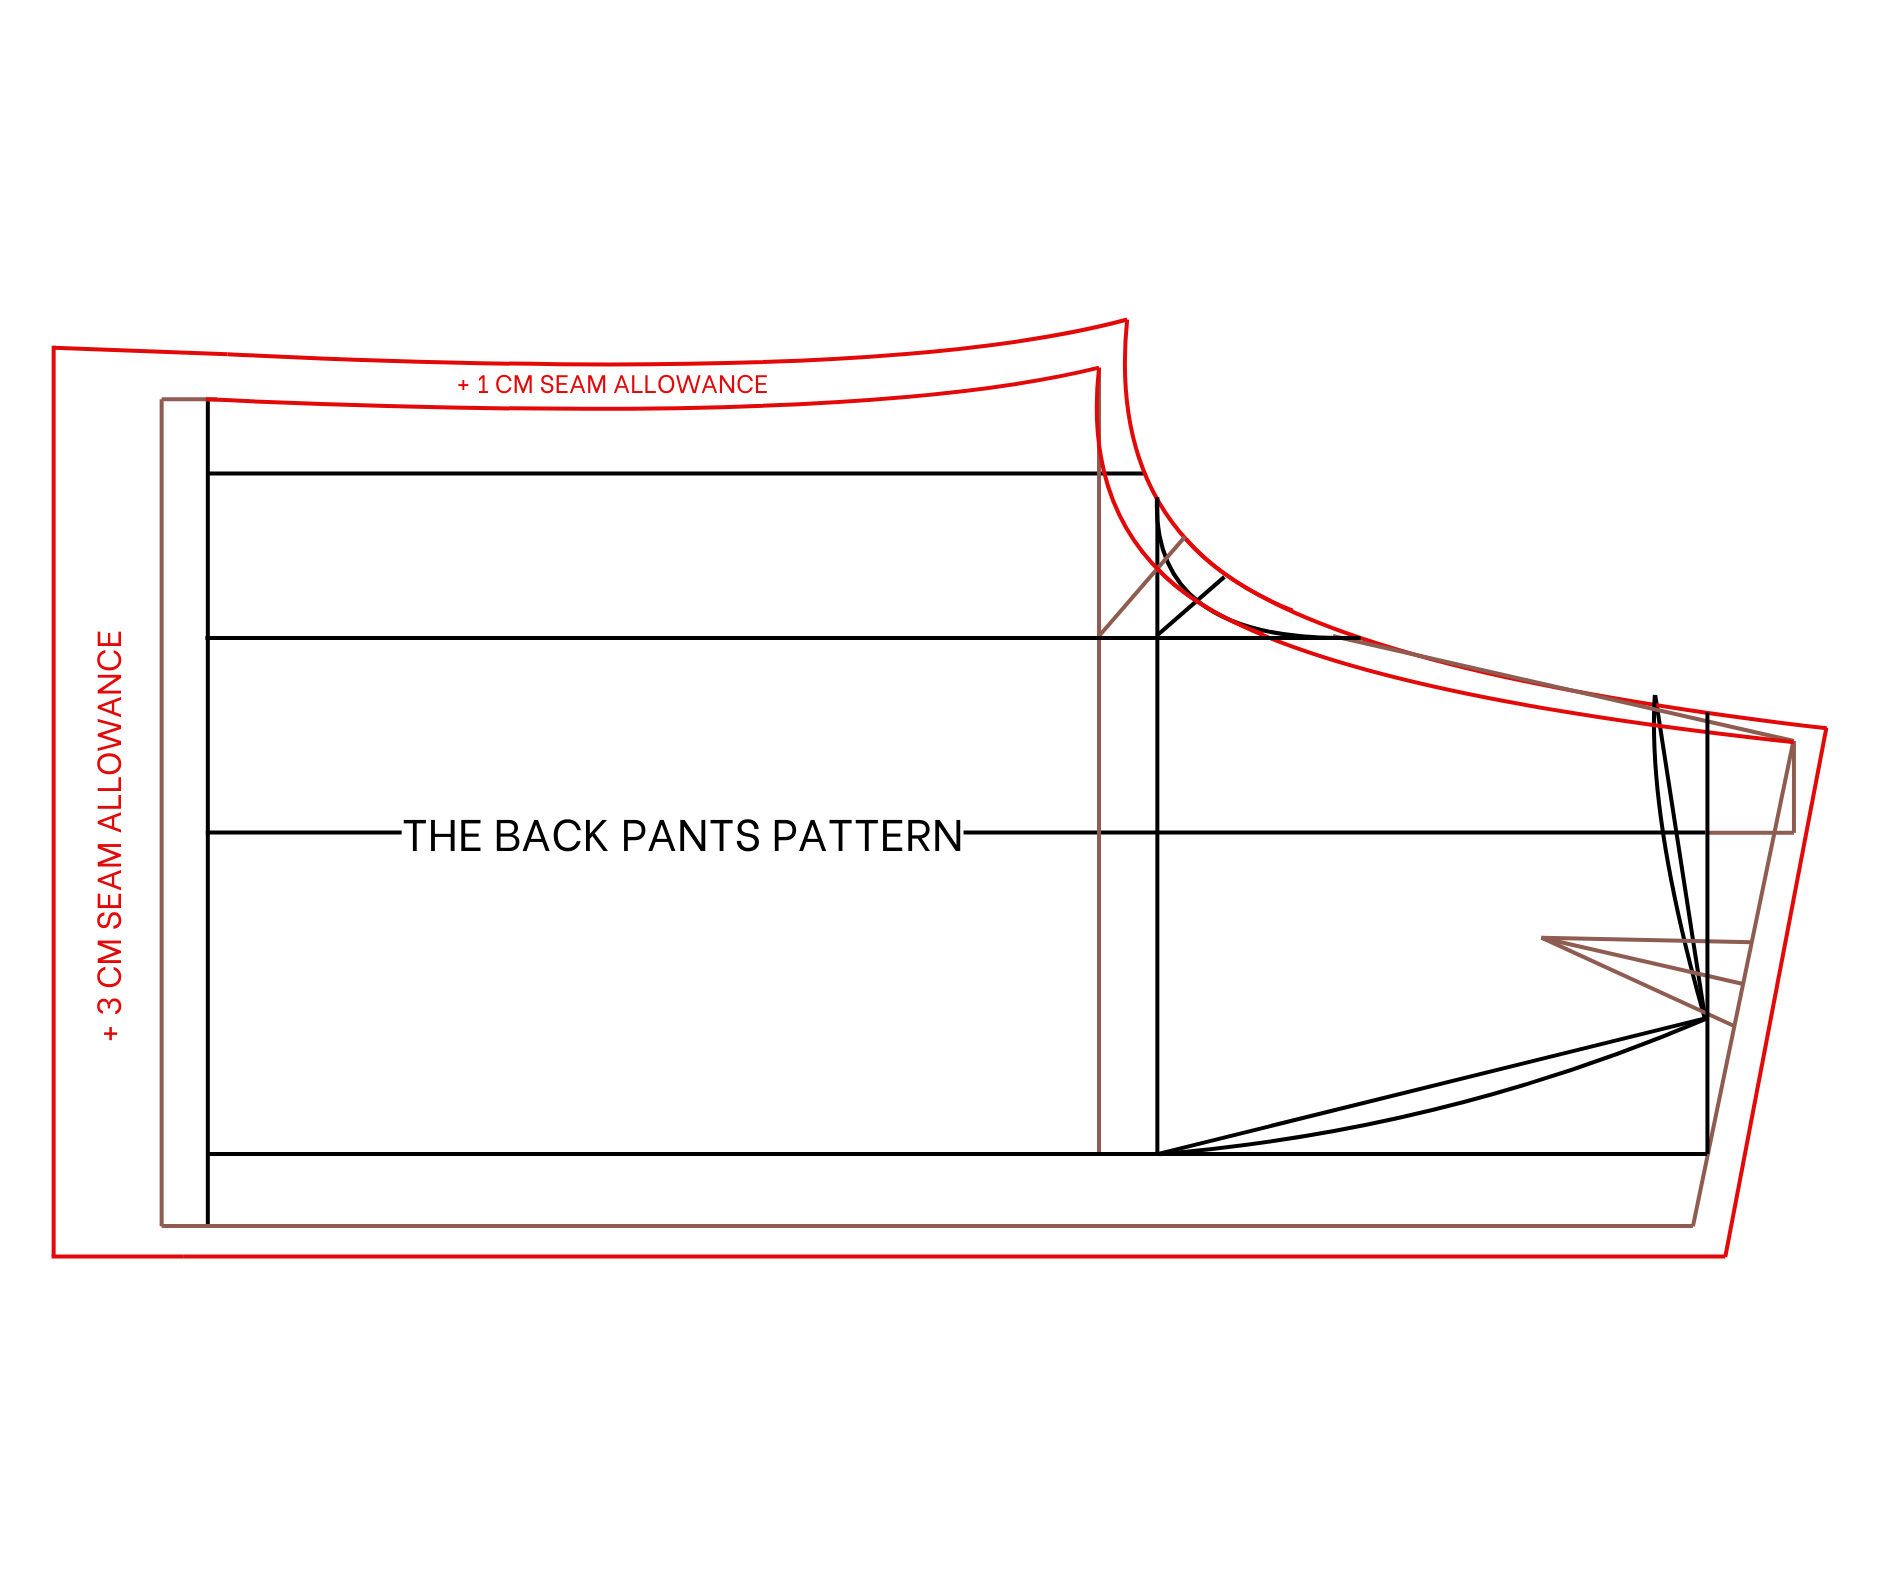
Add 1 cm for seam allowance, except for 3 cm seam allowance at the ending line.
And the back pants pattern will be ready after cutting.
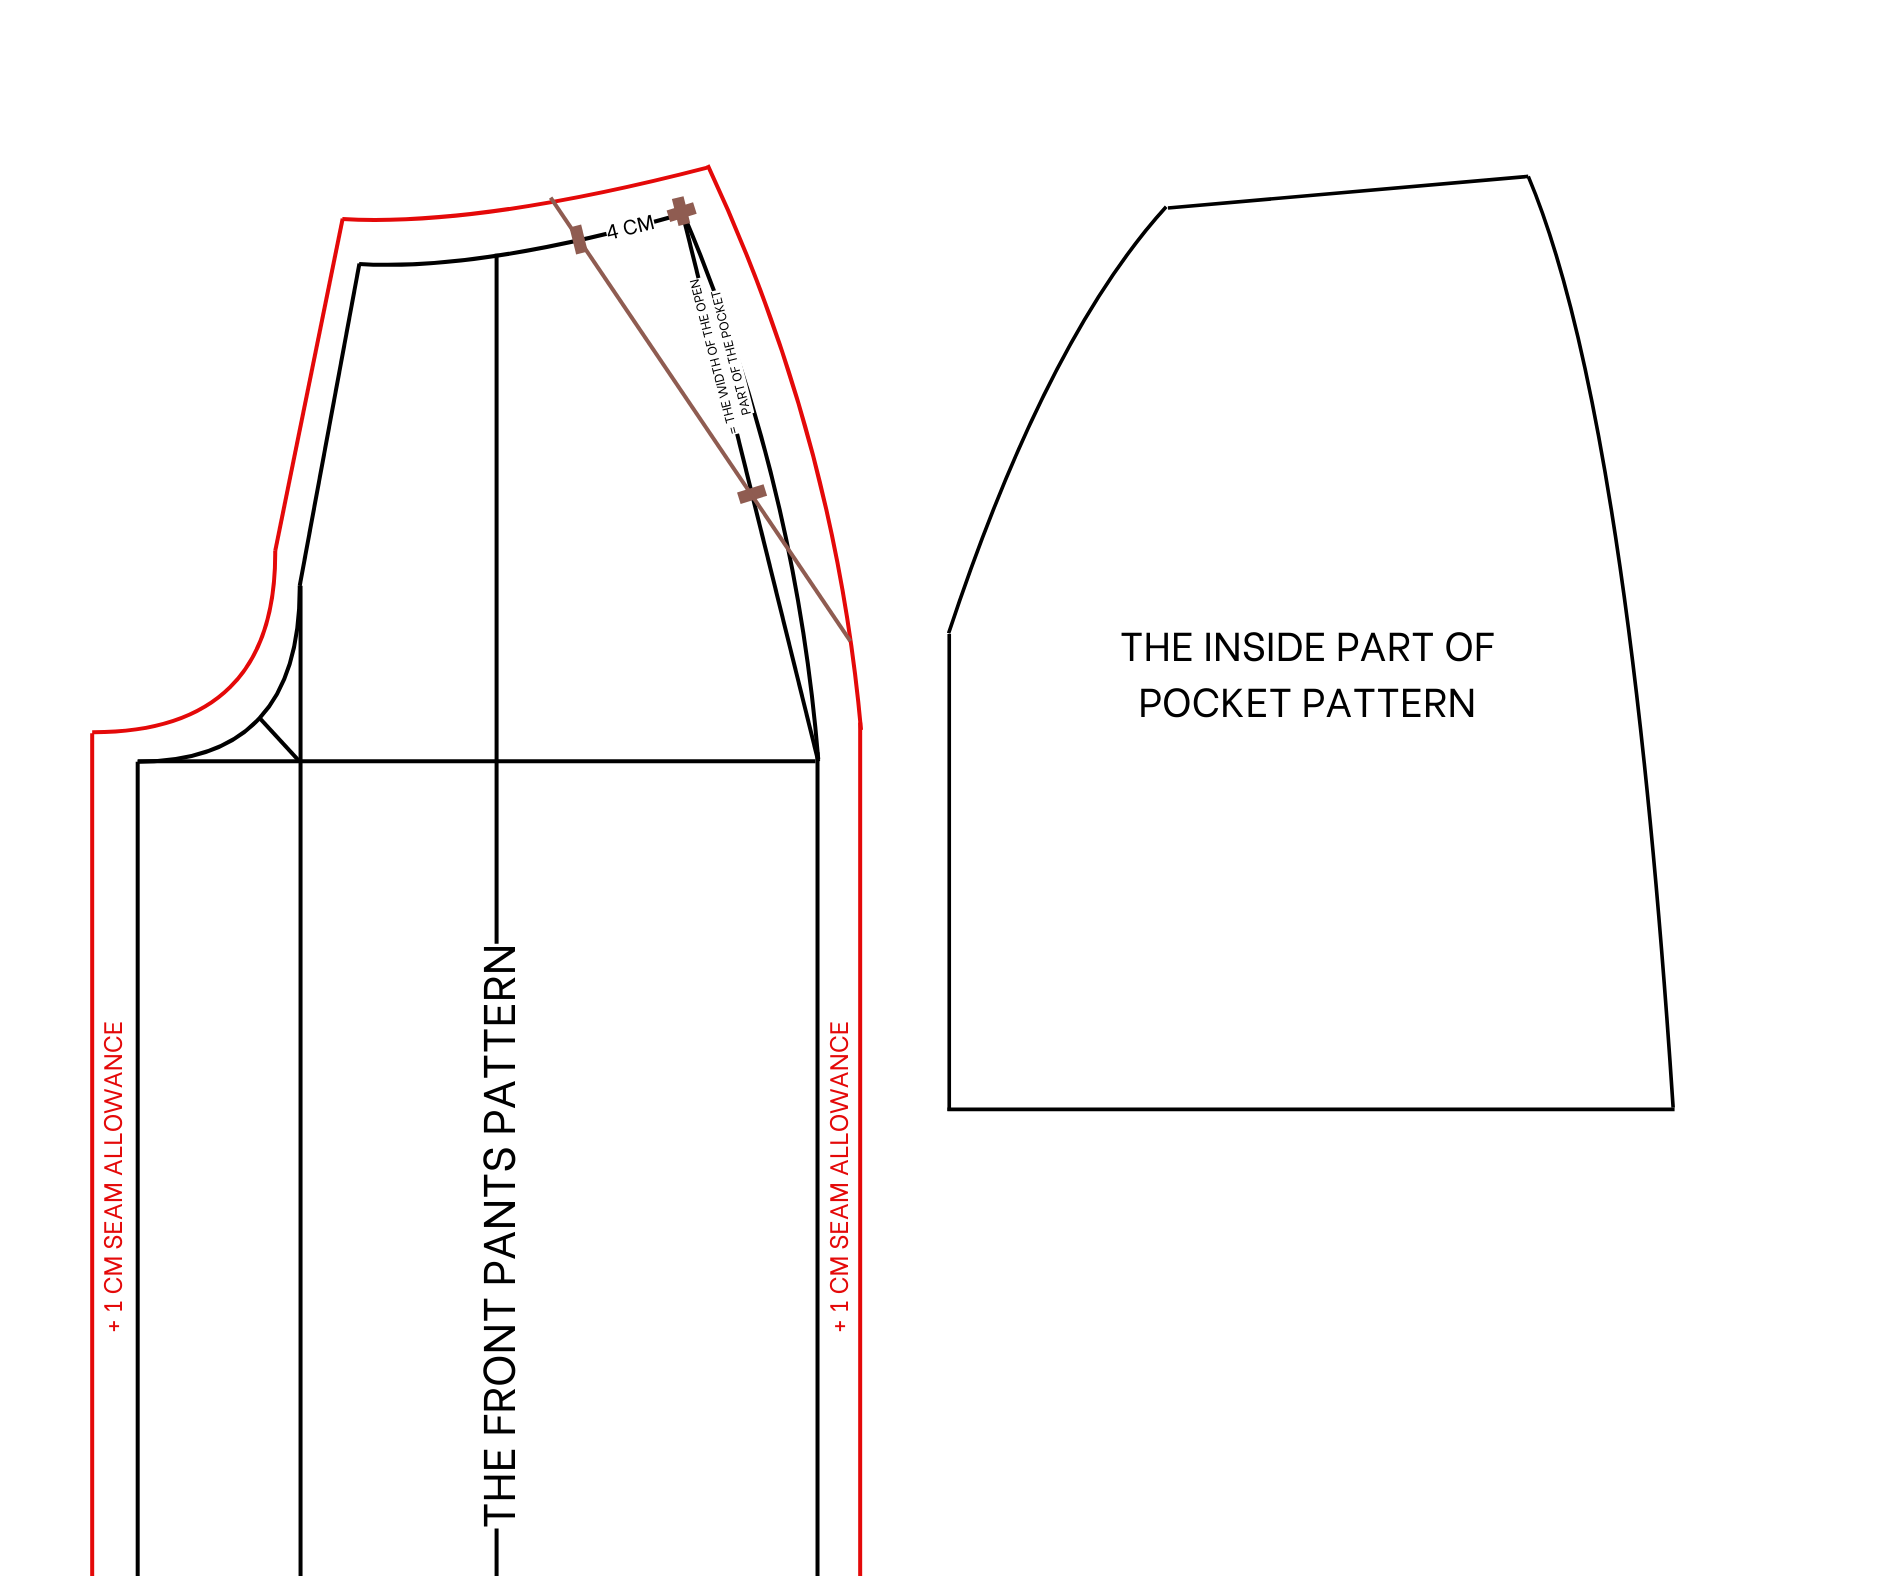
THE SIDE POCKET PATTERN
The inside pocket pattern
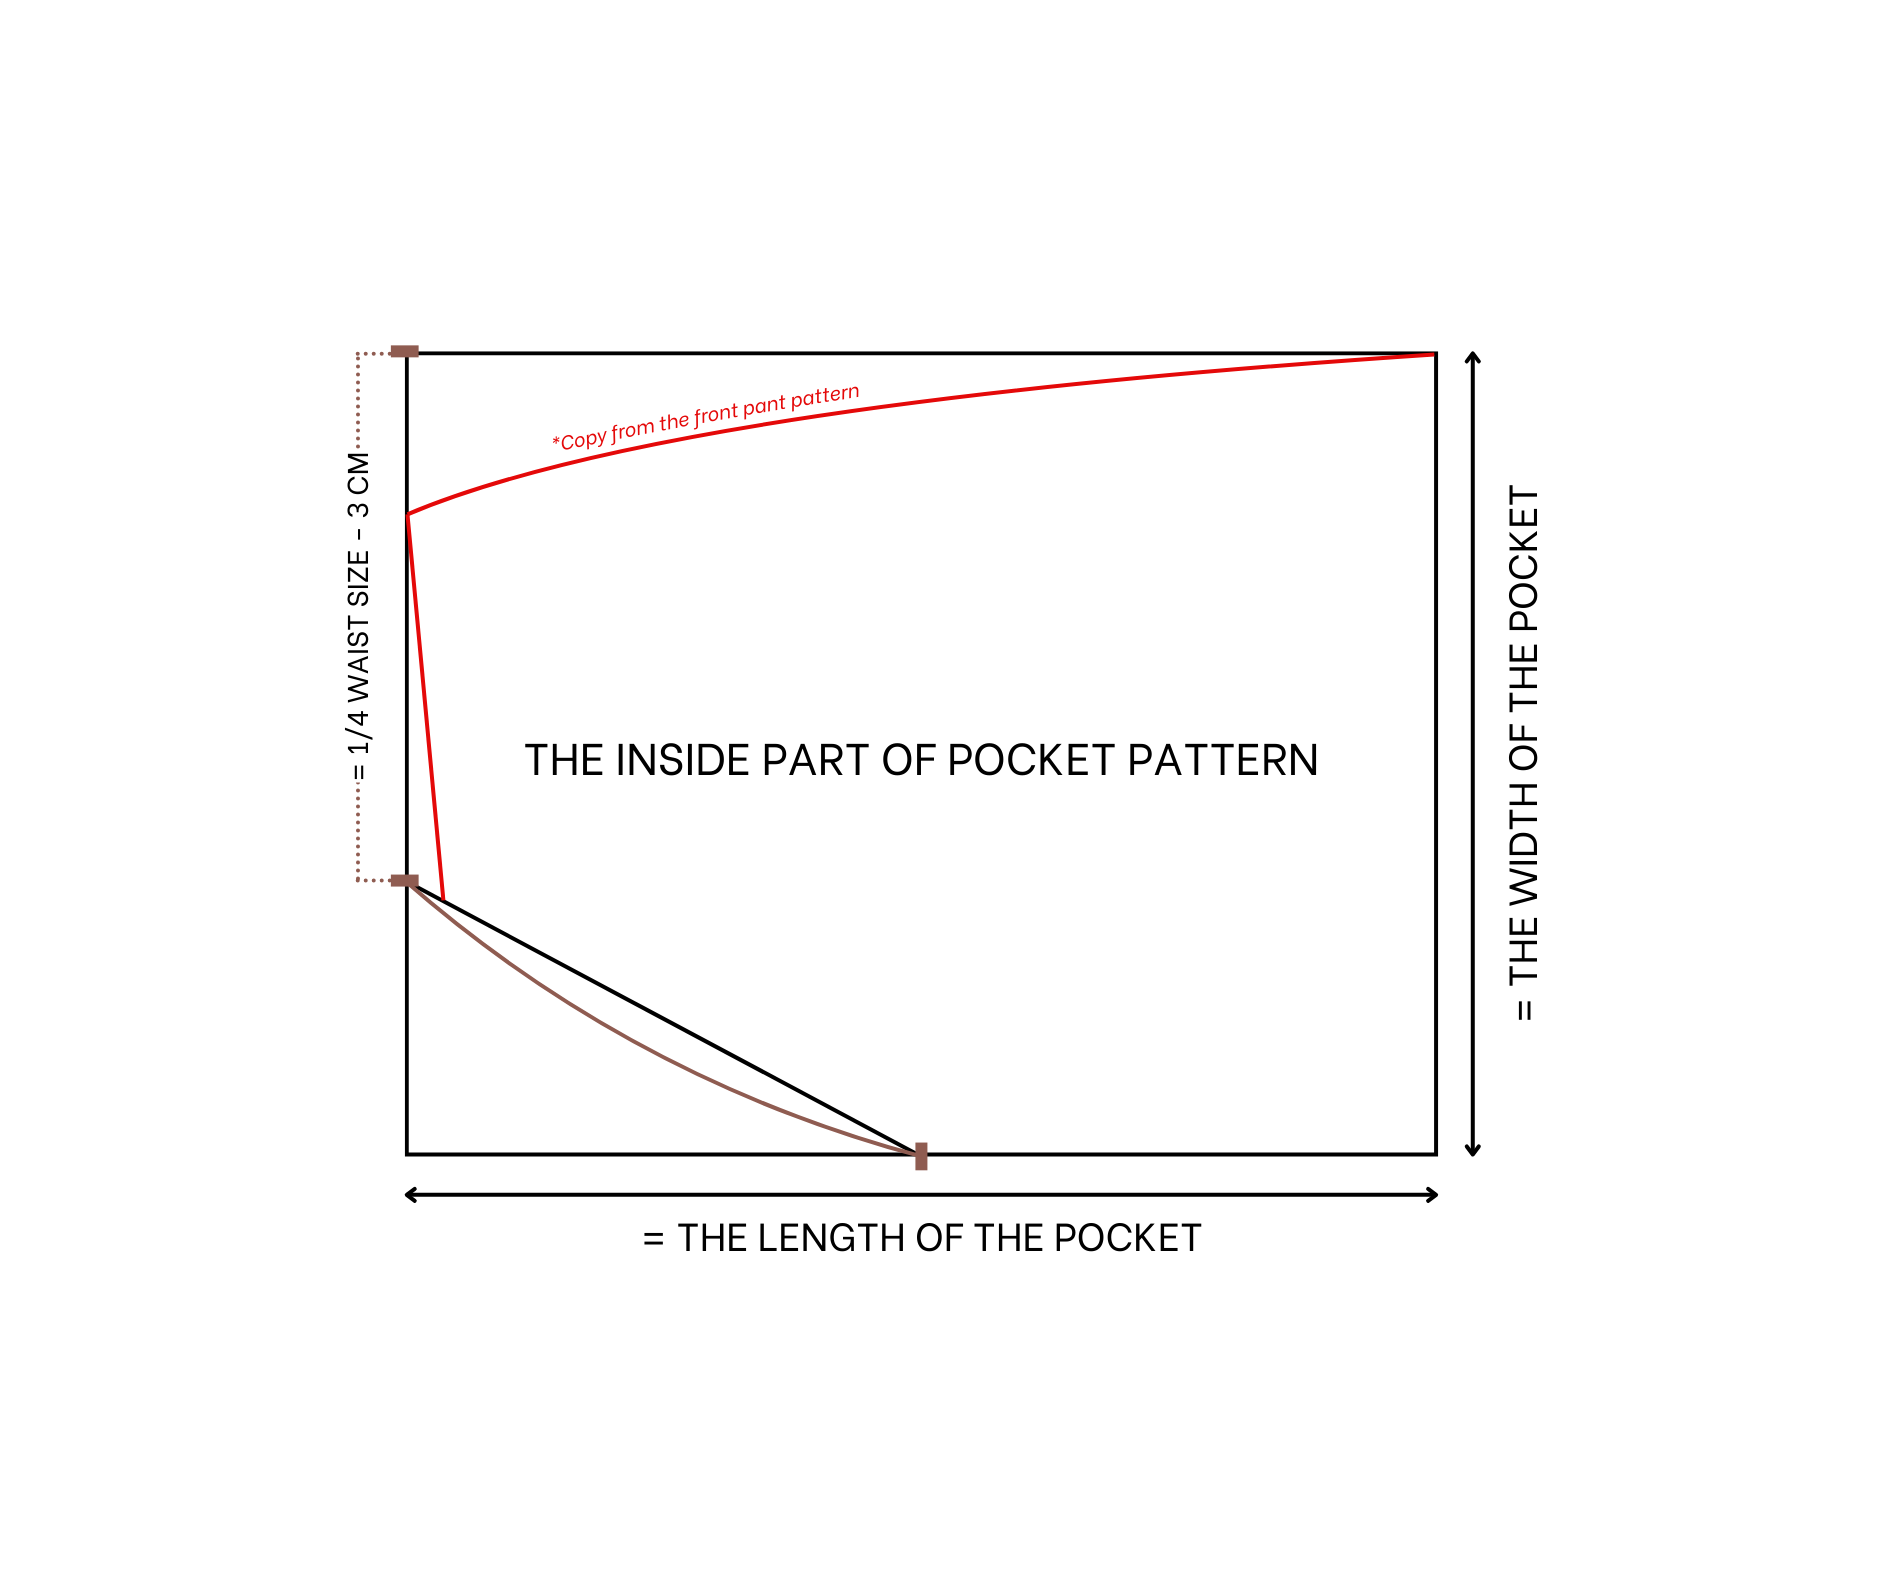
THE INSIDE POCKET PATTERN
Cut a rectangle with 20 cm width, which is the width of the side pocket, and 30 cm length, which is the desired length of the side pocket.
From one end of the top width line, mark 14 cm inside, which is a quarter of waist size minus 3 cm, then connect that mark to the mark in the middle of the line. Based on this, draw a curved line.
After cutting, use the front pants pattern to copy the sideline and waistline to the pocket.
And the inside pocket pattern will be ready after cutting.
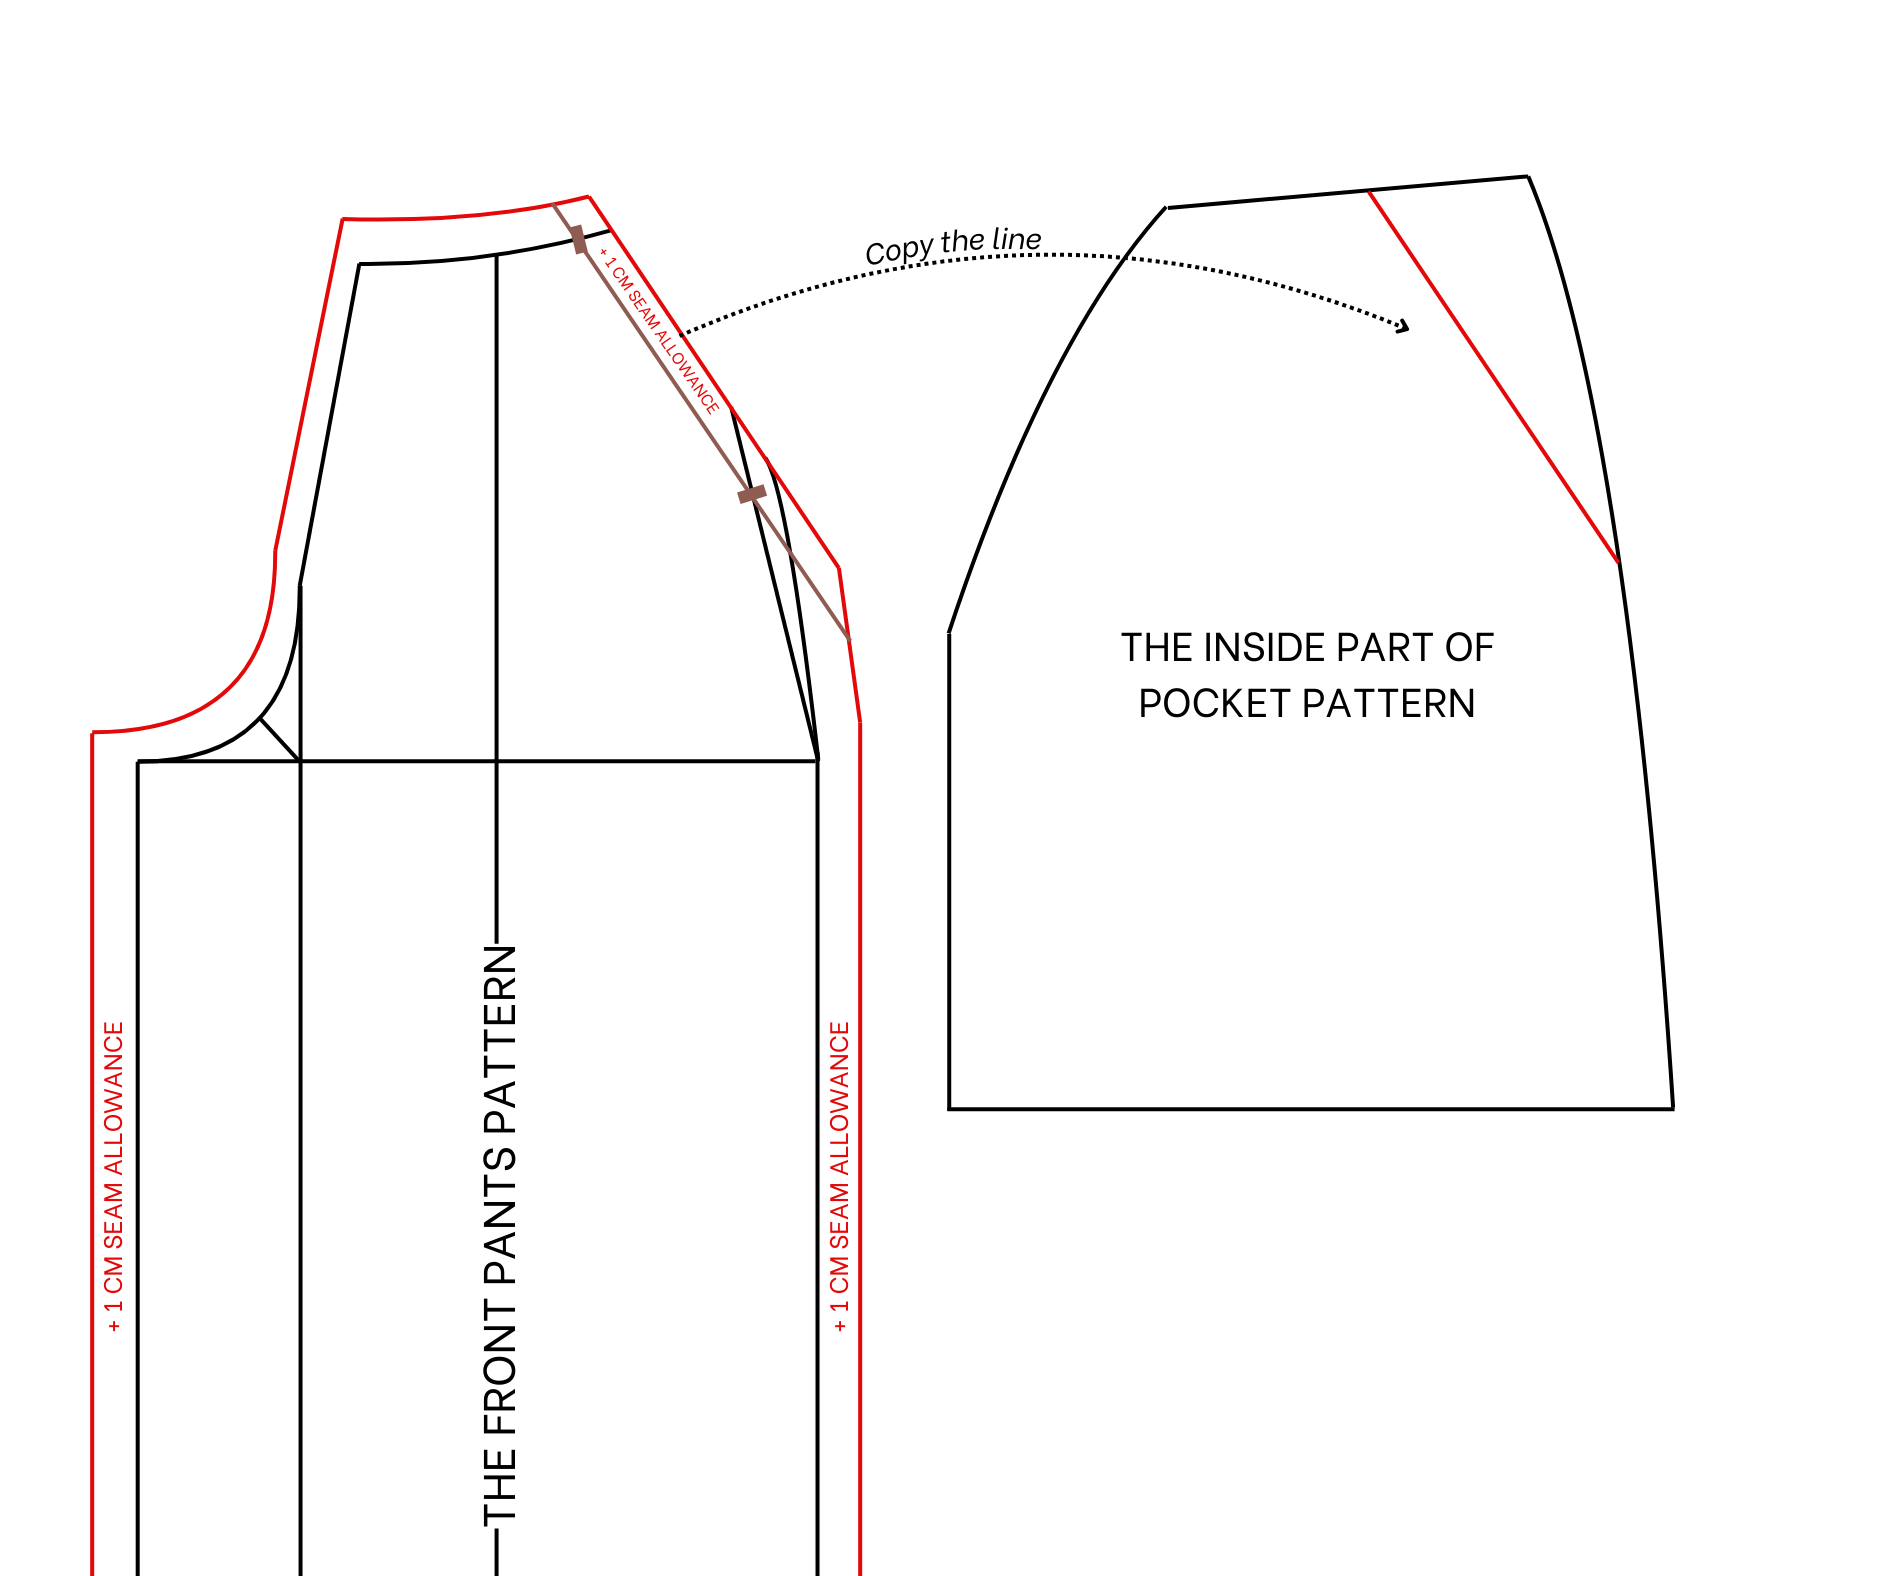
THE OUSTIDE POCKET PATTERN
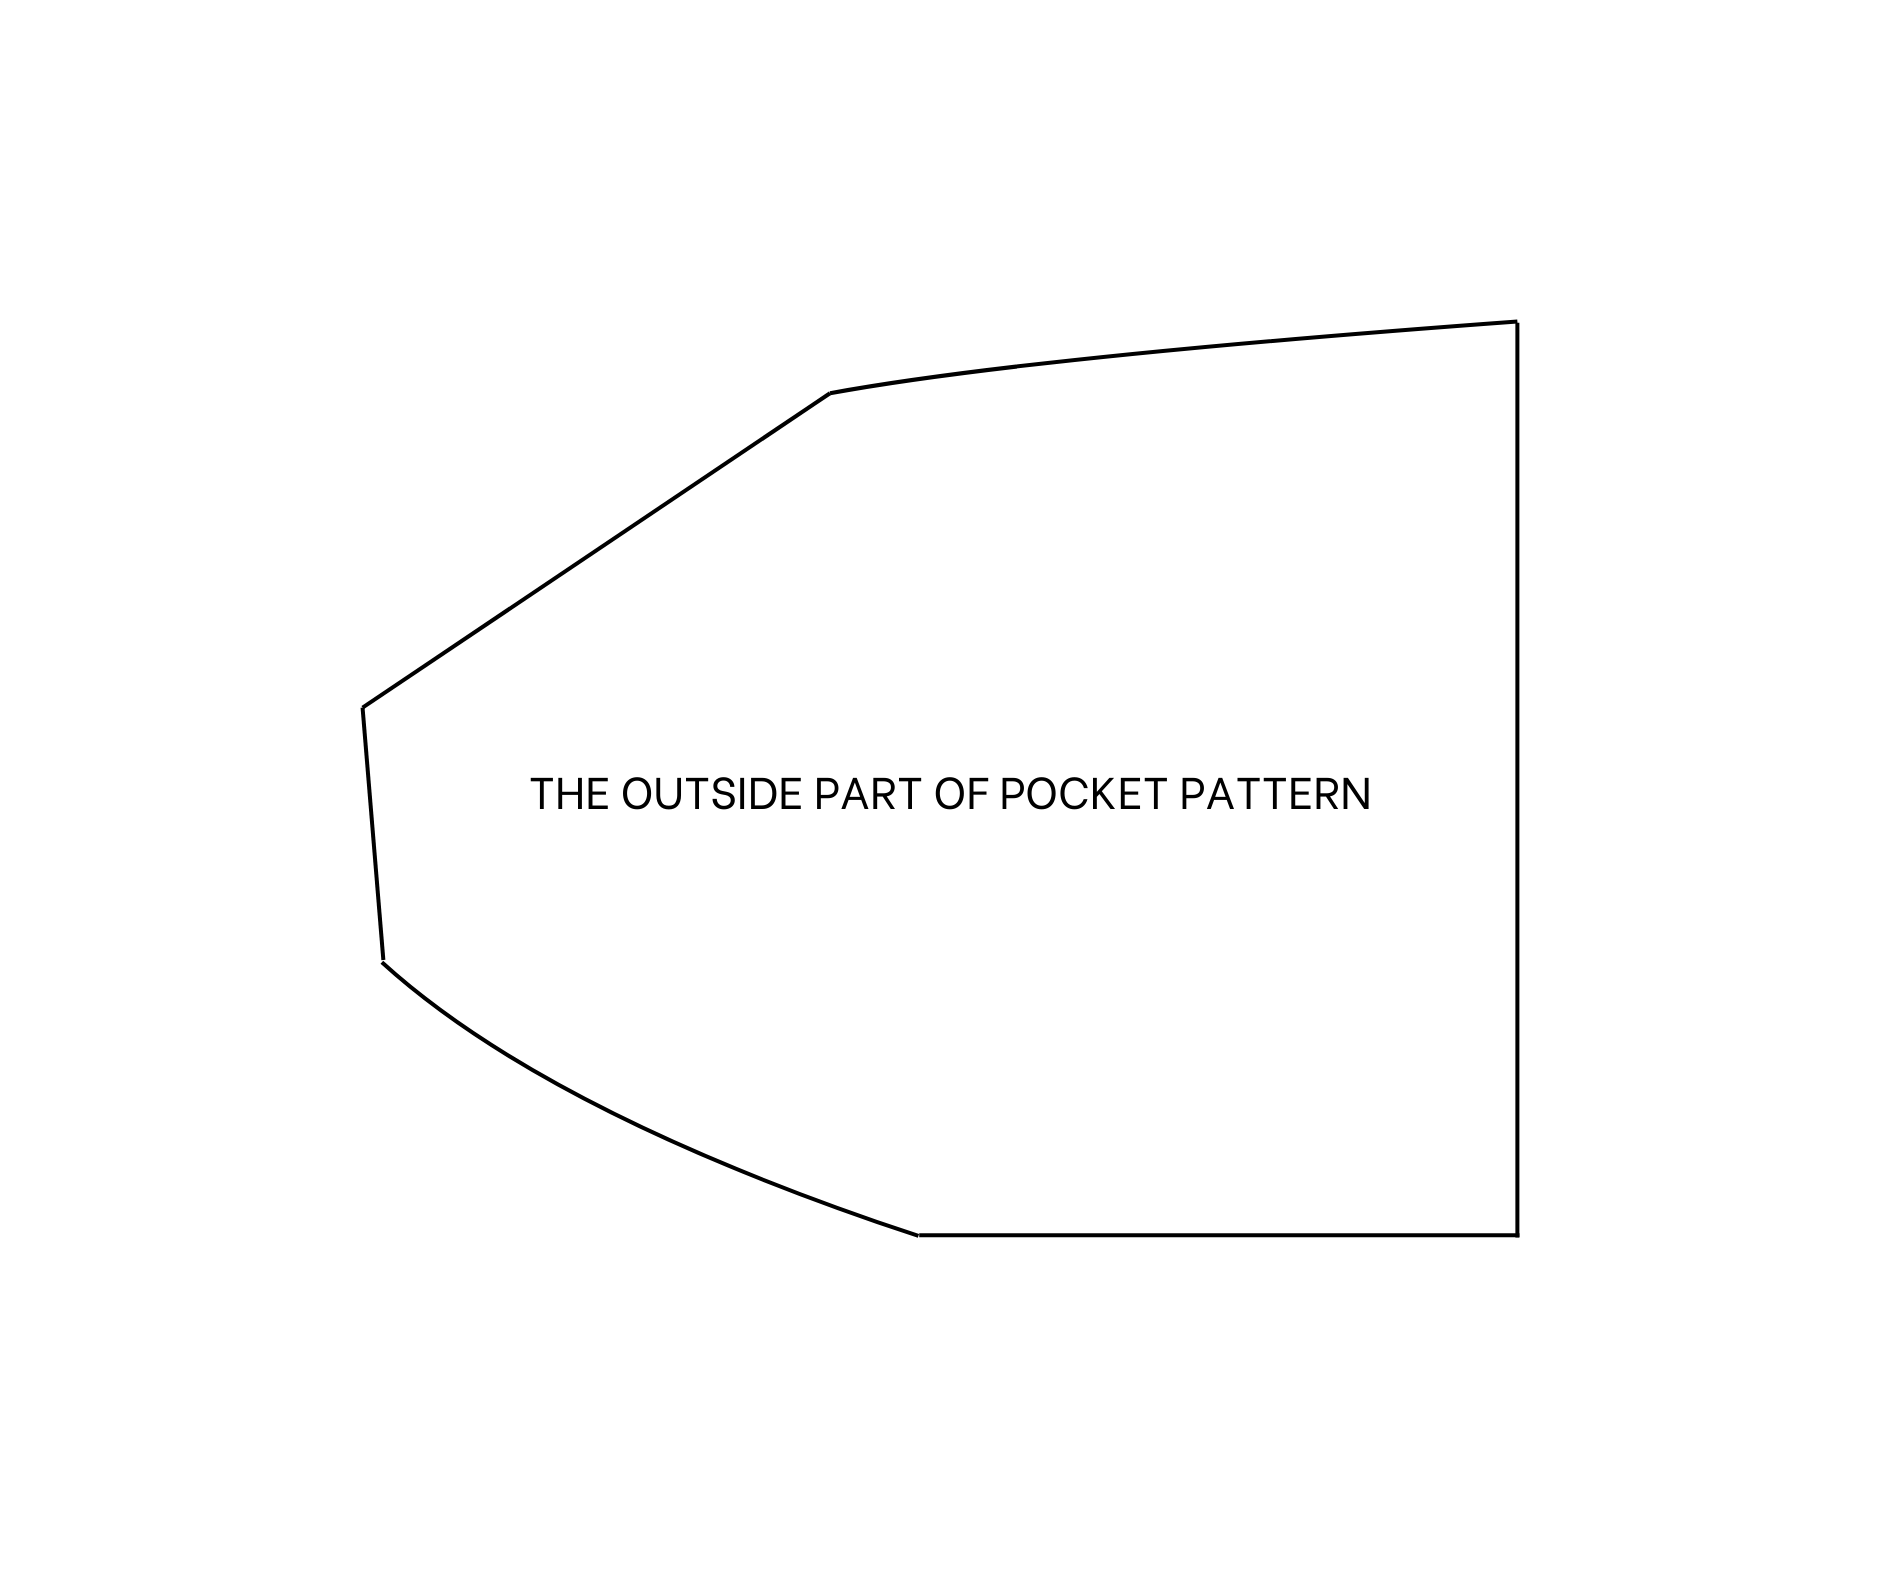
The outside pocket pattern
To give the side pocket a slanted look at the front, draw a slanted line with 4 cm width and 13 cm length from the top sideline.
Add 1 cm for seam allowance for that slanted line before cutting.
Then copy that line to the pocket pattern.
And the outside pocket pattern will be ready after cutting by the line.
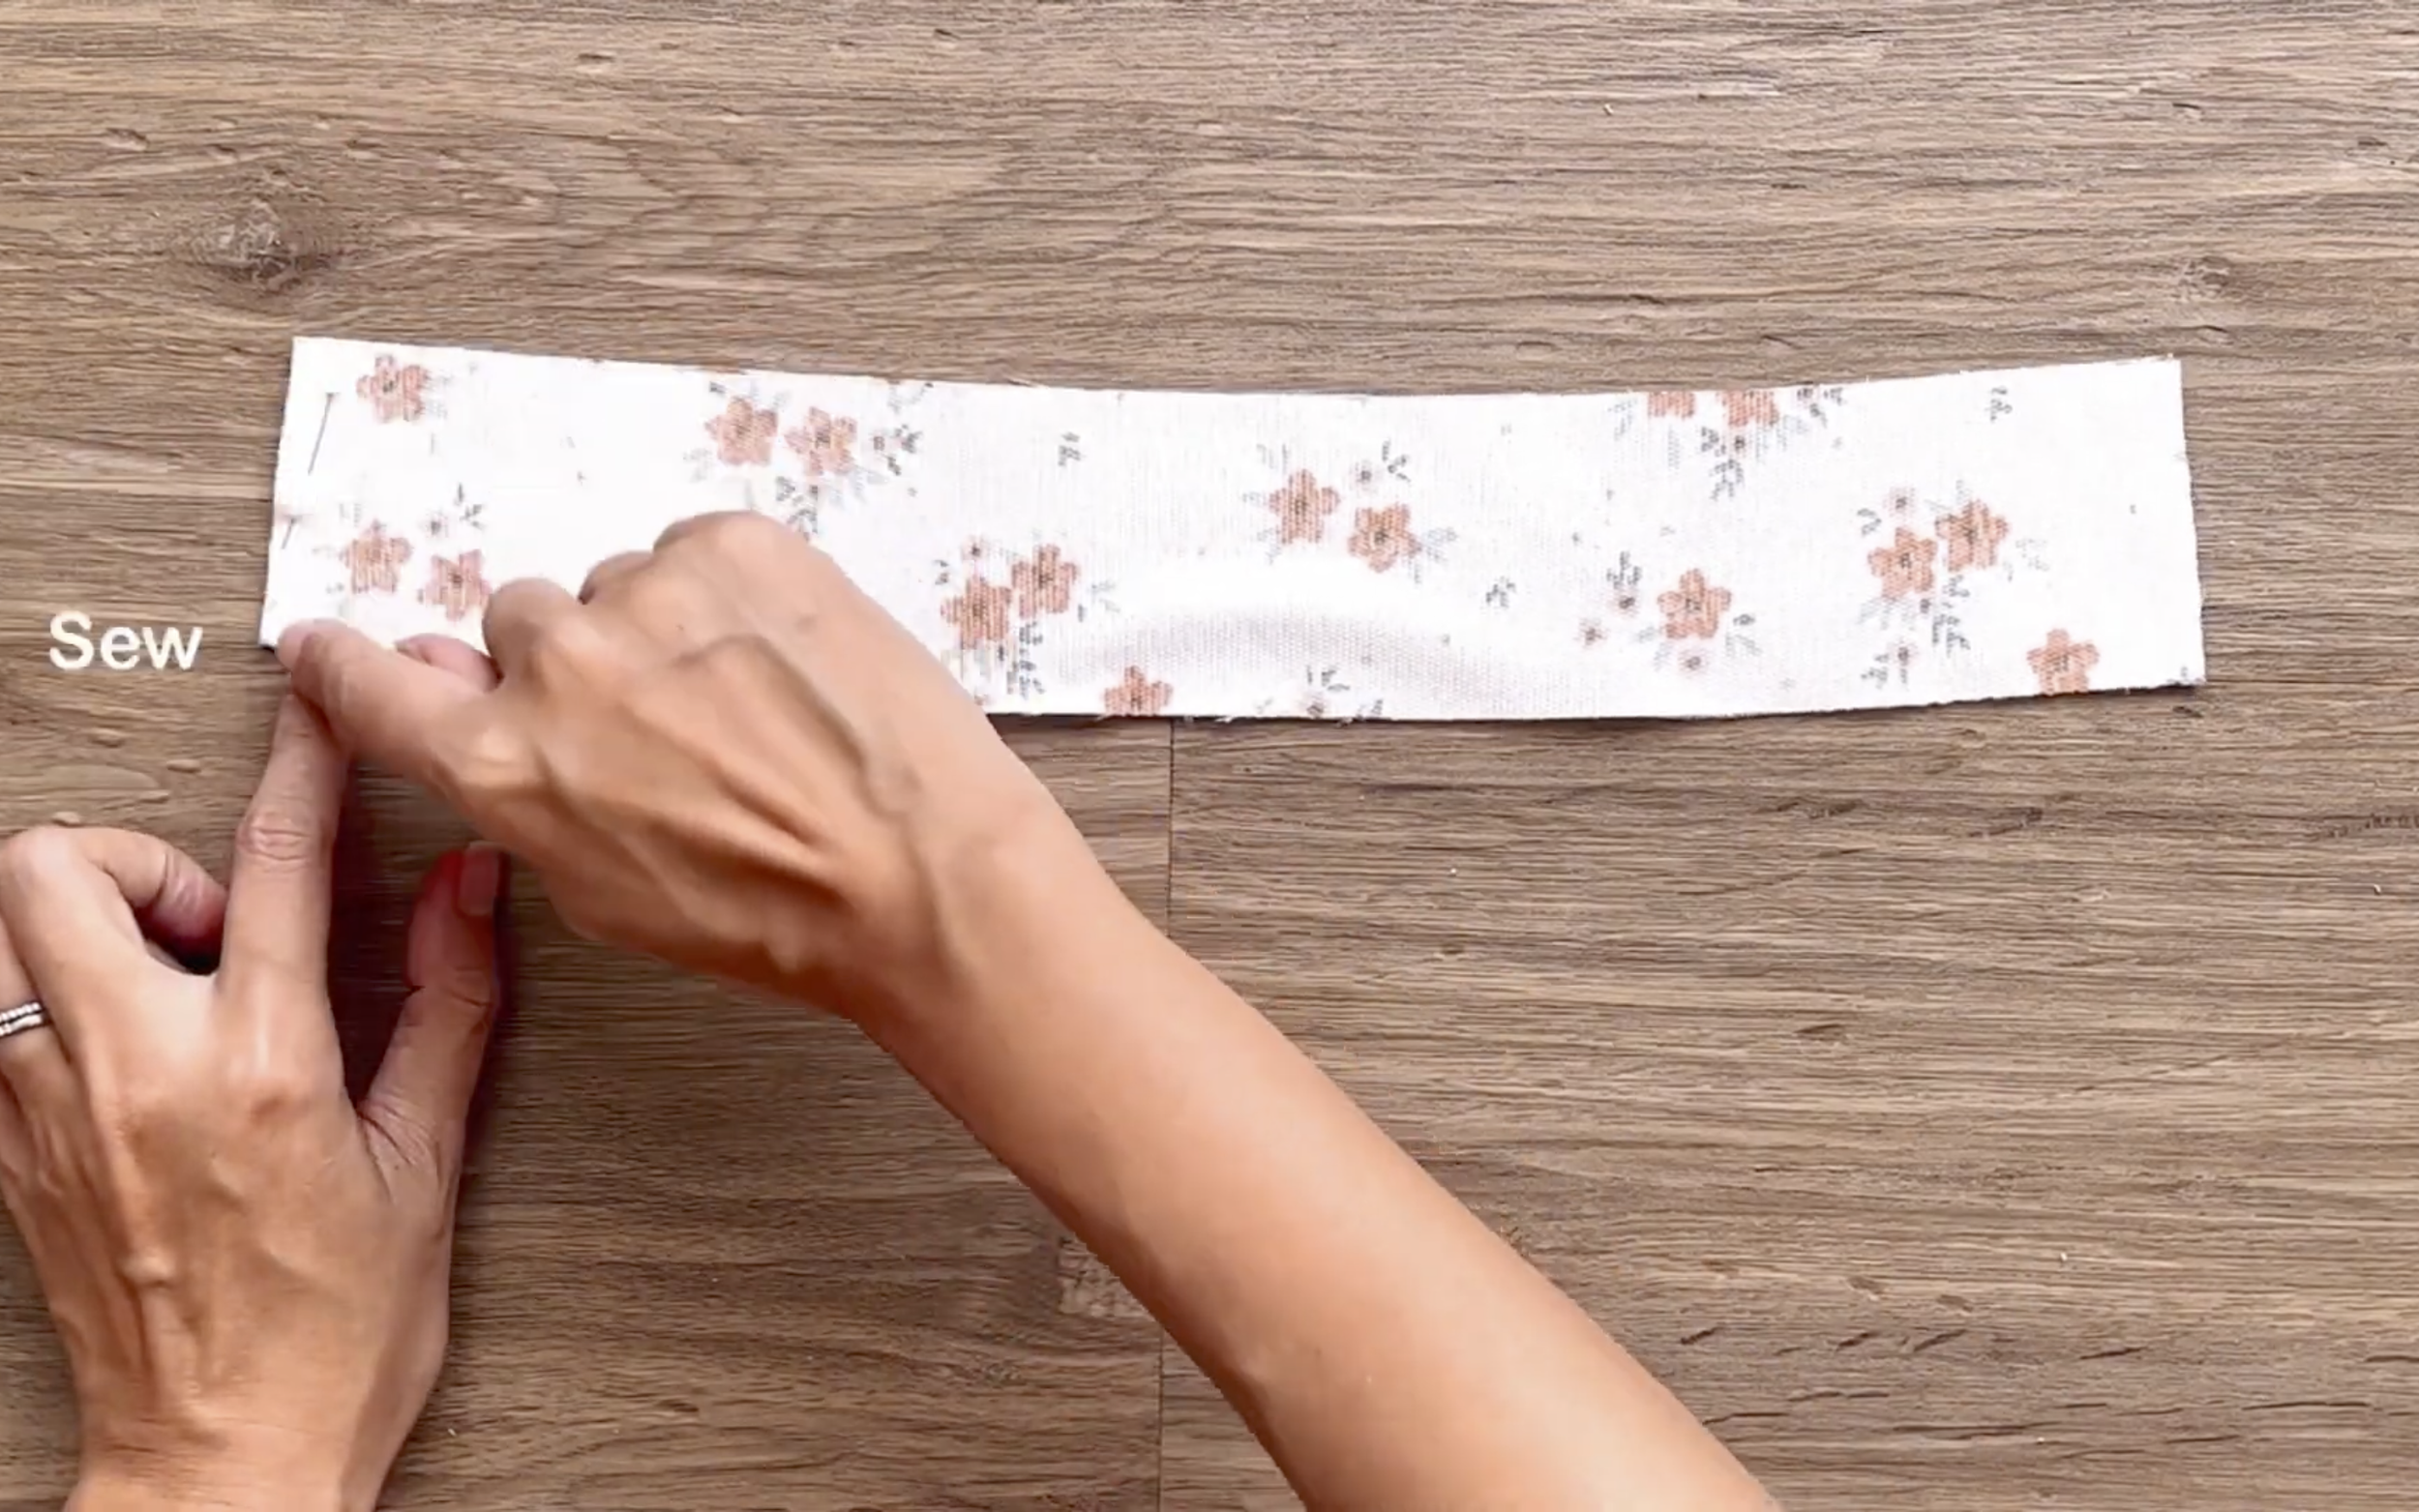
THE WAISTBAND PATTERN
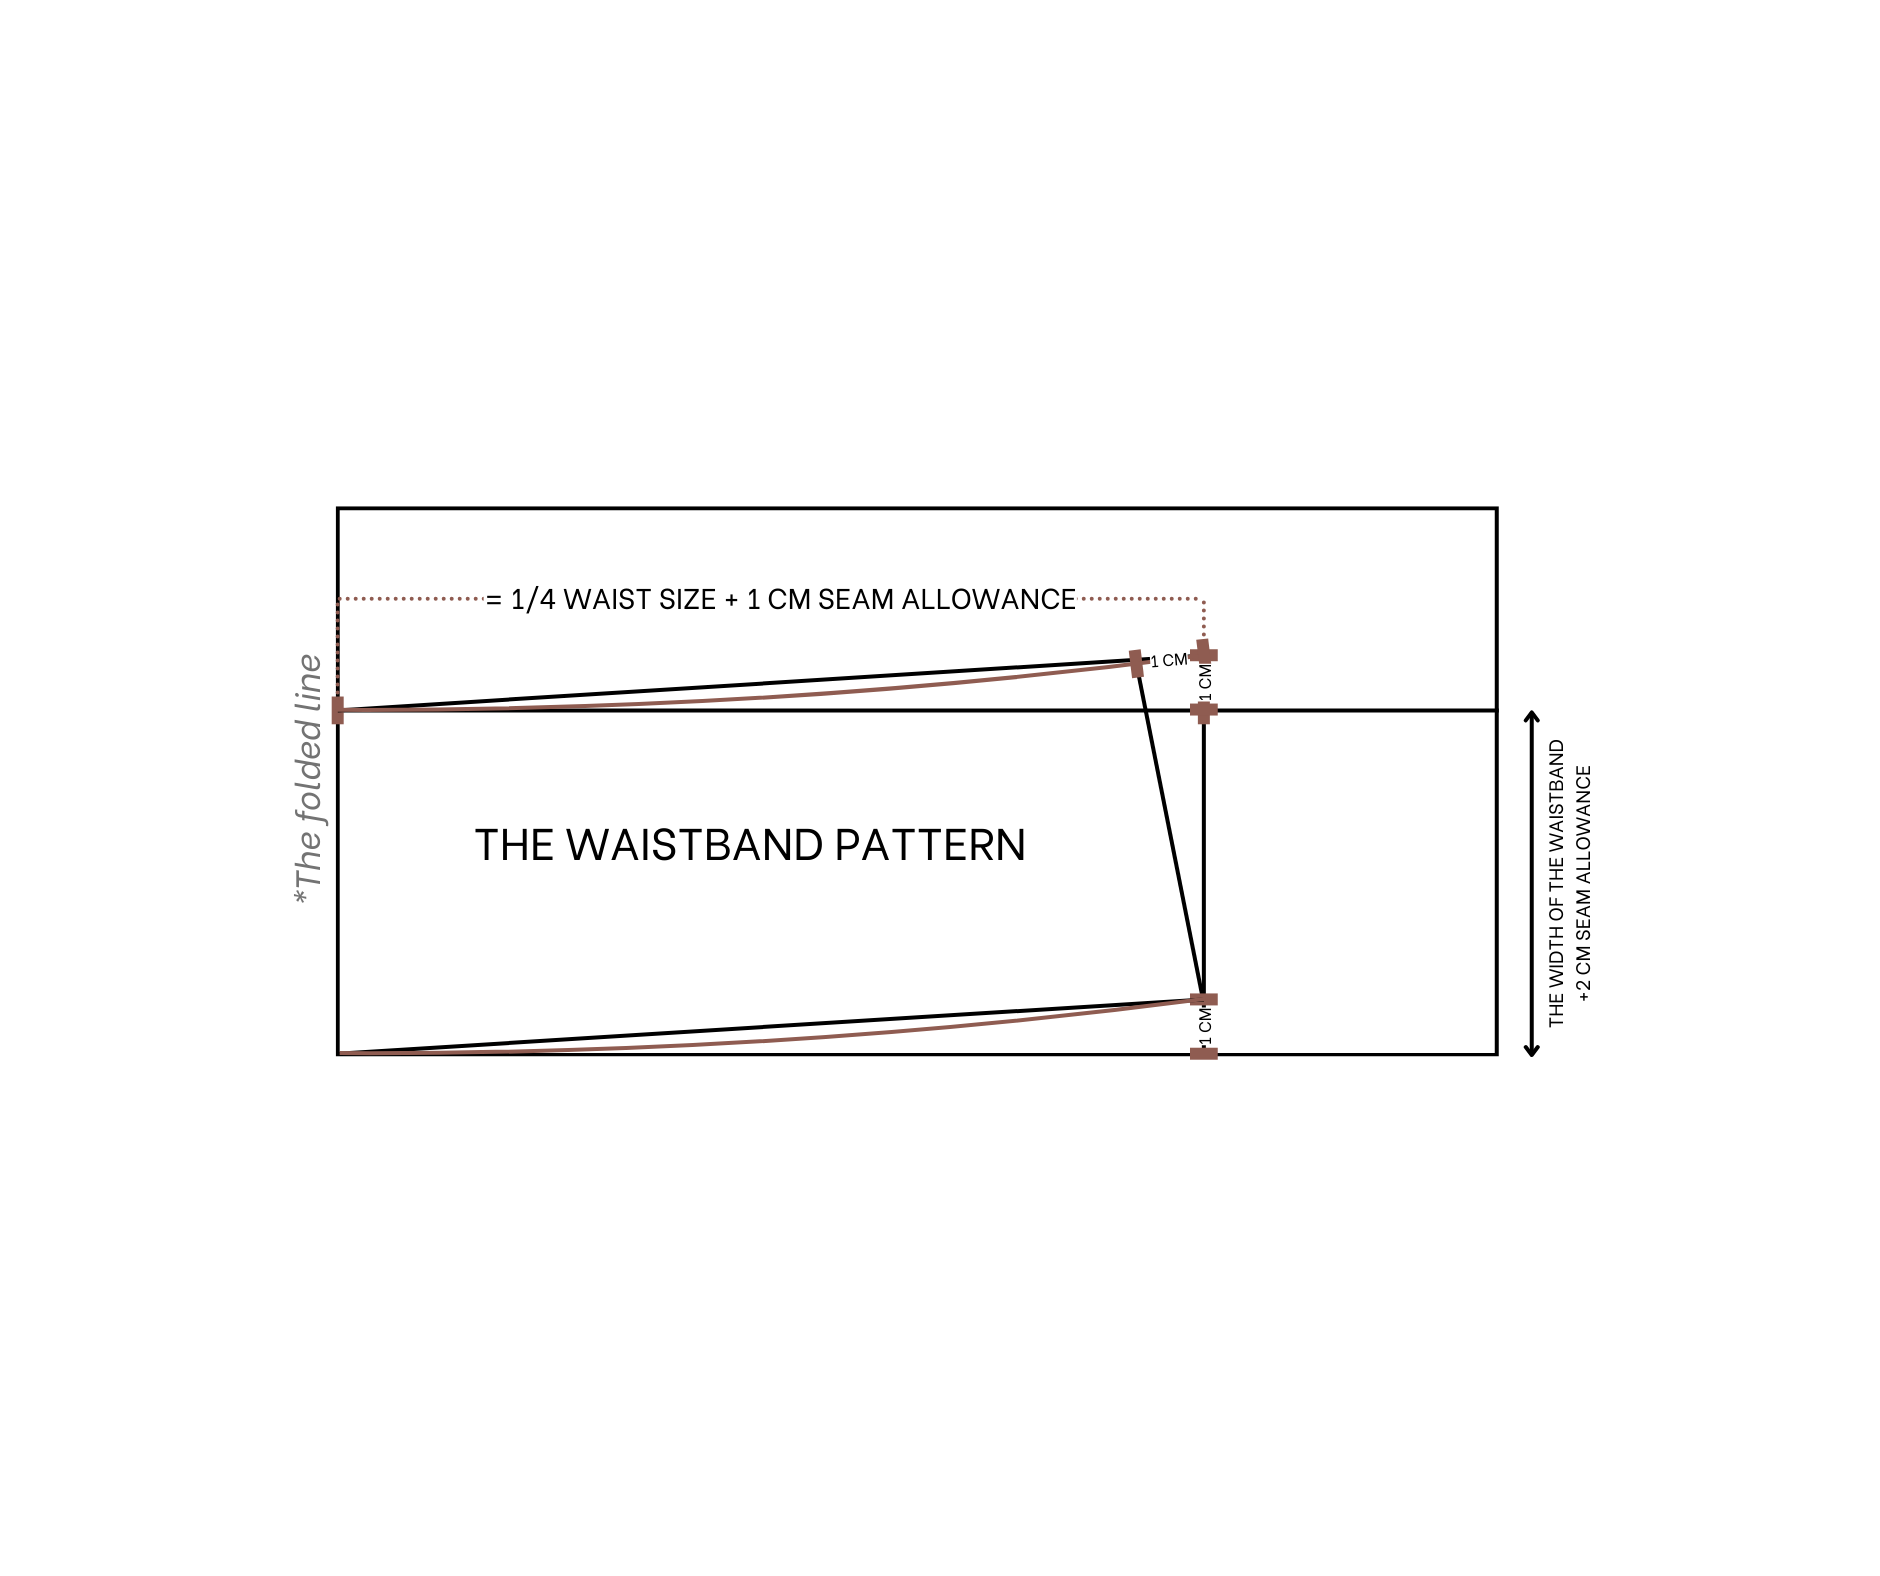

The waistband pattern
To make the waistband, fold the paper in half first.
From the end of the fold, mark 6 cm up, which is the width of the waistband plus 2 cm for seam allowance.
Then draw a line through that mark, parallel to the ending line.From the cutting point between this line and the fold, mark 18 cm, which is a quarter of waist size plus 1 cm for seam allowance. Then draw a straight line to that mark.
From the end of this straight line, mark 1 cm up, and do the same at the top of this line.
After that, connect the 3 marks to the two ends of the fold. Based on this, draw a slightly curved line to create the top and bottom waistline. At the end of the top waistline, move 1 cm inside to make it perpendicular with the bottom waistline
And the waistband pattern will be ready after cutting.
THE FRONT BODICE PATTERN
For the front bodice pattern, draw a horizontal line cutting a straight line first. Then draw another horizontal line 22 cm below the first one. This is the distance from above the breast to 4 cm above the belly button. It’s also the desired length of the front bodice.
From the cutting point between this line and the straight line, mark 11 cm, which is half the inside shoulder width.
From the cutting point between the first horizontal line and the straight line, mark 16 cm, which is a quarter of waist size minus 1 cm.
Then connect the two marks. Based on this, draw a slightly curved line to finish the sideline of the front bodice. Add 1 cm for seam allowance.
This pattern will be cut in folded fabric.
And the front bodice pattern will be ready after cutting.
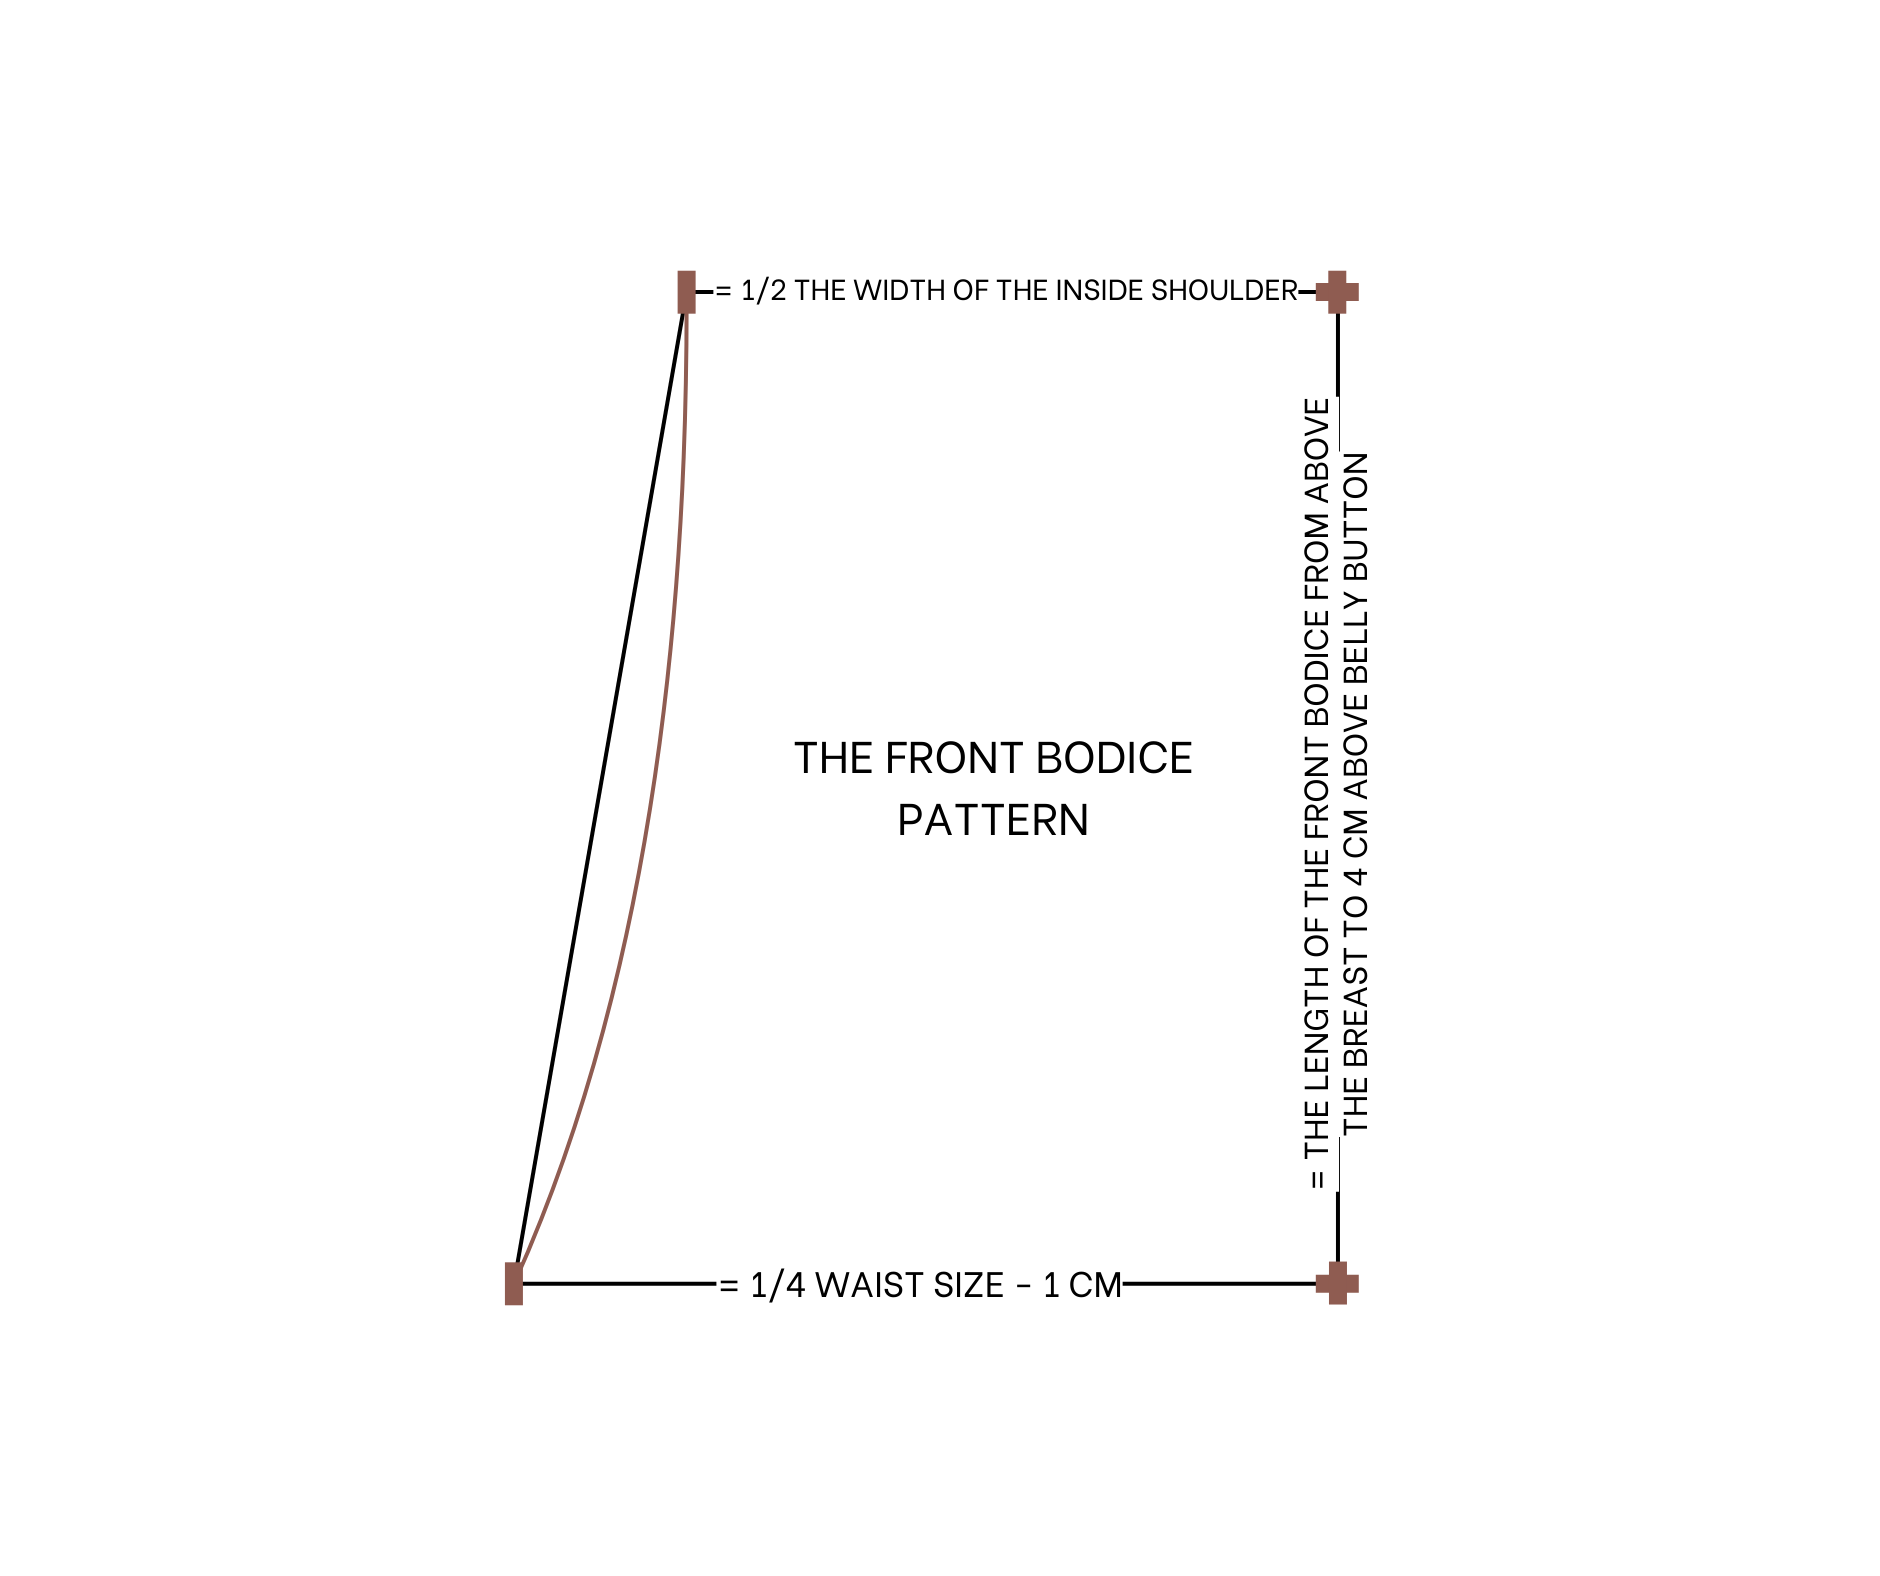
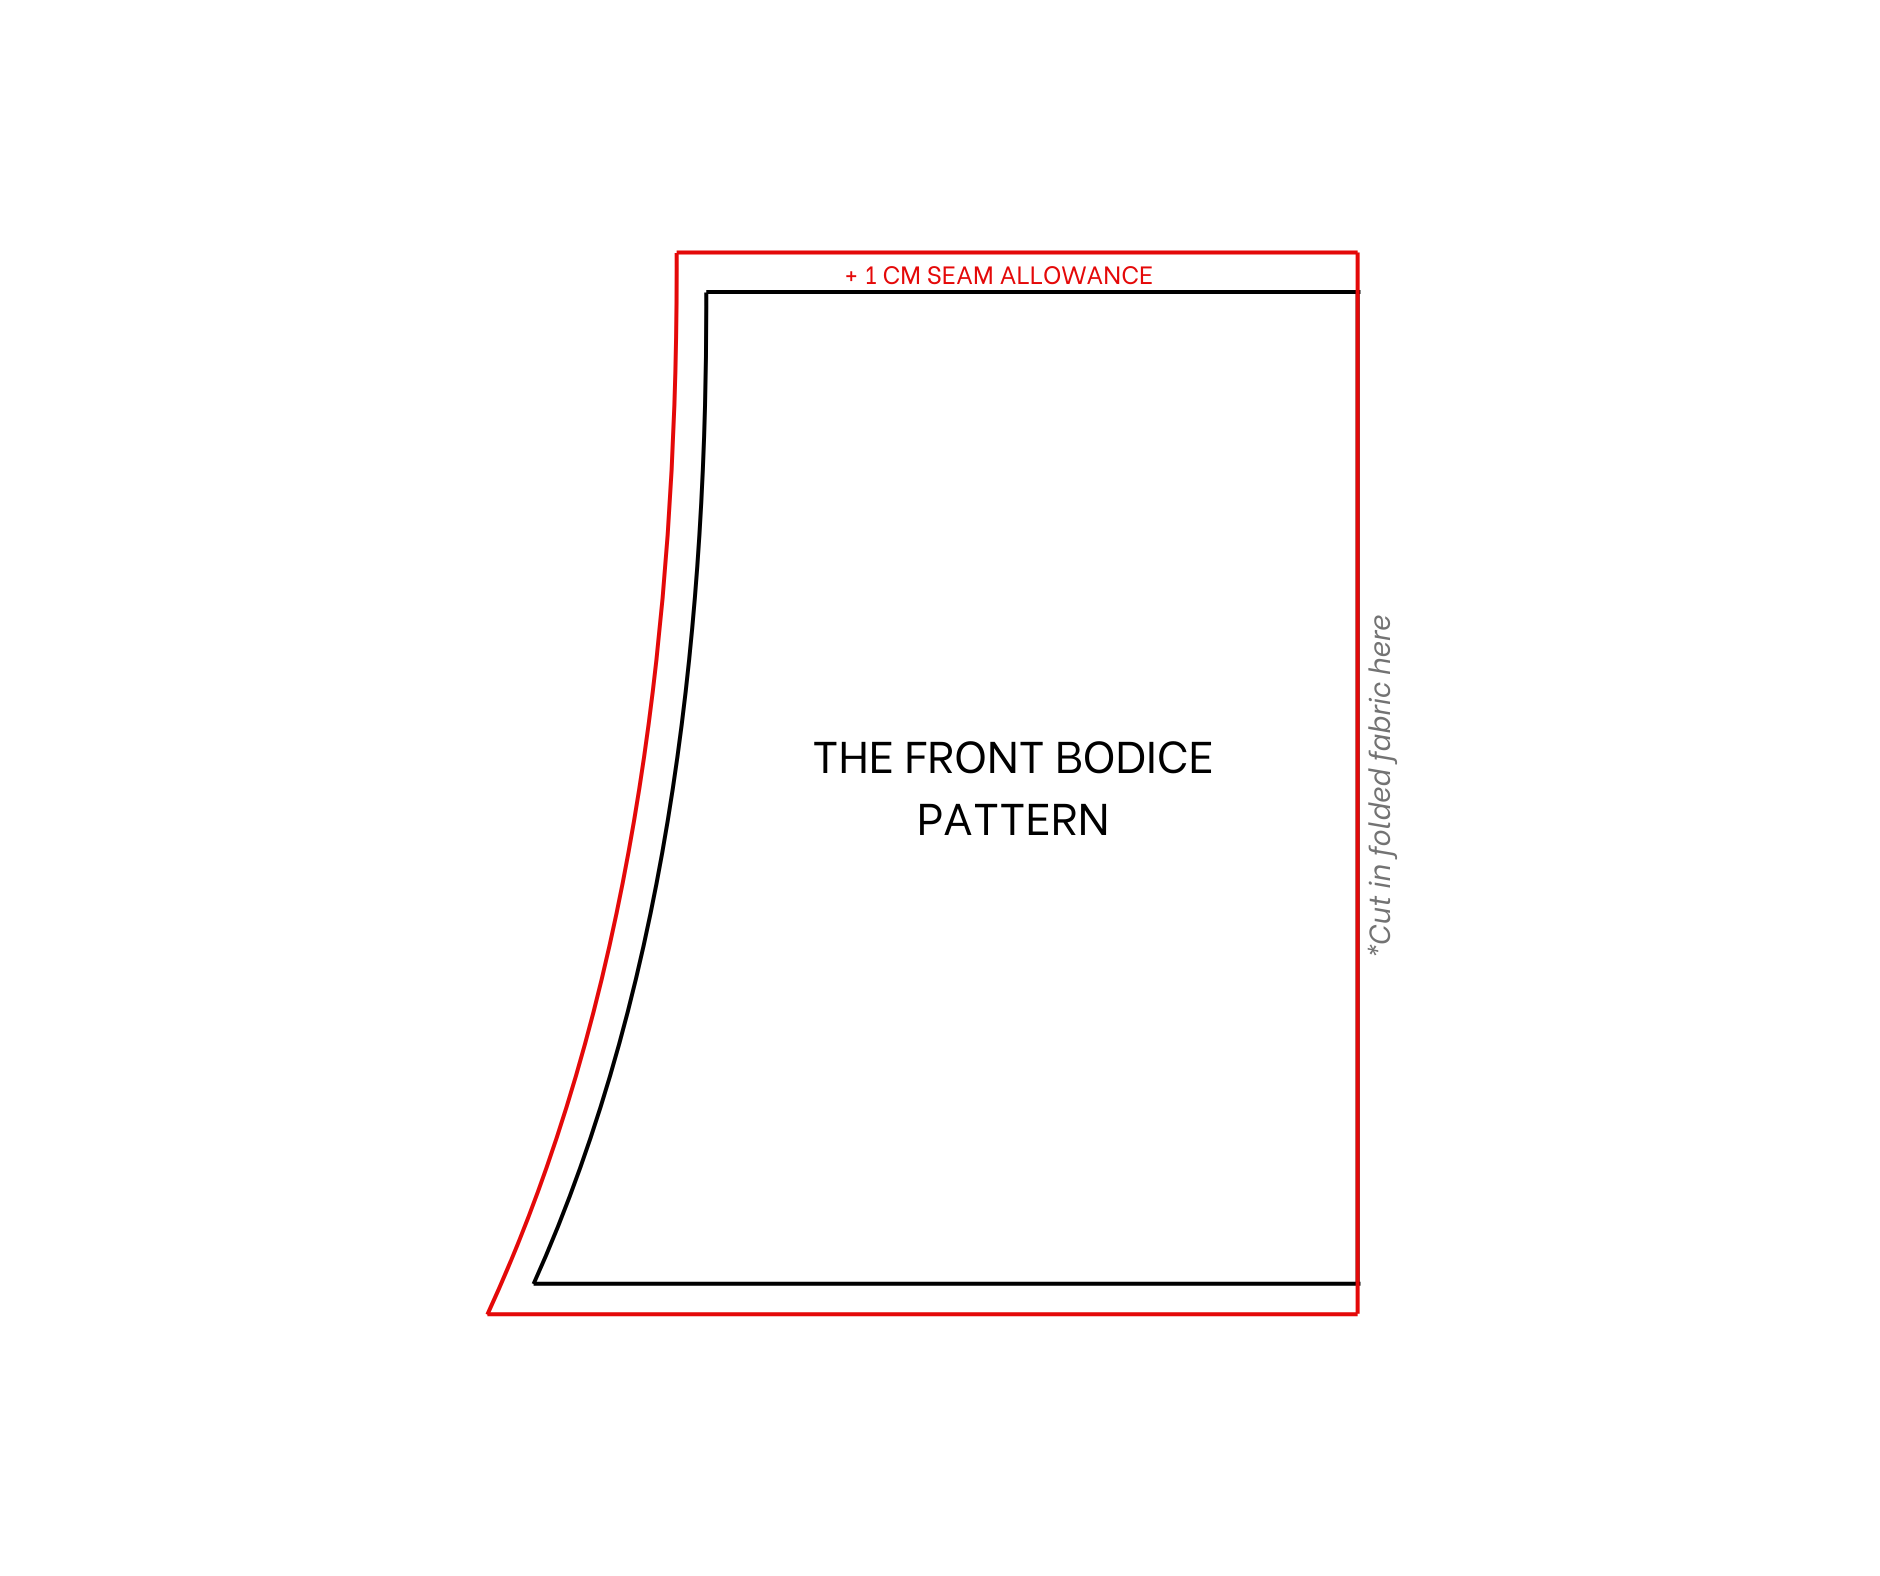
The front bodice pattern
SEWING THE DRESS
THE PANTS
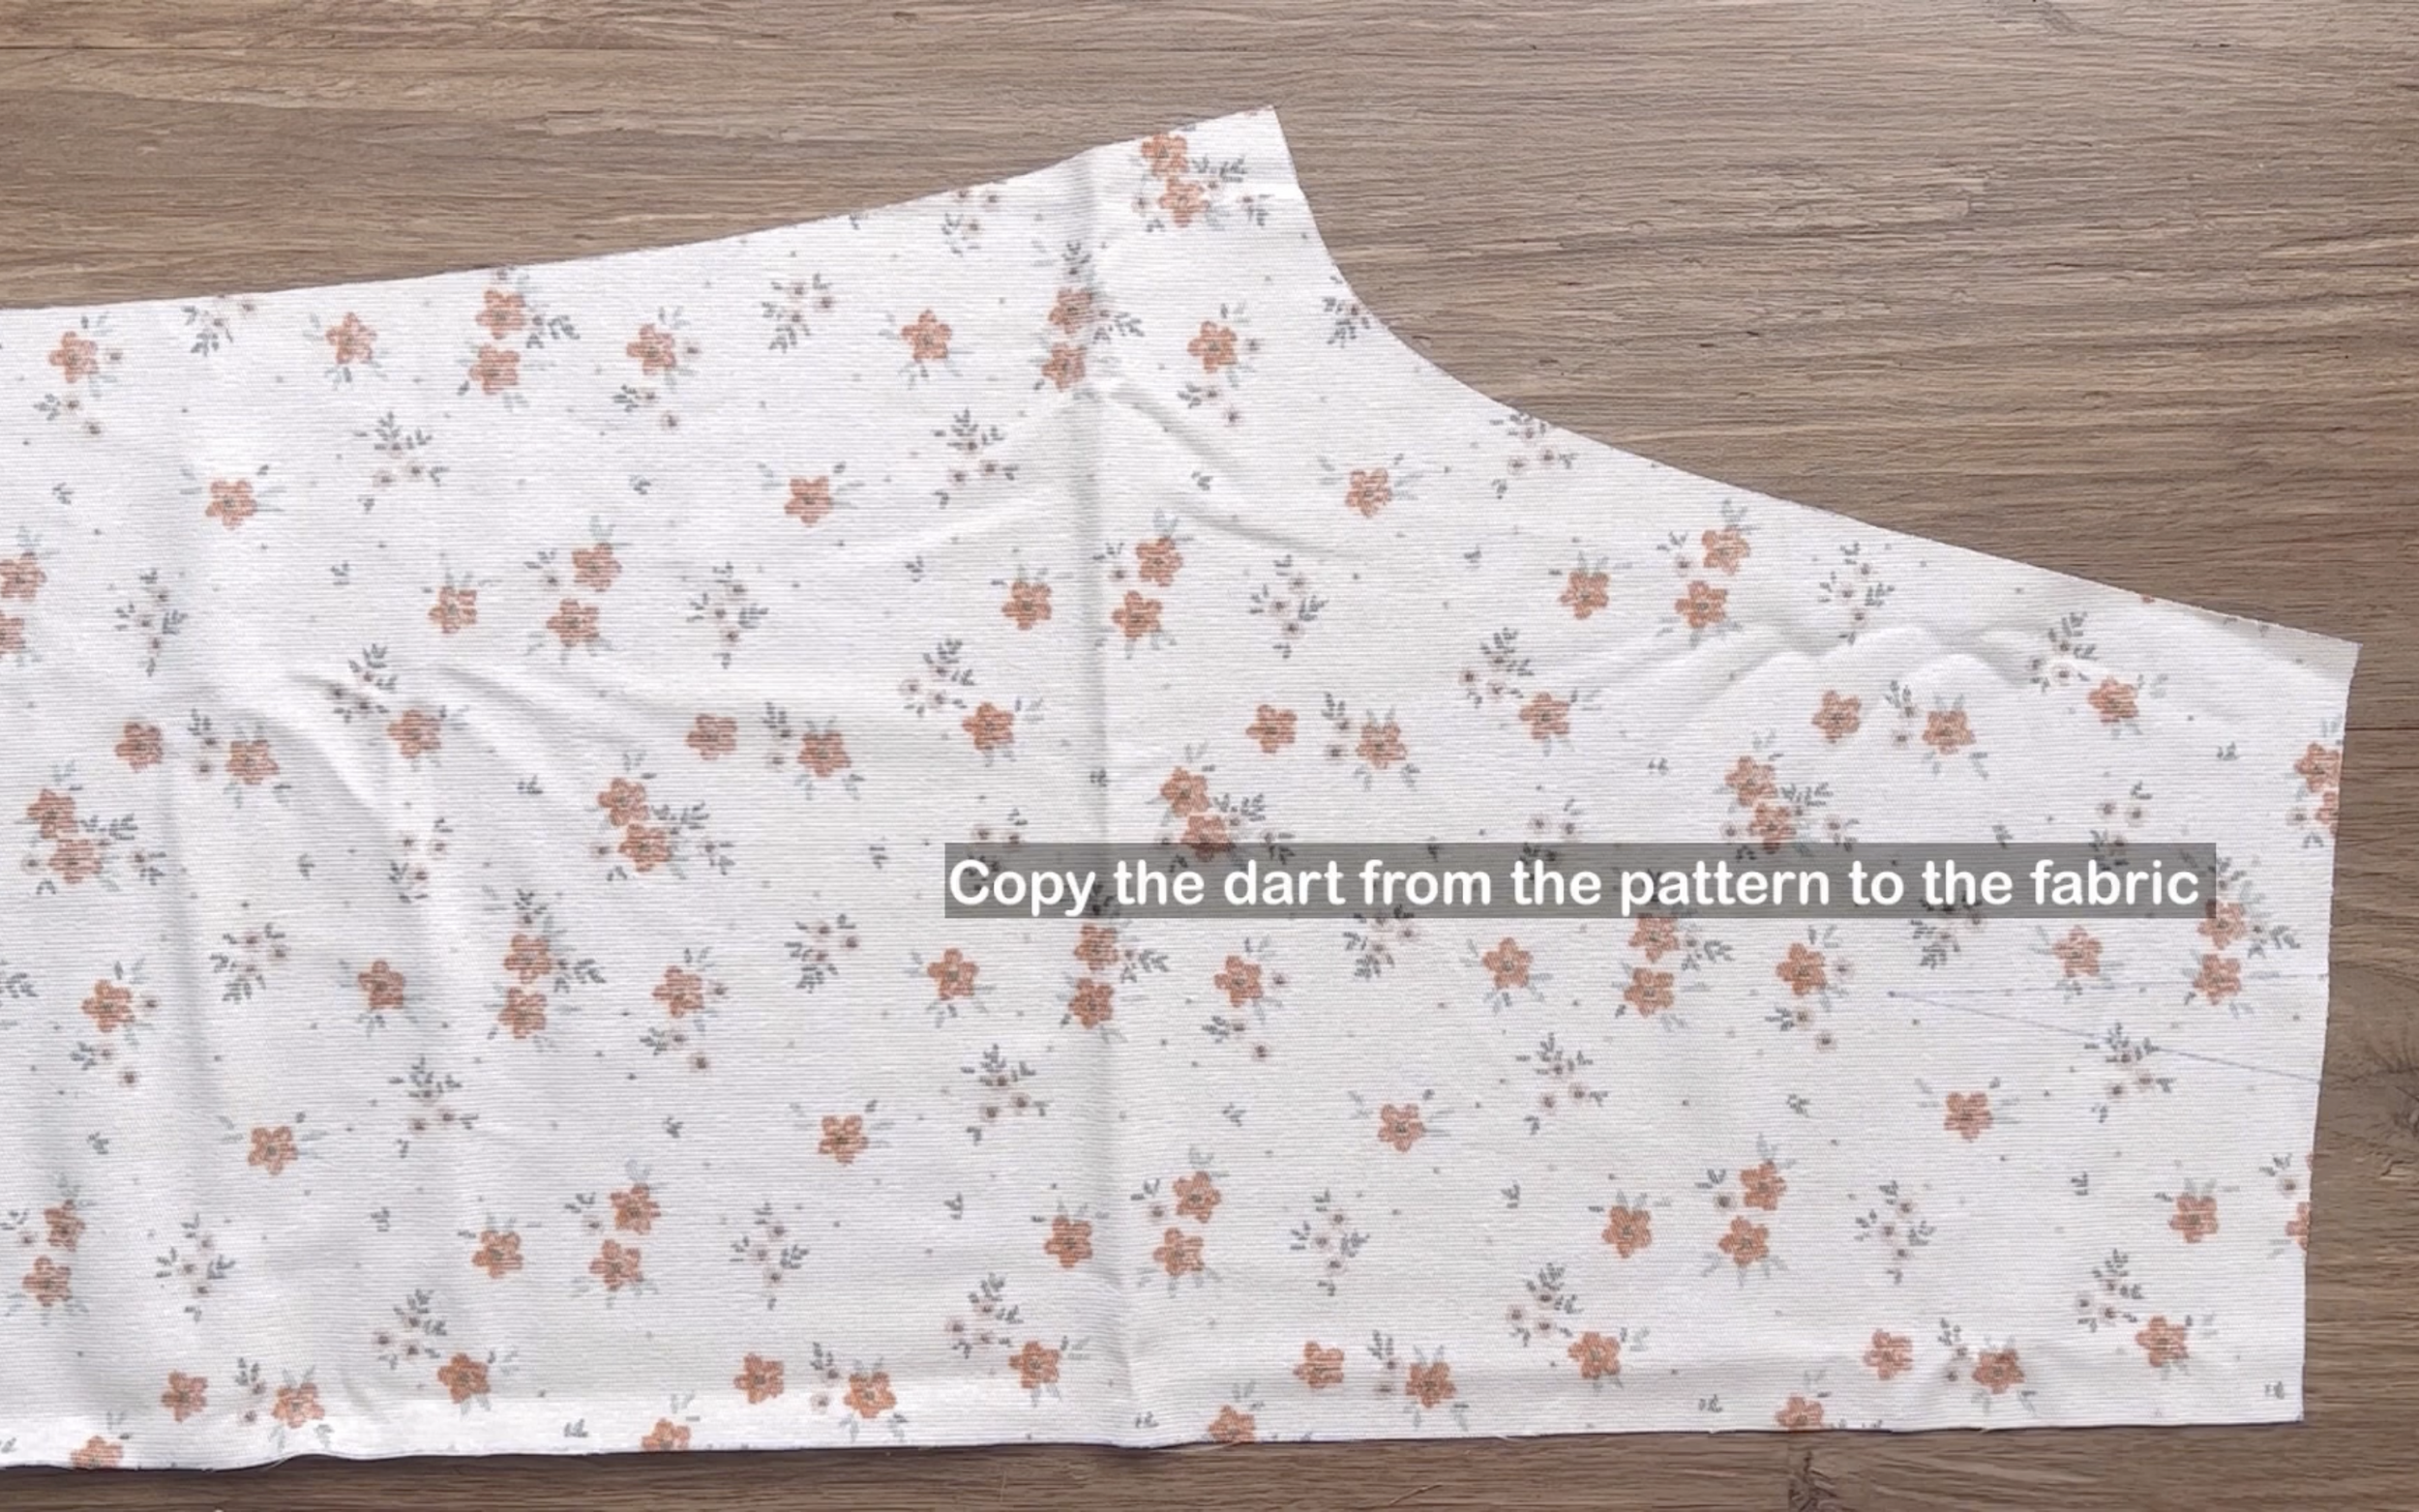
After cutting two pieces of the back pants pattern, copy the dart from the pattern to the fabric.
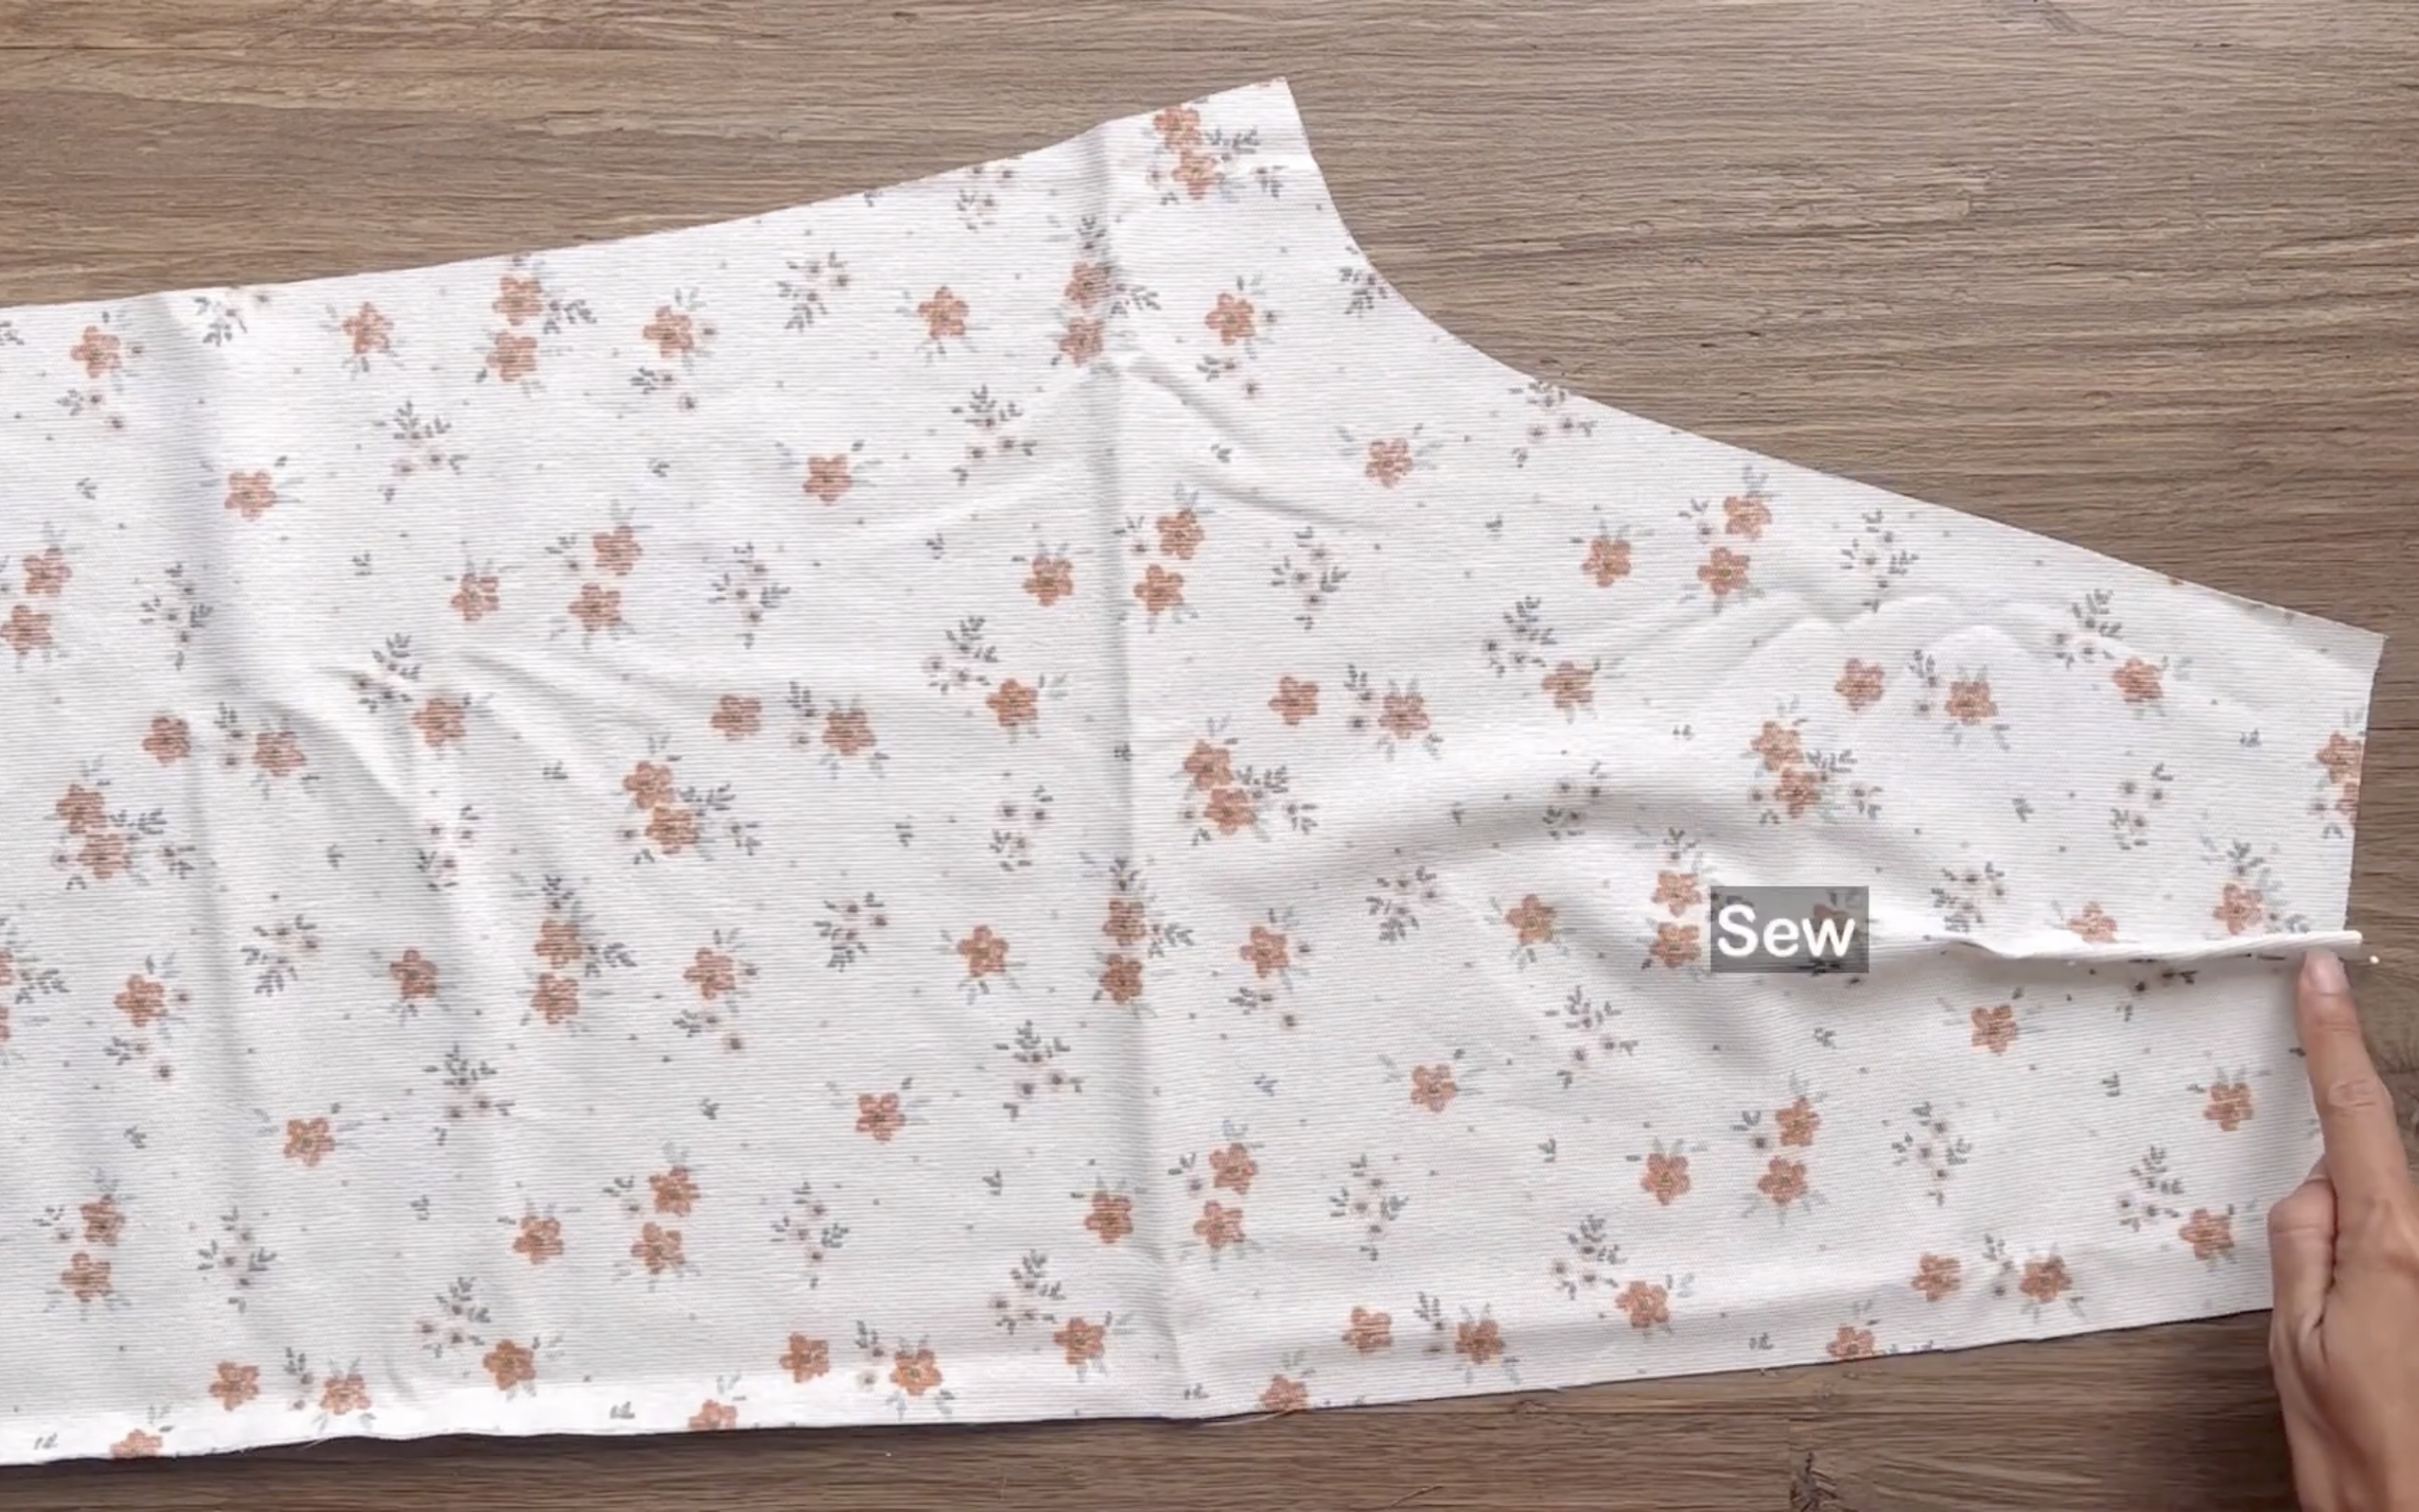
And sew to finish the dart.
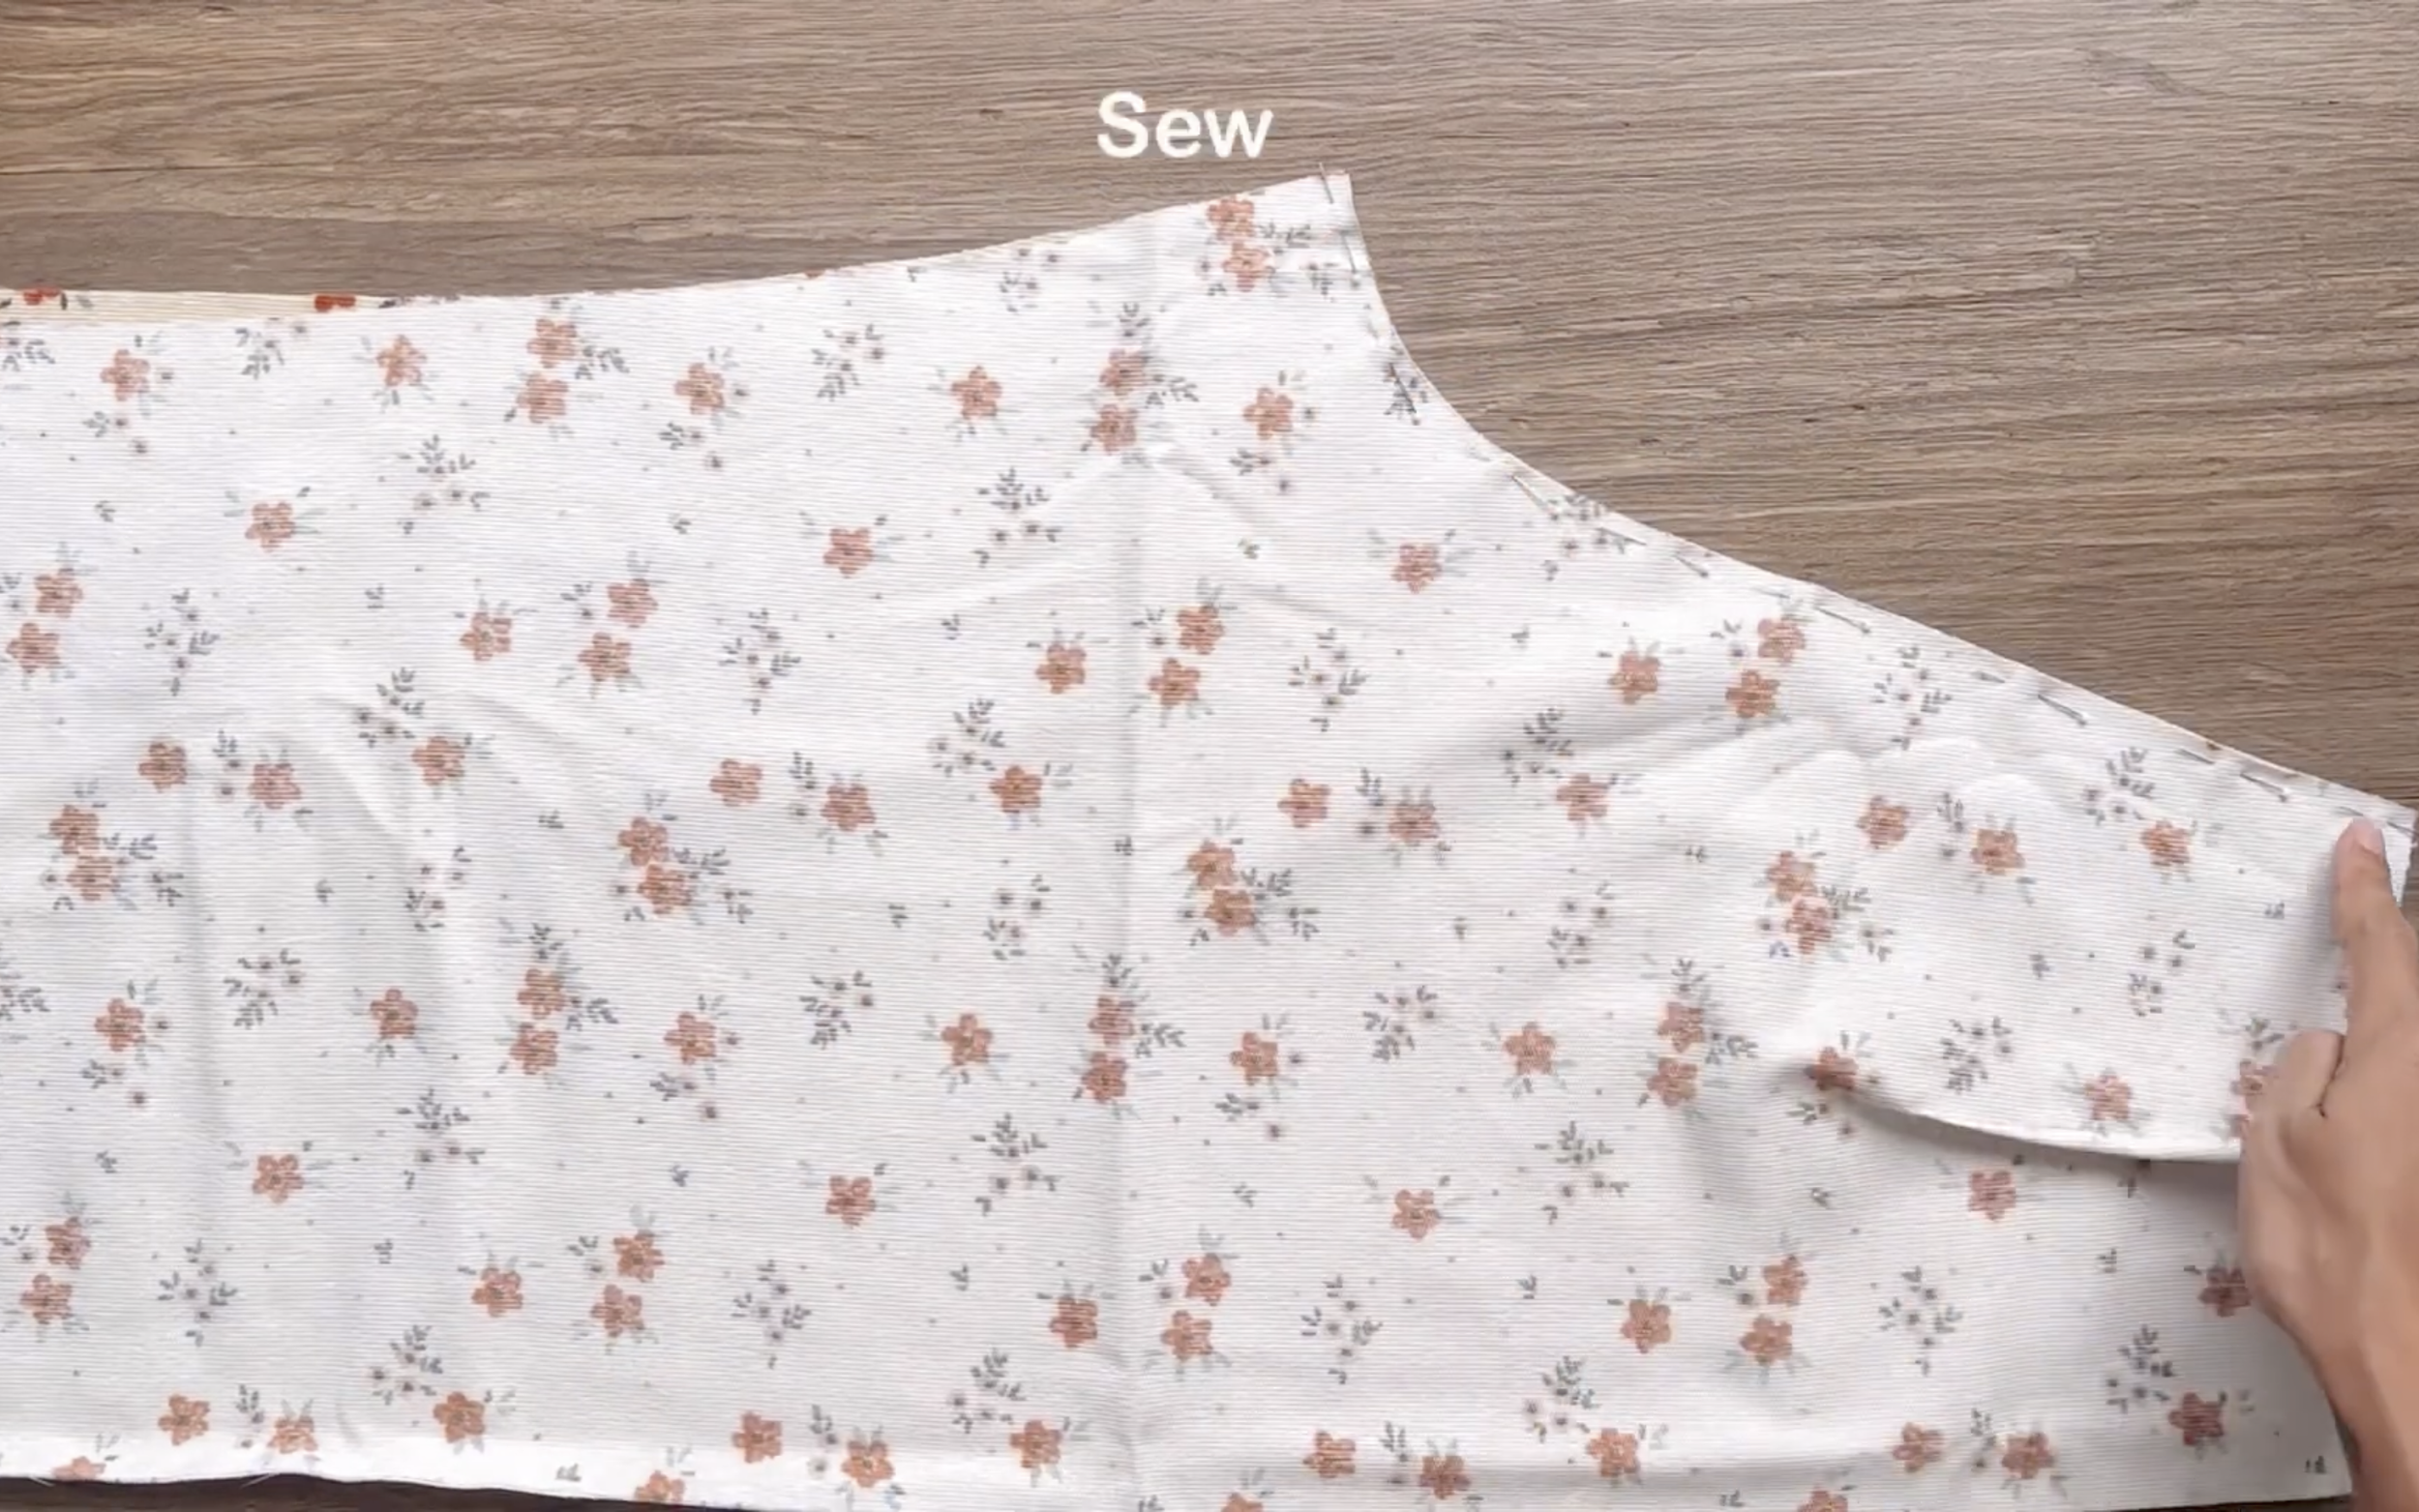
After sewing, connect the two back pieces together at the crotch line.

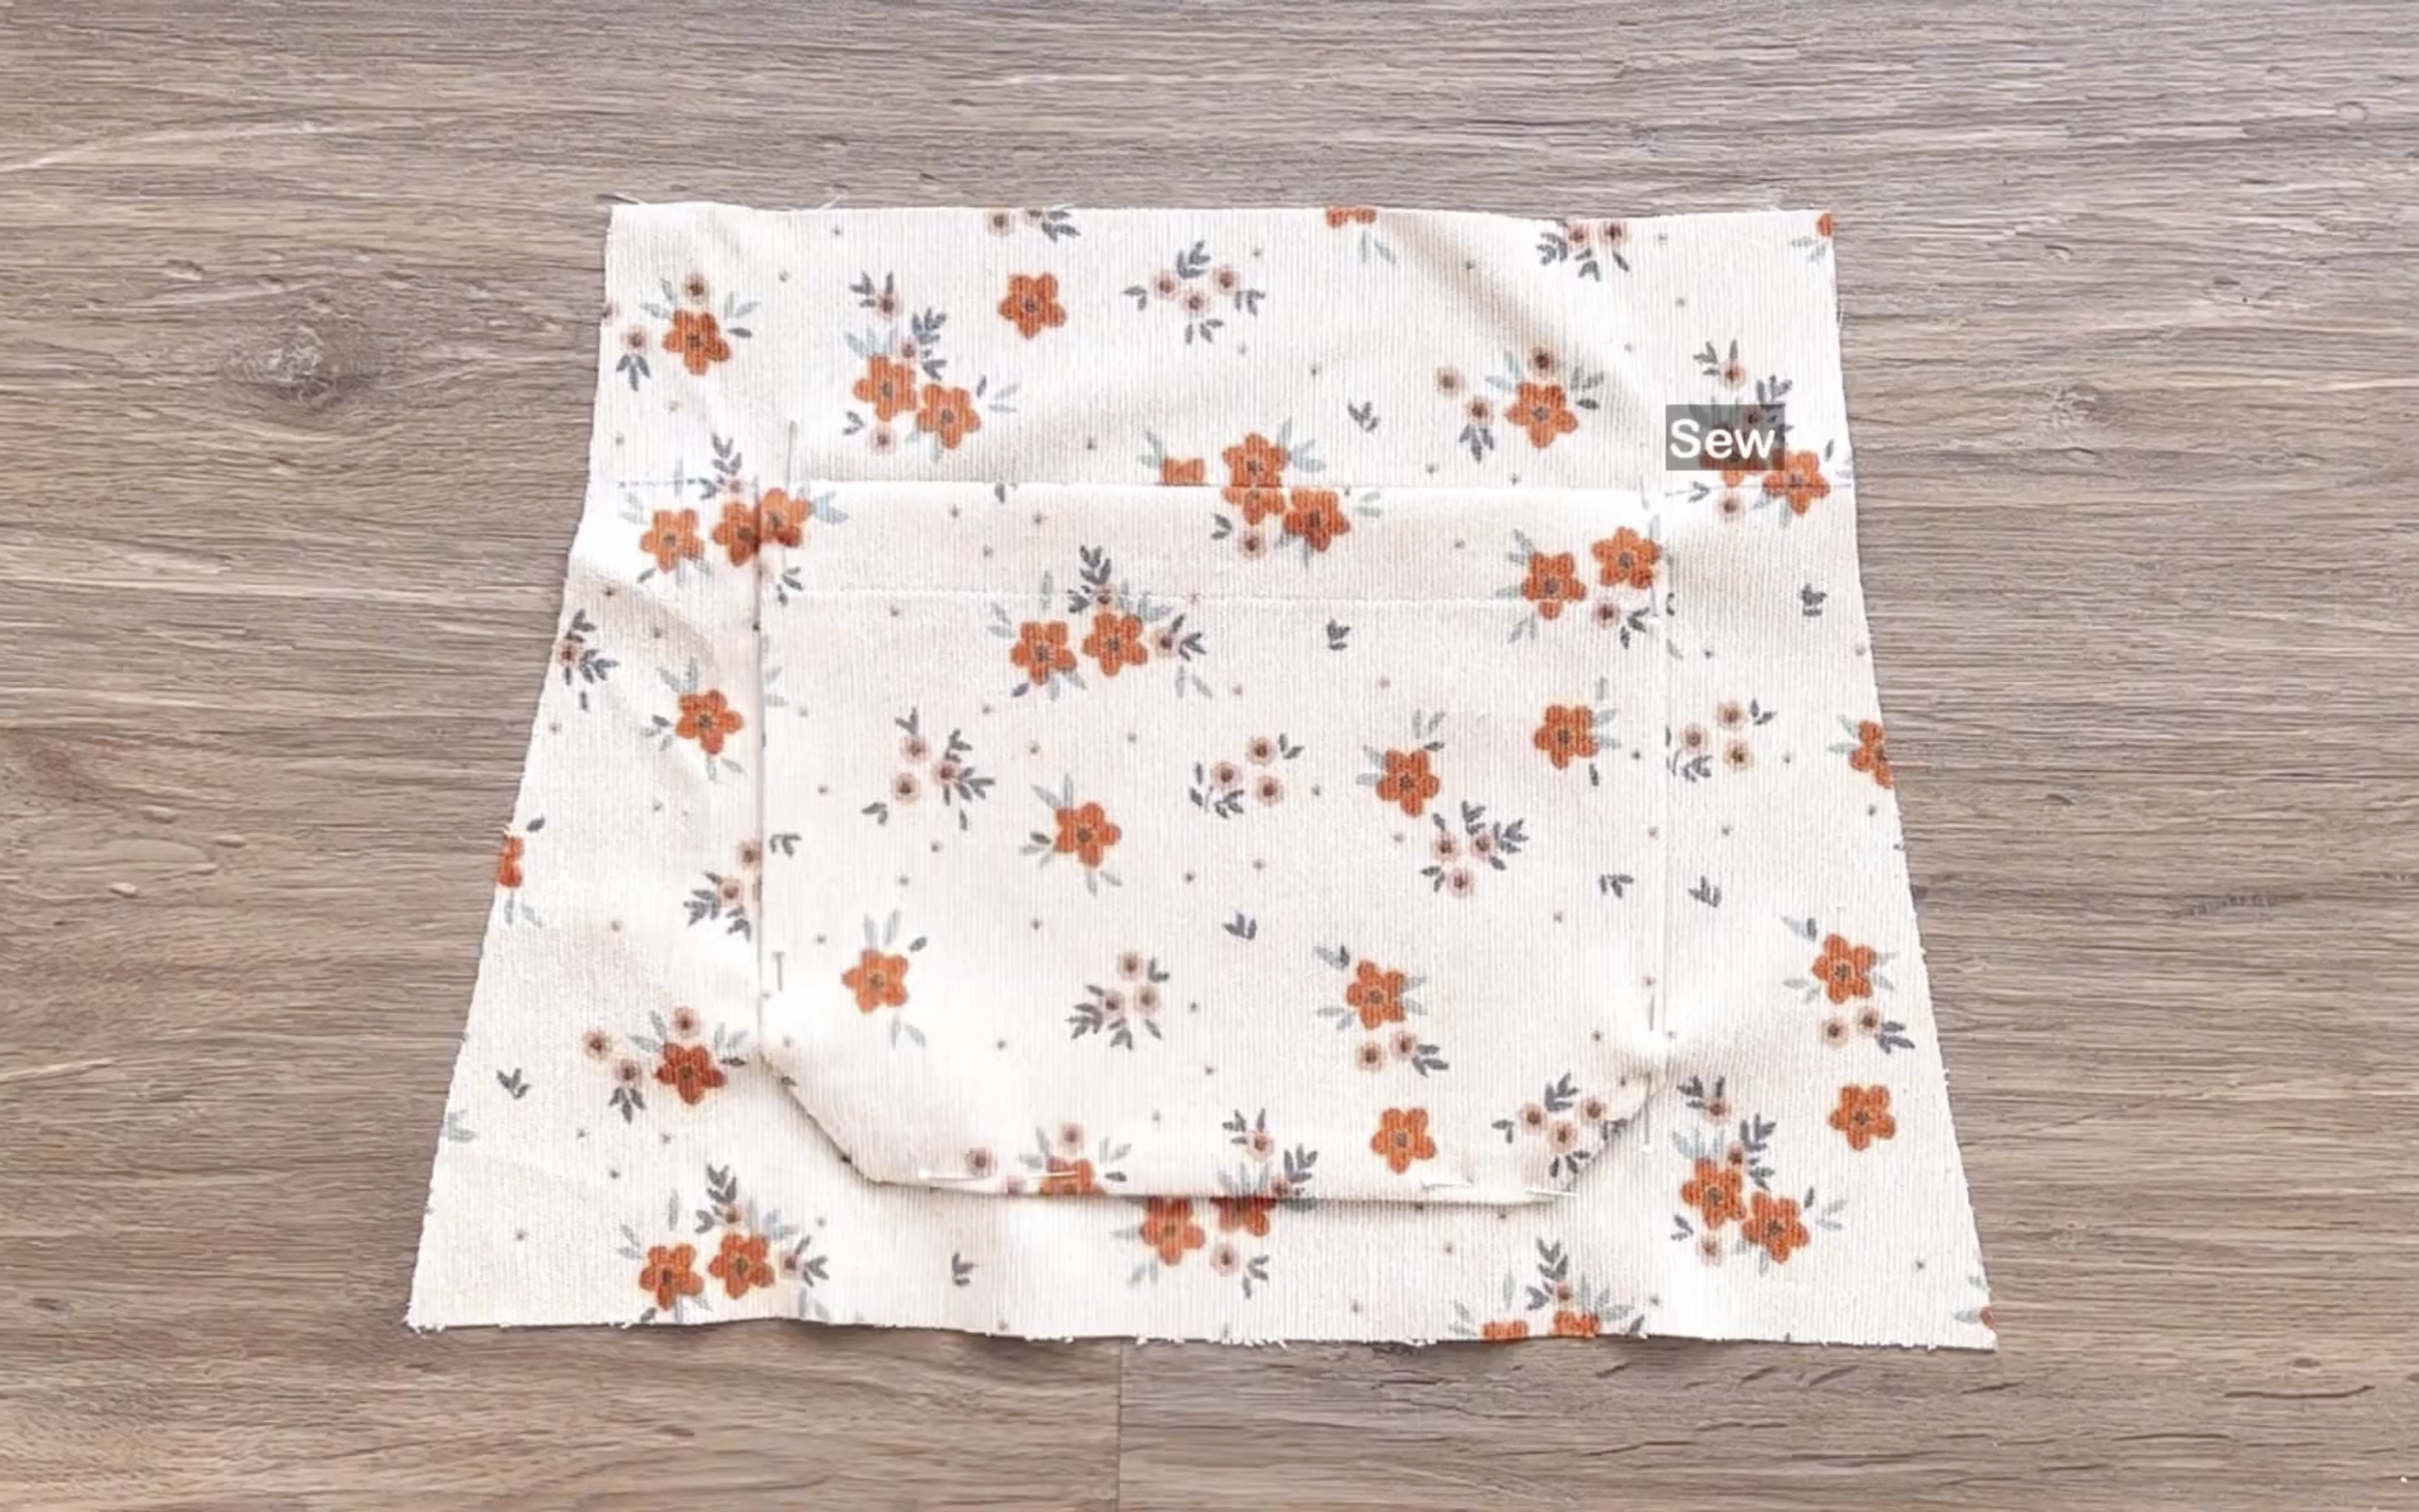
Moving to the front of the pants, connect the outside pocket piece to the front pants at the slanted line of the pocket first.
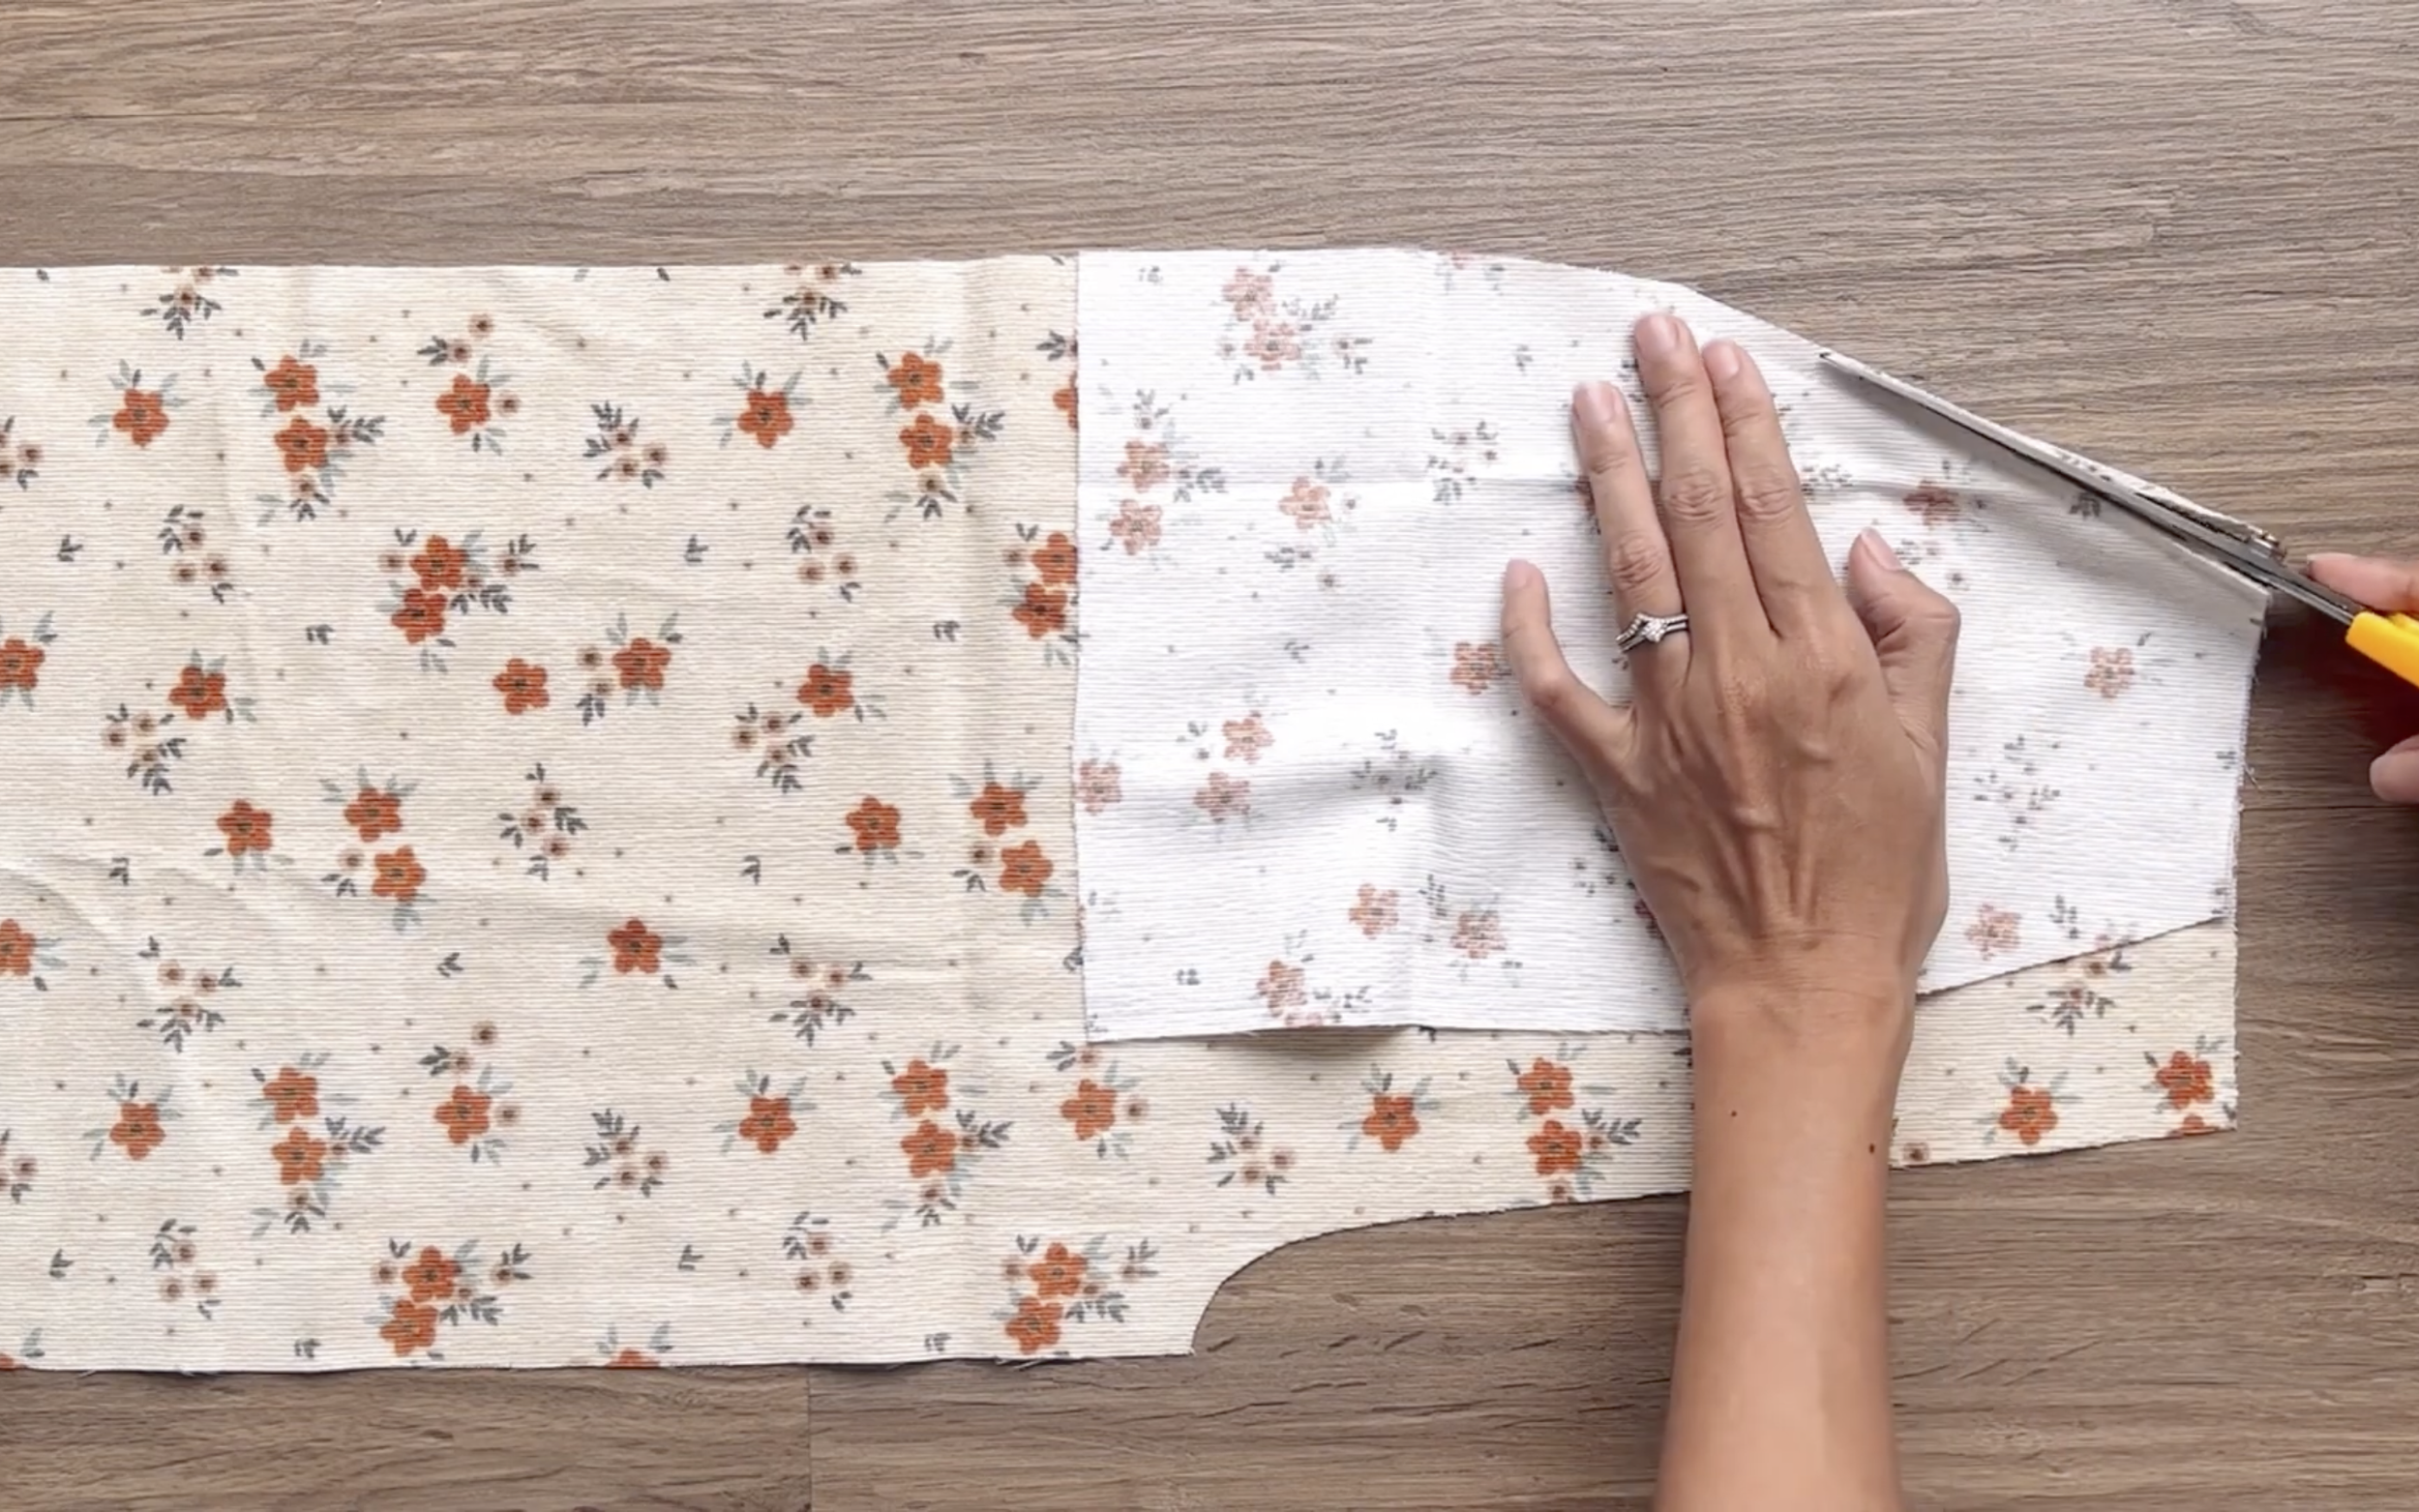
After sewing, cut the end fabric a bit.
Then fold the outside pocket piece inside the front pants and make the second seam.

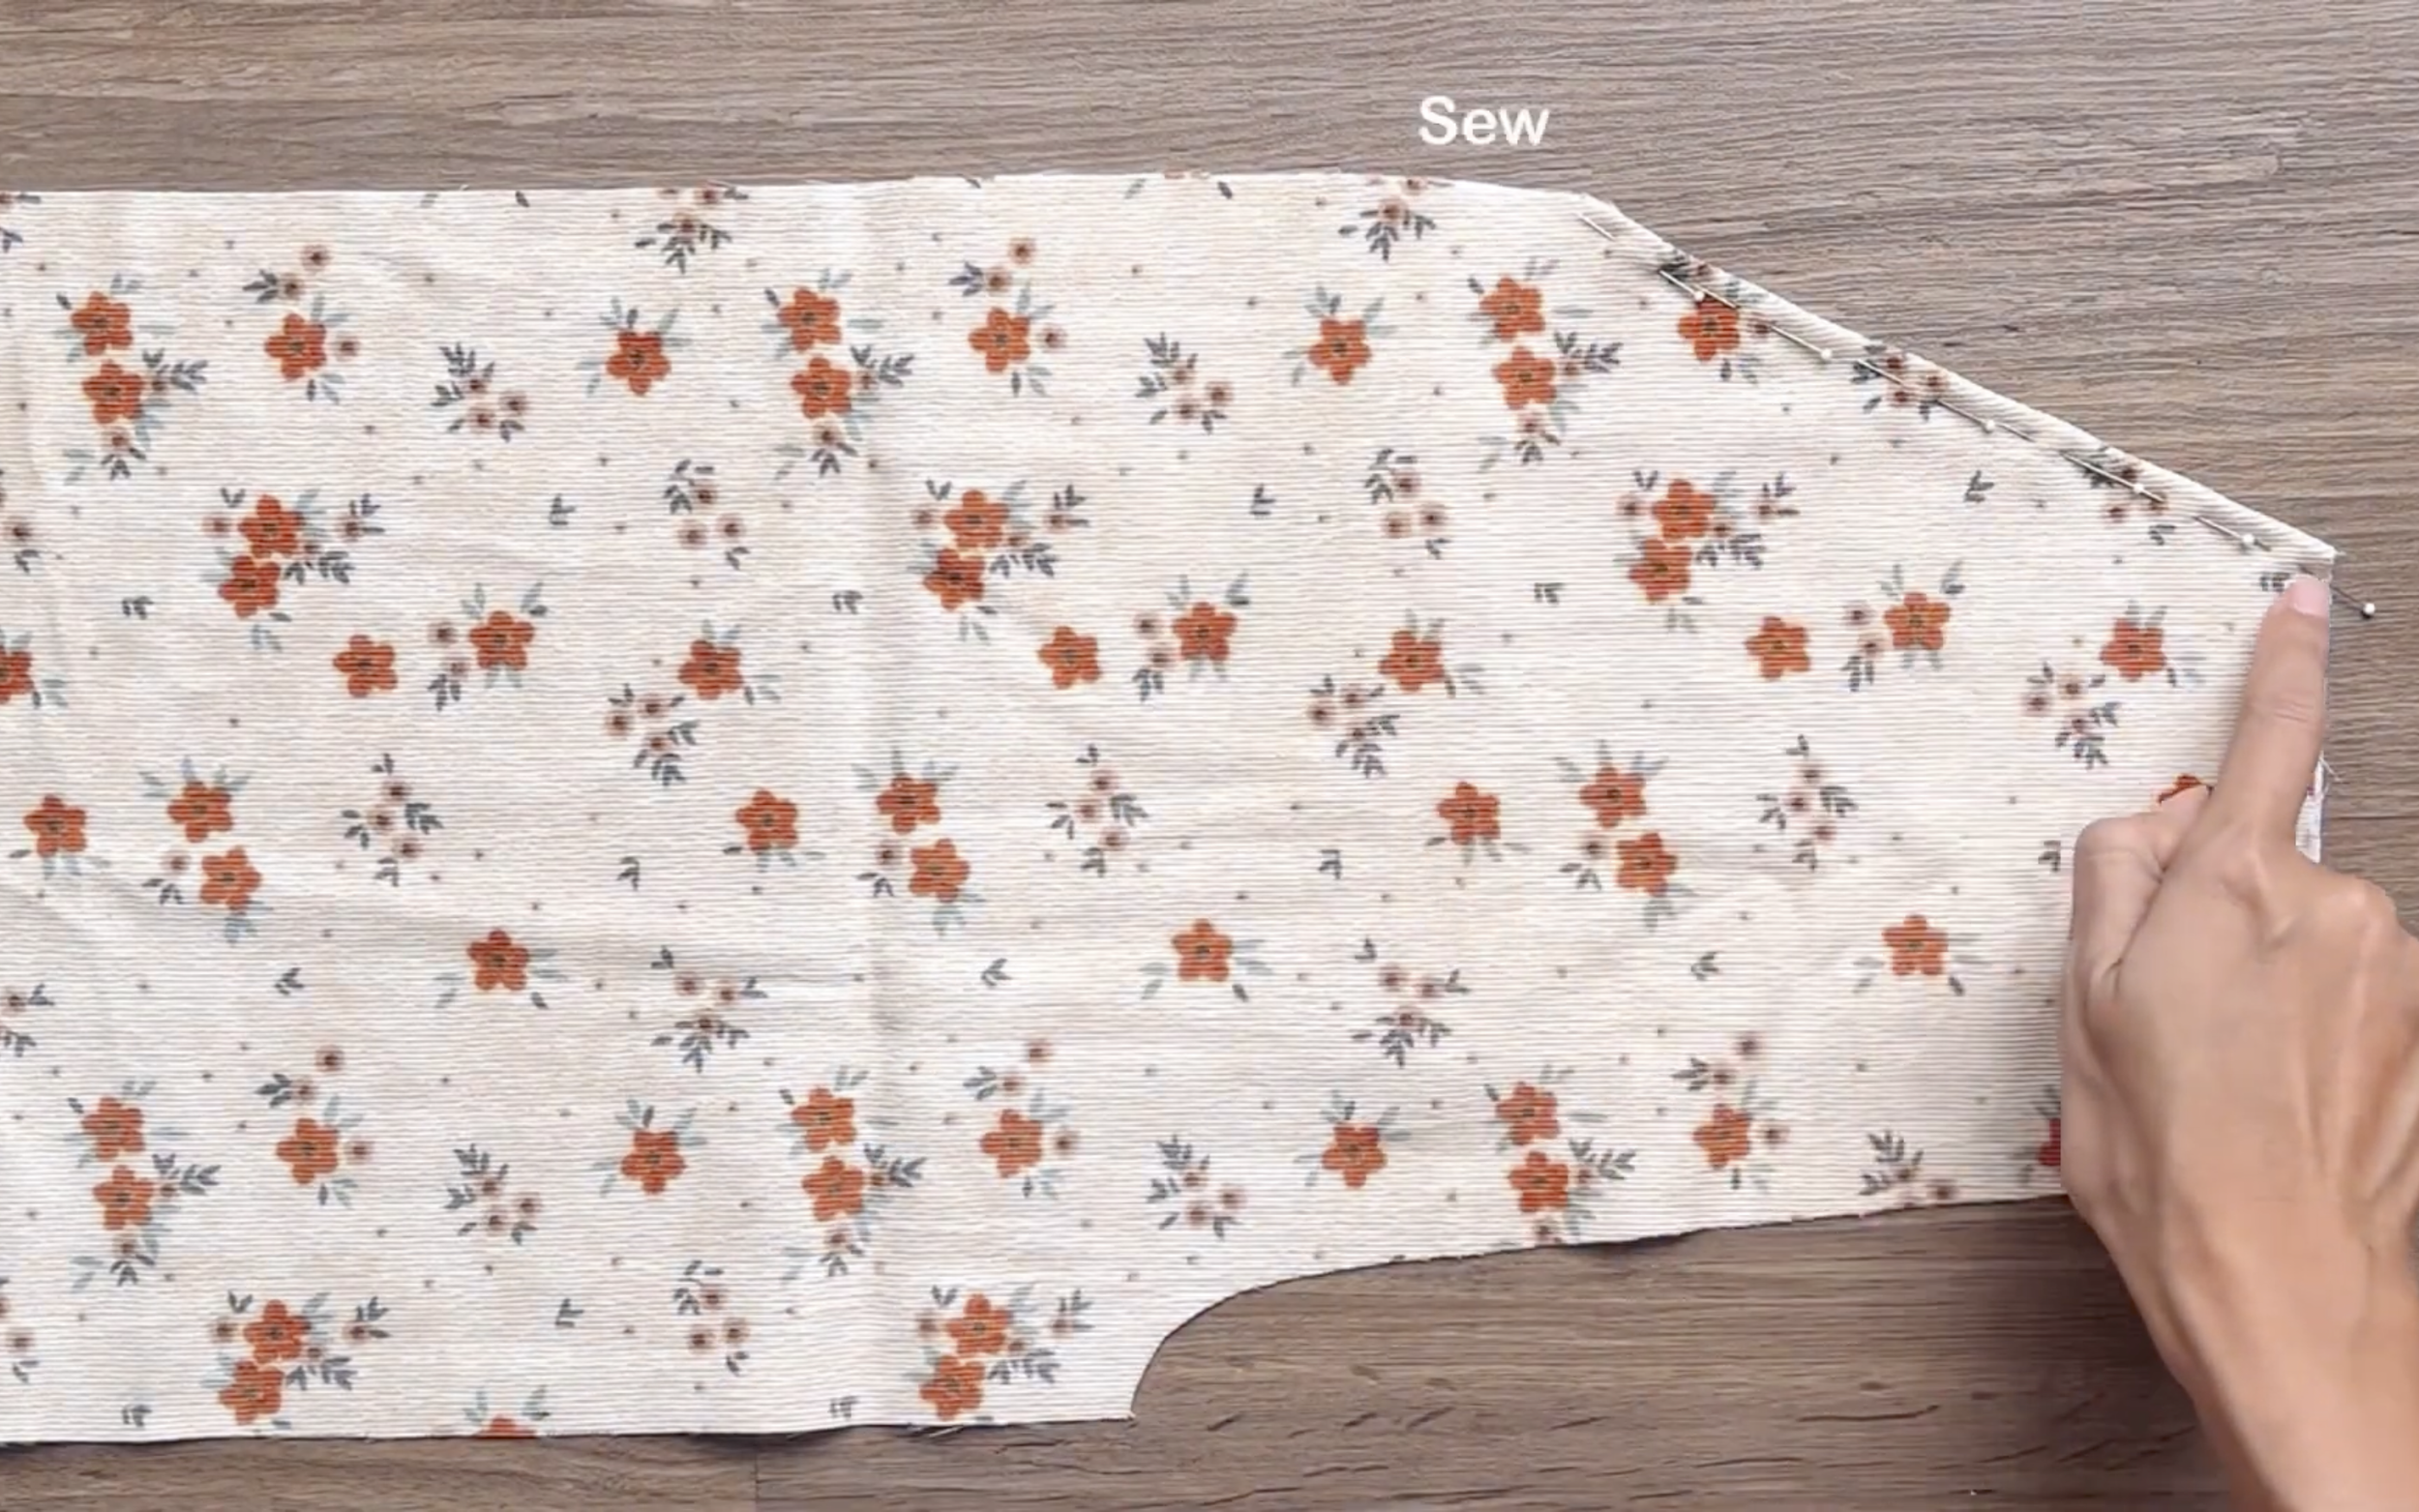
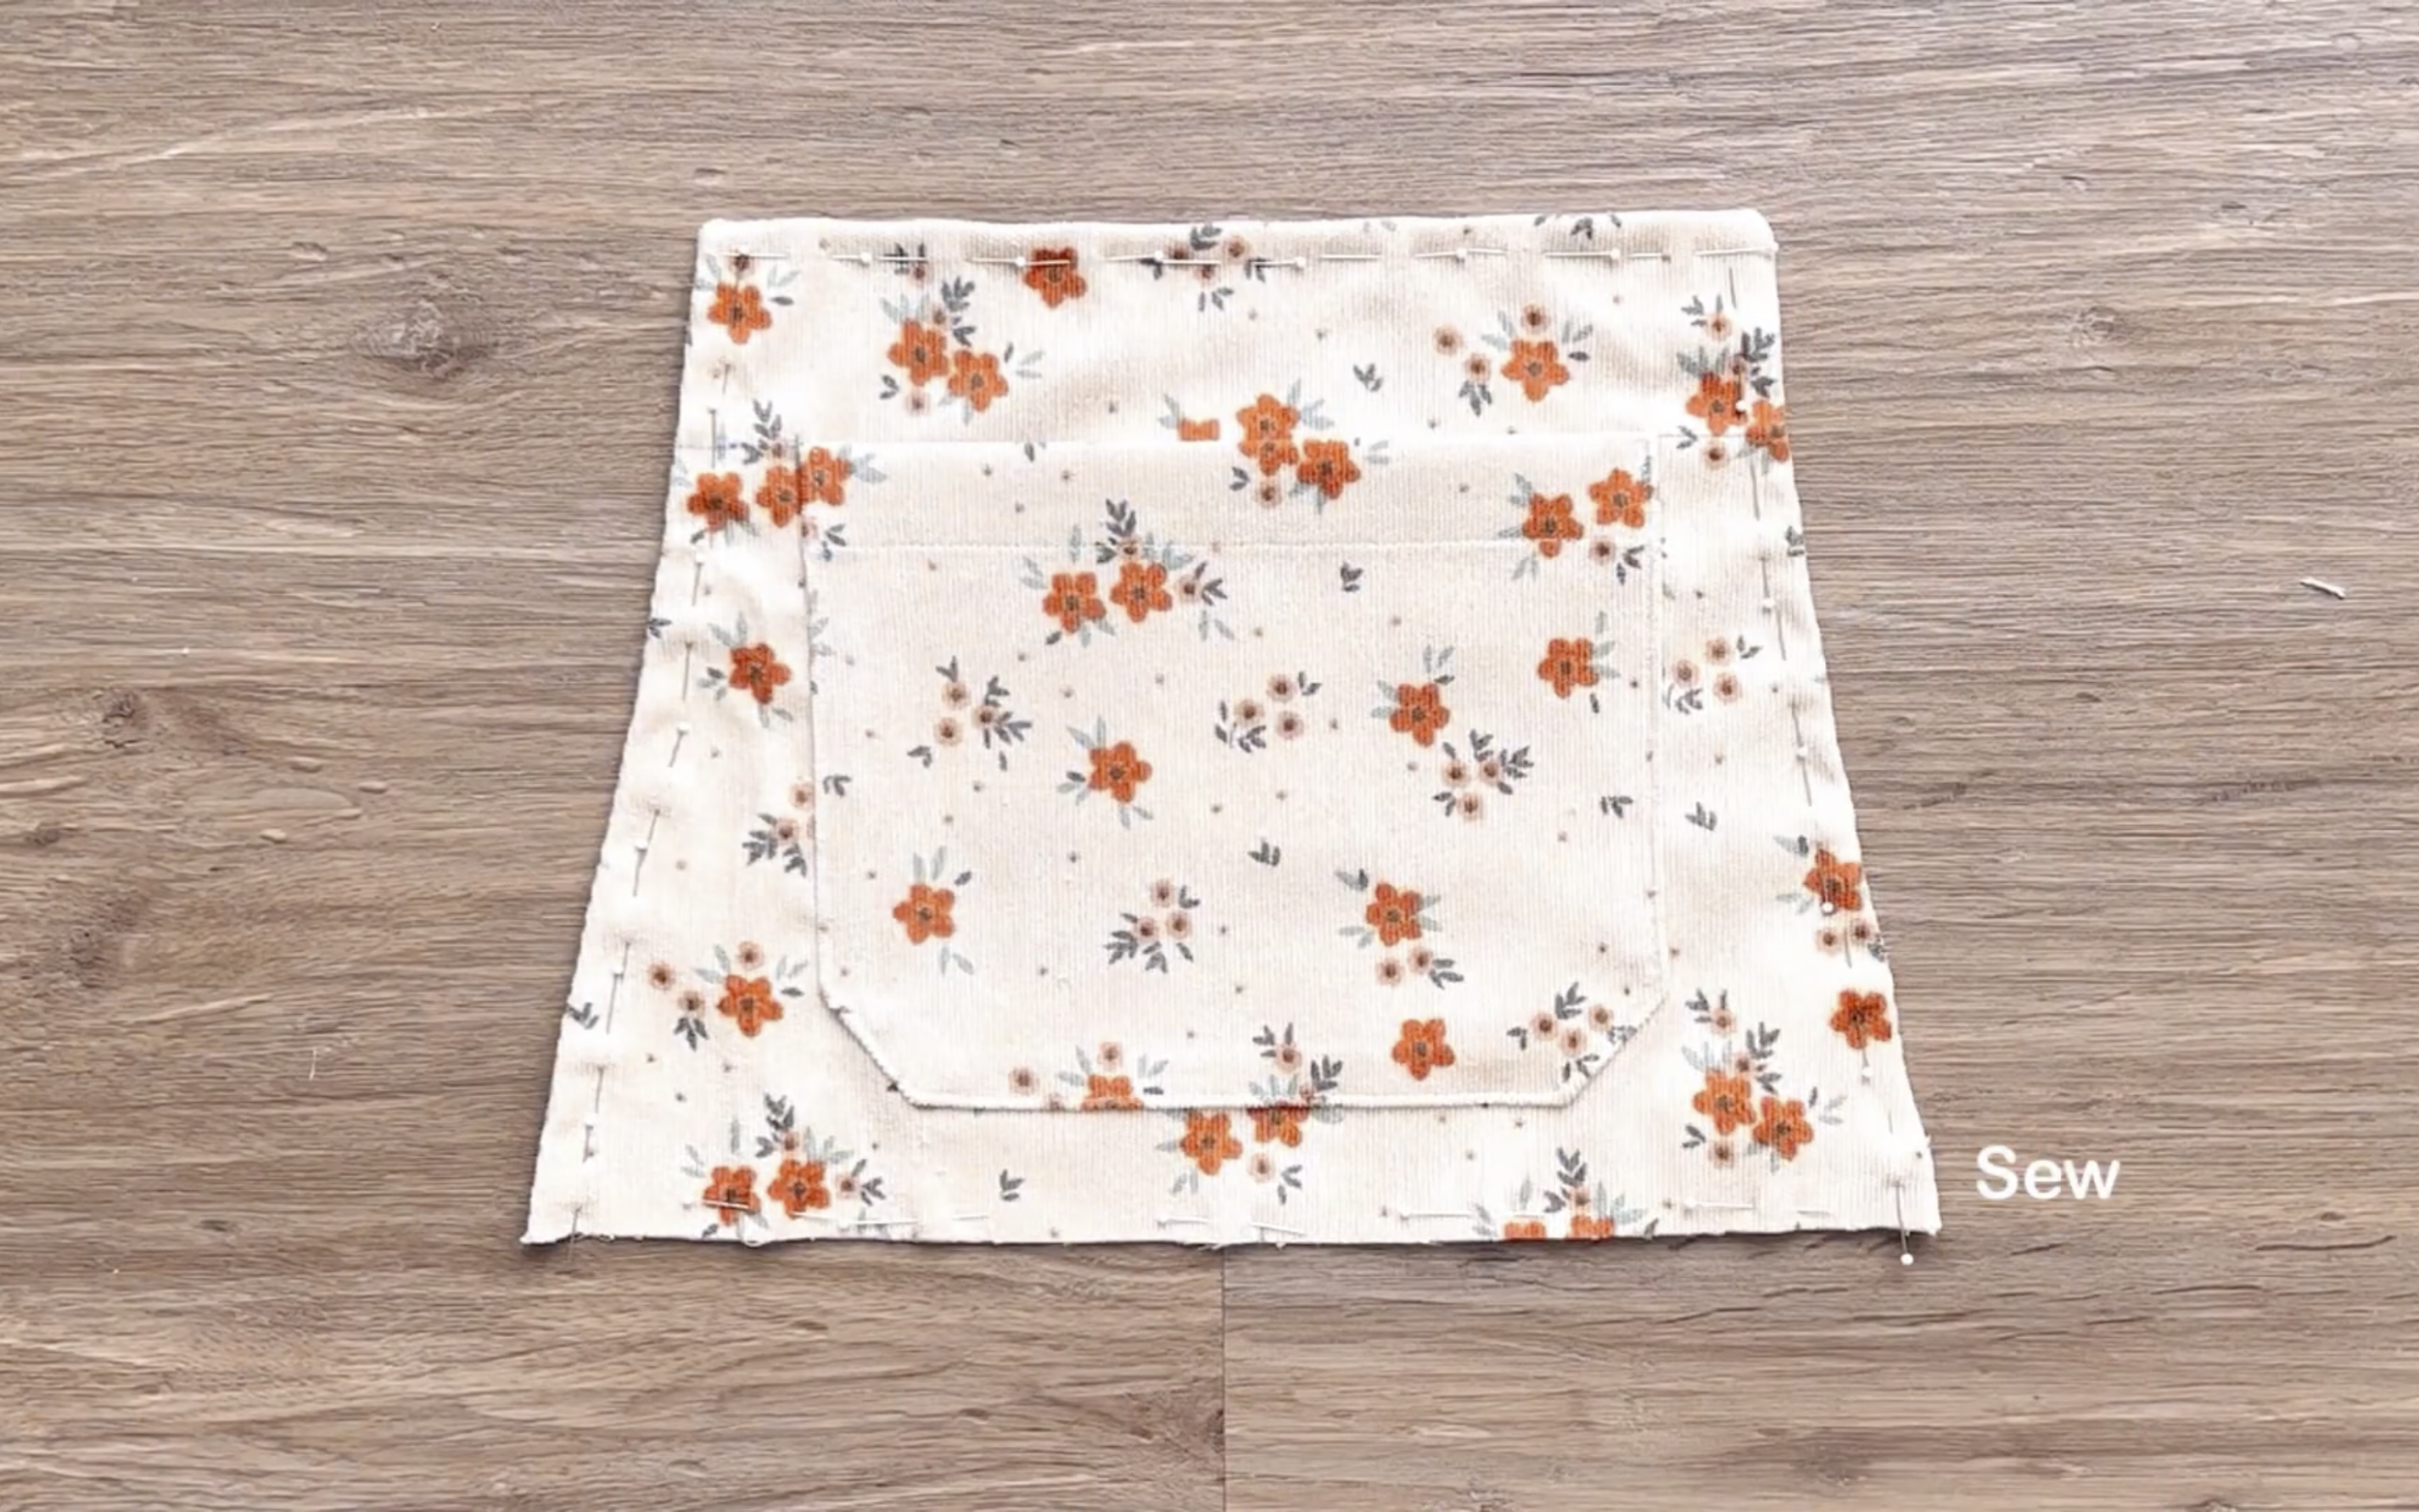
After that, connect the right side of the inside pocket piece to the right side of the outside pocket piece.
After sewing, connect the top and the side of the pocket to the front pants to keep them from moving.
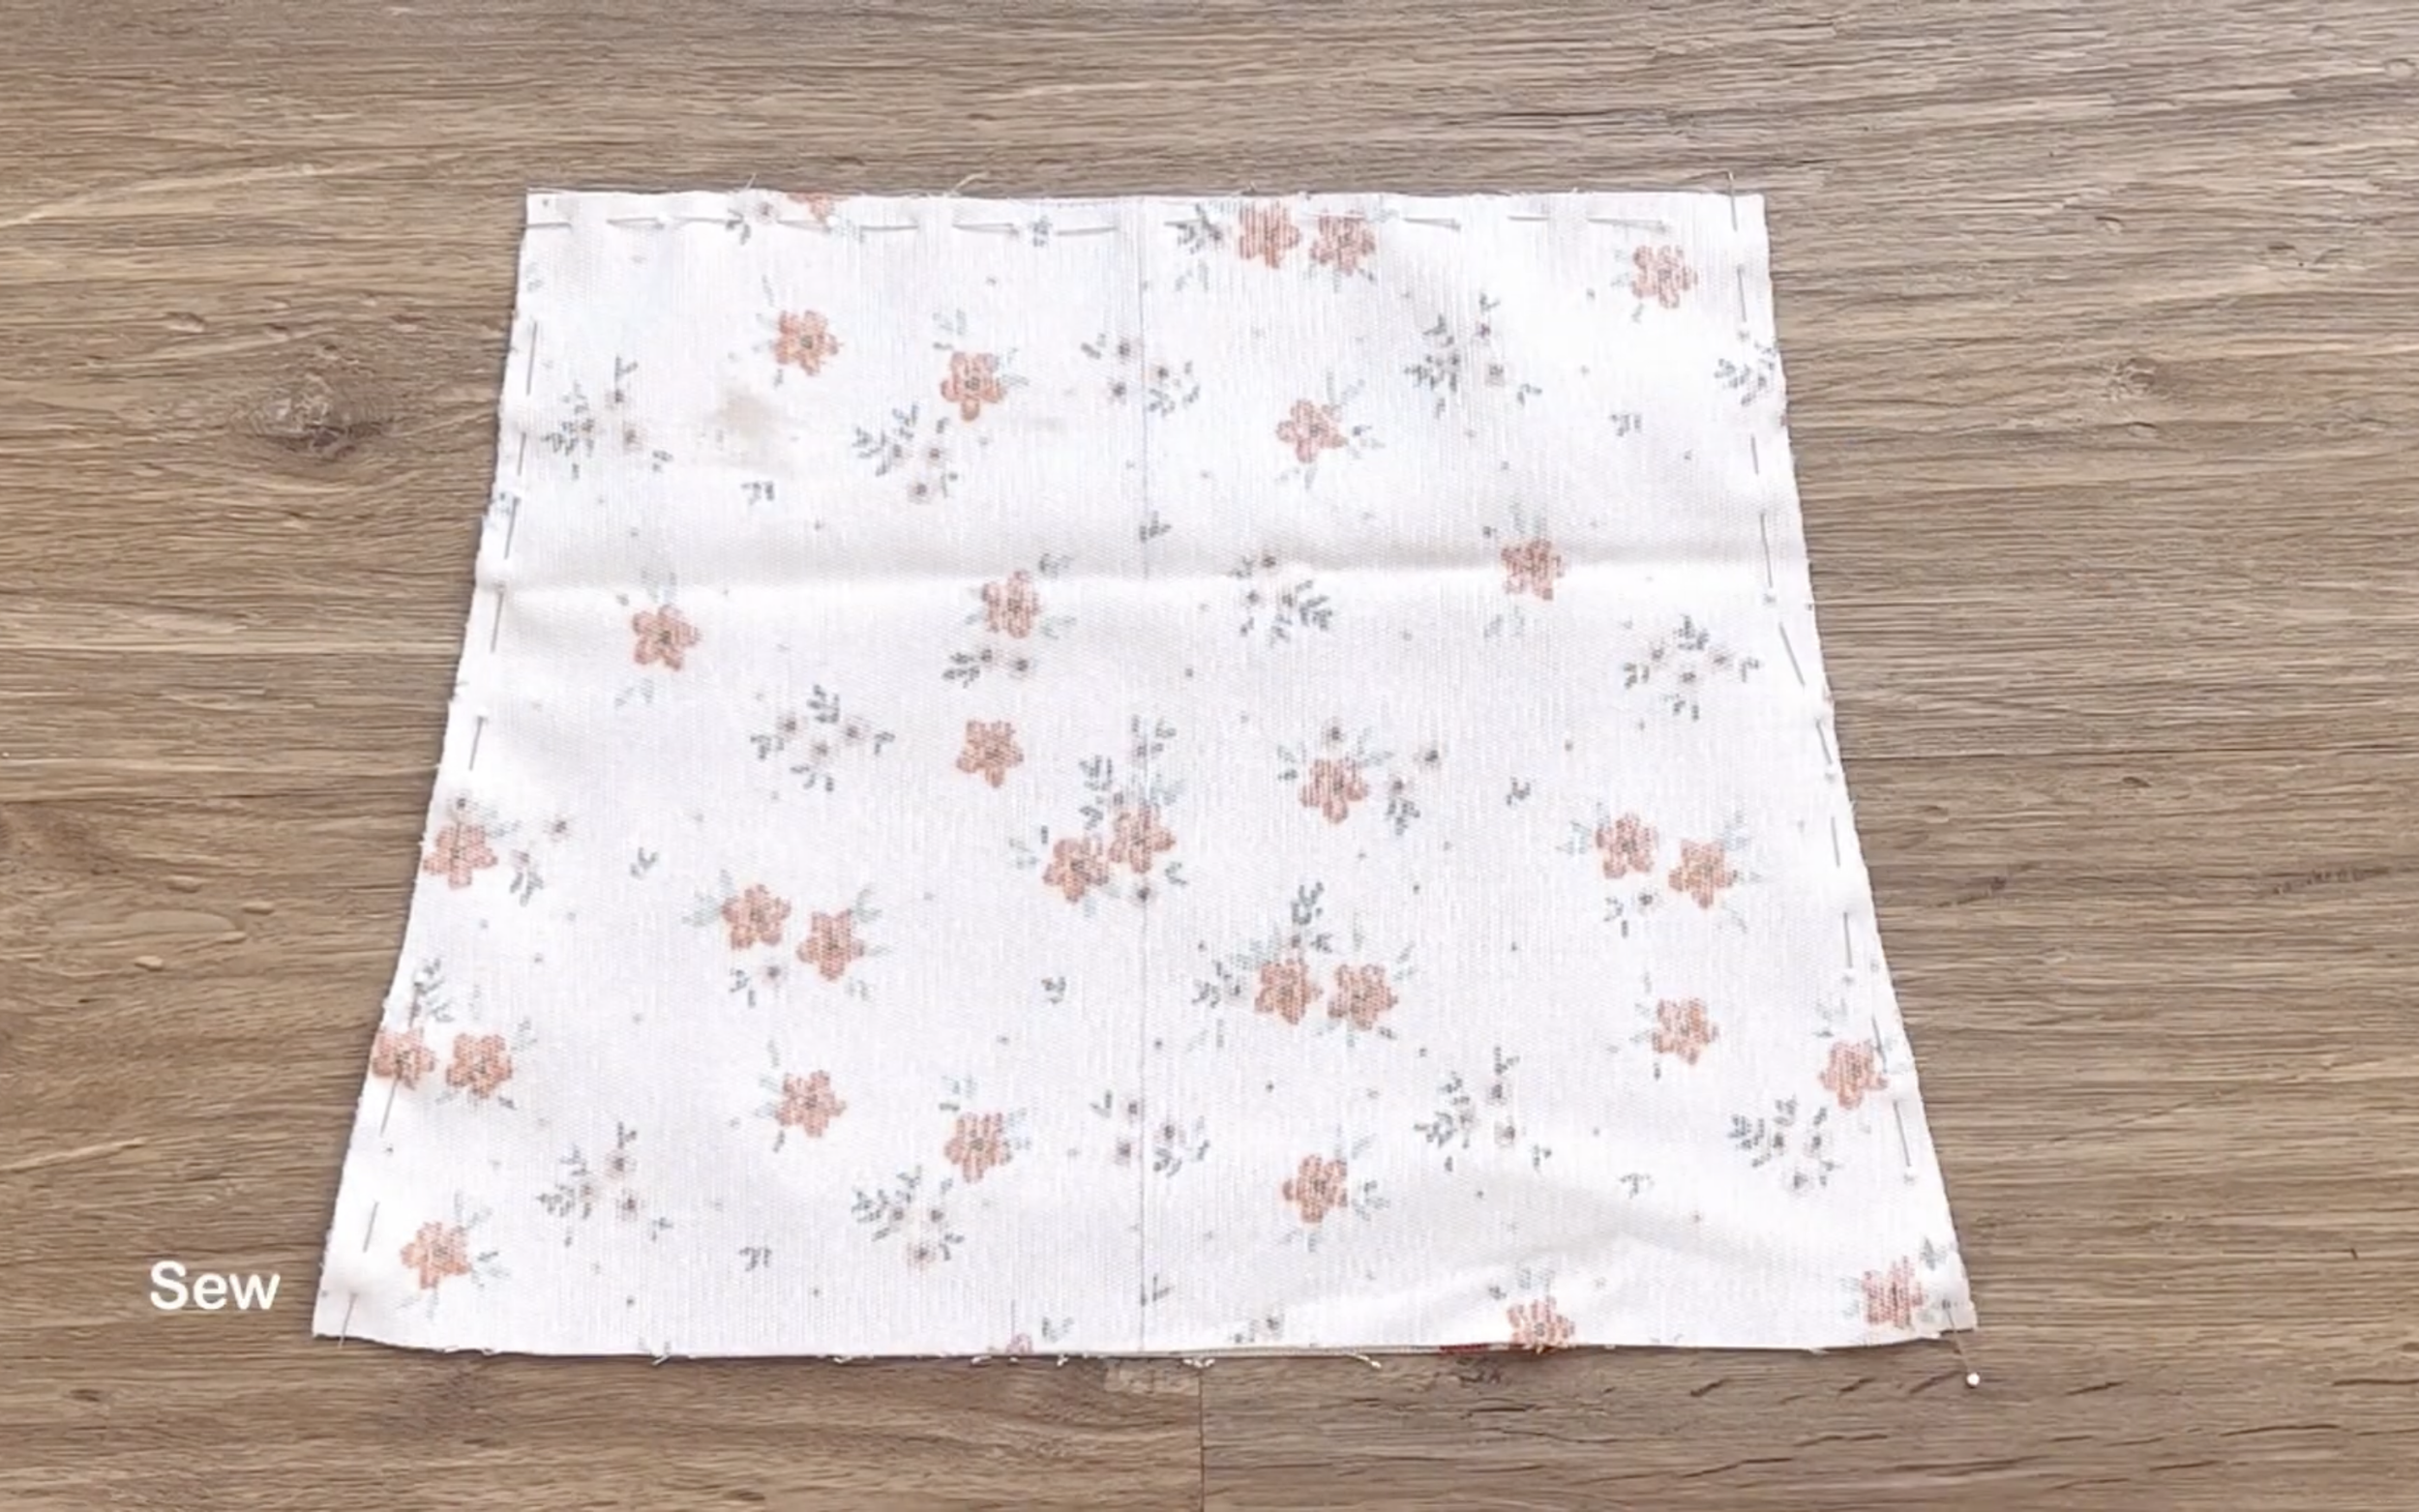
Do the same for the other piece of the front pants.
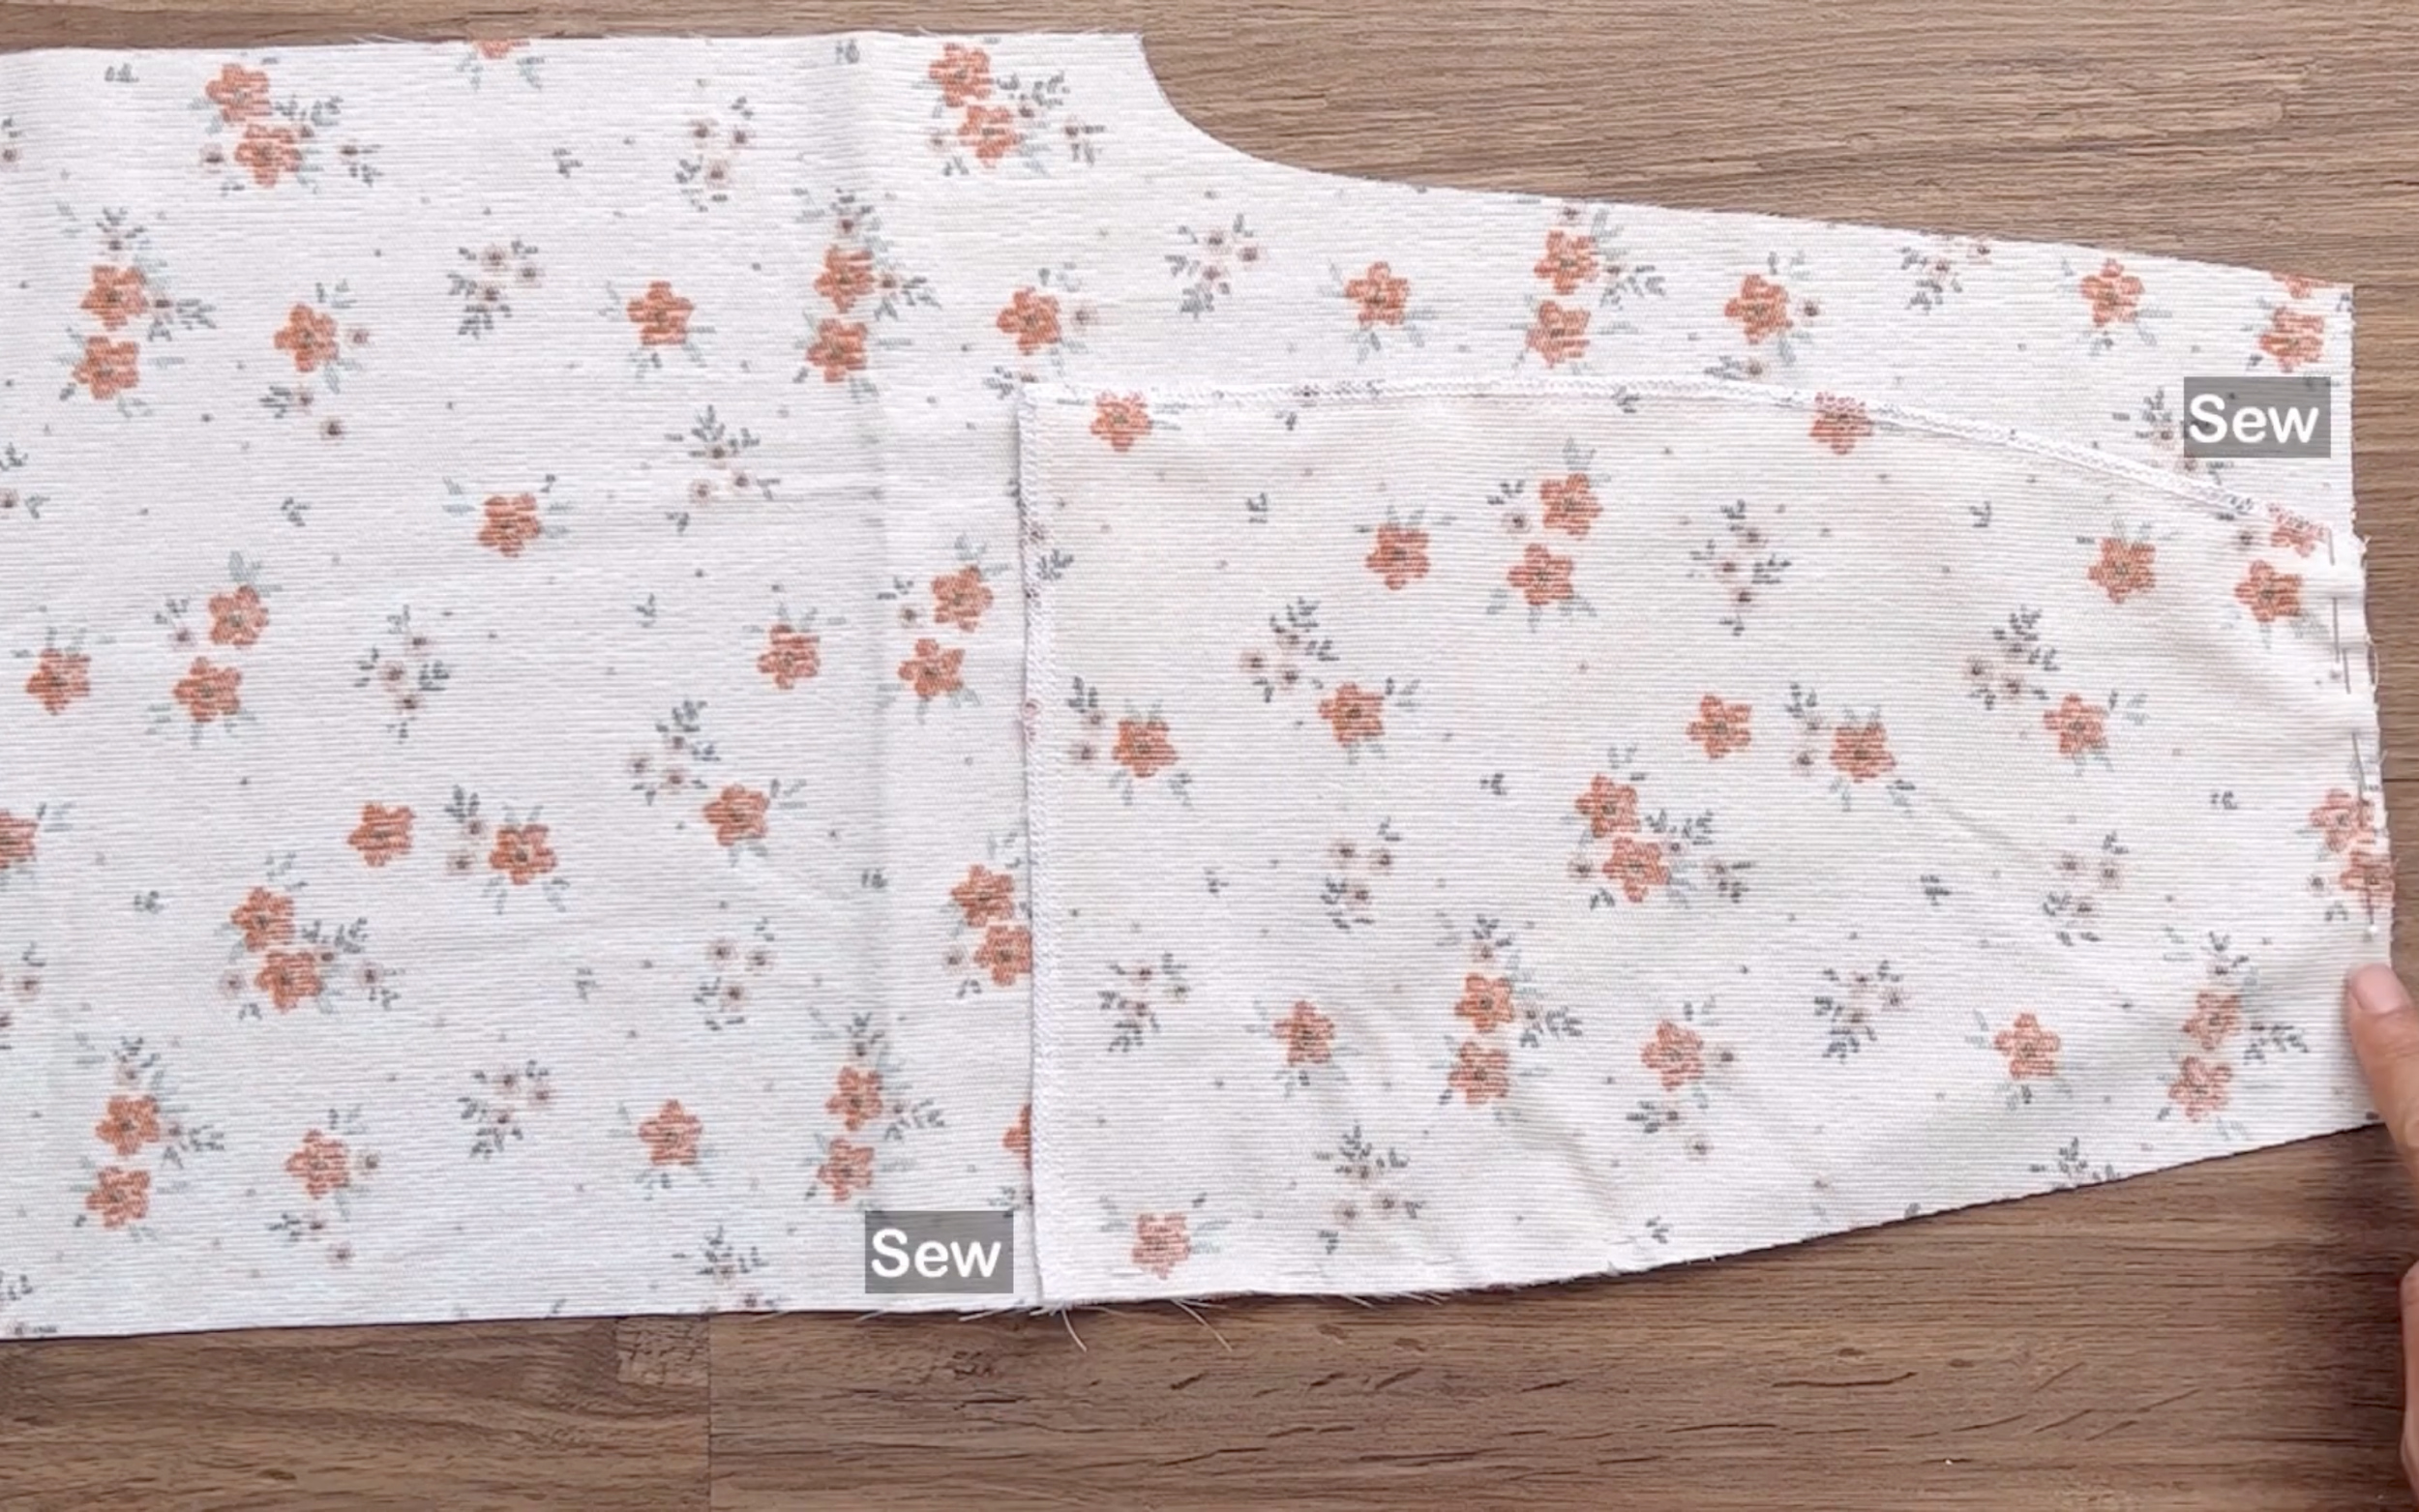
Then, connect them together at the crotch line.
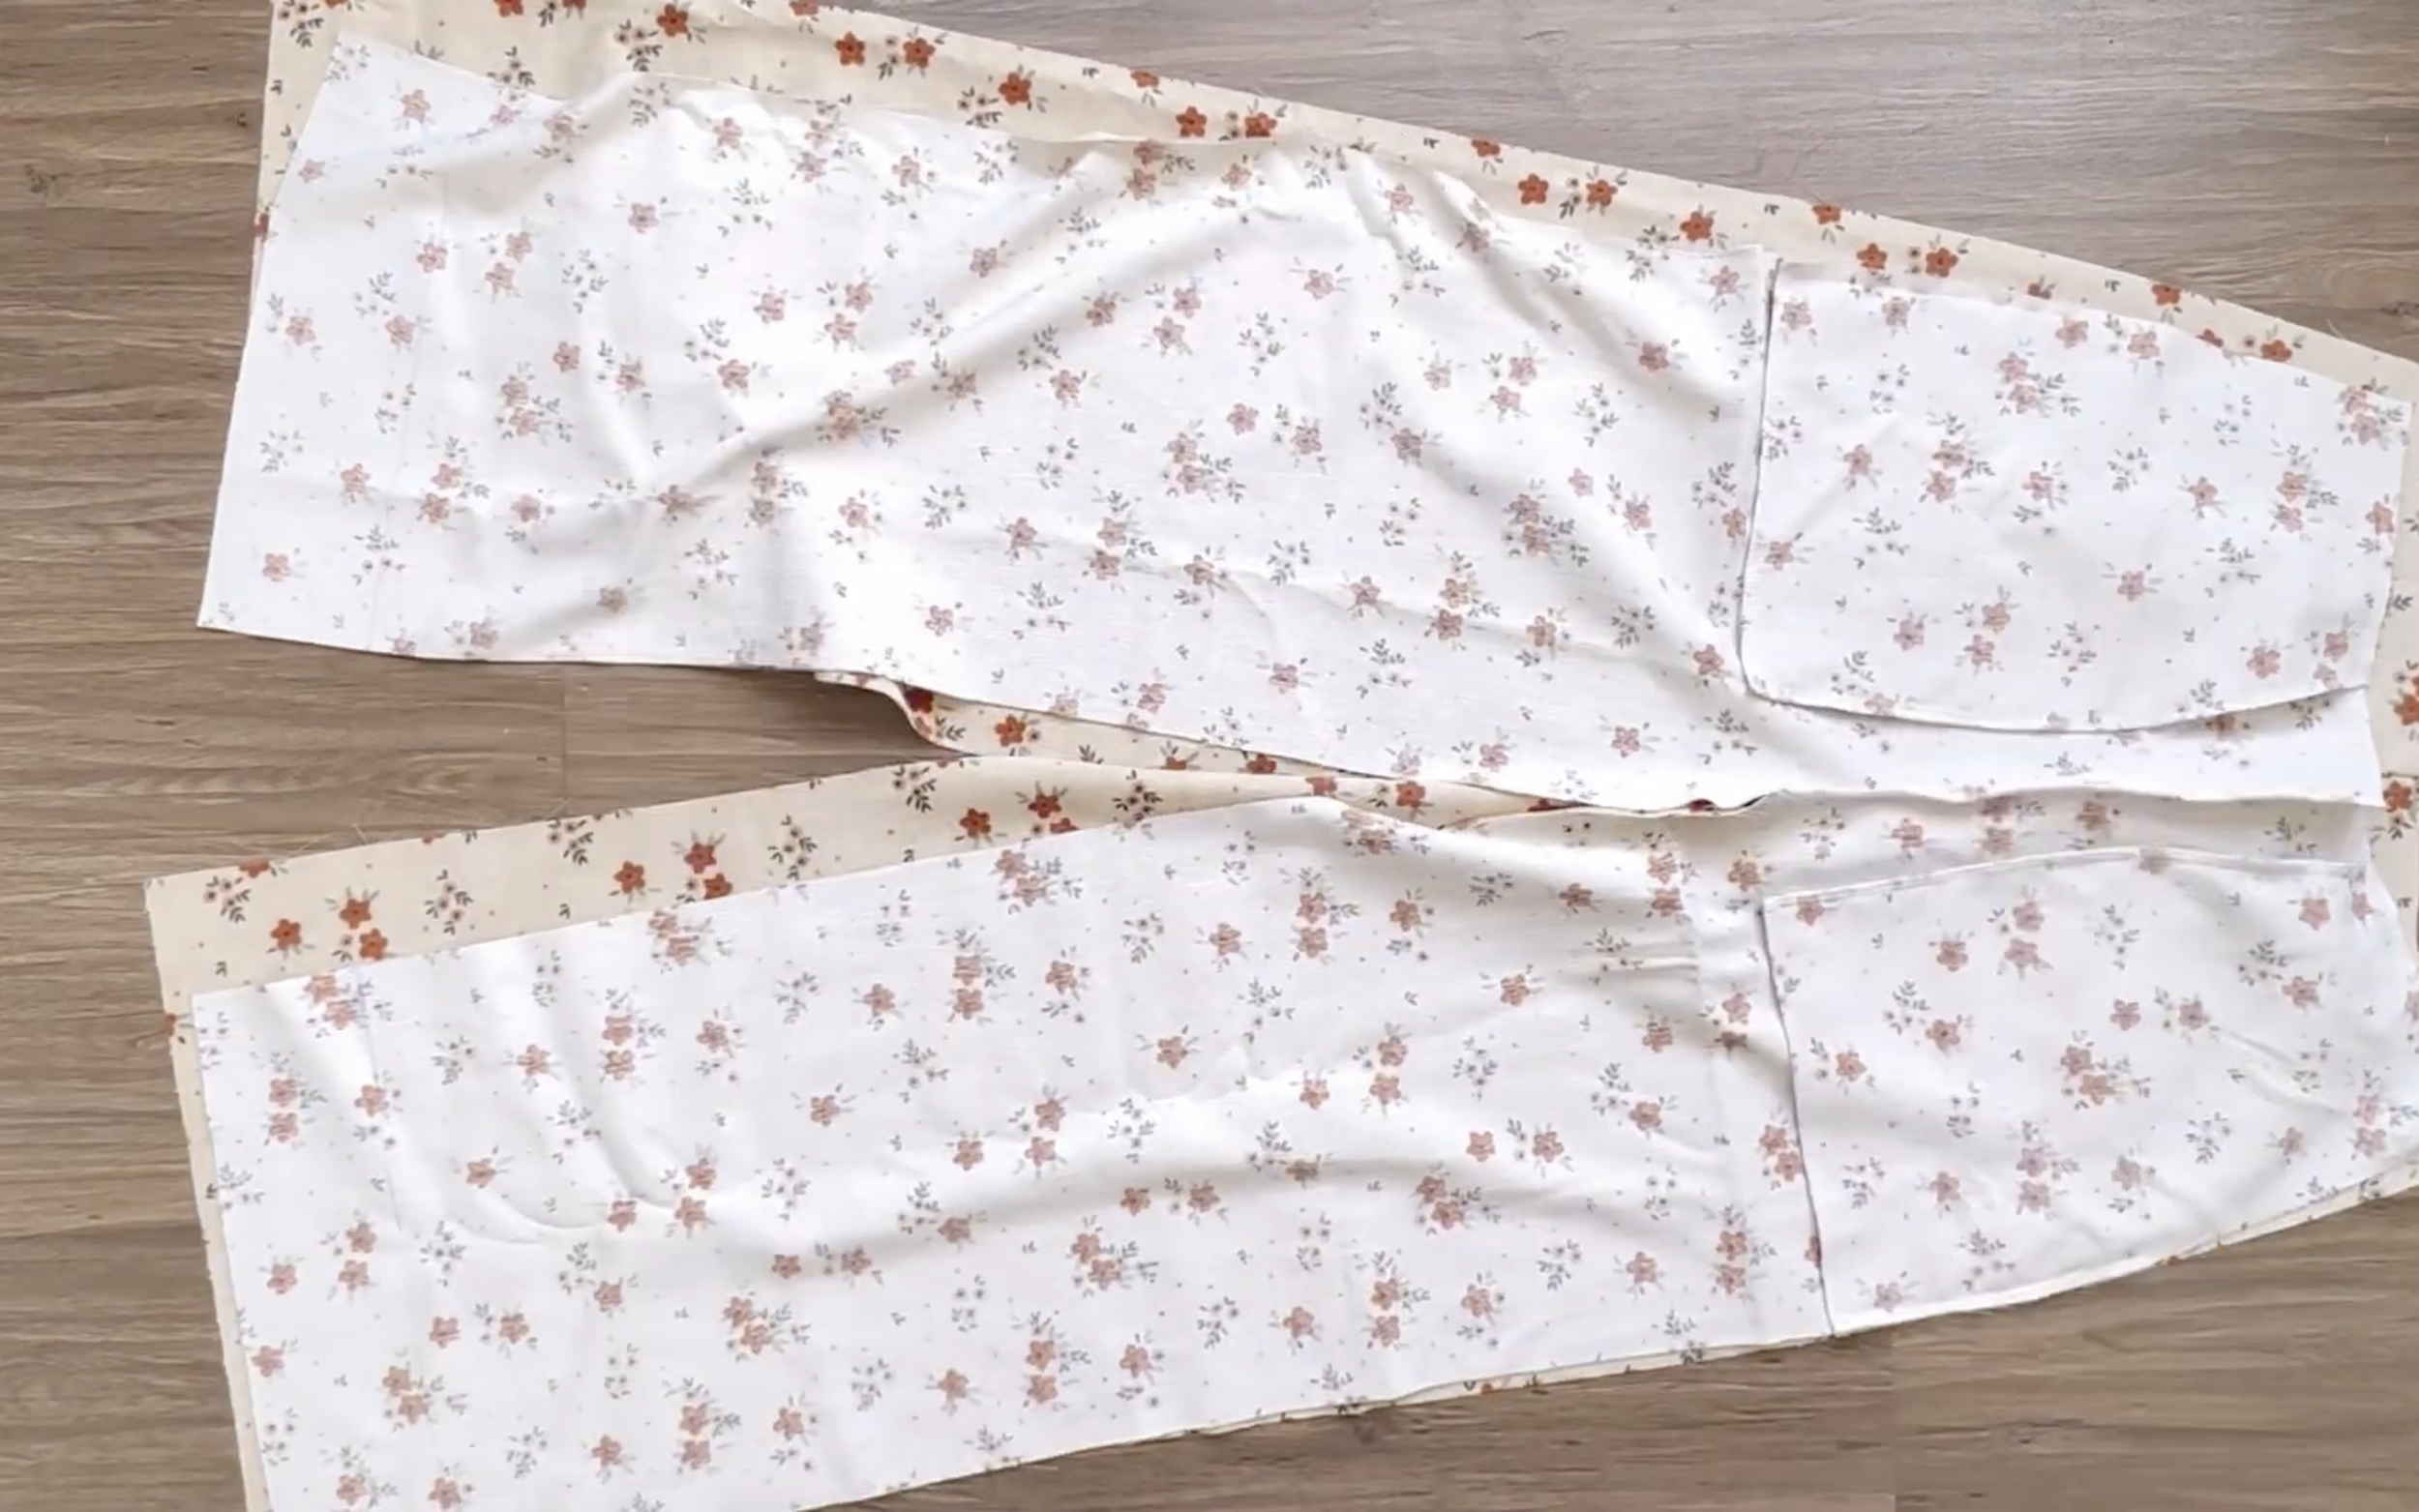
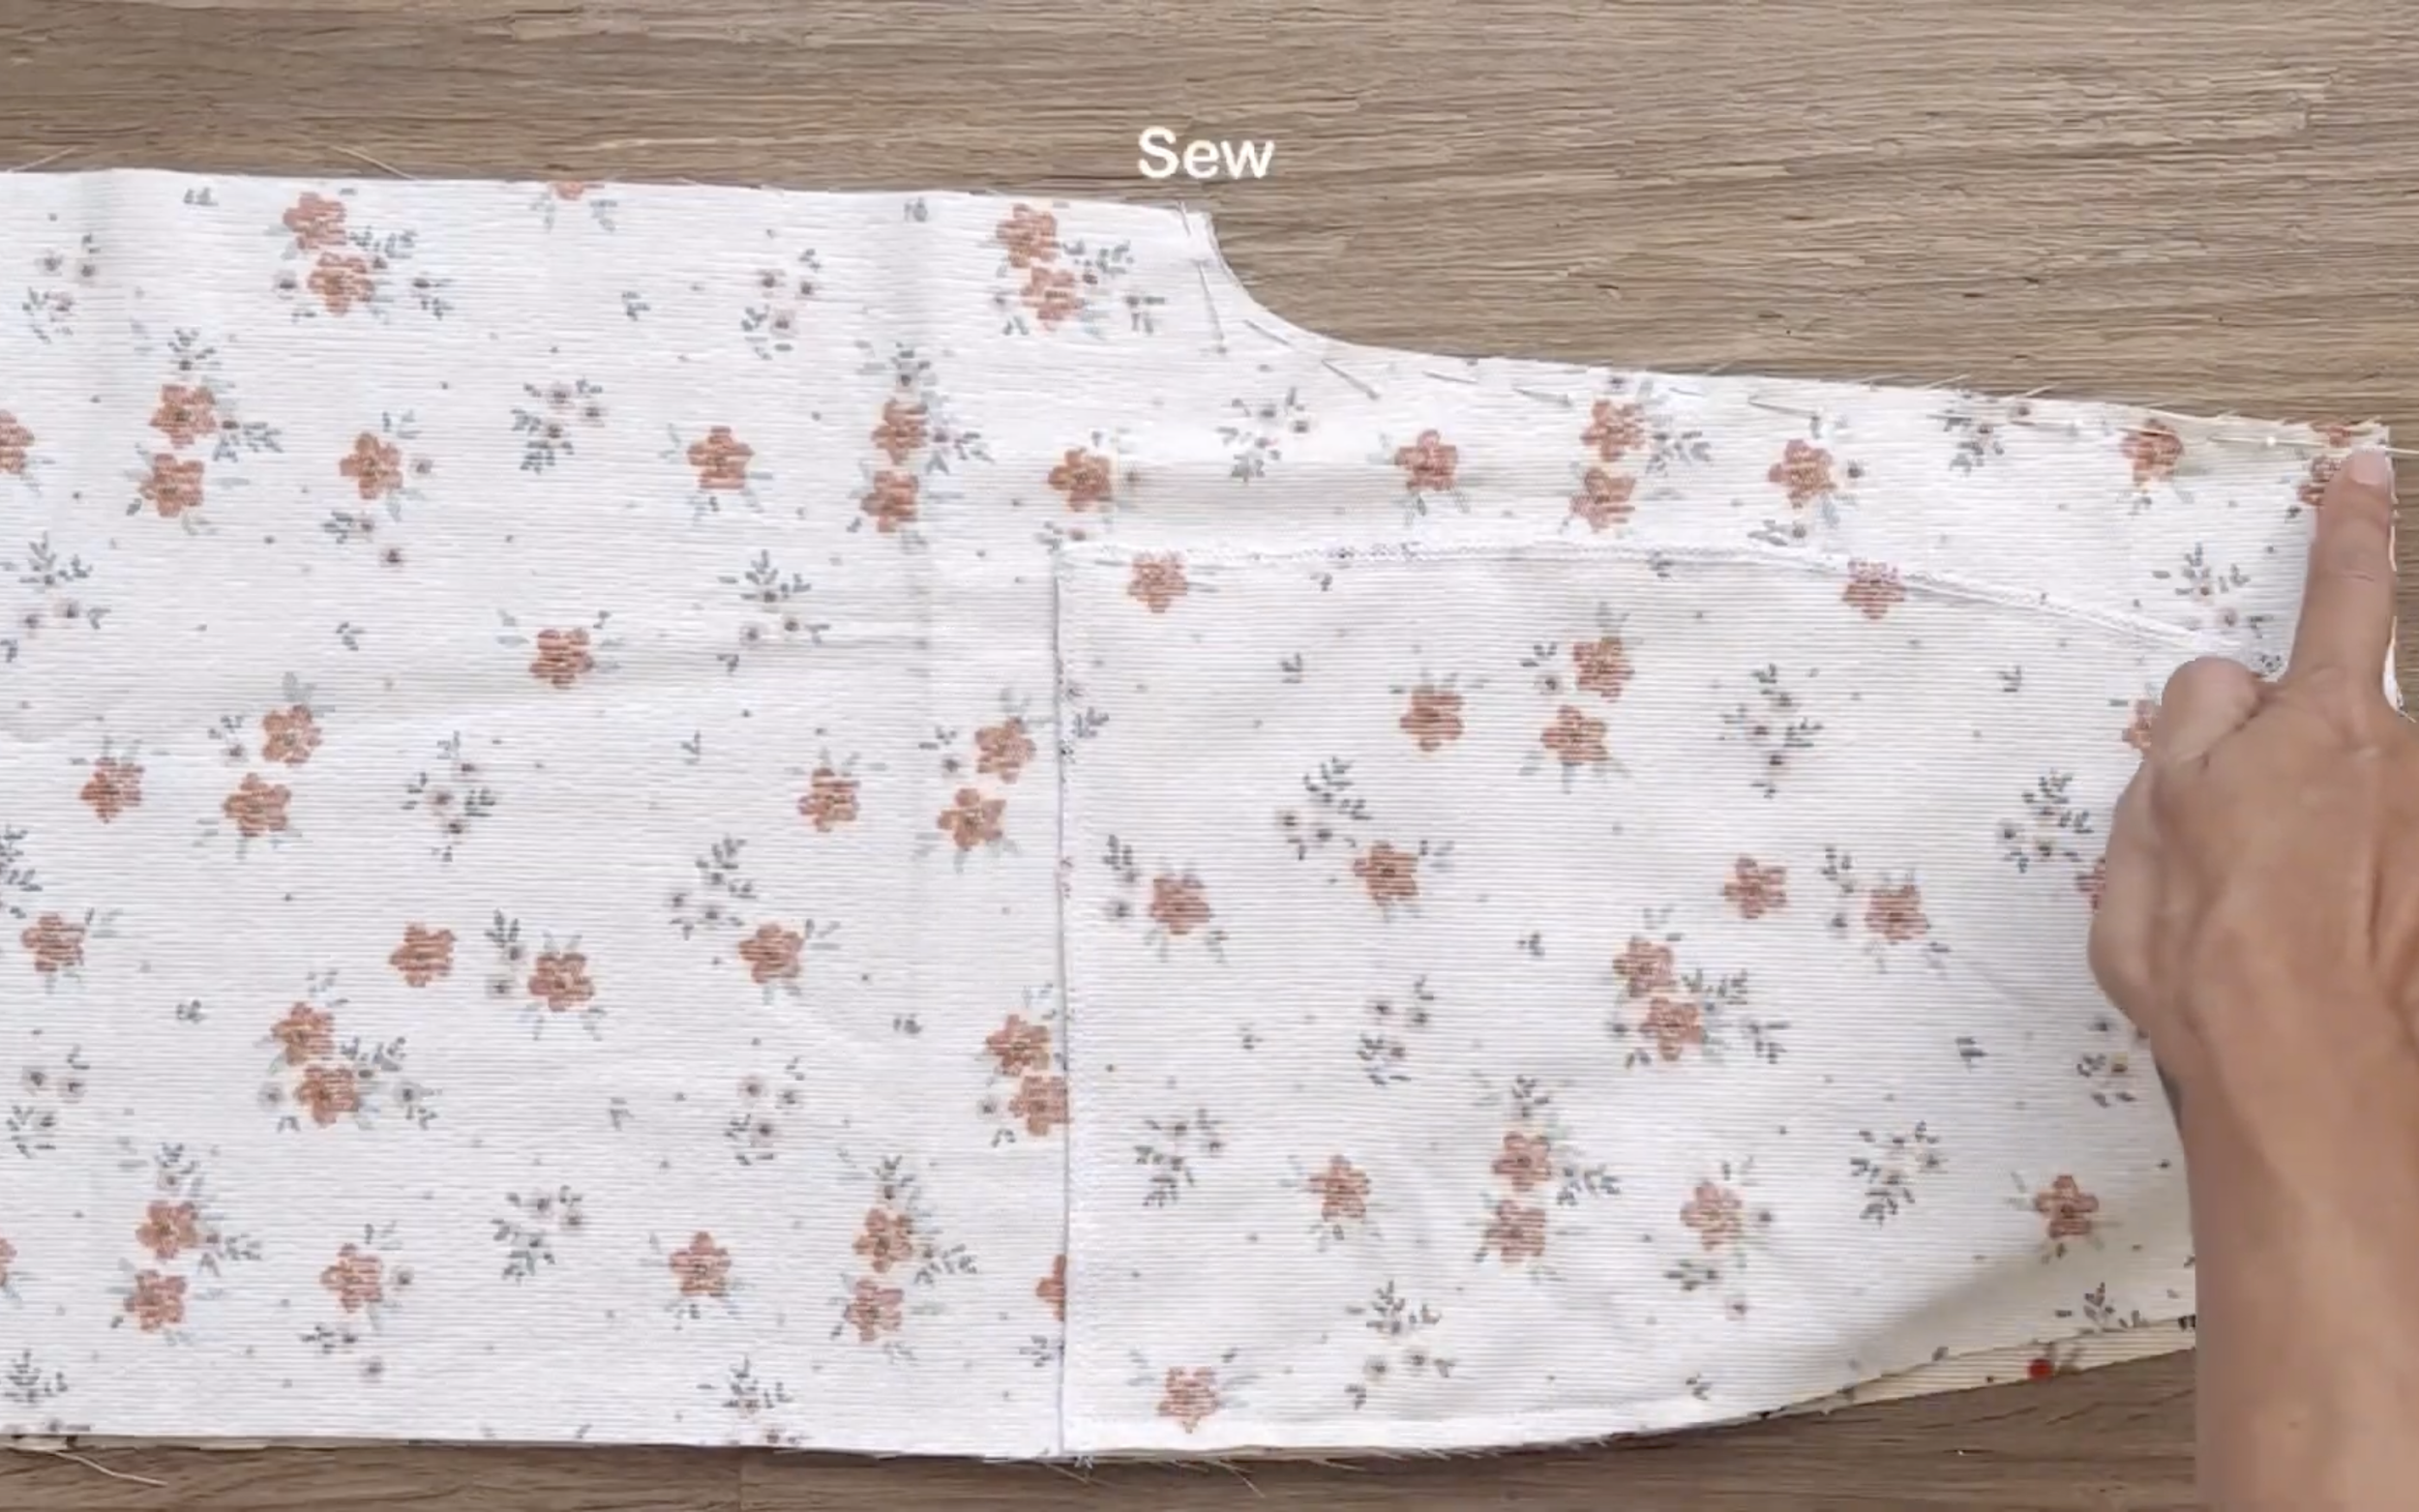
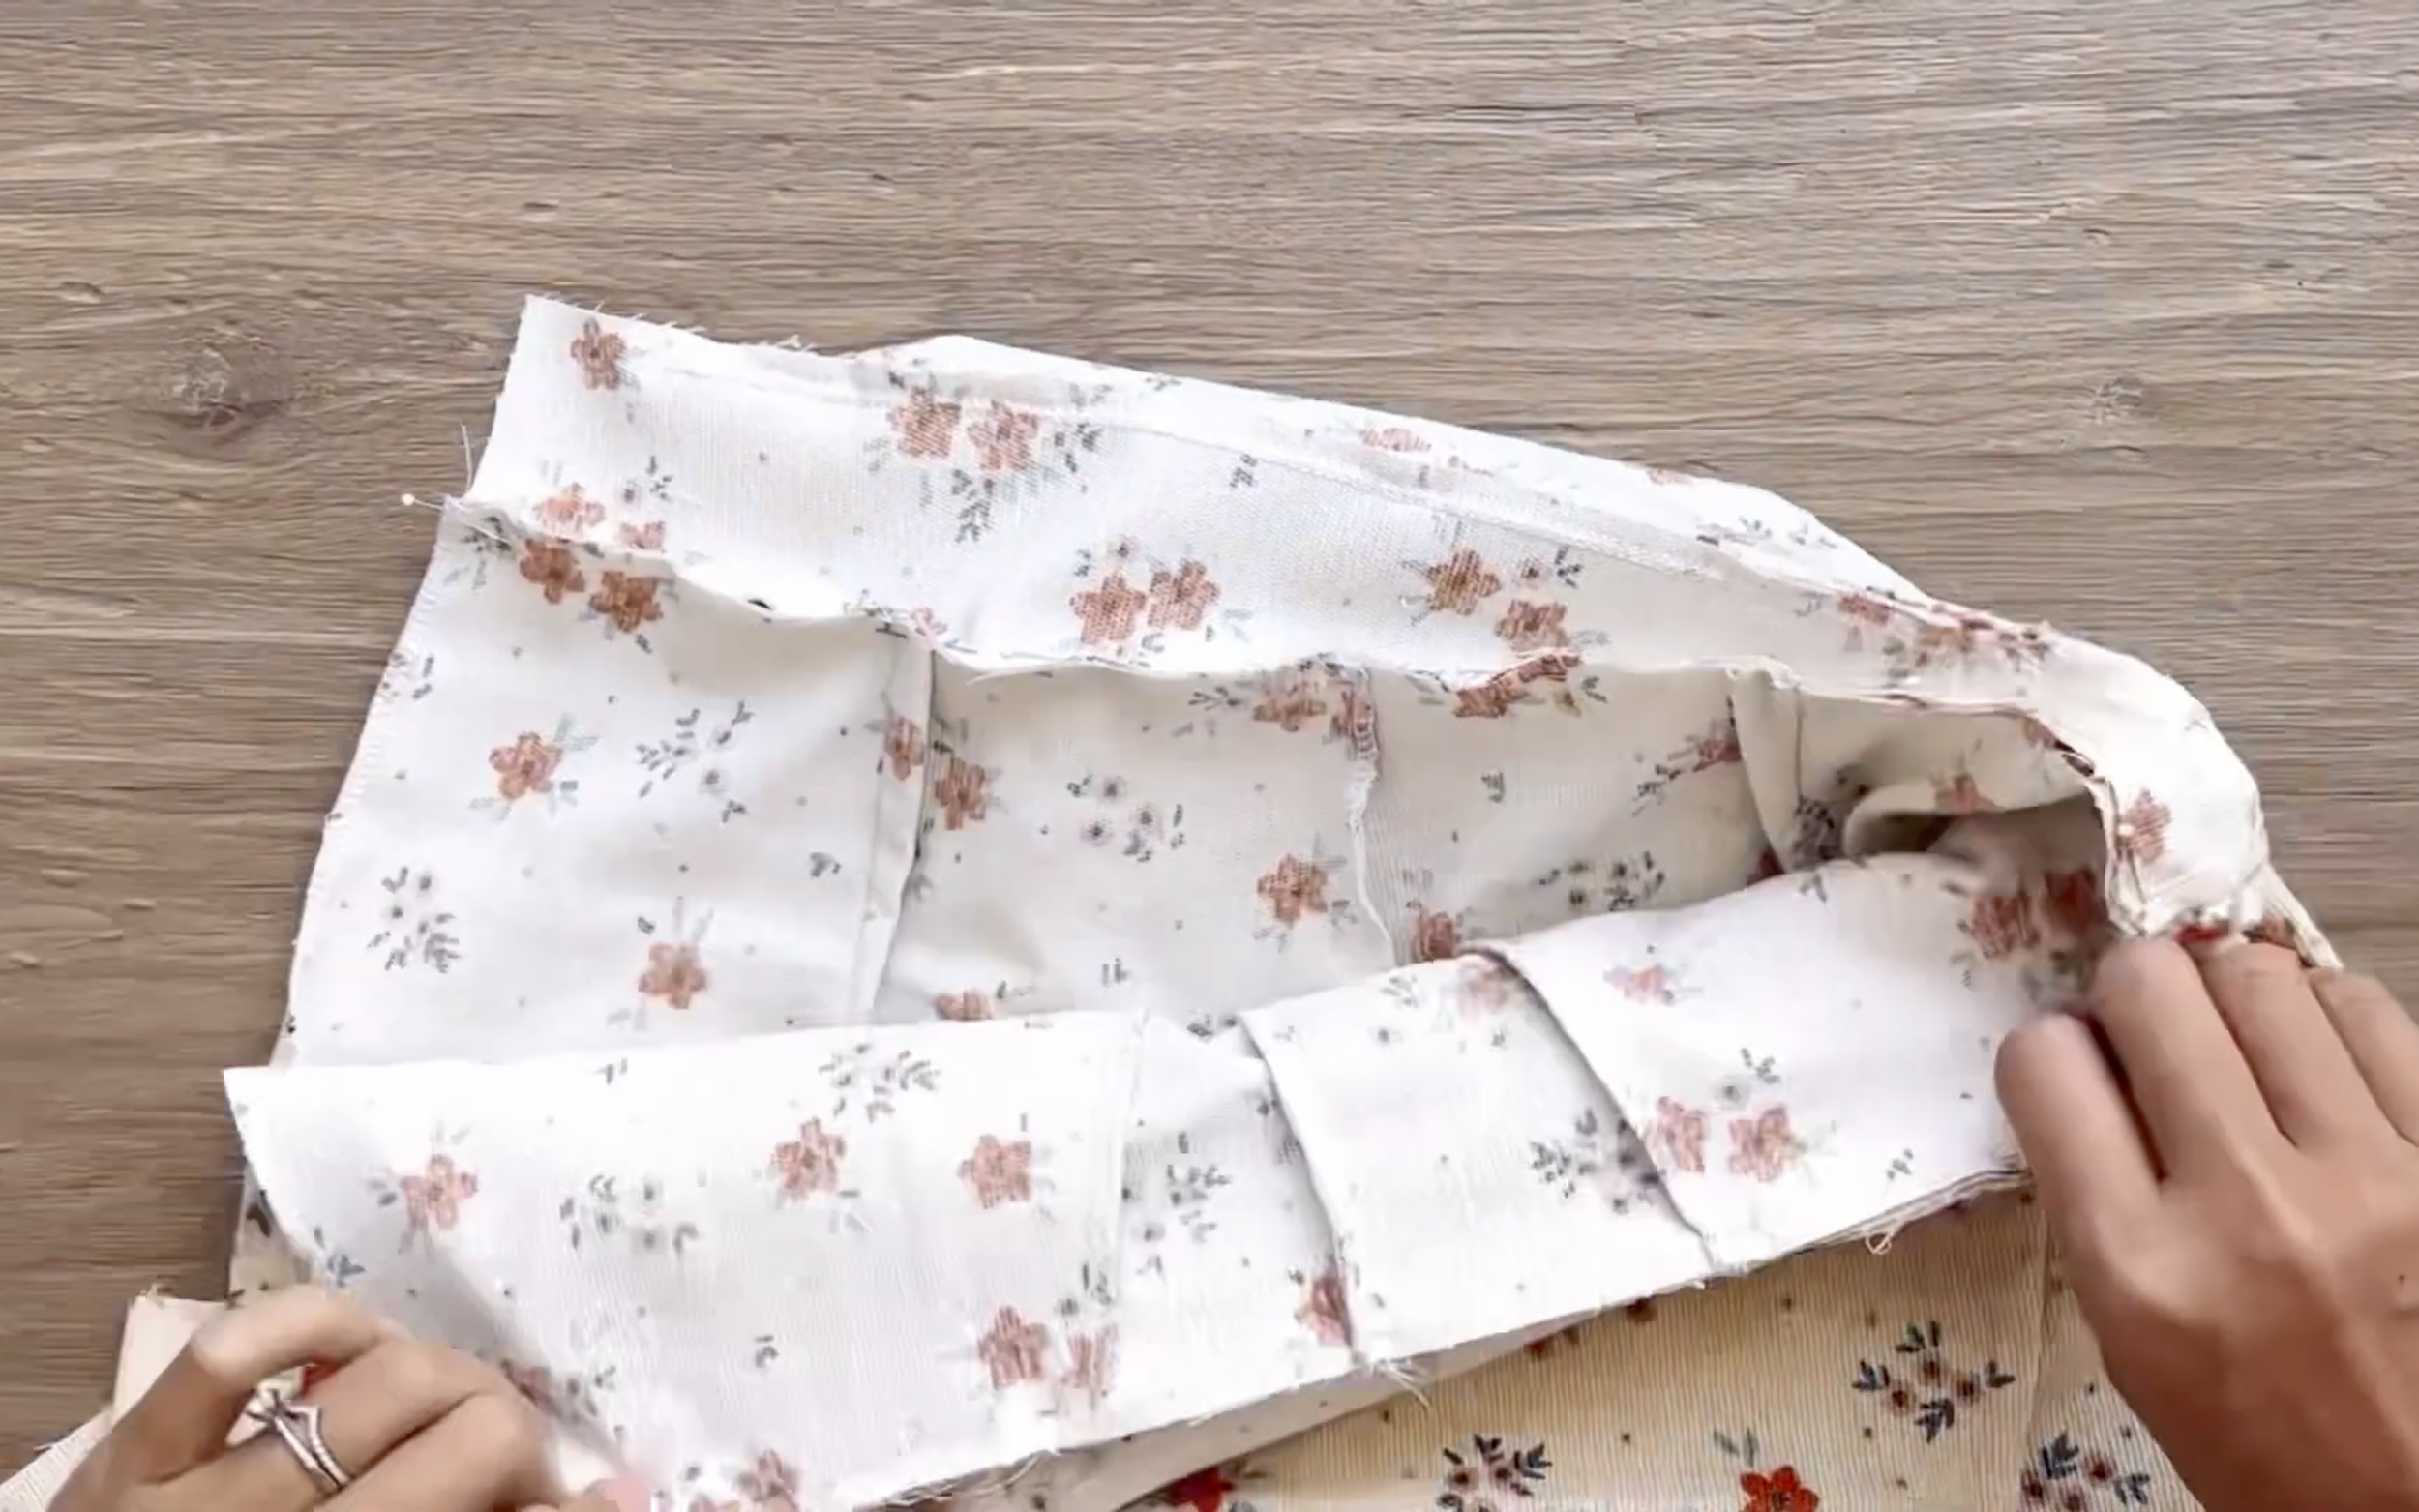
Now, connect the front and back of the pants together at the sideline and the inside leg line.
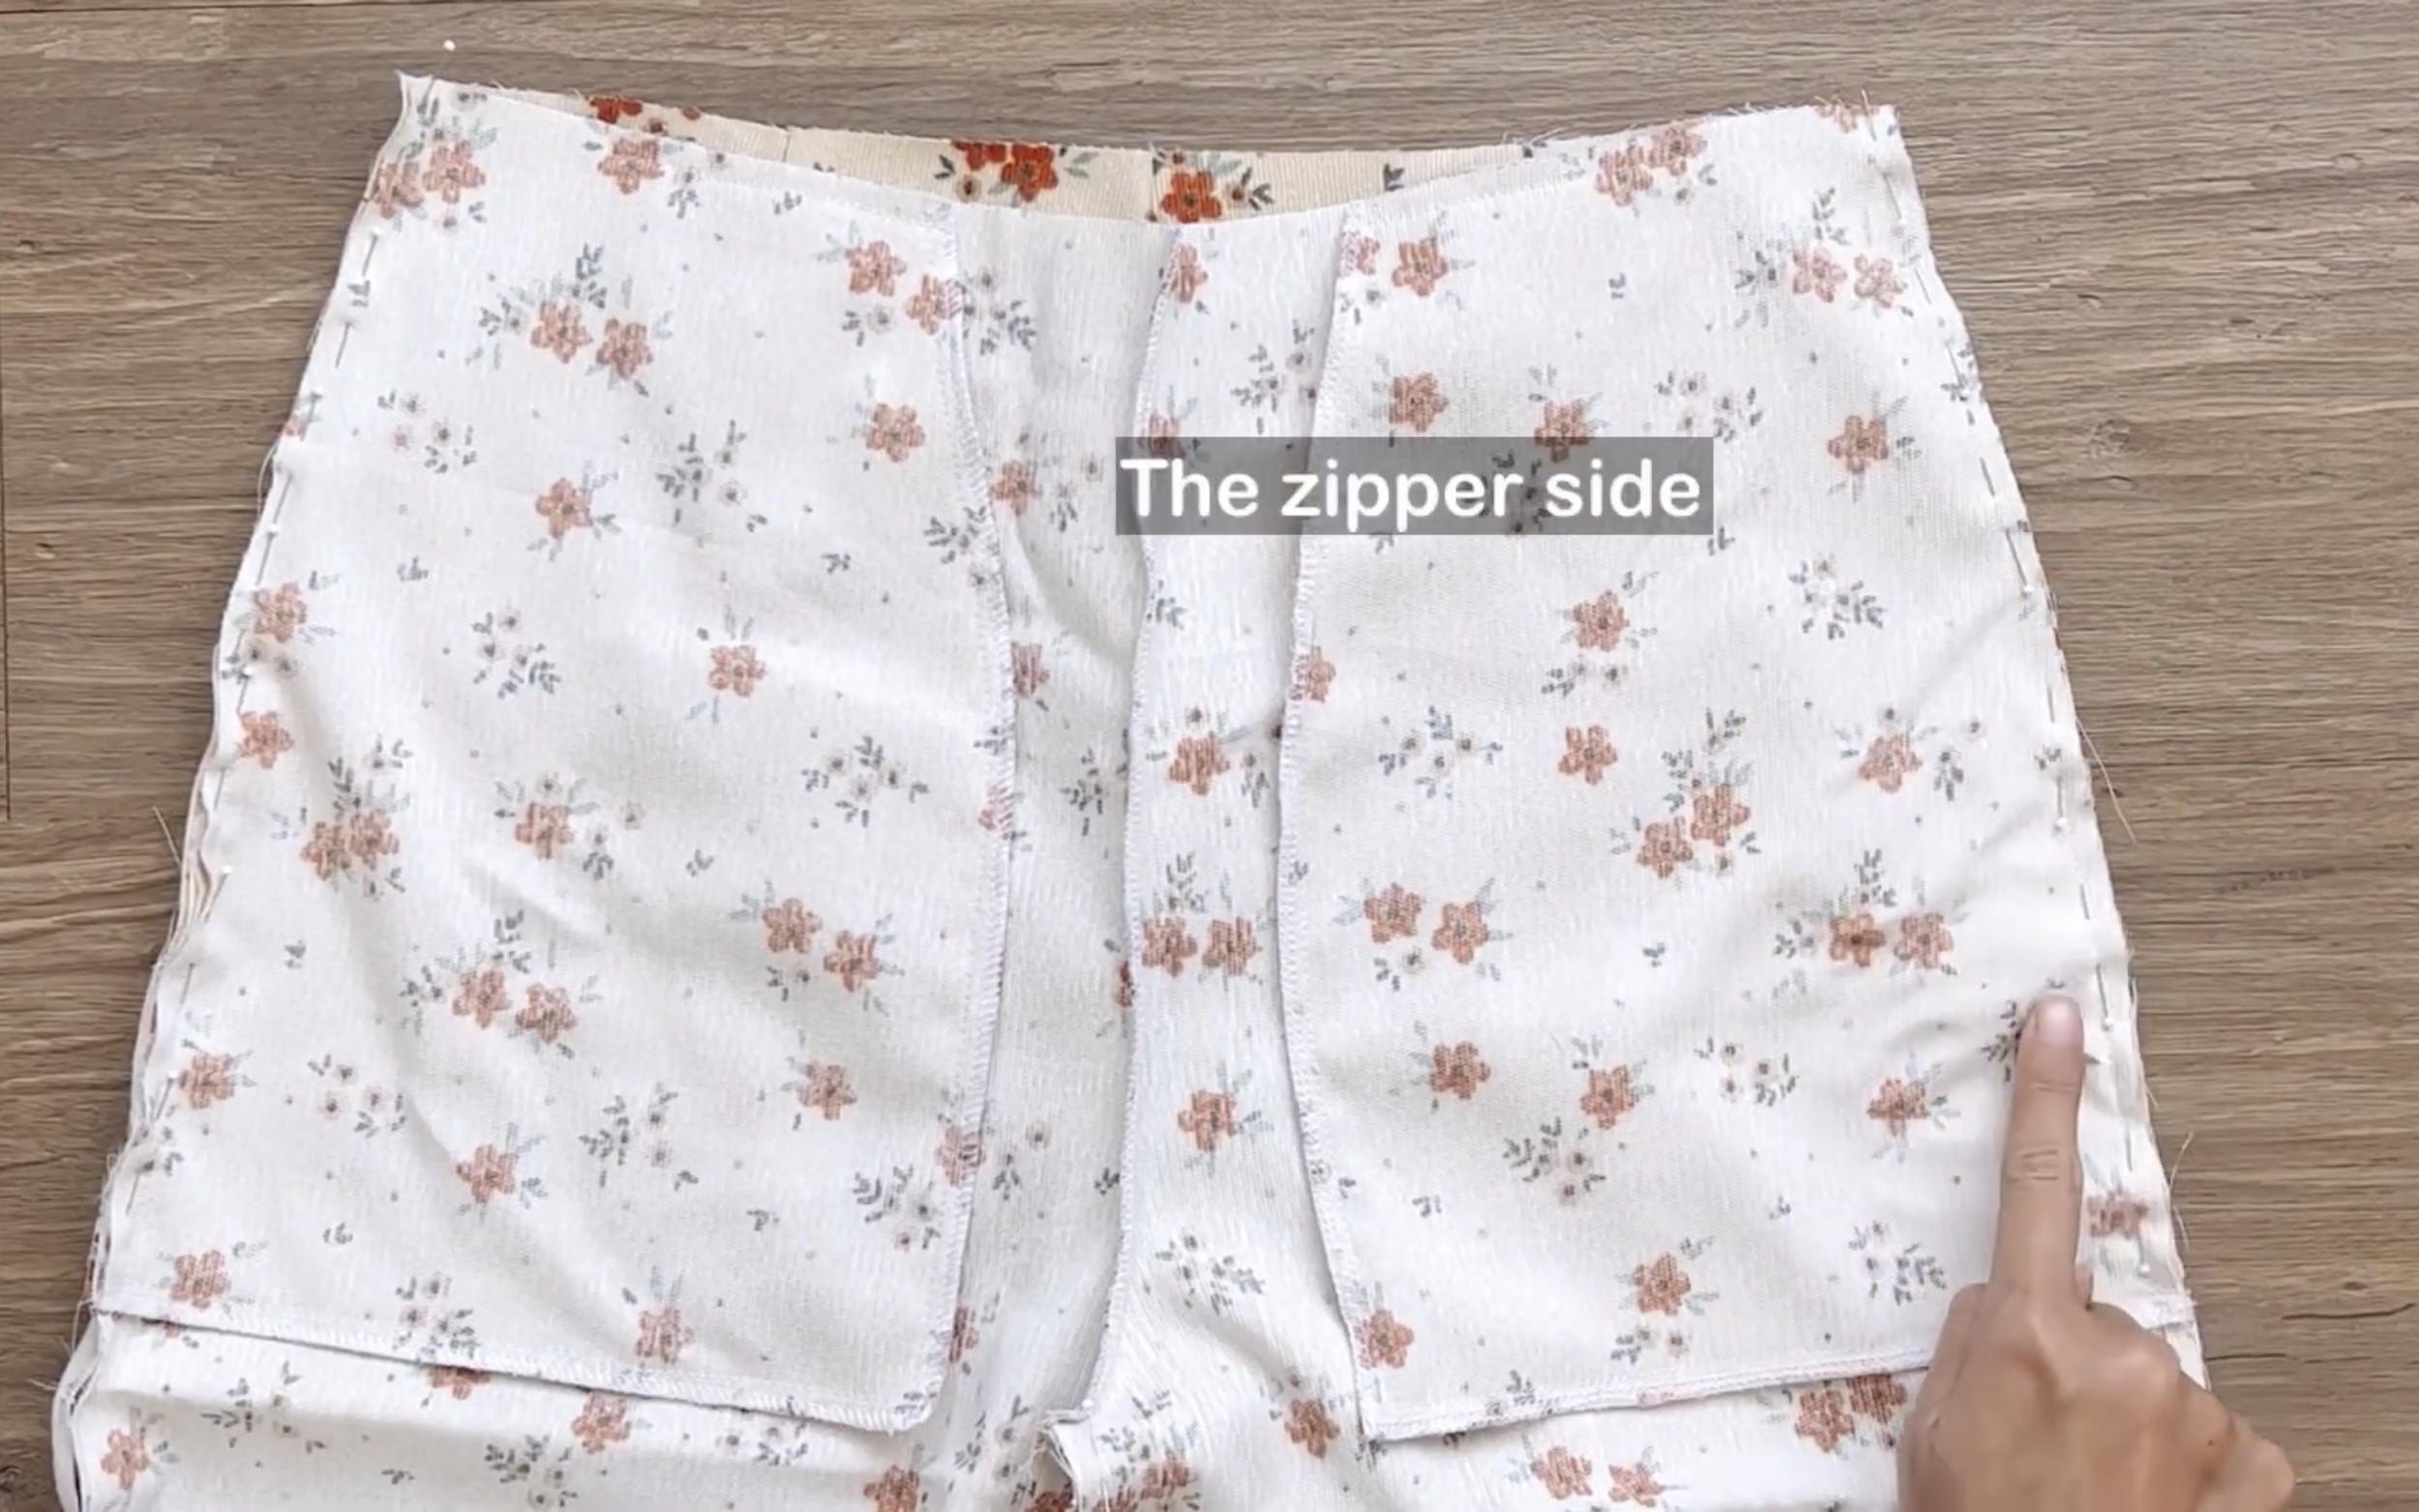
Before sewing, choose one side of the sideline for the zipper.
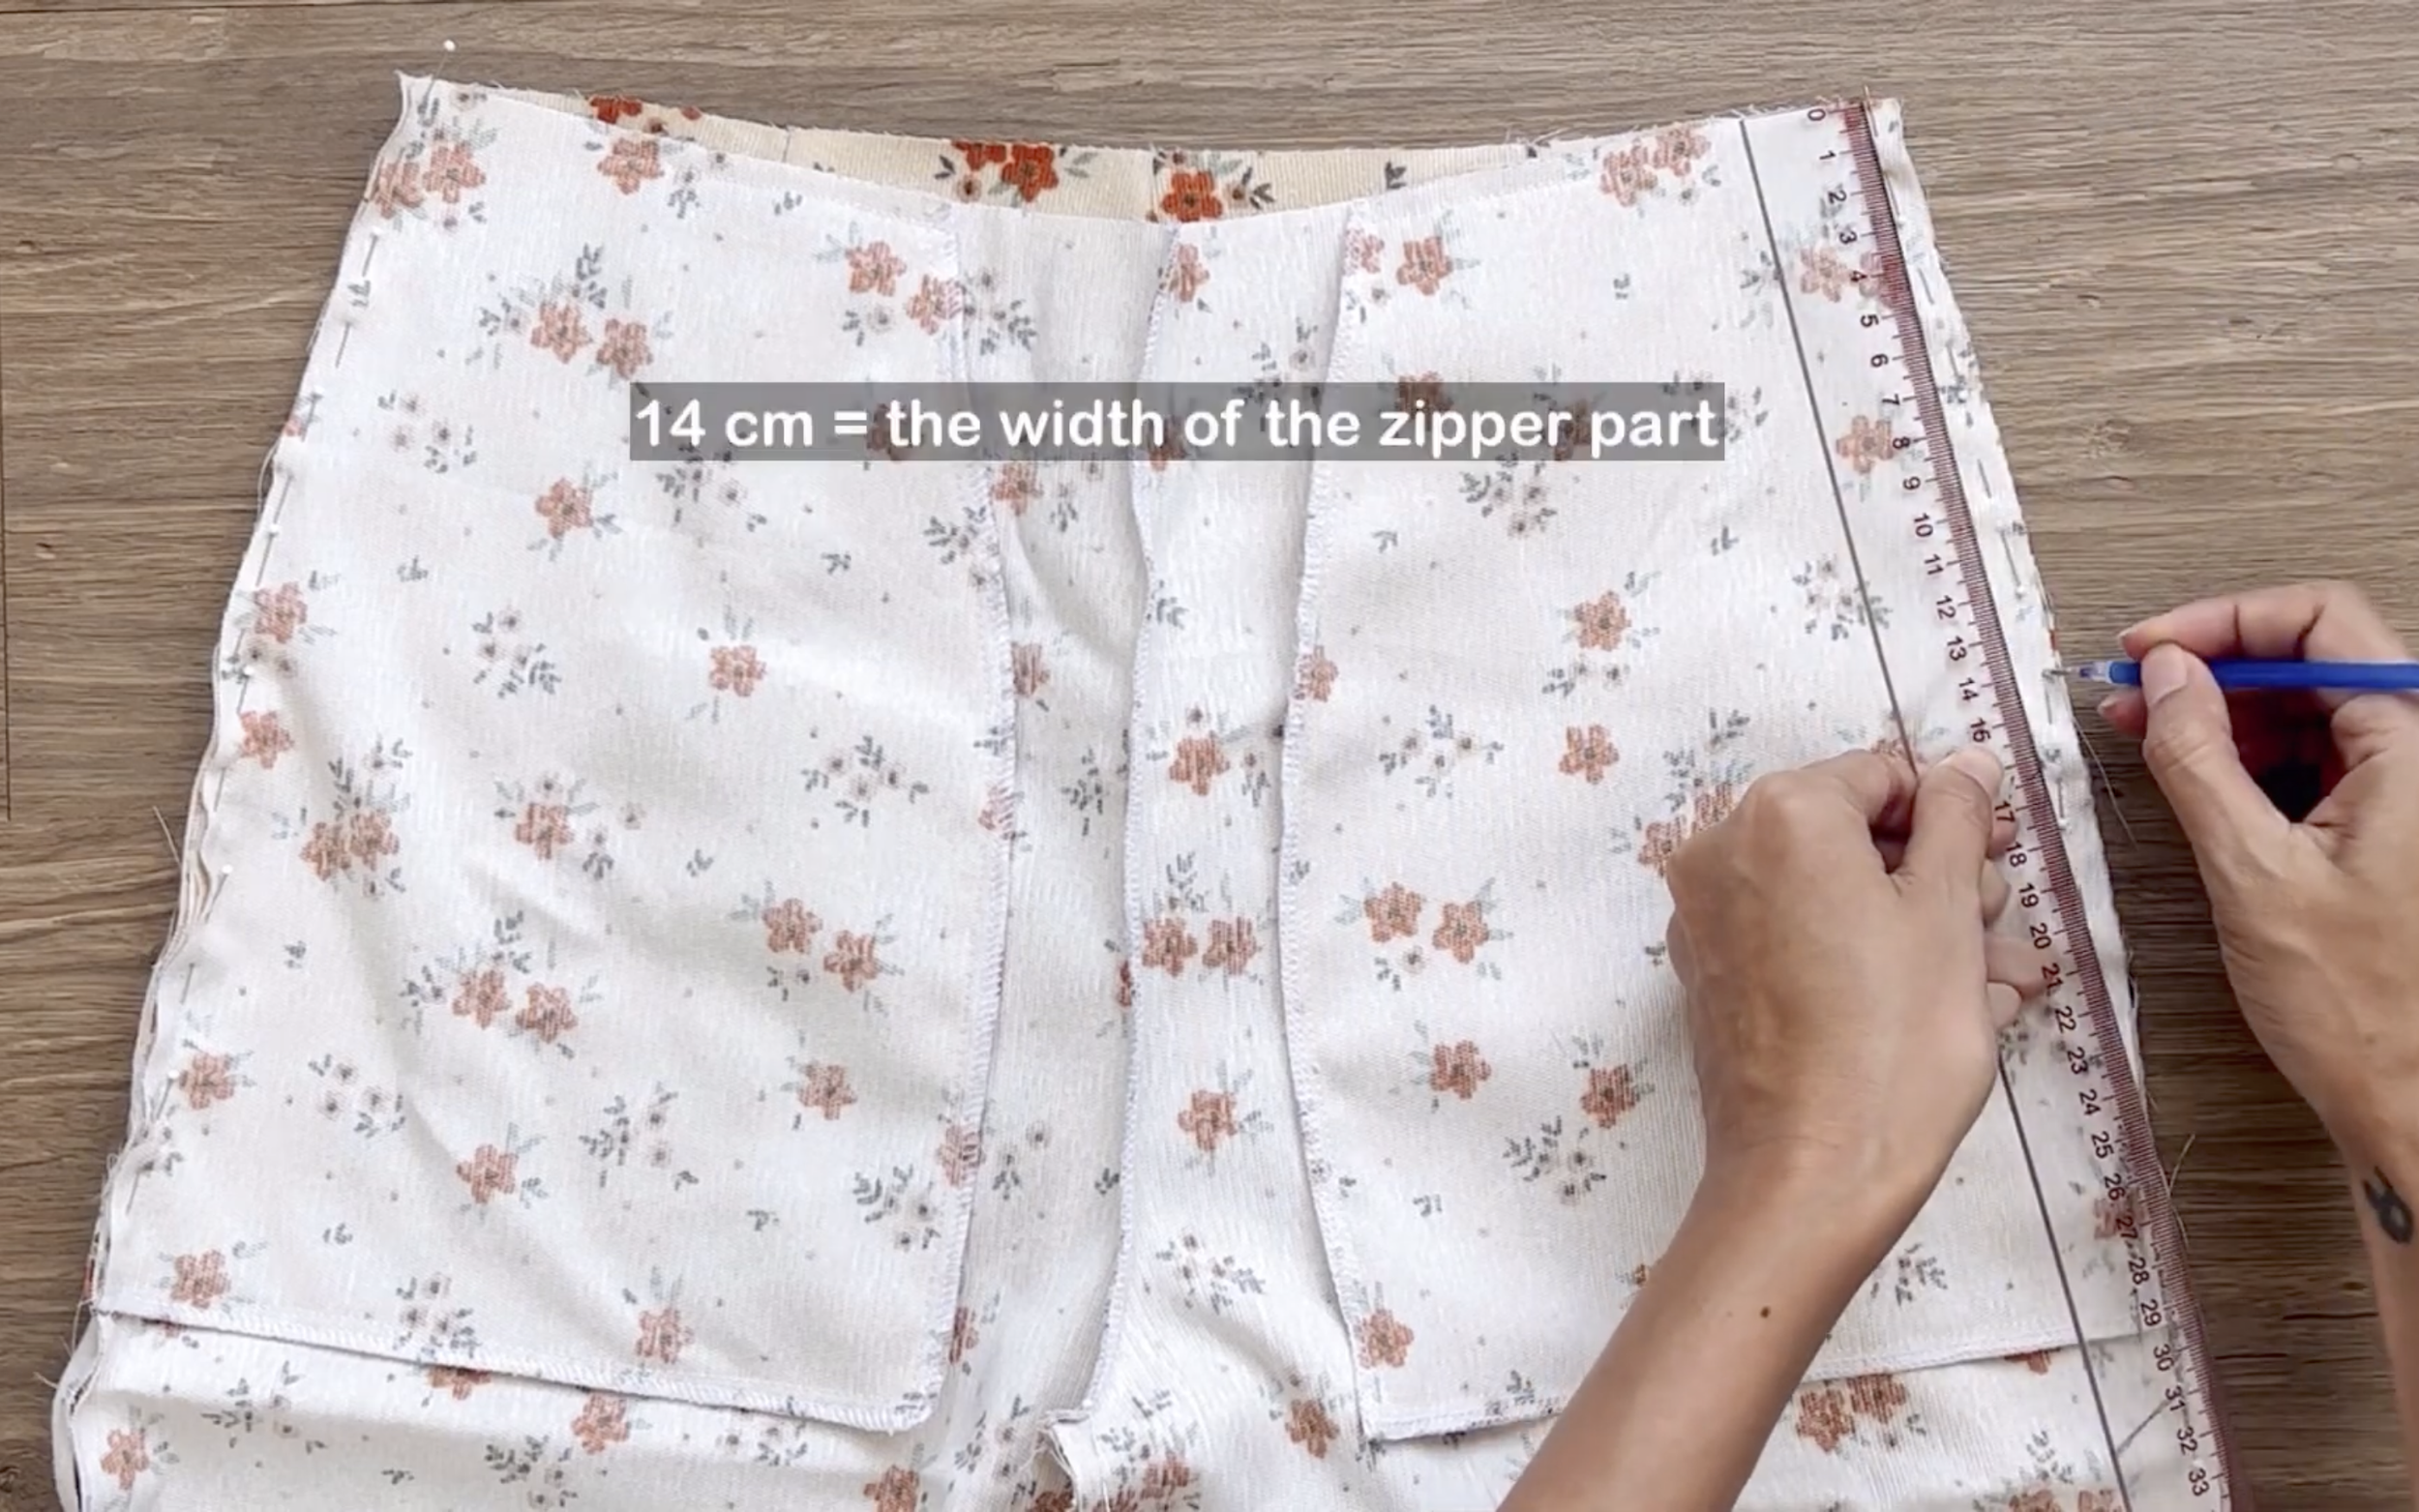
Leave 14 cm open on one side for the zipper.
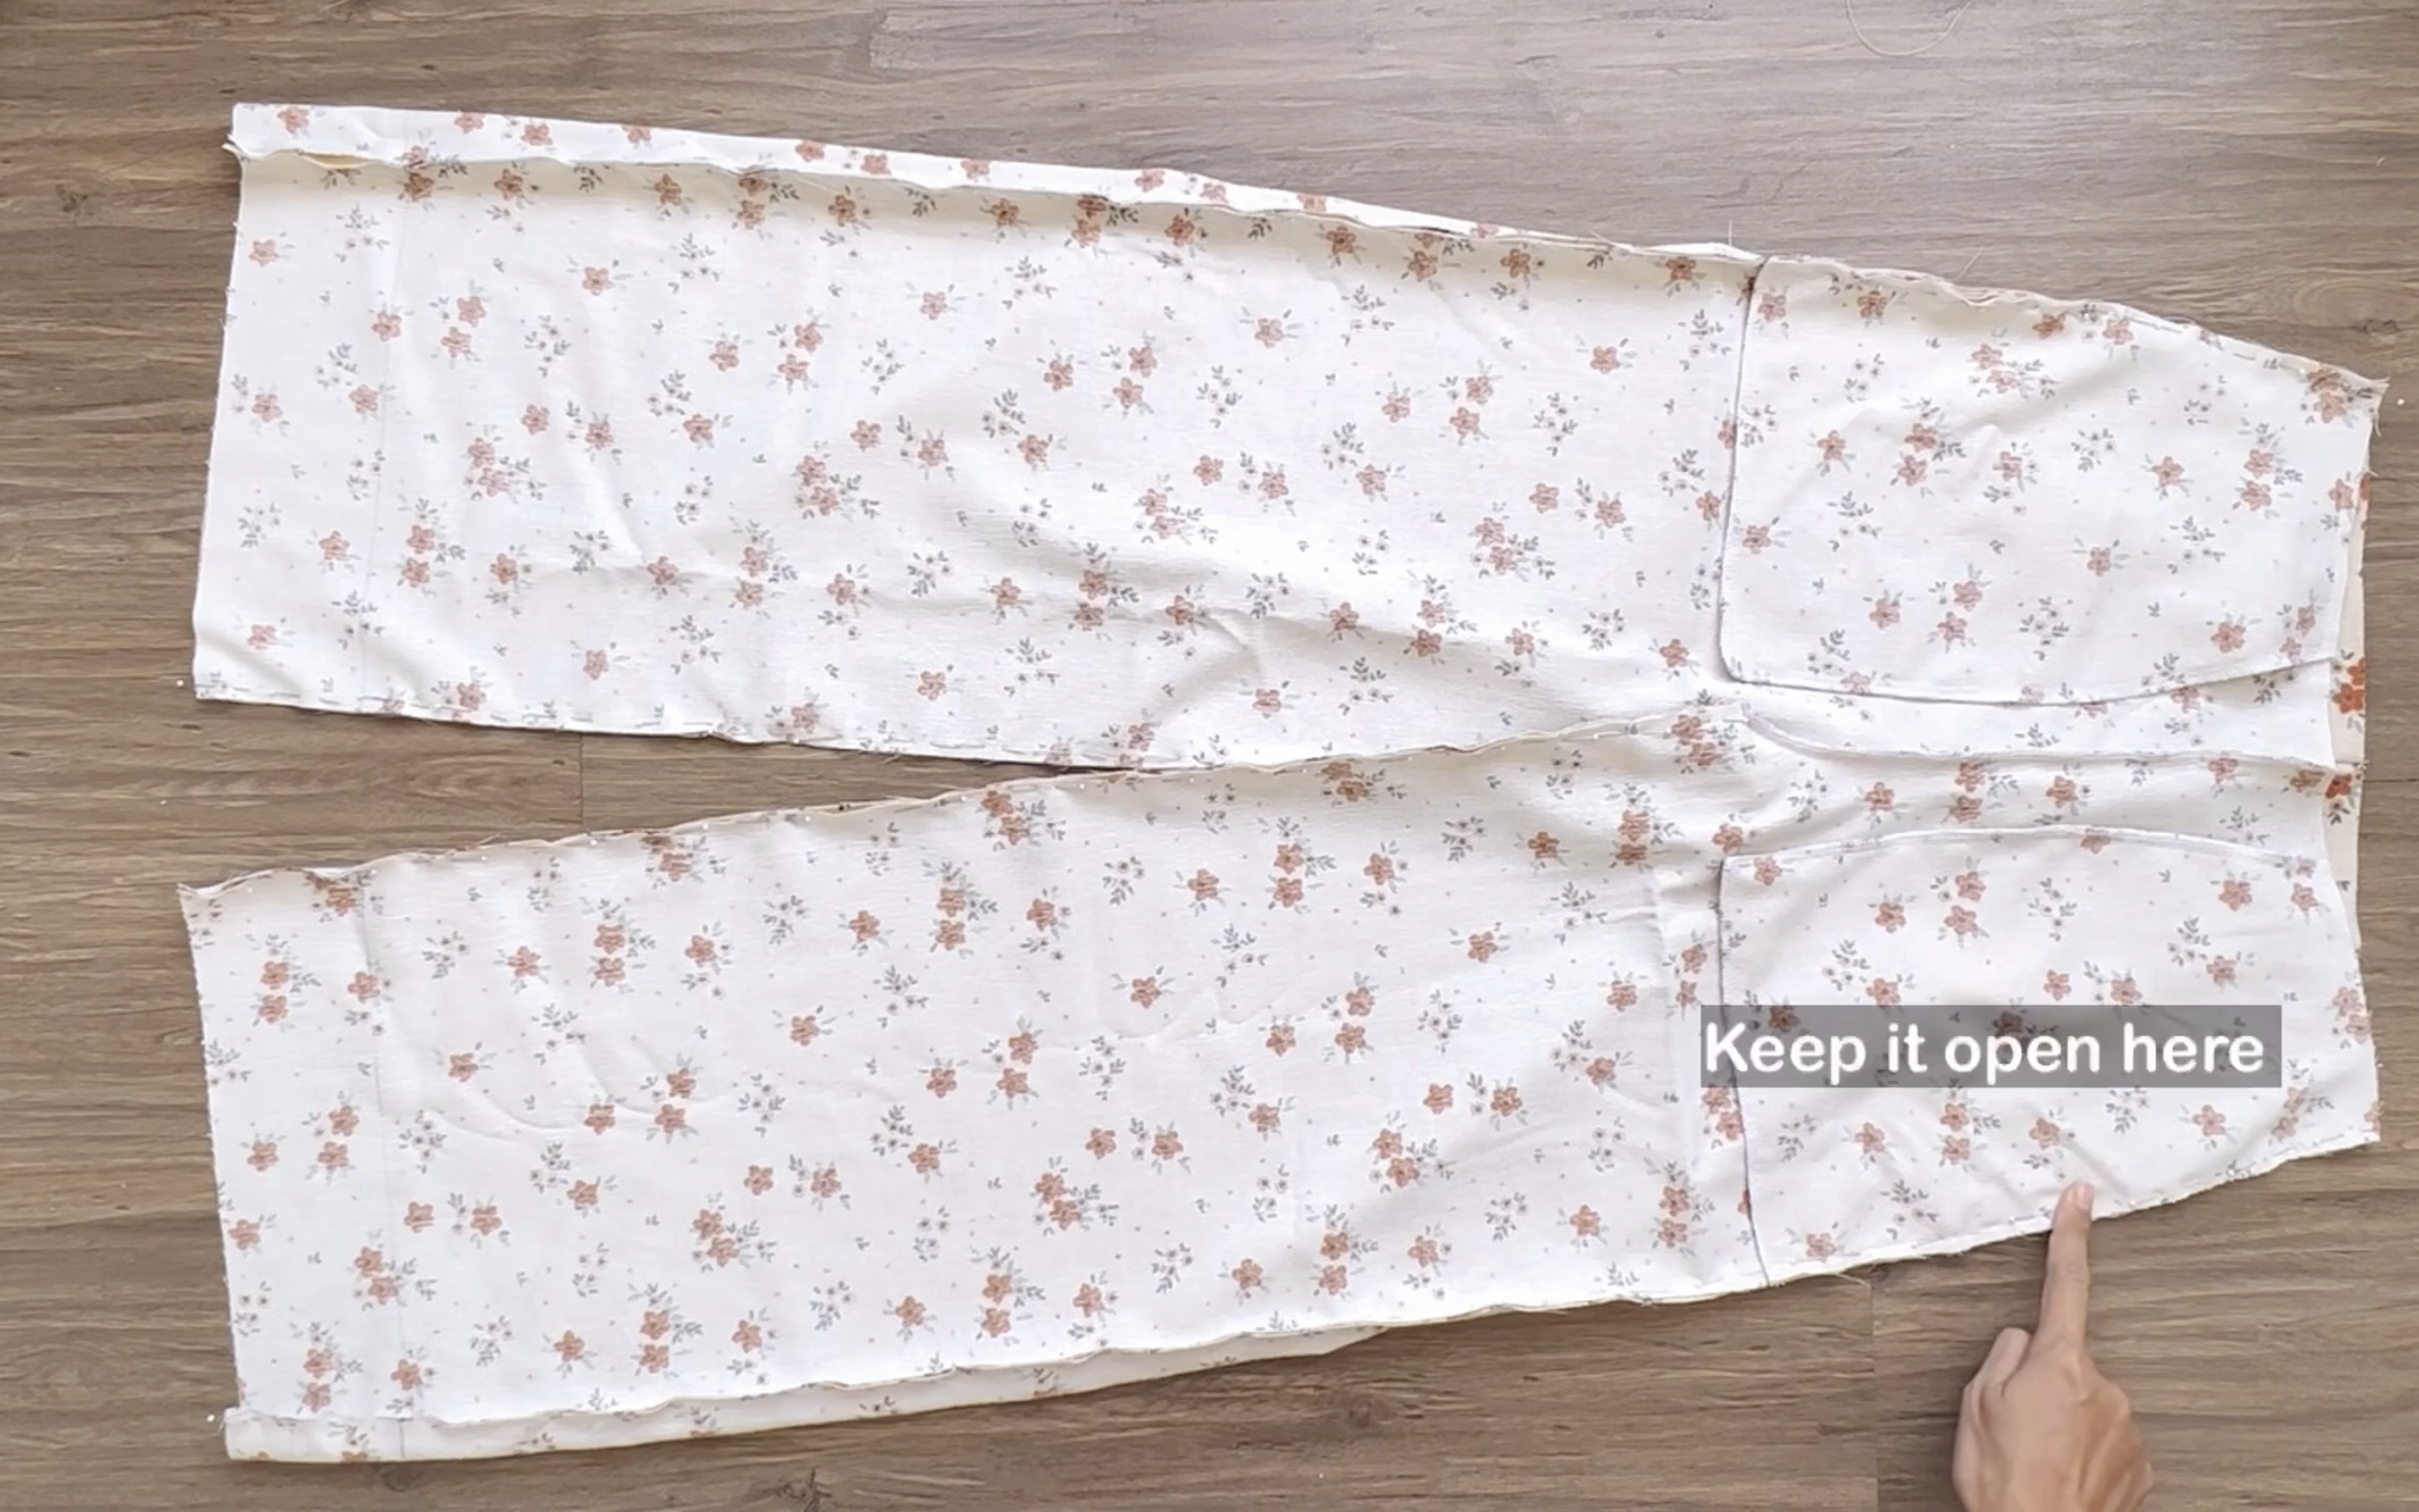
Then, sew the rest together.
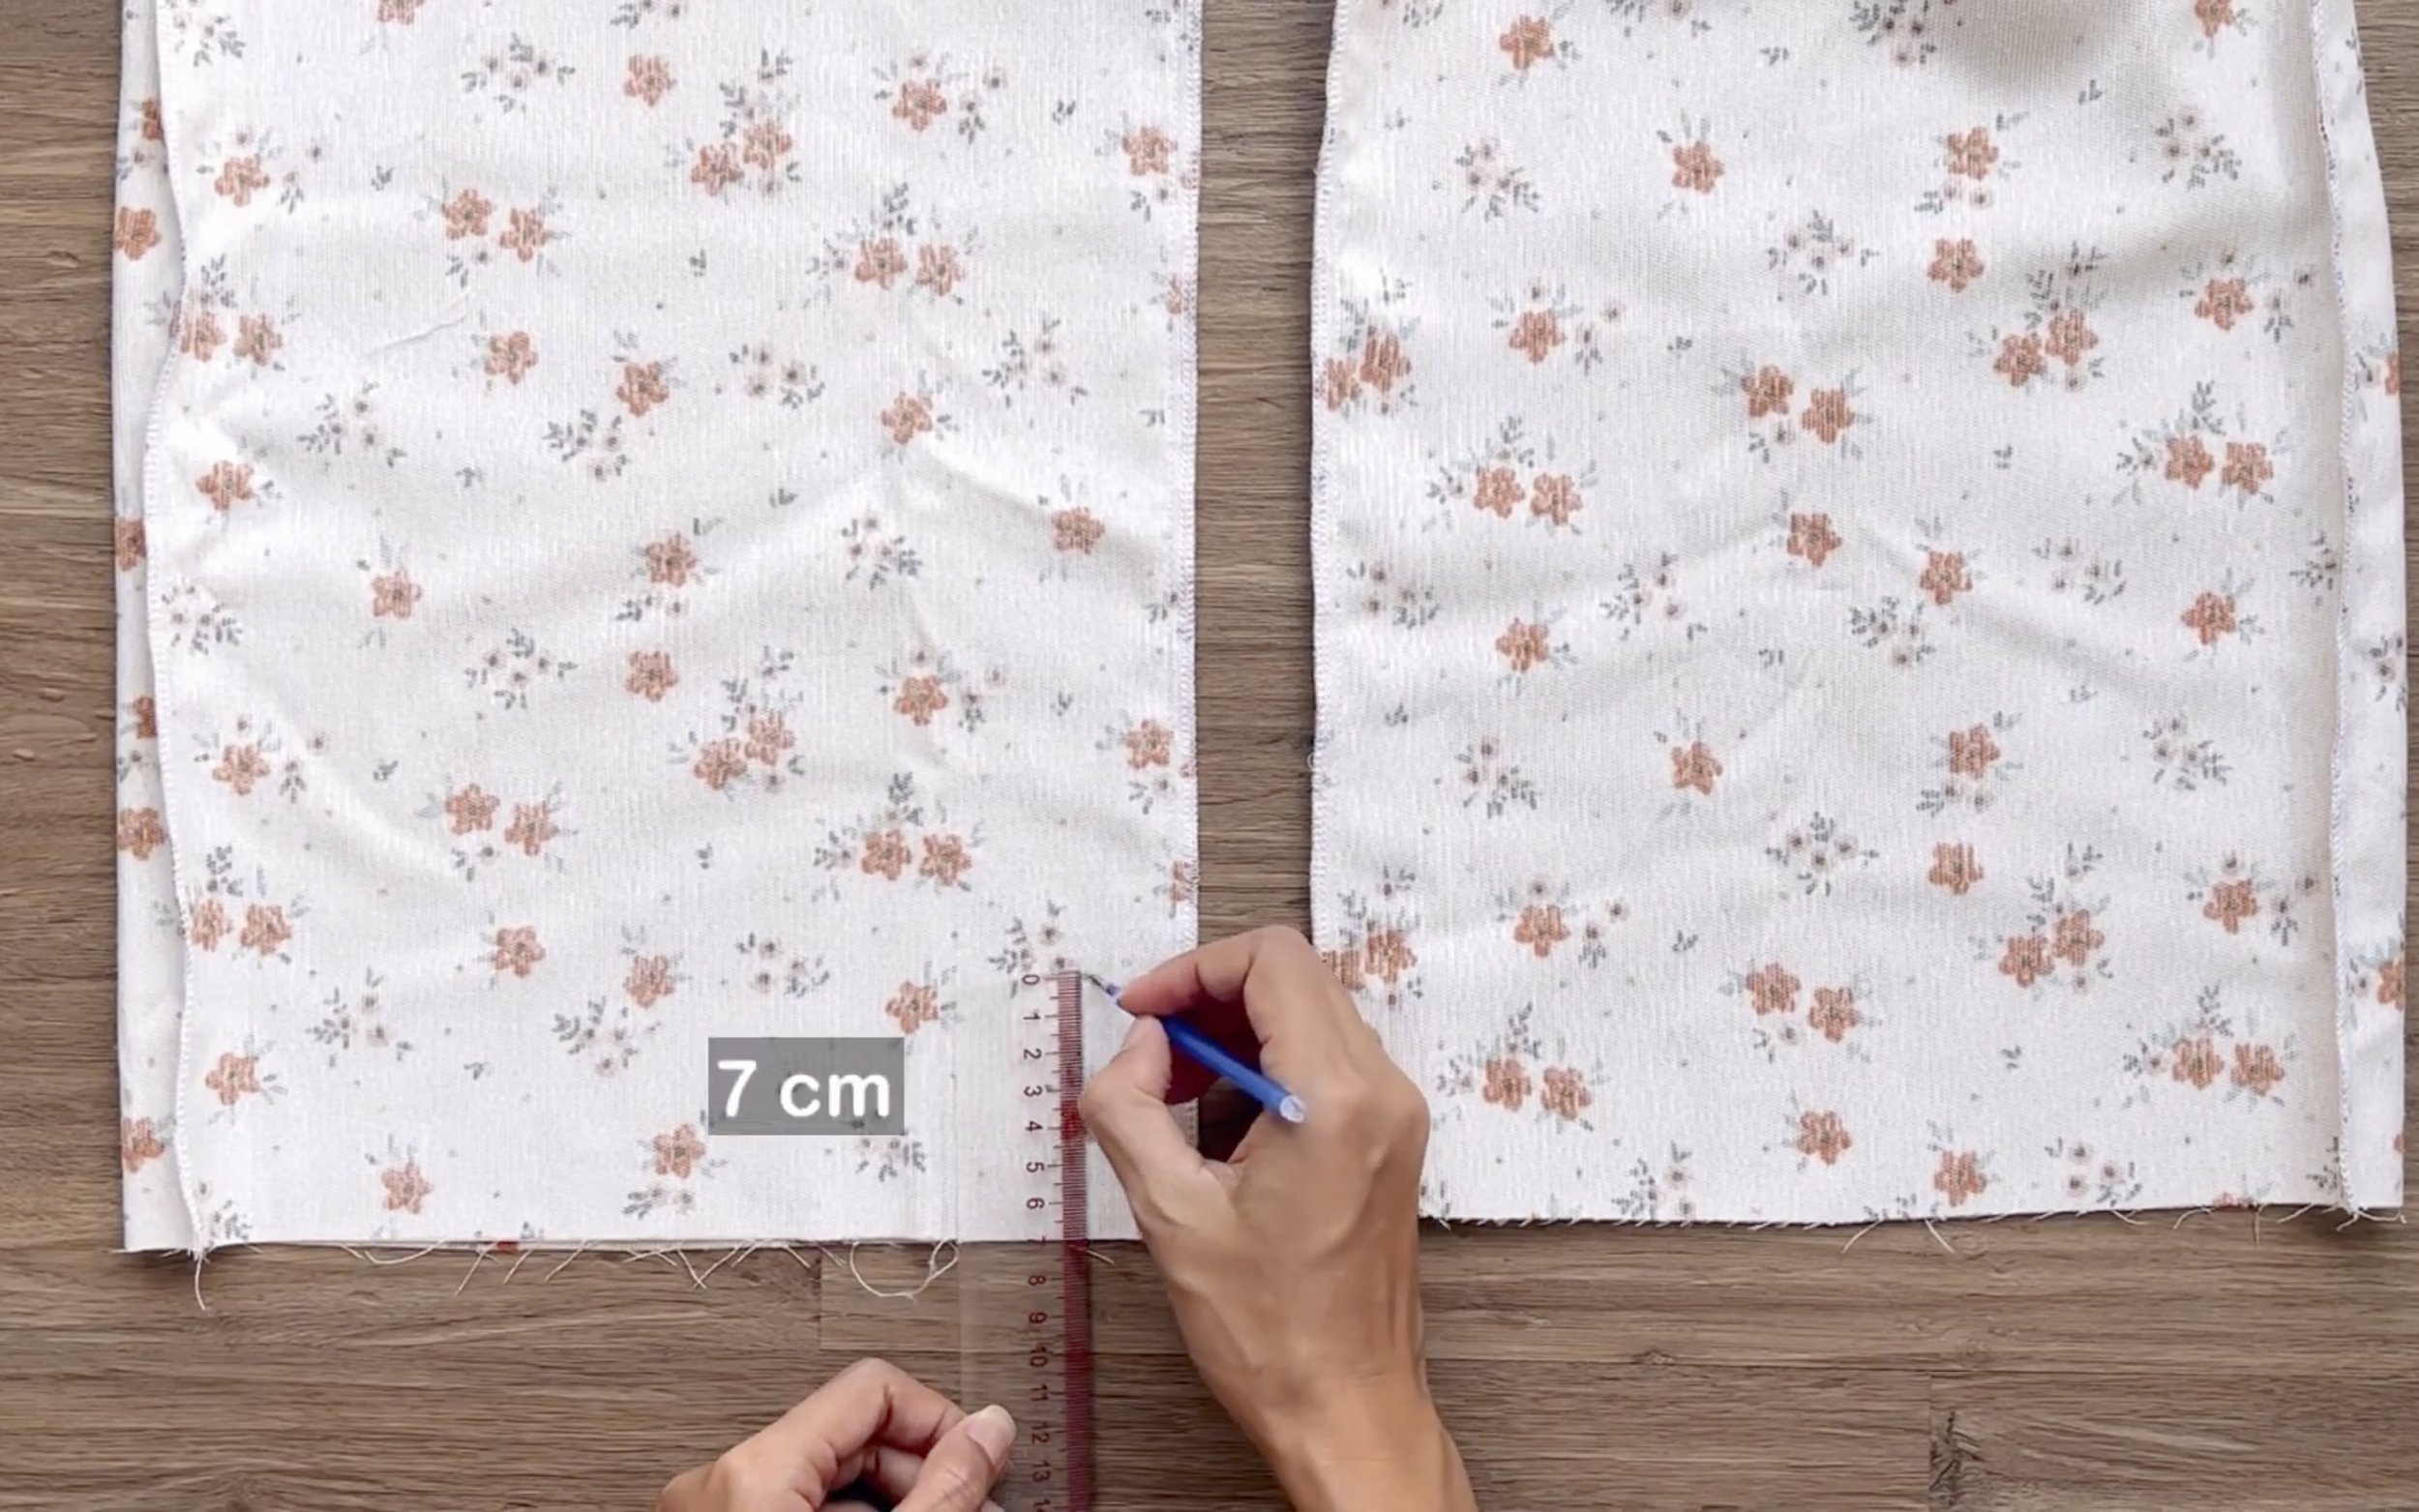
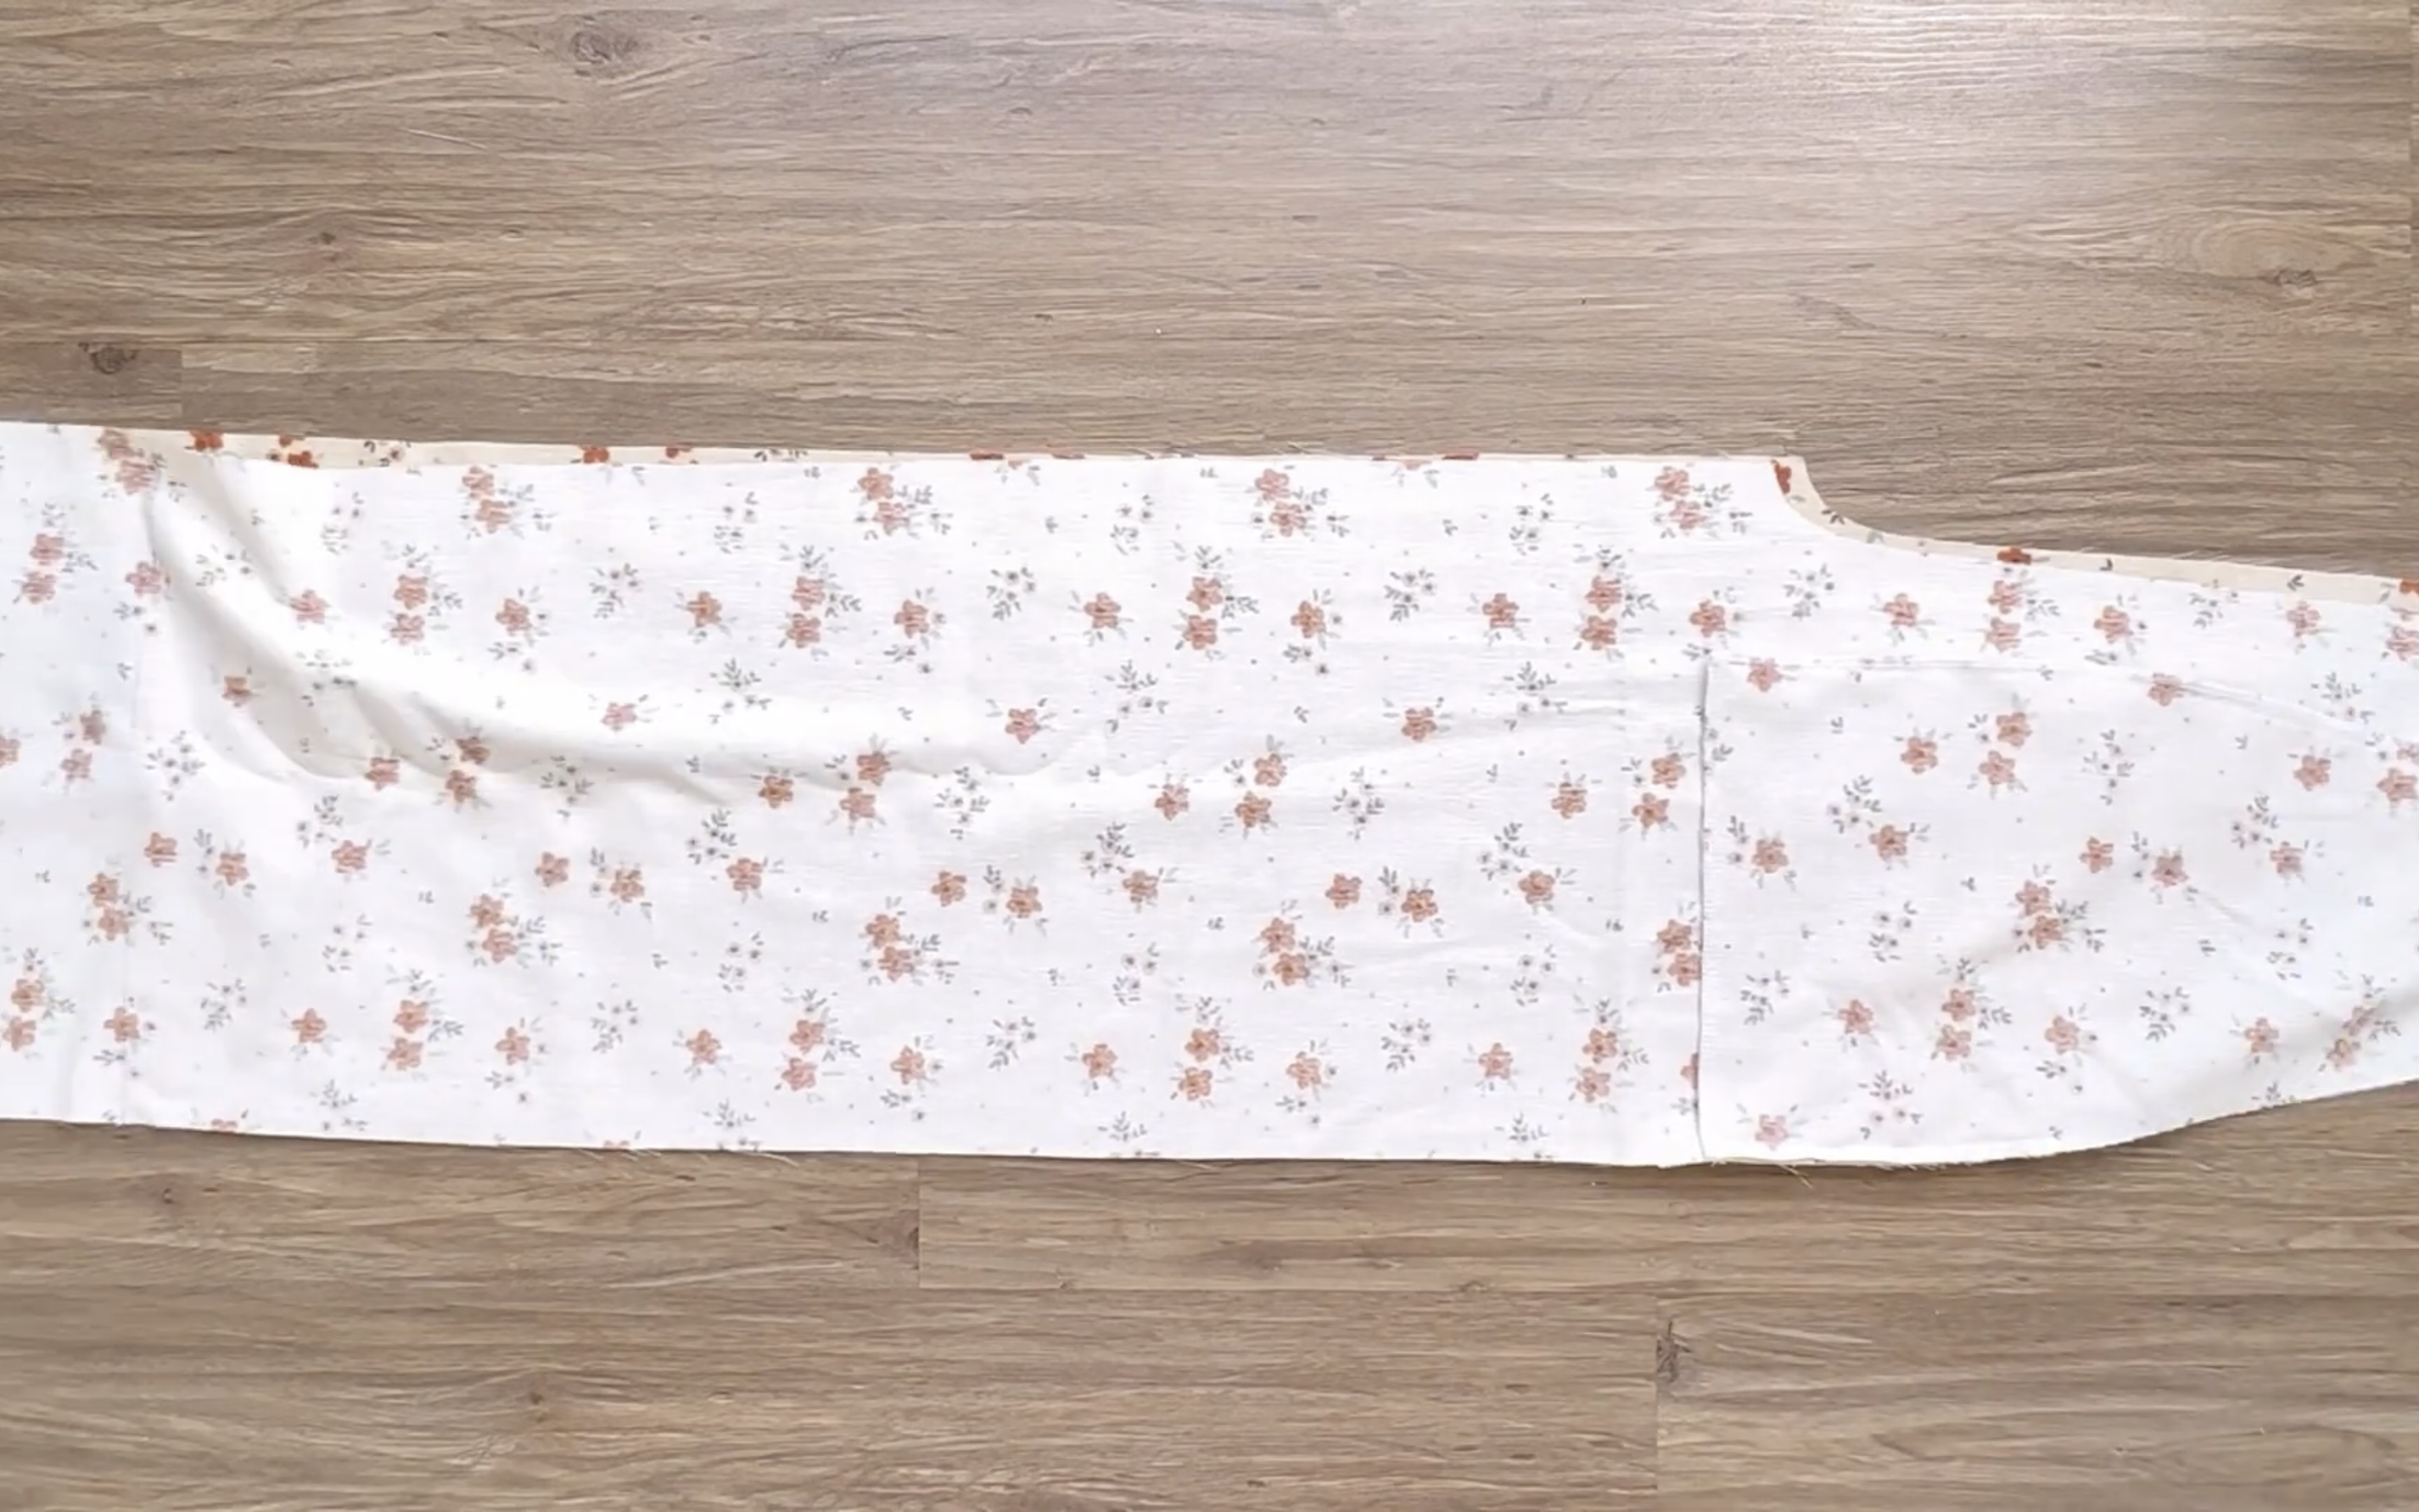
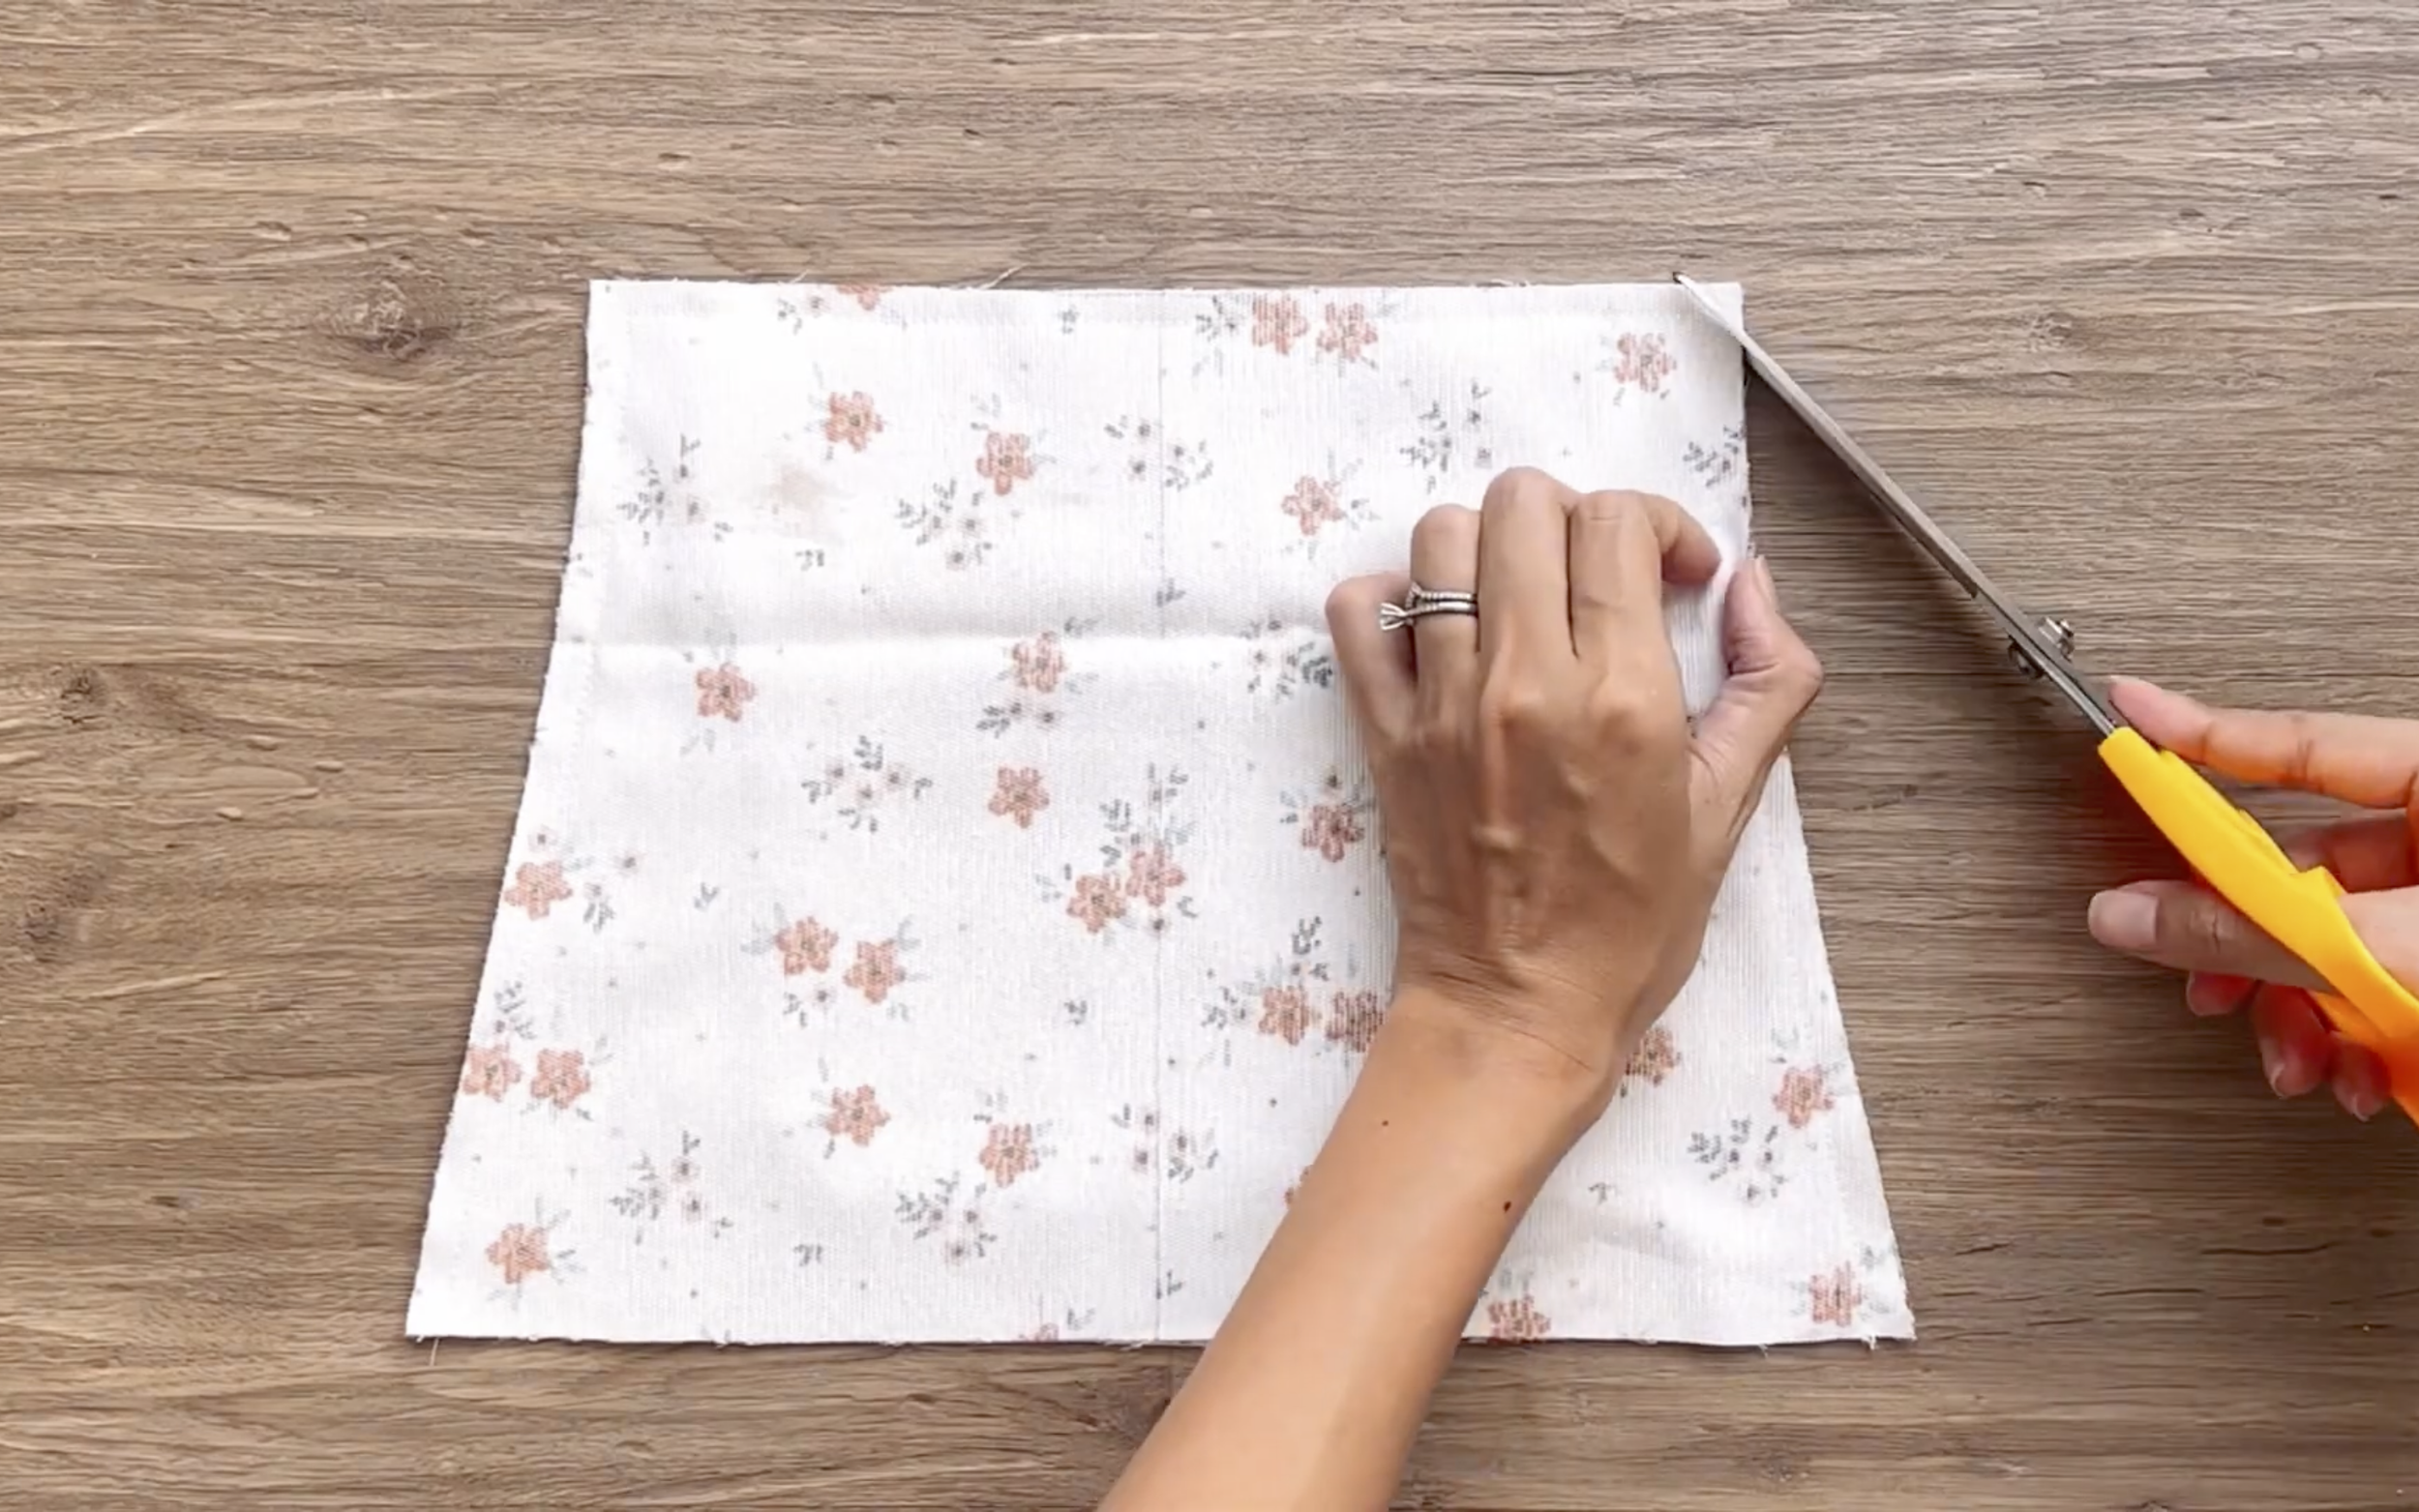
At the end of the pants, draw a line 7 cm above the ending line.
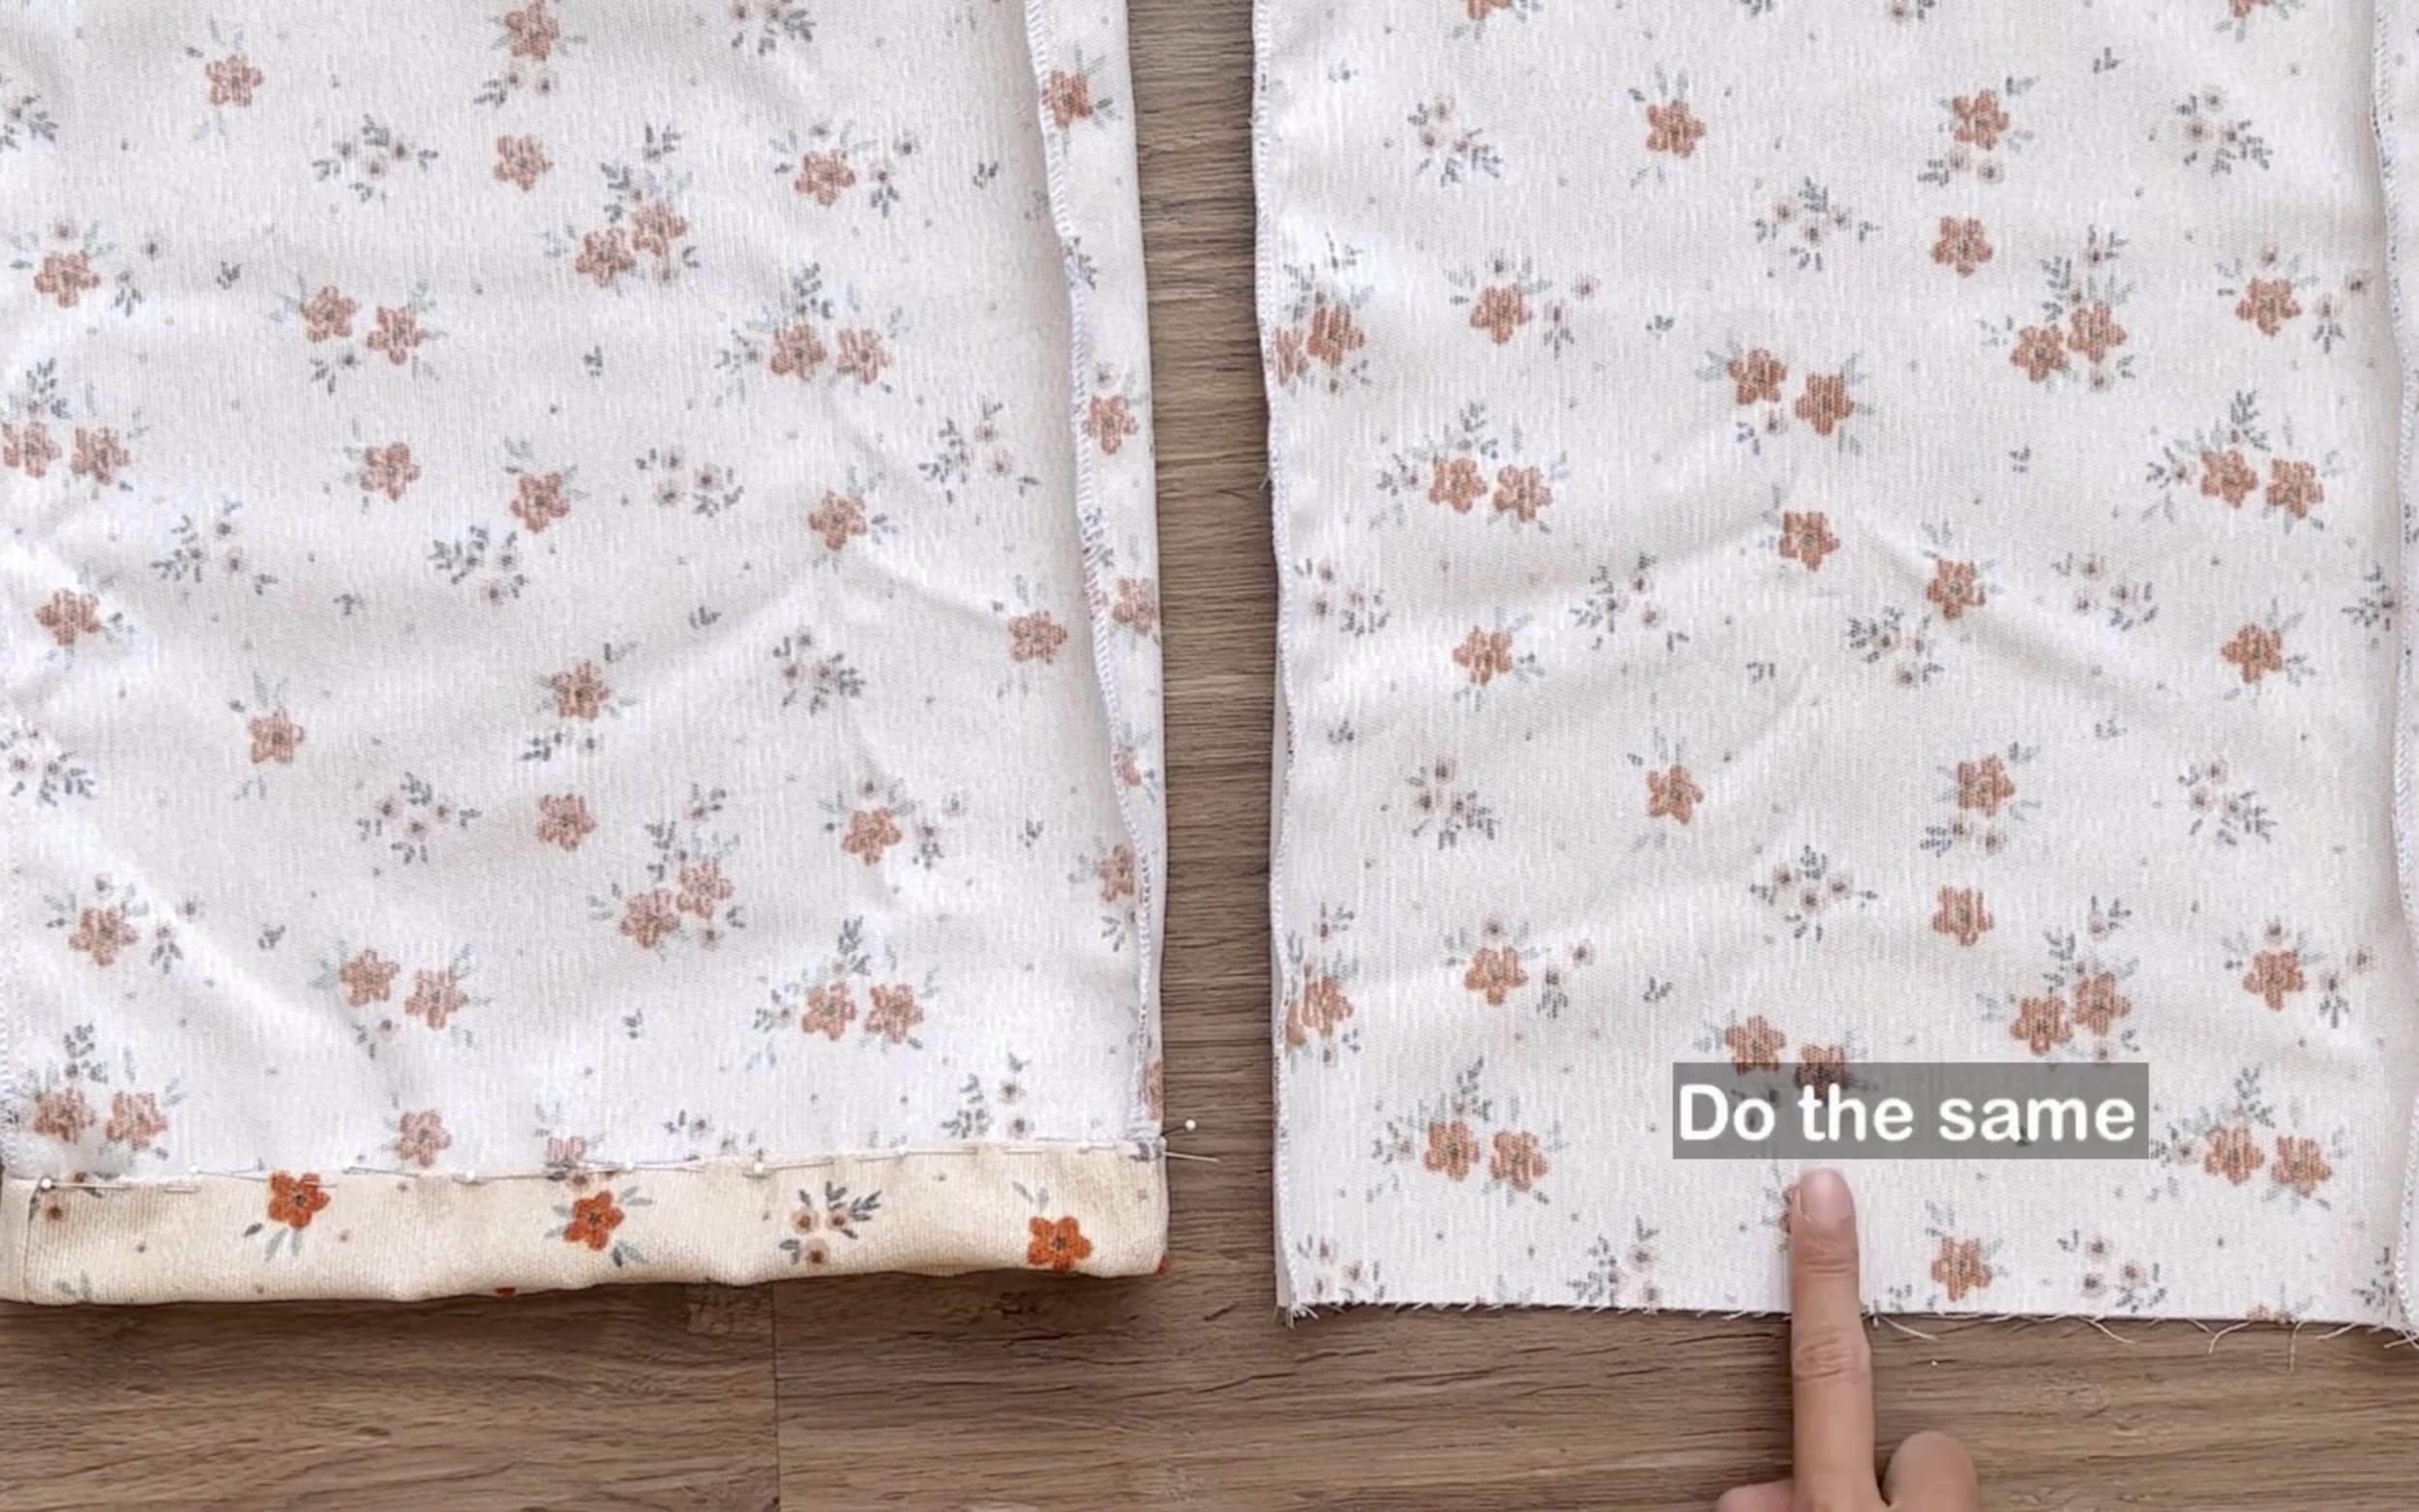
Fold the end fabric inside around 1 cm, then keep folding to the line just drawn and sew to finish the end of the pants.
THE BODICE
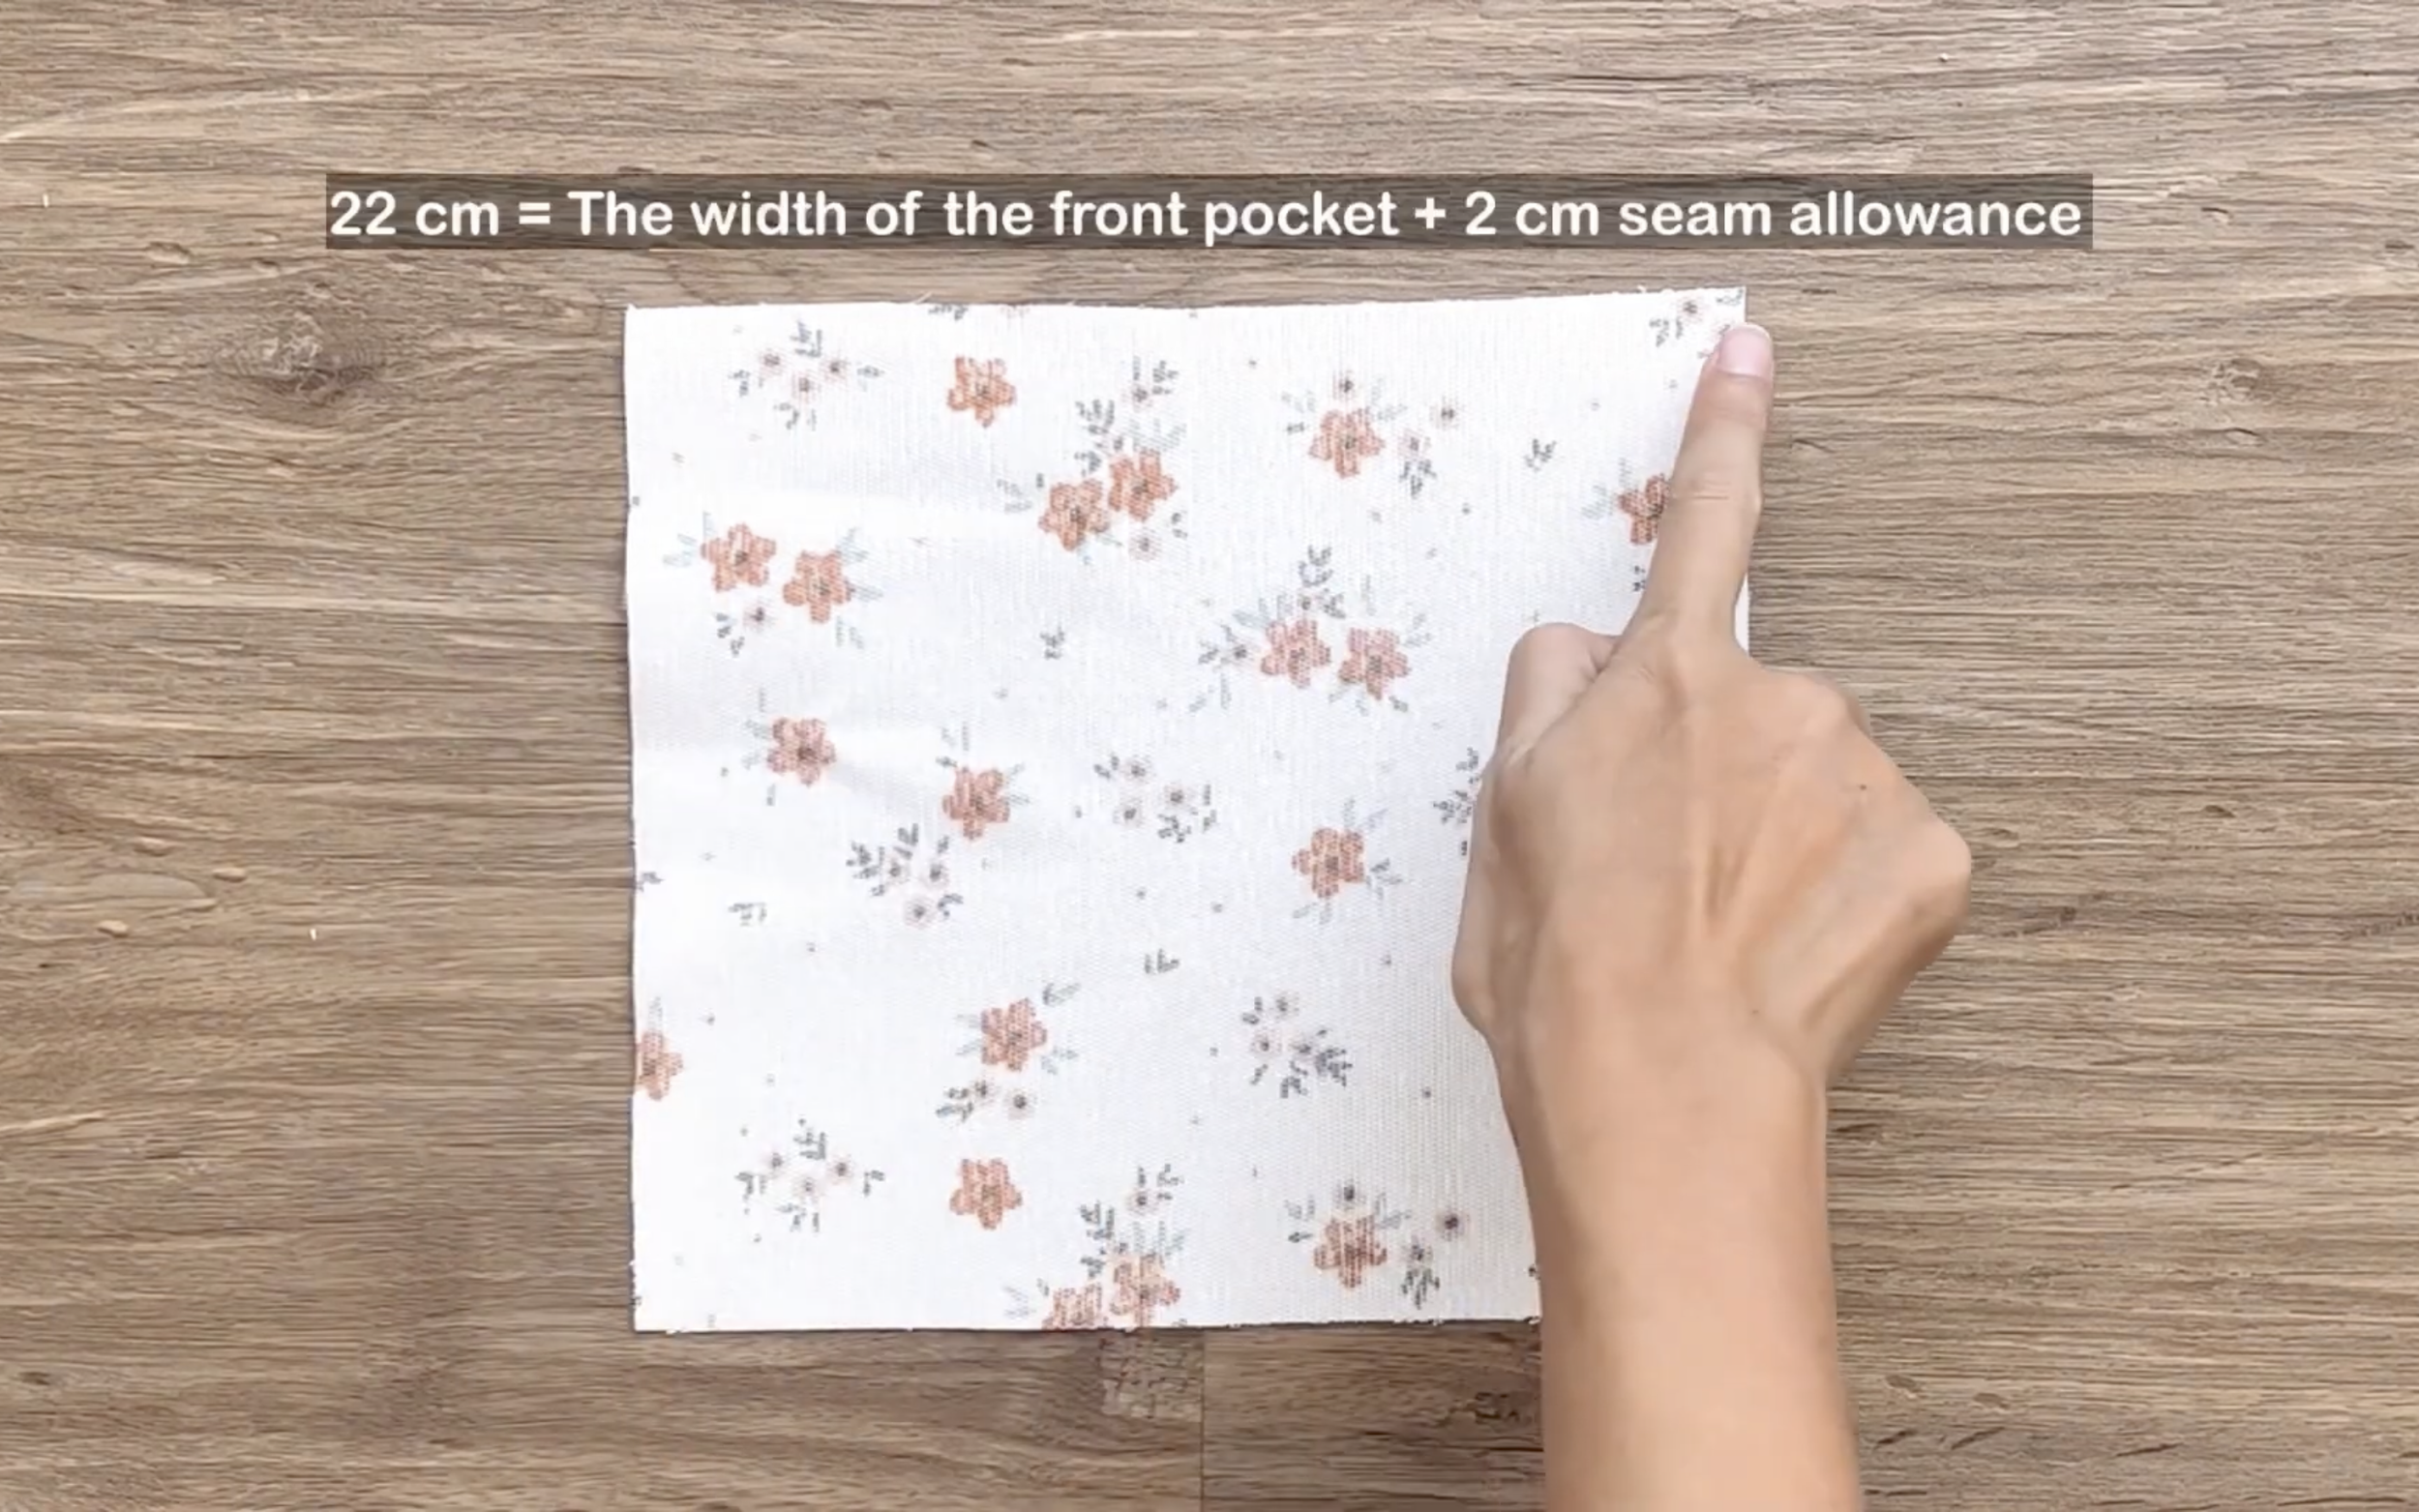
Moving to the bodice part, for the front pocket, cut a rectangle with 22 cm width, which is the desired width of the pocket plus 2 cm for seam allowance.
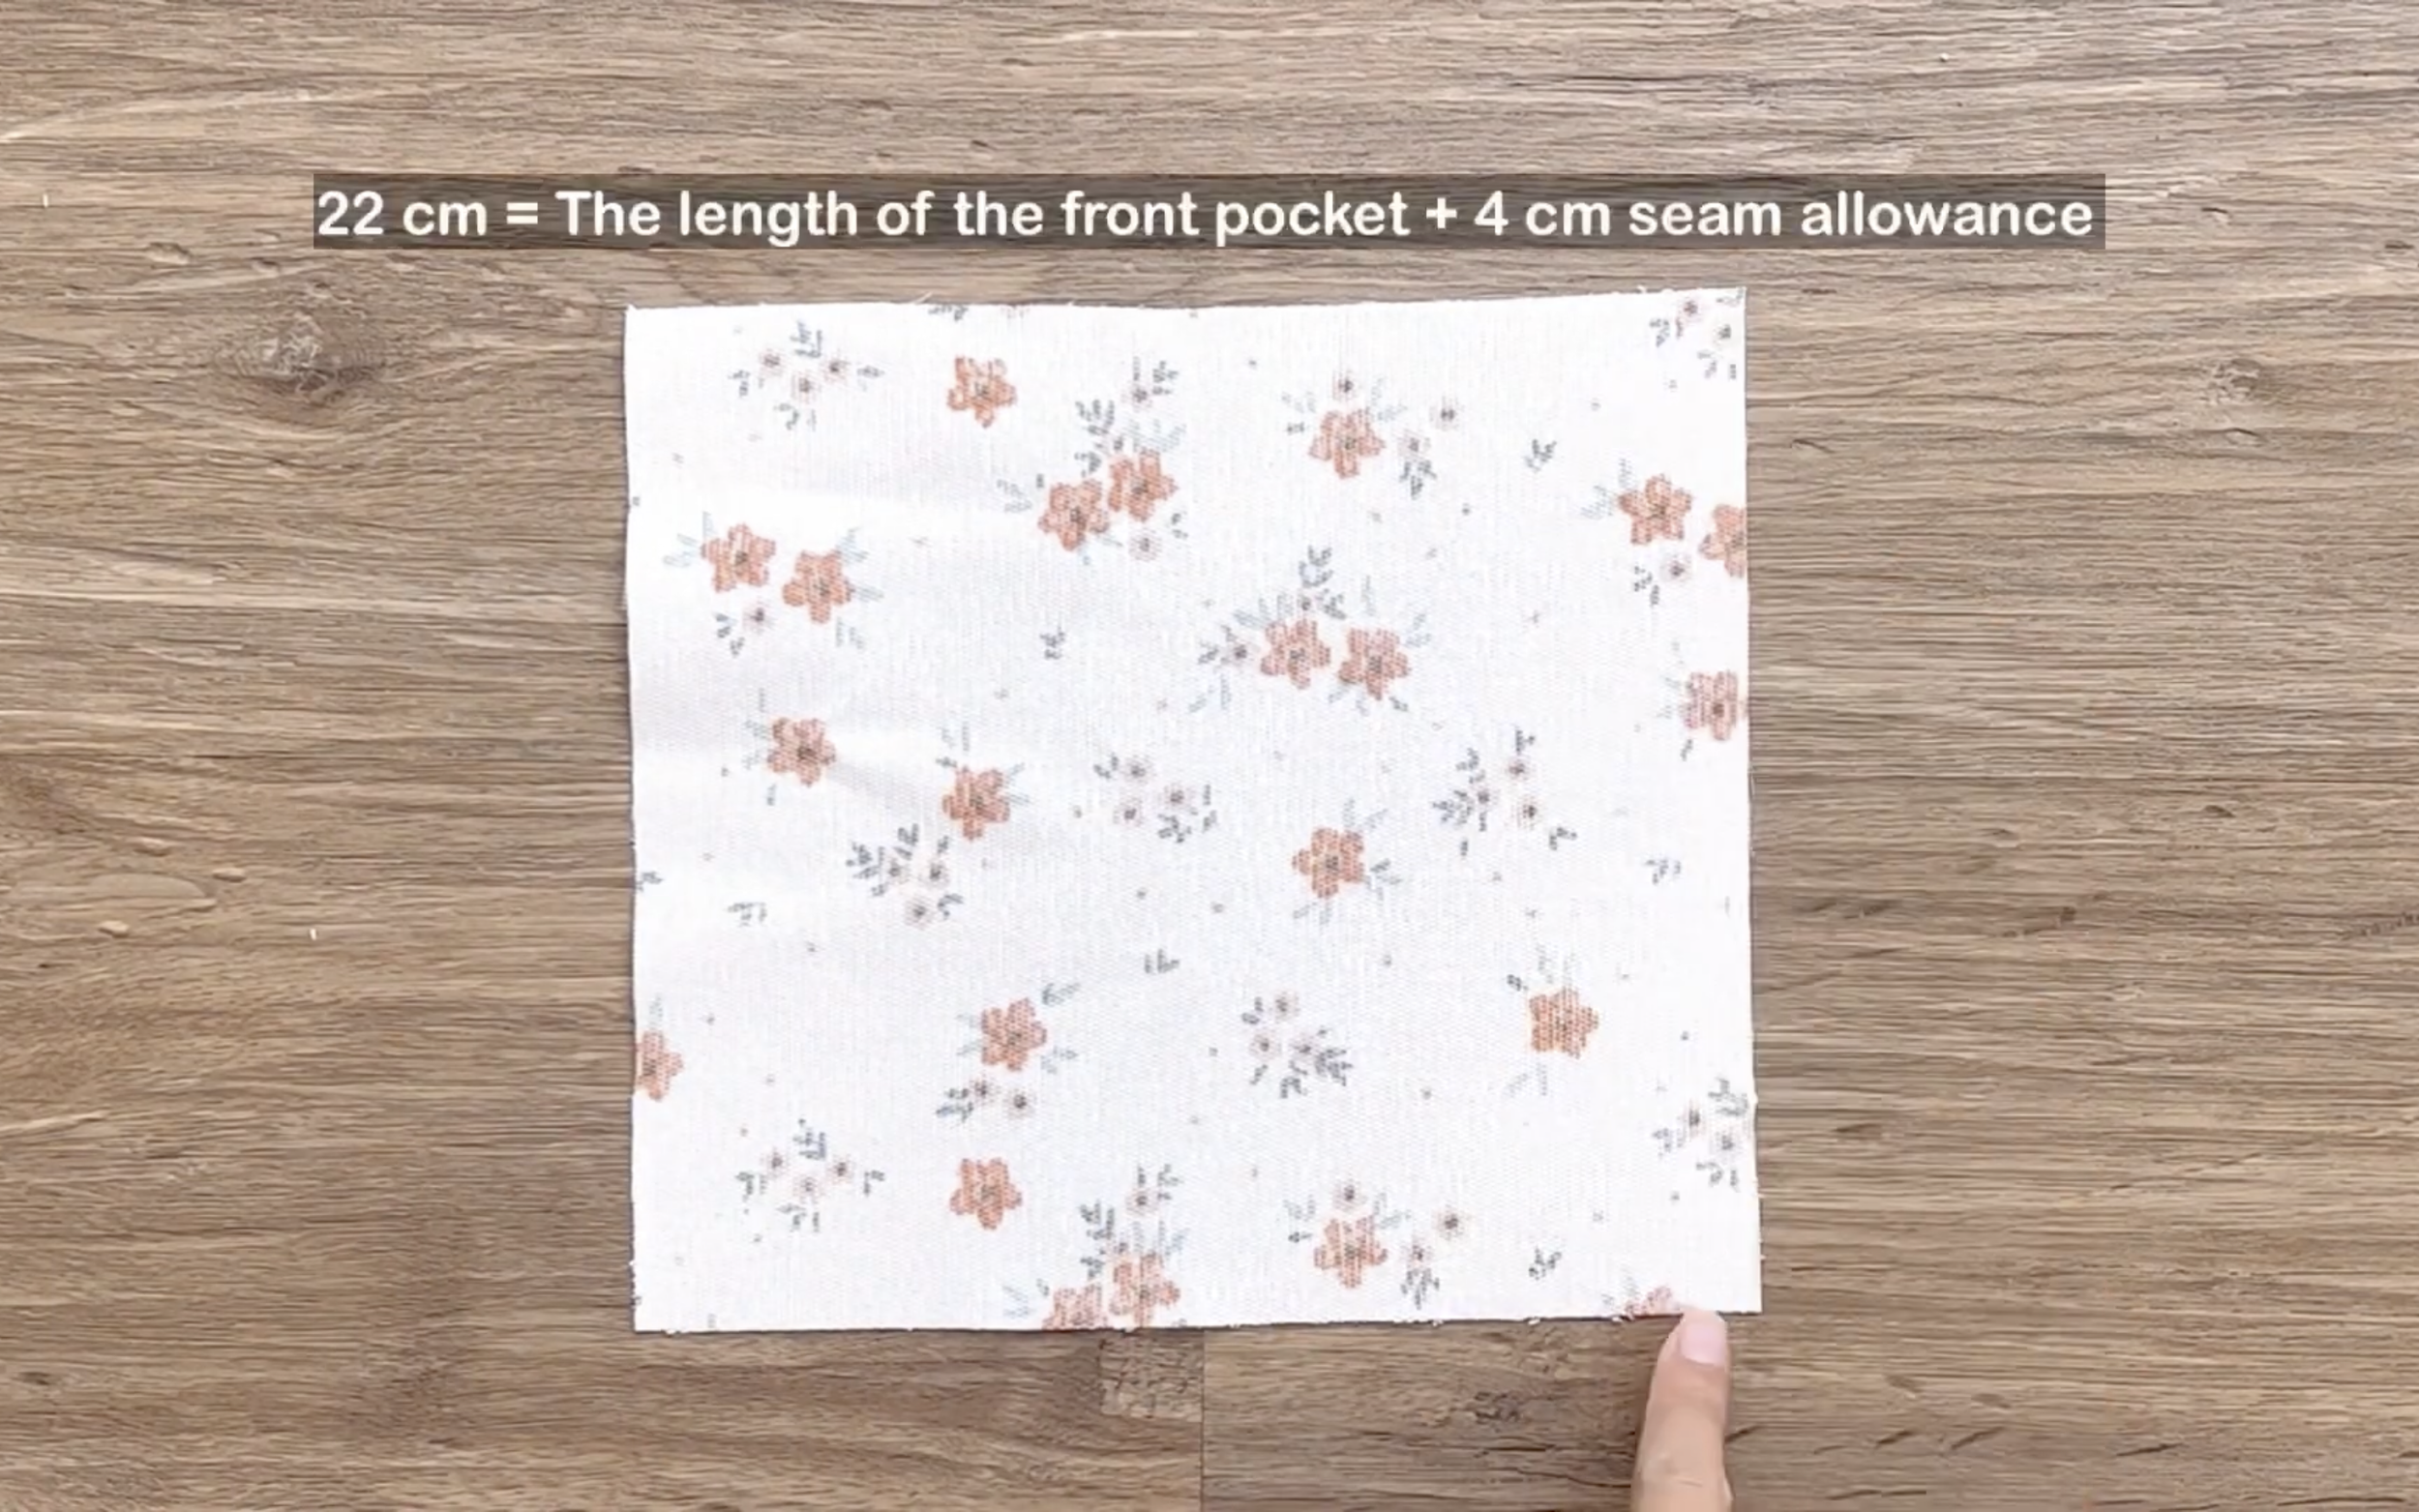
And 22 cm length, which is the desired length of the pocket plus 4 cm for seam allowance.
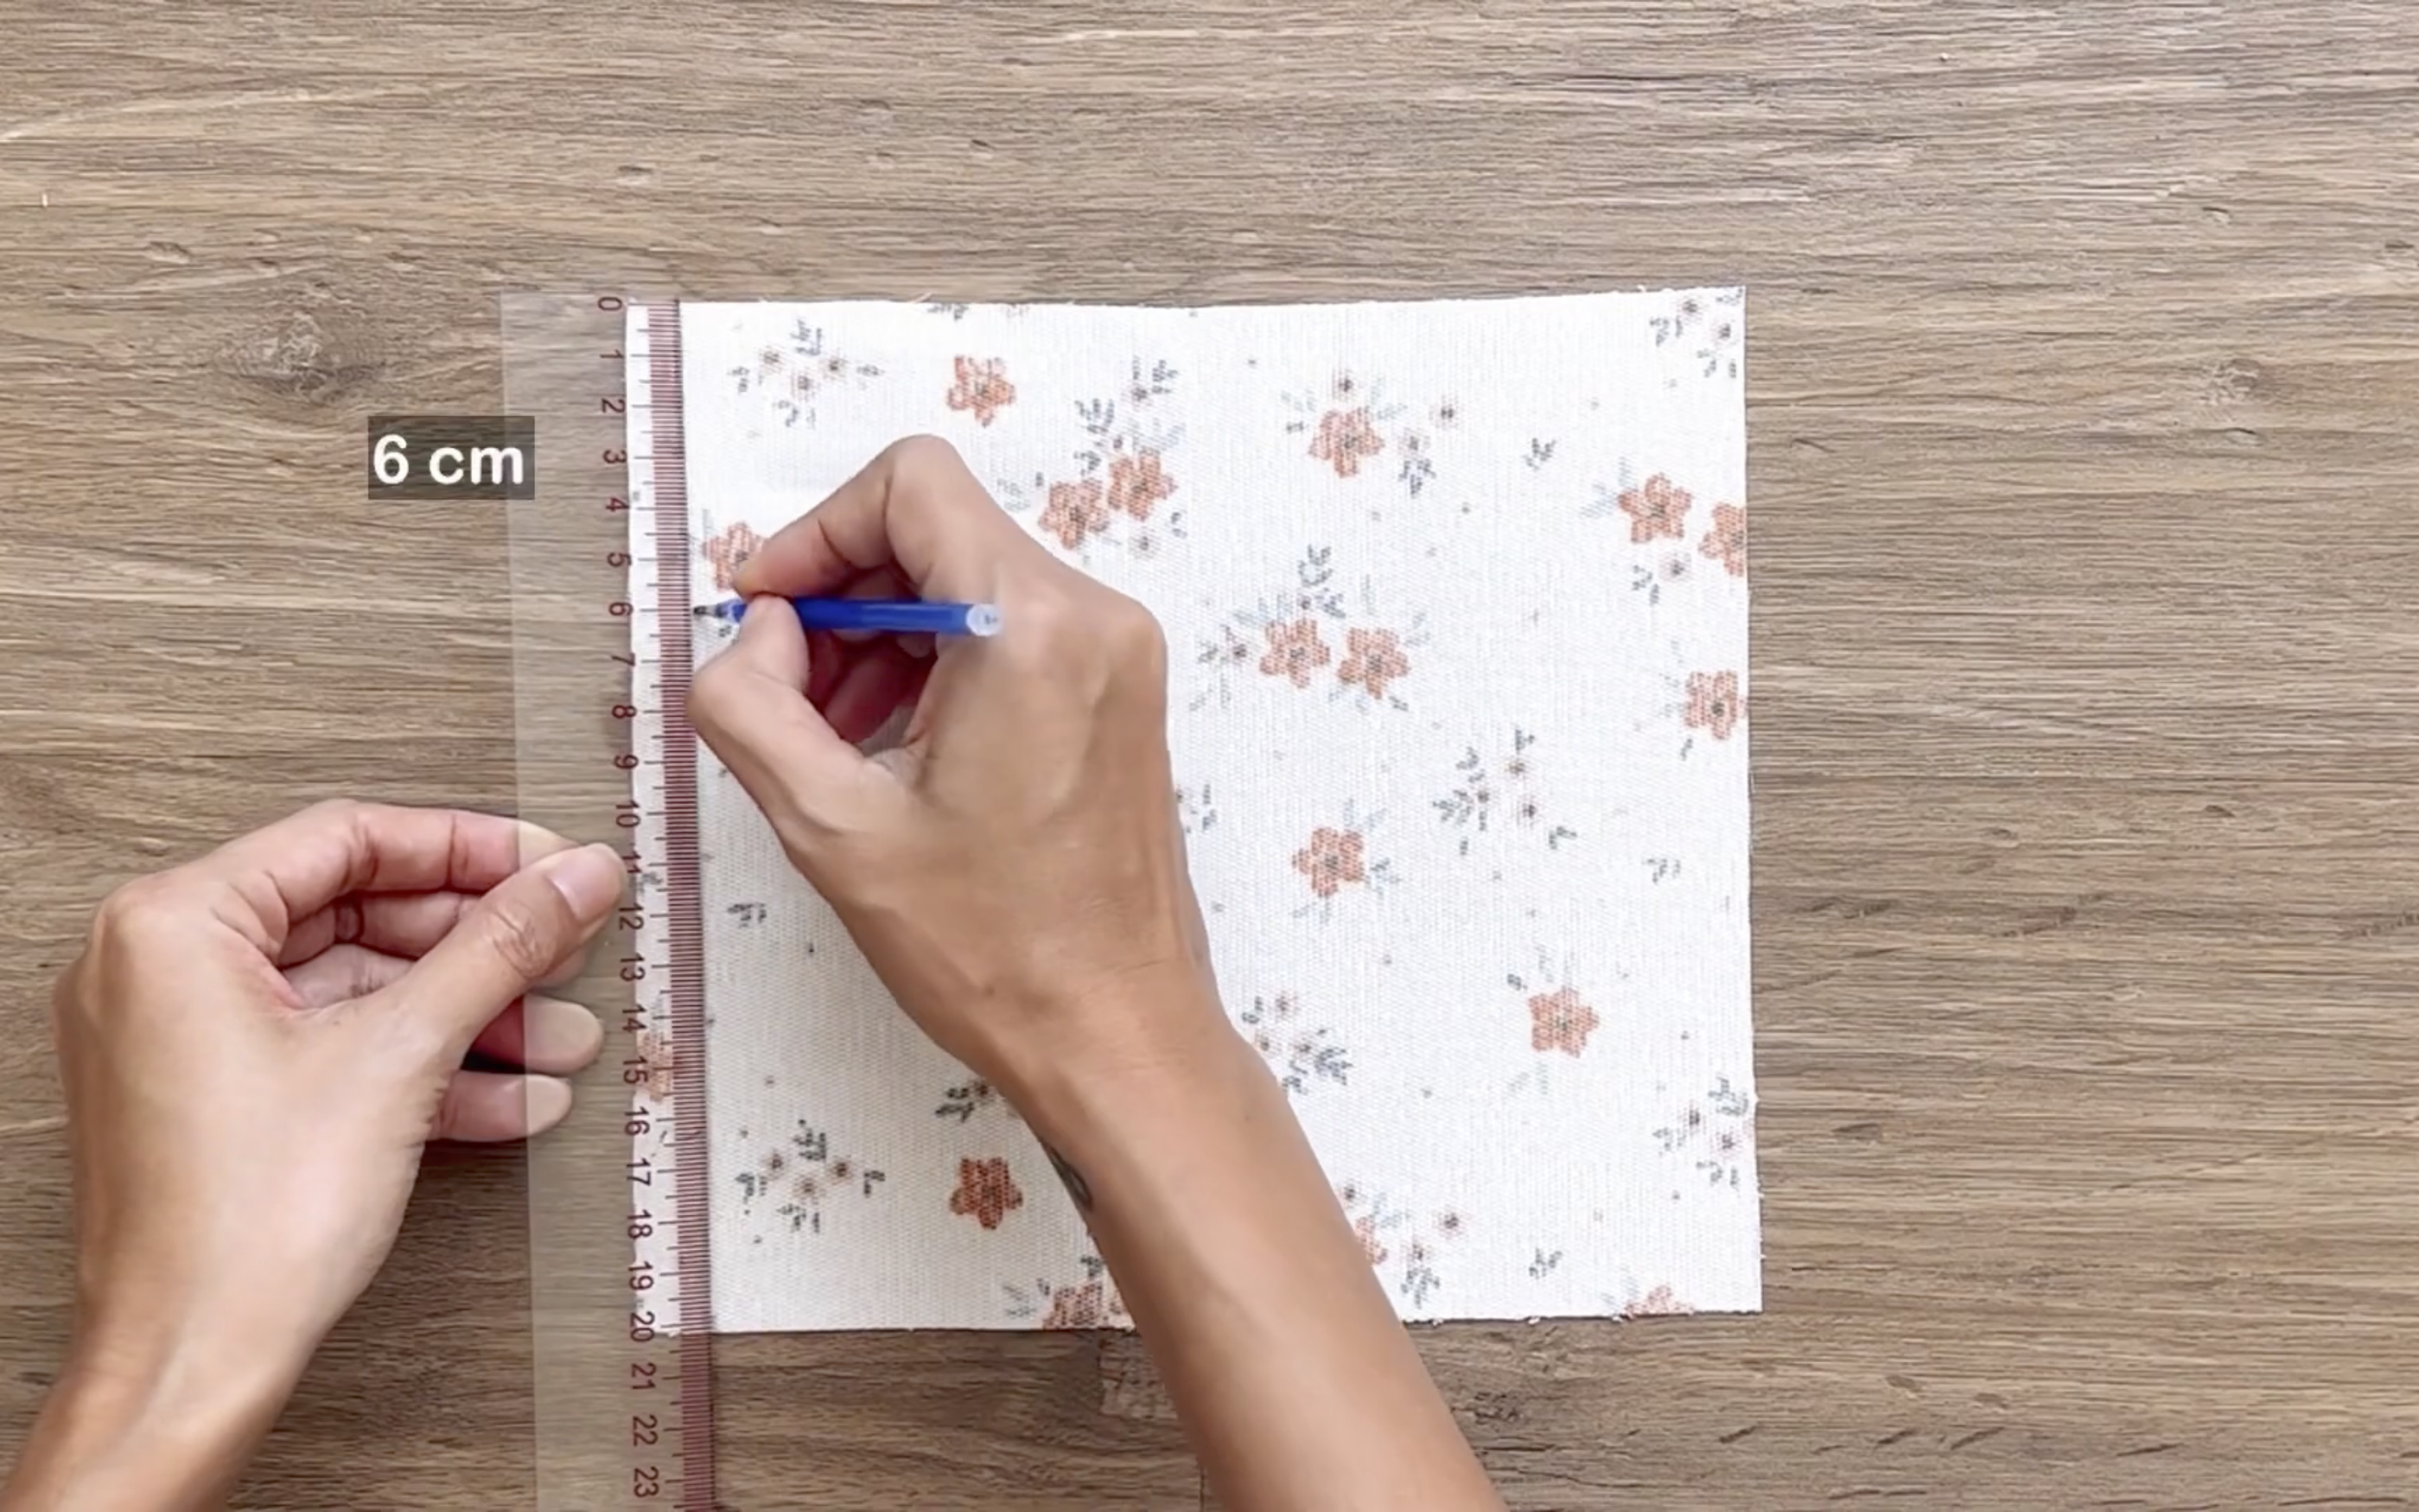
From the top width line, draw another line 6 cm below it.
Fold the end fabric inside 1 cm first, then keep folding it to the line just drawn.
Then, sew to finish the top of the front pocket.
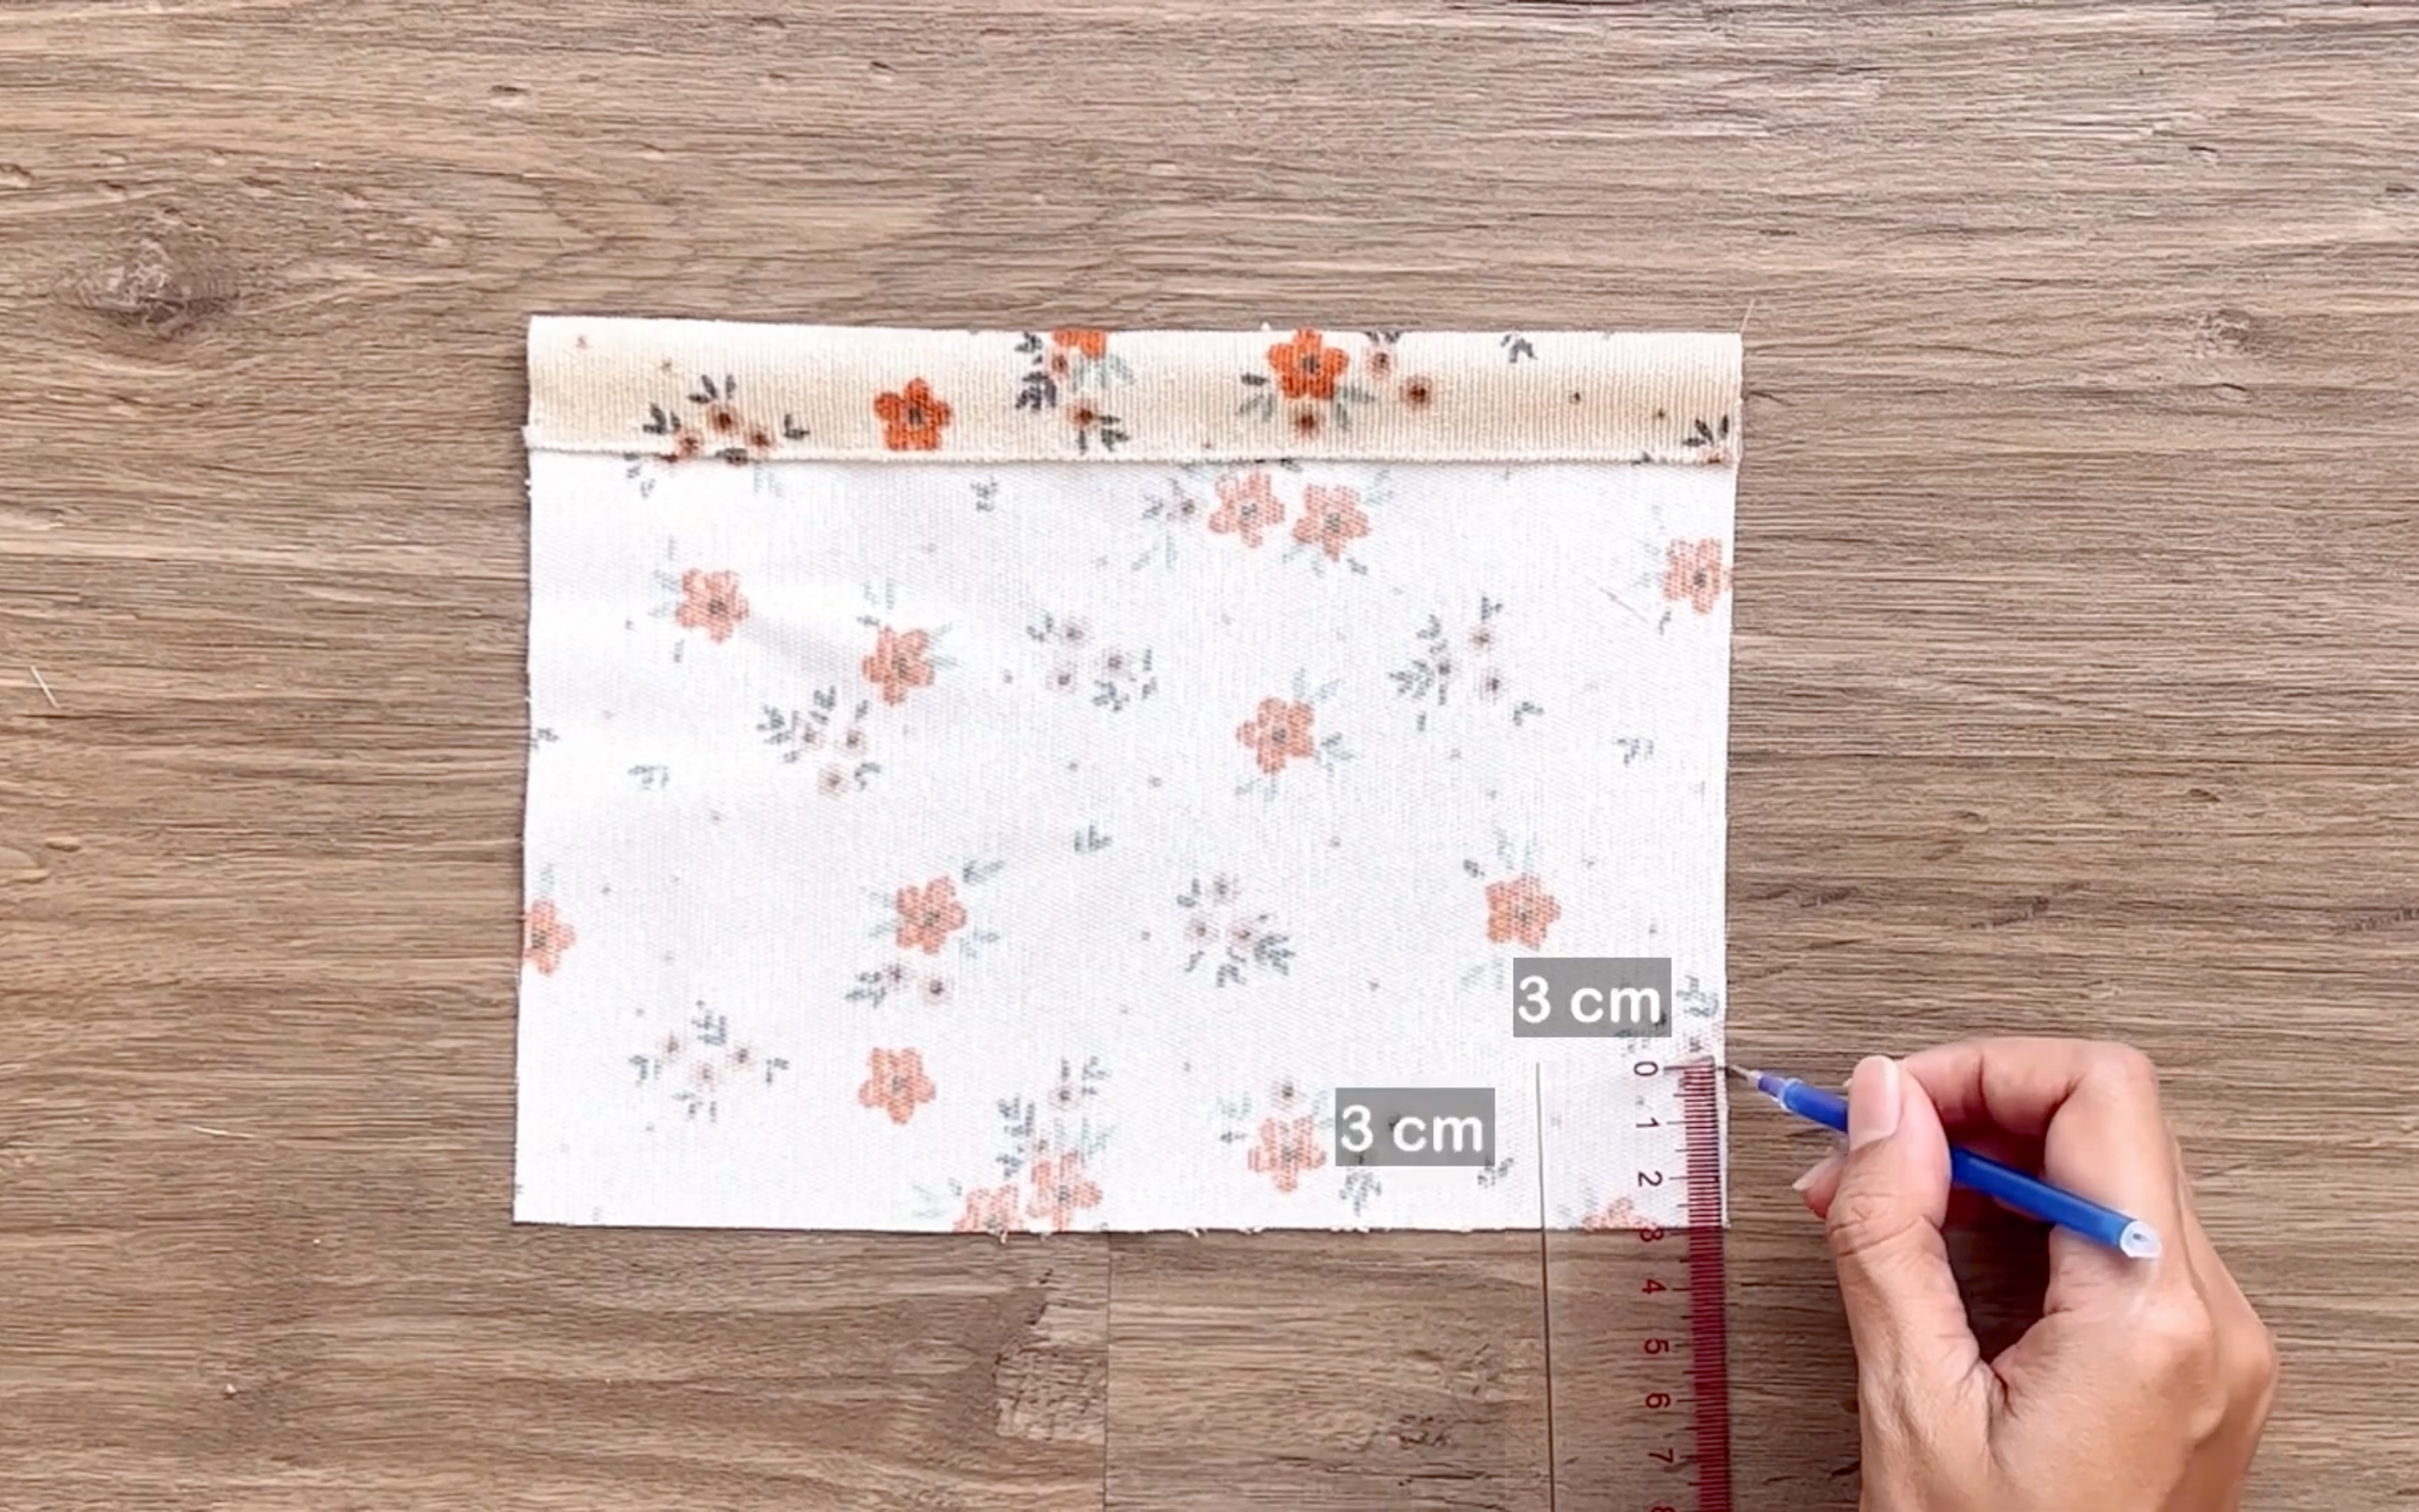
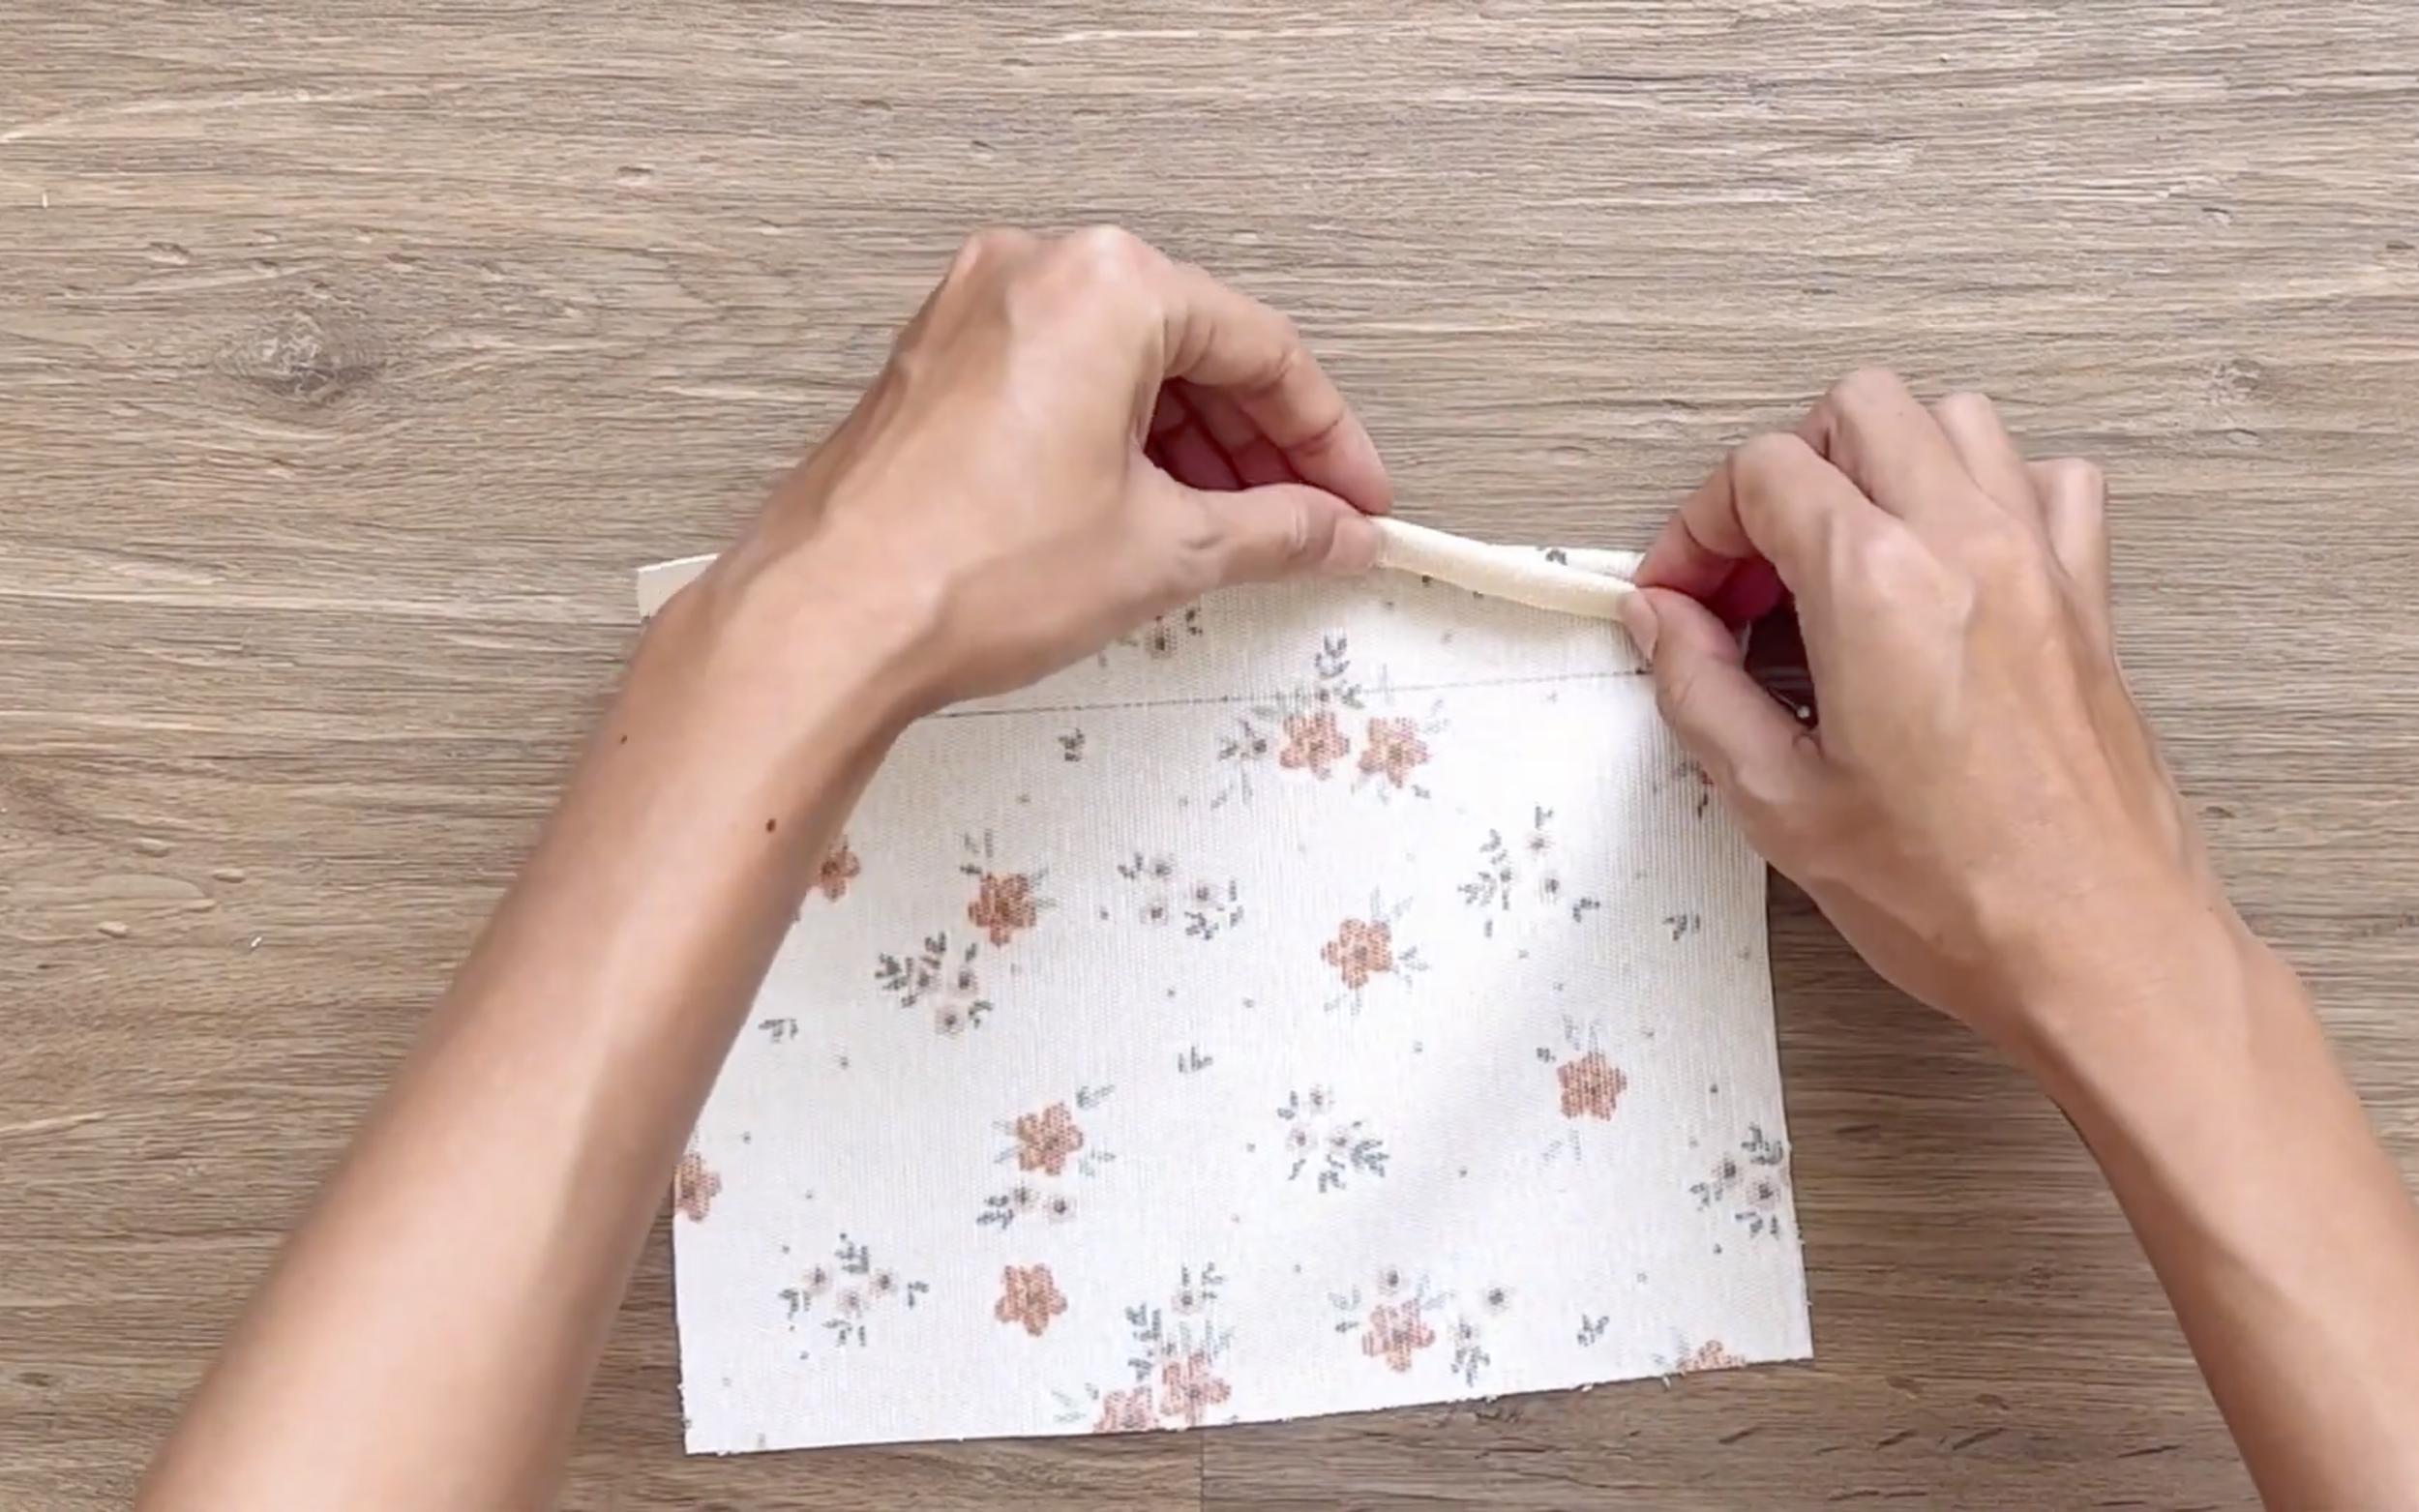
At the end of the front pocket, mark 3 cm up on the side line and 3 cm in on the bottom width line.
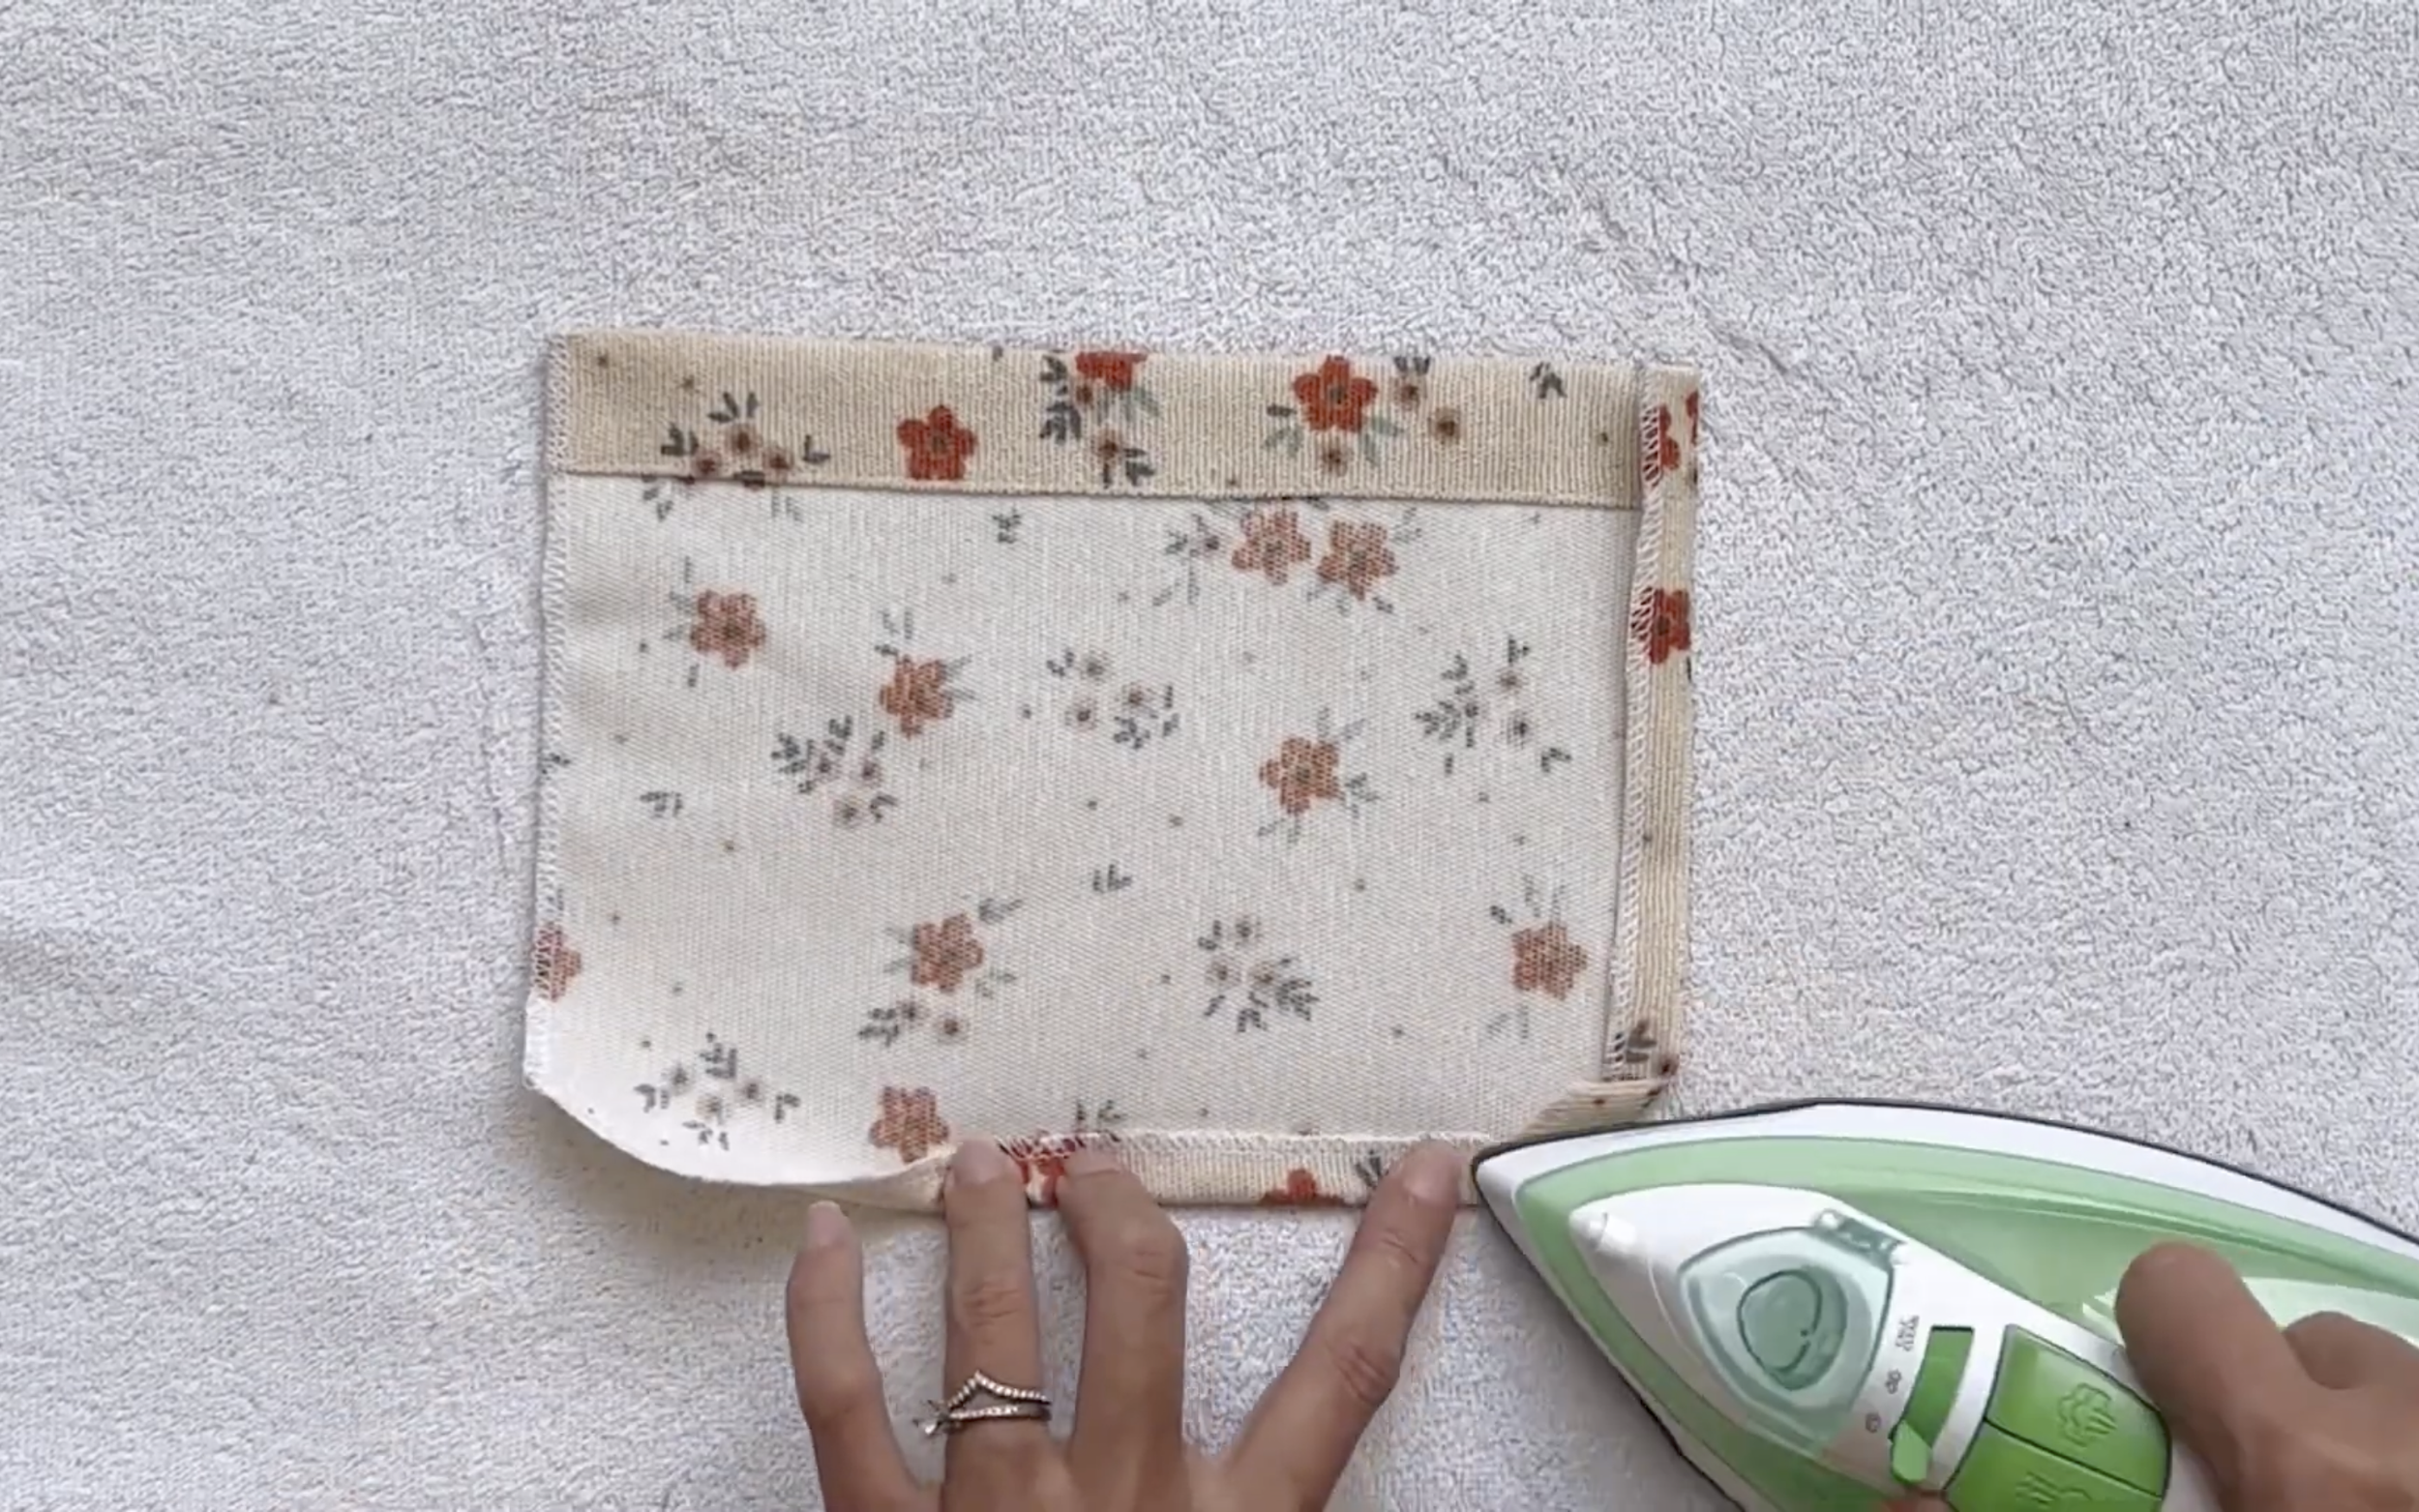
After cutting, use the iron to create the fold.
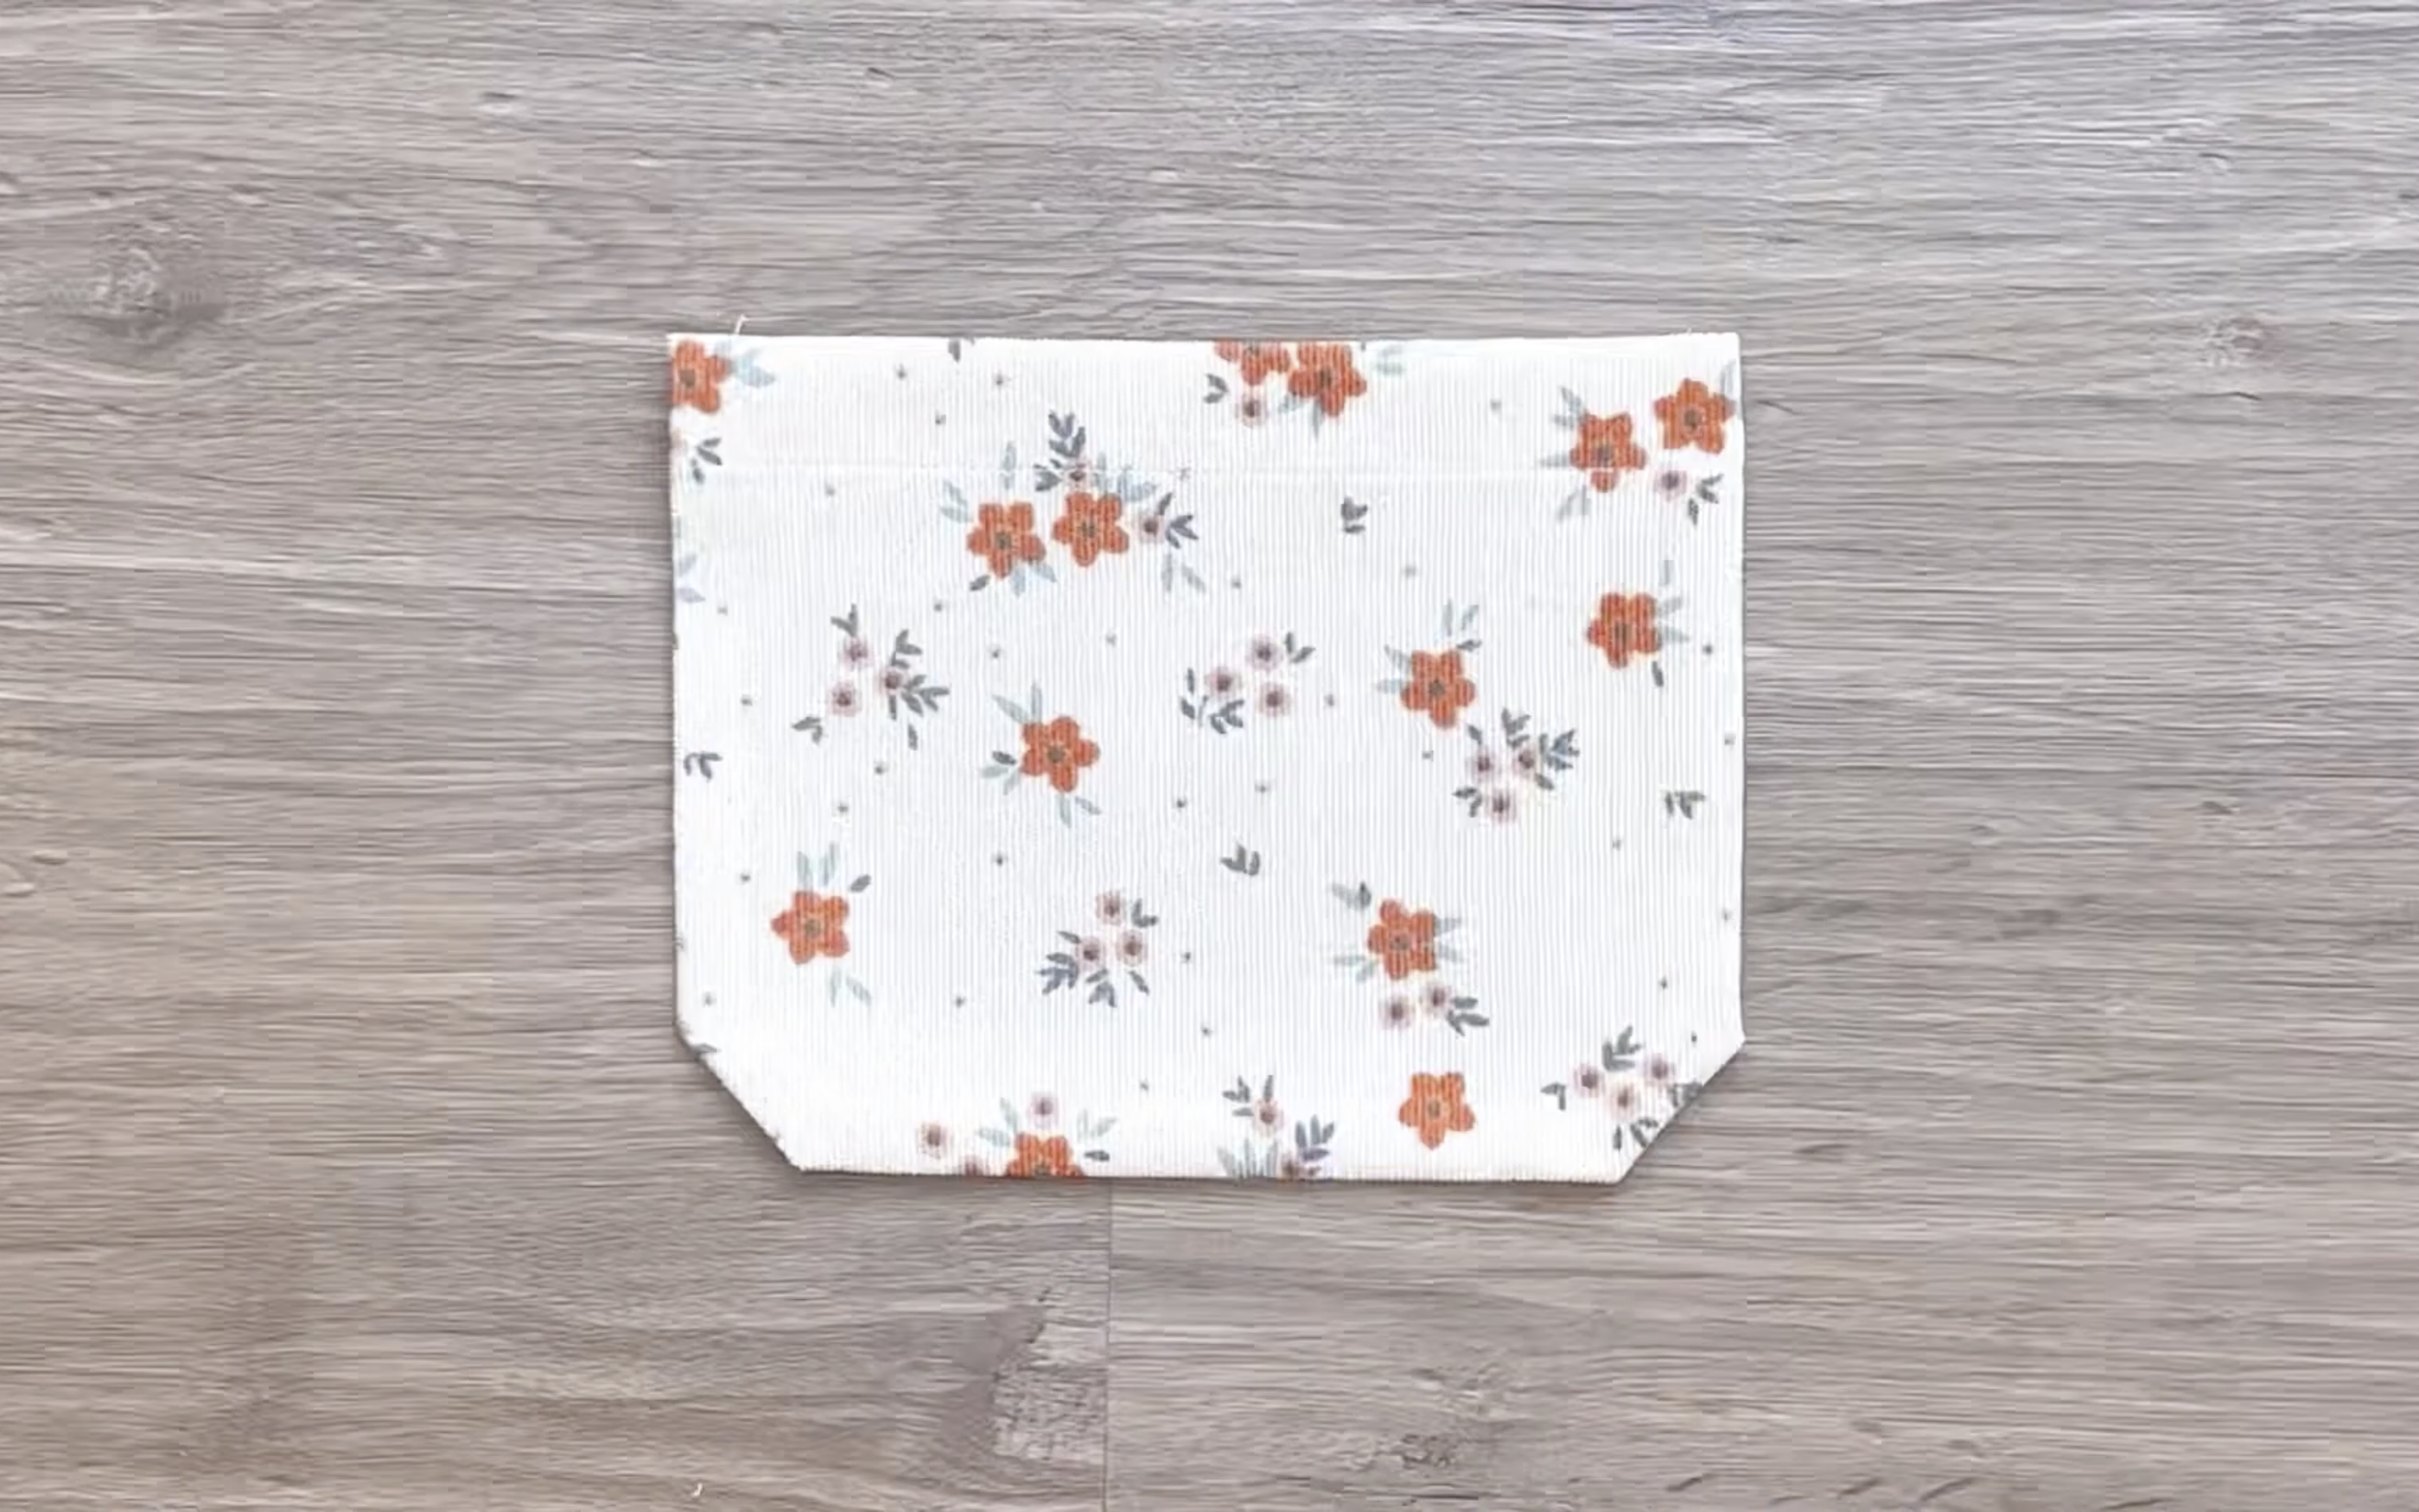
And the front pocket is ready.
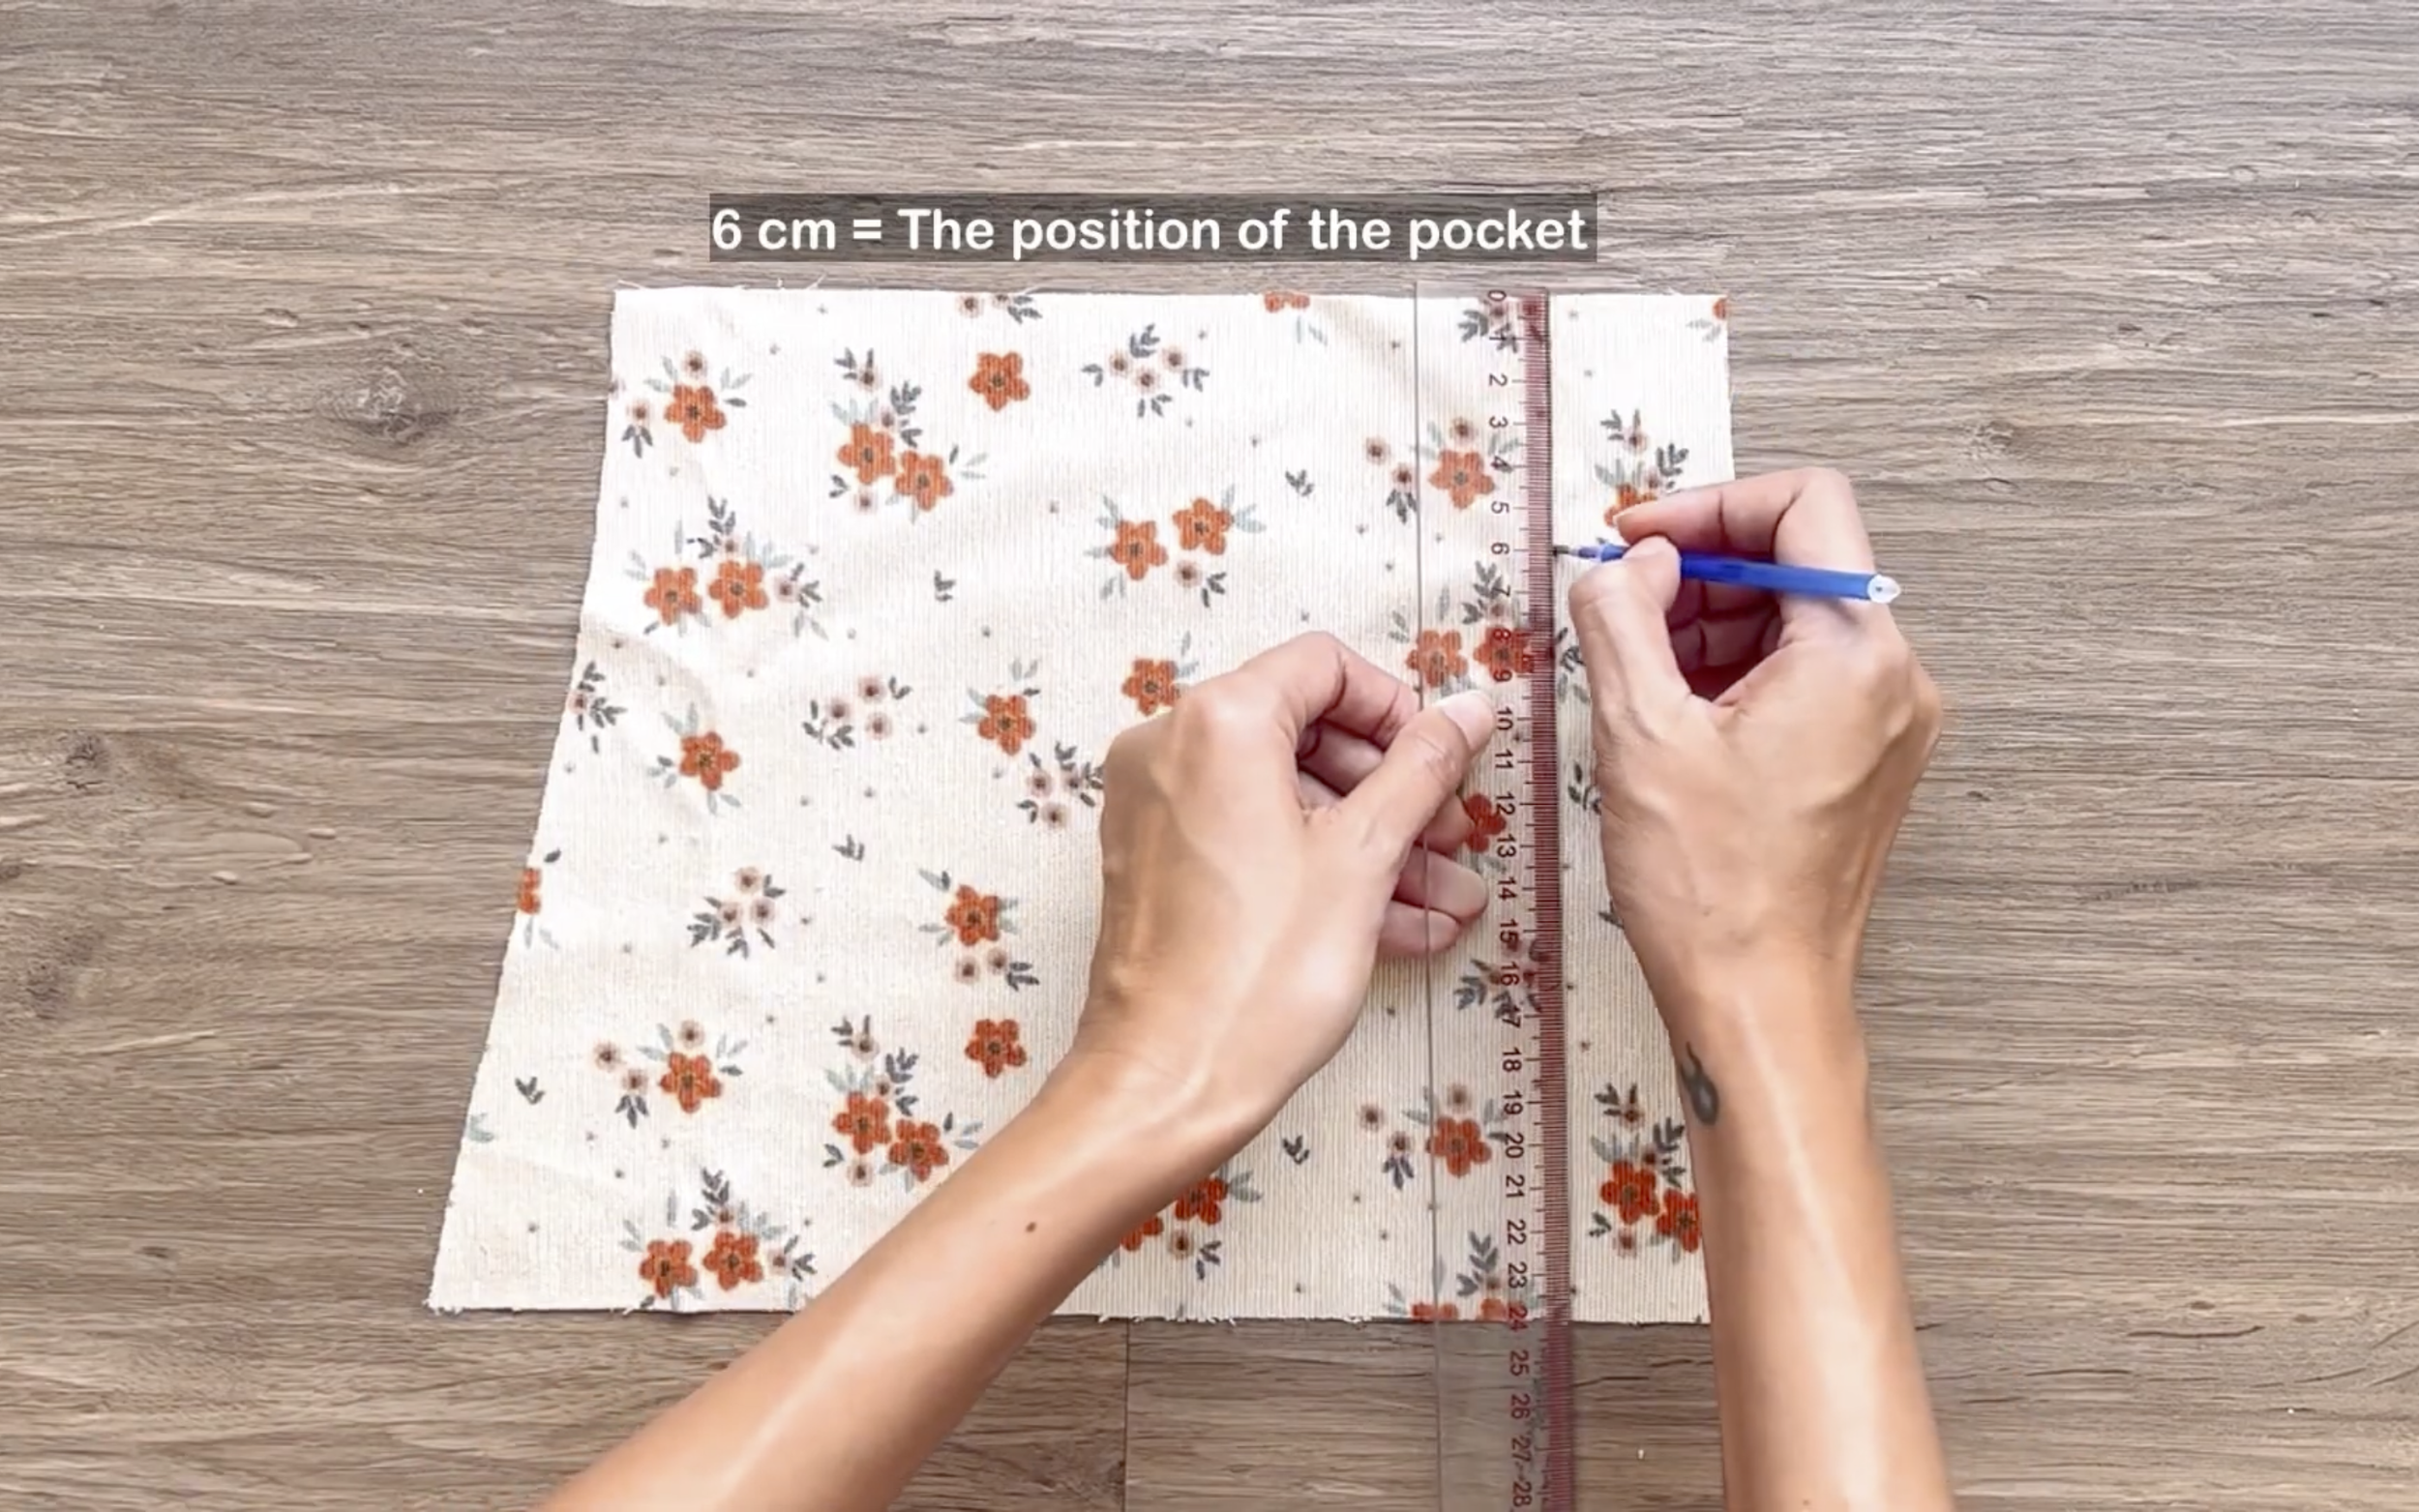
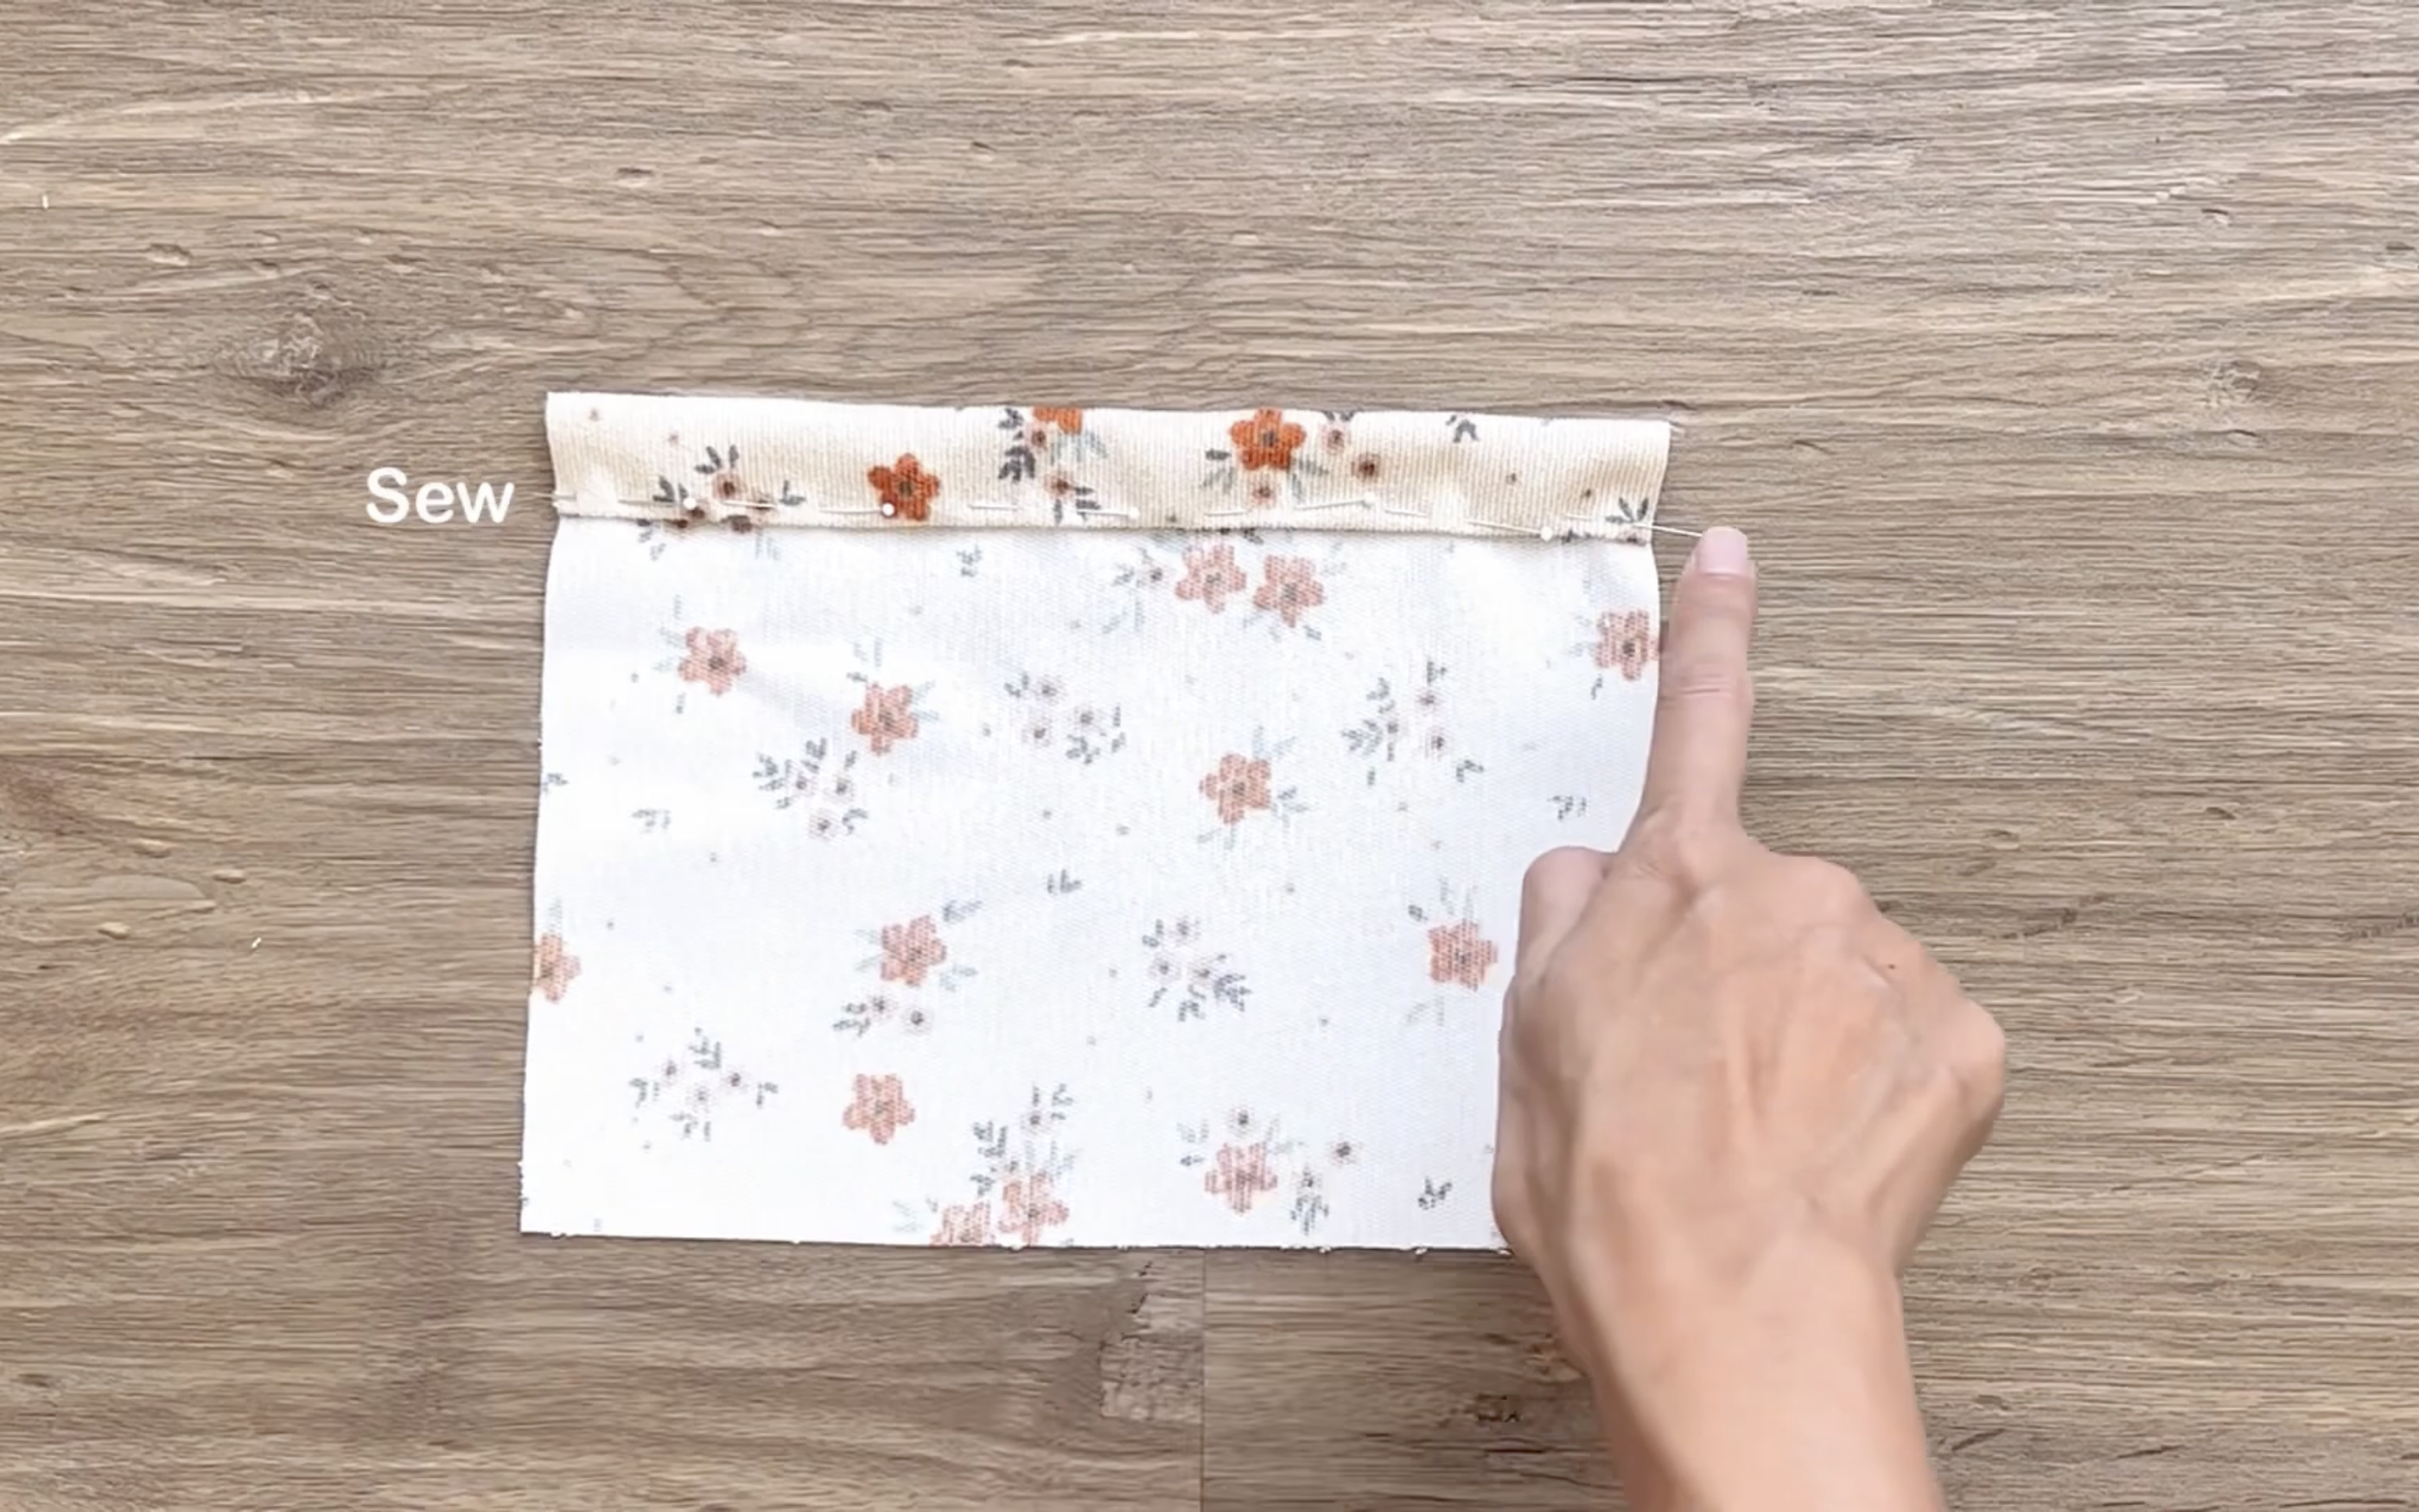
After cutting the front bodice piece, draw a line 6 cm below the top line.
Then attach the top of the front pocket to that line.
Make sure the pocket is centered on the front bodice and sew.
After that, connect another front bodice piece to the current one at the sides and top line.
After sewing, make small cuts at the ends of the top bodice before turning it inside out.
Also, make another seam to keep the two front bodice pieces from moving.
THE WAISTBAND
Here are two pieces of the waistband pattern after cutting.
Connect them together on one side first.
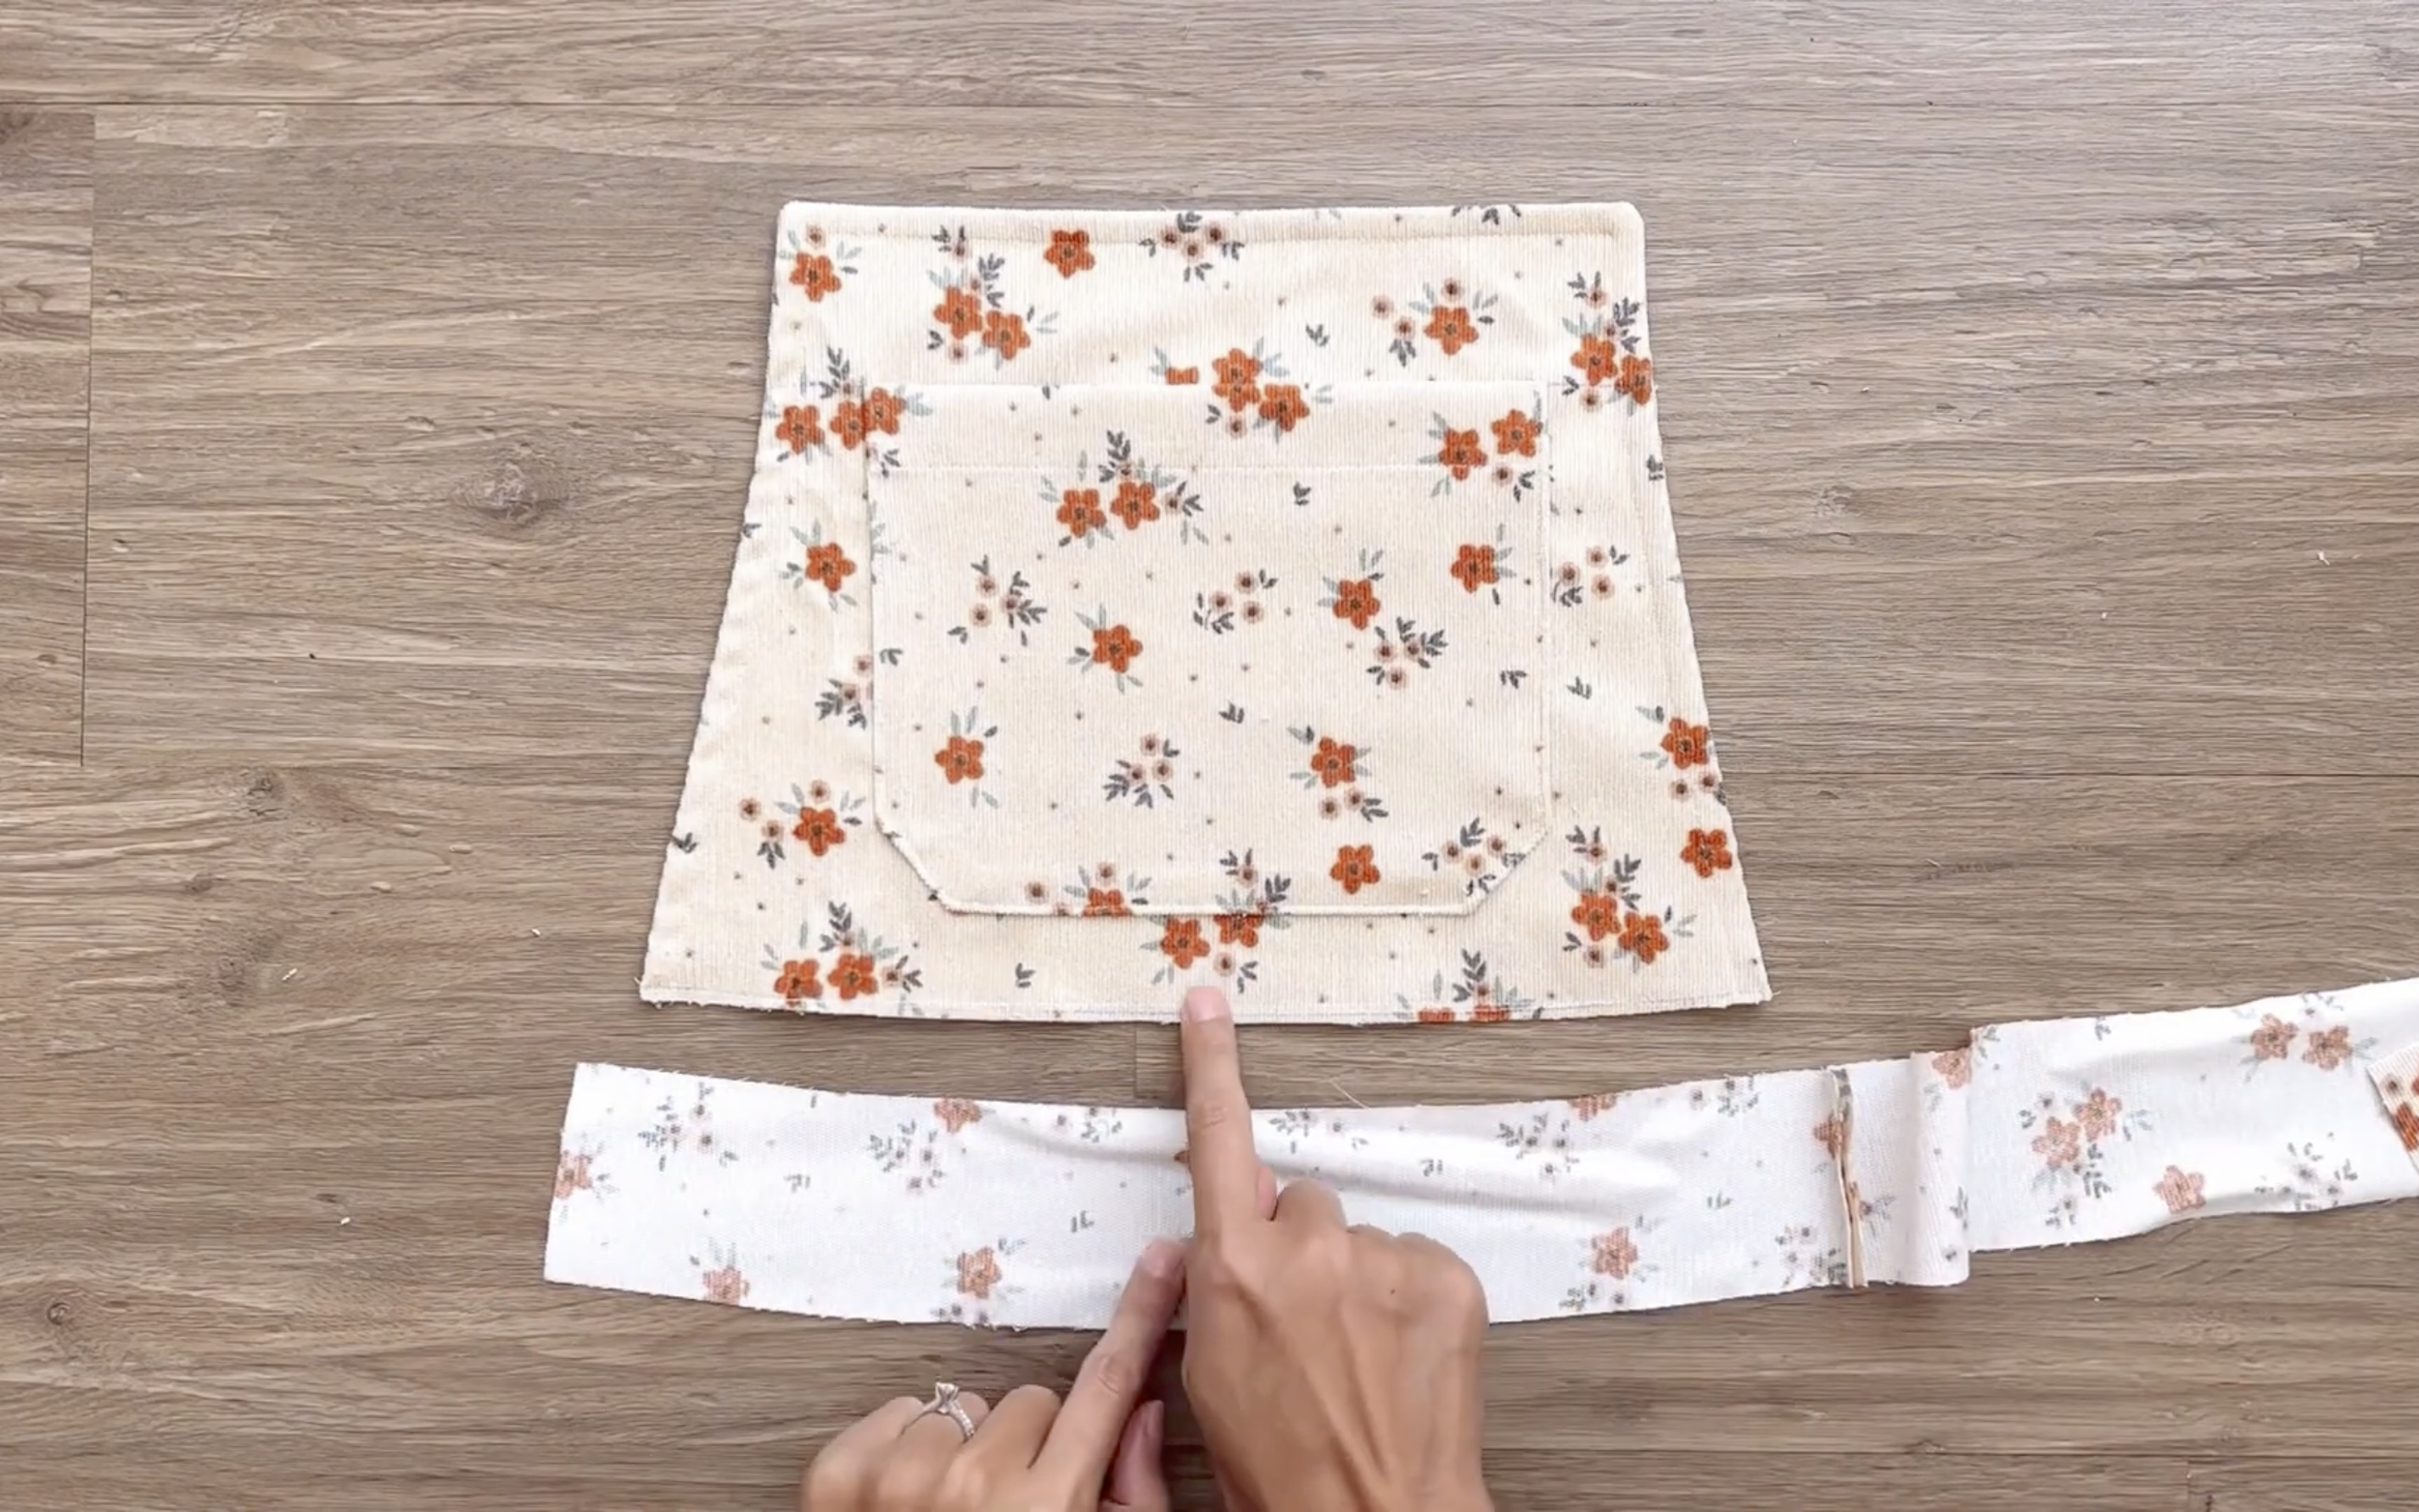
Then connect the top waistline to the end of the front bodice.
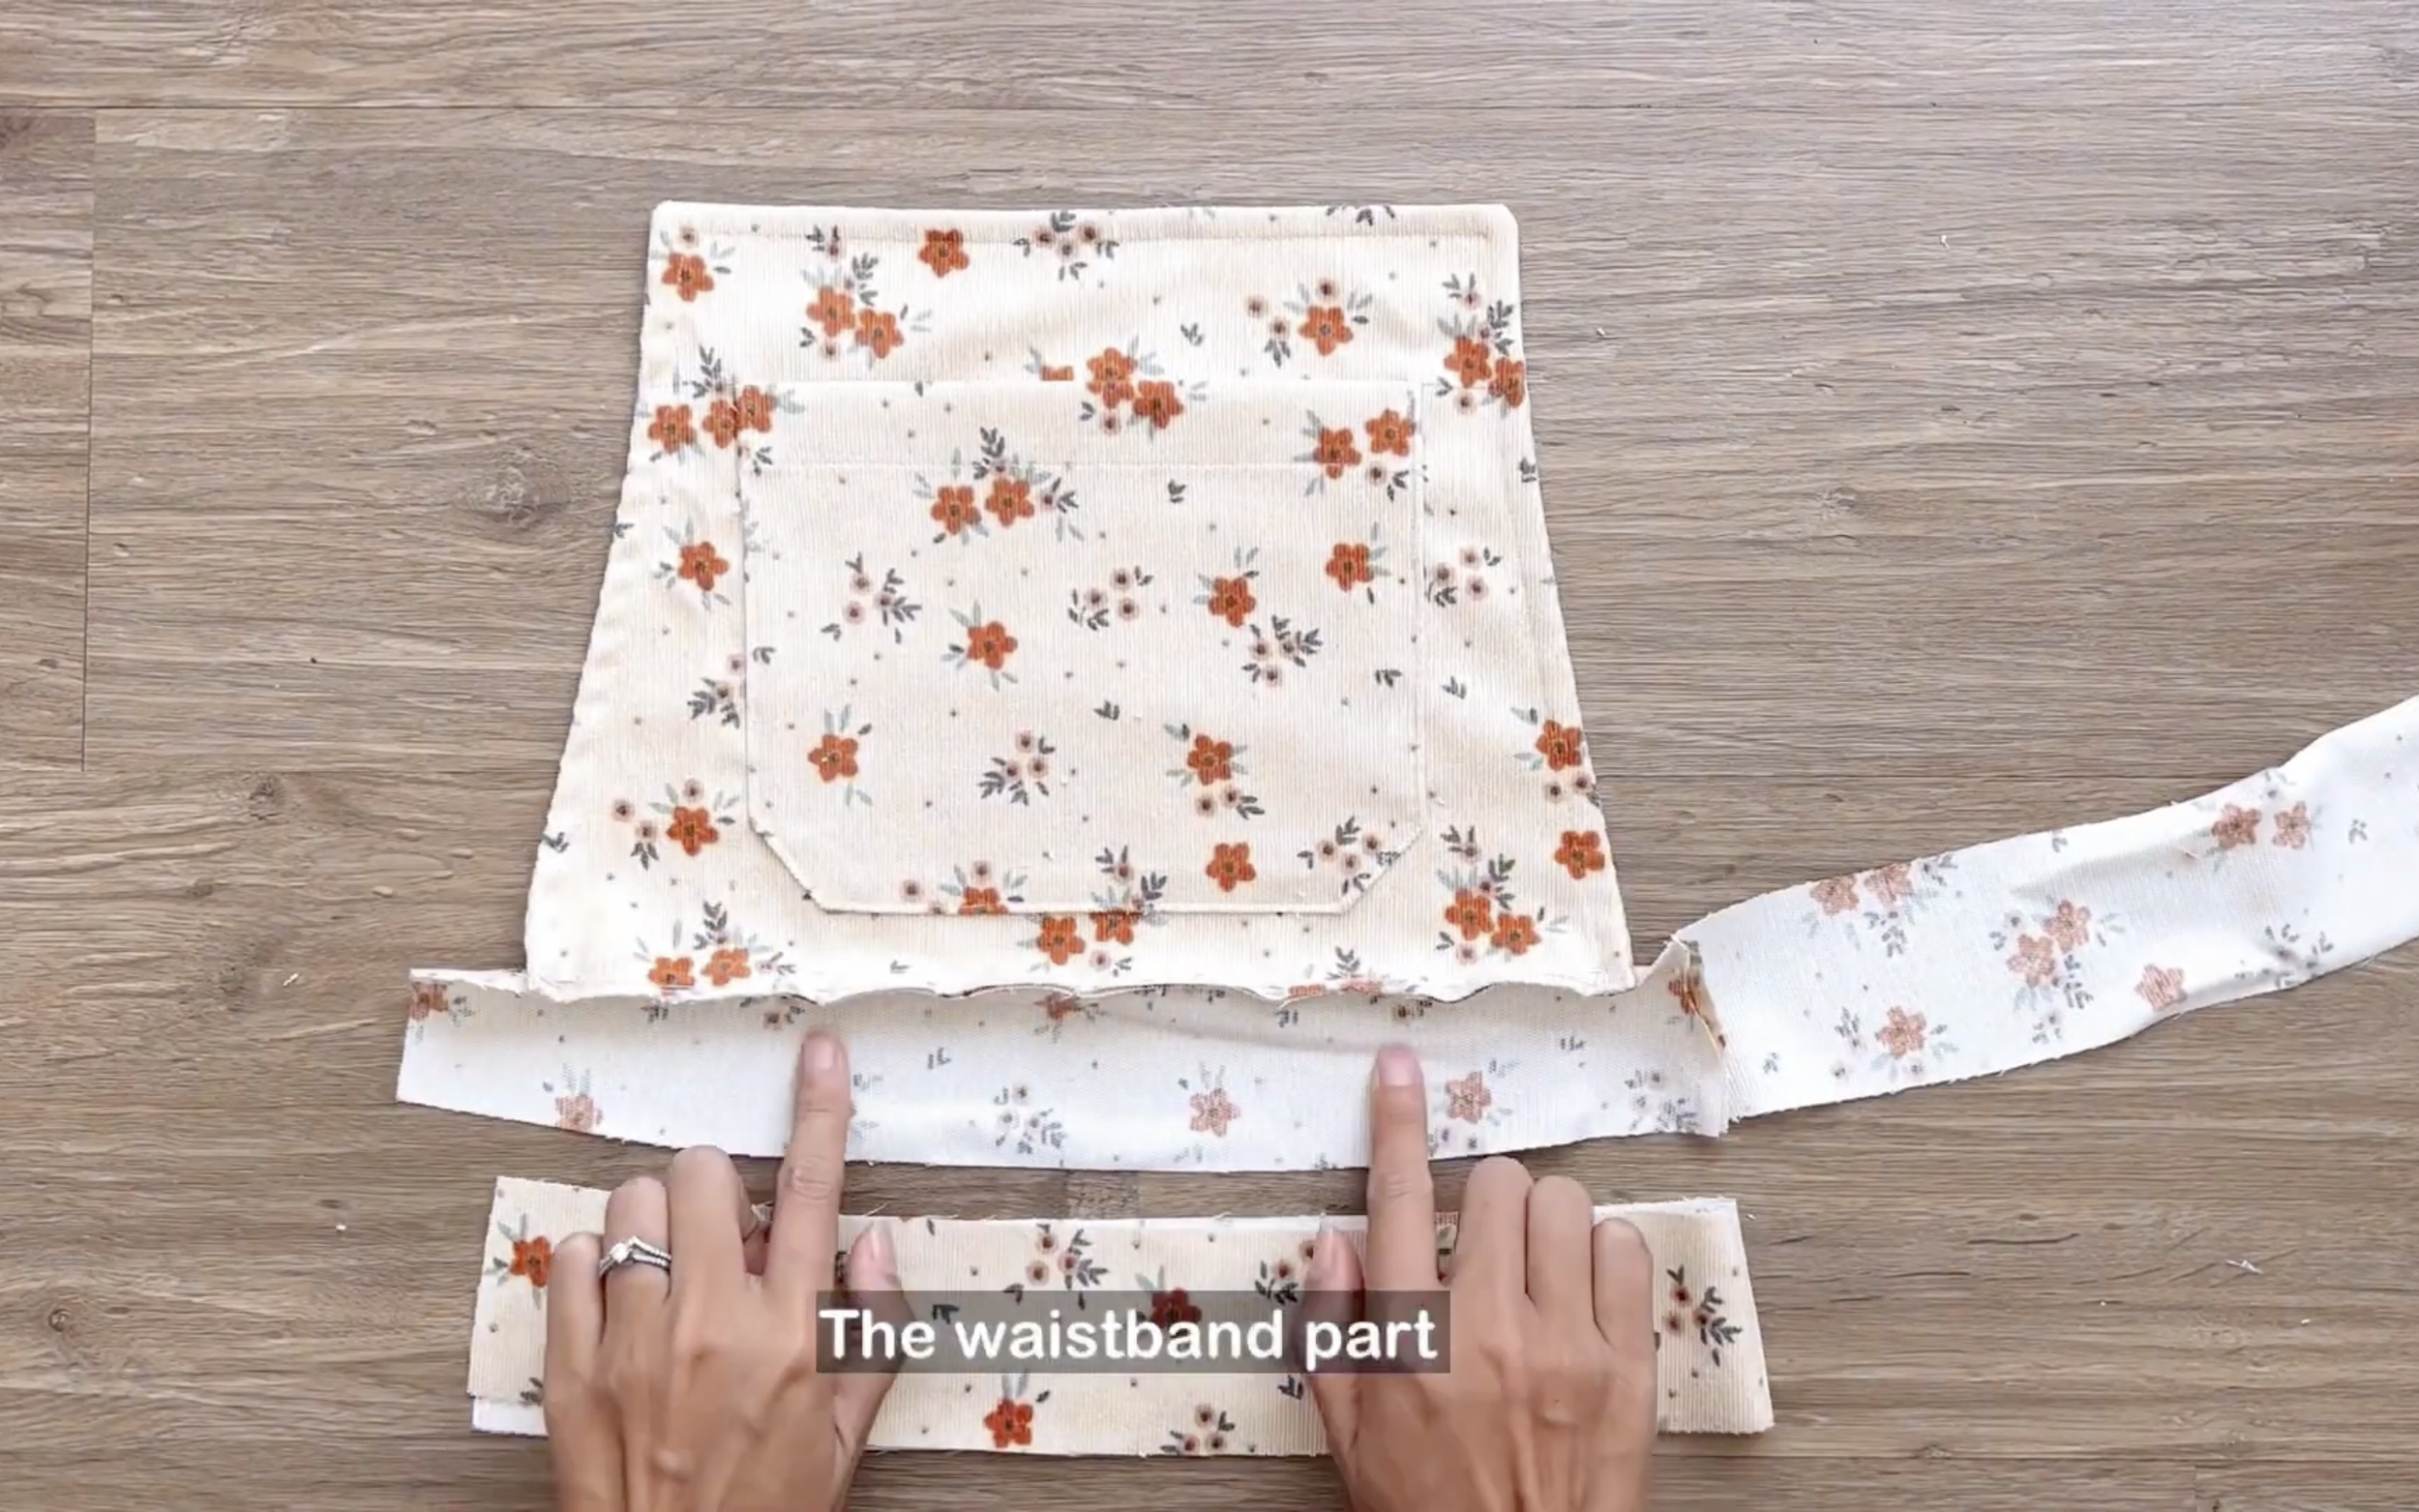
Keep connecting the other waistband piece to the end of the front bodice so the front bodice will be in the middle between the two waistbands.
THE SHOULDER STRAP
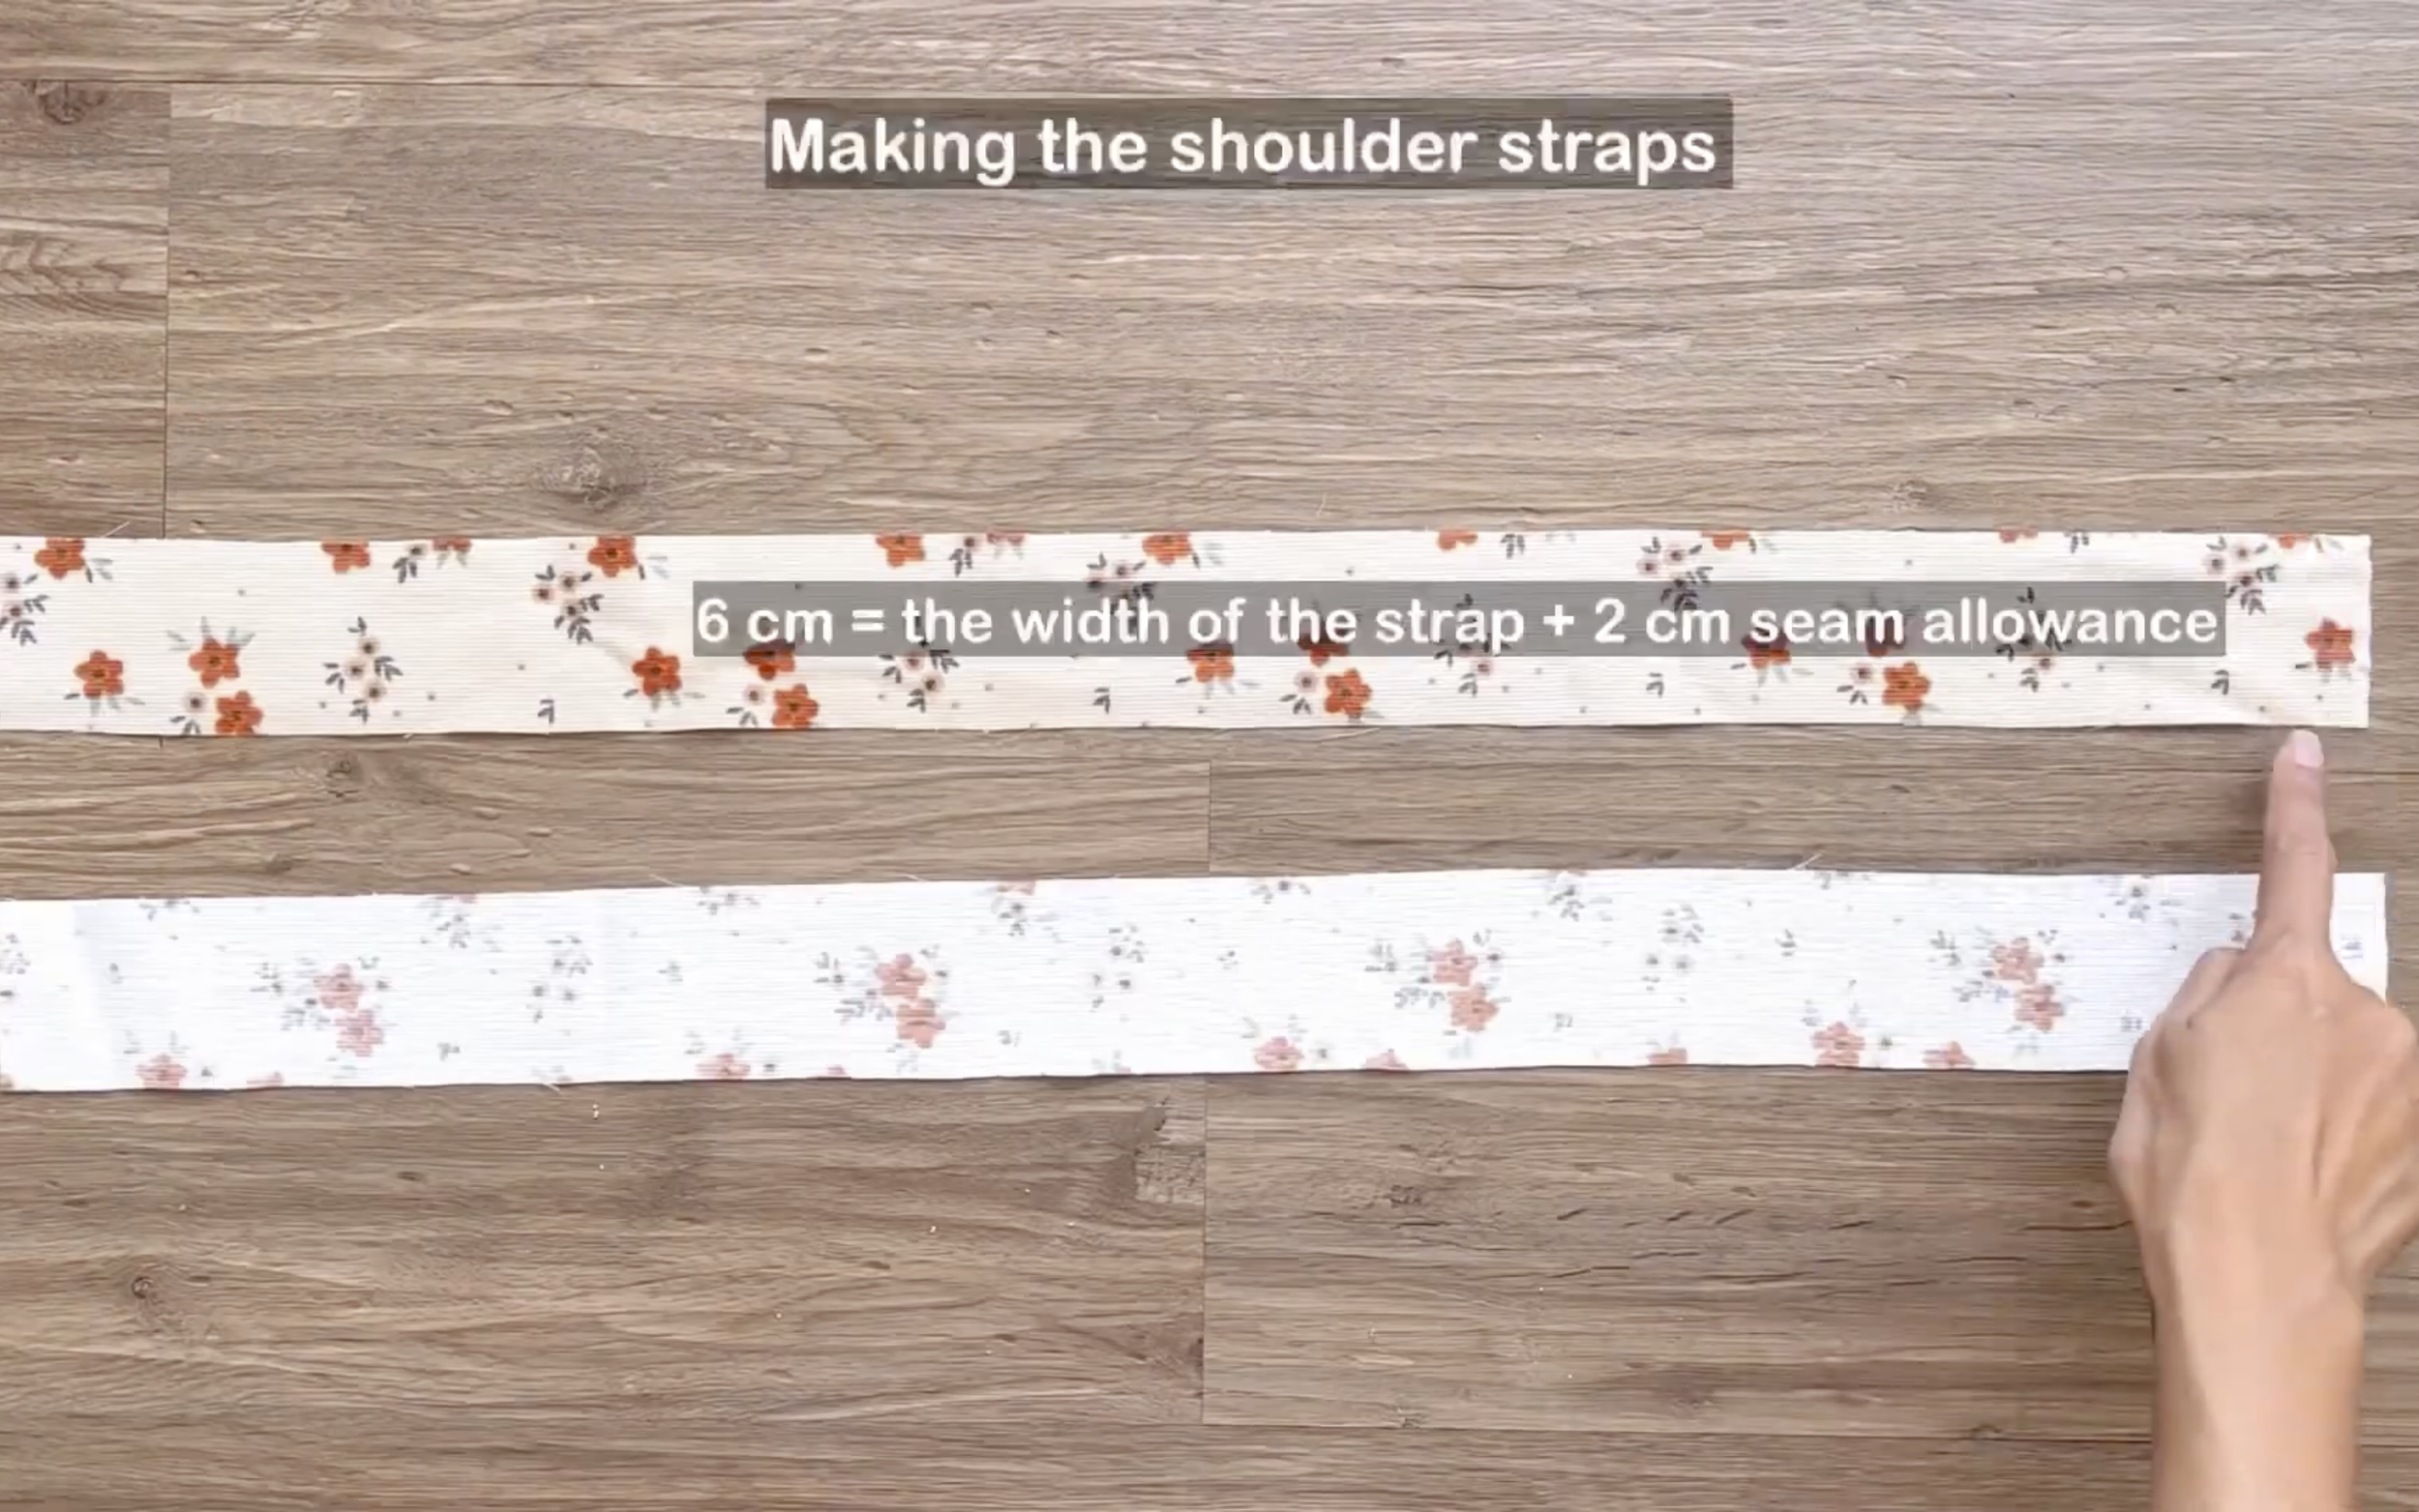
To make the shoulder strap, cut two rectangles with 6 cm width, which is the desired width of the strap plus 2 cm for seam allowance…
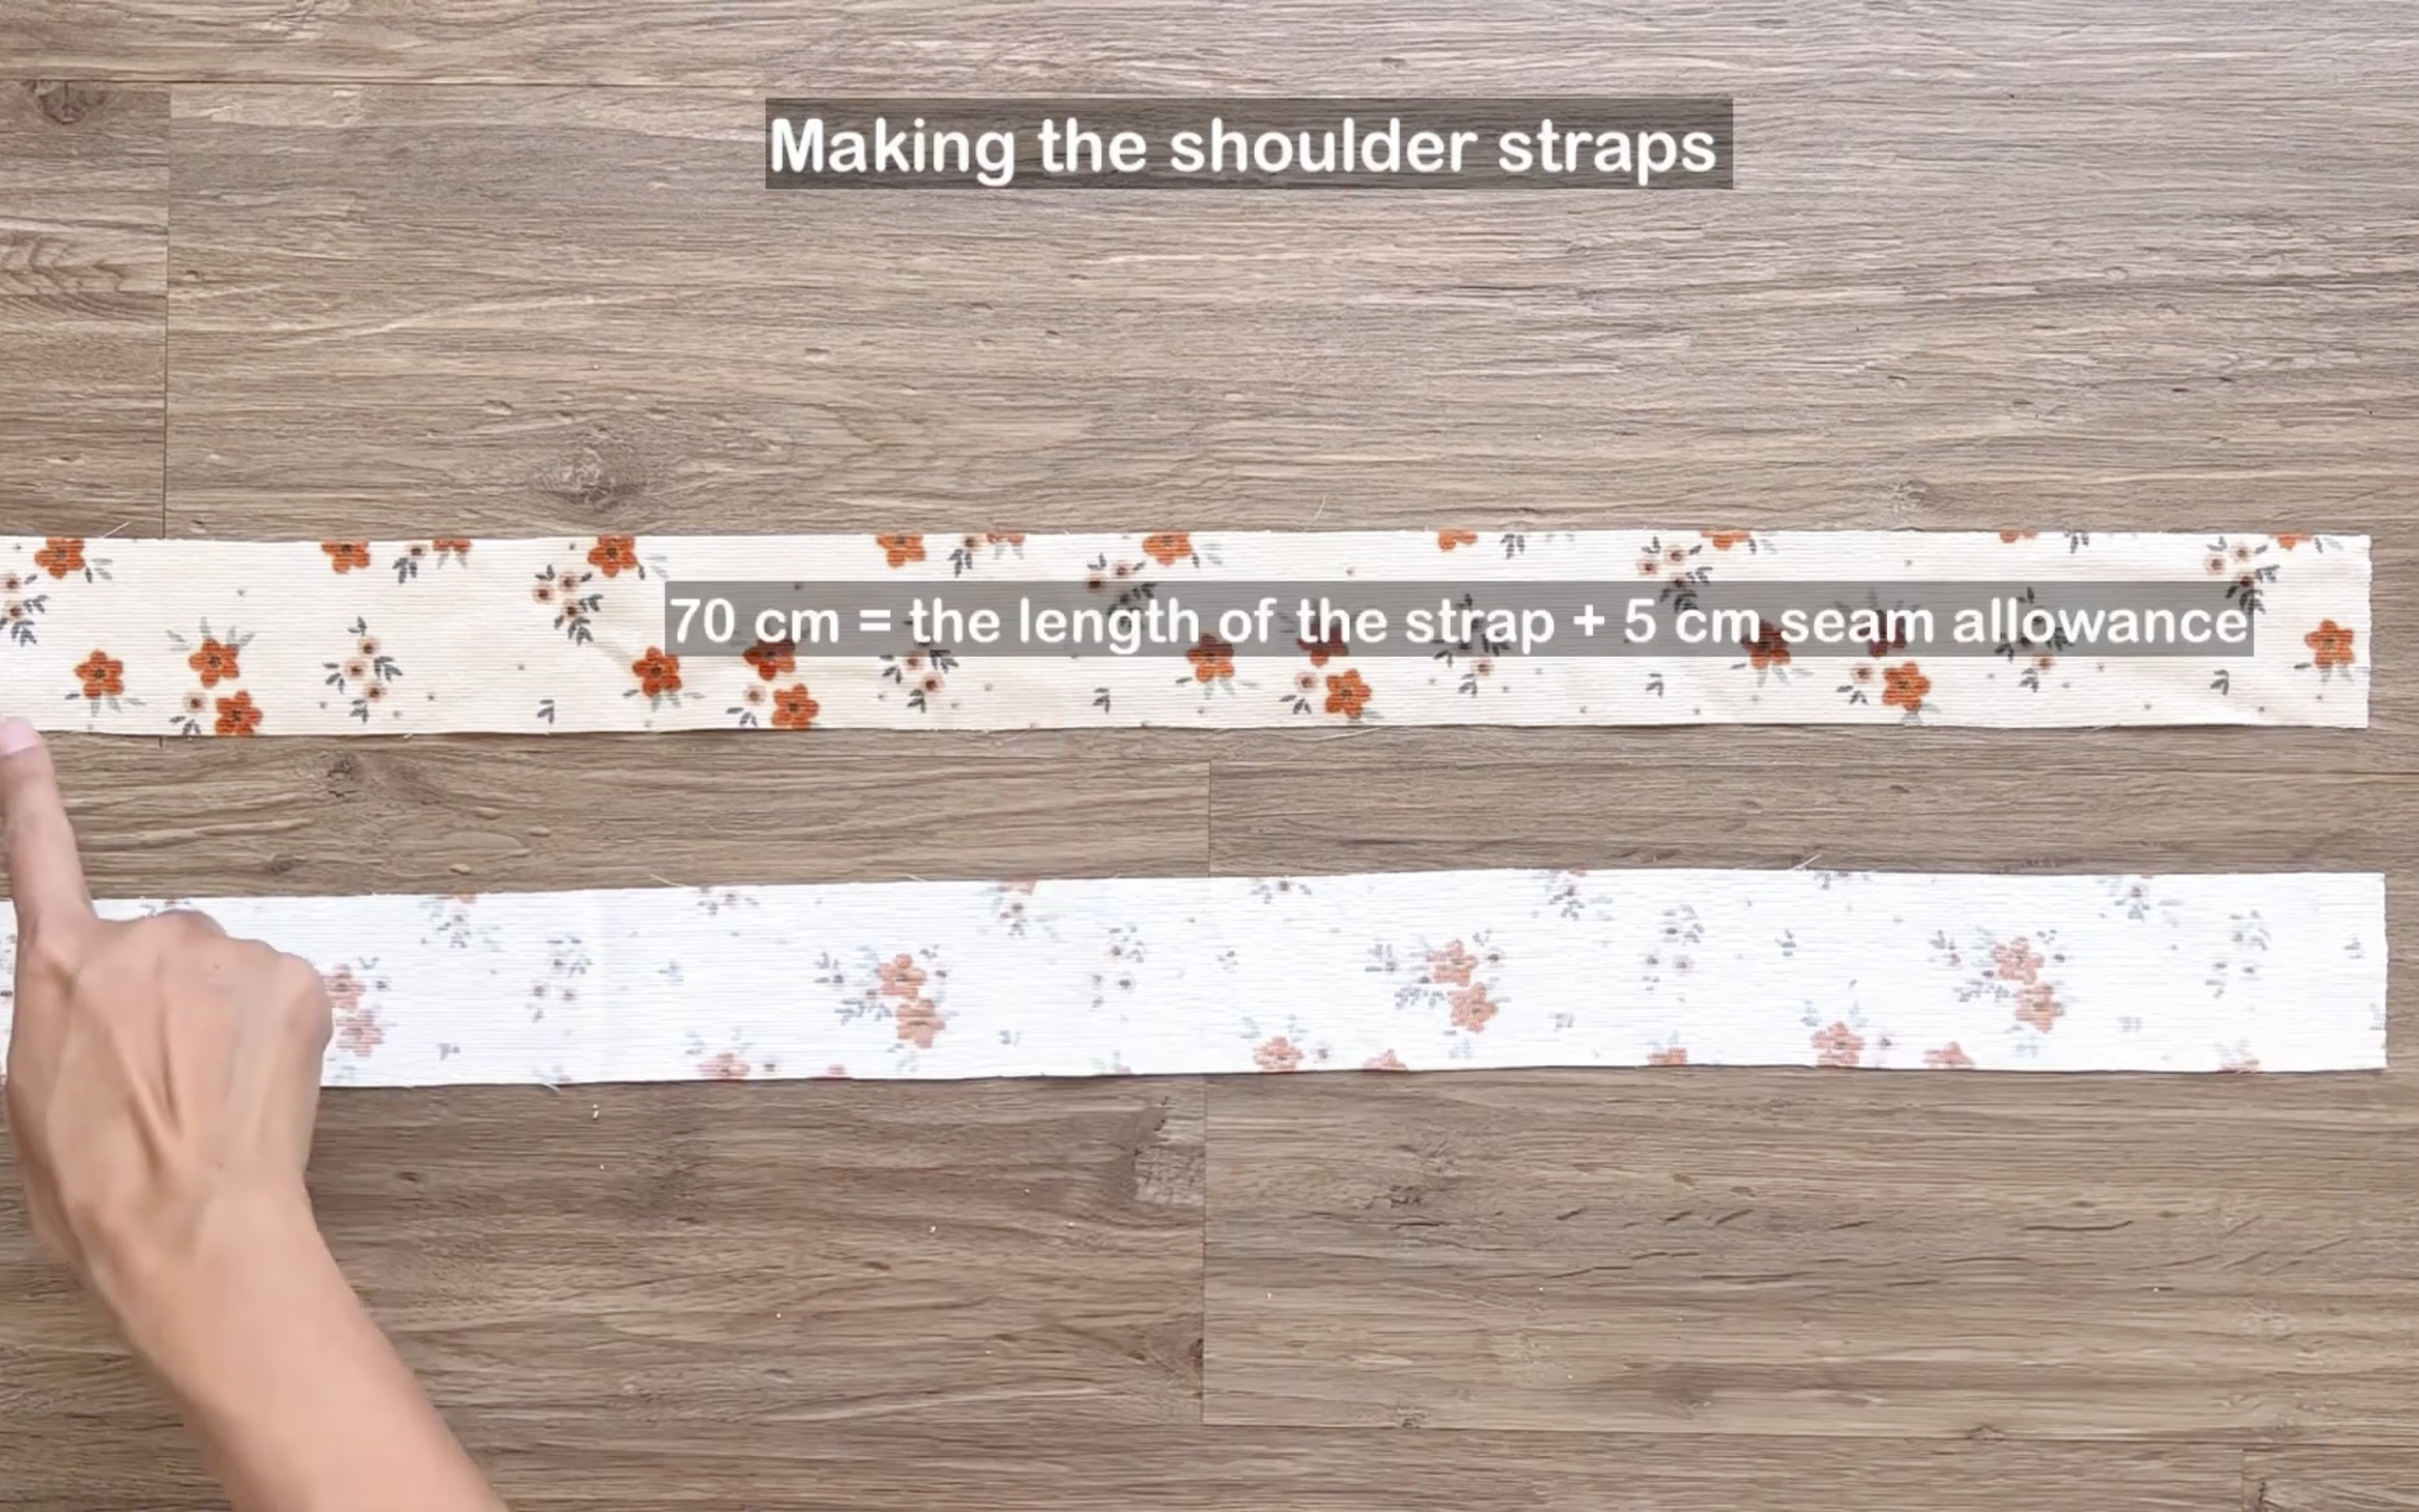
… and 70 cm length, which is the length of the strap from front to back plus 5 cm for seam allowance.
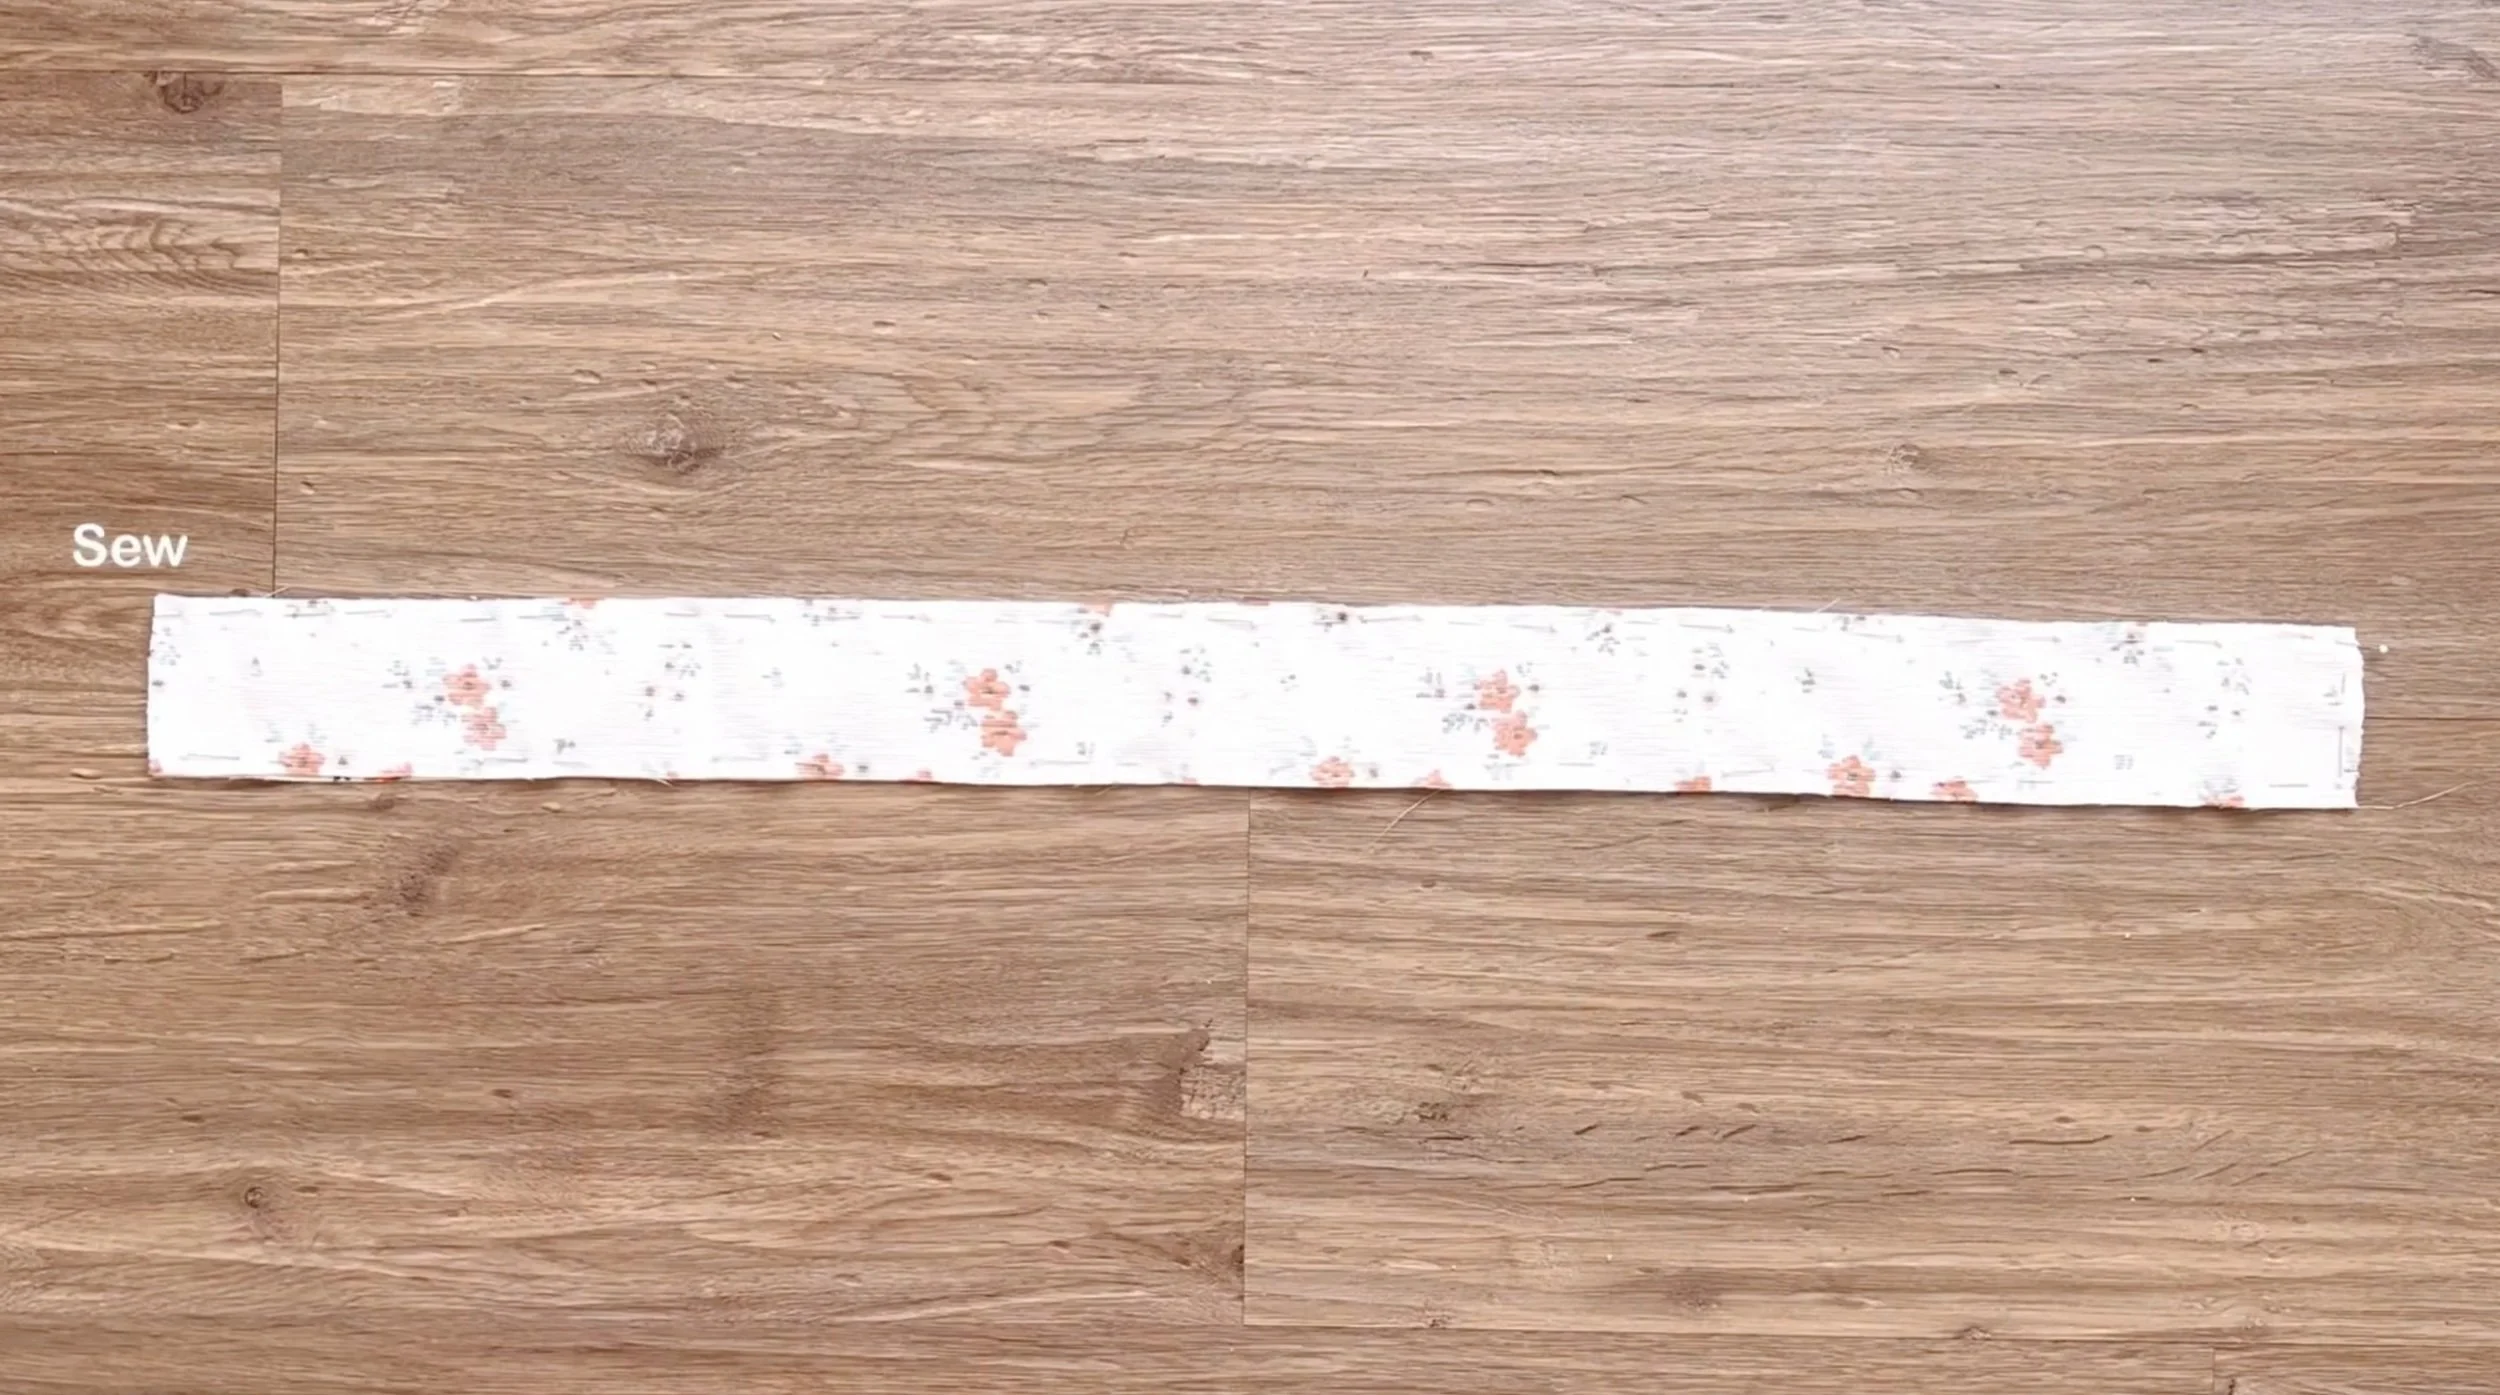
Connect the two rectangles together at the sides and one width line first.
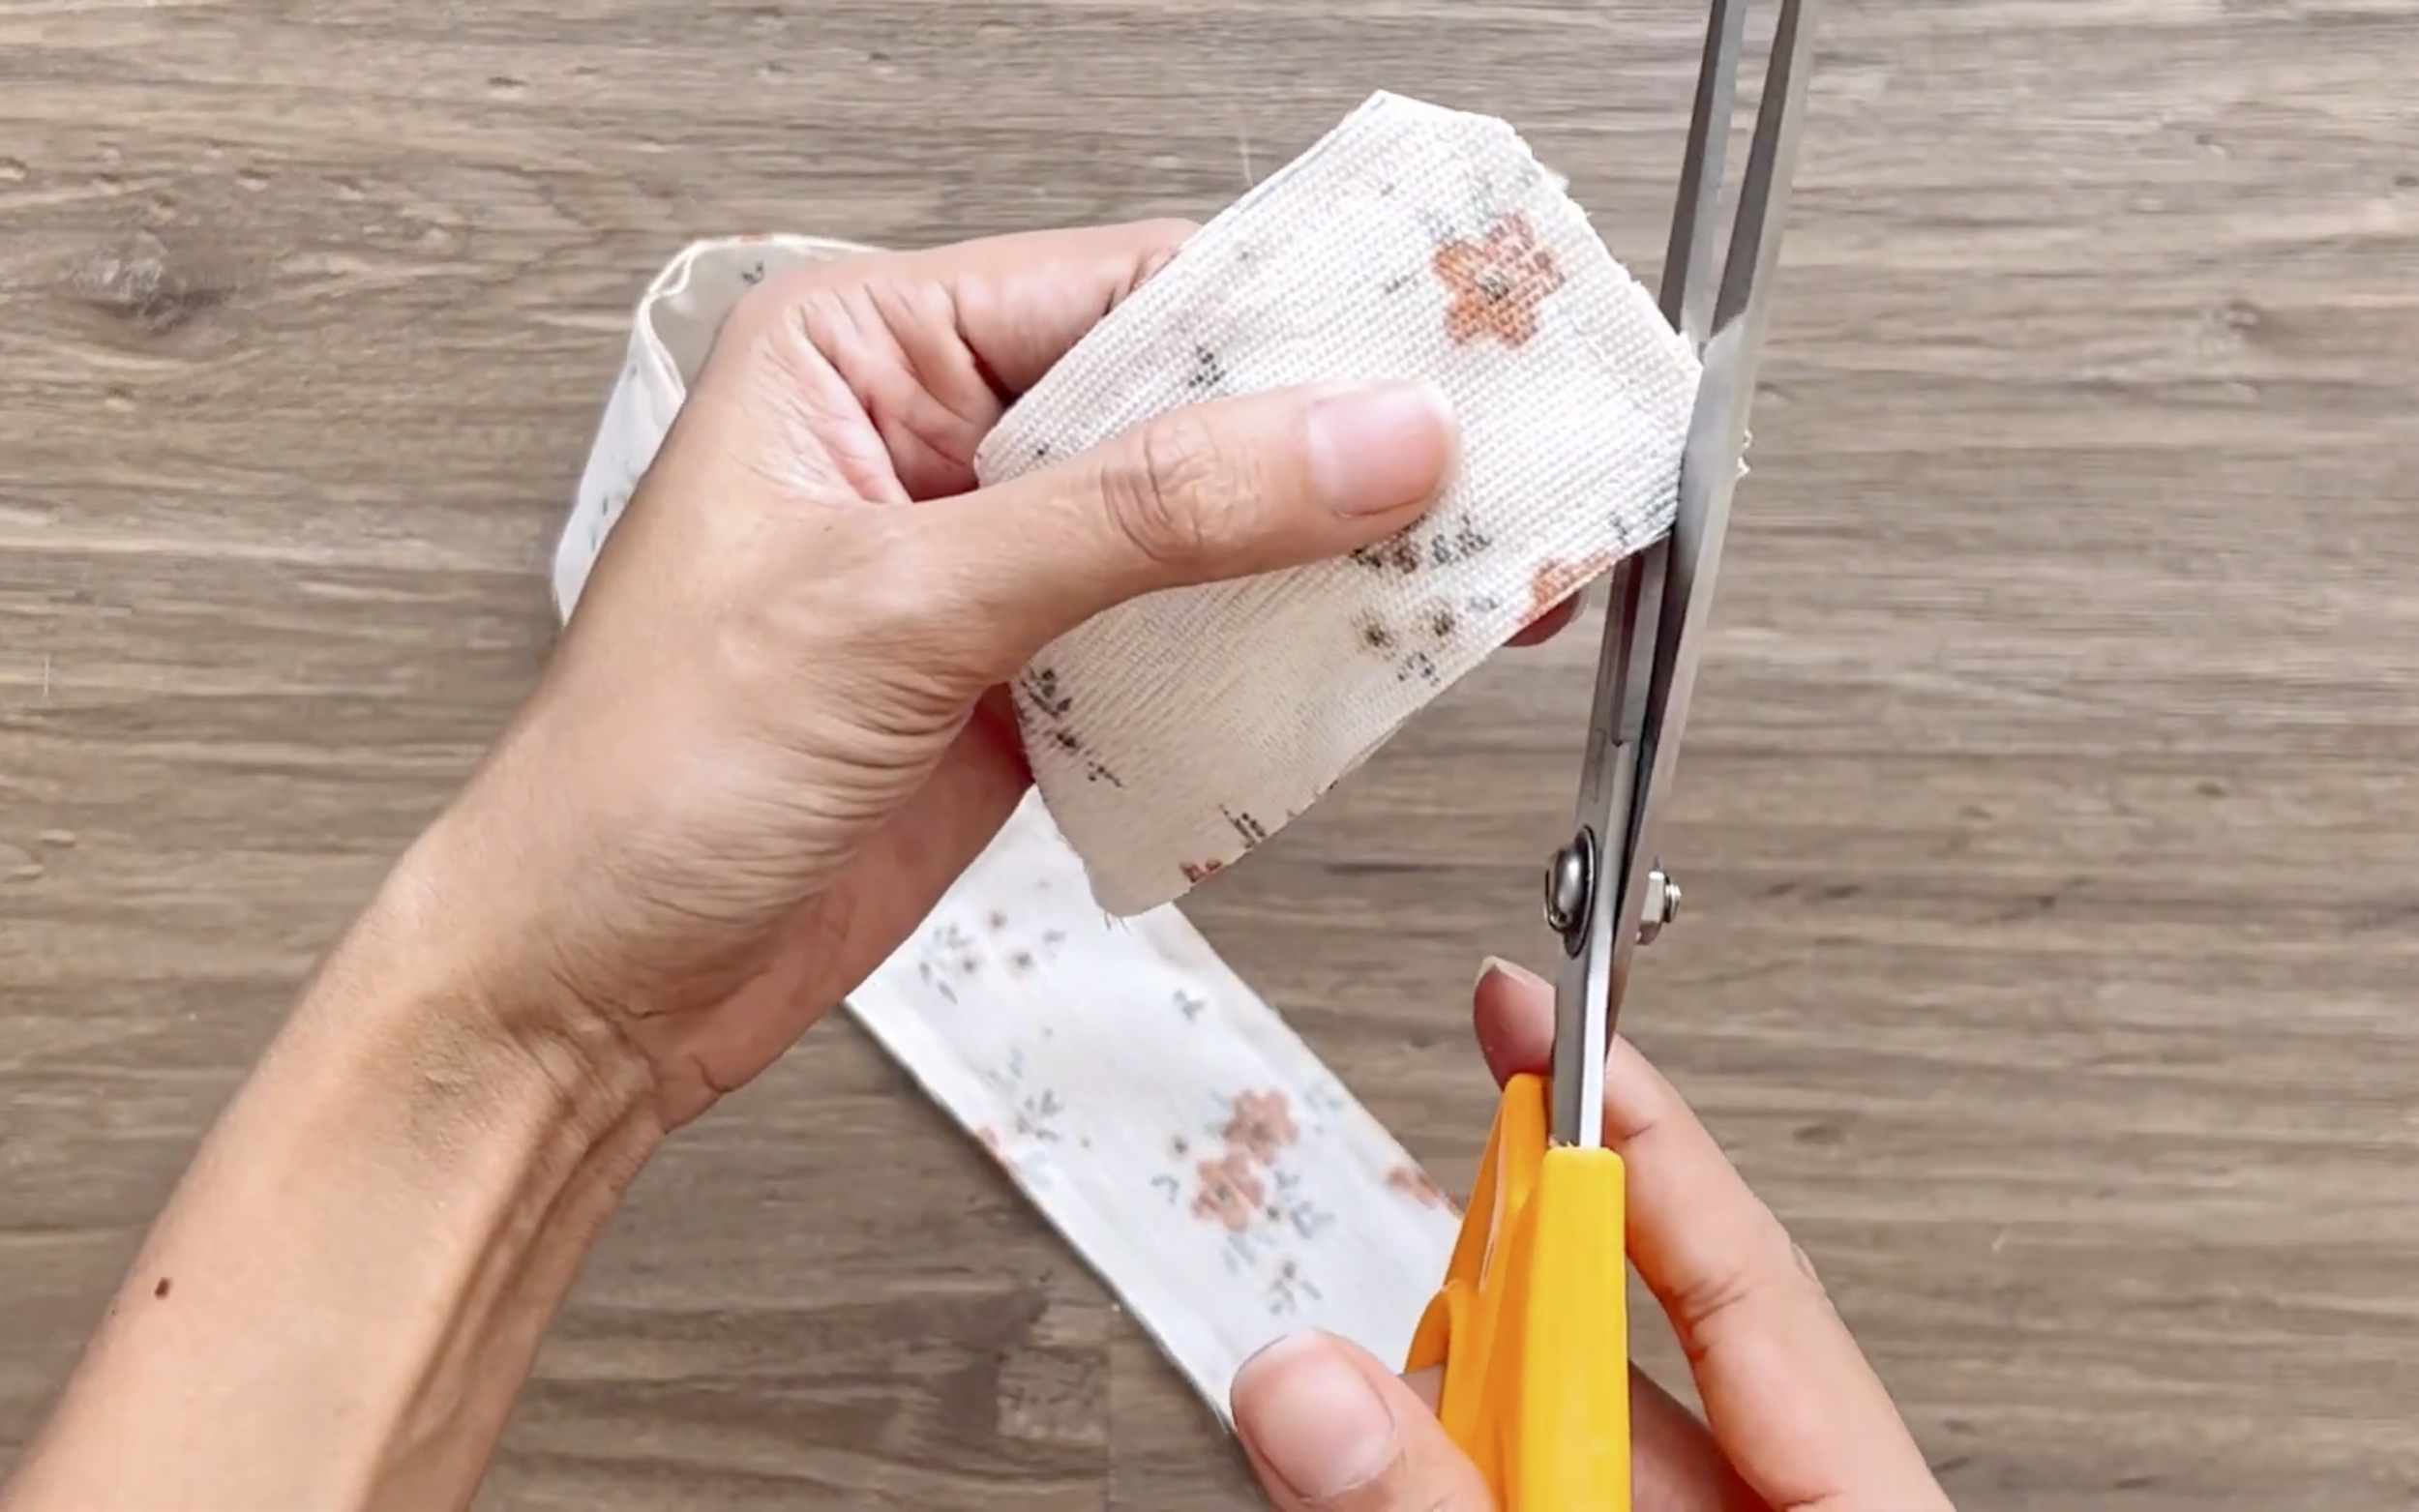
After sewing, make small cuts at the edge of the rectangle before turning it inside out.

Use the iron to set the fold and make the strap look nicer.
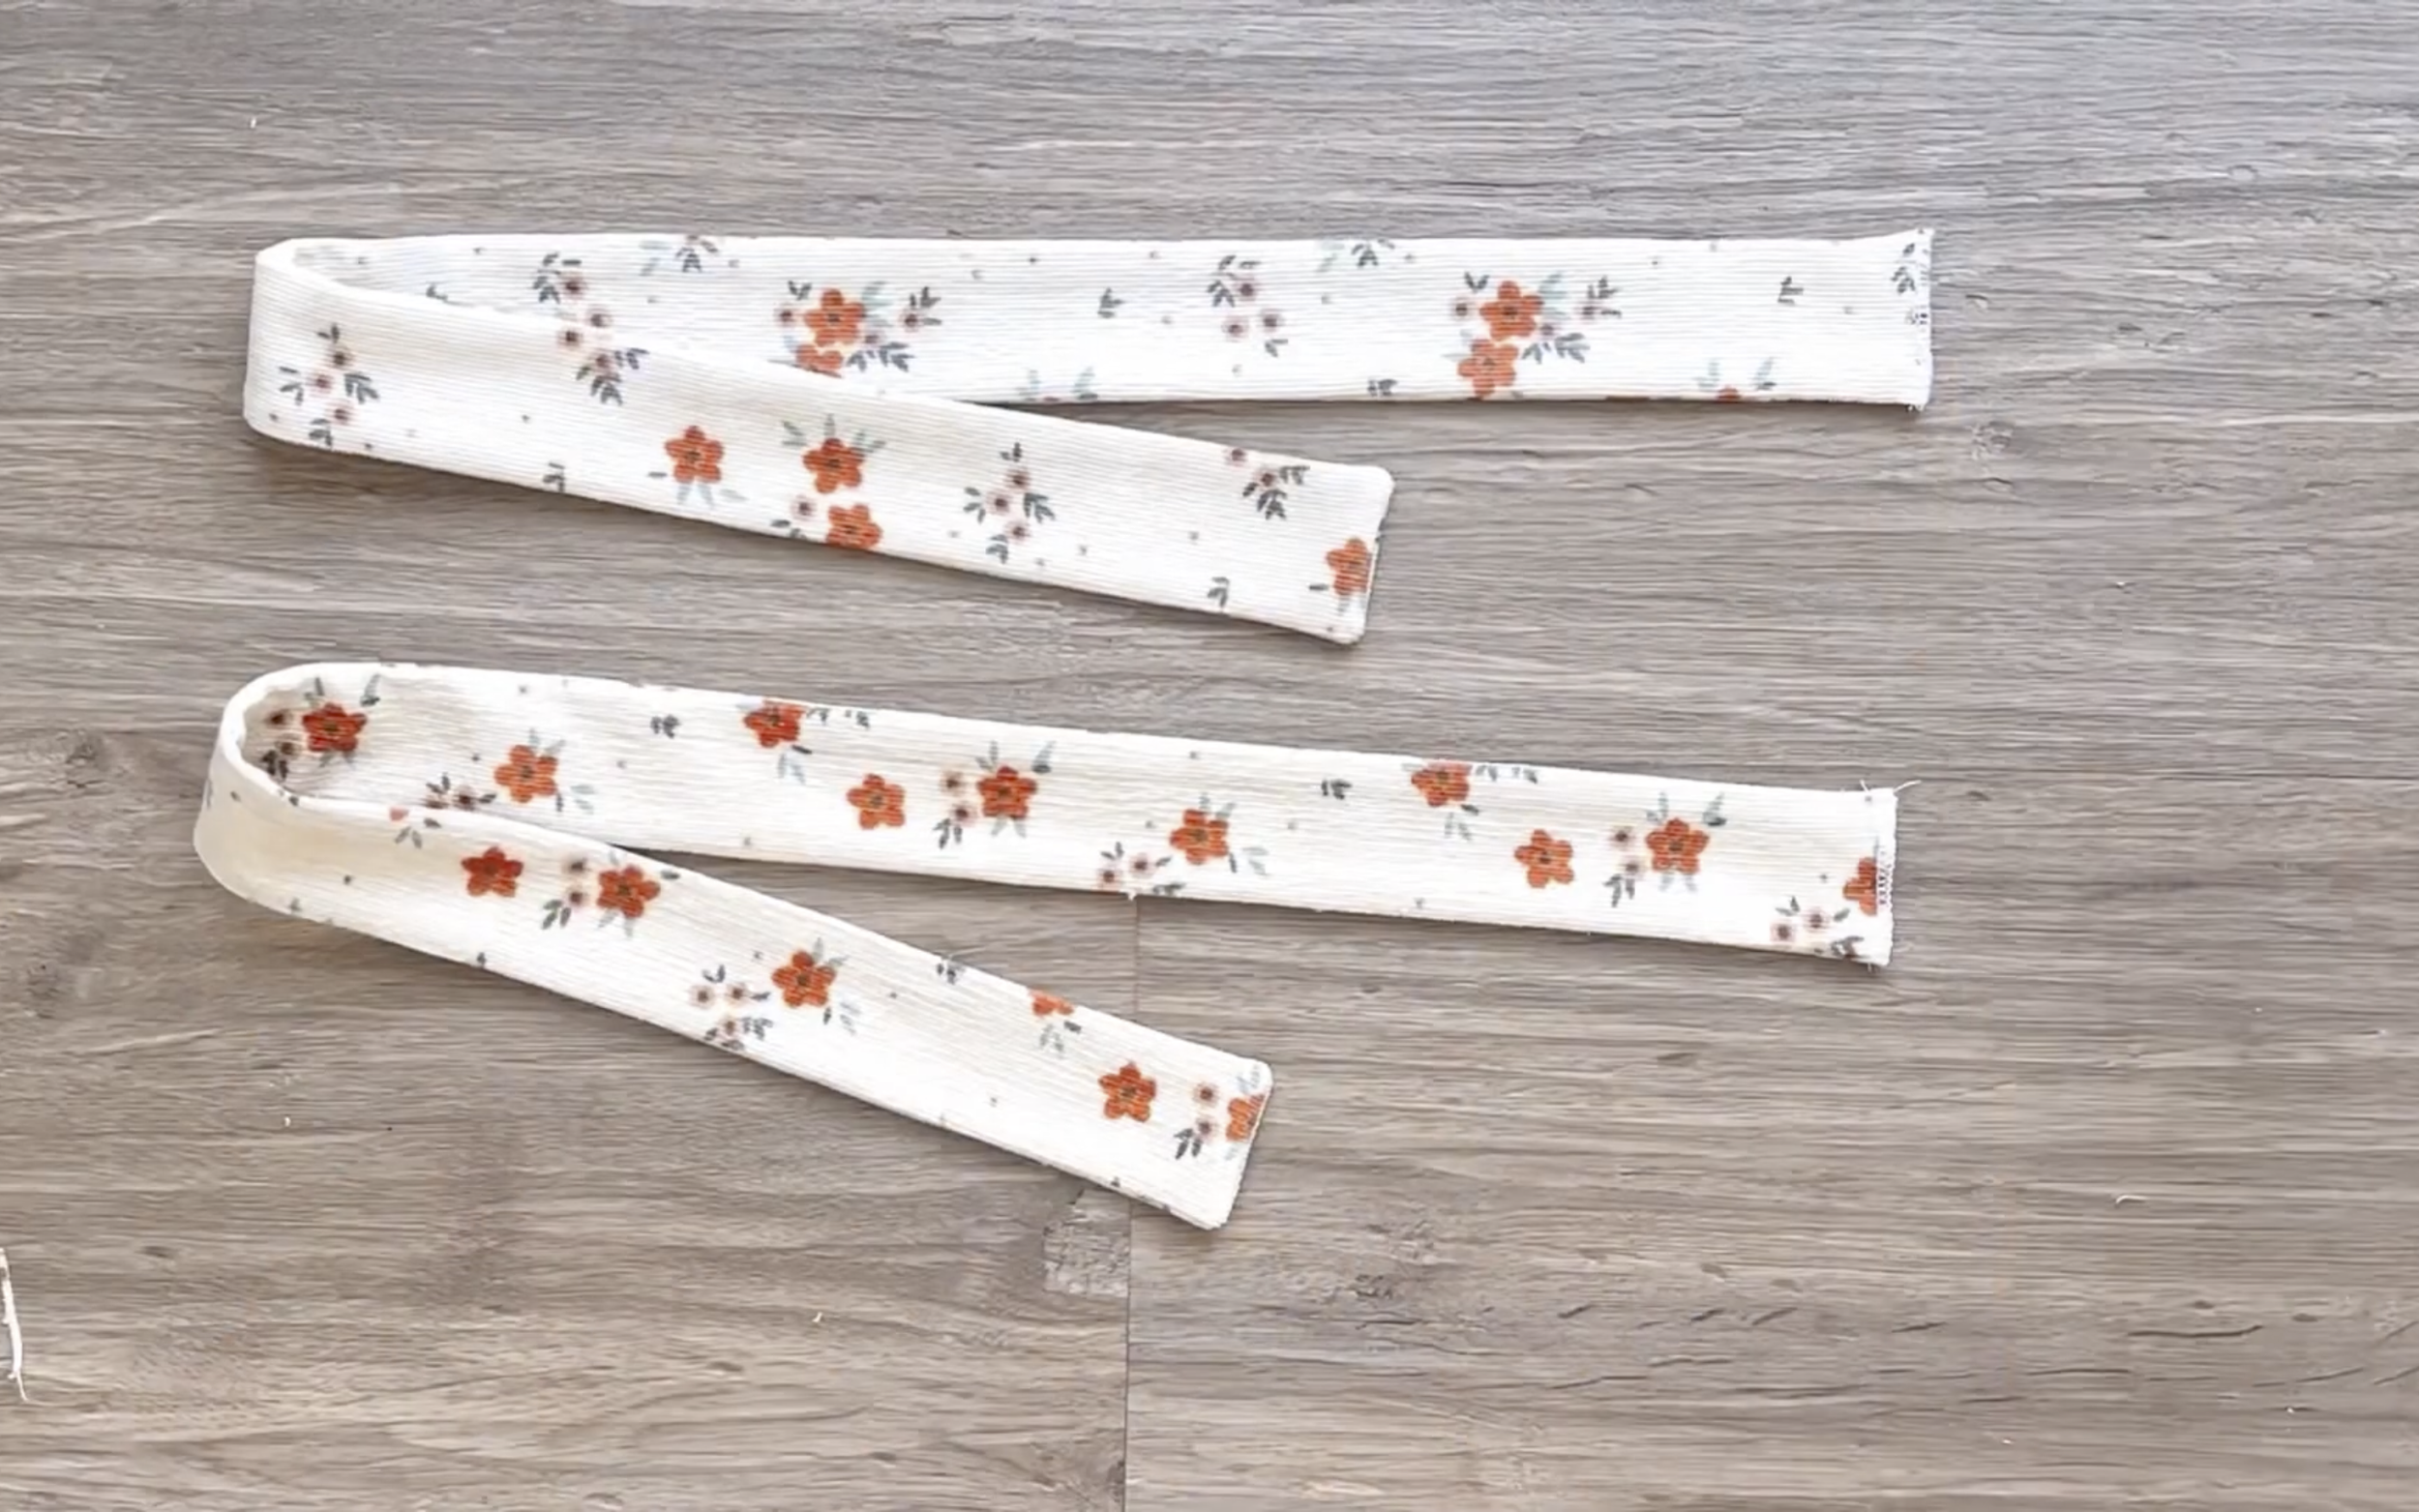
Two straps are needed for the jumpsuit.
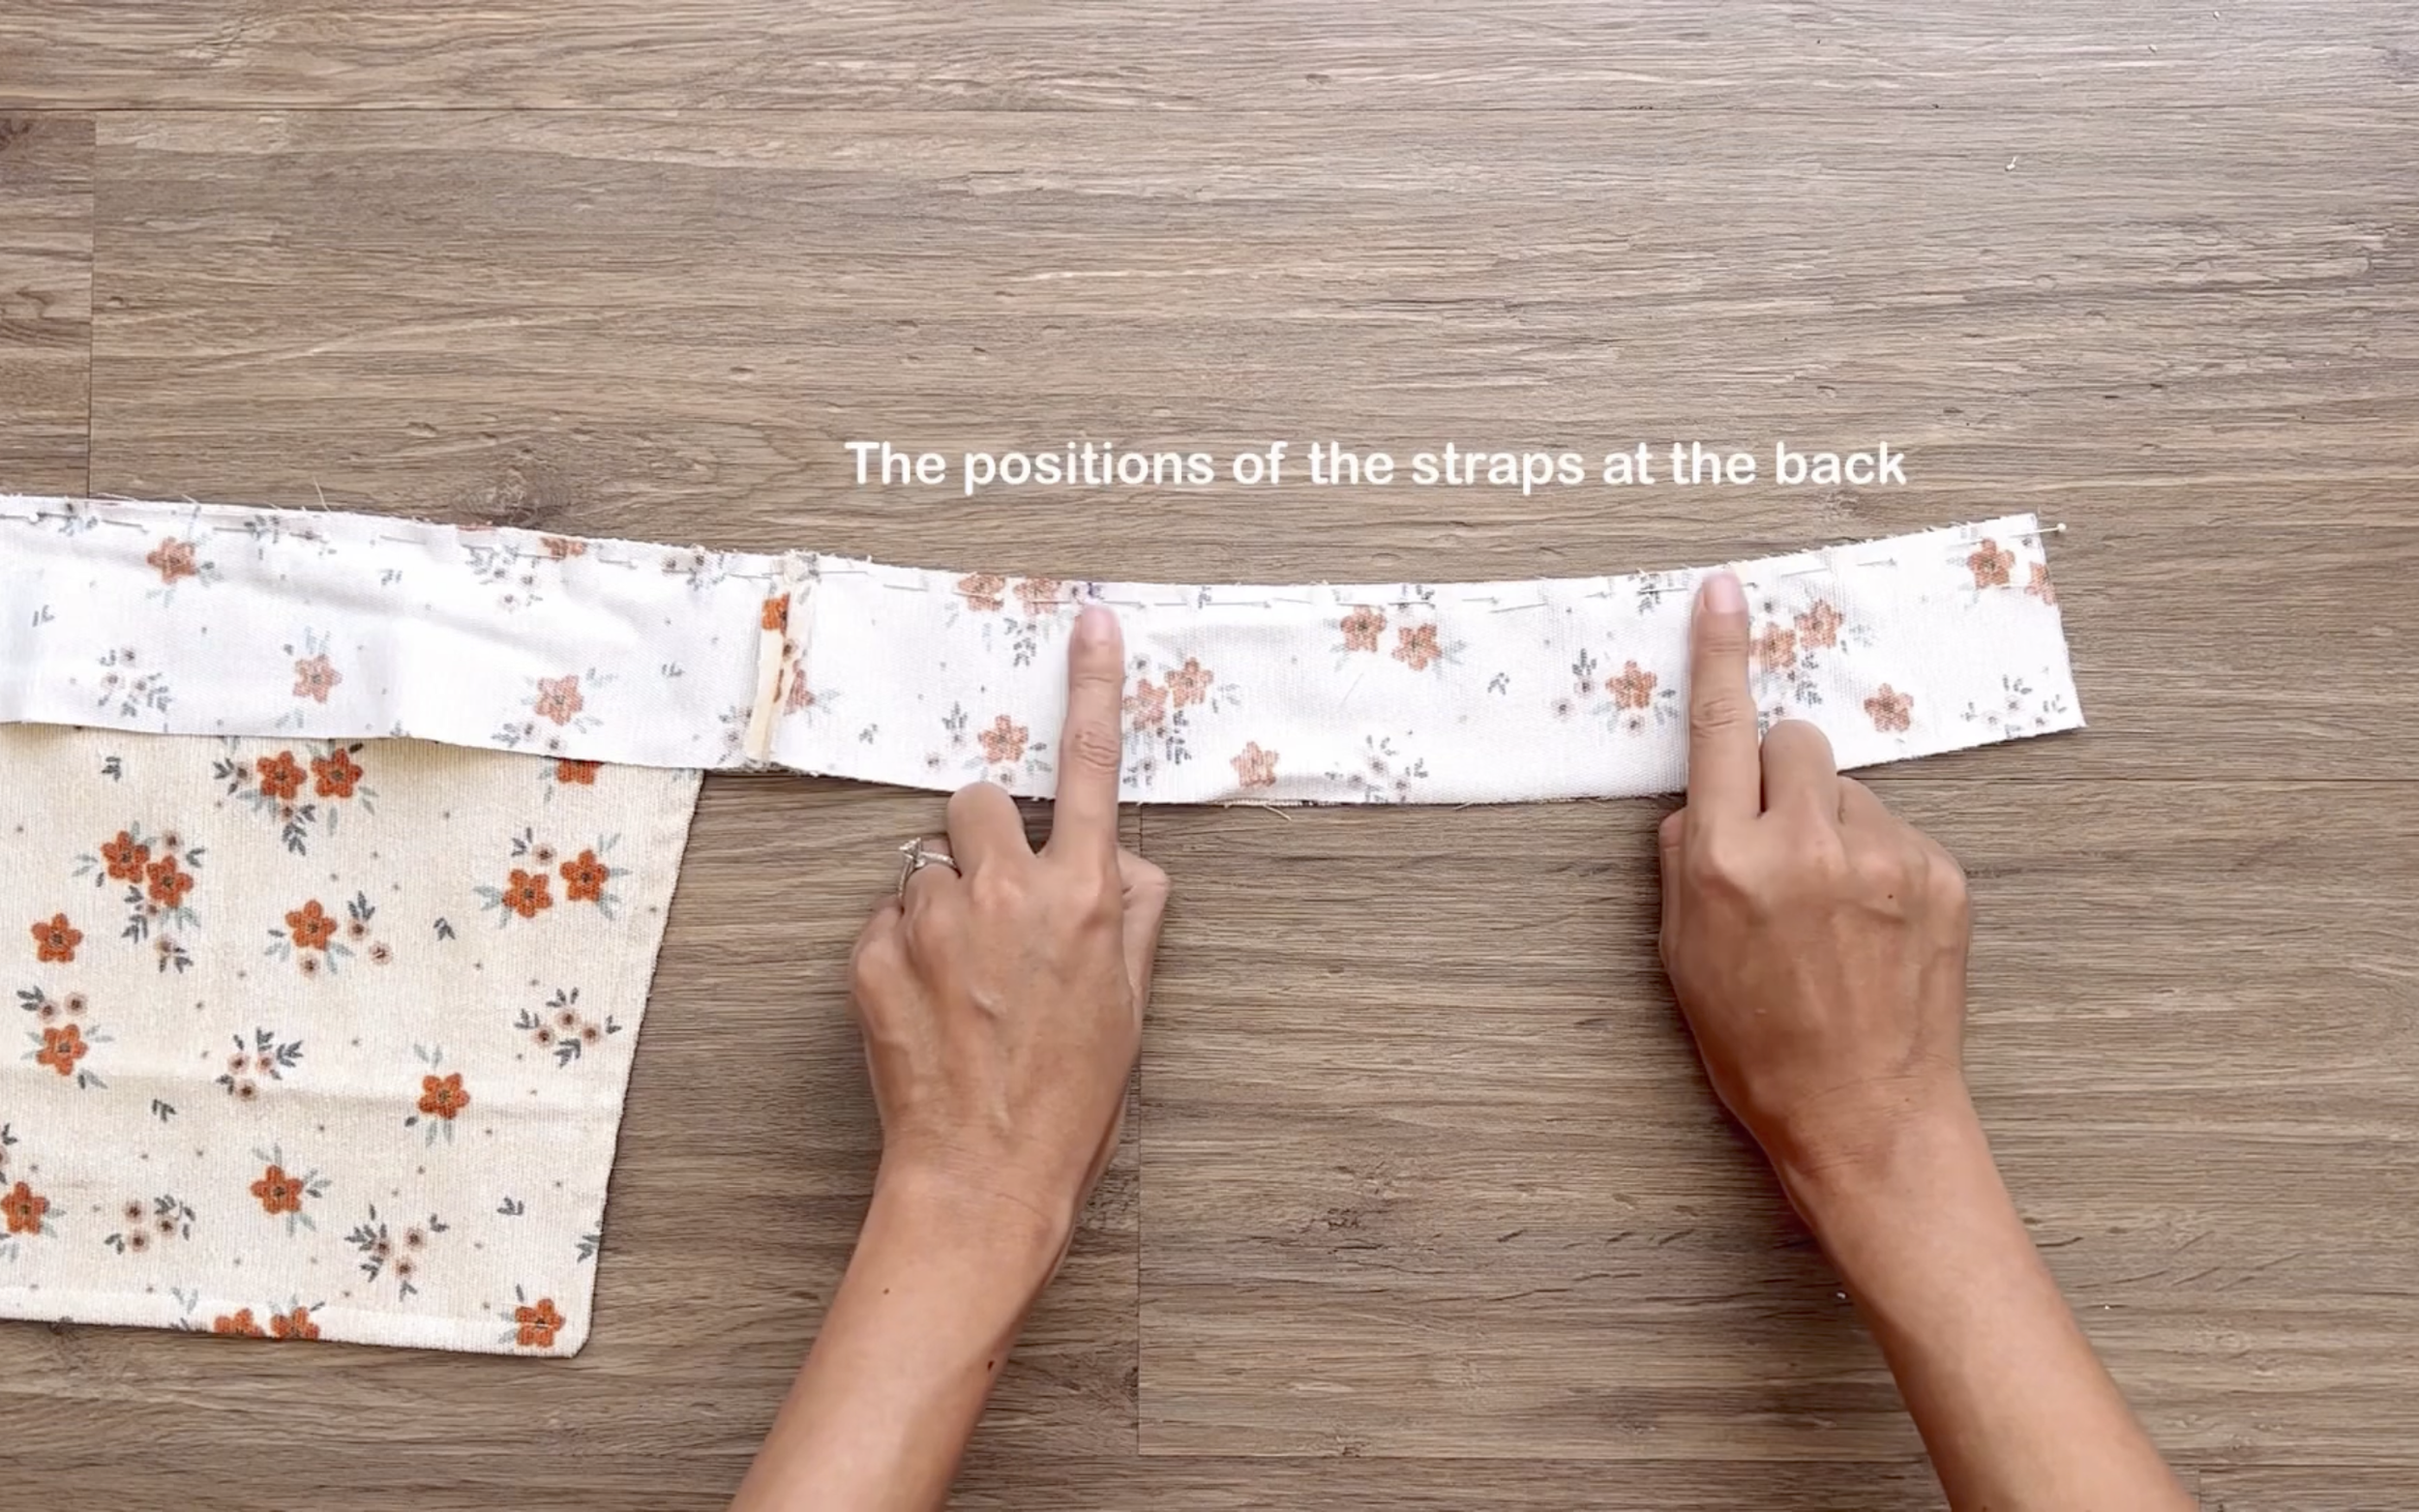
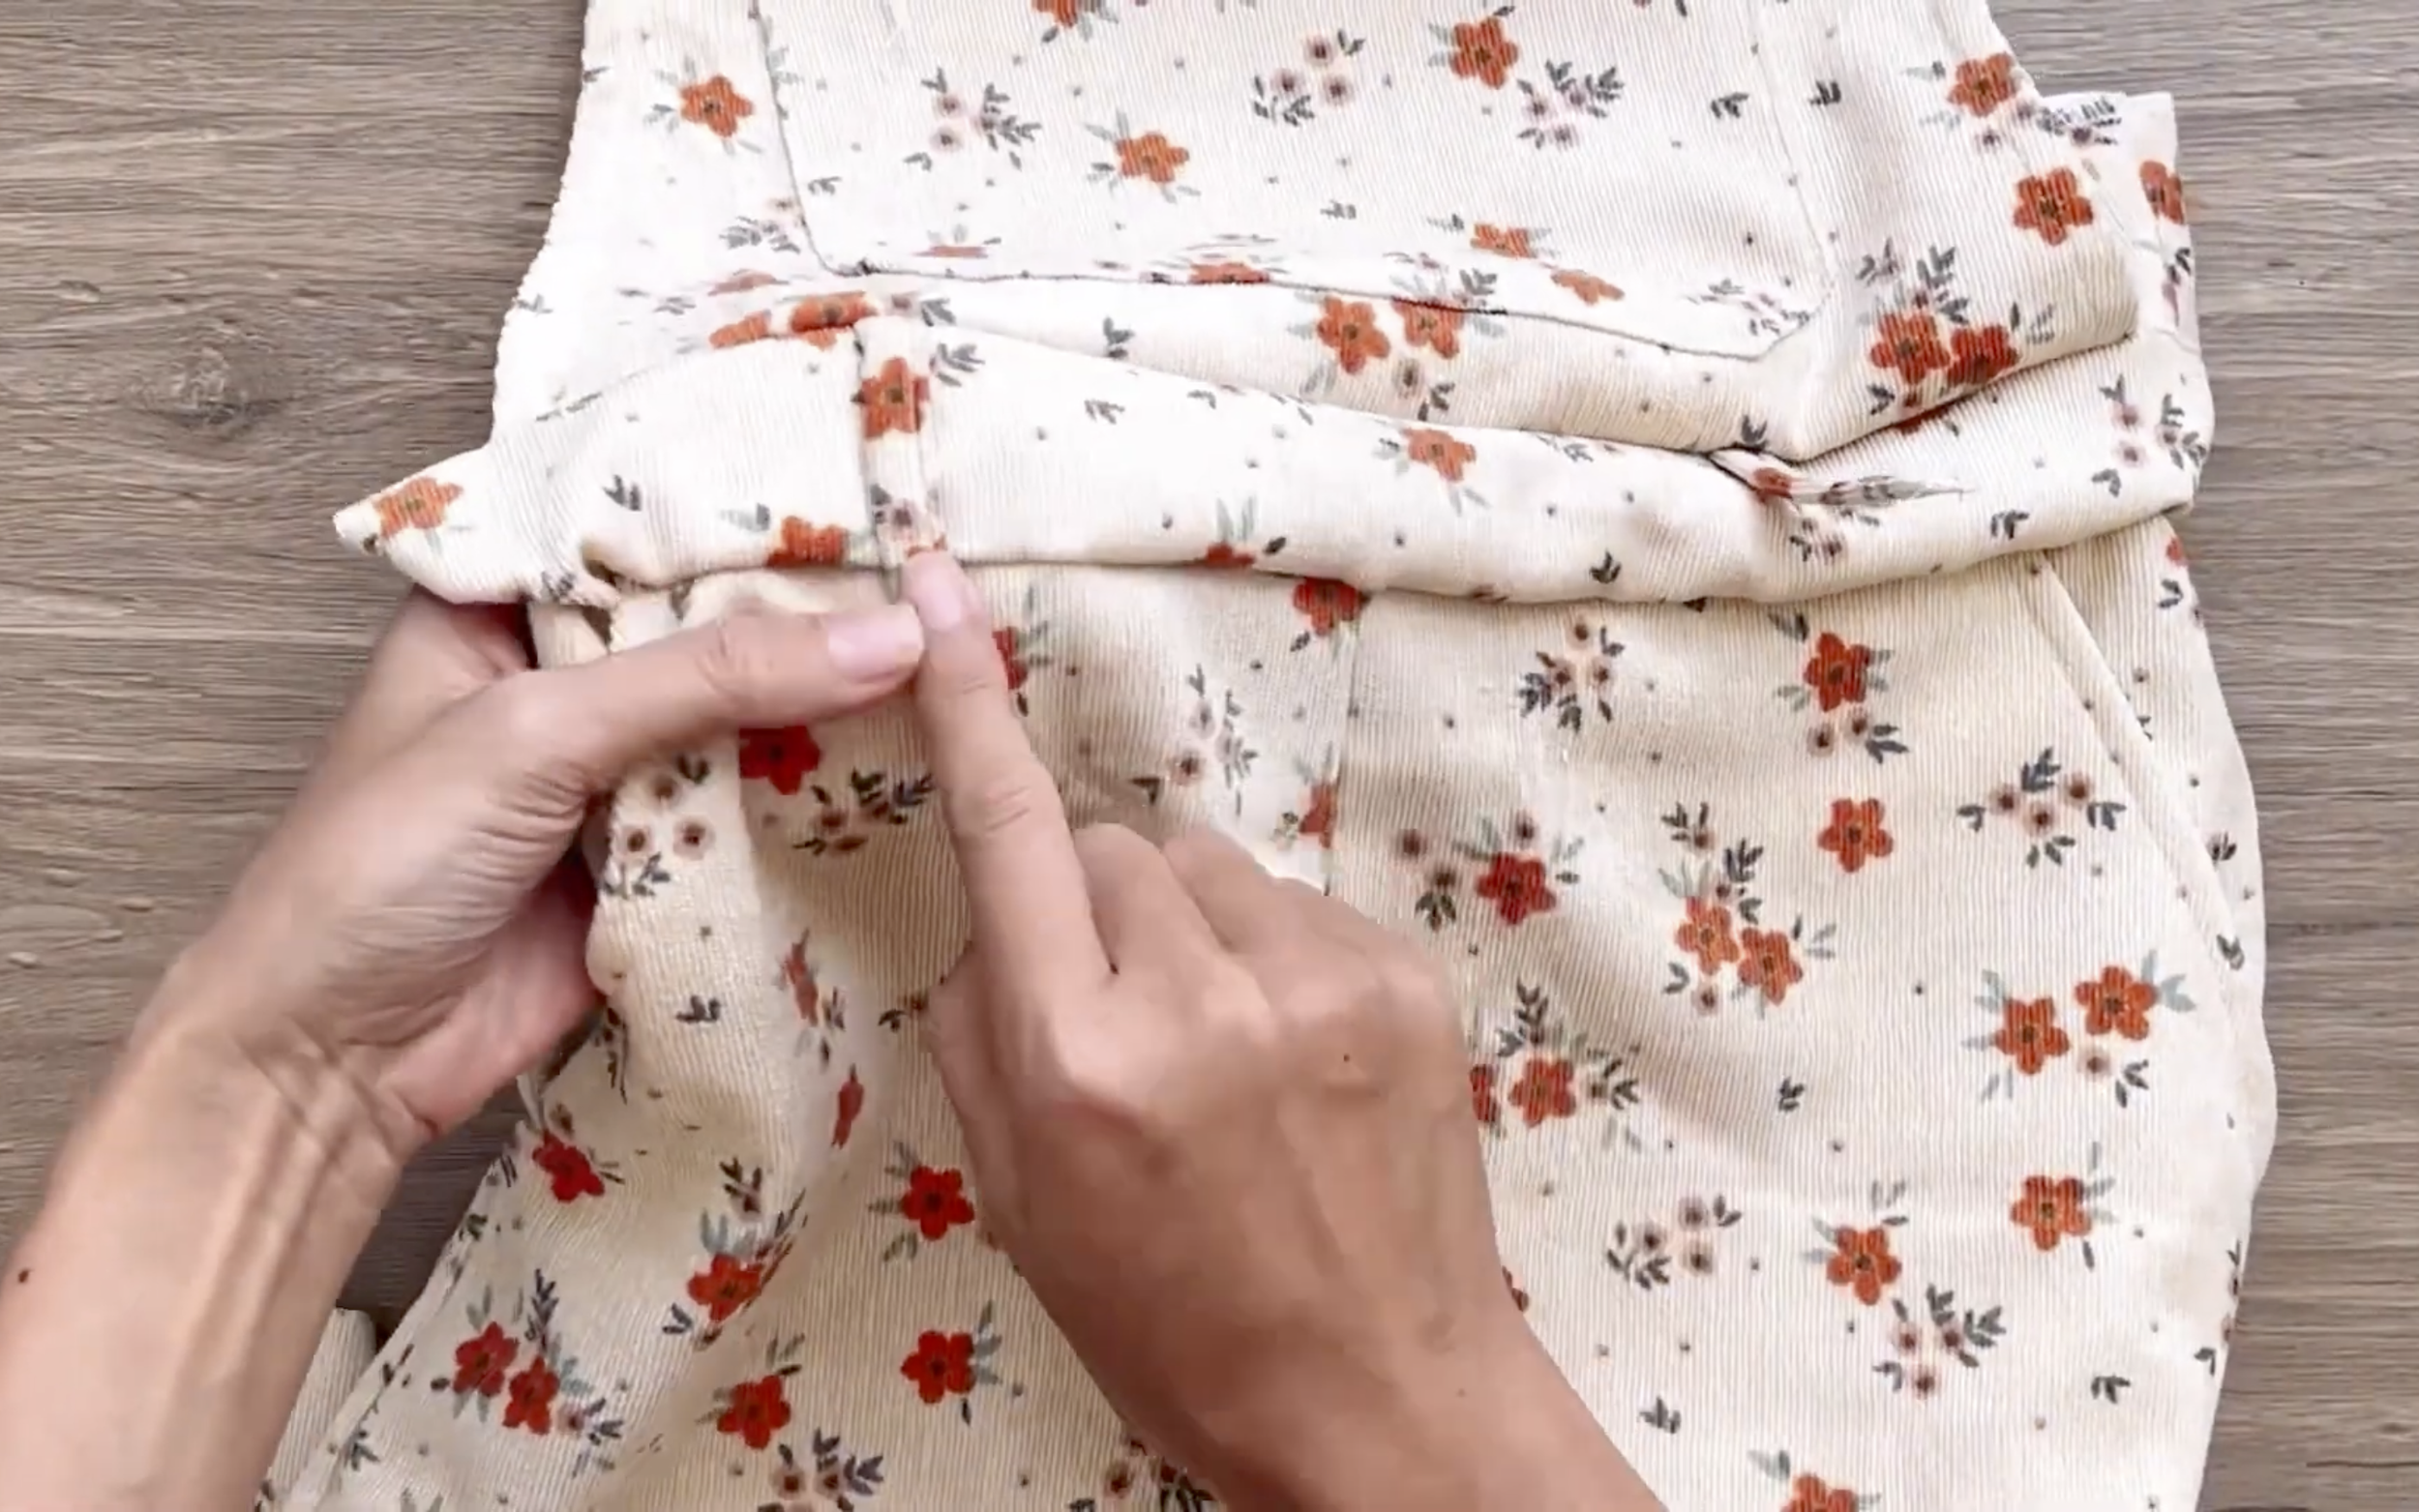
At the back of the waistband, mark the position for the strap, then attach one end of the strap there.
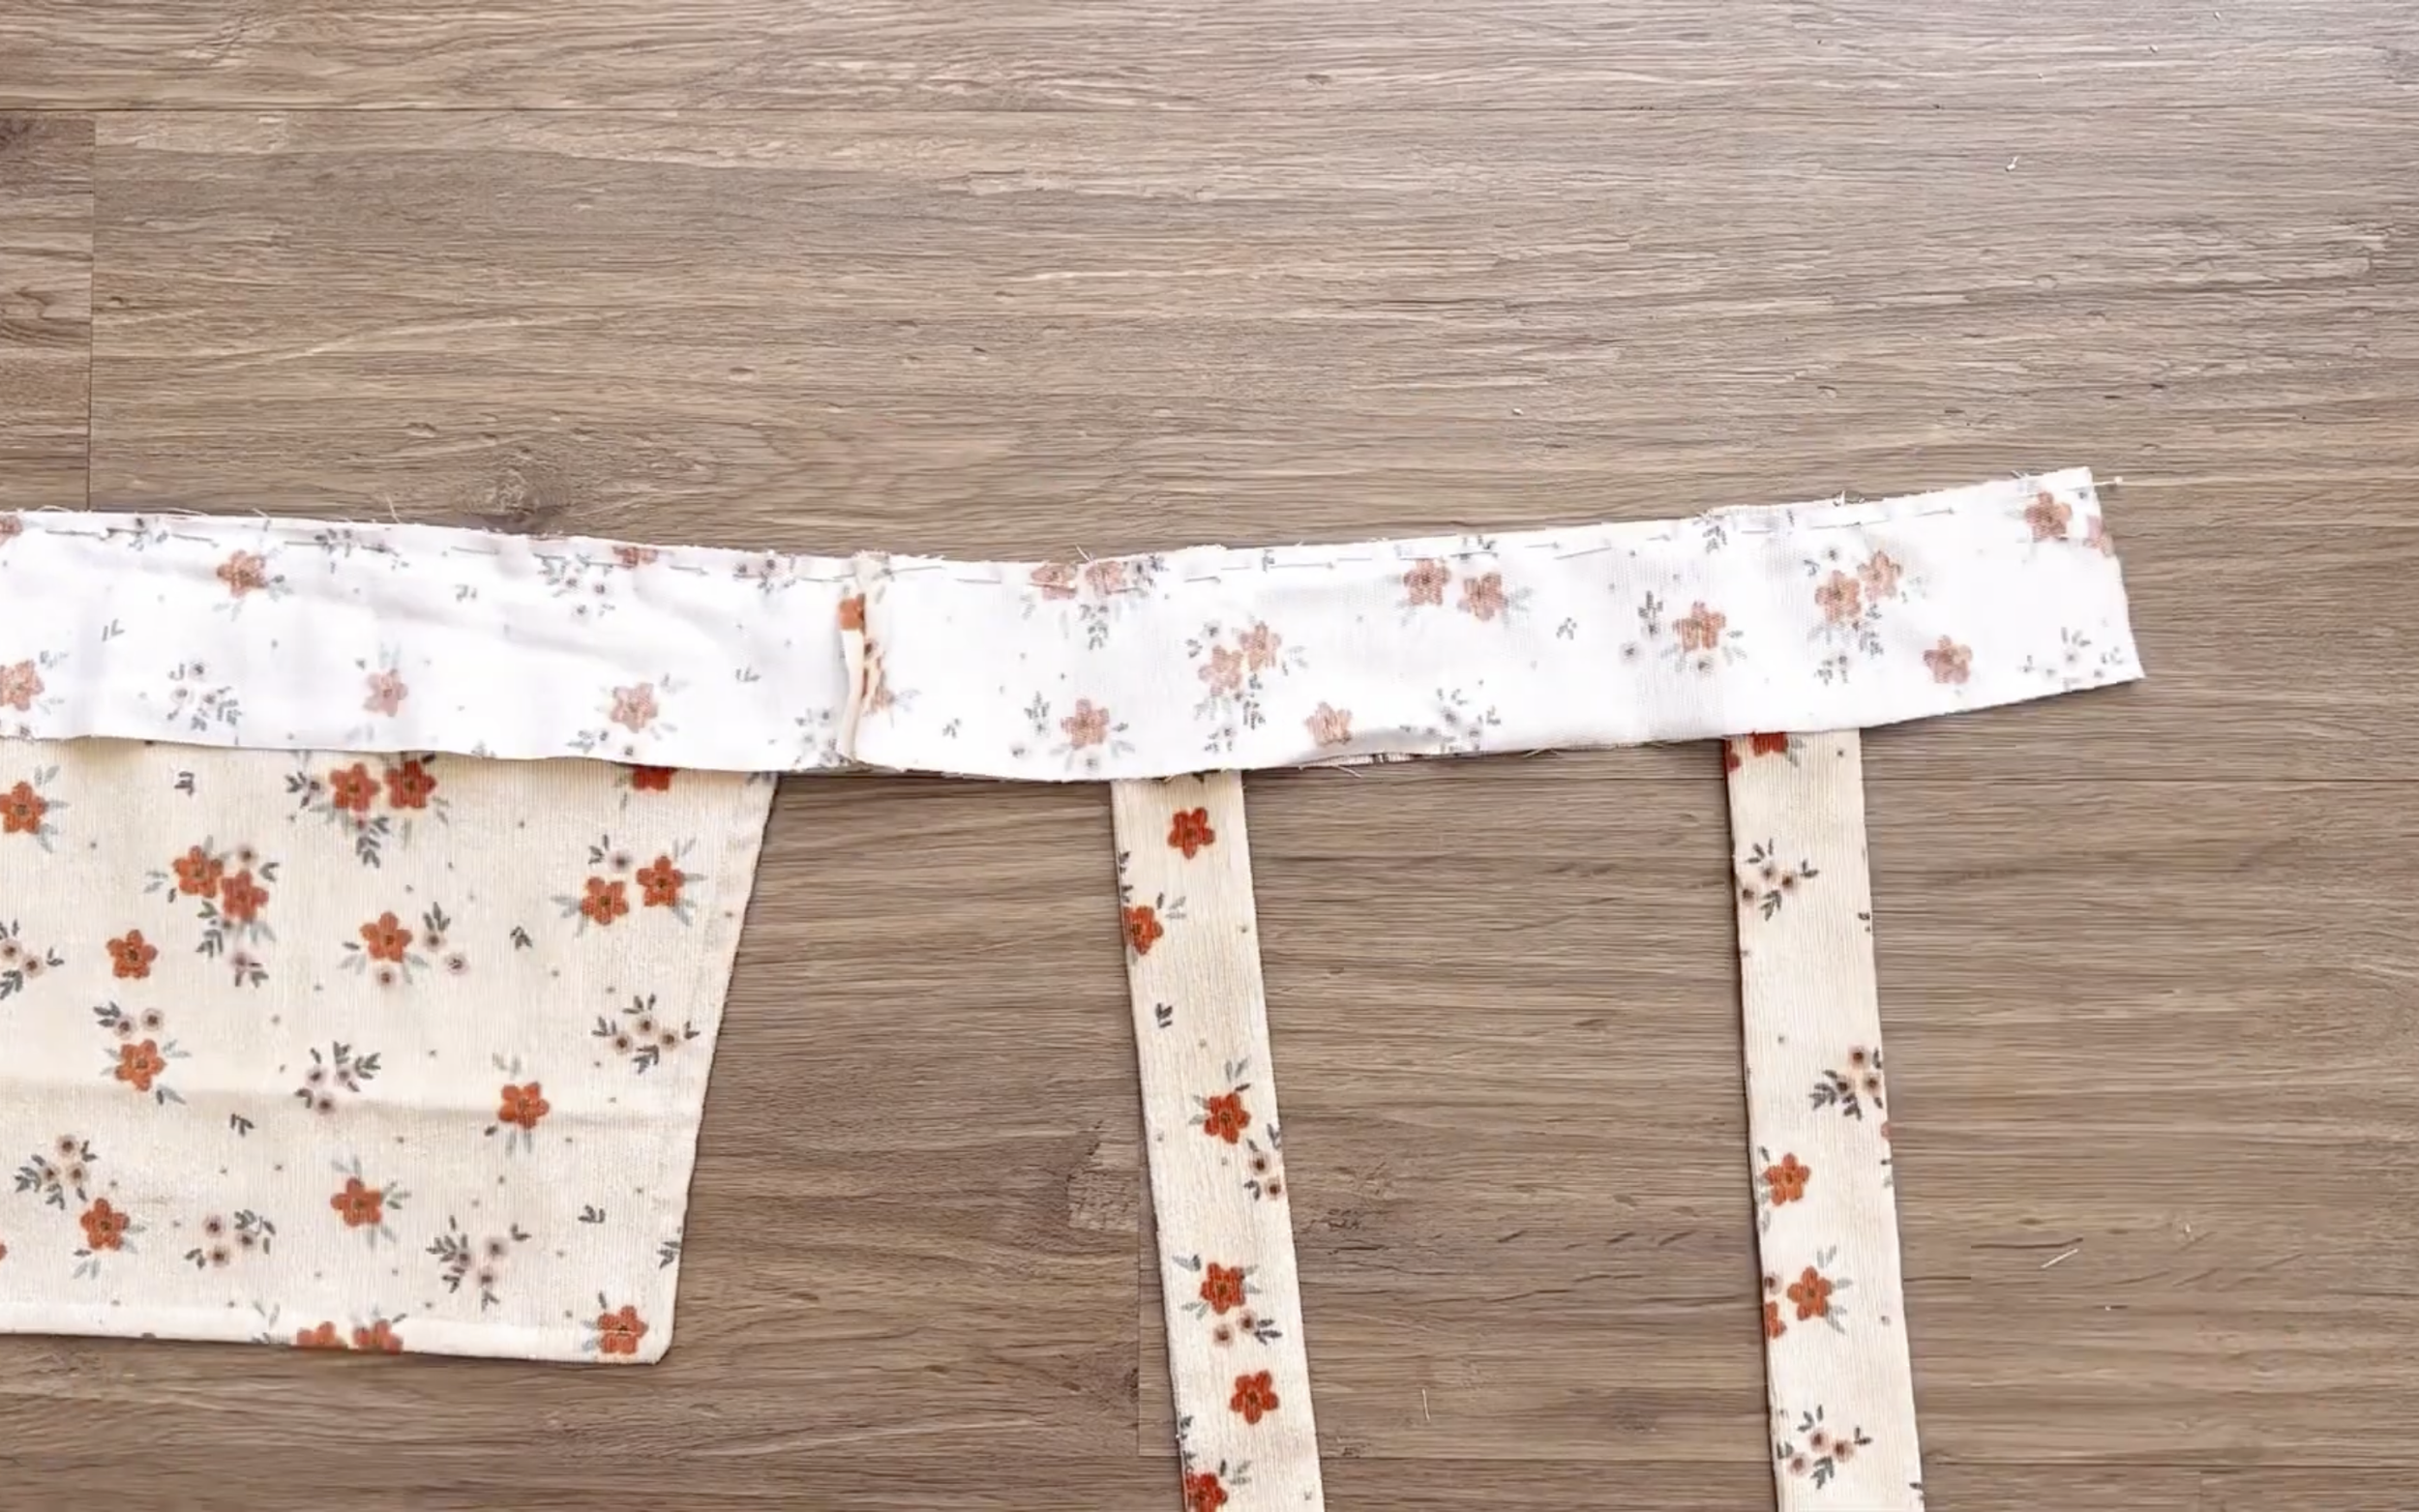
Make sure the strap is centered between the two waistbands.
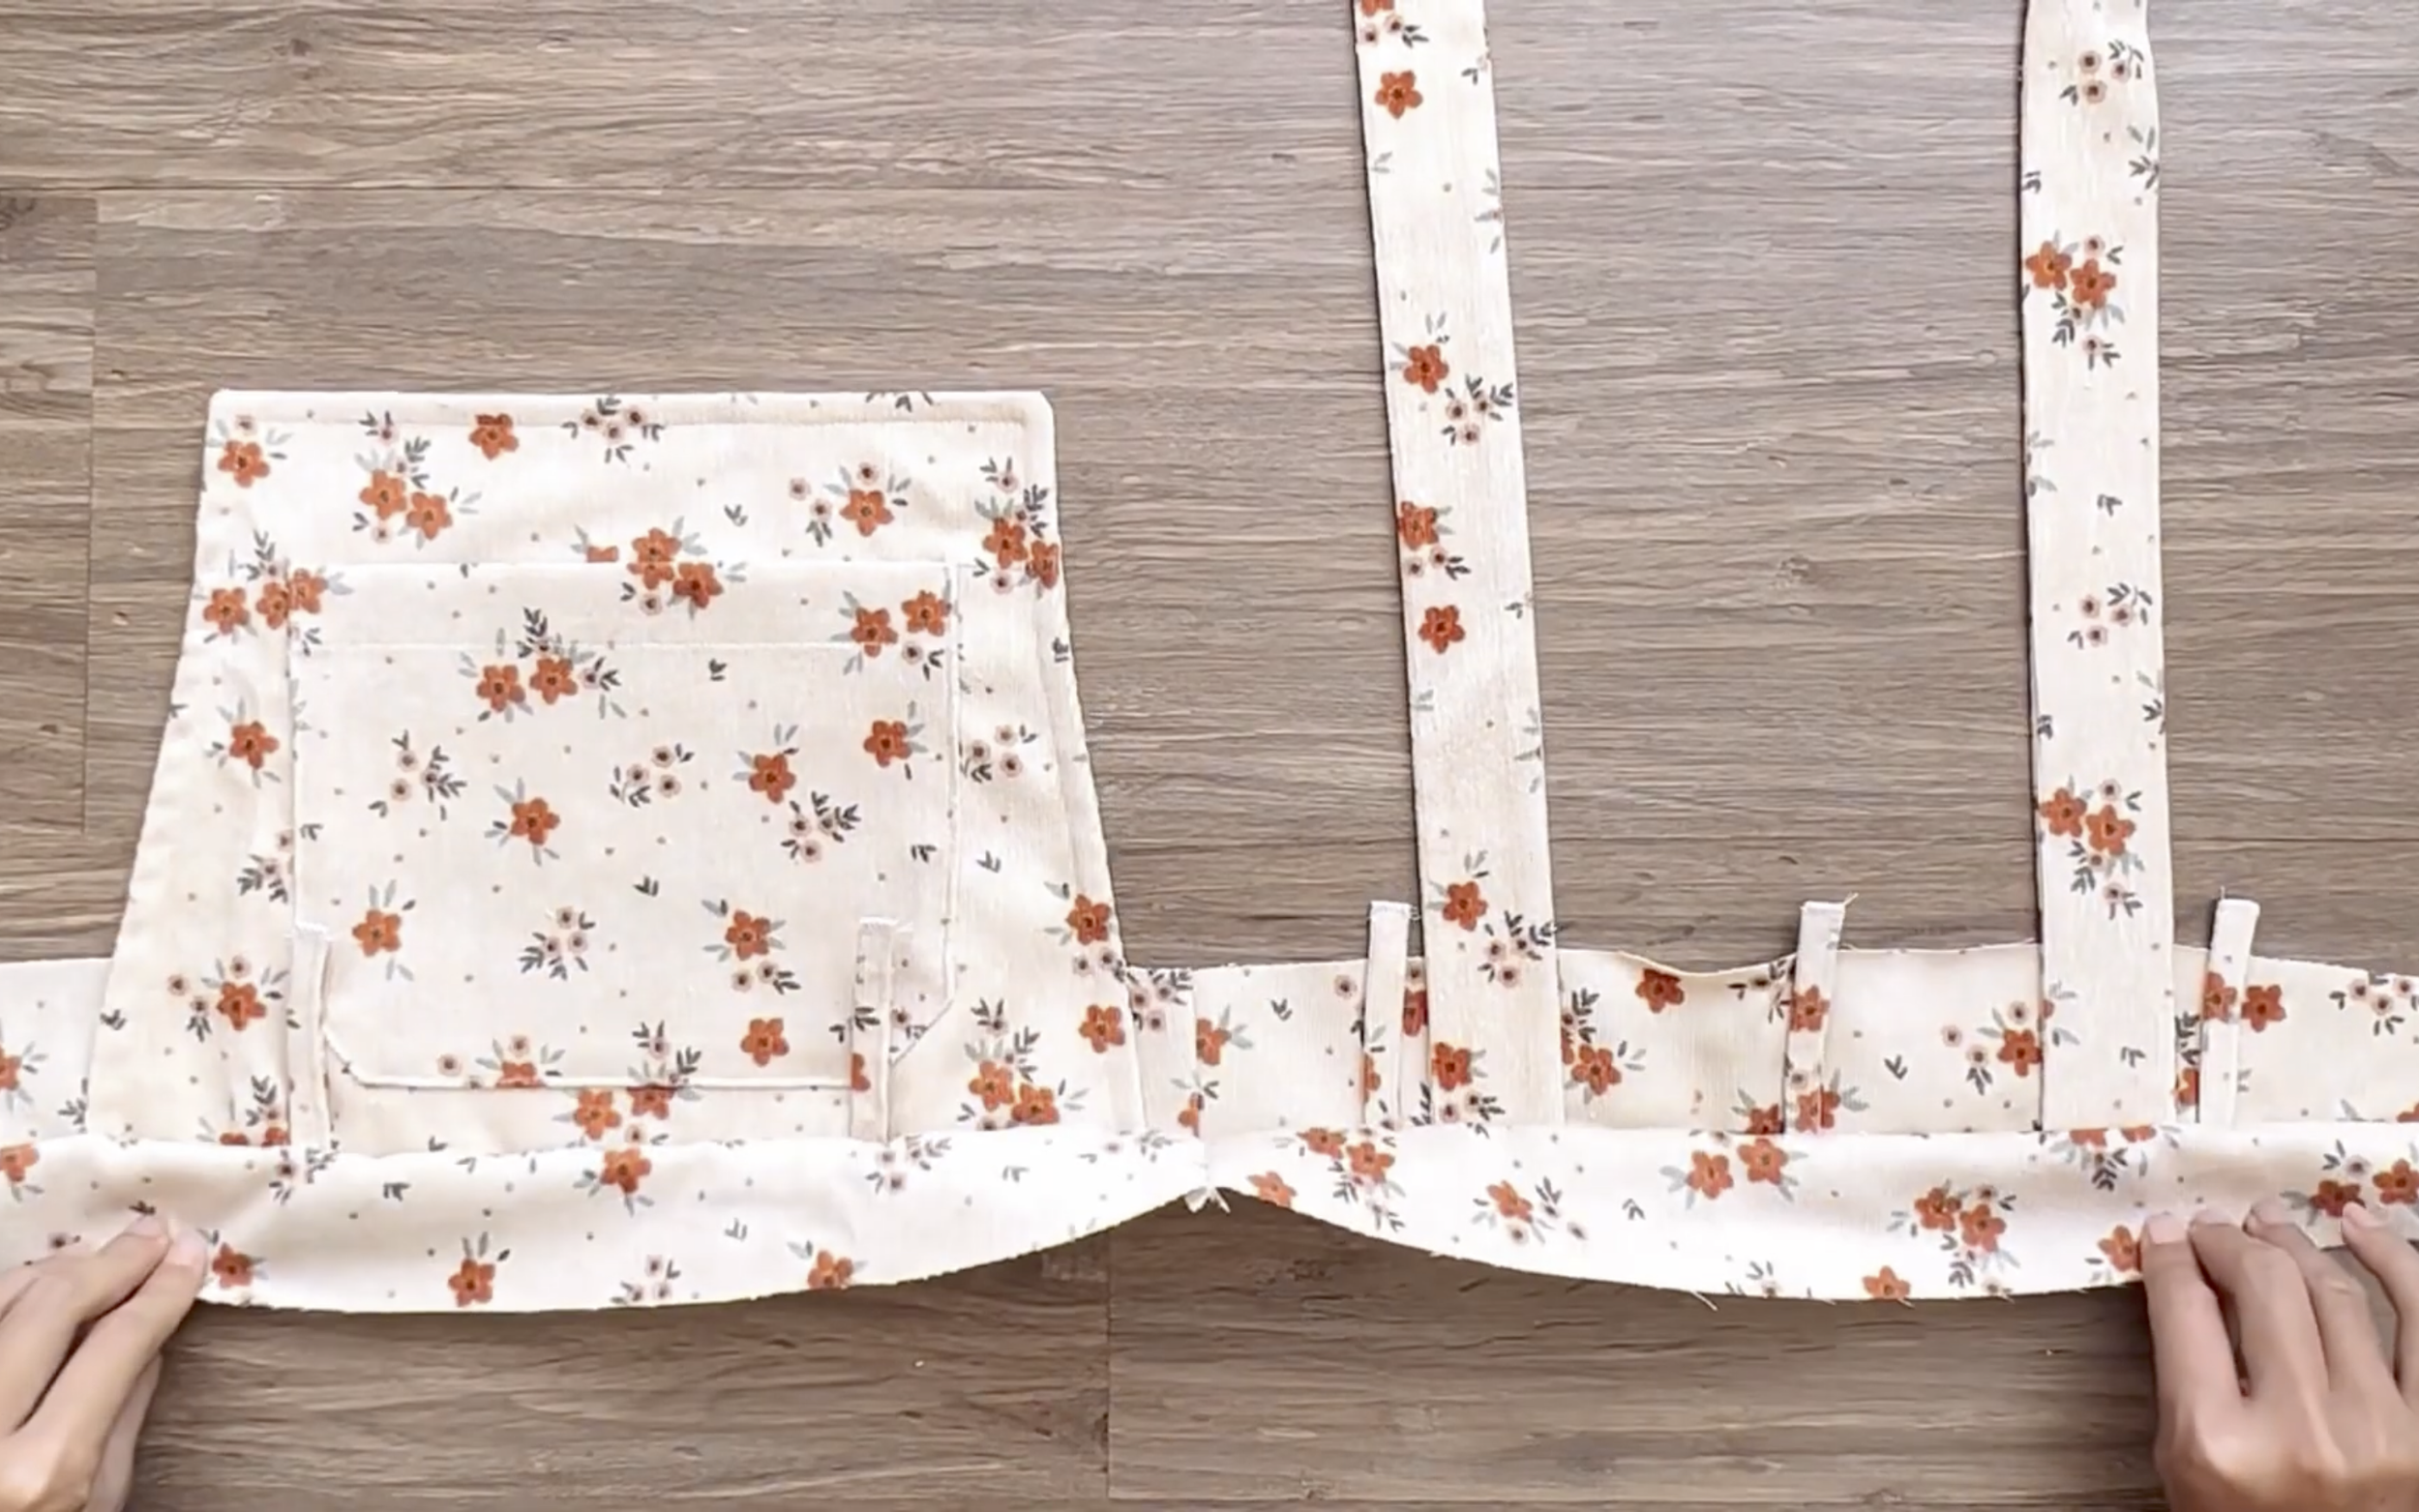
THE BELT LOOPS
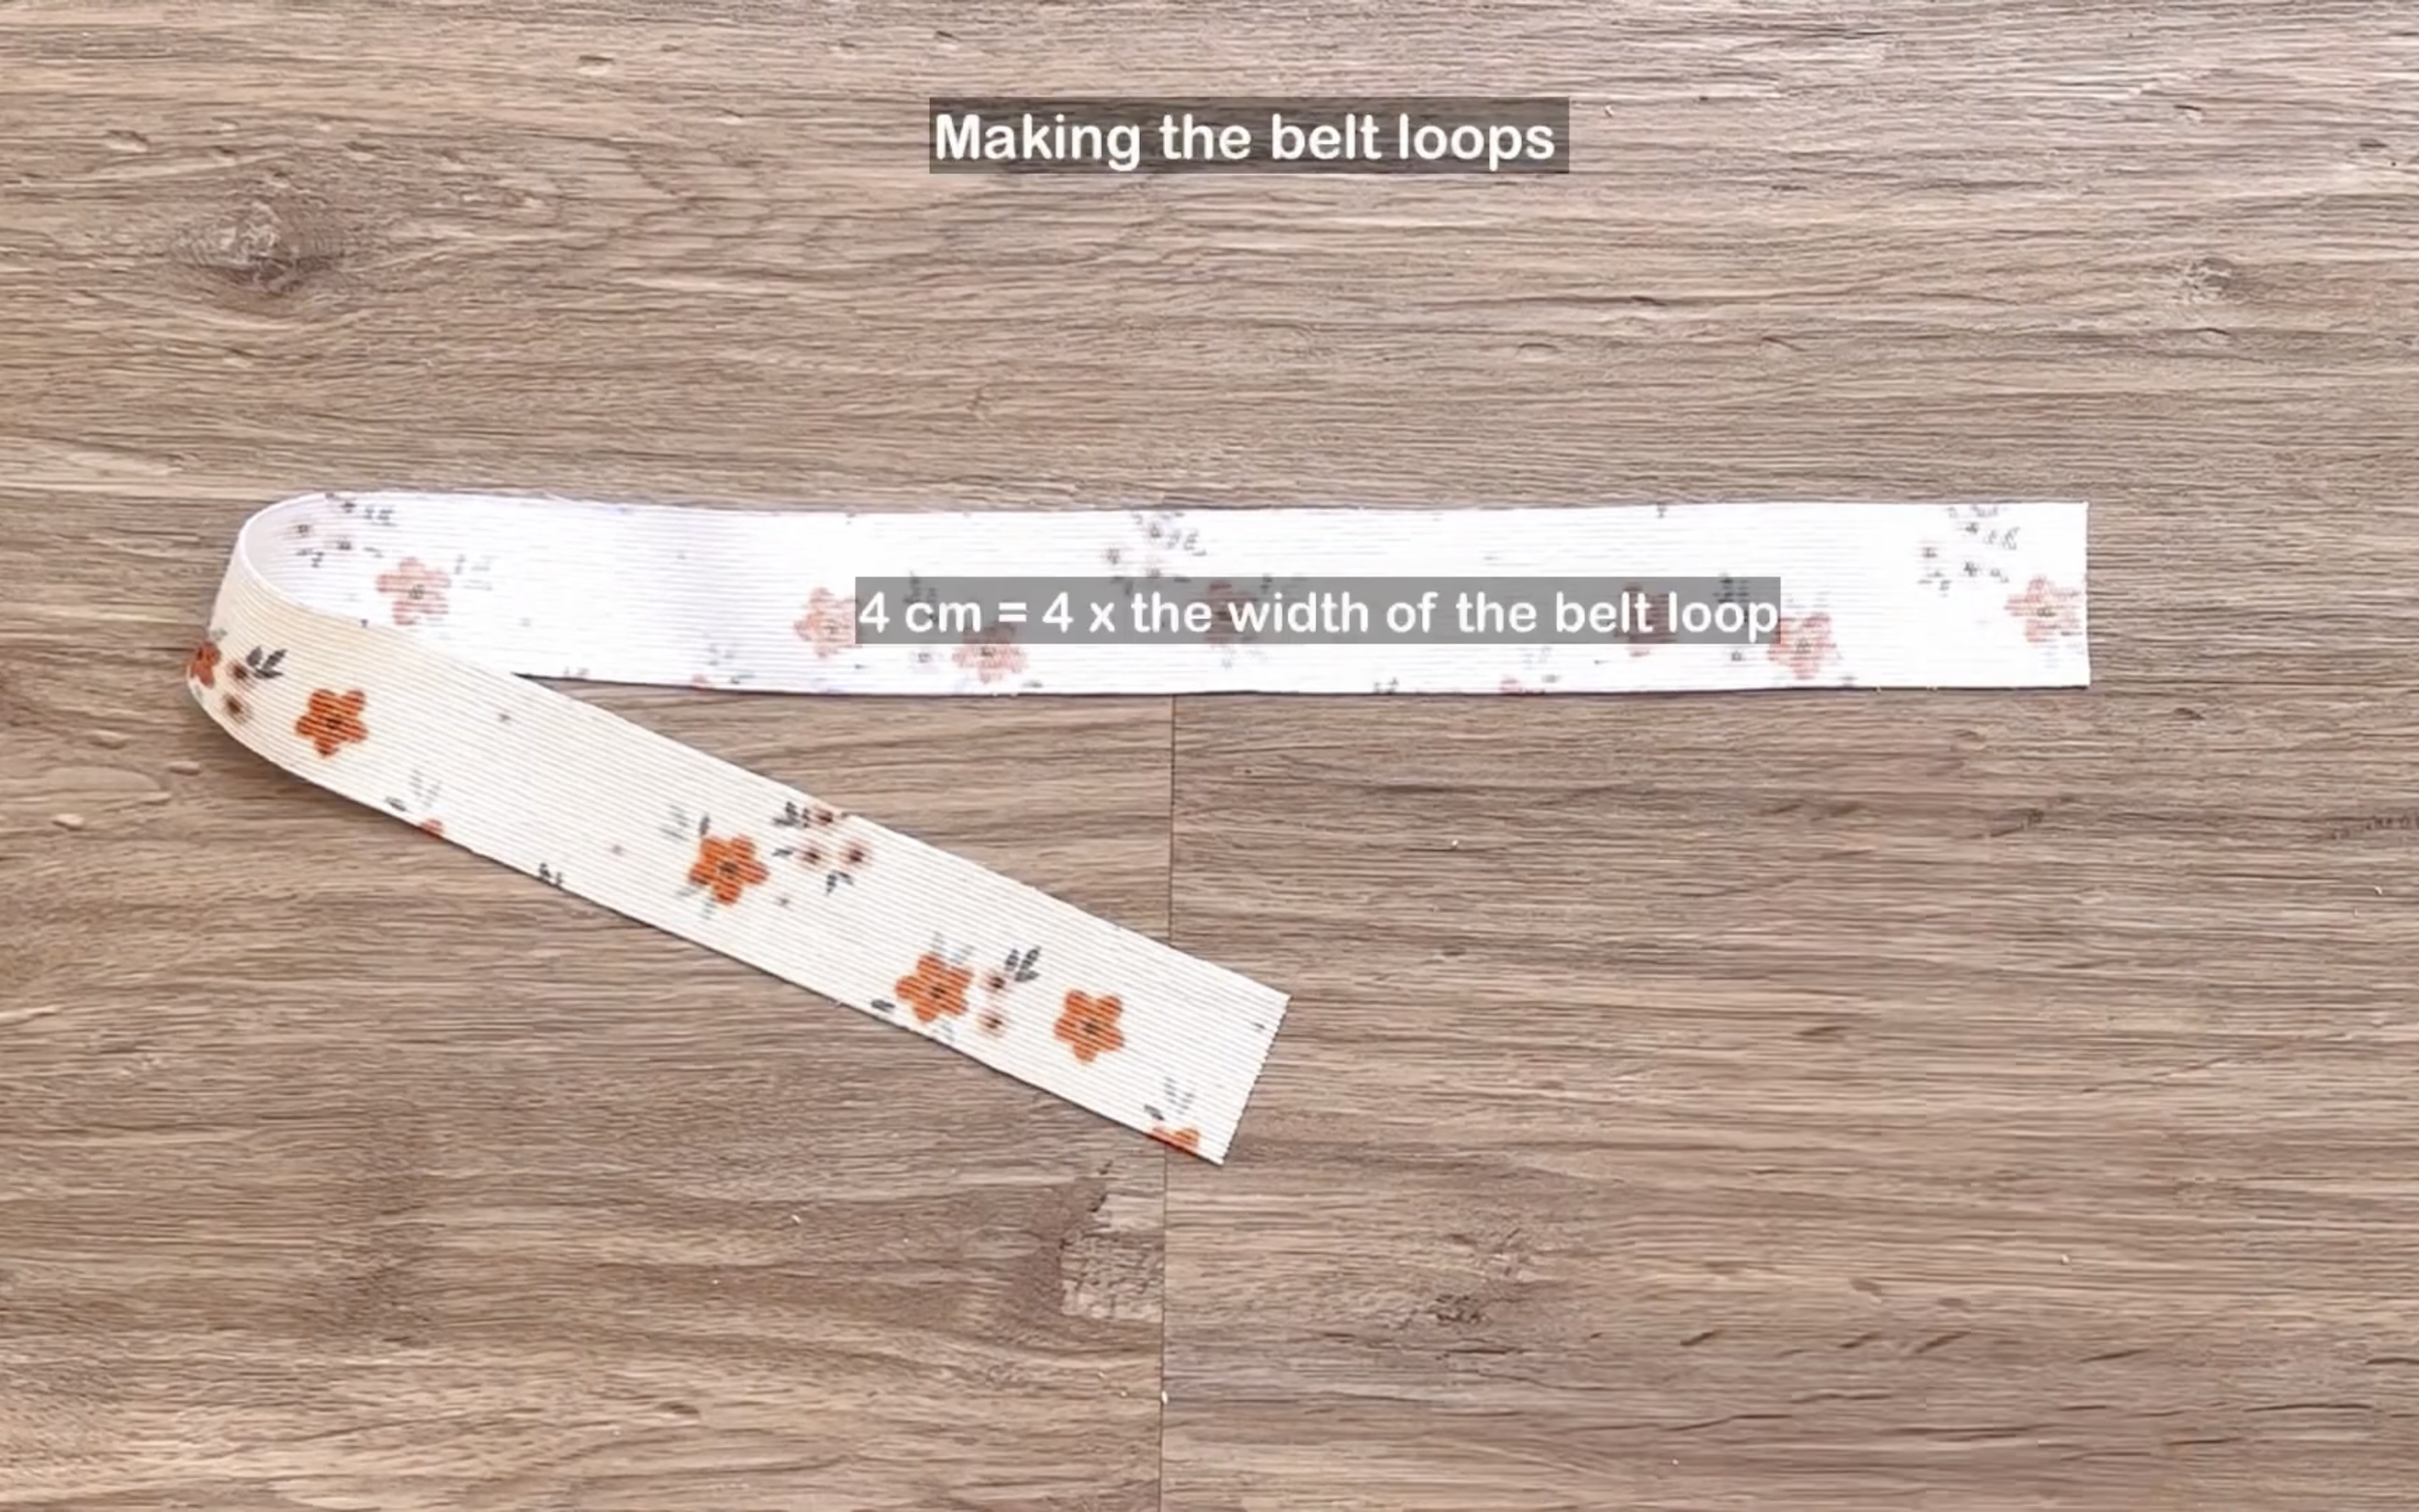
To make the belt loops, cut a fabric strip 4 cm wide, which is 4 times the desired width of the belt loop…
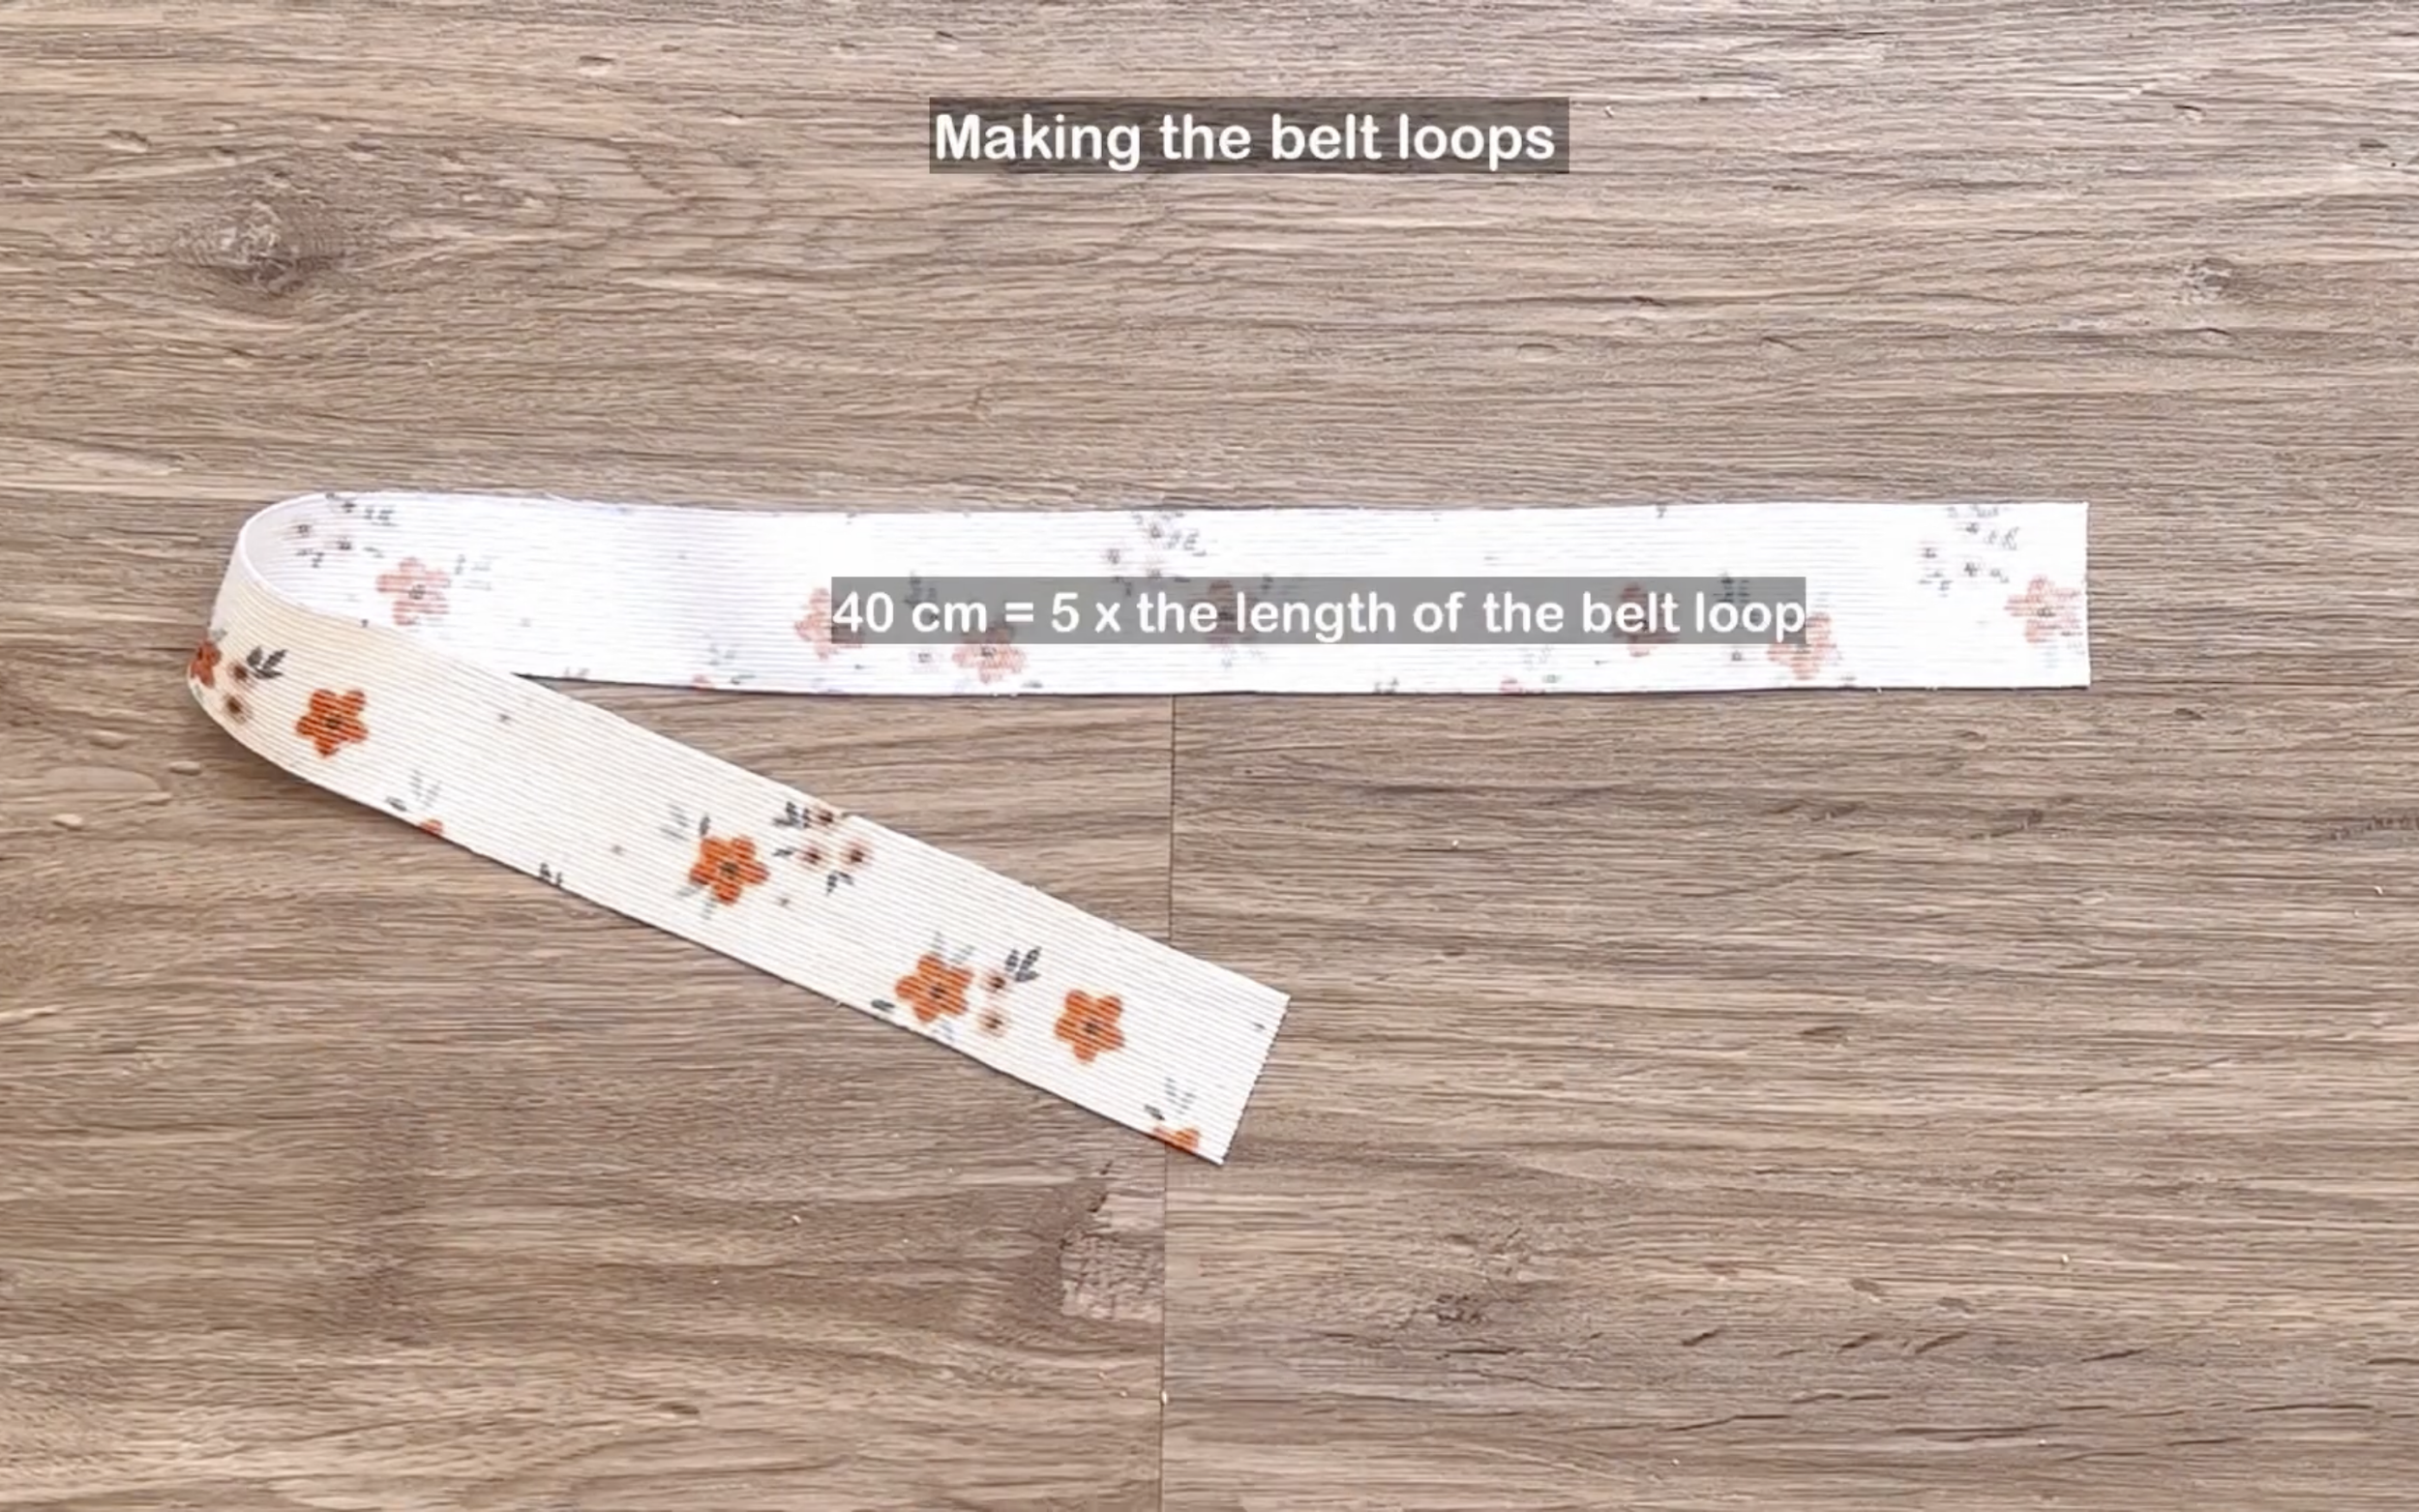
… and 40 cm long, which is 5 times the desired length of the belt loop.
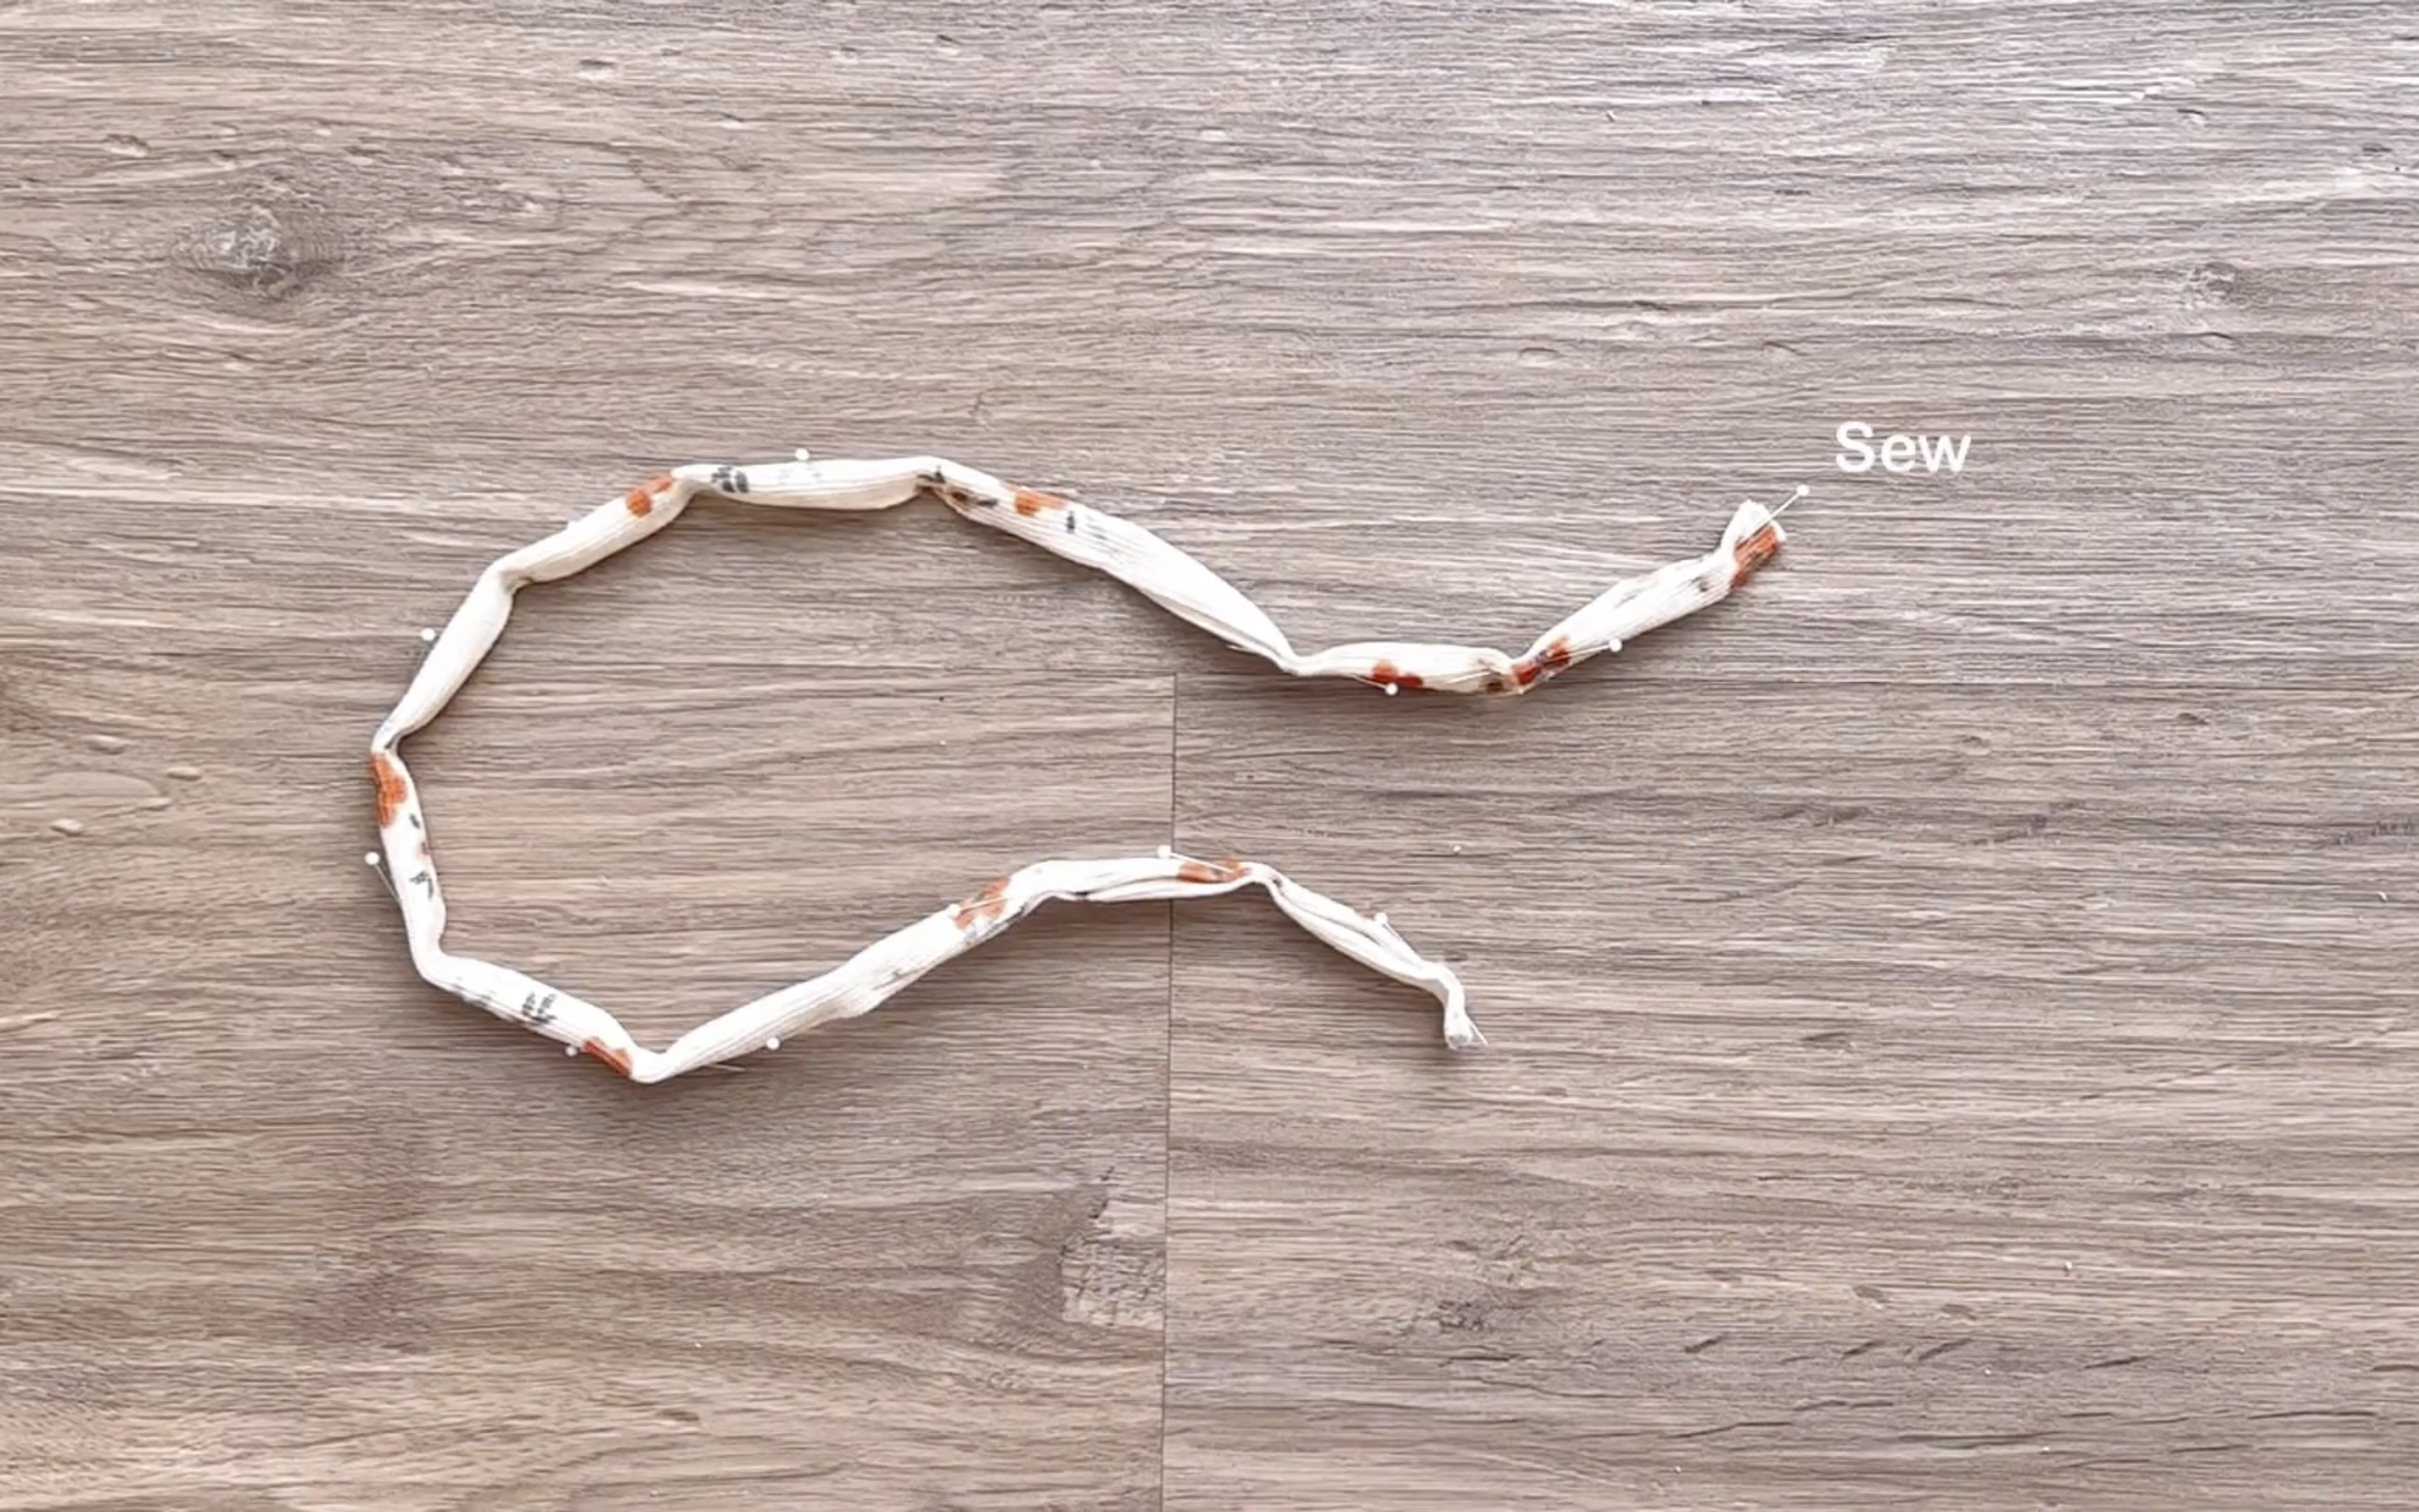
Fold the edges of the fabric toward the middle first, then fold again and sew.
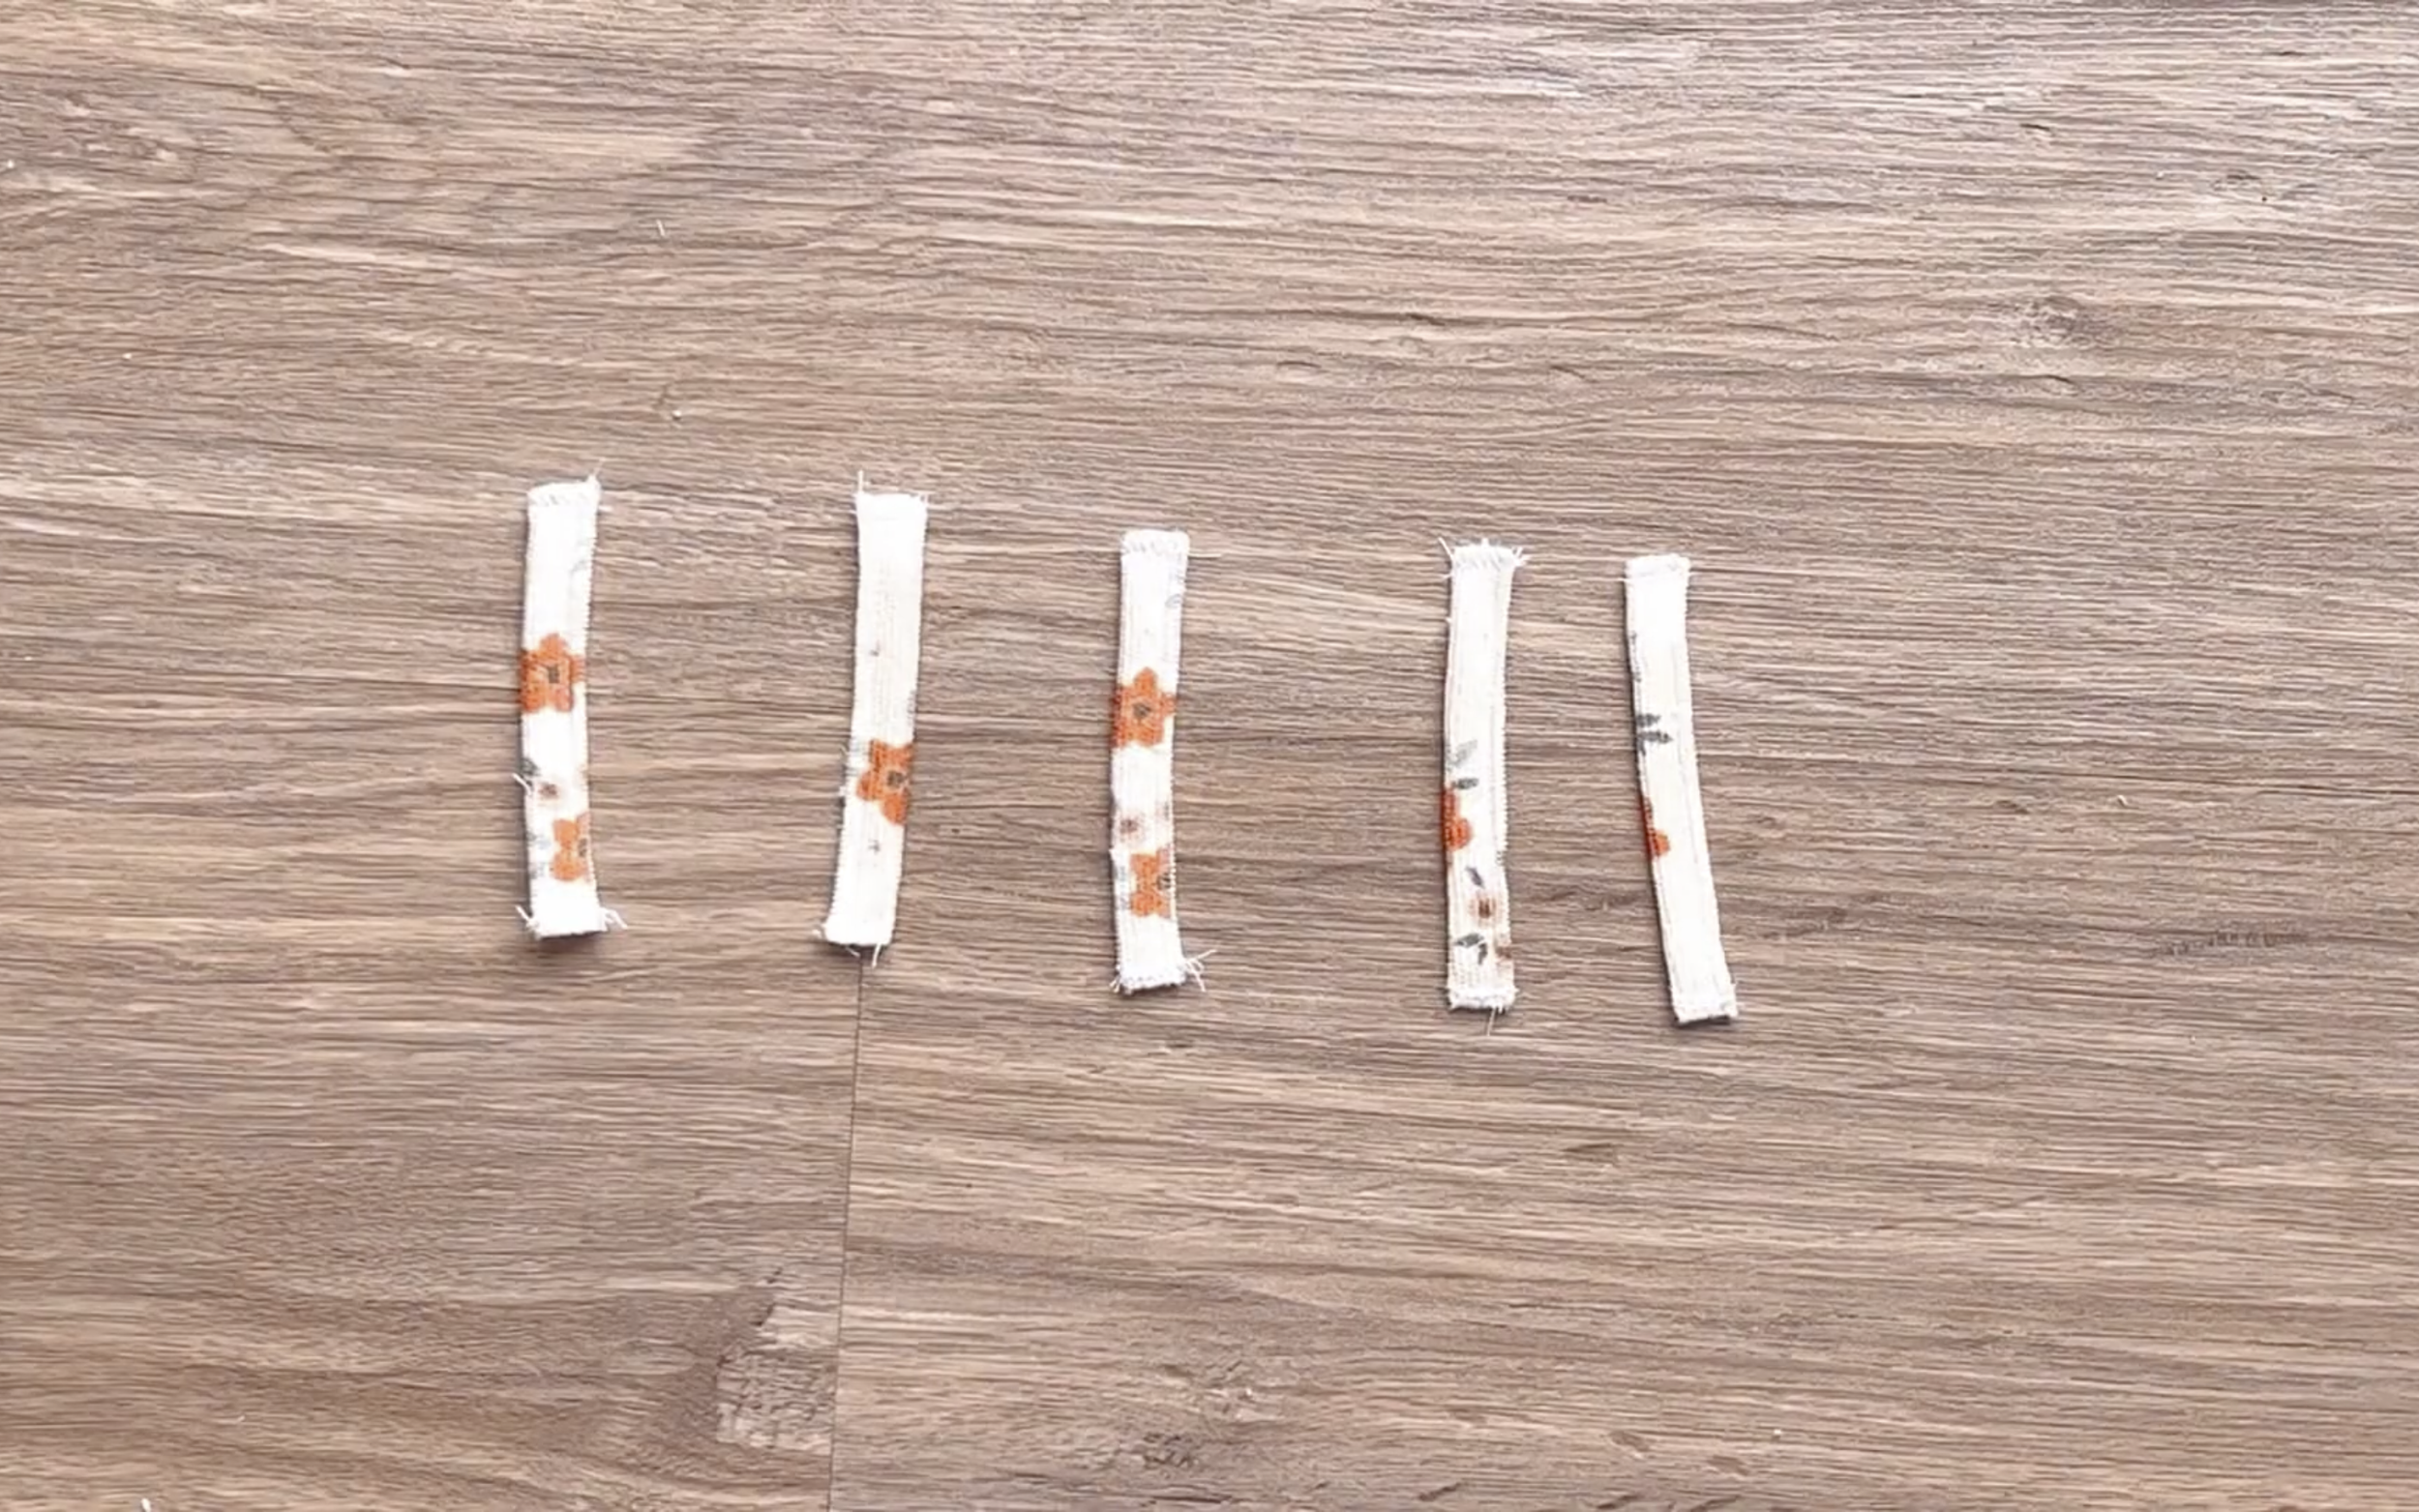
After that, cut the long strip into five pieces, each 8 cm long.
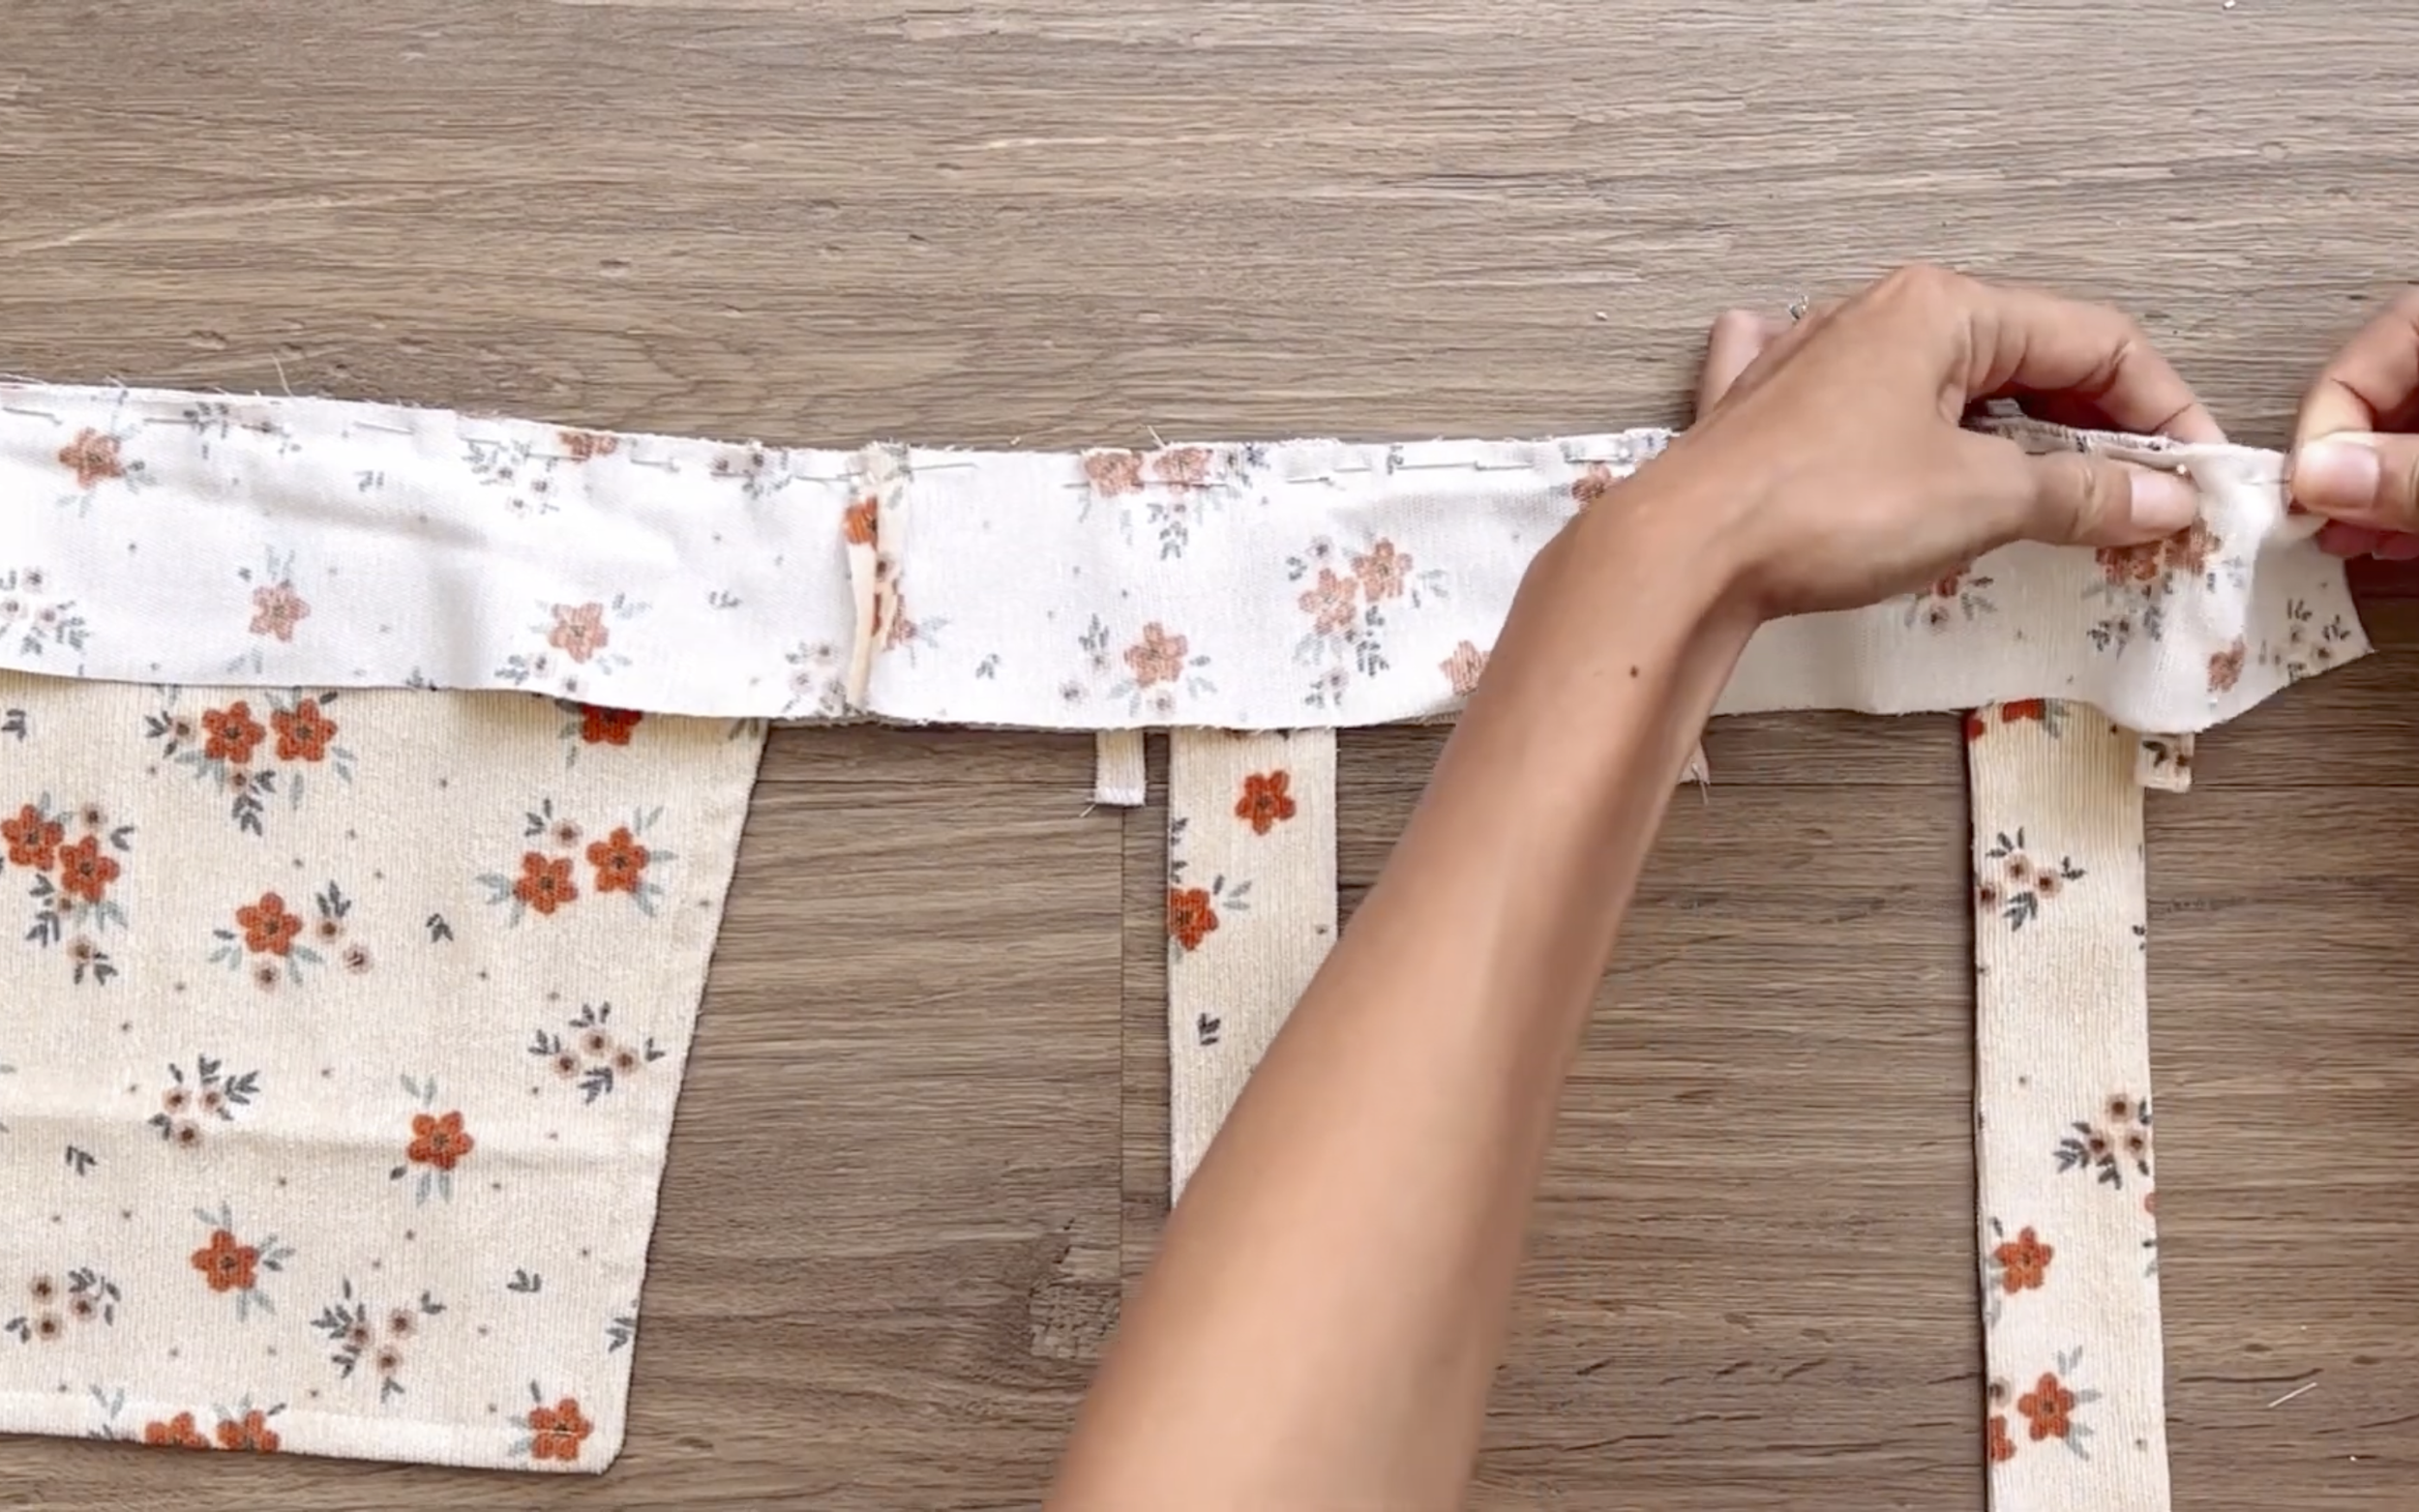
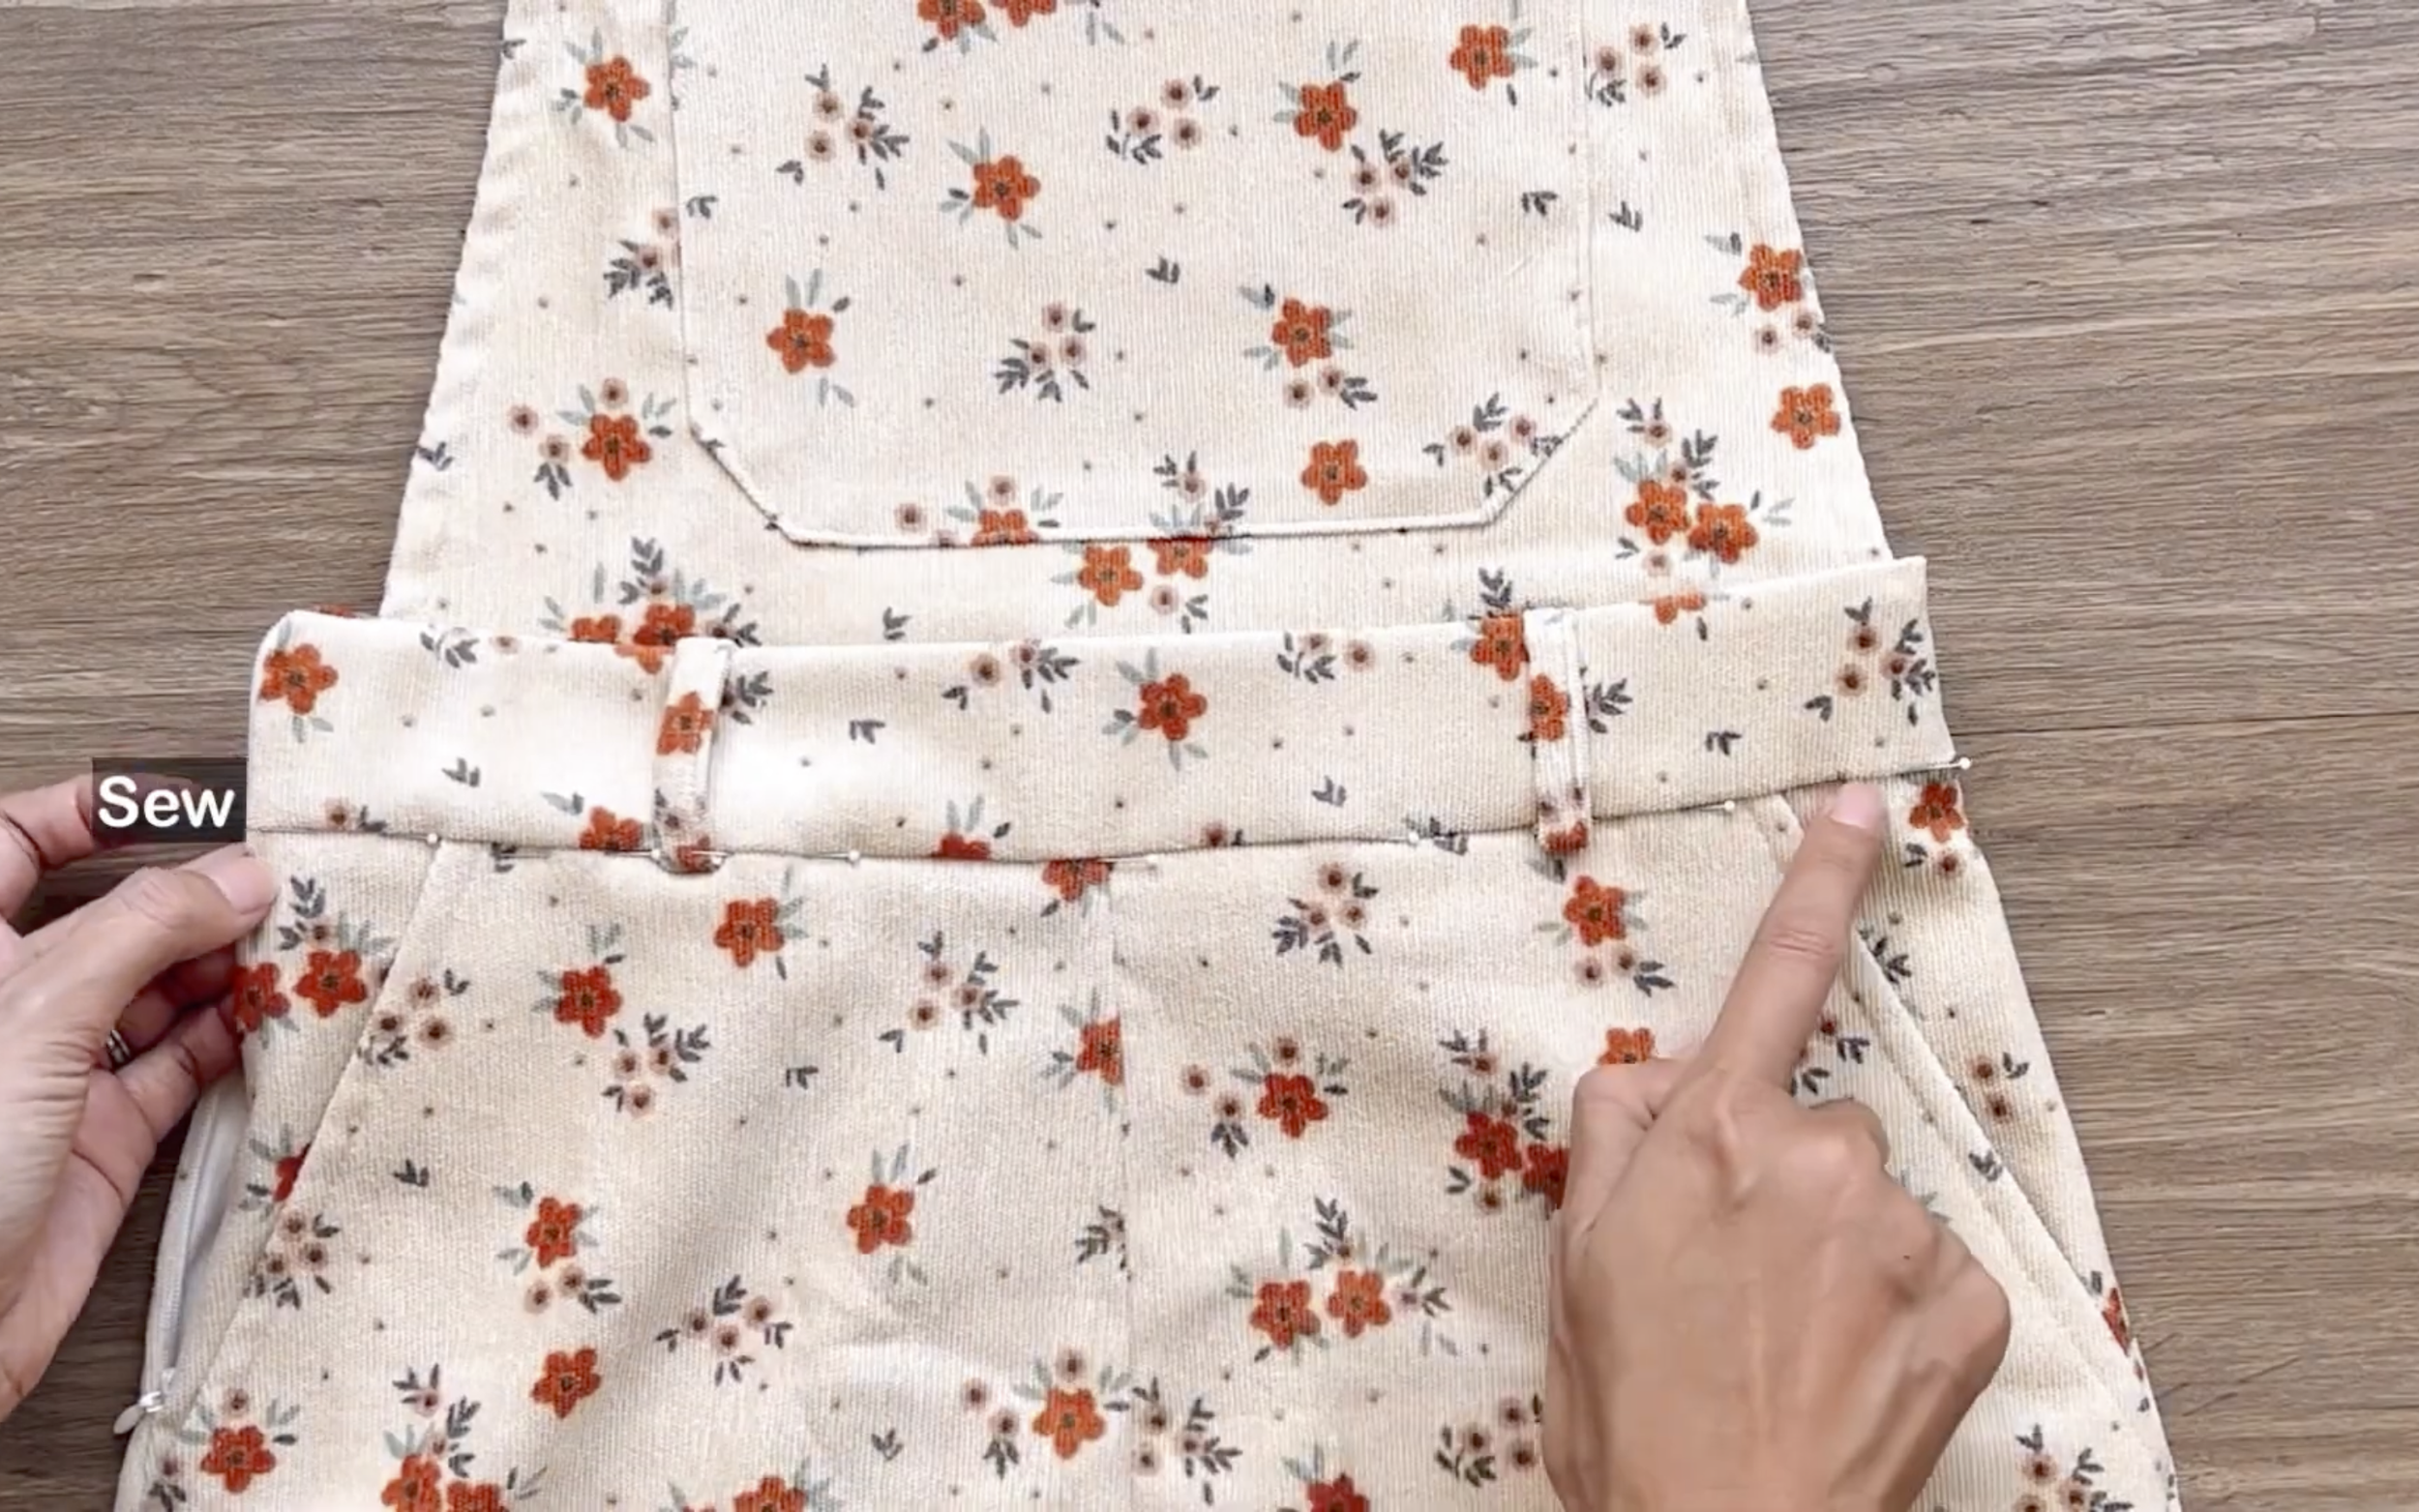
Attach one belt loop to the middle and two others to the sides of the waistband at the back.
Make sure the belt loops are centered between the two waistbands.
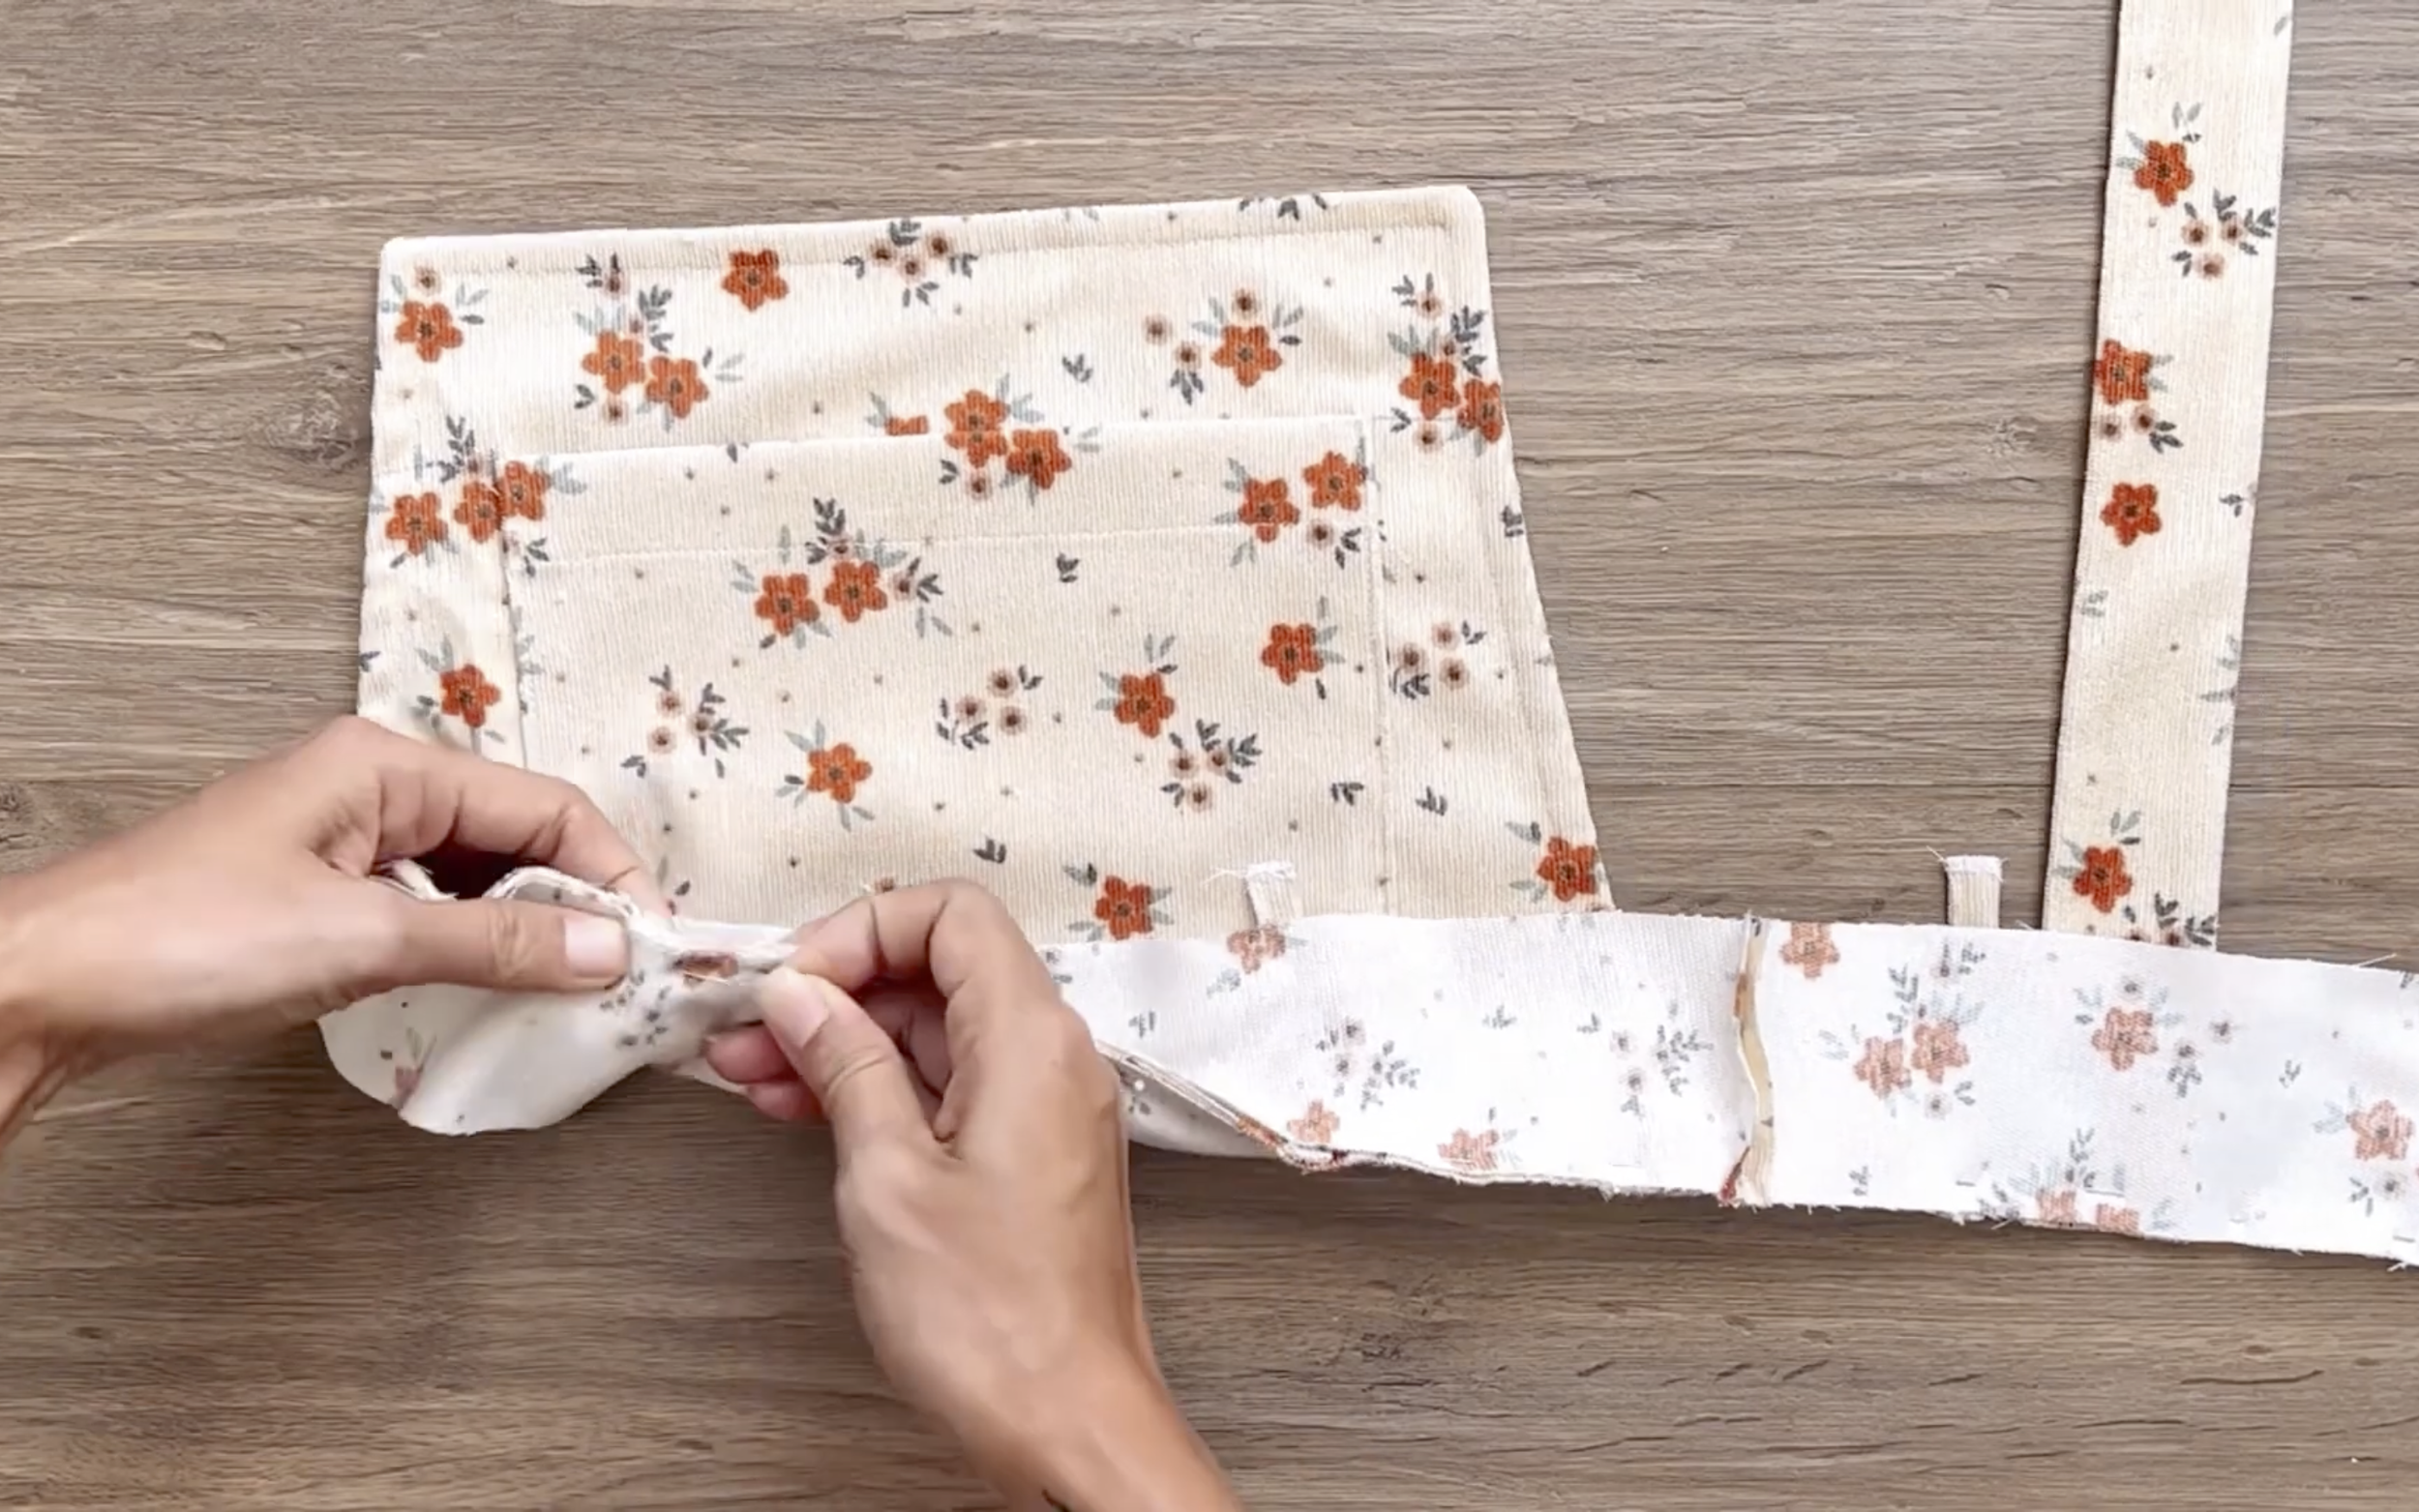
At the front, mark the positions for two belt loops and attach them.
Make sure the belt loops are centered between the outer waistband and the front bodice and sew them together.
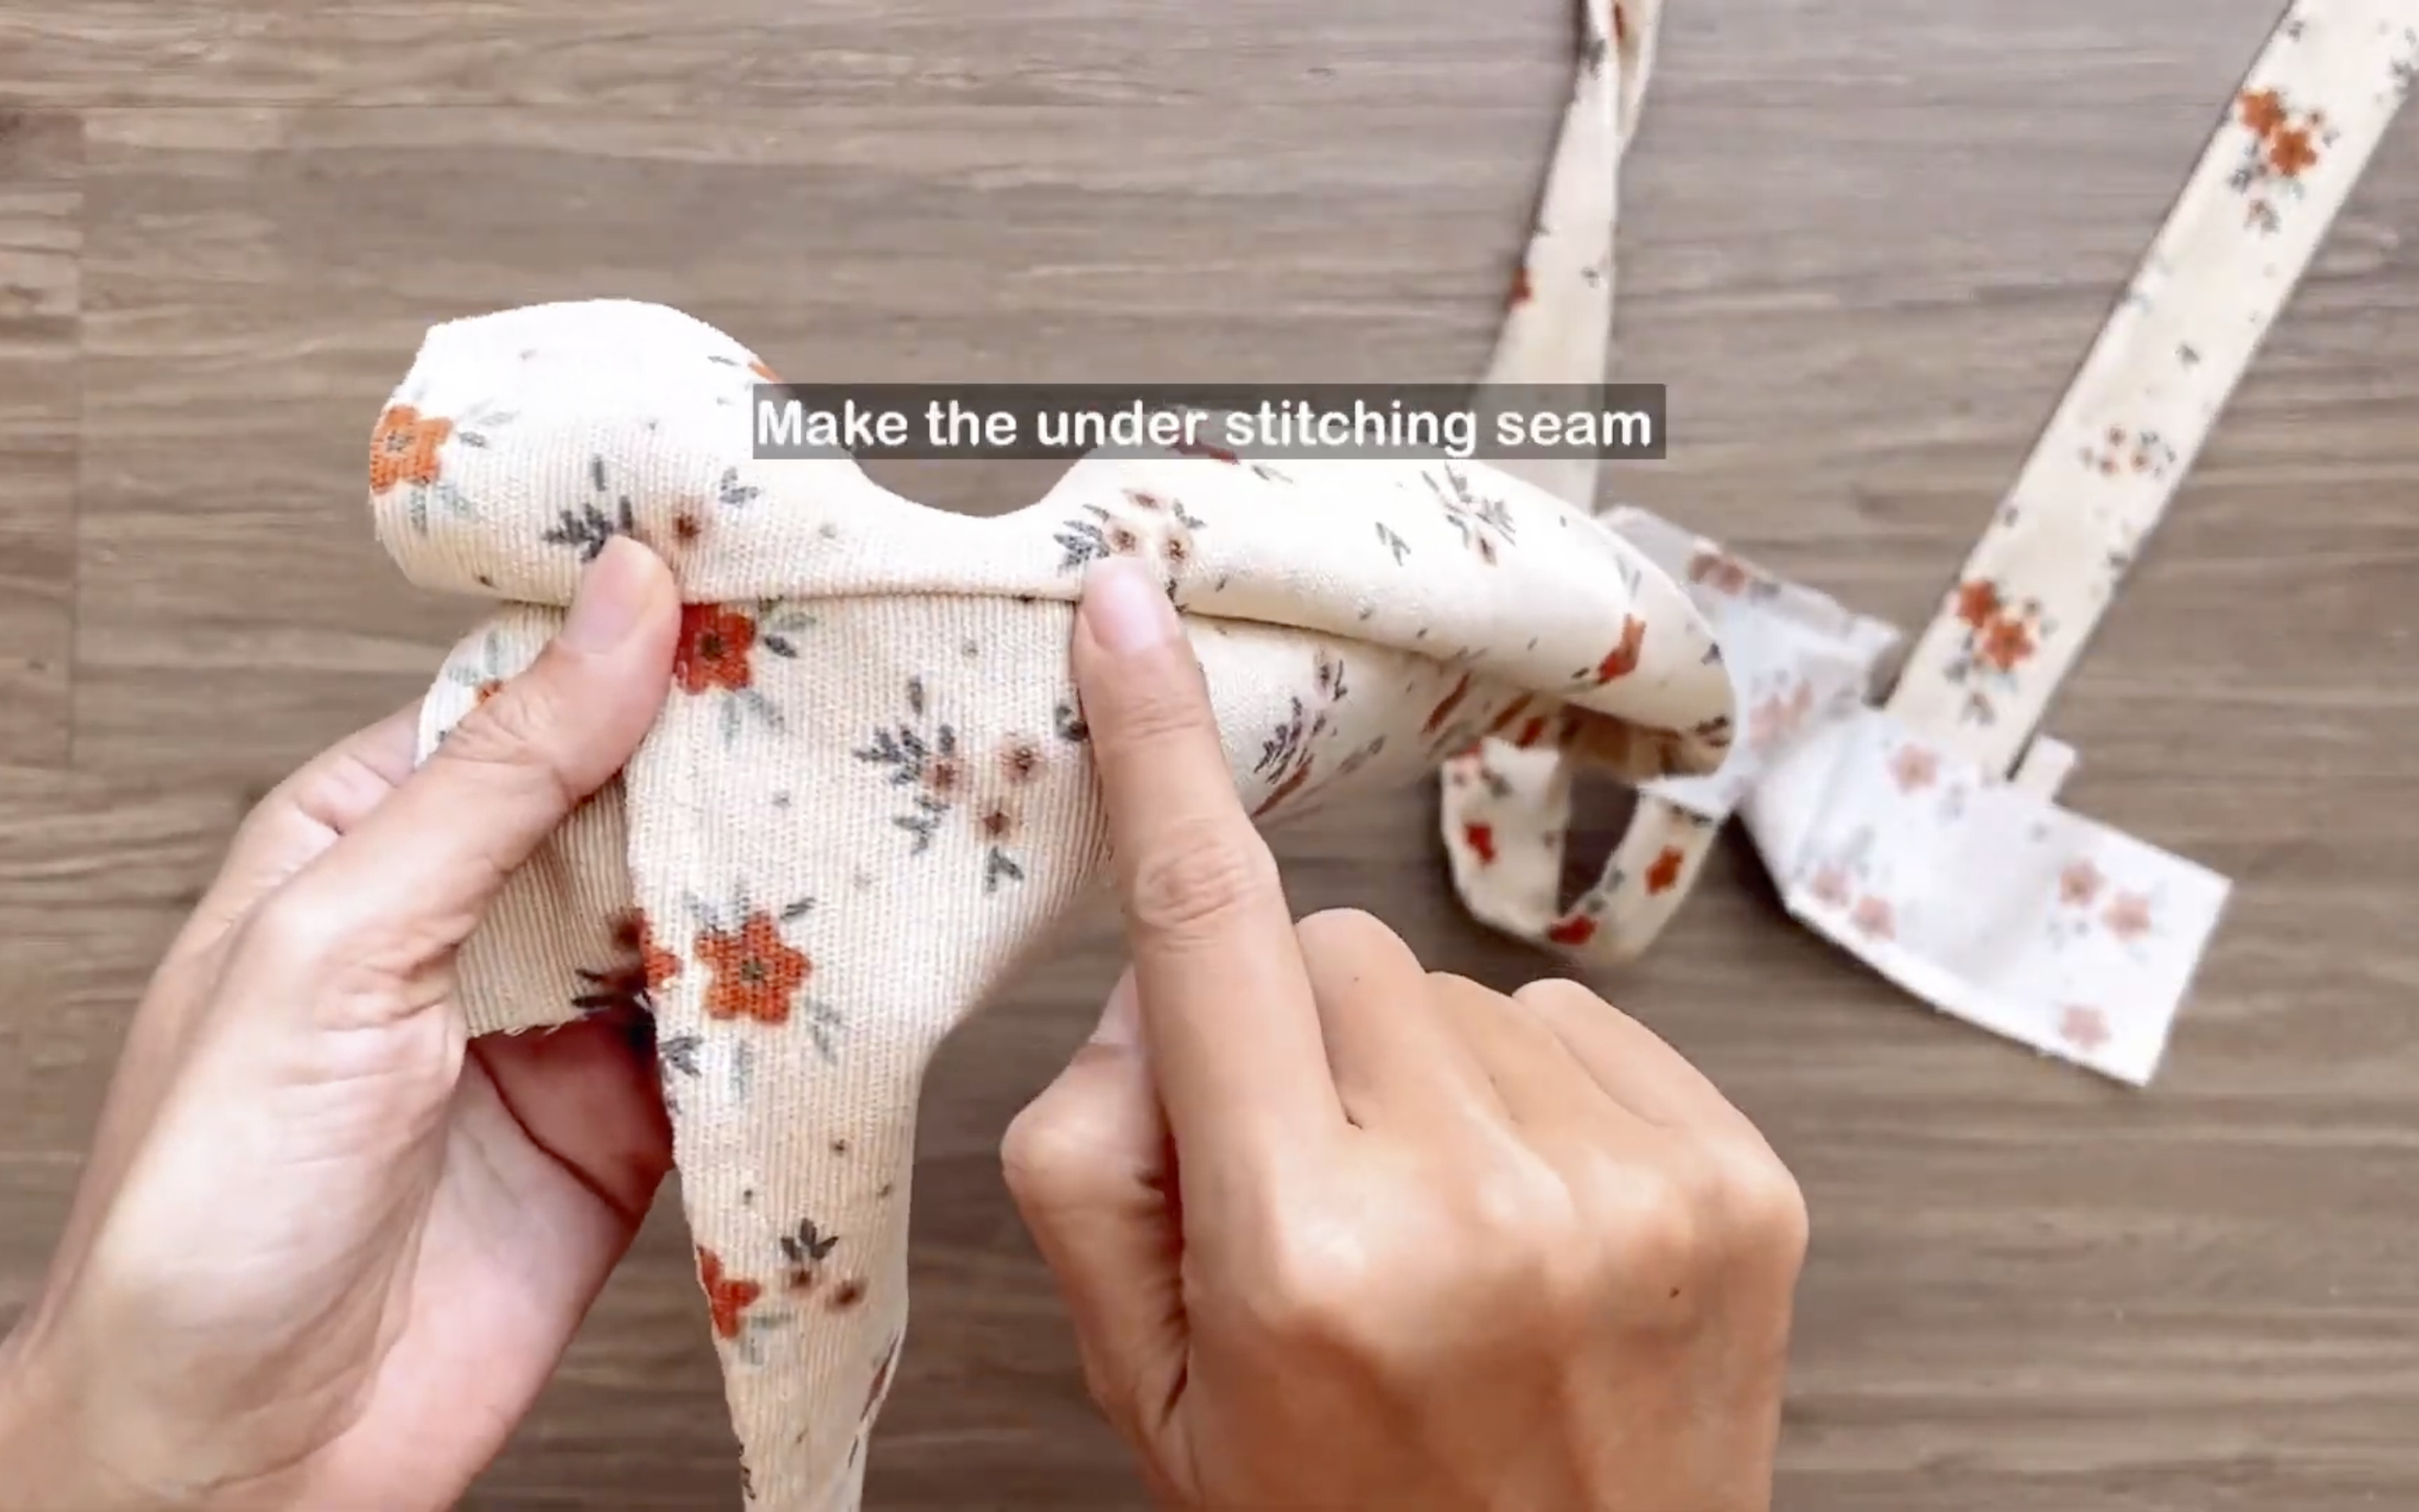
After the first seam, make an understitch seam to secure the end fabric to one side.
CONNECT THE BODICE AND THE PANTS
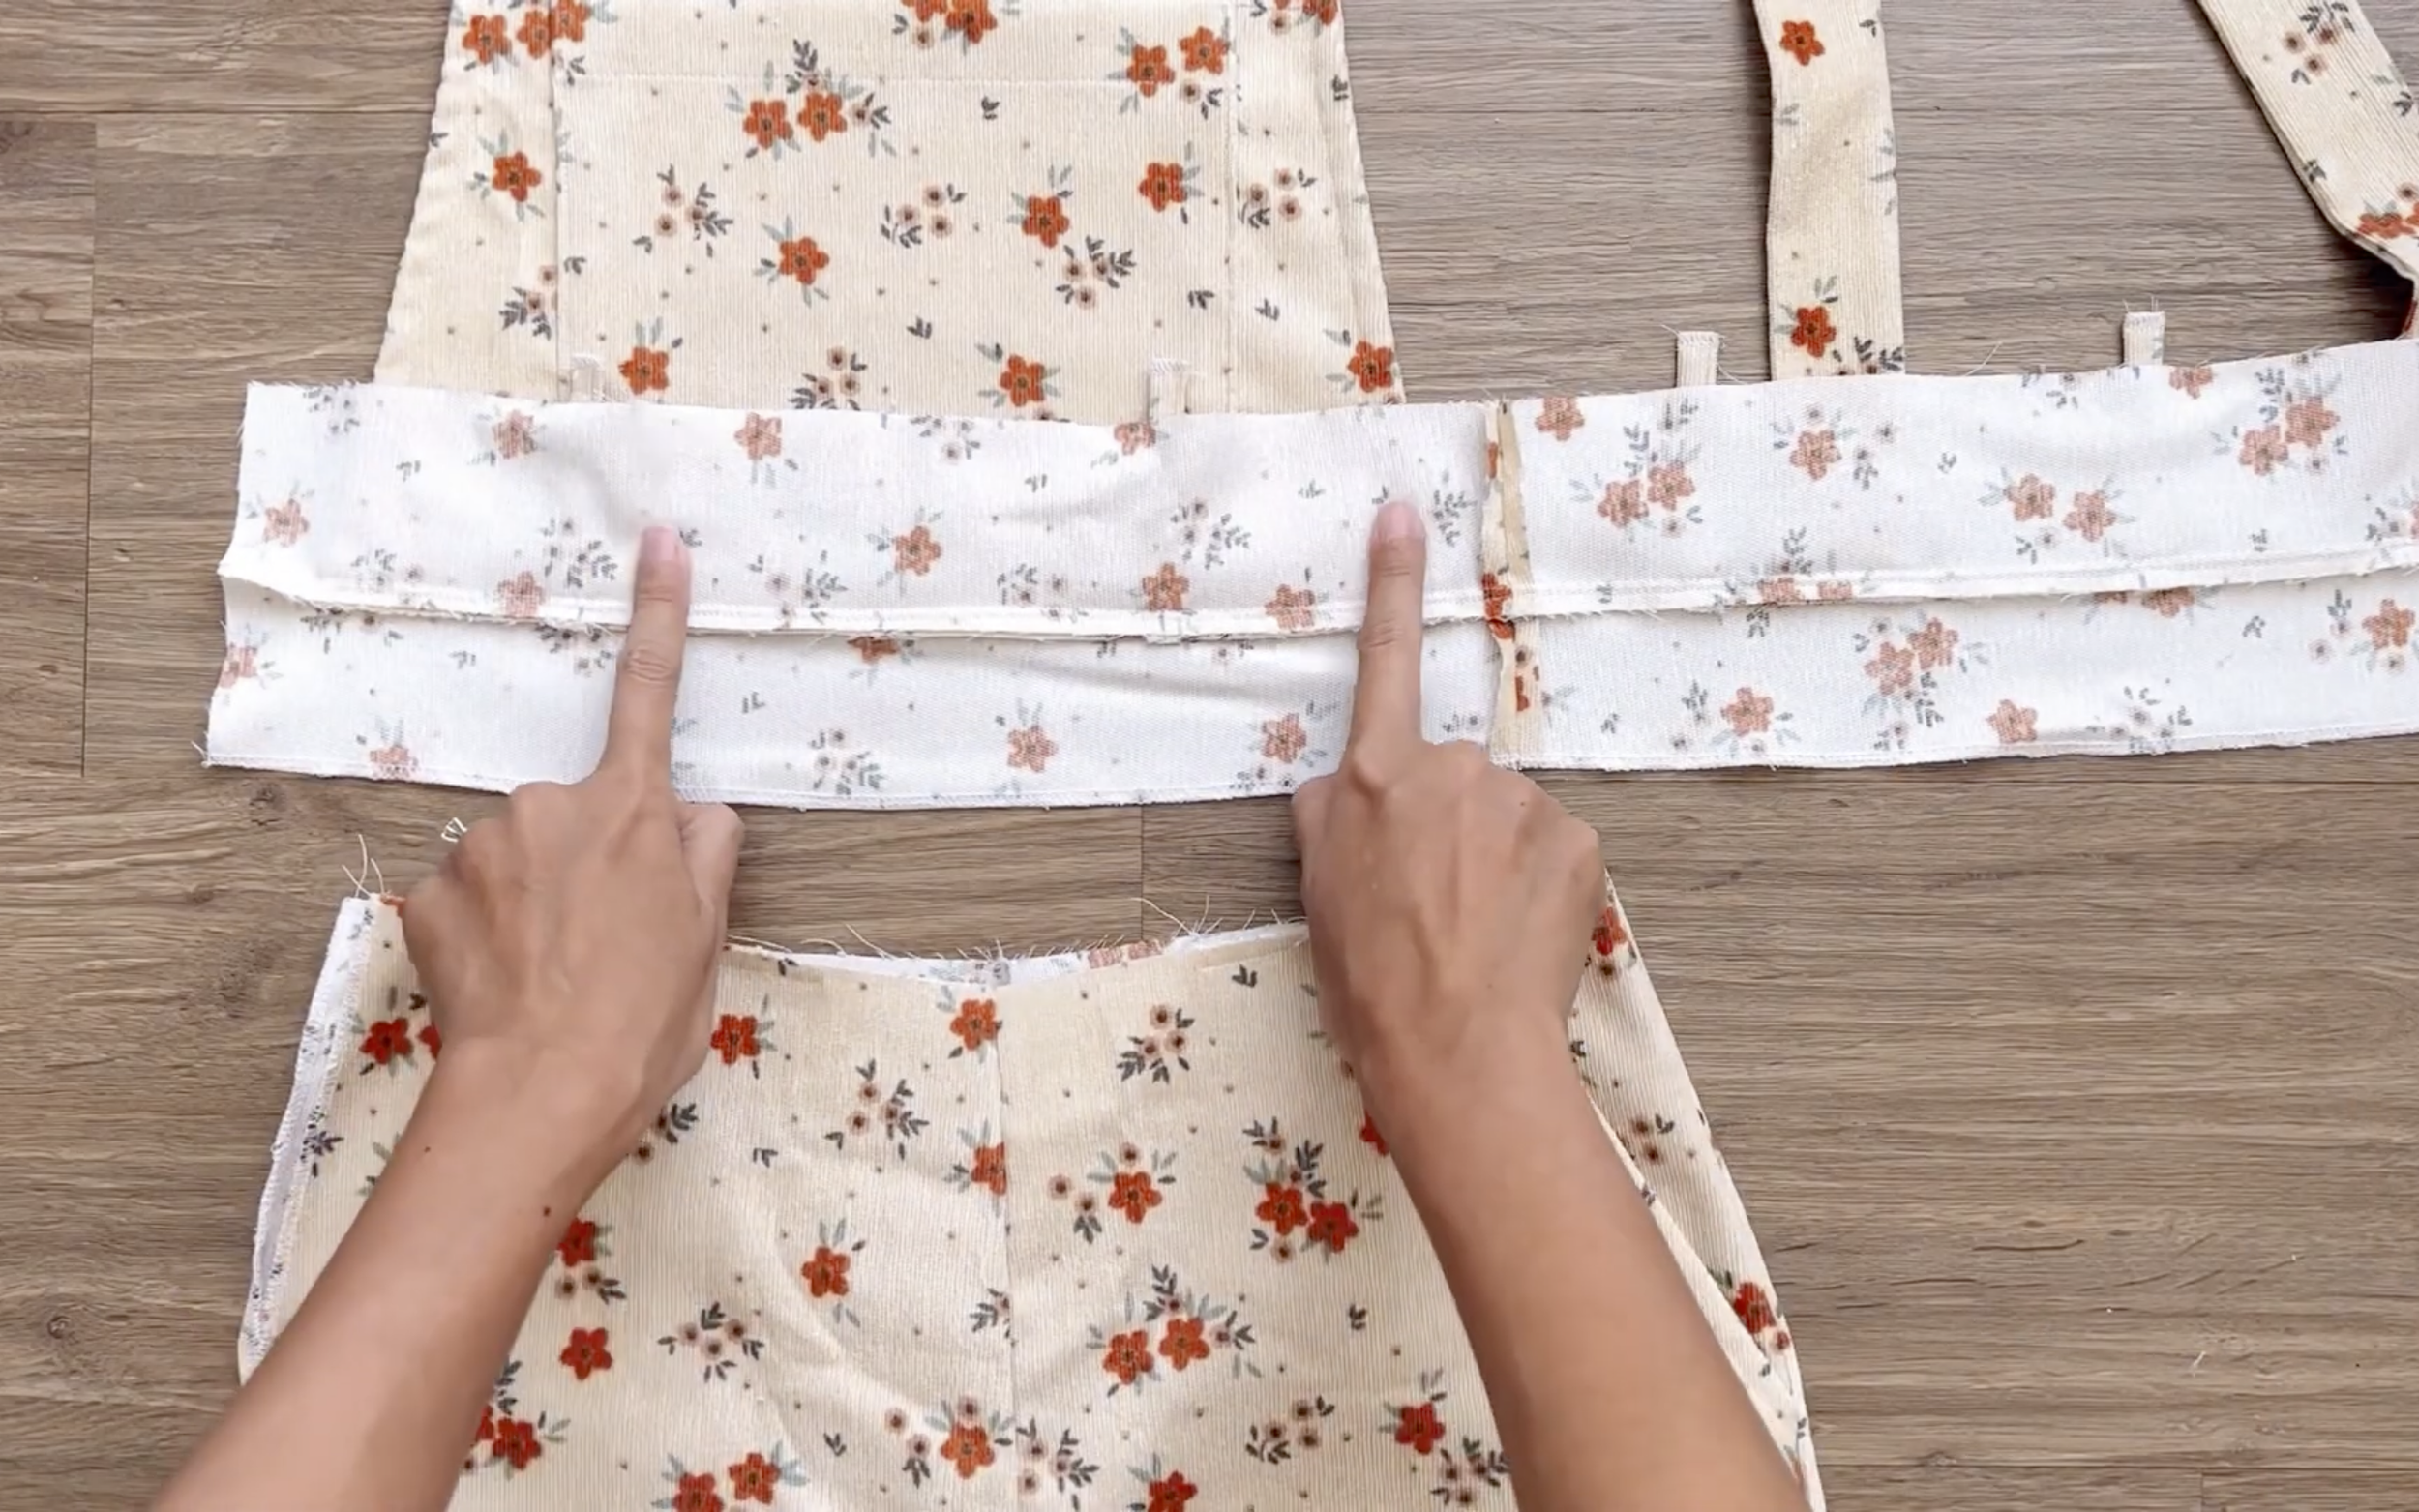
Now, connect the bodice to the pants at the waist.
First, attach the bottom waistband of the outer piece to the waistline of the pants.
Remember to add the other end of the belt loop before sewing.
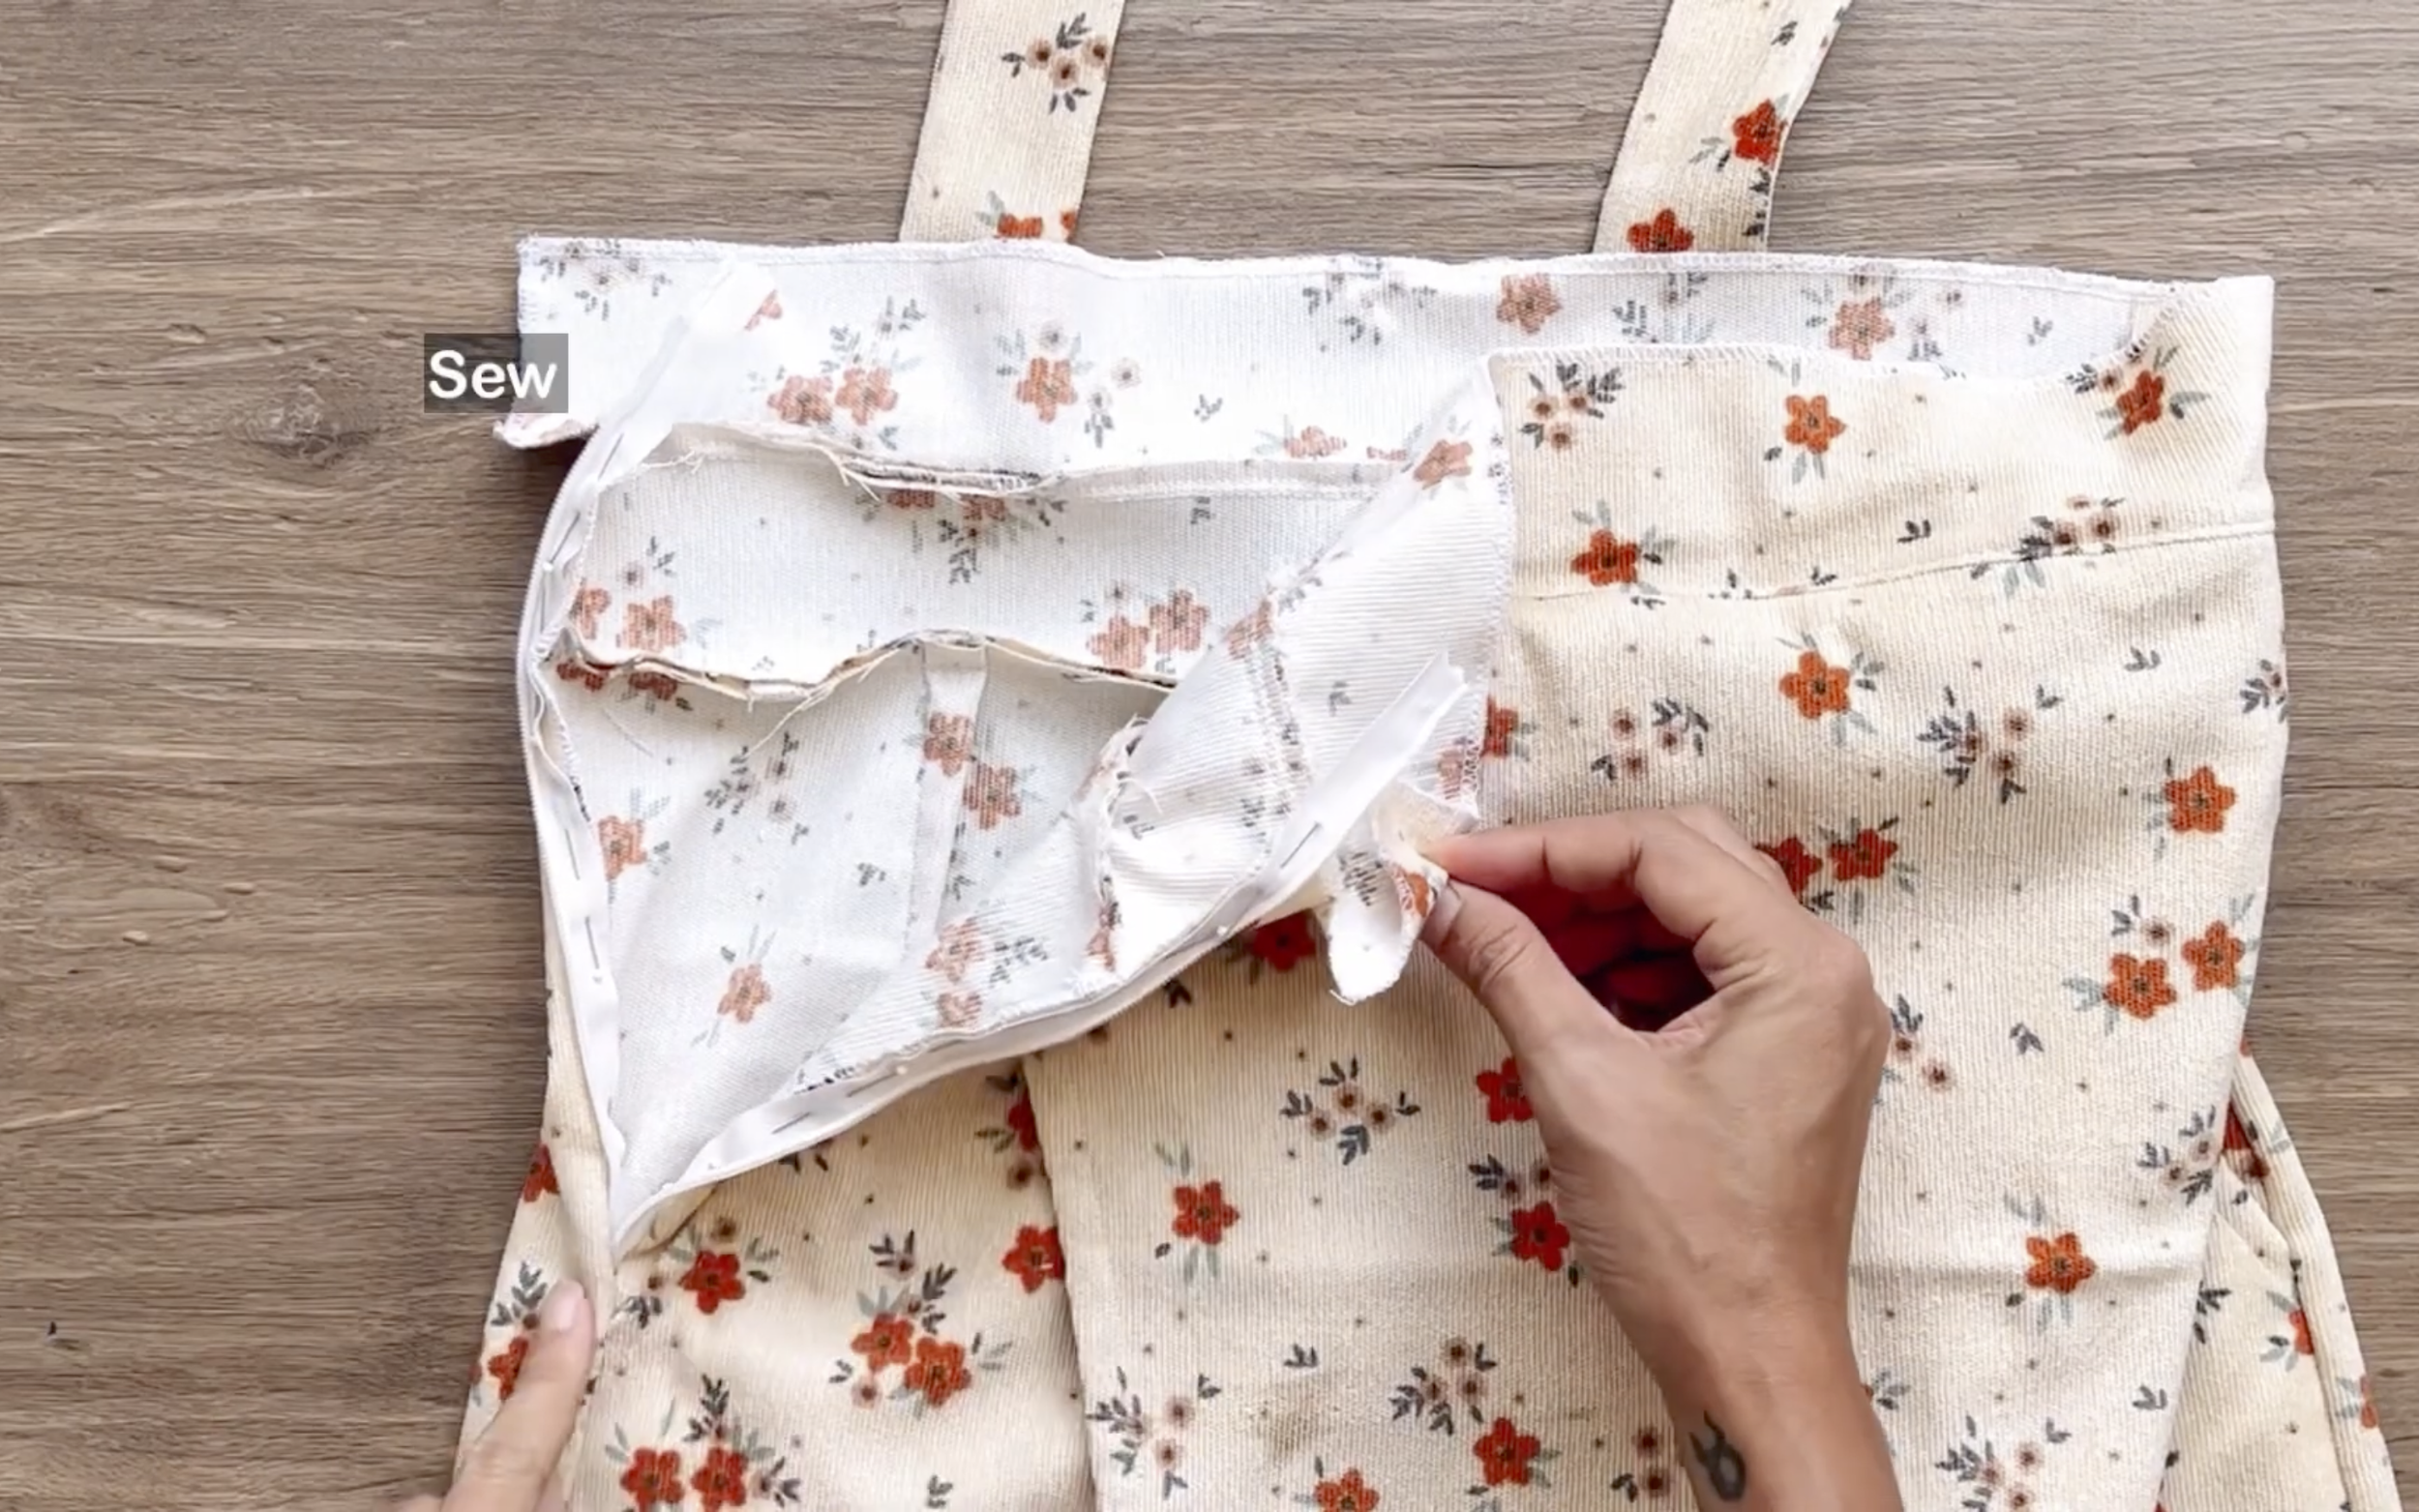
After that, use a 25 cm invisible zipper for the open part of the sideline of the pants.

After sewing, connect the remaining part of the inside waistband to the outer waistband so that the top of the zipper is centered between them.
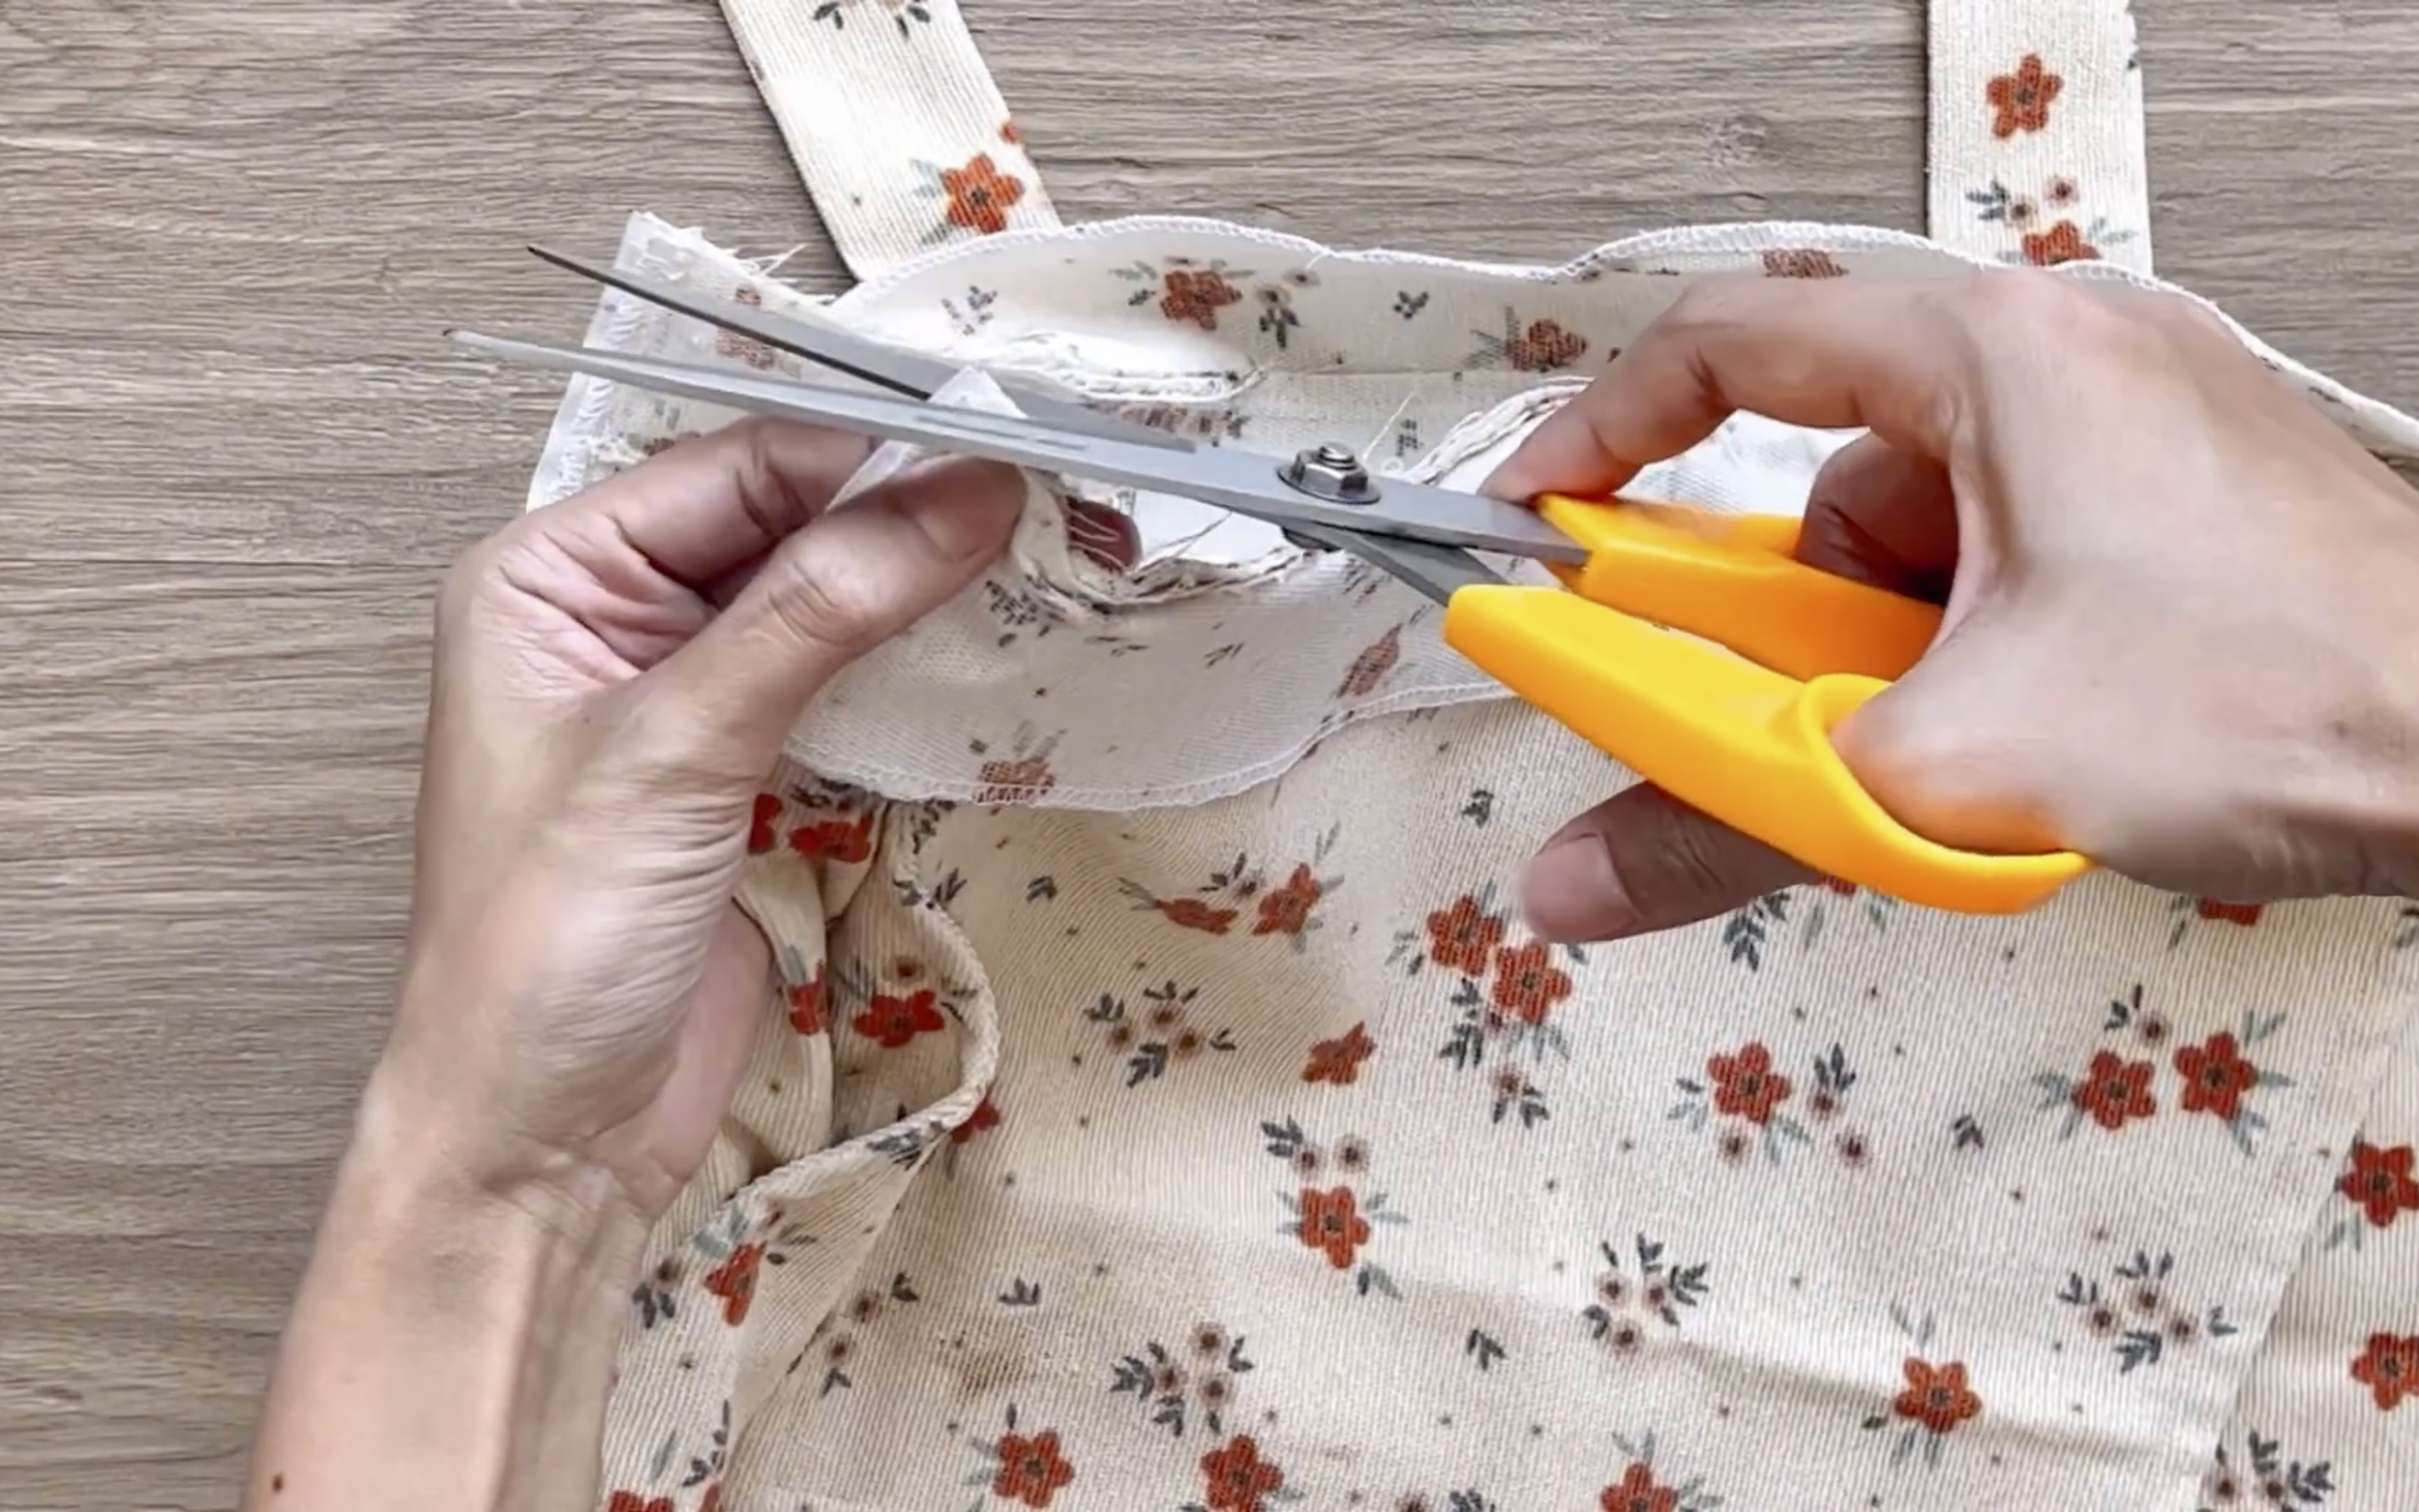
Make small cuts before turning the waistband inside out to make the top of the zipper look cleaner.
Then connect the bottom of the inside waistband to the outside waistband, sewing over the first seam to make the waistband look nicer.
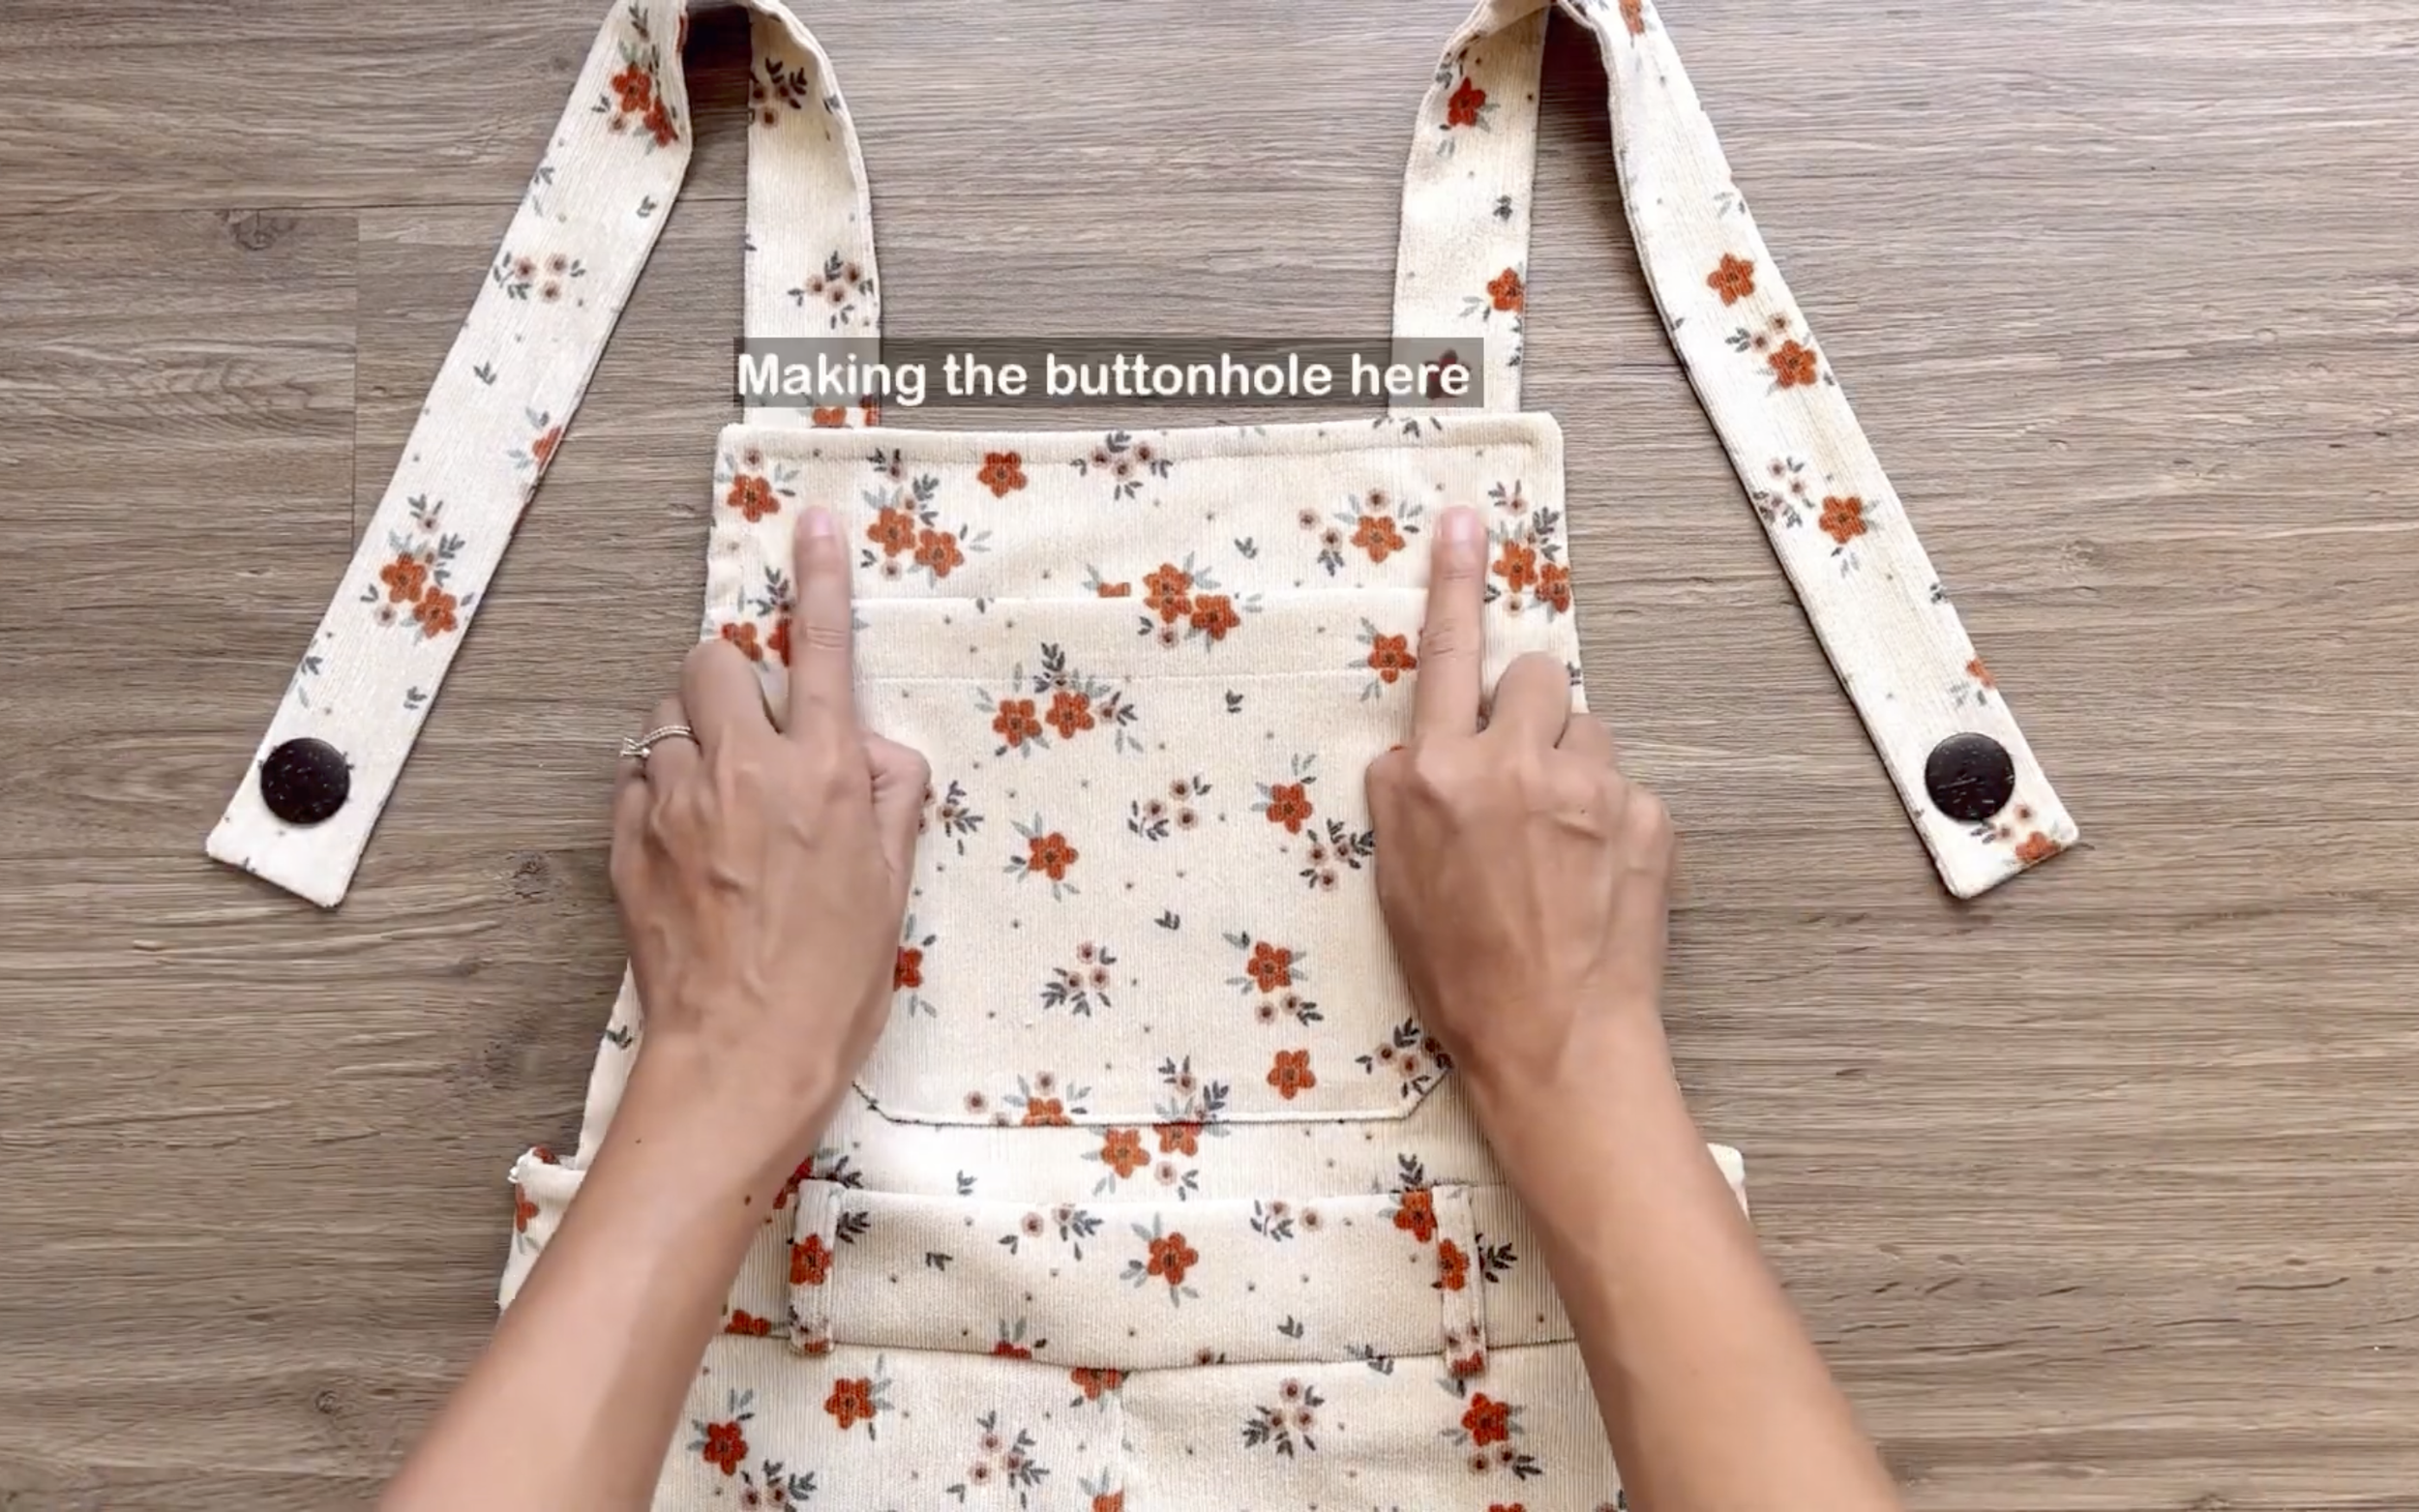
The final step is adding the button to the end of the strap and creating the buttonhole at the top of the front bodice.

Making my dream jumpsuit (high waisted, wide leg pants, side pocket, side zipper) | Sewing tutorial
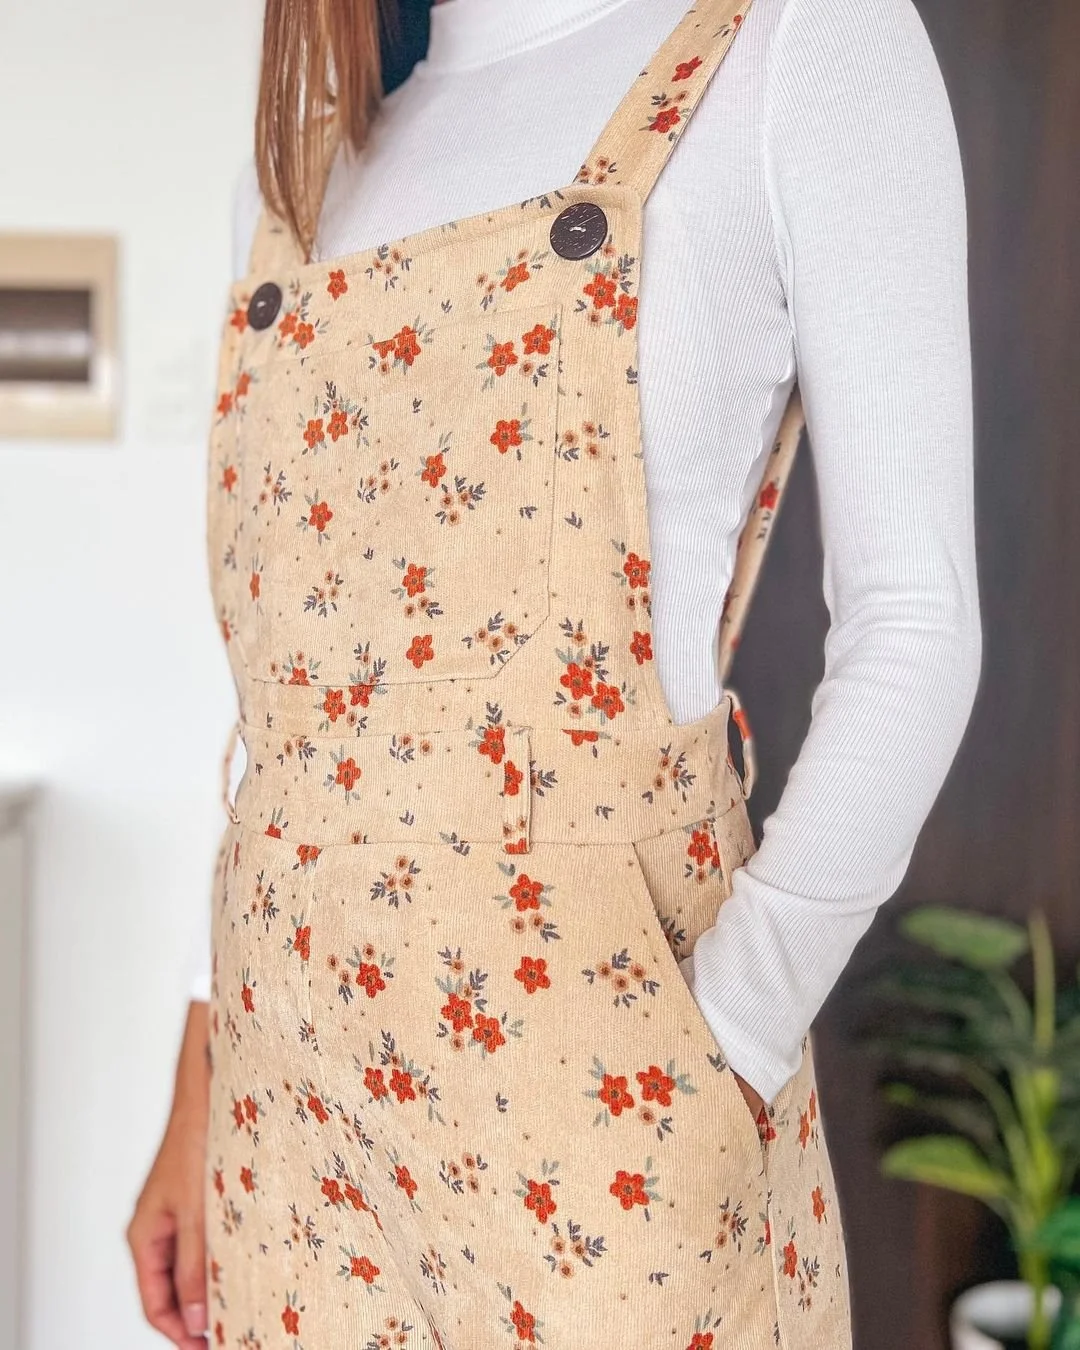
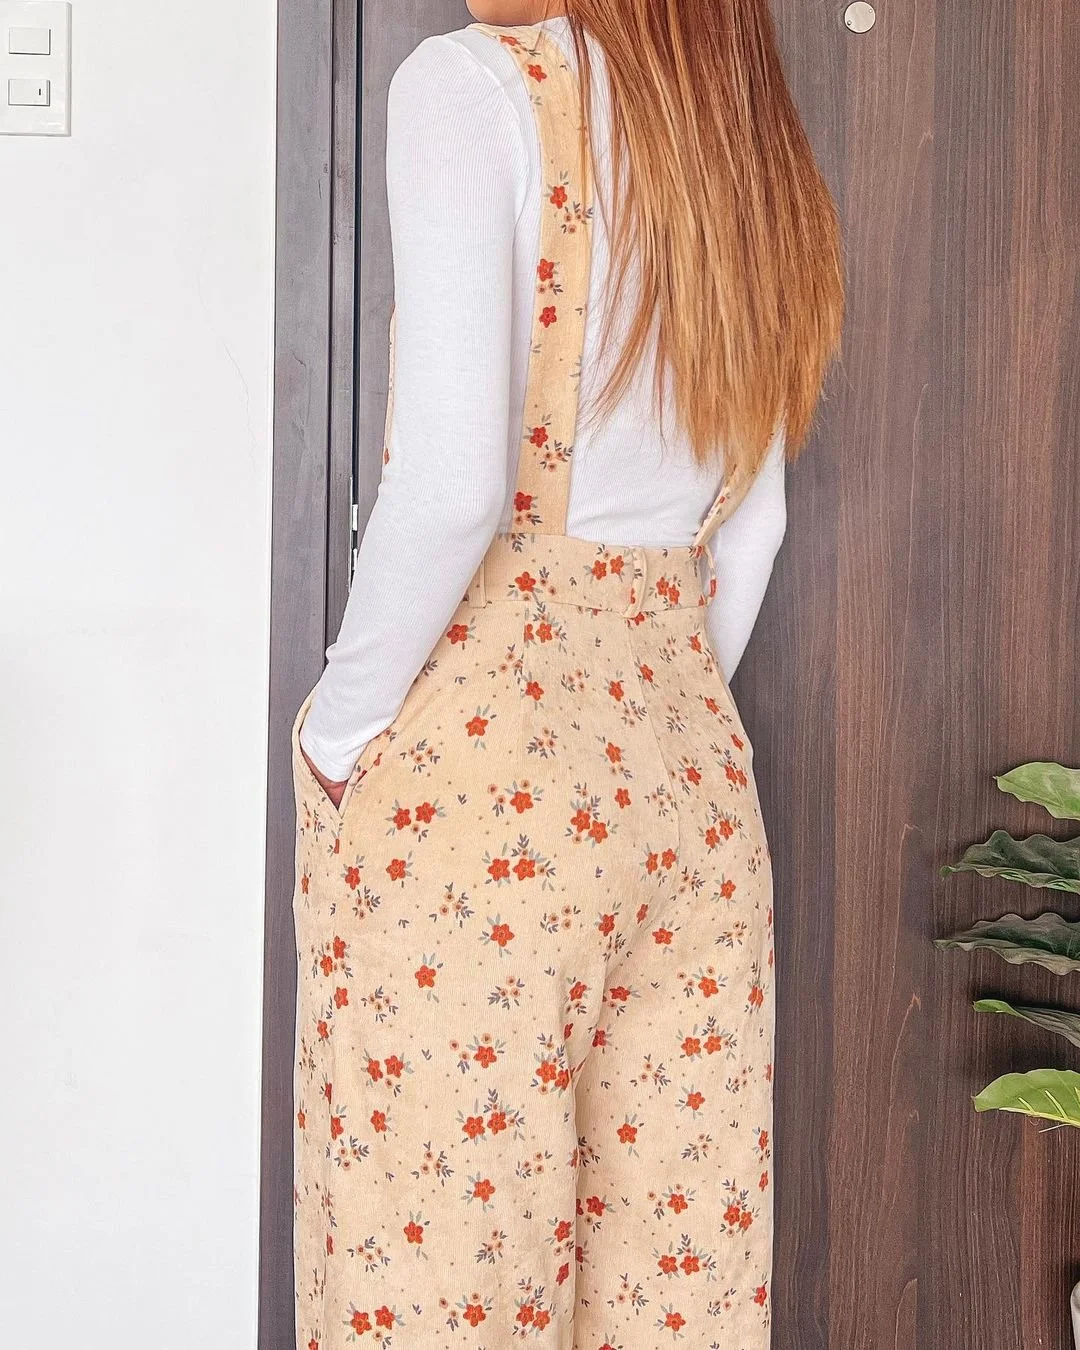
And that’s the finished DIY!
Here’s my dream jumpsuit—the fitted look, combined with an active vibe and vintage feel from the fabric, makes it so special. It’s truly like a dream!
I hope you found my step-by-step guide helpful and inspiring.
If you’re interested in making your own, give it a try and let me know how it goes!
Until then, happy sewing!