DIY 2 Pieces set from Men's shirts | How I transformed 2 men's shirts into a beautiful matching set
DIY 2 Pieces set from Men's shirts | How I transformed 2 men's shirts into a beautiful matching set
Welcome or welcome back to my channel!
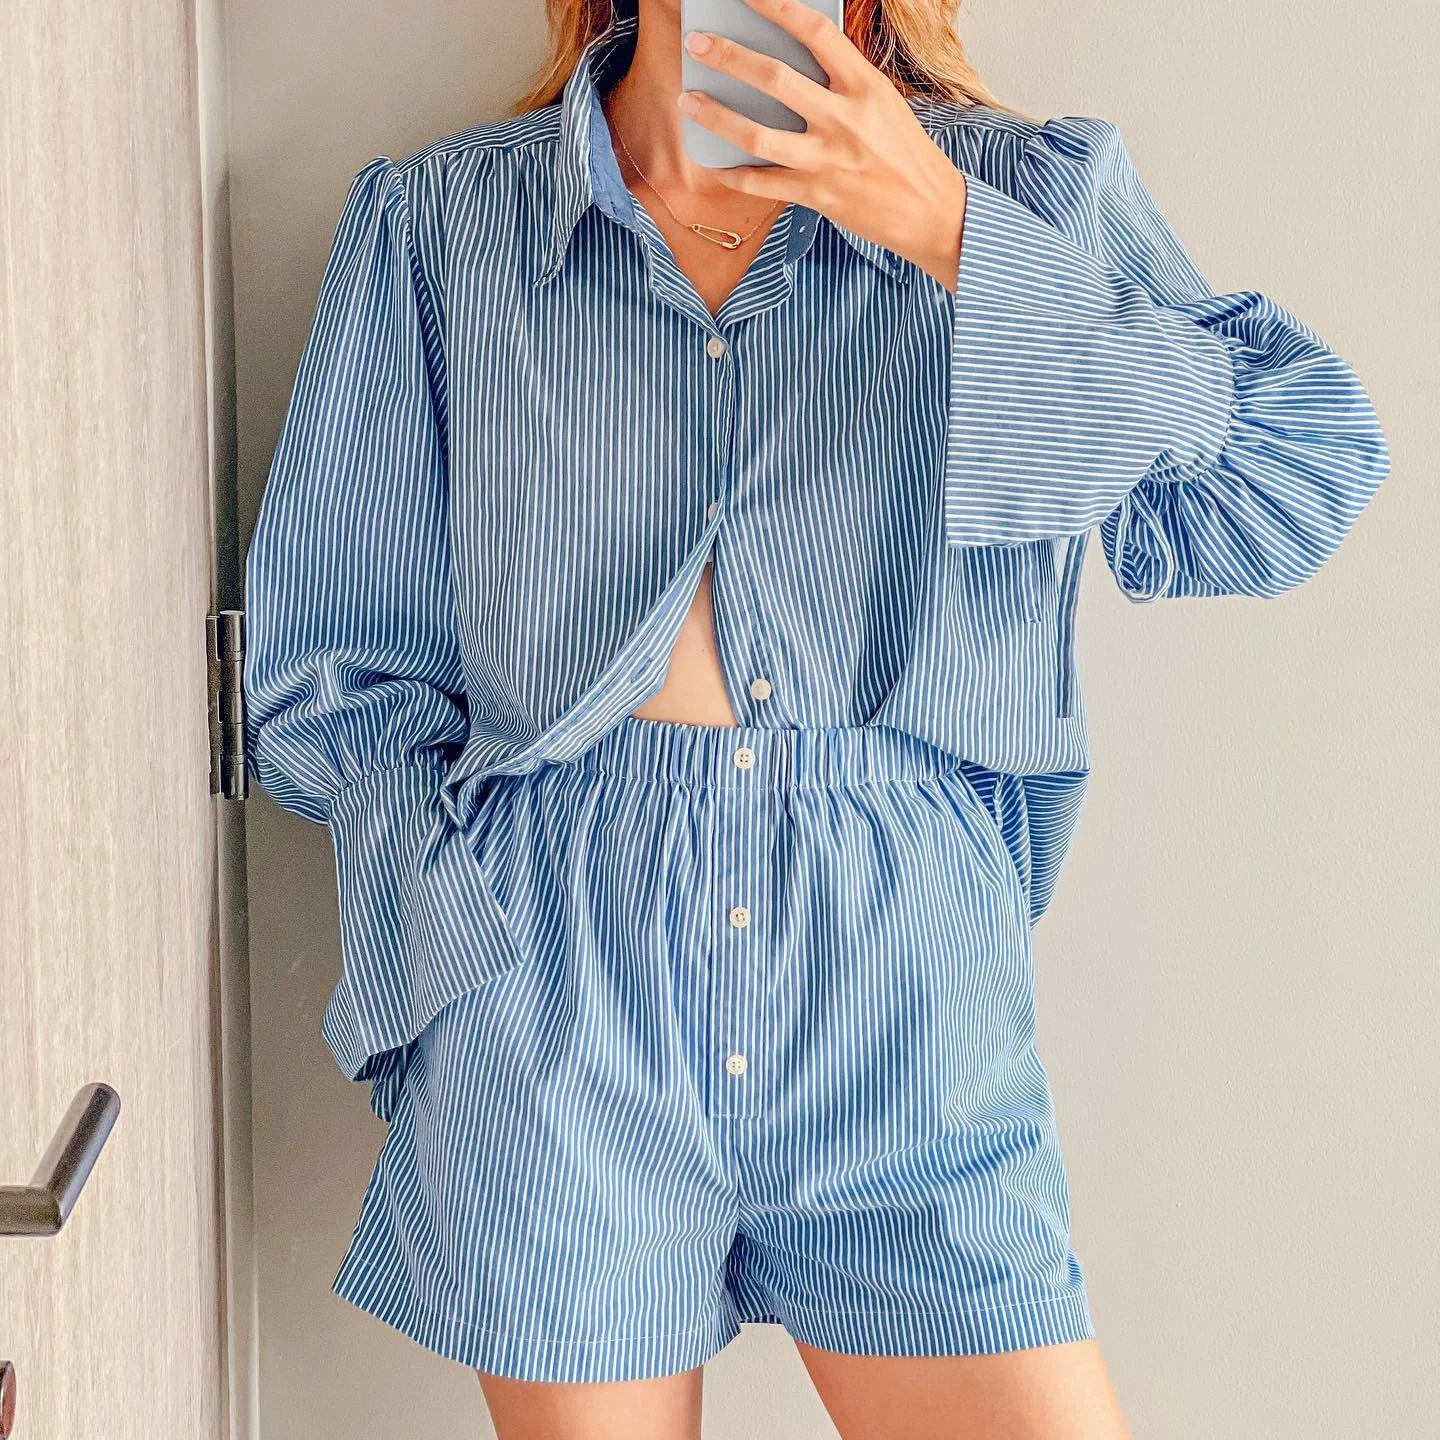
In today's tutorial, I'm going to share with you how I transformed 2 Men's shirts into this beautiful matching set. This set comes with a button front shorts. It has elastic waistband and side pockets. And a long puffy sleeves with a pretty detail. It's such a perfect set for a hot day.
So I hope you like it and try it out and let’s get started!
WHAT YOU’LL NEED

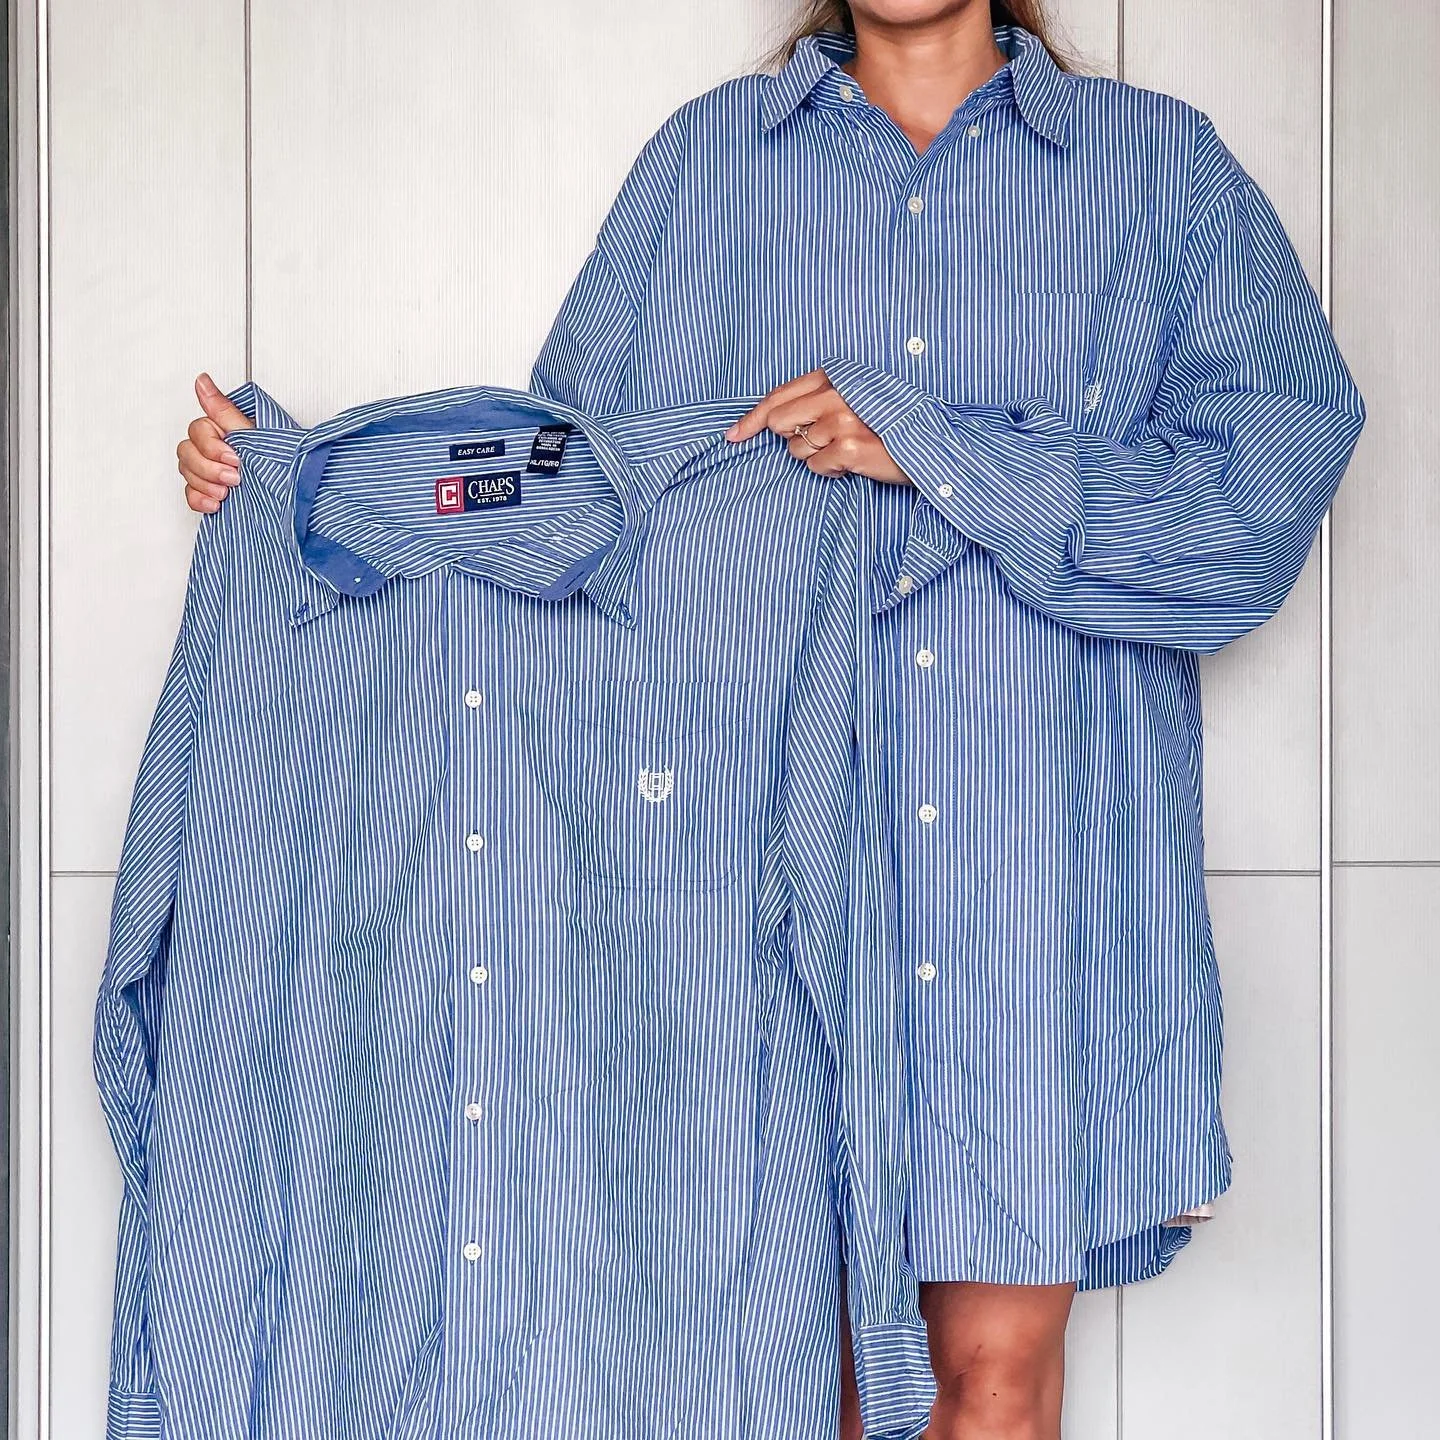
2 Men's shirts in big size. I used XL and XXL size shirts
Measuring tape
Tailor’s chalk
Scissors
Pins
Sewing machine
SEWING THE MATCHING SET
THE SHORTS
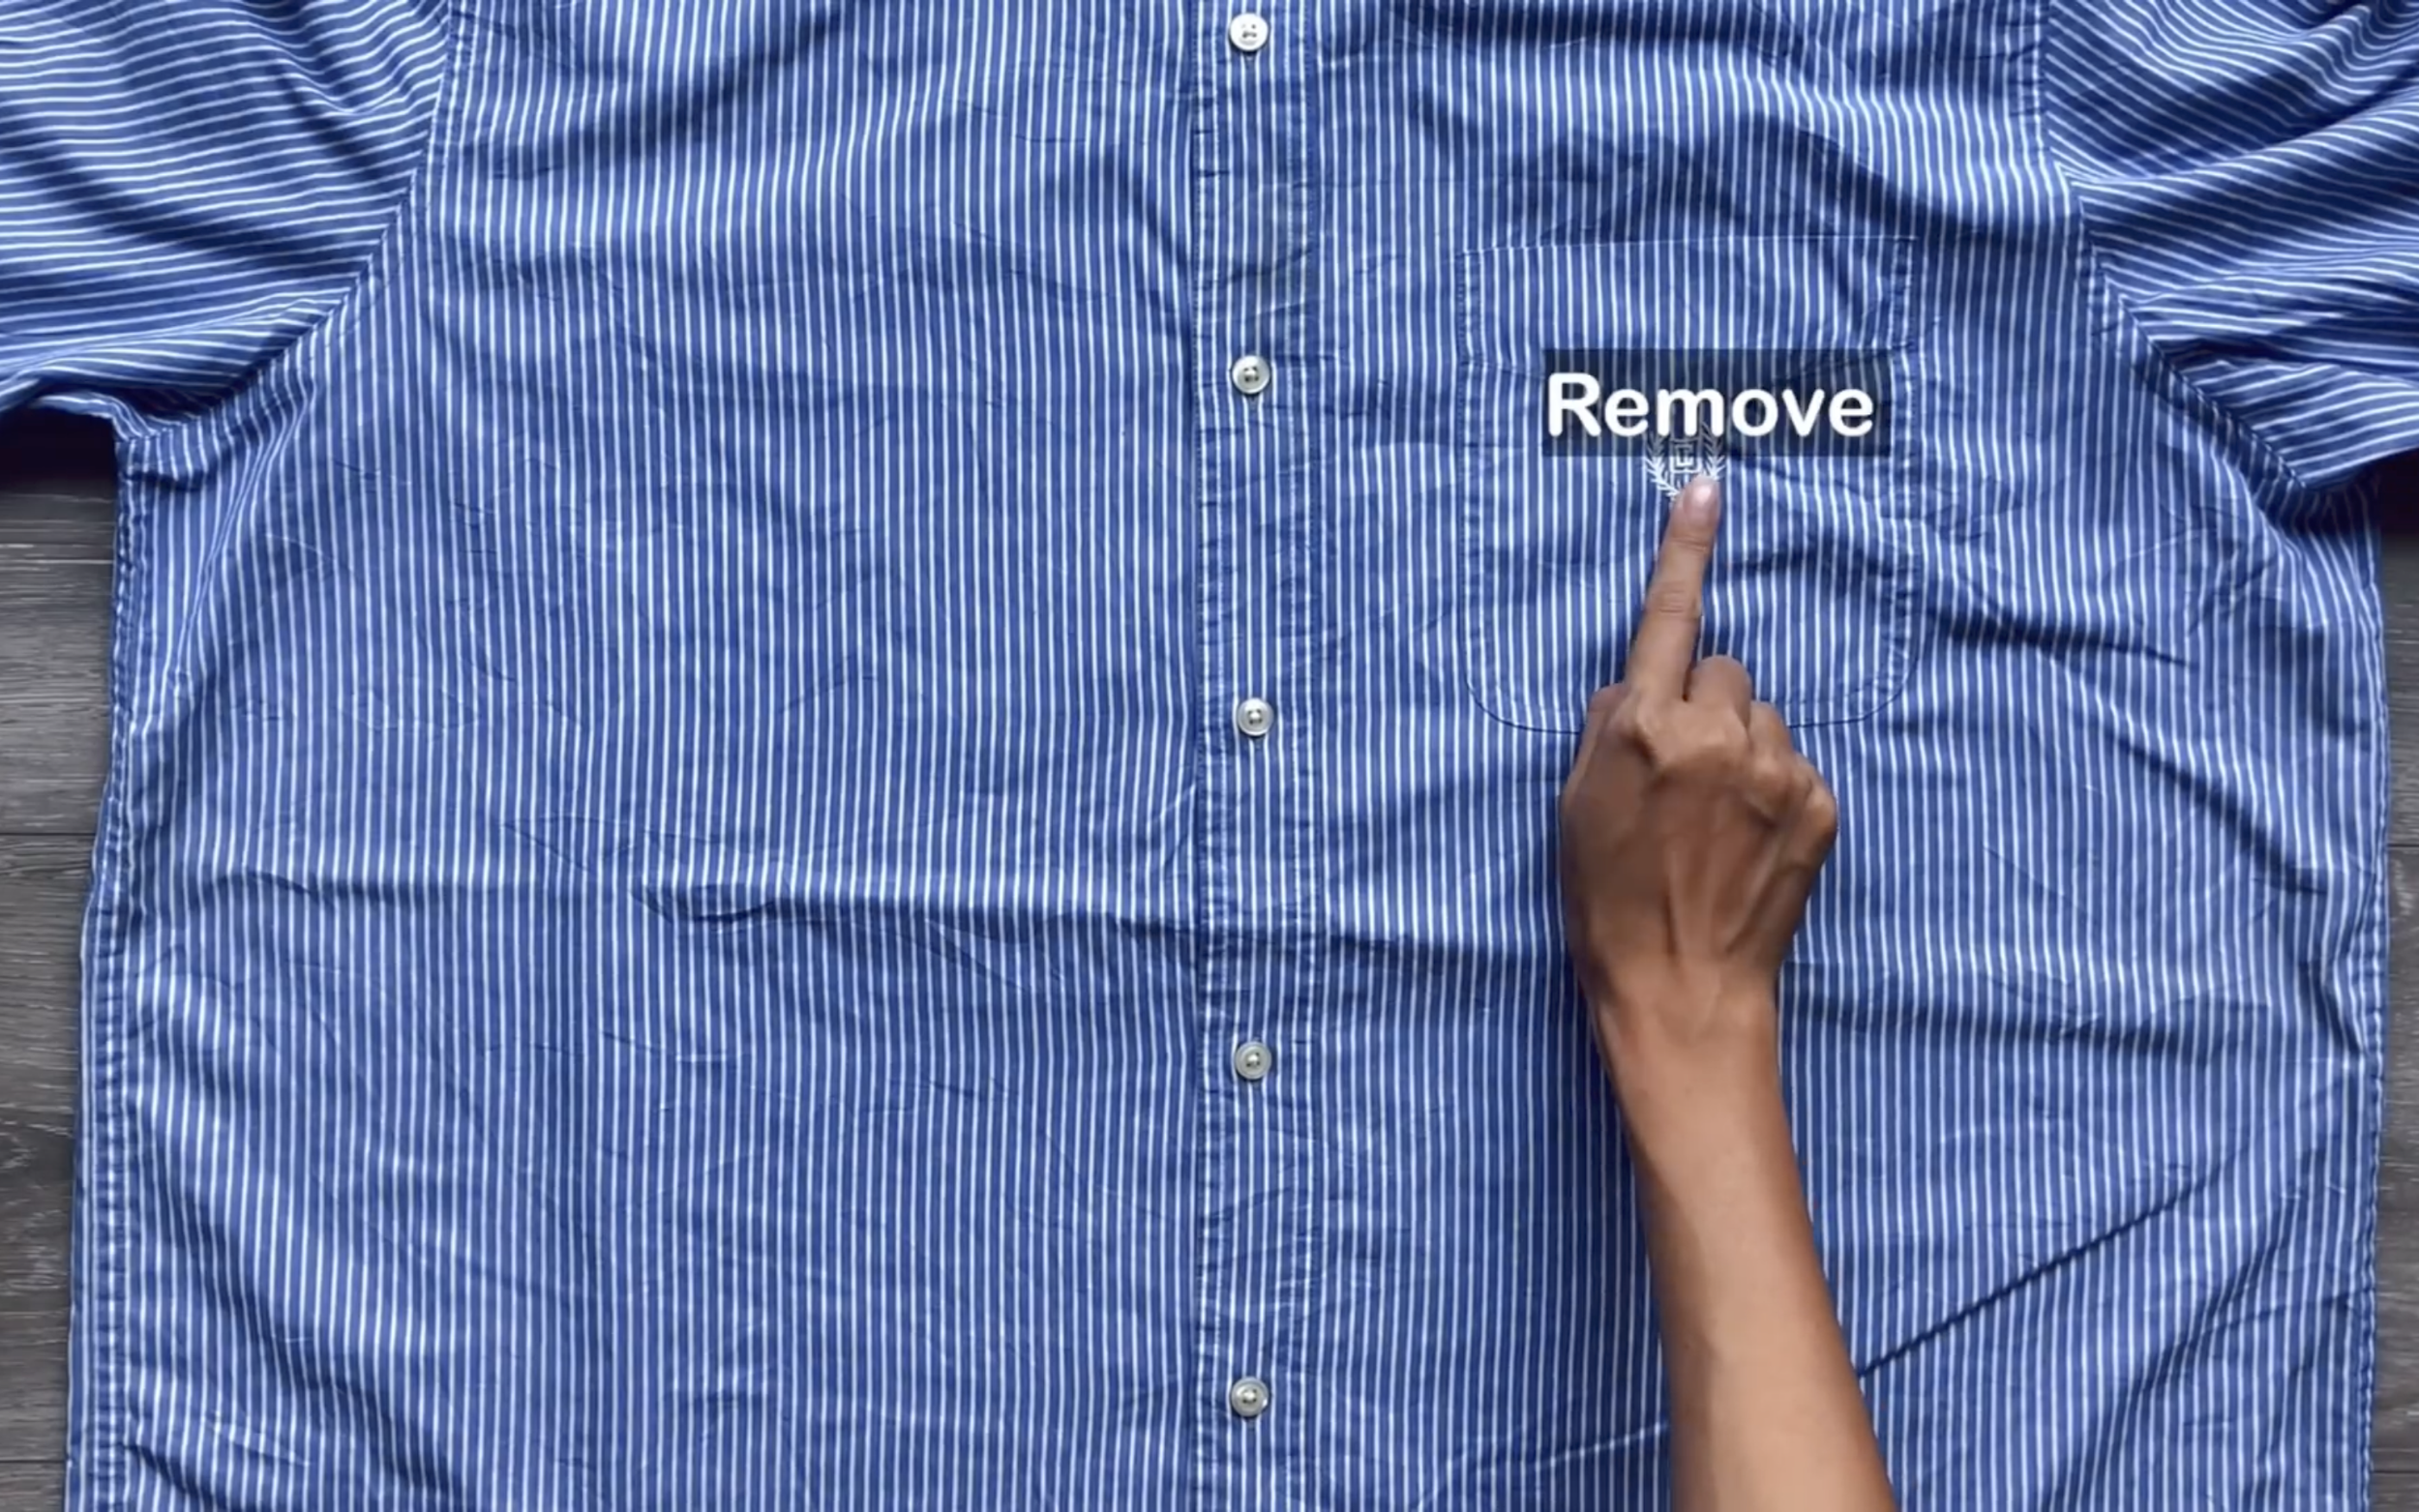
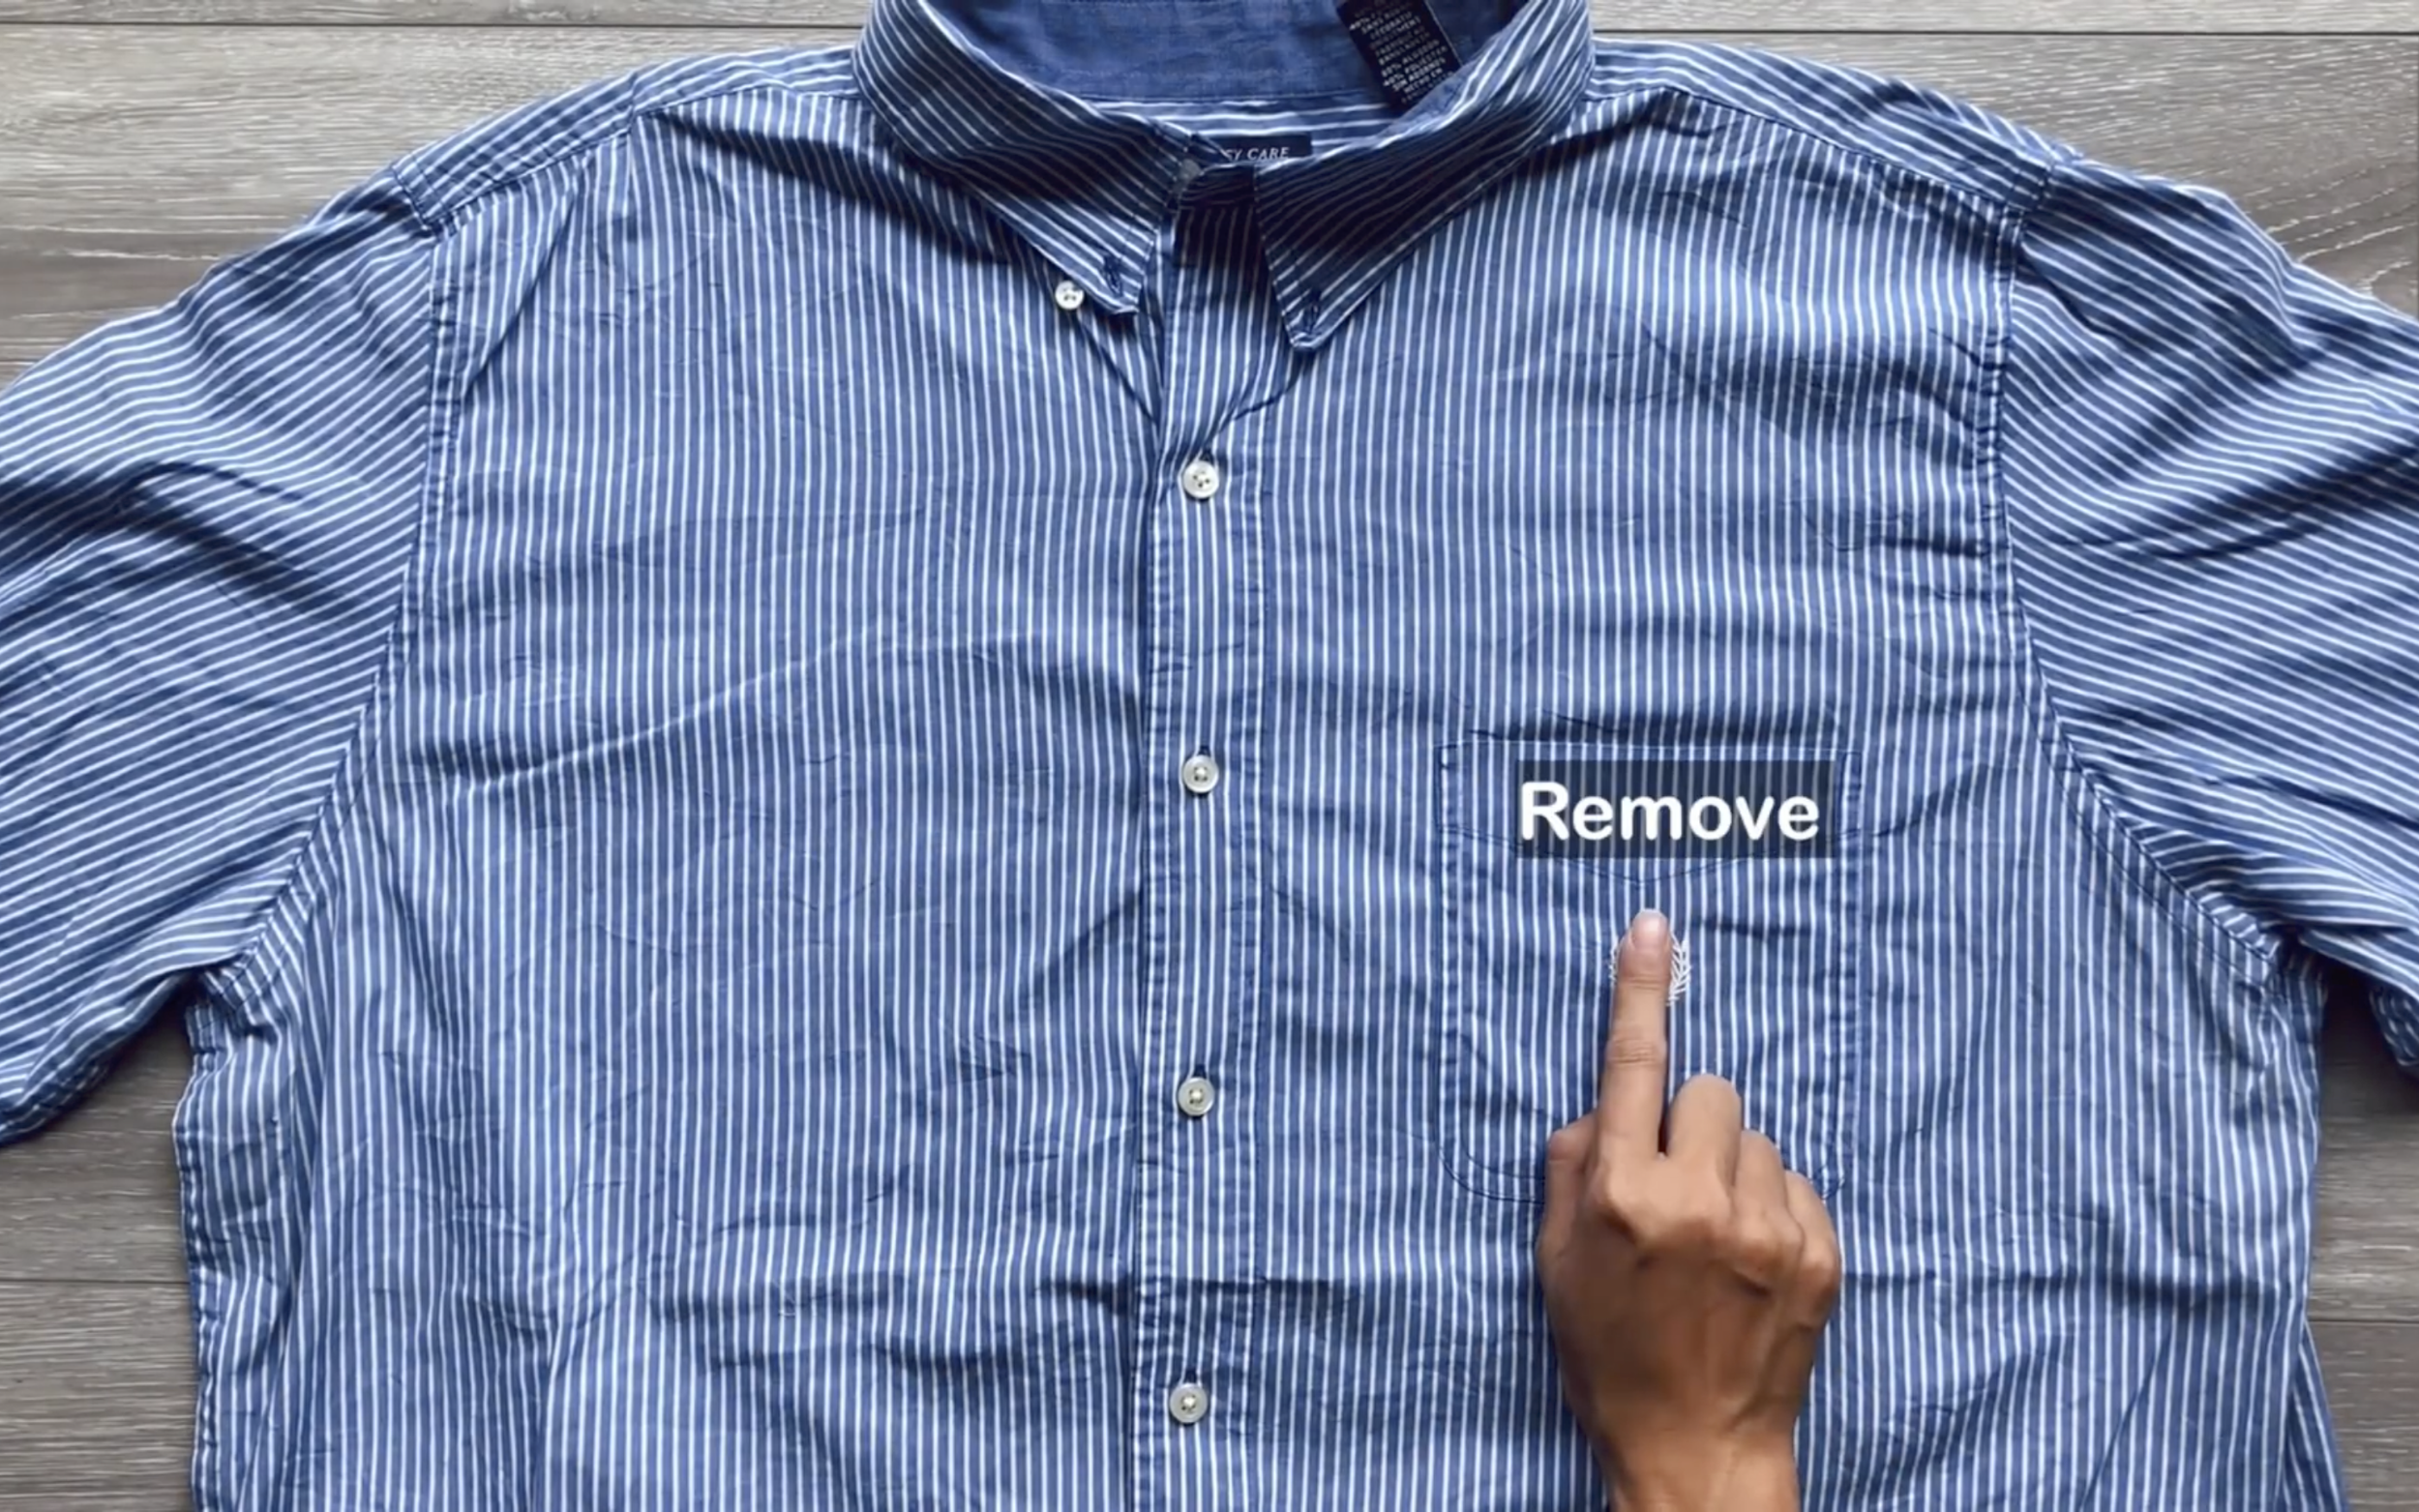
Use the double XL size man shirt because it's bigger and has more fabric for the shorts.
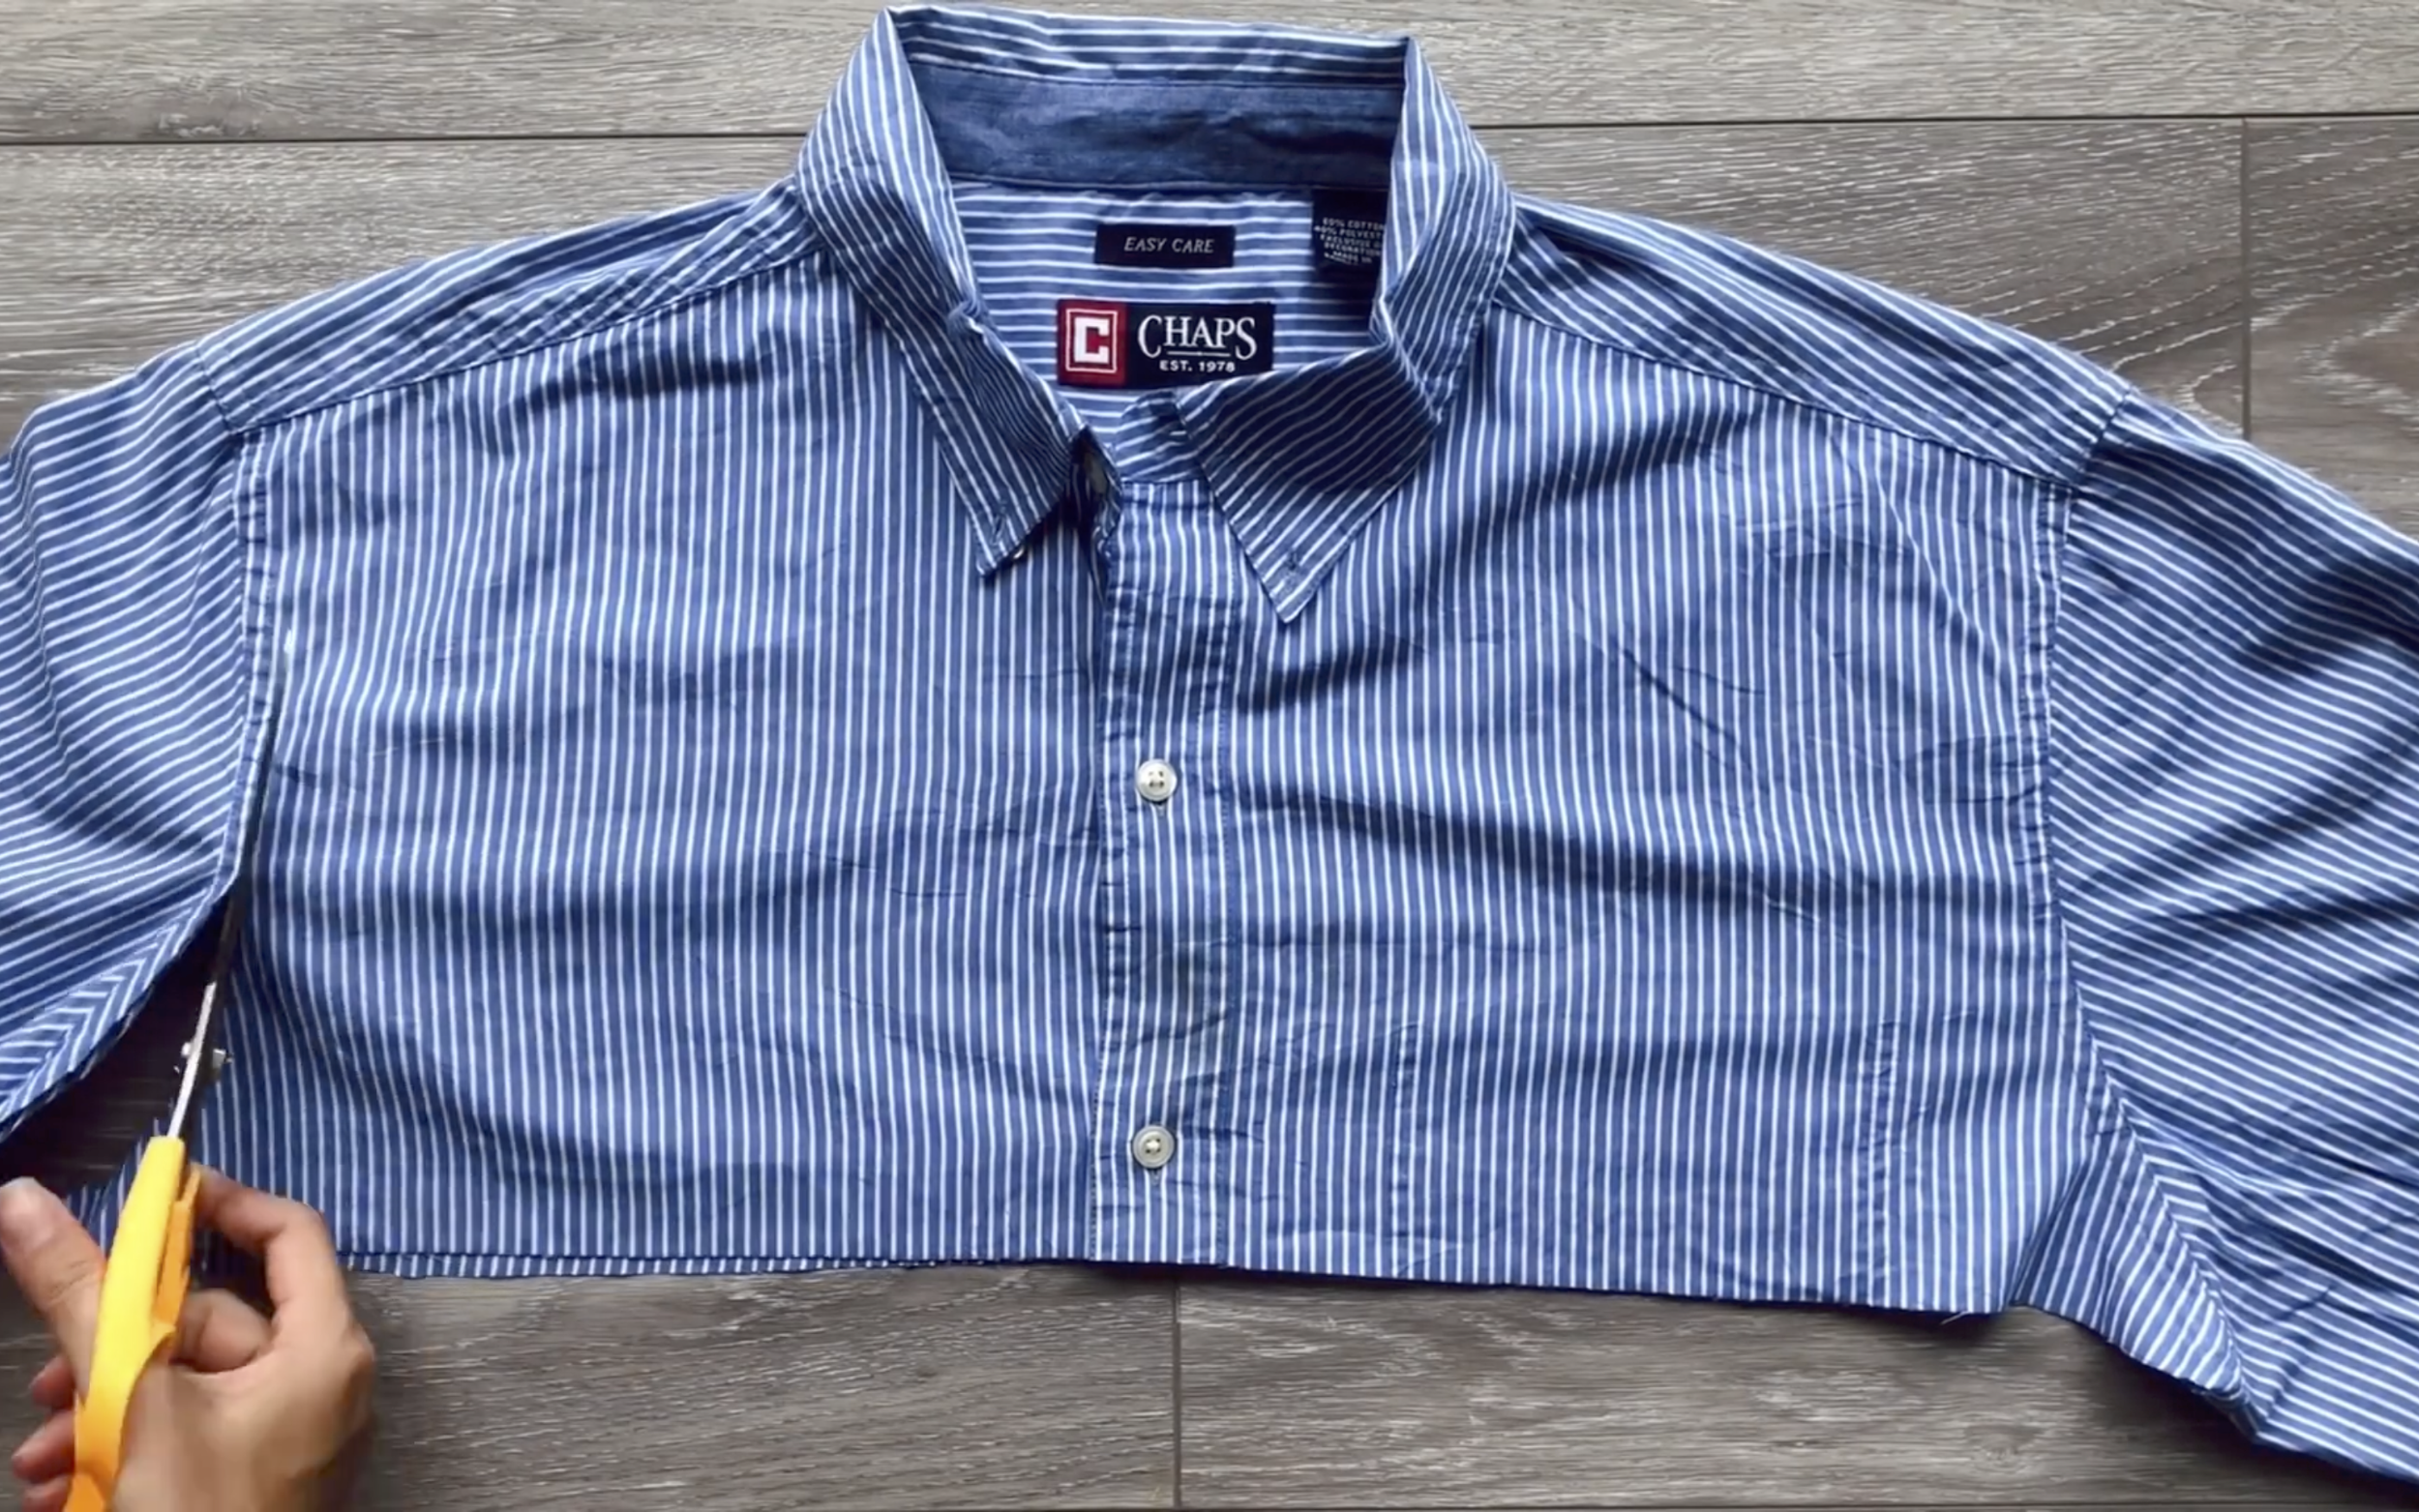
Remove the front pocket first.
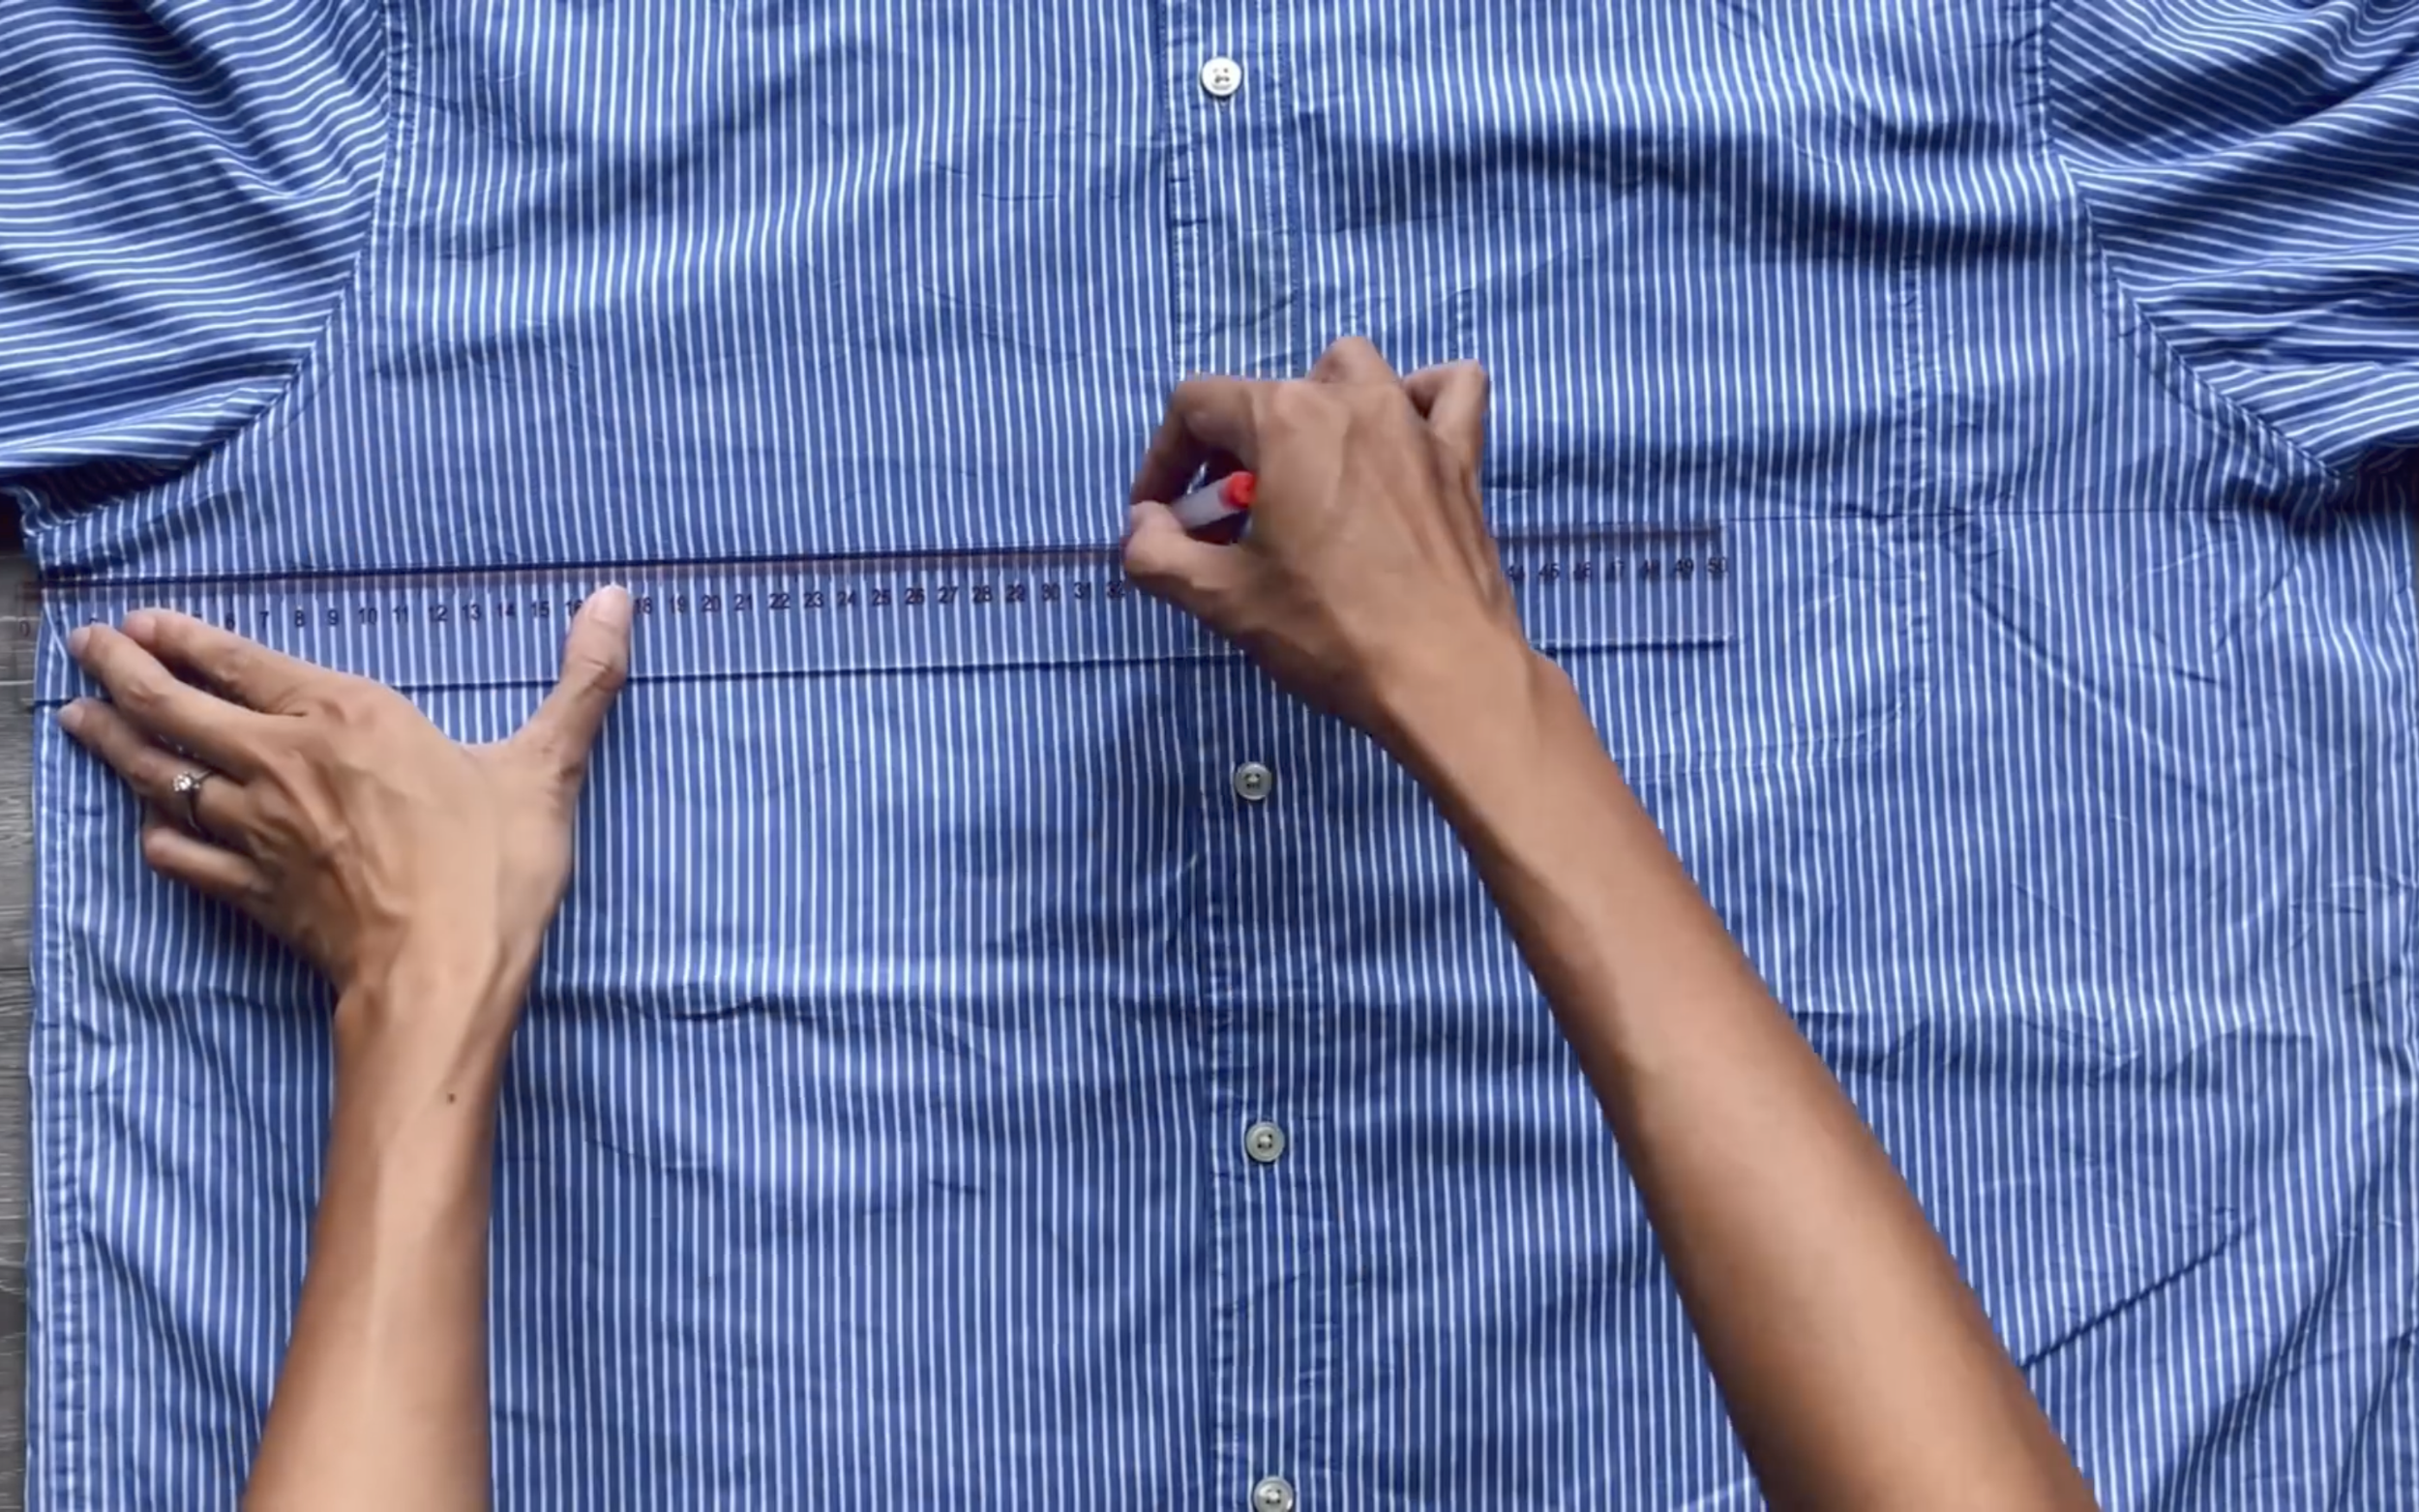
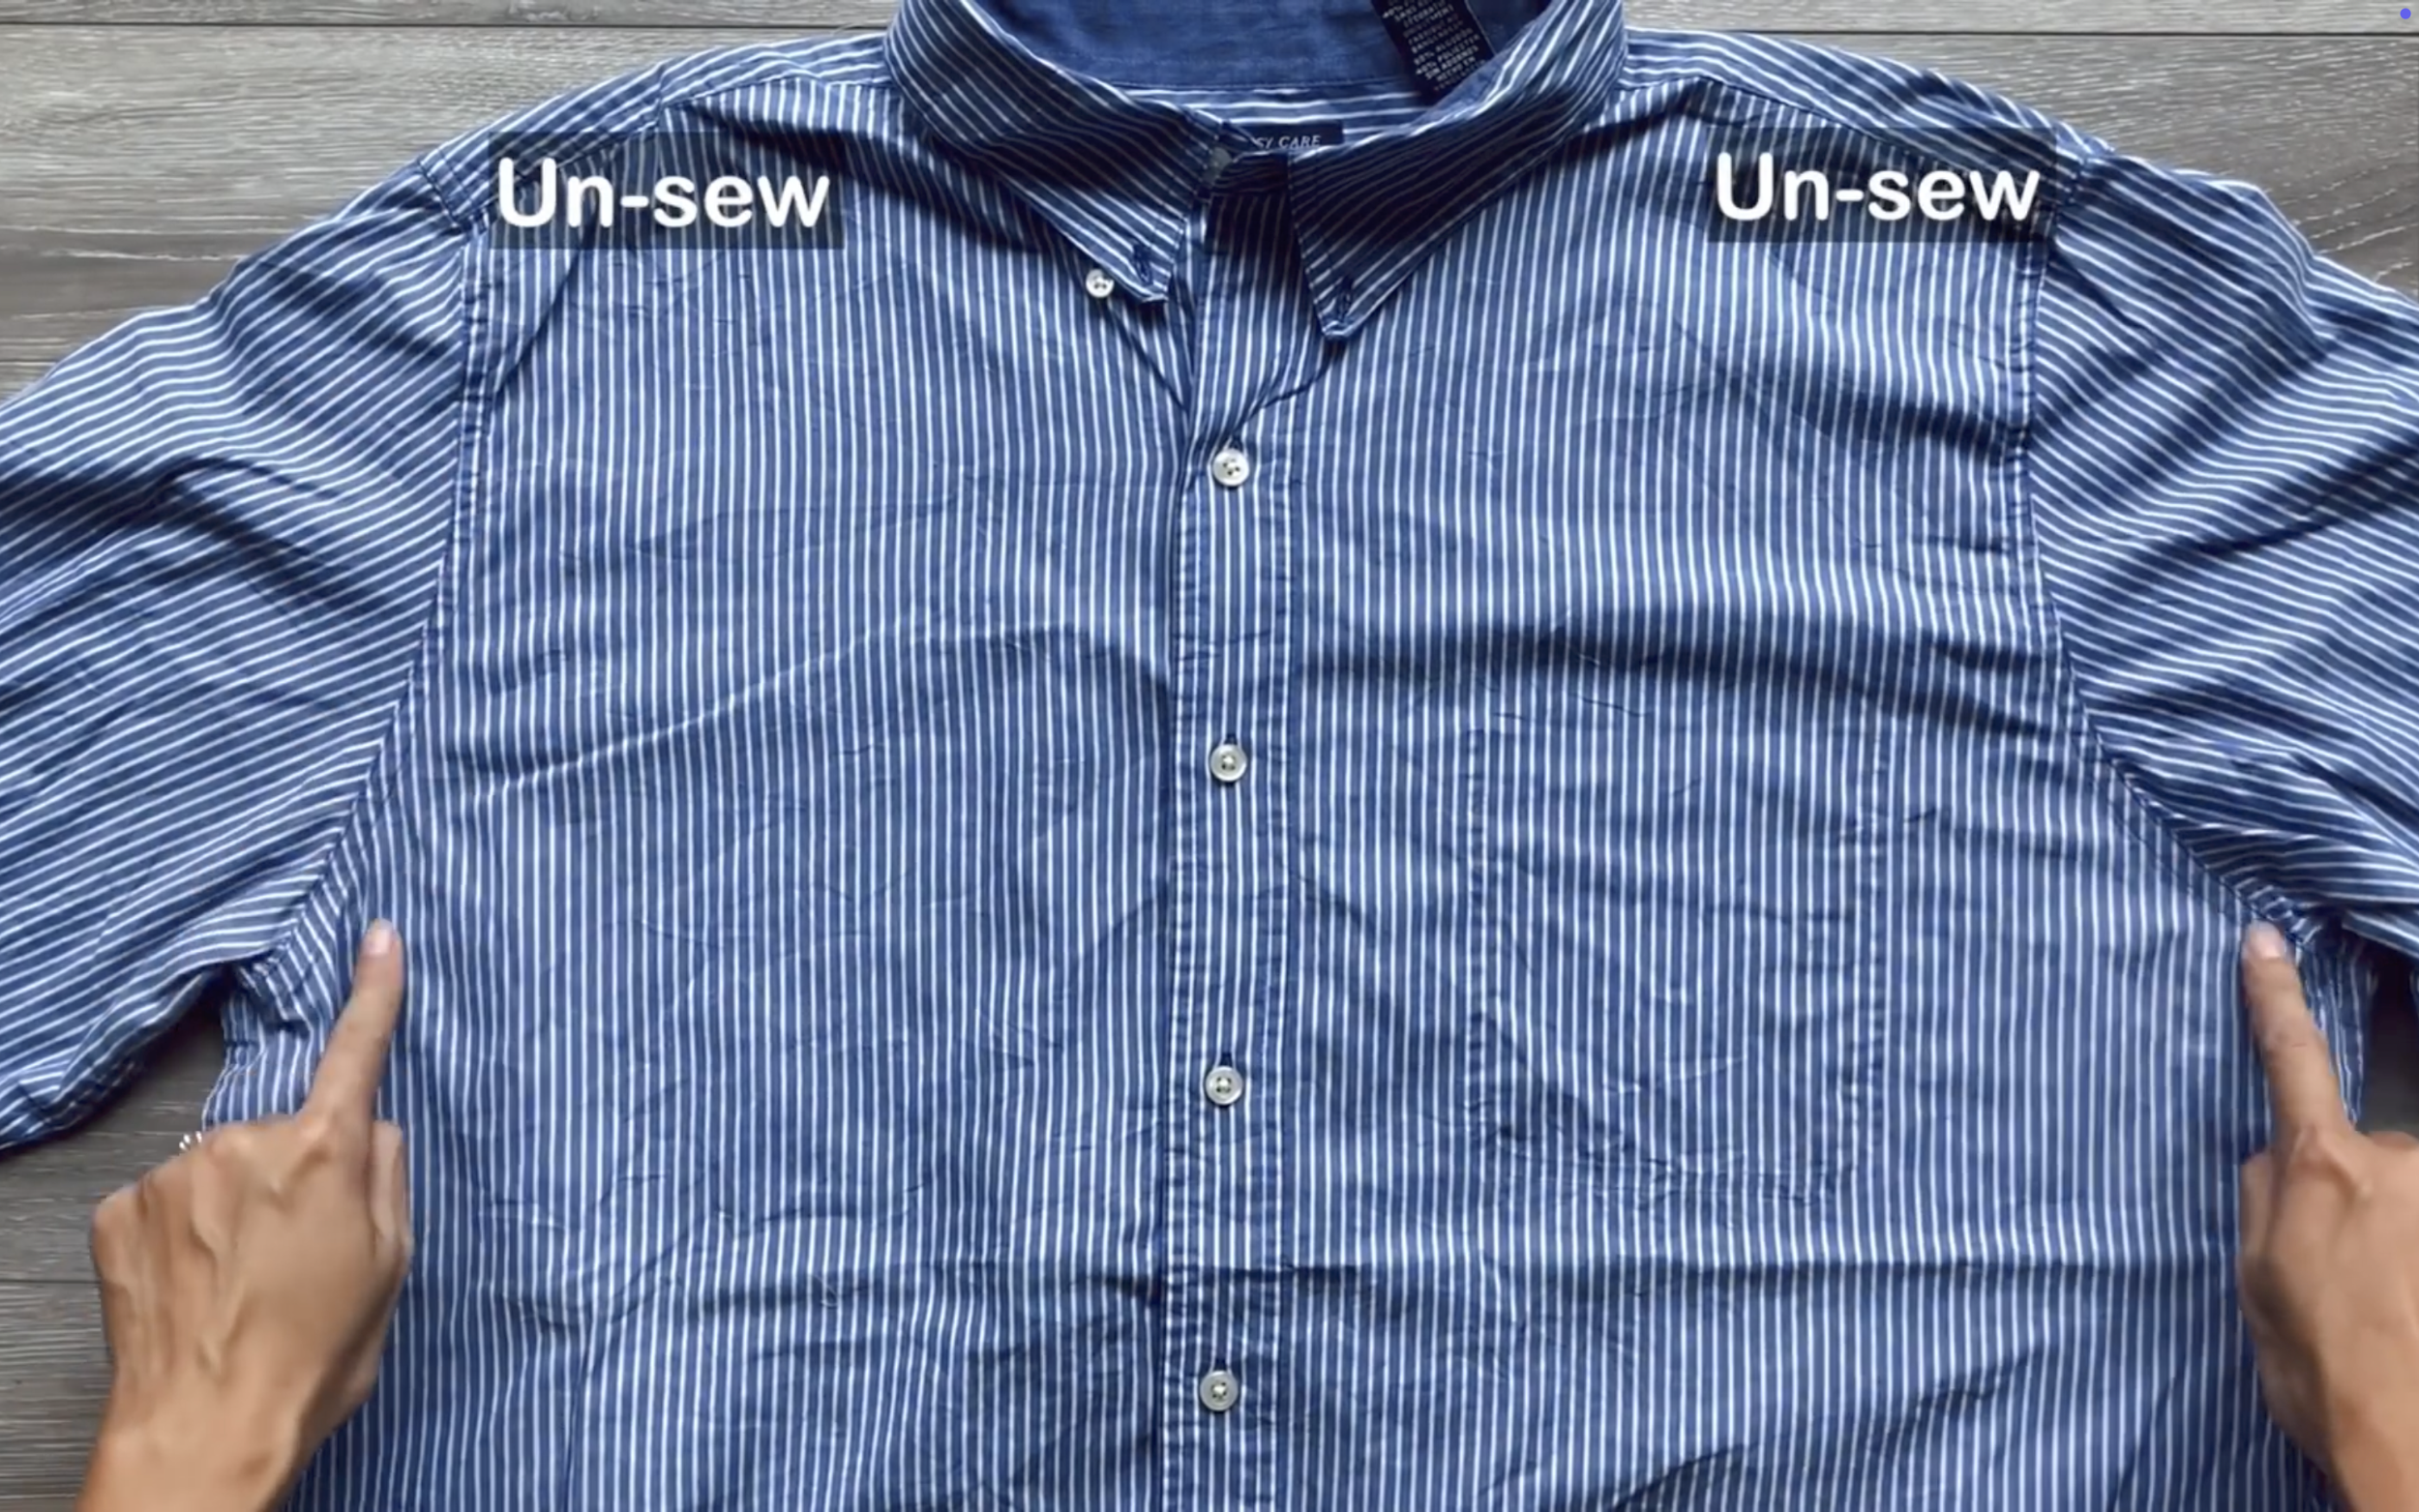
After that, draw a horizontal line under the two sleeves to use the fabric below for the shorts.
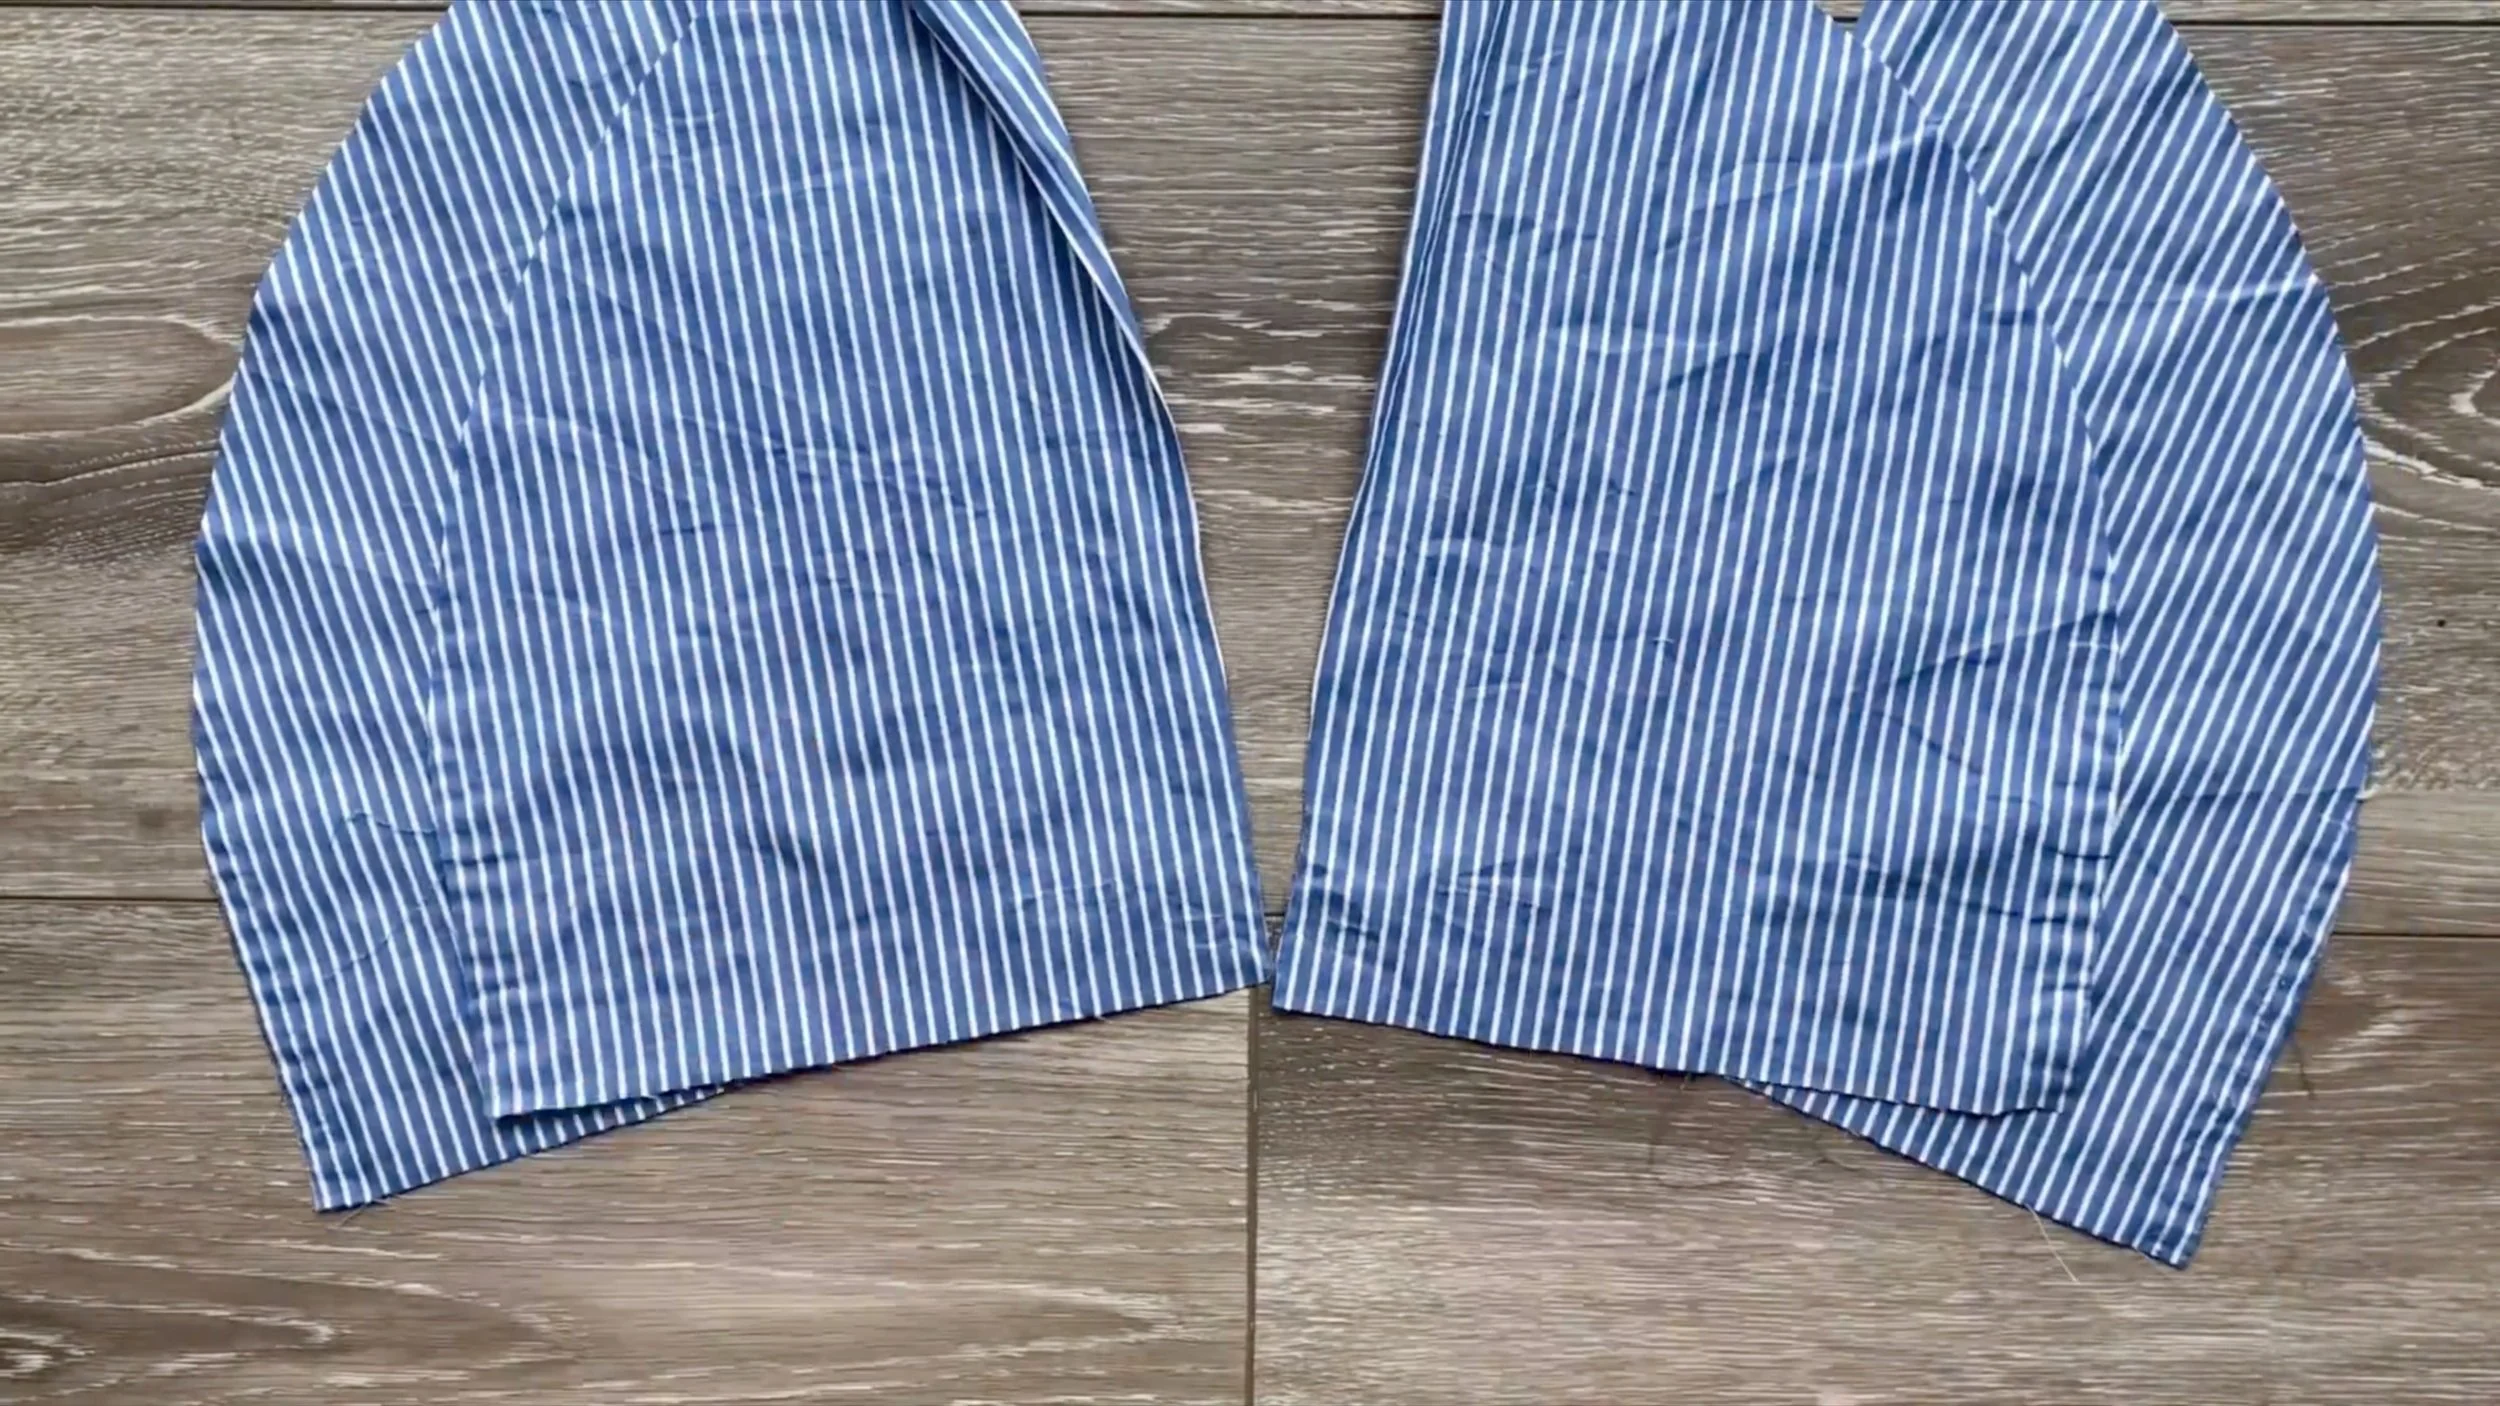
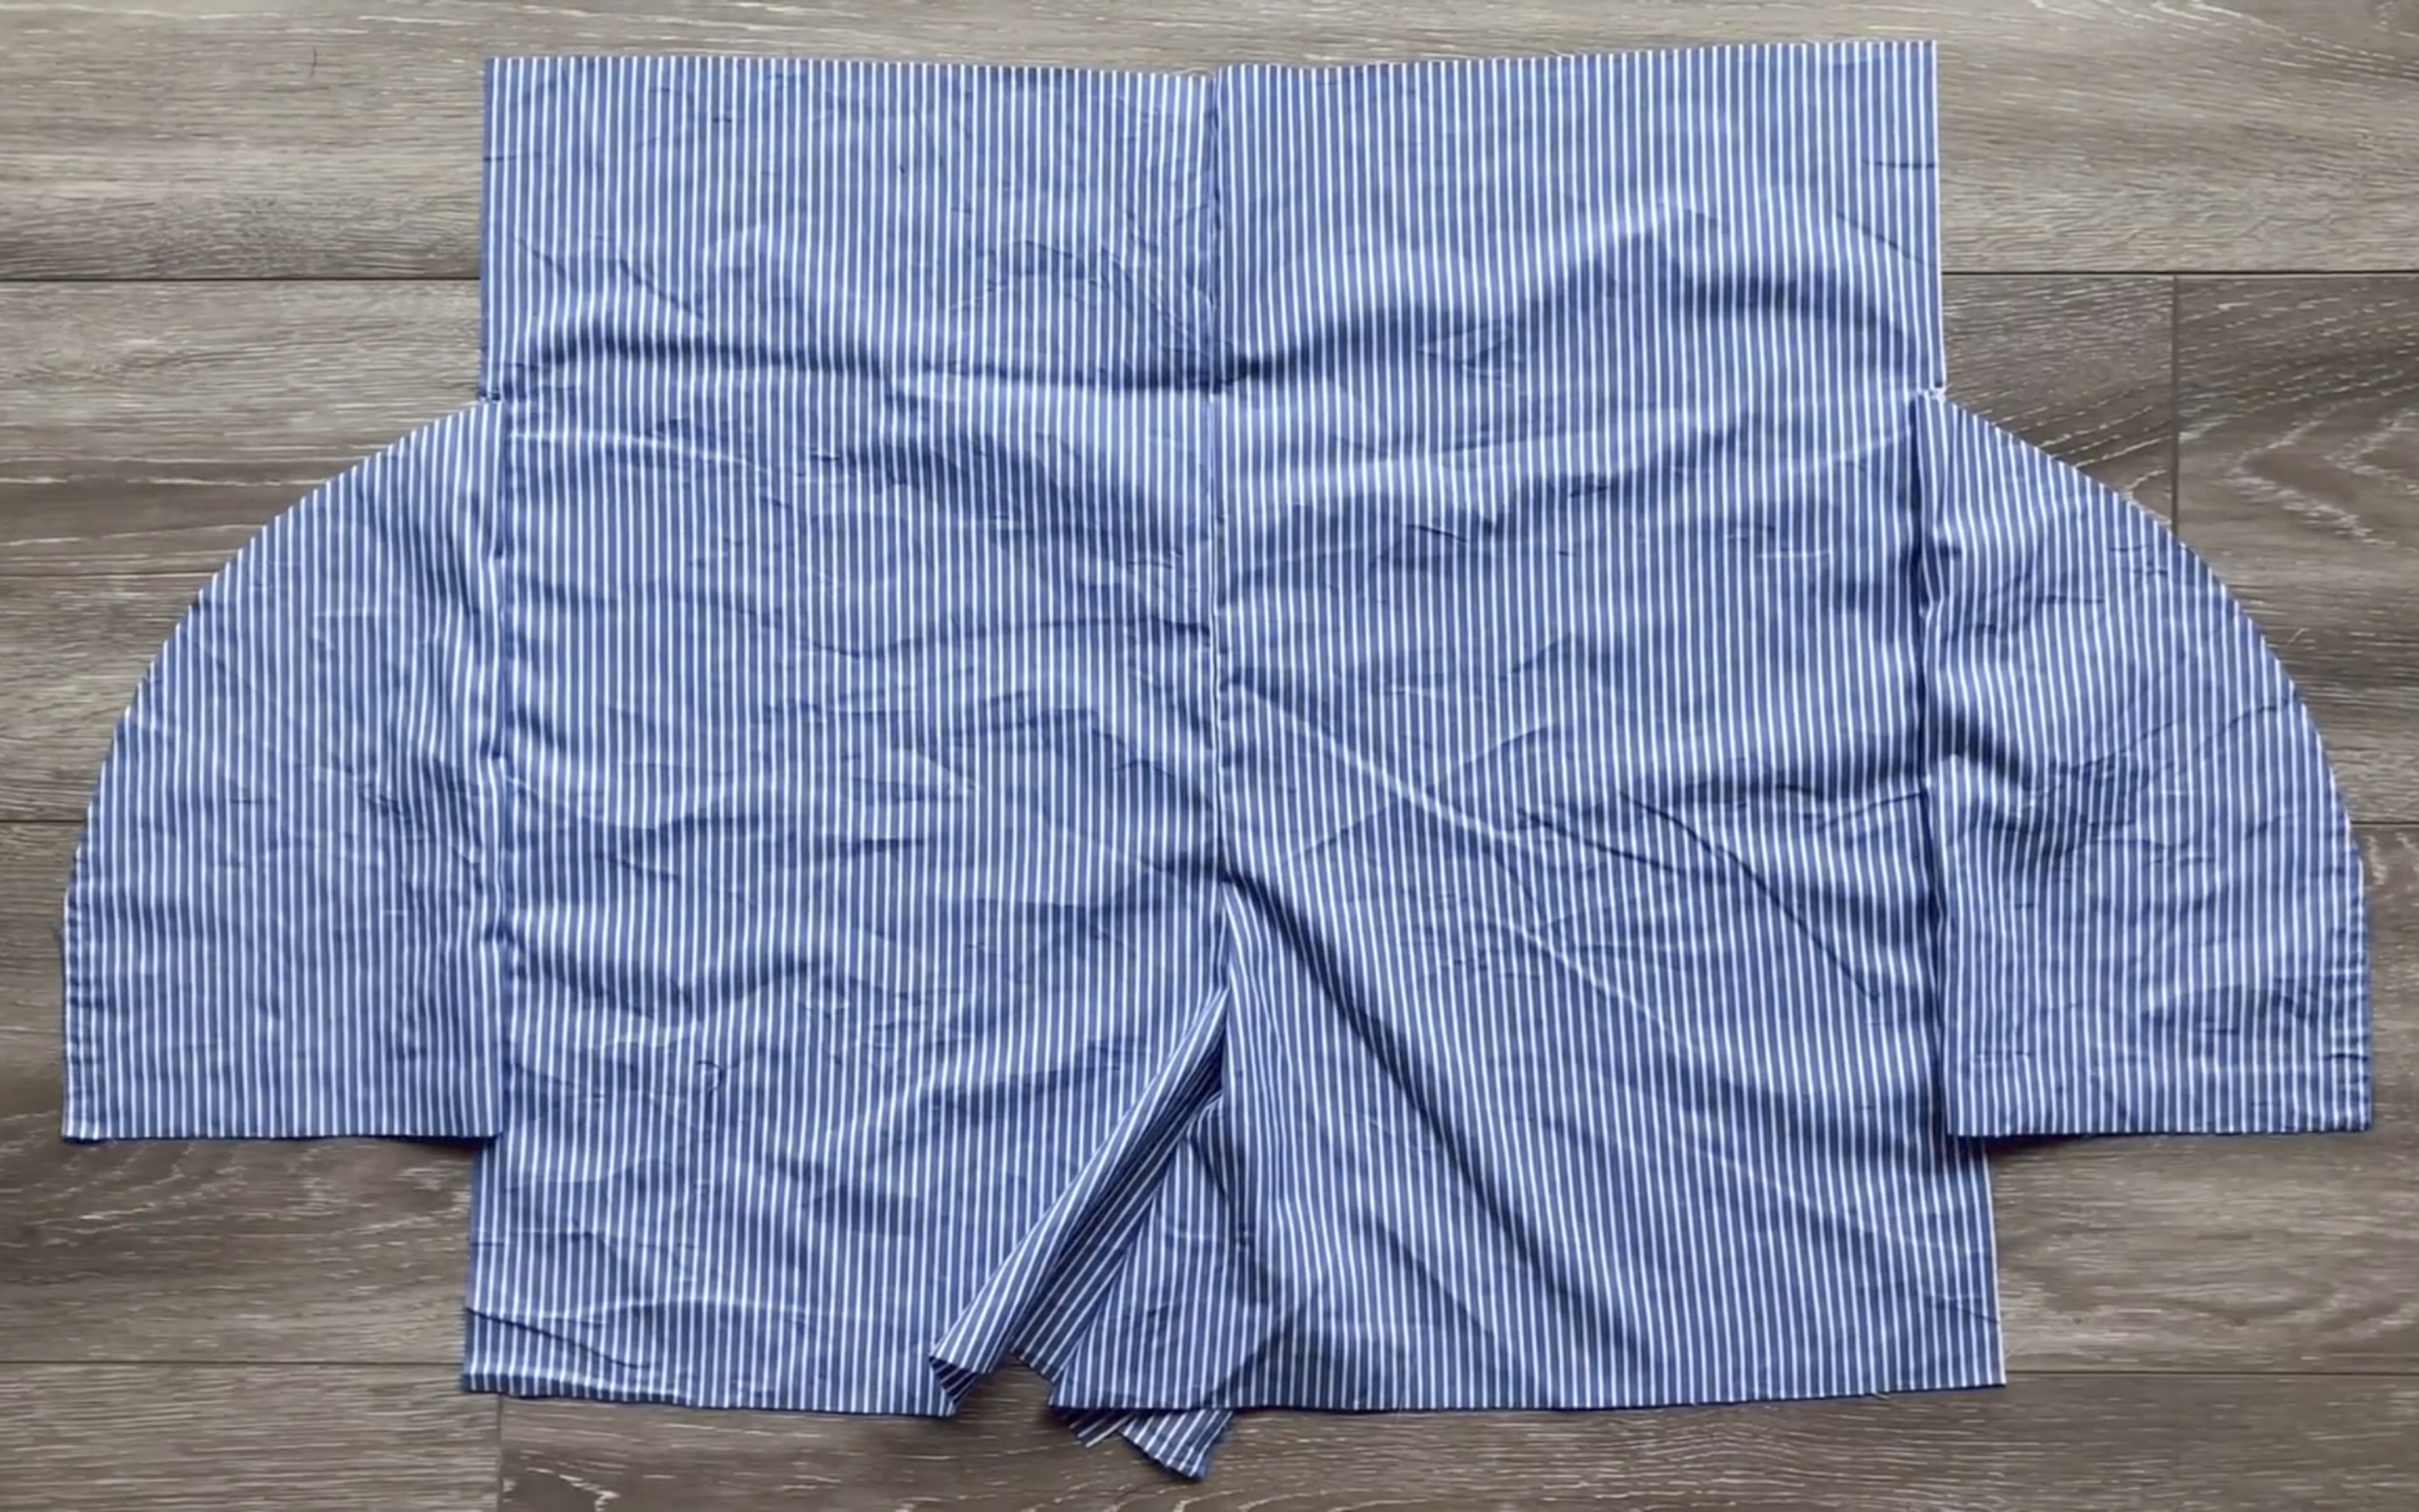
Cut the two side lines of the shirt to have three pieces:
Two front pieces of the shirt will be the two front pieces of the shorts.
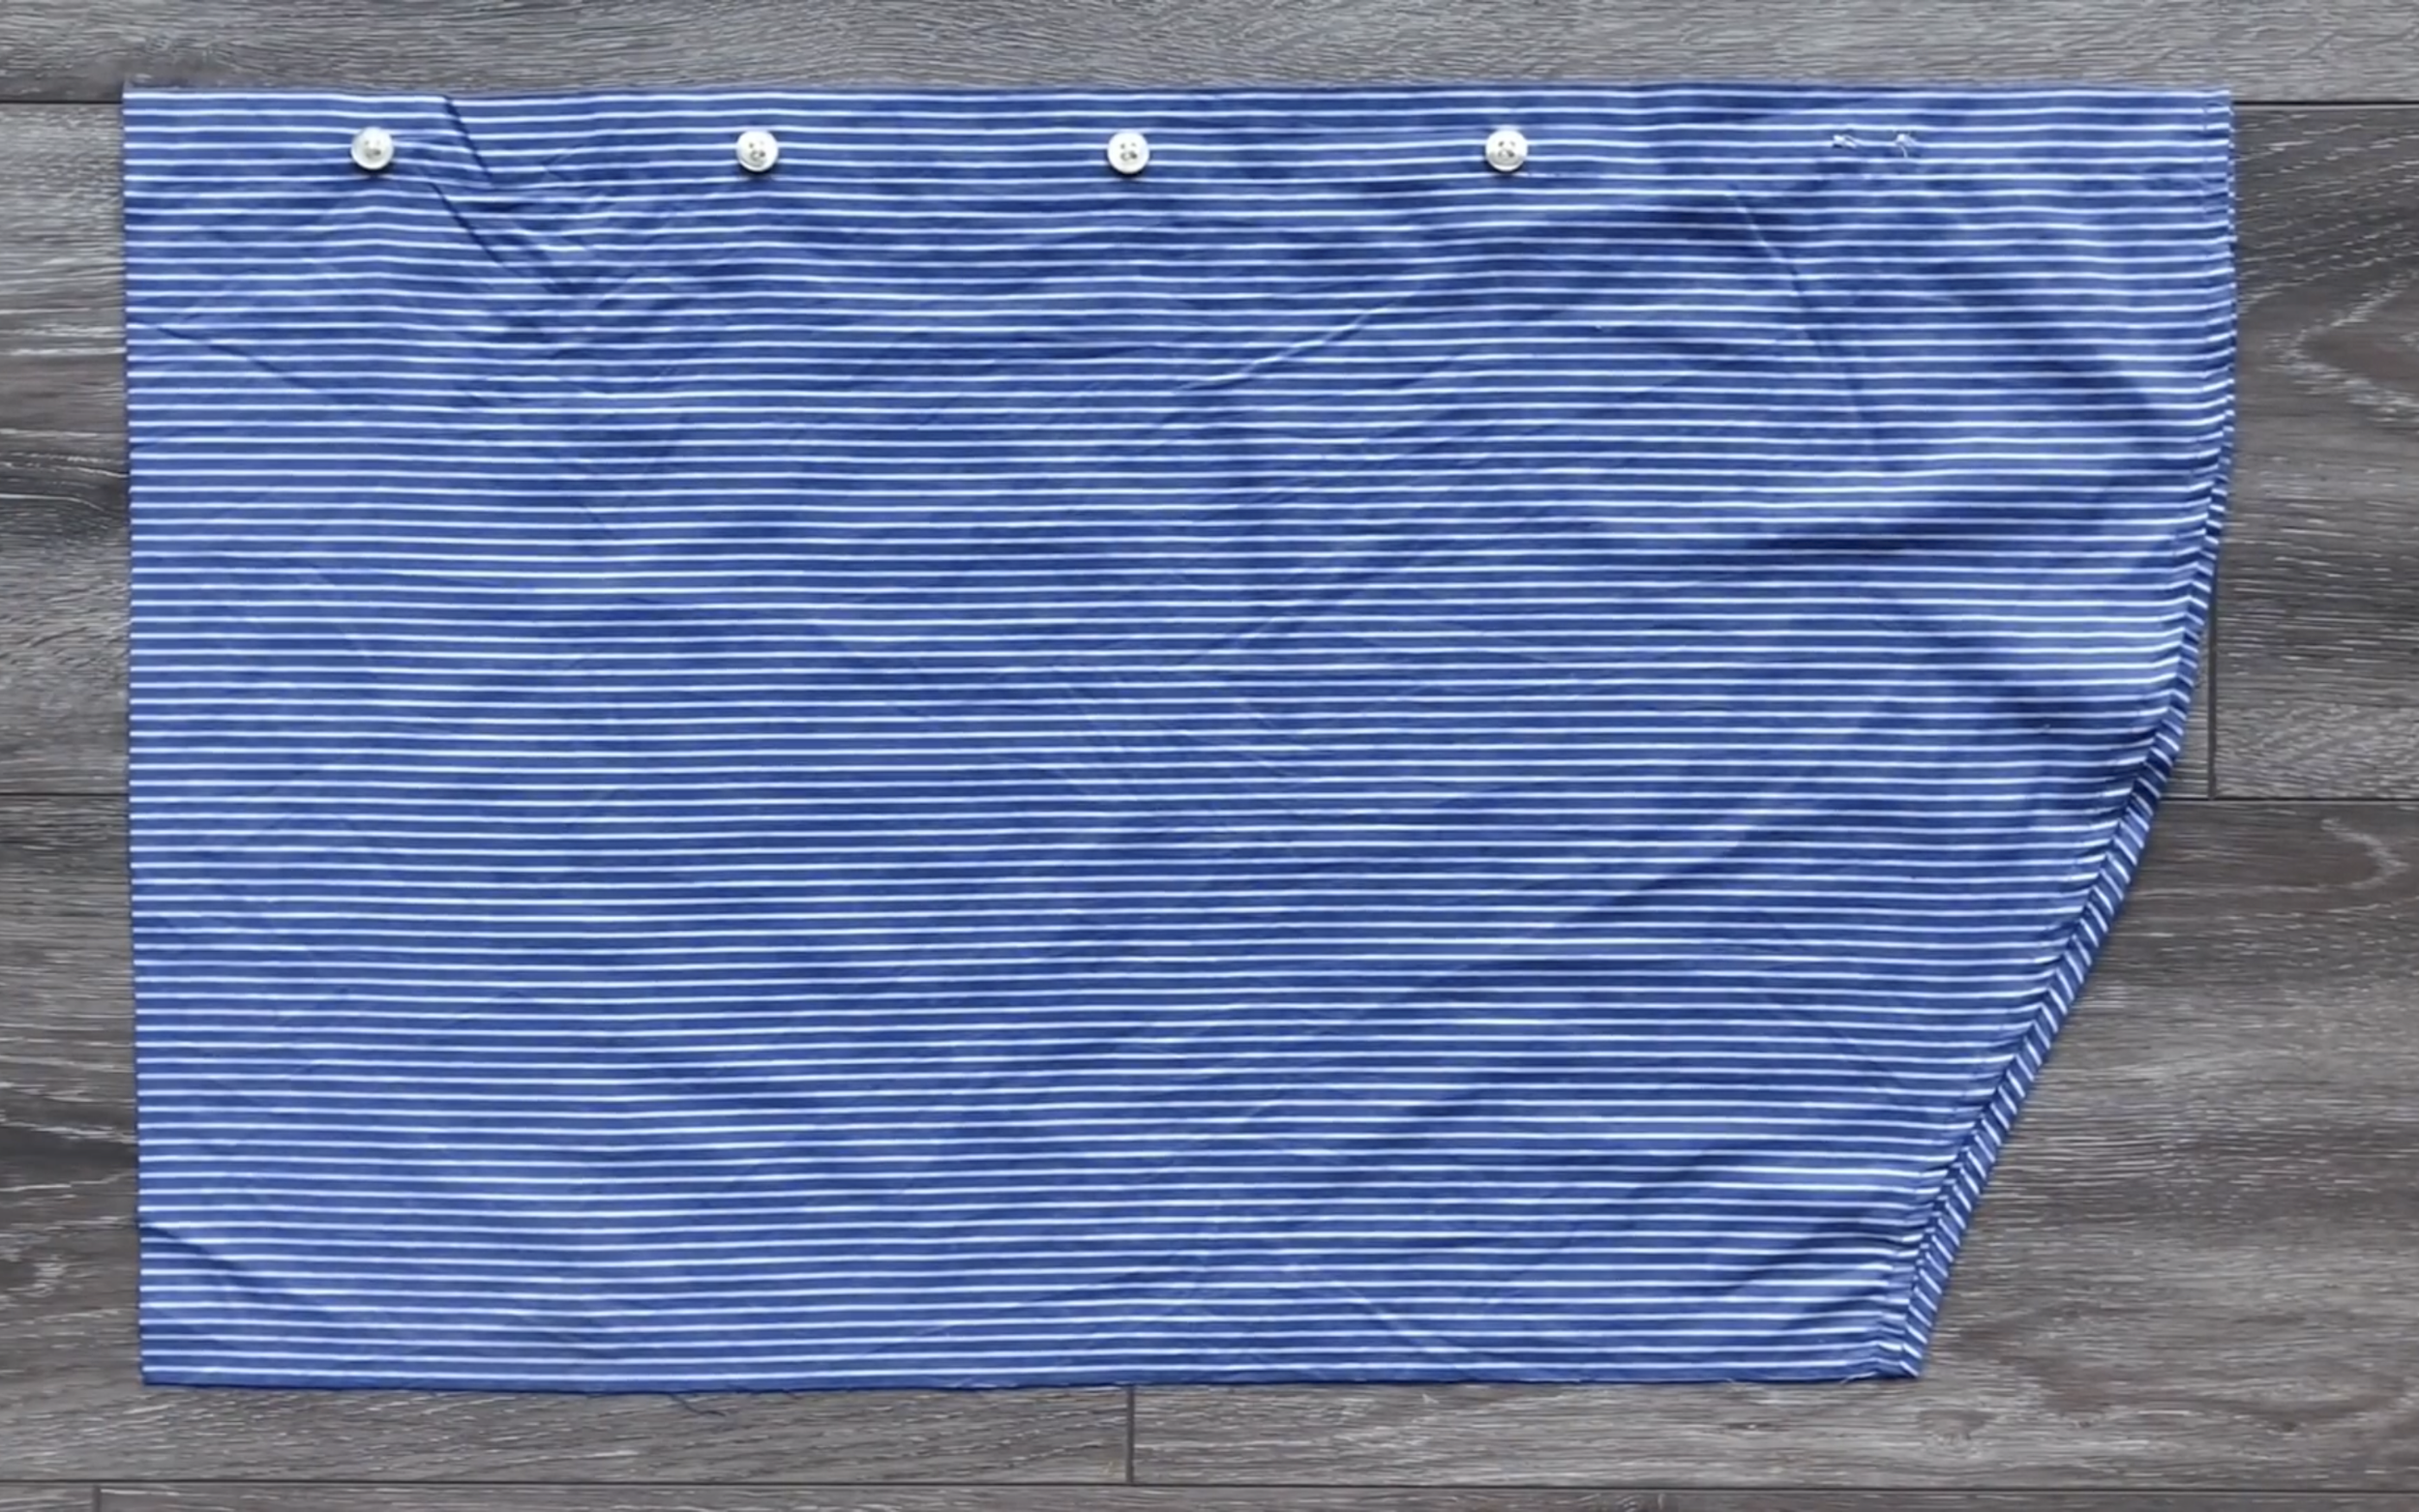
One big back piece of the shirt will be split into two back pieces of the shorts.
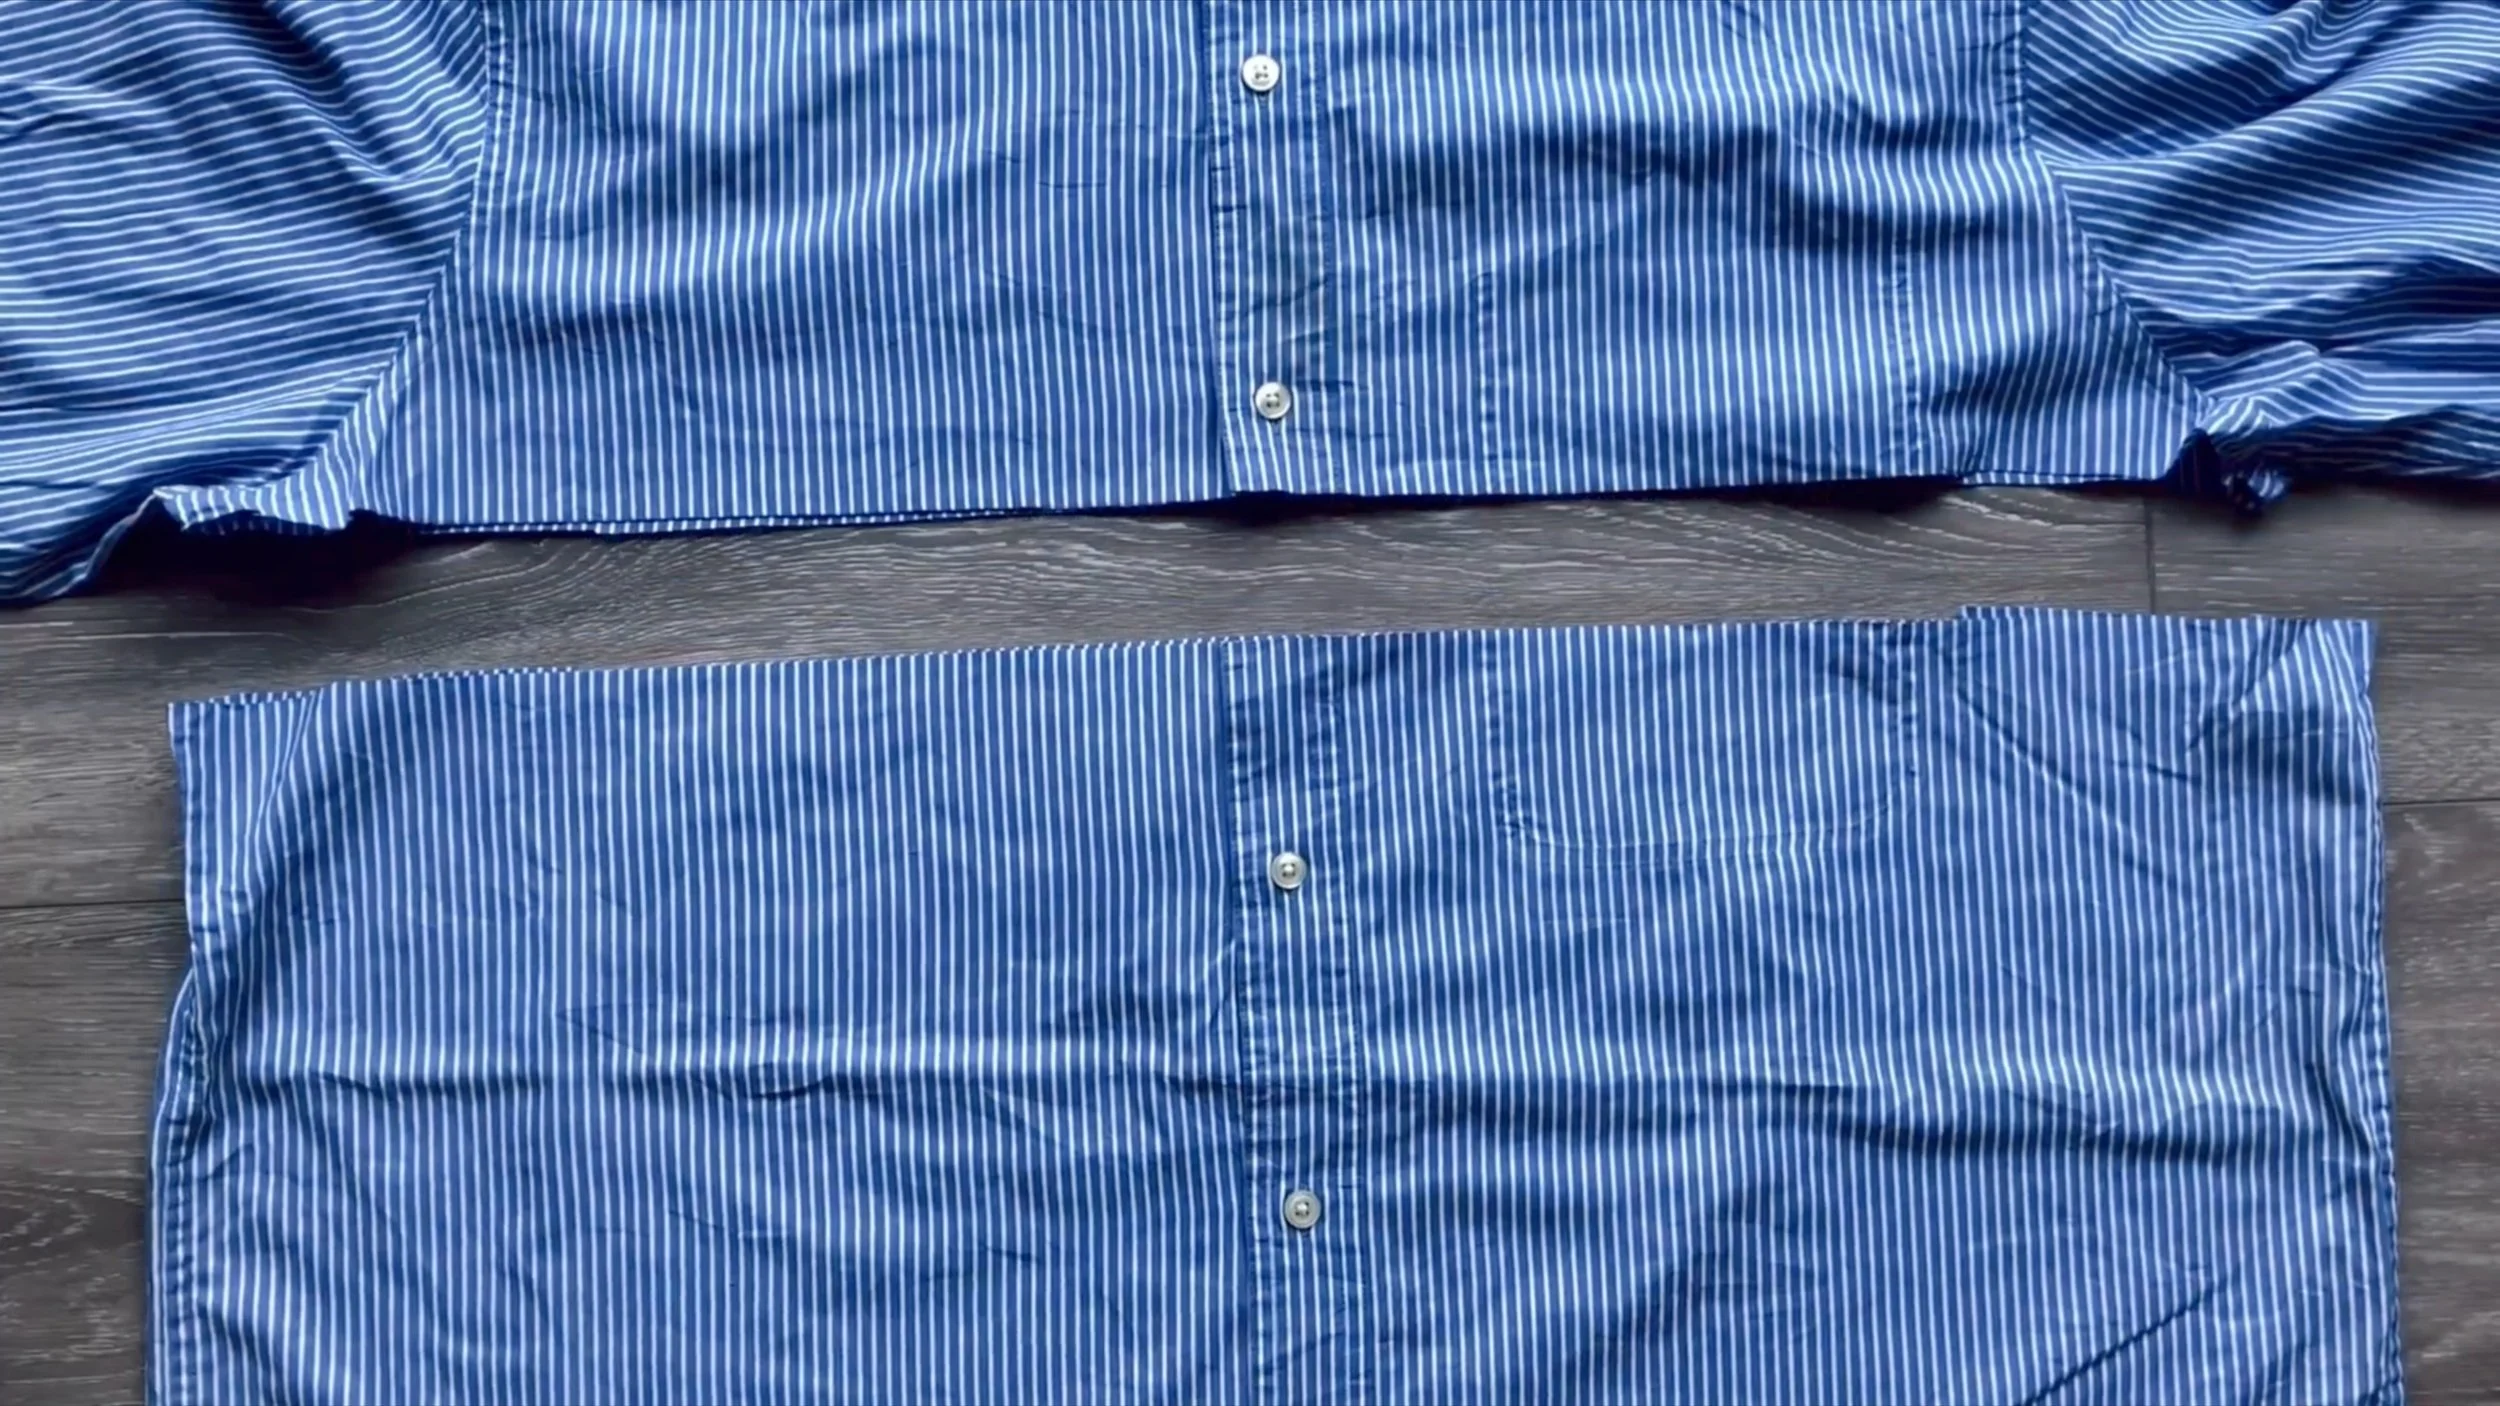
Fold the two front pieces of the shirt nicely.
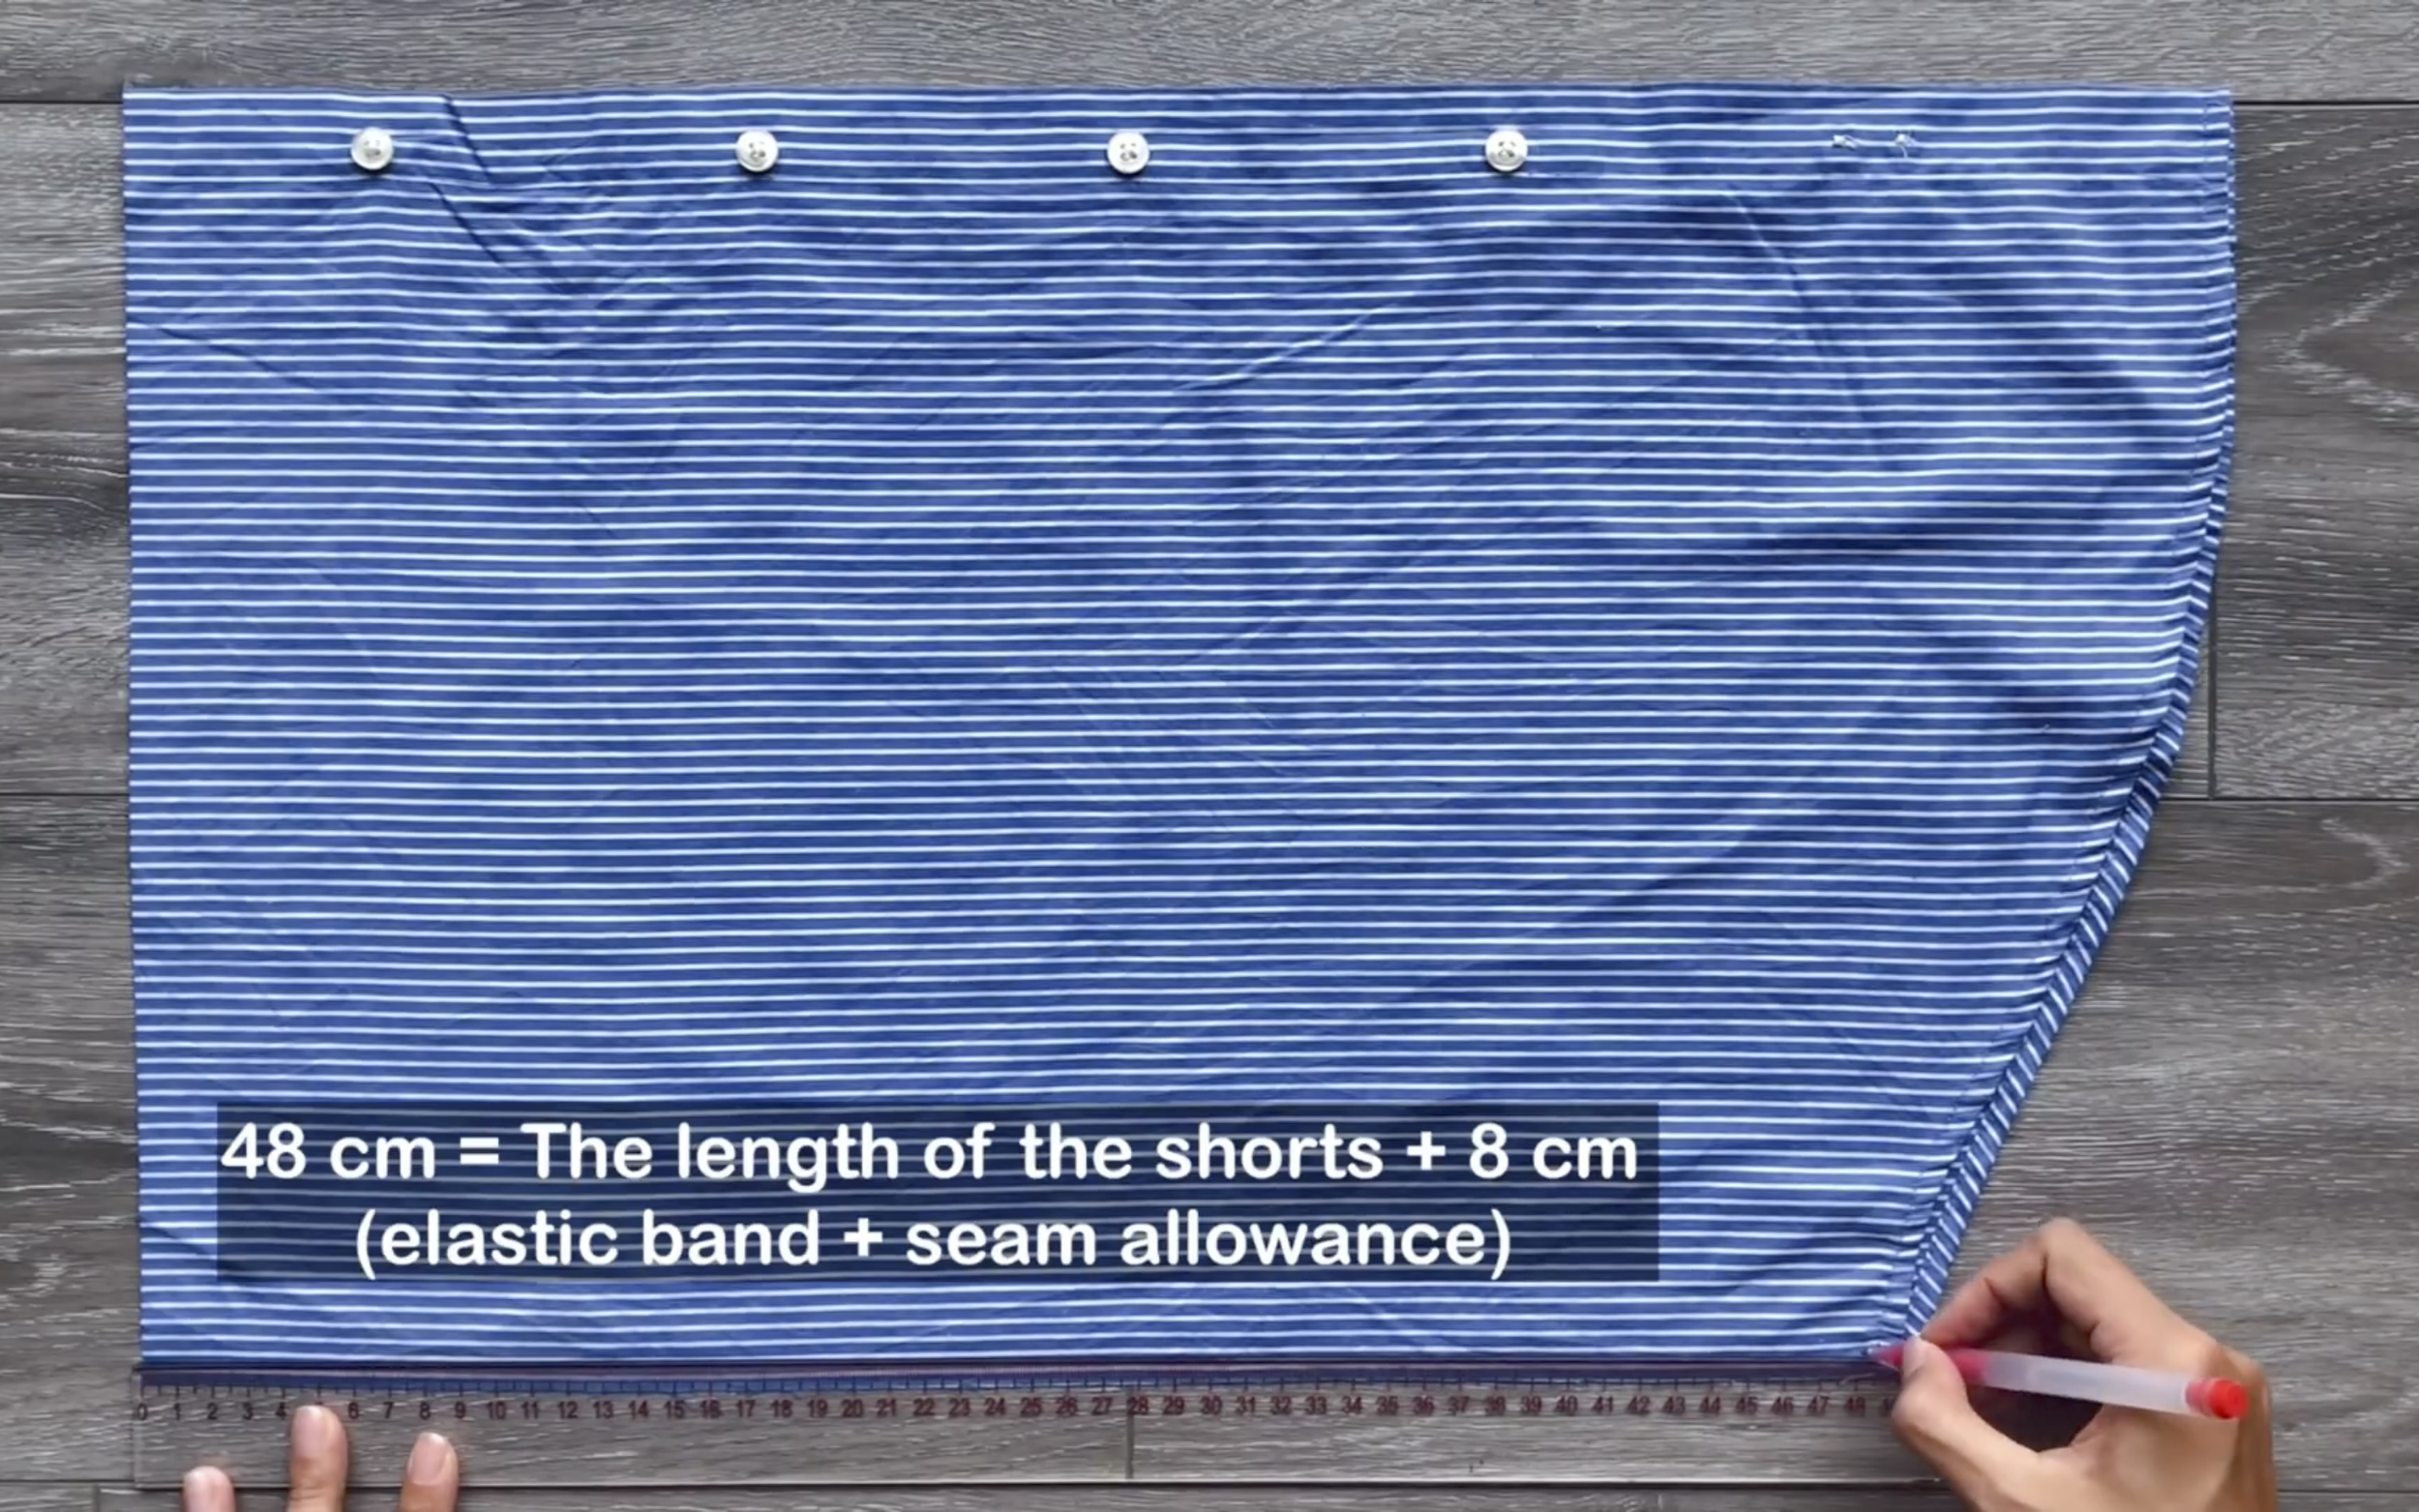
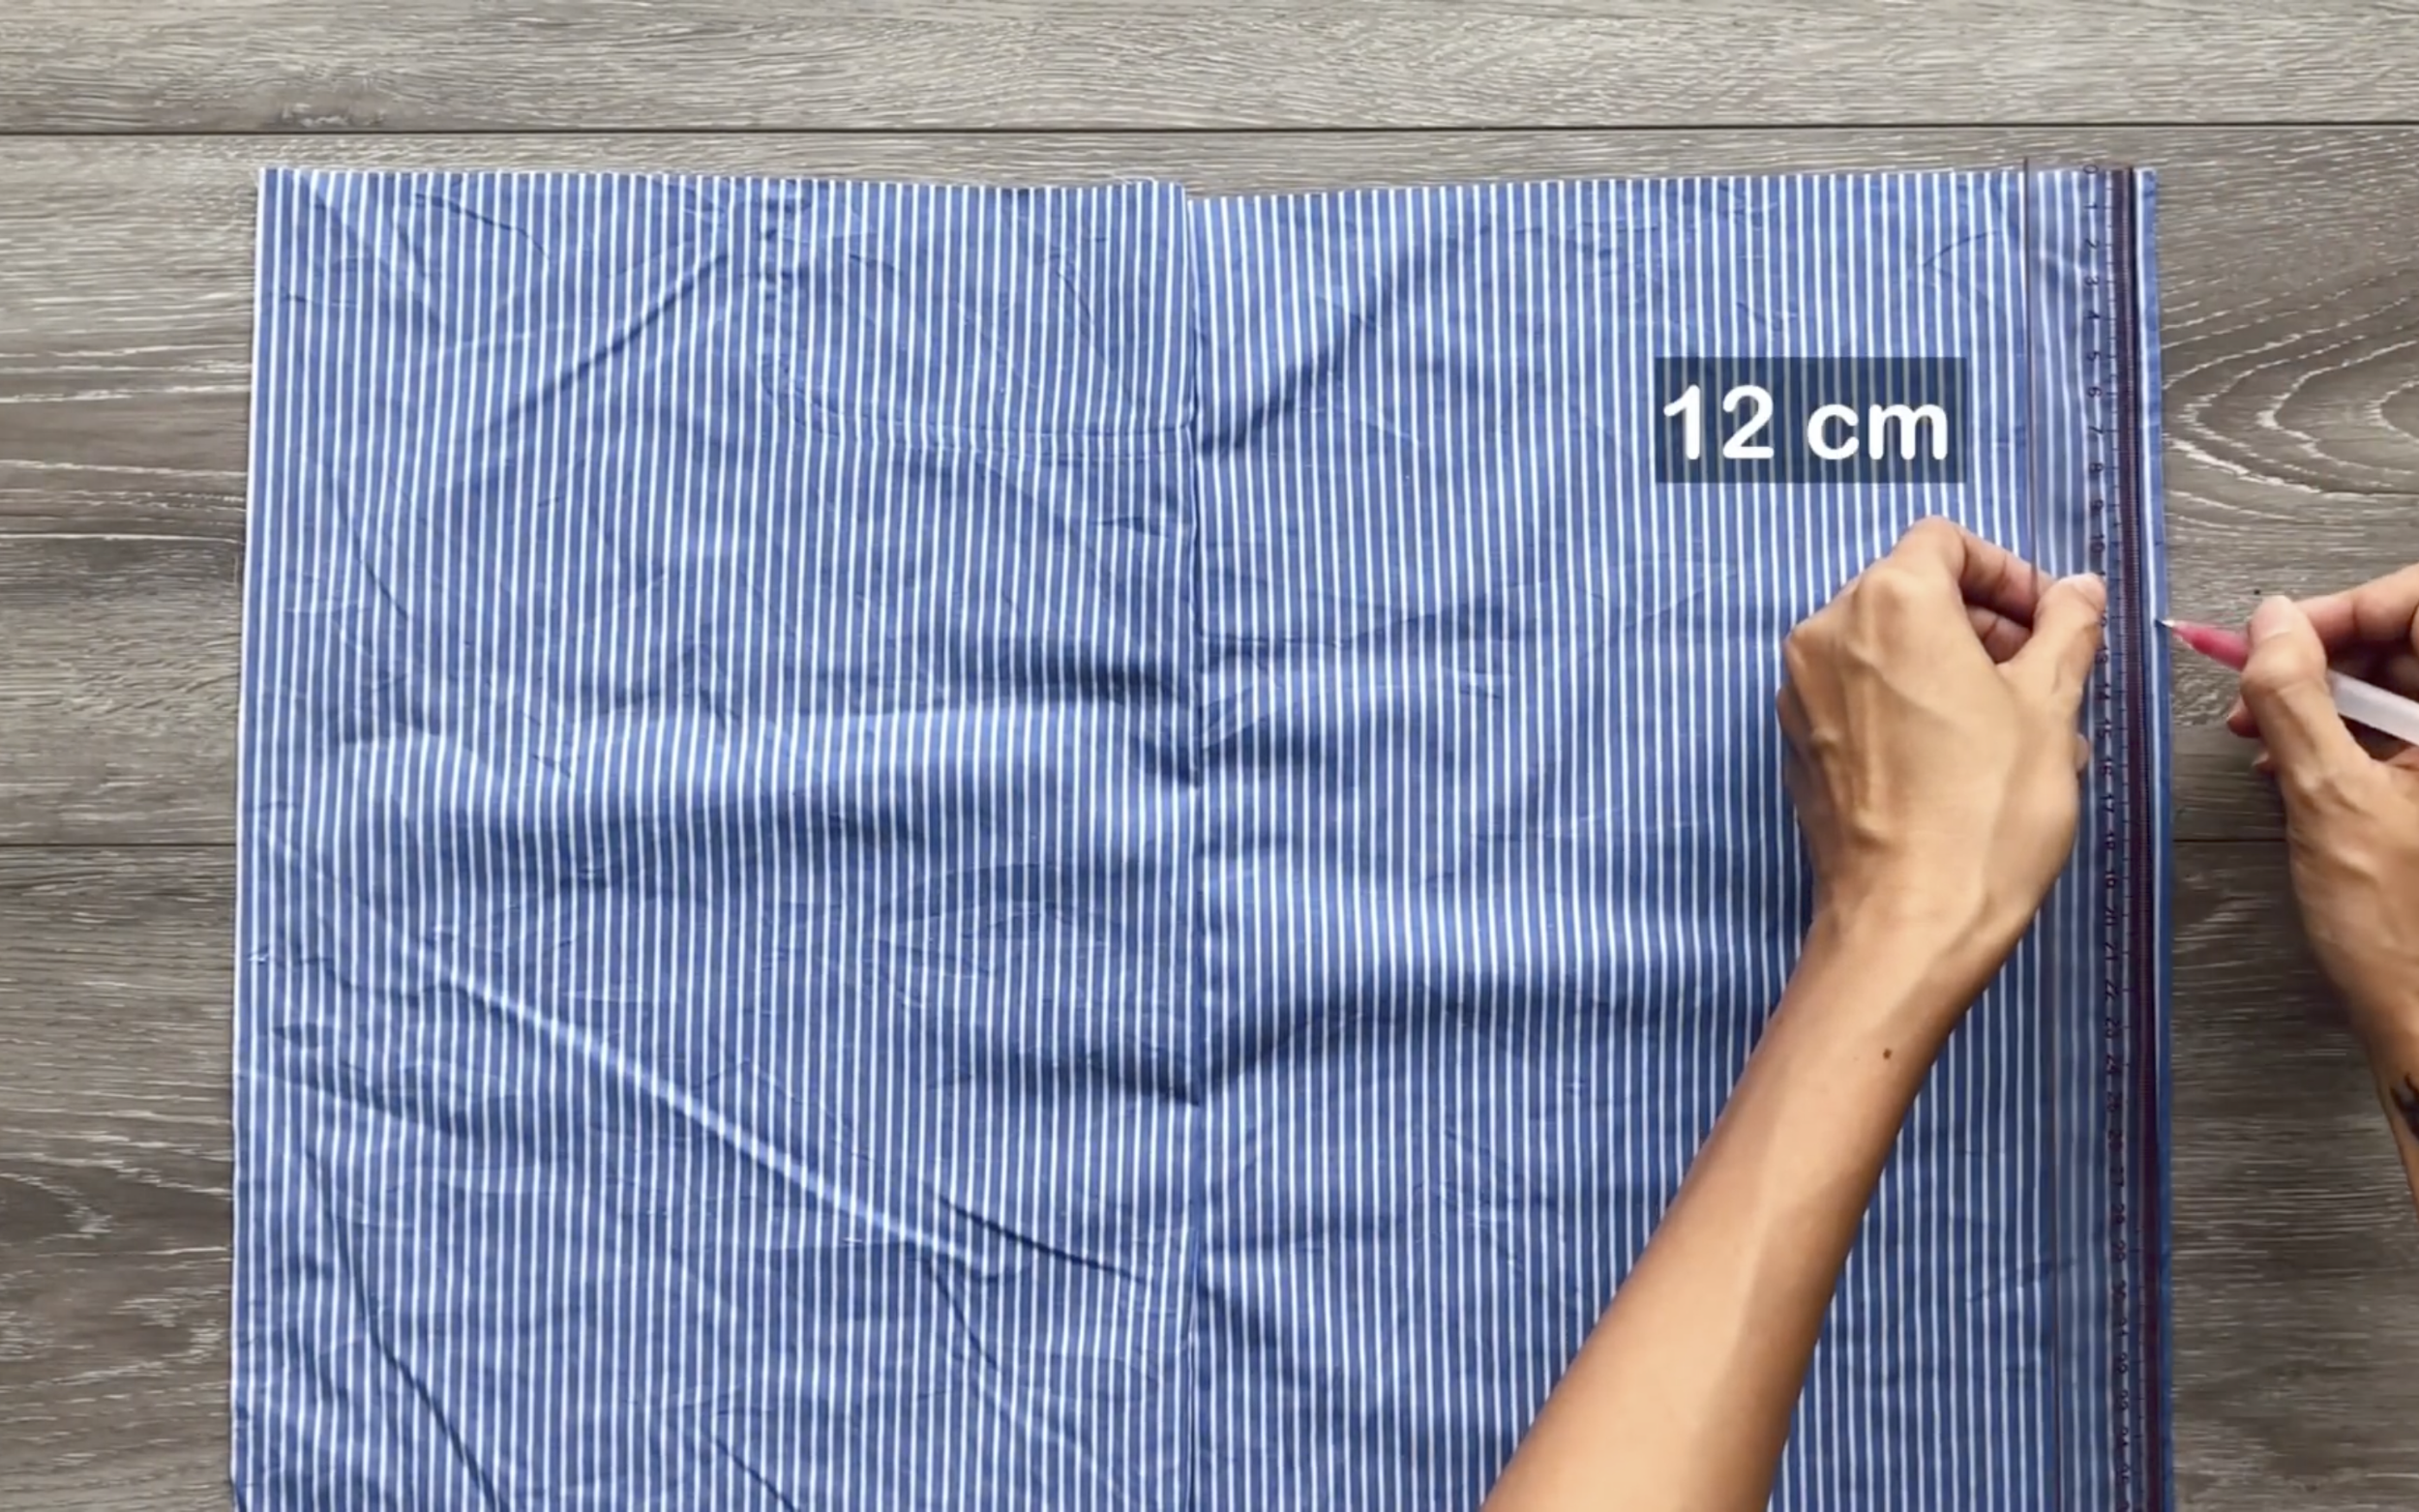
Draw a rectangle with 48 cm length (the desired length of the shorts plus 8 cm for the elastic band and seam allowance)…
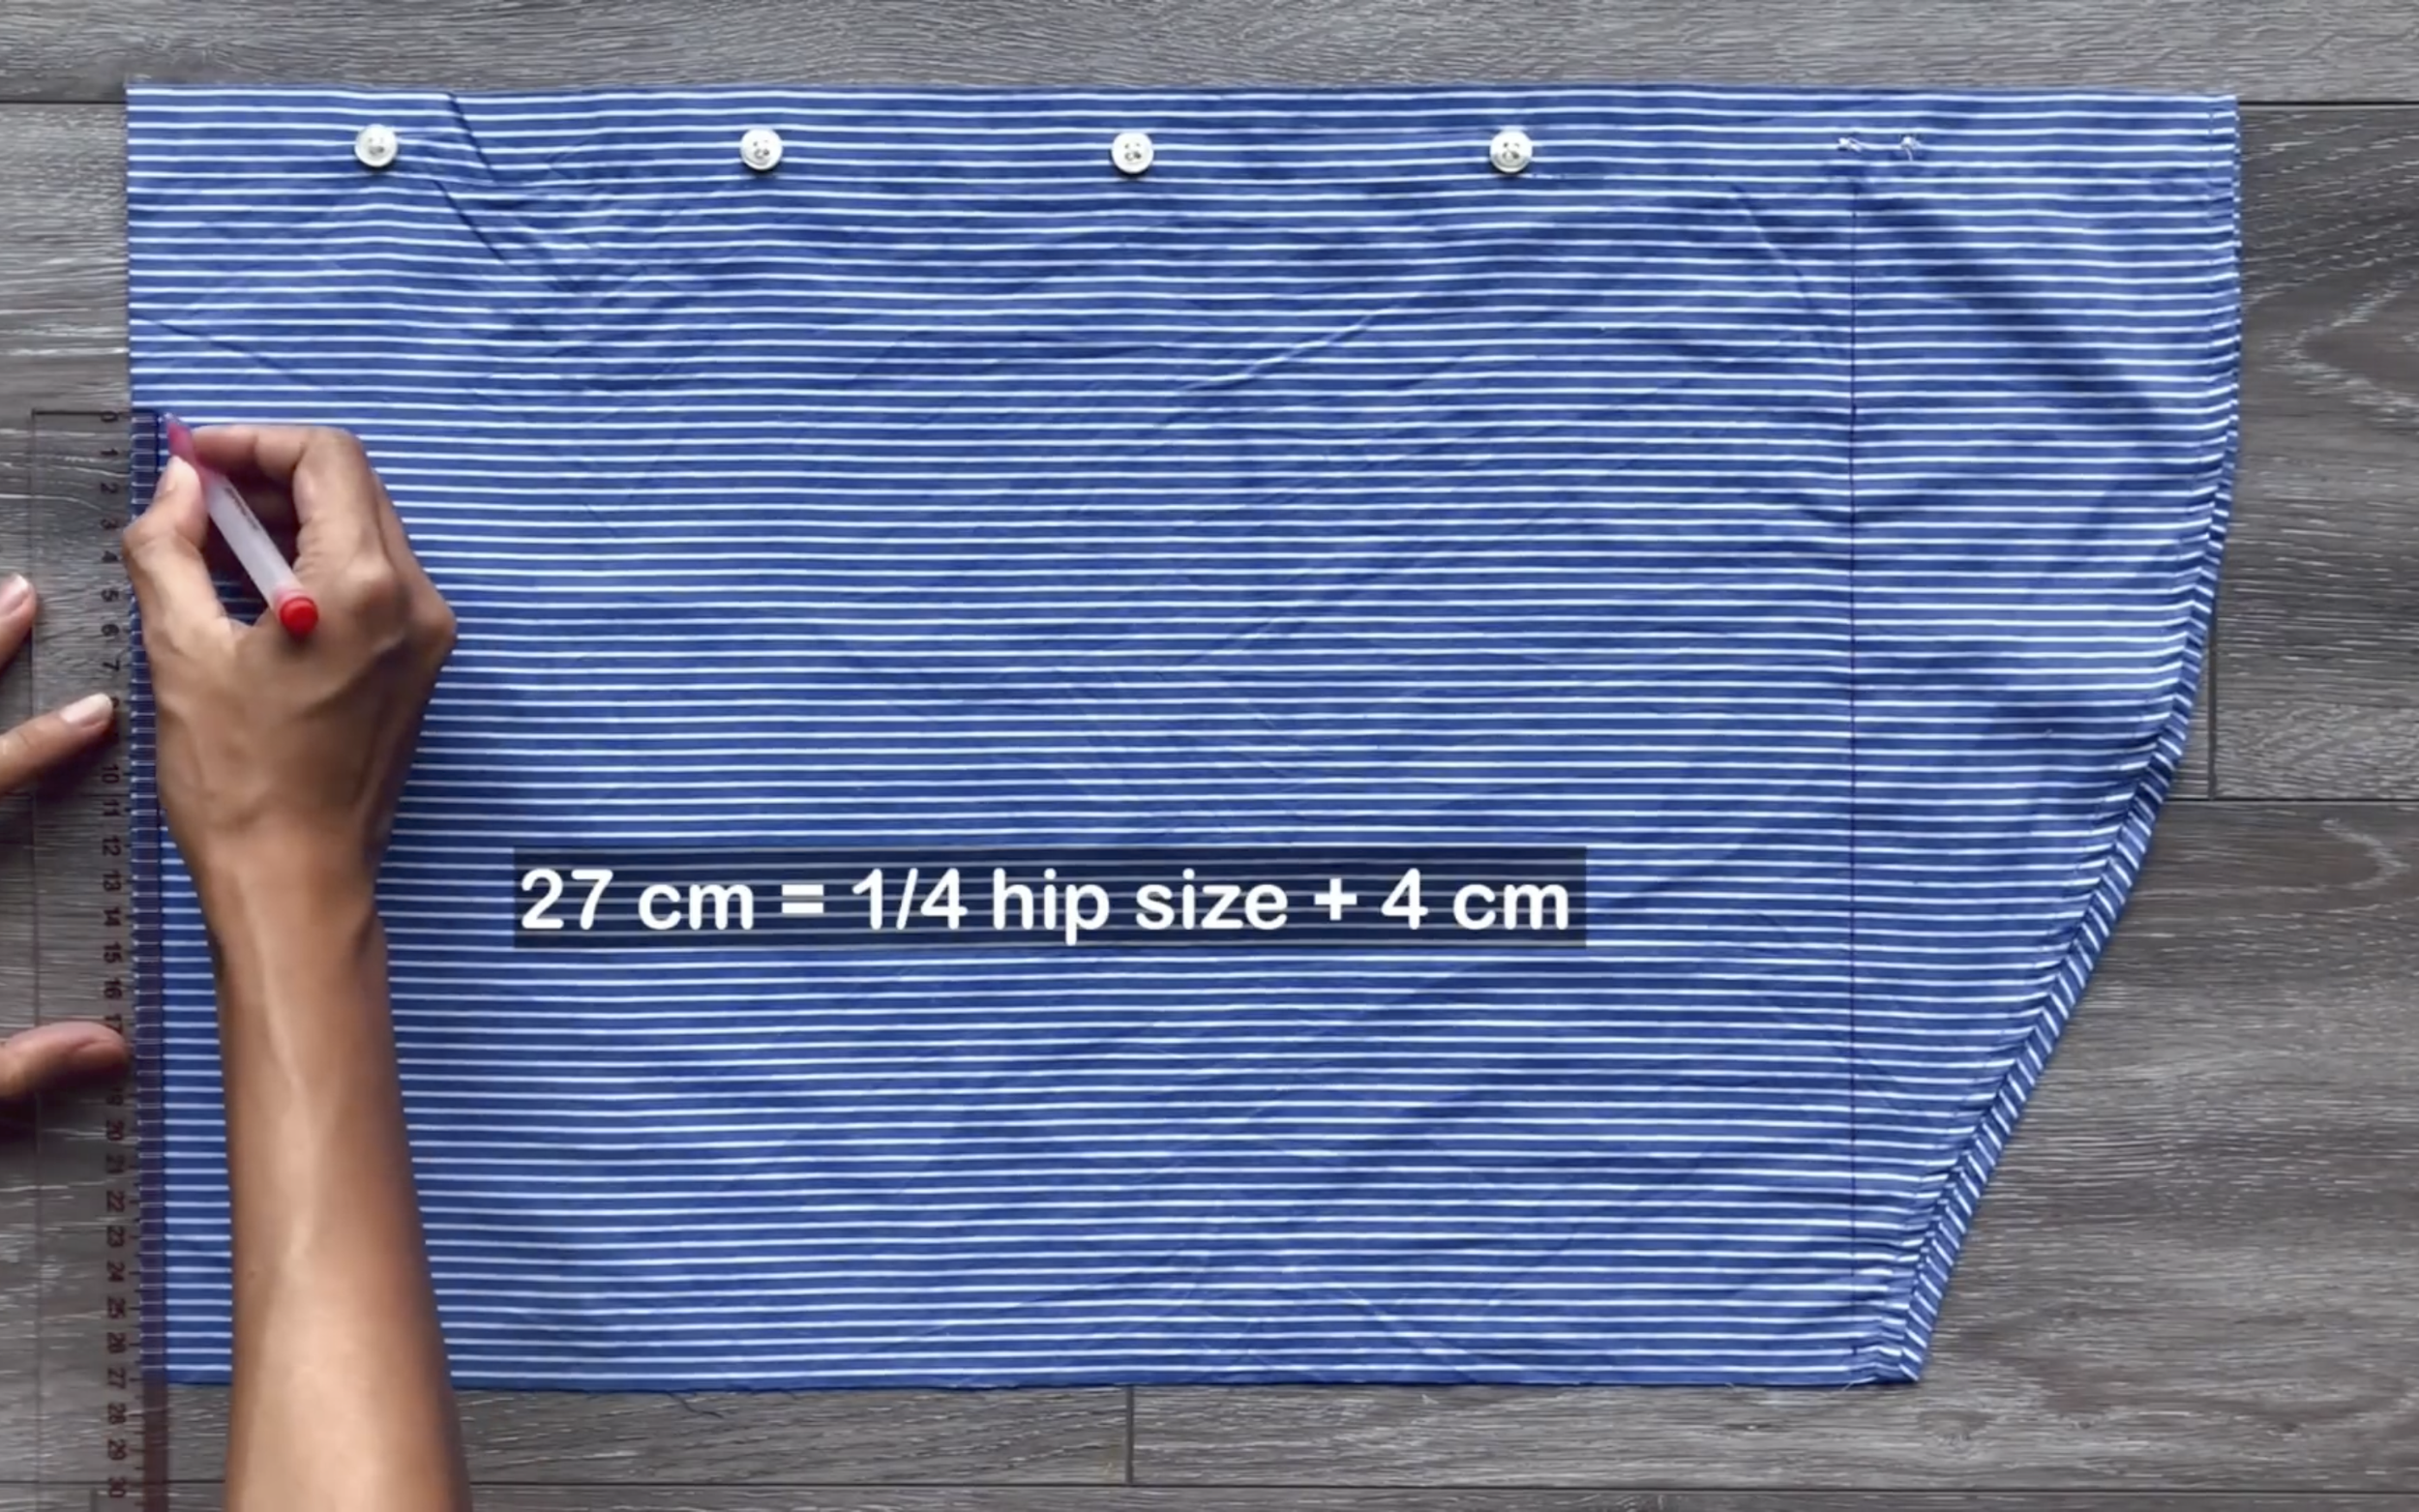
… and 27 cm width (a quarter of hip size plus 4 cm, or bigger for looser shorts).
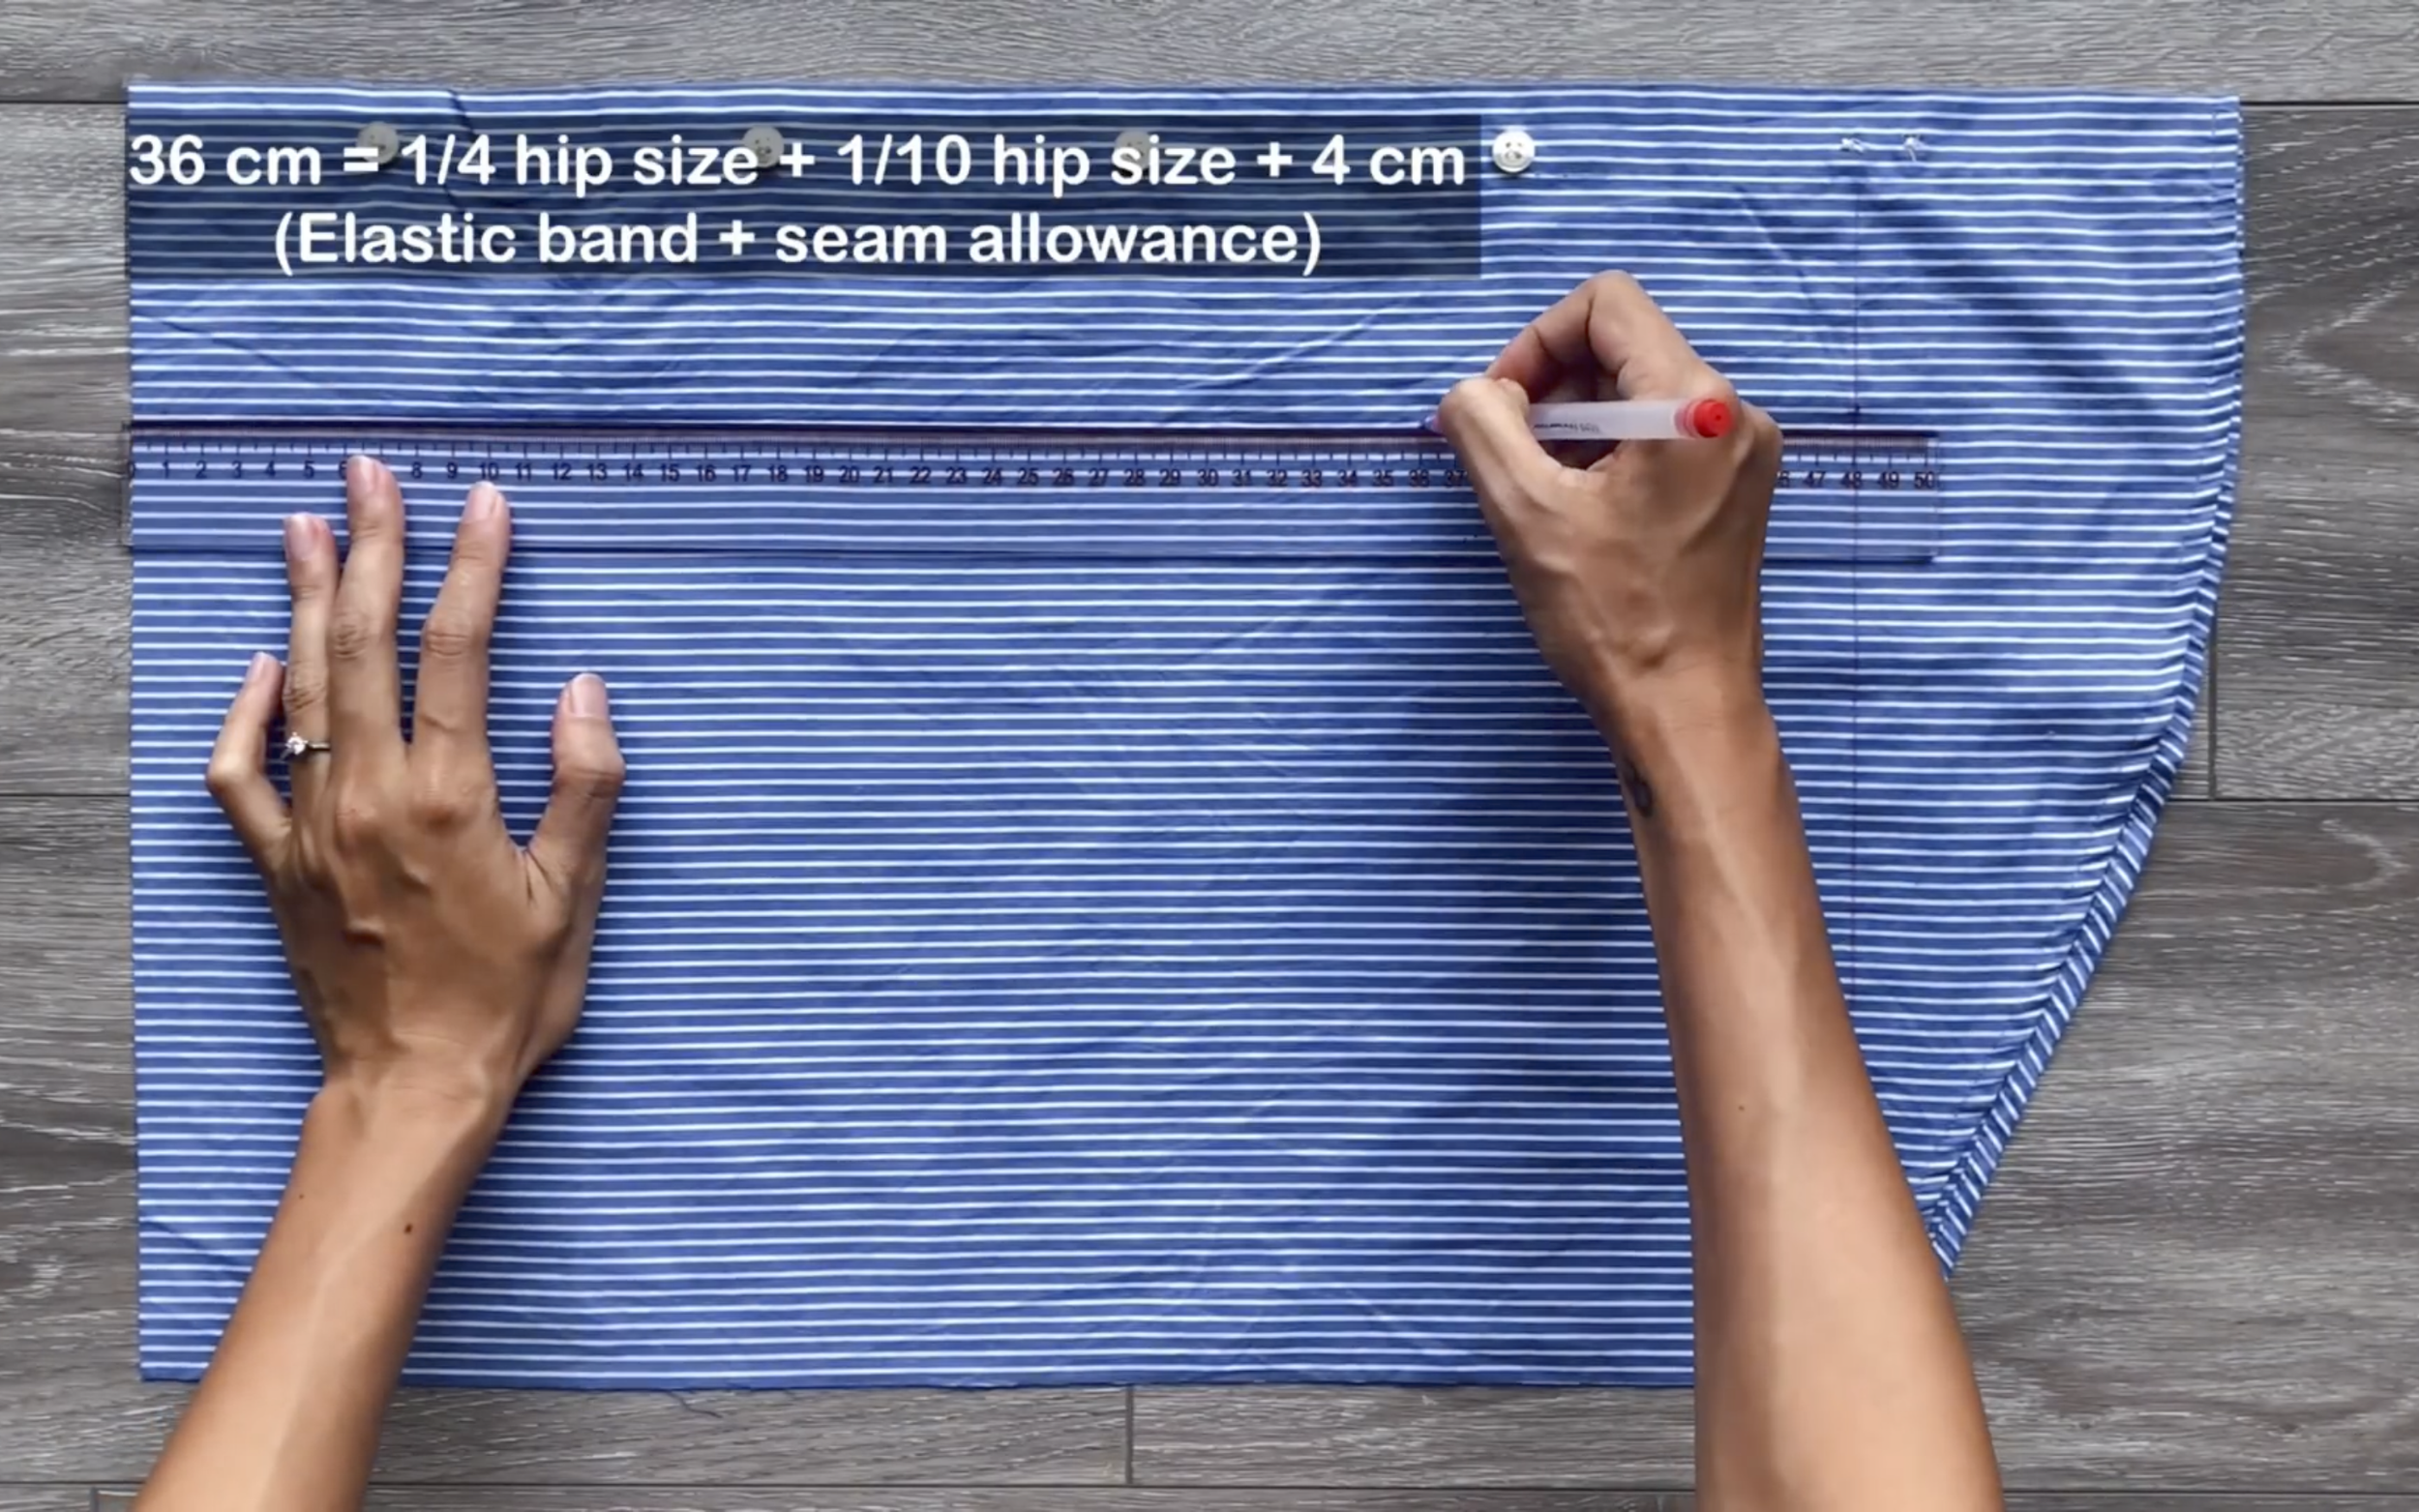
On one side, mark at 36 cm from the top (a quarter of hip size plus 1/10 hip size plus 4 cm for the elastic band and seam allowance).
This is the end position of the crotch line of the shorts.
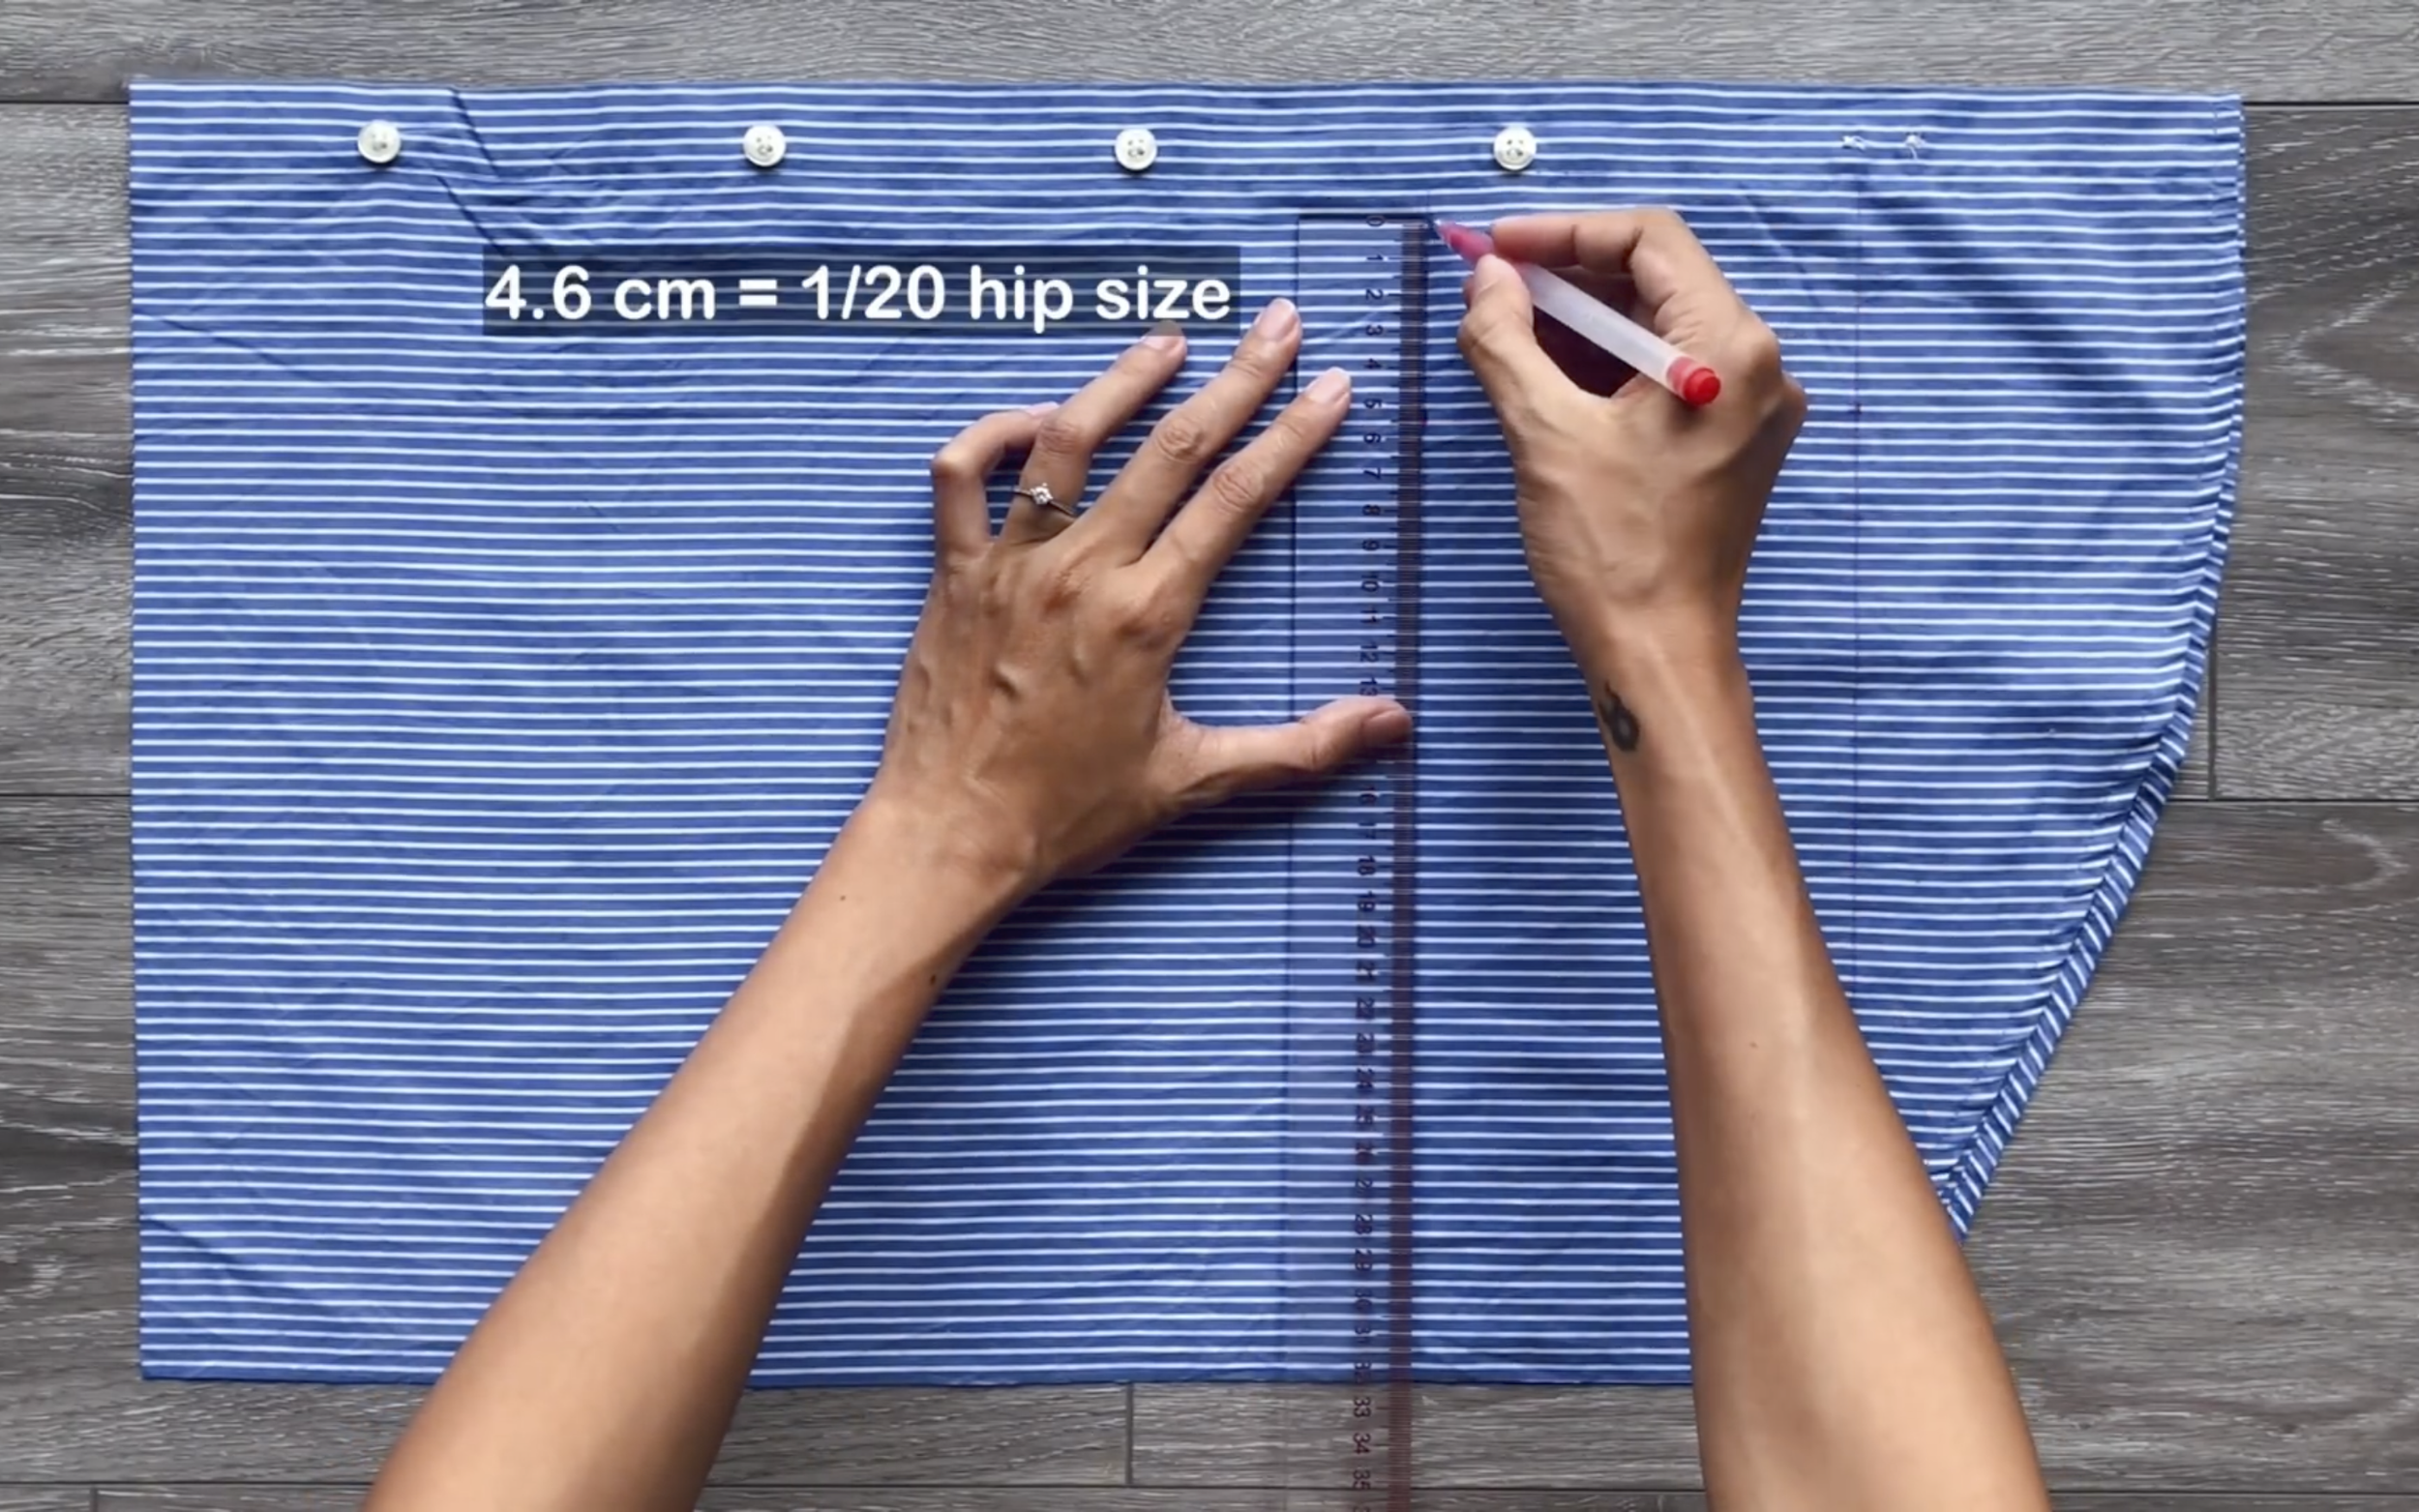
From this mark, draw a straight line outward, 4.6 cm (1/20 hip size), and connect it to the ending line of the front shorts with a horizontal line to create the inside leg line.

From the first mark, mark up 7 cm (the position of the biggest part of the butt).
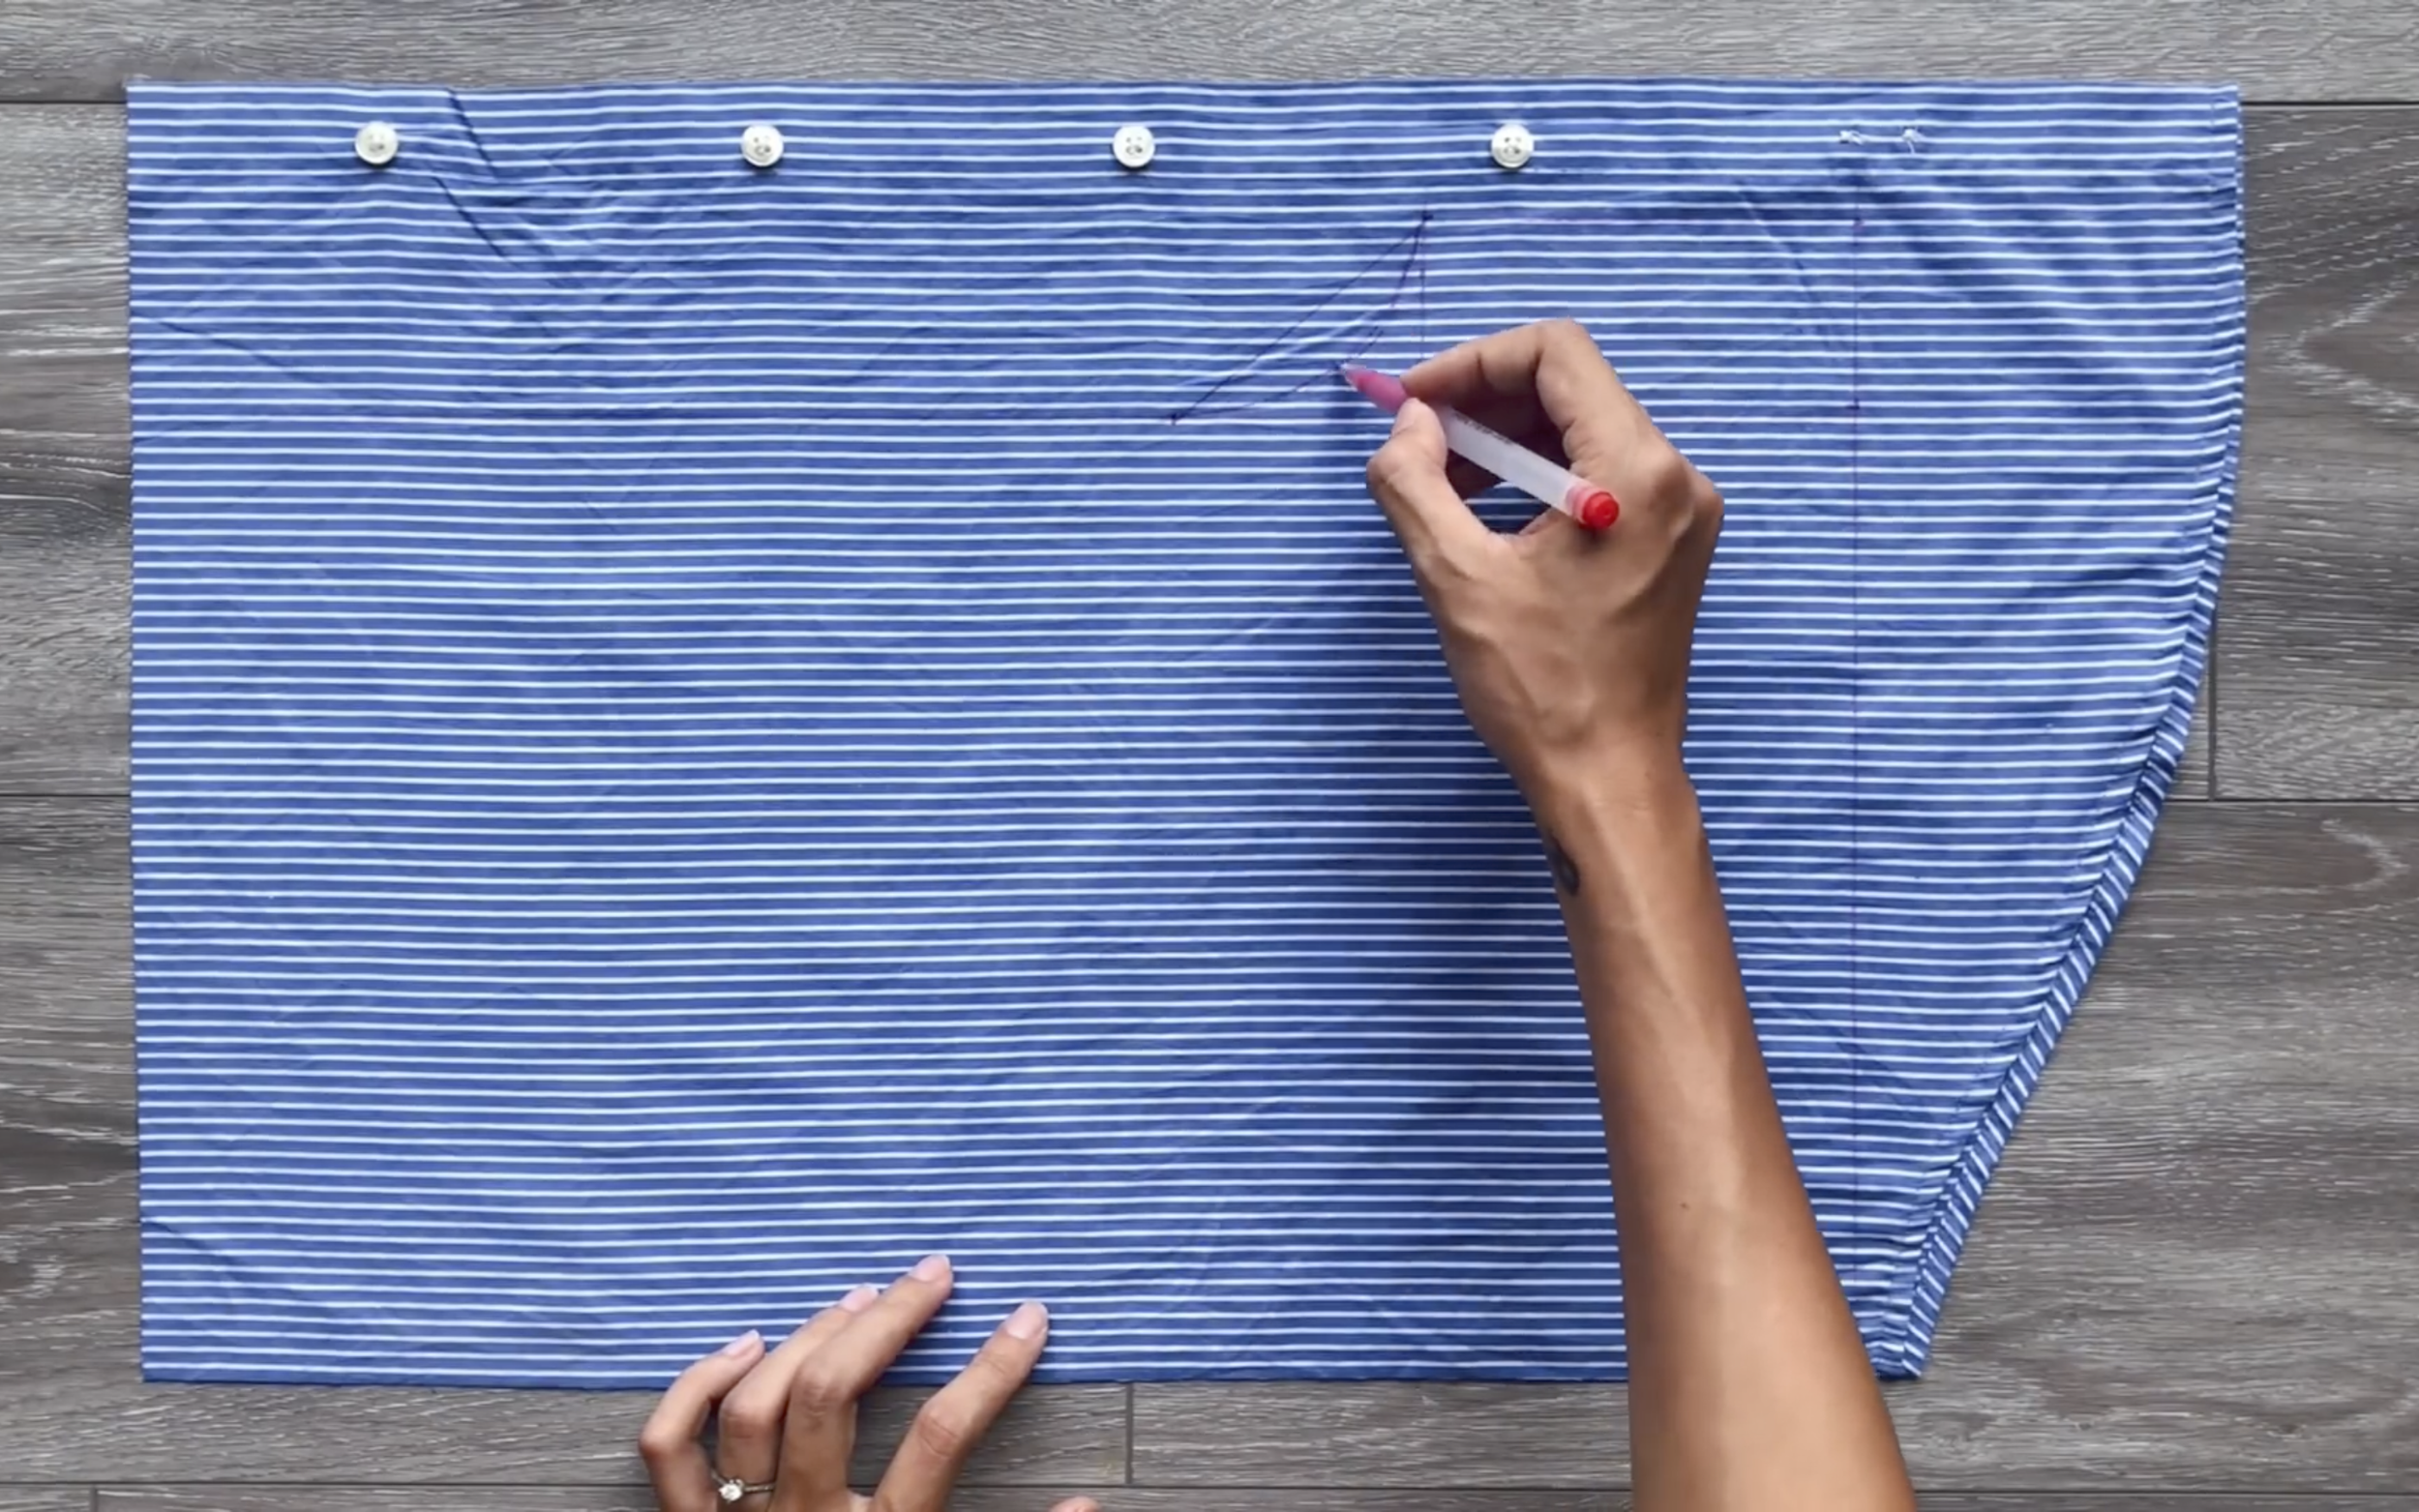
Connect this mark to the end of the straight line with a curved line to complete the crotch line for the front shorts.
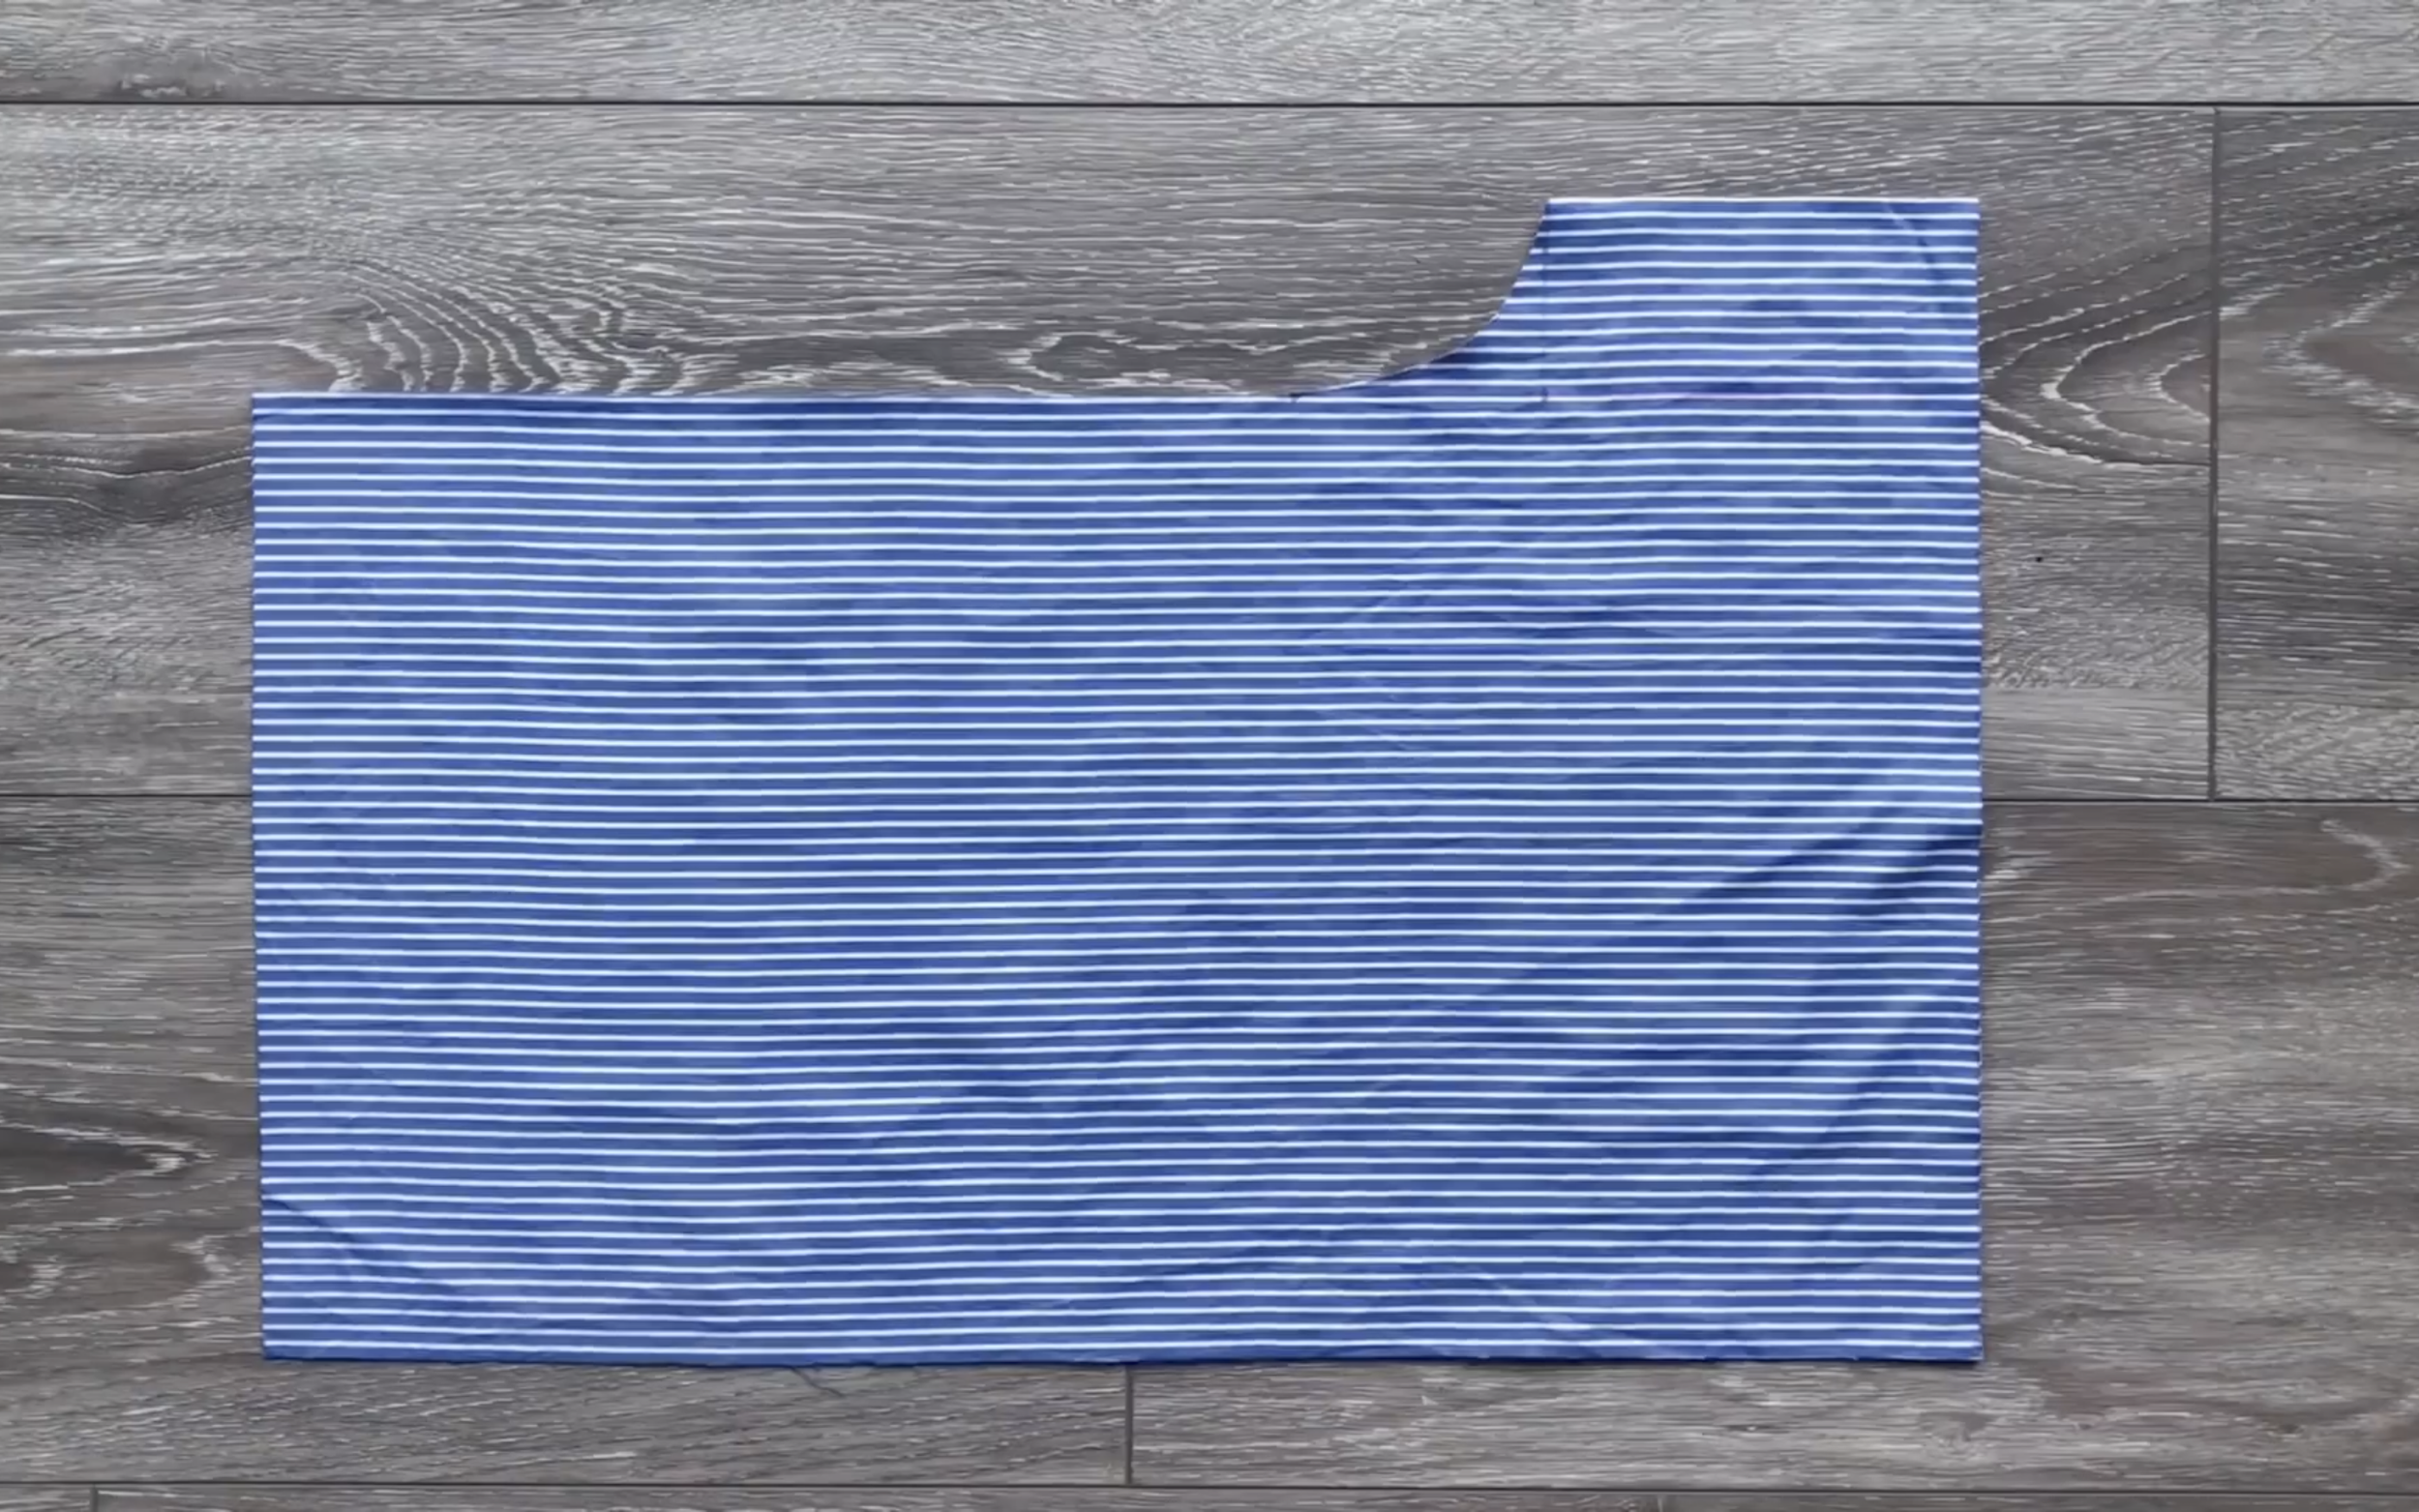
Cut to create two pieces for the front shorts.
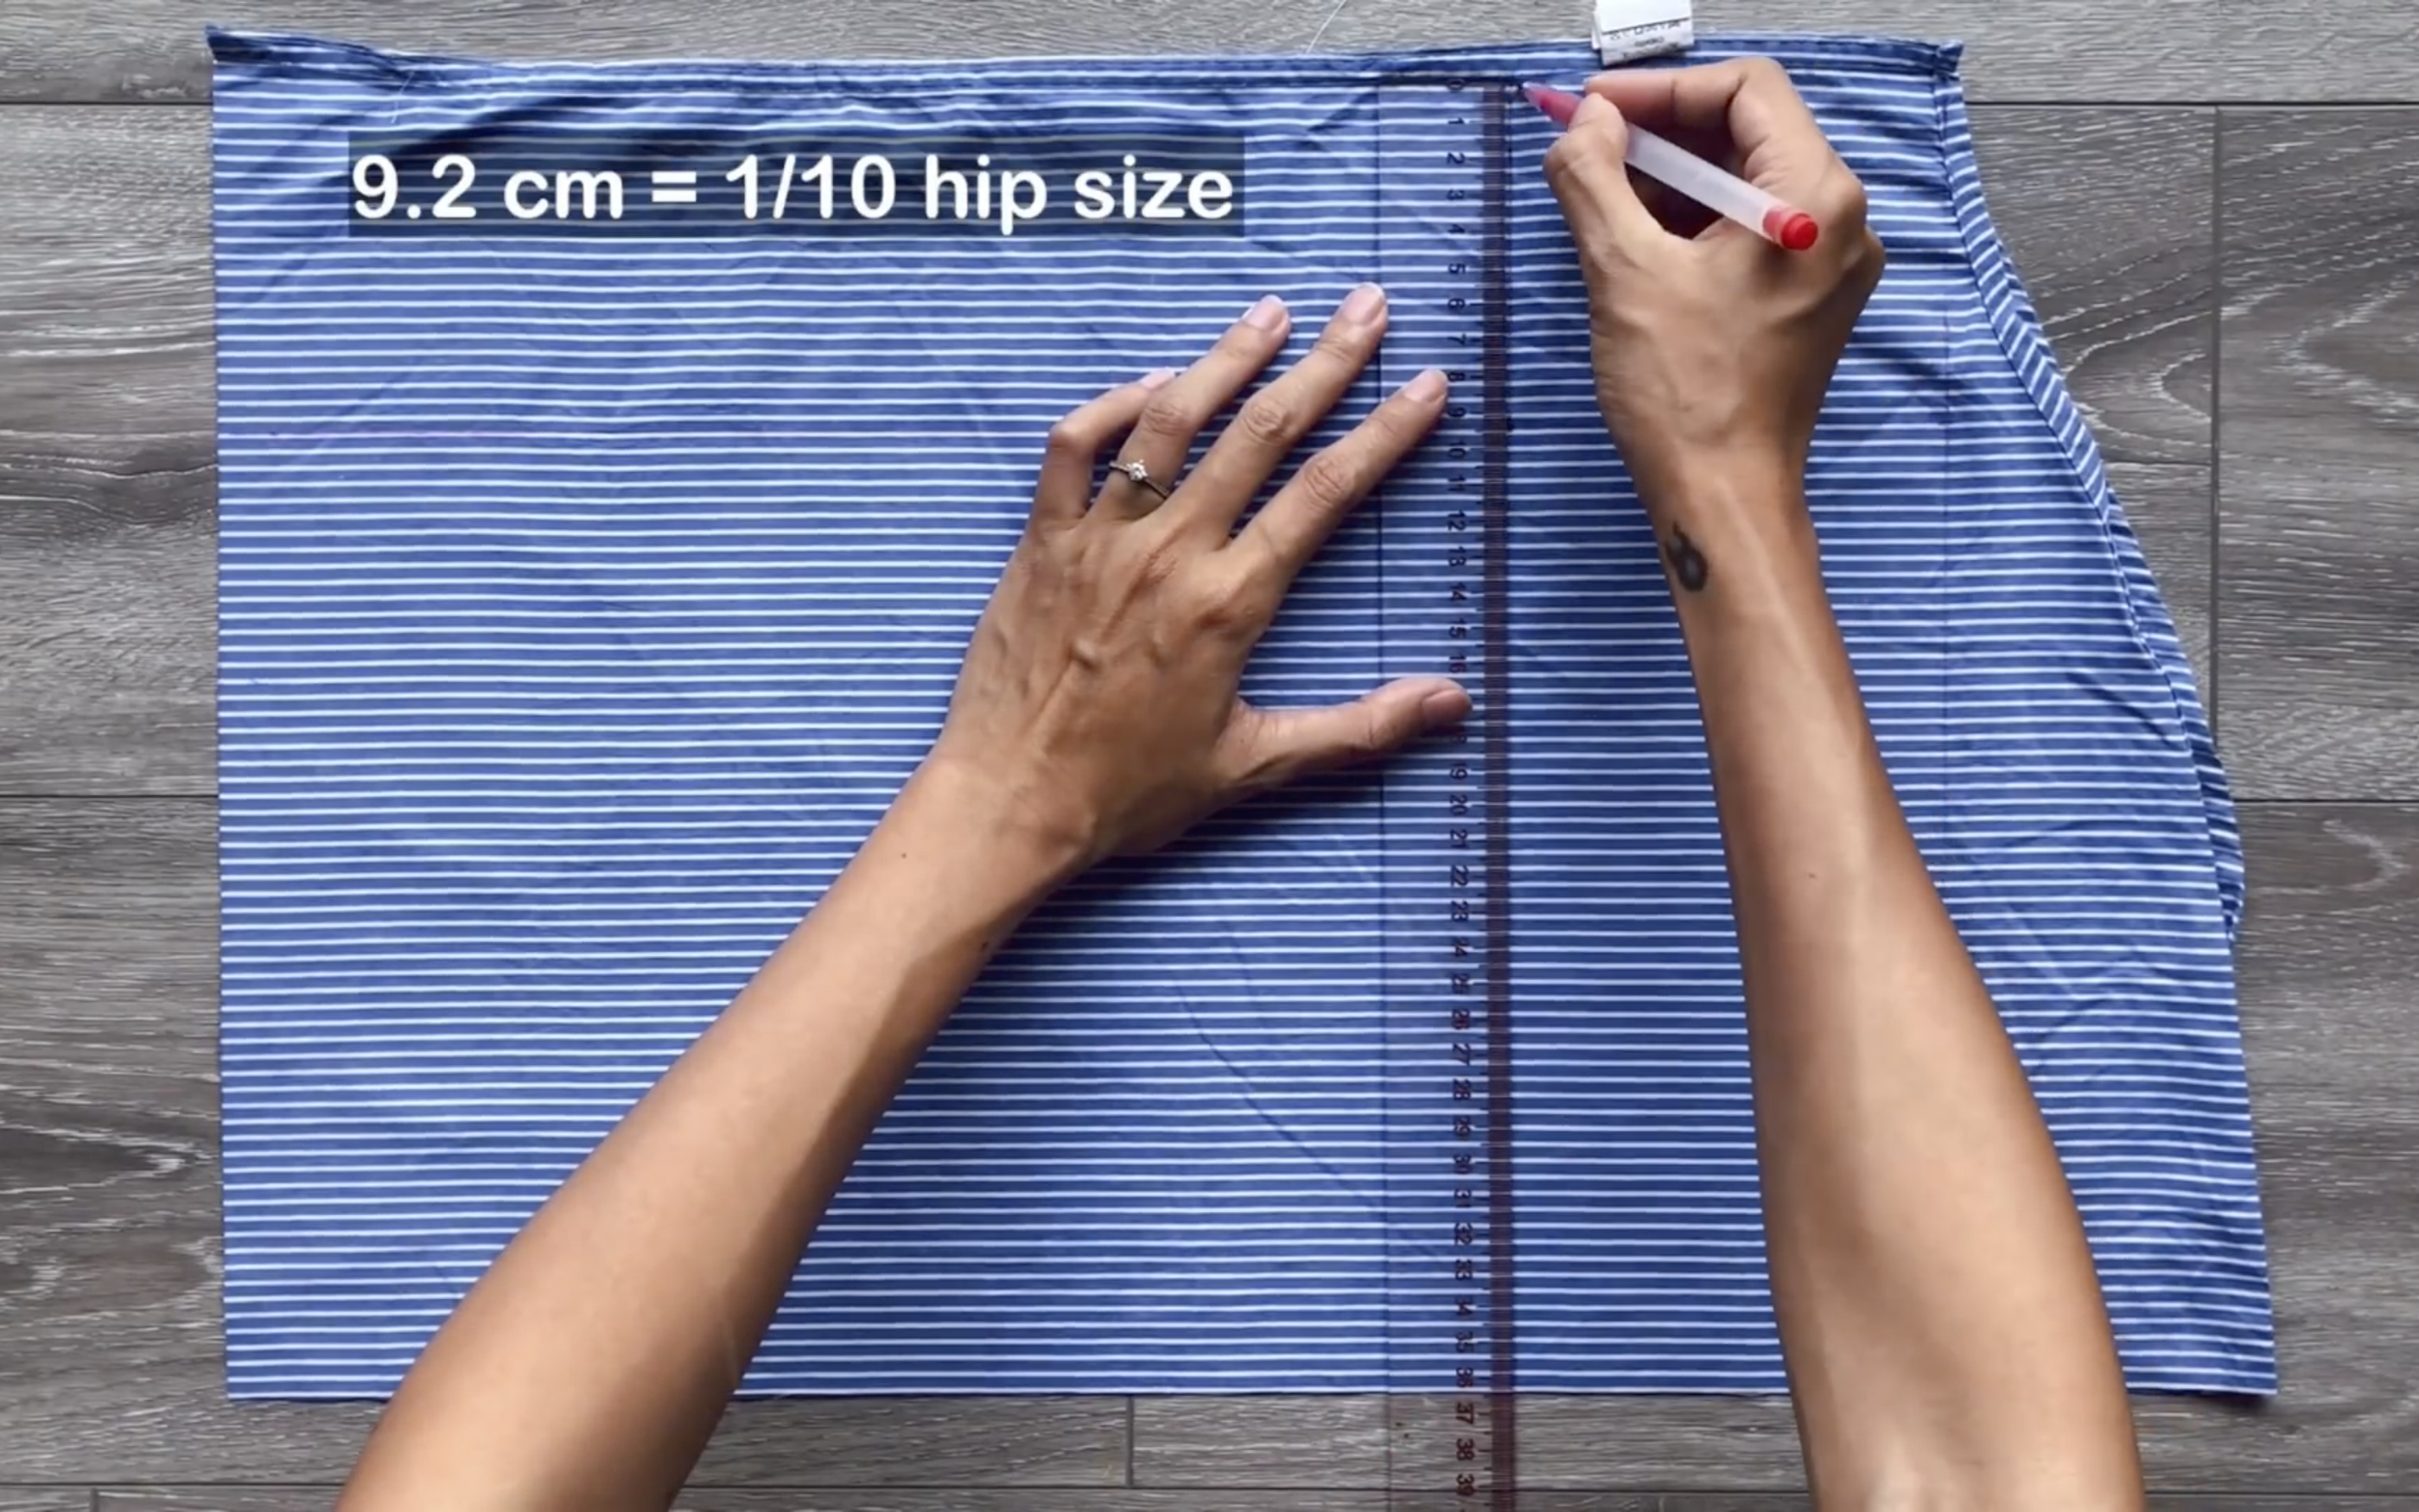
For the back shorts, follow the same process as the front, but make the width of the straight line 9.2 cm (1/10 hip size) instead of 4.6 cm.
To make pockets for the shorts, use the fabric from the top of the man shirt.
Cut four pocket pieces with dimensions of 28 cm length and 20 cm width.
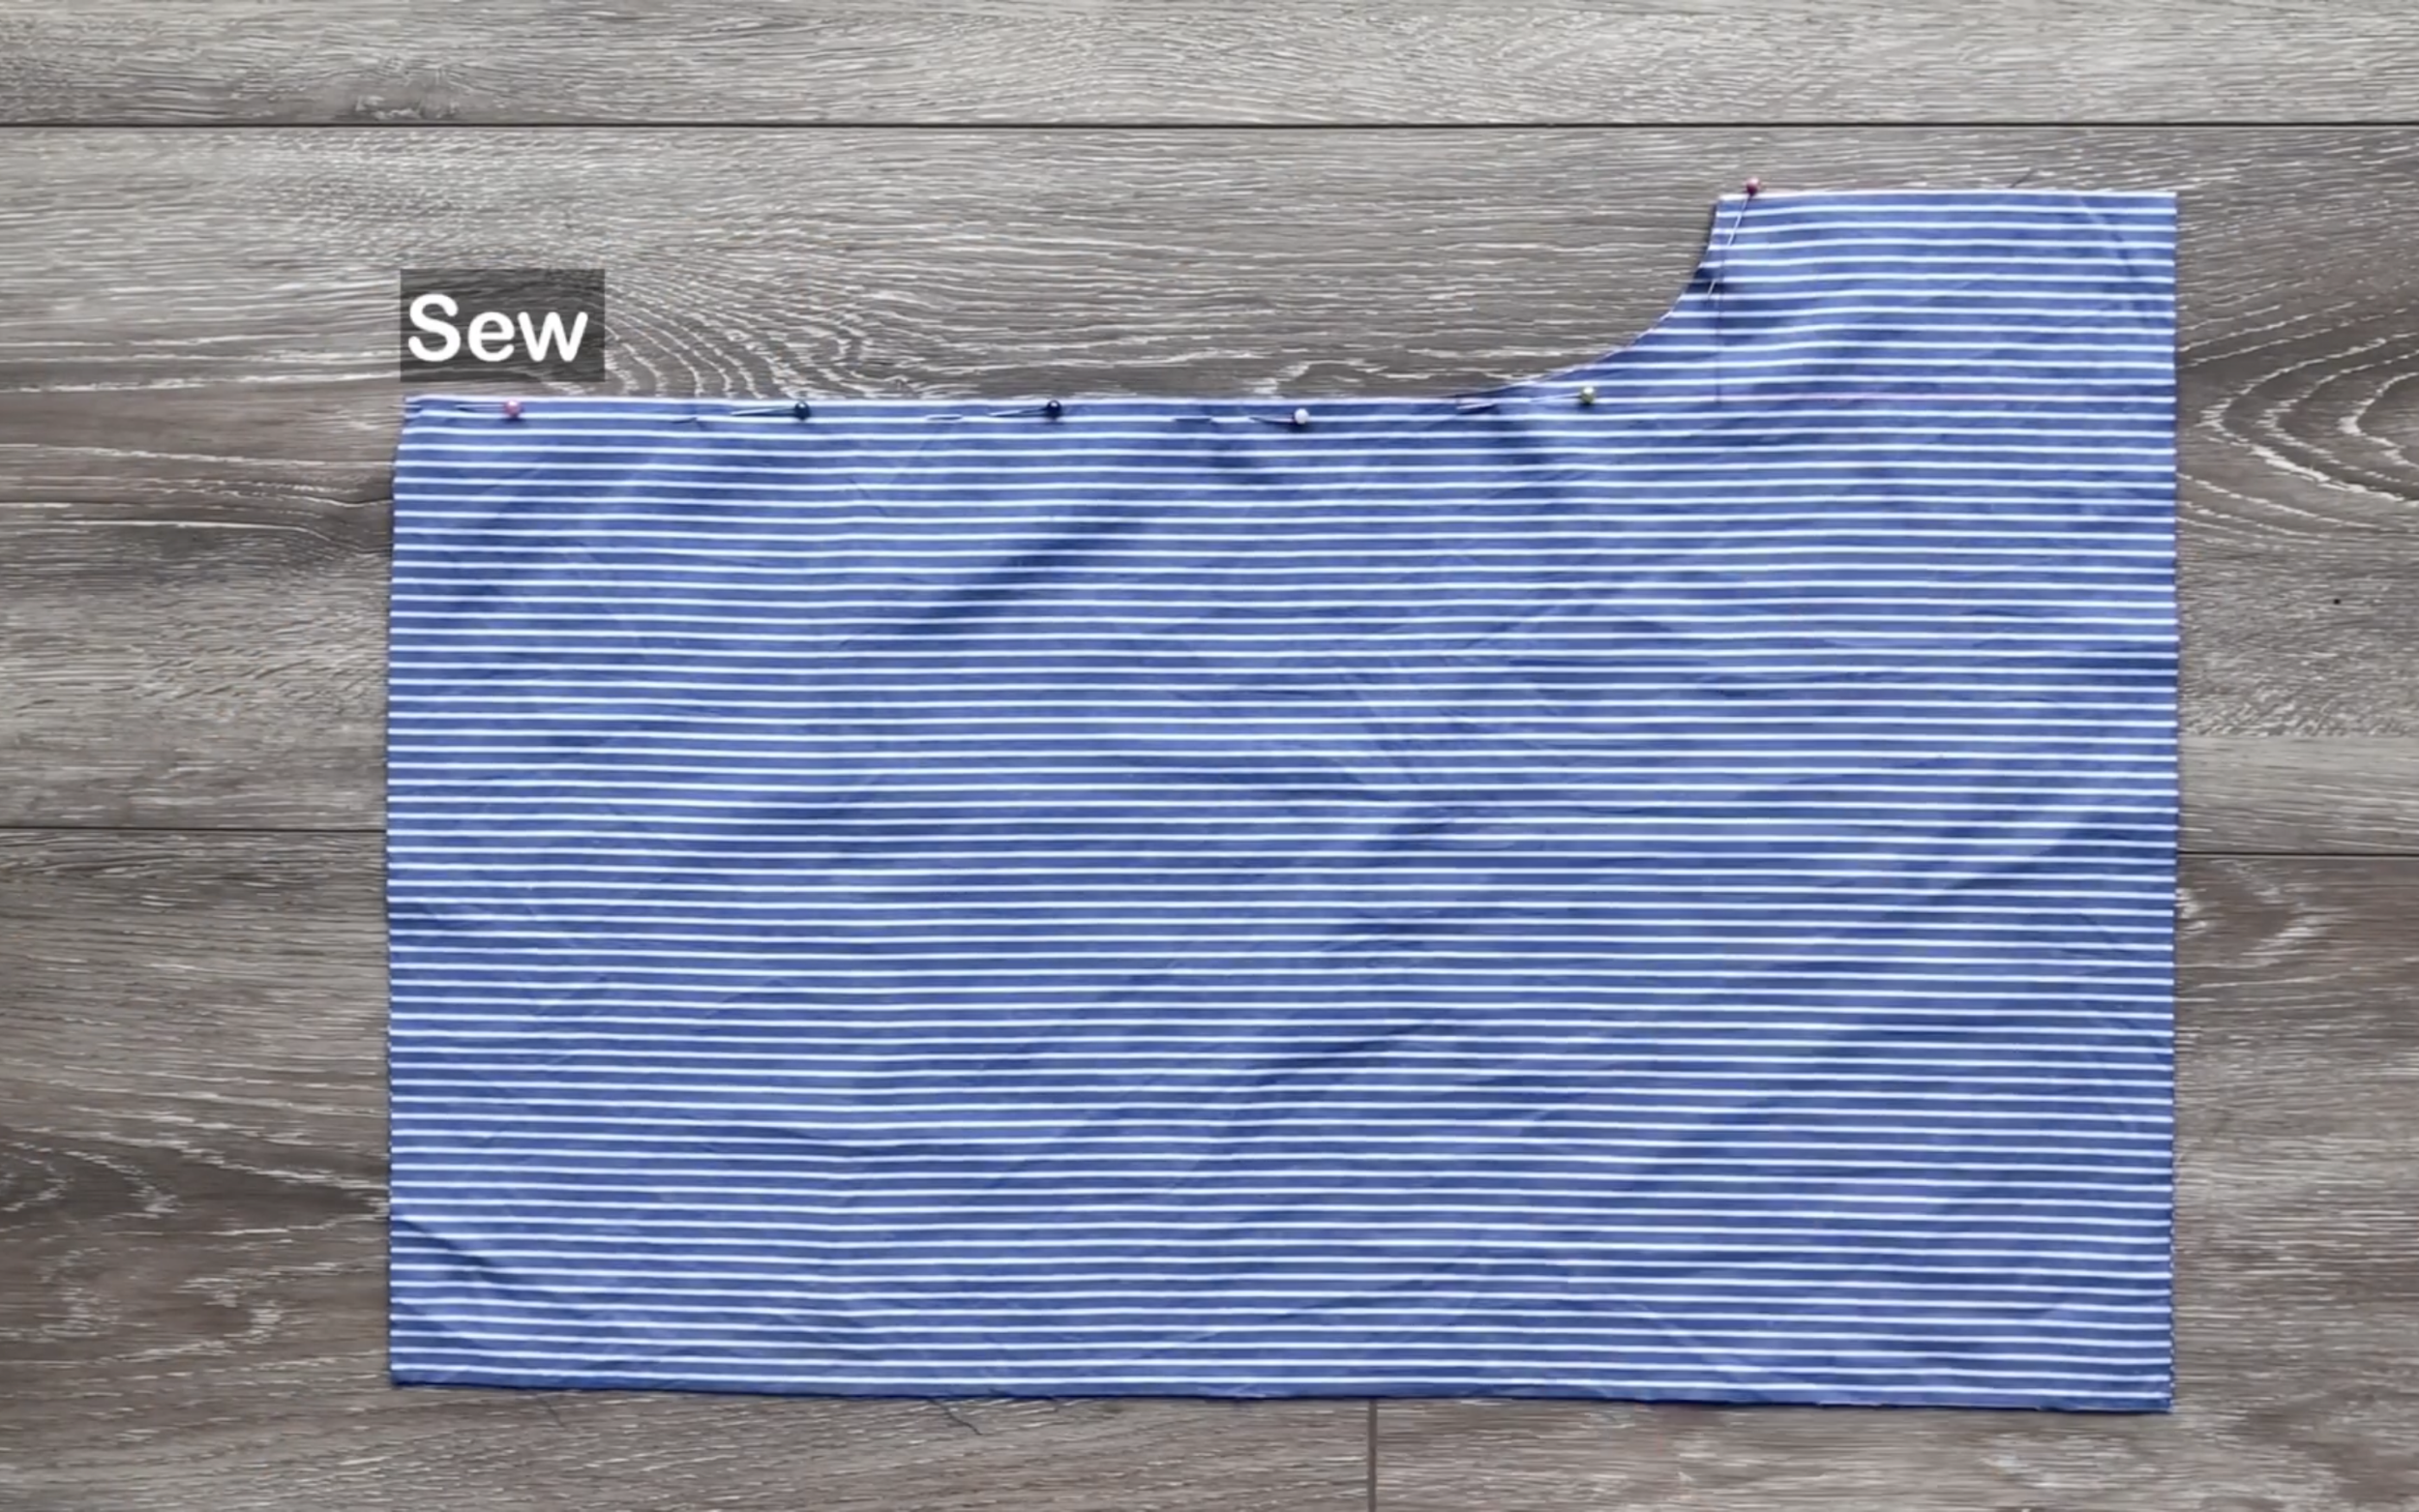
Connect the two front shorts pieces by the crotch line.
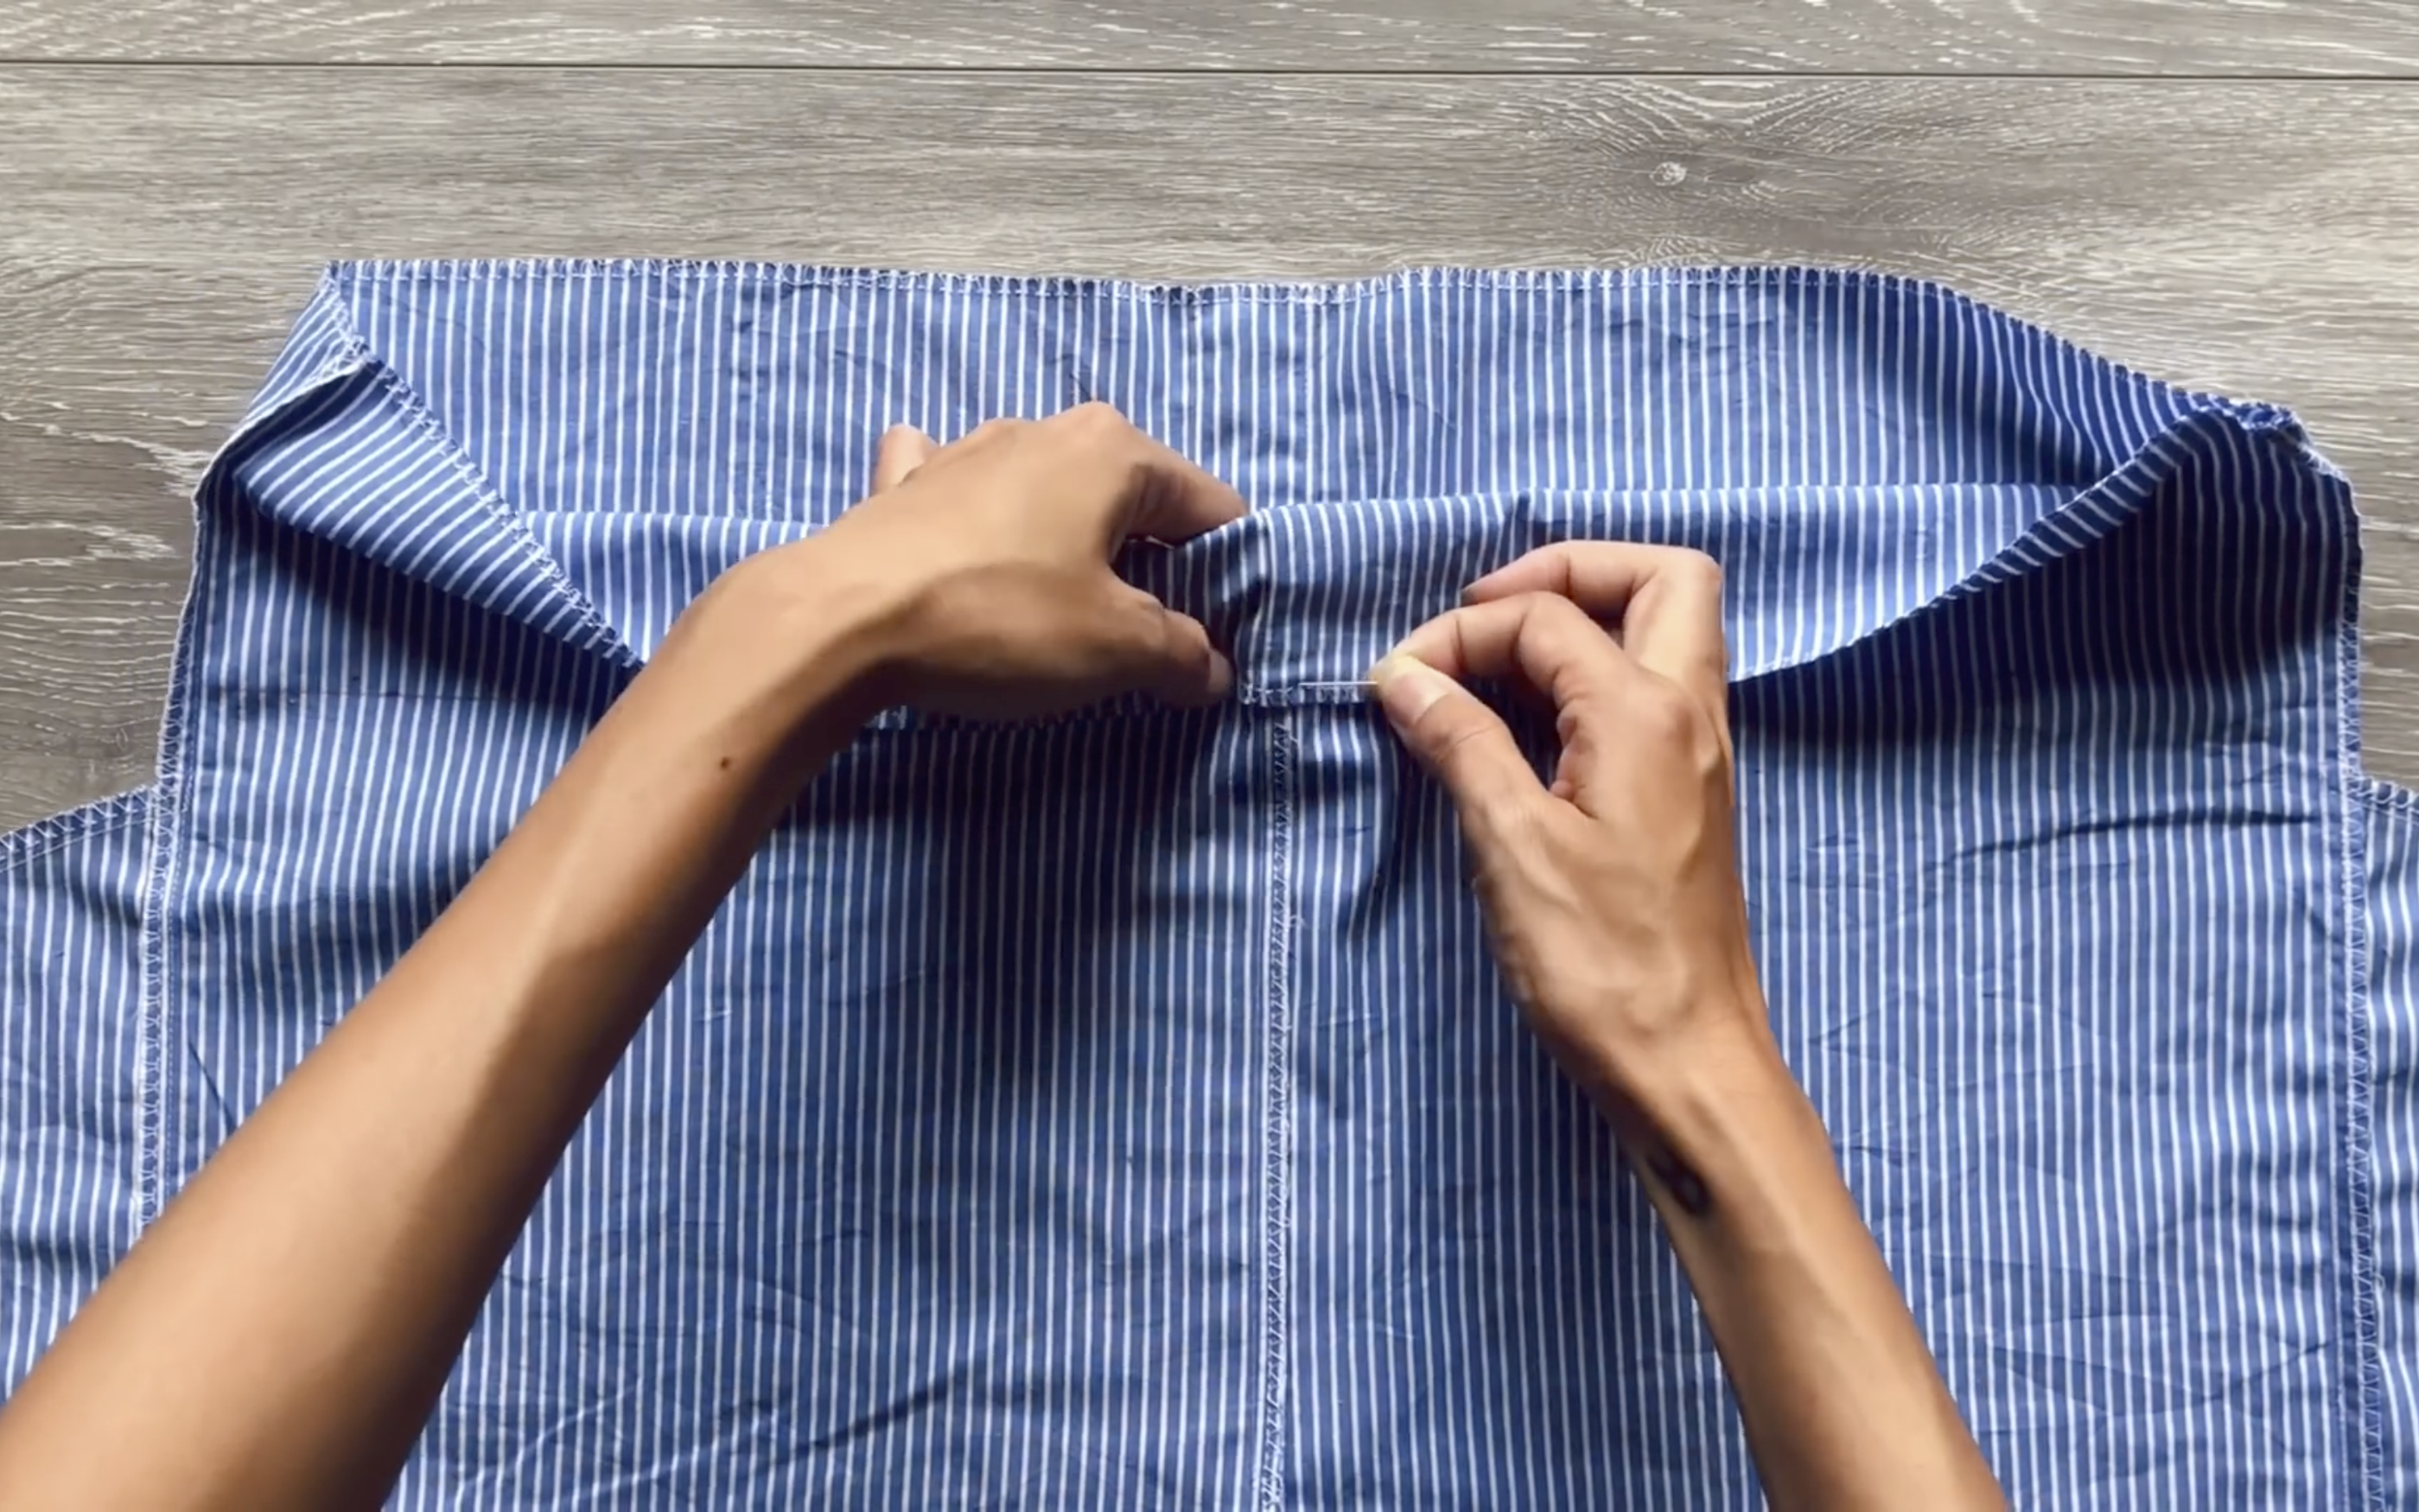
Mark 12 cm down from the top of the shorts on both side lines. This marks the pocket position.
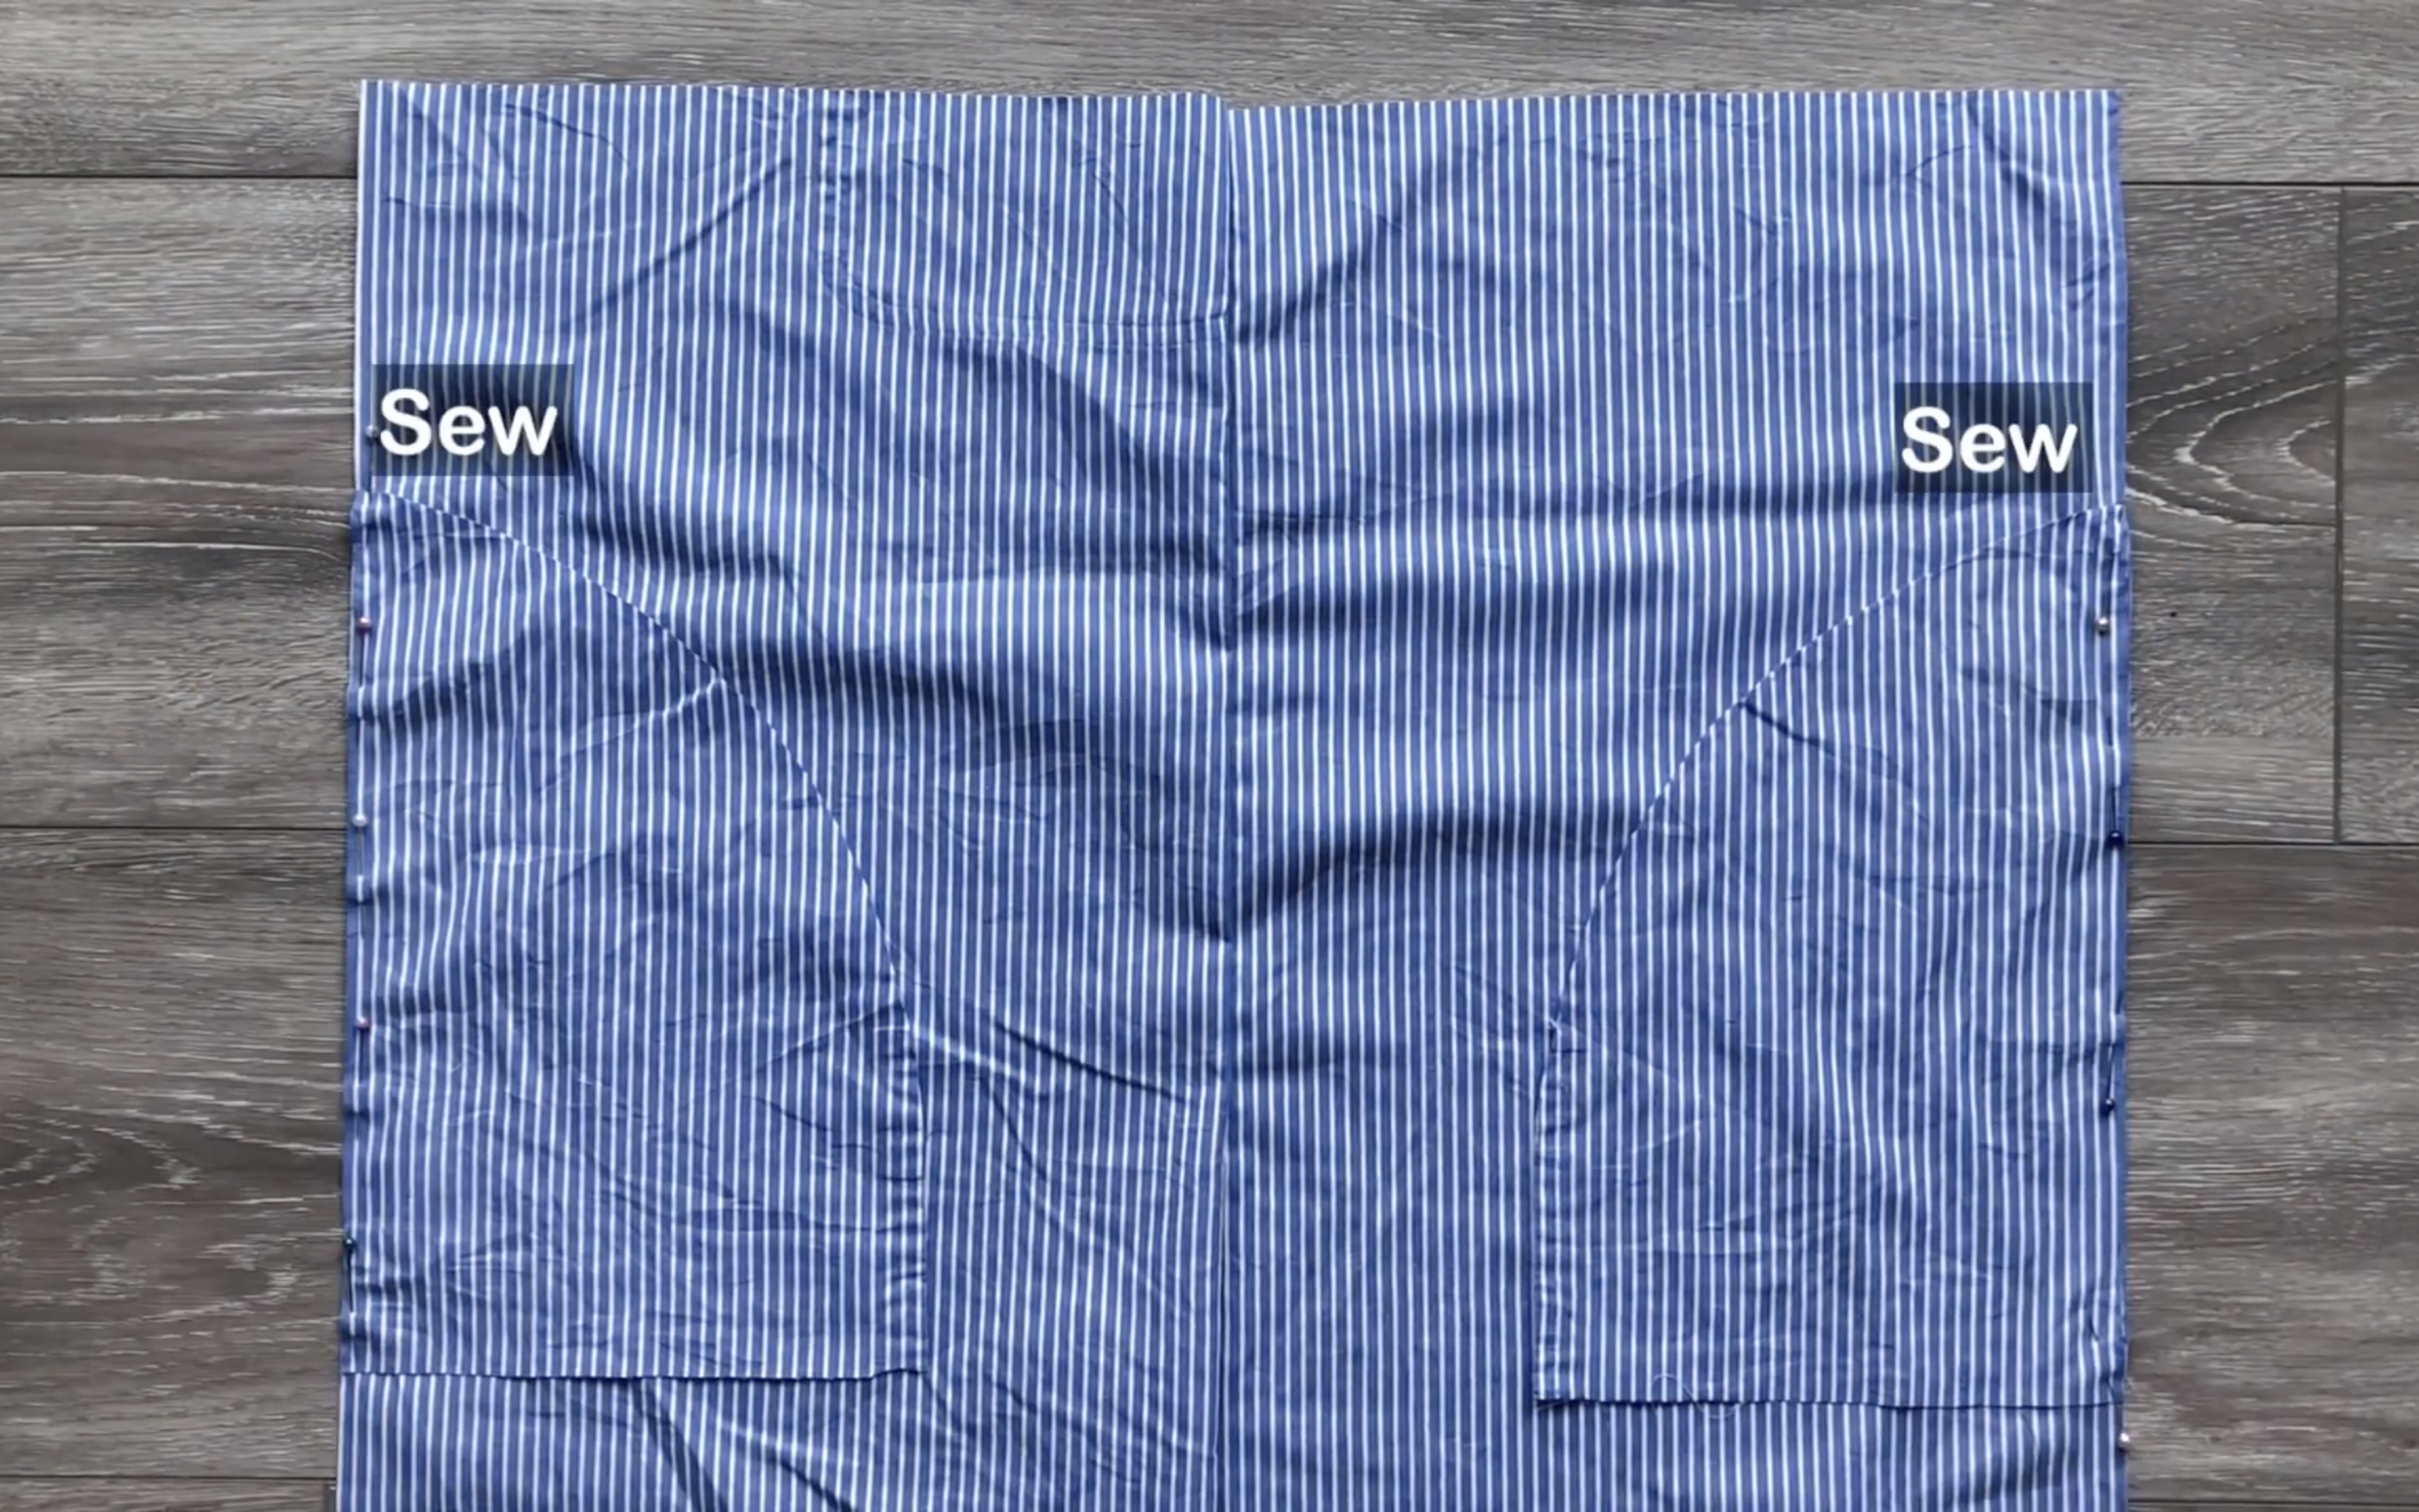
Attach the pockets to the front shorts there and sew them.
Repeat for the back shorts.
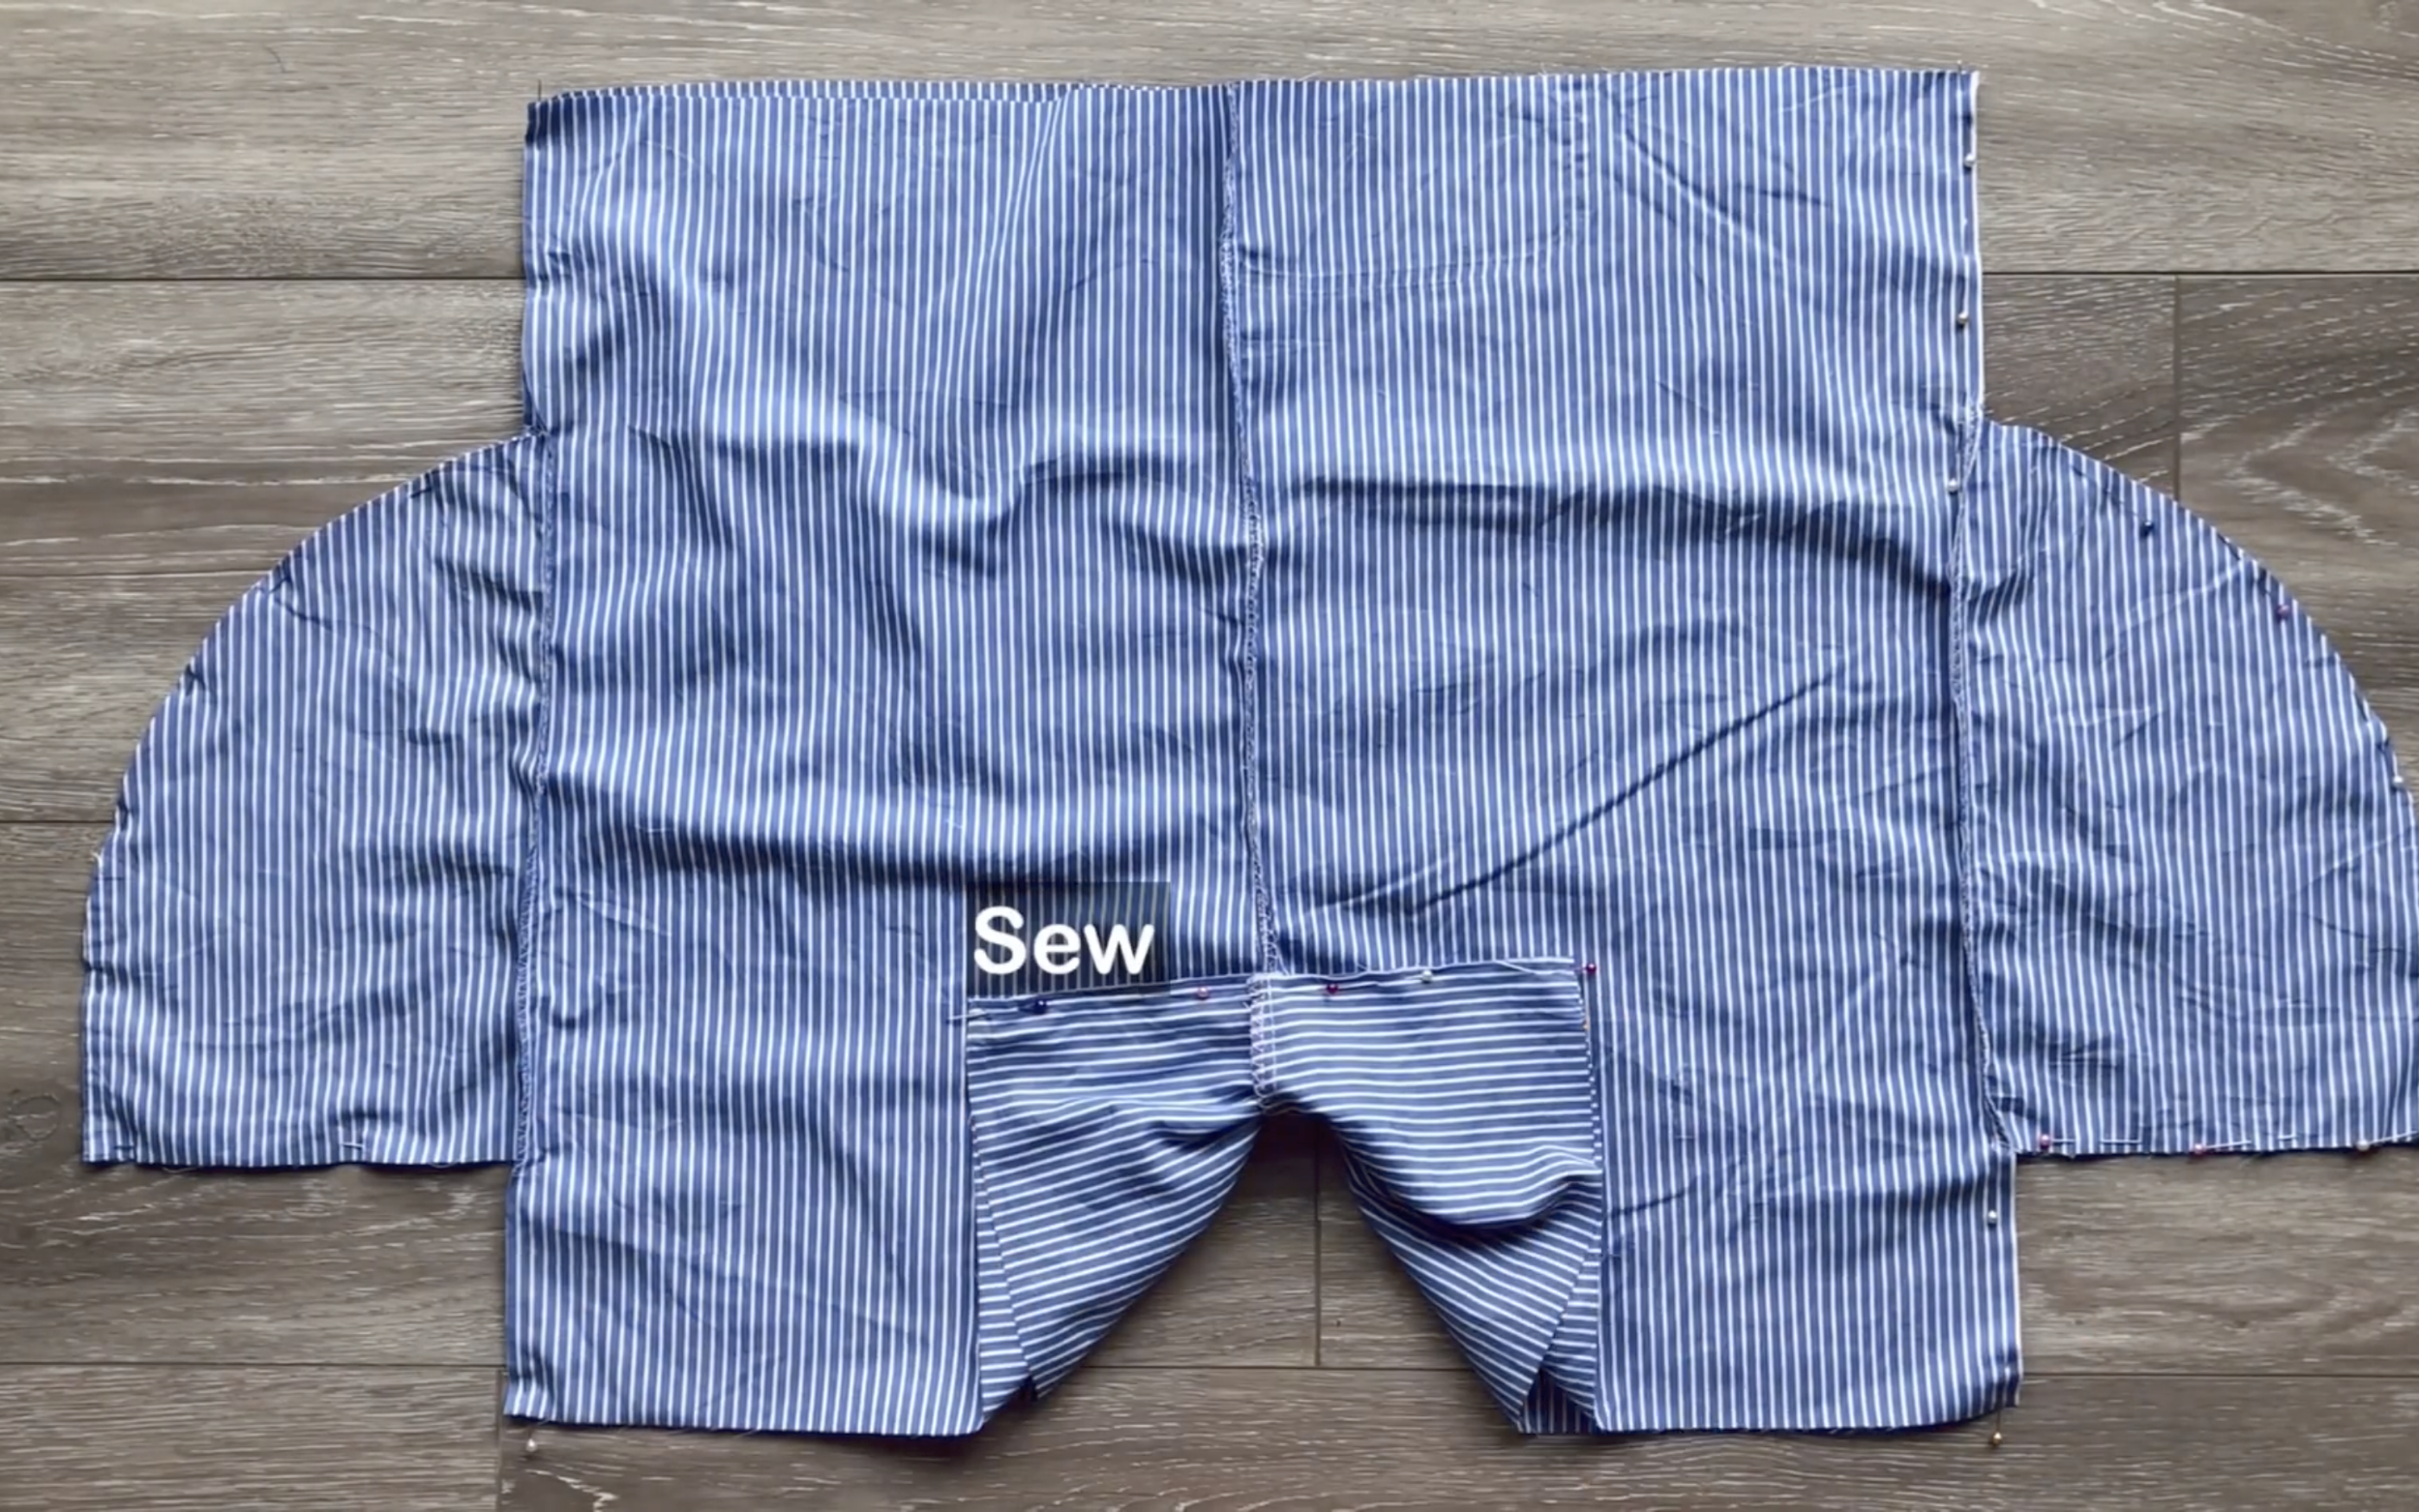
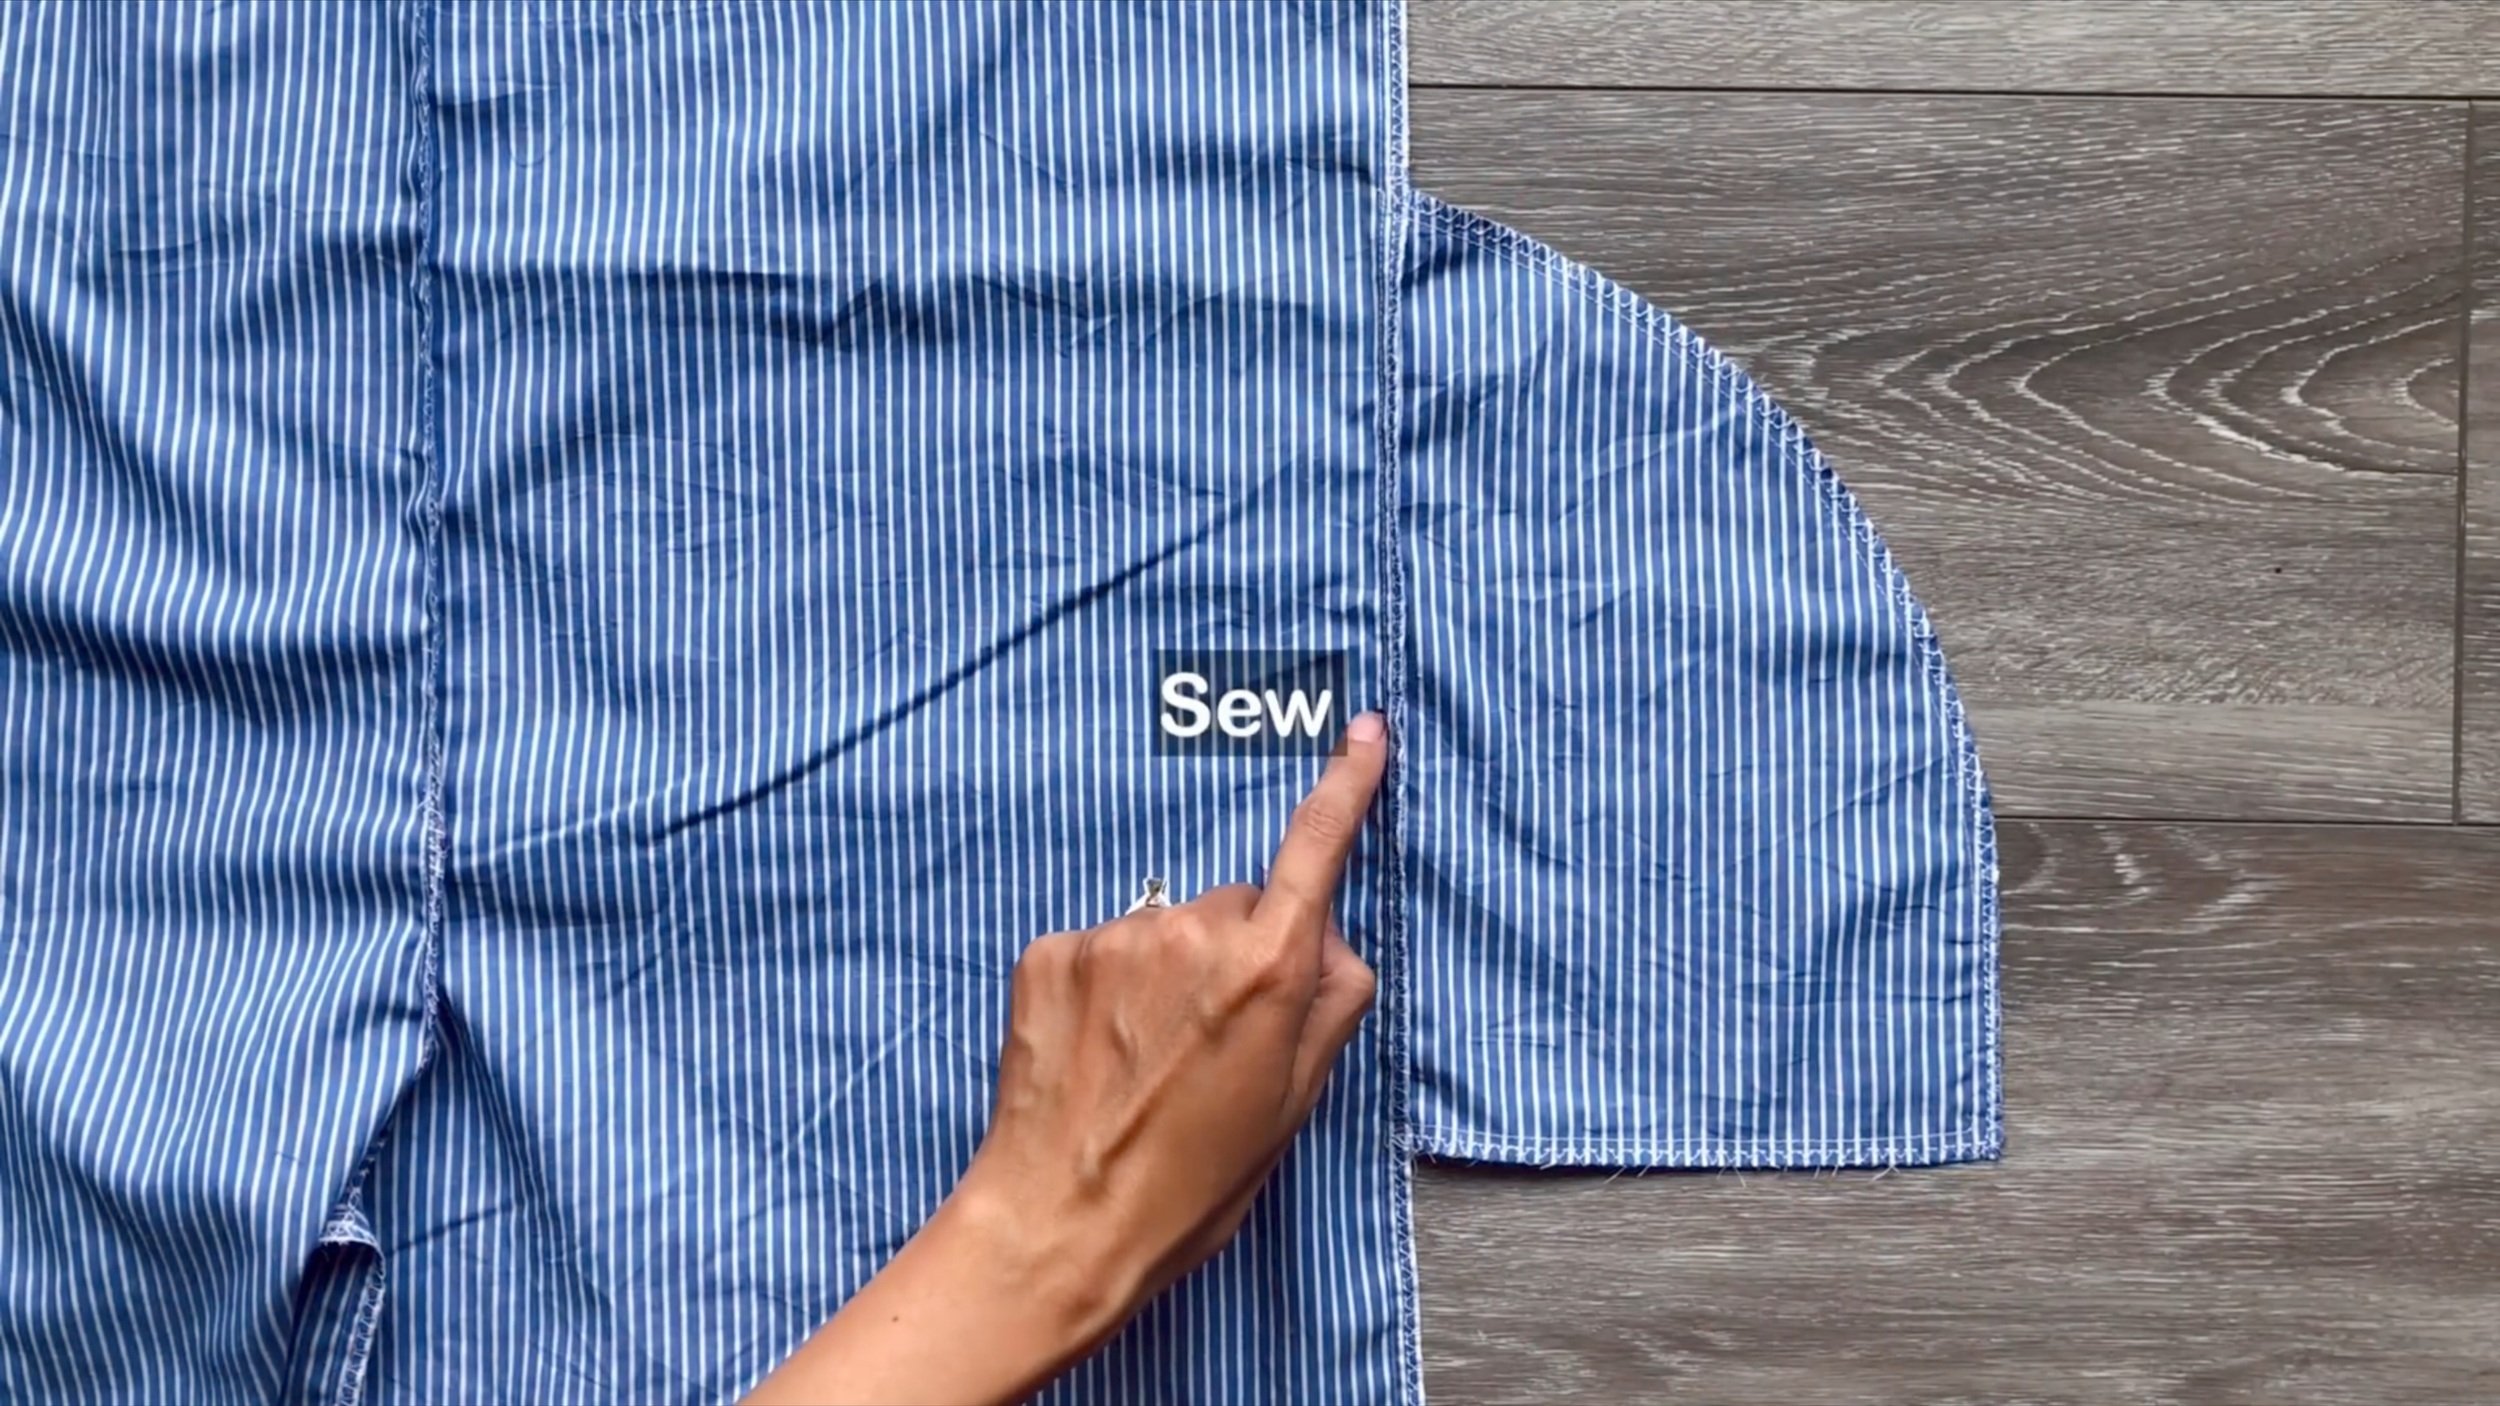
Connect the front and back shorts at the side lines and inside leg lines.
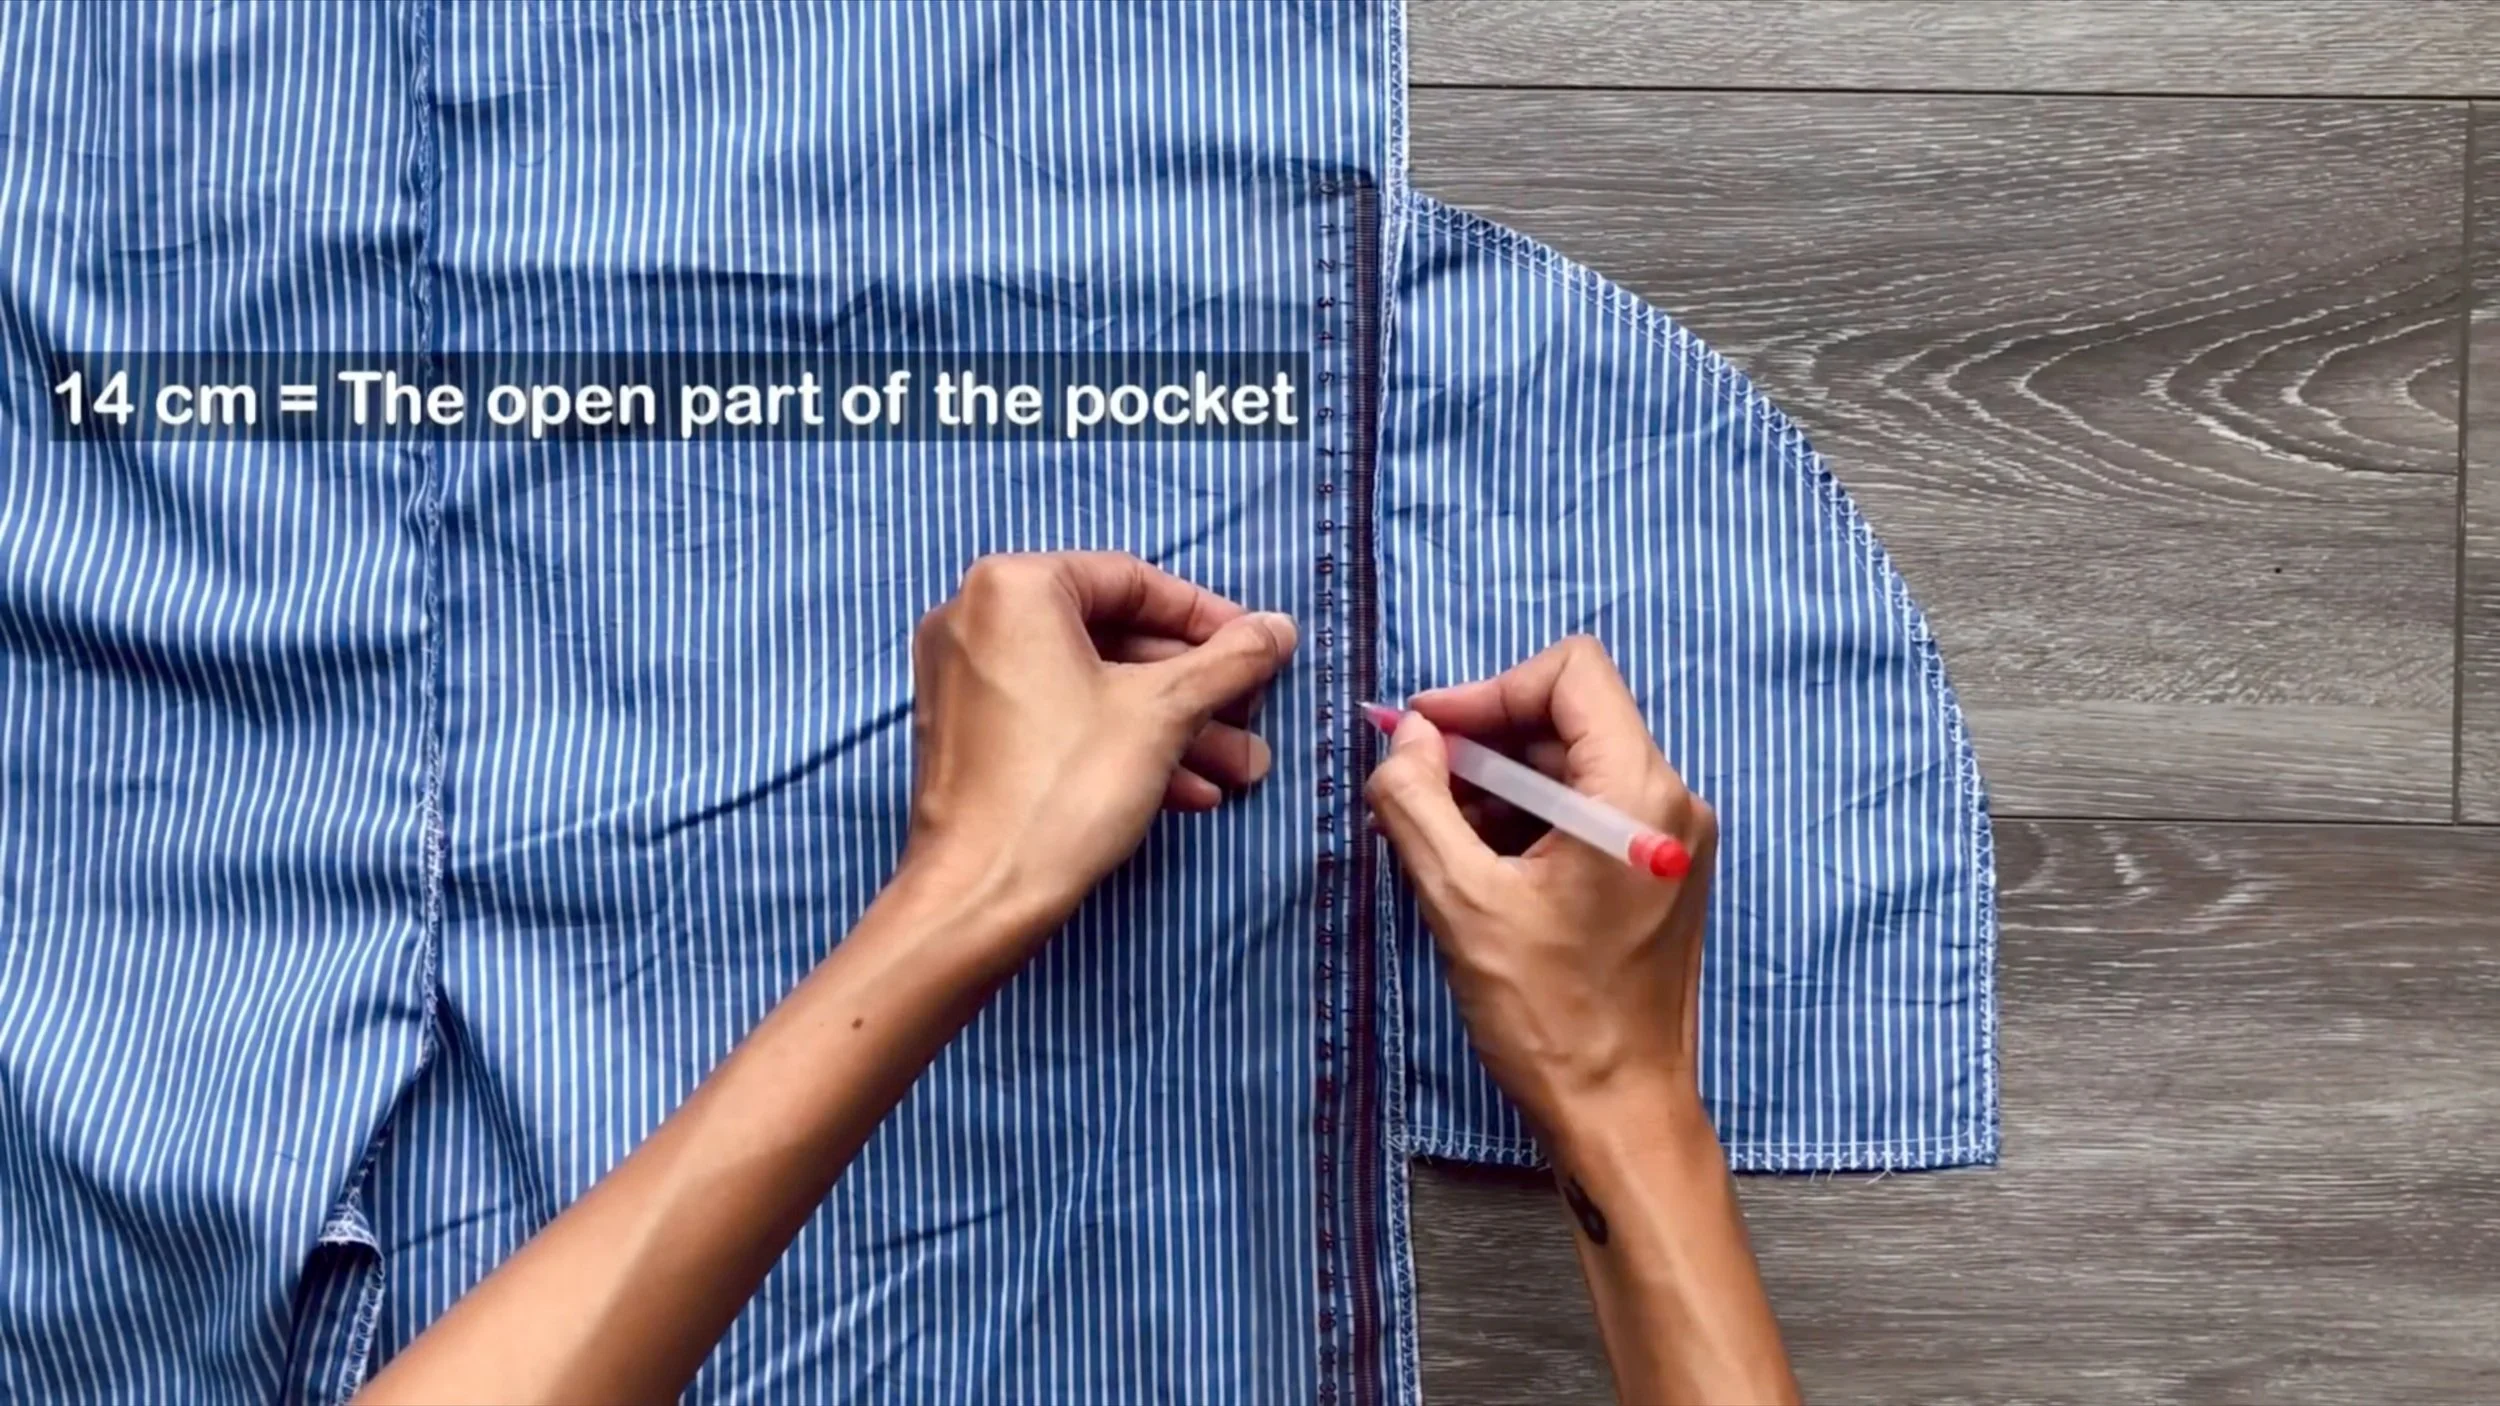
From the top of the pocket, mark down 14 cm (the width of the pocket opening).
Sew the rest of the pocket to create depth.
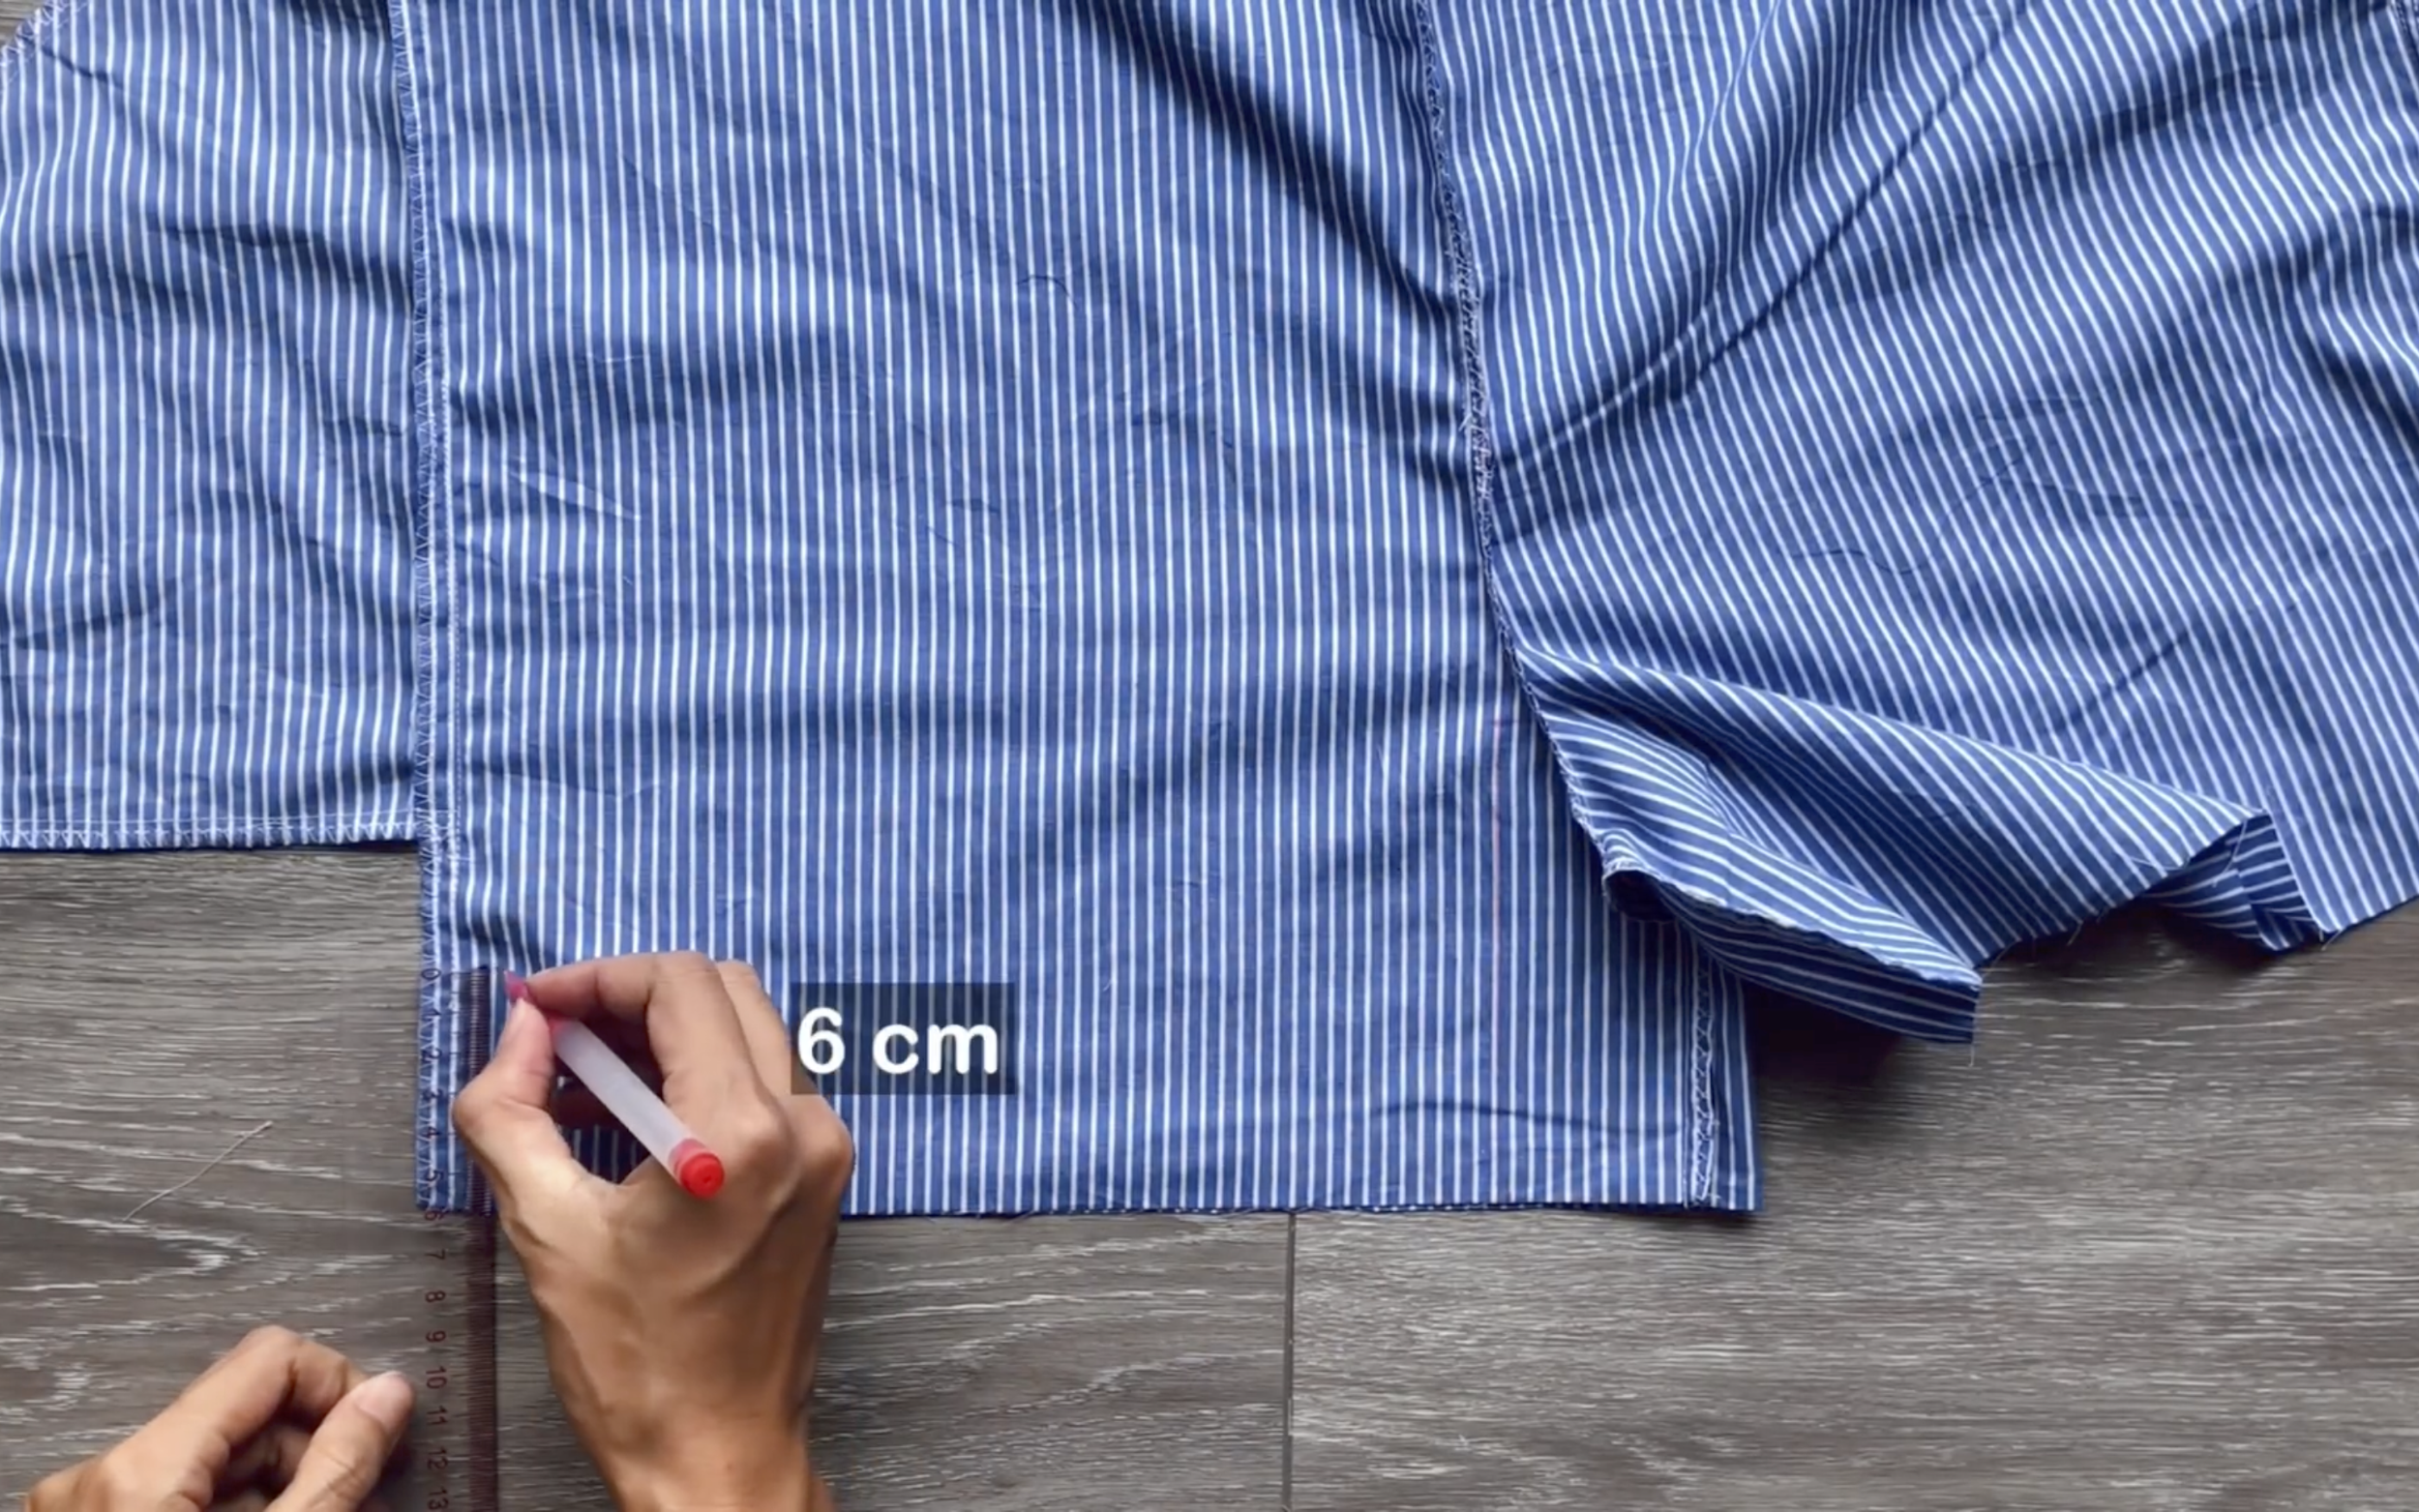
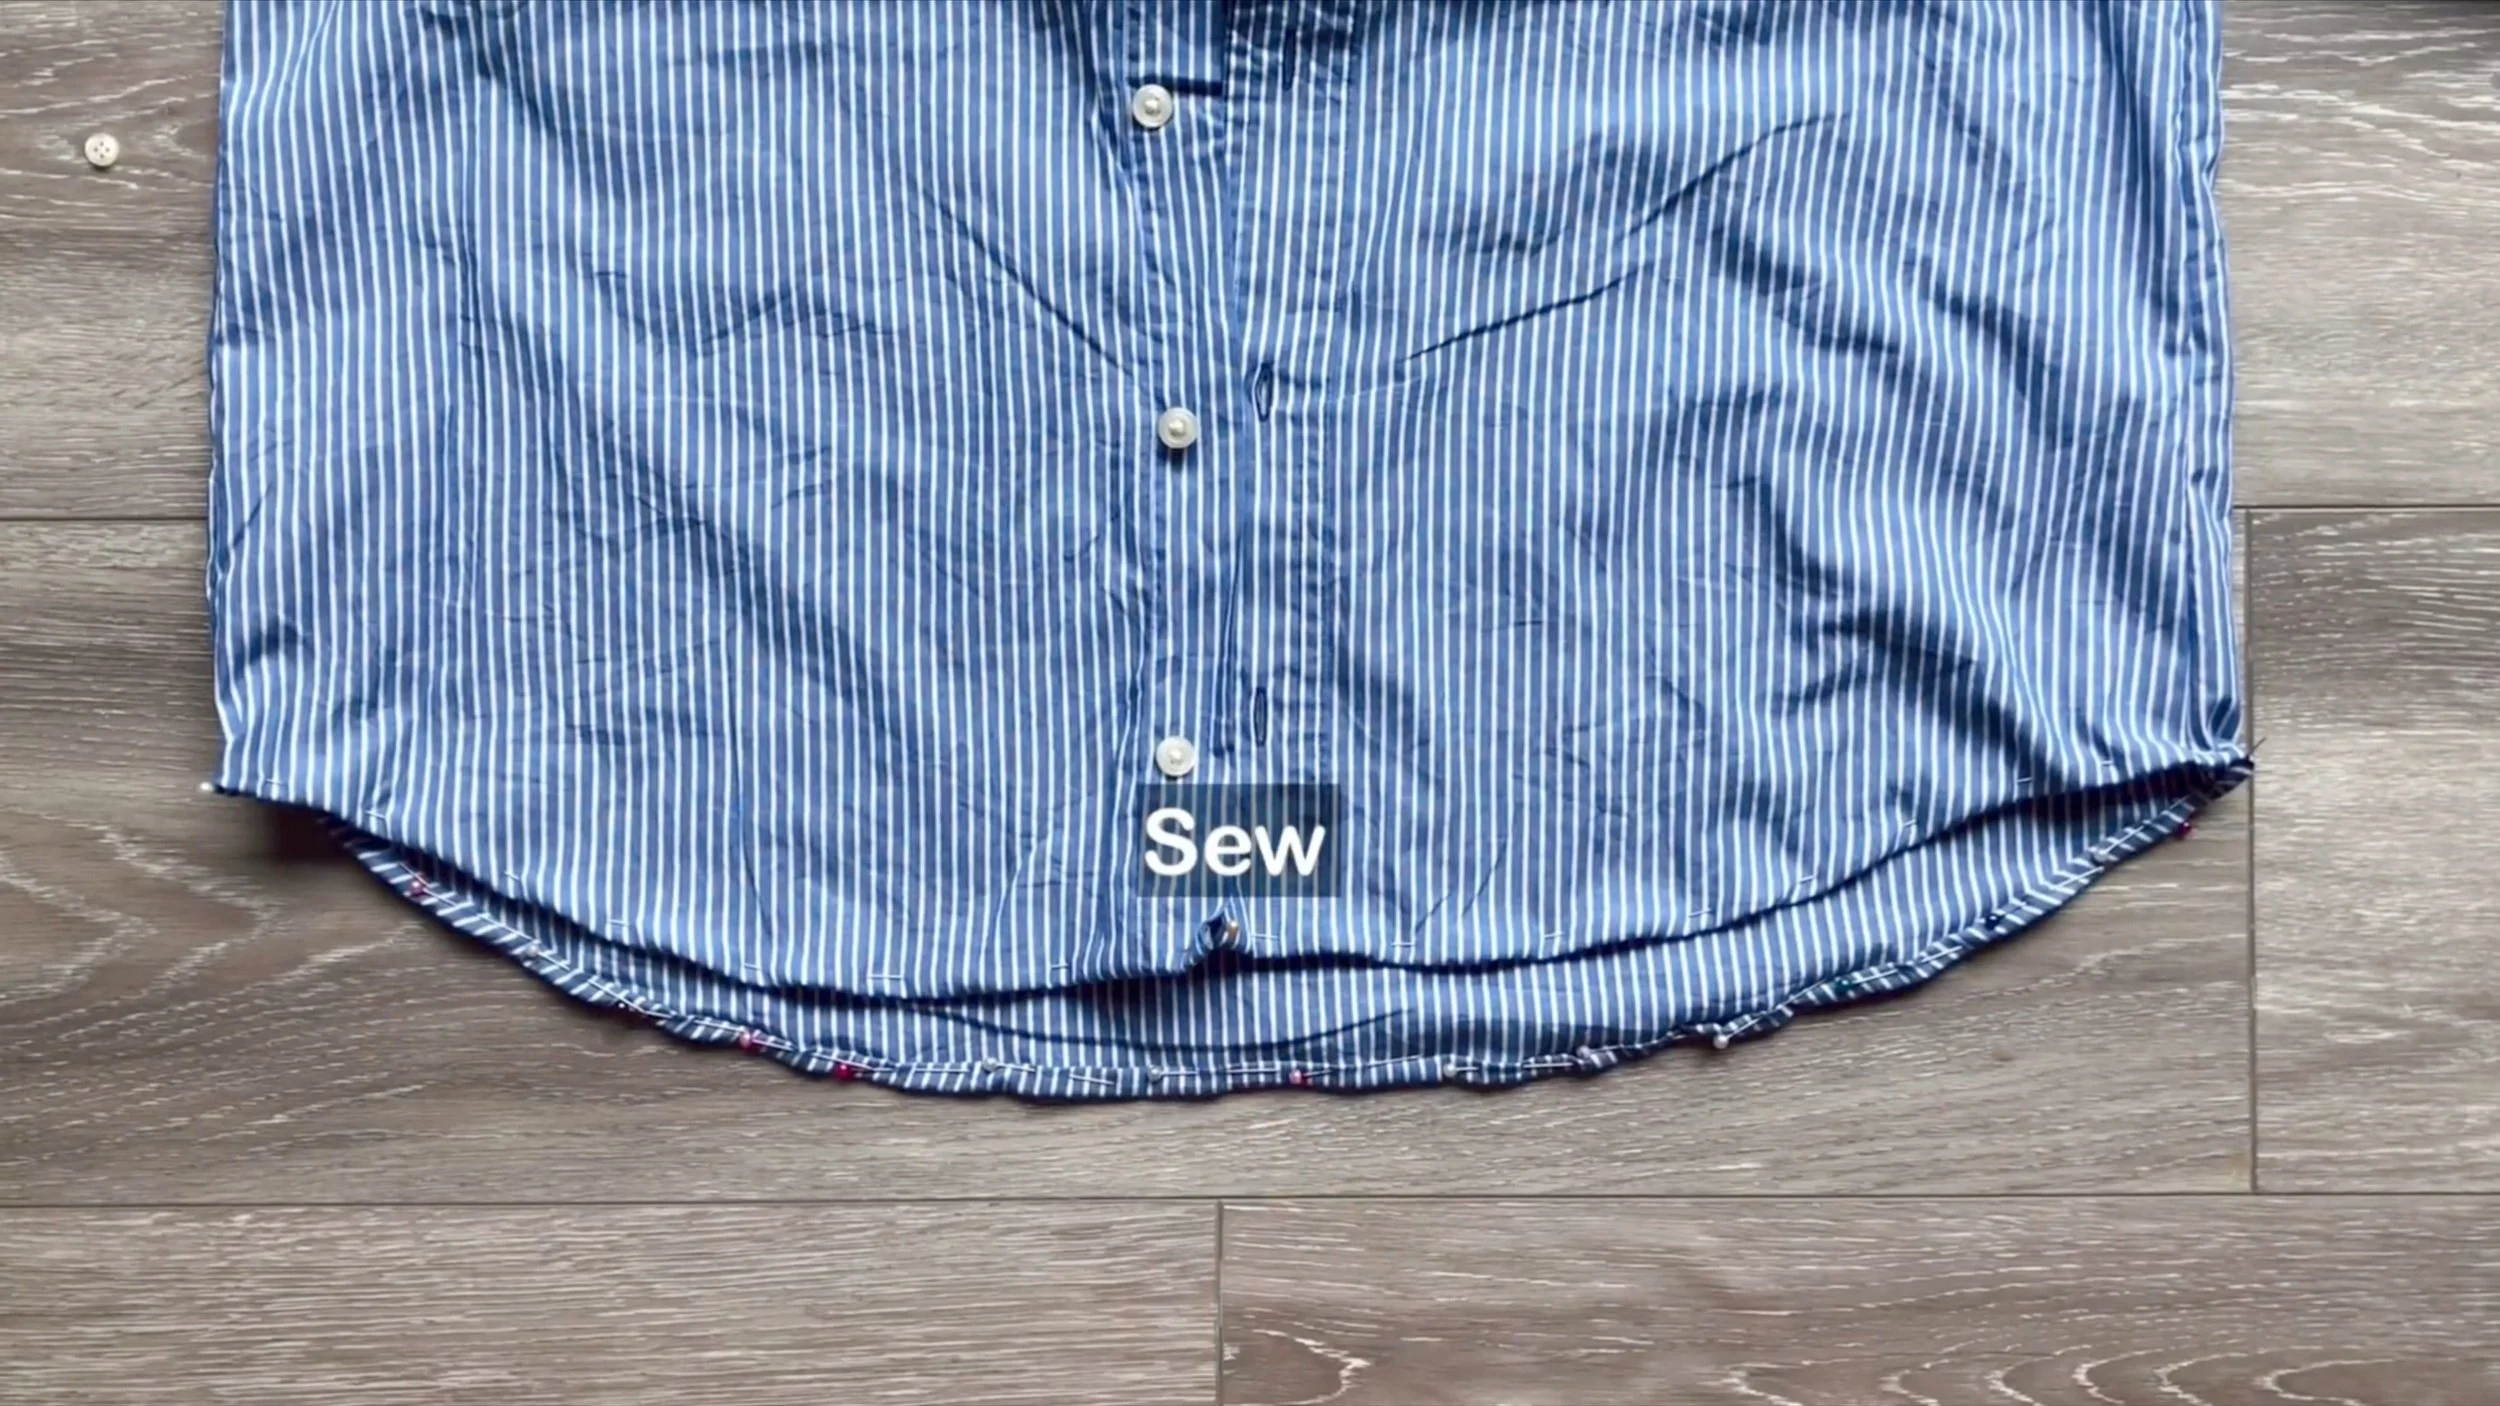
At the end of the shorts, draw a line 6 cm above the edge.
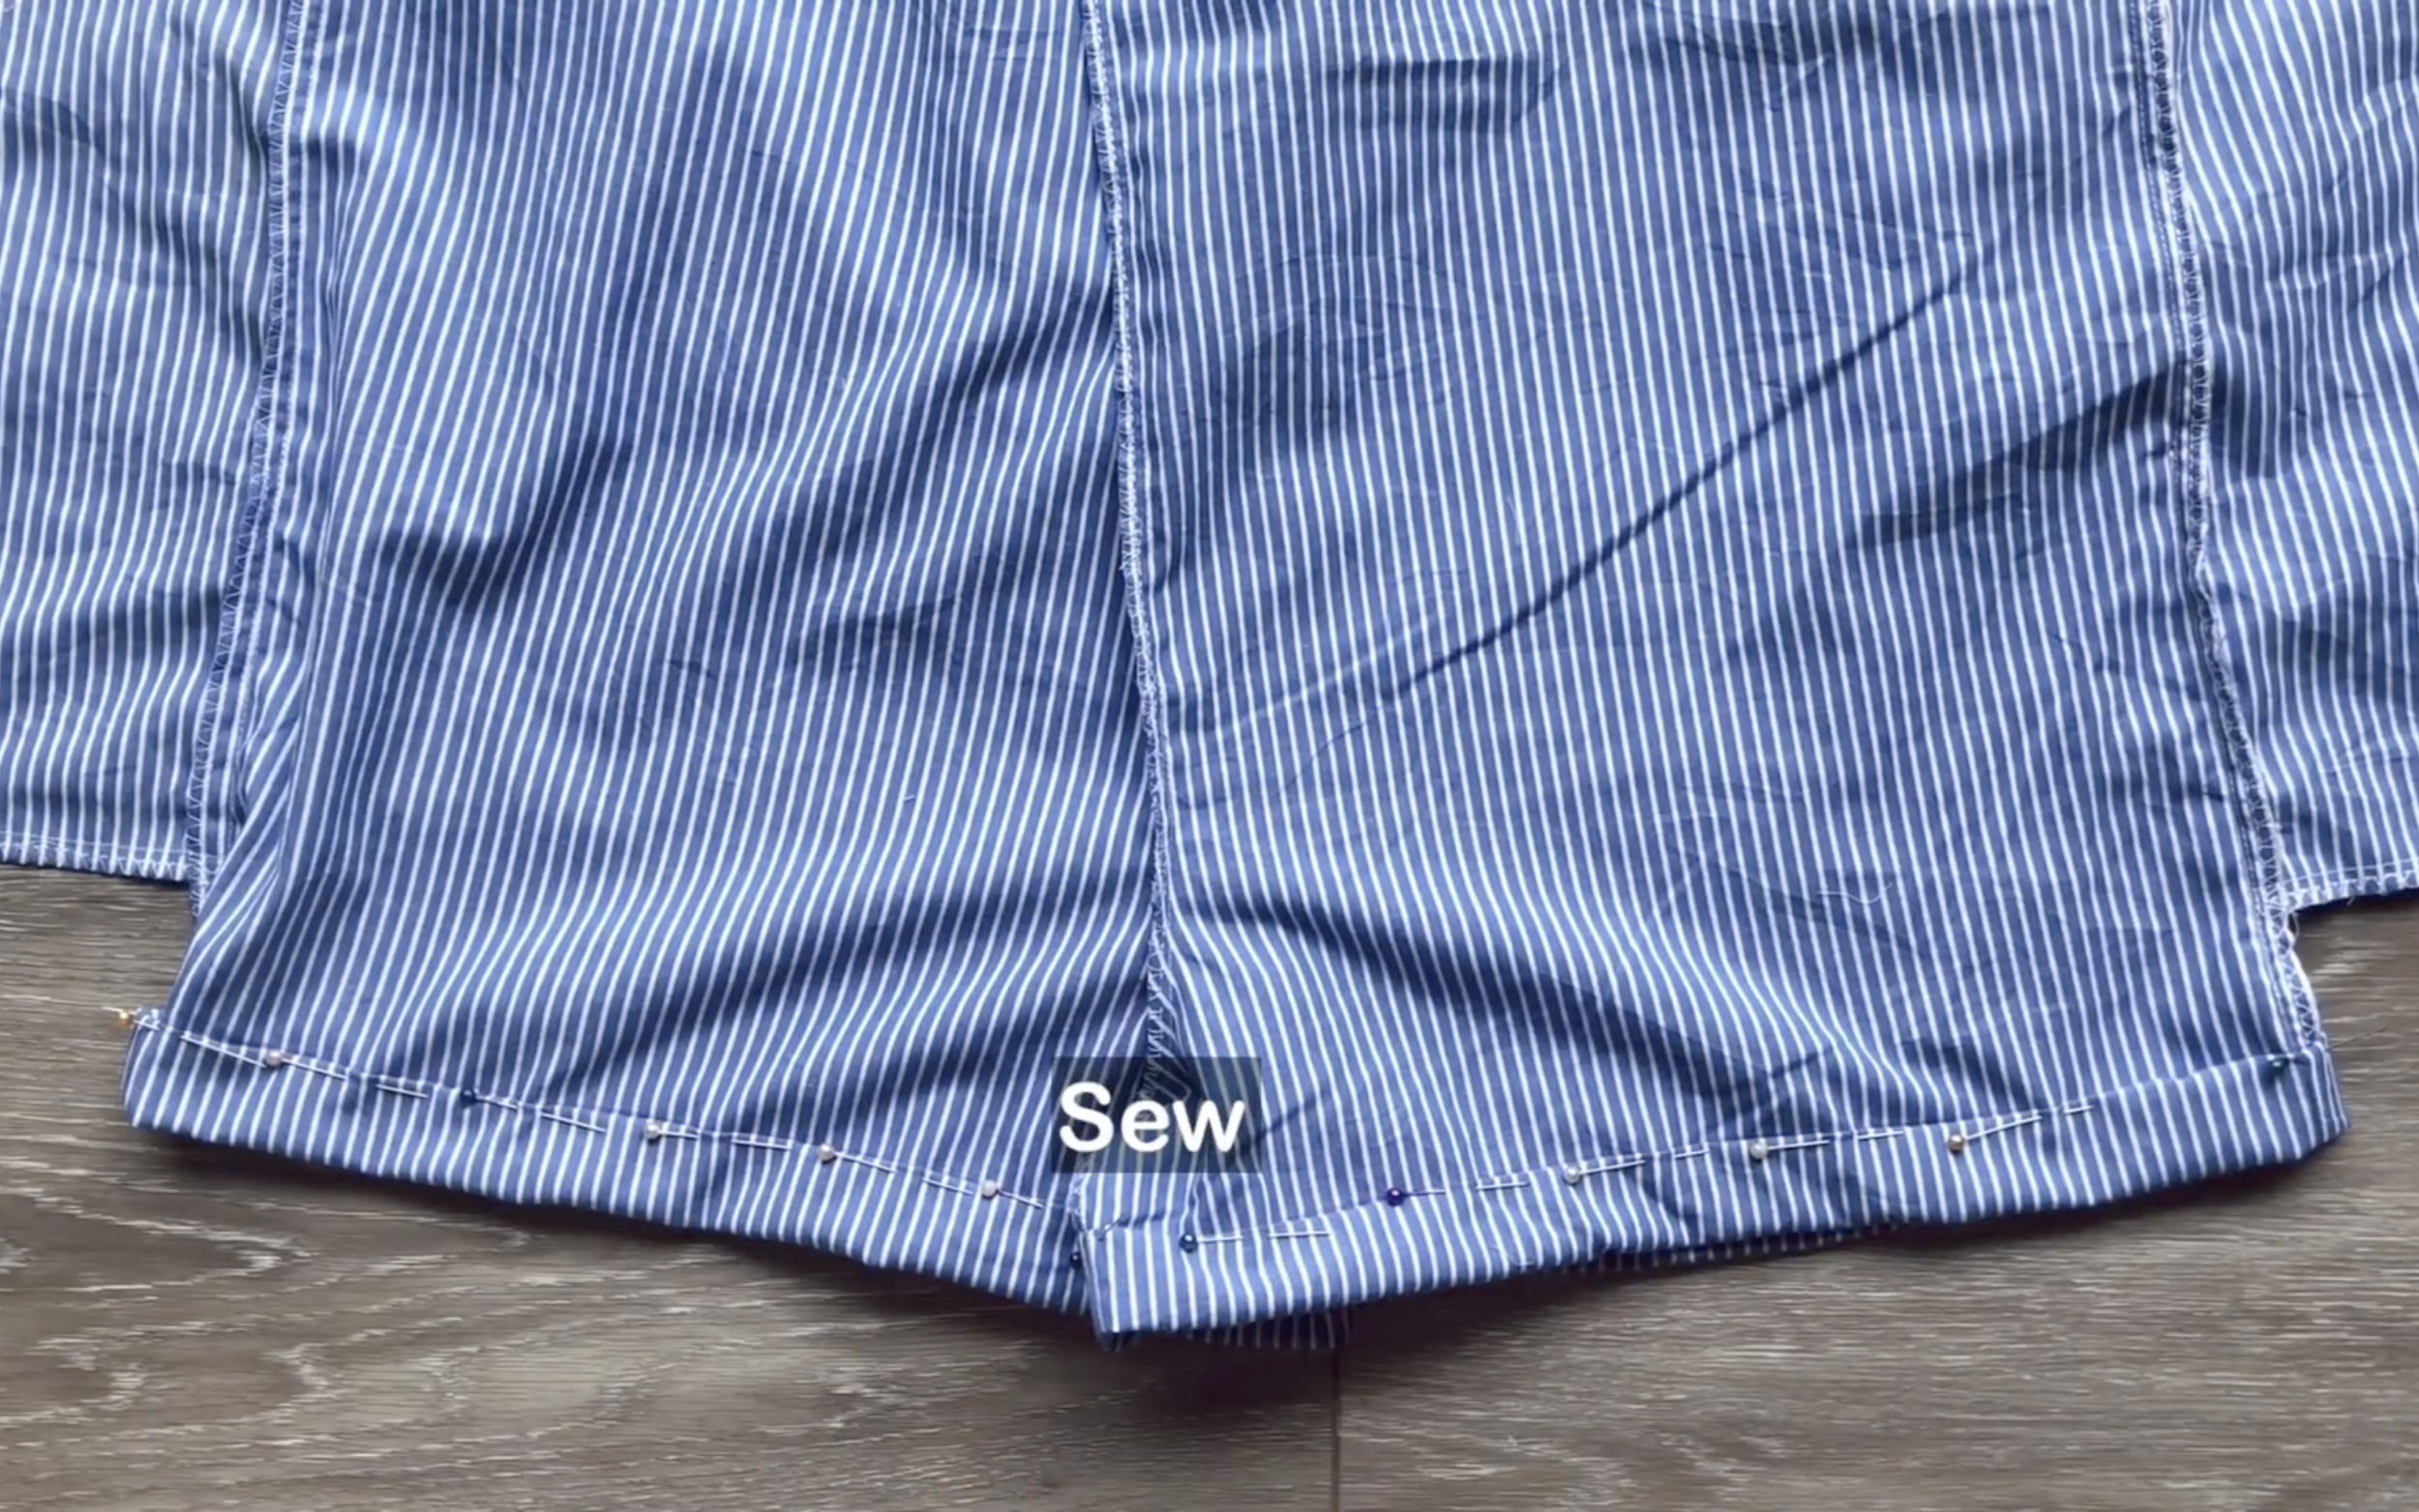
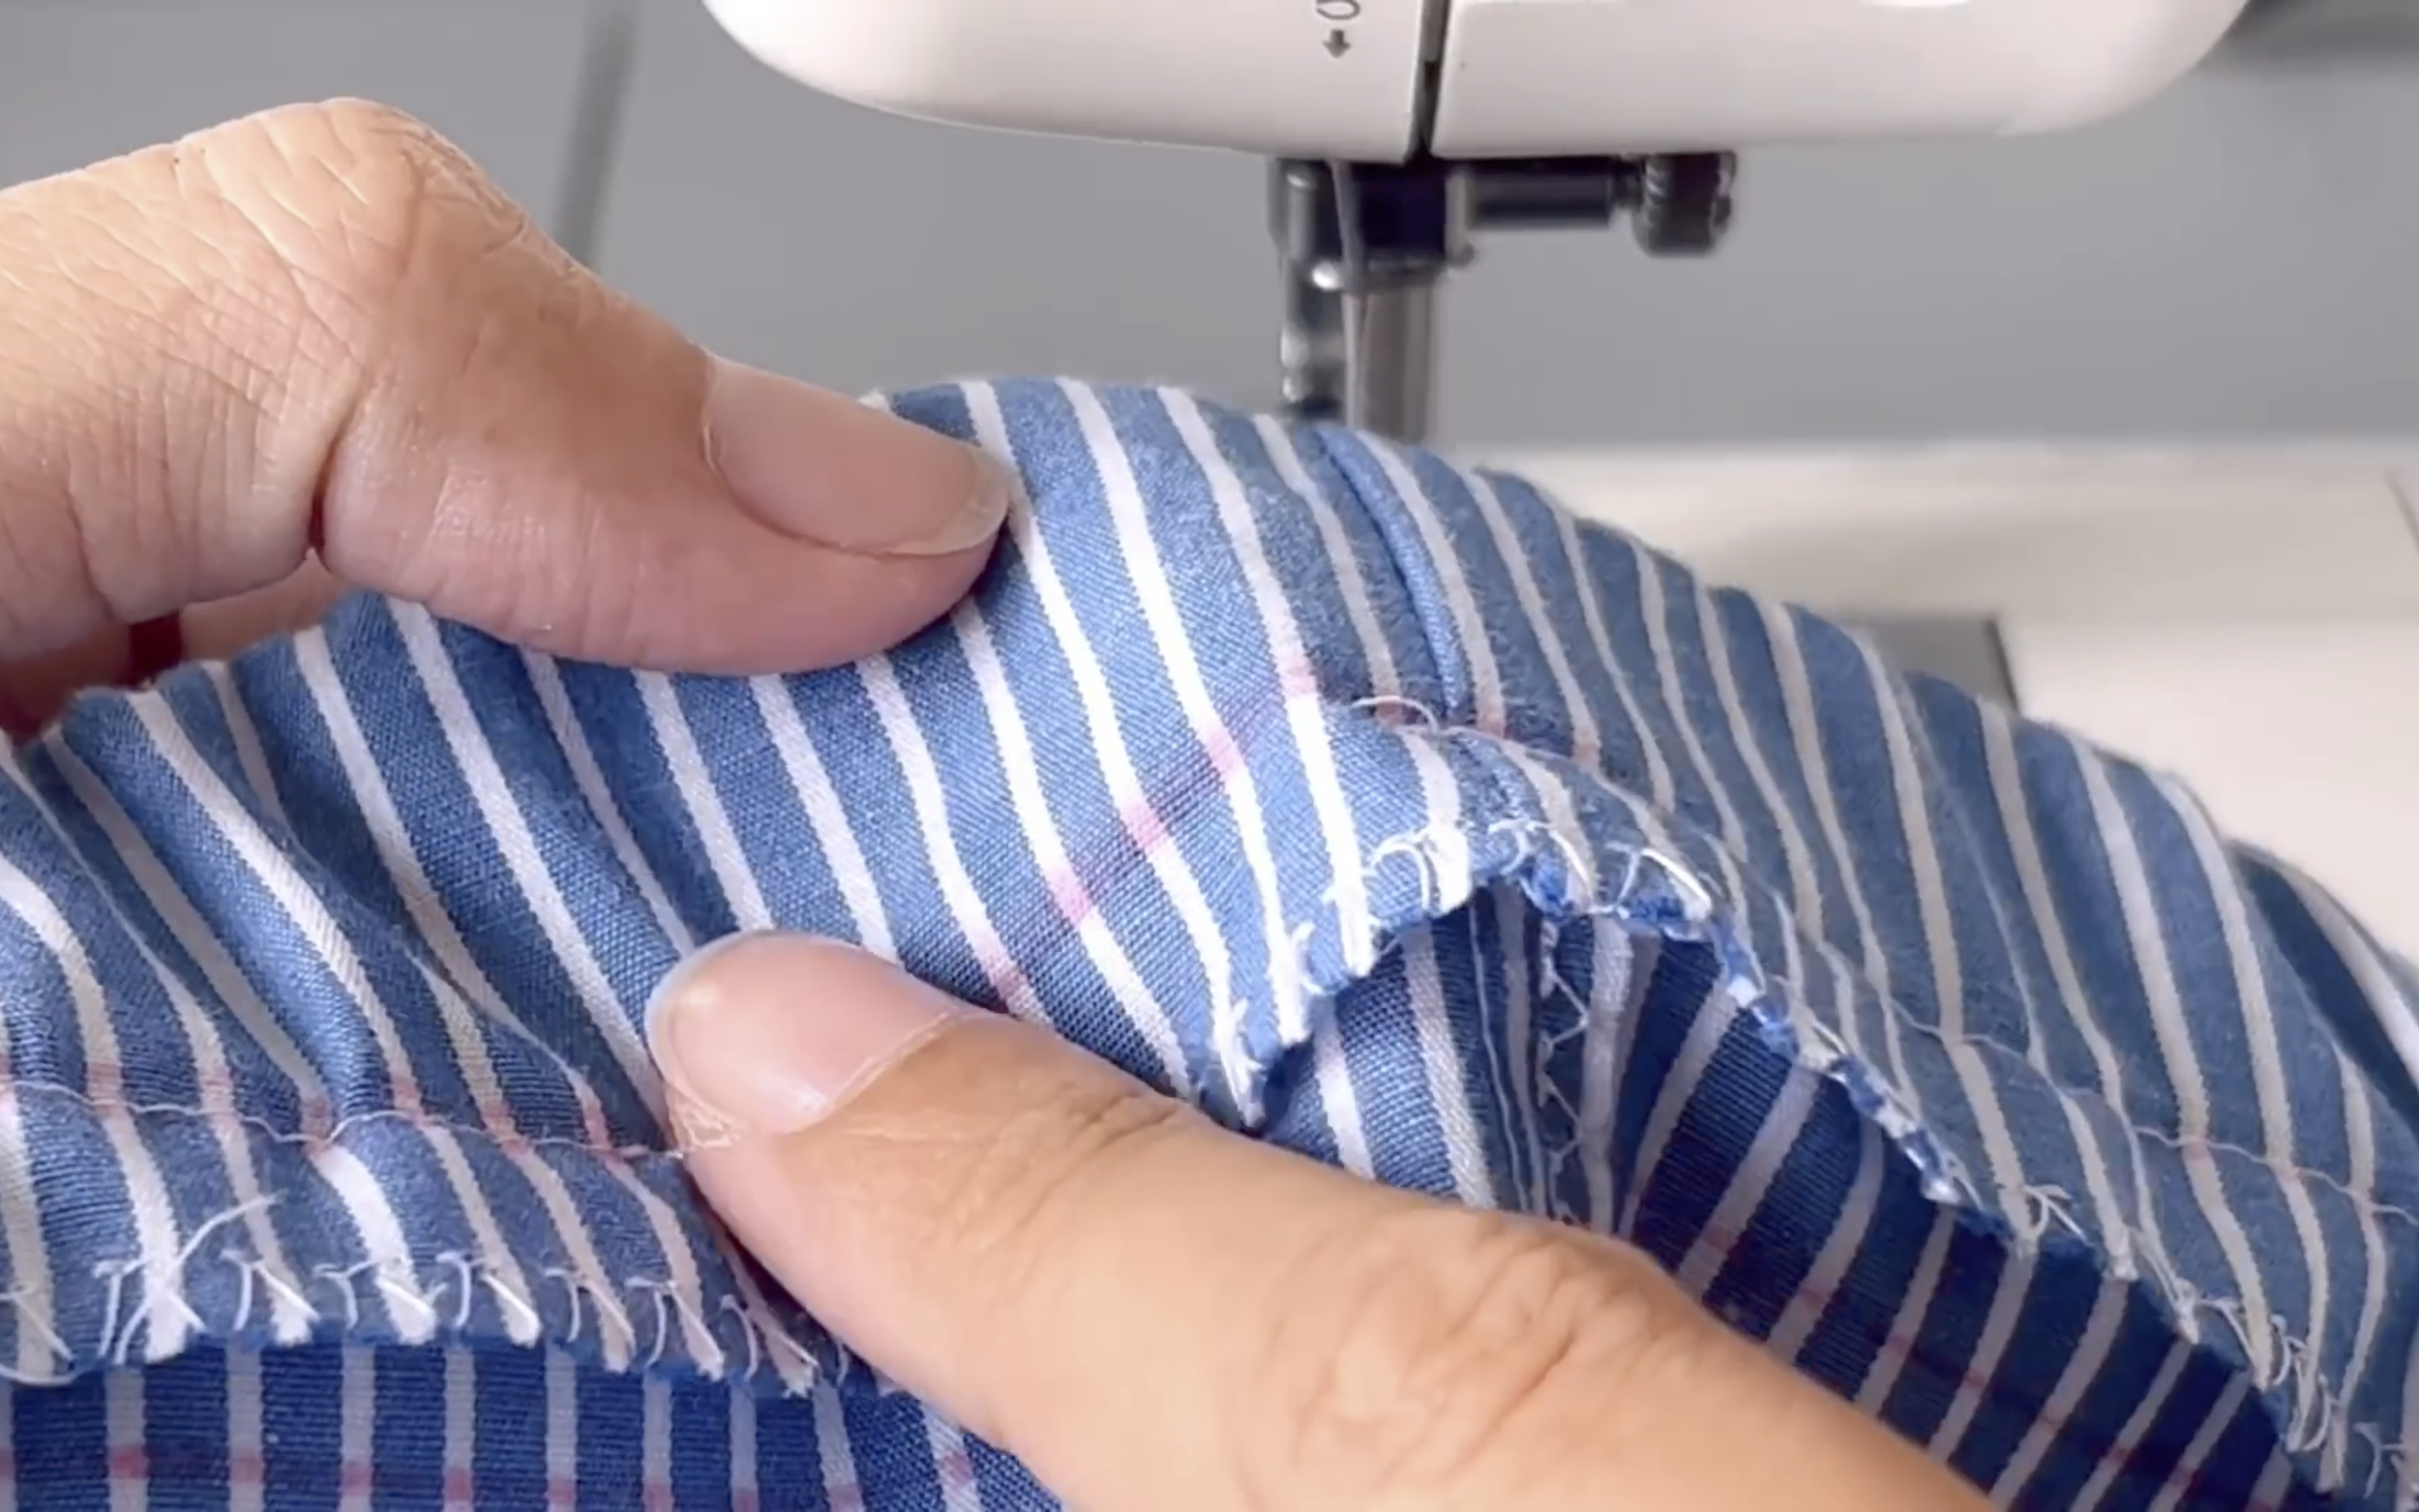
Fold the edge fabric inside by 1 cm, then fold it again to the drawn line and sew to finish the shorts' hem.
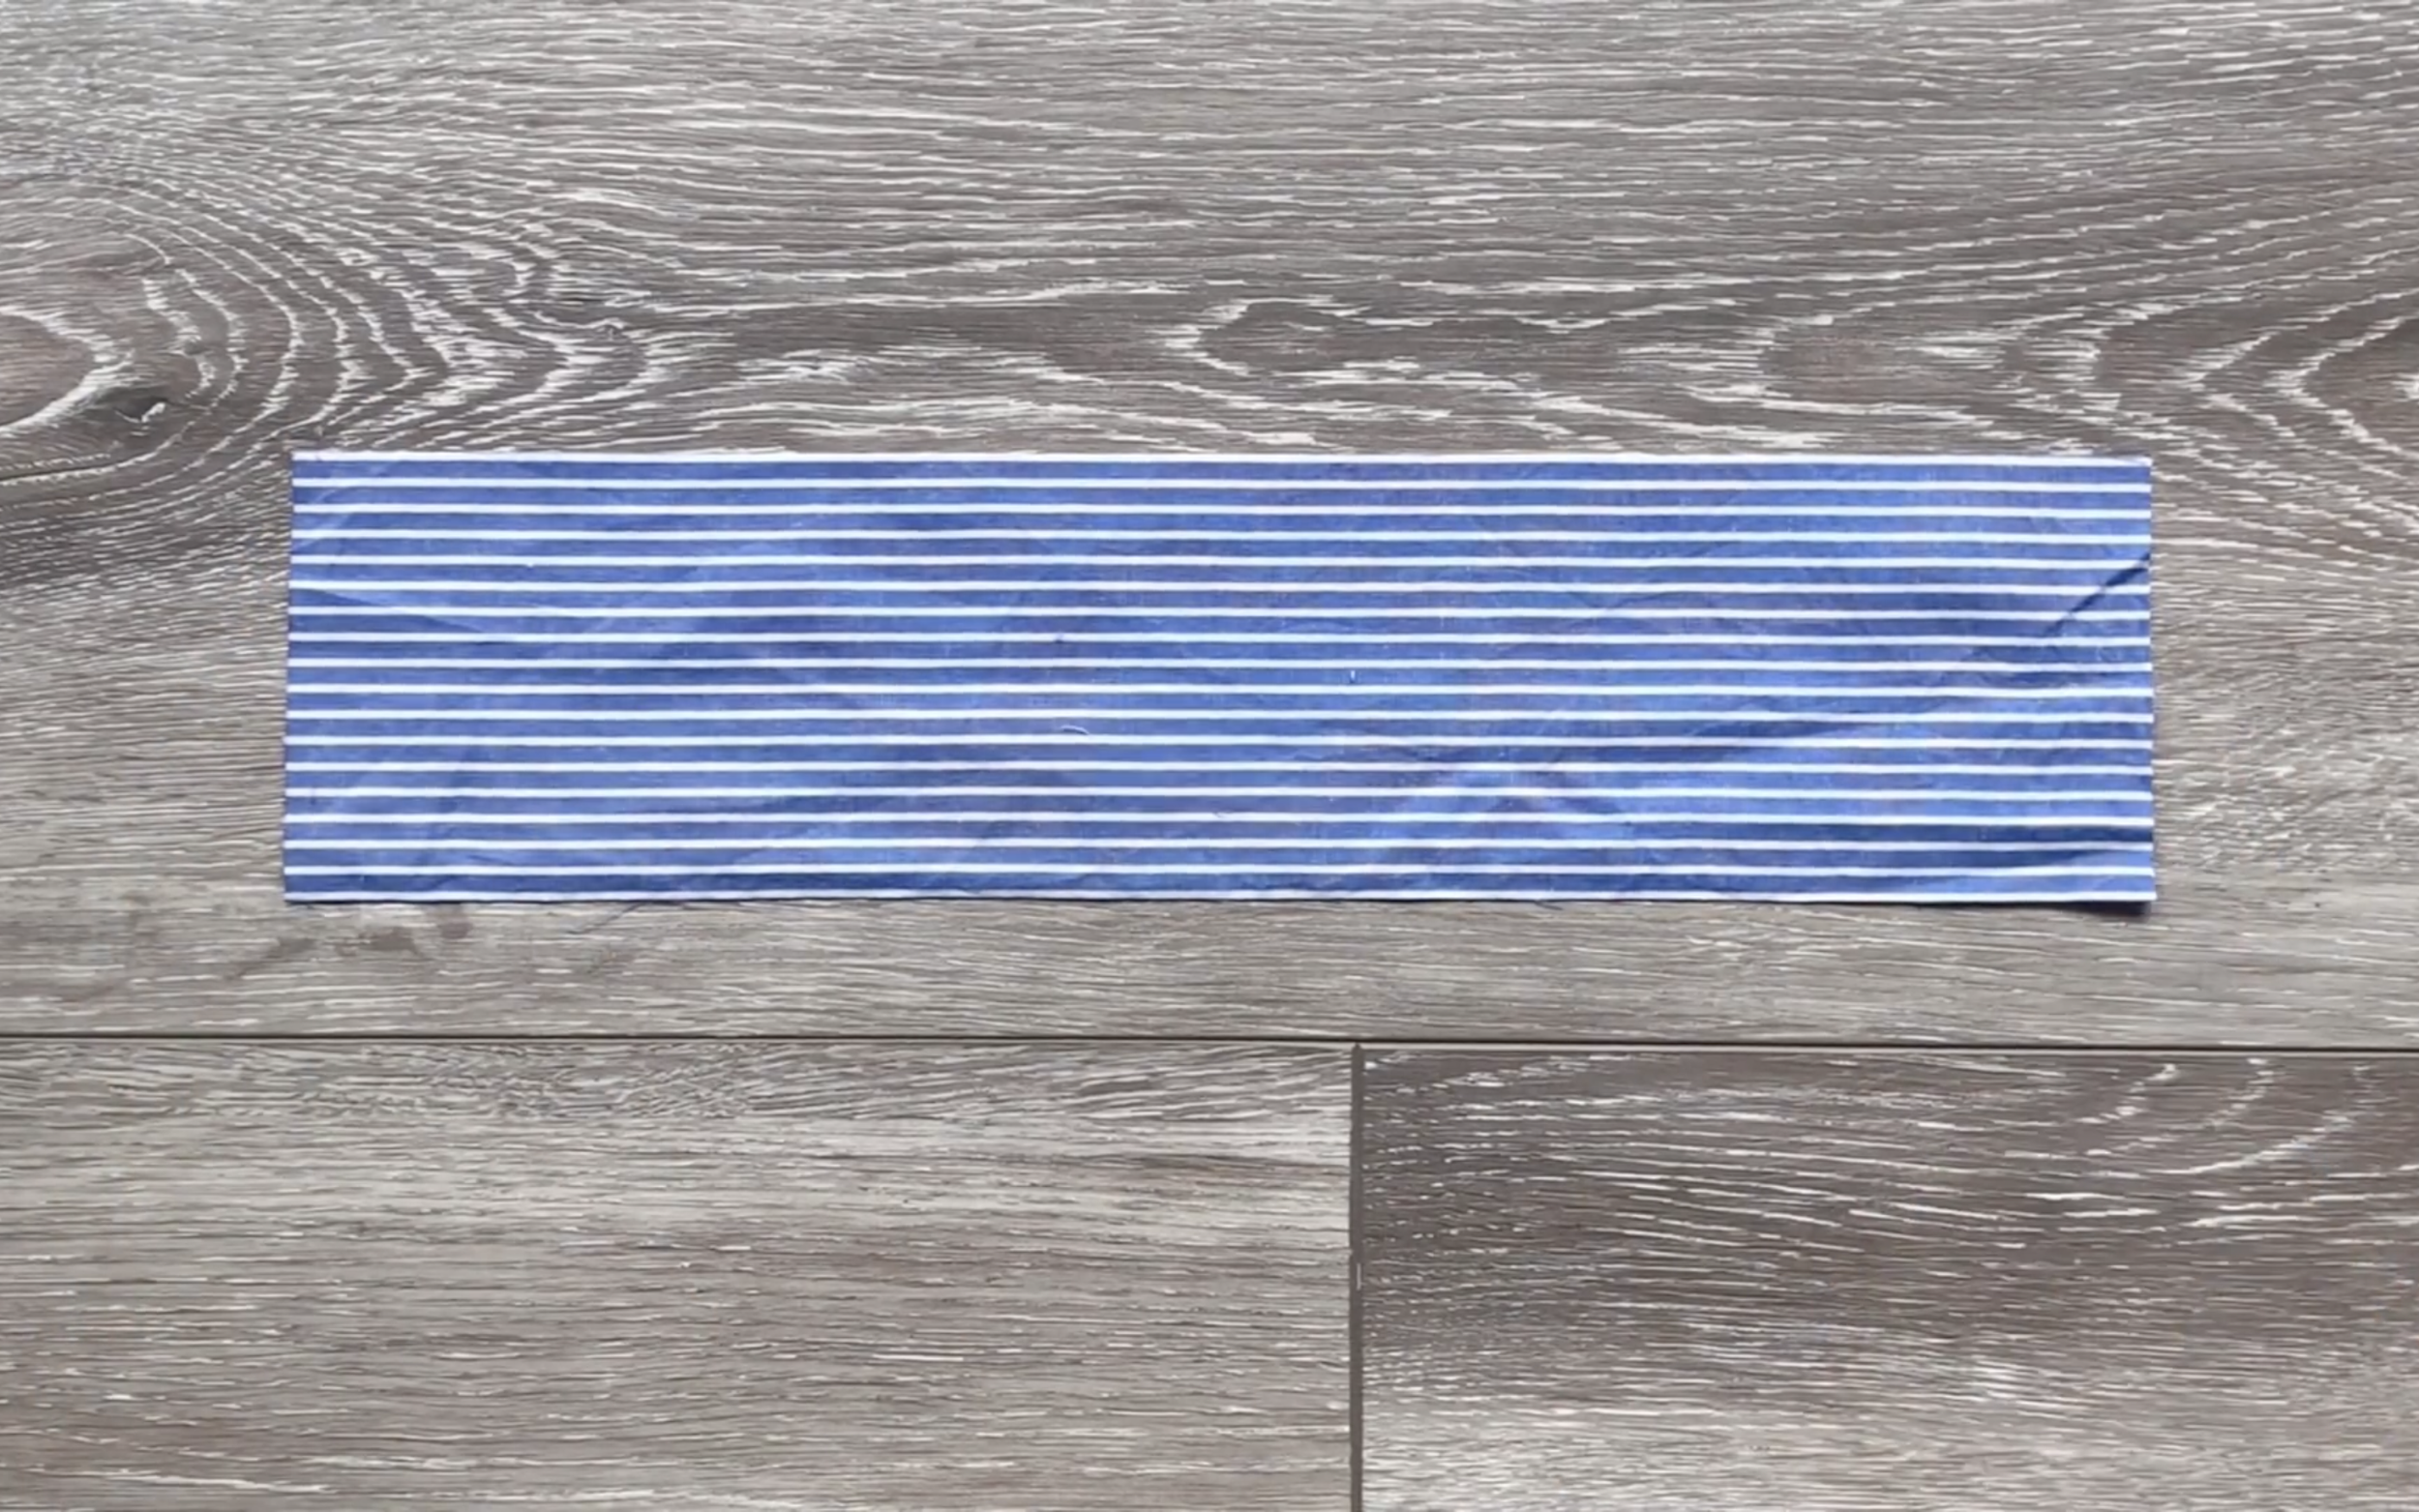
Cut a small rectangle of 8 cm width and 30 cm length.
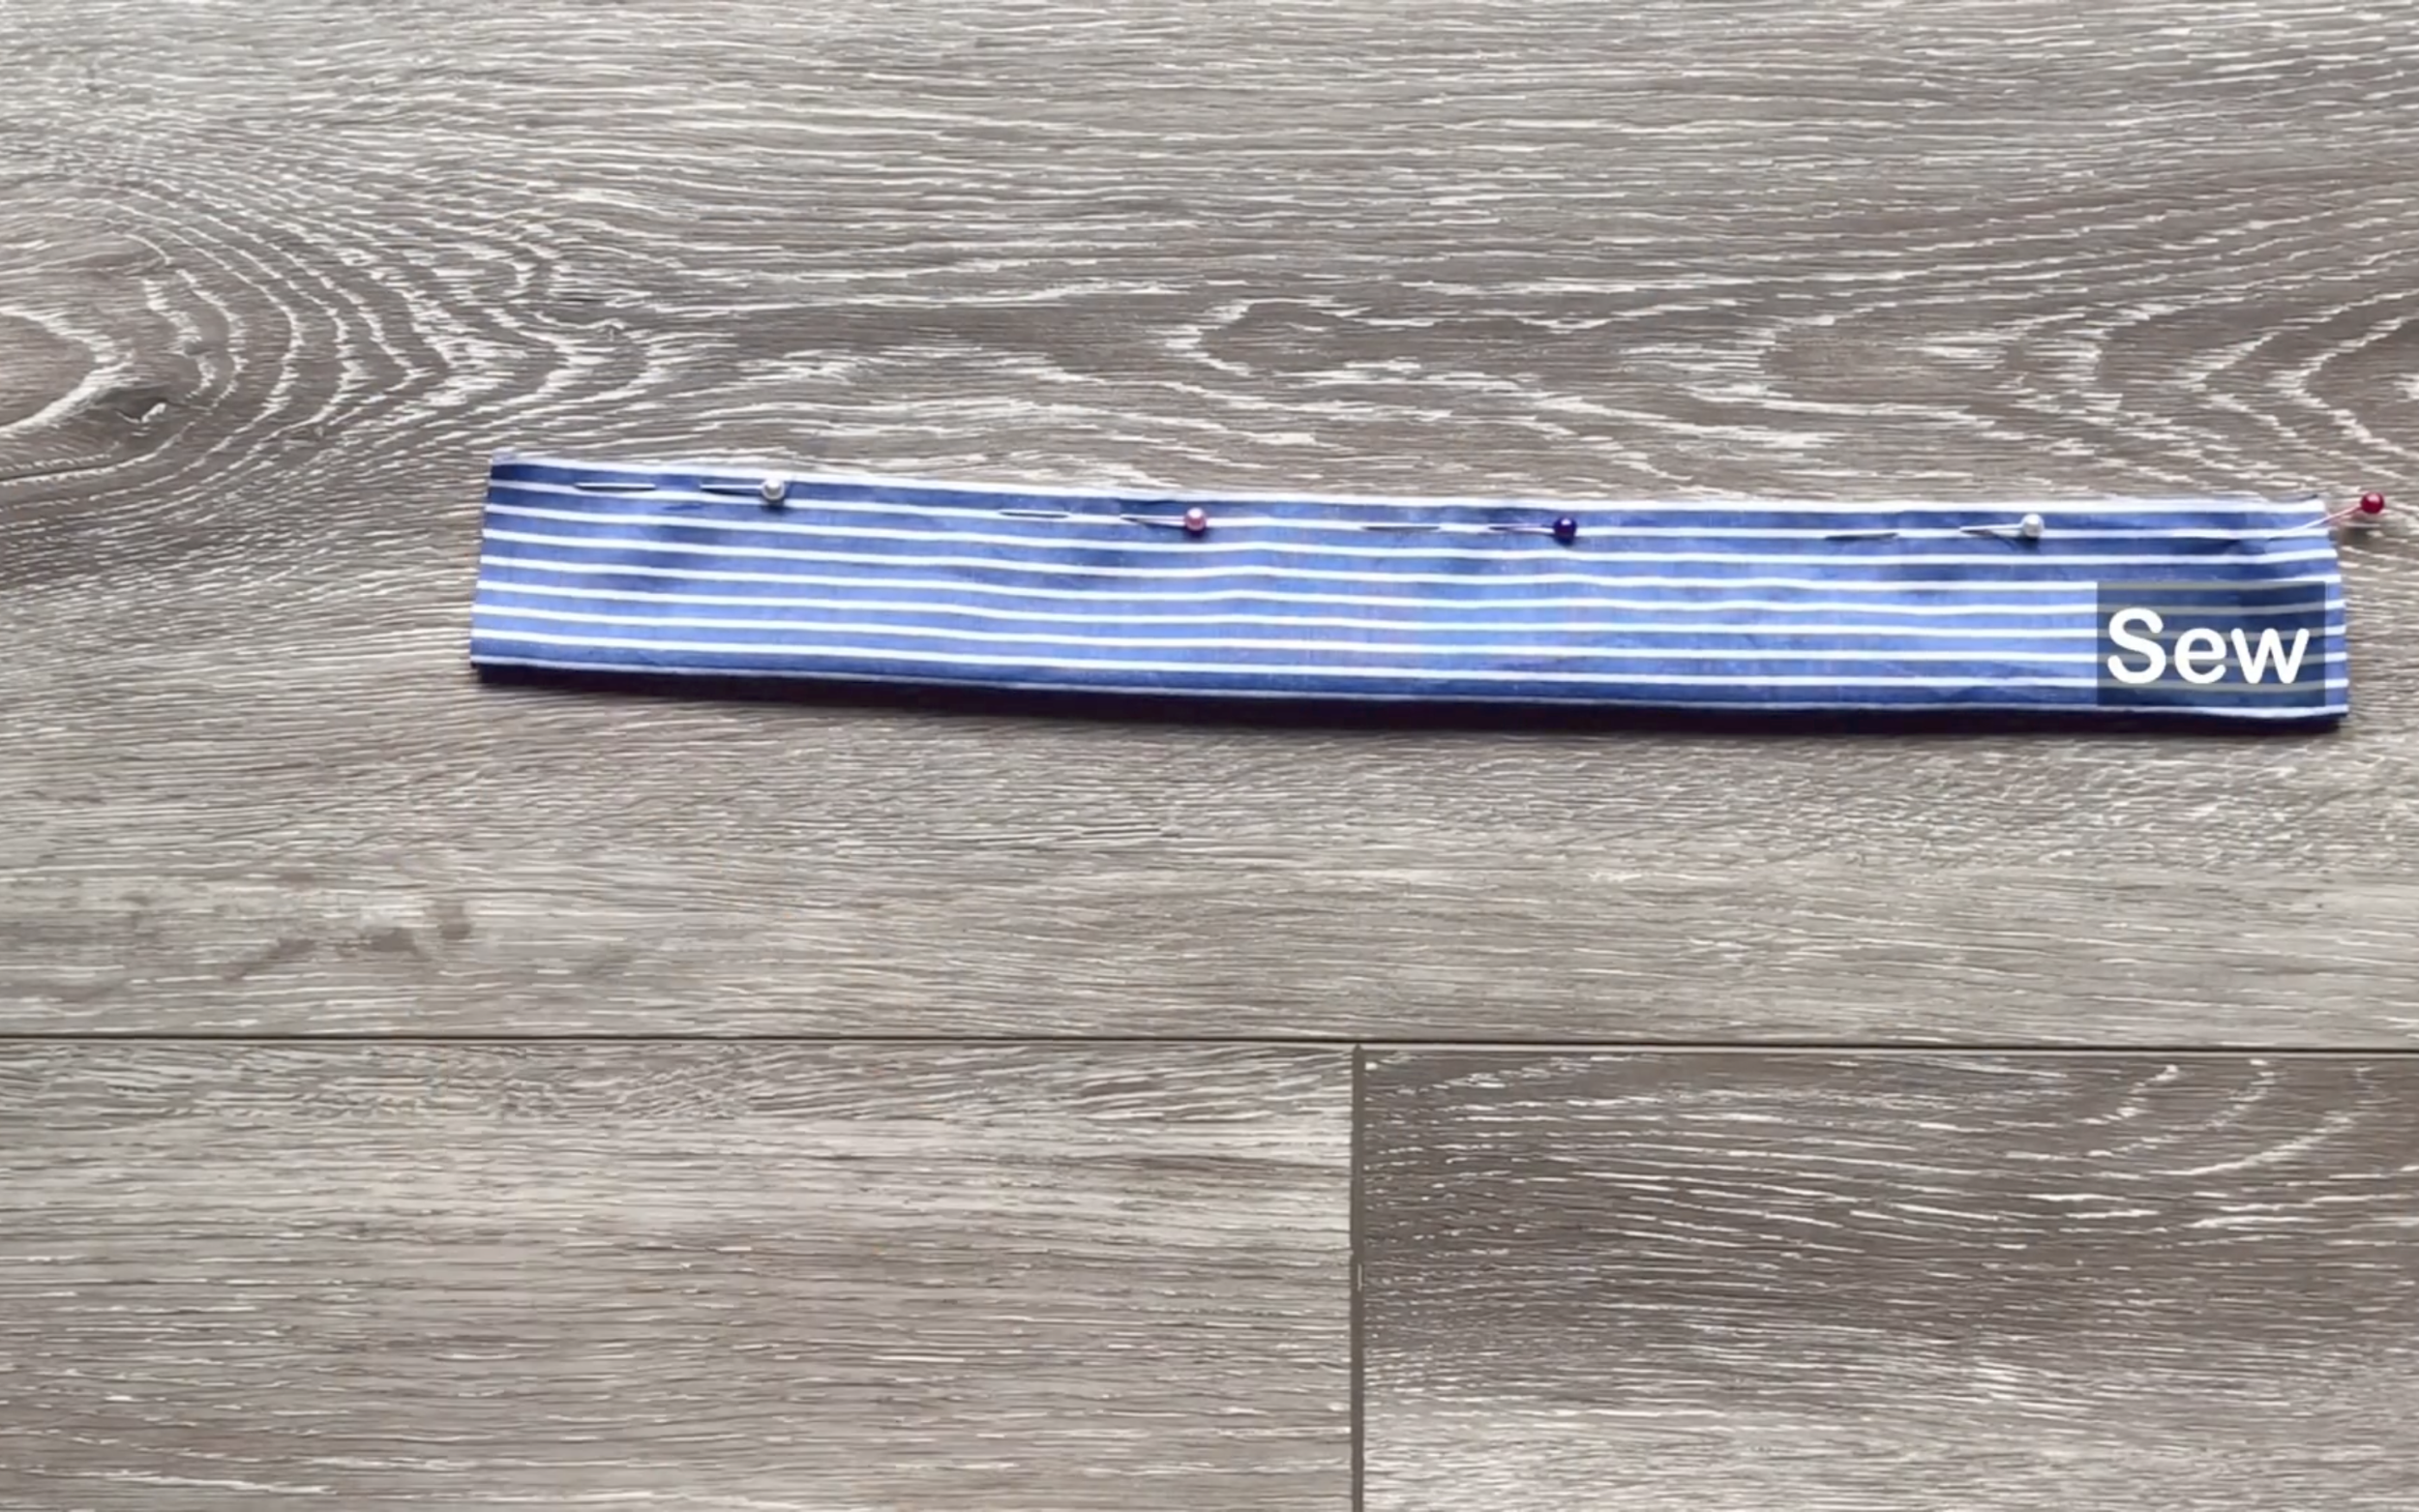
Sew the two long sides together.
Turn it inside out to hide the seam.
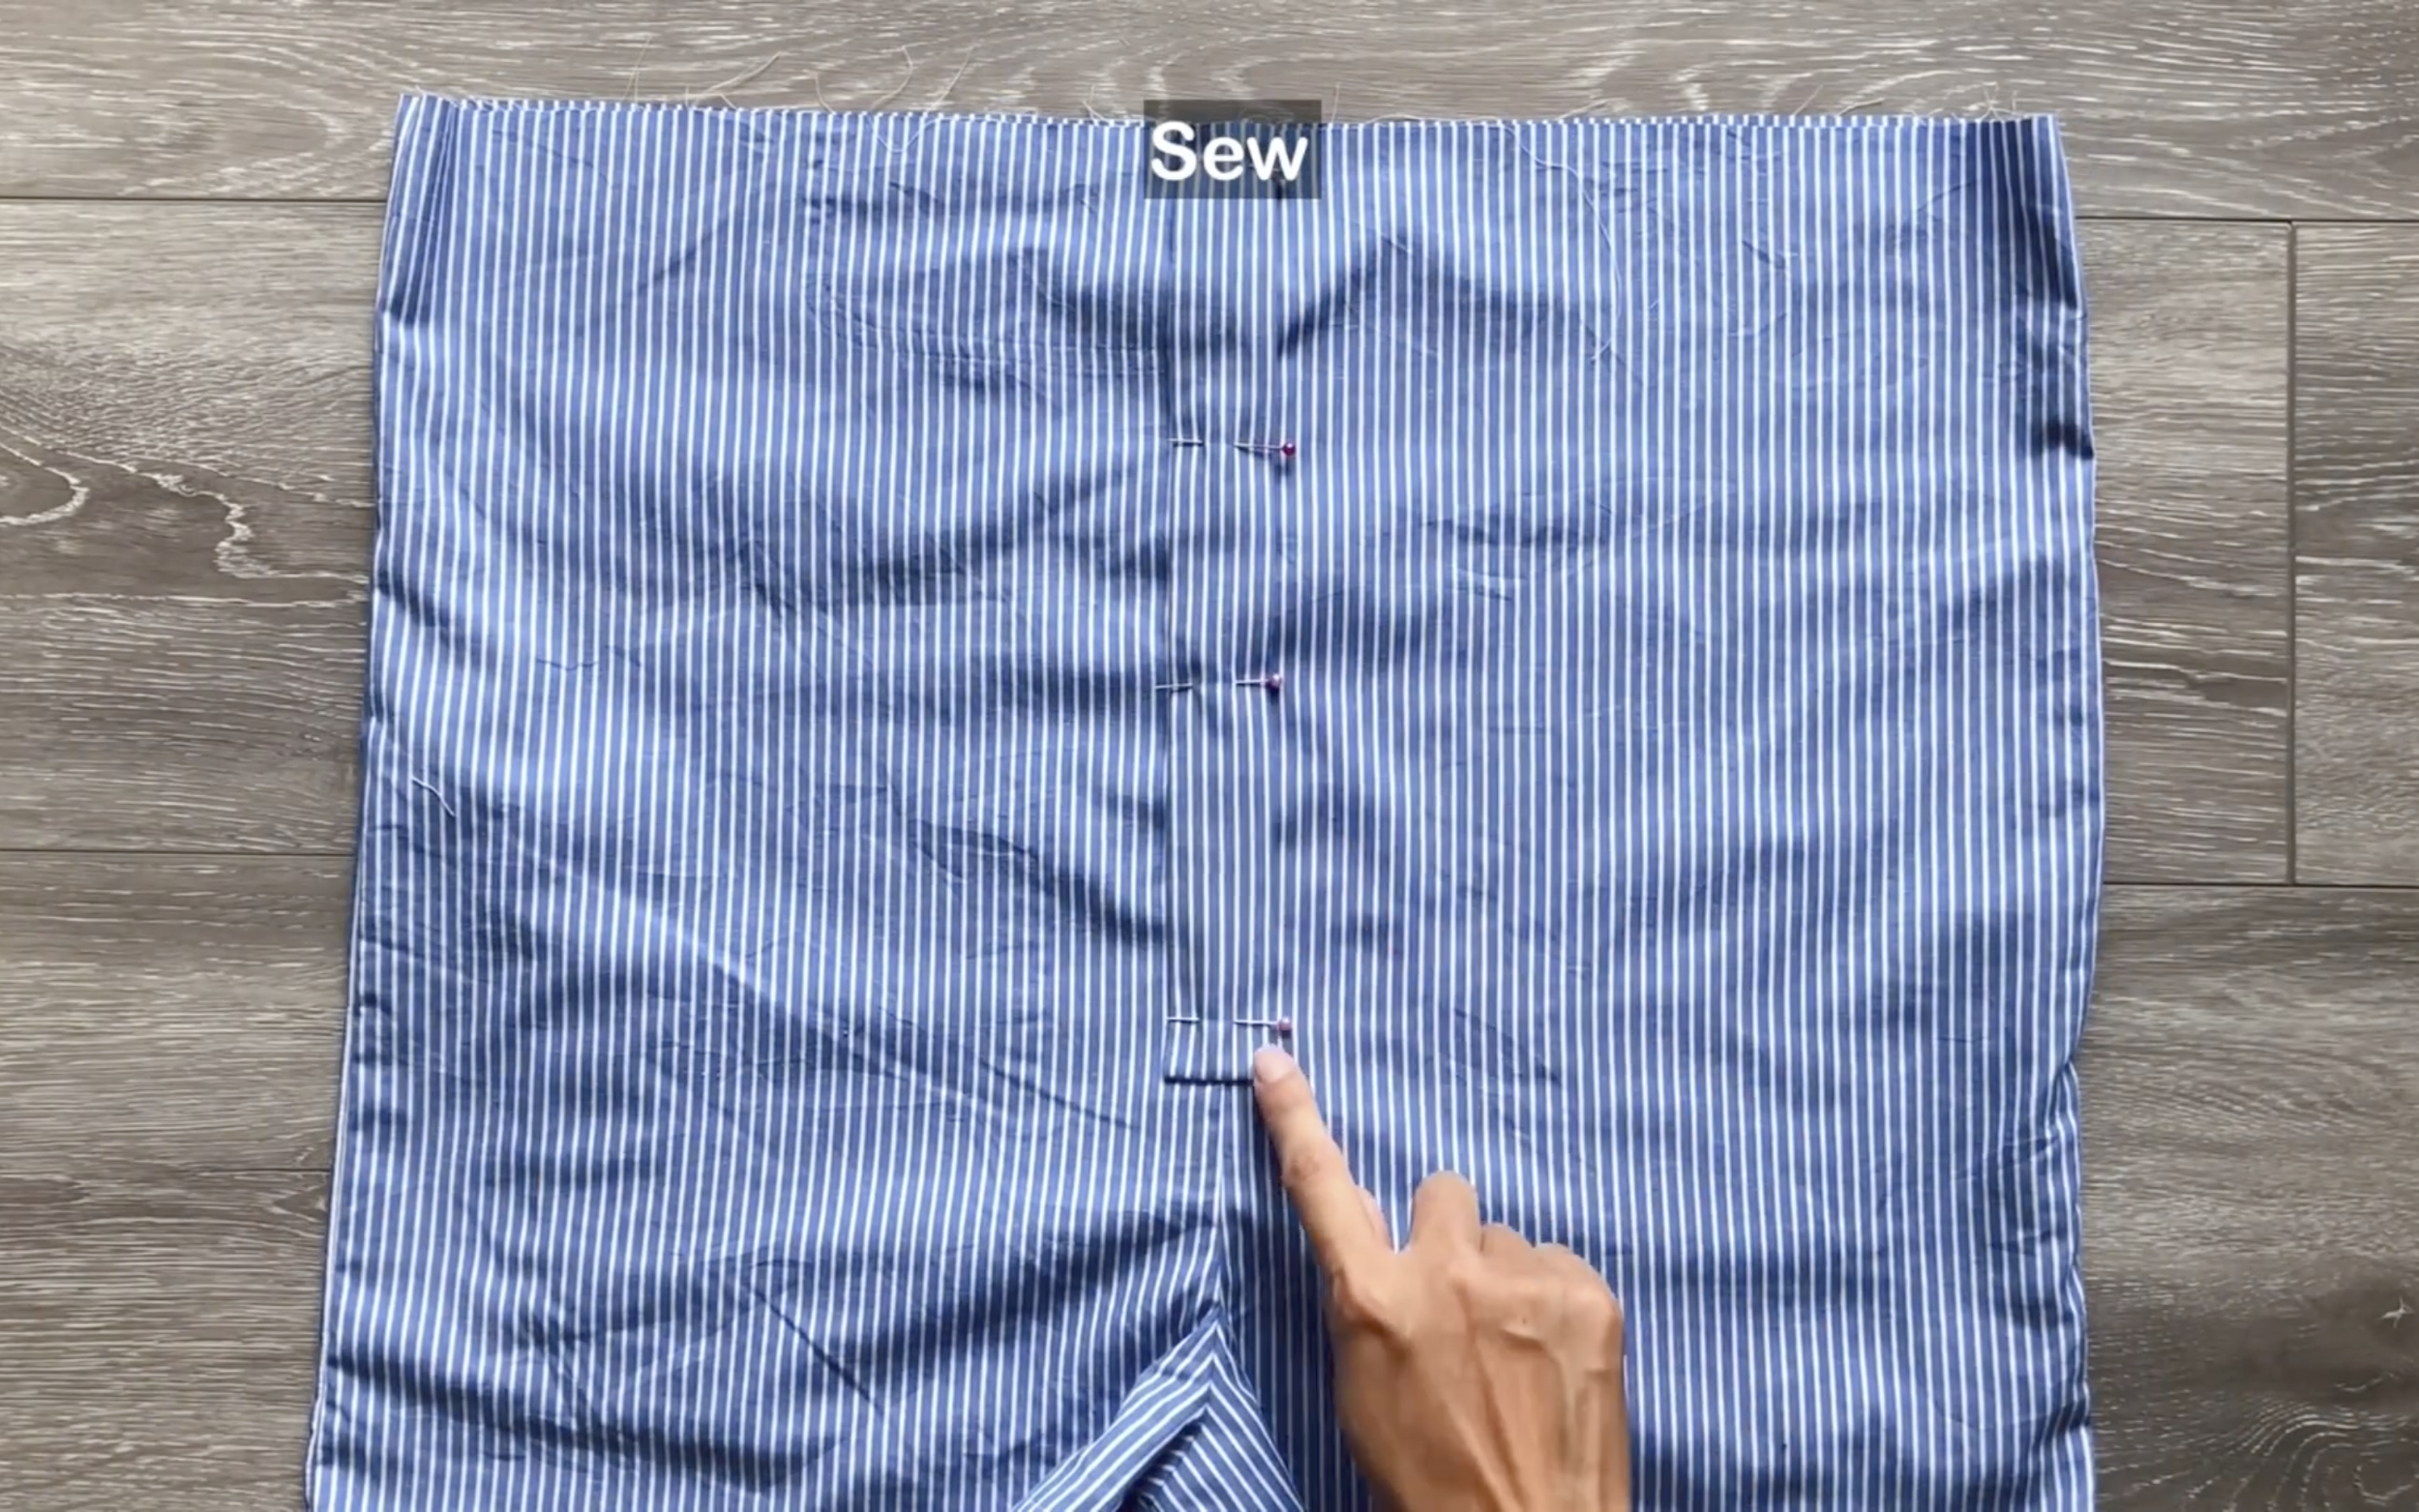
And add it to the middle of the crotch line at the front shorts as the fake button area.
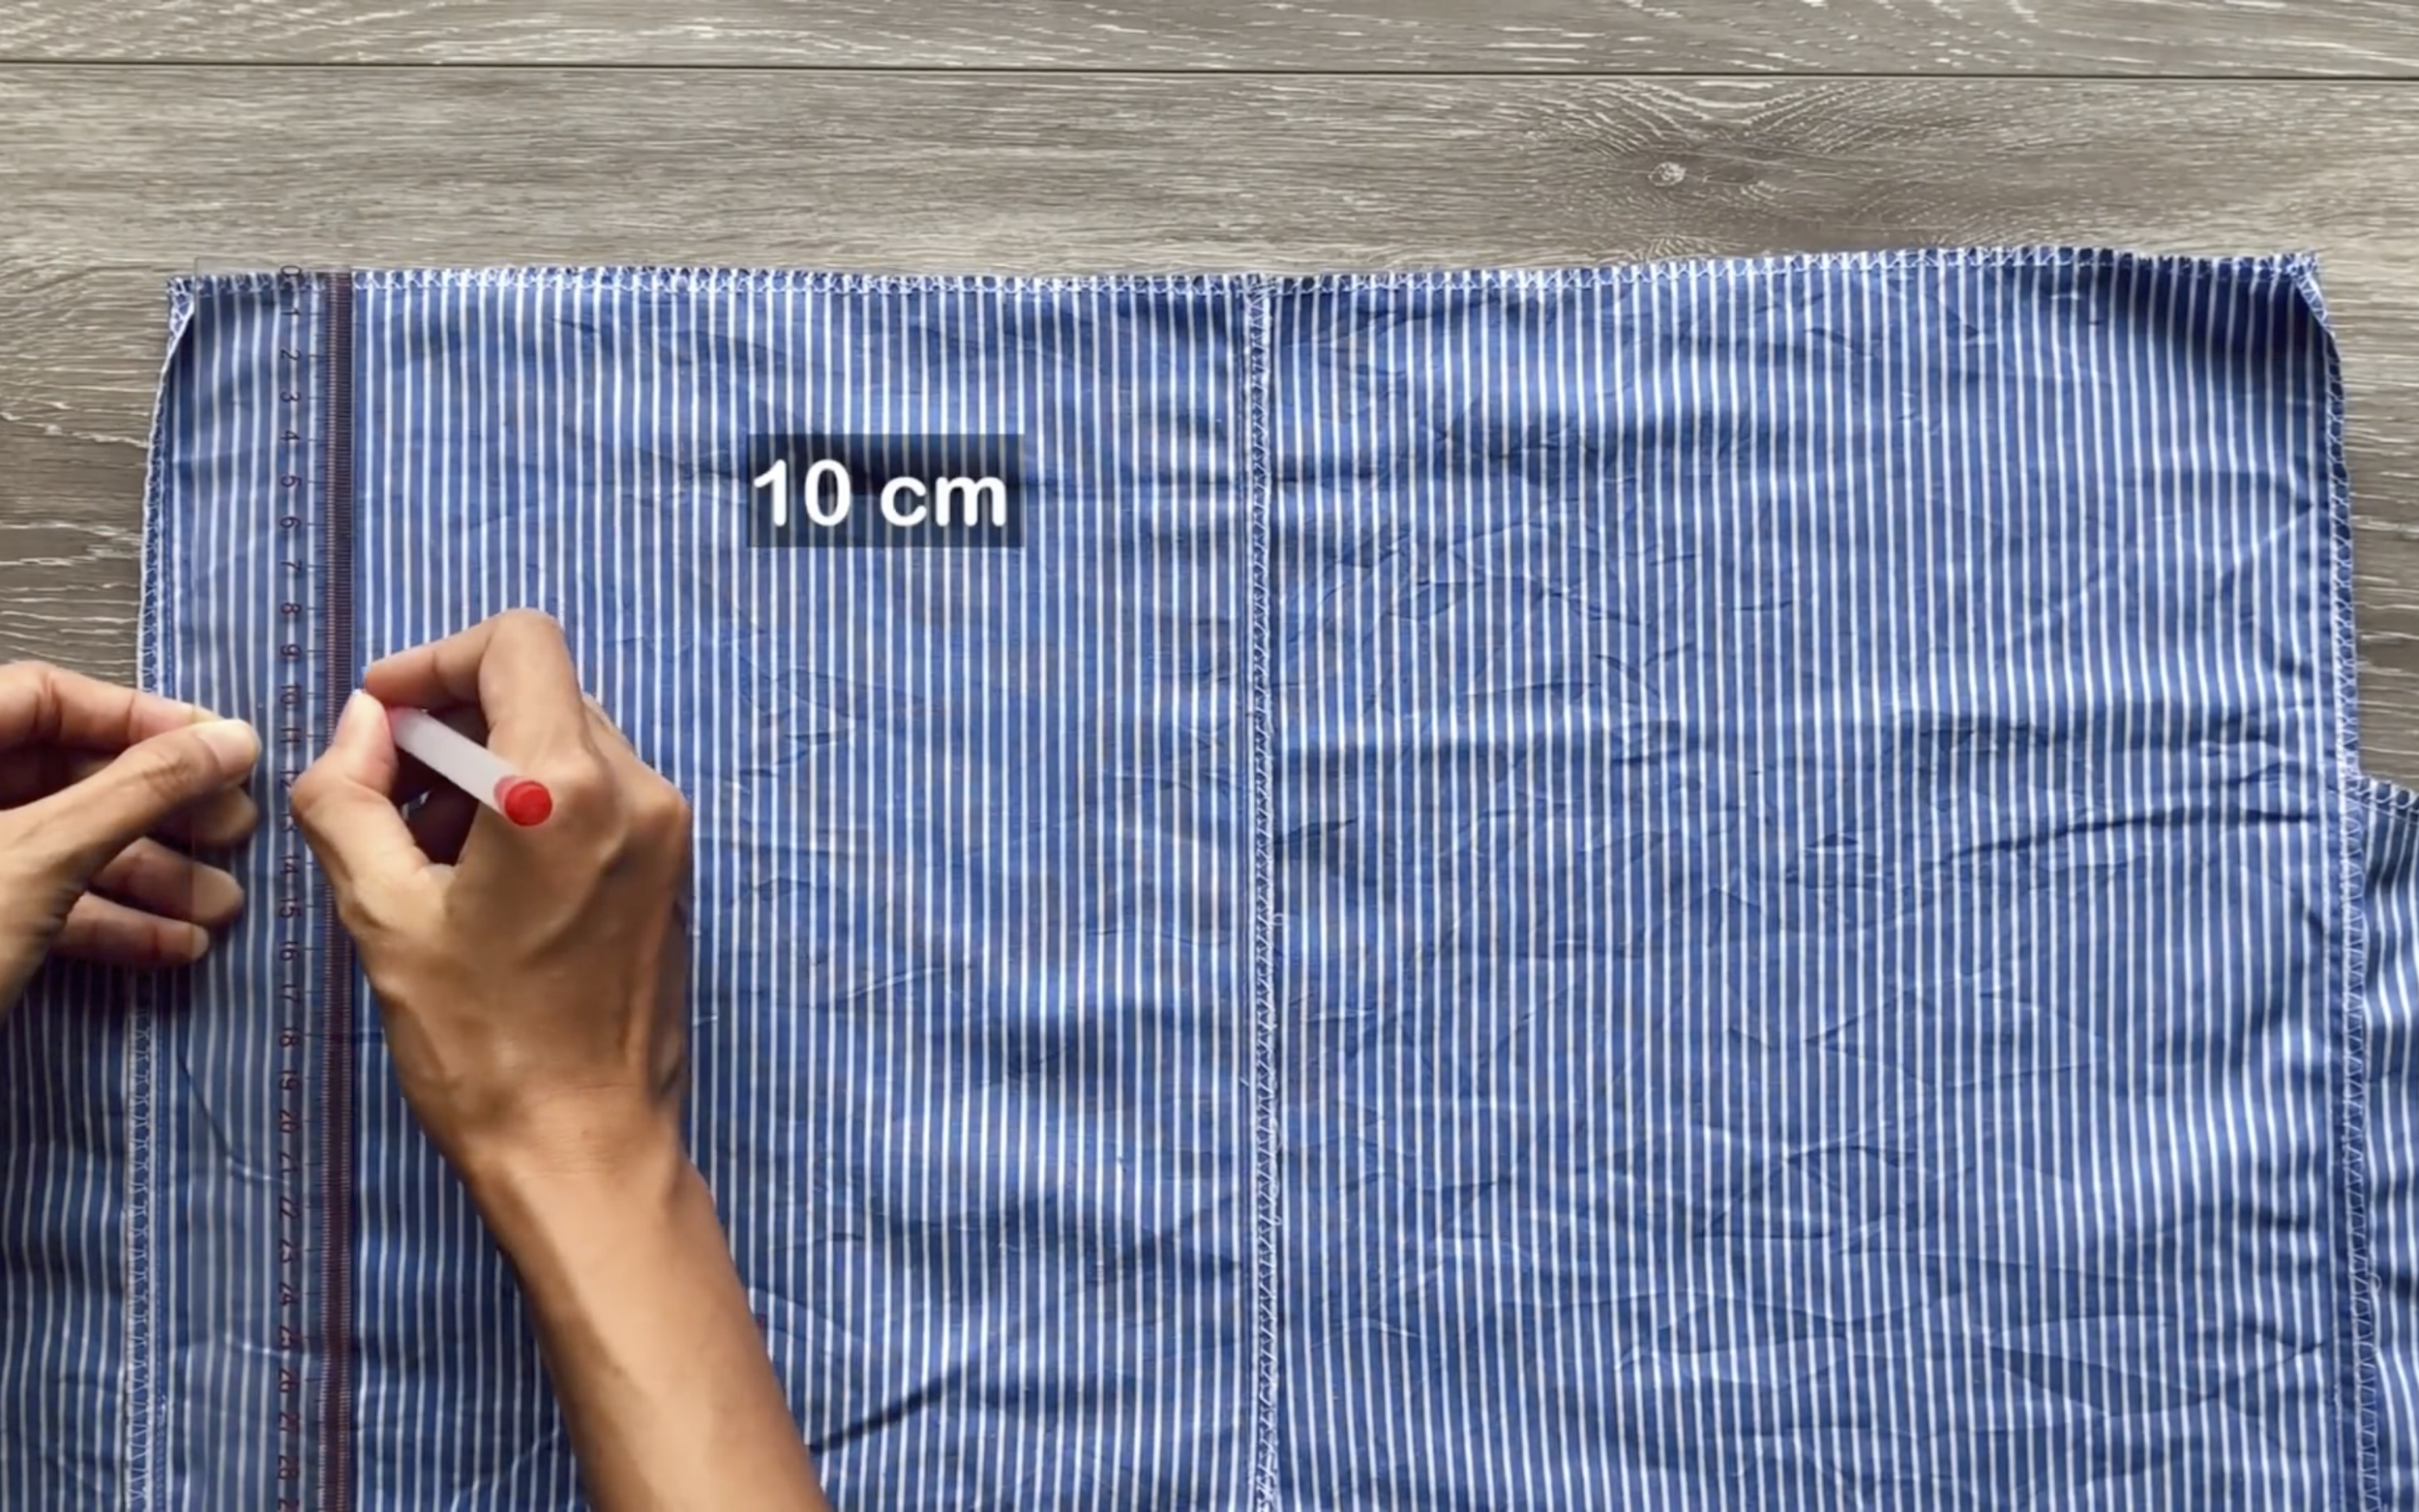
At the top of the shorts, draw a line 10 cm below the edge.
Fold the edge fabric to this line to create a fabric hole for the elastic band.
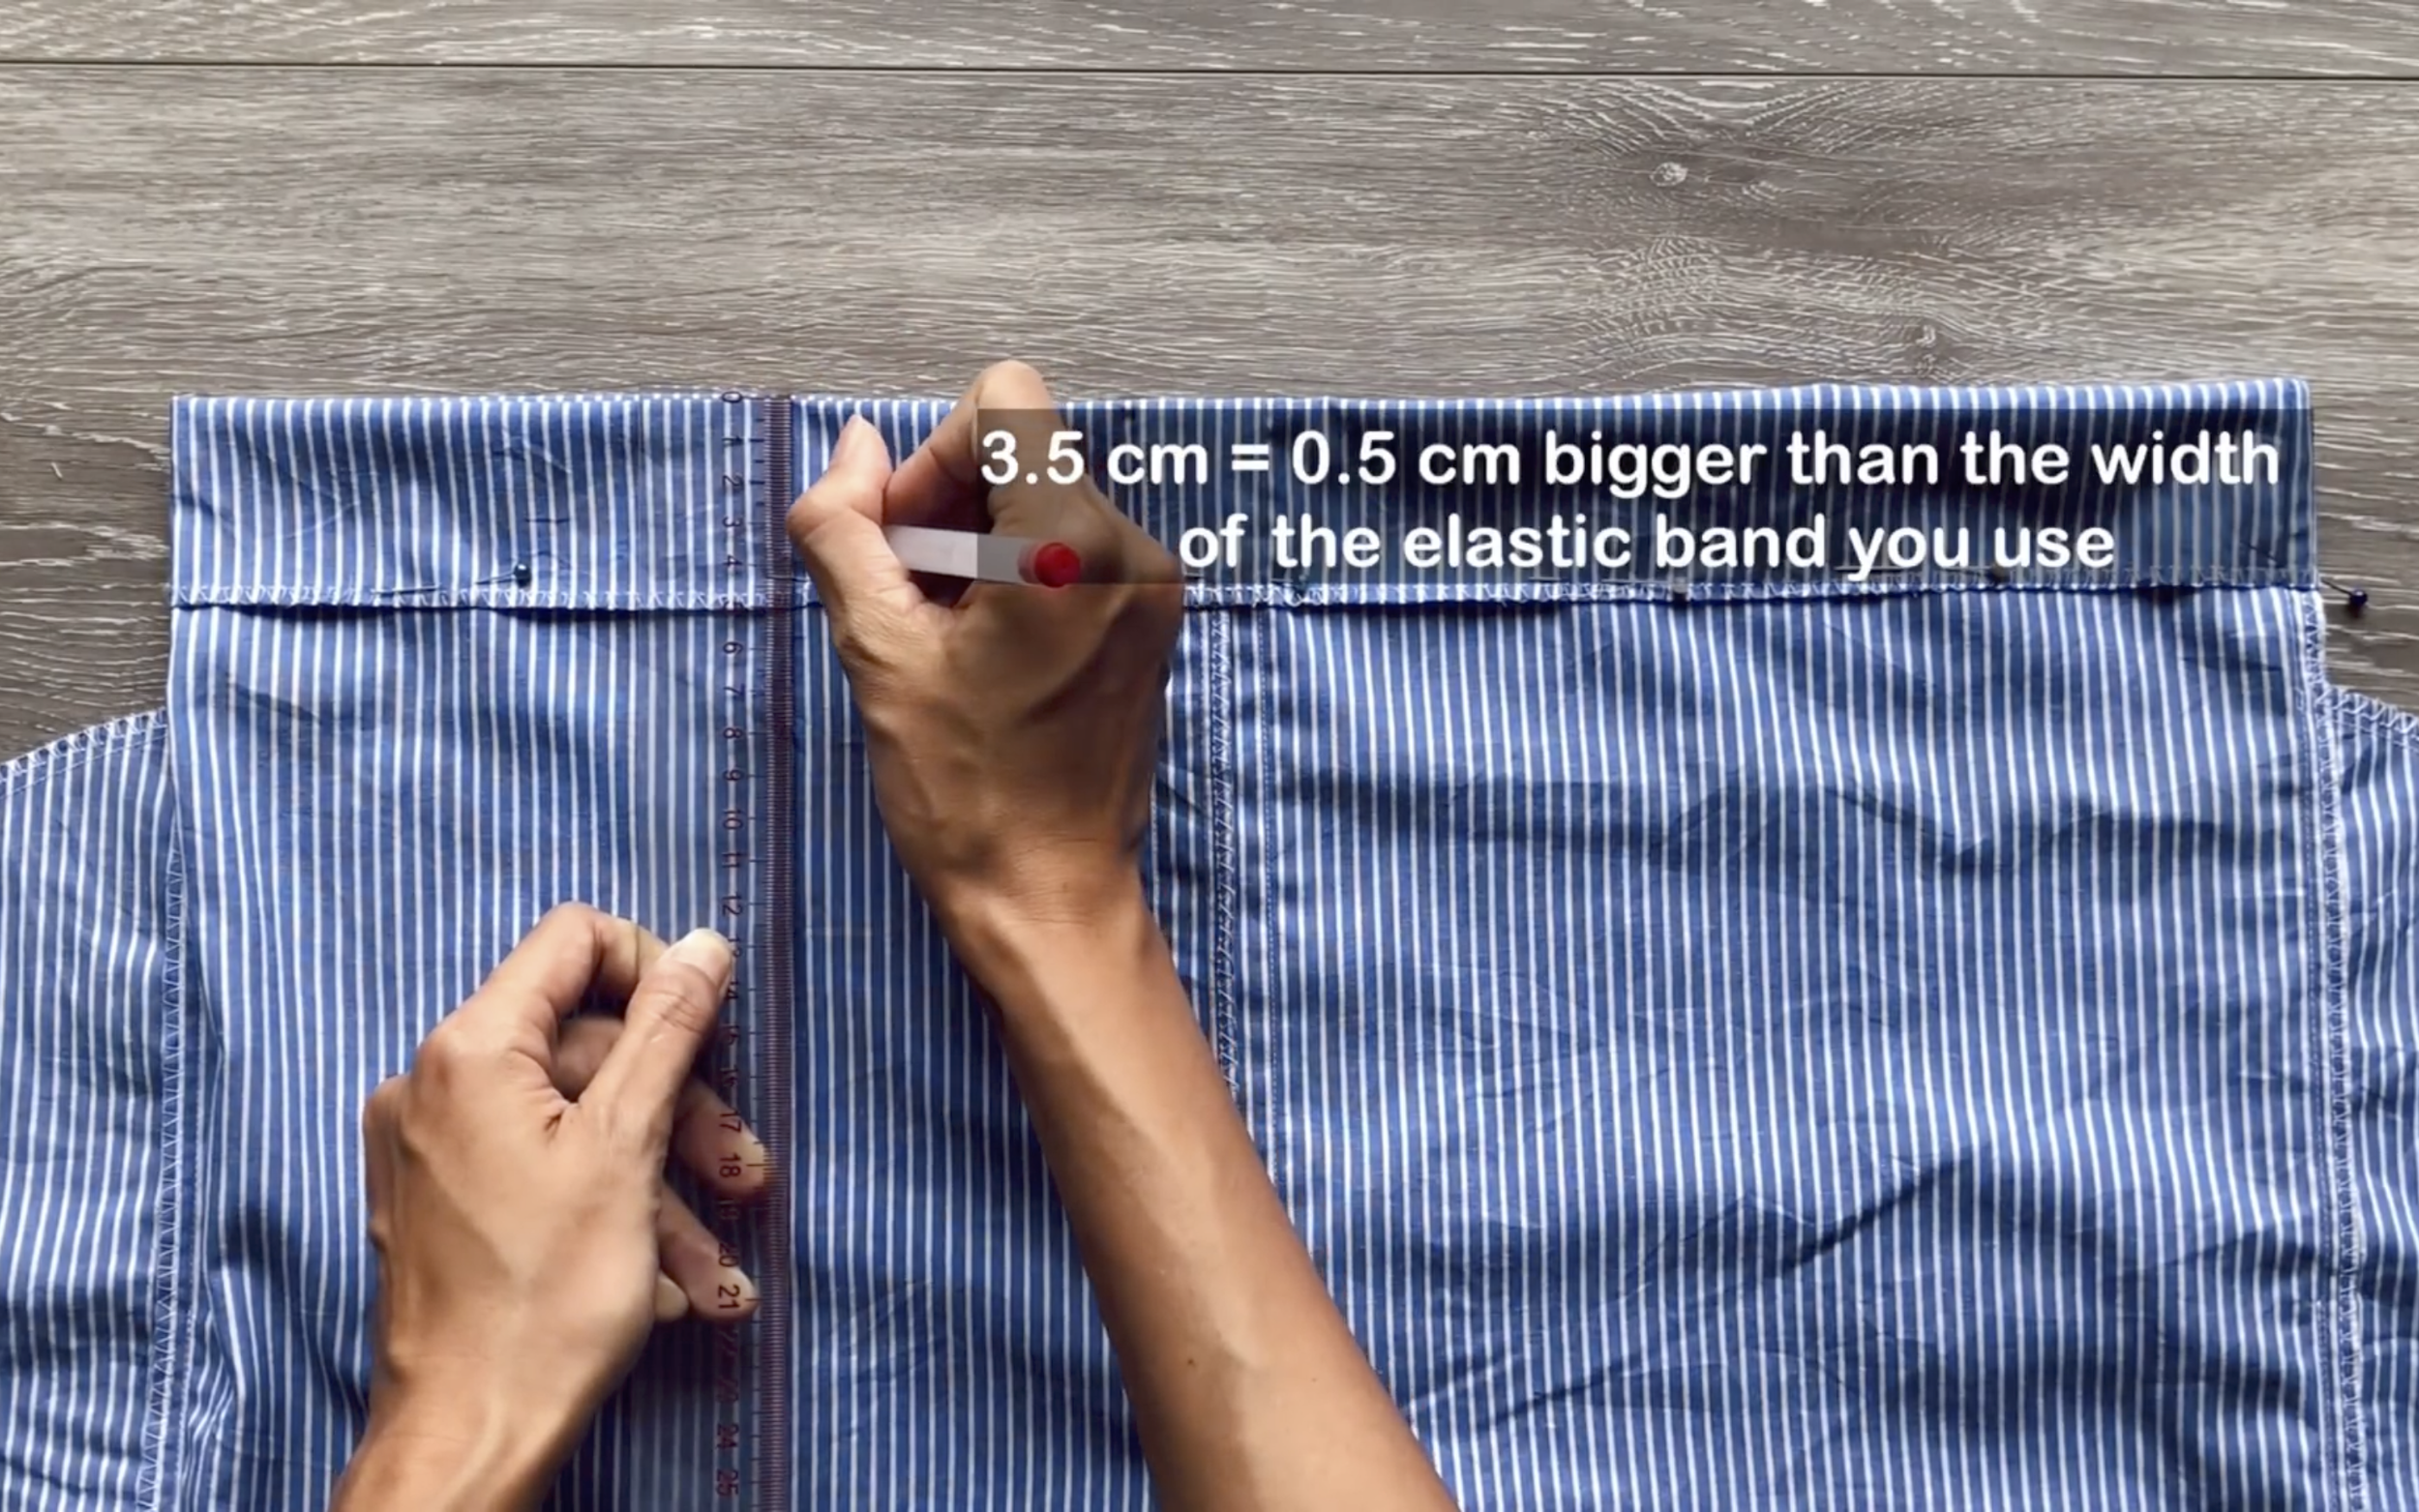
Make surre the hole is 0.5 cm wider than the elastic band for easy movement.
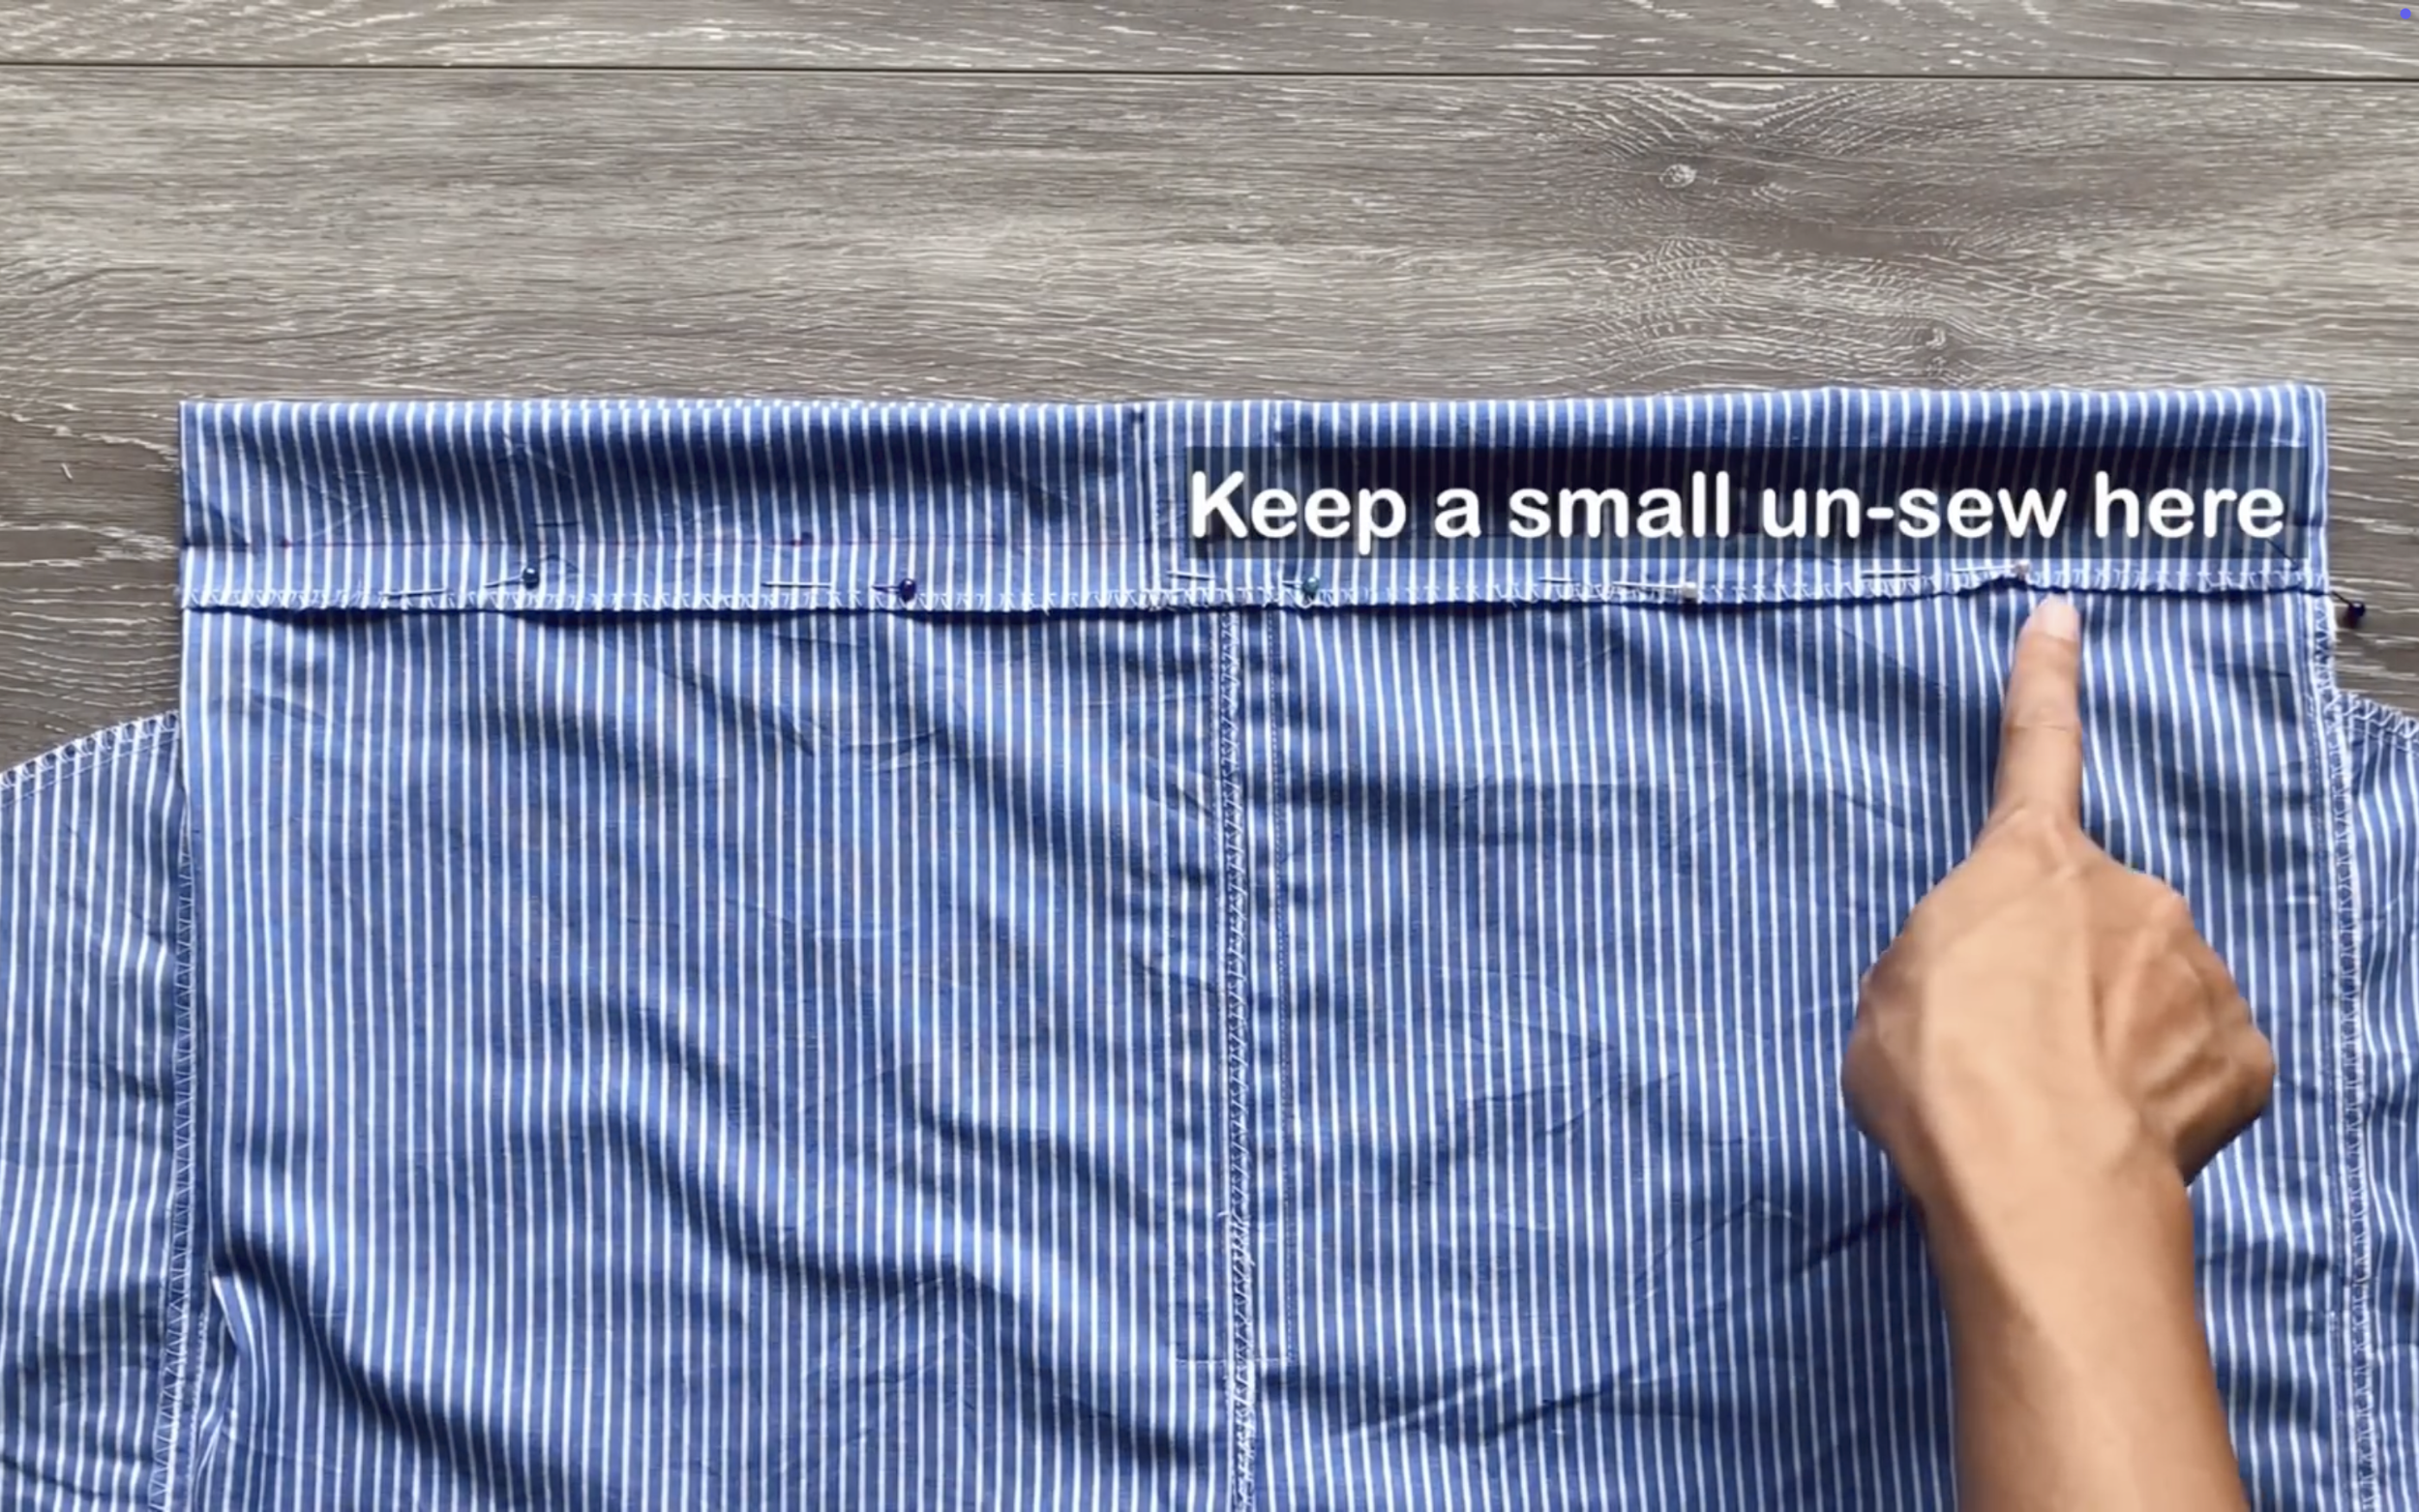
Keep a small unsewn space for inserting the elastic band.
After connecting the elastic band ends, close the unsewn space.
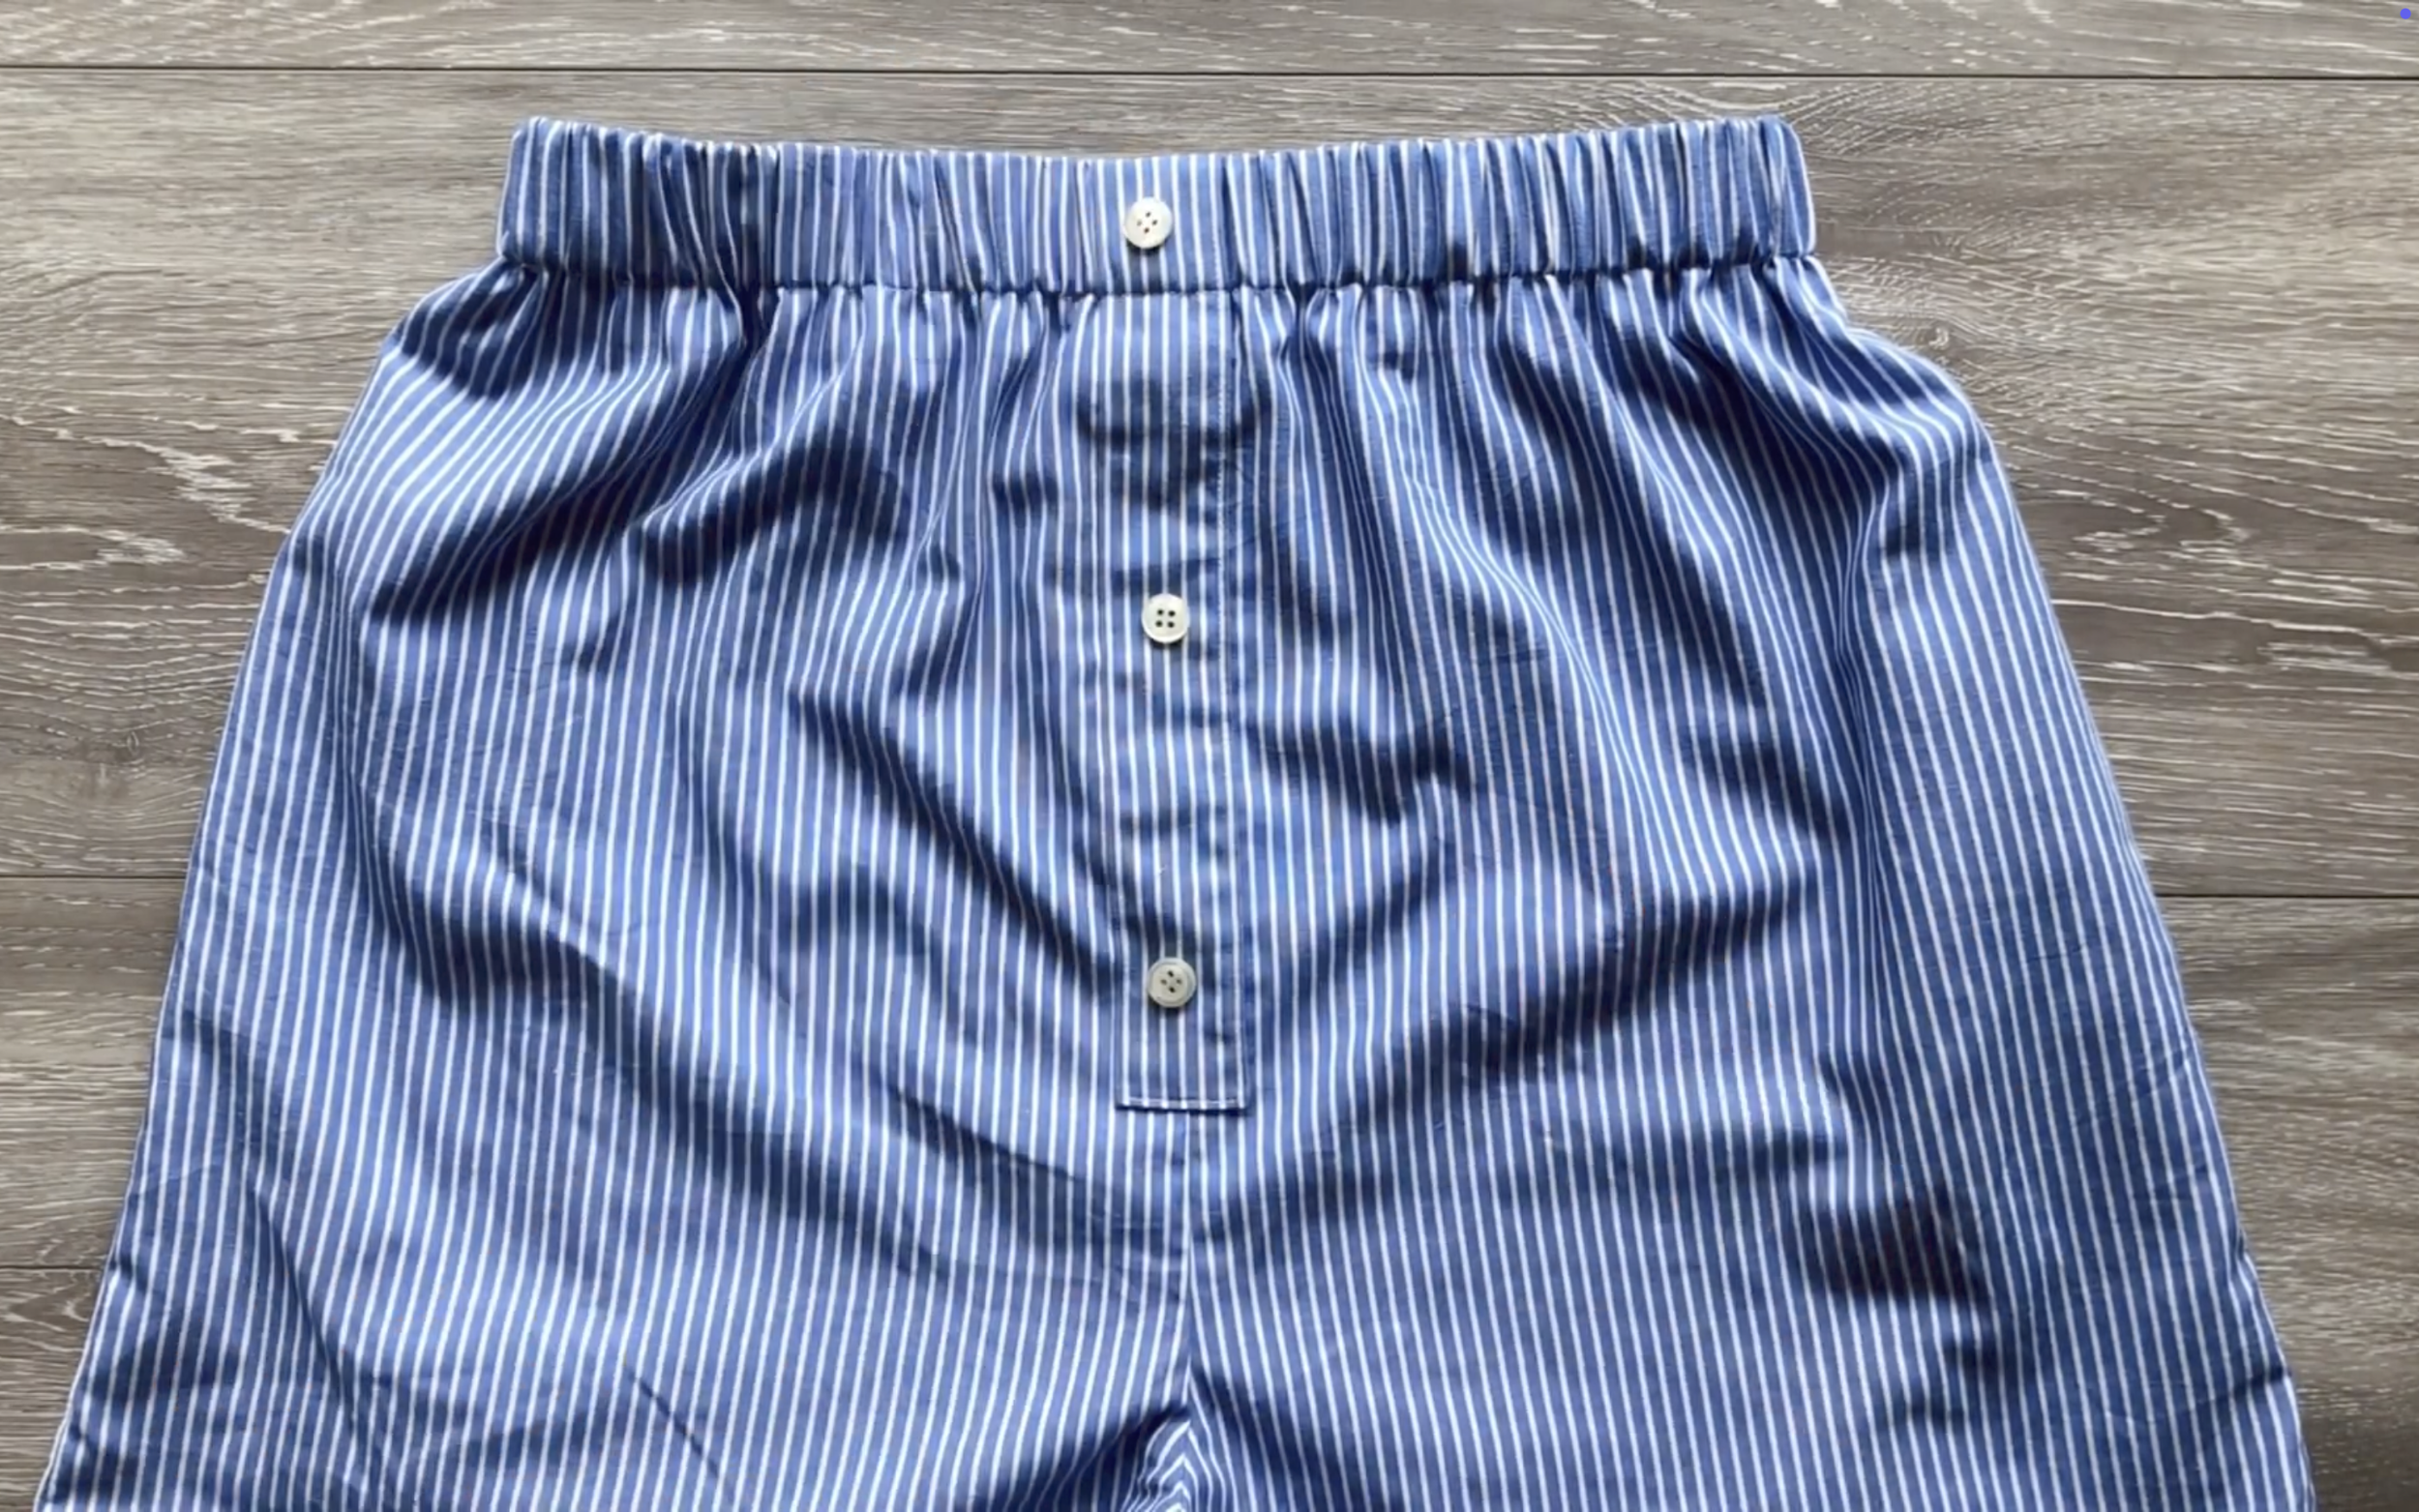
Add the button to the fake button area to complete the shorts.
THE SHIRT
For the top of the matching set, use the XL size man shirt.
Remove the front pocket first.
At the end of the crop top, go up 10 cm and mark there. This mark is at 10 cm because the width from the neck to that mark will be the width of your breast.
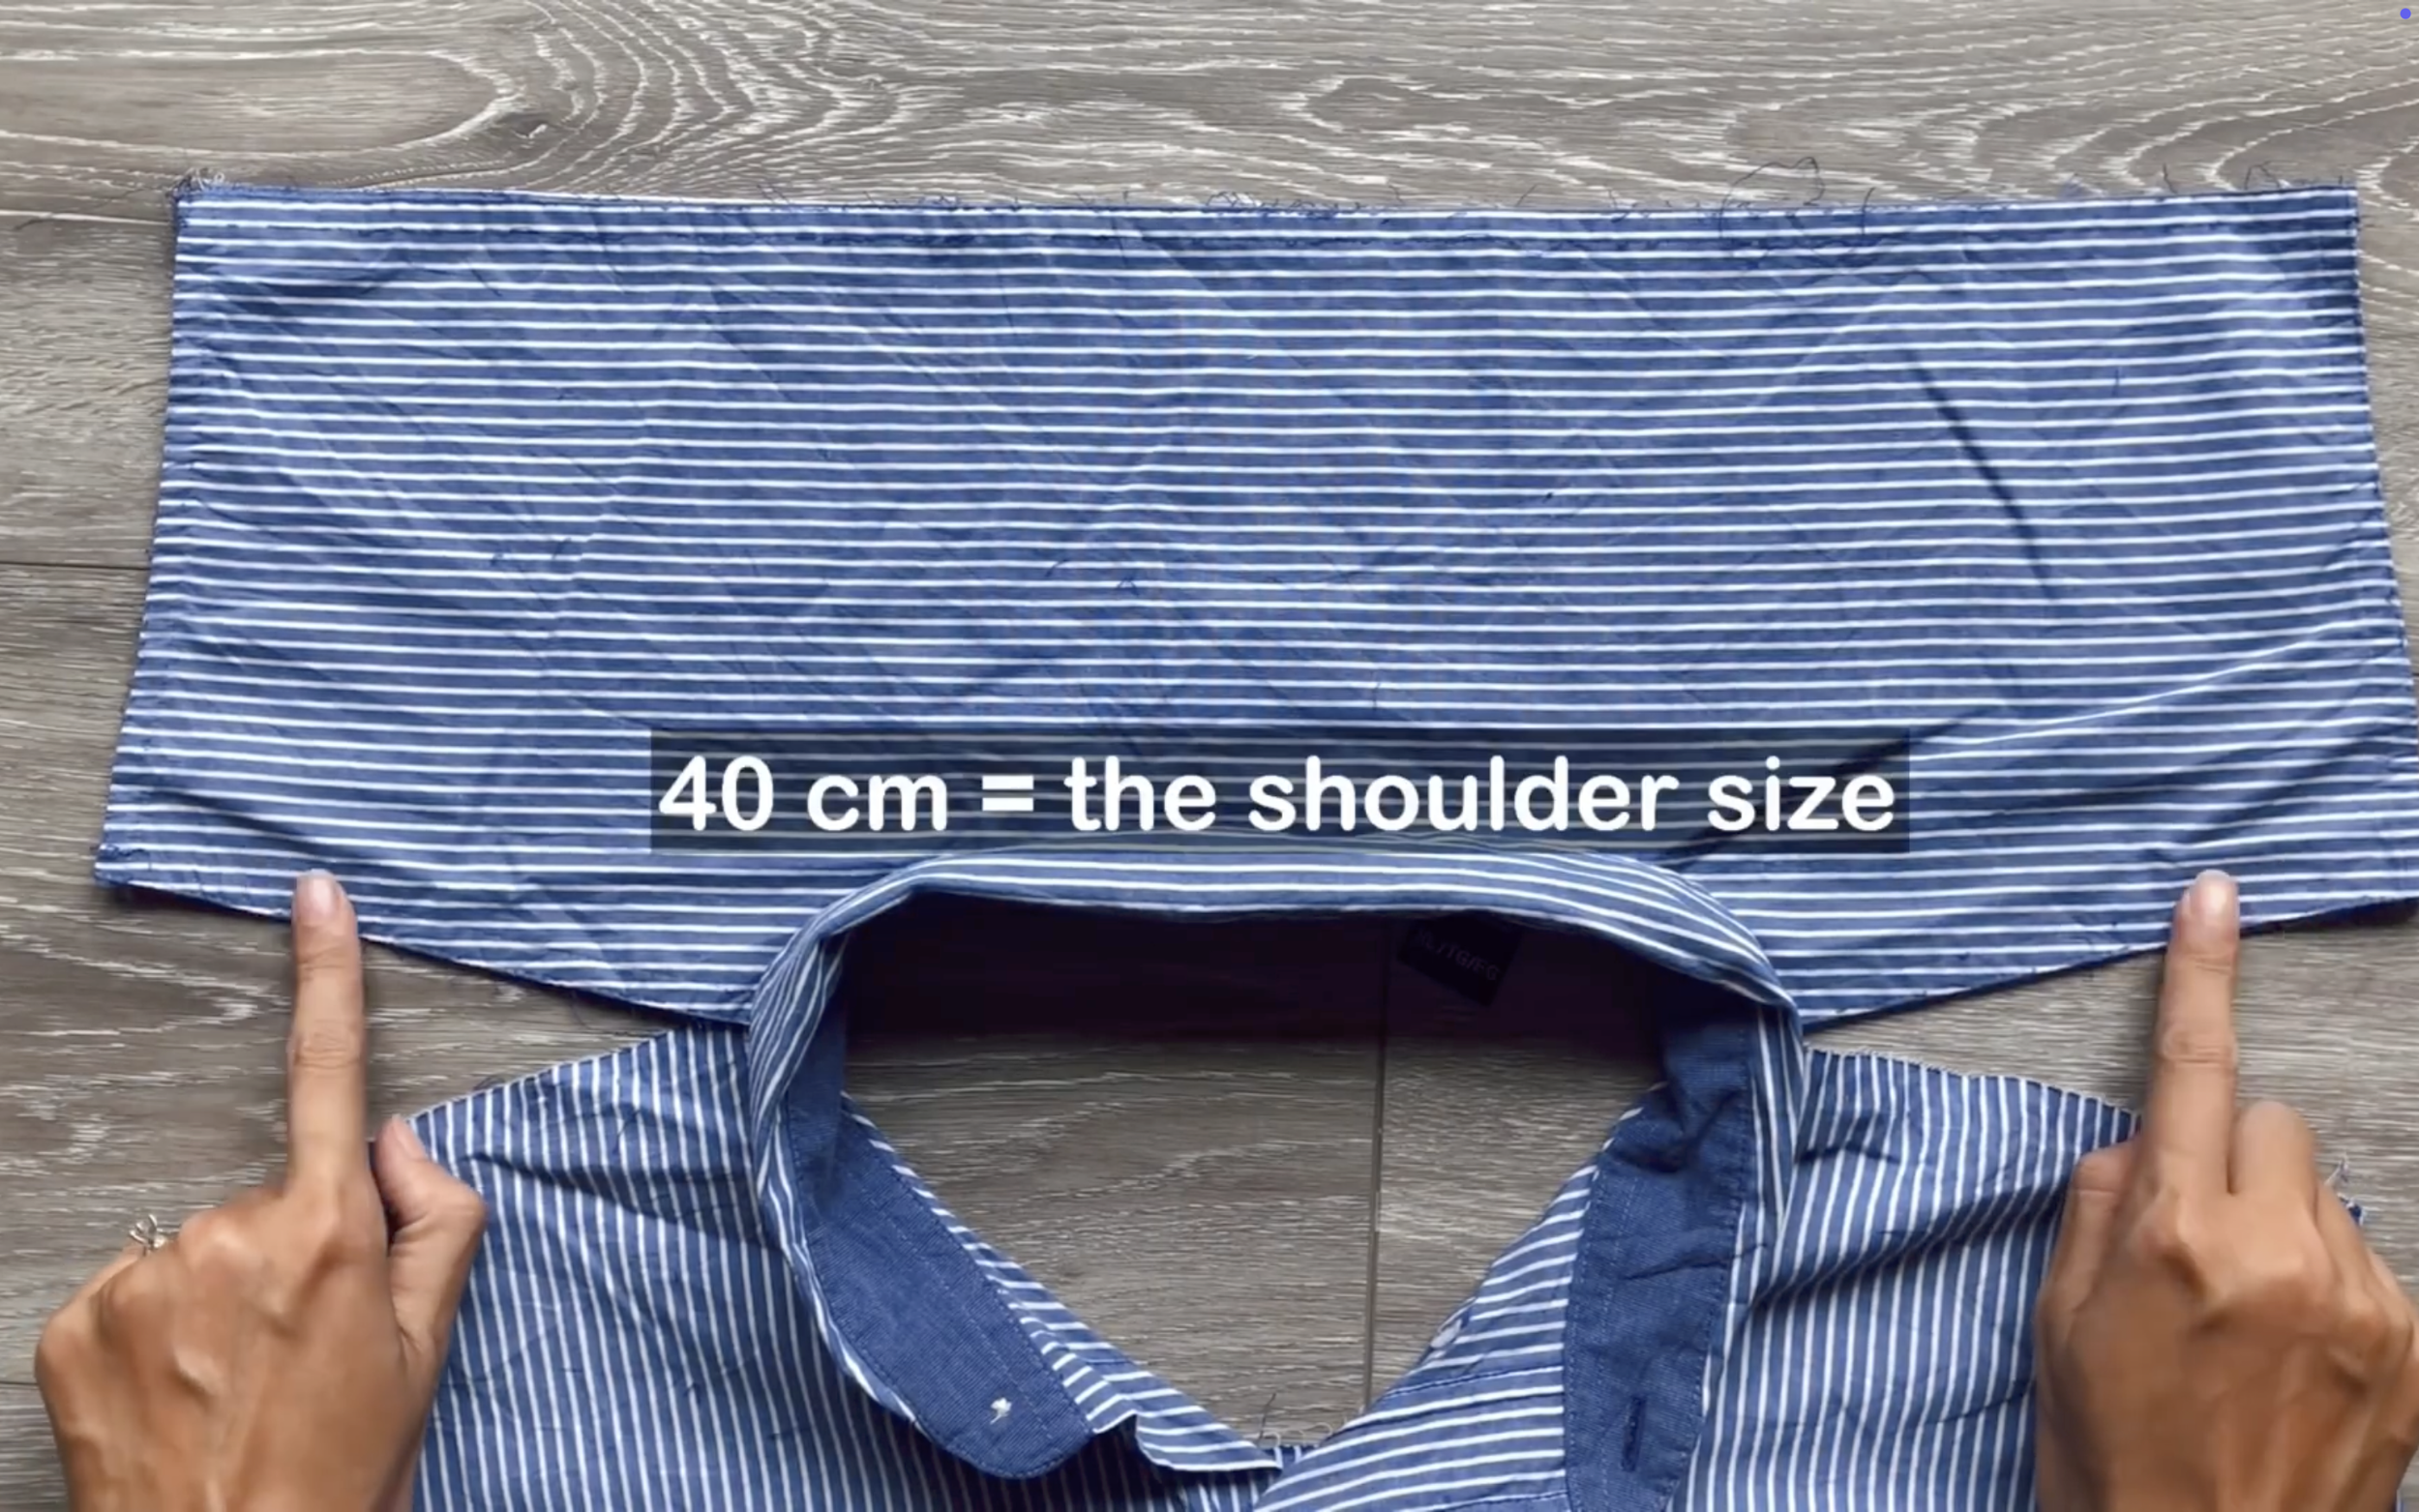
Resize the width of the shoulder at the back of the shirt to fit the shoulder size by drawing two lines on both sides.
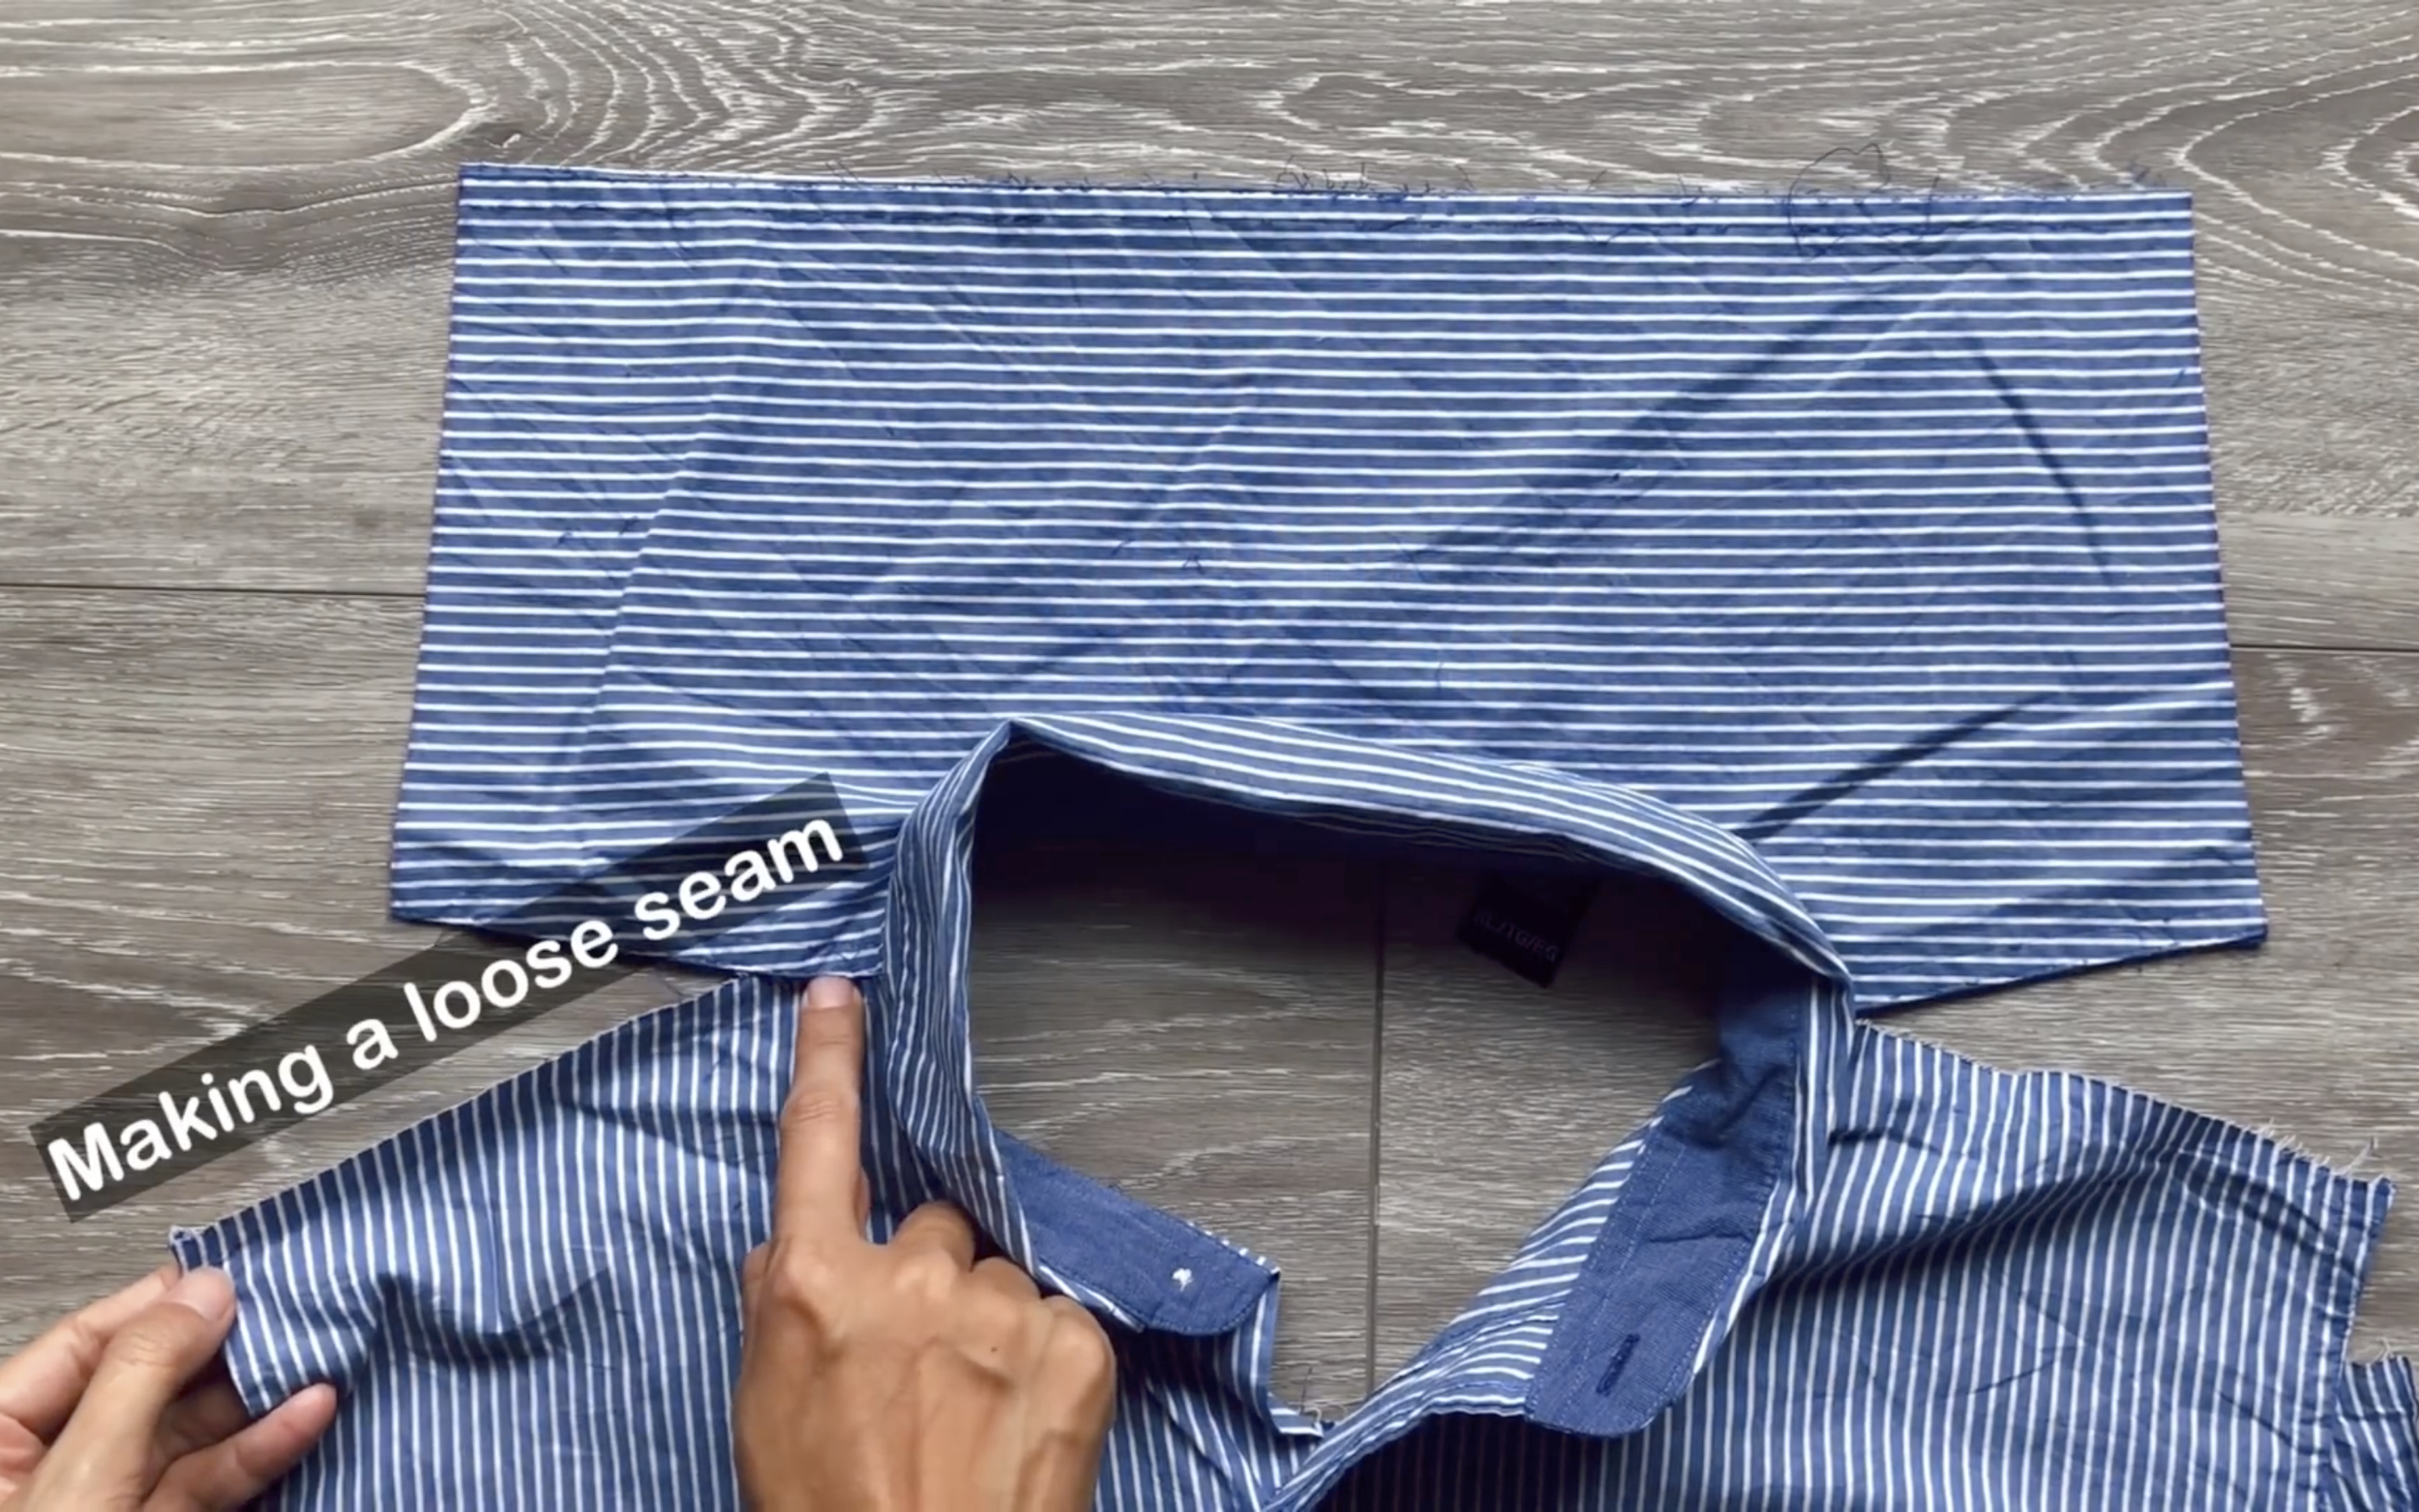
The front shoulder will be longer than the back, so make a loose seam on the front to create gathering fabric.
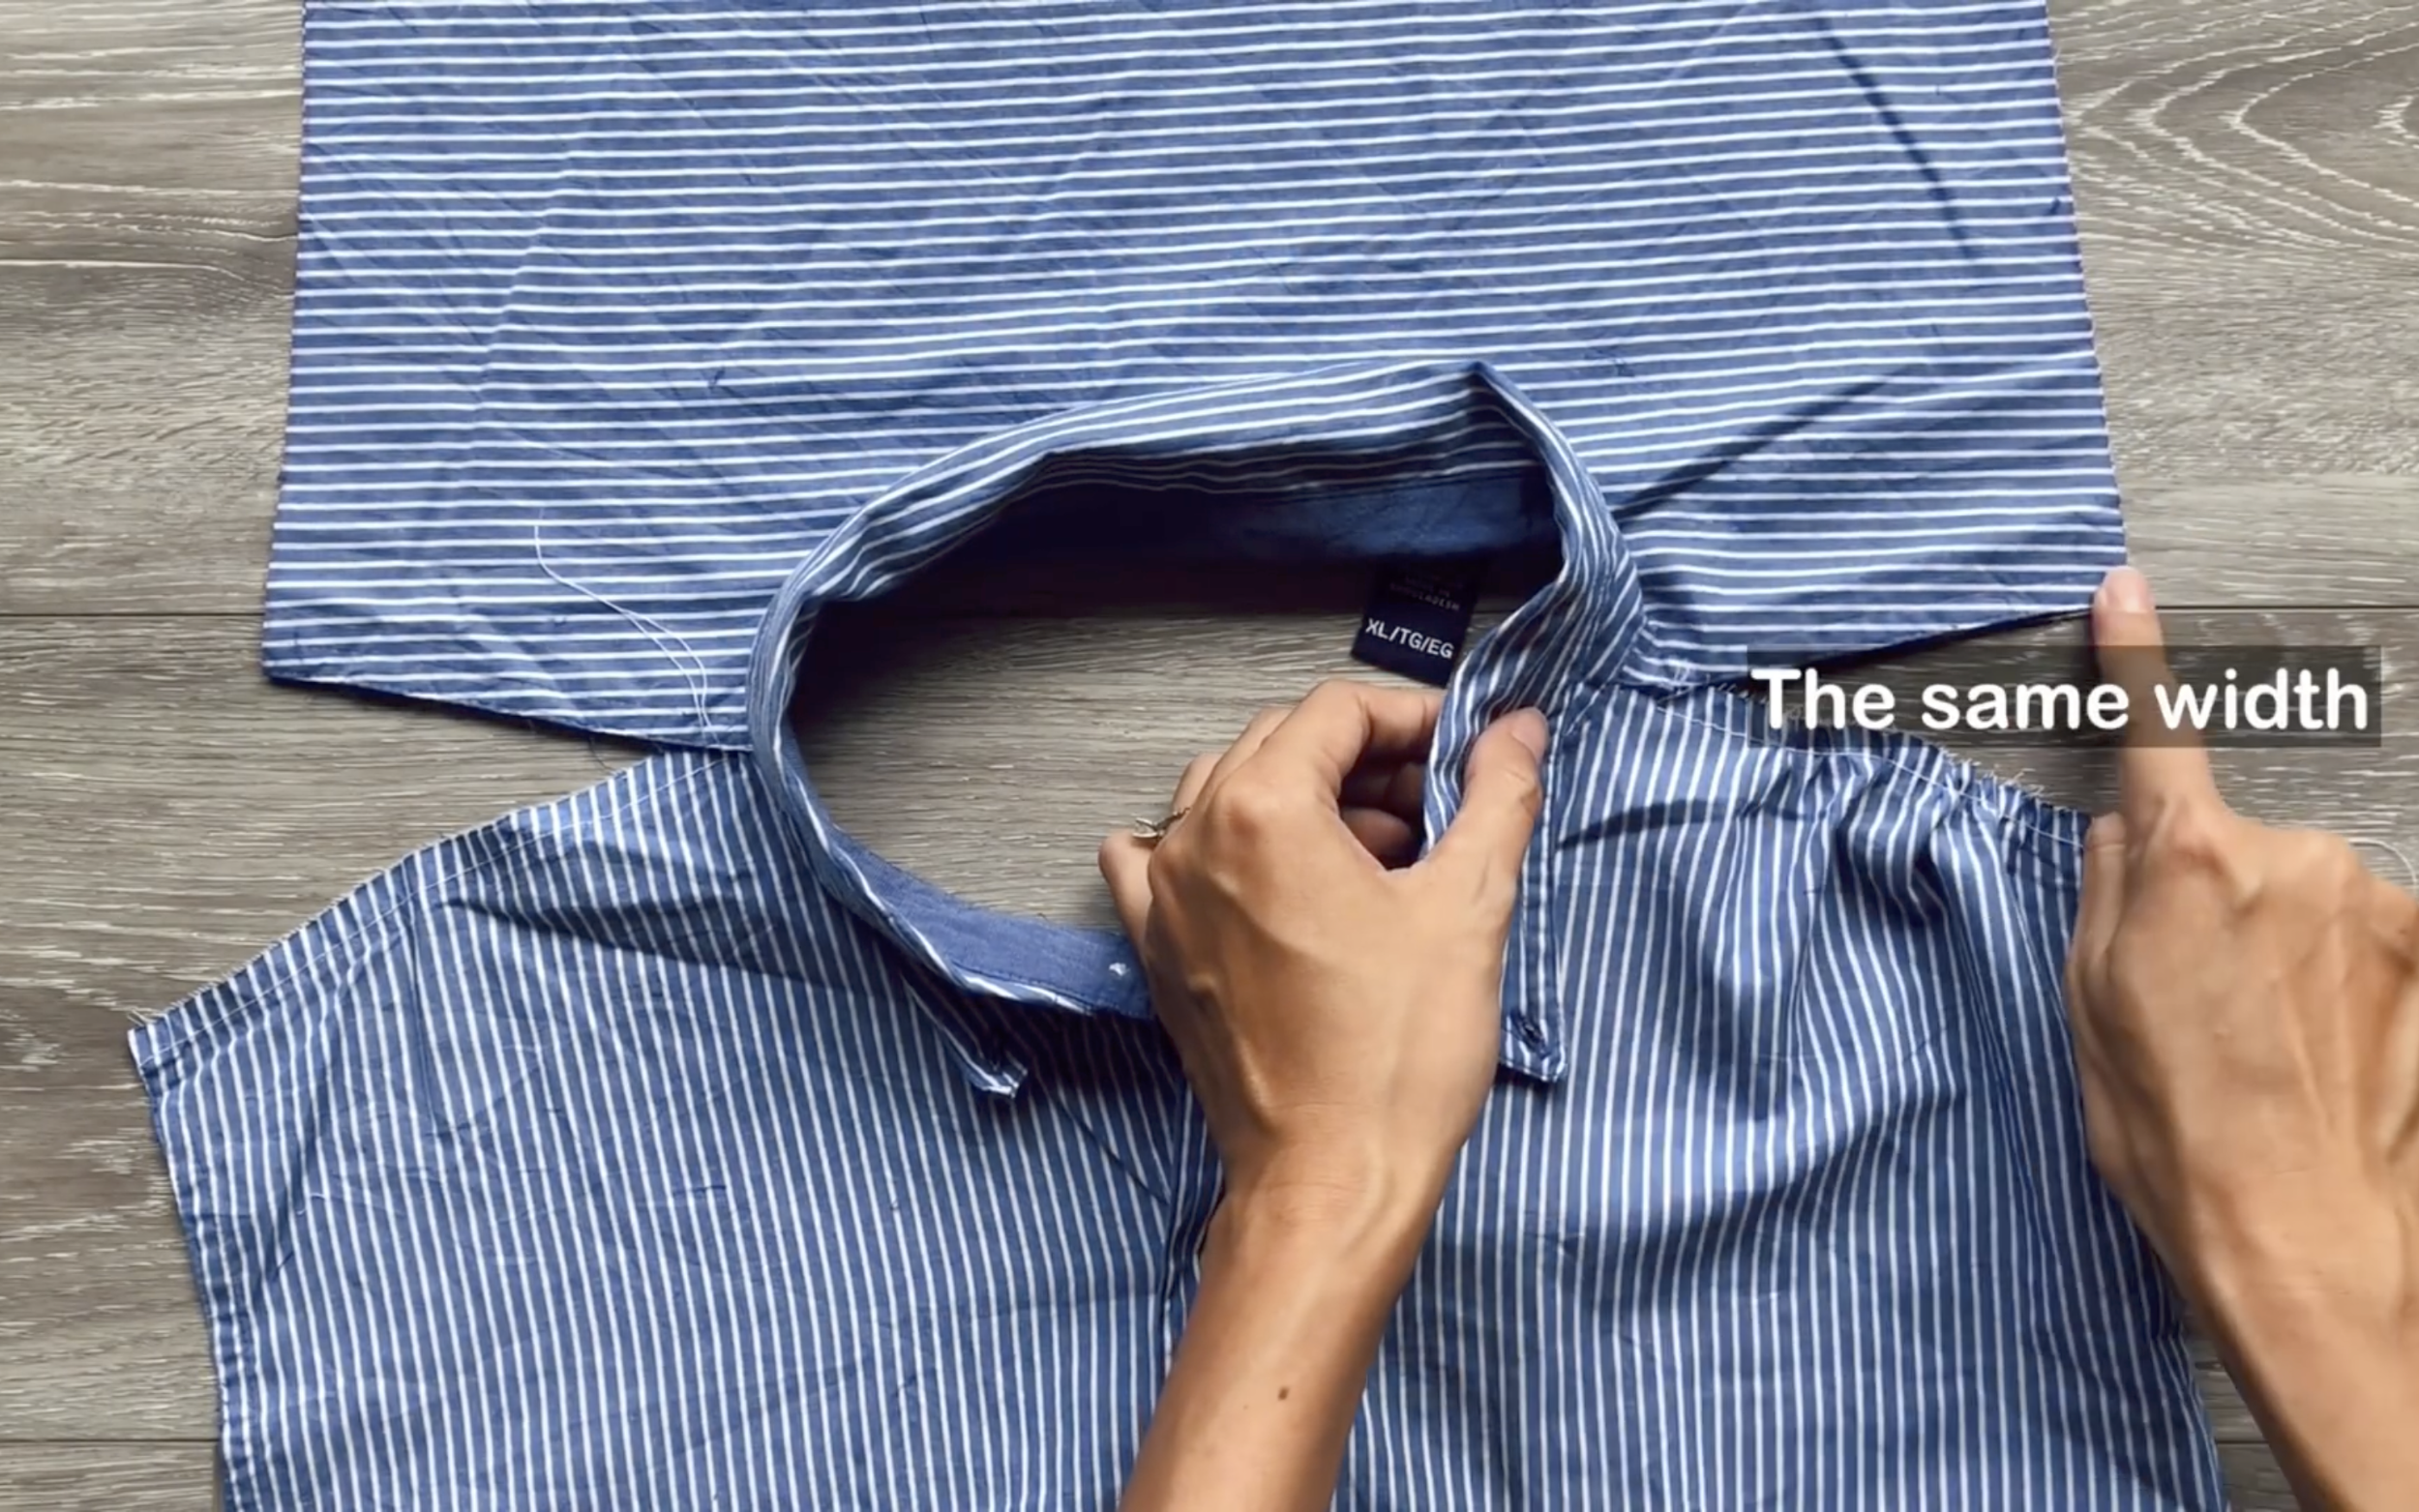
Make sure the final width of the front shoulder matches the back shoulder.
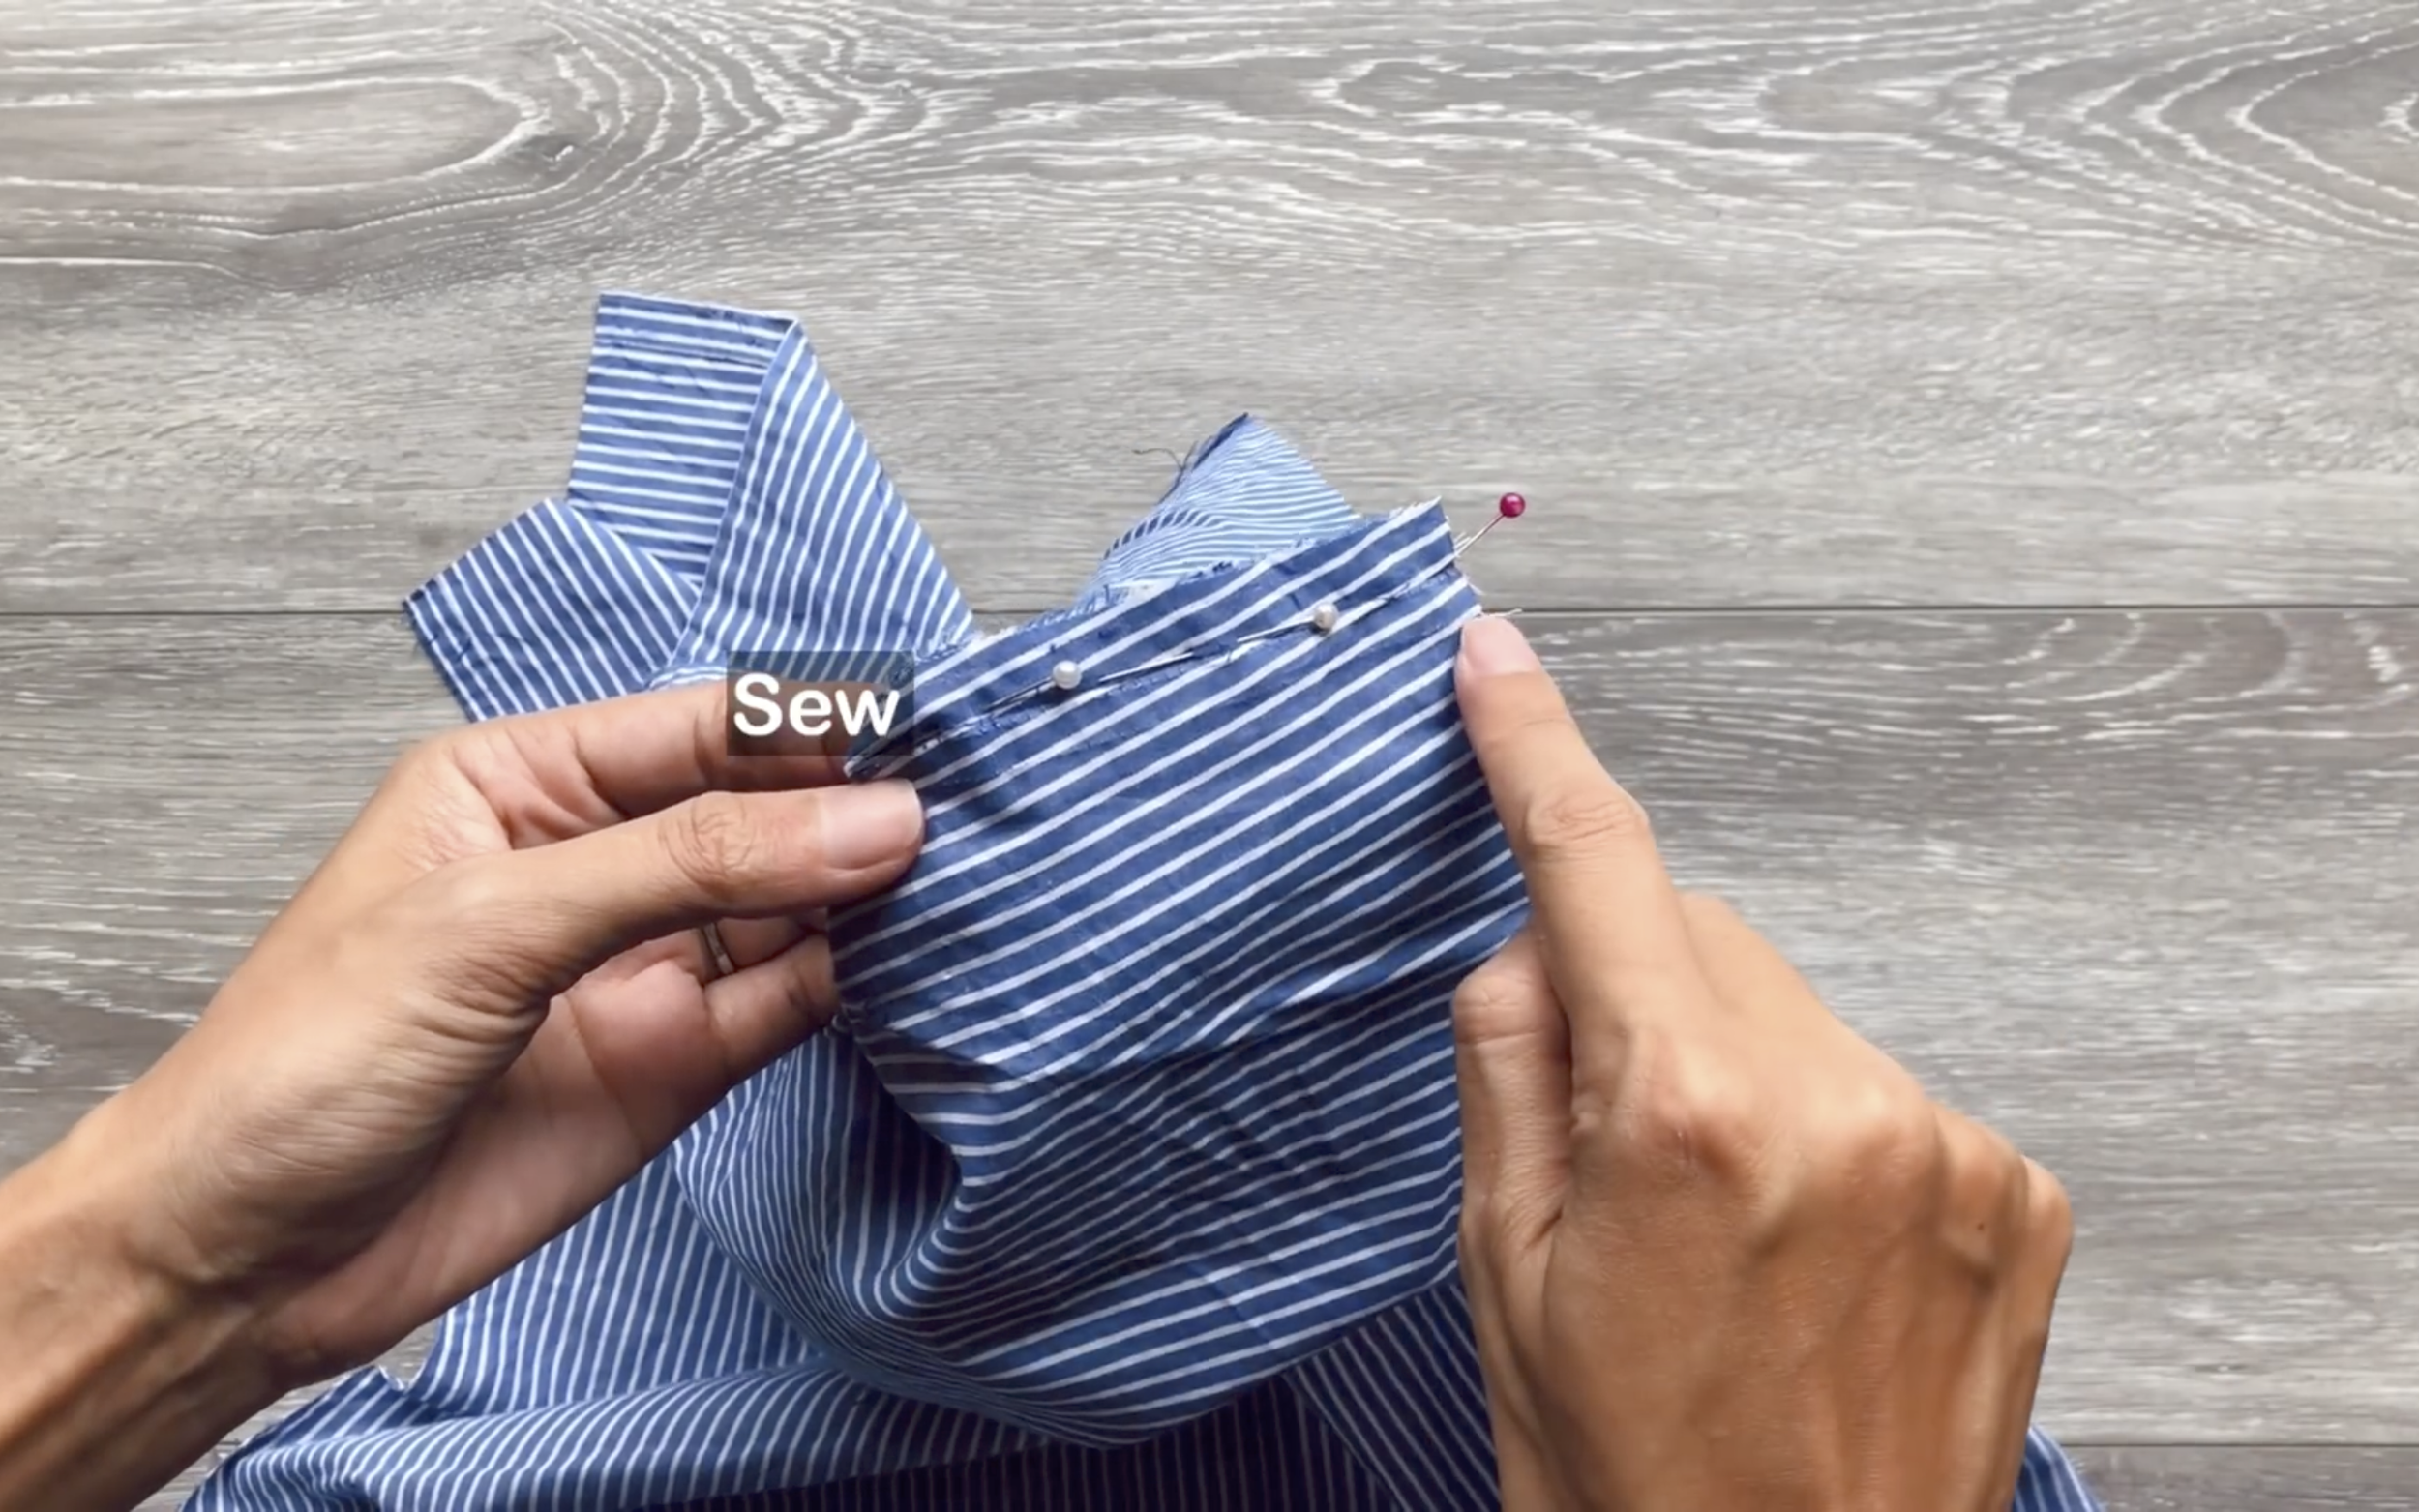
Then connect the front and the back shoulder at the shoulder line.
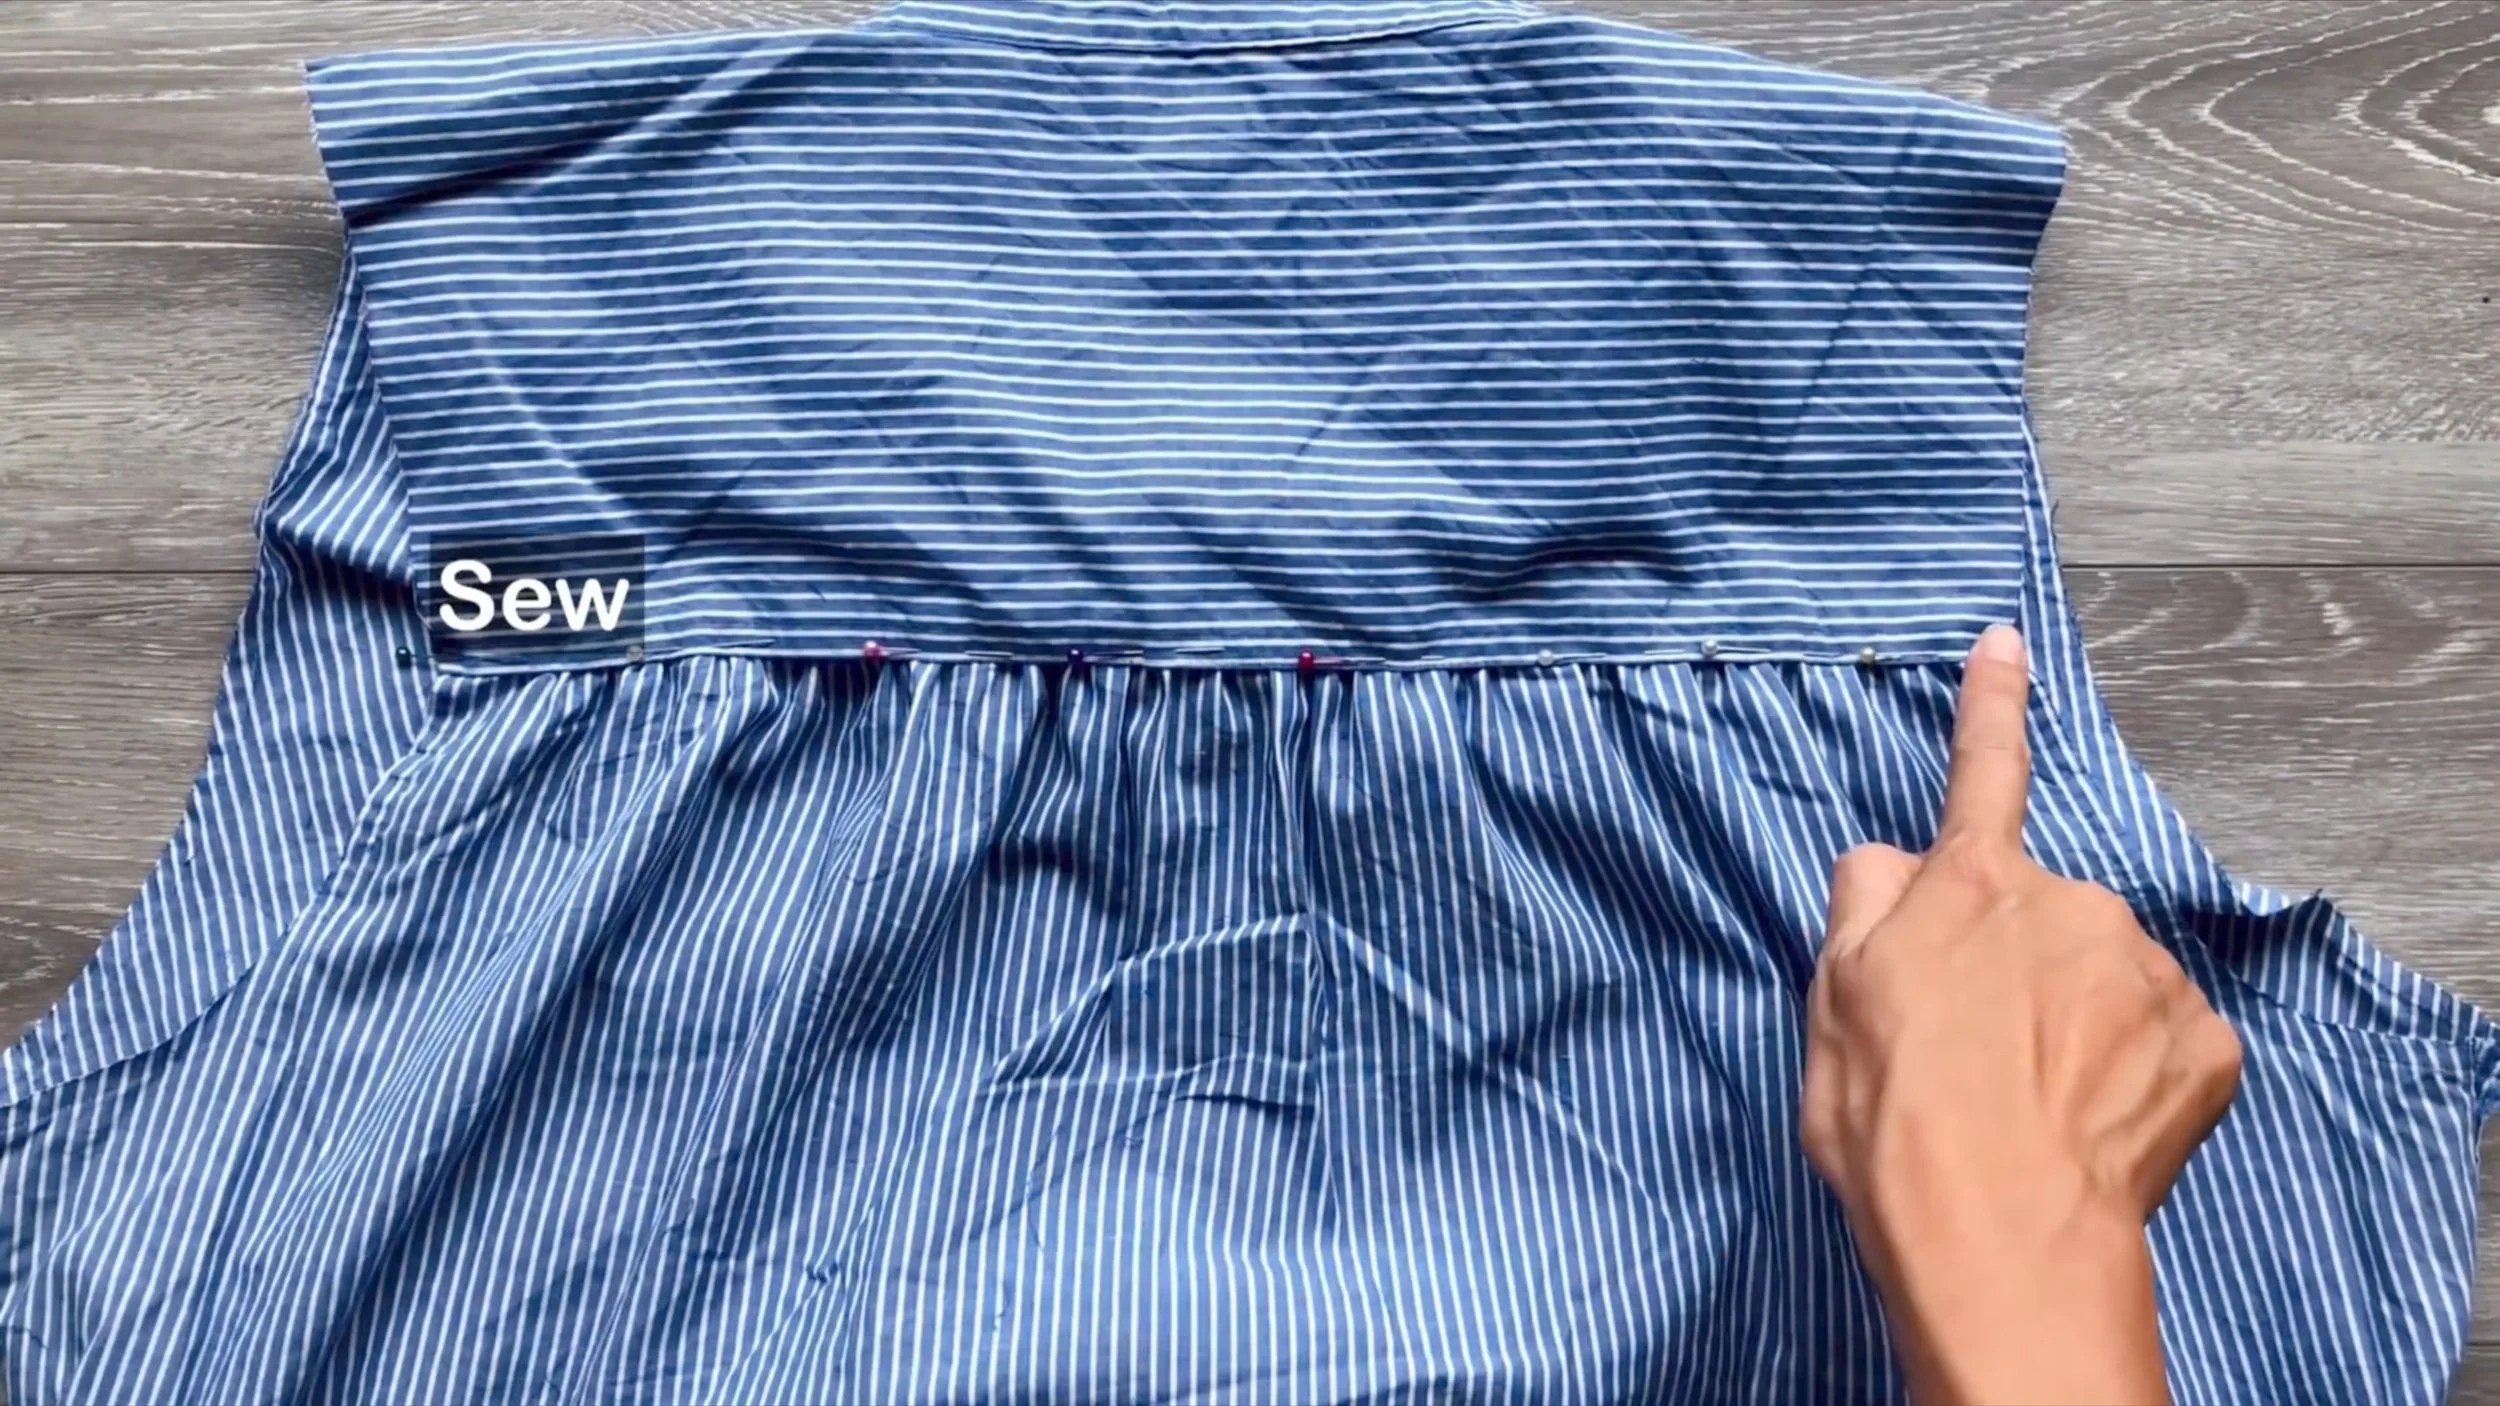
At the back, make a loose seam at the top of the shirt and create gathering fabric.

The final width of the gathered fabric should match the back shoulder width for connection.
Then connect them.
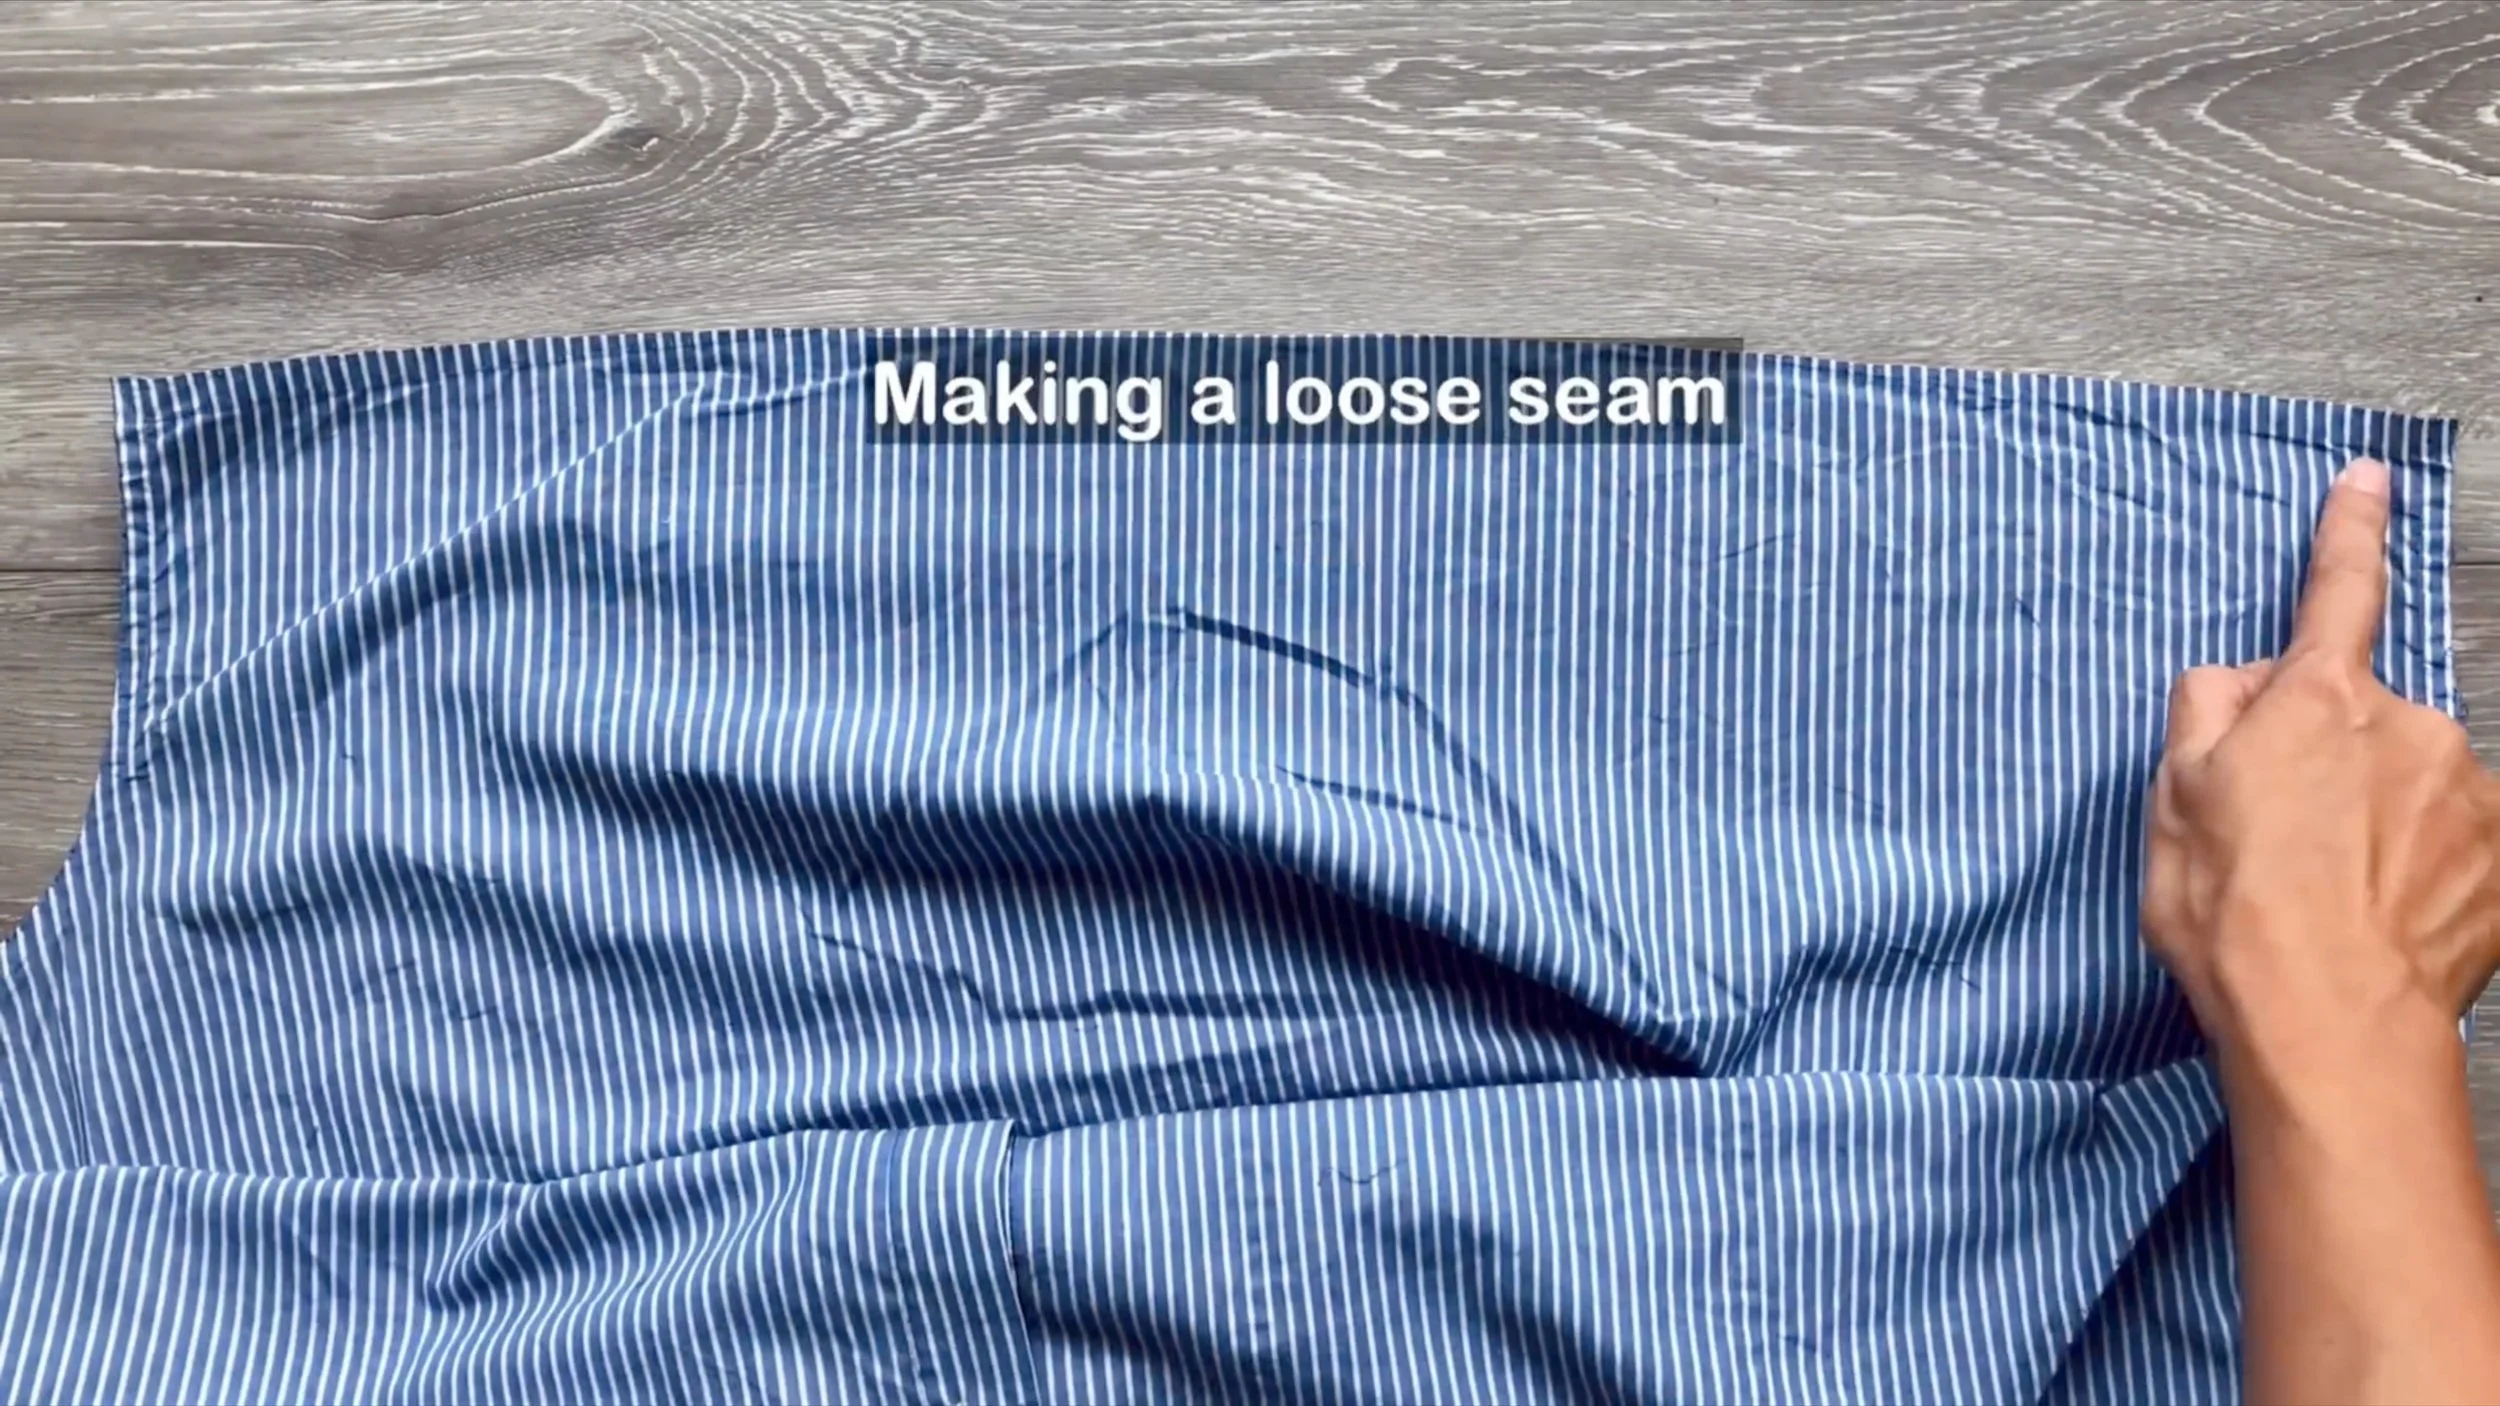
Resize the sleeve to fit.
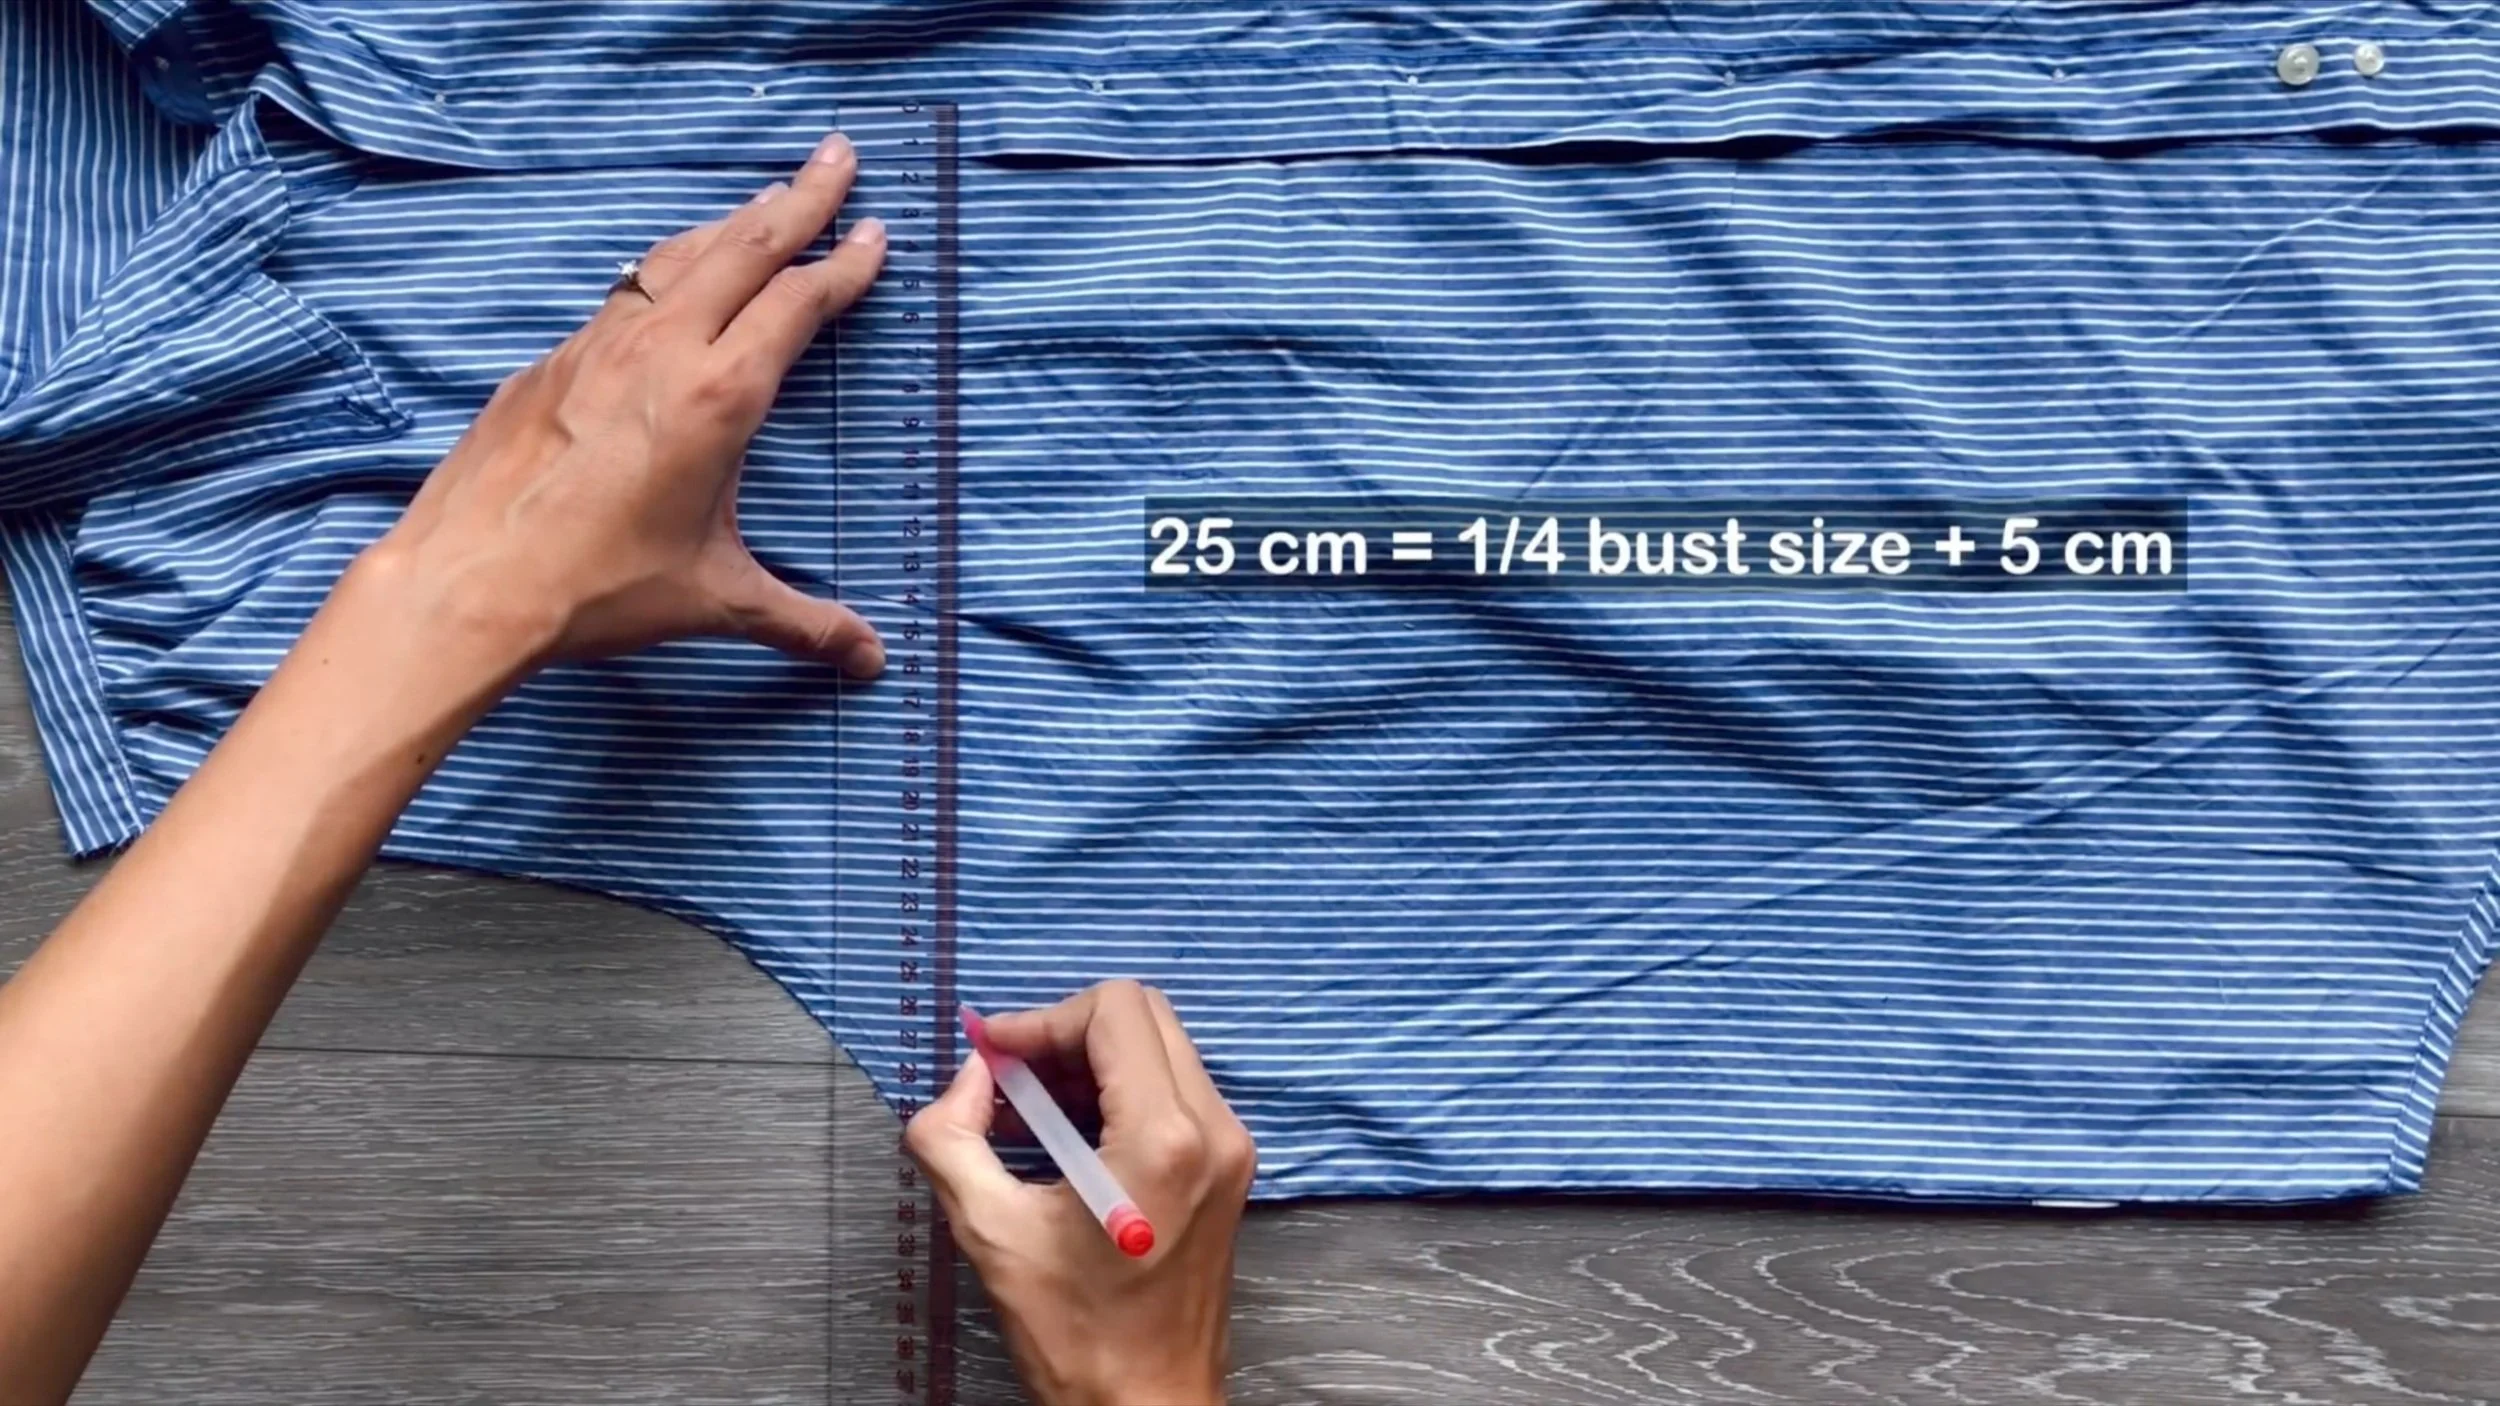
From the middle of the button area, draw a line 25 cm long (a quarter of the bust size plus 5 cm).
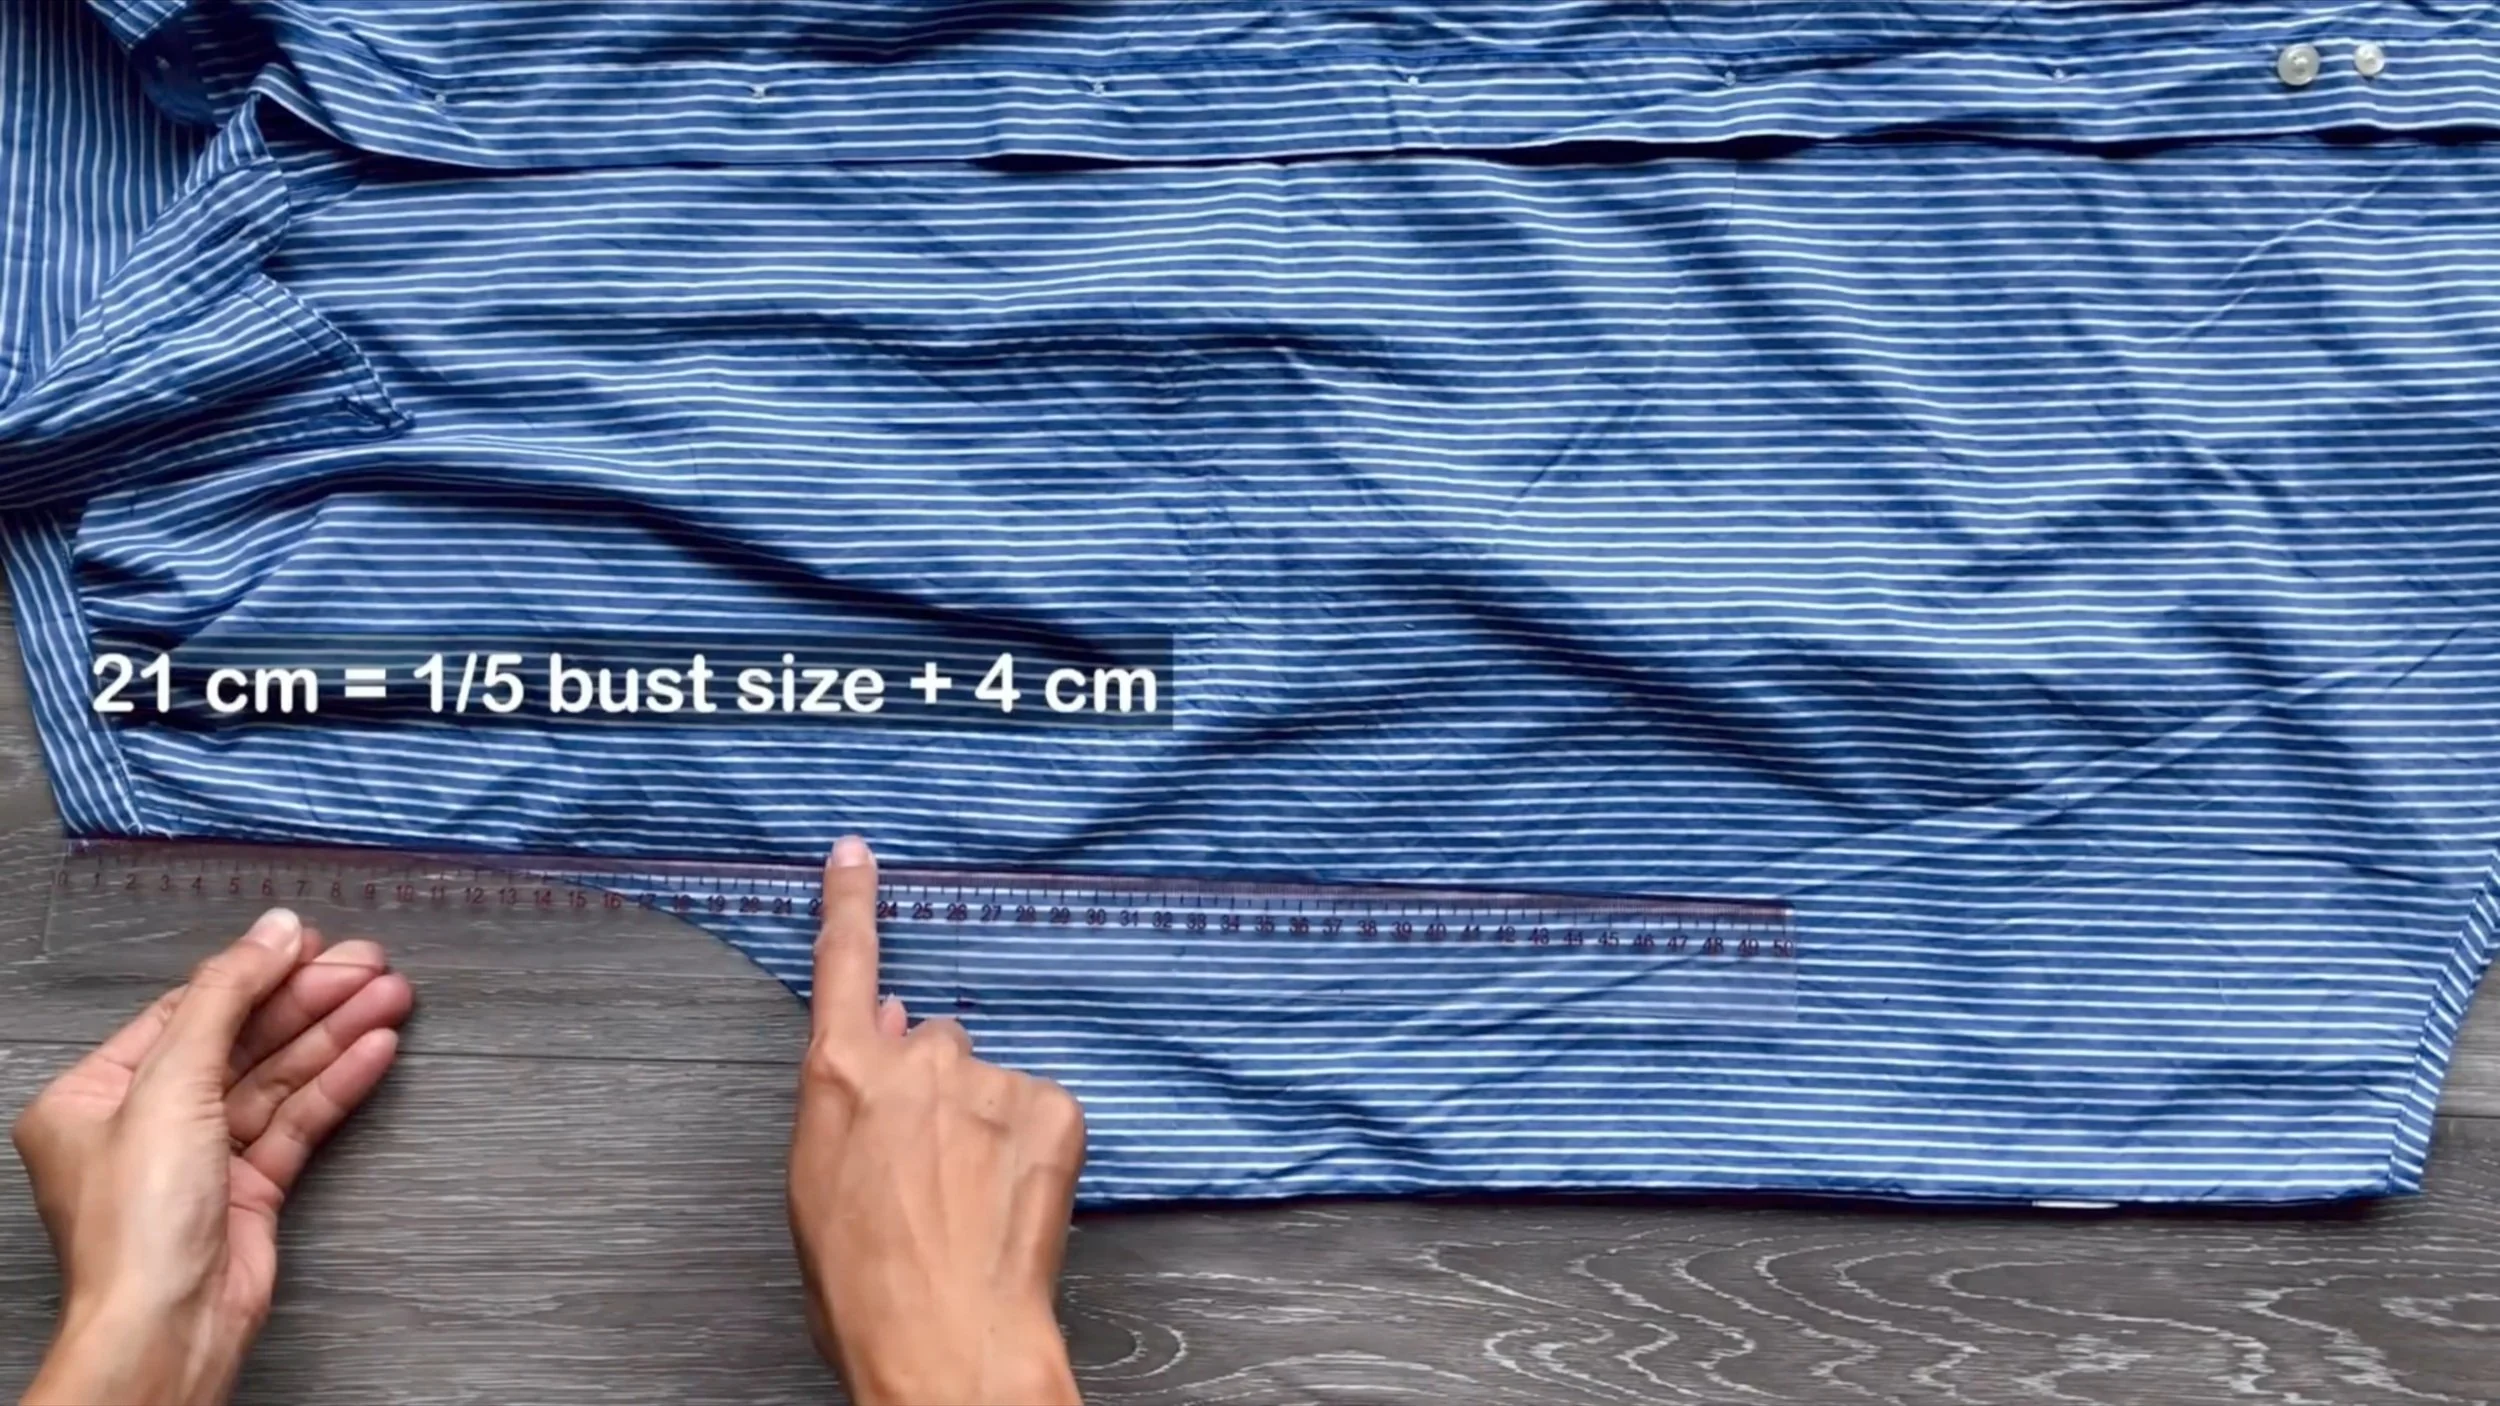
From the top of the sleeve at the shoulder end, mark down 21 cm (1/5 bust size plus 4 cm). This mark will meet the previous line to form the new sleeve line.

Draw a line from this mark to the shirt's edge to create the side line.

Cut and connect the new side lines.
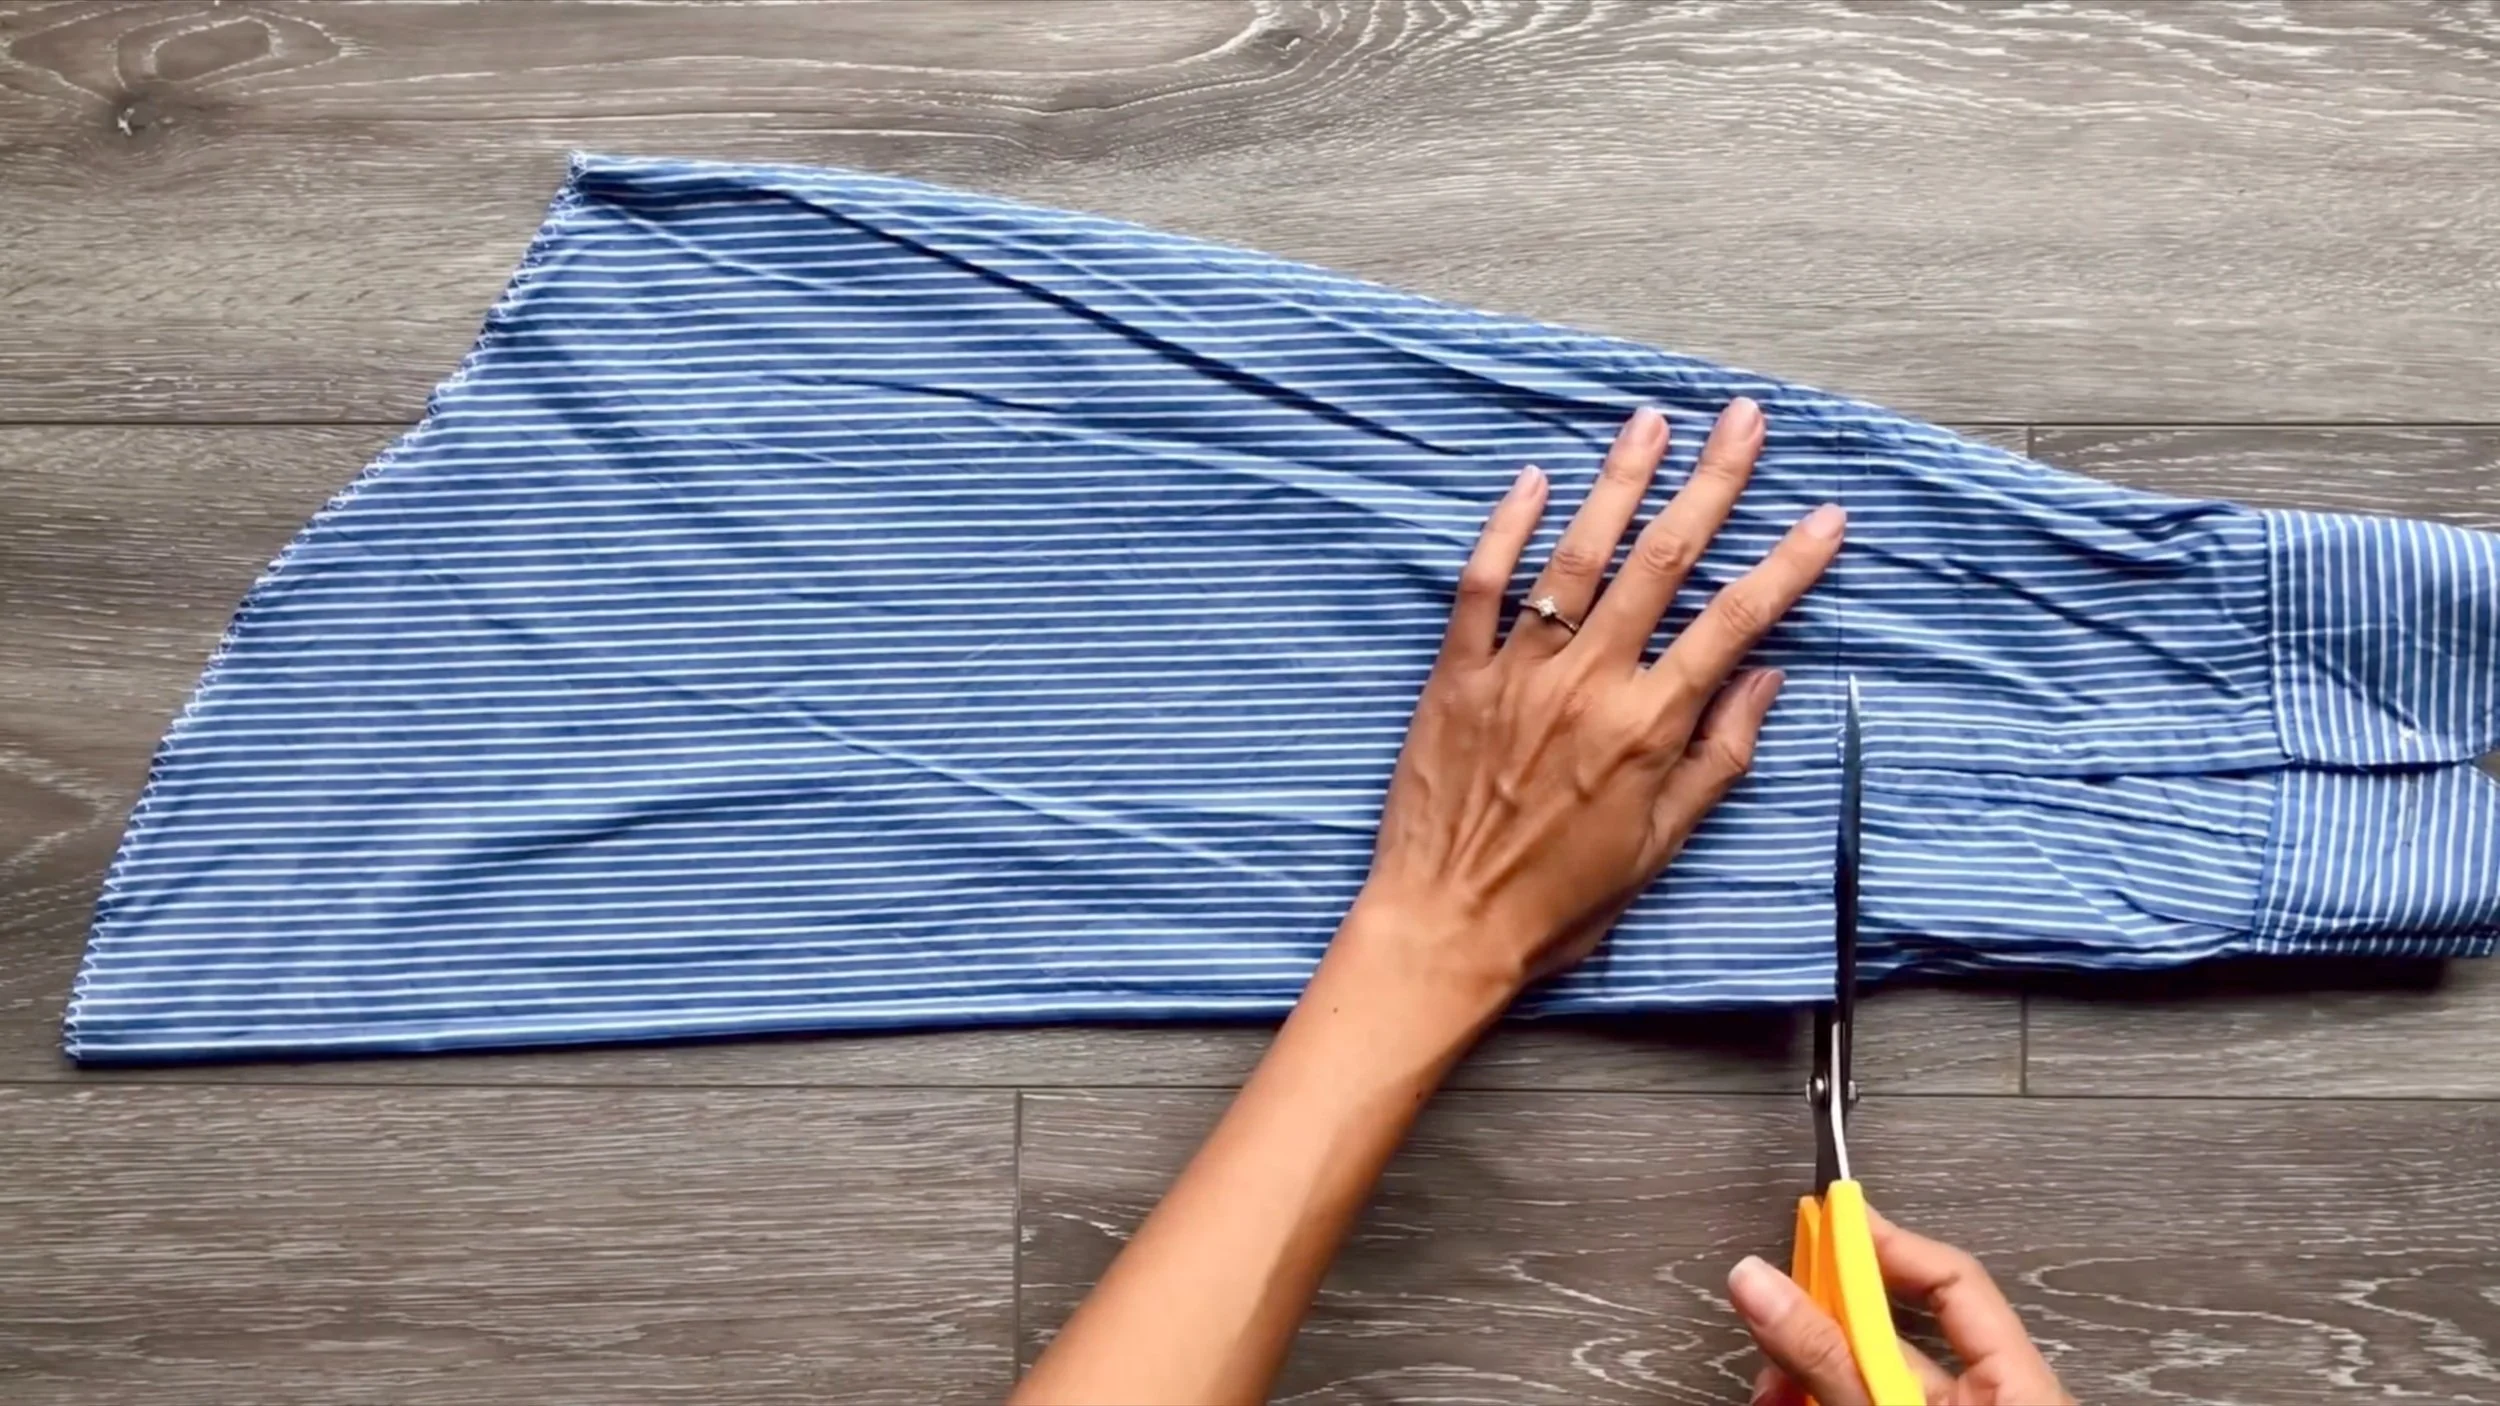
For the sleeve ends, cut and gather the fabric to fit the wrist size.

Make sure the final width of the gathering fabric will be the width of the wrist.
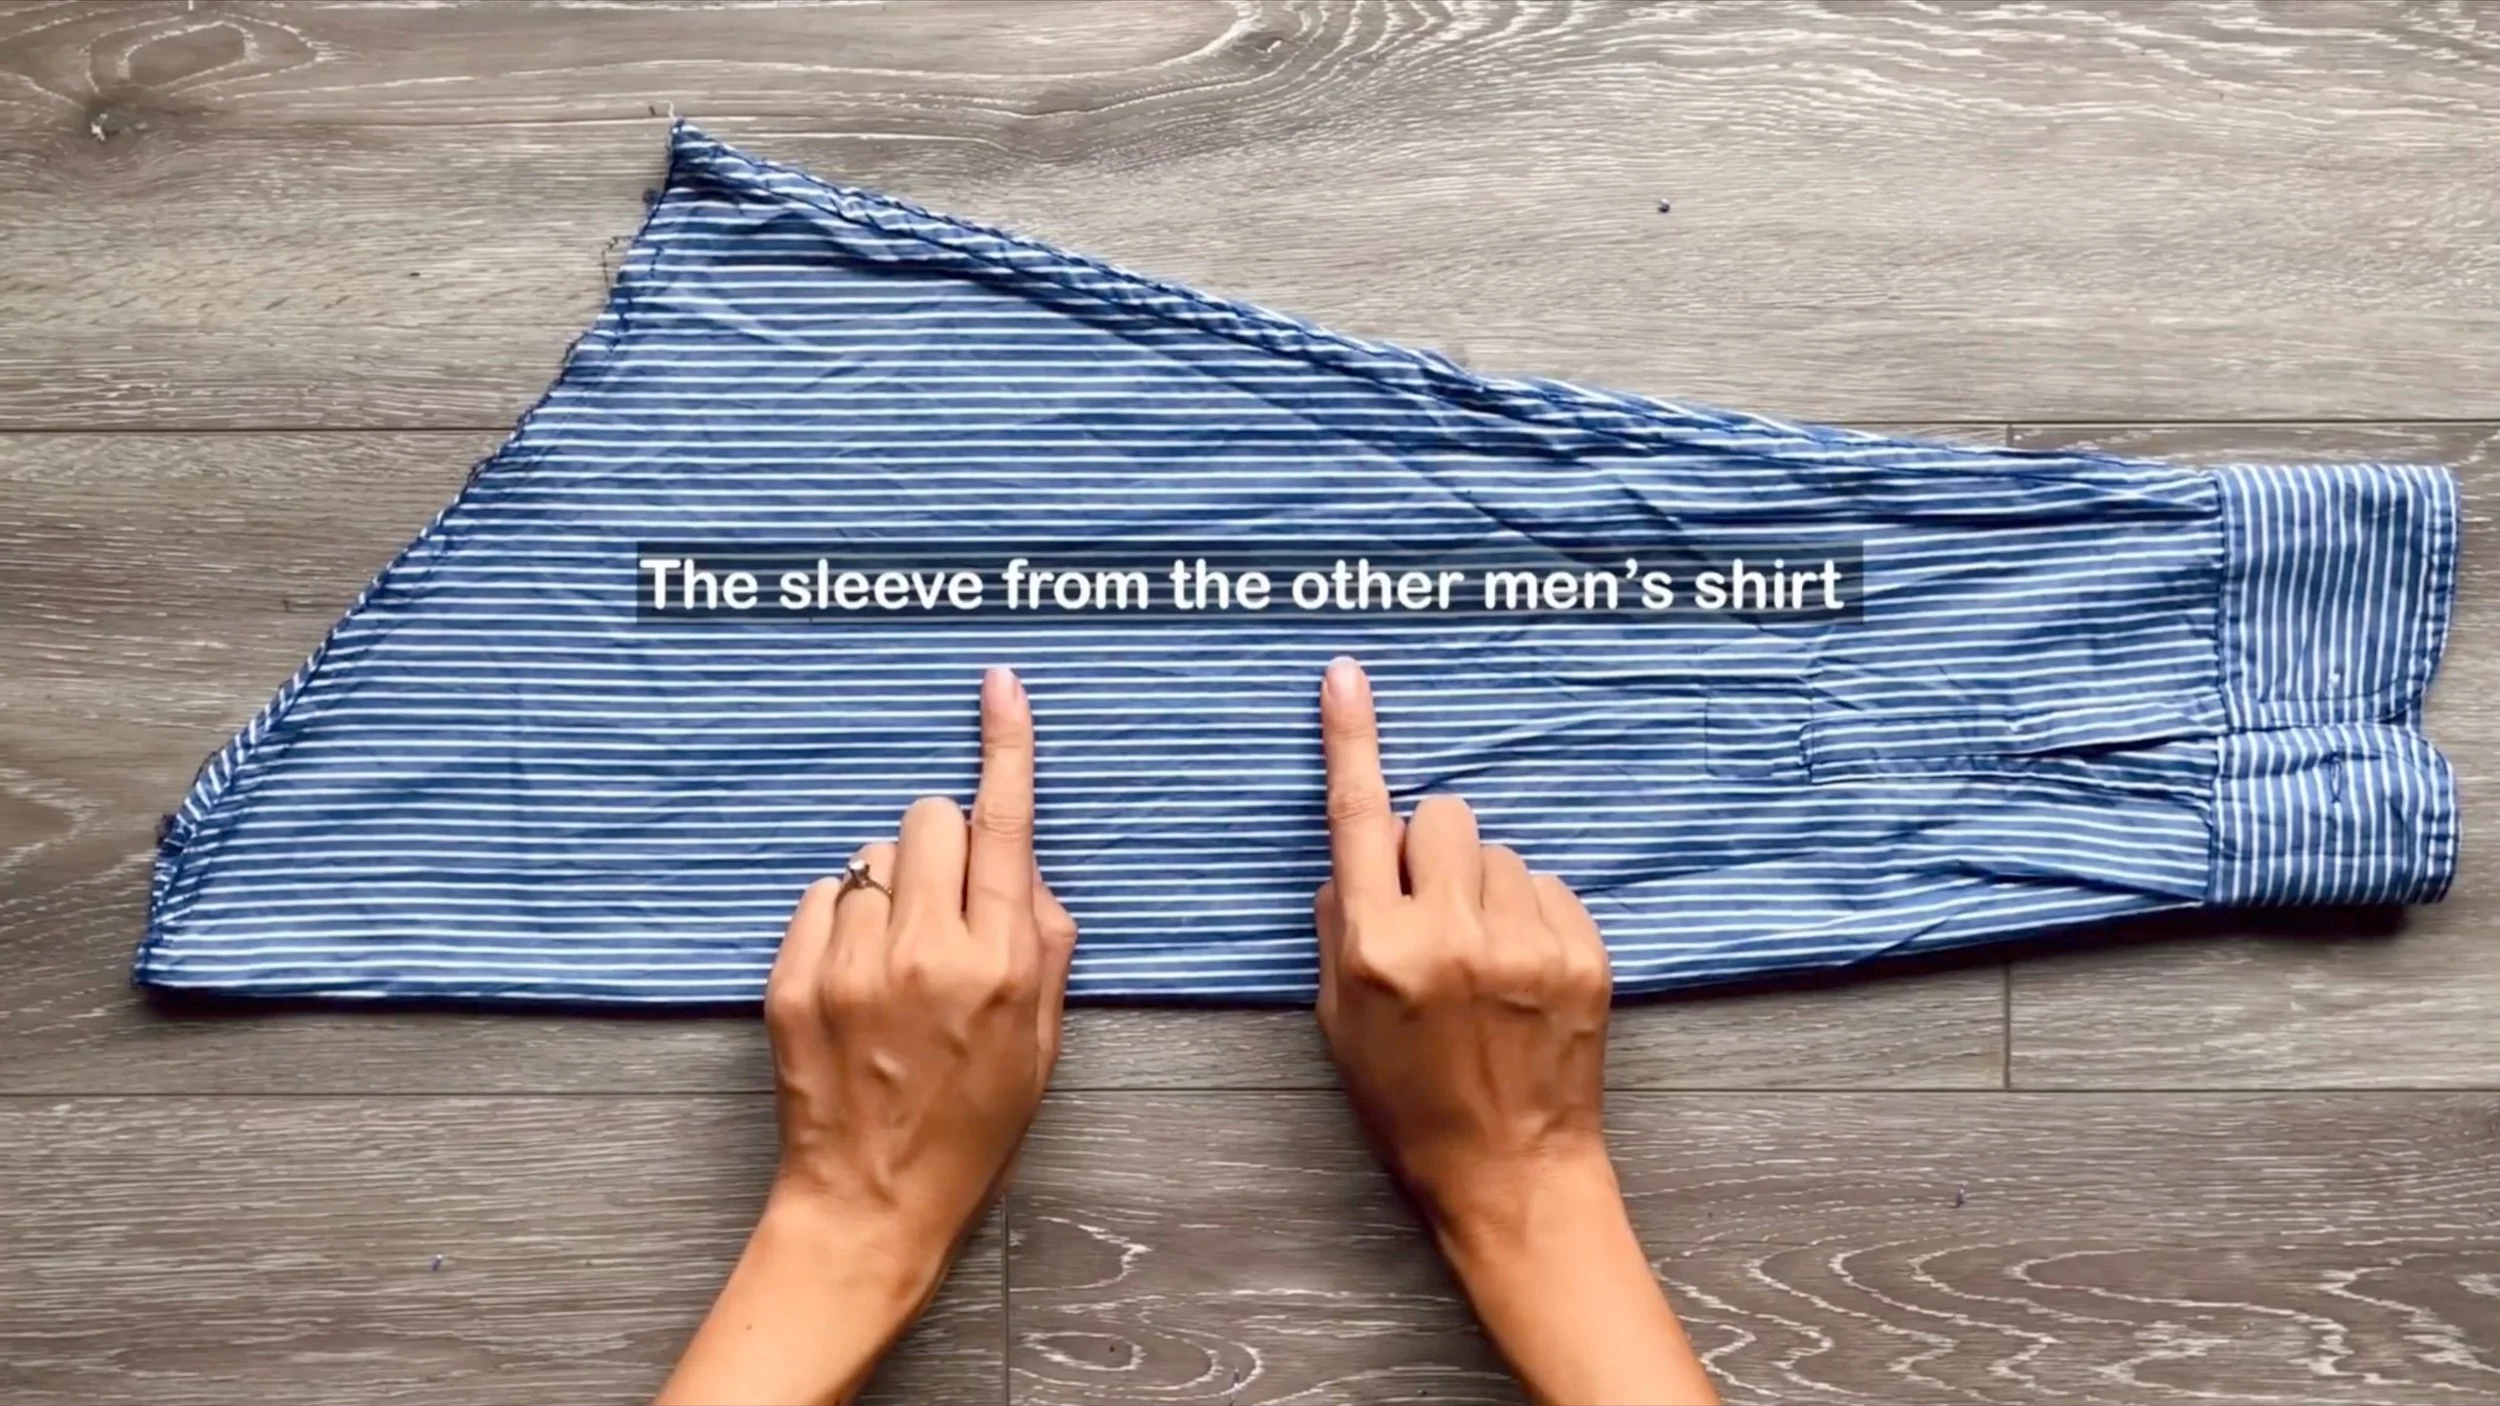
Use fabric from another shirt to make the sleeve's end part.
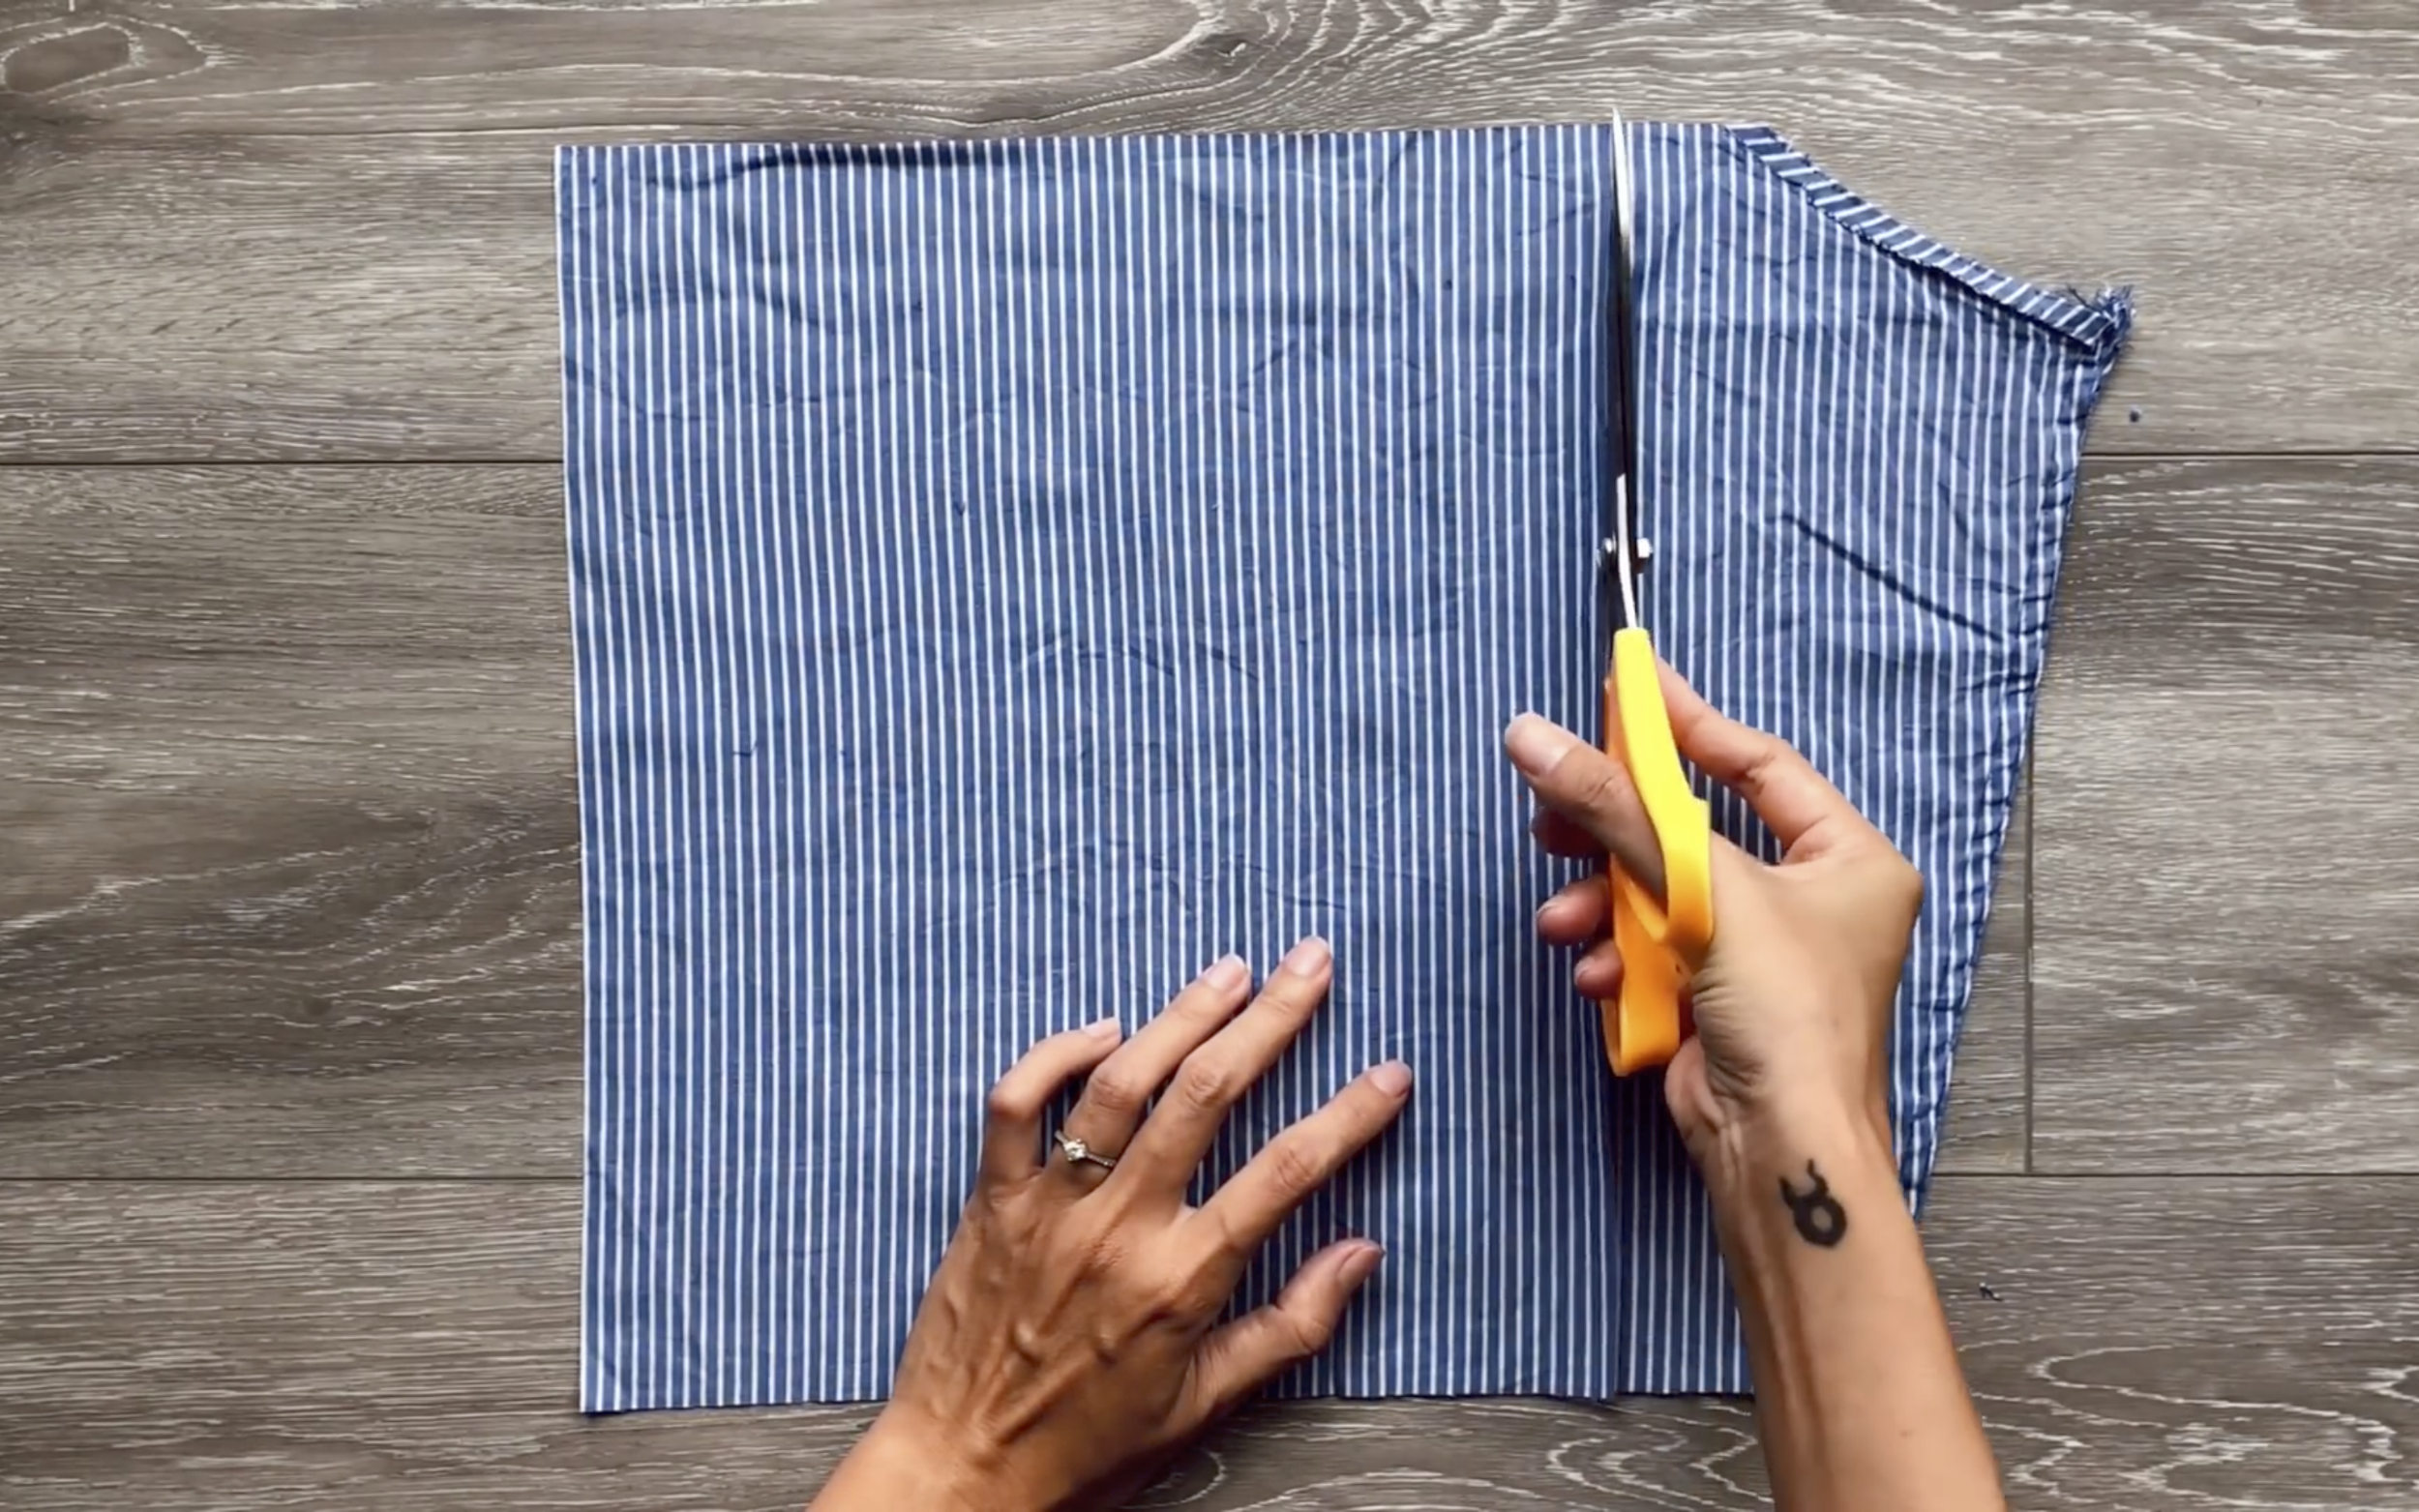
Cut a rectangle of 22 cm width (wrist size plus 2 cm for seam allowance) and 34 cm length (double the desired sleeve length).
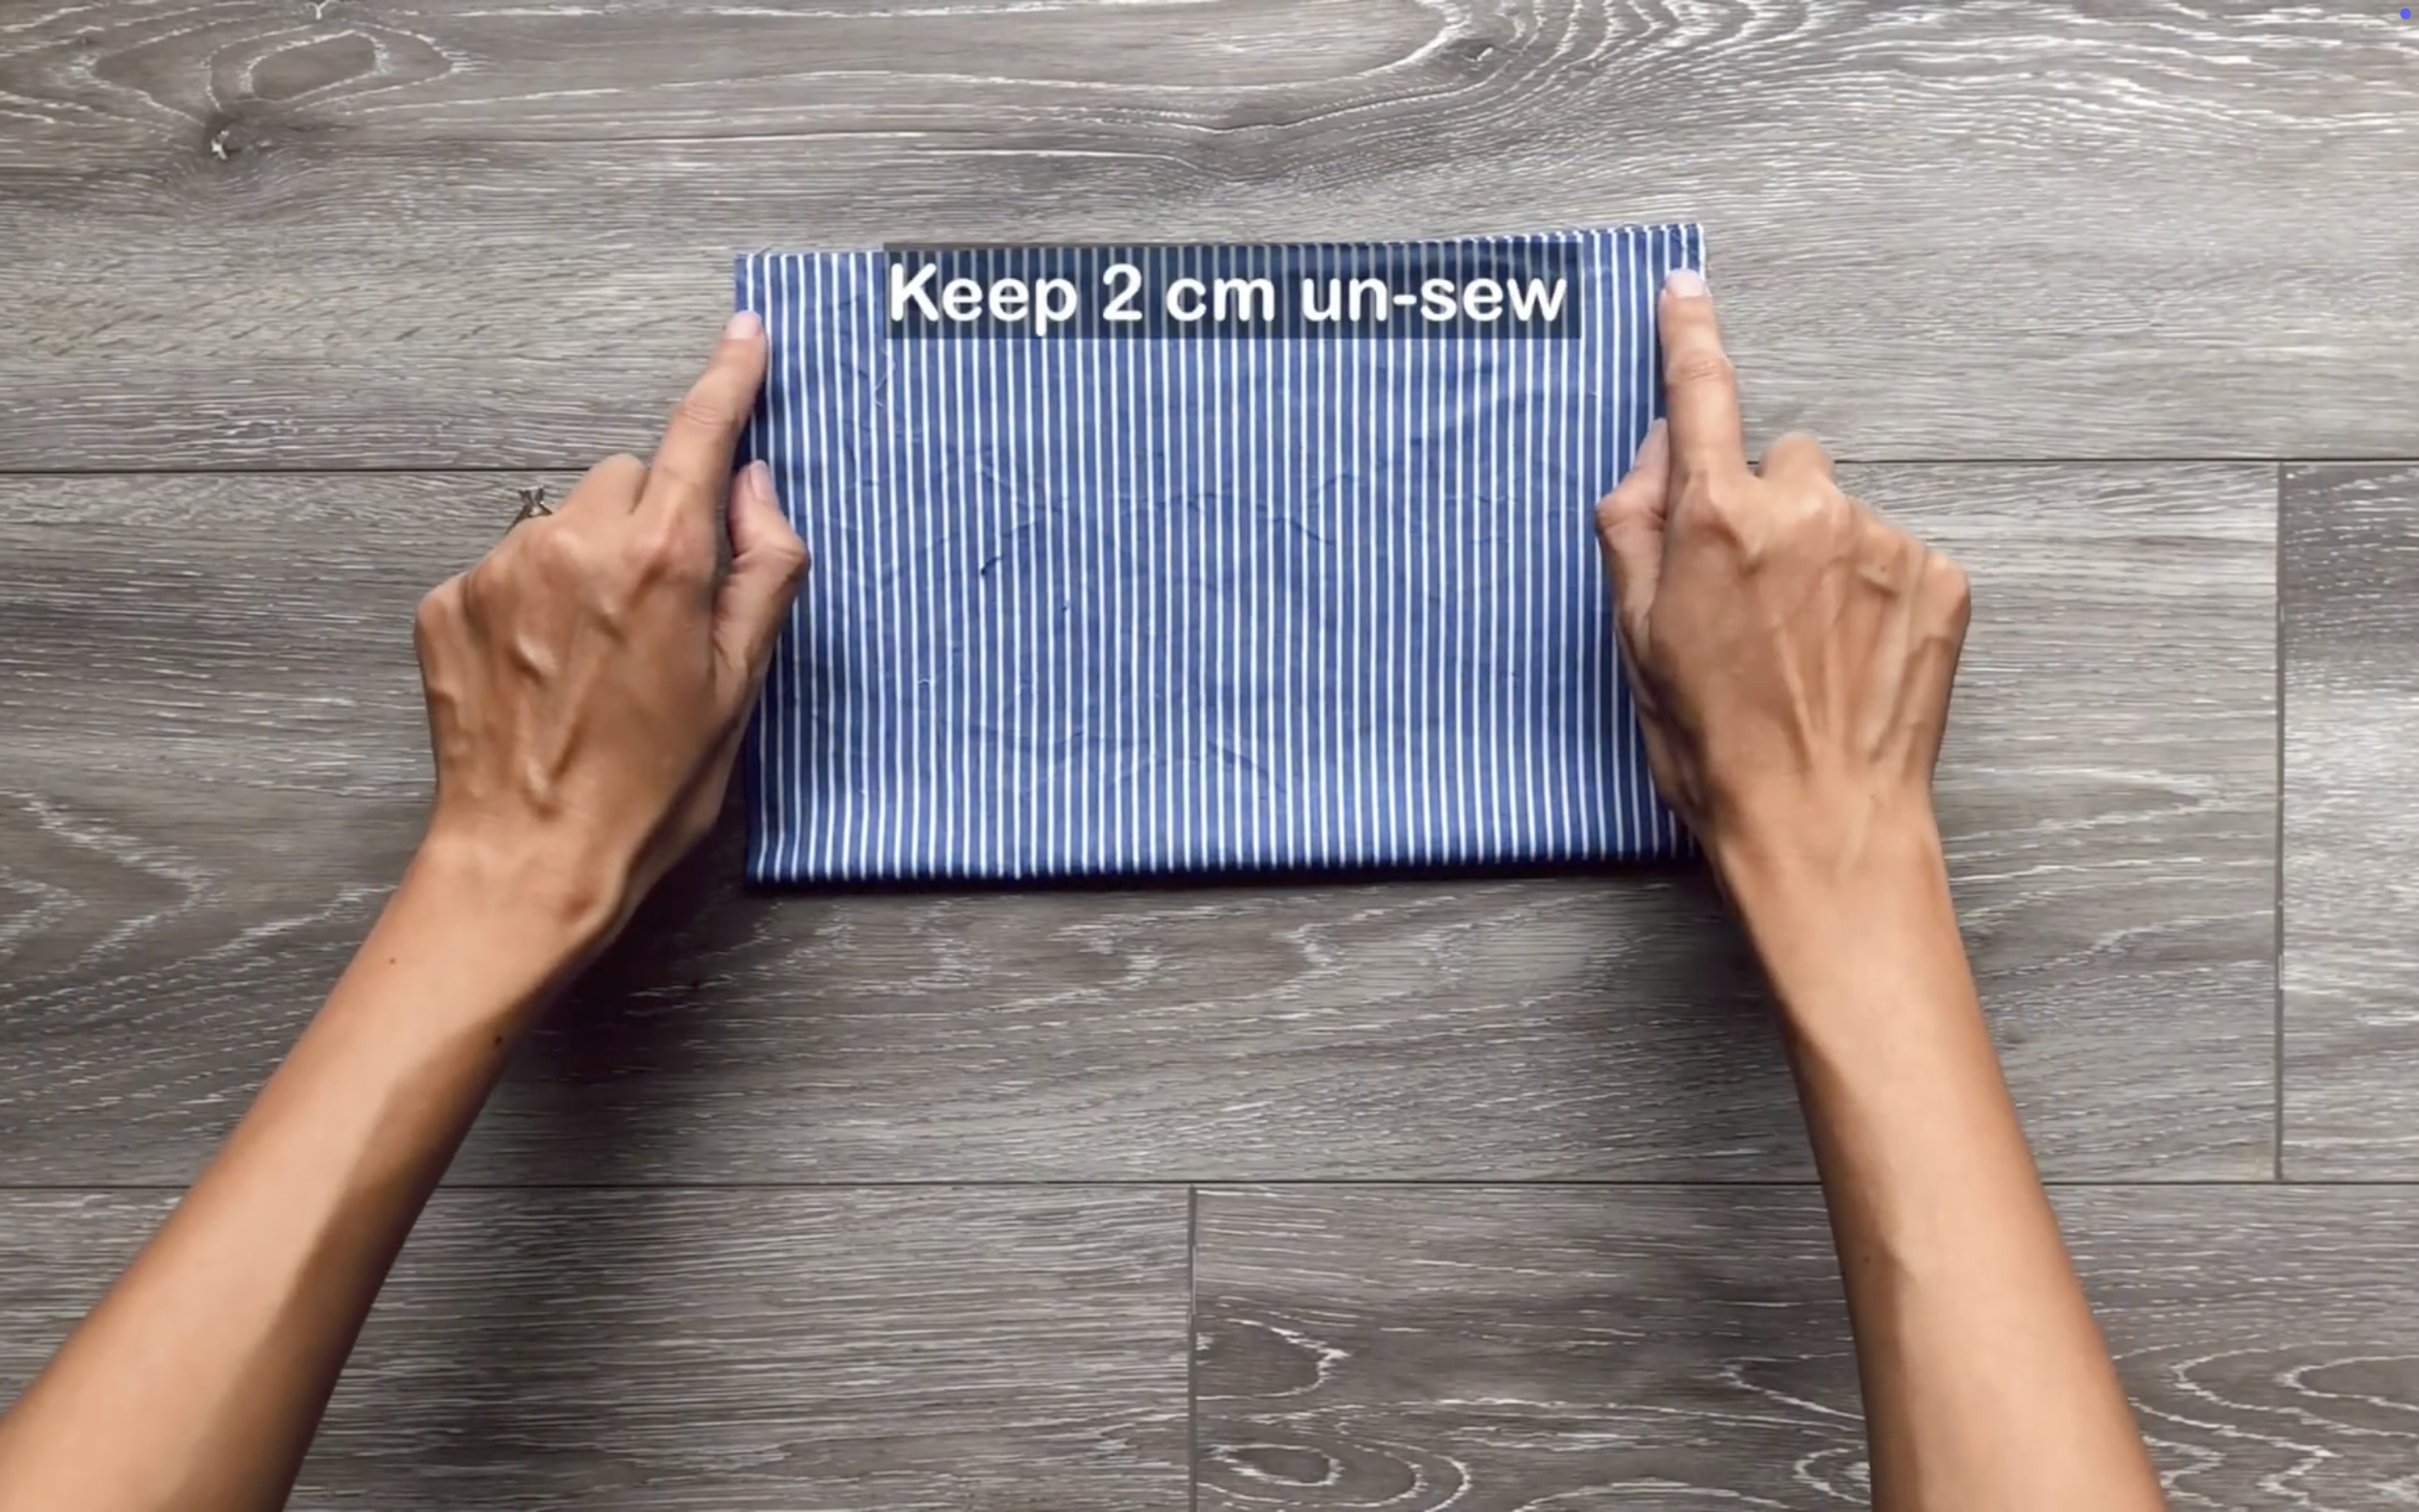
Fold the rectangle widthwise and sew the edges, leaving 2 cm unsewn at one end.
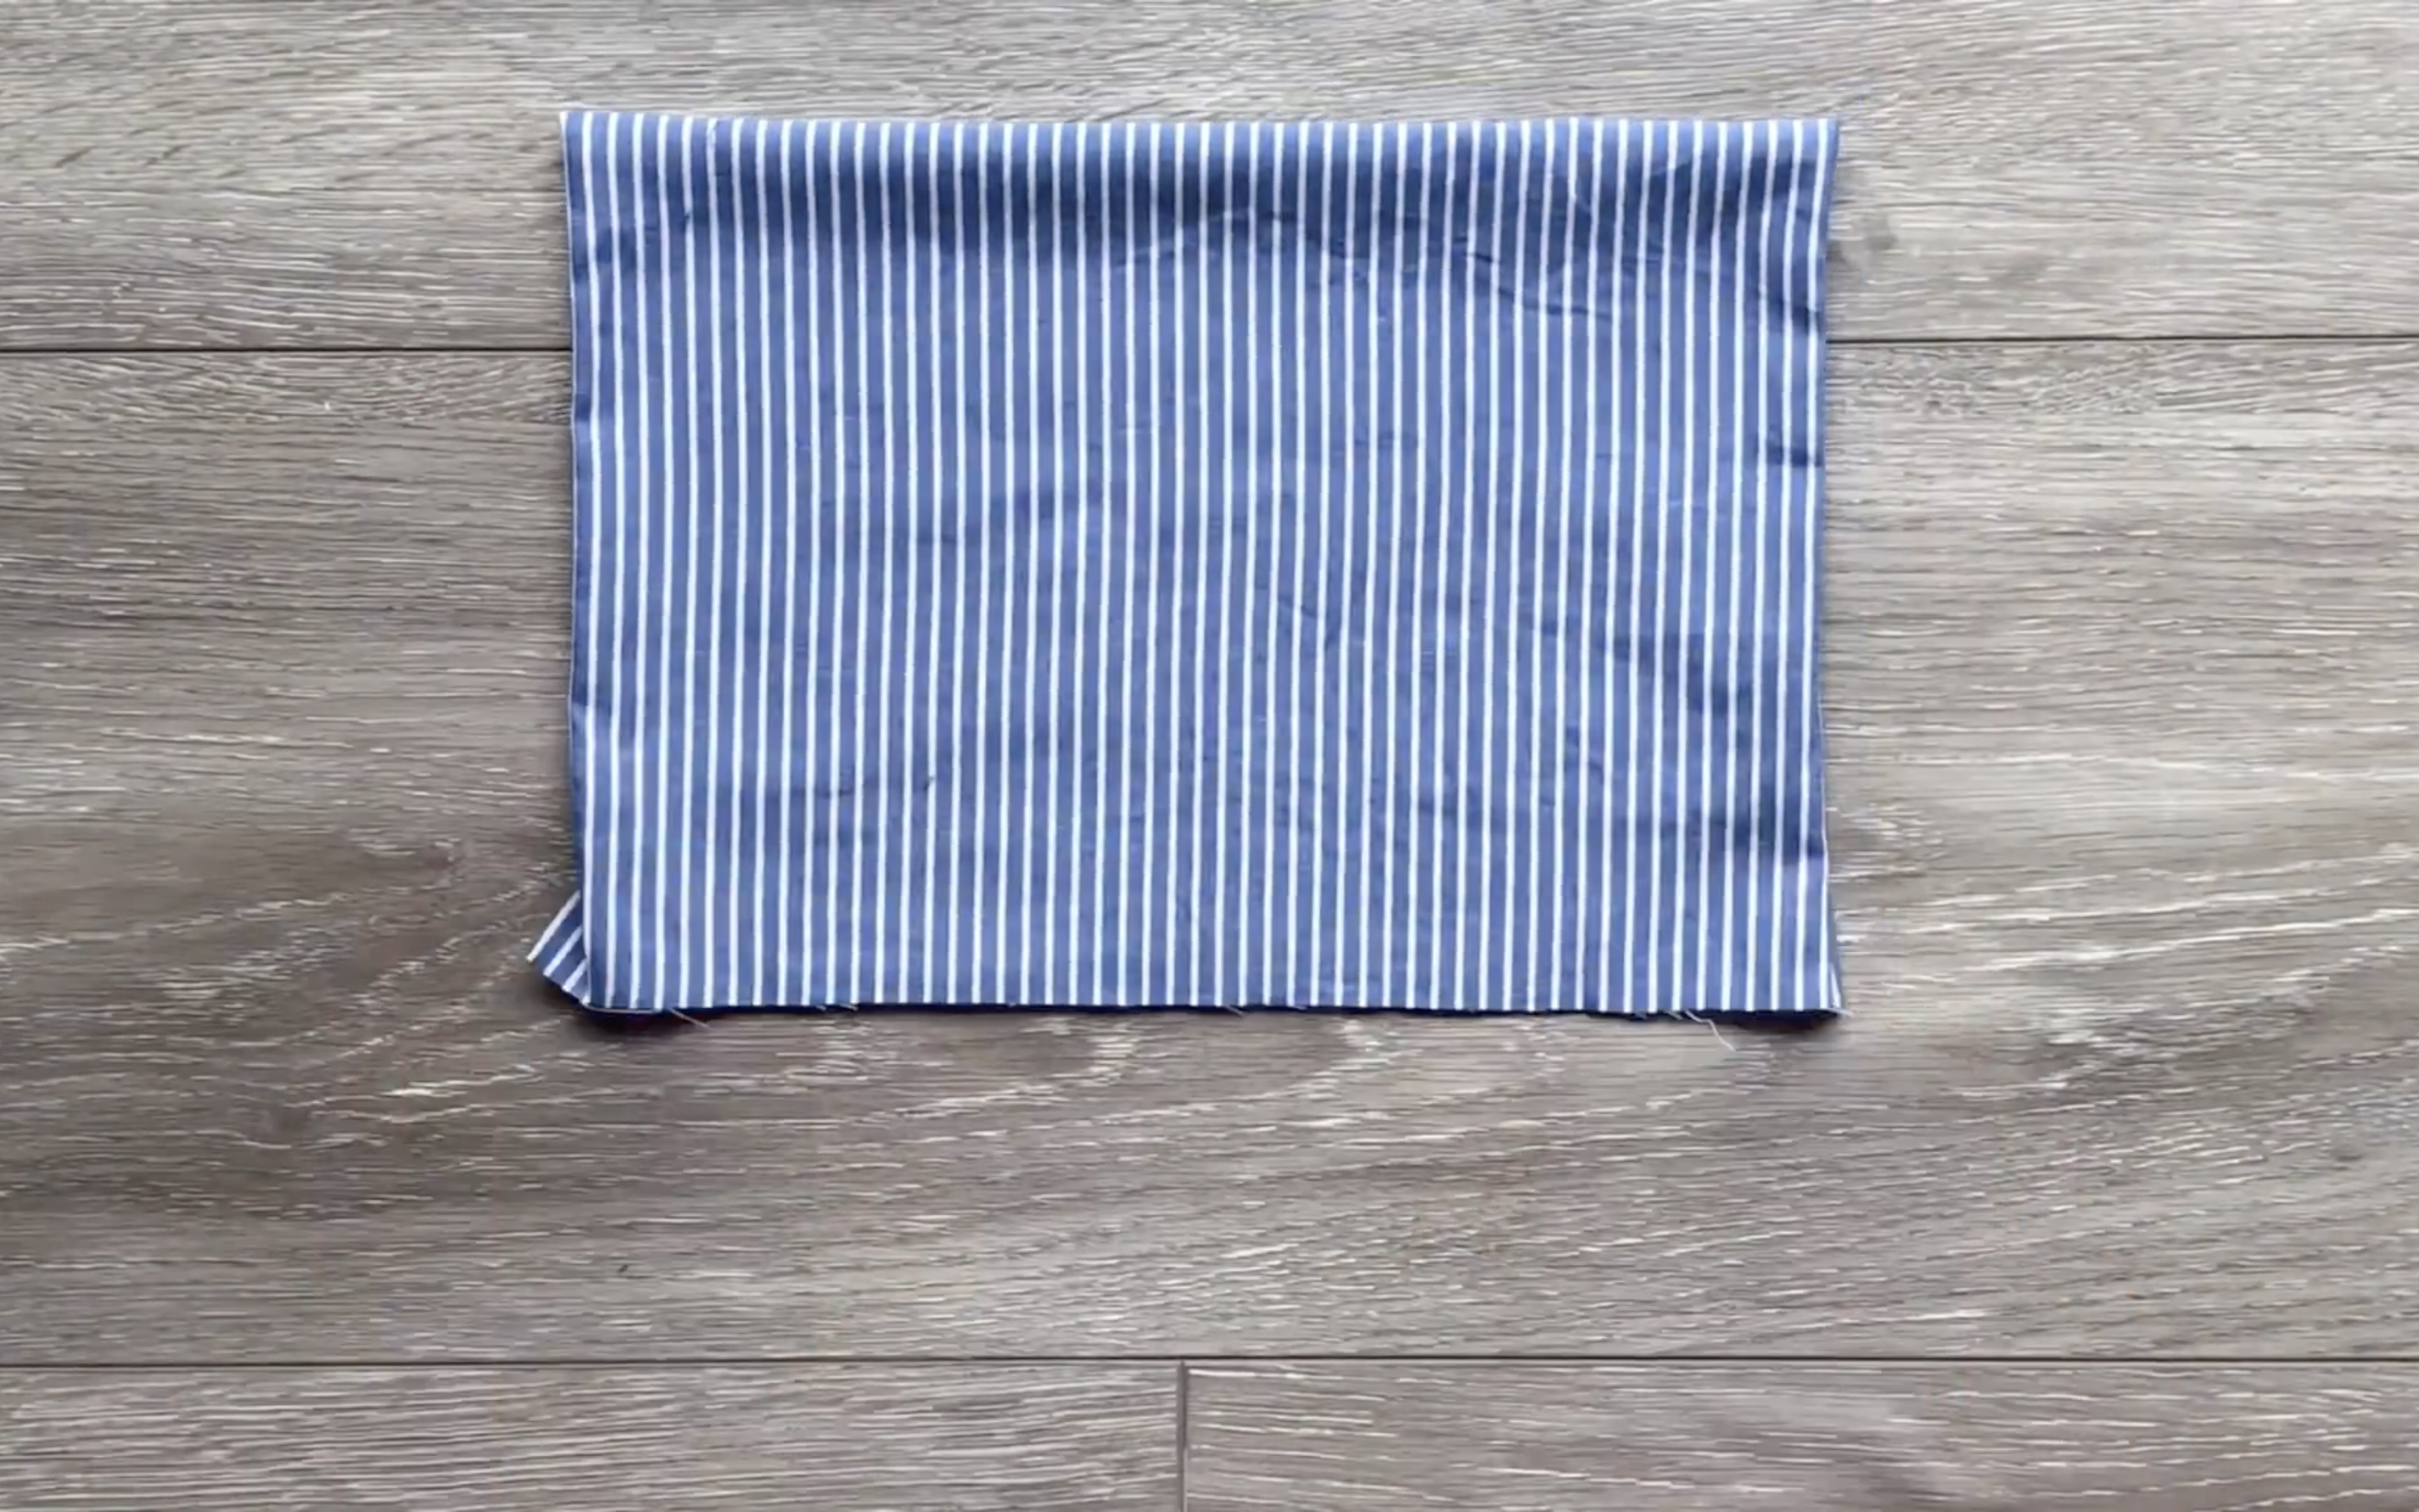
Turn the fabric inside out to hide the seam.
Attach one edge to the sleeve end, sew.
Then fold the other edge over the seam and sew, leaving space for adding a tie.
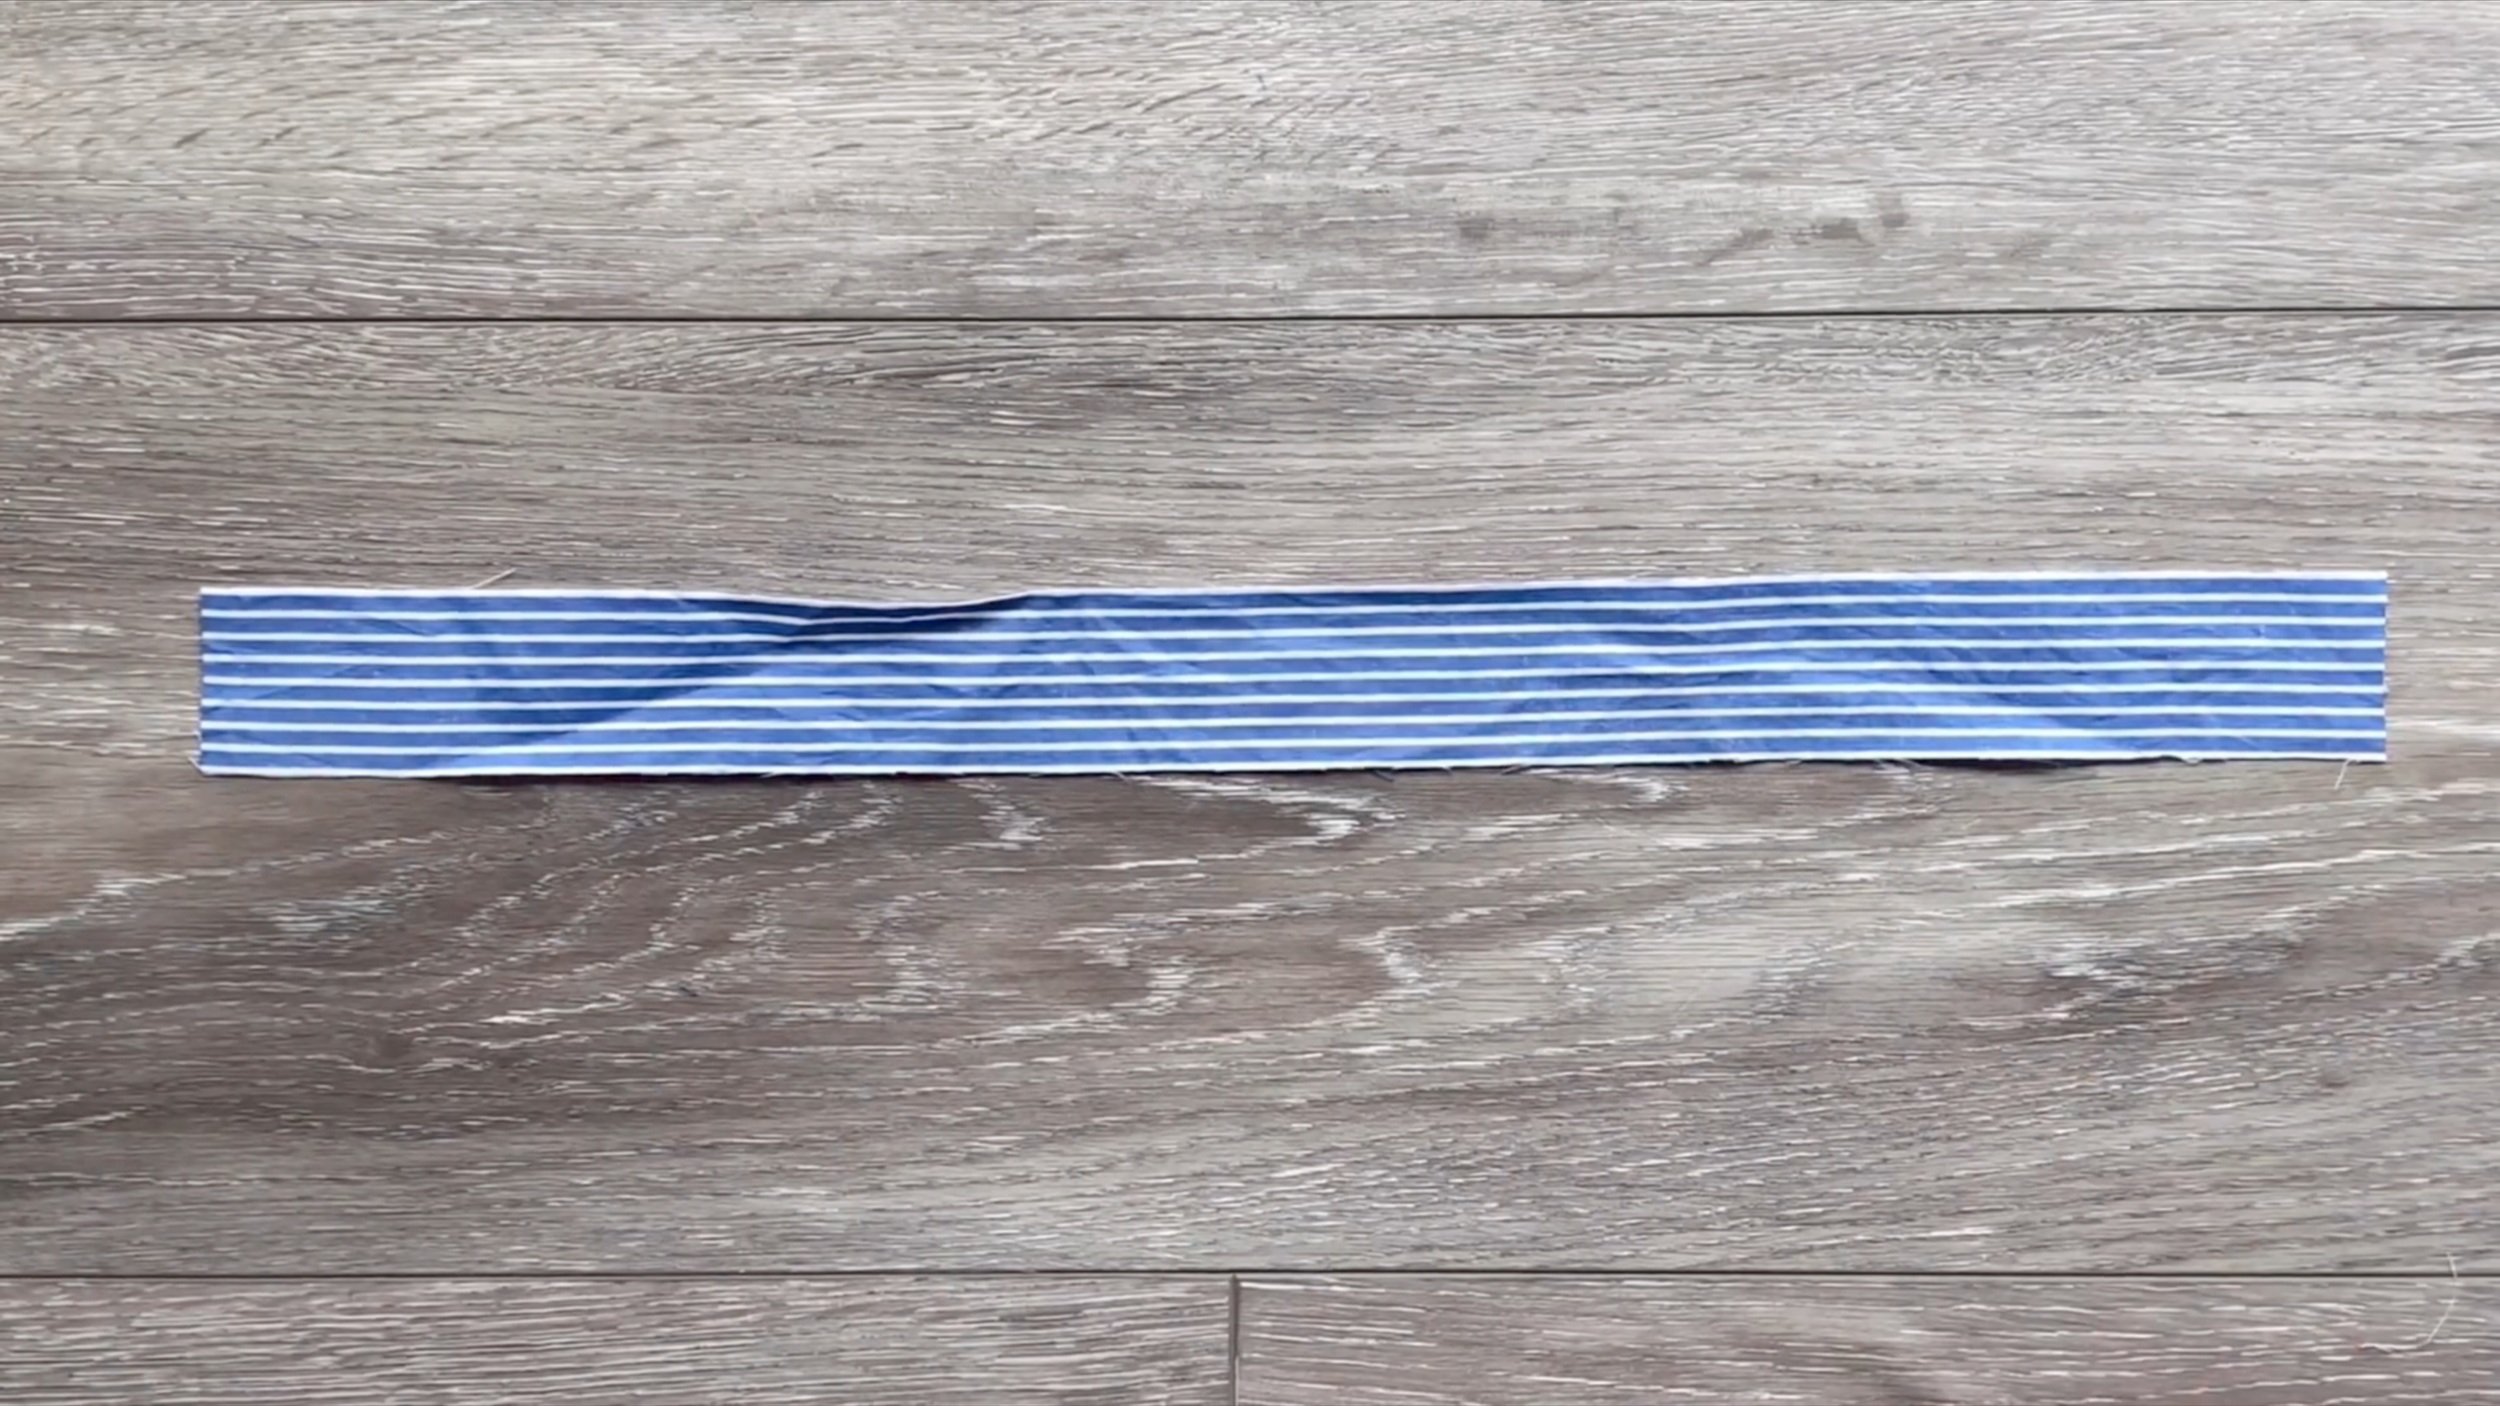
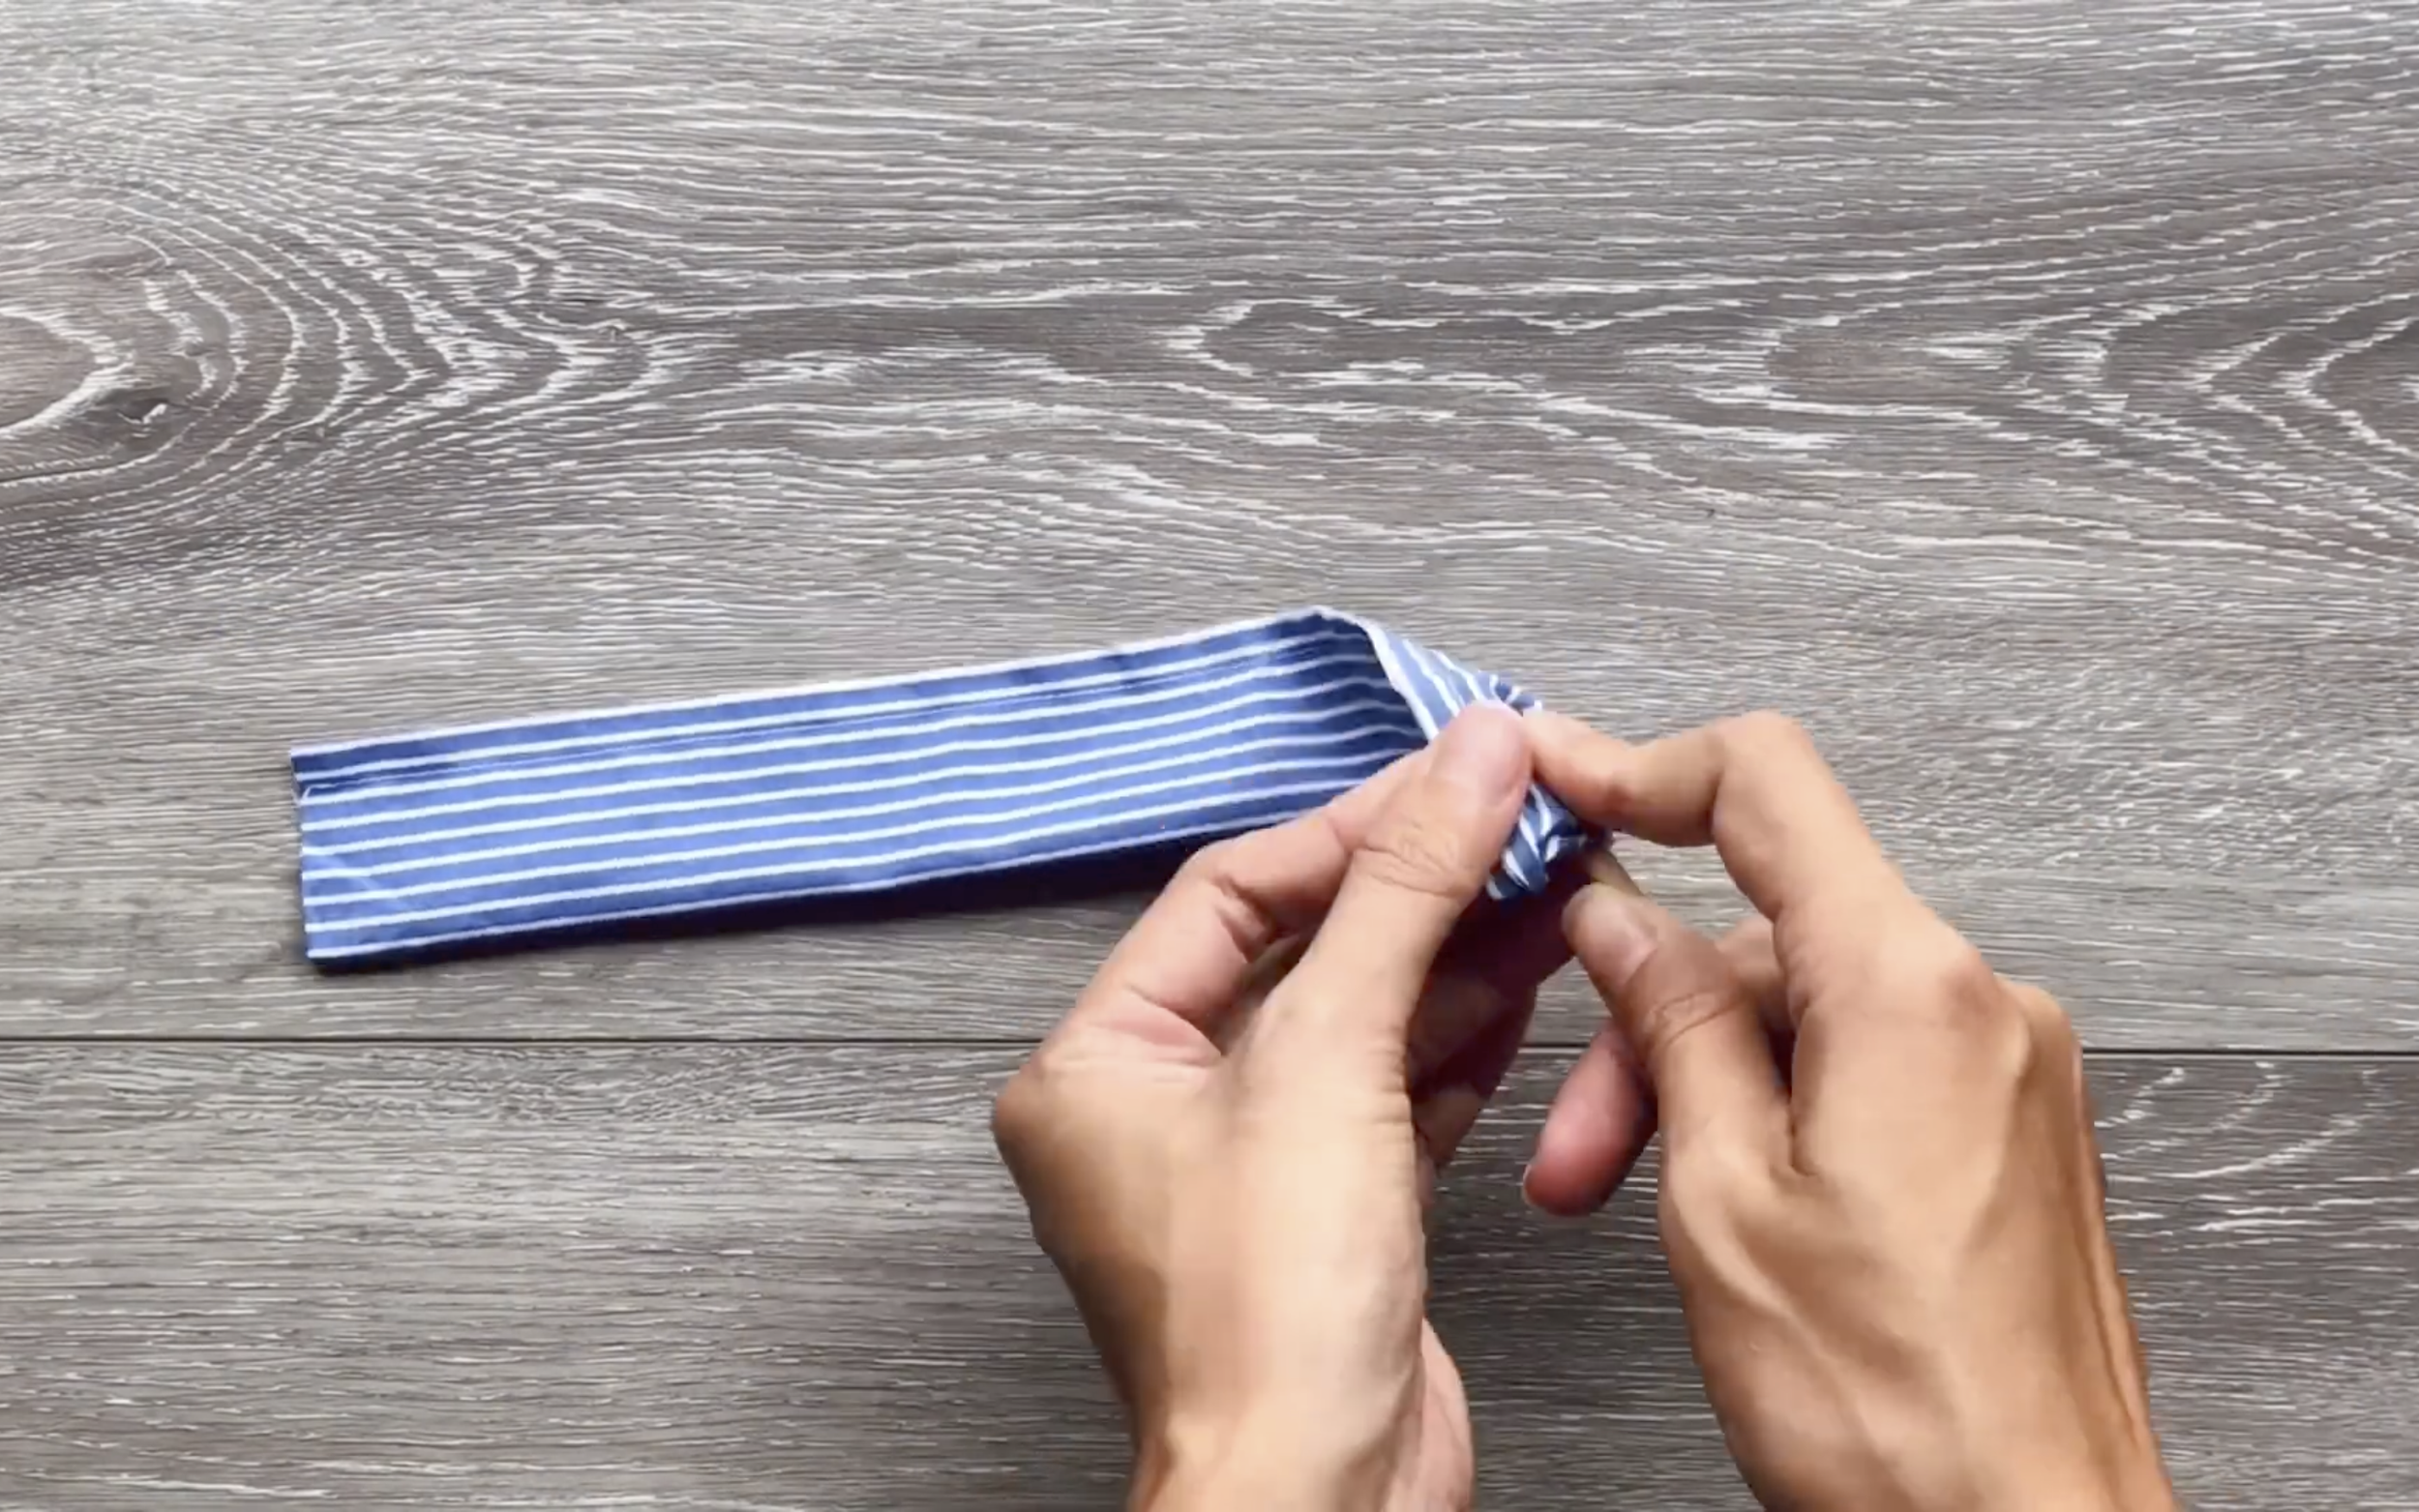
Create a tie by cutting a rectangle of 3.5 cm width and 30 cm length.
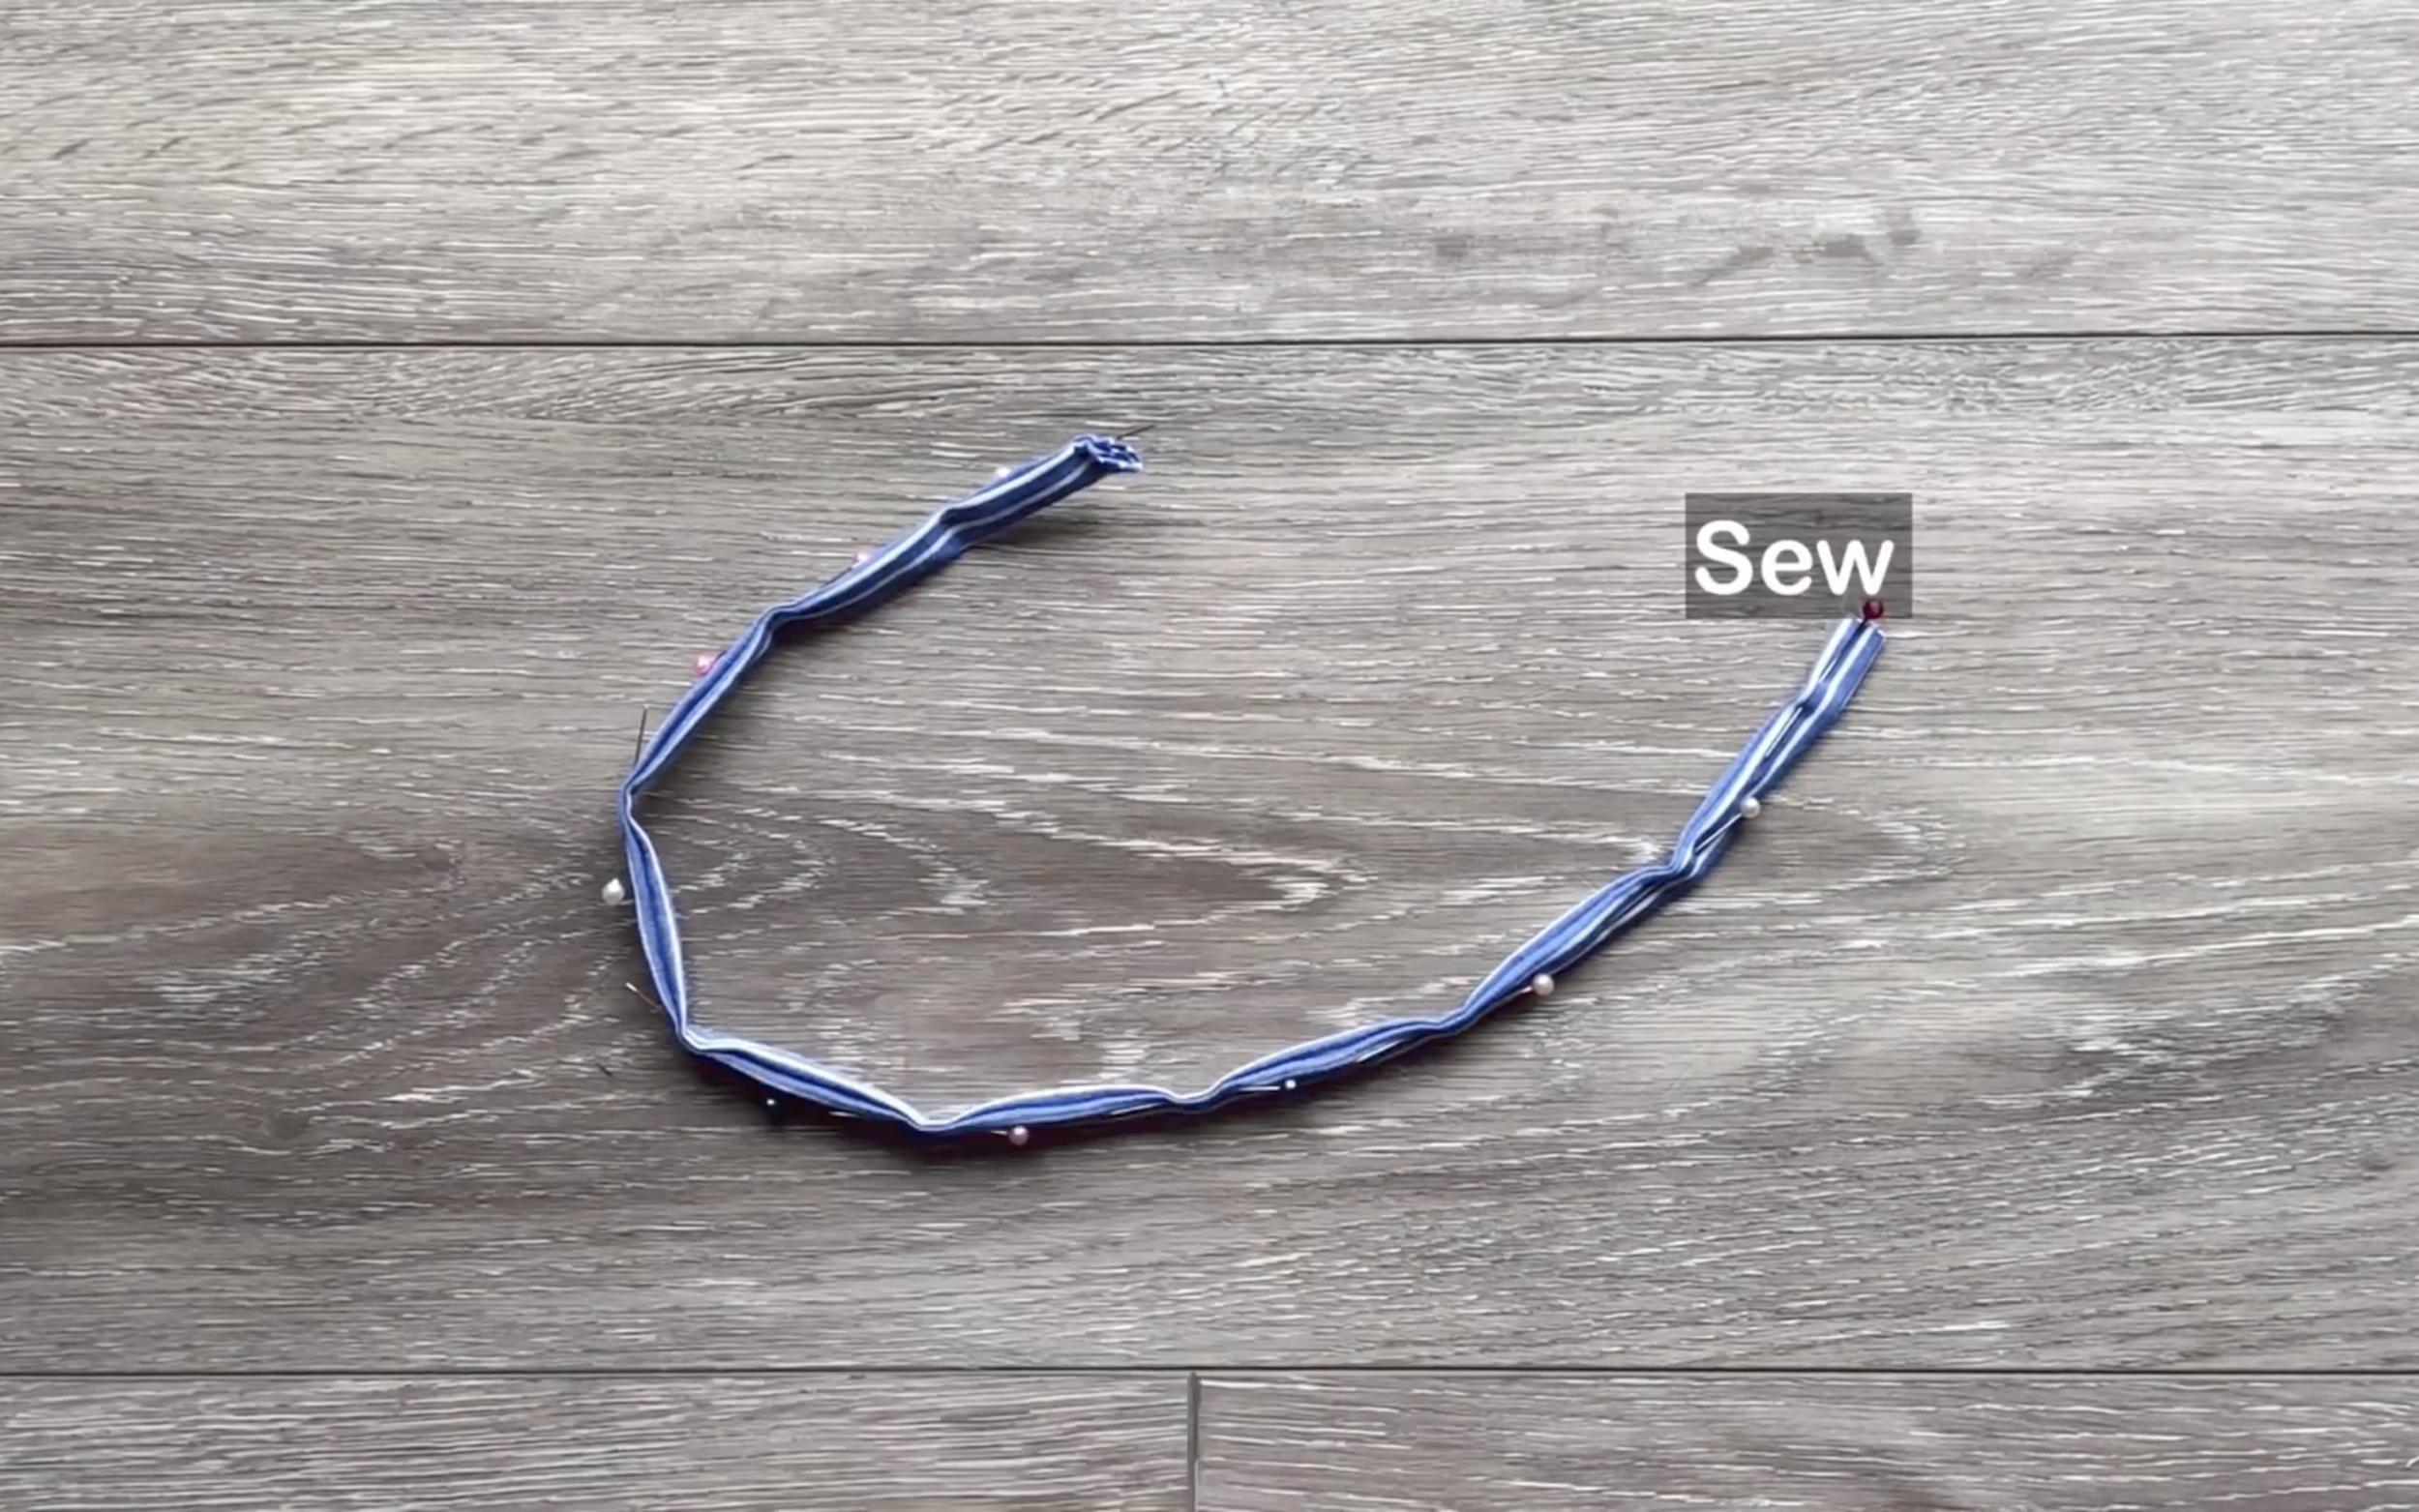
Fold the long edges inward, fold again, and sew to finish.
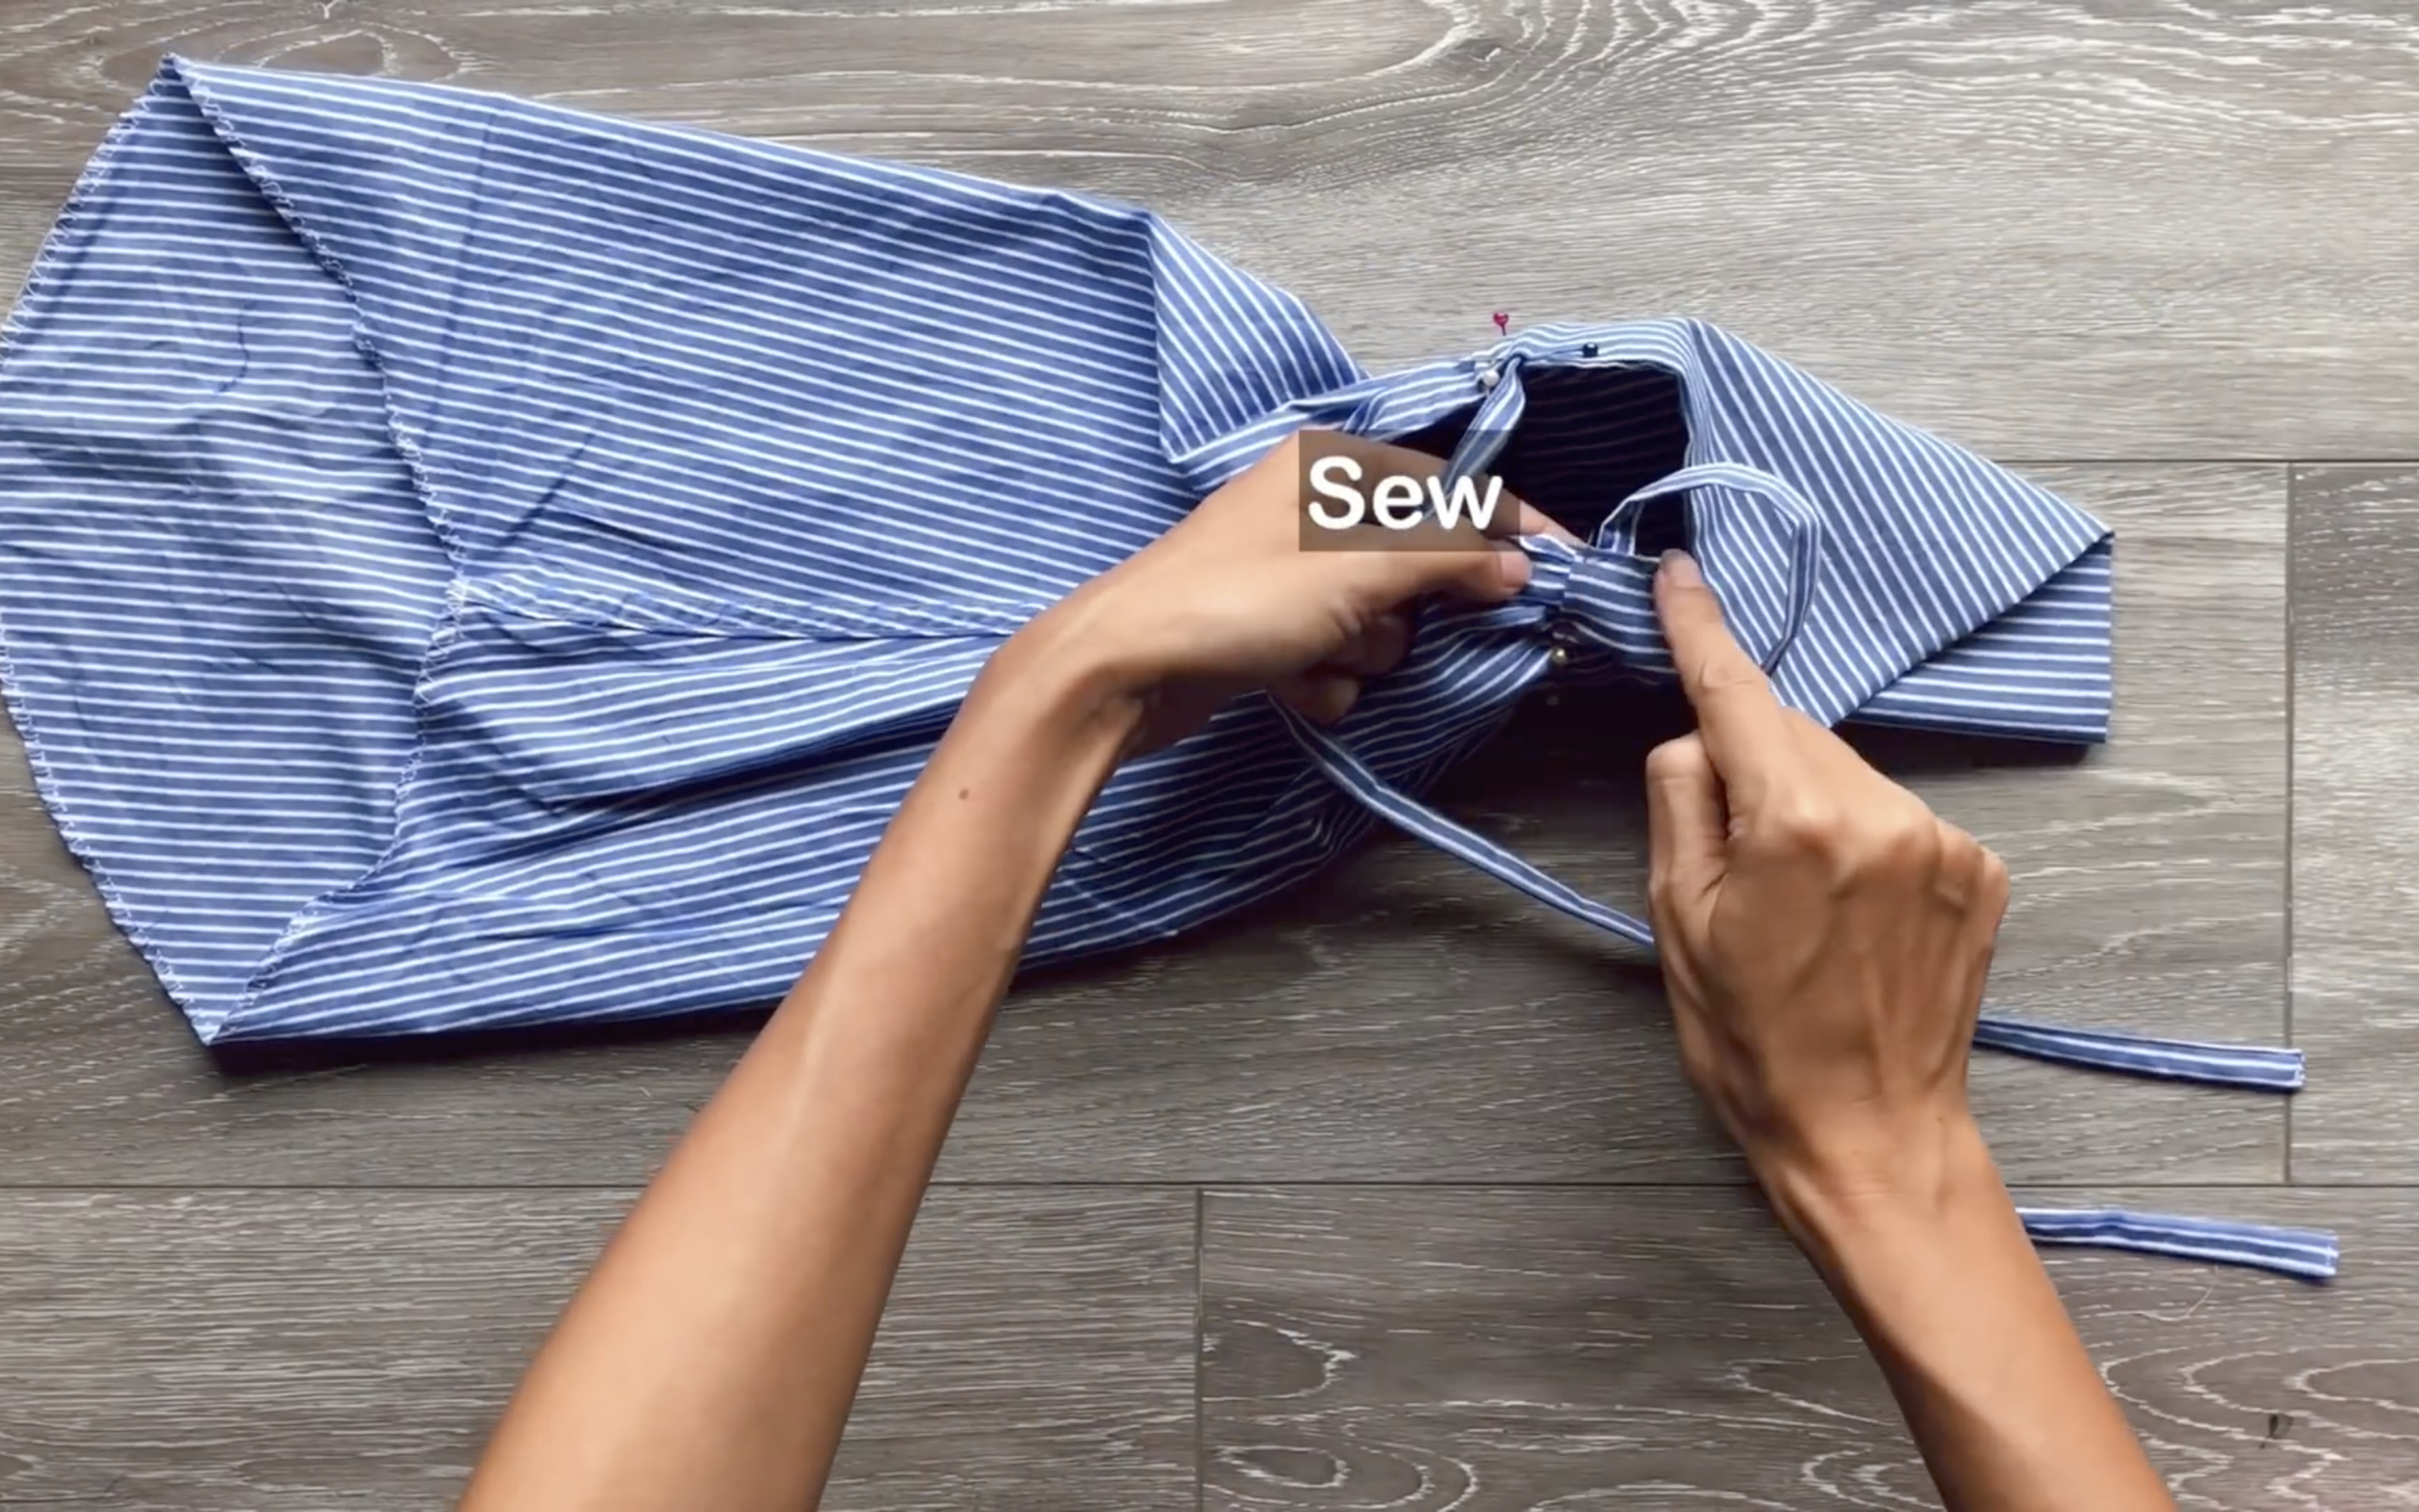
Attach ties to the sleeve ends and sew them.

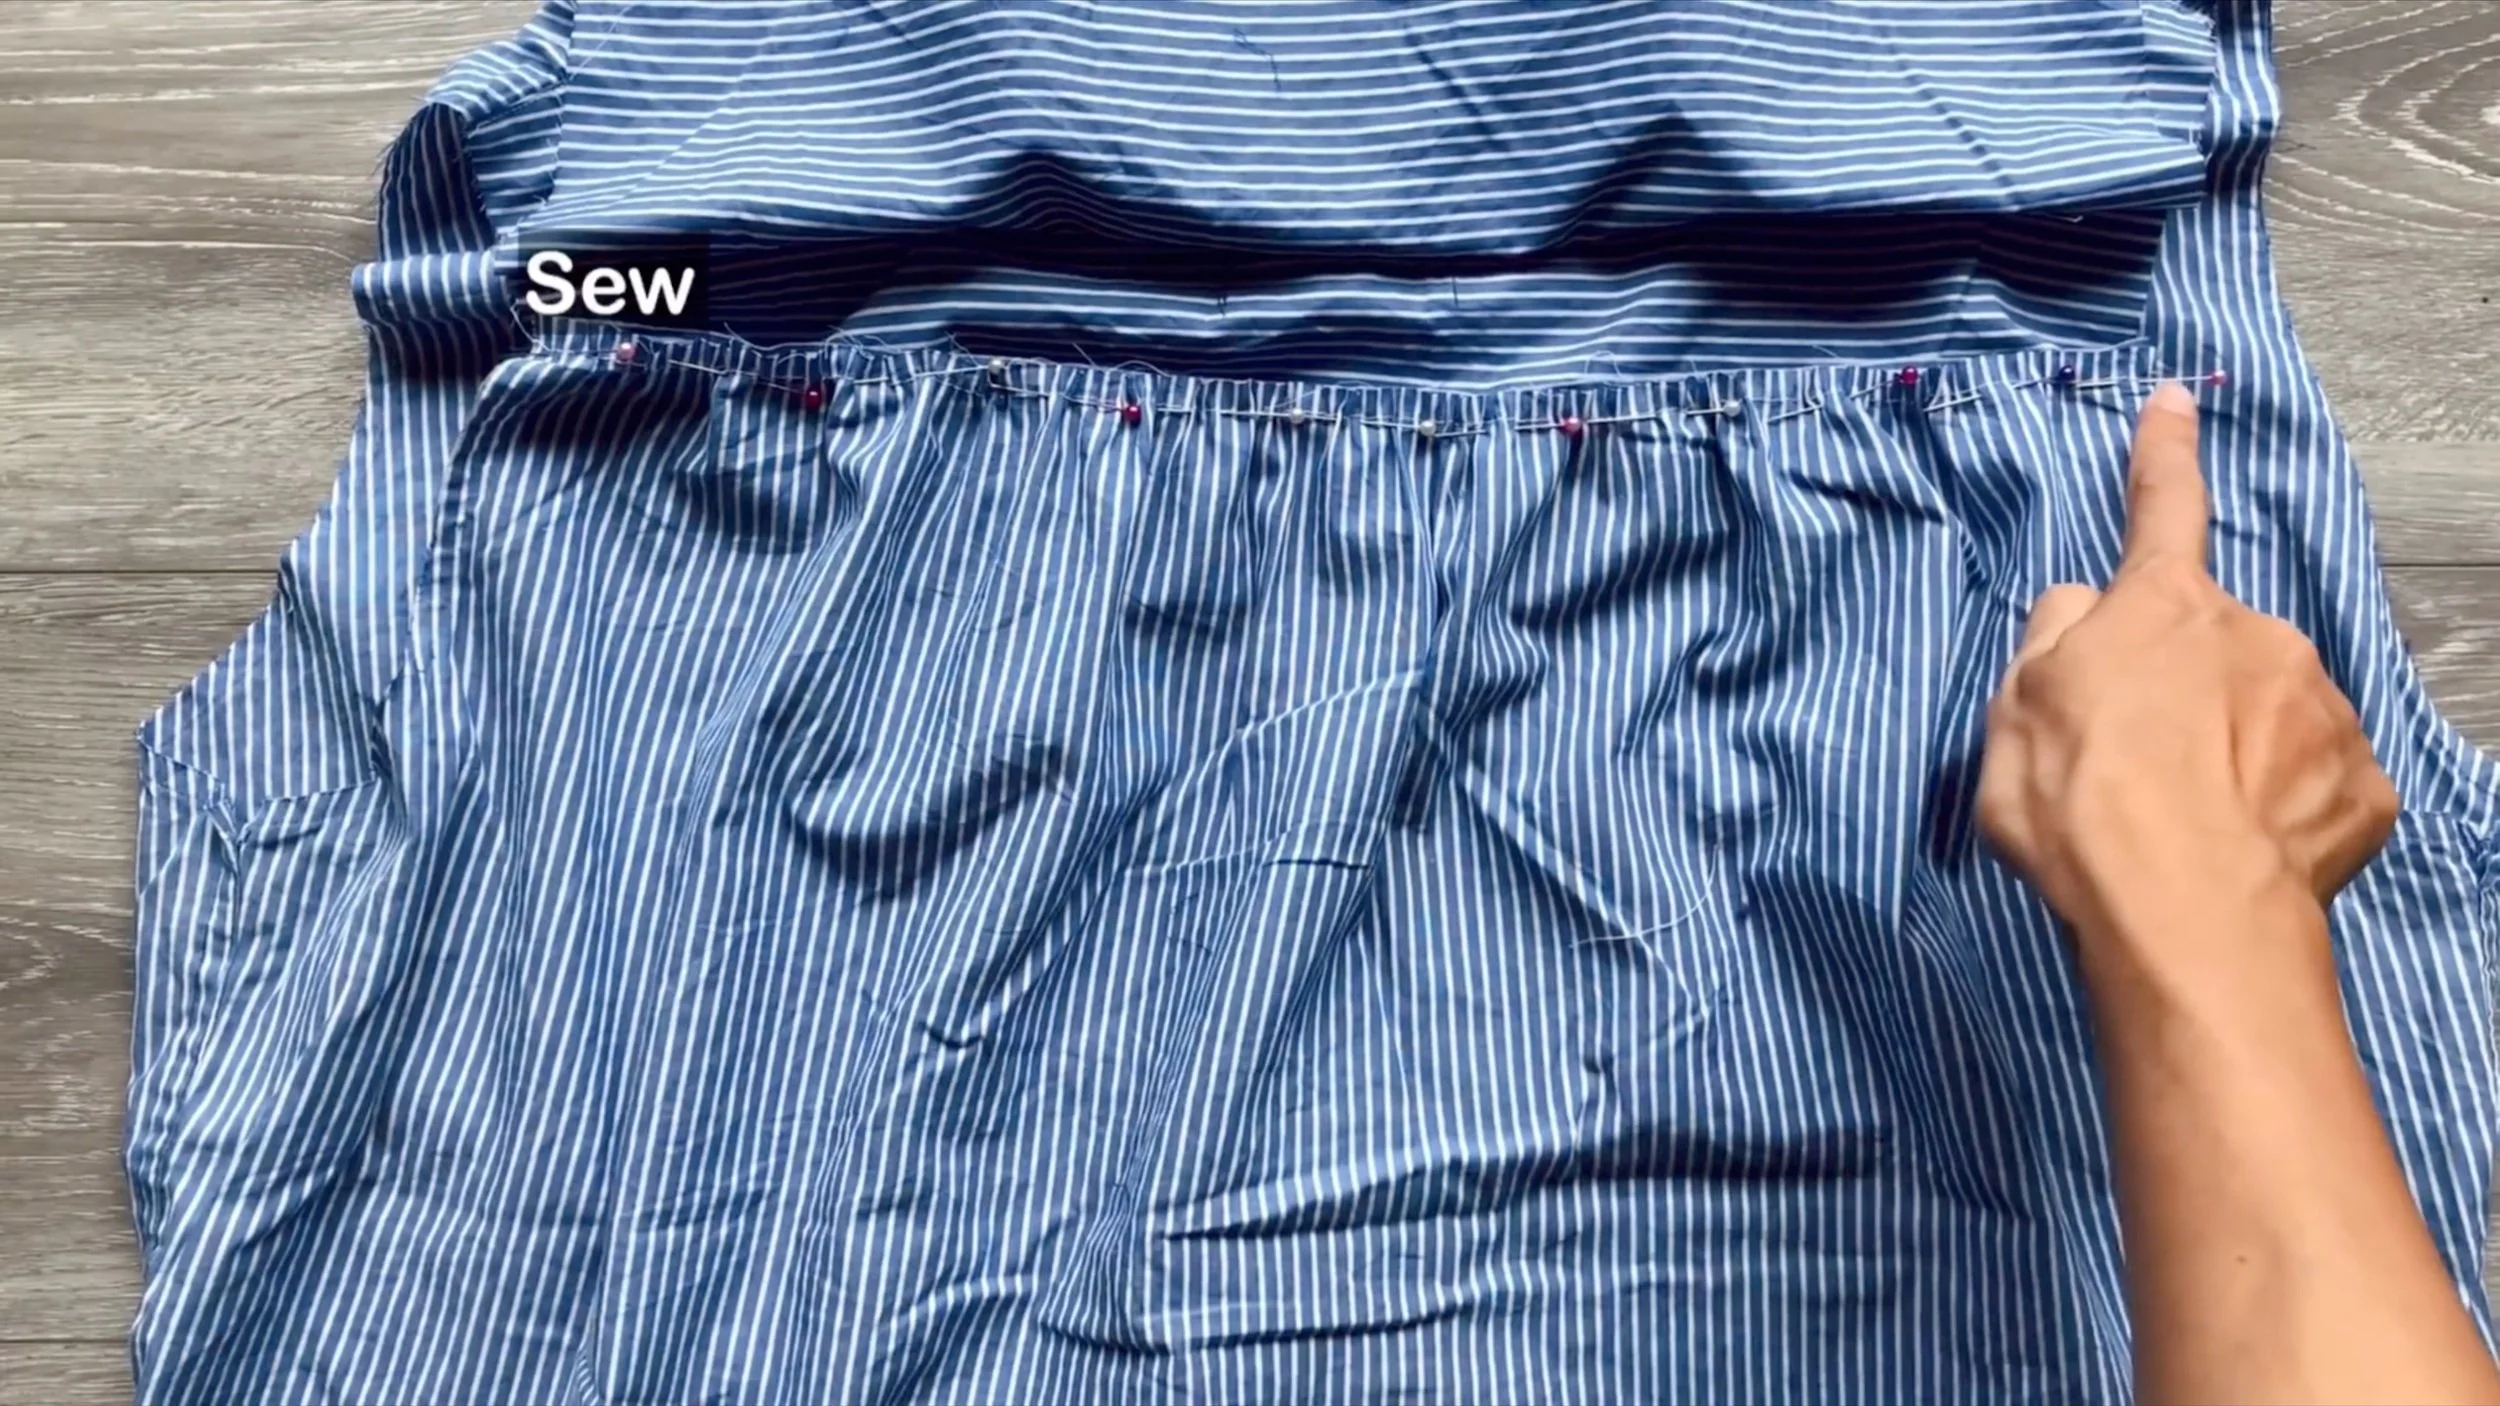
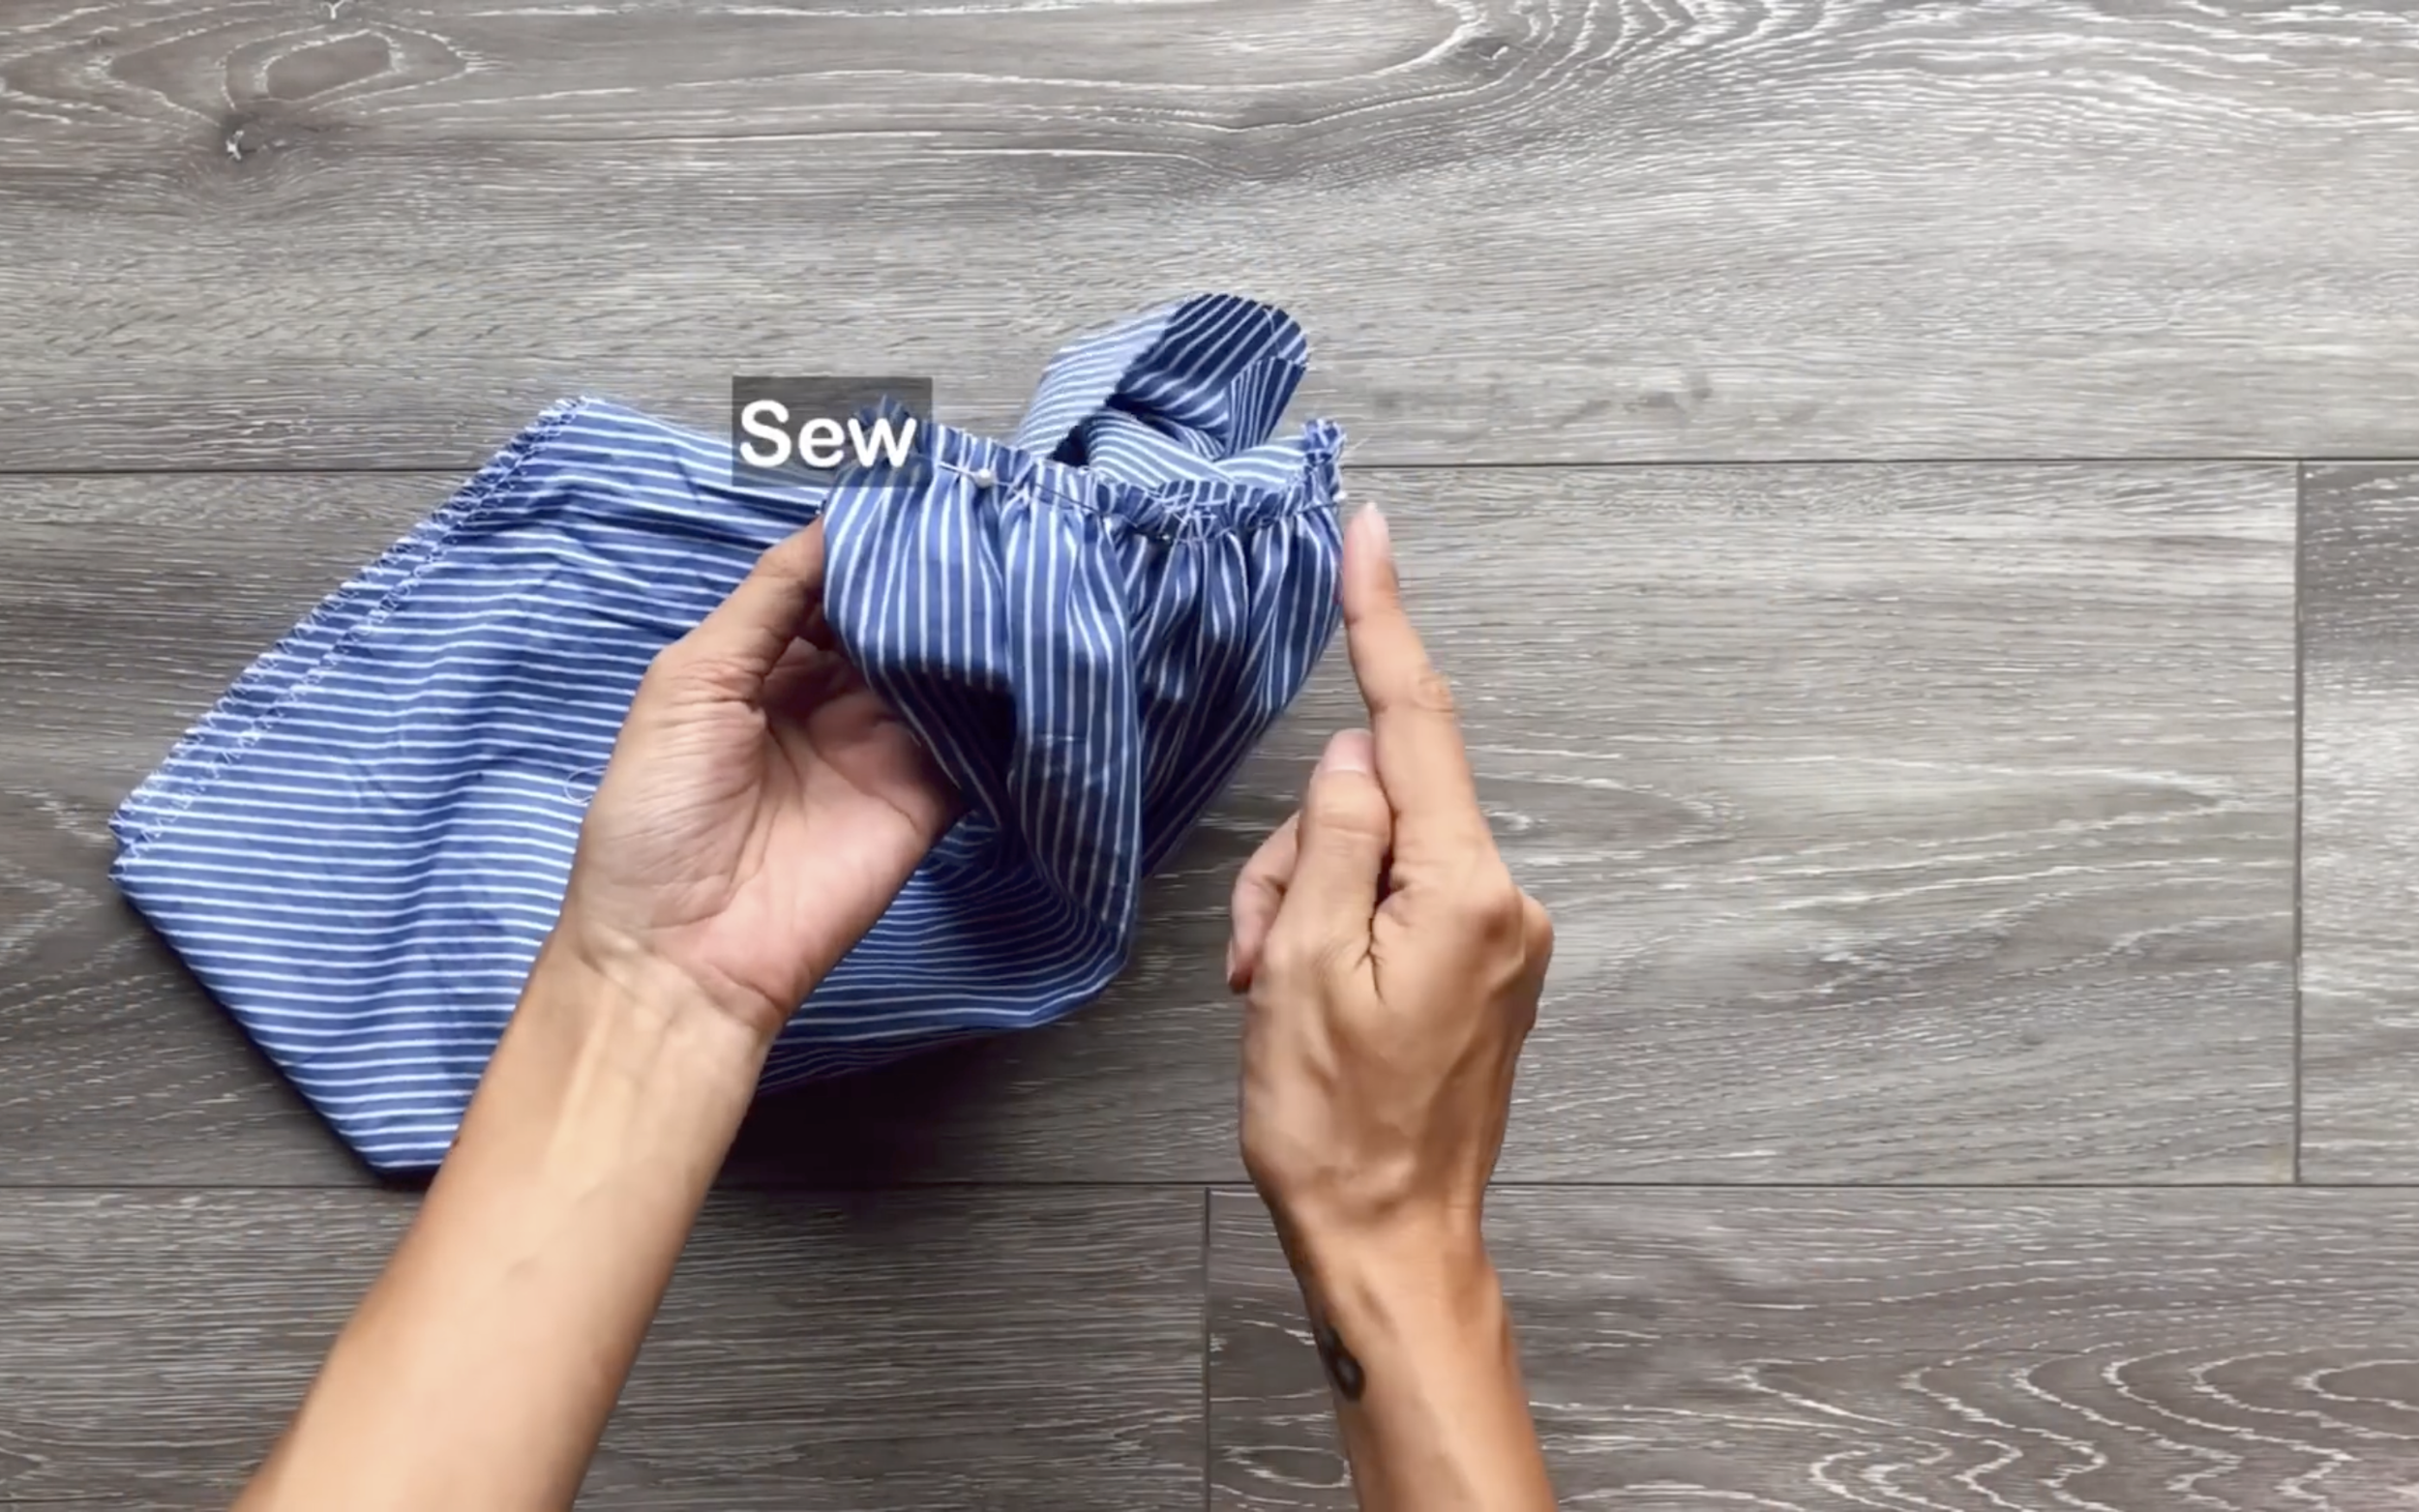
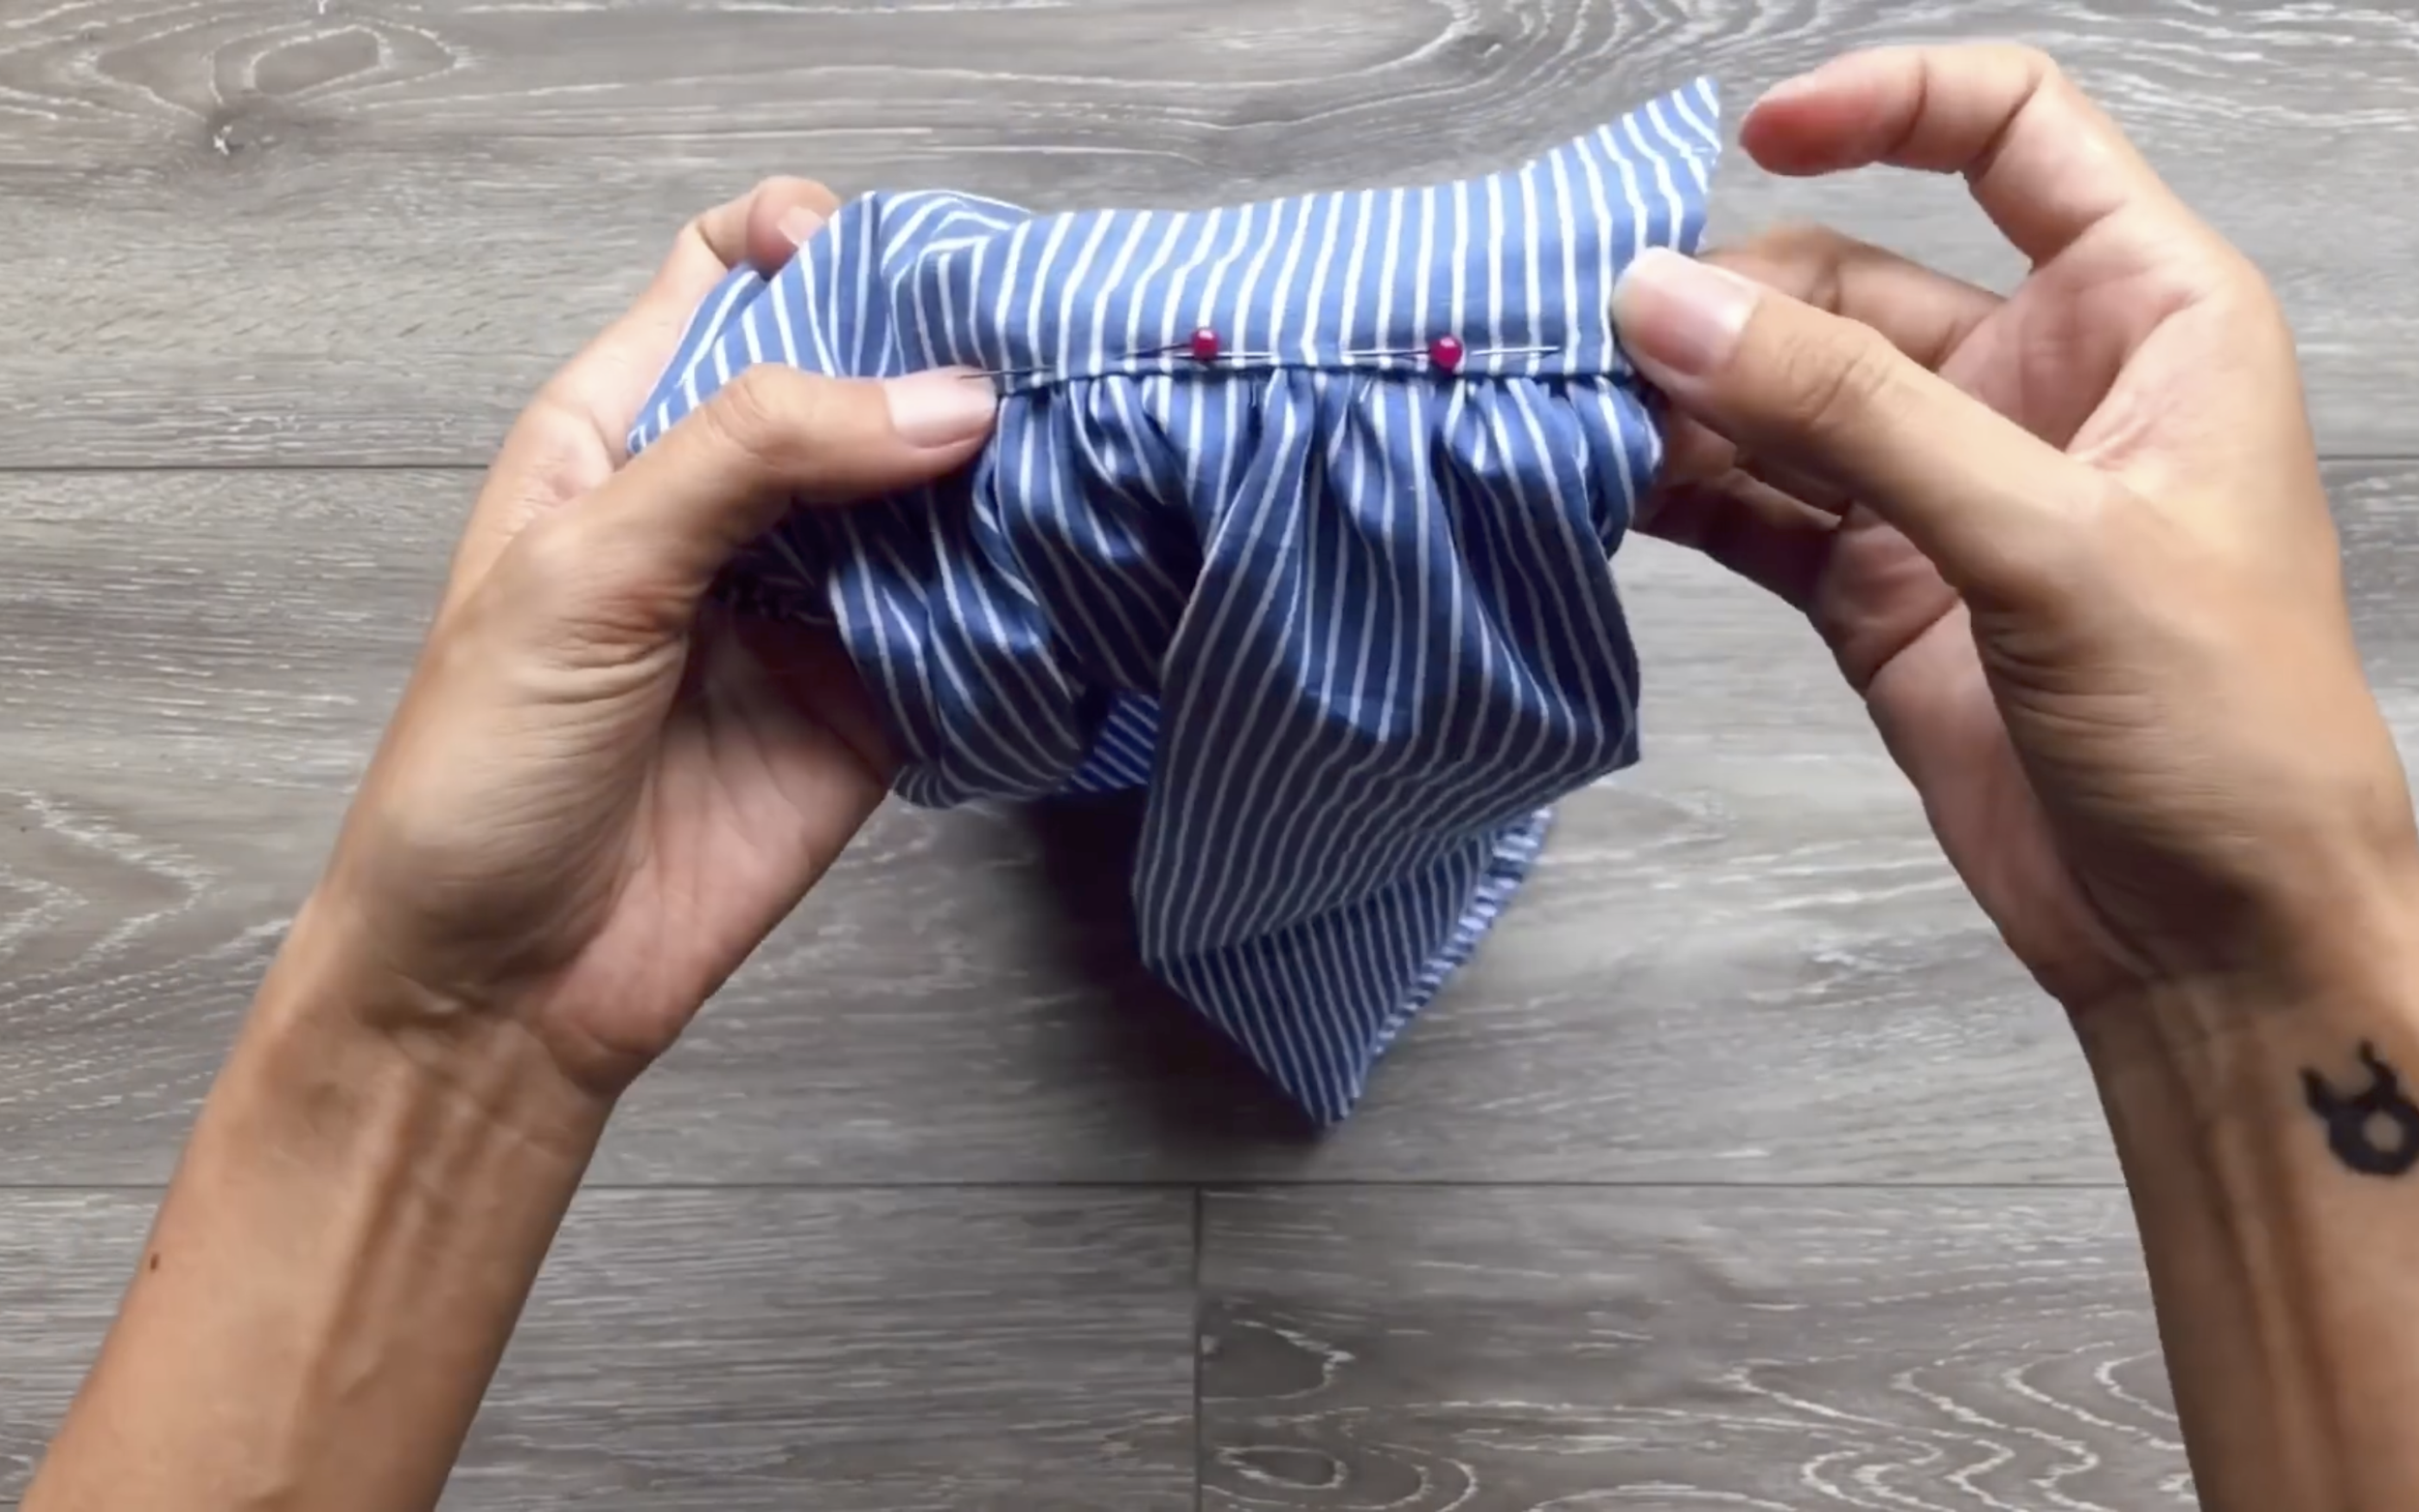
At the top of the sleeve, make a loose seam and create gathering fabric.
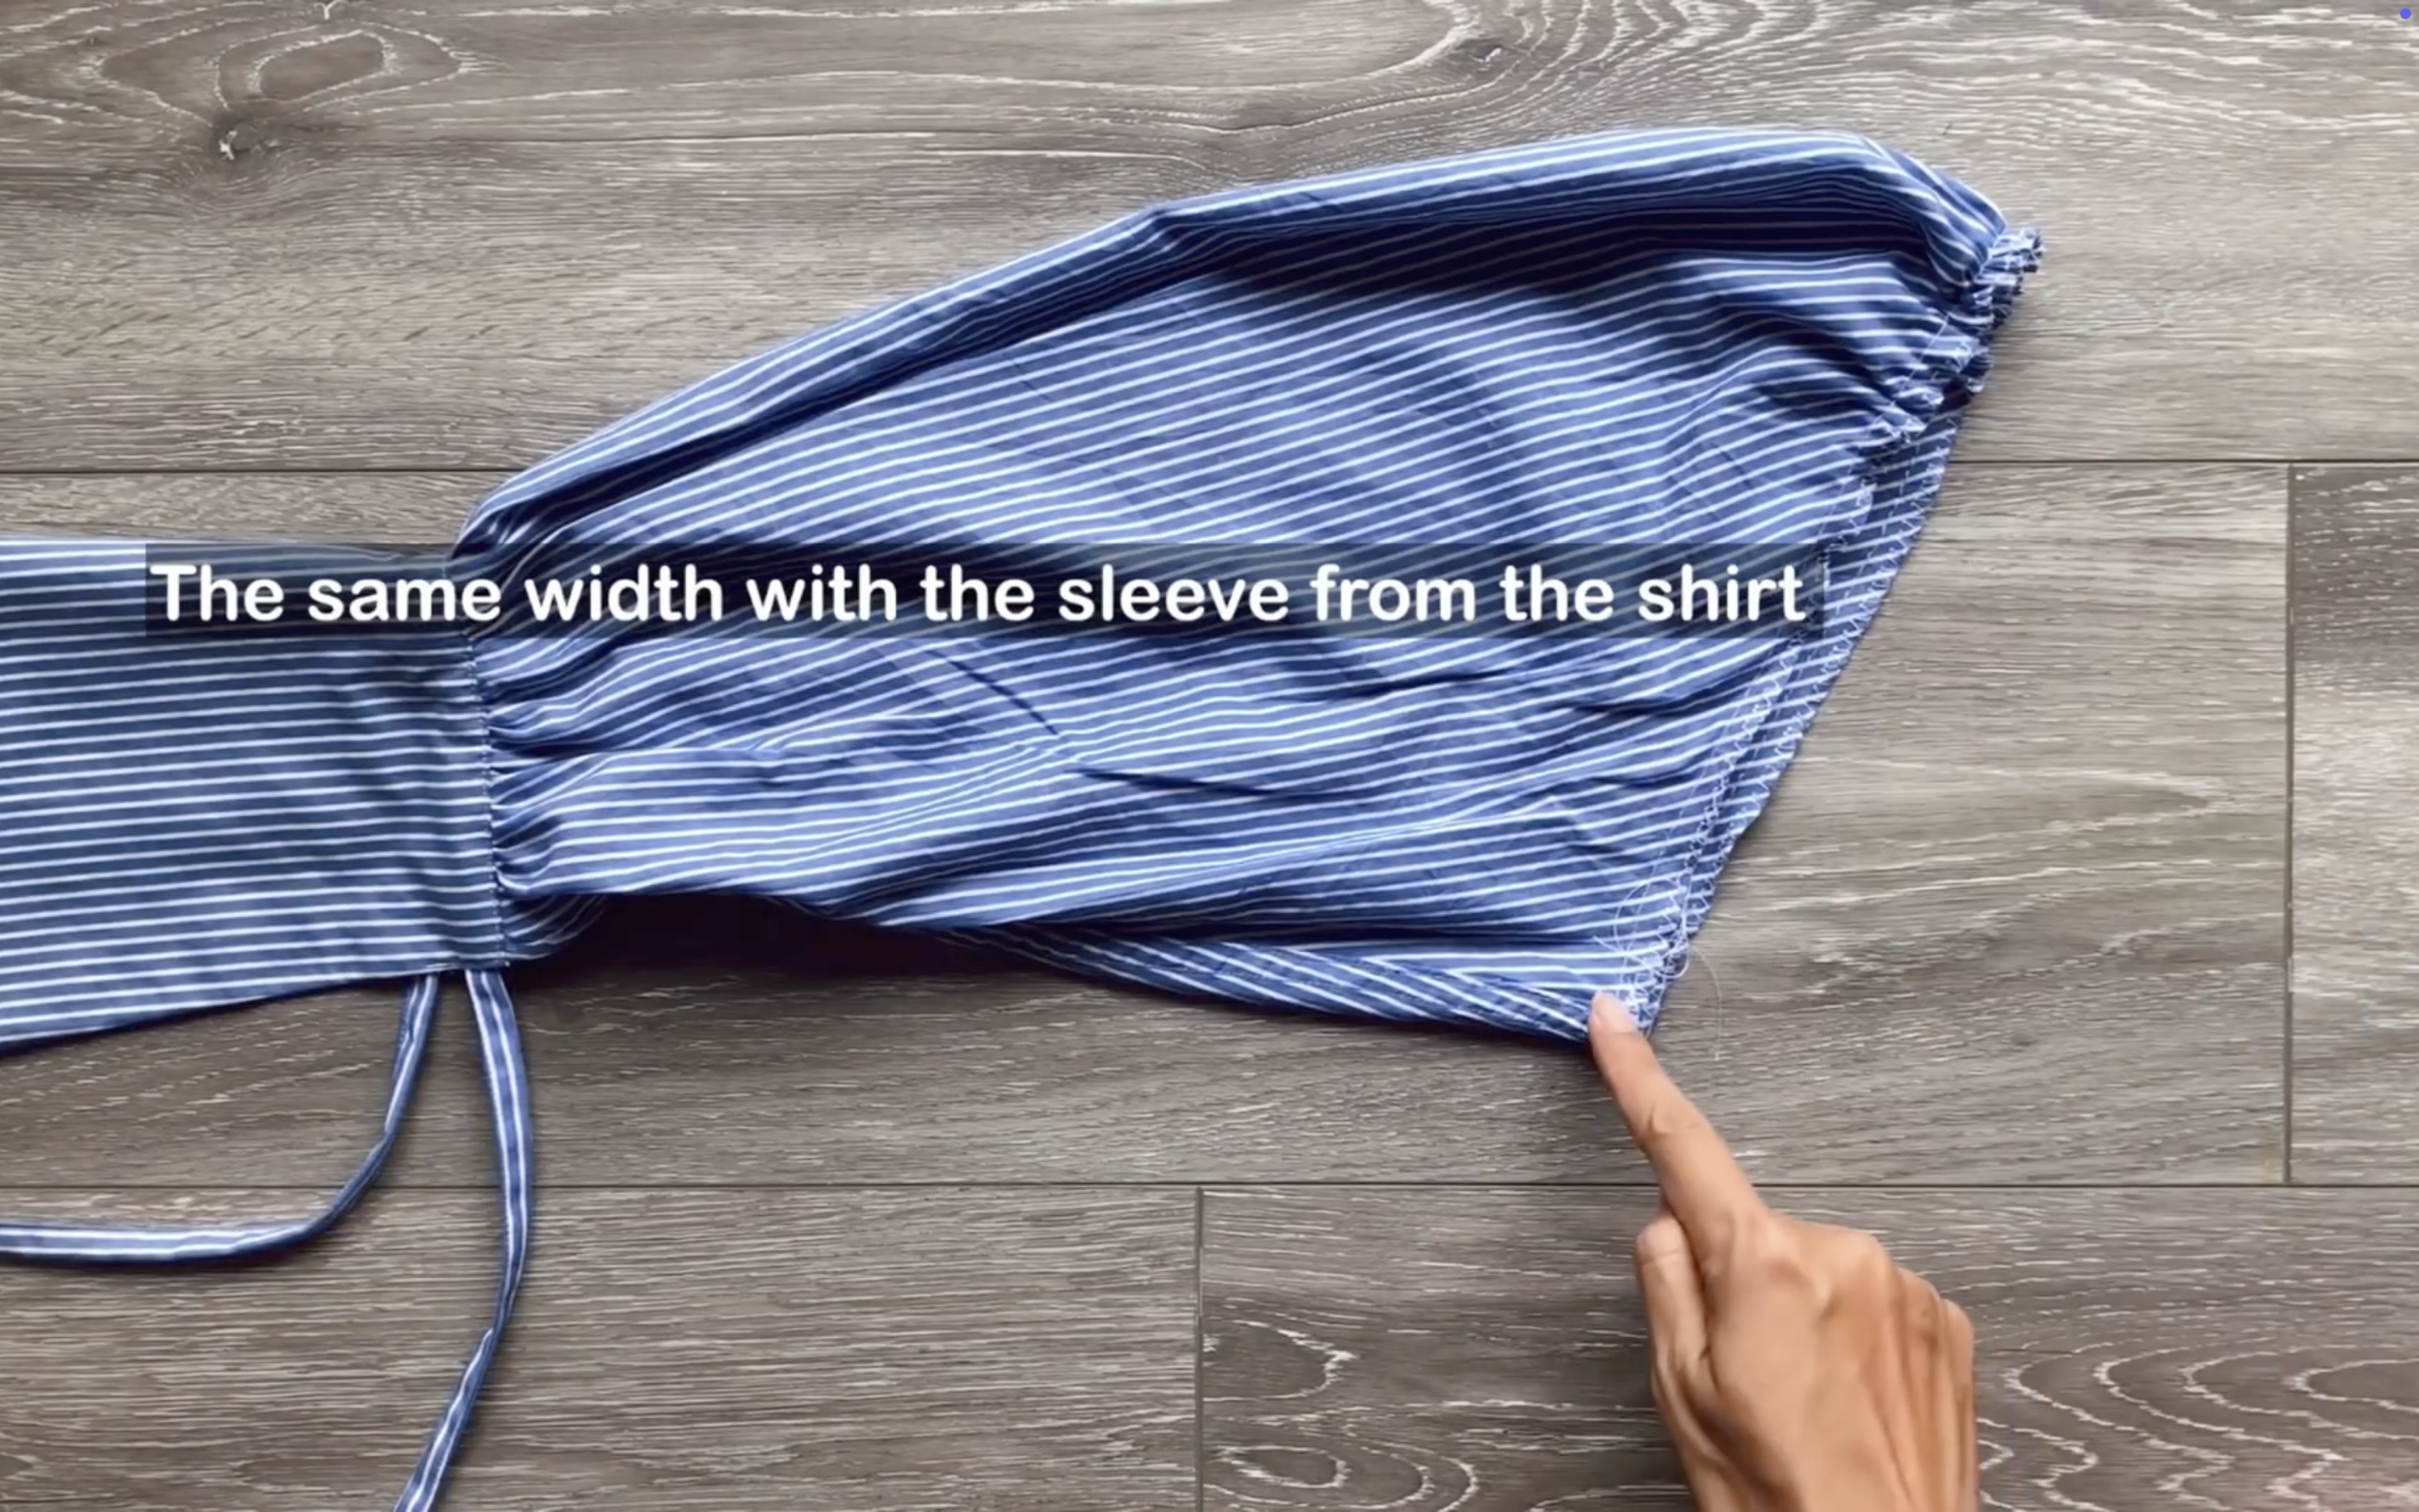
Make sure the gathering fabric will be around the top of the sleeve and the final width will be the same with the sleeve line you made at the shirt before.
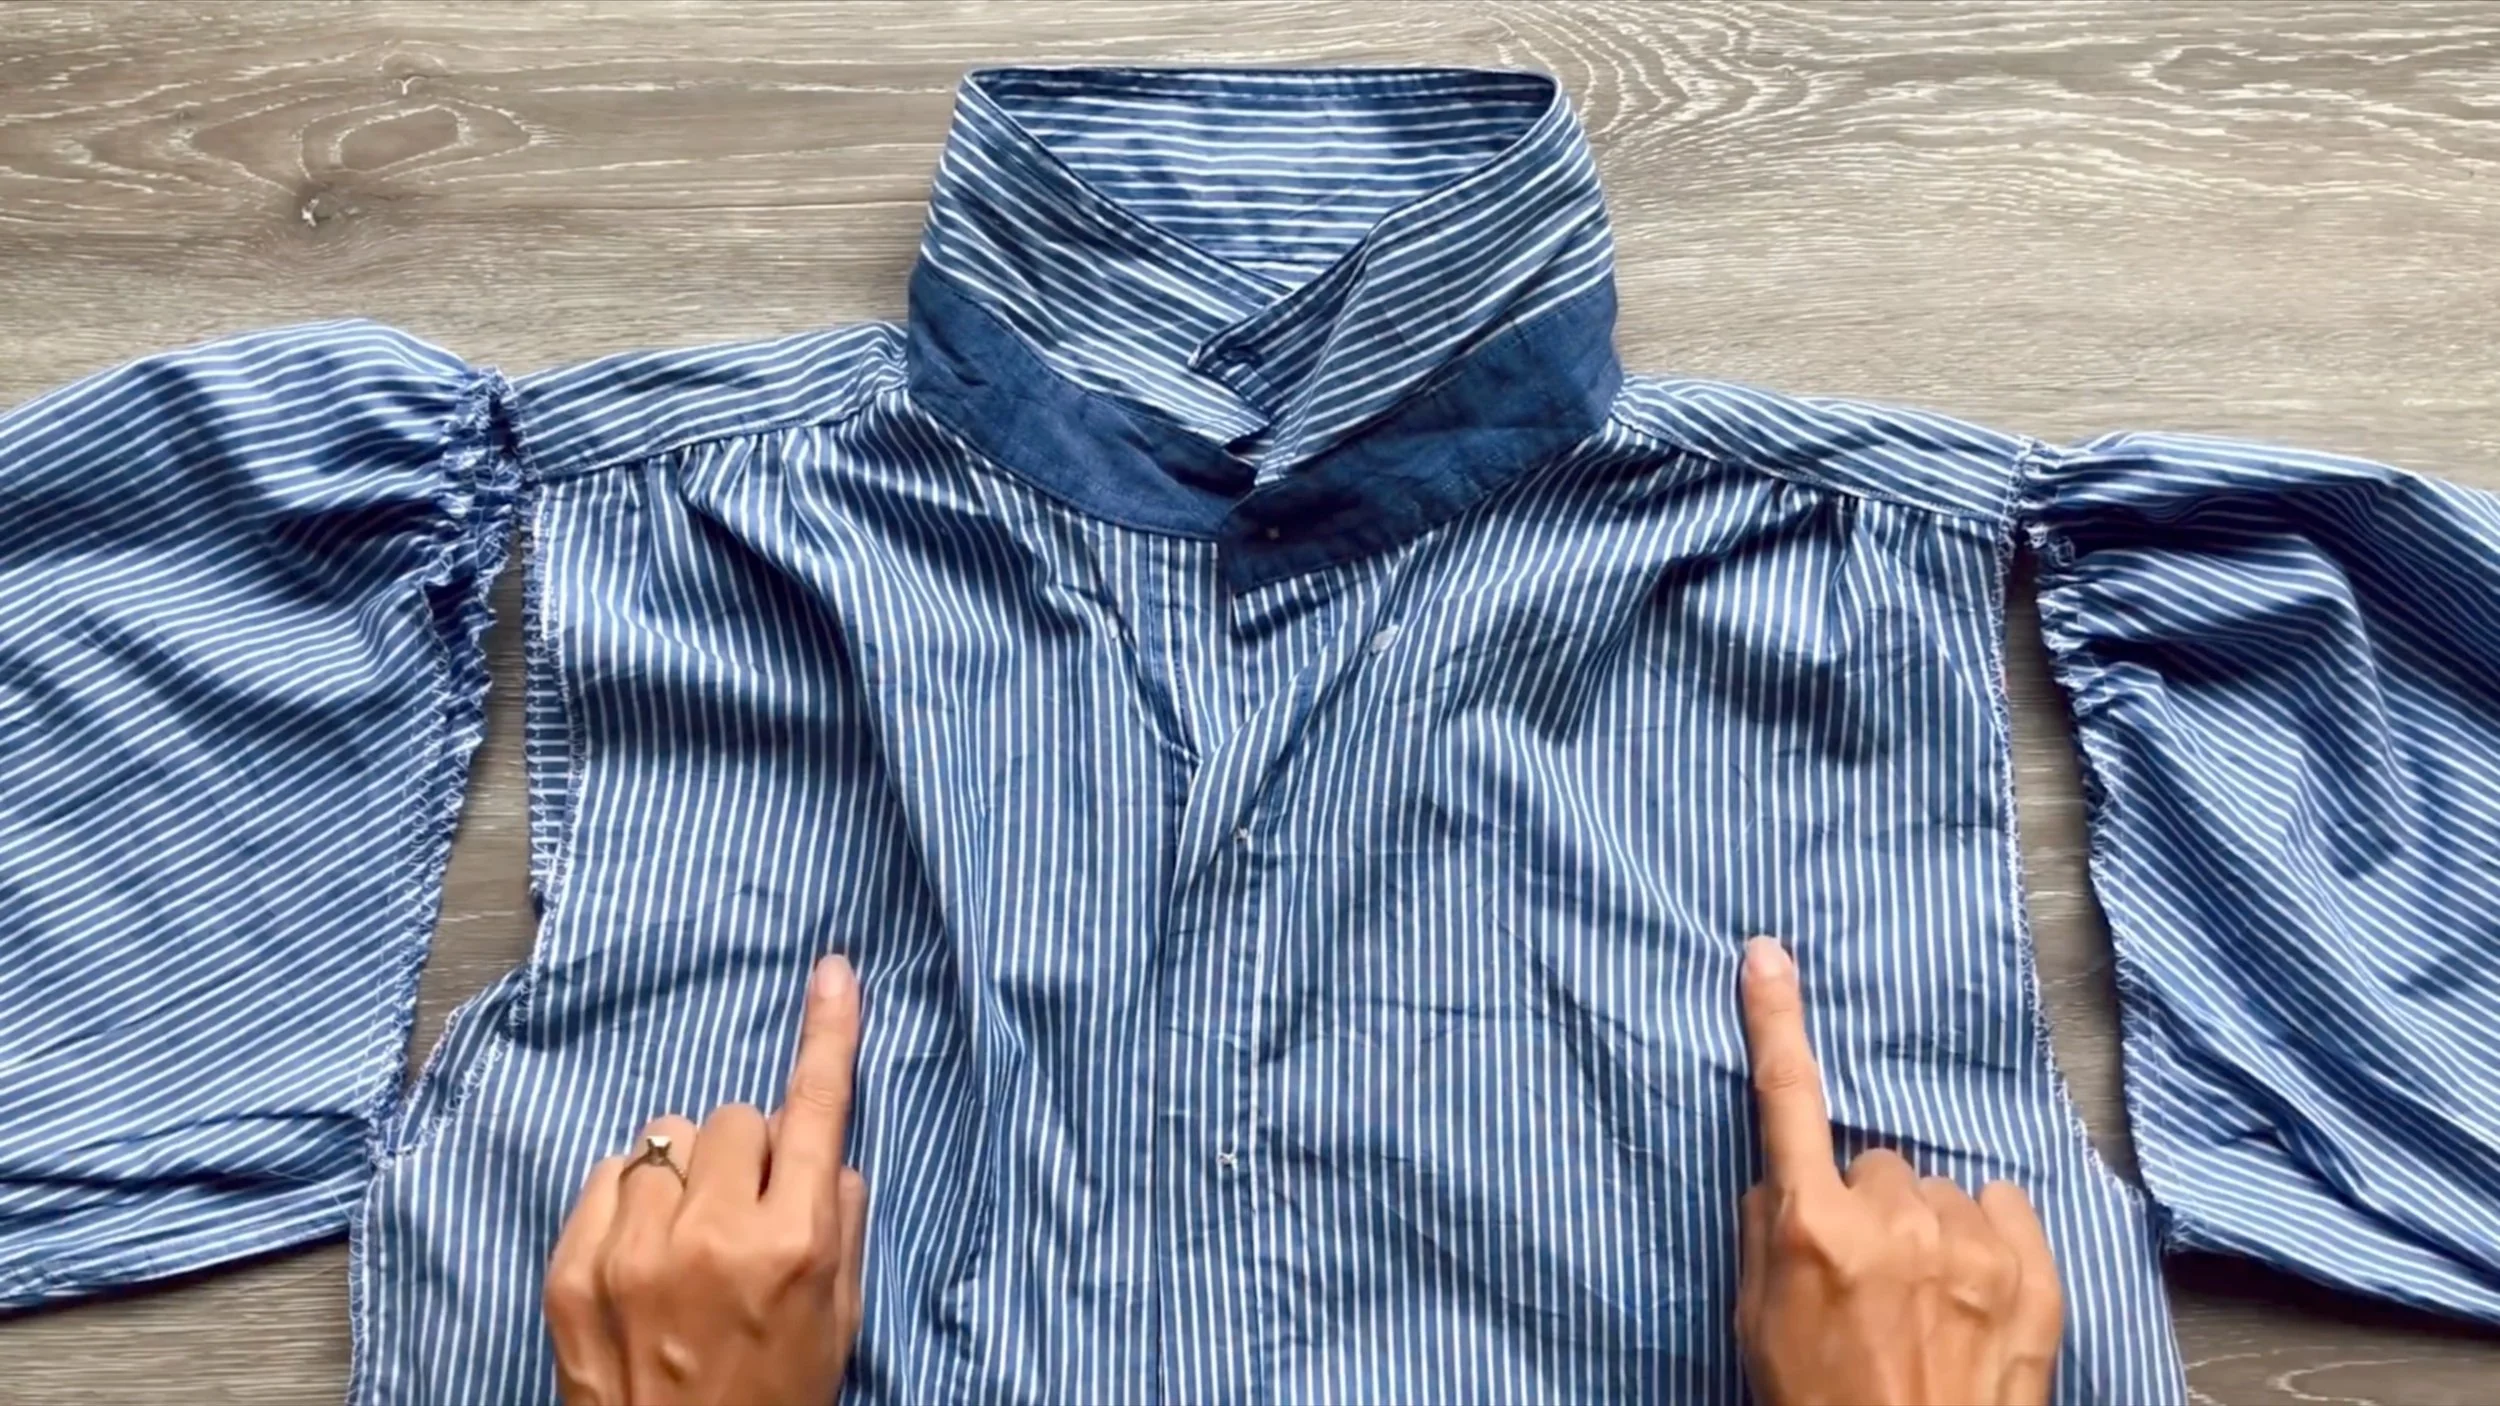
Then connect the sleeve and the bodice together at the sleeve line.
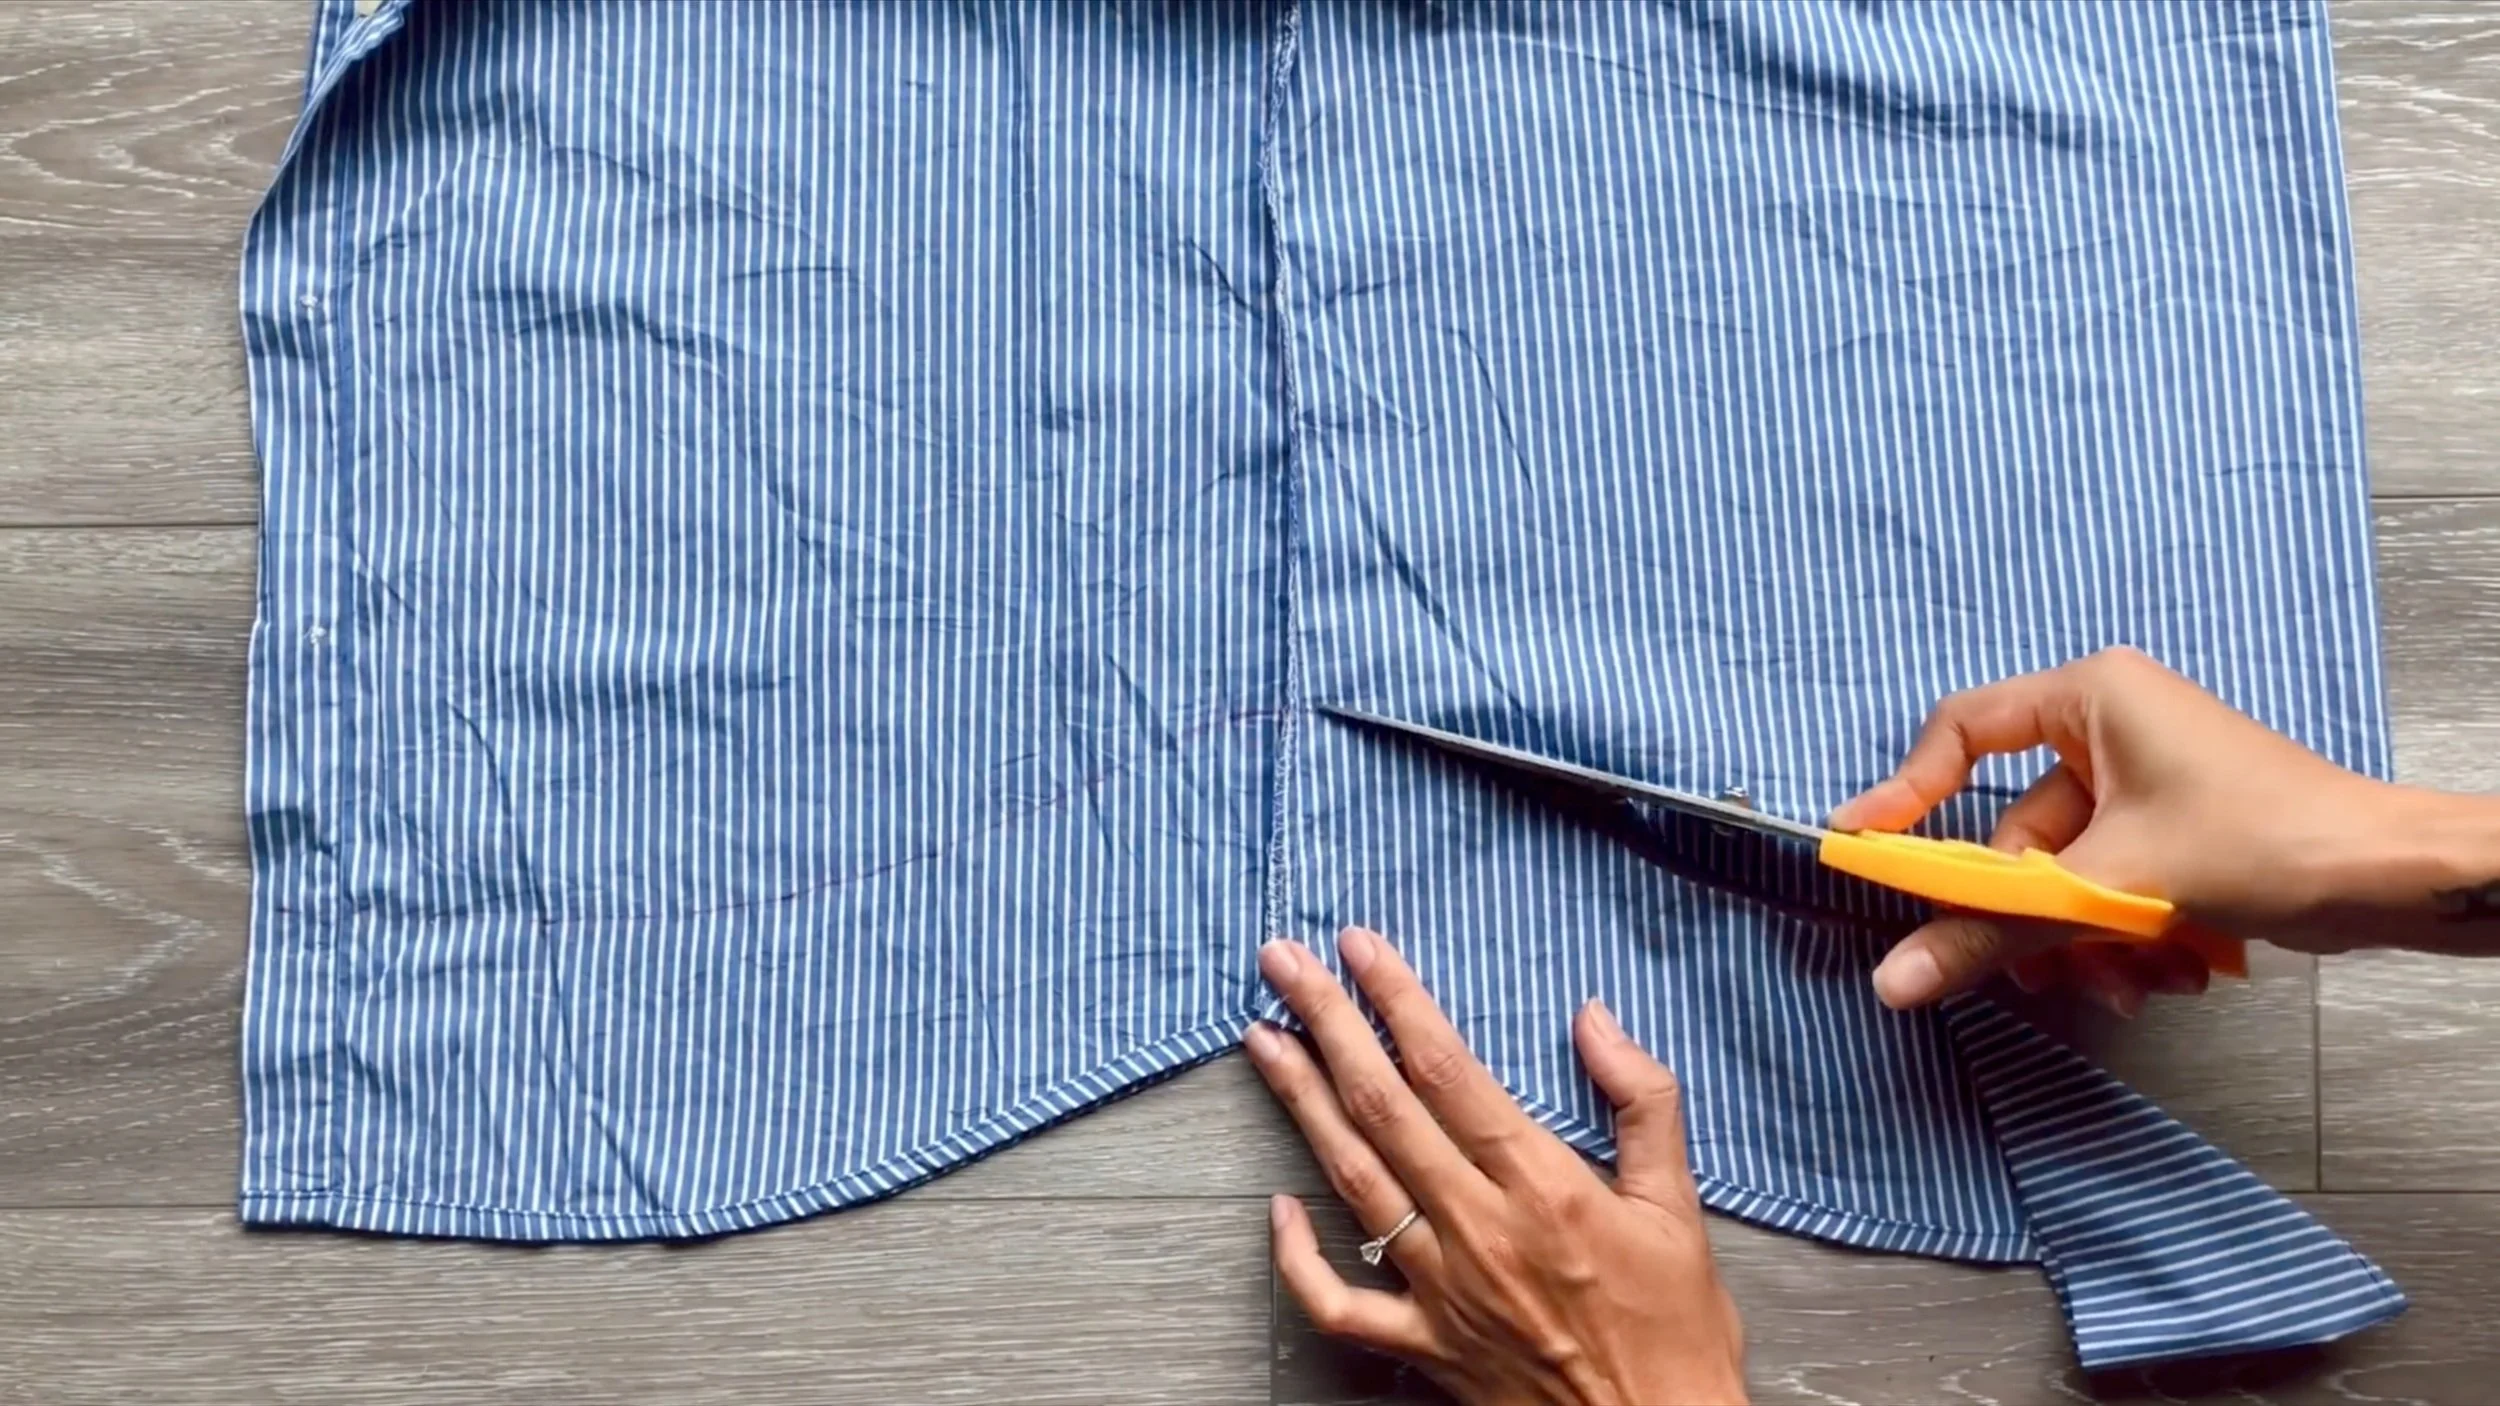
The last step is making the length of the new shirt shorter. The length of the new shirt is around 5 cm above the end of the shorts when wearing.
Then make the hem for the end of the shirt to complete the matching set.
DIY 2 Pieces set from Men's shirts | How I transformed 2 men's shirts into a beautiful matching set
And that wraps up this DIY!
Here’s the final look—this matching set is both comfy and stylish, making it perfect for a hot day.
I hope you found my step-by-step guide helpful and inspiring.
If you’re interested in making your own, give it a try and let me know how it goes!
Until then, happy sewing!