DIY BABYDOLL DRESS (Balloon sleeve & Ruffle hem) | Vacation wardrobe (Ep 4) | Step by step tutorial

DIY BABYDOLL DRESS (Balloon sleeve & Ruffle hem) | Vacation wardrobe (Ep 4) | Step by step tutorial
Welcome or welcome back to my channel!
In today's video, I'm going to share with you how I made my Vacation Babydoll dress. This dress has a balloon sleeve design with high round neck and ruffle hem. It's a throw on dress on the day you don't know what to wear. So I hope you like it and try it out.
Let’s get started!
WHAT YOU’LL NEED
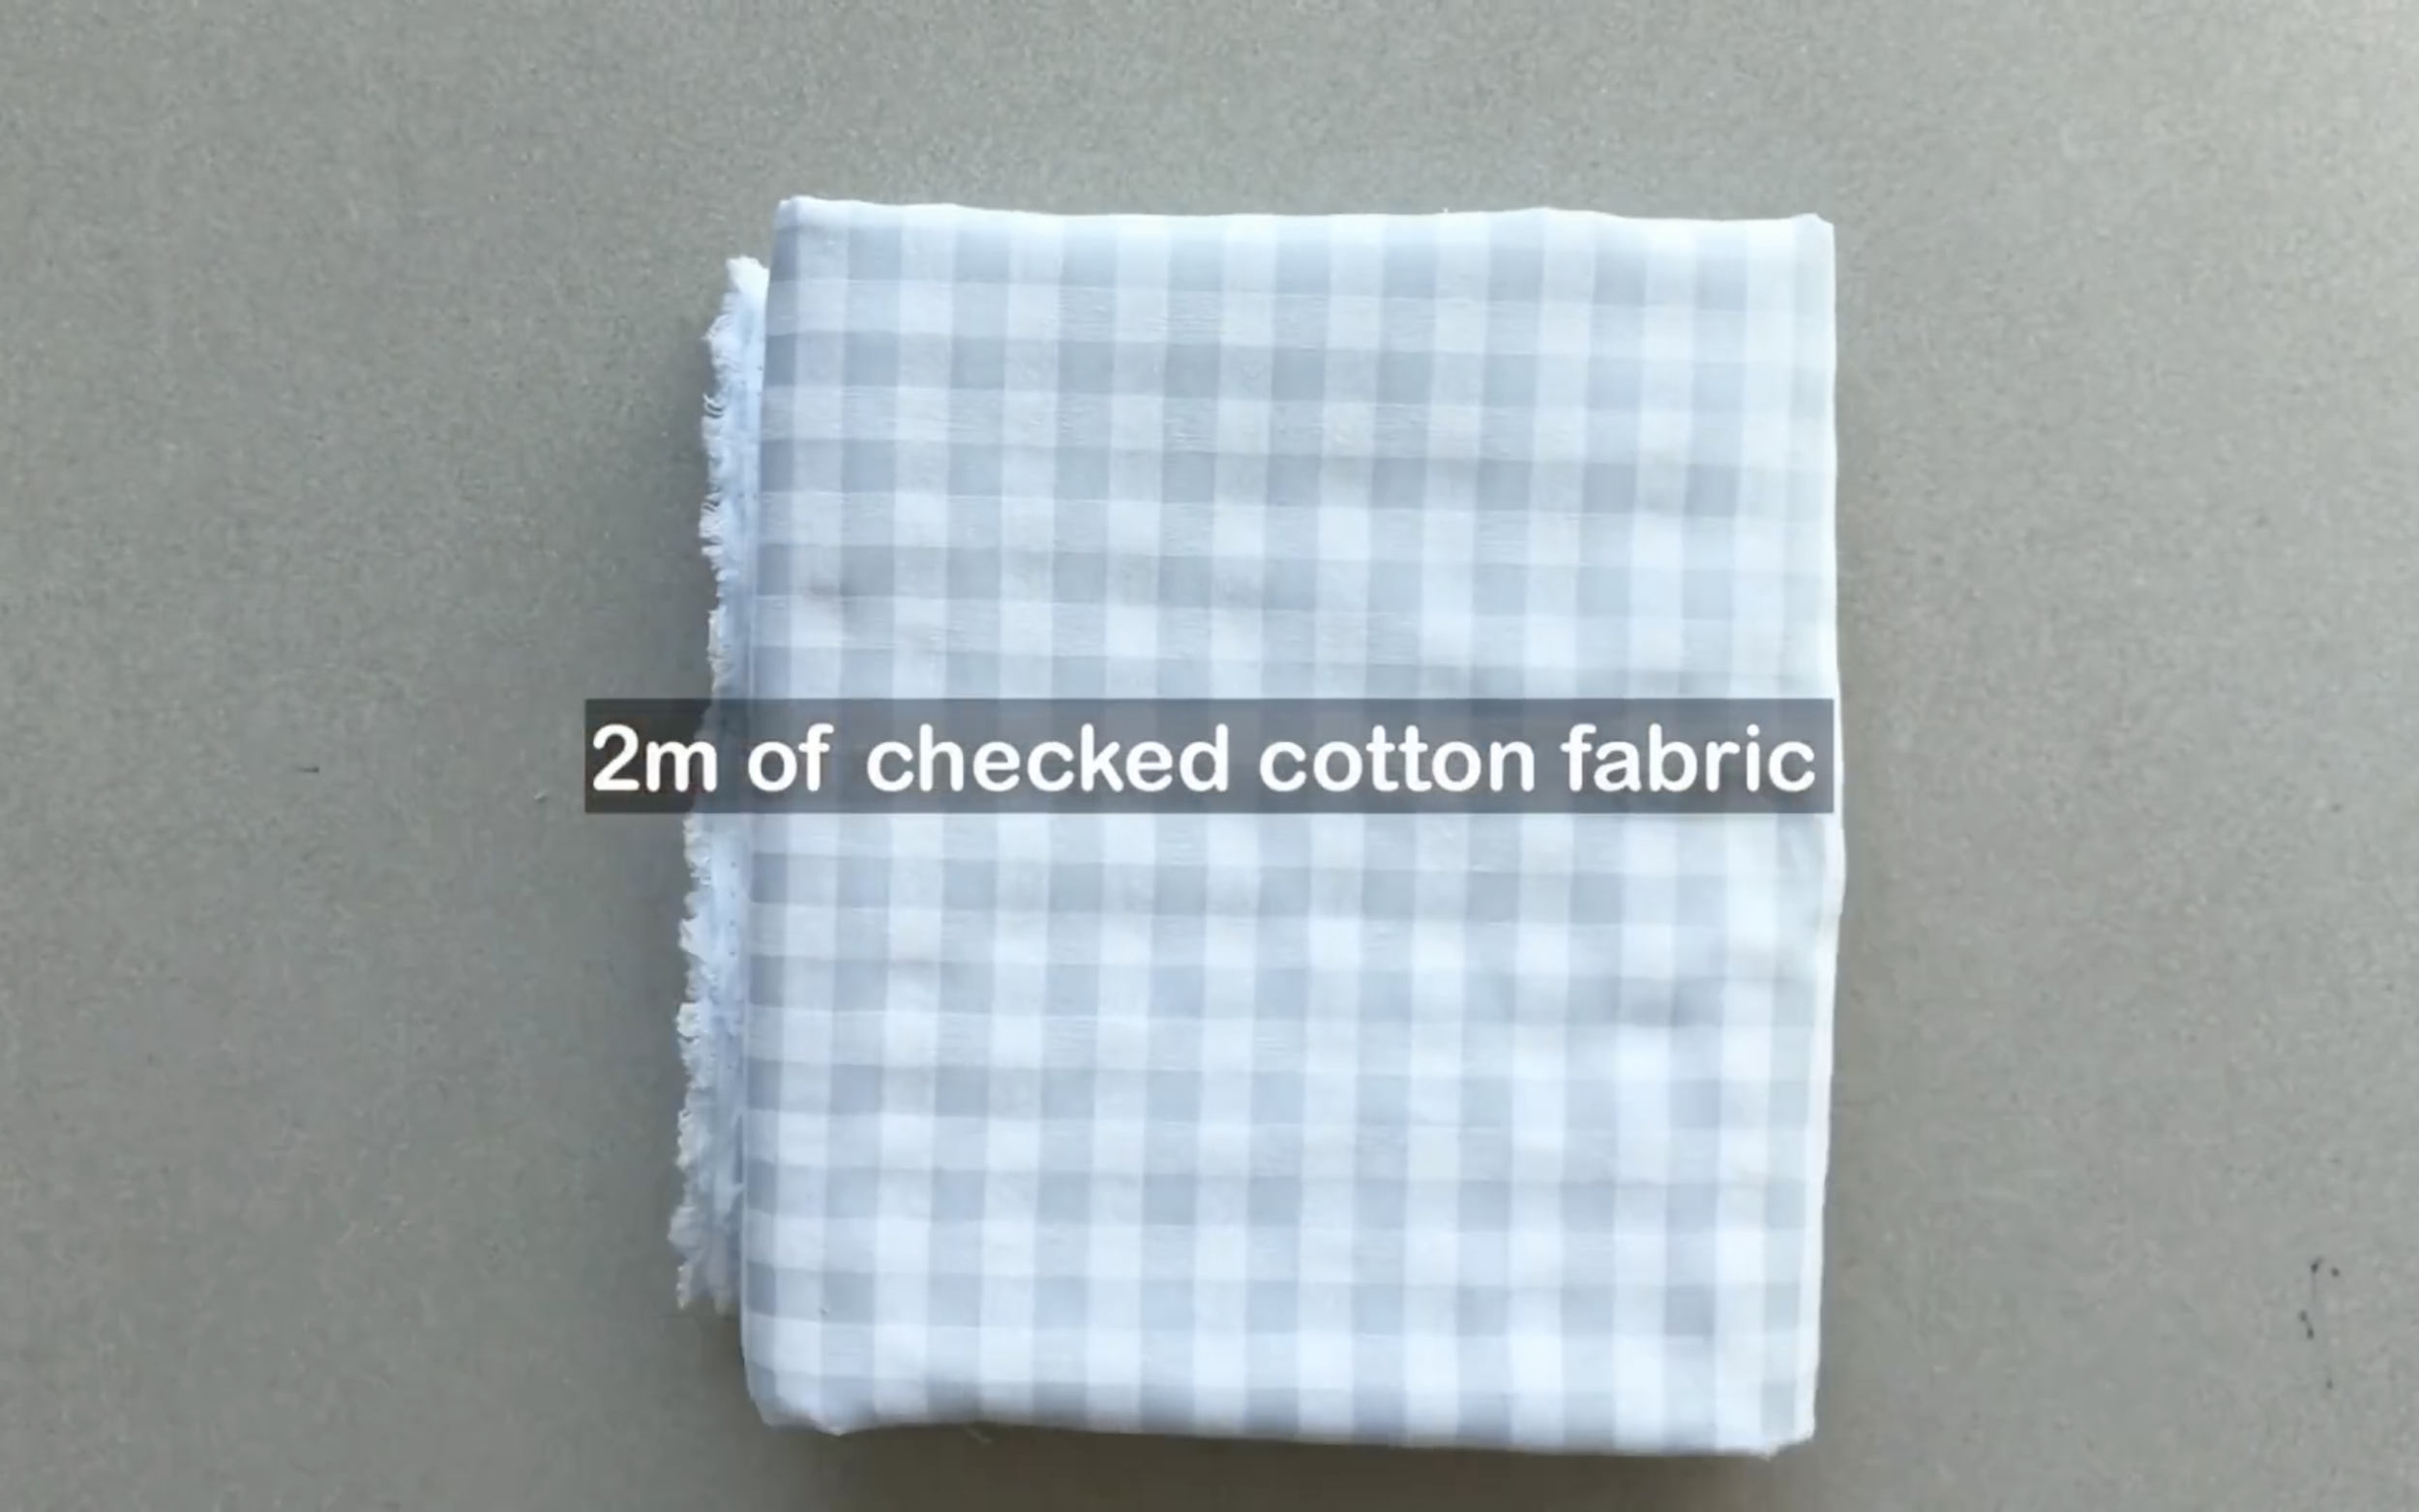
2m of cotton fabric
Pattern paper
Sewing machine
Pins
Scissors
Ruler
Long stick
Zipper
Buttons
MAKING THE PATTERNS
Here’s the pattern for the project. To get a clear understanding of all the measurements needed for the pattern, watch the video from 0:41 to 5:05.
Remember, you can adjust these measurements to fit your own dimensions!
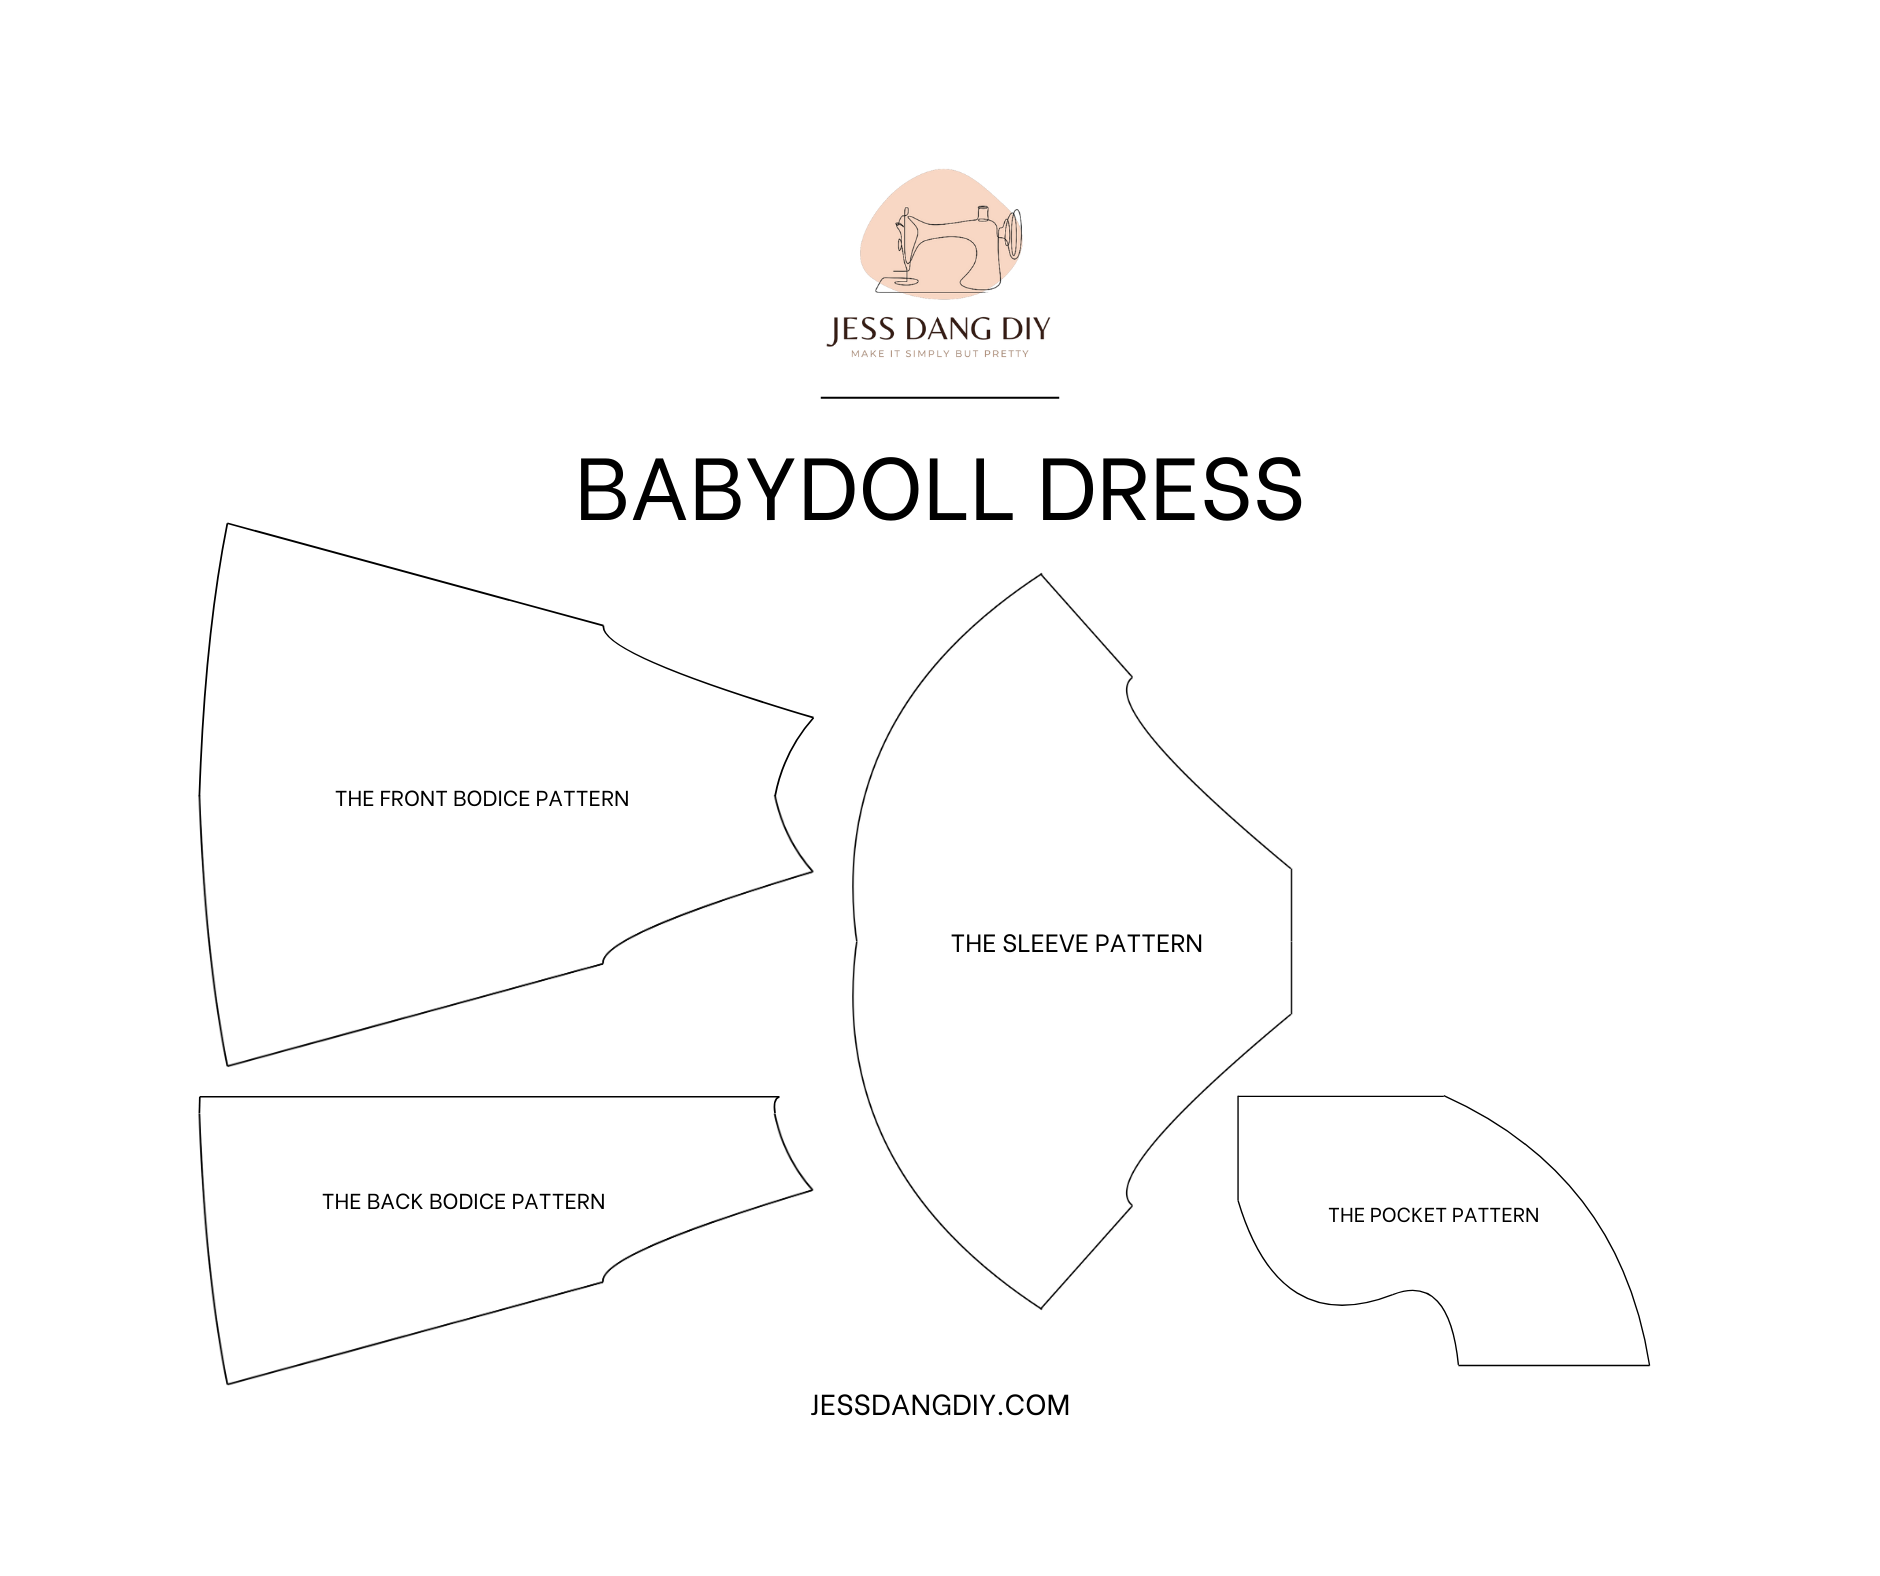
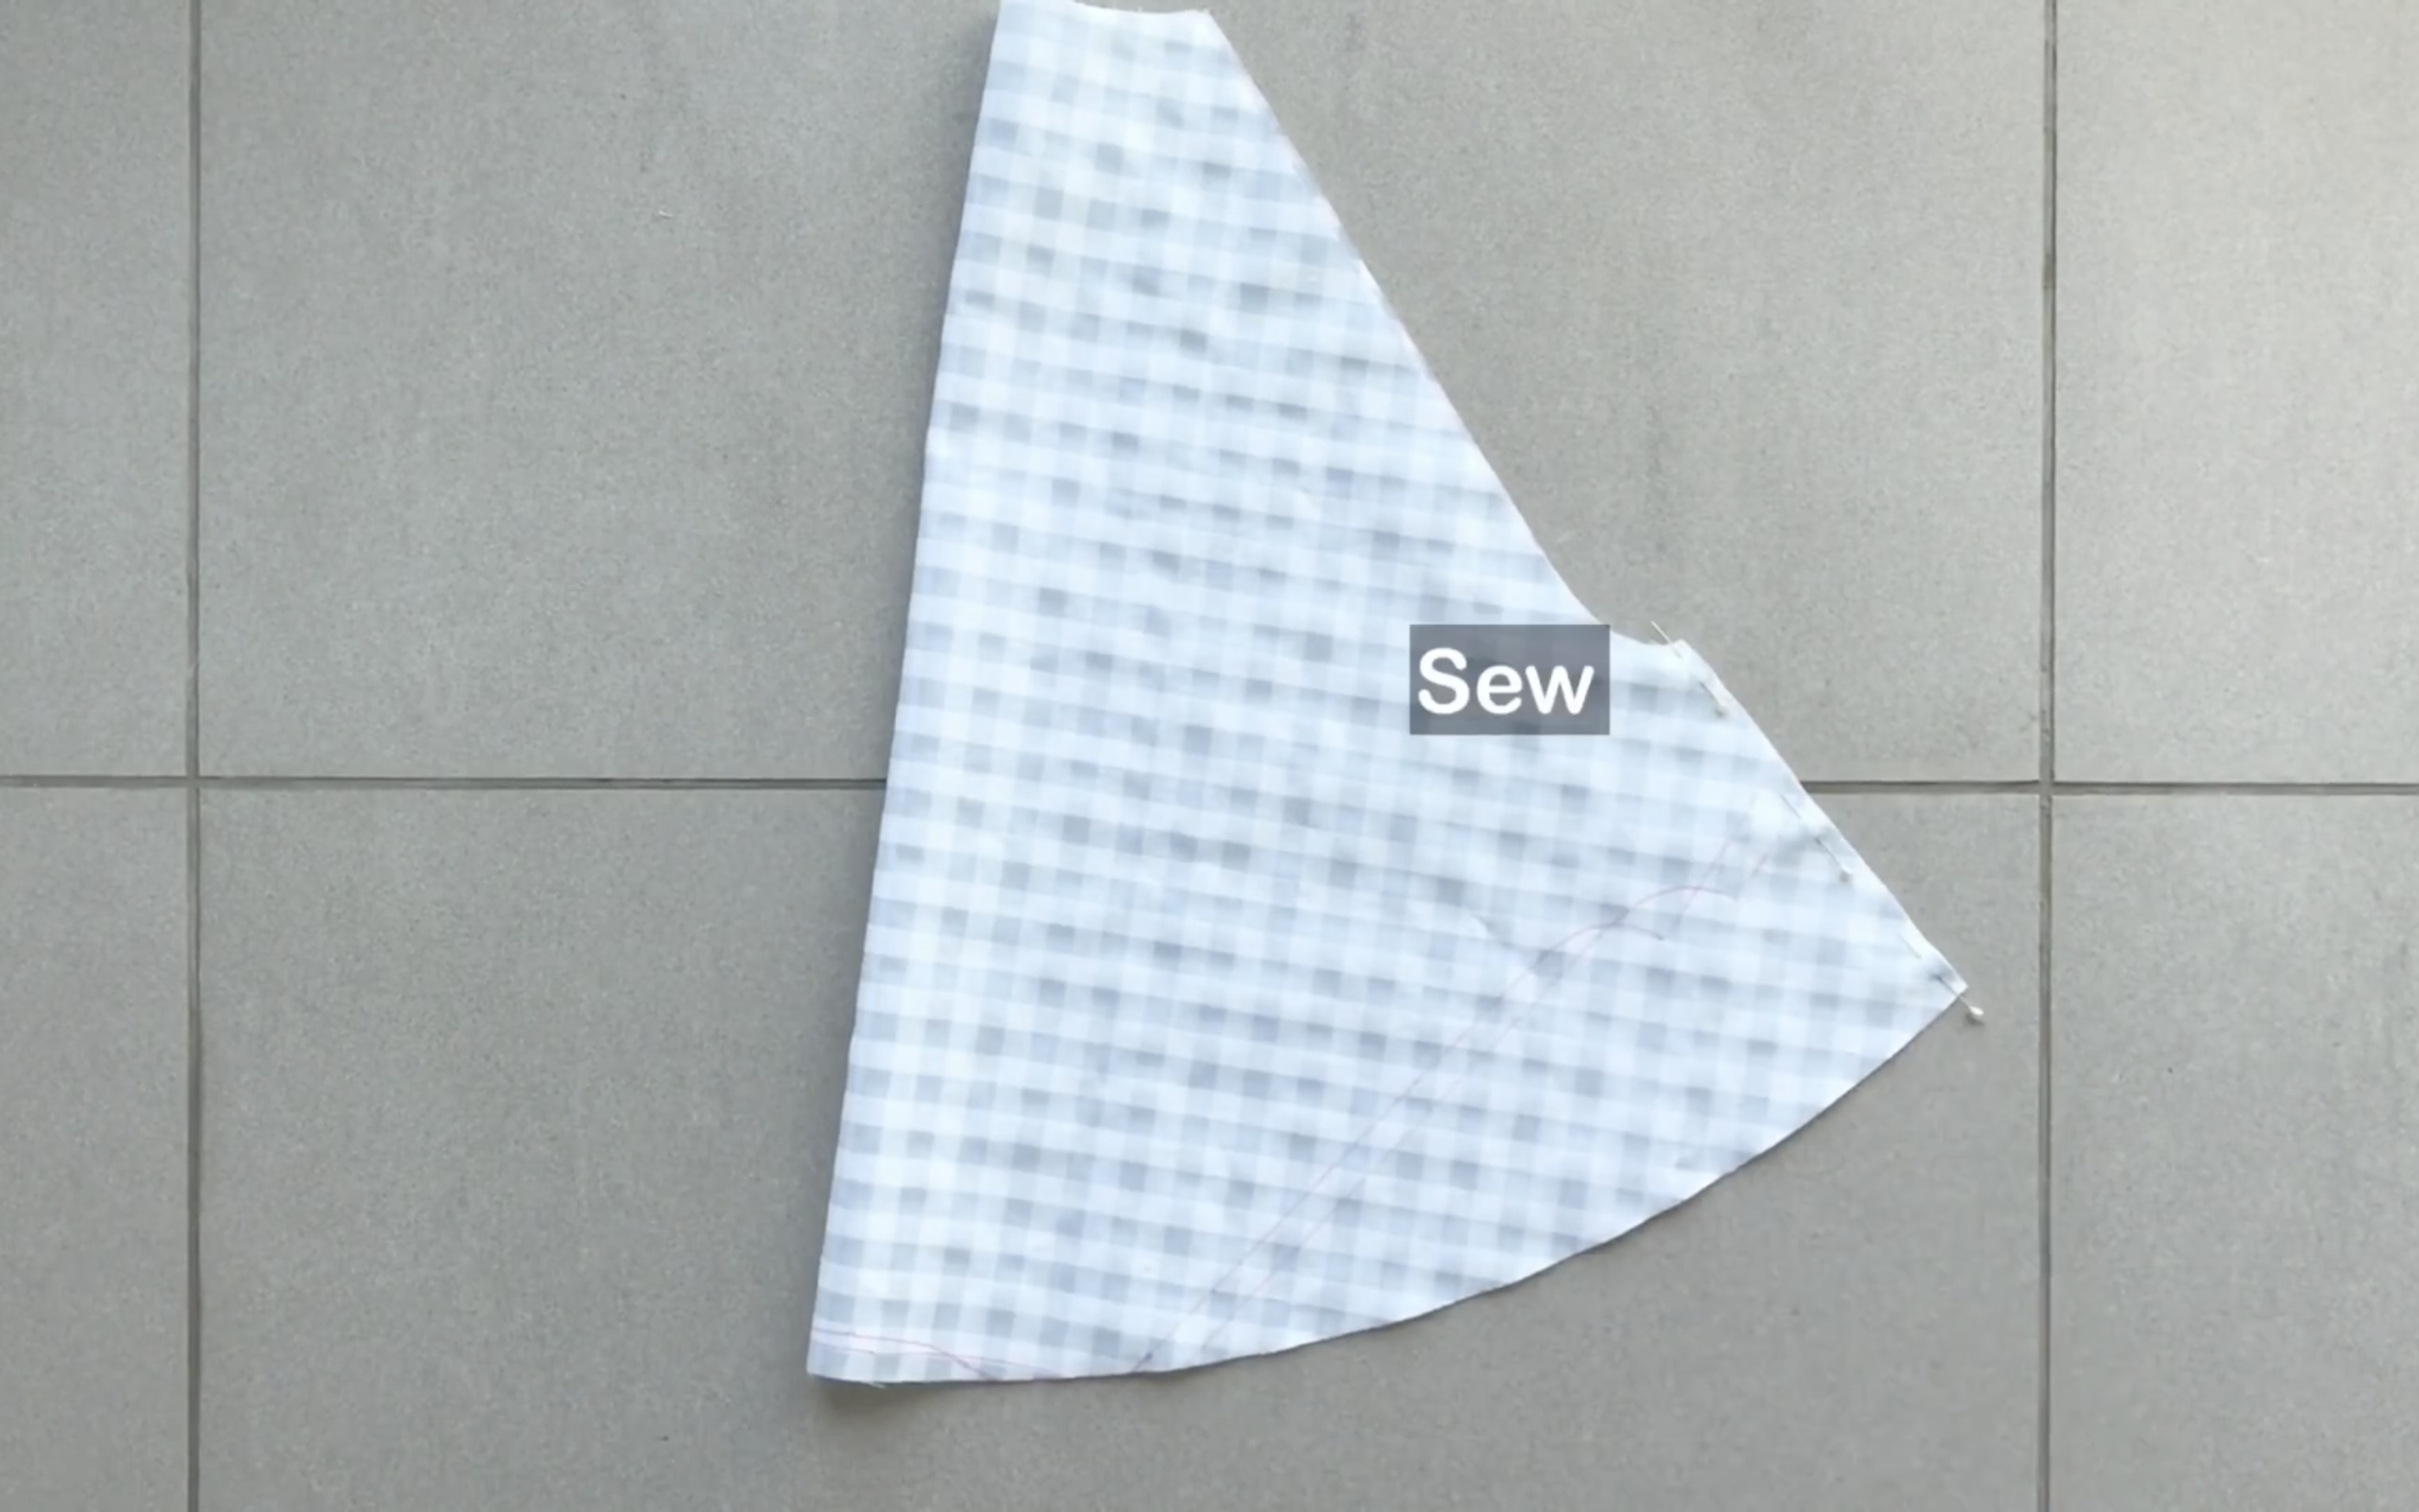
THE FRONT BODICE PATTERN
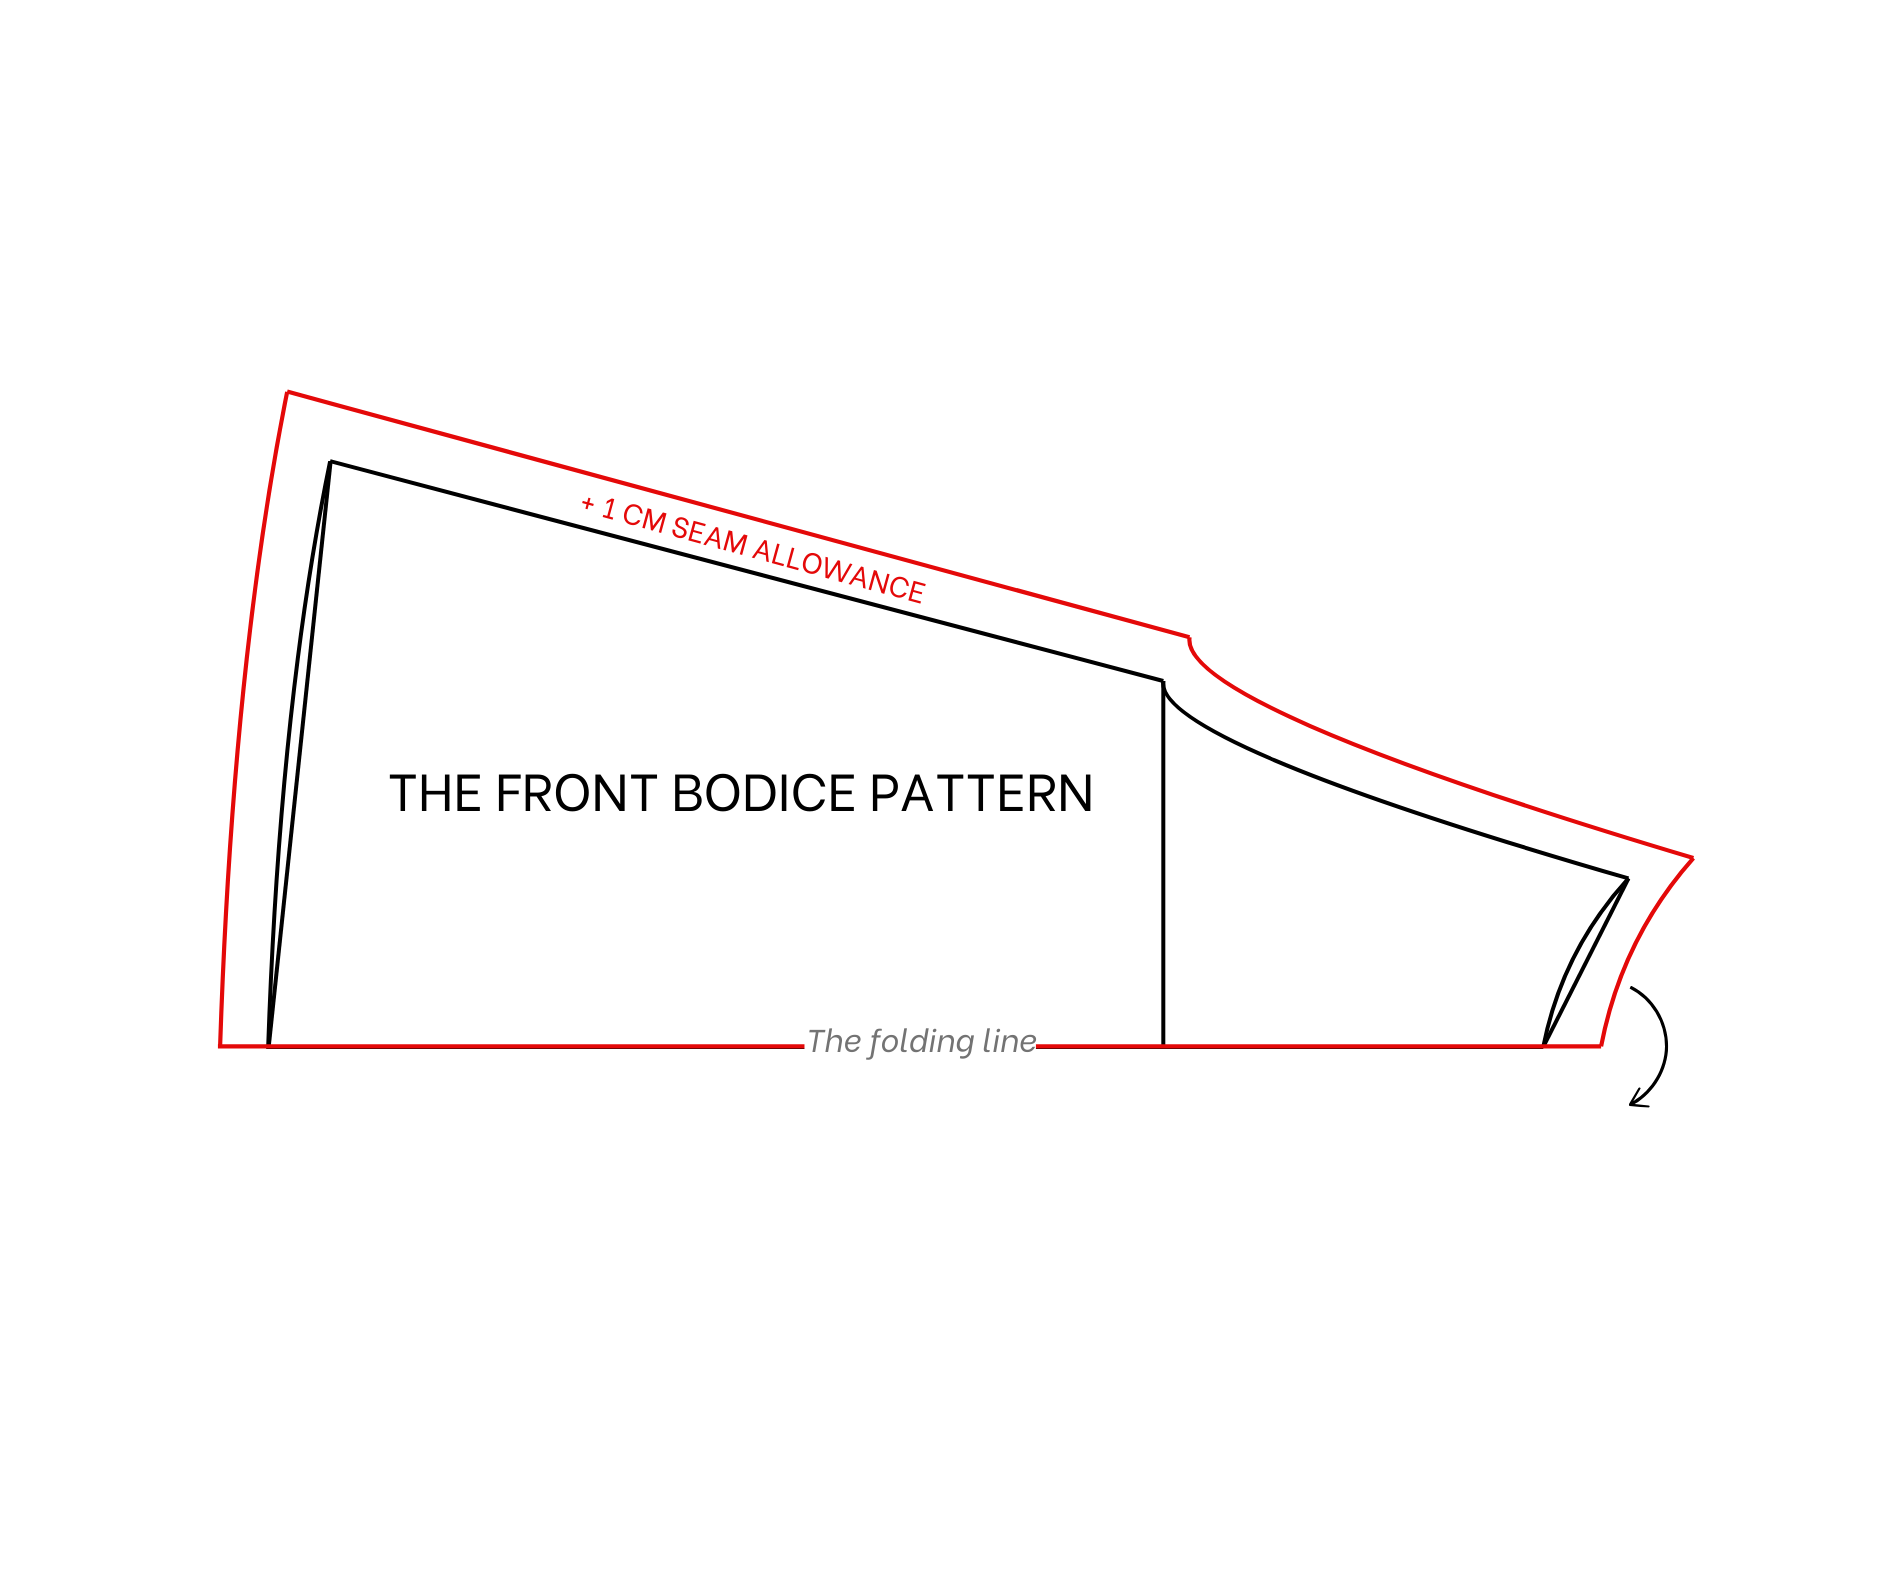
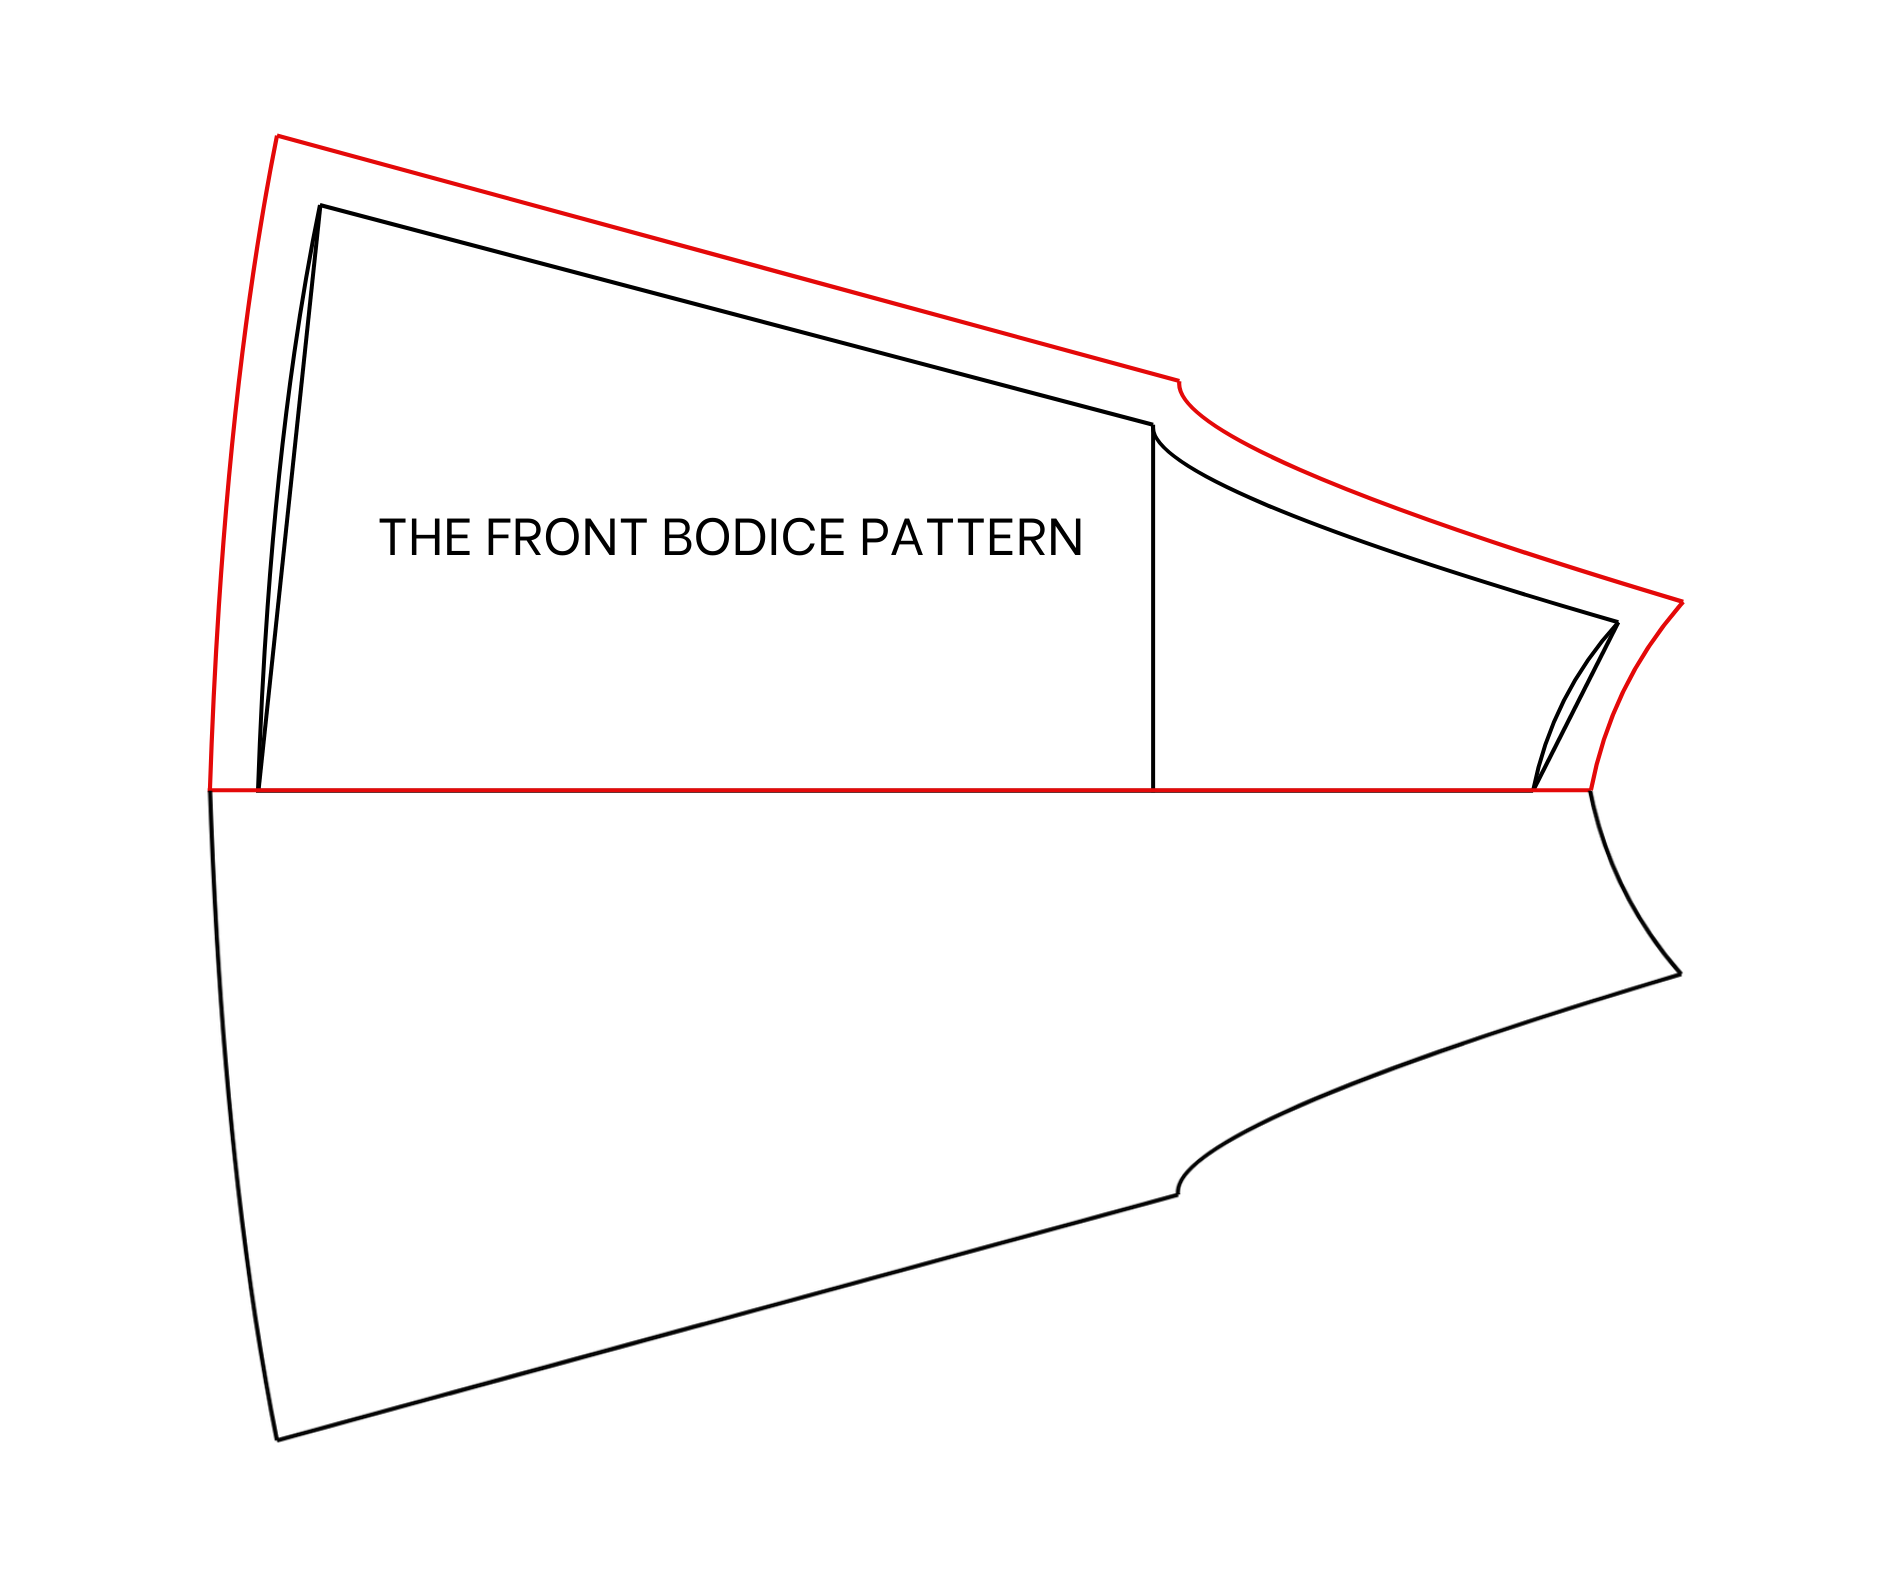
The front bodice pattern
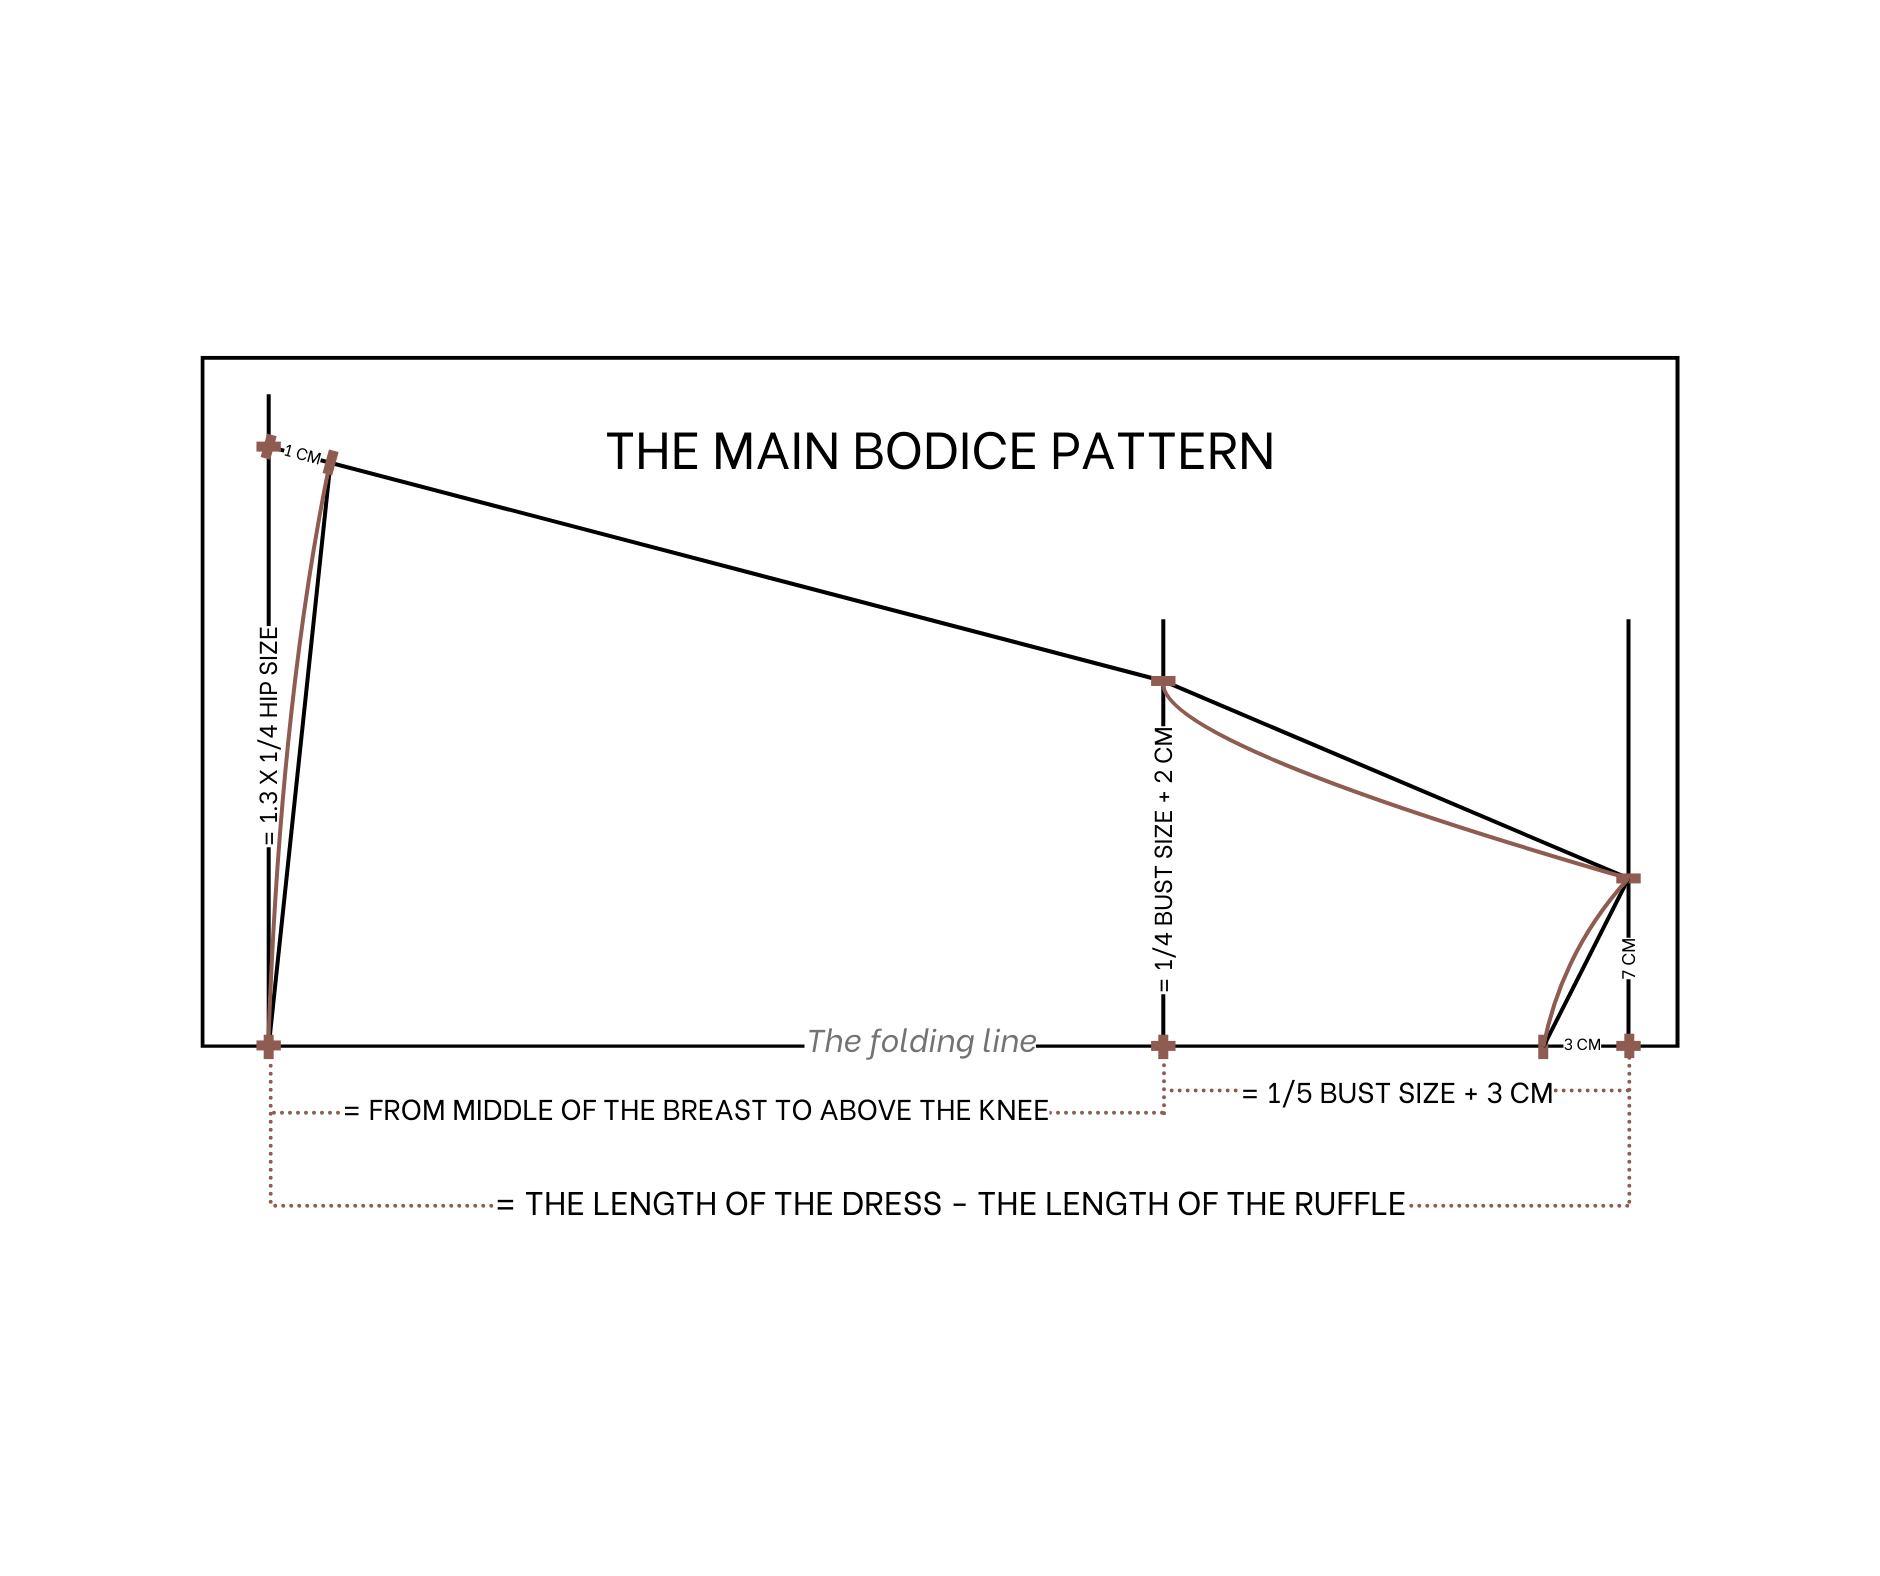
To make the main bodice pattern, fold the paper in half first.
From the fold line, draw a straight line at one side of the paper; this will be the top line of the main bodice. From this line, draw another straight line 20 cm below it. This is 1/5 of the bust size plus 3 cm and will be the bust line of the dress.
On the first straight line, mark up 7 cm, which is half the desired neck width. On the second straight line, mark up 22 cm, which is a quarter of the bust size plus 2 cm. Connect the two marks to create the sleeve line on the main bodice.
From the second straight line, draw the third line 40 cm below it, which is the length from bust to above the knee.
The length between this line and the first straight line will be 60 cm, which is the dress length minus the length of the ruffle hem that will be added later.On the third straight line, mark up 30 cm, which is one and a half times a quarter of the hip size. Connect this mark to the one on the bust line to create the side line for the pattern.
From the first straight line, mark 3 cm on the fold line for the neck depth. Connect this mark to the one on the first straight line, and draw a curved line based on that to finish the neckline for the front pattern.
Curve the sleeve line slightly at the end to create a smooth connection between the sleeve and the side line.
At the end of the side line, mark up 1 cm and connect this to the third straight line’s other end. Make this line a large curve to create a smooth ending for the pattern.
Add 1 cm for seam allowance, and this completes the front pattern of the dress after cutting.
THE BACK BODICE PATTERN
To make the back pattern, draw a line 1 cm away from the middle line of the front pattern.
Fold this new line, and it will serve as the back pattern of the dress.
The back of the dress will be made from two pieces of this pattern.
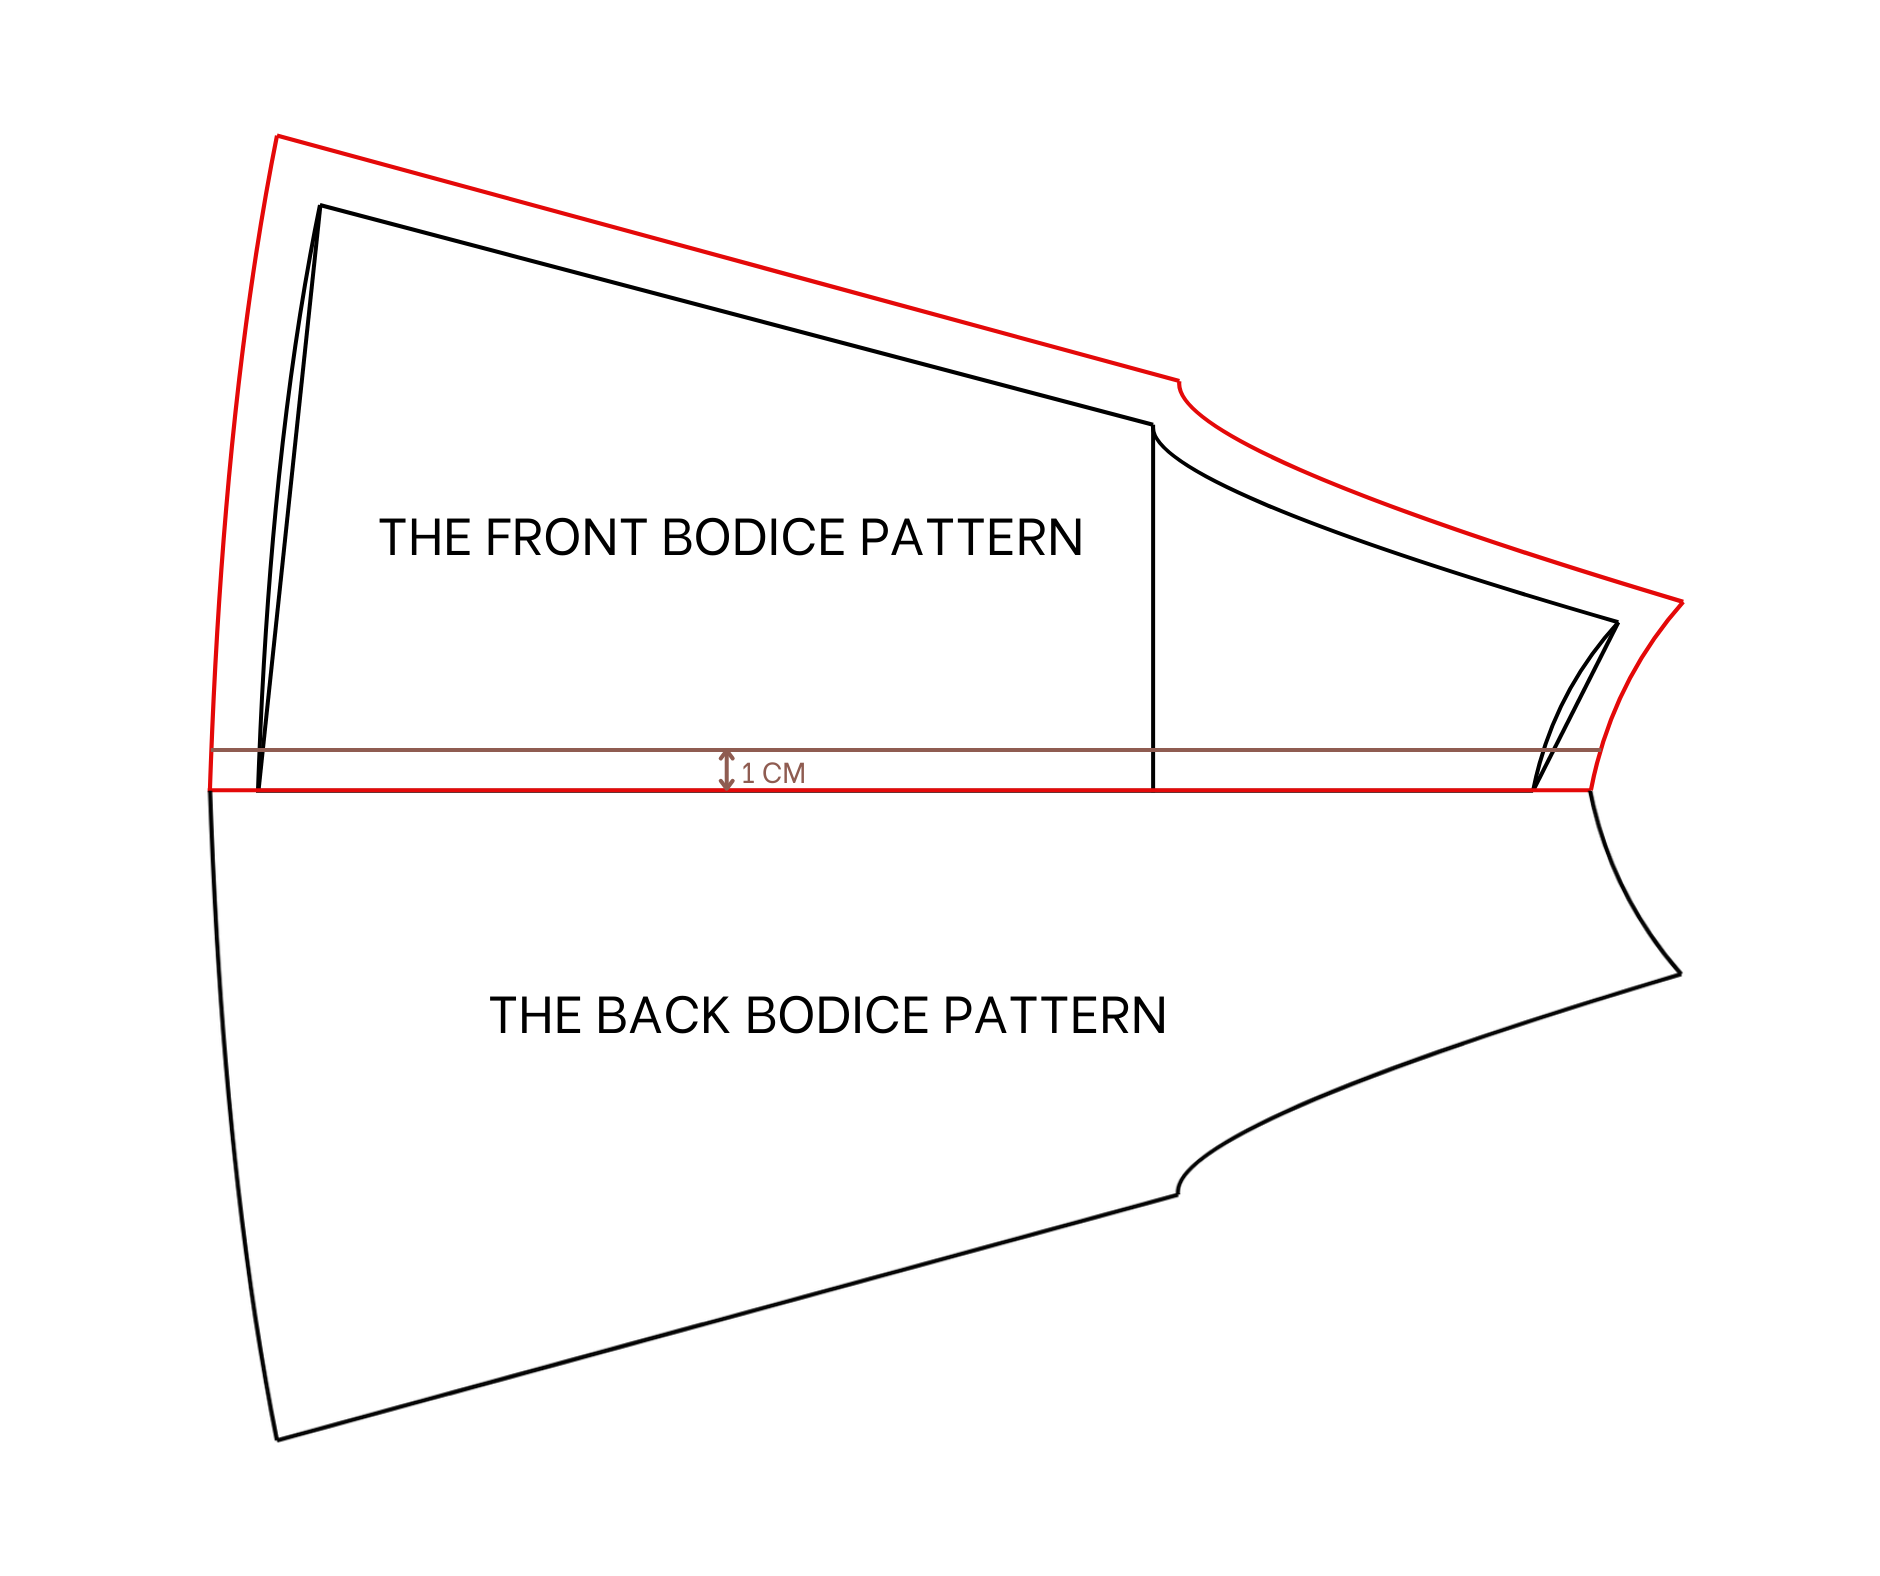
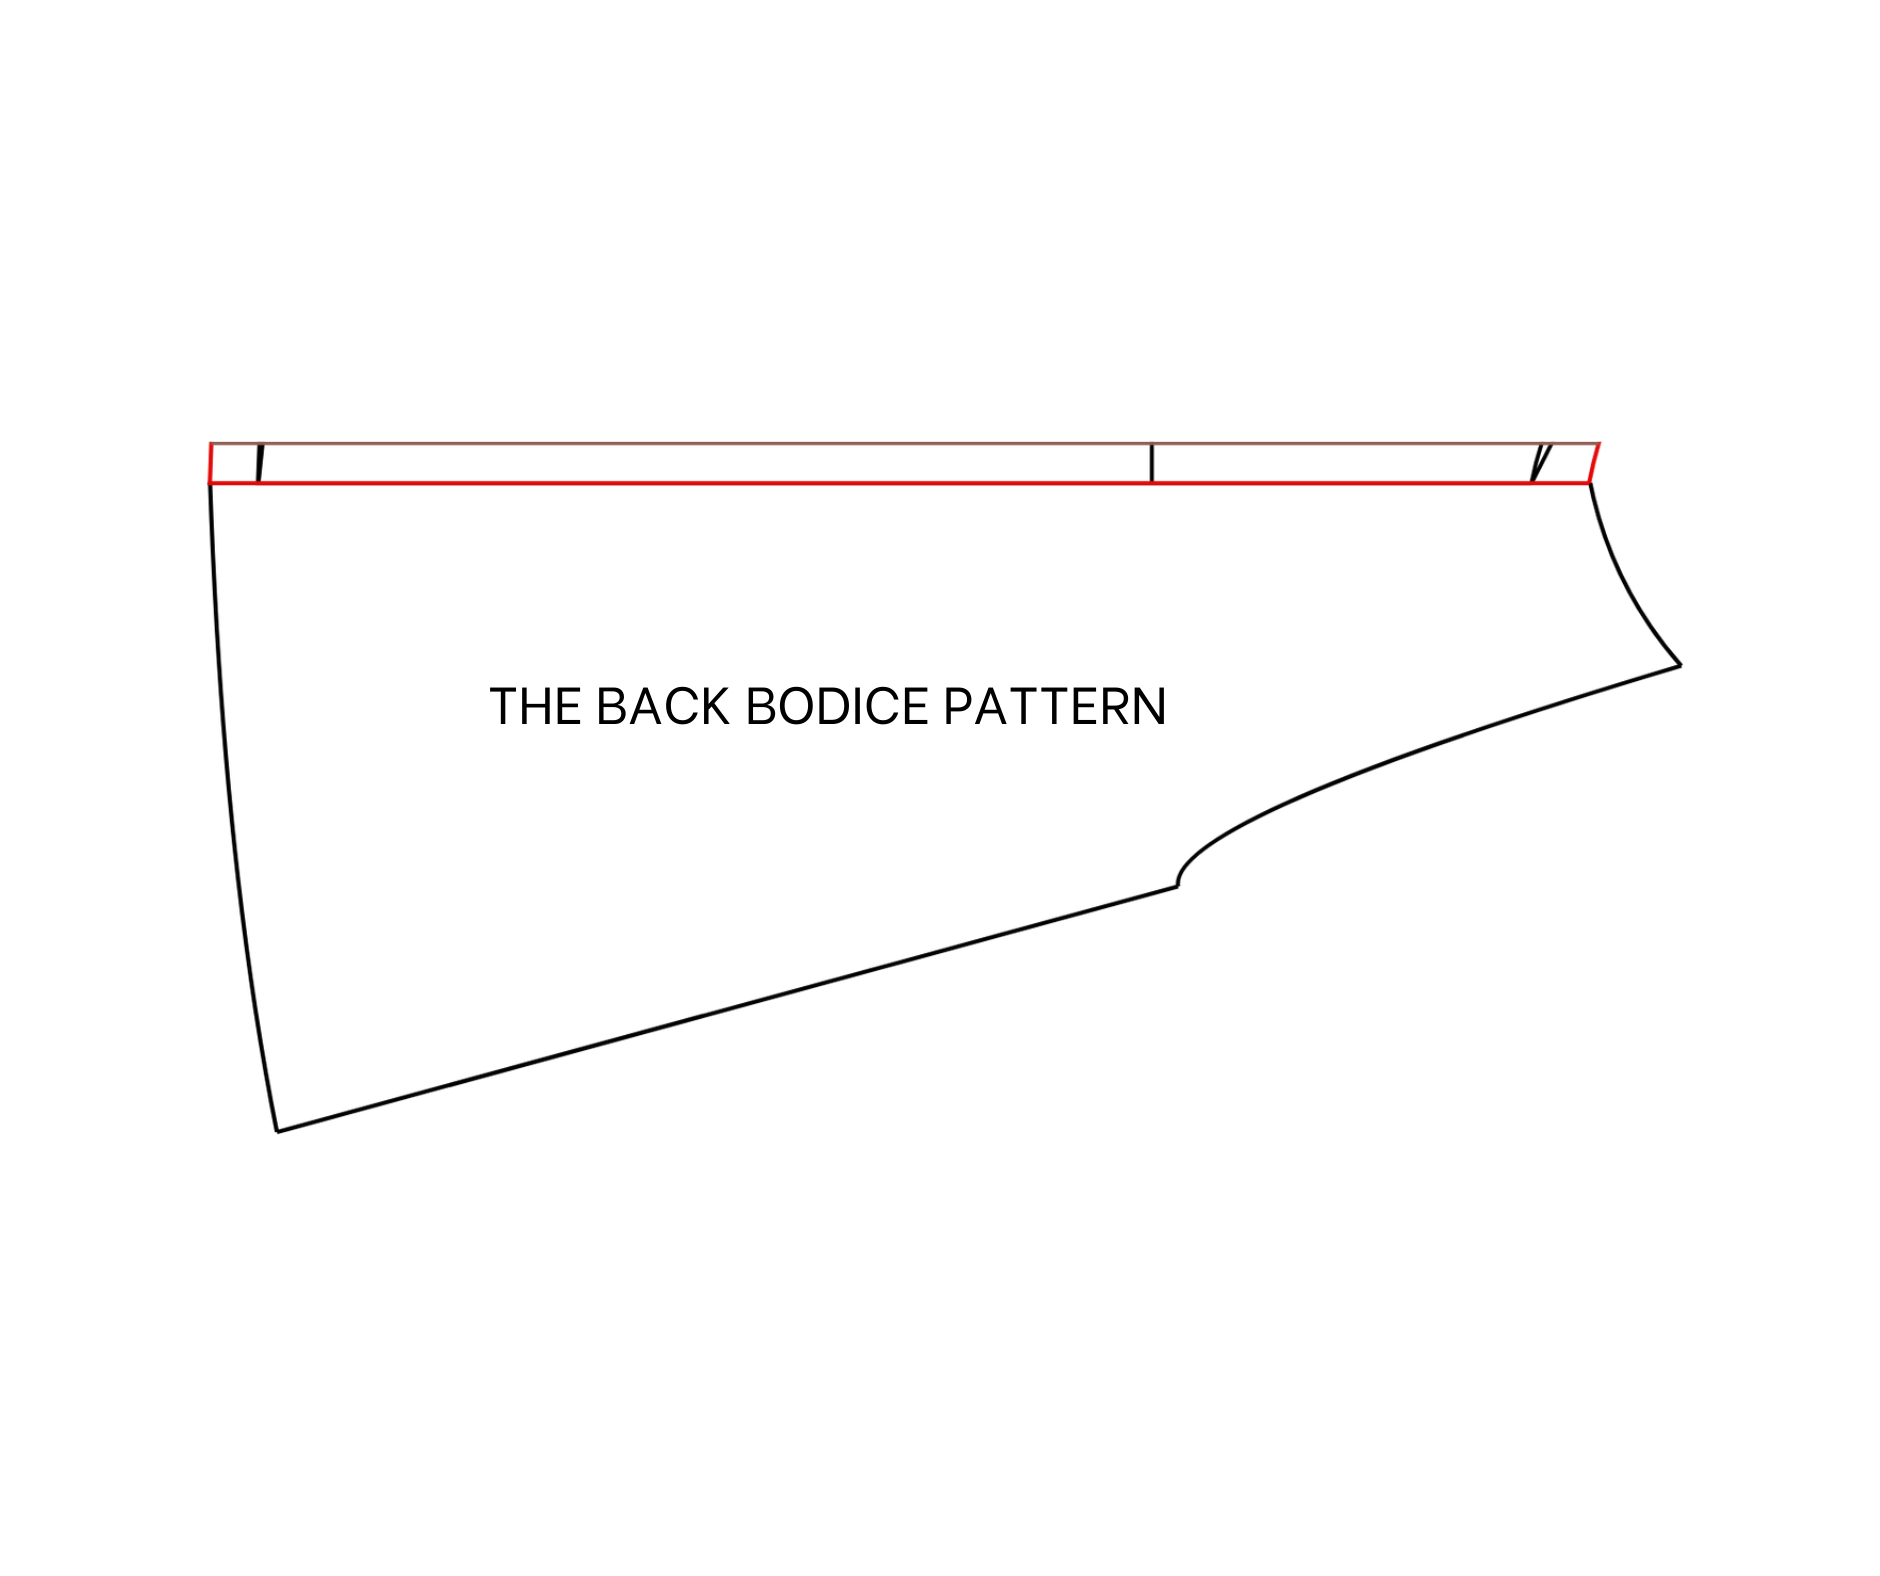
The back bodice pattern
THE SLEEVE PATTERN
Draw a rectangle with 35 cm width, which is half the desired sleeve width, and 40 cm length for the sleeve length.
One side of the rectangle will be the fold line.
From one end of the fold line, draw a circle with a 40 cm length, which will form the sleeve’s ending line. This line will intersect another side of the rectangle.
From the end of the fold line, mark down 7 cm on the width line, which is half the neck size.
Connect this mark to the intersection point on the other side to form the underarm seam.
Measure 20 cm between the width line and the underarm seam, which is 1/5 of the bust size plus 3 cm.
Draw a slight curve from that mark to the top of the underarm line to complete the sleeve pattern.
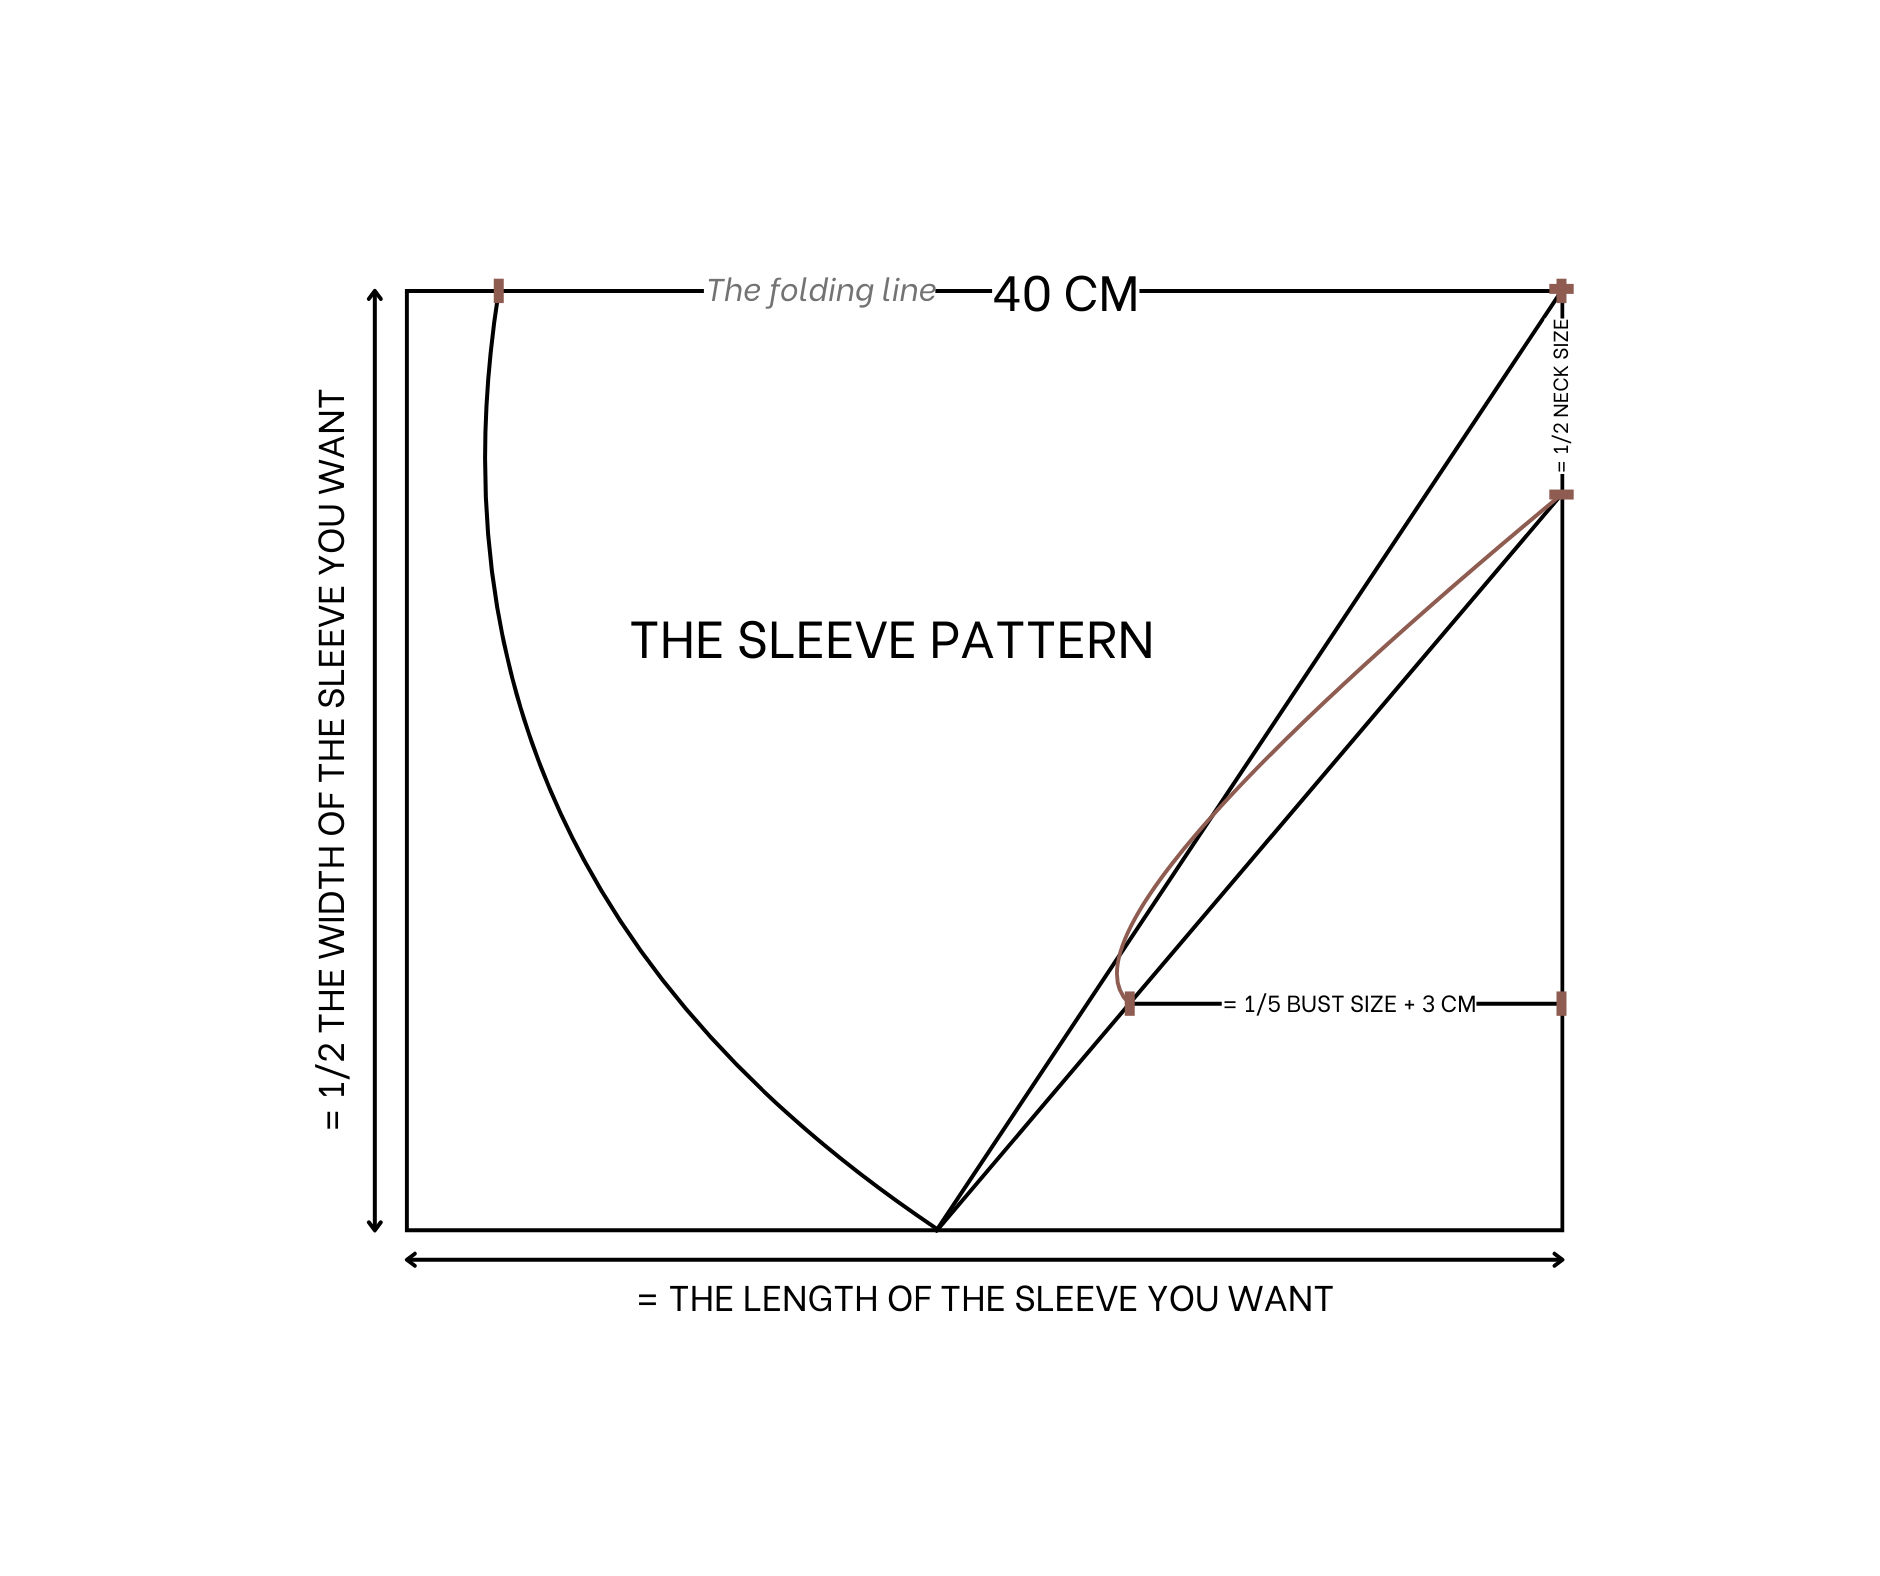
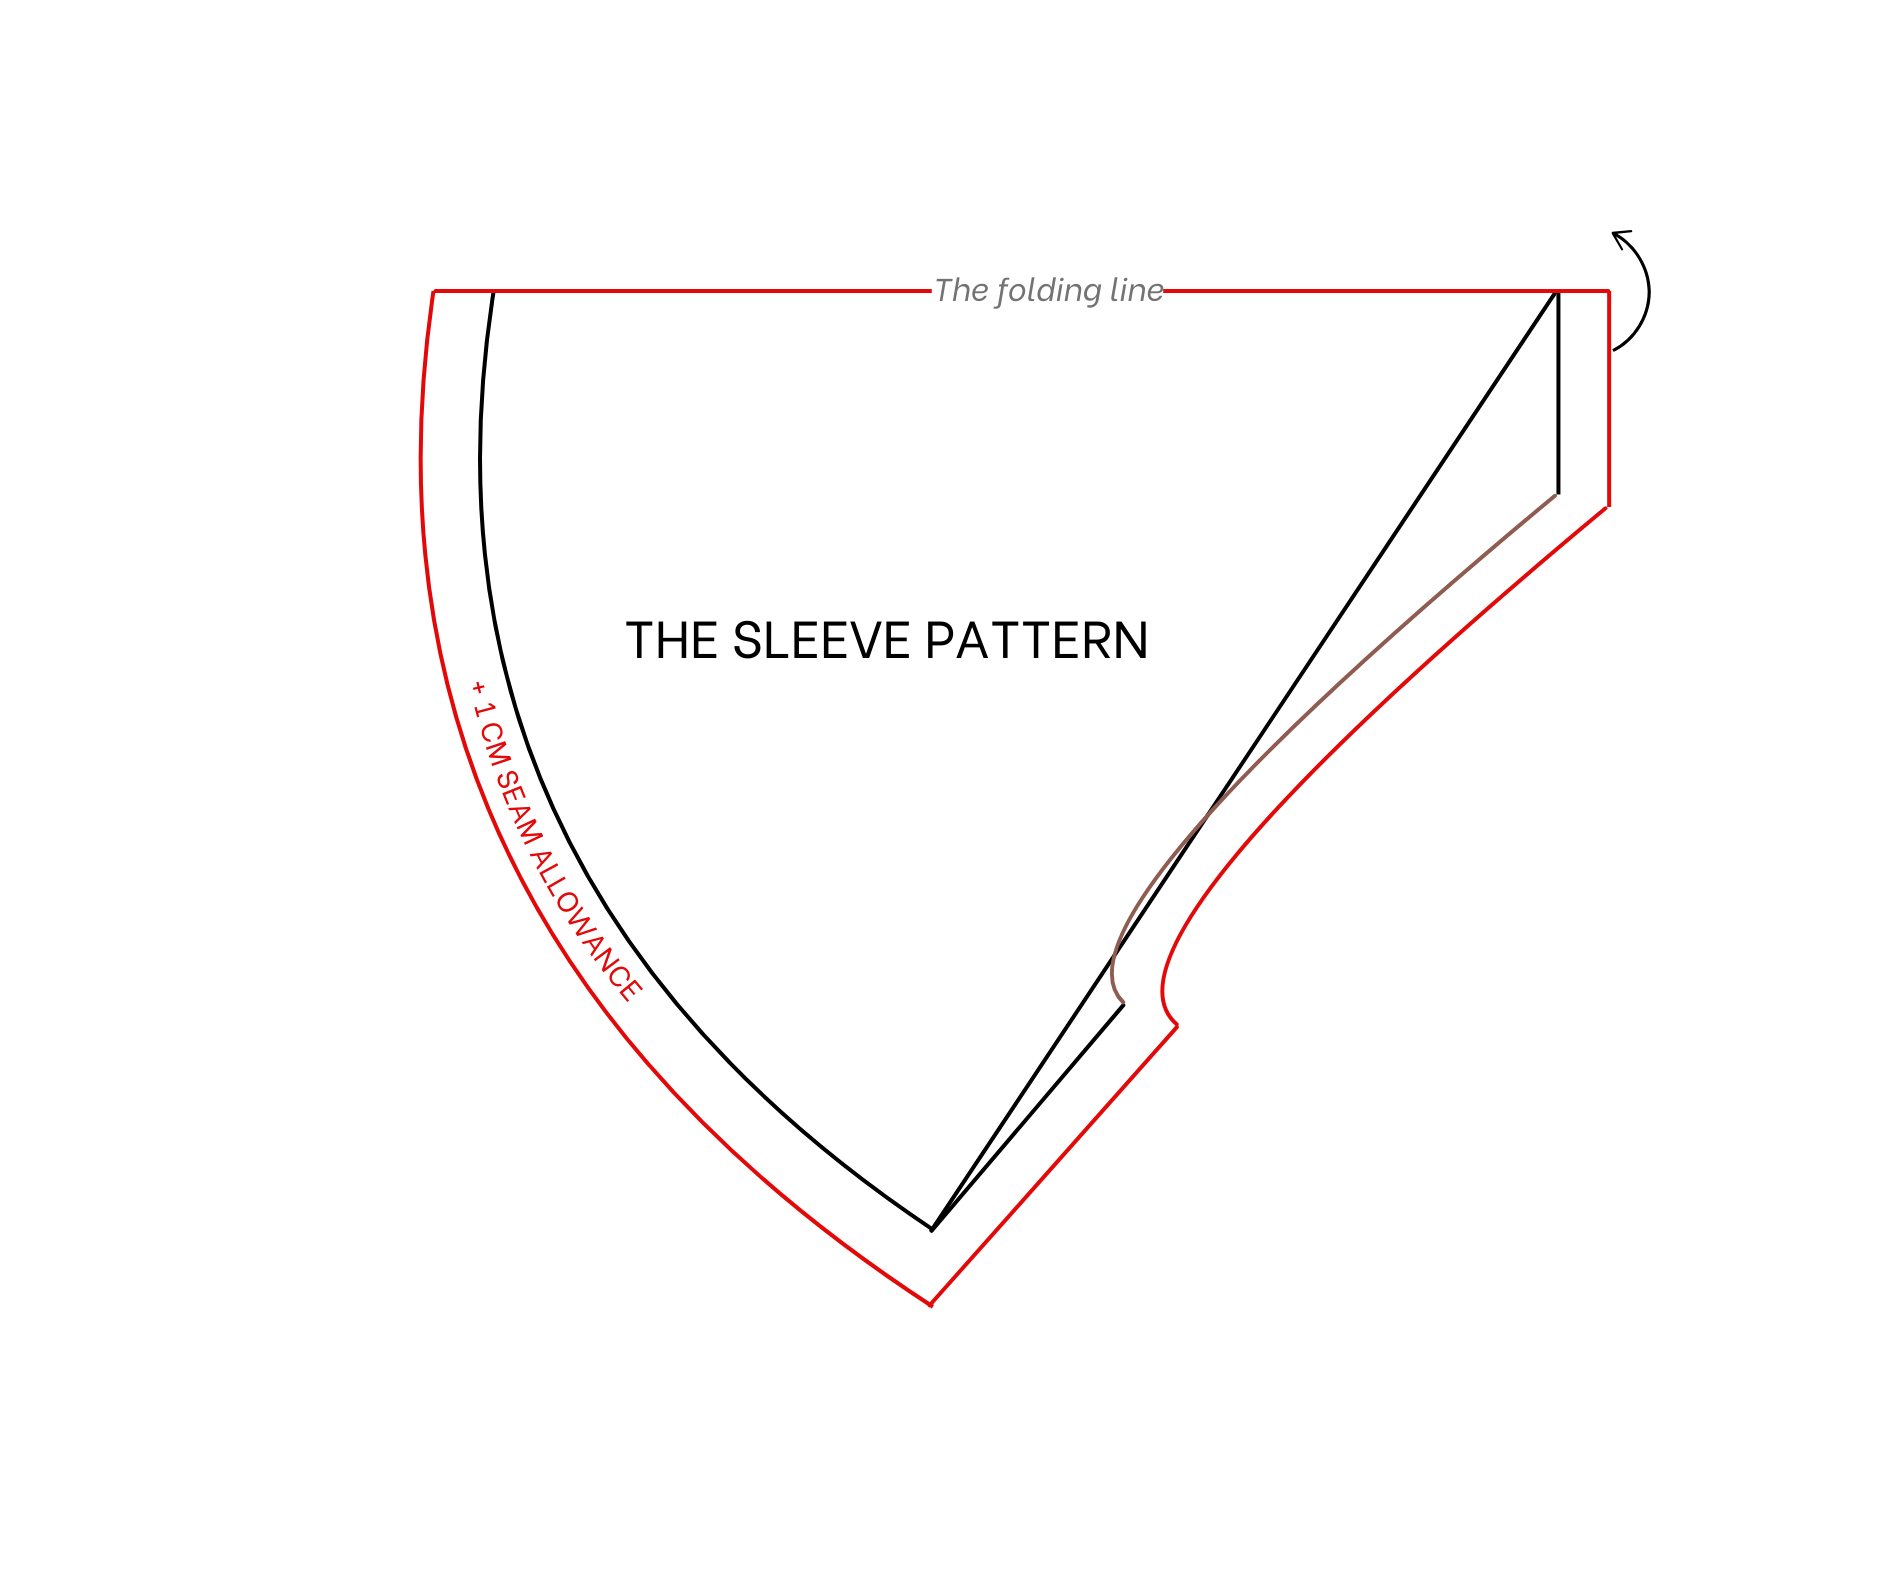
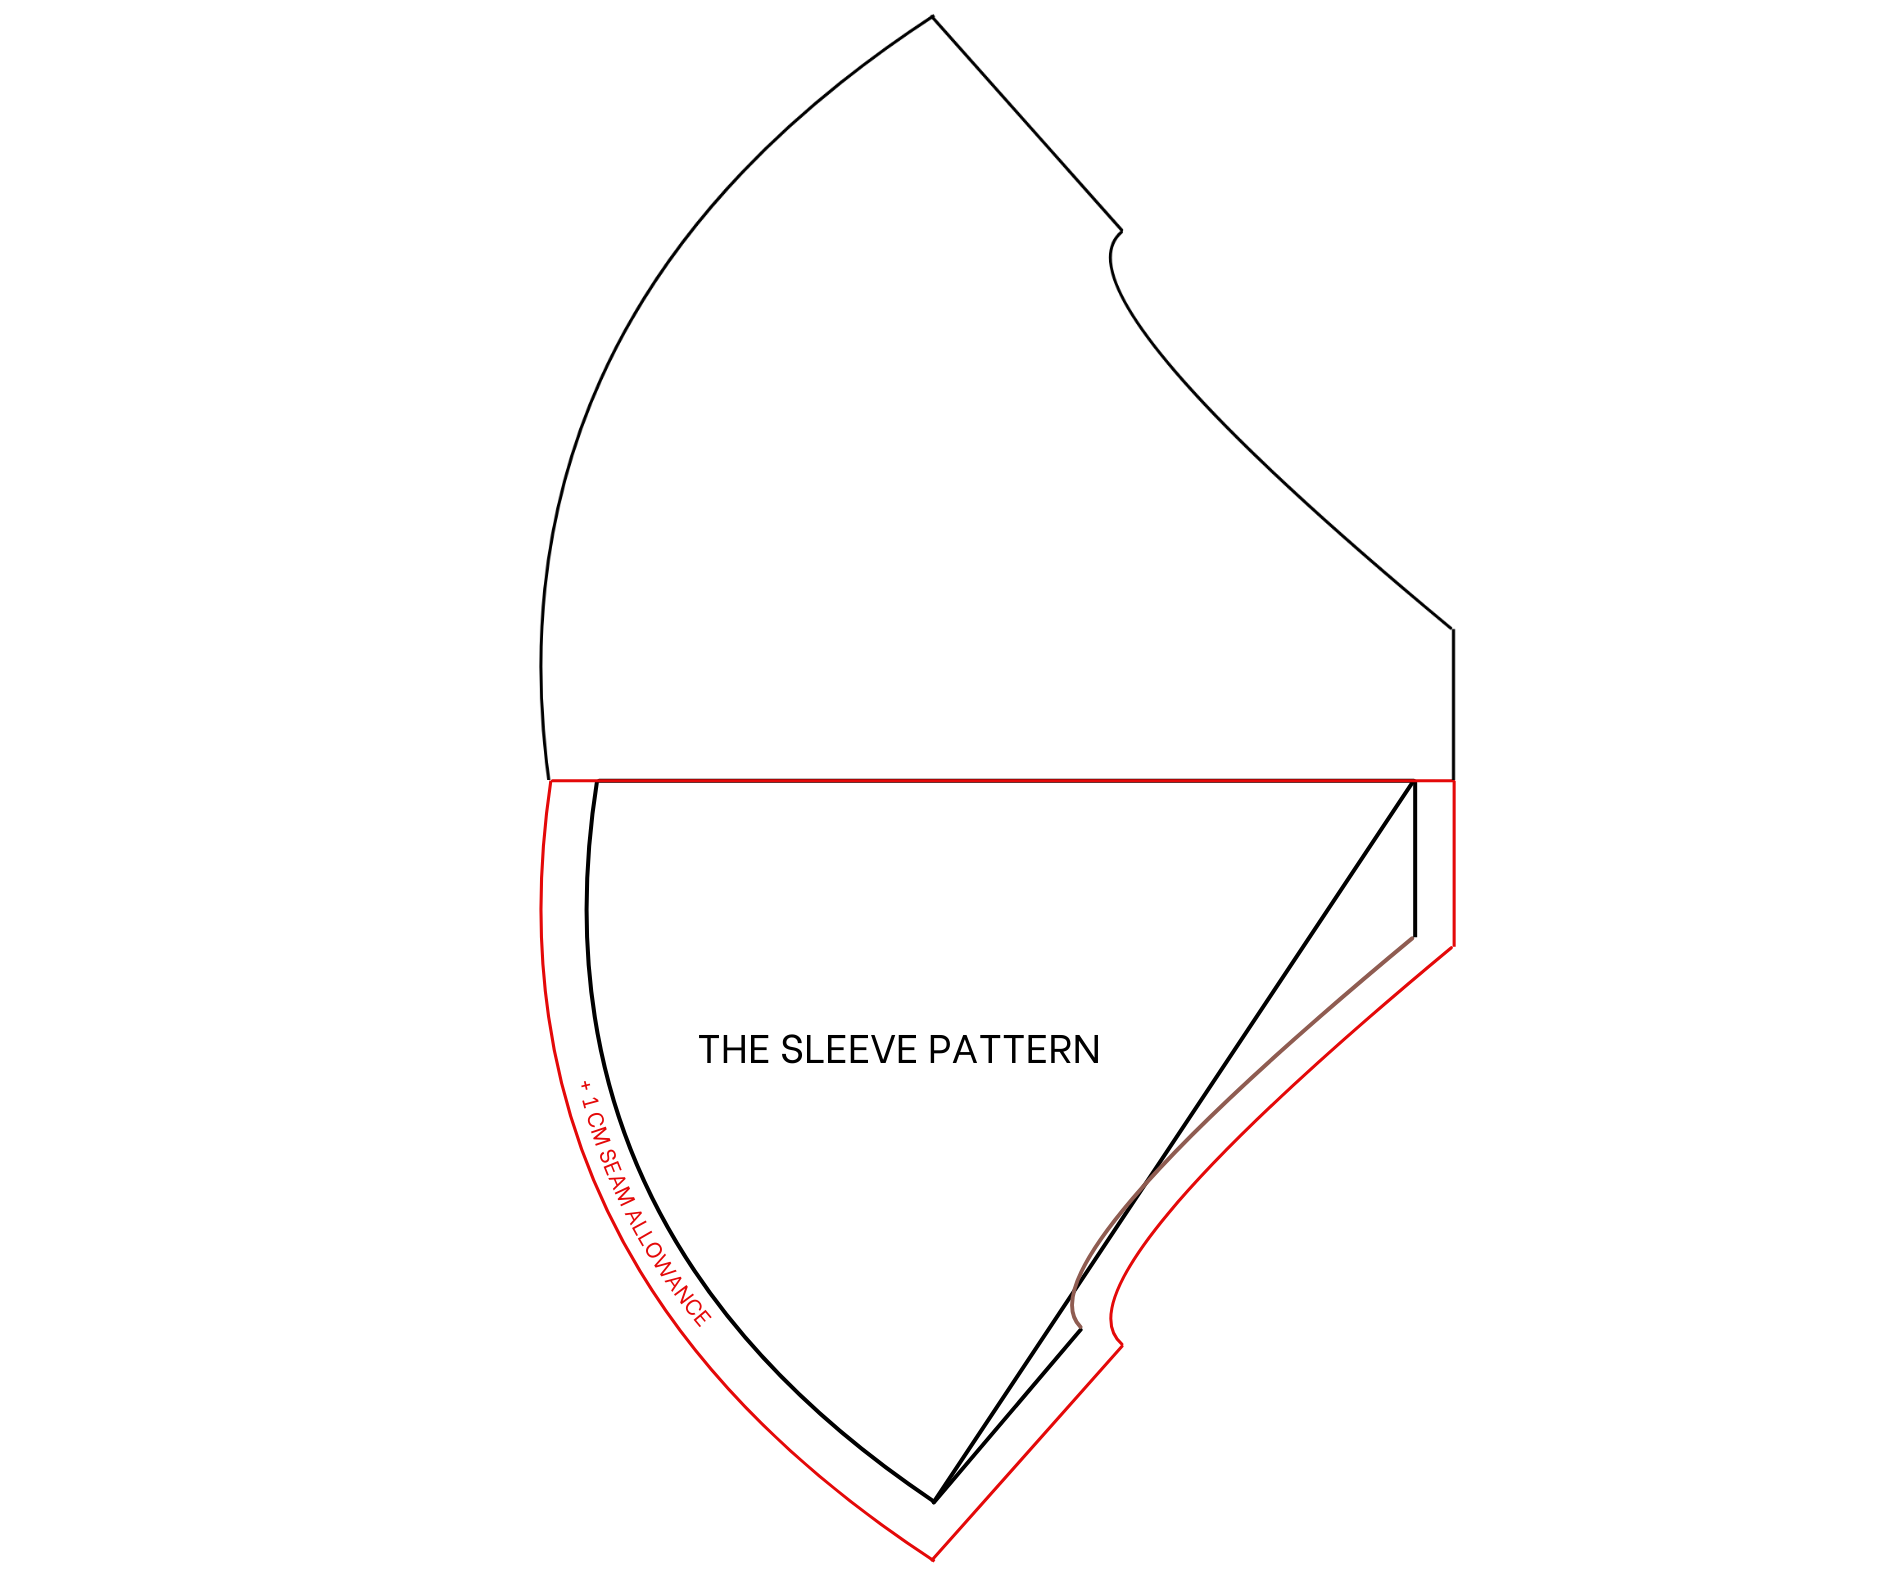
The sleeve pattern
THE POCKET PATTERN
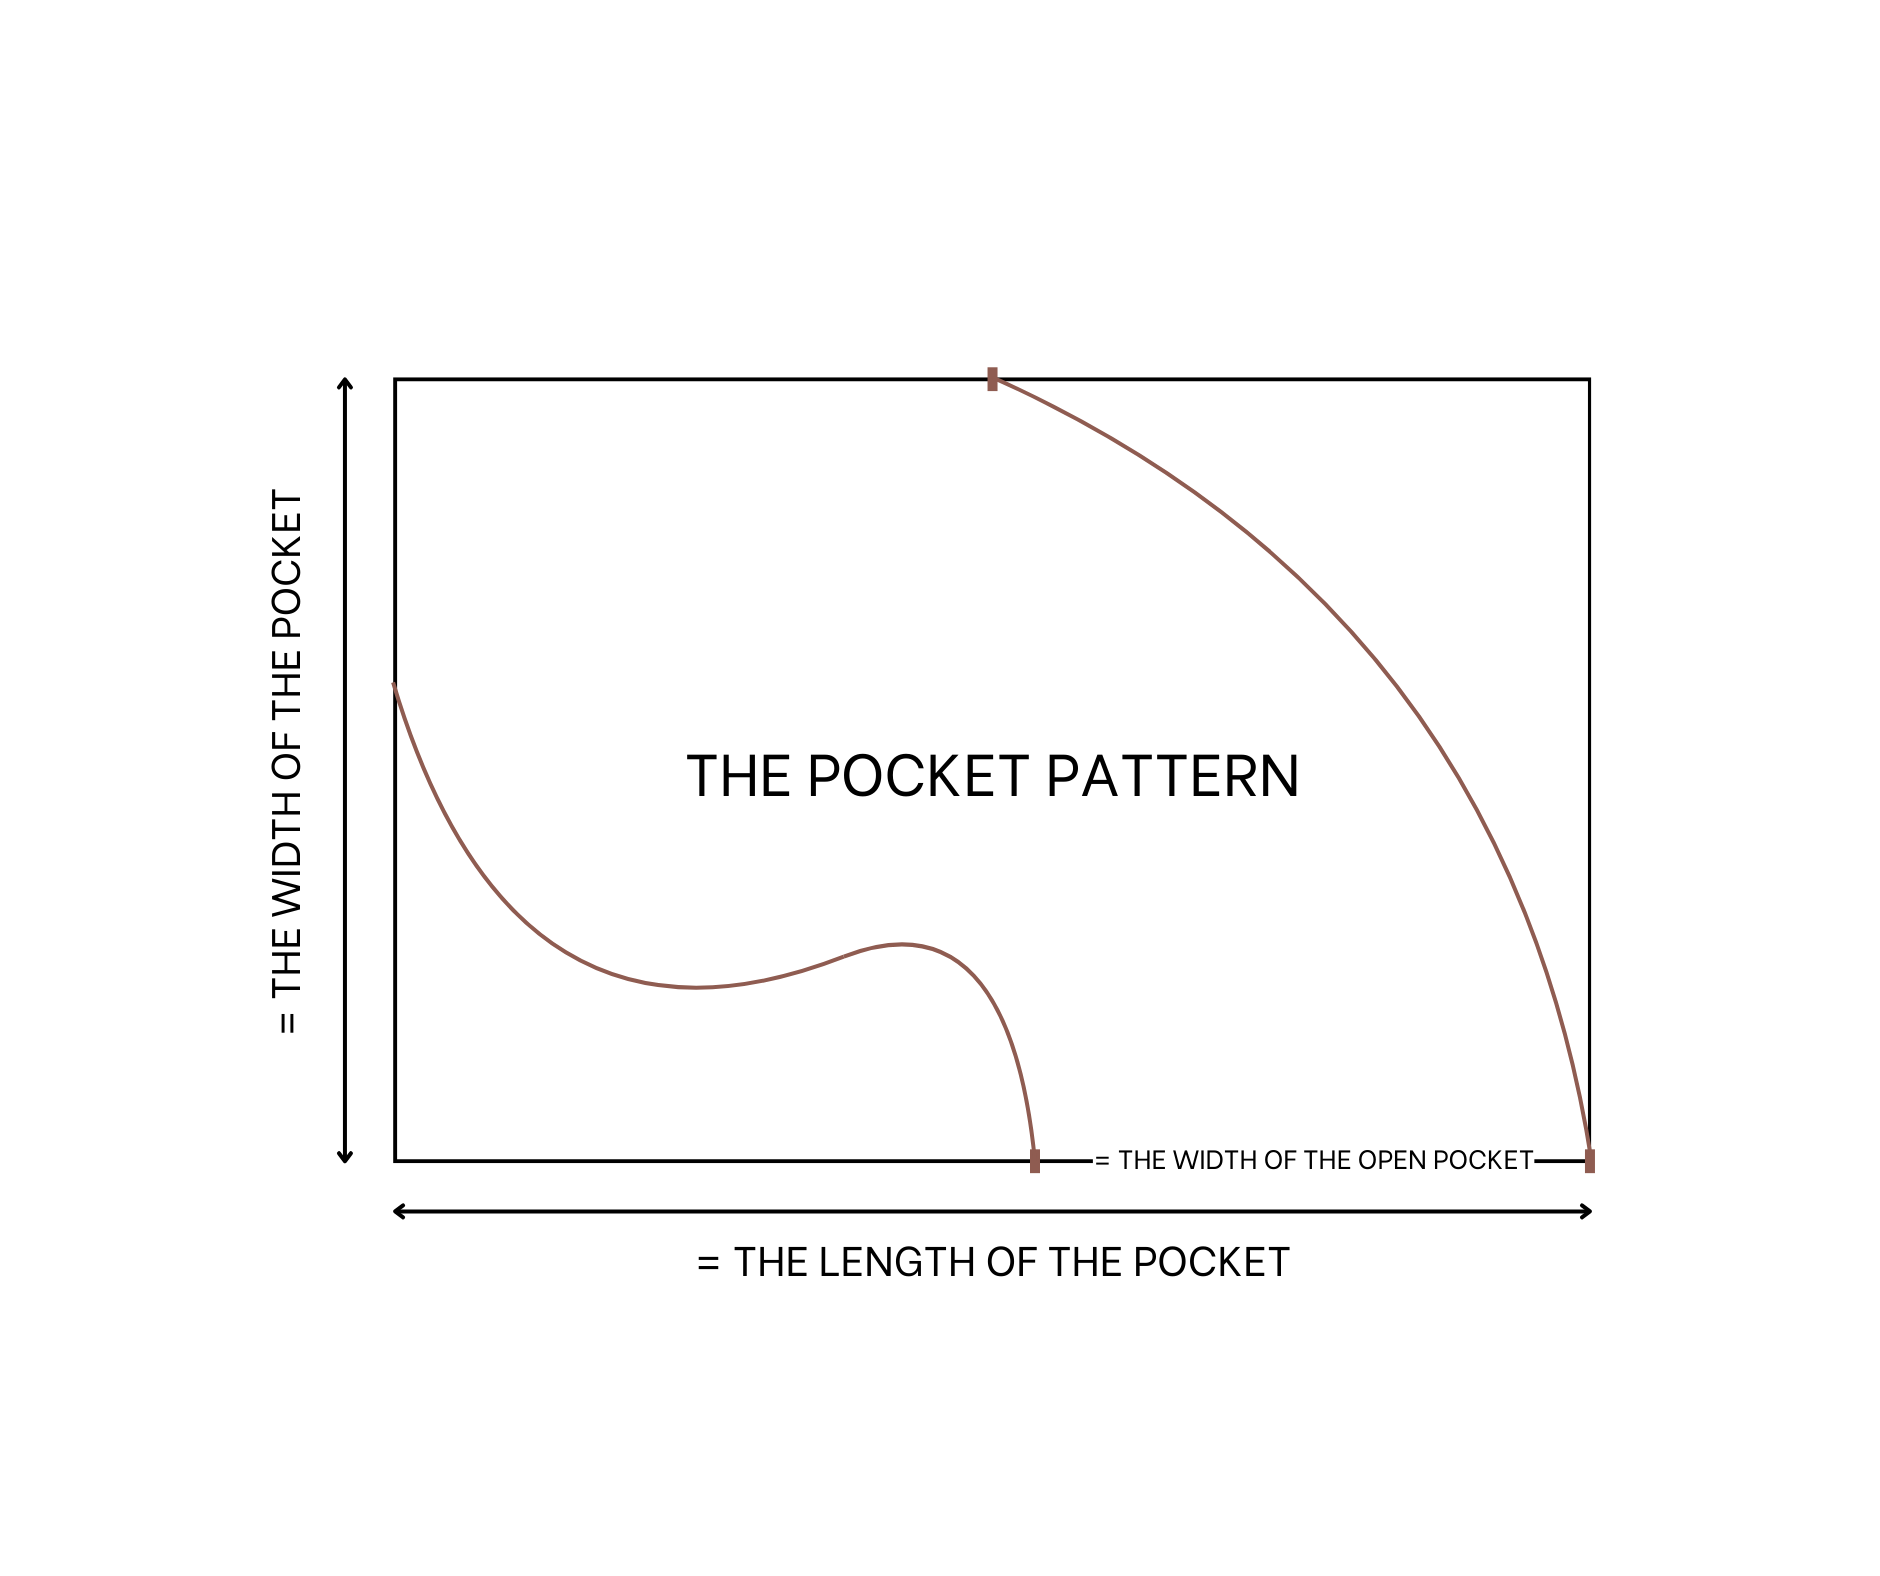
The pocket pattern
cut a rectangle with 20 cm width and 30 cm length.
Mark the middle of one side first, then draw a curved line from this mark to one end of the opposite side.
From one end of the curved line, mark 15 cm on the side for the pocket opening where the hand can go in.
Draw another curved line from this mark to the opposite end of the other side, completing the pocket pattern after cutting.
SEWING THE DRESS
THE MAIN BODICE
After cutting two back pattern pieces, pin them together along the middle line.
From the top of the neck, mark out 12 cm to create the opening for the dress so the head can fit through when wearing.
Sew from this mark to the end of the back pattern.
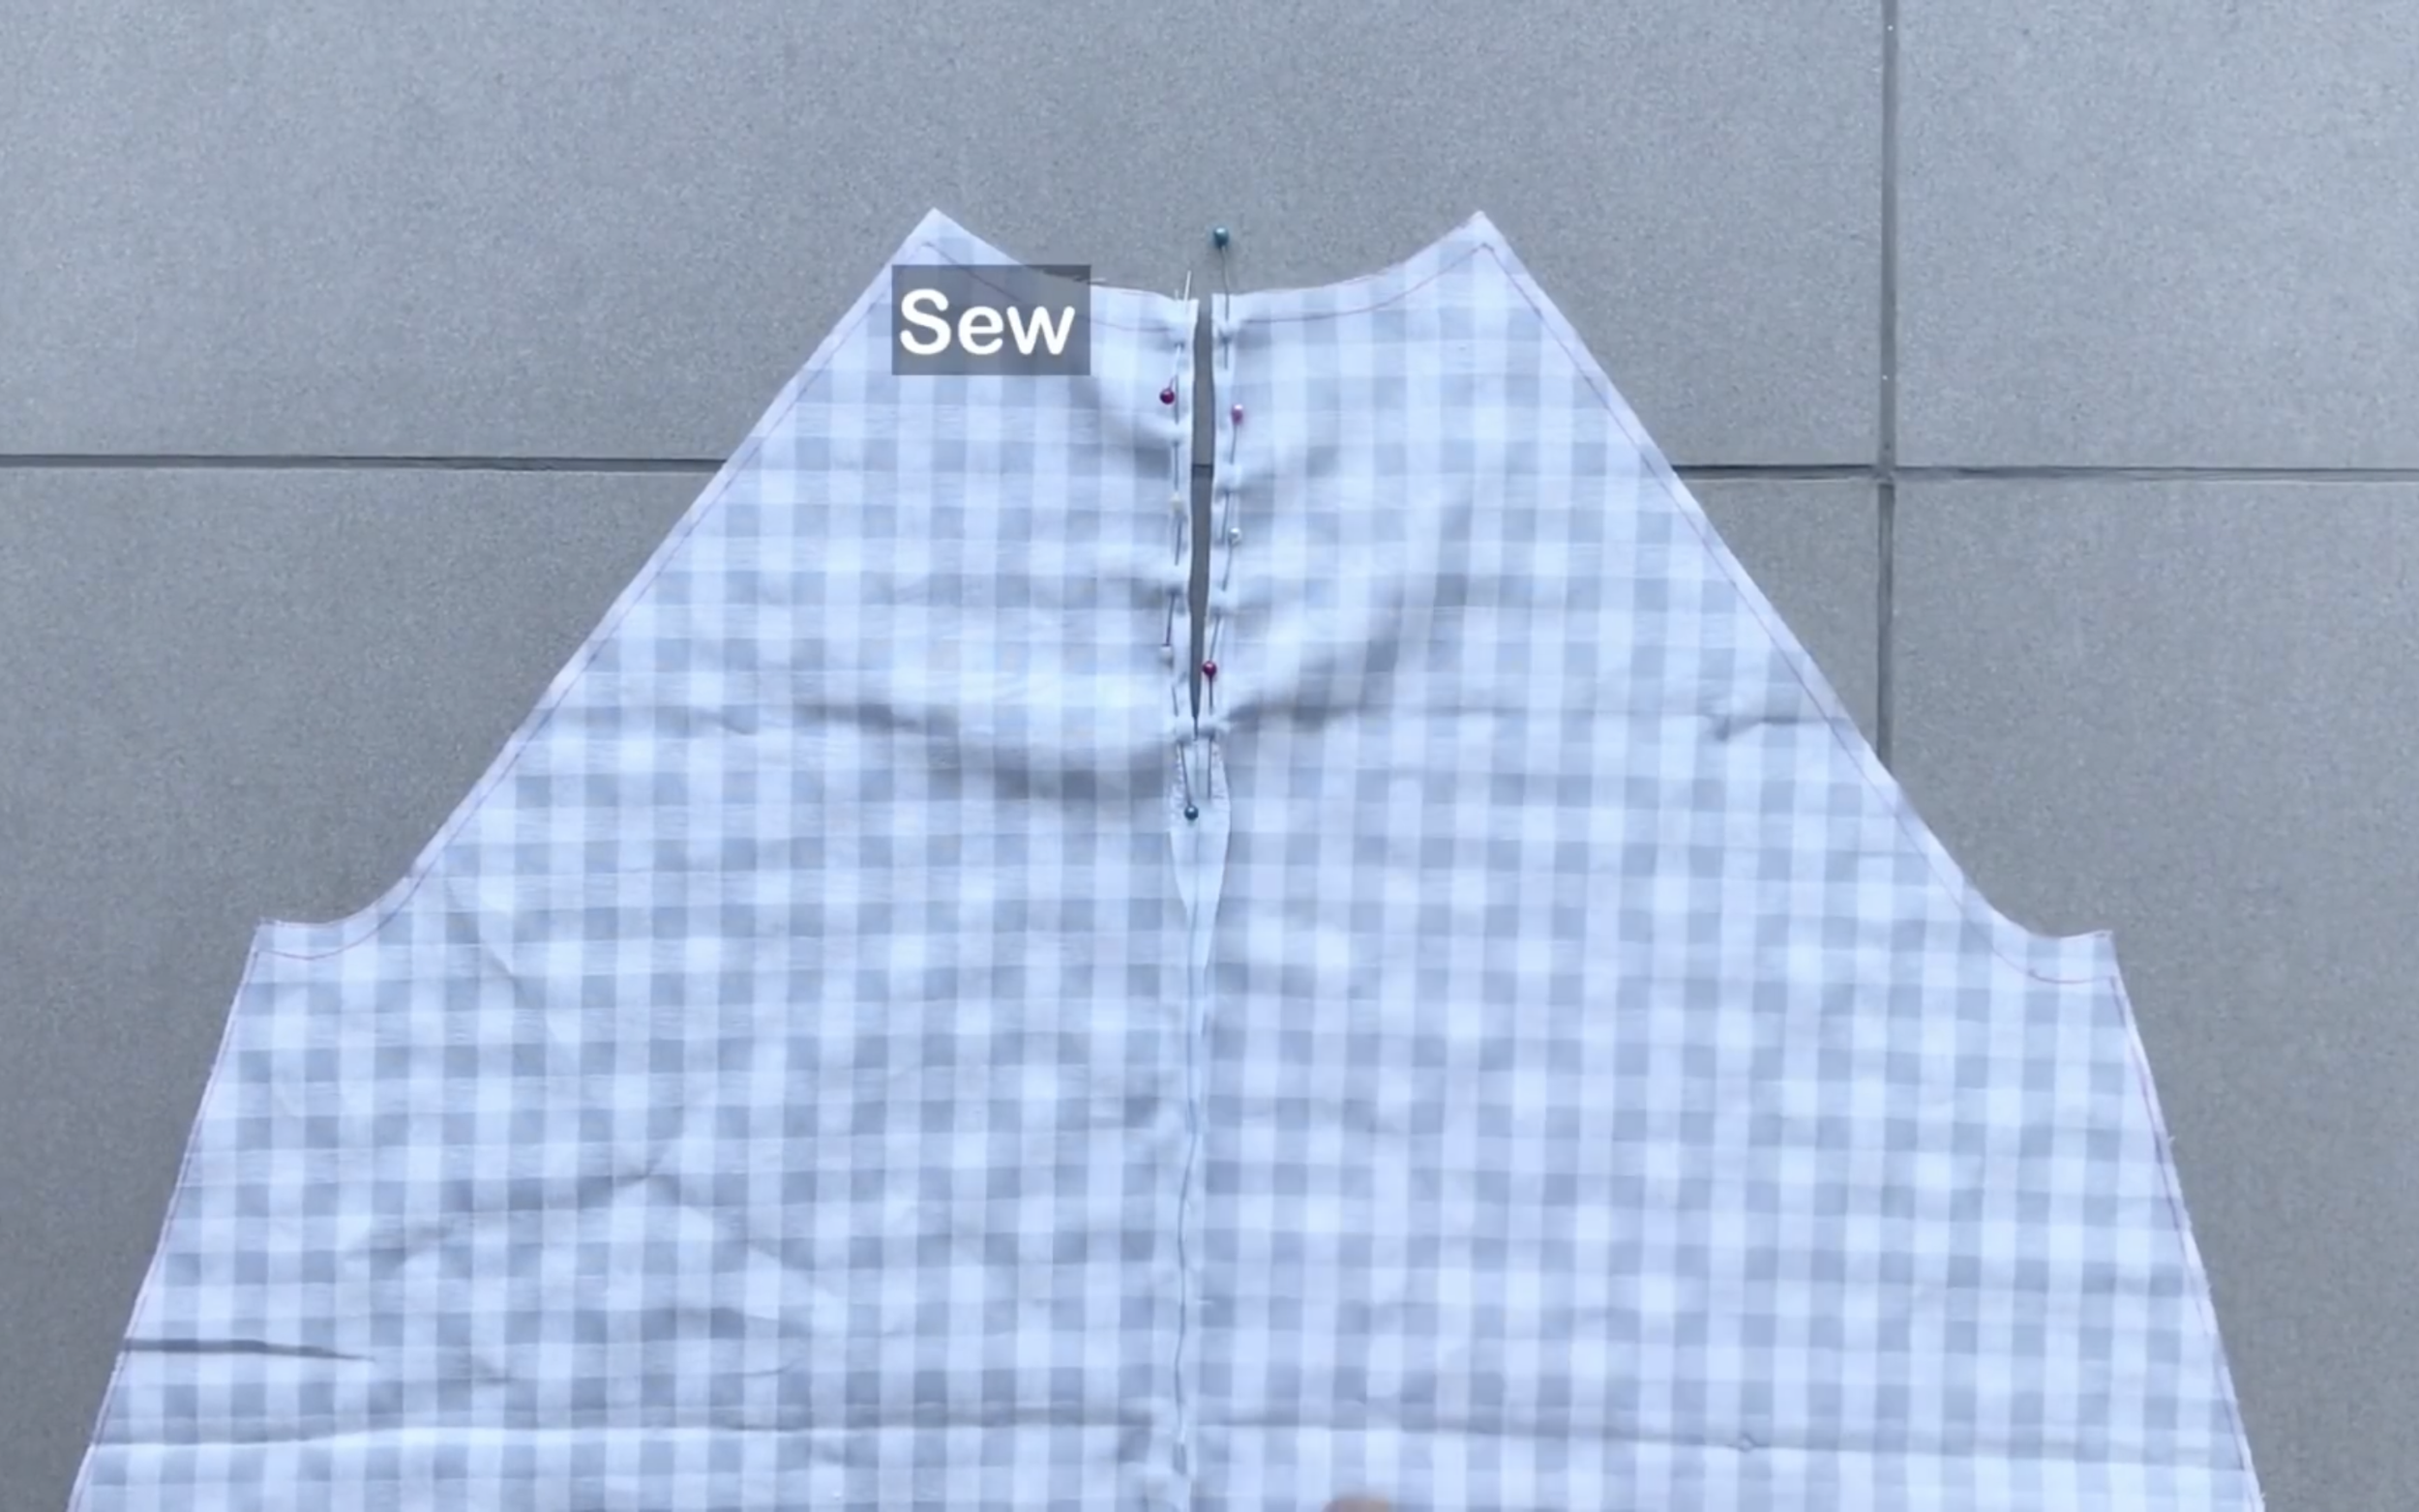
Finish the back opening by folding the fabric inside twice and sewing.
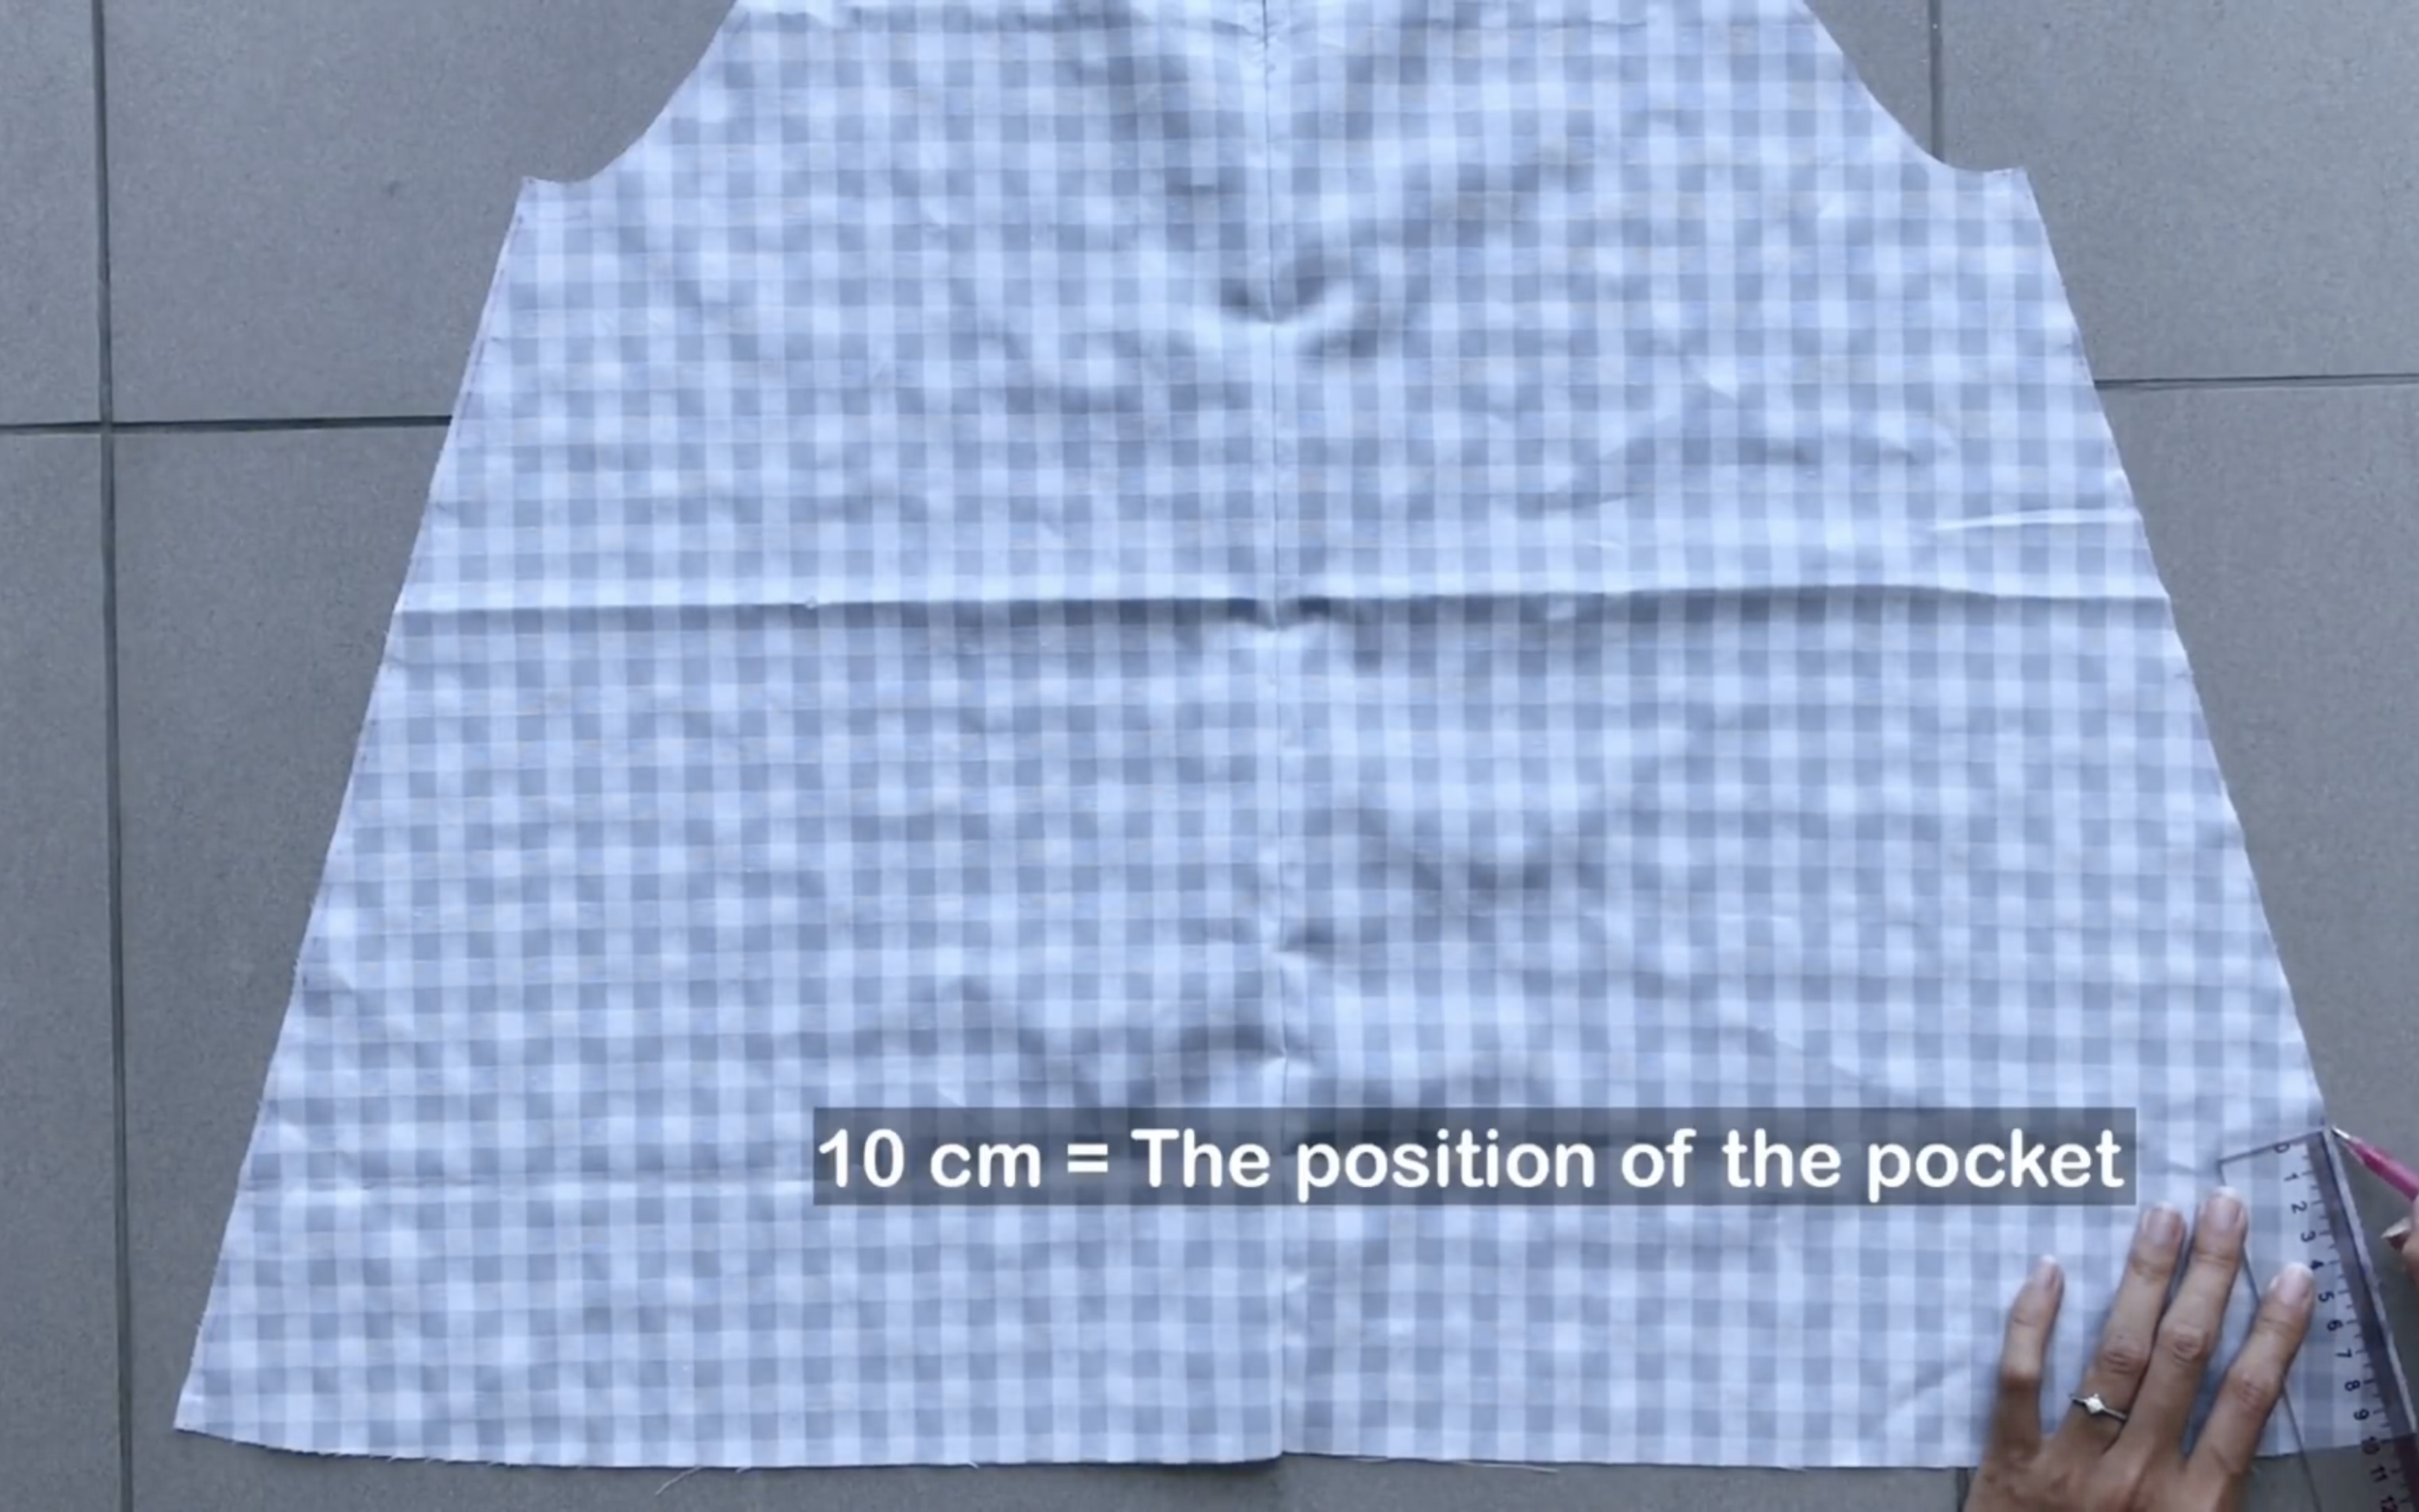
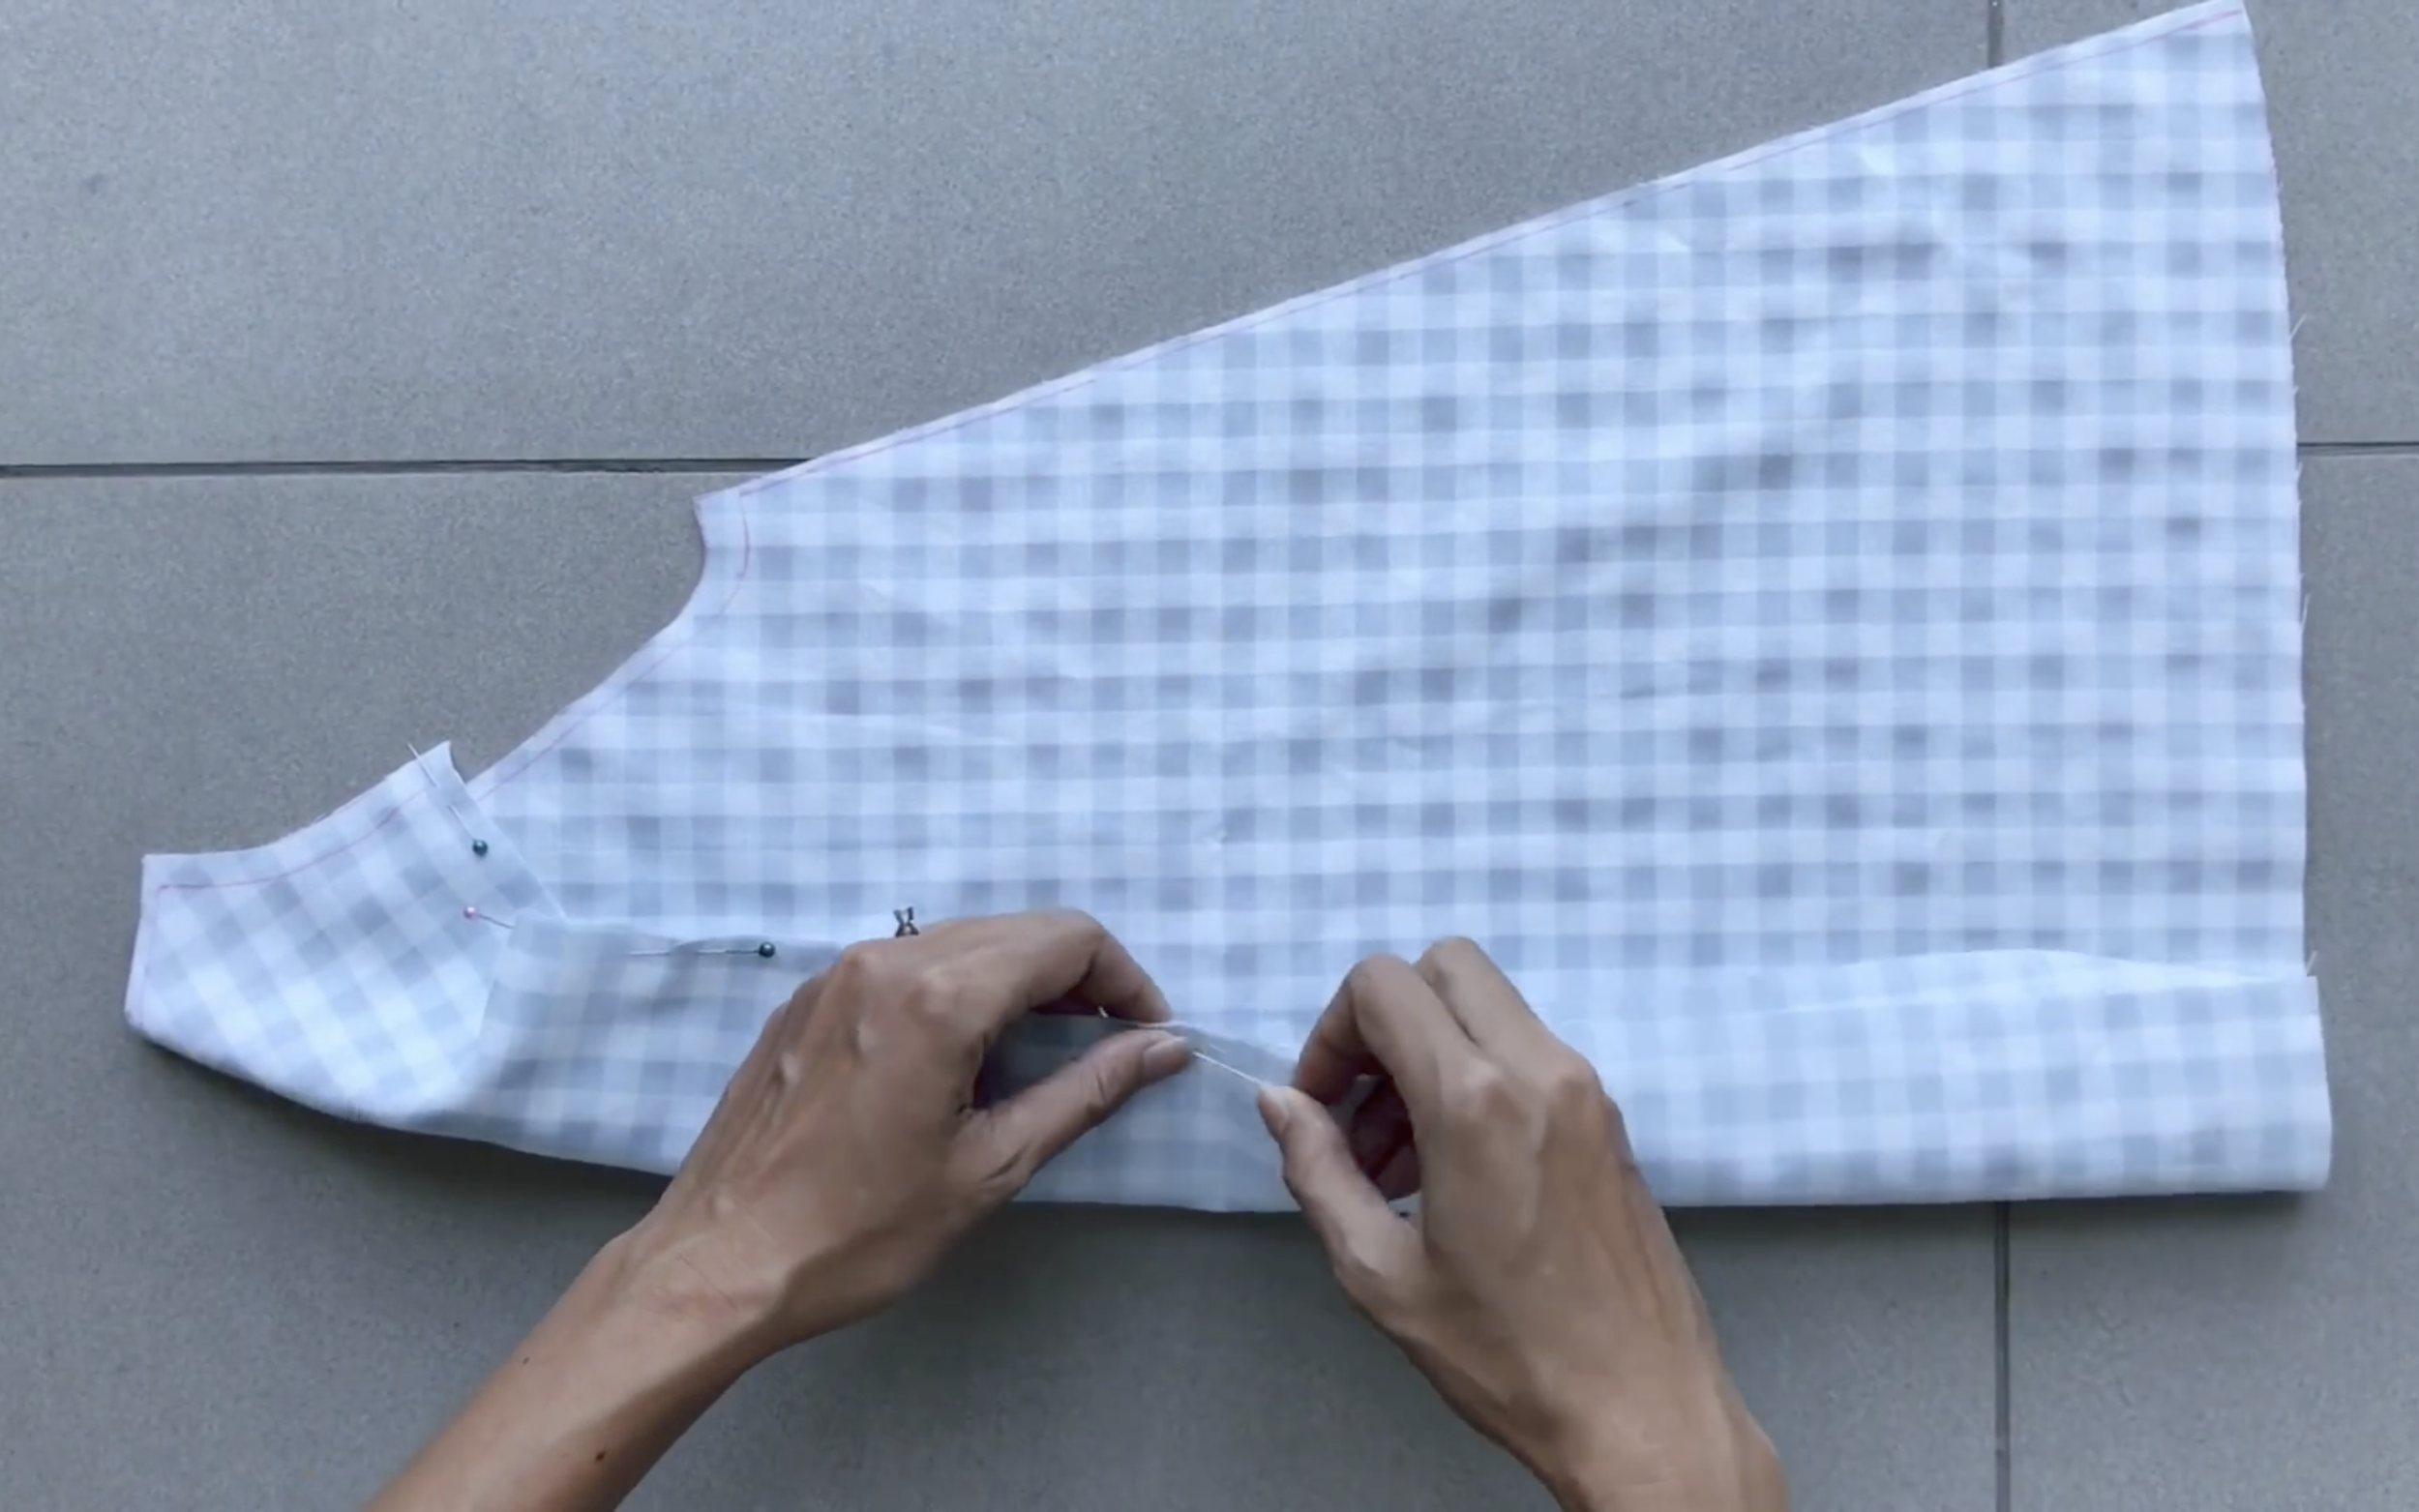
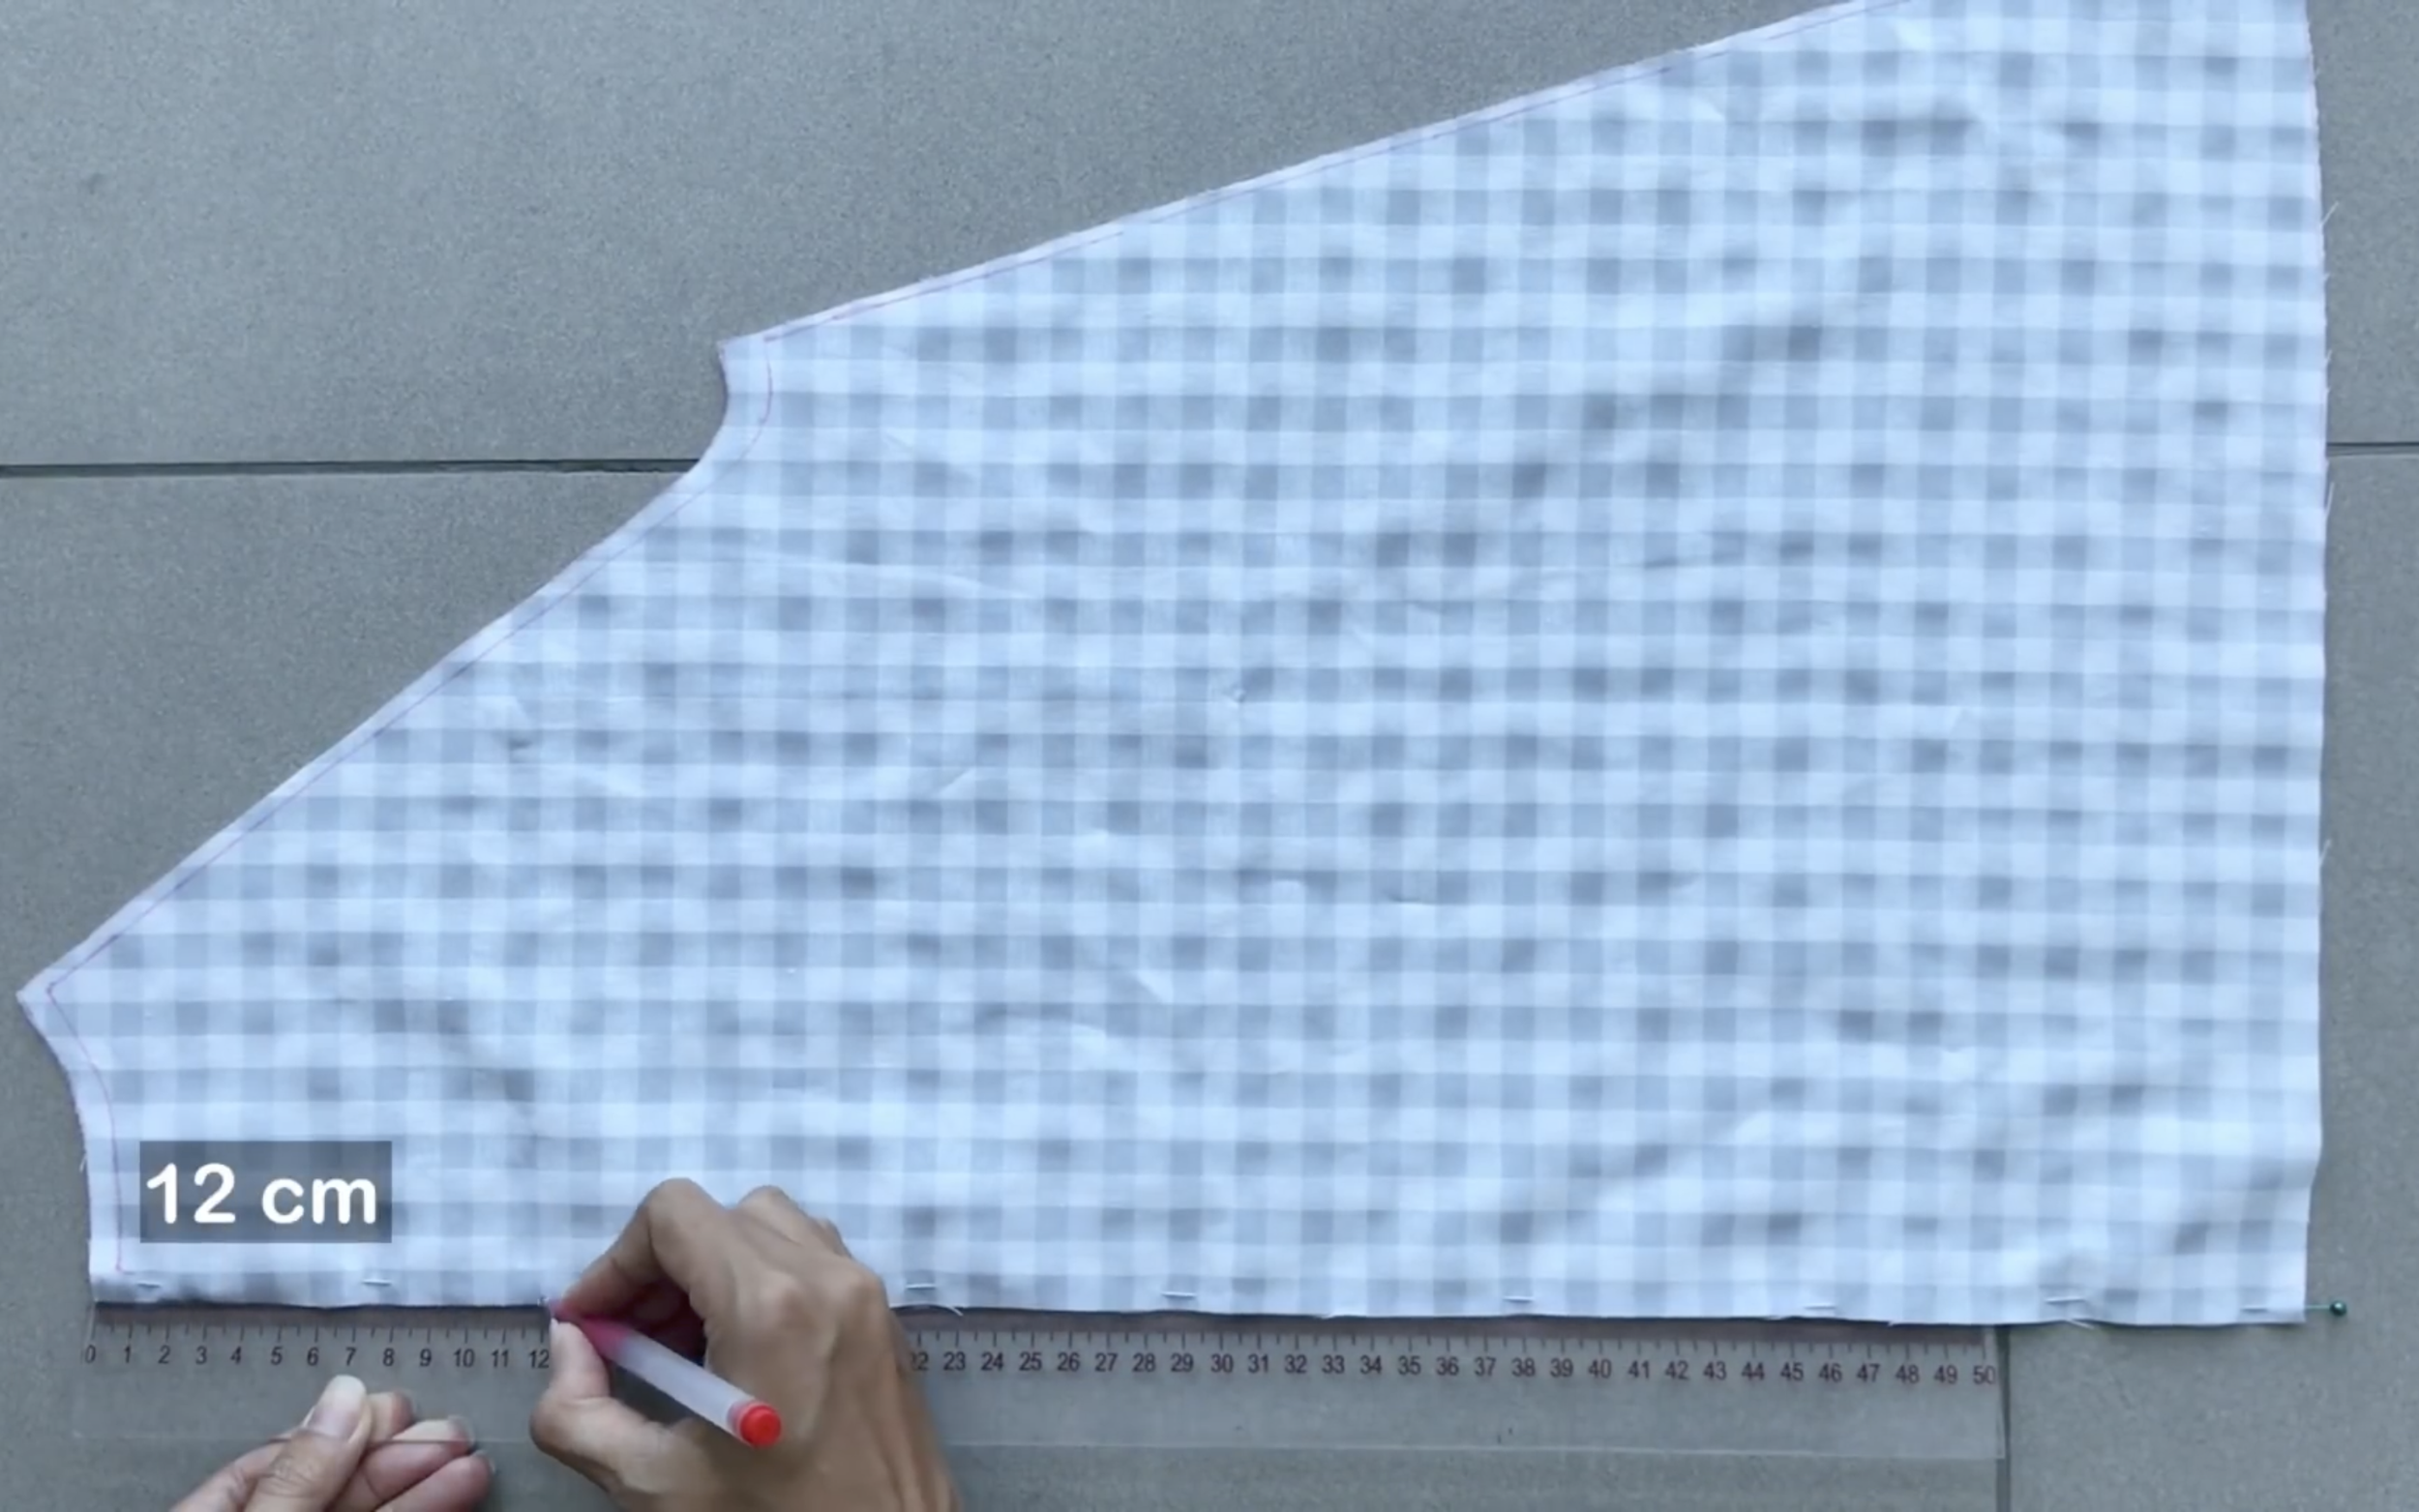
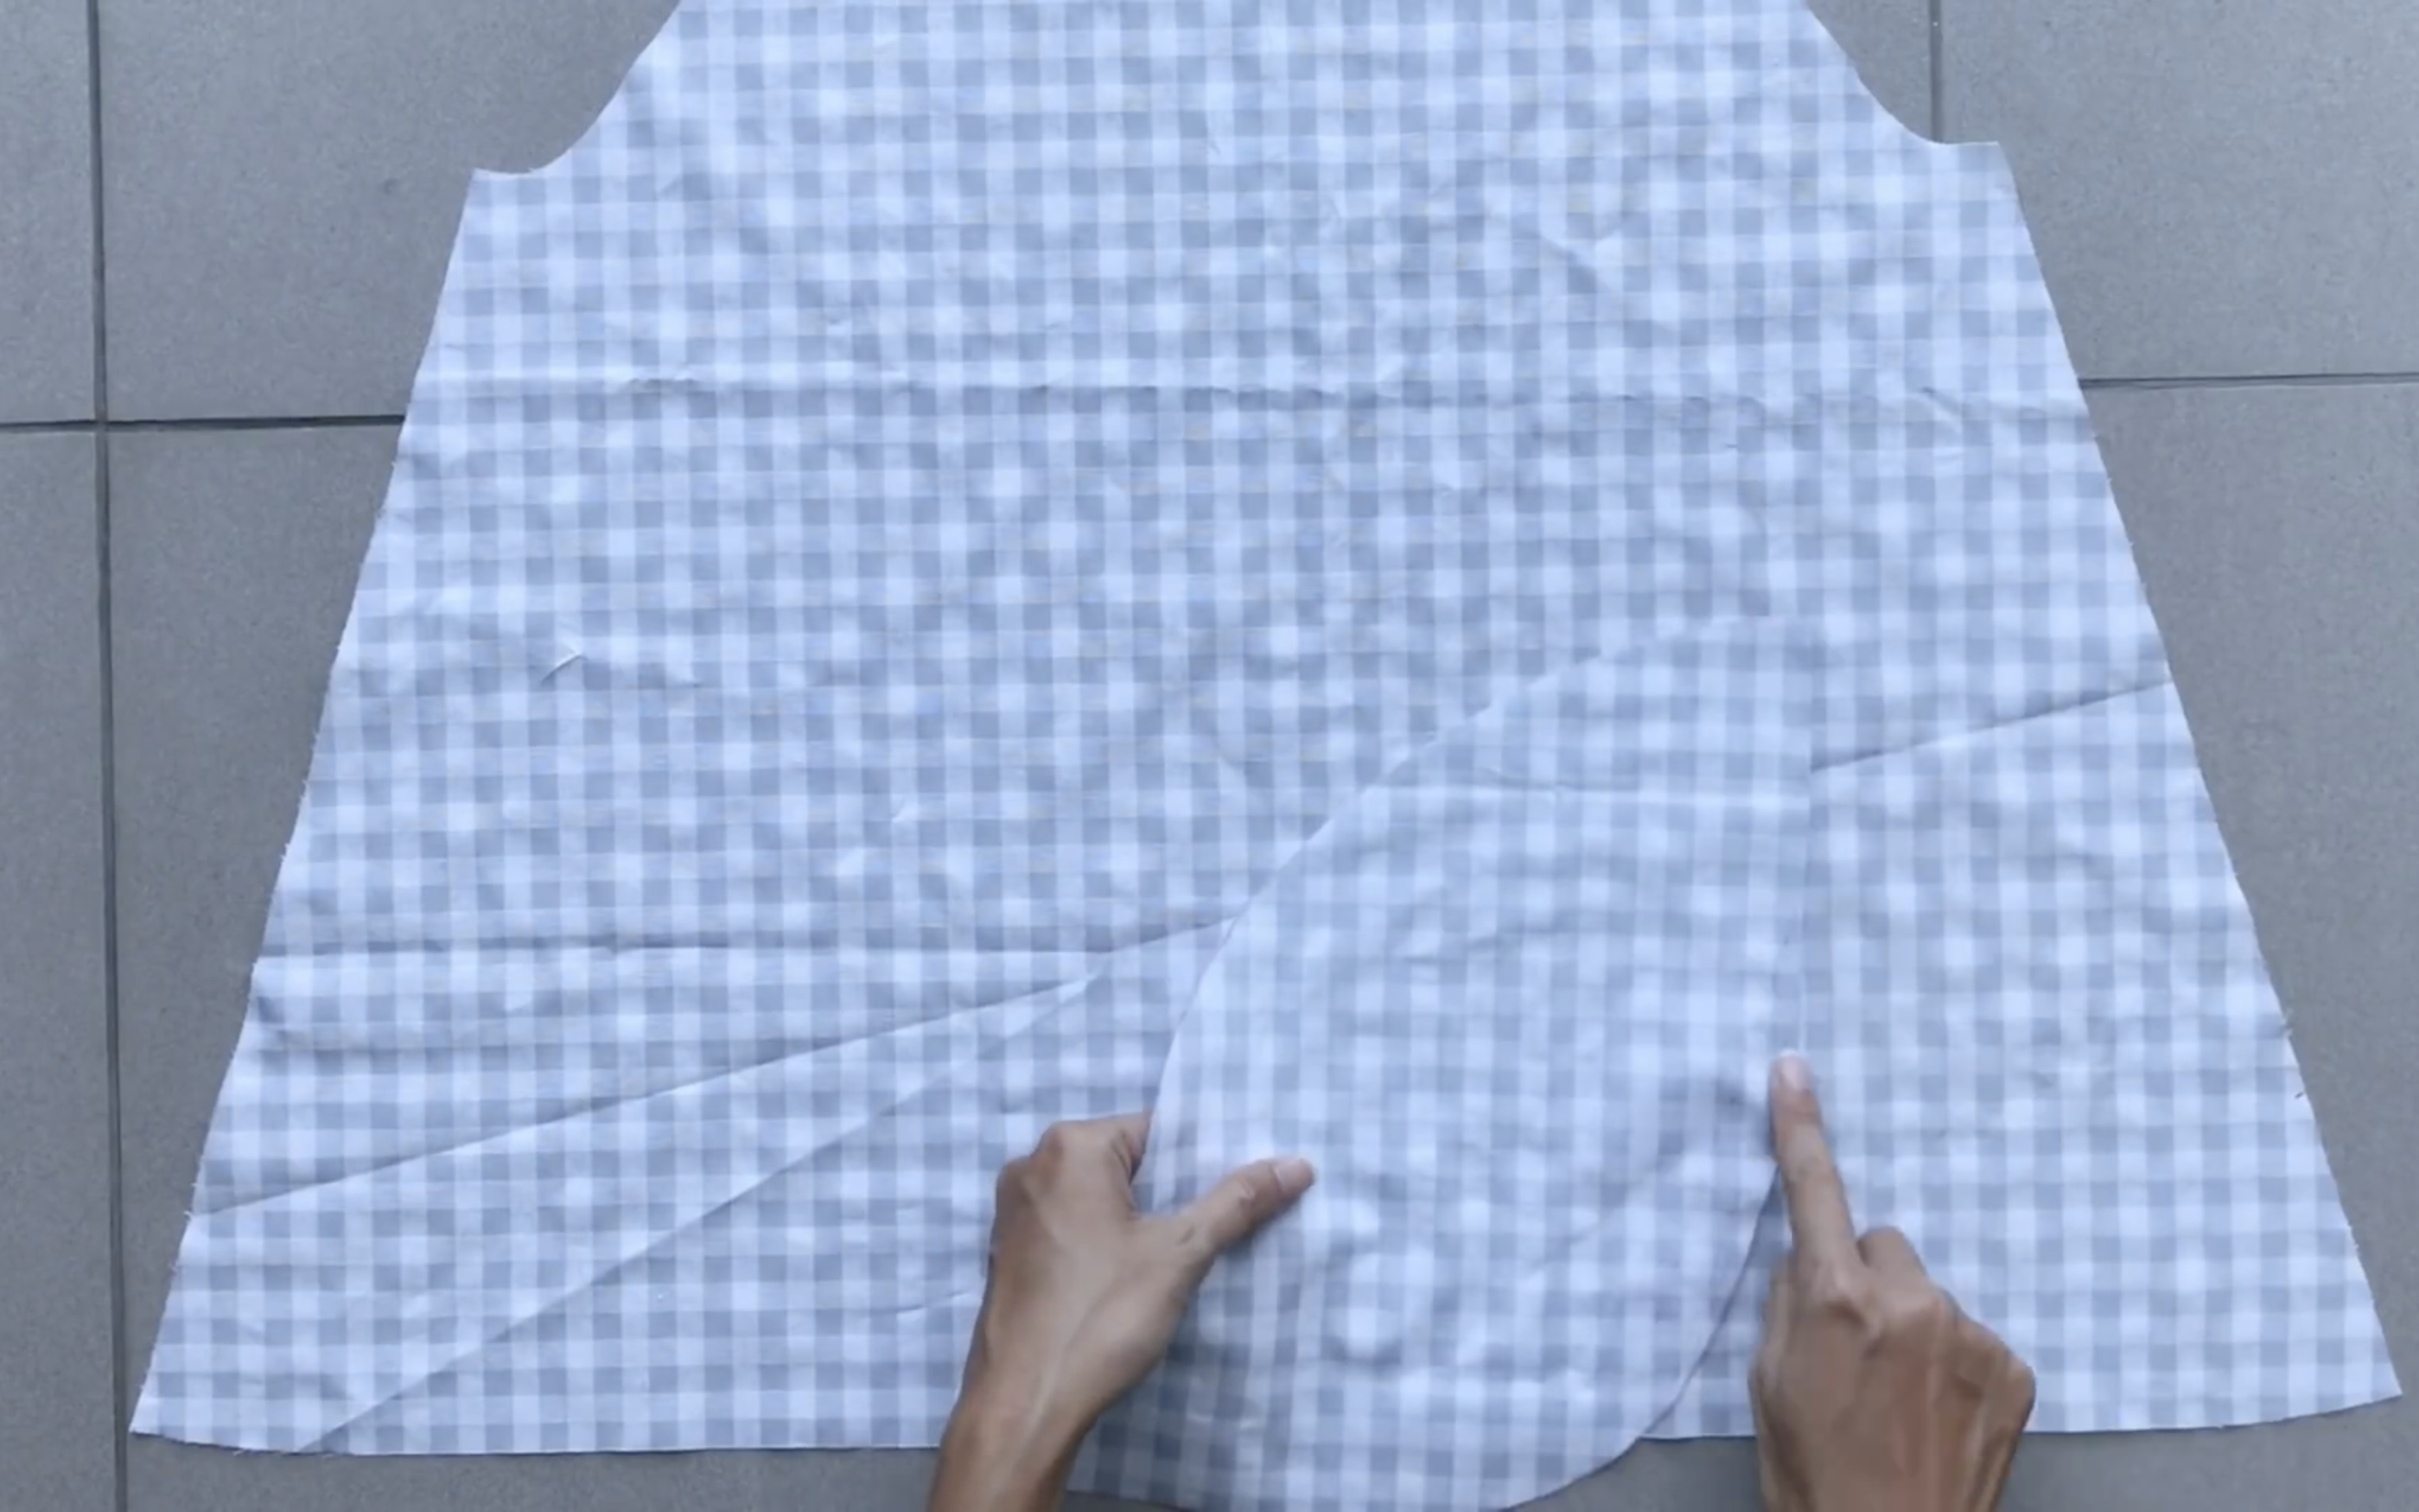
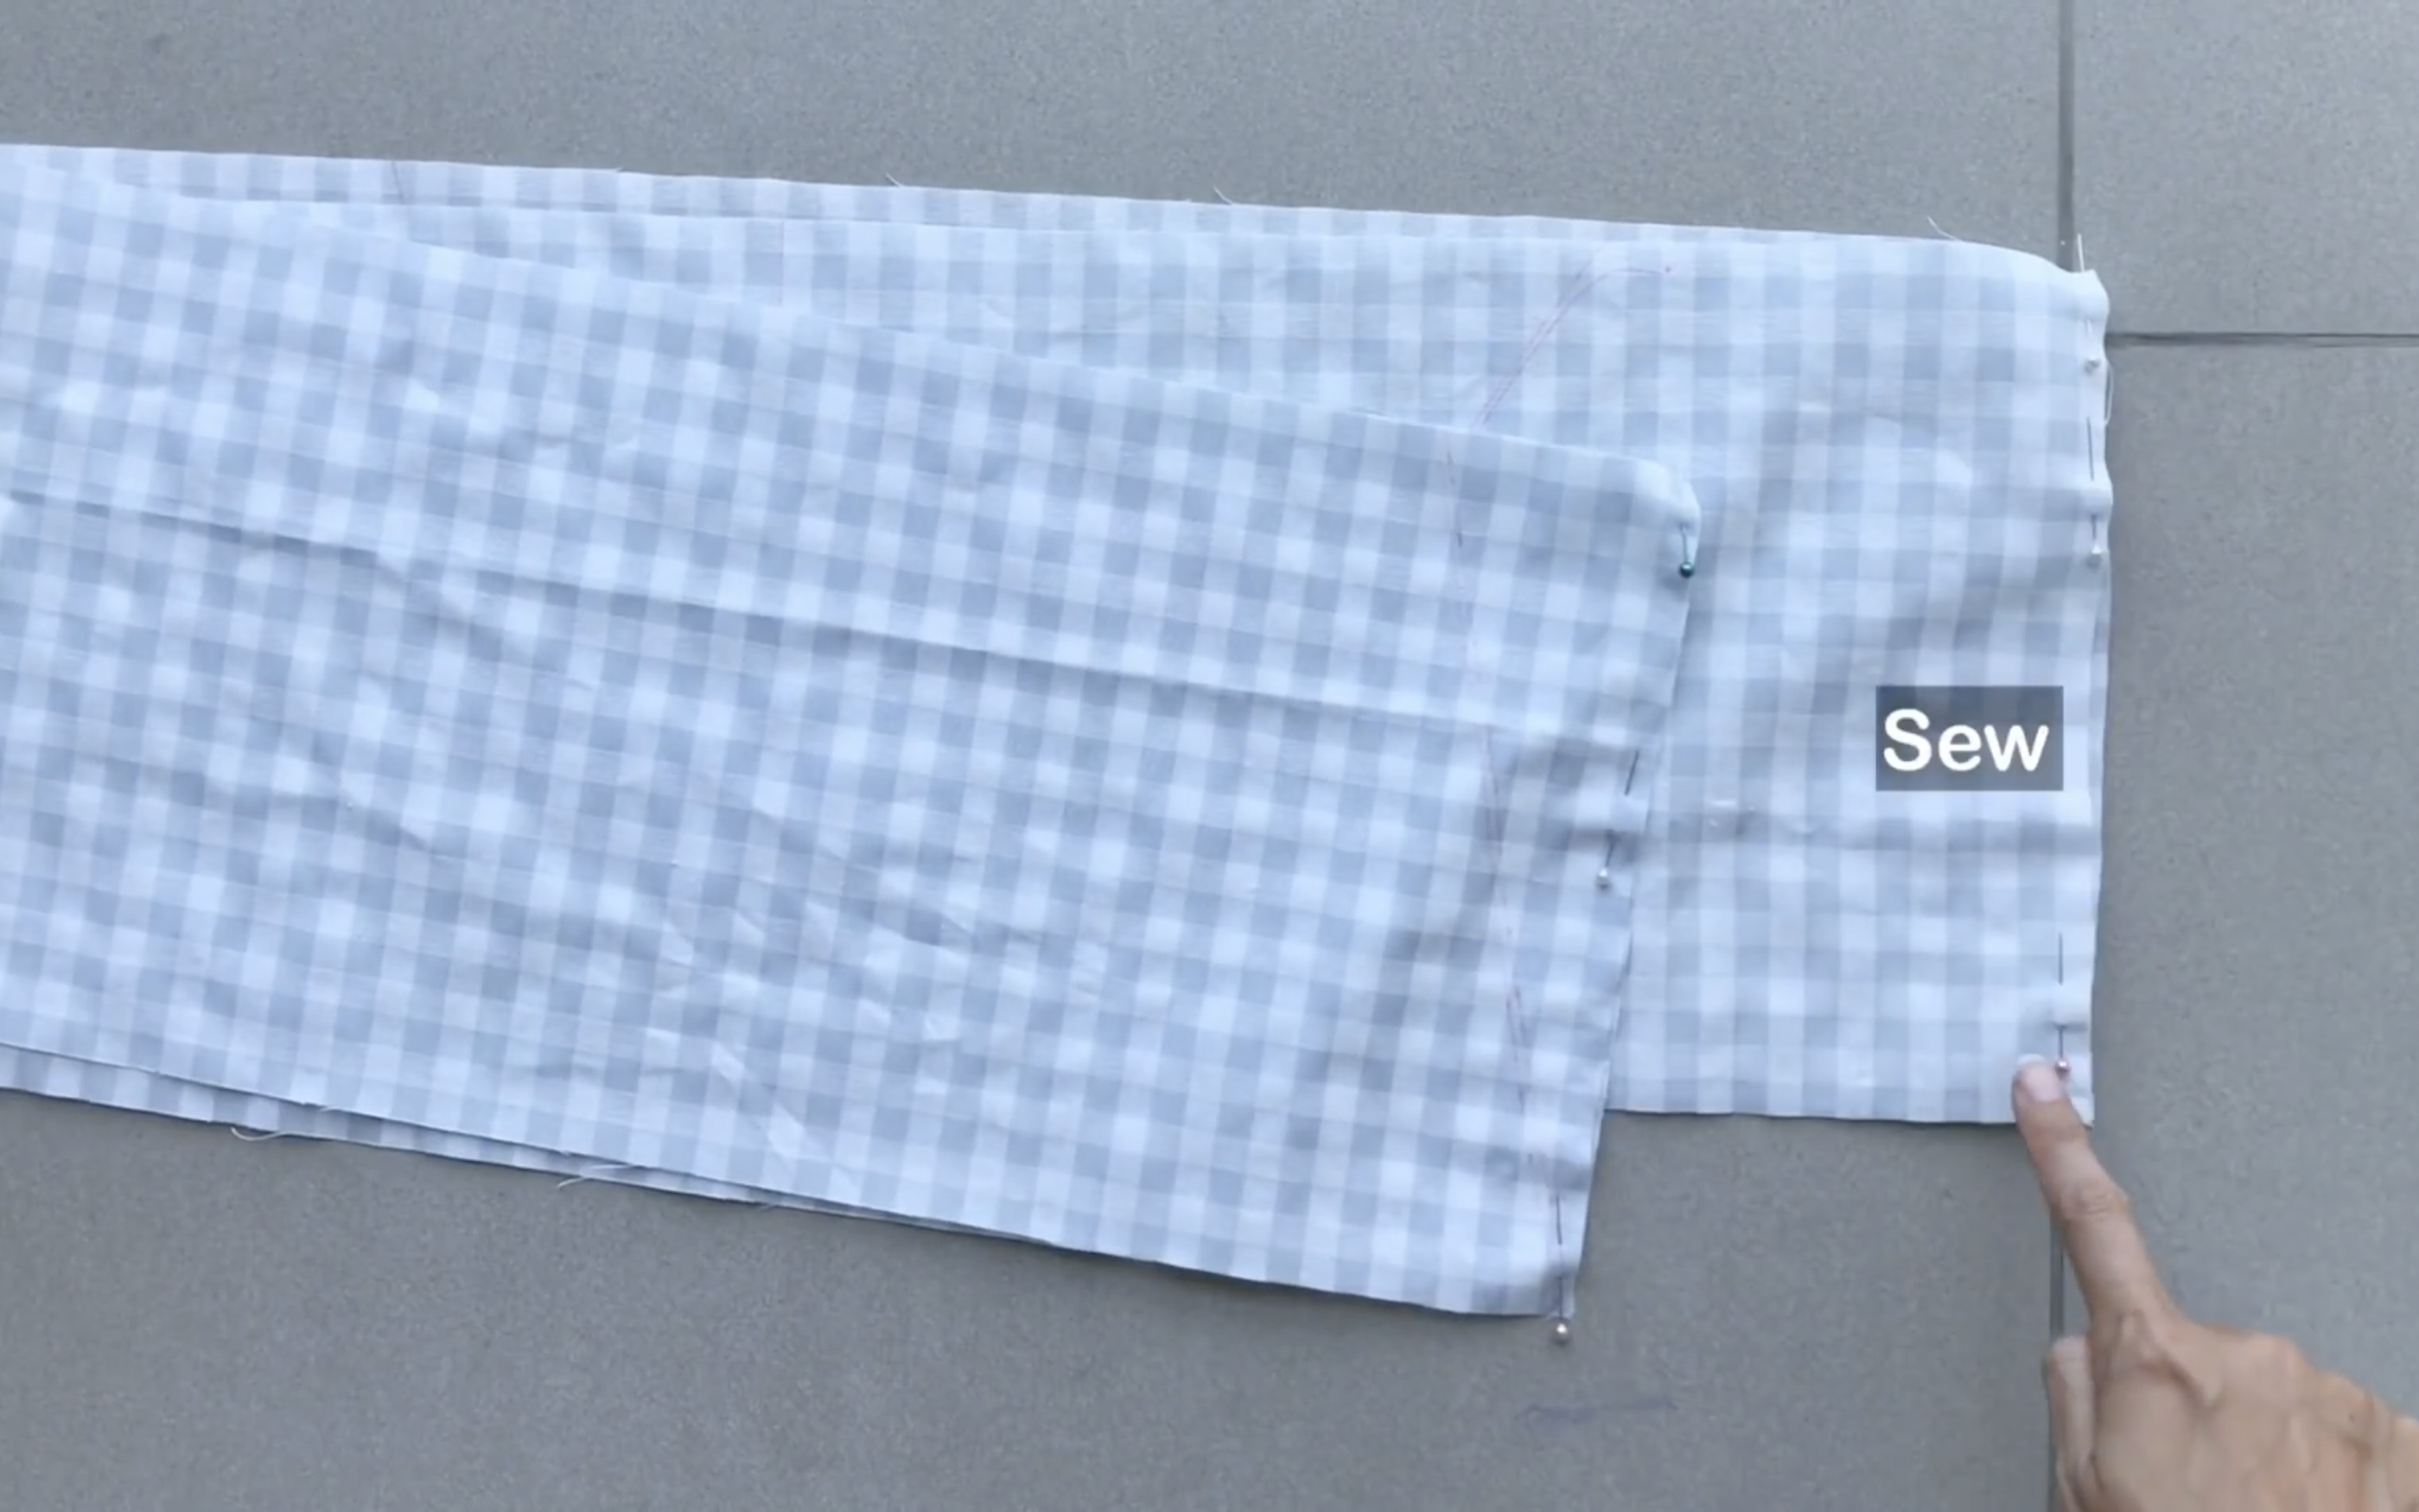
From the end of the side seam, mark up 10 cm, which is the pocket position on the side seam.
Attach the pocket to this mark and sew, repeating the process on both sides.
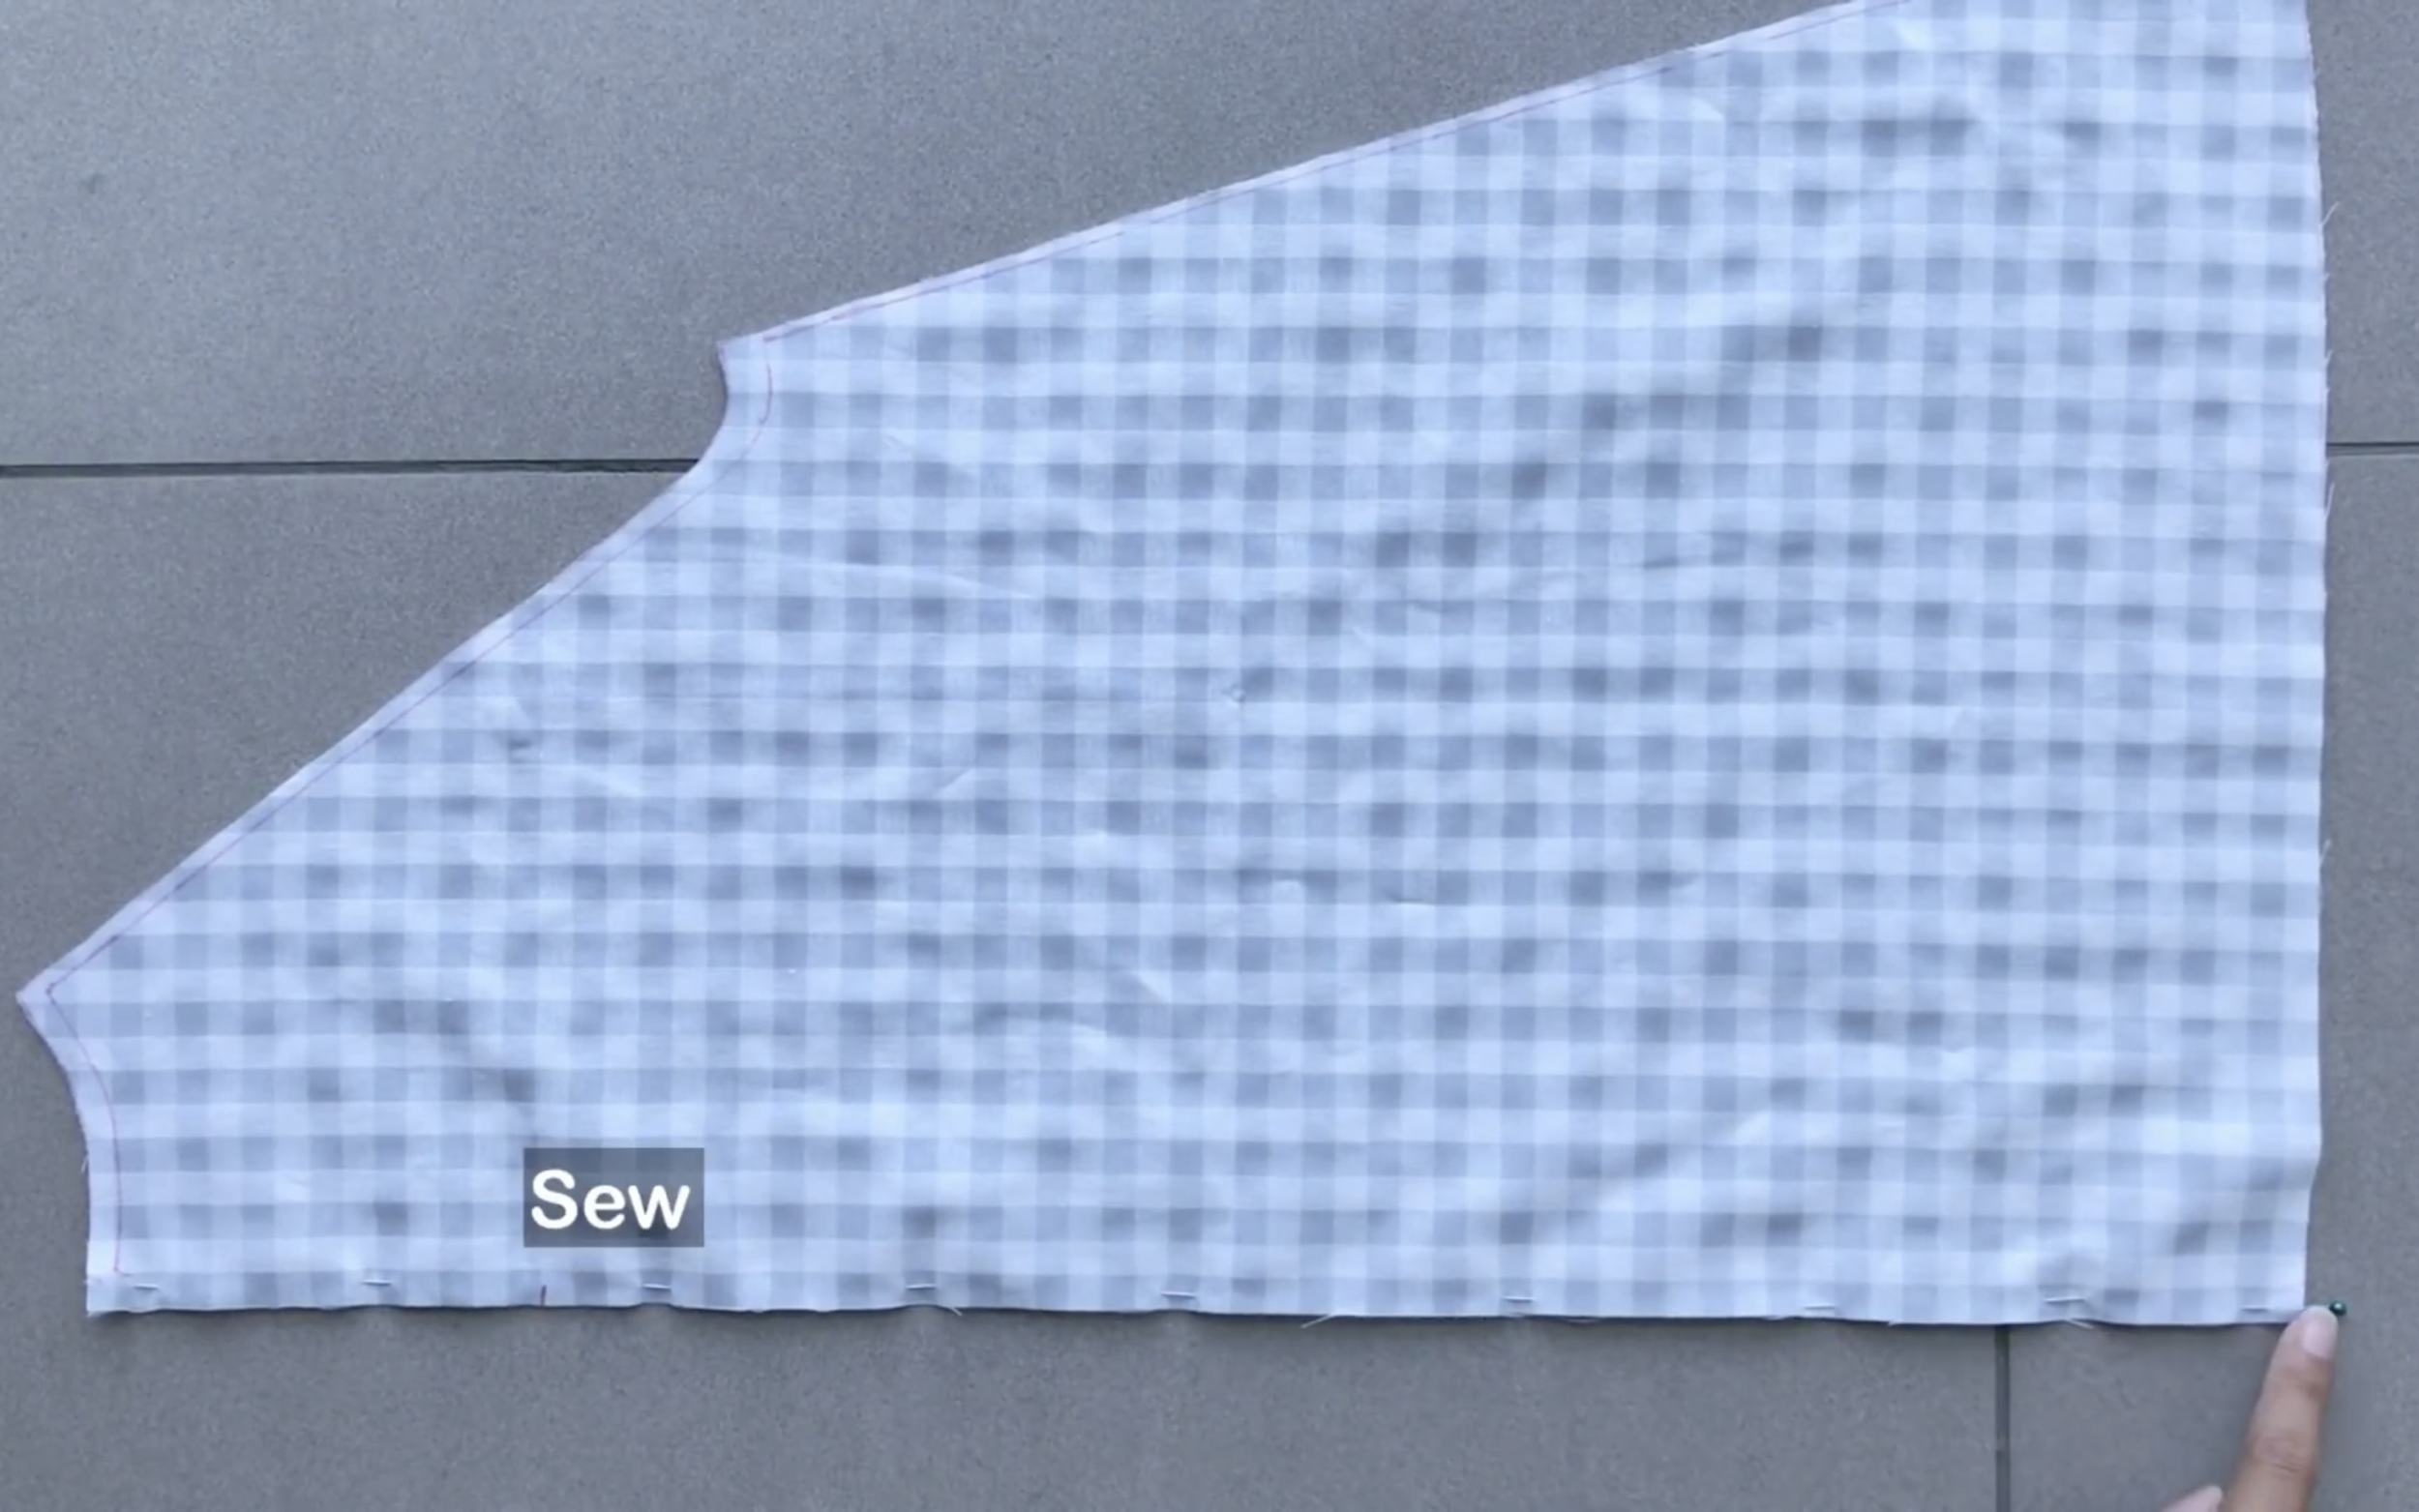
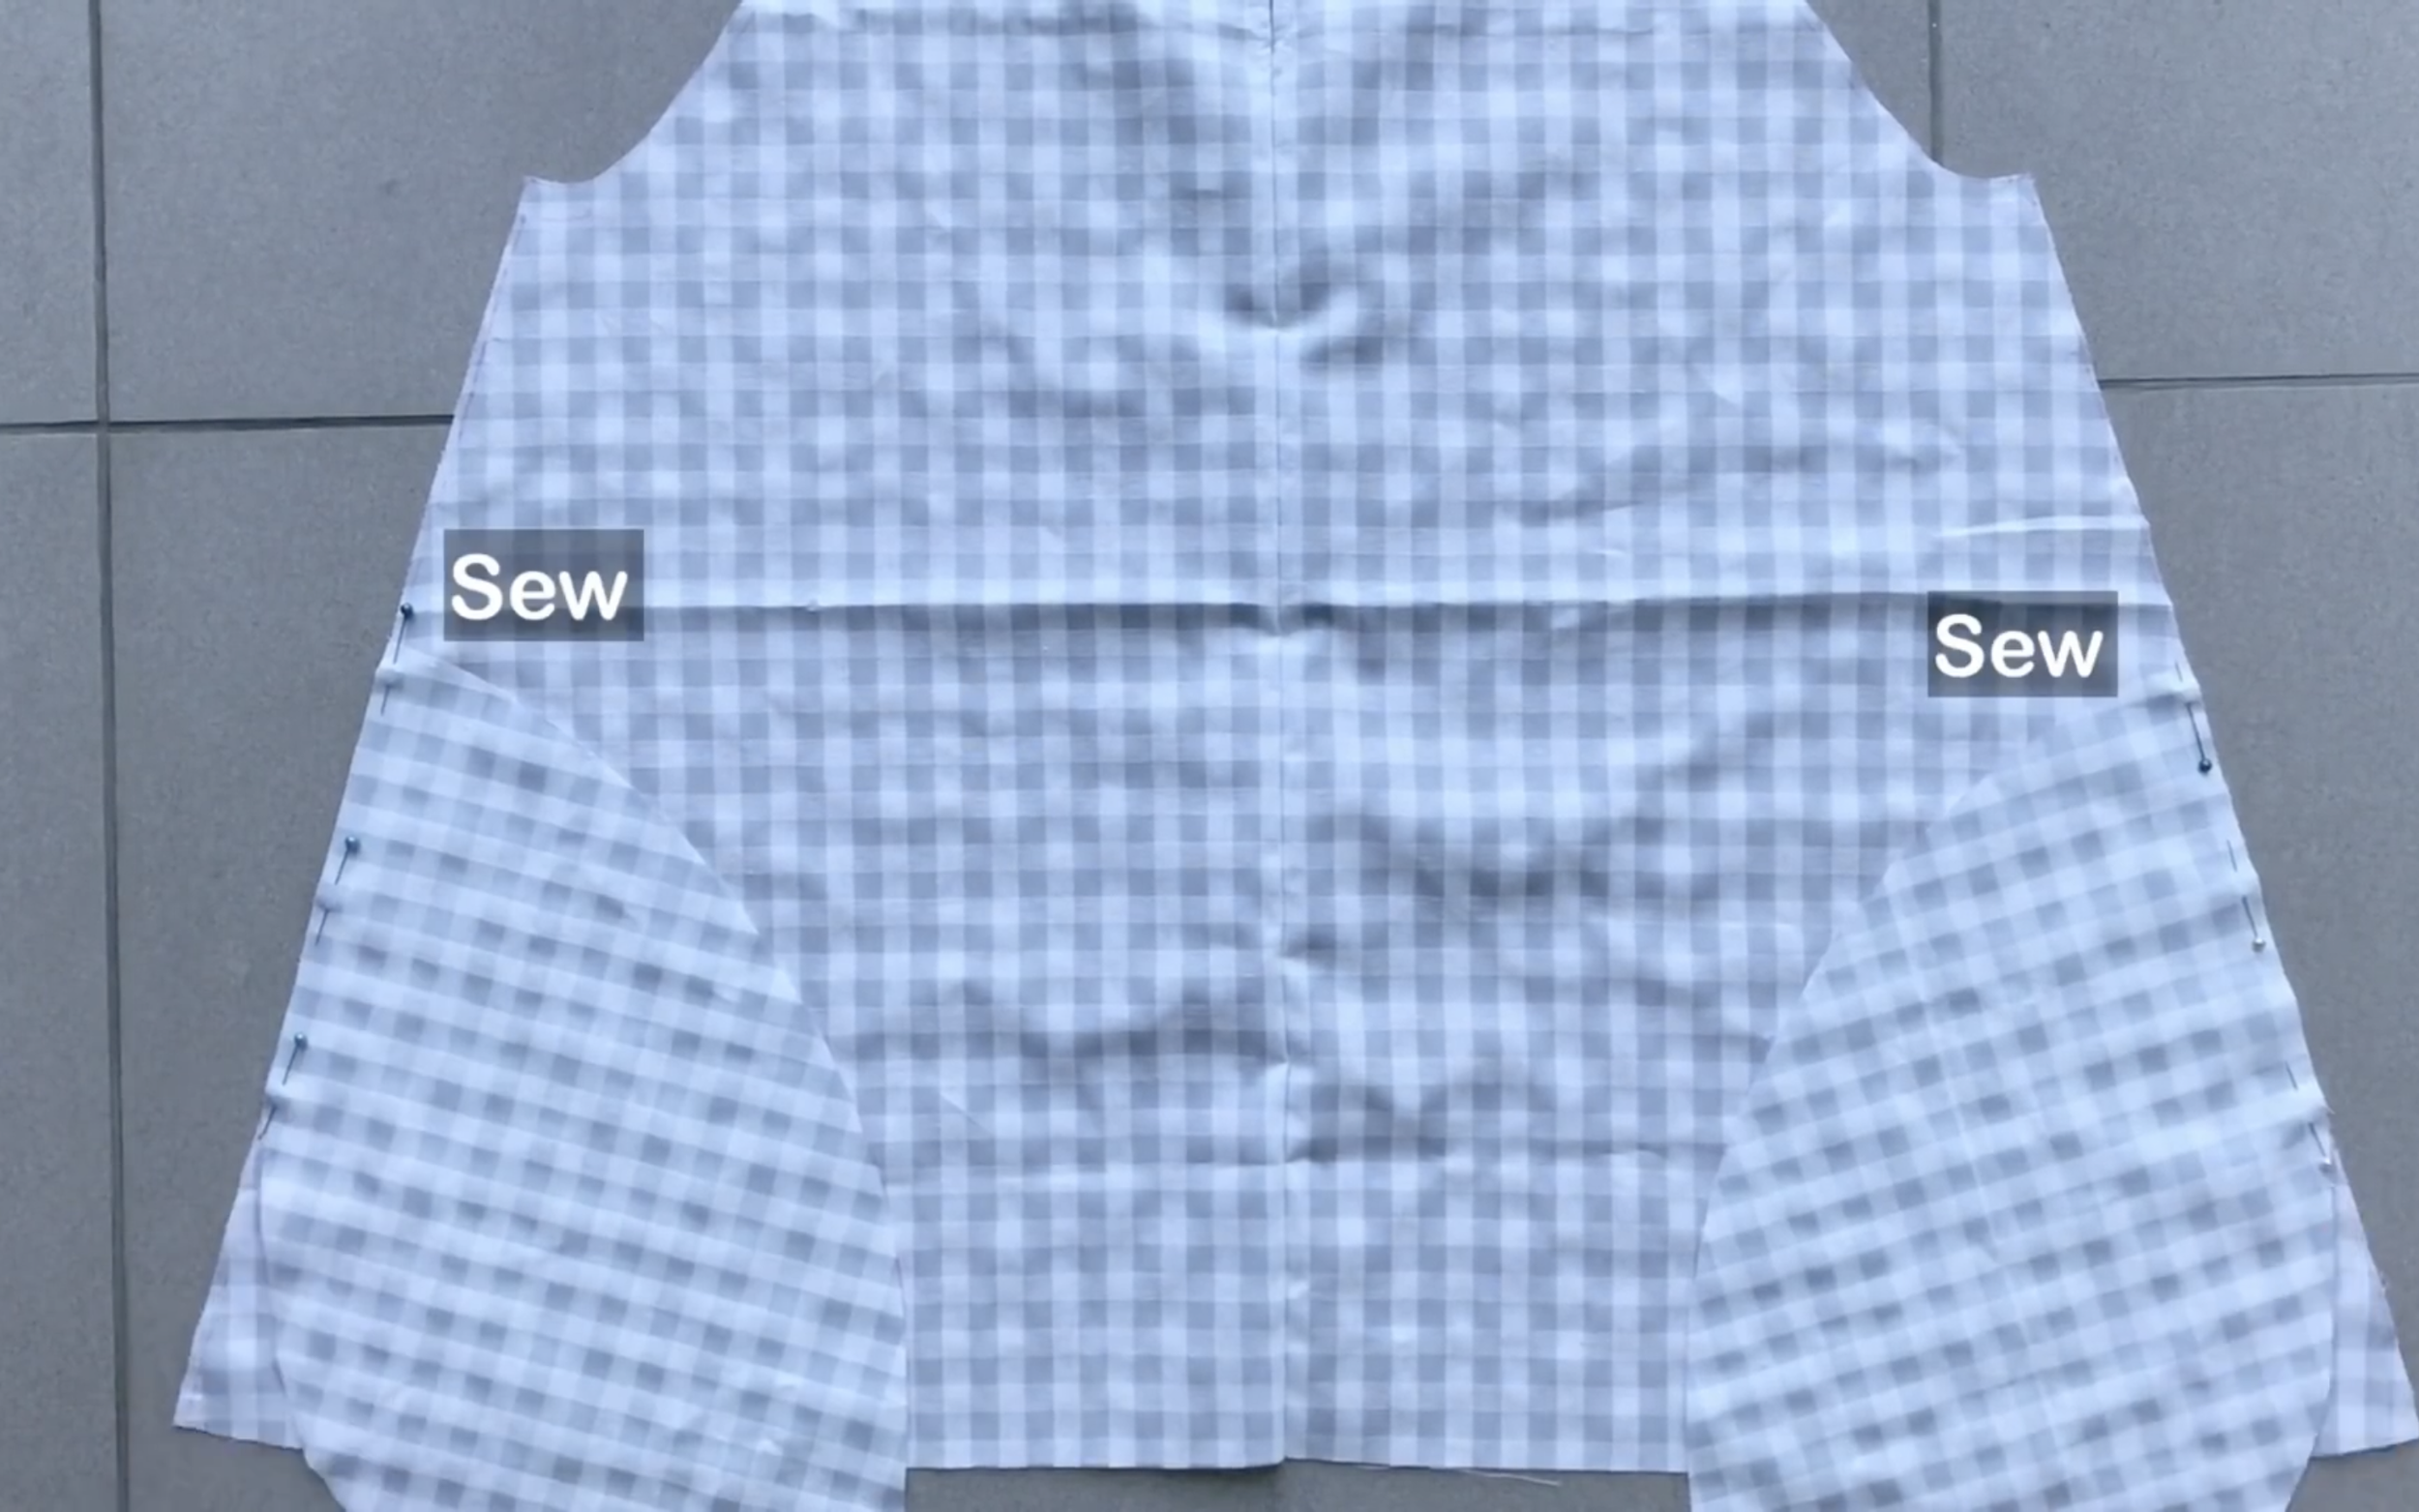
Do the same for the front of the dress.
Then connect the front and back of the dress together along the side seams.
THE RUFFLE HEM
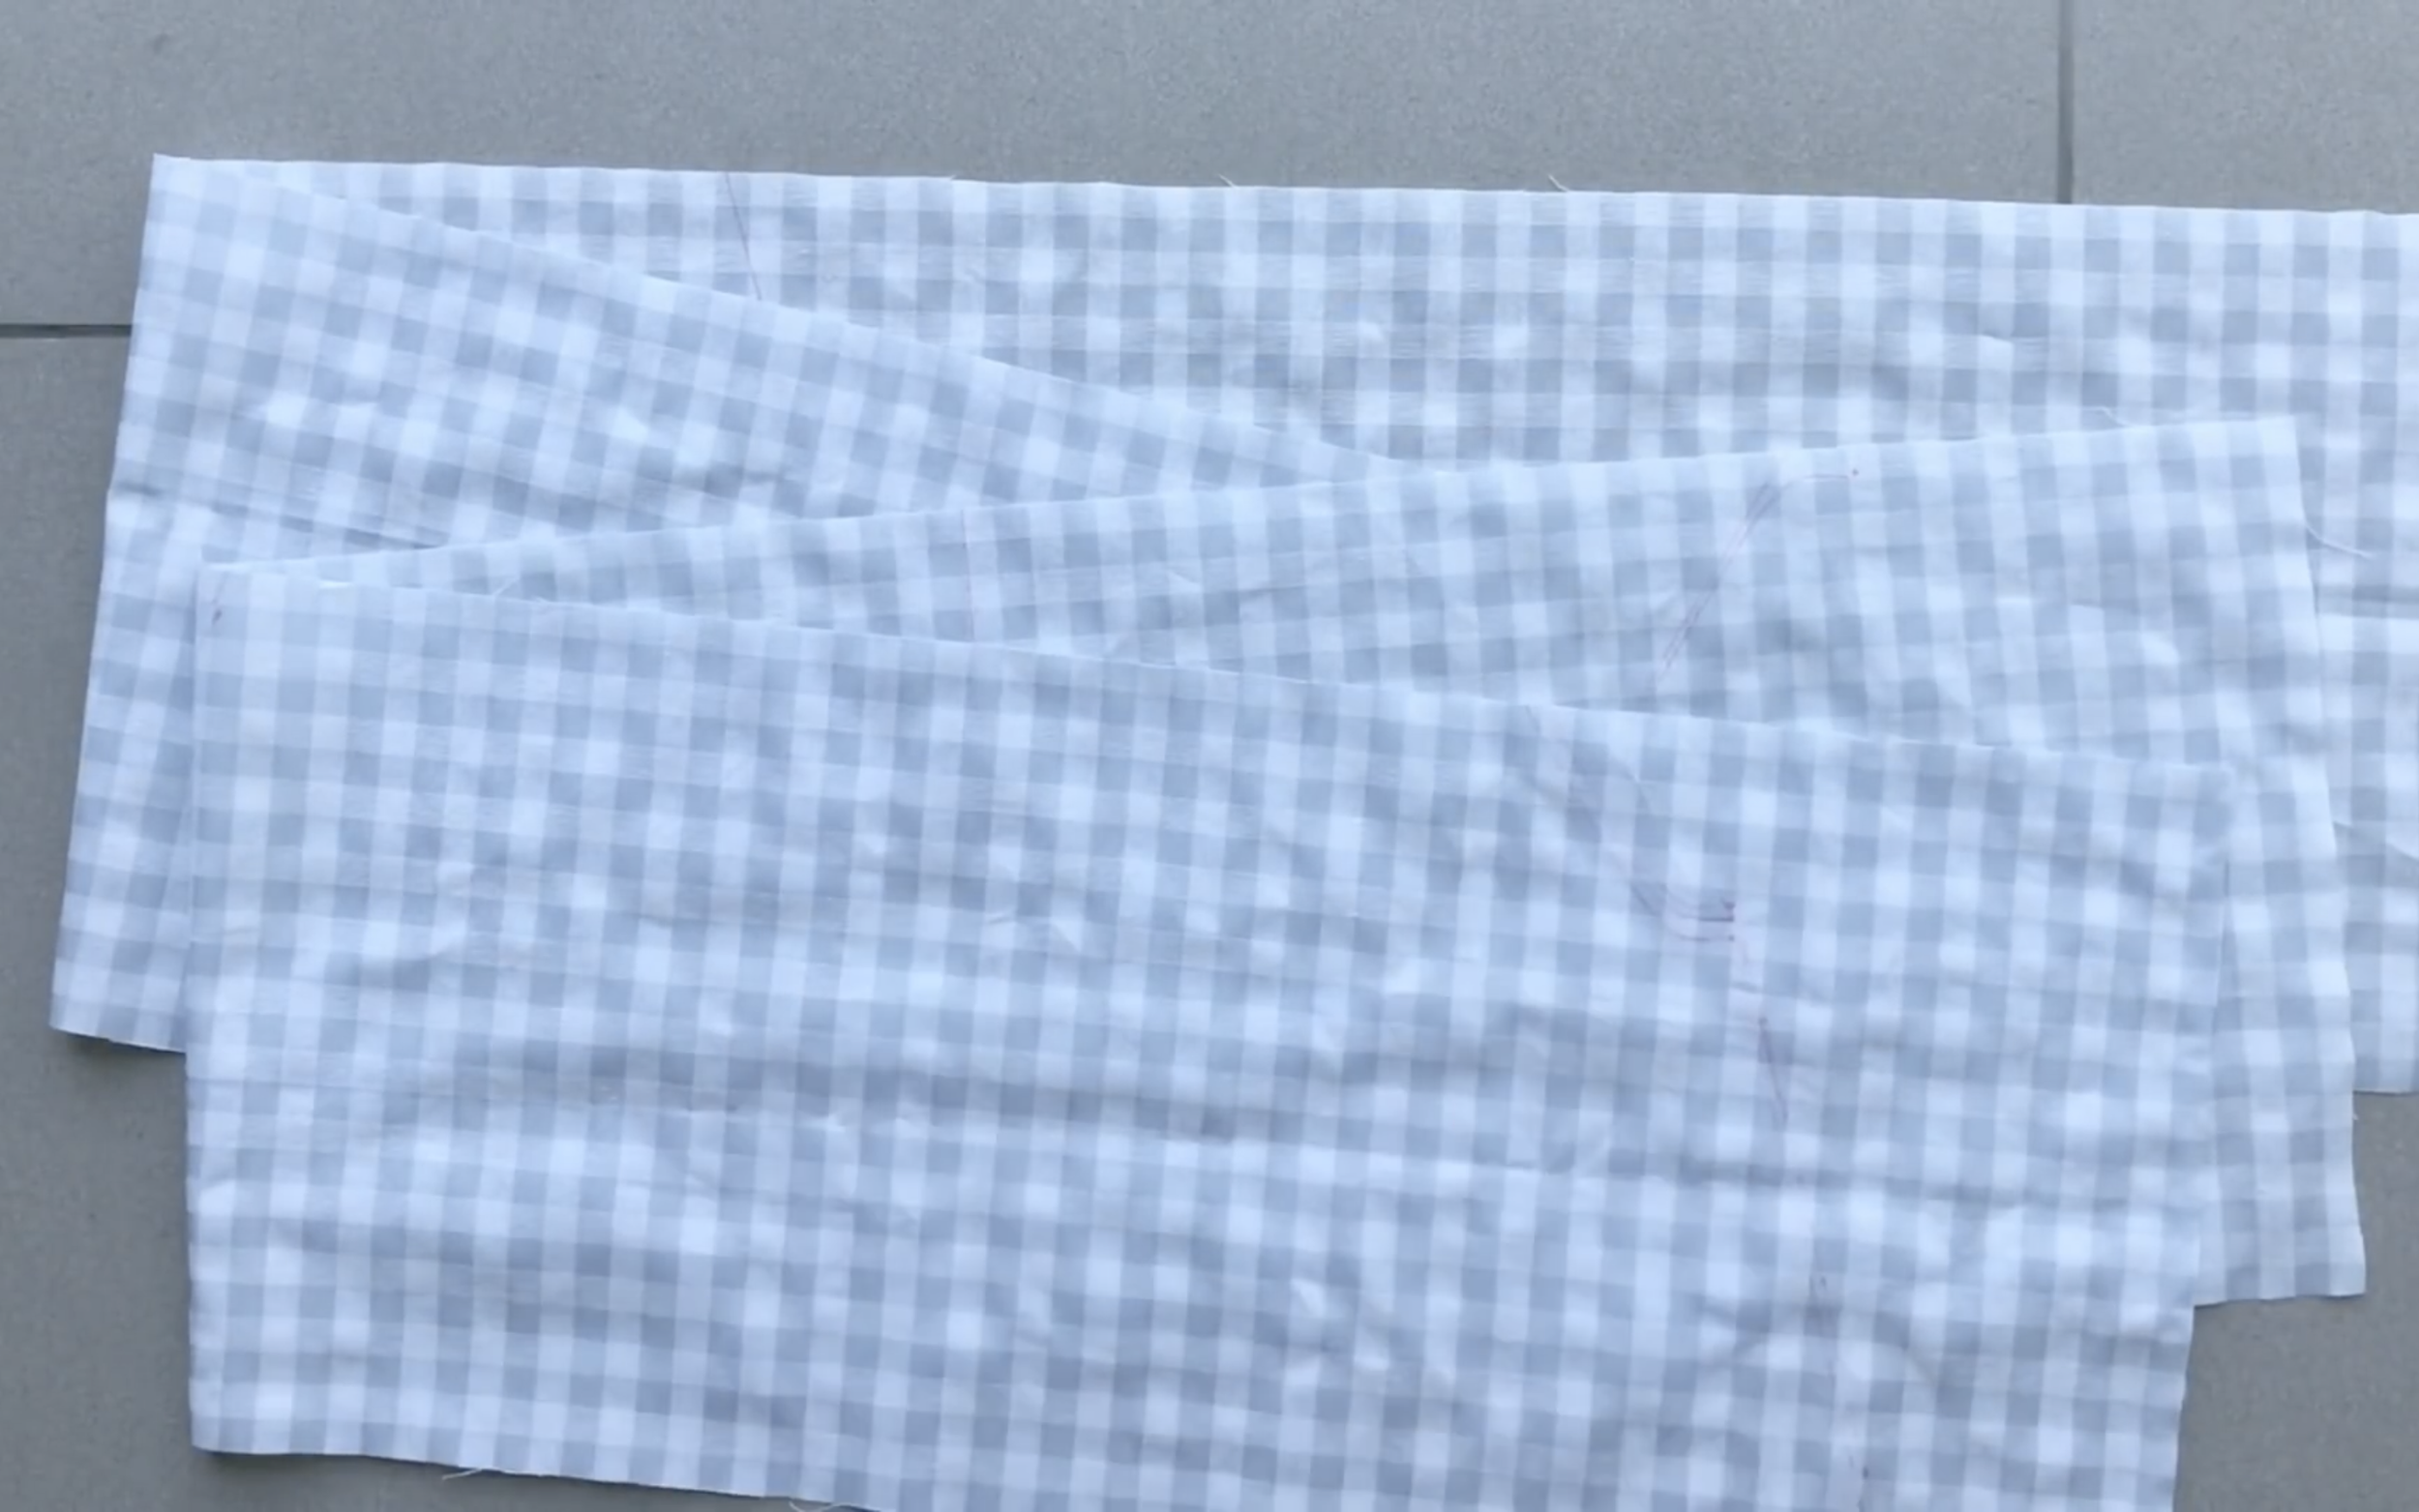
Cut two rectangles with 20 cm length and 90 cm width, which is three times half the hip size and one and a half times the width of the dress’s bottom.
Connect the two rectangles together at the seam to form a circle.
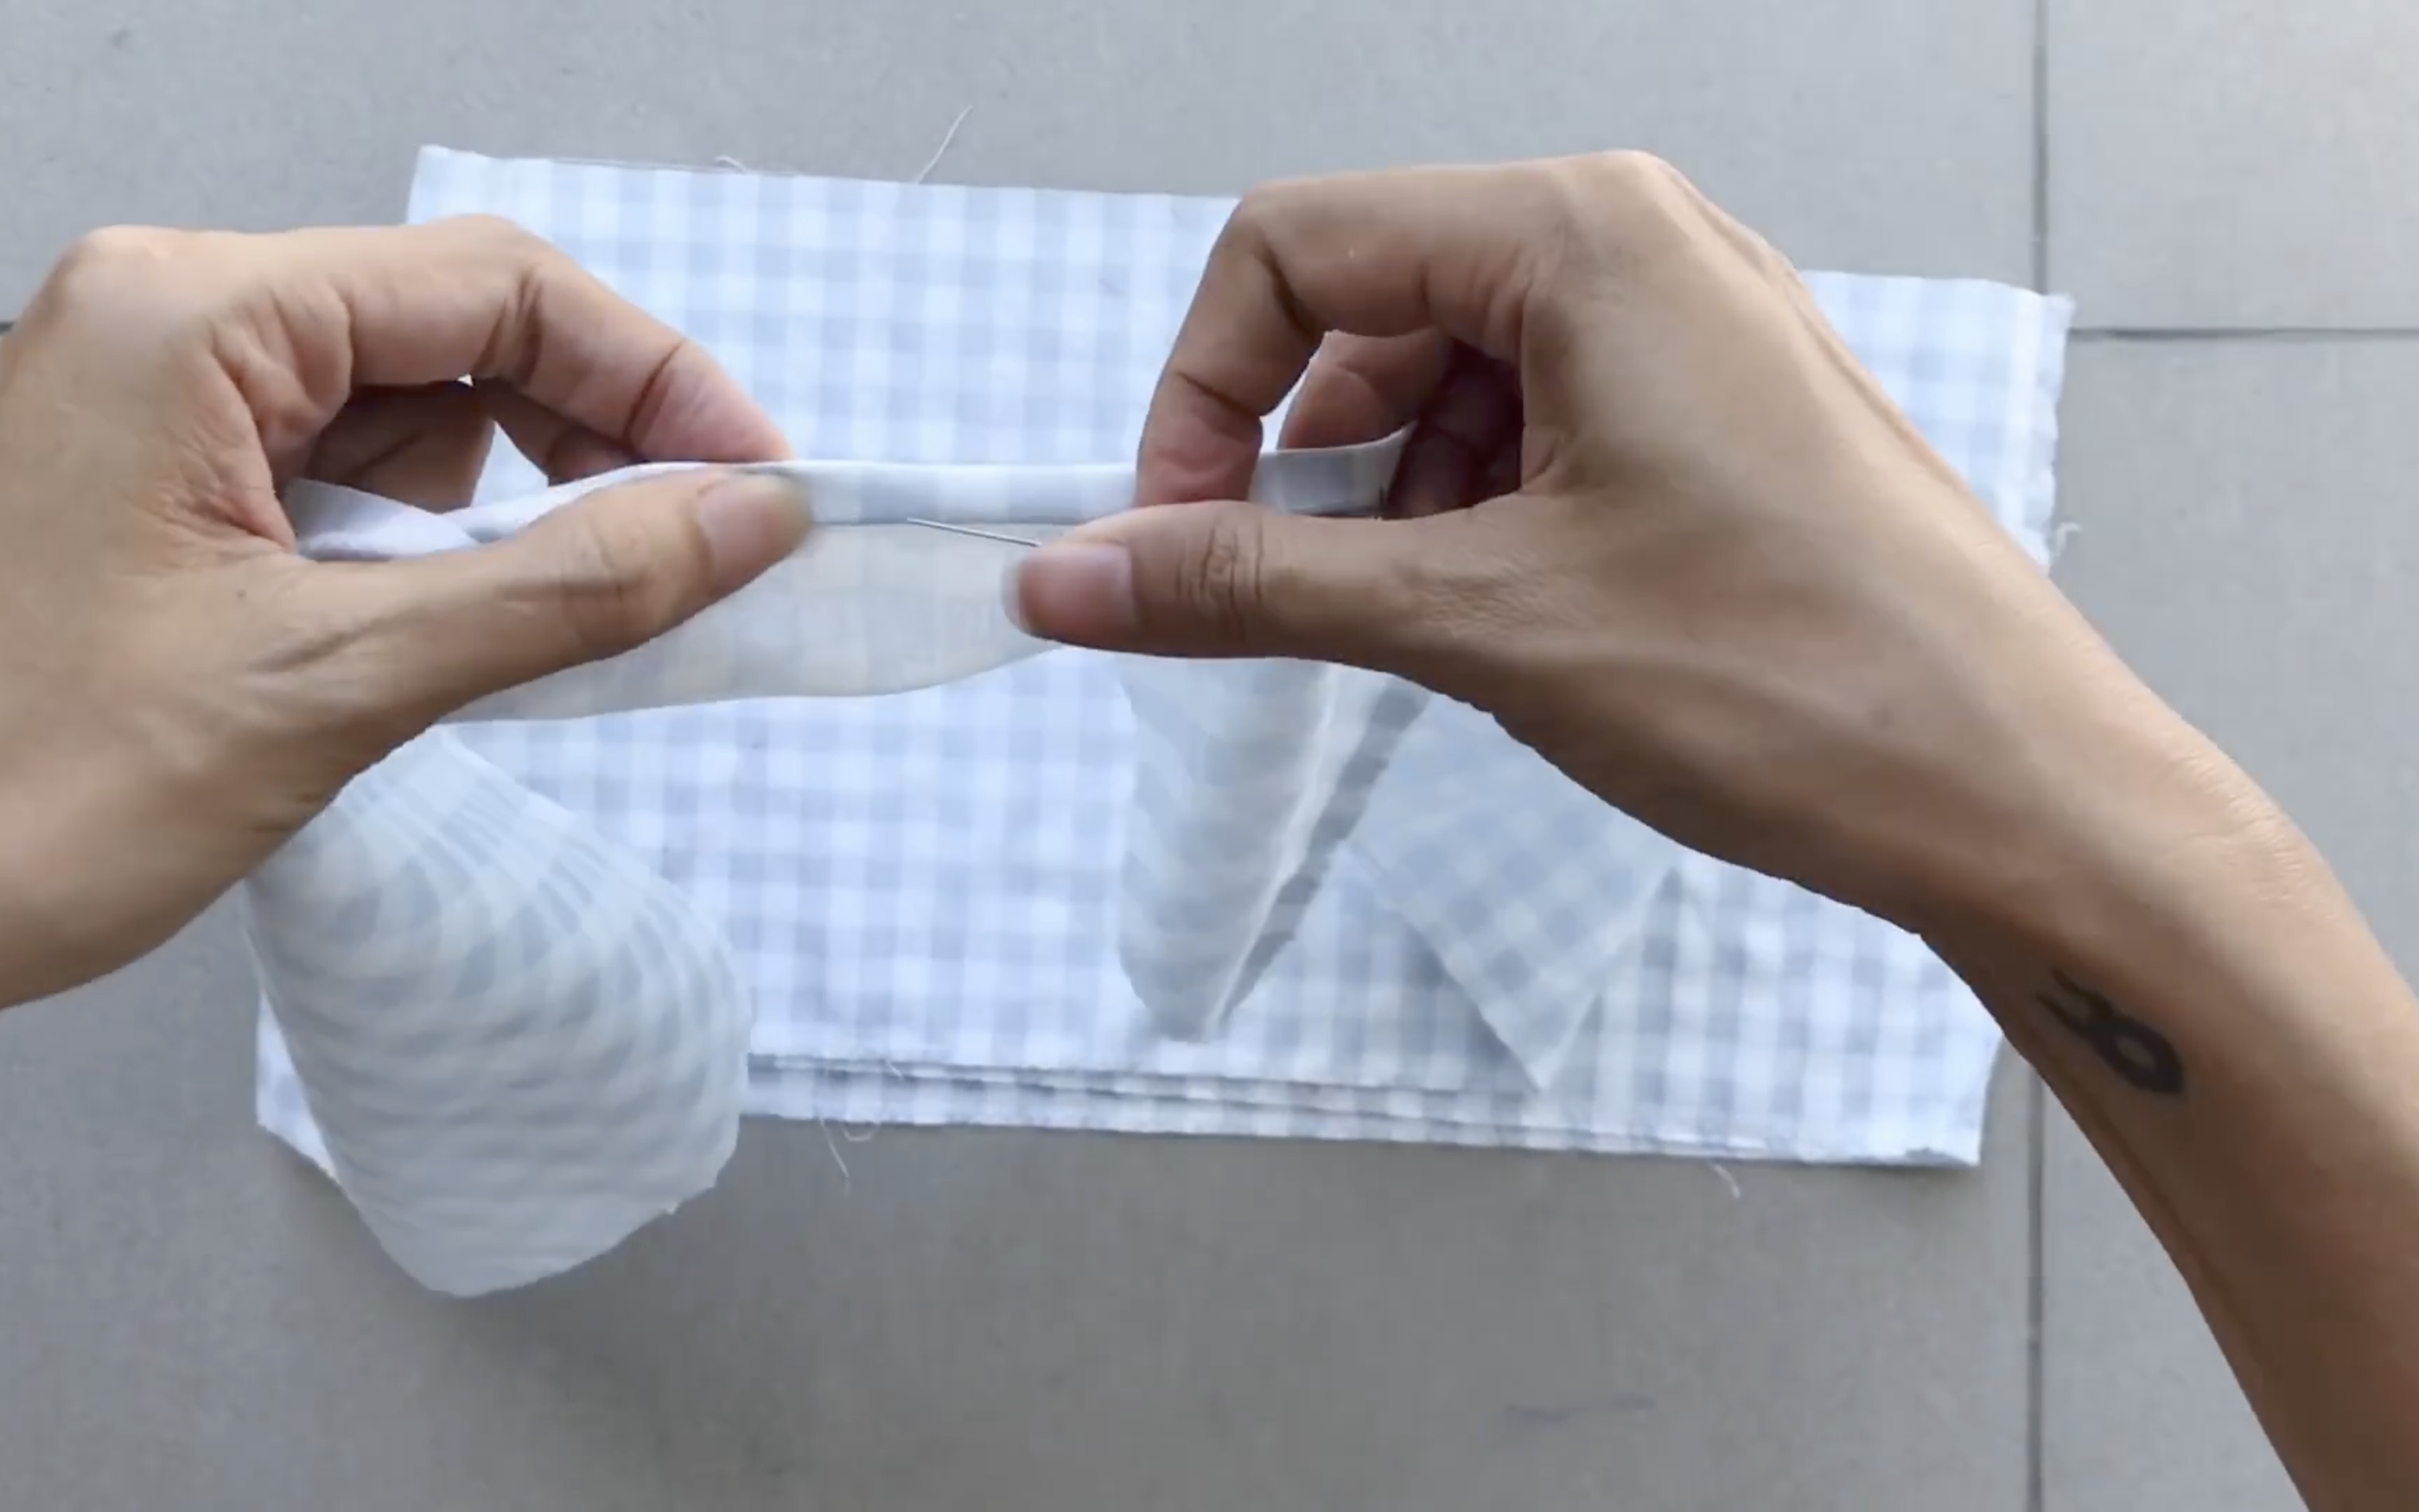
Finish one side of the circle by folding the fabric inside twice and sewing.

On the other side, make a loose seam first.
Then create a gathering effect.
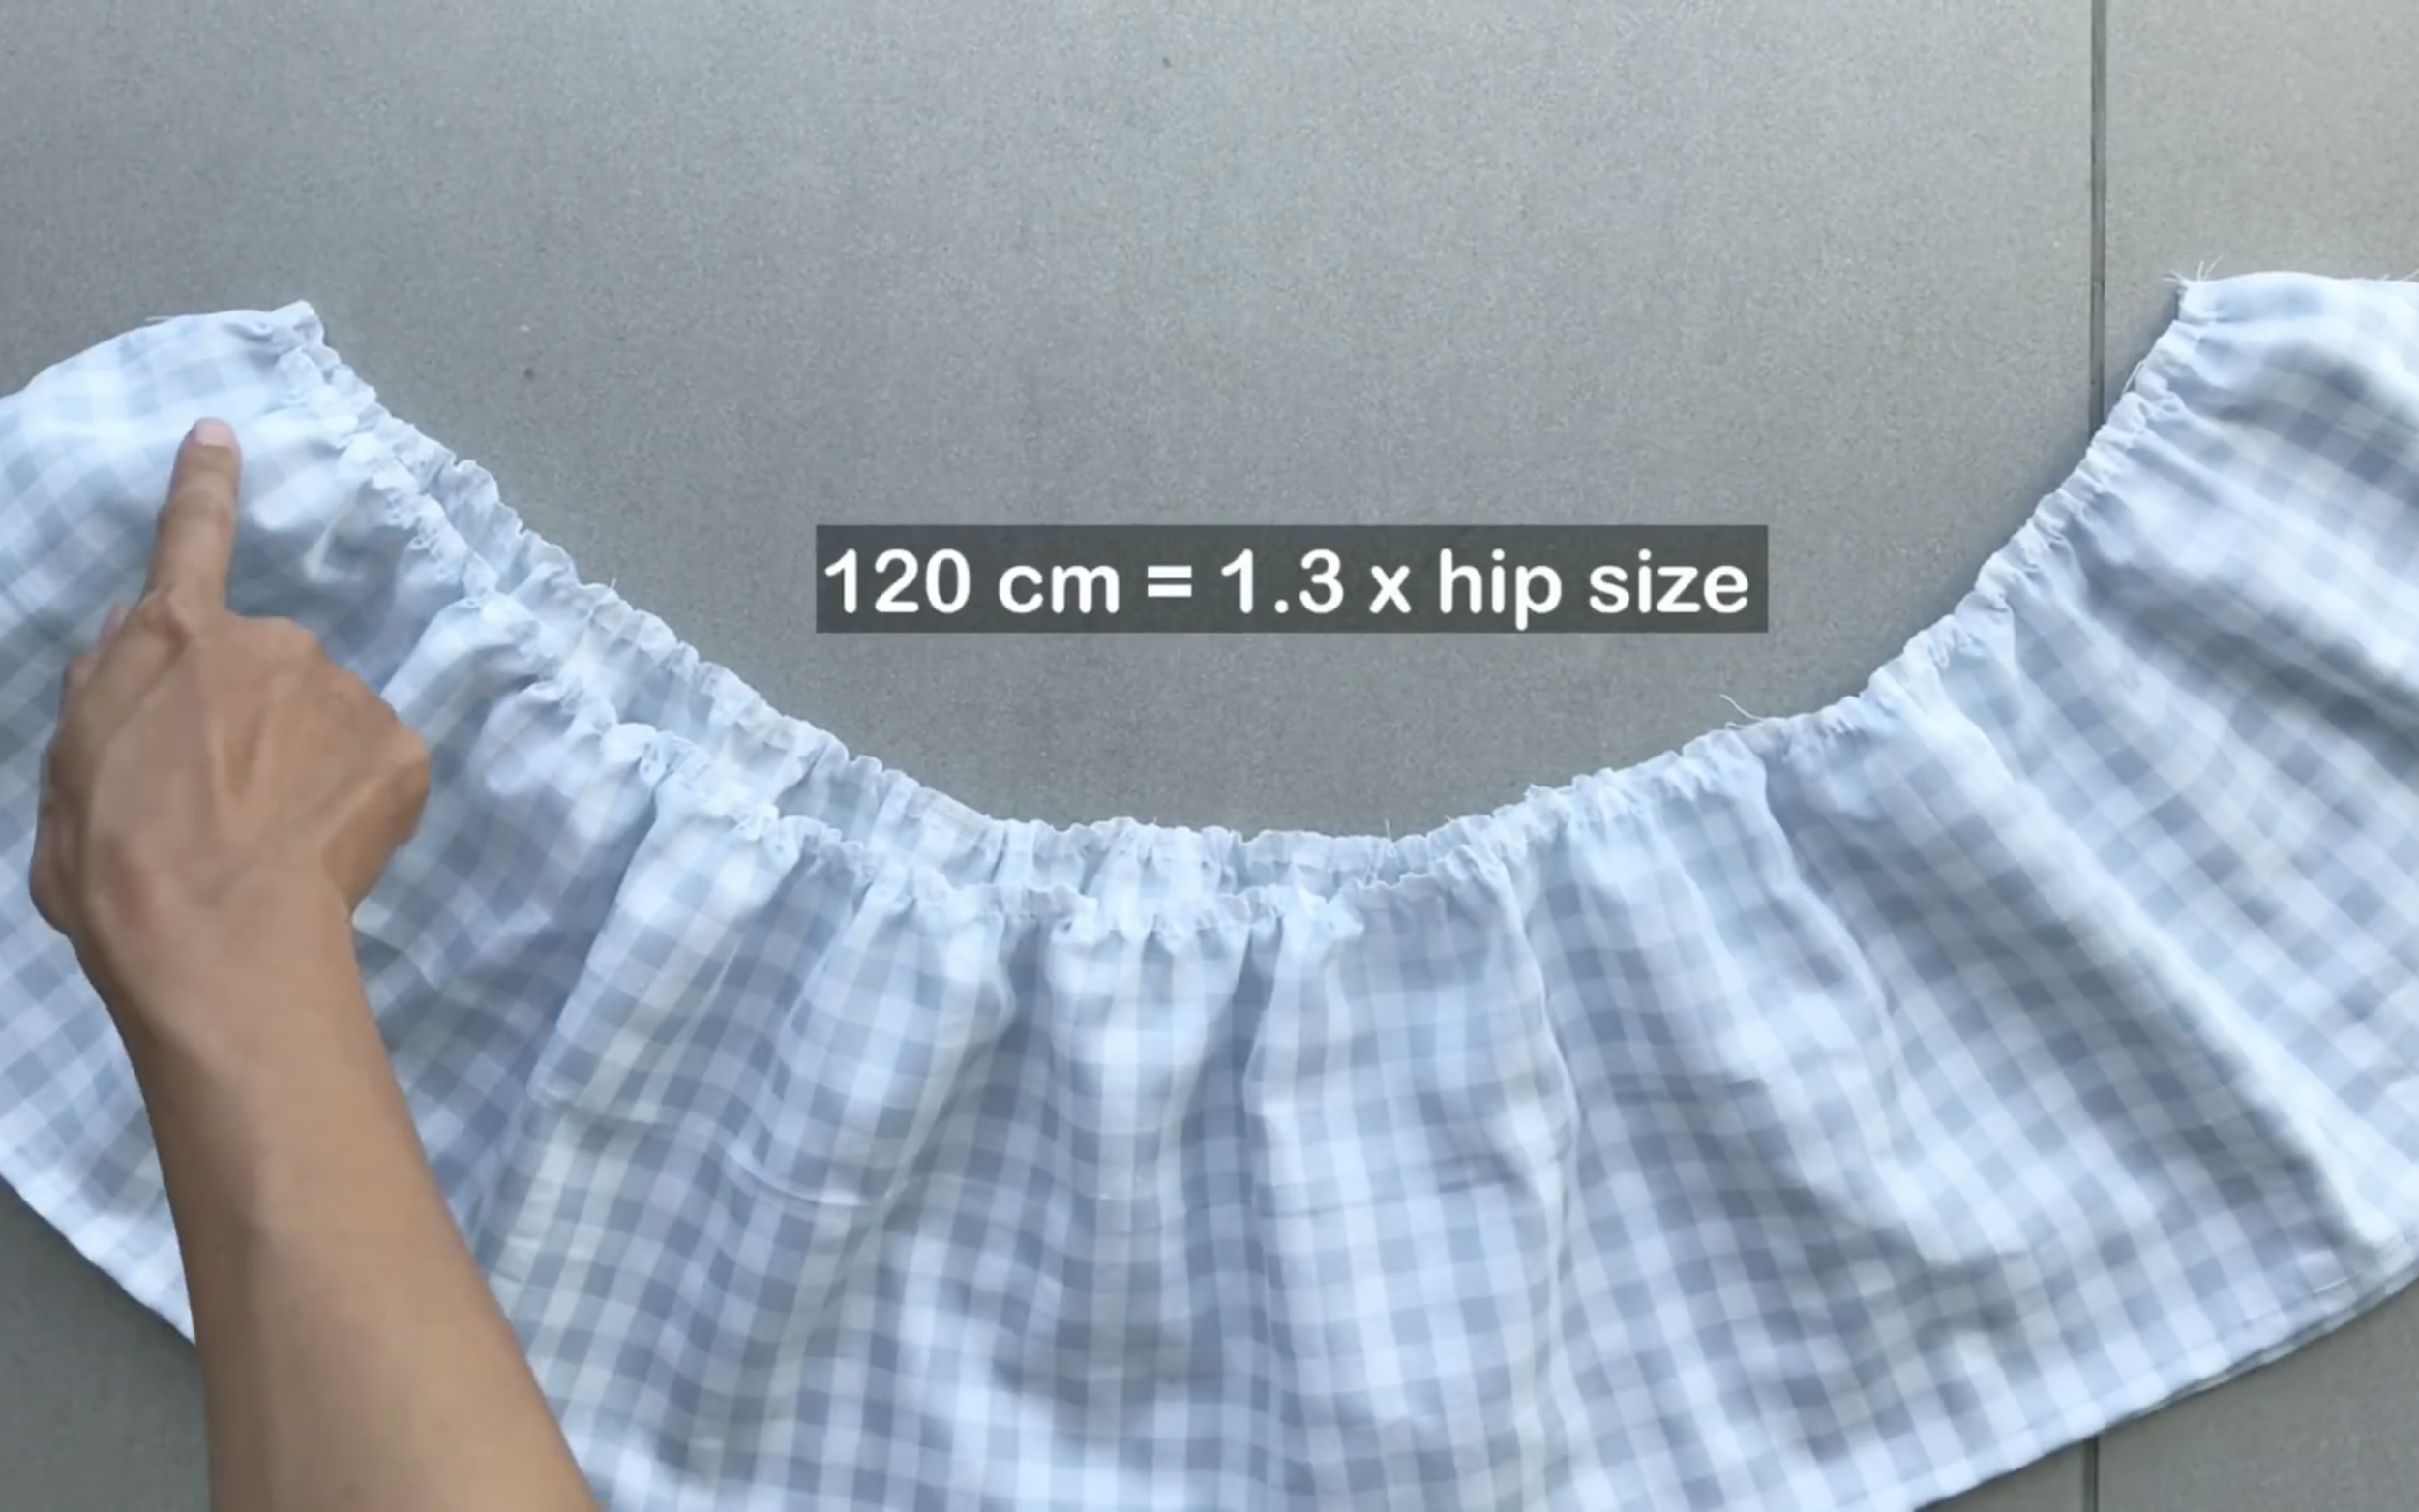
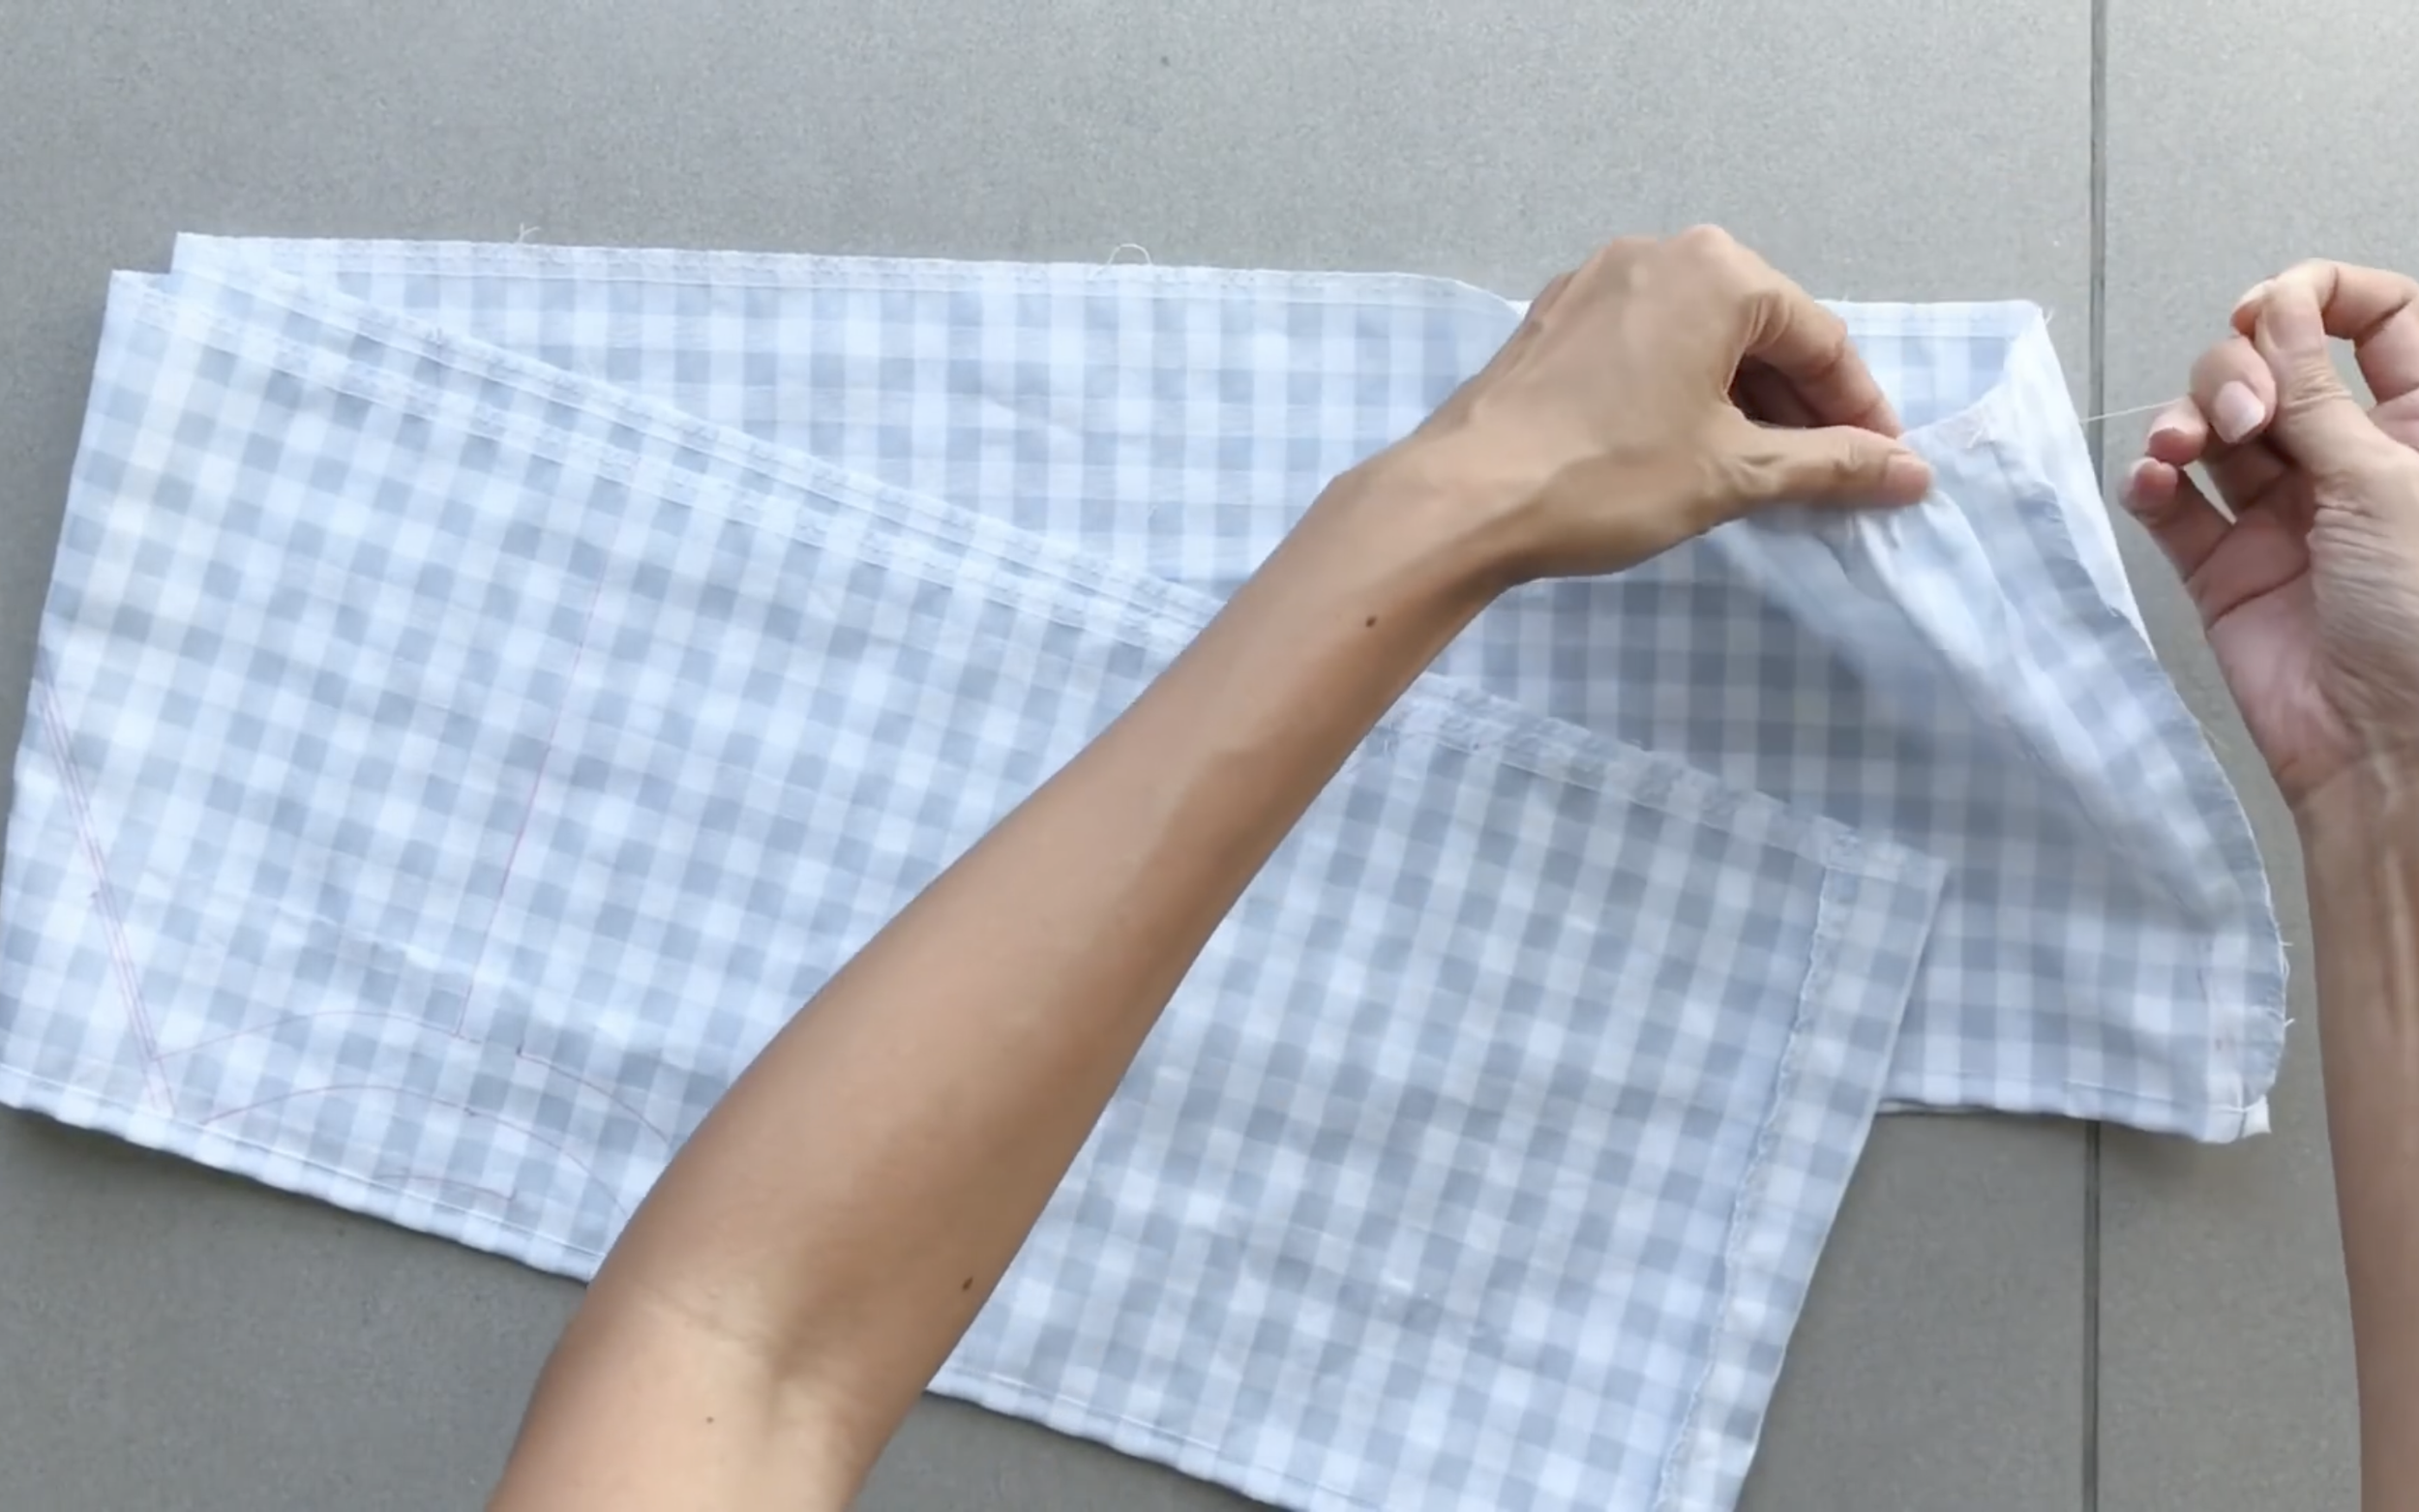
Make sure the final width of the gathered fabric is 120 cm, which is one and a half times the hip size and matches the width of the dress’s bottom.
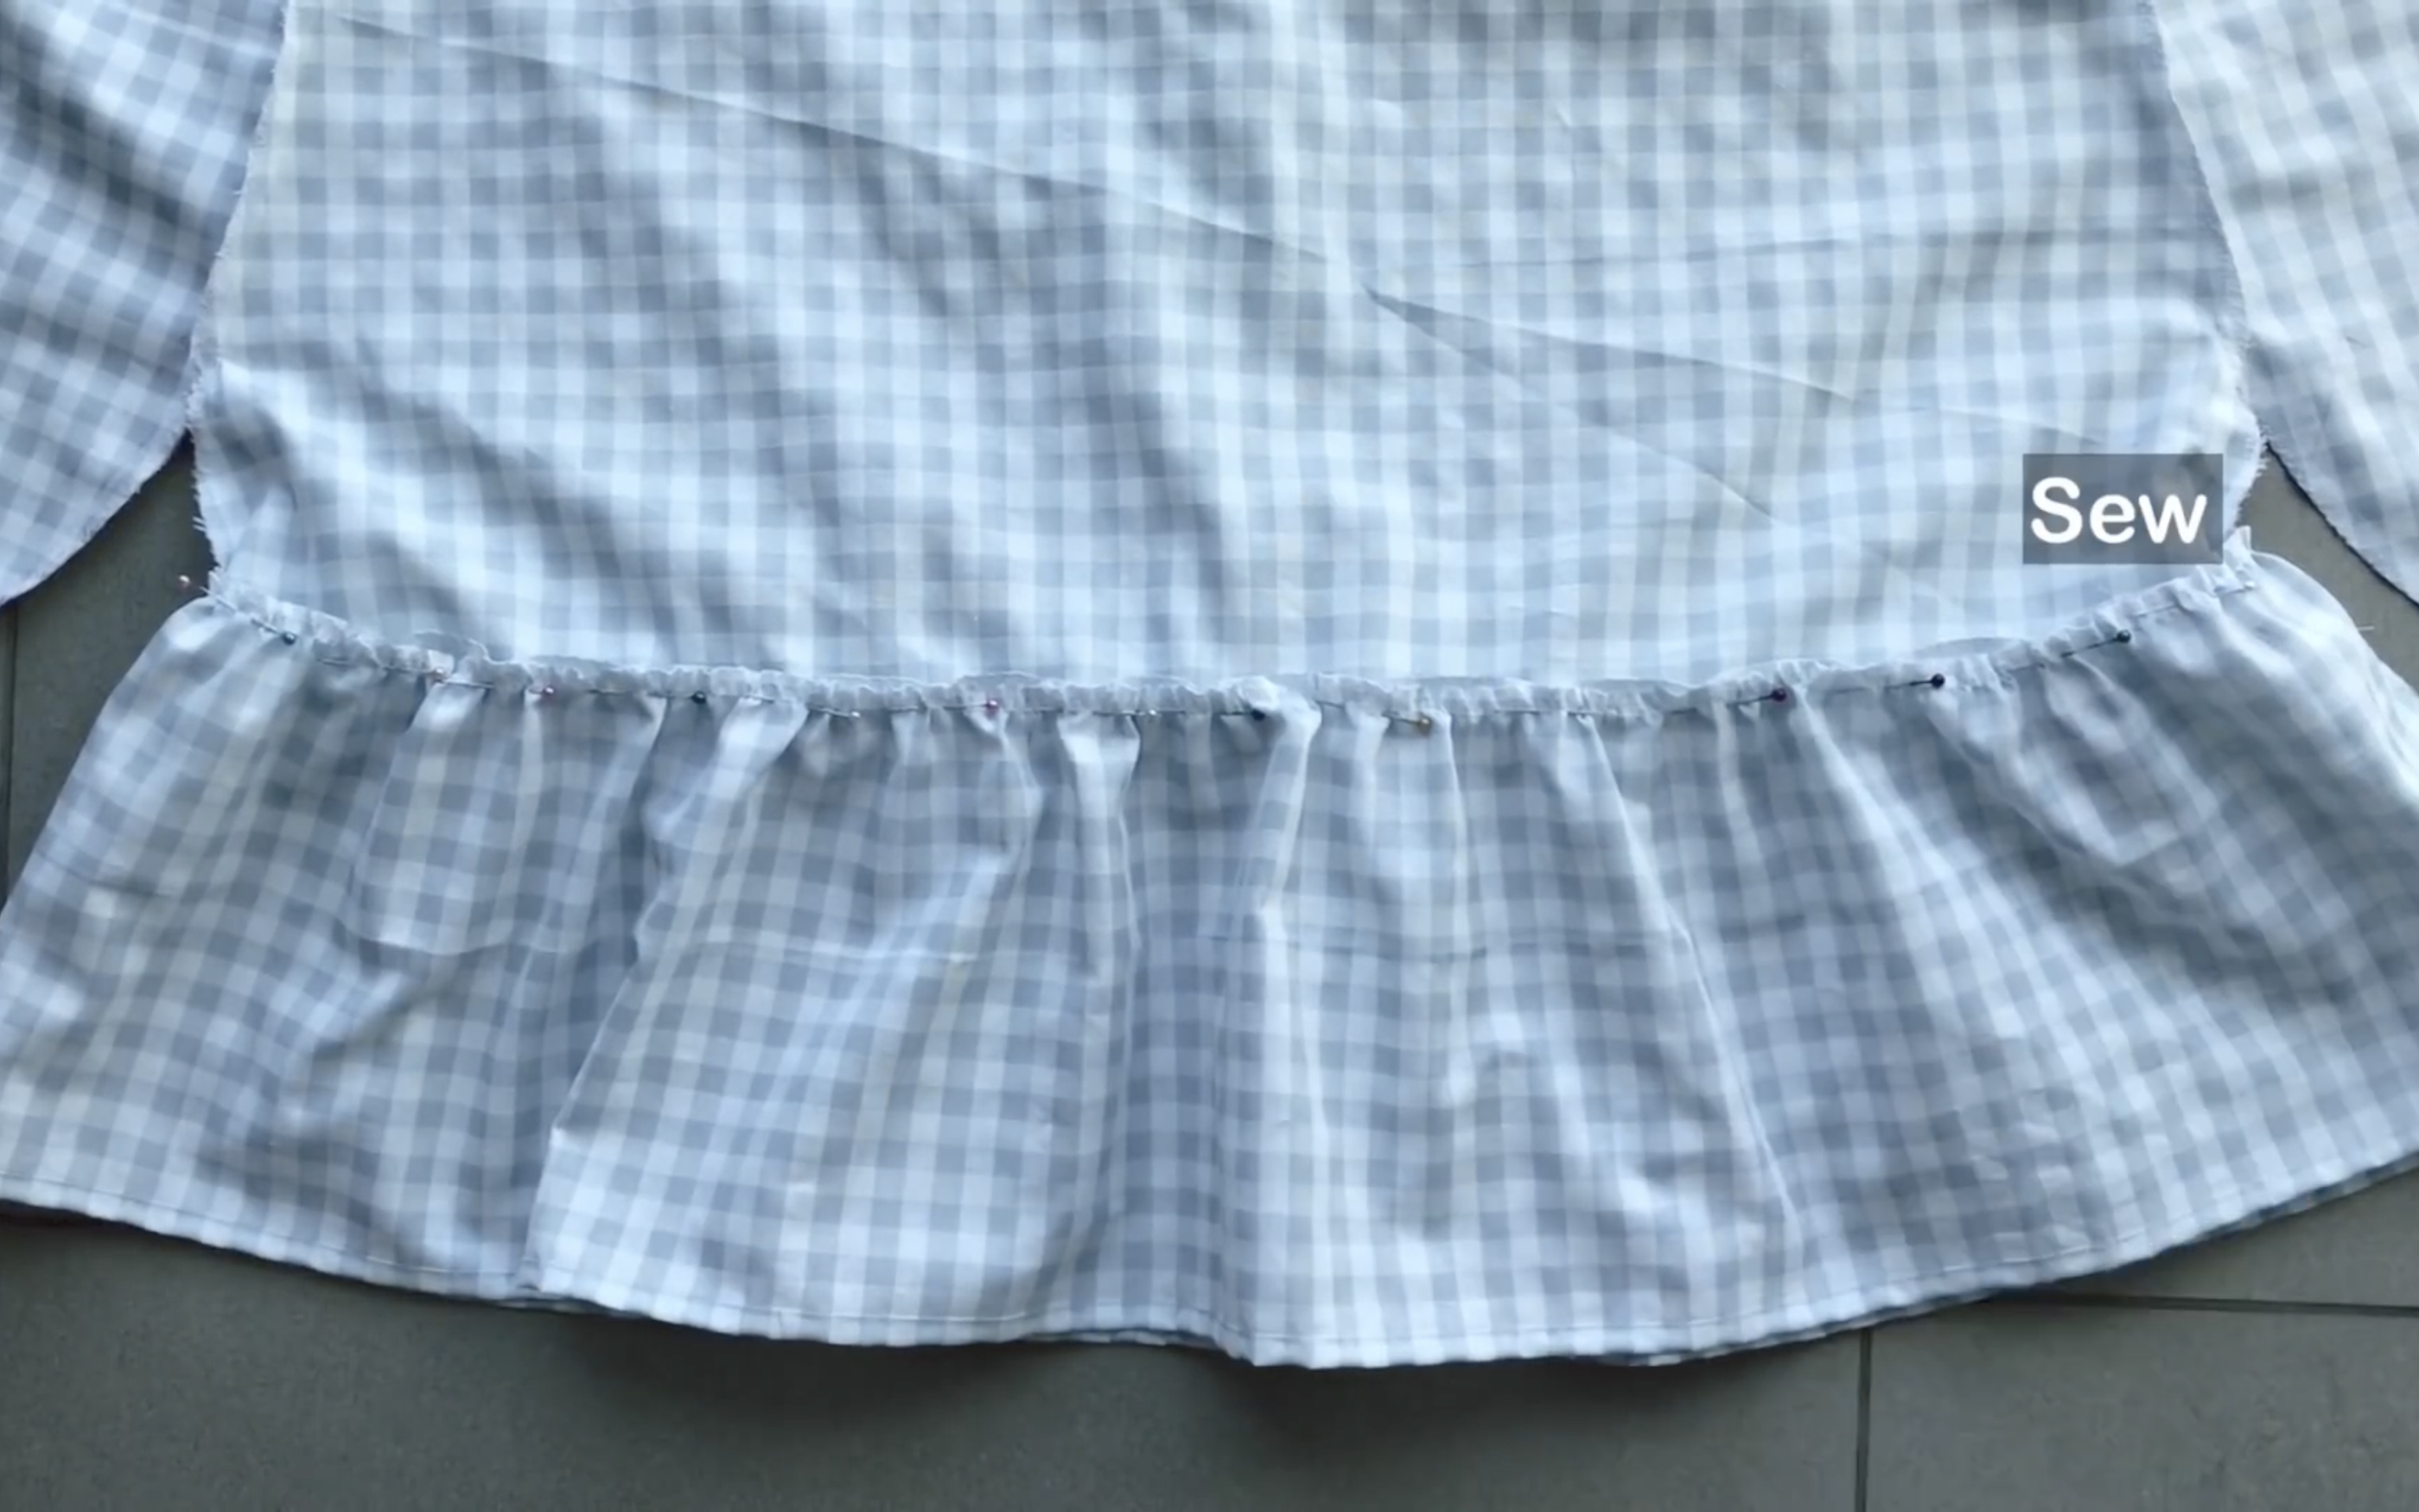
Then connect them together.
THE SLEEVE
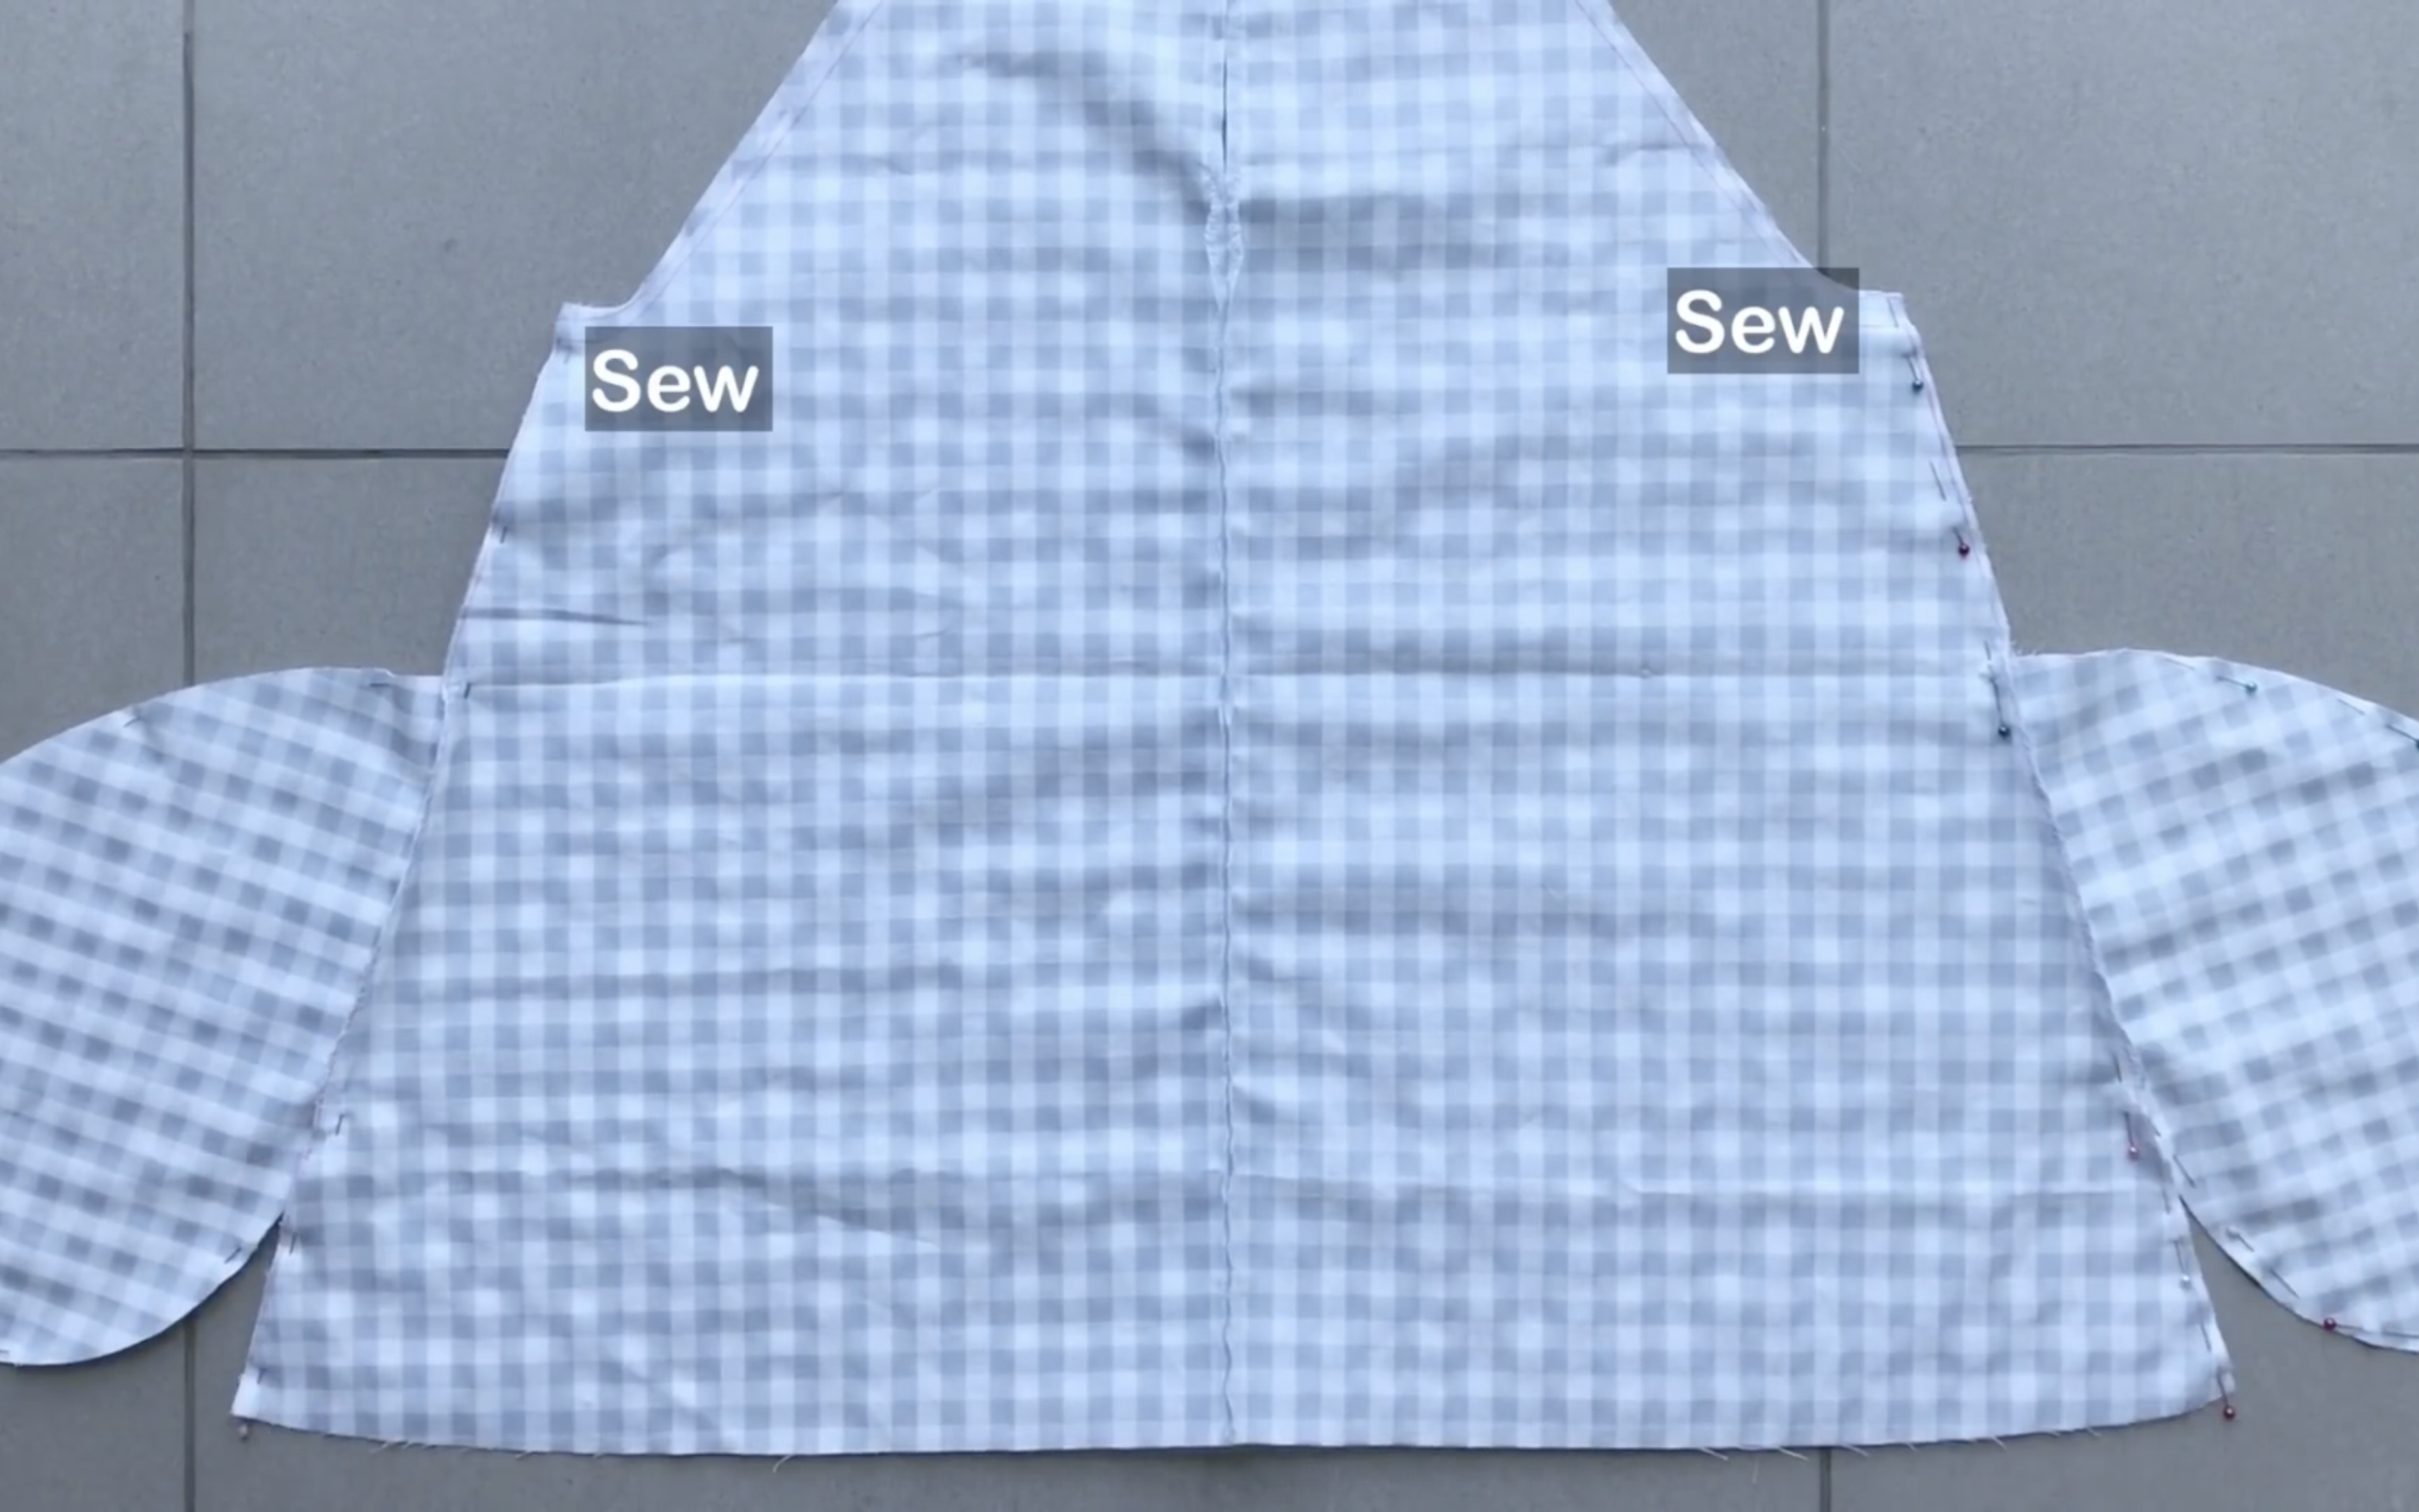
For the sleeve, after cutting, sew the underarm seams together.
Make a loose seam at the sleeve’s end first, then create a gathered effect.
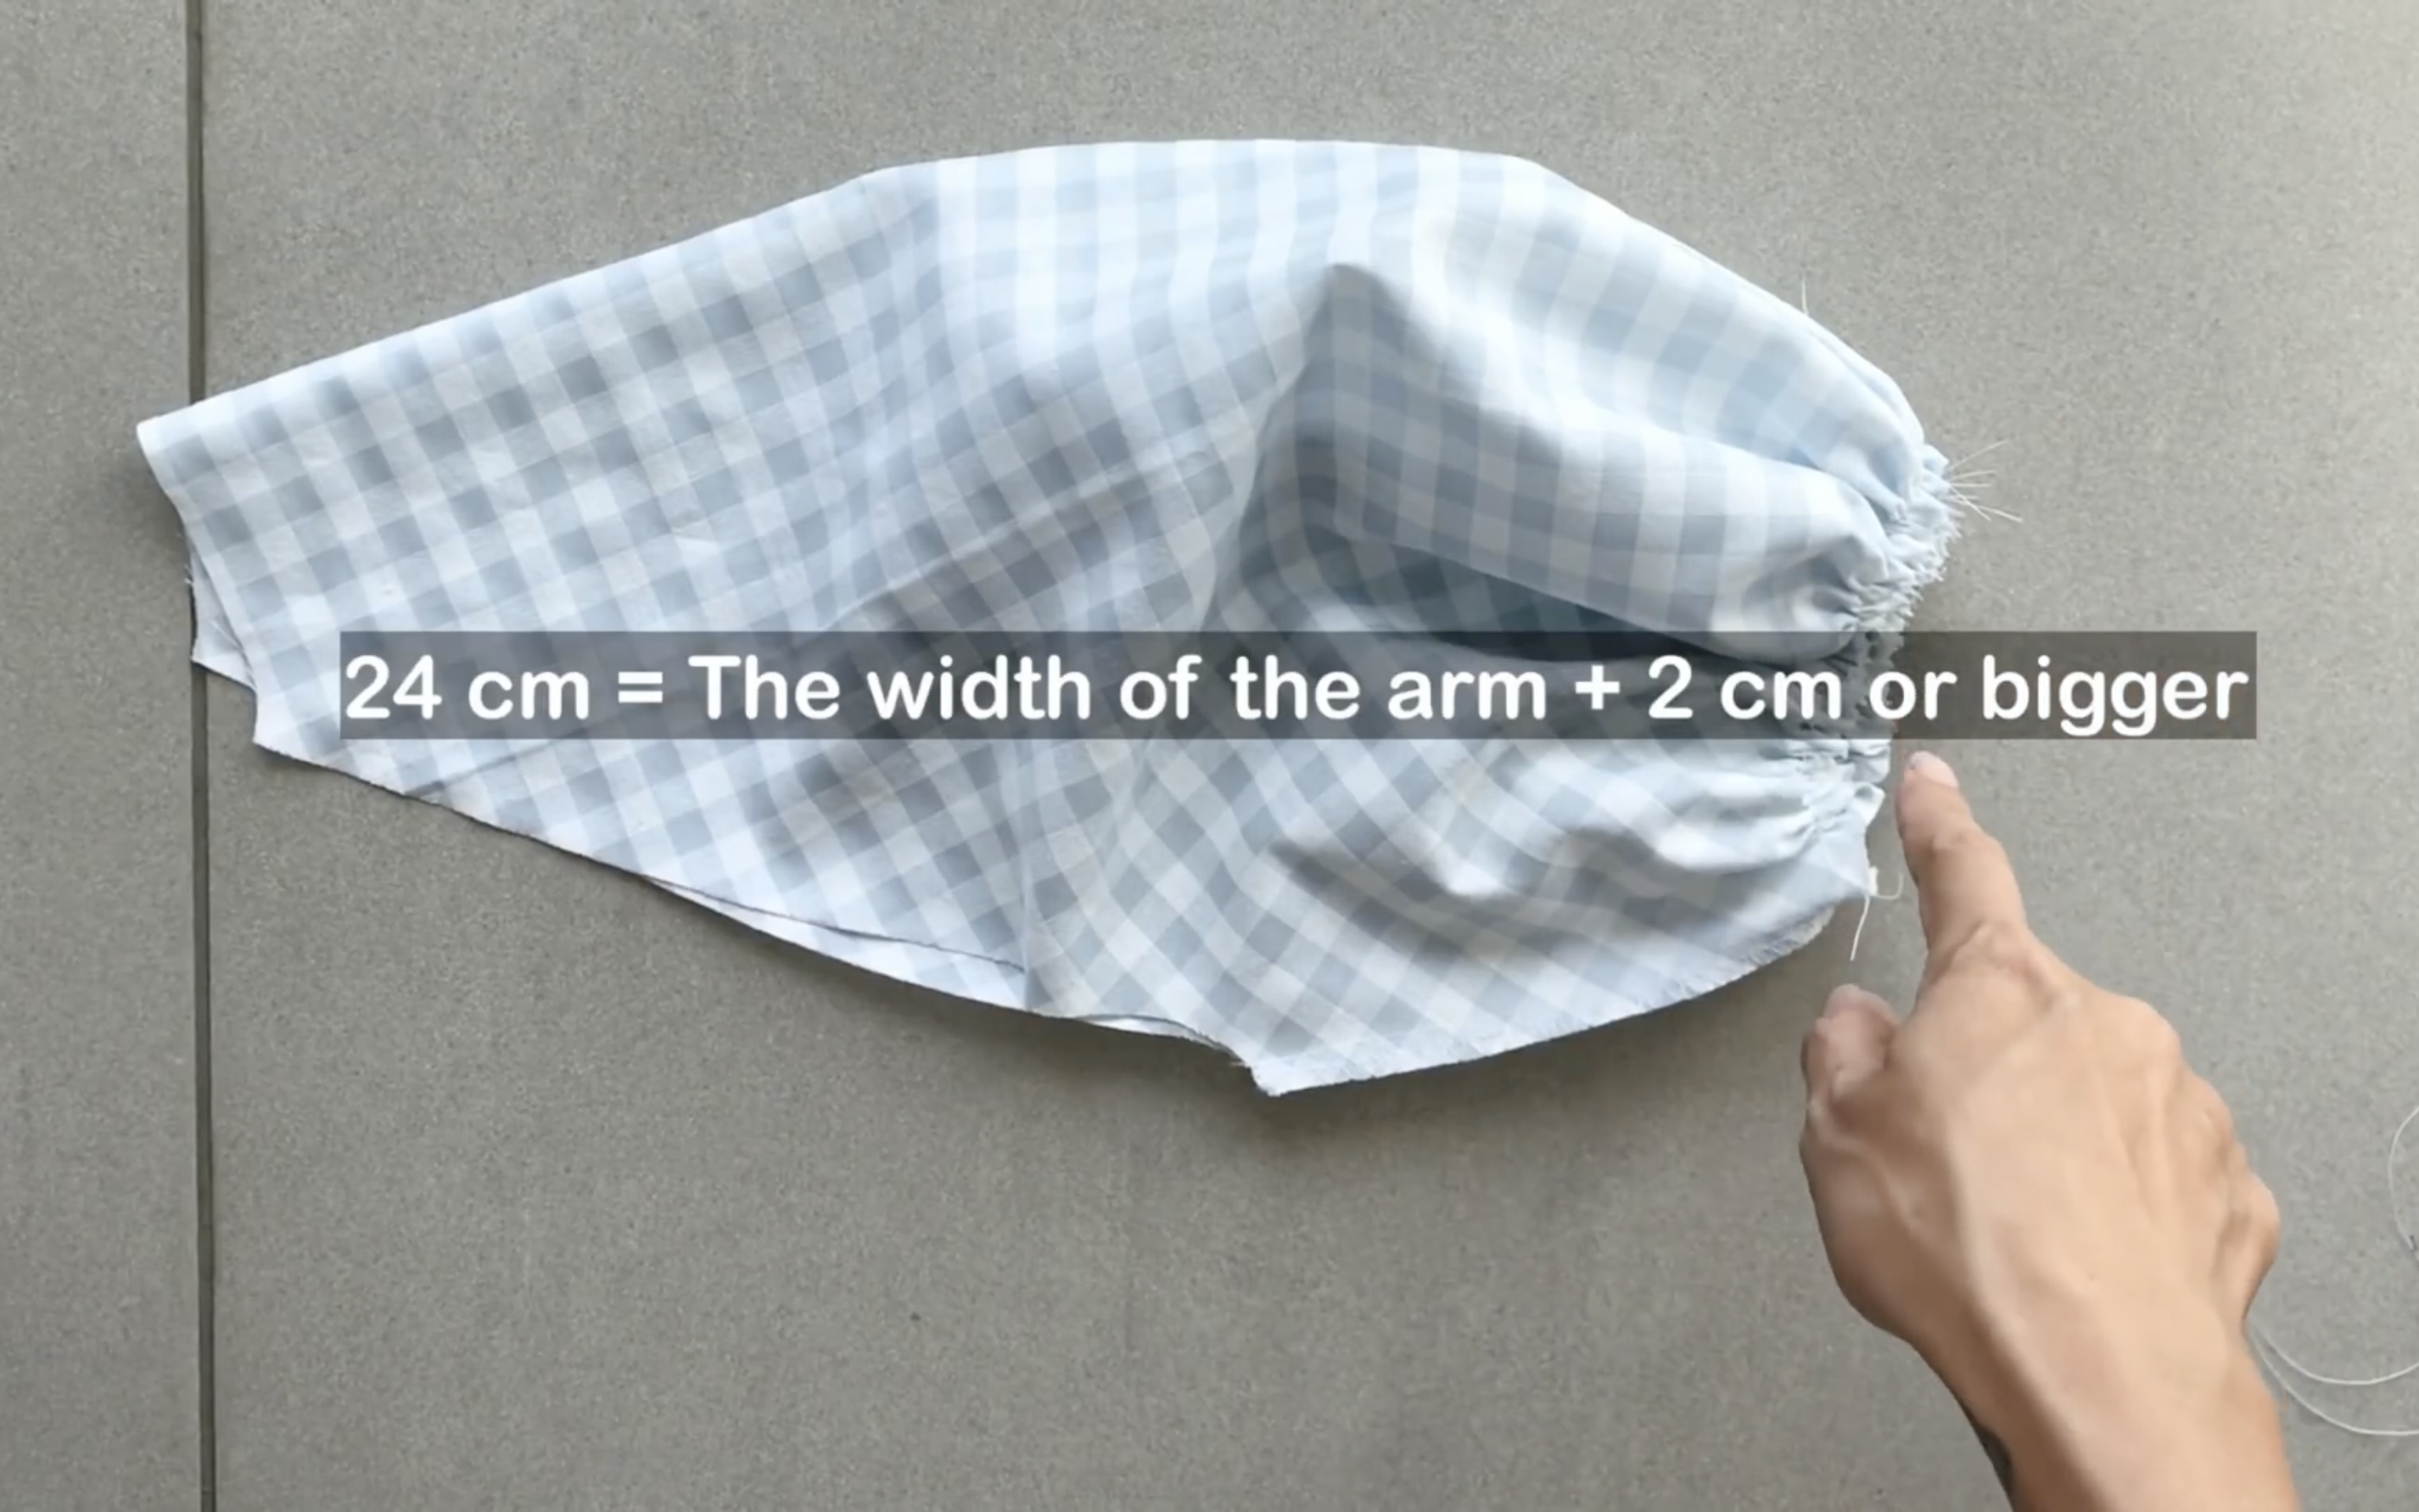
The final width of the gathered fabric should be 24 cm, slightly larger than the arm width.
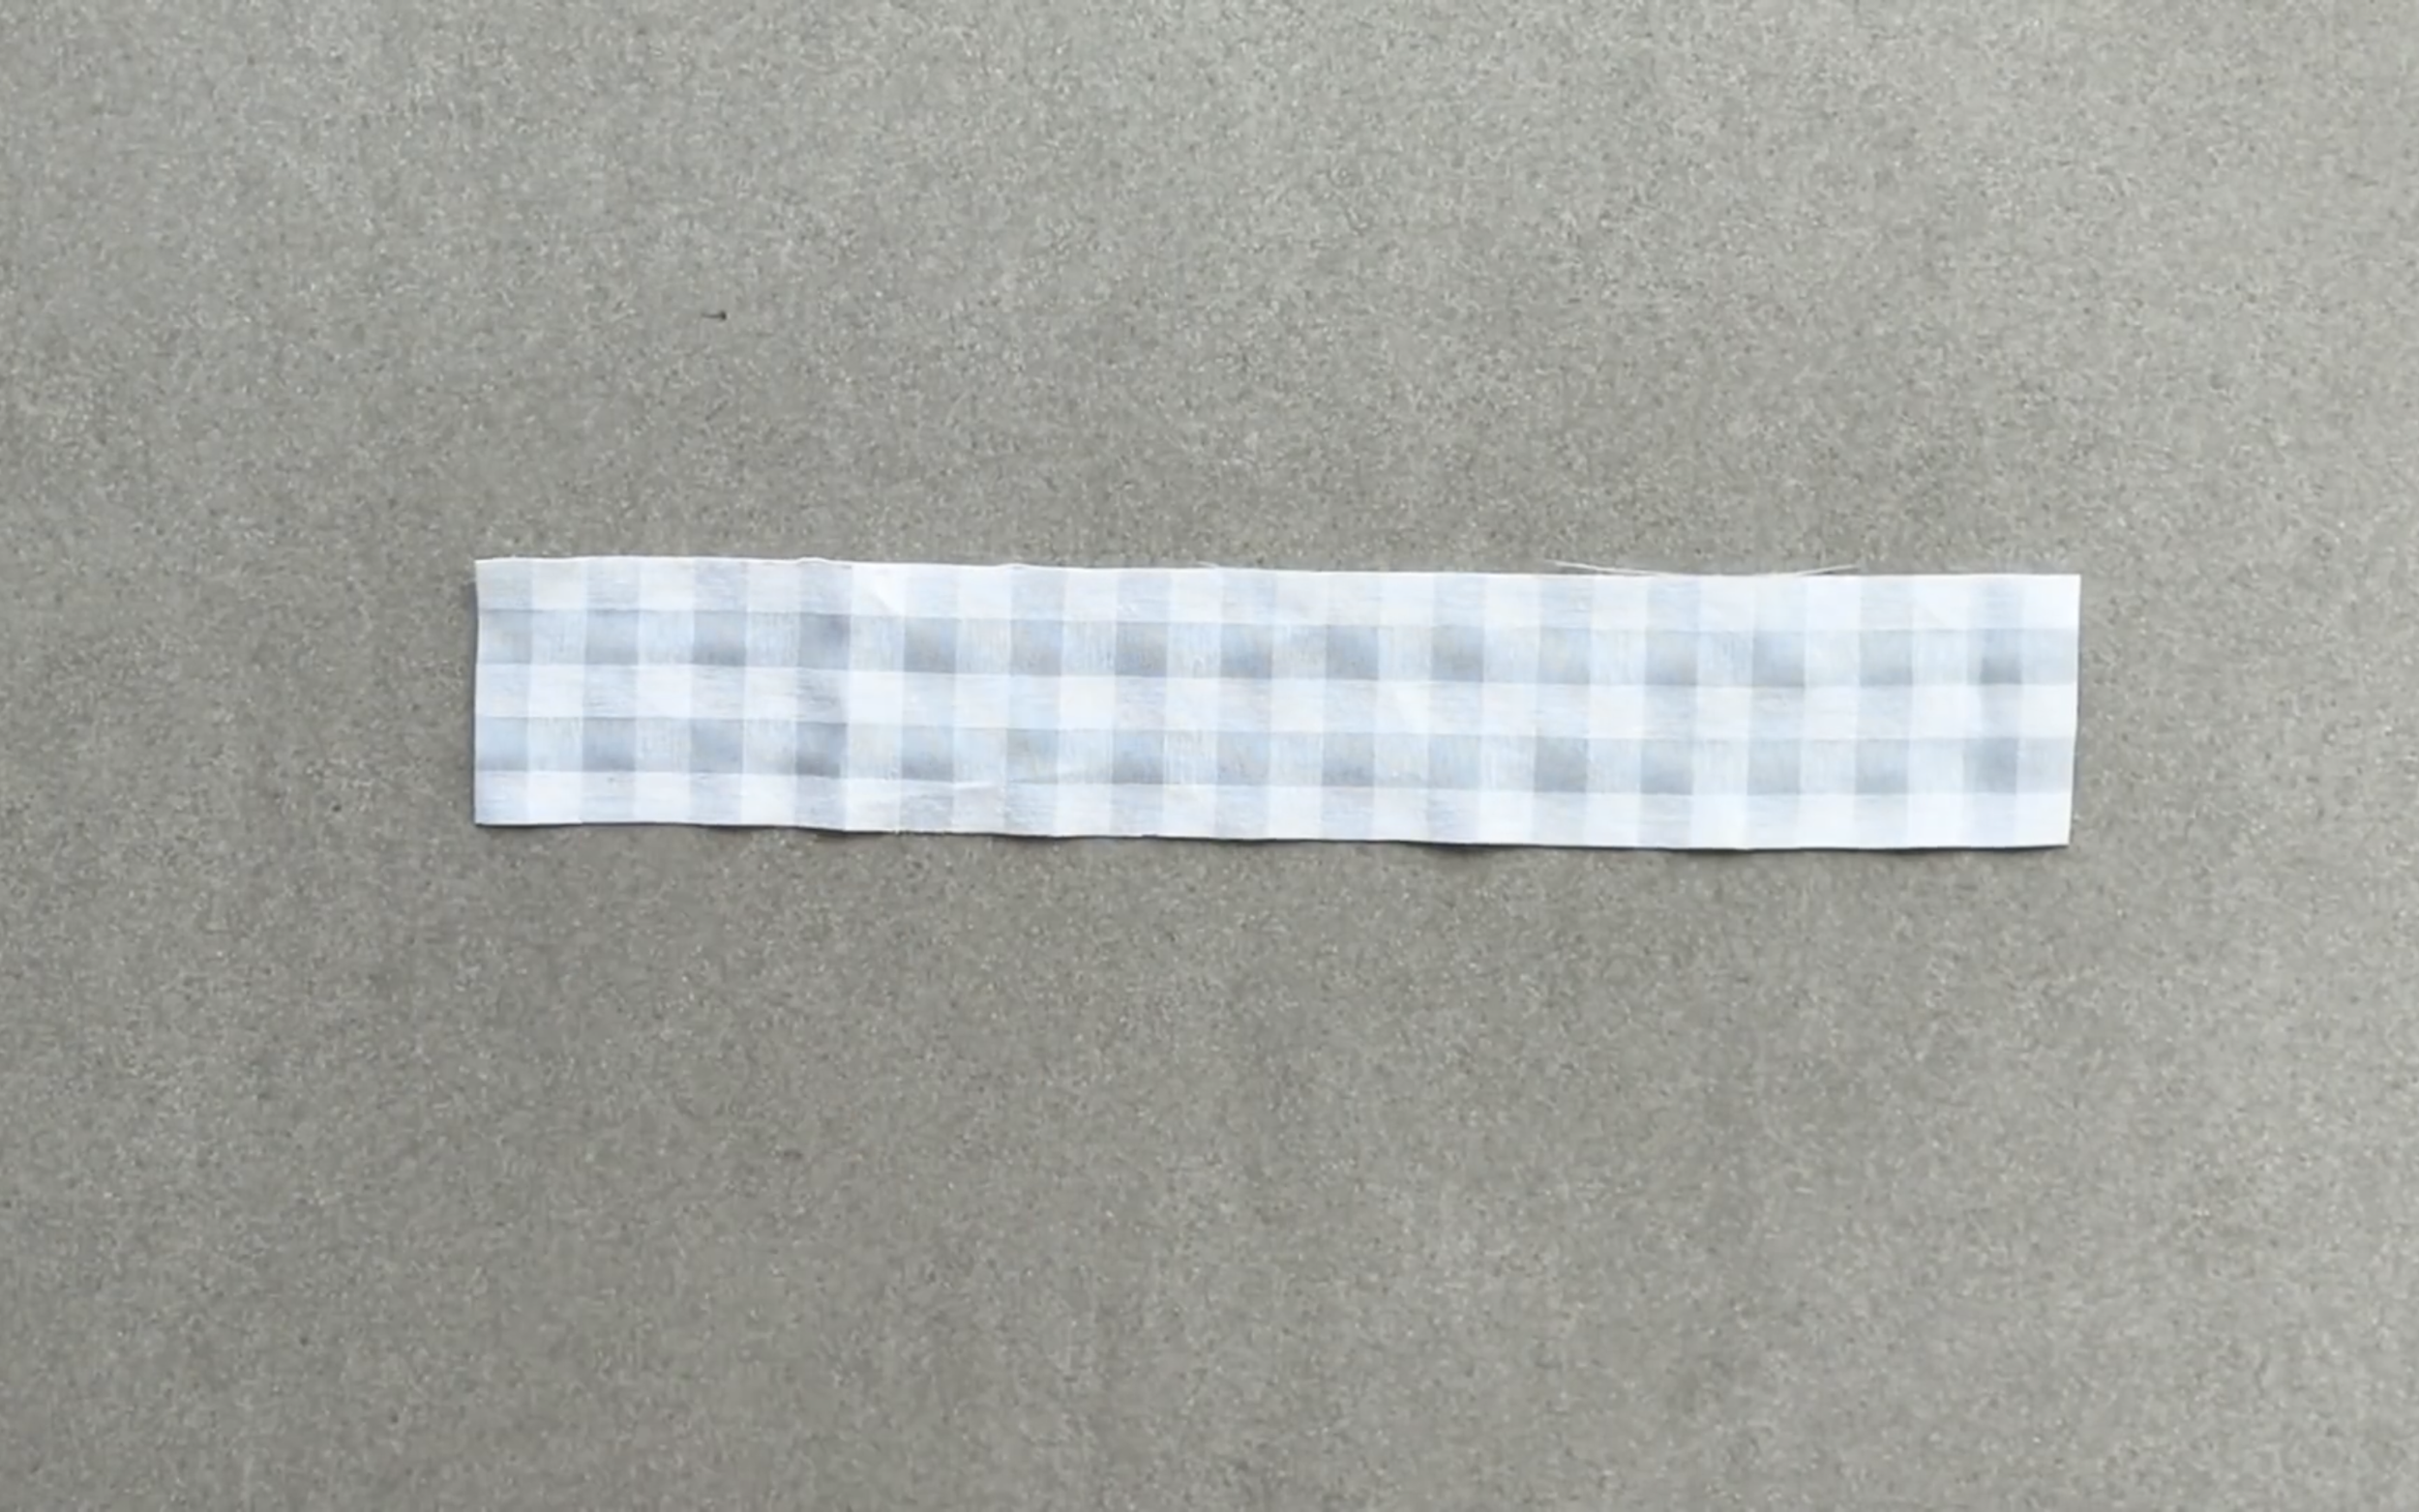
To finish the sleeve’s end, cut a rectangle with 3.5 cm width and 26 cm length, which is 2 cm longer than the sleeve’s end width for seam allowance.
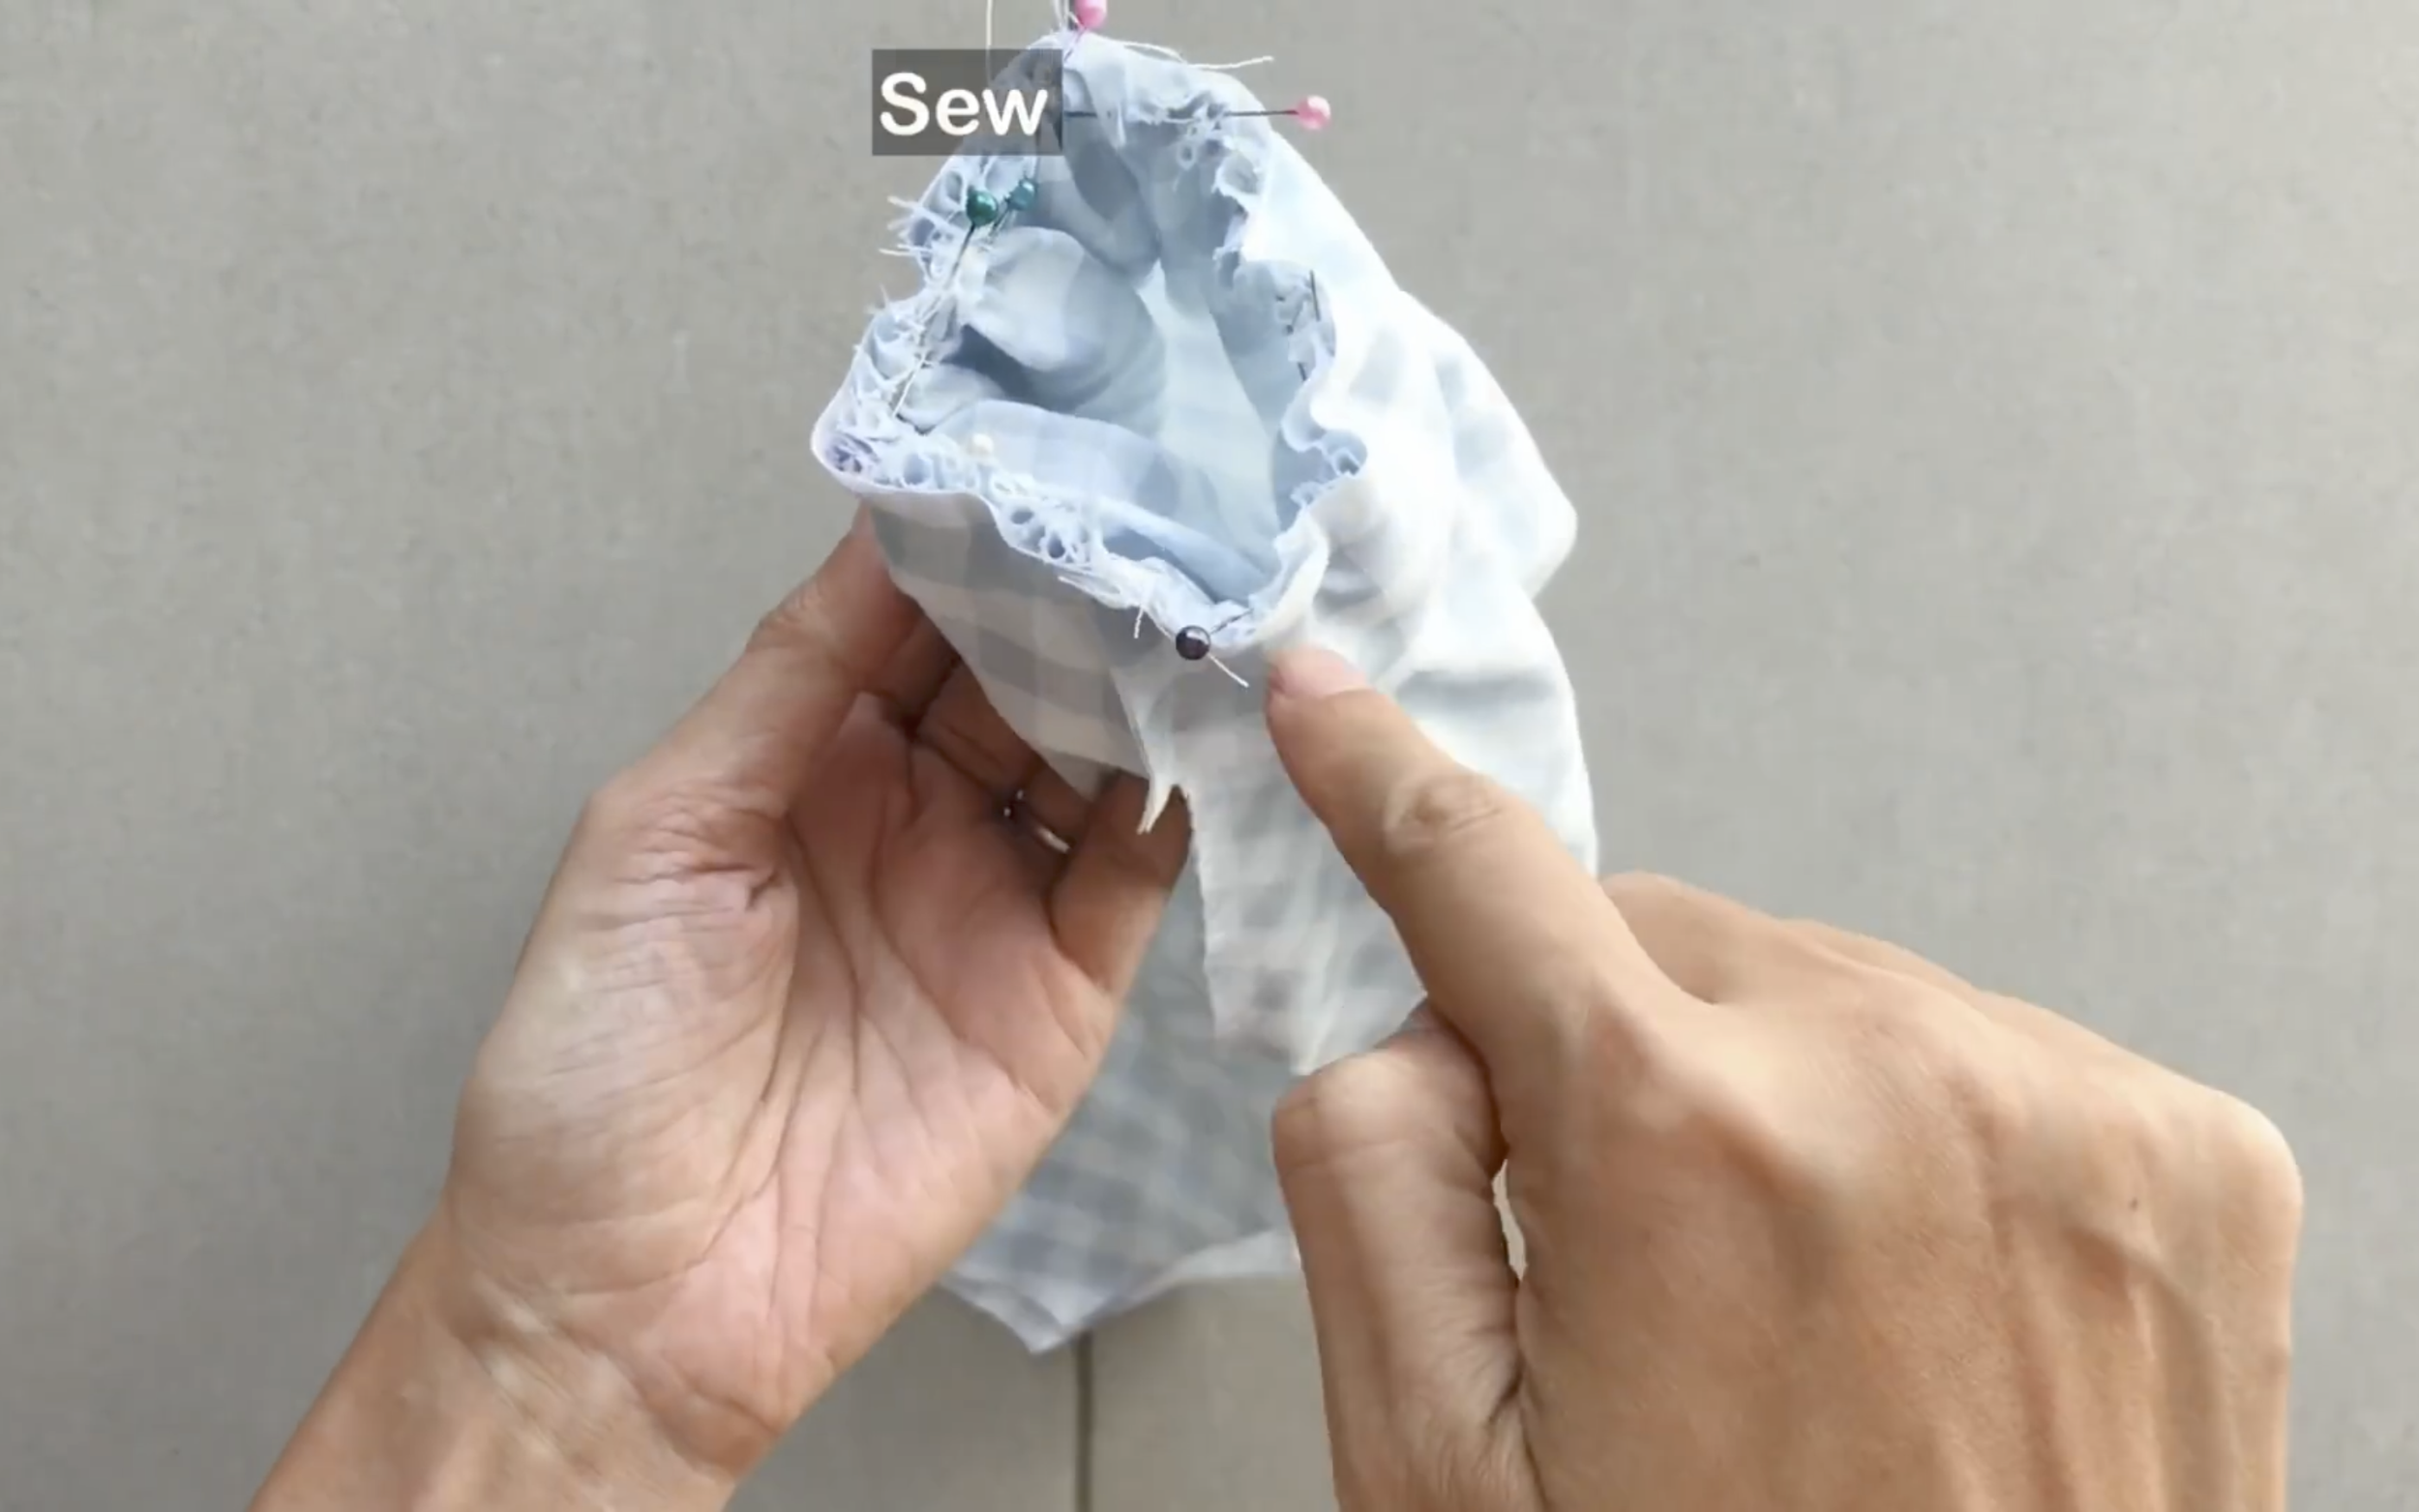
Attach one side of the circle fabric to the sleeve’s end.
After sewing the first seam, fold the other side of the circle fabric inside to the end fabric first, then fold it again over the first seam to hide the raw edges and make the second seam.
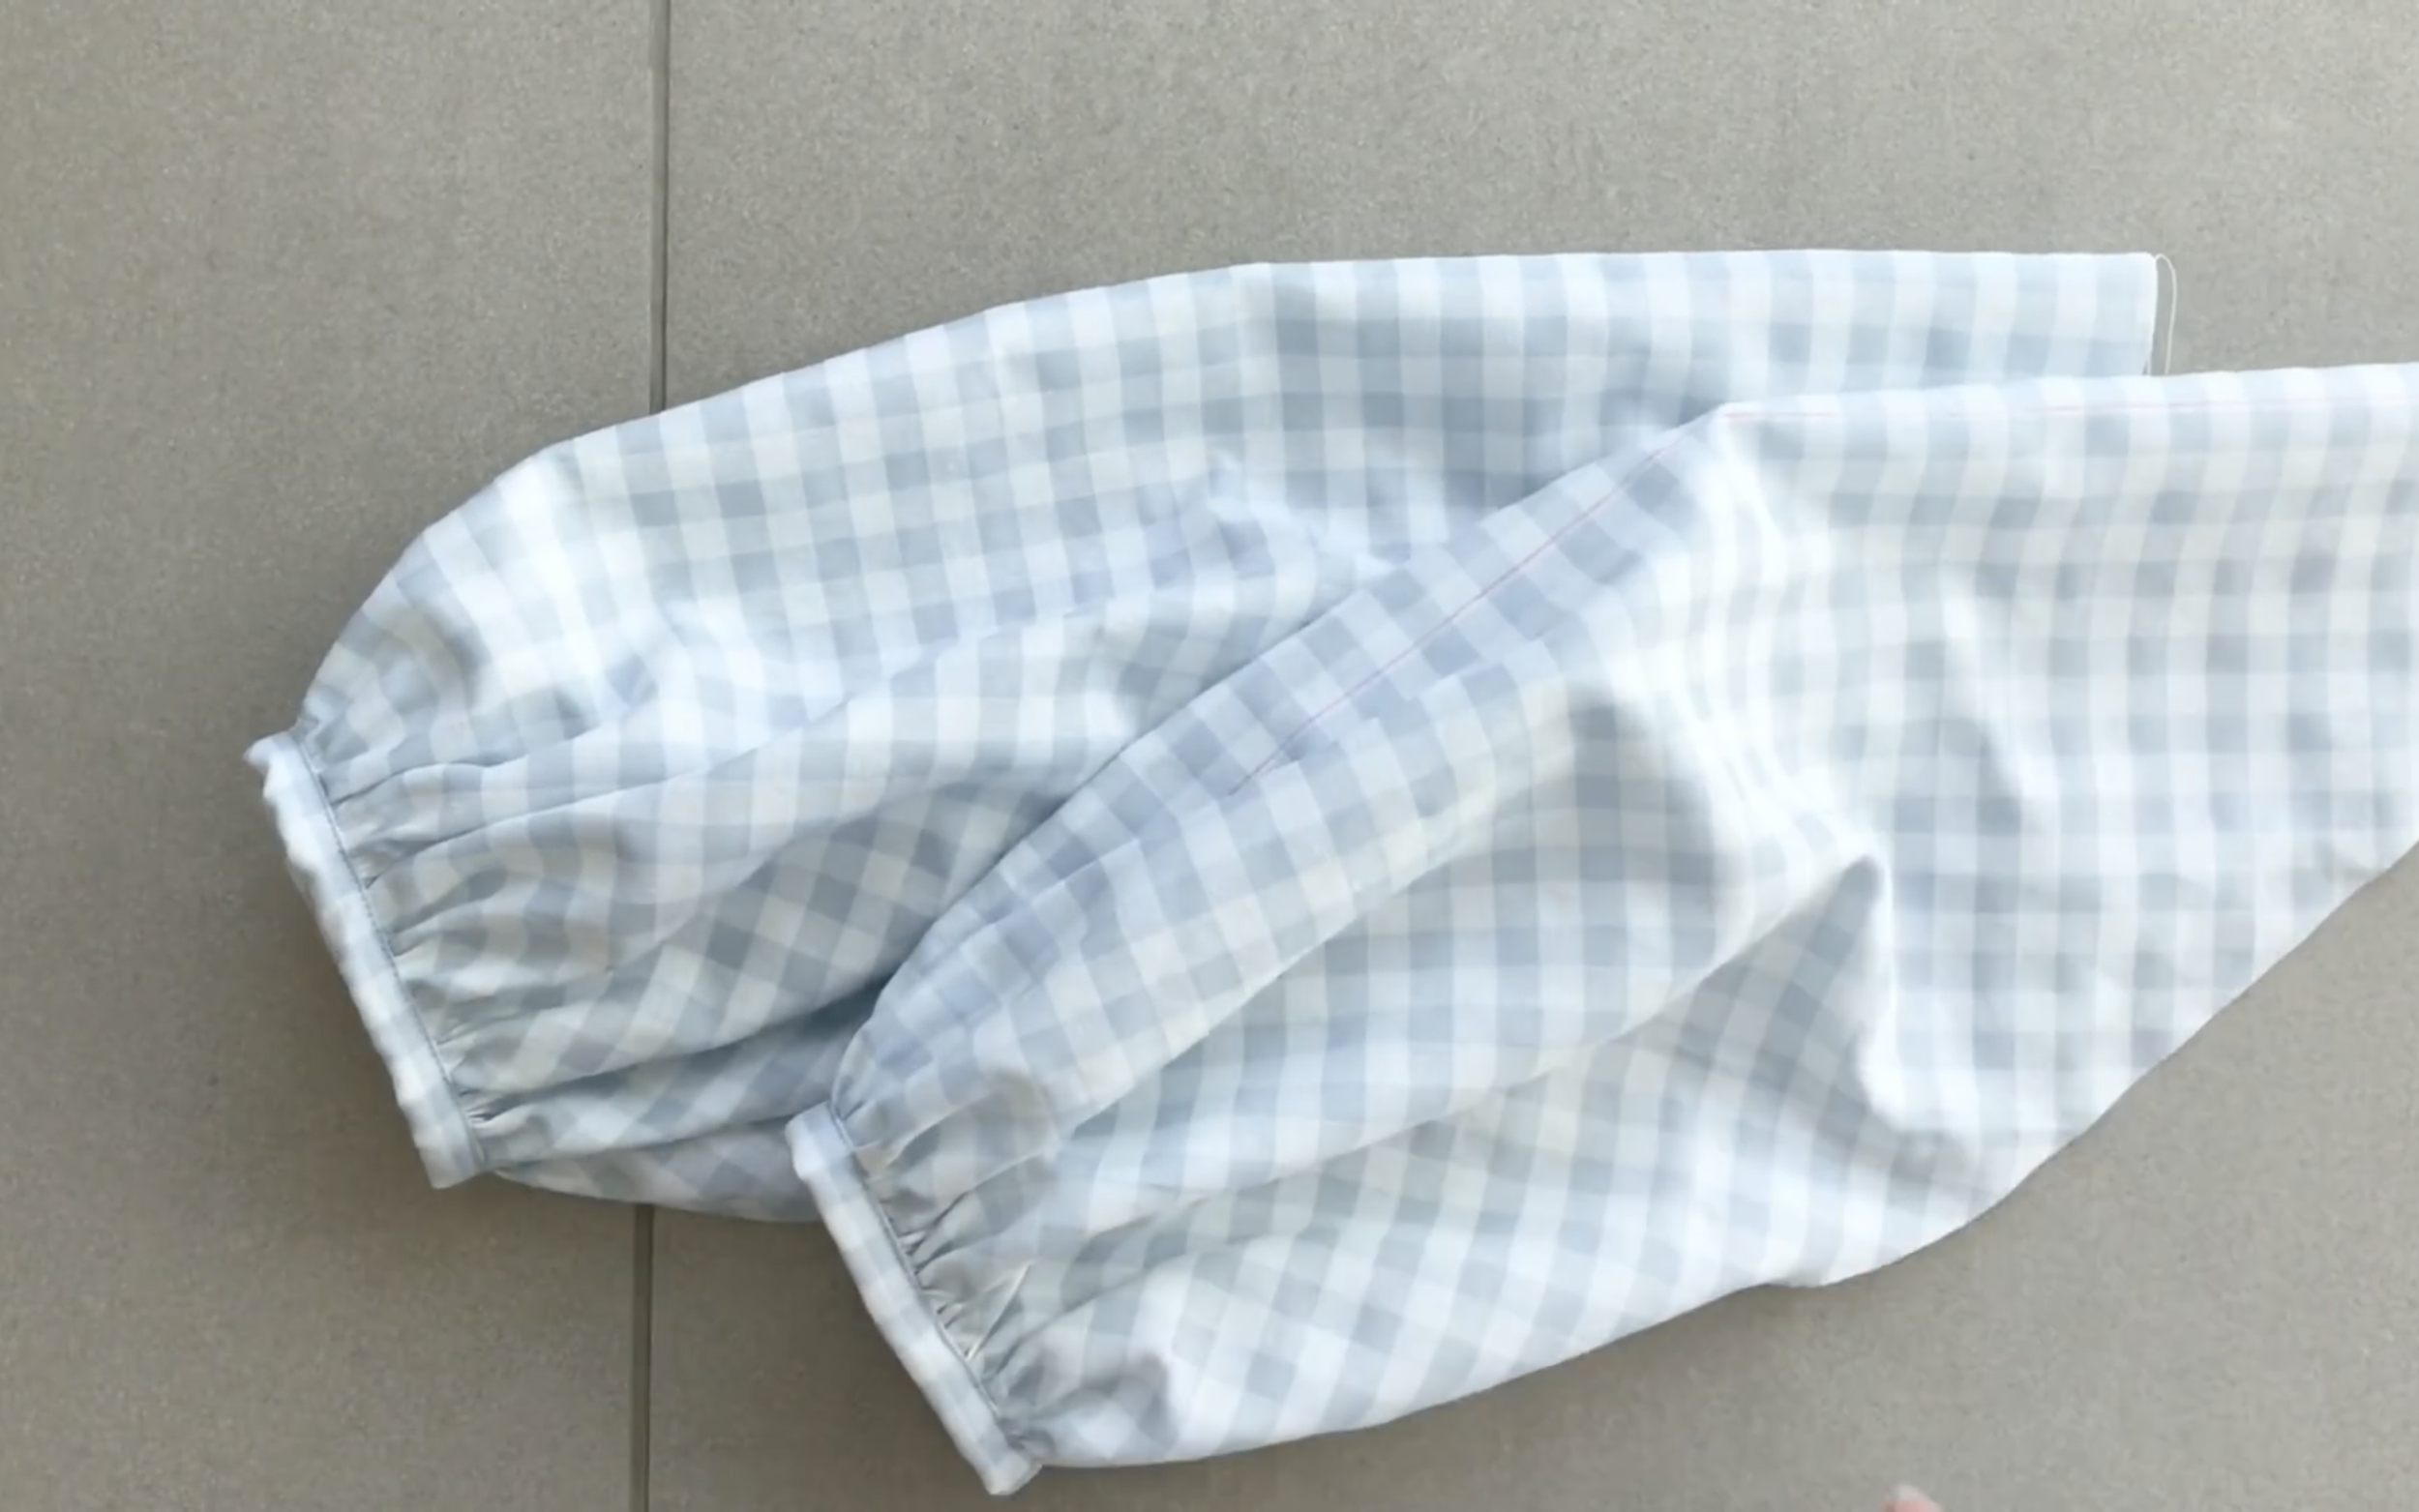
This completes the sleeve. Repeat to make the other sleeve.
CONNECT THE BODICE AND THE SLEEVE
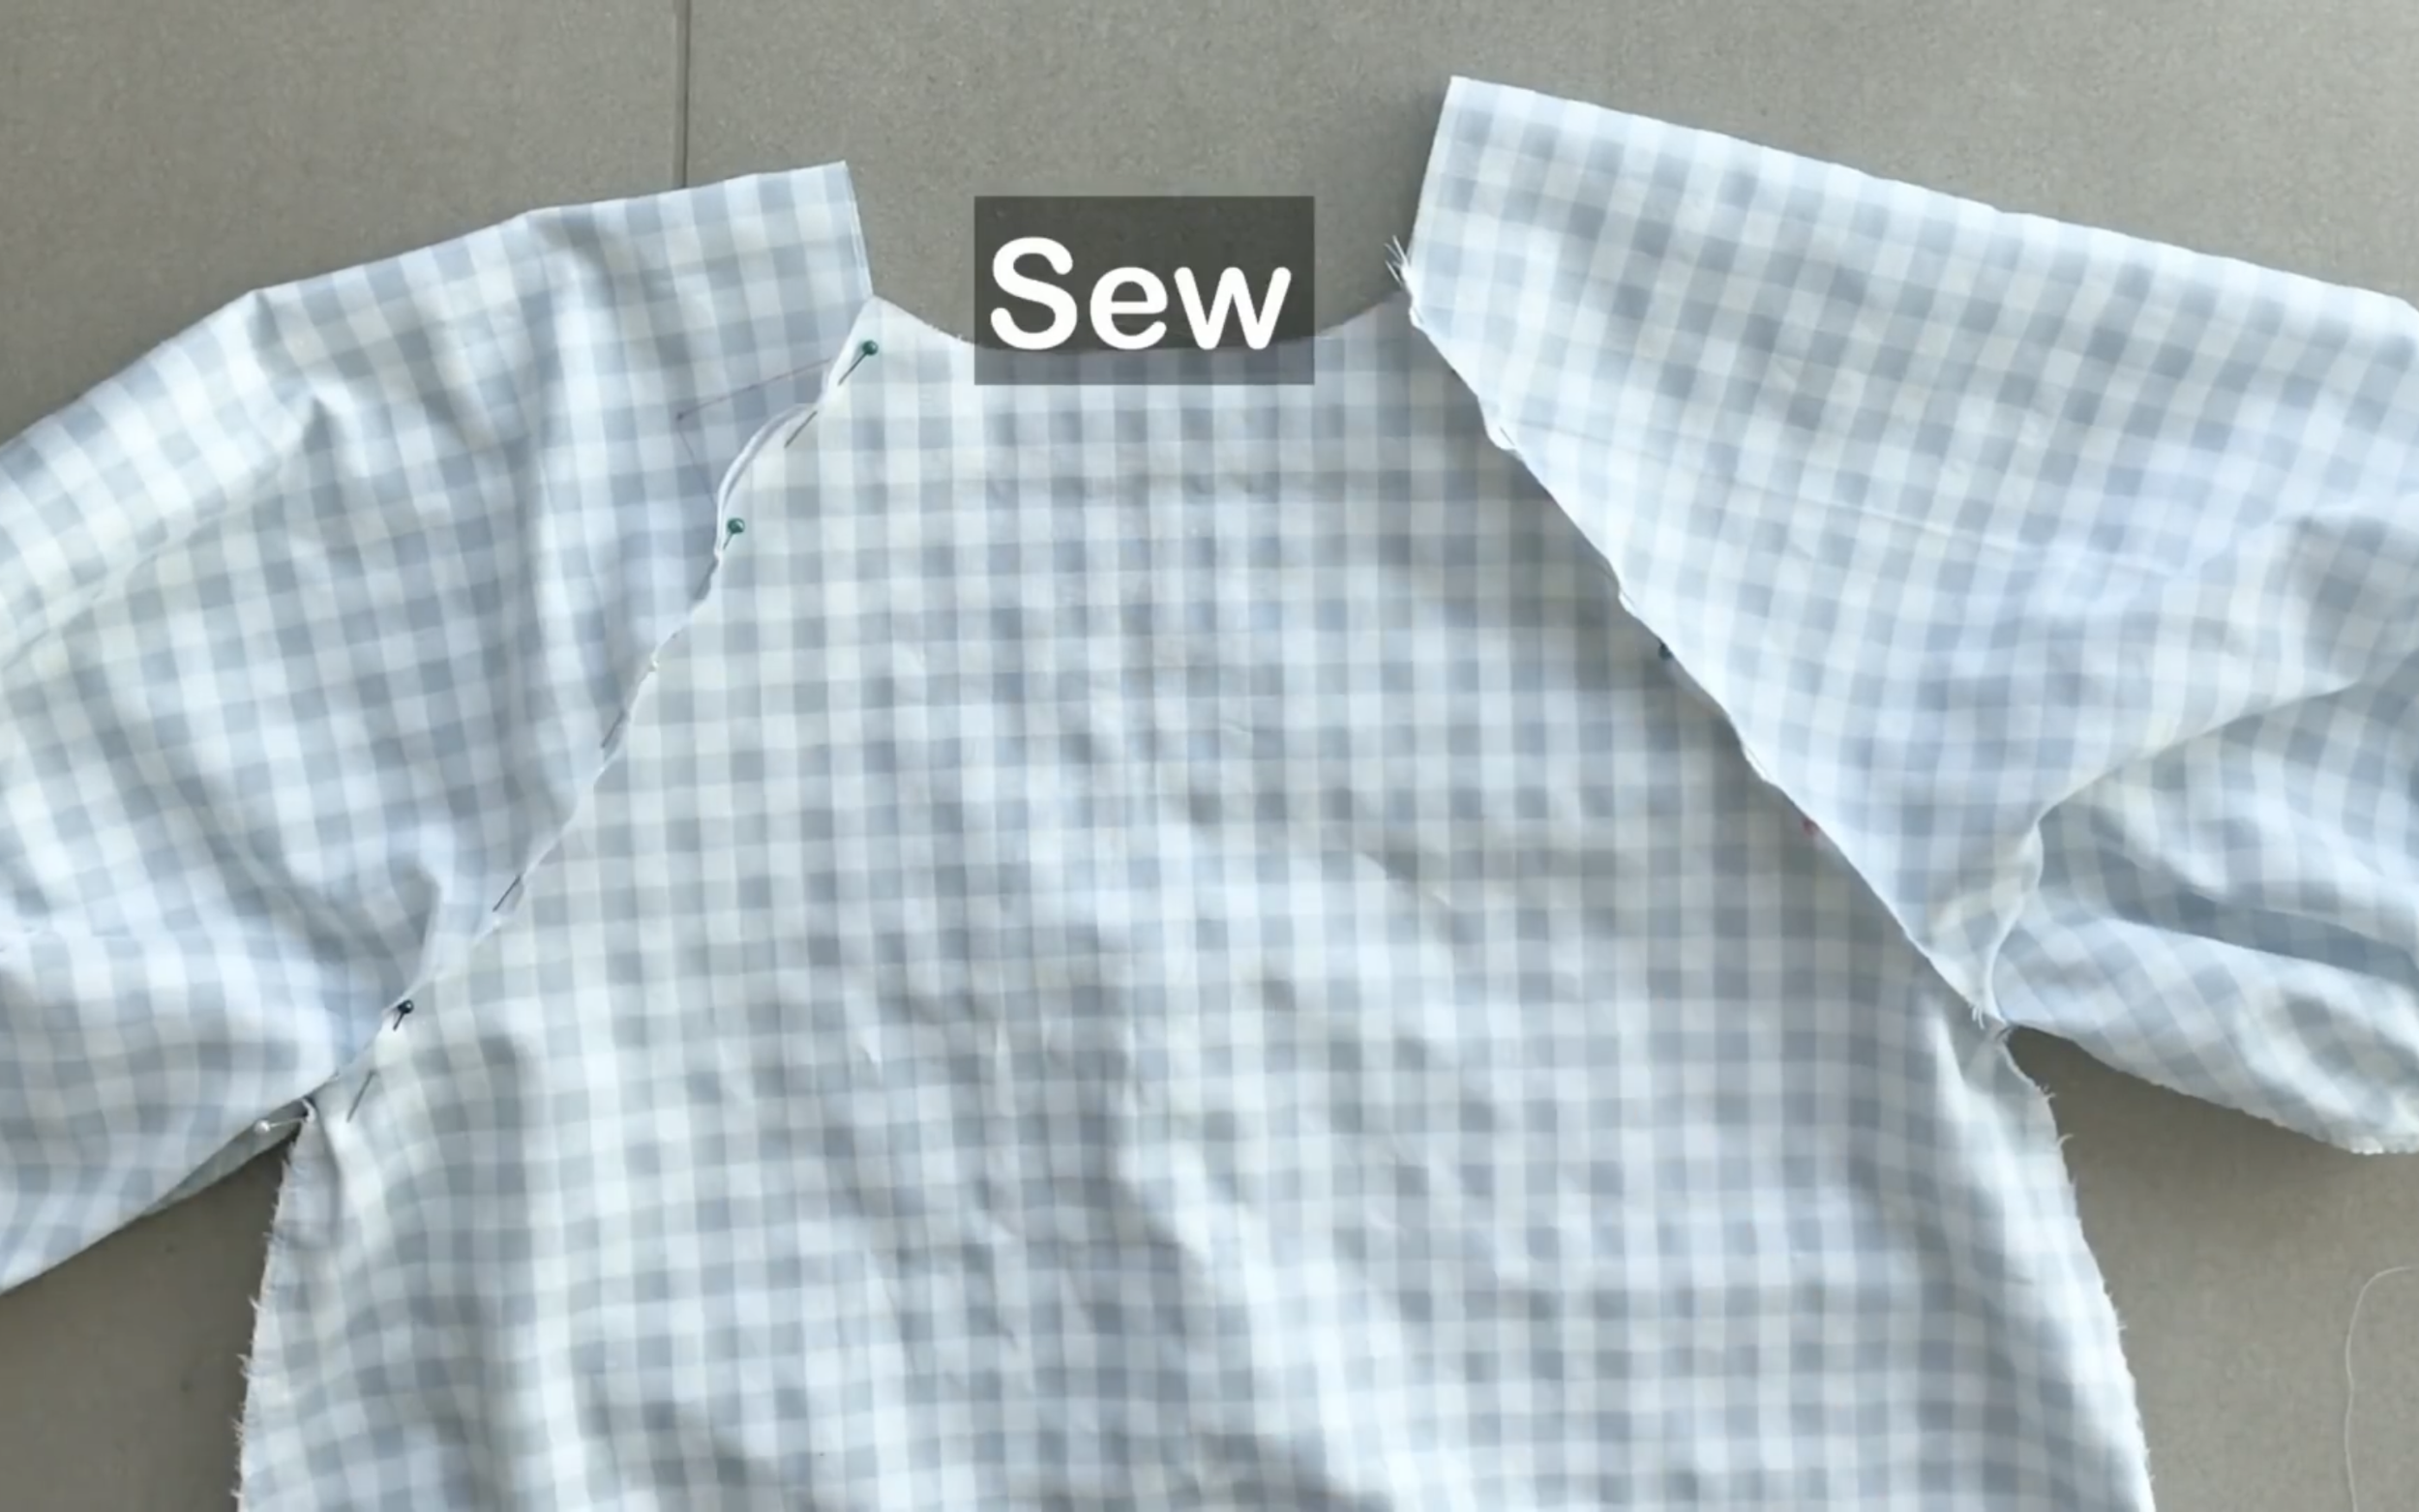
Attach the sleeves to the dress along the sleeve seams.
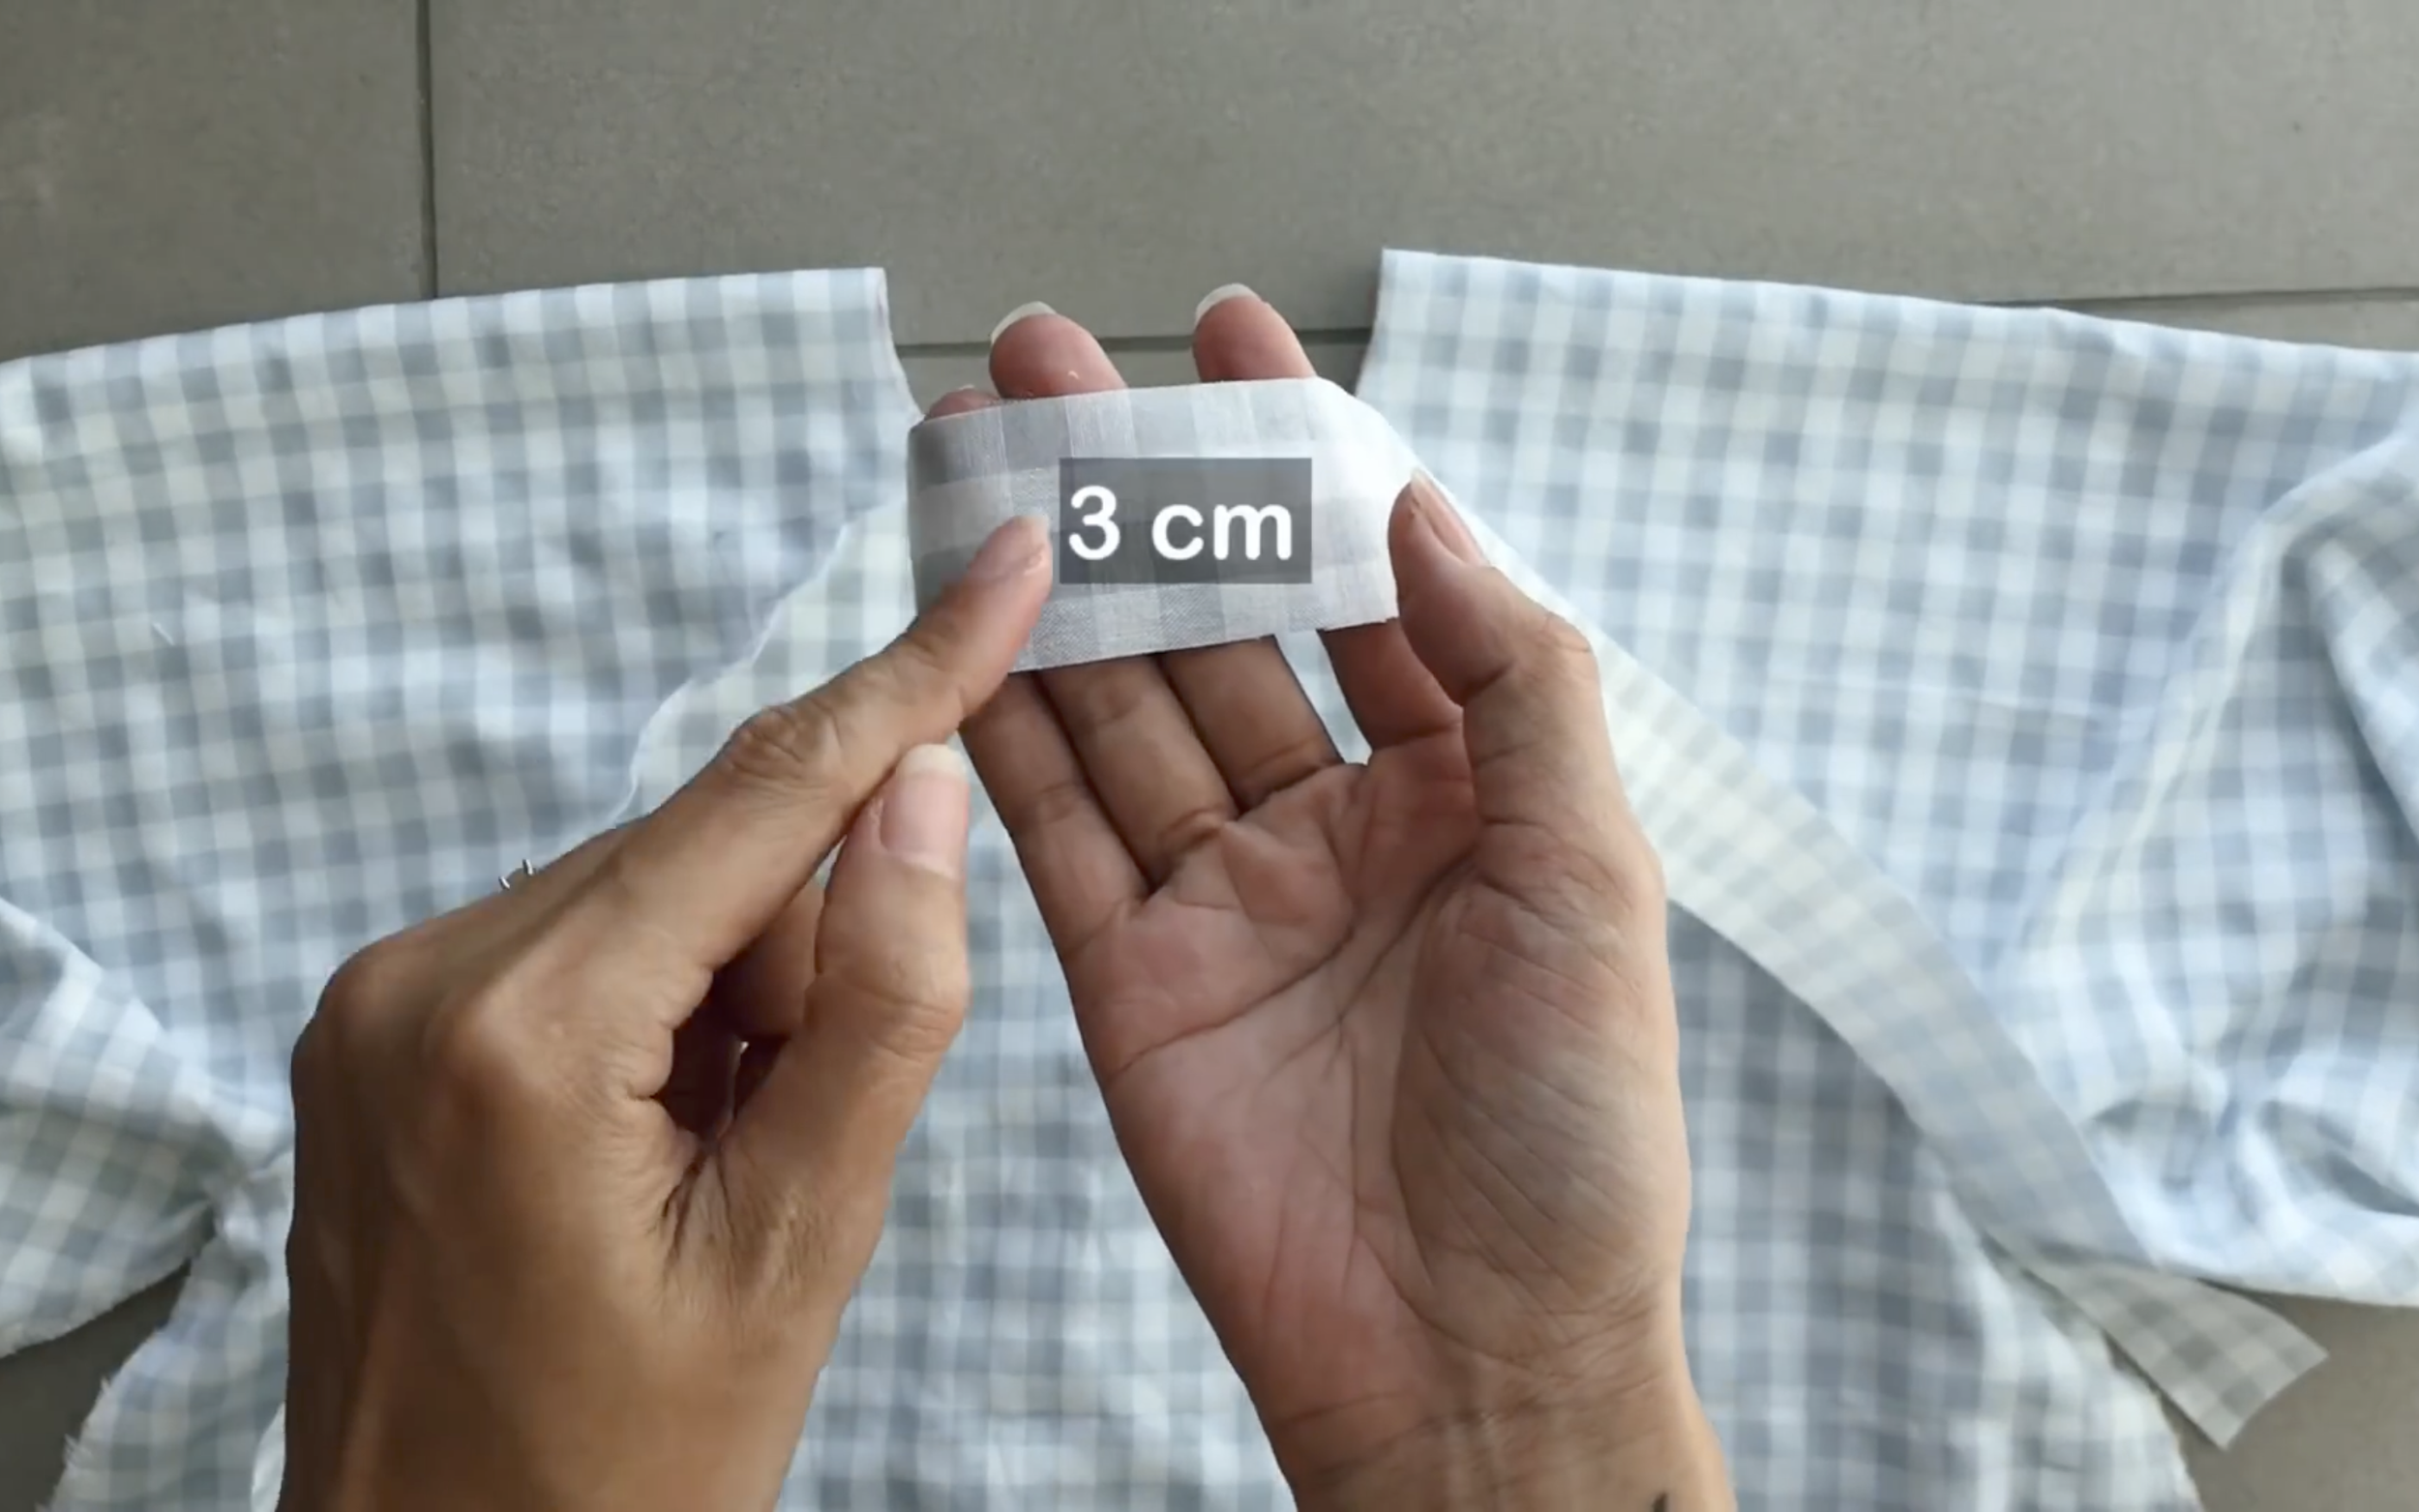
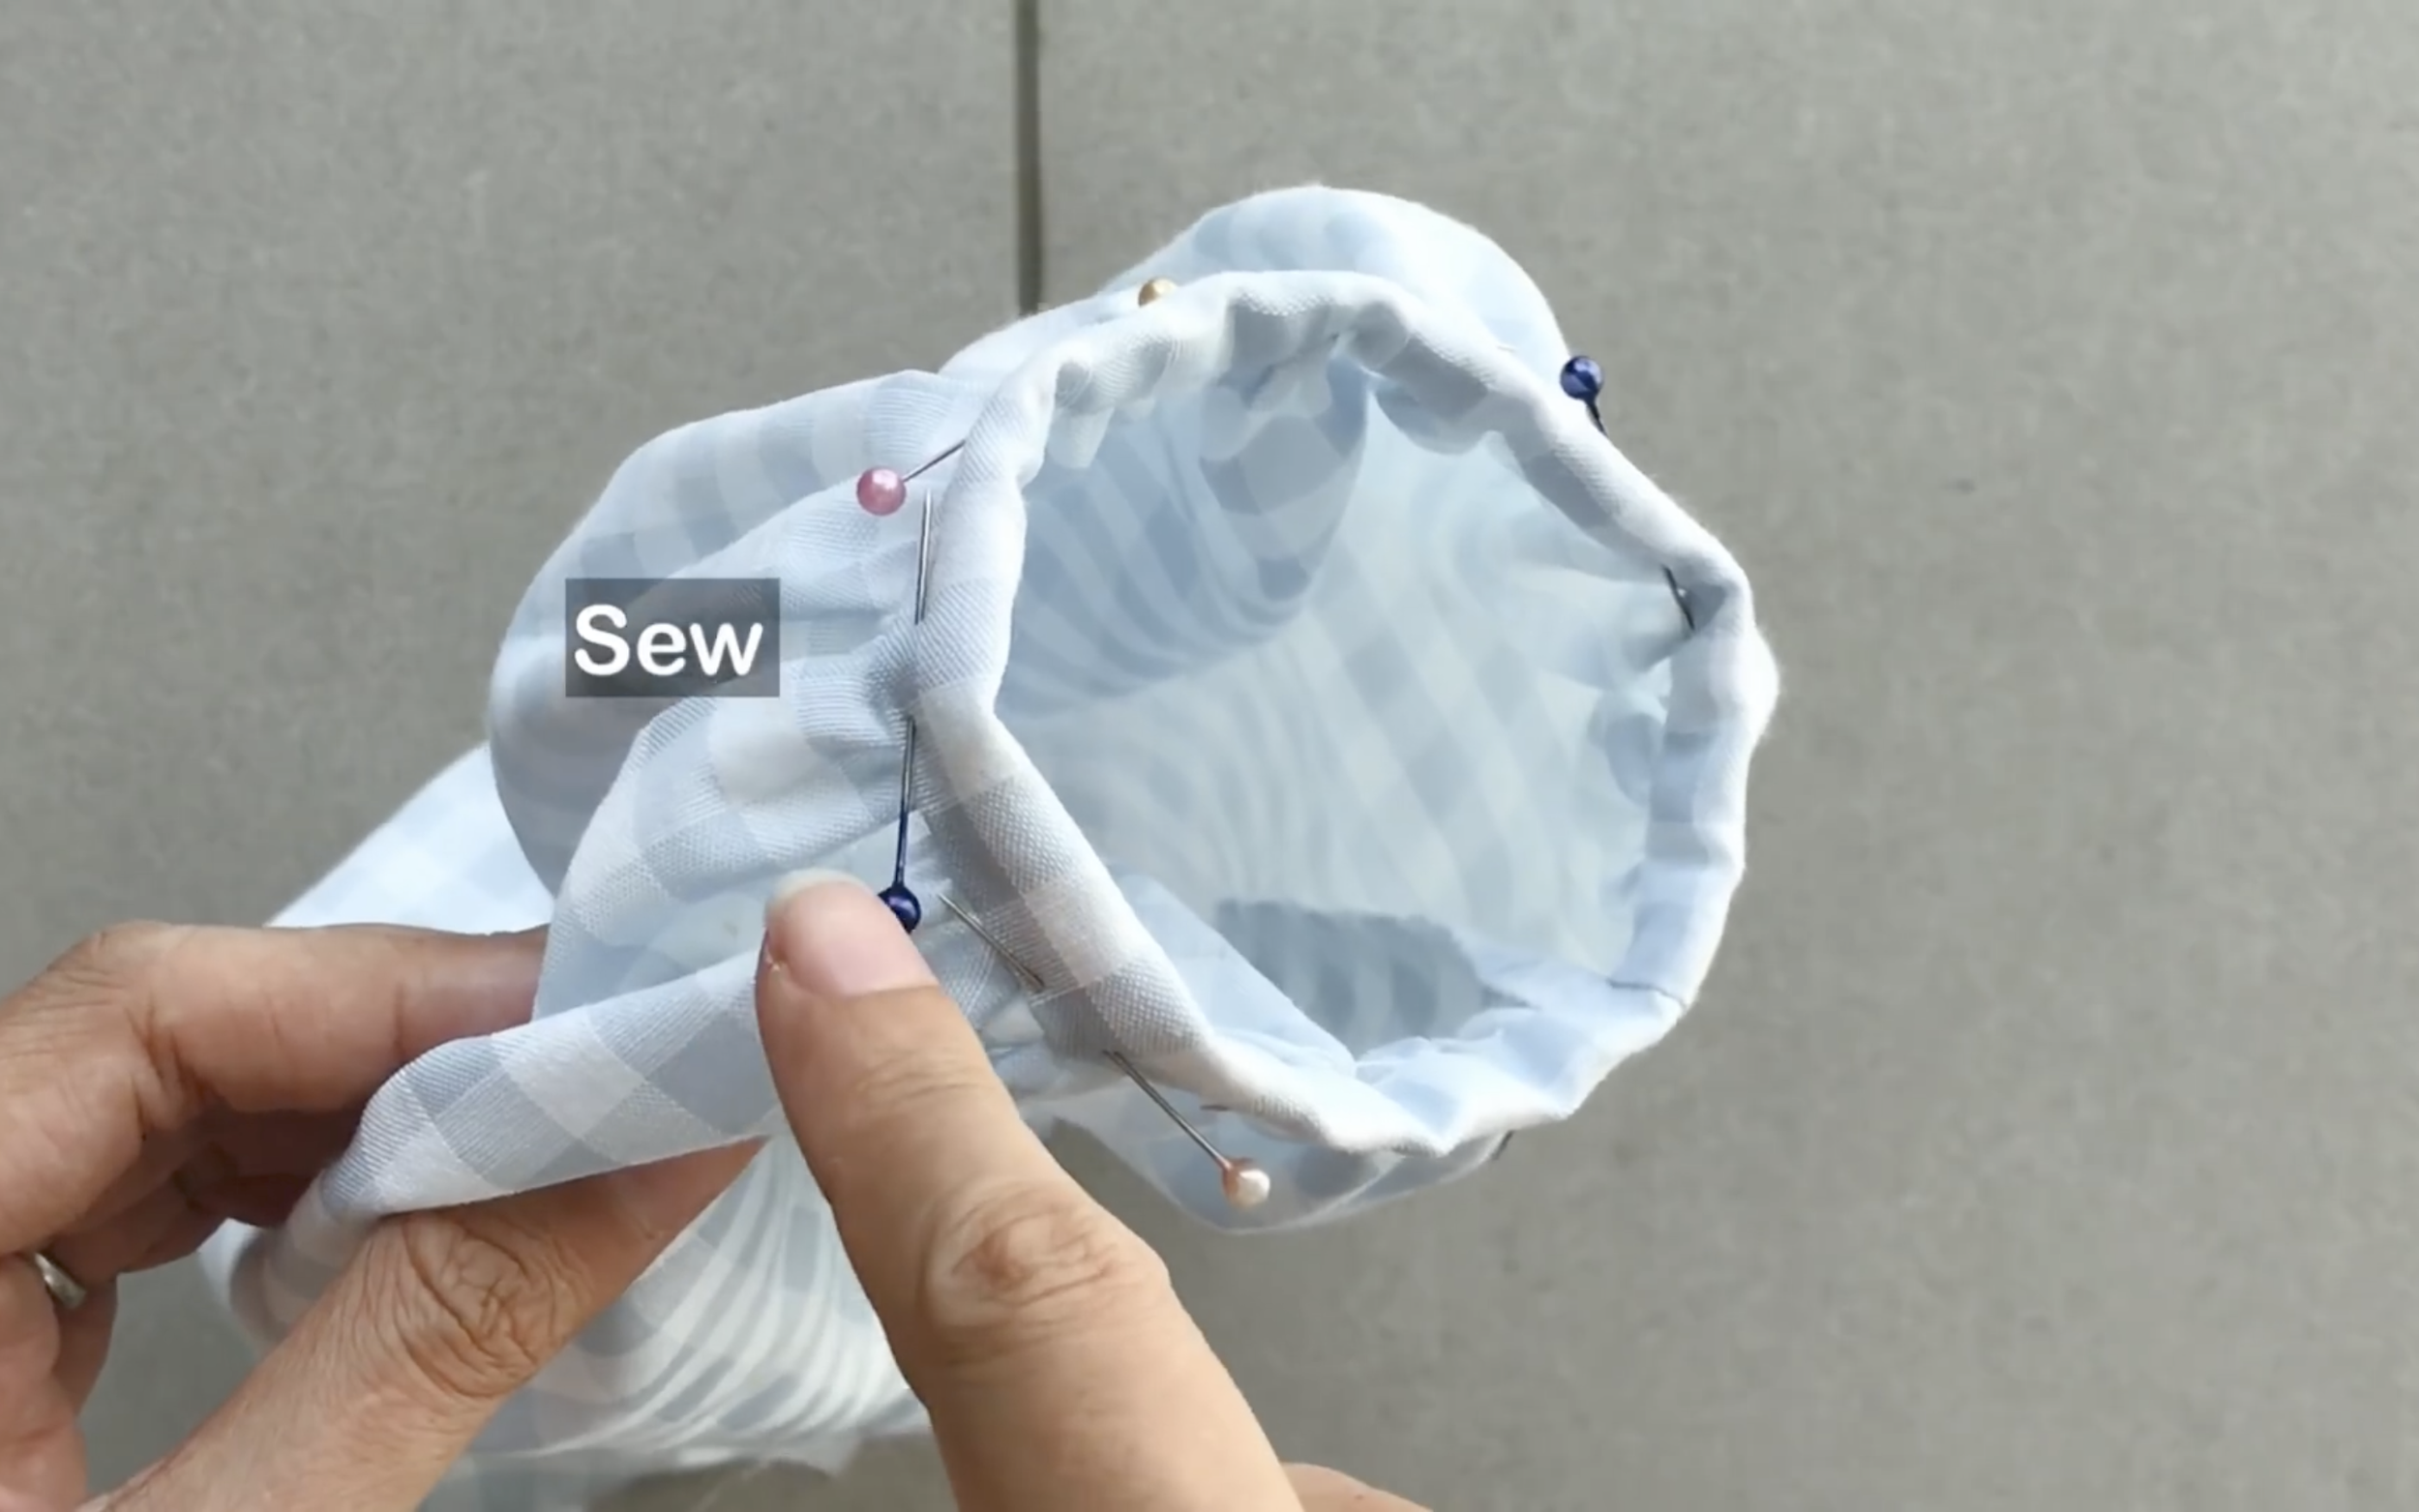
To finish the neckline, cut a long rectangle with 3 cm width and around 70 cm length or longer.
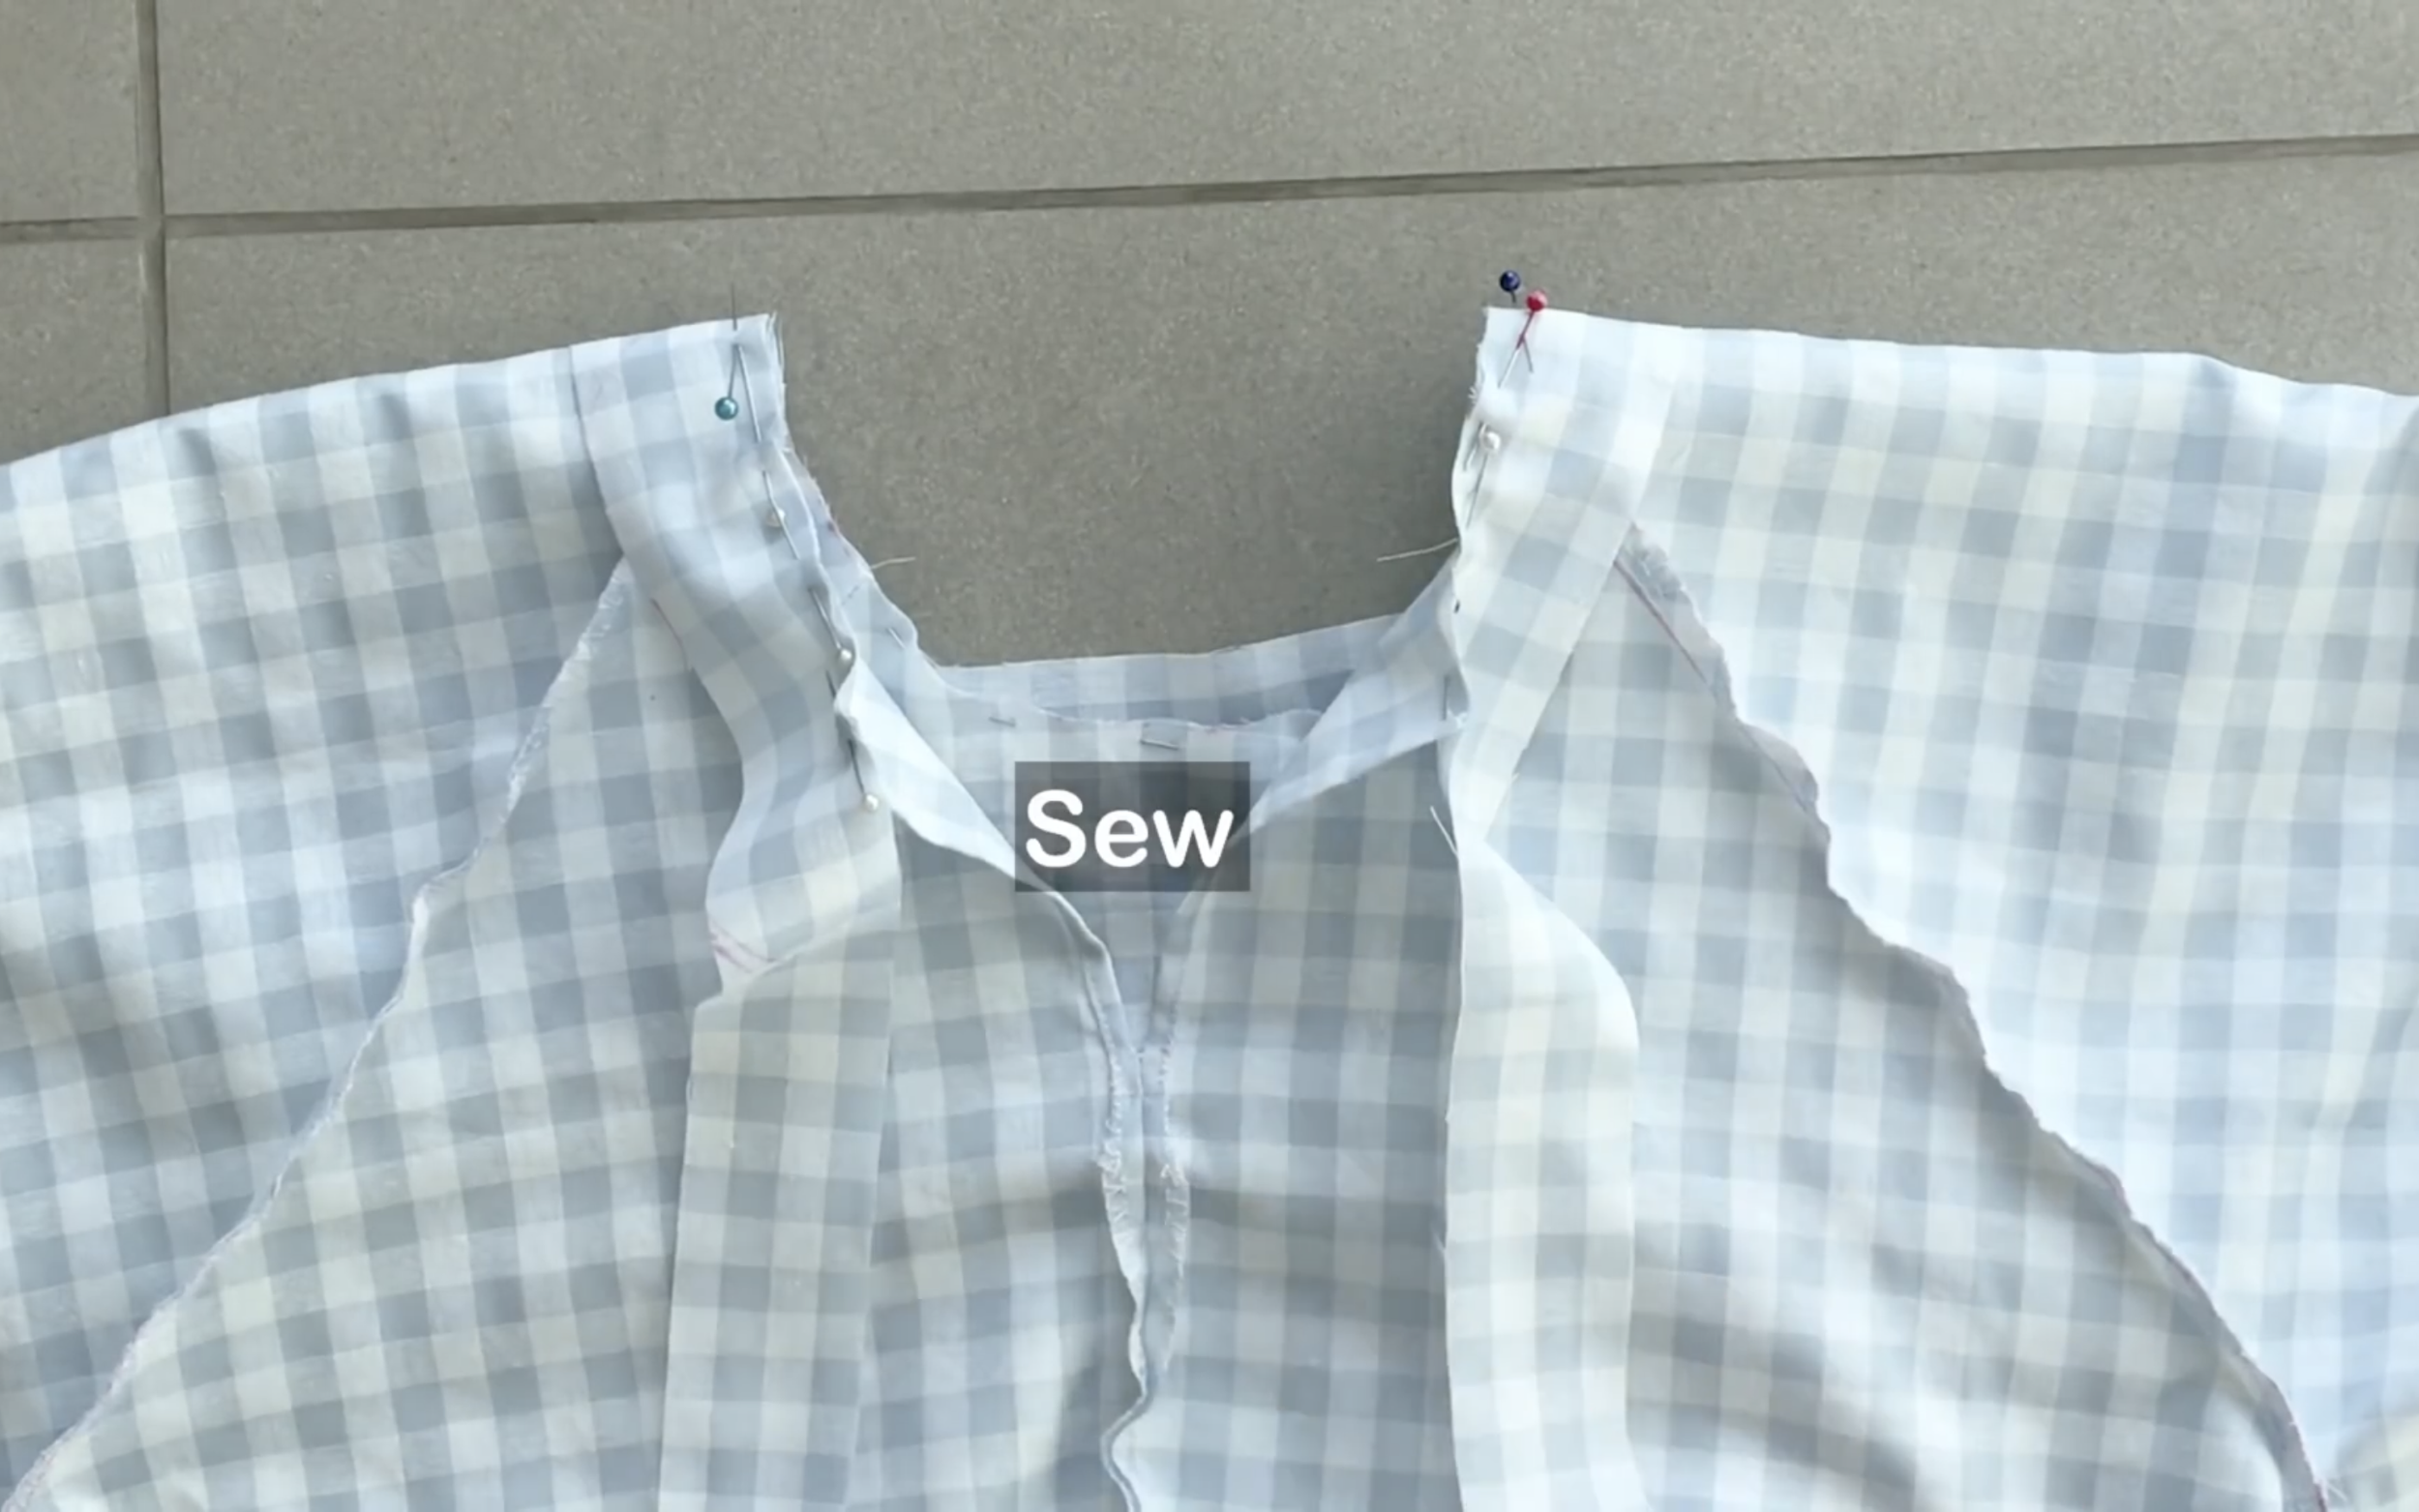
Sew the middle of the rectangle to the middle of the front neckline.

Fold the other side of the rectangle inside first, then fold it over the first seam to hide the raw edges and make the second seam, completing the neckline.

DIY BABYDOLL DRESS (Balloon sleeve & Ruffle hem) | Vacation wardrobe (Ep 4) | Step by step tutorial
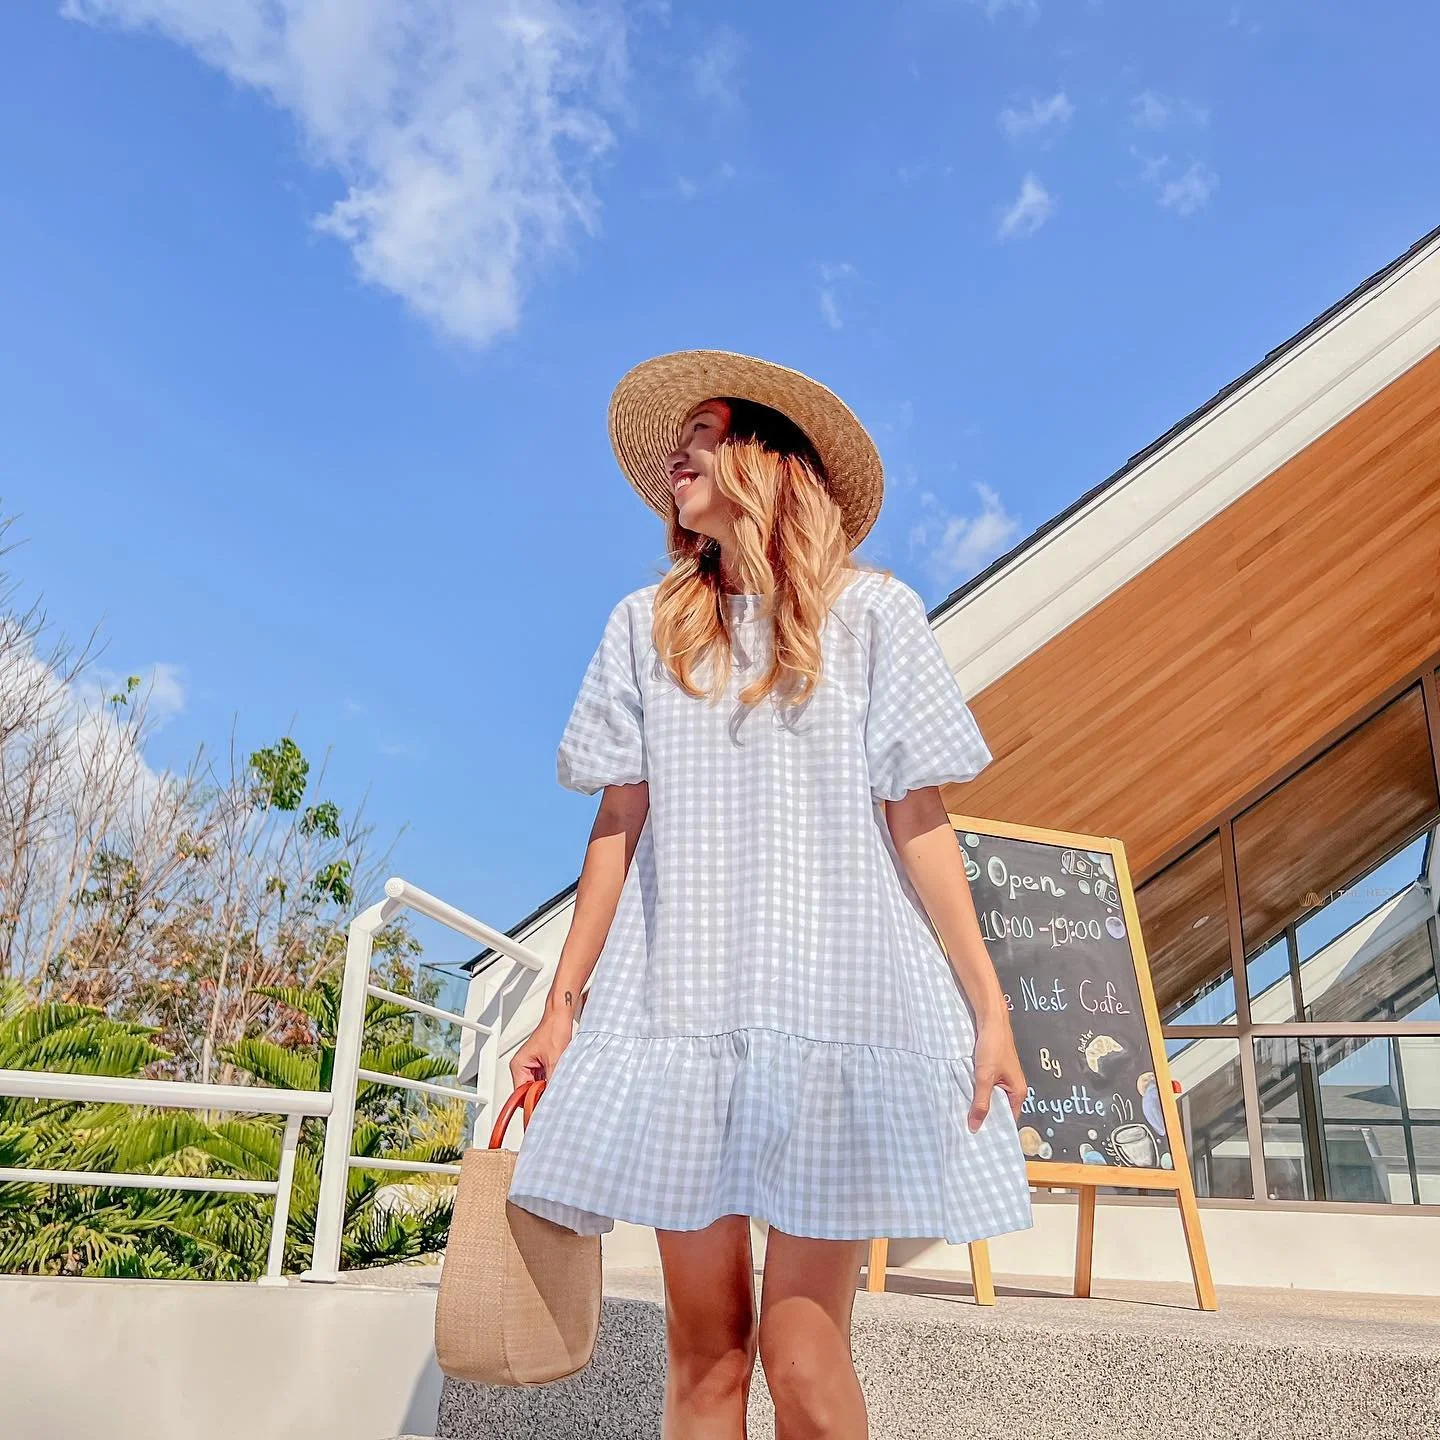
And that’s the finished DIY!
Here’s my dream jumpsuit—the fitted look, combined with an active vibe and vintage feel from the fabric, makes it so special. It’s truly like a dream!
I hope you found my step-by-step guide helpful and inspiring.
If you’re interested in making your own, give it a try and let me know how it goes!
Until then, happy sewing!