DIY Baggy pants from oversize pants with zipper & pockets - Step by step tutorial

DIY Baggy pants from oversize pants with zipper & pockets
Welcome and welcome back to my sewing blog!
Today I'm going to share with you how I transformed an oversize pants into a baggy pants for my friend. My lovely friend found an oversize pants at a thrift store. Even it's way bigger than her and not in her style. But she still got it because of the color and the fabric. Then she asked me to help her to transform it to the baggy pants. This is the first time I DIY a pants with zipper and fron pockets. But it turns out so good. My friend really love it. And it's the most satisfying feeling to me.
I also learned how I install a zipper and front pockets to the pants. So I just want to share with you they way I did it. I hope it will help you with your DIY.
So let’s get started!
WHAT YOU’LL NEED
An old pants
Measuring tape
Chalk
Scissors
Pins
Sewing machine
SEWING THE PANTS
CUTTING
First step, unsew the waistband and two sides of the pants.
Then, unsew the middle seam and the legs.
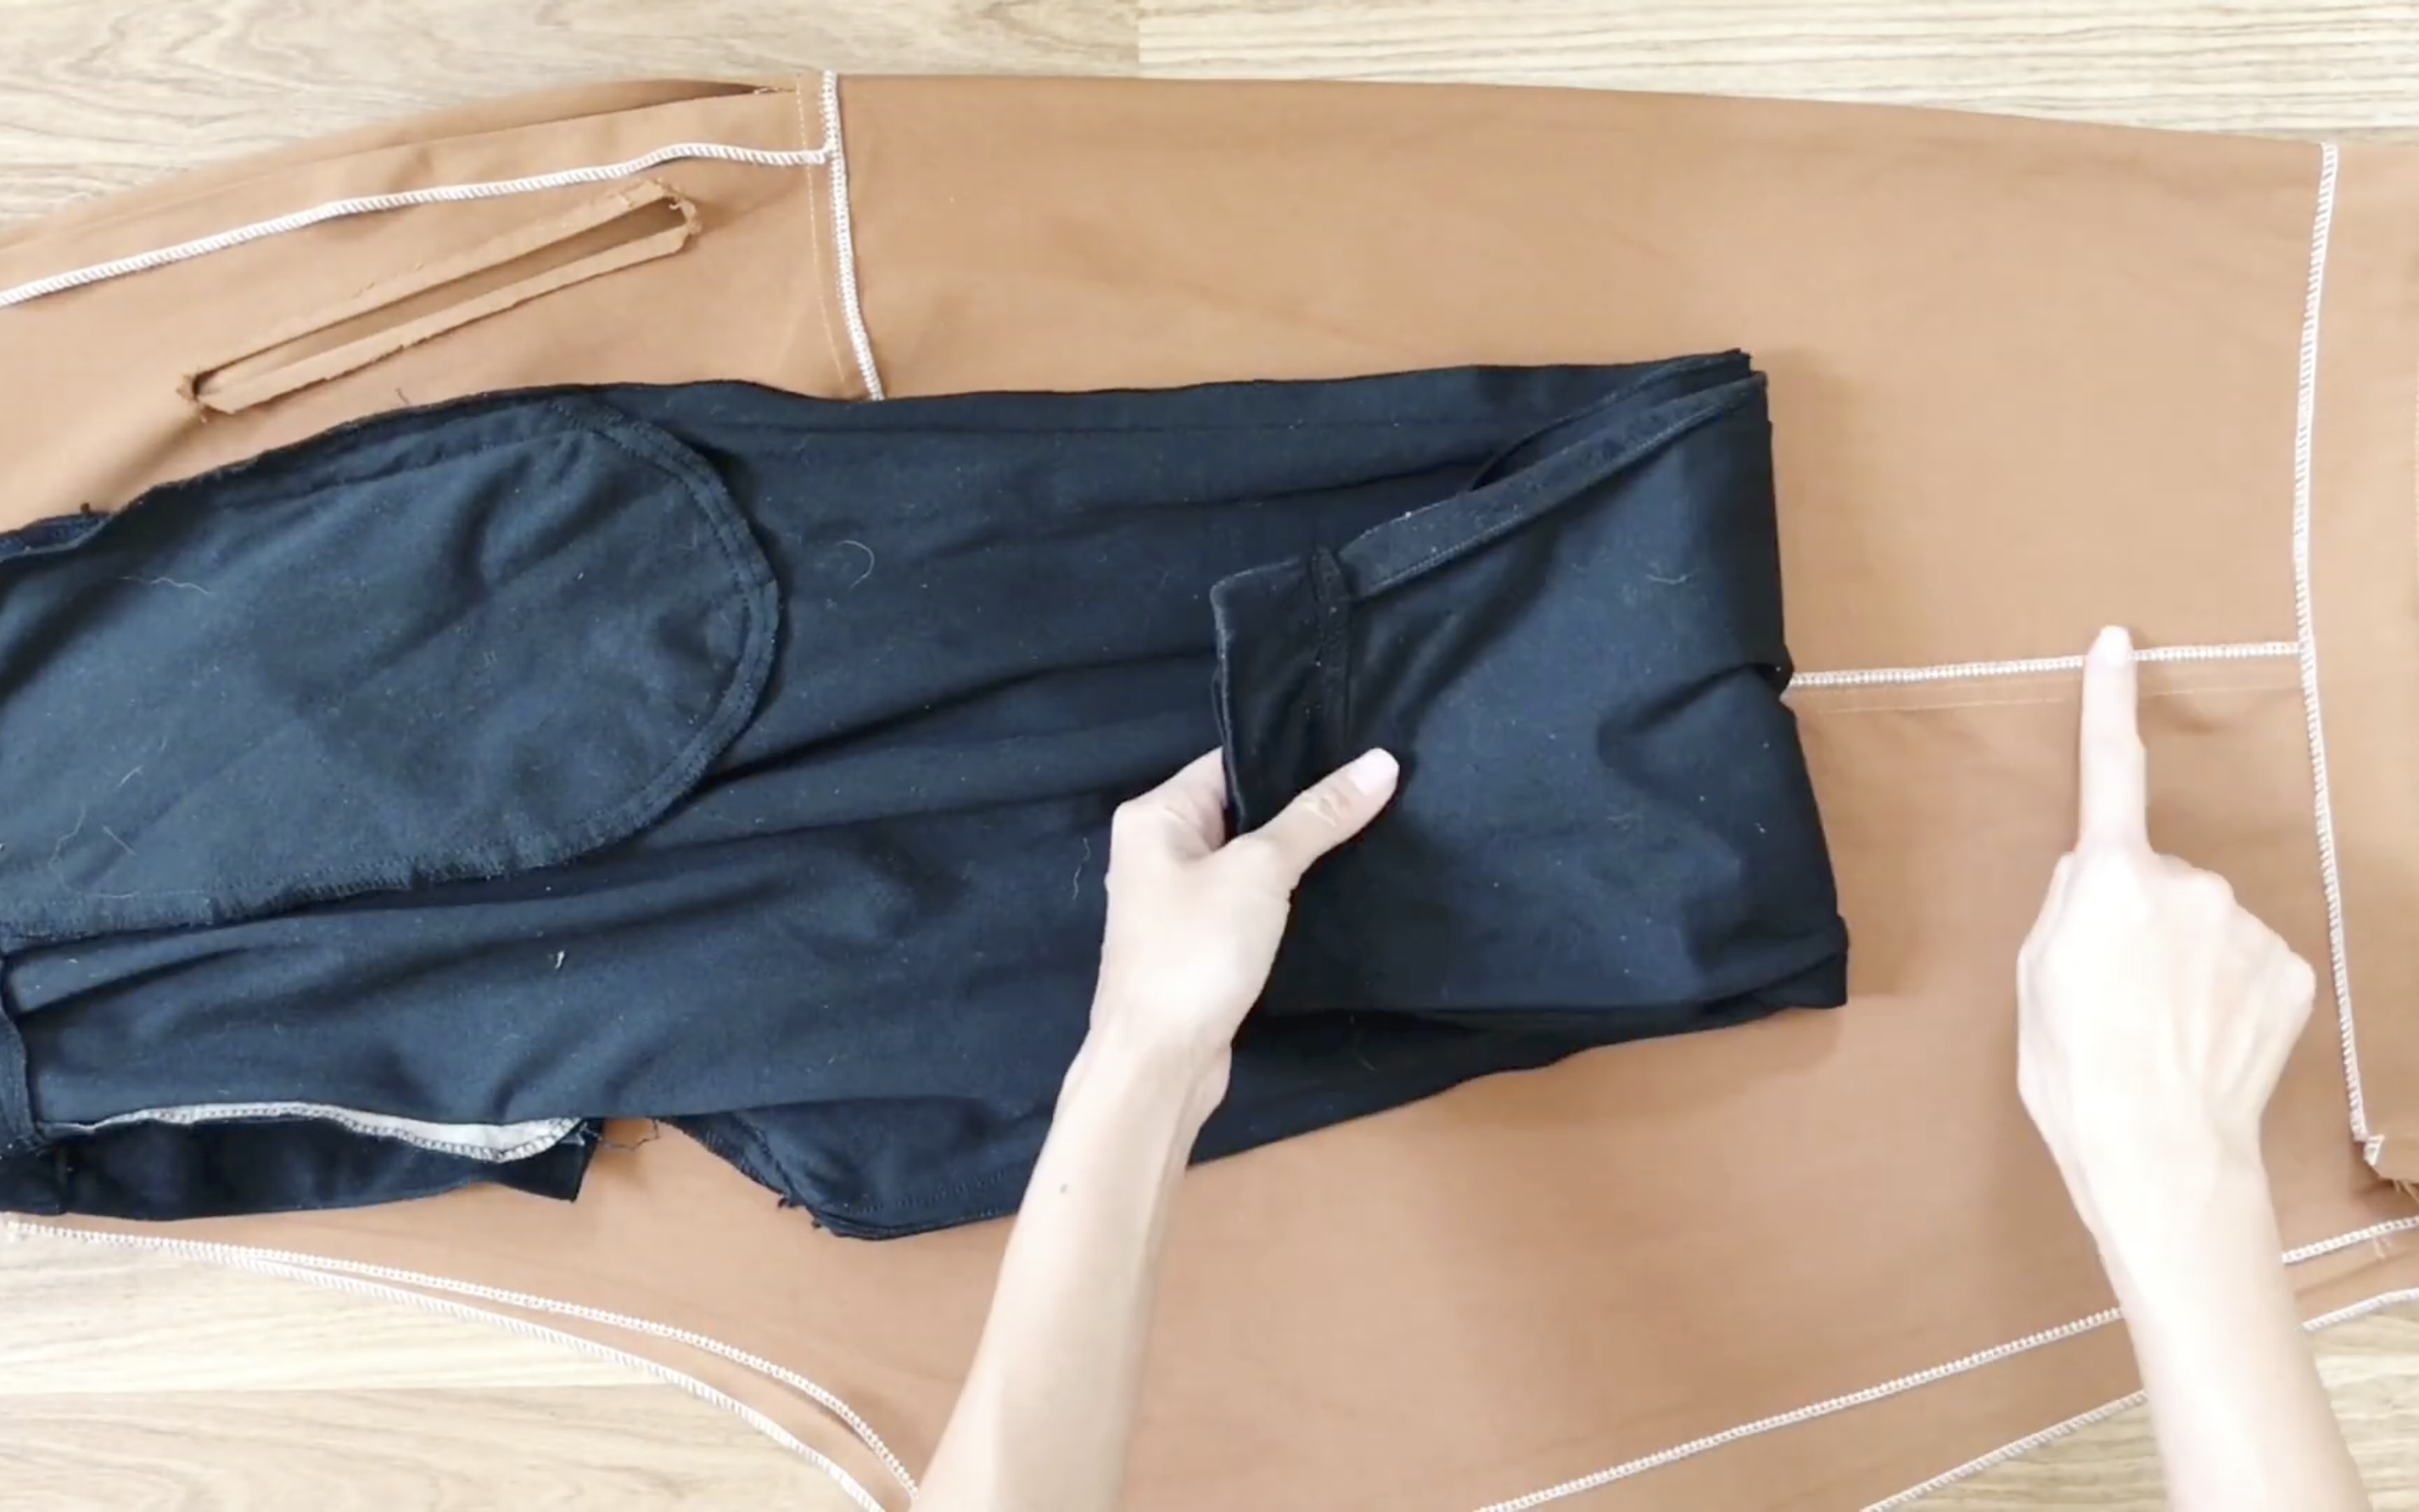
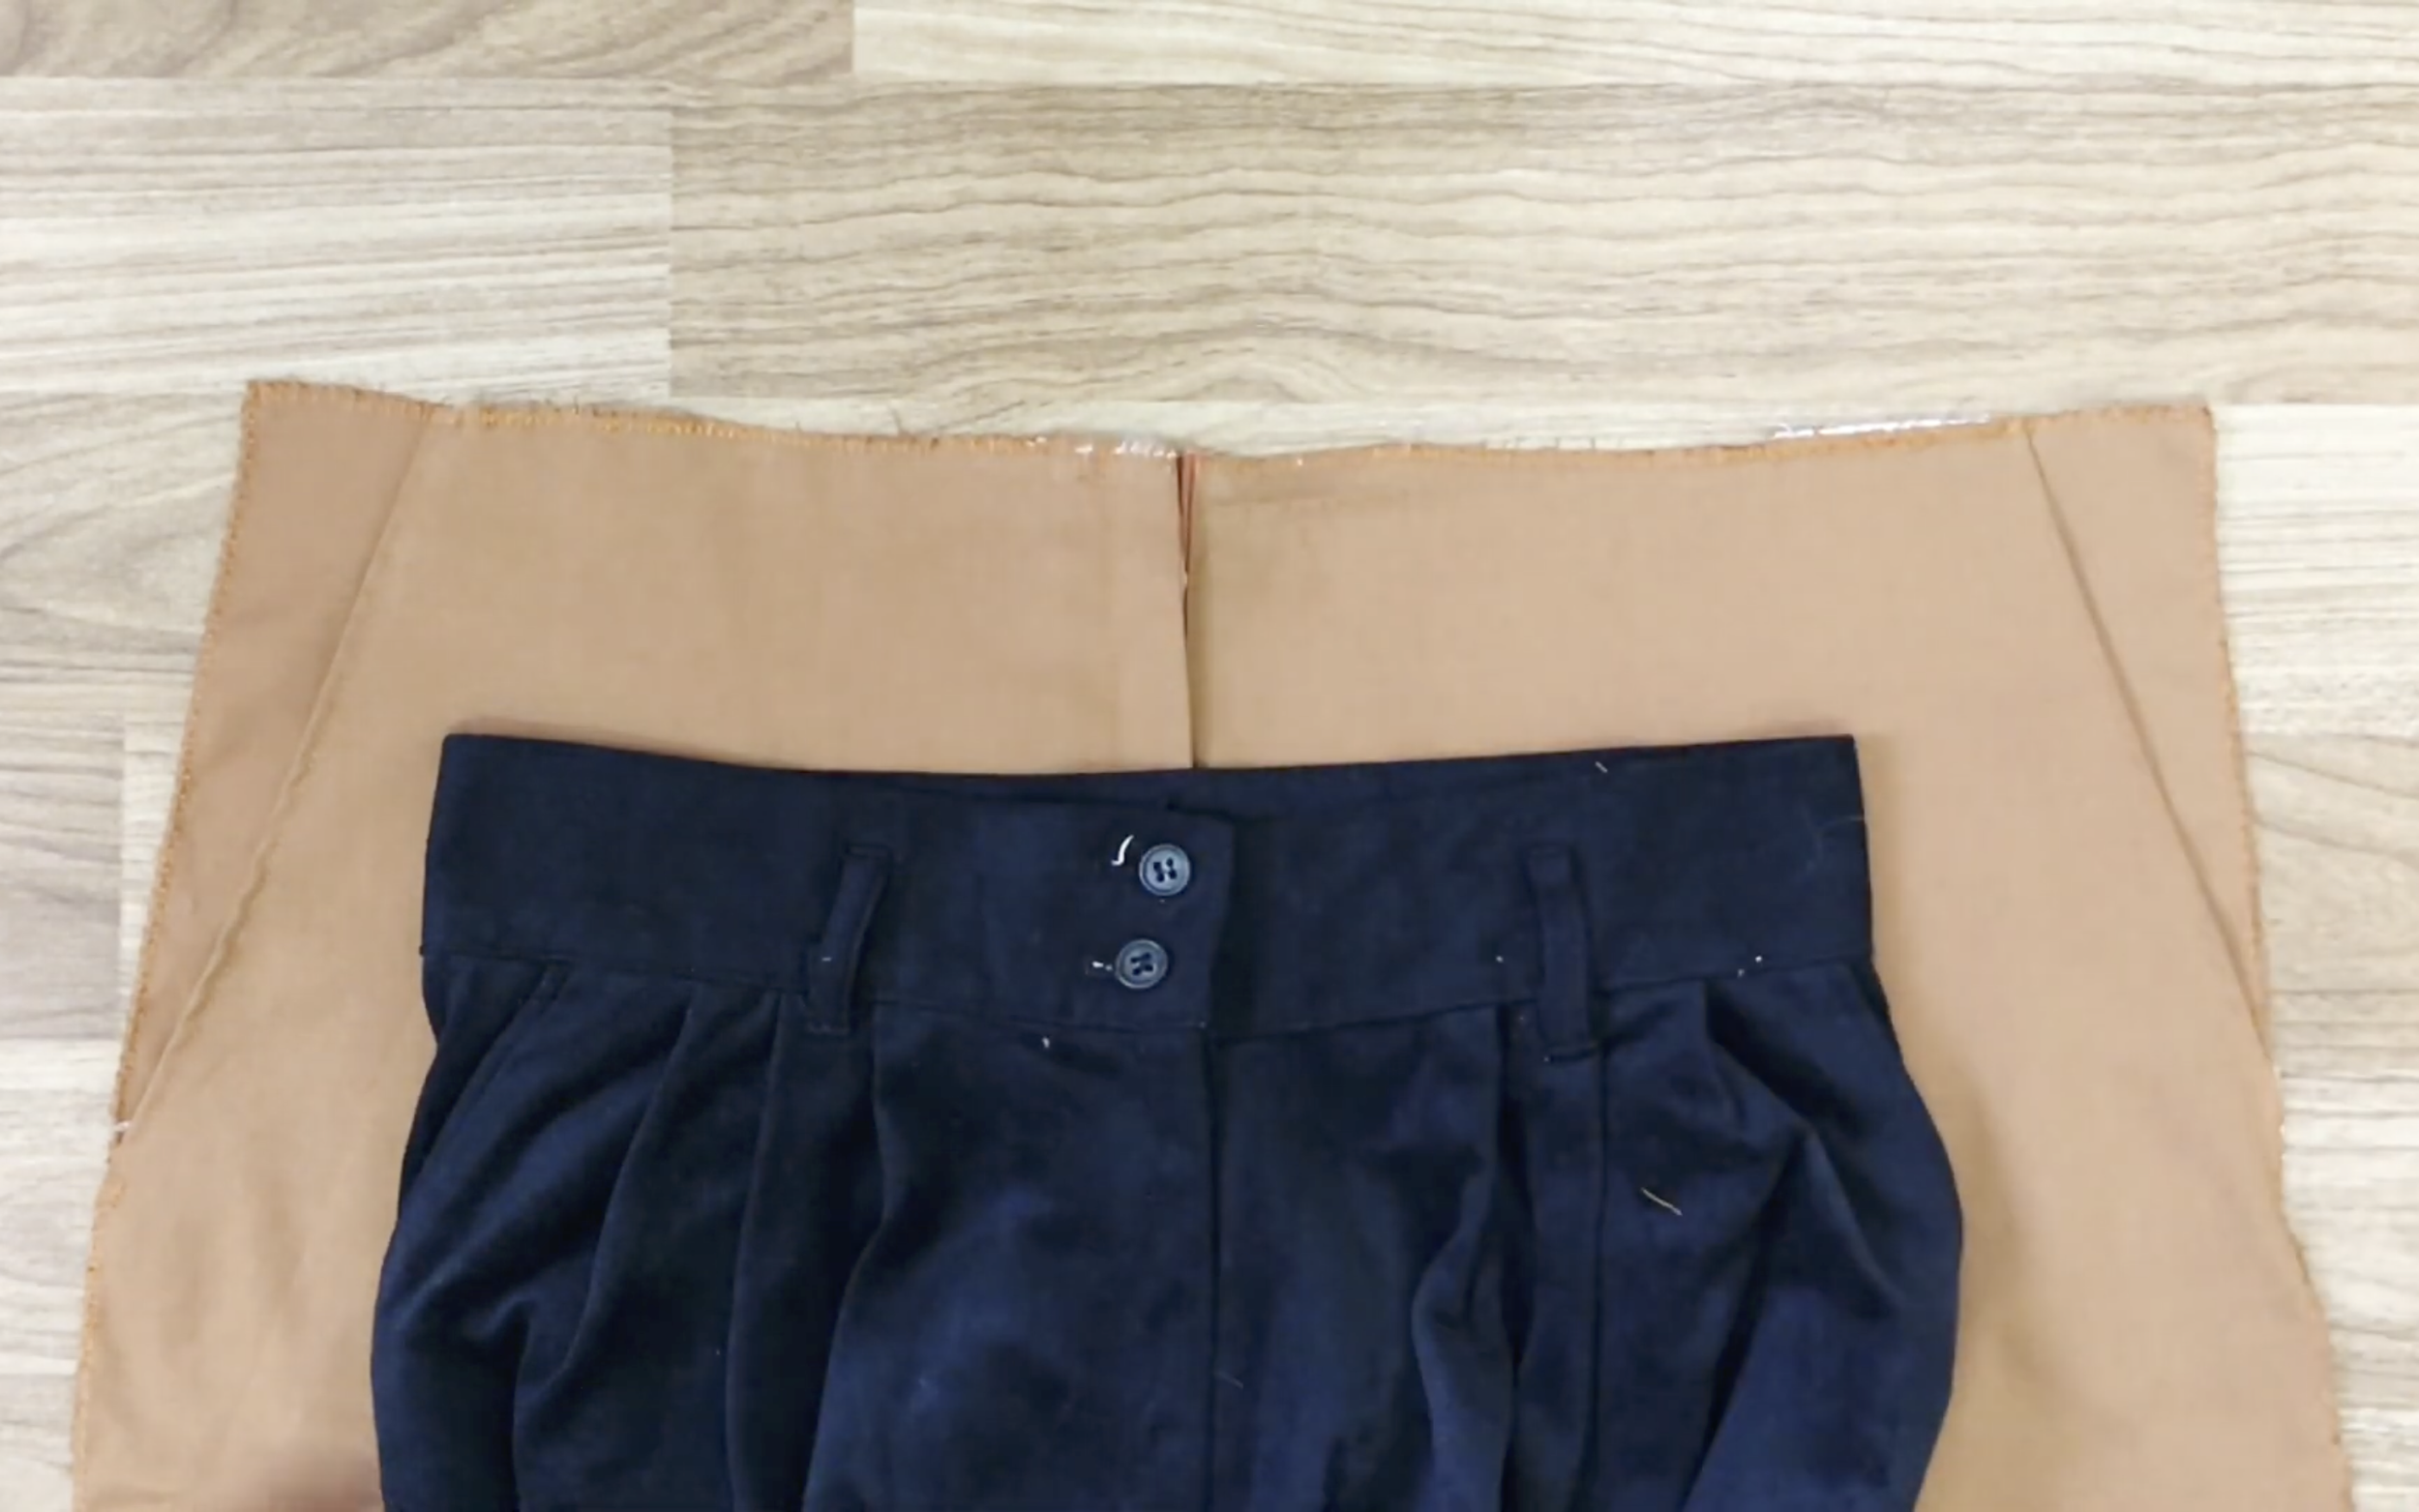
After unsewing, fold the black pants at one leg to apply to the brown pants.
Make sure the cutting line of the brown pants is in the middle of the legs of the black one.
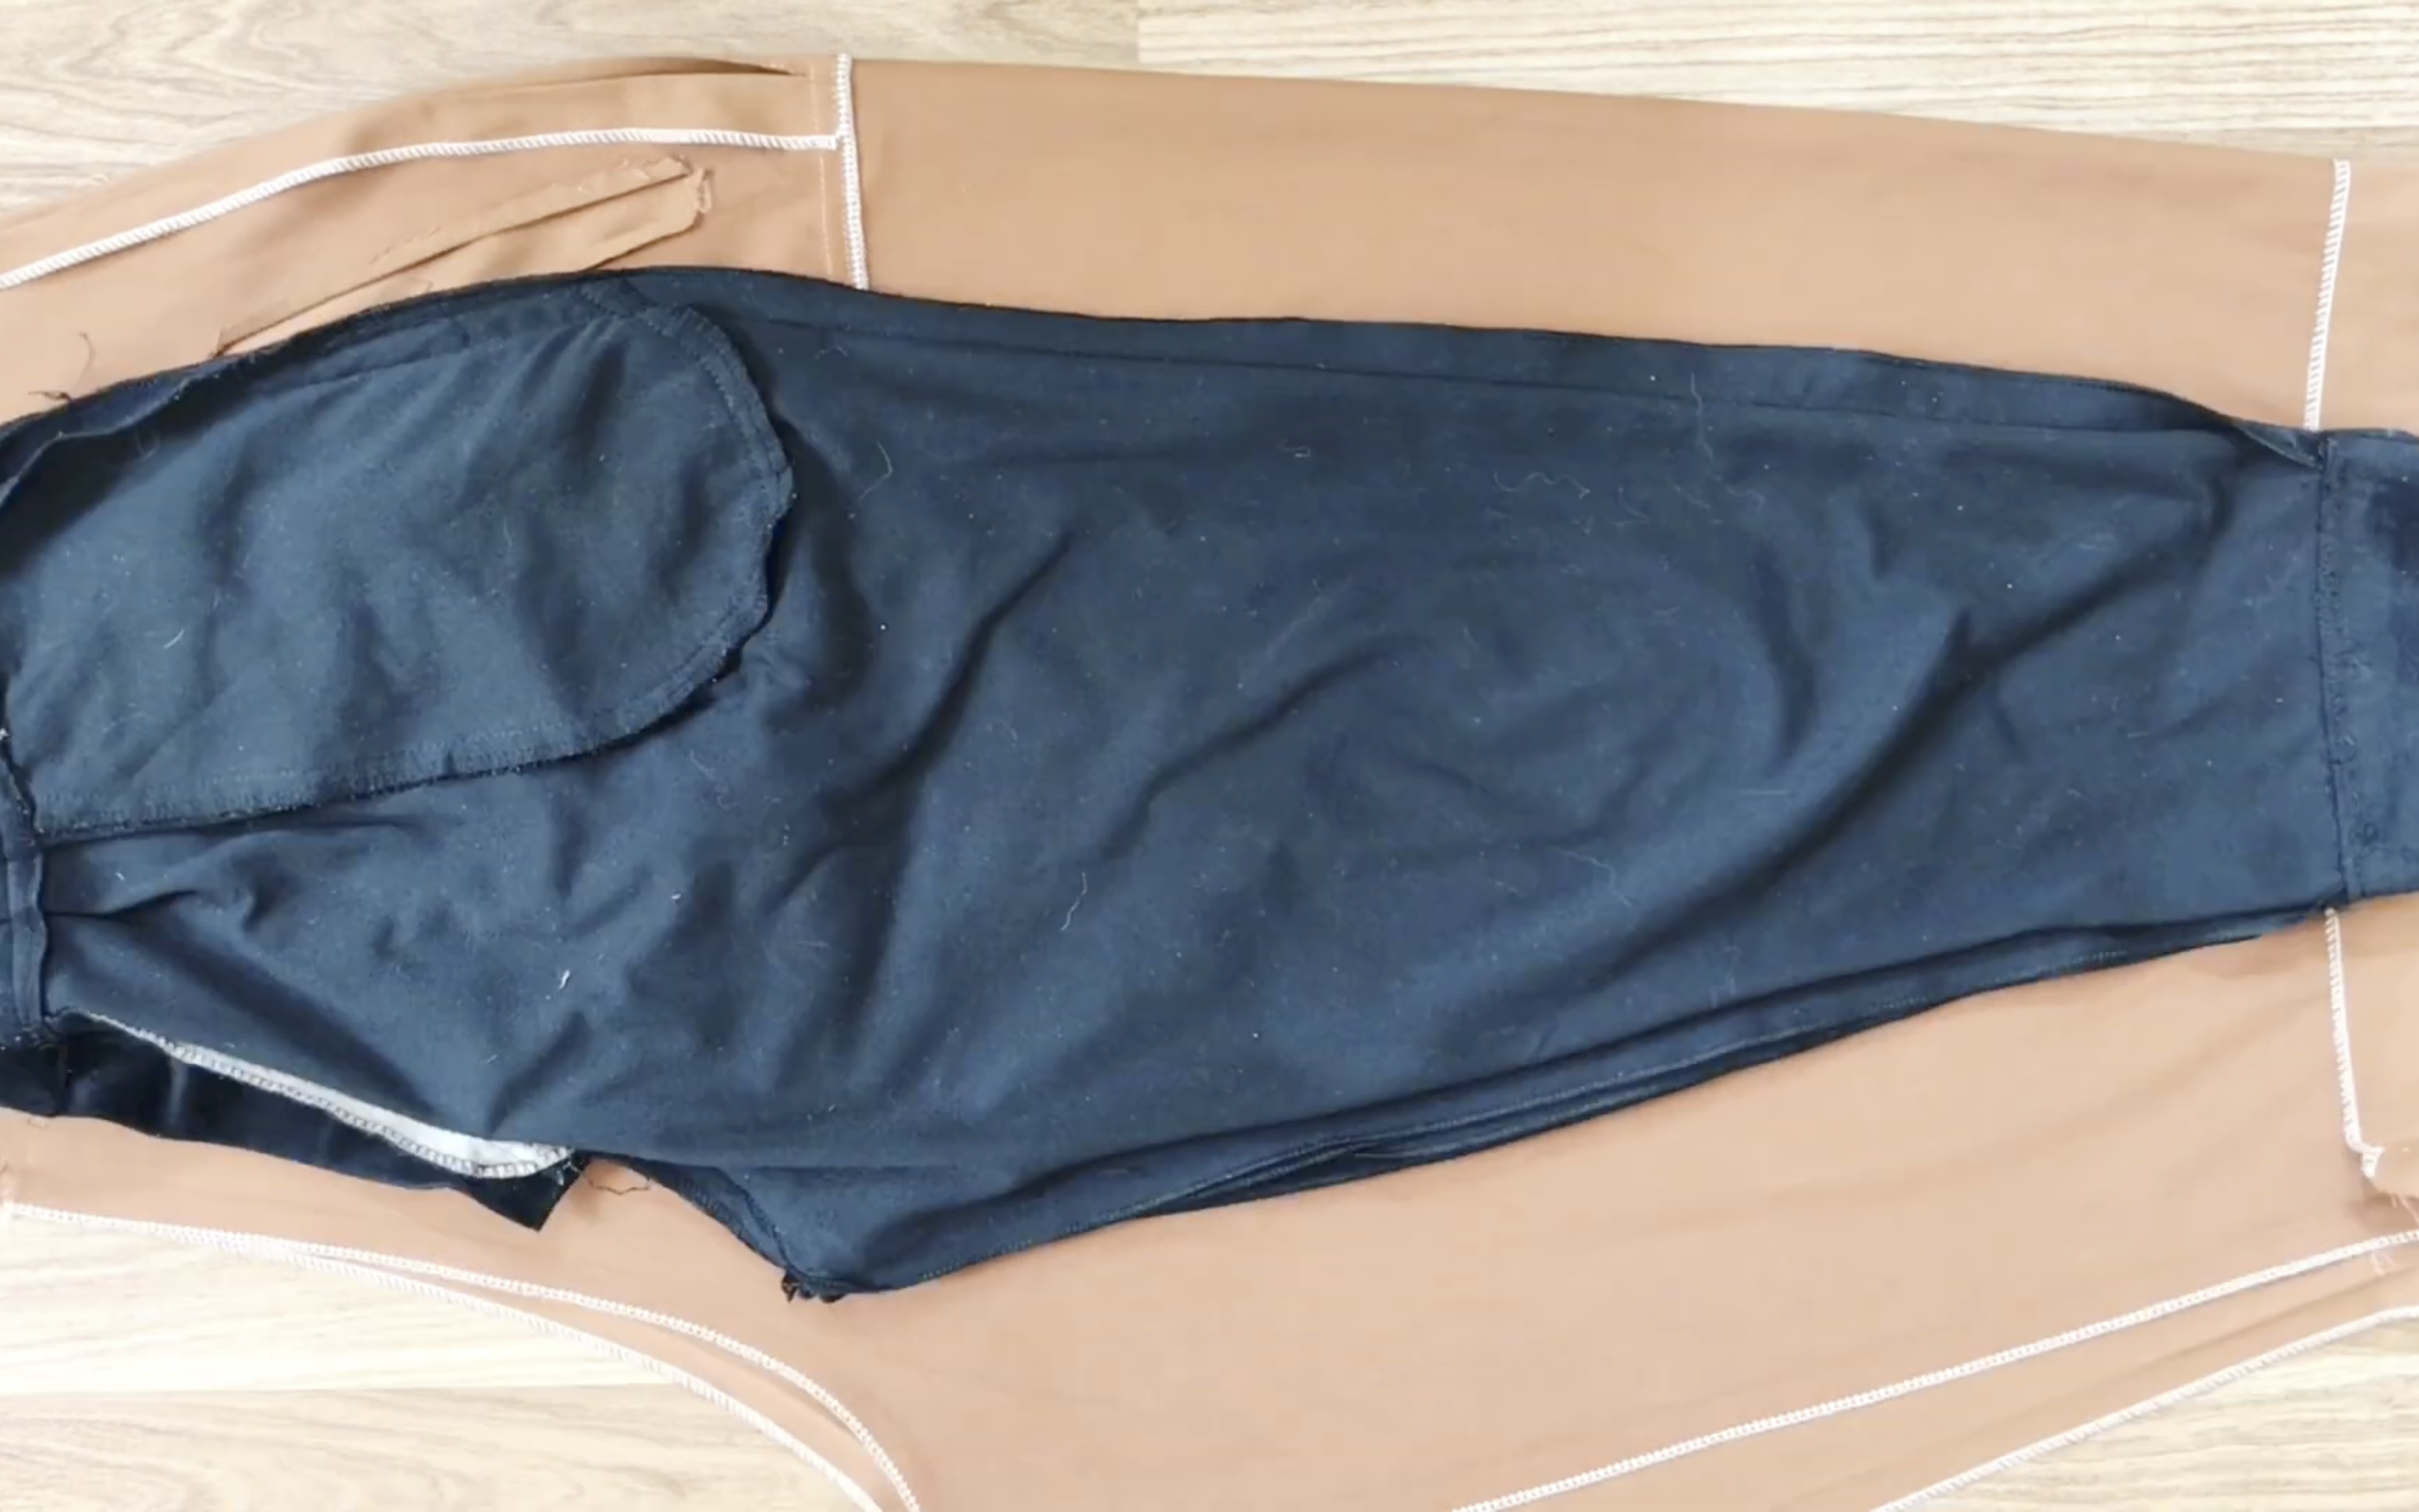
Then draw along the edge of the black pants onto the brown one.
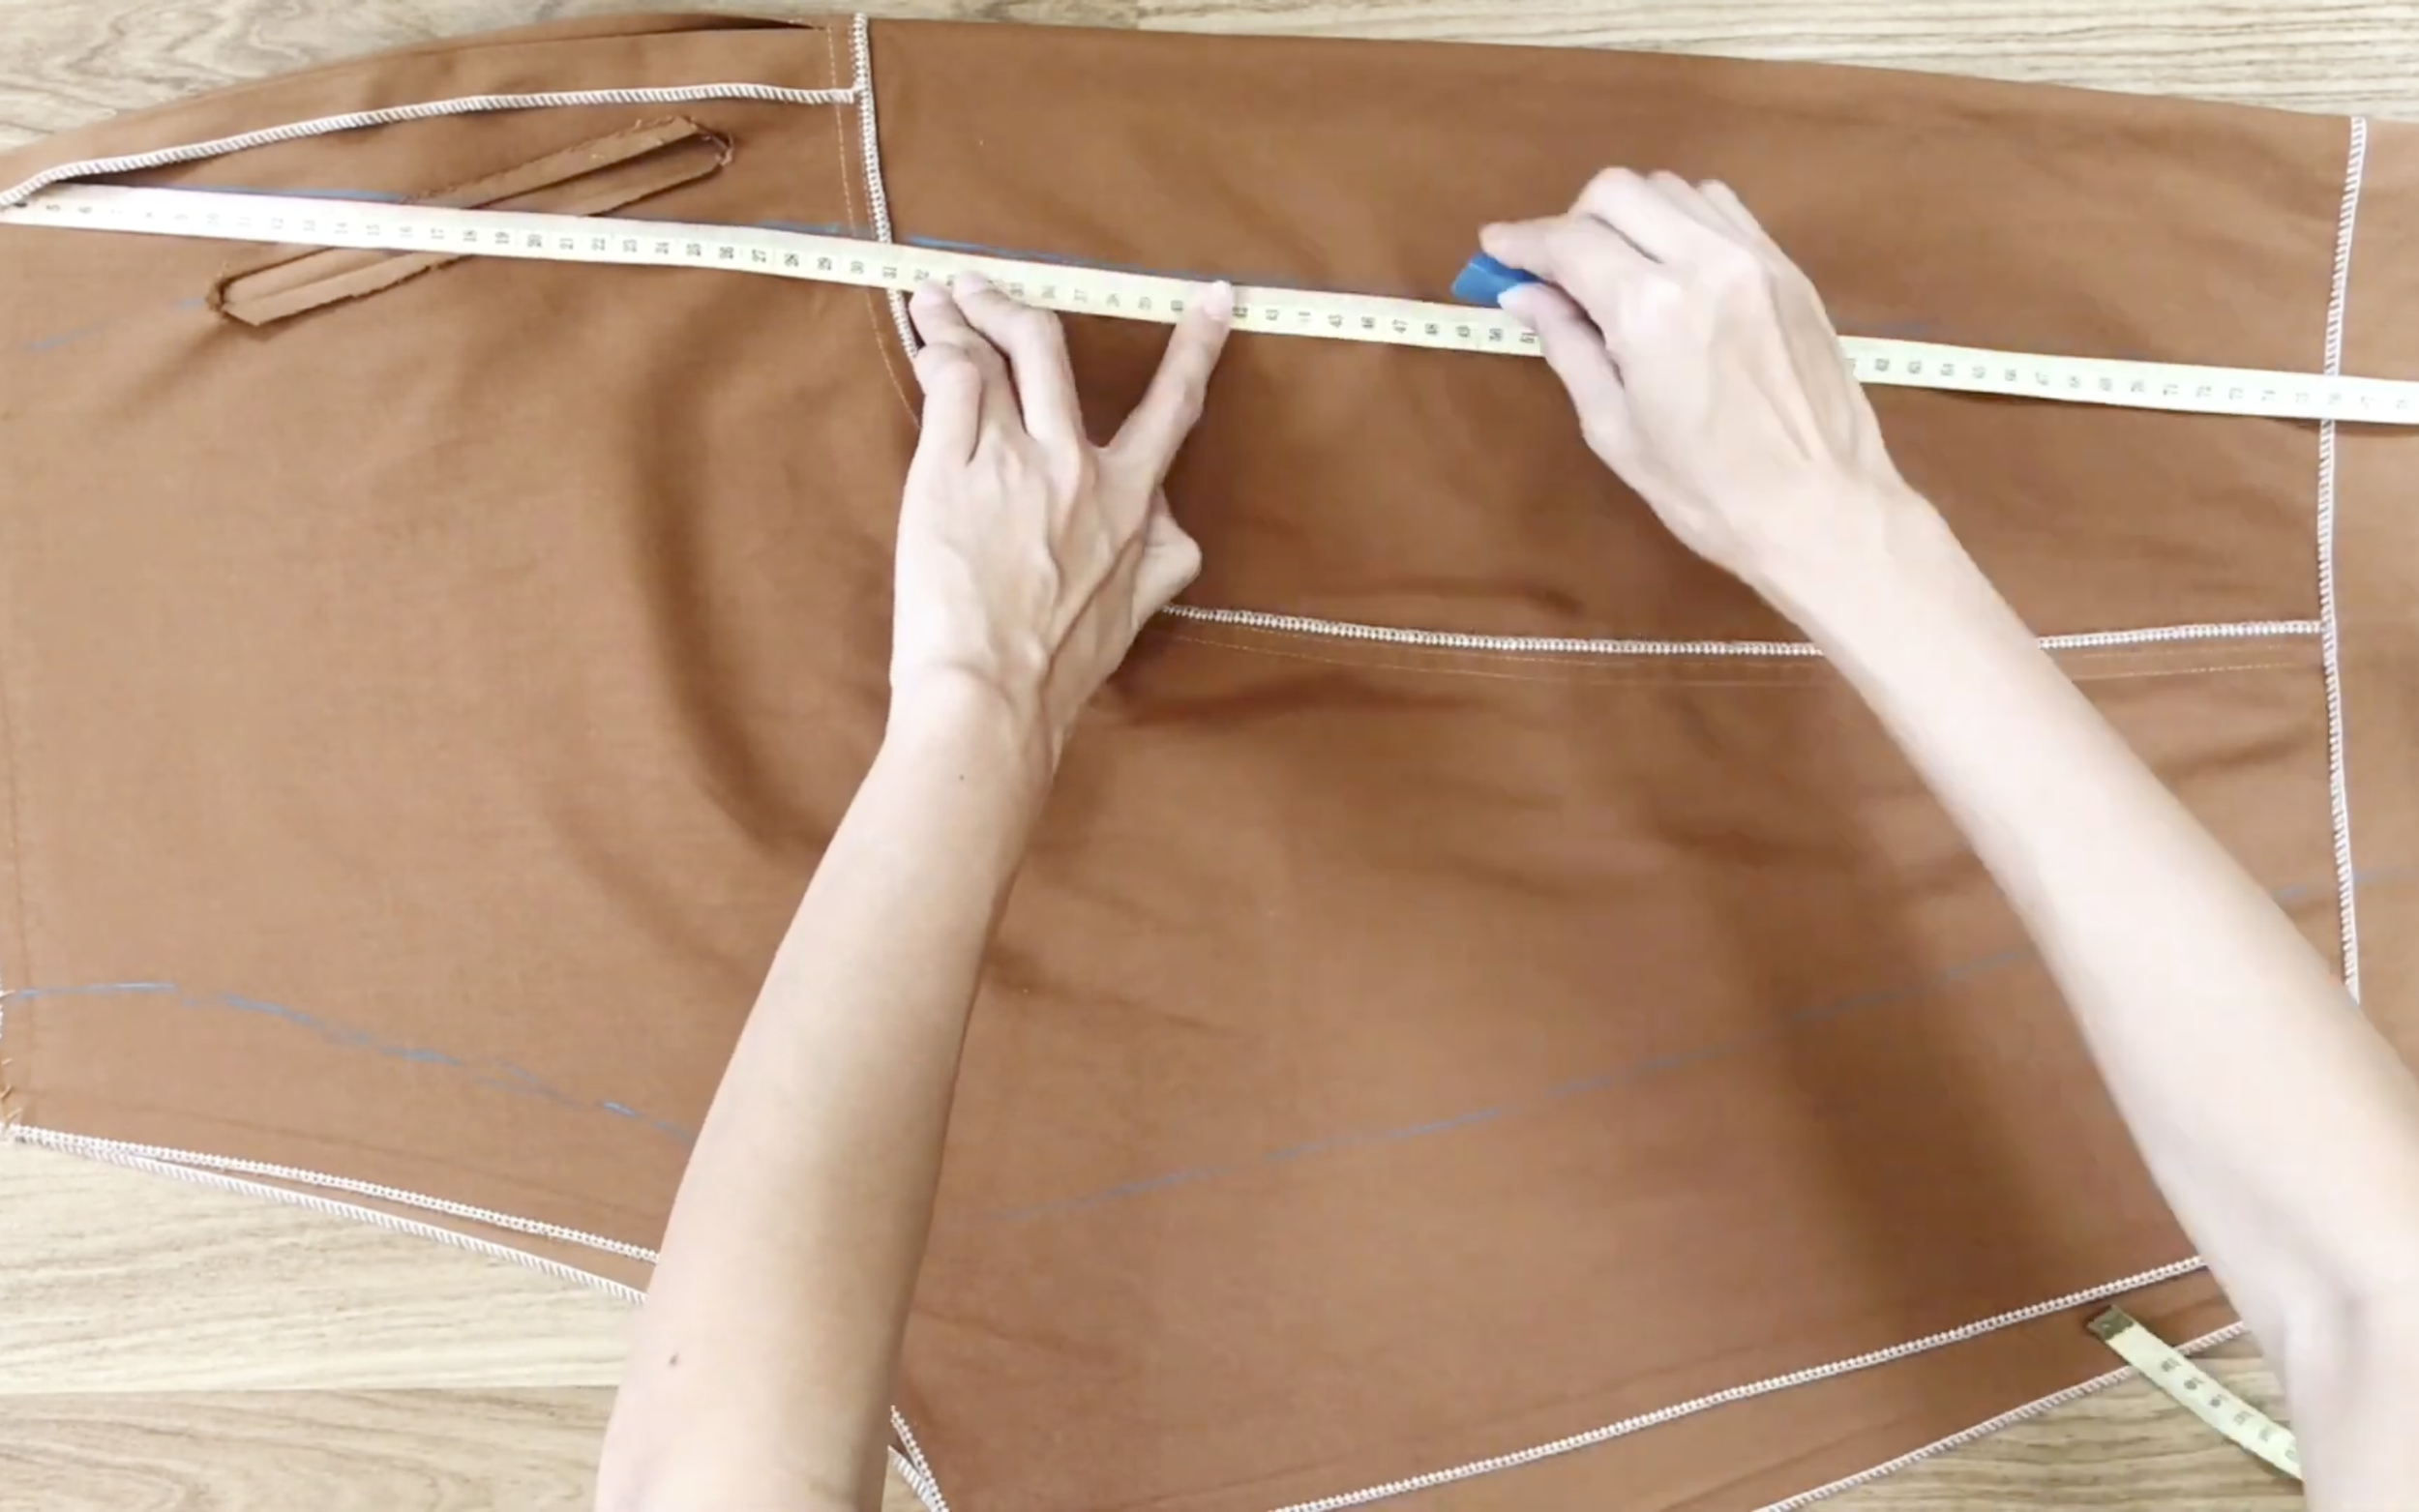
After drawing, use a ruler to go over it again to ensure the lines are straight.

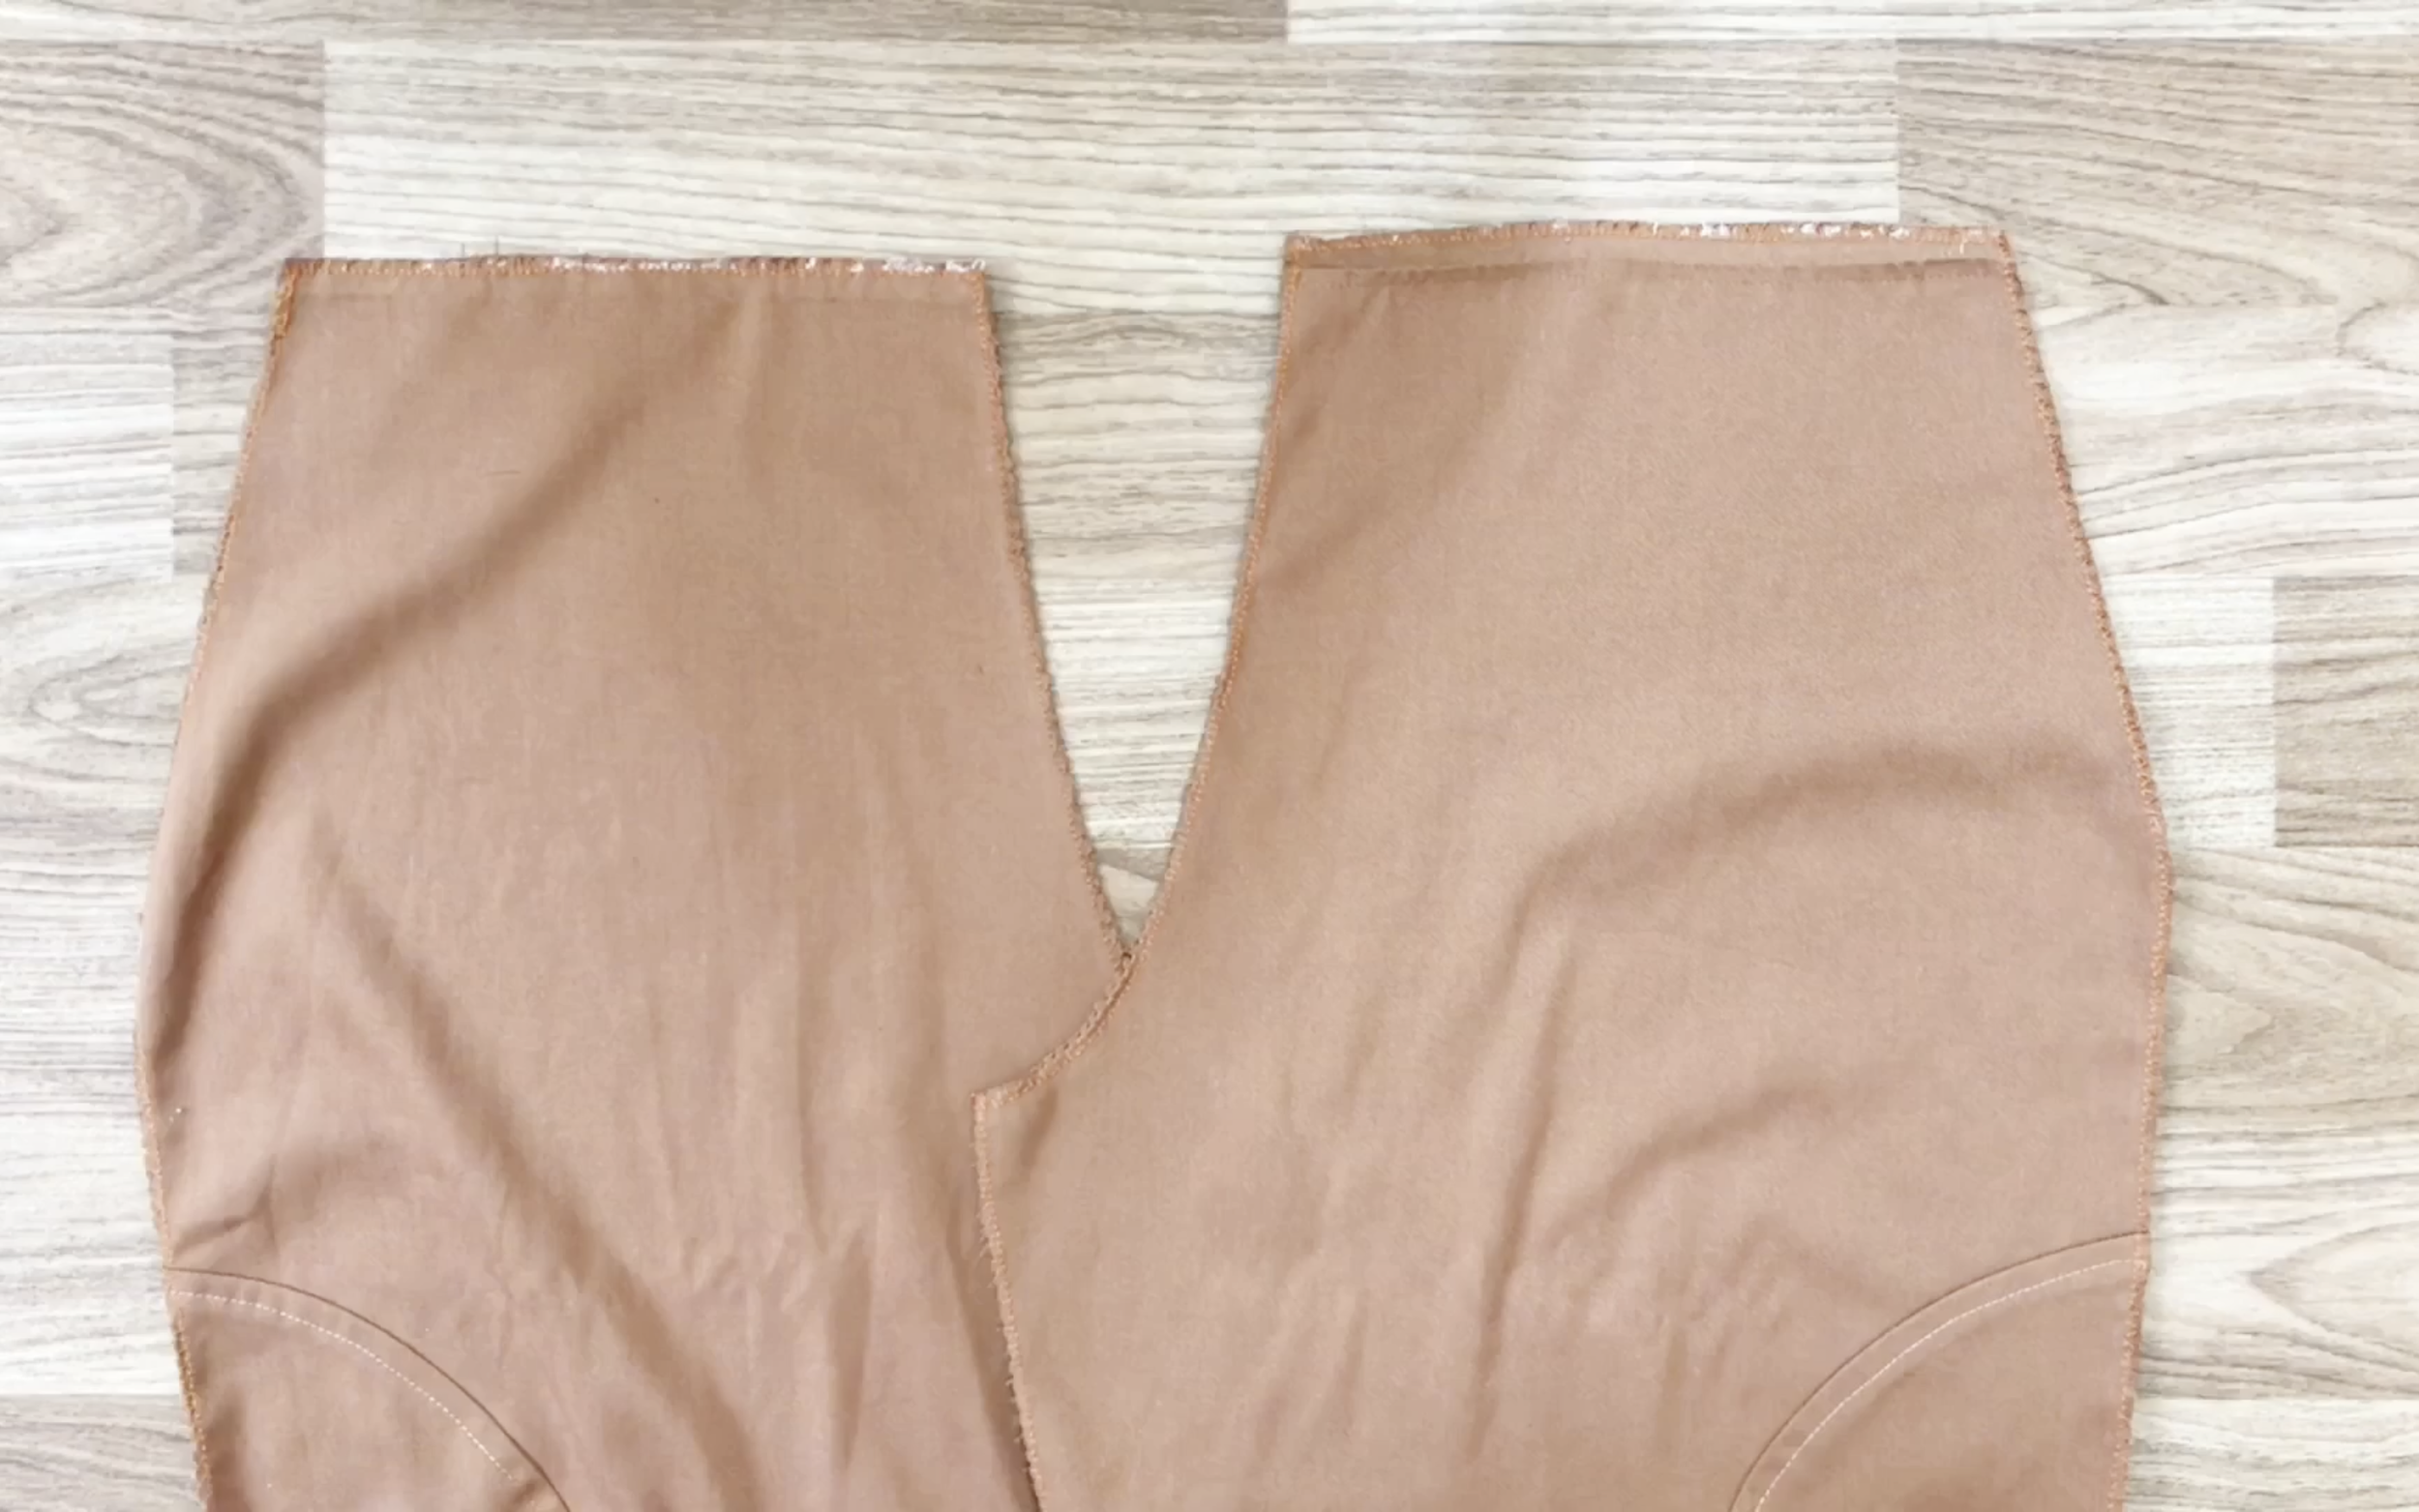
Then cut along the drawing line to get the front body of the pants.
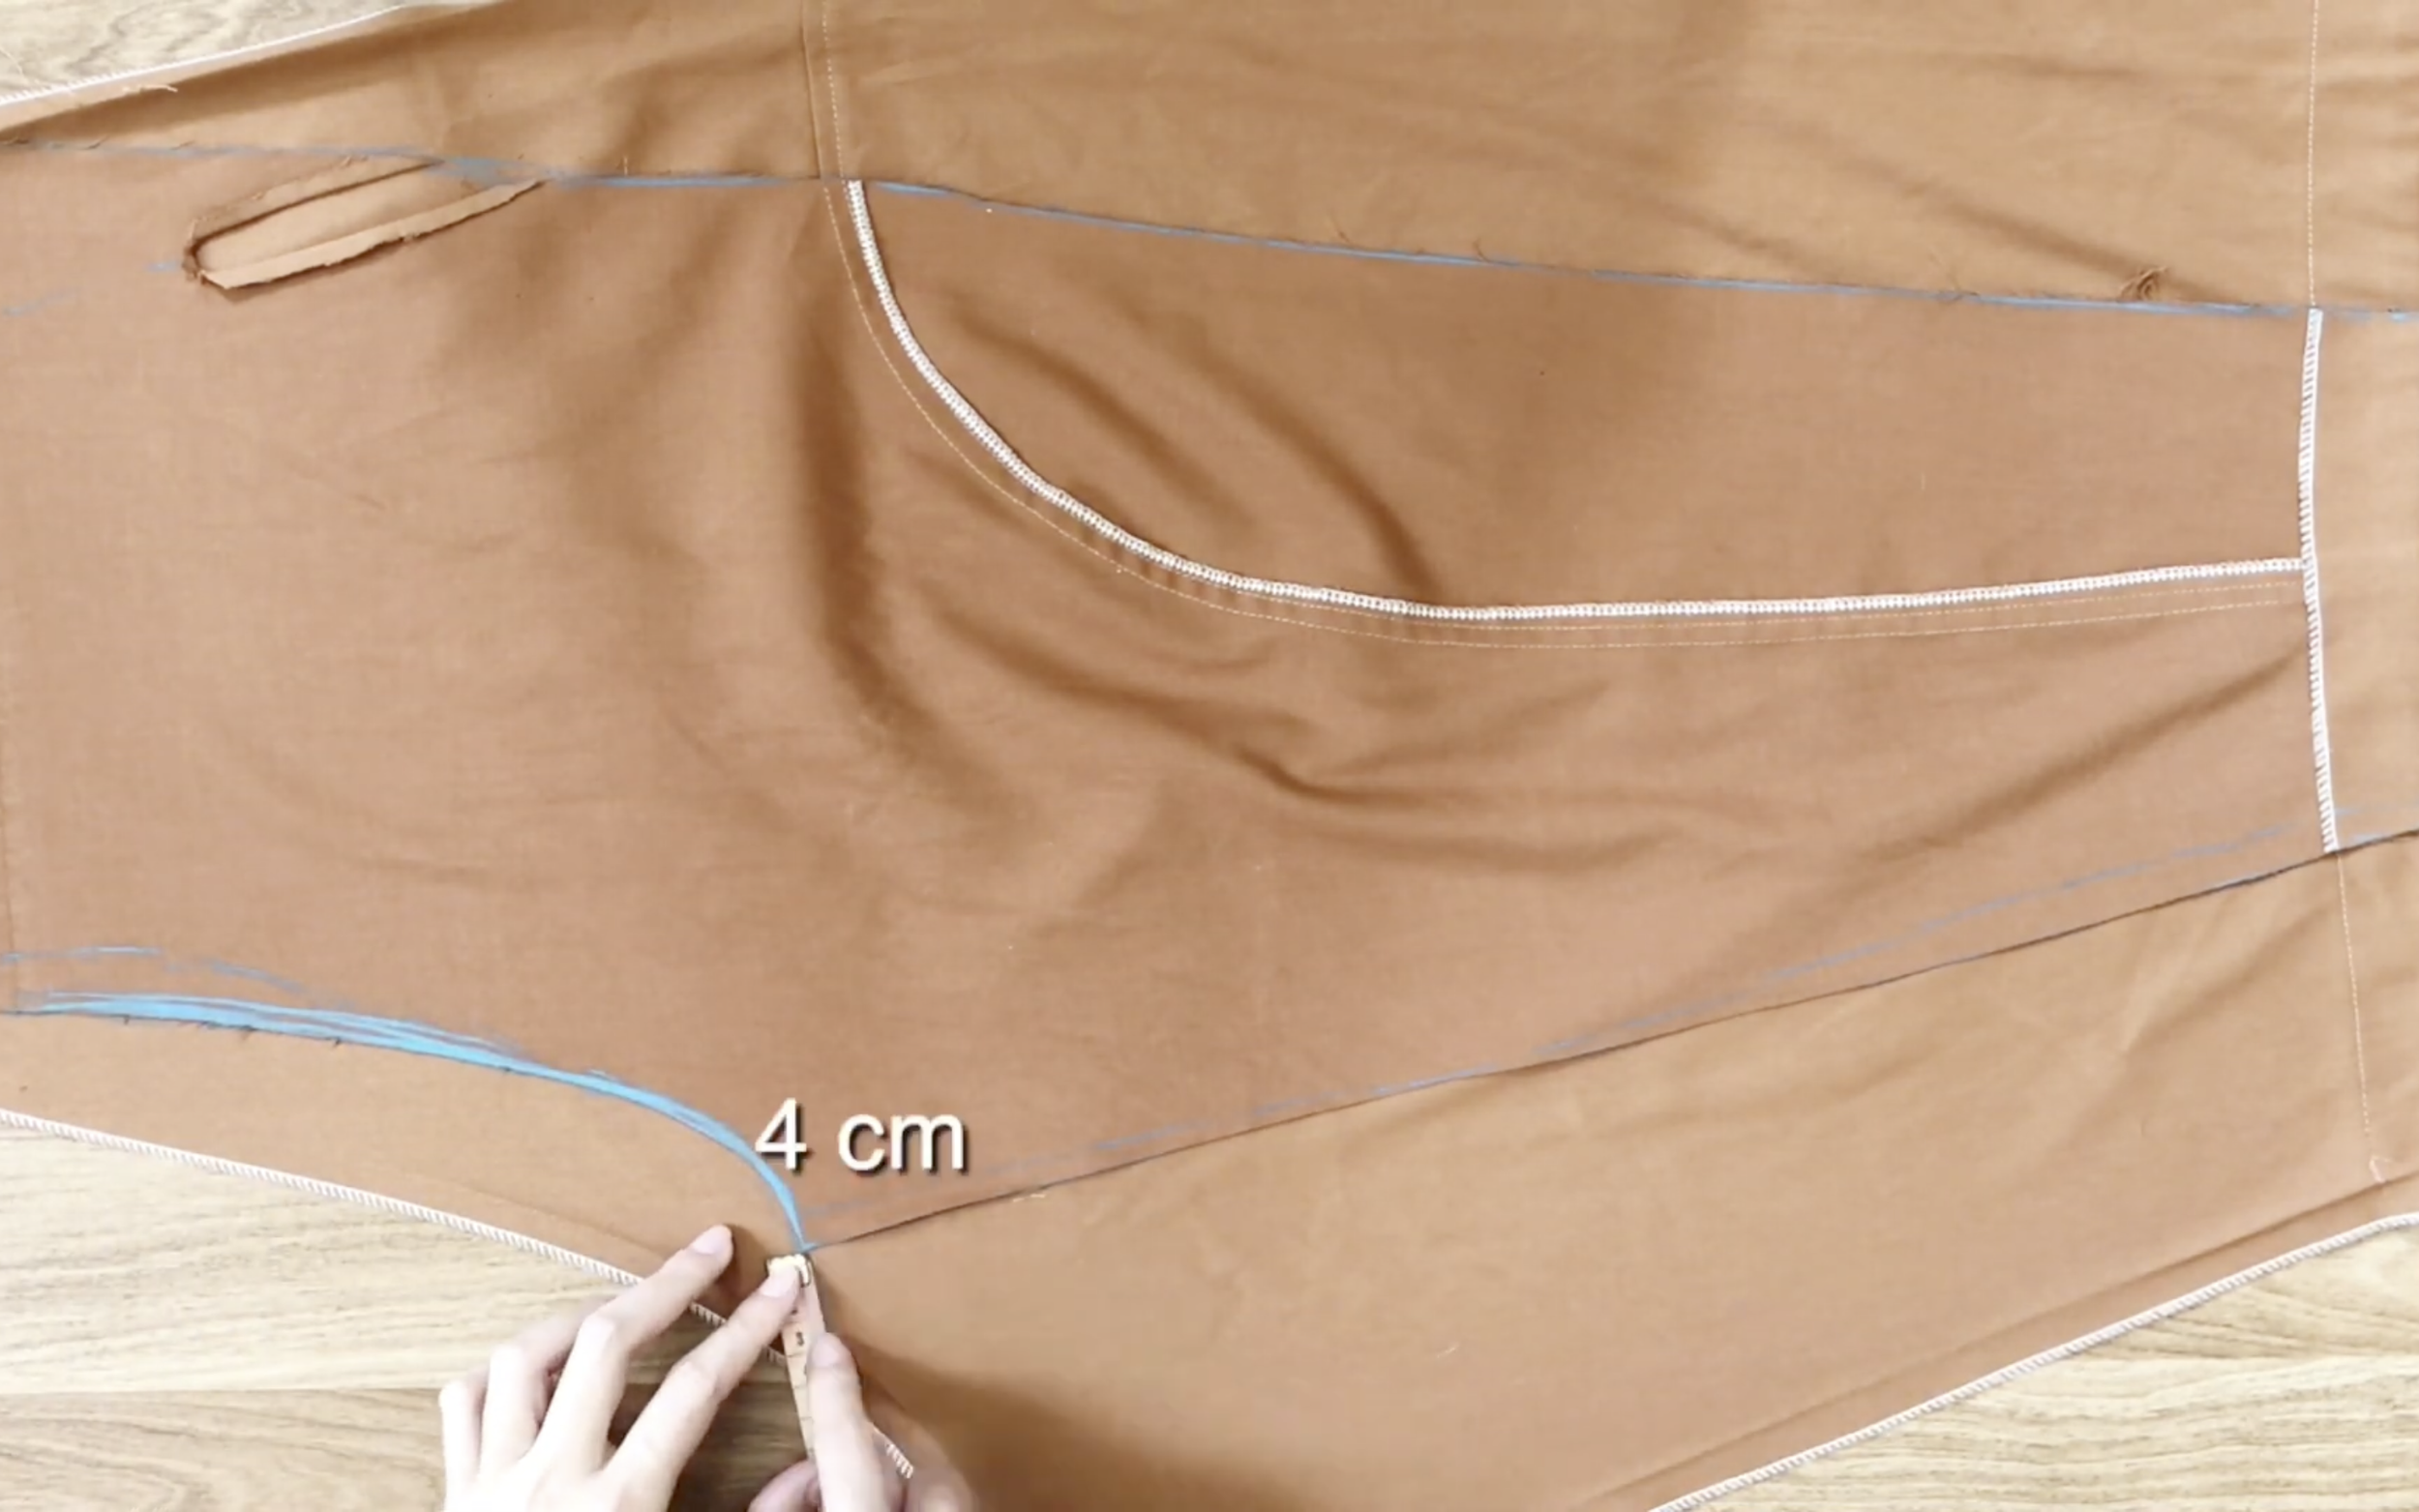
The back body of the pants will be similar to the front, but the crotch will be 4cm longer than the front.
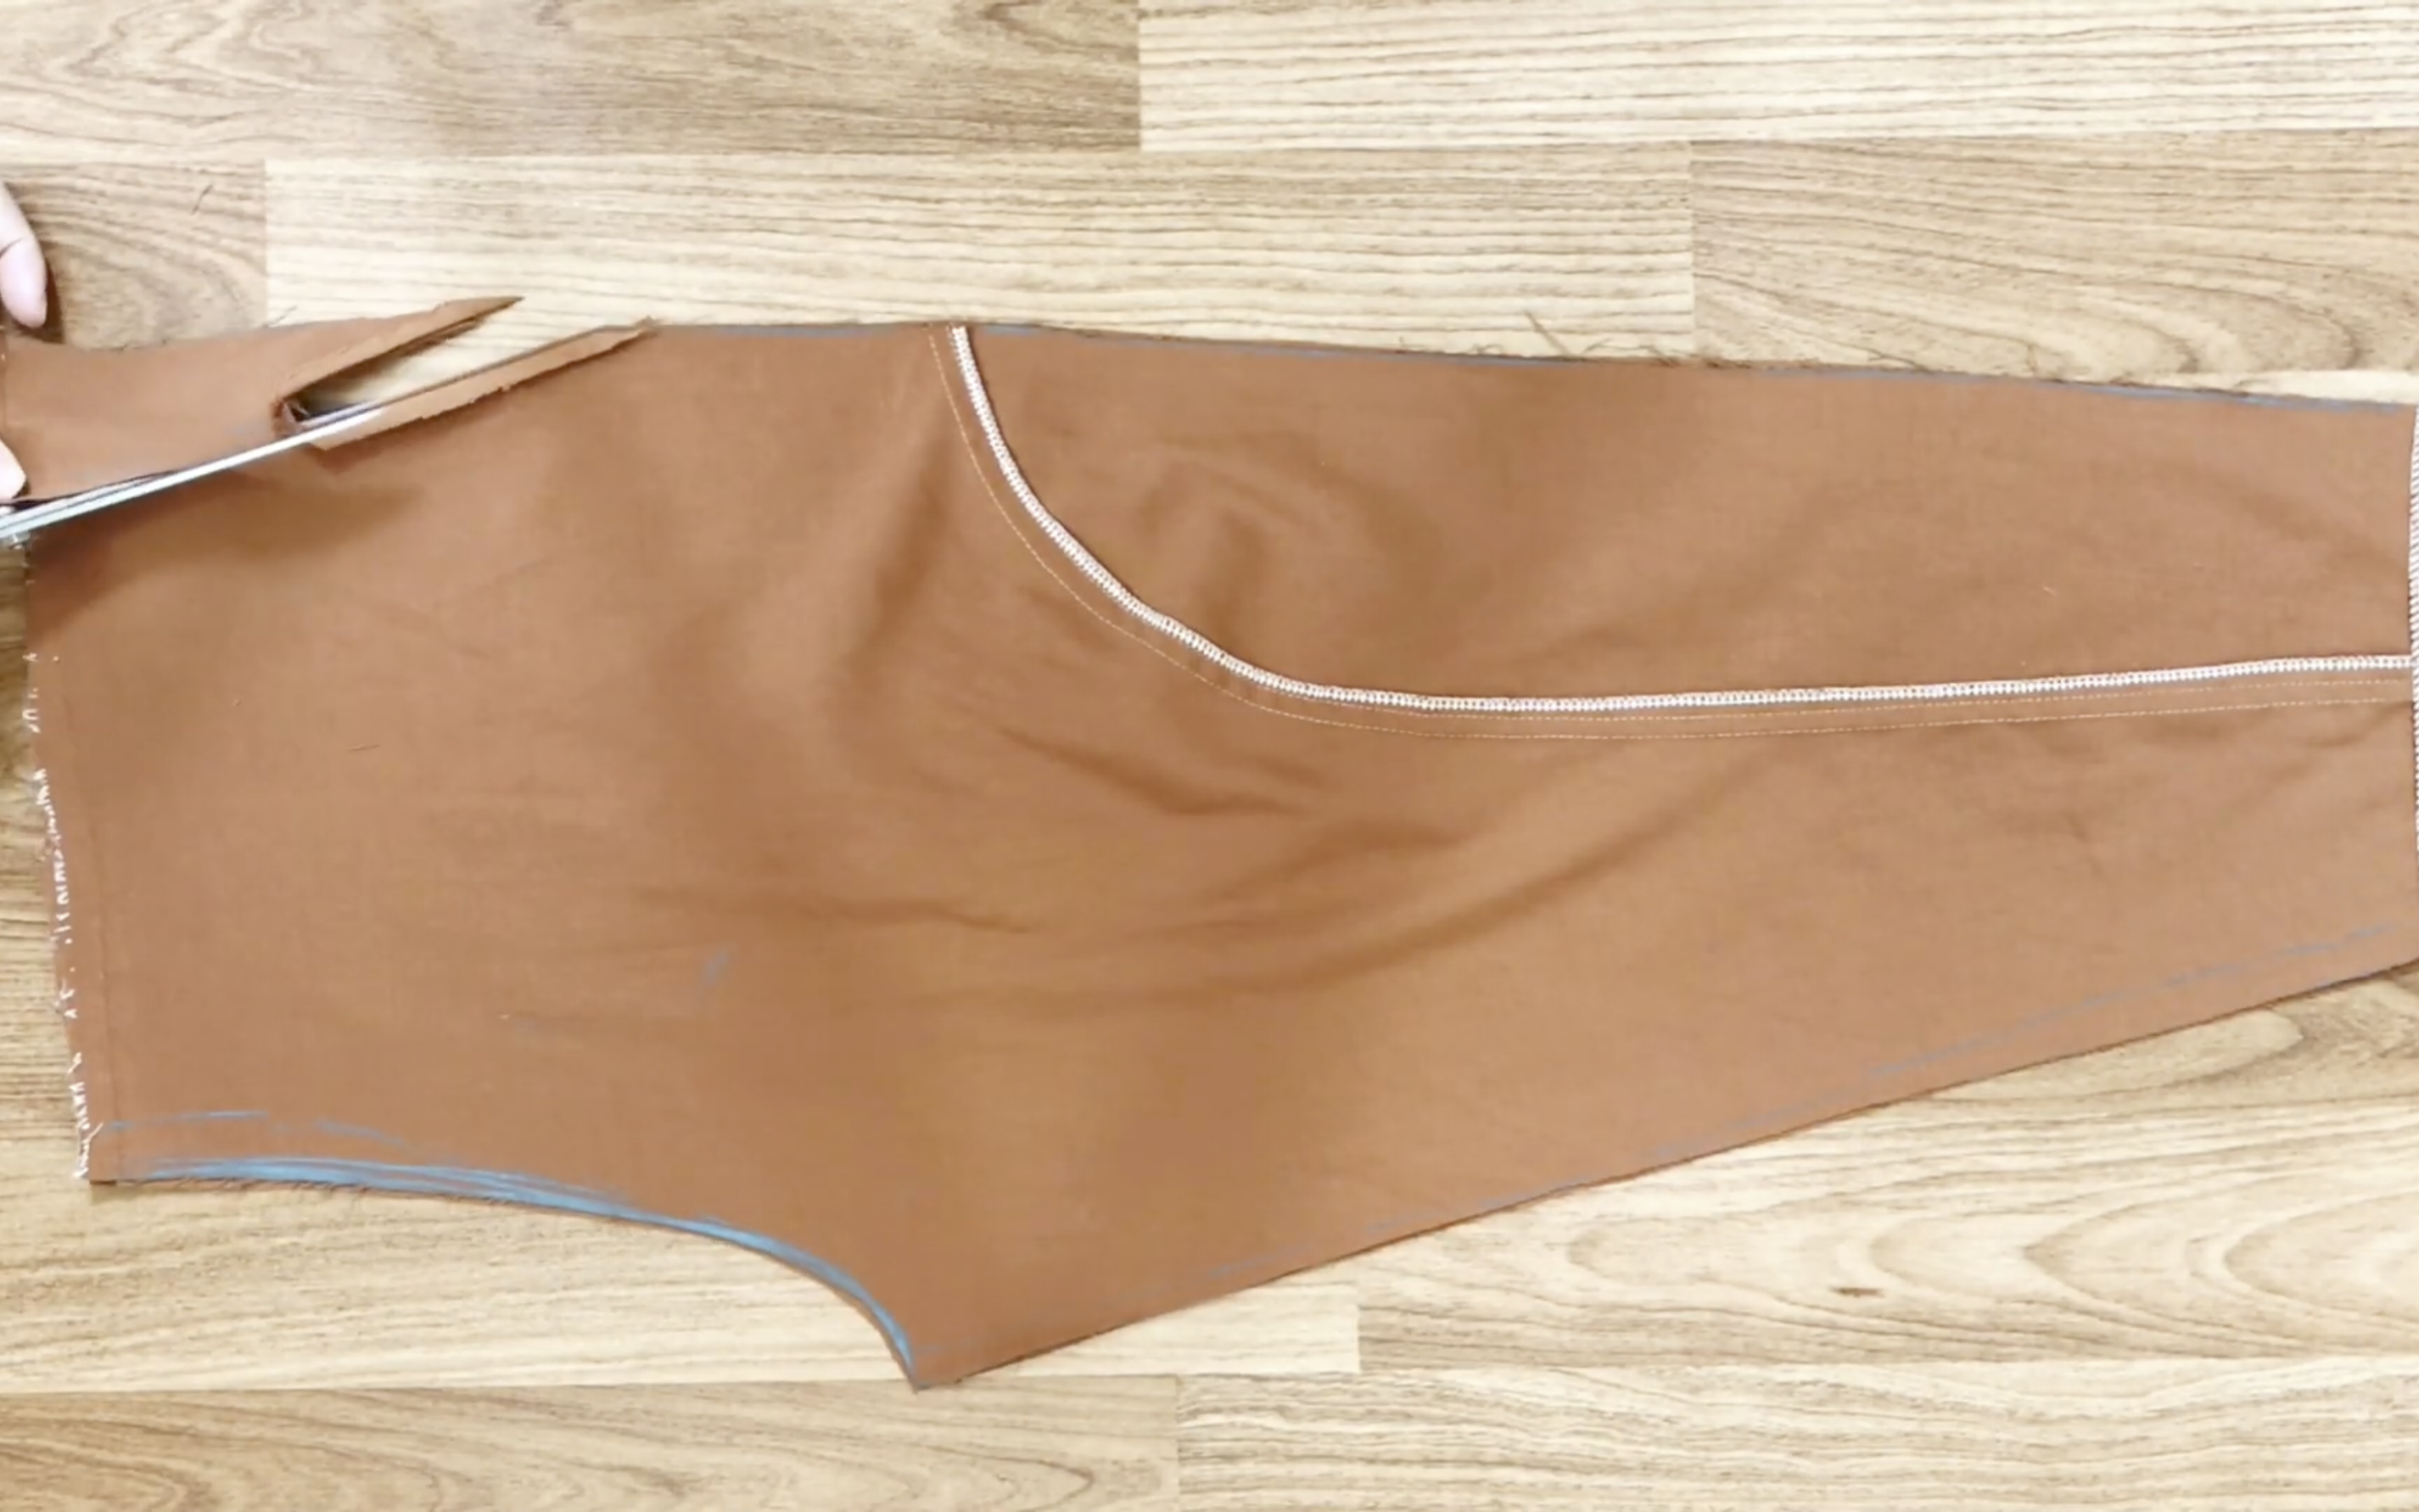
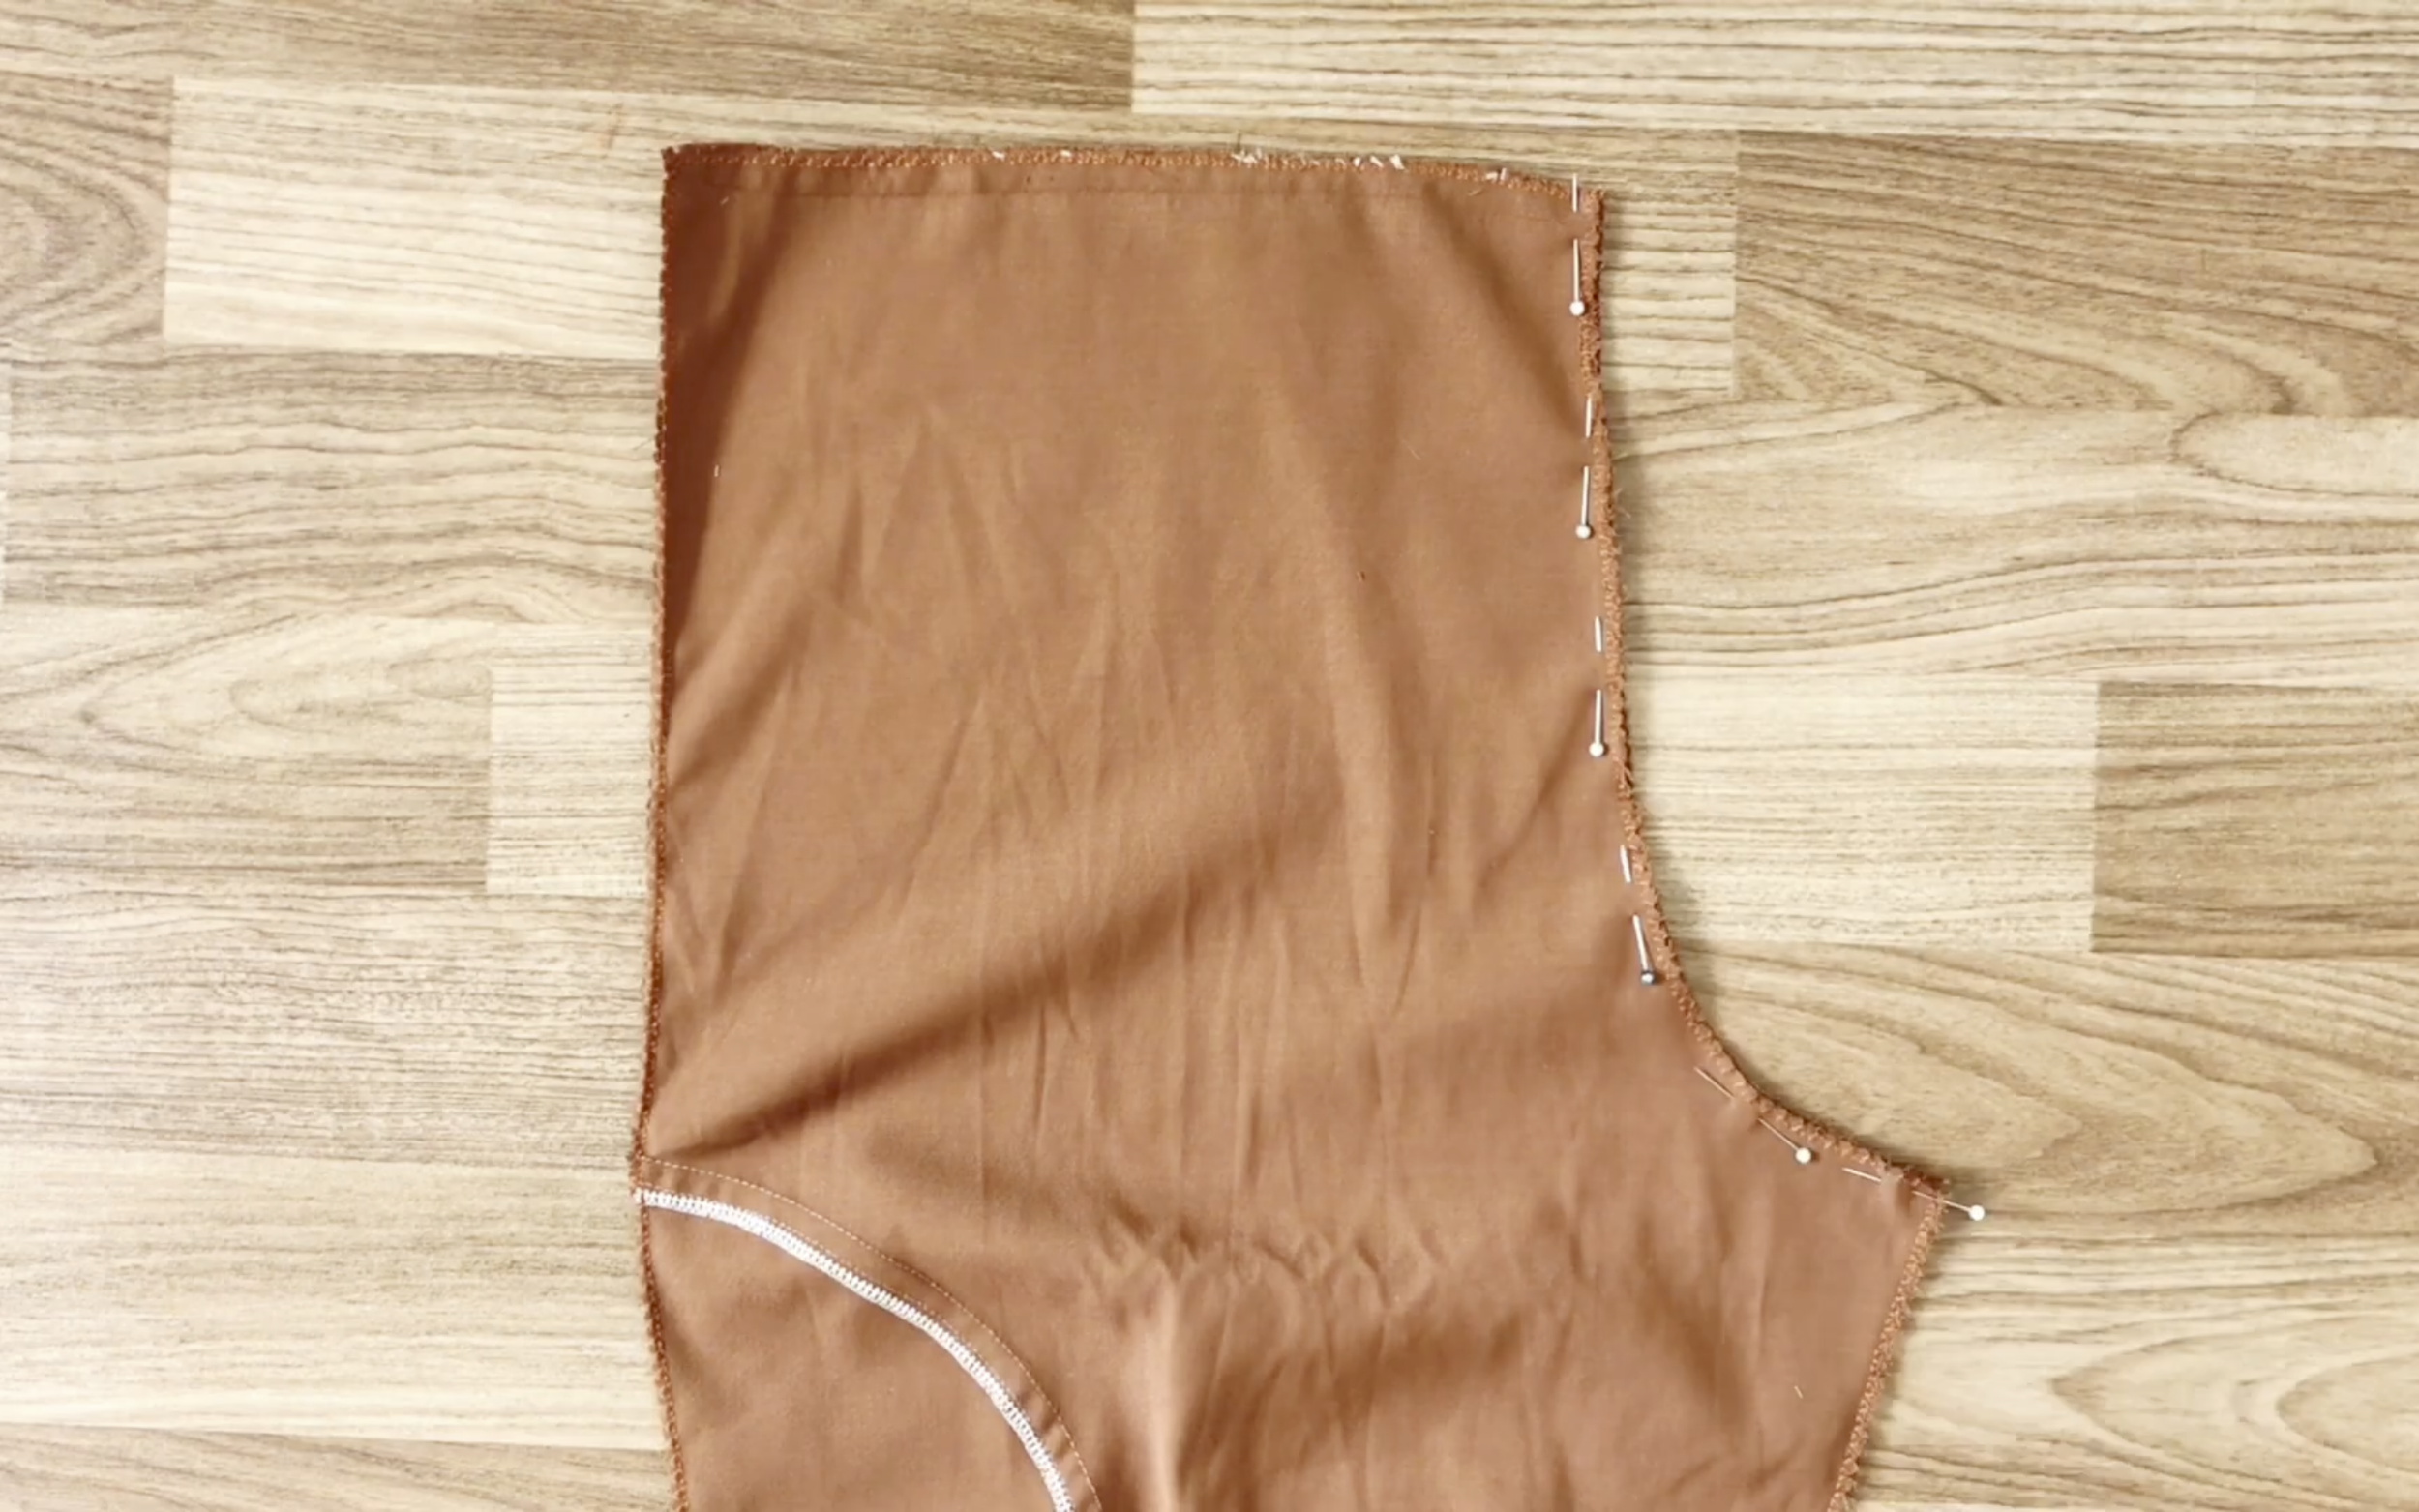
Because the front body has a cut at the old pockets, cut from there to create a pocket area for the baggy pants.
Don't forget to overlock after cutting to protect the fabric.
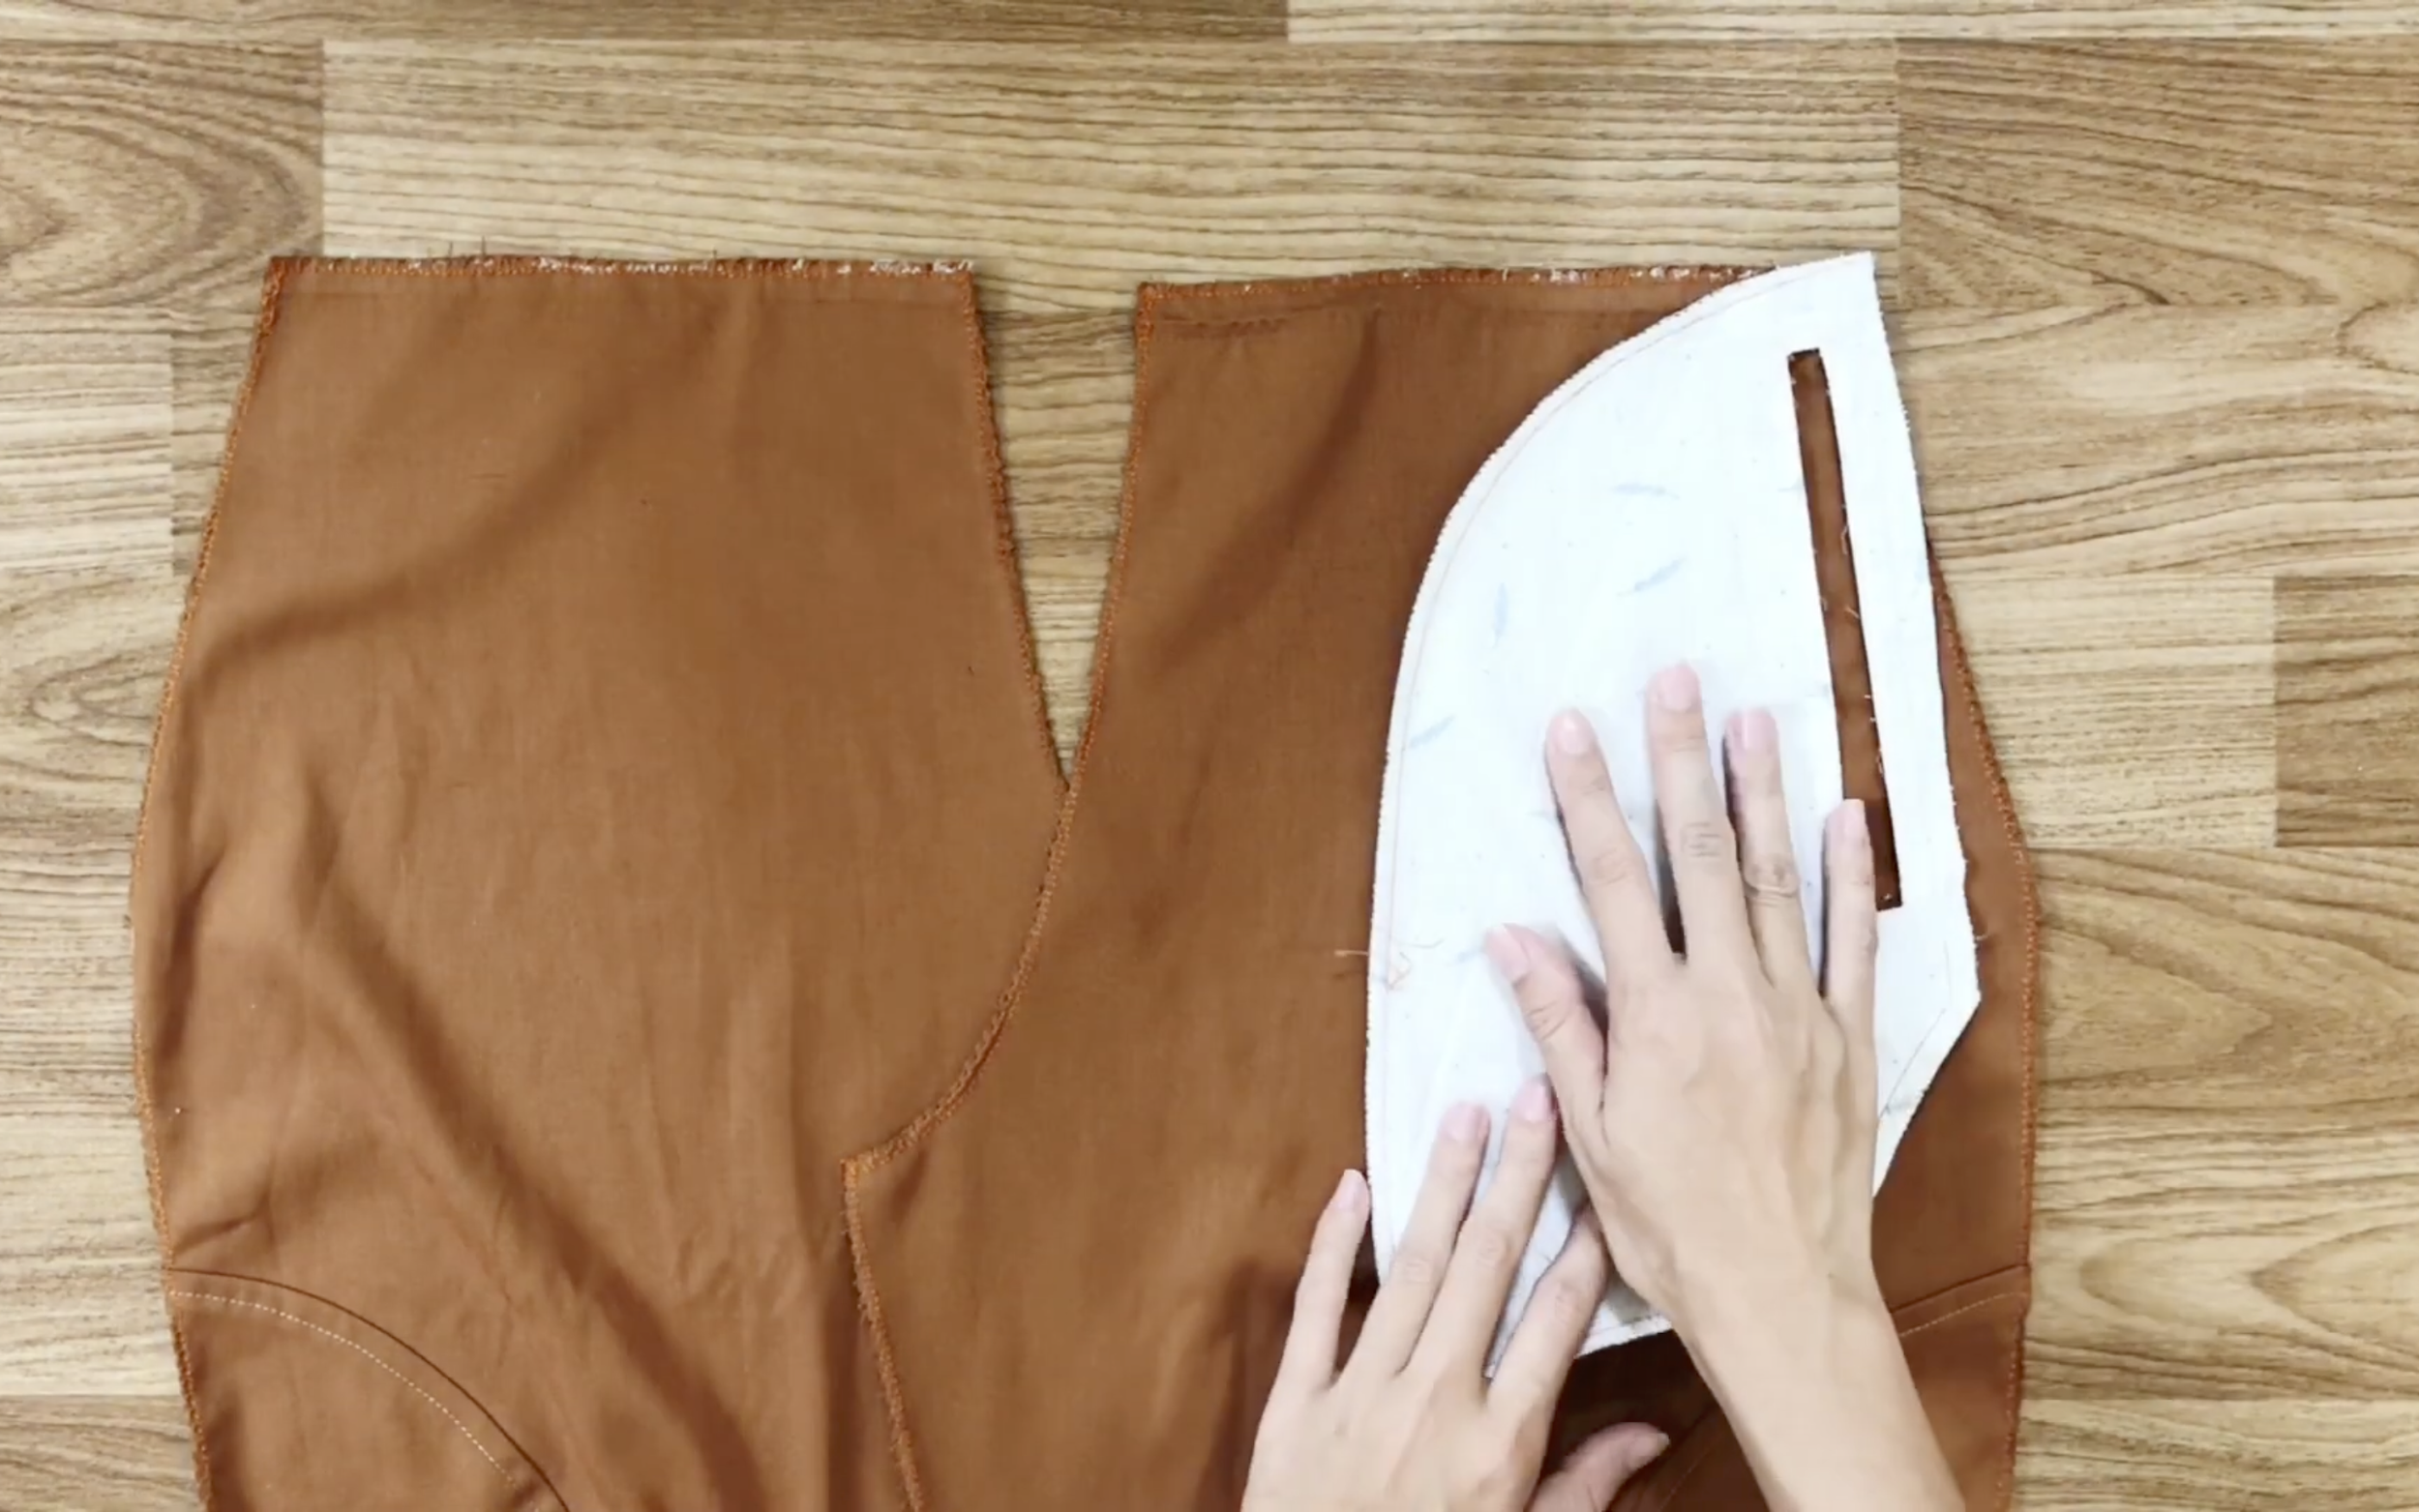
At the pocket area of the front body, make new pockets using the old ones, though with a different style.
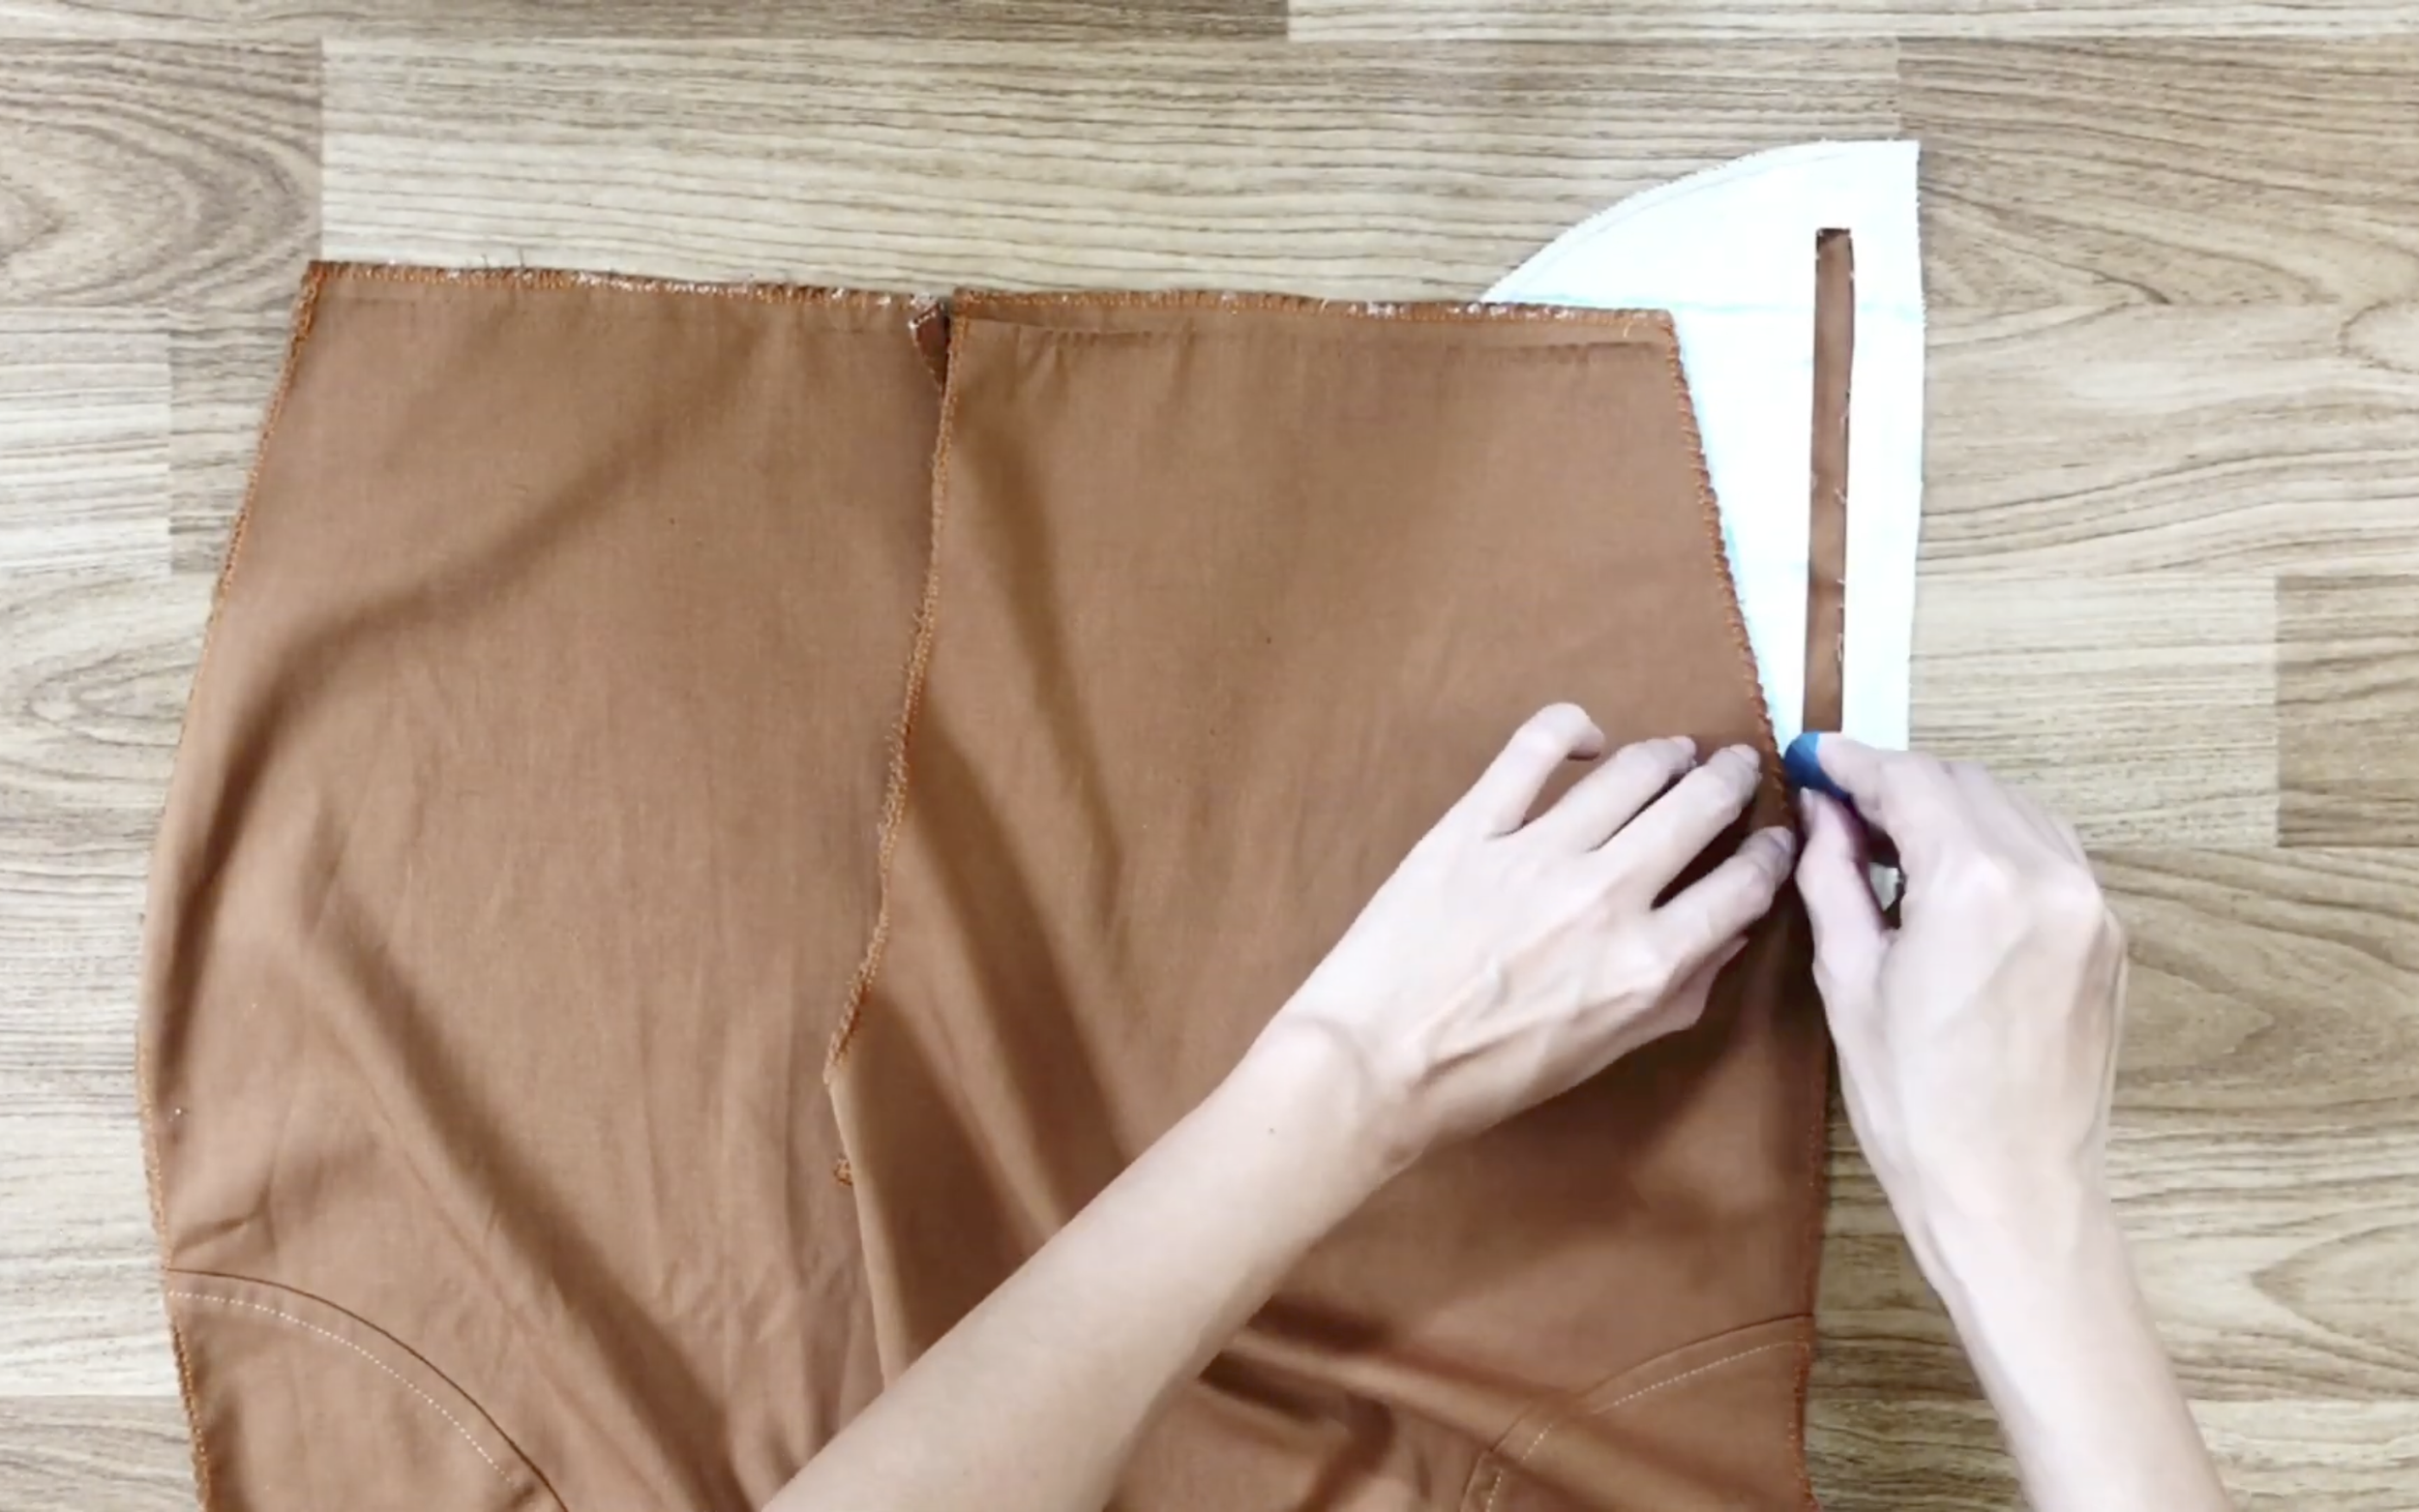
Apply them to the pocket area of the front body to draw the new pocket shape.
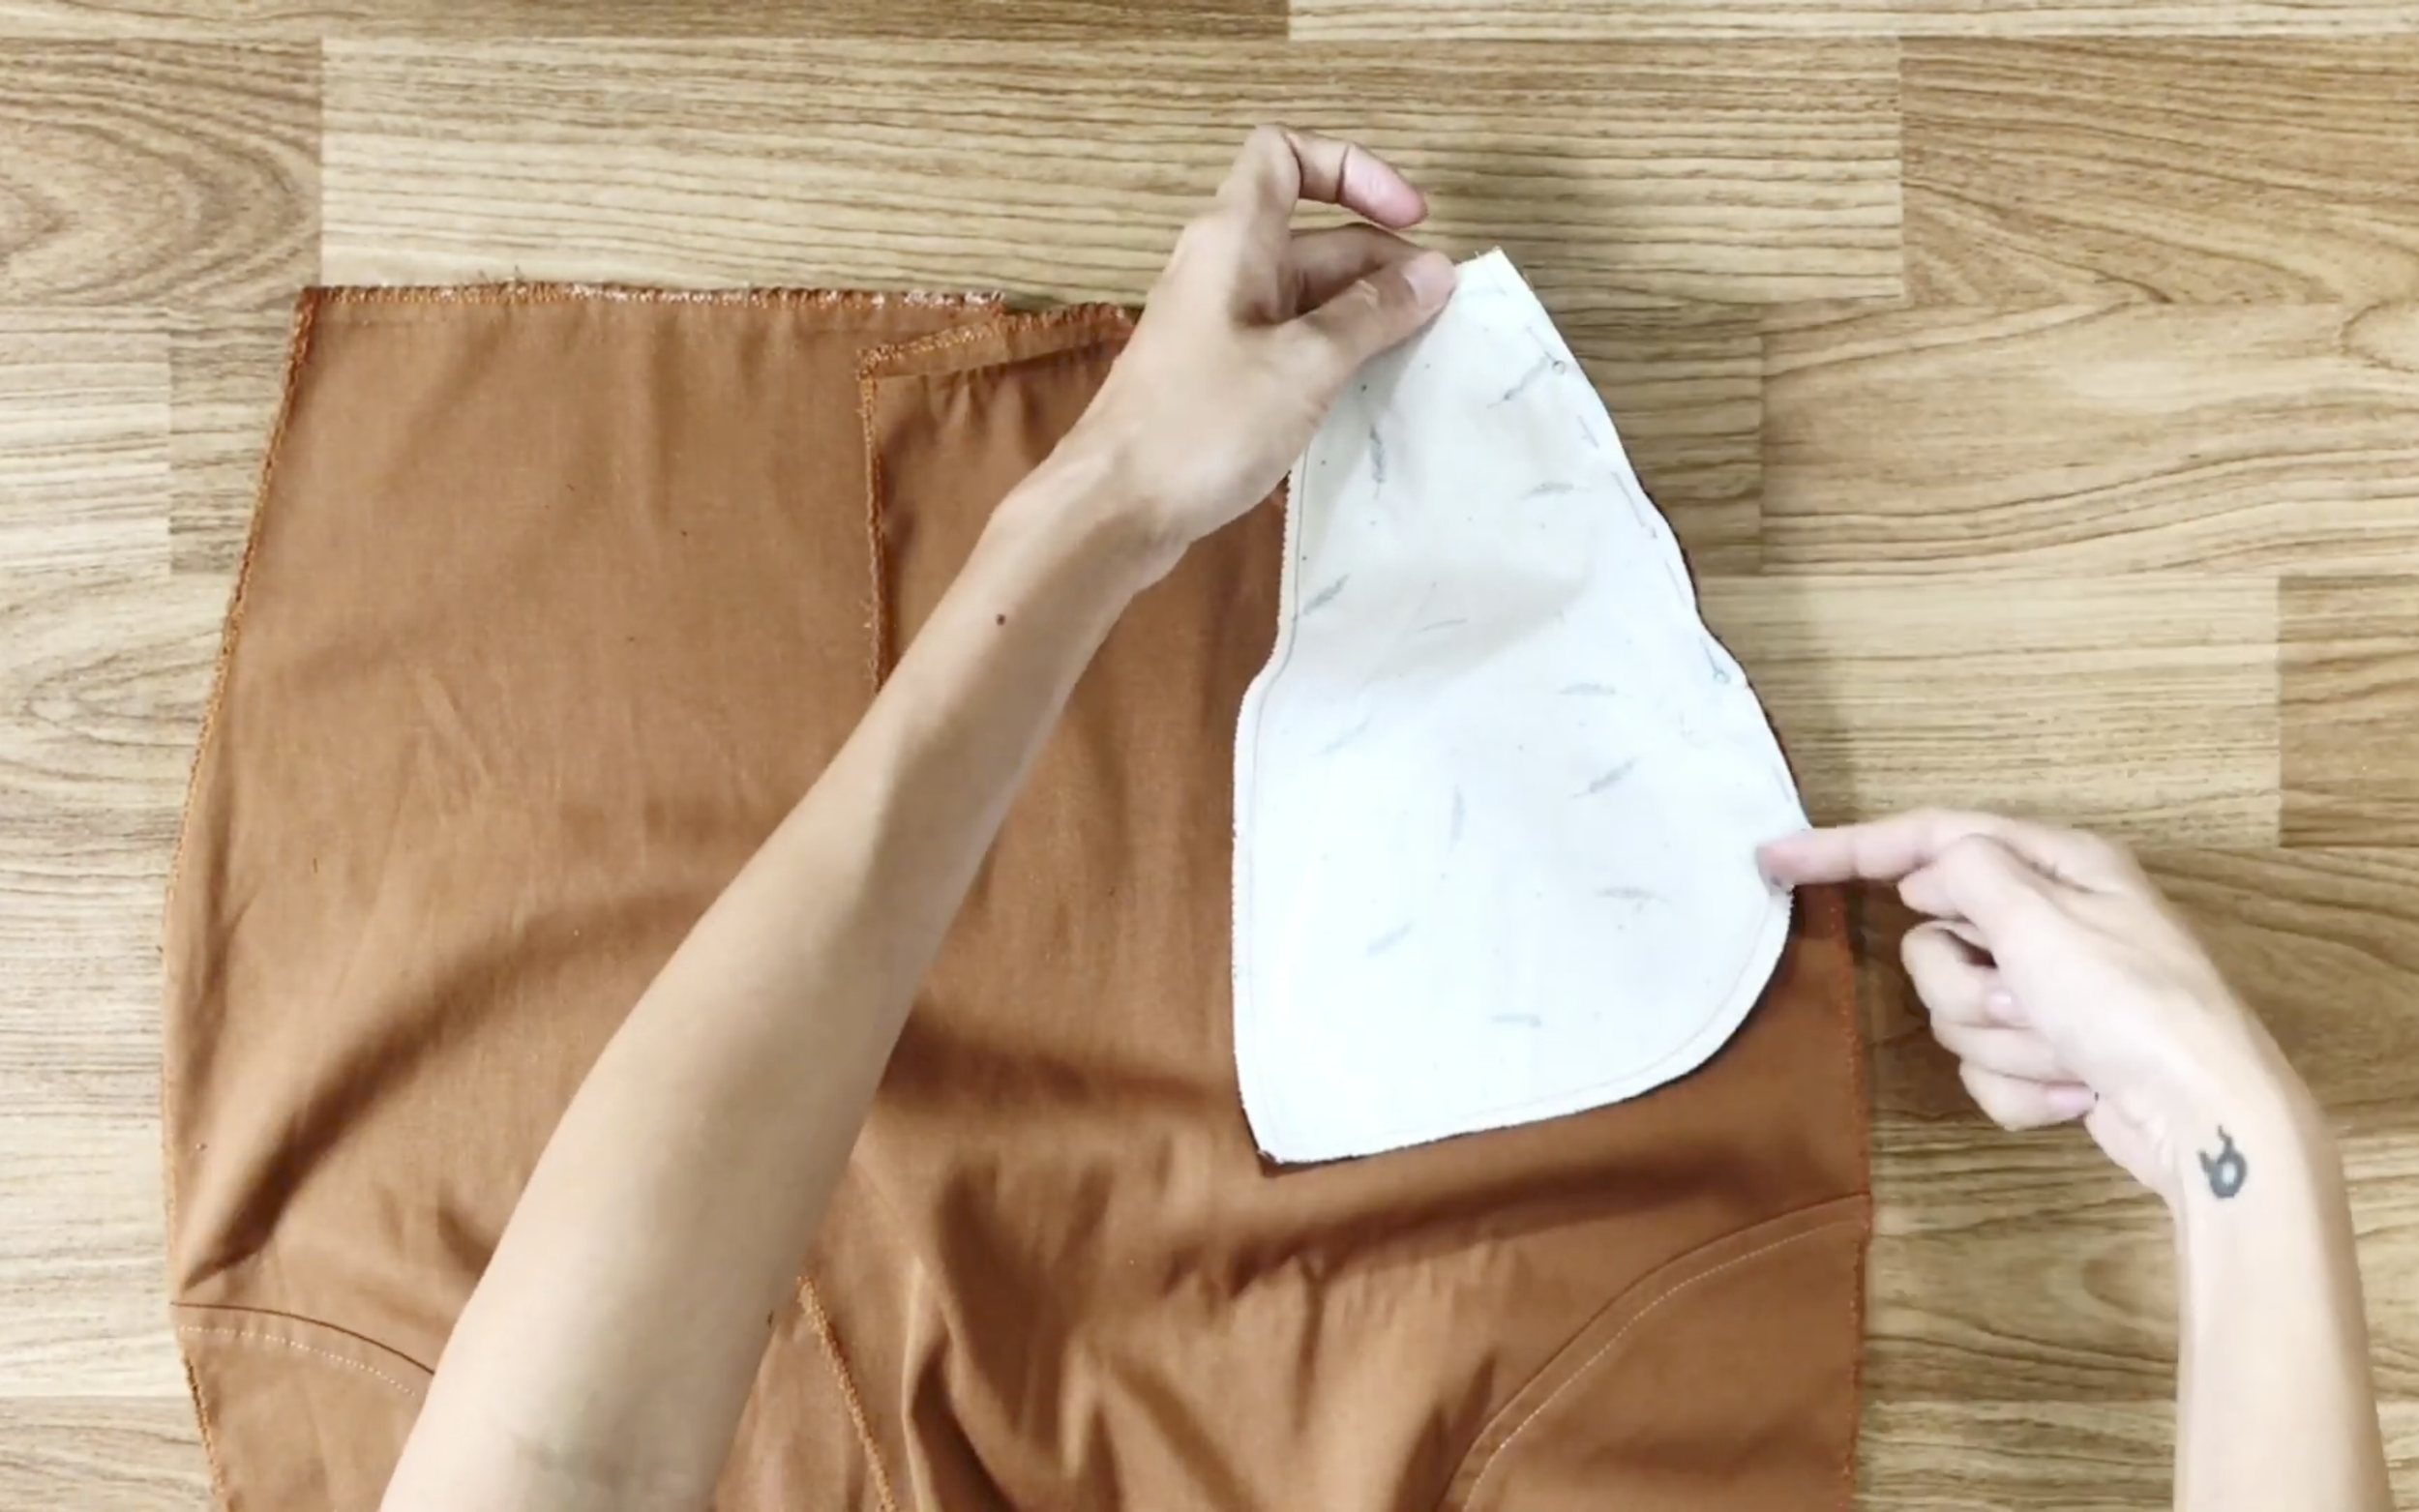
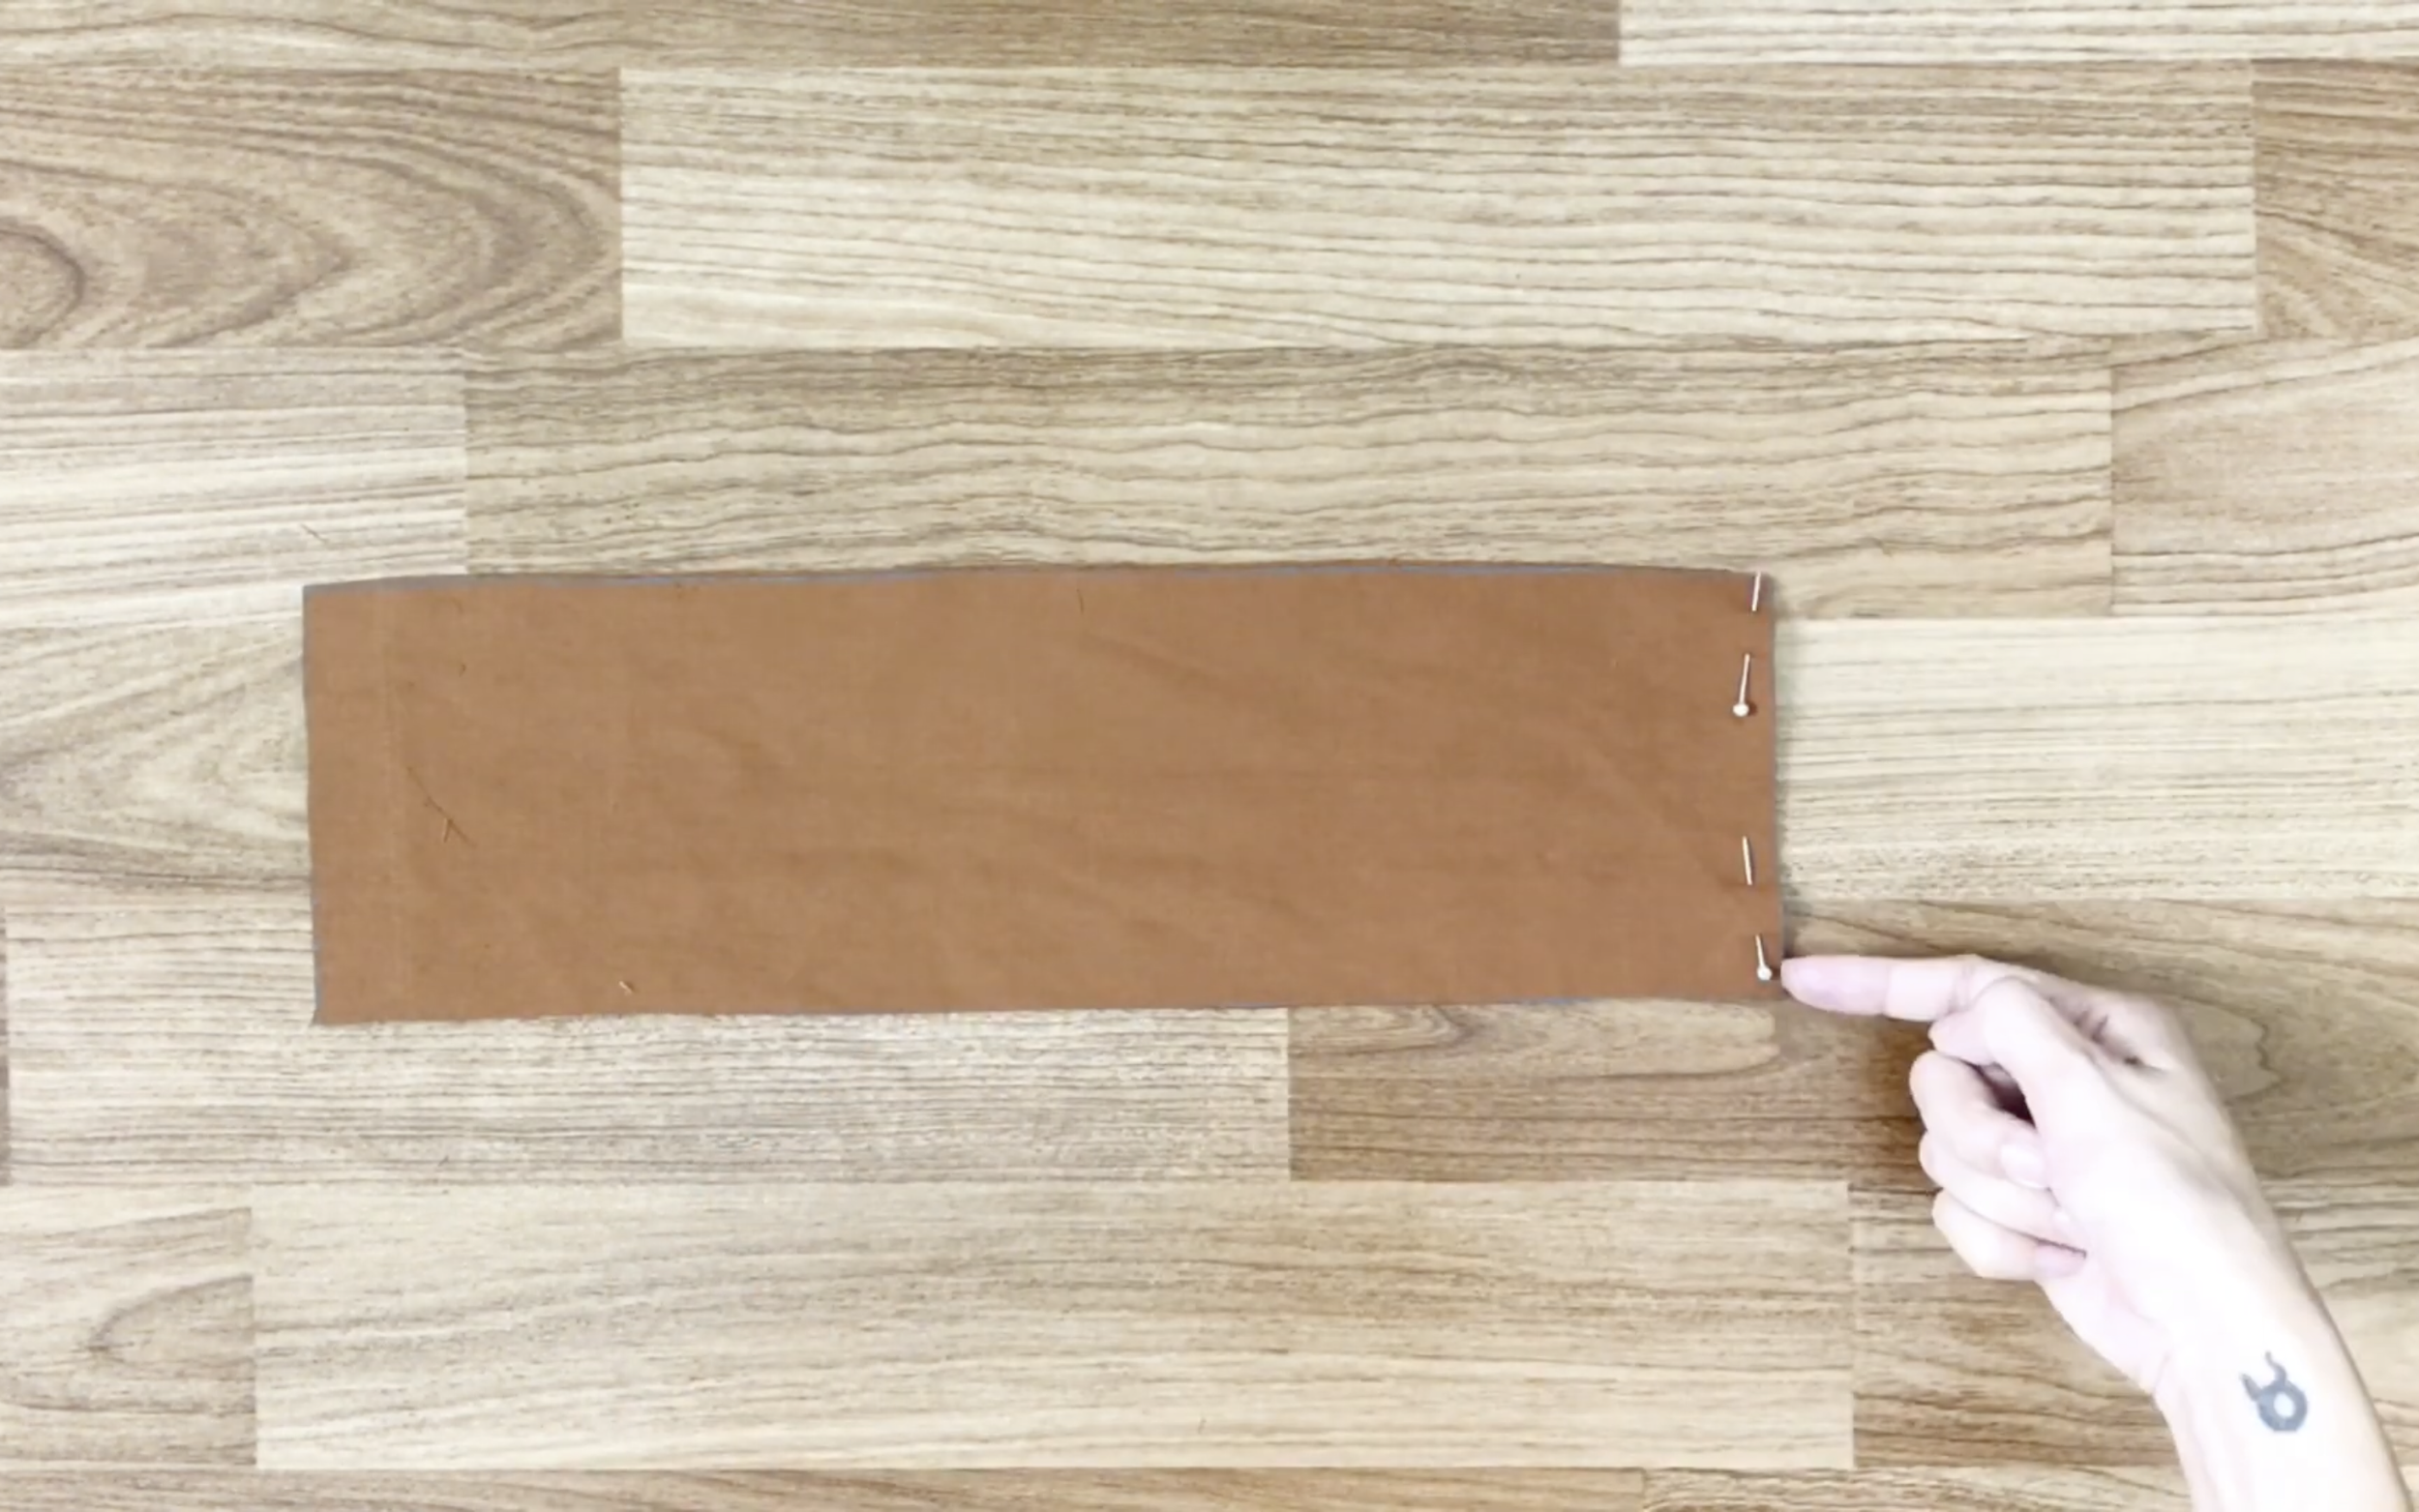
After cutting, fix one end of the pocket to the pocket area of the front body with pins before sewing.

Then, make an additional seam outside the previous one to hide the lining fabric of the pocket.
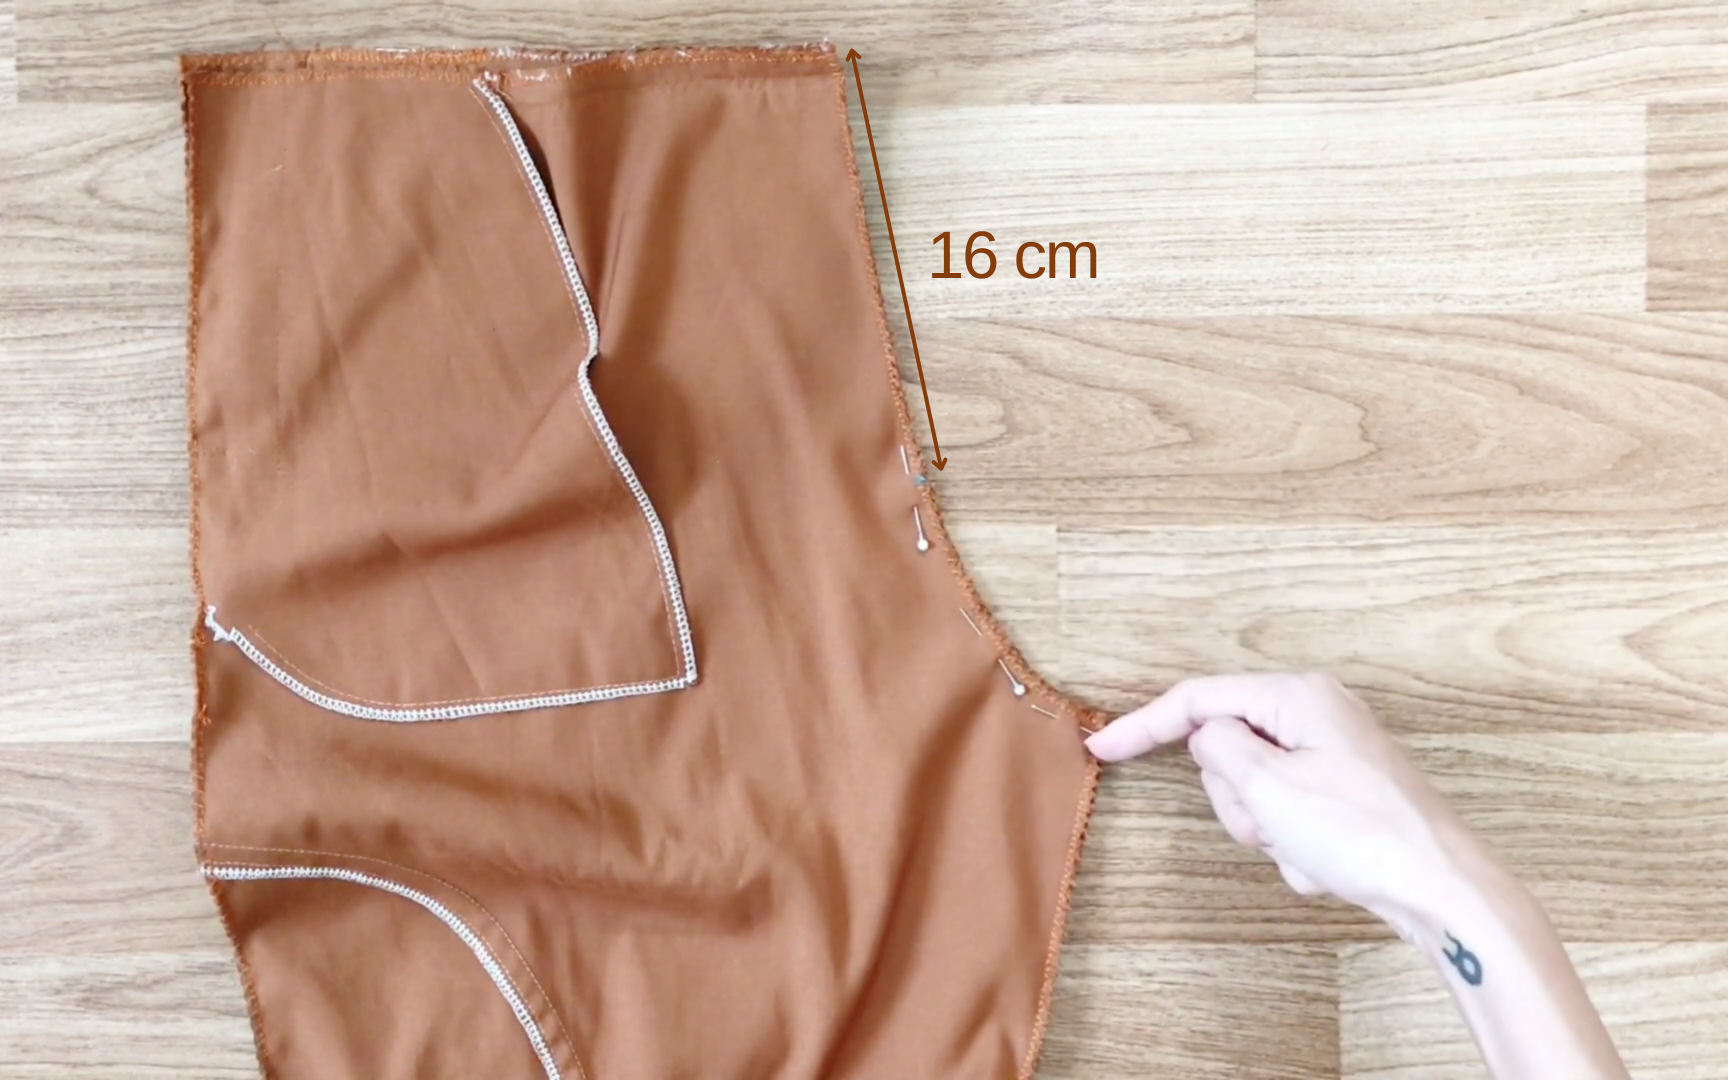
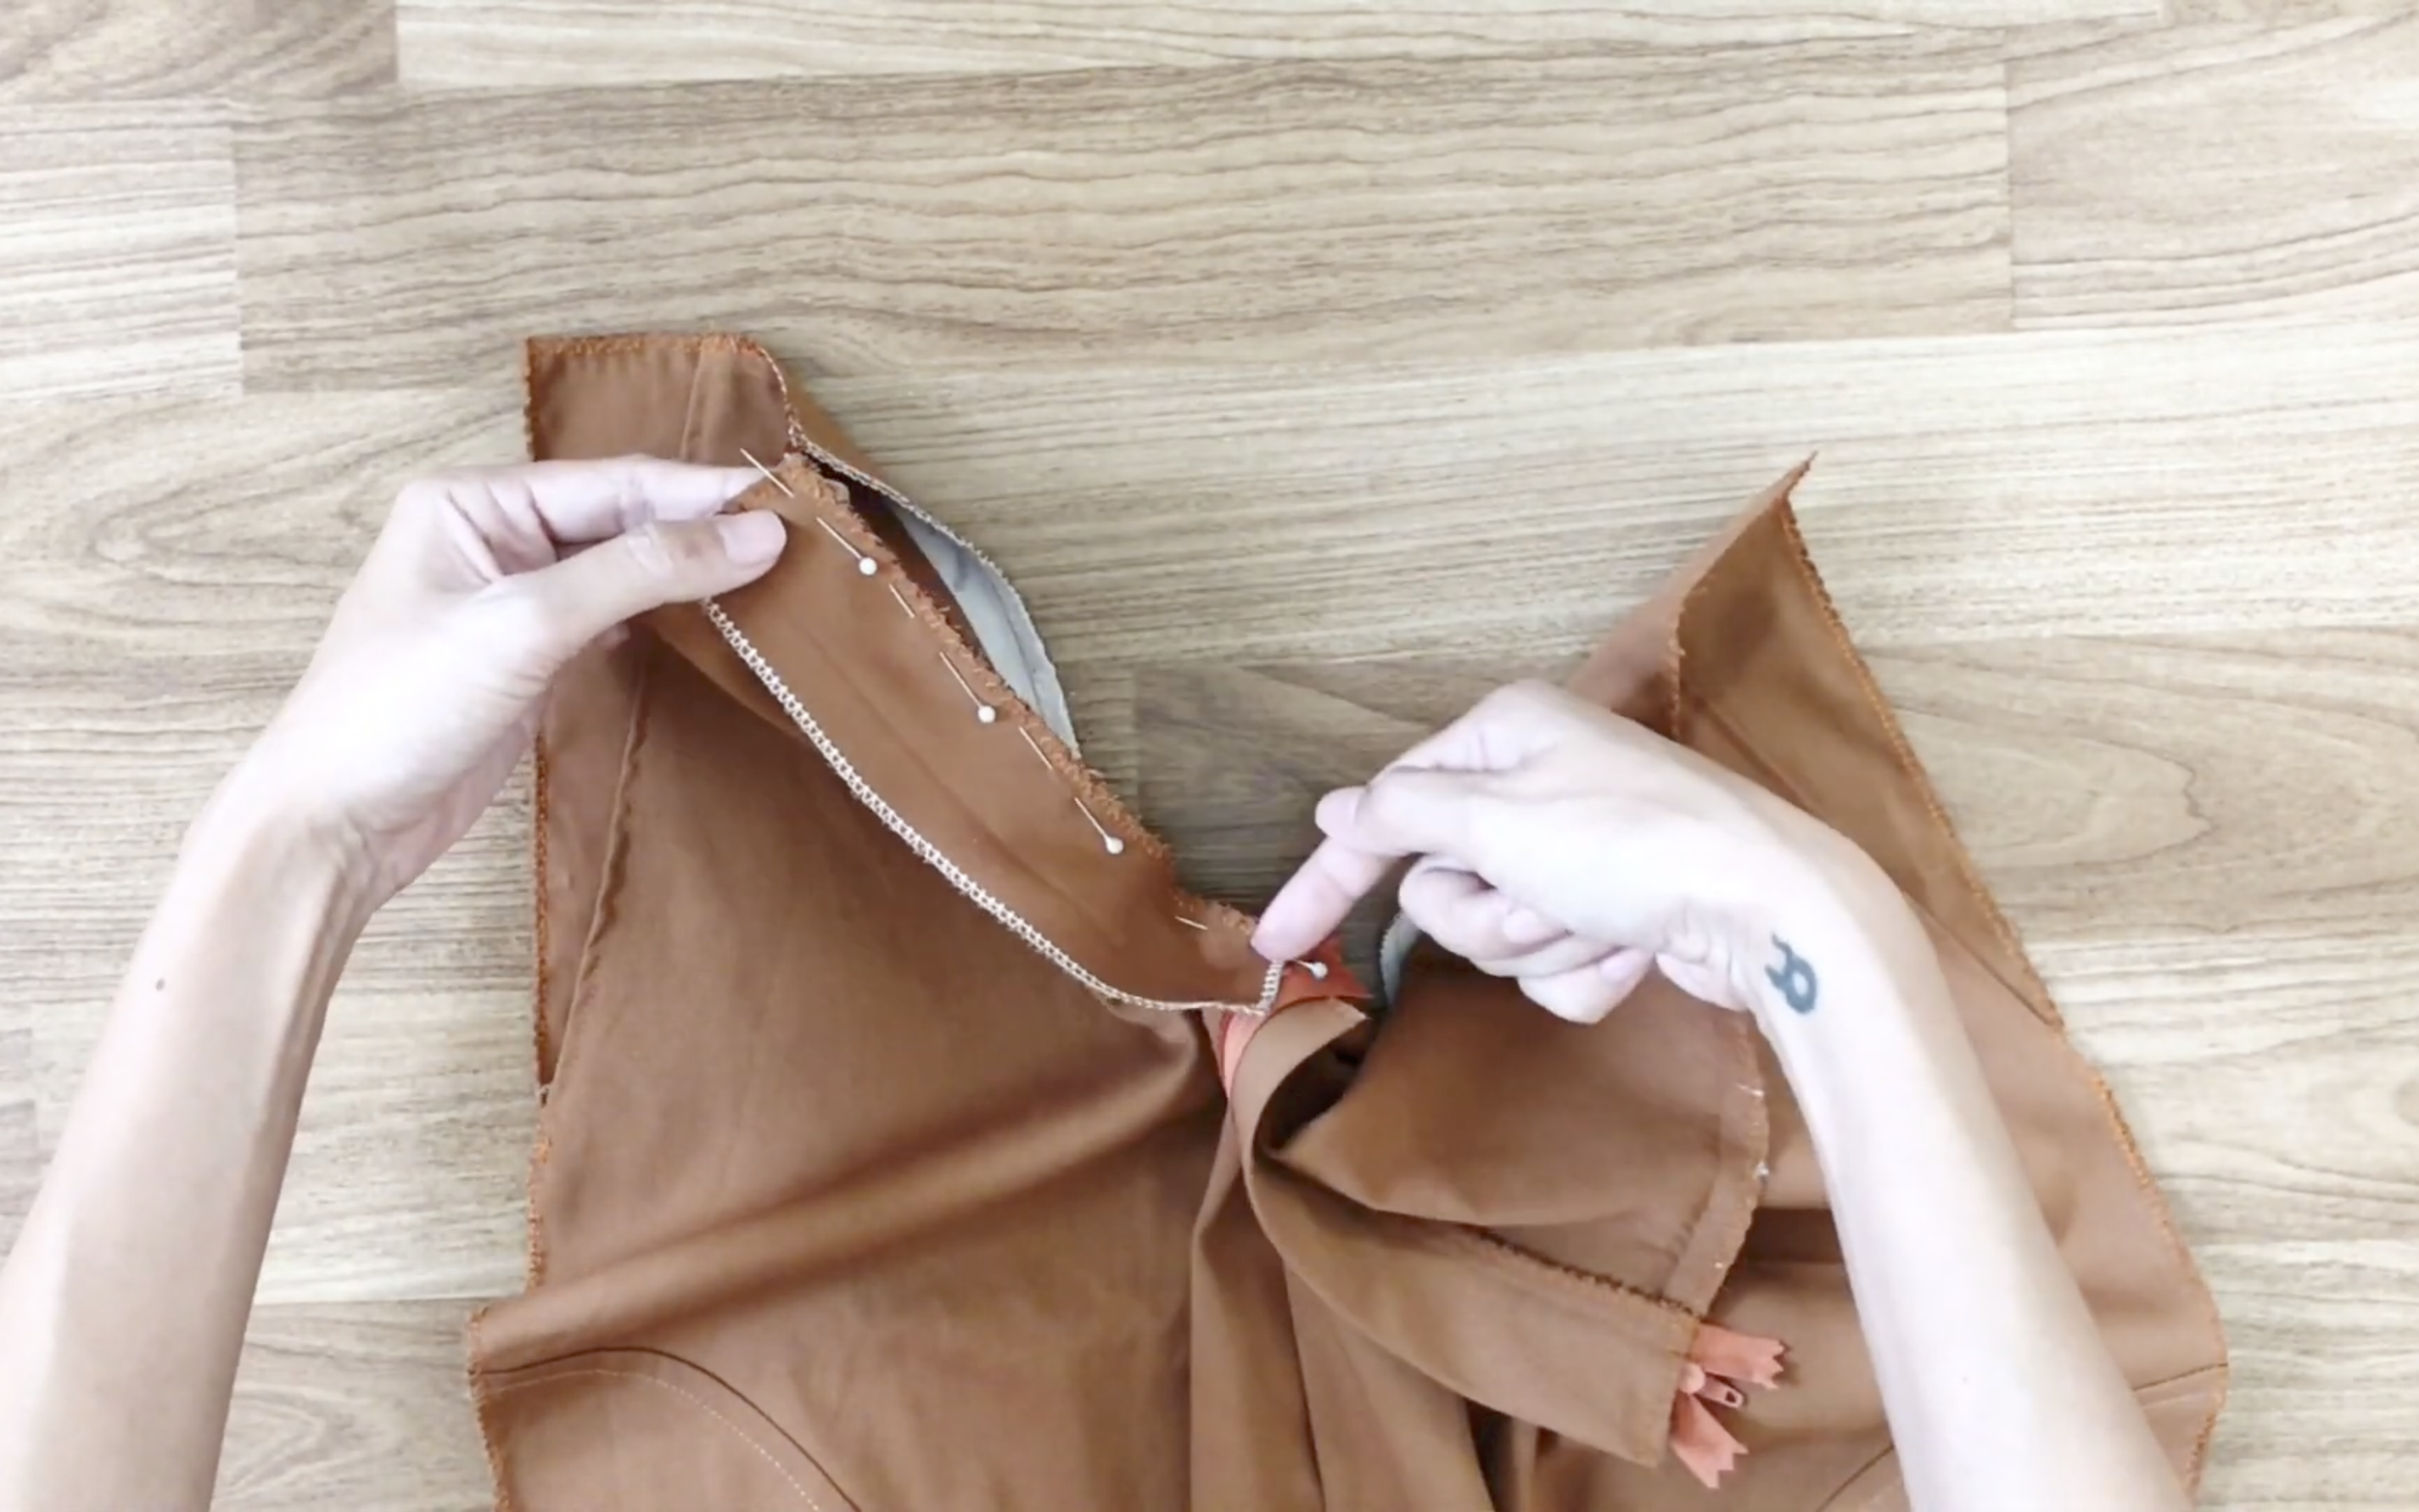
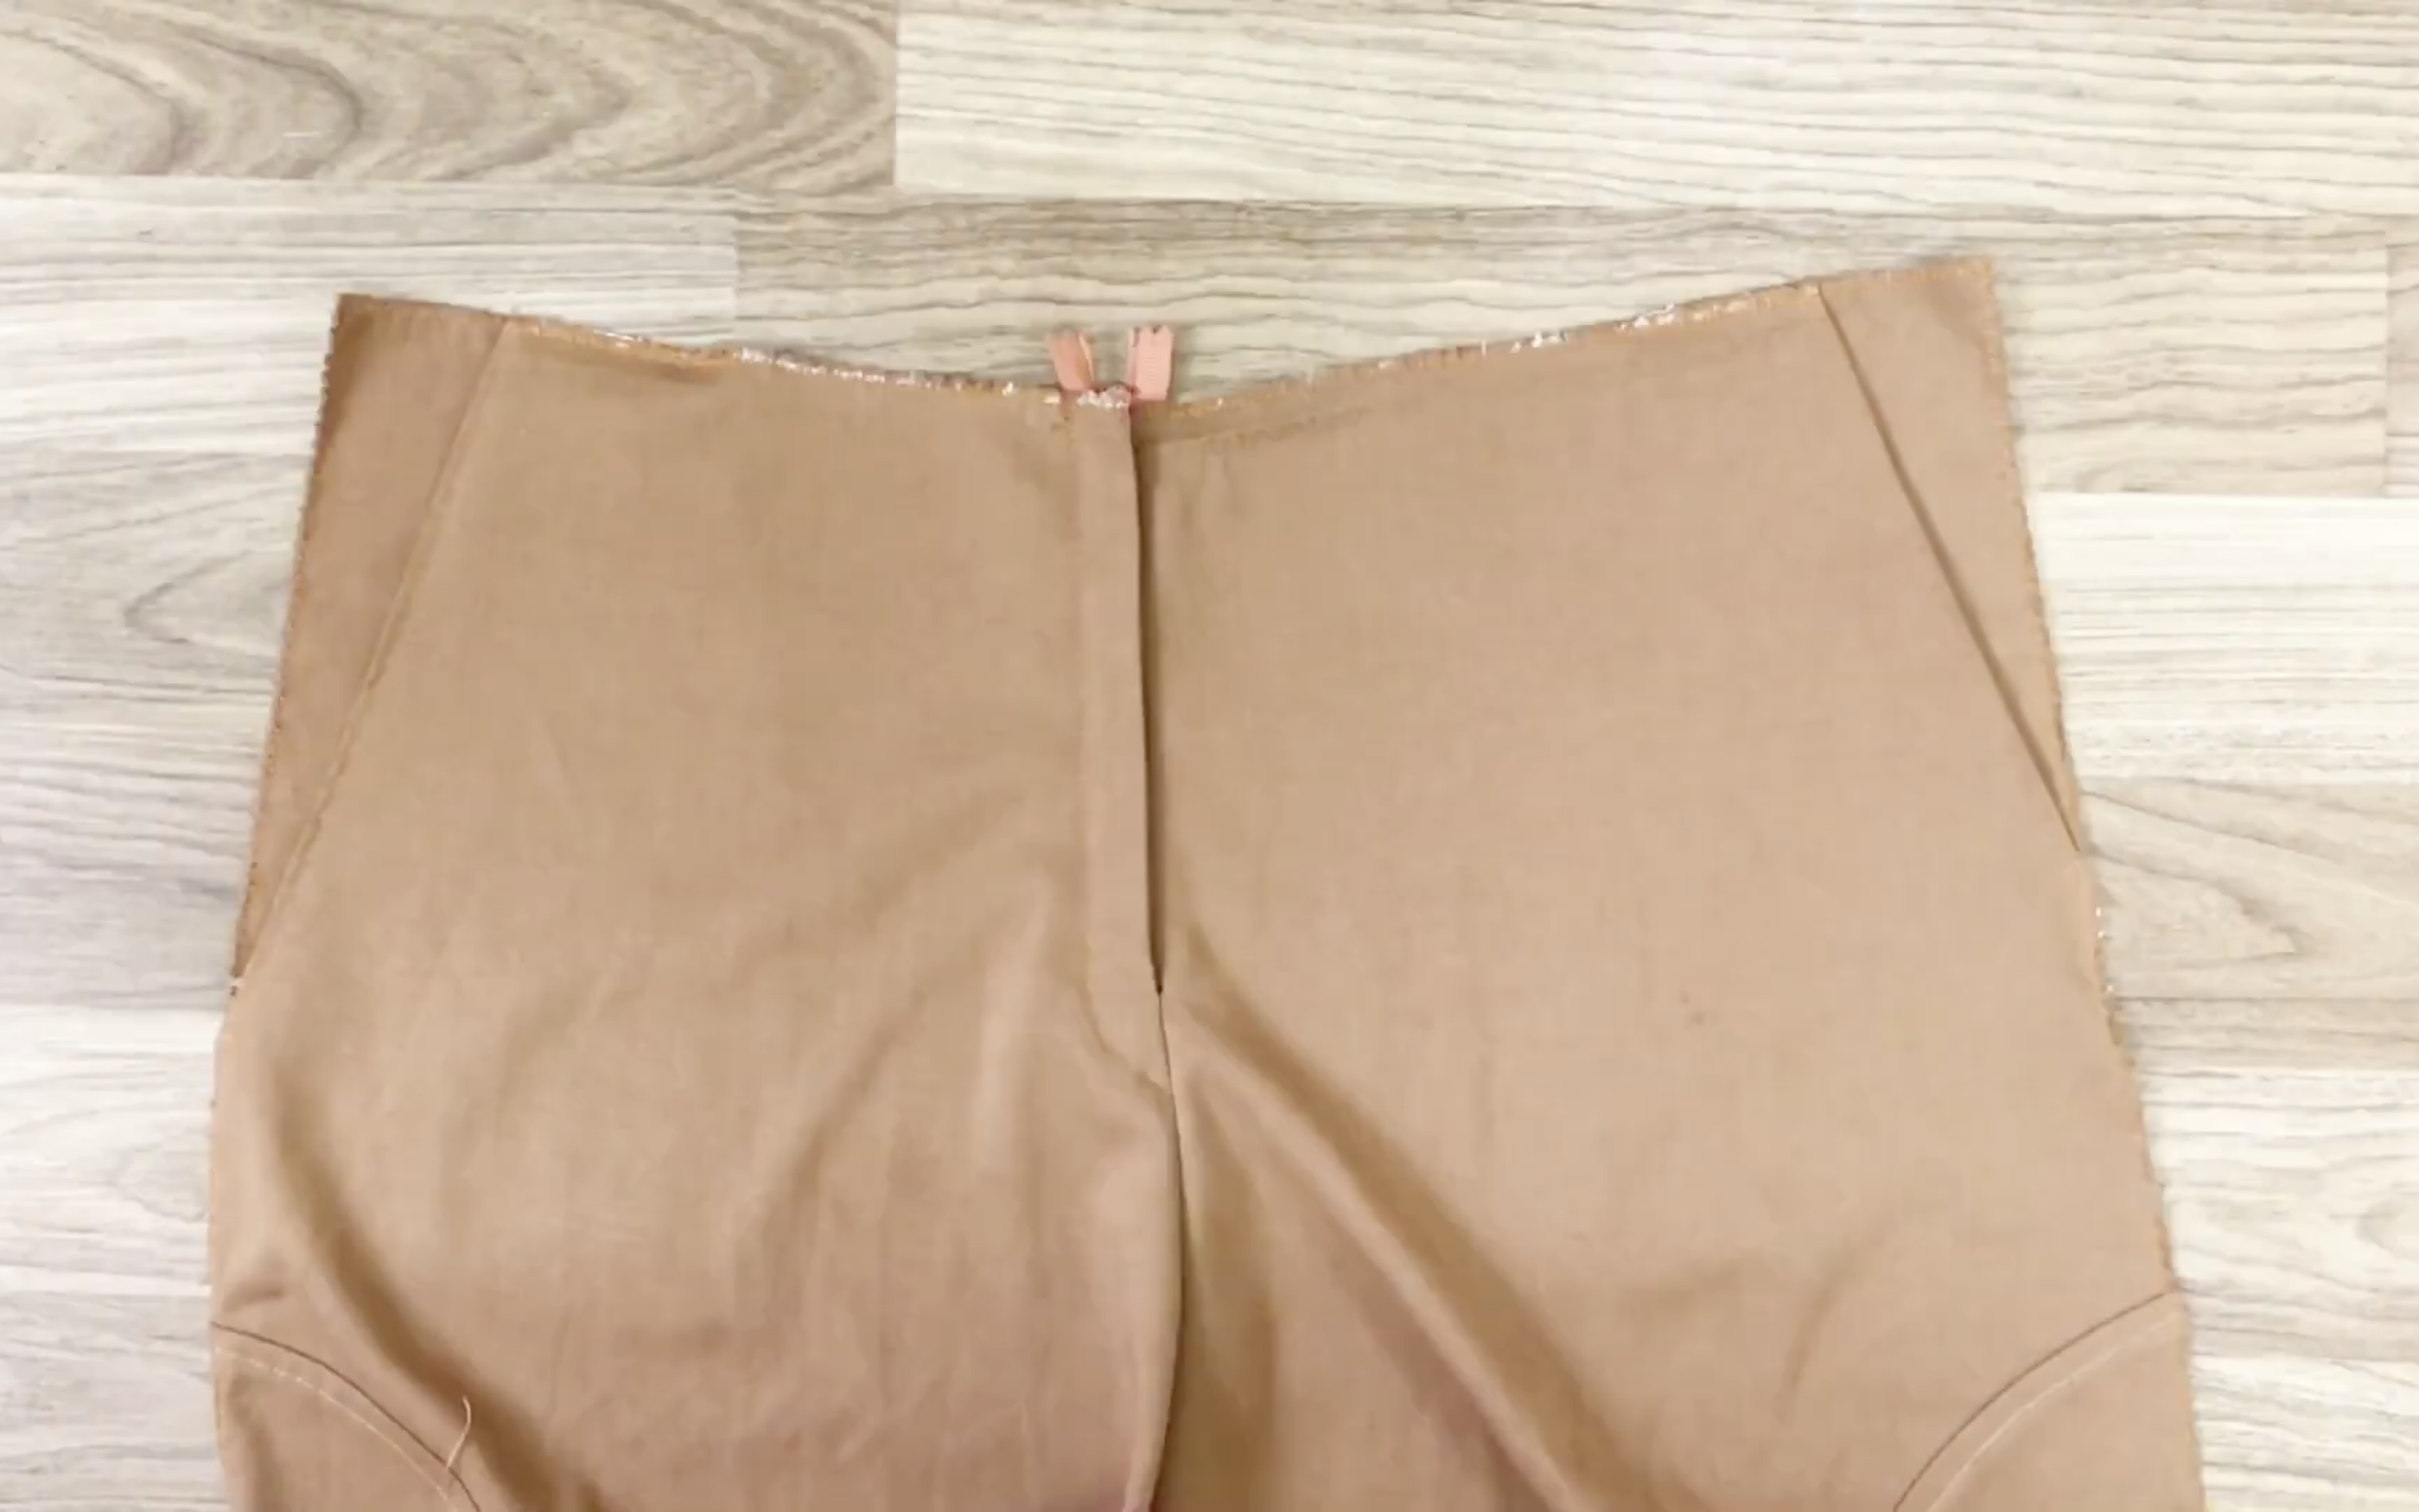
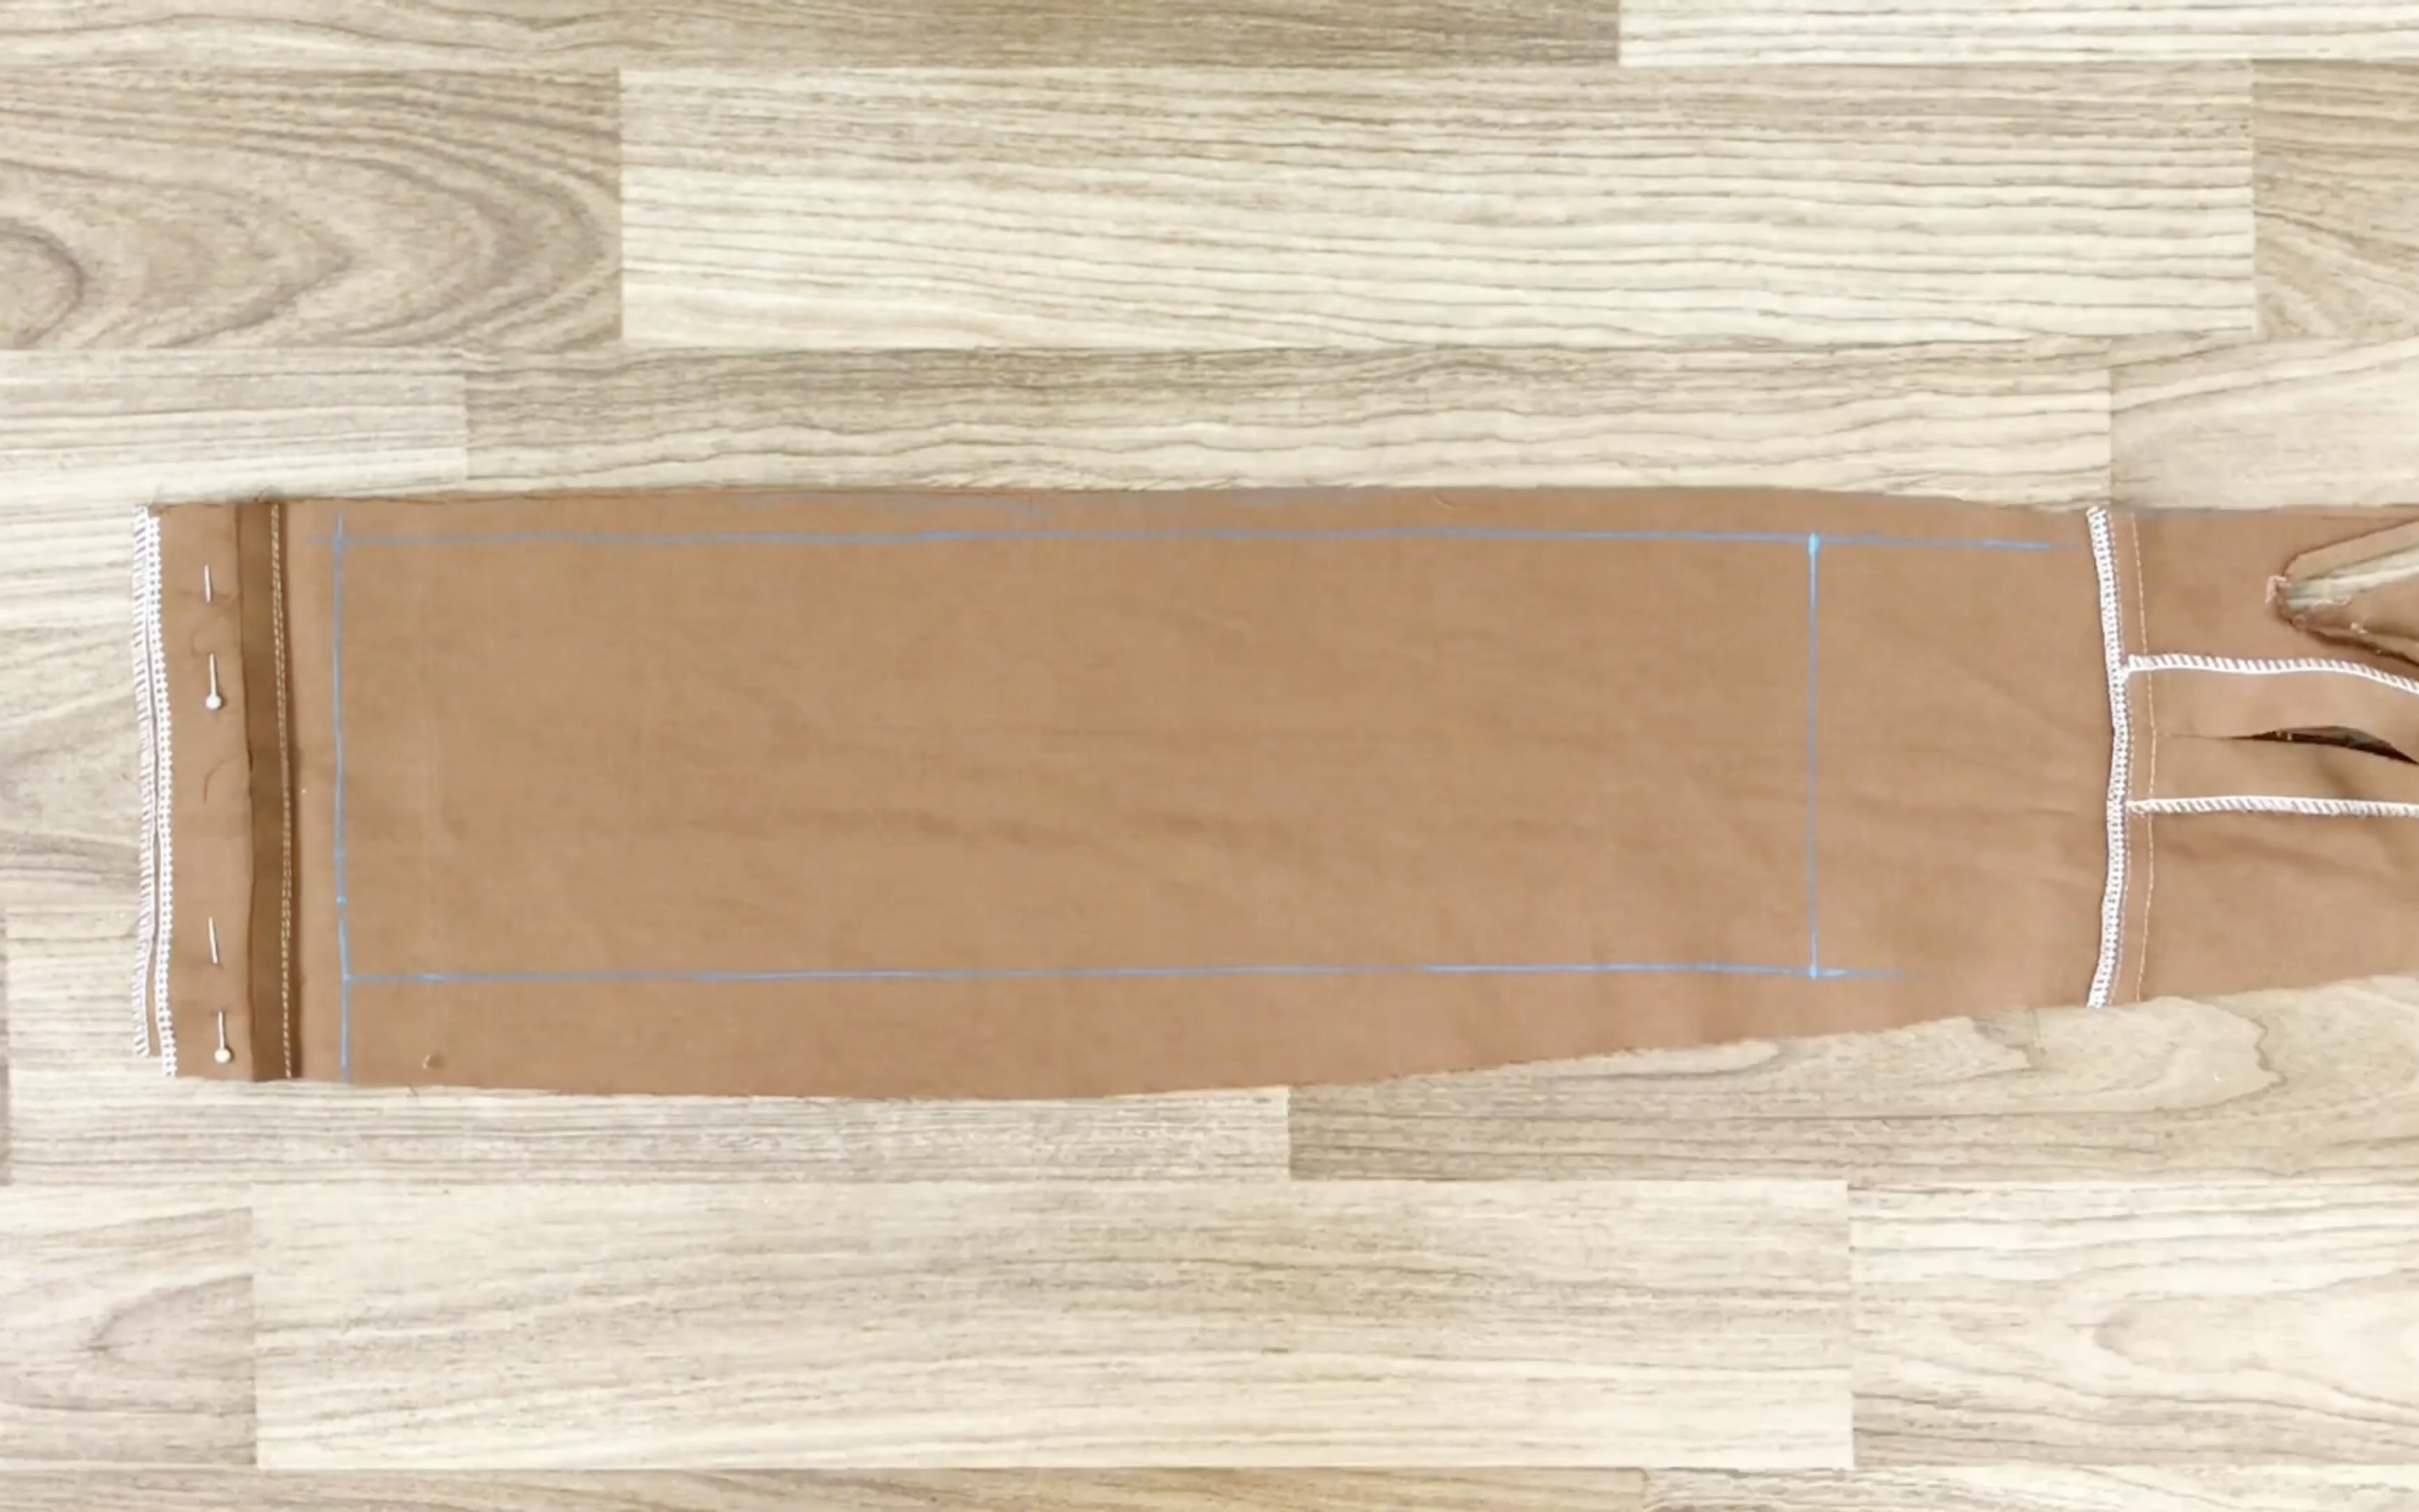
Next, connect the two front bodies together at the crotch curve, but only from 16cm to the end, as a zipper will be installed at the top.
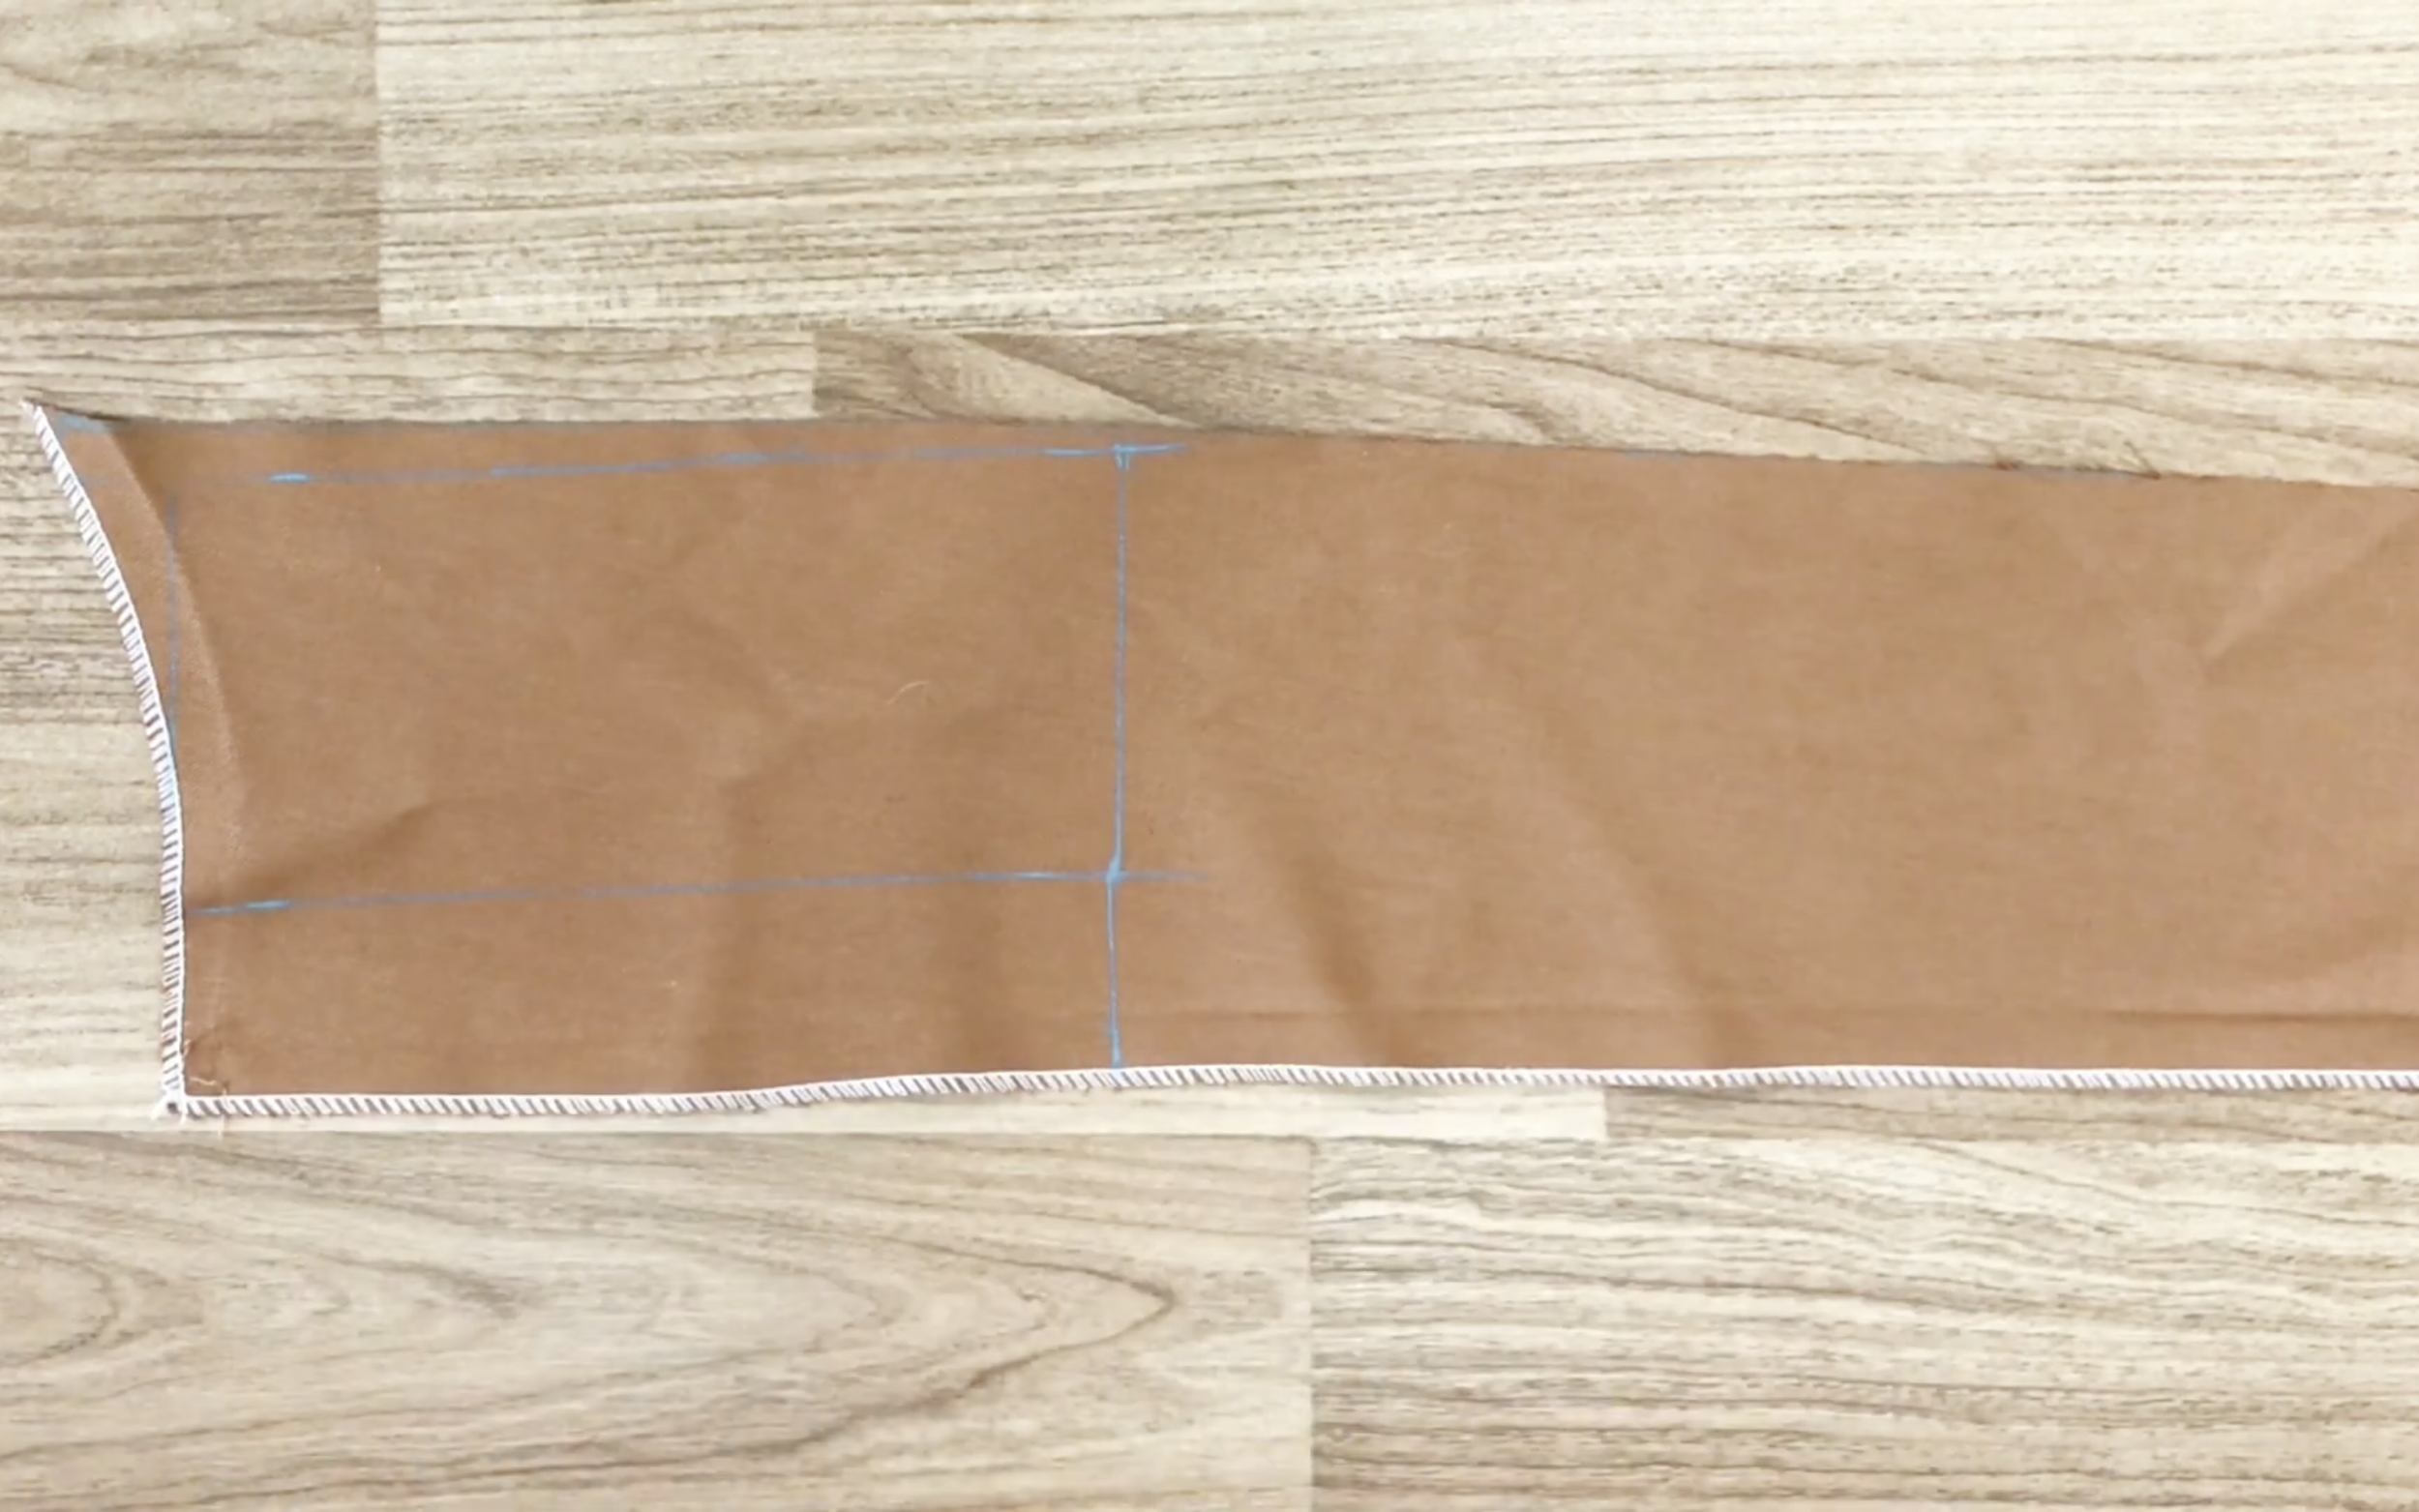
Next step, draw two rectangles.
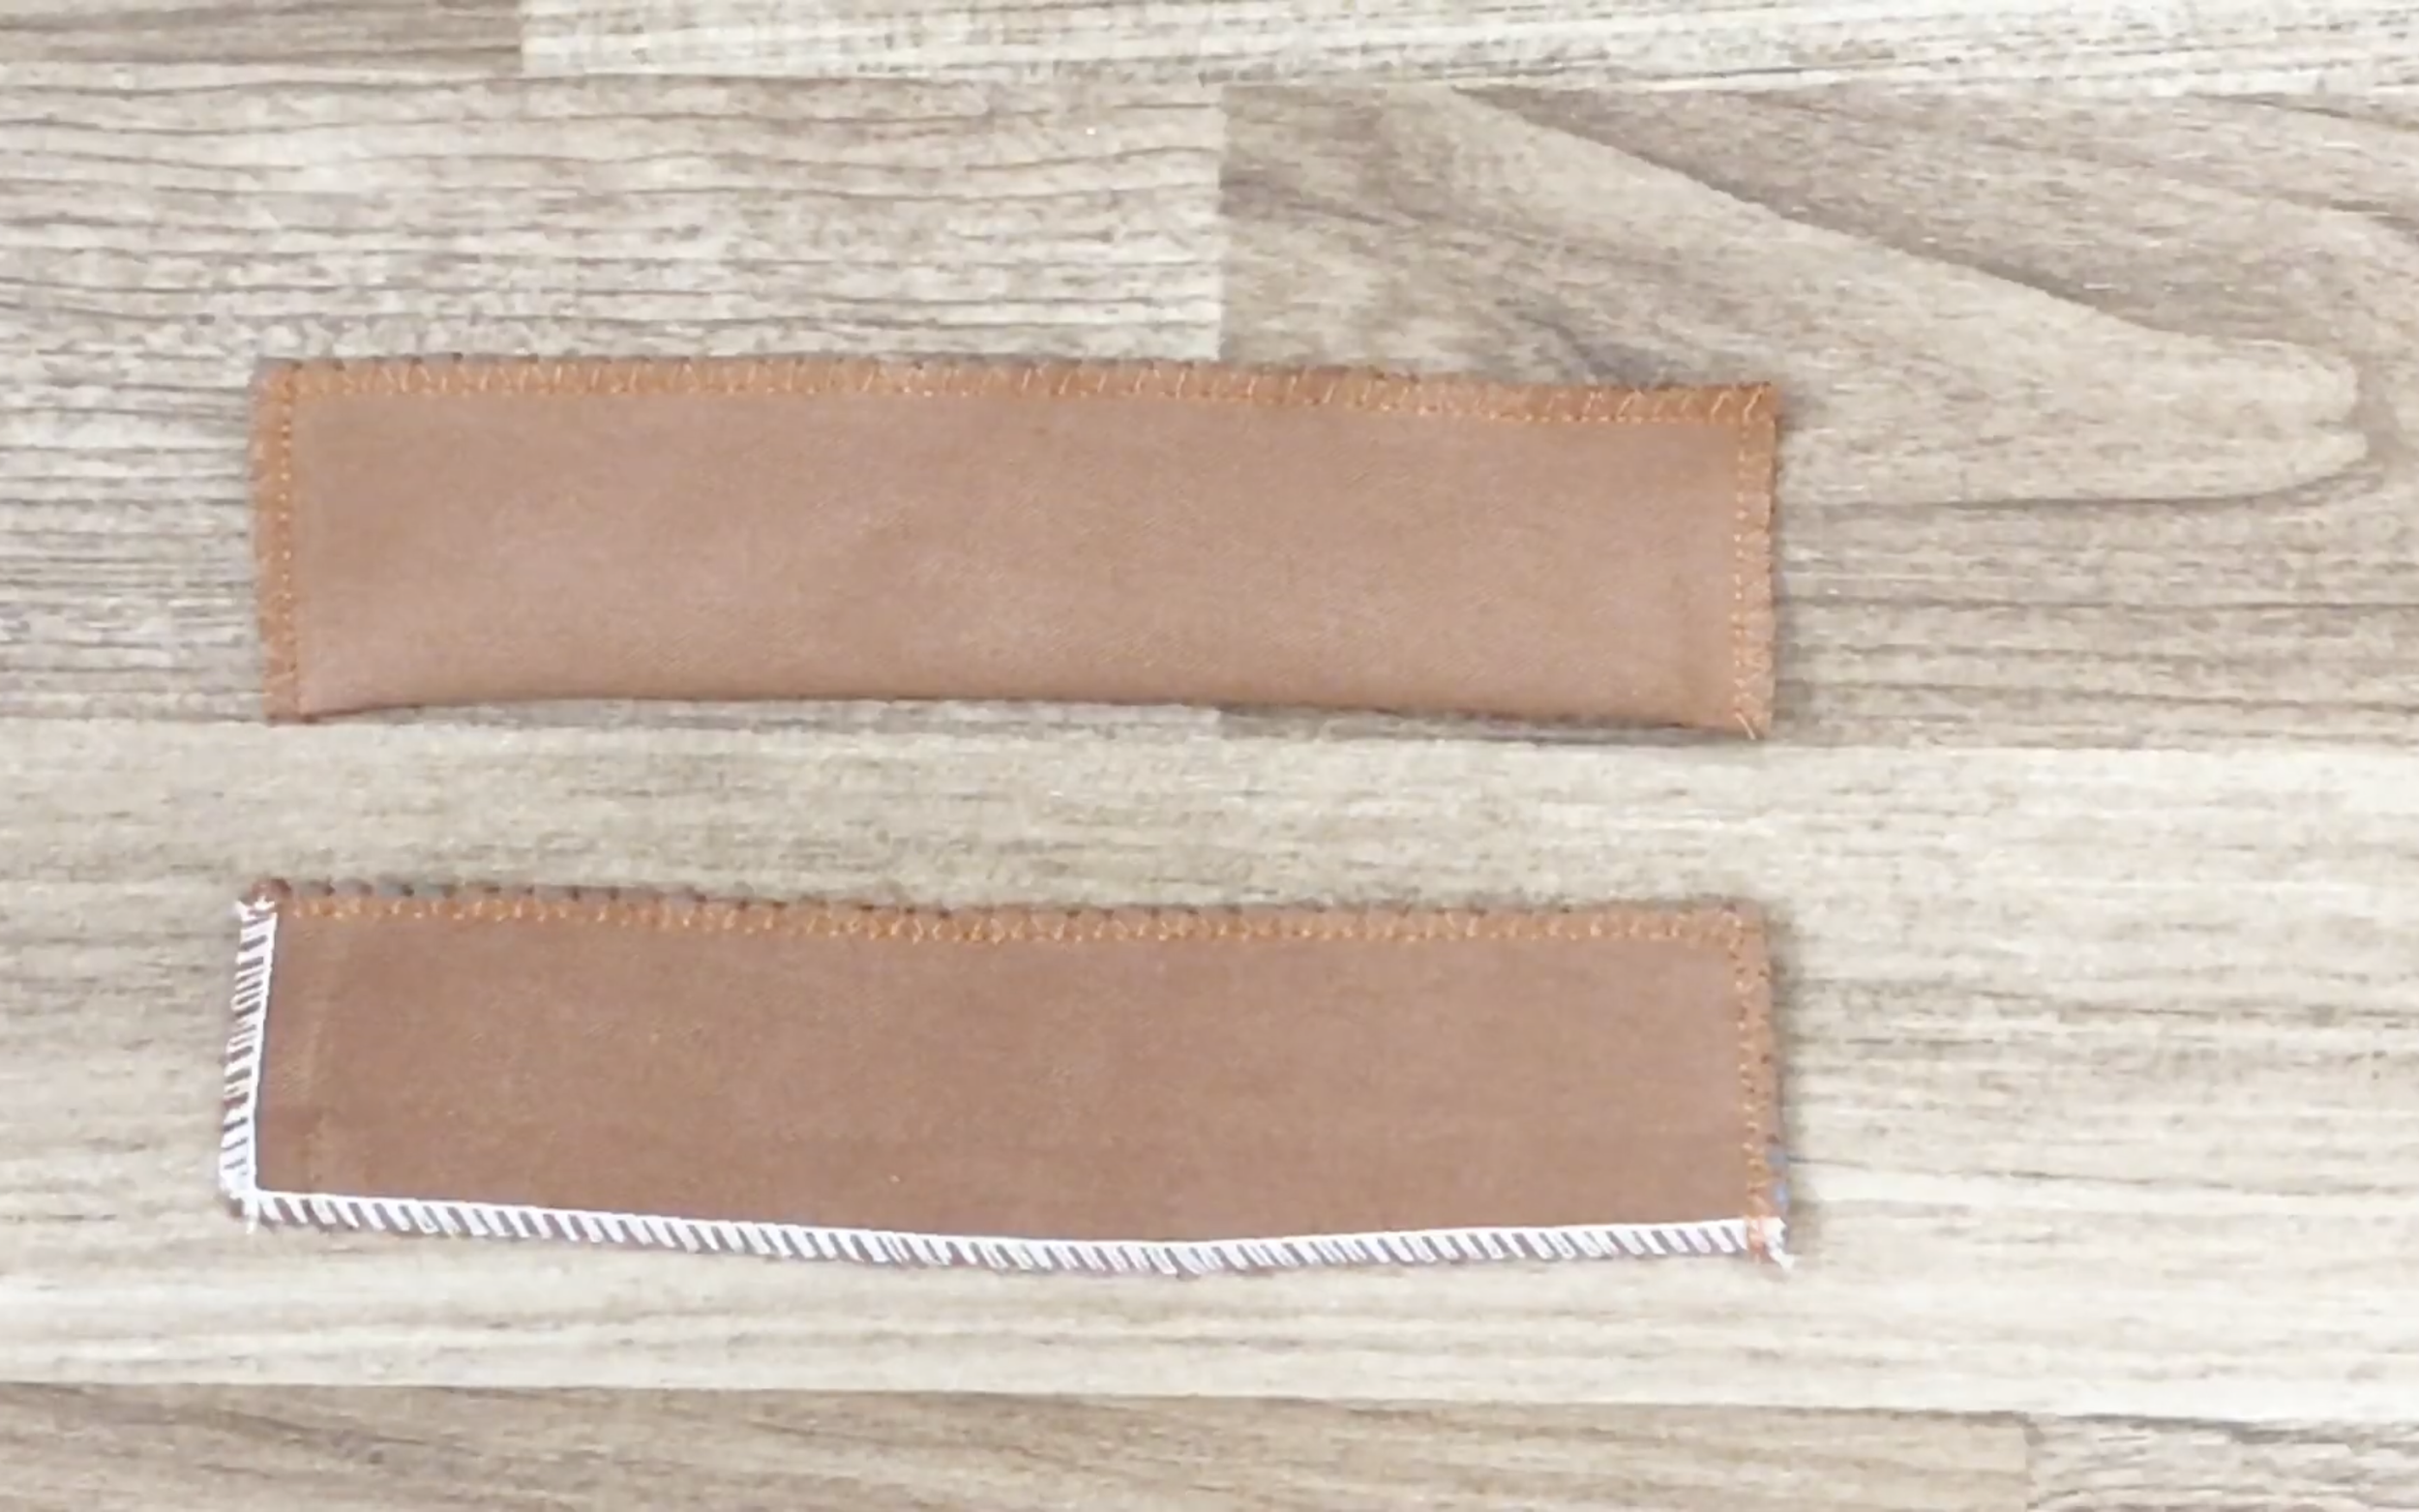
The first rectangle is 4cm high and 18cm wide.
The second rectangle is 8cm high and 18cm wide, but it will be folded in half so it becomes the same size as the first rectangle.
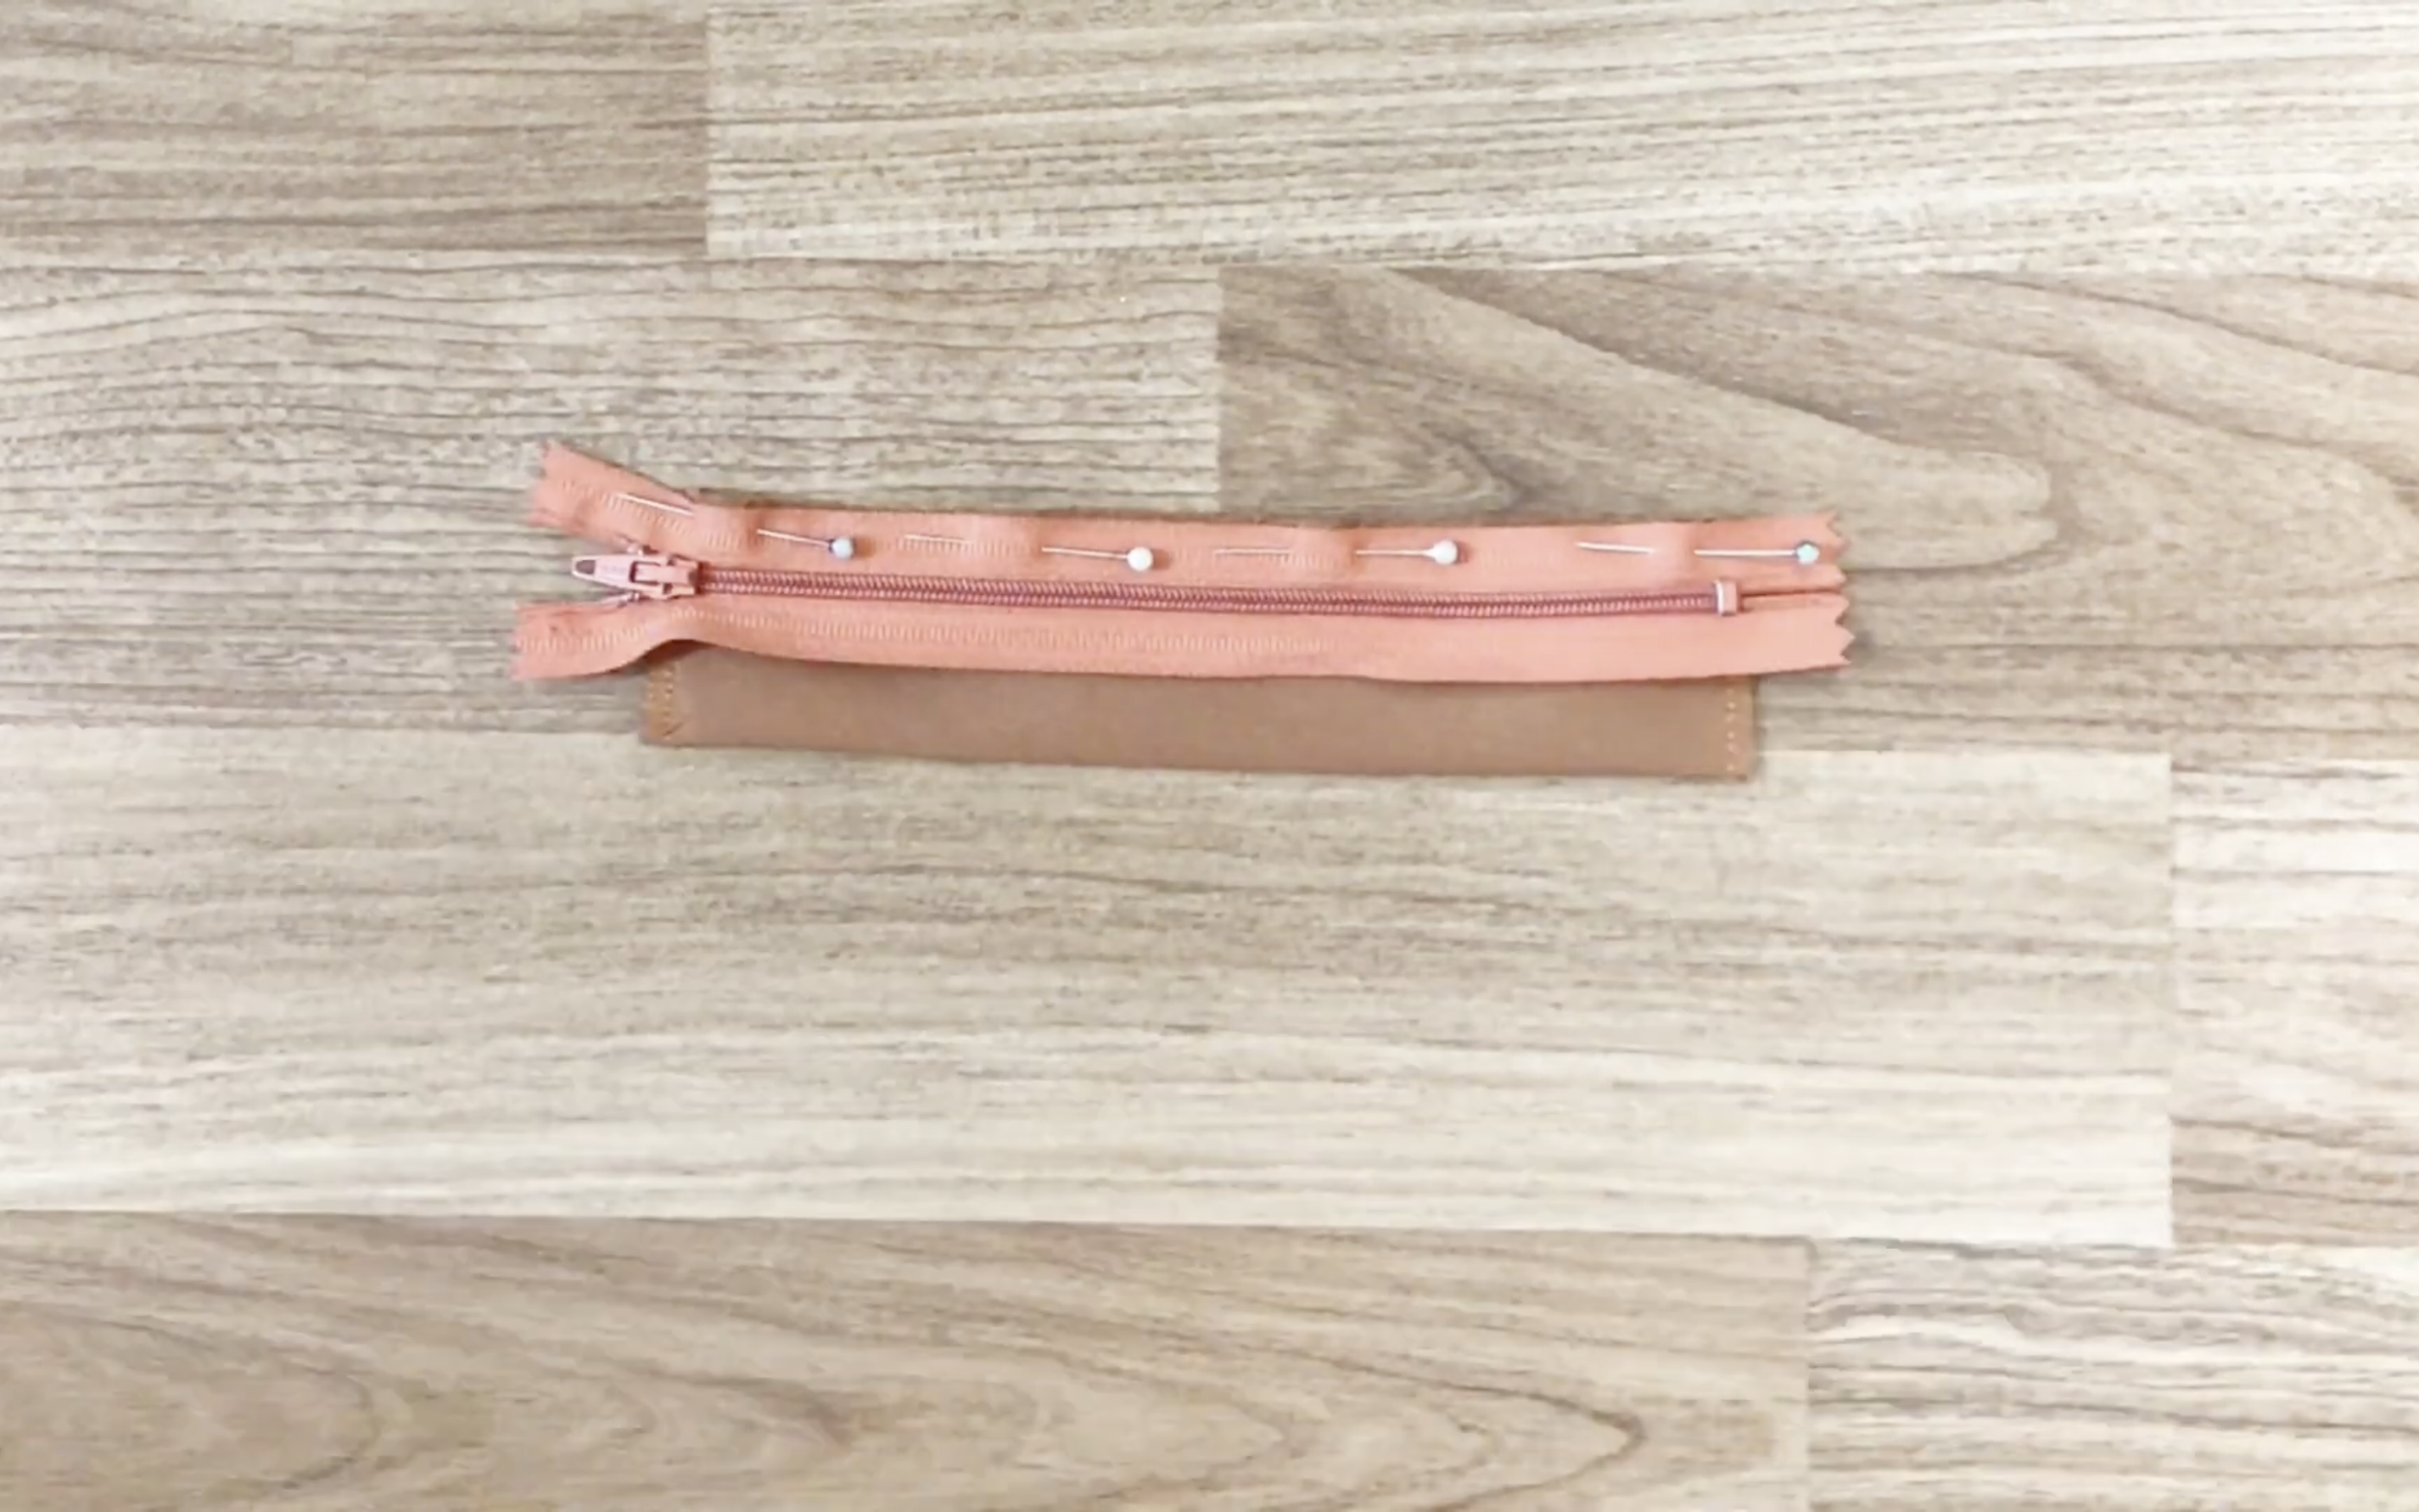
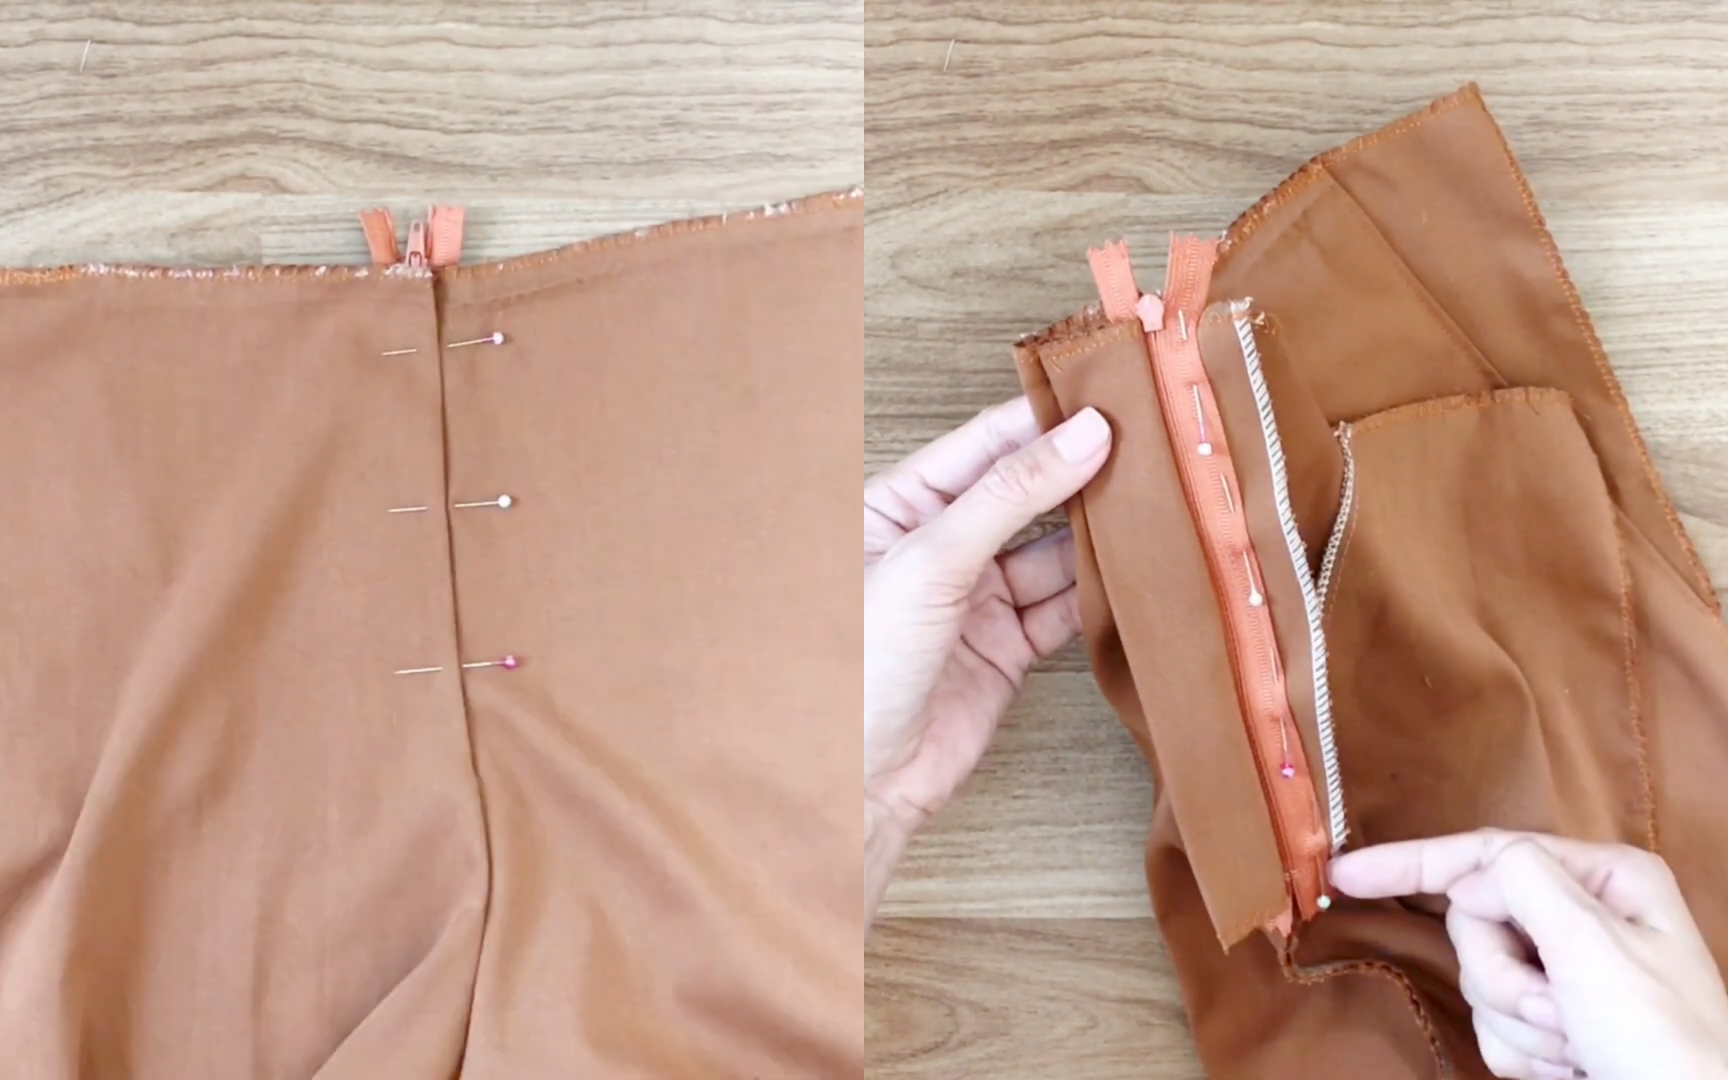
Now, fix the zipper into the second rectangle on one side using pins, then sew.
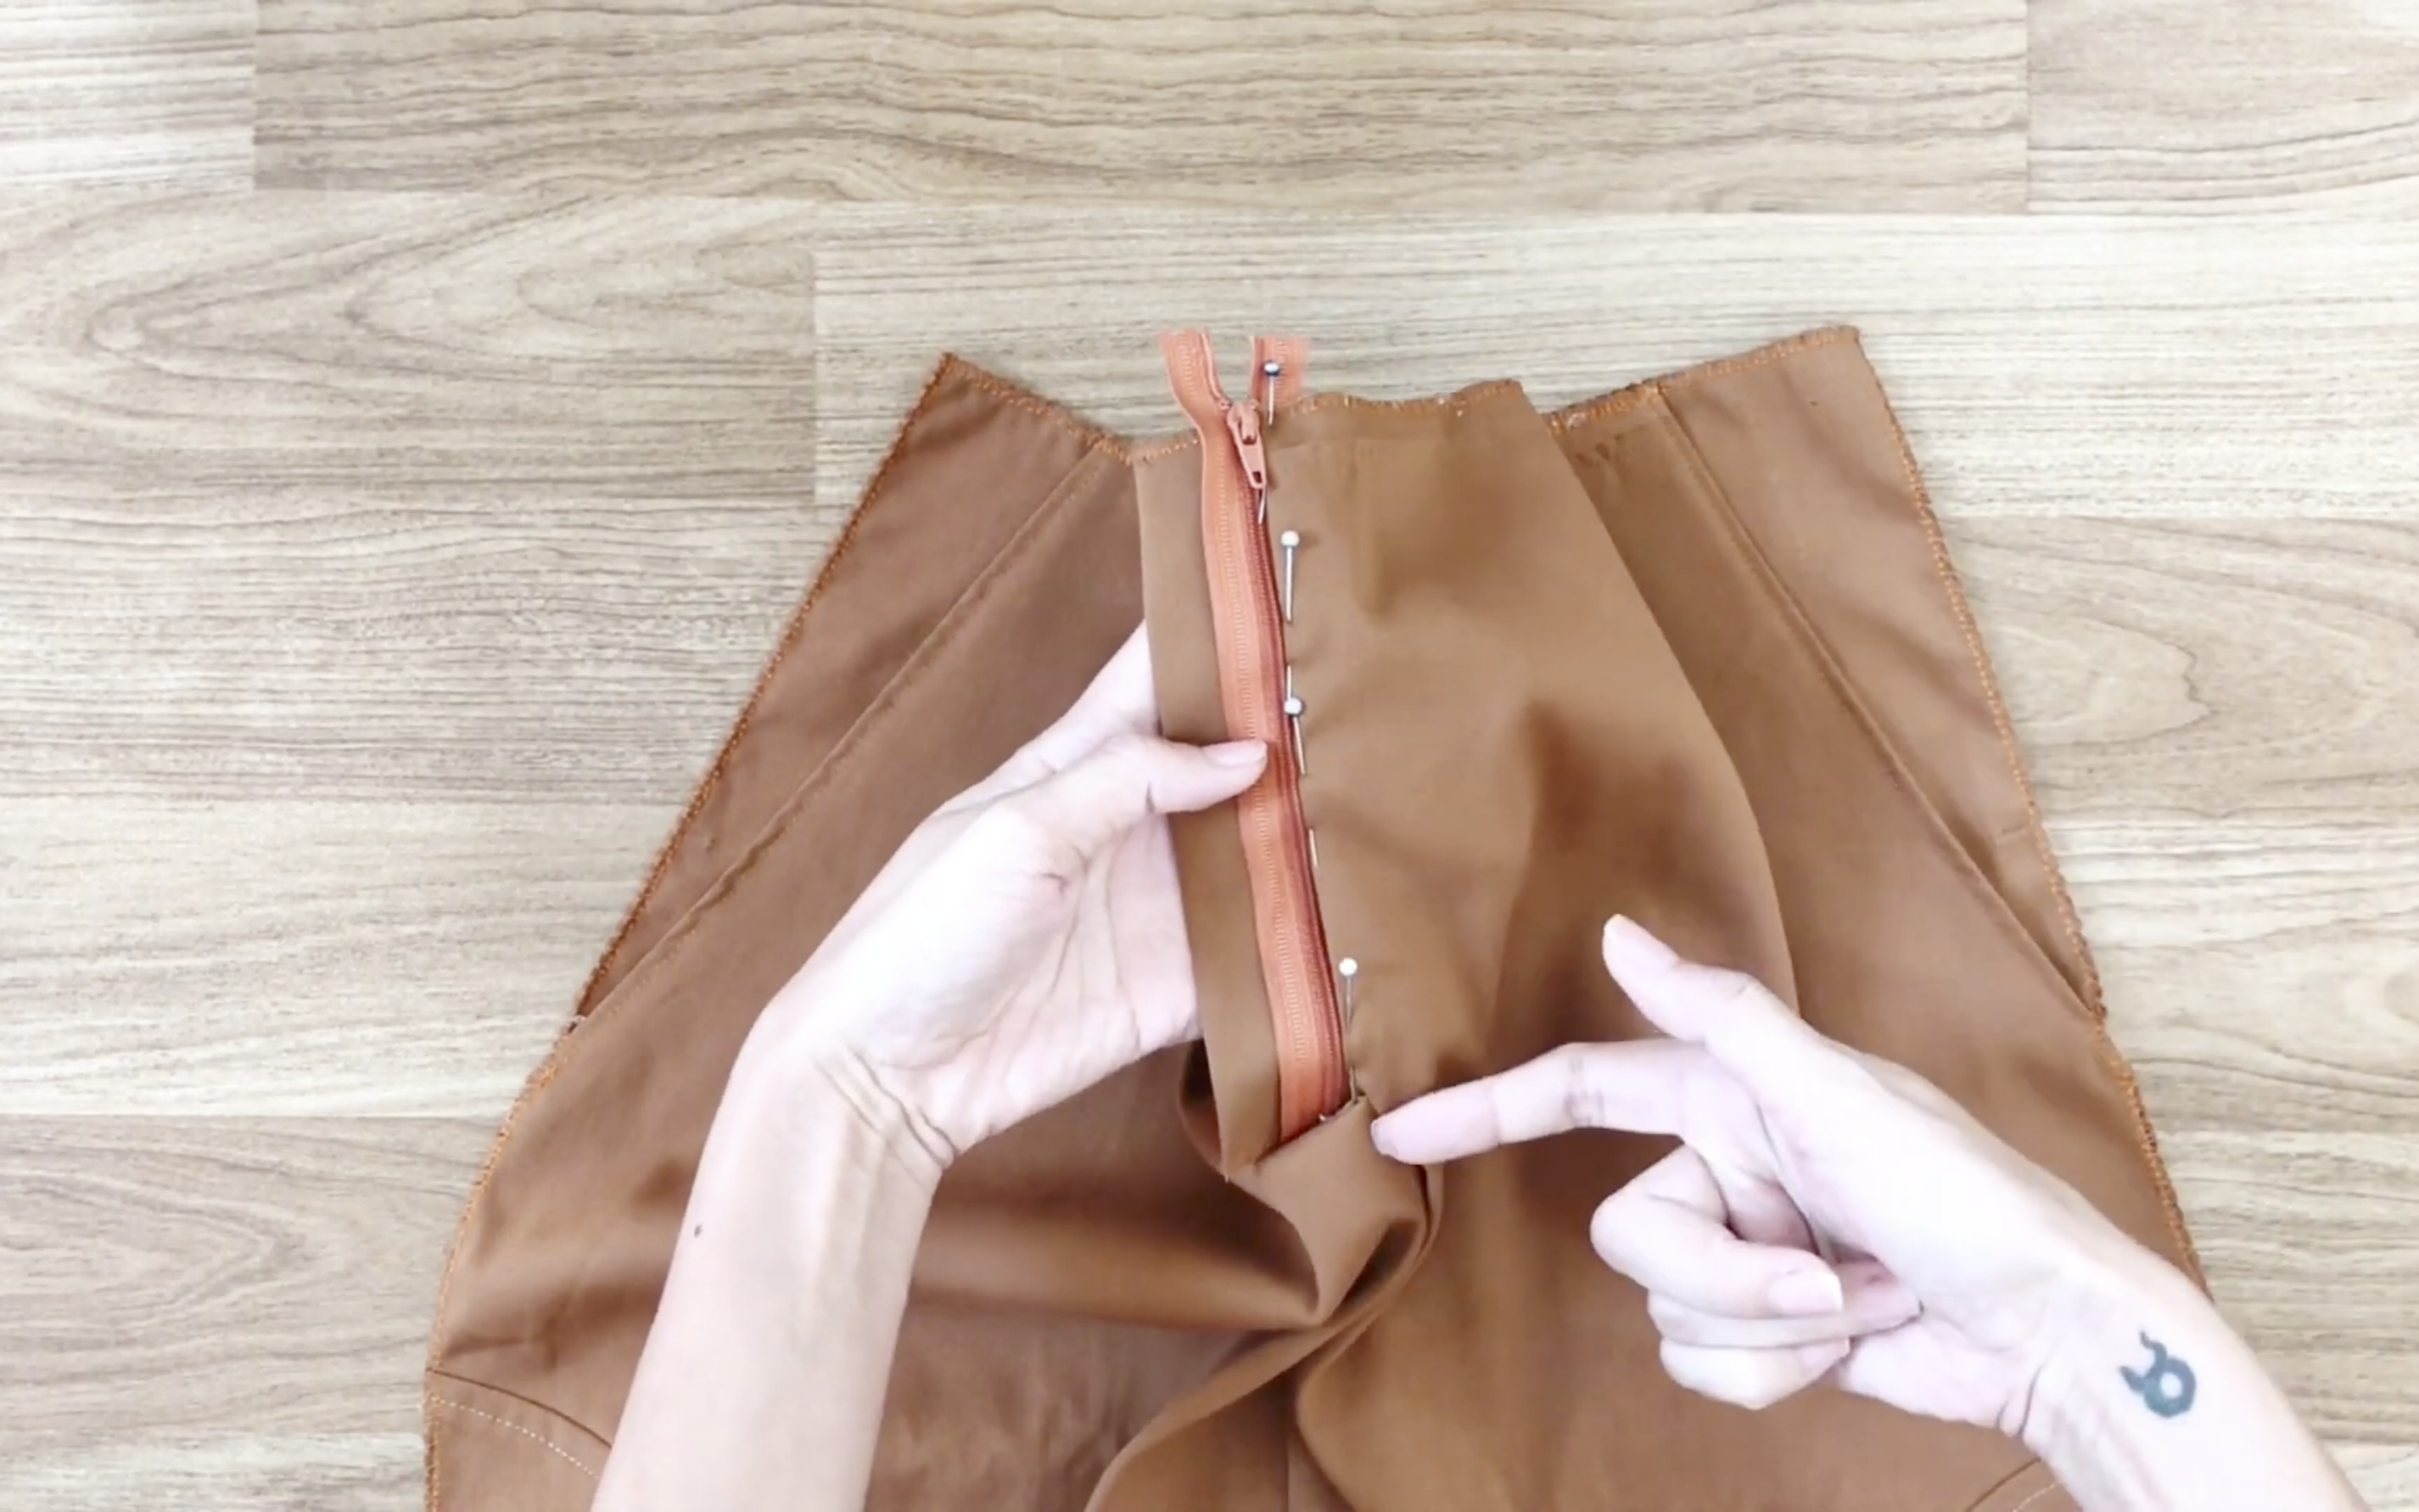
Install the zipper into the front body at the top of the crotch curve on the right side.
A tip: opening the zipper while sewing makes it easier, and try to sew the crotch curve close to the zipper for a clean seam.
Next, fix the first rectangle to the left side of the crotch curve with pins, then sew.
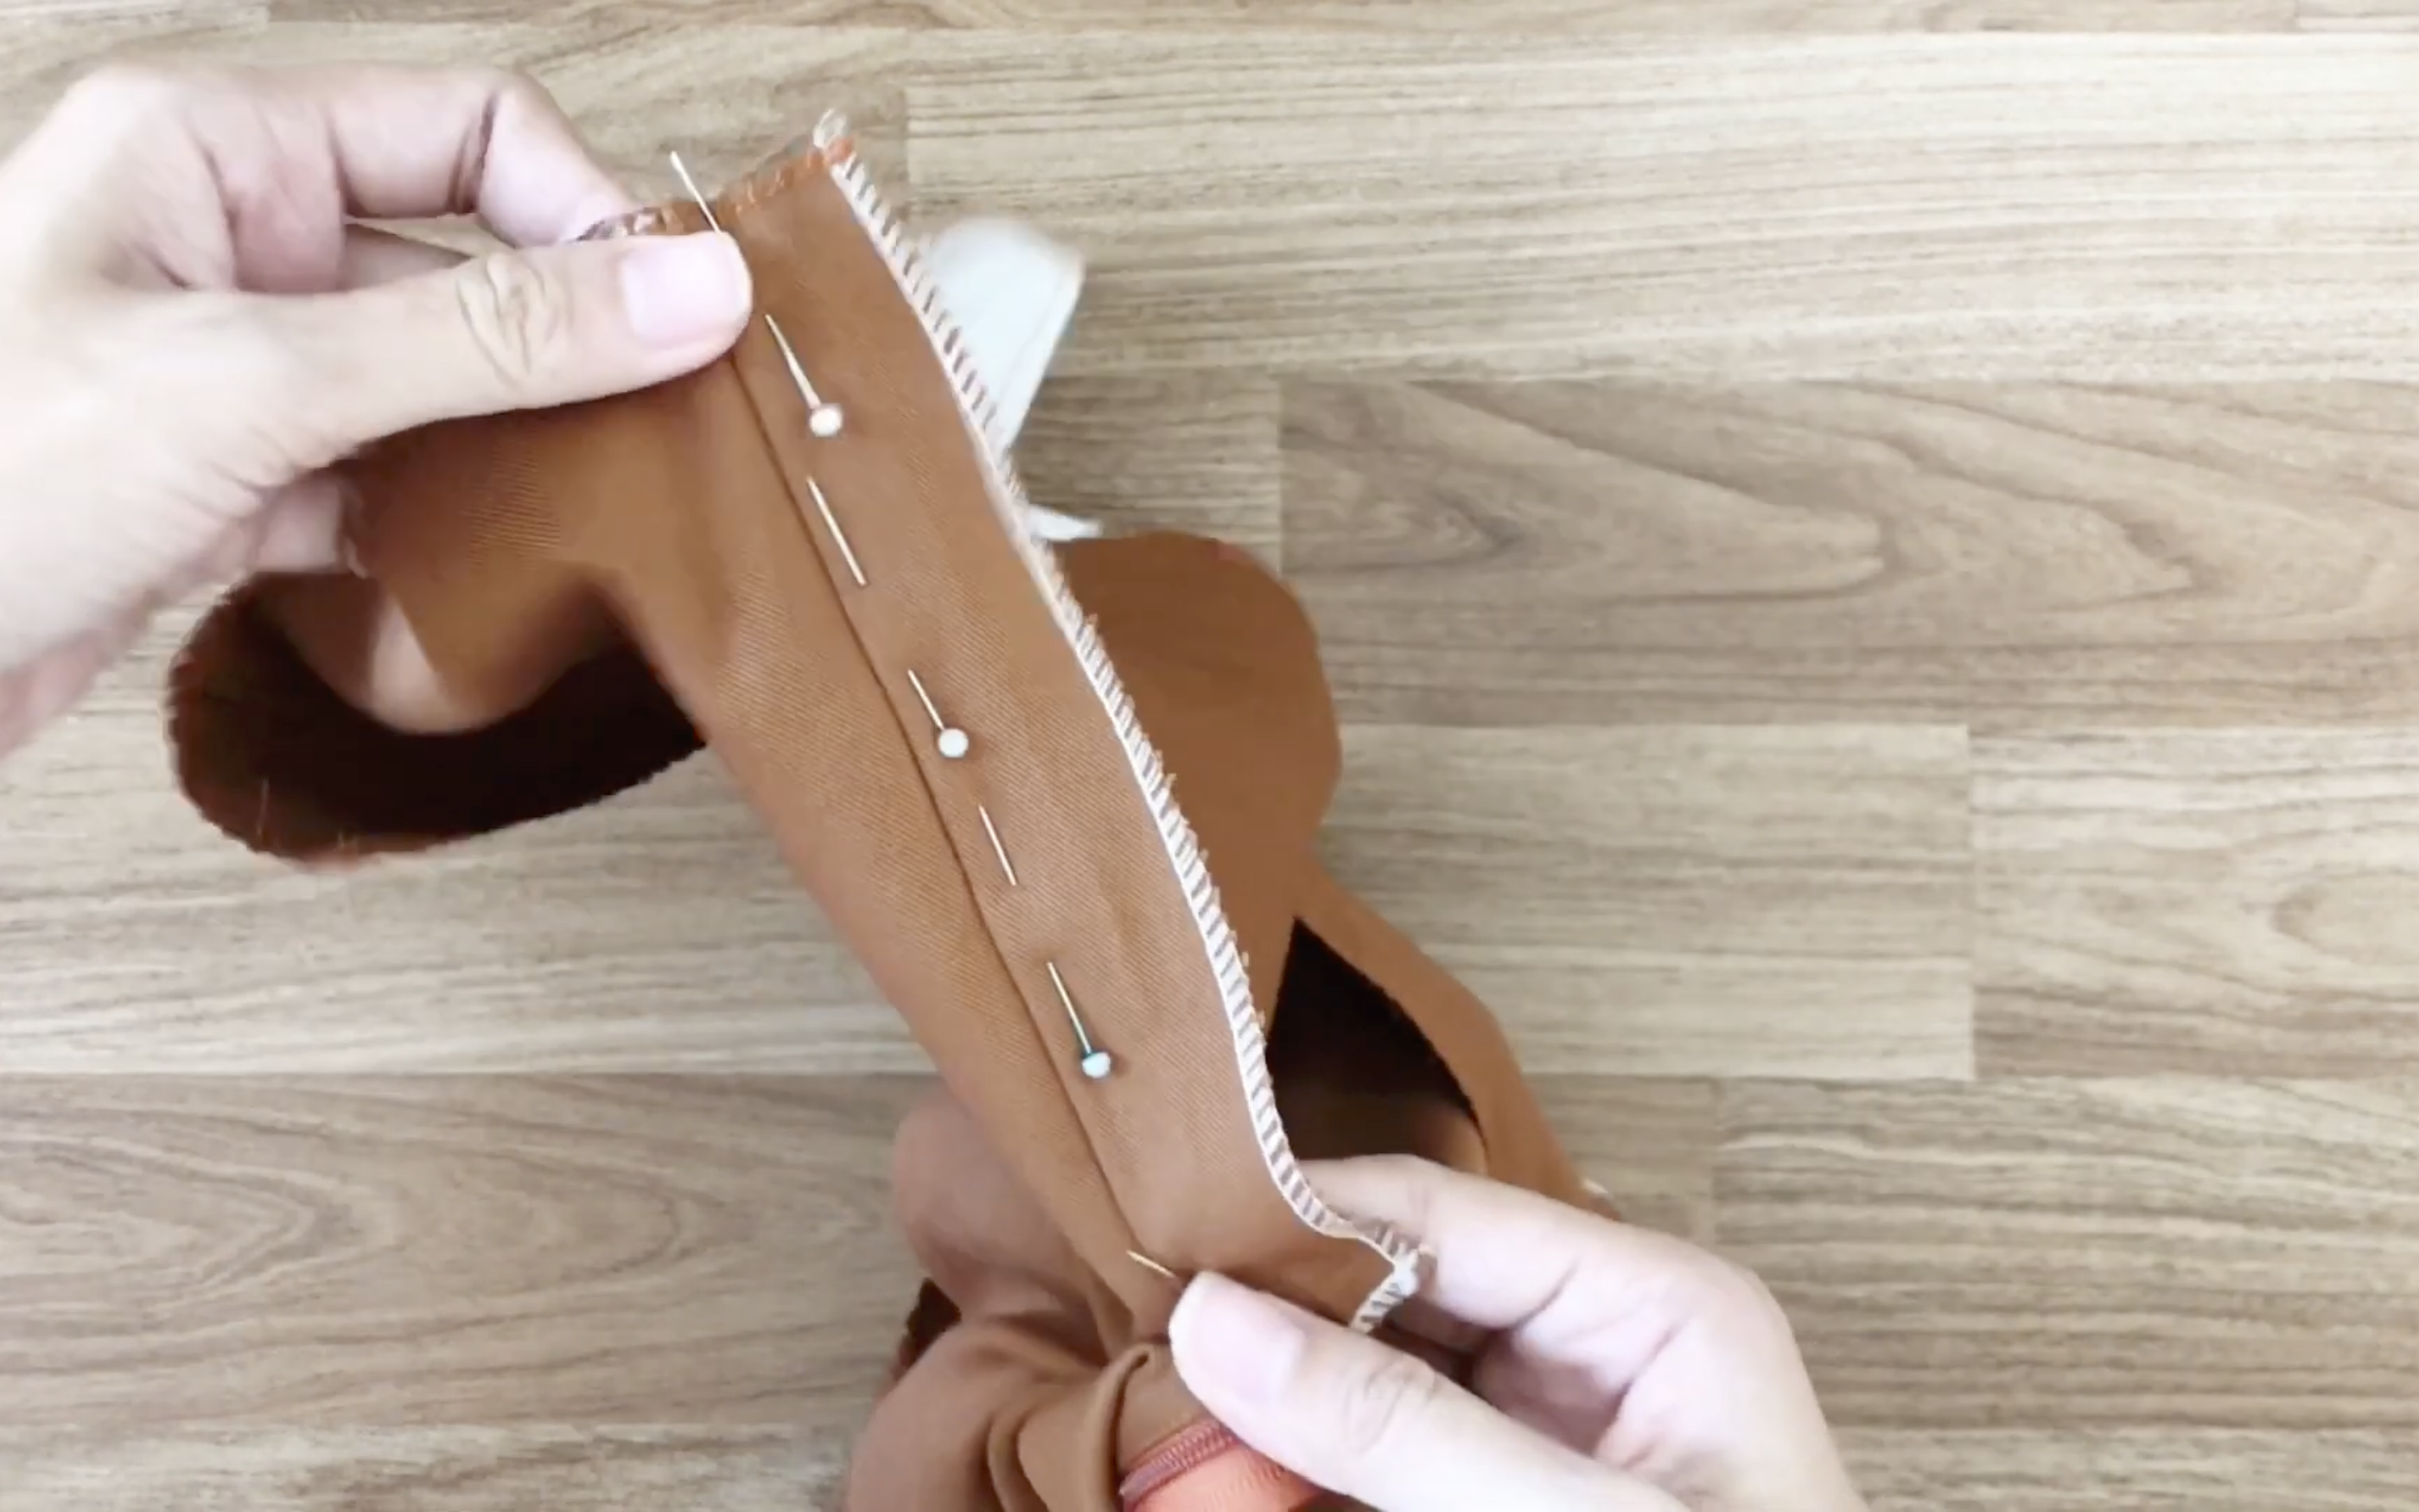
Sew another seam outside the previous one to keep the rectangle inside the crotch curve.
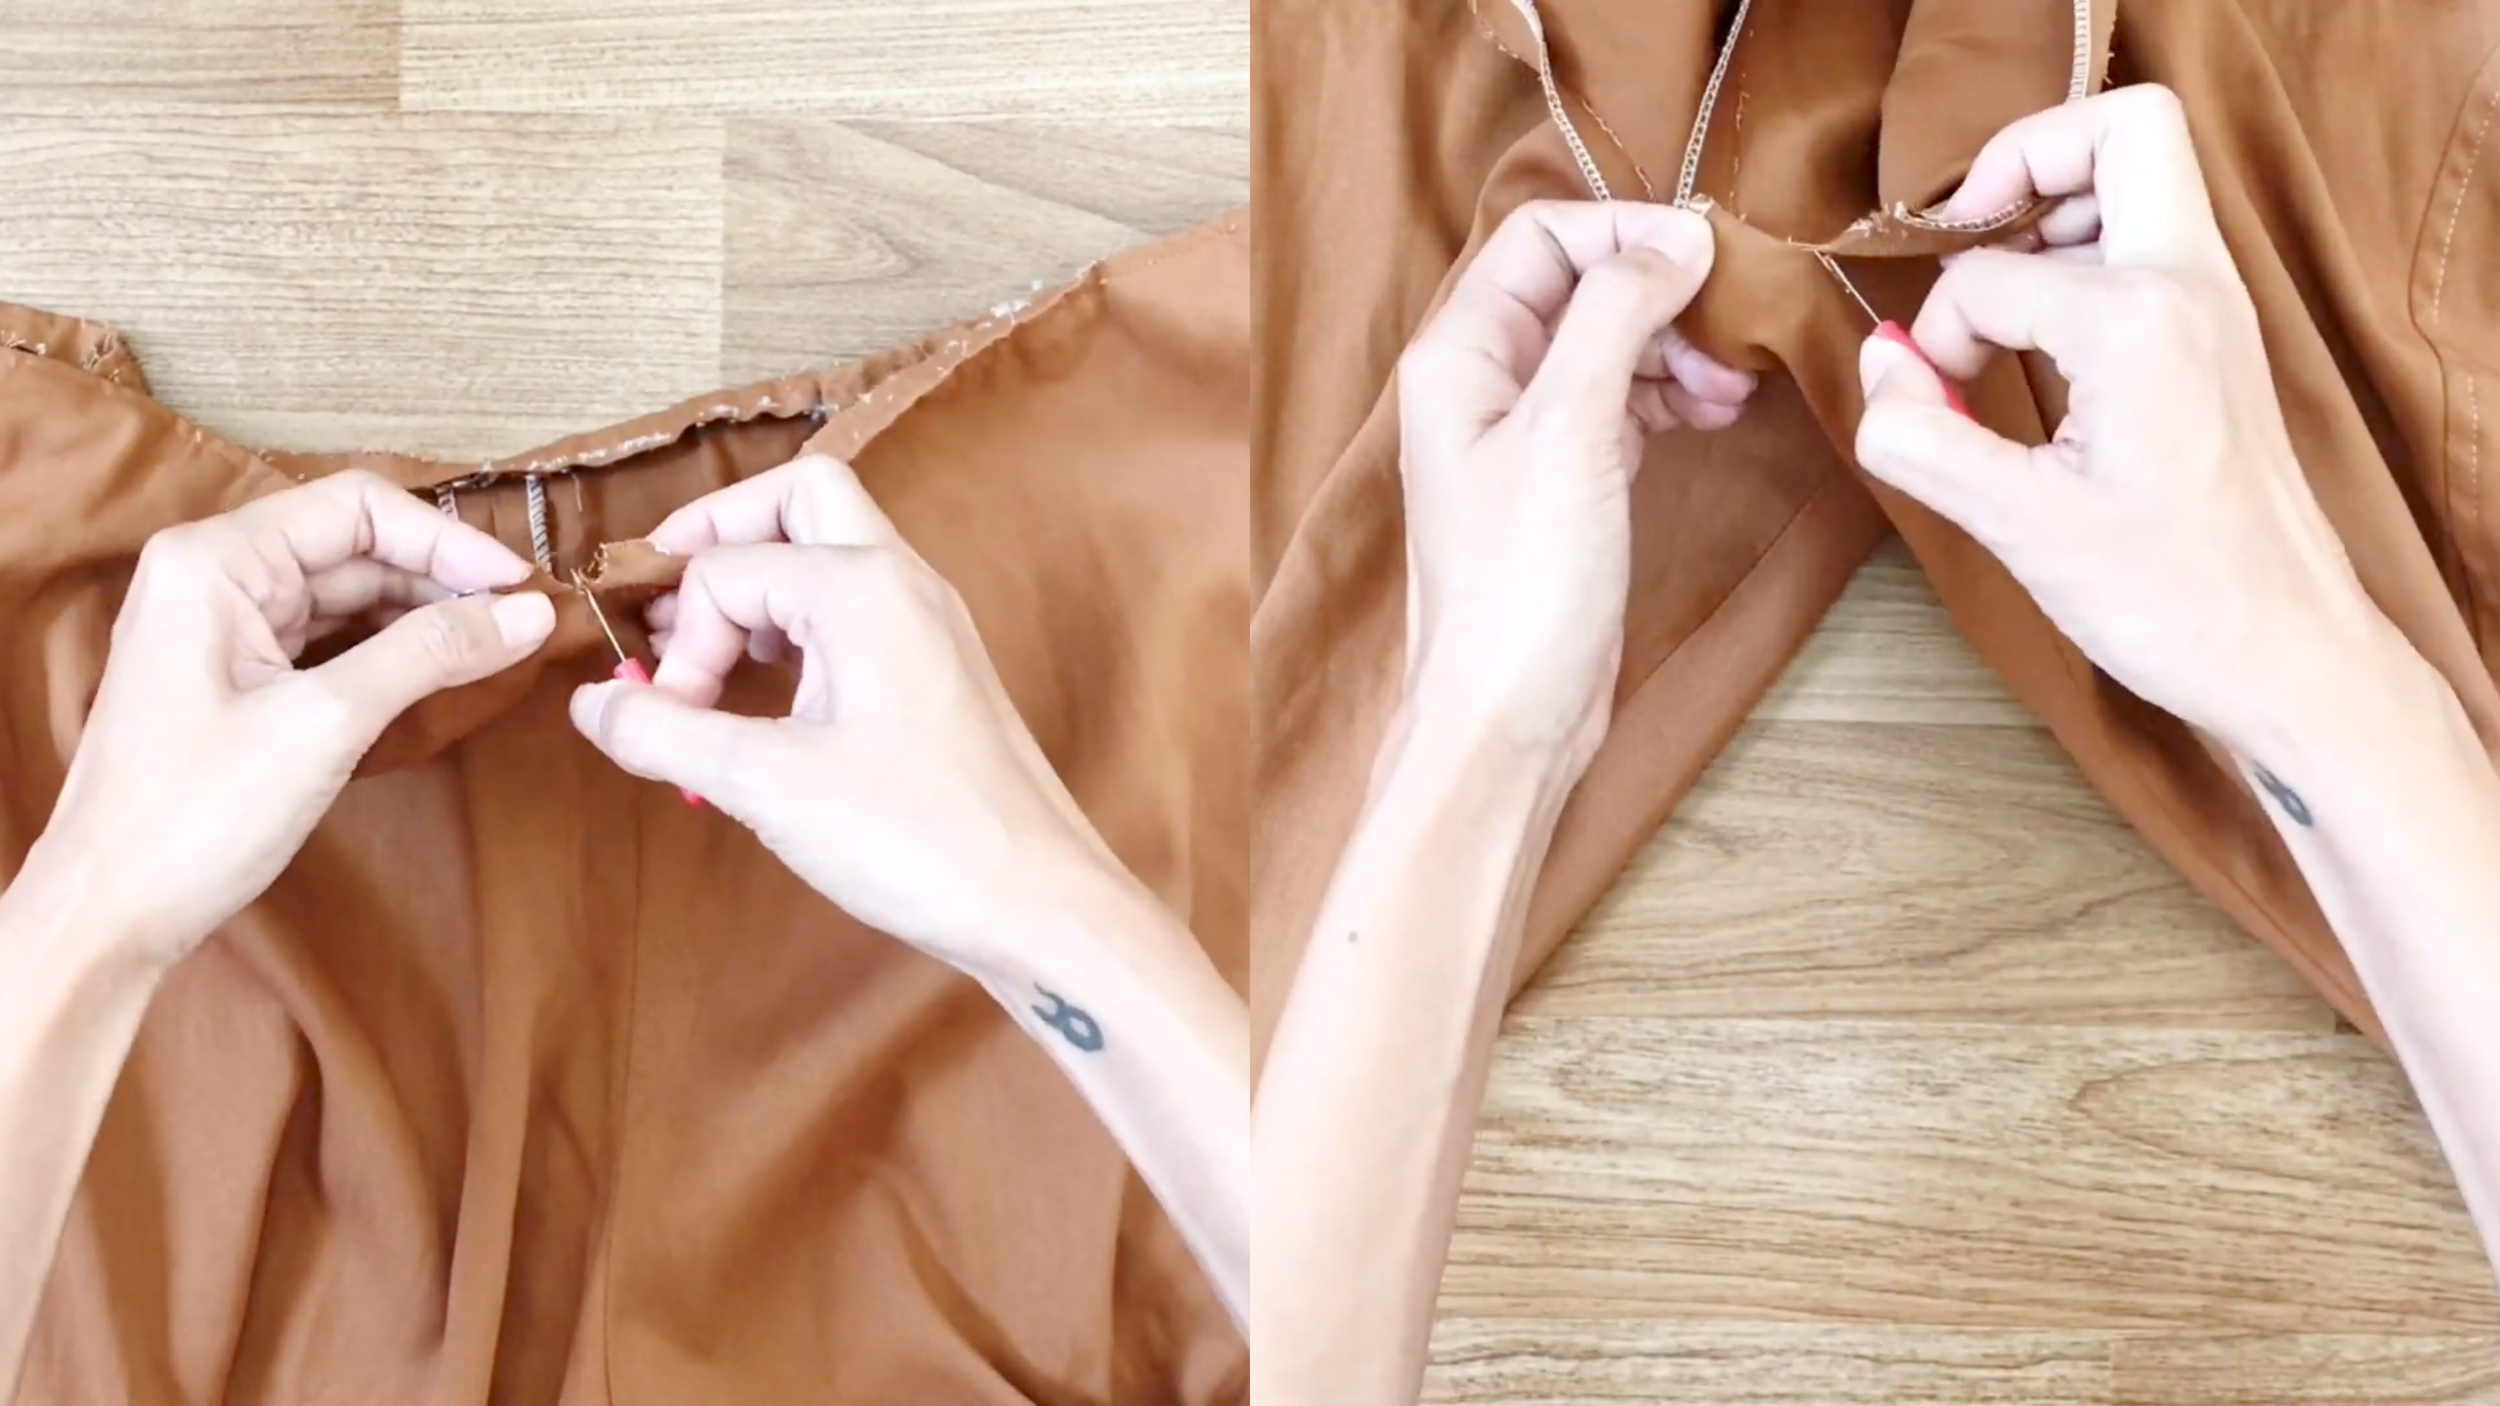
To ensure the zipper stays inside, pin the two sides of the crotch curve together before fixing the zipper to the first rectangle, then sew.
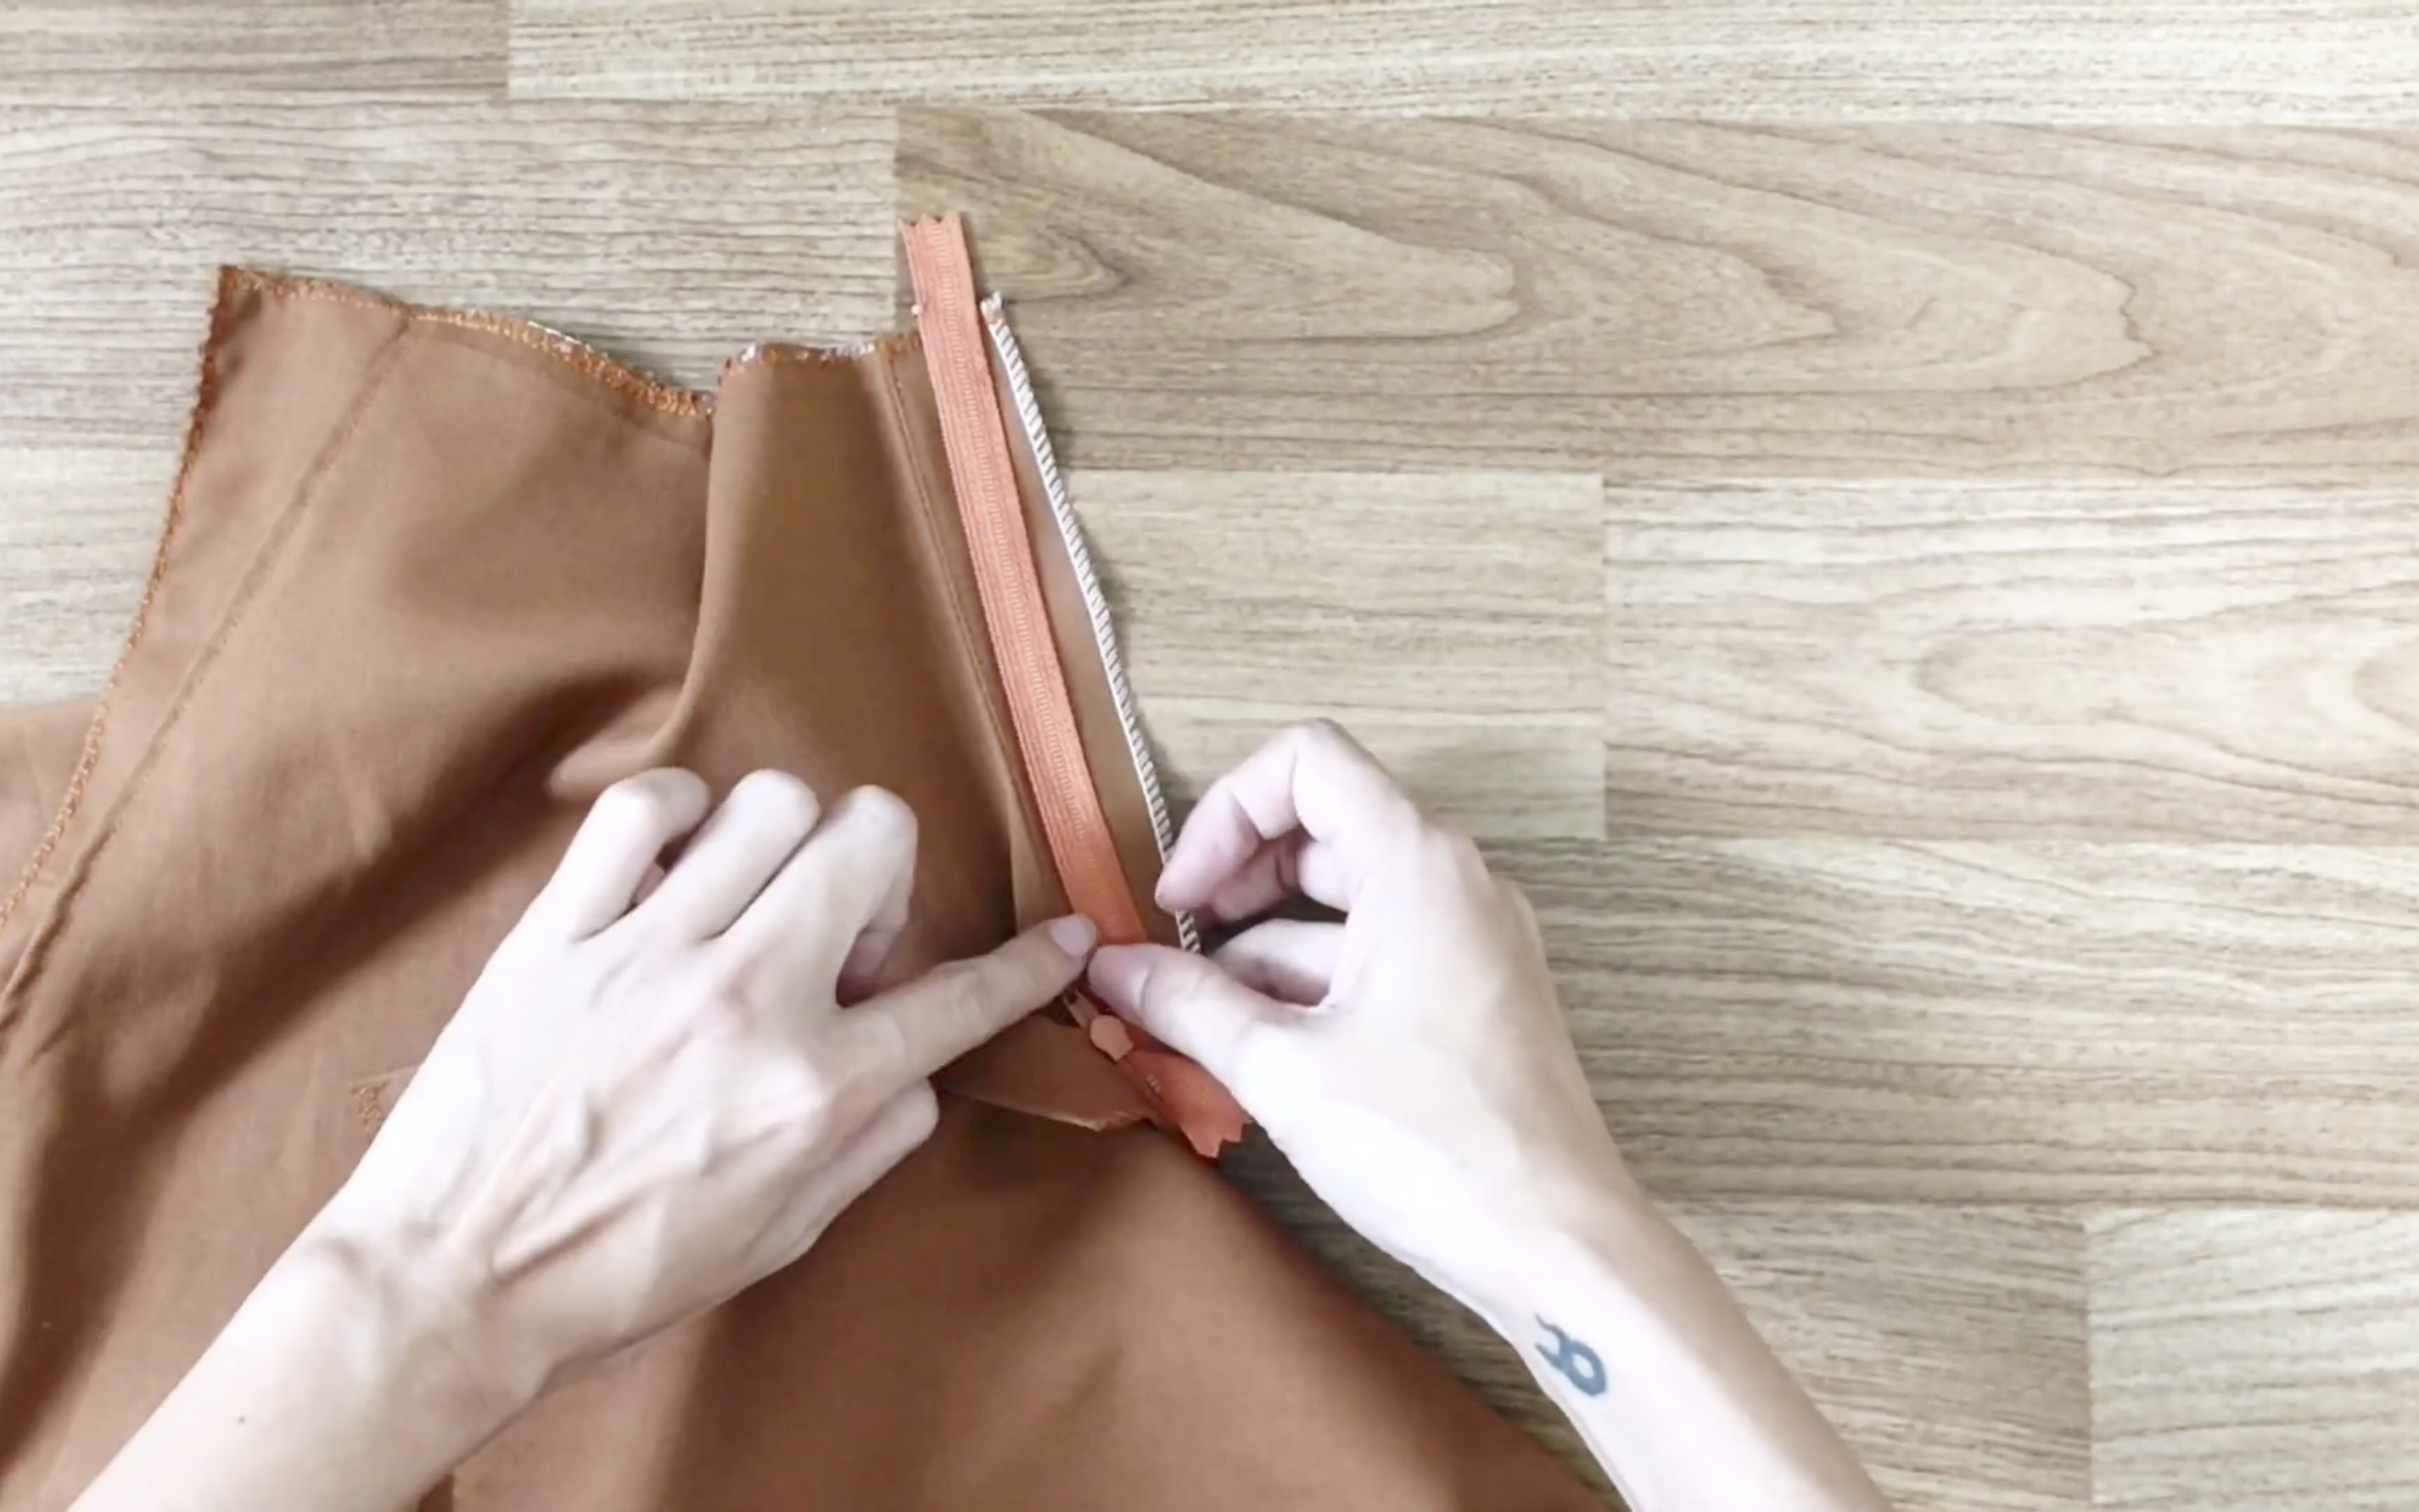
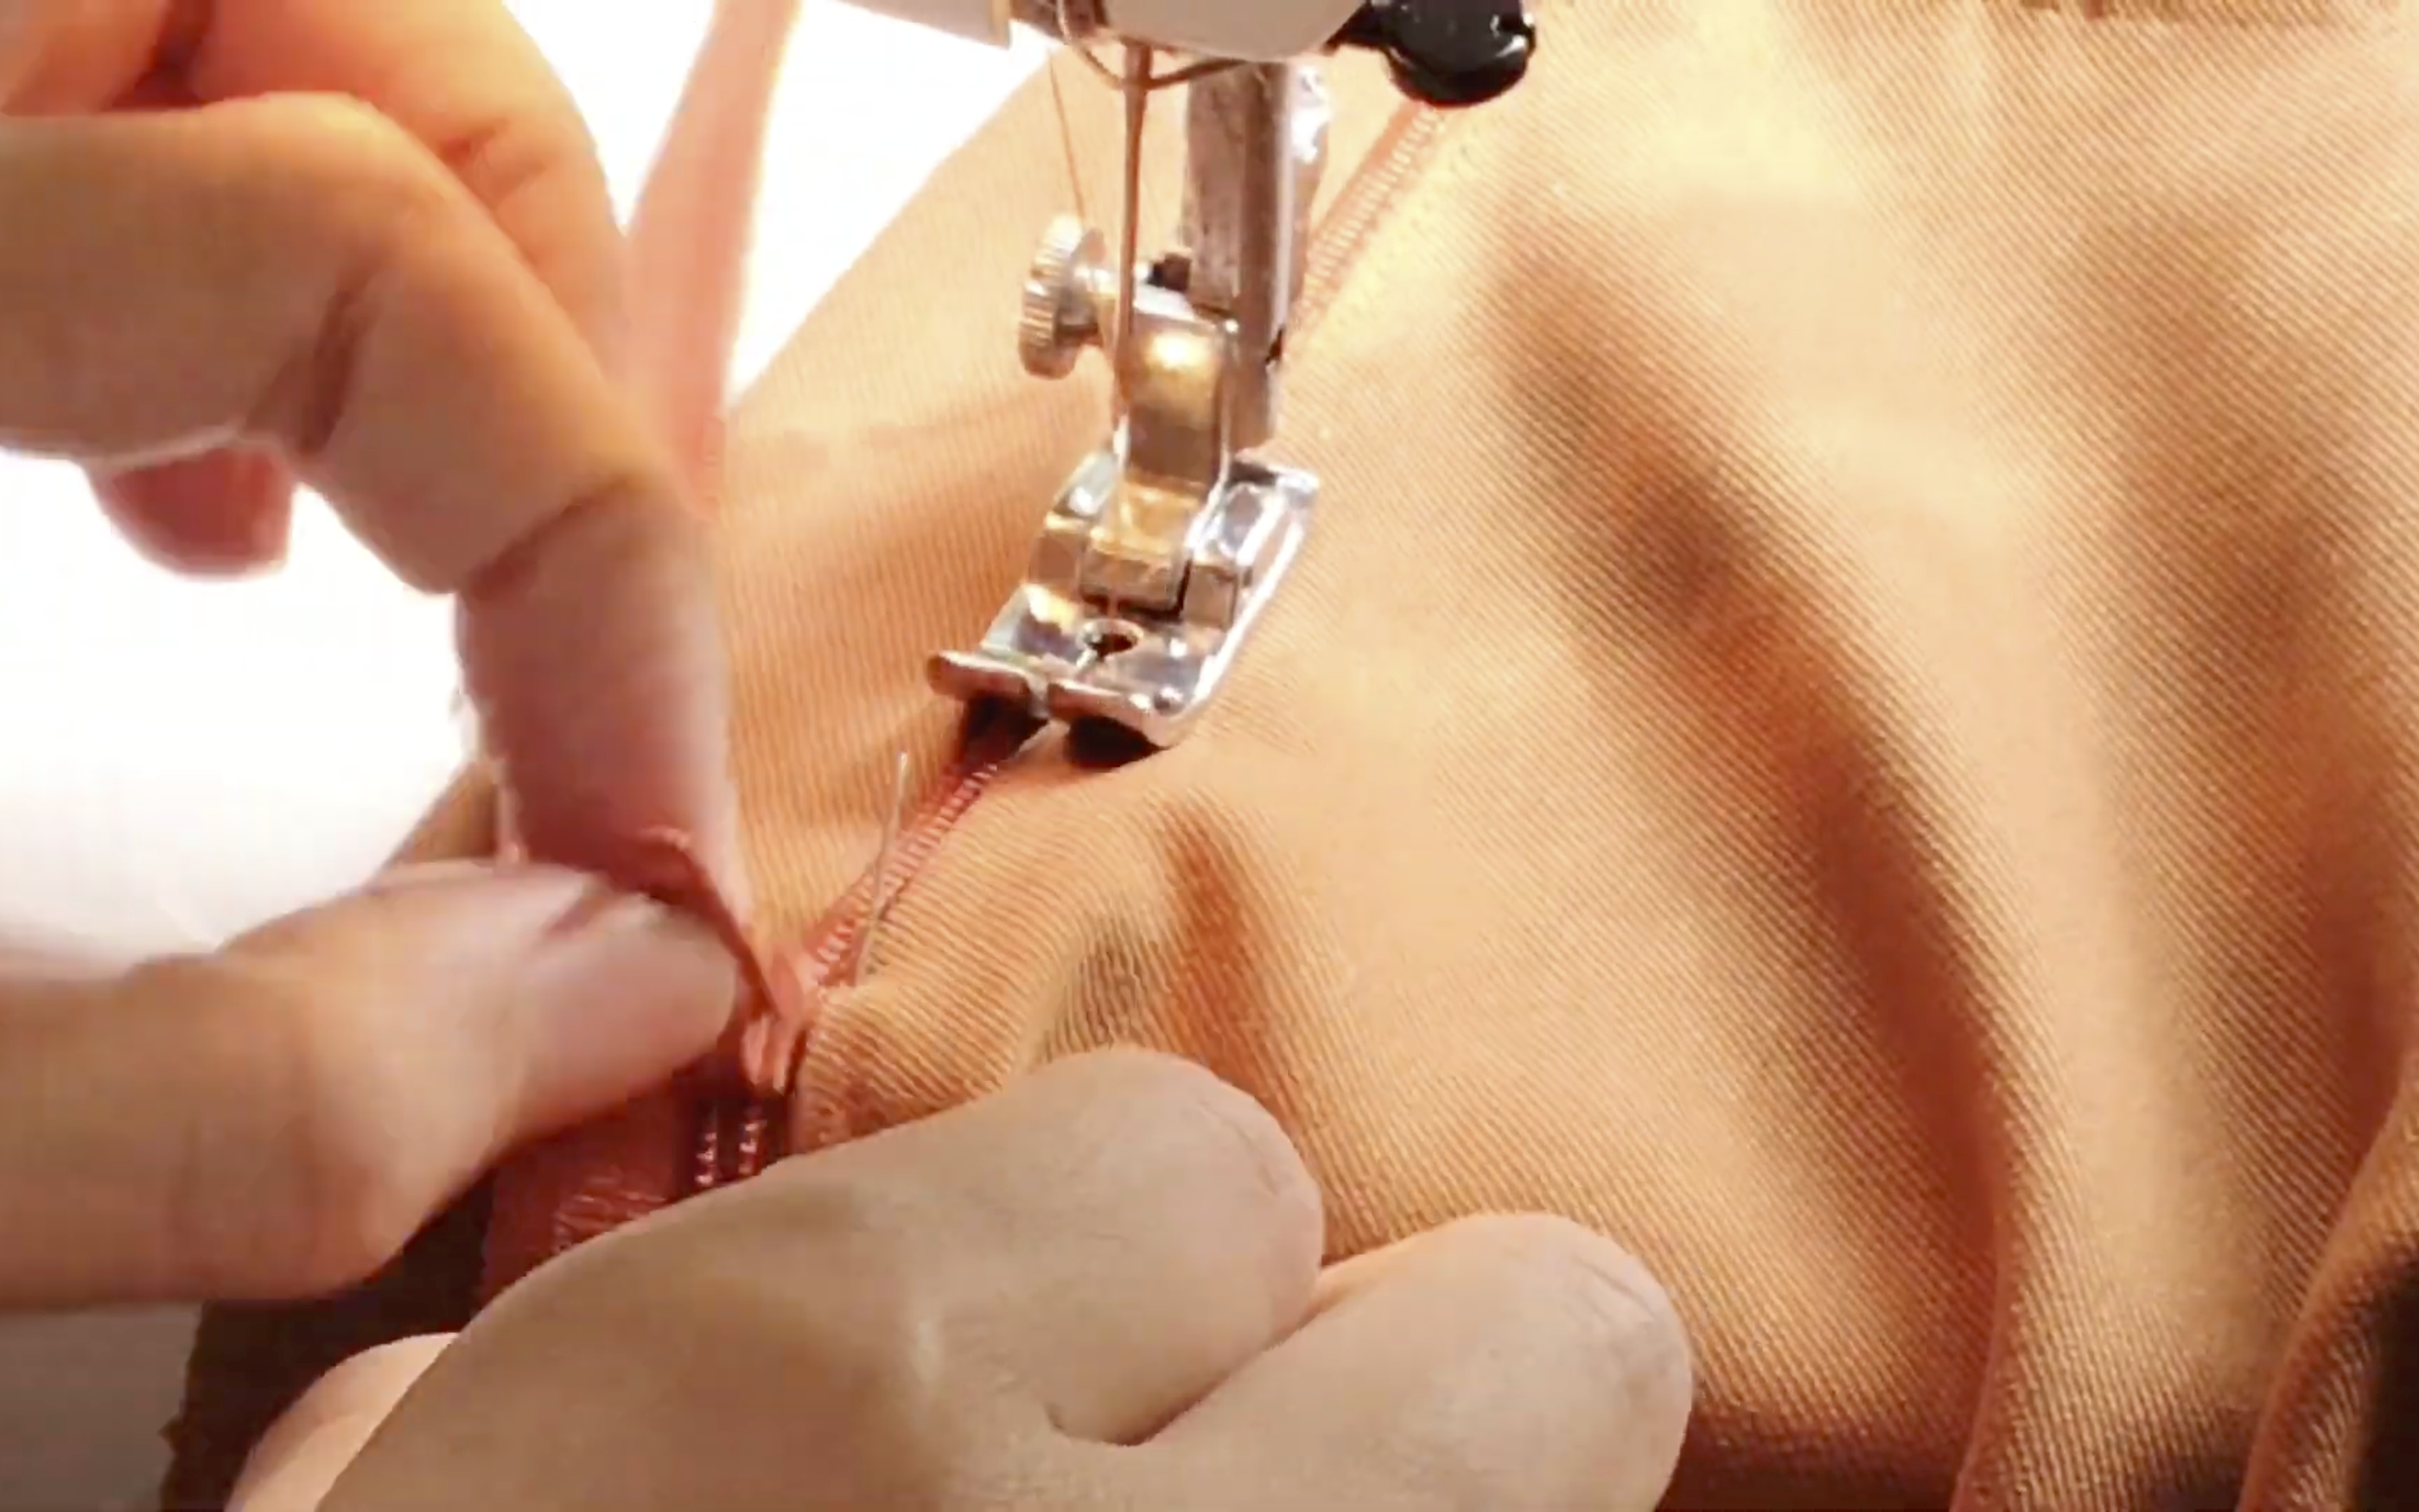
Sew another seam next to it, close to the zipper, to secure it.
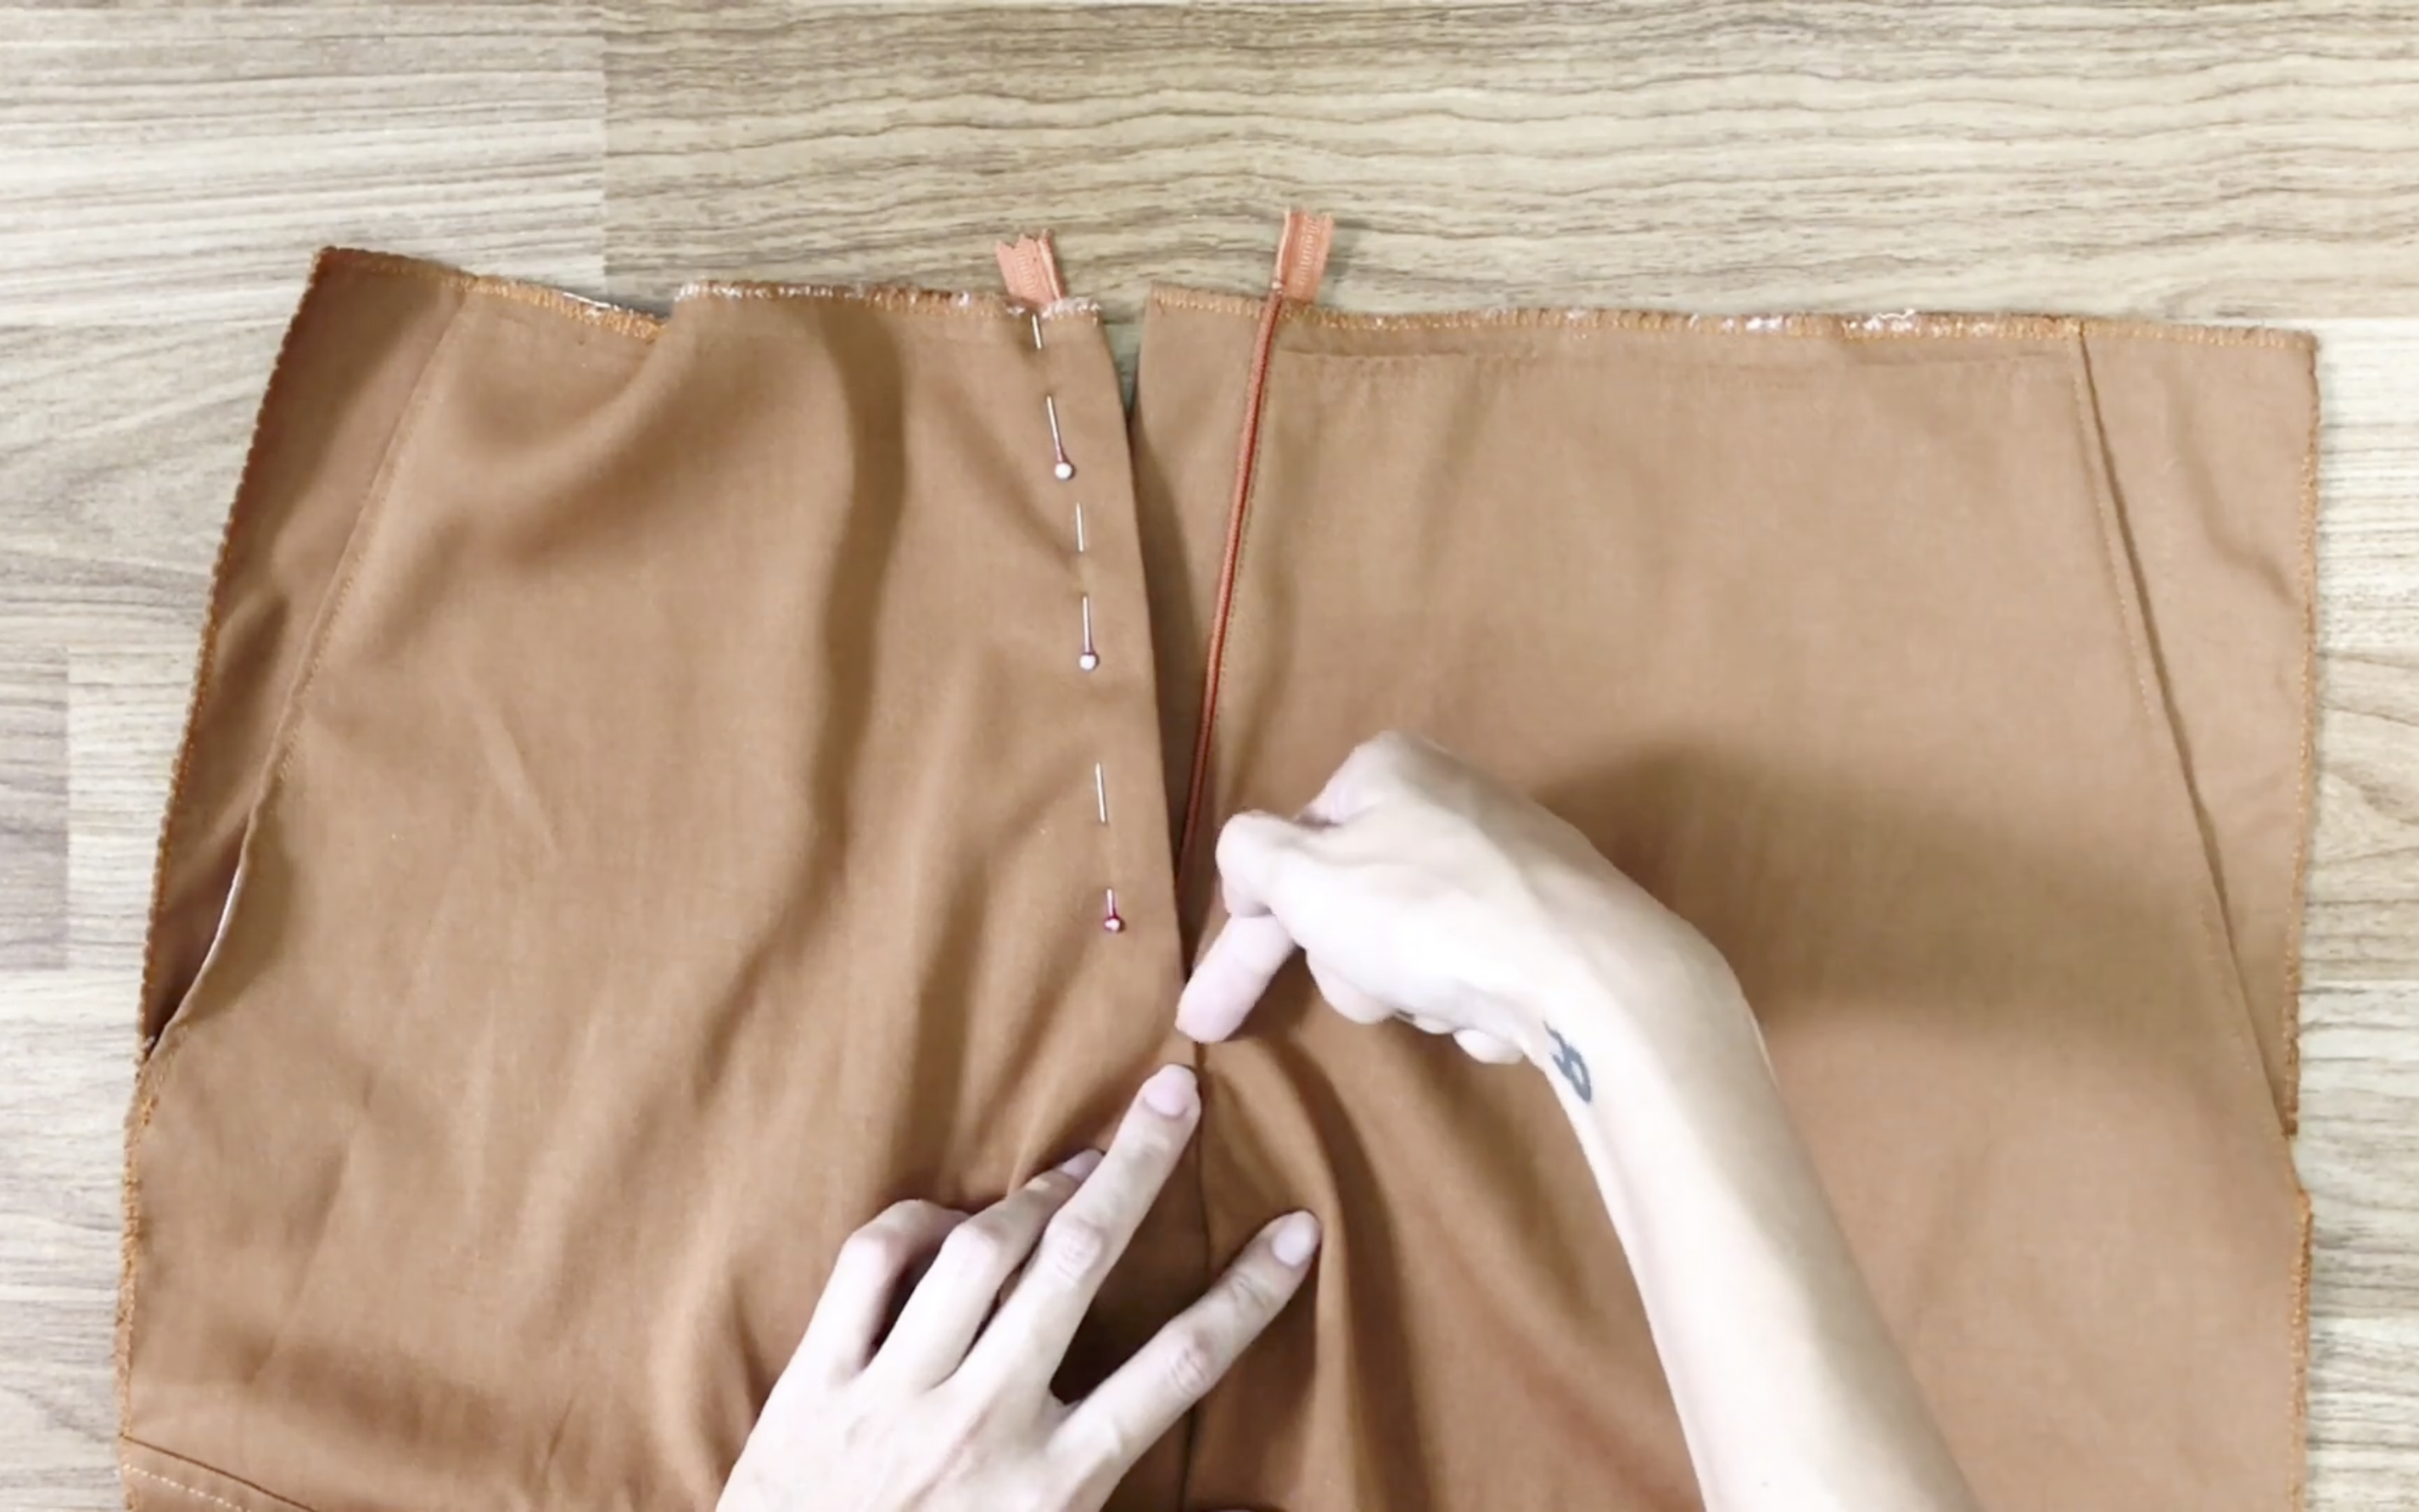
Sew another seam to fix the first rectangle to the front body and finish the zipper.
Remember, there should be a curve at the end of the seam, and a part of the second rectangle should also be sewn at the end.
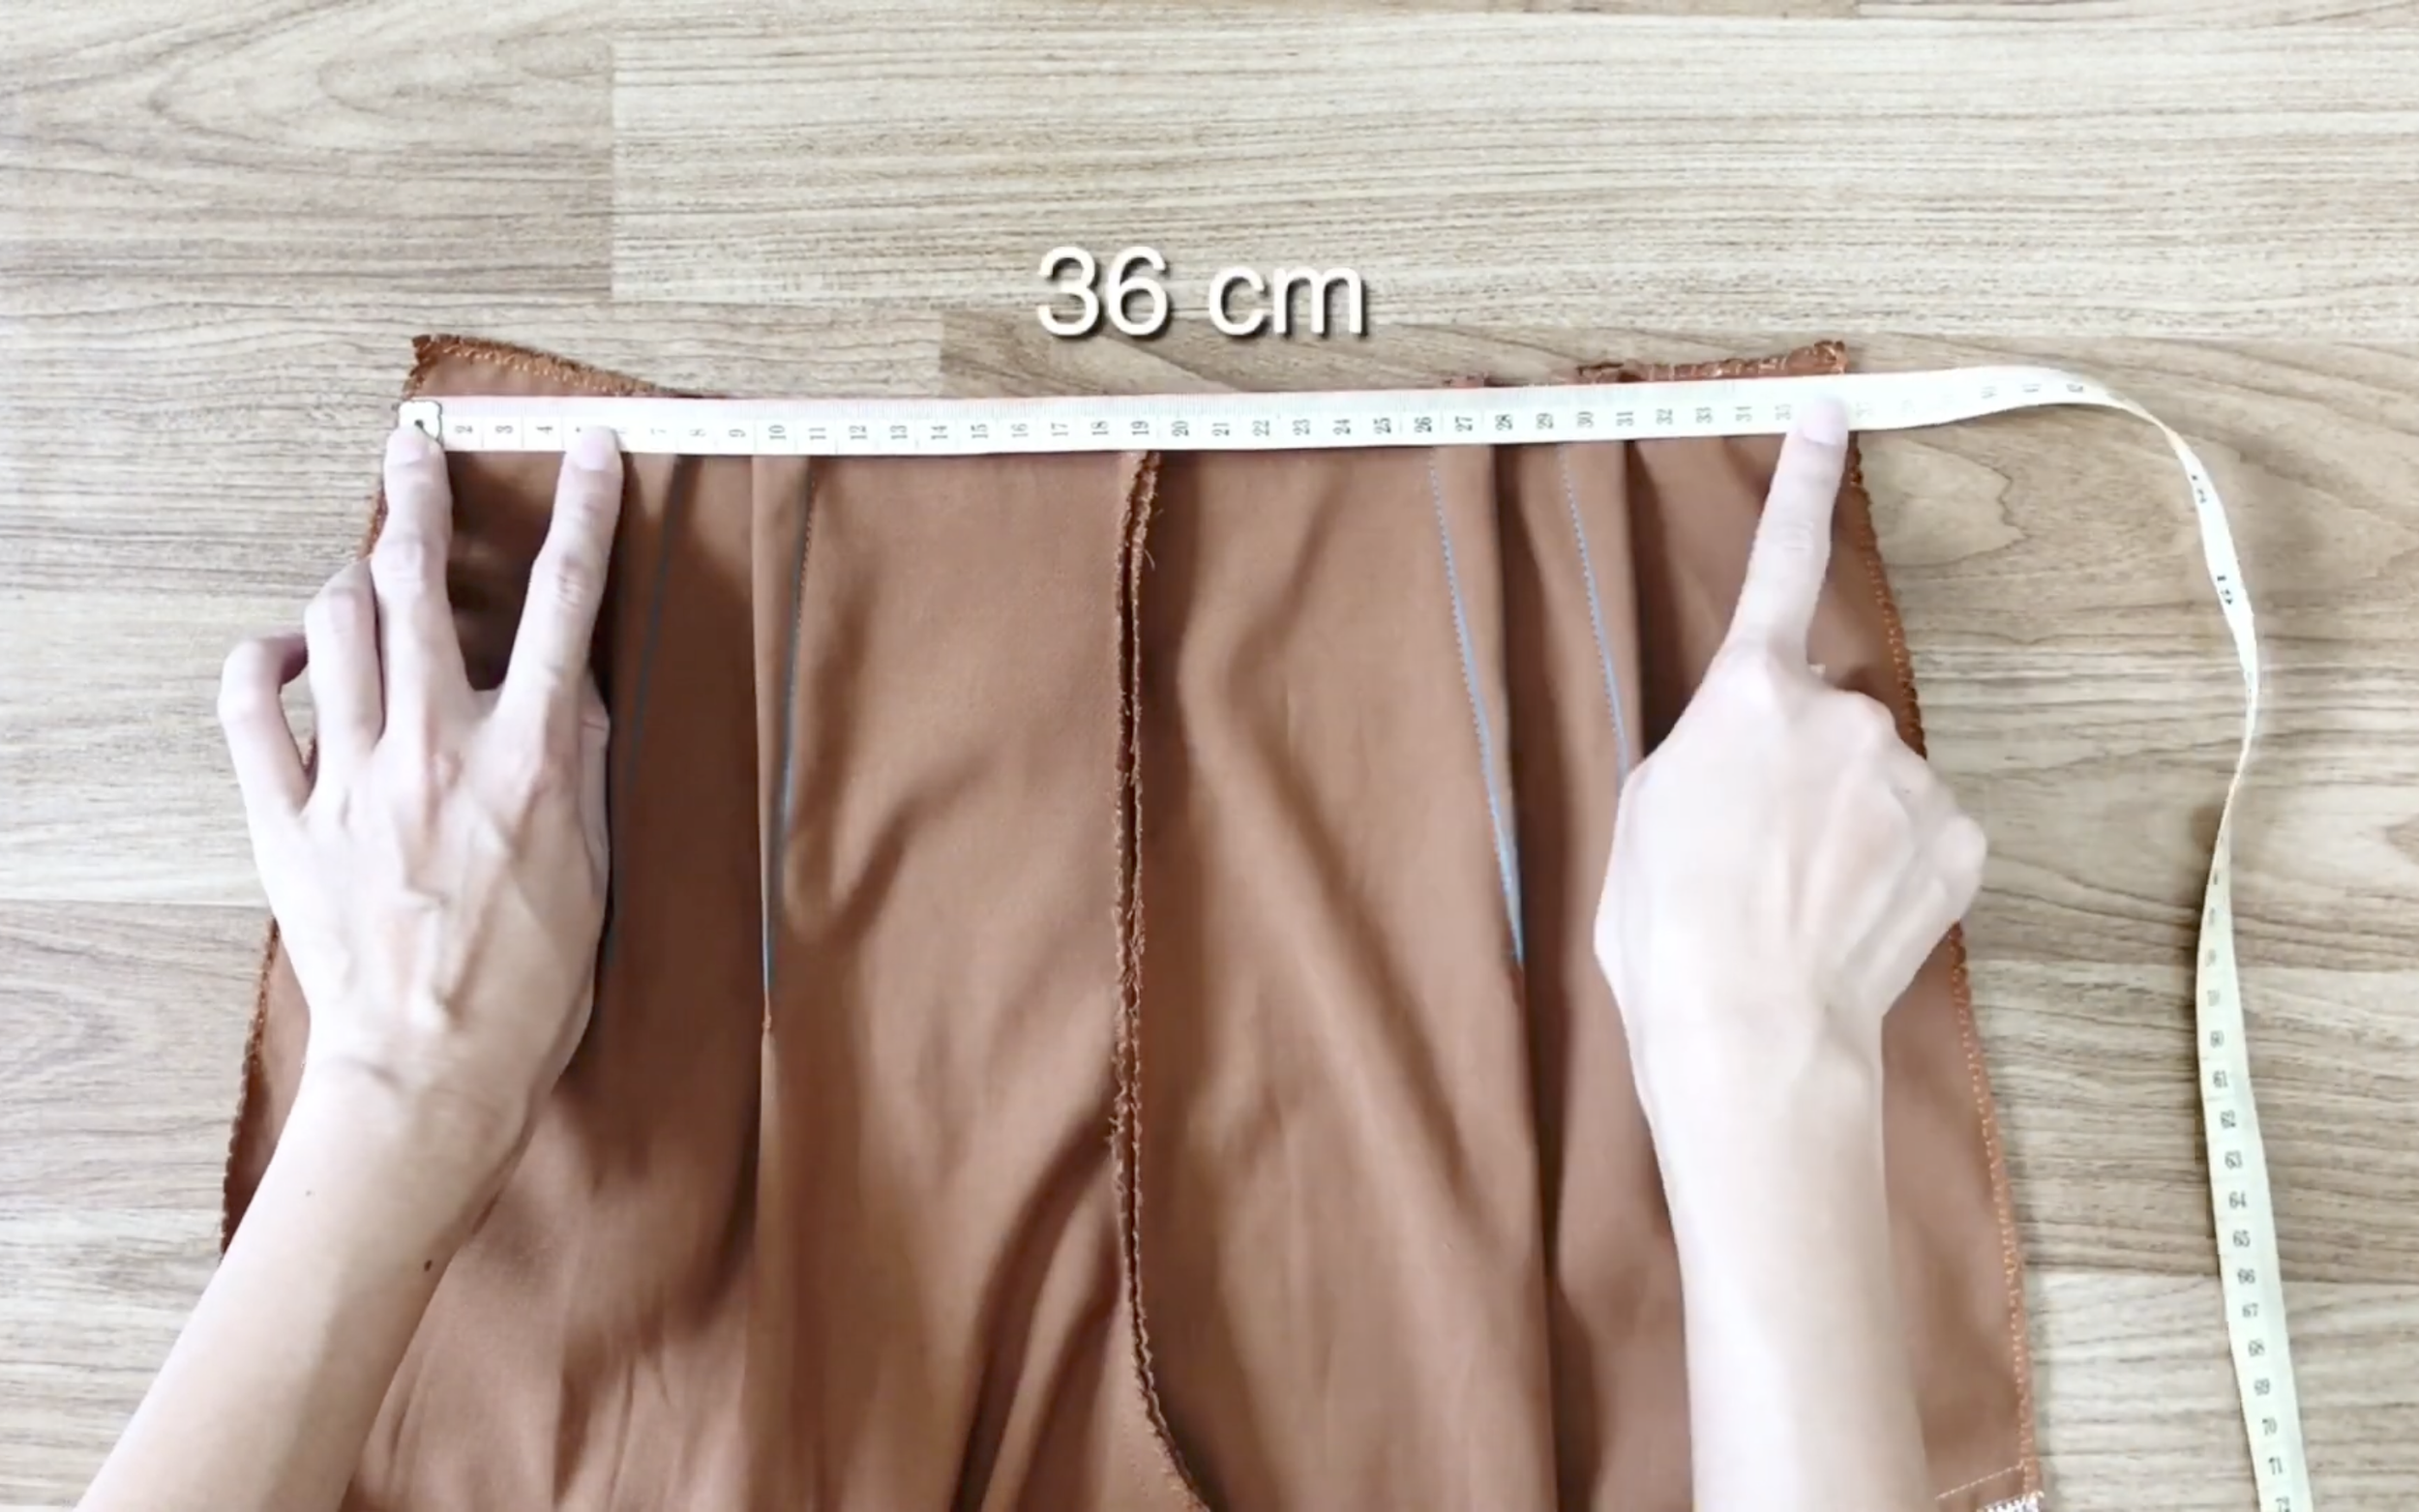
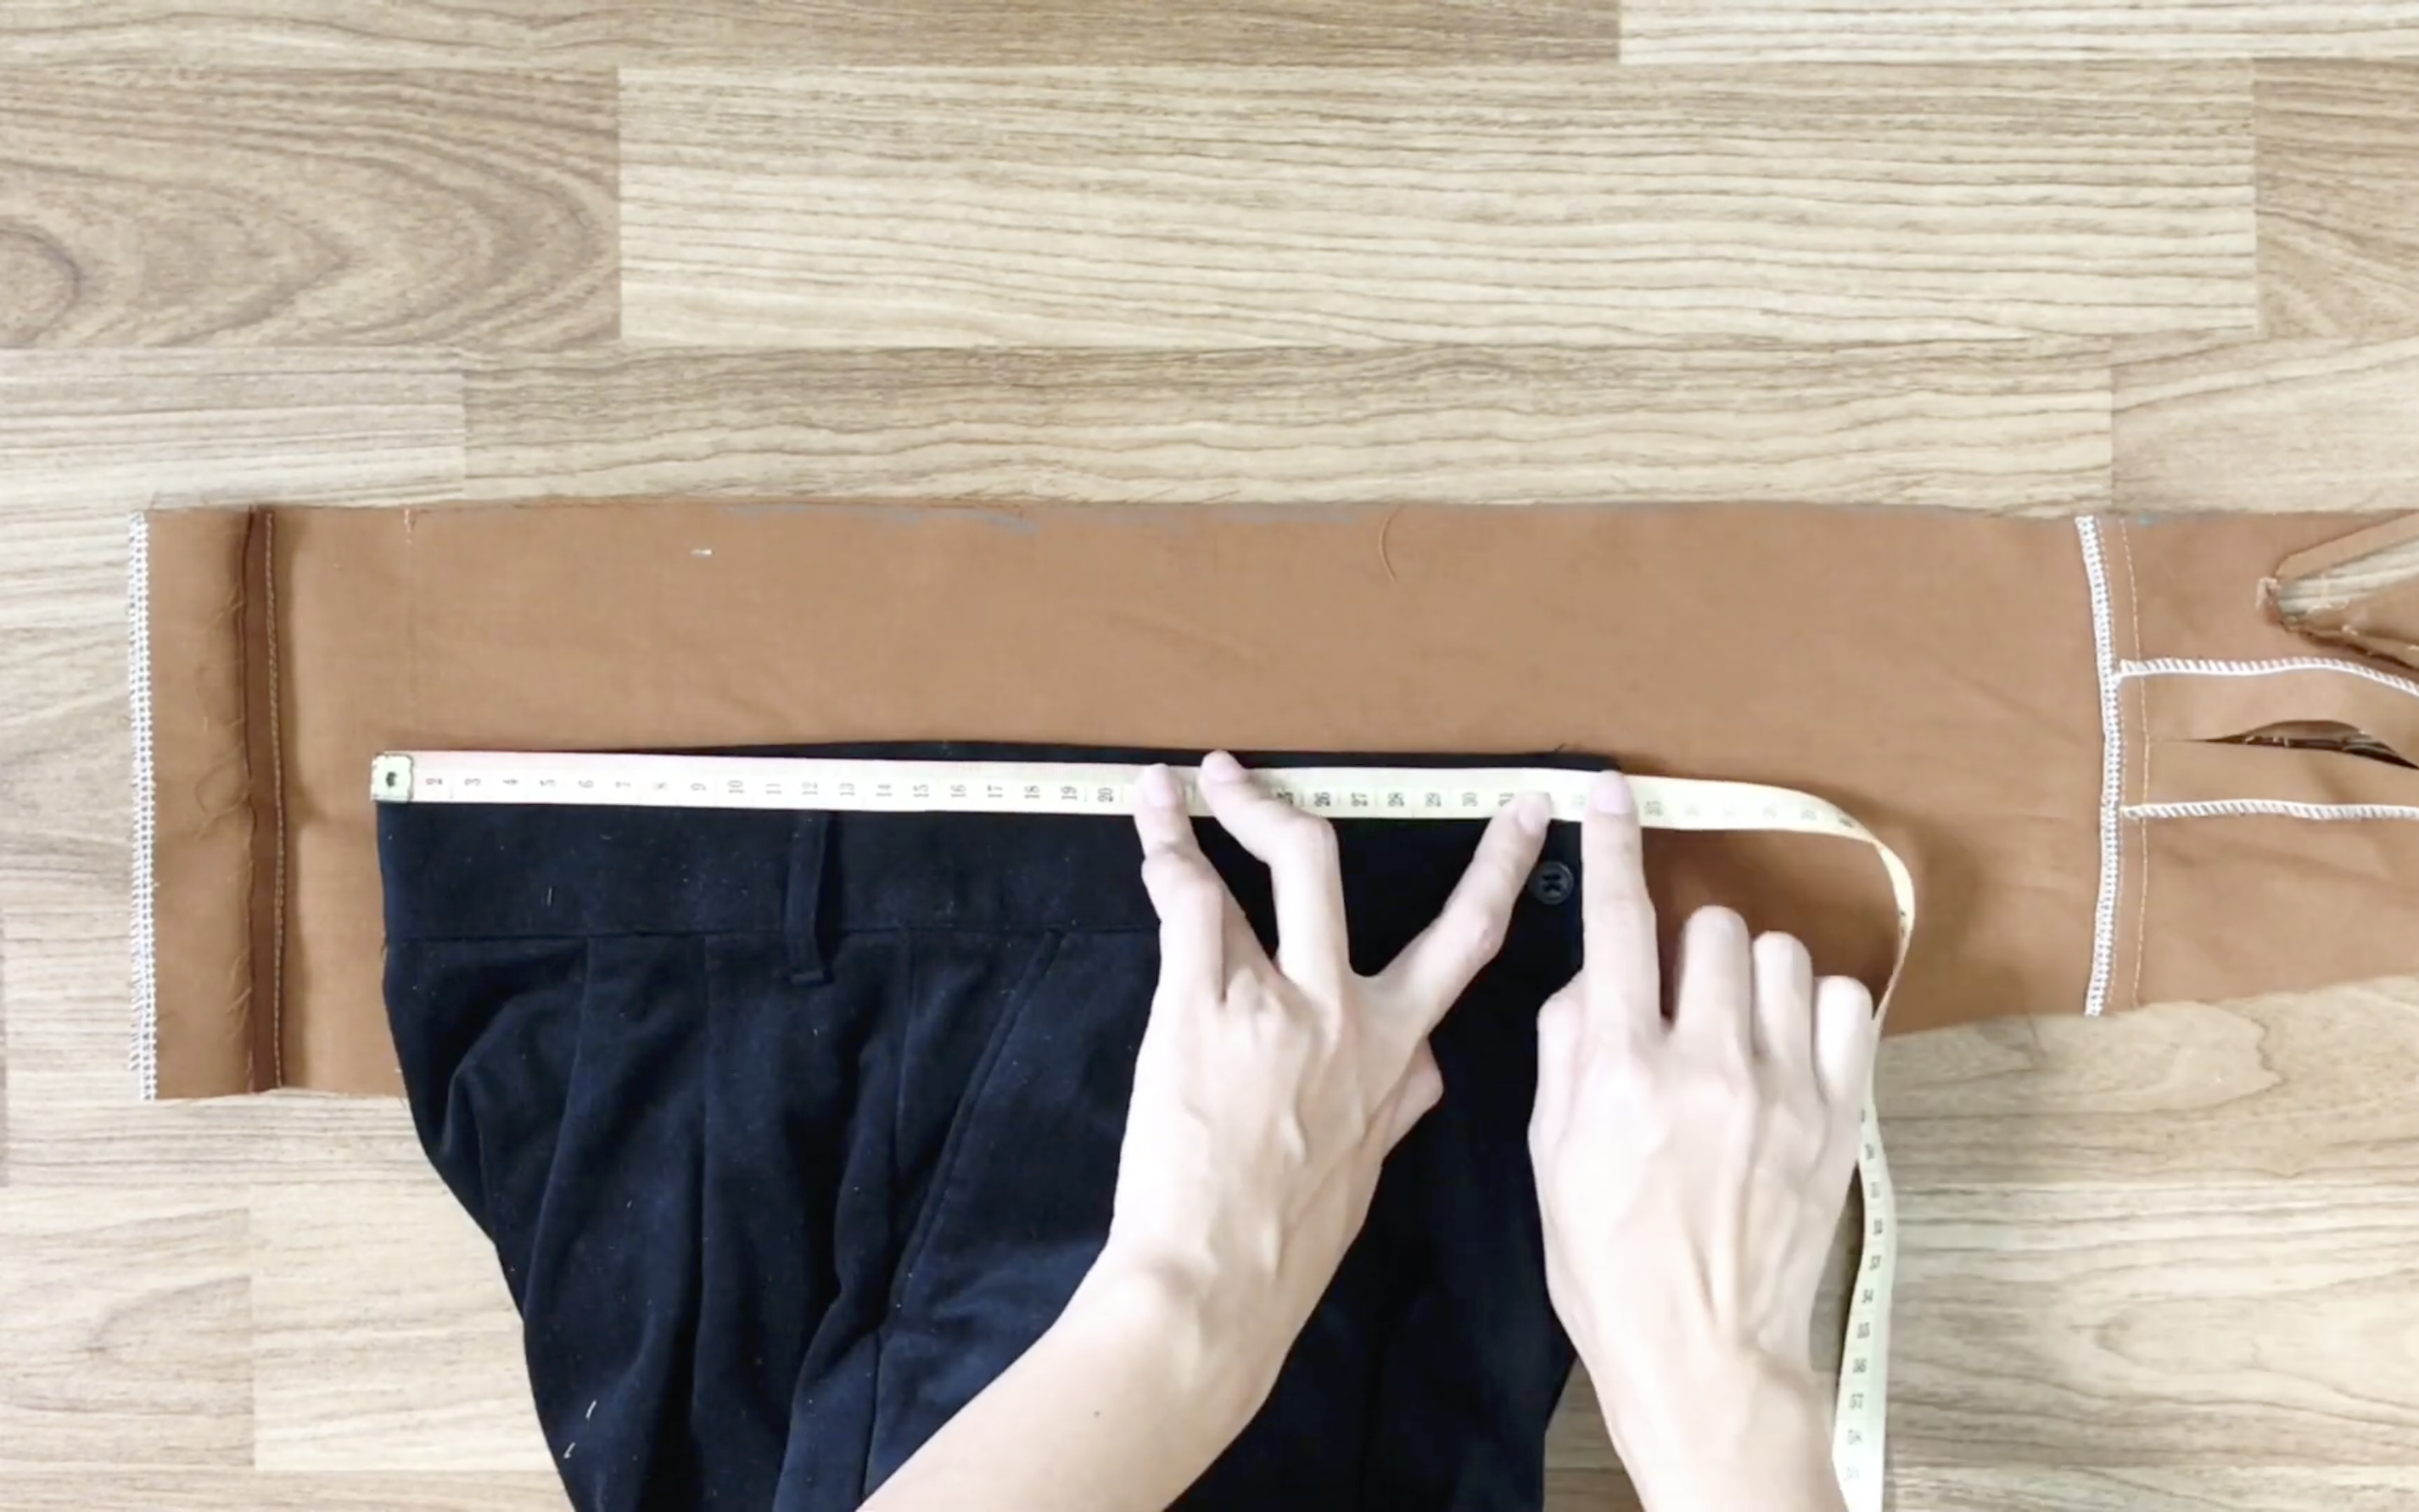
Now, measure the width of the belly of both the black and brown pants to determine how much to fold in on the brown one.
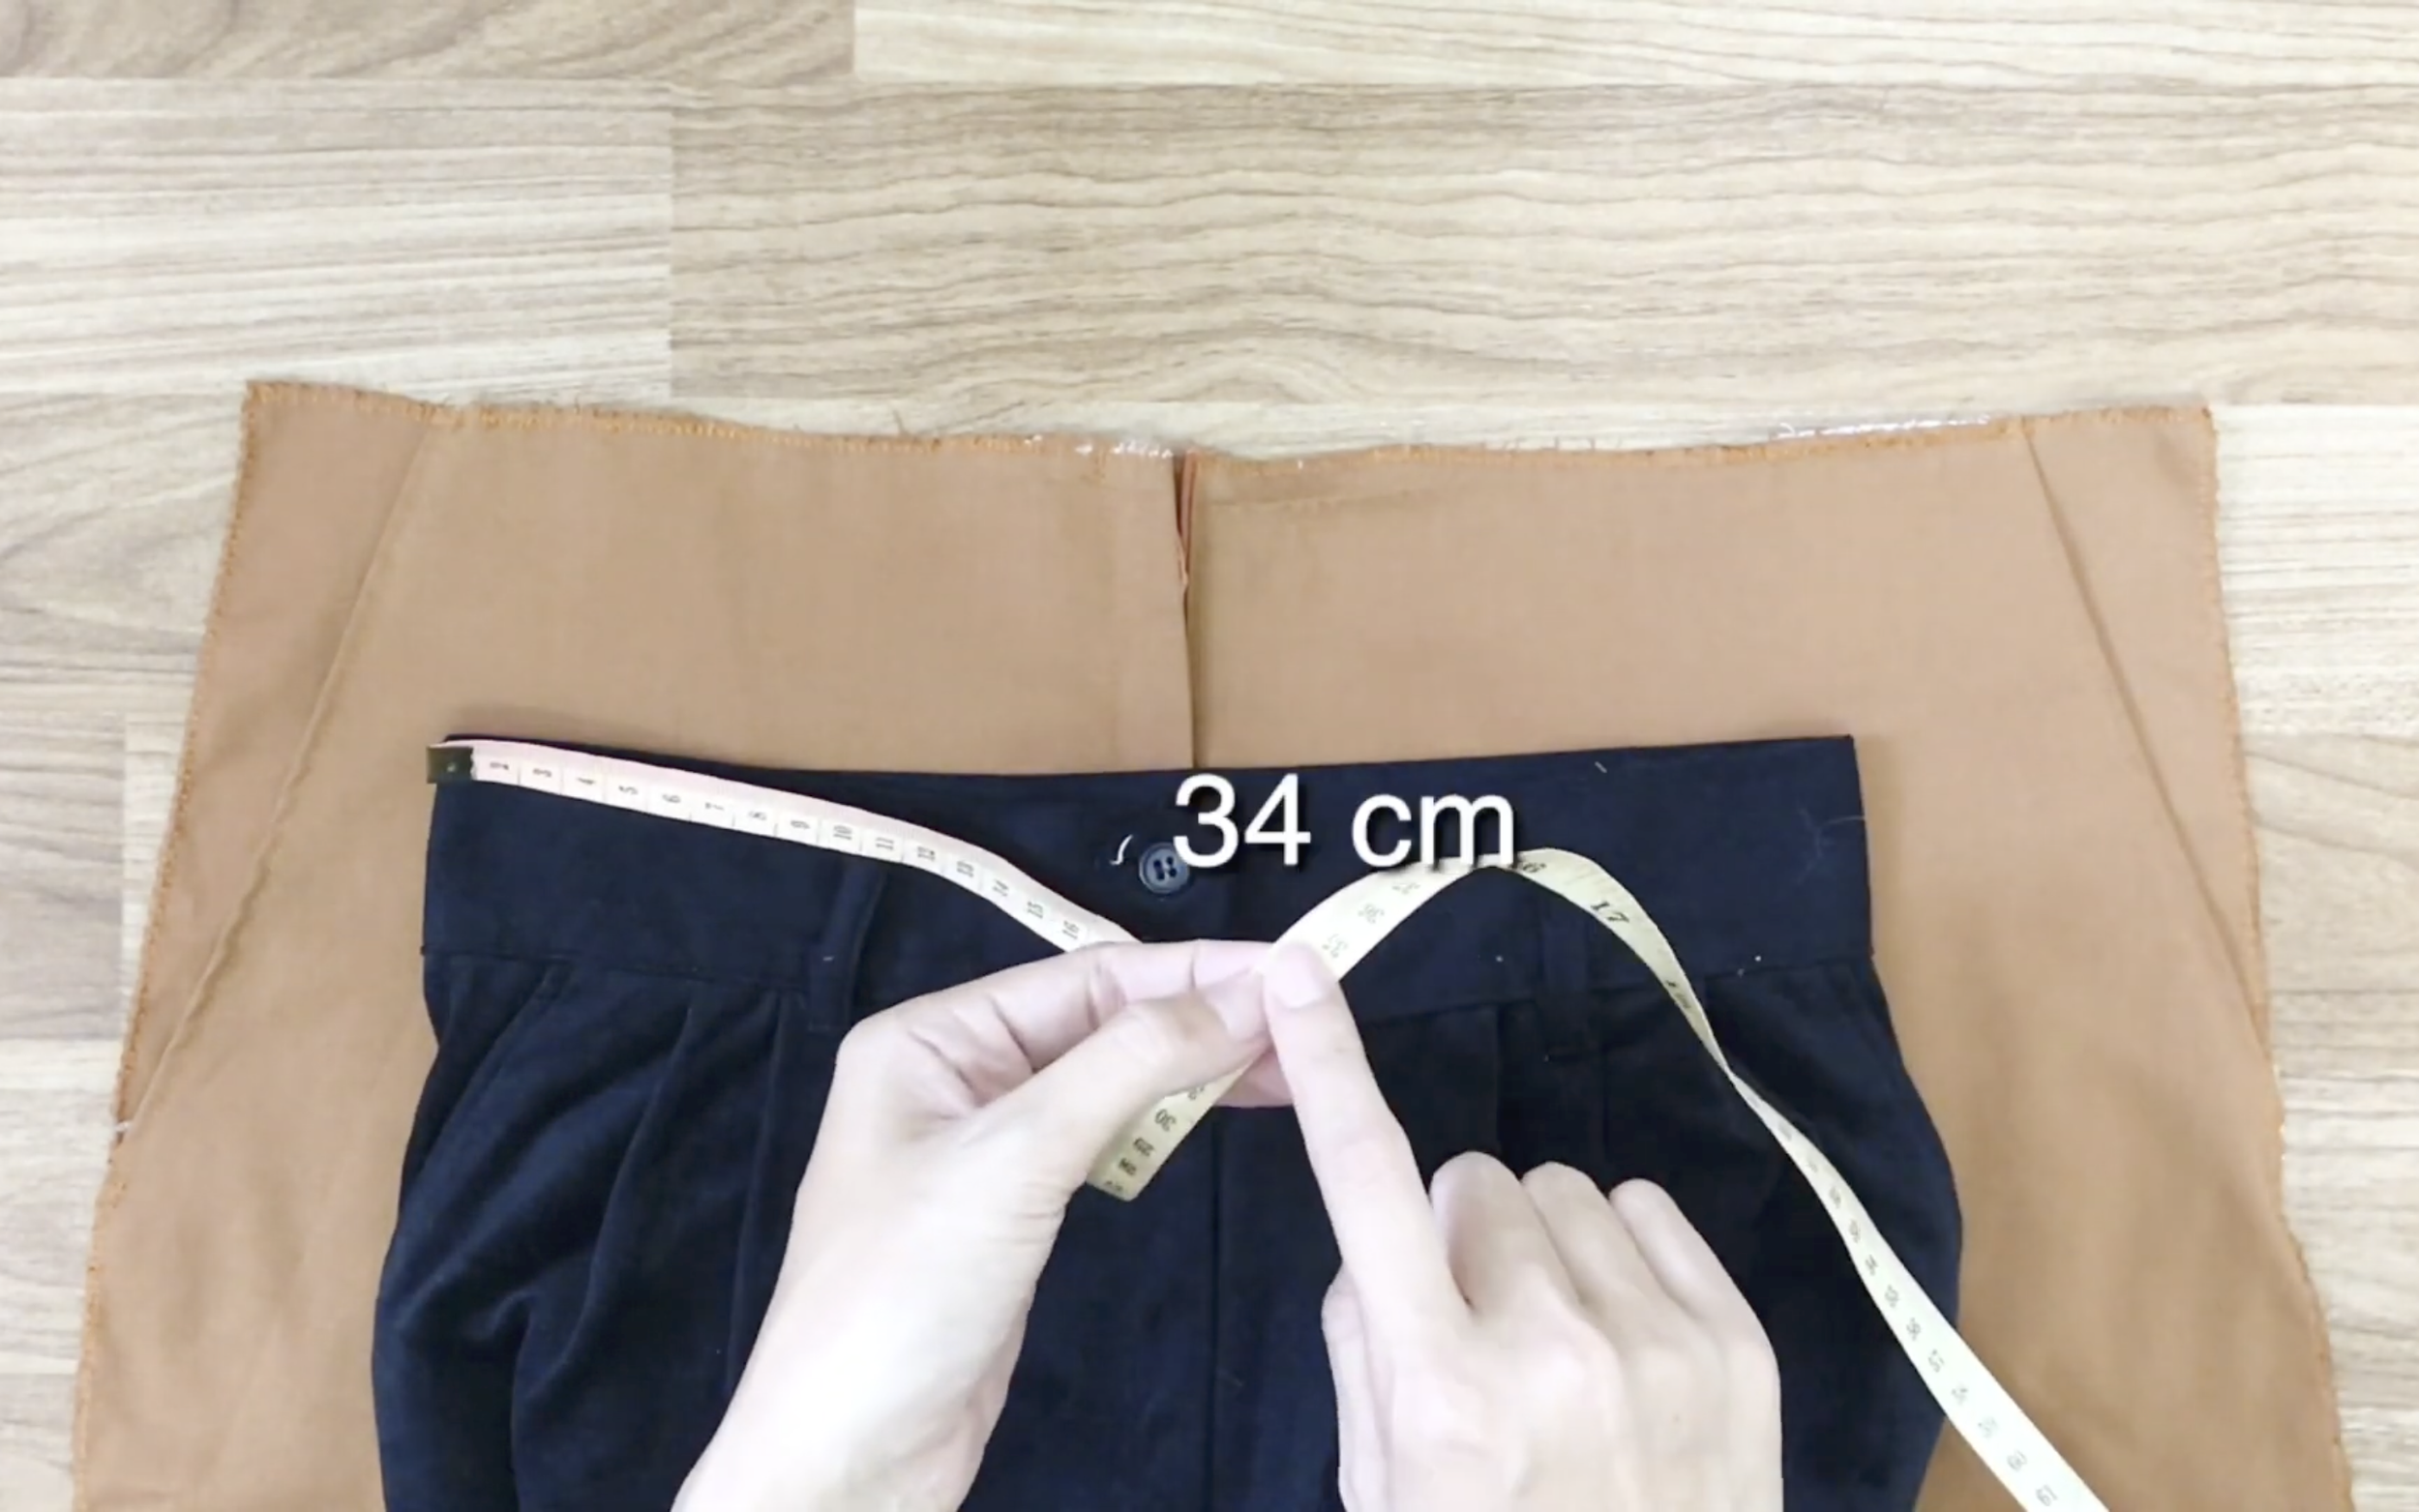
The width of the black pants is 34cm.
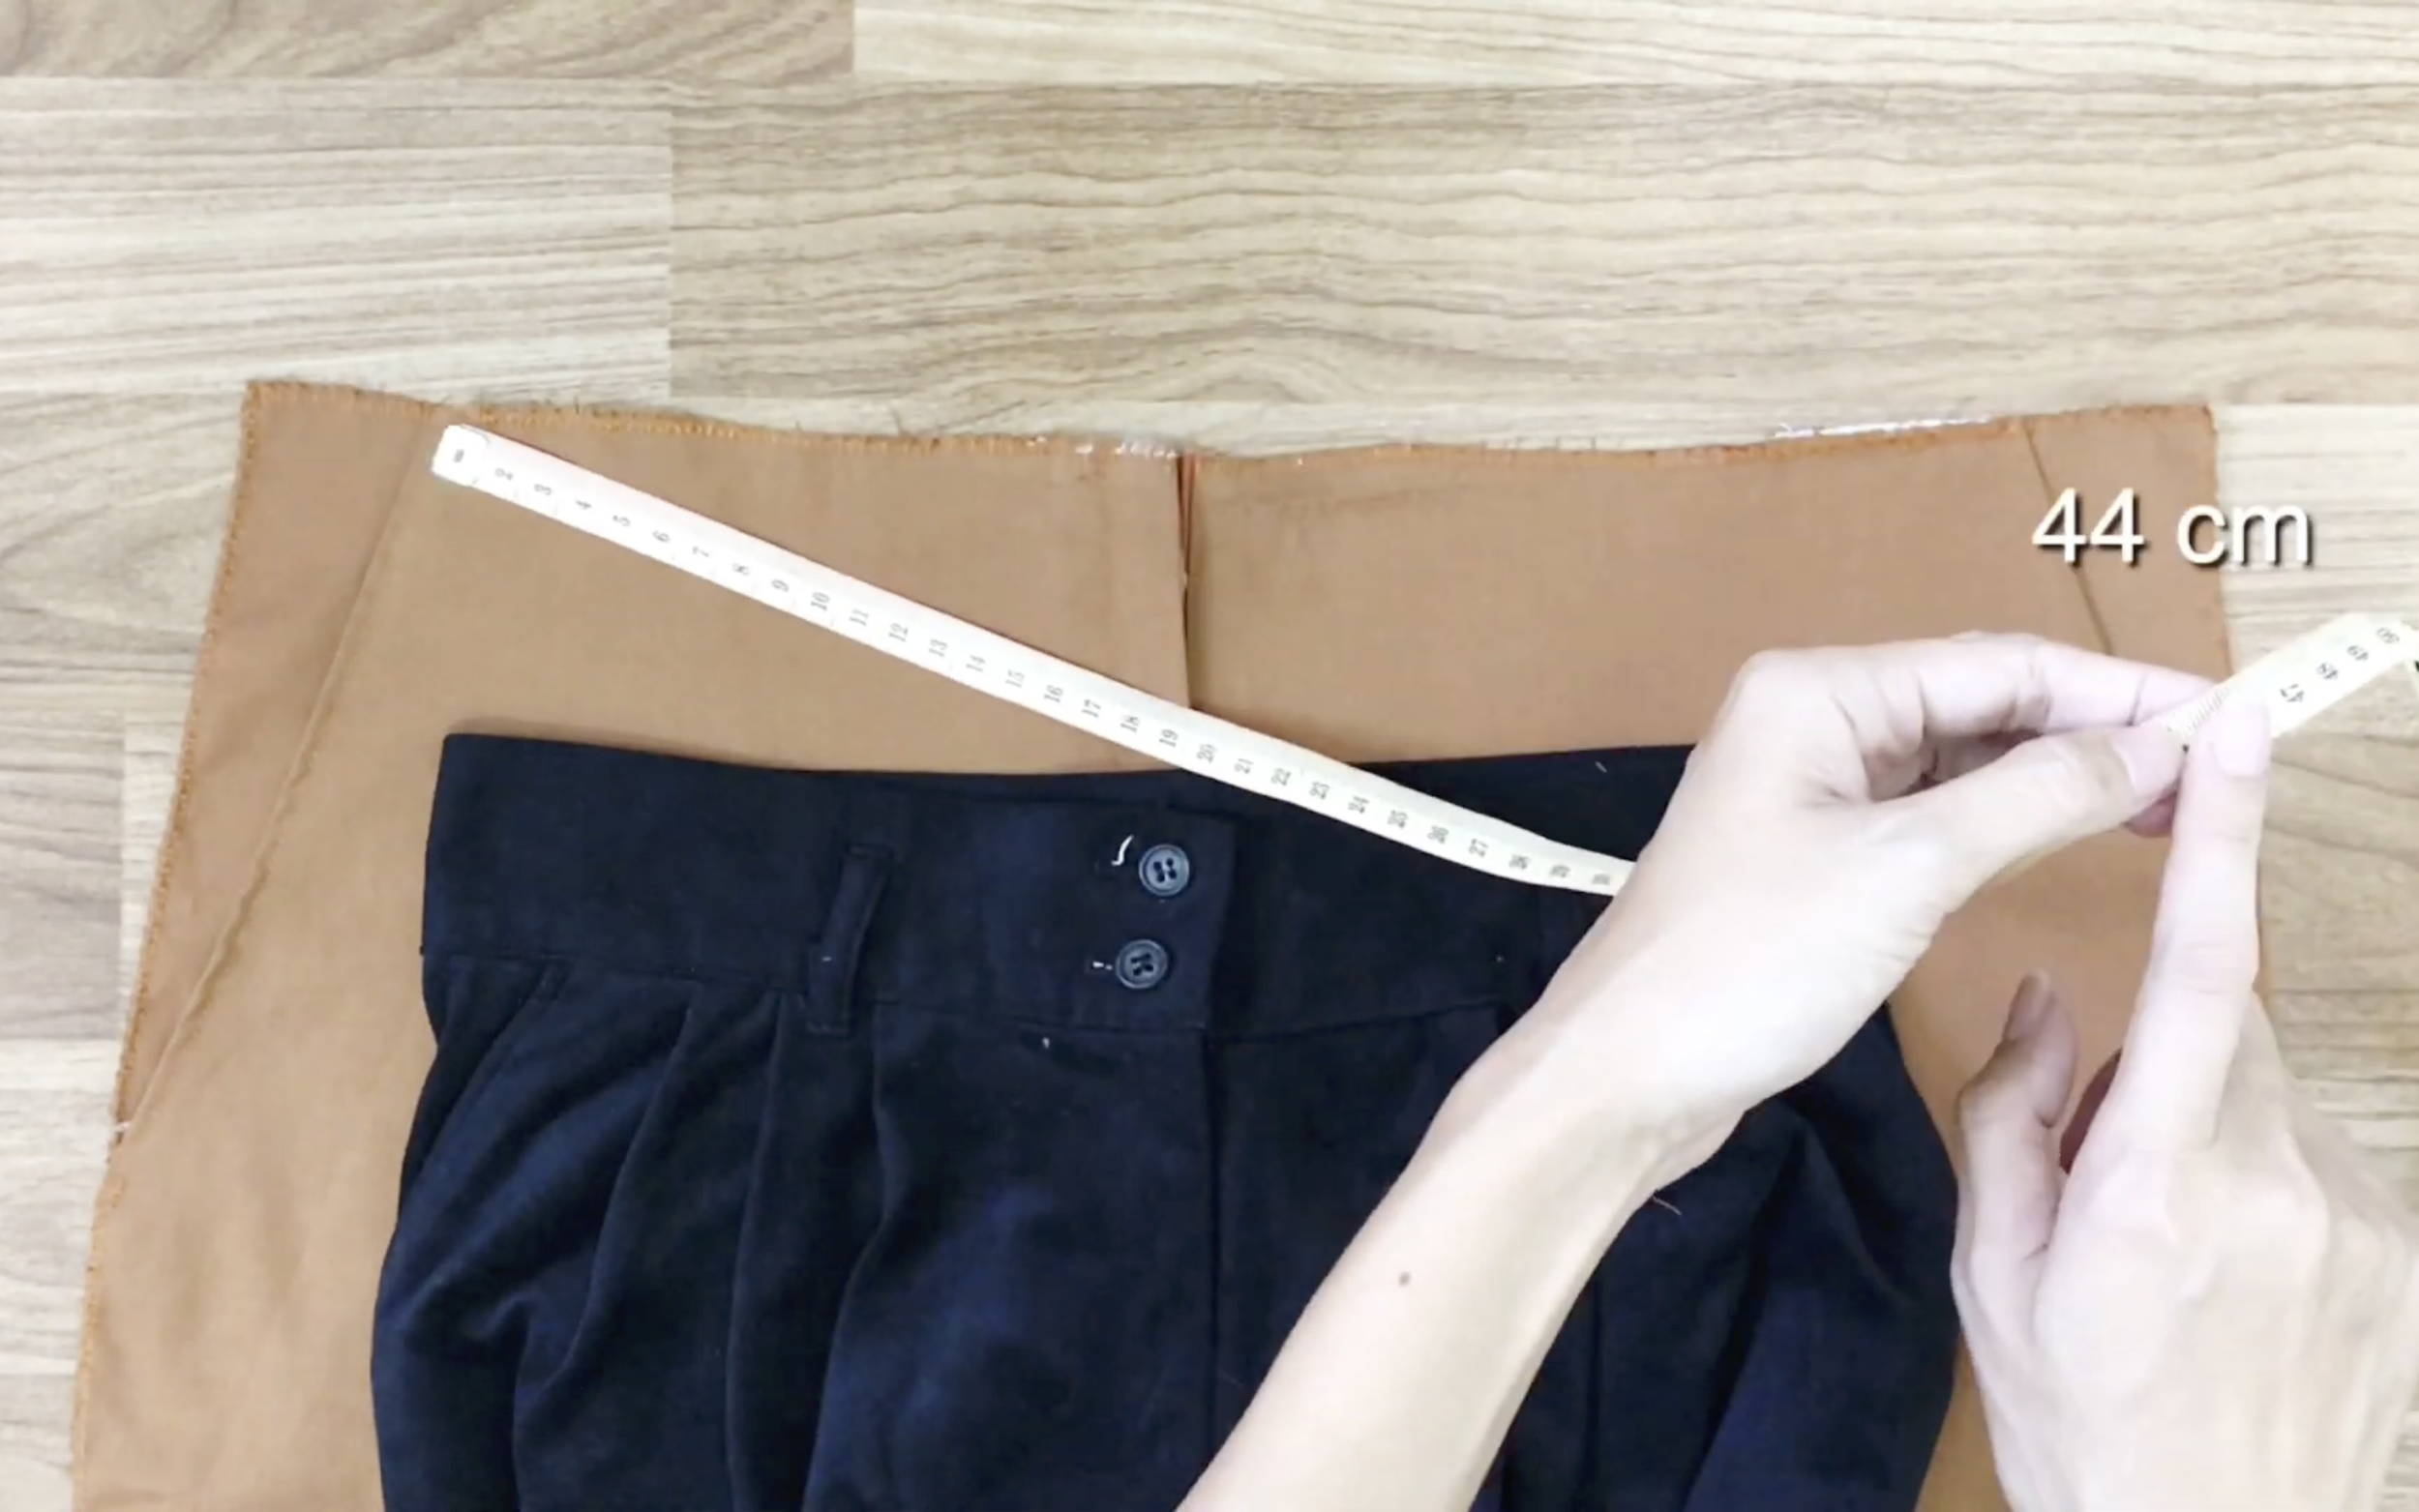
And the brown one is 44cm.
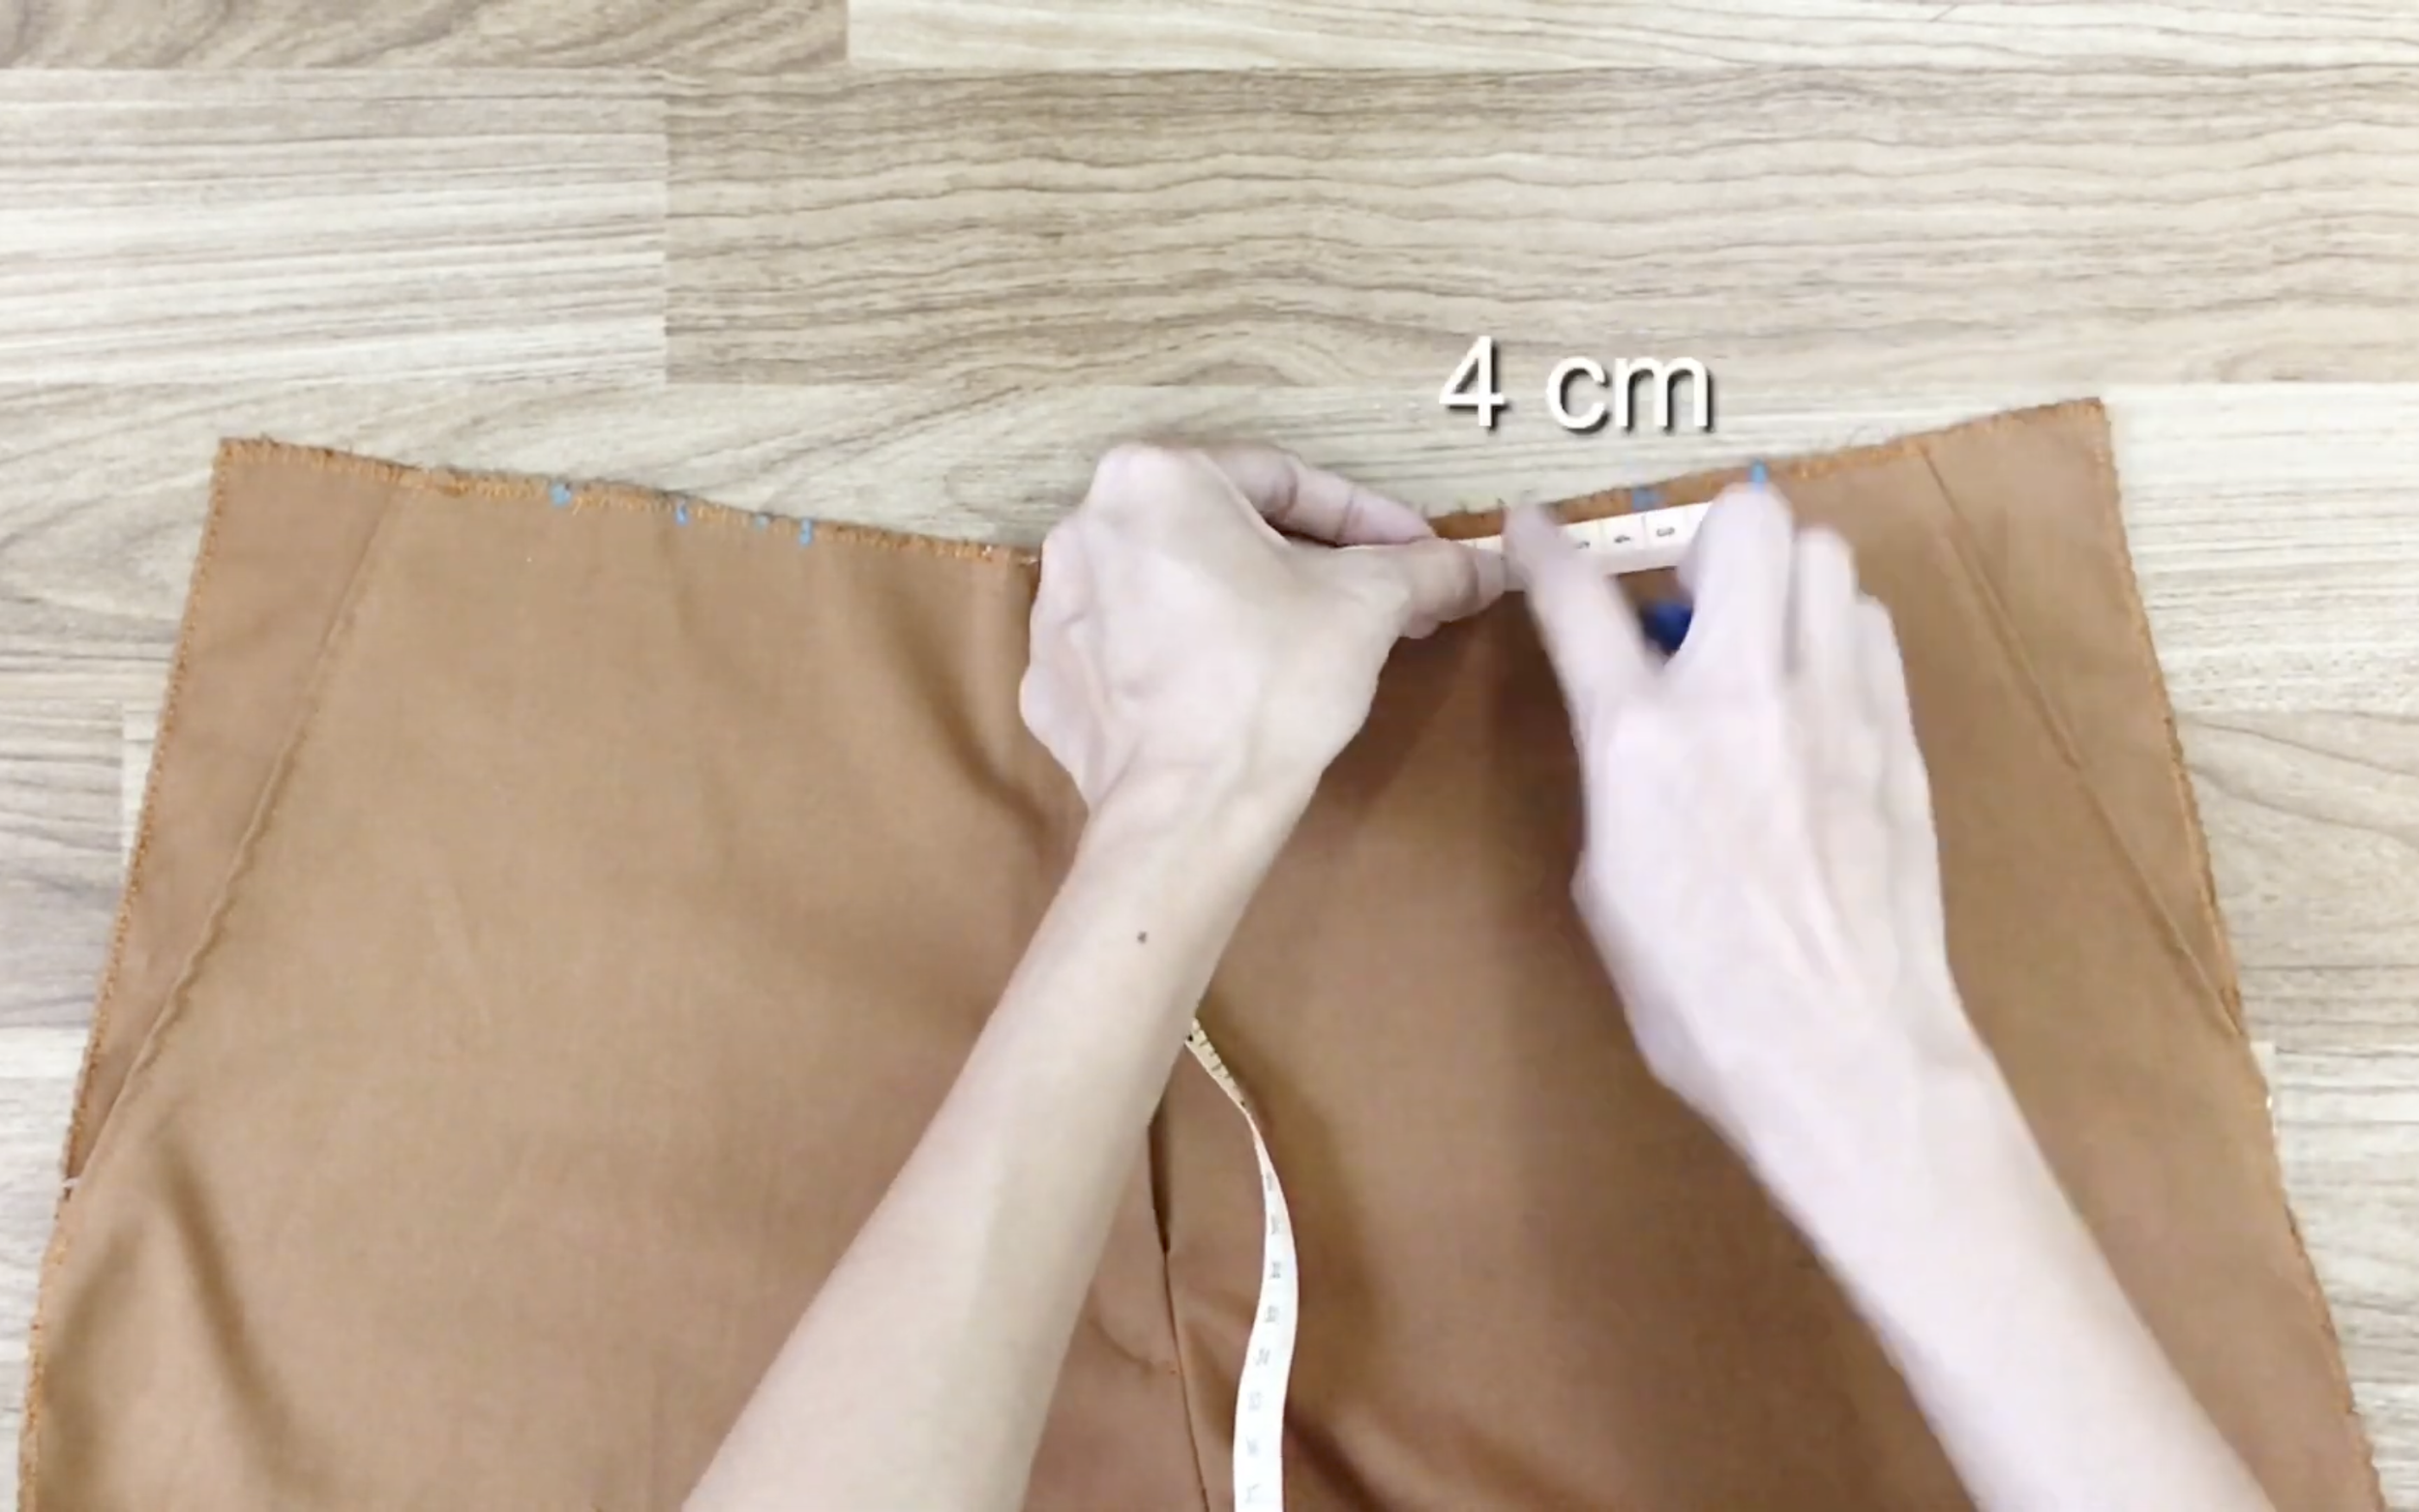
So fold 4cm on both sides of the front body.
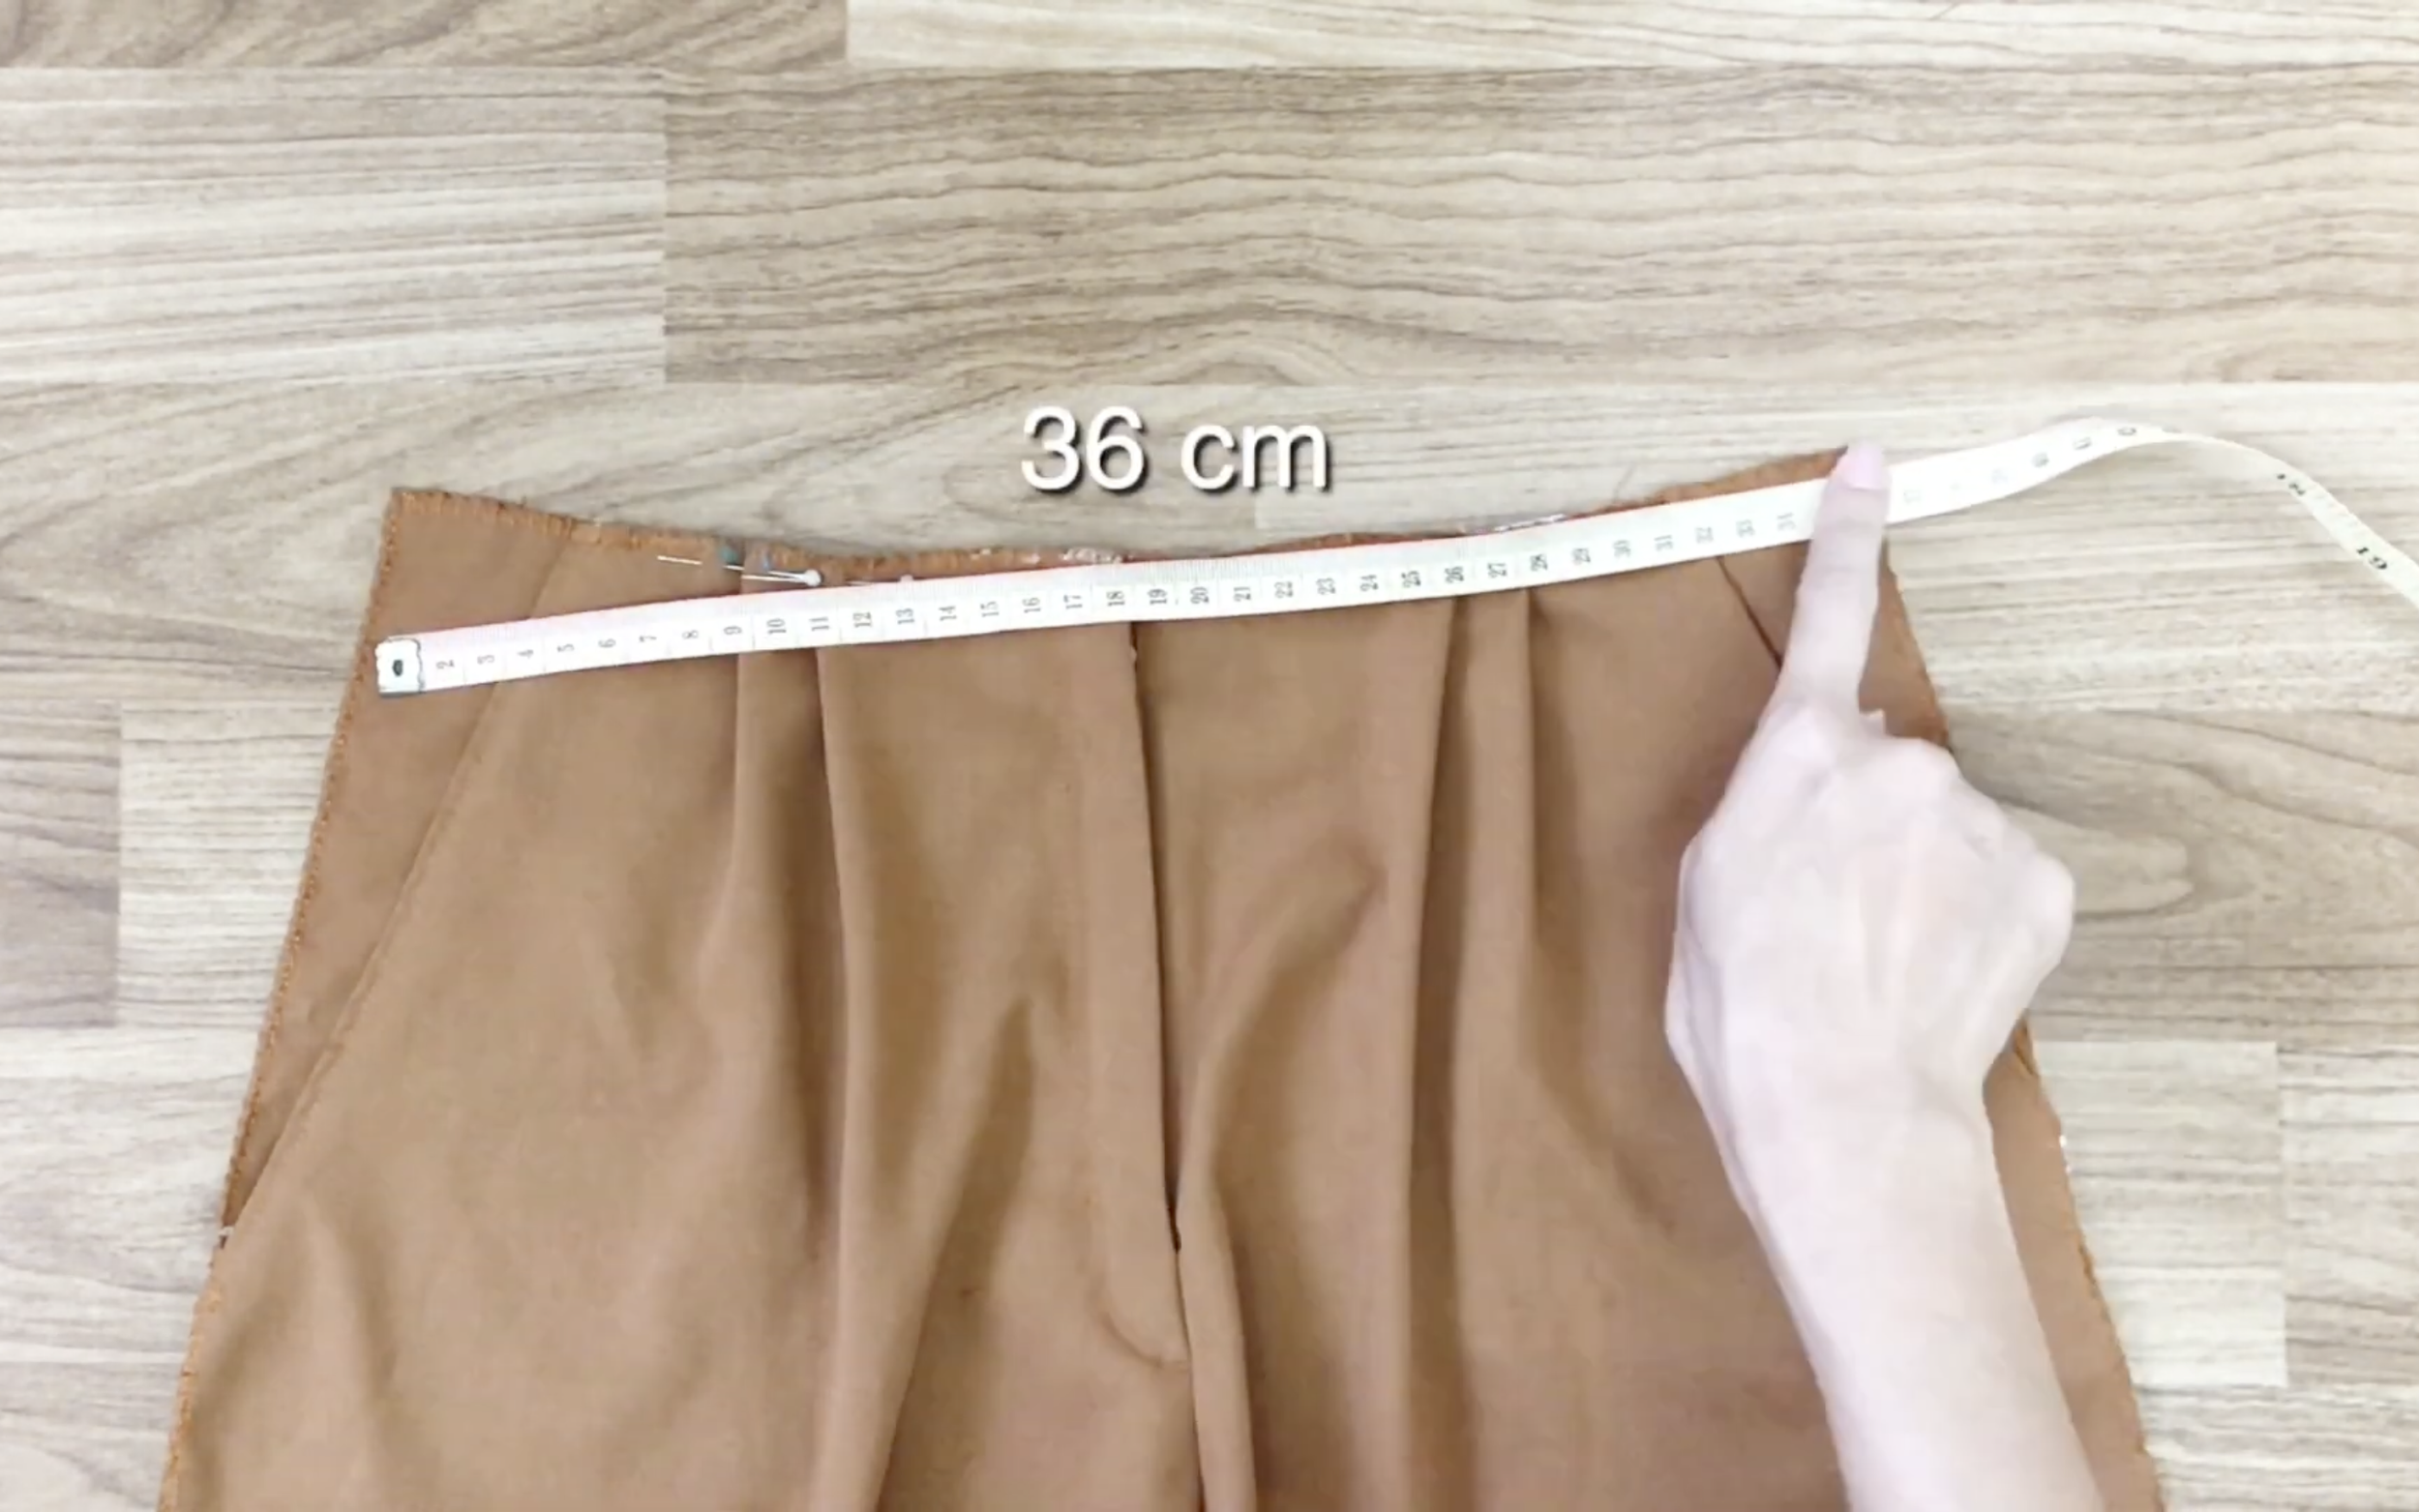
Create two 4cm folds on each side, so the total width after folding will be 36cm, 2cm longer than the black one.
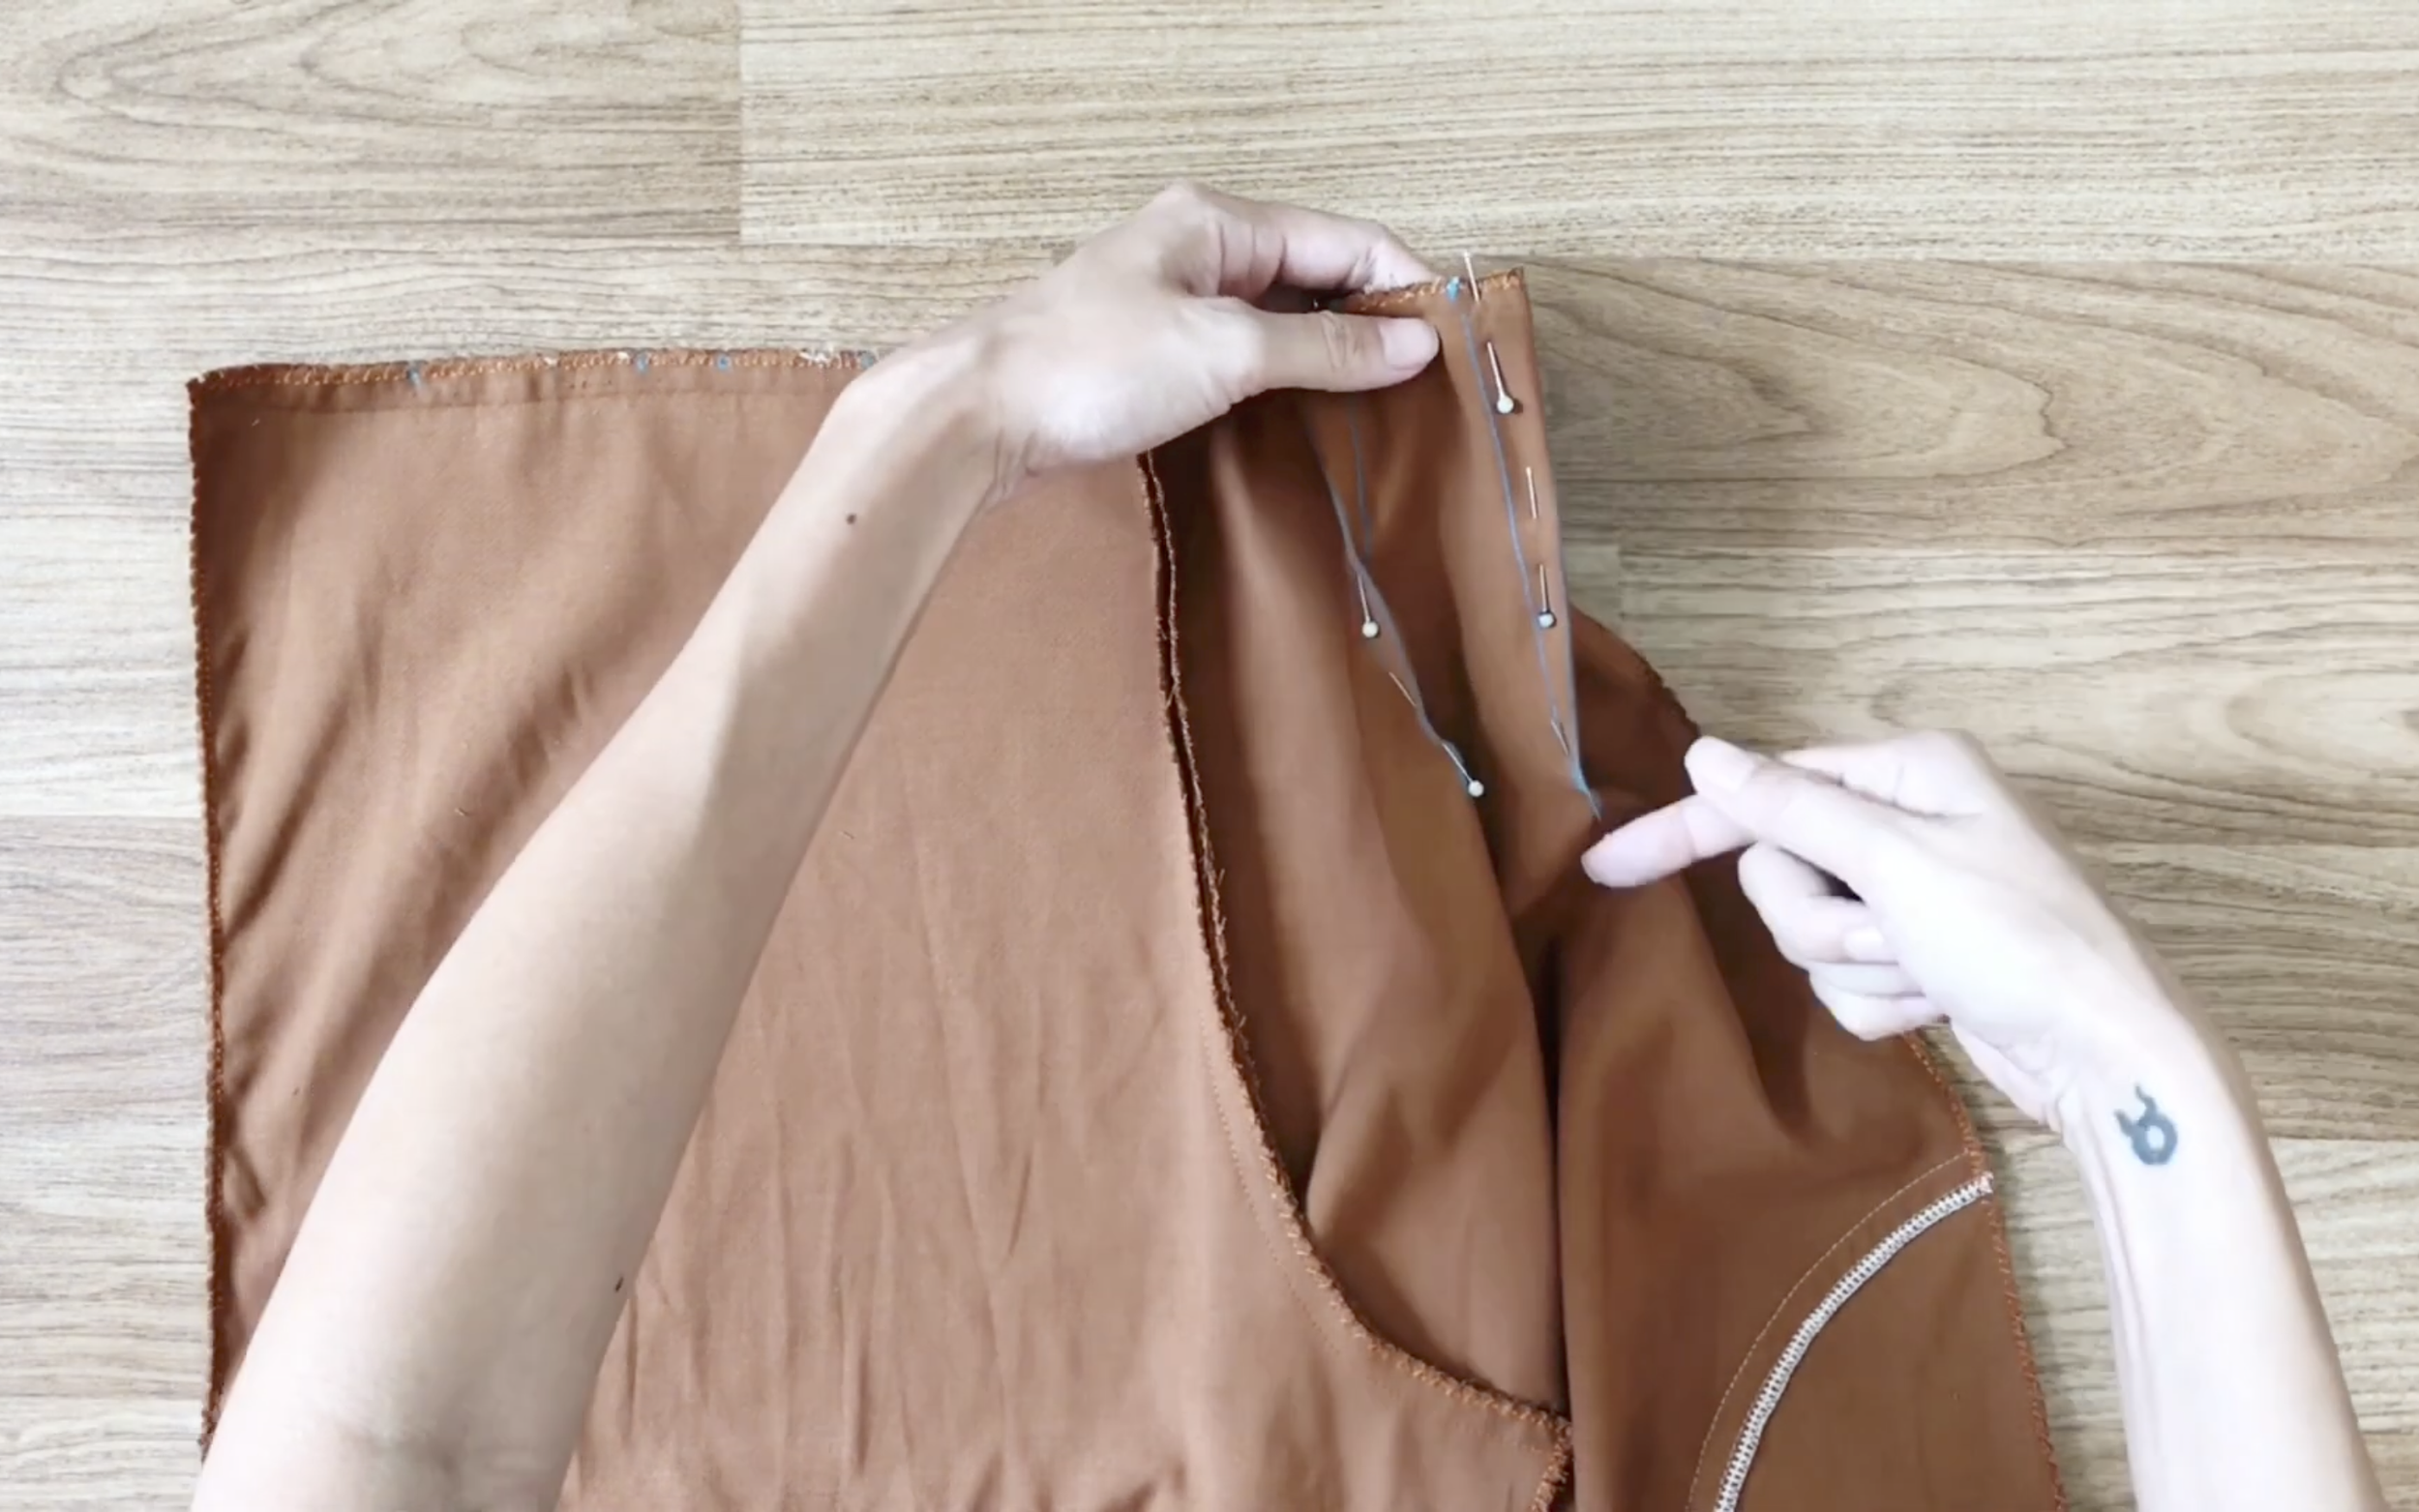
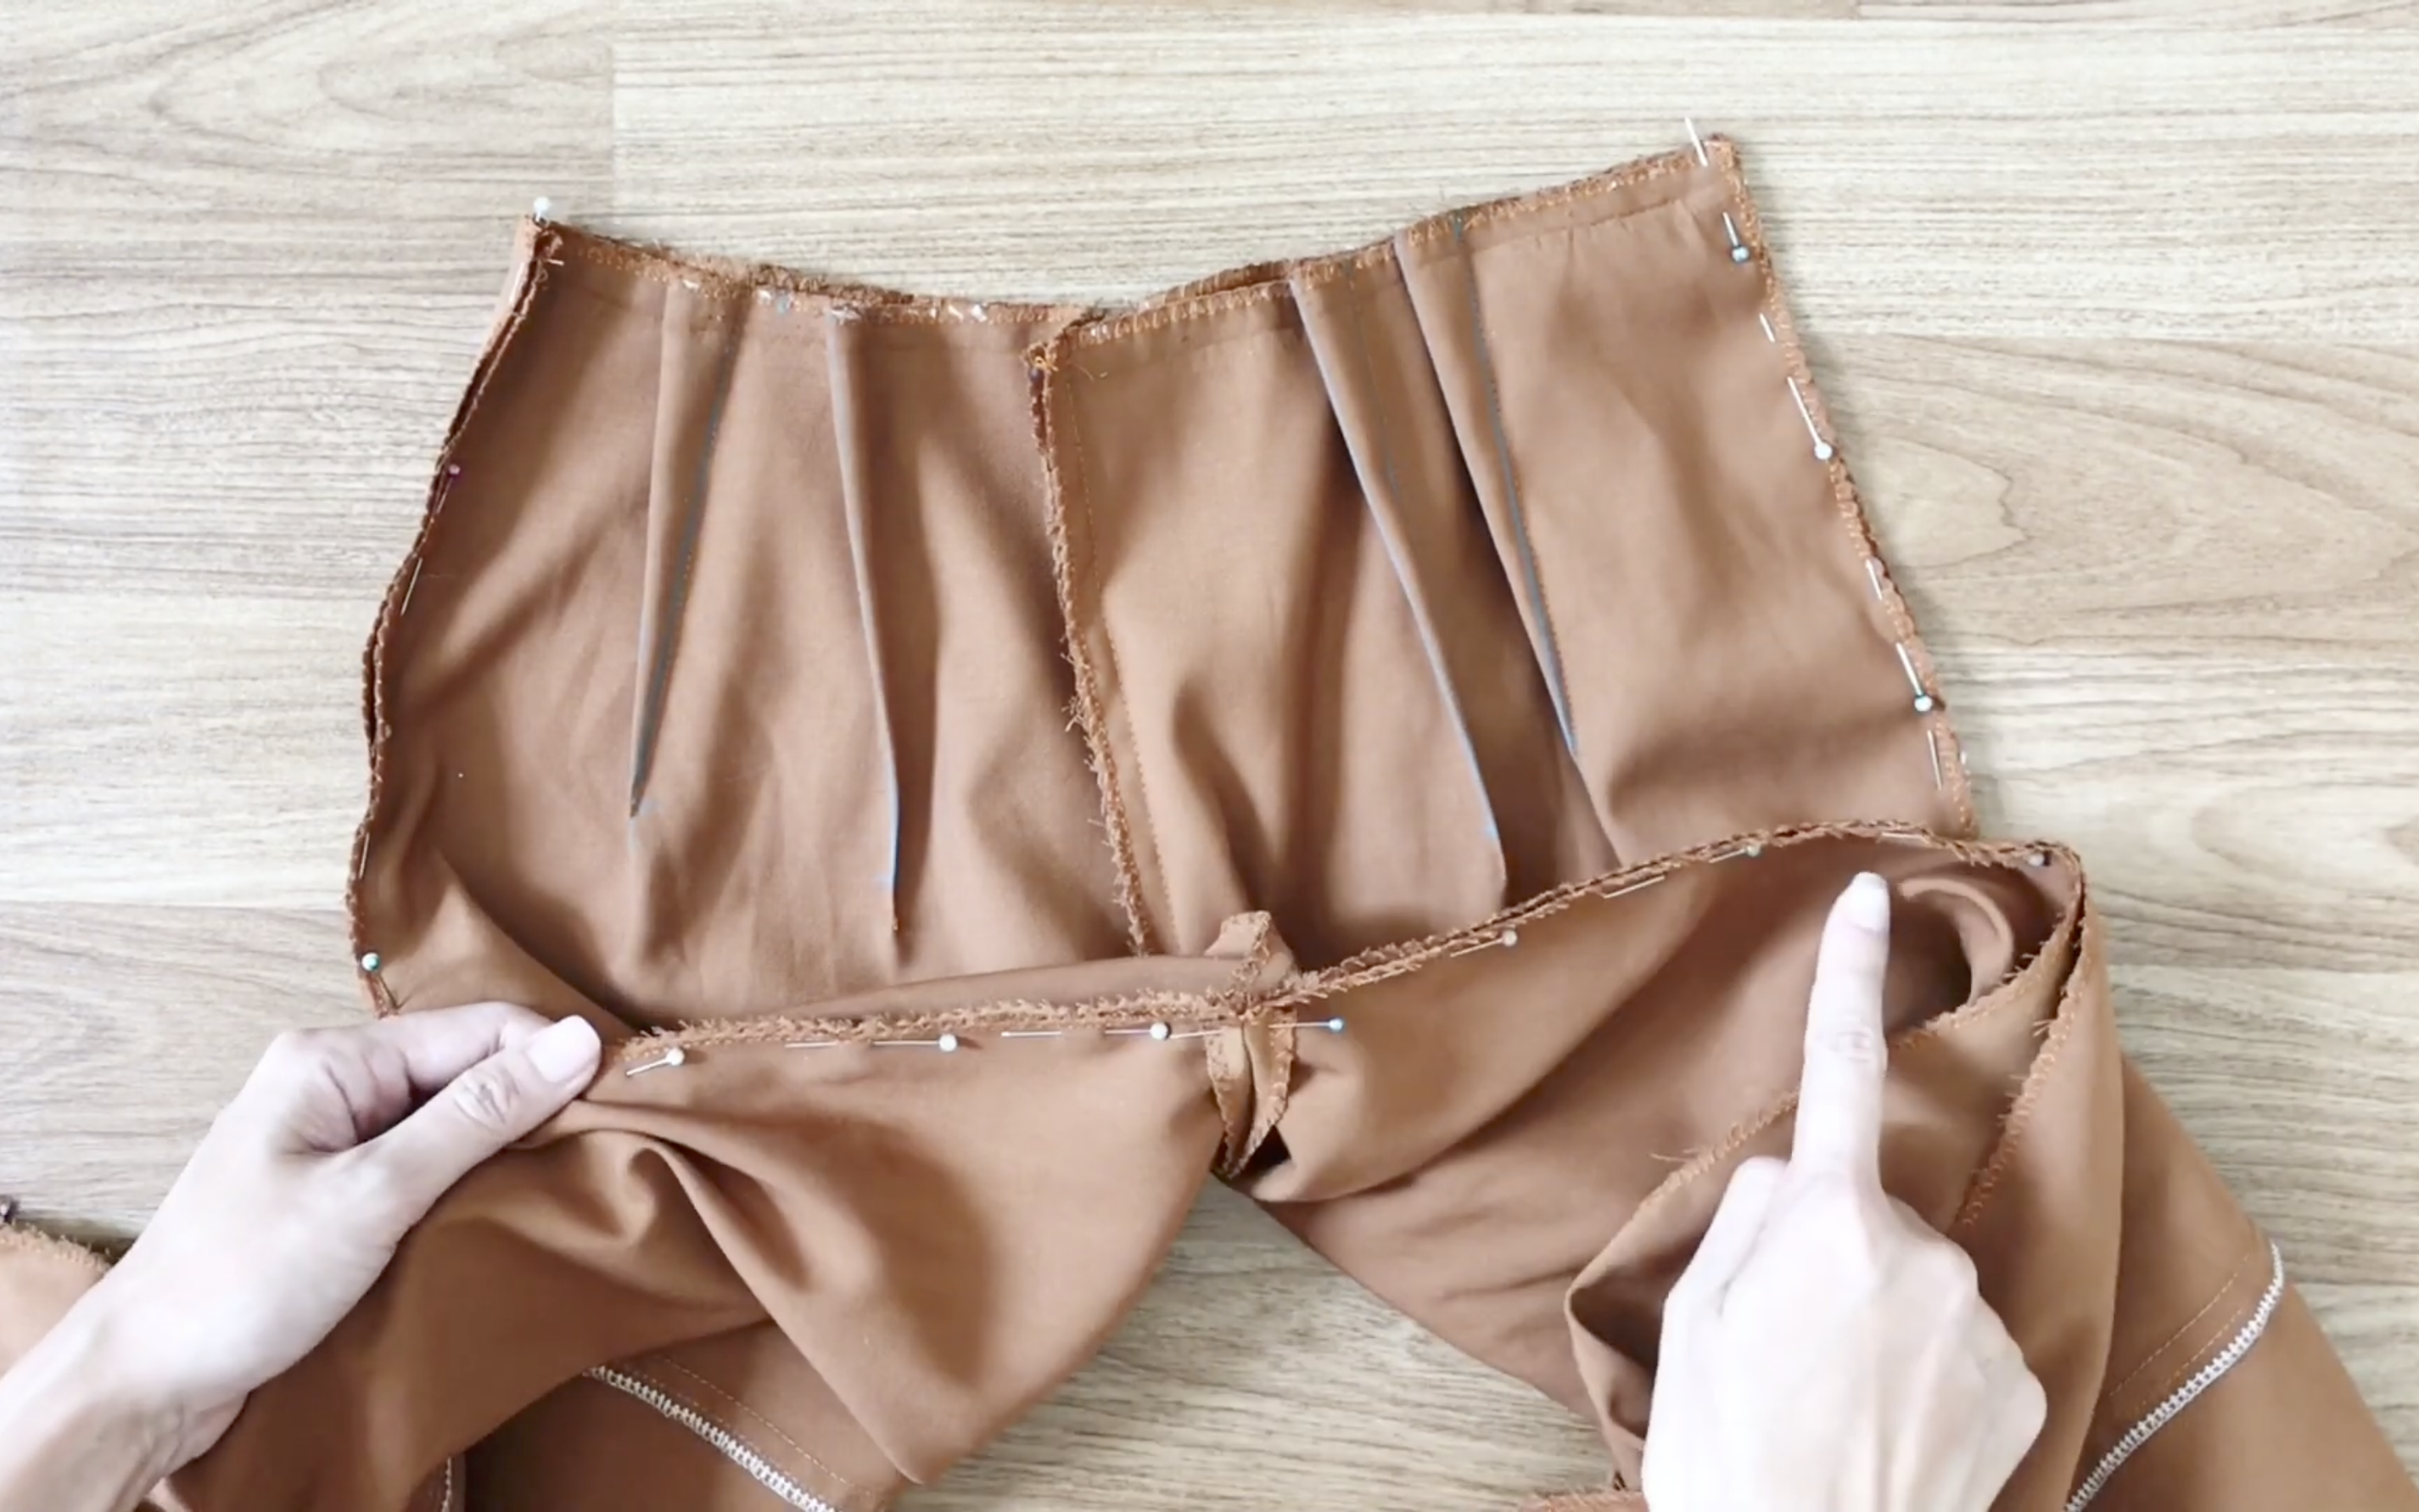
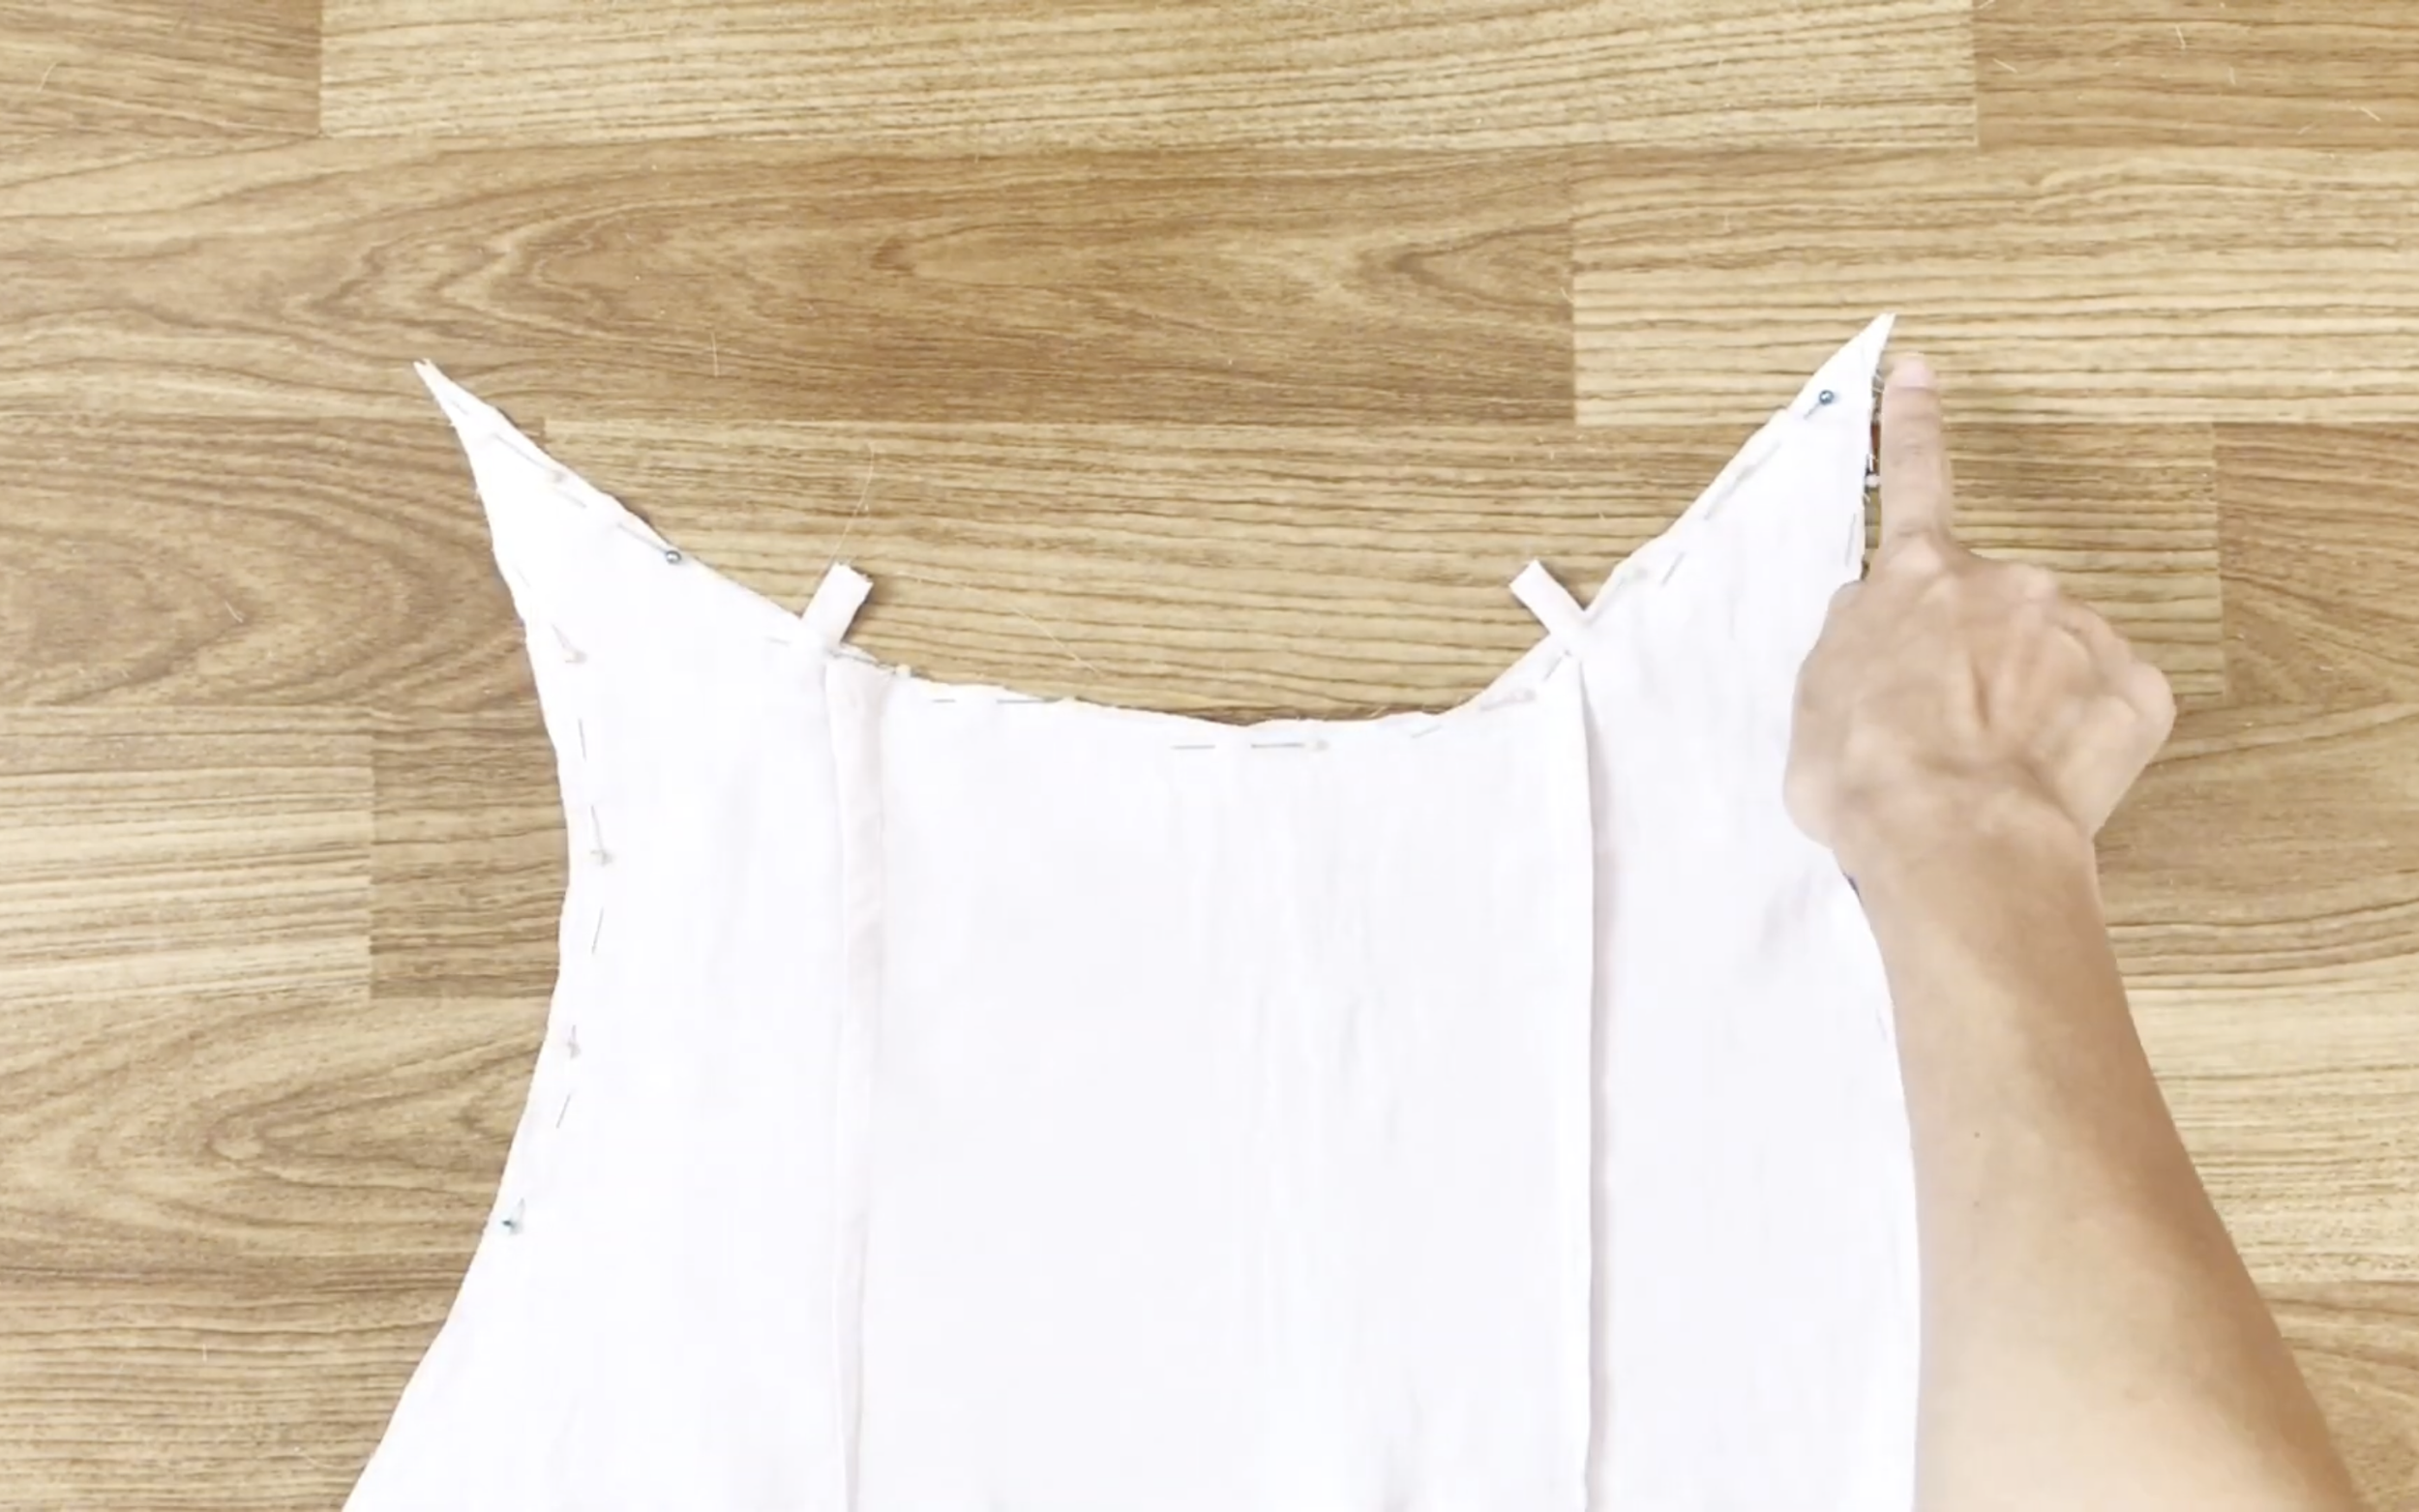
For the back body, pin the two back bodies together at the crotch curve, then sew.
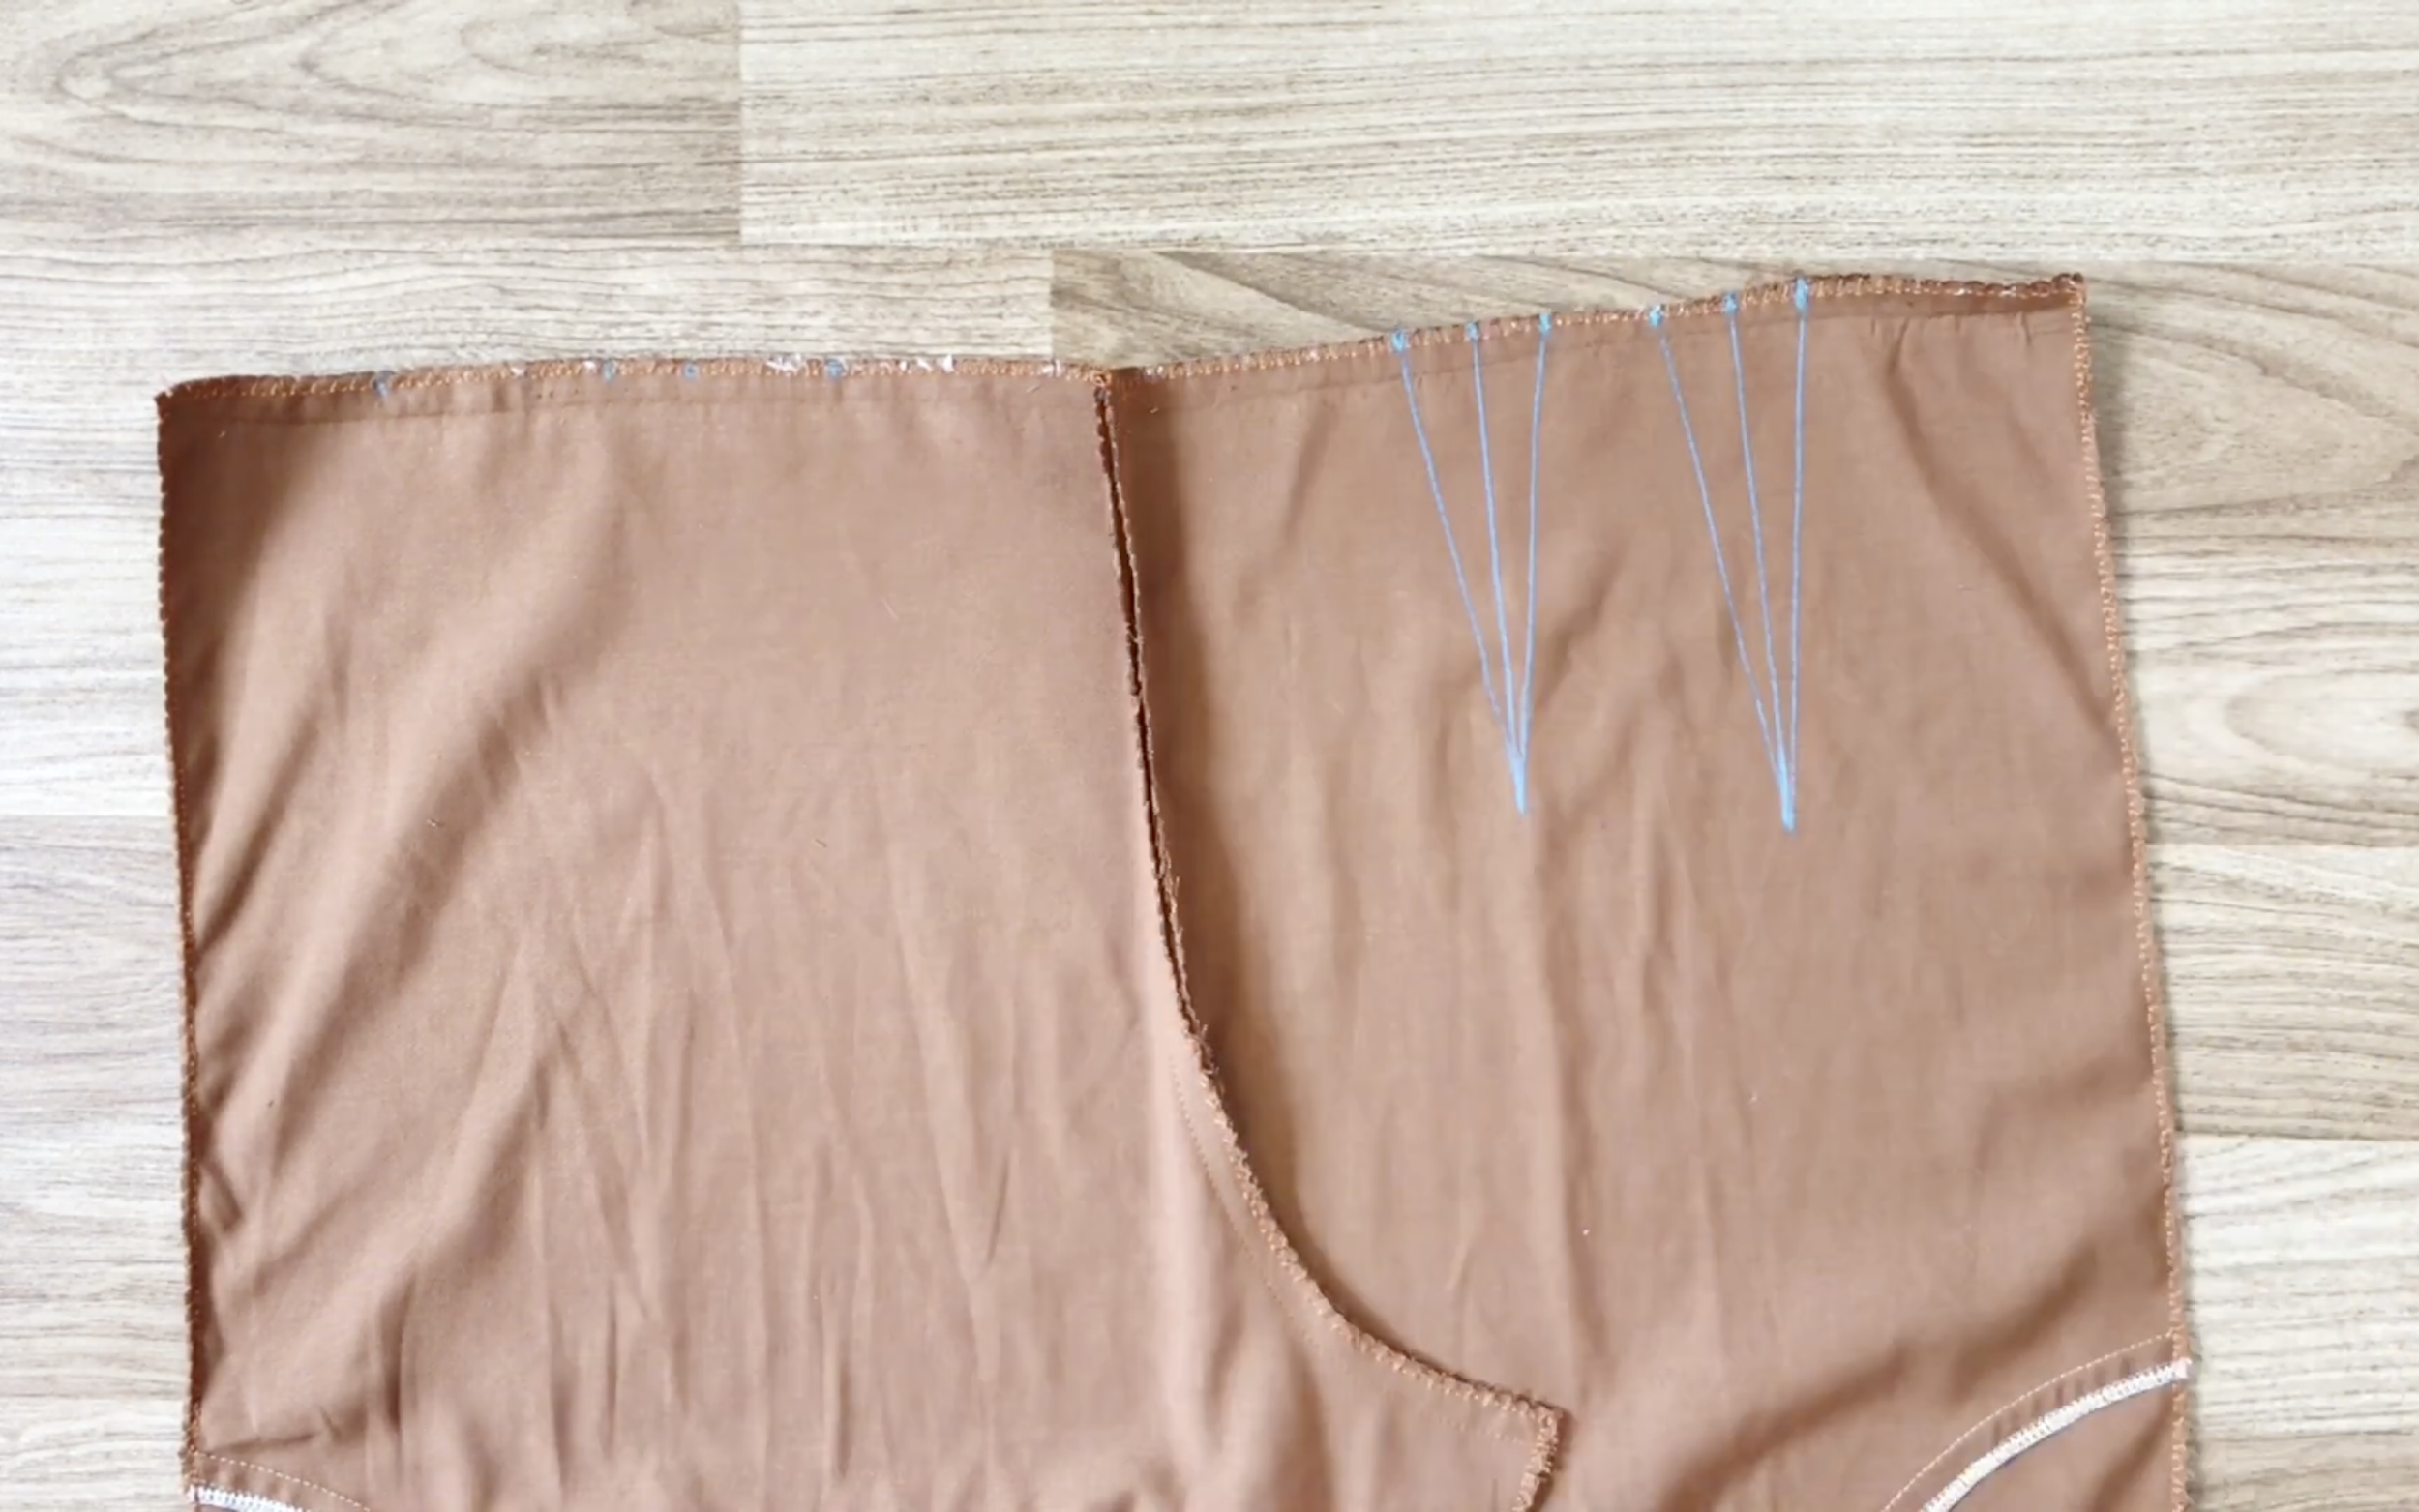
Instead of folds like the front body, create different folds at the back by making two triangles facing each other on each side.
Each triangle should be 2cm wide and 15cm long. Fold the two triangles together, then sew.
Check the final width of the back after sewing to ensure it matches the 36cm width of the front body.
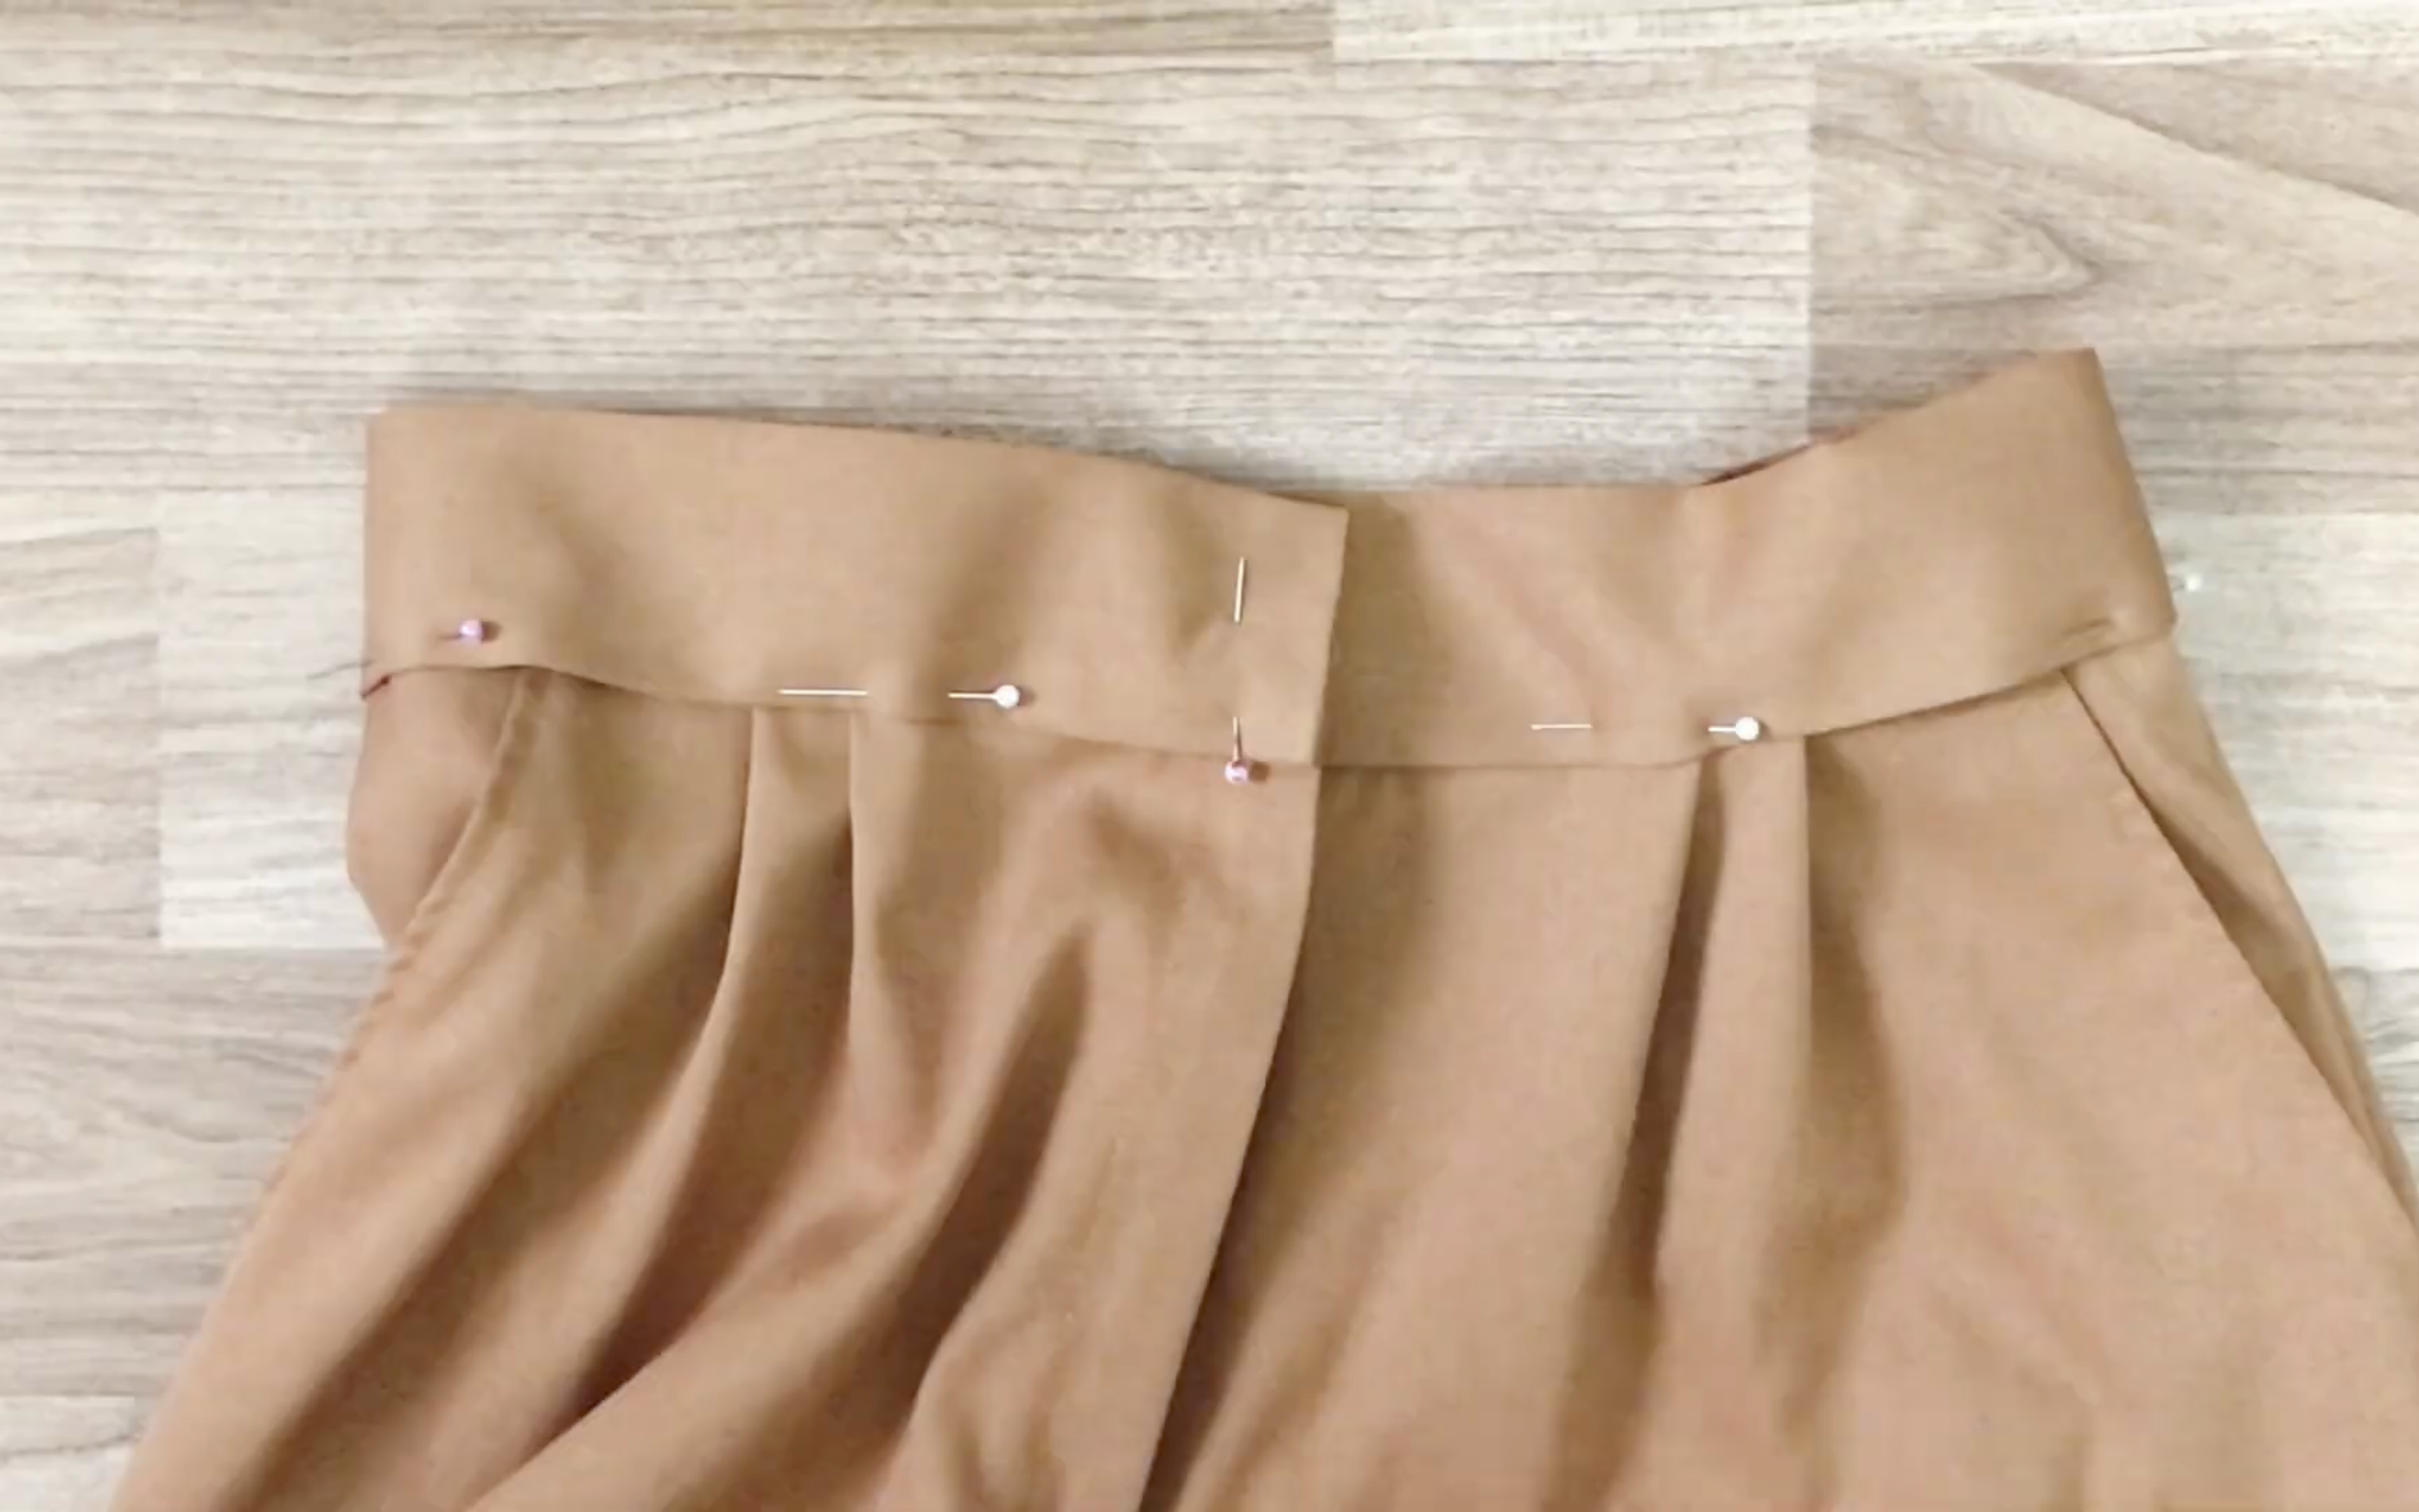
Next step is connecting the front and back bodies together. Pin them before sewing.
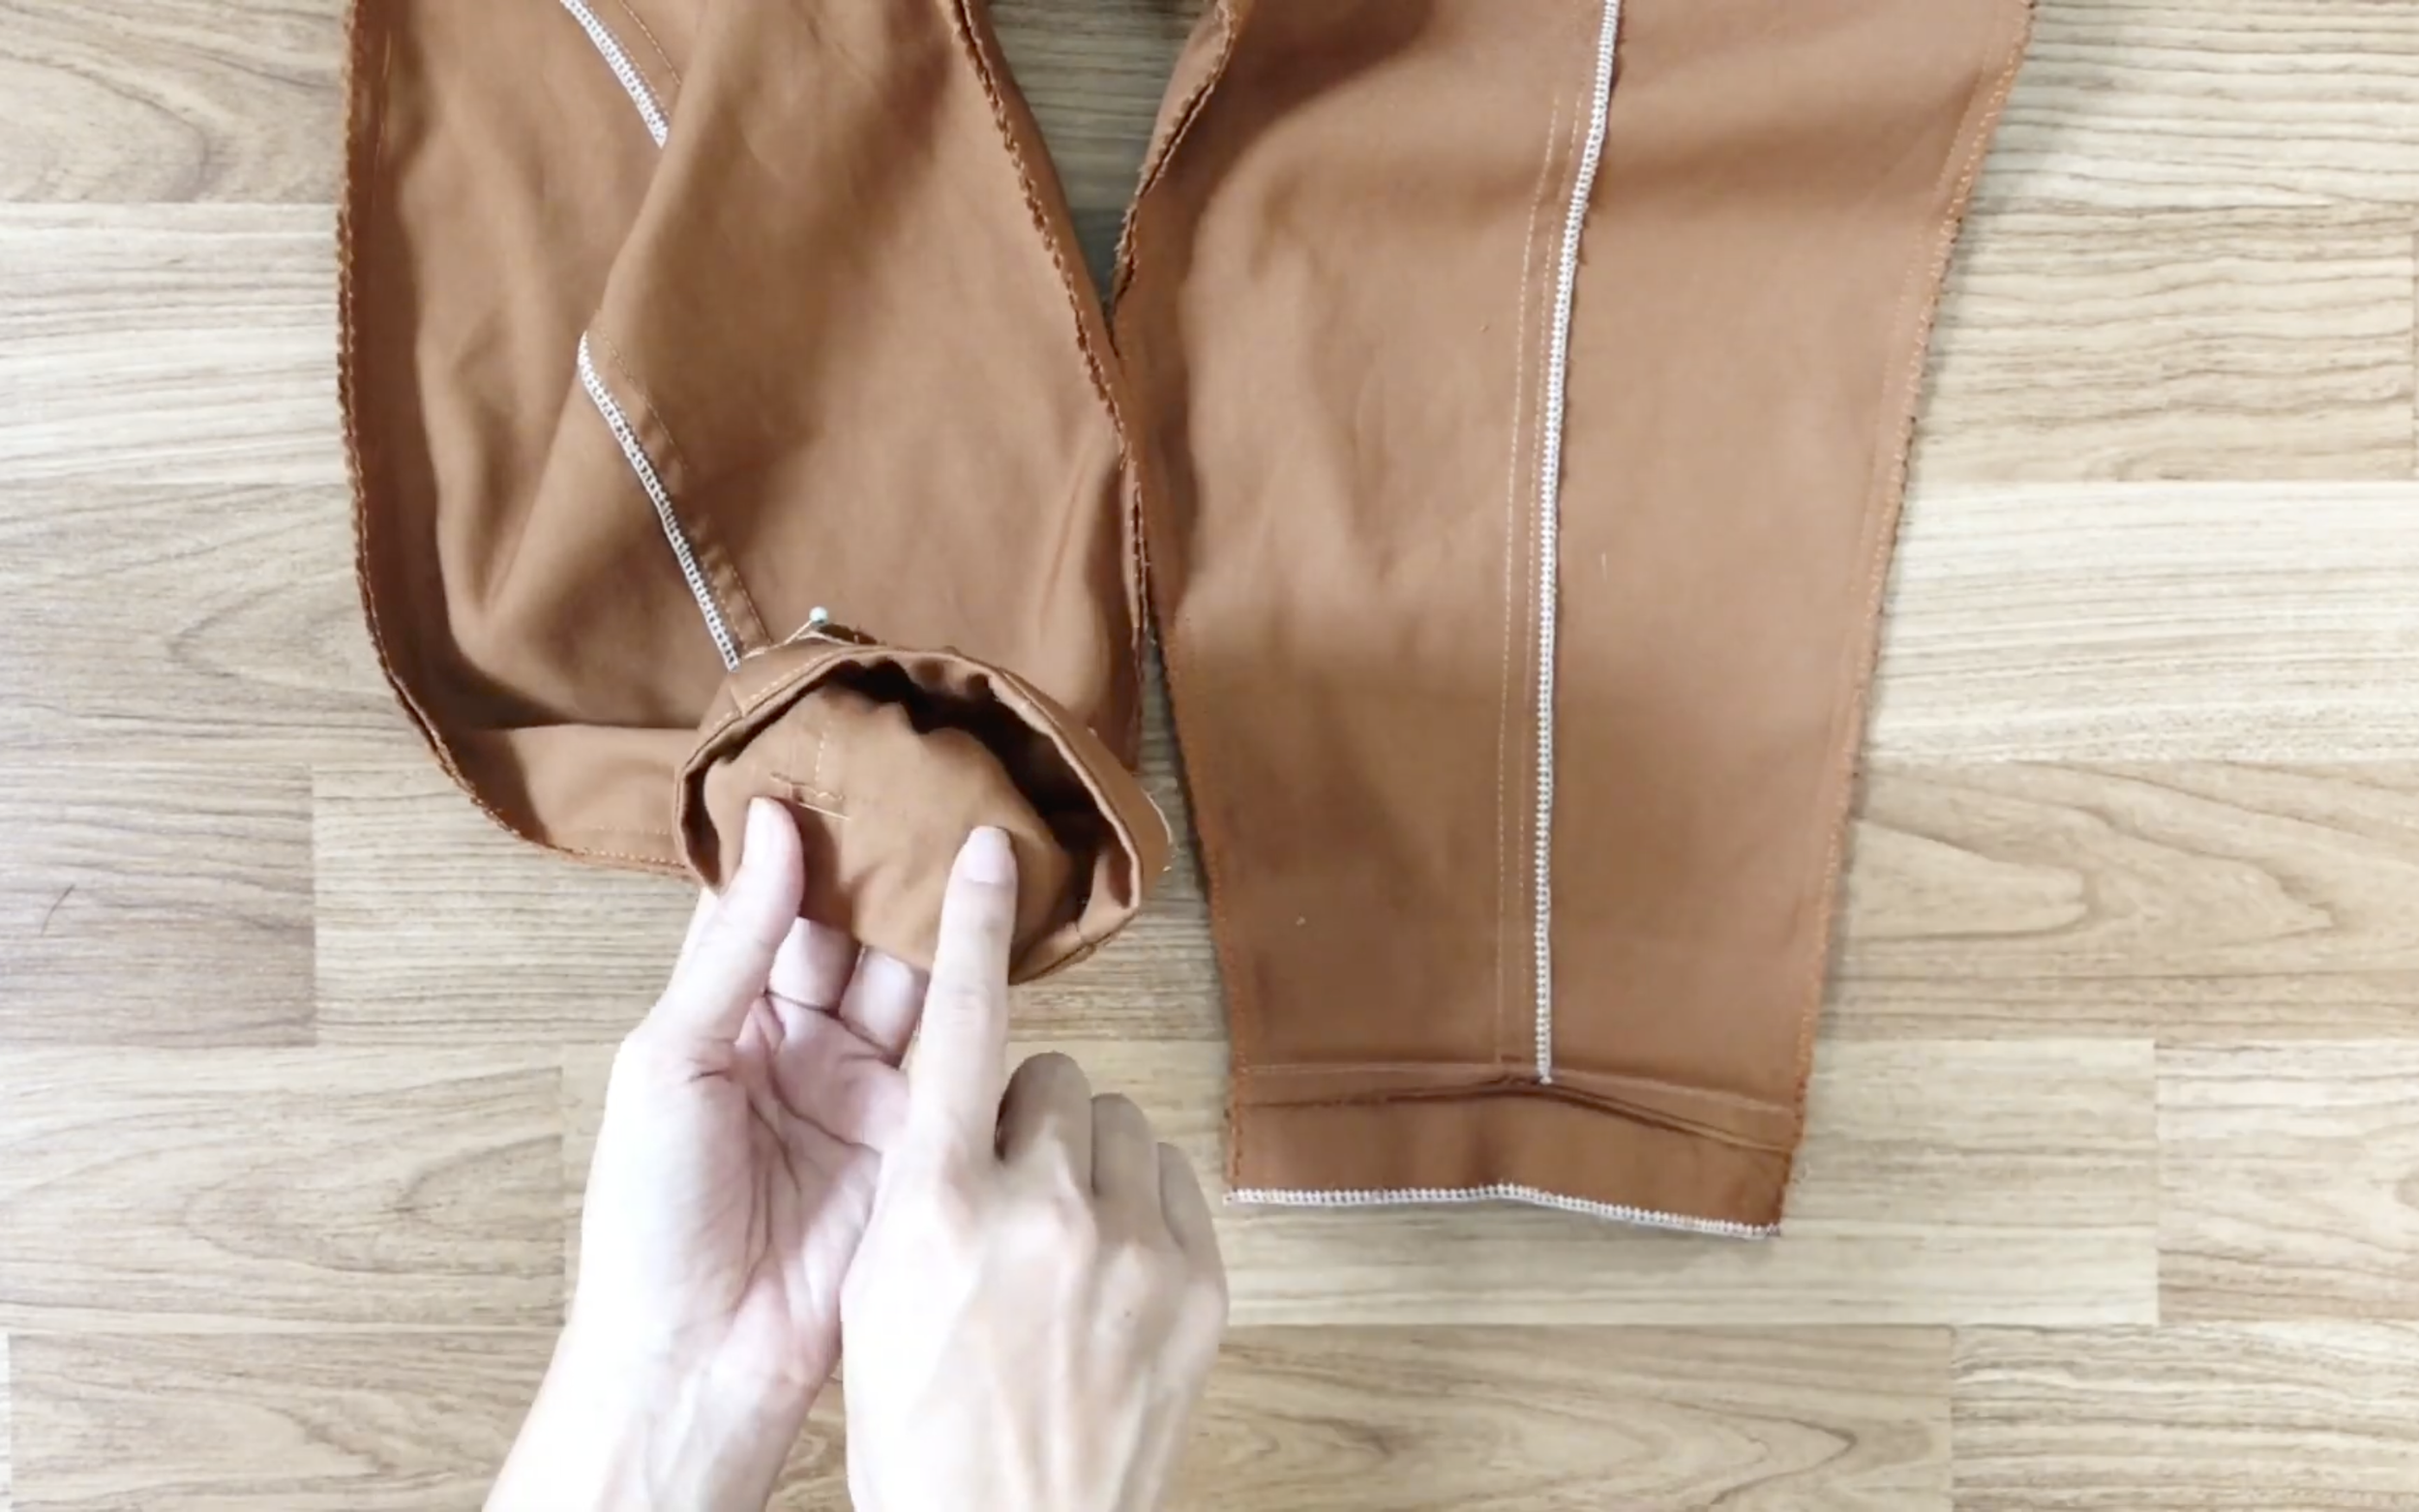
Fold the ends of the legs inward and sew along the old seam to preserve the original fold line of the legs.
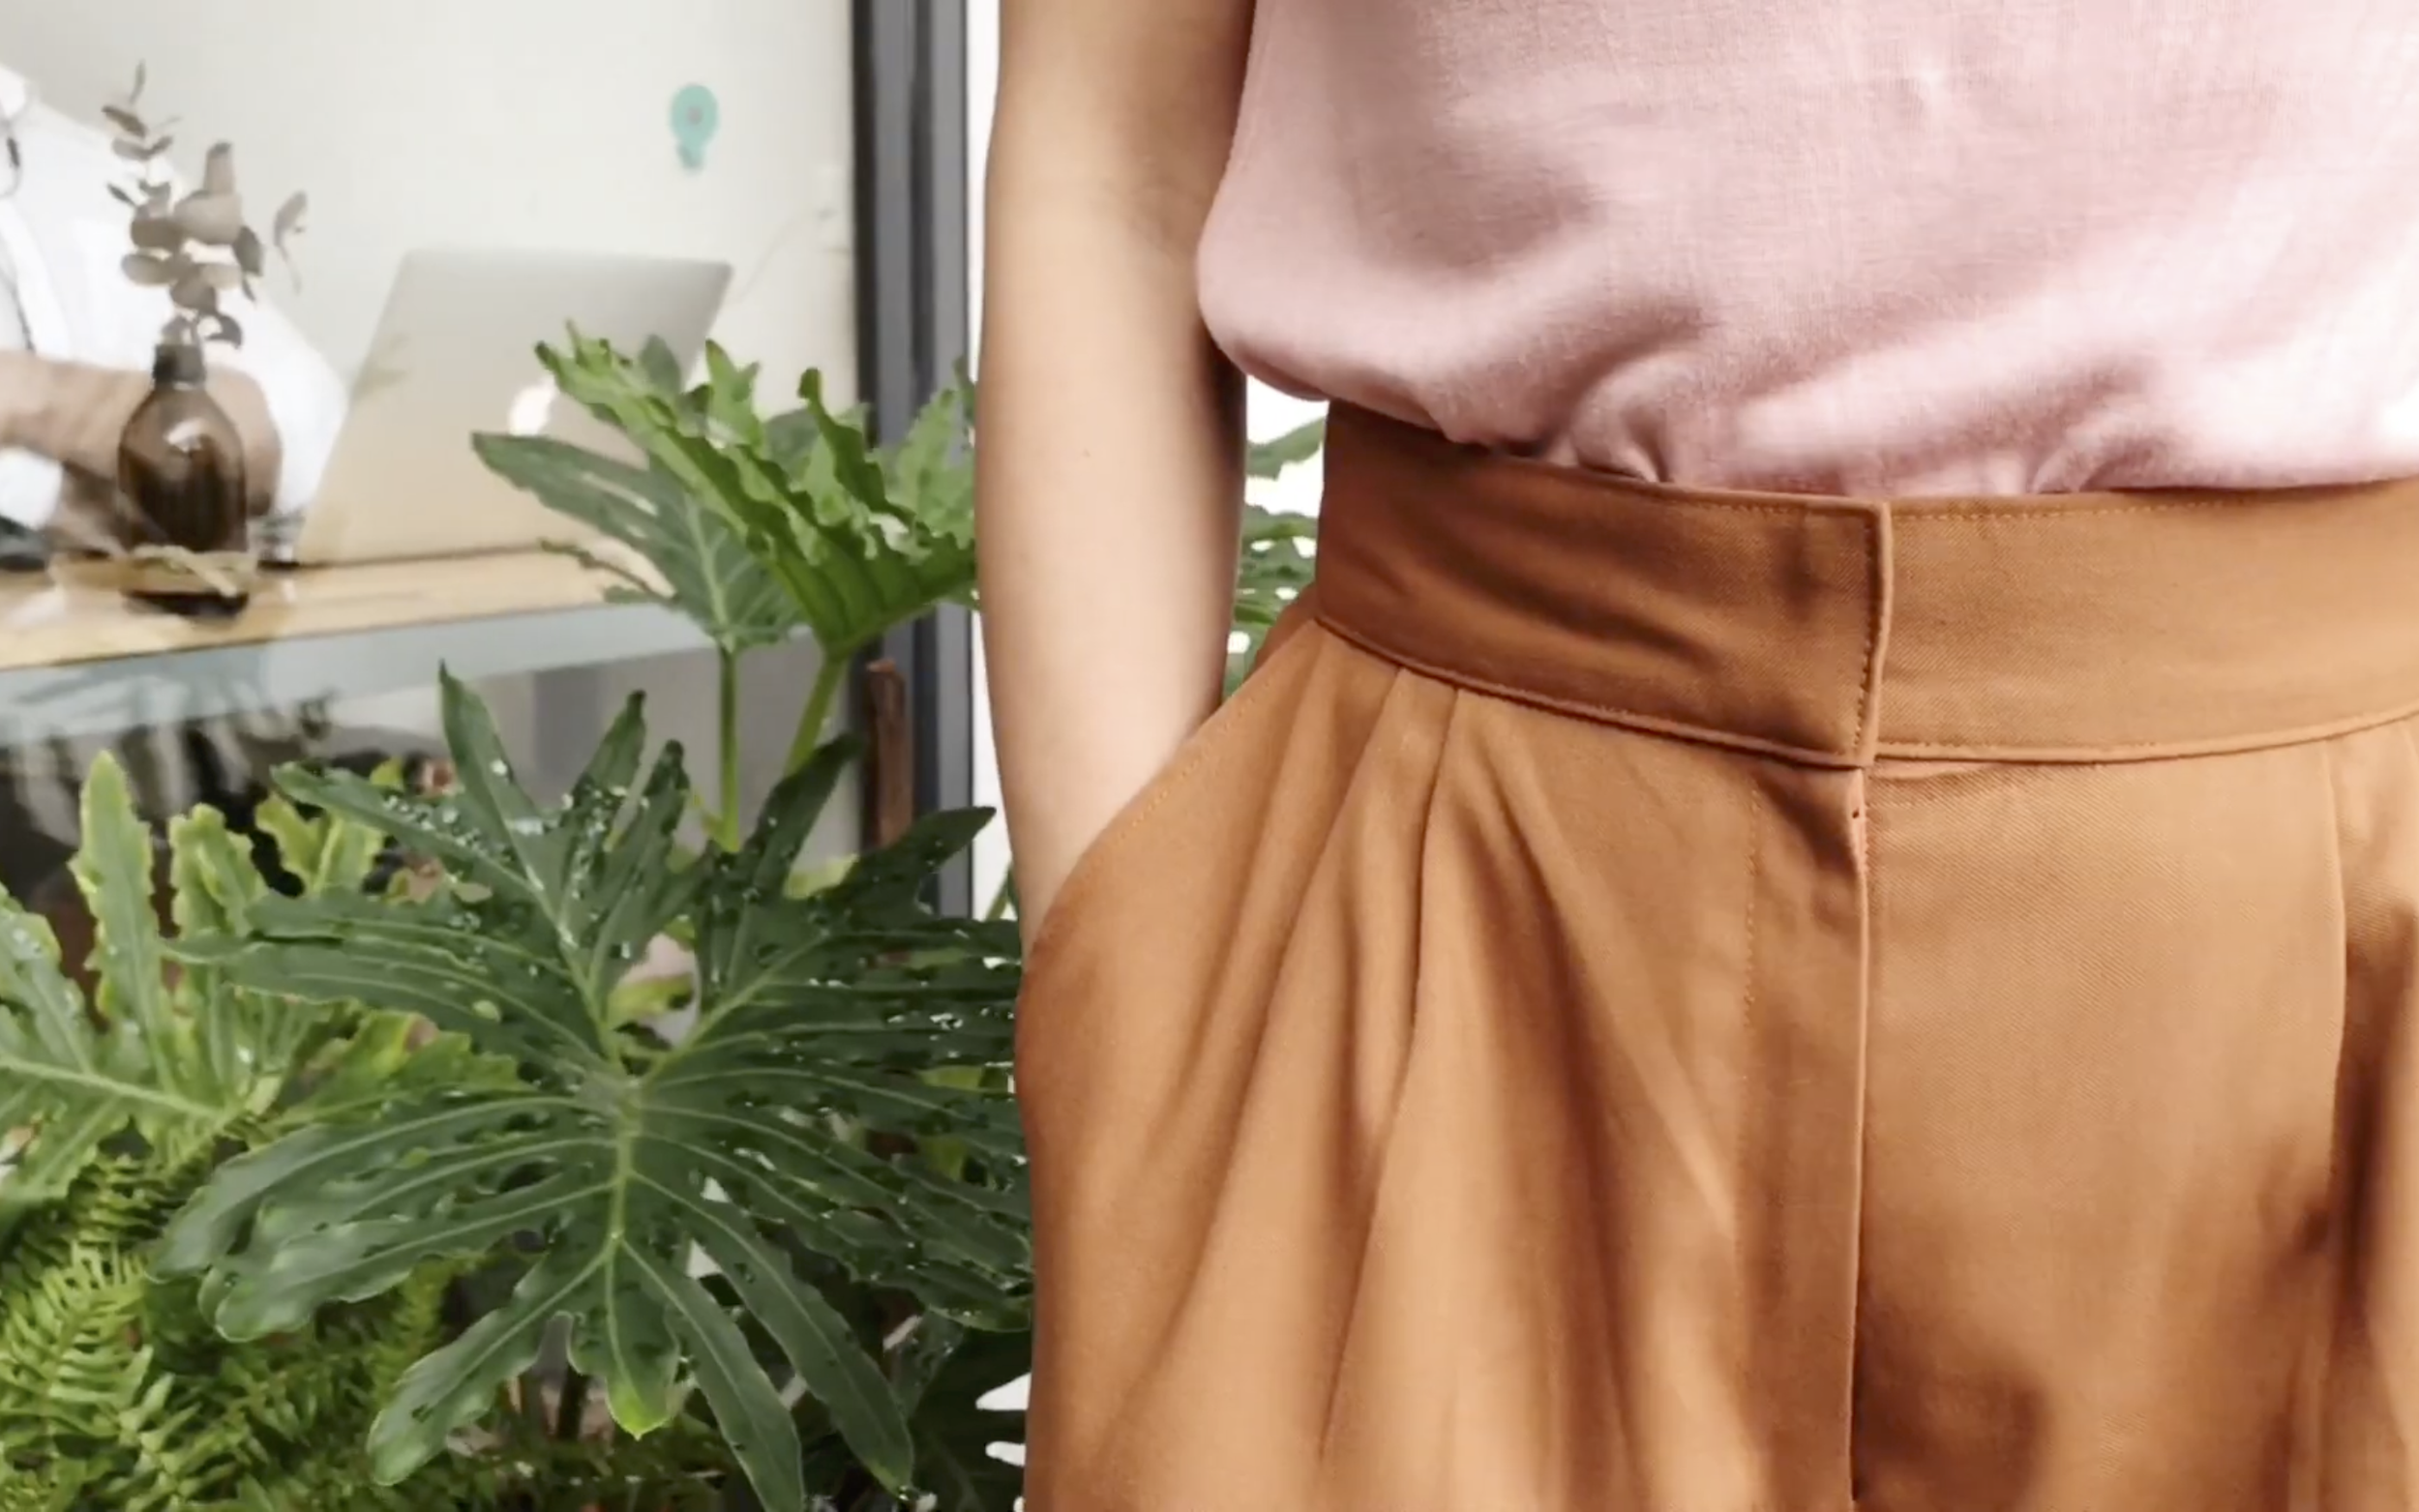
THE WAISTBAND
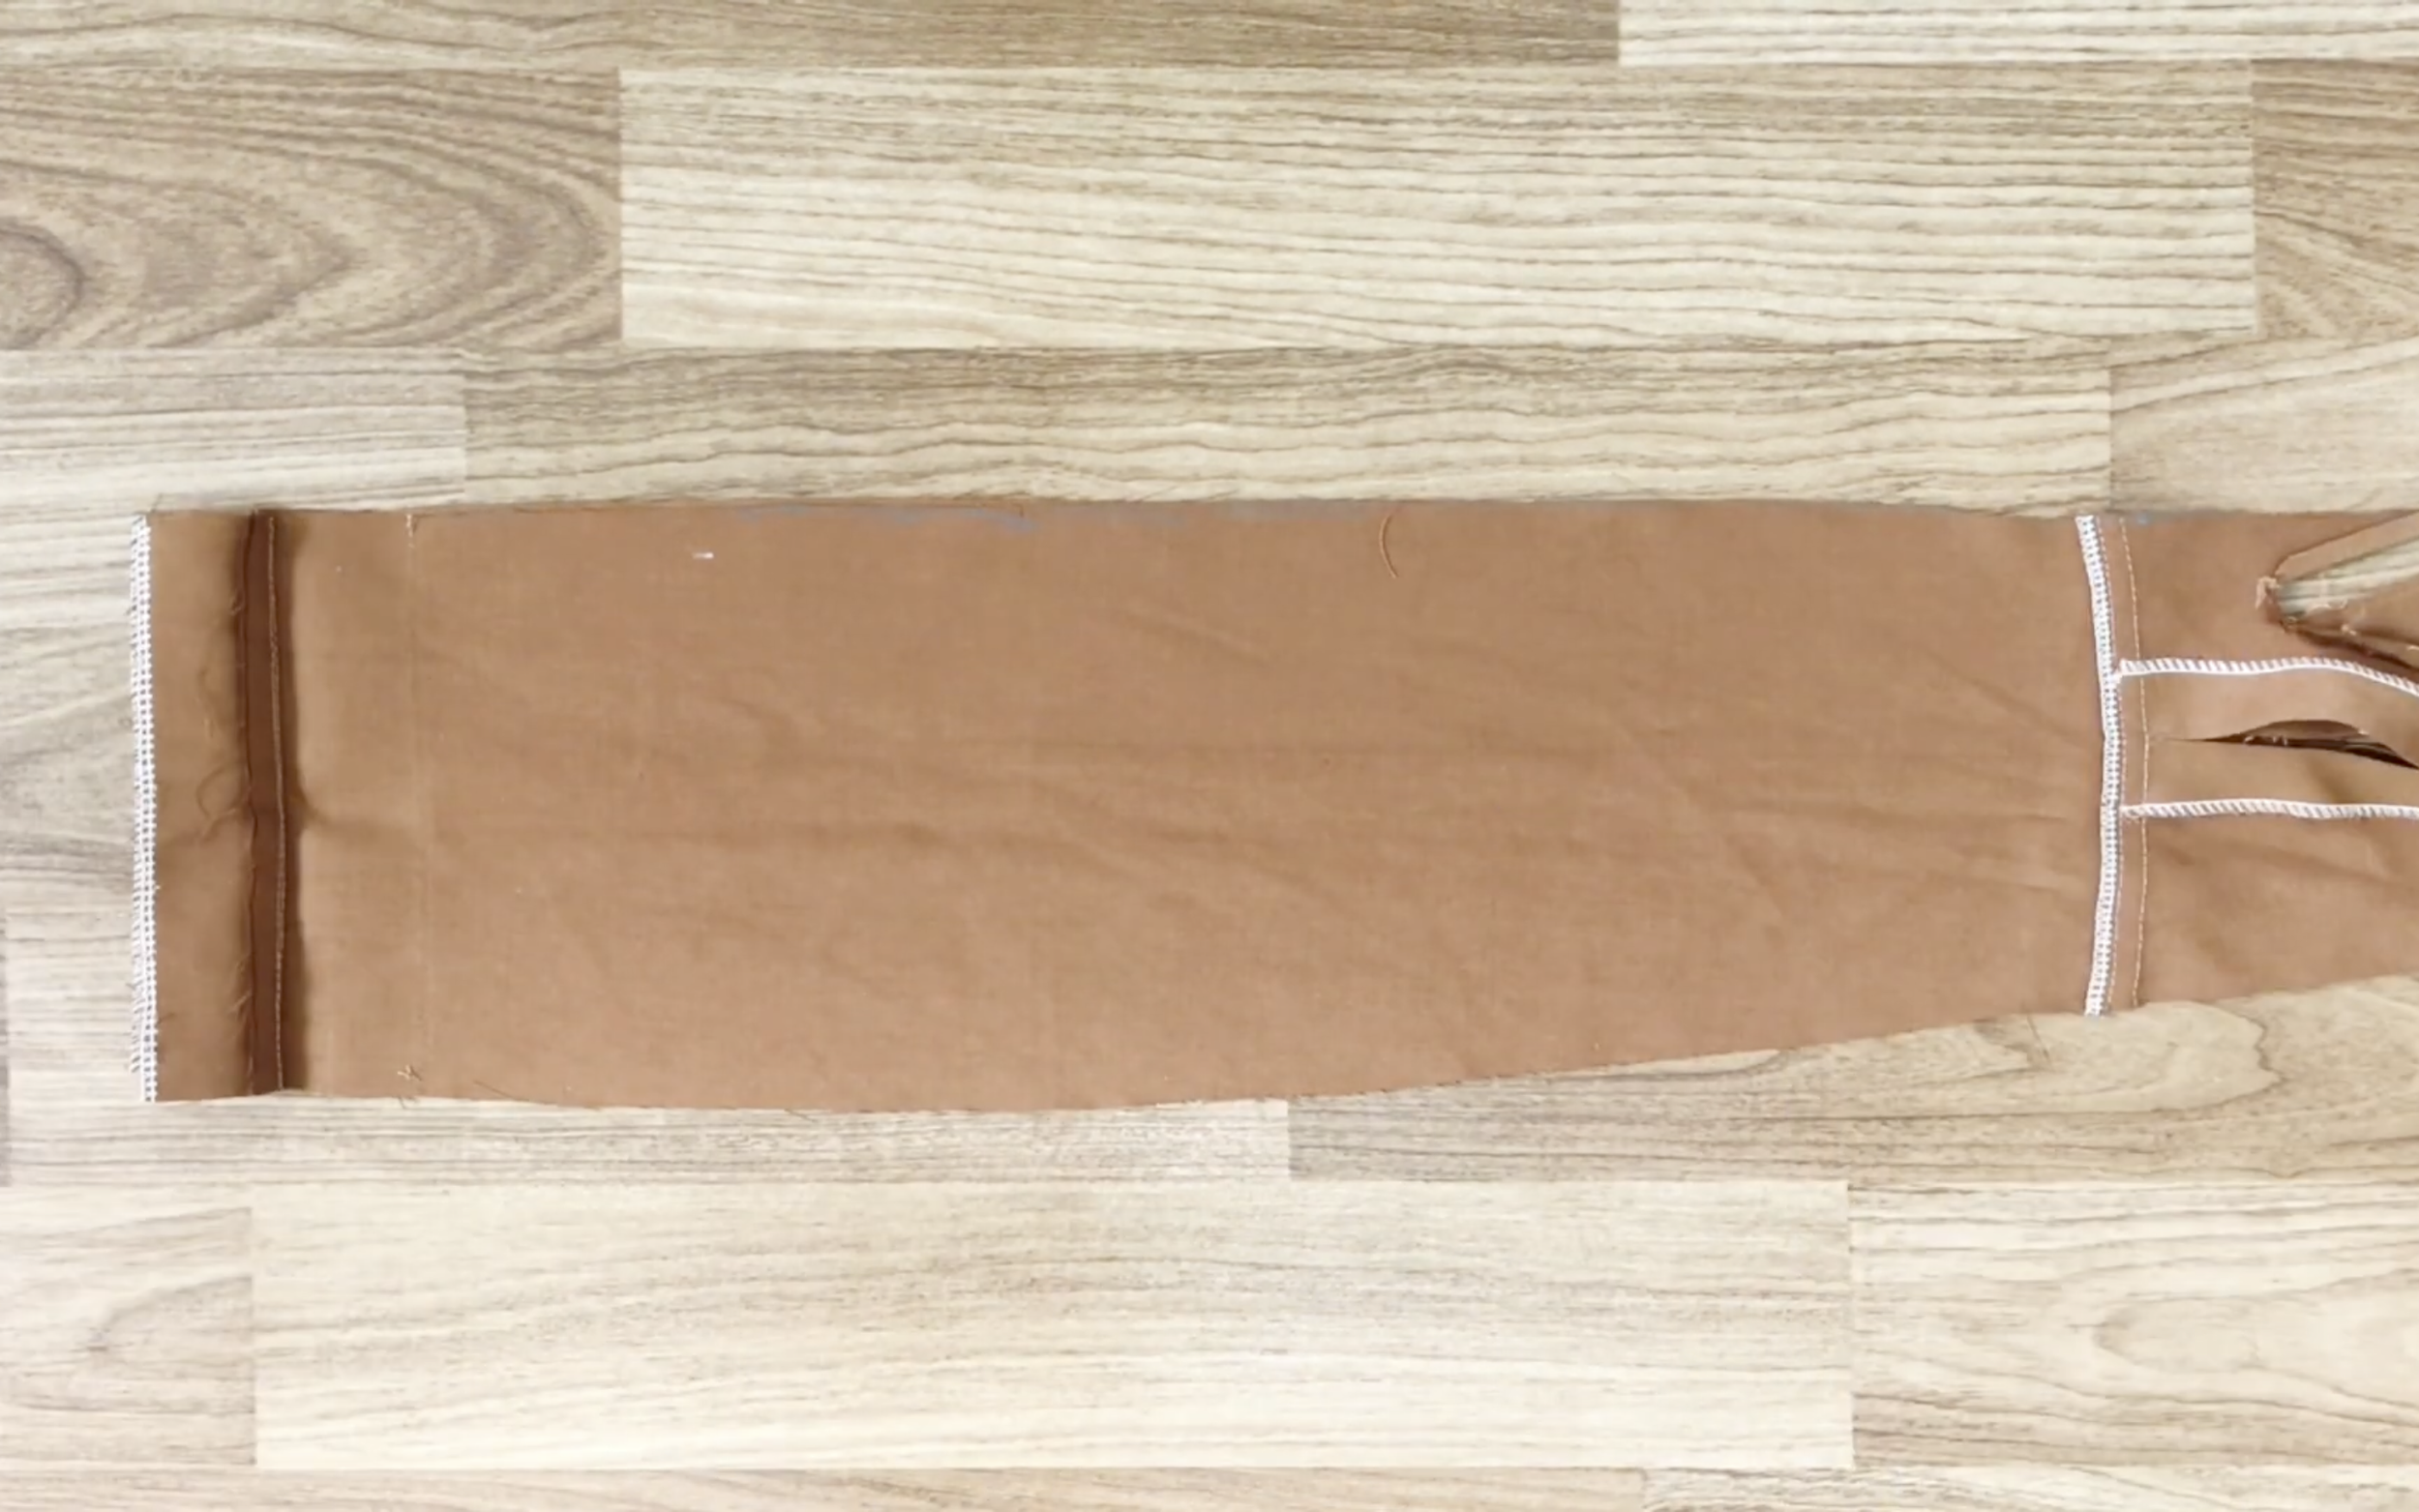
For the waistband, use the leftover fabric from the legs.
Measure the length and width of the black pants to apply to the brown one.
Draw two rectangles, 12cm wide and 40cm long.
Then sew one side of the rectangles together after cutting.
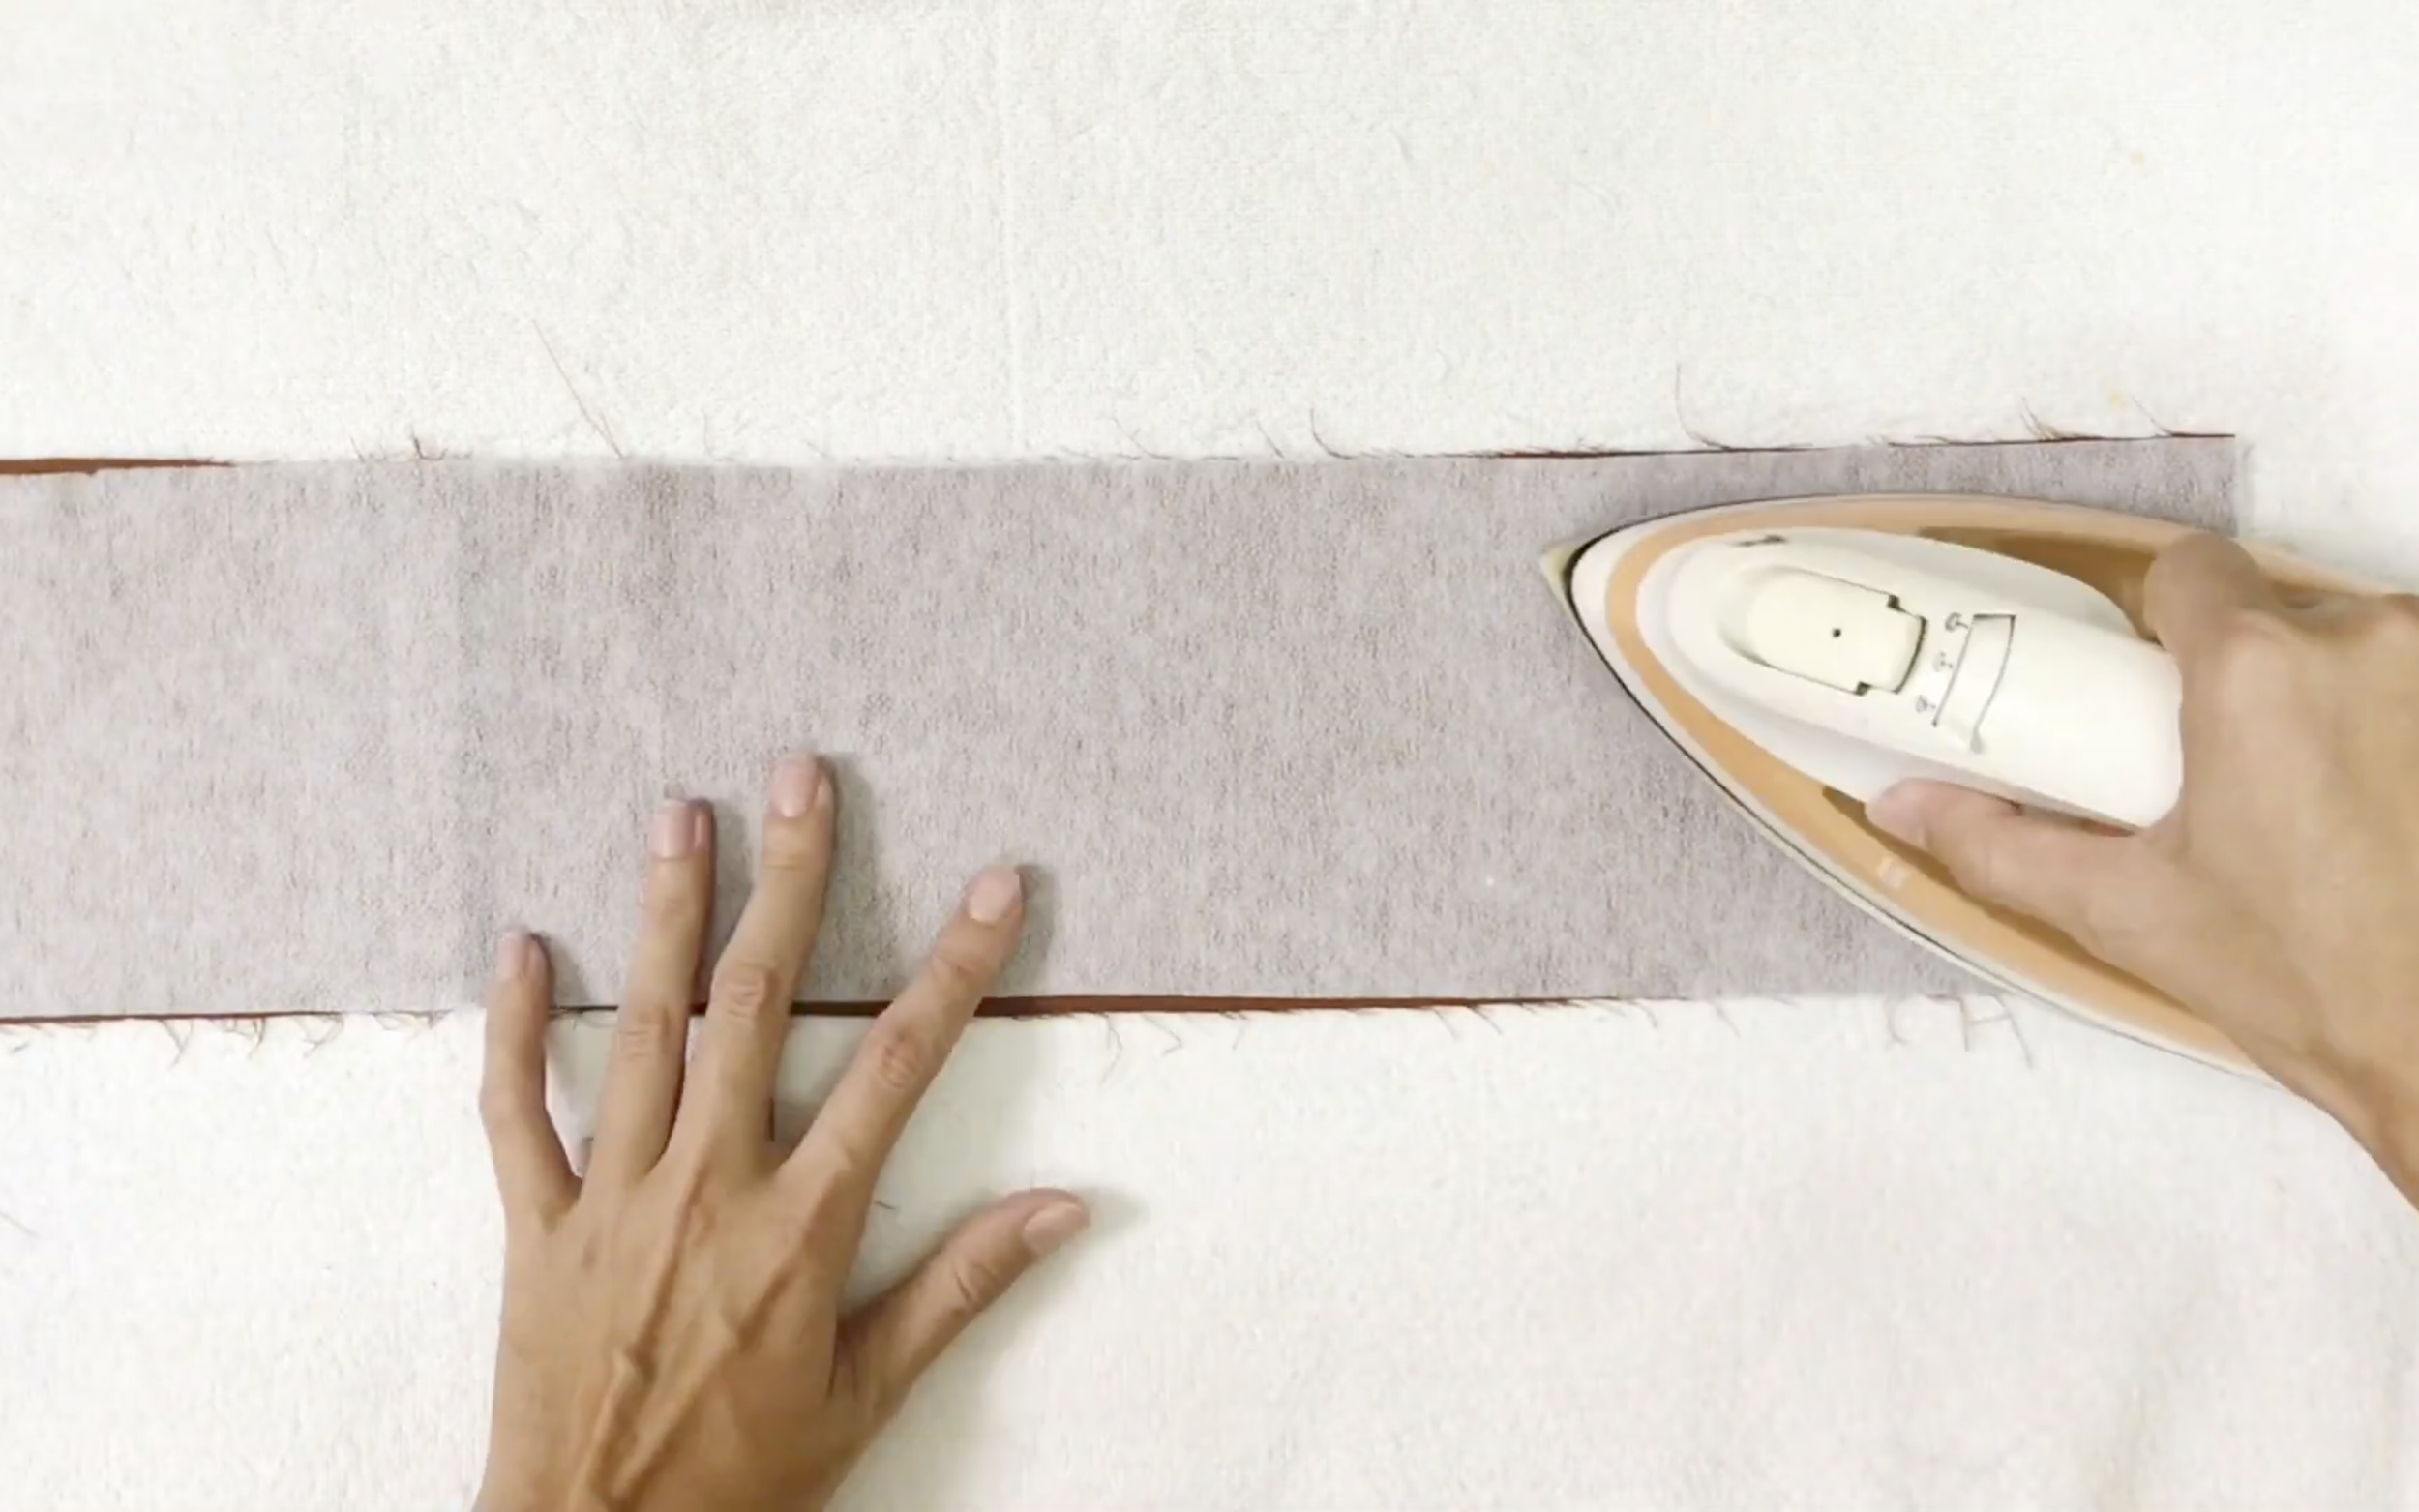
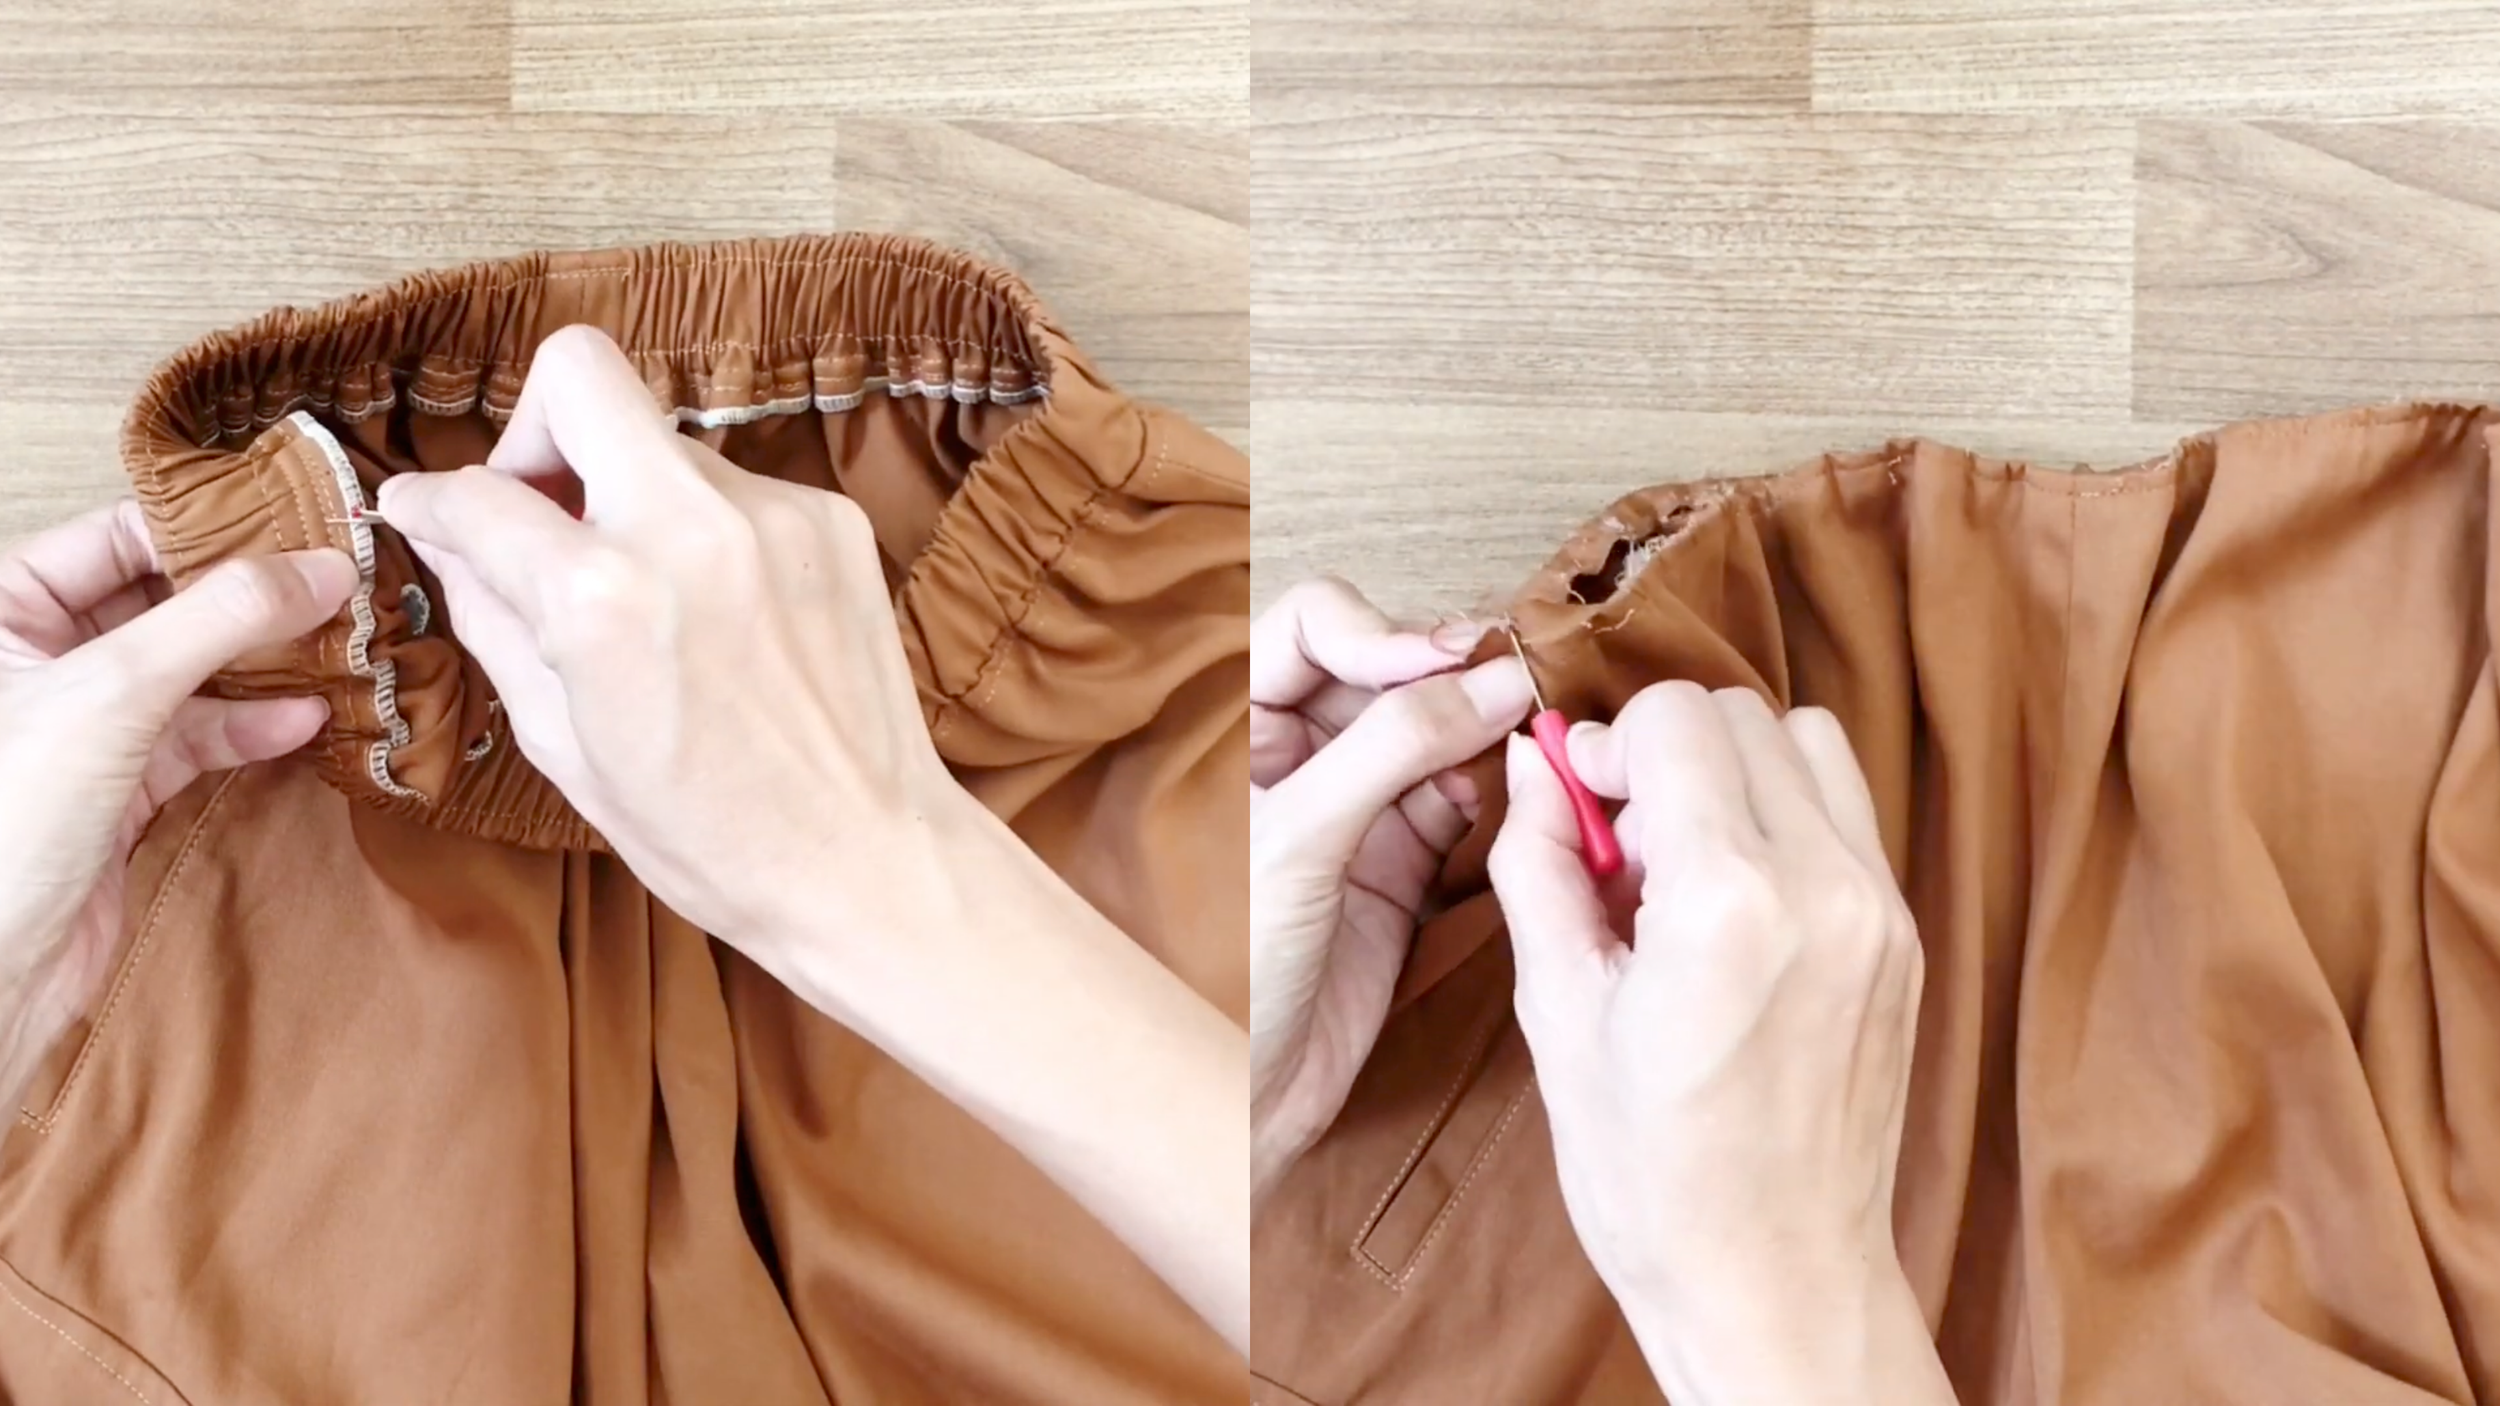
To make the waistband thicker, use lining fabric inside, then use an iron to fold and shape the waistband.
Fix the waistband into the pants with pins, then sew.
The last step is installing the buttons at the end of the waistband.
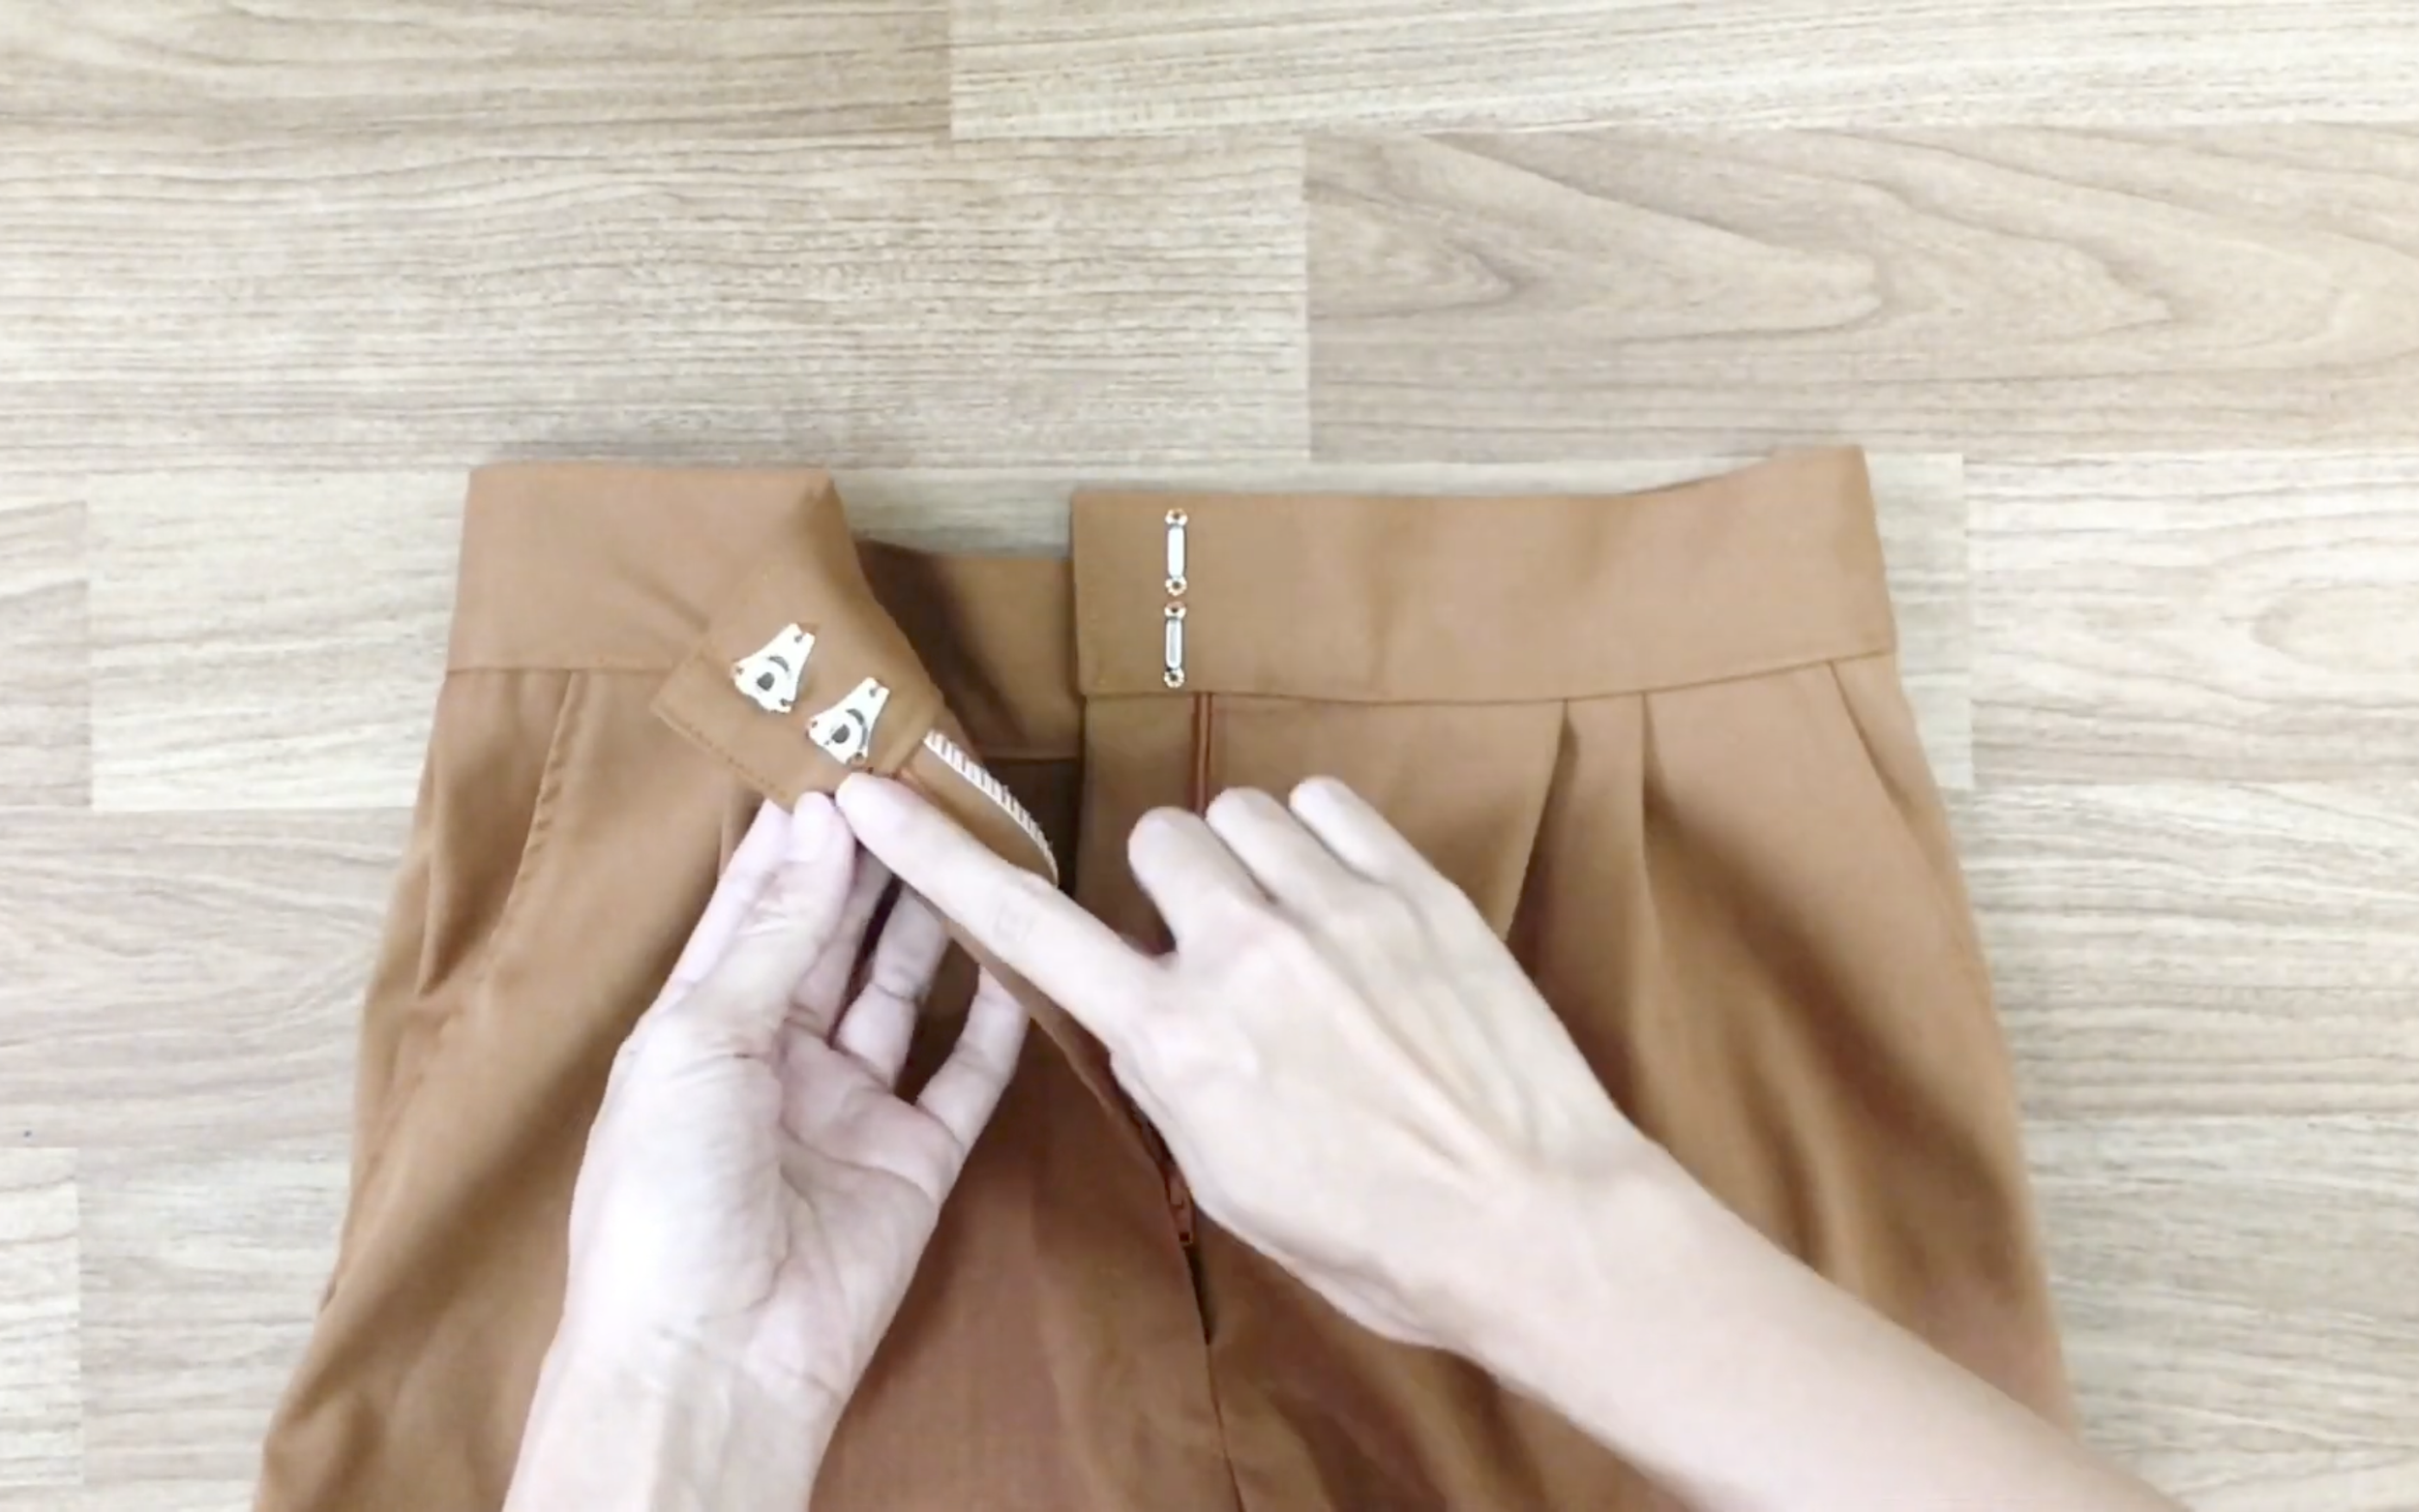
Instead of using a normal button, use a button set that doesn’t require making a buttonhole, which hides the button. Alternatively, a normal button and buttonhole can be used.

DIY Baggy pants from oversize pants with zipper & pockets
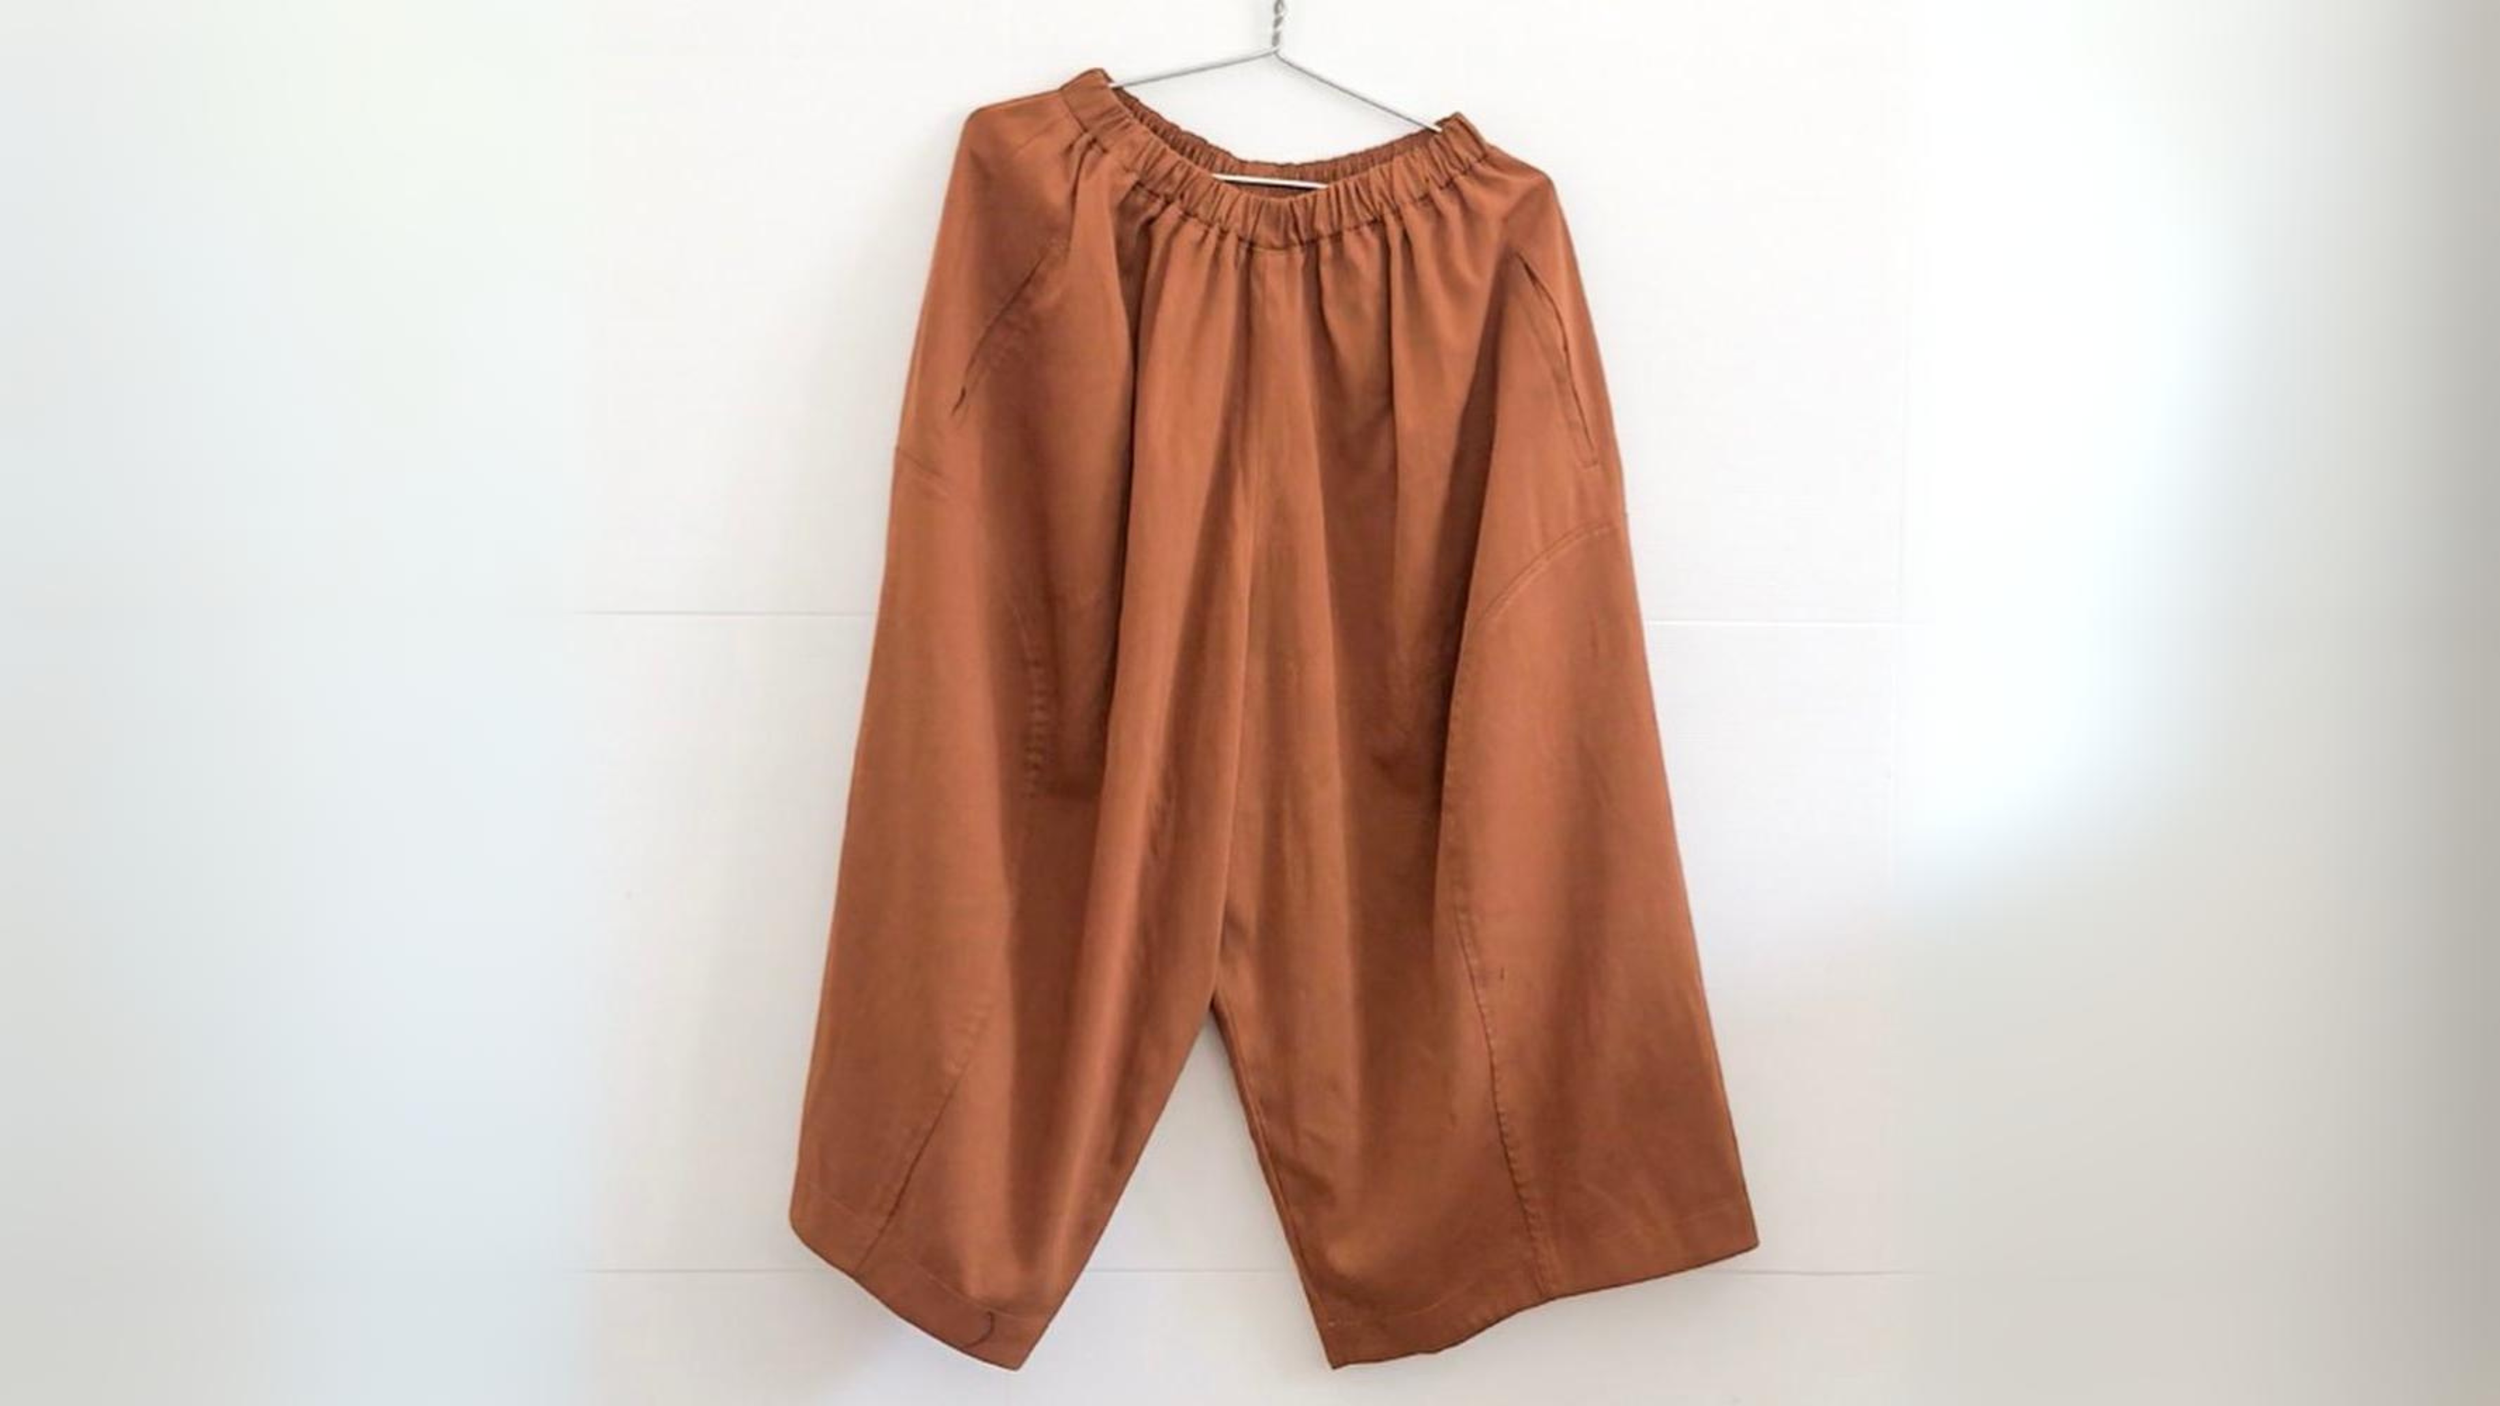
And that’s a wrap on this DIY!
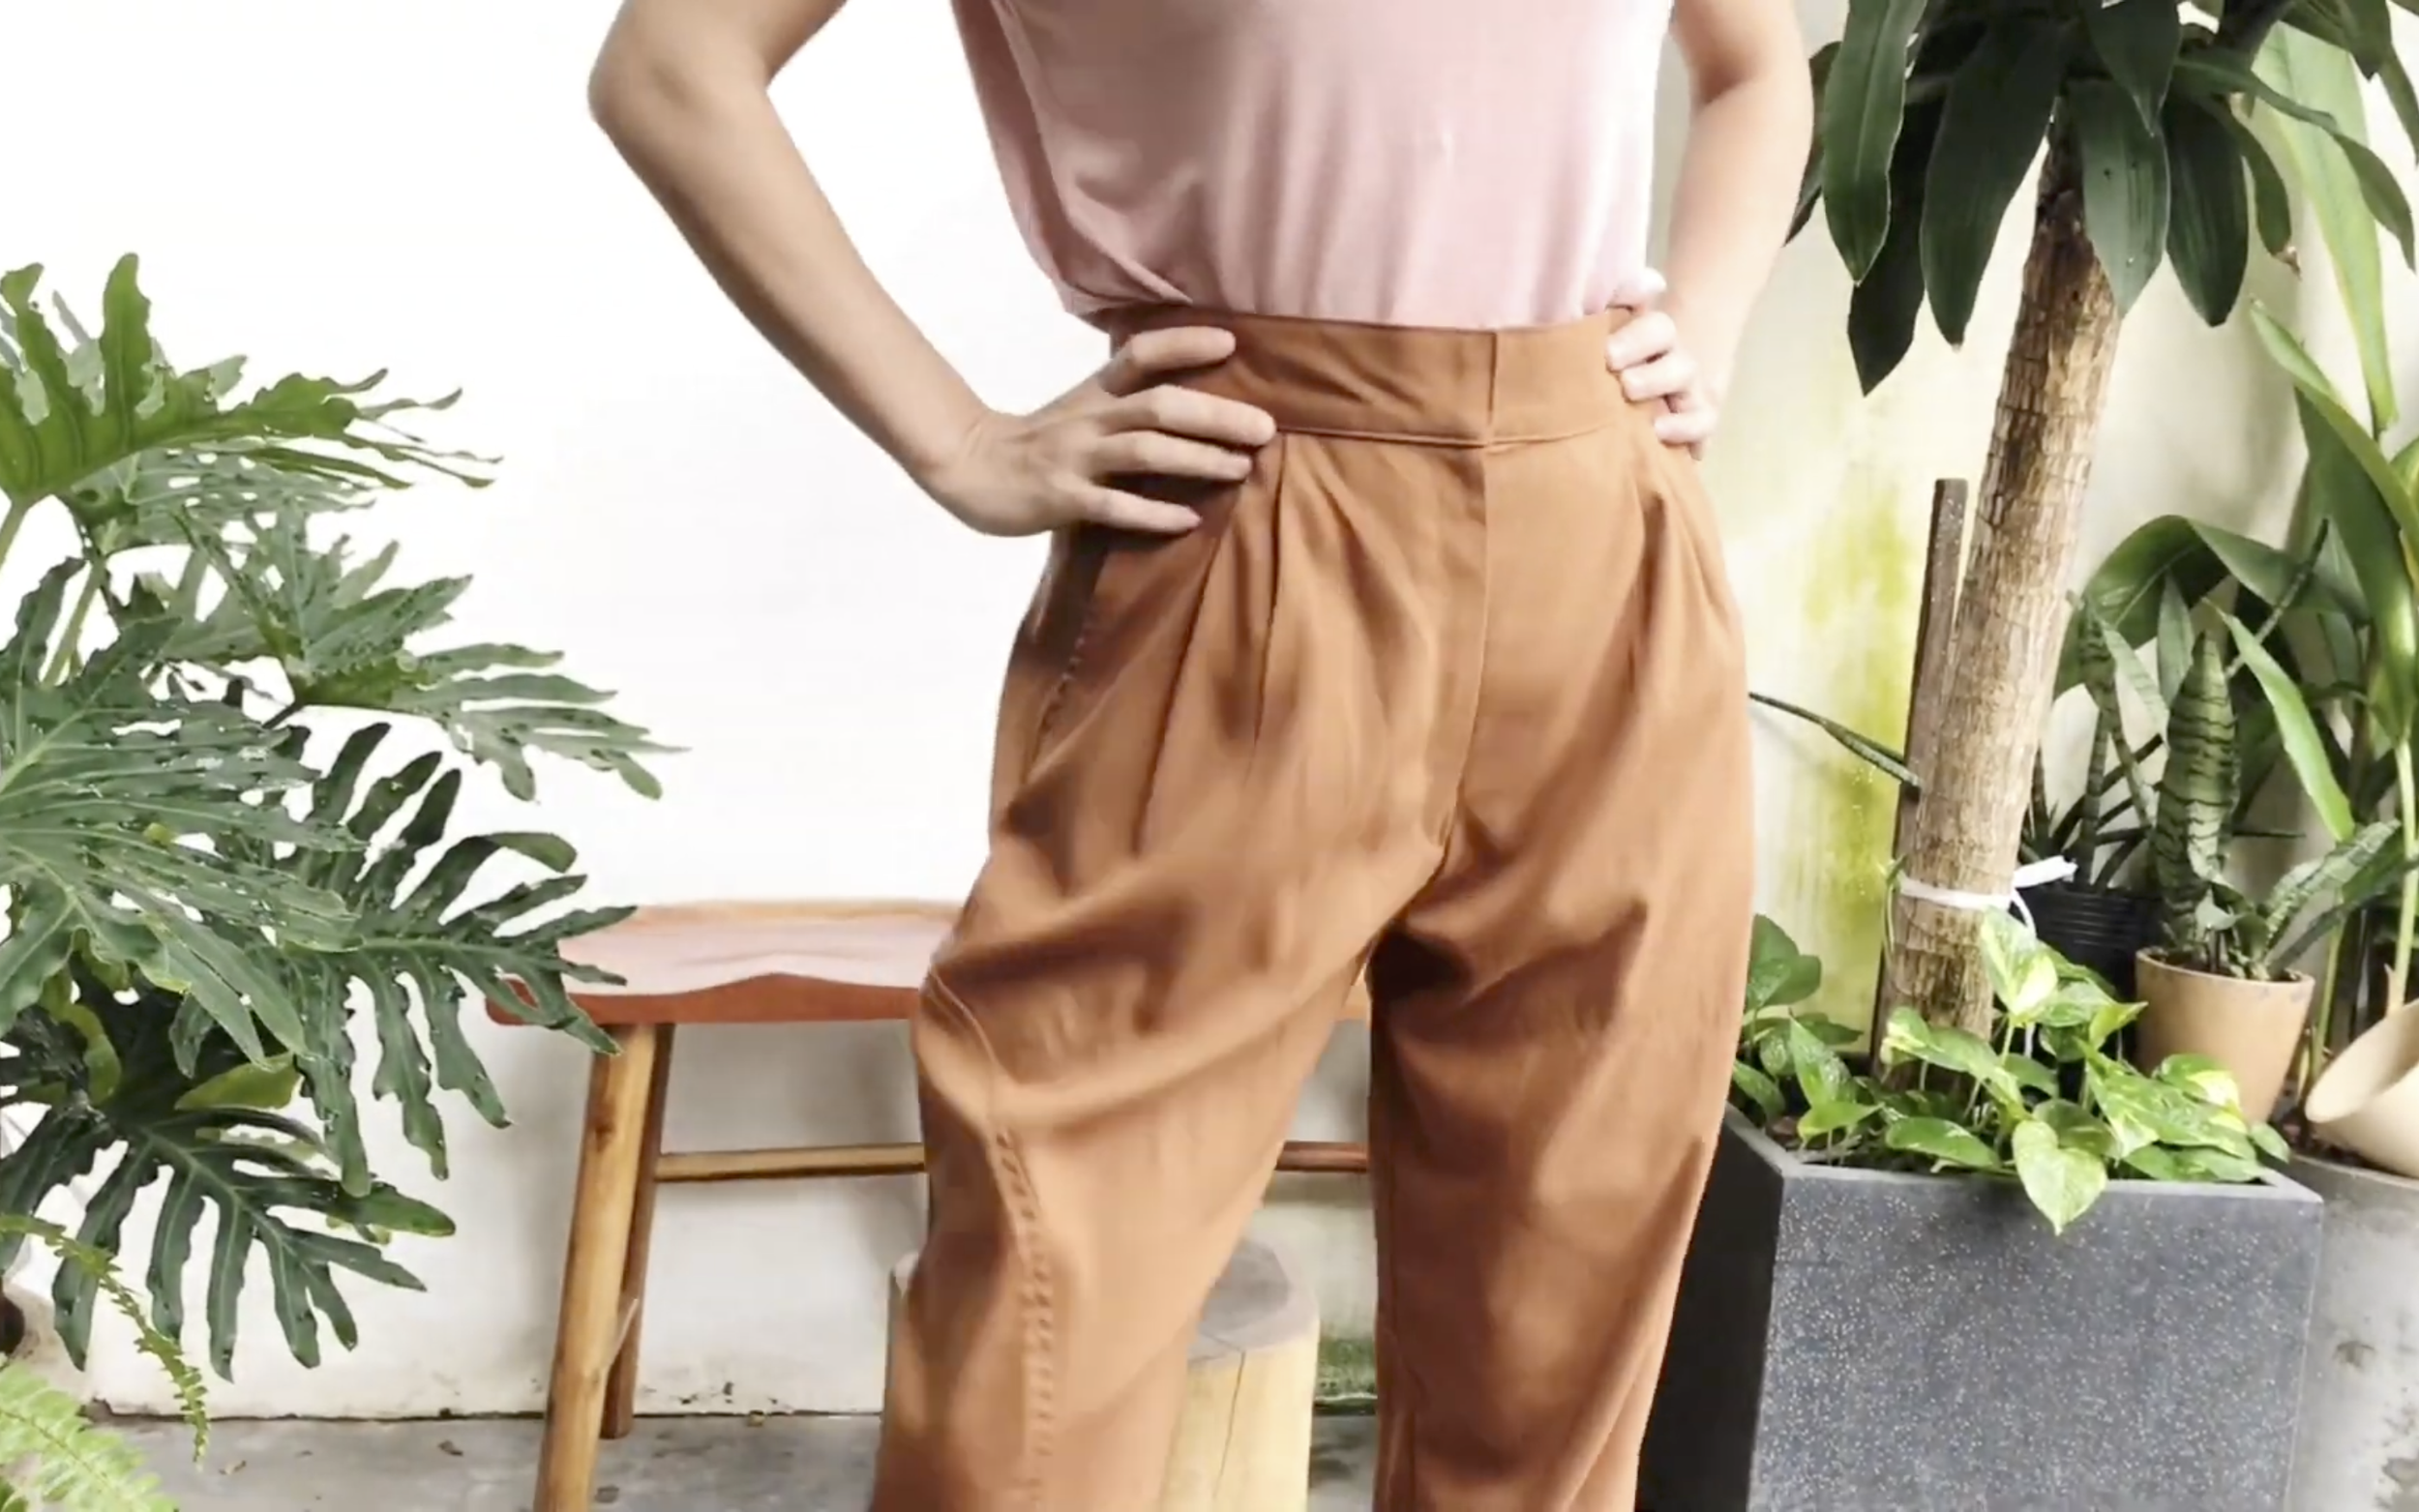
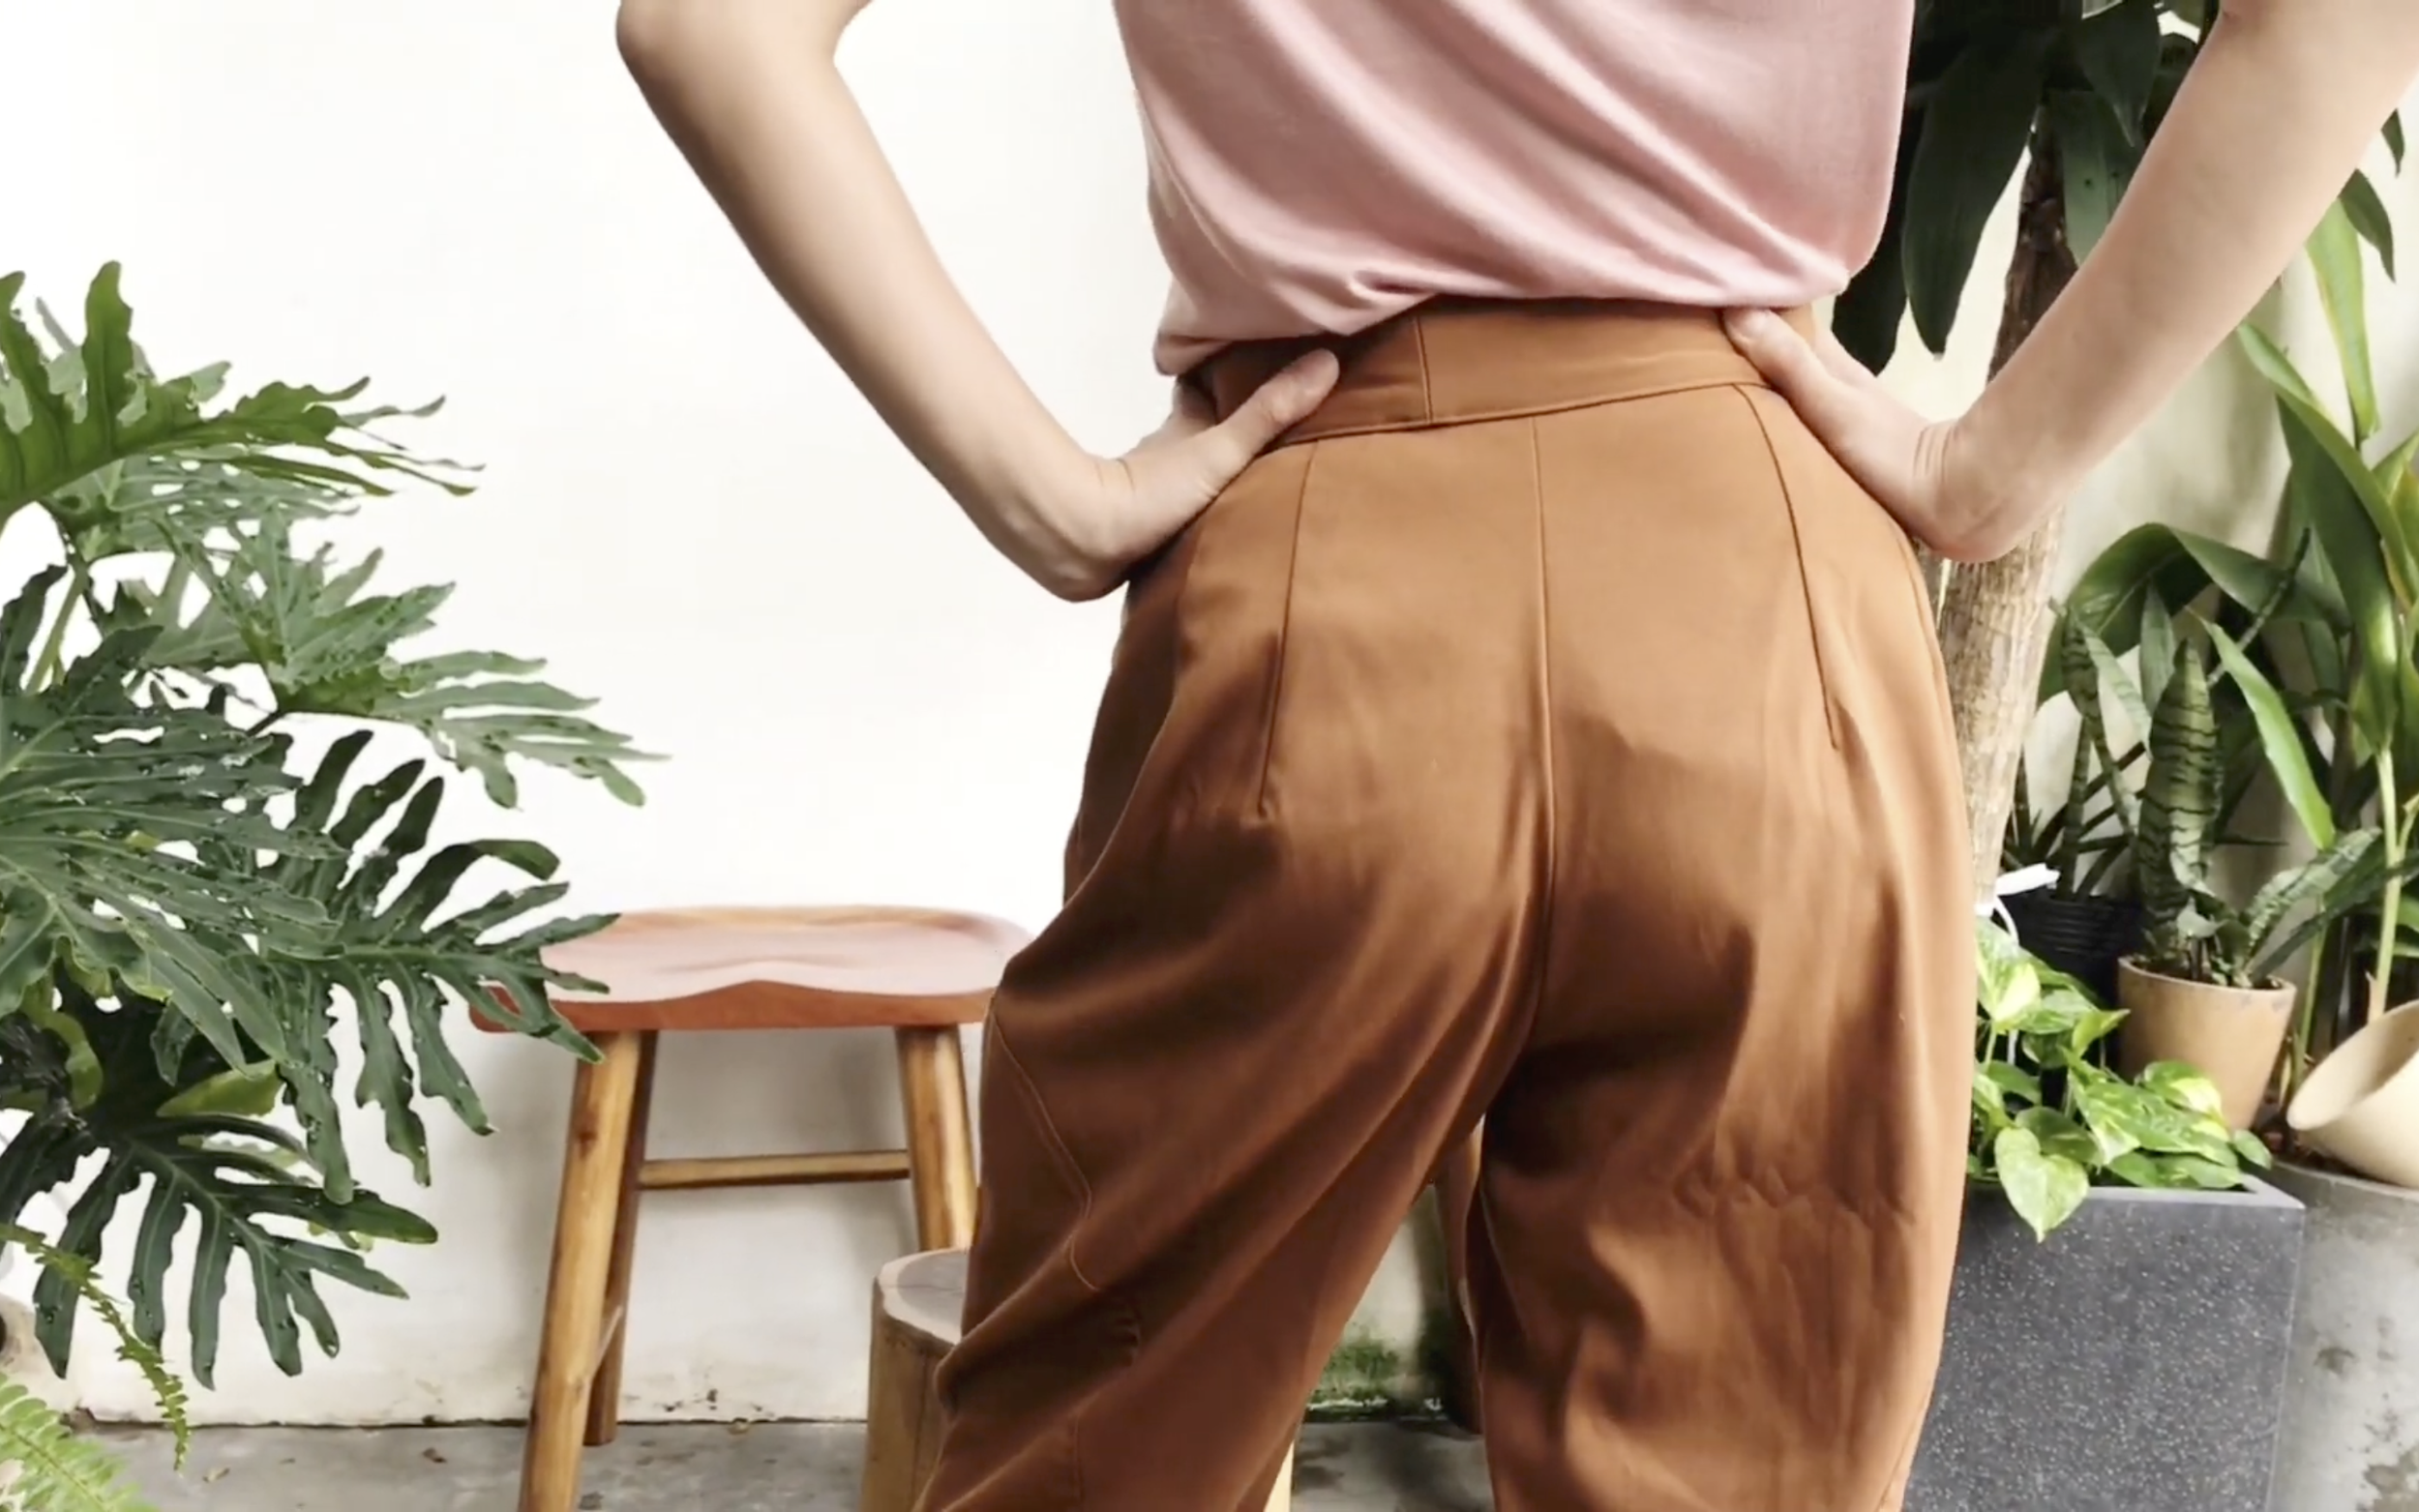
Here’s the final transformation—these baggy pants turned out great with a zipper, two front pockets, and vintage-style foldings. The center leg cut makes them extra special,
And the best part is they fit my friend perfectly—she loves them! It was my first time making pants with a zipper and pockets, but I’m so happy with the result.
And it won't be too difficult to make. So I hope you will give it a try.
If you liked this project, please share it and subscribe to my channel so you won’t miss any of my upcoming DIYs.
Until next week, happy sewing!