DIY High waisted pant - The pants to make you look taller
DIY High waisted pant
Welcome or welcome back to my channel!
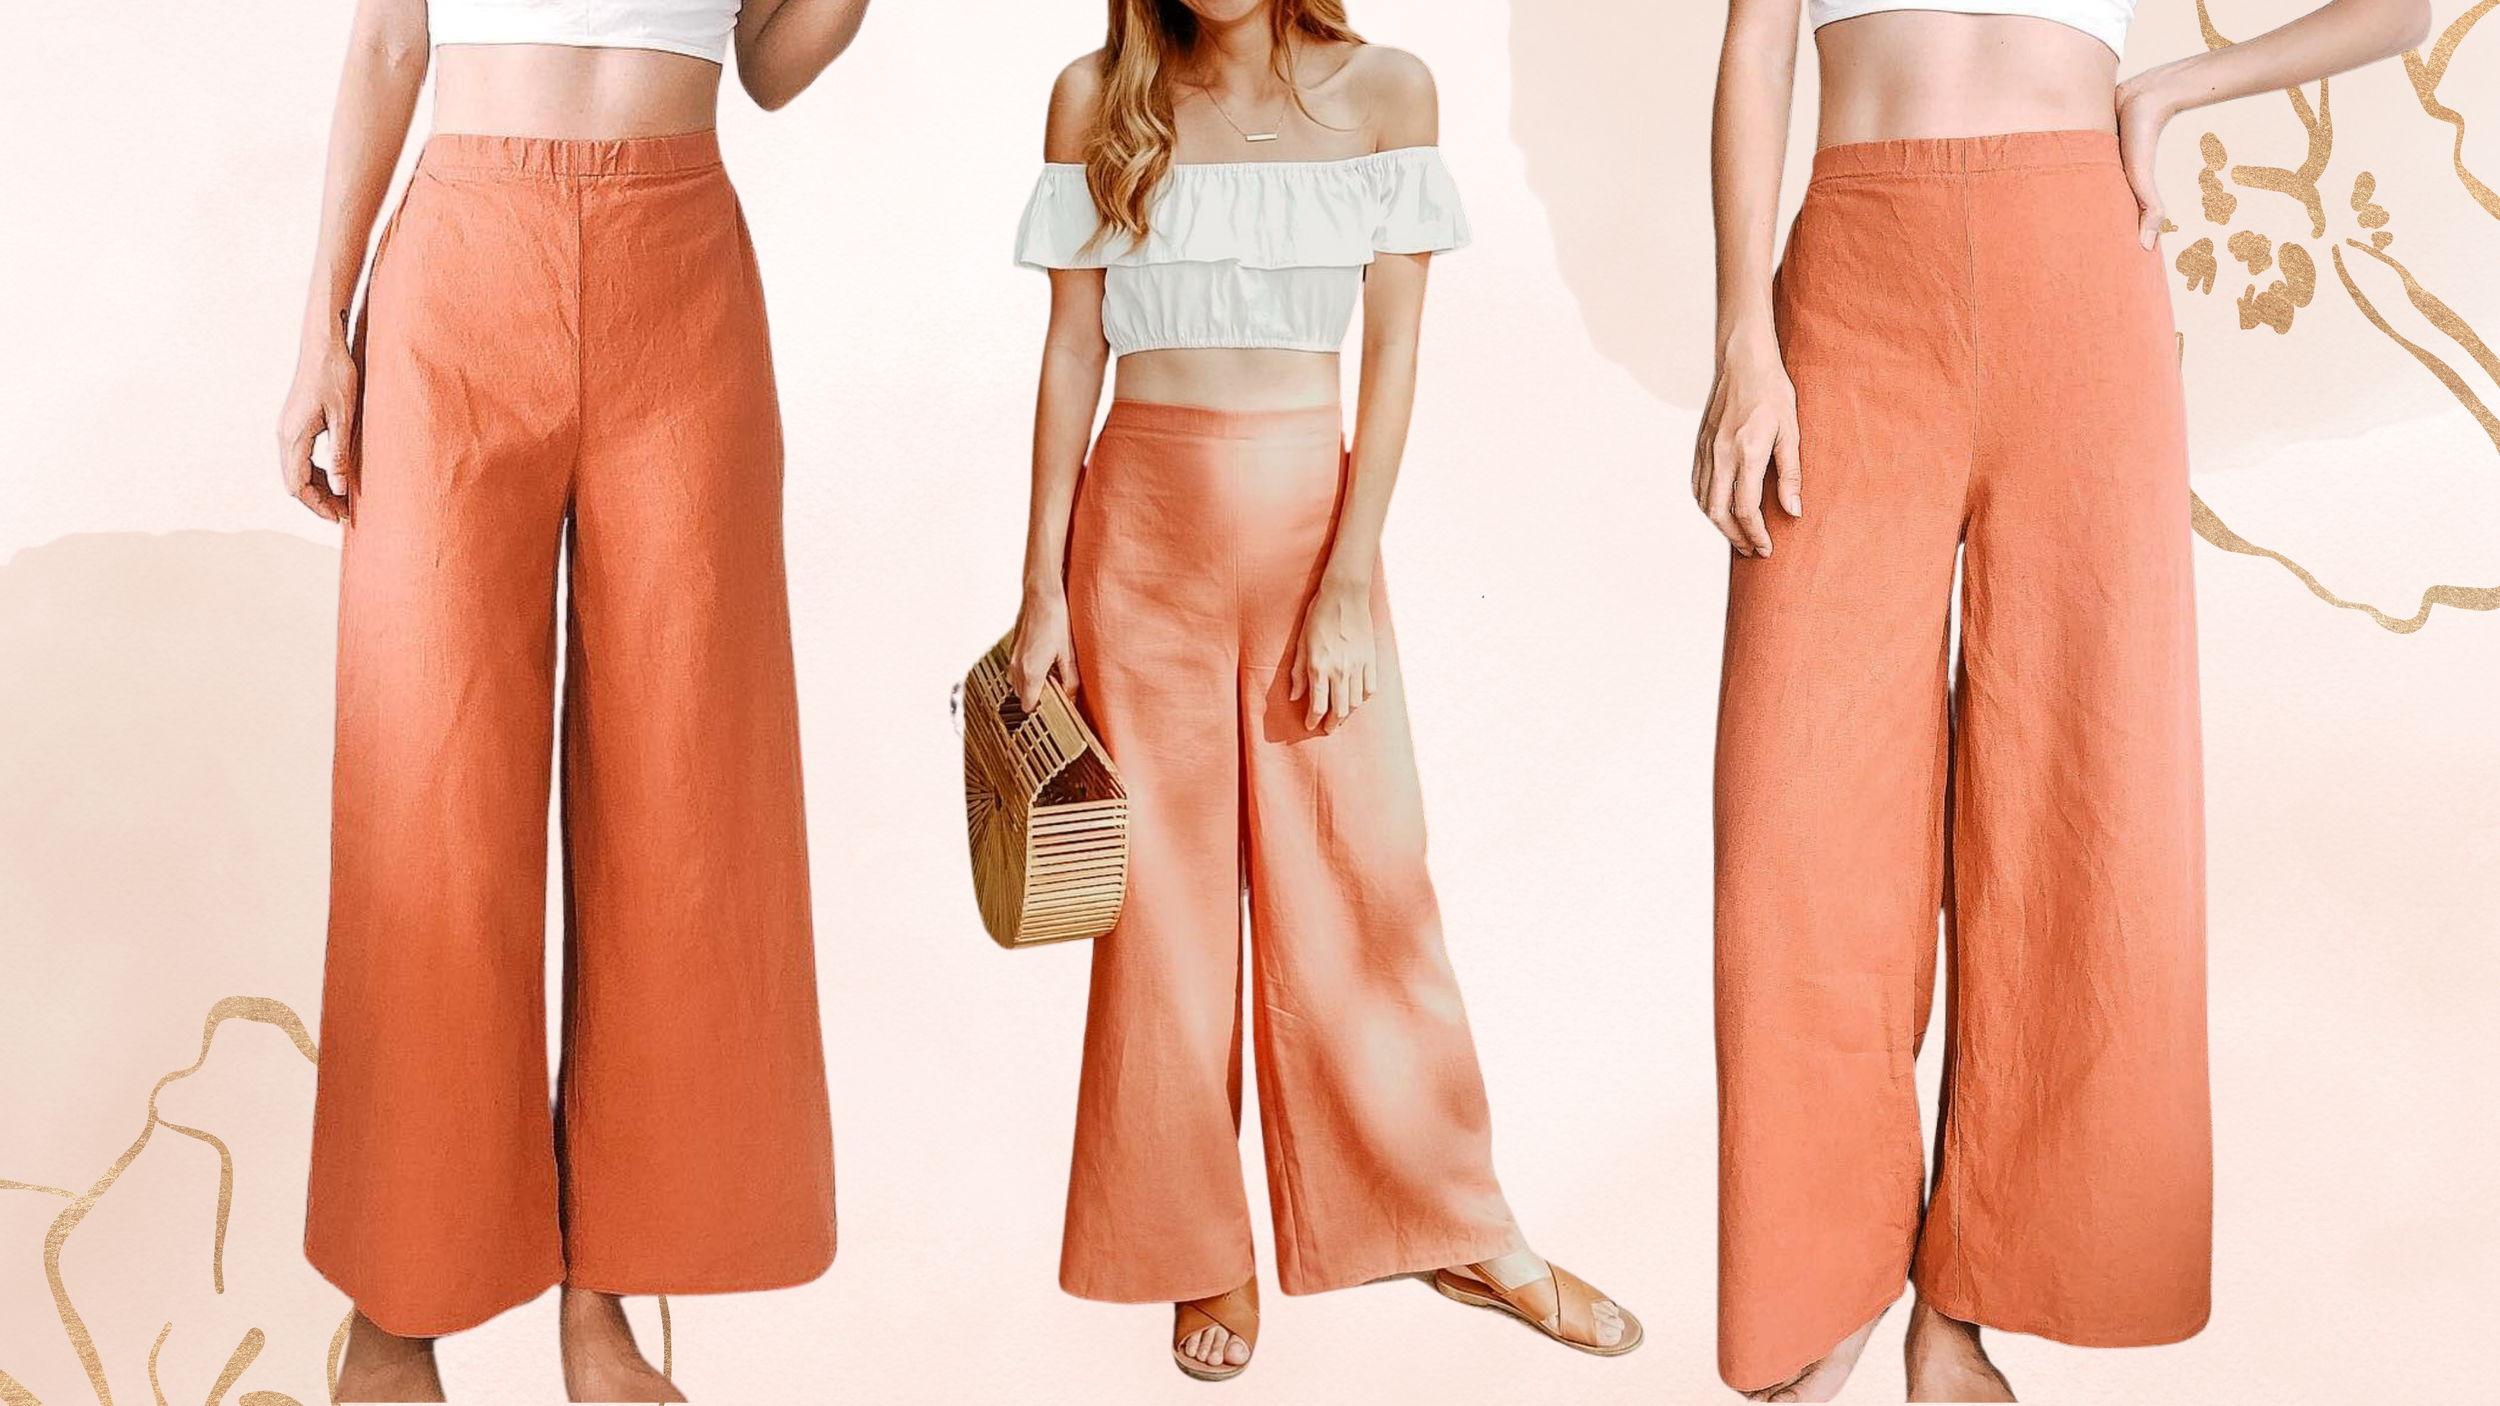
Today video, I'm going to share with you how I make the high waisted pant from scratch. This pant is perfect for a short girl or who wants to look taller. And it's super easy to make with a simple cutting. I made this pant from loose linen fabric which is my favorite material. It's gonna be my most worn for this summer.
So, let’s get started!
WHAT YOU’LL NEED
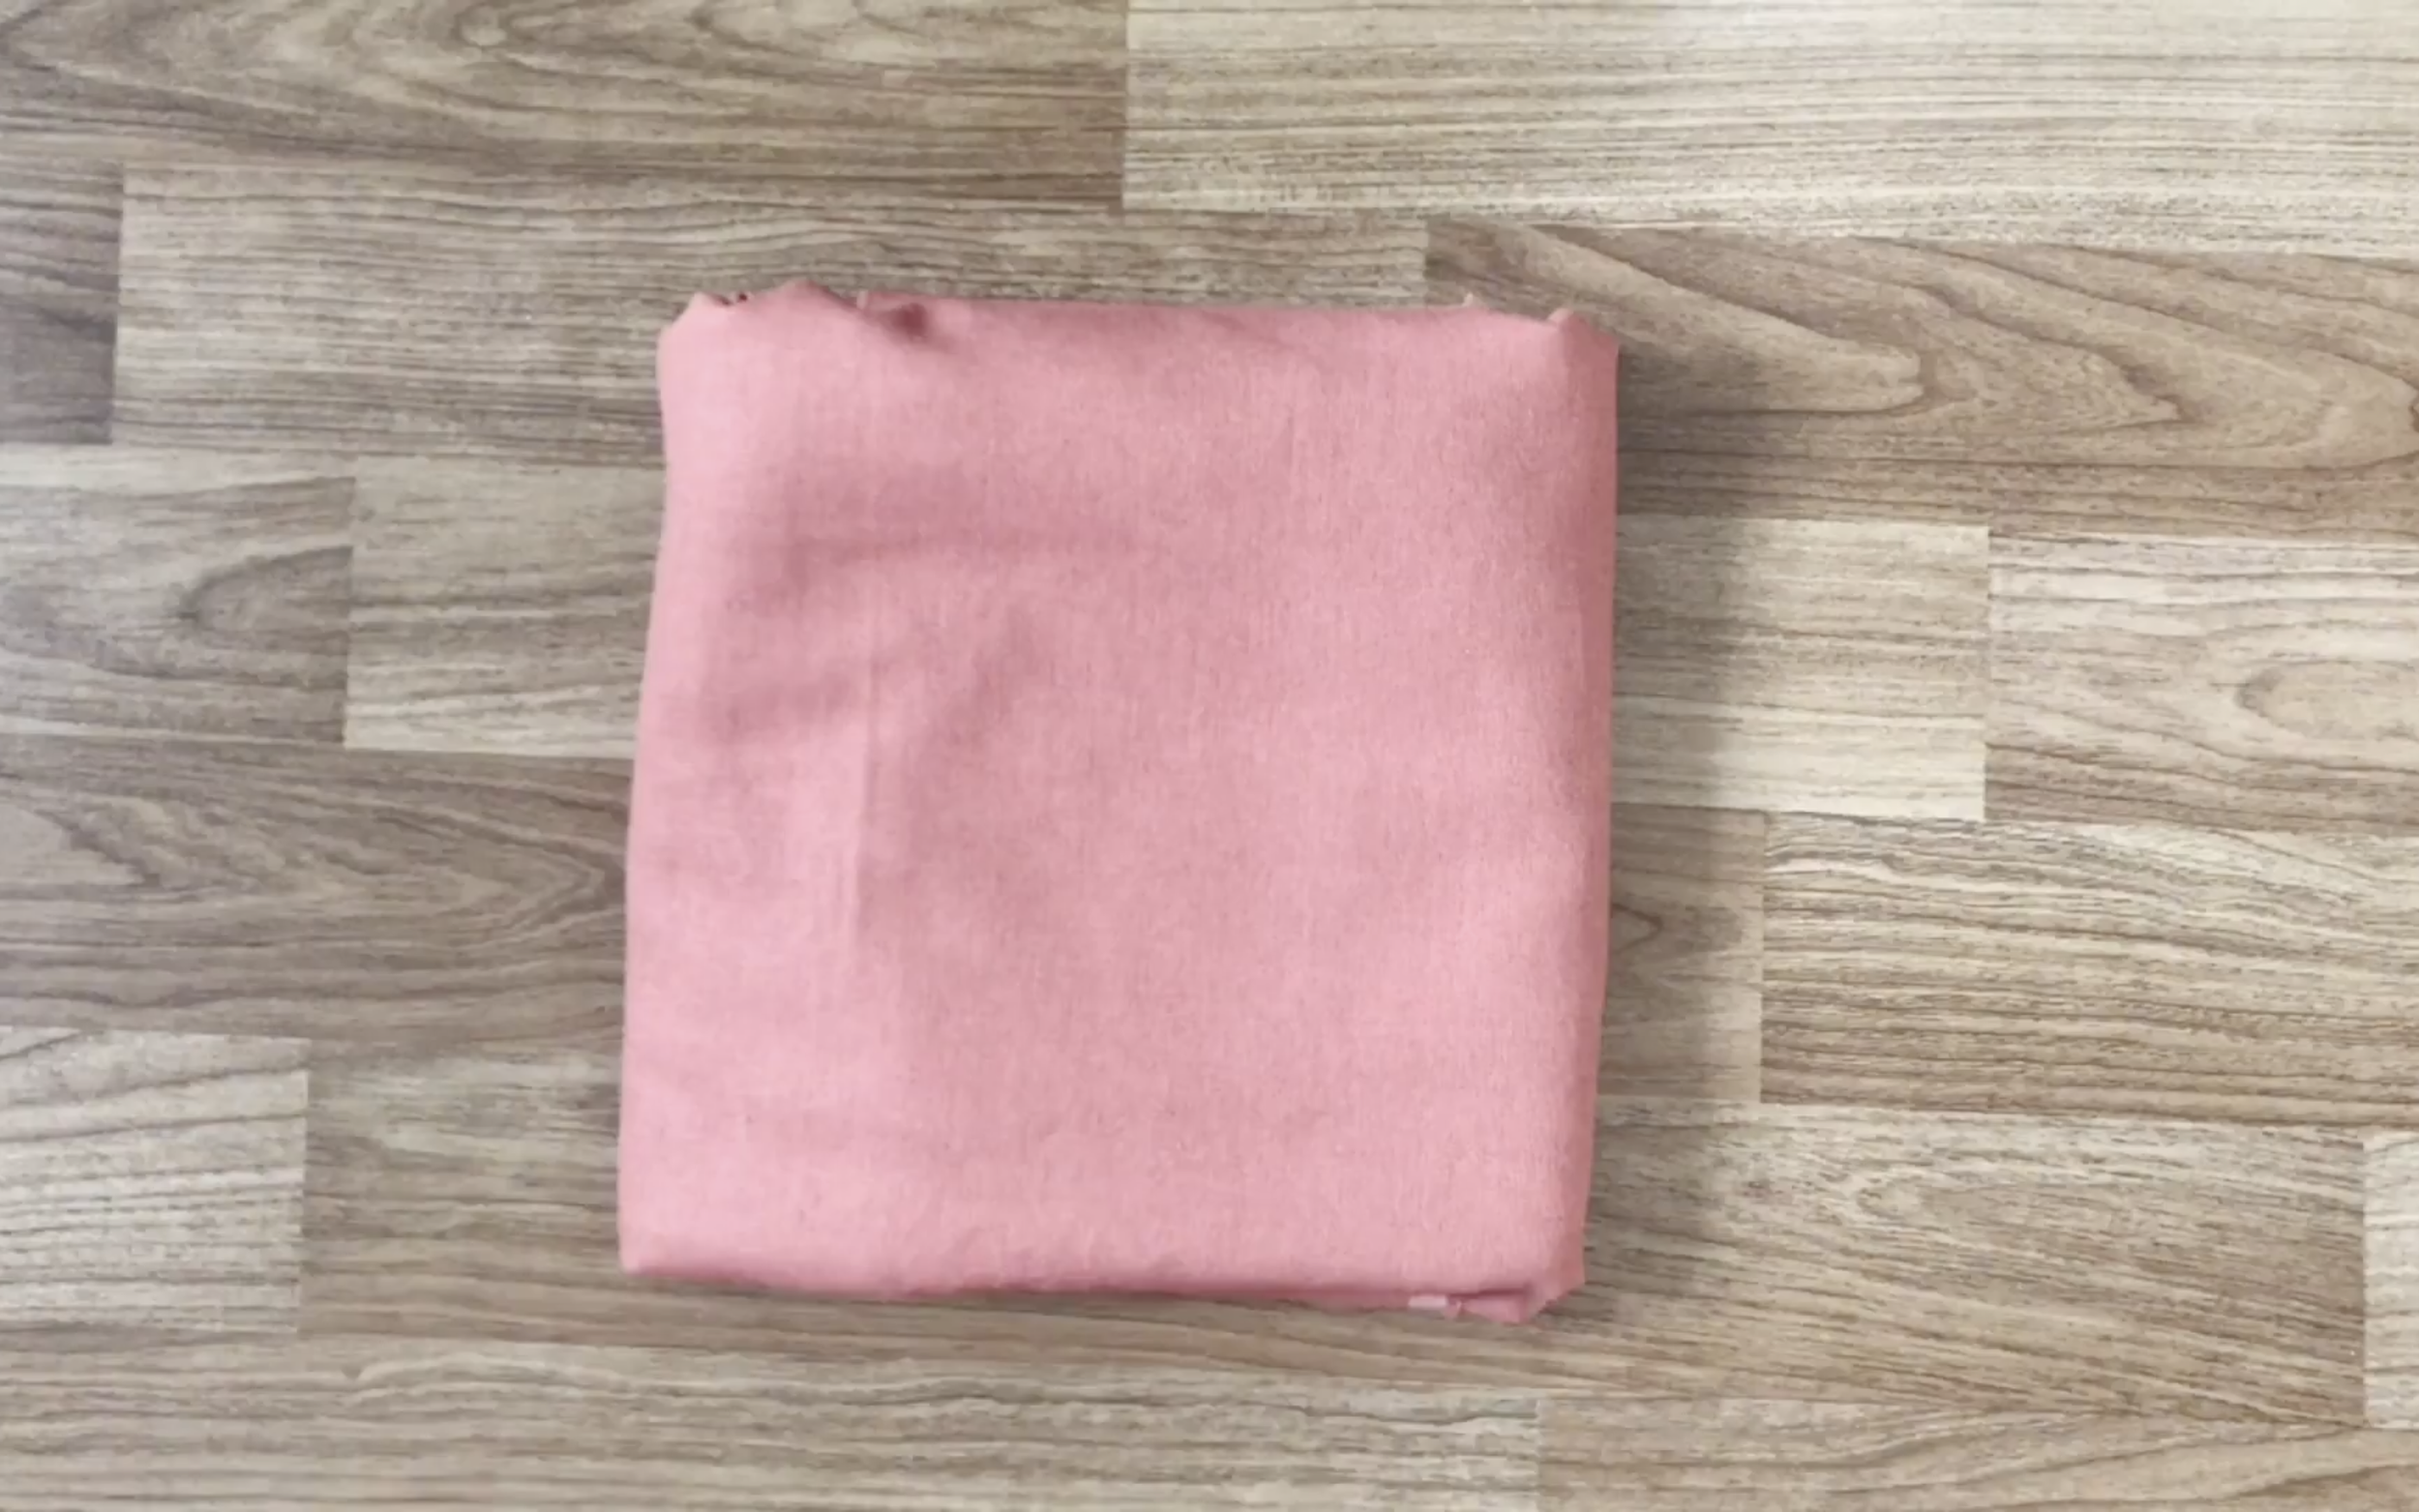
Loose linen in terracota color
Pattern paper
Sewing machine
Pins
Scissors
Ruler
Long stick
SEWING THE DRESS
THE BODY
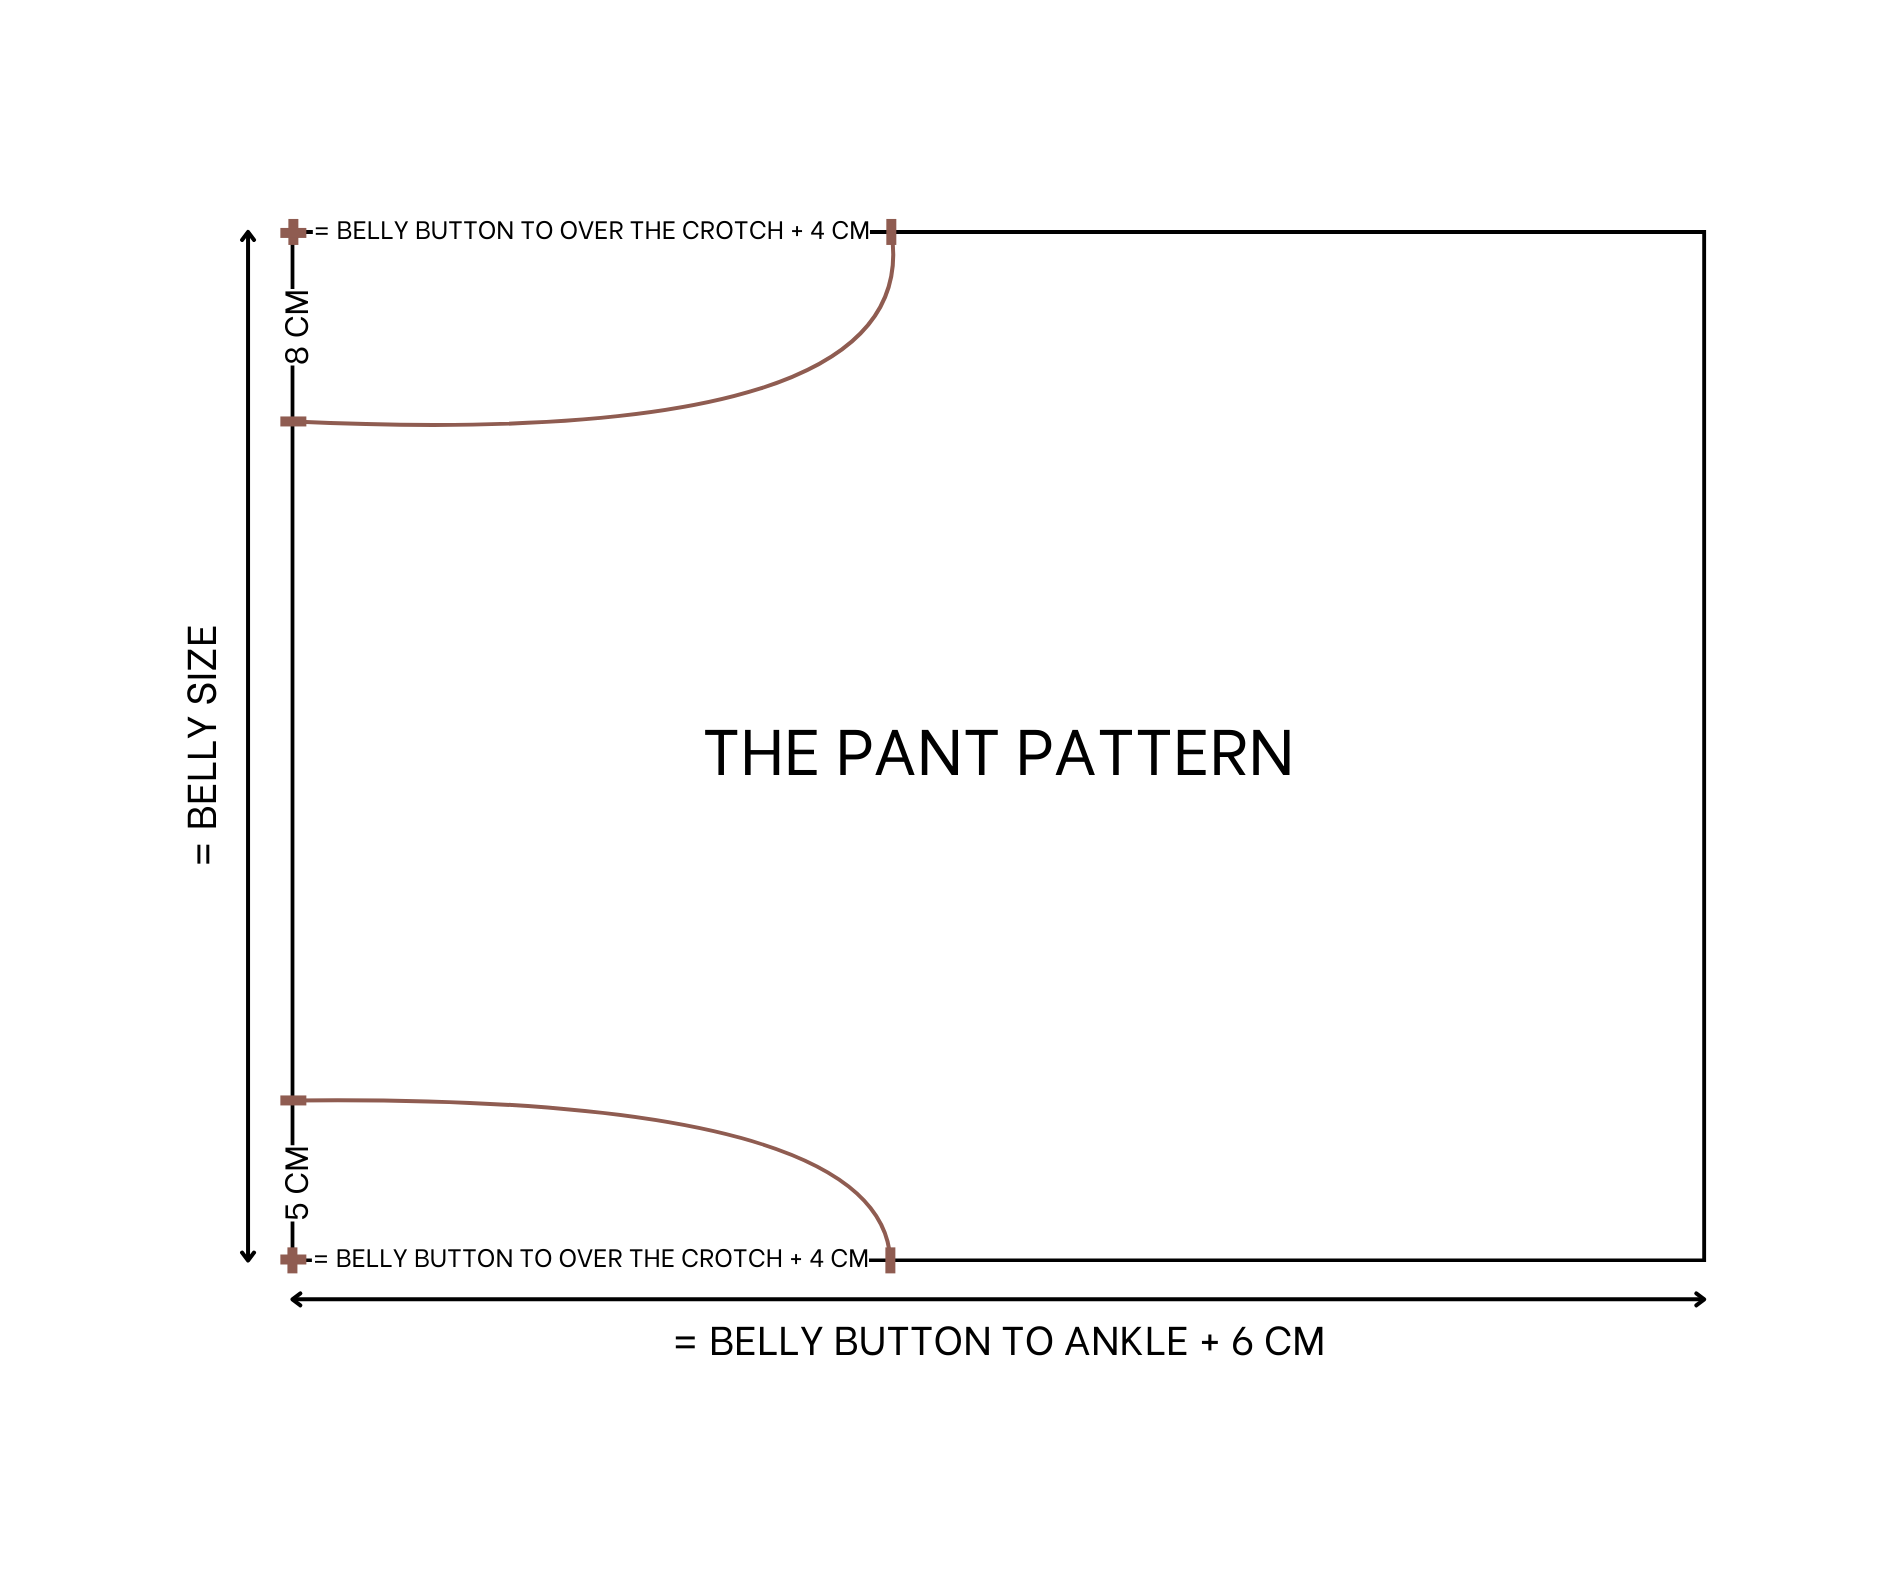
The pant pattern
THE PANT PATTERN
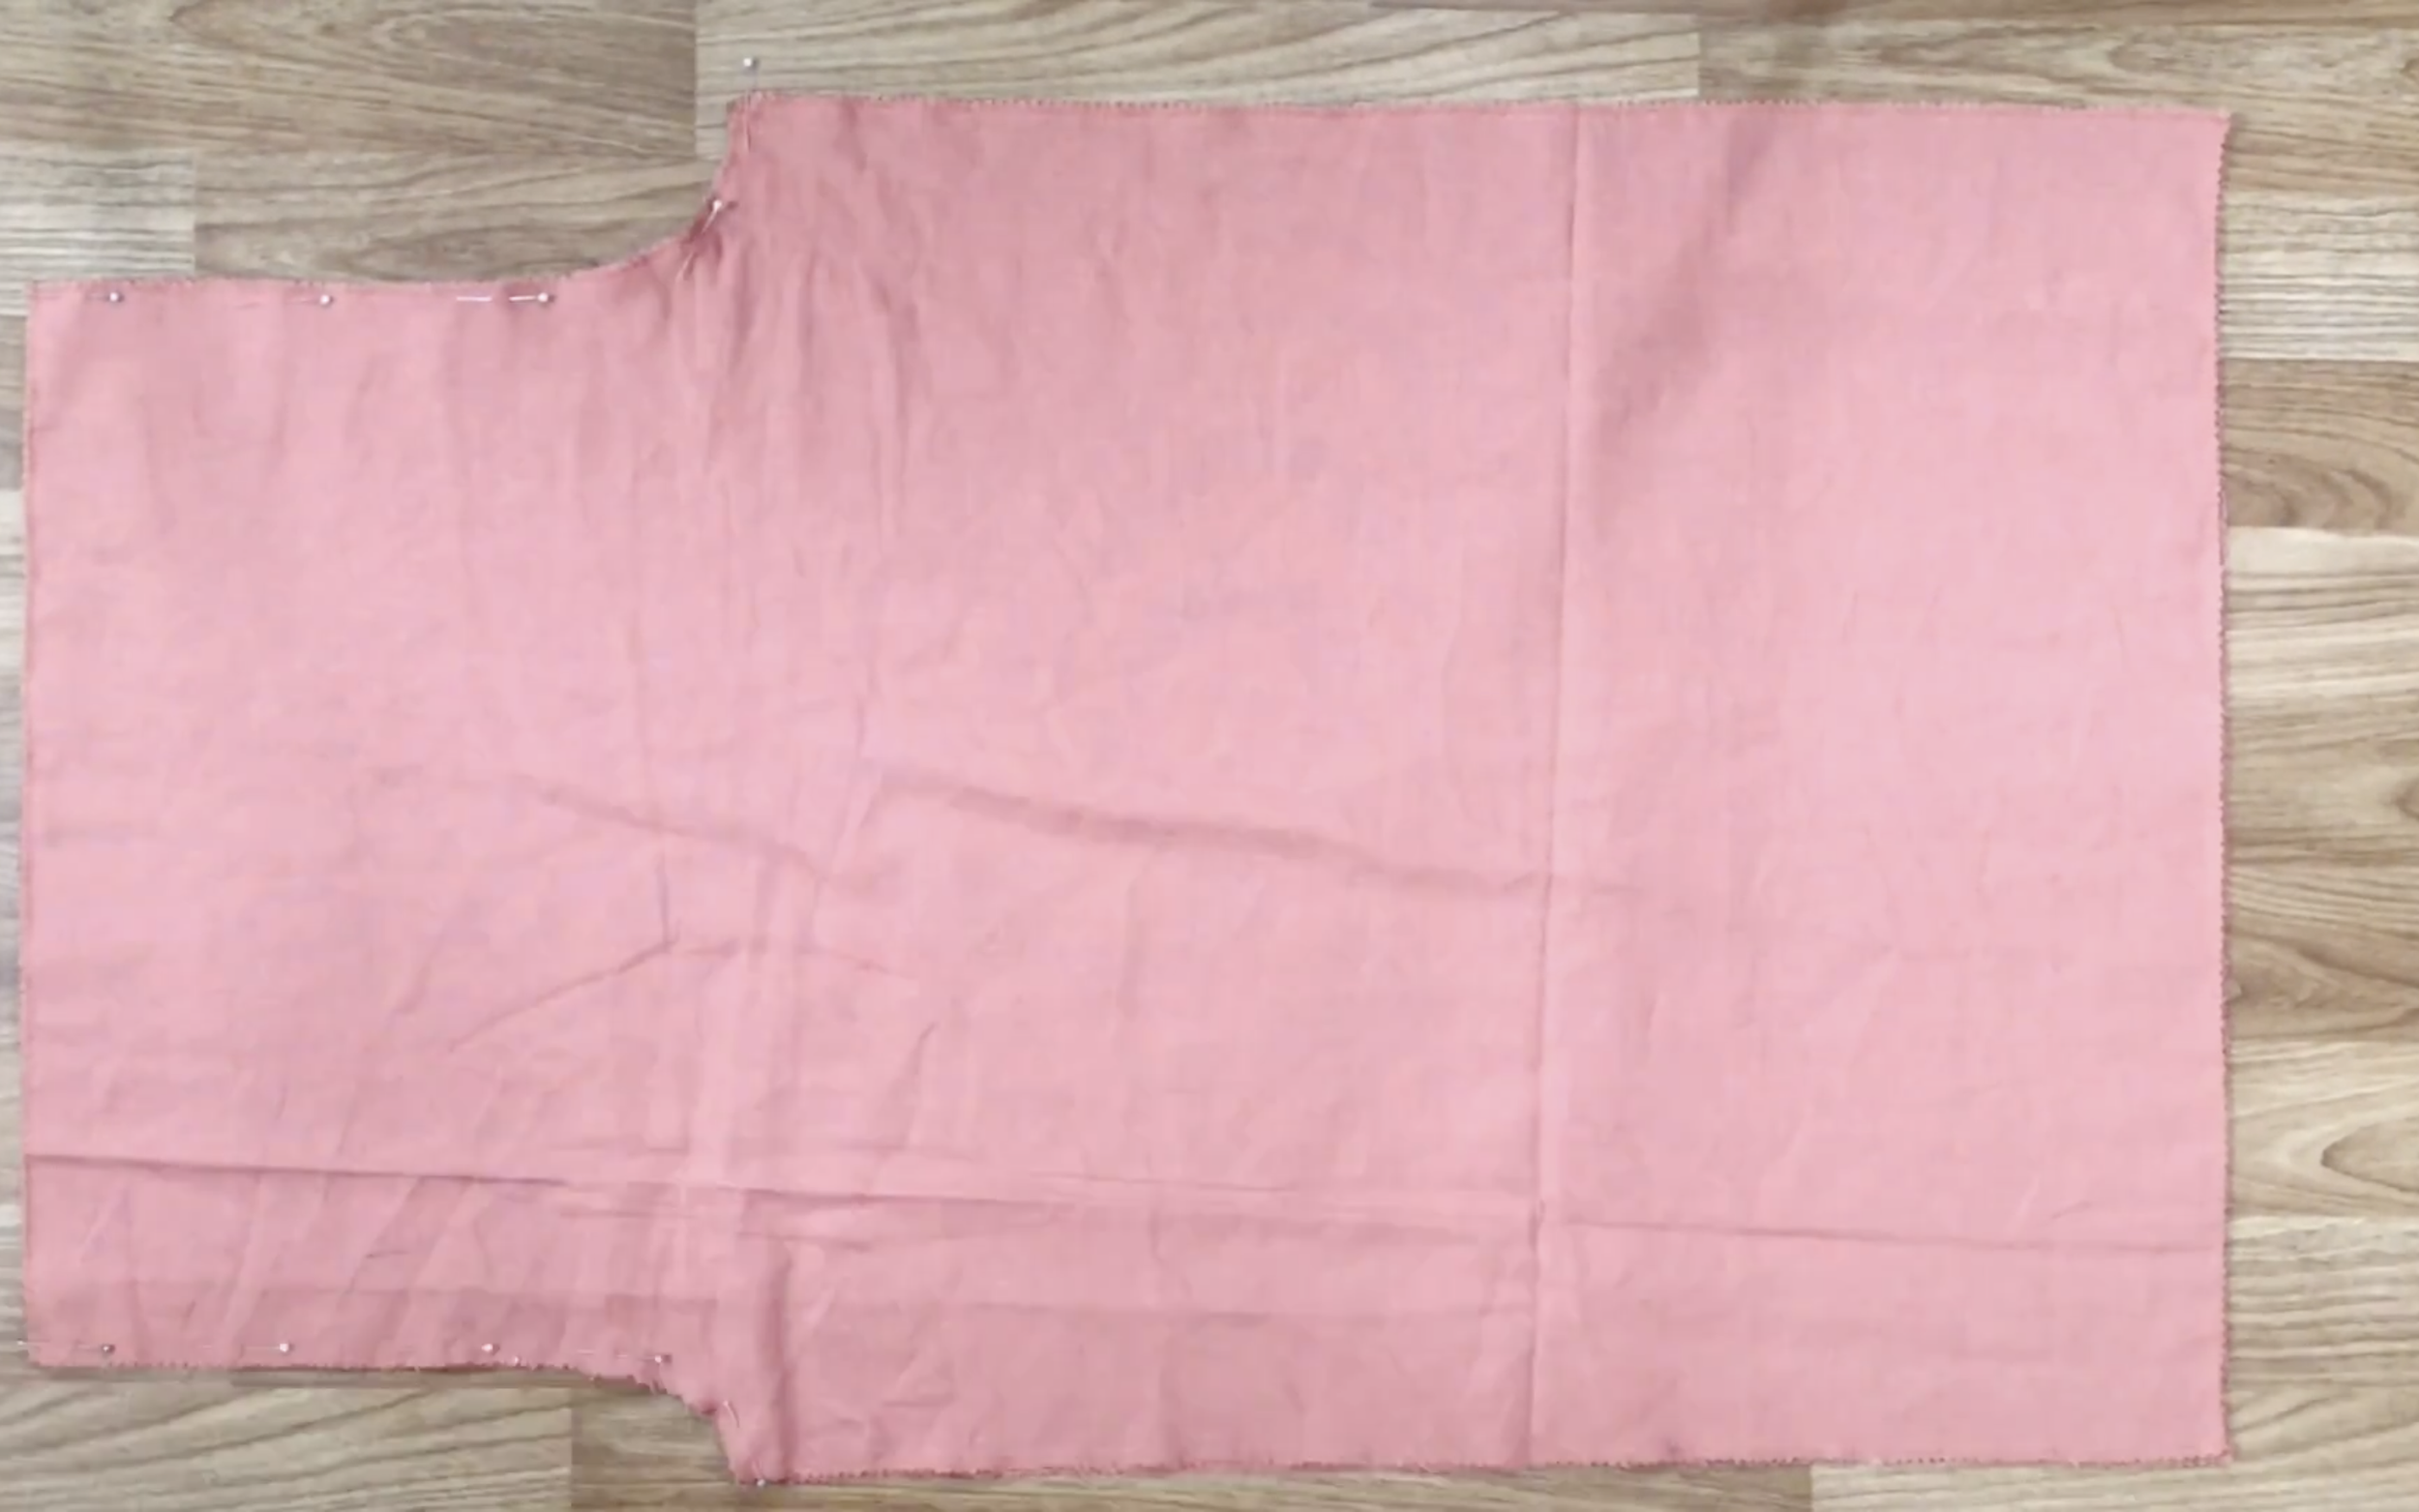
Draw a horizontal line right next to the edge of the fabric after folding it in half.
Then from the top, go down 64cm, which is the belly size, making the width of the legs 64cm. If a bigger leg is desired, go down longer.
For the length of the pants, mark at 110cm, which is the length from the belly to over the ankle, plus 6cm. The length can be adjusted as needed.
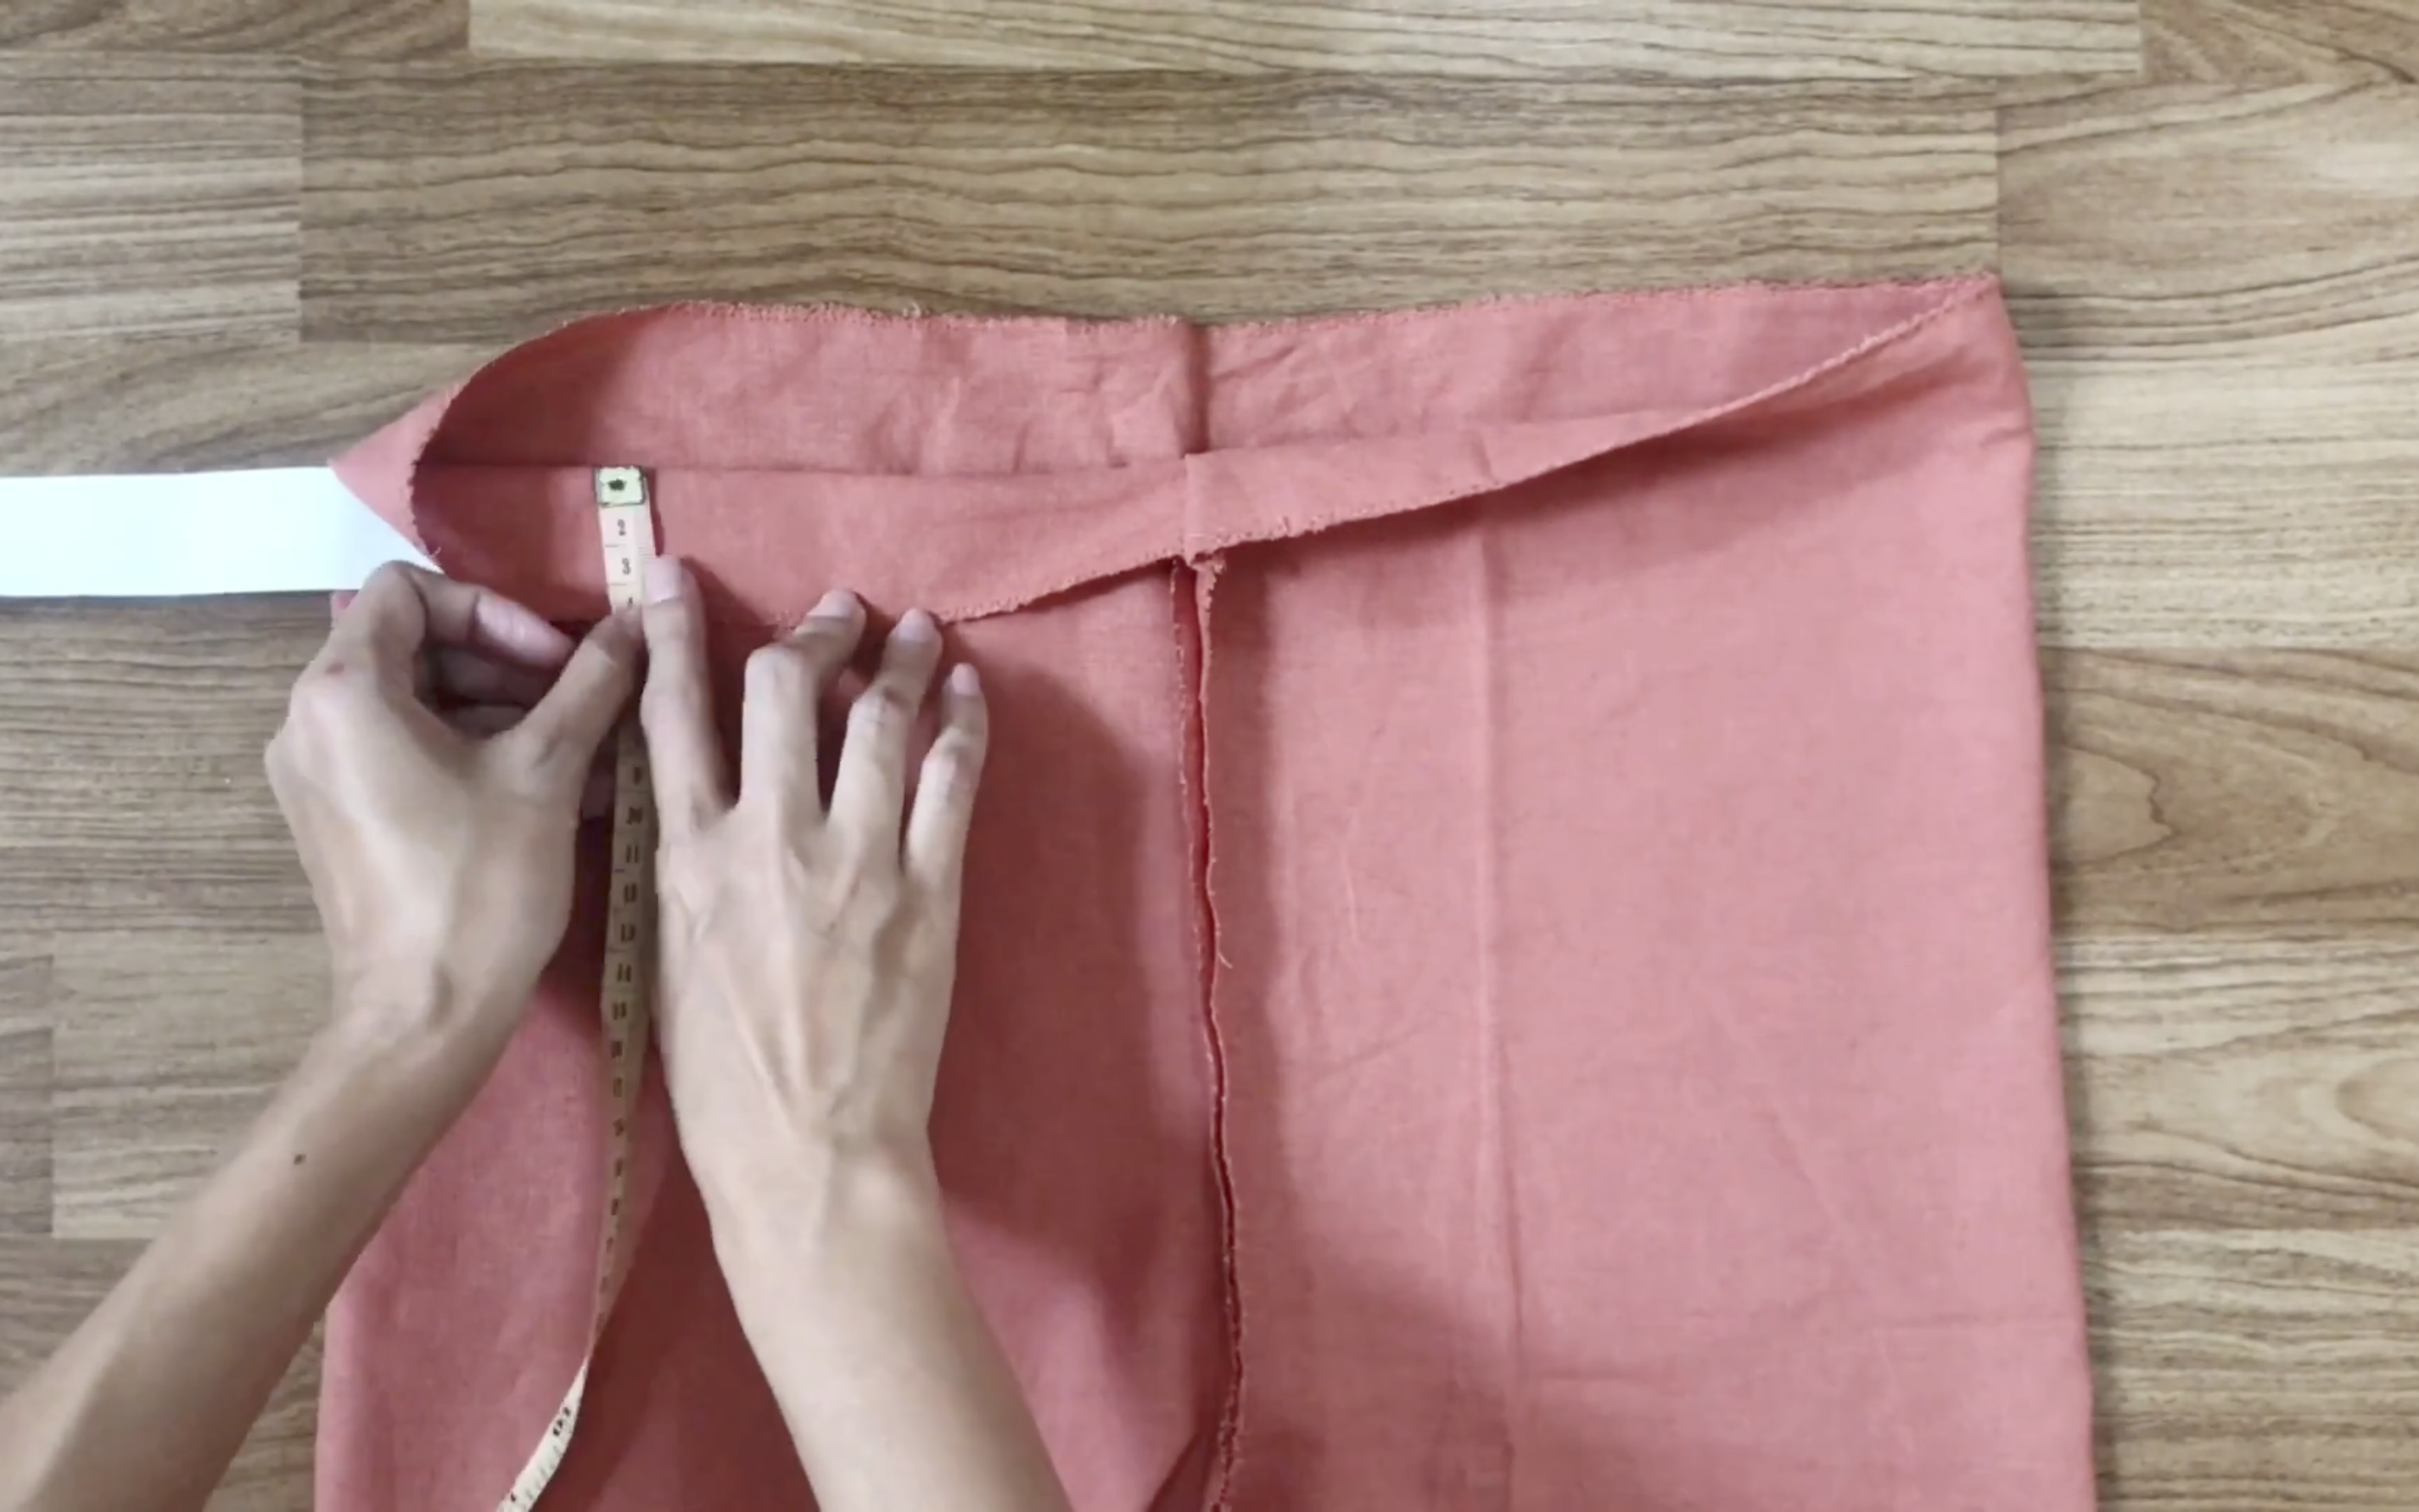
On one side of the rectangle, draw a line 5cm inside from the edge. Then mark at 34cm, which is the width from the belly button to over the crotch, plus 4cm. Draw an arc from that mark to connect to the line drawn inside. This will be the front of the pants.
For the back of the pants, at the other side, do similarly to the front, but draw the line 8cm inside from the edge of the rectangle.
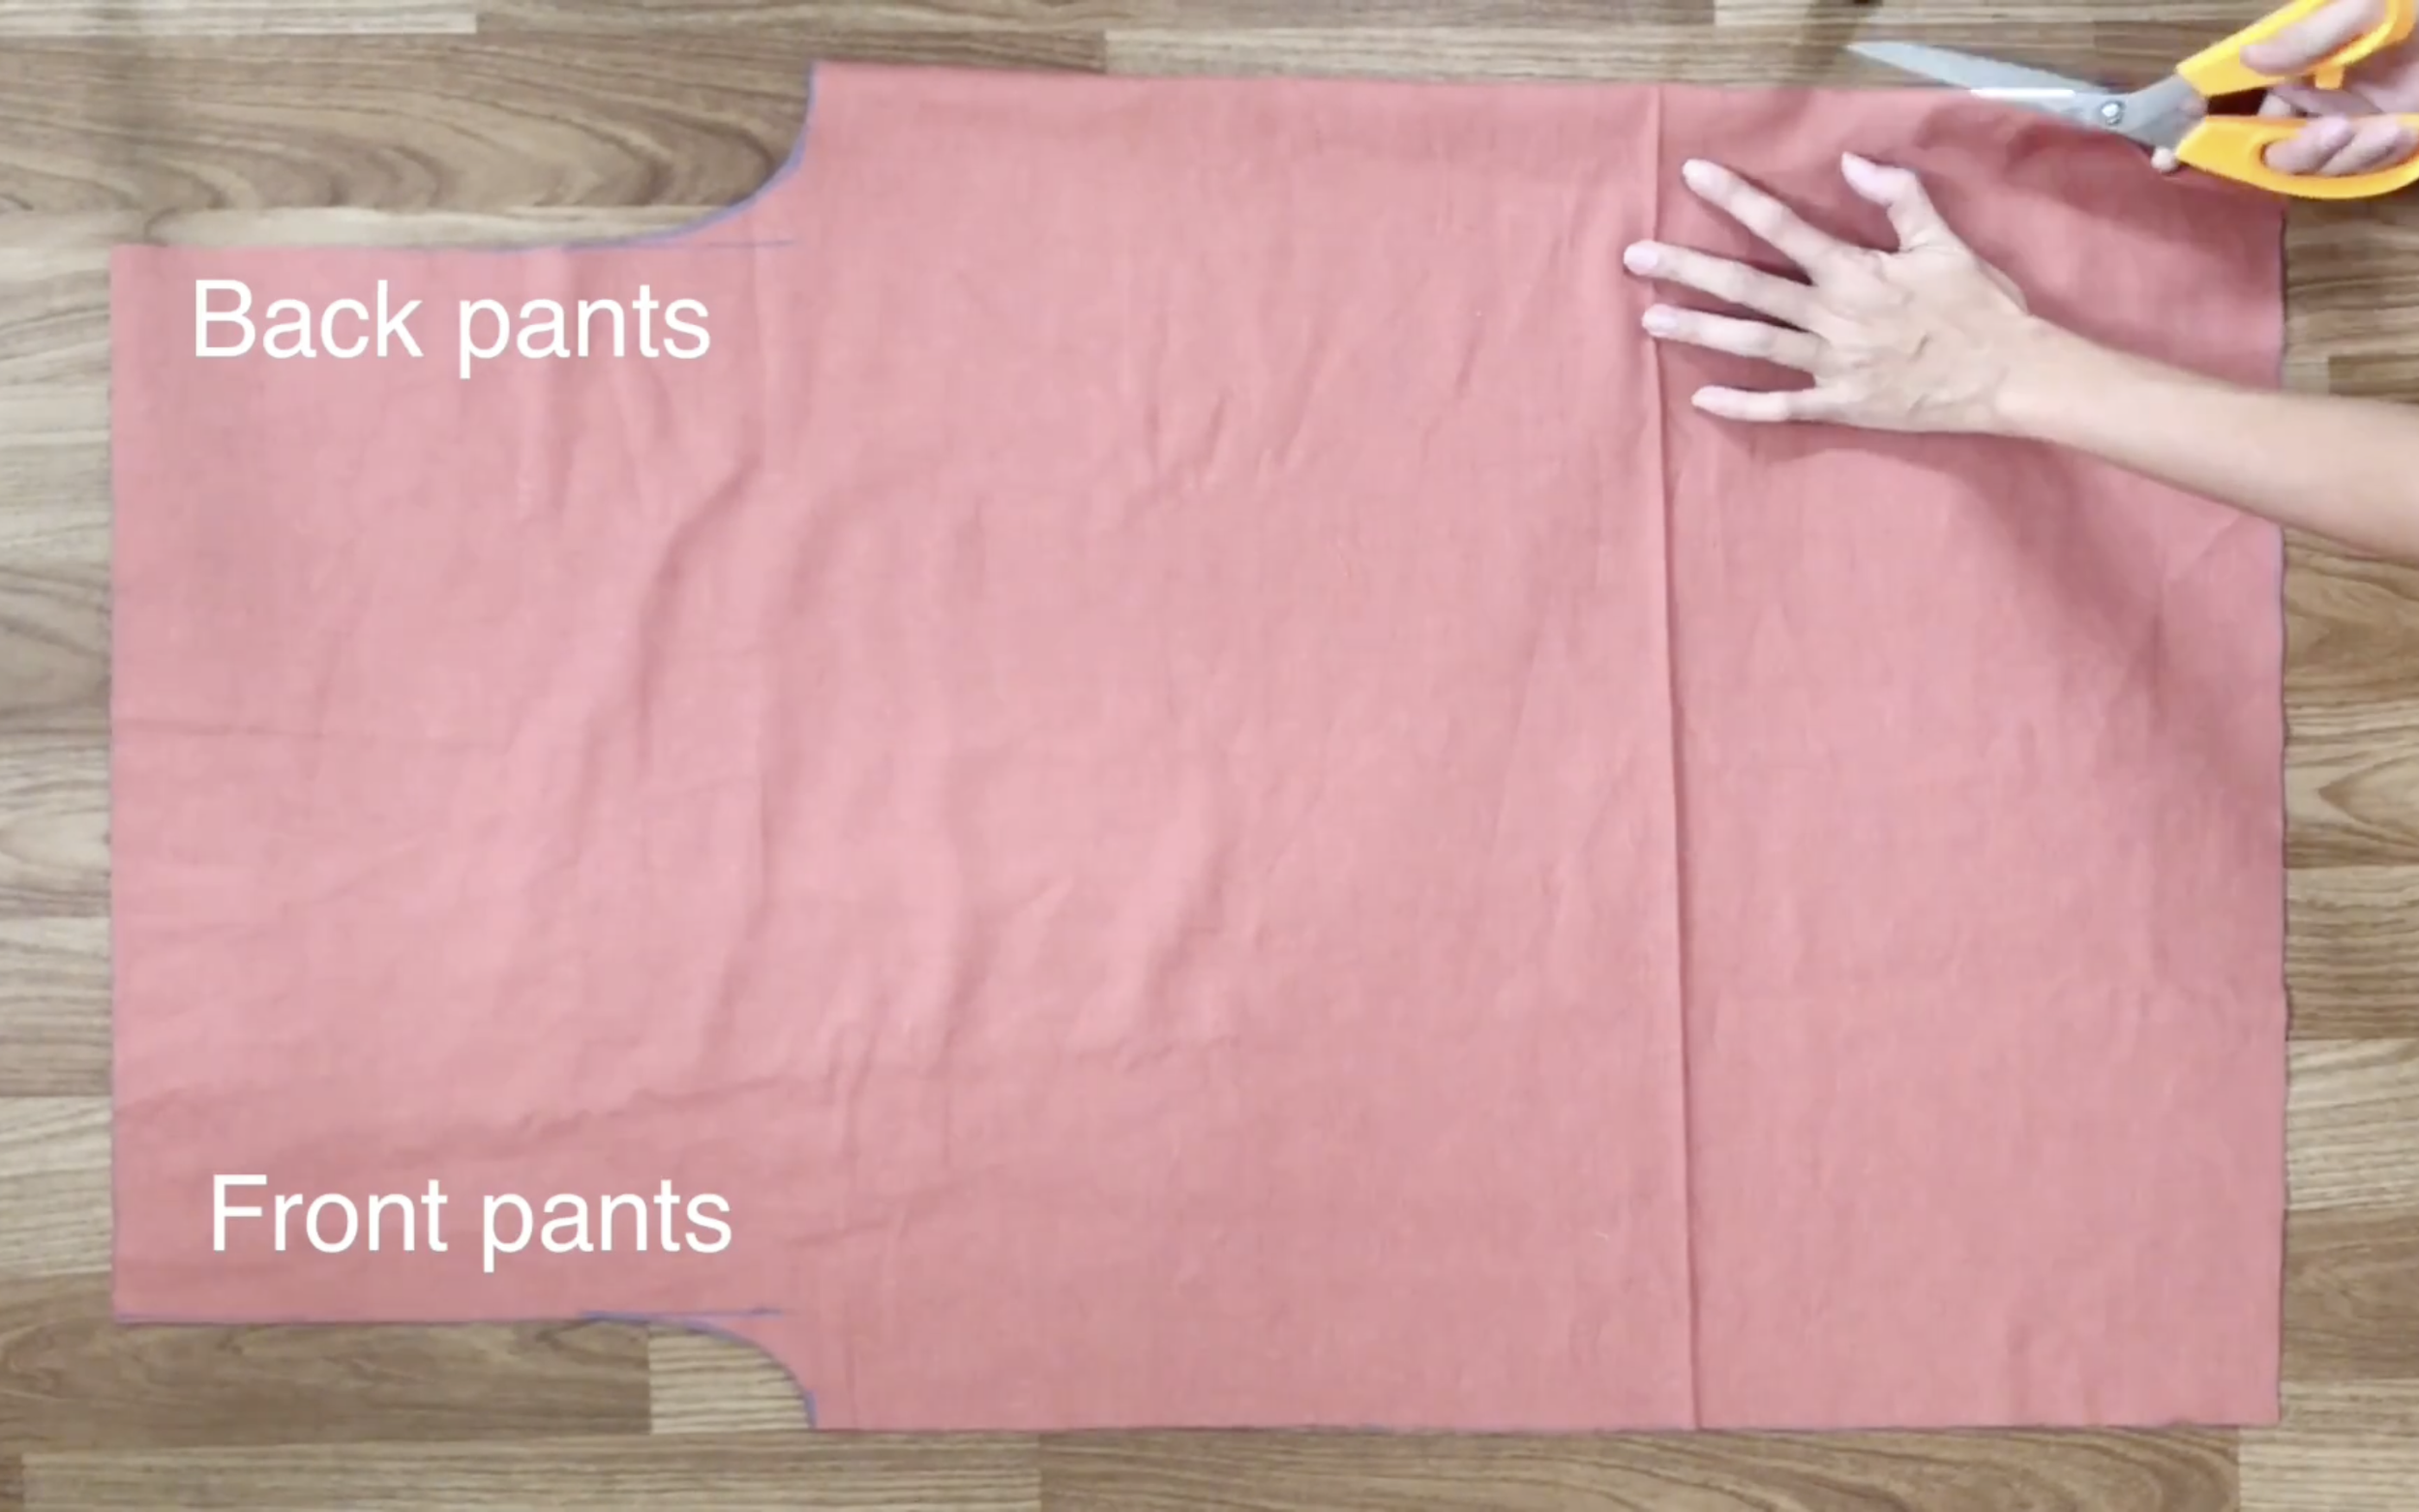
Then cut along the drawing lines.
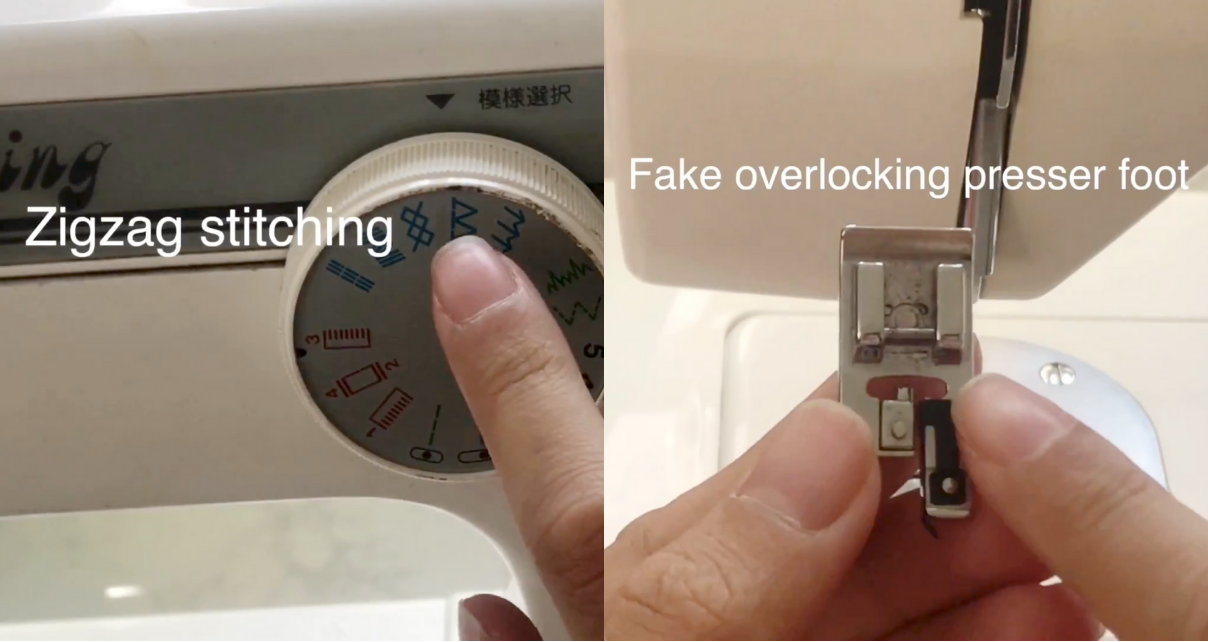
After that, overlock the cut edges by using the zigzag stitching and the fake overlocking presser foot.
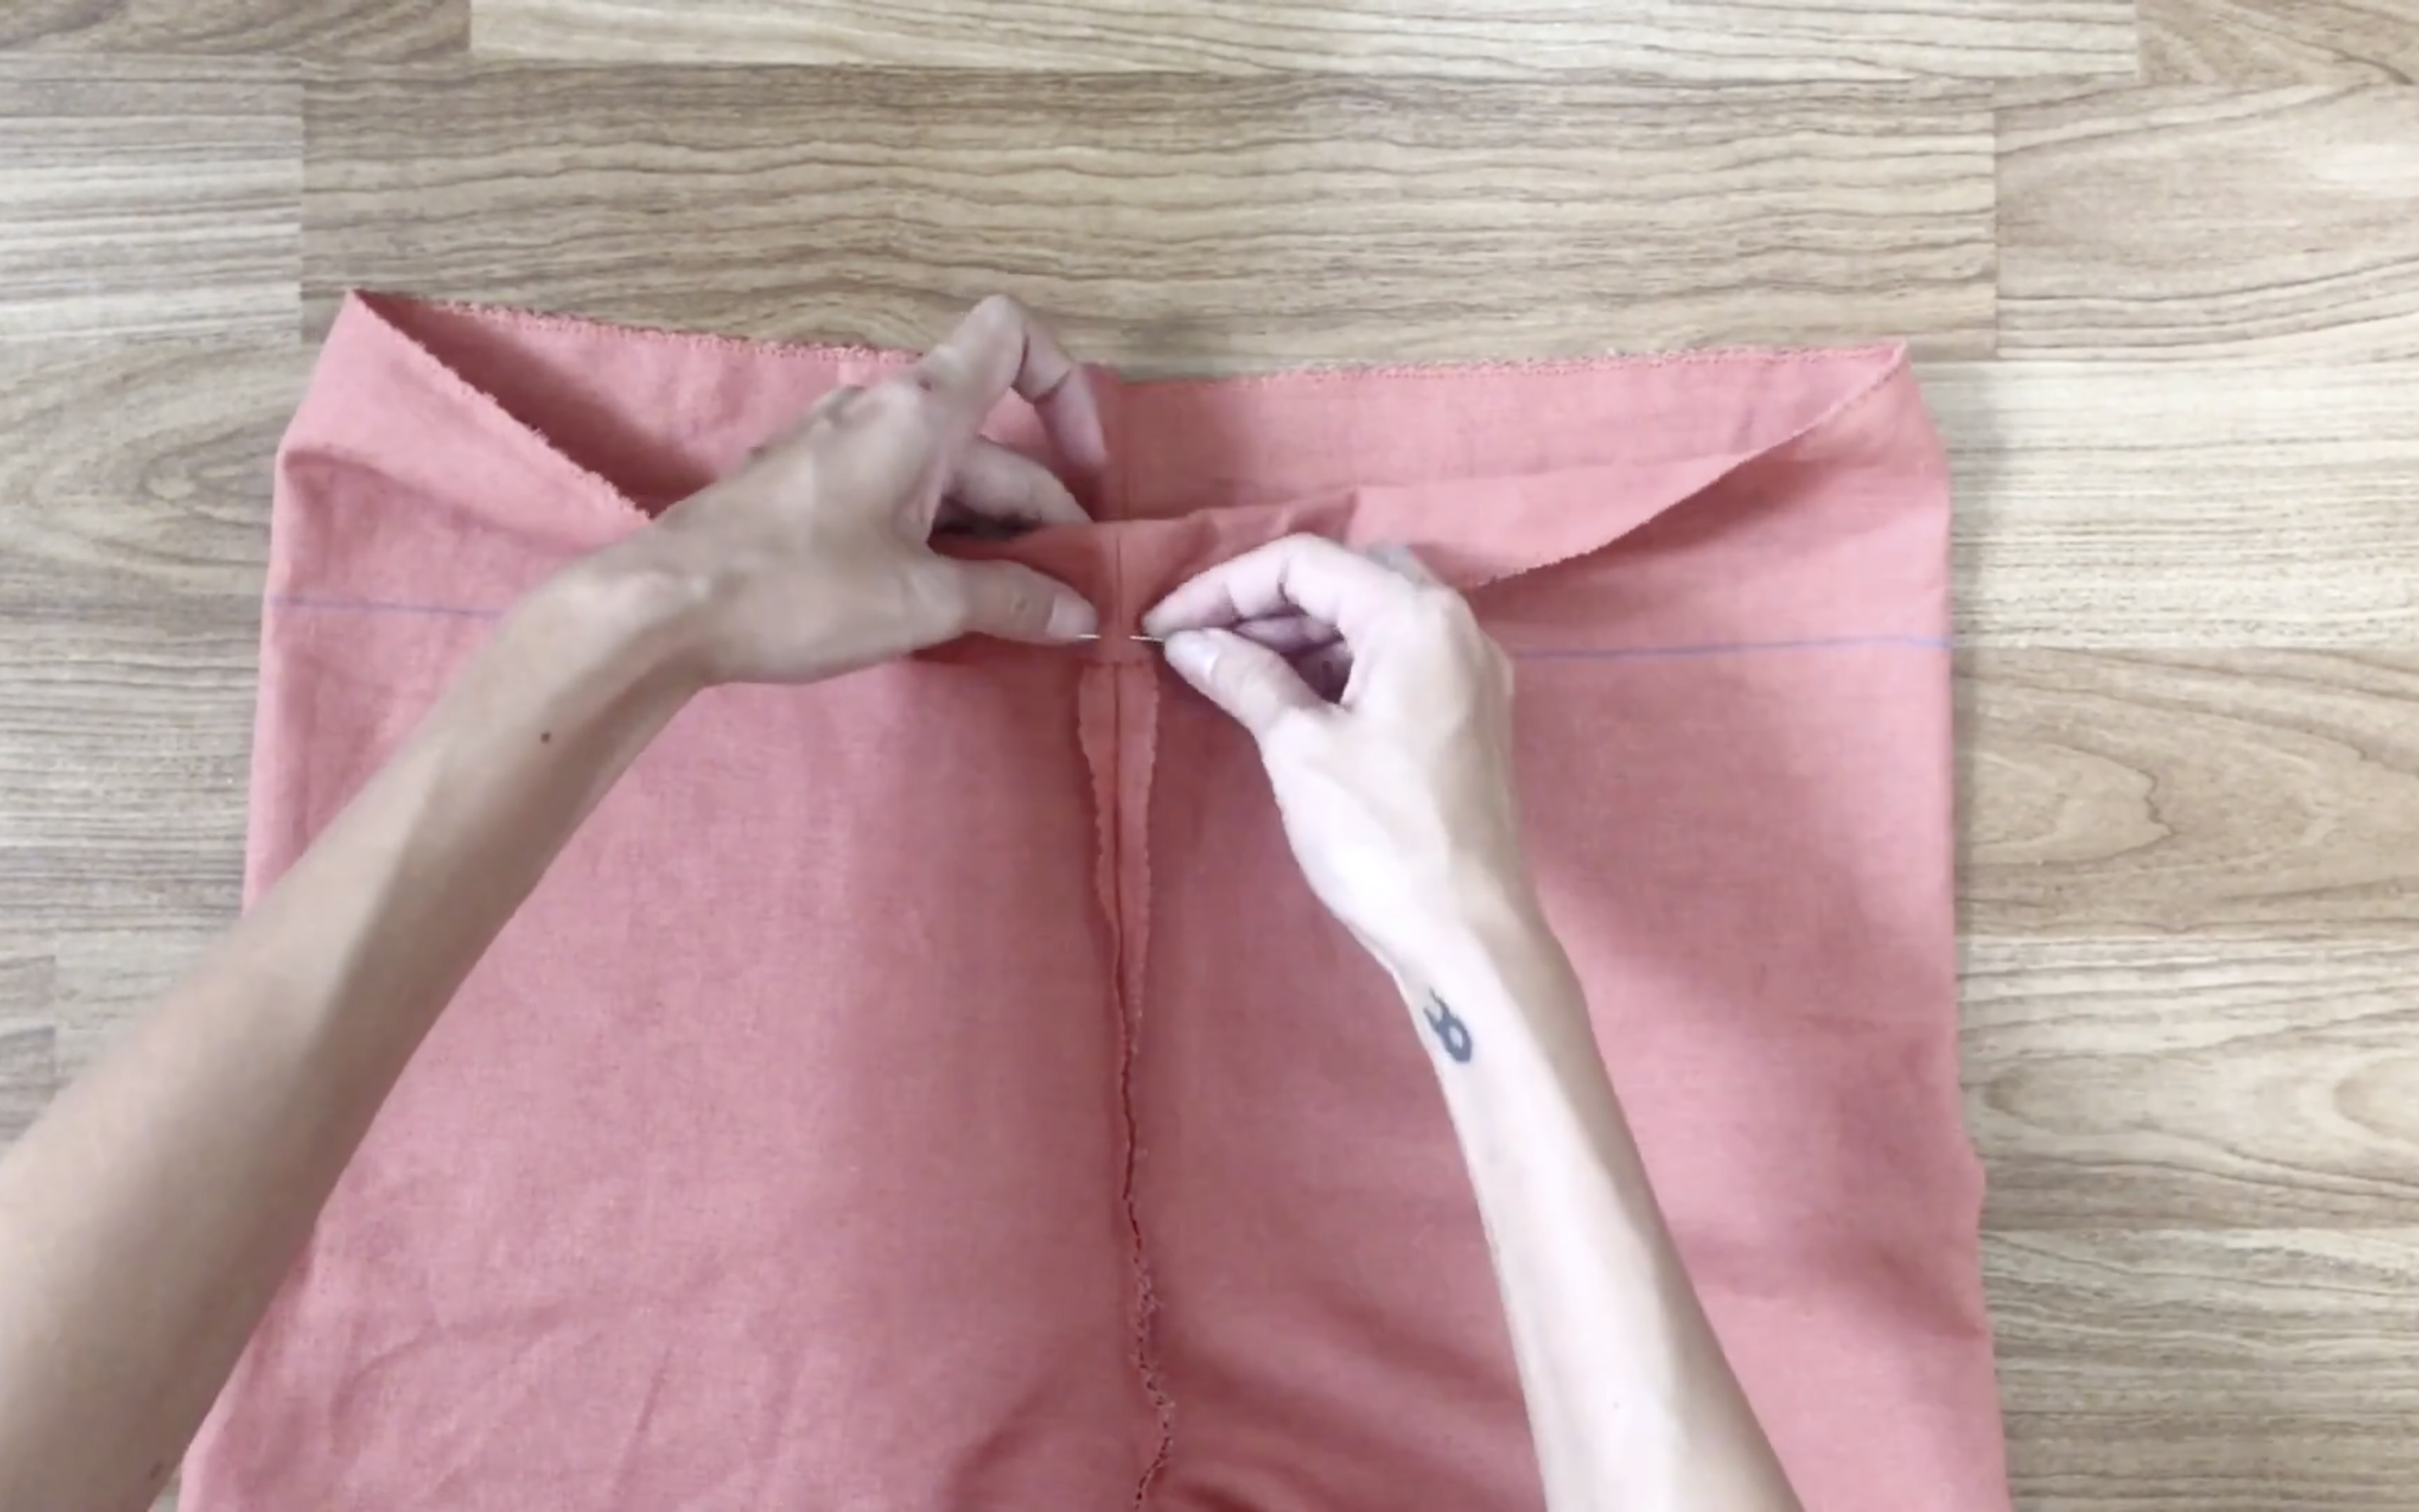
Connect the two rectangles together at the arc lines with pins and sew.
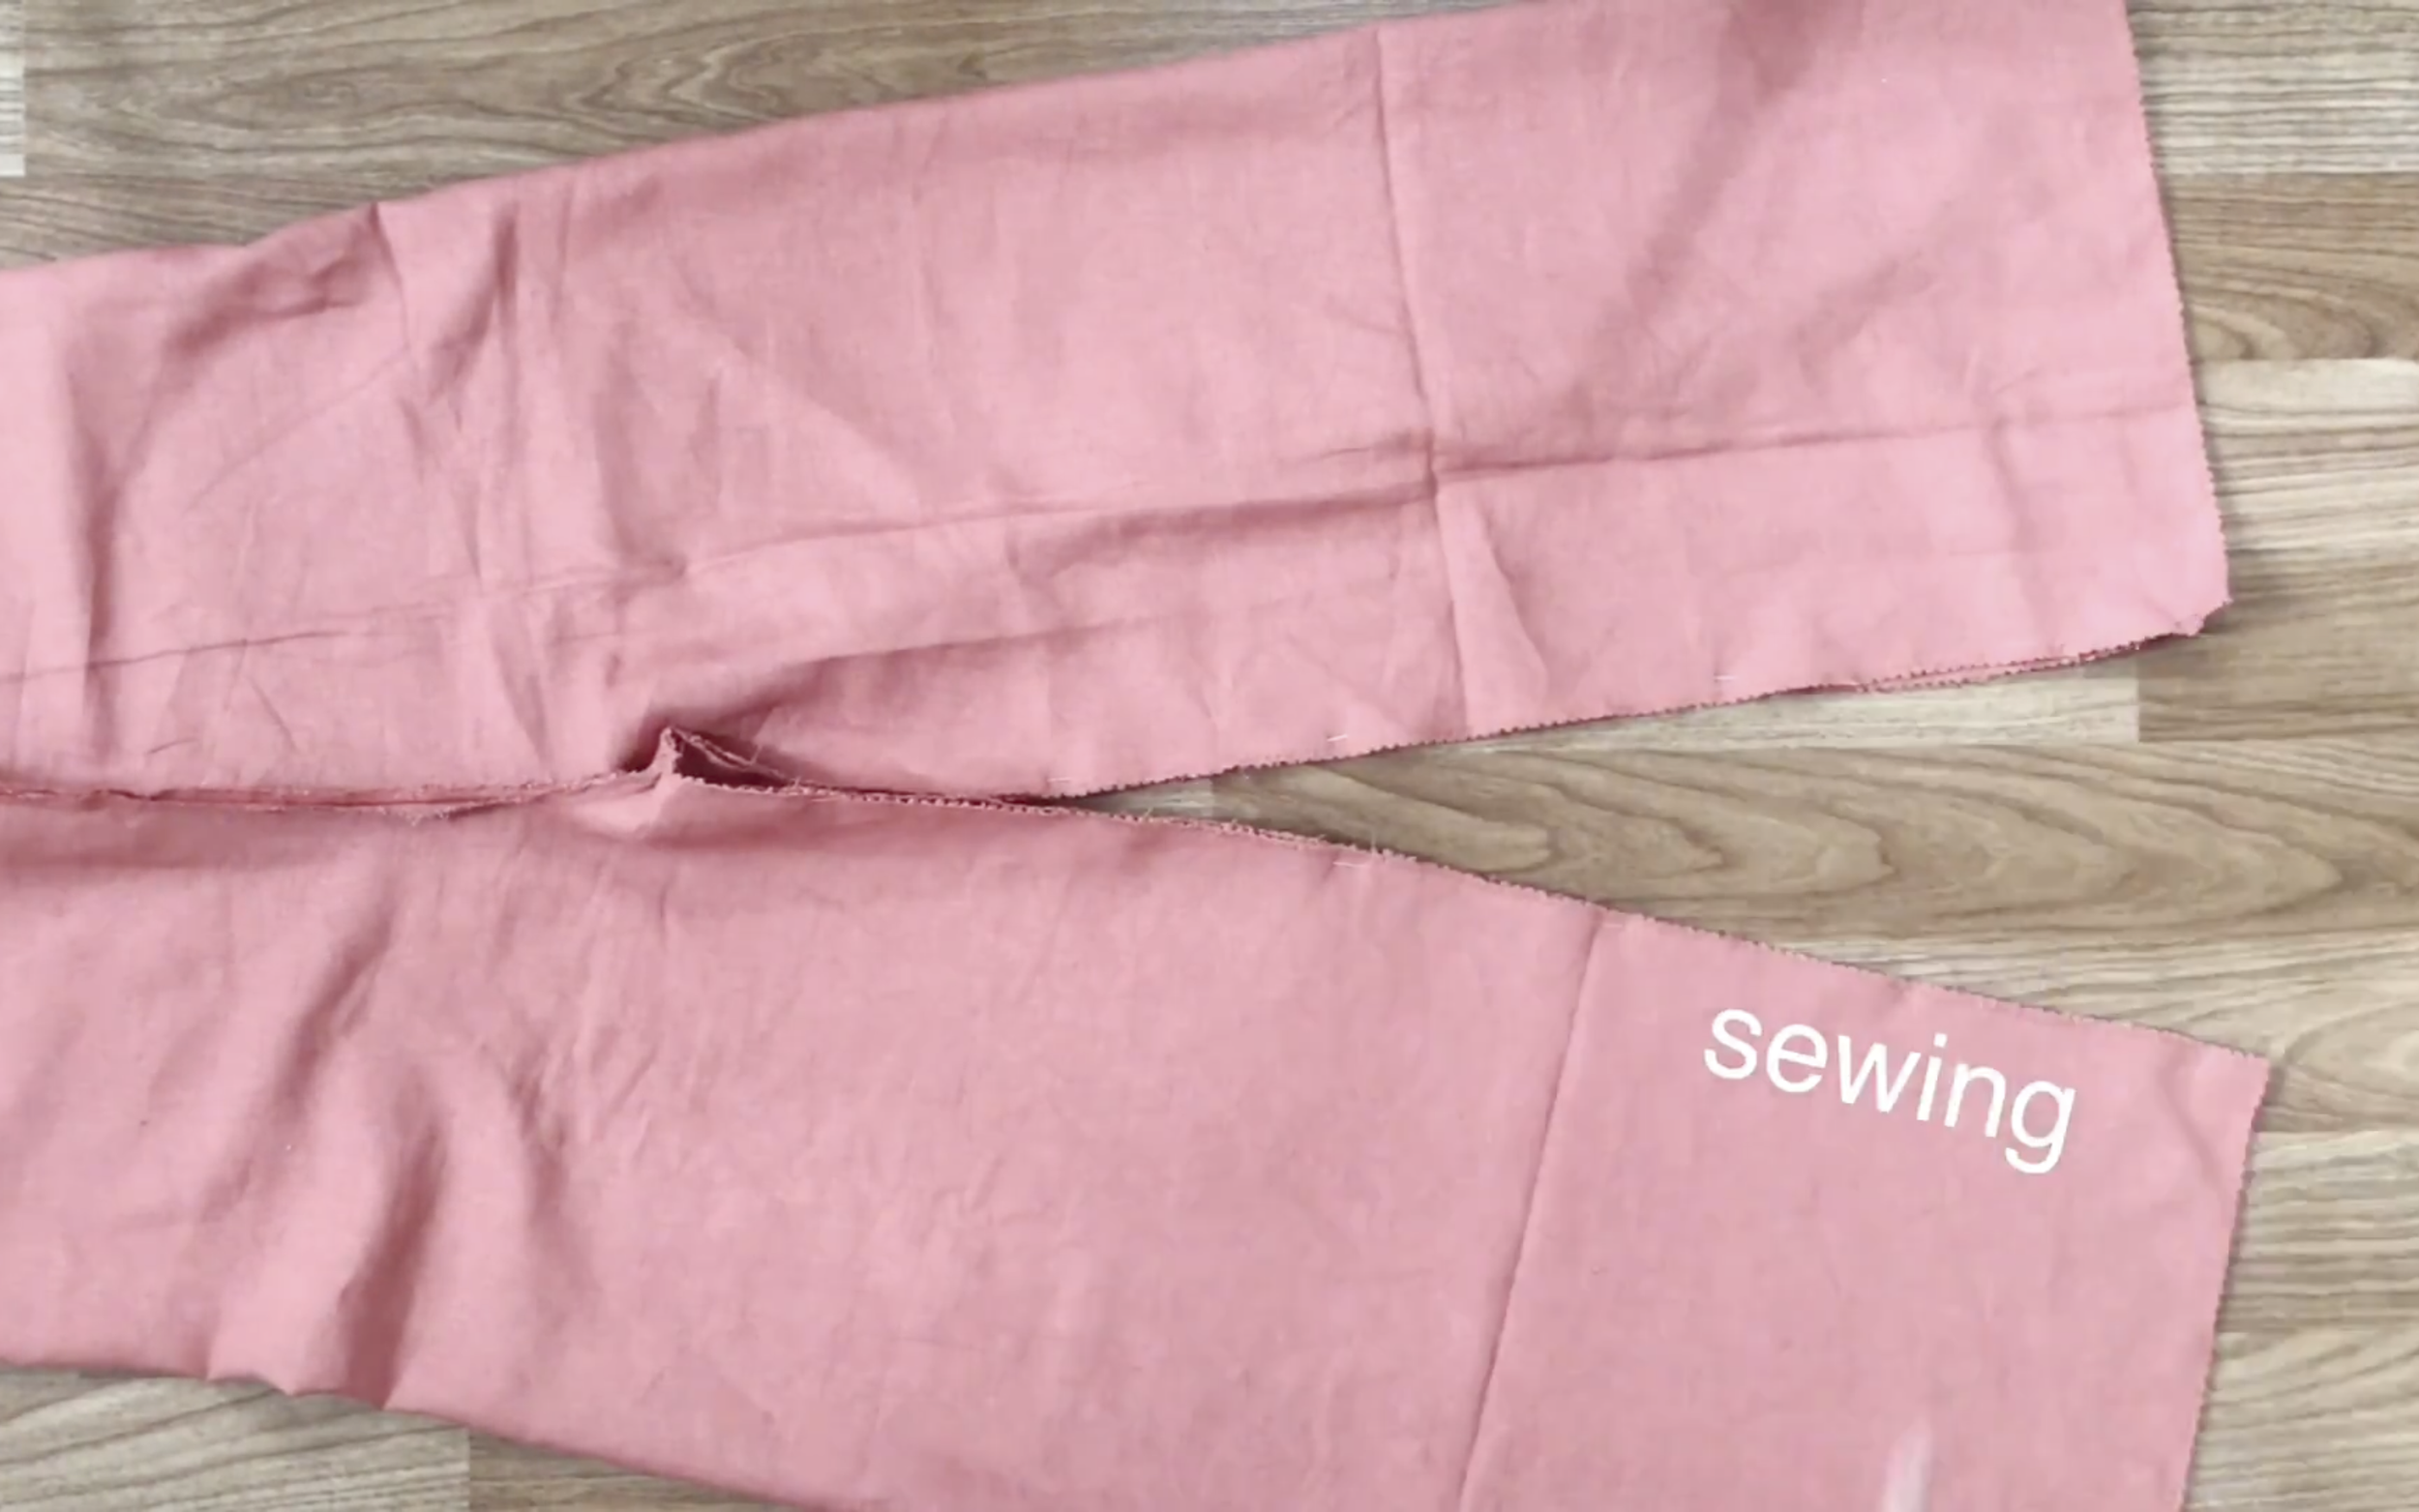
Next, connect the two legs together by starting at the crotch and then sewing down both legs.
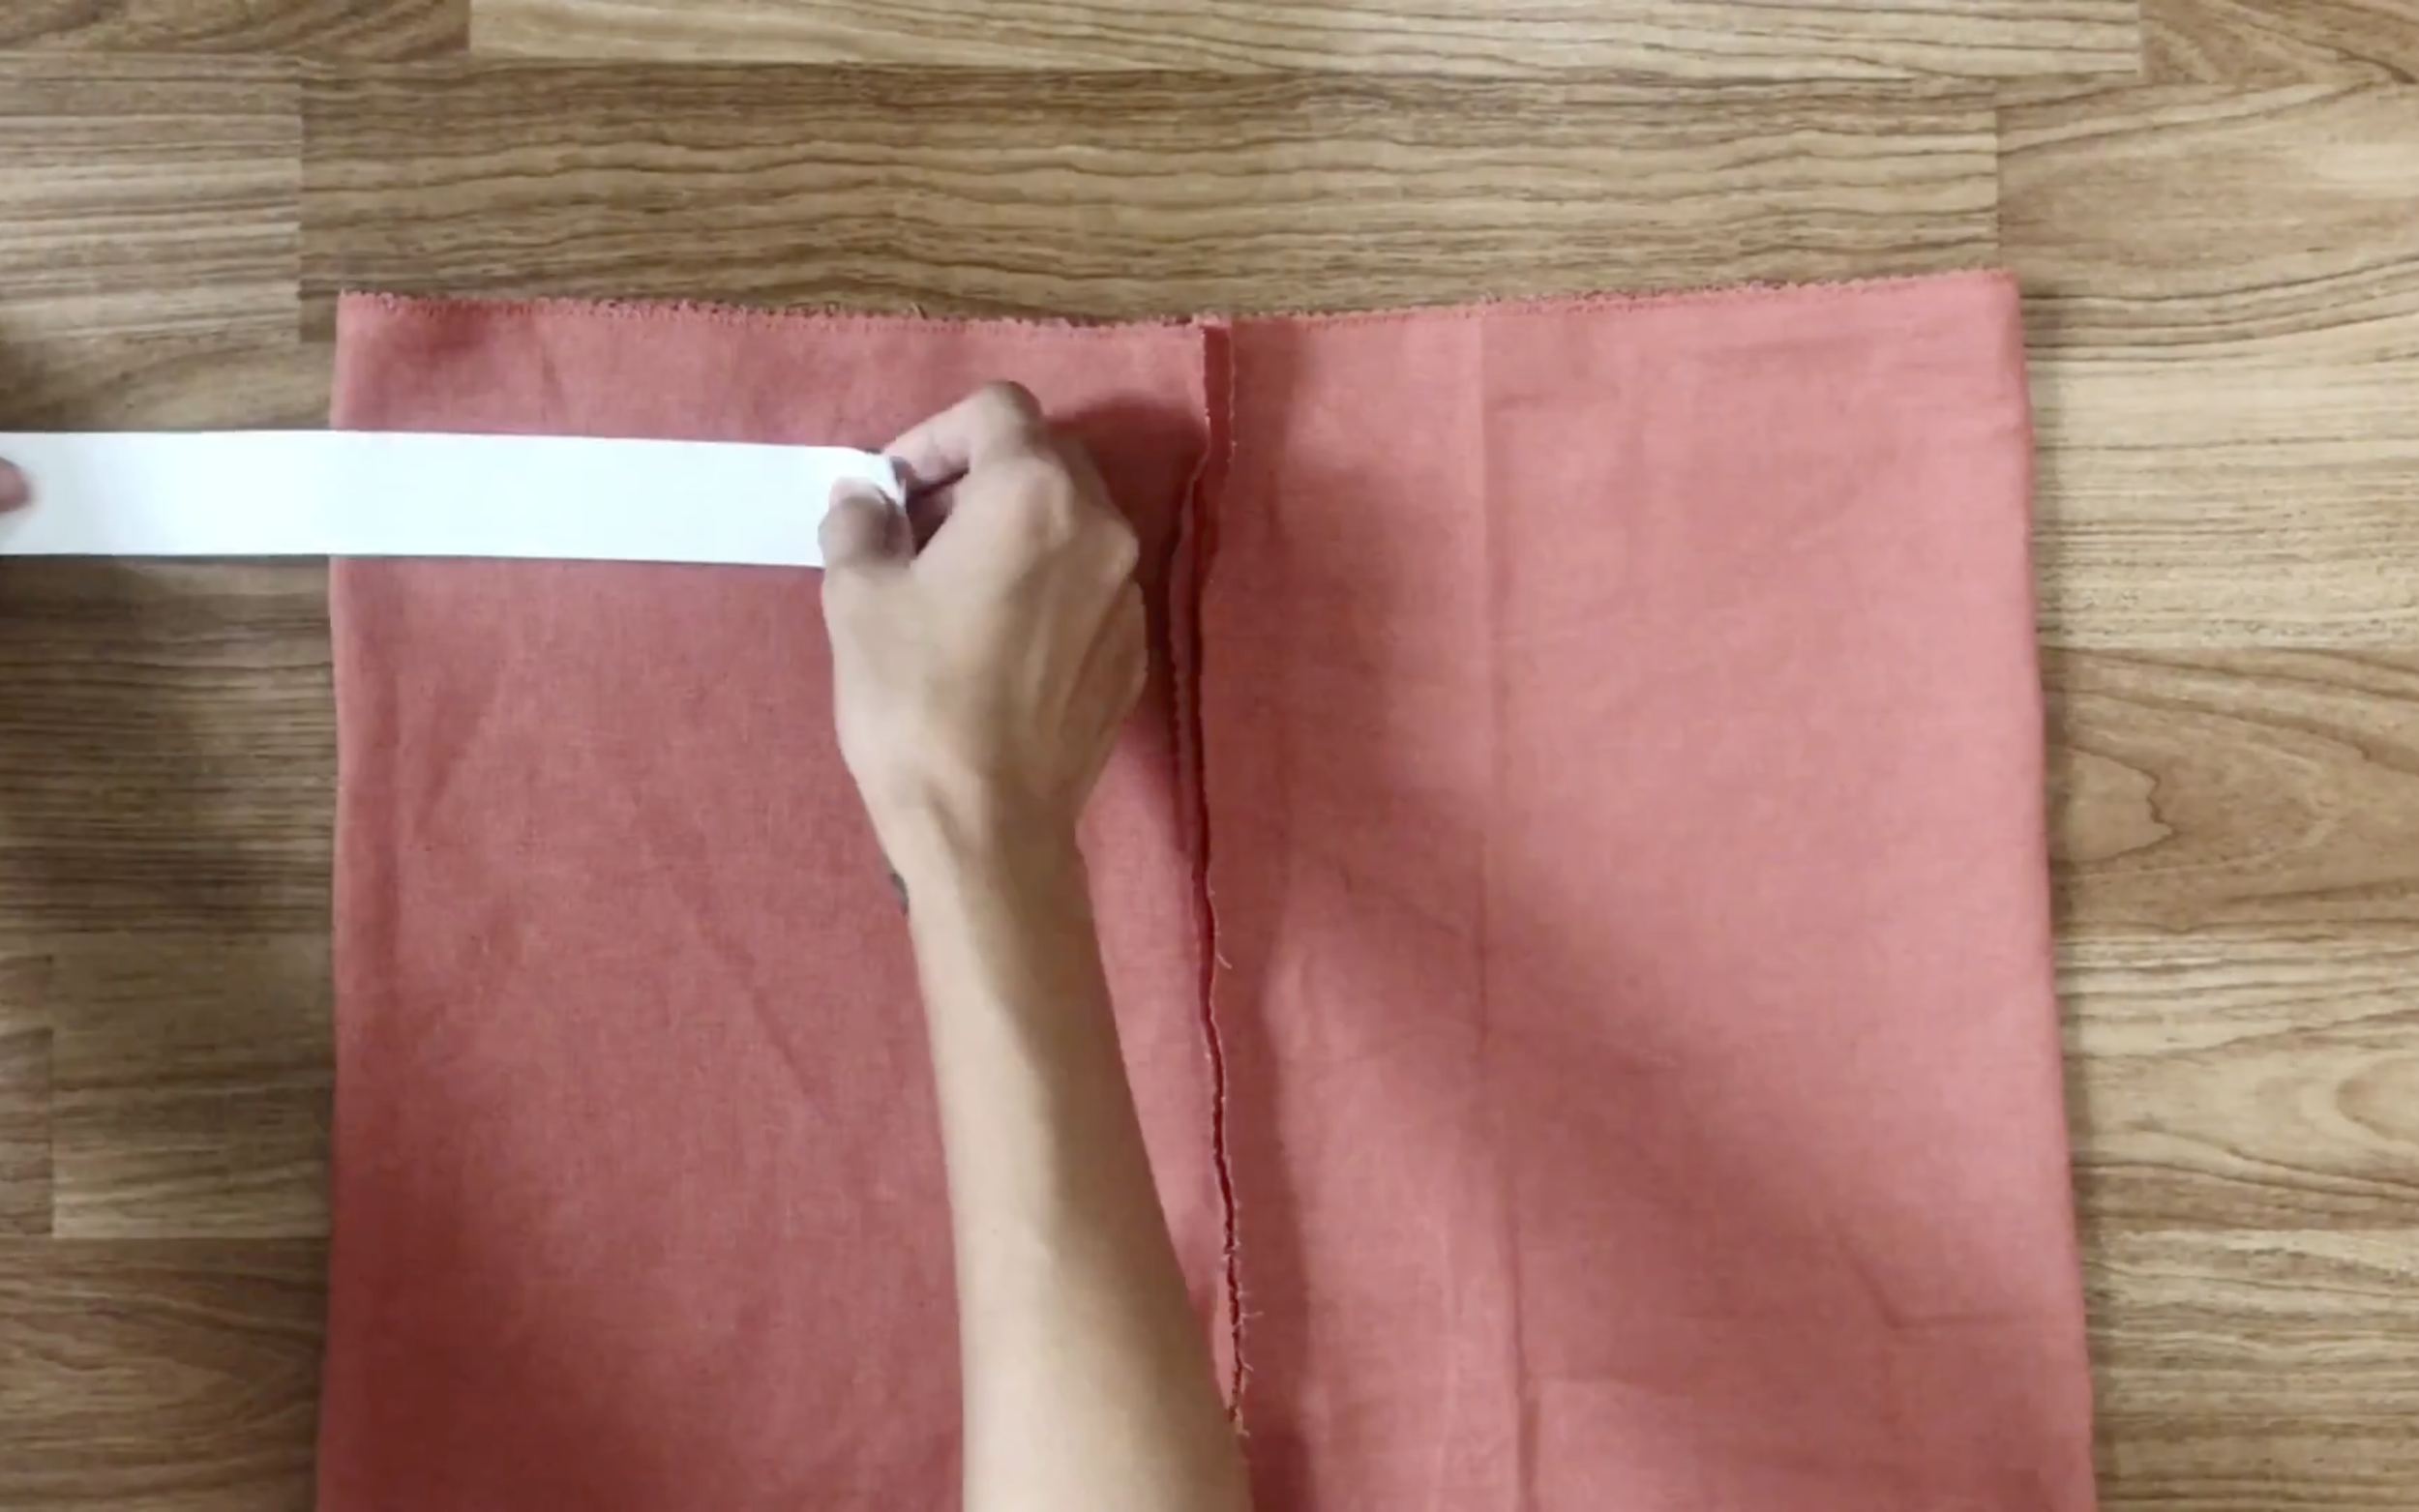
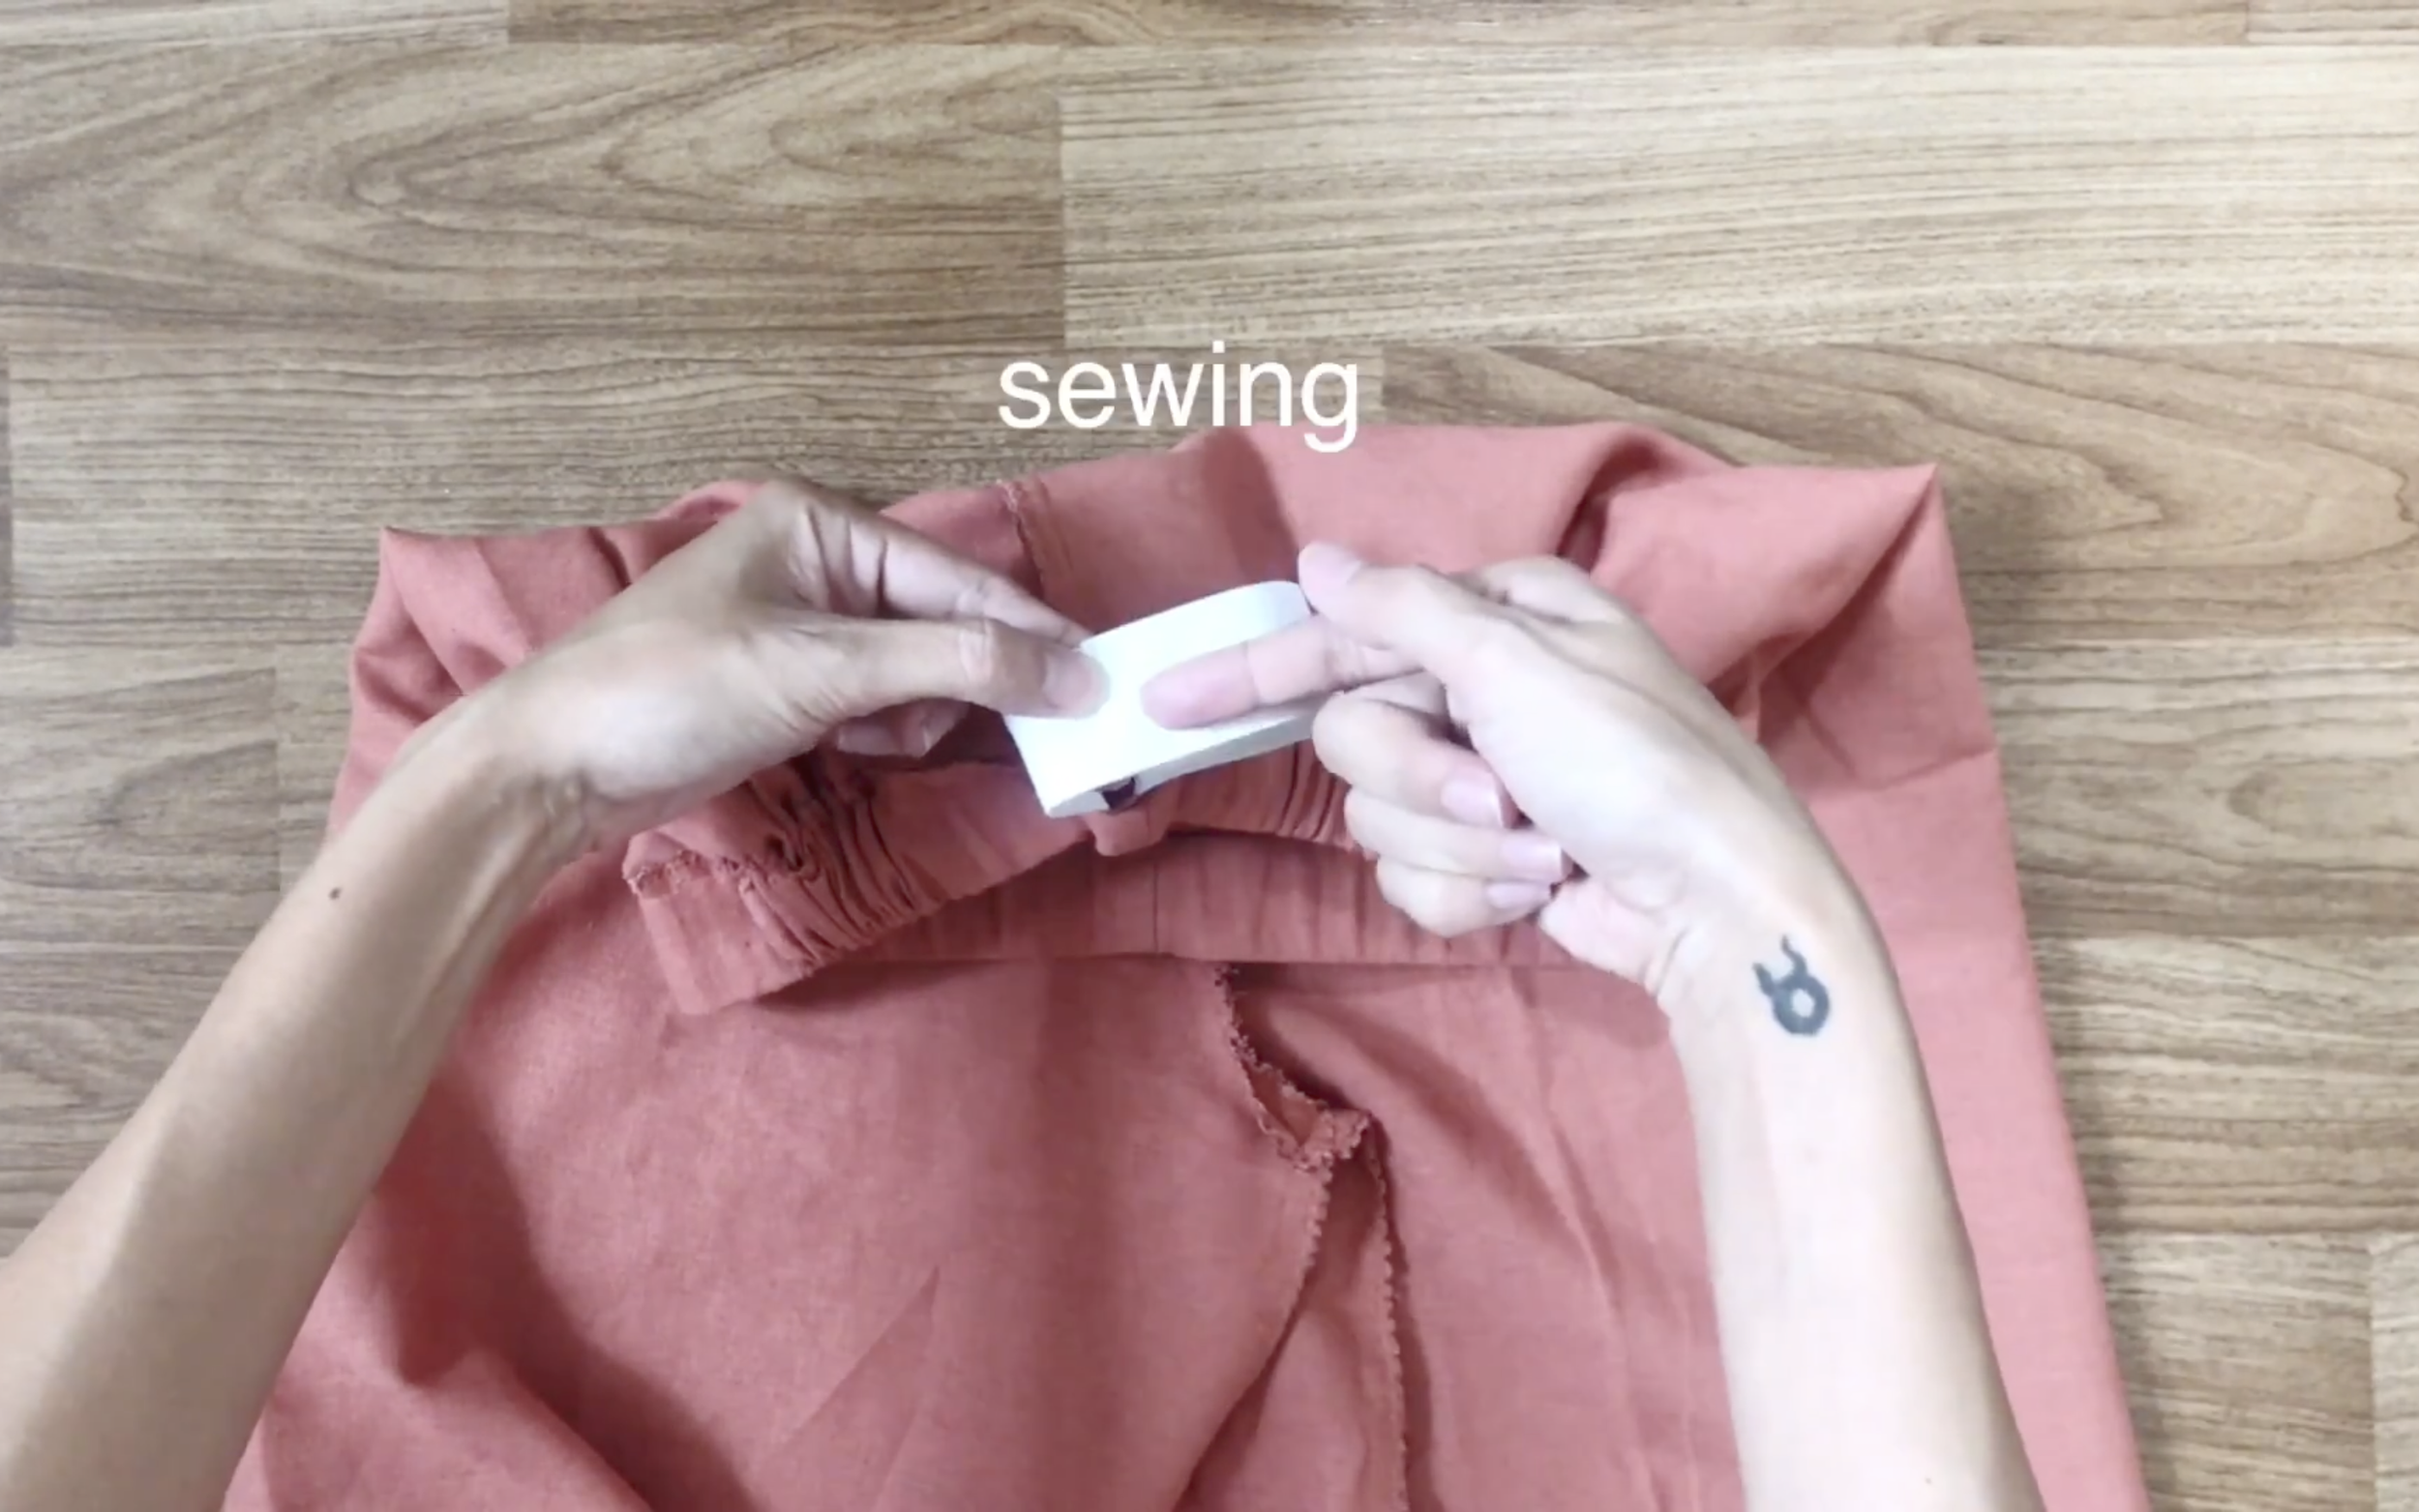
At the top of the pants, use an elastic band with a 3cm width to create the waistband.
Measure the width of the fabric to fold in first and mark it, then draw a line at that mark.
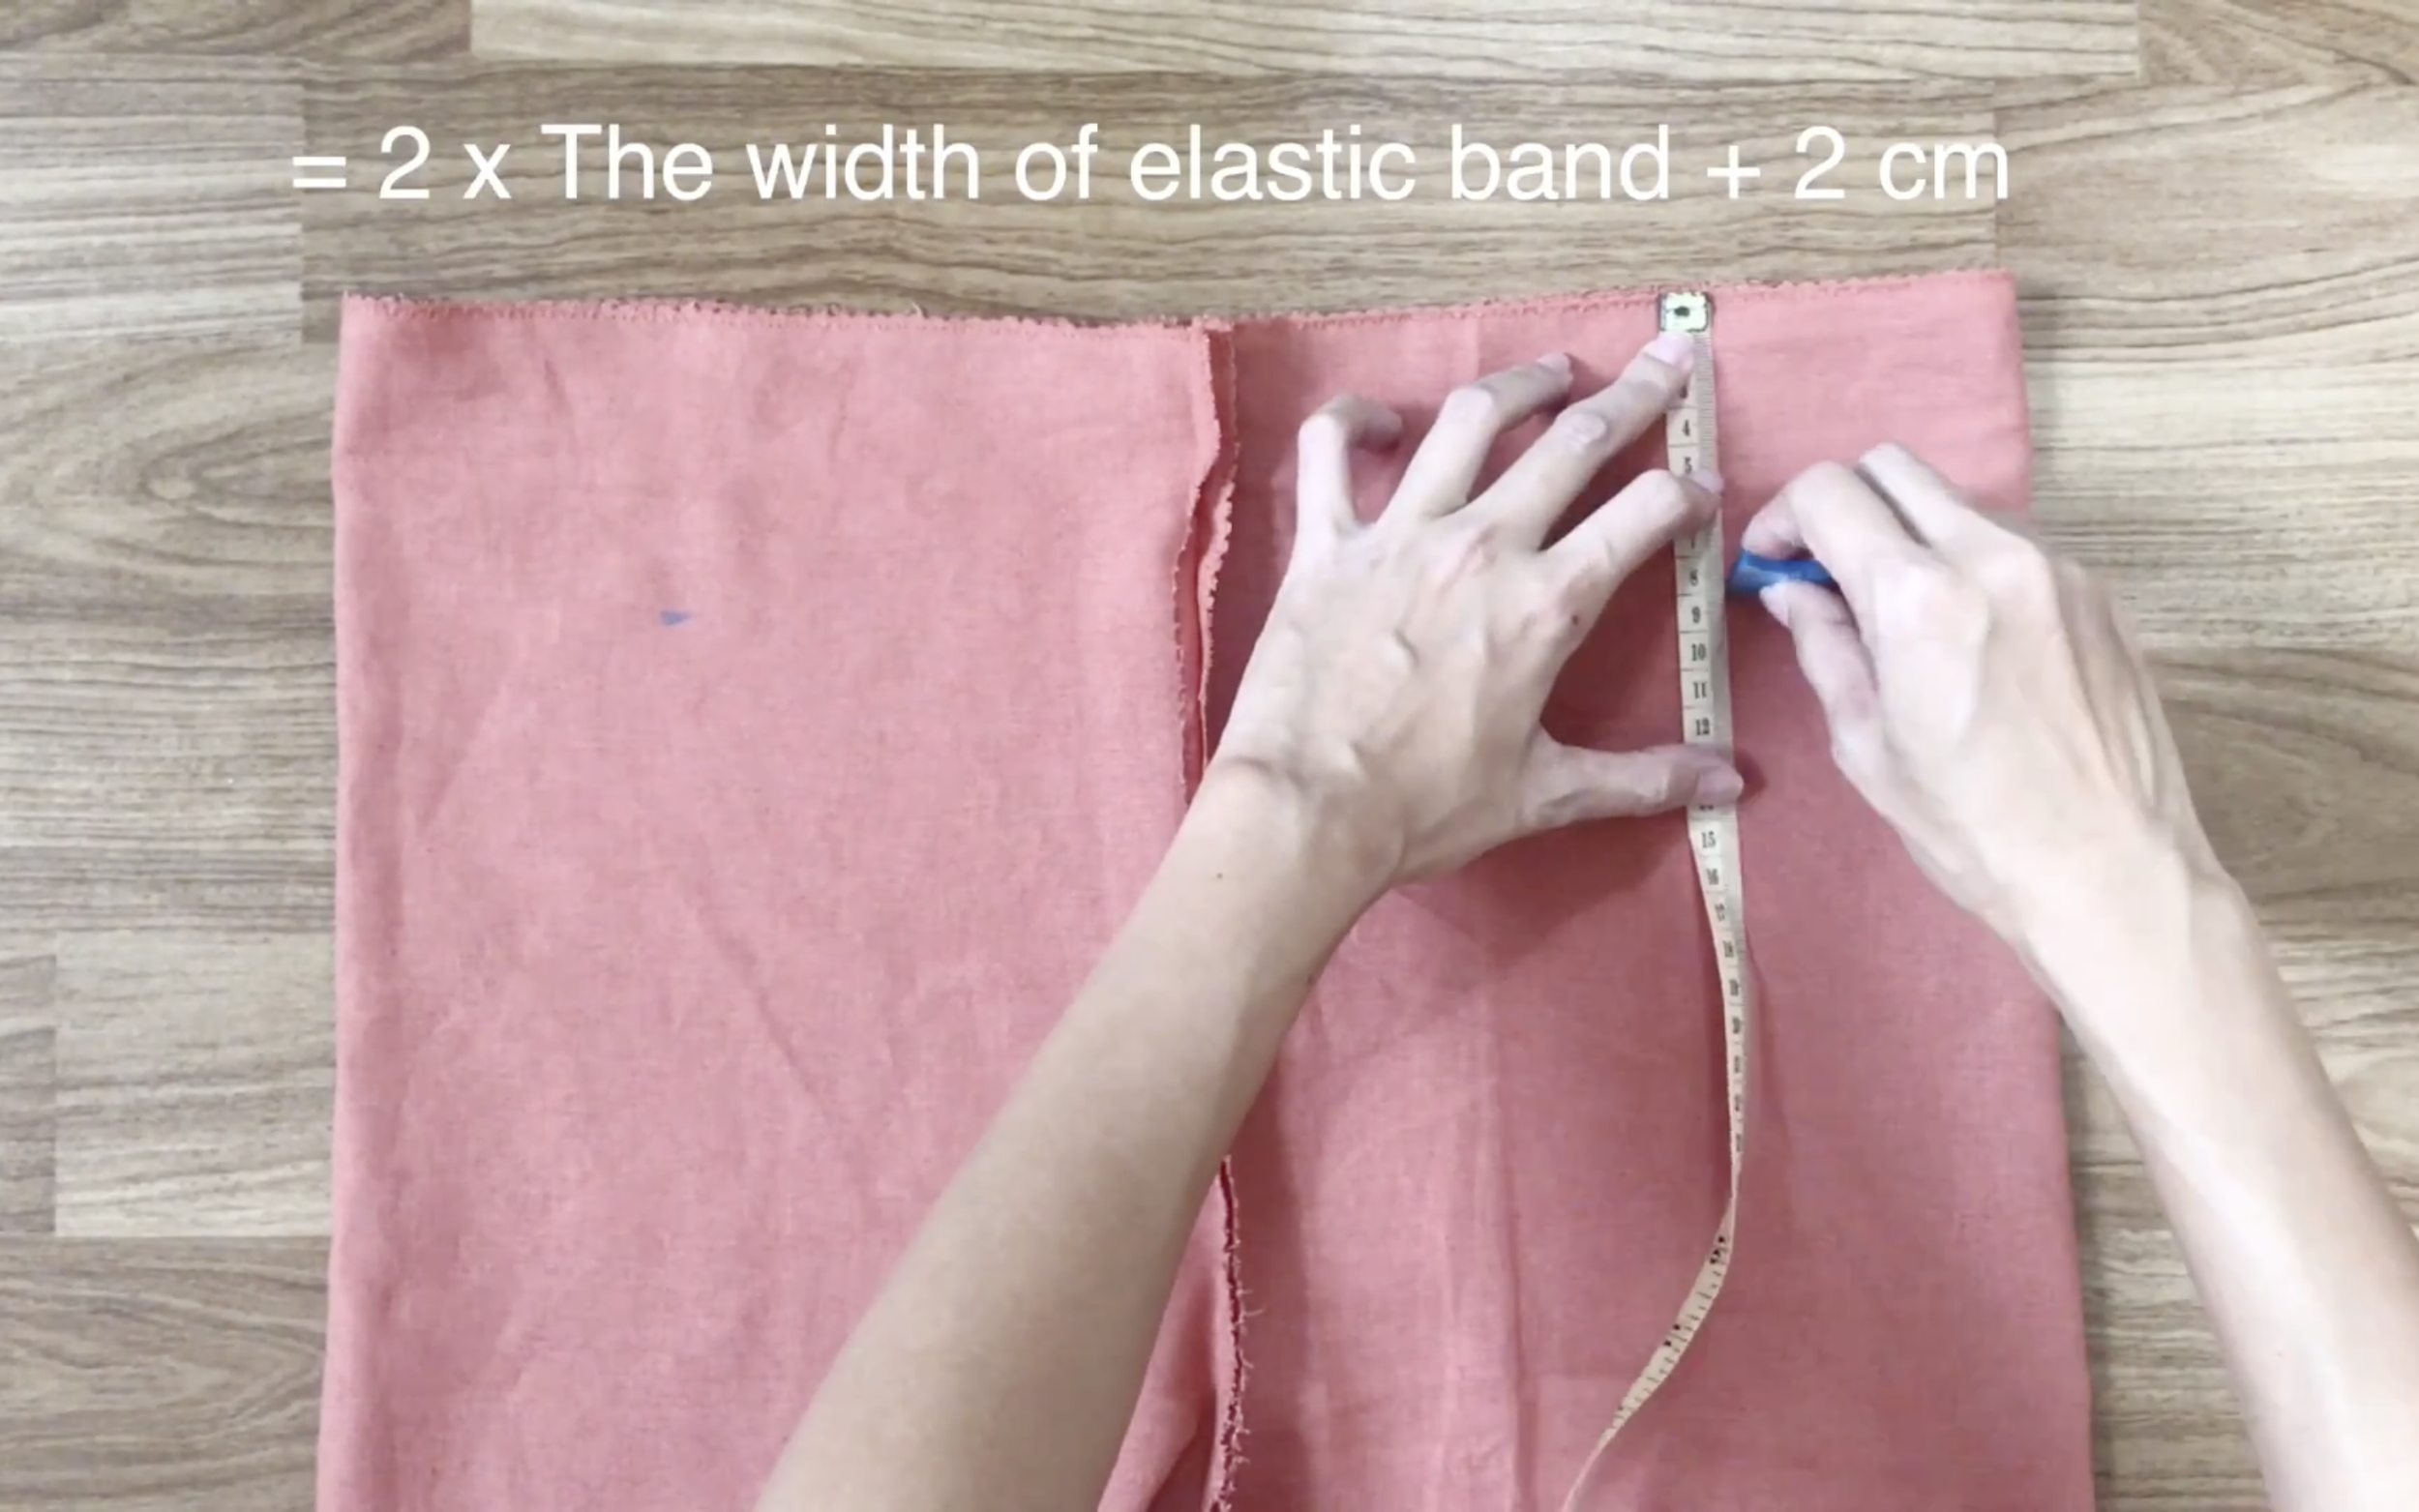
Usually, the width of the fabric fold is double the width of the elastic band, plus 2cm.
After that, fold the top of the pants inward along the drawing line, pin it, and sew.
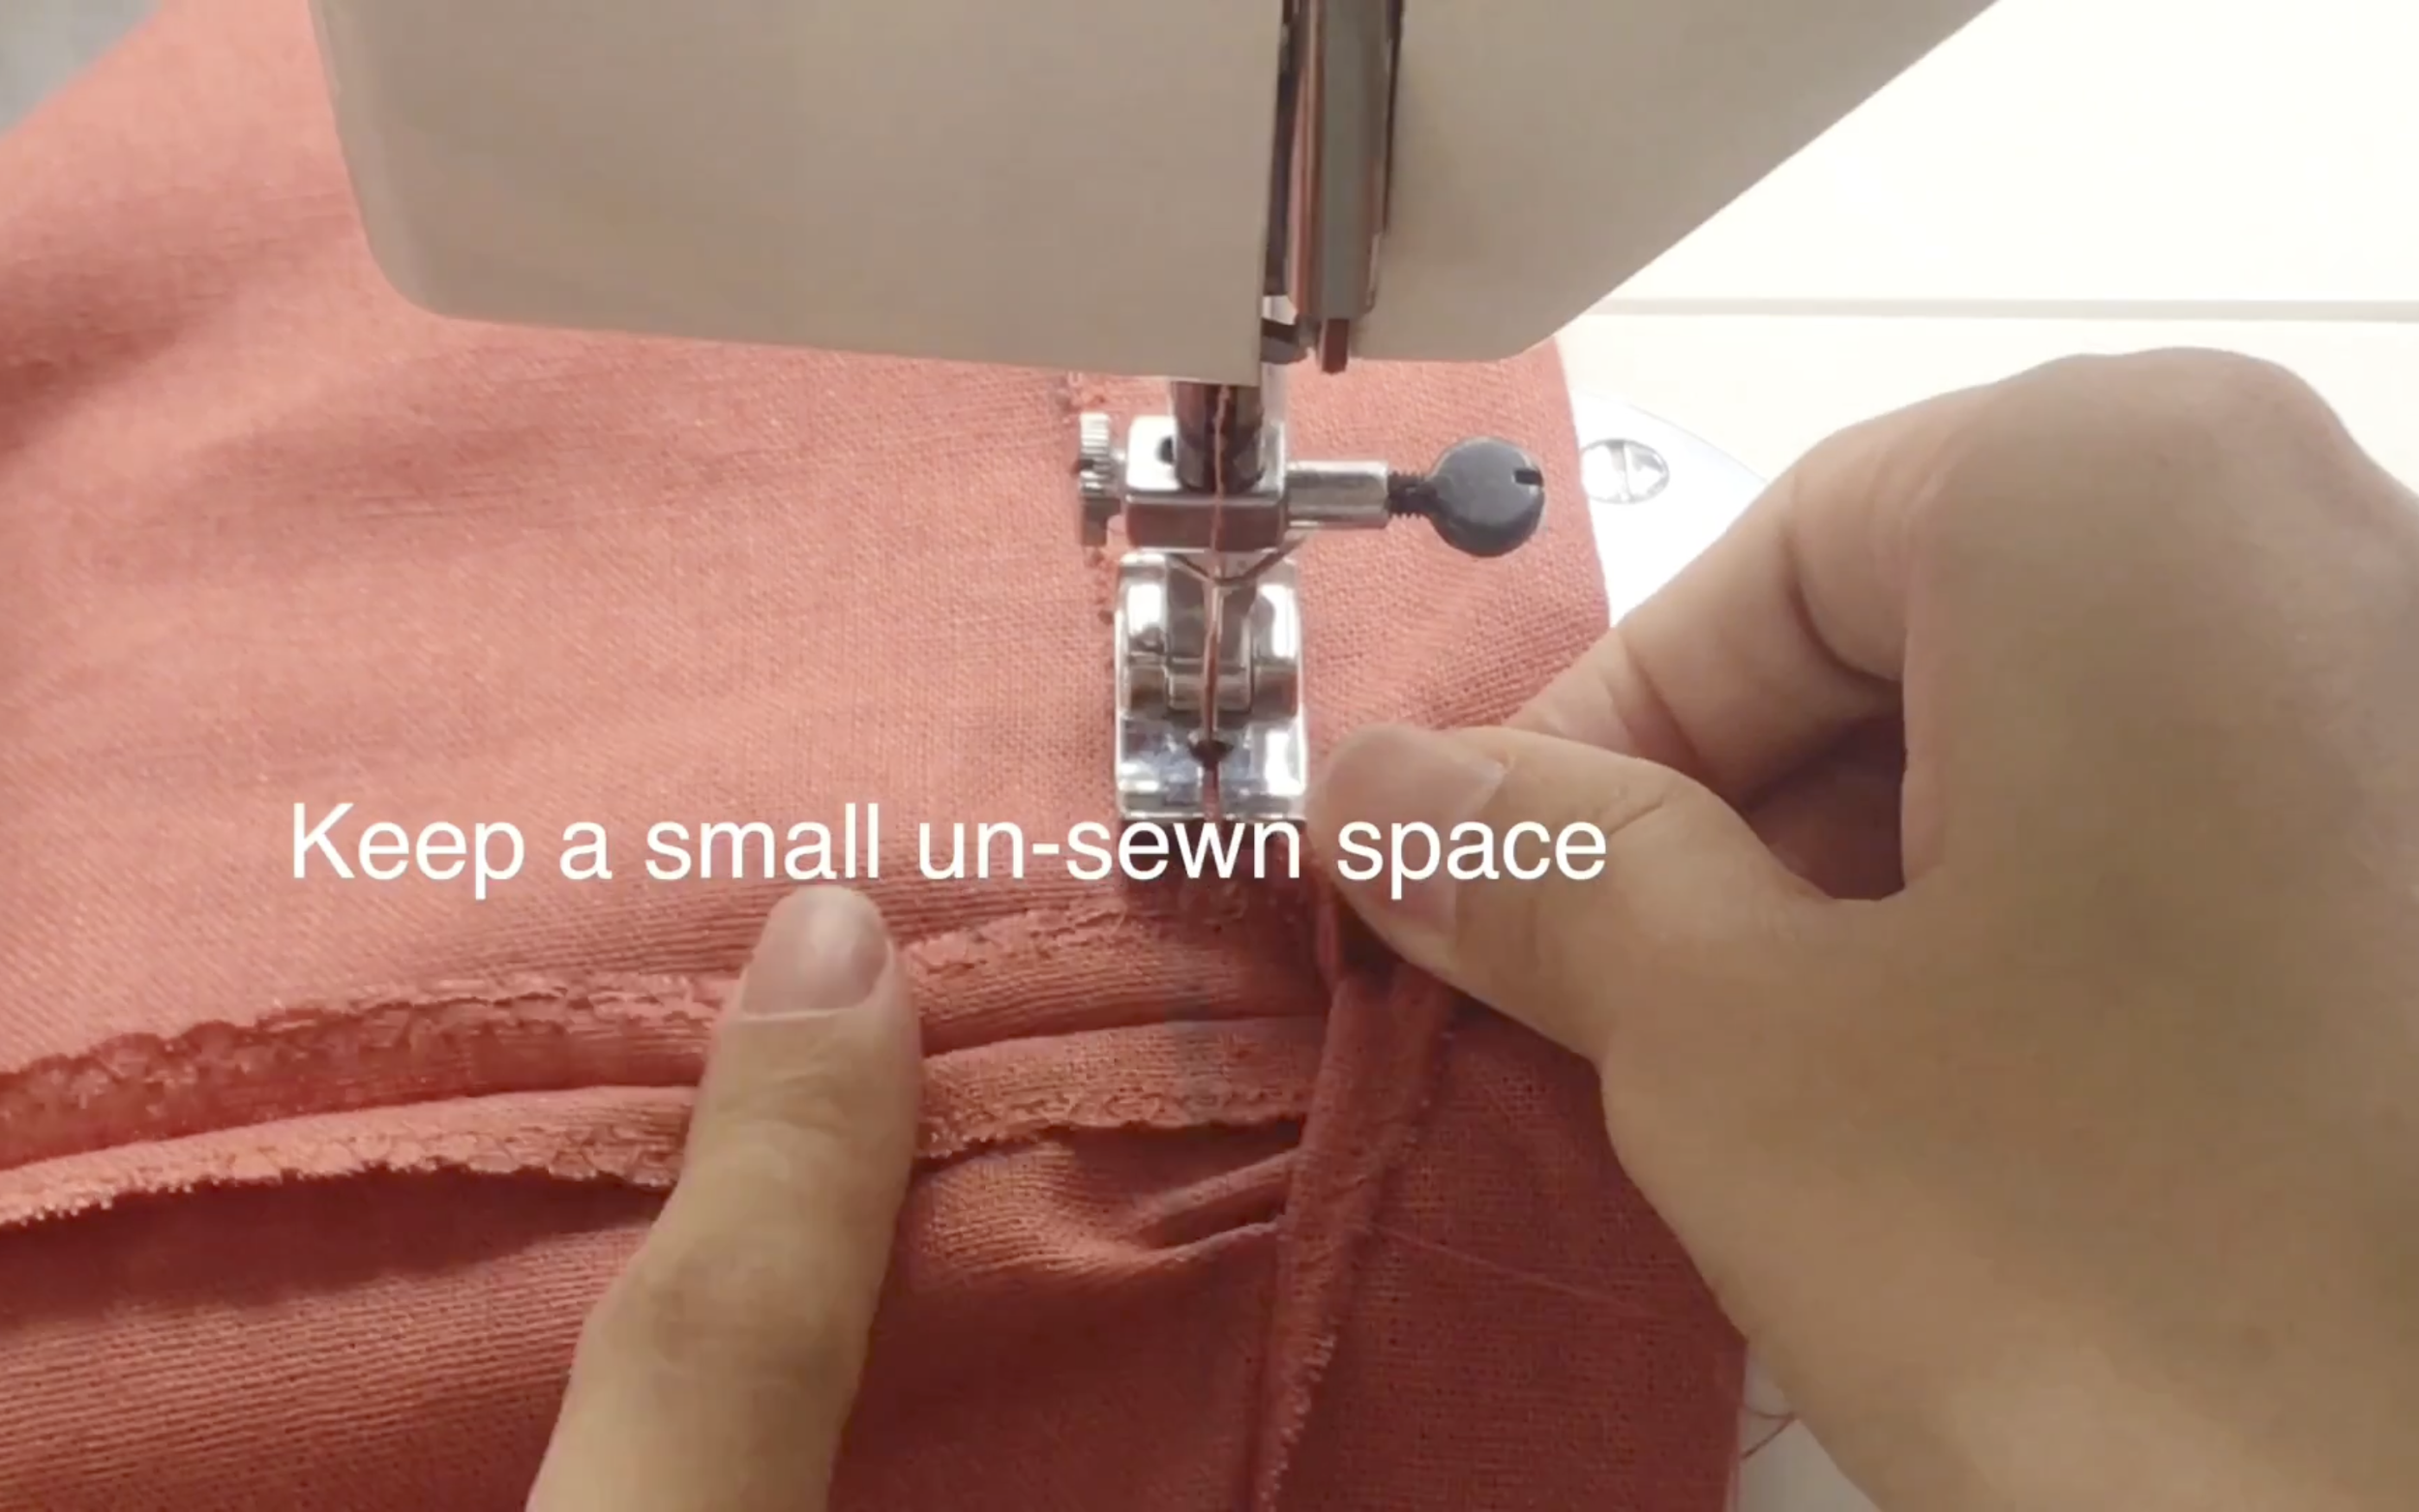
Leave a small un-sewn space at the back for inserting the elastic band later.
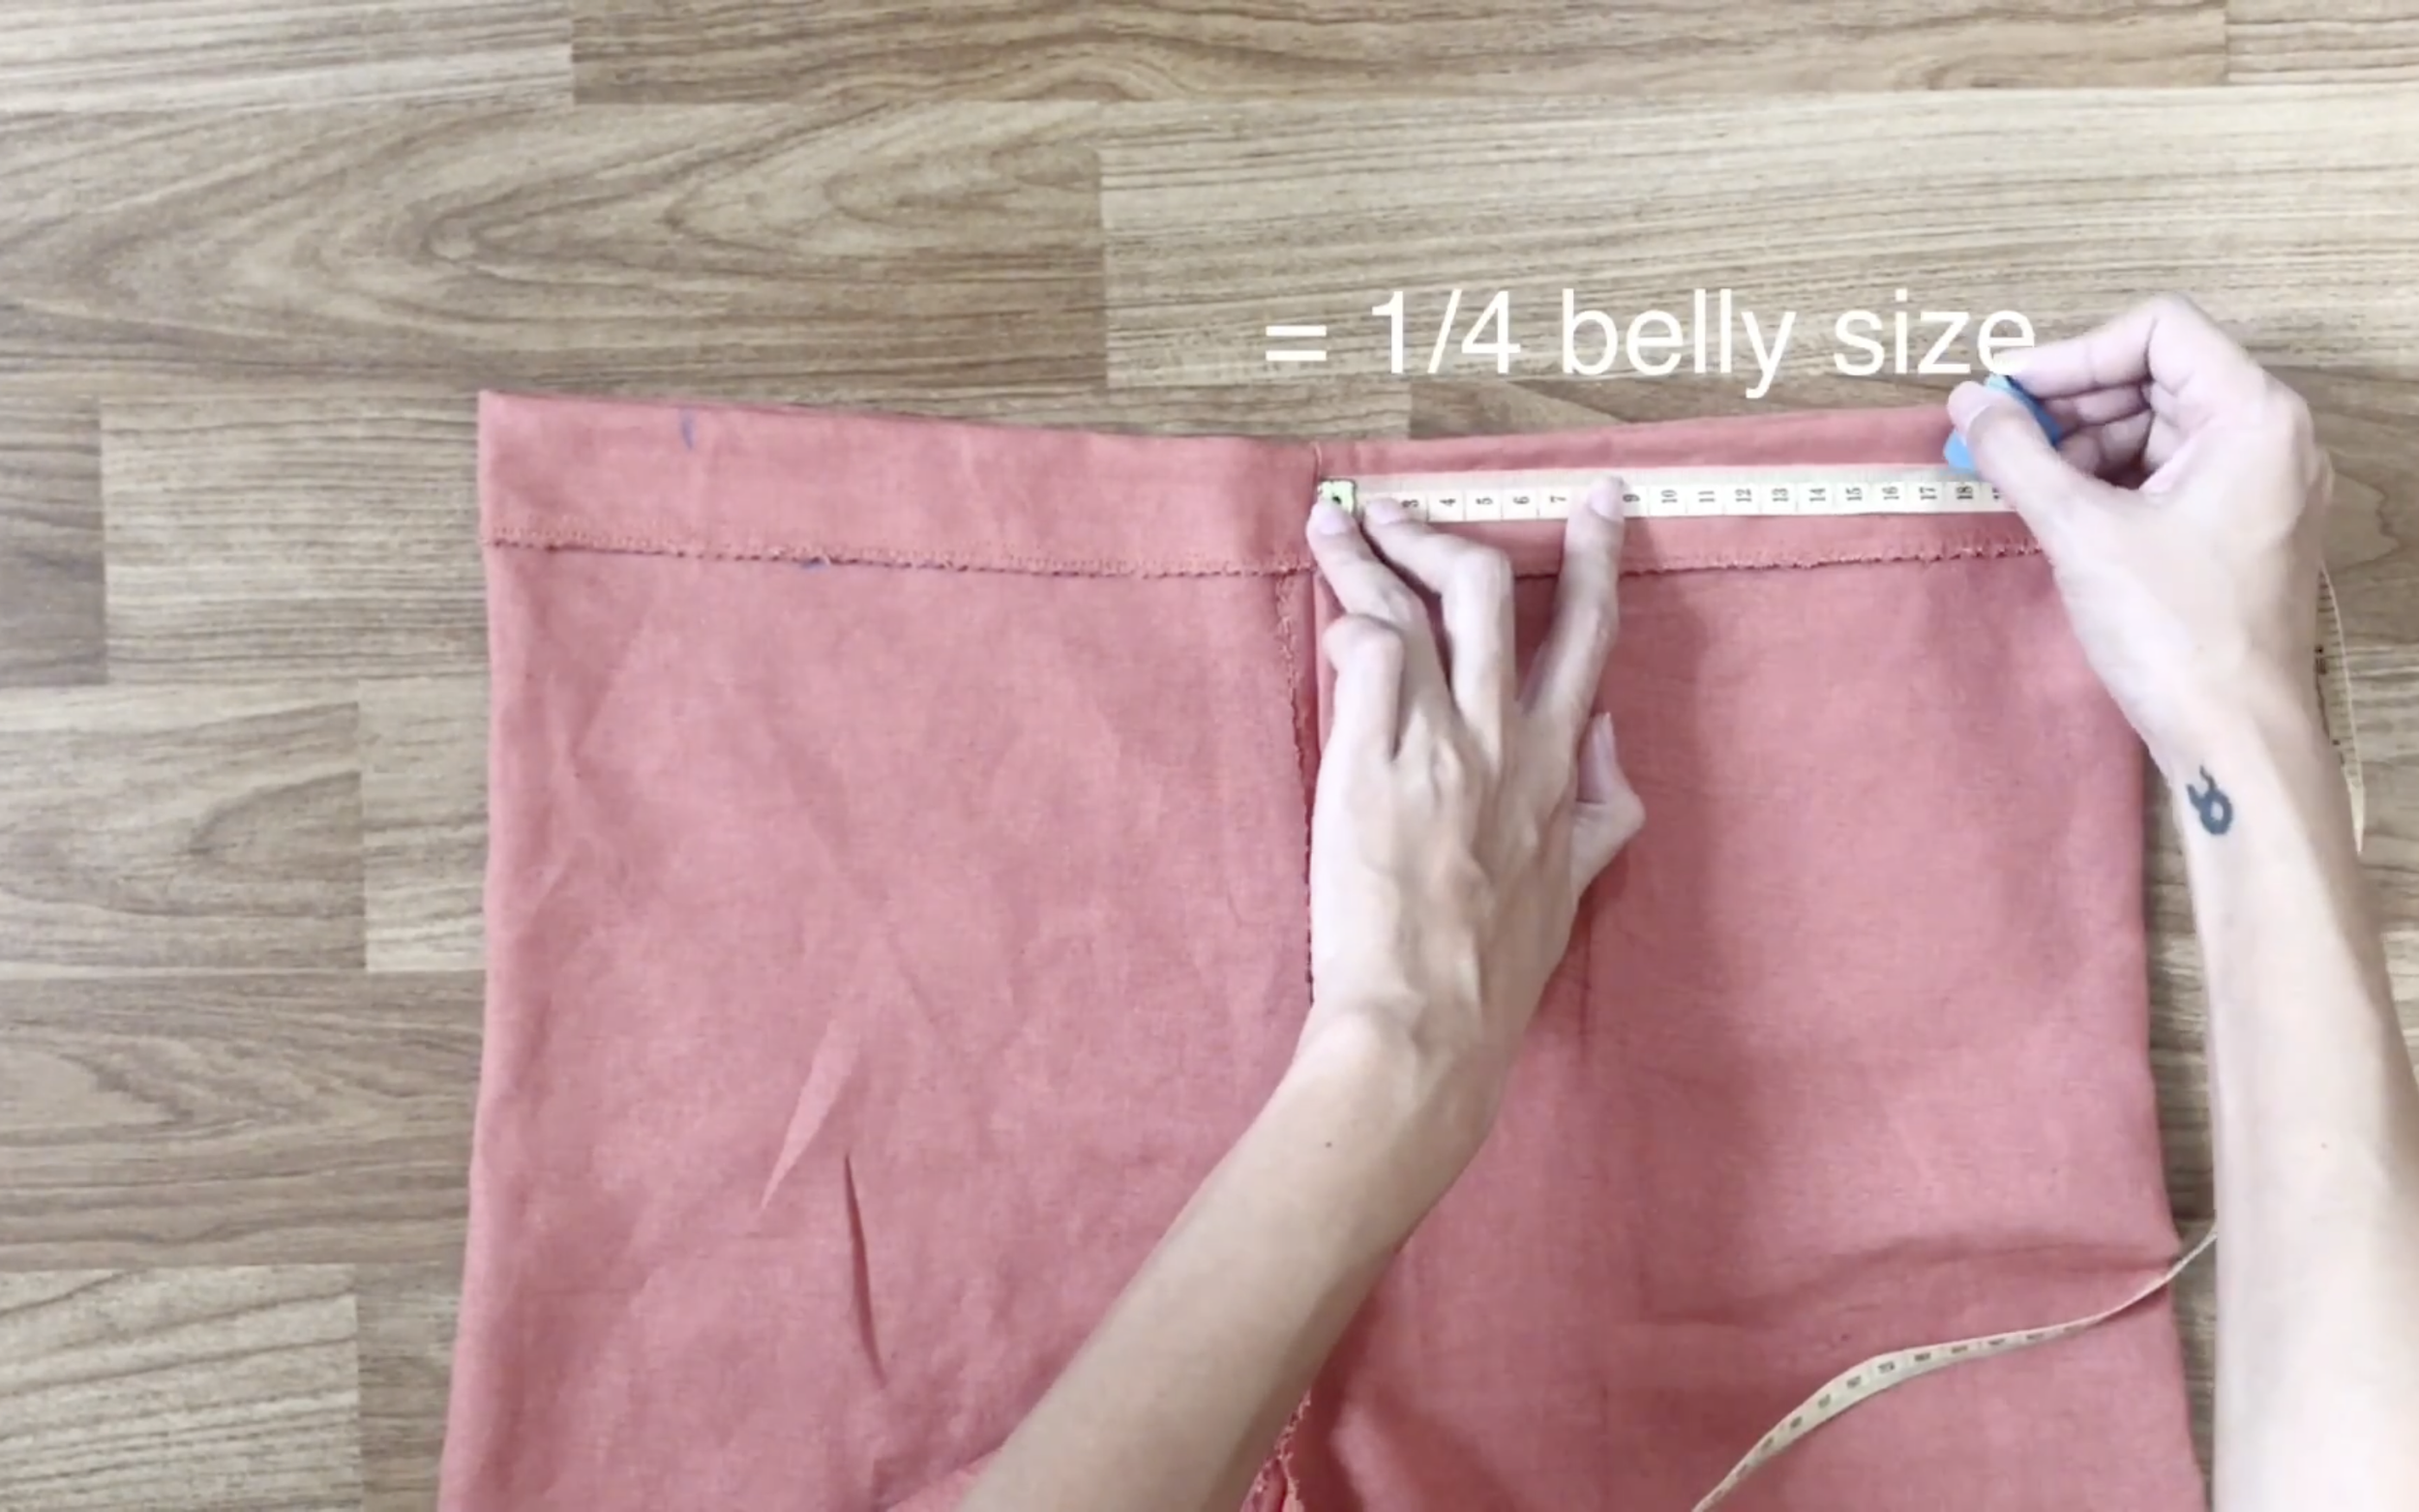
At the front of the pants, from the middle, go 16cm to the left and mark it, then do the same for the right.
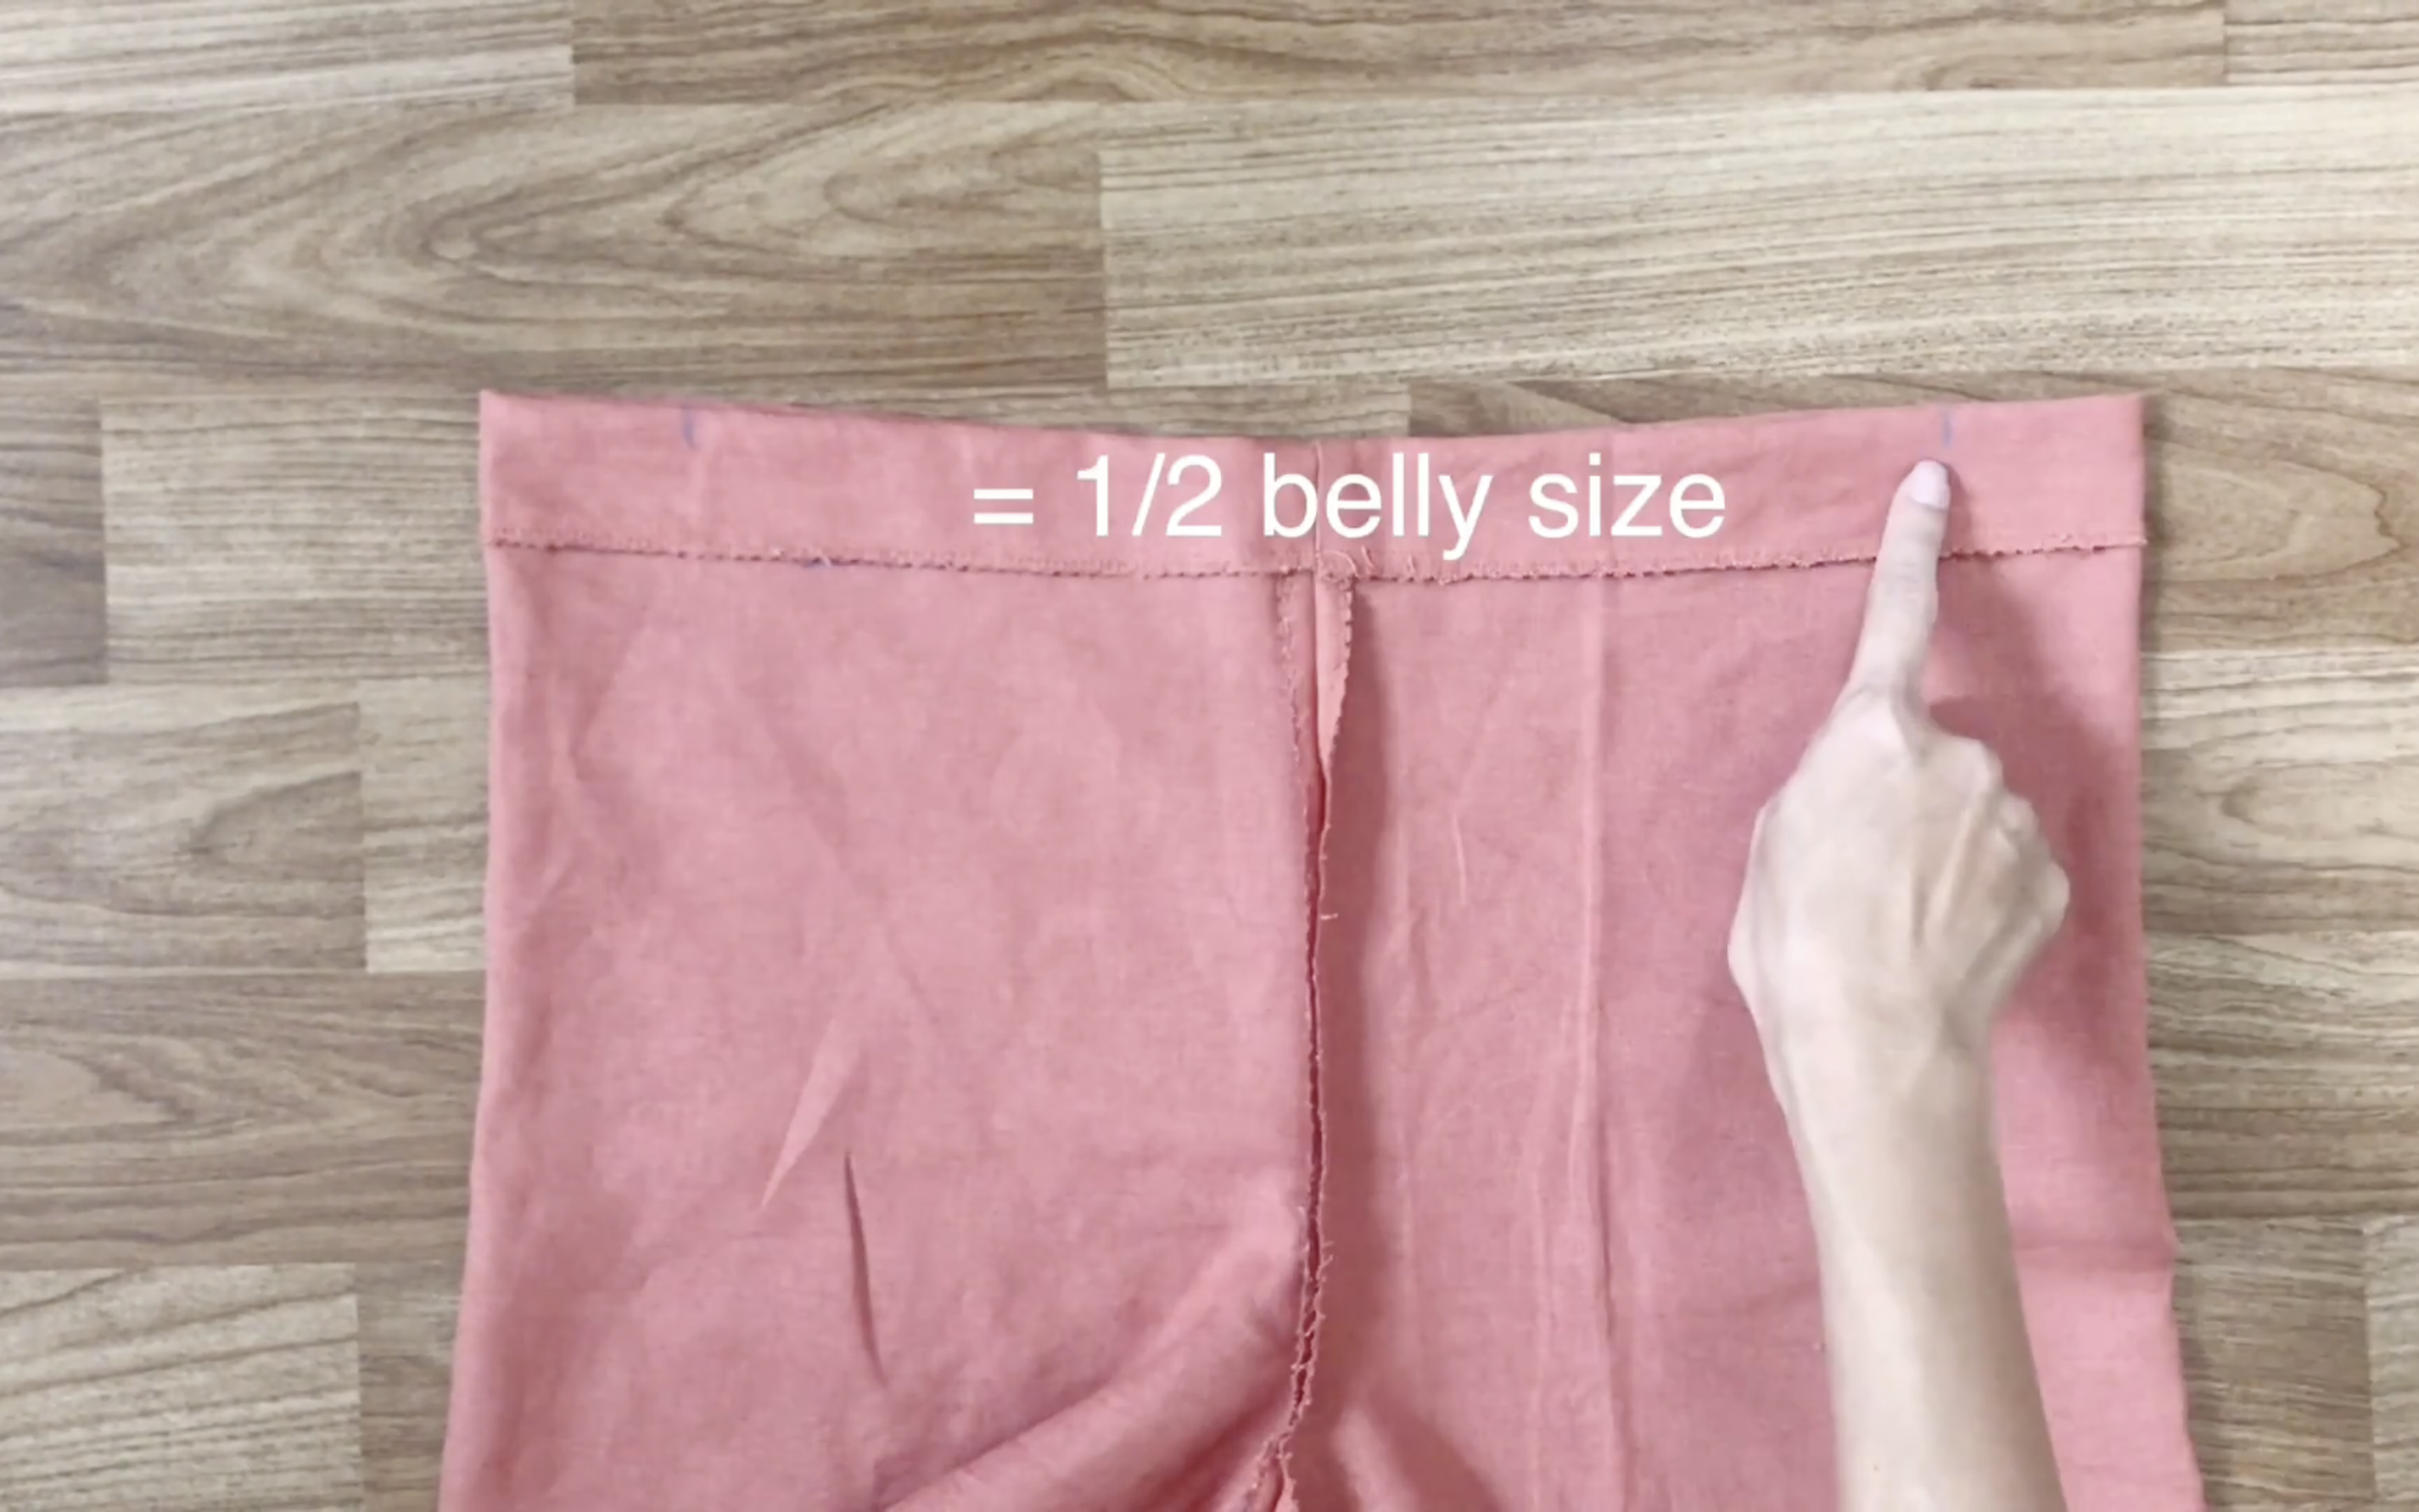
The width between the two marks will be 32cm, which is half the belly size.
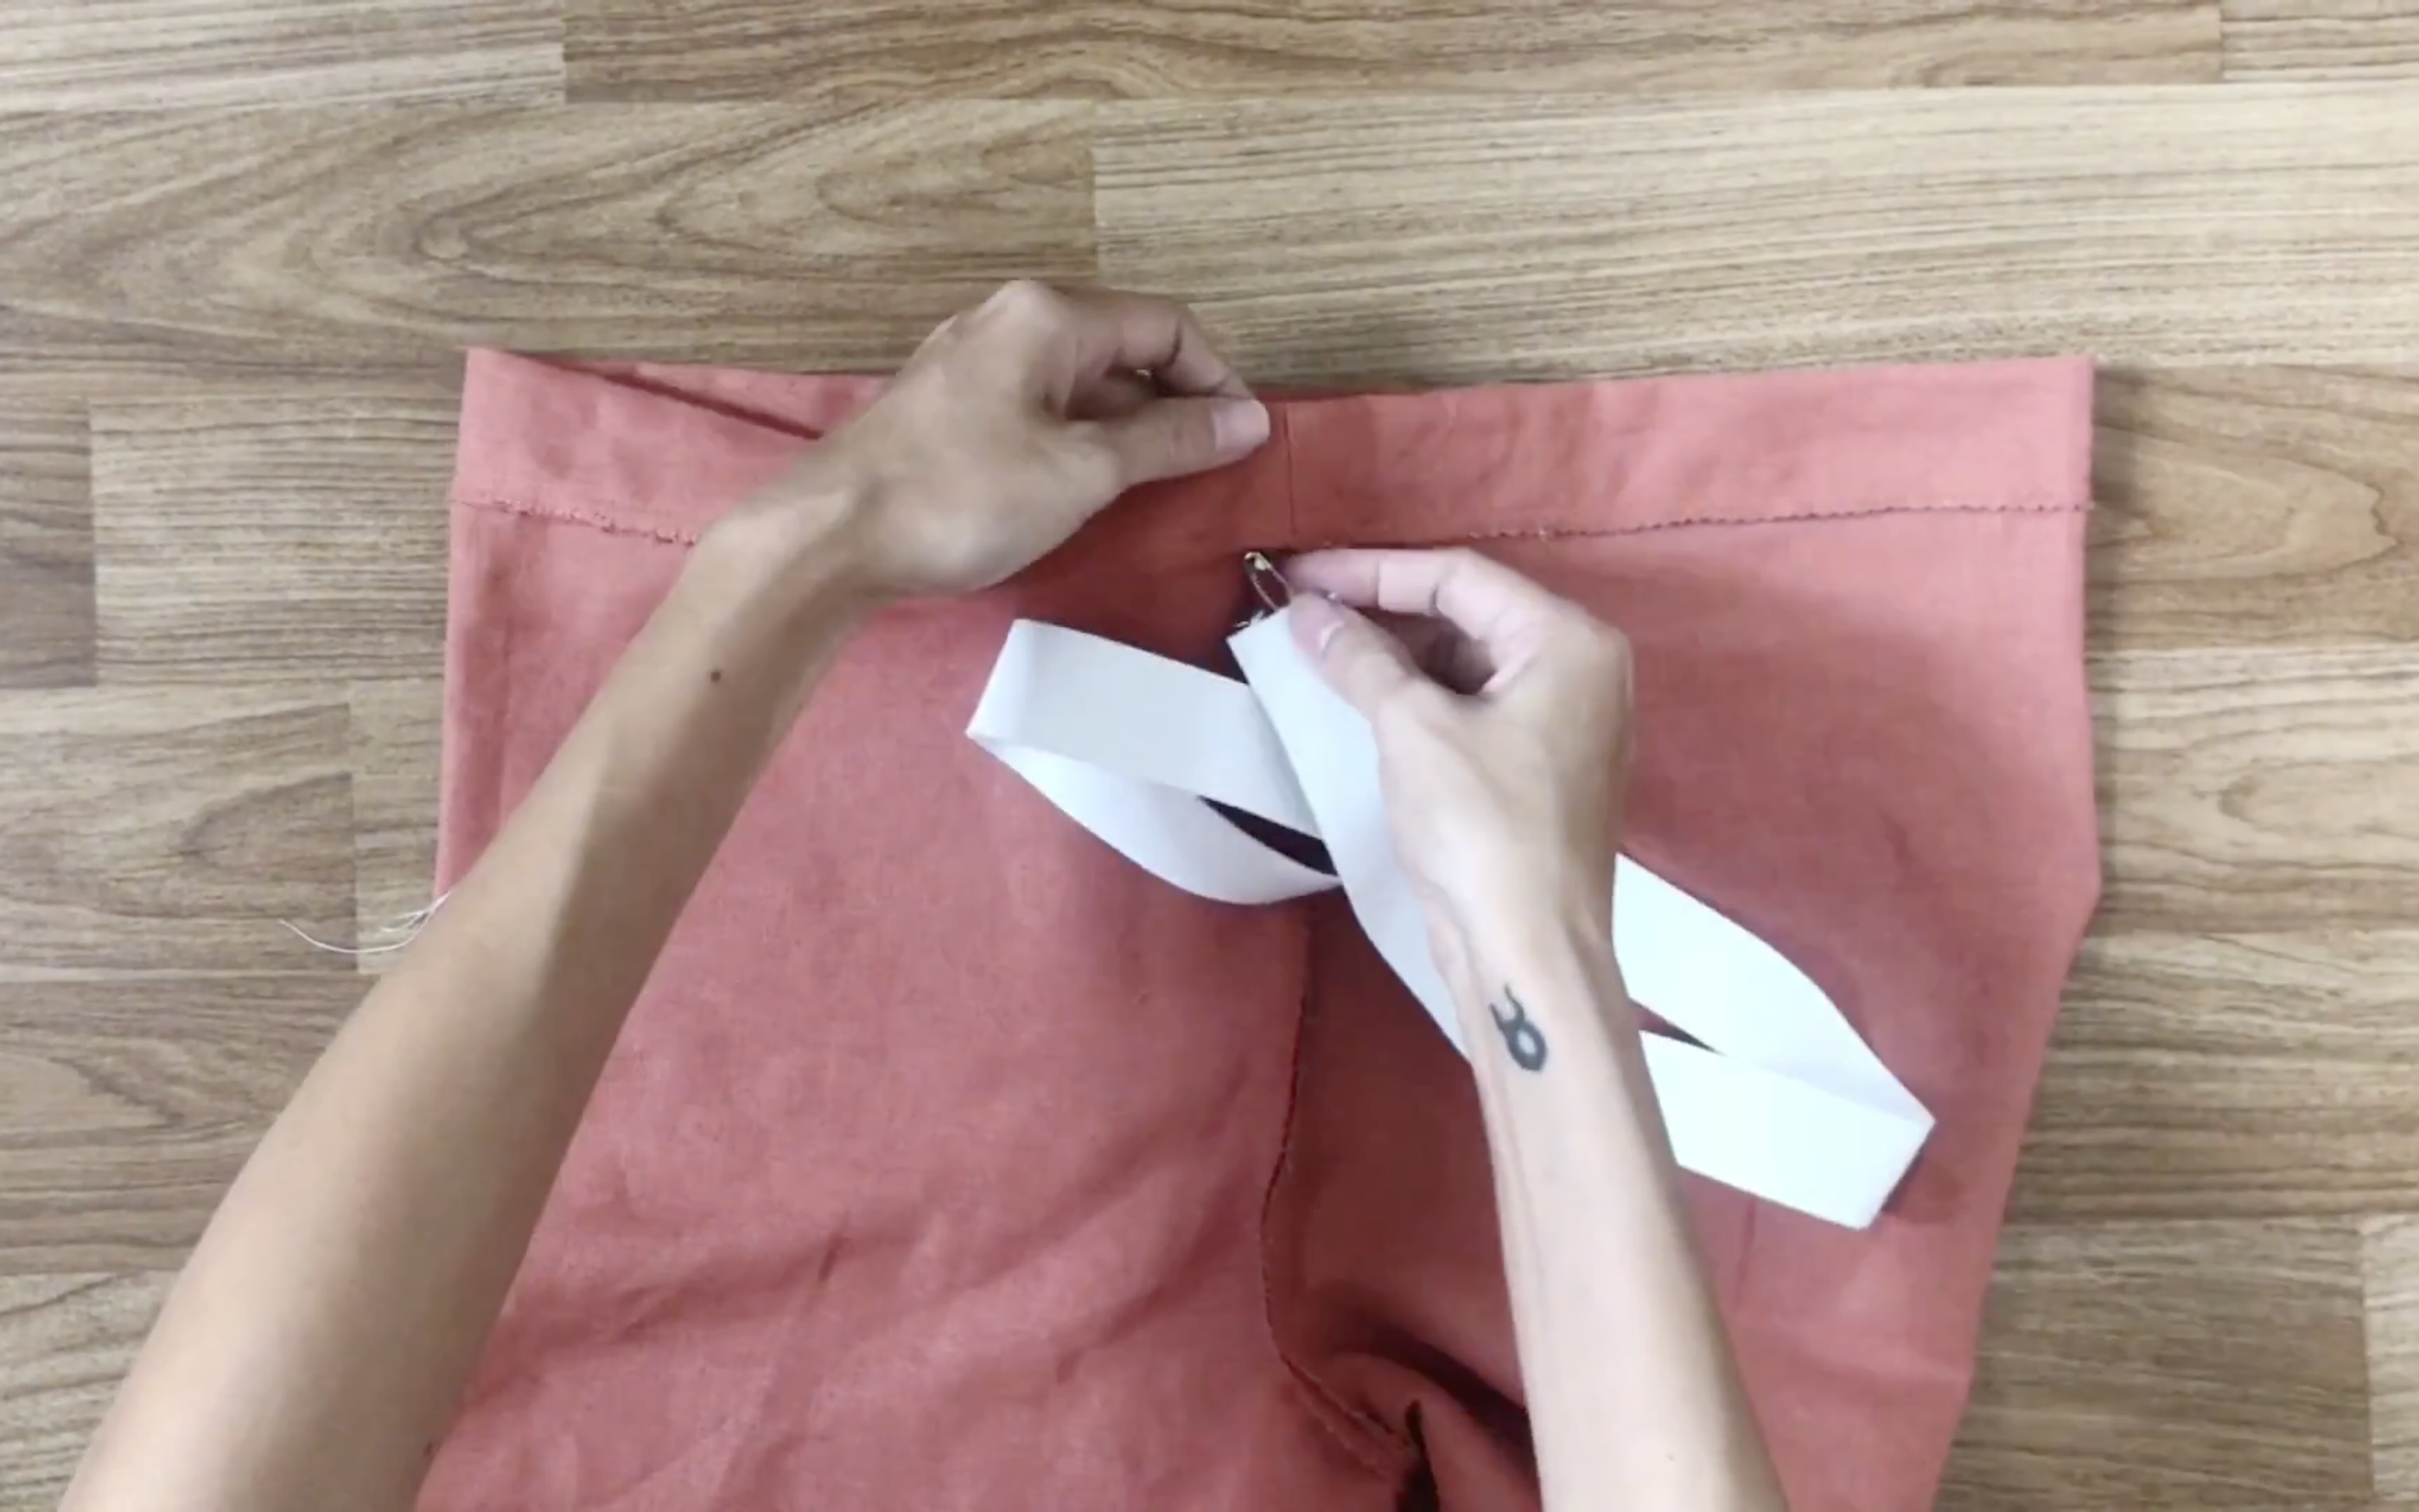
Insert the elastic band into the waistband, using two safety pins to guide it—one to keep one end outside and the other to help the other end go through.
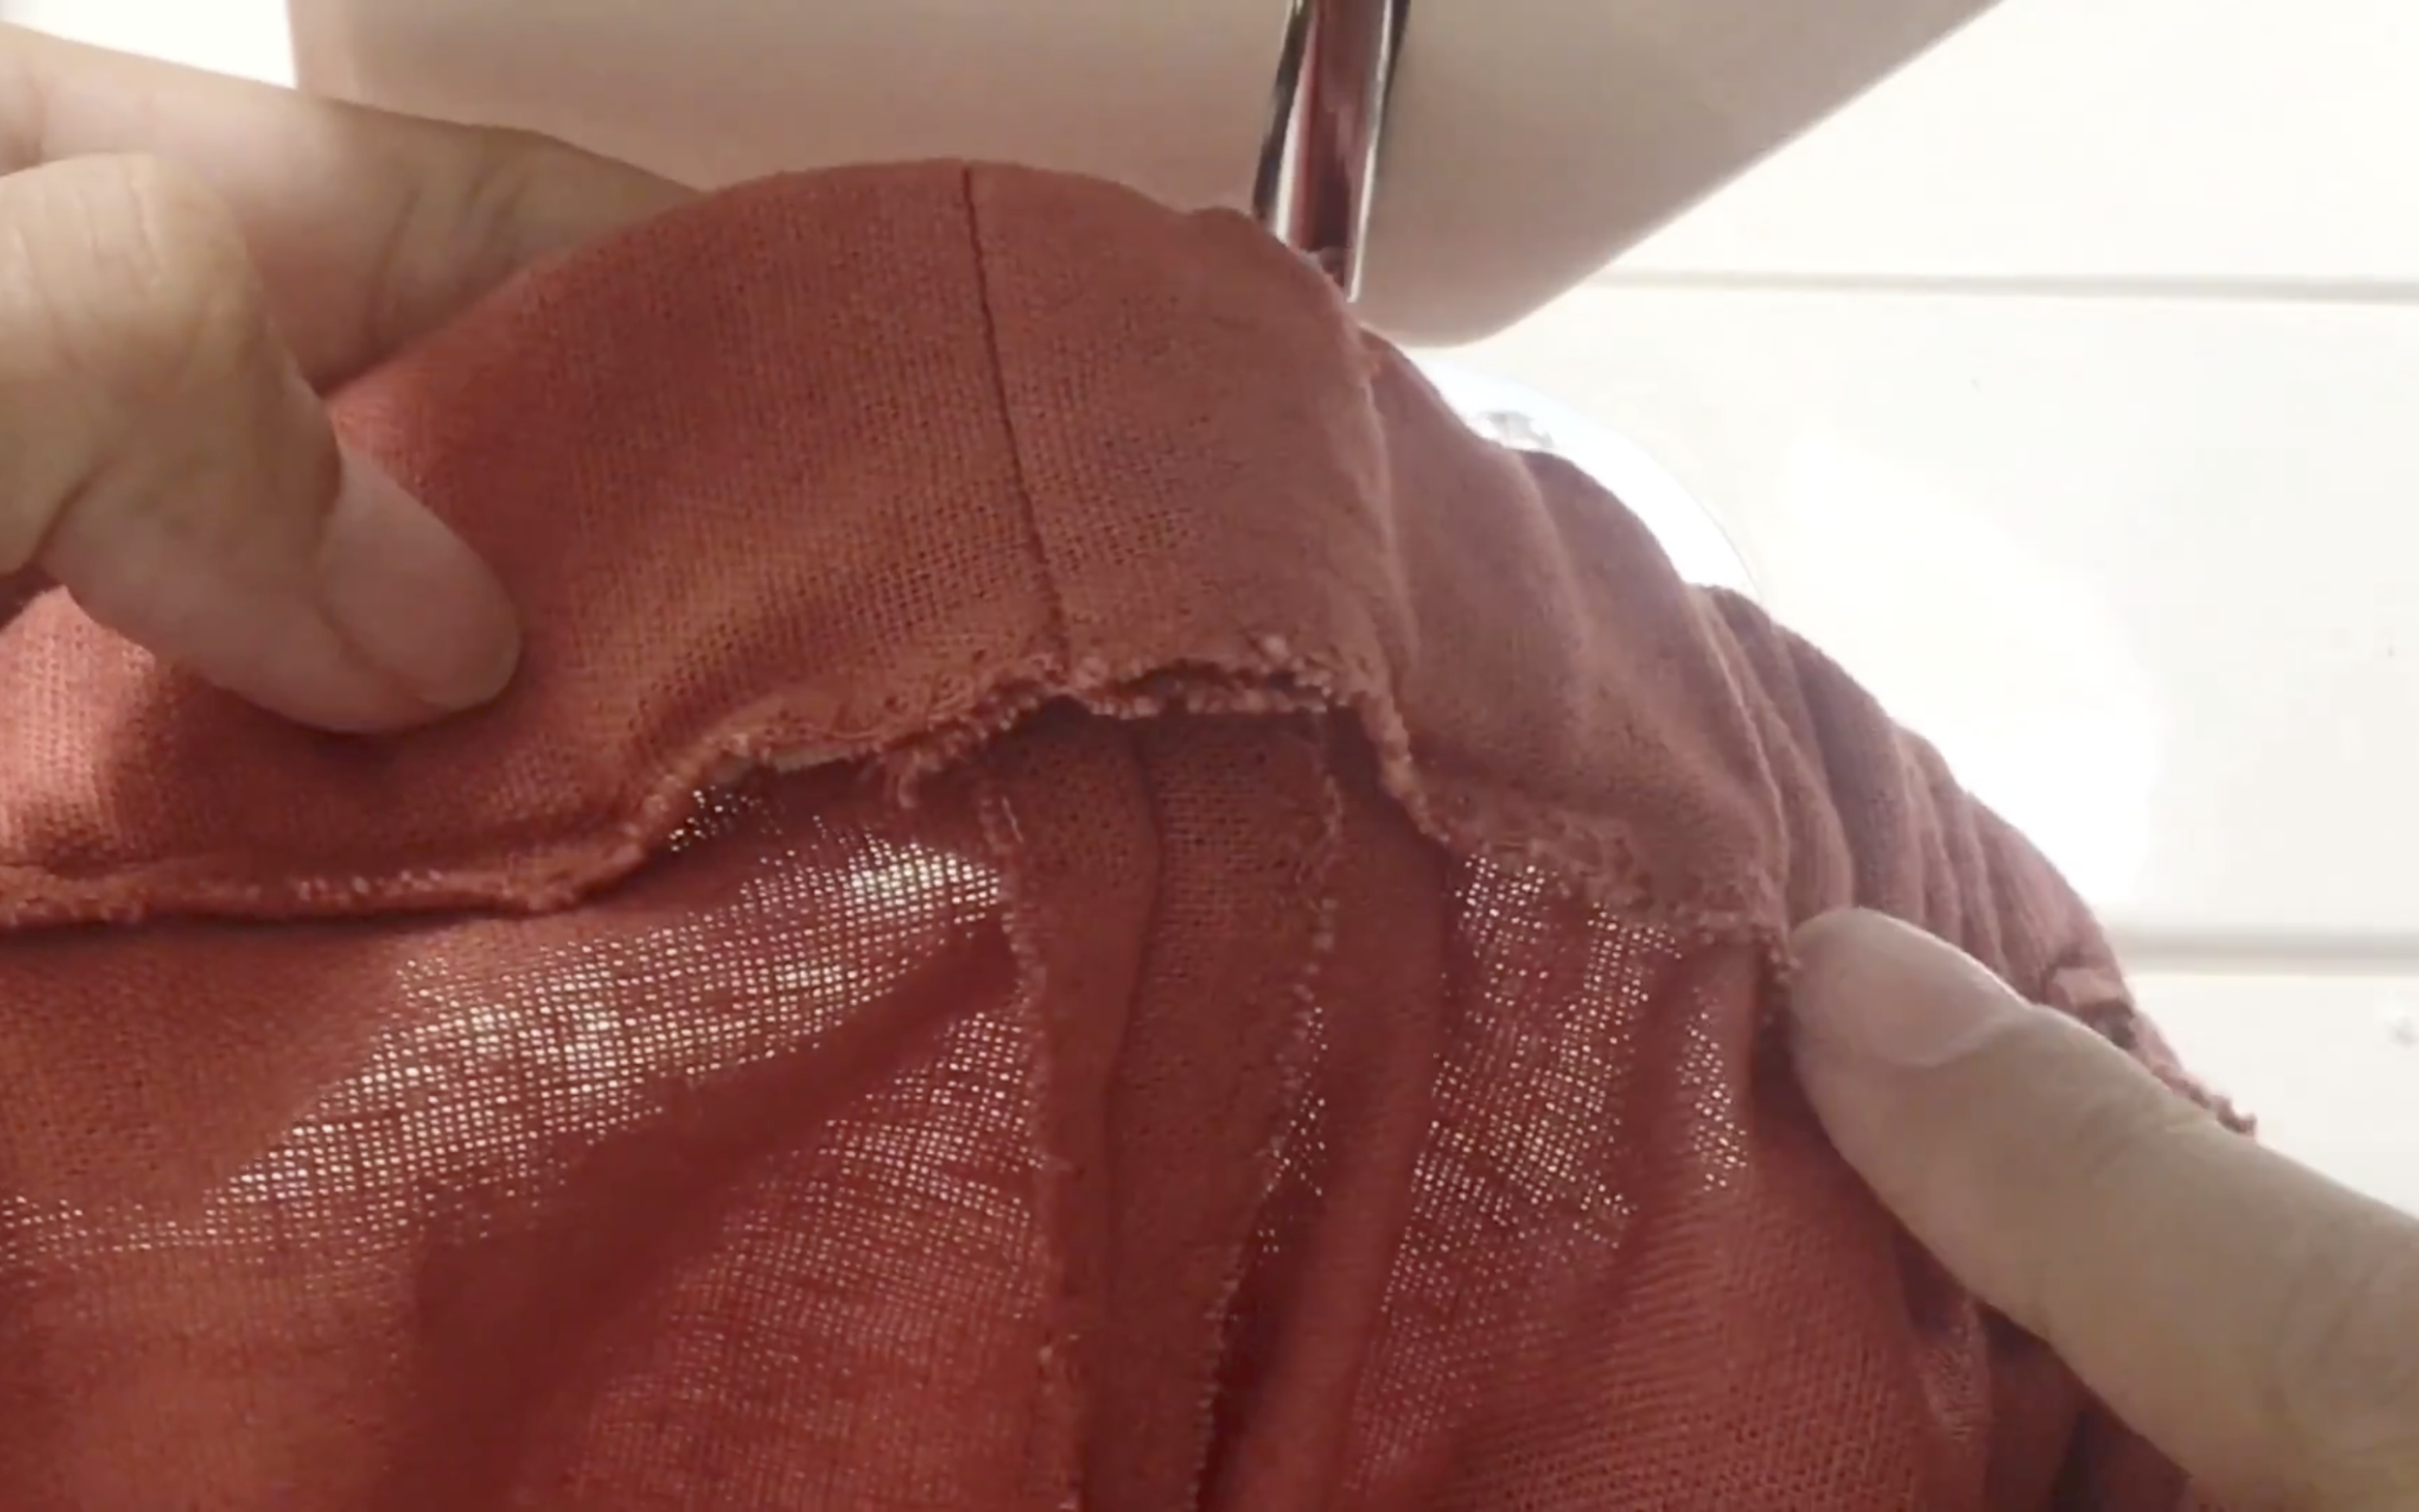
At the front of the pants, loosen the elastic band to create a flat waistband. Sew at the marks made earlier to secure the elastic band.
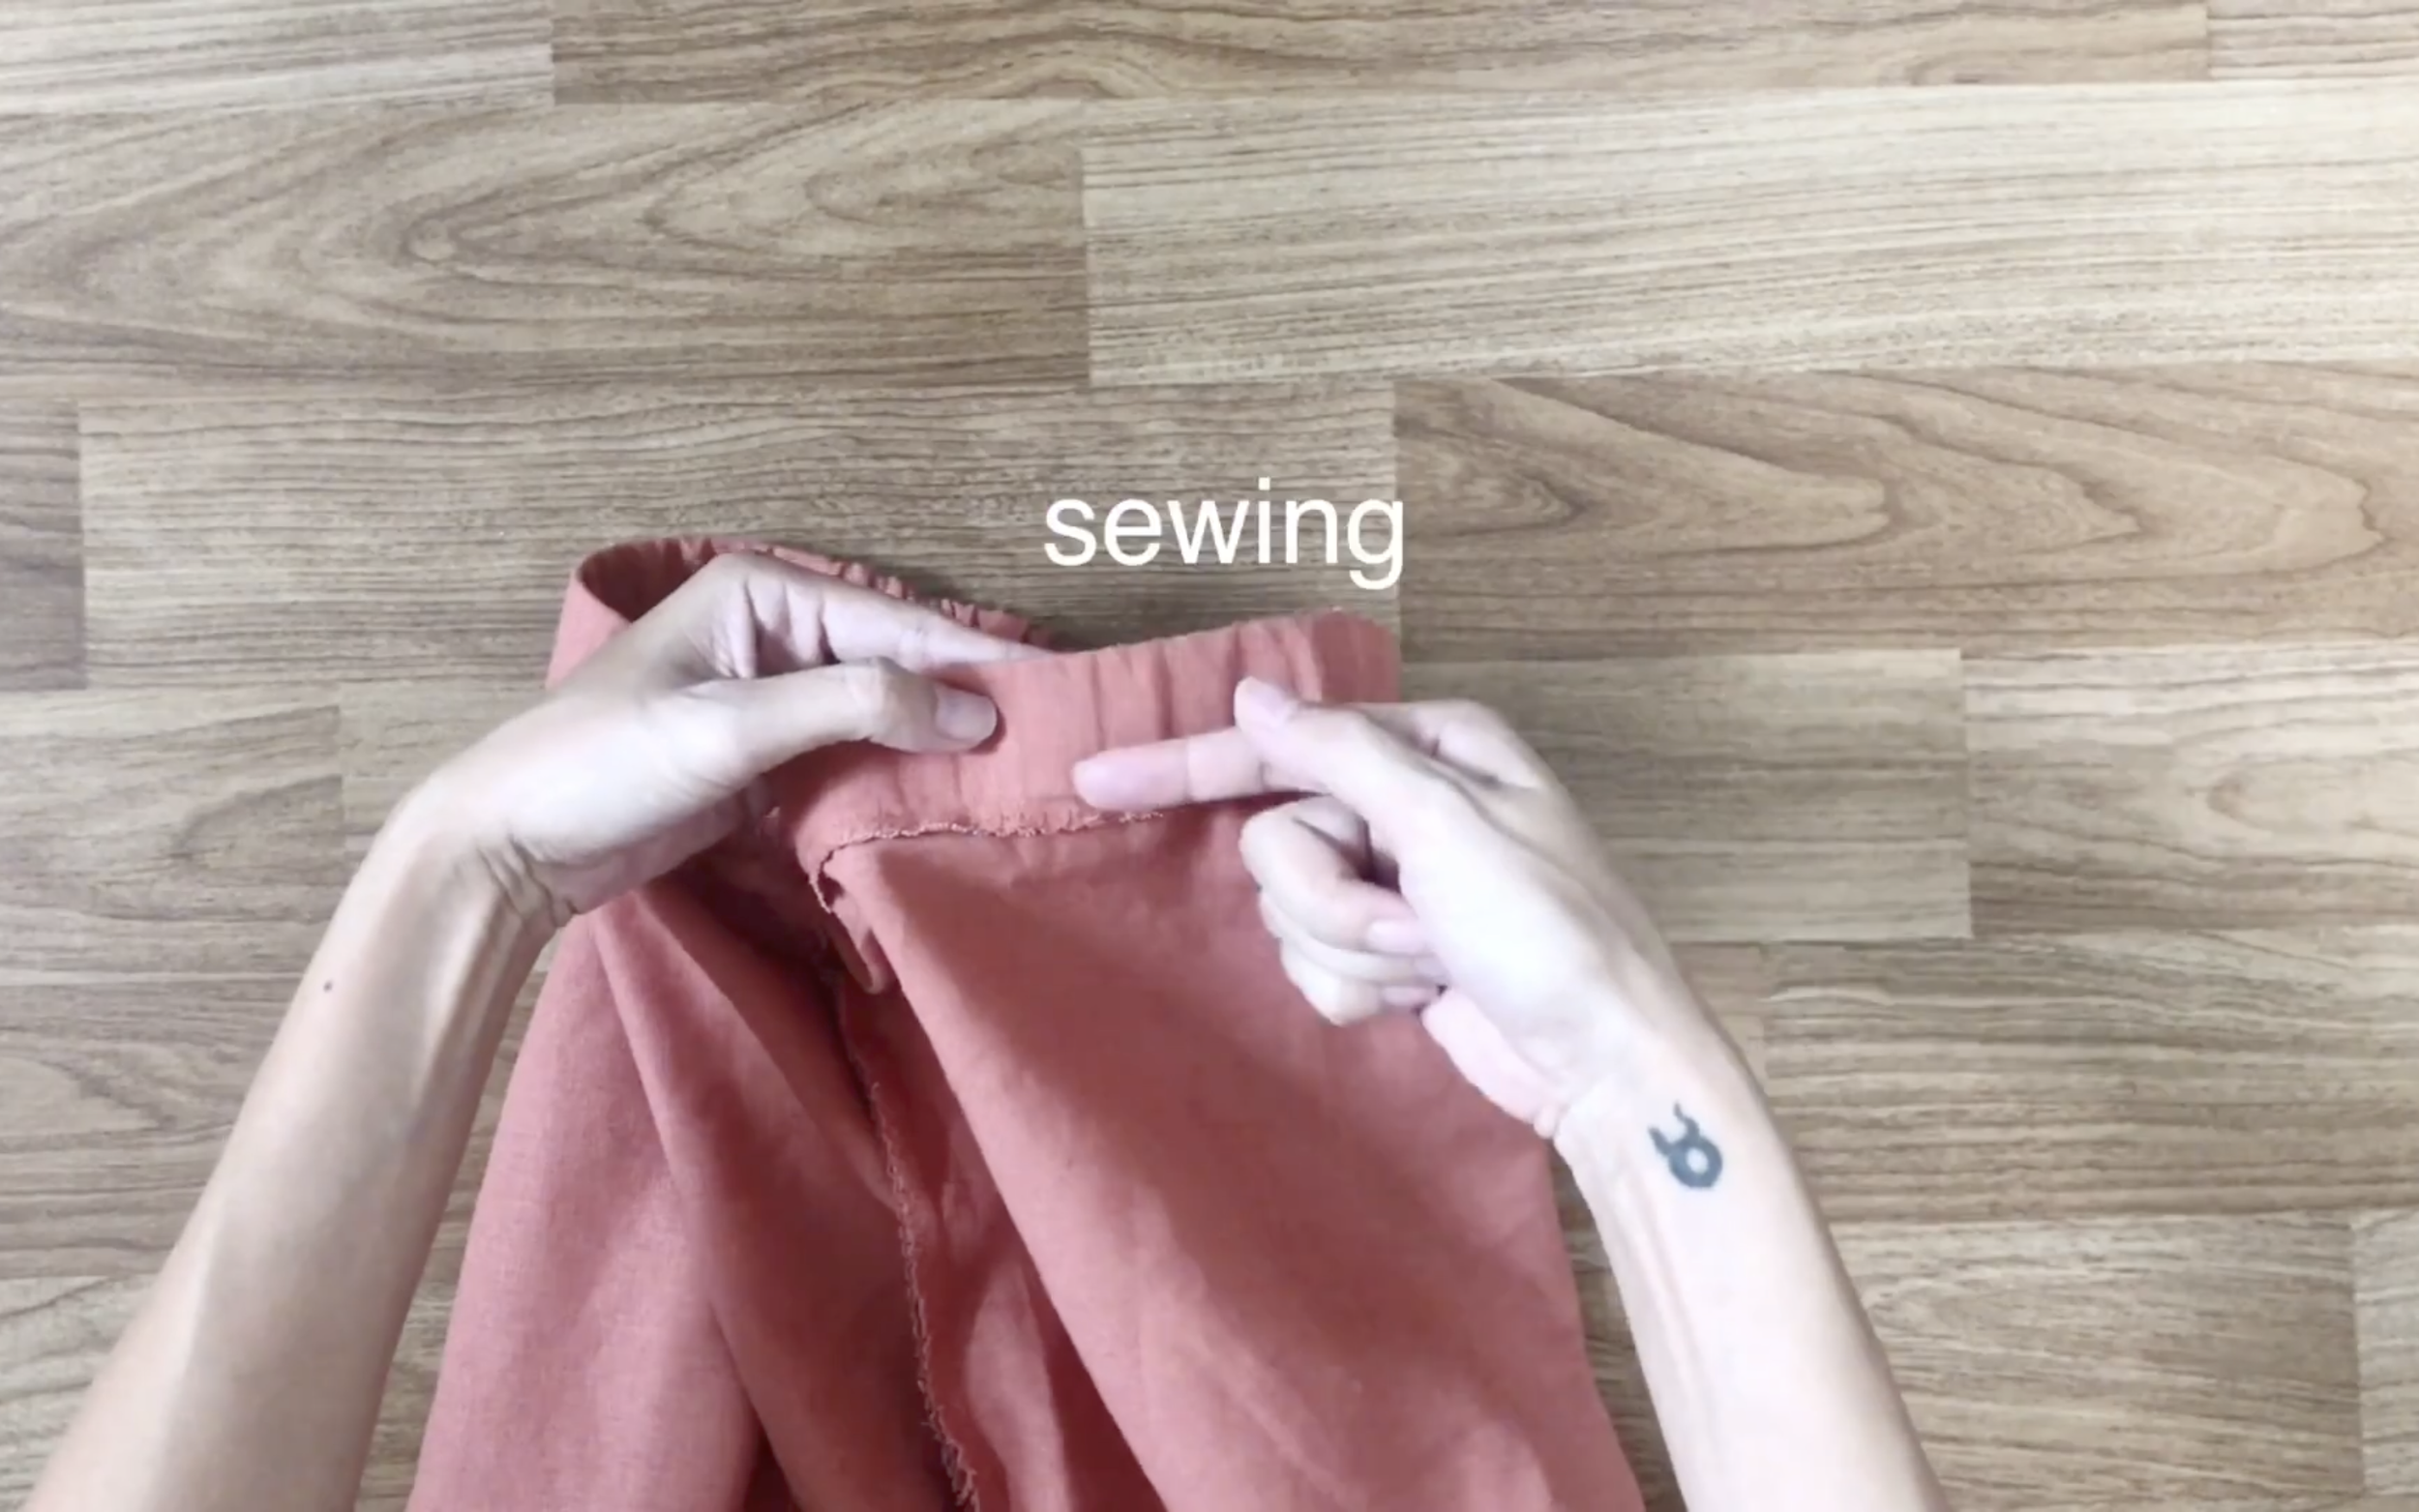
At the back, sew the two ends of the elastic band together.
Then, close the gap to complete the waistband.
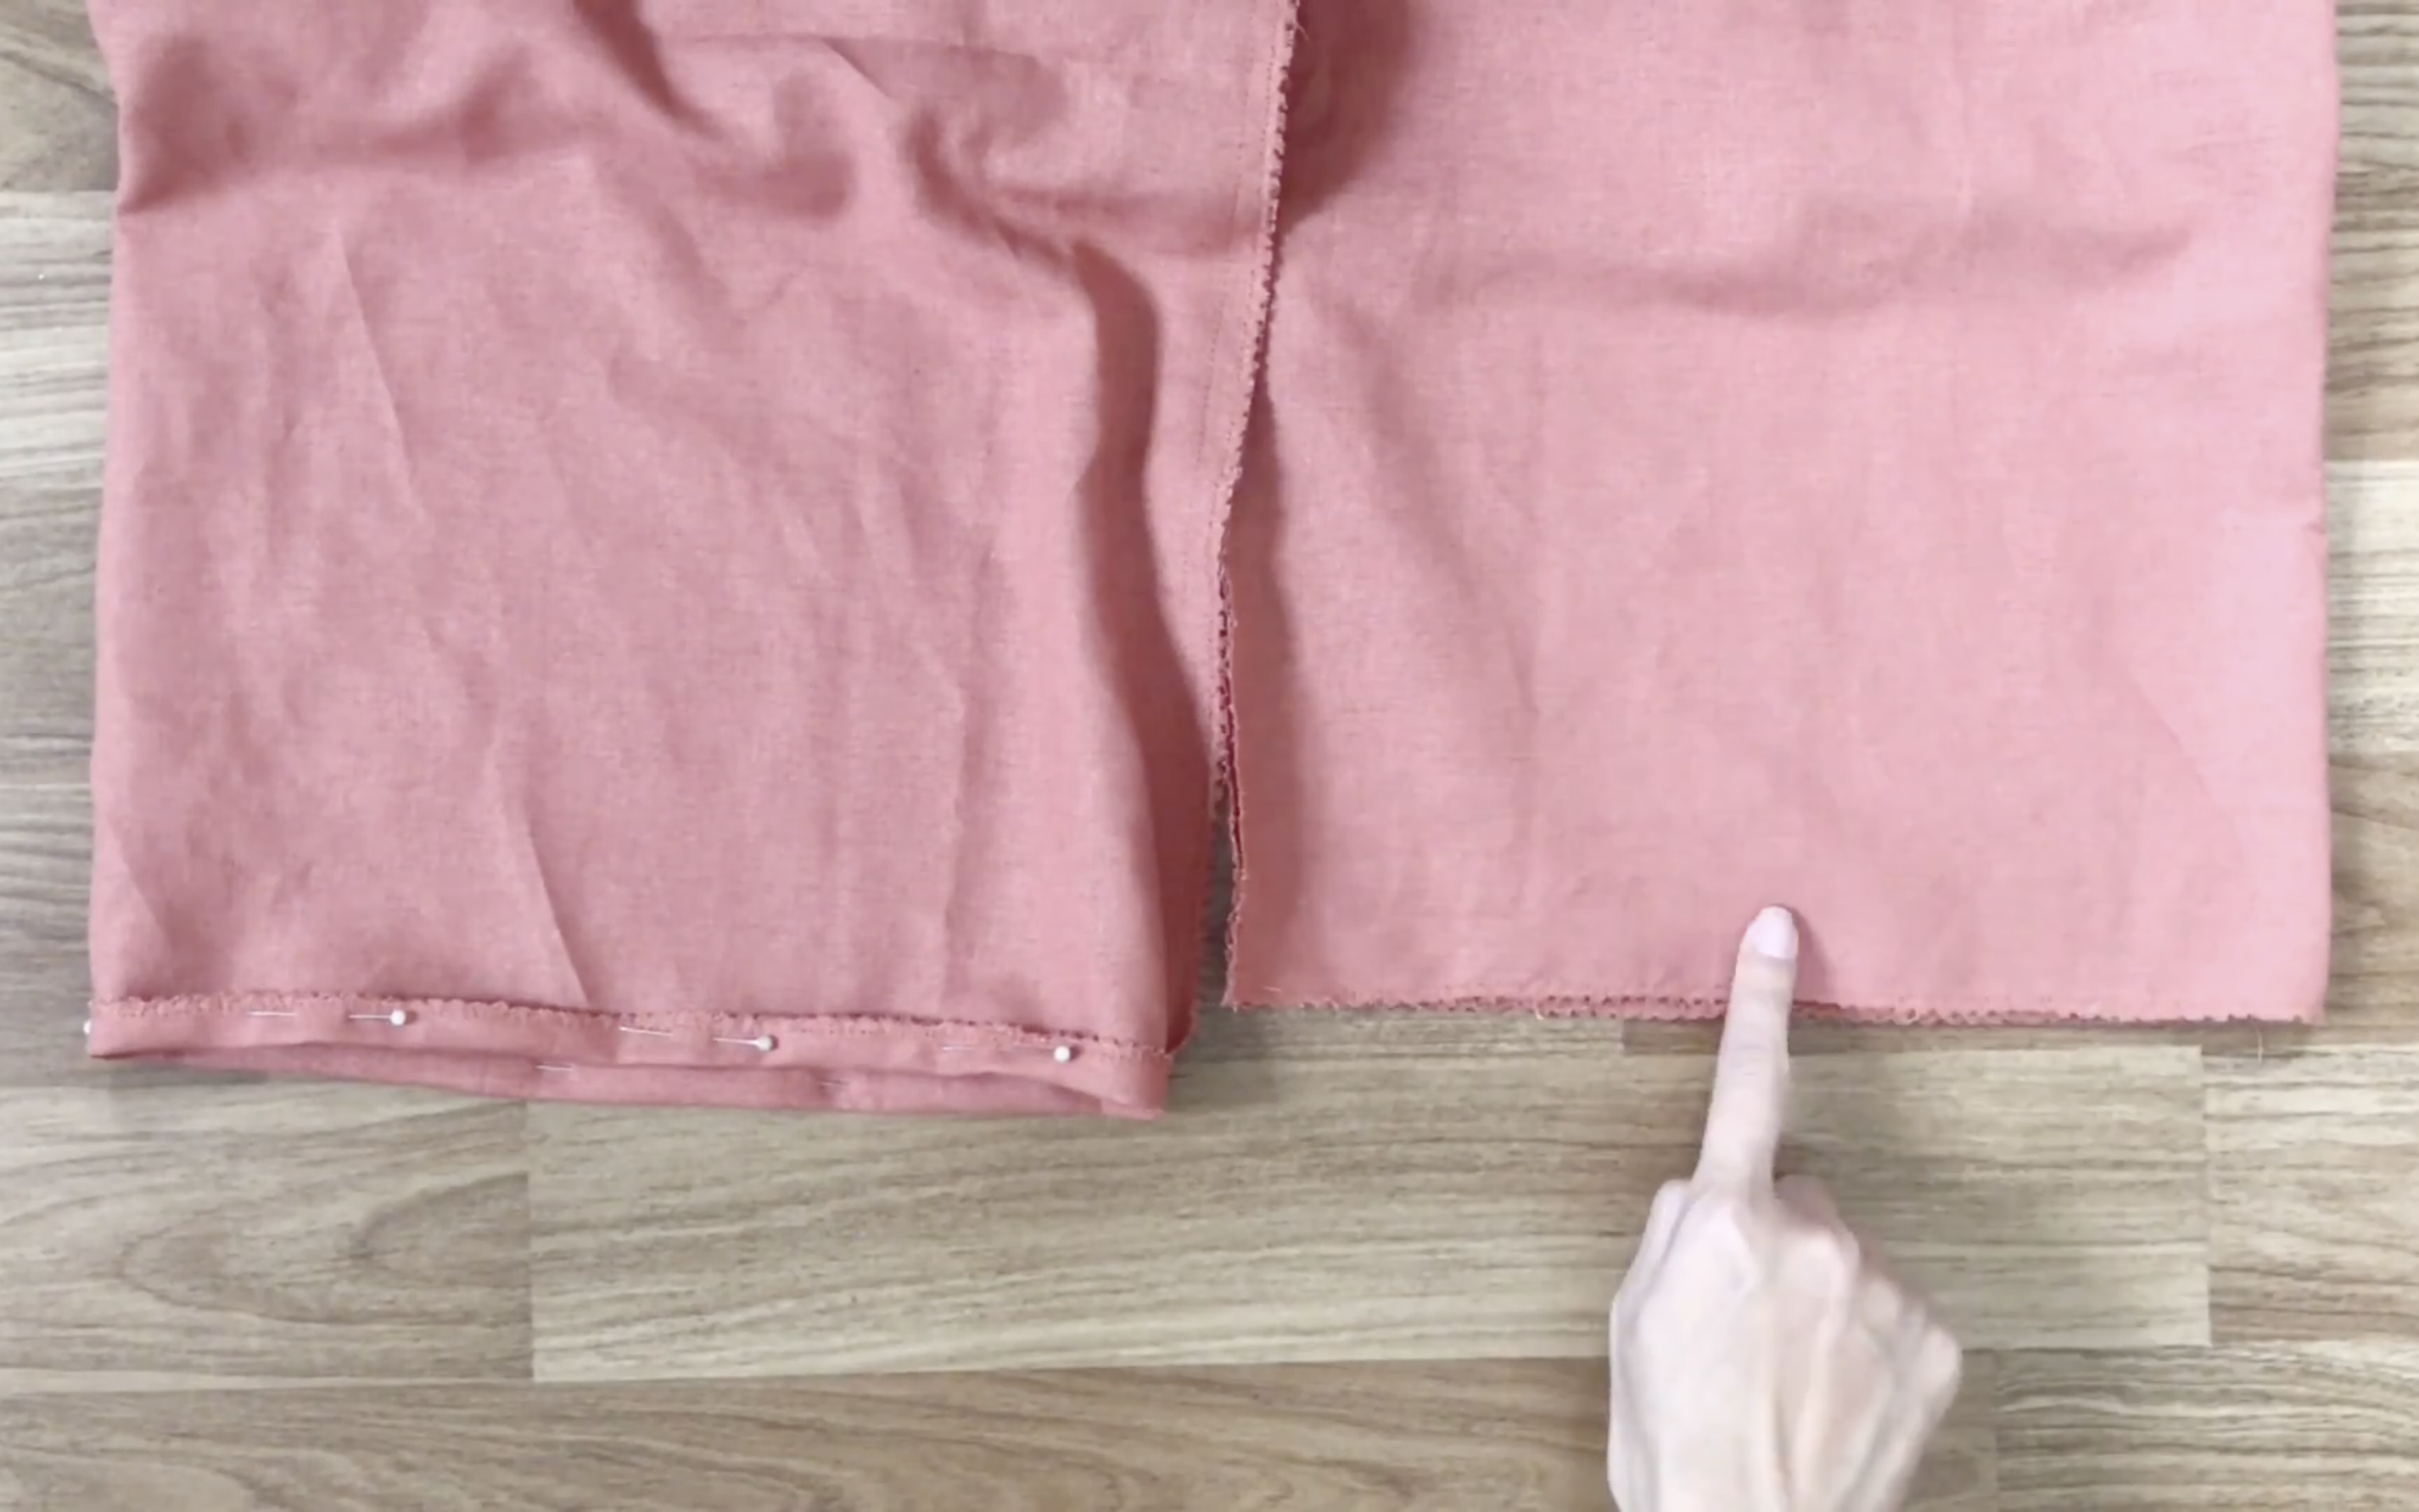
The last step is finishing the legs by folding the fabric at the ends inward, pinning it, and sewing.

DIY High waisted pan
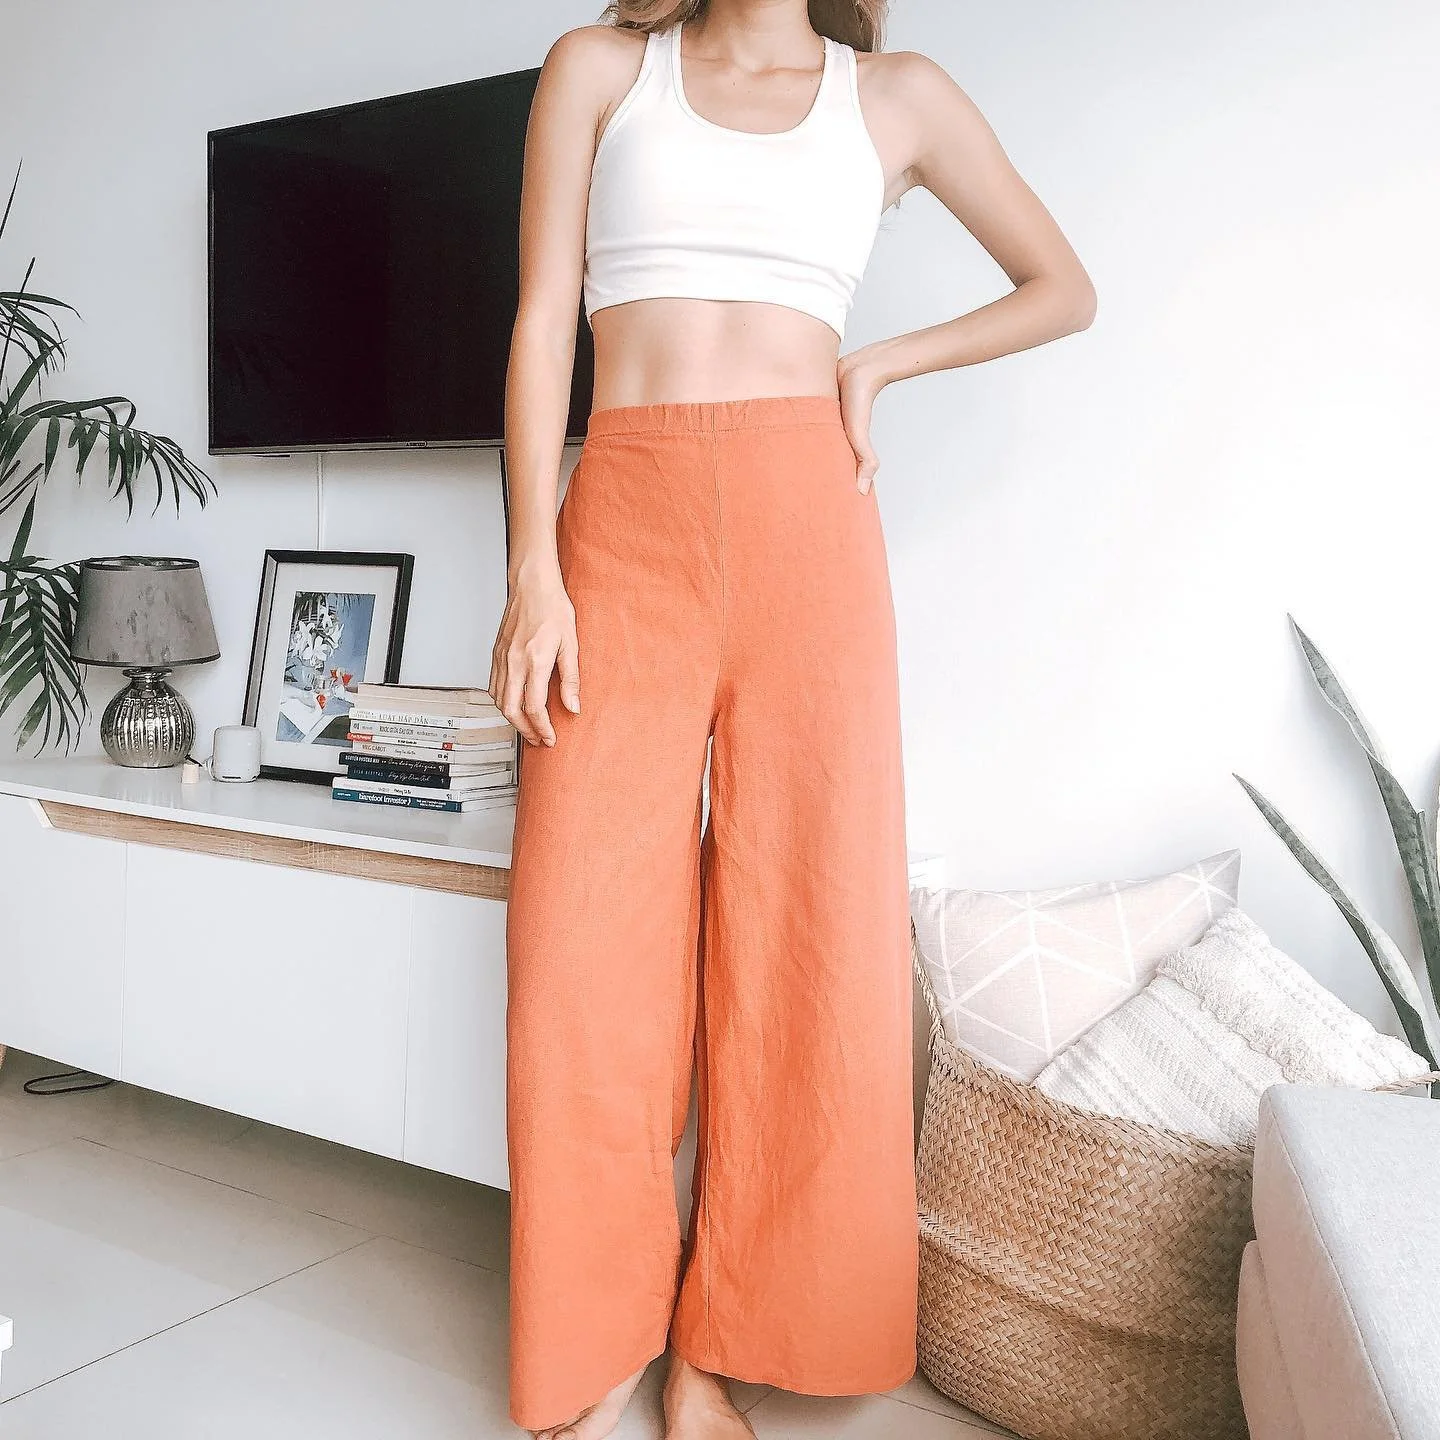
And that’s the finished DIY! Here’s my final result.
I feel like a princess in this dress, now all I need is a prince!

I hope you enjoyed this video and remember, don’t be afraid to make the clothes you dream of.
See you next week with more DIYs!