DIY Barbie inspired dress in the Cottage style | Step by step sewing tutorial with pattern making

DIY Barbie inspired dress in the Cottage style
Welcome or welcome back to my sewing blog!
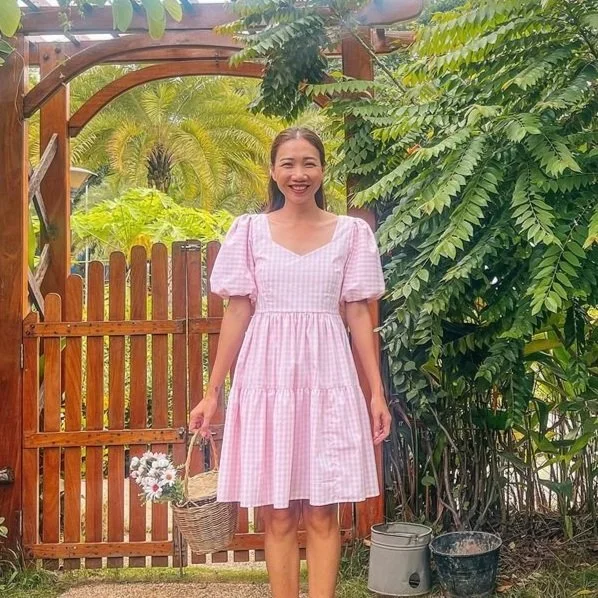
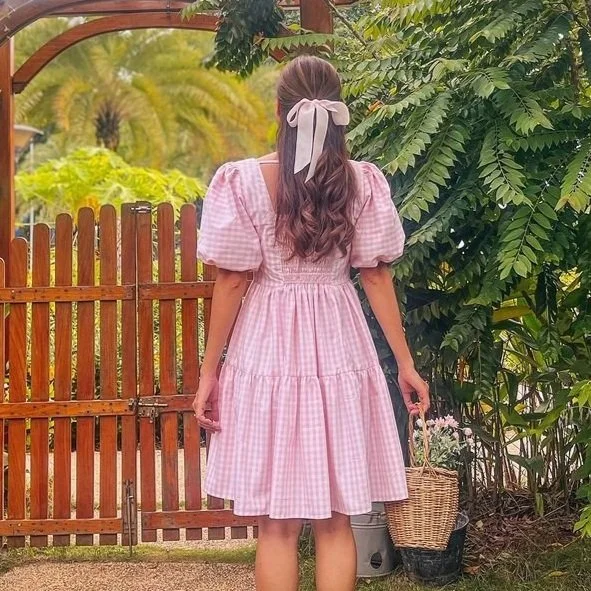
In today’s video, I’m excited to share my latest sewing project: the Barbie-inspired Cottage dress. This charming design combines vintage elegance with a touch of modern flair. The heart-shaped neckline frames the décolletage beautifully, and the ethereal double face puff sleeves add a dreamy touch. The gathered fabric at the back replaces the traditional zipper, ensuring both comfort and style.
In the tutorial, I’ll guide you step by step, from selecting the fabric to sewing the wrap-style closure. Whether you’re a seasoned seamstress or a beginner, this project is both fun and rewarding.
So I hope you will like this tutorial.
Let’s get started!
WHAT YOU’LL NEED
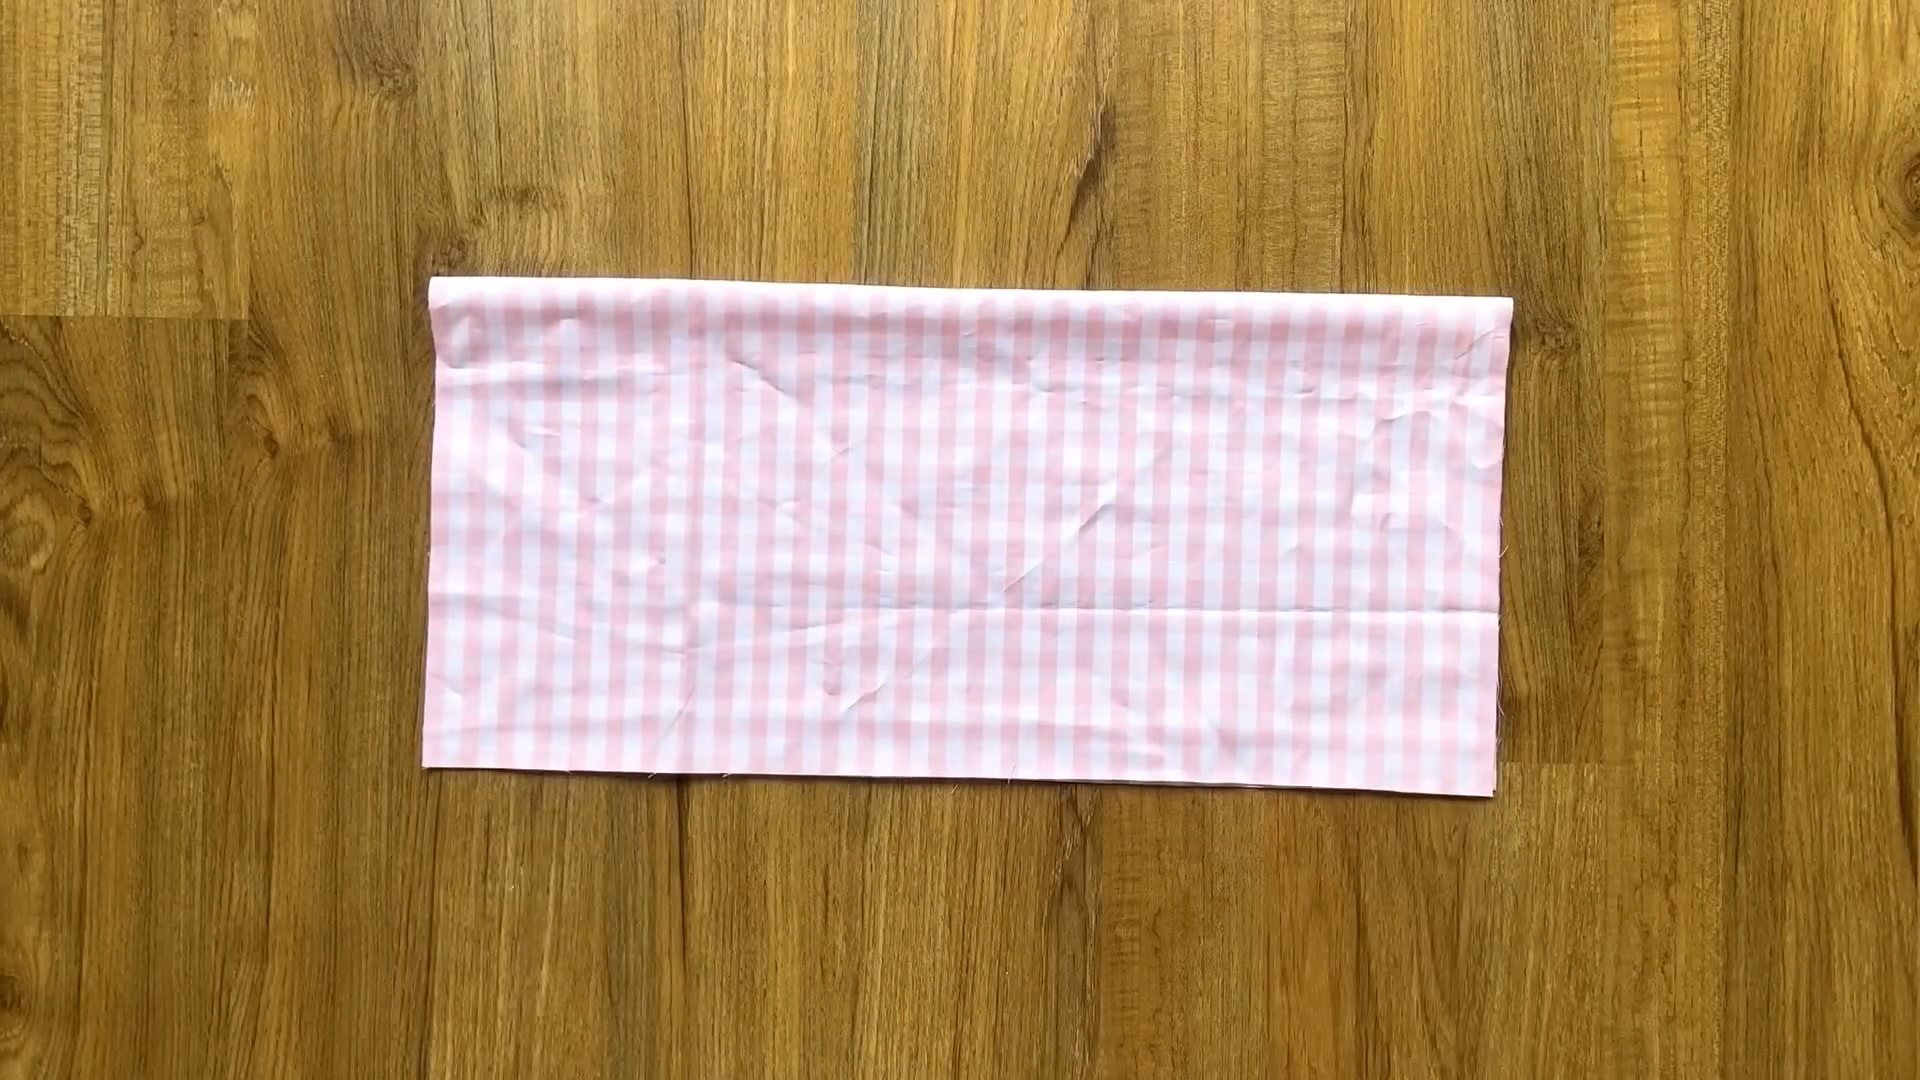
1m of soft cotton fabric
Pattern paper
Sewing machine
Pins
Scissors
Ruler
Long stick
MAKING THE PATTERNS
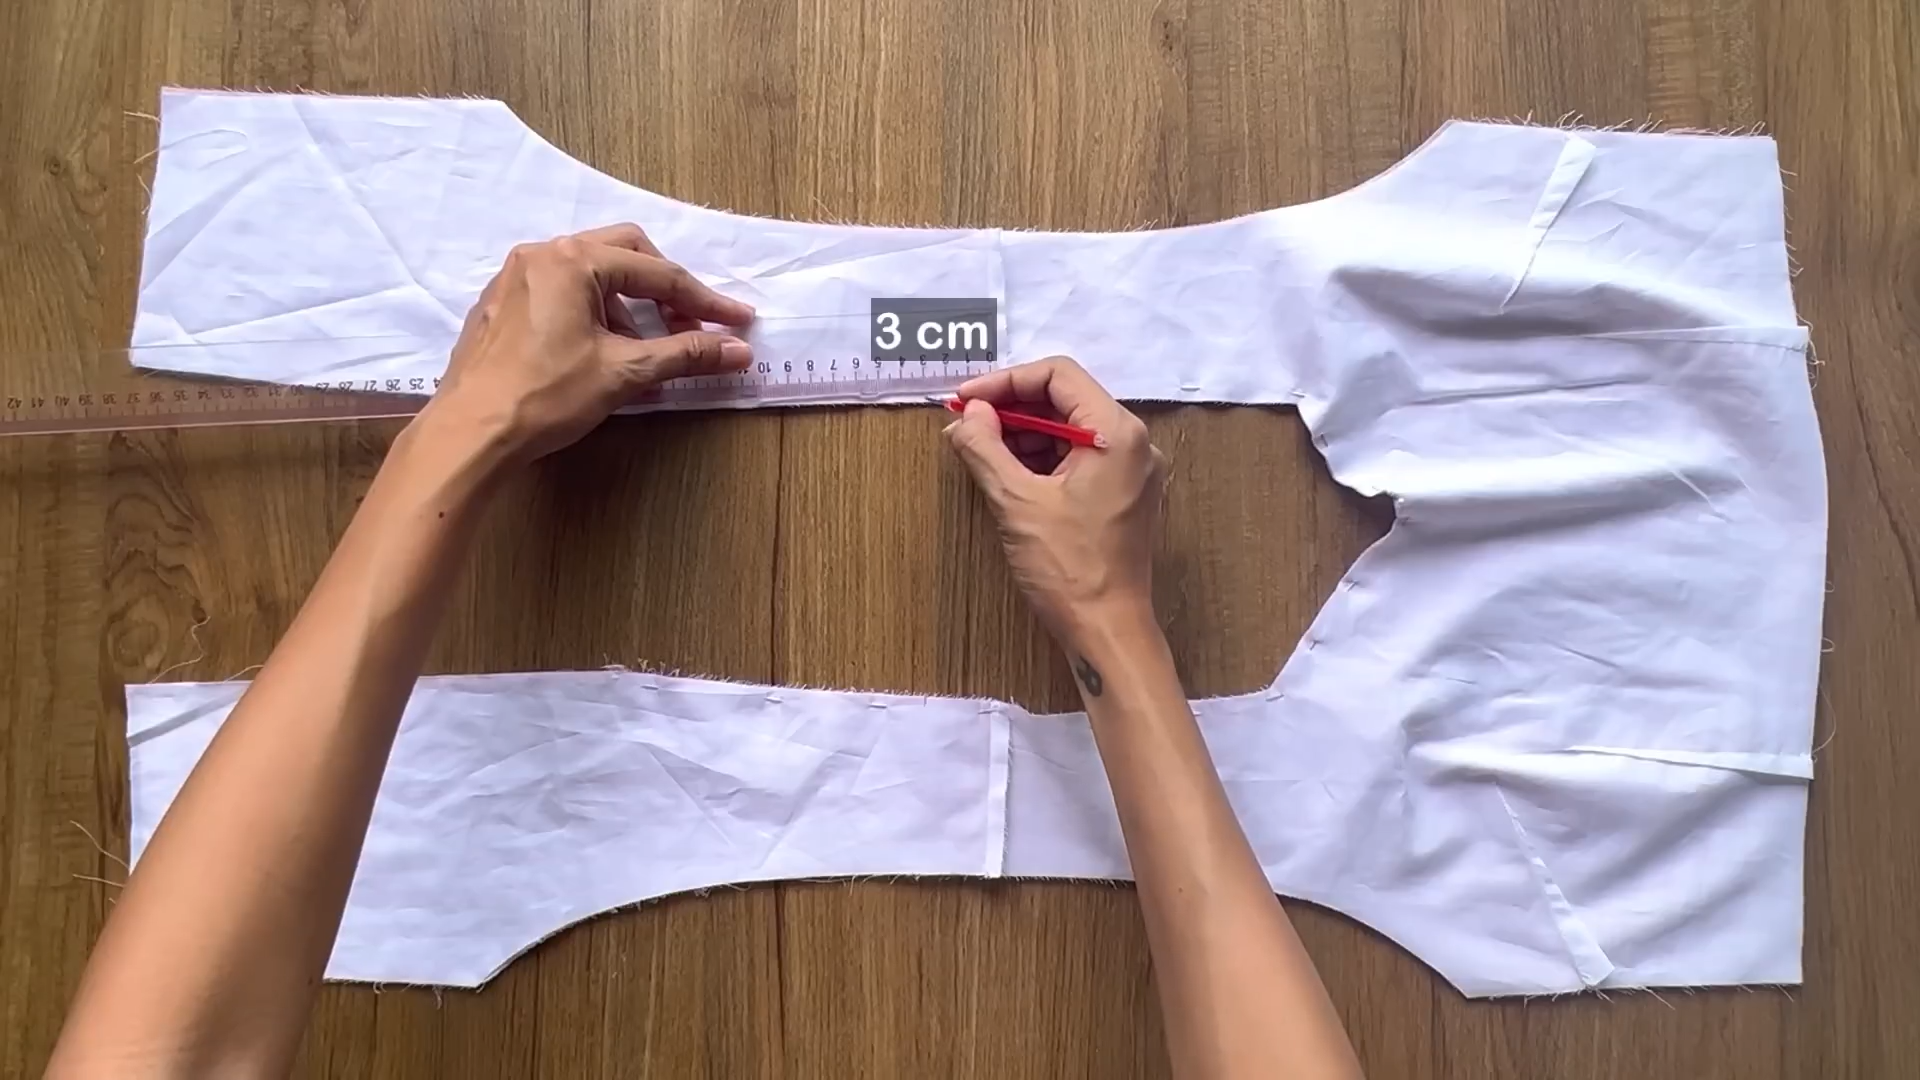
Here’s the pattern for the project. To get a clear understanding of all the measurements needed for the pattern, watch the video from 0:37 to 9:53.
Remember, you can adjust these measurements to fit your own dimensions!

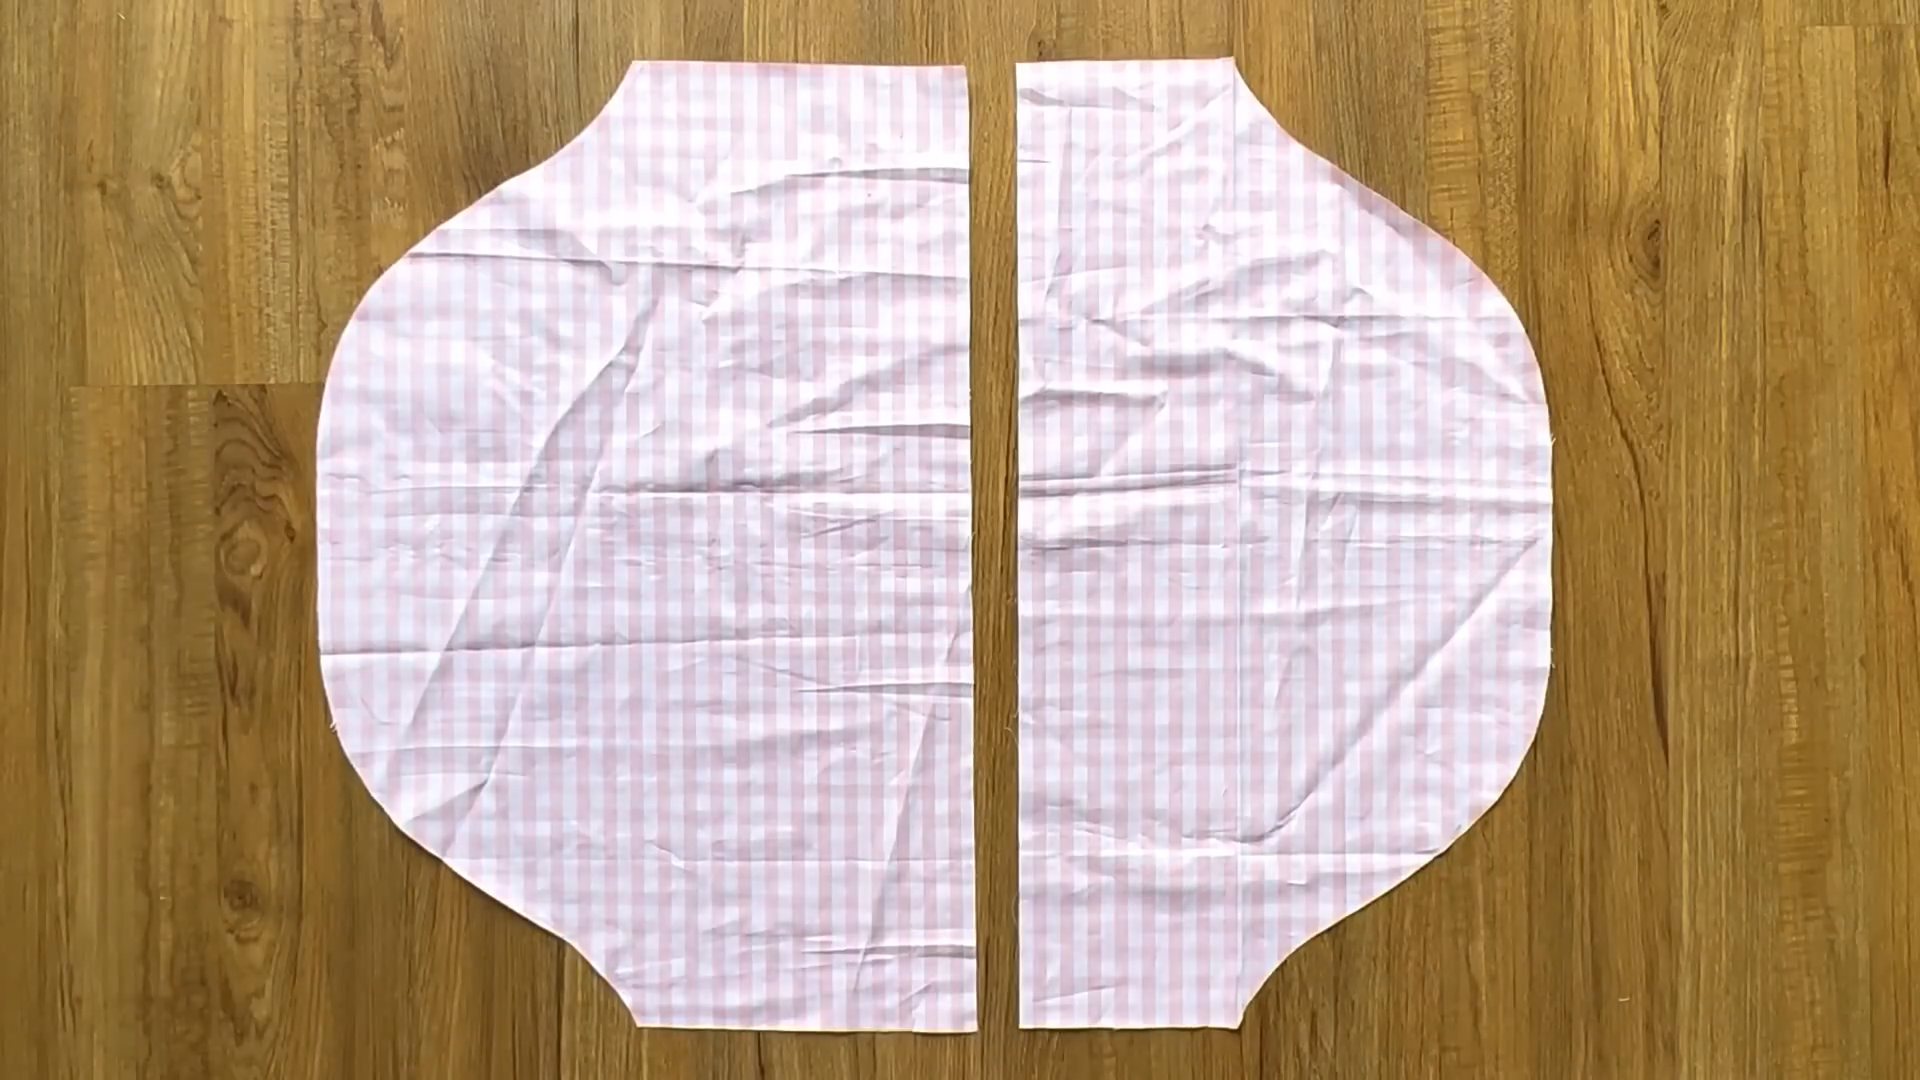
THE FRONT BODICE PATTERN

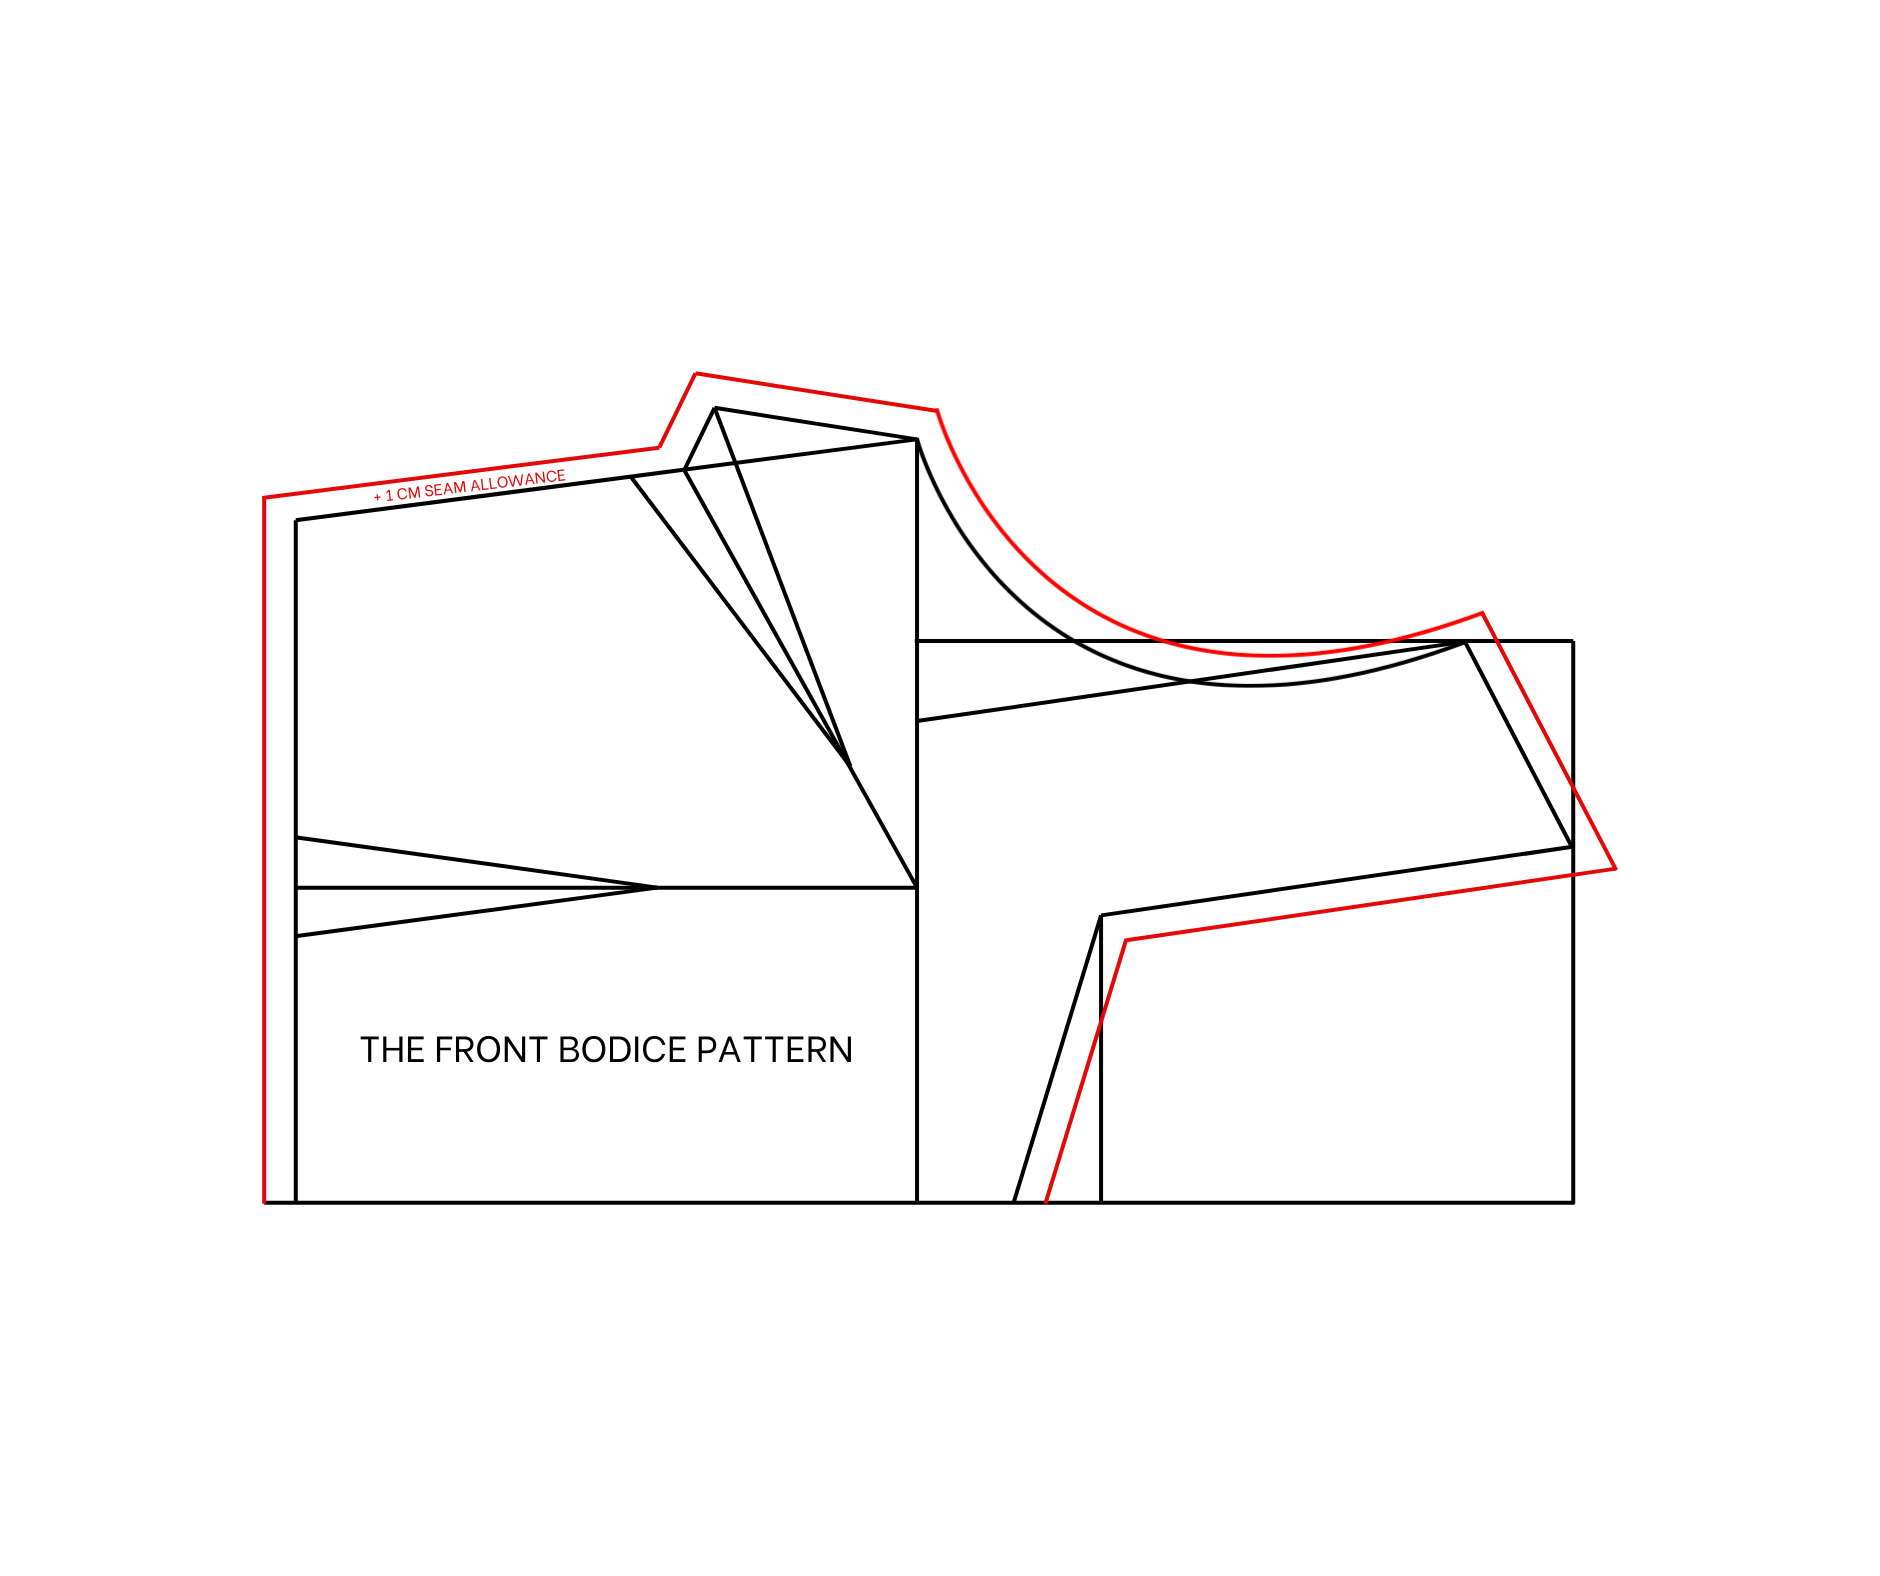
The front bodice pattern
To make the front bodice pattern, draw a straight line cutting the edge horizontal line first.
From the cutting point, mark up 17 cm on the straight line, it's a half of your shoulder size. Then draw a perpendicular line from that mark, the width of this line will be 2.4 cm which is 1 per 10 your shoulder size minus 1 cm.
From the first mark on the straight line, mark out 6 cm which is the width of the shoulder of the dress that you want. Then connect that mark to the end of the perpendicular line to create the shoulder line for the front bodice.
From the first straight line, make another line 22 cm from it. It's a quarter of your bust size plus 2 cm, this will be the bust line of the front bodice.
From the cutting point between this line and the edge horizontal line, mark up 22 cm which is a quarter of your bust size plus 2 cm. After that, continue the perpendicular line from the shoulder to cut the bust line at one point.
From this cutting point, mark to inside 2.5 cm then connect that mark to the end of the shoulder line. After that, mark at the middle of the slanted line before connecting it to the mark on the bust line. Based on it draw a curved line to finish the sleeve line for the front bodice.
From the first straight line, keep drawing another one 40 cm from it, it's the length from the shoulder to above your belly button. It's also the length of the bodice you want.
From the end of this line, mark up 20 cm which is a quarter of your waist size plus 3 cm then connect that mark to the end of the sleeve line to create the sideline of the front bodice.
From the first straight line, mark at 15 cm on the edge horizontal line, it's the length from the shoulder to above your breast. Then draw a straight line to that mark.
After that, mark up 8.5 cm on this line which is a half of the width of the front neck that you want. Then connect that mark to the top of the shoulder line to create the neckline for the front bodice.
From the mark on the edge horizontal line, make another mark at 3 cm next to it. Then connect that mark to the mark on the perpendicular line next to it that you’ve just made before to finish the neckline for the front bodice.
From the top of the sideline, mark down 7 cm. From the end of the bust line, mark up 10 cm which is a half of the width between two breasts then connect two marks together. From the end of this line, mark out 3 cm.
From the mark on the side line, make two more marks at 1.5 cm two sides of it then connect them to the mark on the slanted line to create a dart there for the front bodice. After that, measure the width of two dart lines to redraw to make sure they will be the same.
From the mark on the bust line, draw a horizontal line to cut the waistline. From the cutting point, make two marks at 1.5 cm two sides of it. From the mark on the bust line, mark out 6 cm on the horizontal line then connect that mark to two marks you make before to create a dart there.
Add 1 cm for seam allowance after that and you will have the front bodice pattern after cutting. You will need to cut this pattern in folded fabric at the edge horizontal line.
THE BACK BODICE PATTERN
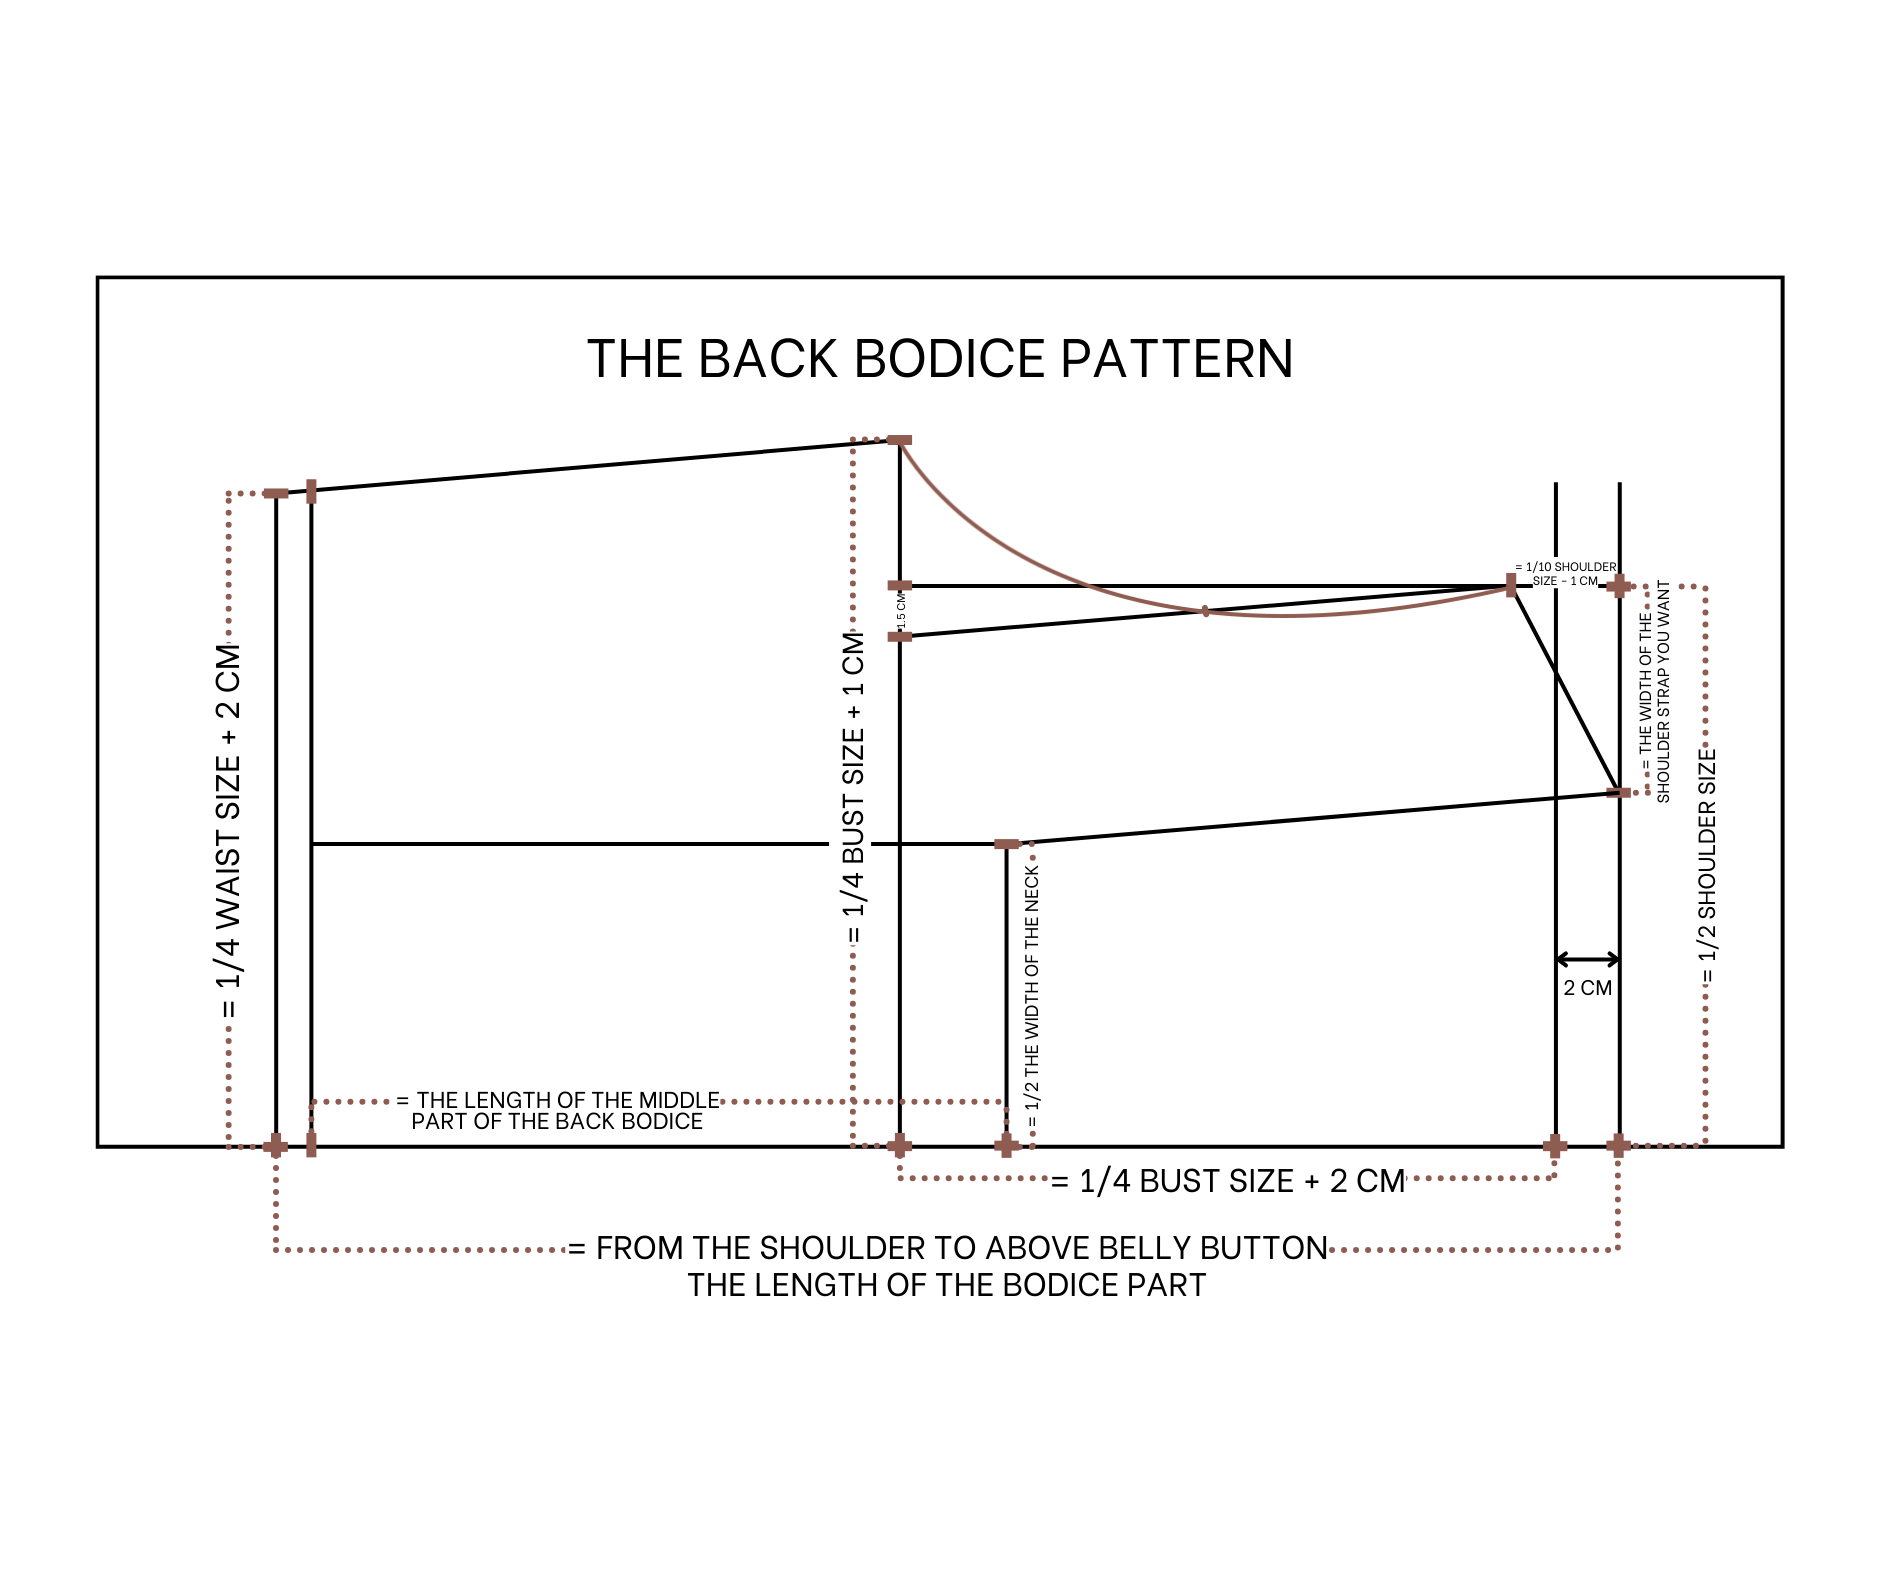


The back bodice pattern
Moving to the back bodice pattern, draw a straight line cut the edge horizontal line first.
From the first straight line, draw another one at 2 cm next to it. From the end of this line, mark up 17 cm which is a half of your shoulder size then draw a perpendicular line from that mark. The length of this line will be 2.4 cm which is one per 10 your shoulder size minus 1 cm.
From the mark on the second straight line, mark down 6 cm which is the width of the shoulder strap of the bodice that you want. Then connect that mark to the end of the perpendicular line to create a shoulder line for the back bodice.
From the first straight line, make another one at 22 cm next to it, it's a quarter of your bust size plus 2 cm. From the end of this line, mark up 21 cm which is a quarter of your bust size plus 1 cm.
After that, continue the perpendicular line from the shoulder to cut the bust line. From this cutting point, mark in 1.5 cm then connect that mark to the end of the shoulder line.
From the second straight line, keep drawing another one at 40 cm from it. It's the length from the shoulder to above the belly button, it's also the length of the bodice that you want.
From the end of this line, mark up 19 cm which is a quarter of your waist size plus 2 cm. Then connect that mark to the end of the sleeve line to create the sideline of the back bodice.
After that, measure to find the width of the sideline at the front bodice without the dart to redraw the sideline for the back bodice.
From the ending line, mark up 18 cm on the edge horizontal line then draw a straight line to that mark. From the end of this straight line, mark up 8.5 cm which is a half width of the front neck that you make before then connect that mark to the top of the shoulder line to create the neckline for the back bodice.
Also draw a horizontal line from that mark to cut the ending line too. Add 1 cm for seam allowance and after that and we will have the back bodice pattern after cutting.
The back bodice will come with the side pattern and the middle pattern. Increase the width of the middle pattern four times to create a gathering fabric there later.
THE SLEEVE PATTERN


The sleeve pattern
Moving to the sleeve pattern, measure the total width of the sleeve lines at the front and the back bodice first. After that, draw a straight line cut the edge horizontal line.
From the edge horizontal line, draw another line 5 cm above it, it's a half of the gathering fabric at the top of the sleeve that you want.
From the cutting point between the second horizontal line and the straight line, mark at 15 cm on the horizontal line, it's one per five your bust size minus 1 cm. This will be the top of the sleeve.
From this mark, measure and draw a slanted line with 21 cm which is a half width of the total sleeve line you check before at the bodice patterns minus 2 cm. Divide that line into three equal parts.
After that from the middle between two top parts, draw an outside perpendicular line with 2 cm width. In the bottom part, mark in the middle first then draw an inside perpendicular line later with 0.5 cm width.
After that, draw a curved line through these marks to create the sleeve line for the sleeve pattern.
From the top of the sleeve, mark at 33 cm on the edge horizontal line, it's the length of the sleeve from the shoulder to above the elbow plus 2 cm. Then draw a straight line through that mark.
After that, draw a horizontal line from the edge of the sleeve line to cut the new straight line to create the under arm big line for the sleeve pattern.
Add 1 cm for seam allowance after that and you will have the outside sleeve pattern after cutting. You will need to cut this pattern in folded fabric at the edge horizontal line.
From the ending line of the outside sleeve pattern, draw another line at 4 cm above it and we will have the inside pattern after cutting.
You will need to cut this pattern in folded fabric at the edge horizontal line.
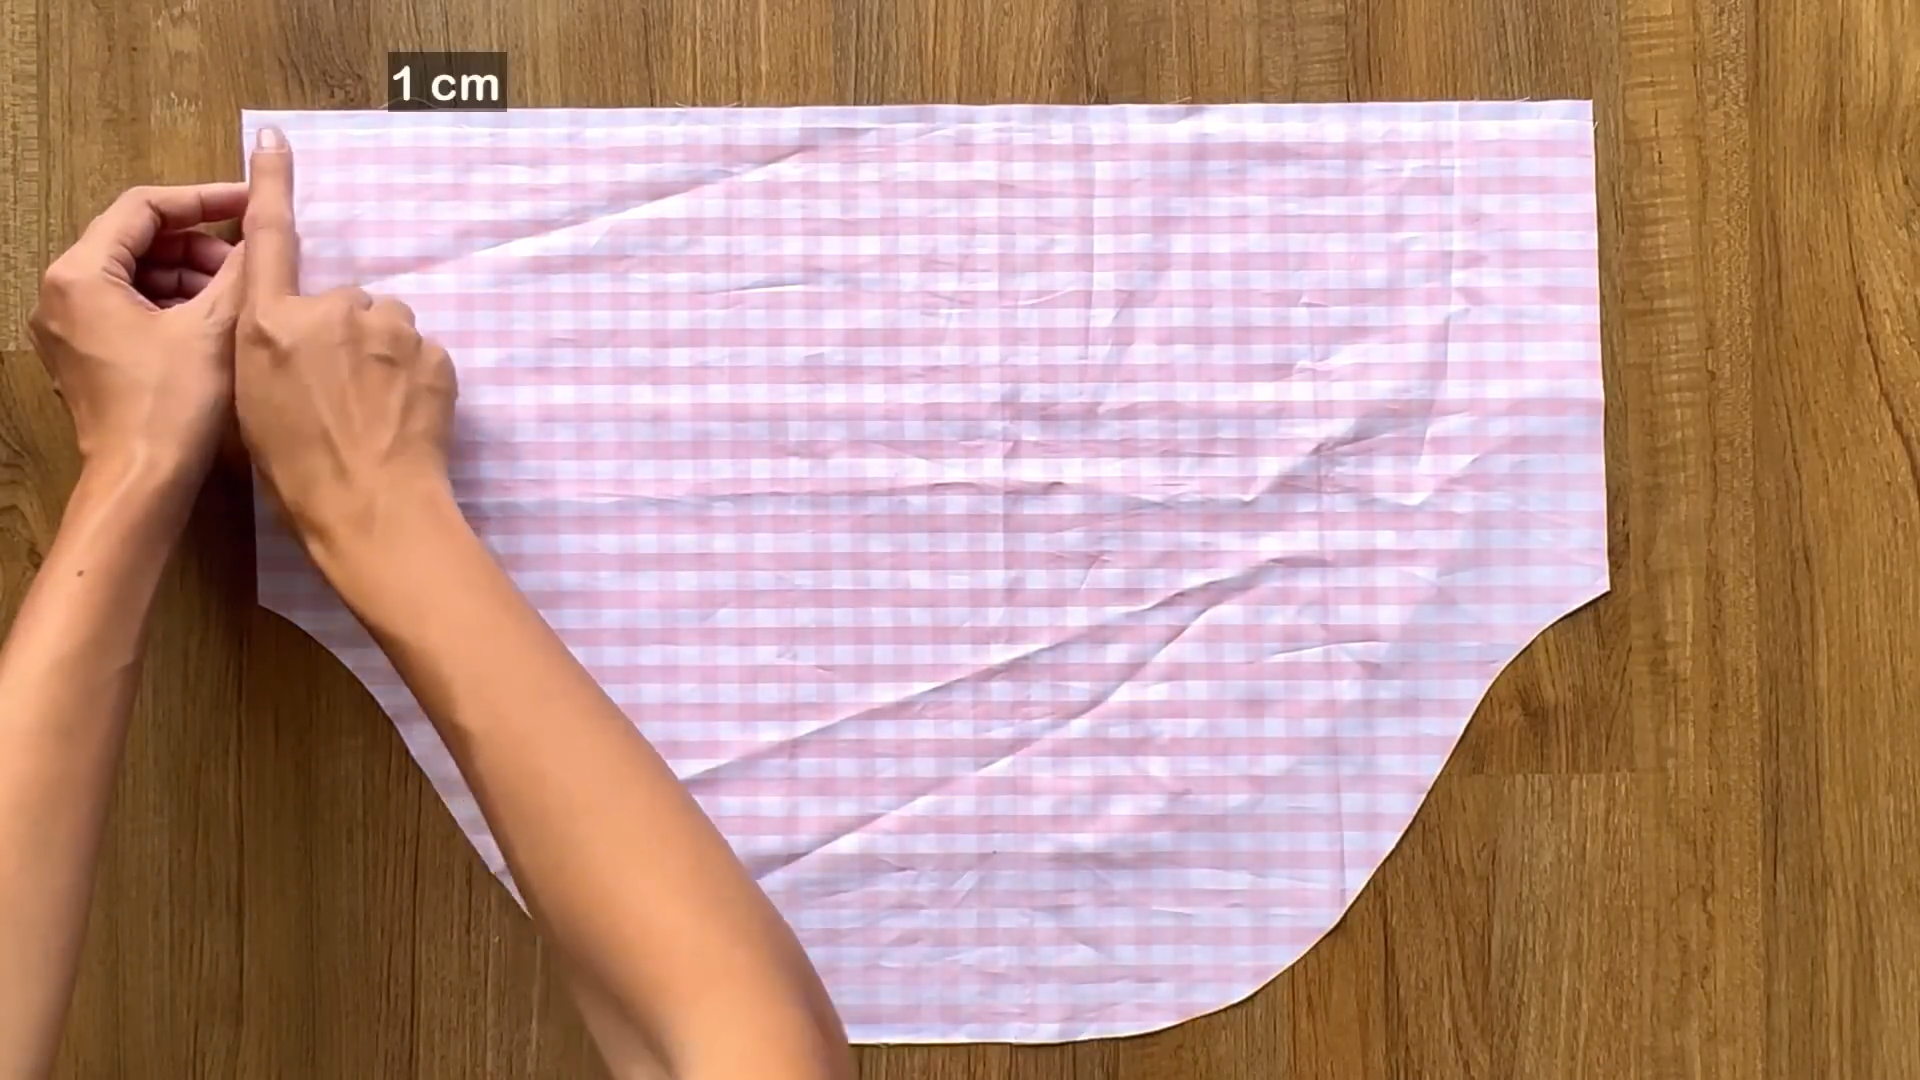
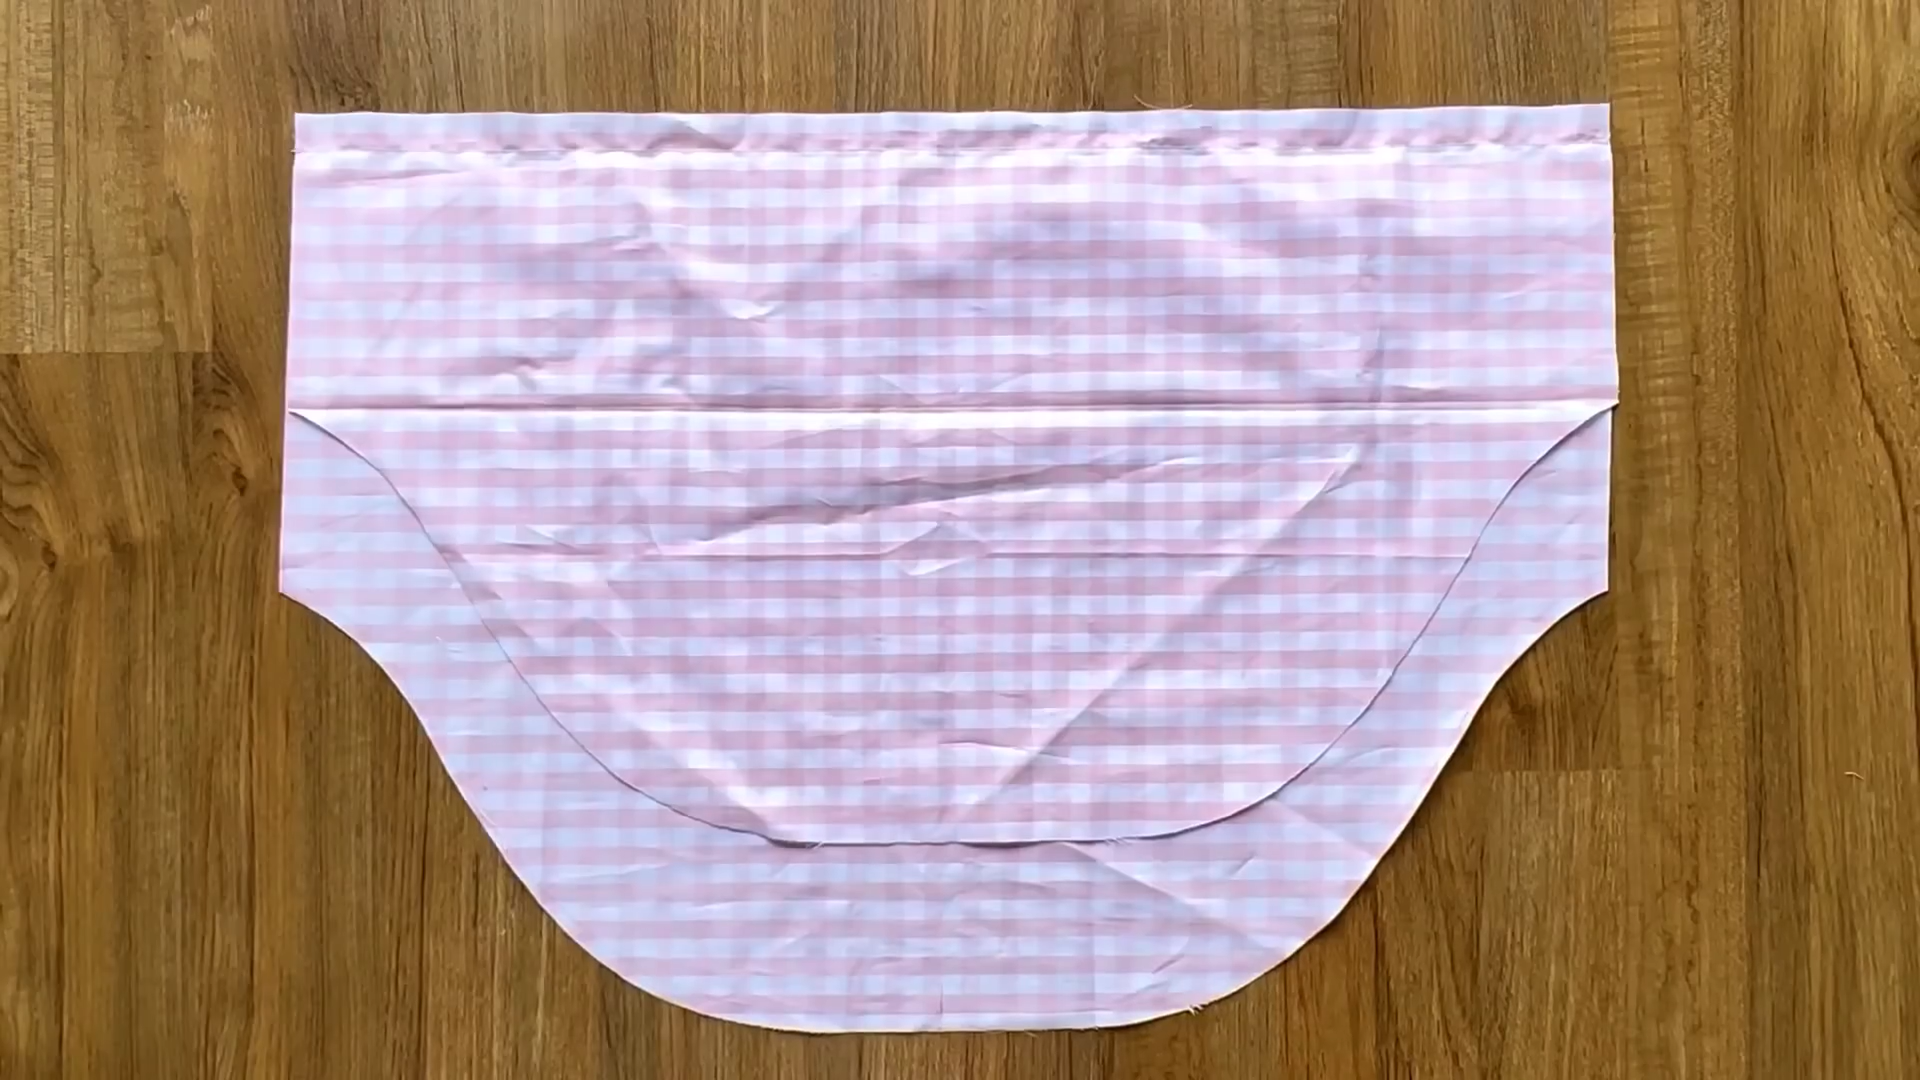
THE SKIRT PATTERN

The skirt pattern
SEWING THE DRESS
THE BODICE PART
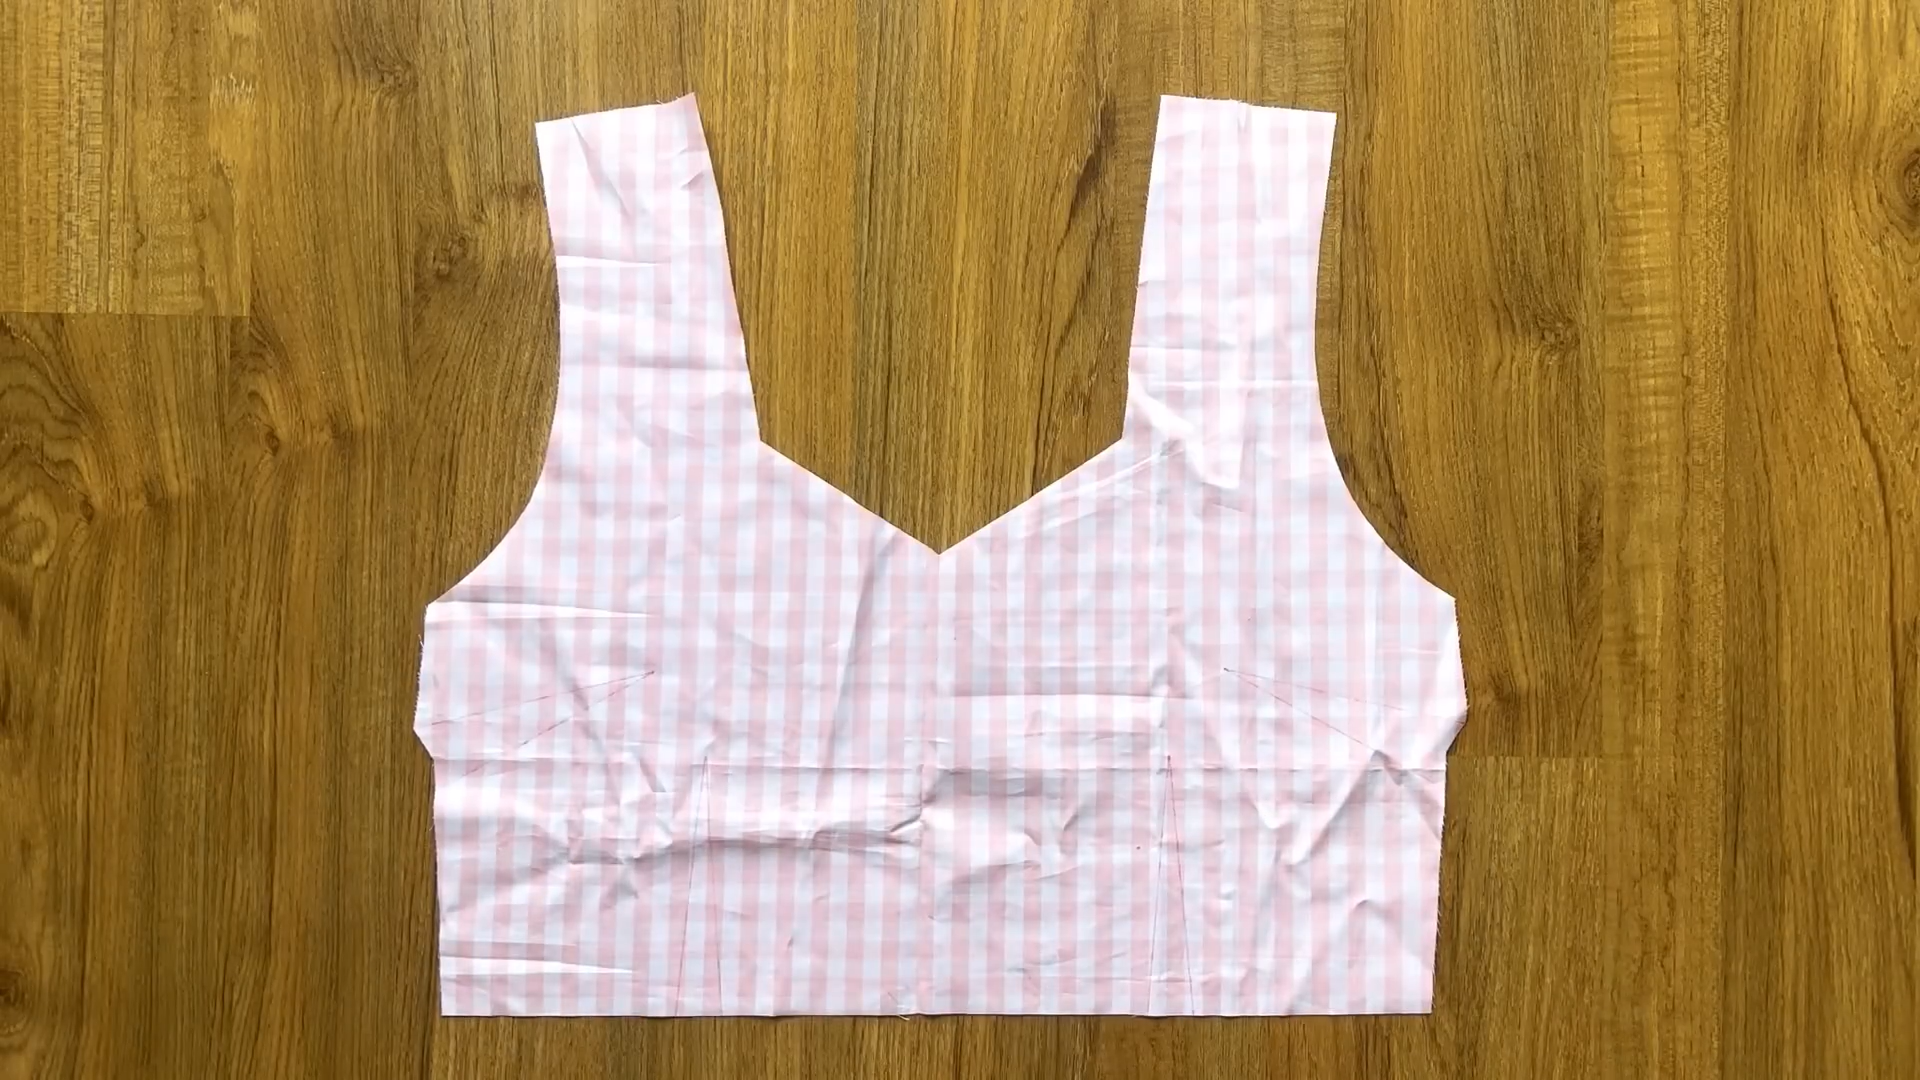
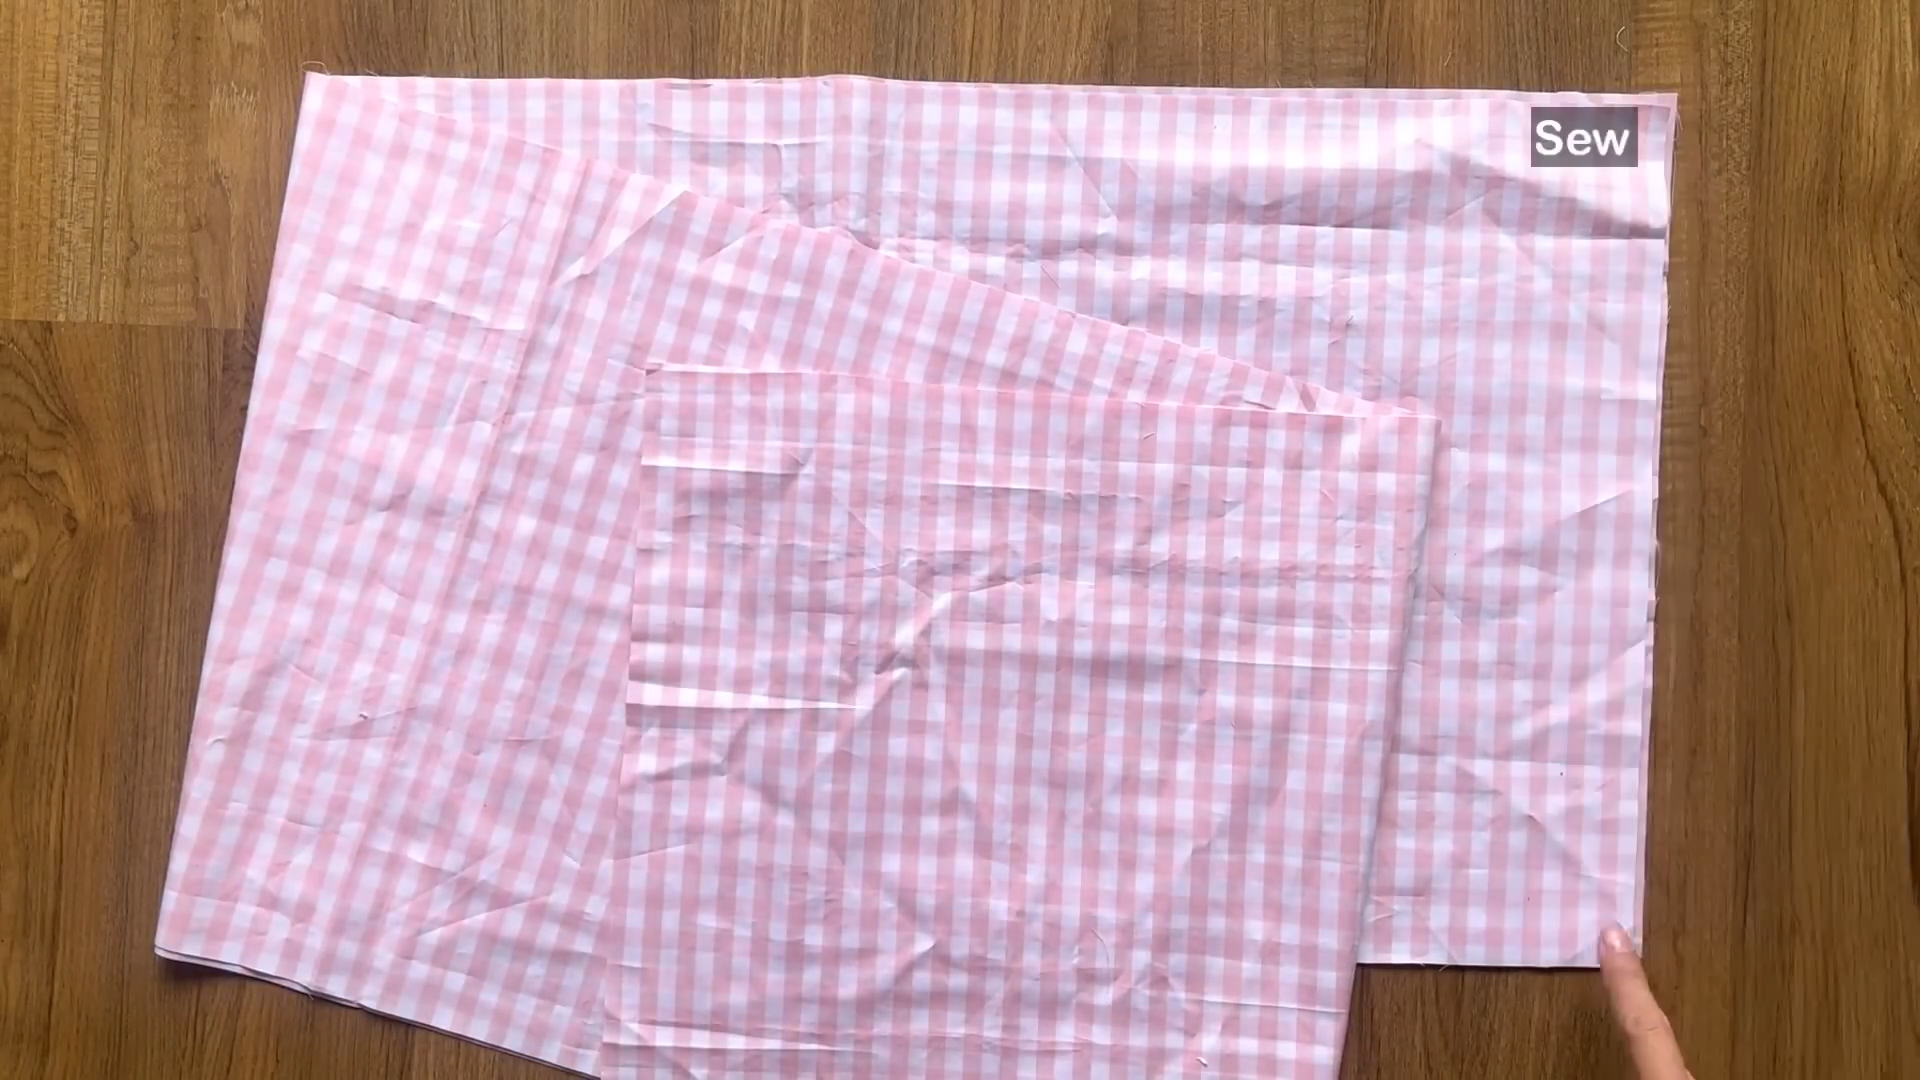
Cut out the front bodice from your fabric
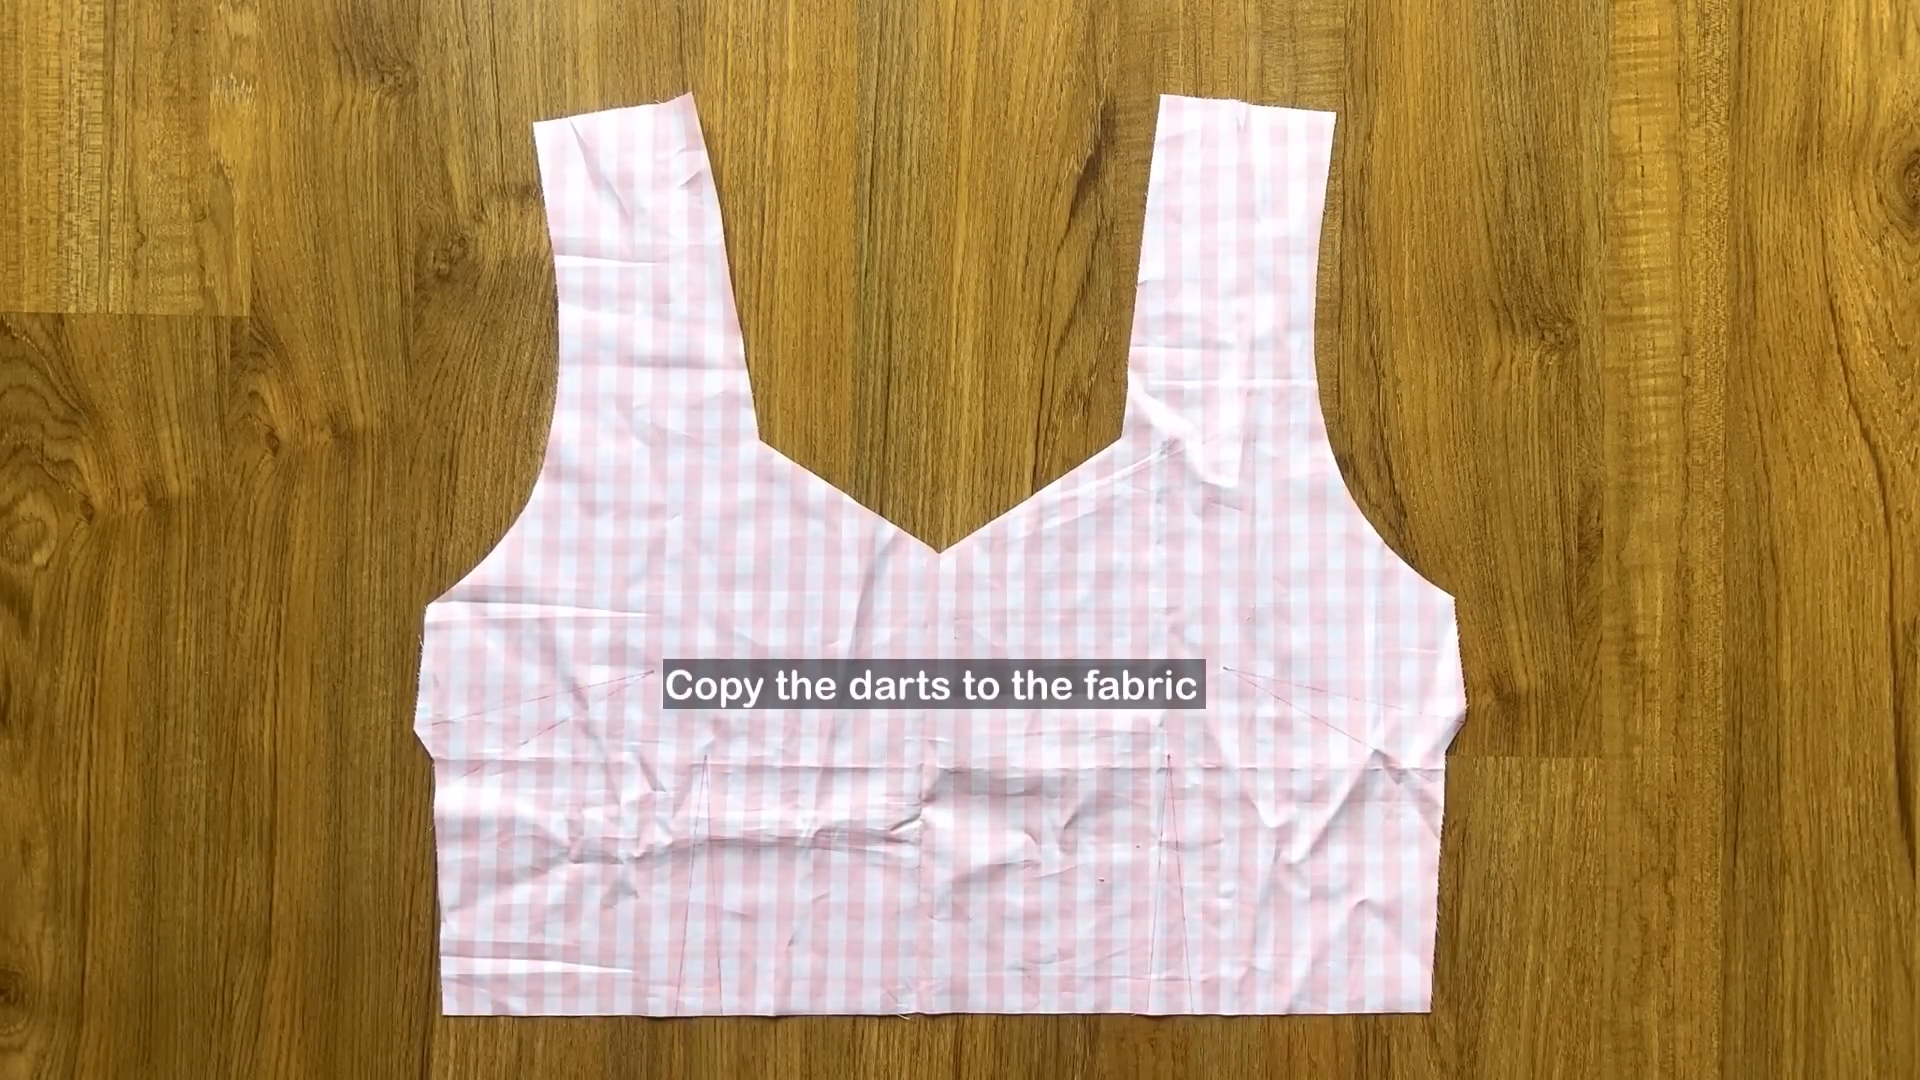
Transfer the dart markings from your pattern onto the fabric.
Stitch along these lines to create the darts.
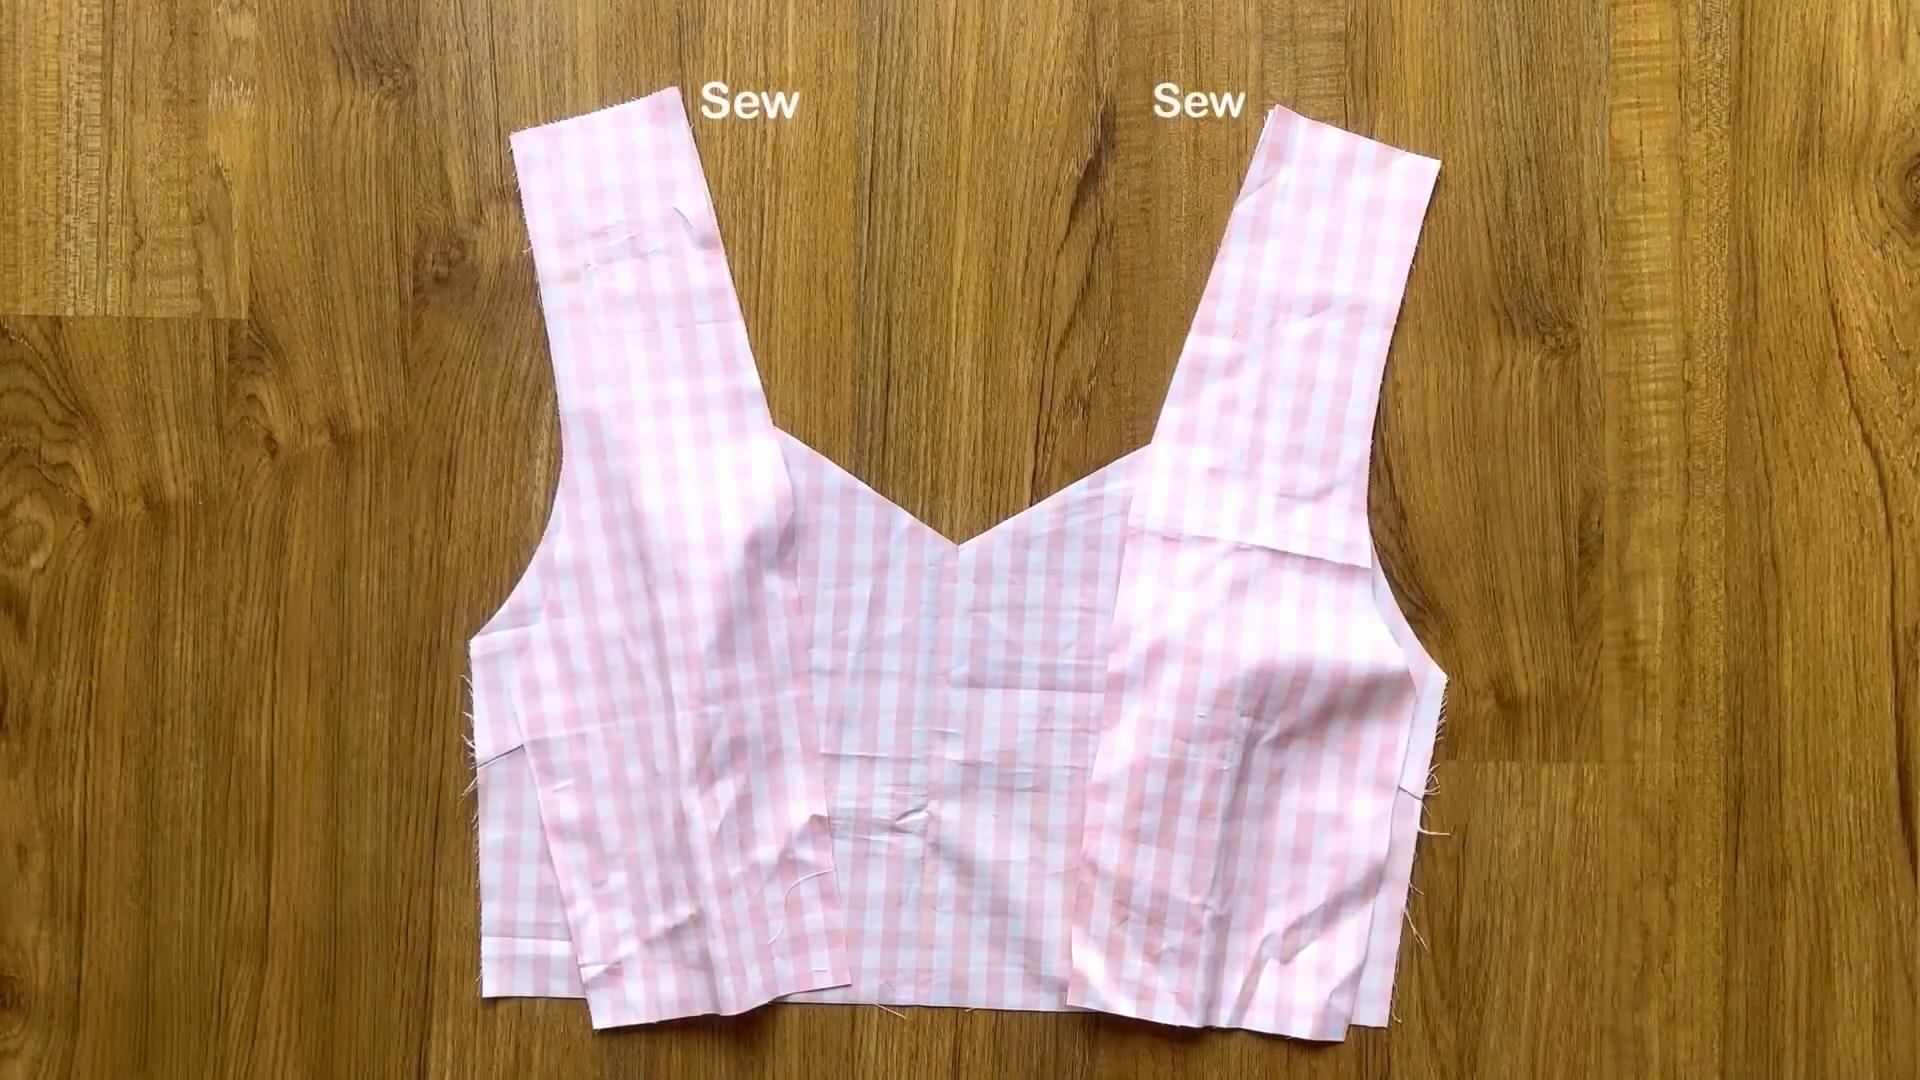
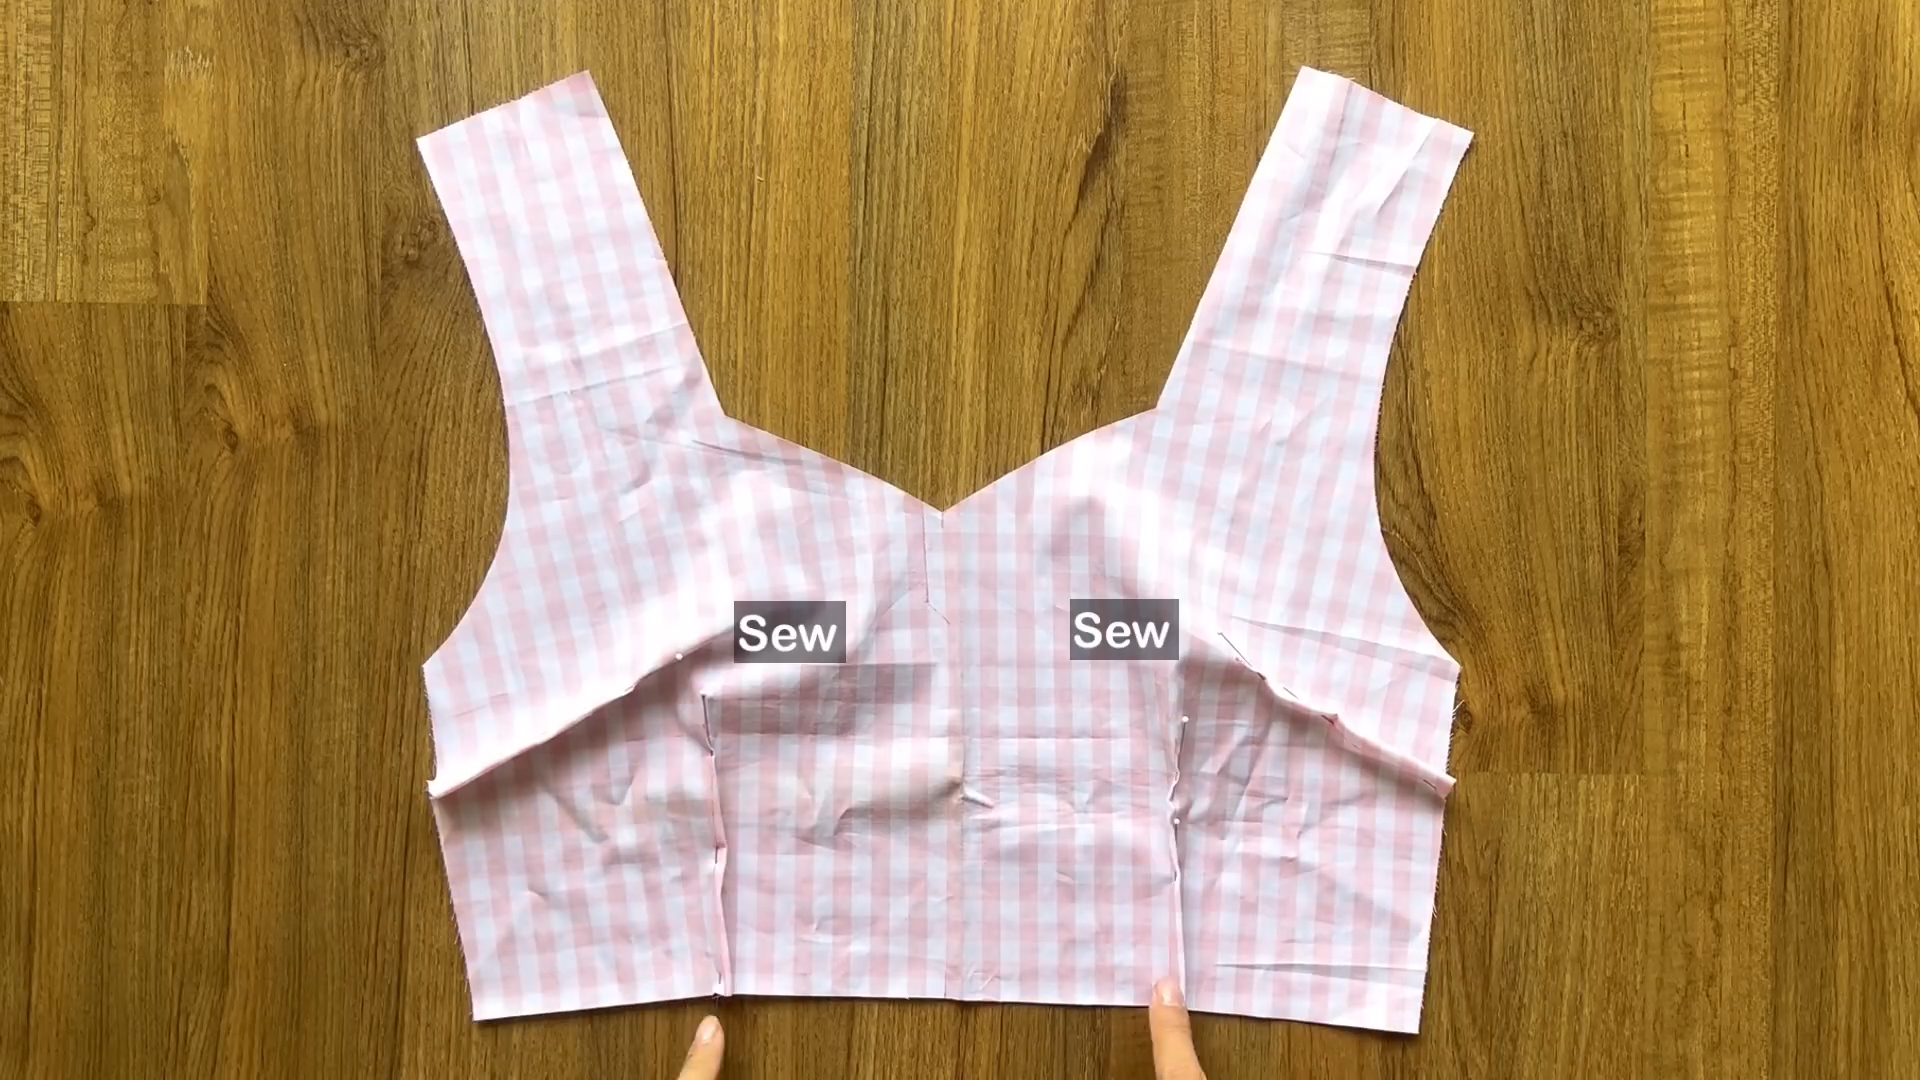
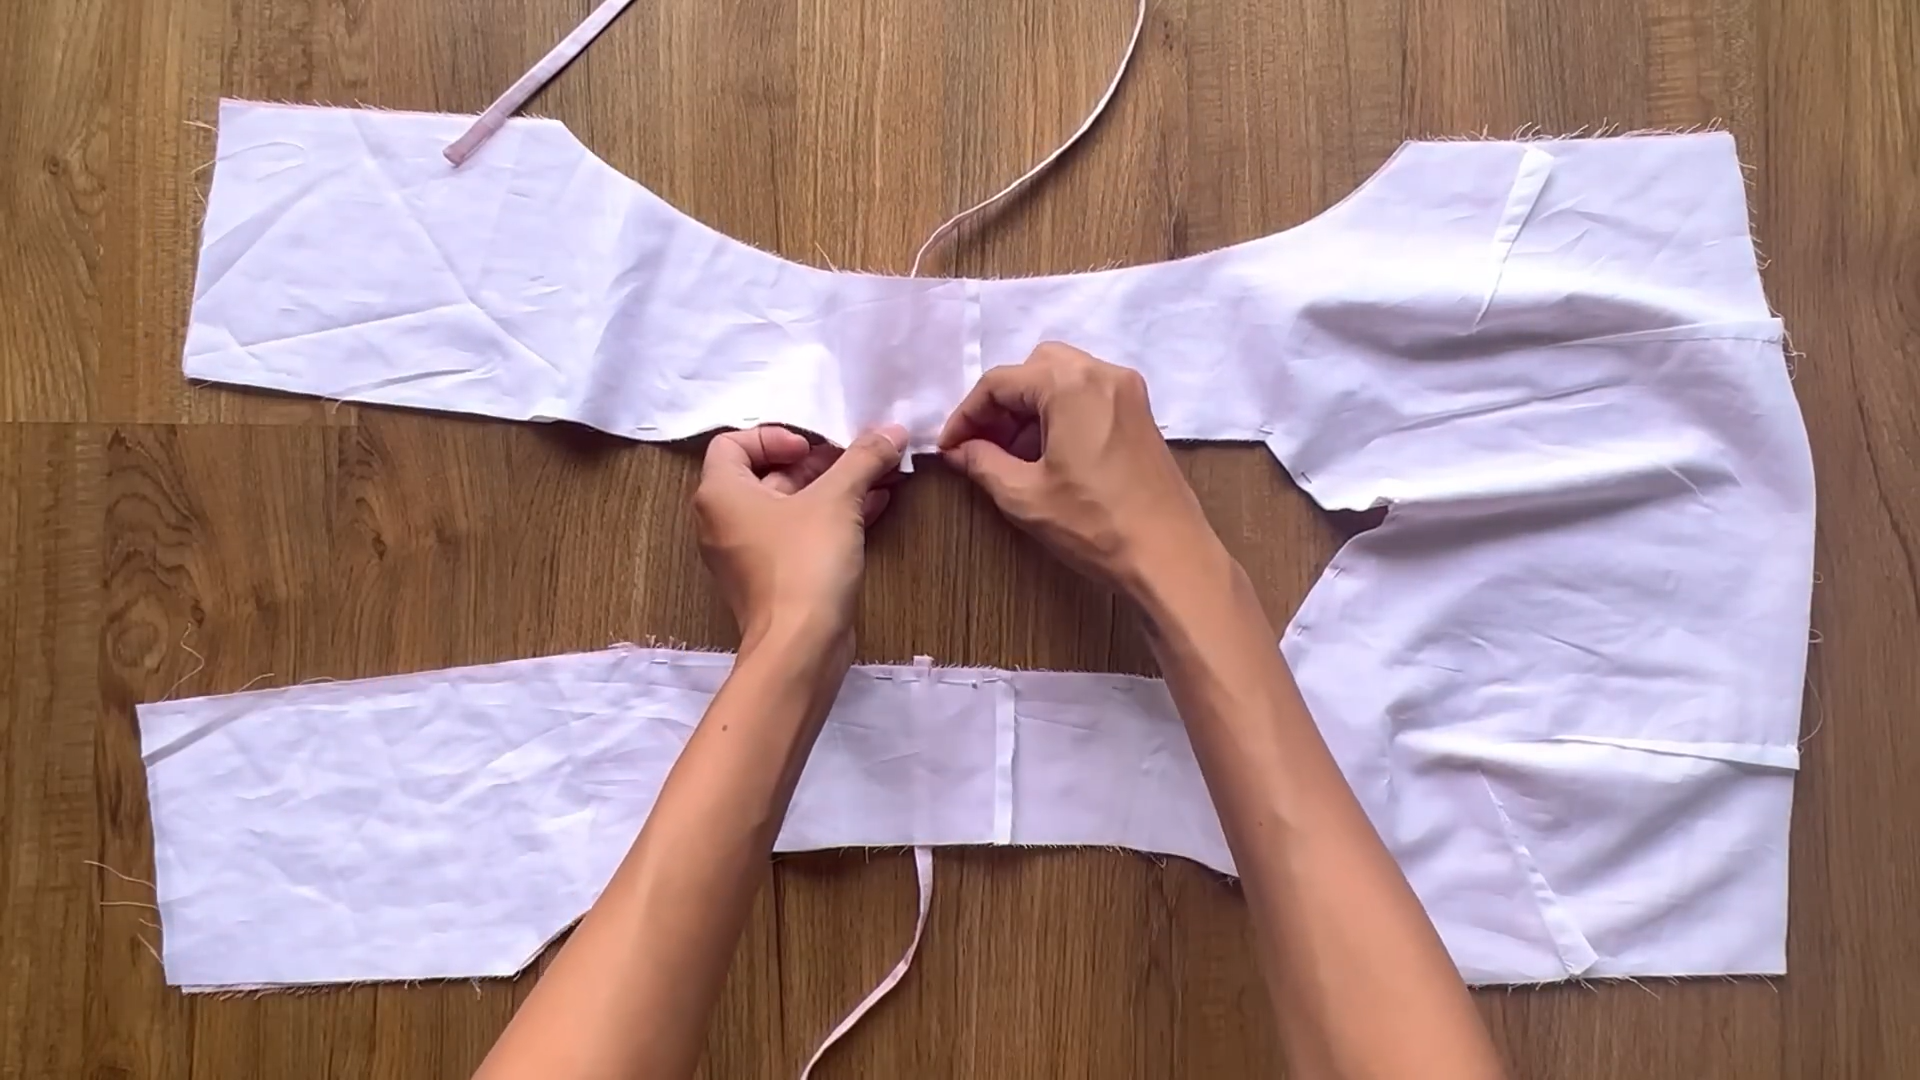
Align the shoulder lines of the front and back bodice and sew along the shoulder seams.
Repeat this process for both the main fabric and the lining.
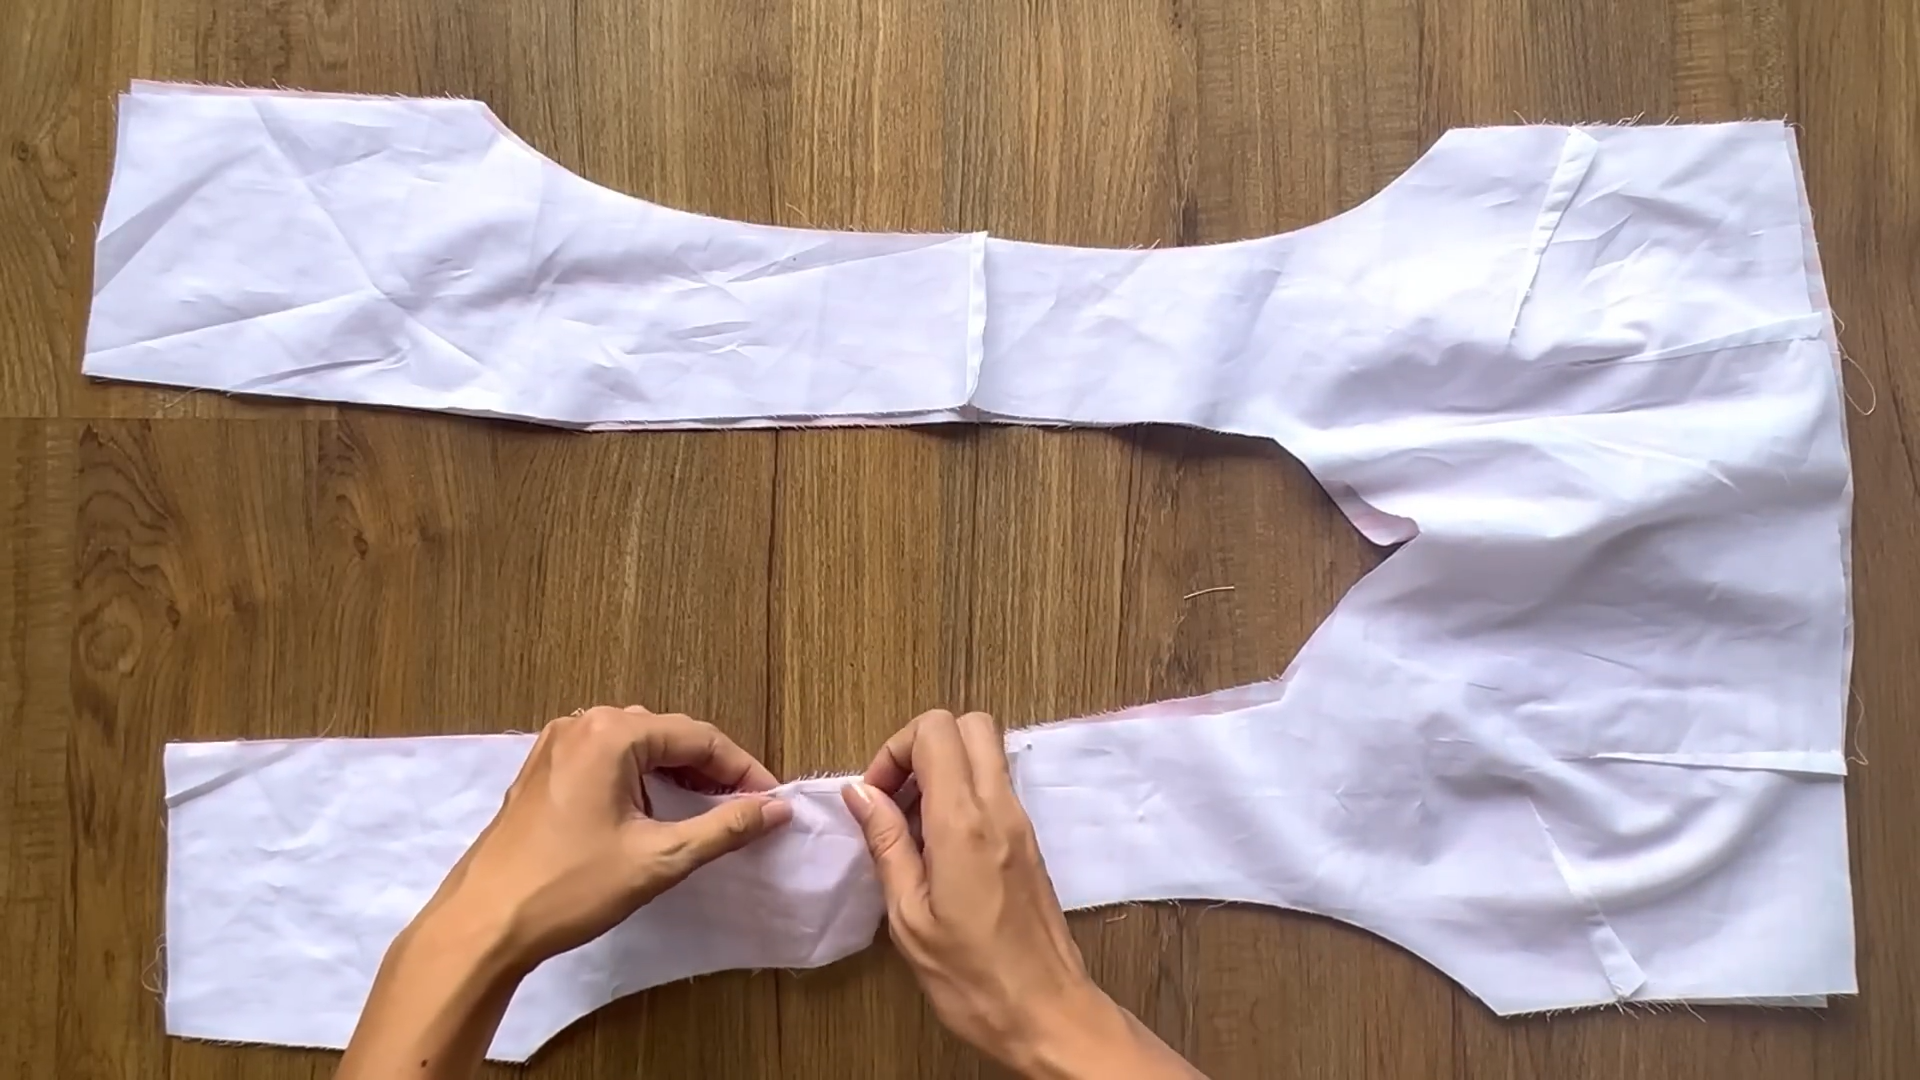
Pin the lining and main fabric together at the neckline.
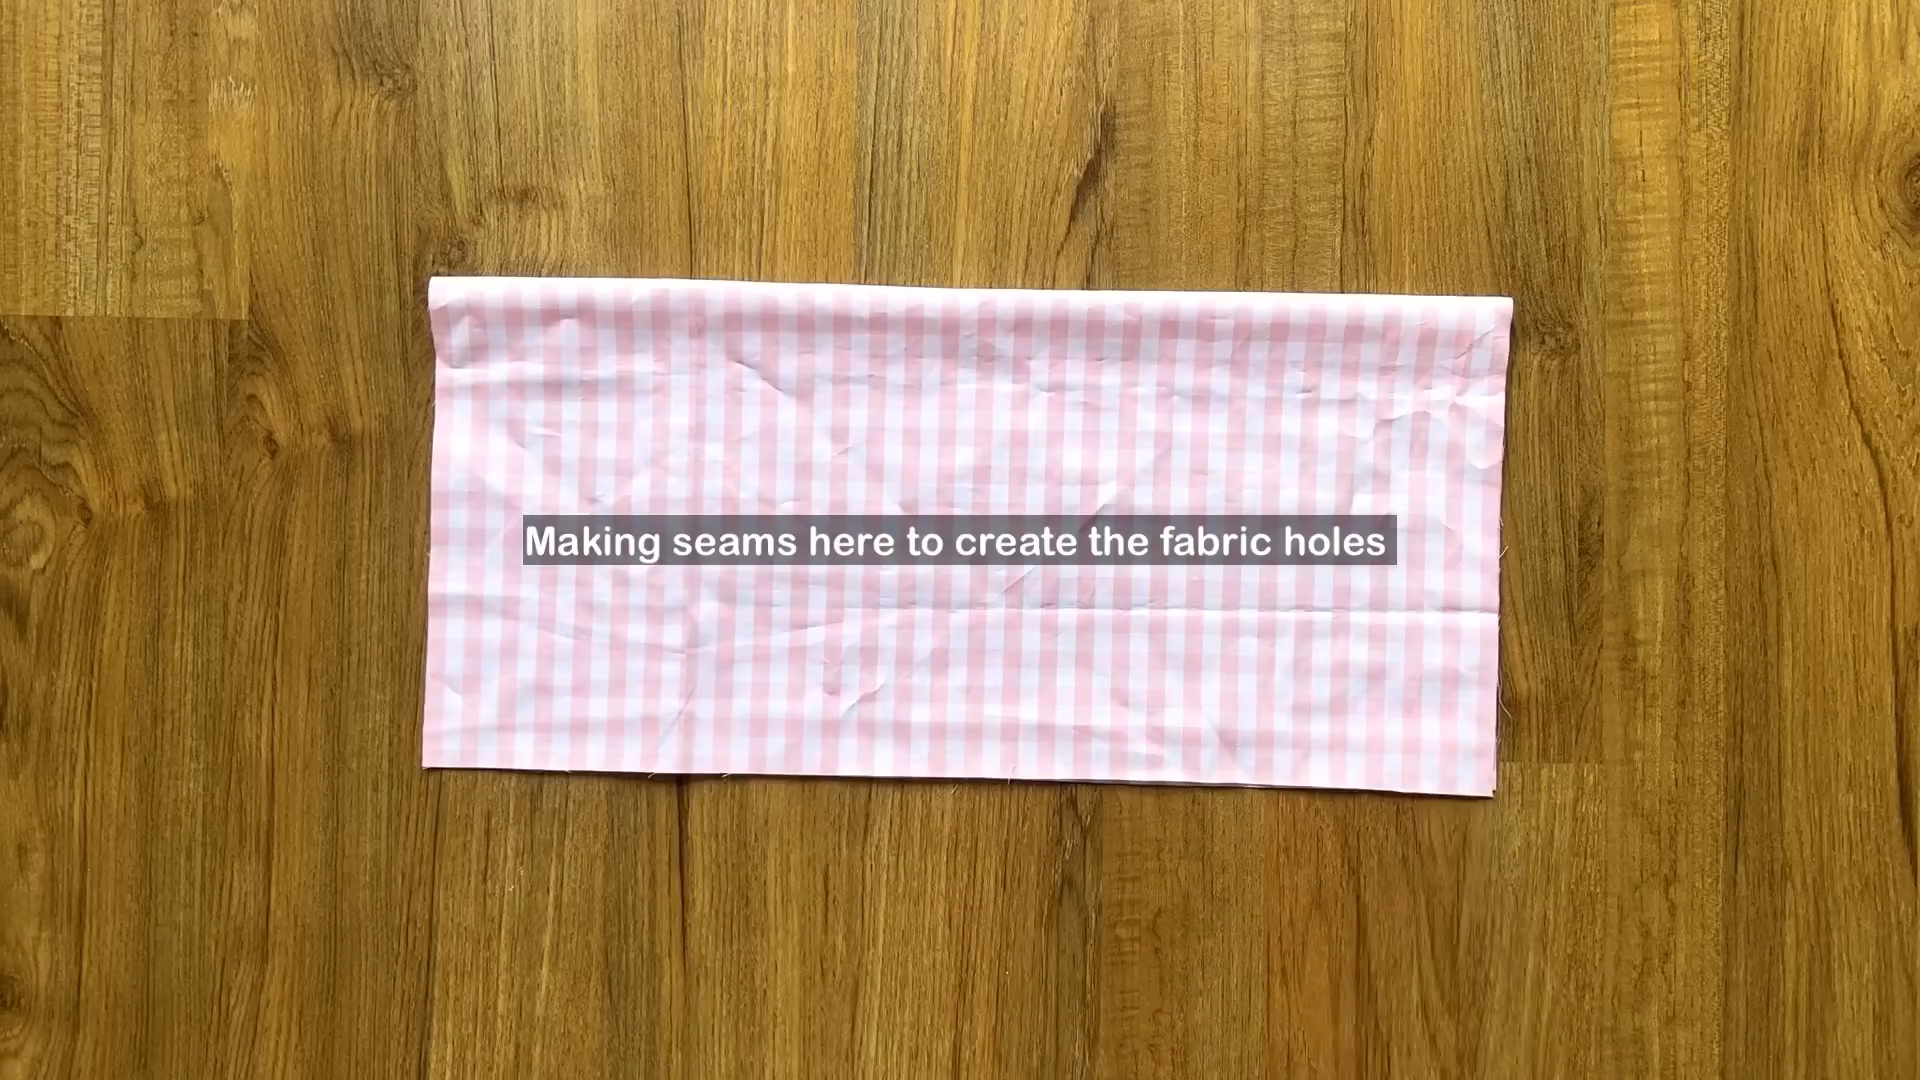
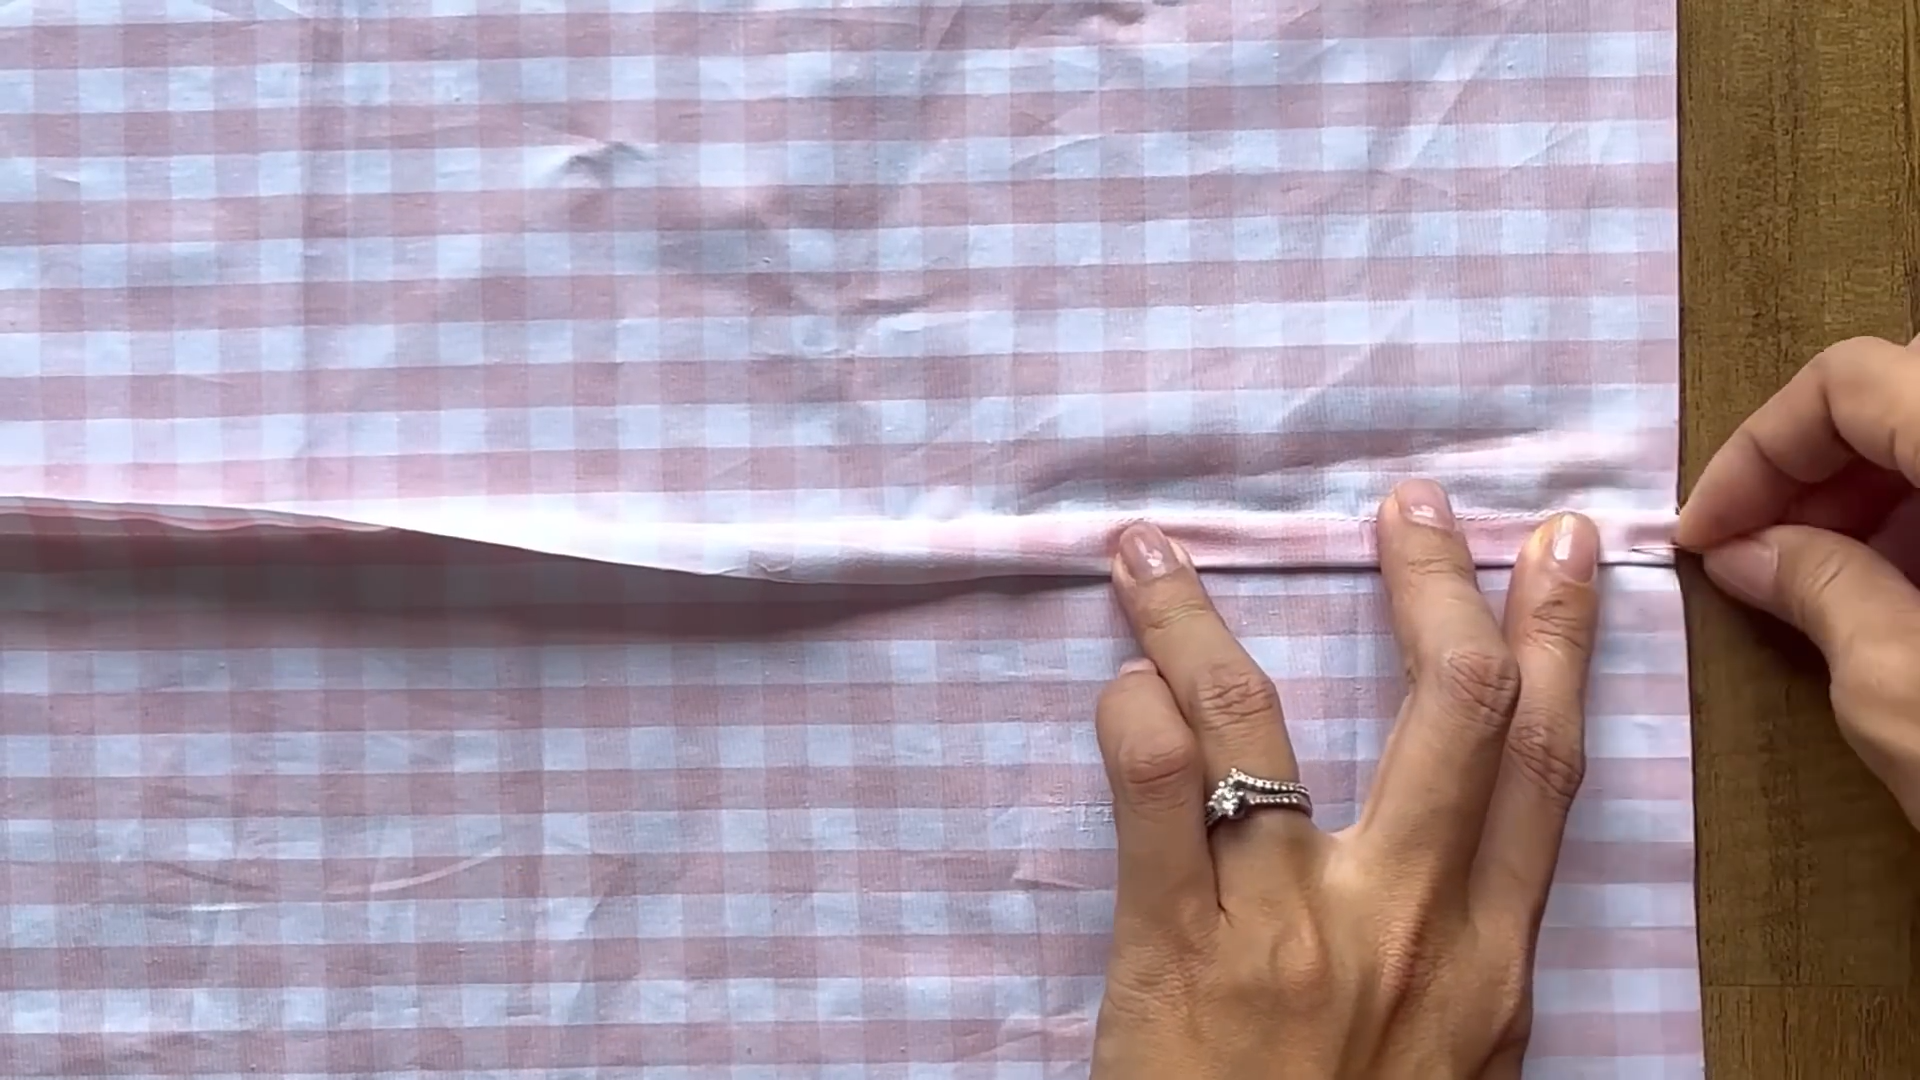
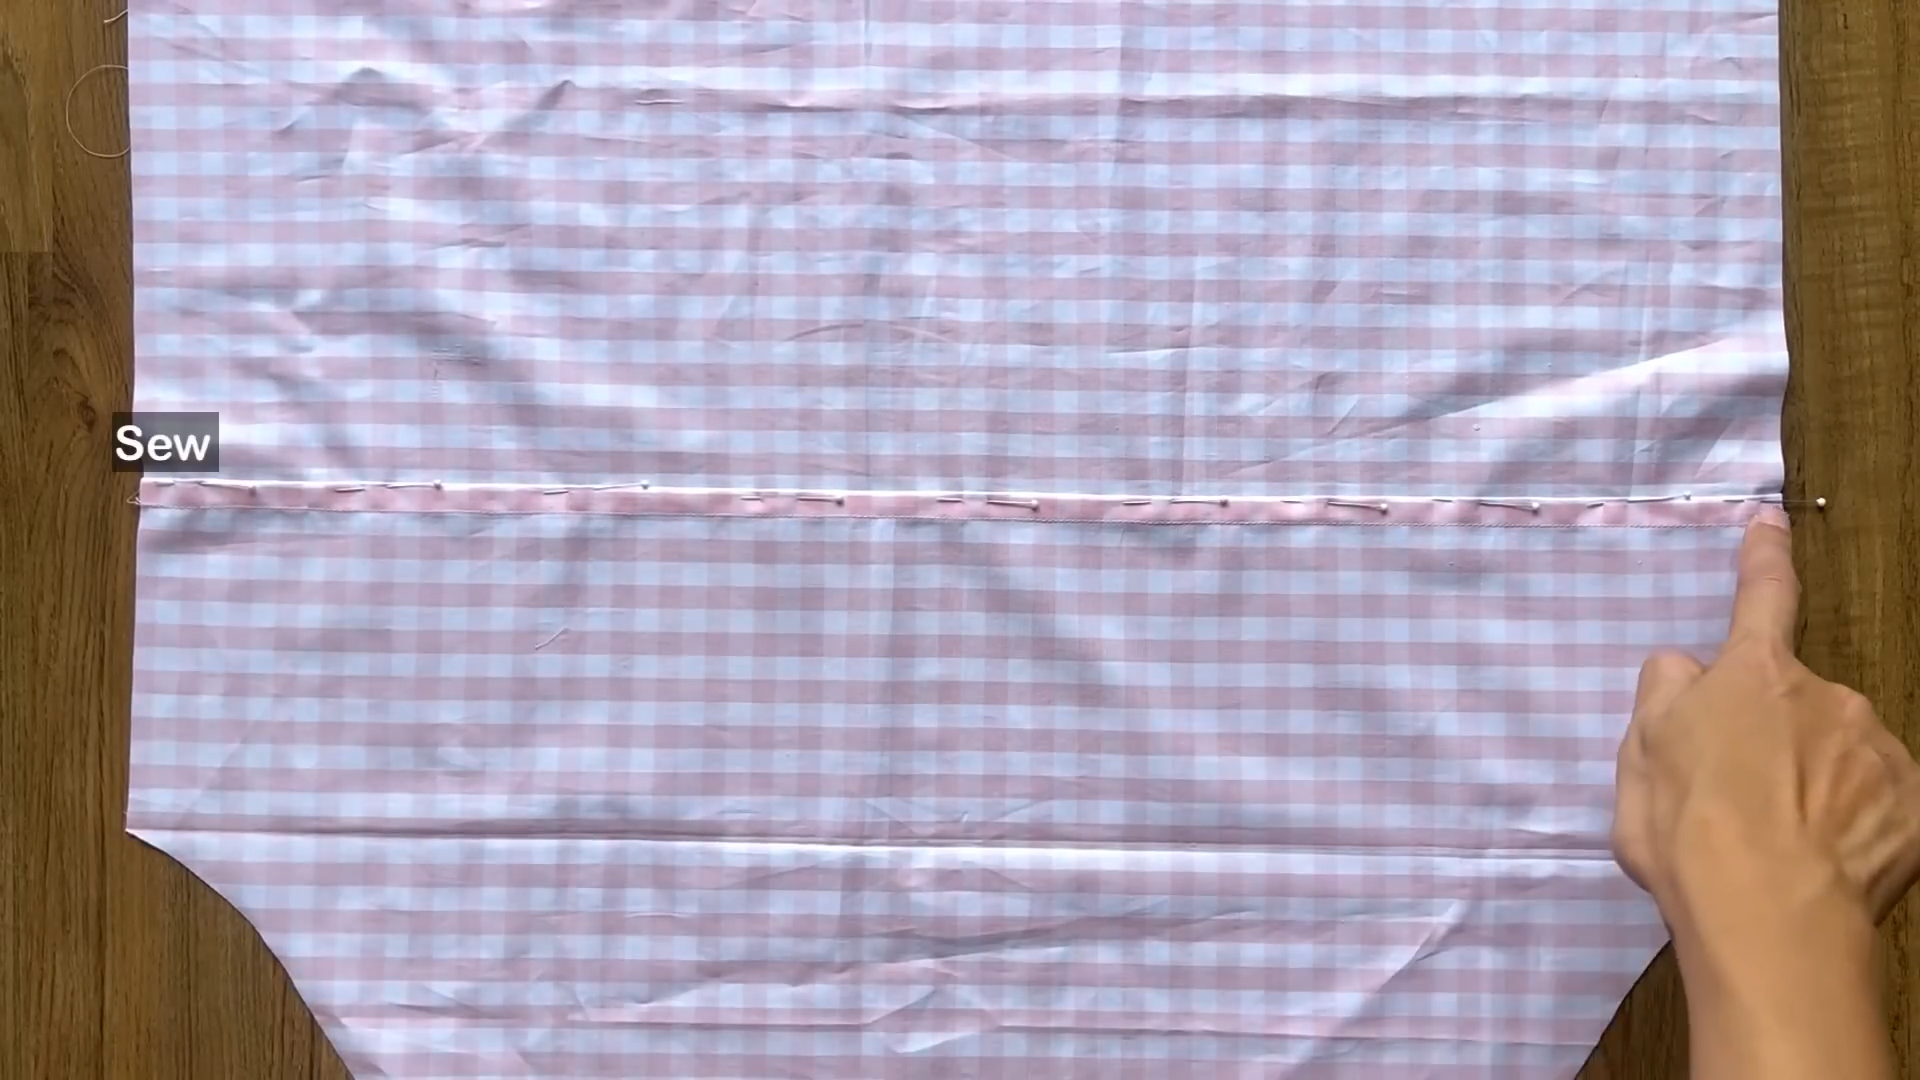
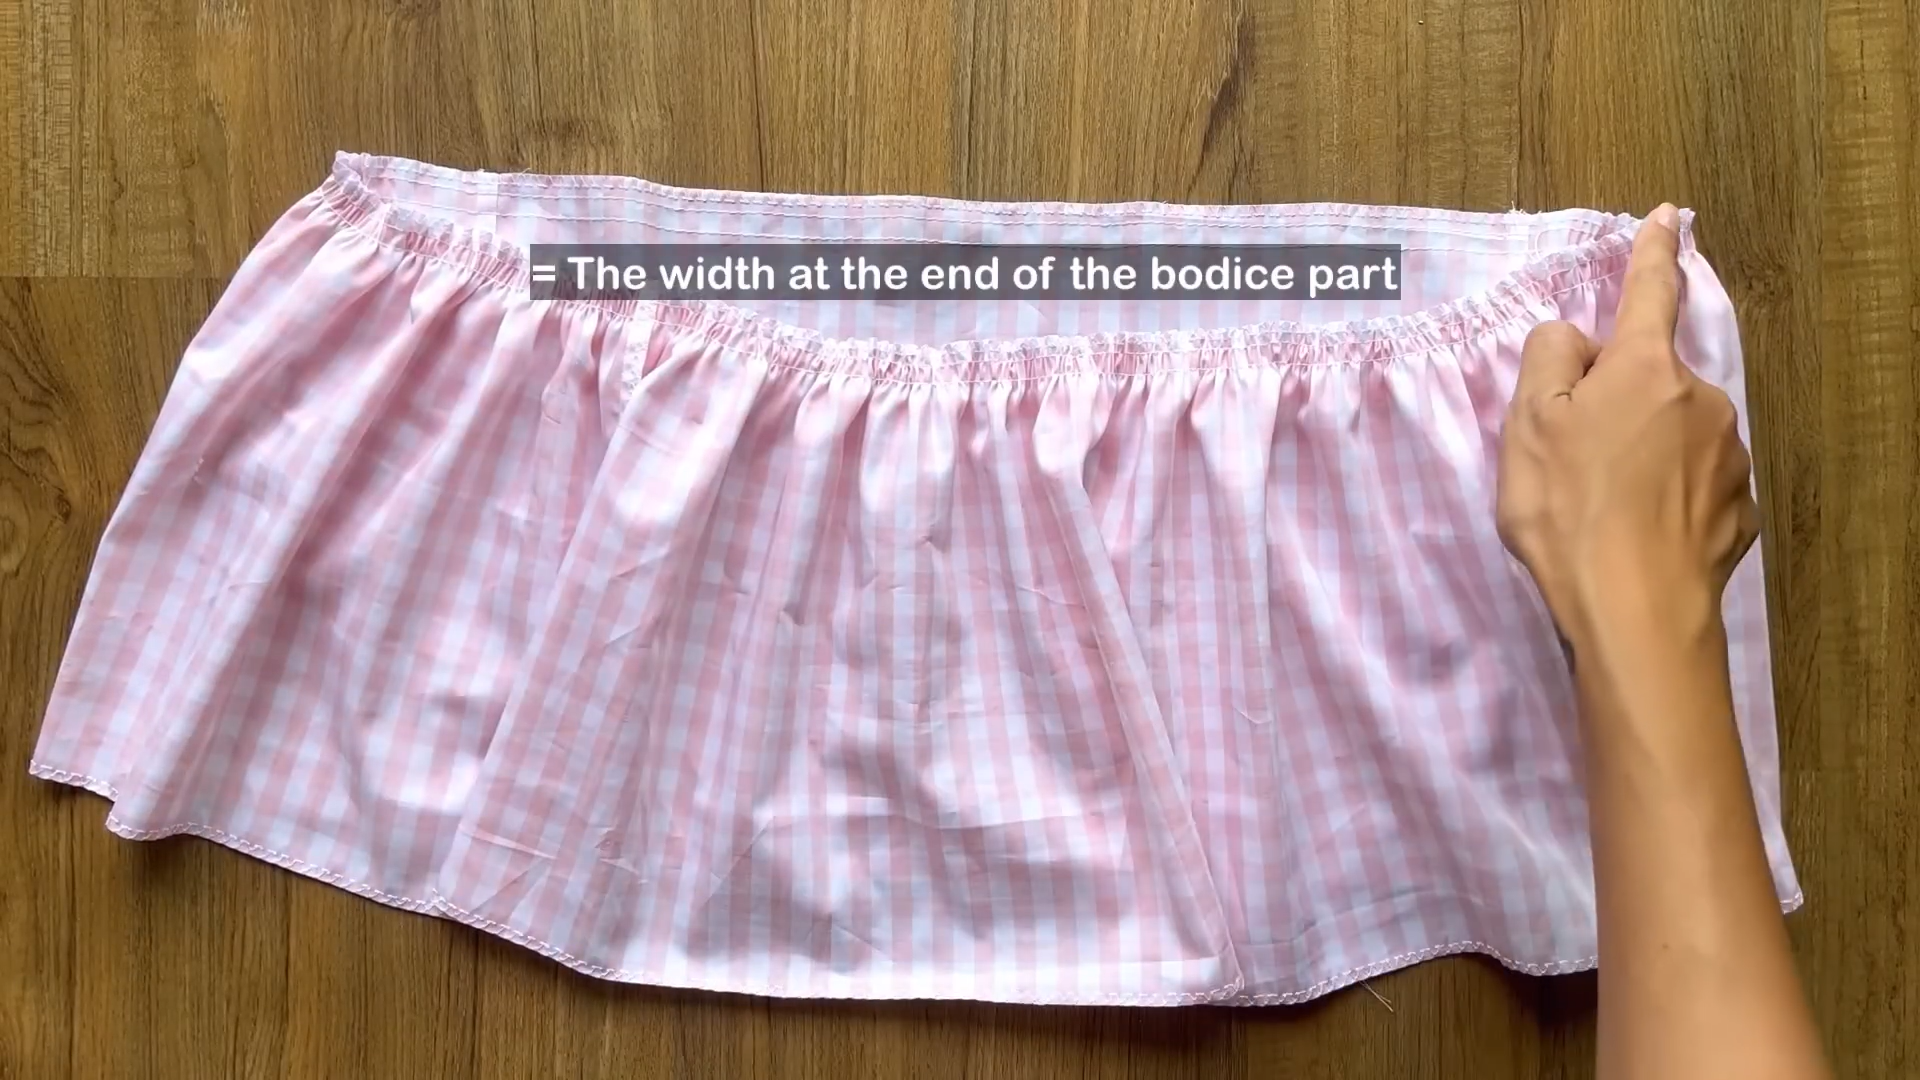
Fold the middle back bodice in half along the center line and sew straight seams for holding elastic bands later.
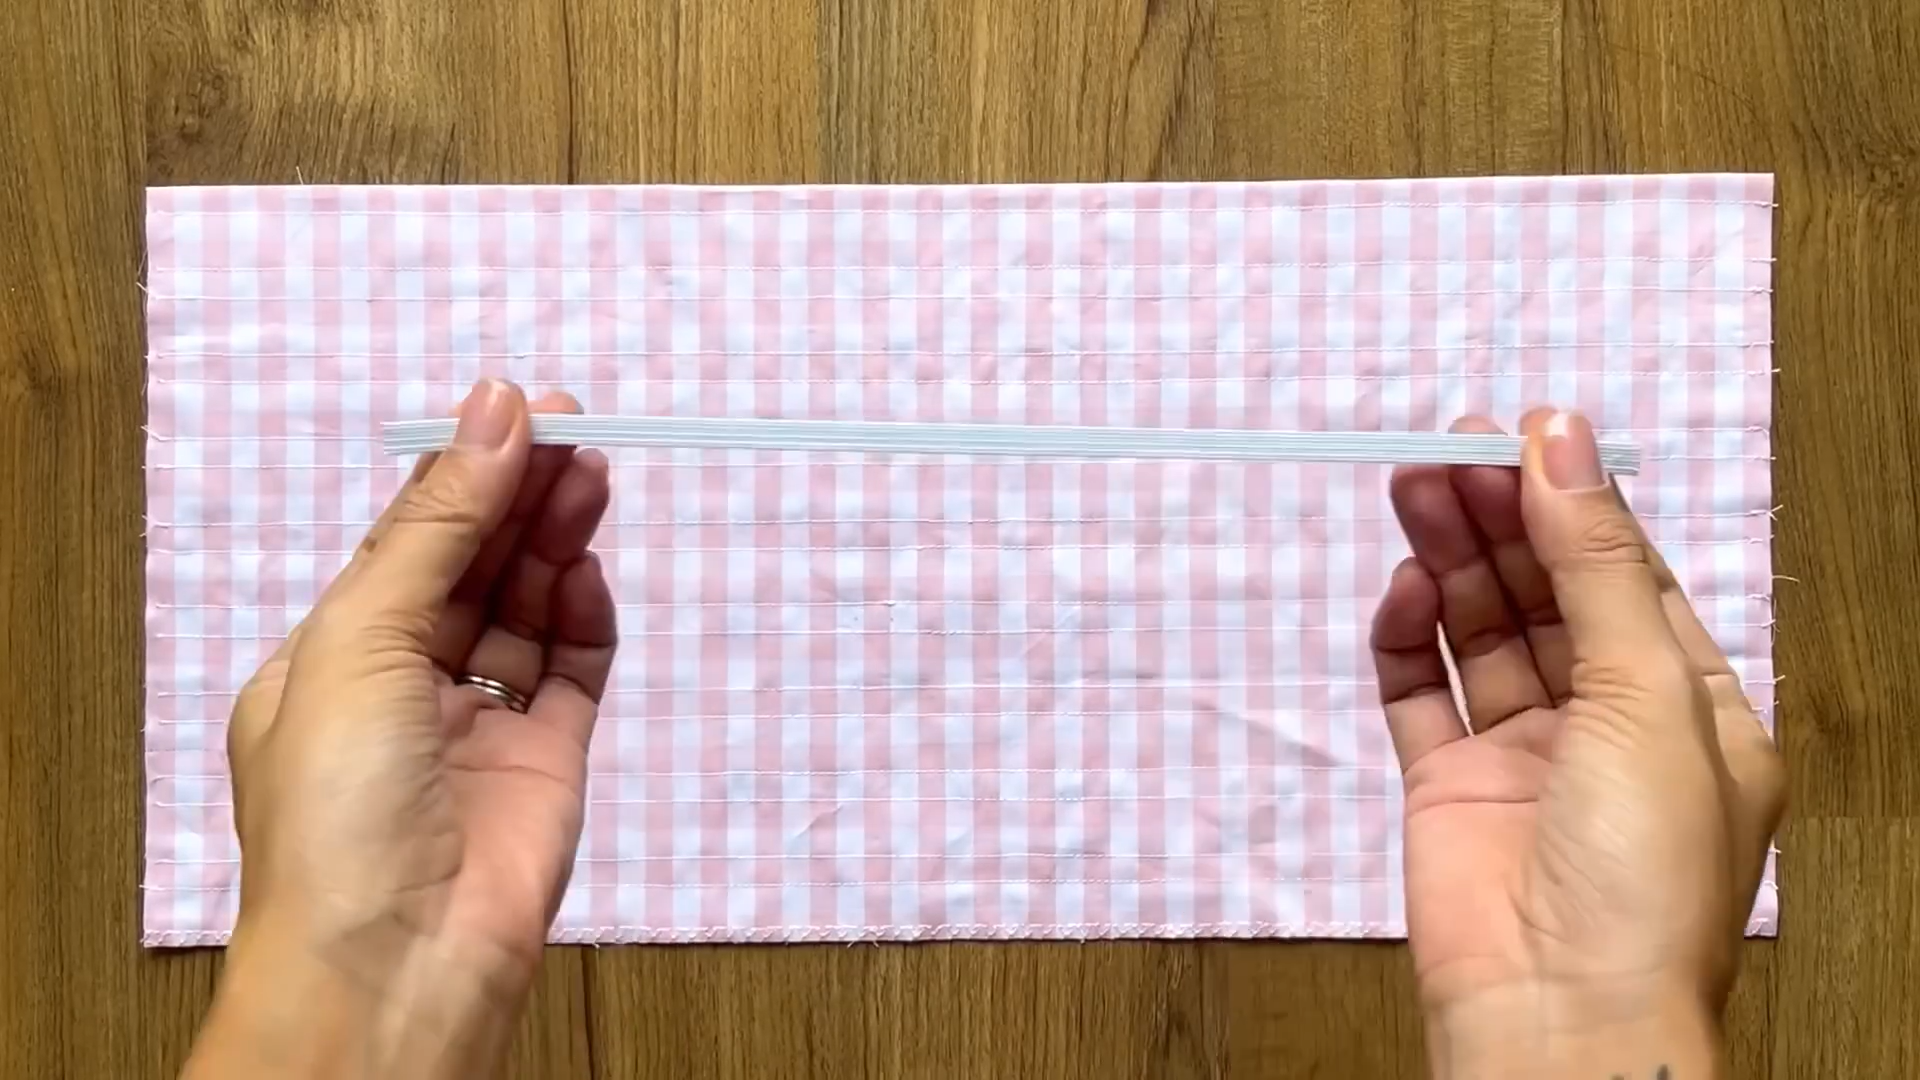
The length of the elastic band should be twice the width of the middle back bodice pattern.
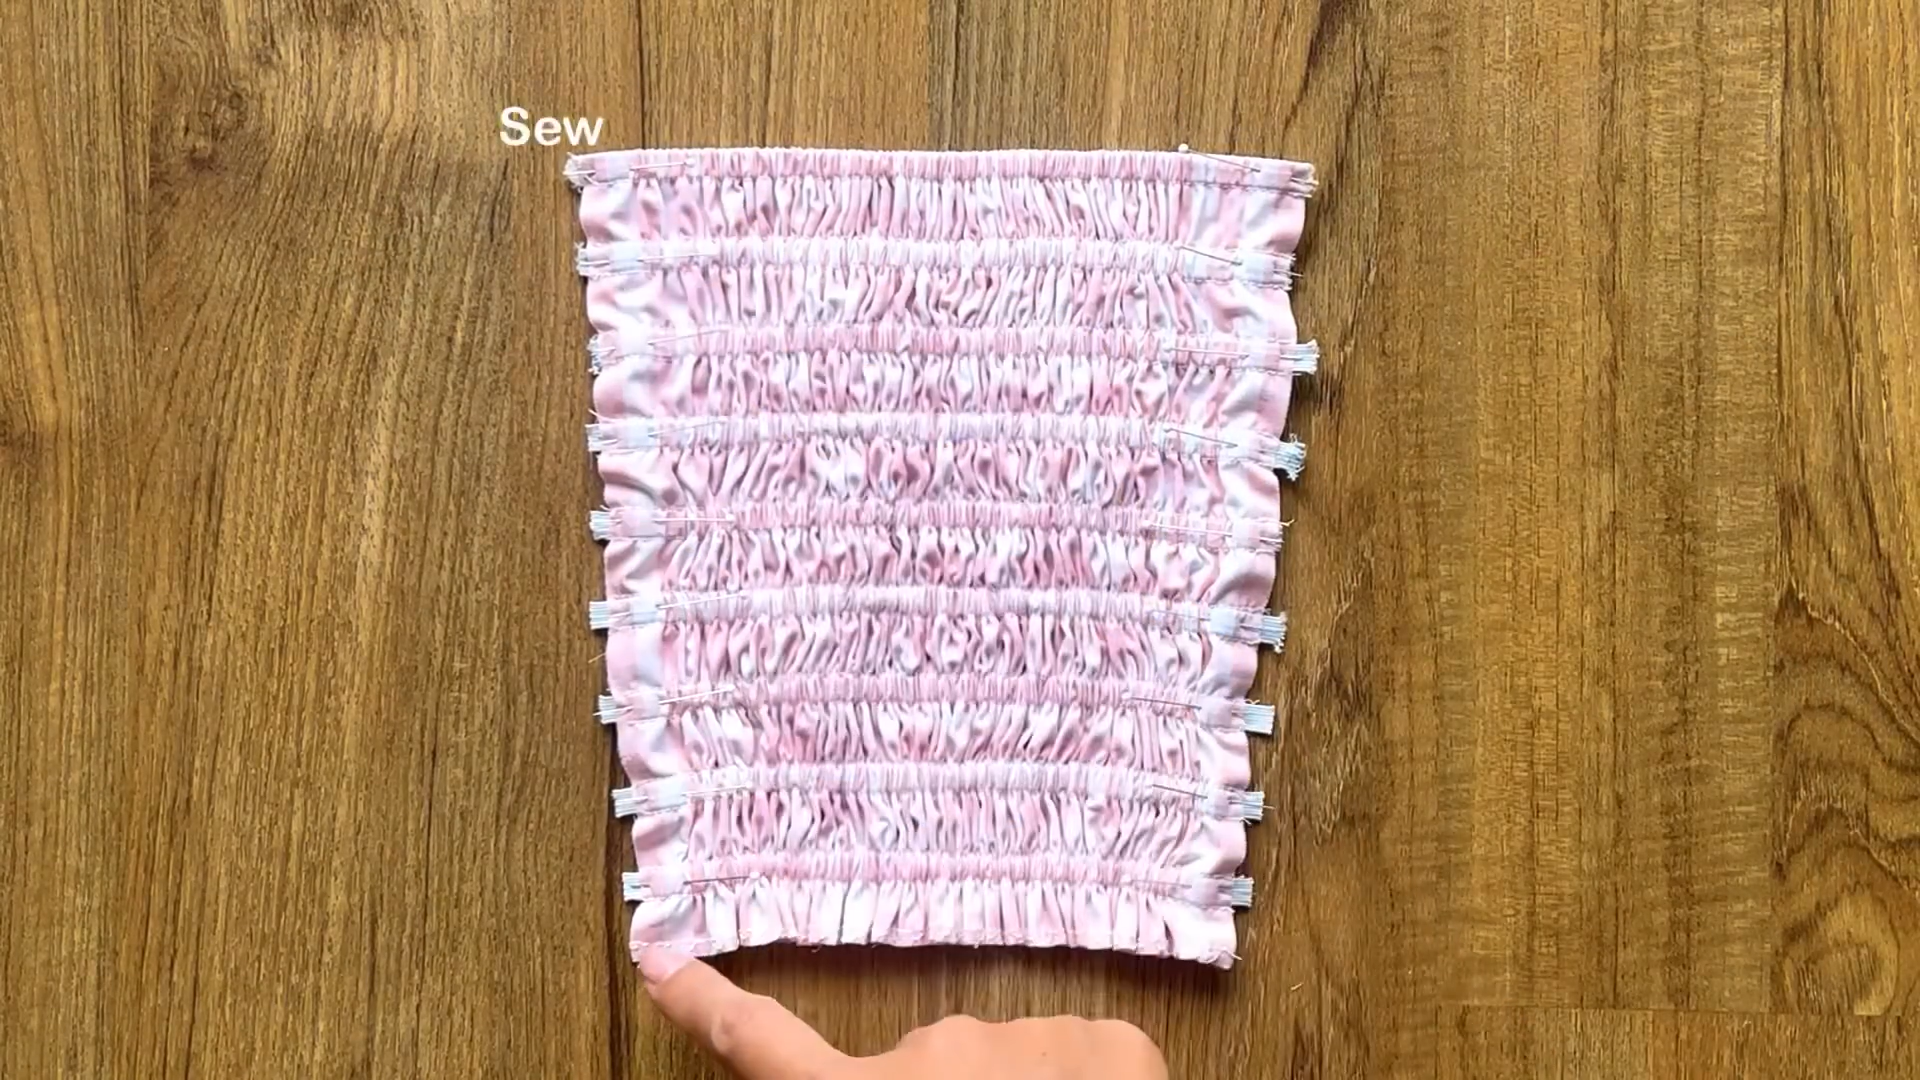
Add the elastic bands to the middle back bodice.
Alternatively, you can use shirring techniques for a similar effect.
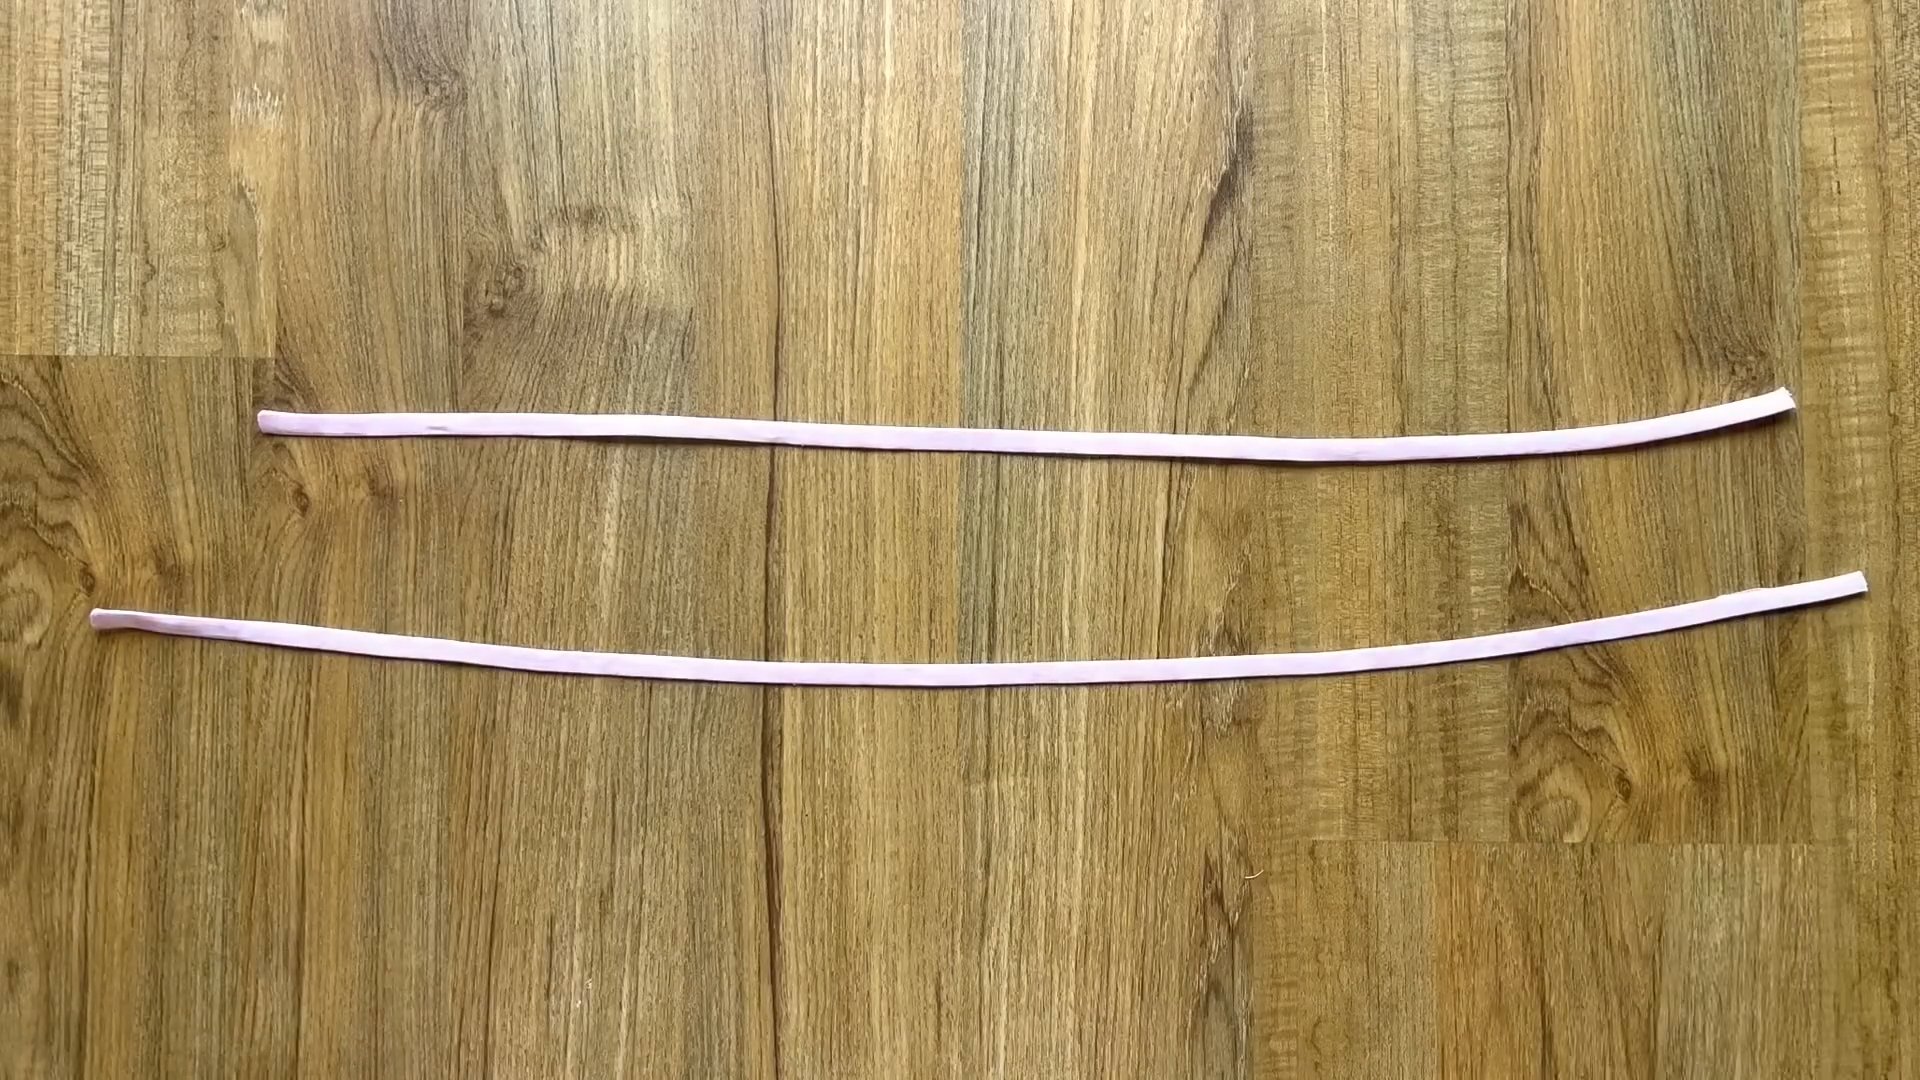
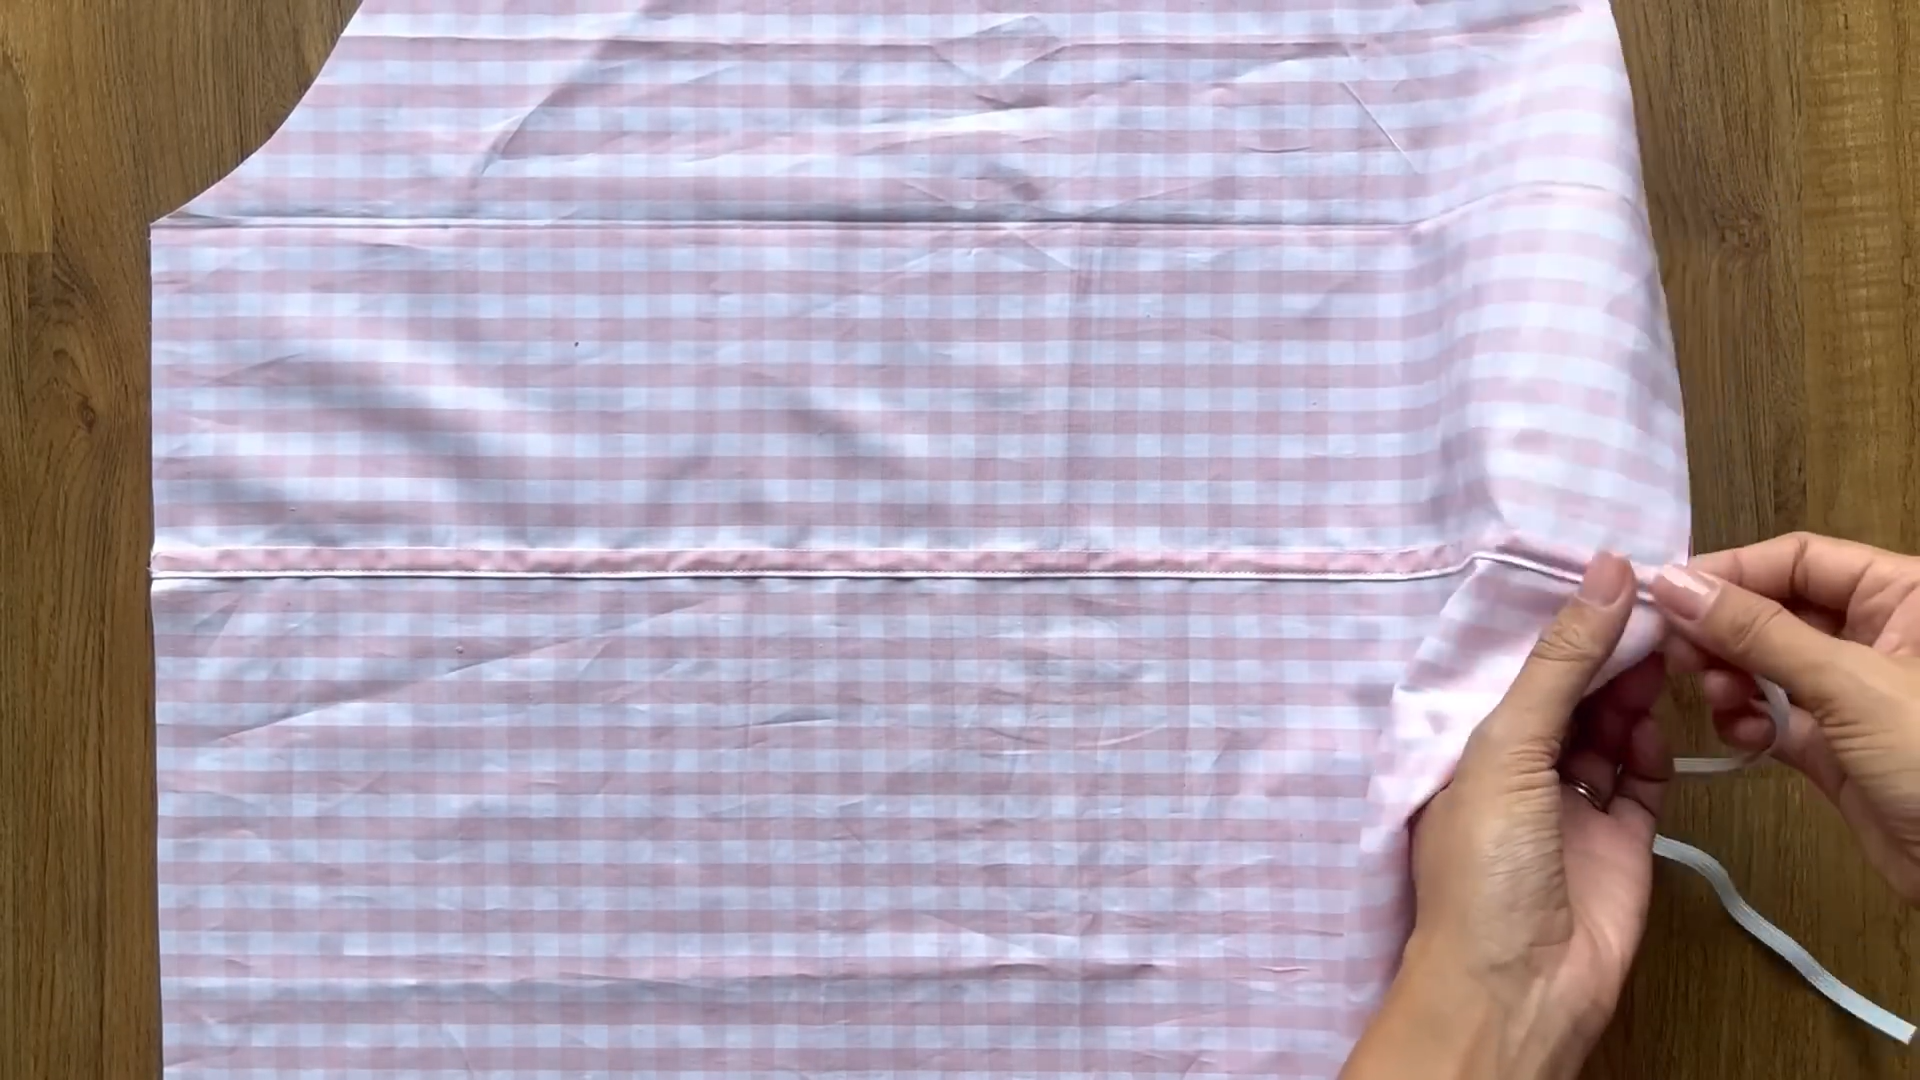
Cut two long ties for the back bodice.
Position them about 3 cm down from the top of the back neckline.
Attach the ties between the main fabric and the lining.
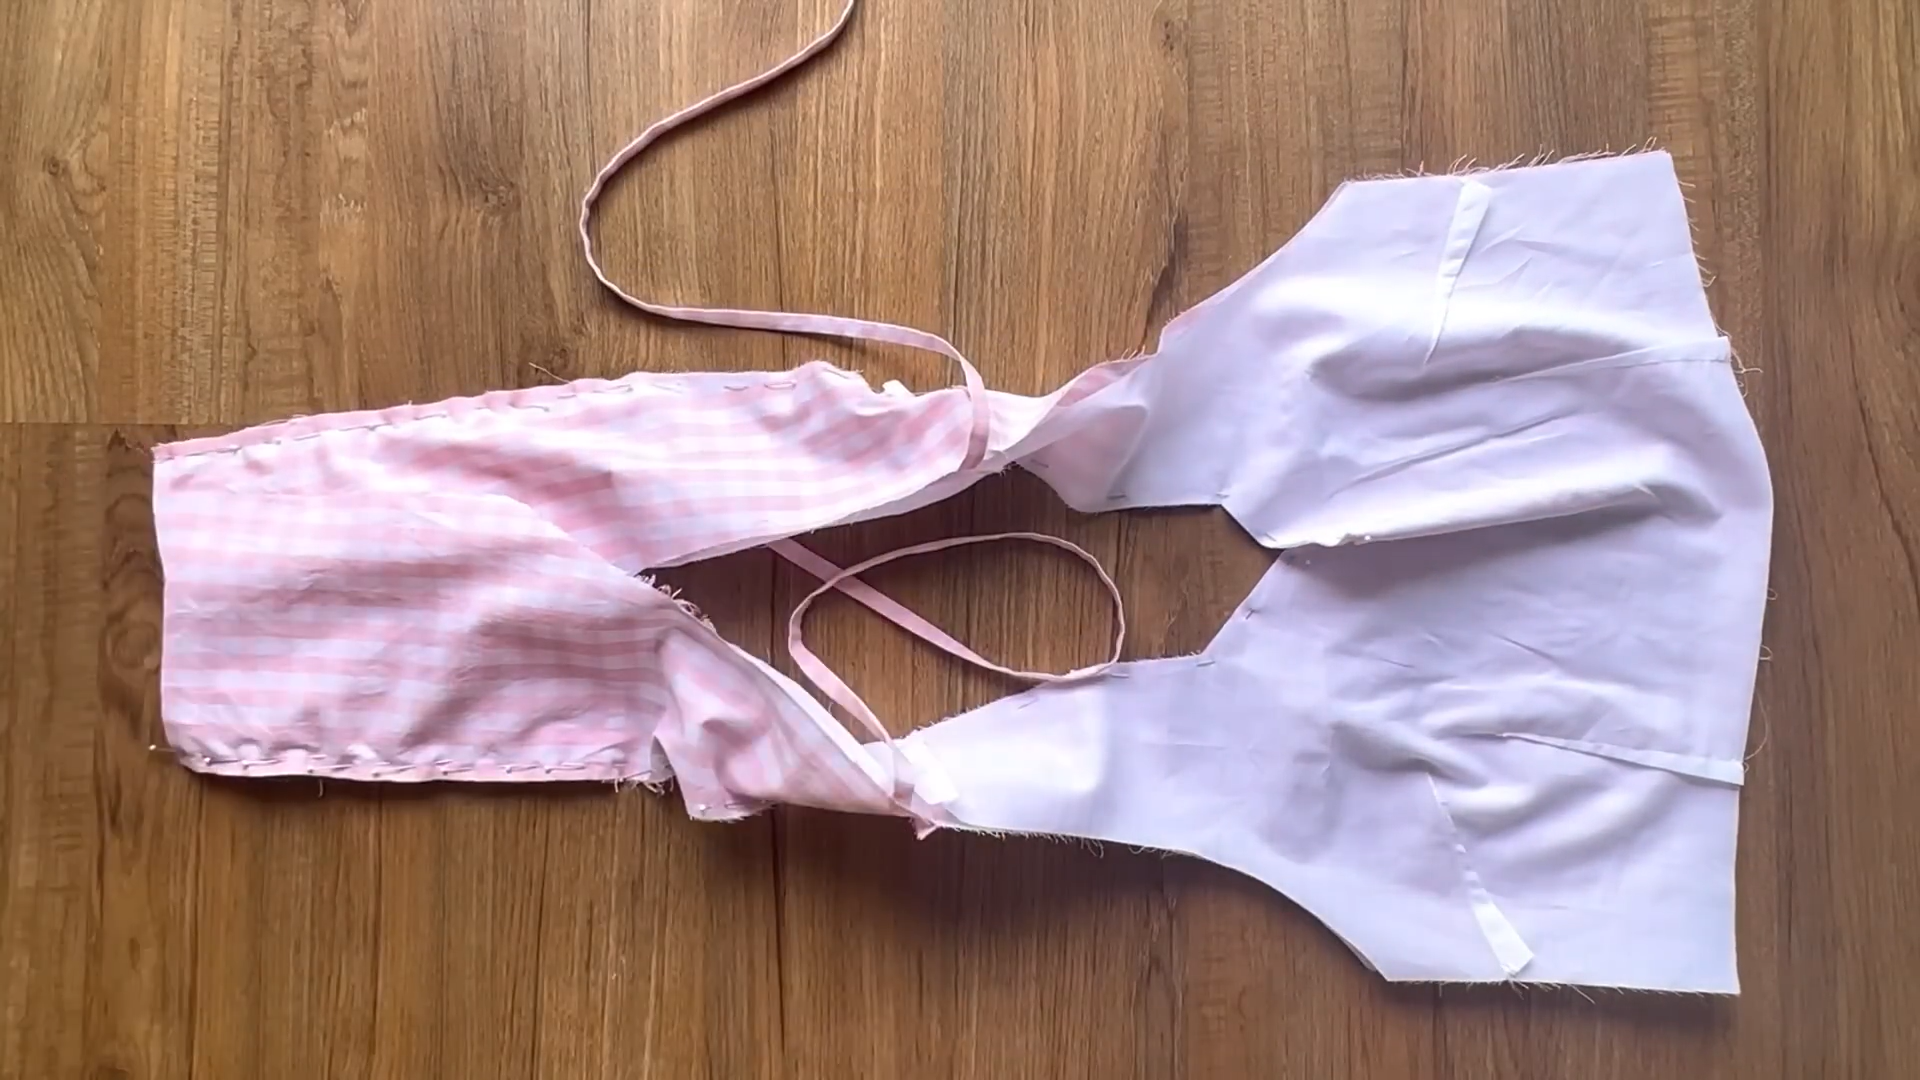
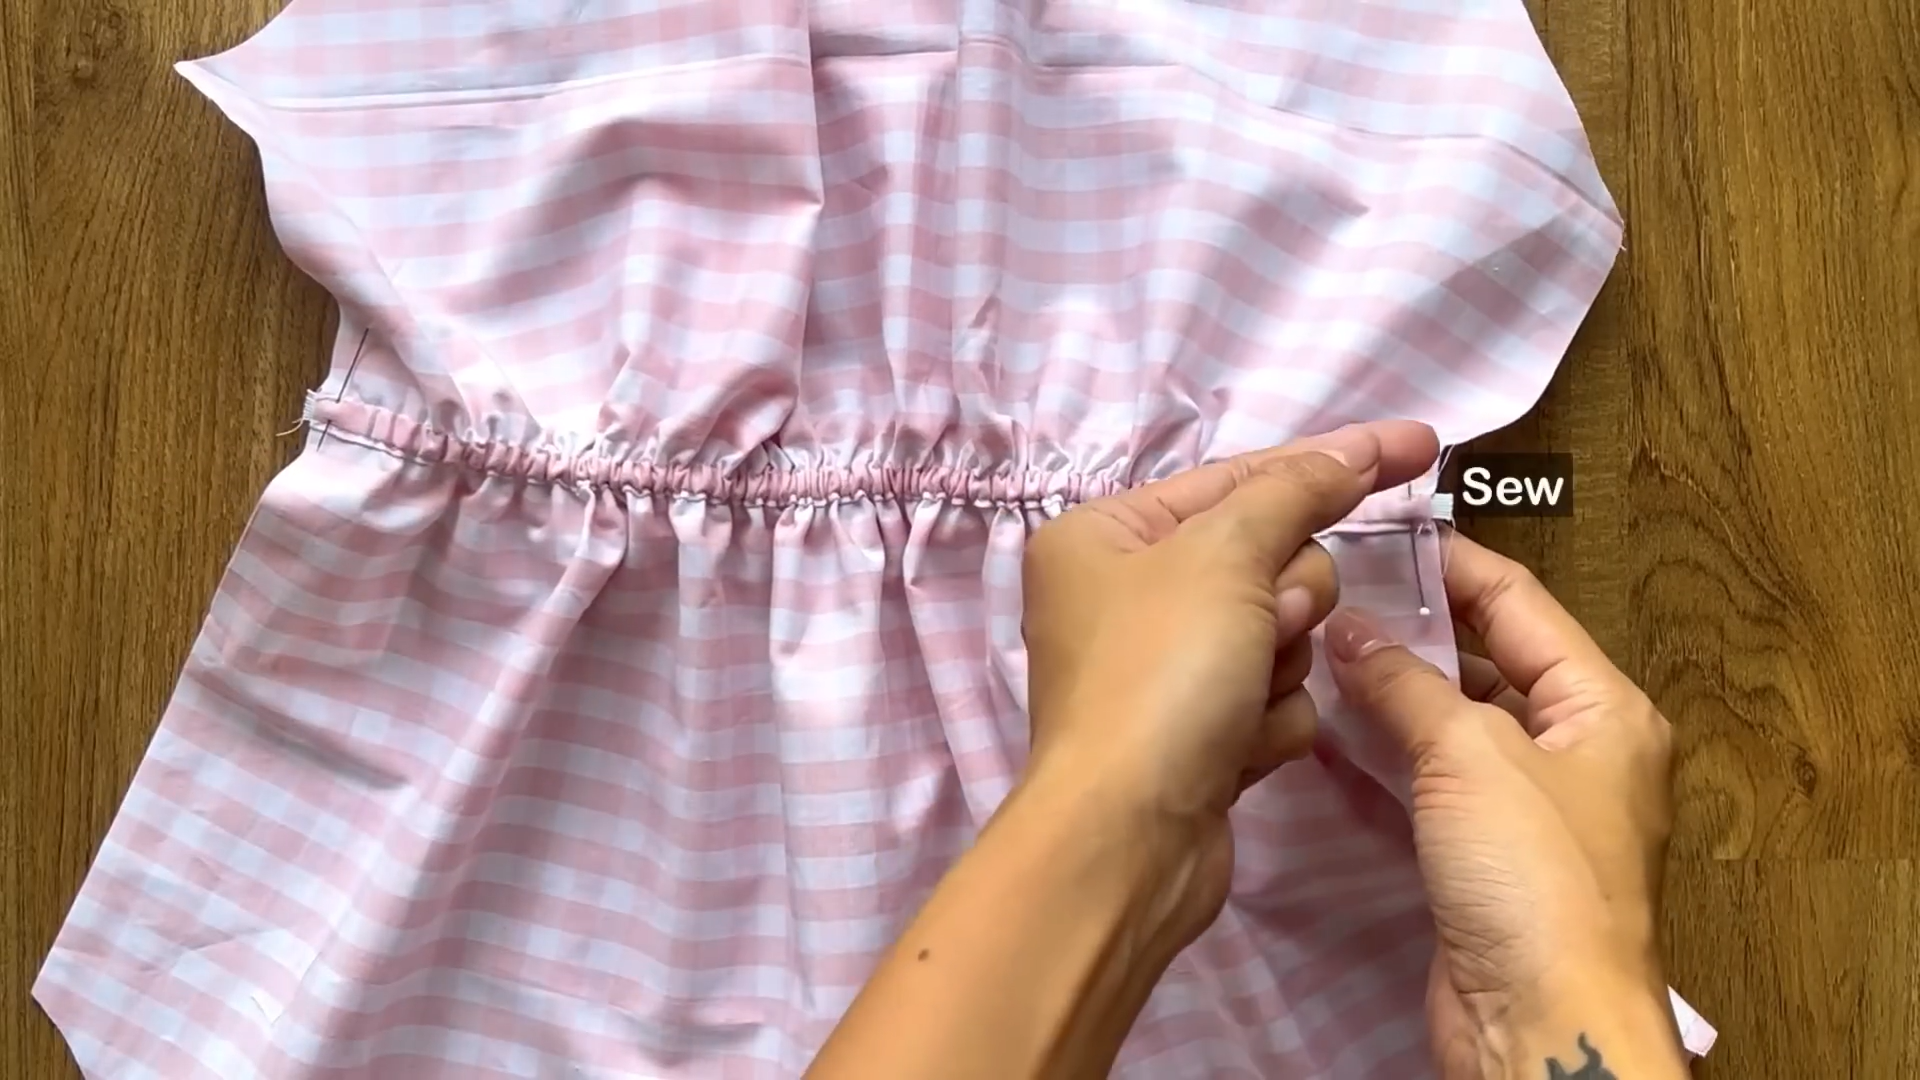
Place the gathered fabric in its designated position and sew it all together.
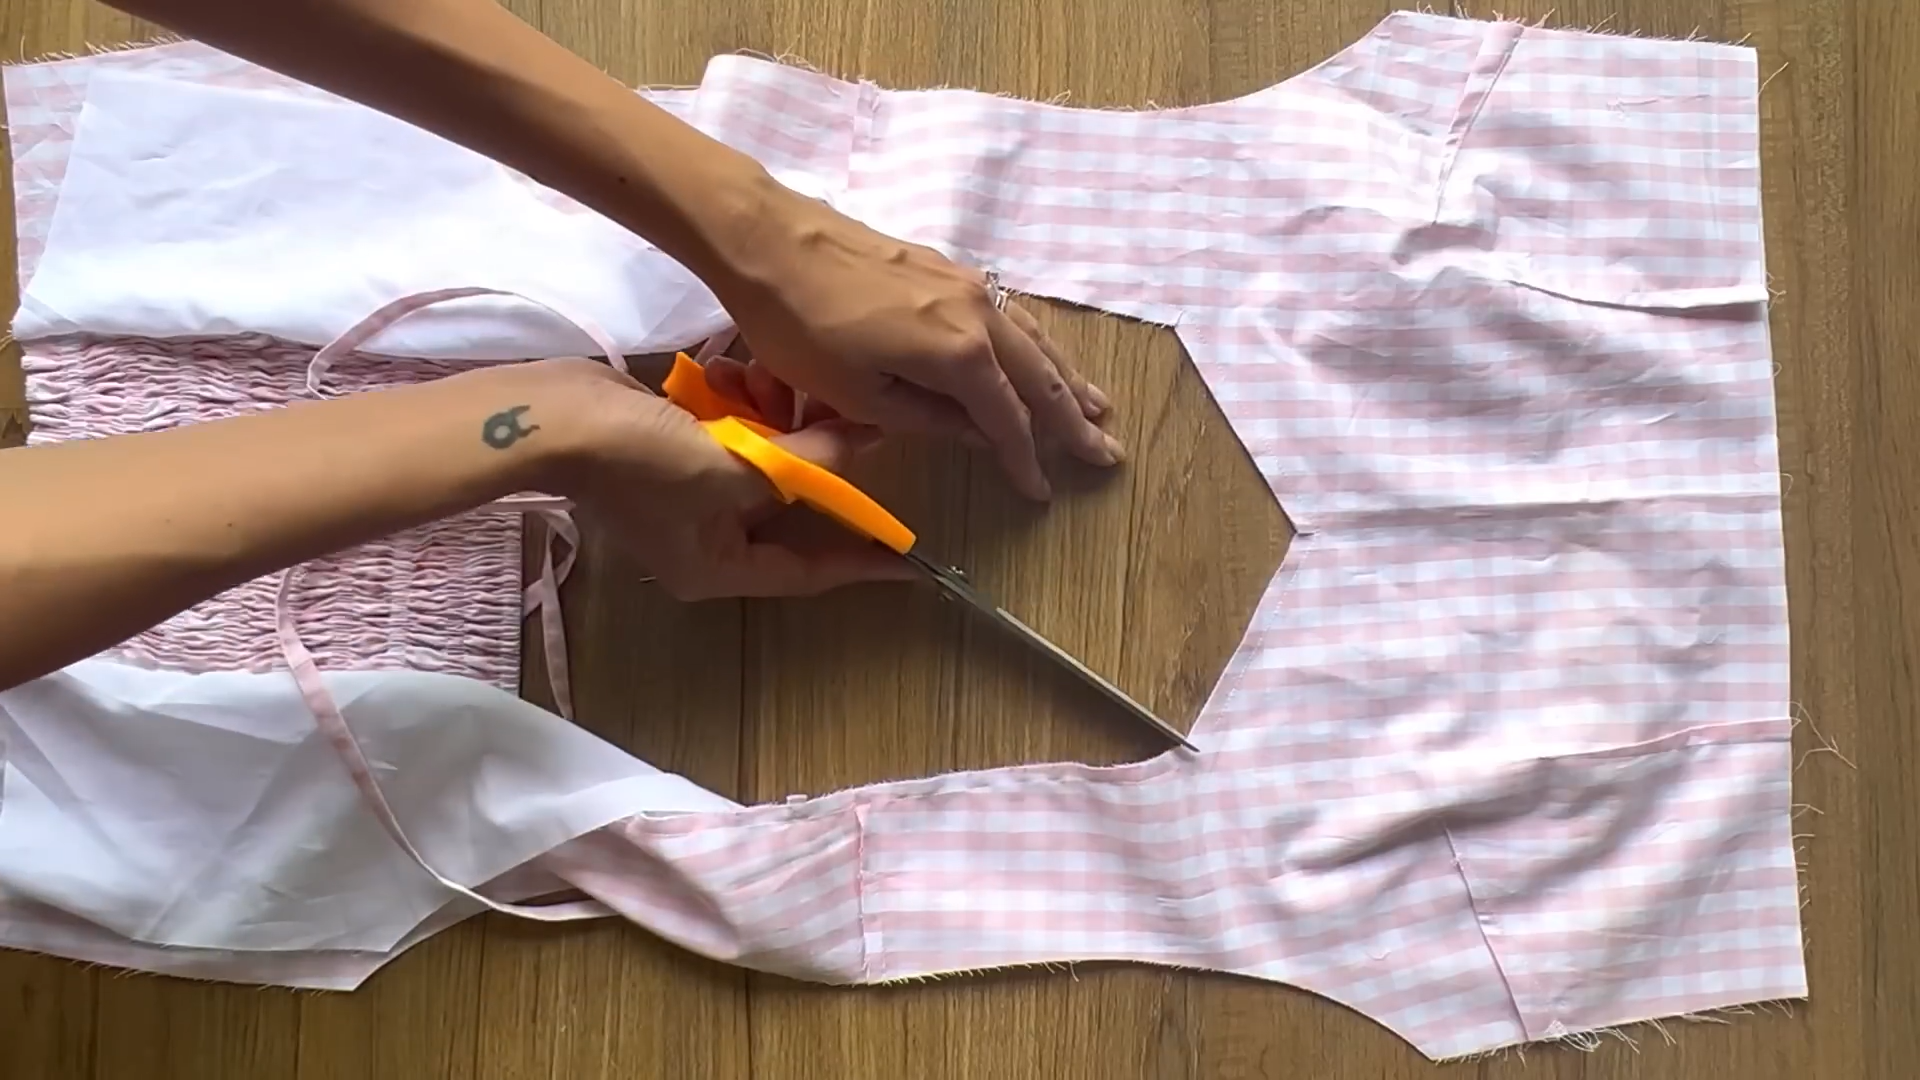
Make small cuts at the neckline to allow for smoother turning
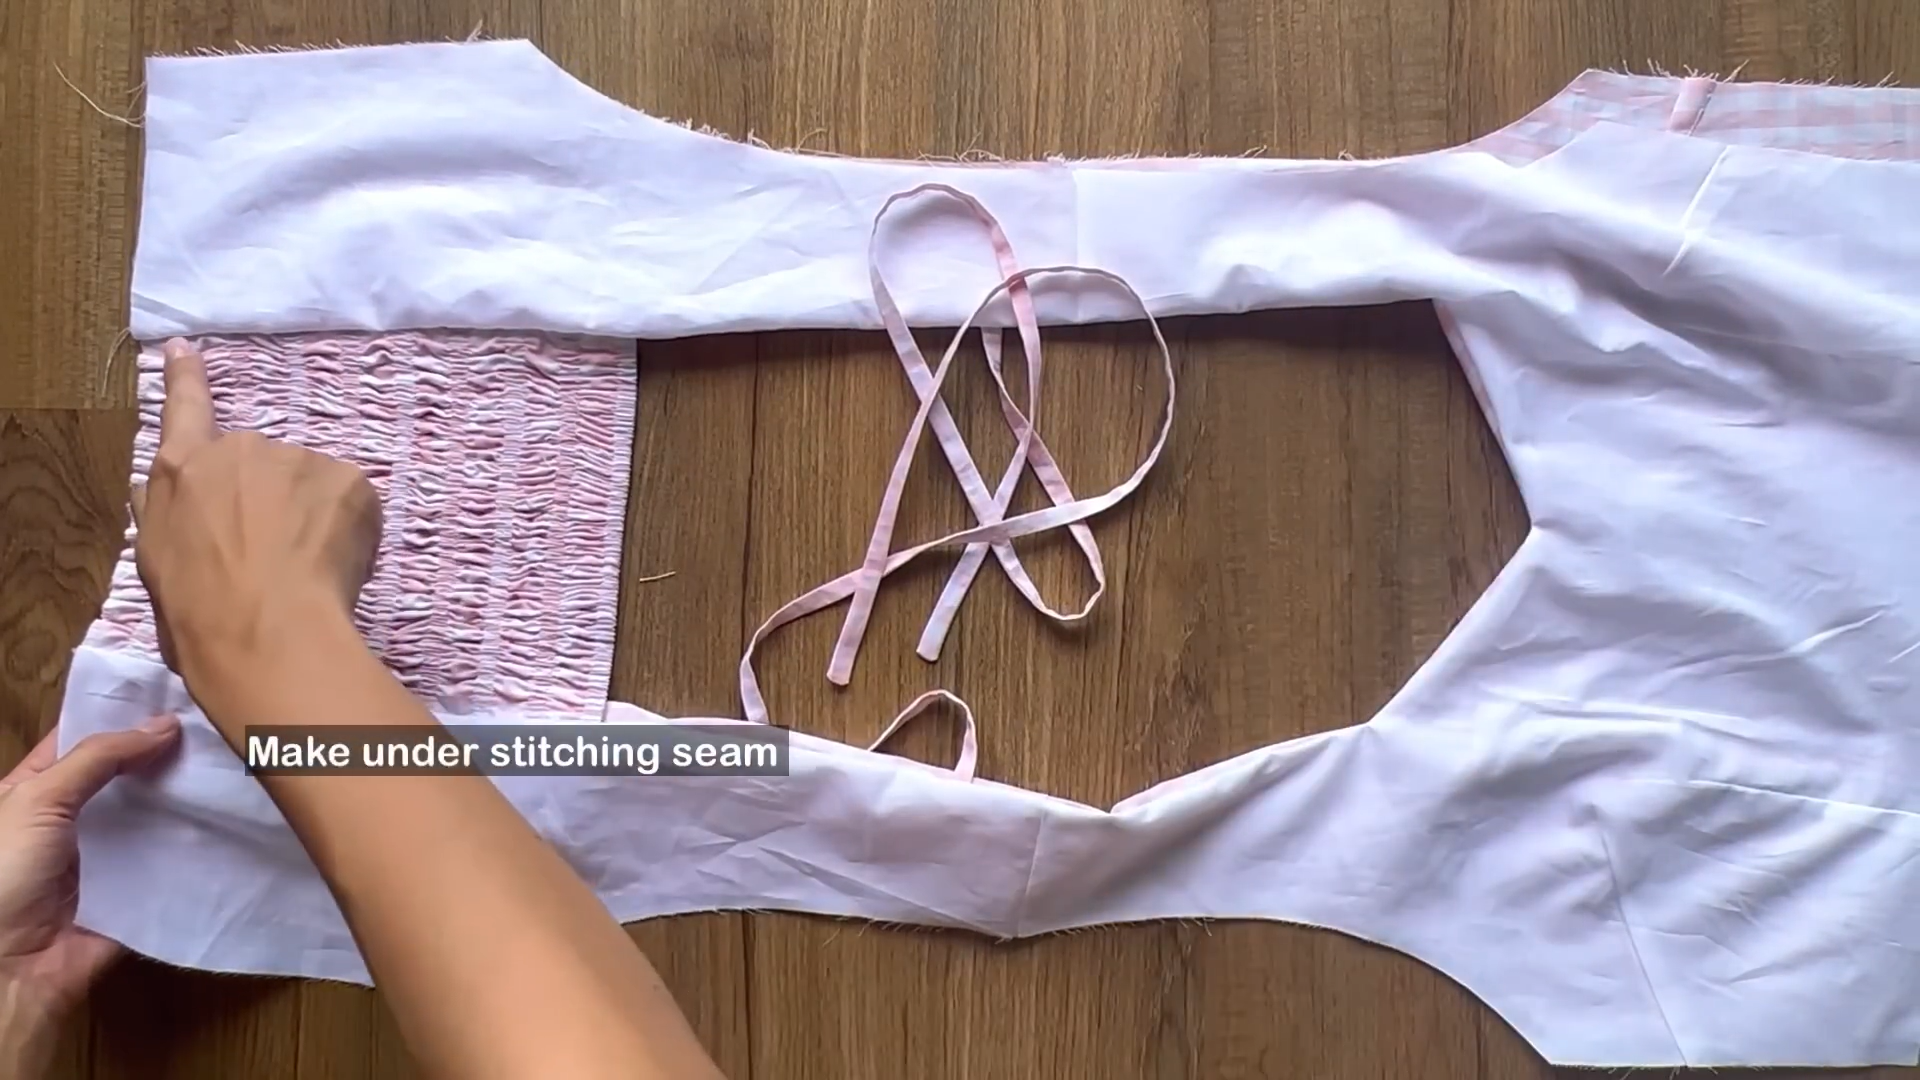
Create an under-stitching seam to keep the lining neatly in place before turning it inside.
Don’t forget to press the folding lines with an iron for a crisp finish.
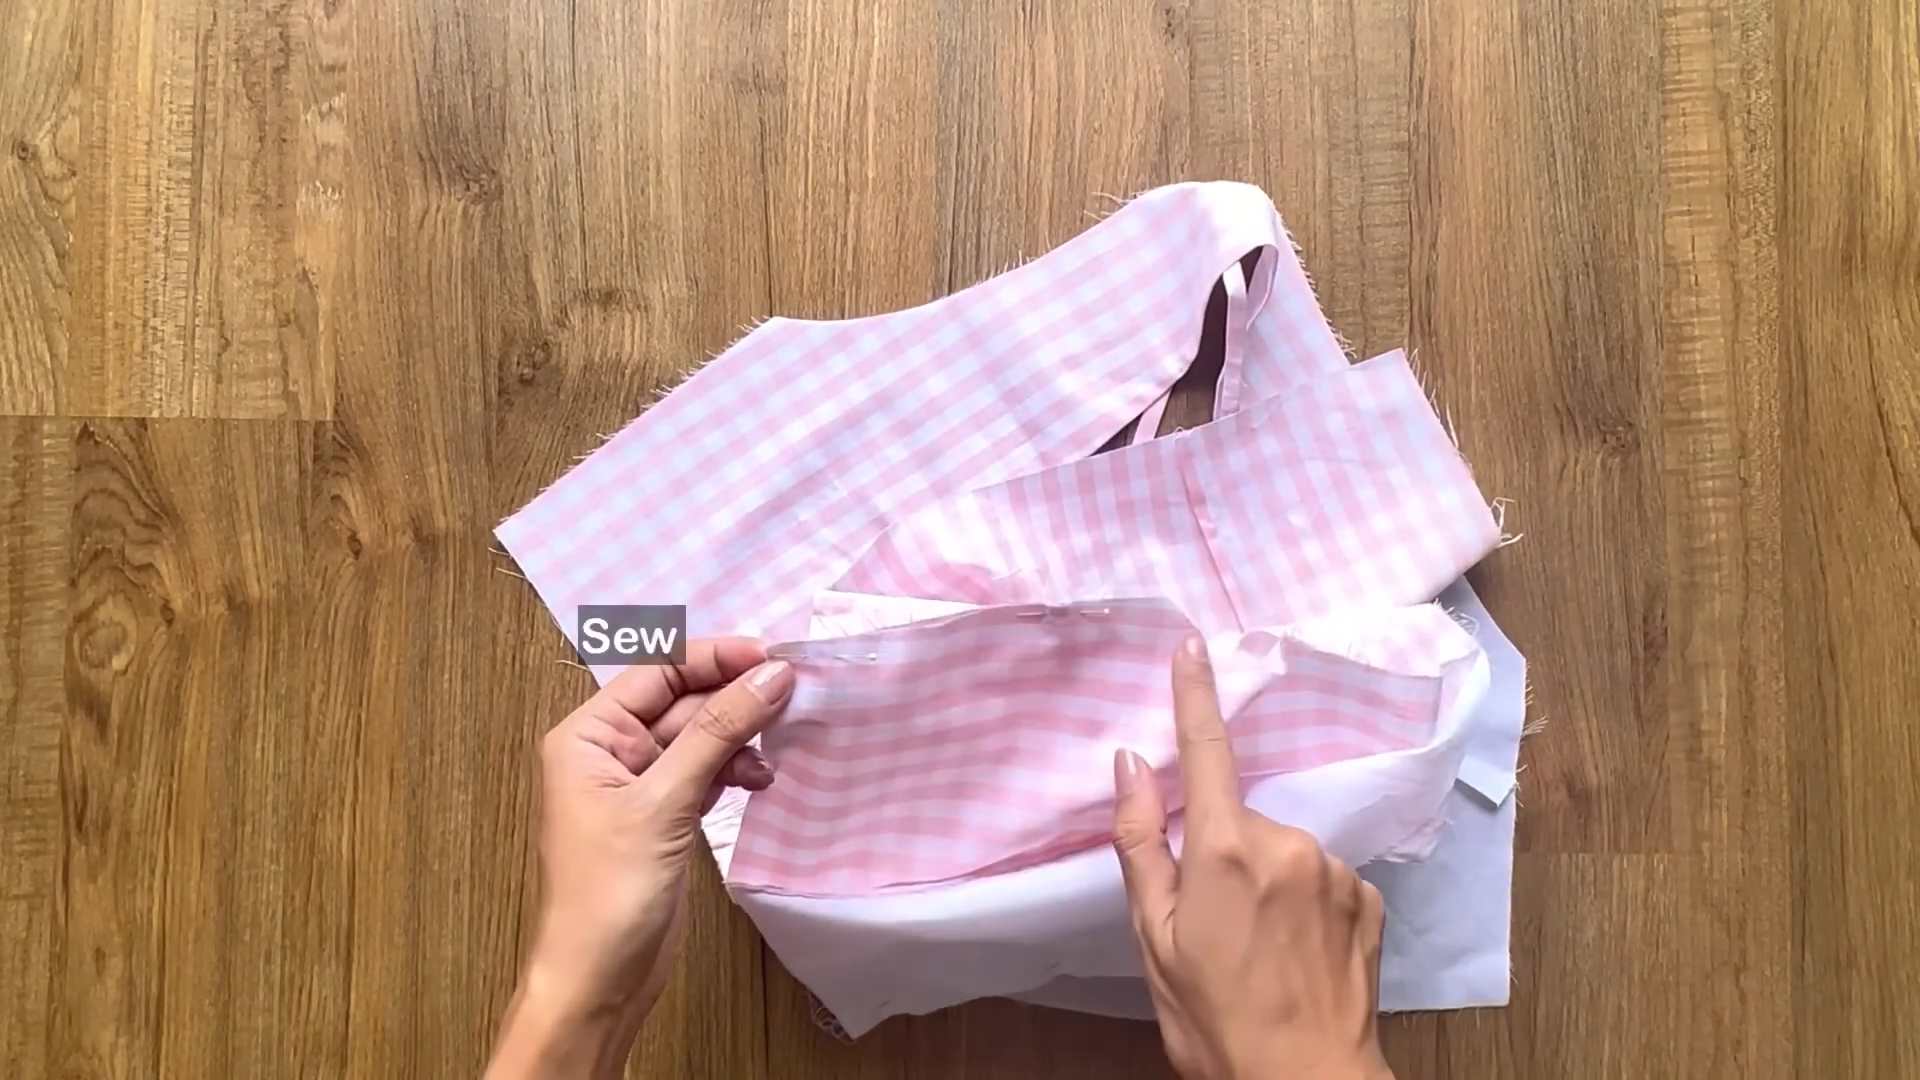
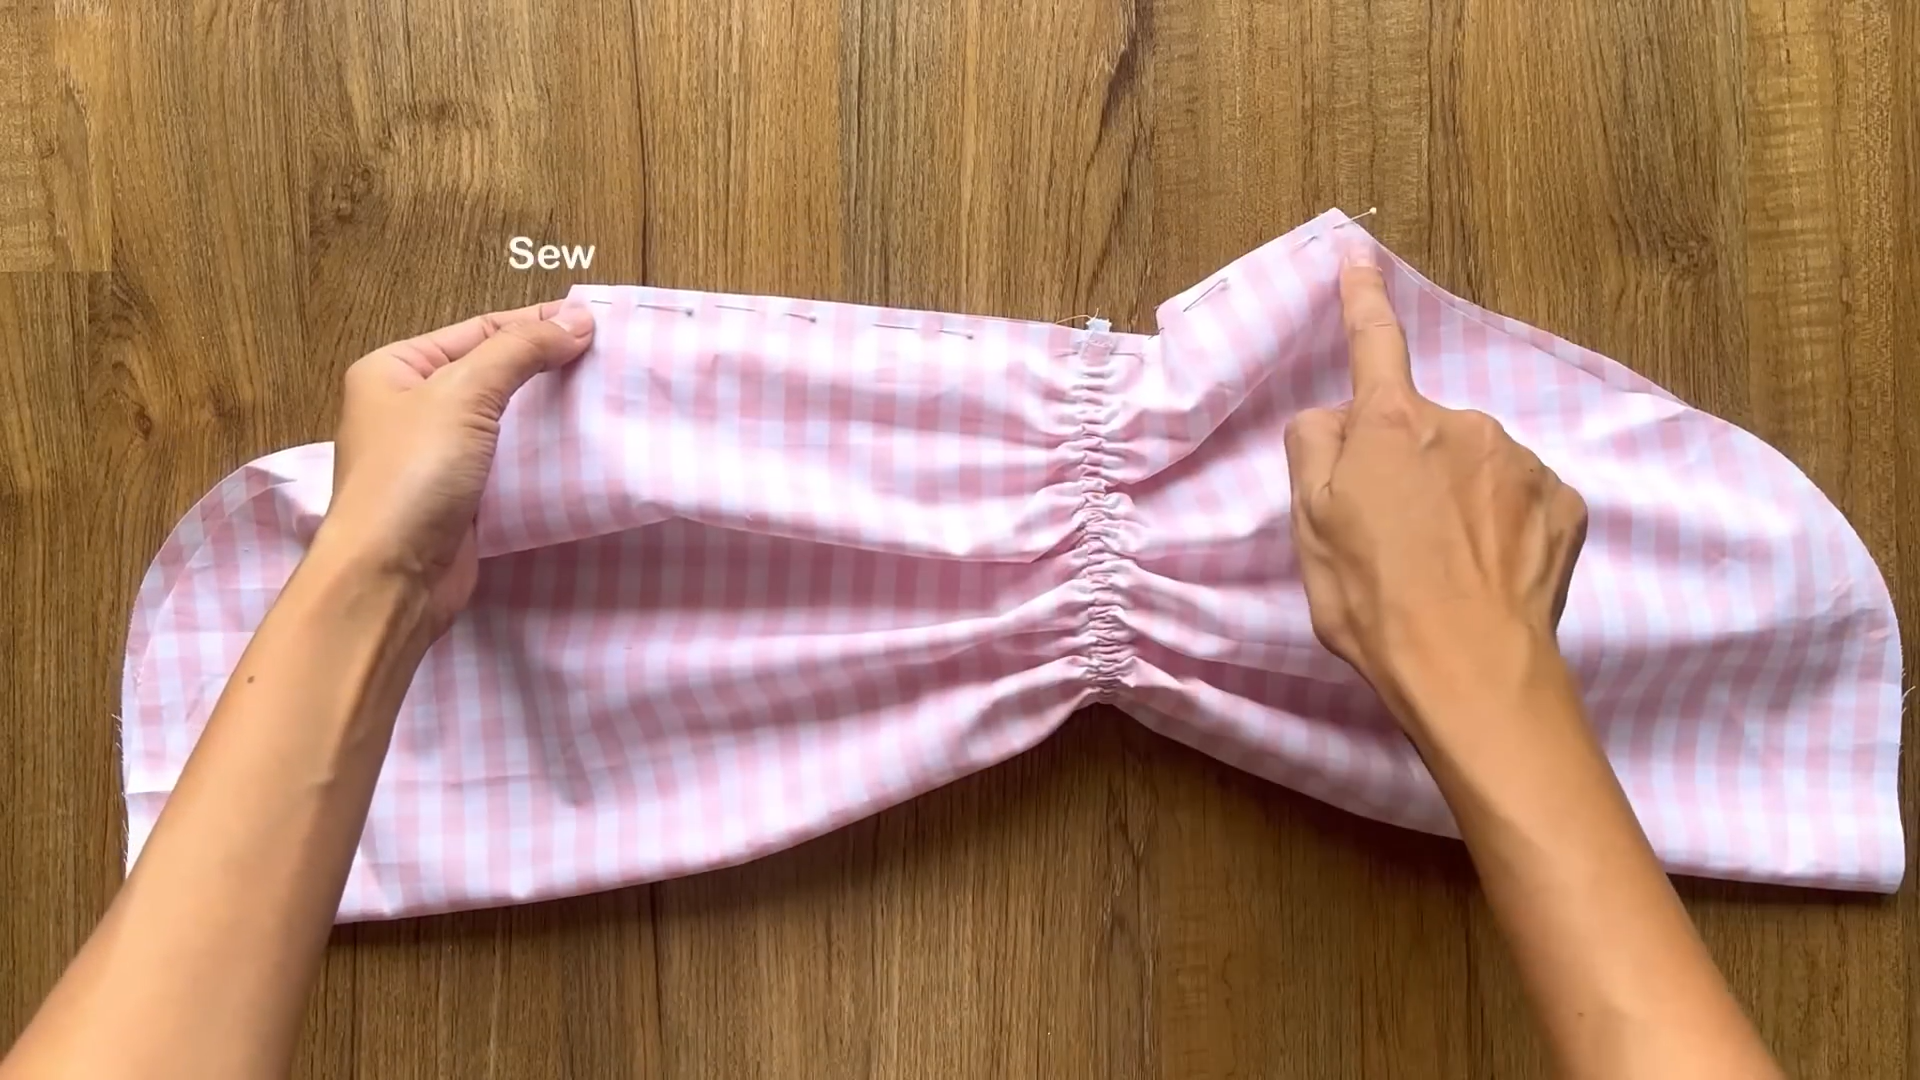
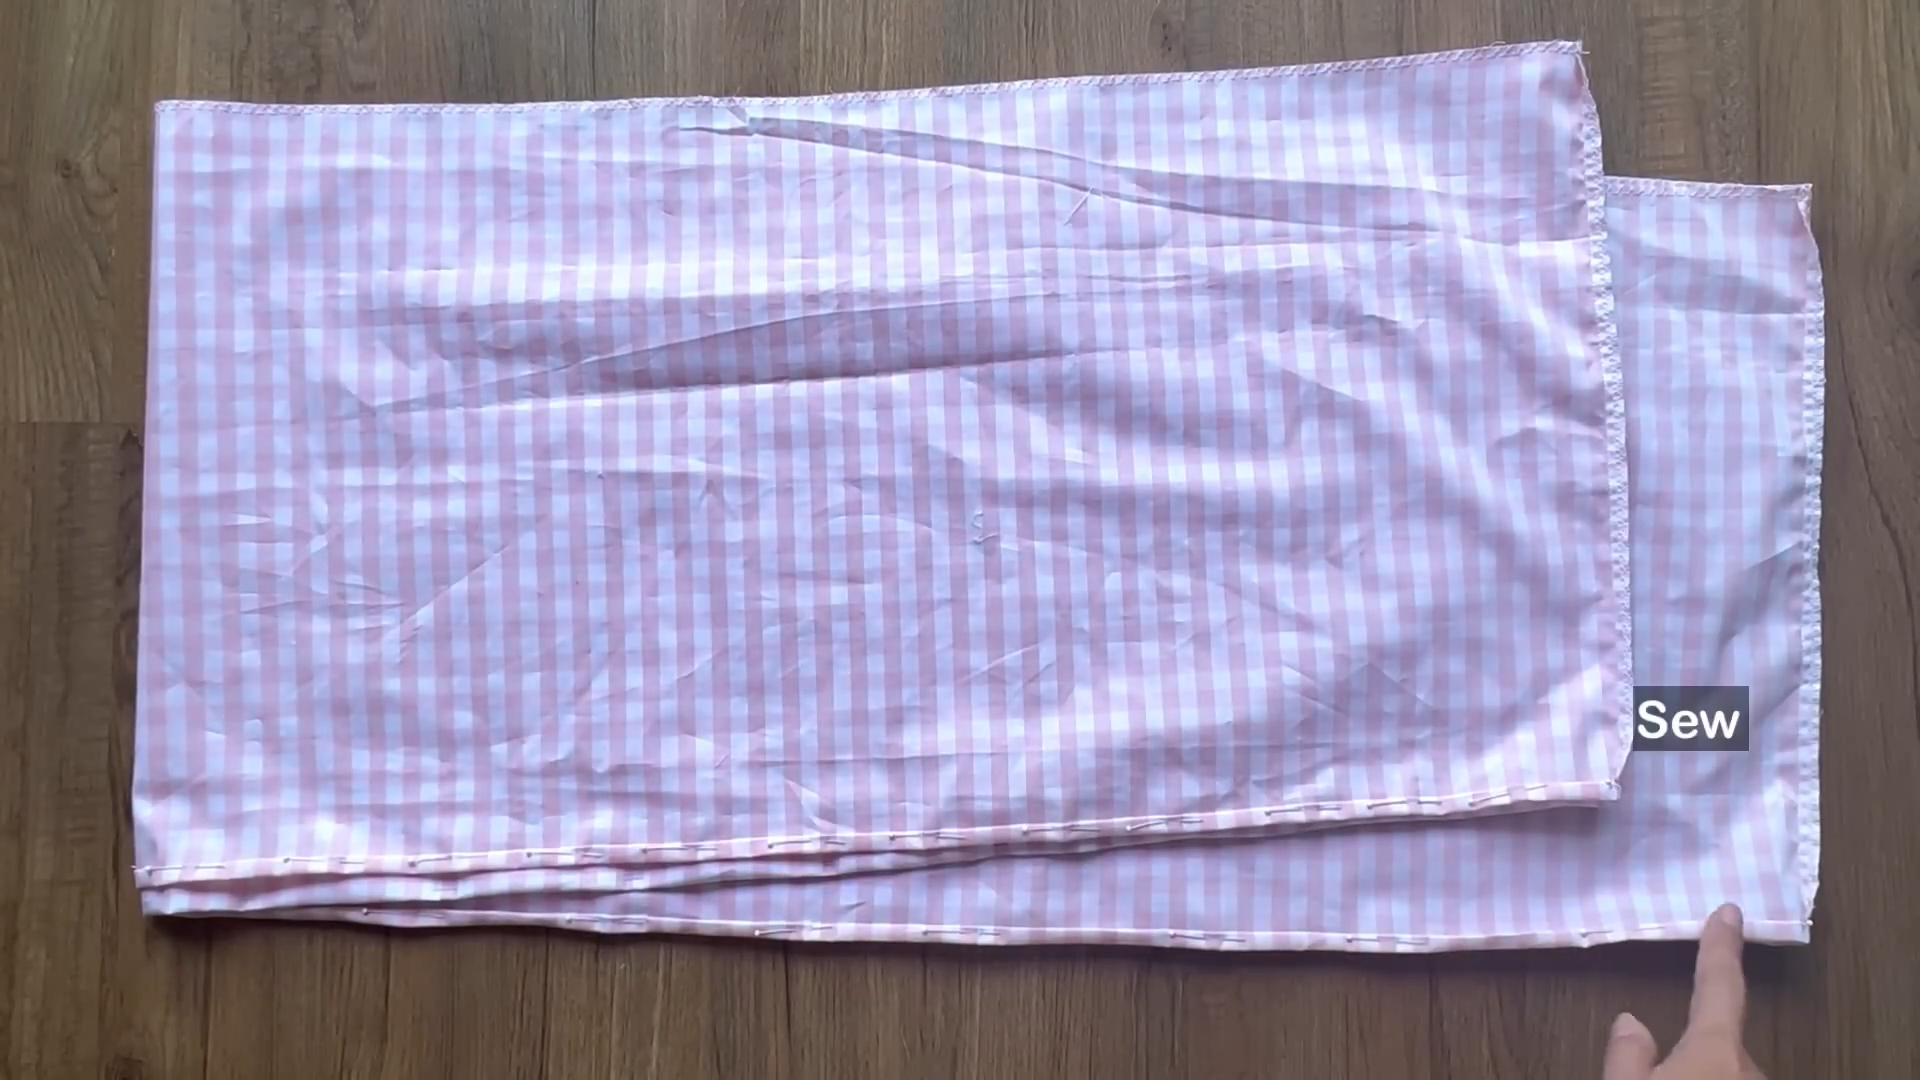
Connect the side seams of the main fabric and the lining.
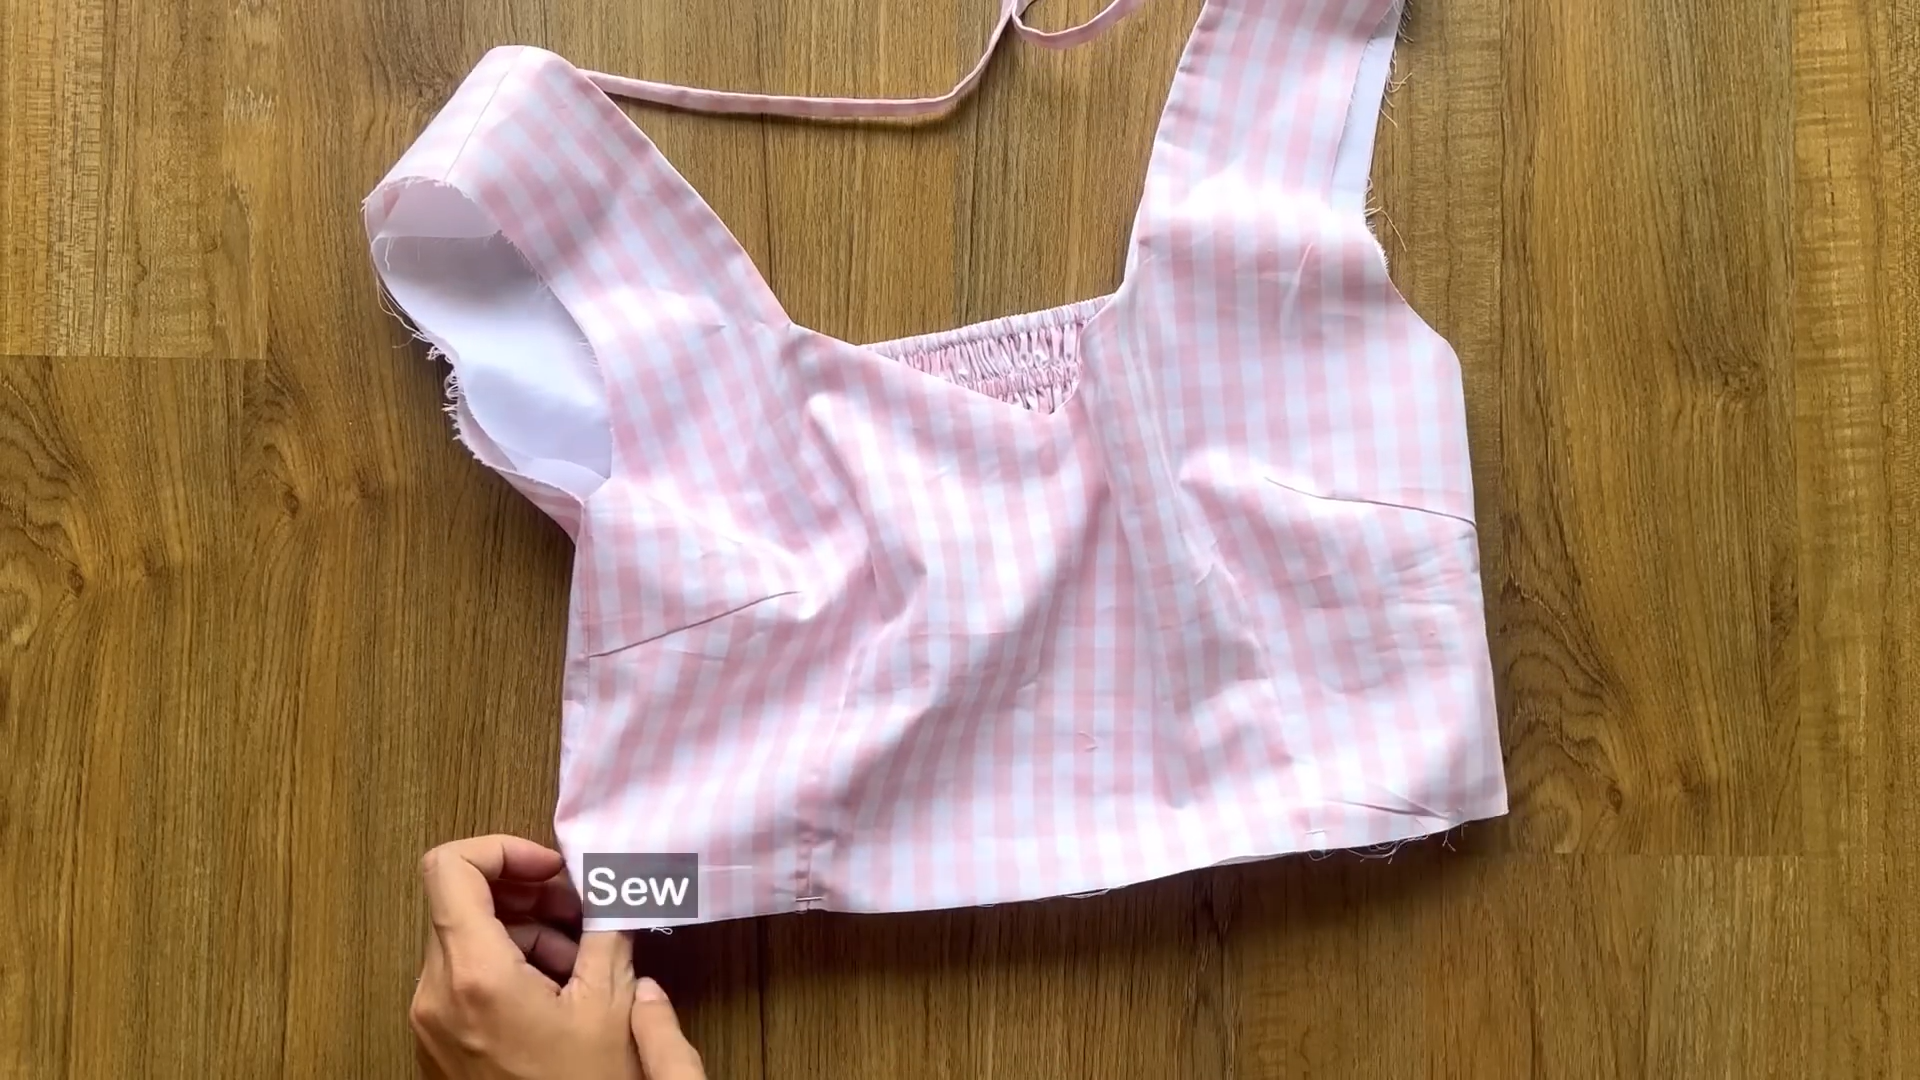
Sew the bottom edge of both layers together.
Stitch the sleeve lines of the main fabric and the lining together.
THE SLEEVE
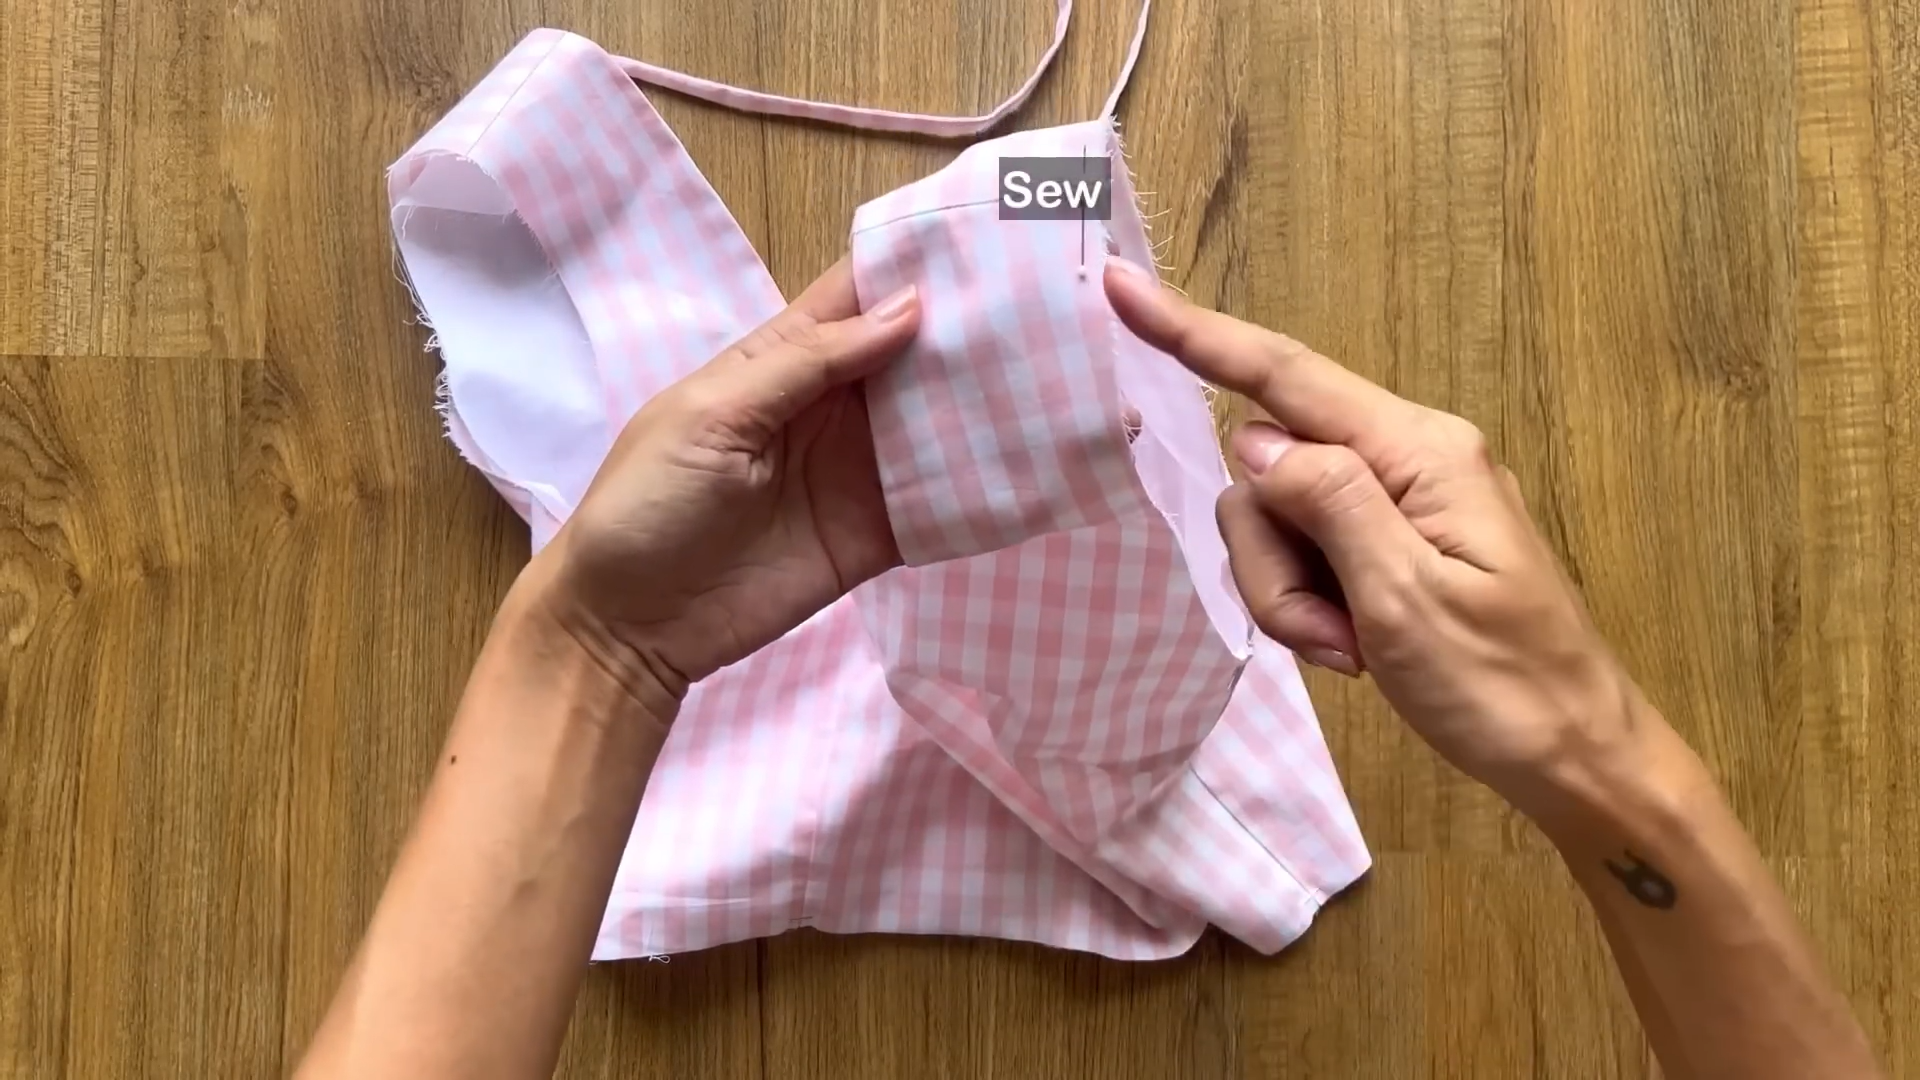
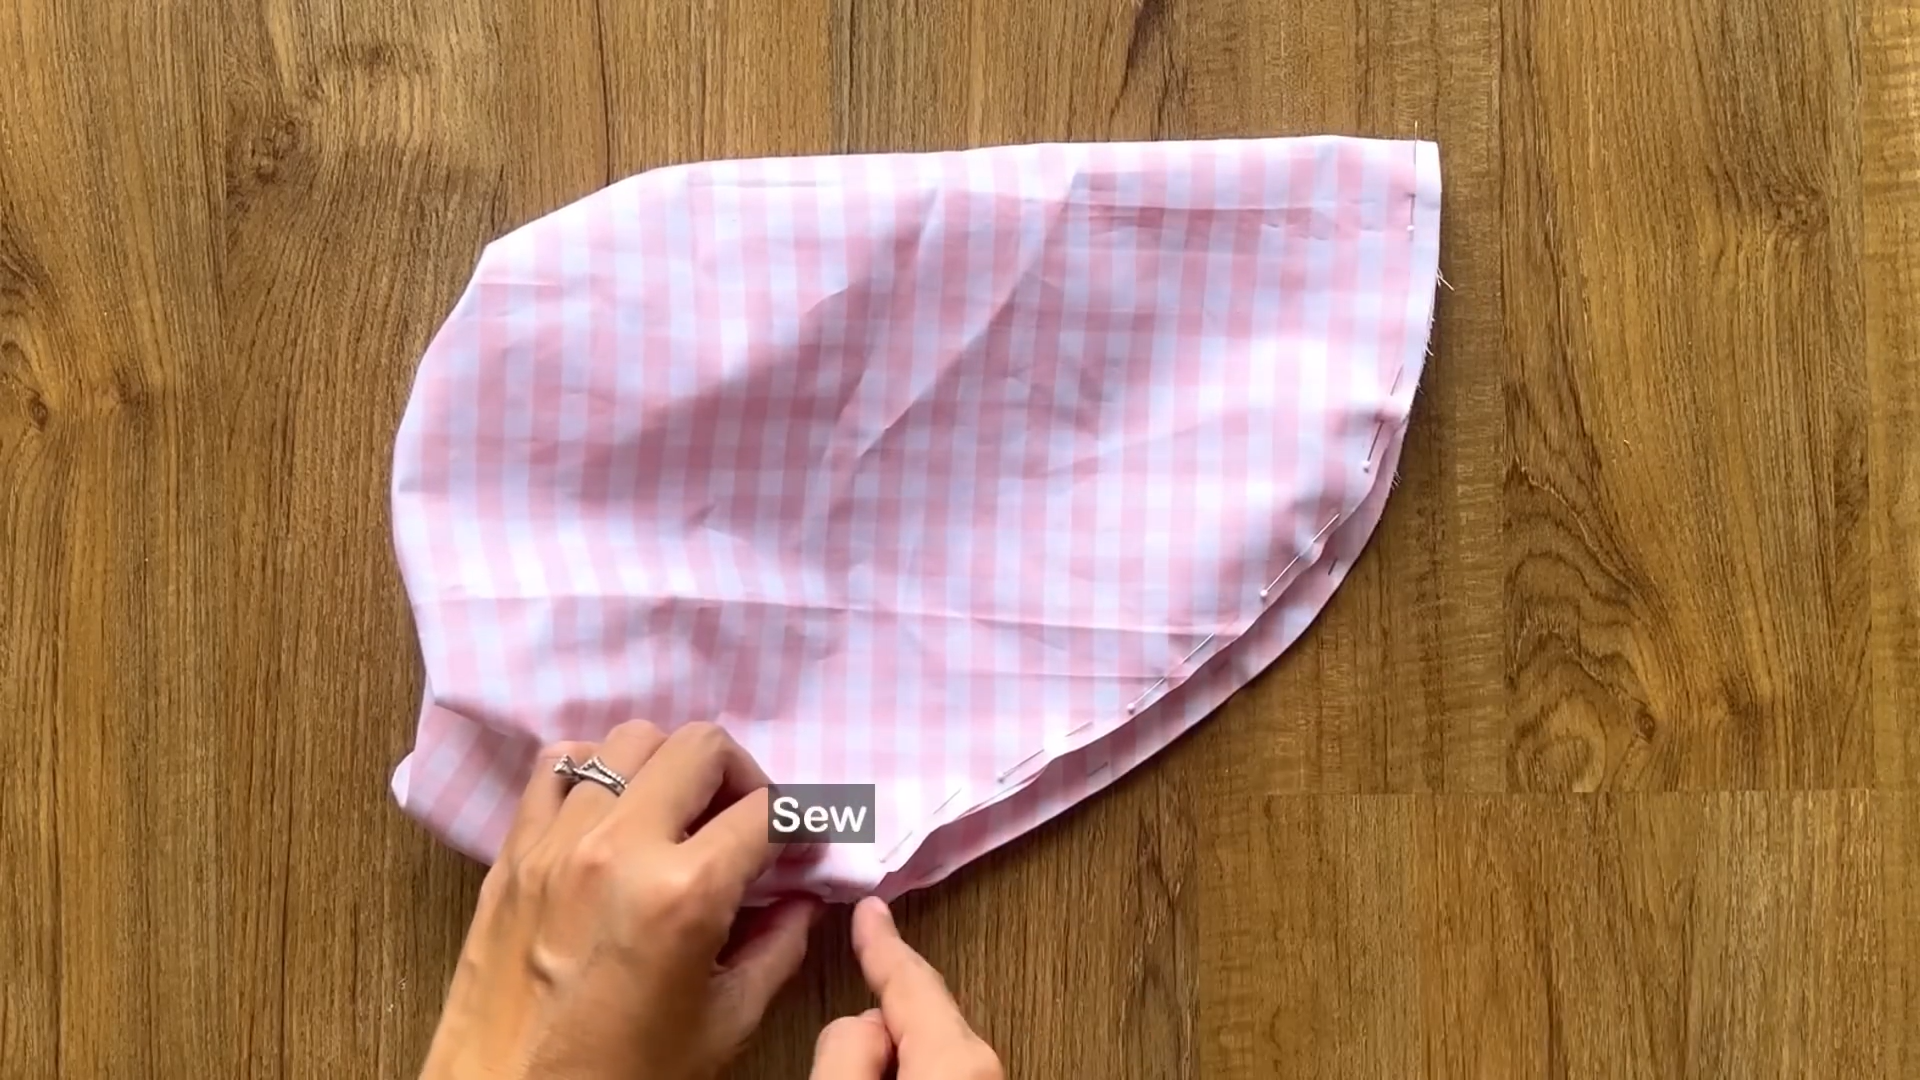
Cut out 2 pieces of the sleeve part based on the pattern.
Align the inside and outside sleeve pieces at the ending line.
Make sure the inside is about 1 cm longer than the outside sleeve, considering the seam allowance.
Sew along the ending line to connect the two layers.
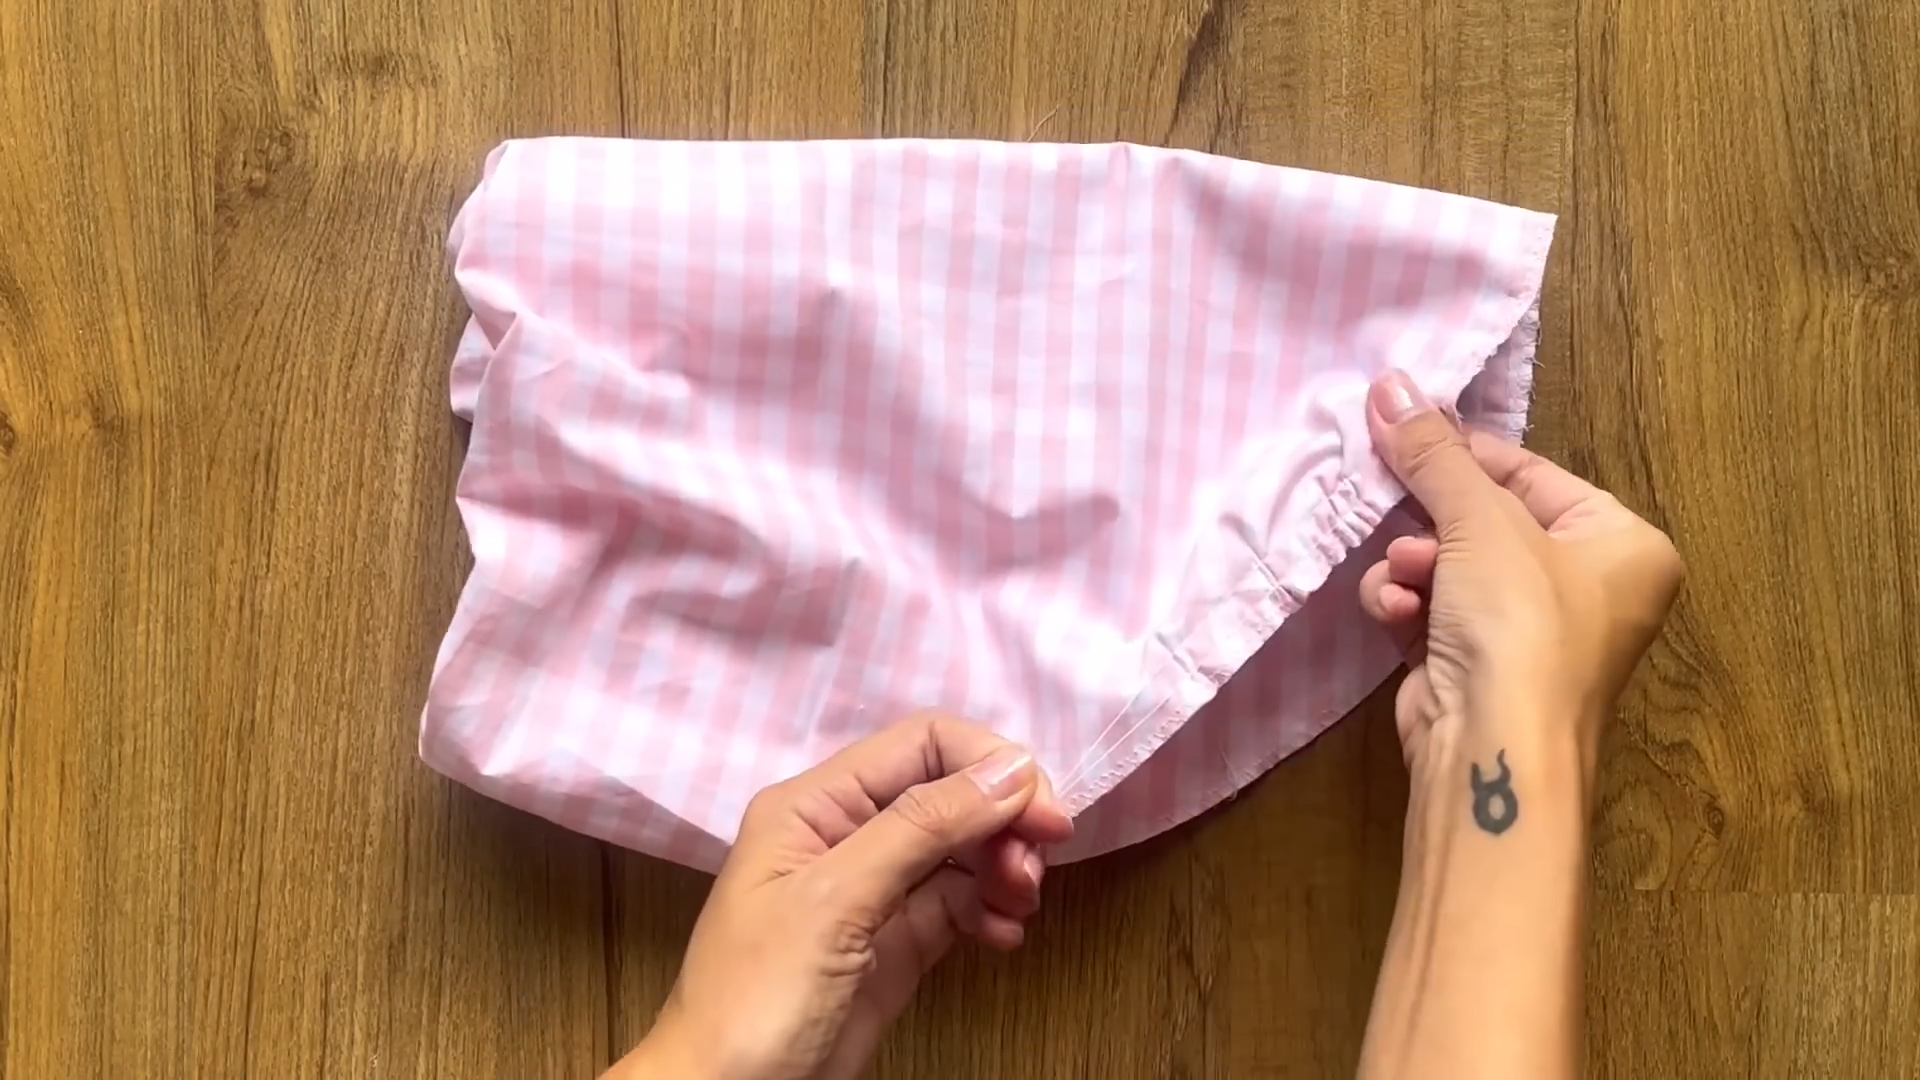
Fold the inside sleeve to the inside twice by approximately 0.5 cm each time to create a fabric hole.
Secure the folded layers with stitches.
Take your elastic band (approximately 25 cm wide) and thread it through the fabric hole.
Sew the two ends of the elastic band to the corresponding ends of the fabric hole to keep it in place.
Align the underarm seams of the inside sleeve and the outside sleeve and sew them together.
Sew their sleeve lines together after that.
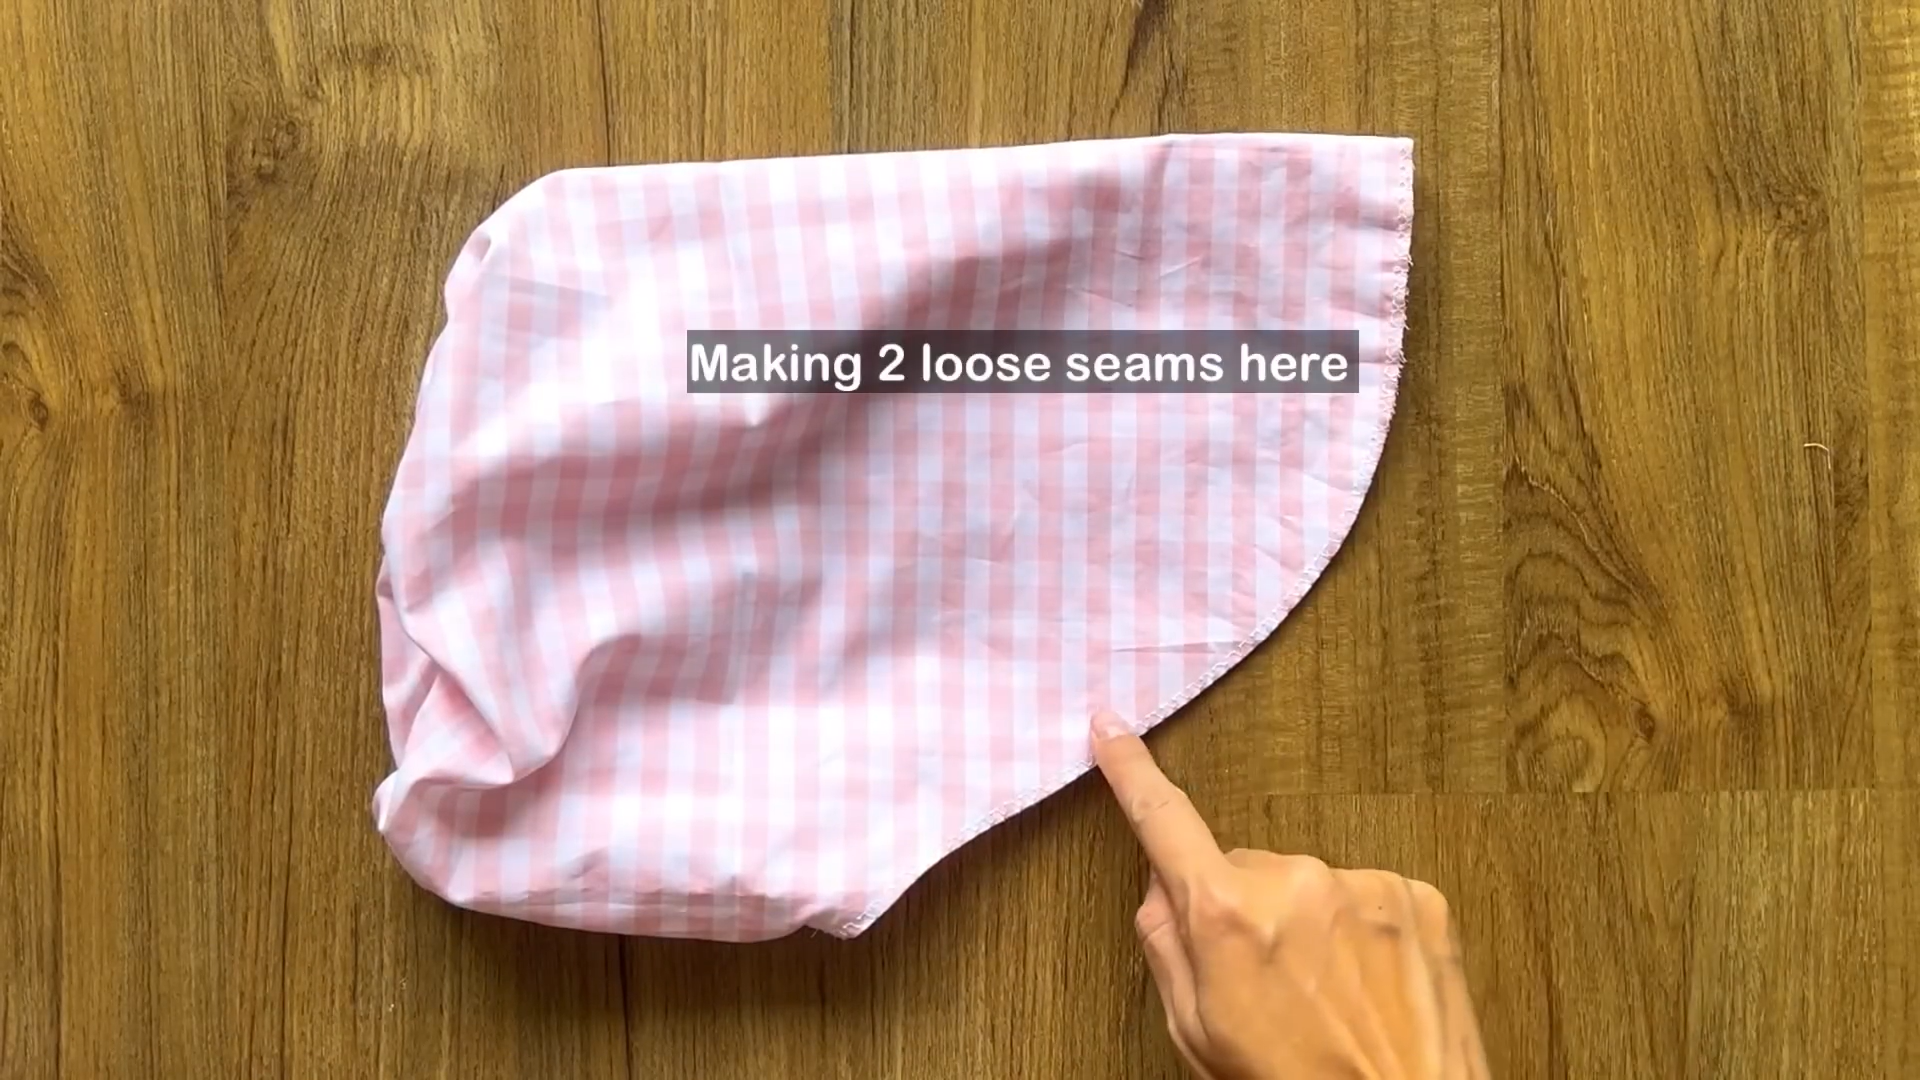
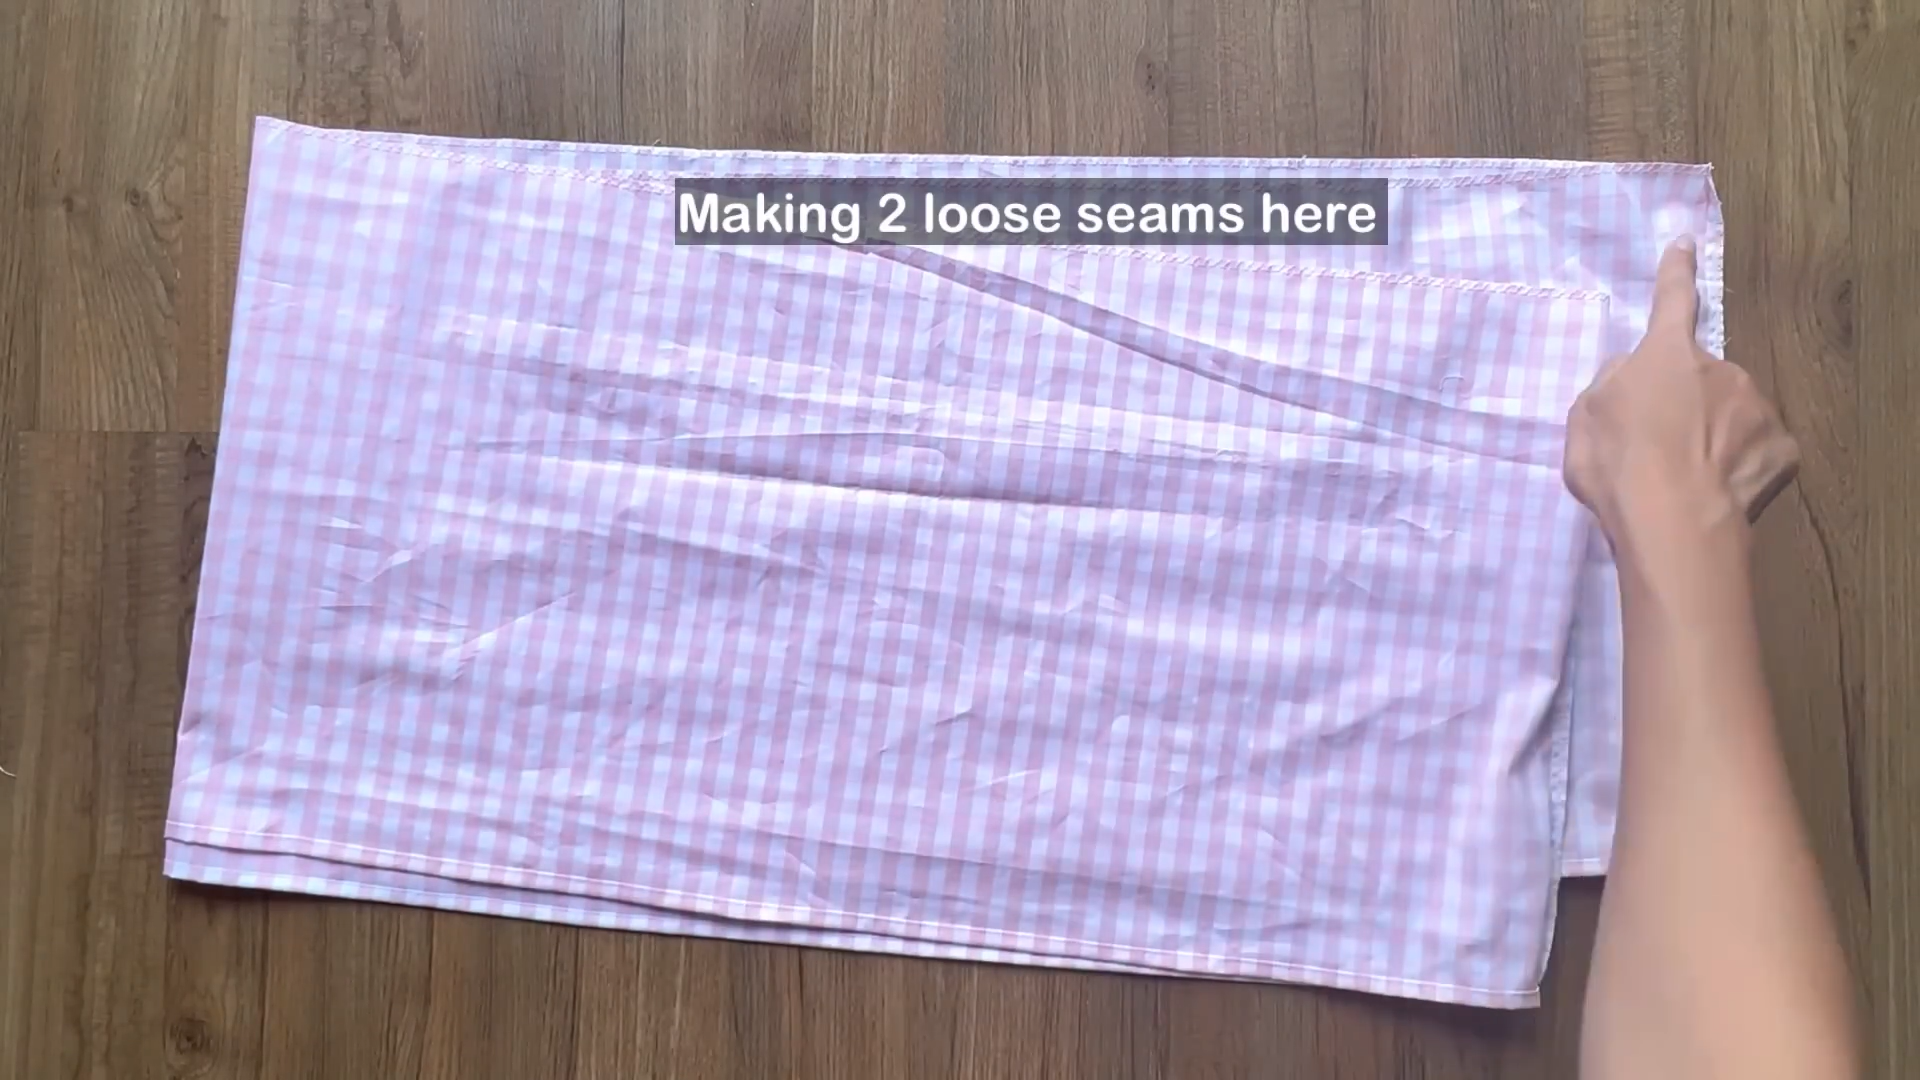
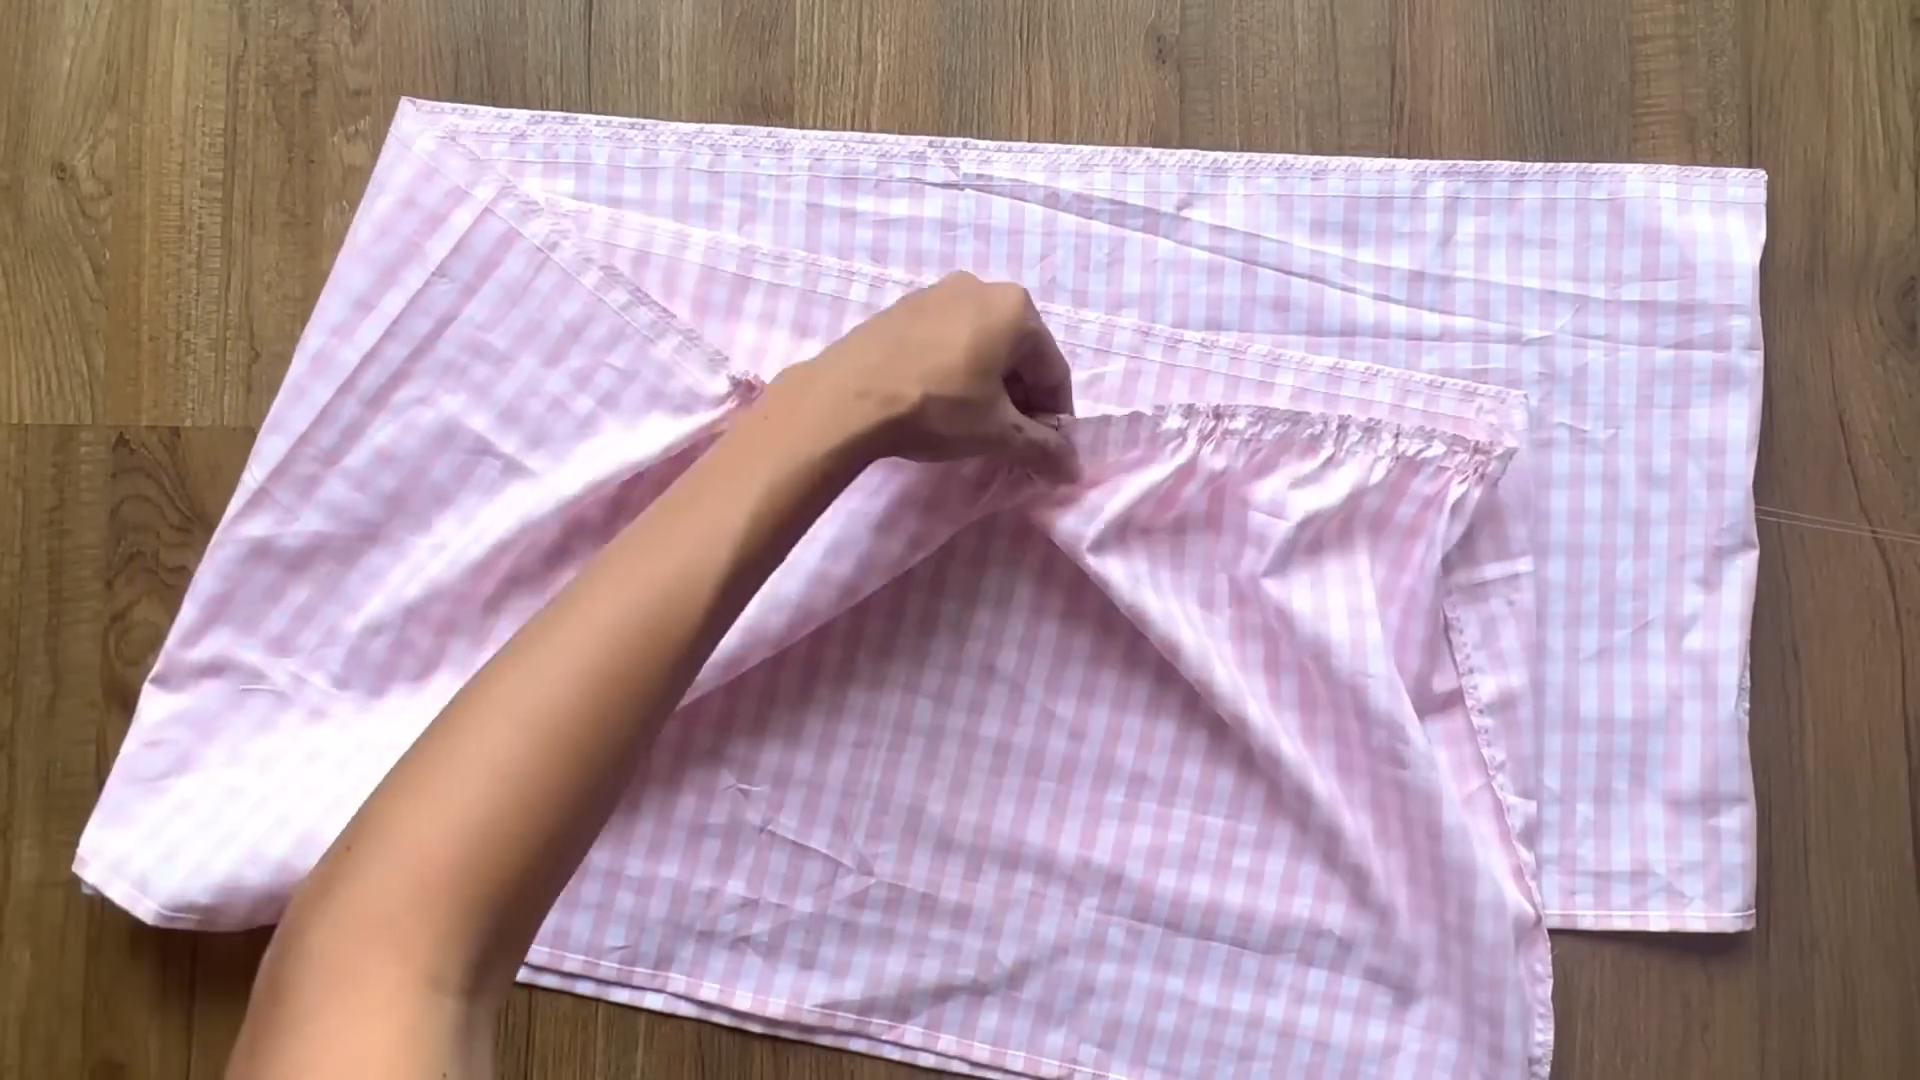
Make two loose seams at the top of the sleeve.
Create a gathering fabric there.
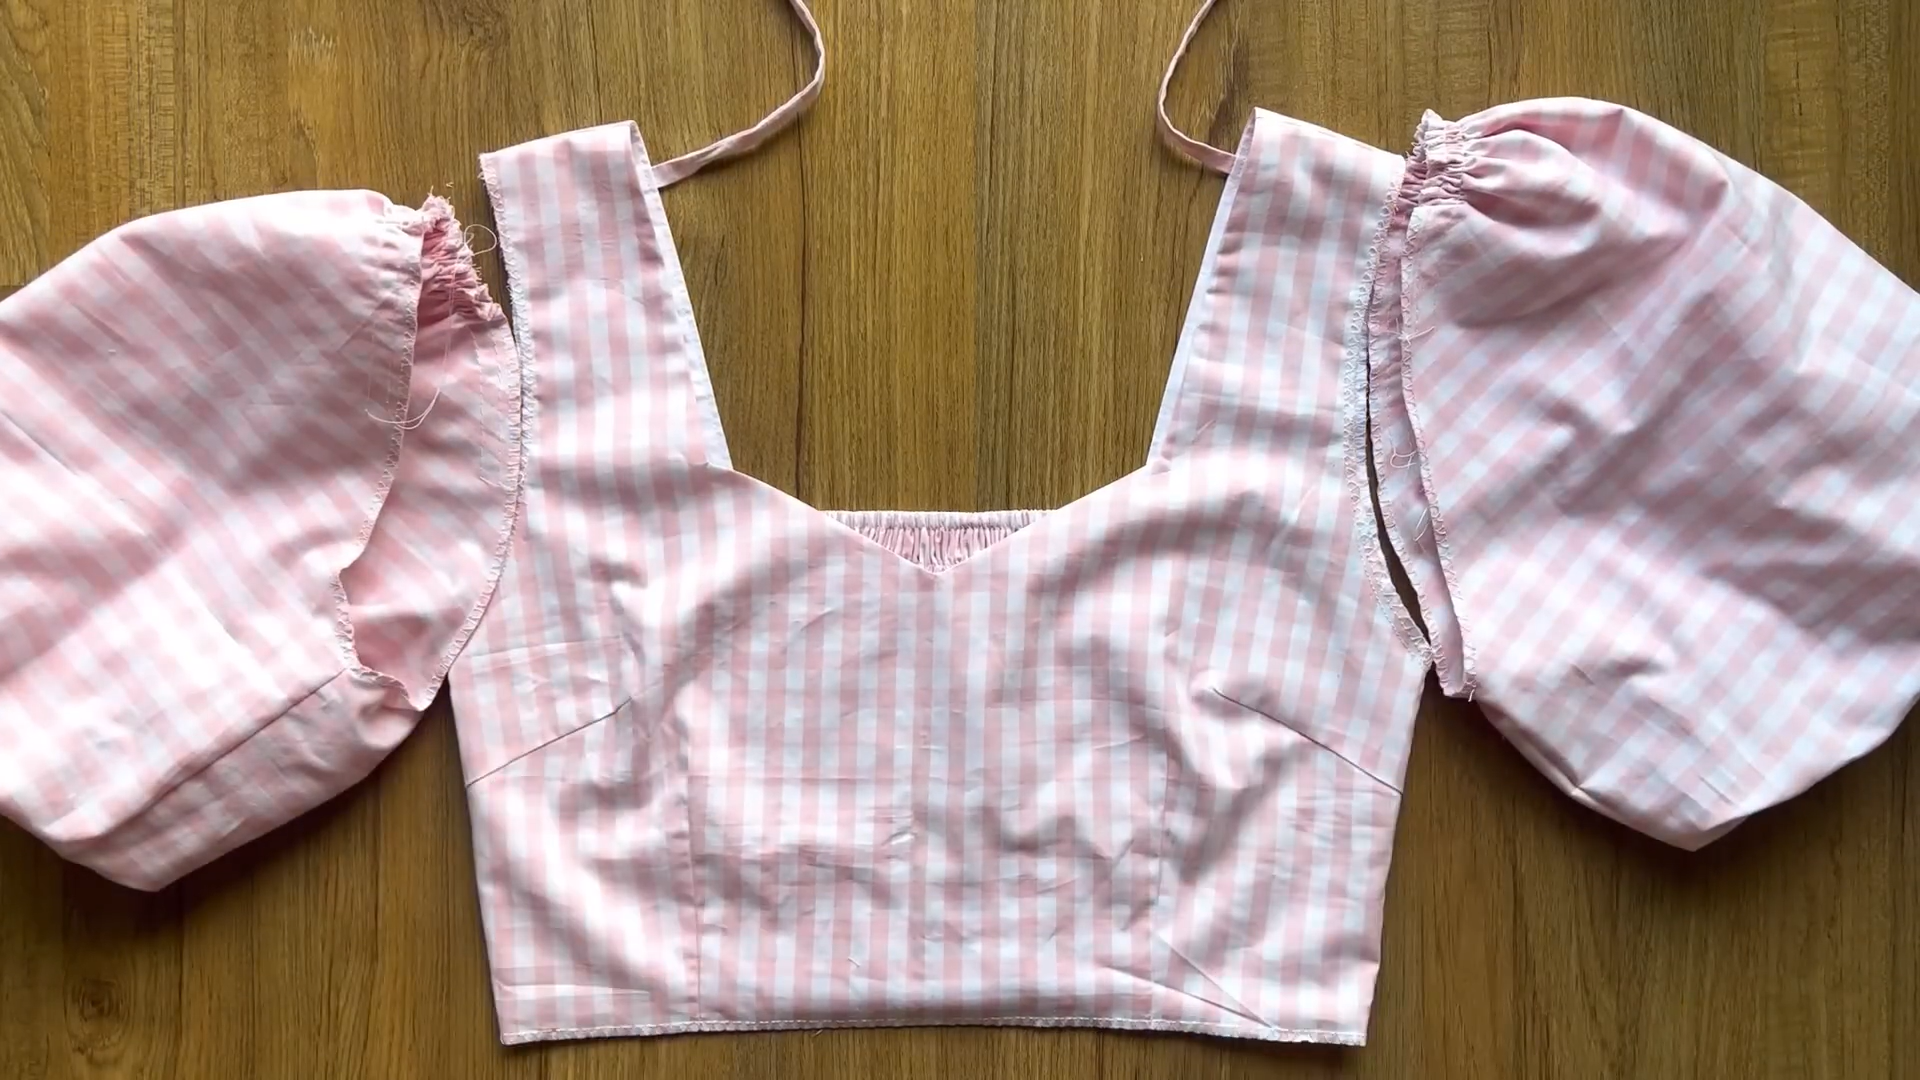
You can now attach the sleeves to the bodice along the sleeve lines.
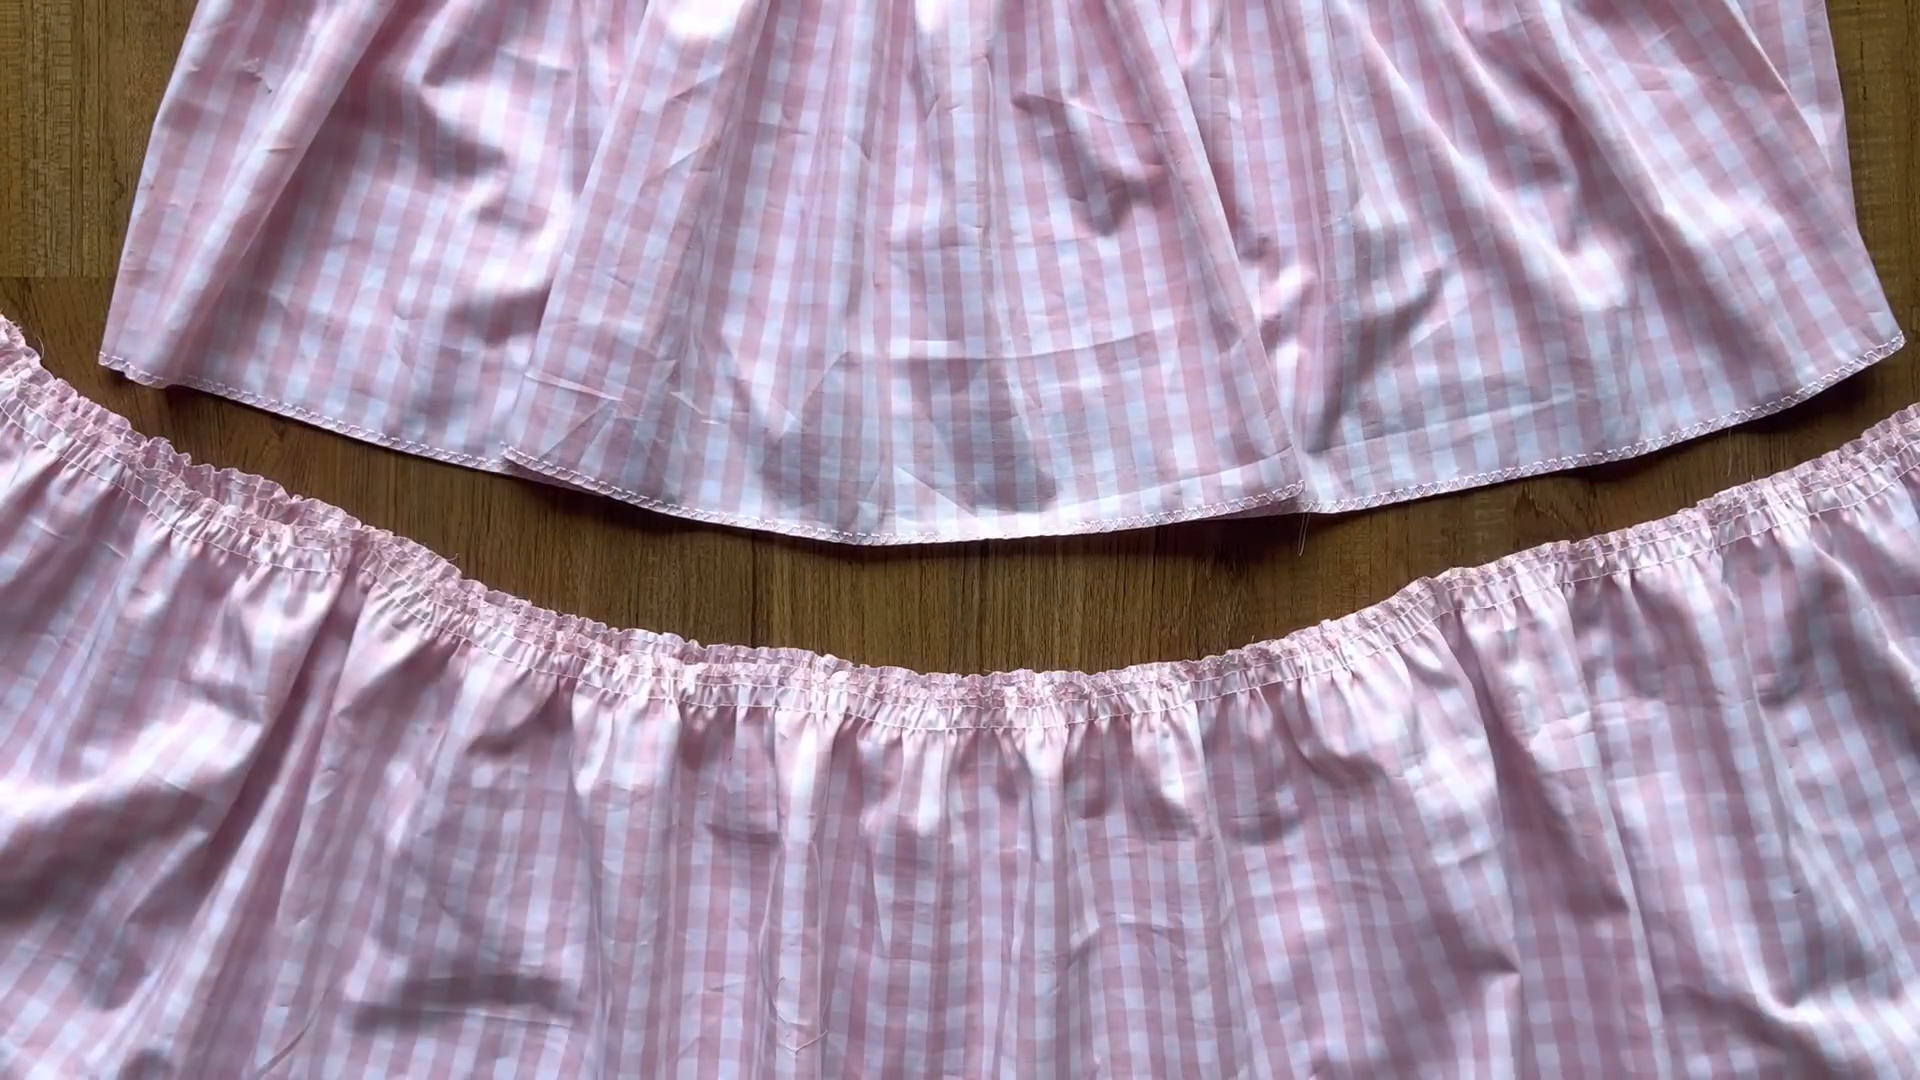
THE SKIRT PART
Cut out two rectangles of fabric for the second tier.
Sew the length lines of the rectangles together to create a large circle of fabric.
Fold one side of the circle fabric inside twice, about 1 cm each time.
Sew along the folded edge to secure it.
On the opposite side of the circle fabric, make two loose seams.
Pull the threads from these seams to gather the fabric.
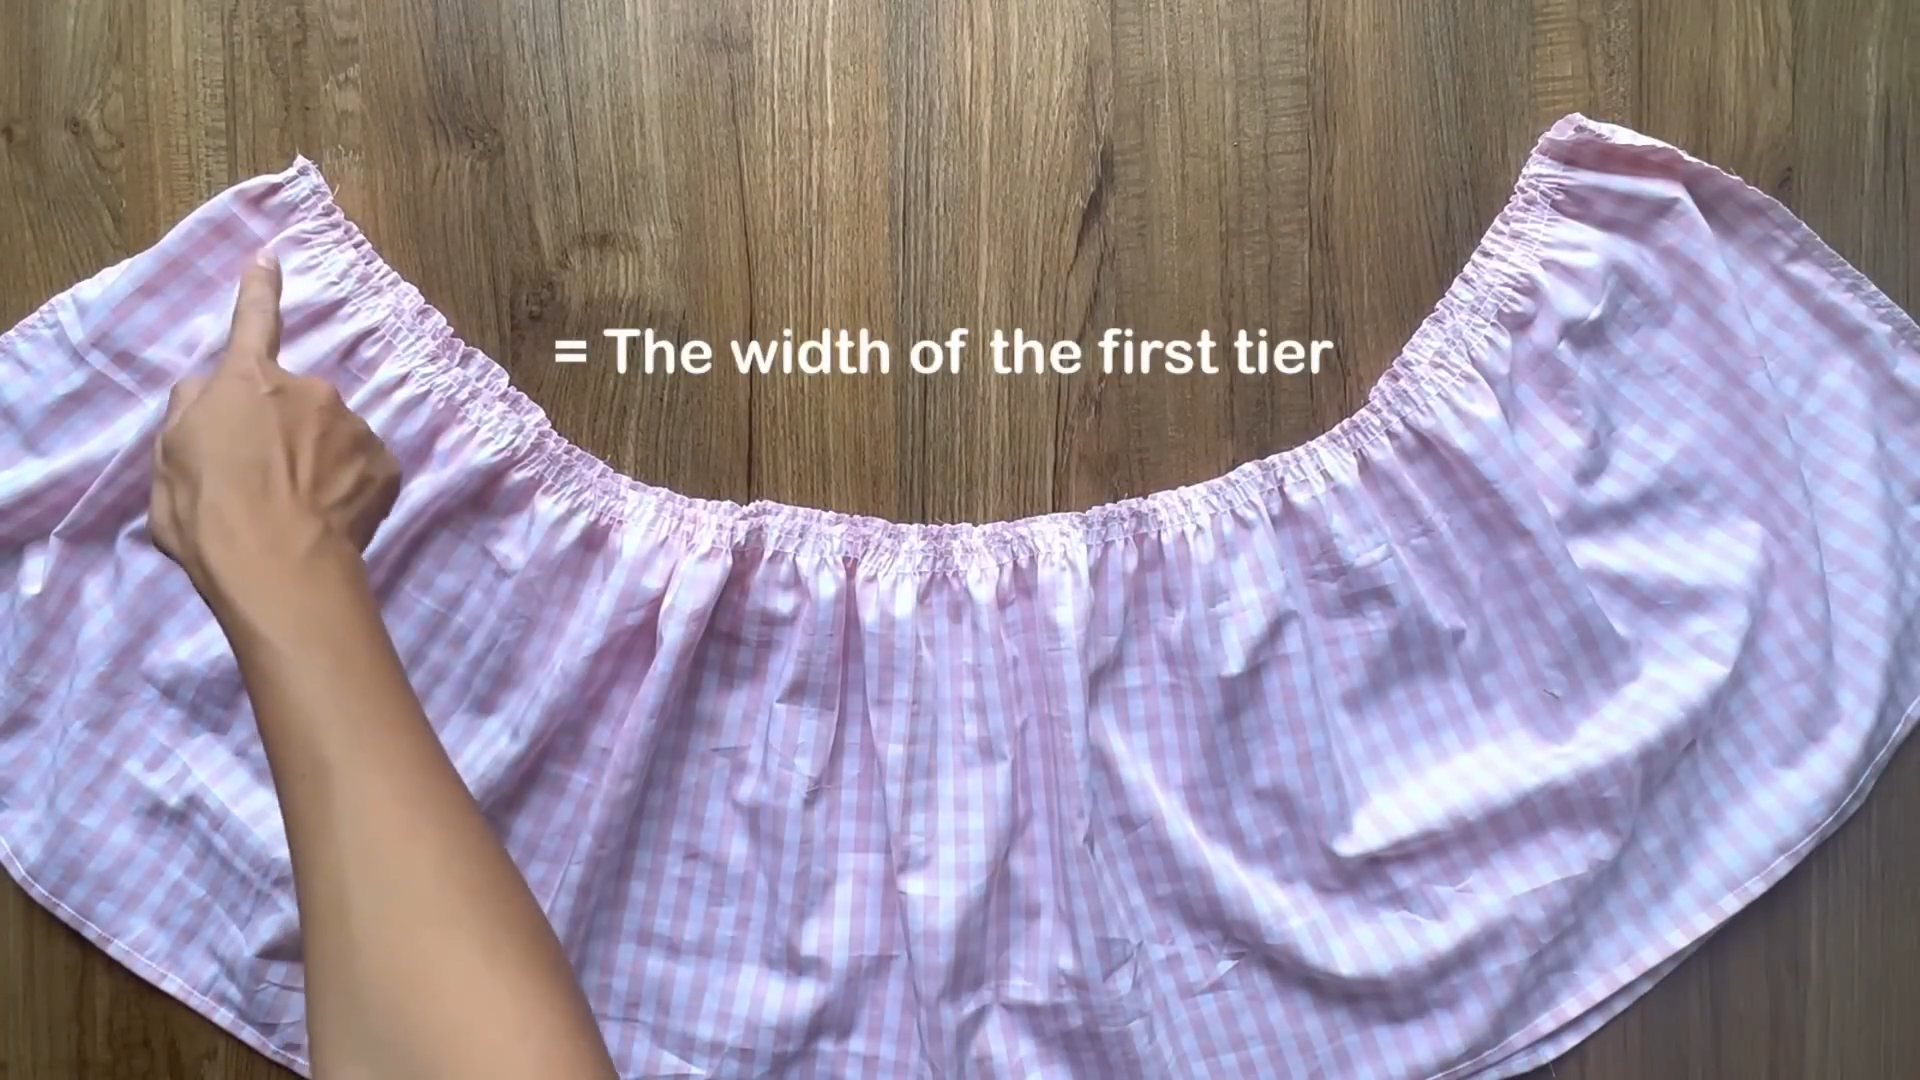
Adjust the gathering until the width matches that of the first tier.
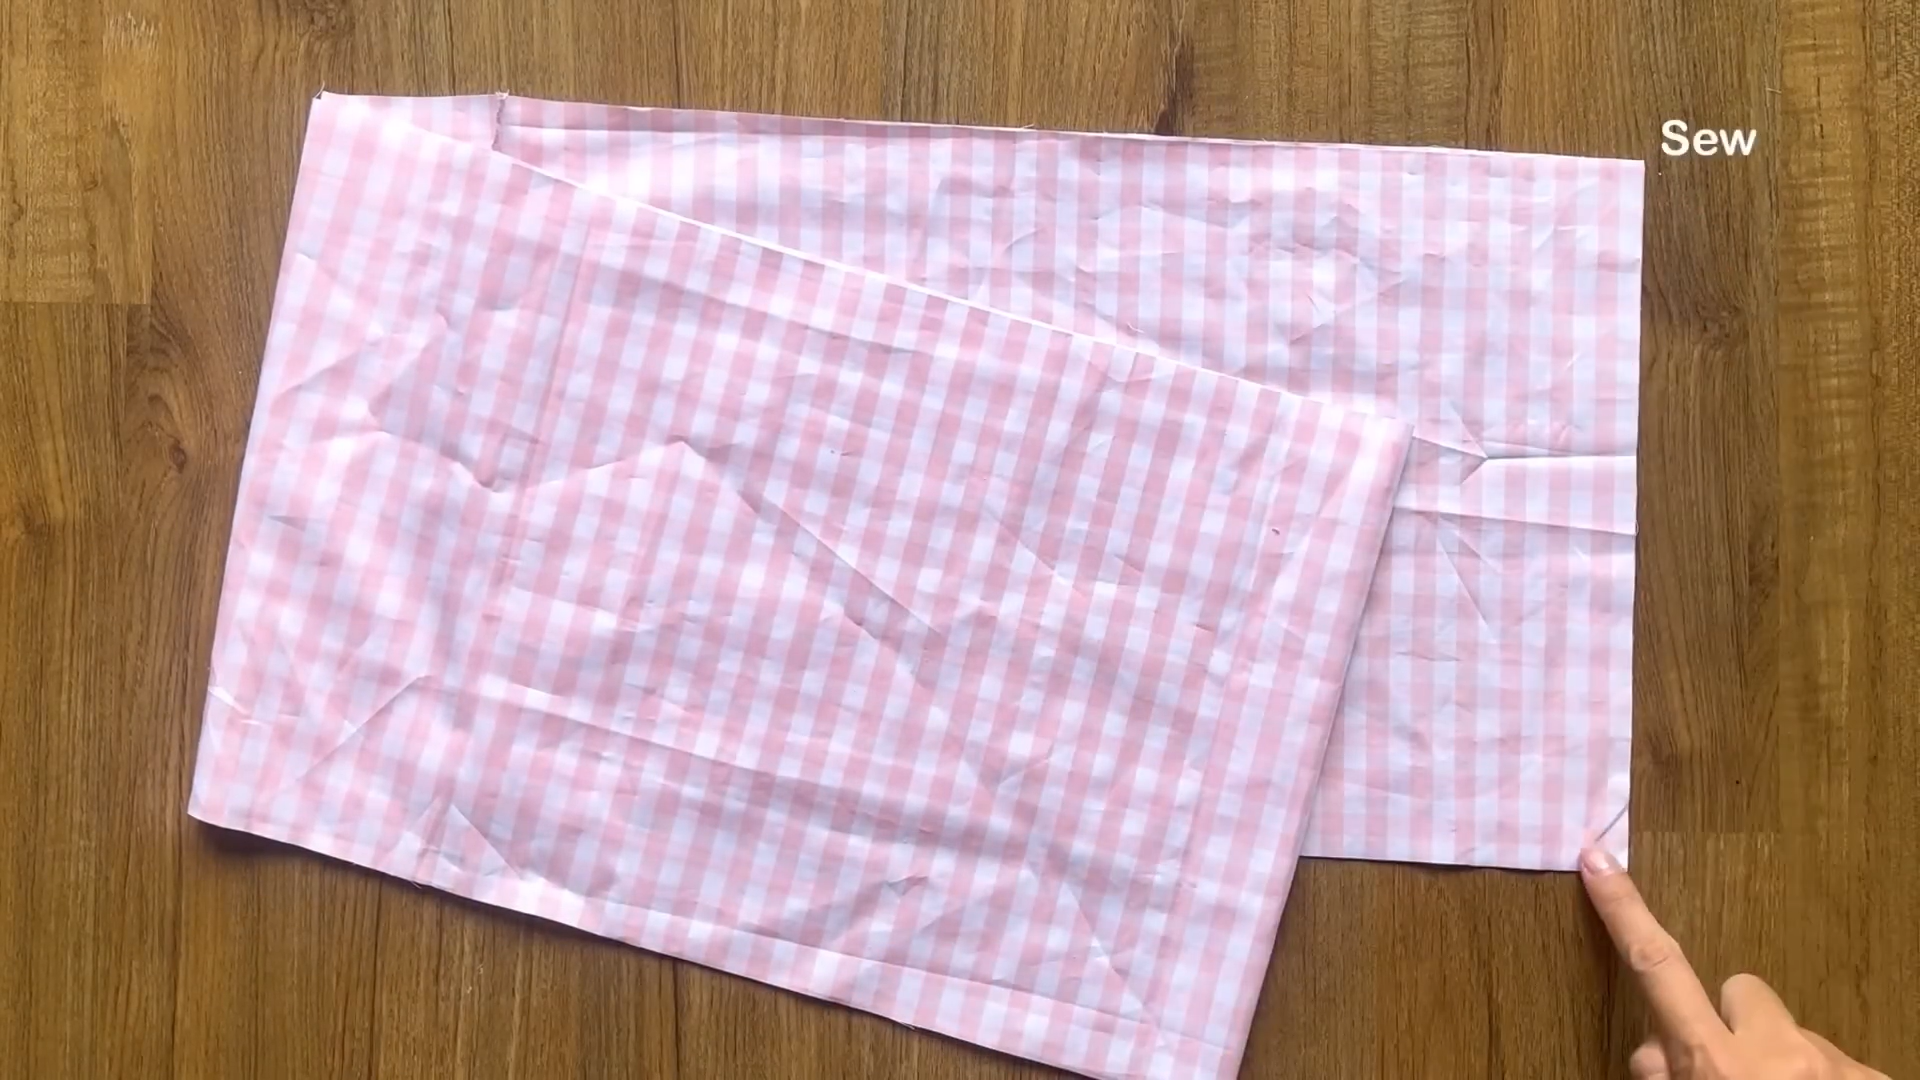
Cut out another two rectangles of fabric for the first tier.
Sew the length lines of the rectangles together.
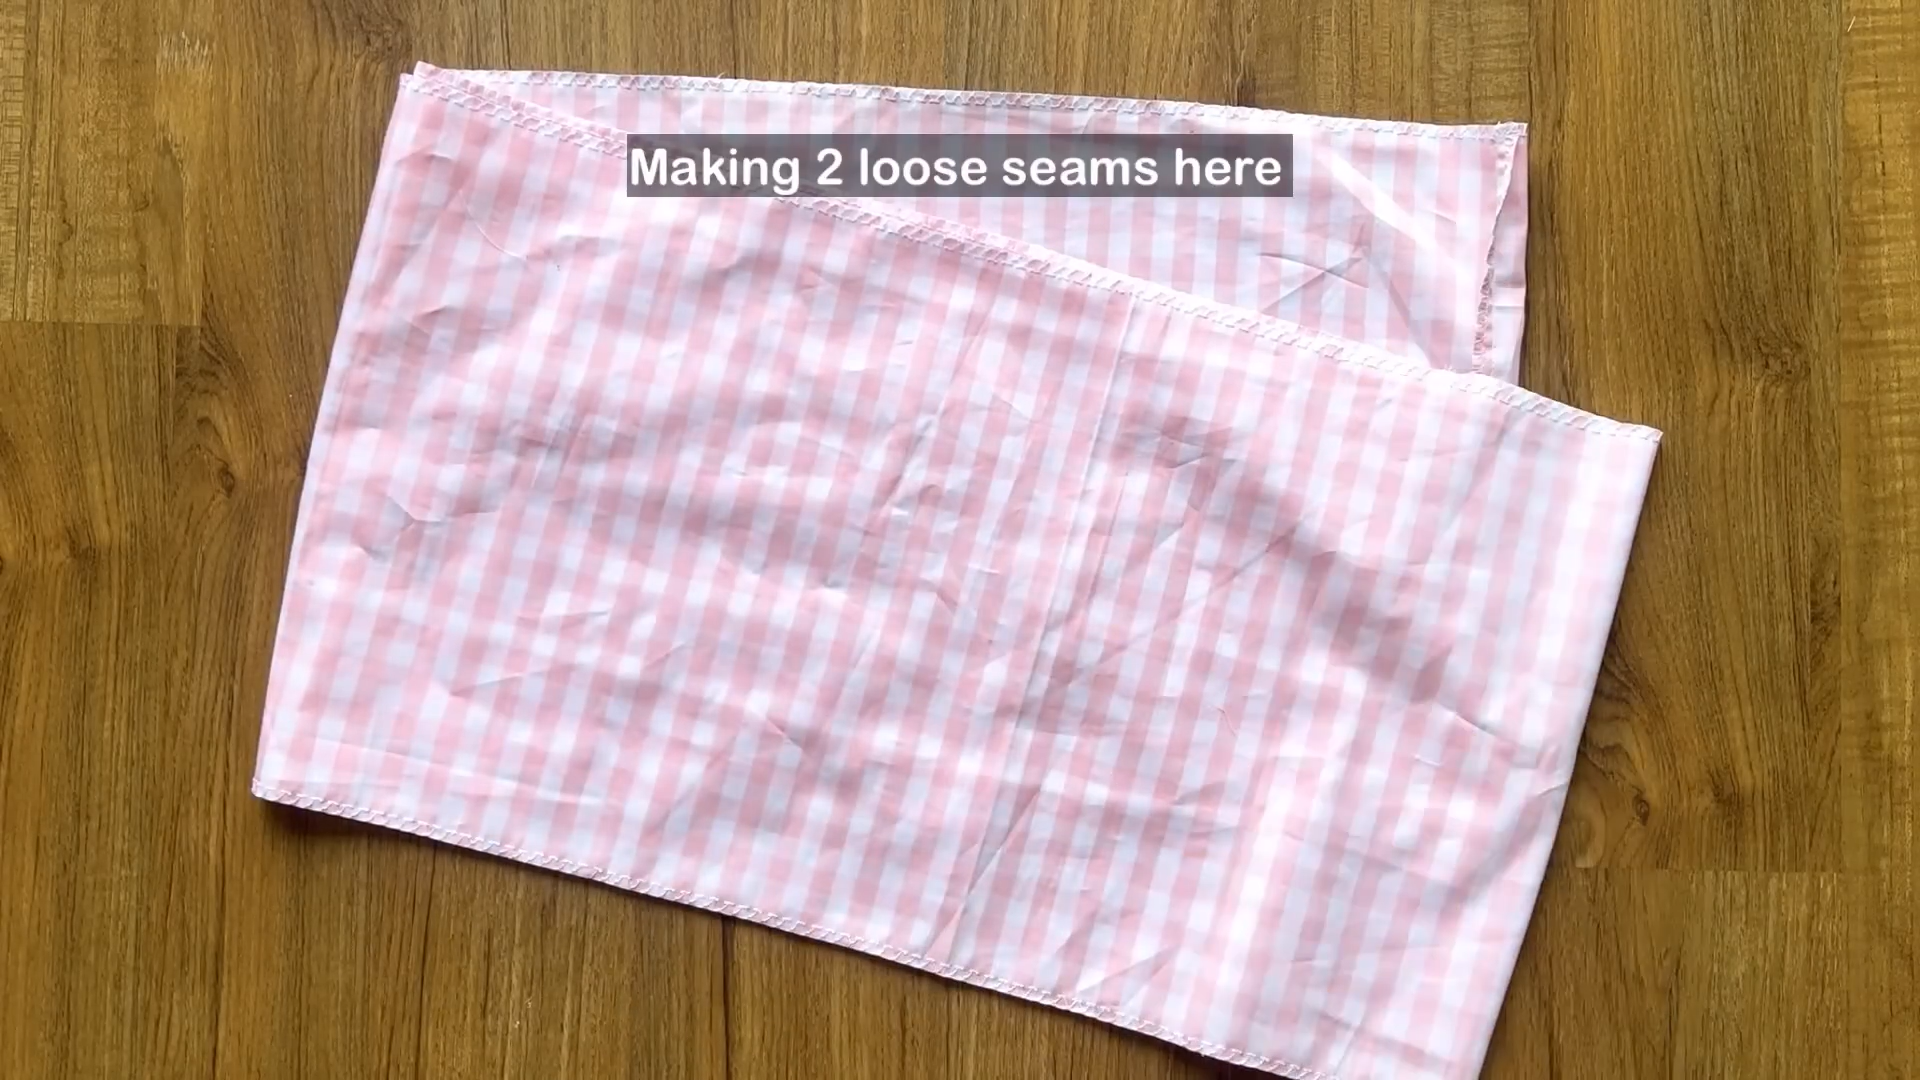
Make two loose seams at one side of the circle fabric.
Pull the threads from these seams to gather the fabric.
Make sure the gathering width match that of the bodice part.
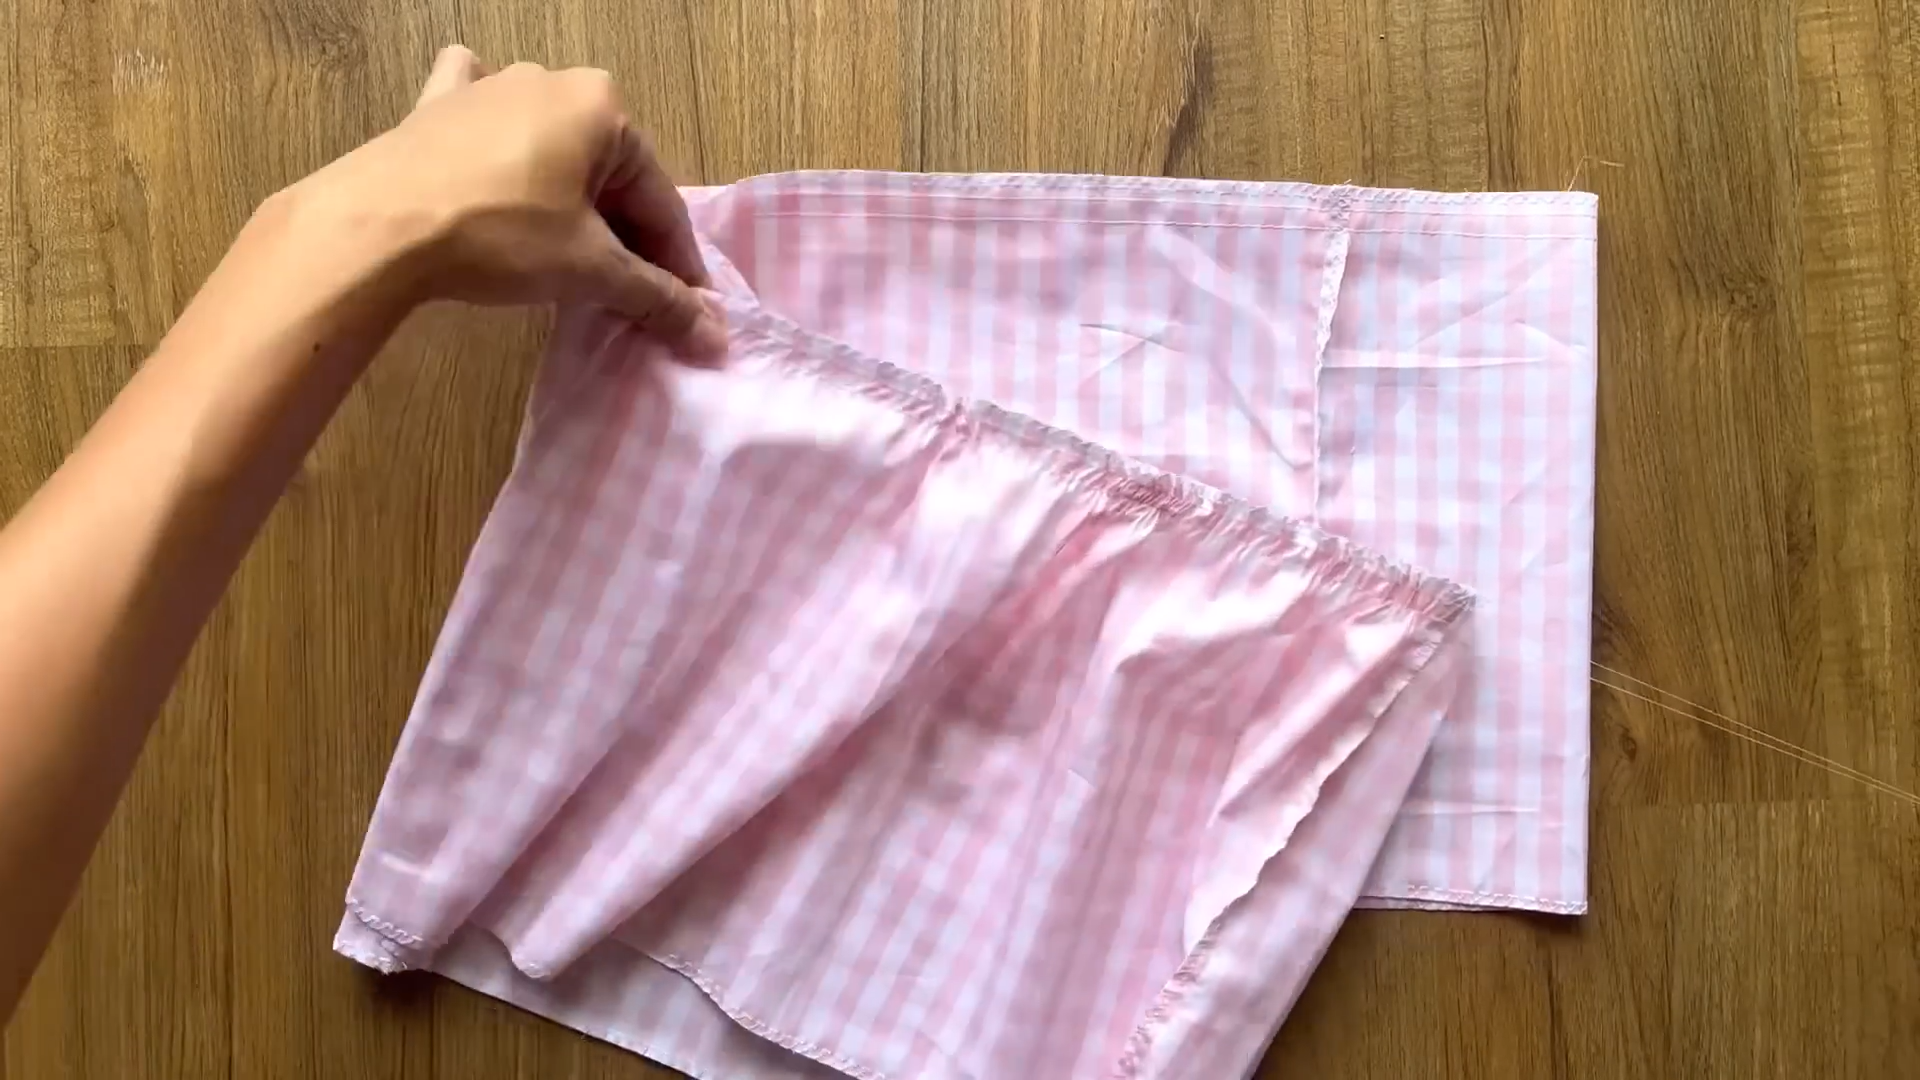
Connect the second tier to the first tier, aligning the edges and stitch them together
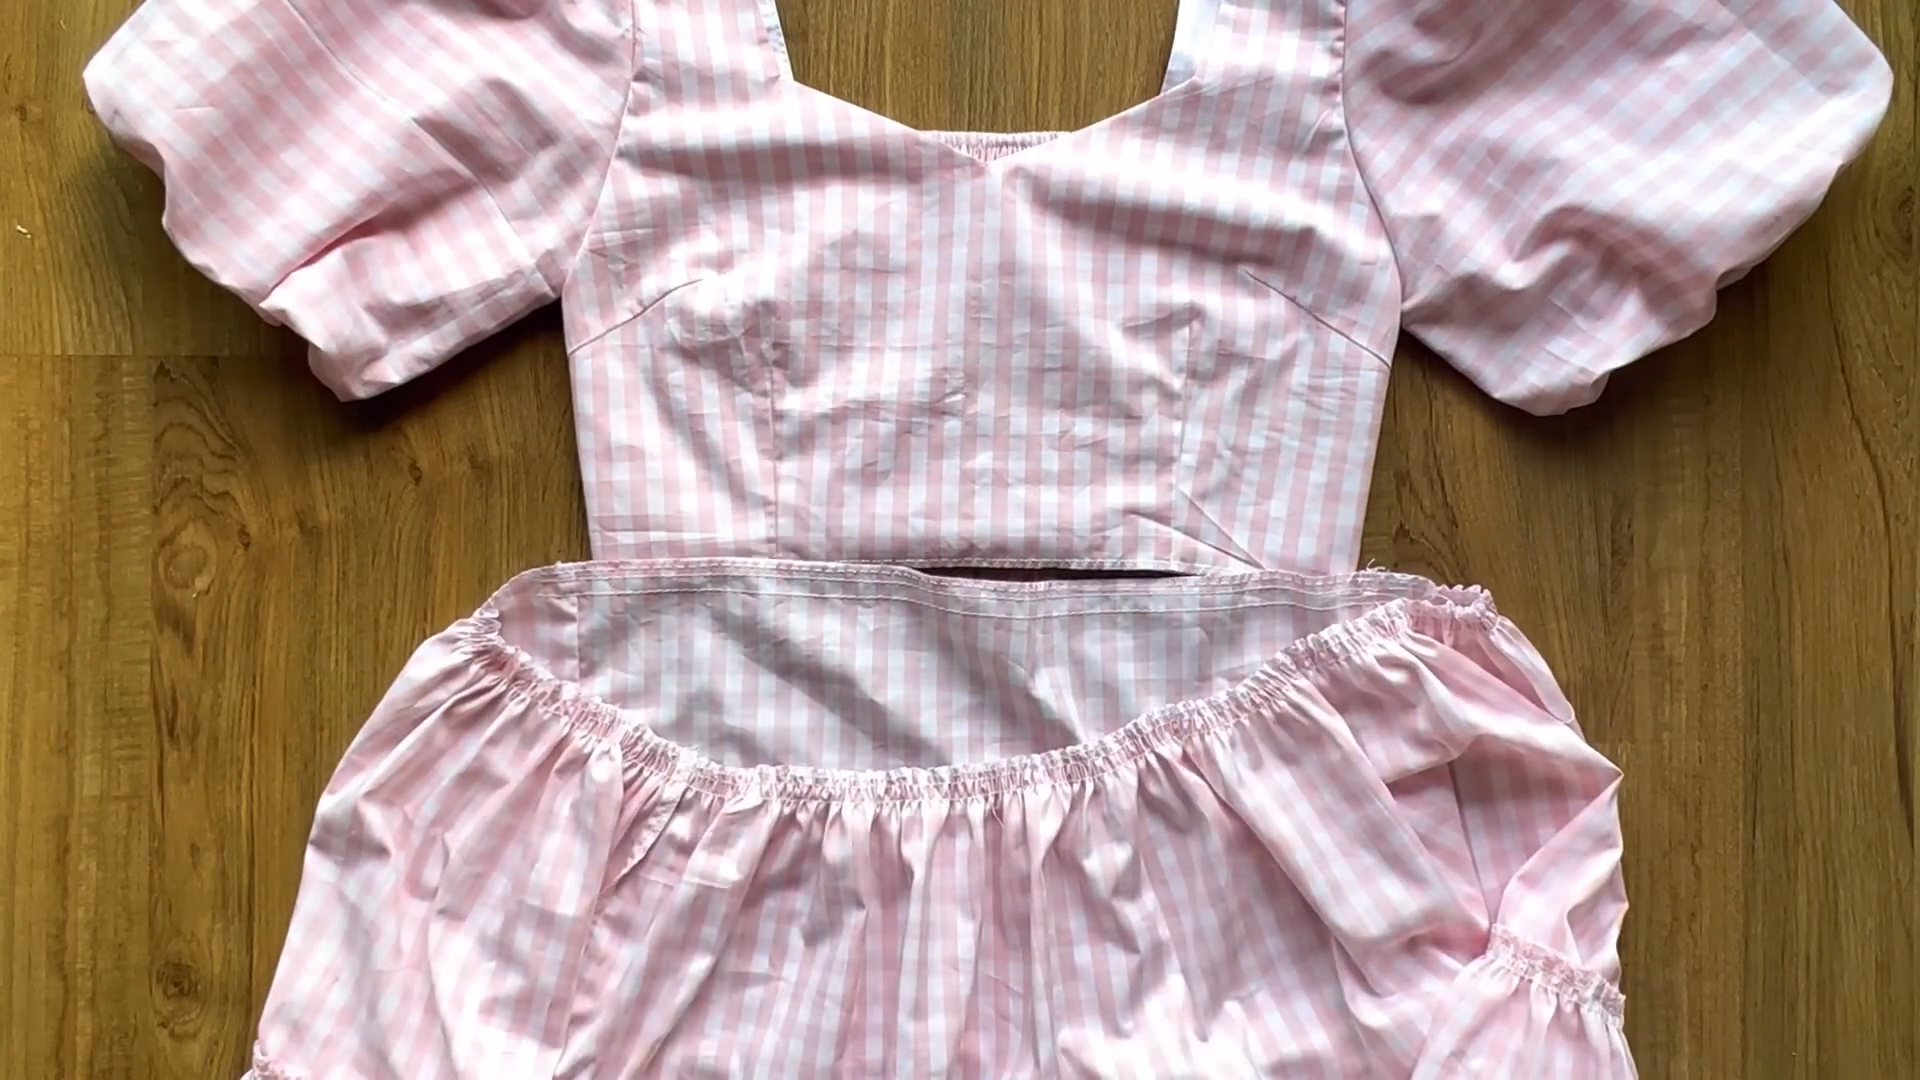
Sew the skirt to the top part to finish the dress.

DIY Barbie inspired dress in the Cottage style
There you have it!
The combination of cute and cozy is what makes this dress truly special. As you slip into your new creation, imagine the soft thread embracing you like a warm hug. Whether you’re sipping tea by the window or twirling in the garden, this piece will be your faithful companion.
I hope you found my step-by-step guide helpful and inspiring. If you’re interested in making your own waistcoat, give it a try and let me know how it goes!
Until then, happy sewing!