DIY Classic puff sleeve dress | Step by step sewing tutorial

DIY Classic puff sleeve dress
Welcome or welcome back to my channel!
It's my birthday month, and you know what that means? Time to treat myself... by sewing something amazing!
Who doesn't love a classic? Today, we're diving into the world of timeless fashion with a DIY puff sleeve dress! This versatile piece is perfect for any occasion, from a casual day out to a dressier event. With its flattering midi length and comfortable fit, you'll find yourself reaching for this dress again and again.
So, let’s get started!
WHAT YOU’LL NEED
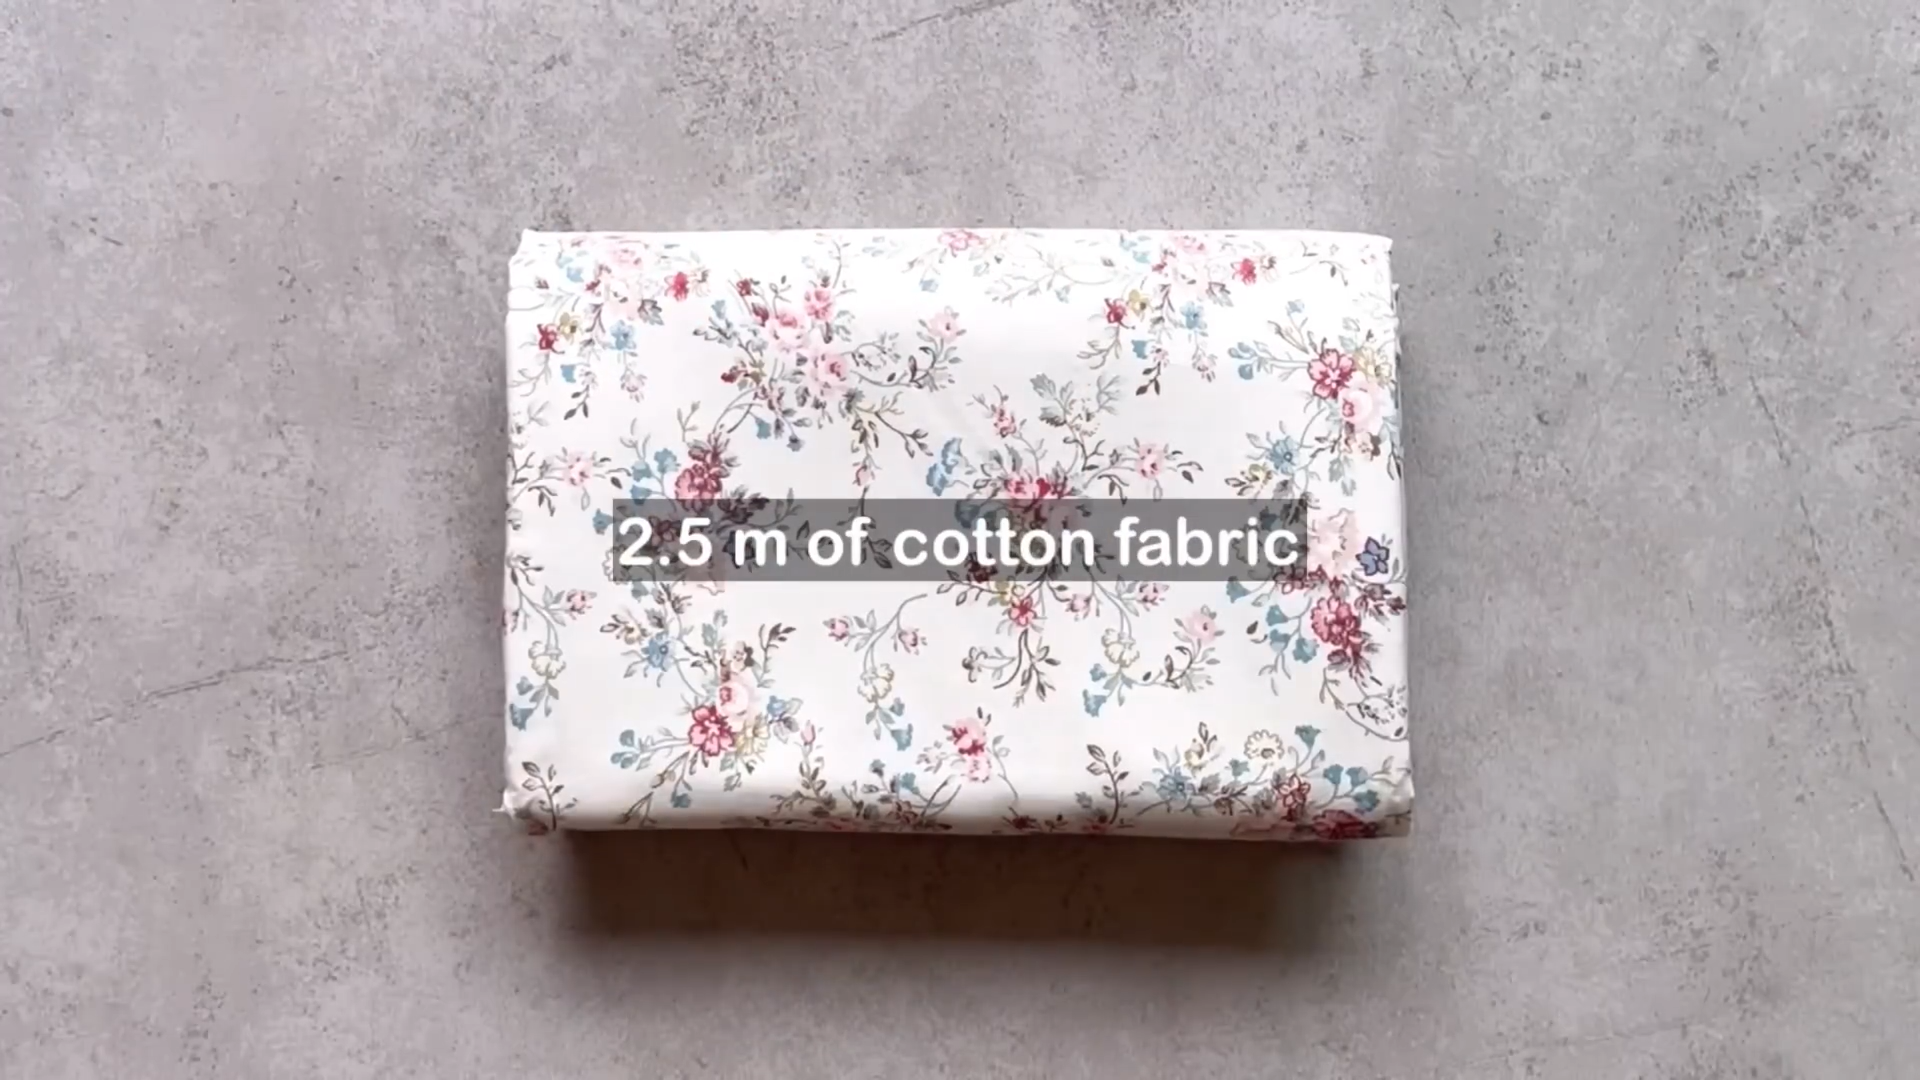
2.5m of cotton fabric in floral printing
Pattern paper
Sewing machine
Pins
Scissors
Ruler
Long stick
MAKING THE PATTERNS
Here’s the pattern for the project. To get a clear understanding of all the measurements needed for the pattern, watch the video from 0:30 to 7:30.
Remember, you can adjust these measurements to fit your own dimensions!

THE FRONT BODICE PATTERN

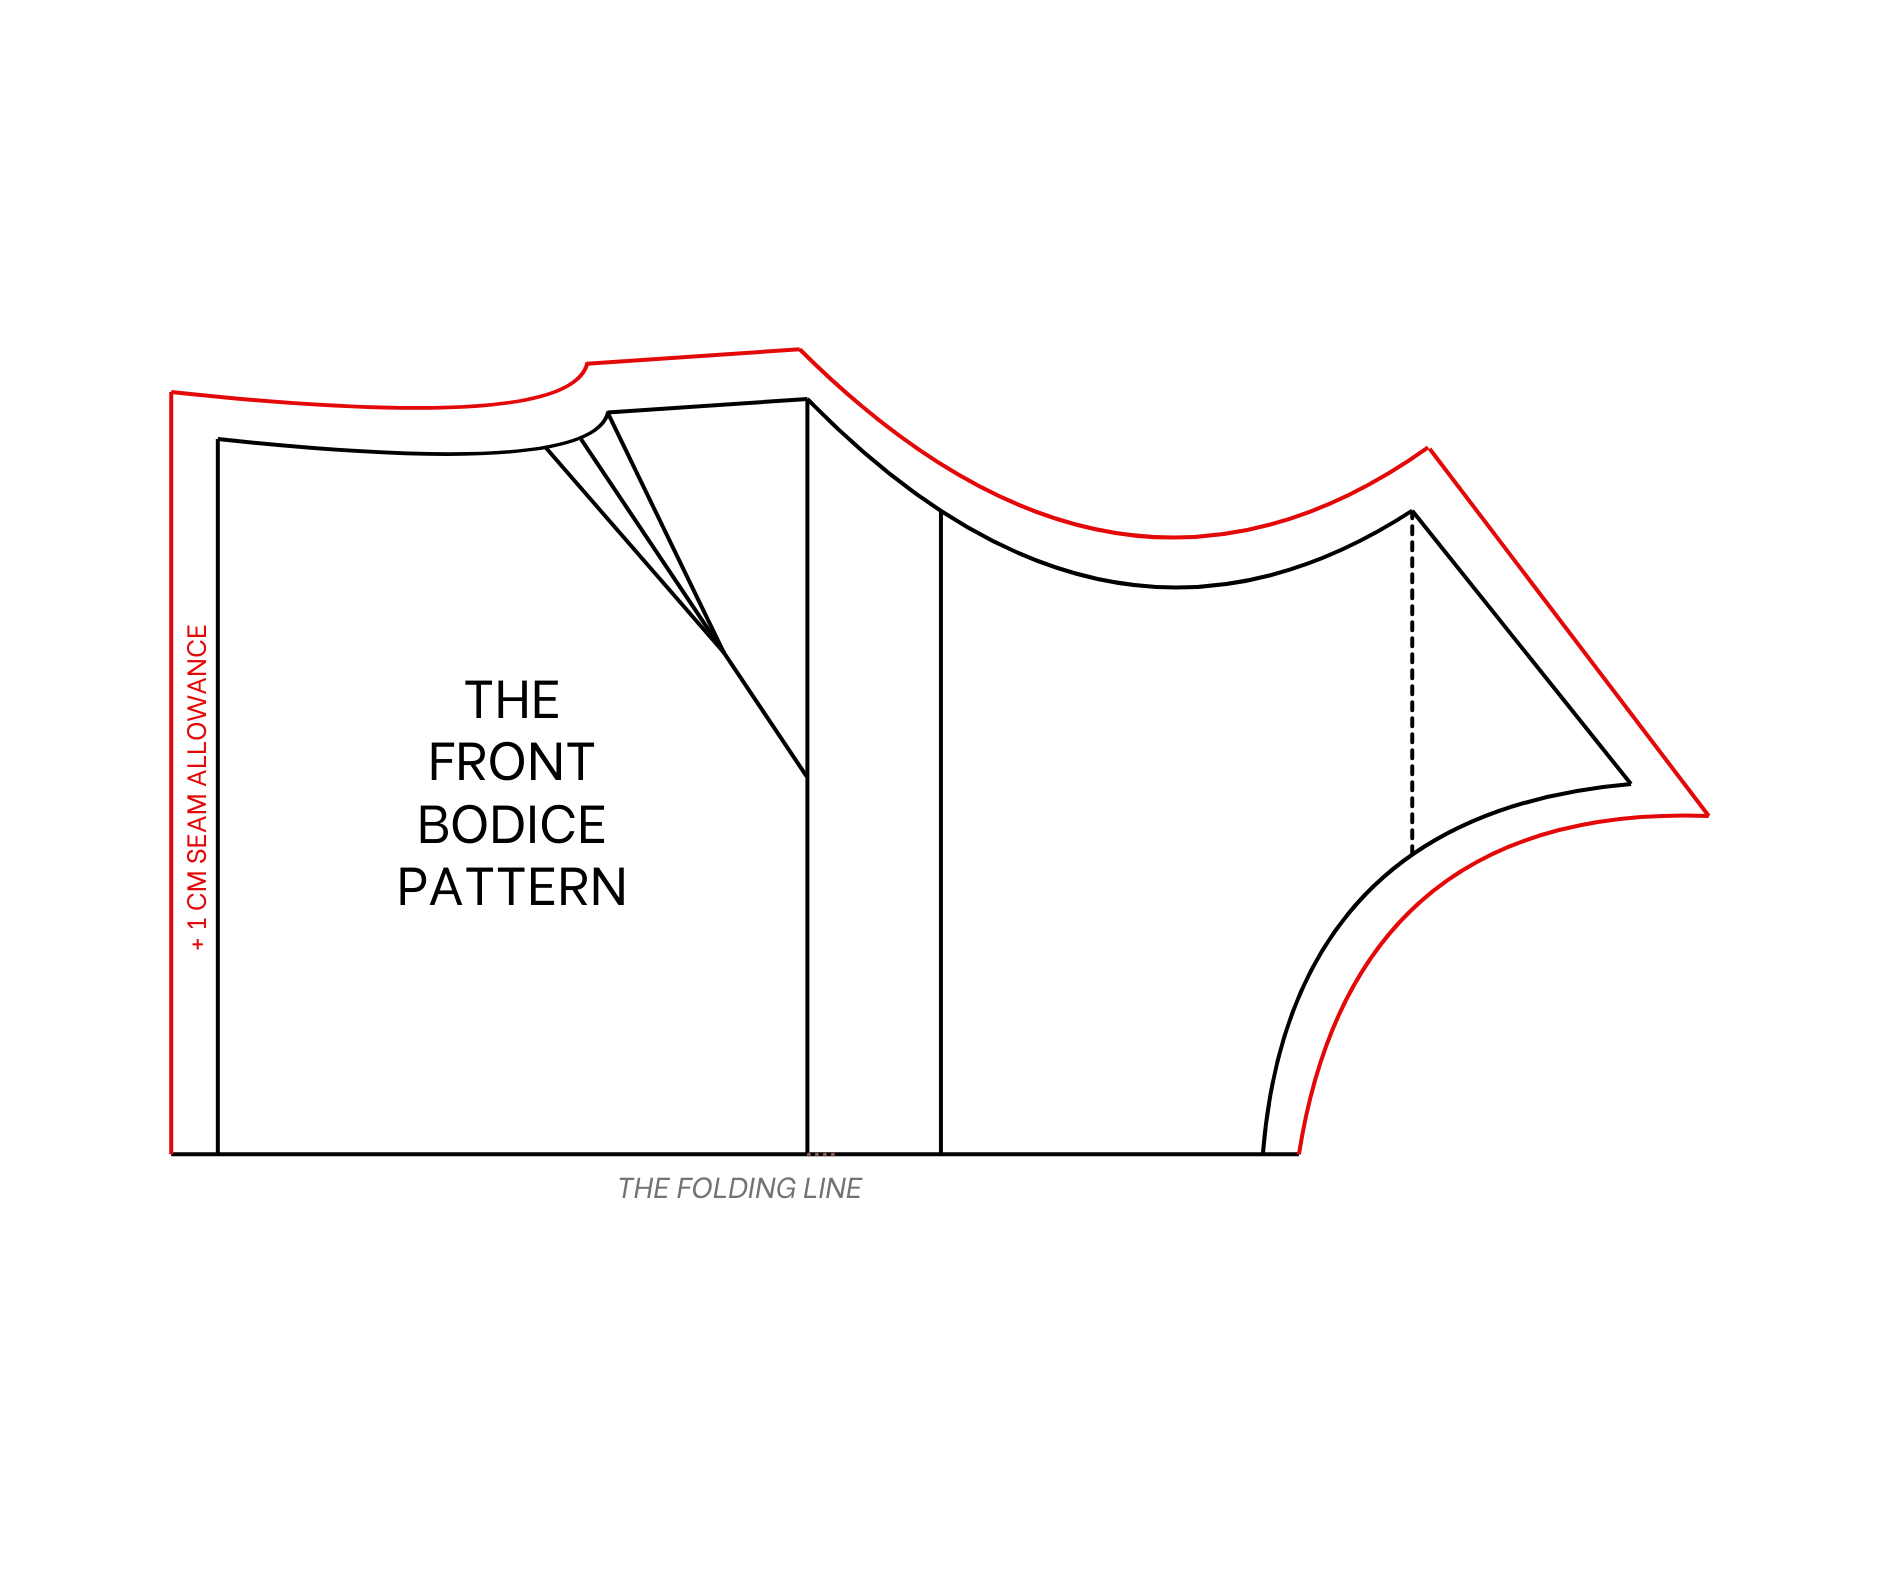
The front bodice pattern
To make the bodice part, draw a horizontal line and a straight line cutting each other at one point. From the straight line, make another line 2 cm next to it.
On this line, mark up 10 cm which is a half of the neck size. After that, mark on the horizontal line 9 cm which is the depth of the neck that you want then connect two marks together. Based on it, draw a slightly curved line to finish the neckline of the dress.
On the second straight line, make another mark at 16 cm, which is a half of your shoulder size, then draw a perpendicular line from that mark. The length of this line will be 3.2 centimeters which is one per 10 your shoulder size.
Then connect the end of this line to the end of the neckline to finish the shoulder line of the dress. Because of the new shoulder line, redraw the neckline a bit.
After drawing a straight line from the end of the shoulder line, draw another straight line 16 cm next to it, it's one per five your bust size. From this line, keep drawing another straight line 3 cm away from it, this will be the bust line of the bodice.
On this line, mark up 22 cm which is a quarter of your bust size plus 2 cm, then draw a curved line from this mark to the end of the shoulder line to finish the sleeve line of the bodice.
From the top of the bodice, mark at 38 cm on the horizontal line, it's the length from the shoulder to 3 cm above the belly button, it's also the length of the bodice that you want. Then draw a straight line from that mark.
On this line, mark up 21 cm which is a quarter of your bust size plus 1 cm then connect this mark to the end of the sleeve line to create the sideline of the bodice.
To make the dart for the bust at the front bodice, mark down 6 cm from the top of the sideline. After that, connect this mark to the middle of the bust line.
On this line, mark at 9 cm which is 3 cm under the bust line. At the end of this line, mark two sides 1 cm on the sideline first then connect these marks to the mark you've just made before that to finish the dart.
Because of the dart, the sideline will be changed a little bit. Fold the dark in to redraw the new sideline for the front bodice.
Add 1 cm for seam allowance before cutting and you will have the front bodice pattern. Remember to cut it in full fabric.
THE BACK BODICE PATTERN


The back bodice pattern
To make the back bodice, copy the front bodice pattern first.
After that, make the sleeve line a bit bigger for the back bodice. Then move the depth of the neck a bit shorter for the back compared to the front.
Also redraw the sideline of the back bodice as well. Make sure the length of the sideline at the front and the back will be the same so you can connect them together when sewing.
Check the final length from the front bodice first then measure and mark on the back bodice later. Because of that the ending line of the back bodice will be changed a bit, too.
Add 1 cm extra for seam allowance at the folding line of the pattern because the back will be made from two pieces.
You will have the back bodice pattern after cutting. You will need to cut two pieces for this pattern.
THE SLEEVE PATTERN


The sleeve pattern
Draw a rectangle with 30 cm width, which is a half of the width of the sleeve you want plus 1 cm for seam allowance, and 45 cm length, which is the length from the shoulder to your elbow plus 2 cm for seam allowance. It's also the length of the sleeve want.
From one width line, draw a line 18 cm next to it, it's one per five your bust size plus 2 cm. Then connect one end of this line to one end of the length line at the other side.
This will create a triangle at the top of the sleeve. On the length line of the triangle, divide into three equal parts then draw straight lines based on it. These straight lines will cut the other line of the triangle and divide into three other parts.
At the ending part of this line, mark in the middle first then draw a perpendicular line with one centimeter width after that. From the cutting point on the other two parts, draw a perpendicular line with 2 cm. Then draw a curved line going through these marks to finish the sleeve line of the sleeve.
From the end of the length line of the rectangle, mark up 25 cm on the width line, it's a half of the width at the end of the sleeve plus 1 cm for seam allowance. Then connect this mark to the end of the sleeve line to finish the under armpit line of the sleeve.
You will have the sleeve pattern after cutting. Remember to cut it in full fabric.
THE POCKET PATTERN

The pocket pattern
Draw a rectangle with 20 cm width and 30 cm length.
On one length line, mark in the middle first then draw a curved line from this mark to one end of the other length line.
You will have the pocket pattern after cutting. You will need to cut four pieces of this pattern.
SEWING THE DRESS
THE BODICE
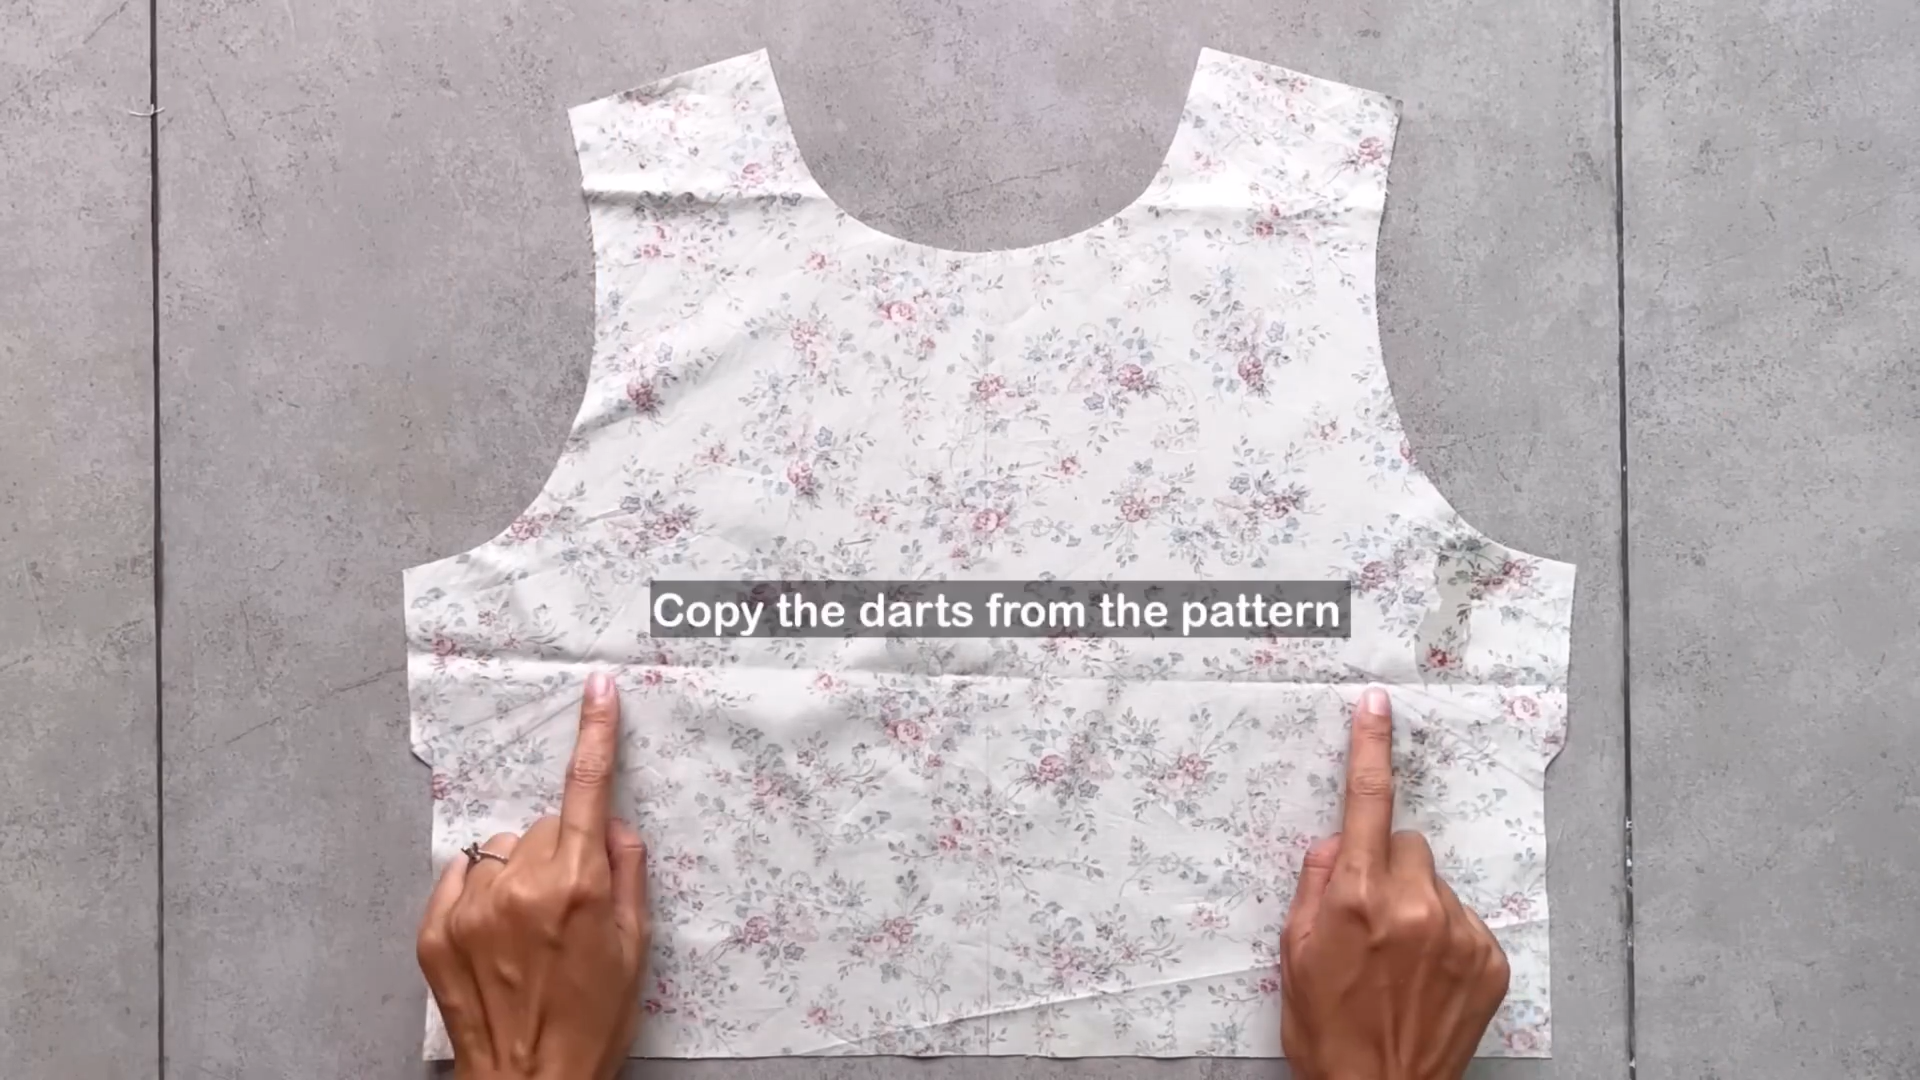
Transfer the dart markings from the pattern to your fabric.
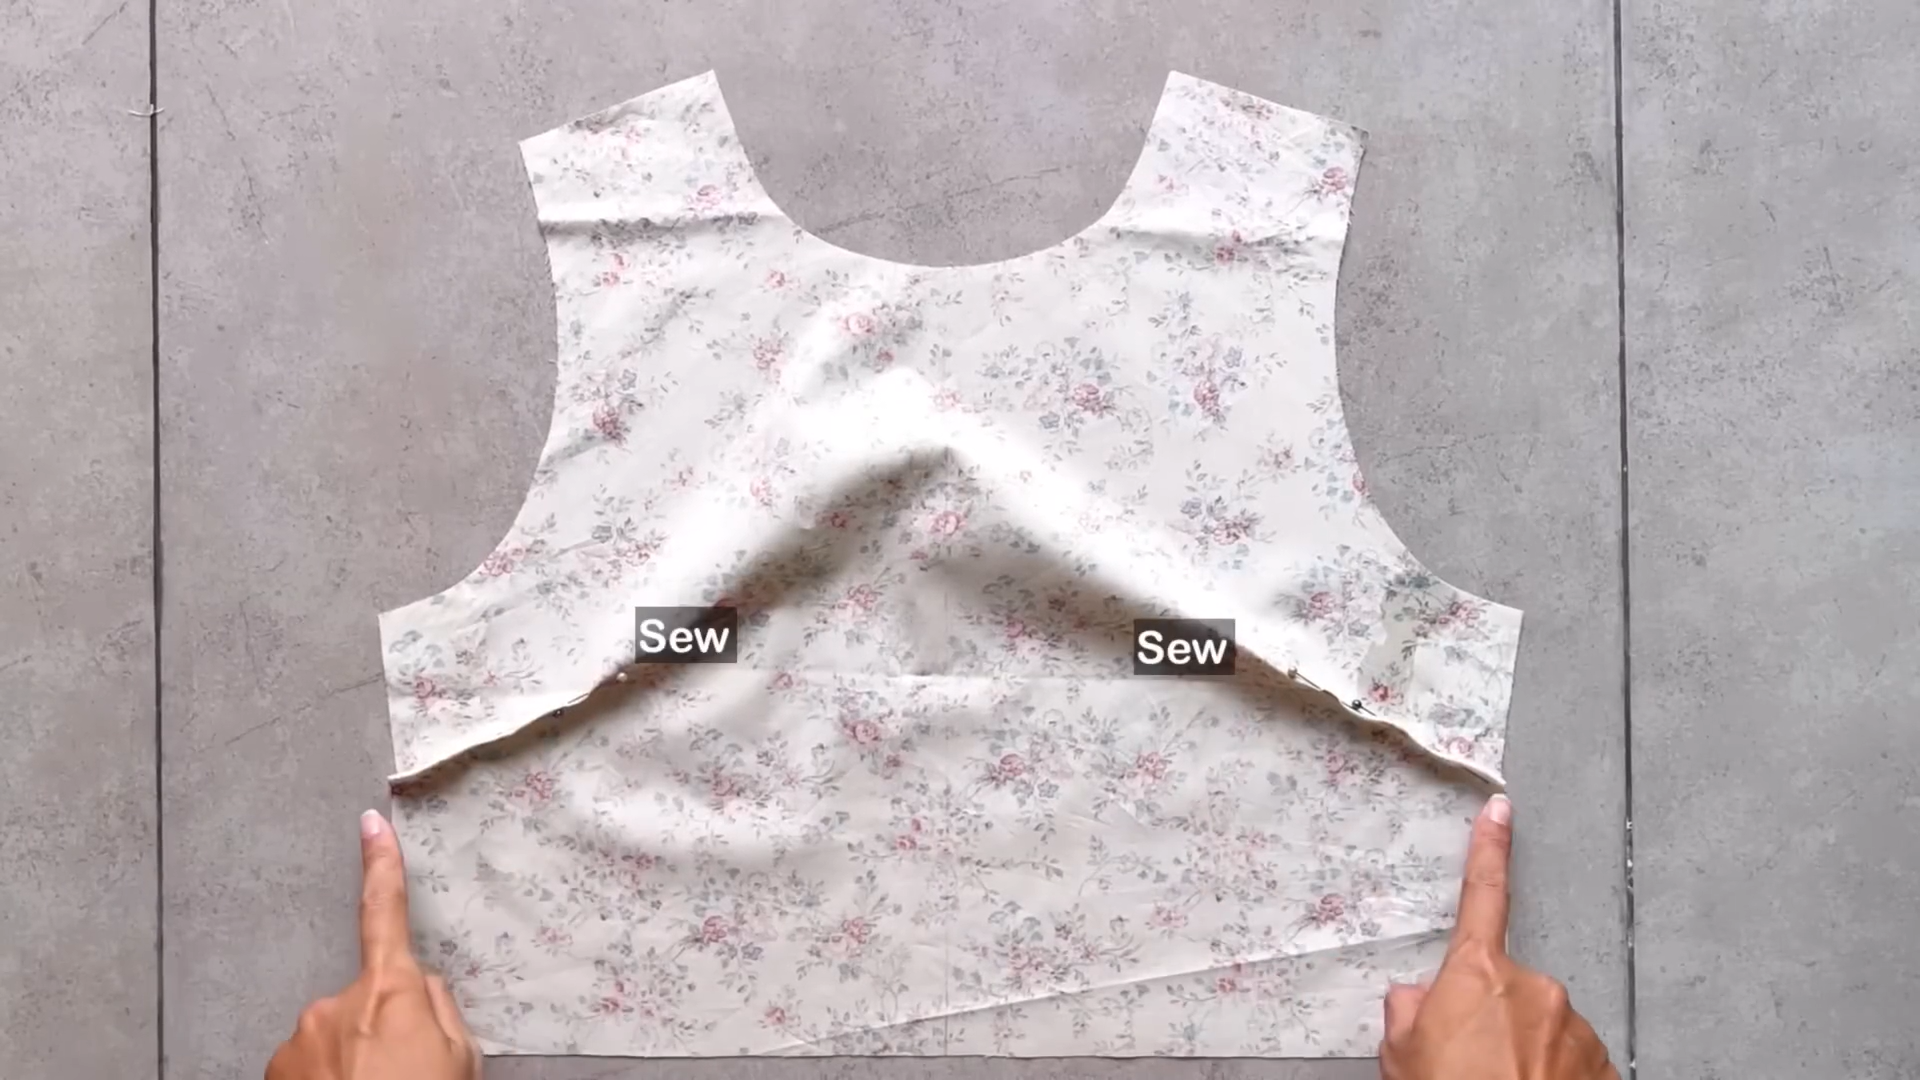
Fold the fabric along these lines and stitch to create the darts.

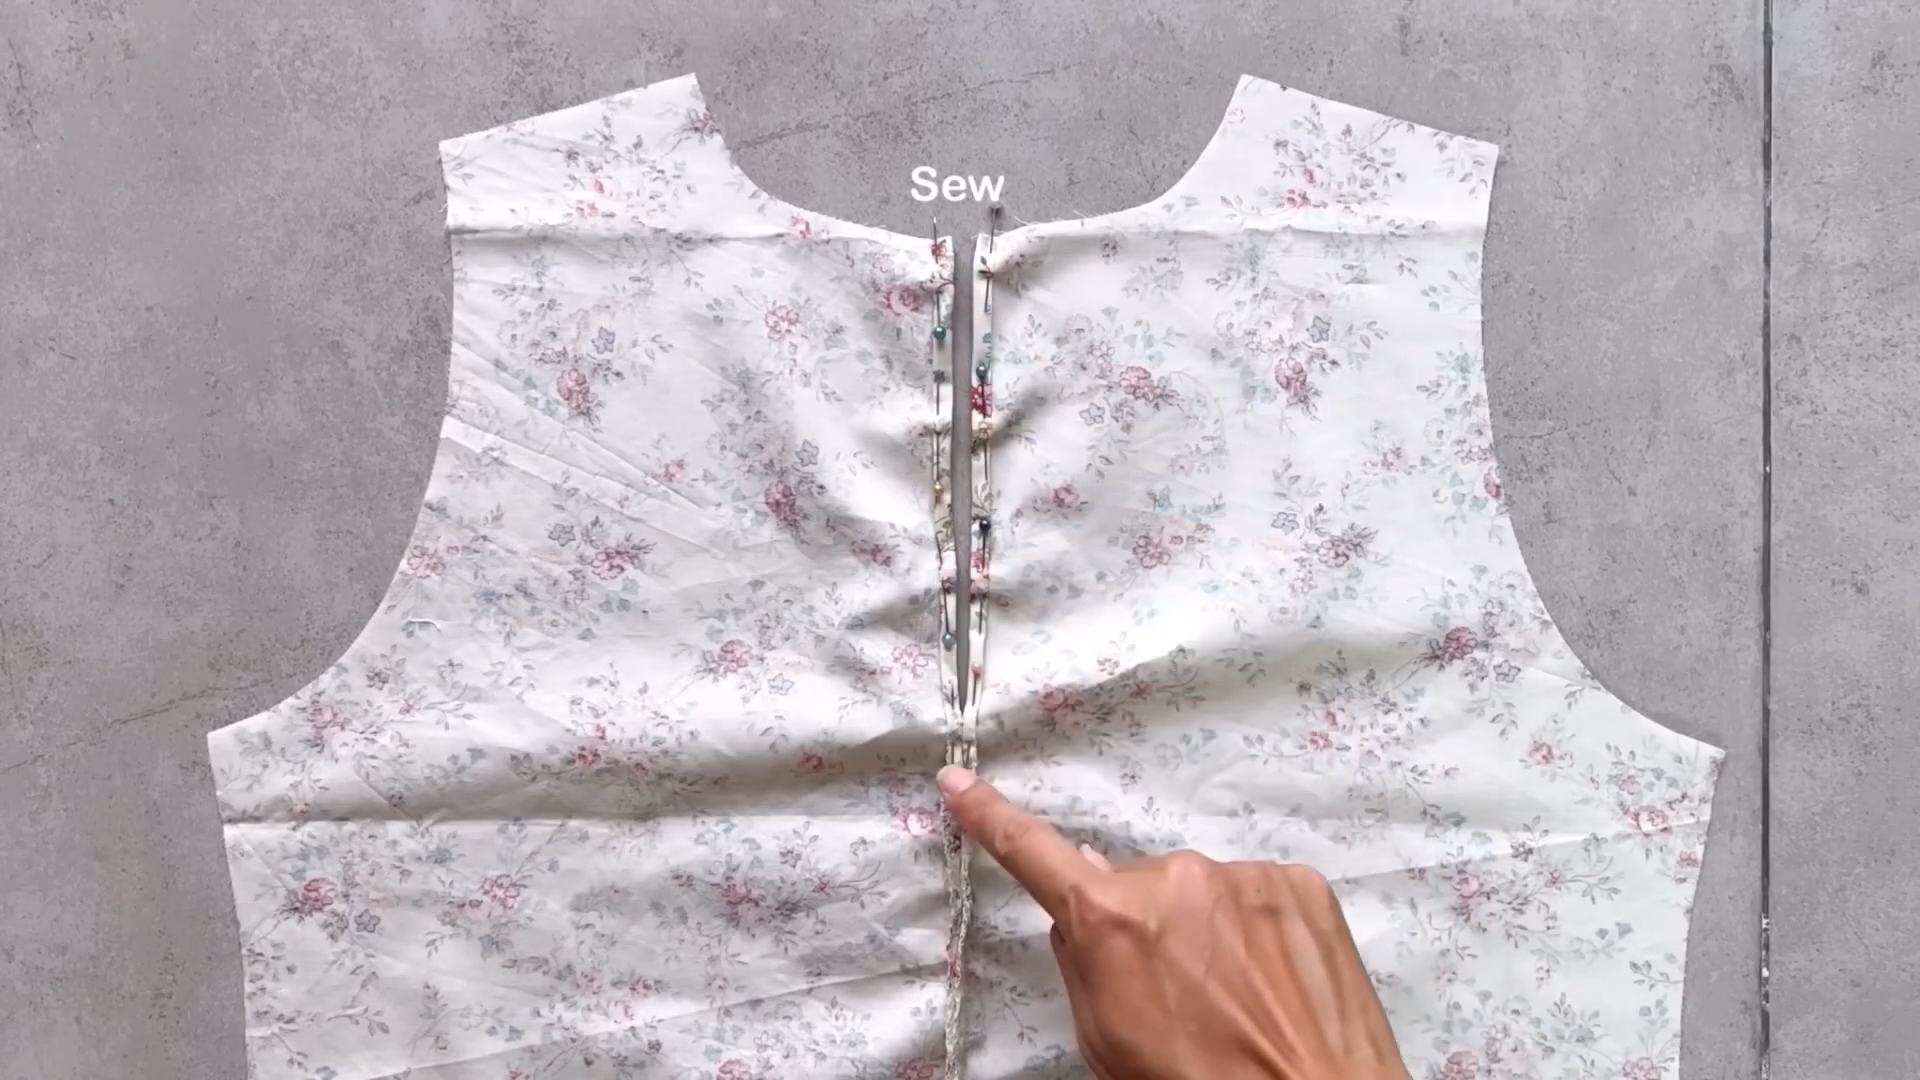
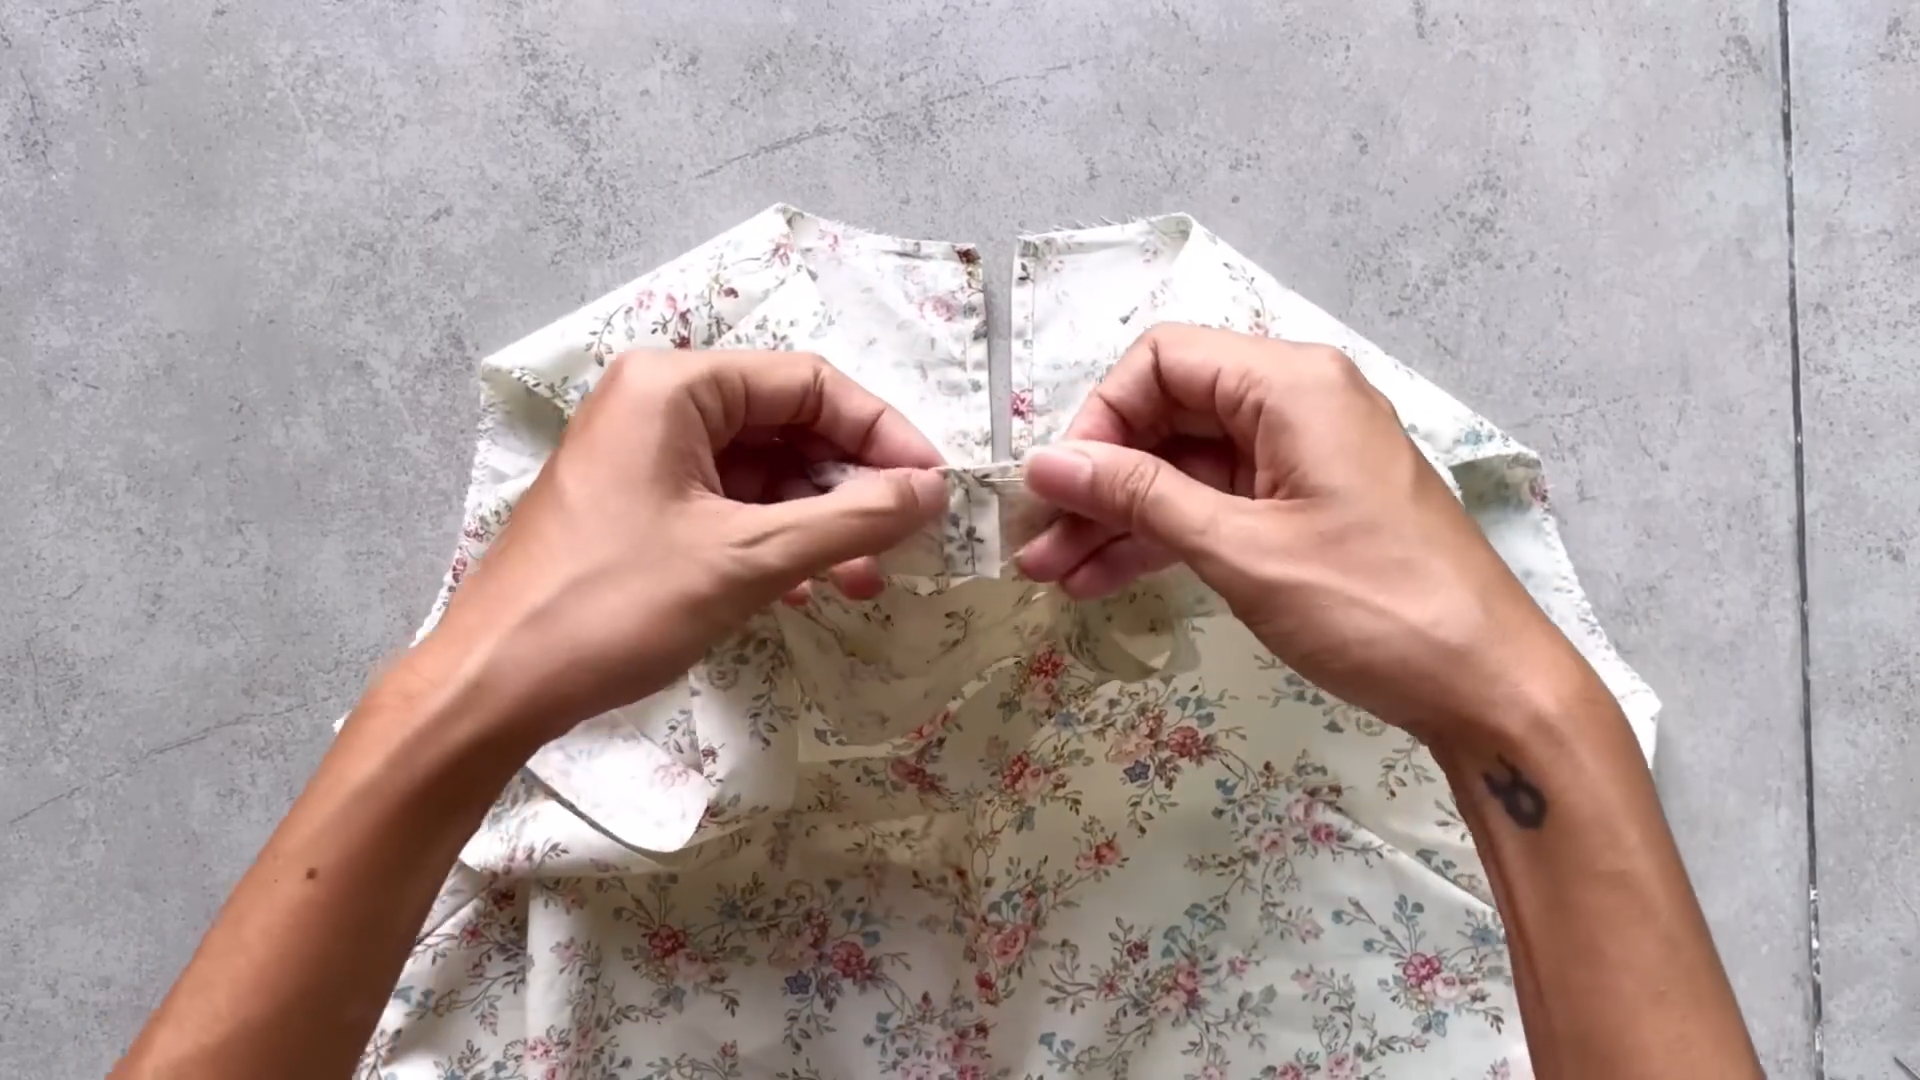
Pin the two back bodice pieces together along the center back seam.

Mark at 15 cm down from the top of the back bodice – this will be the opening for the back neckline.
Sew the remaining portion of the back bodice seam together.
Finish the opening by folding the fabric inwards twice (0.5 cm each fold) and stitching.
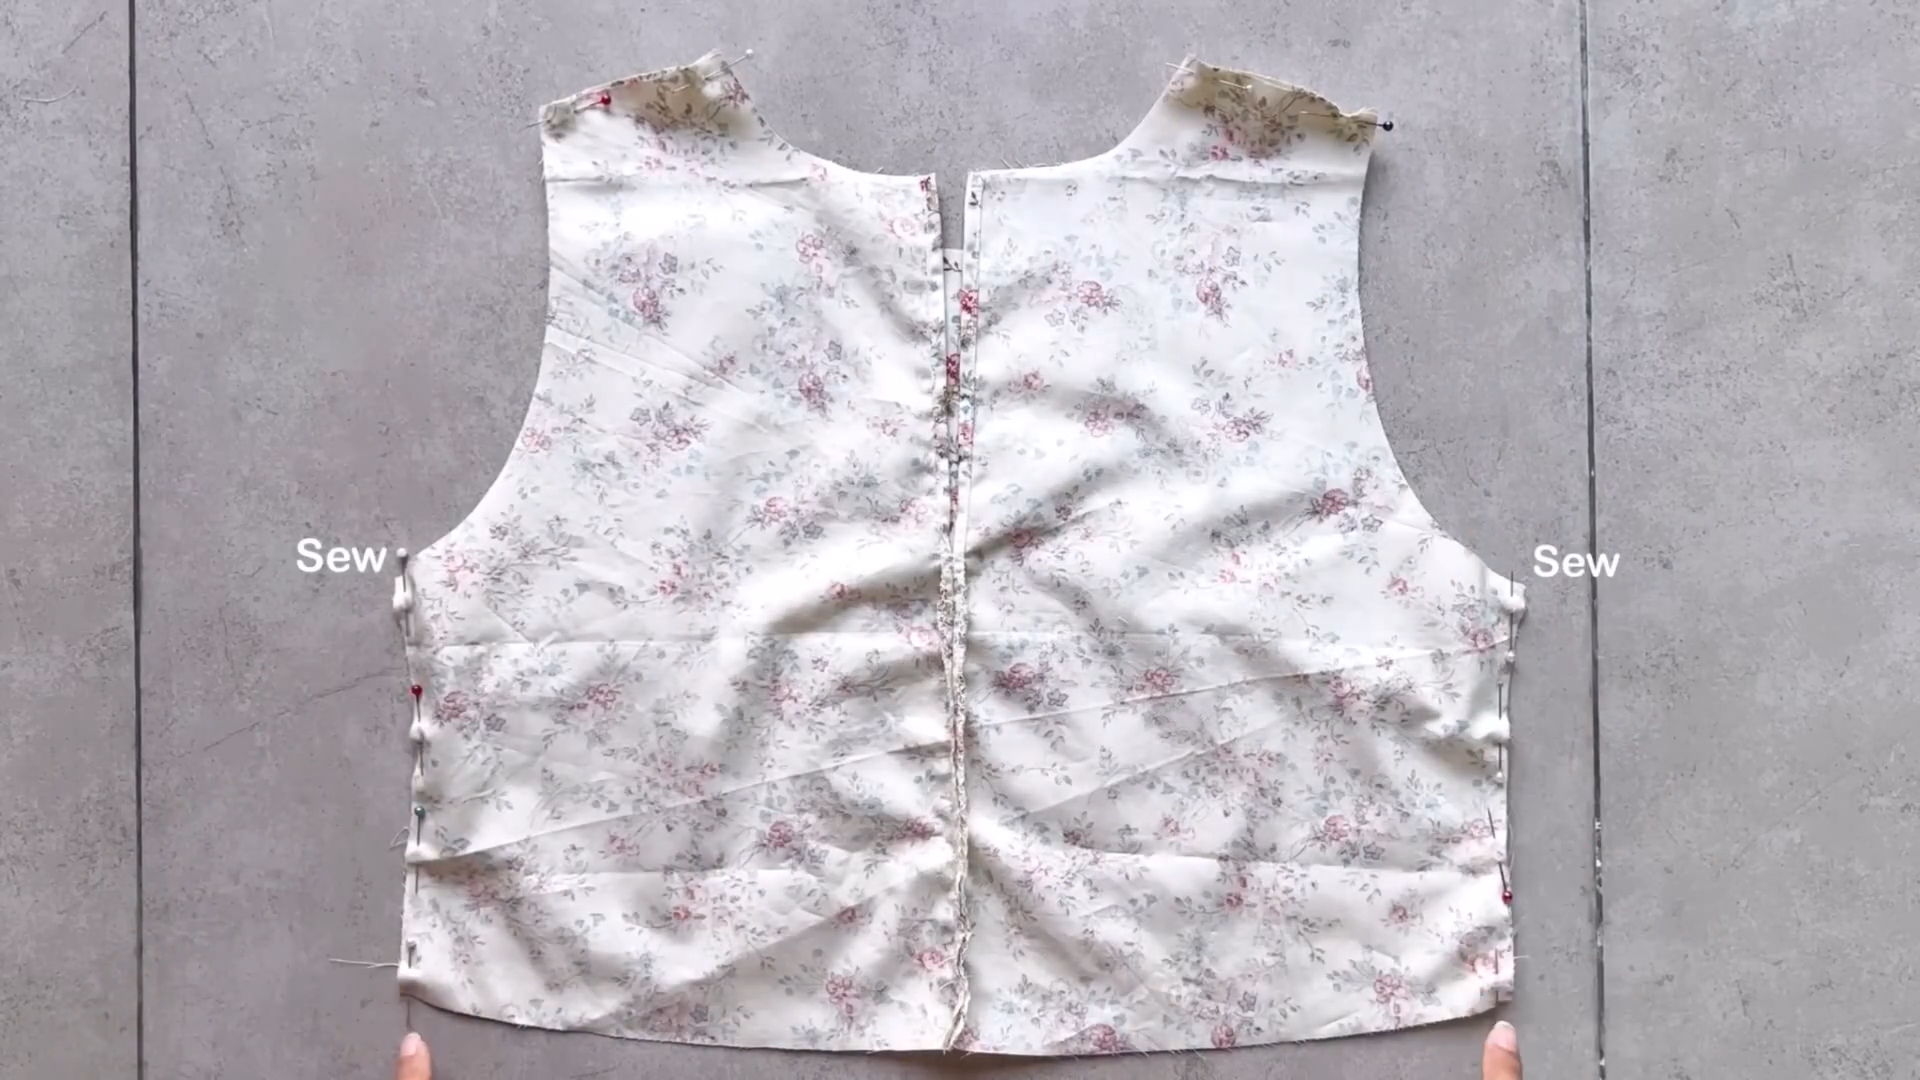
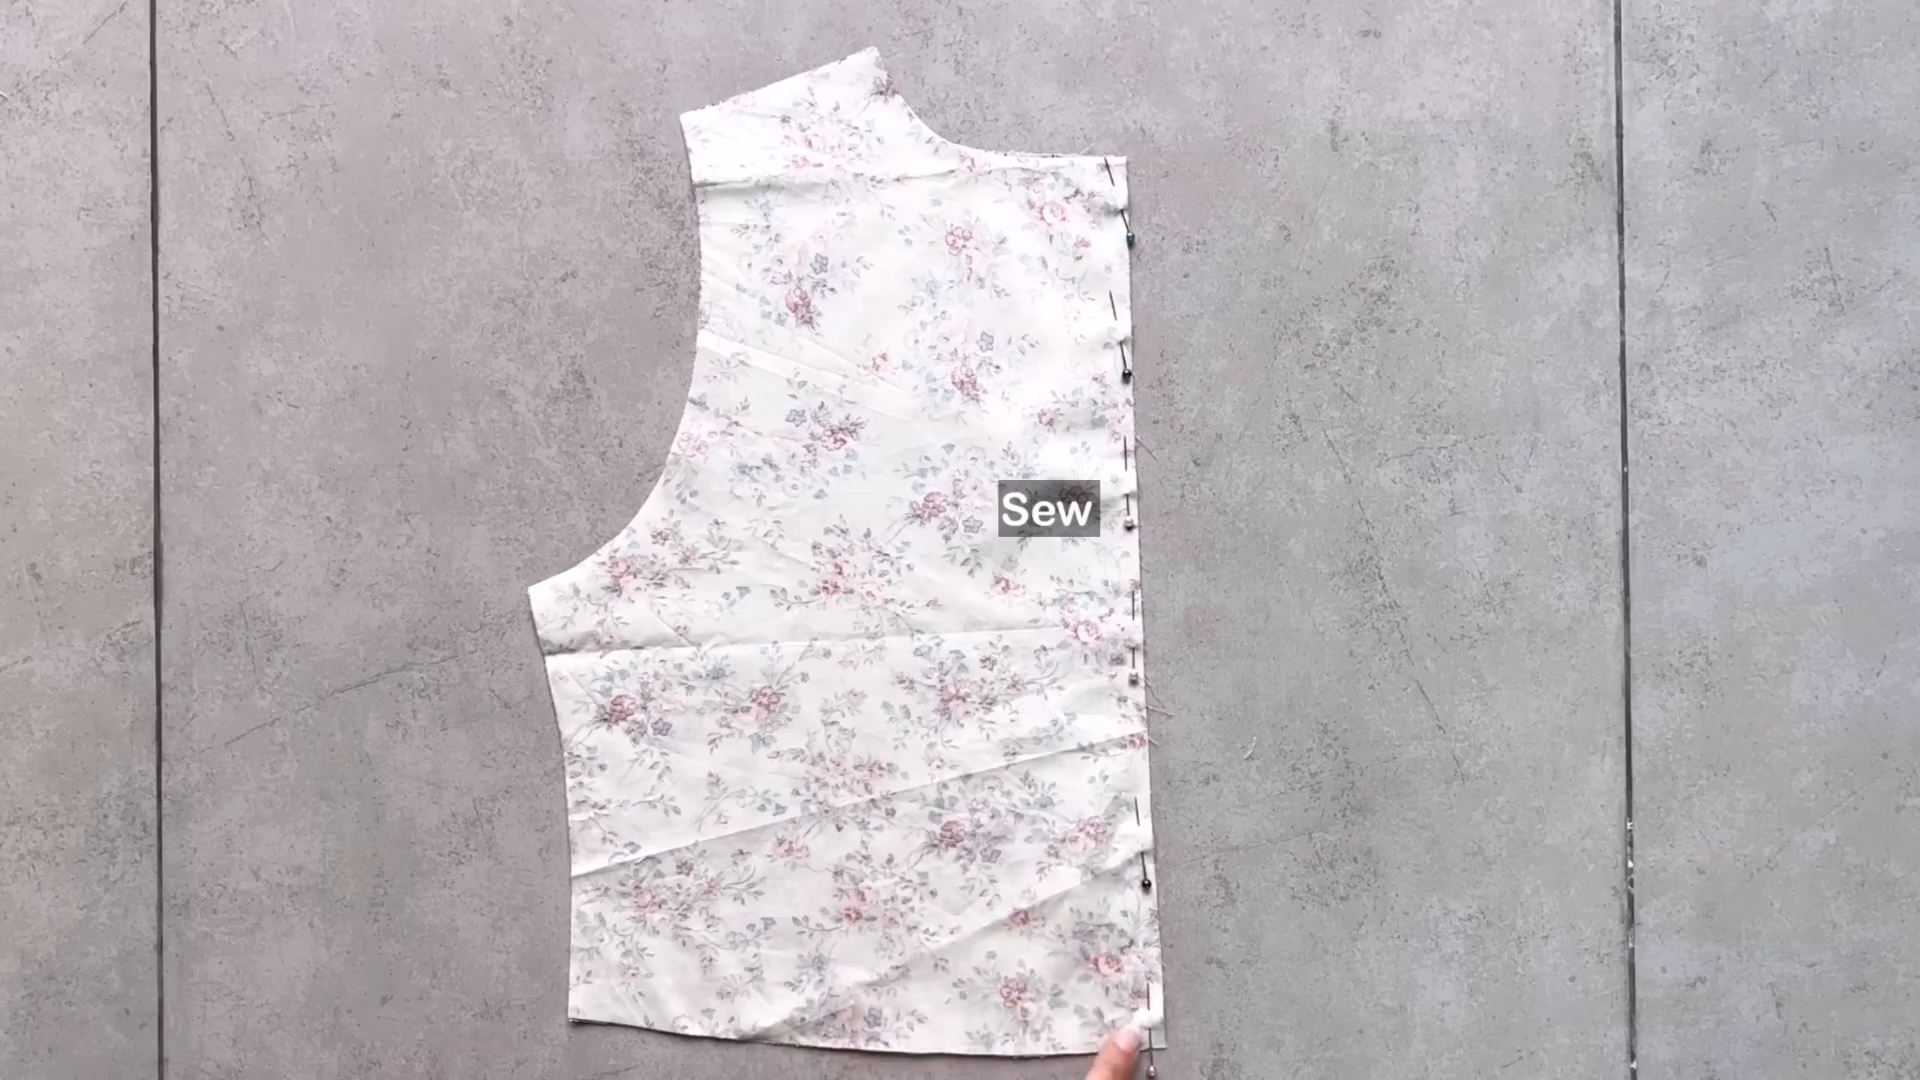
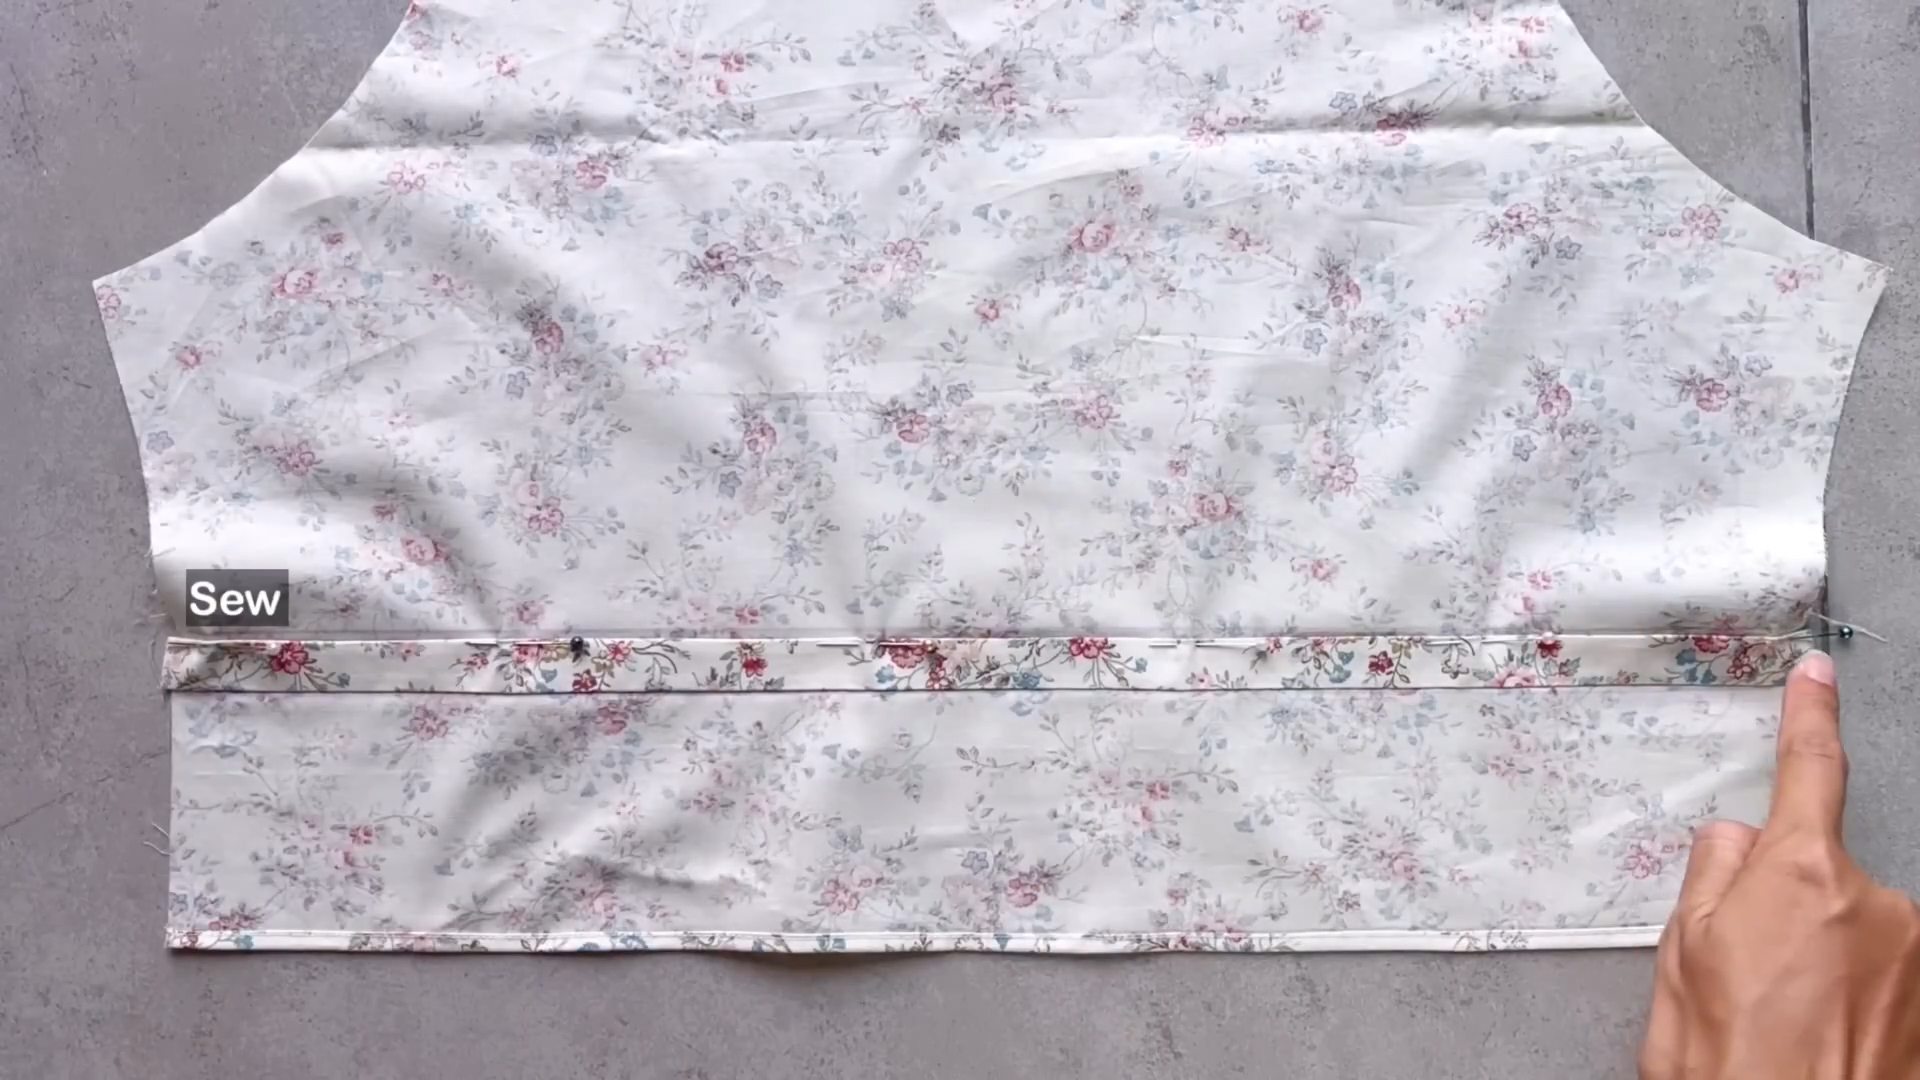
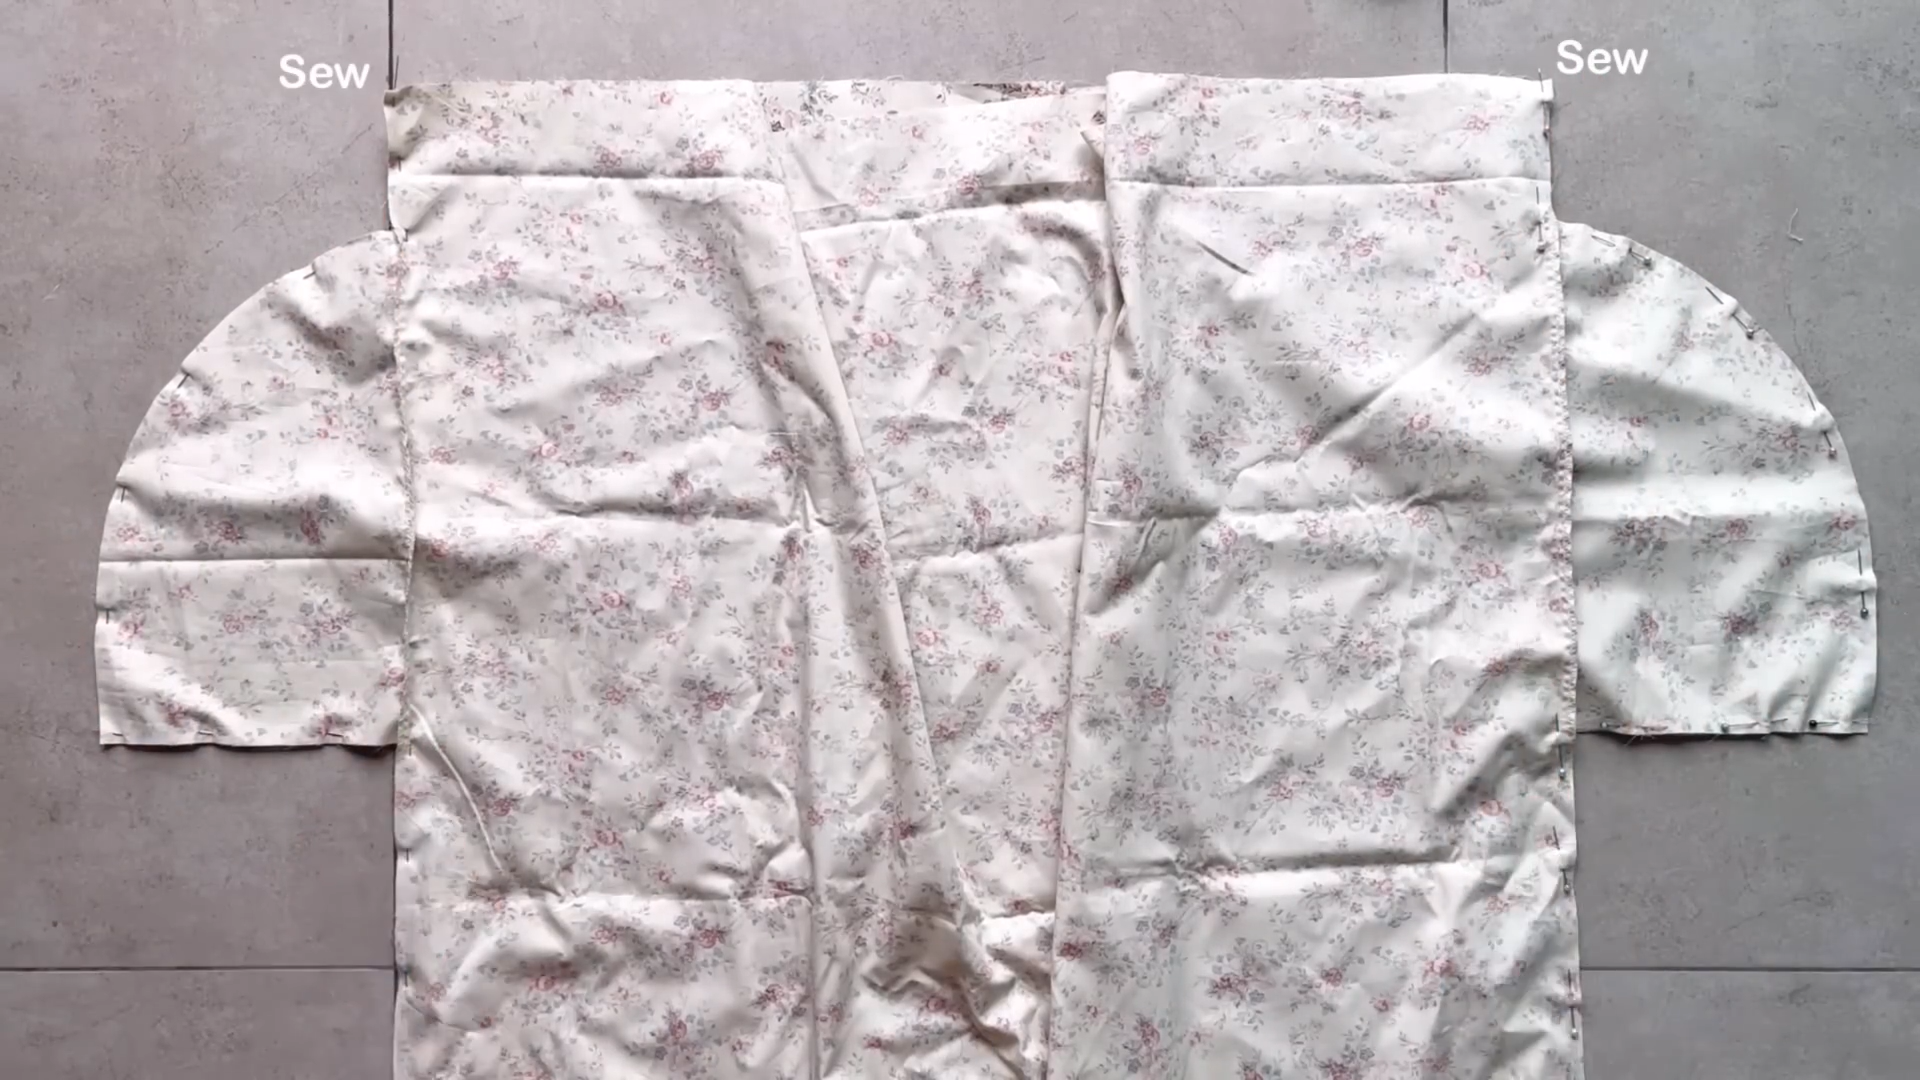
Sew the shoulder lines and side lines to join the front and back bodice pieces.
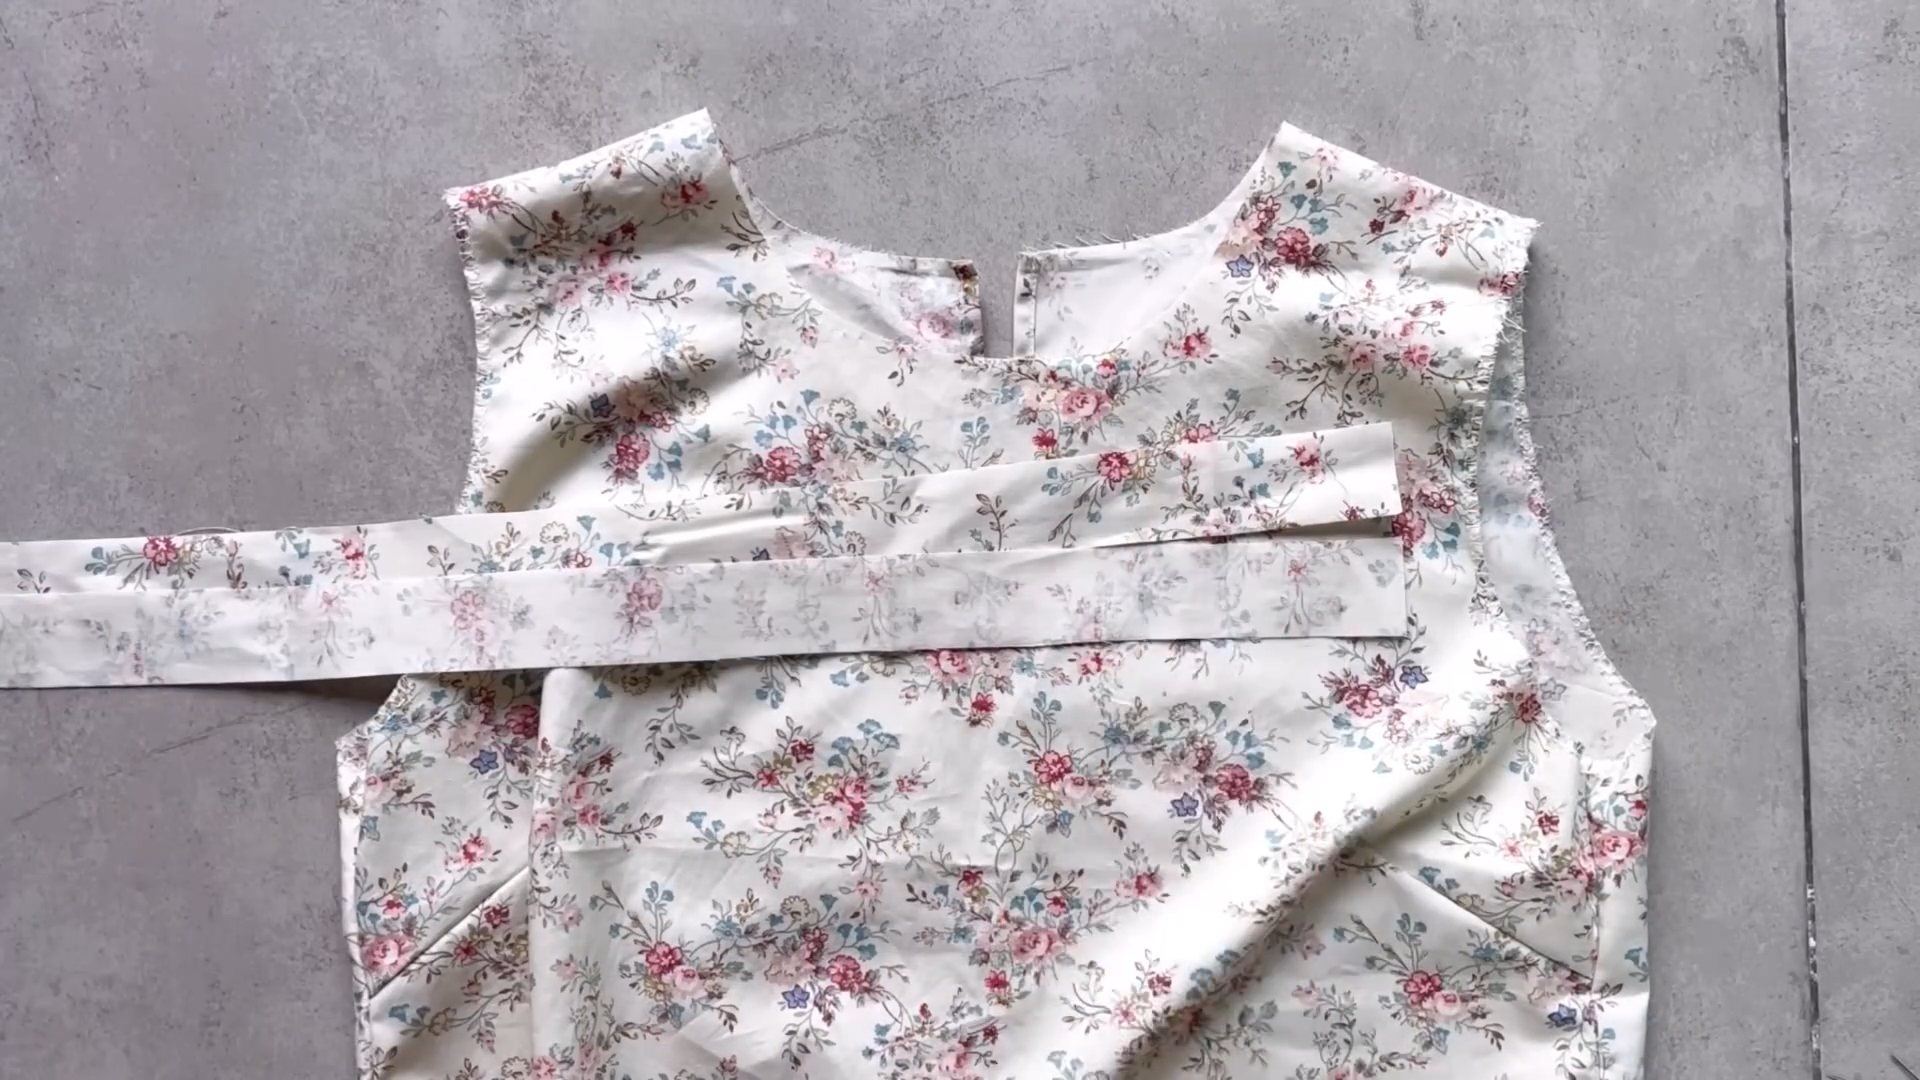
Cut a long strip of fabric (3.5 cm wide and 100 cm long) for the neckline binding.
Align the center of the fabric strip with the center of the front neckline and pin them together.
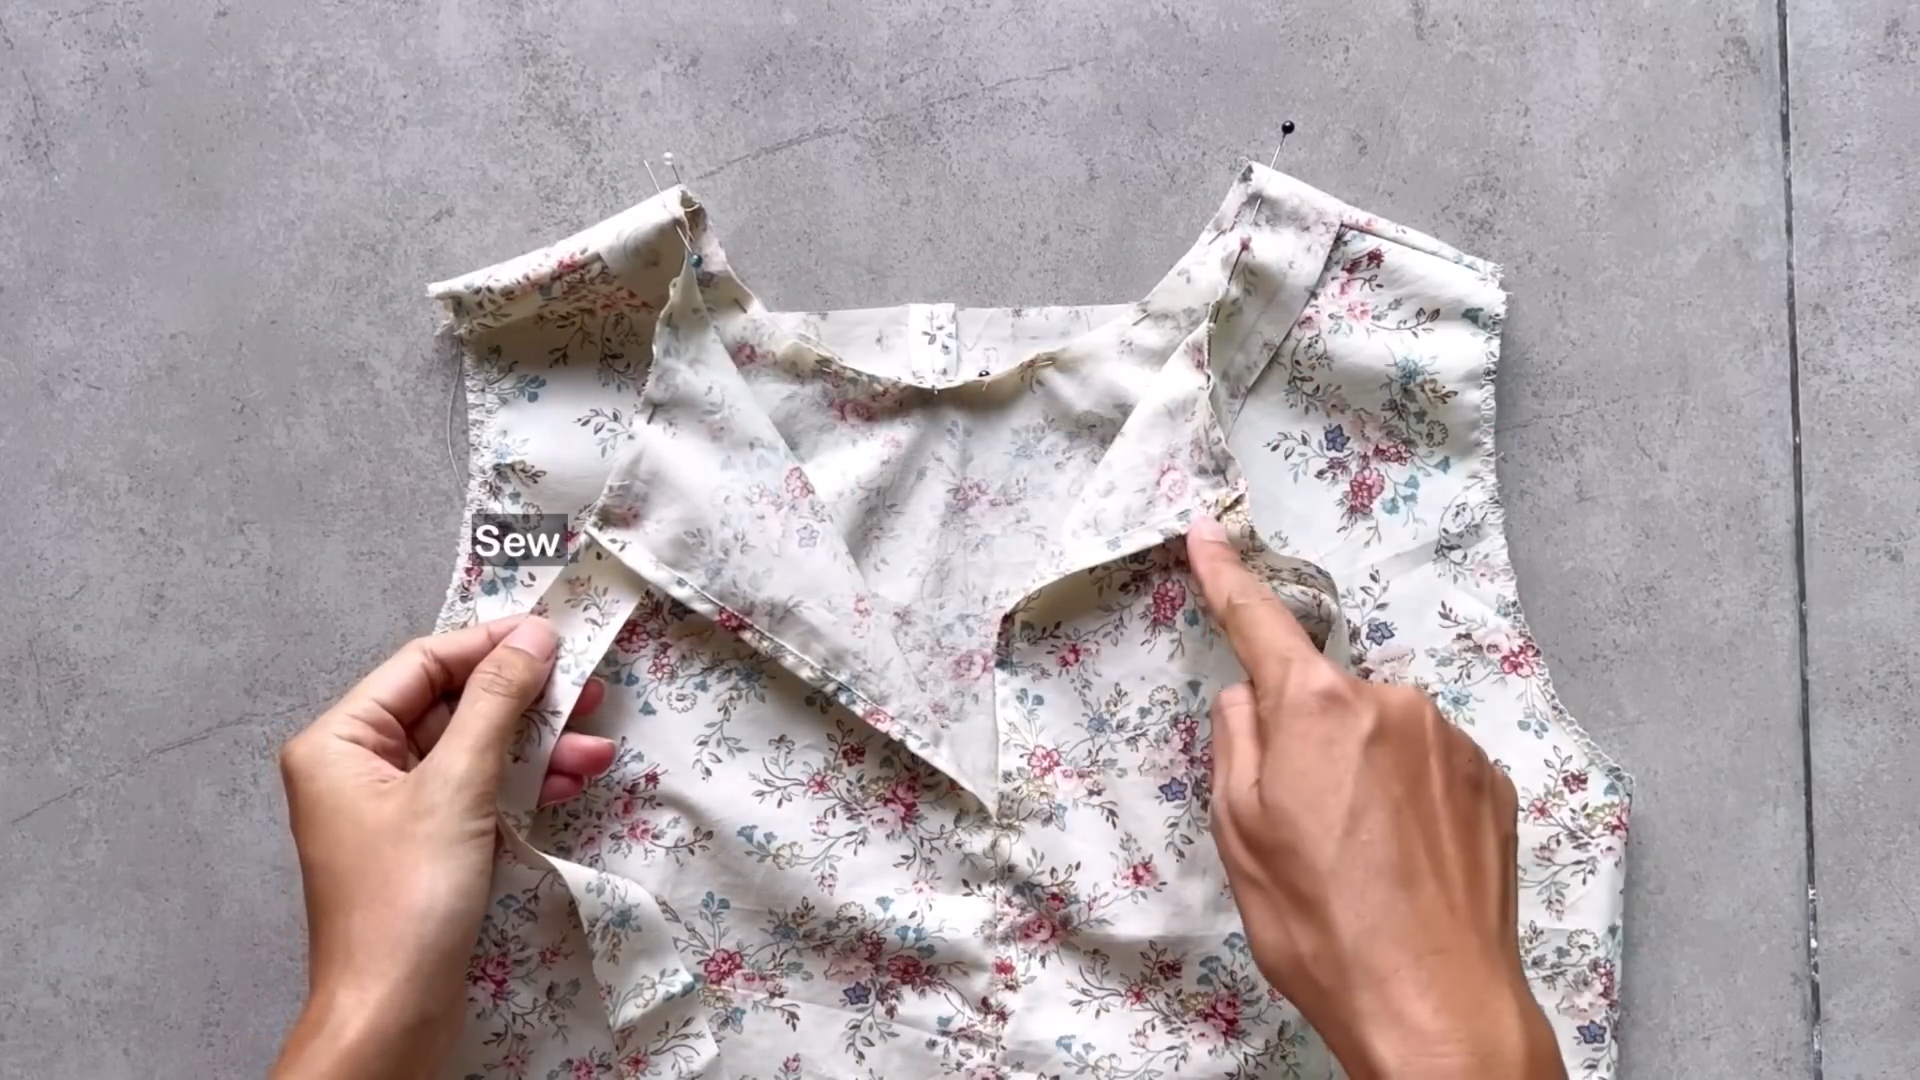
Sew the strip around the entire neckline.
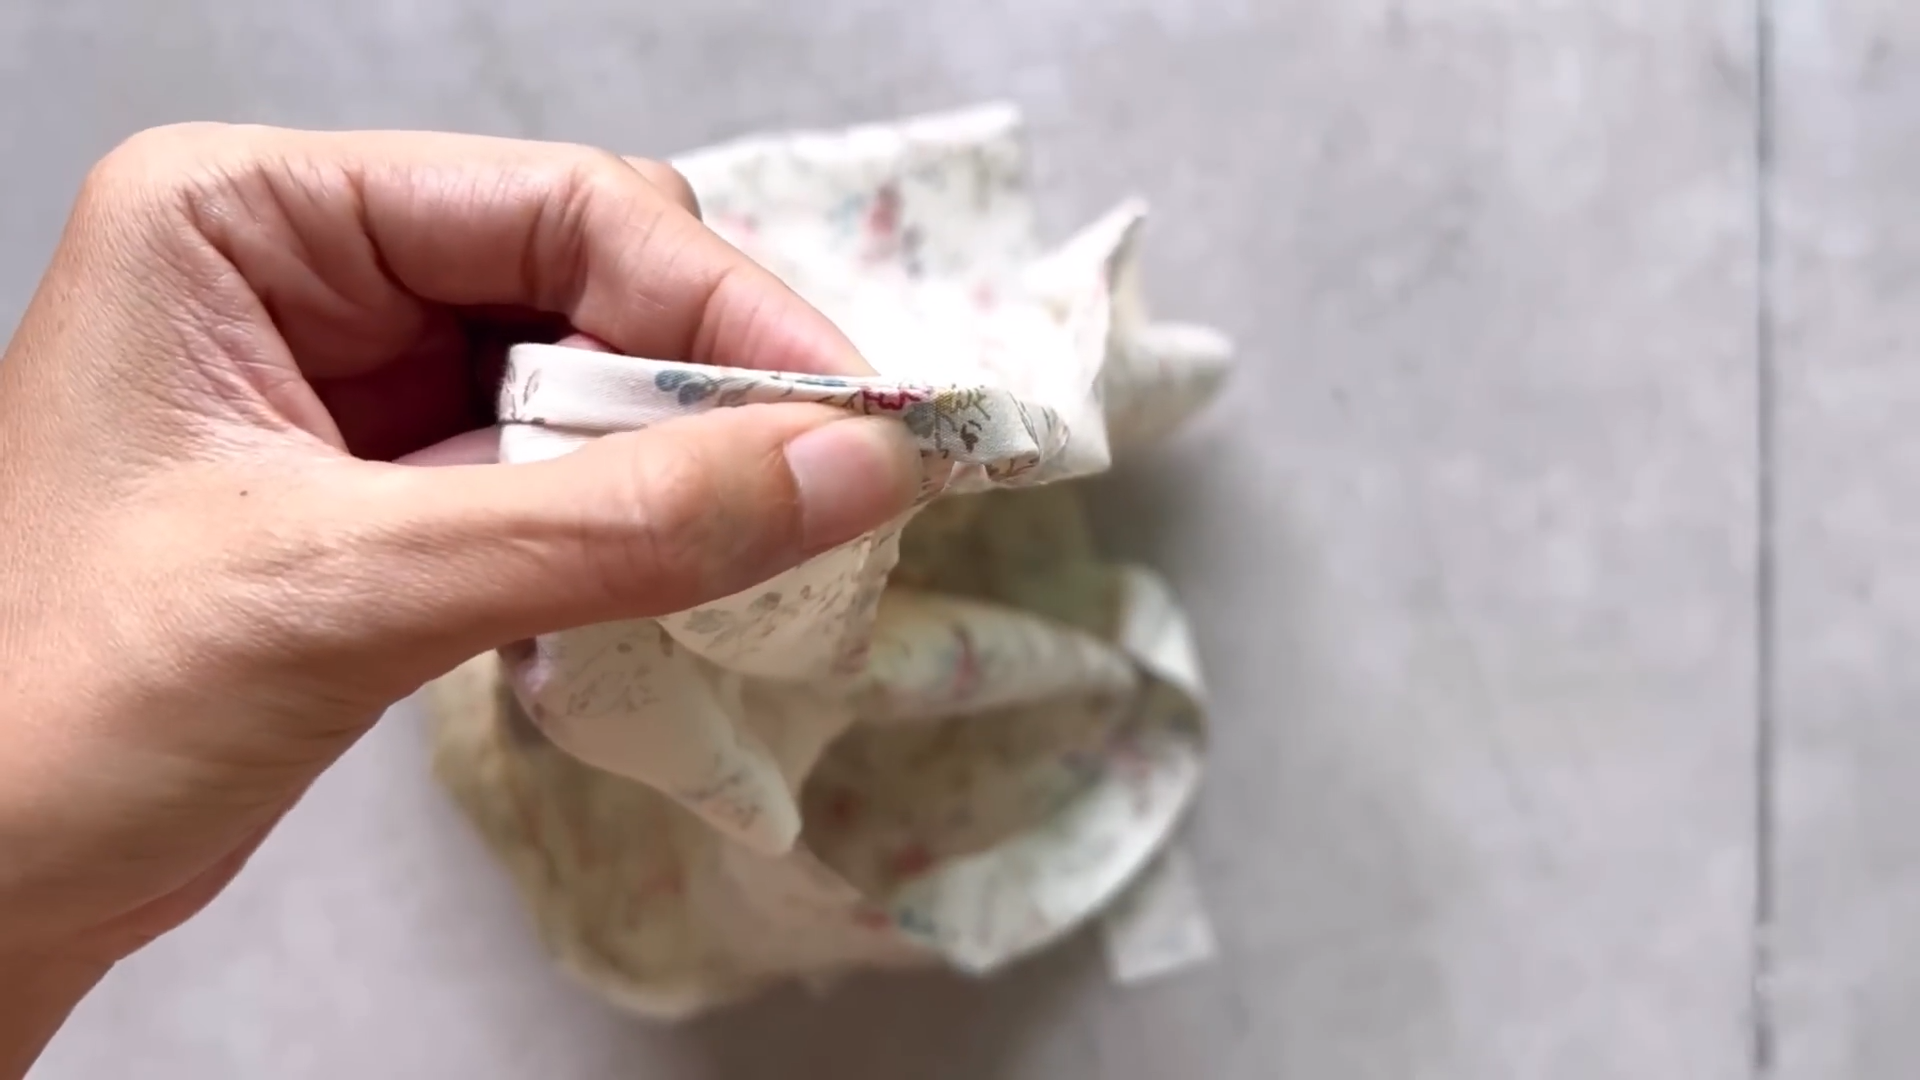
Fold the remaining fabric strip inwards twice first and make the last fold with all of them inside.
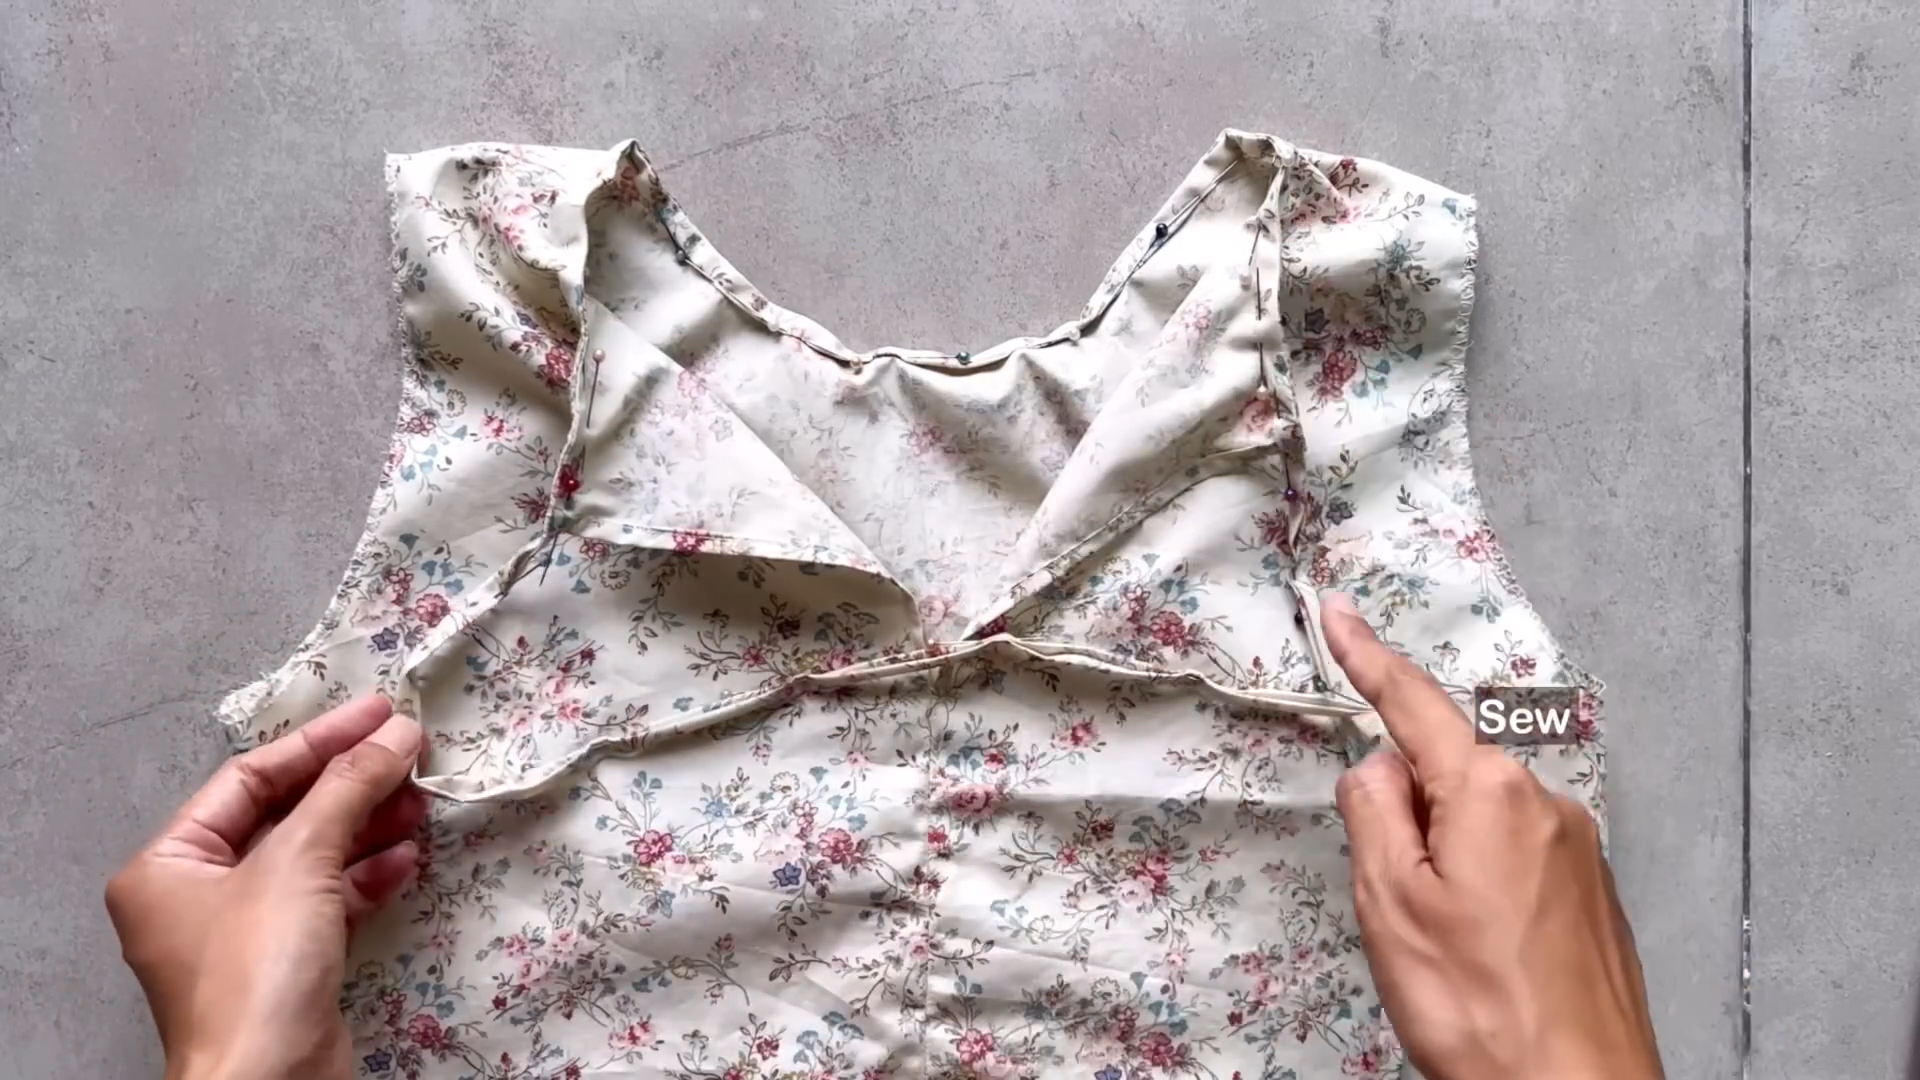
Stitch along the fold to create a clean finish.
The extra fabric can be used to create ties for the dress.
SEW THE SLEEVE

Finish the bottom edge of the sleeve by folding the fabric inward twice (0.5 cm each fold) and stitching.
Draw a line 8 cm above the finished sleeve edge – this will be the placement for the elastic band casing.
Cut a long strip of fabric (3 cm wide and 50 cm long) for the elastic band casing.
Align this strip with the marked line on the sleeve and sew.
Create a second line 2 cm from the first seam.

Fold the other fabric edge inward 0.5 cm first then keep folding it to the marked line and iron flat
Sew along the folded edge to create a casing for the elastic band.
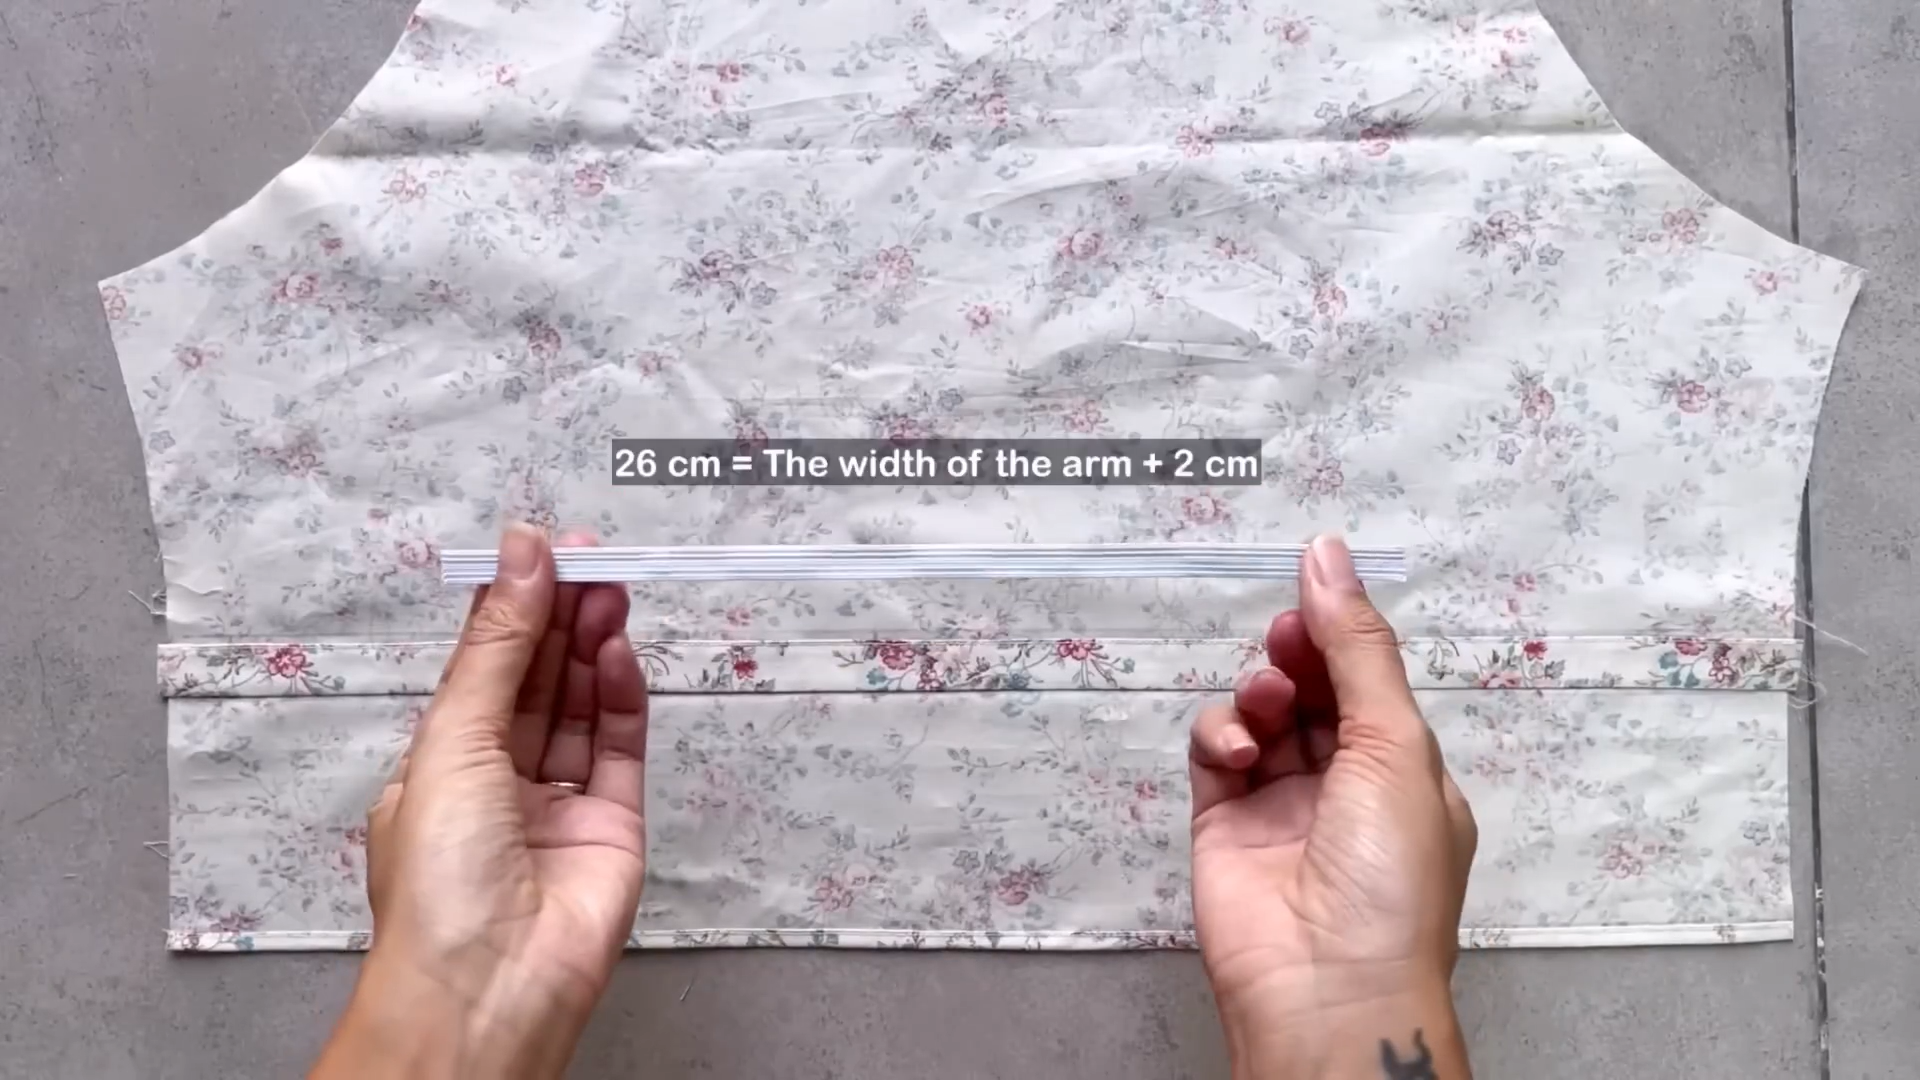
Cut an elastic band slightly longer than your arm width (about 26 cm).
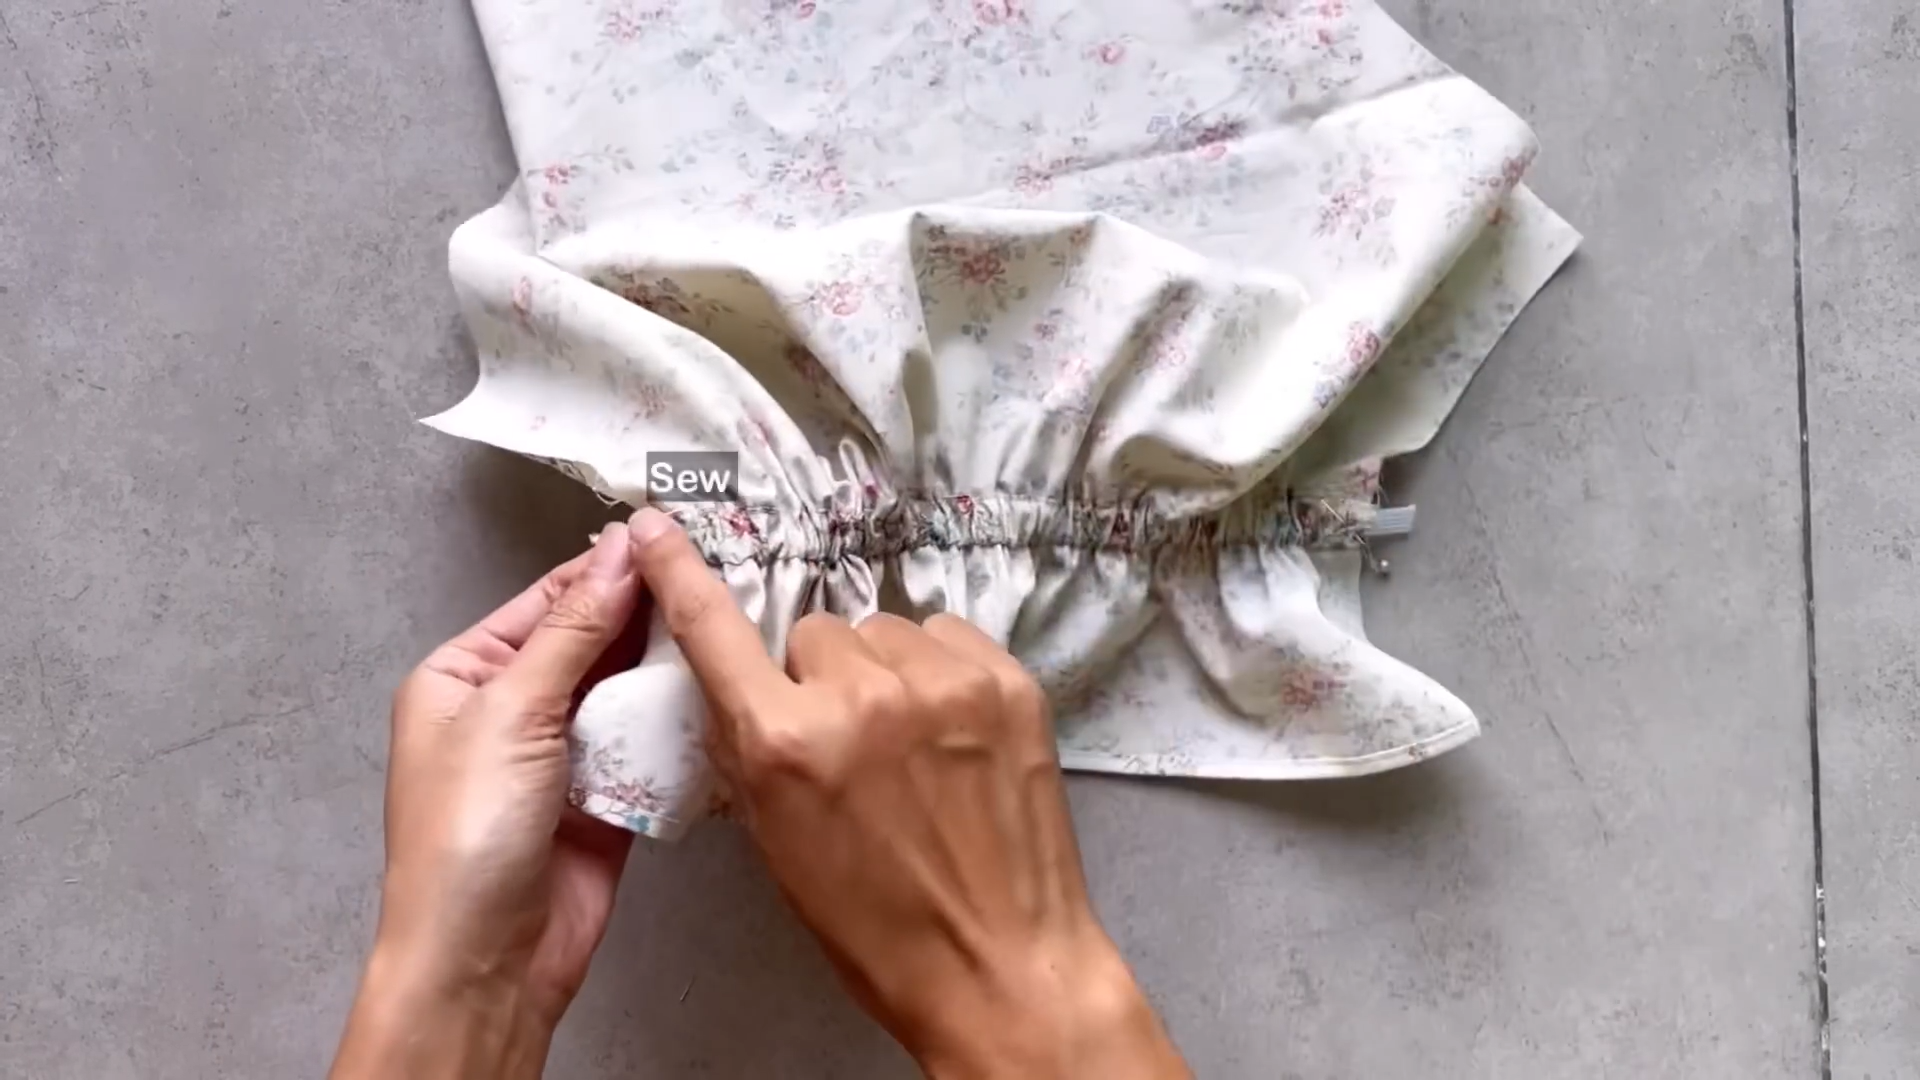
Insert the elastic into the casing and sew the ends together to secure.
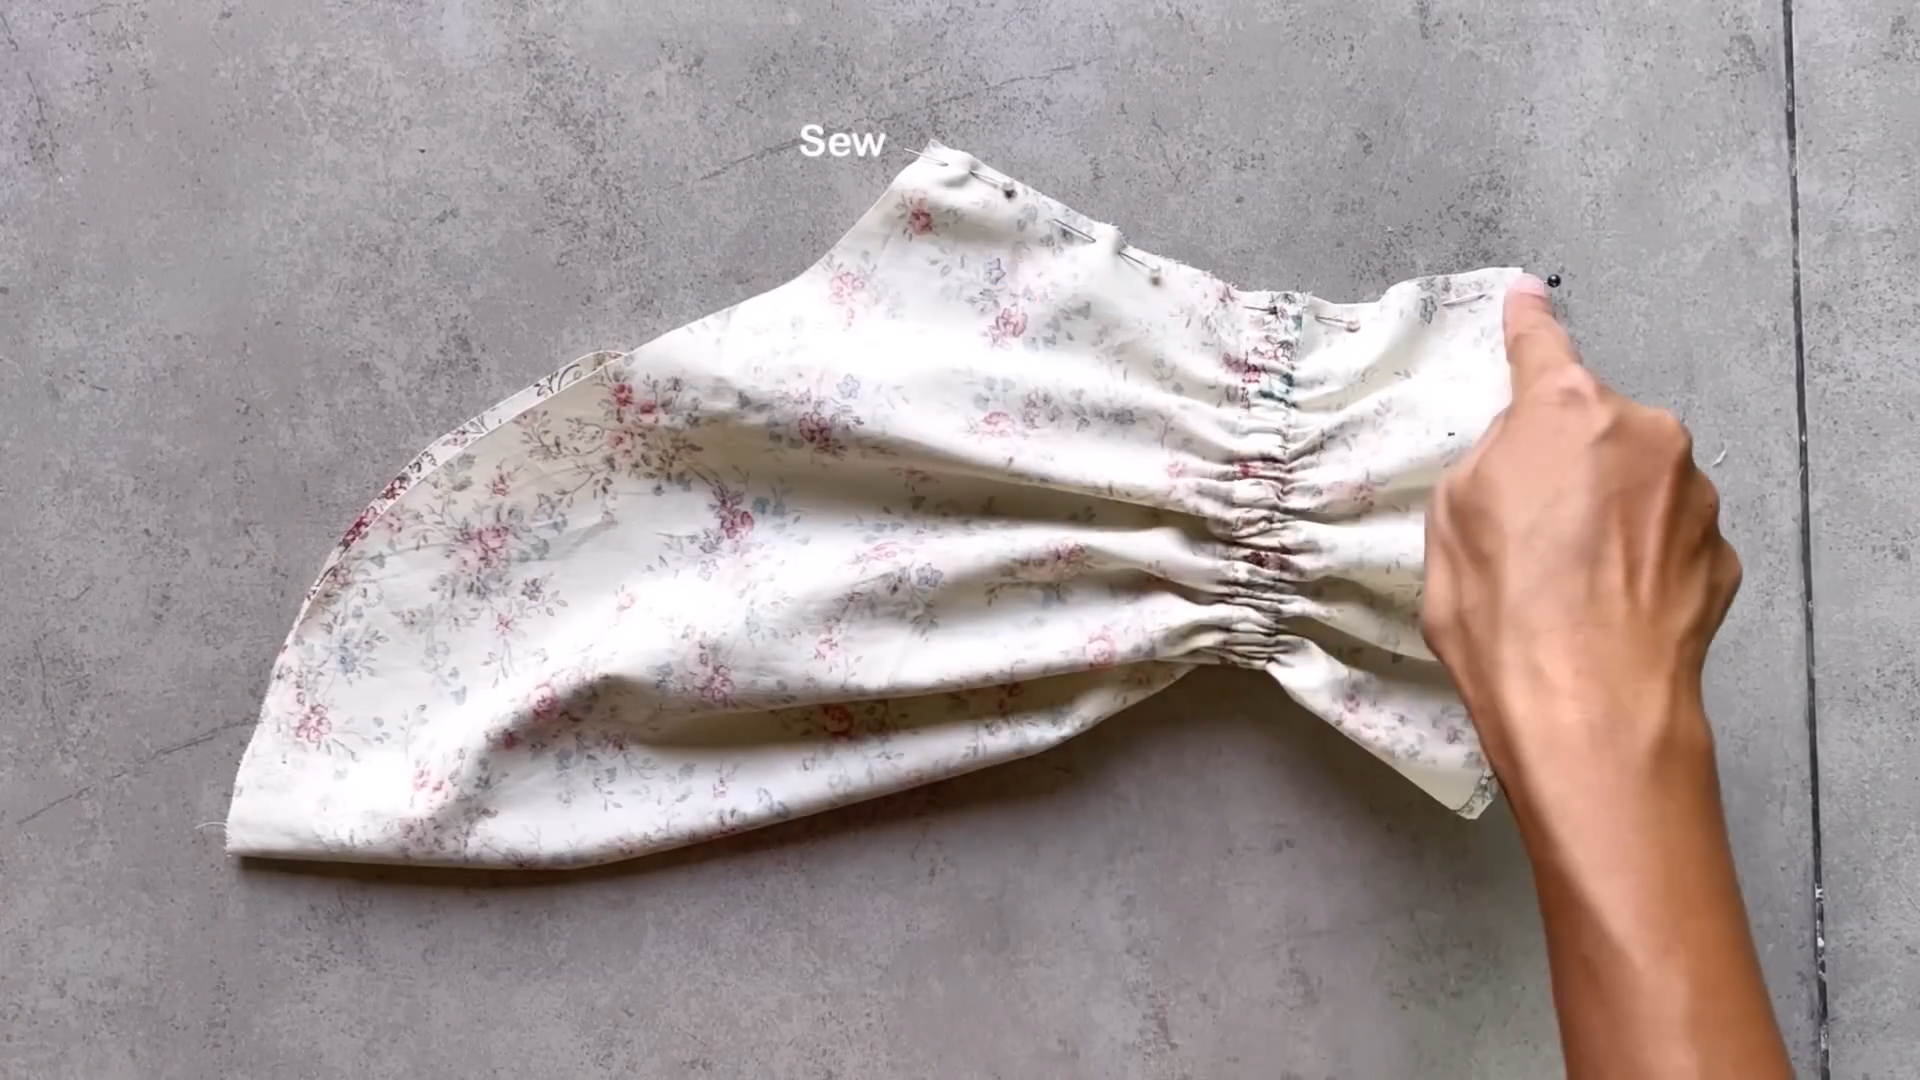
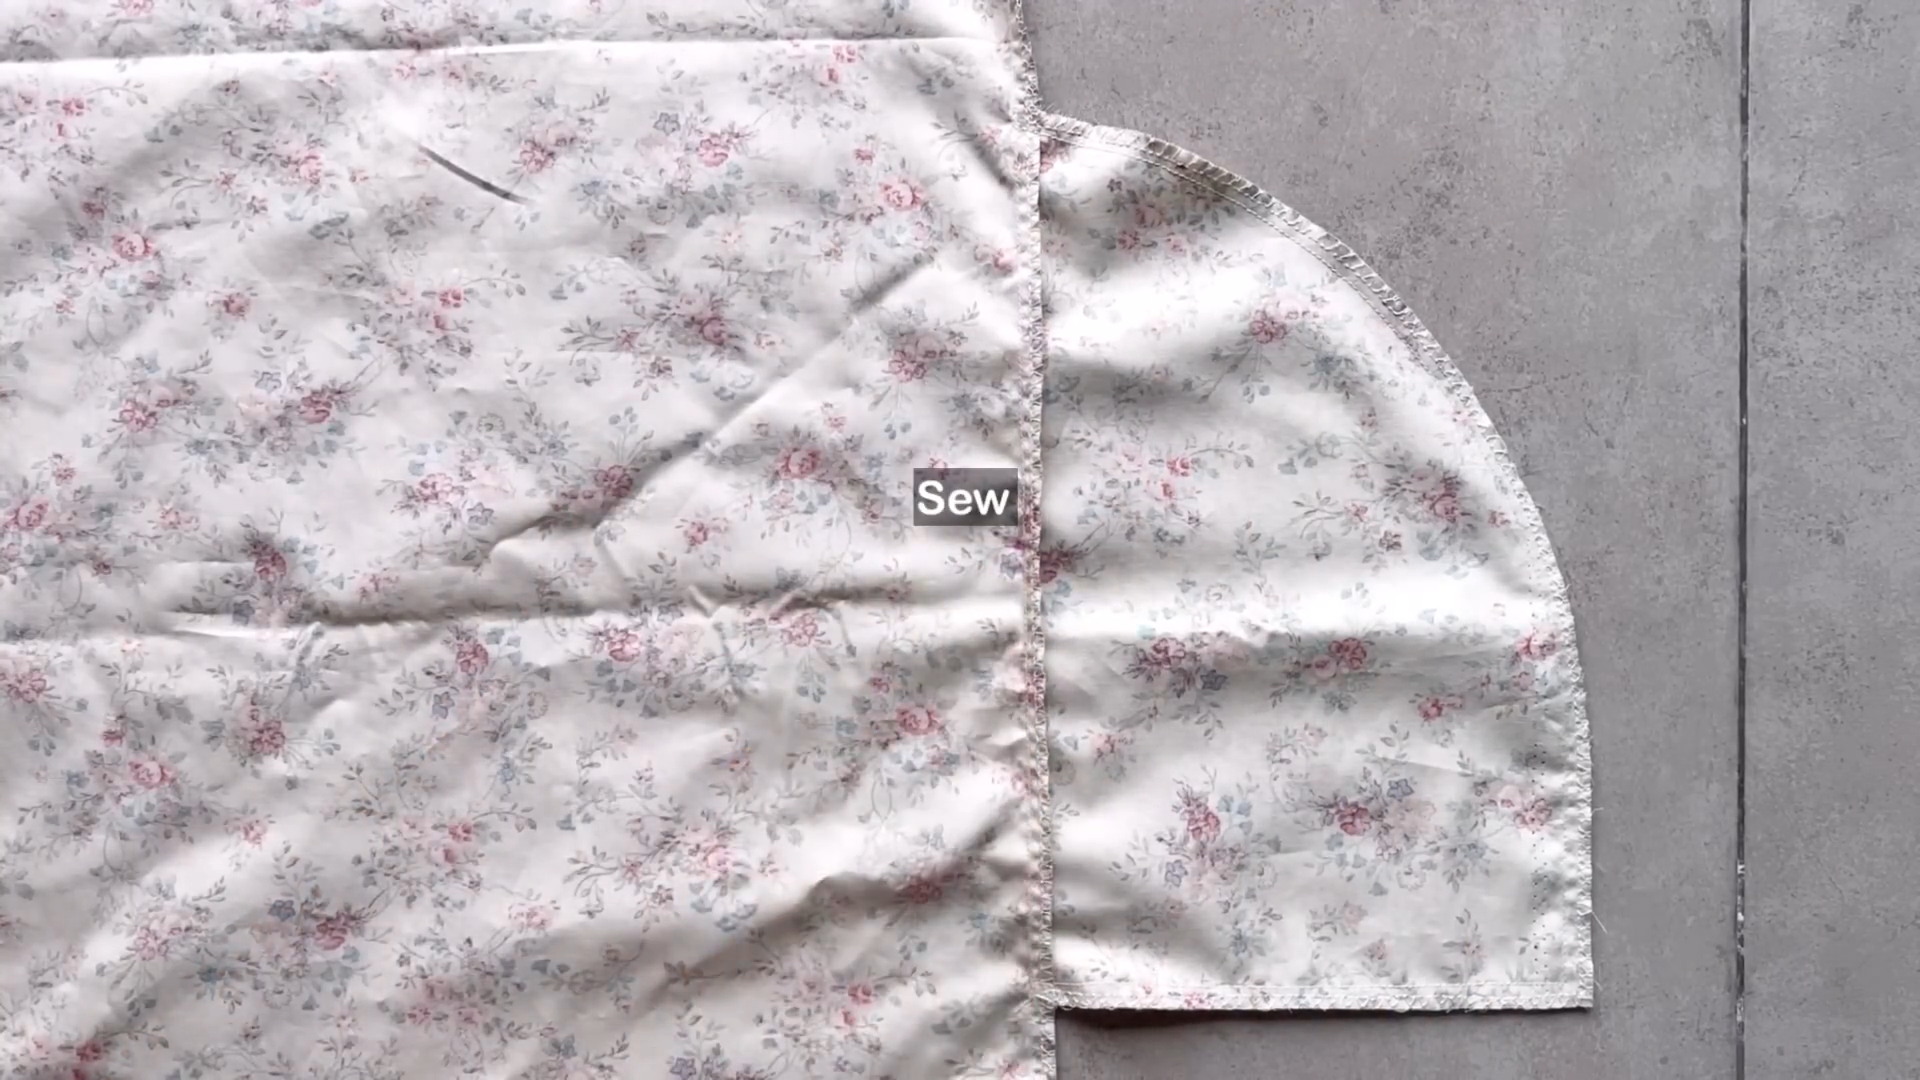
Sew the under armpit lines together.
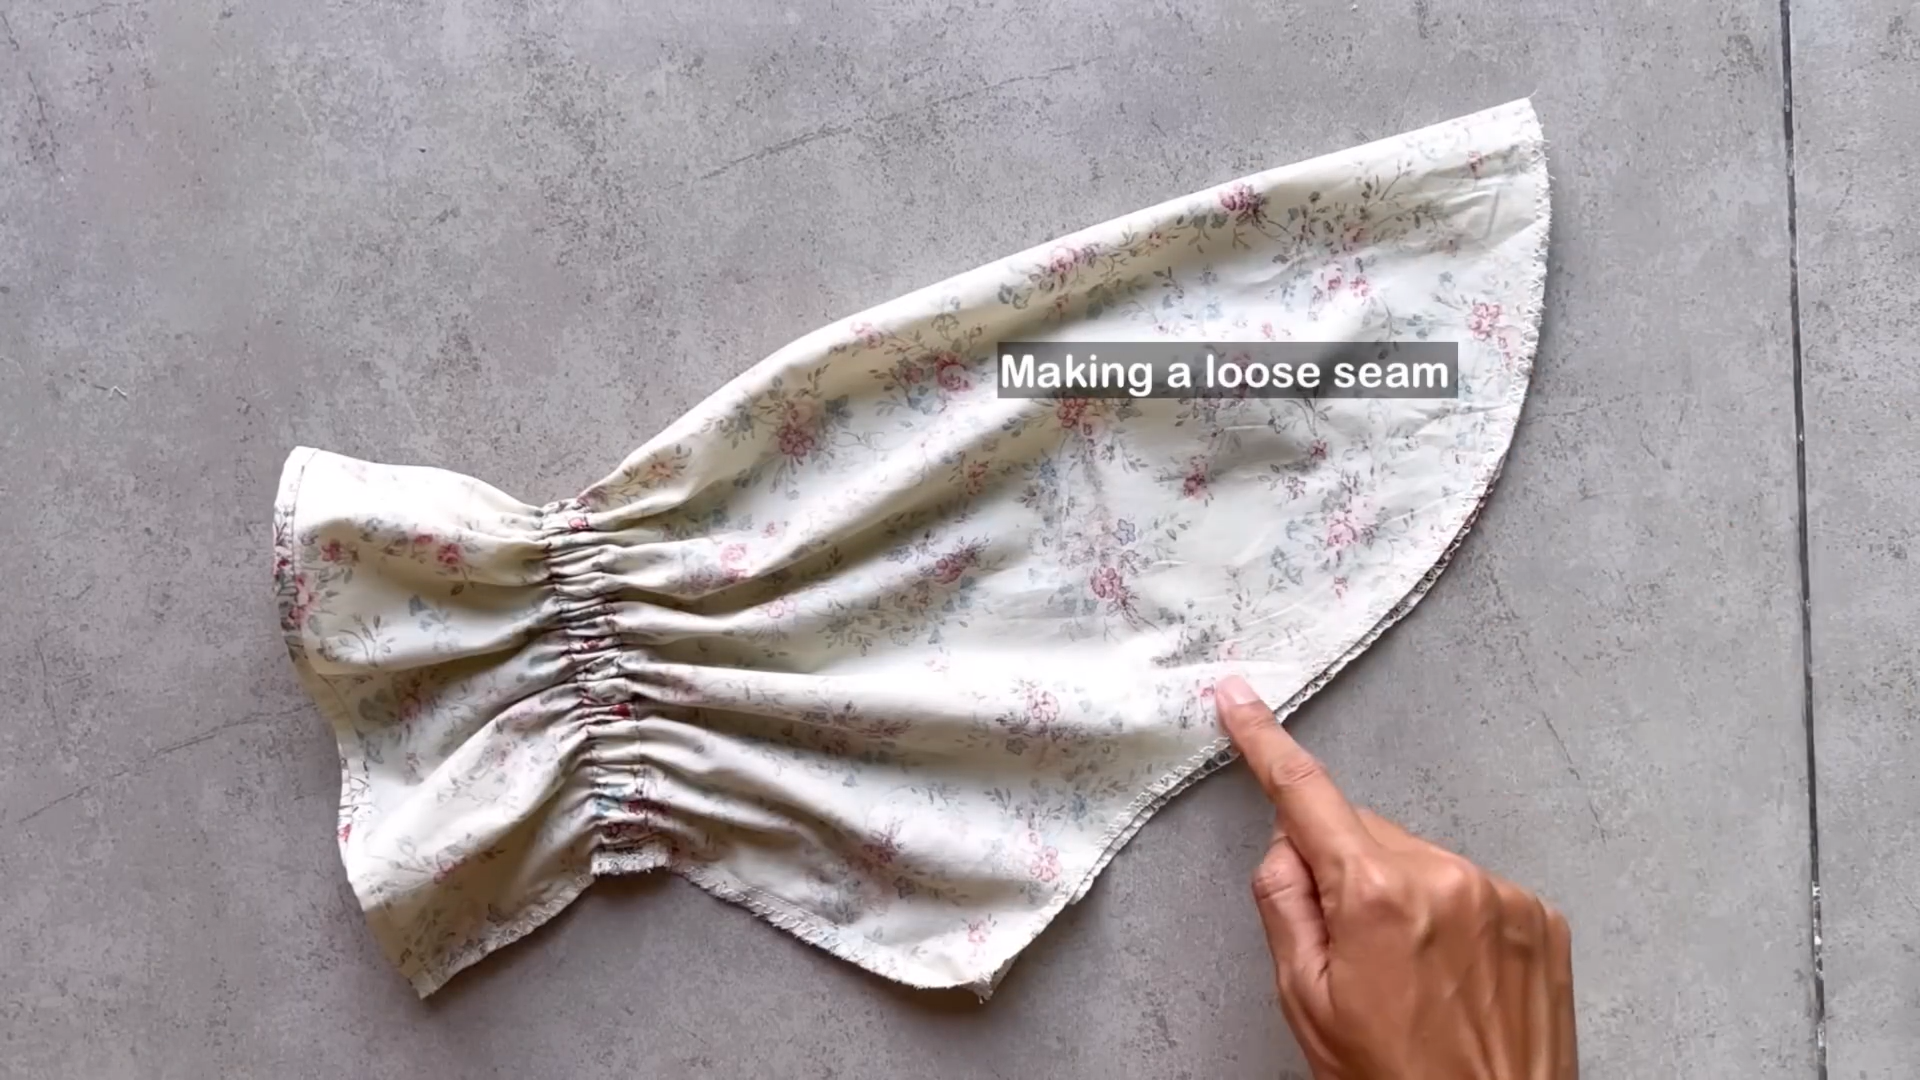
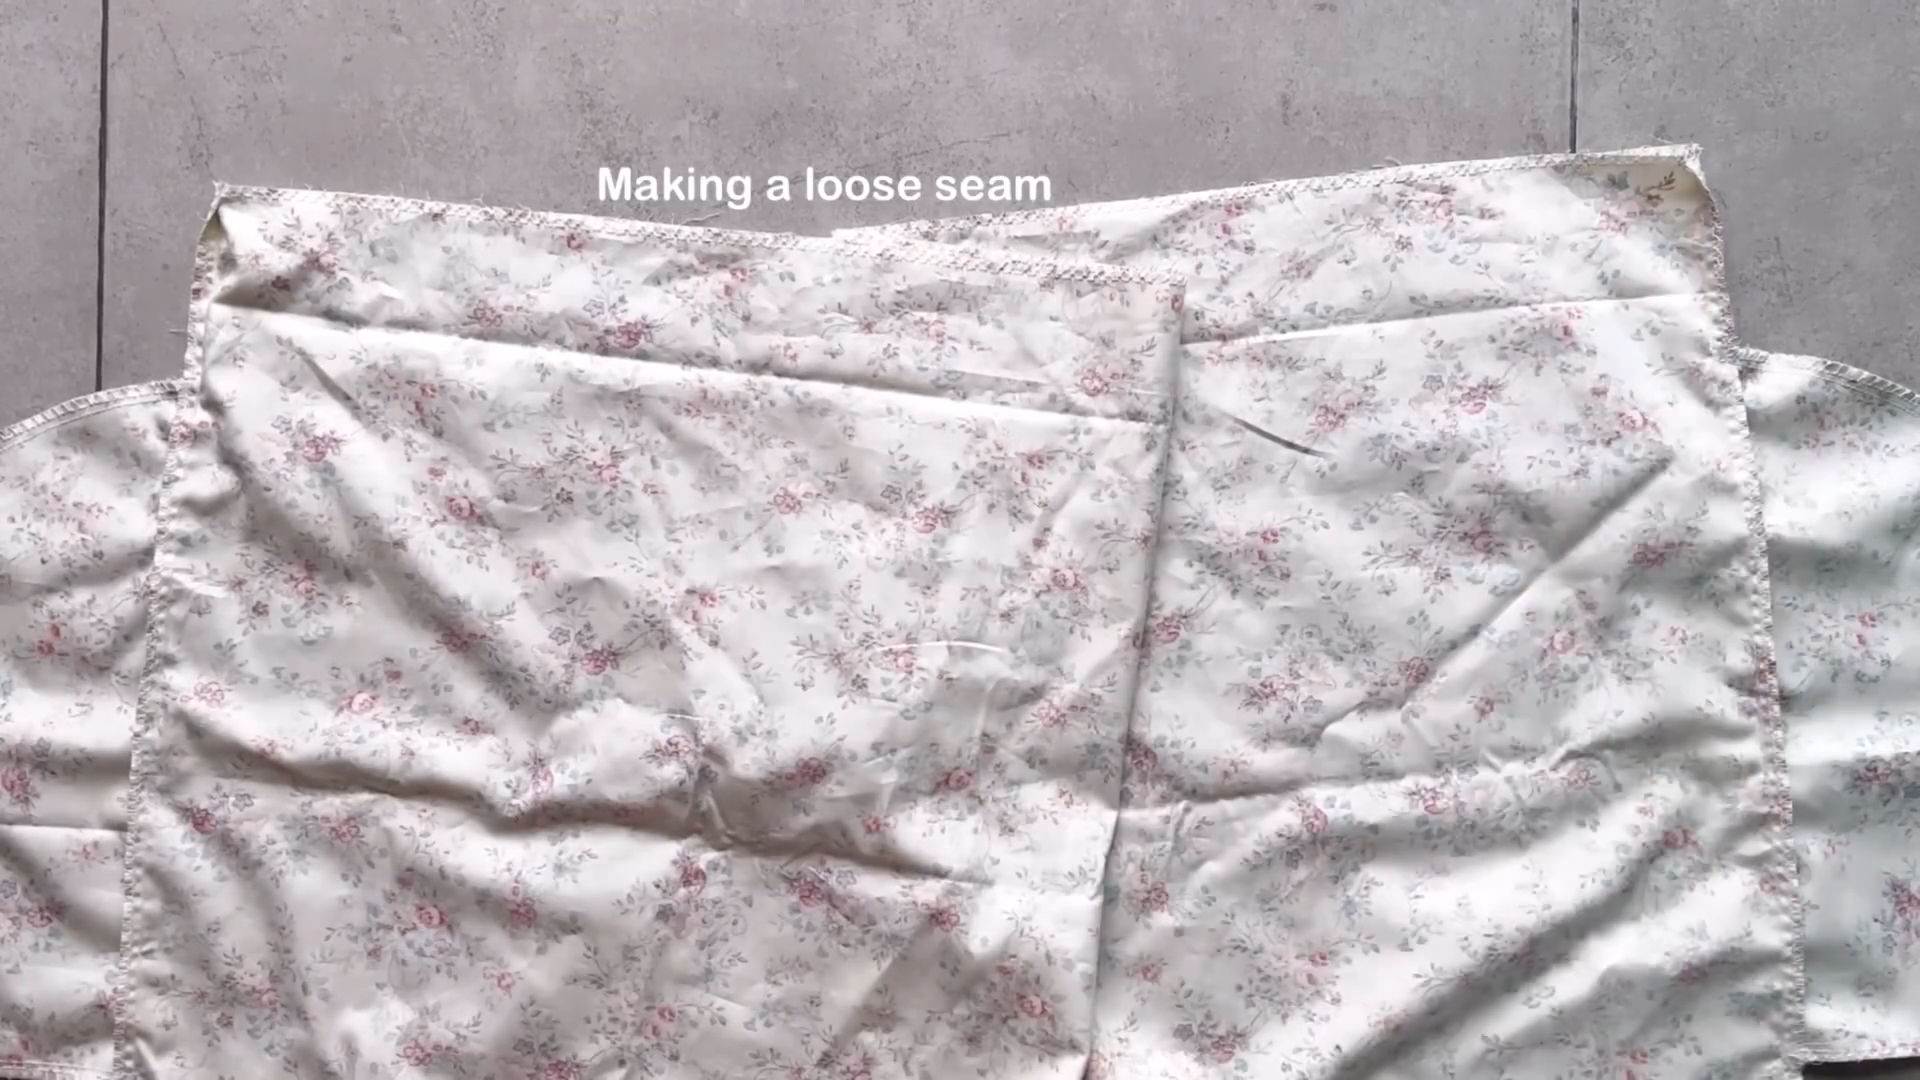
Sew a loose seam along the top edge of the sleeve.

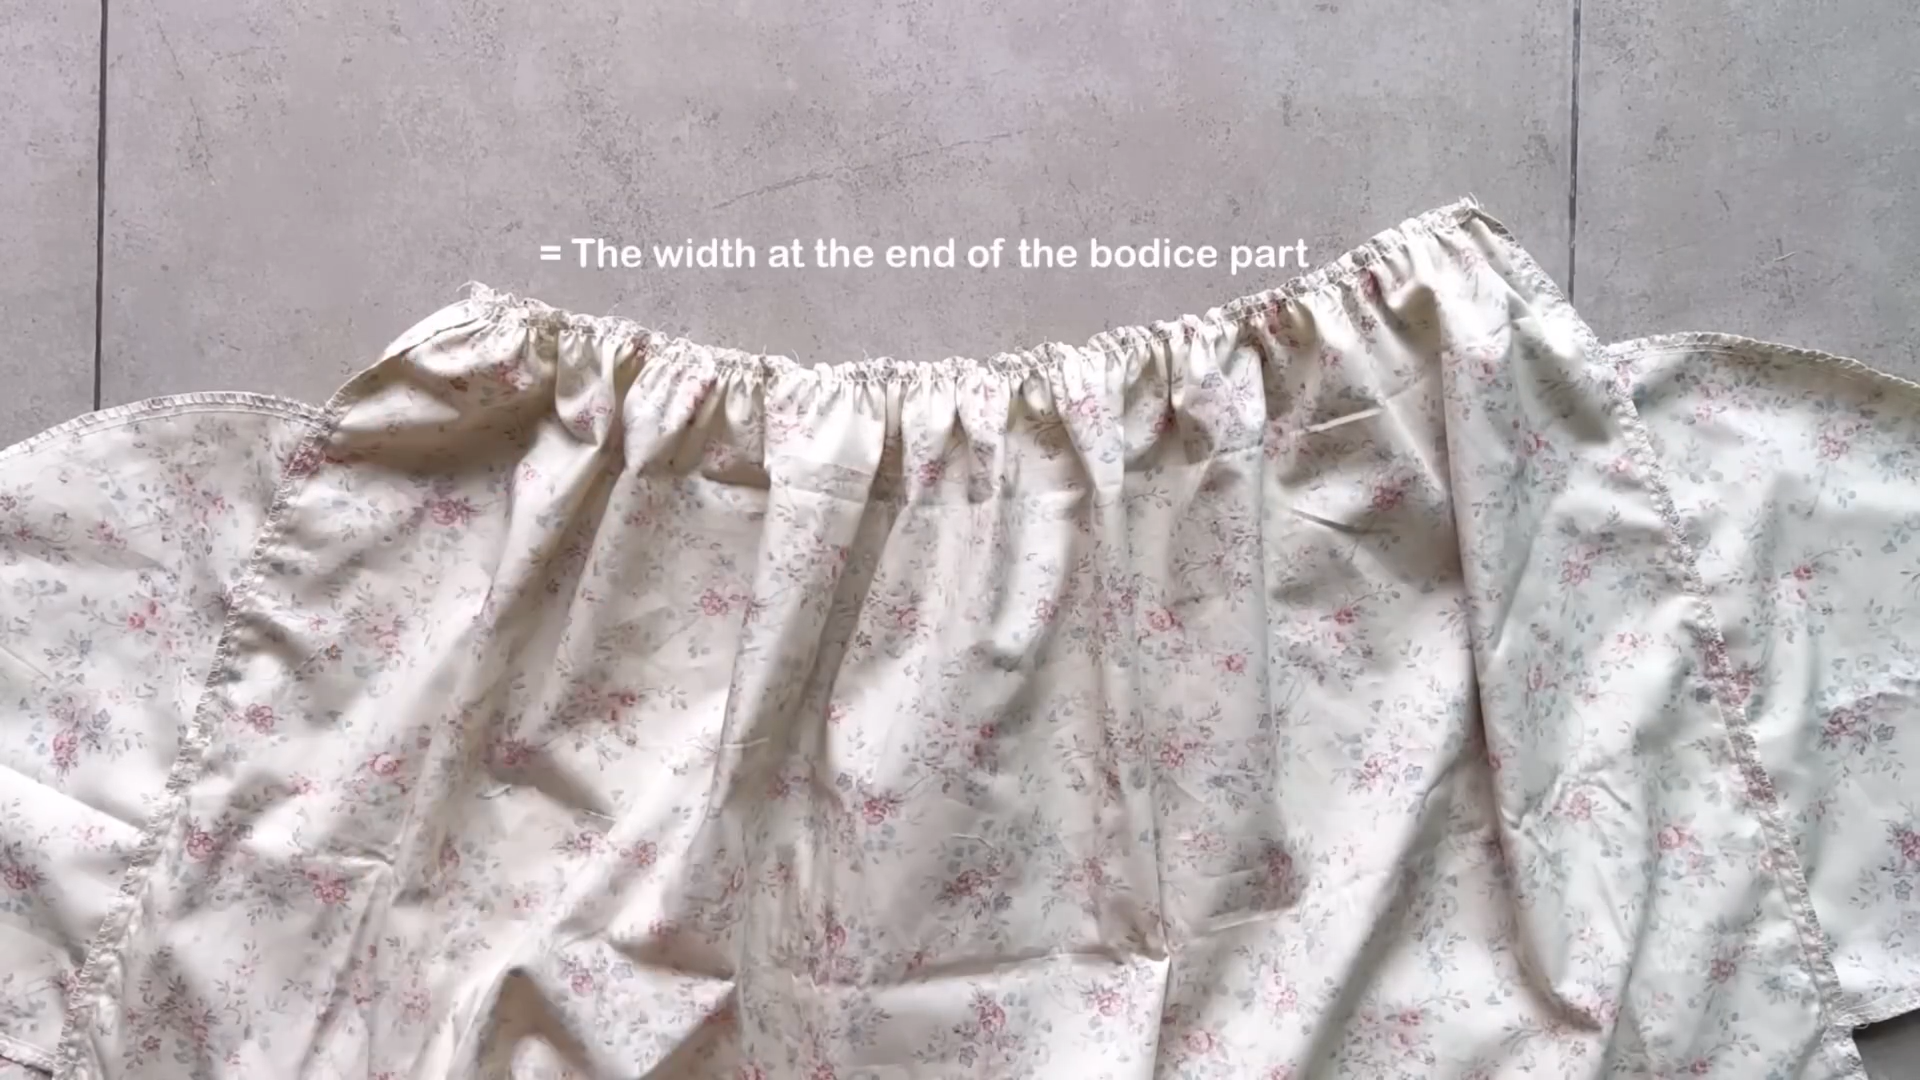
Create a gathering fabric from the loose seam.
Adjust the gathers to match the sleeve opening on the bodice.

Sew the sleeves to the bodice at the sleeve lines.
THE SKIRT
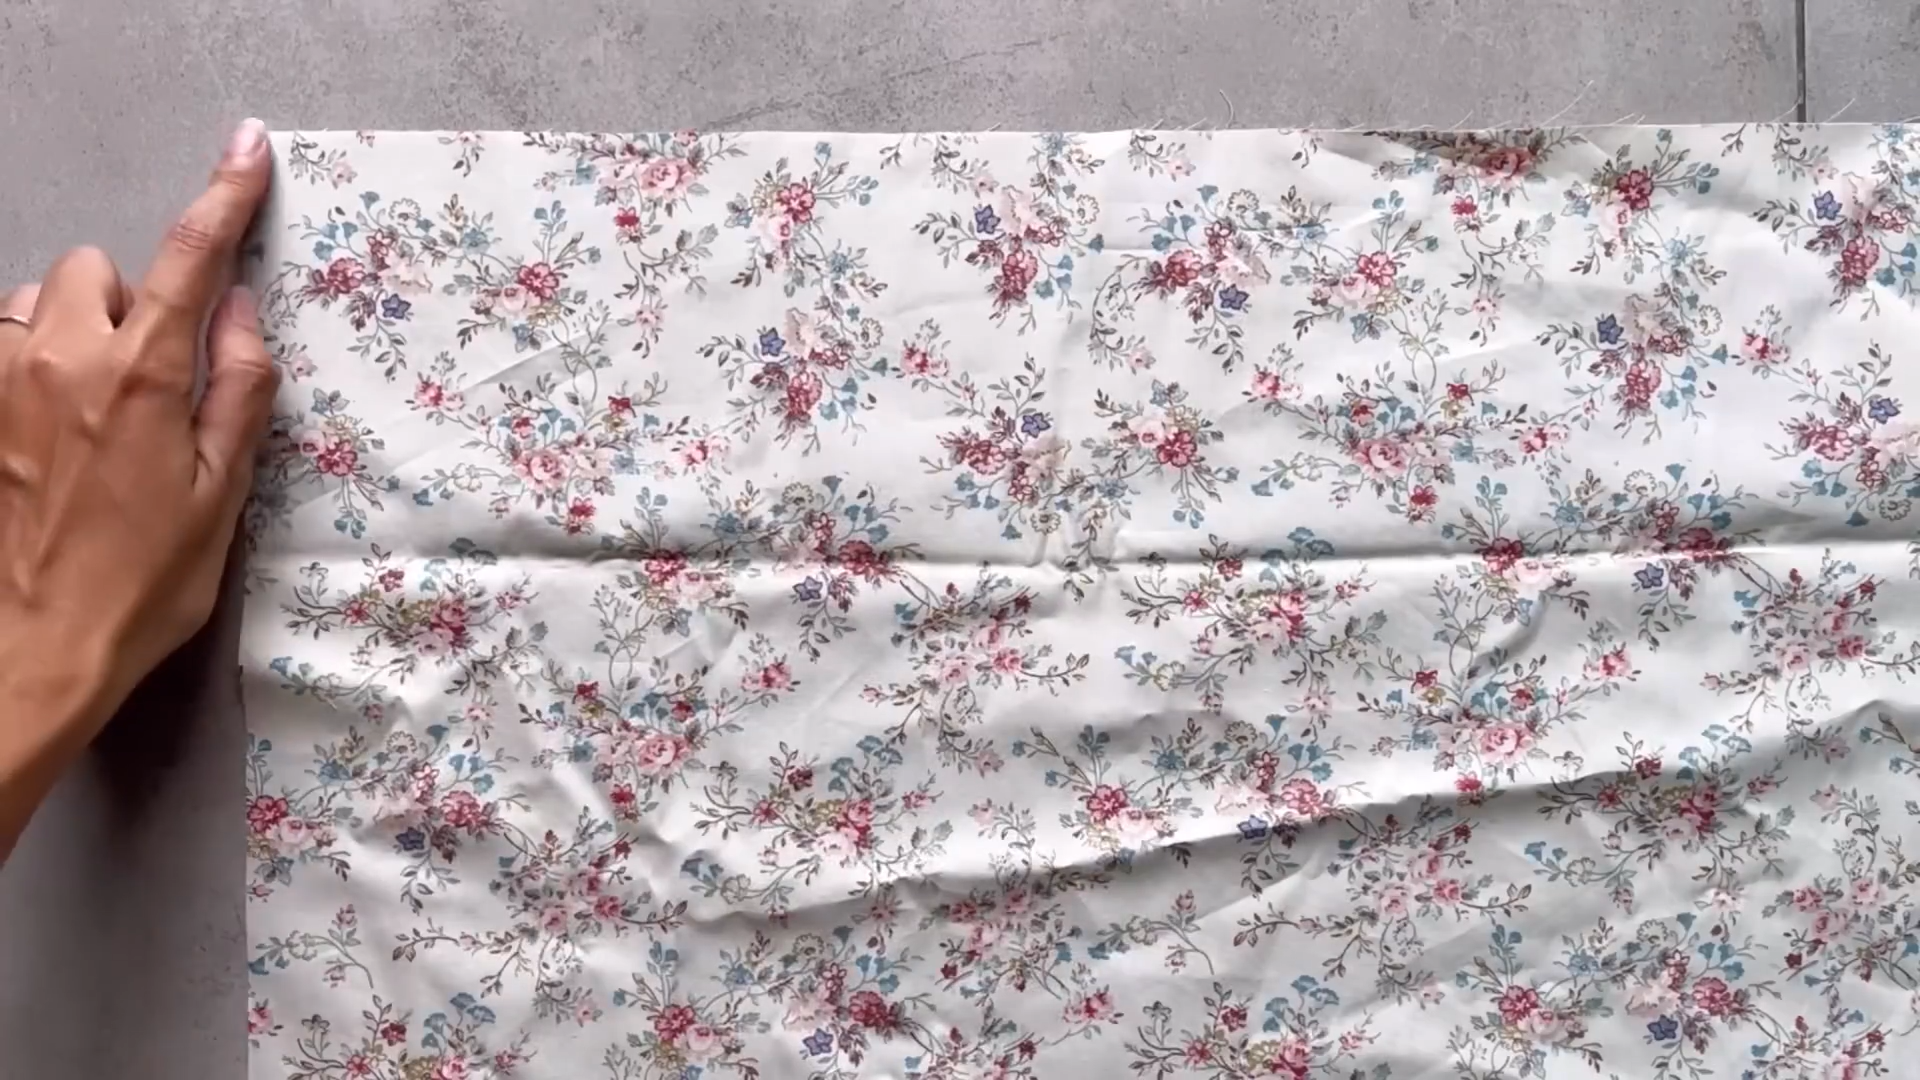
Cut a large rectangle for the skirt with 93 cm width and 8 cm length.

Mark a point 7 cm down from the top edge on each side of the skirt for the pocket placement.
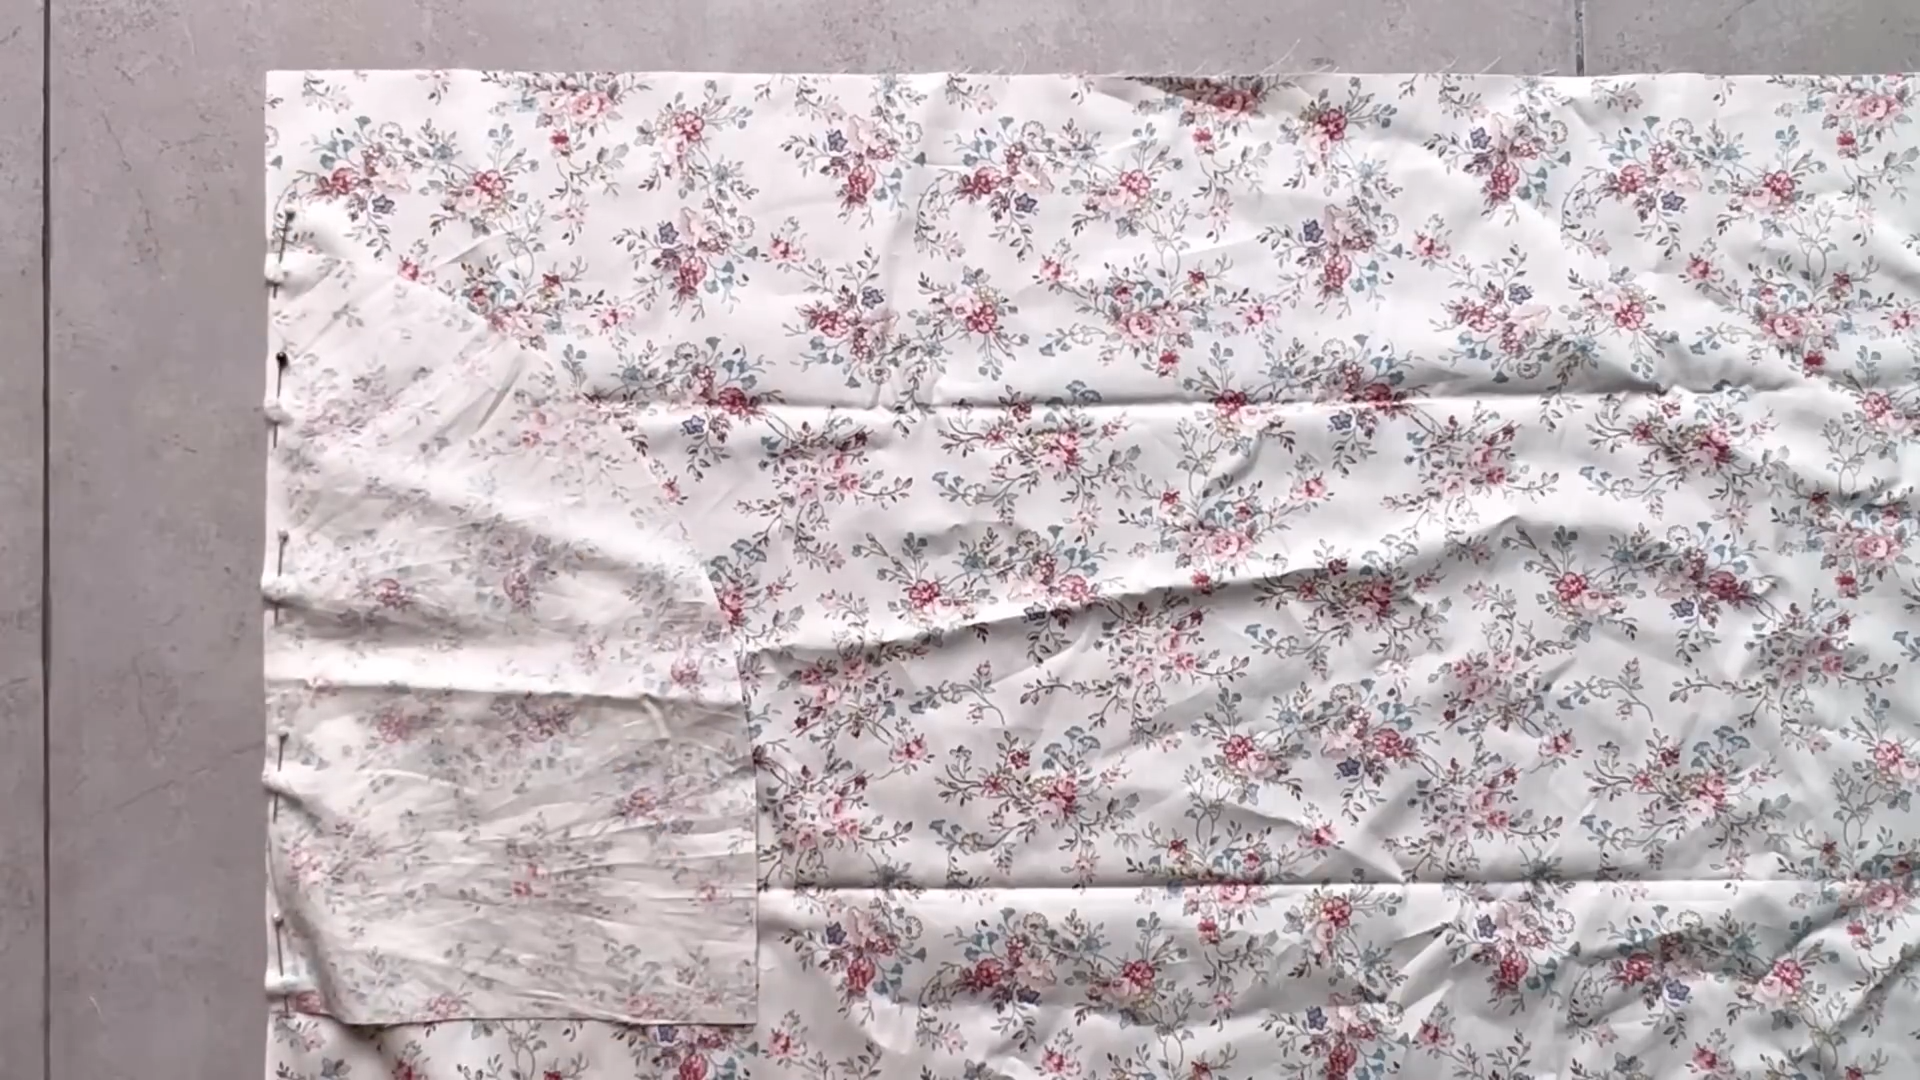
Attach the pocket to the marked position with pins.
Add the pockets on both sides and sew them in place.
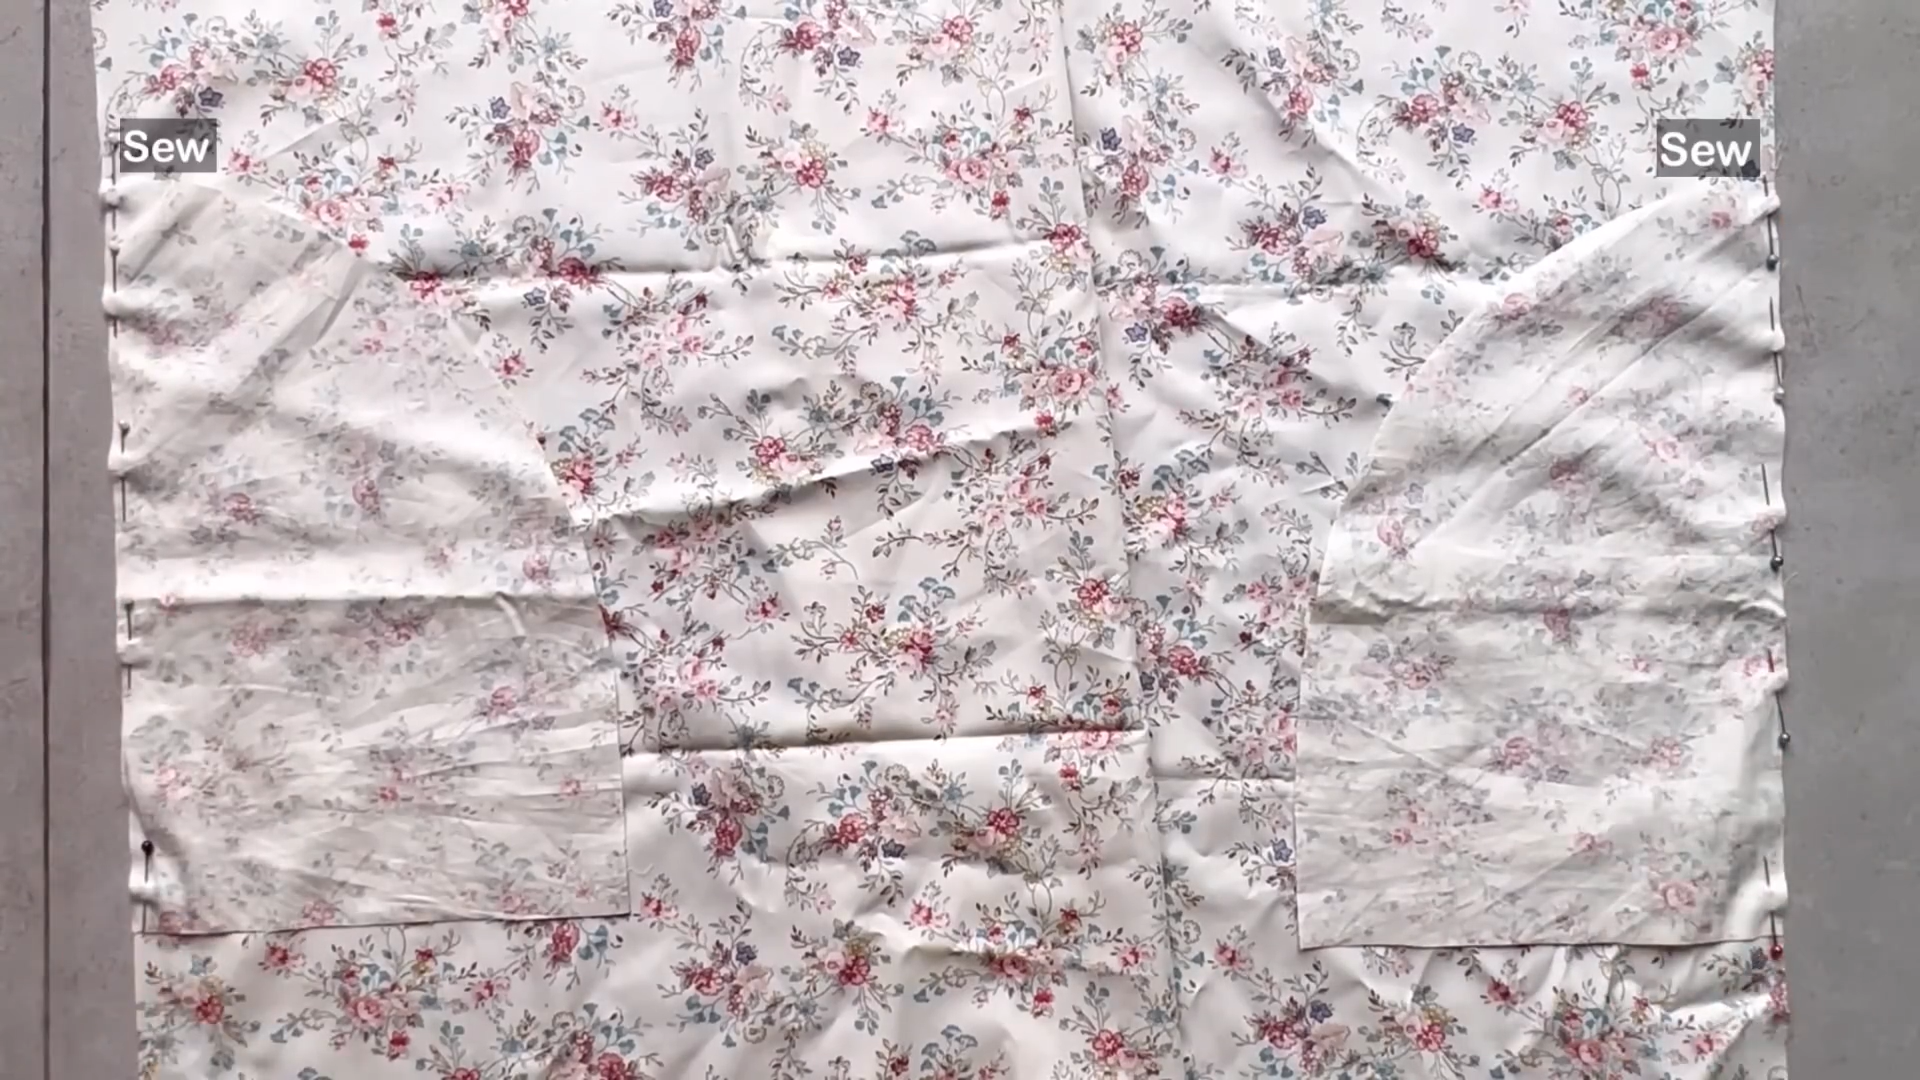
Repeat the steps to create another skirt piece with pockets.
Sew the two skirt pieces together along the side seams.
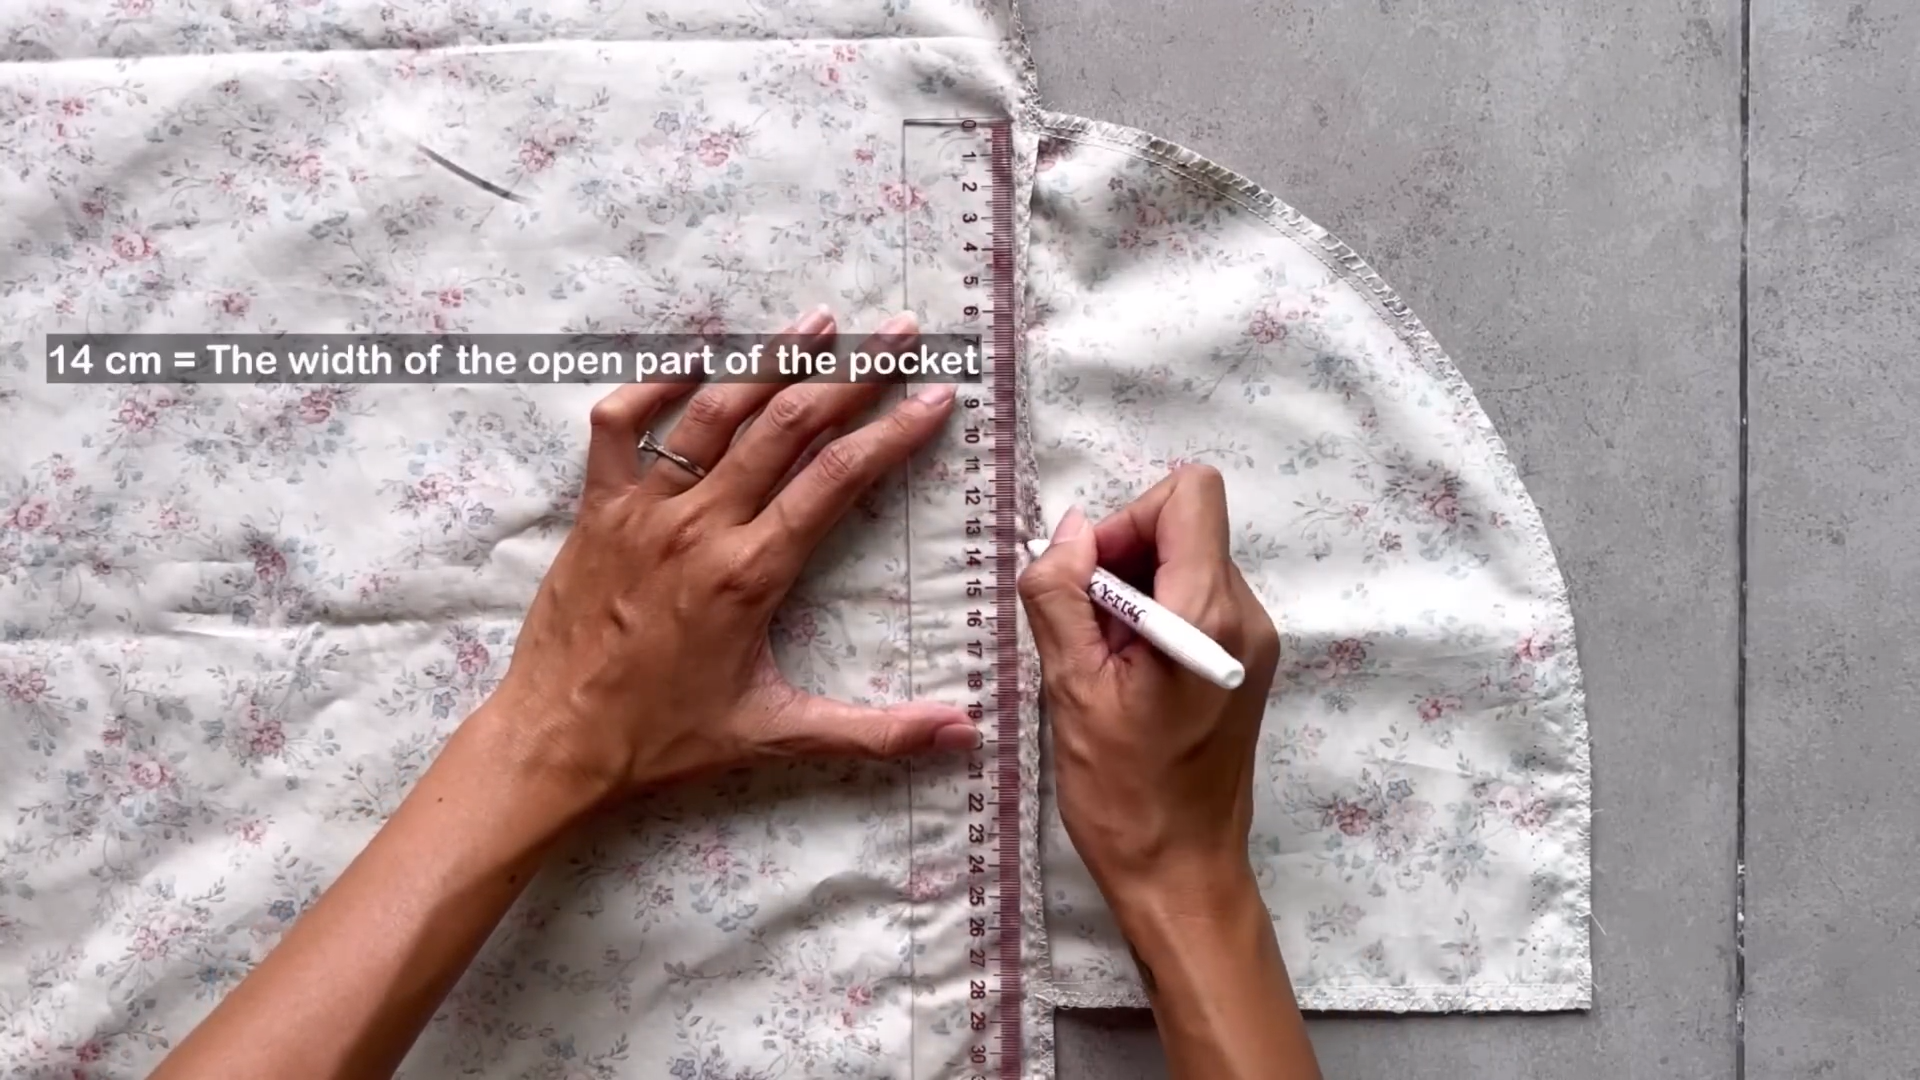
Measure and mark at 14 cm down from the top of the pocket - this will be its opening part.
Stitch the rest of the pocket together to create the depth.
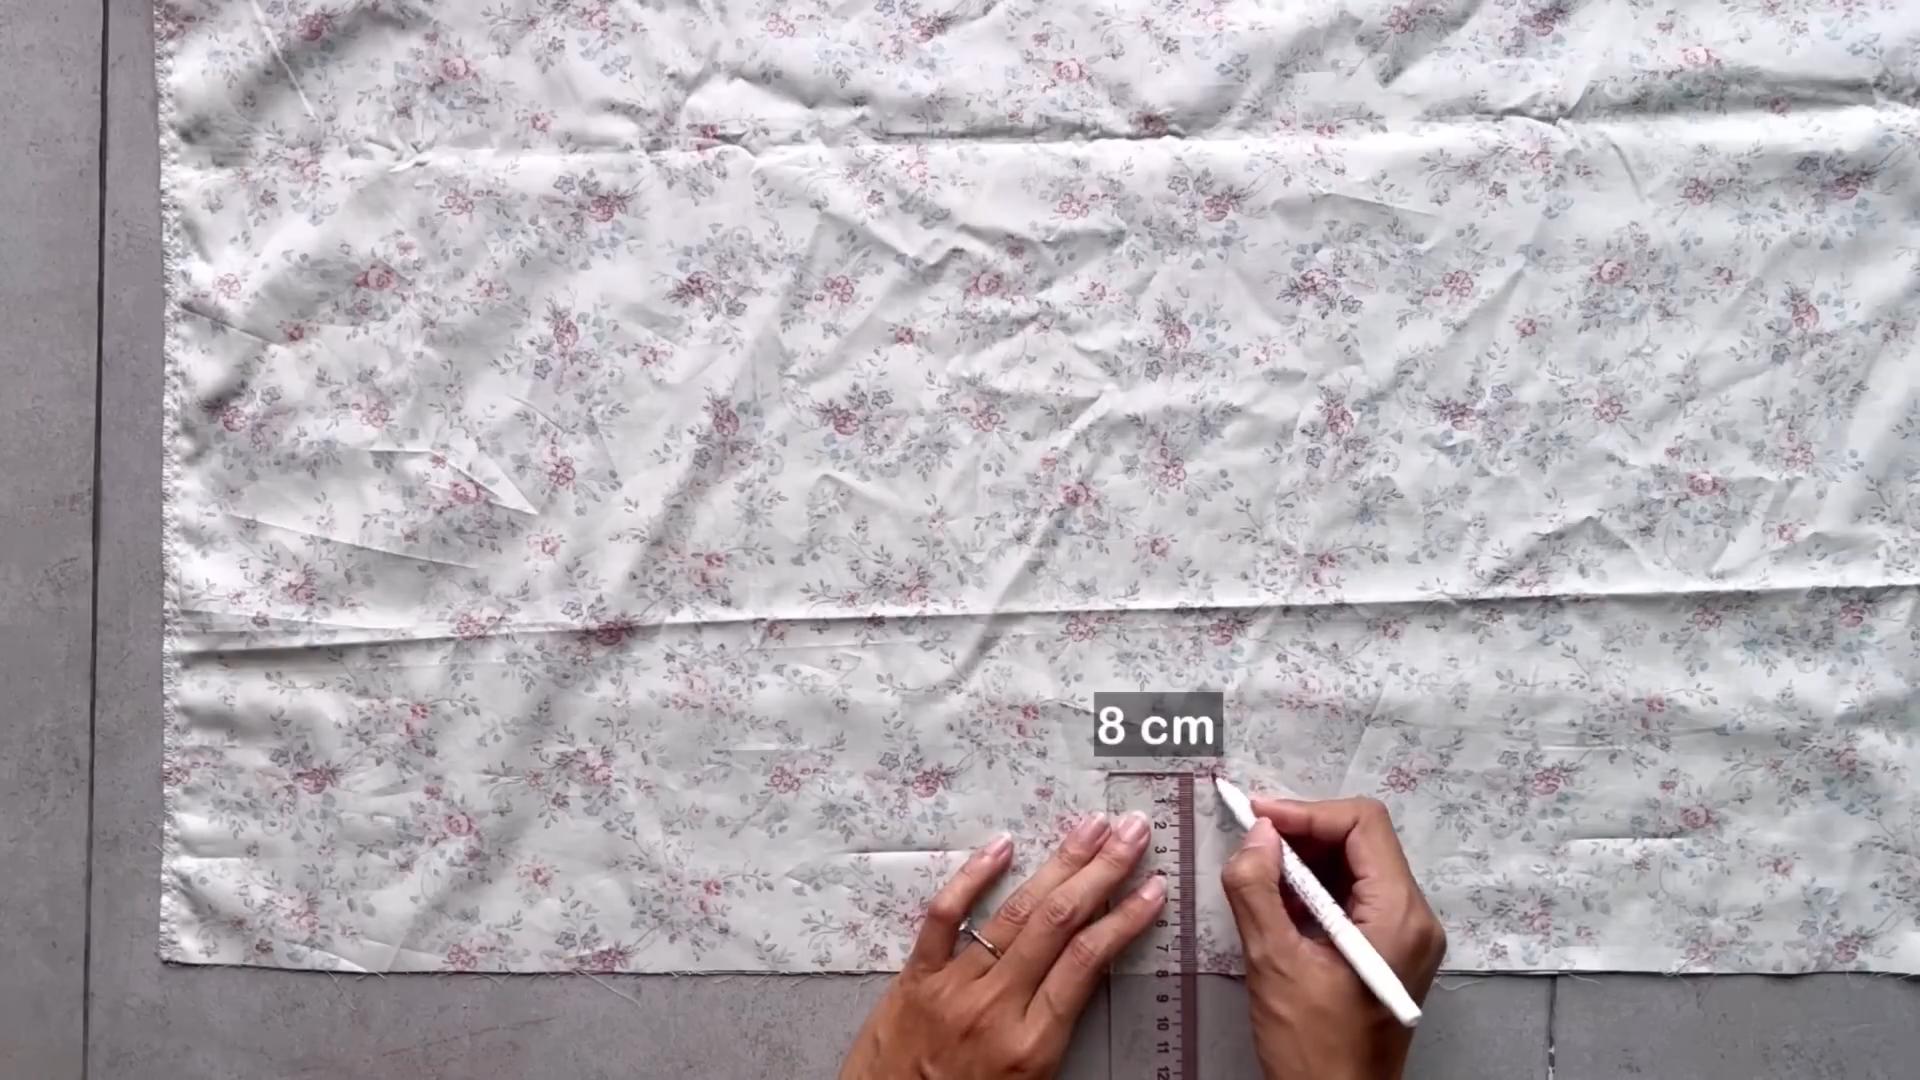
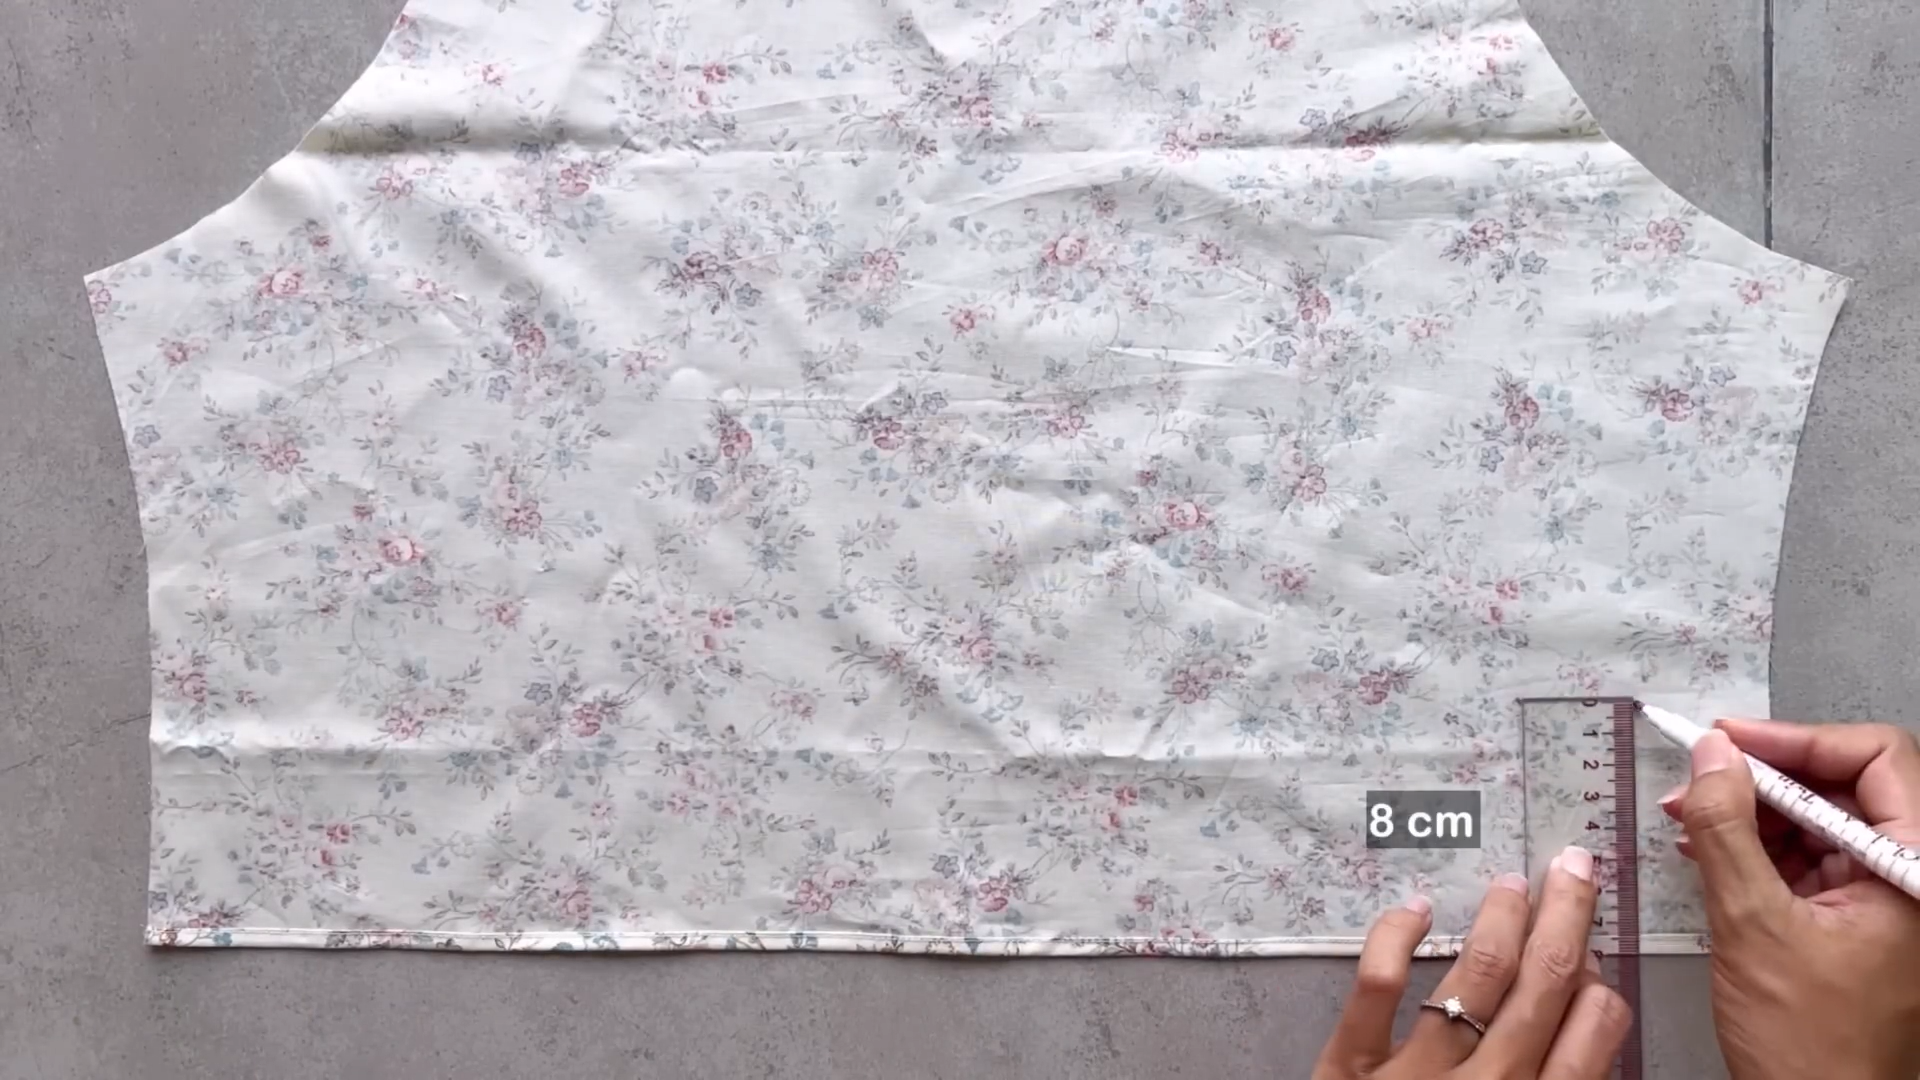
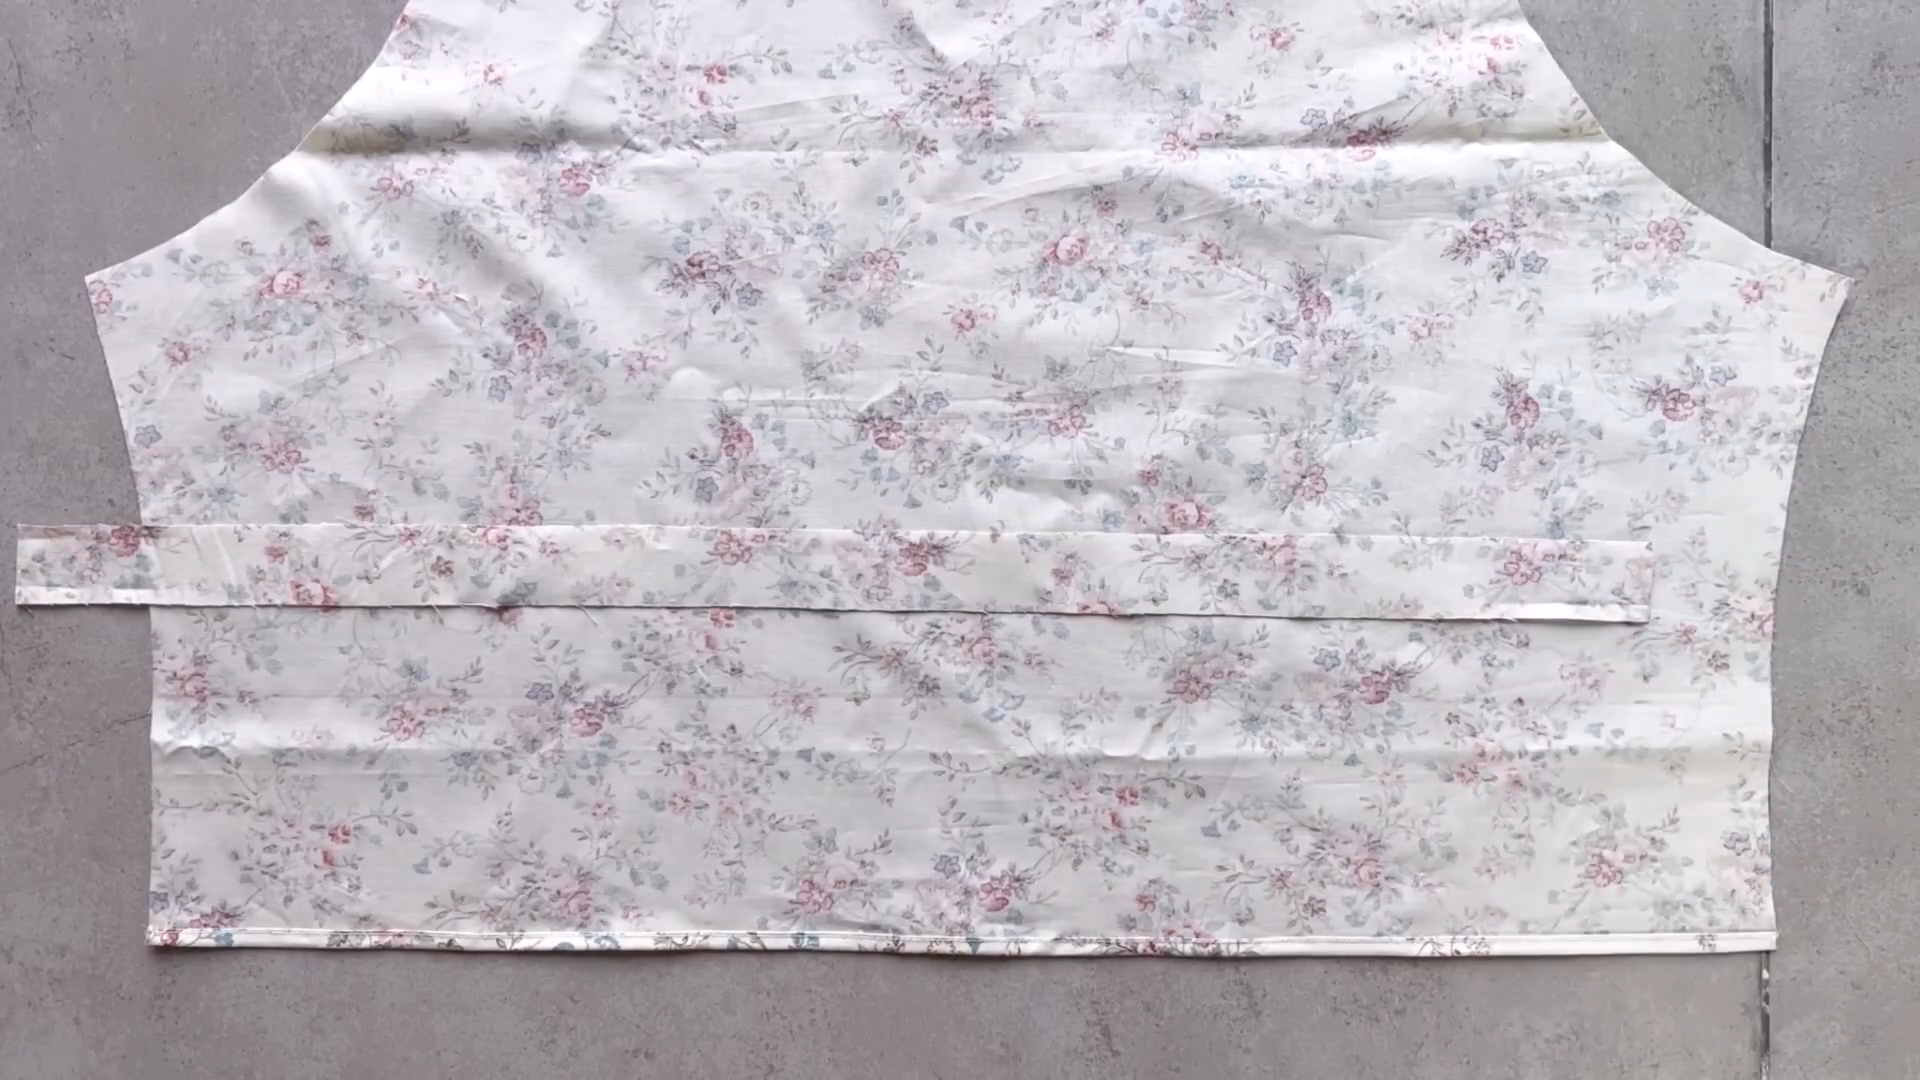
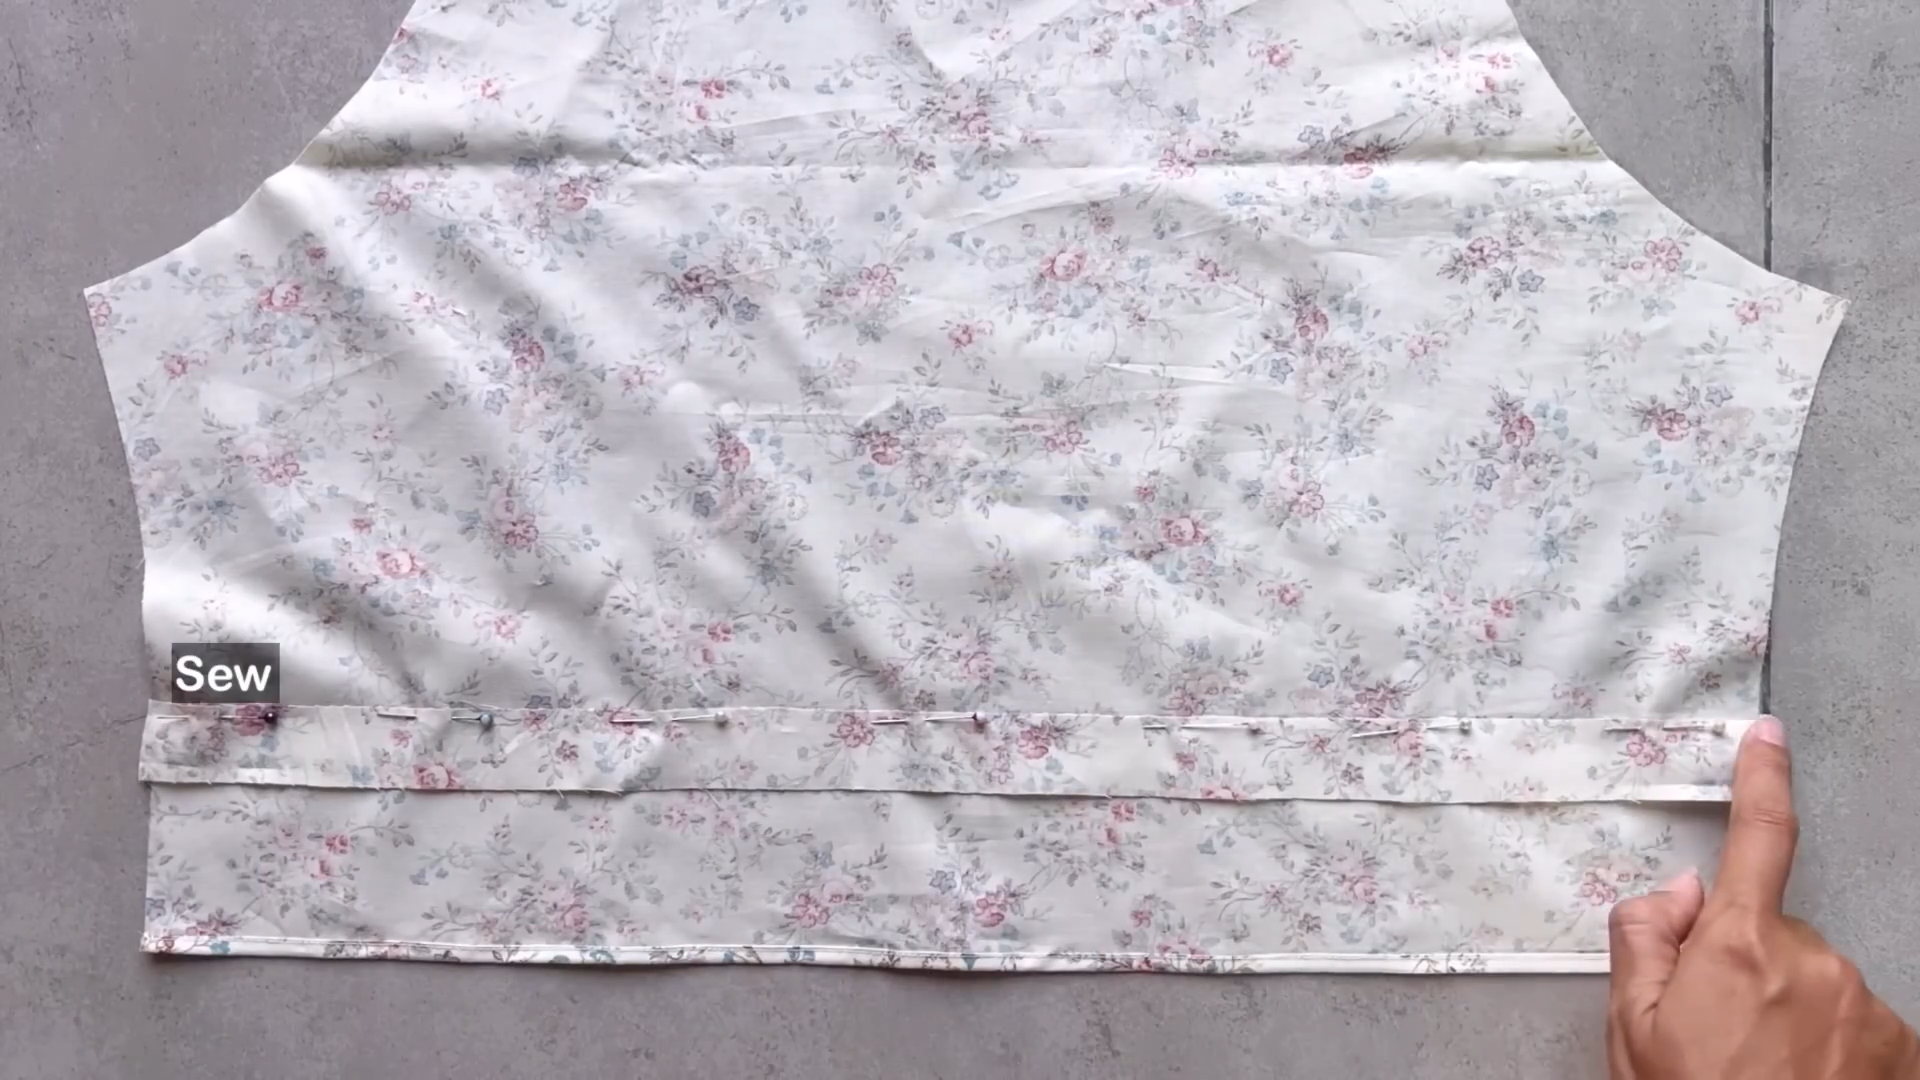
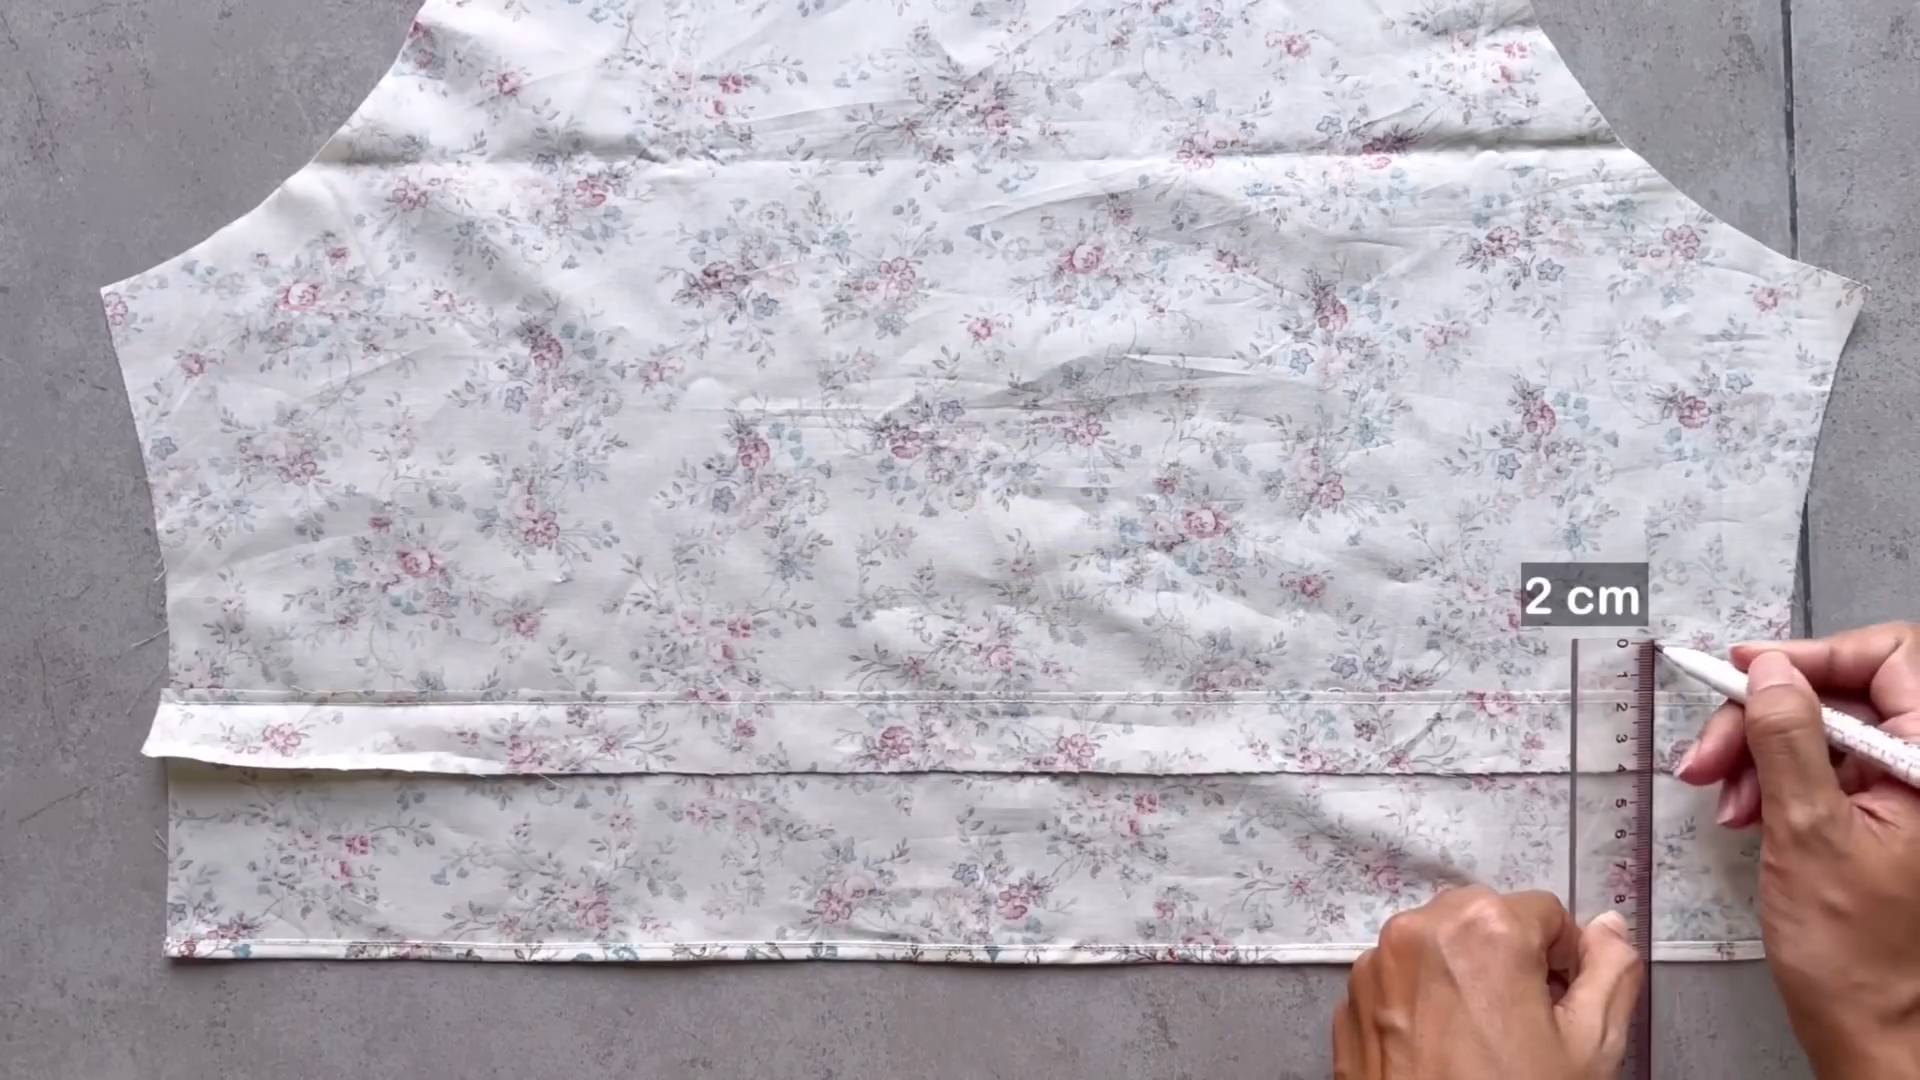
Mark a line at 8 cm above the bottom edge of the skirt.
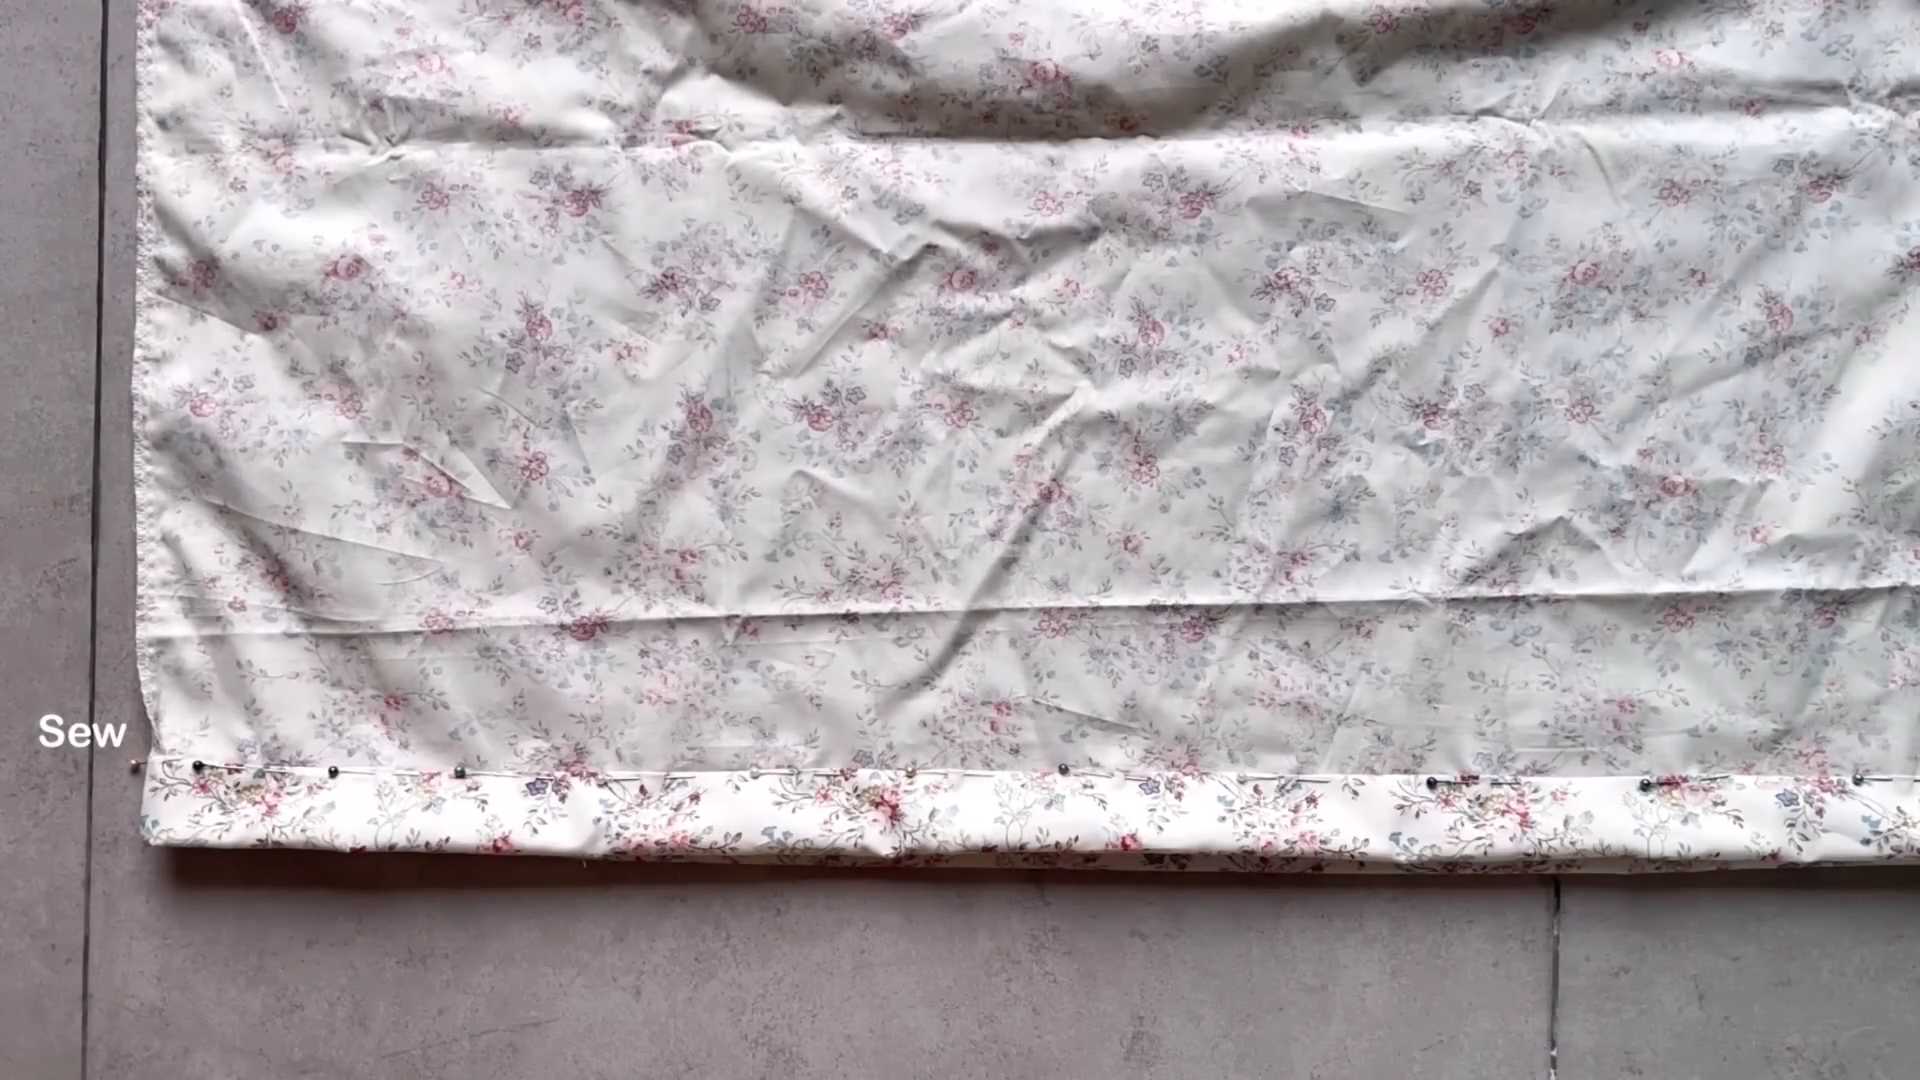
Fold the end fabric inside 1 cm first then continue folding it to the marked line.
Sew to finish the end of the skirt.
Sew a loose seam along the top edge of the skirt.
Adjust the gathers to match the bodice width.
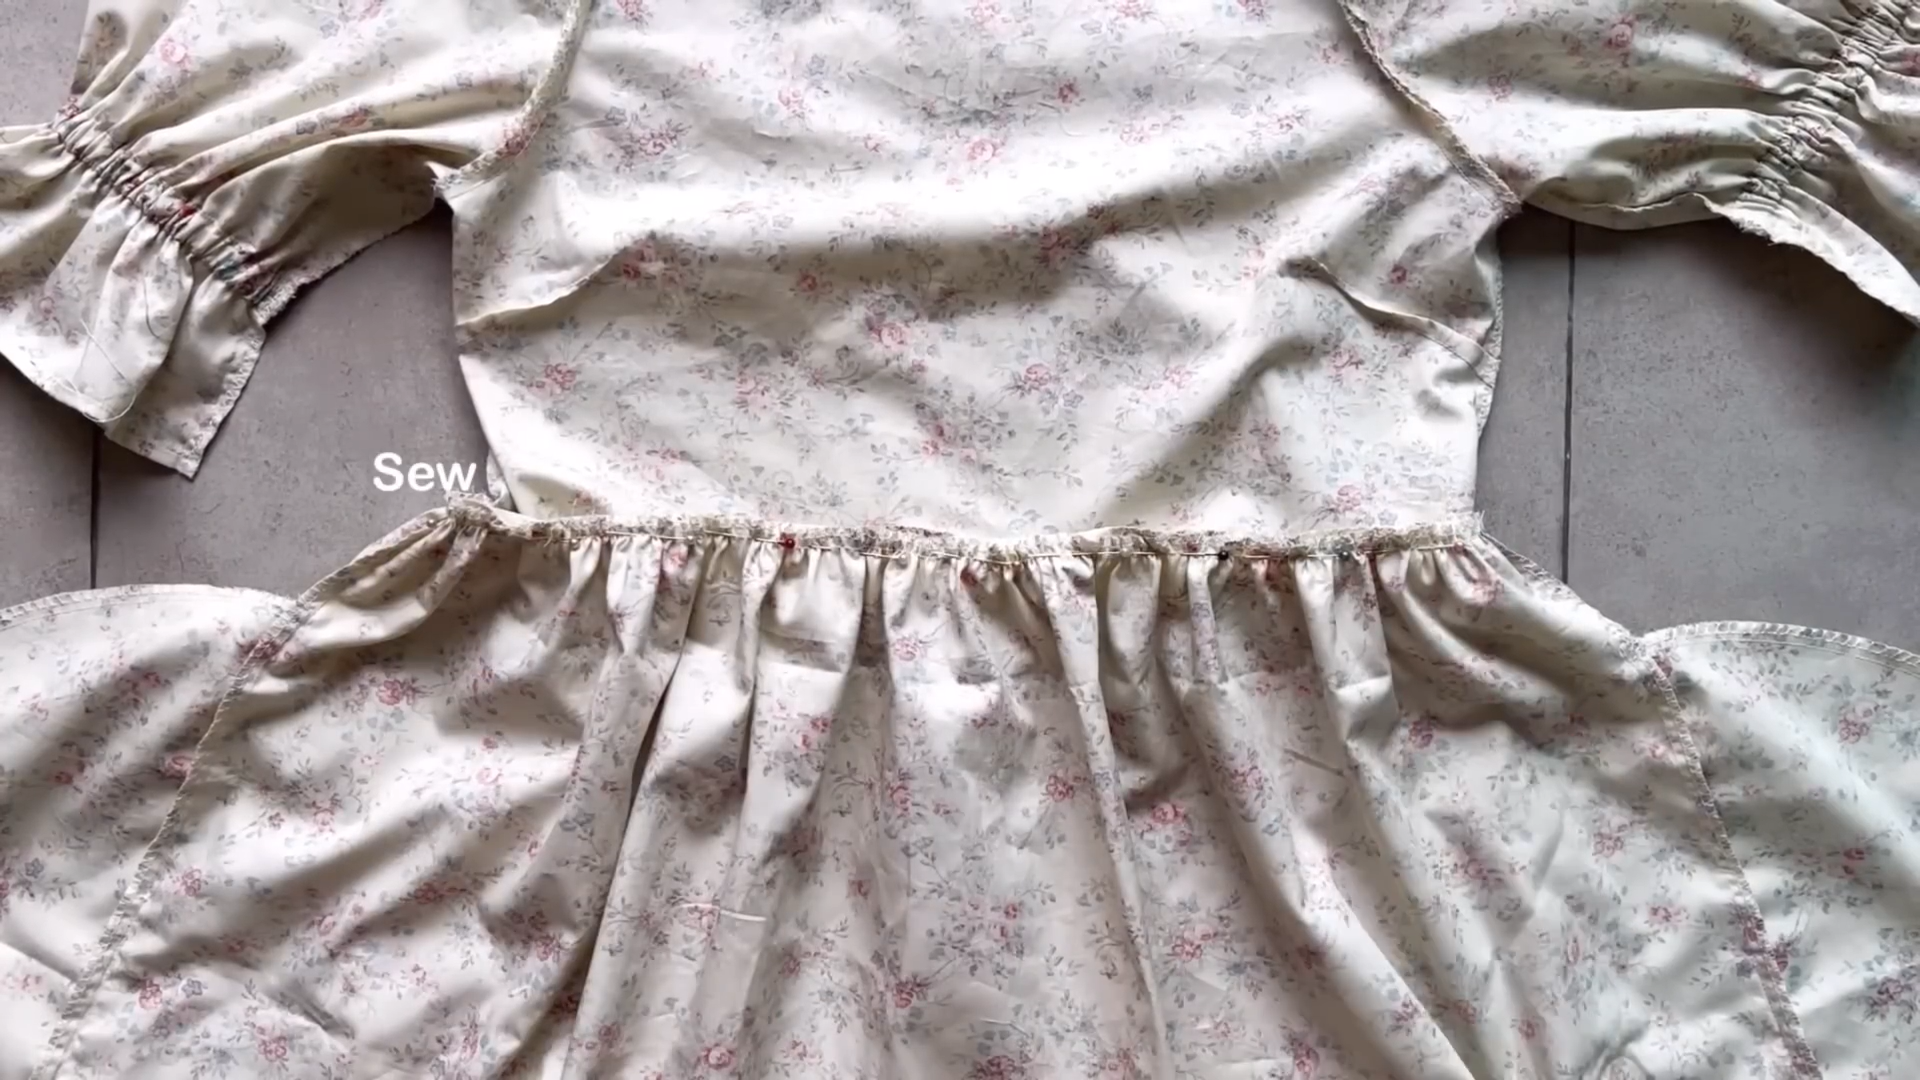
Sew the skirt part to the bodice to complete the dress.
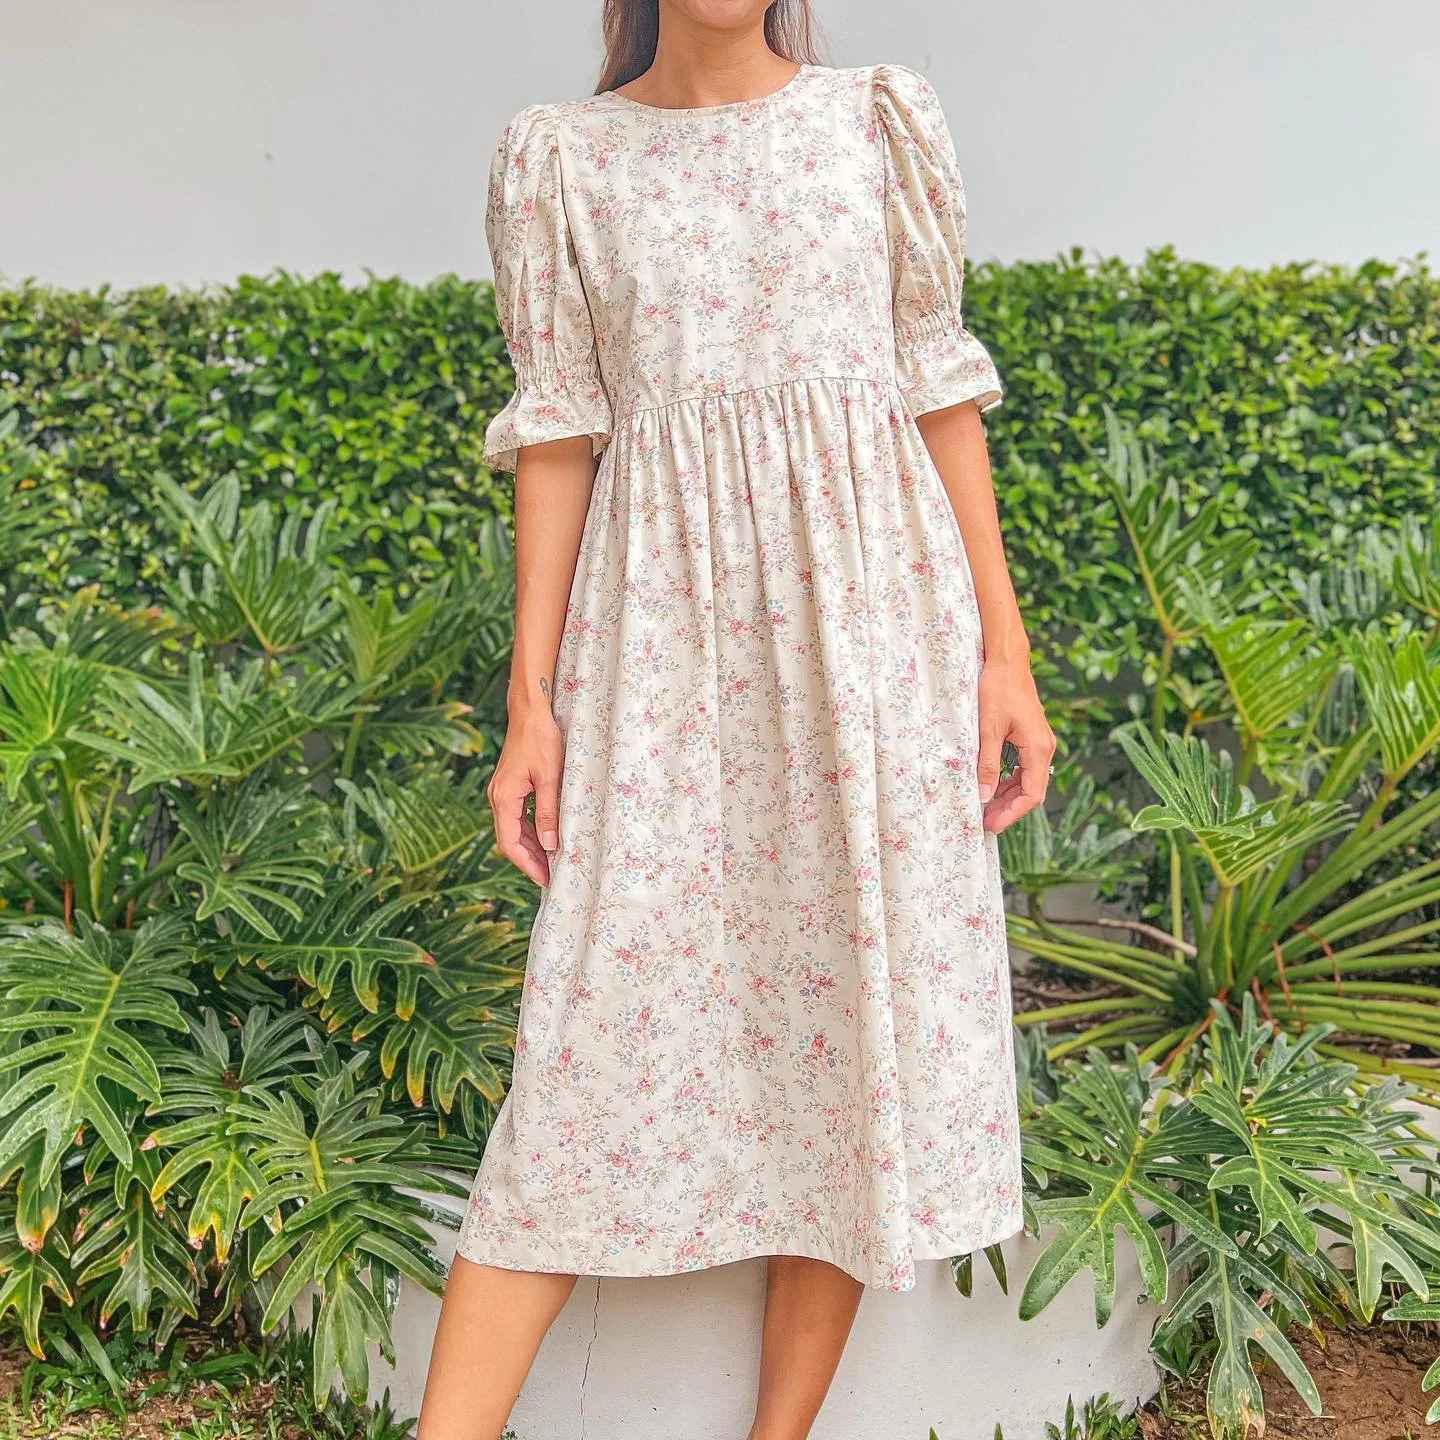
DIY Classic puff sleeve dress
And there you have it! A classic puff sleeve dress is complete!
I'm absolutely in love with how this turned out. It's the perfect blend of comfort and style. The puff sleeves add a touch of whimsy, while the midi length keeps it elegant.
I encourage you to give this dress a try. It's a fantastic project for both beginners and experienced sewers. Remember, you can always customize it to your personal style by experimenting with different fabrics and lengths.

I hope you found my step-by-step guide helpful and inspiring.
If you’re interested in making your own, give it a try and let me know how it goes!
Until then, happy sewing!