DIY Cottage dress | Making a shirred dress and a wrap dress in one design | Sewing tutorial
DIY Cottage dress
Welcome or welcome back to my channel!
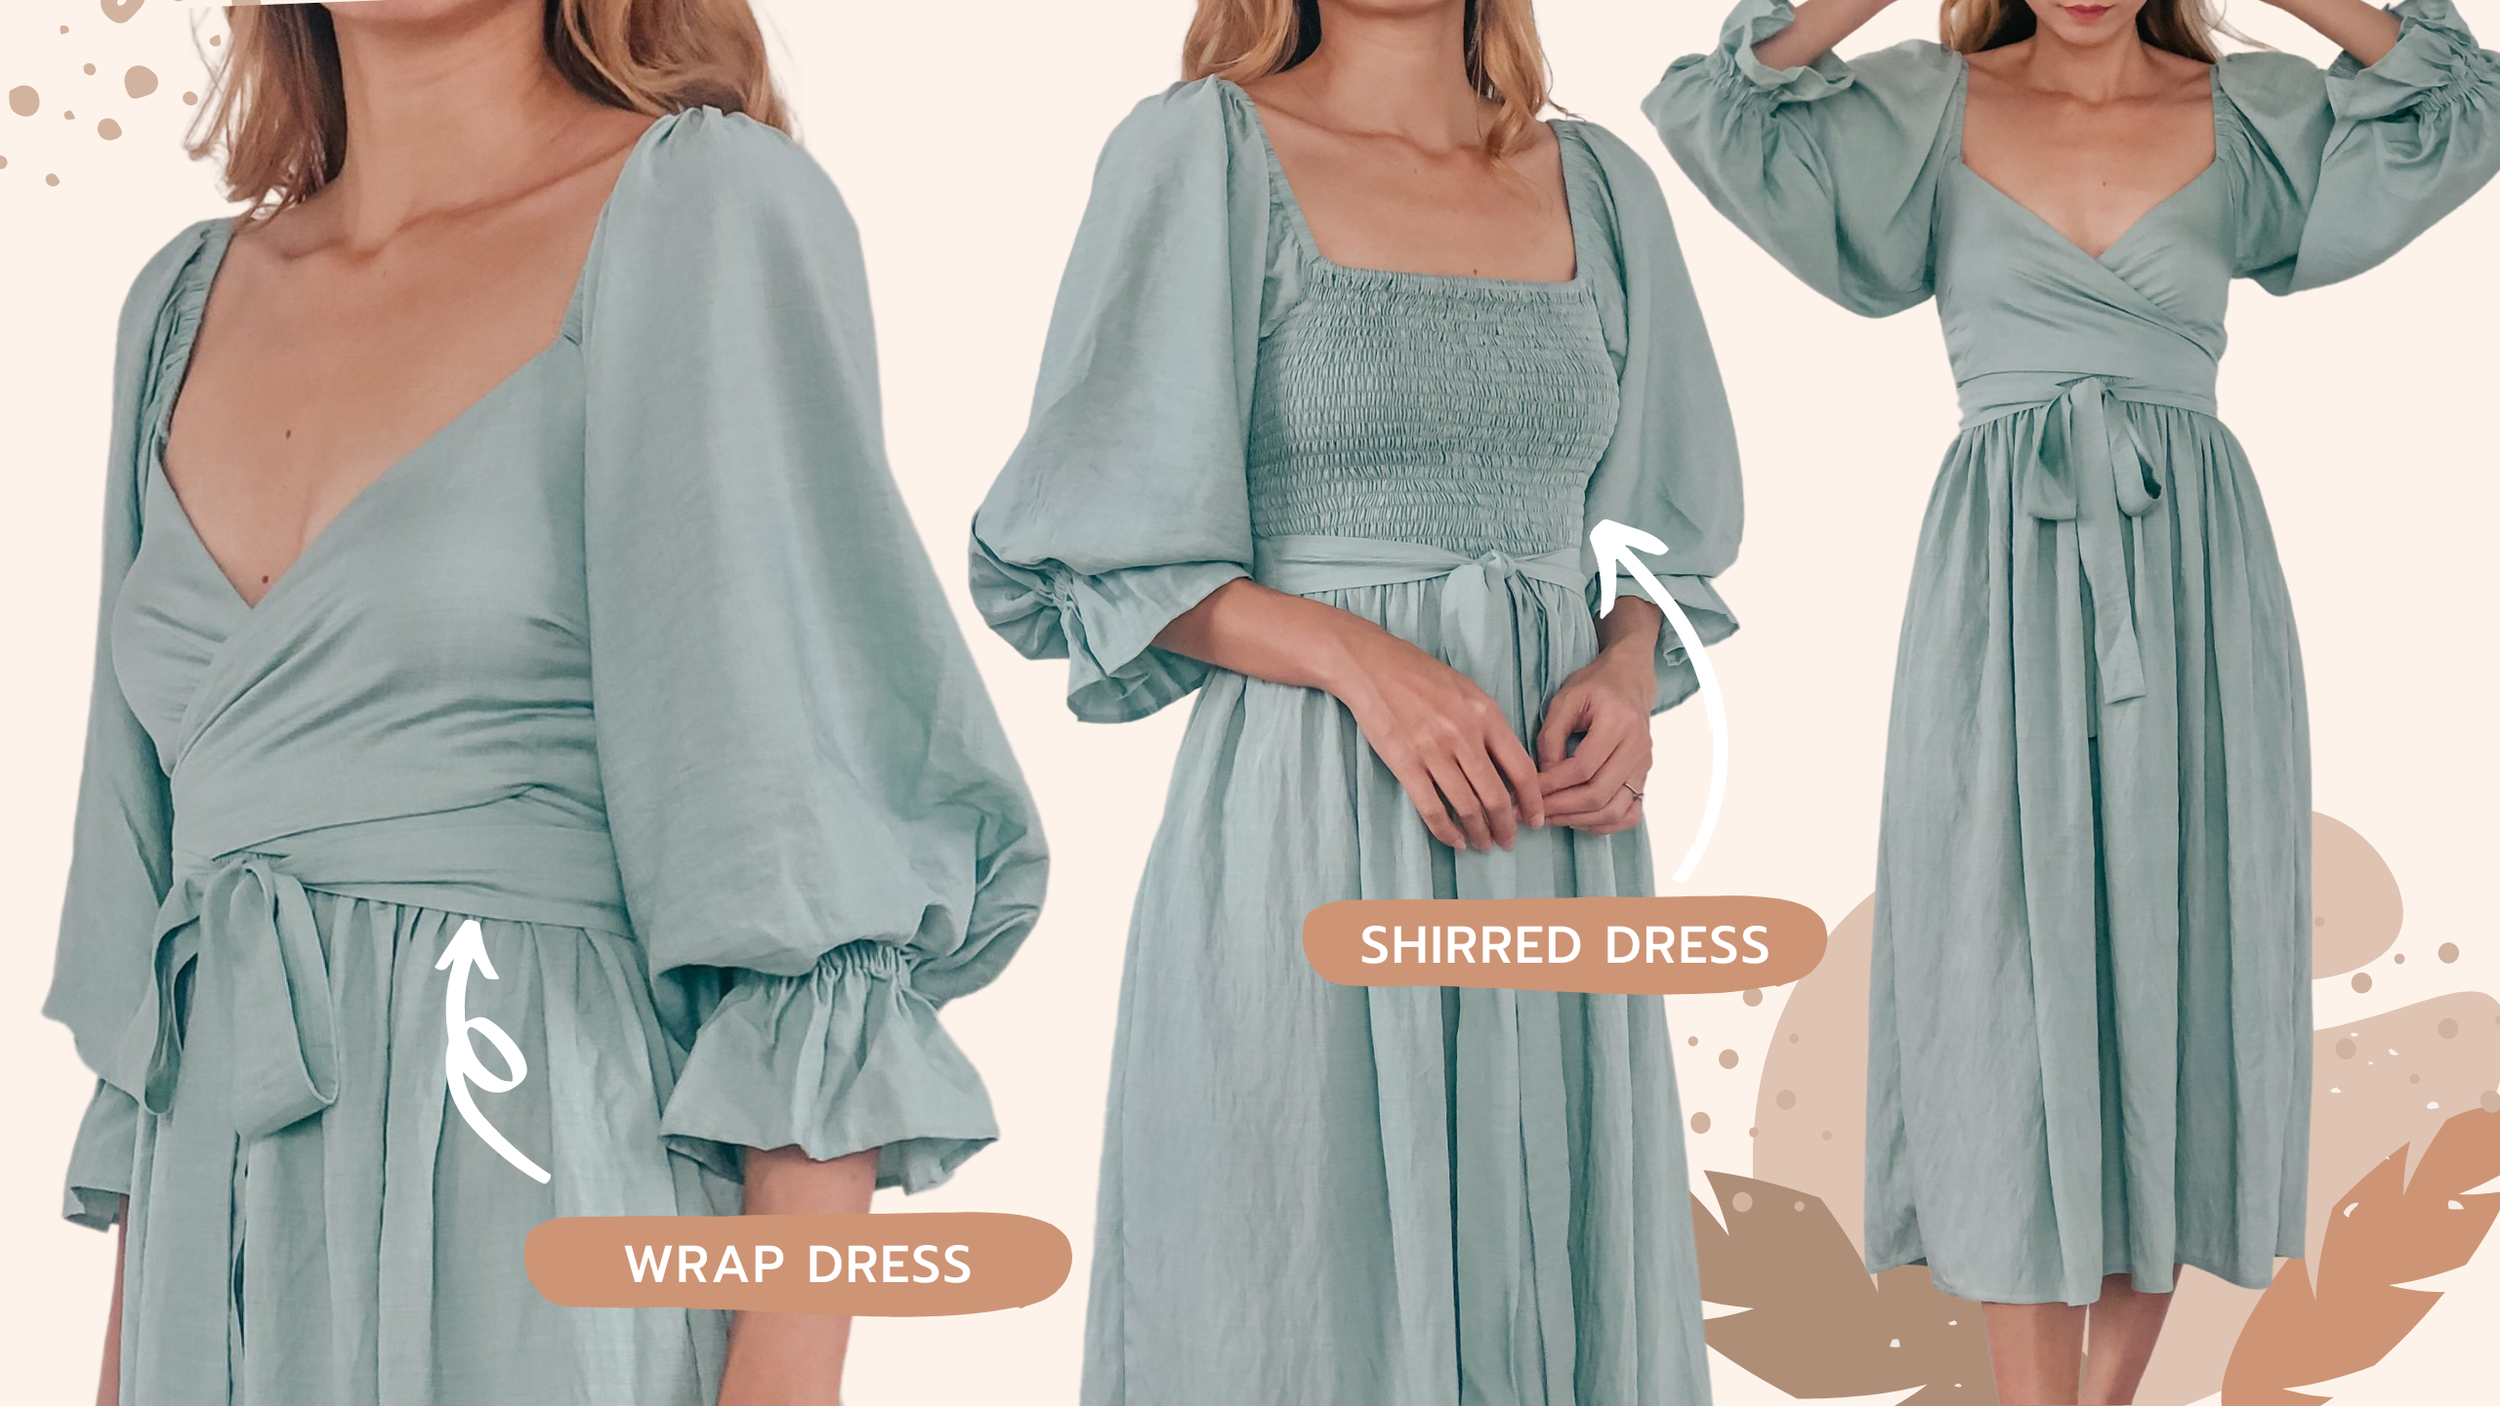
Today's project is a perfect example: a stunning cottage dress that blends the charm of a shirred bodice with the versatility of a wrap dress. It's perfect for twirling through fields or adding a touch of whimsy to your everyday look.
The best part? I've designed this project with beginners in mind! The easy-to-follow tutorial will guide you through every step, so you can create a dress you'll love to wear, regardless of your sewing experience.
So, let’s get started!
WHAT YOU’LL NEED
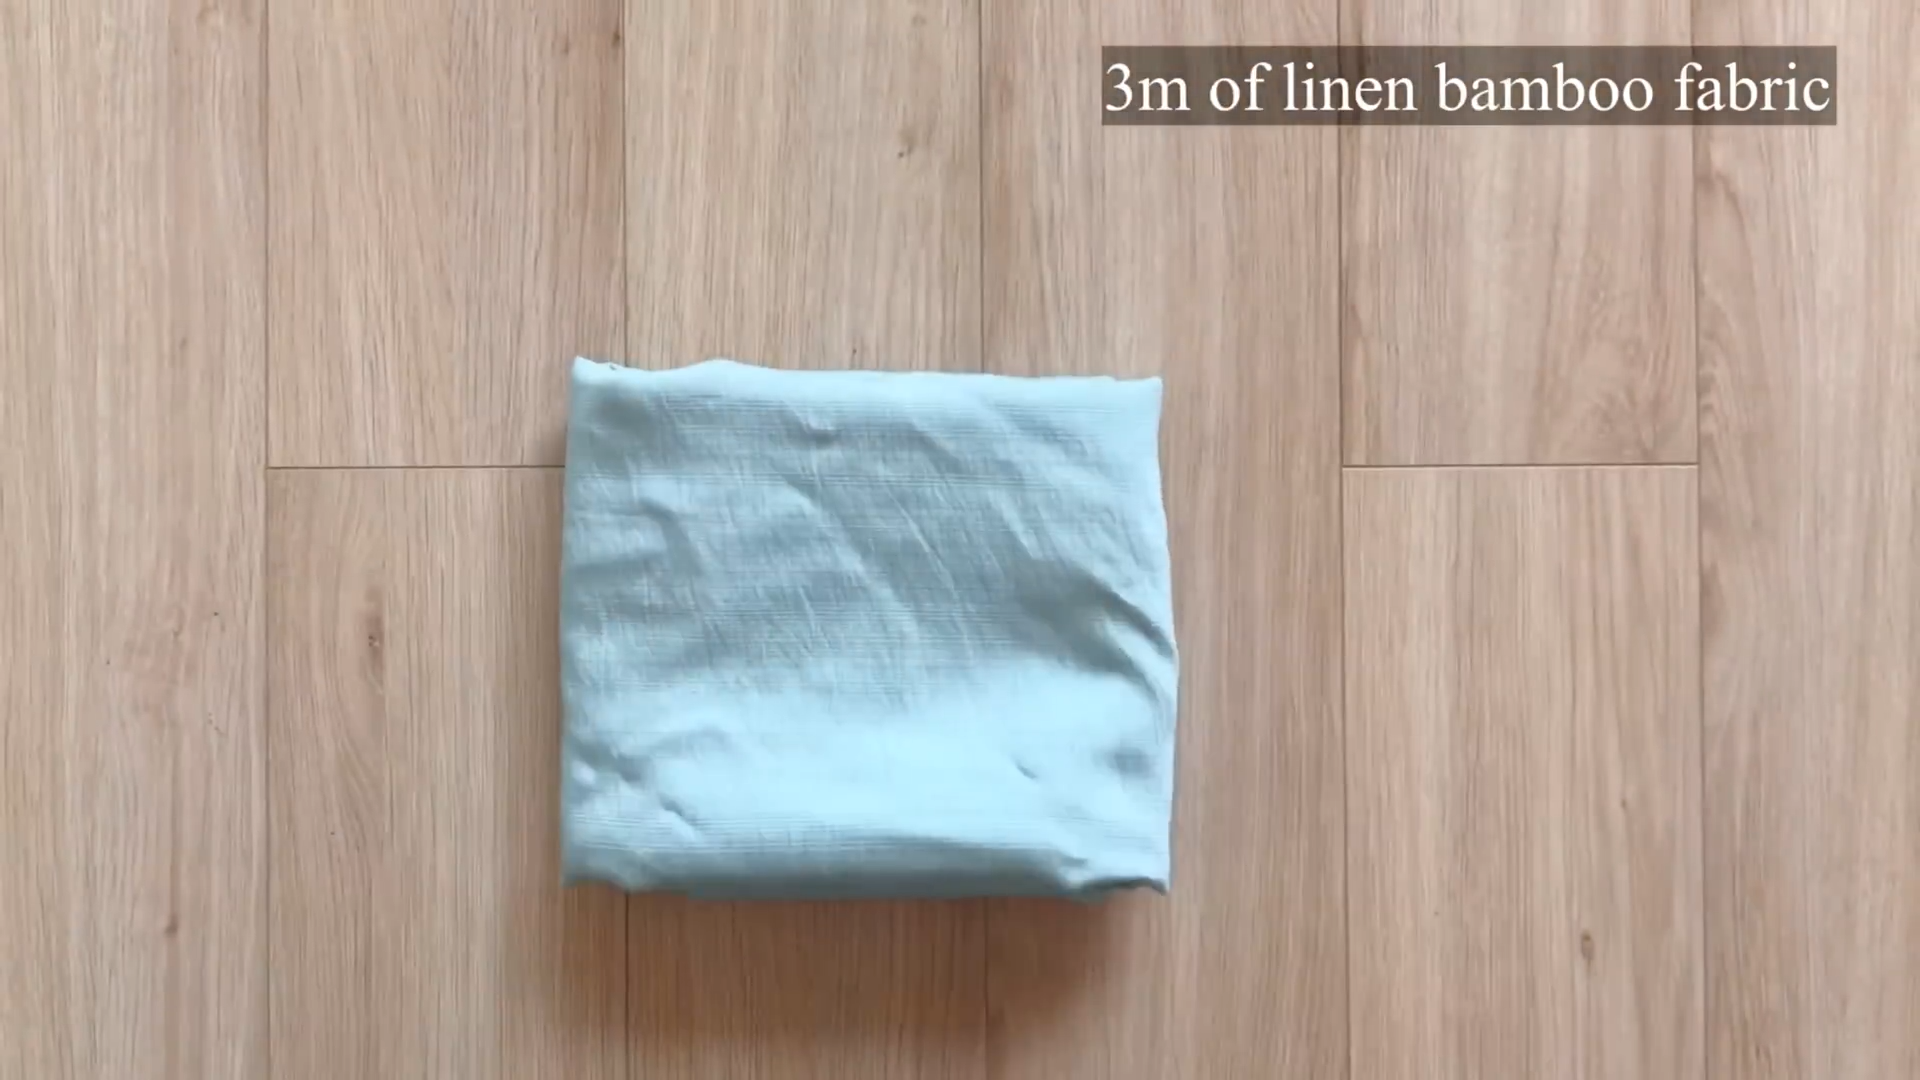
3m of linen bamboo fabric
Pattern paper
Sewing machine
Pins
Scissors
Ruler
Long stick
SEWING THE DRESS
THE BACK BODICE
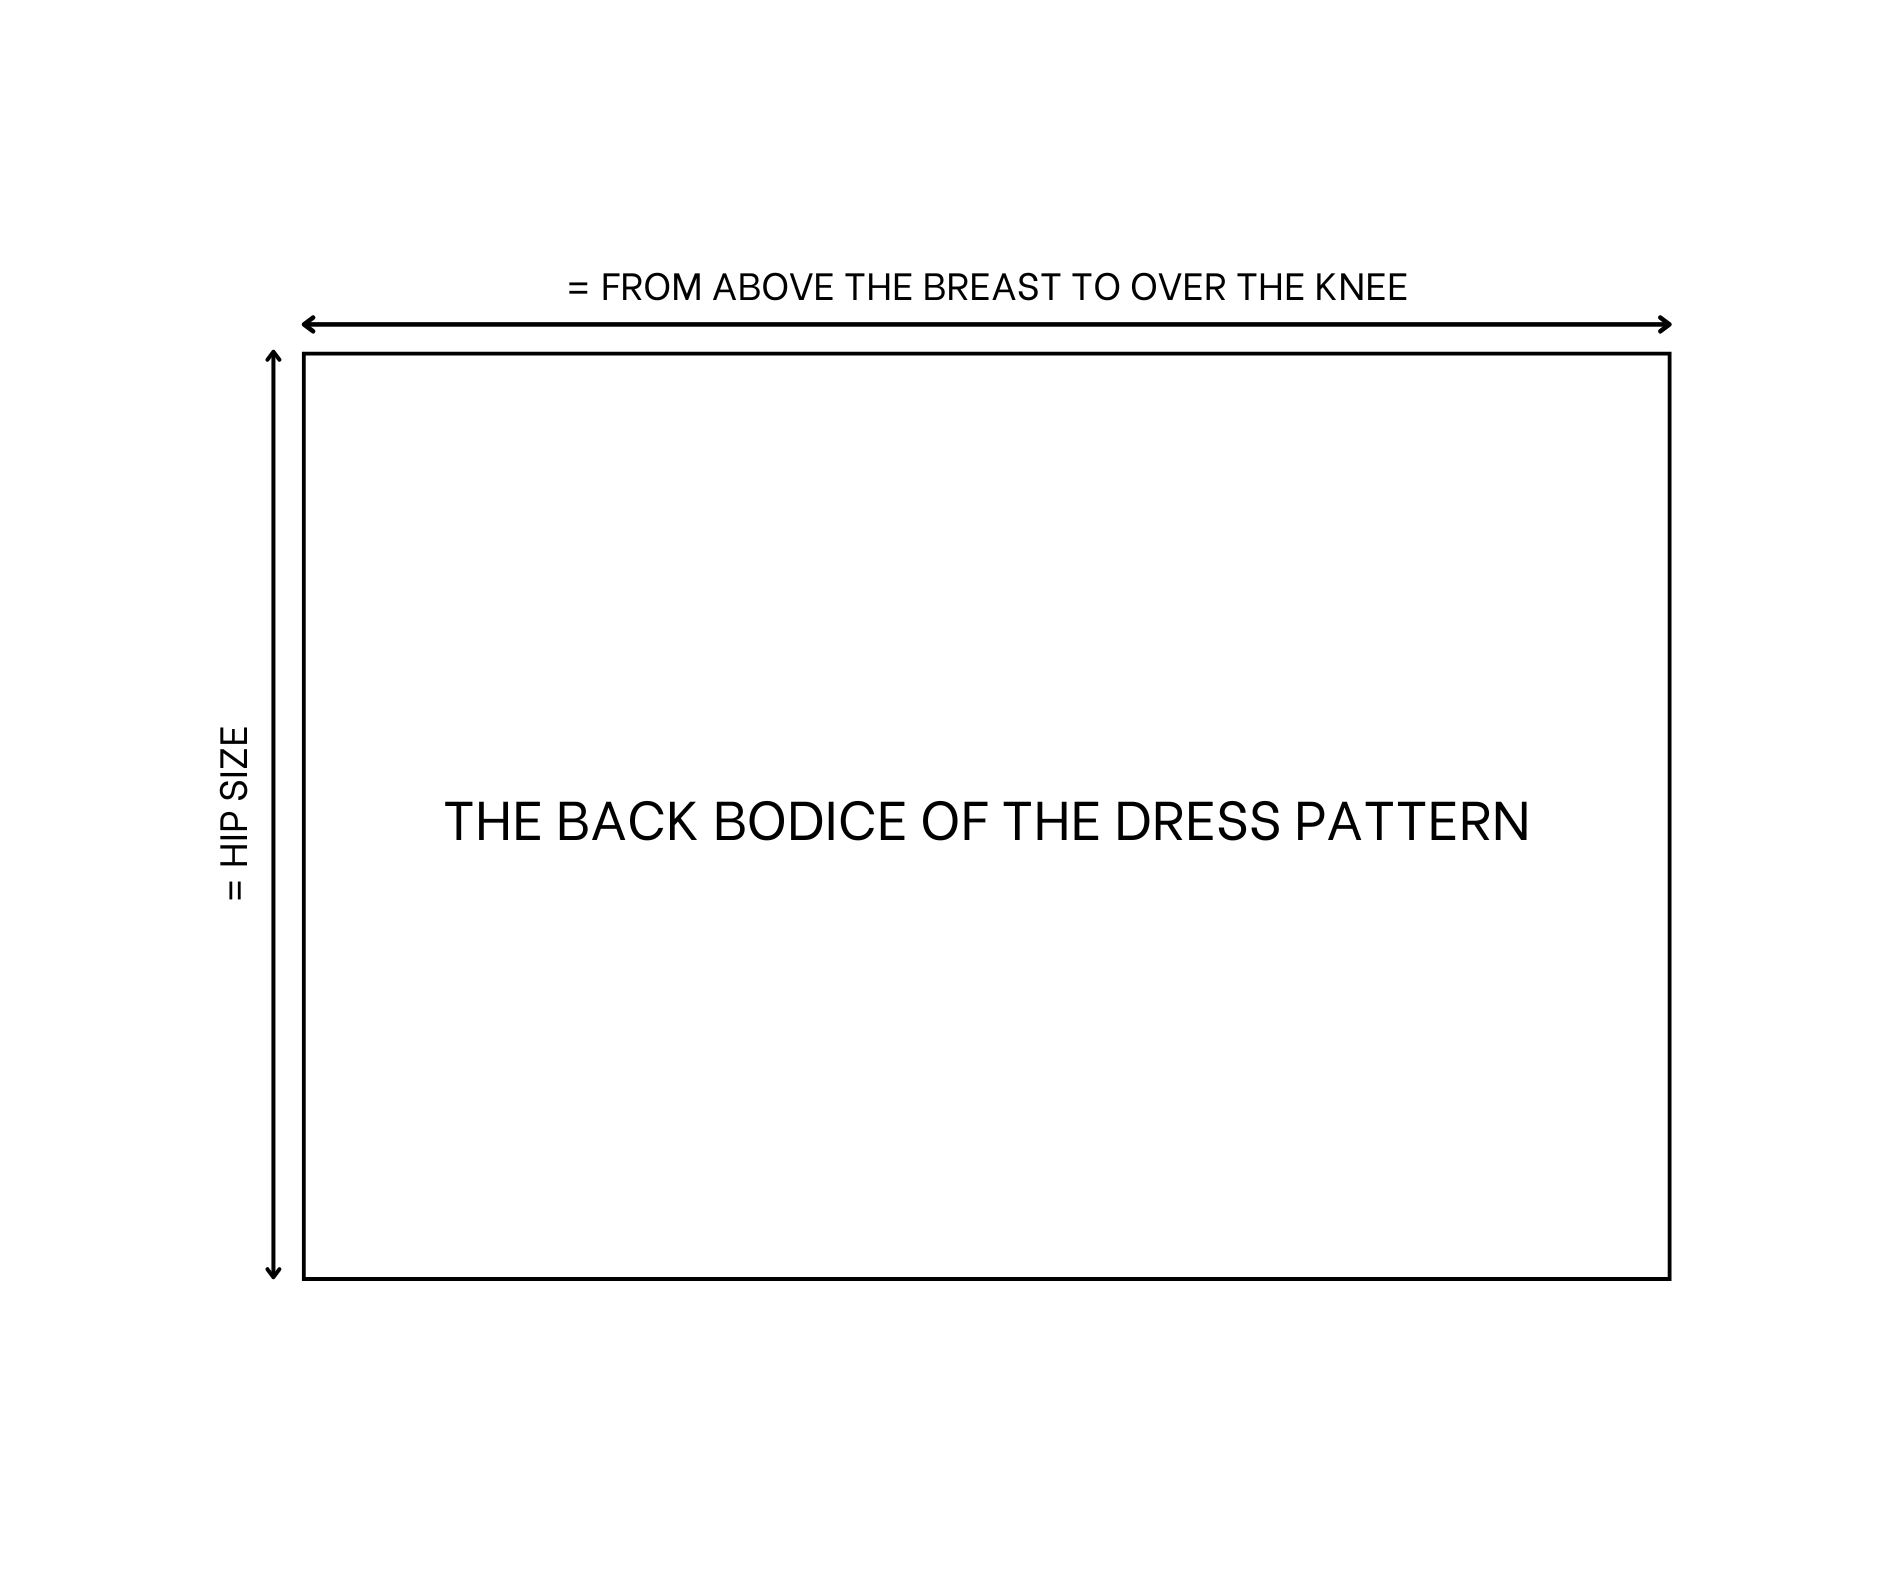
The back body of the dress pattern
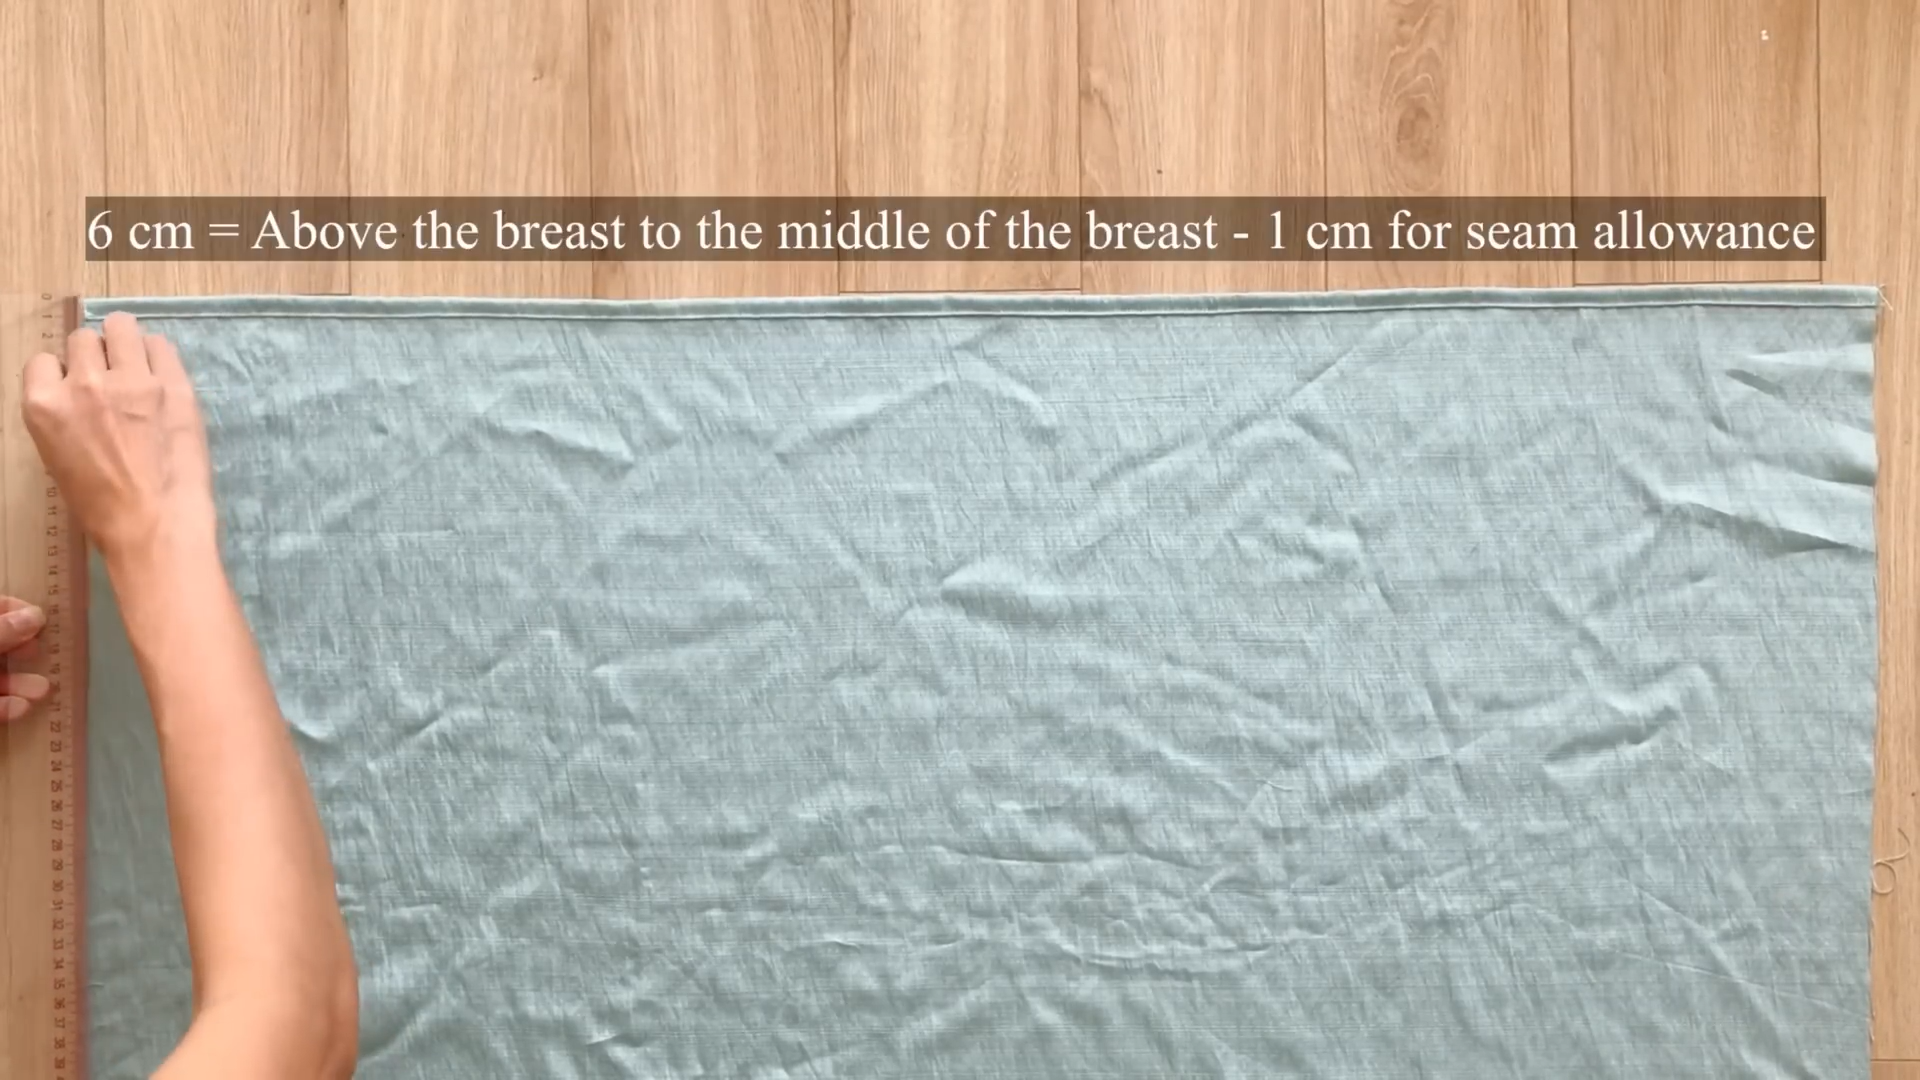
Draw a rectangle with 92 cm width which is your hip size and 112 cm length which is the length from above your breast to over your knee, it's the length of the dress that you want.
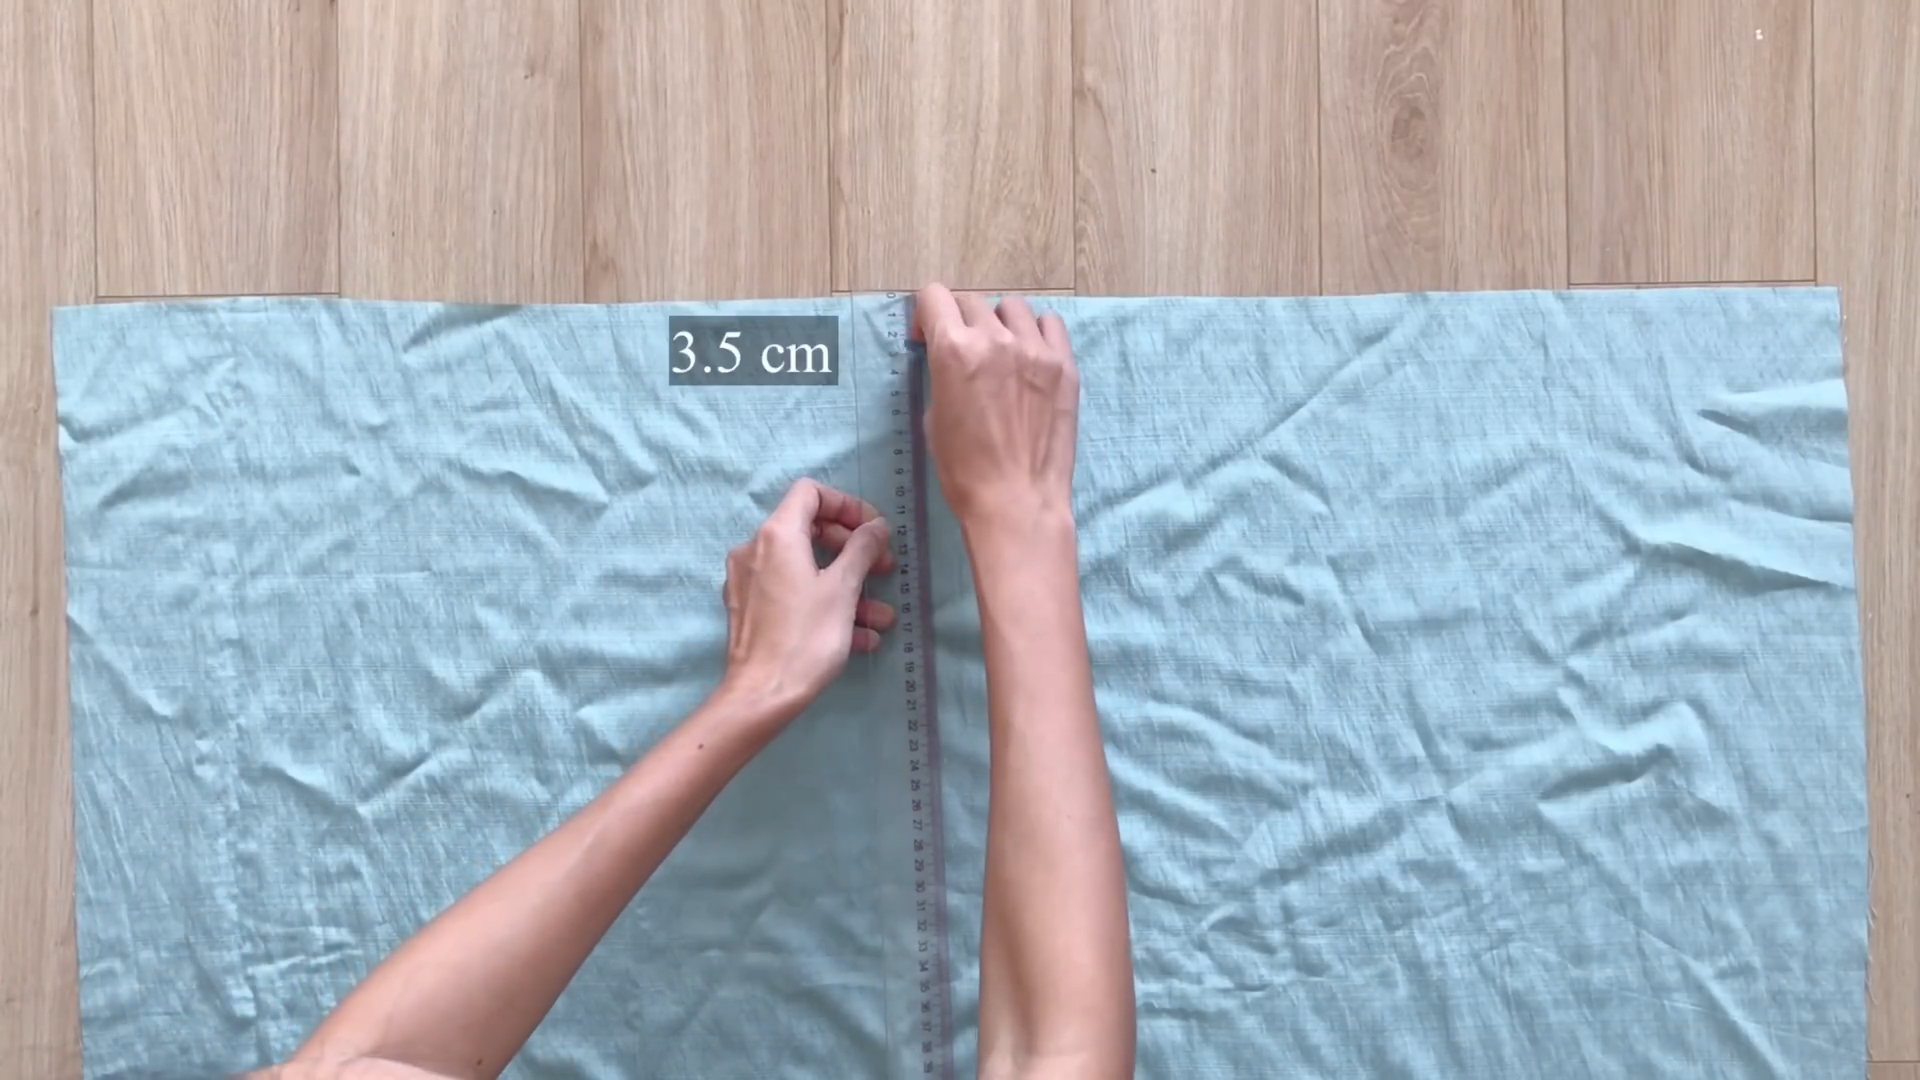
From one width line of the rectangle, measure and mark 3.5 cm down.
Fold the fabric inward by 0.5 cm, then continue folding inwards until you reach the 3.5 cm mark.
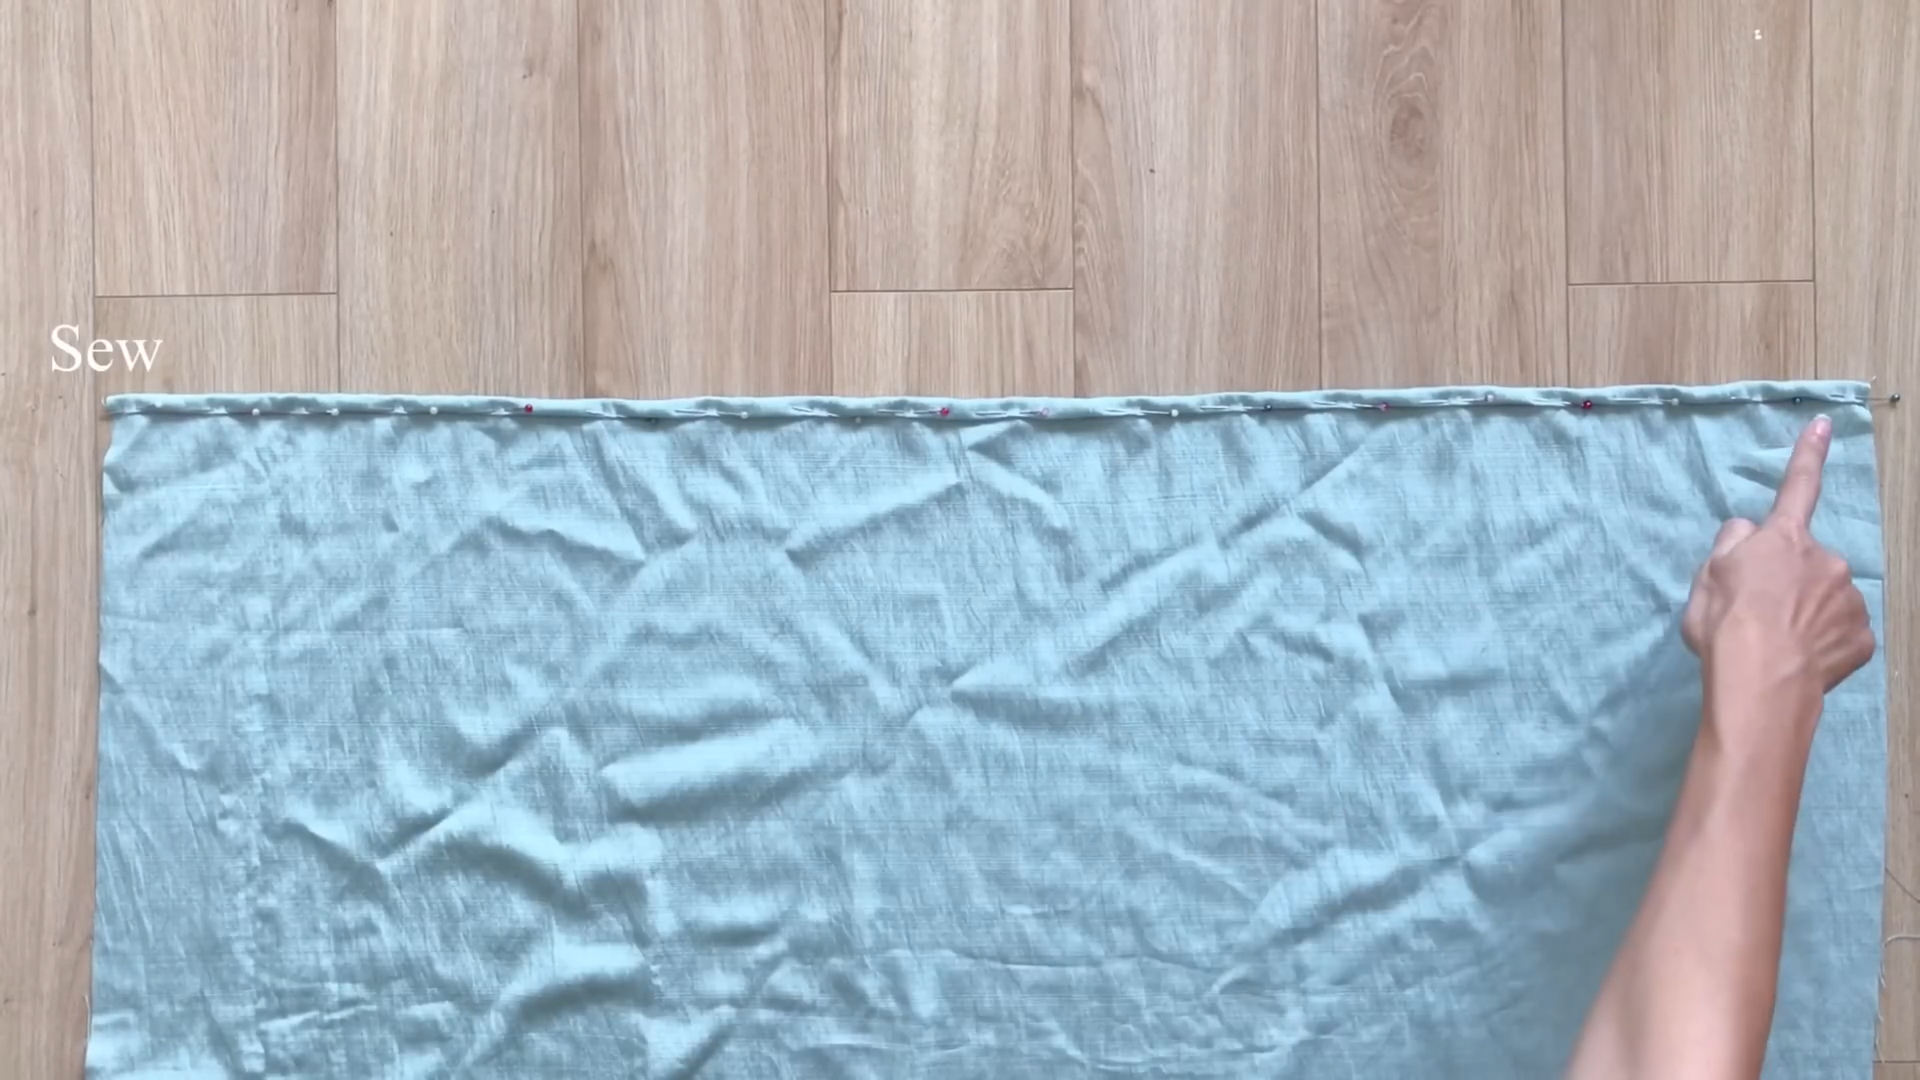
Sew along the folded edge to create a casing for the elastic band.
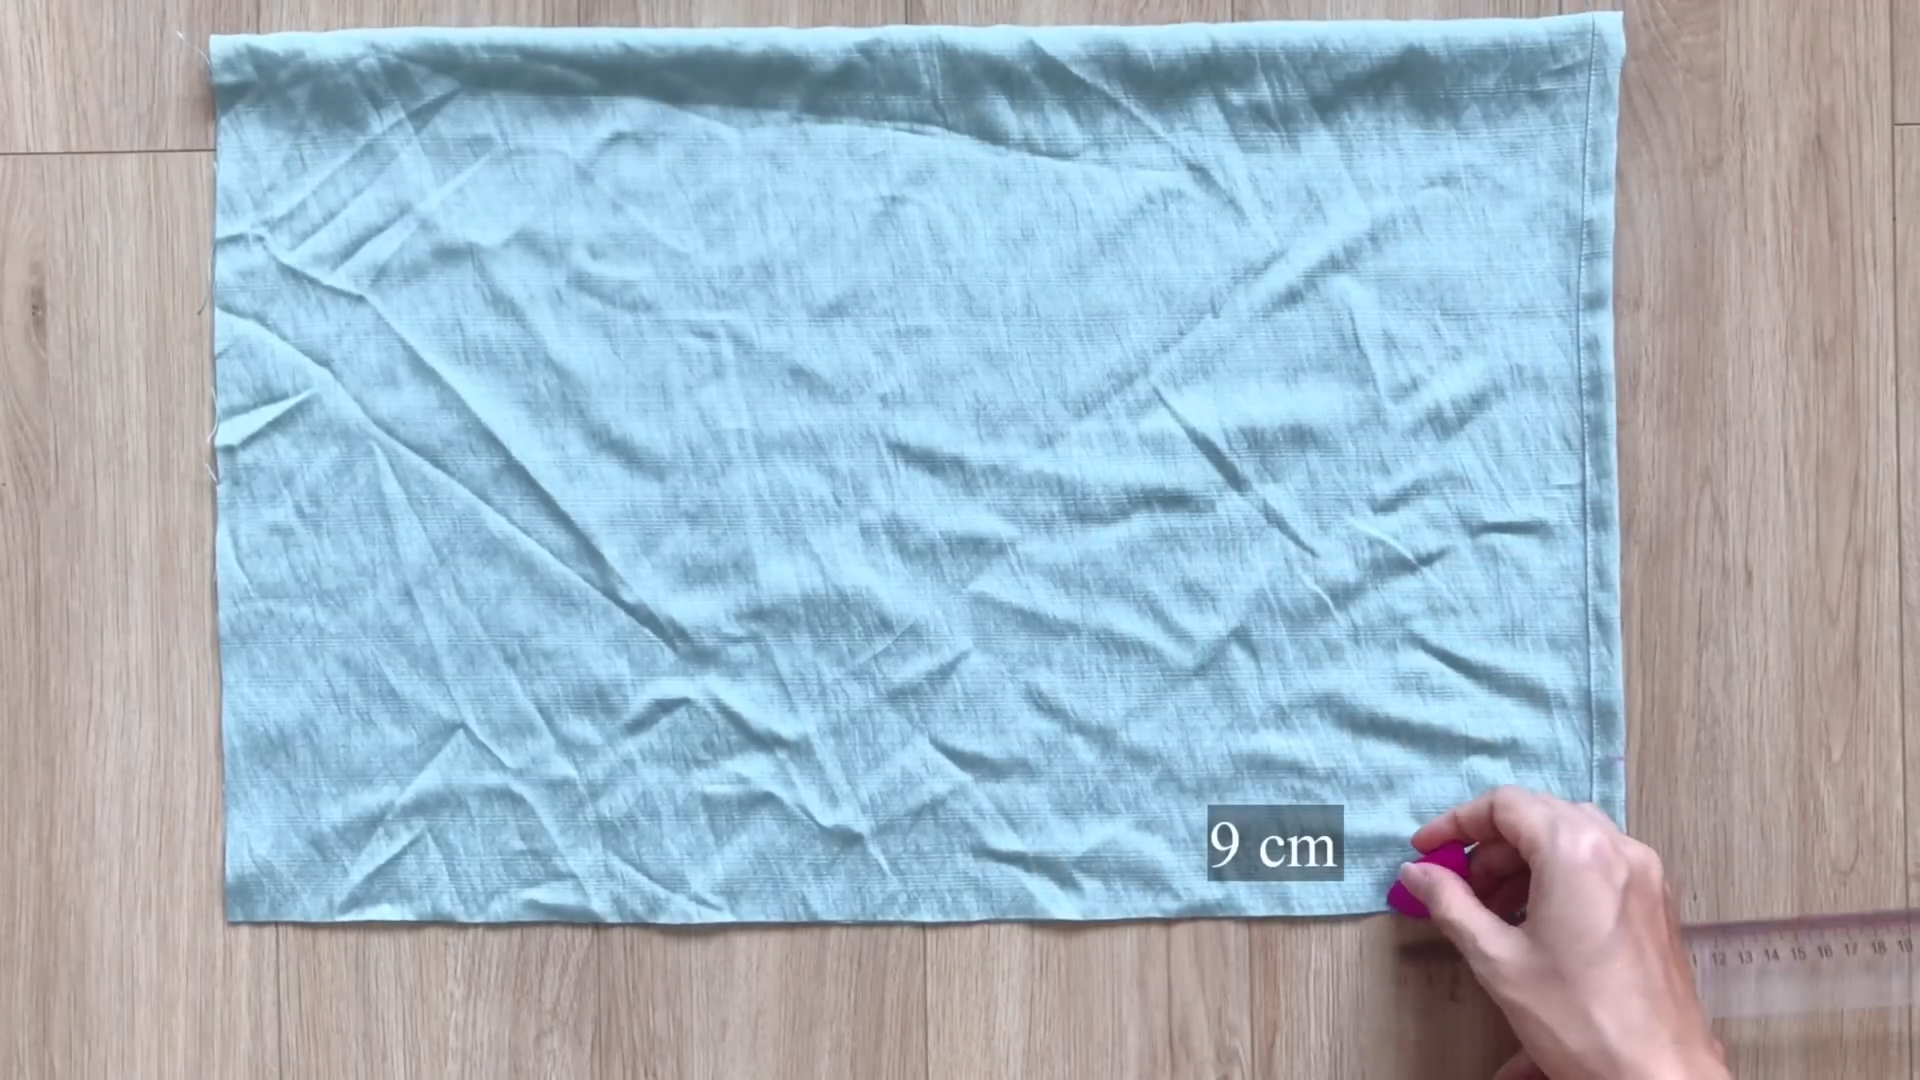
Measure 6 cm down from the same short end of the rectangle – this is the depth of the armpit area.
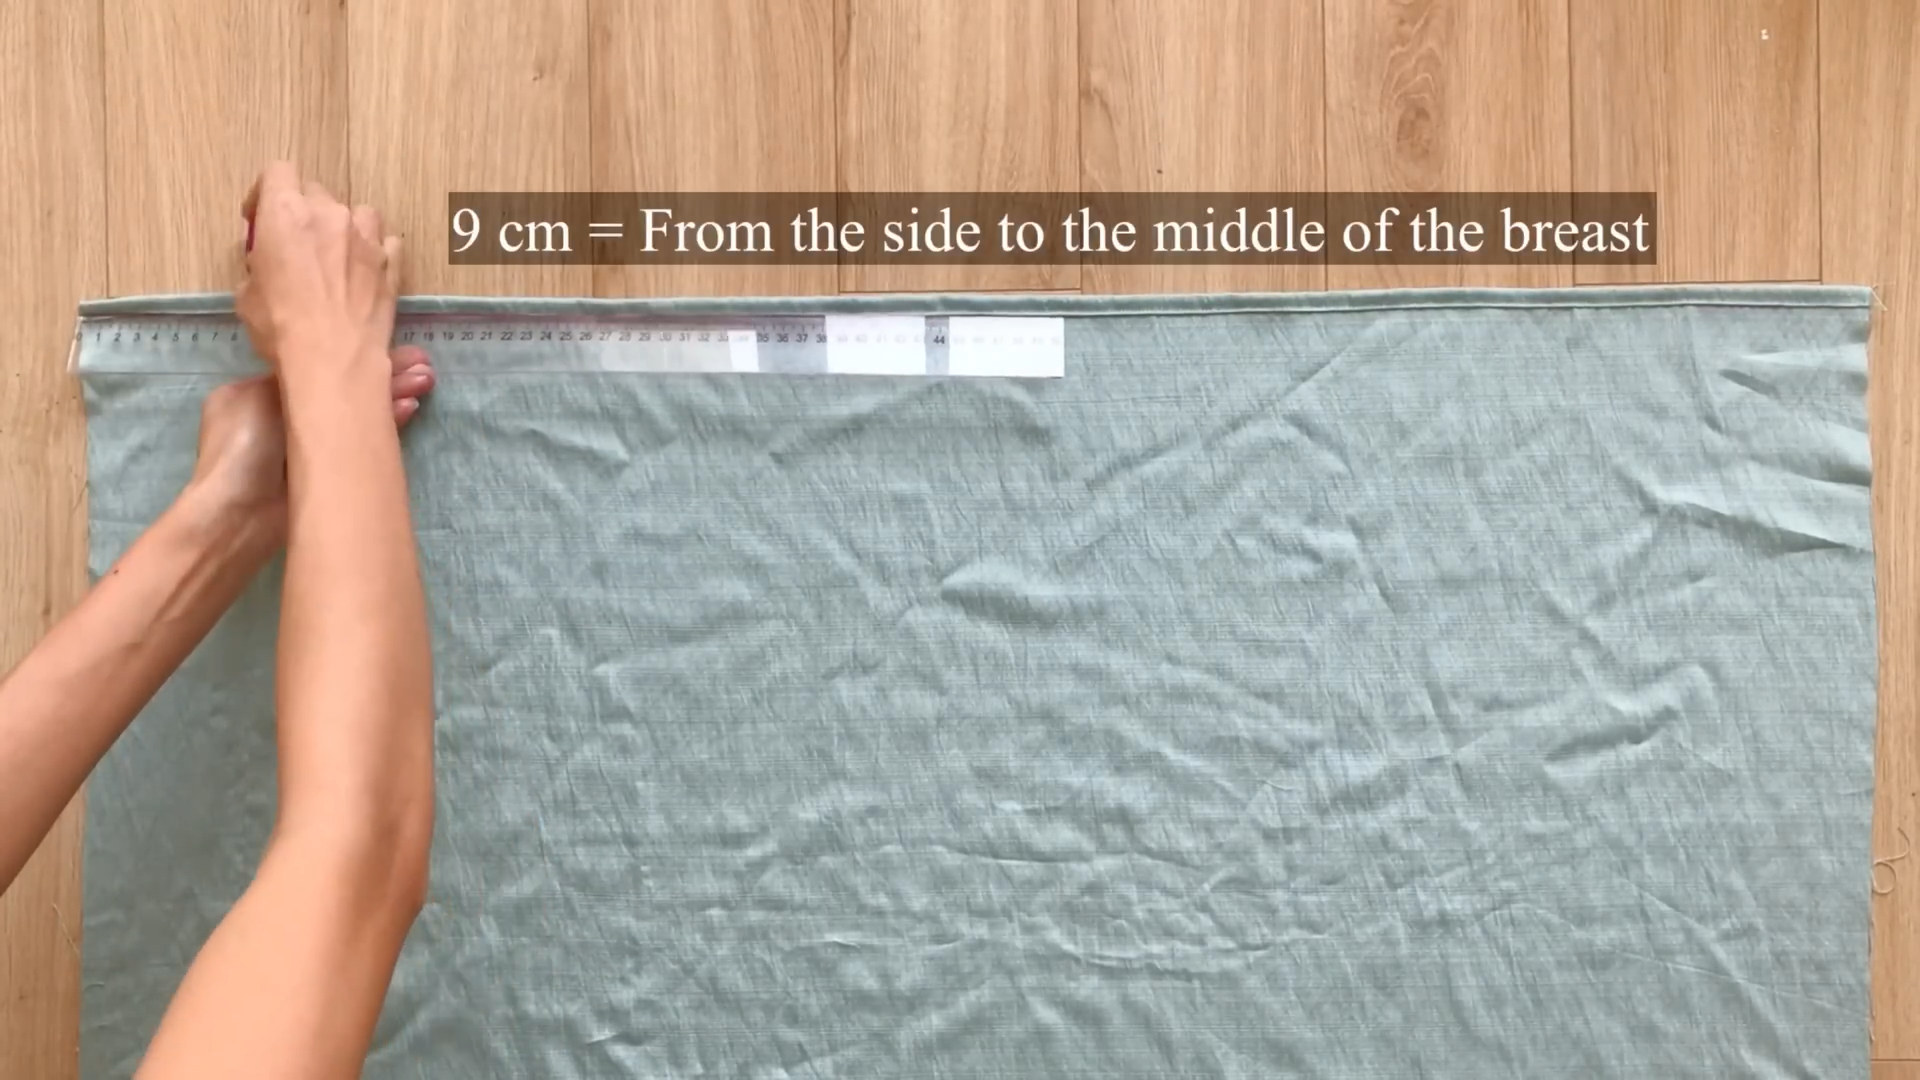
Next, mark another 9 cm inwards from that point – it’s the shoulder width of your sleeve.
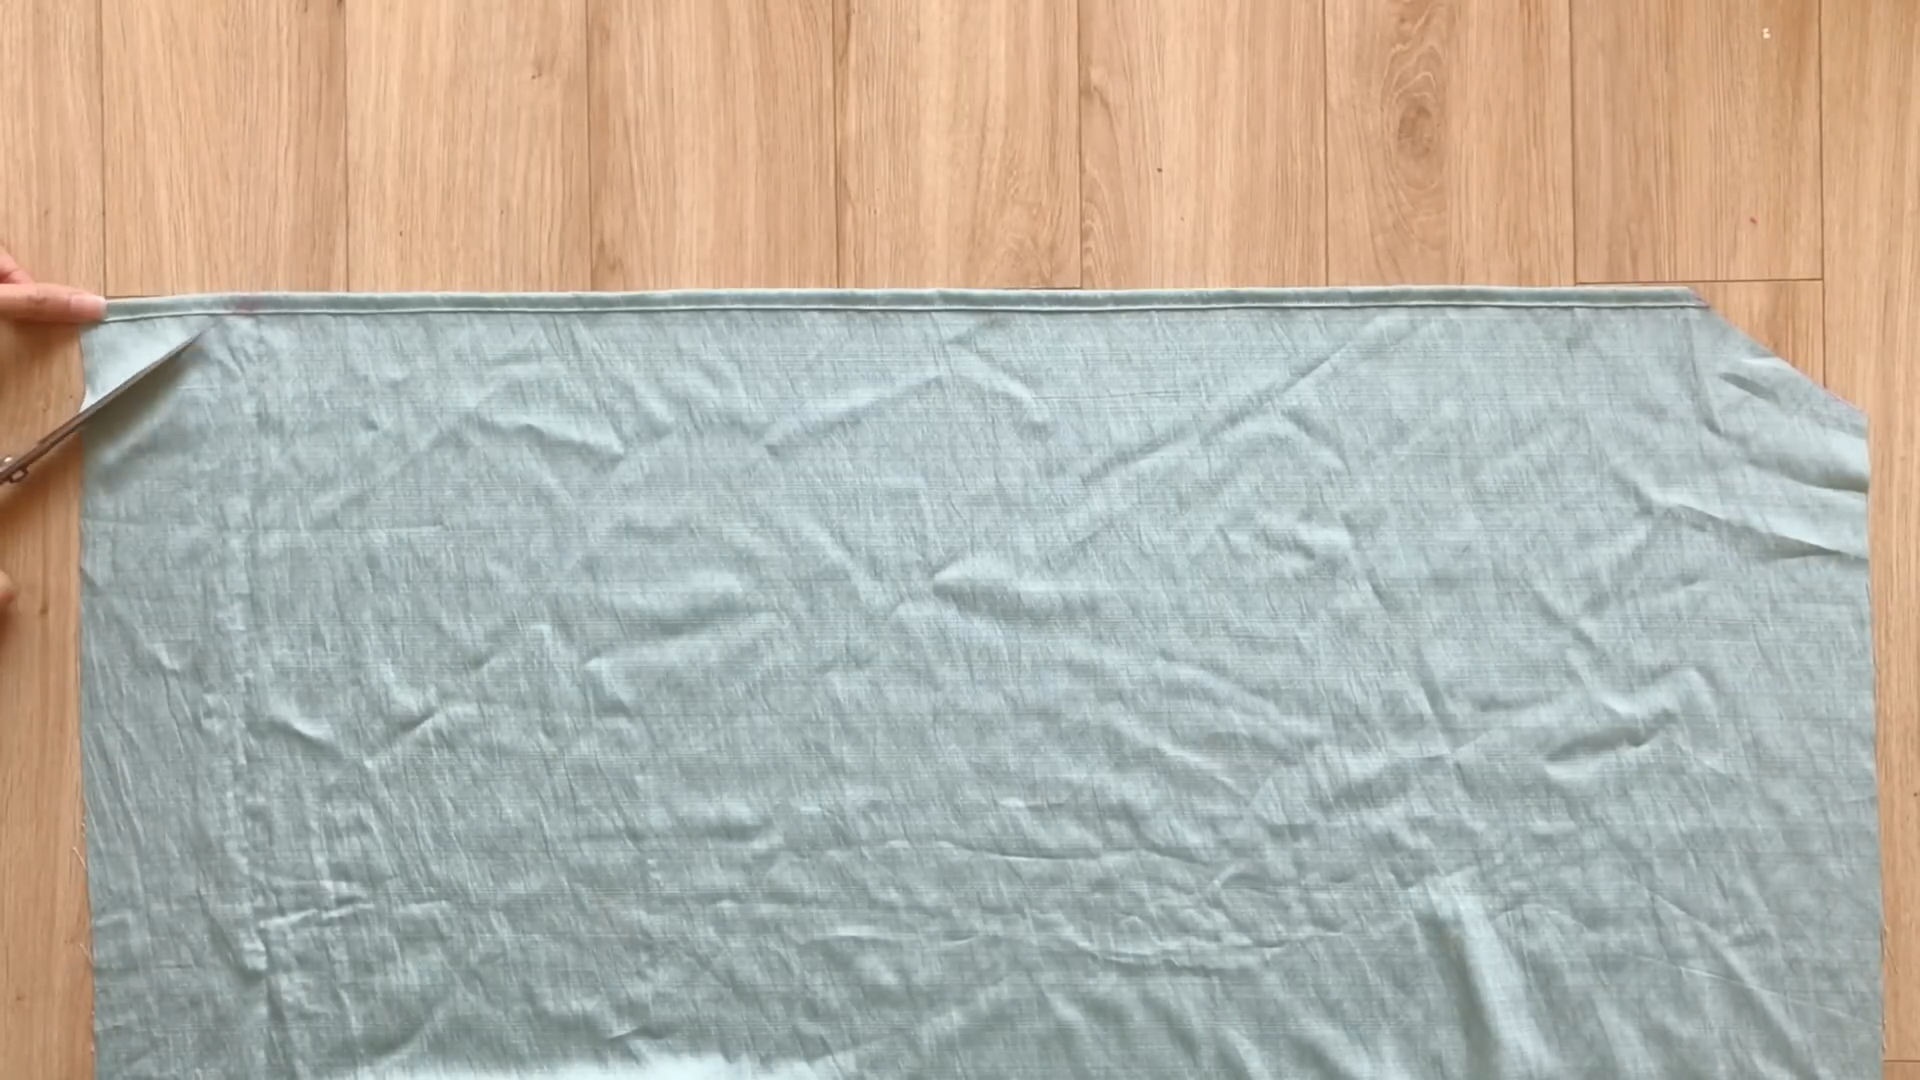
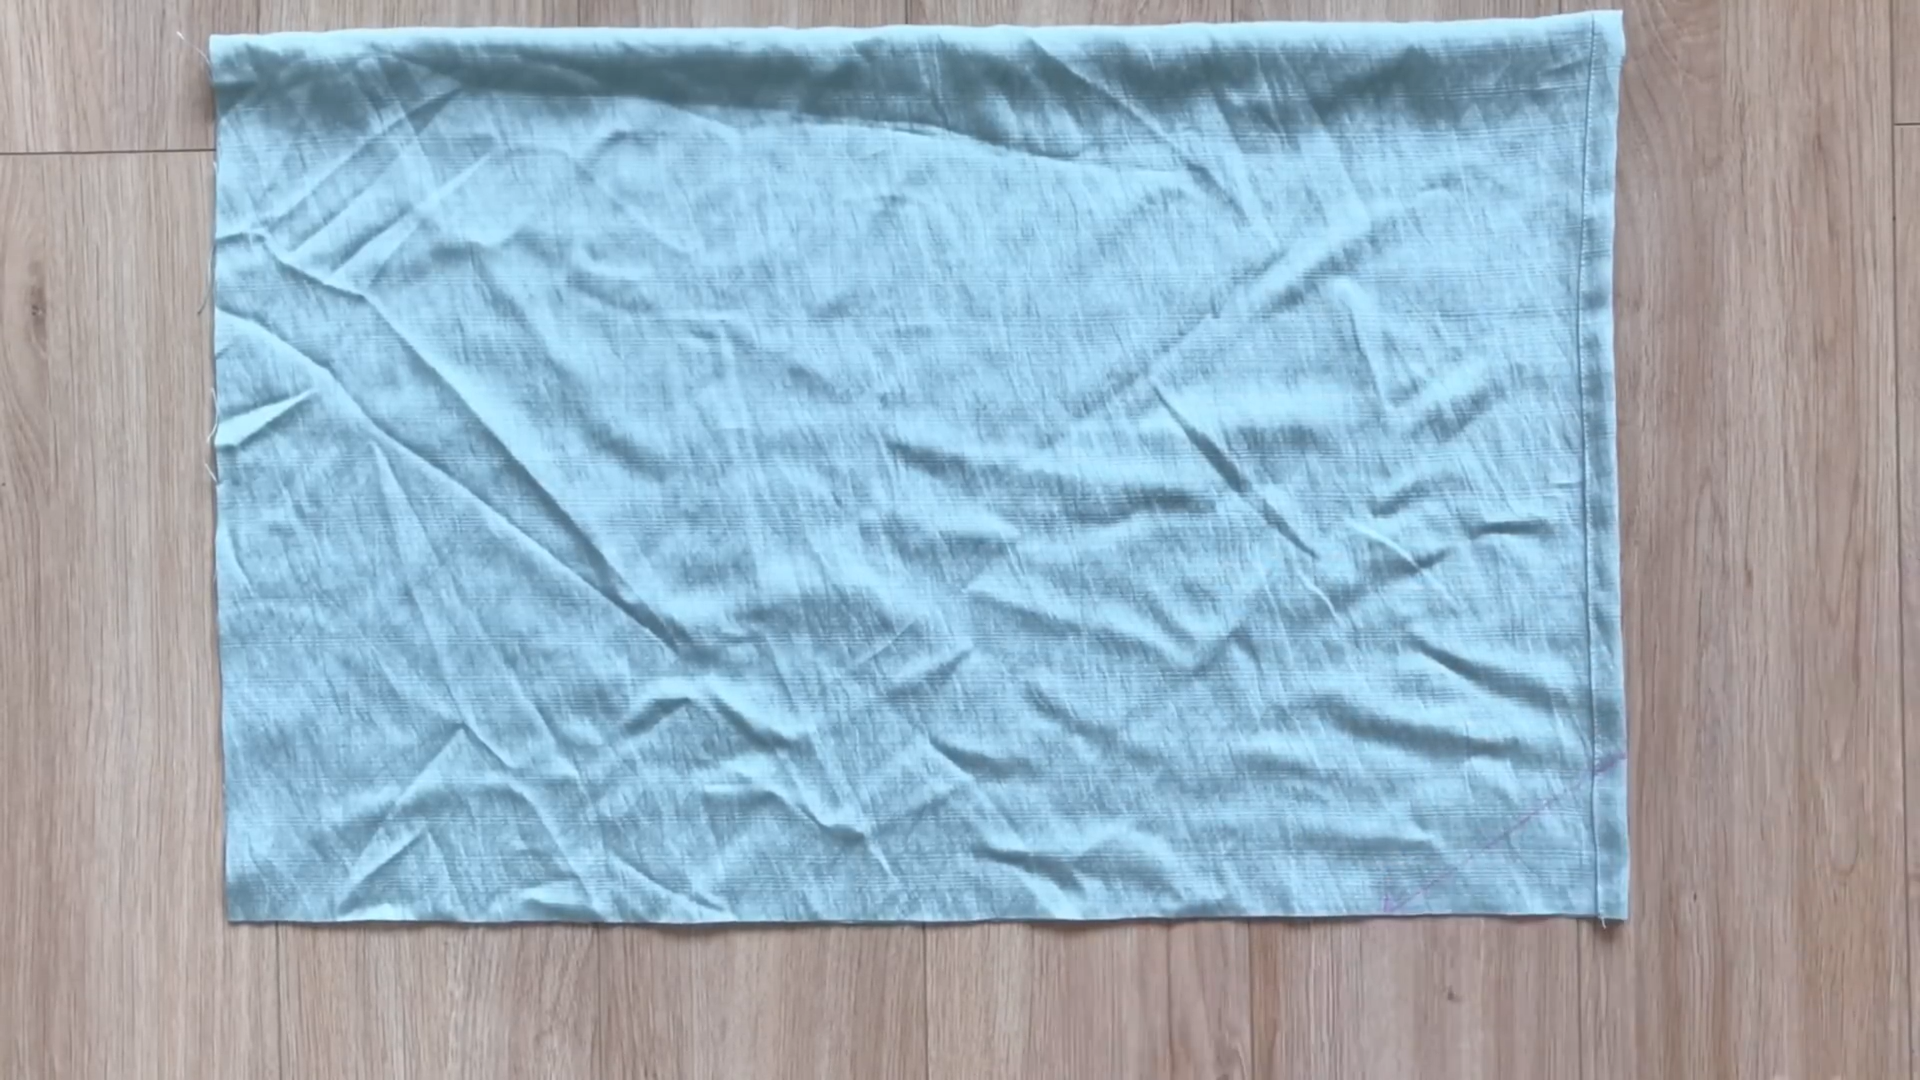
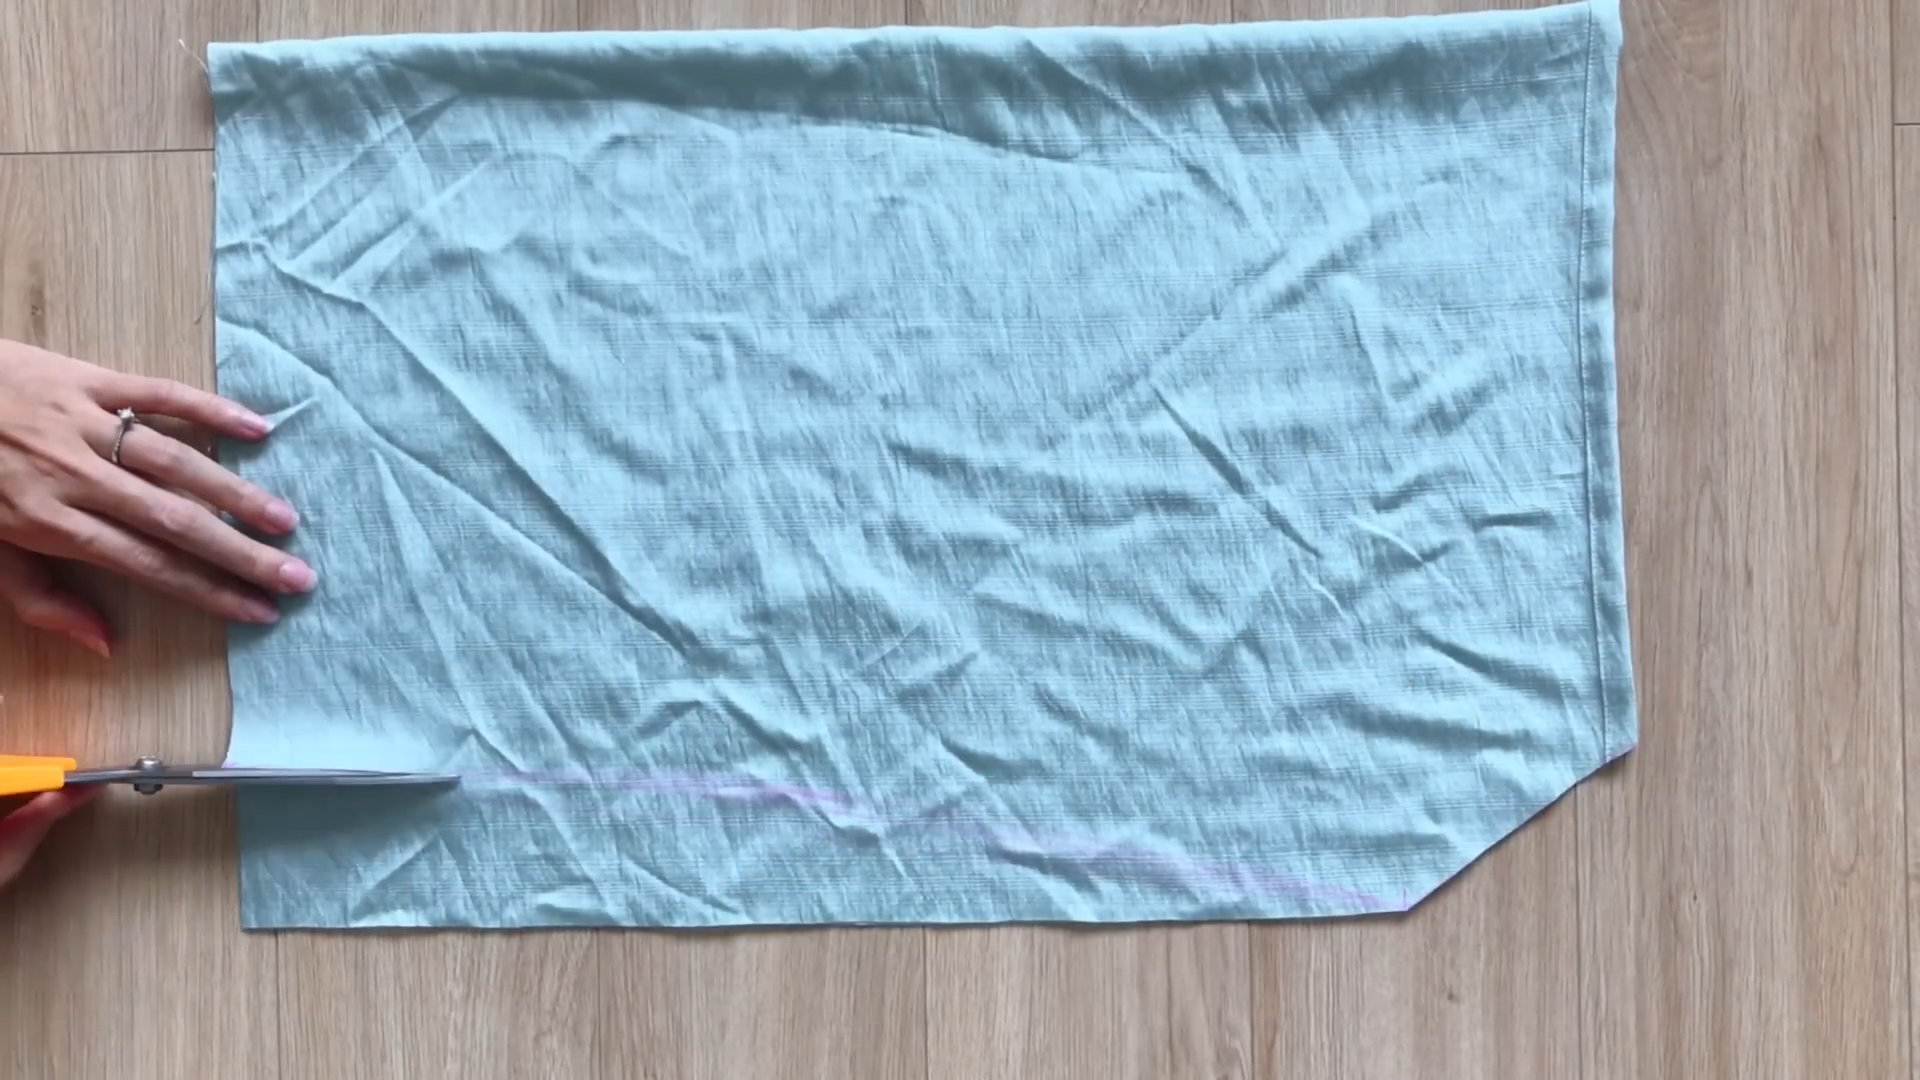
Connect these two marks with a straight line and carefully cut along this line to create the armhole shape.
Repeat the same steps on the other side.
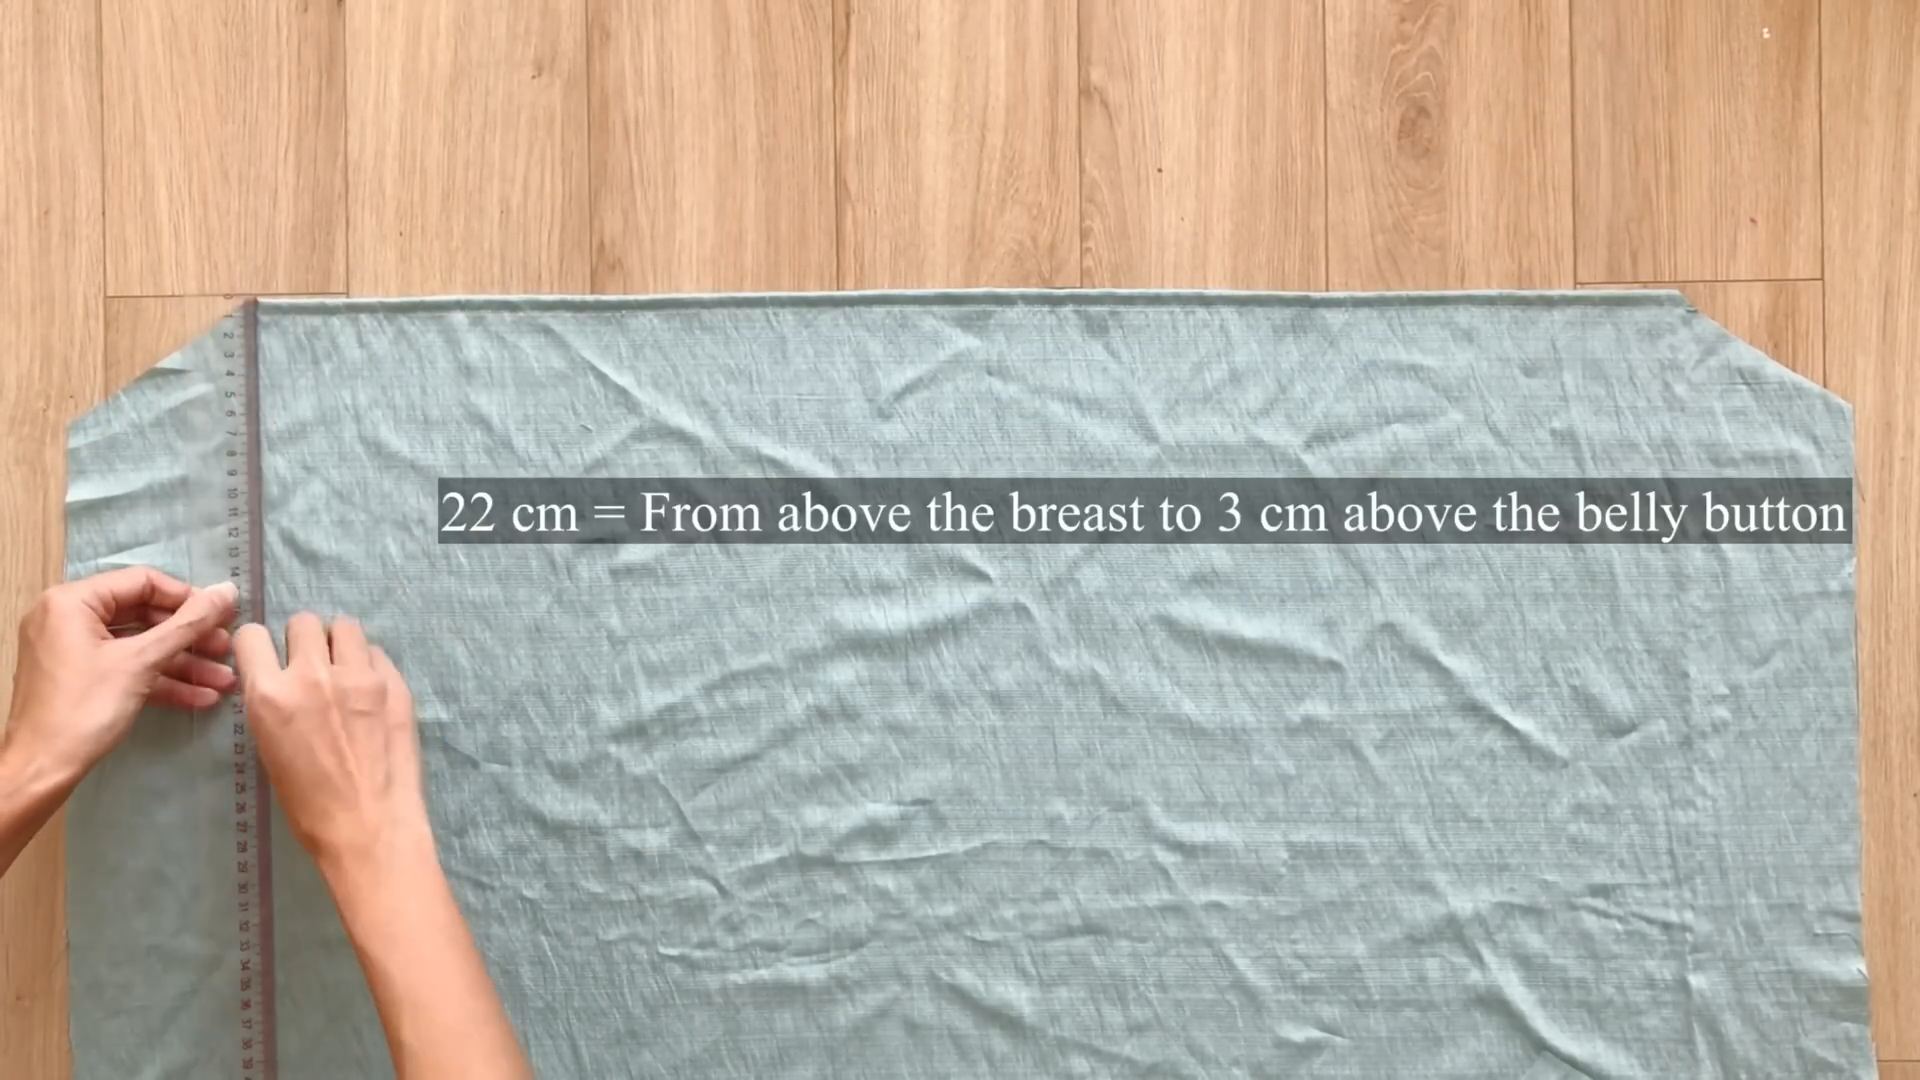
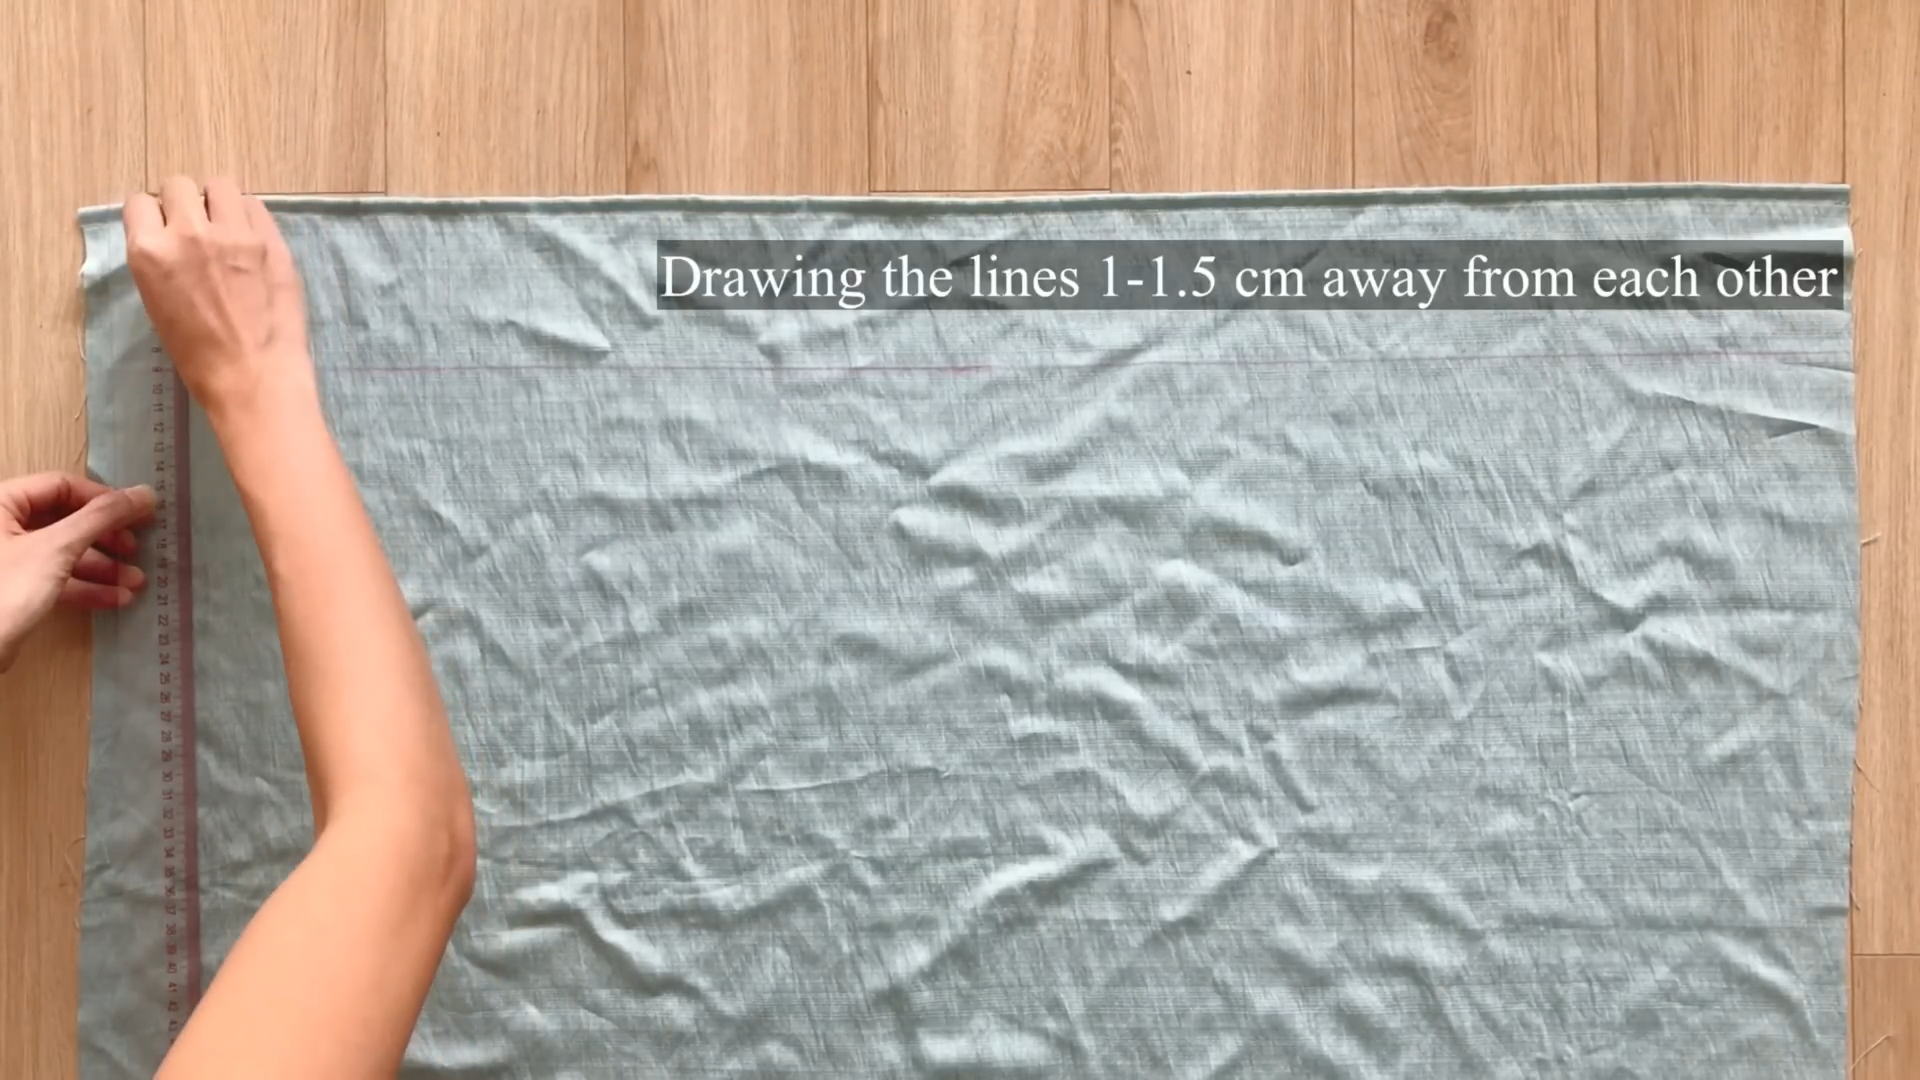
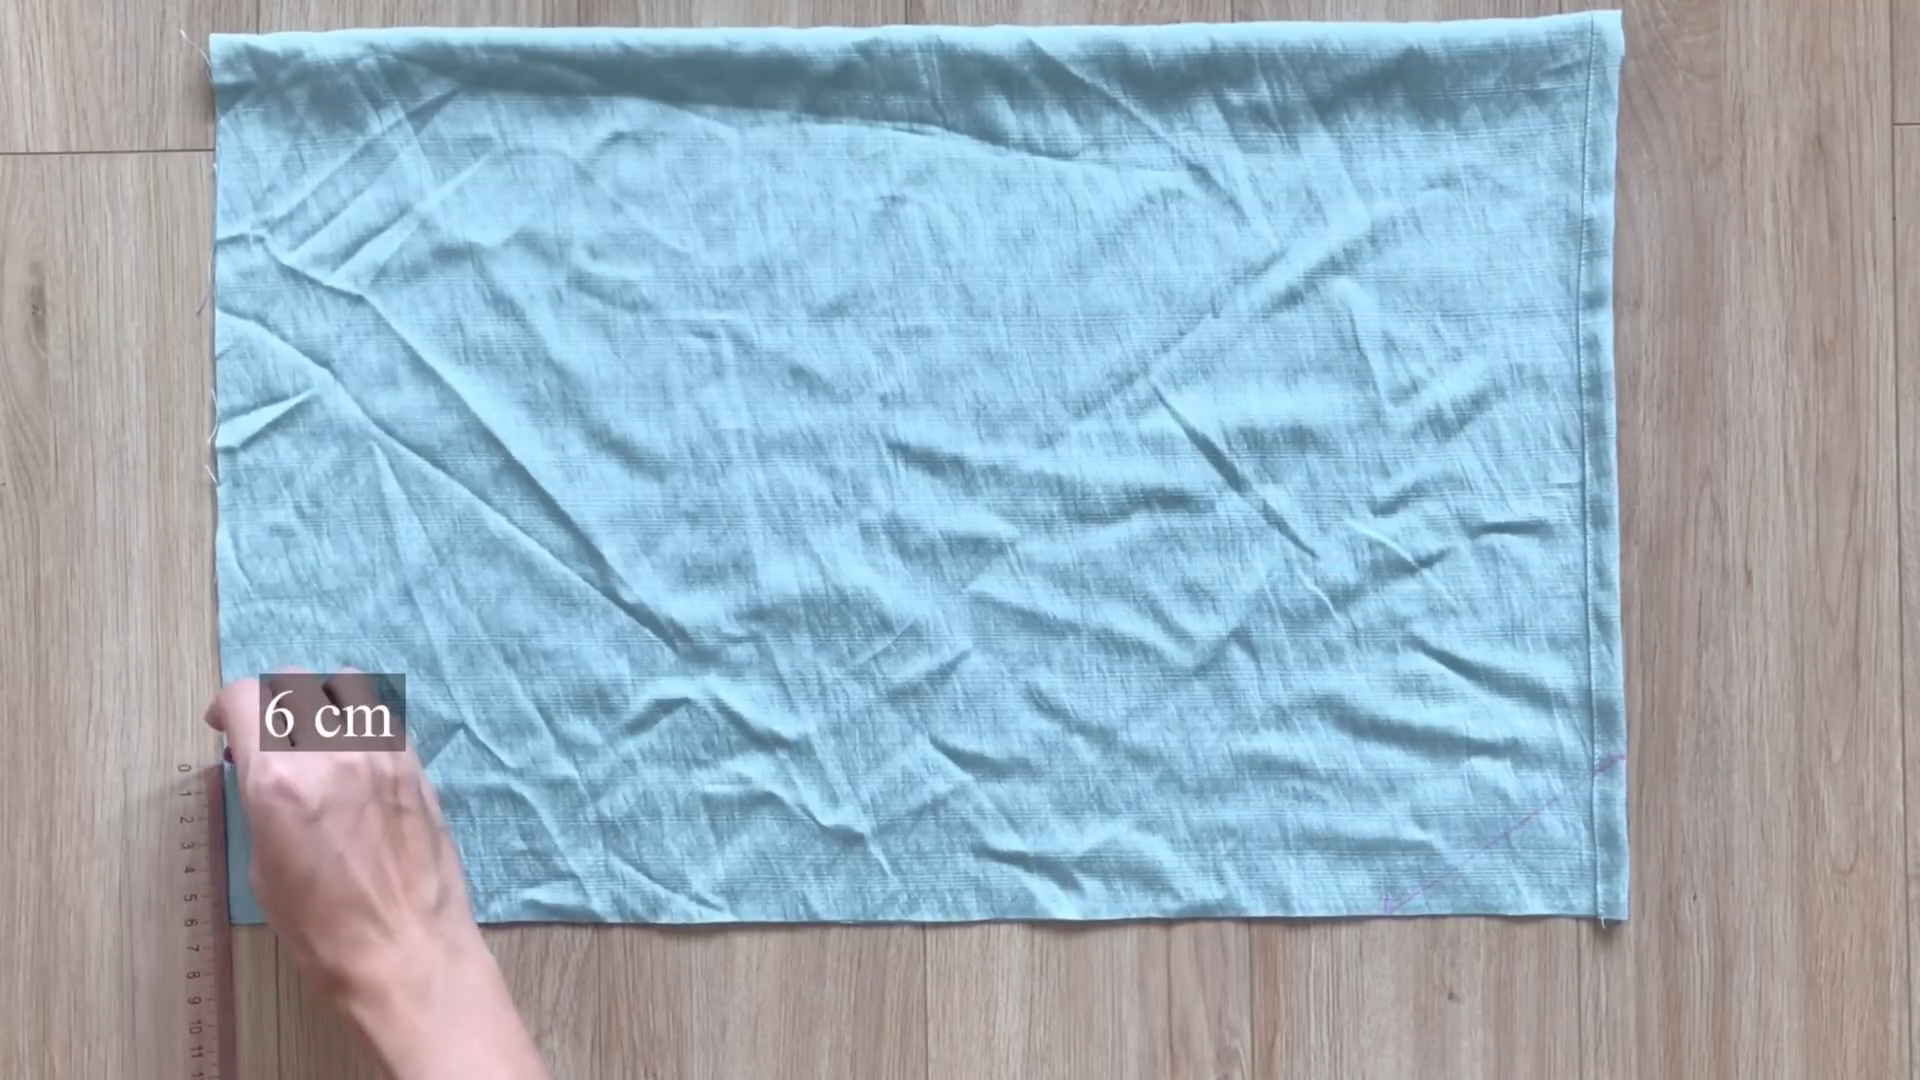
Starting from the same short end of the rectangle, measure and mark 22 cm downwards.

Draw a series of horizontal lines at 1 cm intervals between the previous mark and width line.
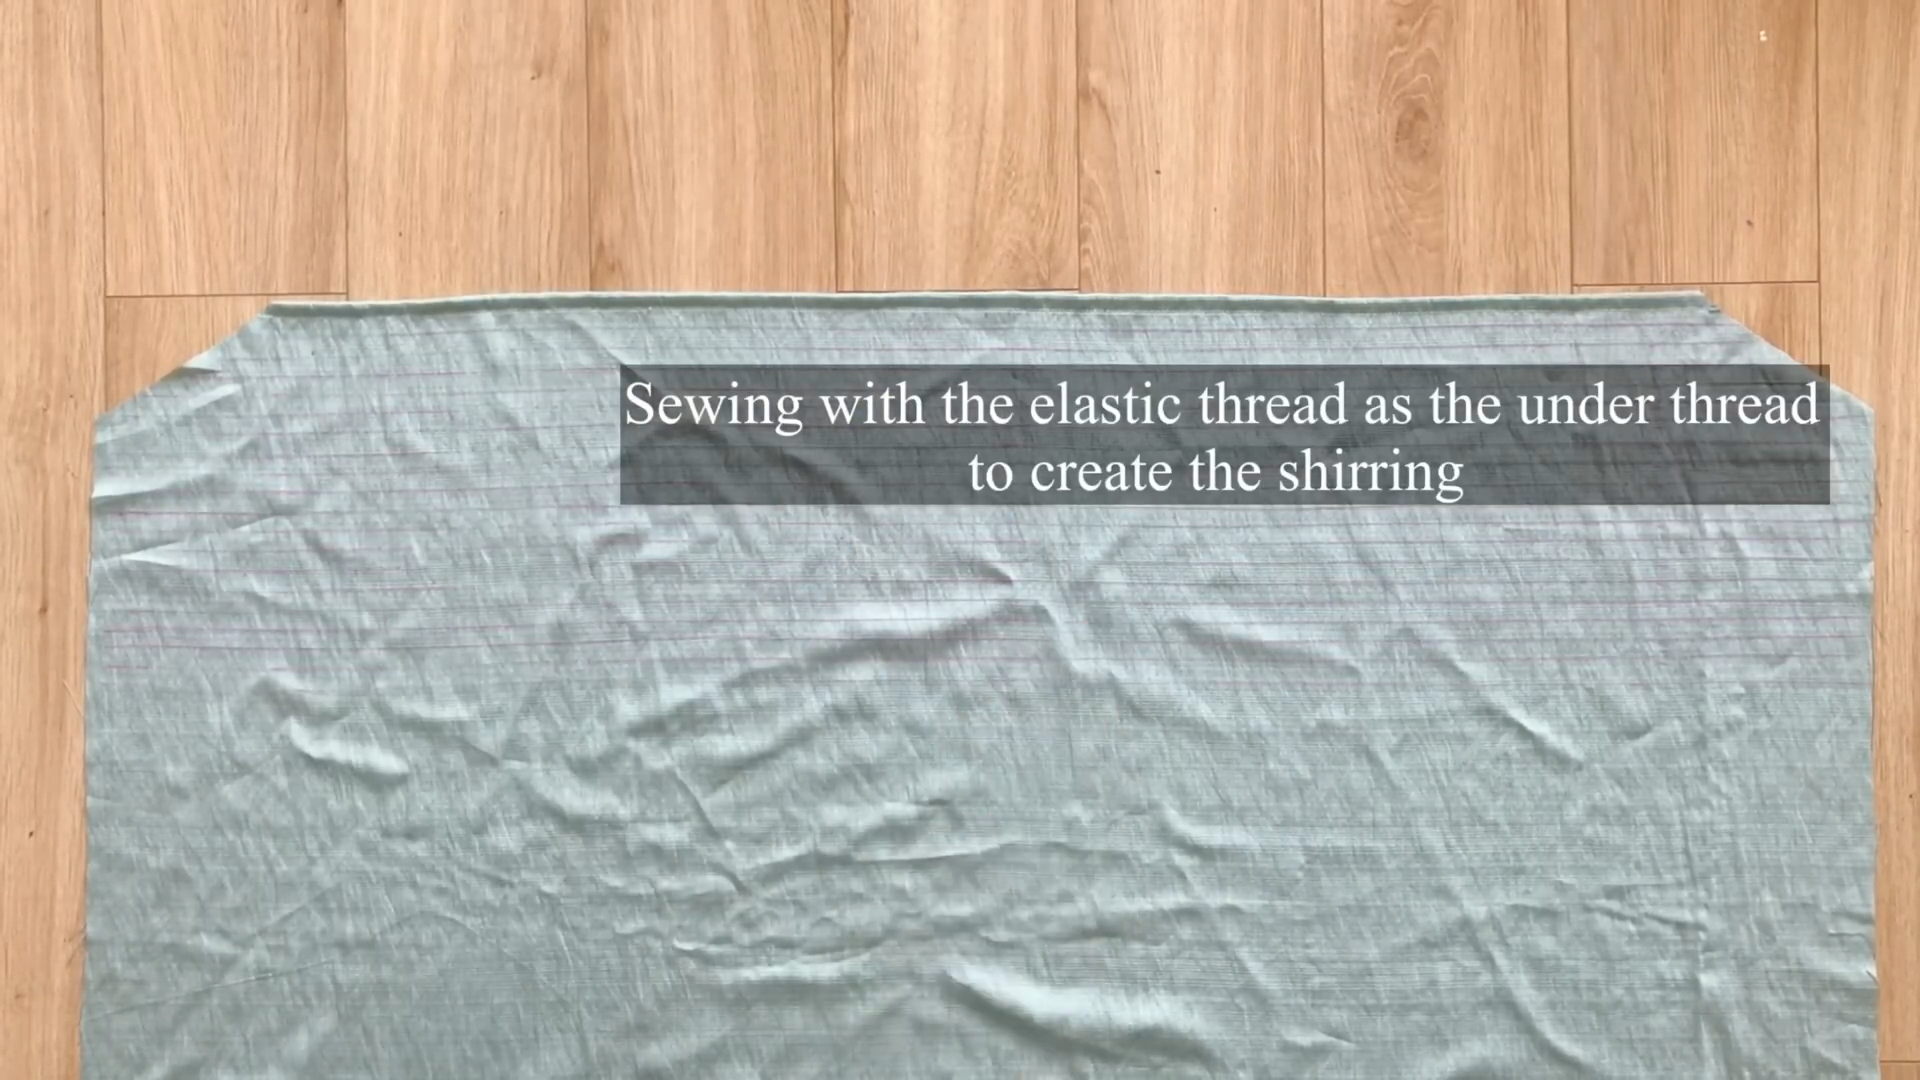
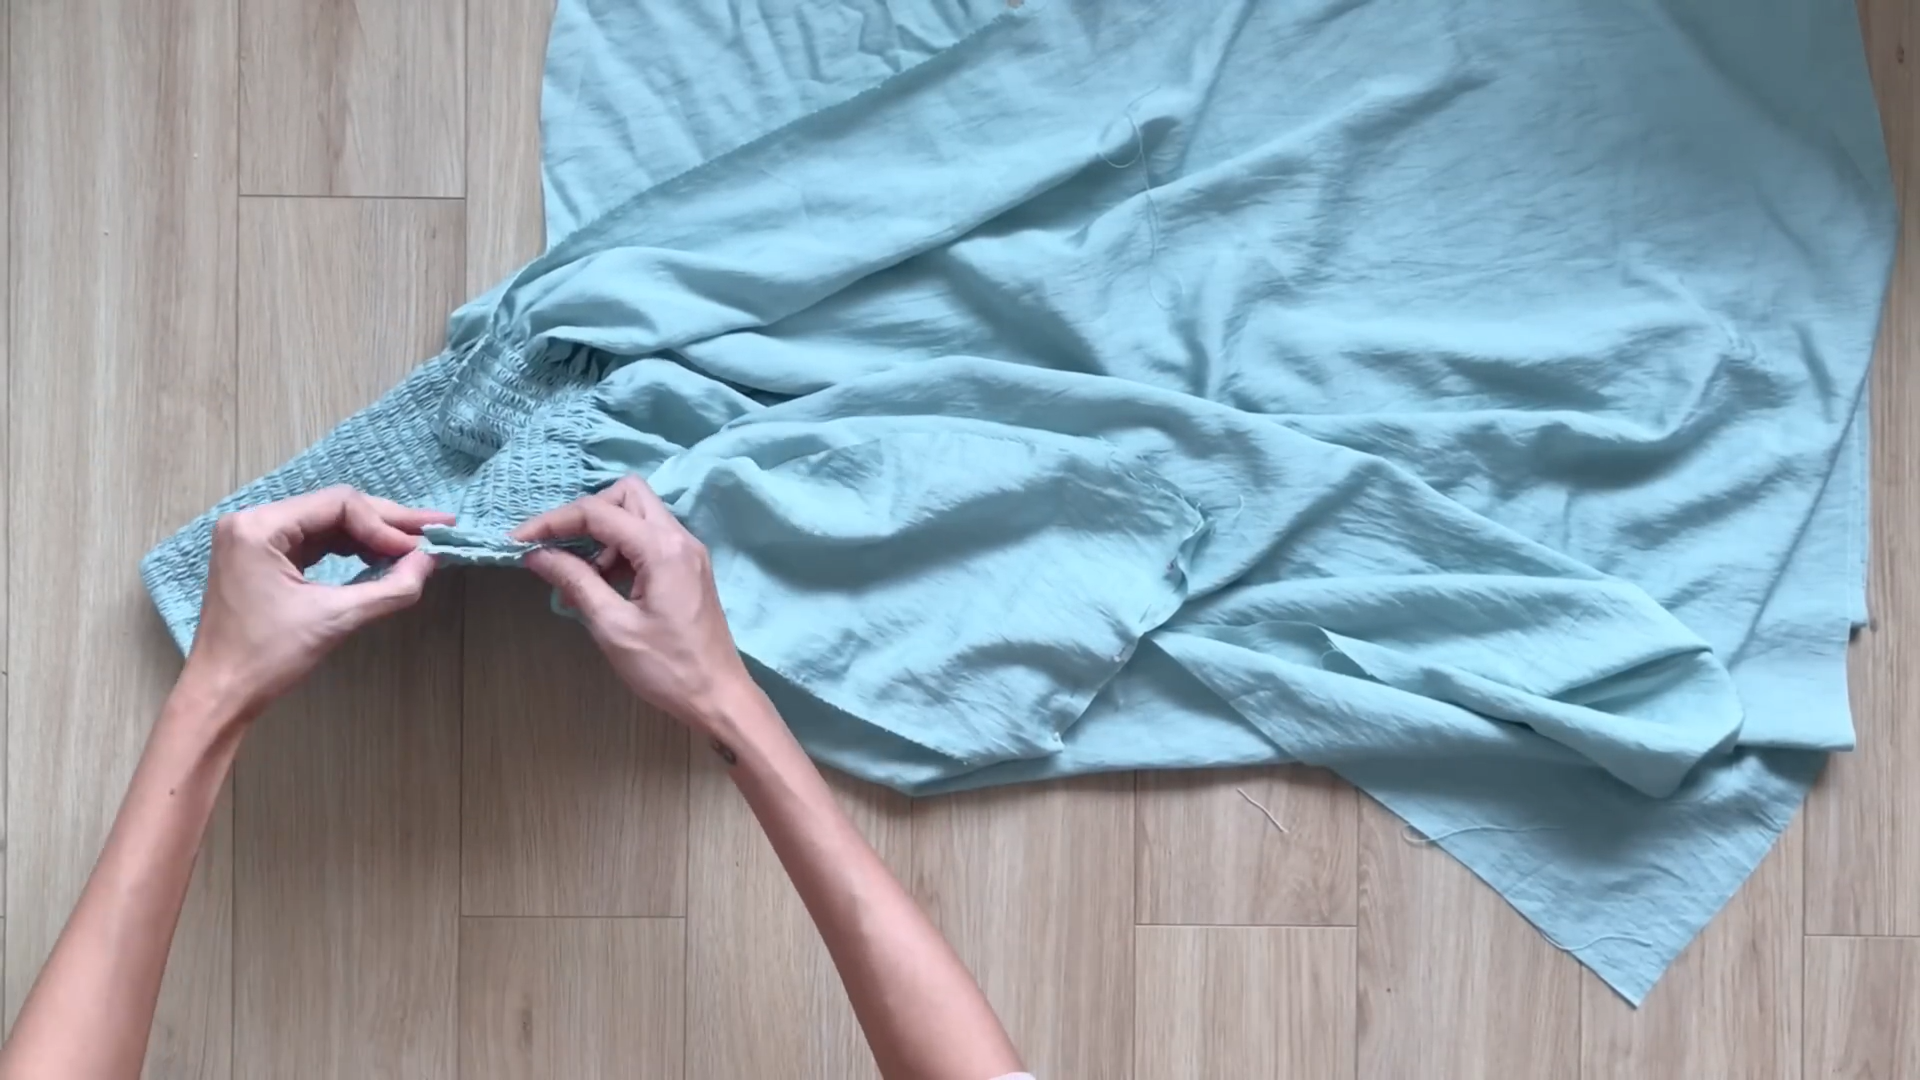
Create the shirring part based on the lines.
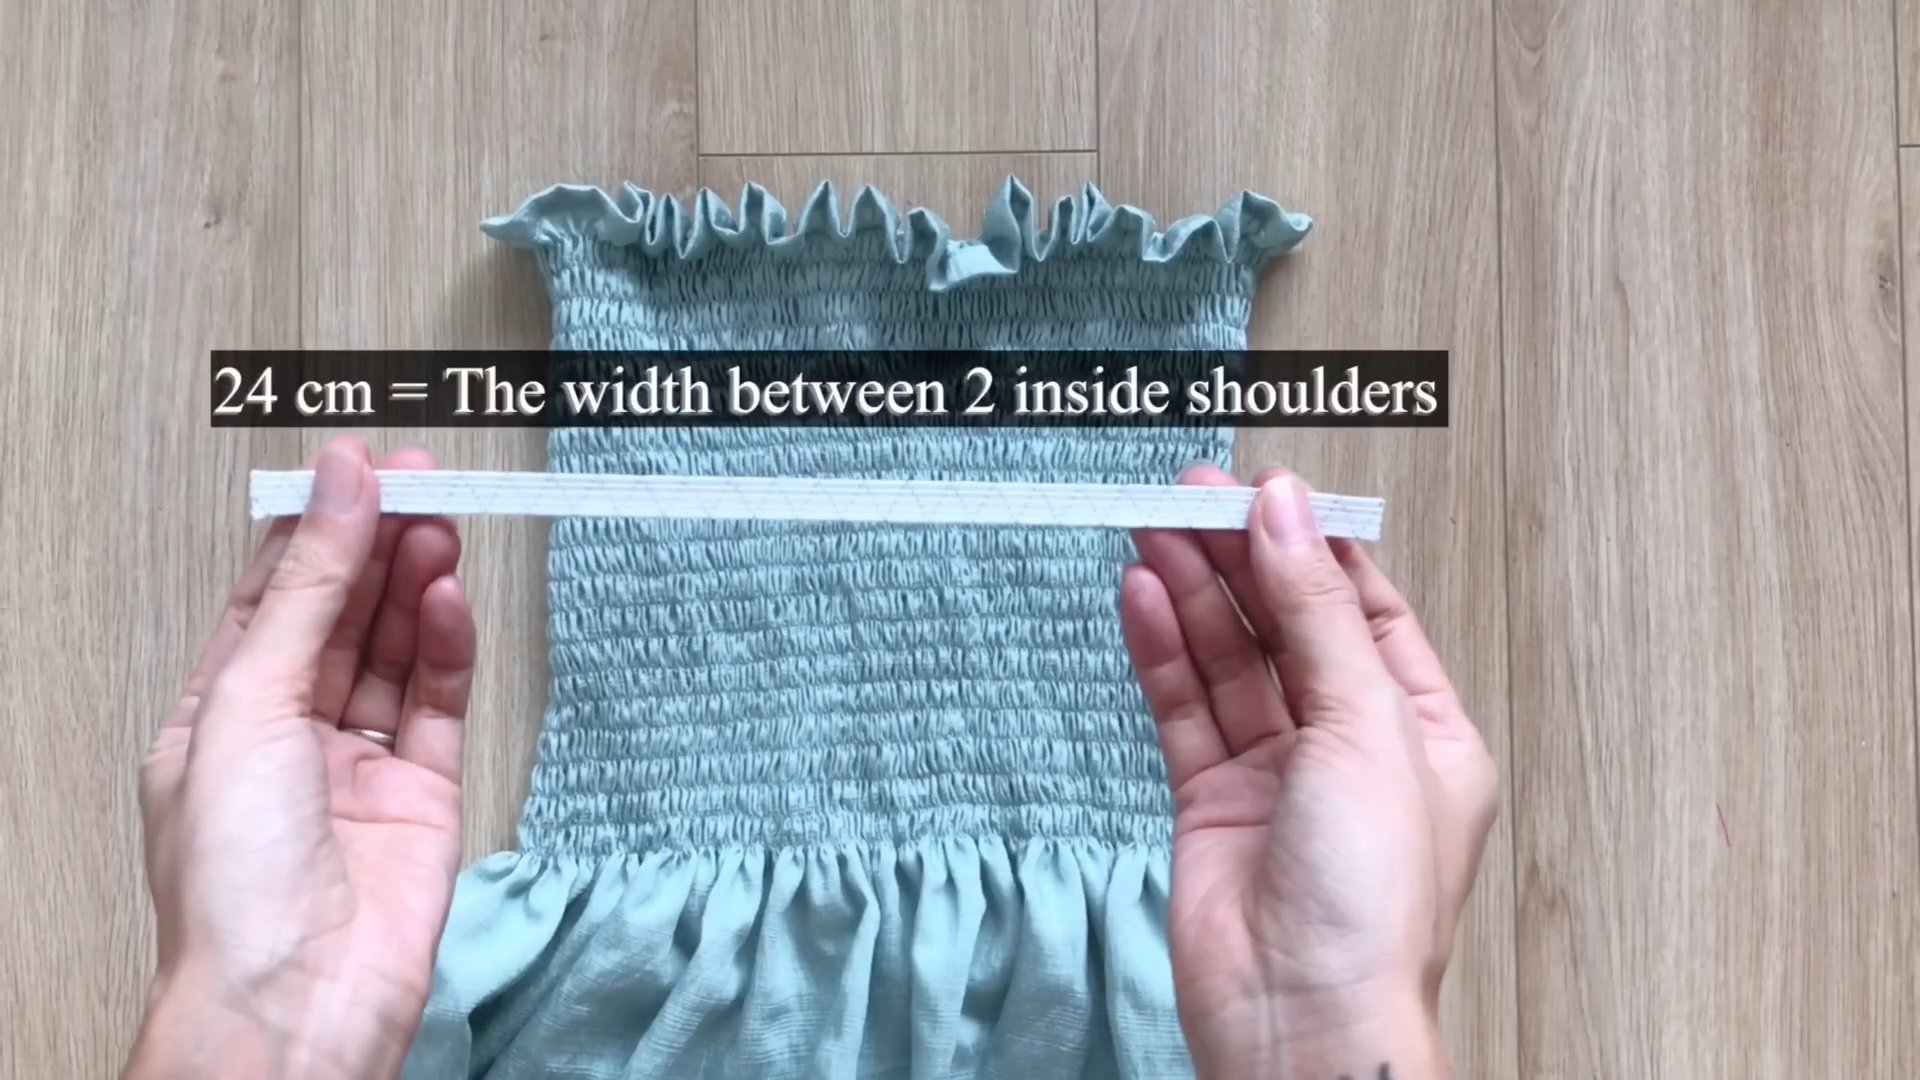
Cut an elastic band with a length equal to the distance between your shoulders.
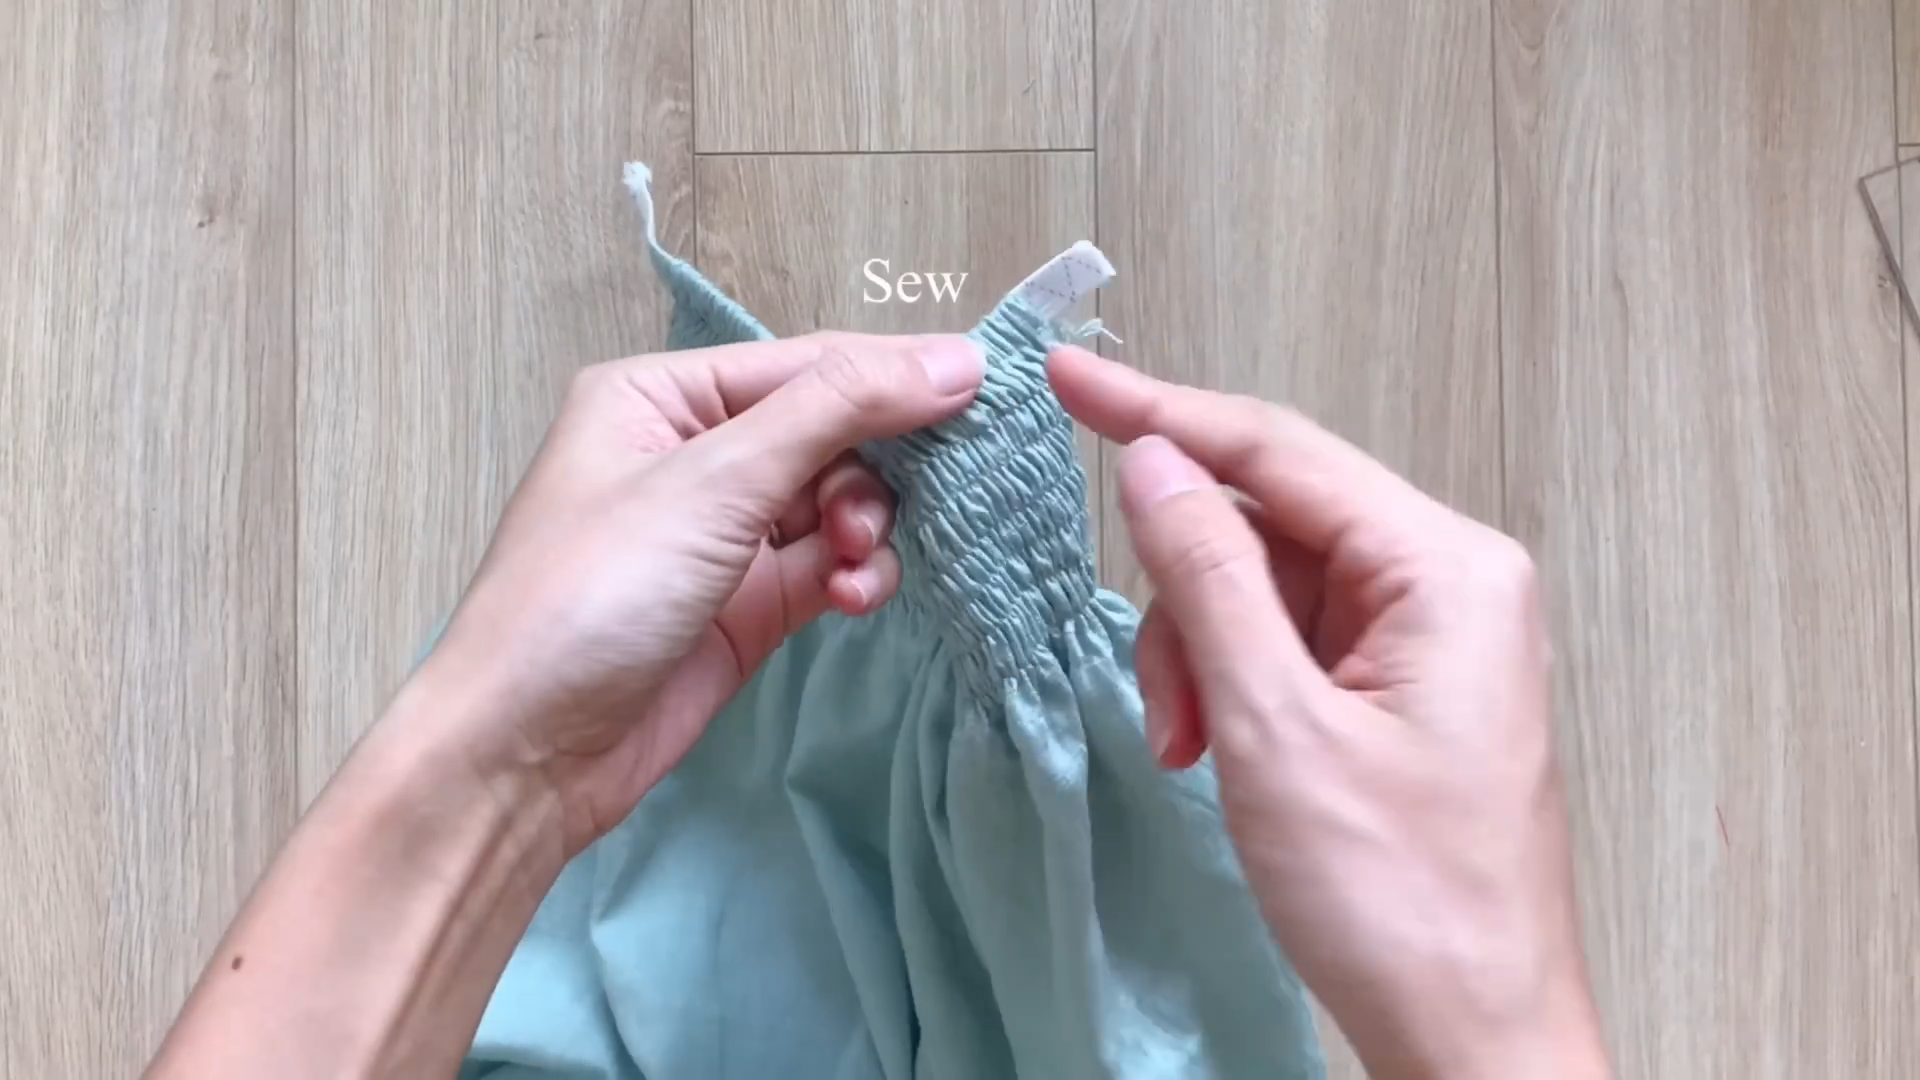
Thread the elastic band through the casing we created earlier.
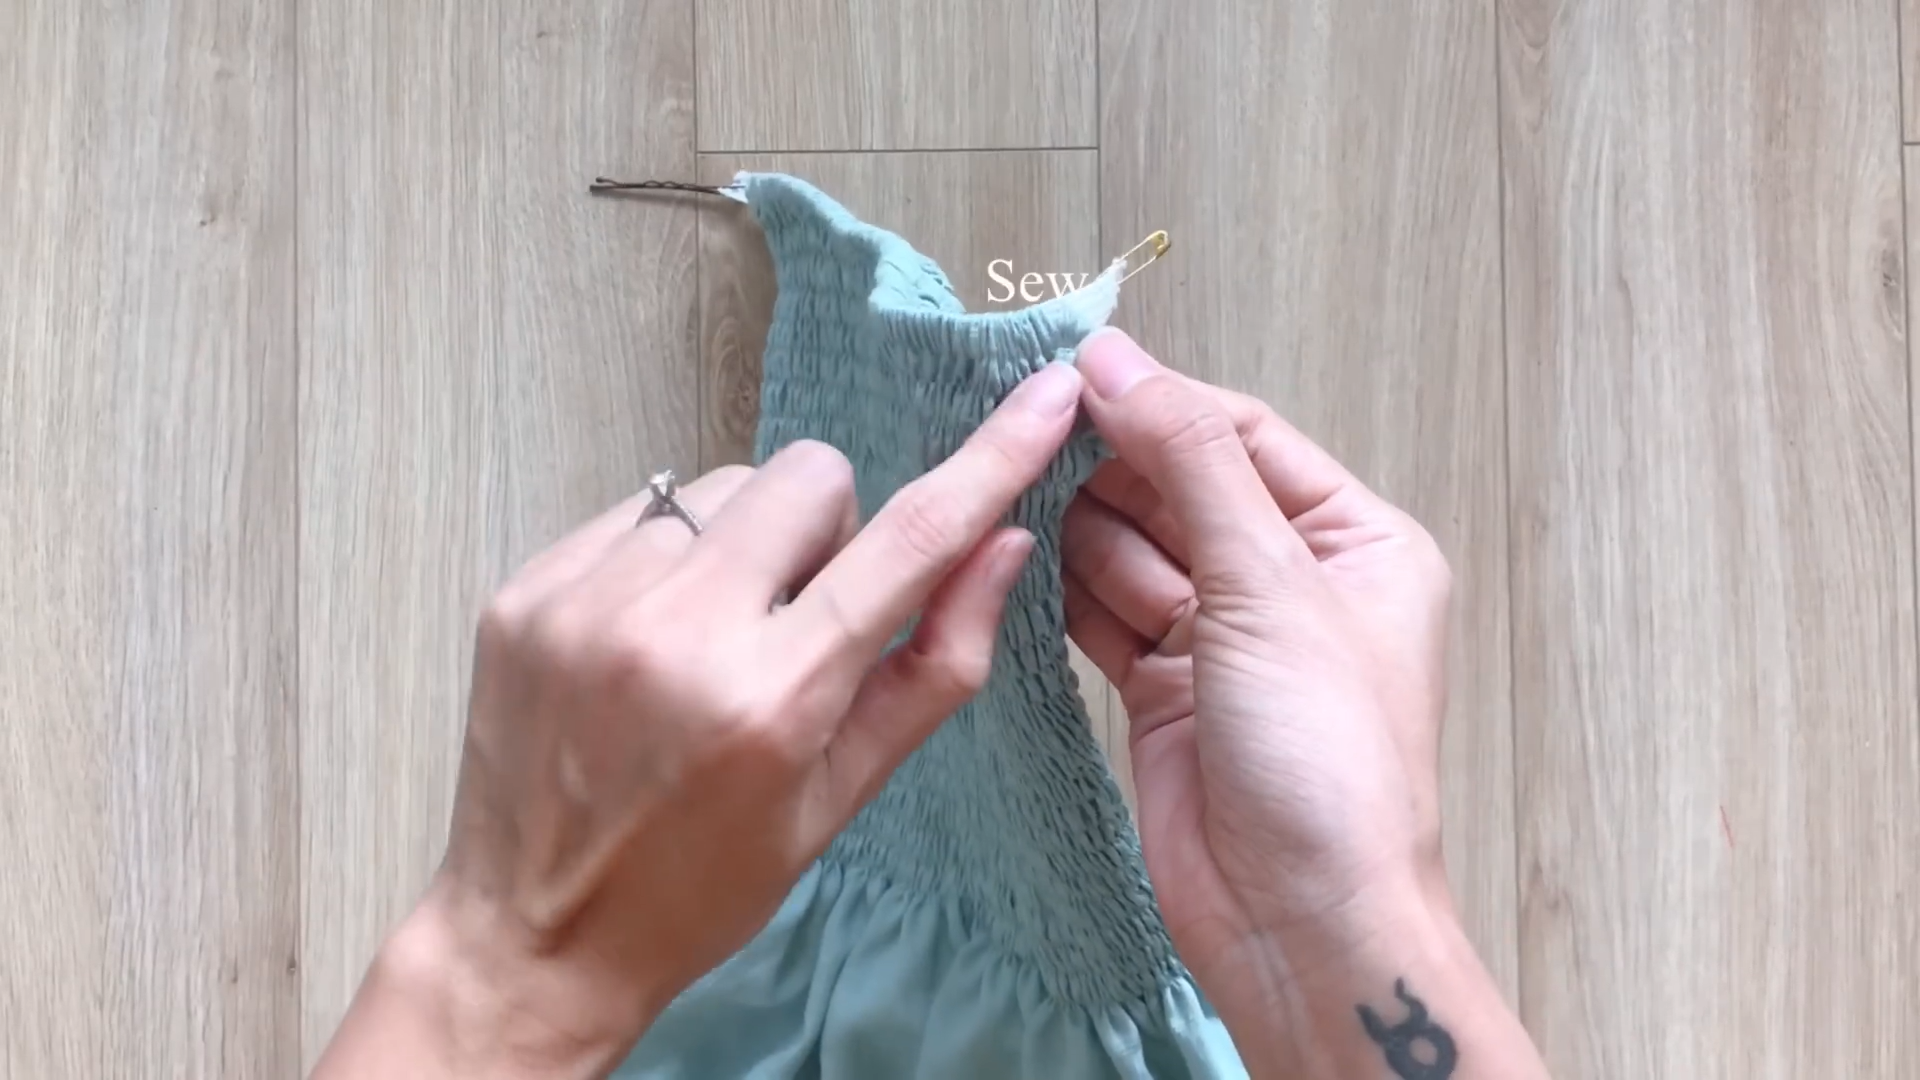
Secure the elastic by sewing the ends to the fabric

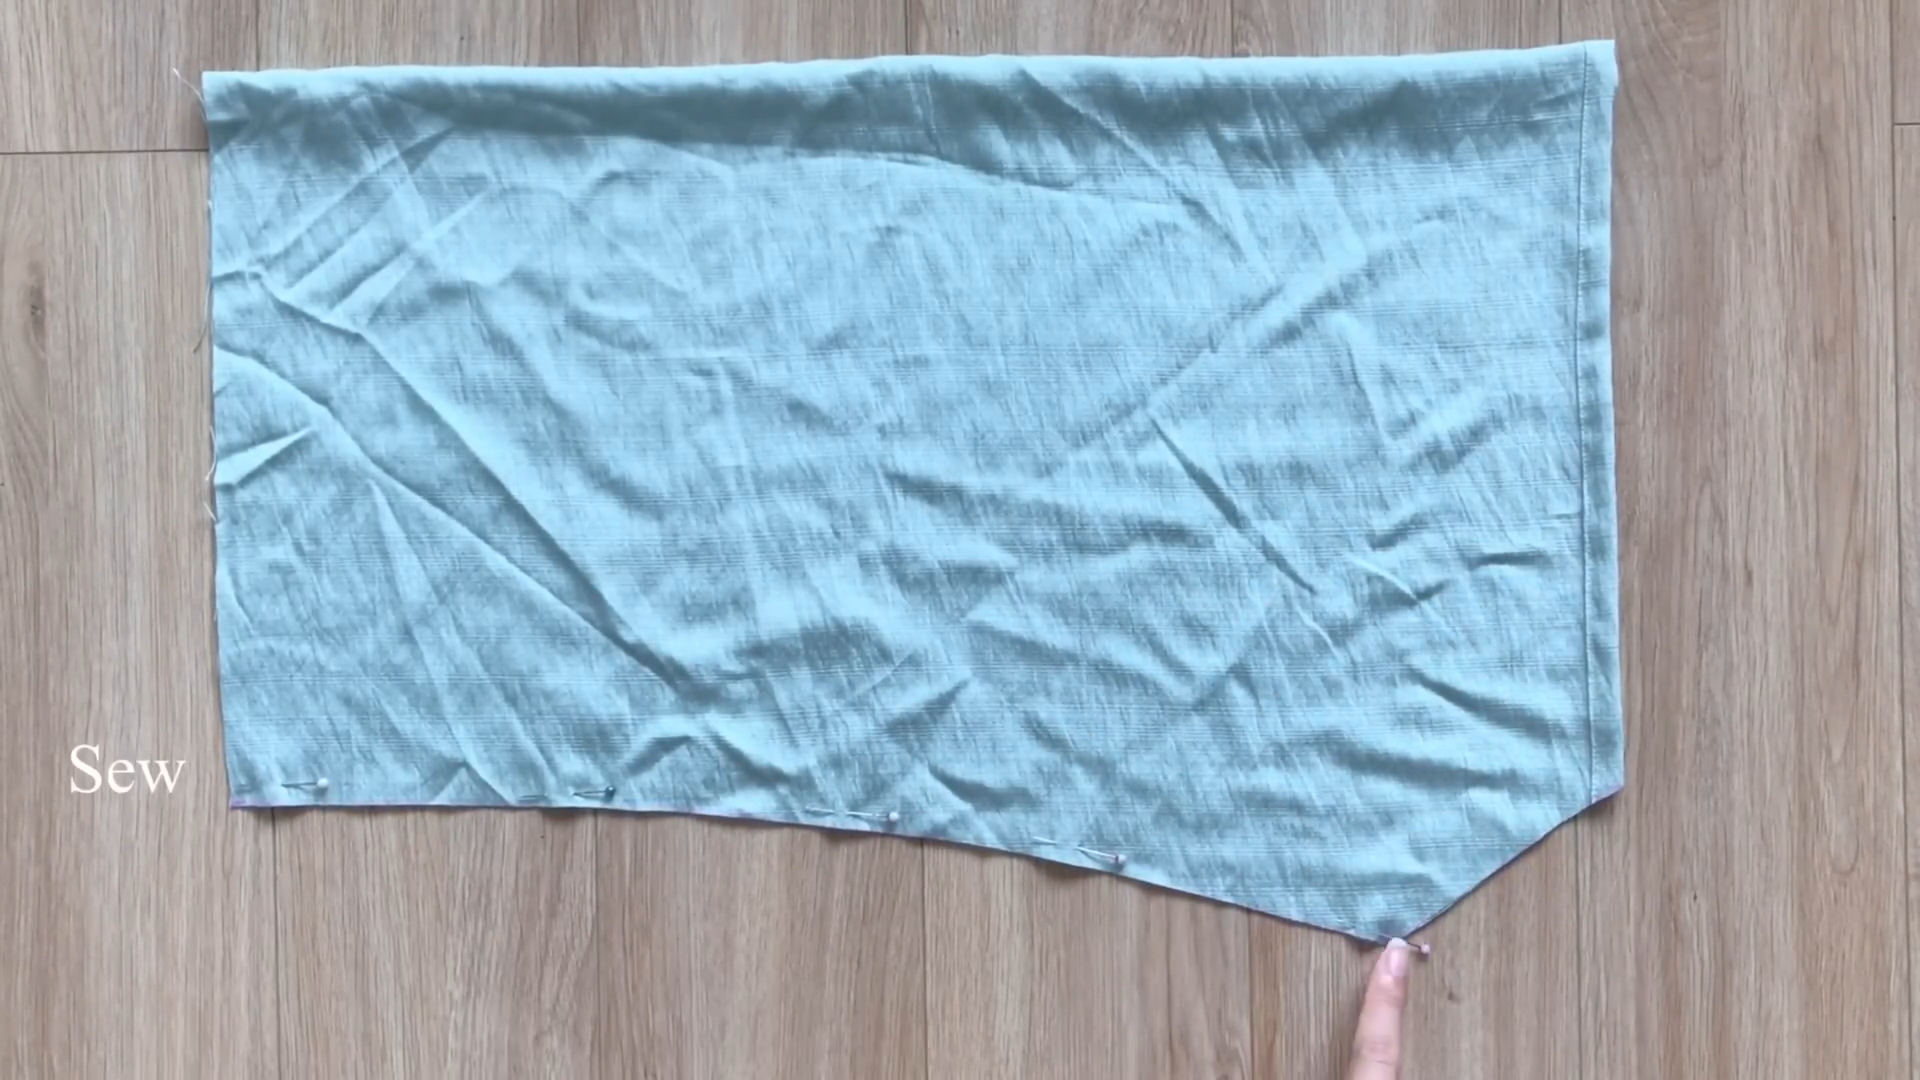
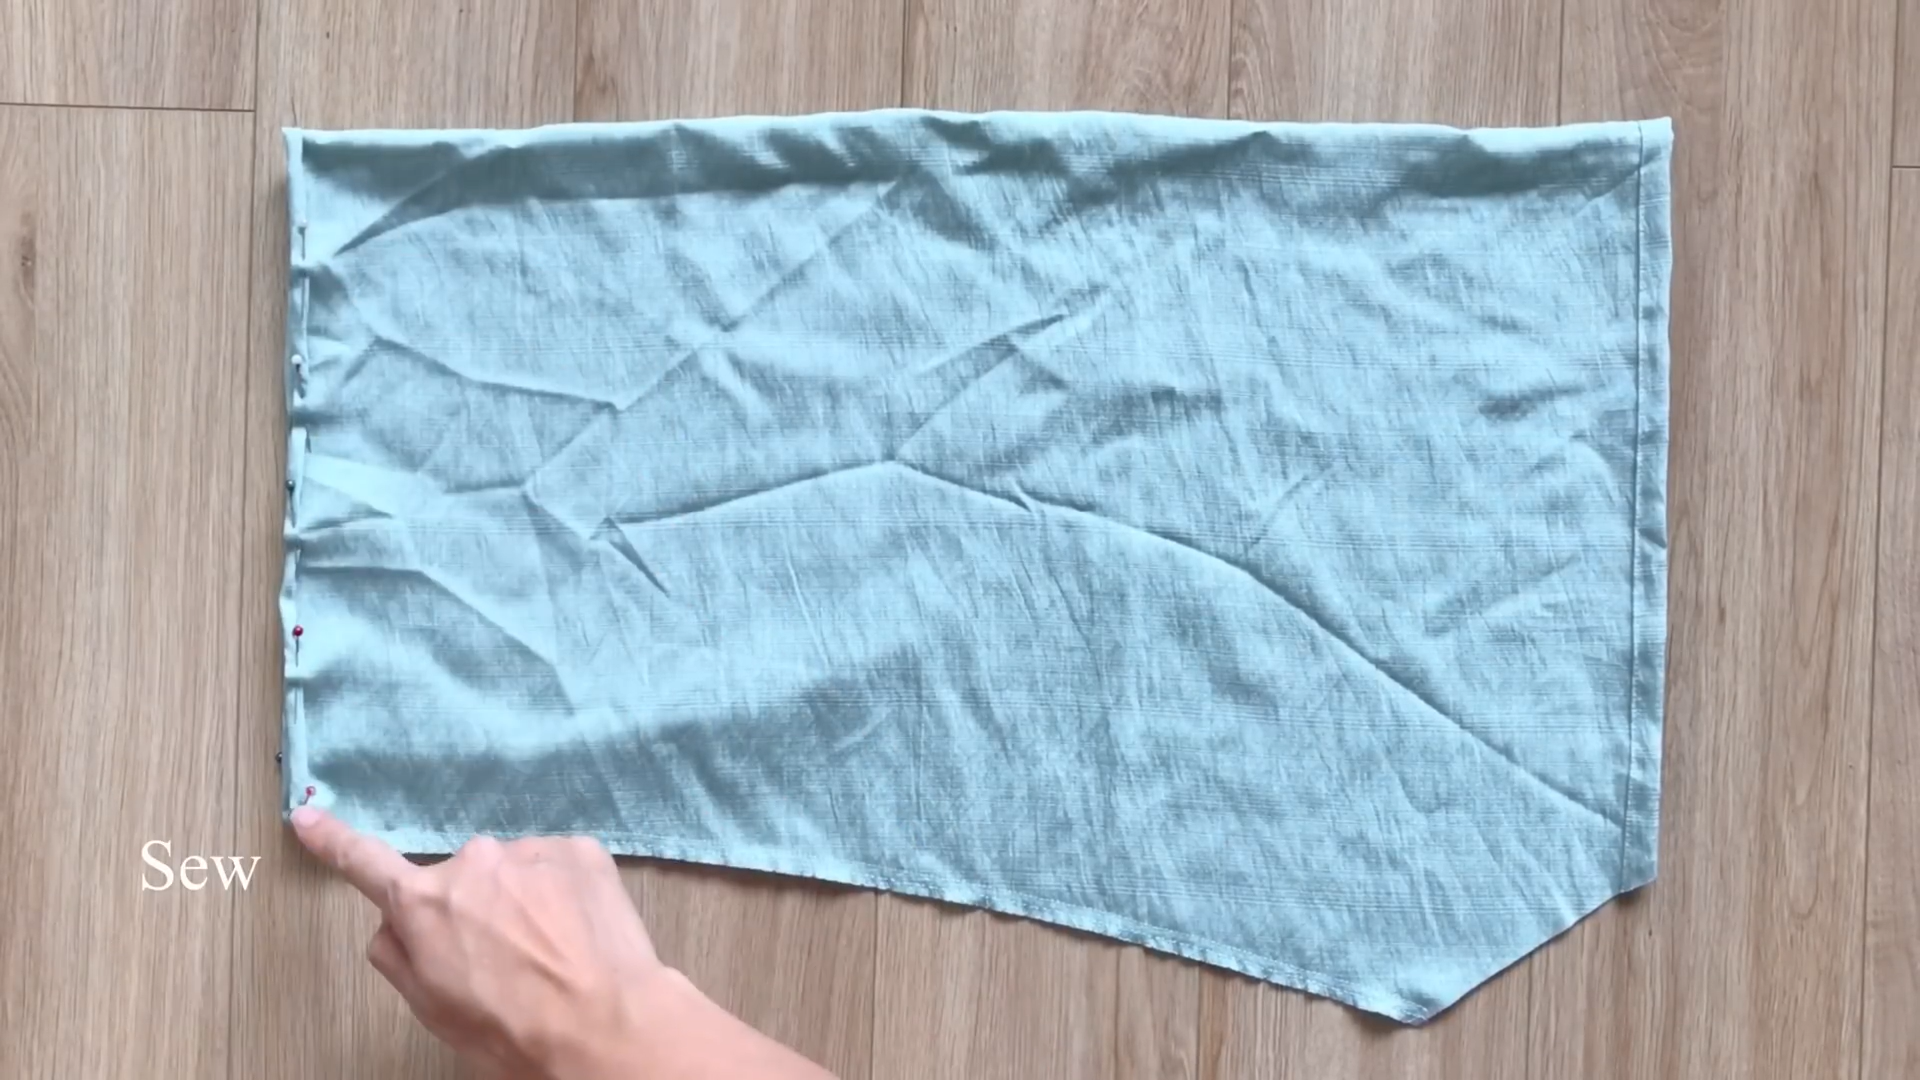
Mark 5 cm below the bottom of the shirring – this will be the pocket placement.
Sew pockets onto both sides at the marked positions.
THE FRONT BODICE
THE BOTTOM PART
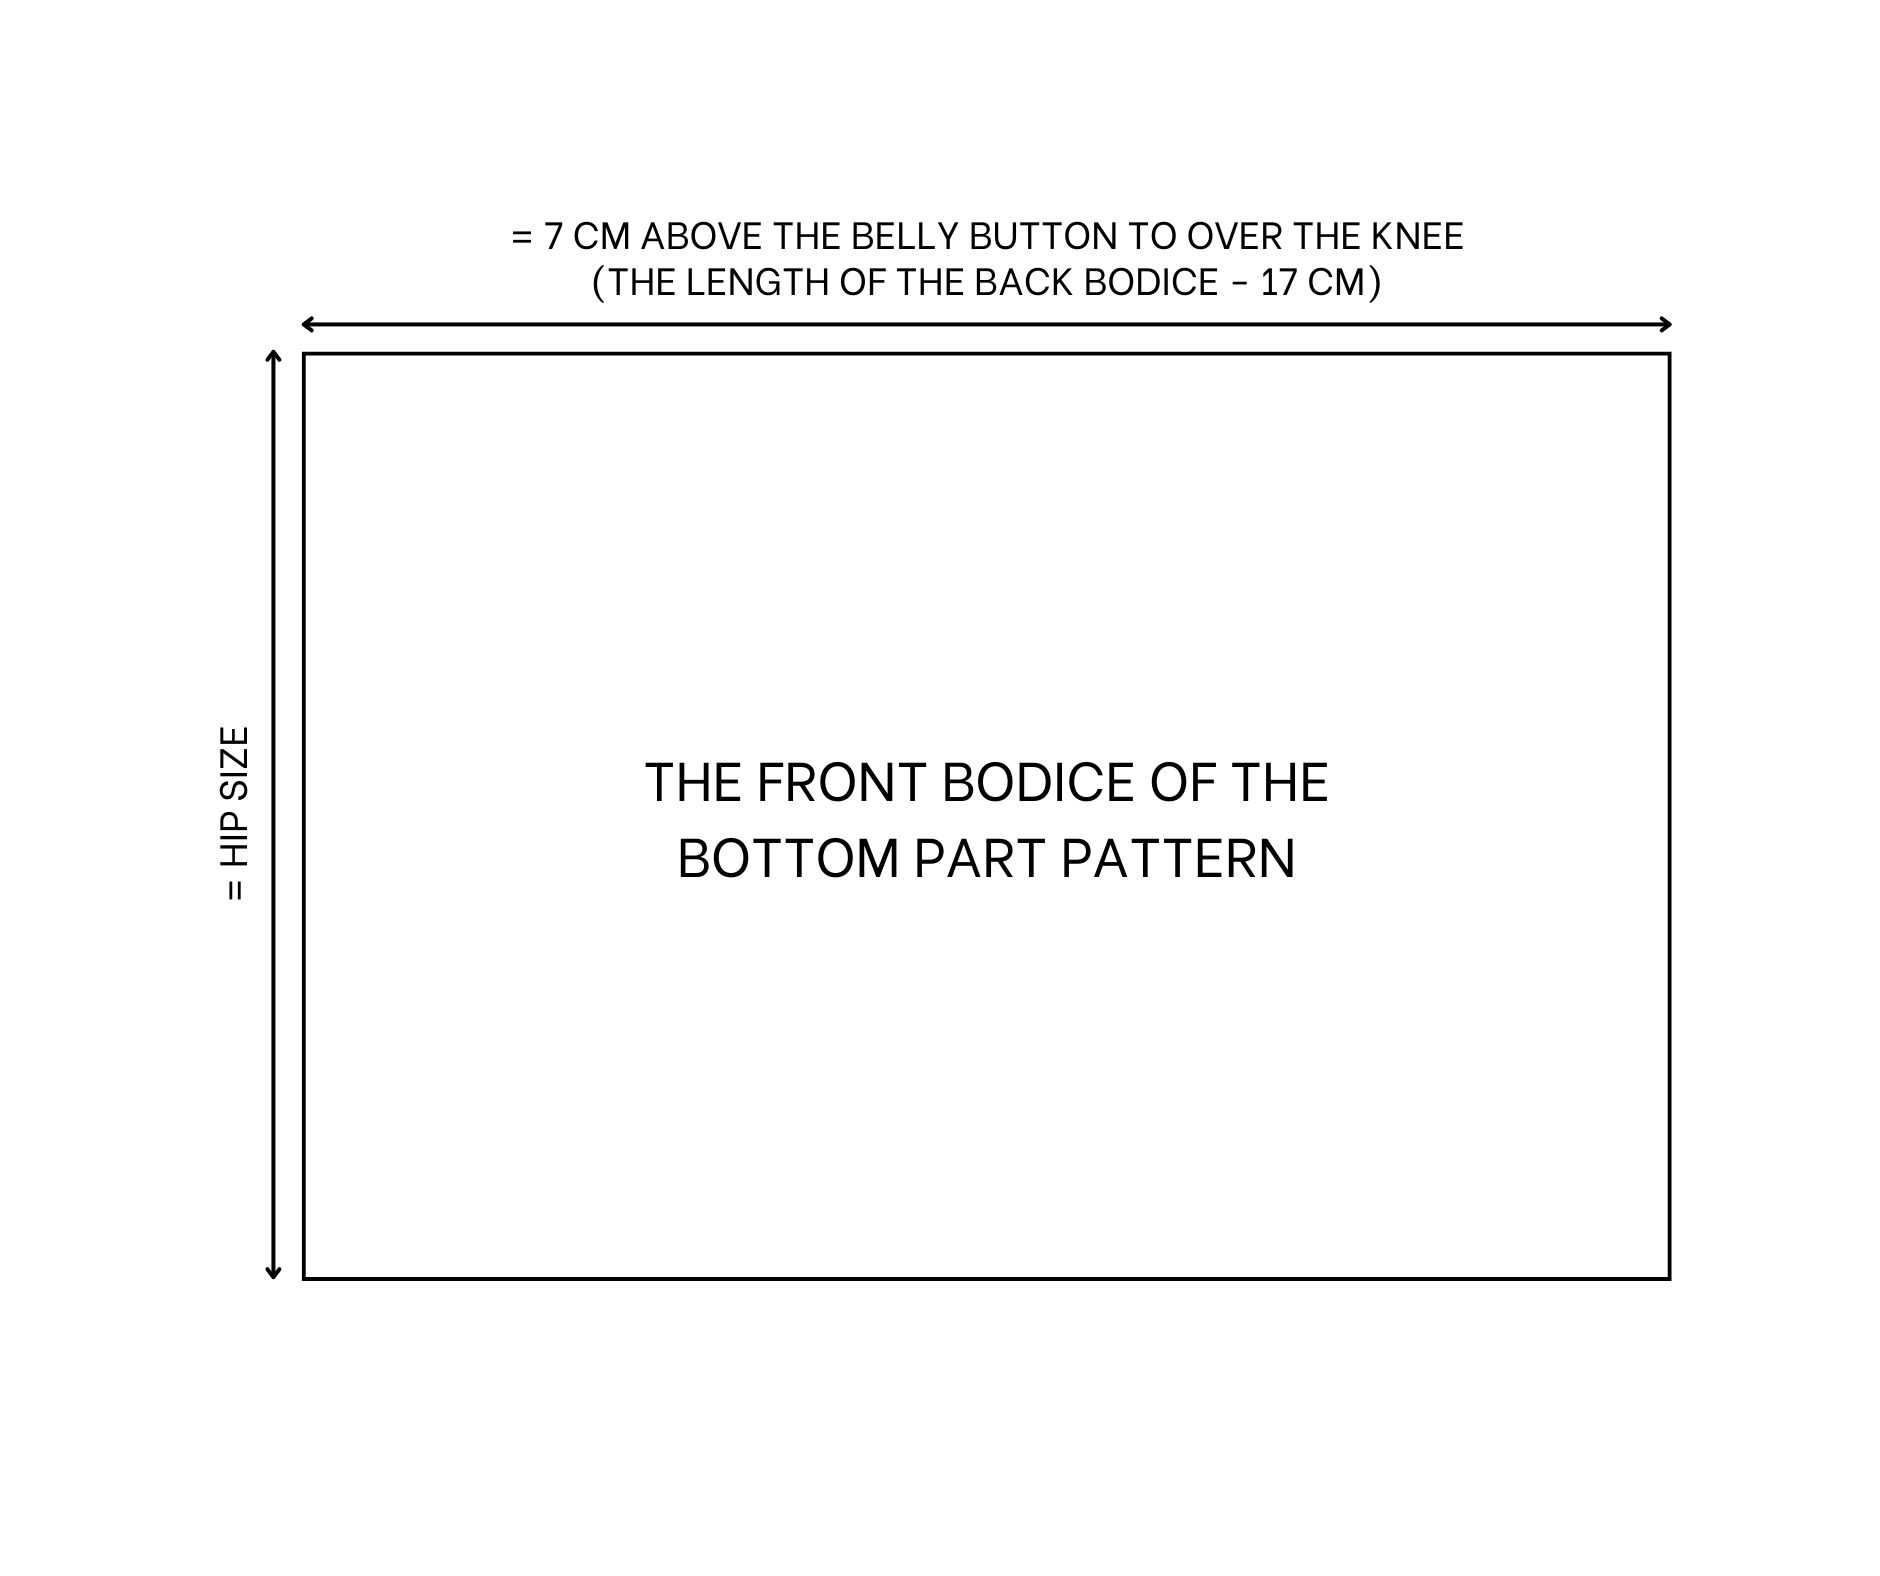
The front bodice of the bottom part pattern
Draw a rectangle with 92 cm width which is your hip size and 95 cm length which is the length from 7 cm above the belly button to over your knee.
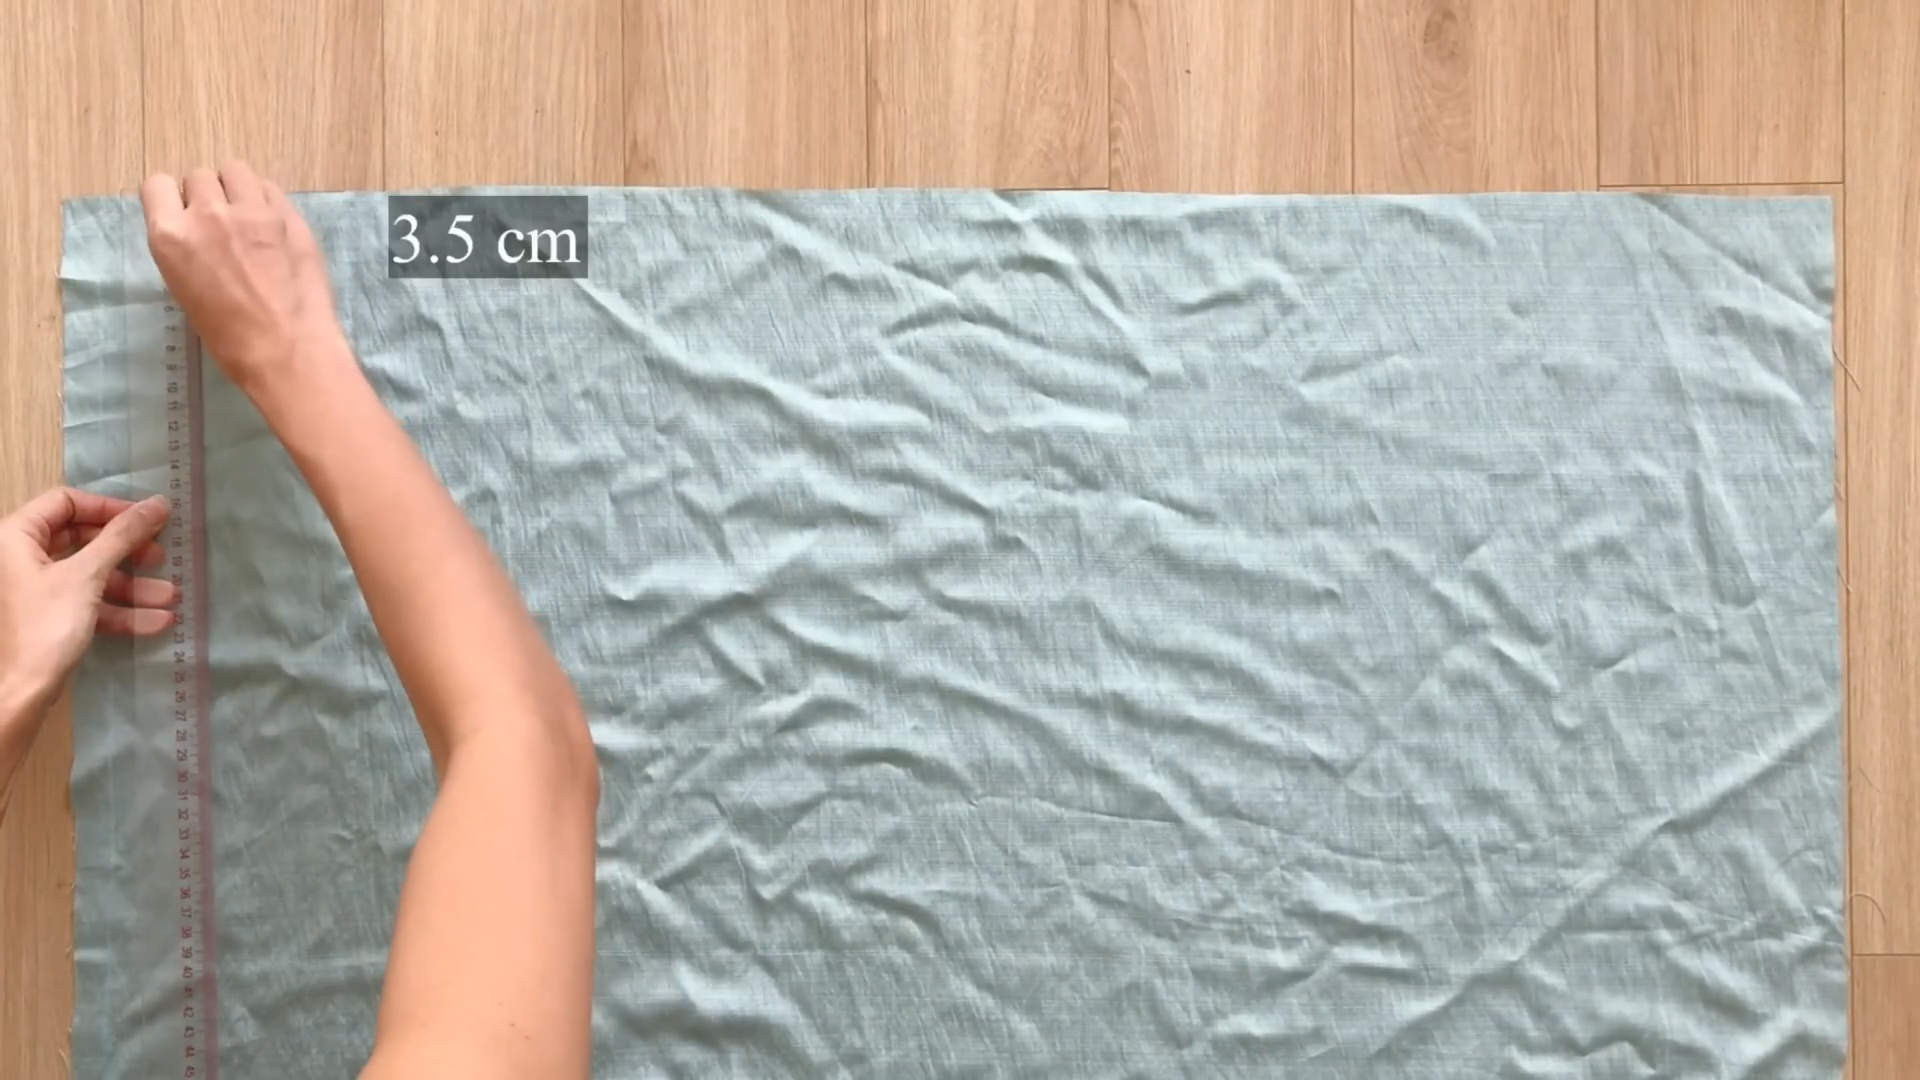
From one of the shorter ends of the rectangle, measure and mark 3.5 cm downwards.

Create a casing for the elastic band, just like we did with the back bodice.
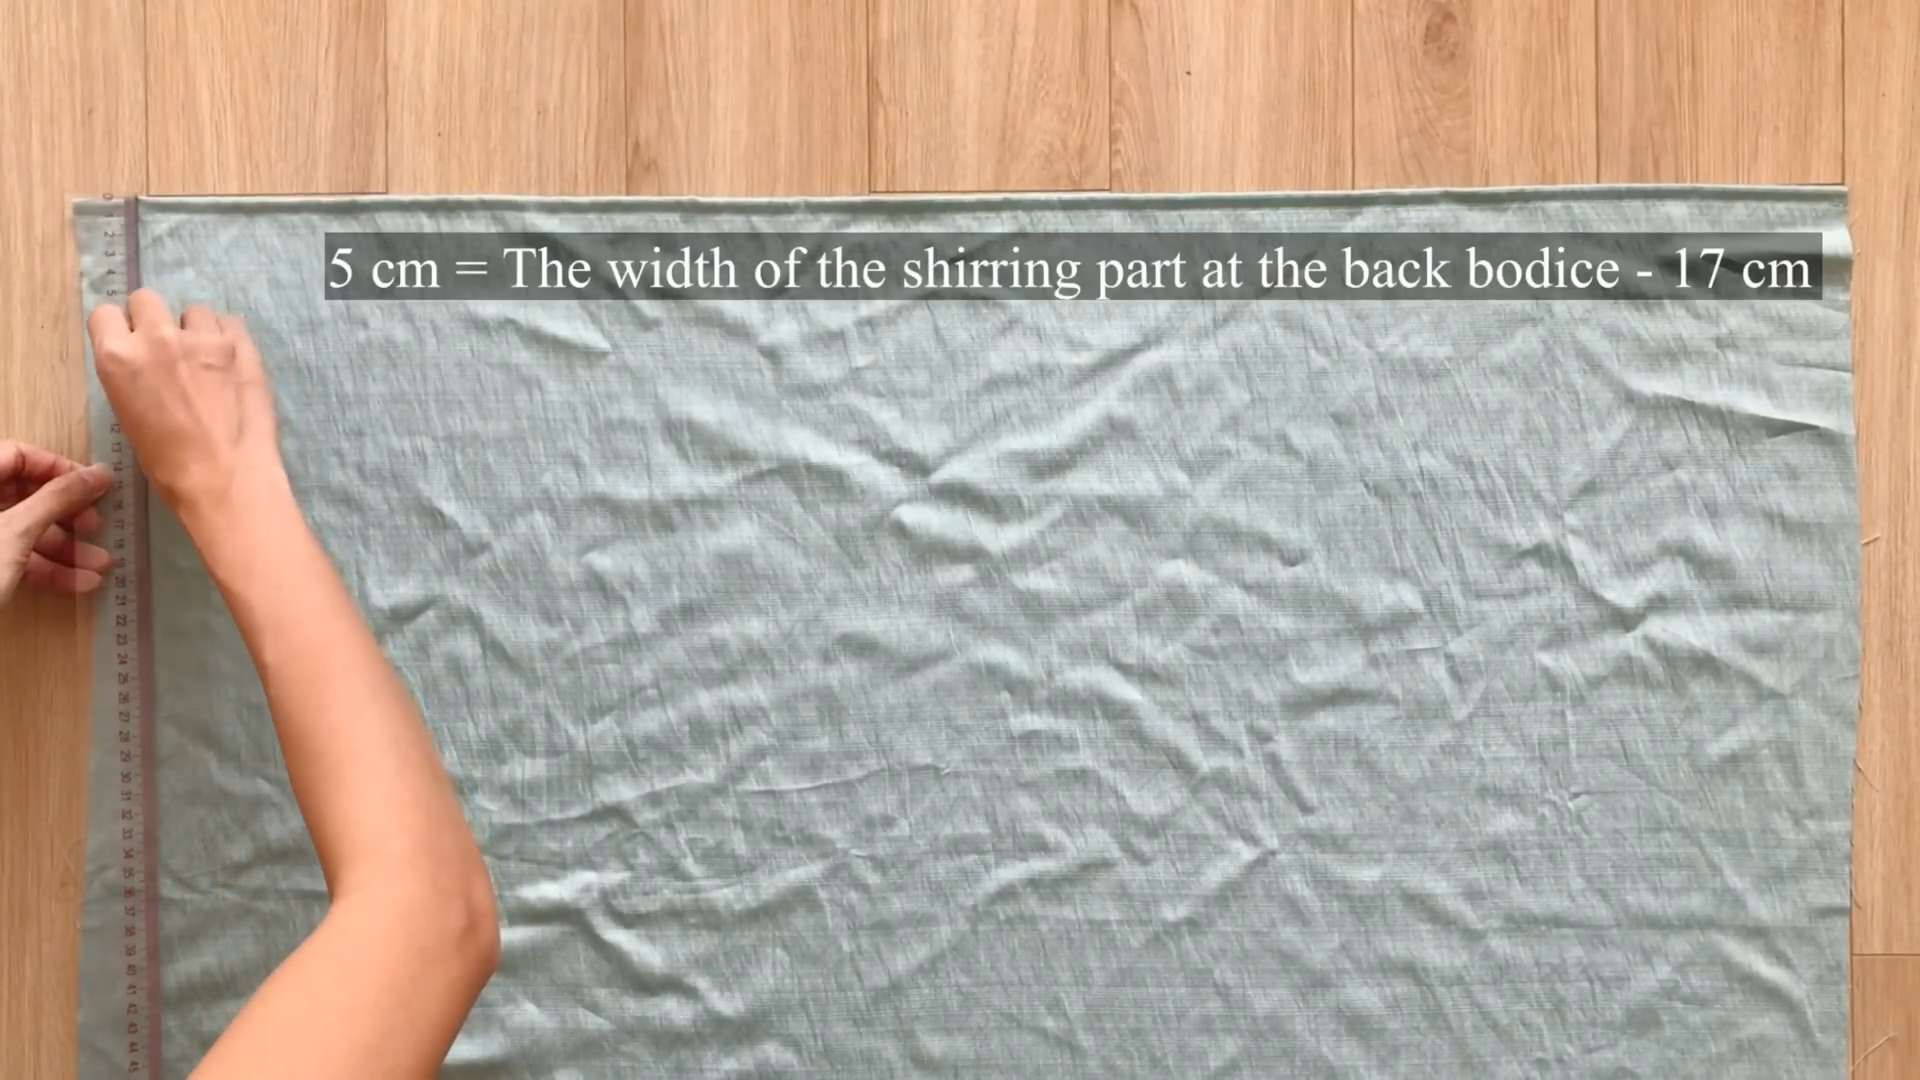
Measure and mark 5 cm downwards from the width line.
Draw a series of horizontal lines at 1 cm intervals between the lines.

Create the shirring part for the front bodice.
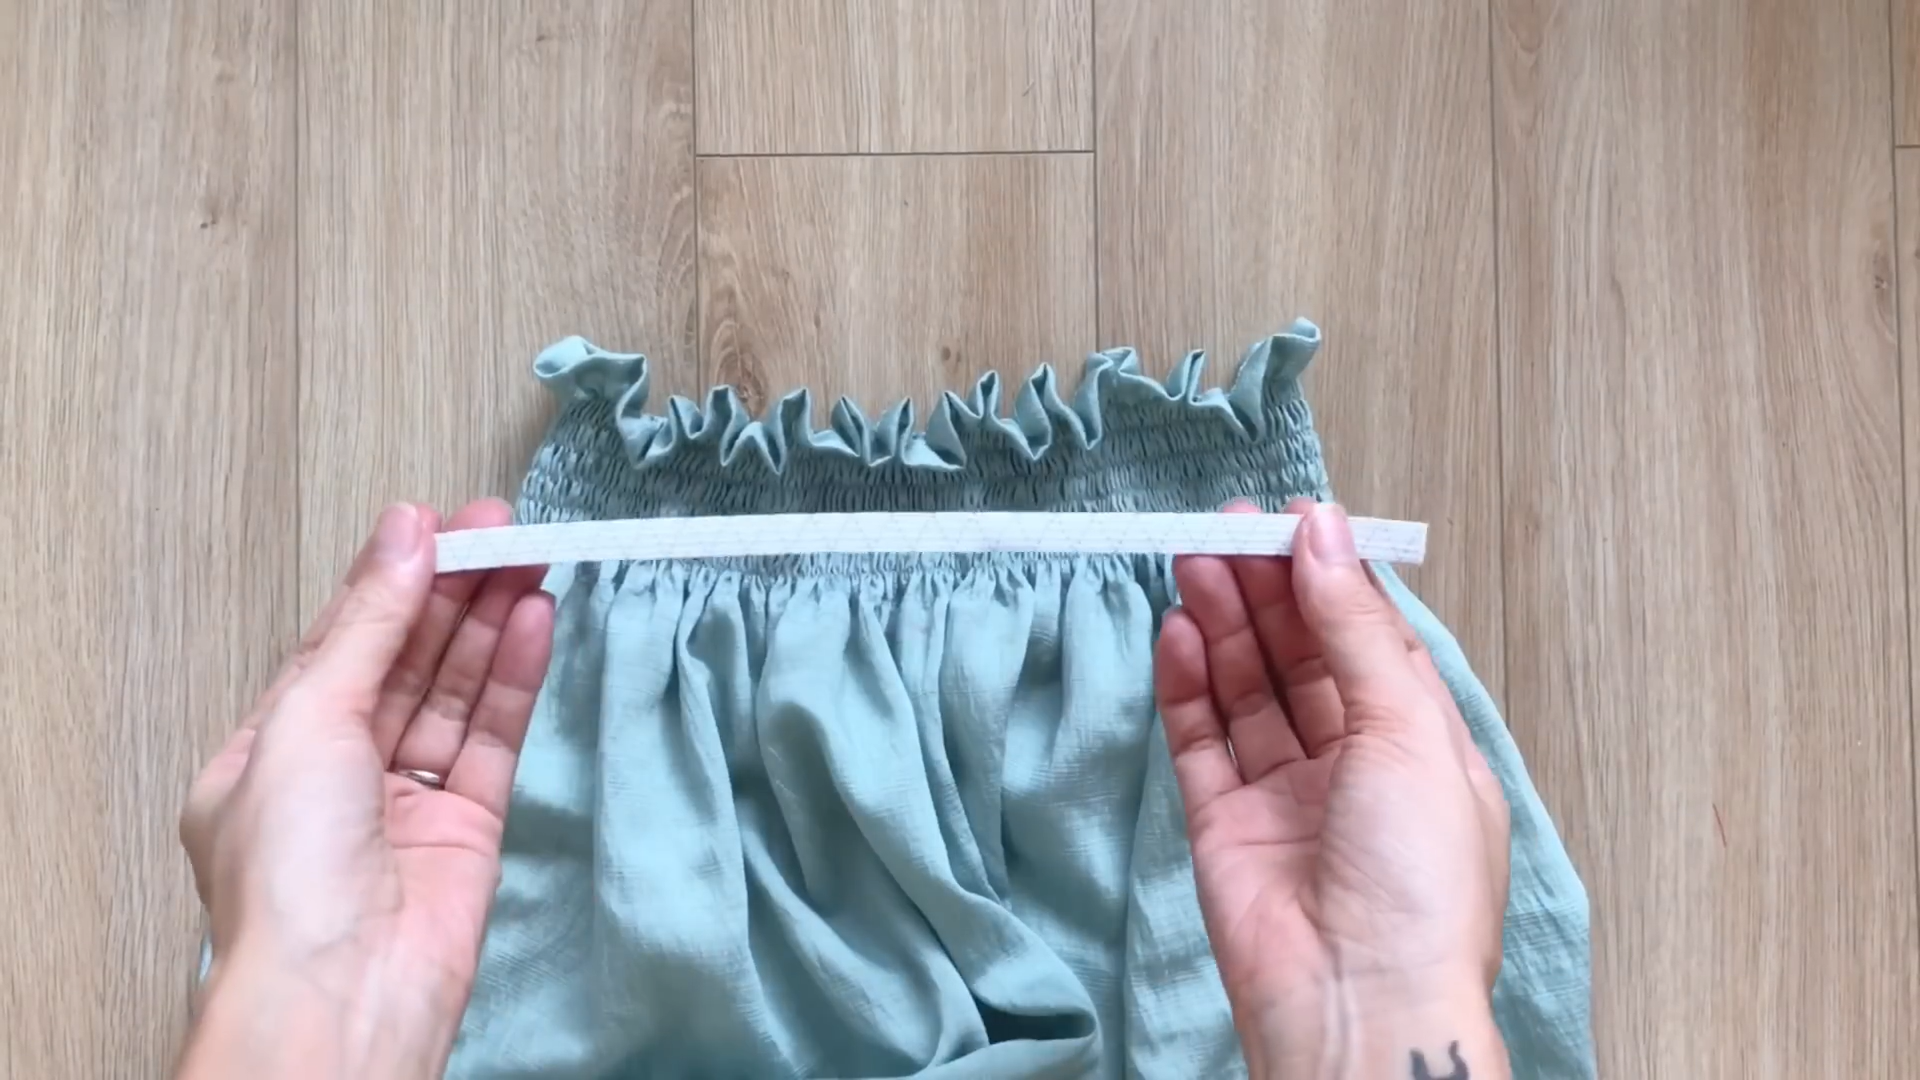
Cut an elastic band with a length equal to half your waist measurement.
Thread the elastic band through the casing we created earlier.
Secure the elastic by sewing the ends to the fabric.

Mark 5 cm below the bottom of the shirring – this will be the pocket placement.

Add pockets to both sides at these marked positions.
THE TOP PART
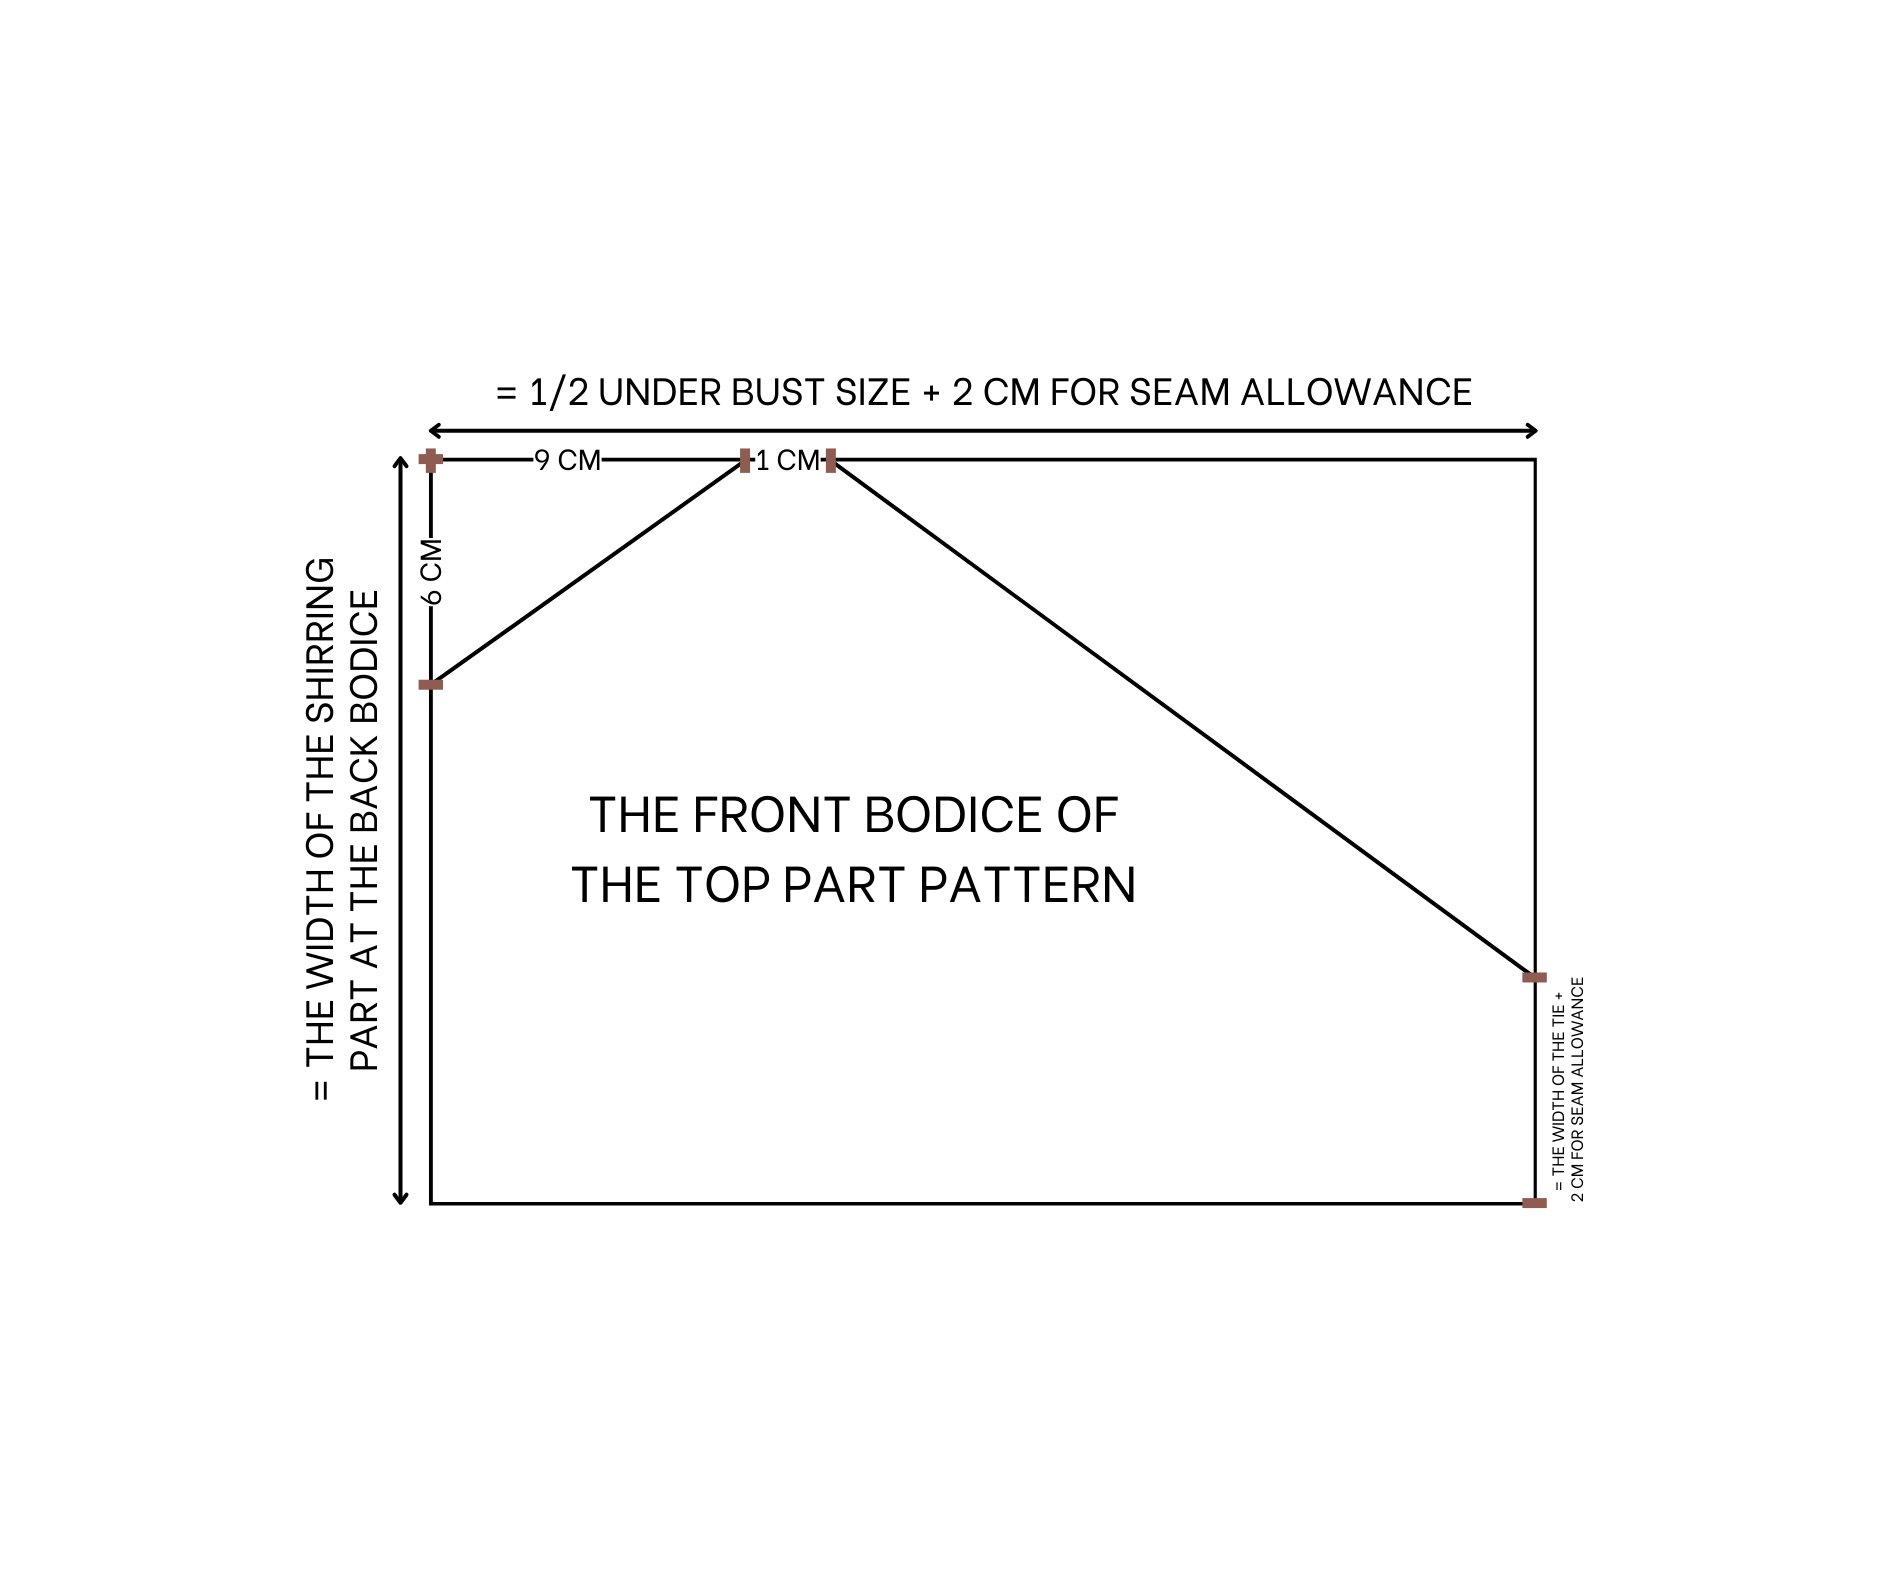
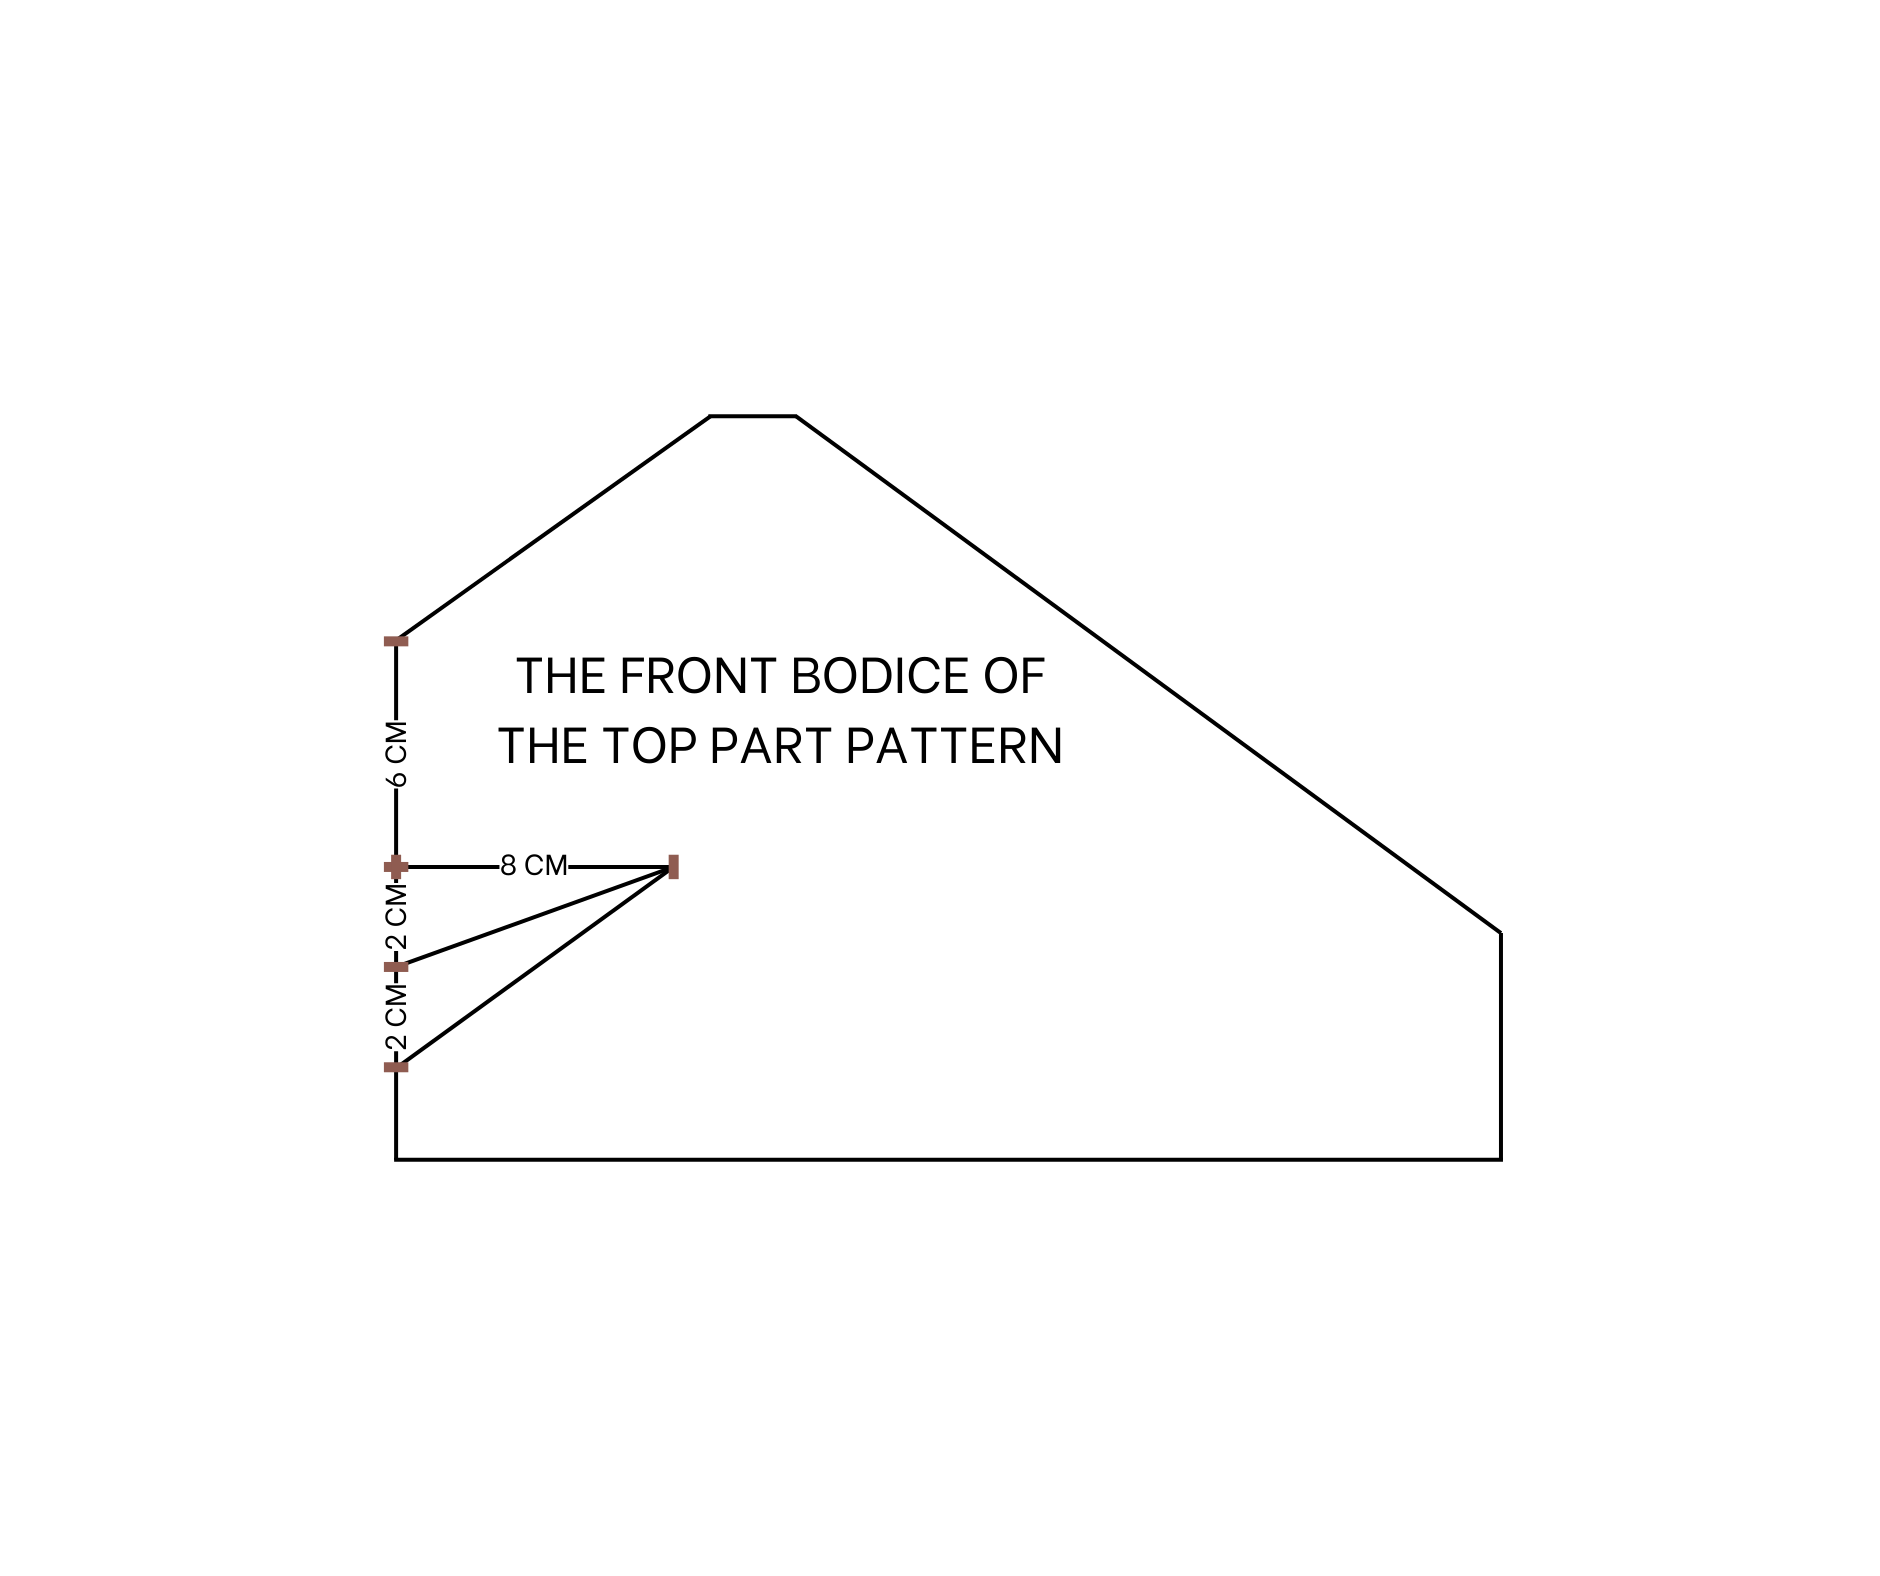
The front bodice of the top part pattern
From one of the shorter ends of the rectangle, measure and mark 6 cm downwards.
Next, mark another 9 cm inwards from the same short end.
Connect these two marks with a straight line.
From the 9 cm mark we made earlier, measure 1 cm inwards on the same horizontal line.
Connect this new mark to the 6 cm mark on the length line on the opposite side of the rectangle.
Cut along the connected lines.
From the sleeve line, measure 6 cm downwards on the vertical line.
Draw an 8 cm line perpendicularly inwards from this point. Connect the end of this perpendicular line to two points 2 cm below.
Sew the dart for the front bodice based on the previous lines.
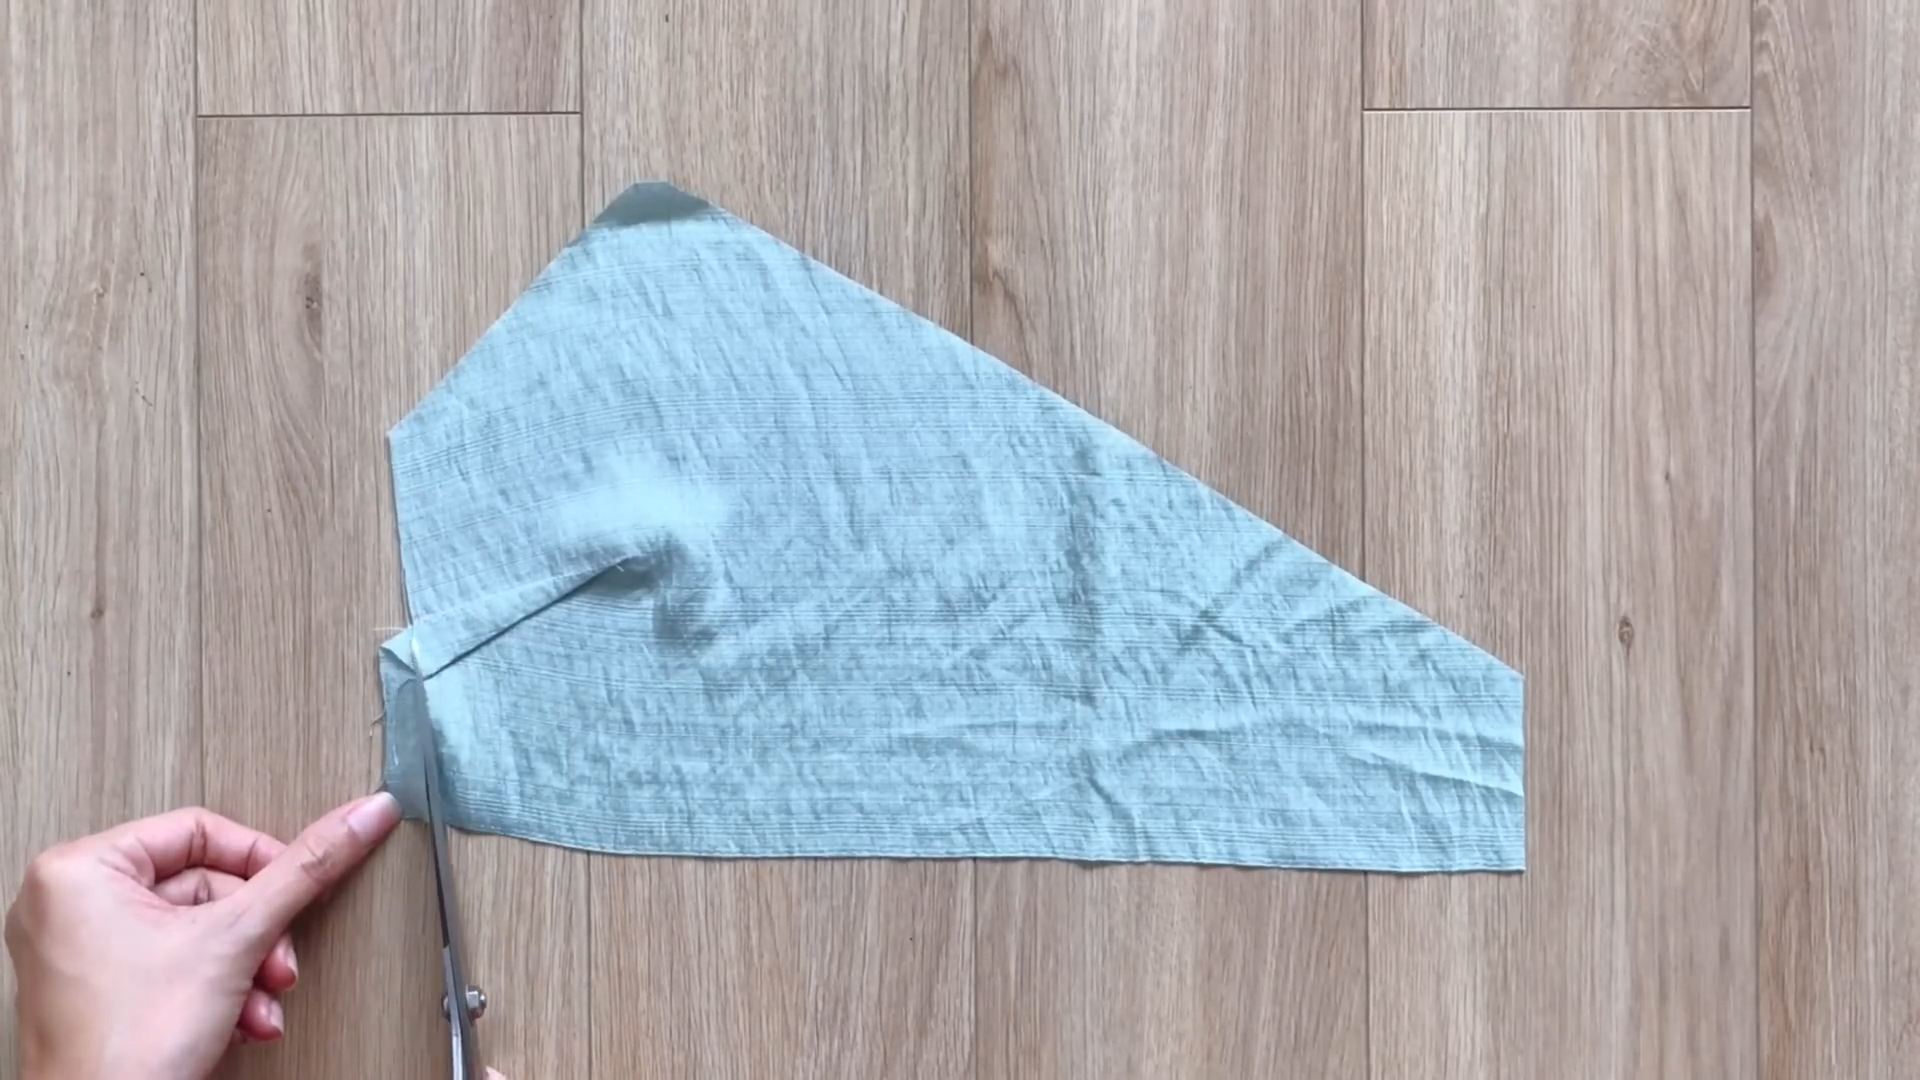
Recut the side edge to create a clean, straight line.
Iron the dart to make it look nicer.
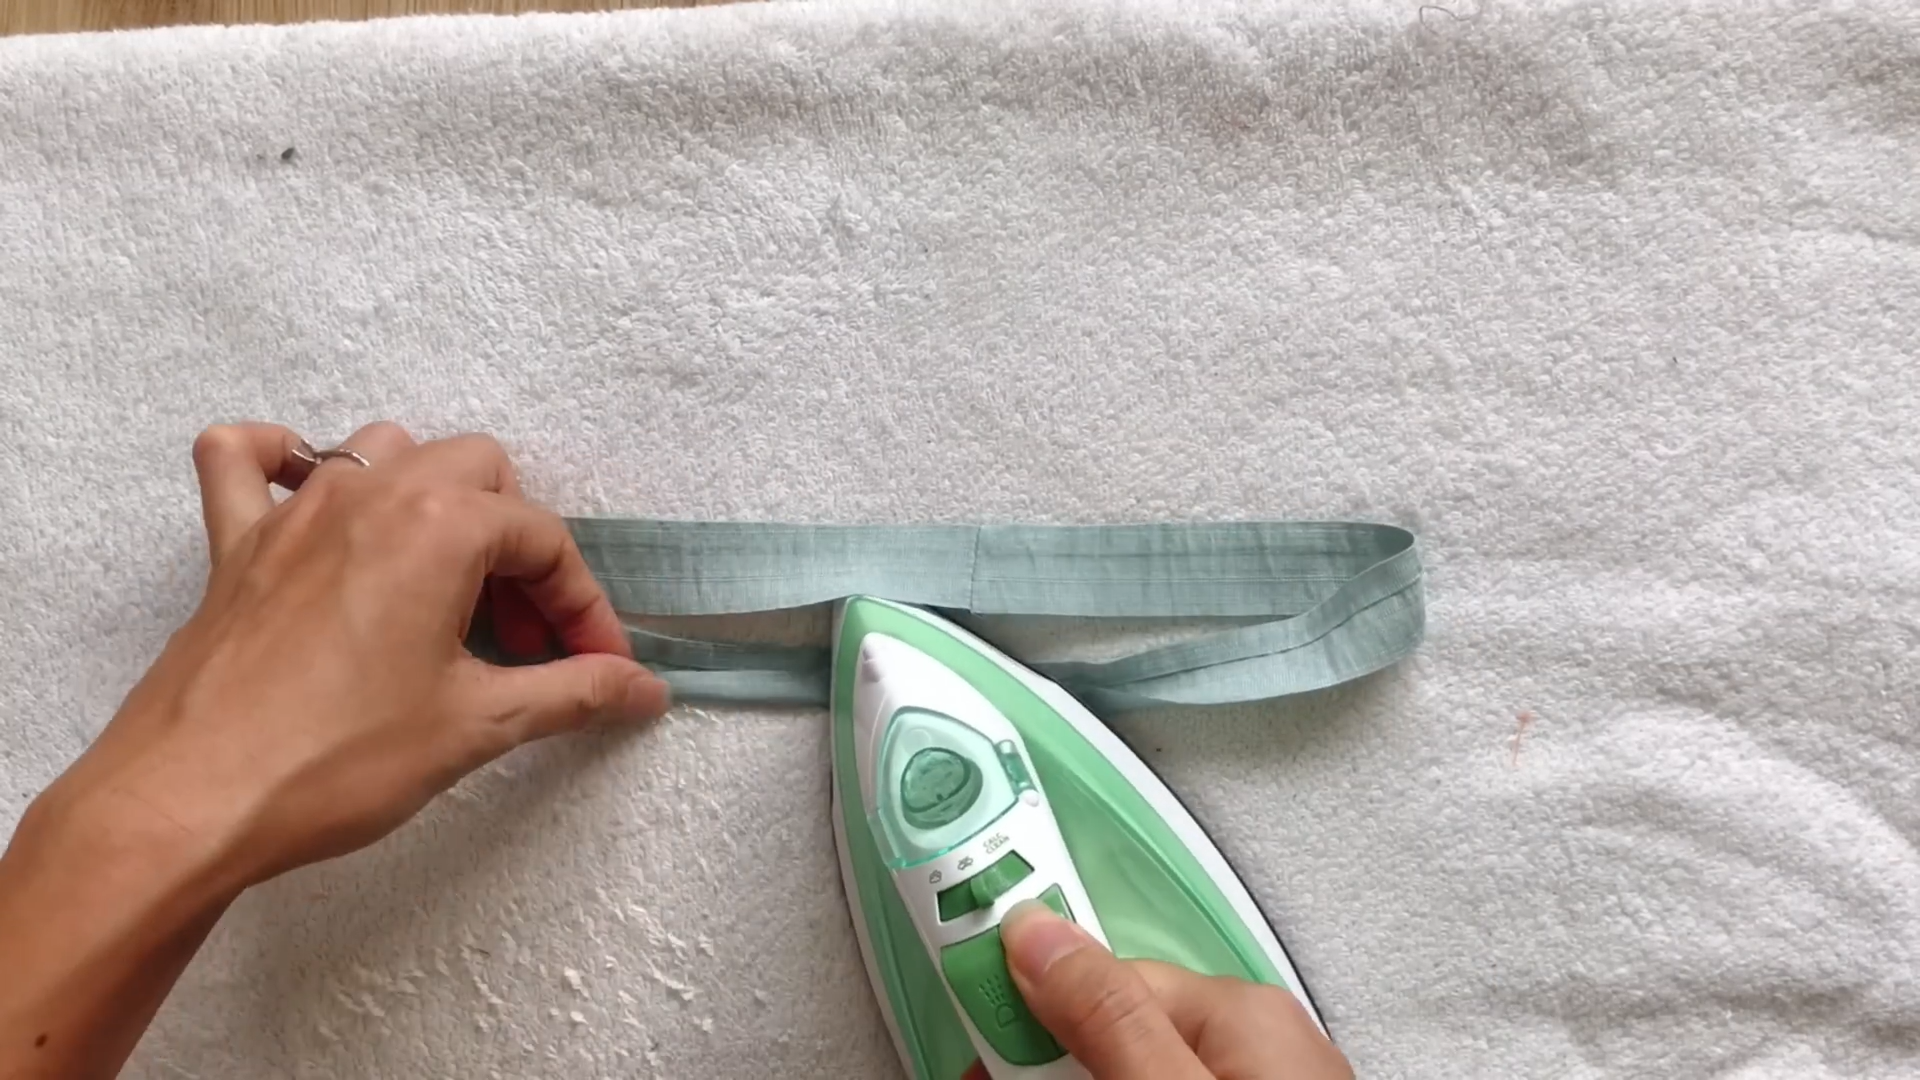
THE TIE
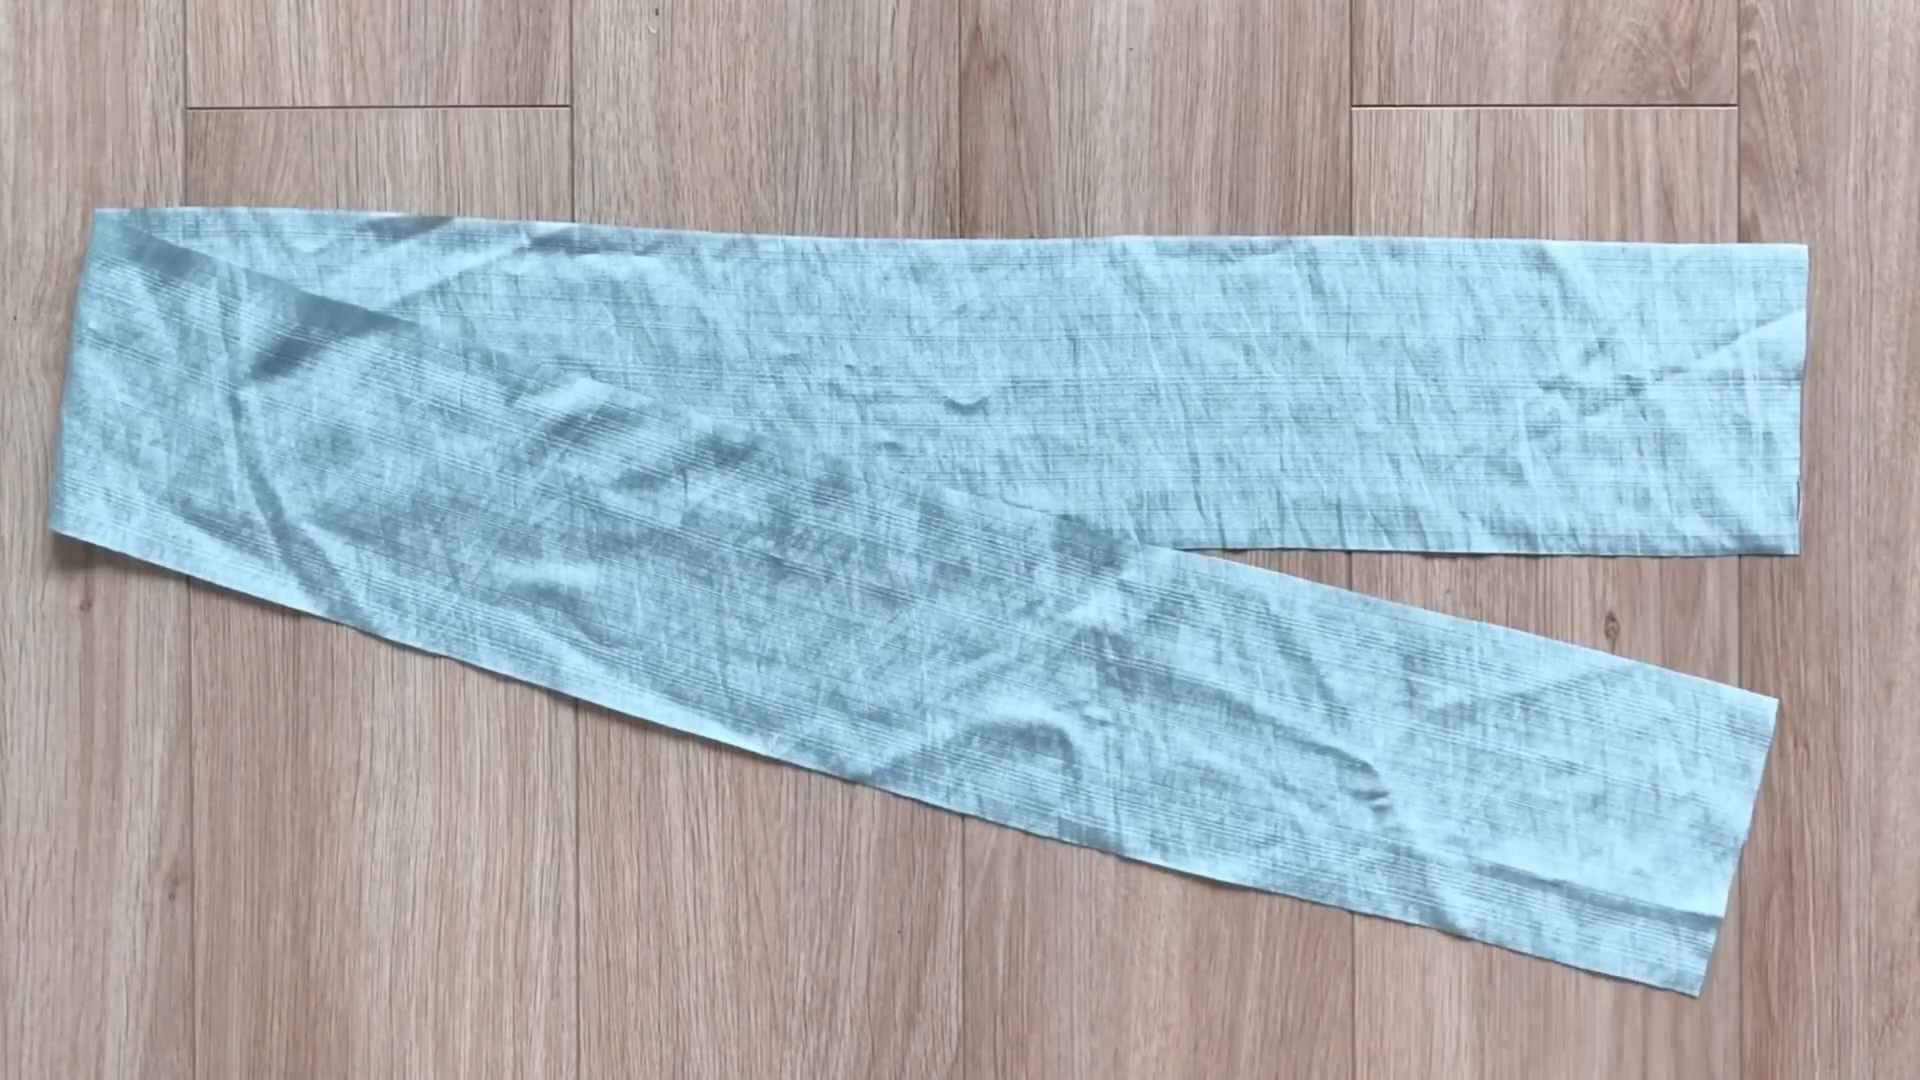
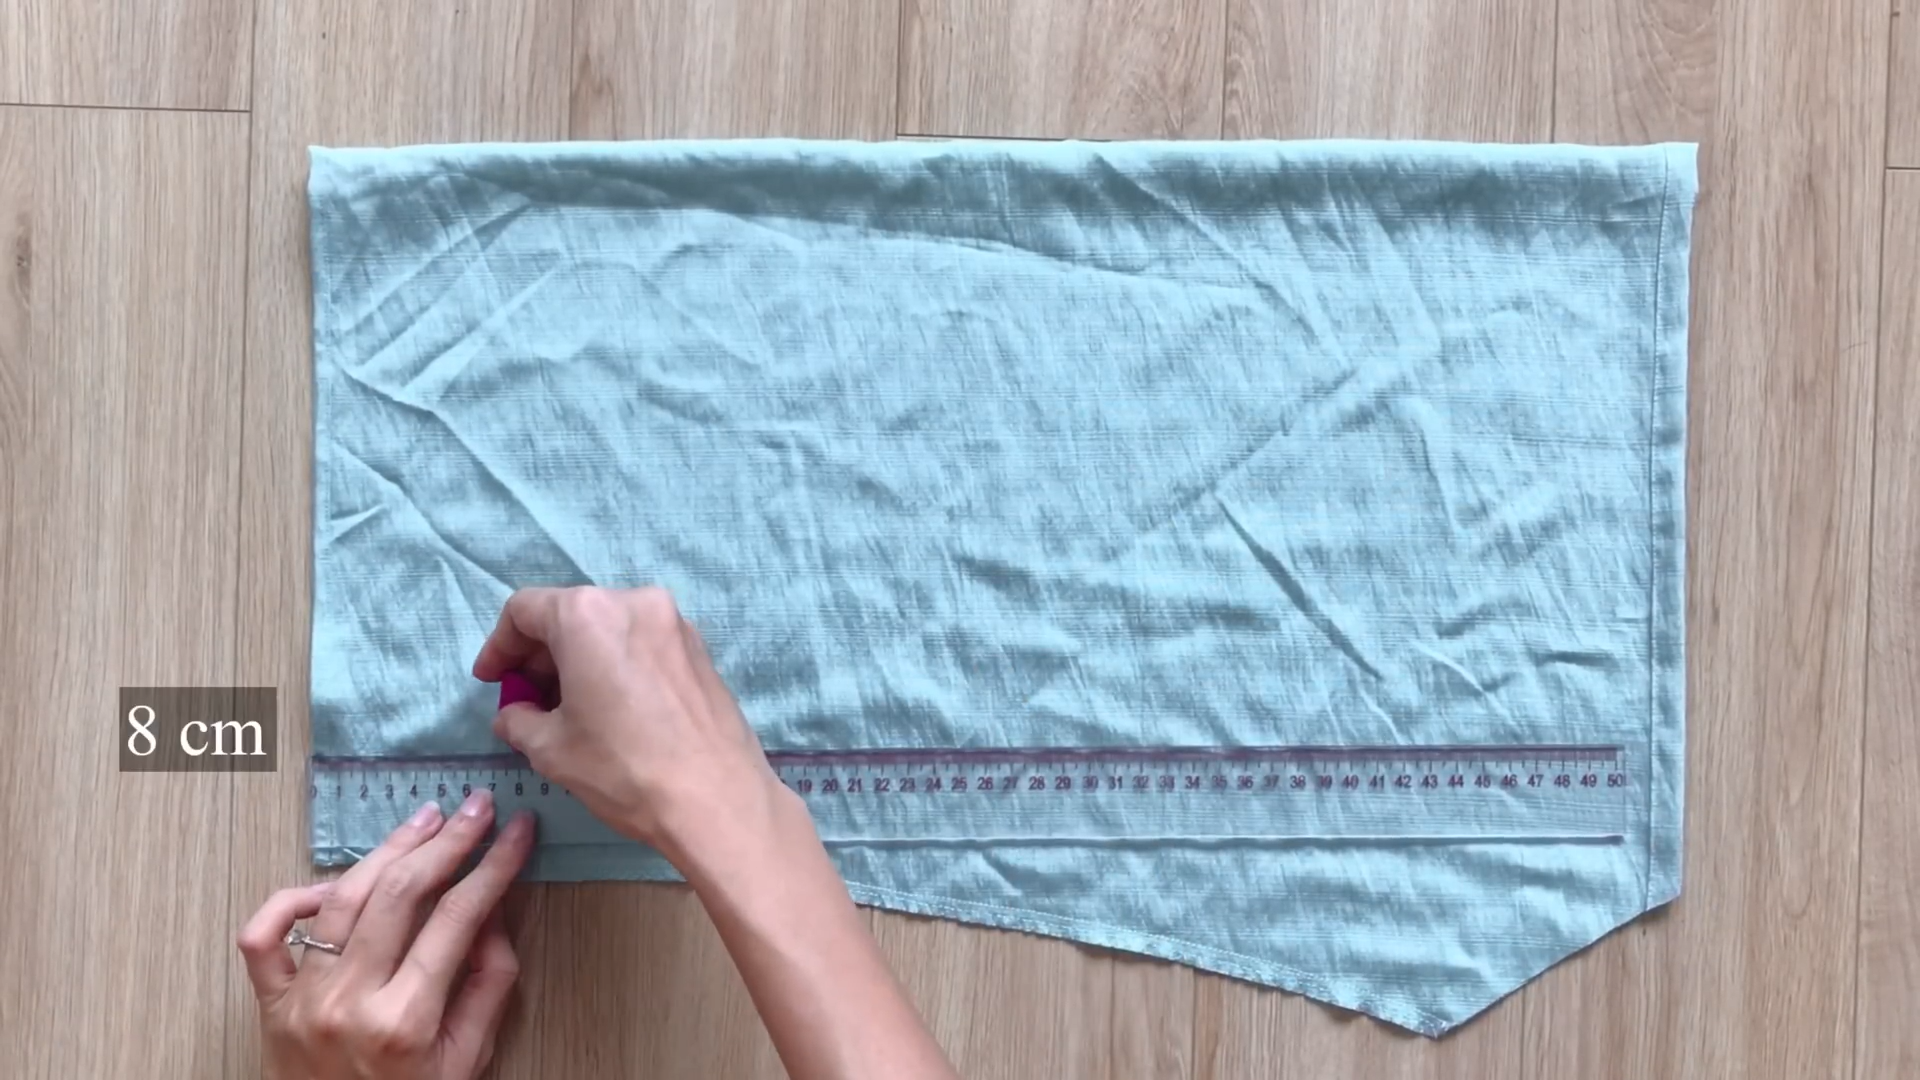
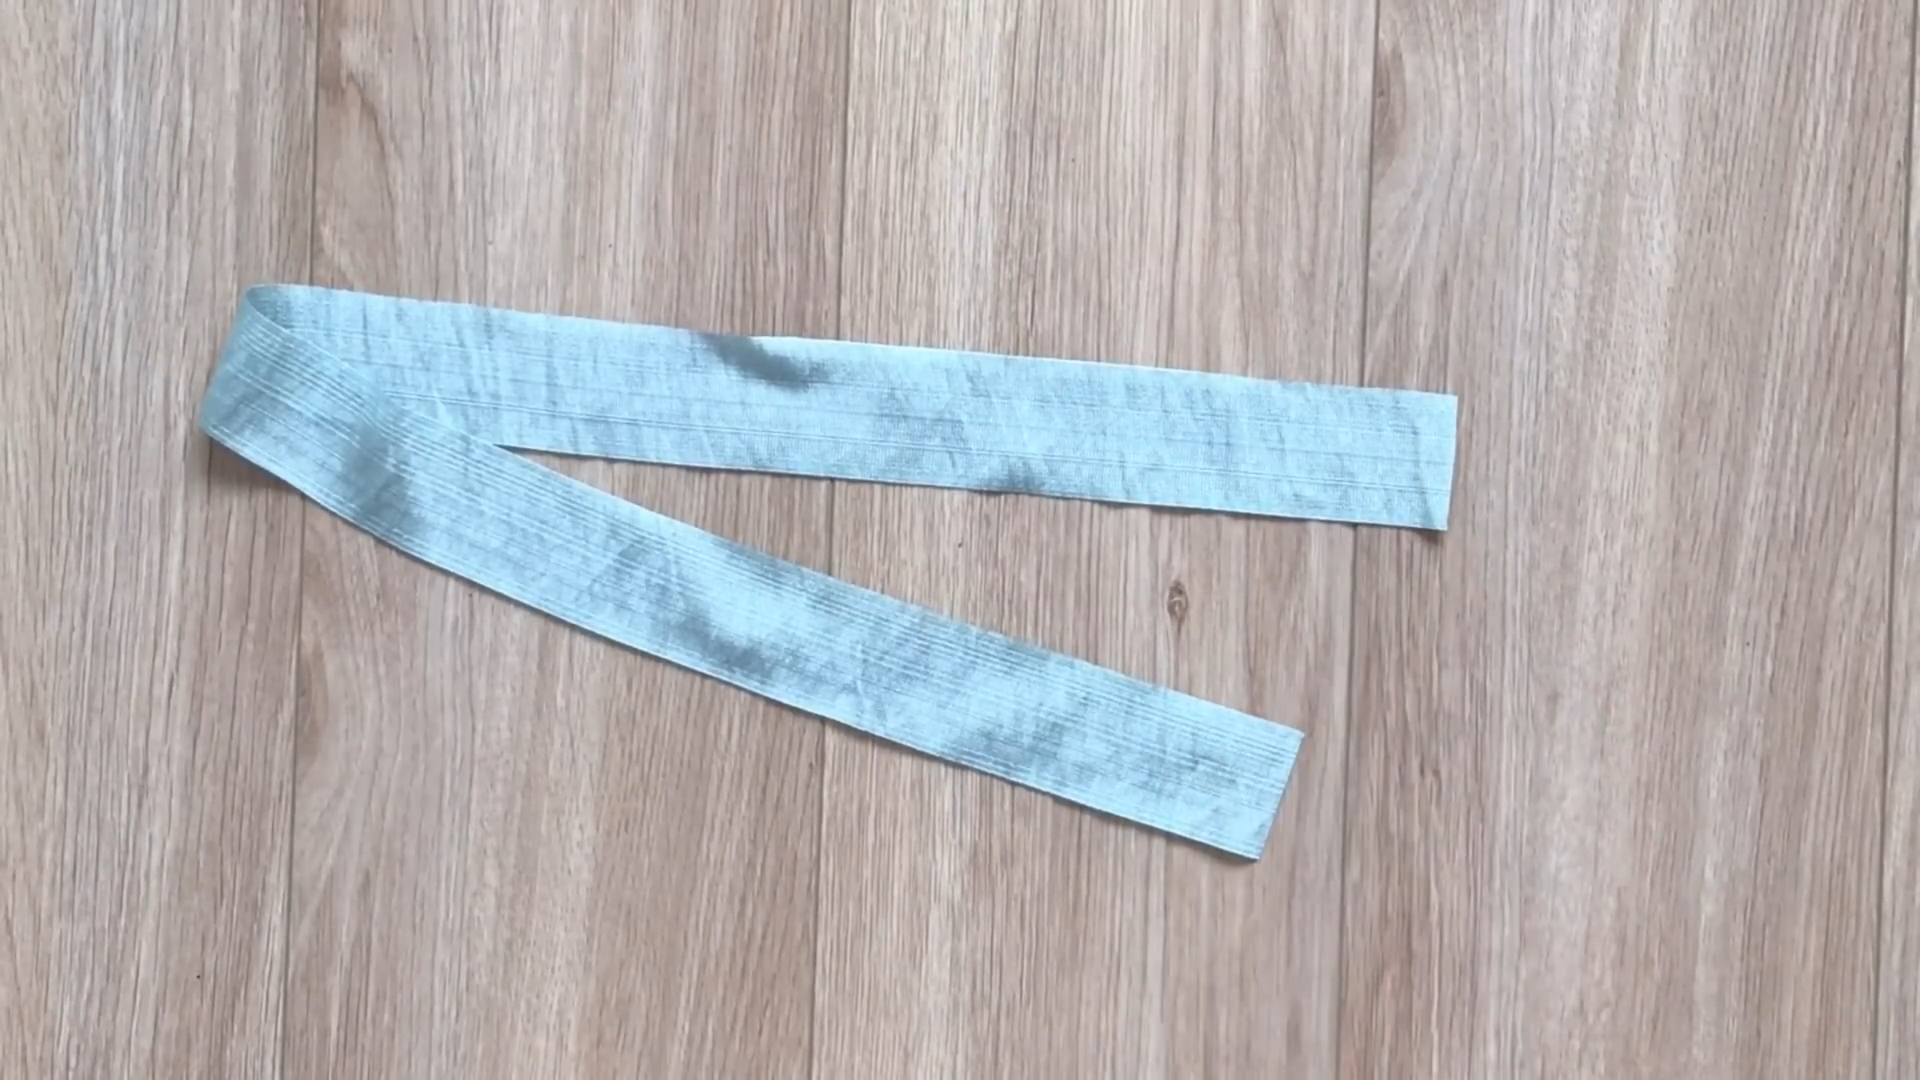
Cut a long rectangle with a width of 8 cm and a length of 80 cm for the tie.
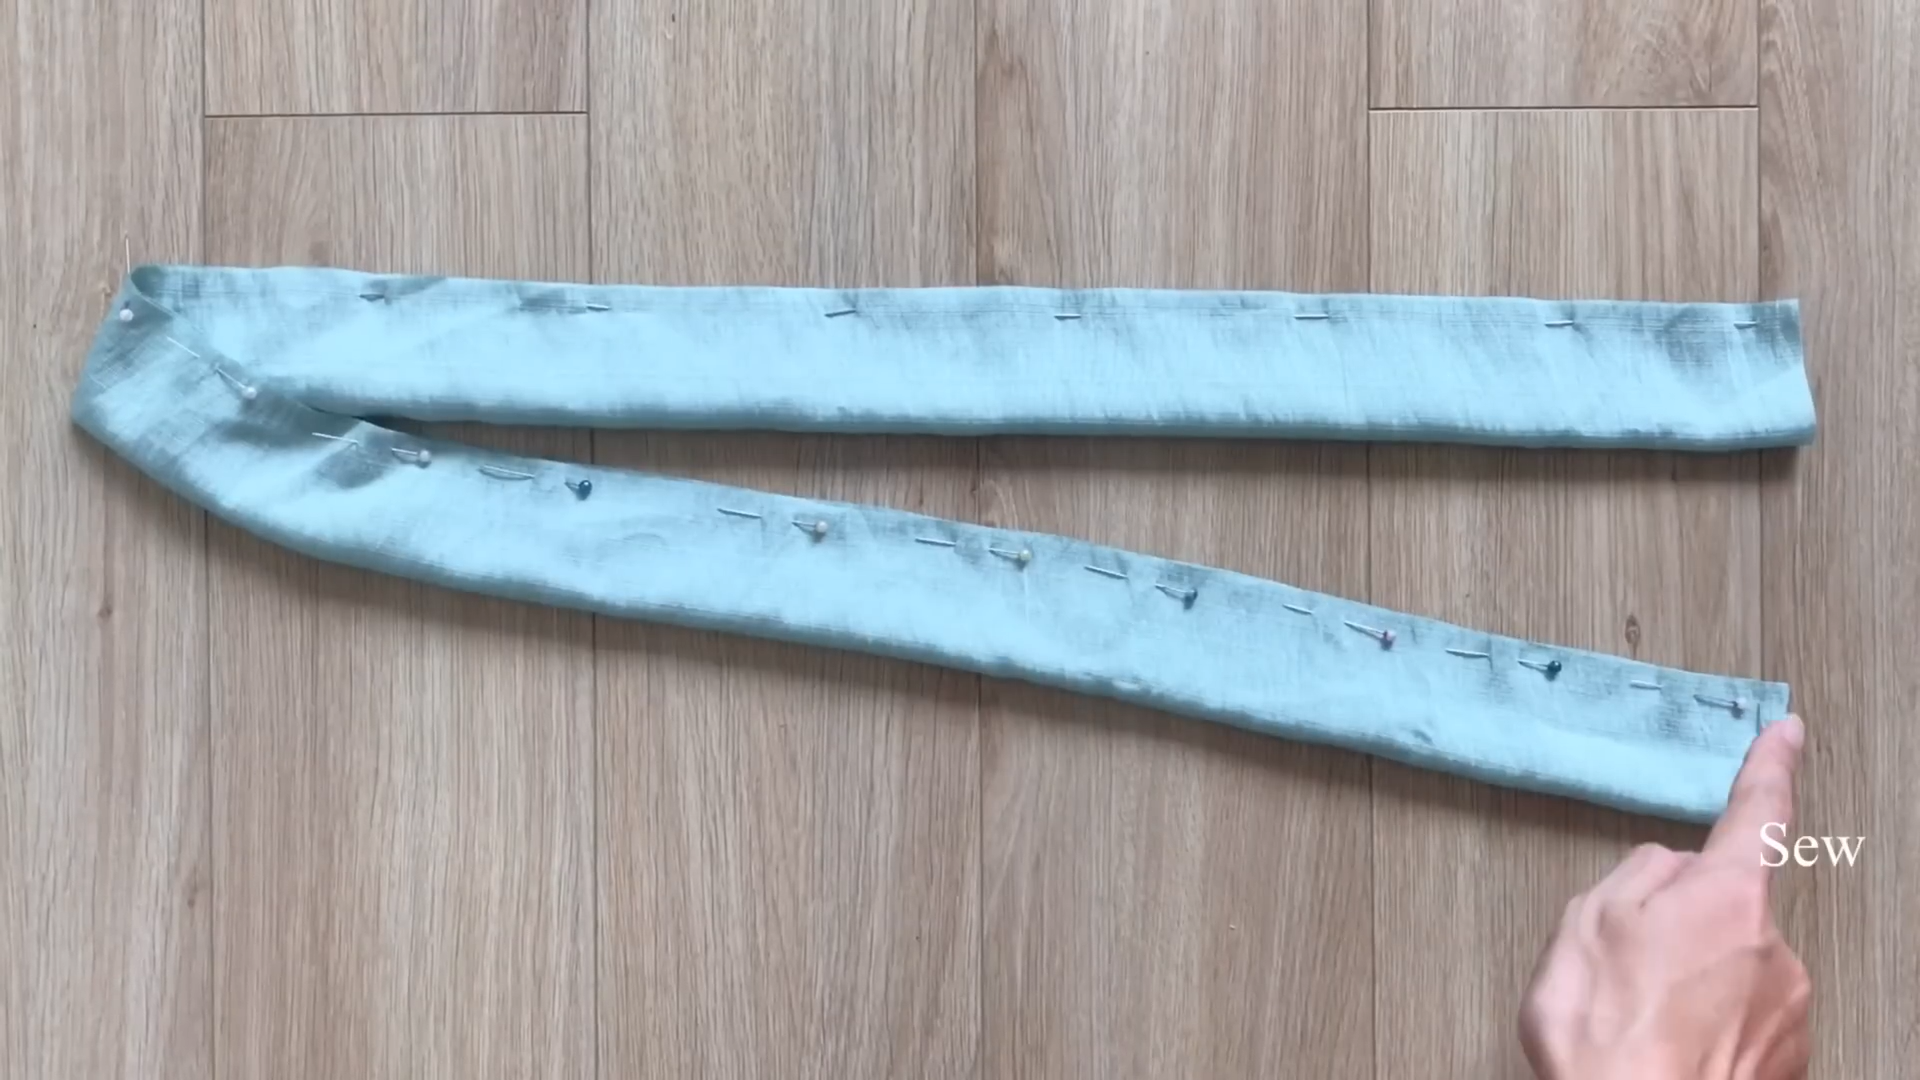
Fold the rectangle lengthwise, sew the edges together, and turn it inside out for a clean finish.
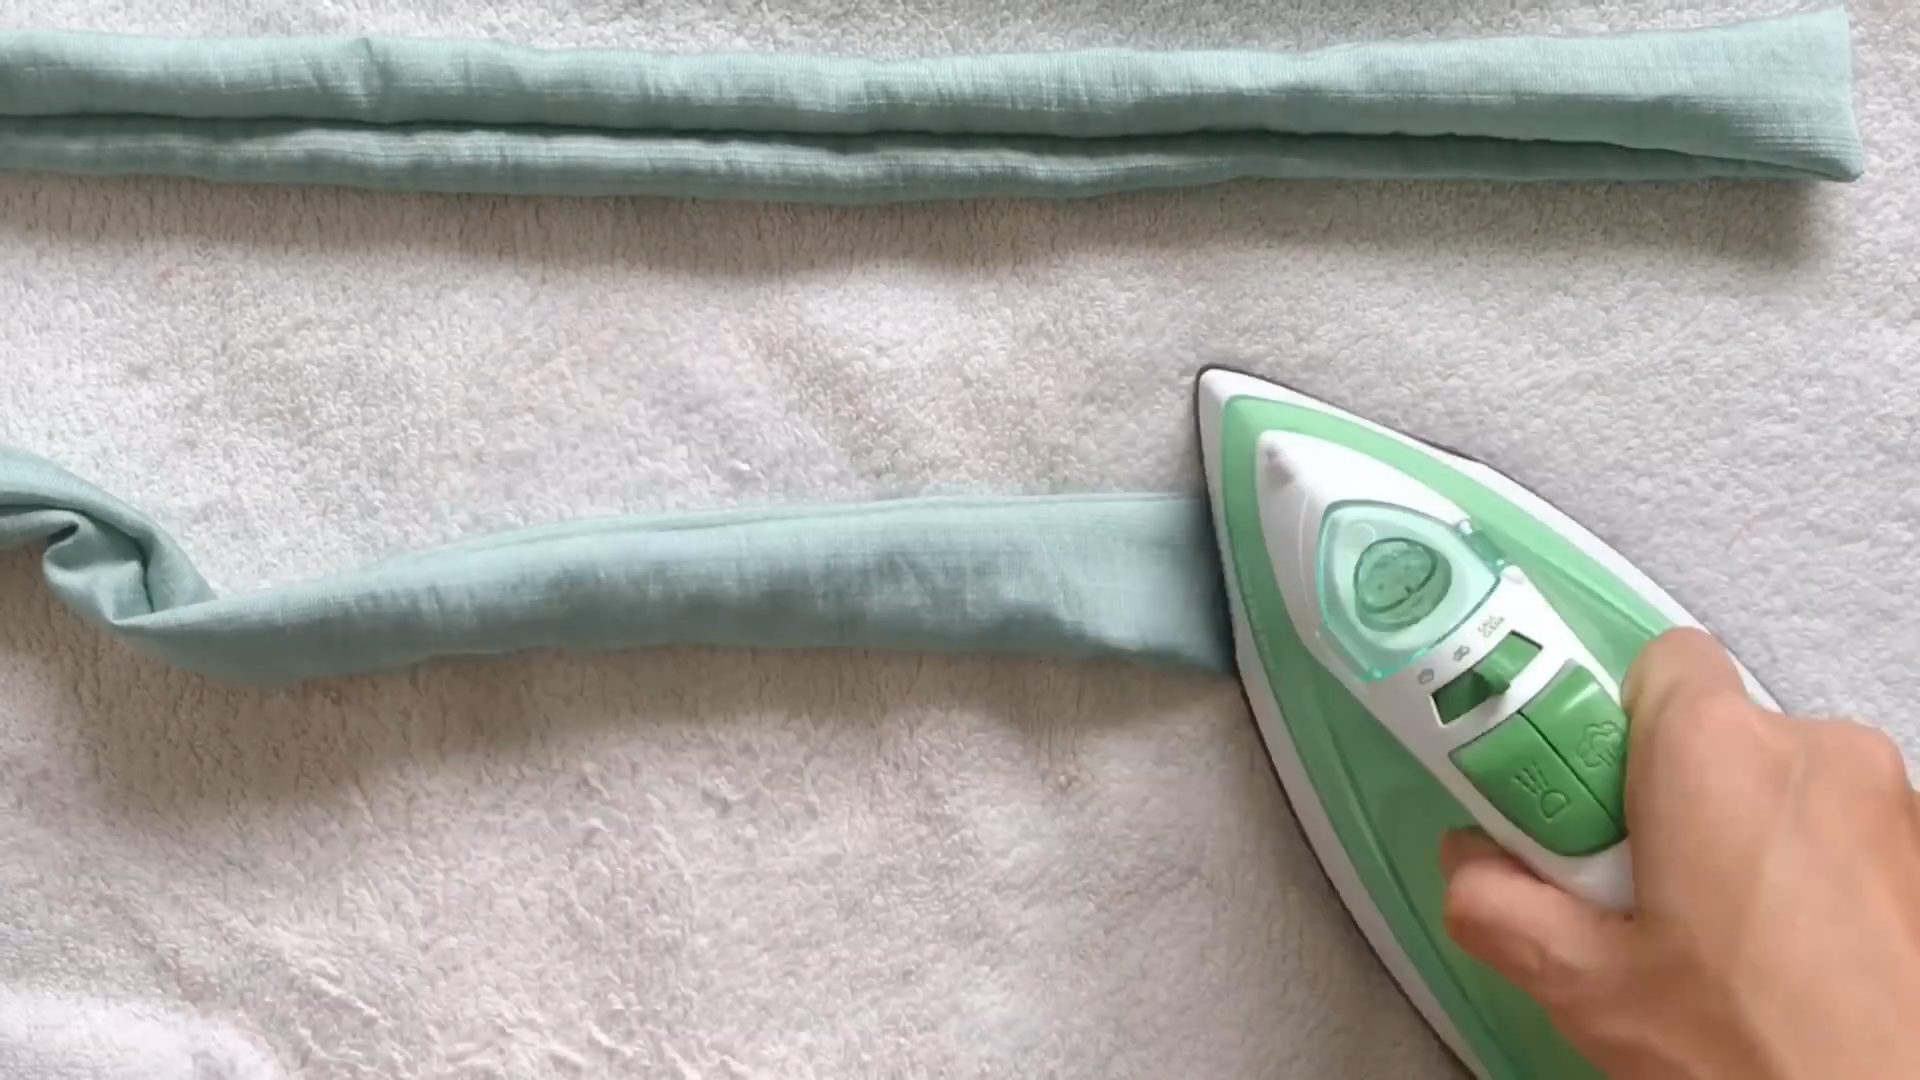
Iron it flat to create a neat tie.
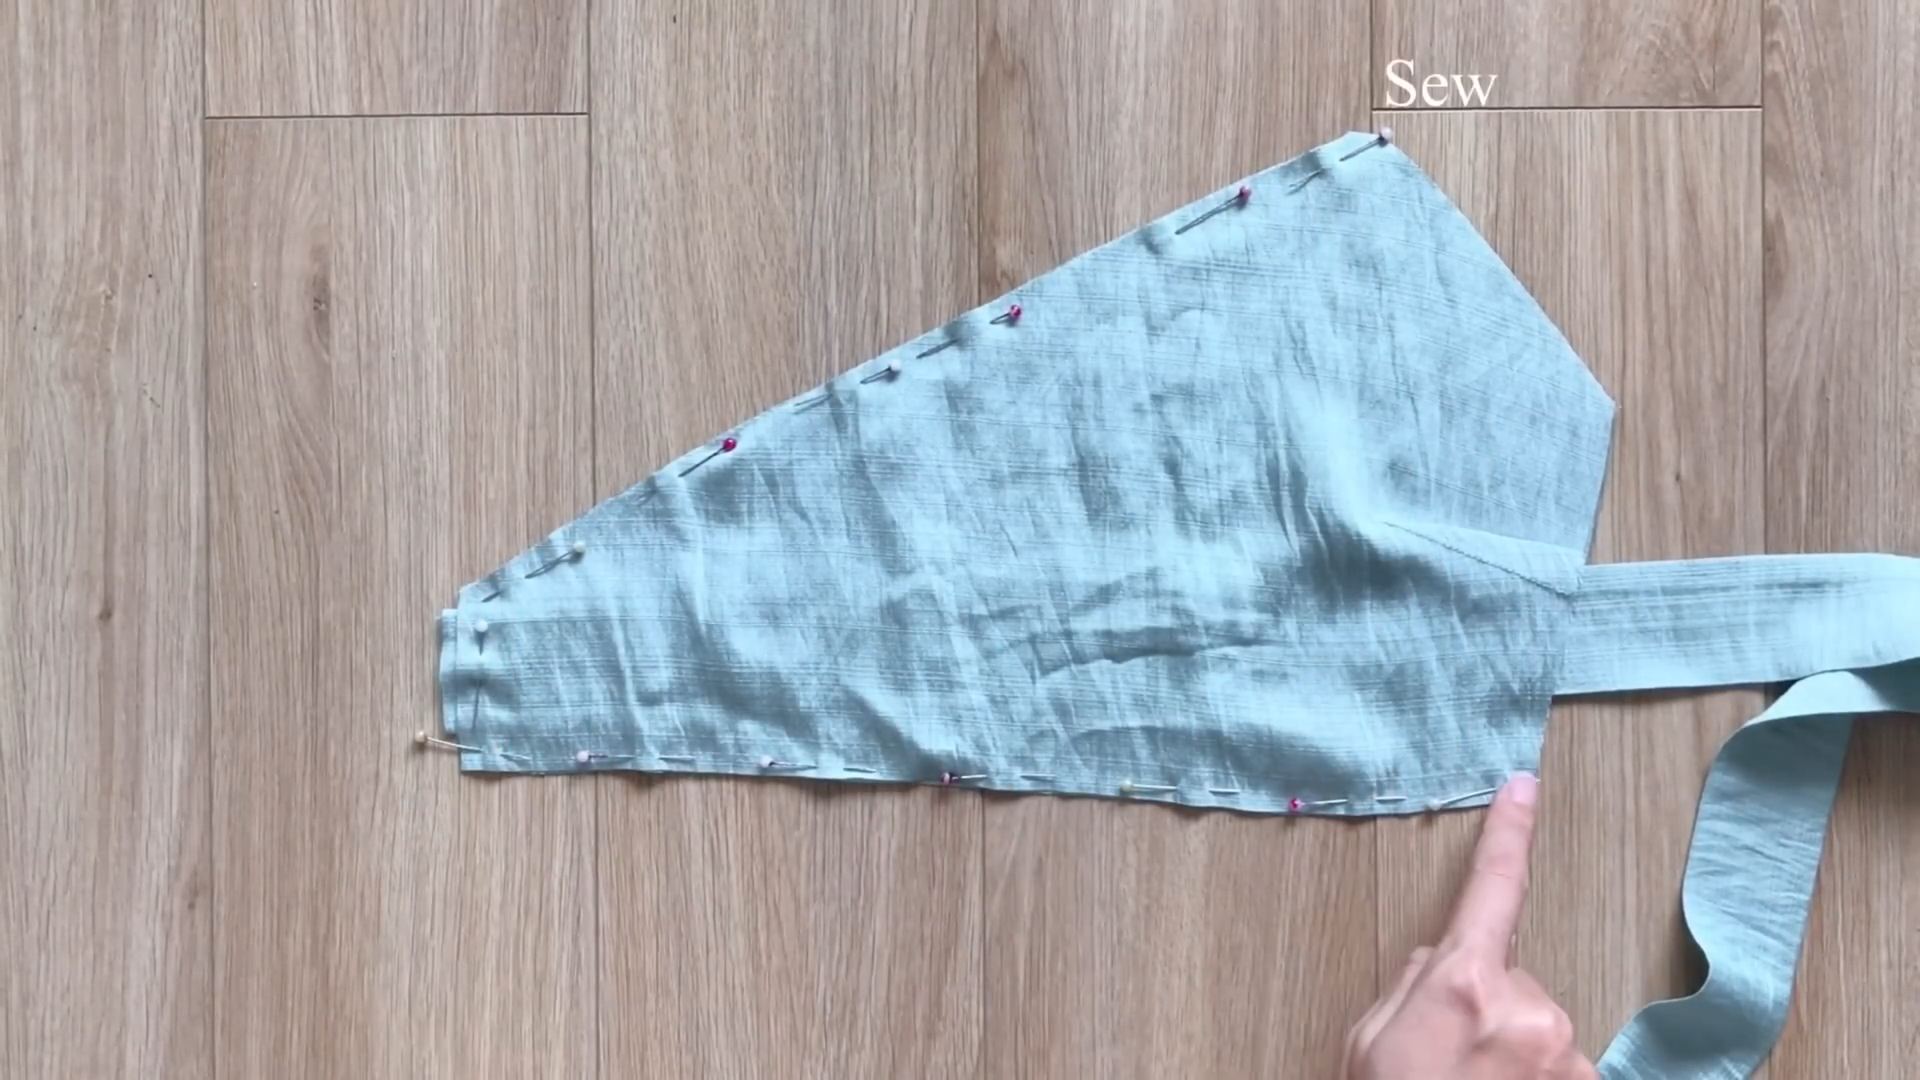
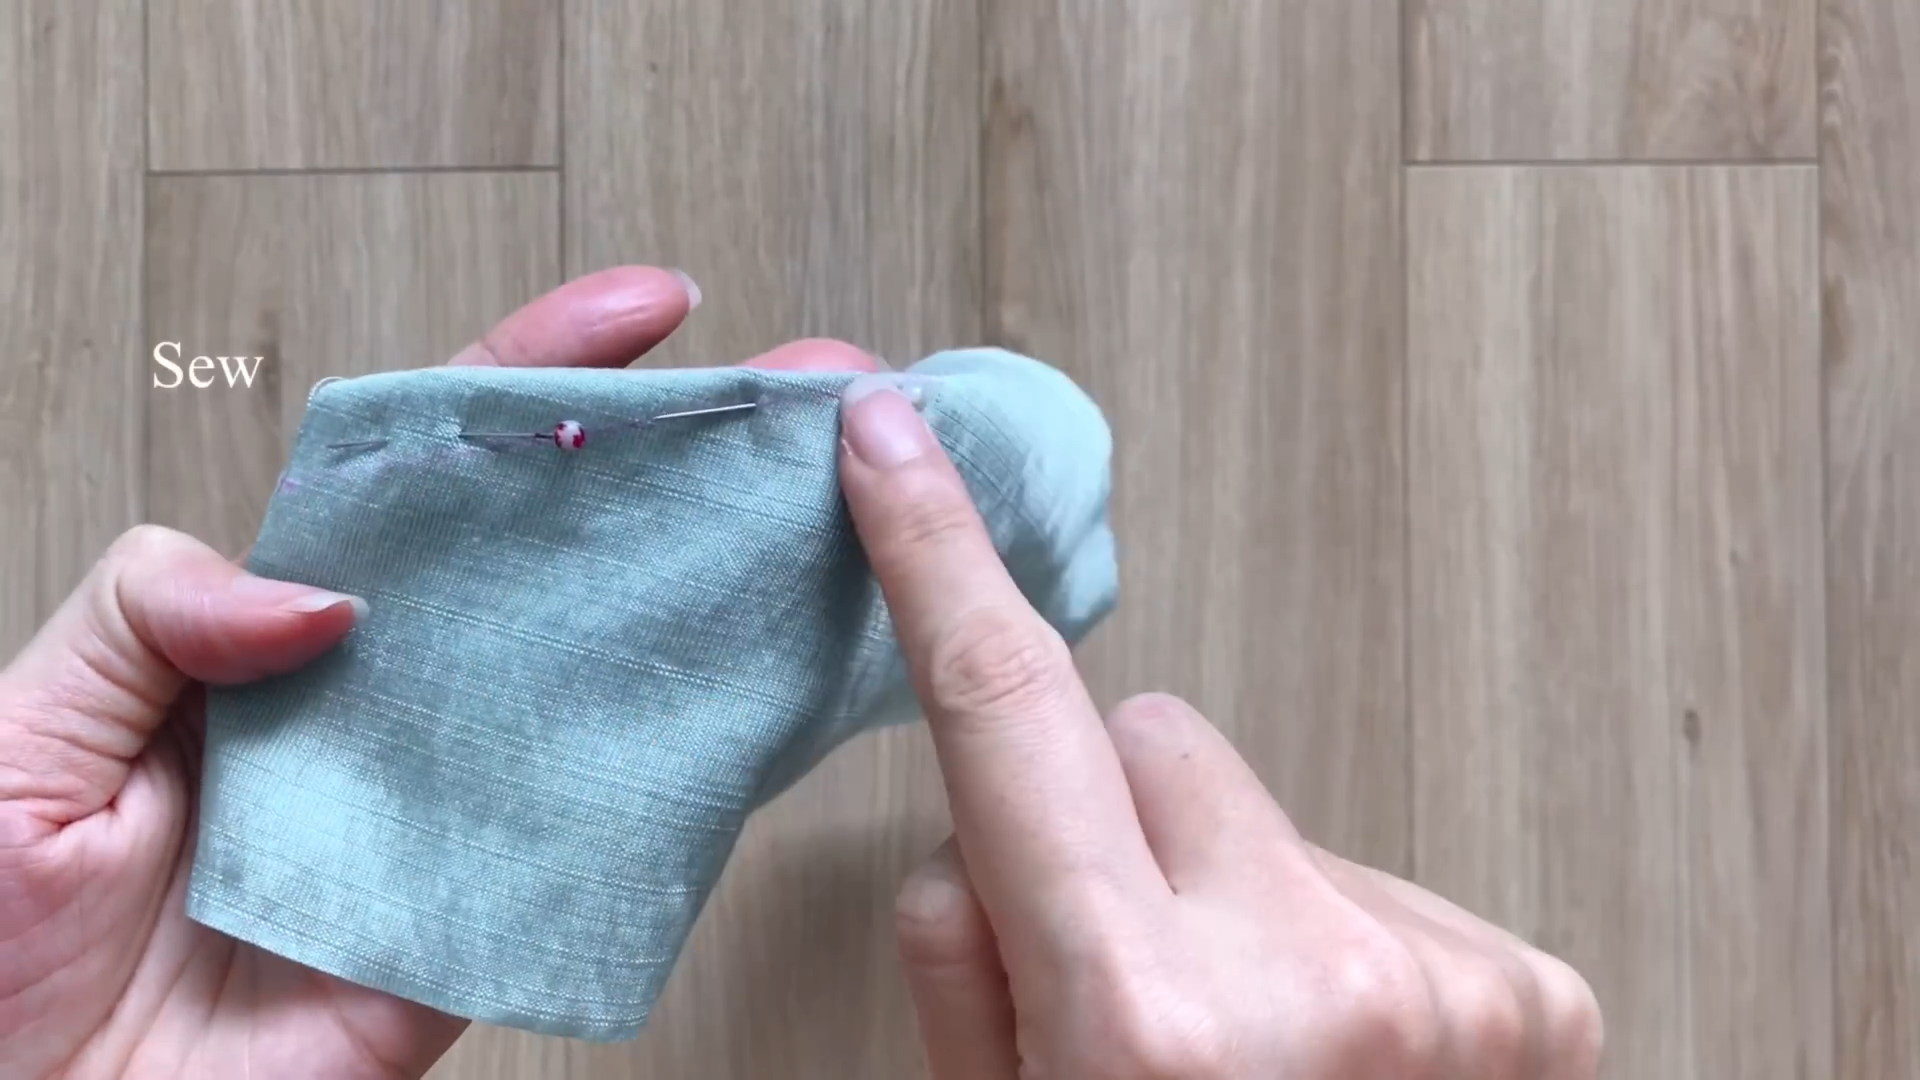
Place the tie between the two pieces of the top bodice.
Sew the pieces together, enclosing the tie within the bodice.
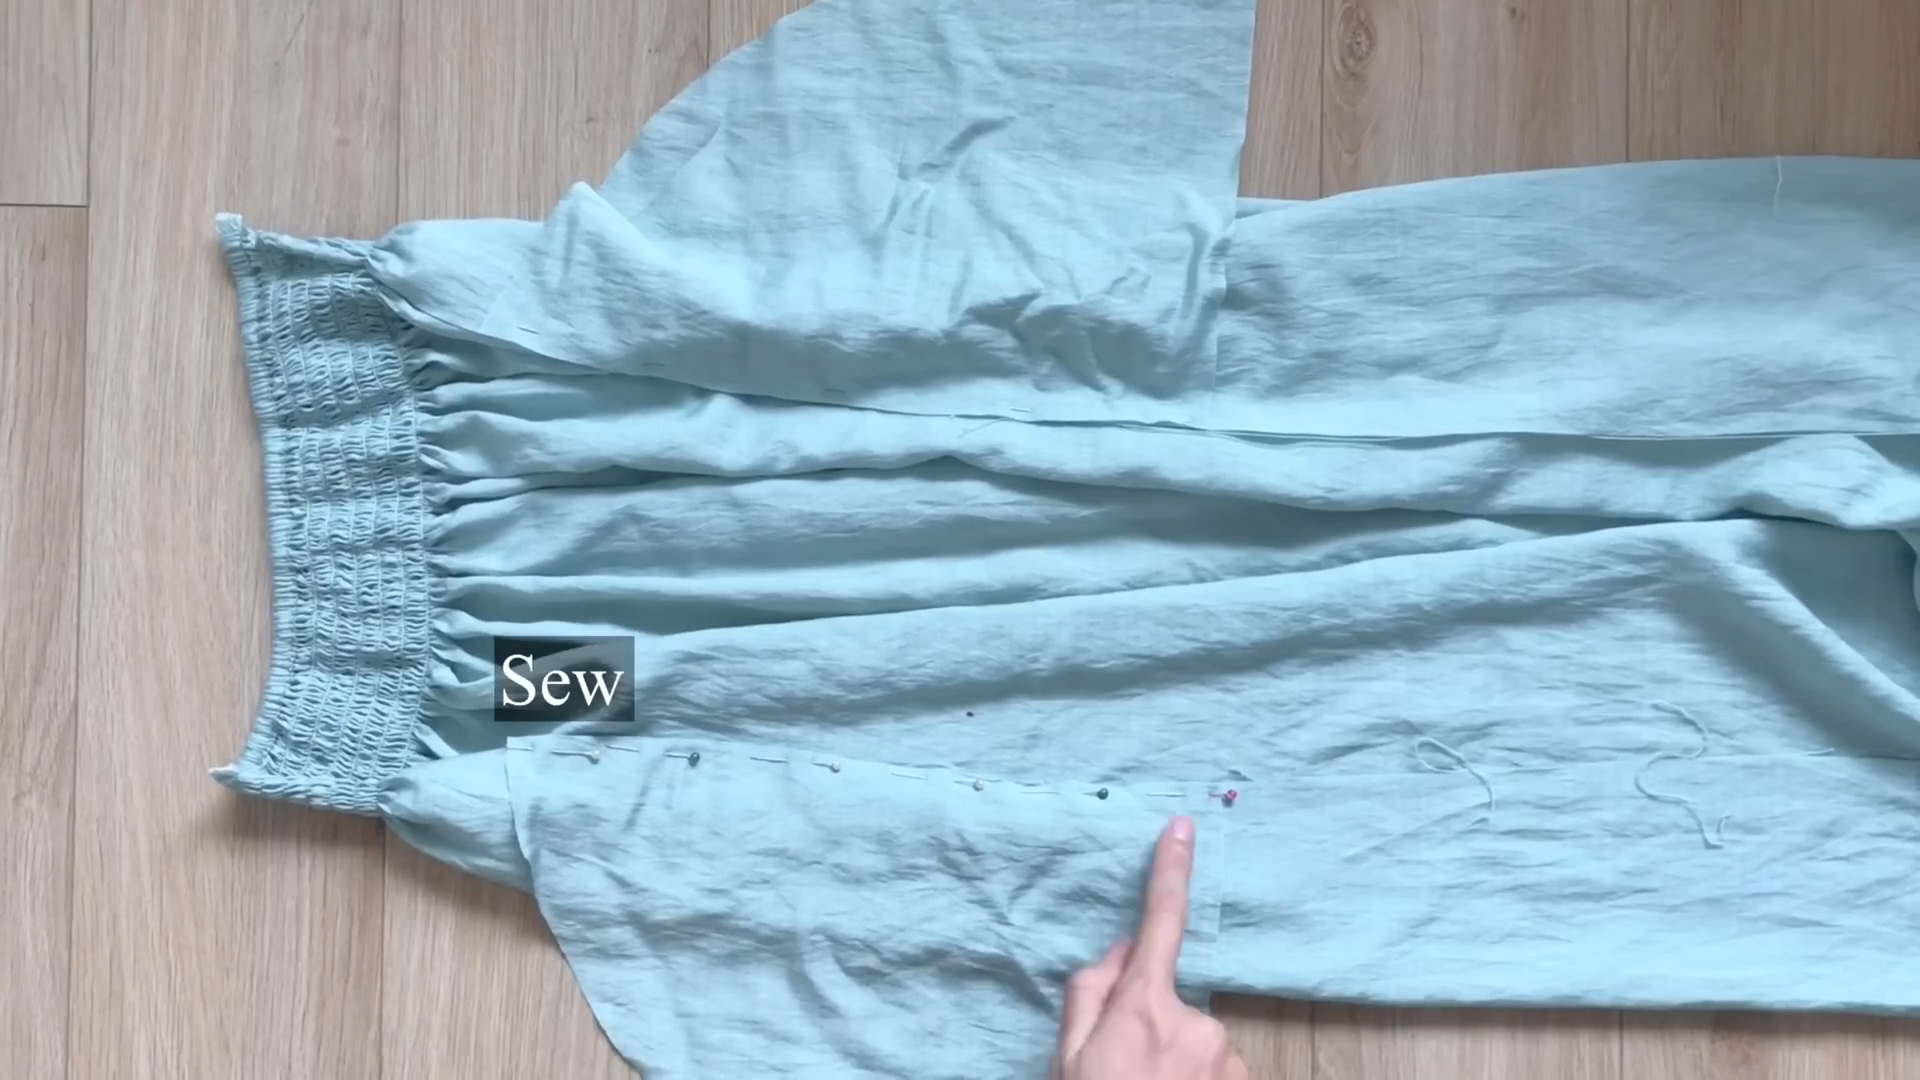
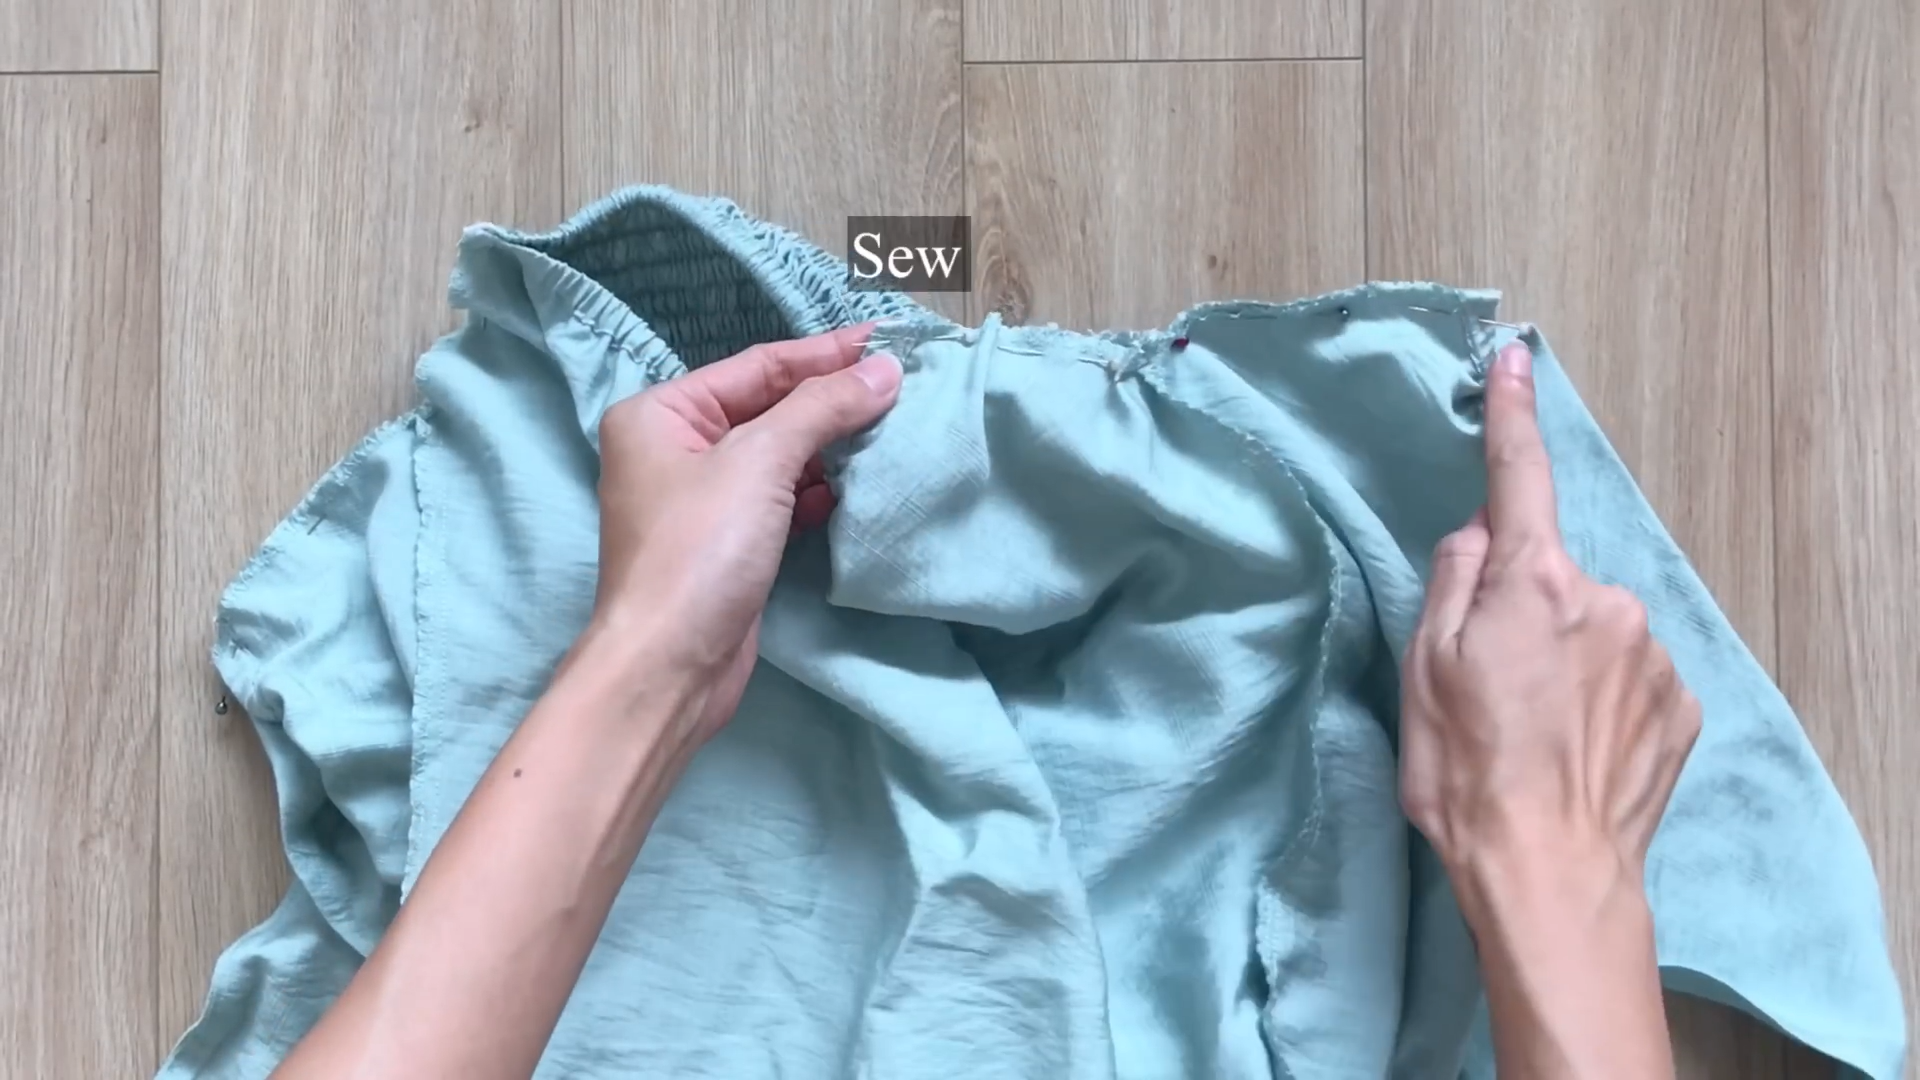
CONNECT THE FRONT AND THE BACK BODICE
First, join the back bodice to the bottom portion of the front bodice.
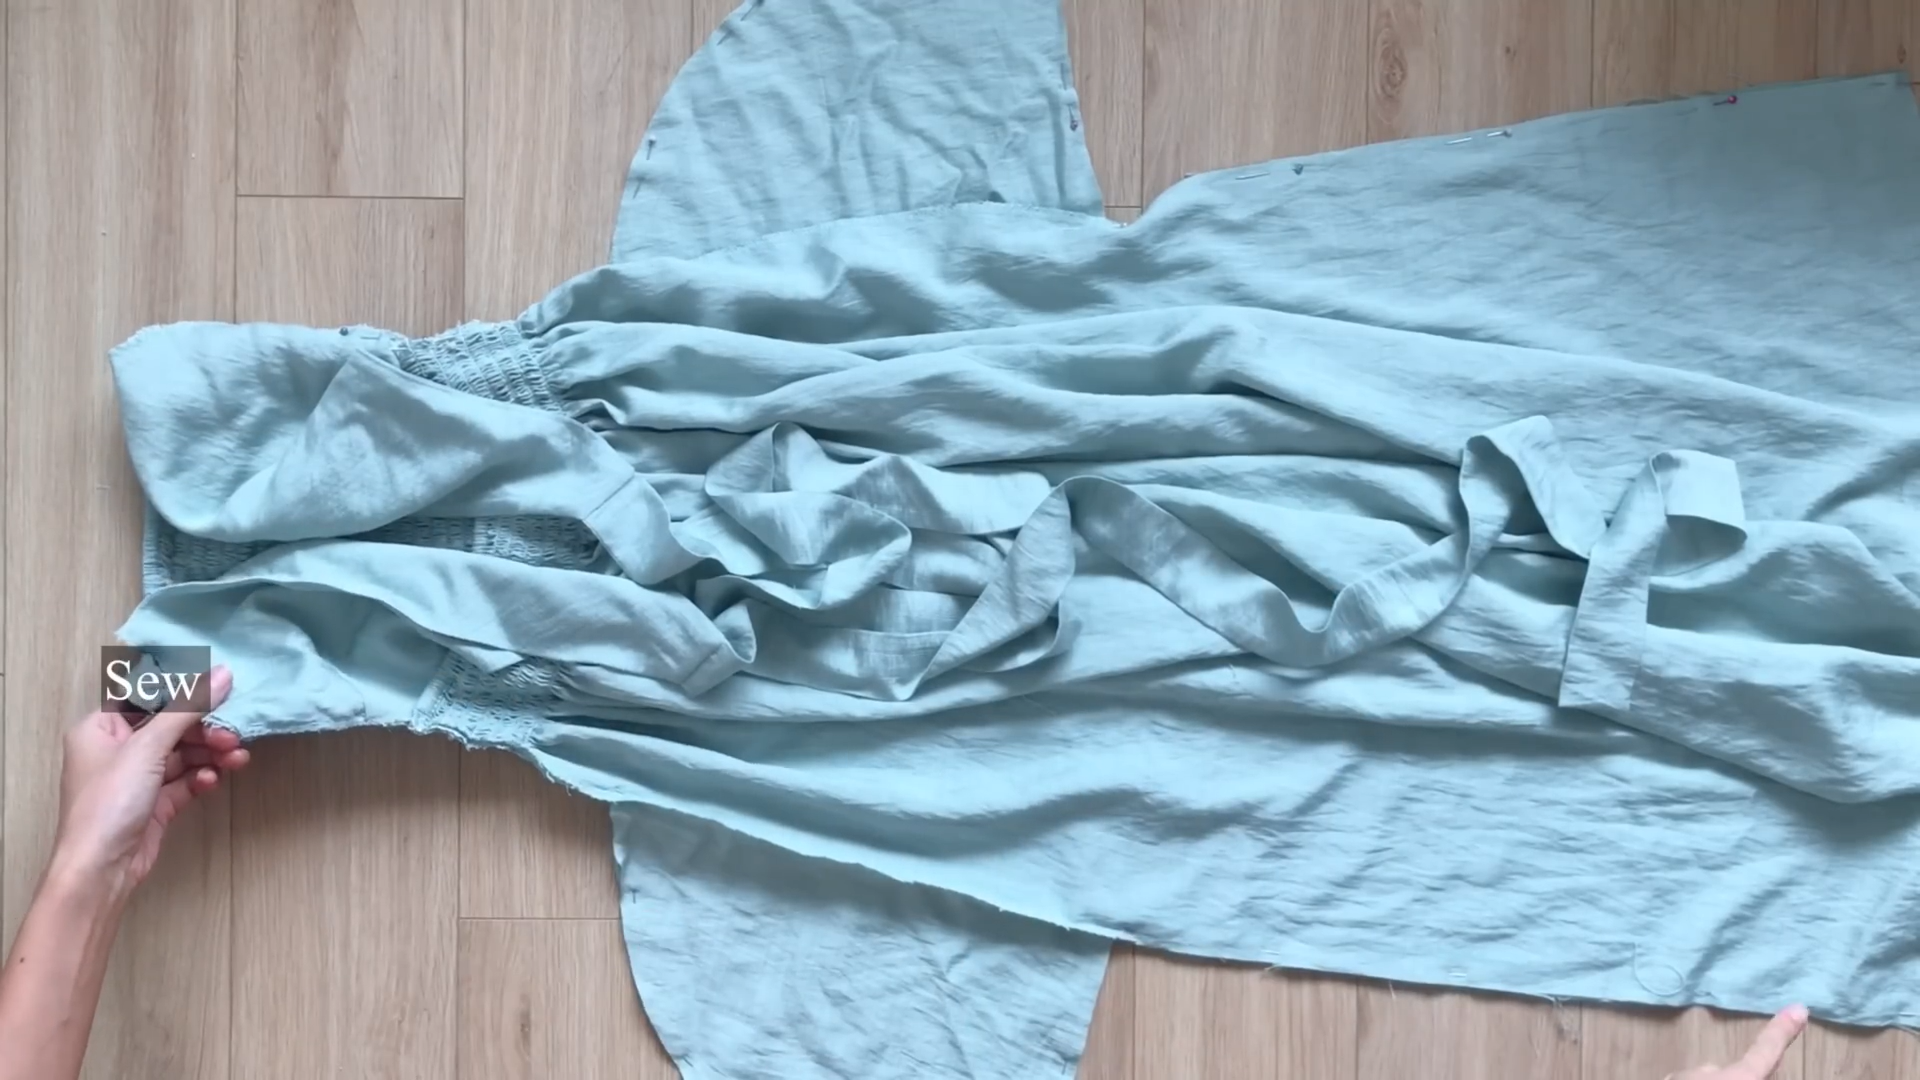
Next, incorporate the top part of the front bodice. Place the top bodice piece outside the bottom front bodice.
Sew them all together.
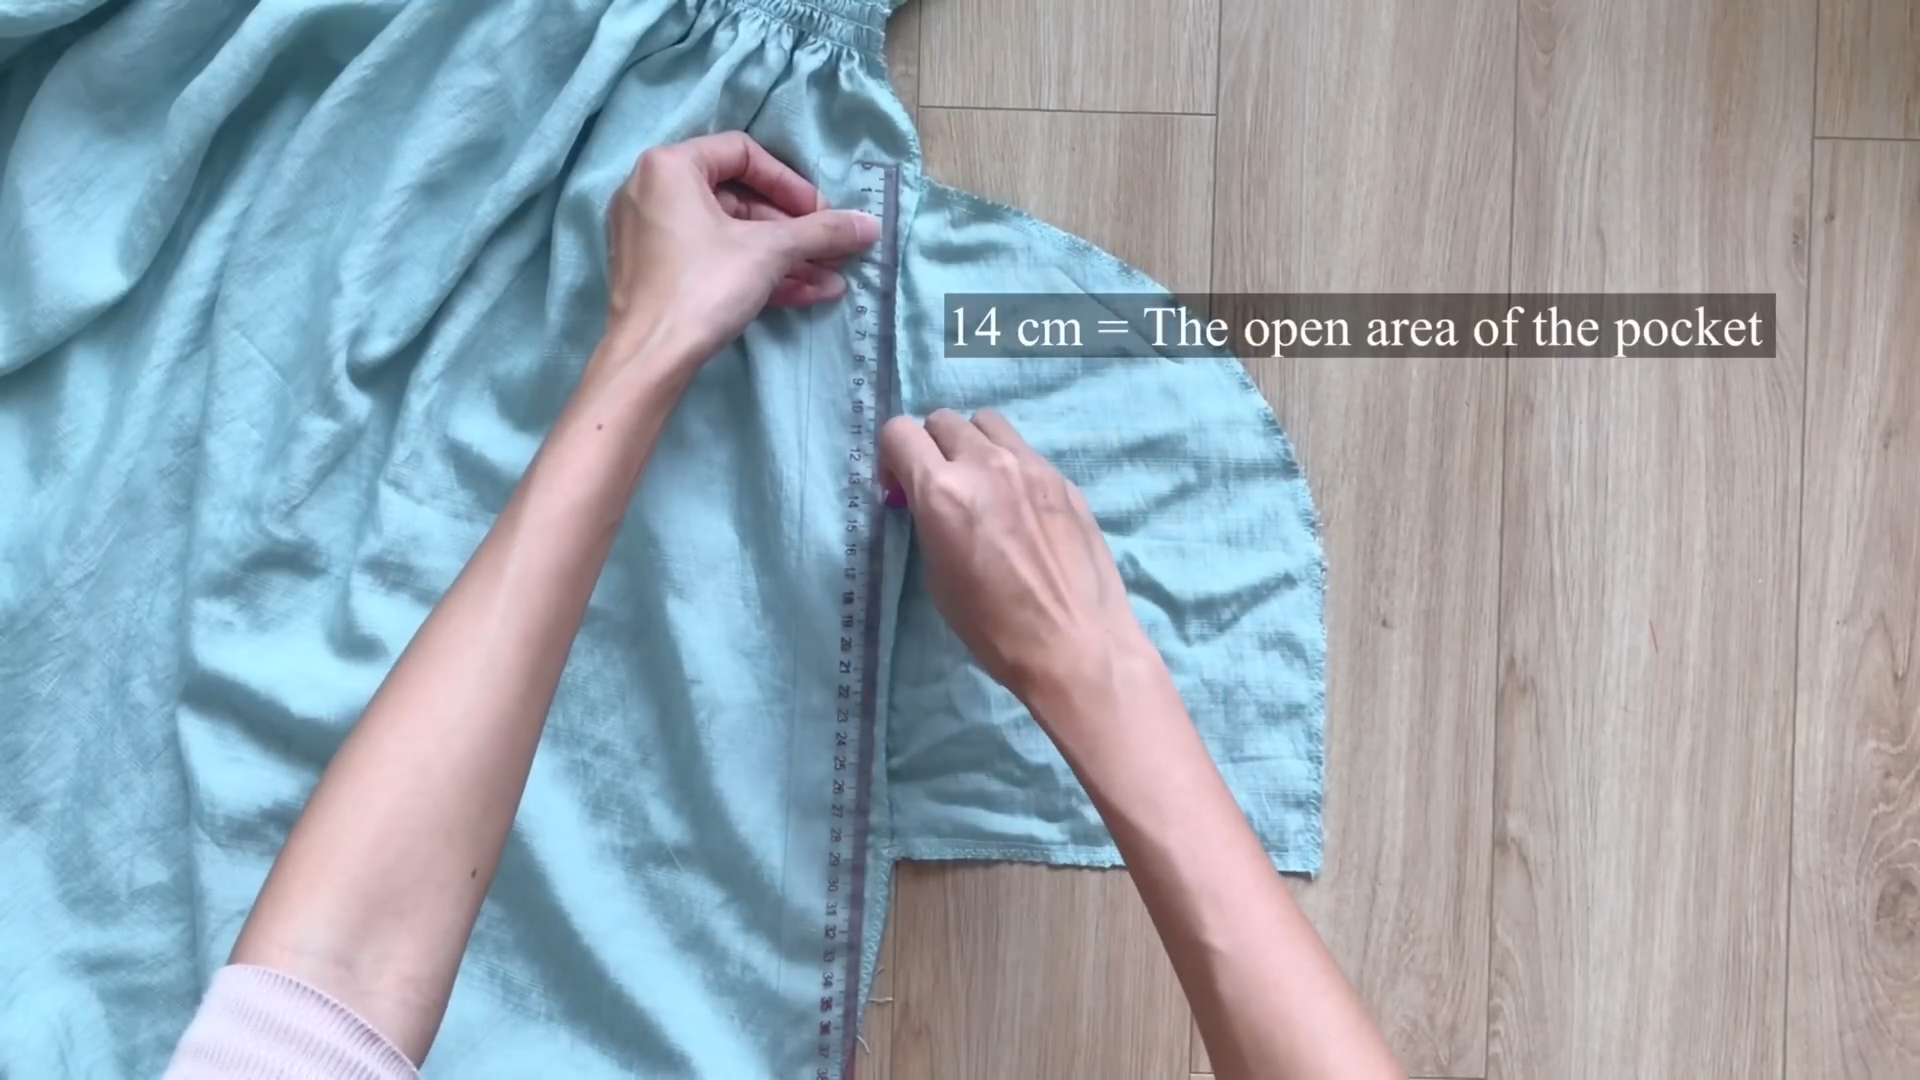
Measure 14 cm downwards from the top of the pocket - this is the opening section.
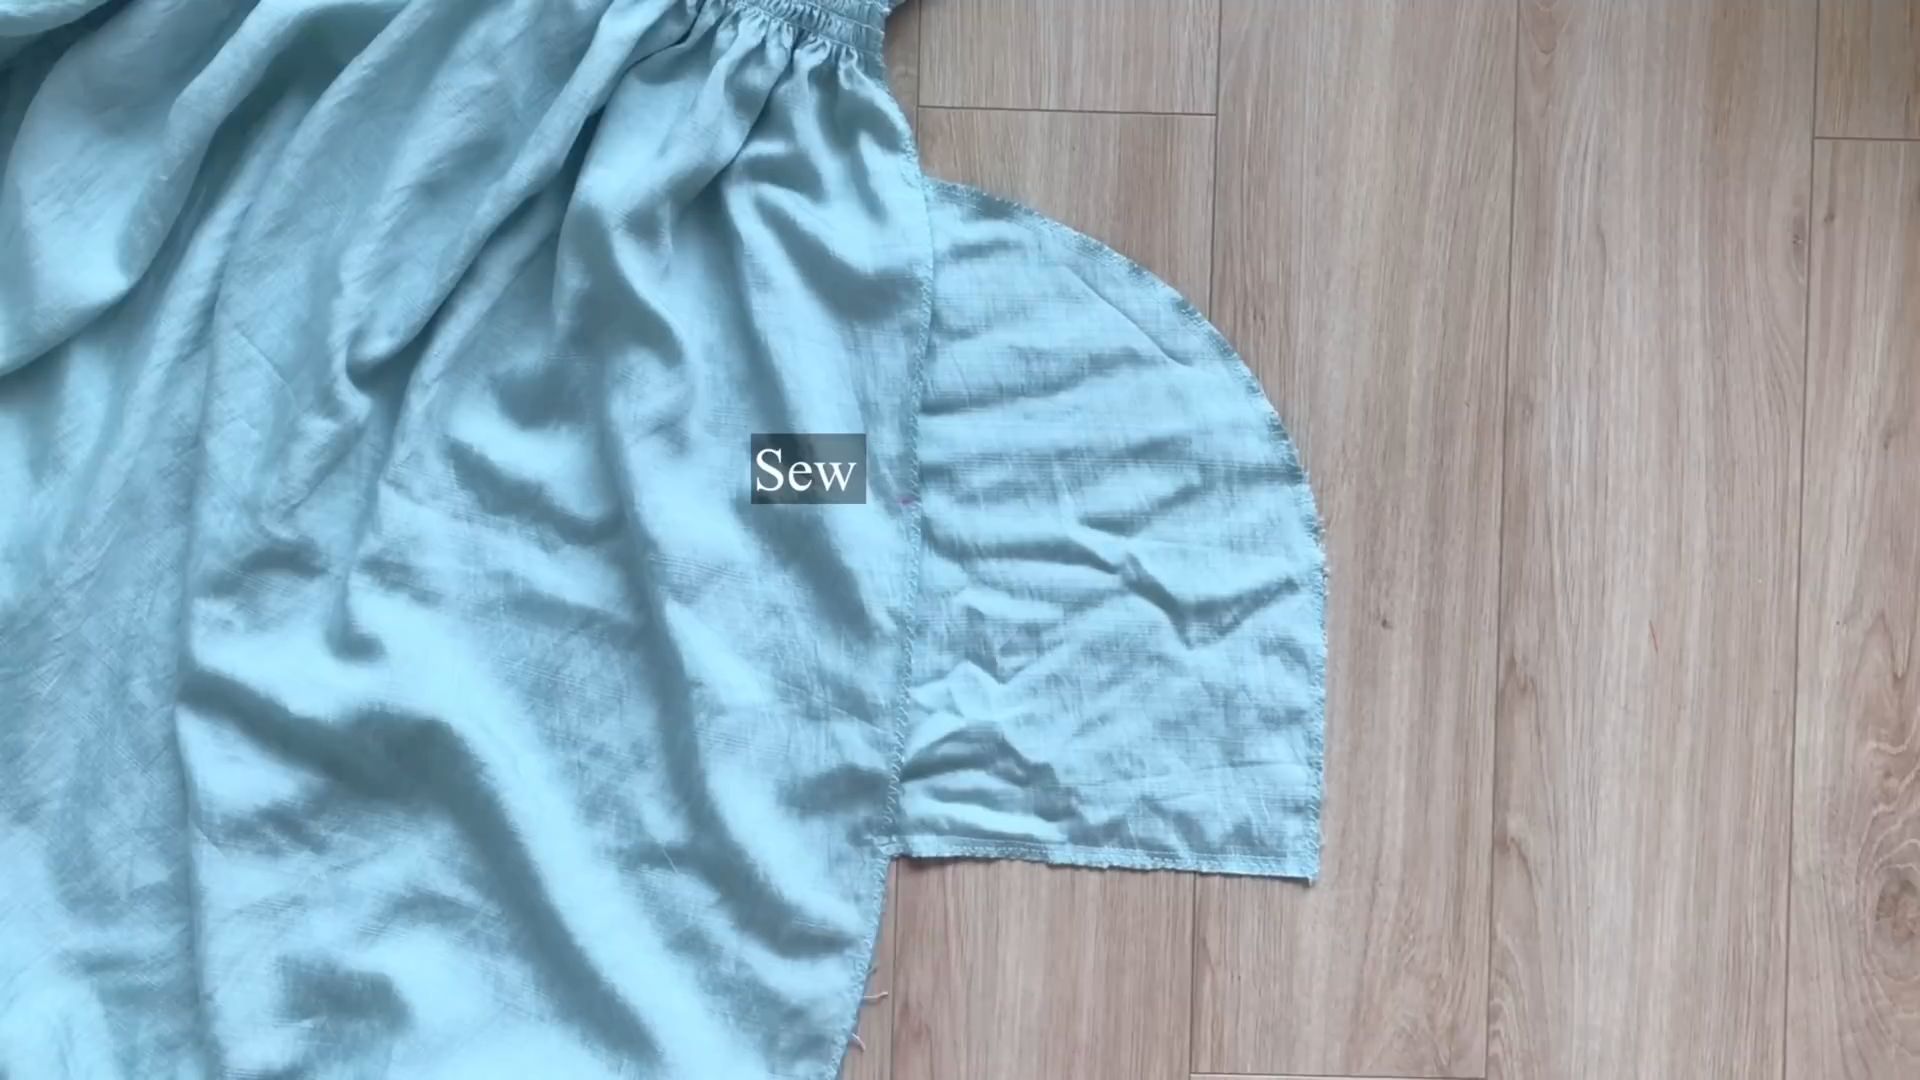
Sew along the remaining sides and bottom of the pocket.
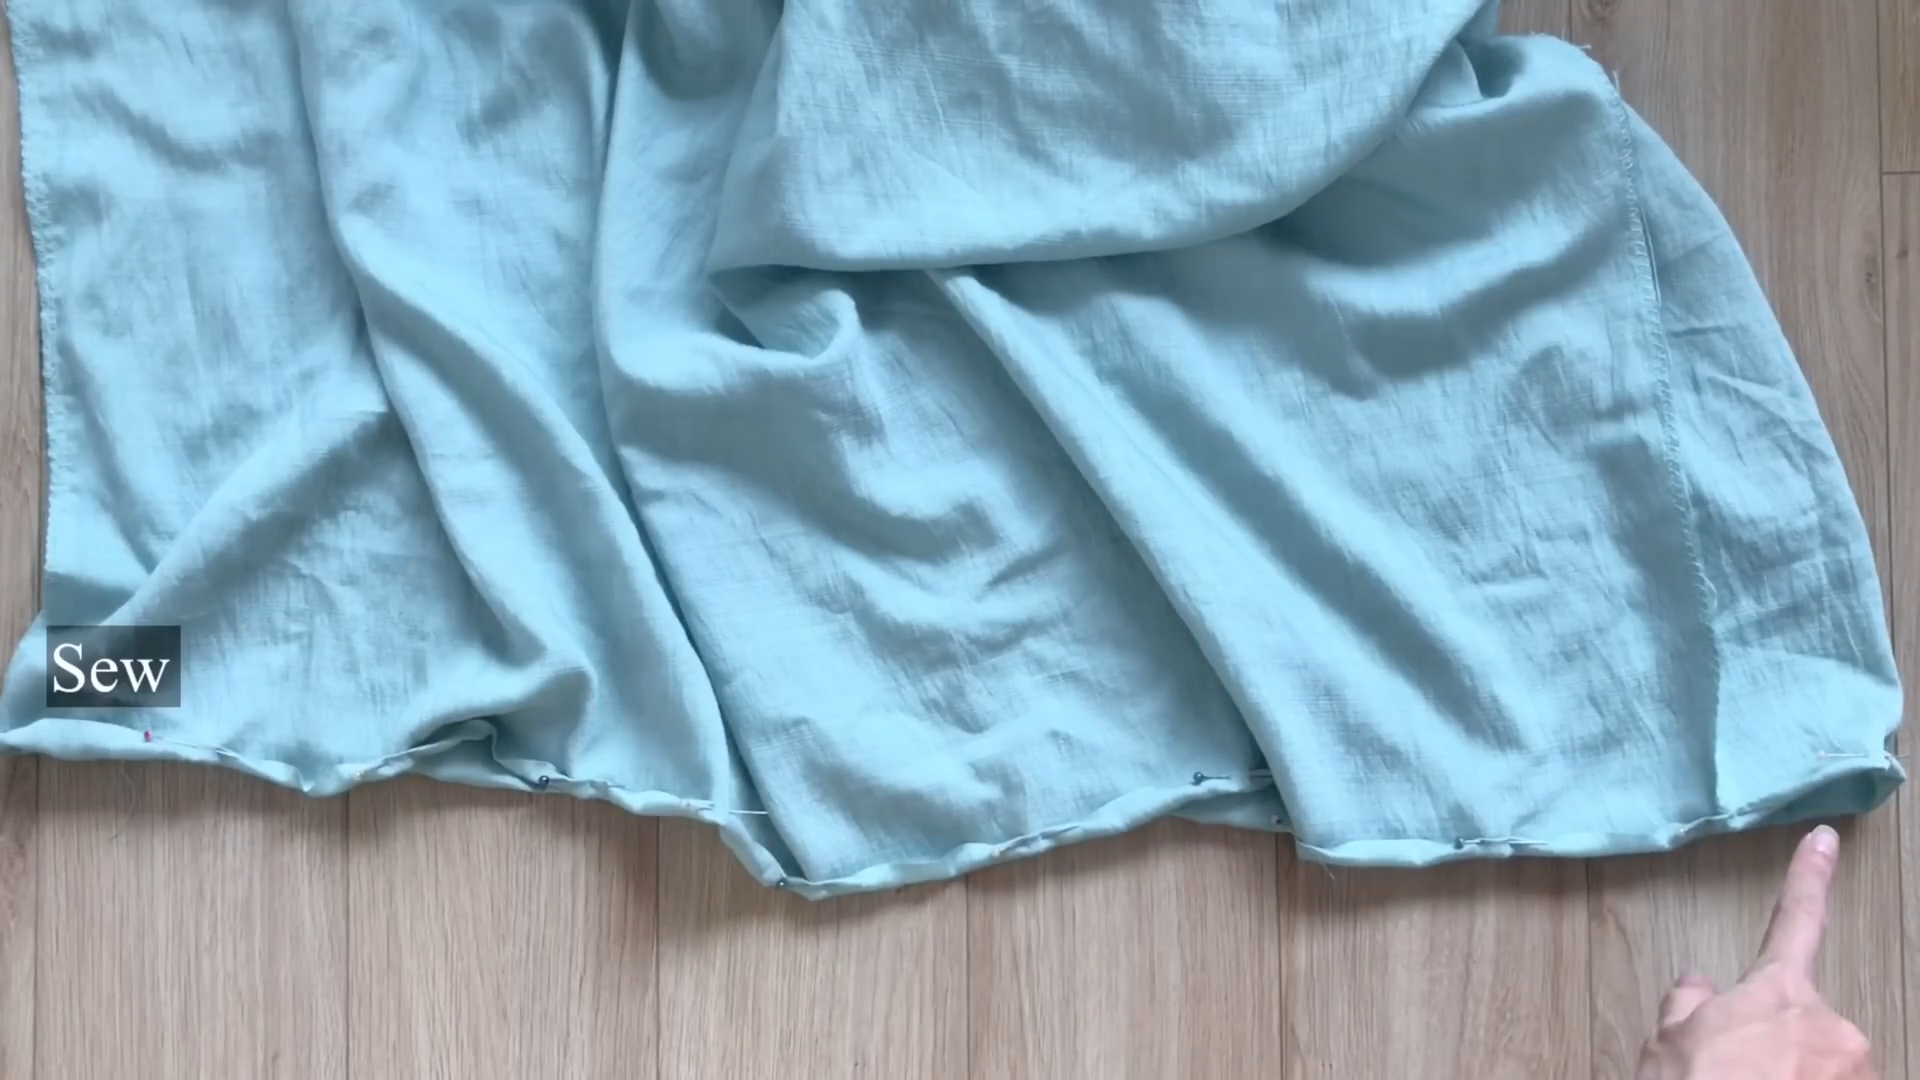
Fold the end fabric inward twice and stitch it down to create a neat hem.
THE SLEEVE
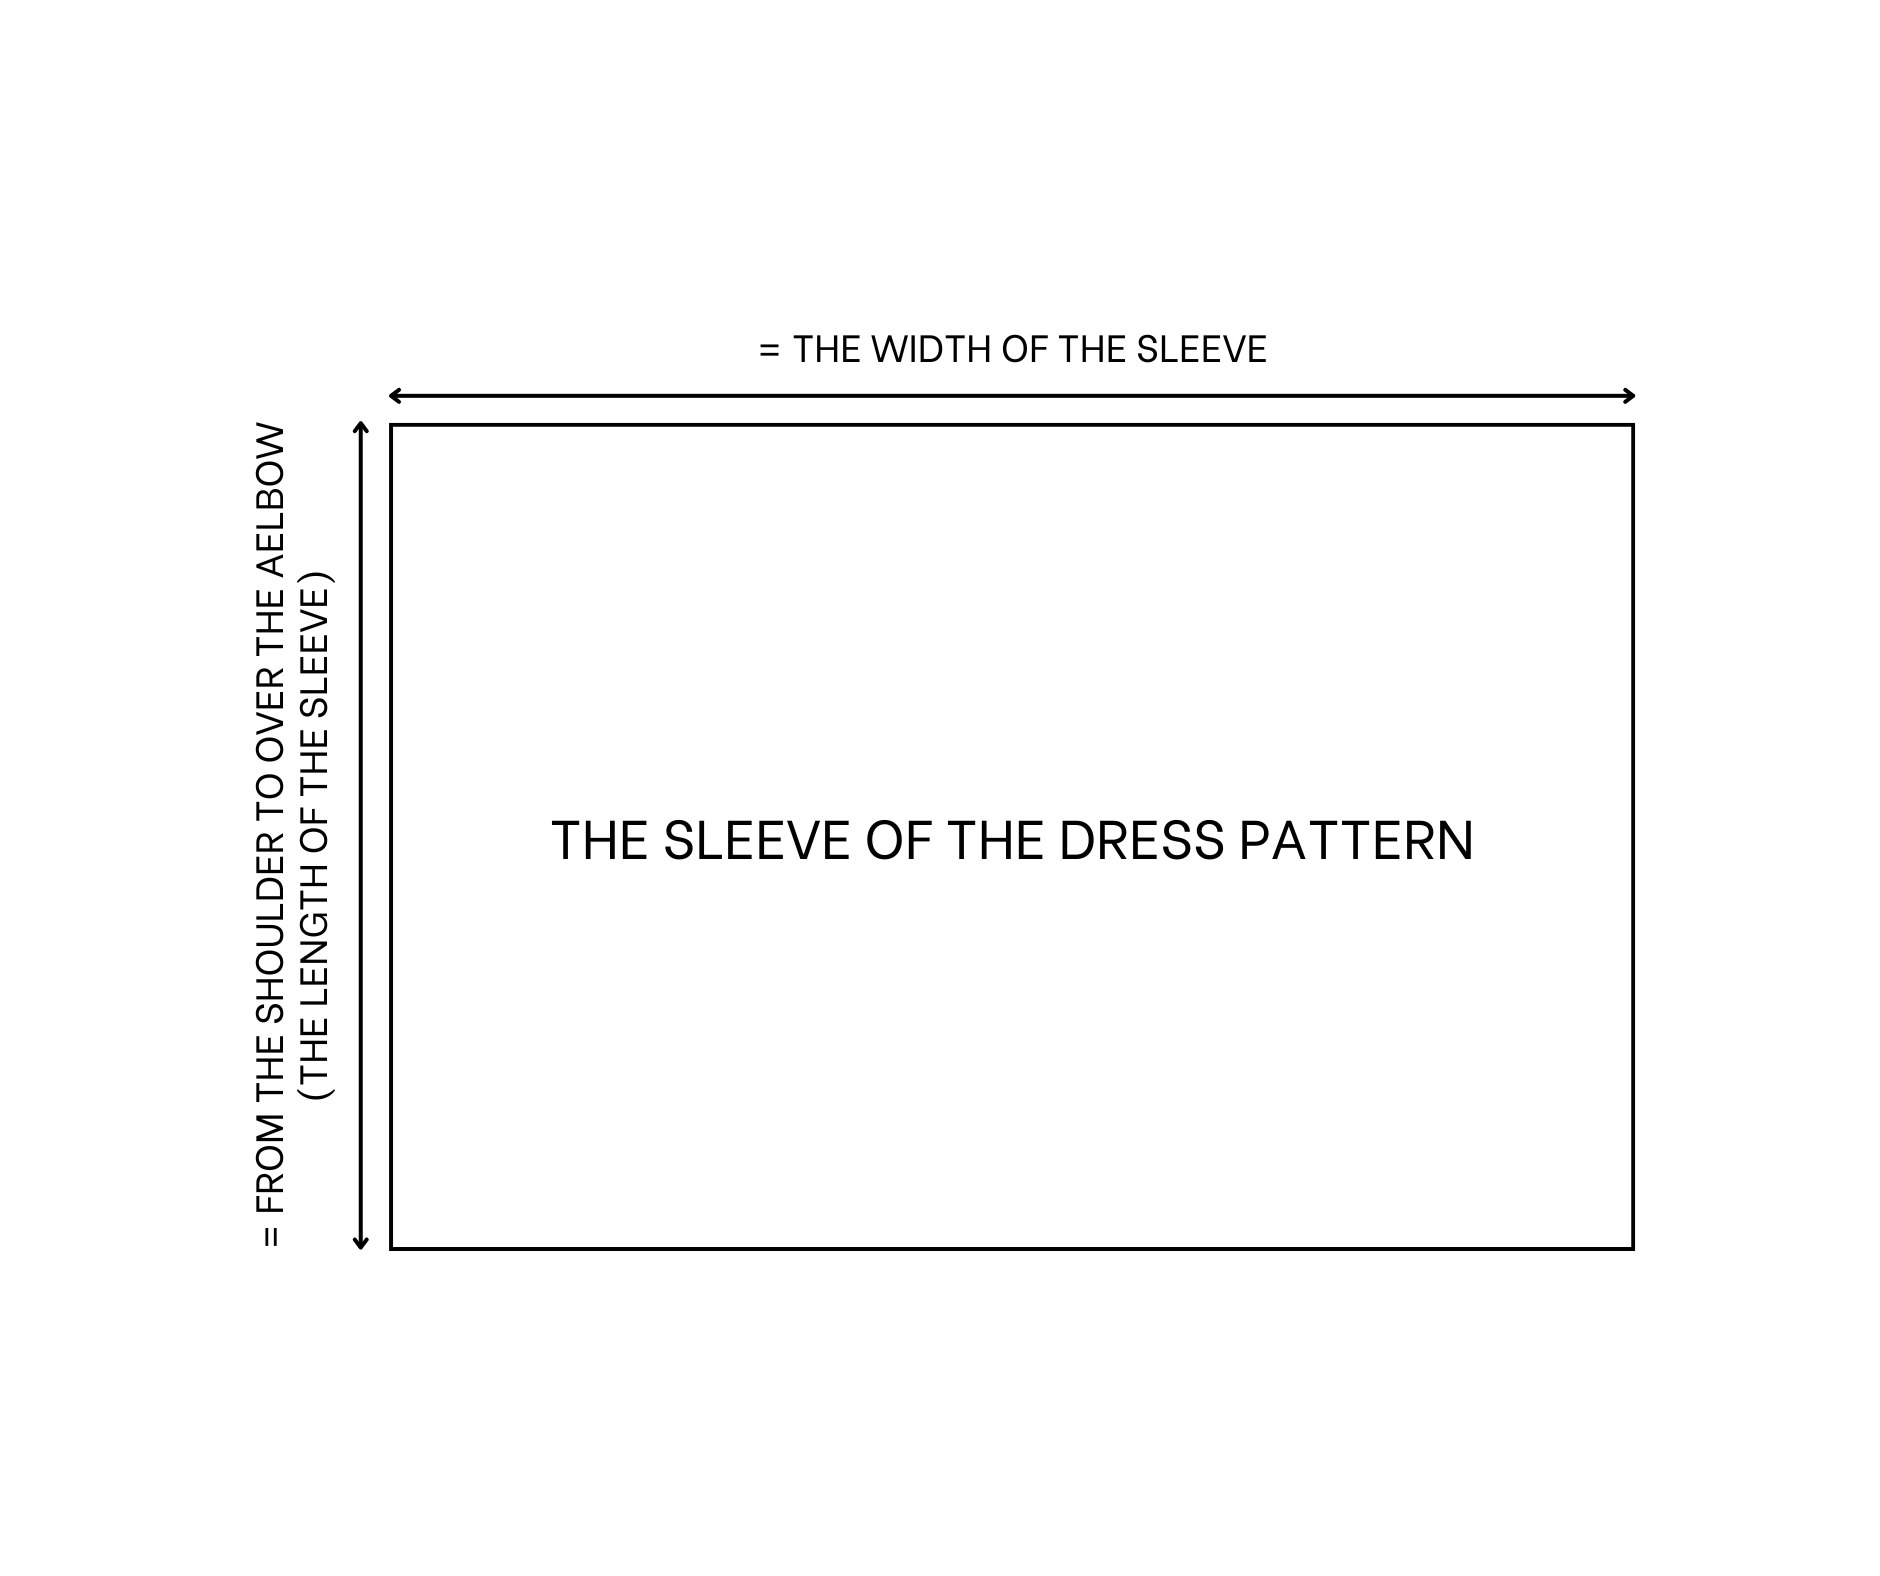
The sleeve of the dress pattern
Draw a rectangle with 55 cm length which is the length from the shoulder to over your elbow, it's the length of the sleeve that you want, and 80 cm width which is two times the width of the sleeve that you want.
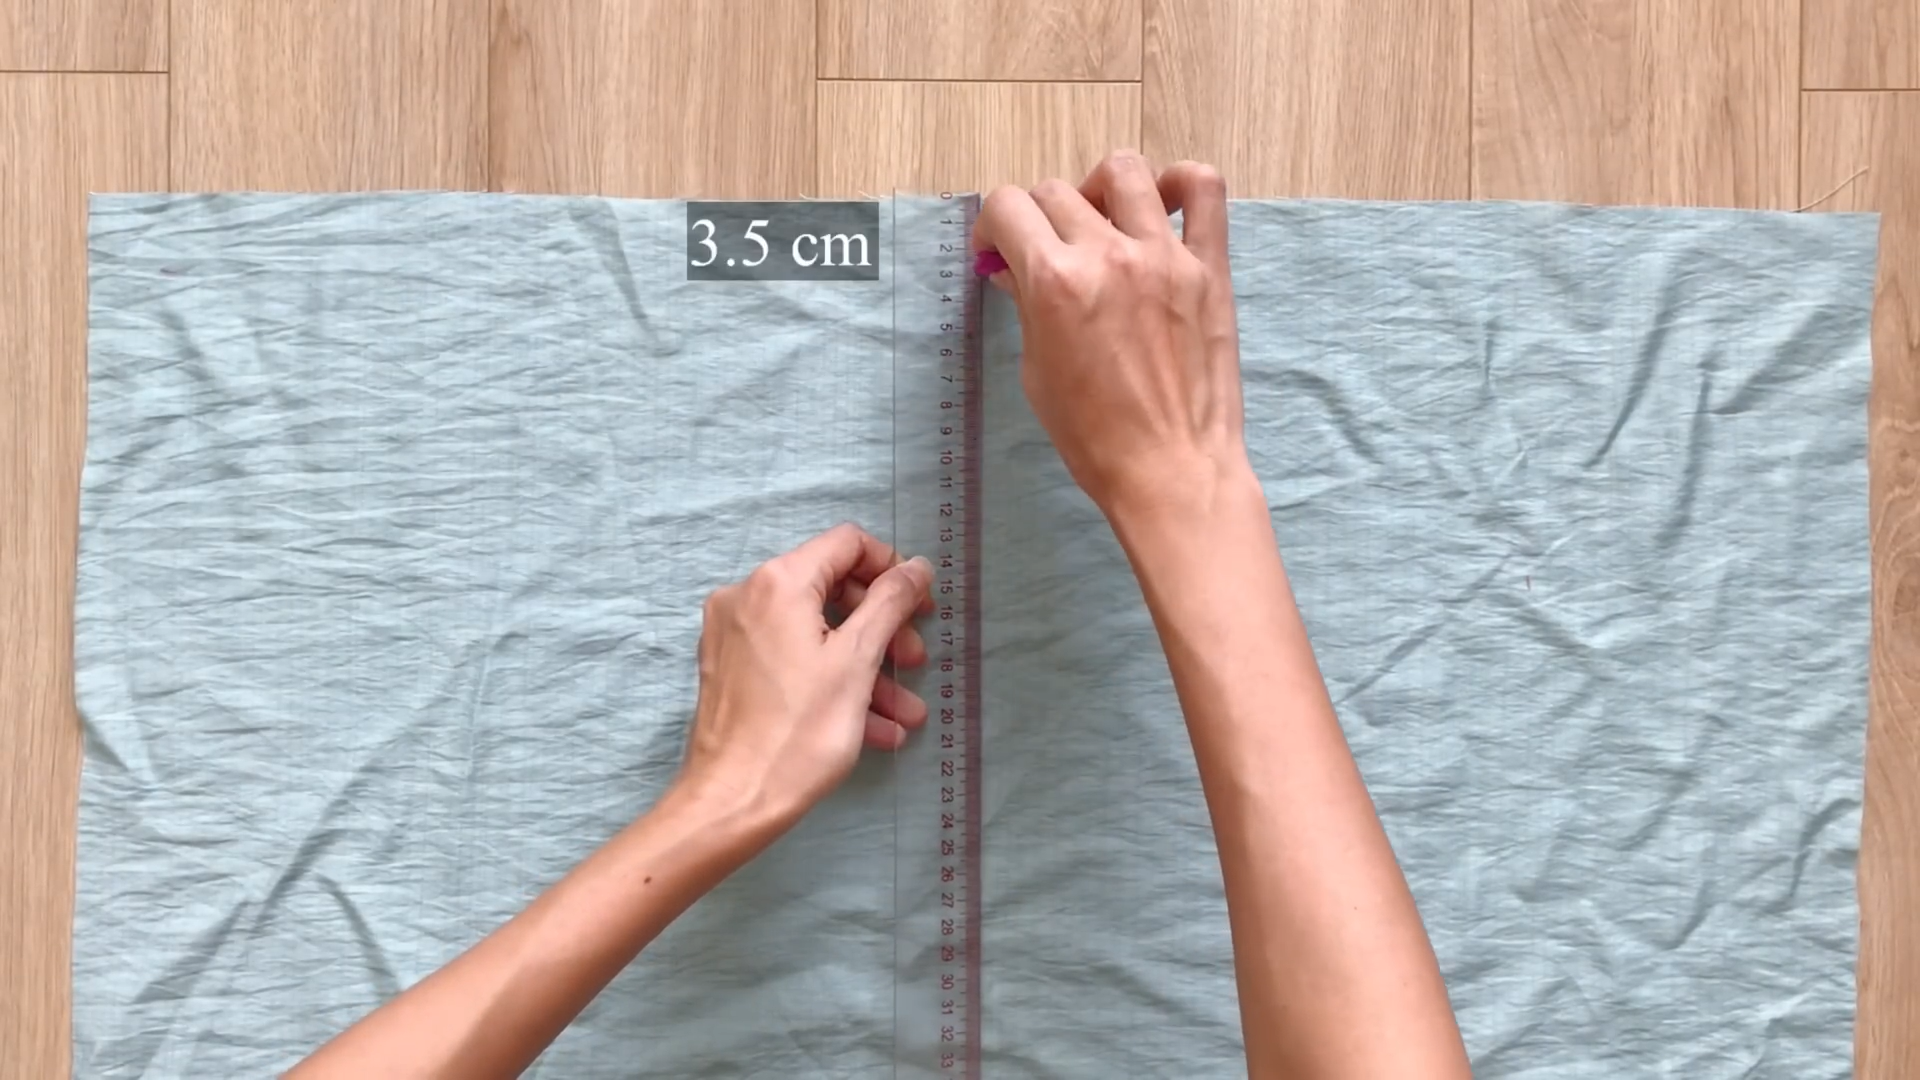
From one of the shorter ends of the rectangle, measure and mark 3.5 cm downwards.
Fold the fabric inward at this point by 0.5 cm, then keep folding until you reach the 3.5 cm mark.
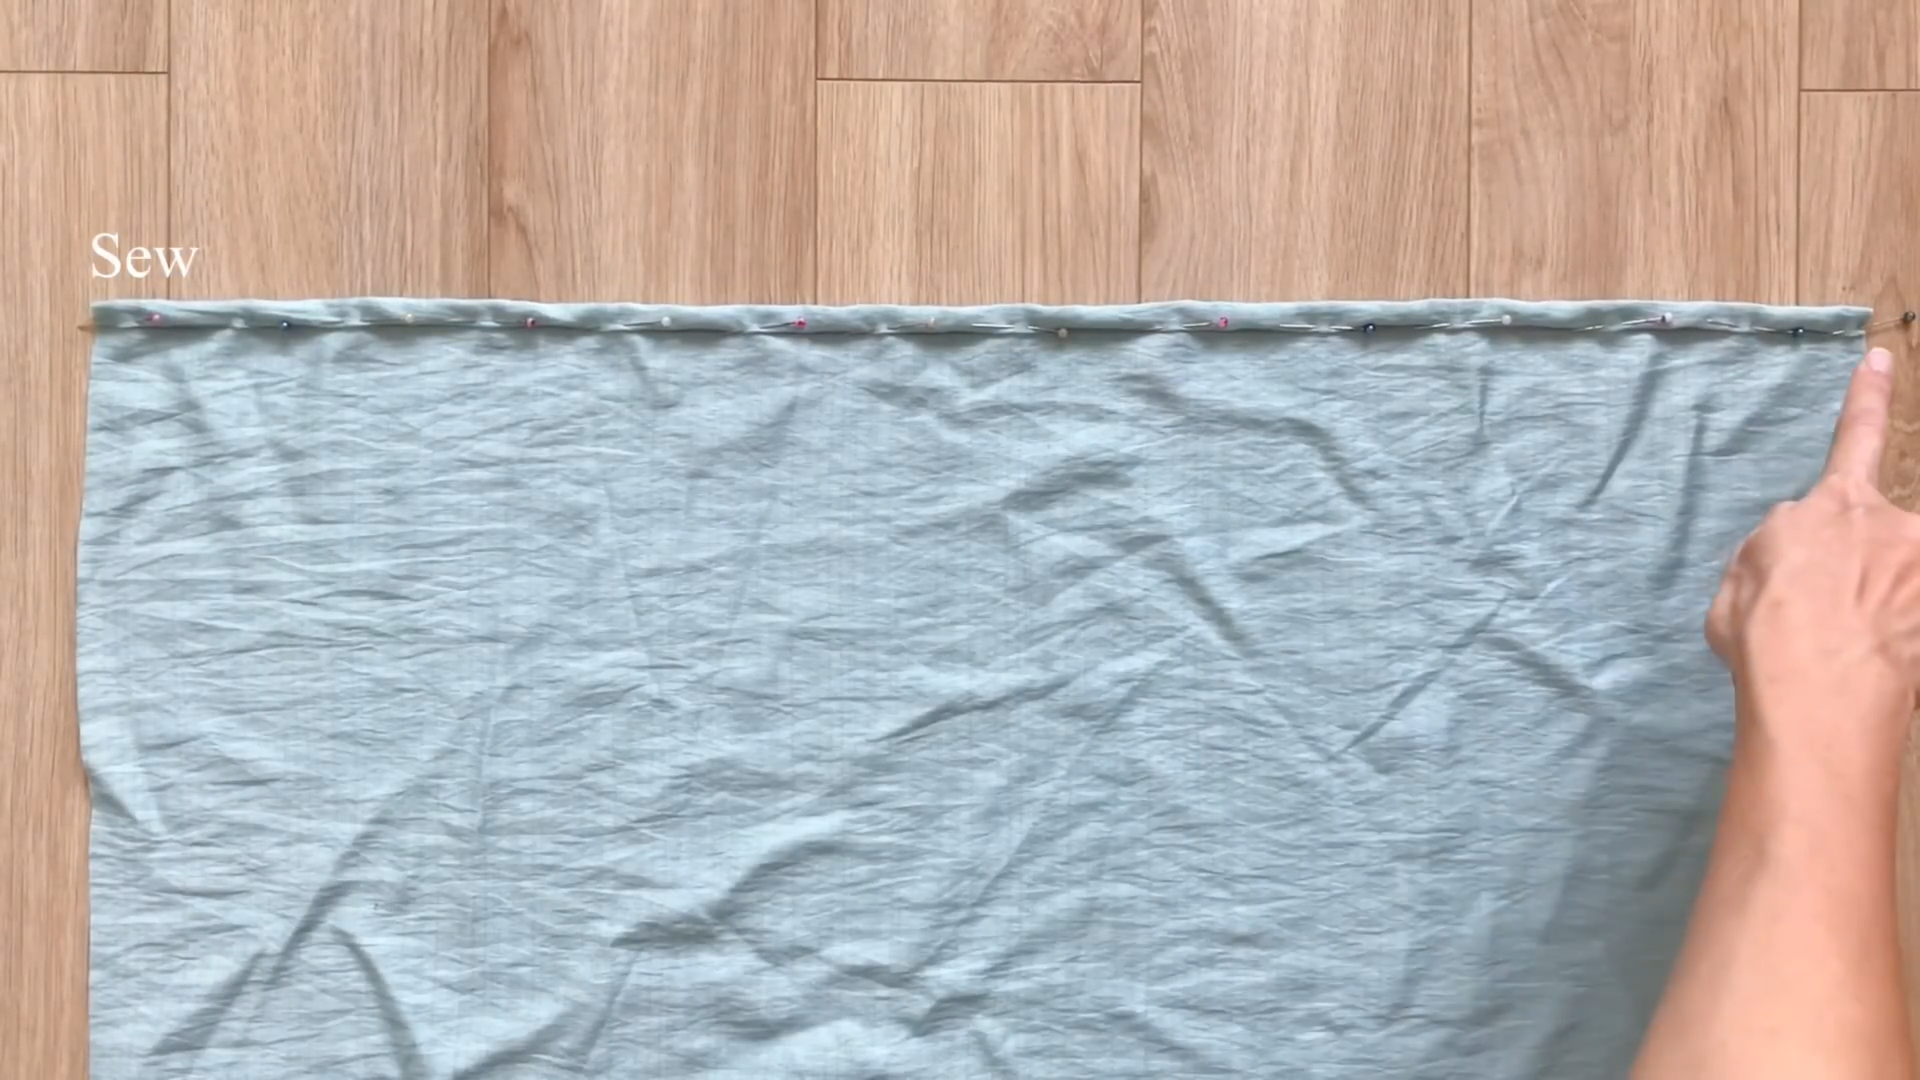
Sew along the folded edge to create a secure casing.
Fold the rectangle in half by the width line.
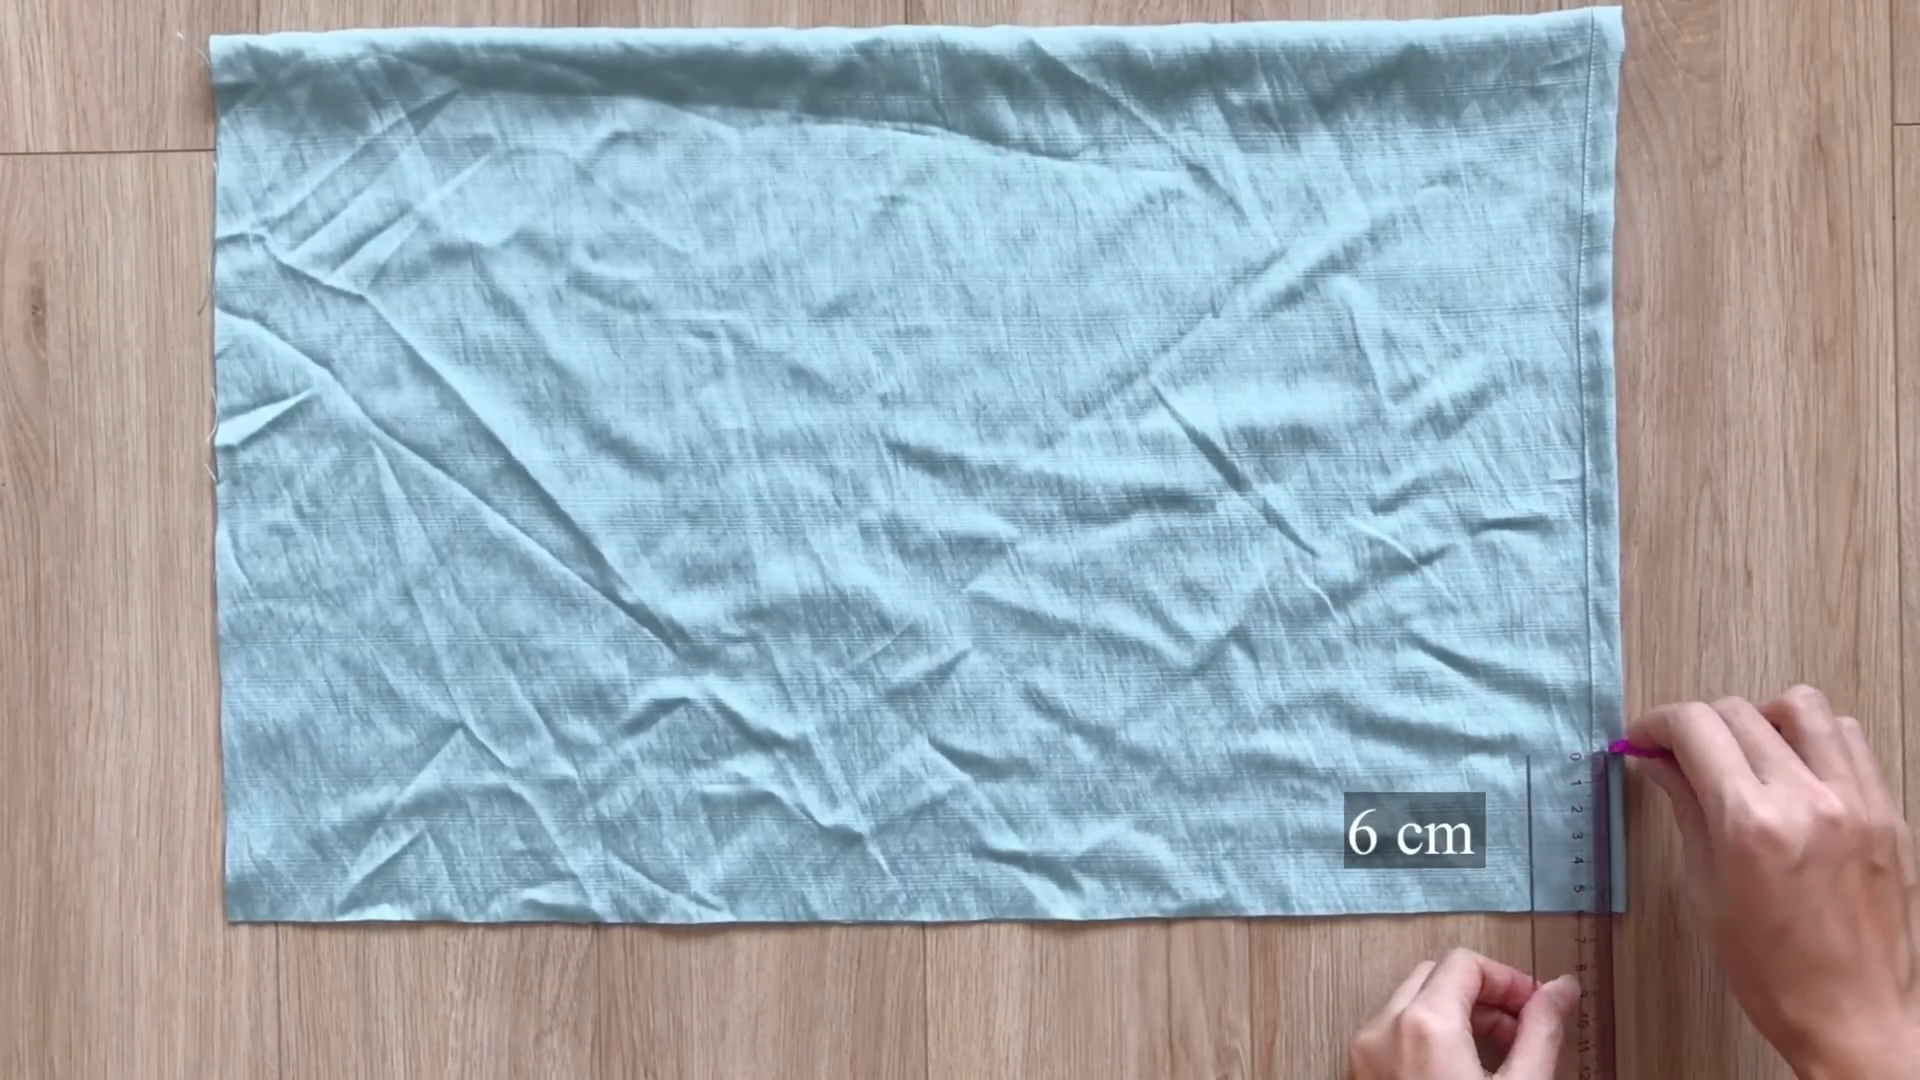
Mark 6 cm upwards from the bottom edge.
Mark 9 cm inwards from that end on the horizontal line.
Connect these two marks with a straight line
On the other end of the folded fabric, mark upwards 6 cm.

Draw a curved line from that mark to the 9 cm mark on the horizontal line.
Cut along this curved line and the line before to shape the sleeve.
Sew the two curved edges of the sleeve together.
Fold the bottom raw edge of the sleeve inwards twice and sew it down to create a clean hem.
Mark 8 cm inwards from the bottom hem of the sleeve – this will be the placement line for the elastic band that will create the puff.
Cut a small rectangle with a width of 2.5 cm and a length equal to the circumference of the end of your sleeve.

Connect the two short ends of the rectangle to create a circle of fabric.
Fold the edges of the circle in the middle lengthwise, then iron along the fold to create a central crease.
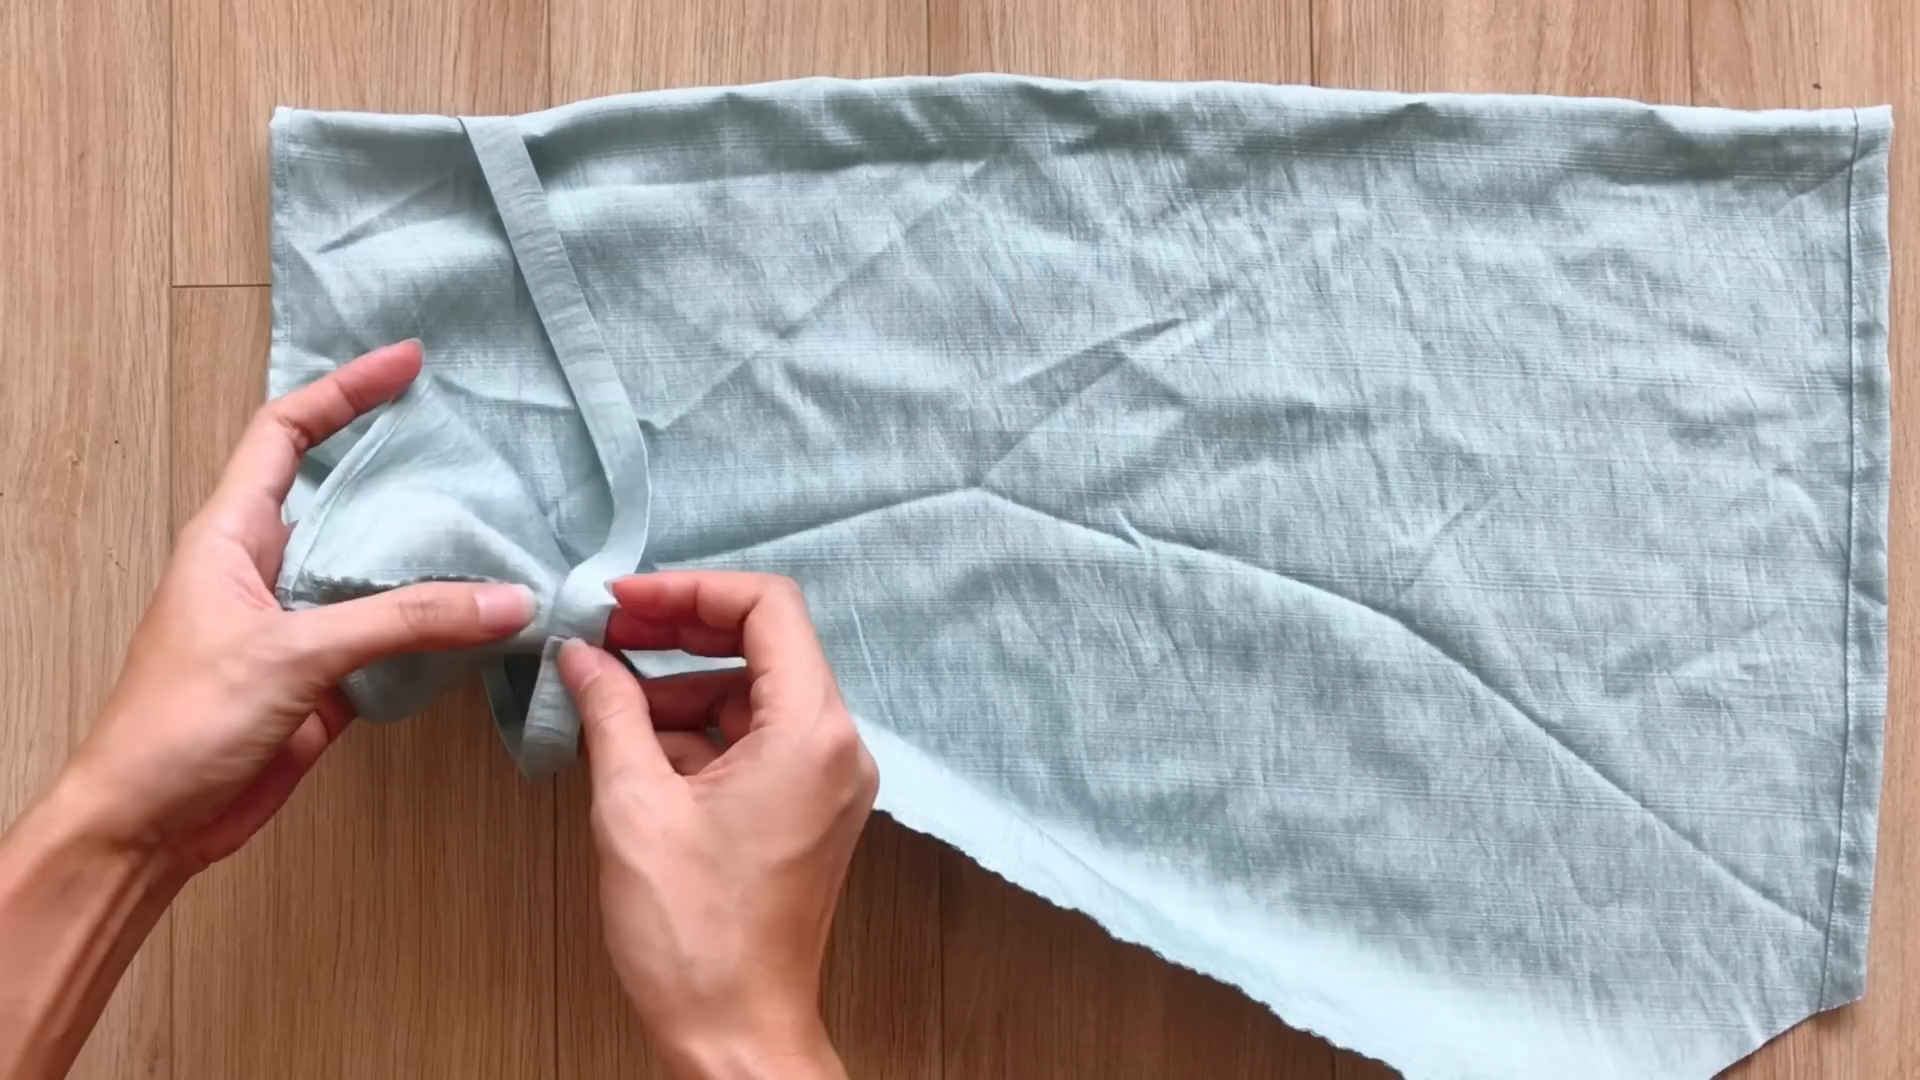
Sew the two long edges to the marked position on the sleeve, leaving a small gap unsewn.
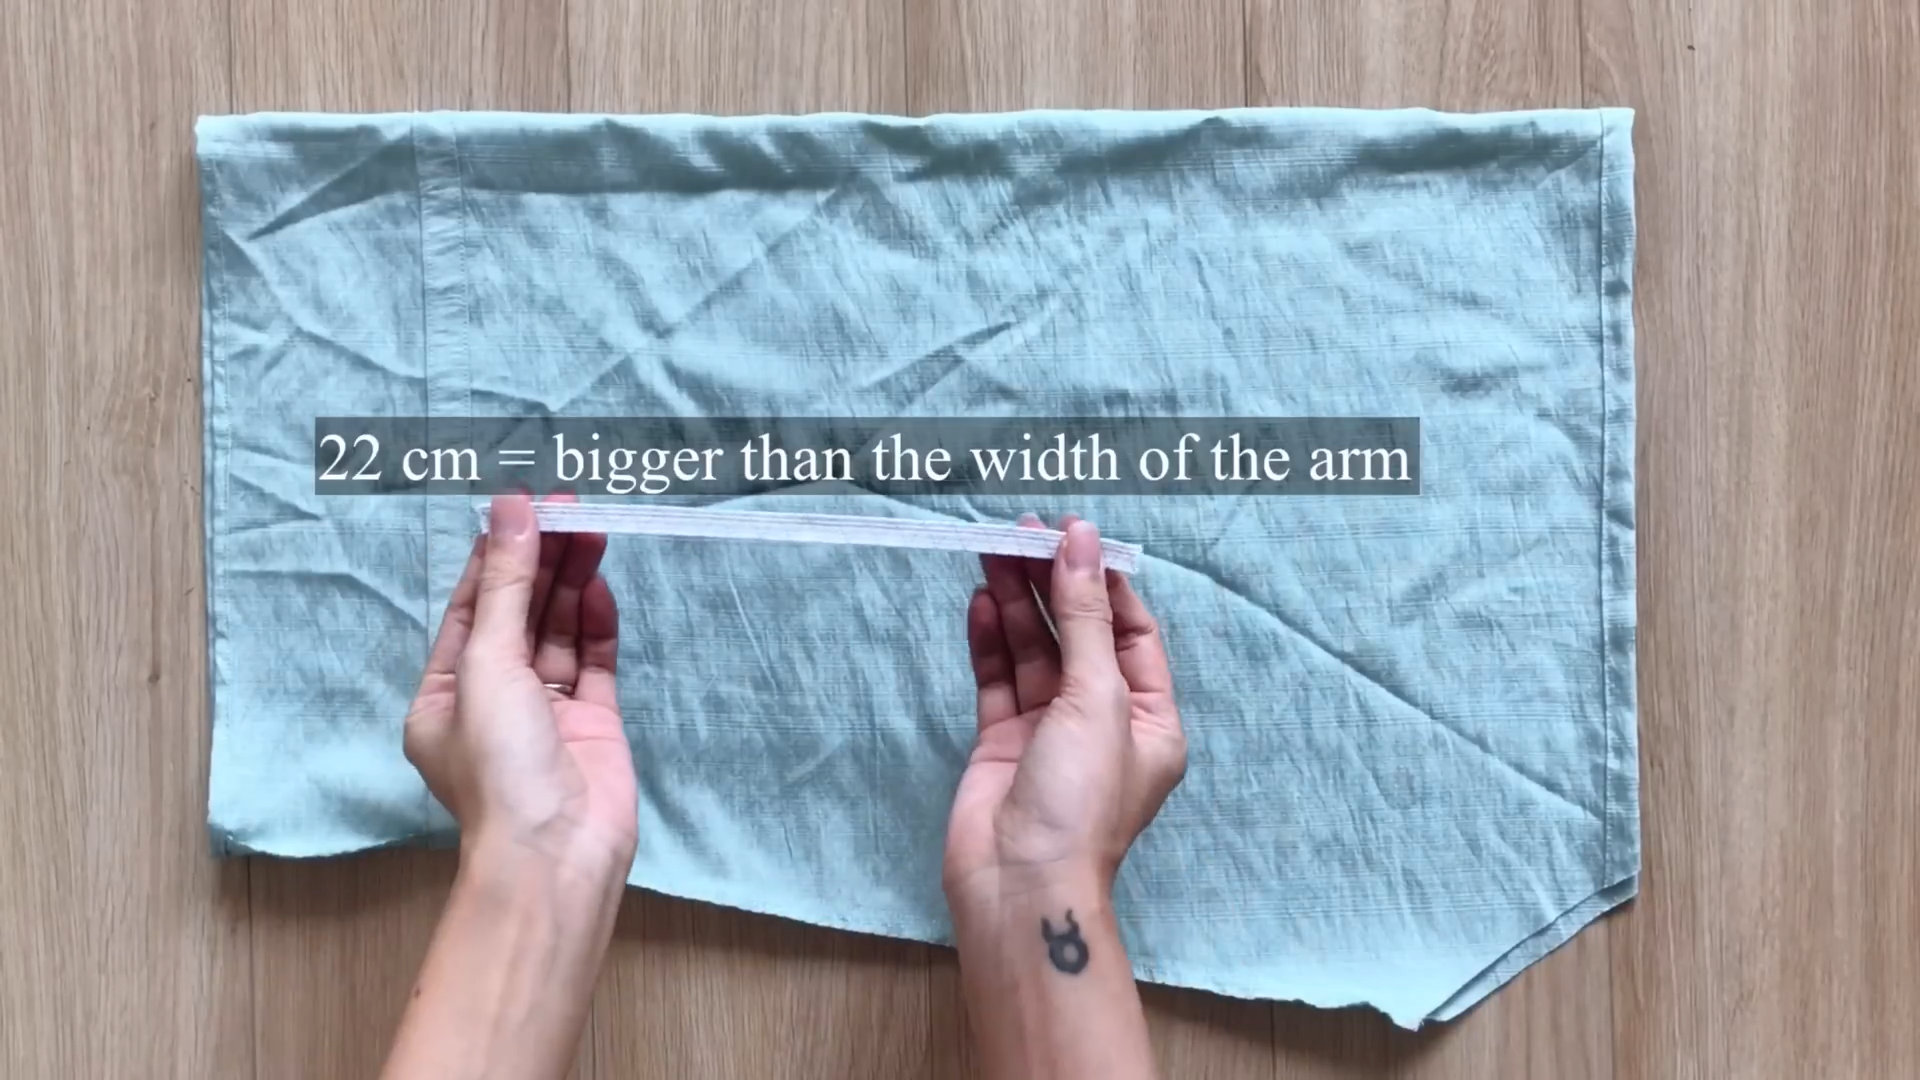
Thread a 22 cm elastic band (slightly larger than your arm width) through the casing you just created.
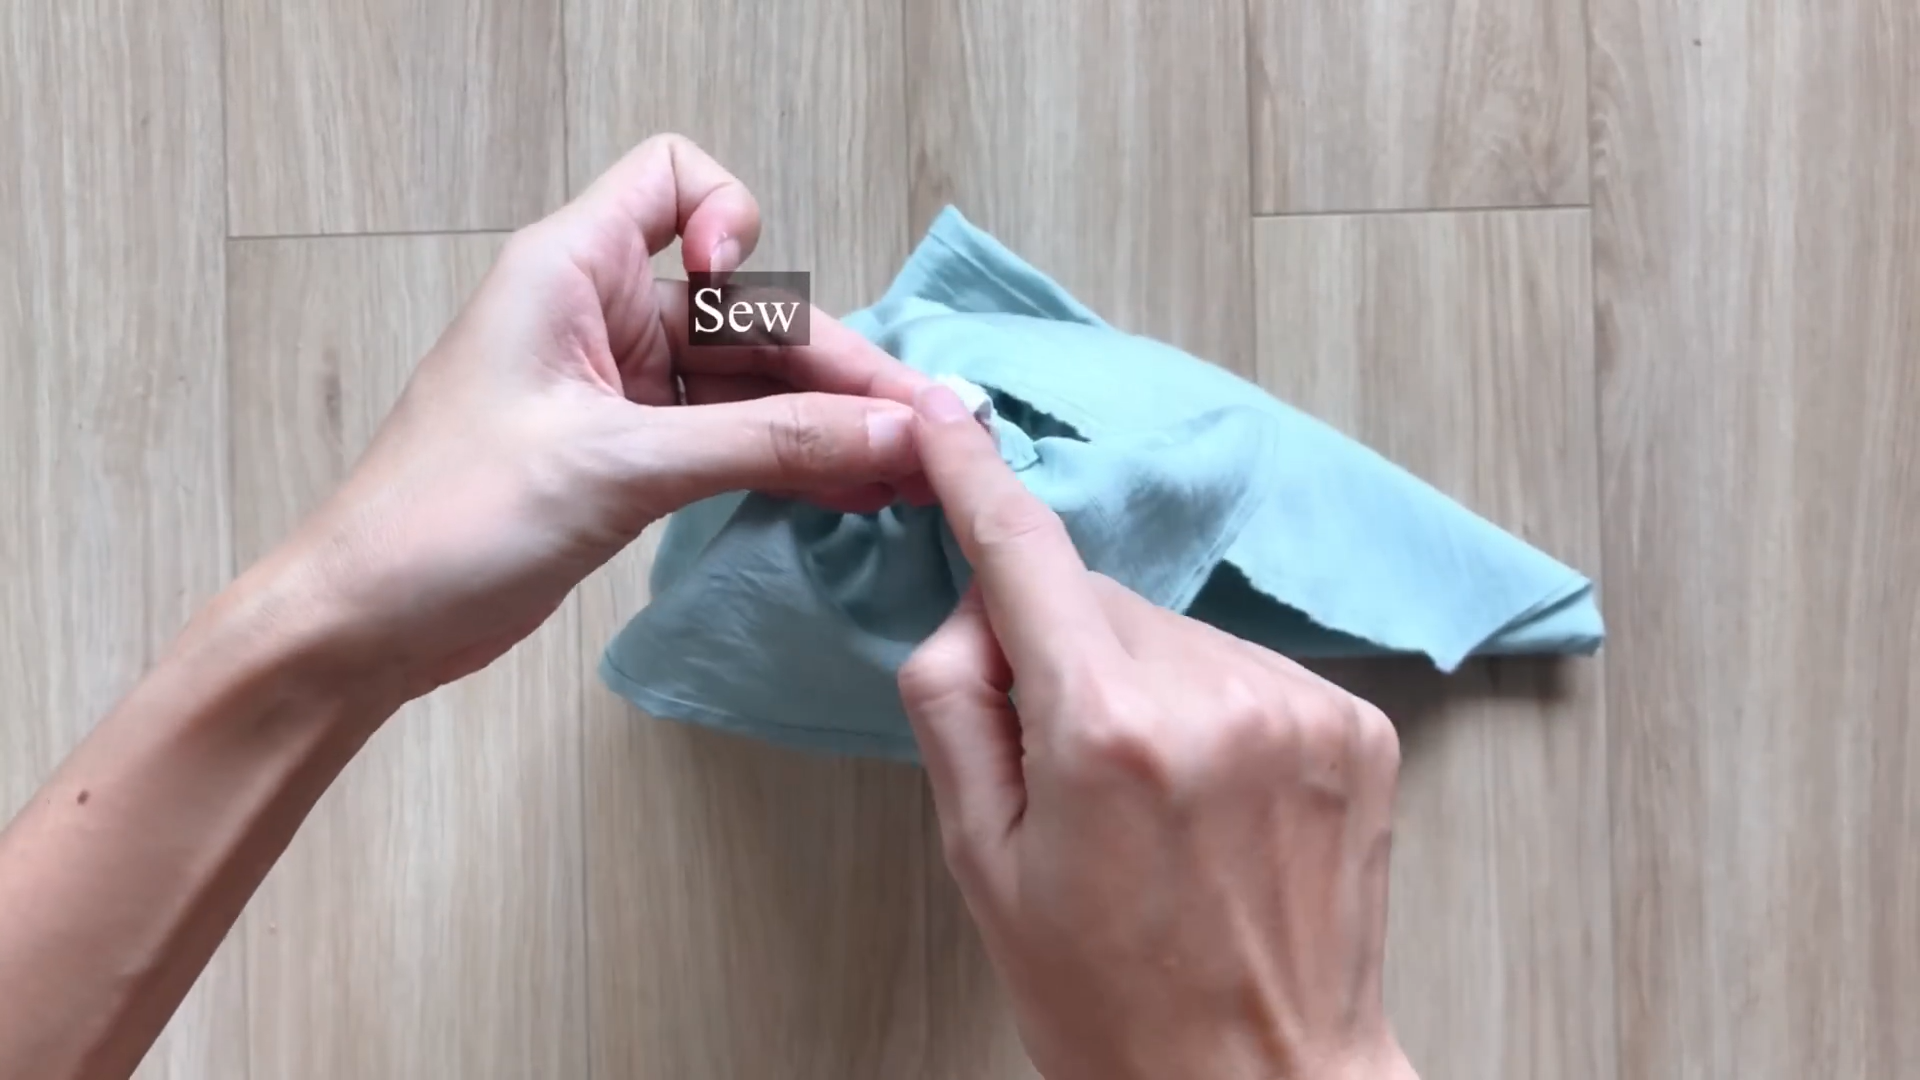
Sew the two ends of the elastic band together to secure it, then close the small gap in the circle by sewing it shut.
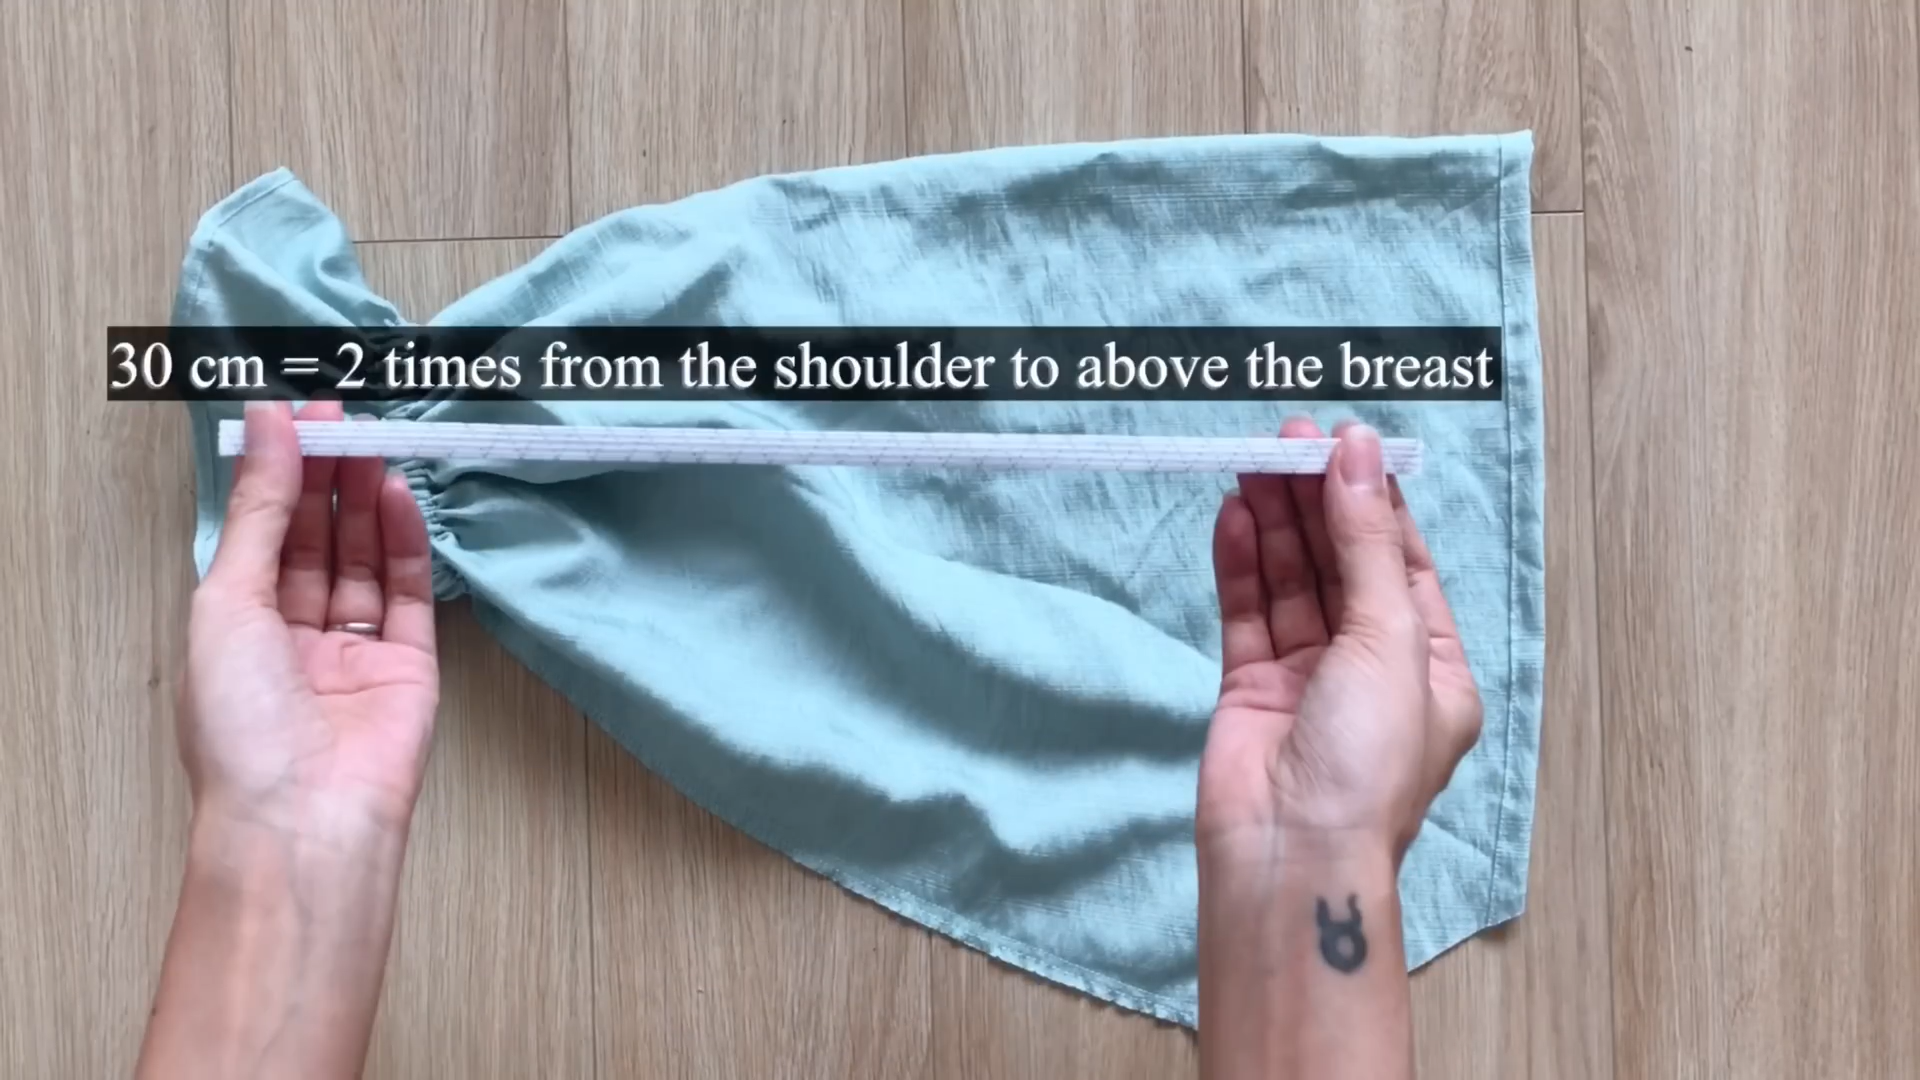
Cut another elastic band with a length of 30 cm, which is twice the distance from your shoulder to above your bust.

Thread this elastic band through the casing we created at the very top of the sleeve.
Sew the ends of the elastic band to the fabric to secure it in place.
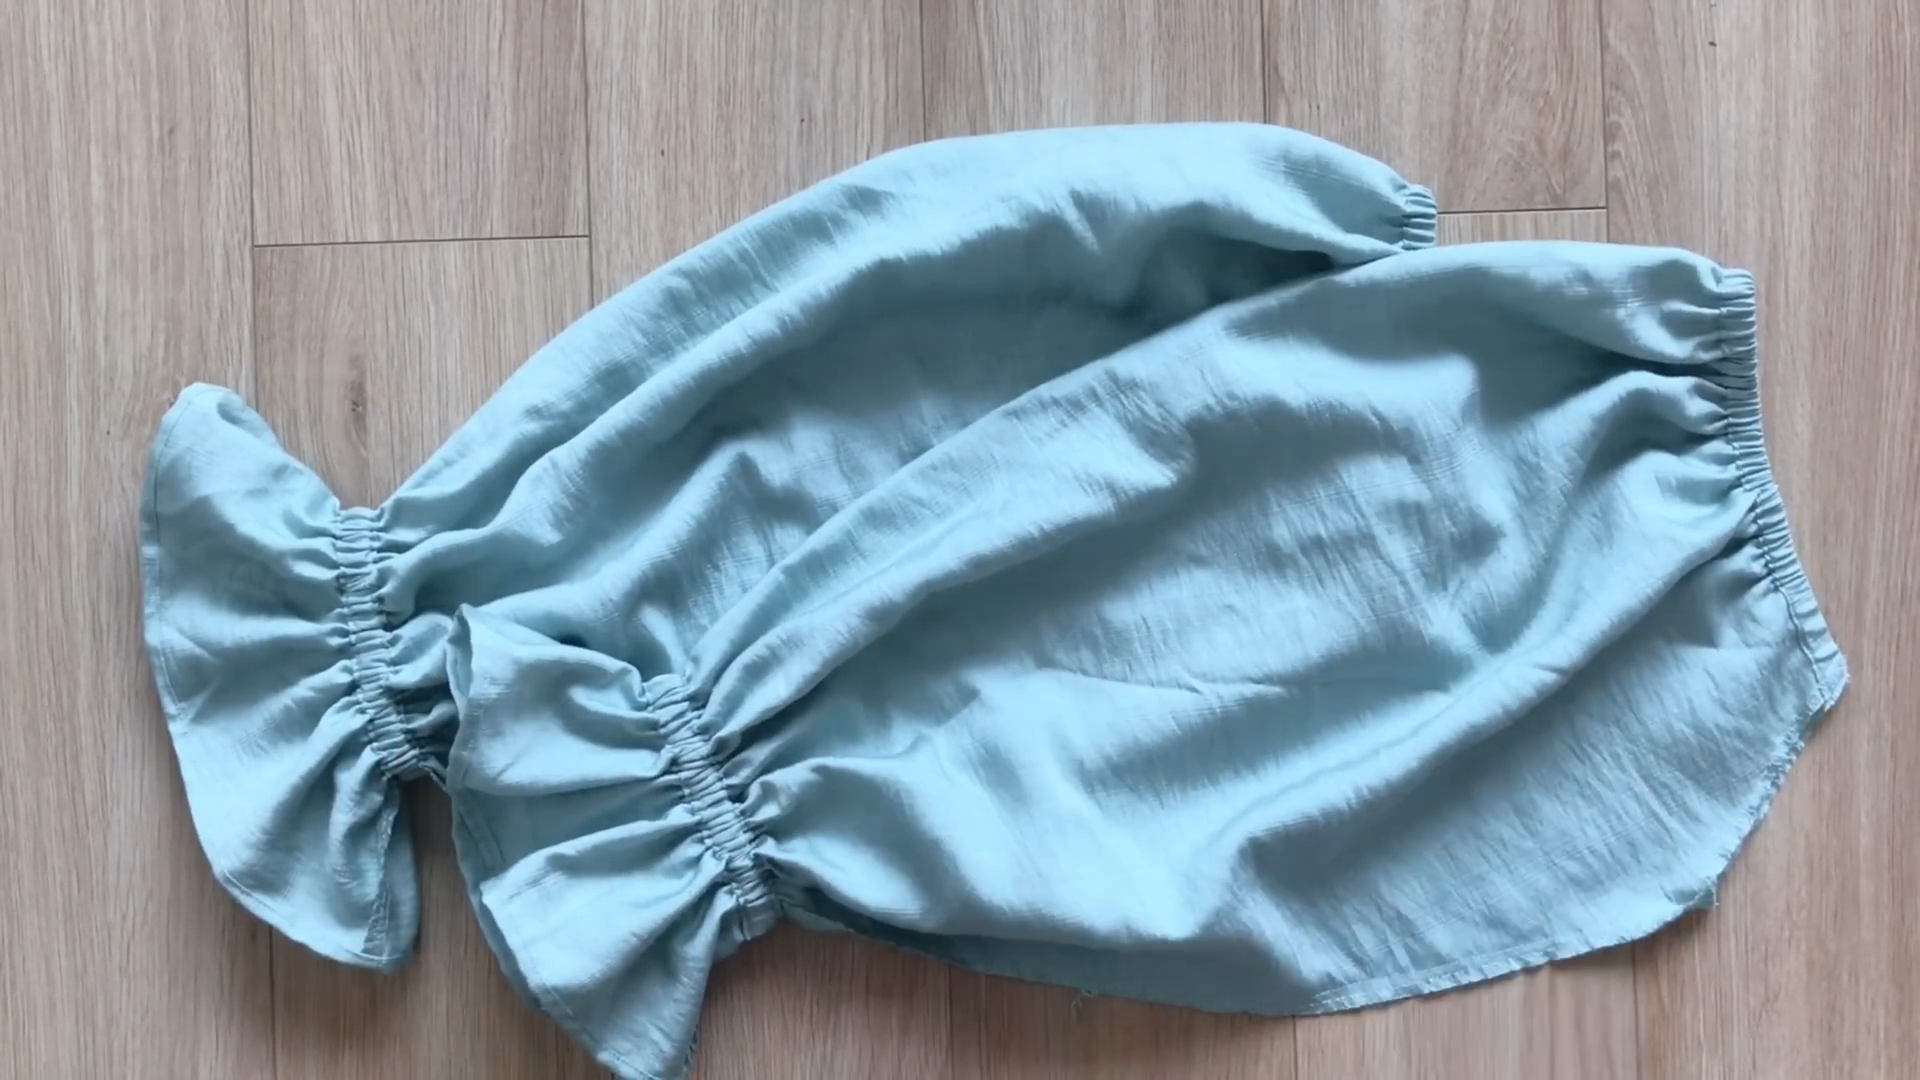
Repeat the steps to create another sleeve.
Attach the sleeves to the bodice at the sleeve lines.

DIY Cottage dress | Making a shirred dress and a wrap dress in one design
And there you have it!
A stunning DIY cottage dress that's not only beautiful but also versatile. The soft, airy fabric drapes beautifully, and the two-way wear design makes it endlessly versatile. It's the perfect piece to add a touch of whimsy and romance to your wardrobe.

DIY Cottage dress | Making a shirred dress and a wrap dress in one design
I hope you’re inspired to create one for yourself. Happy sewing!
Please let me know your thoughts in the comments below. I would love to know more from you guys to improve my skills.