DIY Cut out crop top from t-shirt | T-shirt transformation ideas | Easy sewing tutorial for beginner
DIY Cut out crop top from t-shirt | T-shirt transformation ideas | Easy sewing tutorial for beginner
Welcome or welcome back to my channel. My name is Jess and I love doing DIY, making clothes in a "simply but pretty" way.
In today's tutorial, I'm going to share with you 3 ideas to make a cut out crop top from t-shirt. These crop tops are in trend and will help you steal all the look when wearing.
So I hope you like it and try it out. Let’s get started!
WHAT YOU’LL NEED
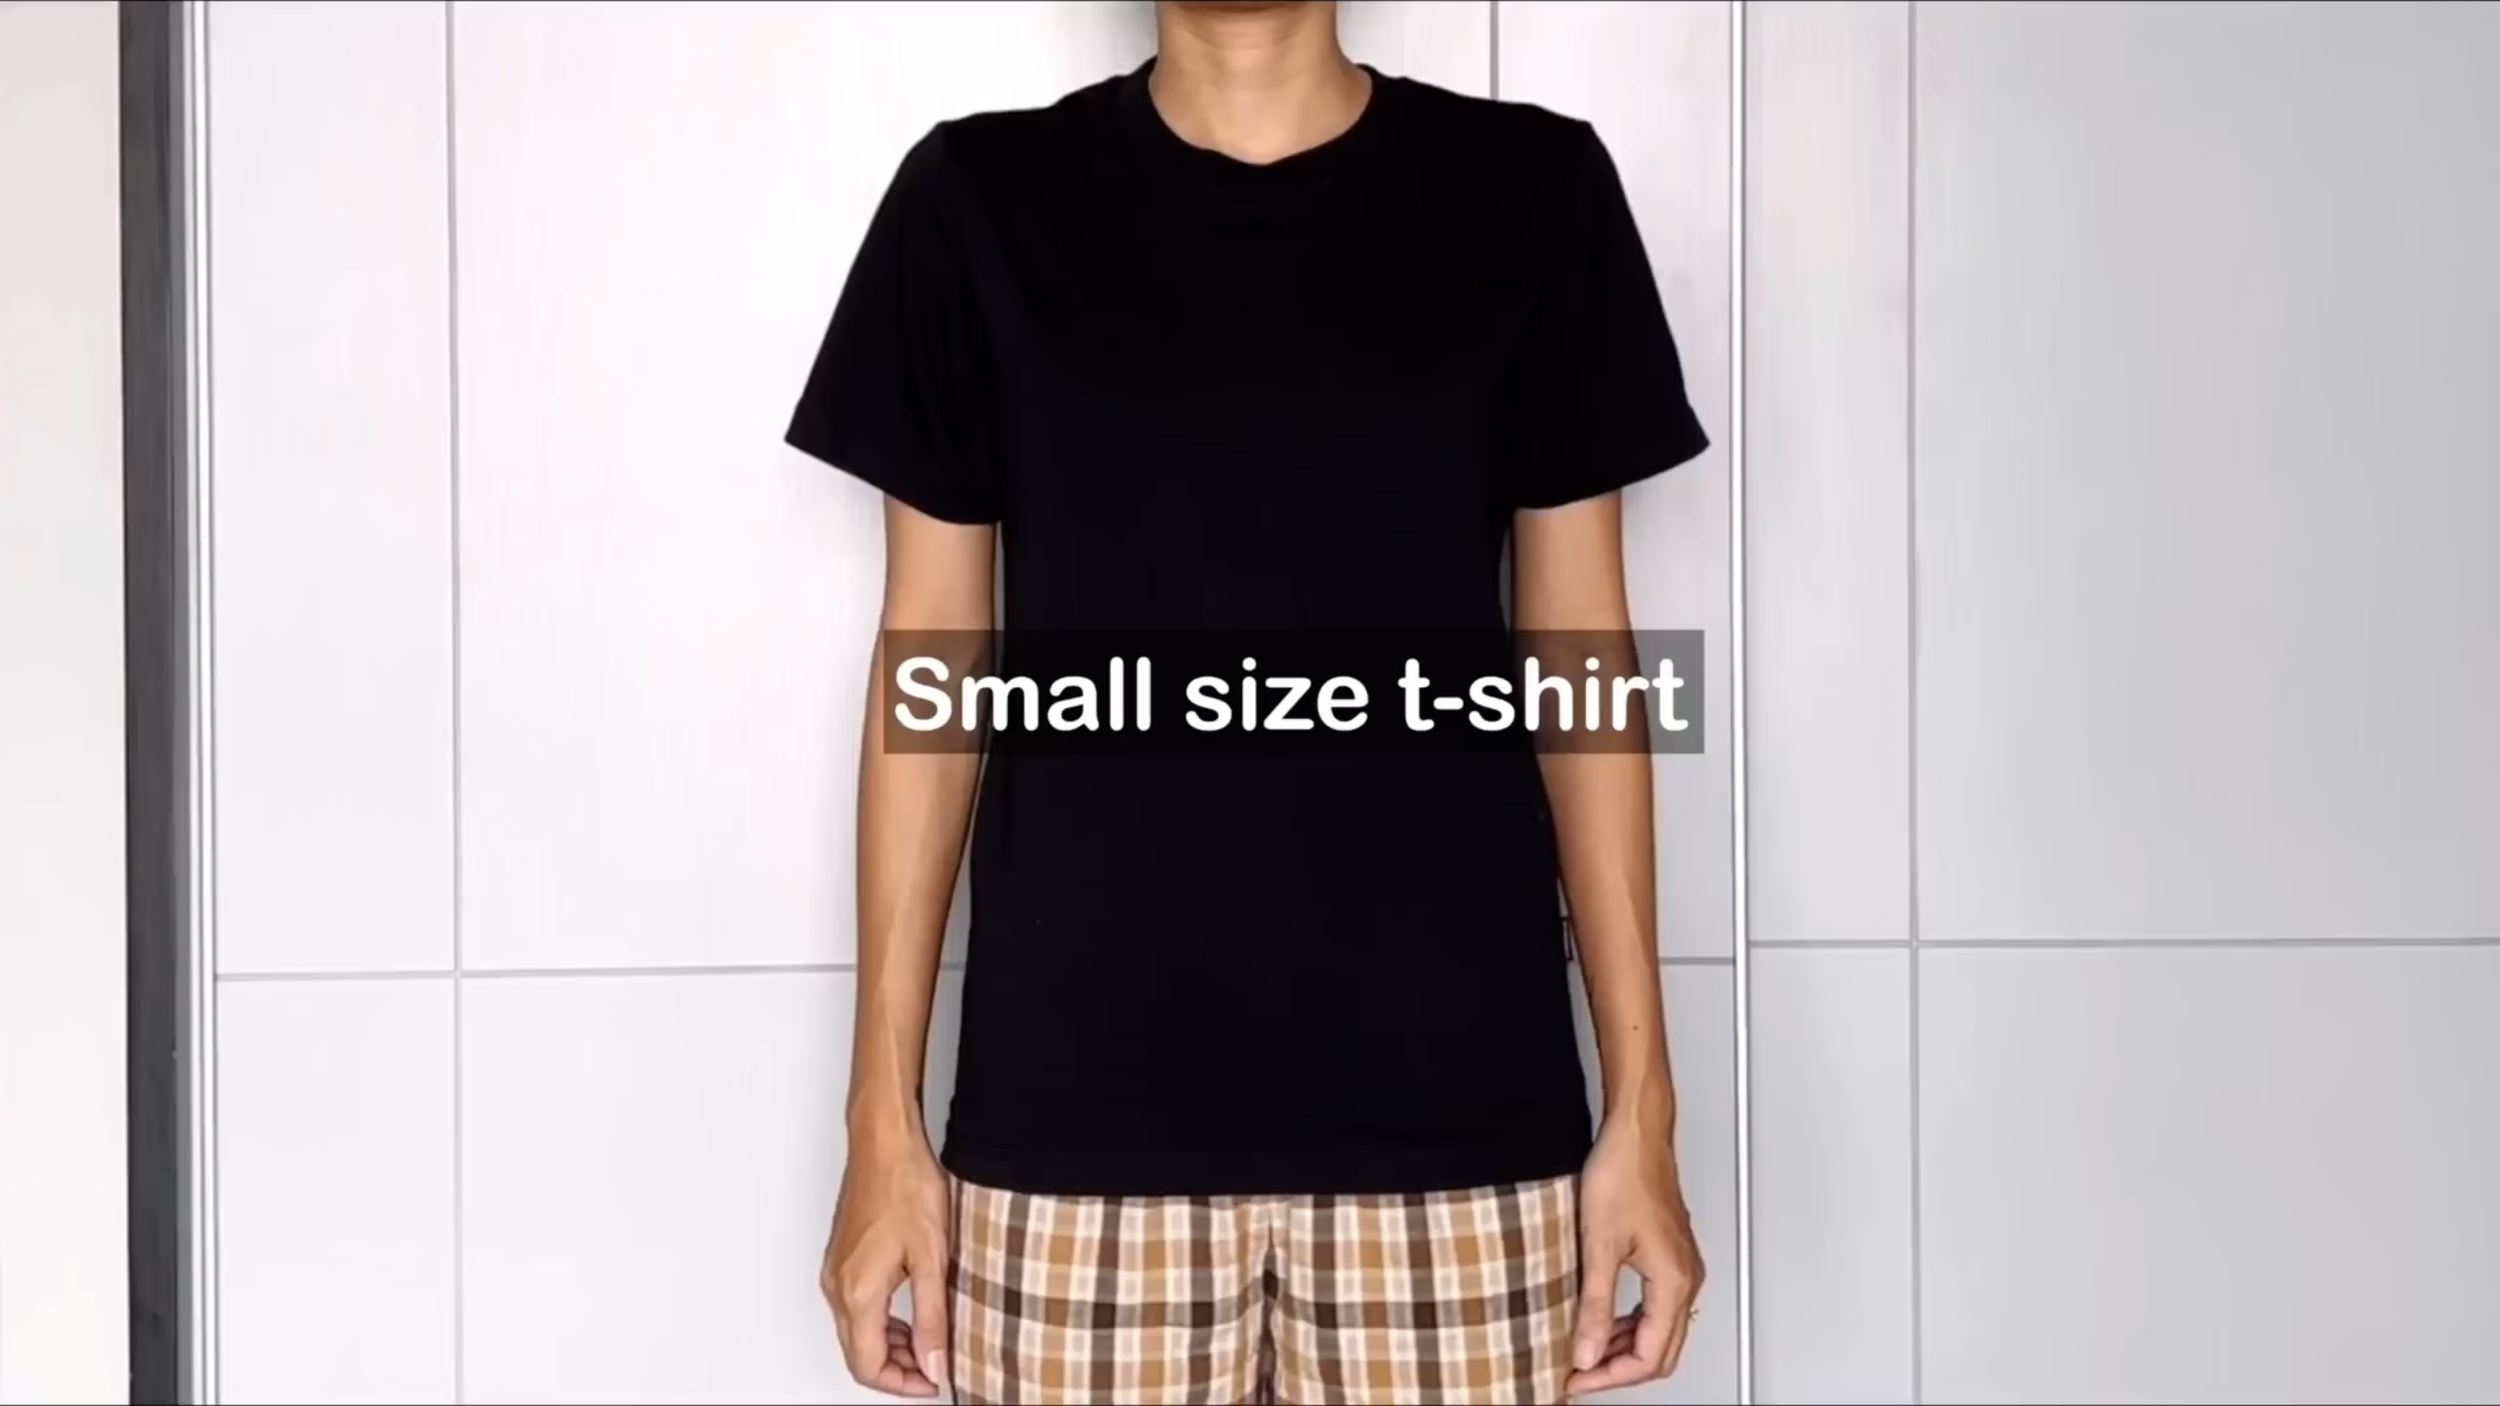
Small size (or tight) t-shirts
Measuring tape
Scissors
Pins
Sewing machine
Elastic band
SIDE CUT OUT CROP TOP

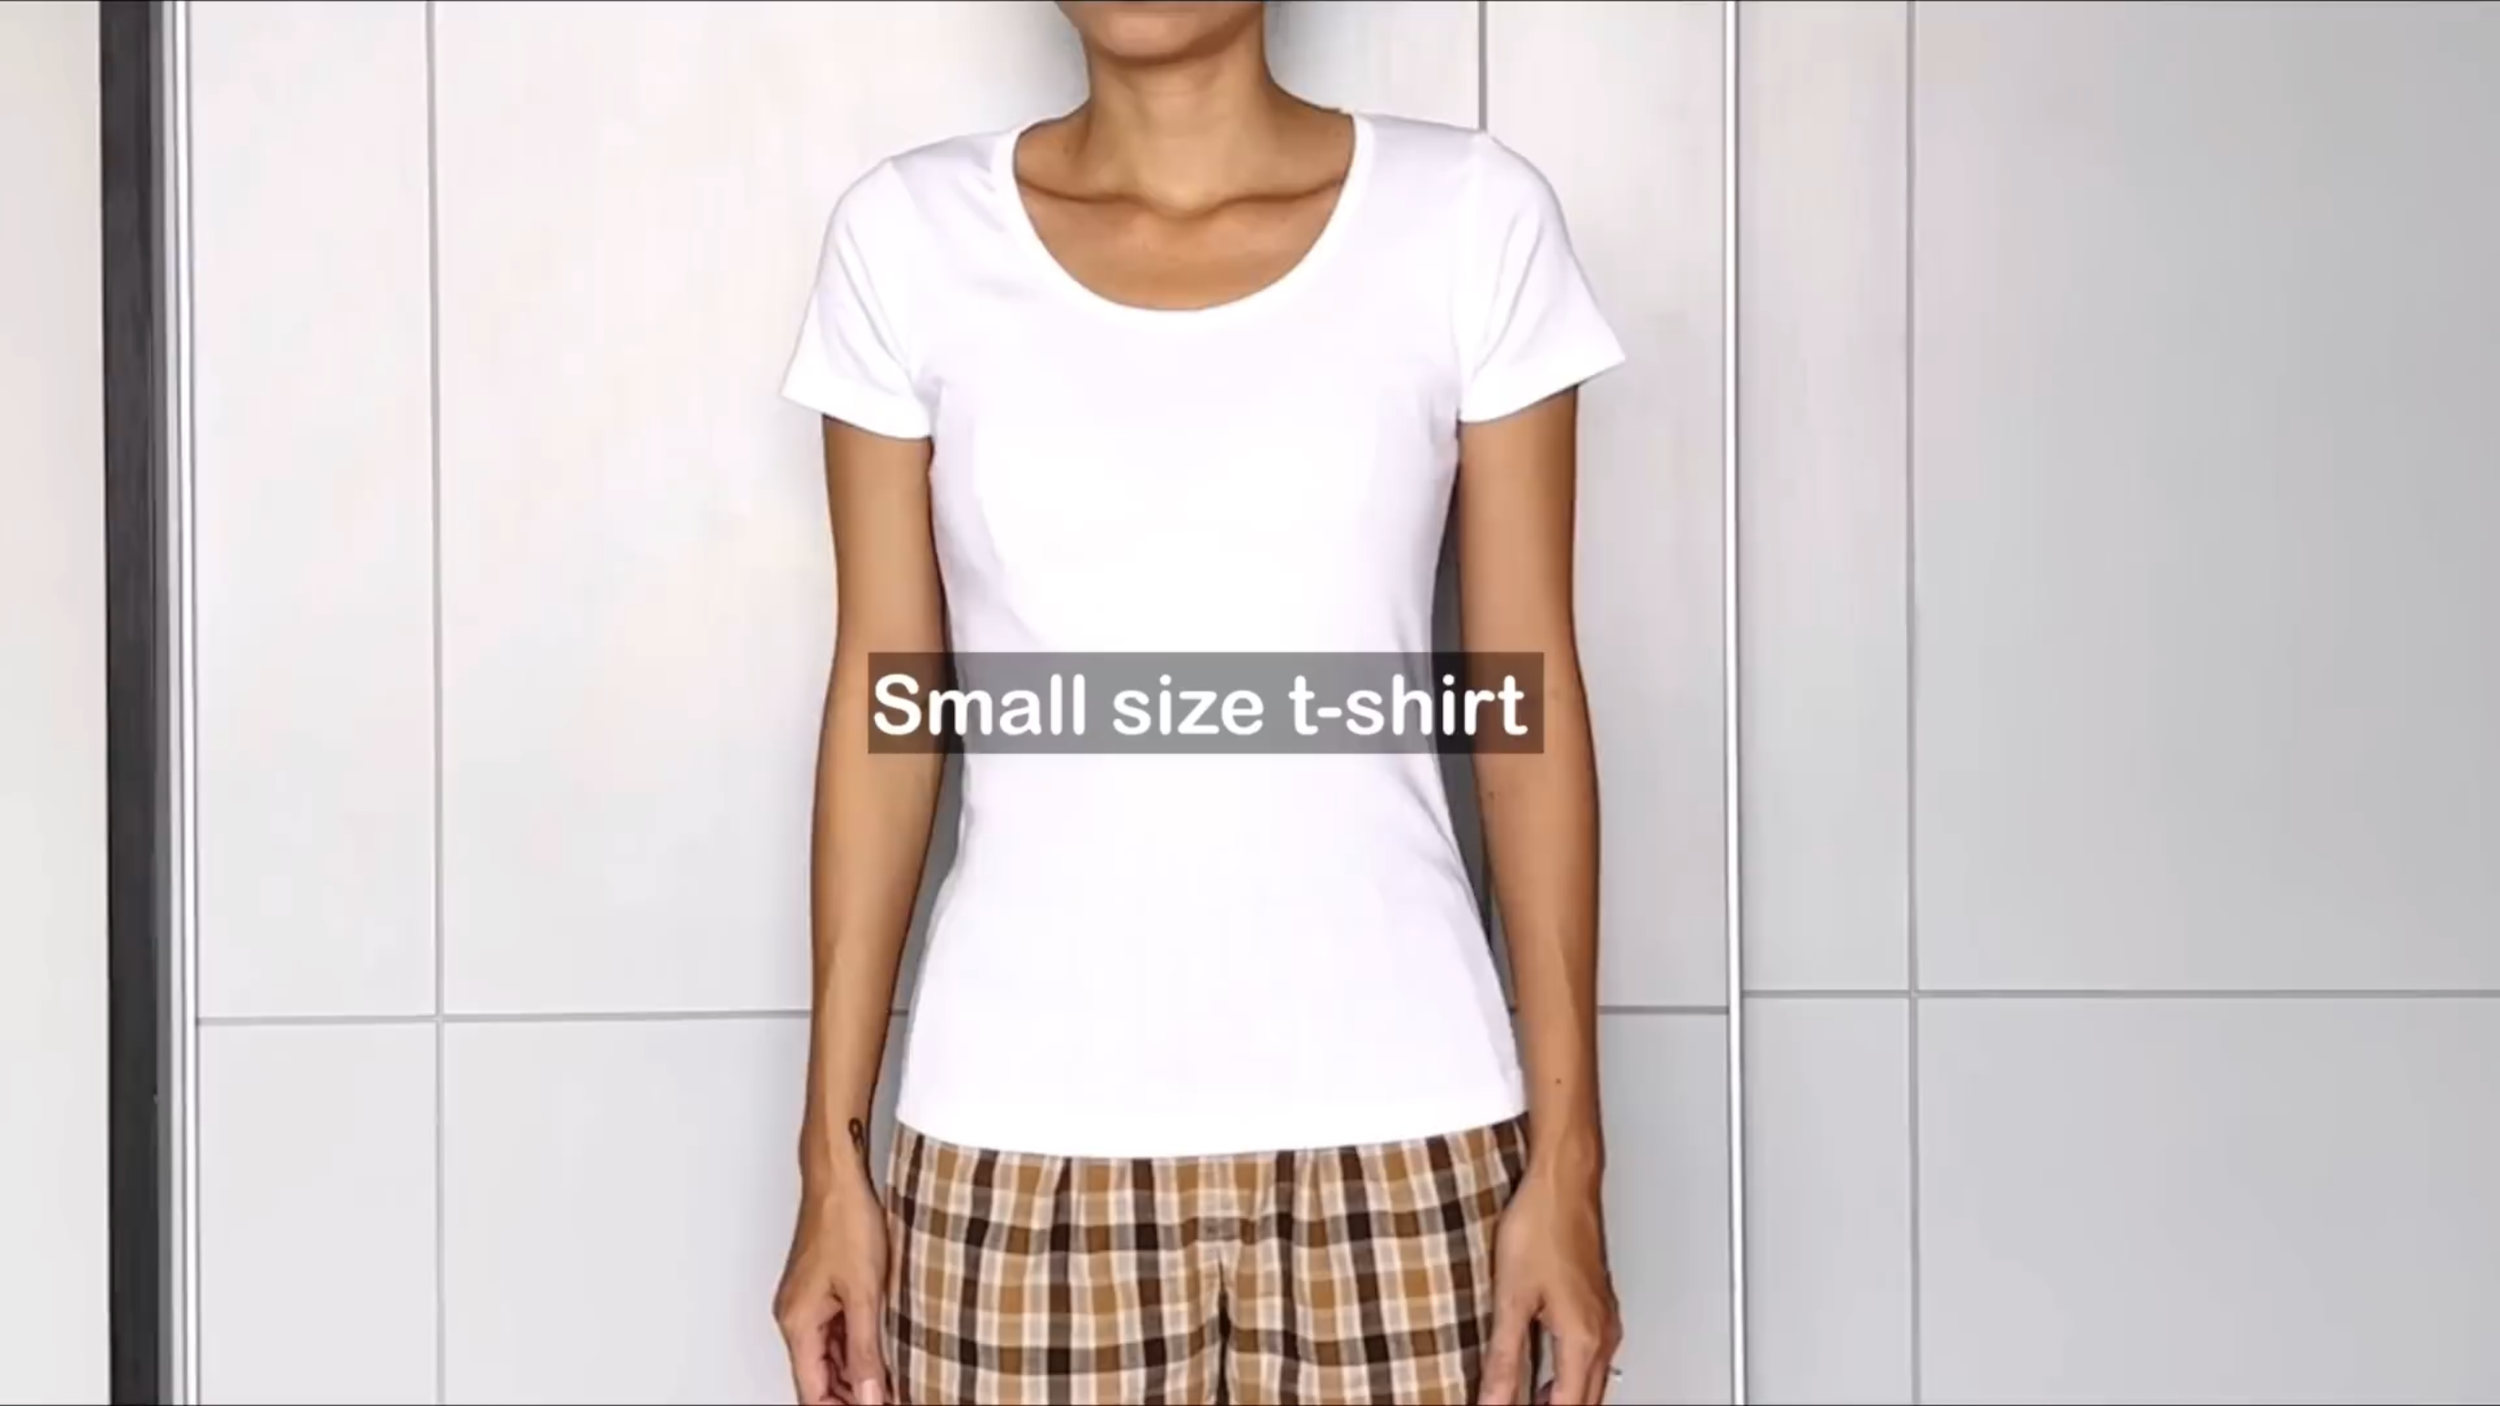
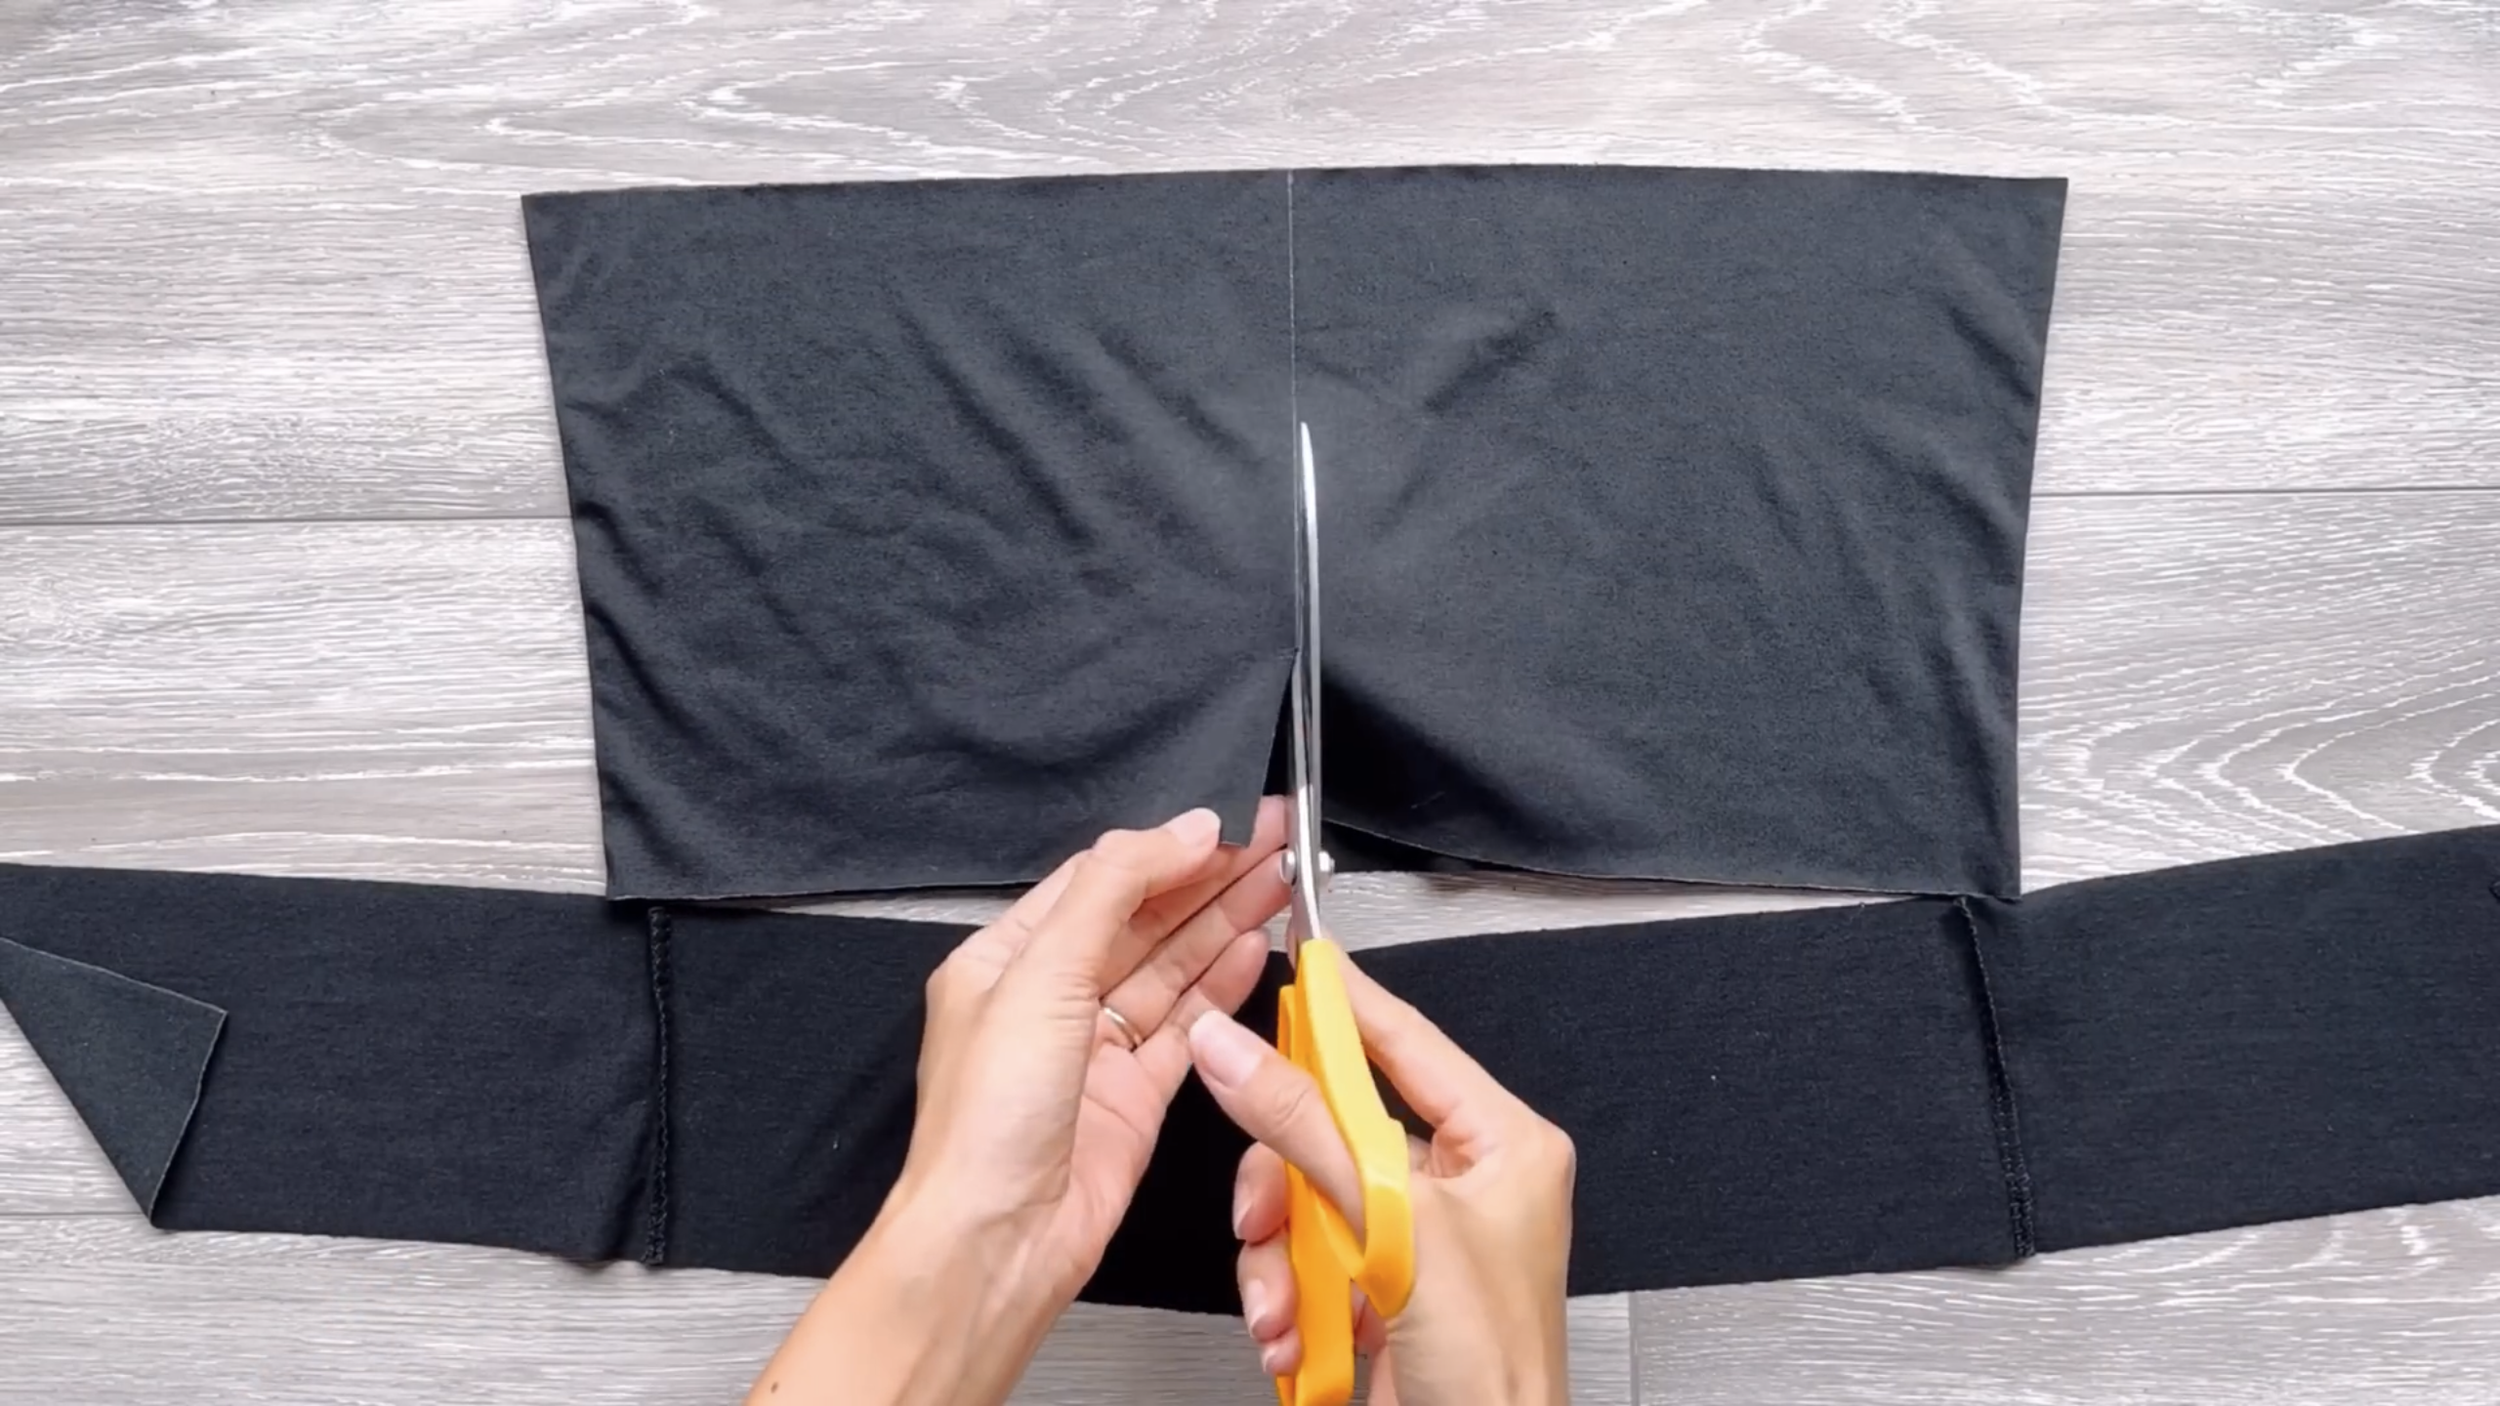
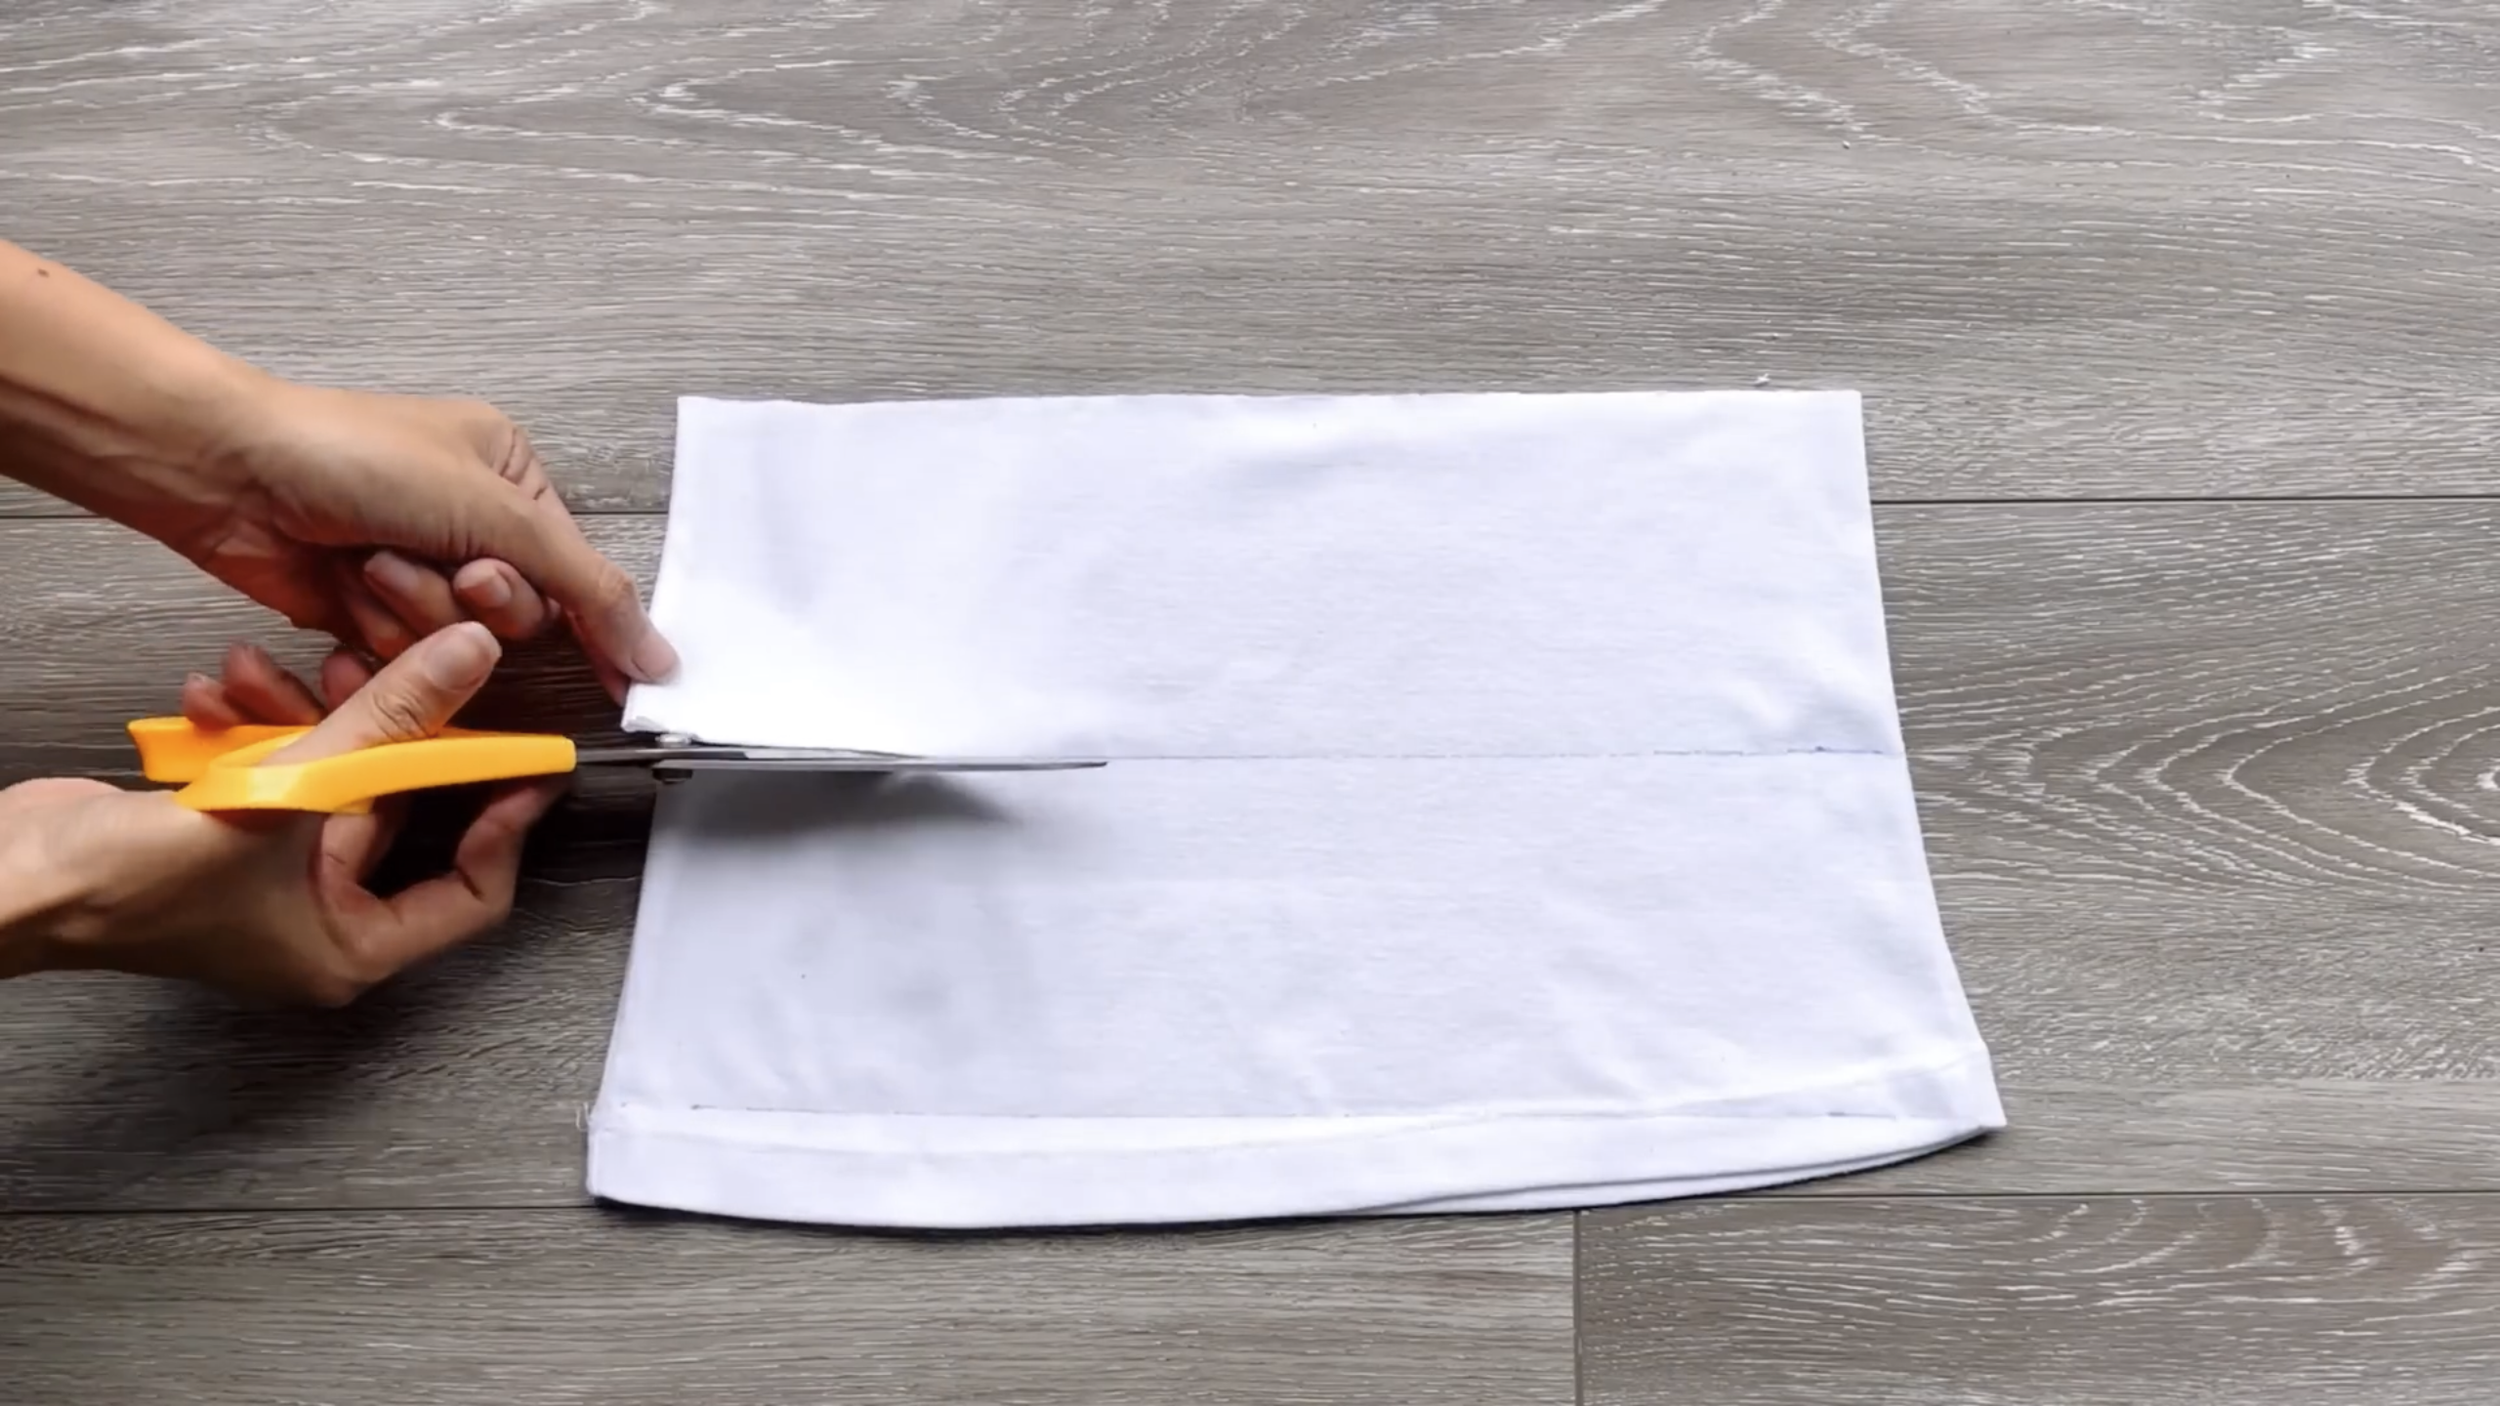
For this DIY, use a small-size t-shirt.
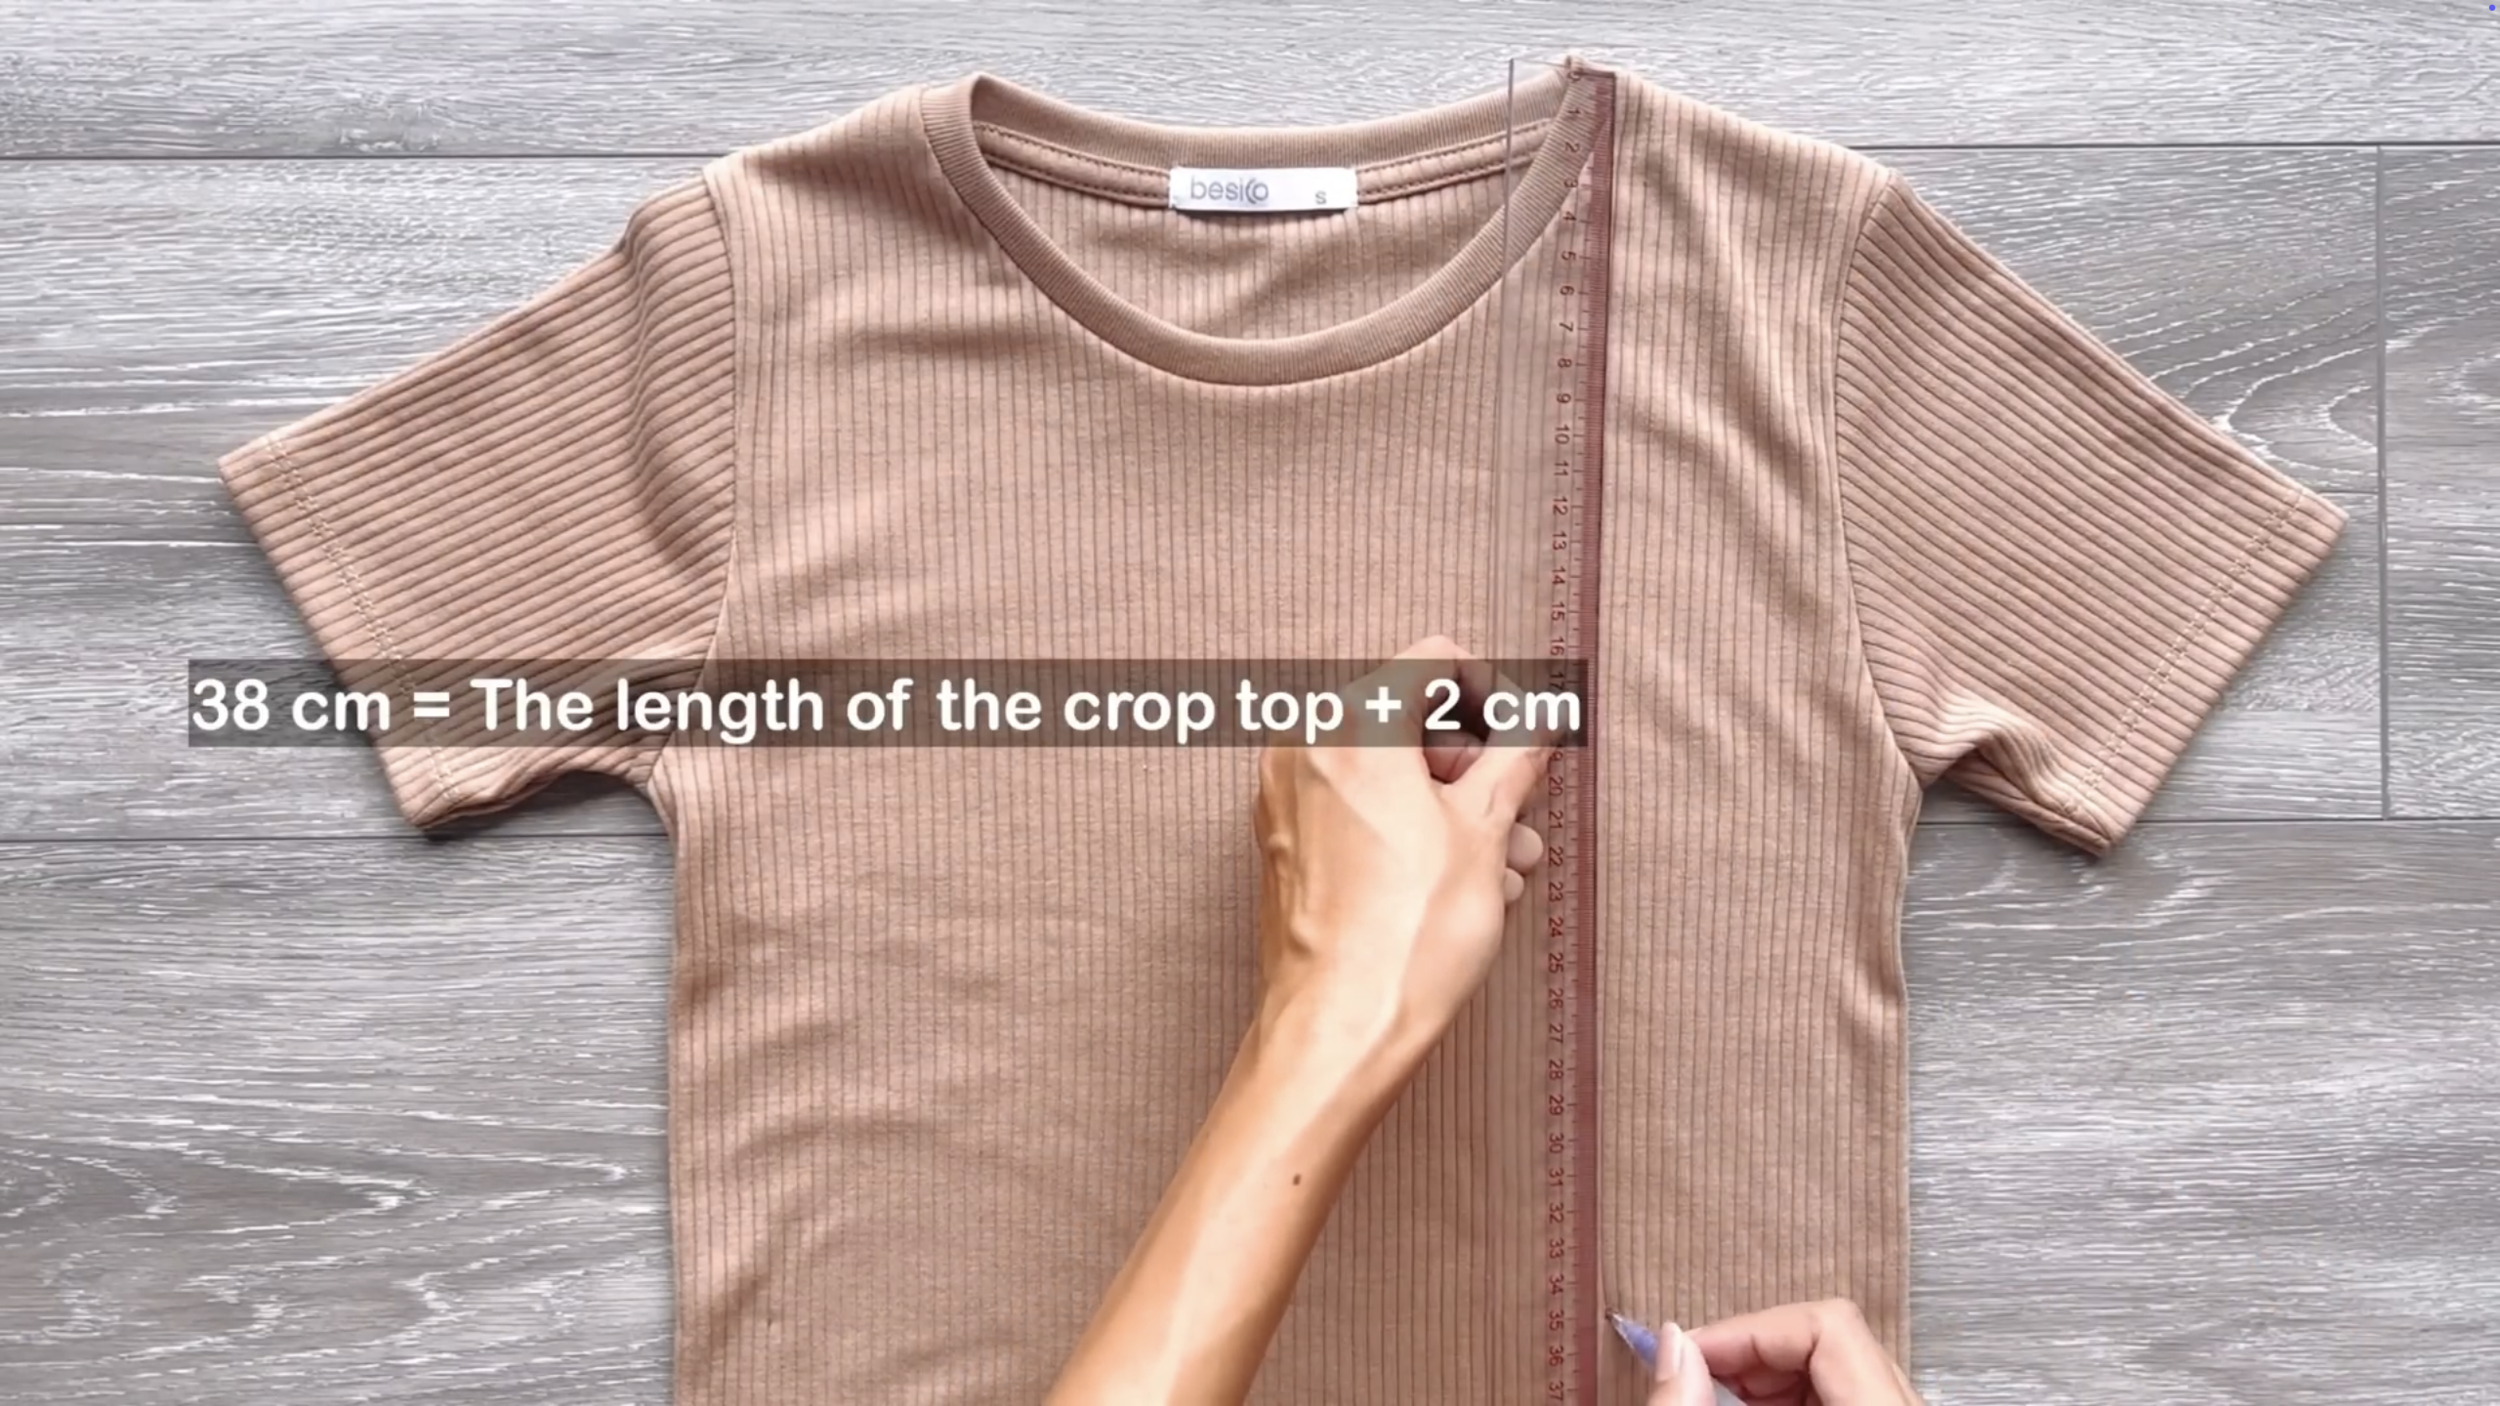
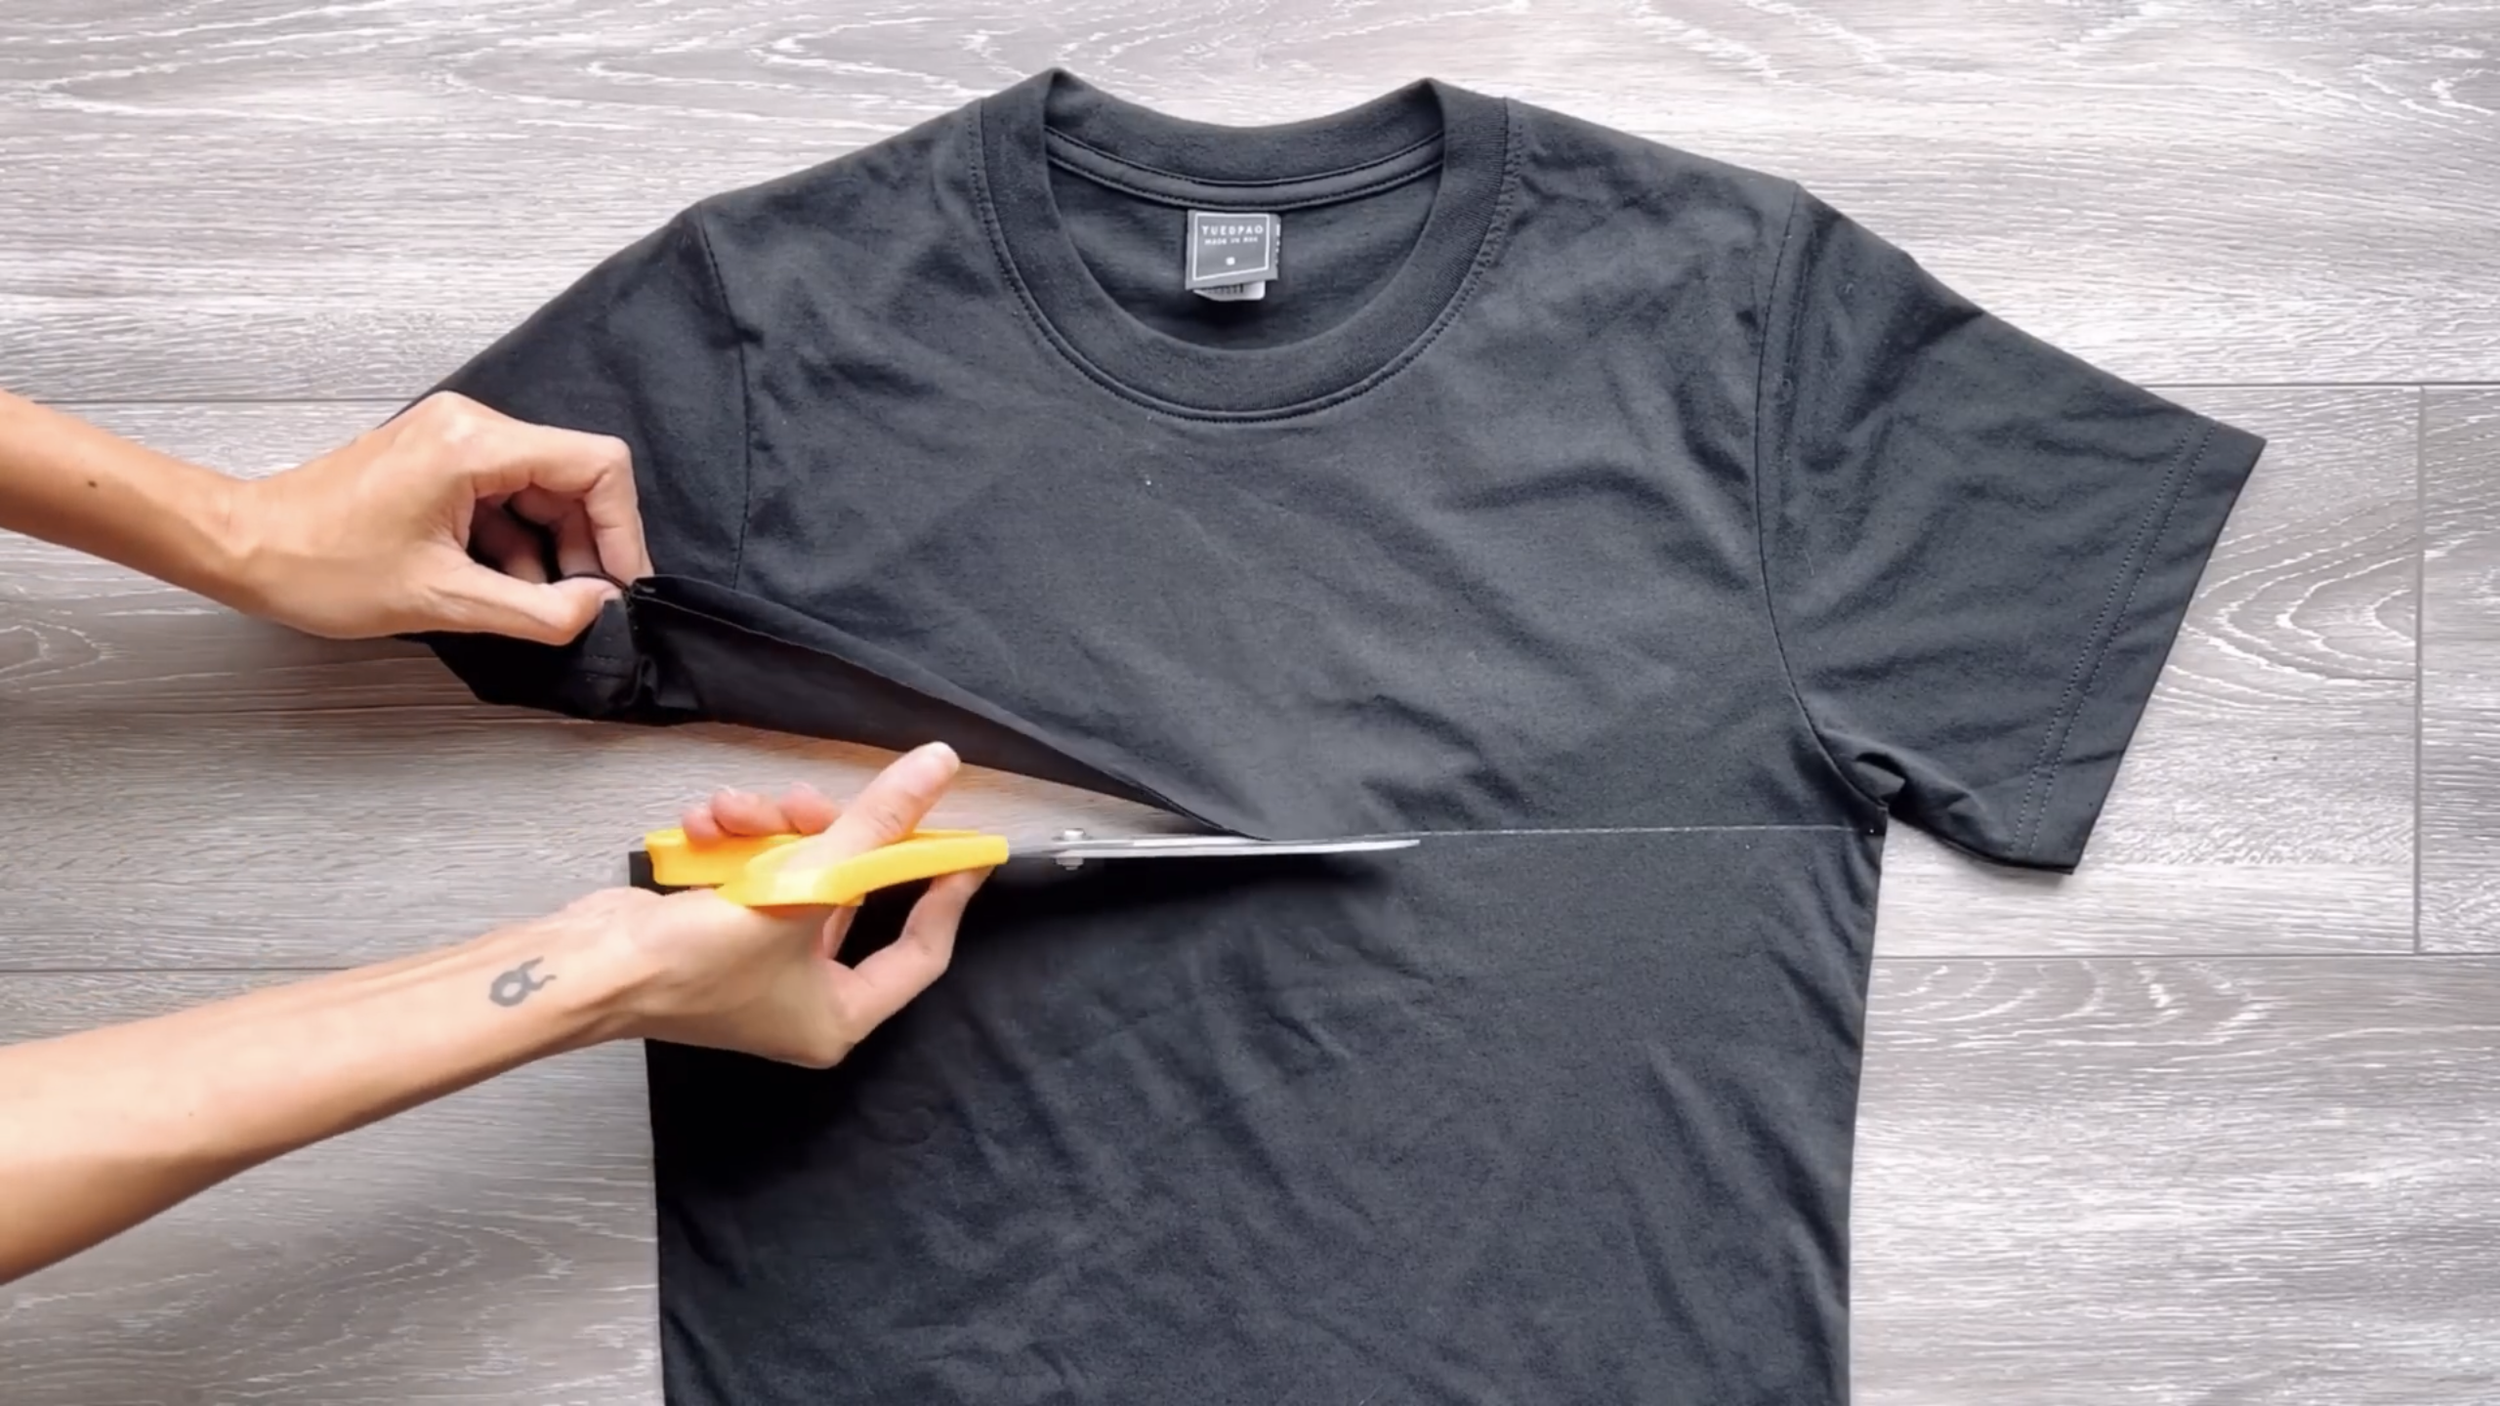
From two sides of the neck, mark down 38 cm, which is the length of the crop top that is wanted plus 2 cm. Make sure this length has to be over your breast.
Then, draw a line to connect two marks together.
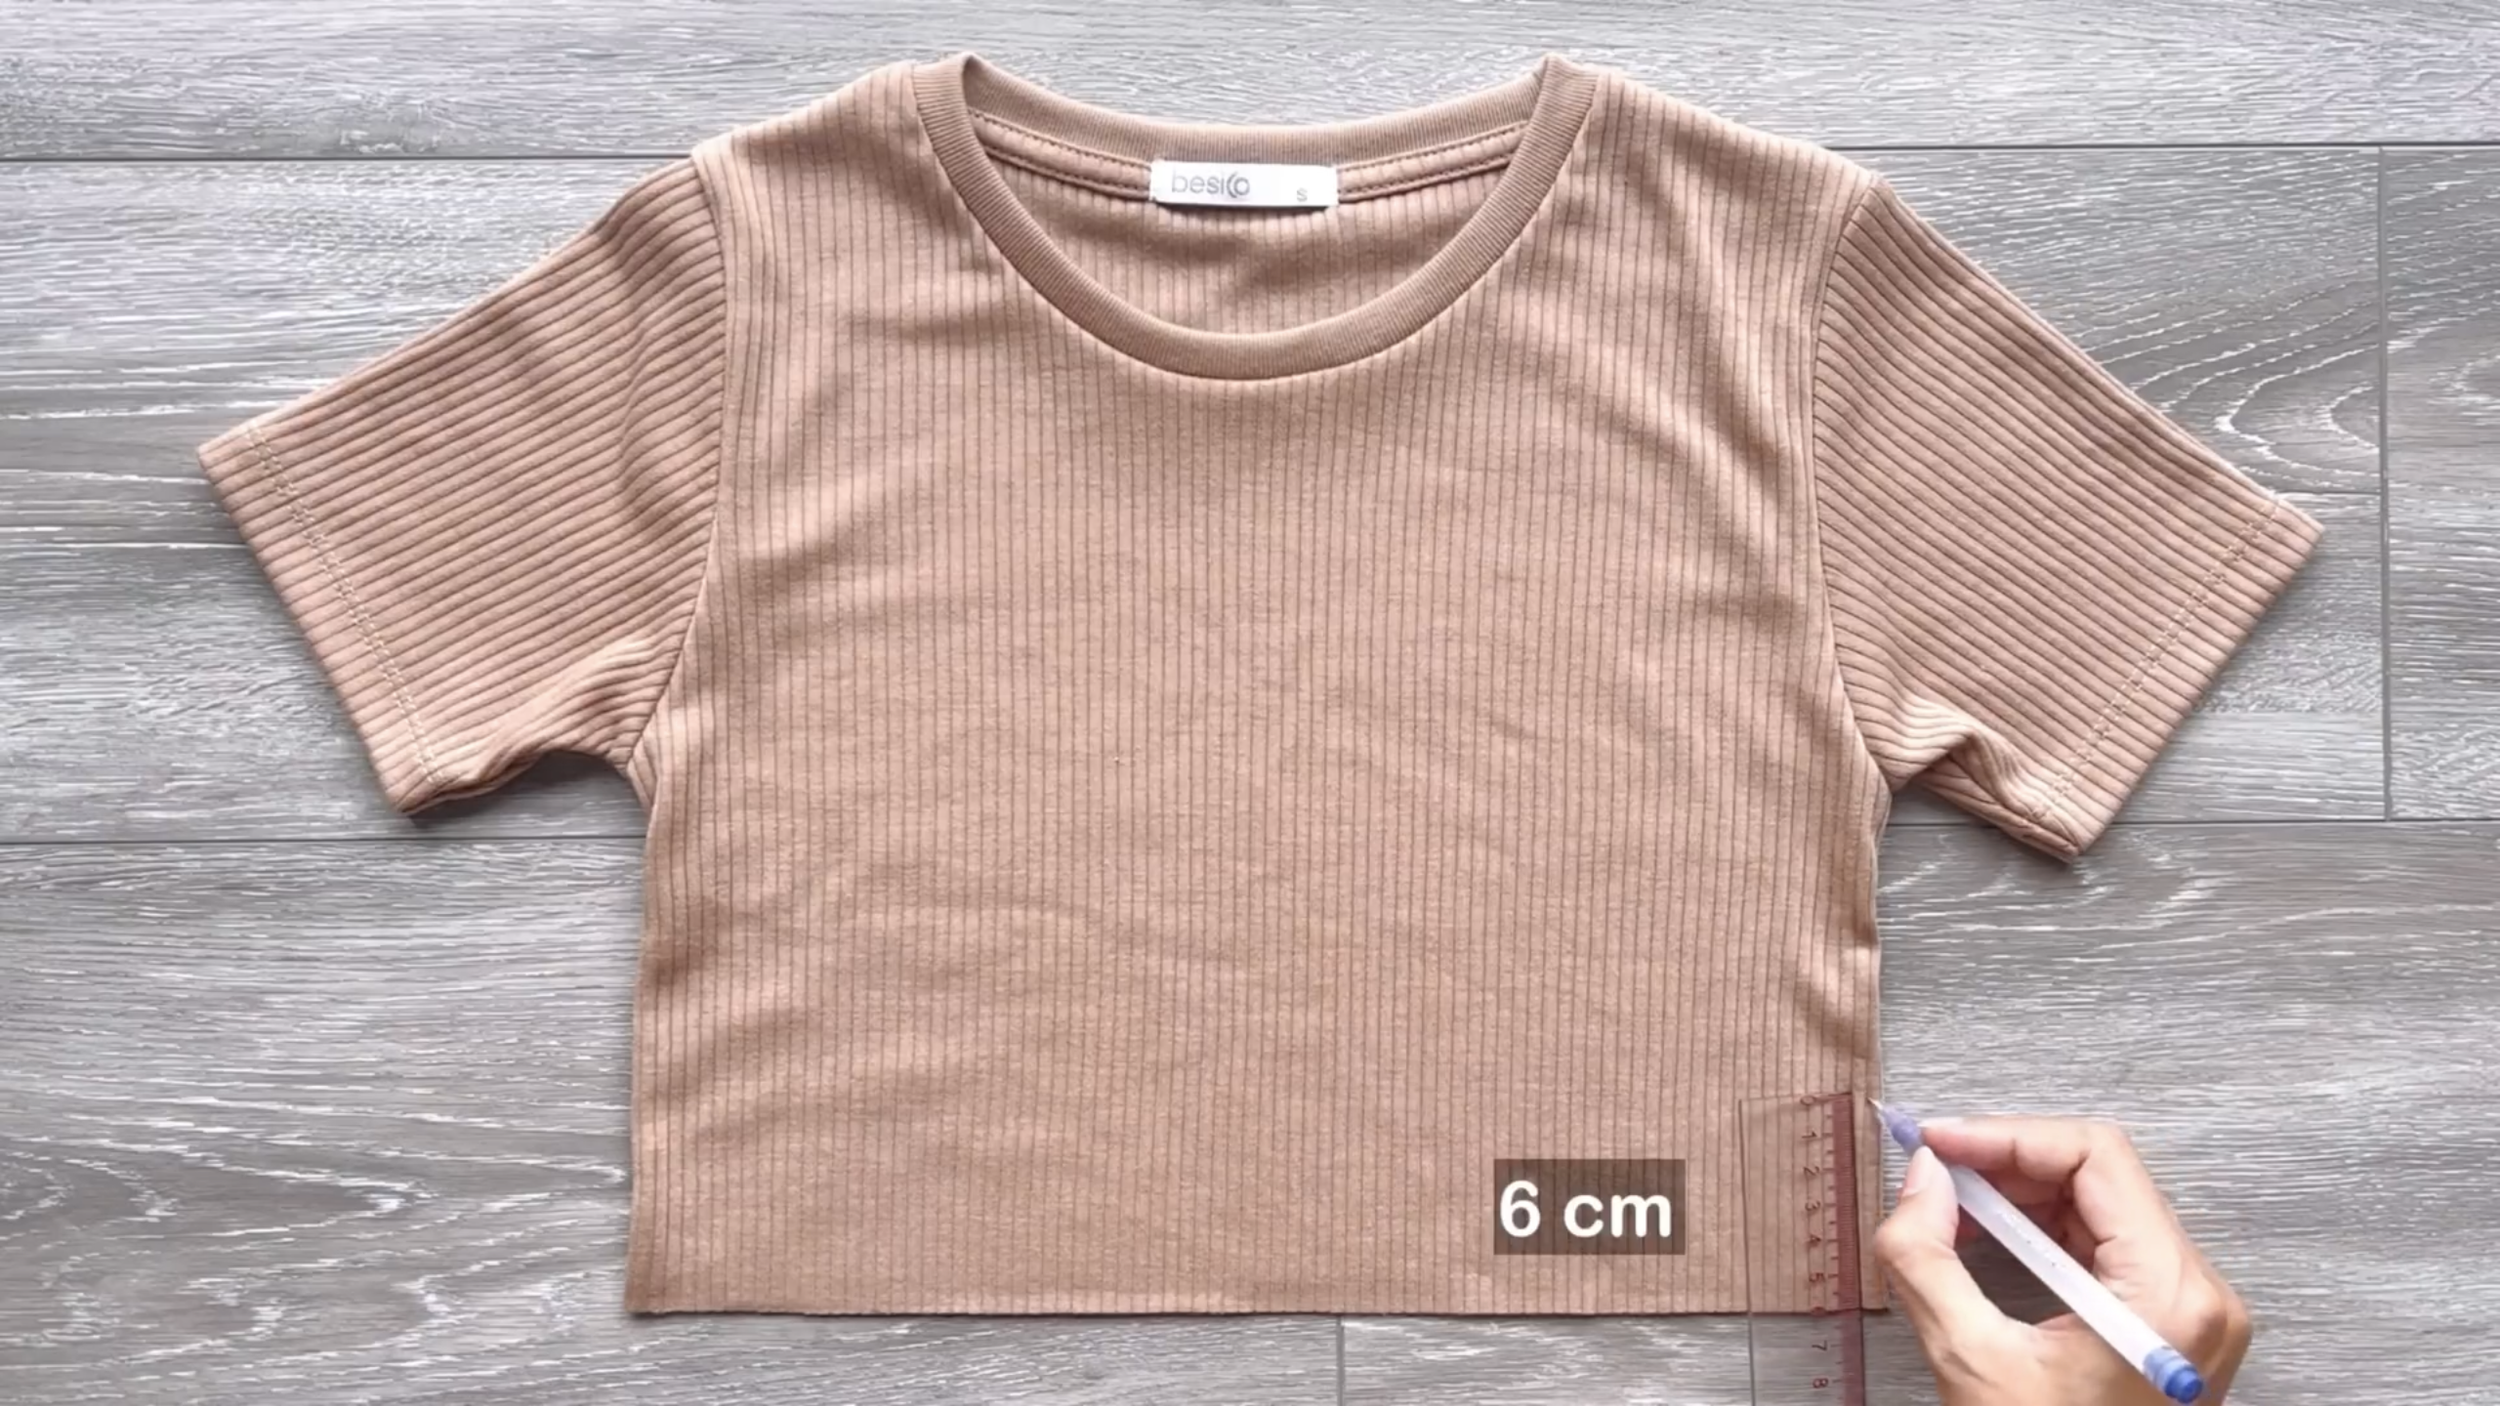
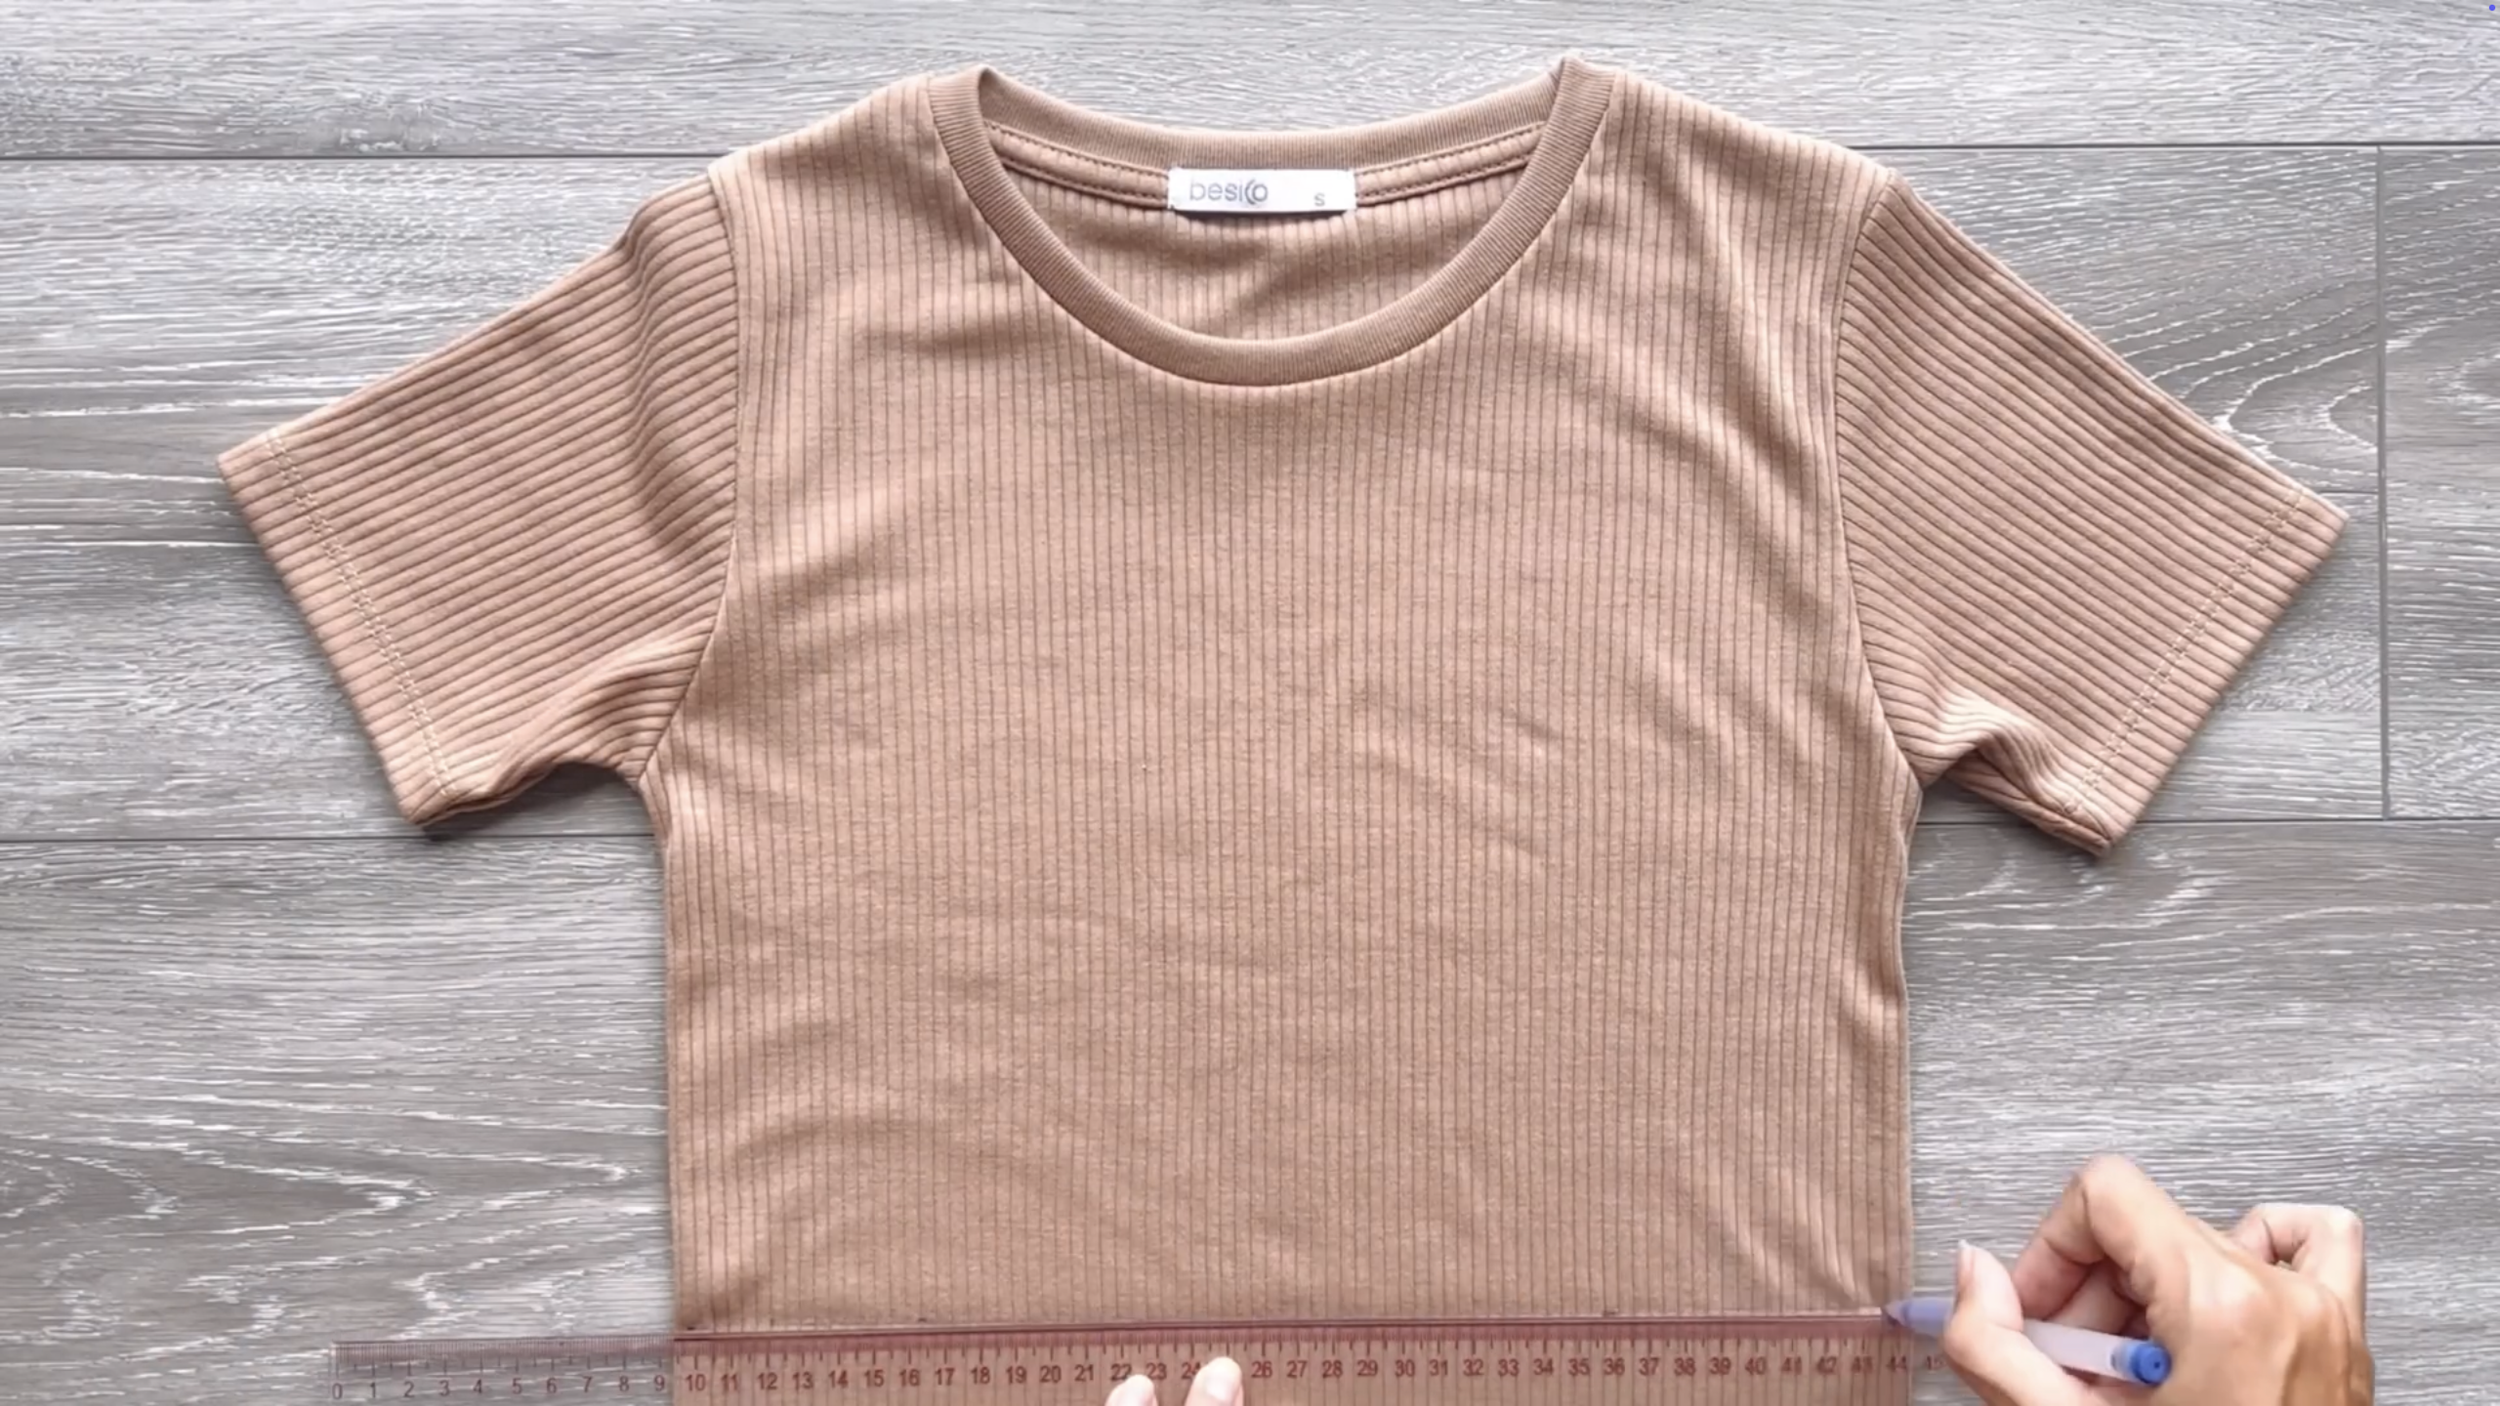
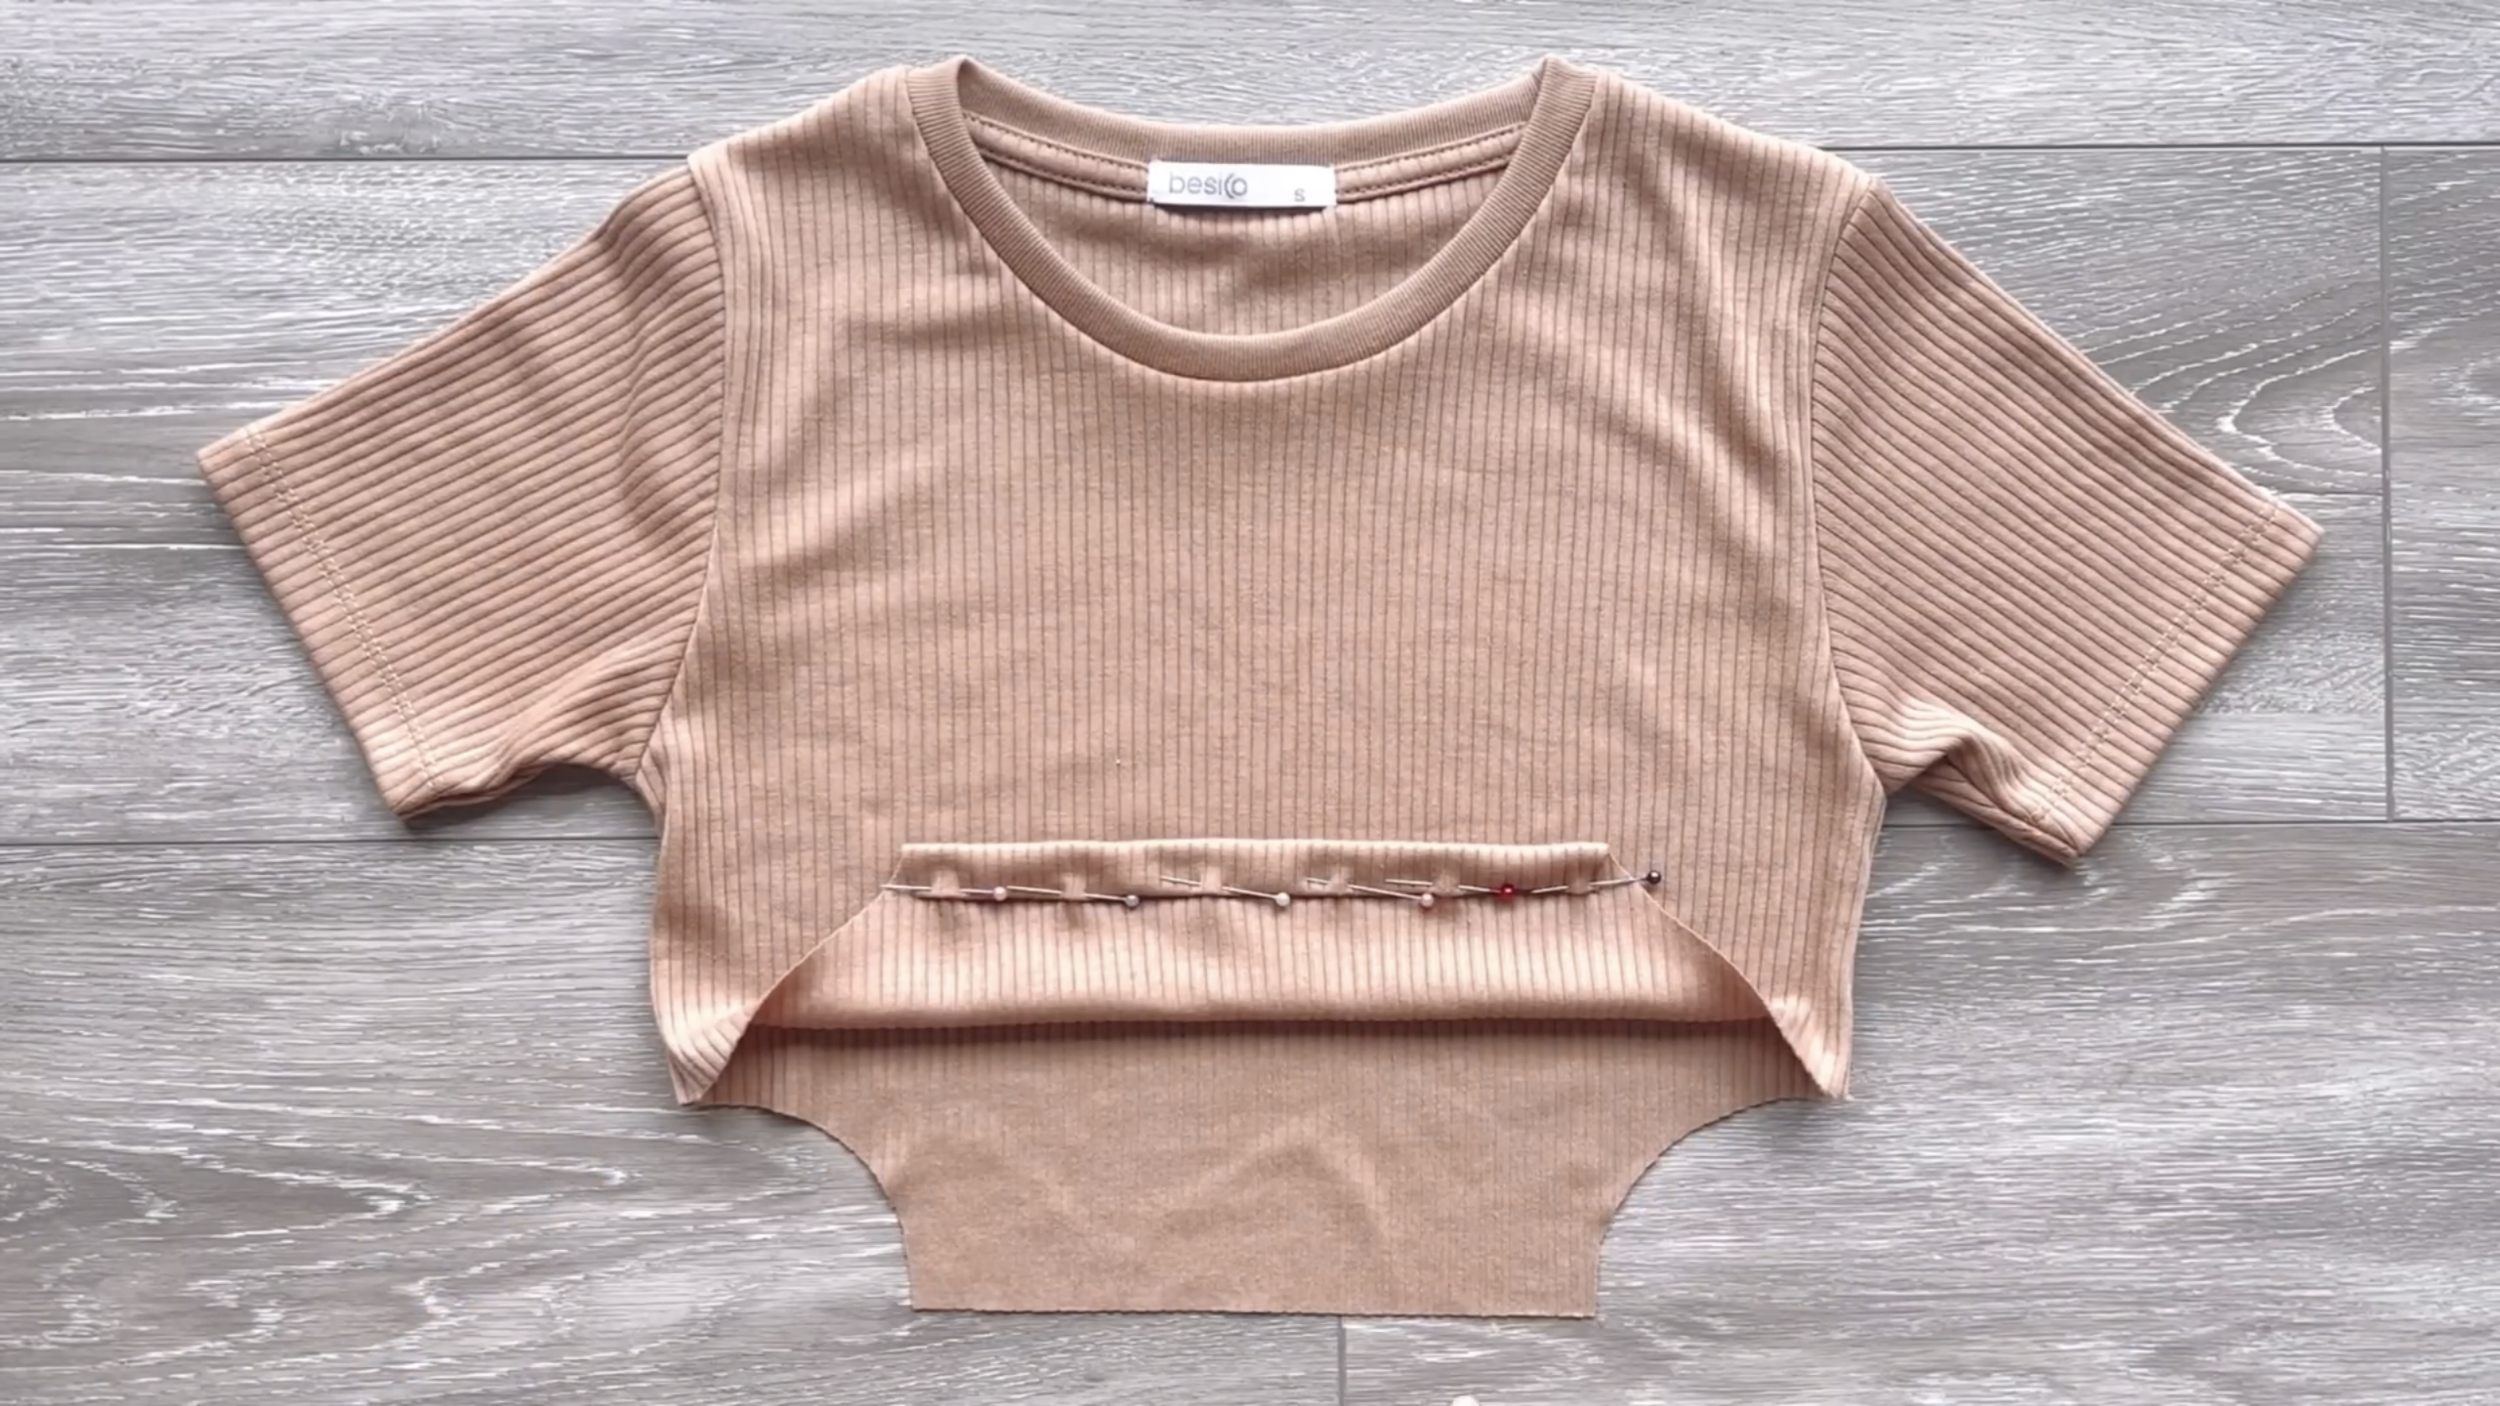
After cutting, start making the cut-out at two sides at the end of the crop top. From the end of the crop top, mark up at 6 cm on the sideline, which is right at the end of your breast.
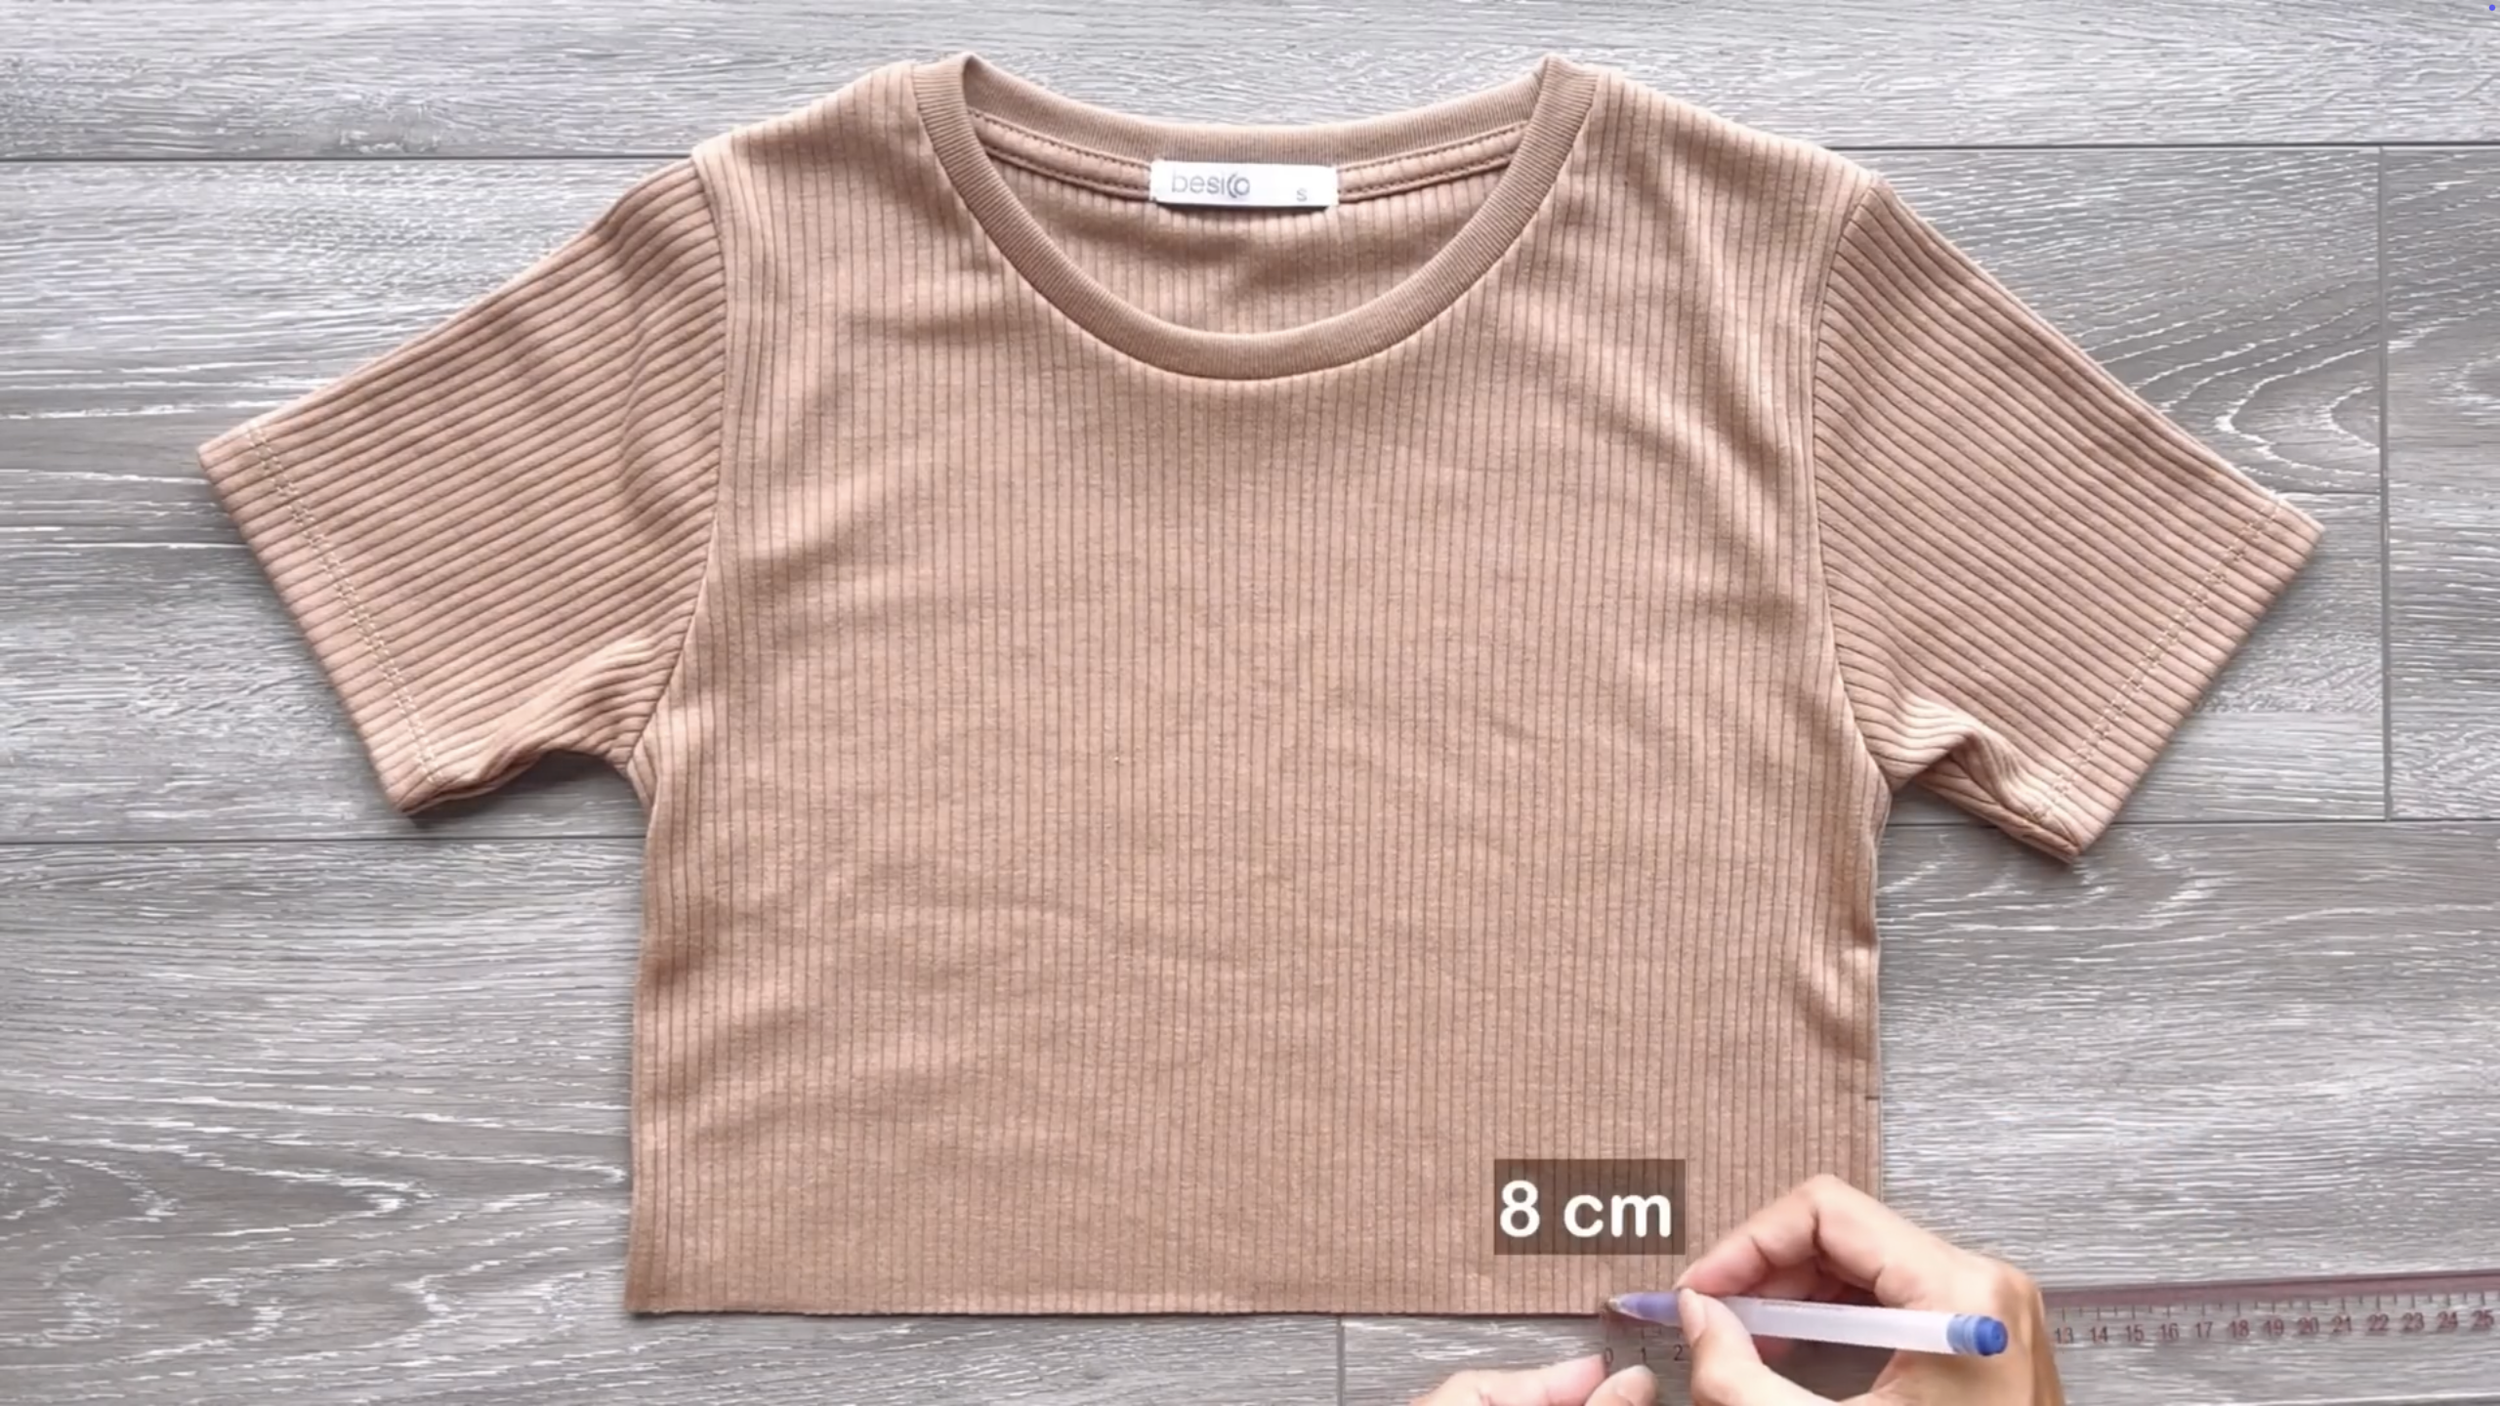
And mark inside 8 cm on the ending line so the width between two marks on the ending line will be 24 cm, which is shorter than half of your waist size.
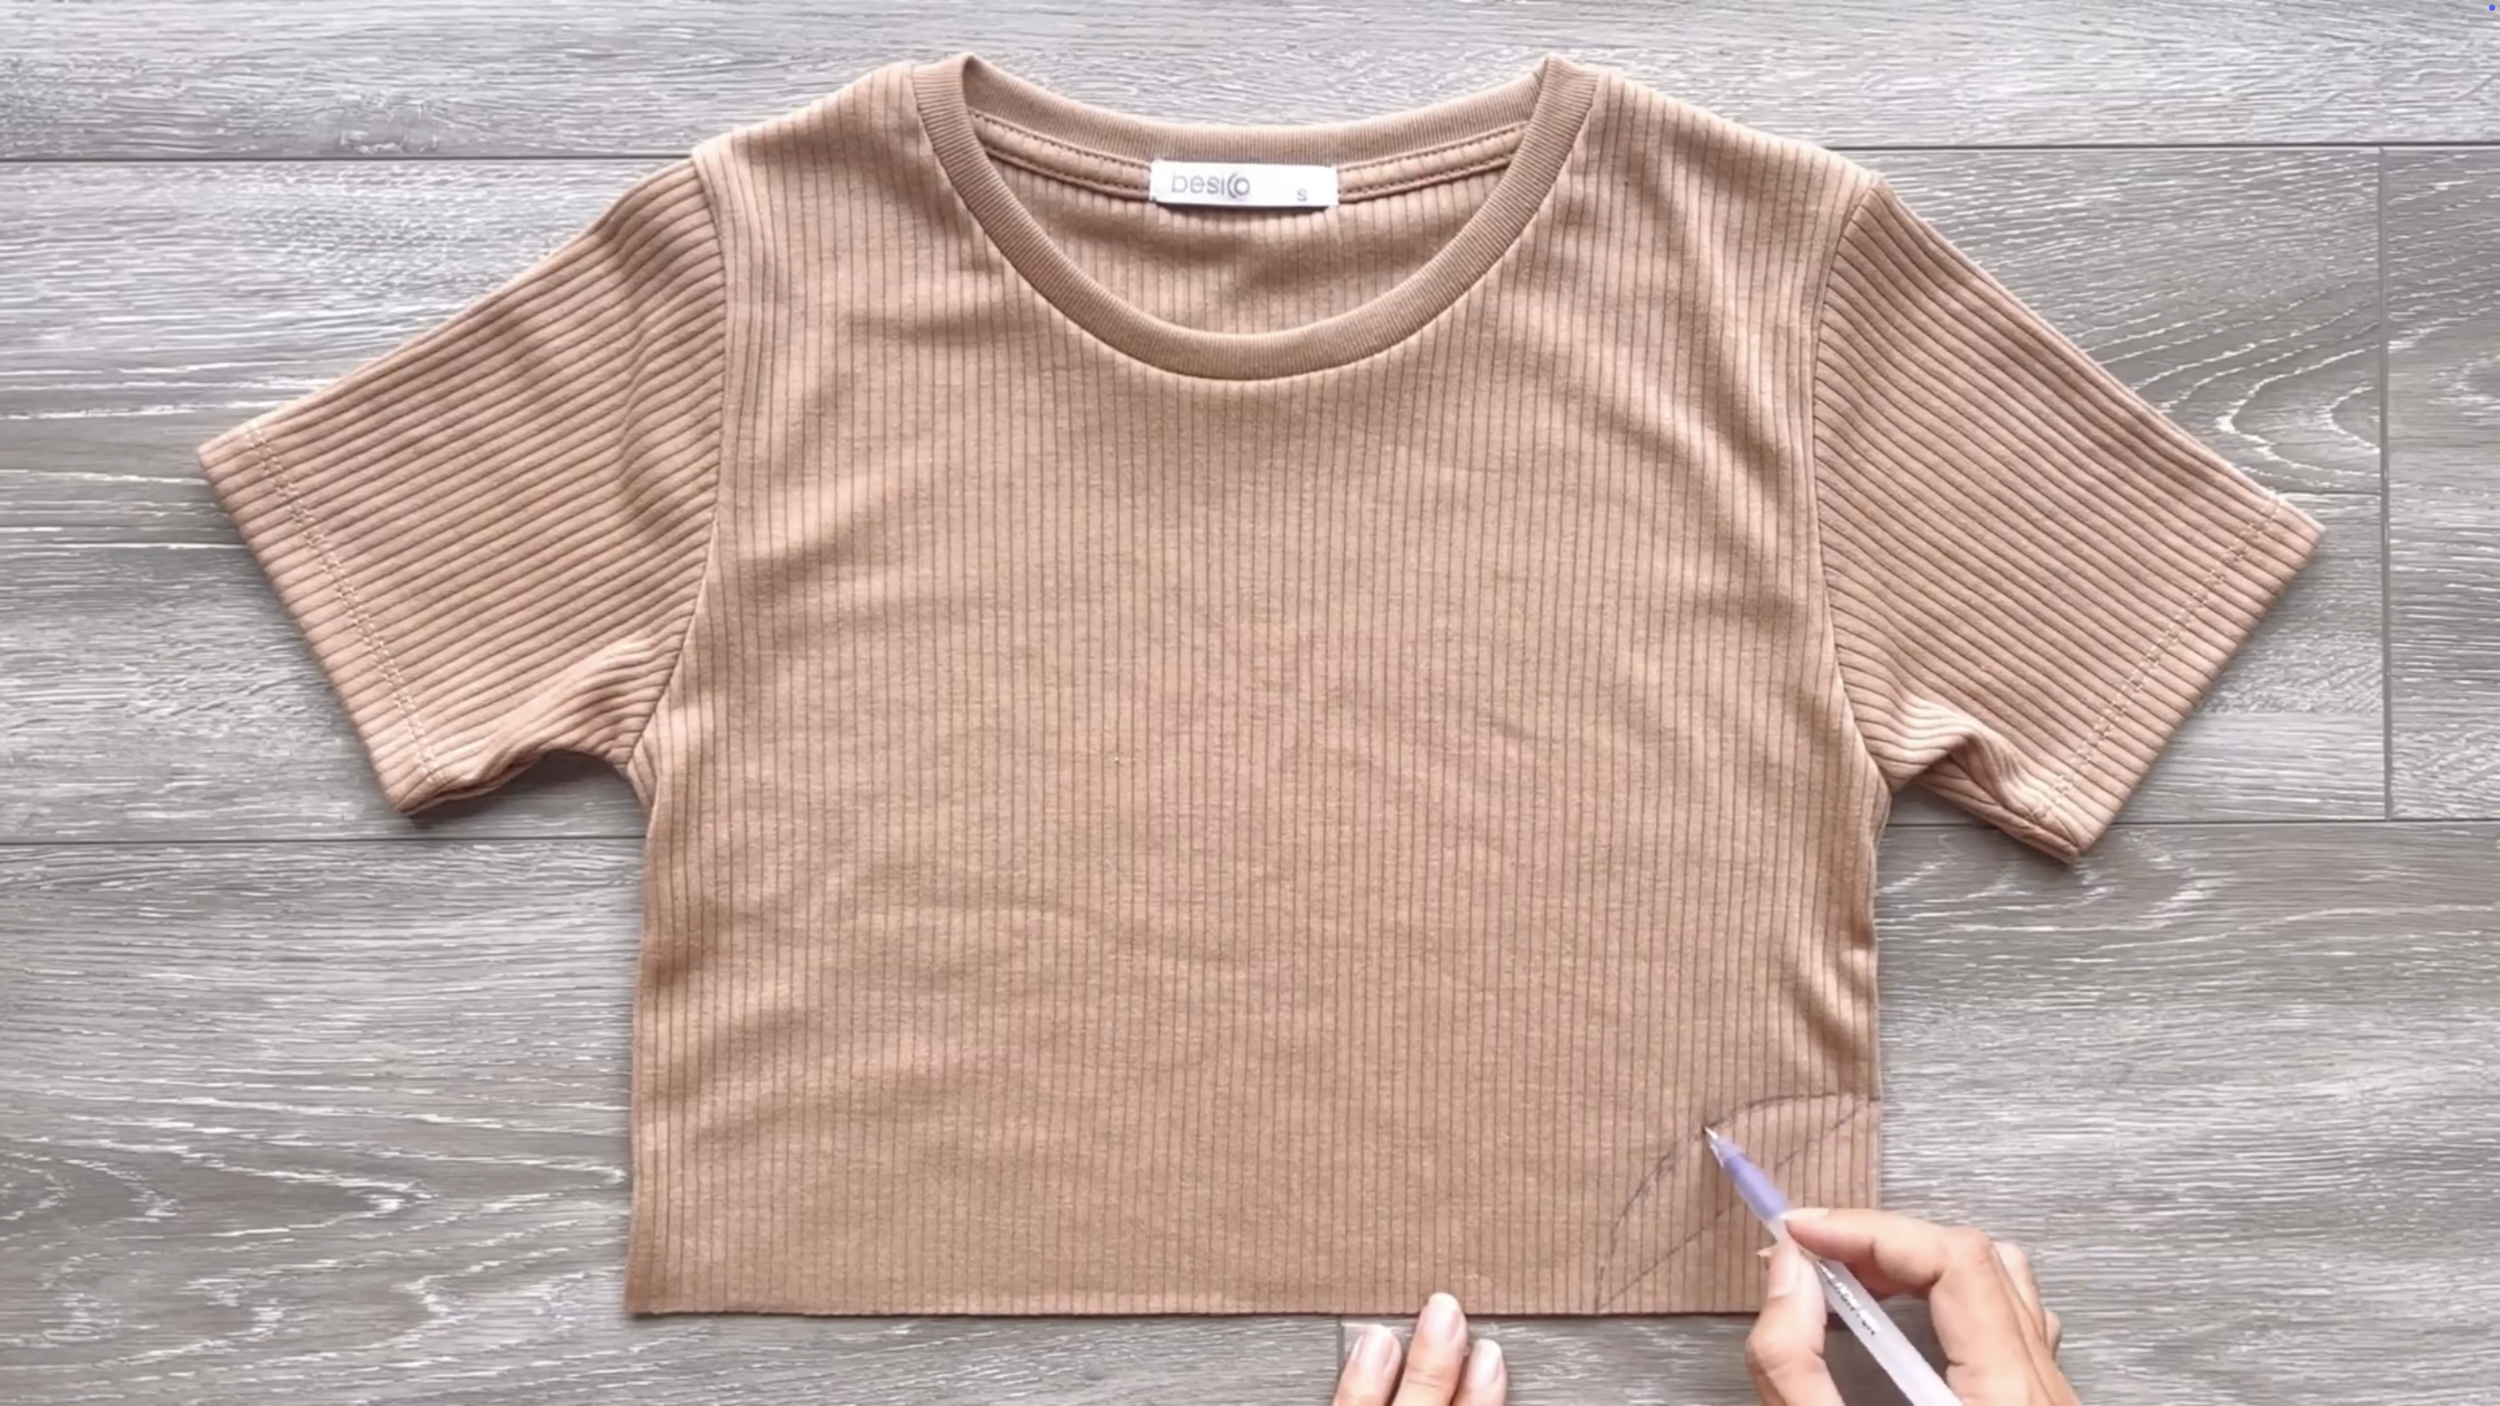
Then, connect two marks together. Based on that line, draw a curved line to finish the cut-out at one side of the crop top.
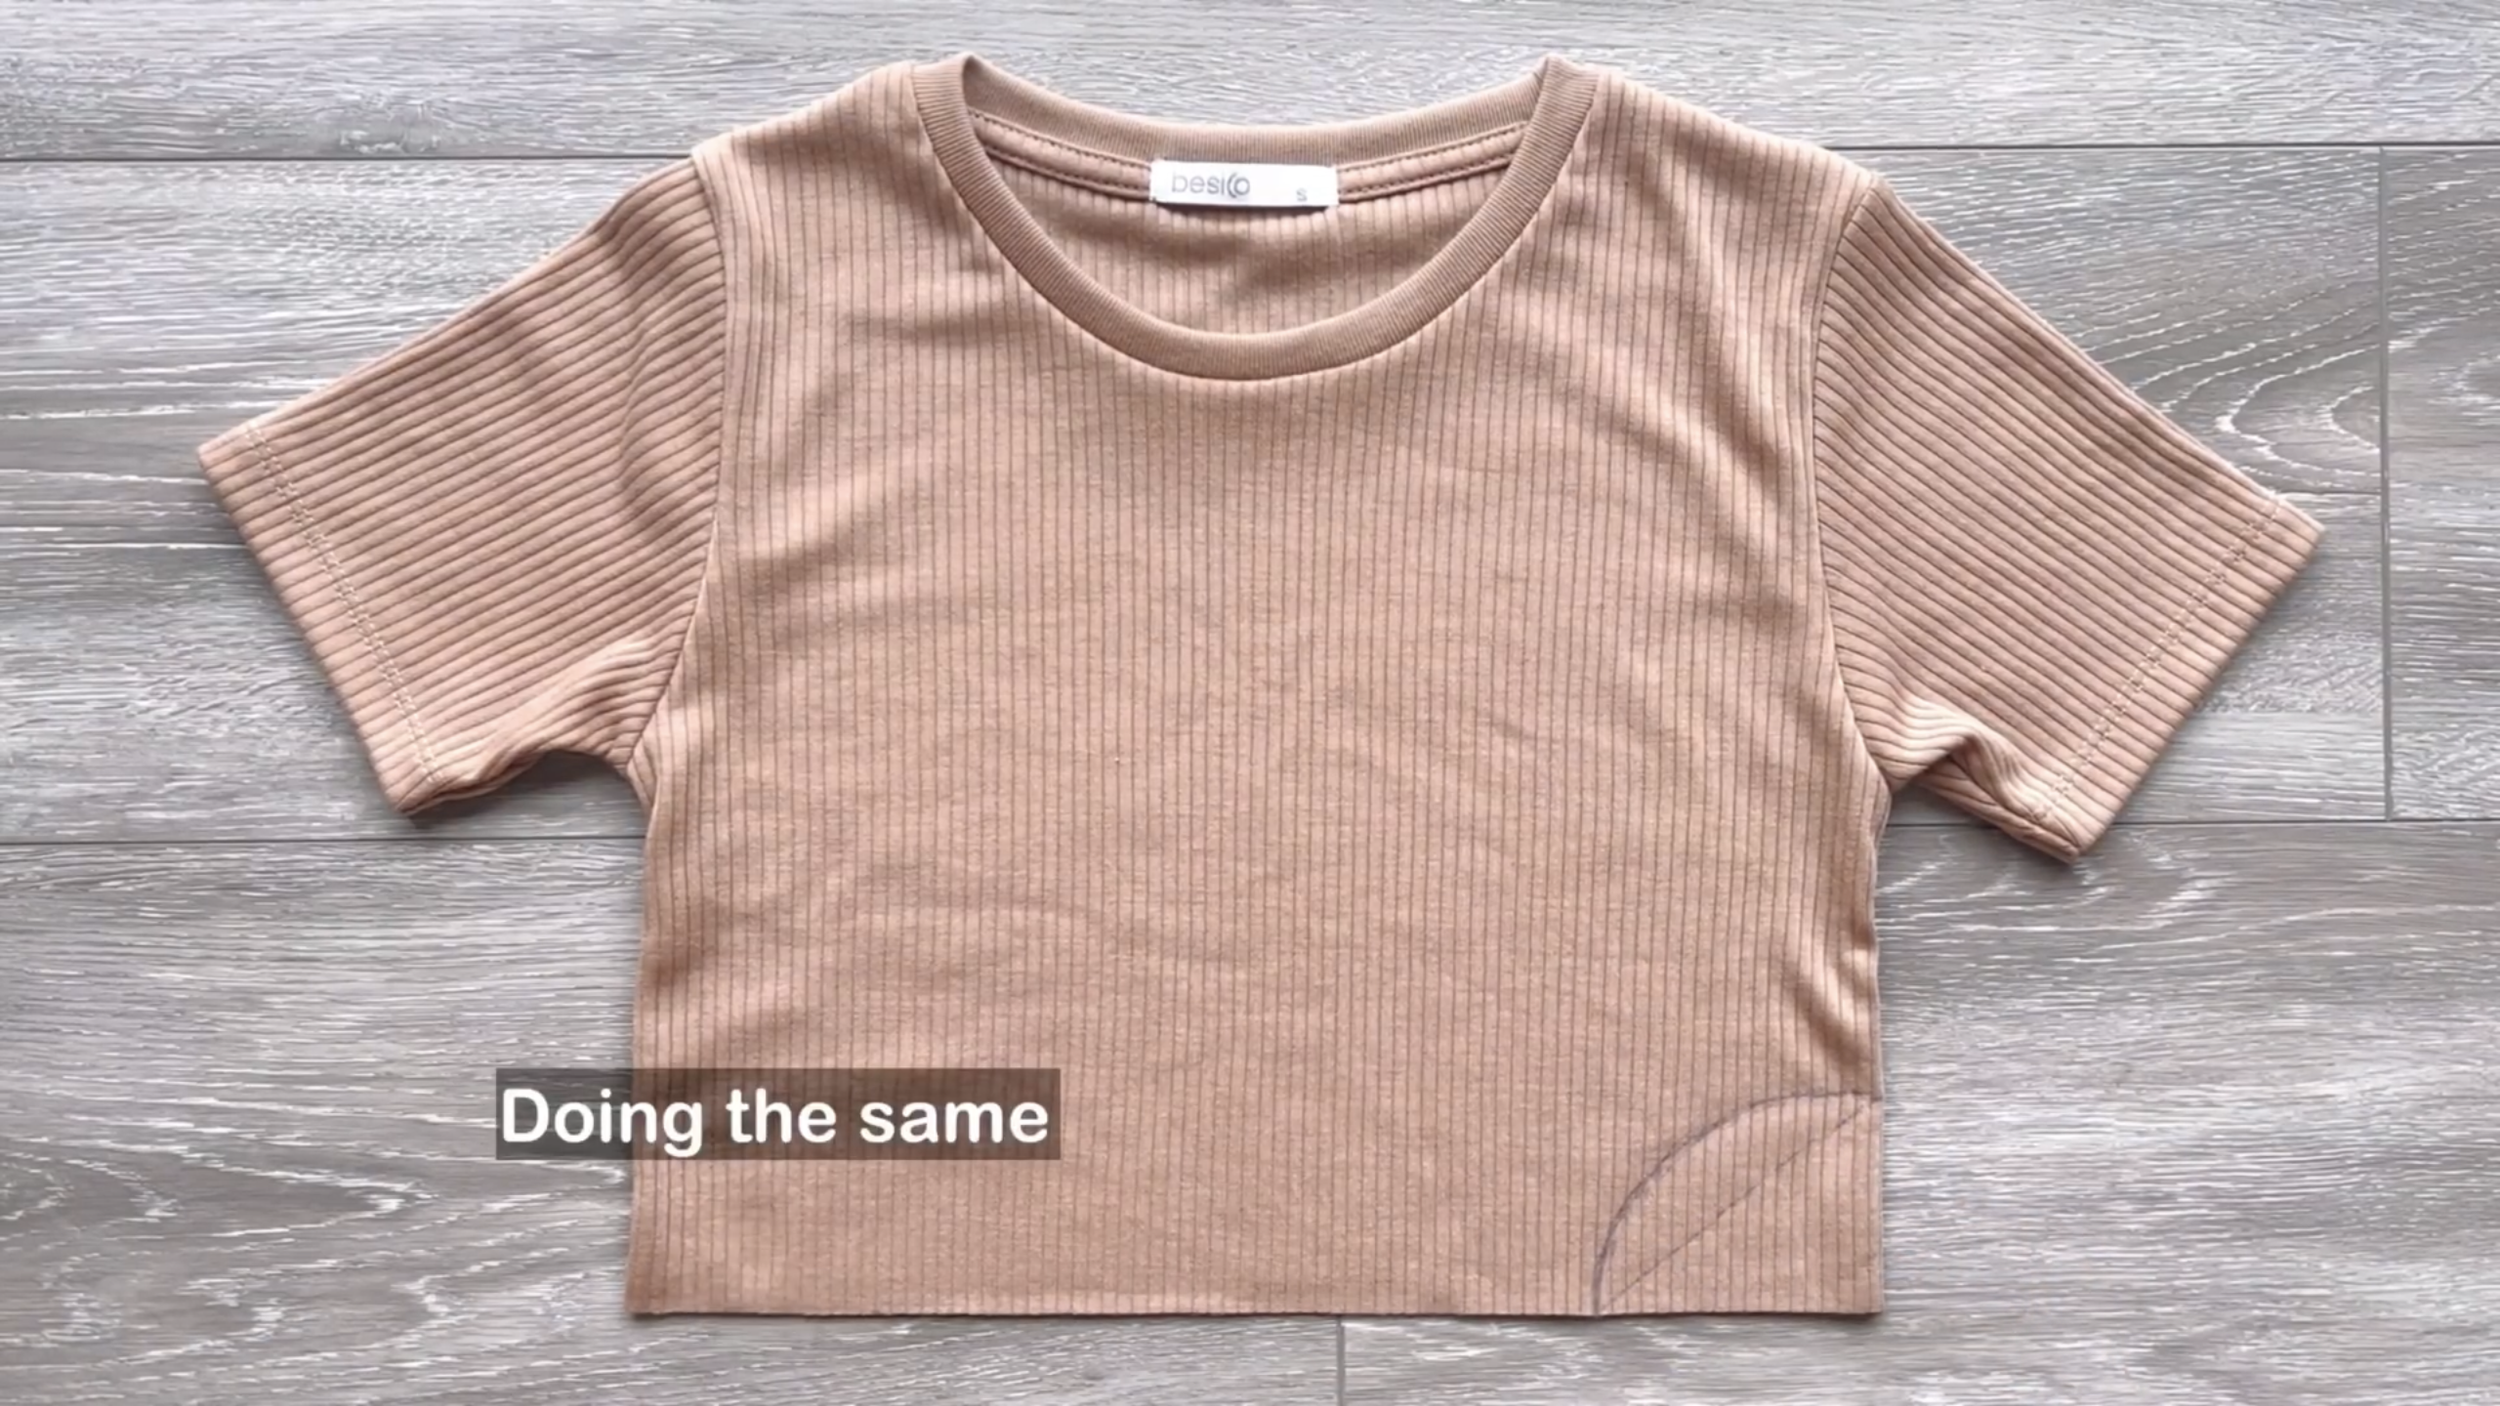
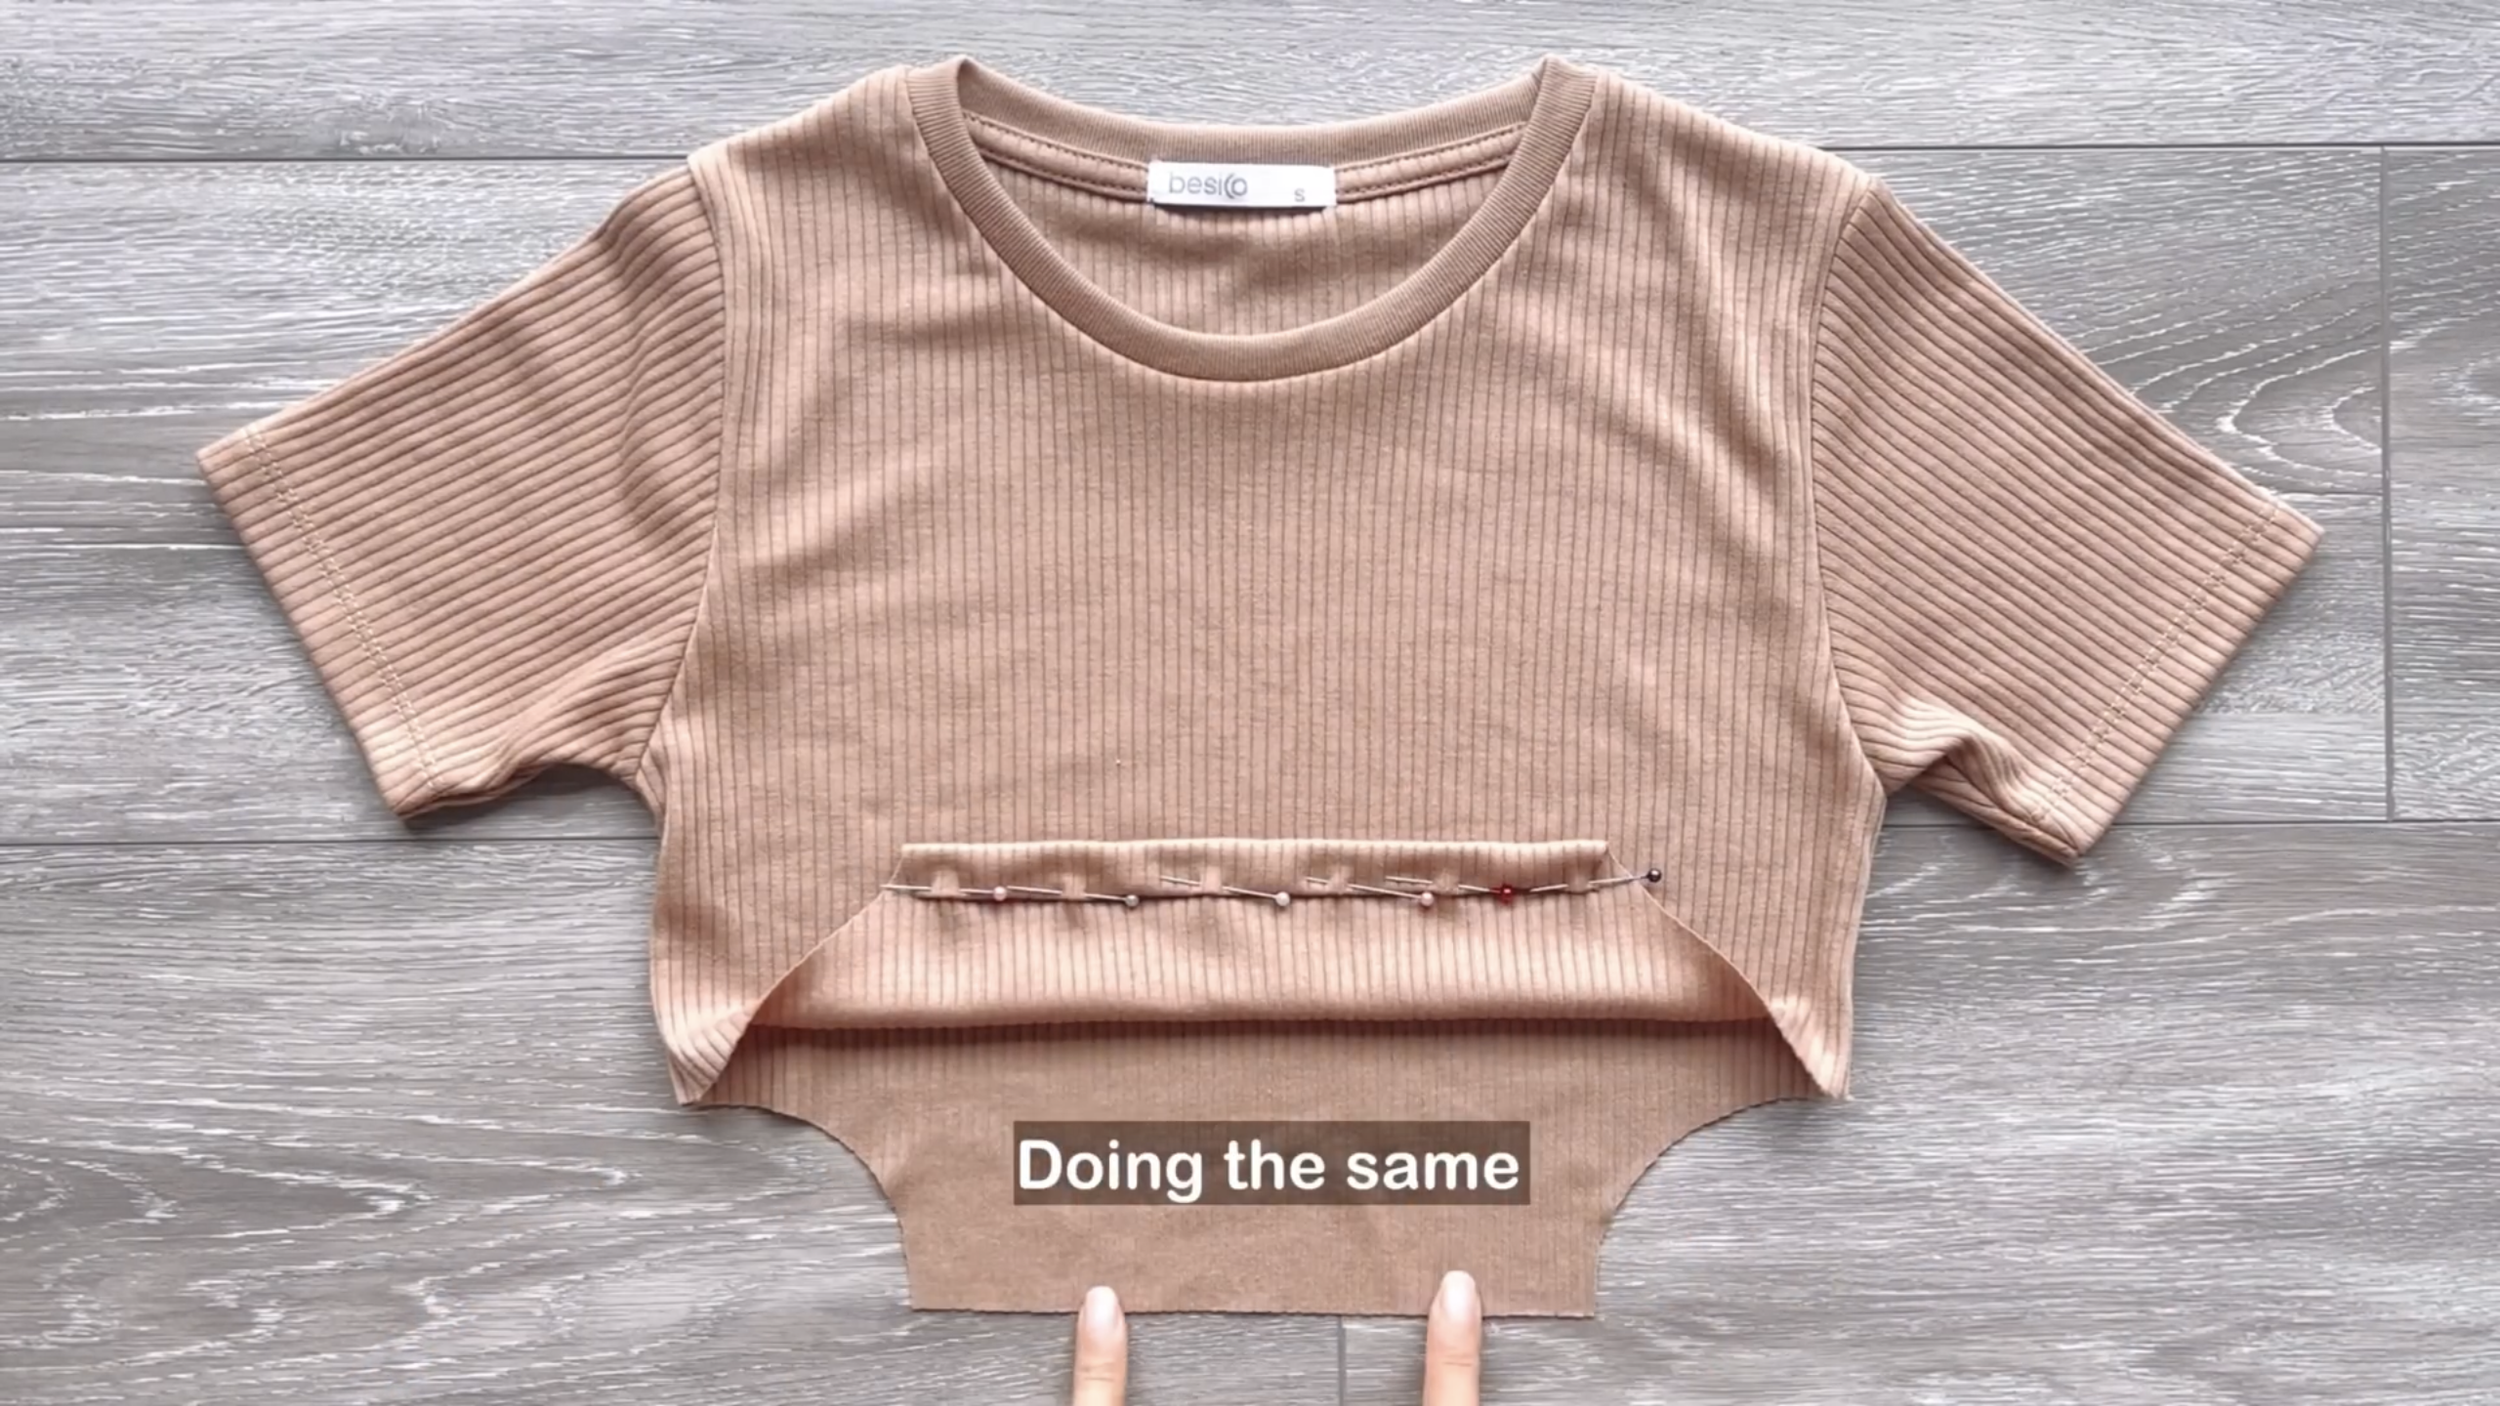
Do the same for the other side.
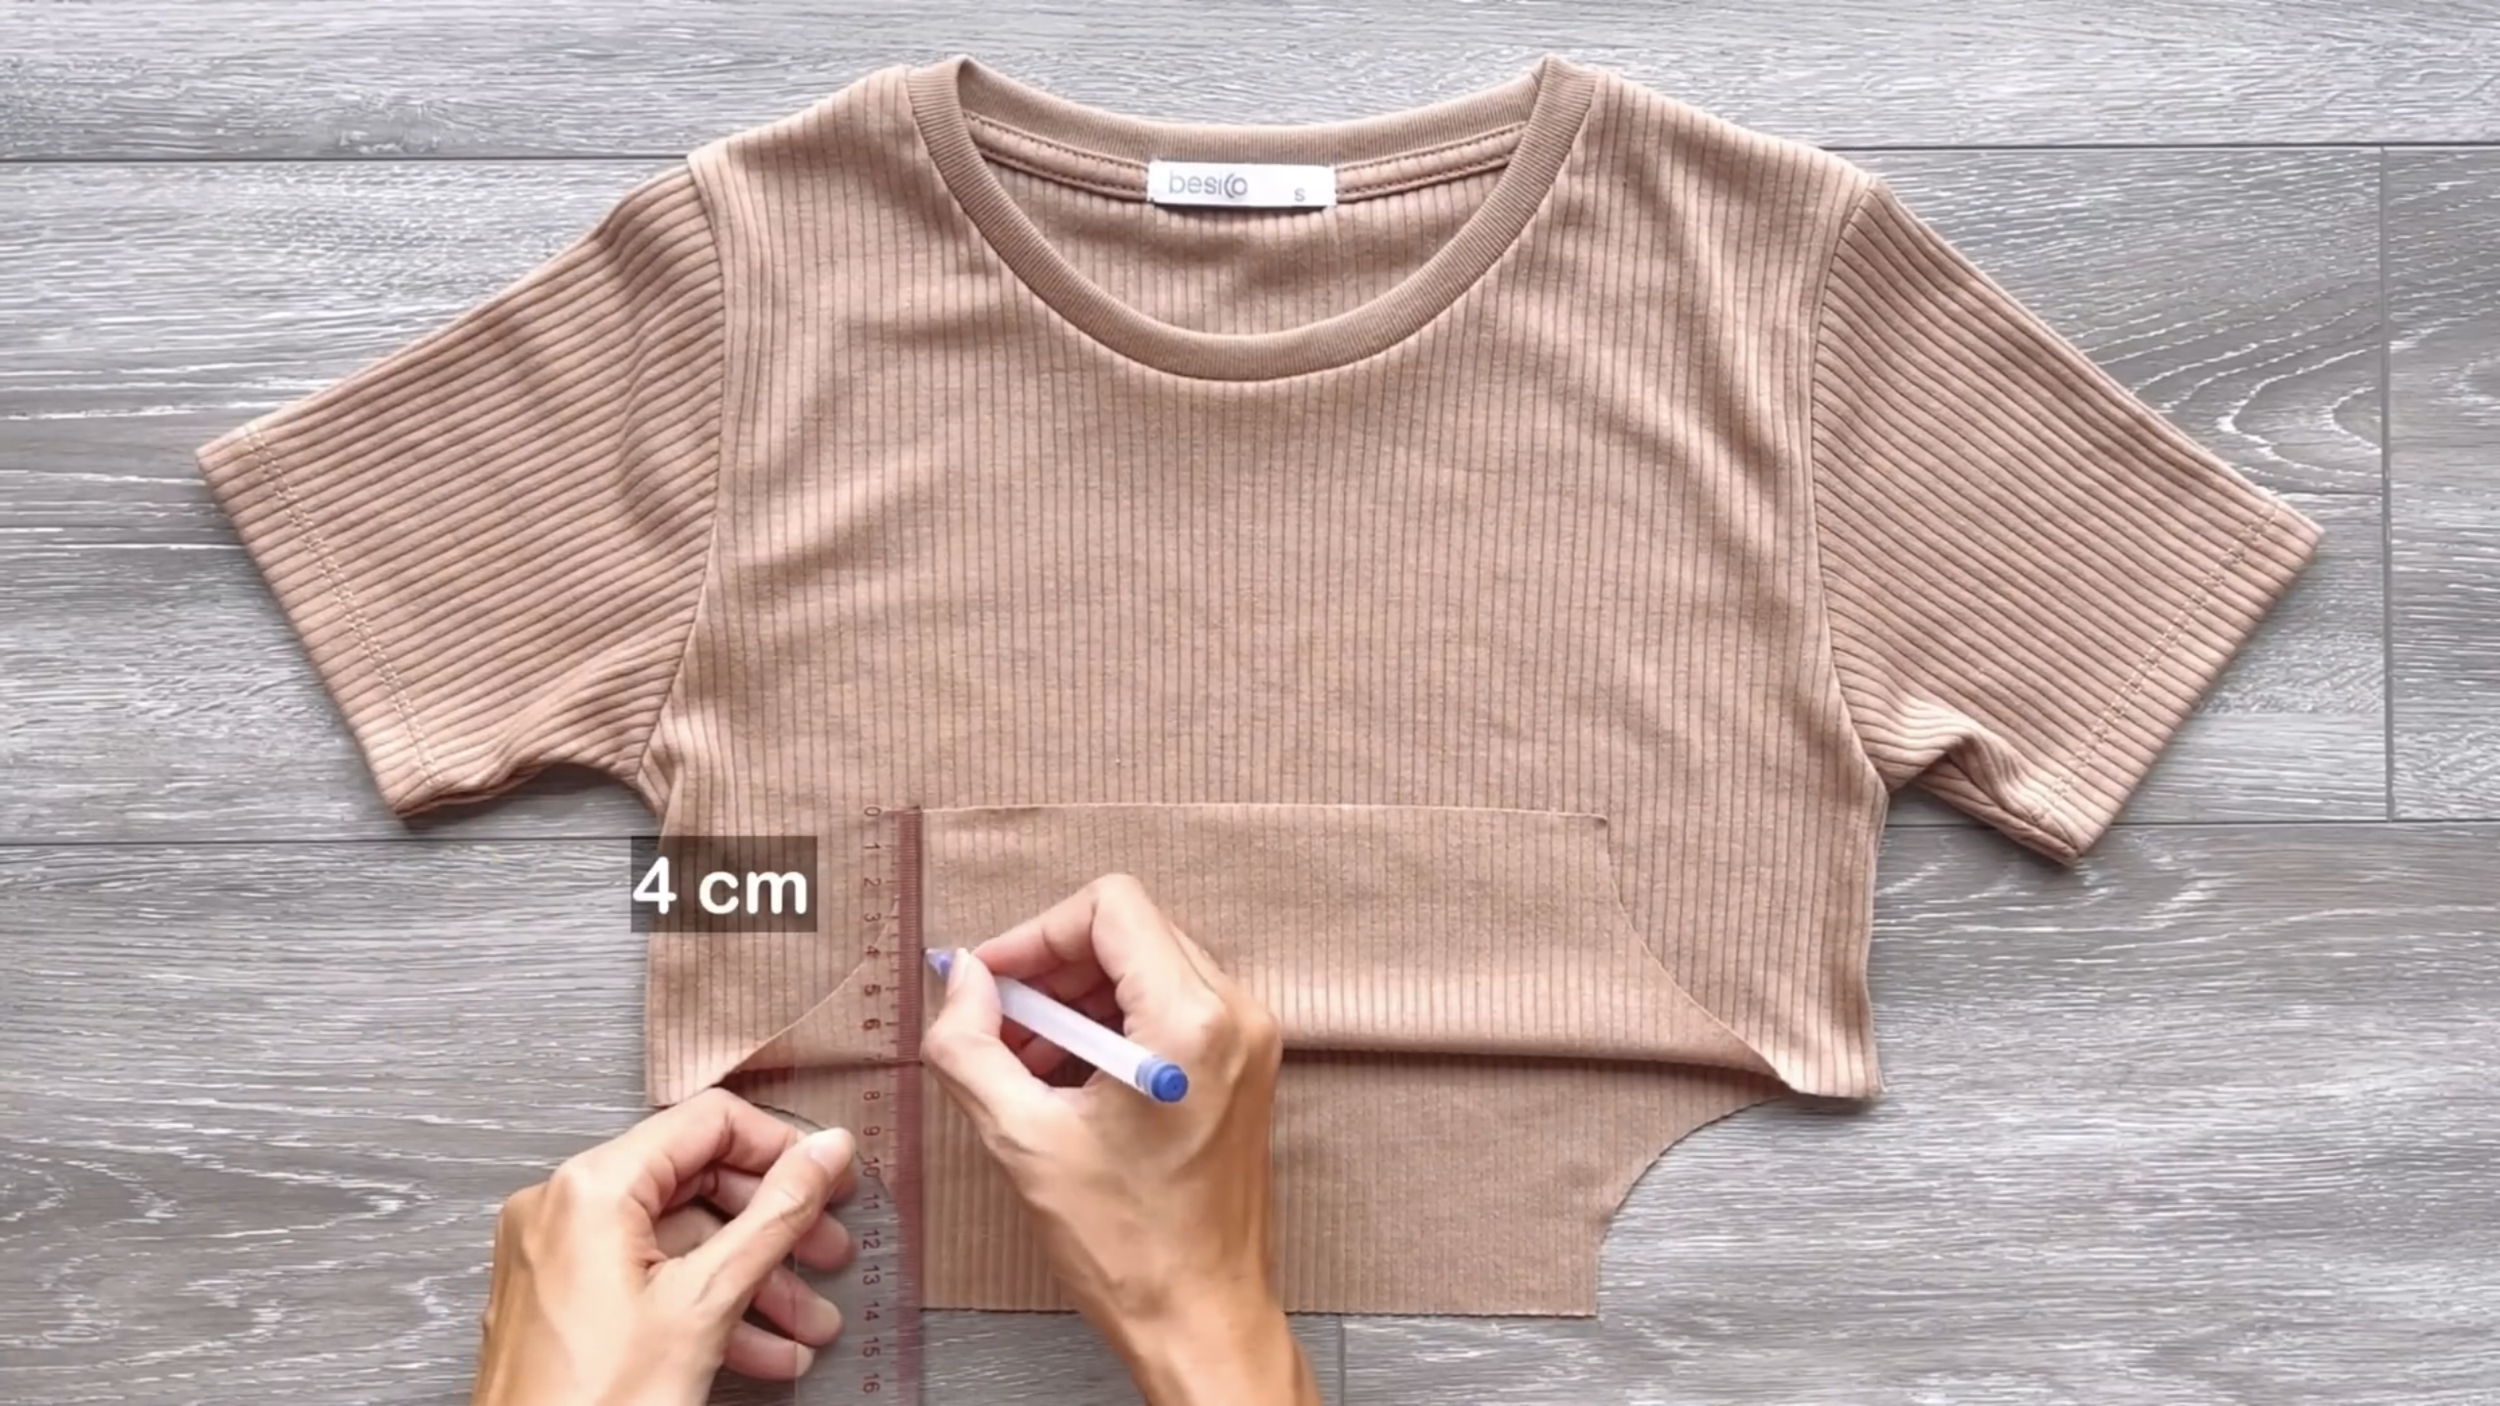
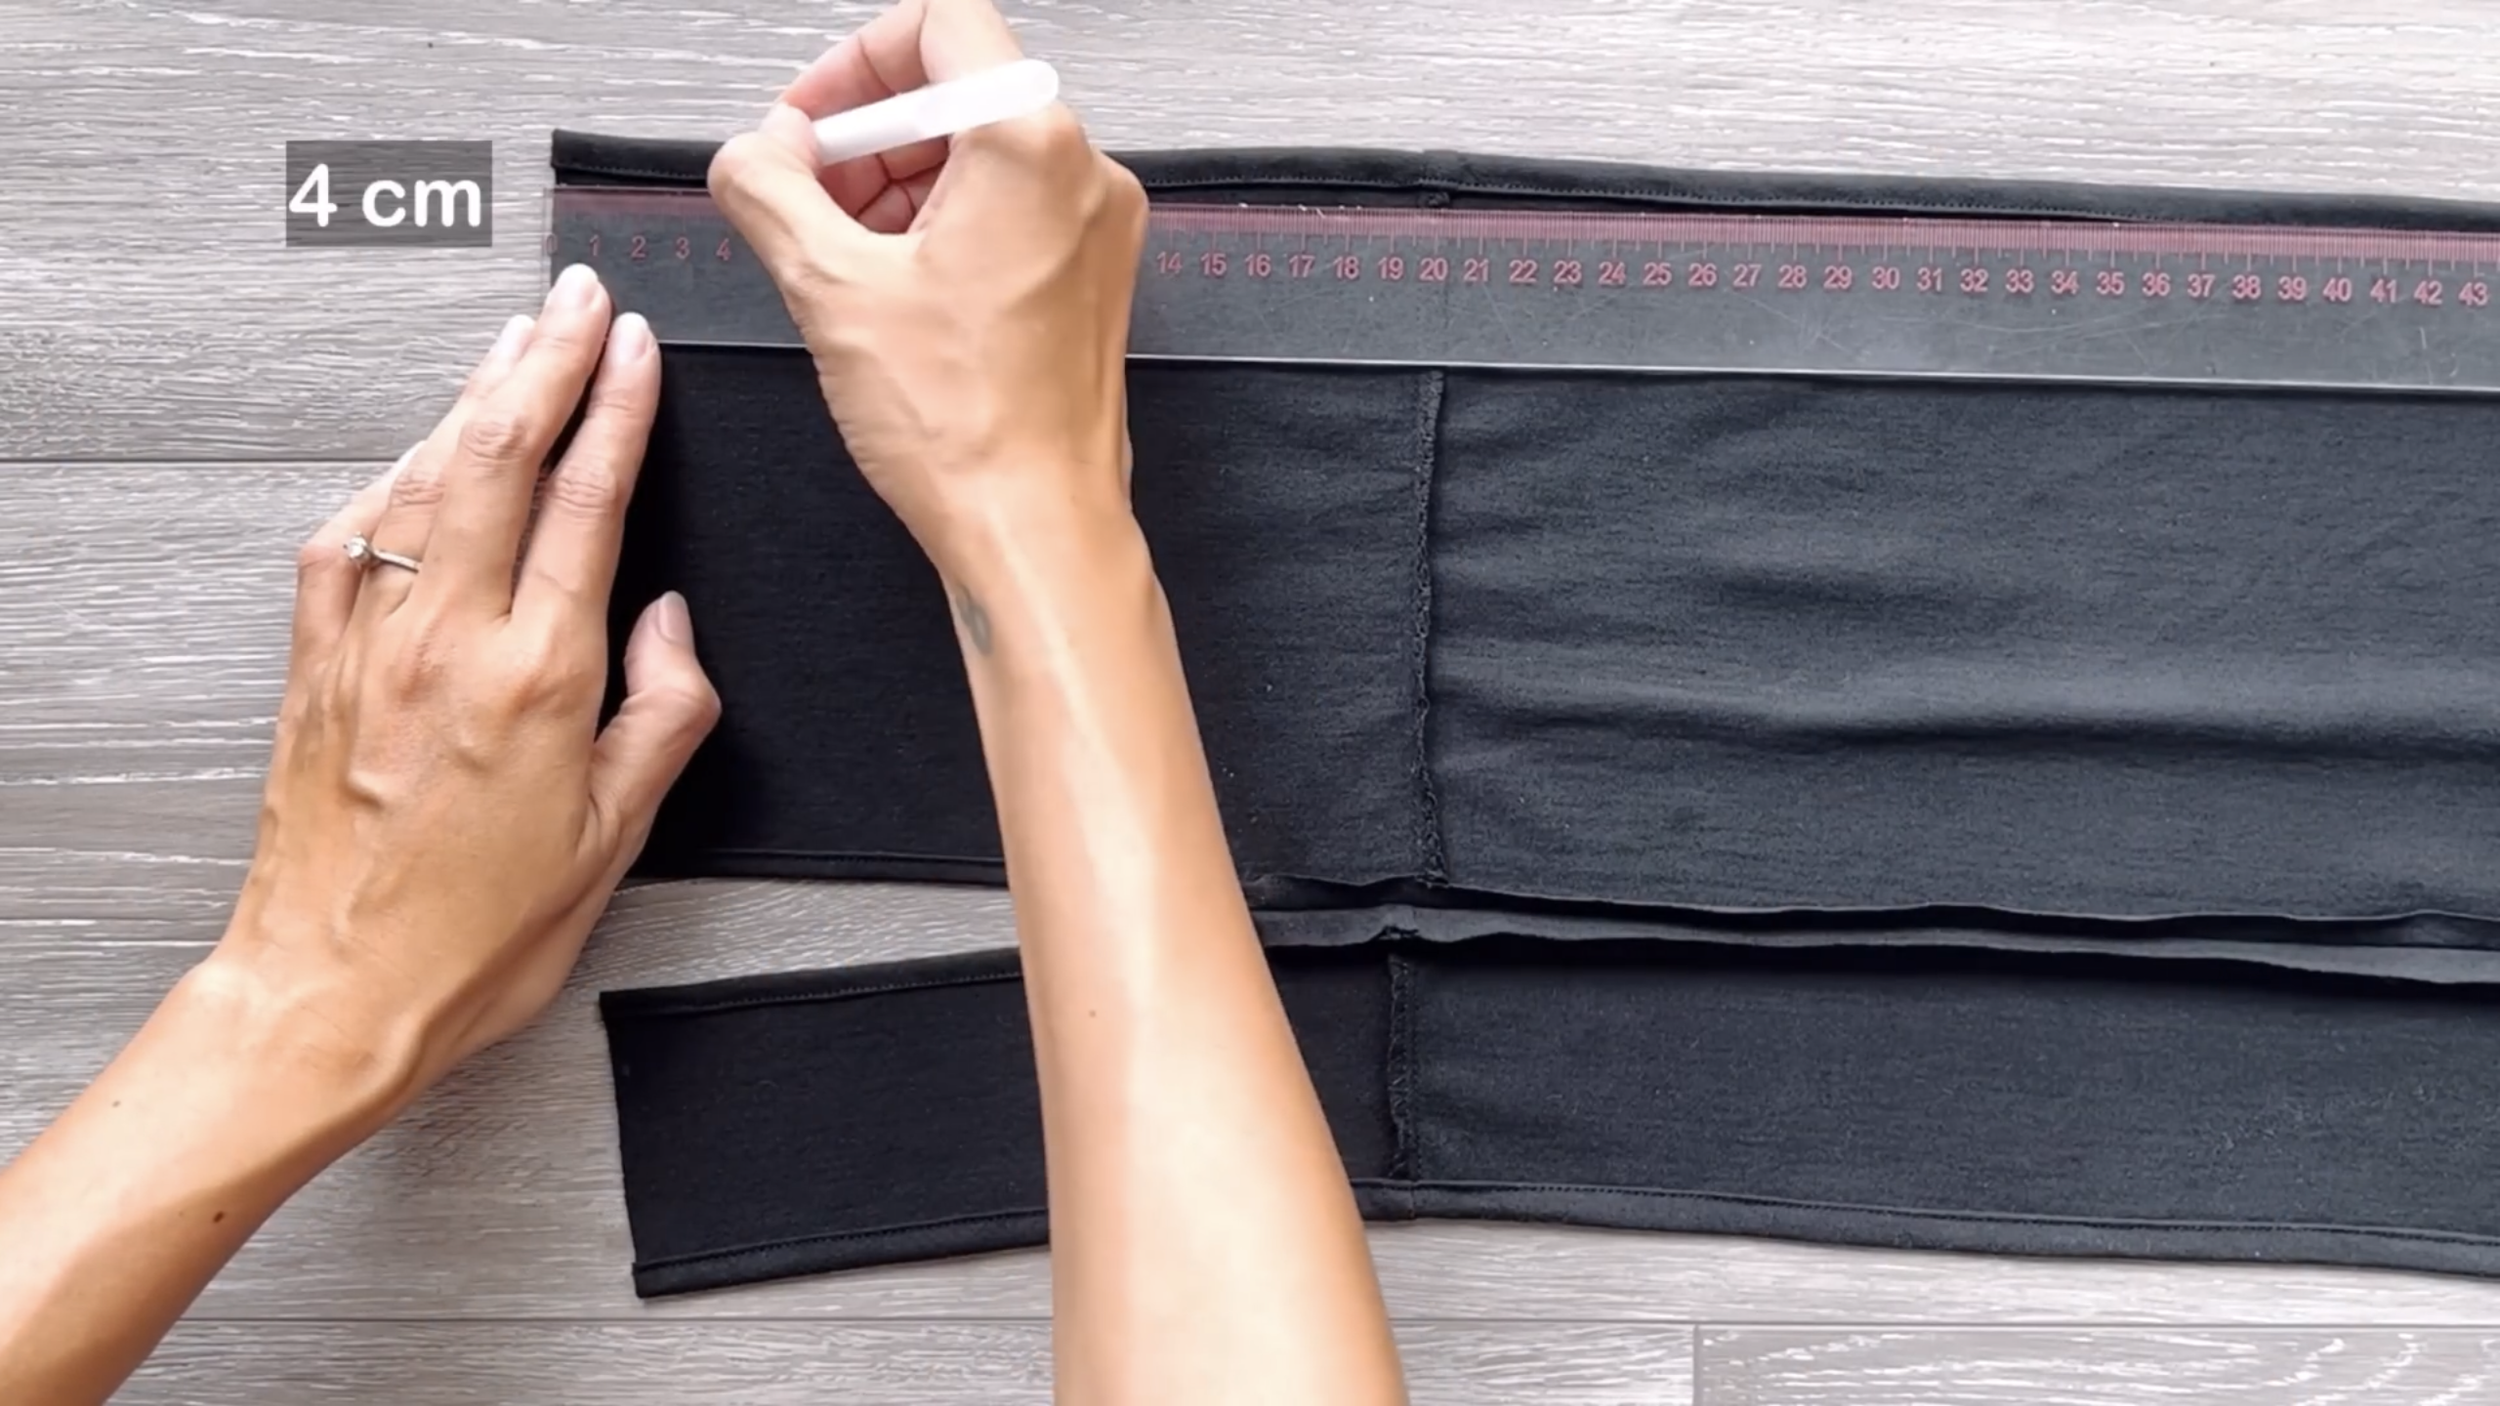
At the ending line, draw a line 4 cm above it.
After that, fold the end fabric inside around 0.5 cm first, then keep folding it to the line drawn before that and sew to finish the end of the crop top.
Make two seams to make a nice ending.
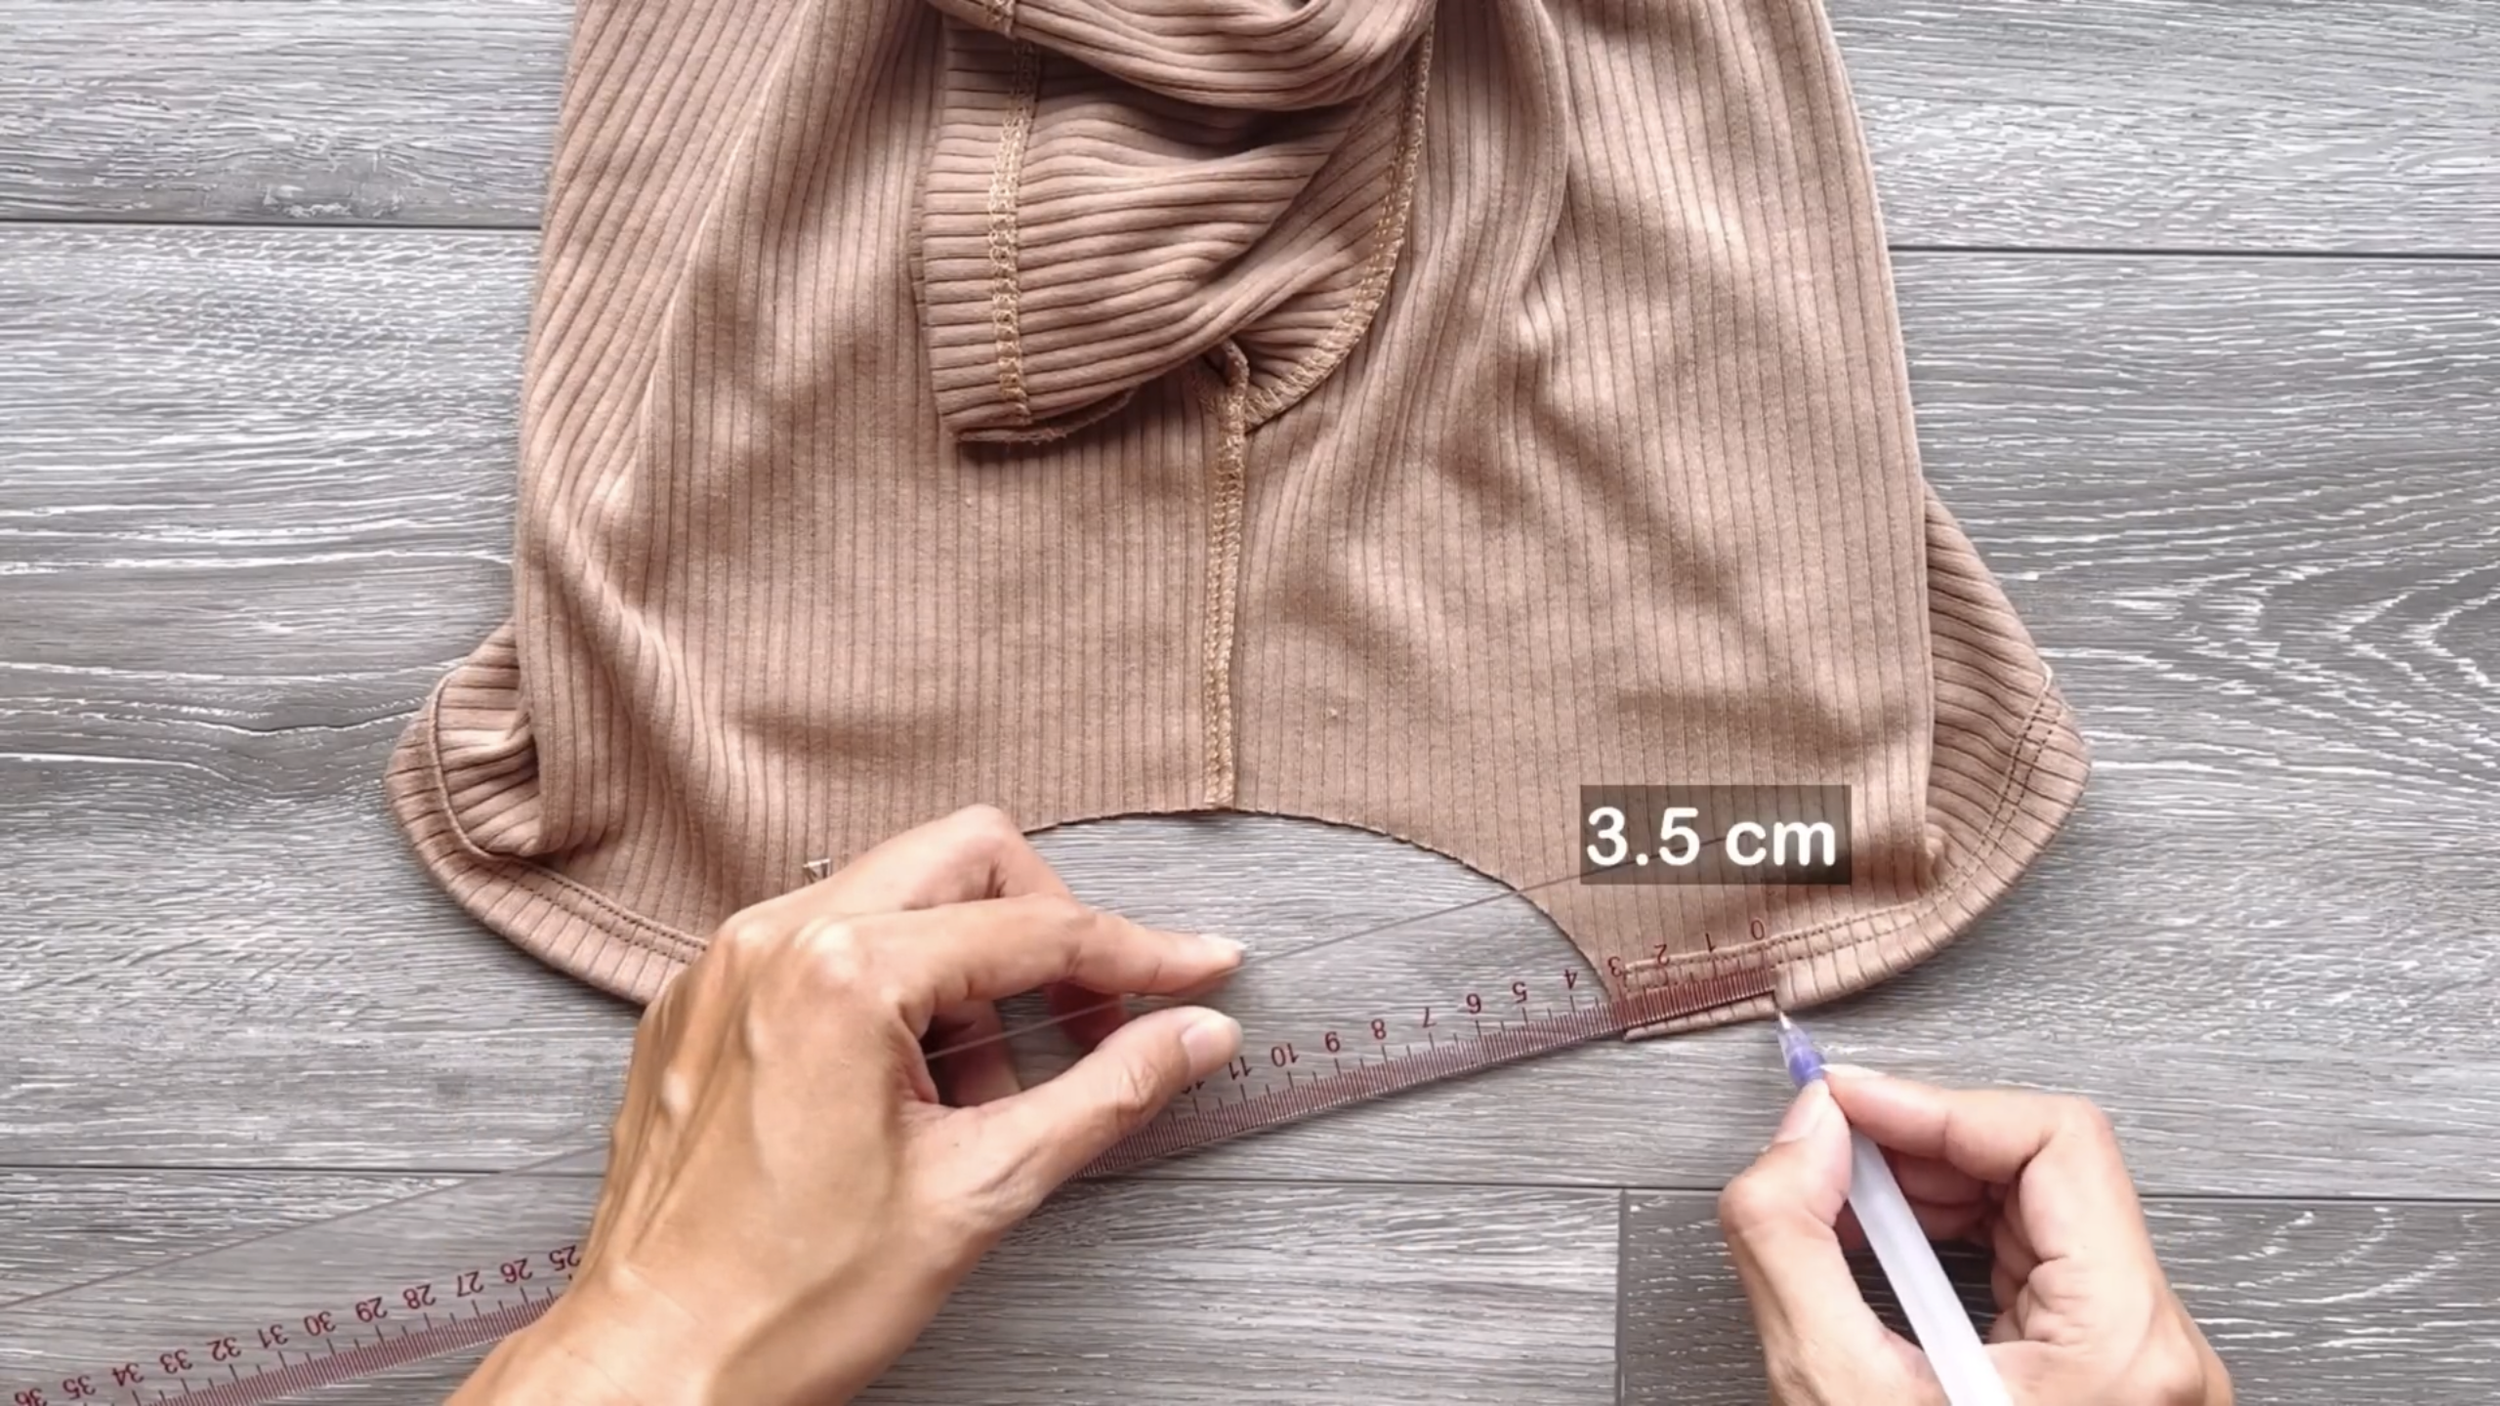
At the curved line, draw another curved line at 3.5 cm from the edge of it.
Then, fold the ending fabric inside around 0.5 cm first, then keep folding it to the curve line drawn before that.

Then, sew to create a fabric hole.
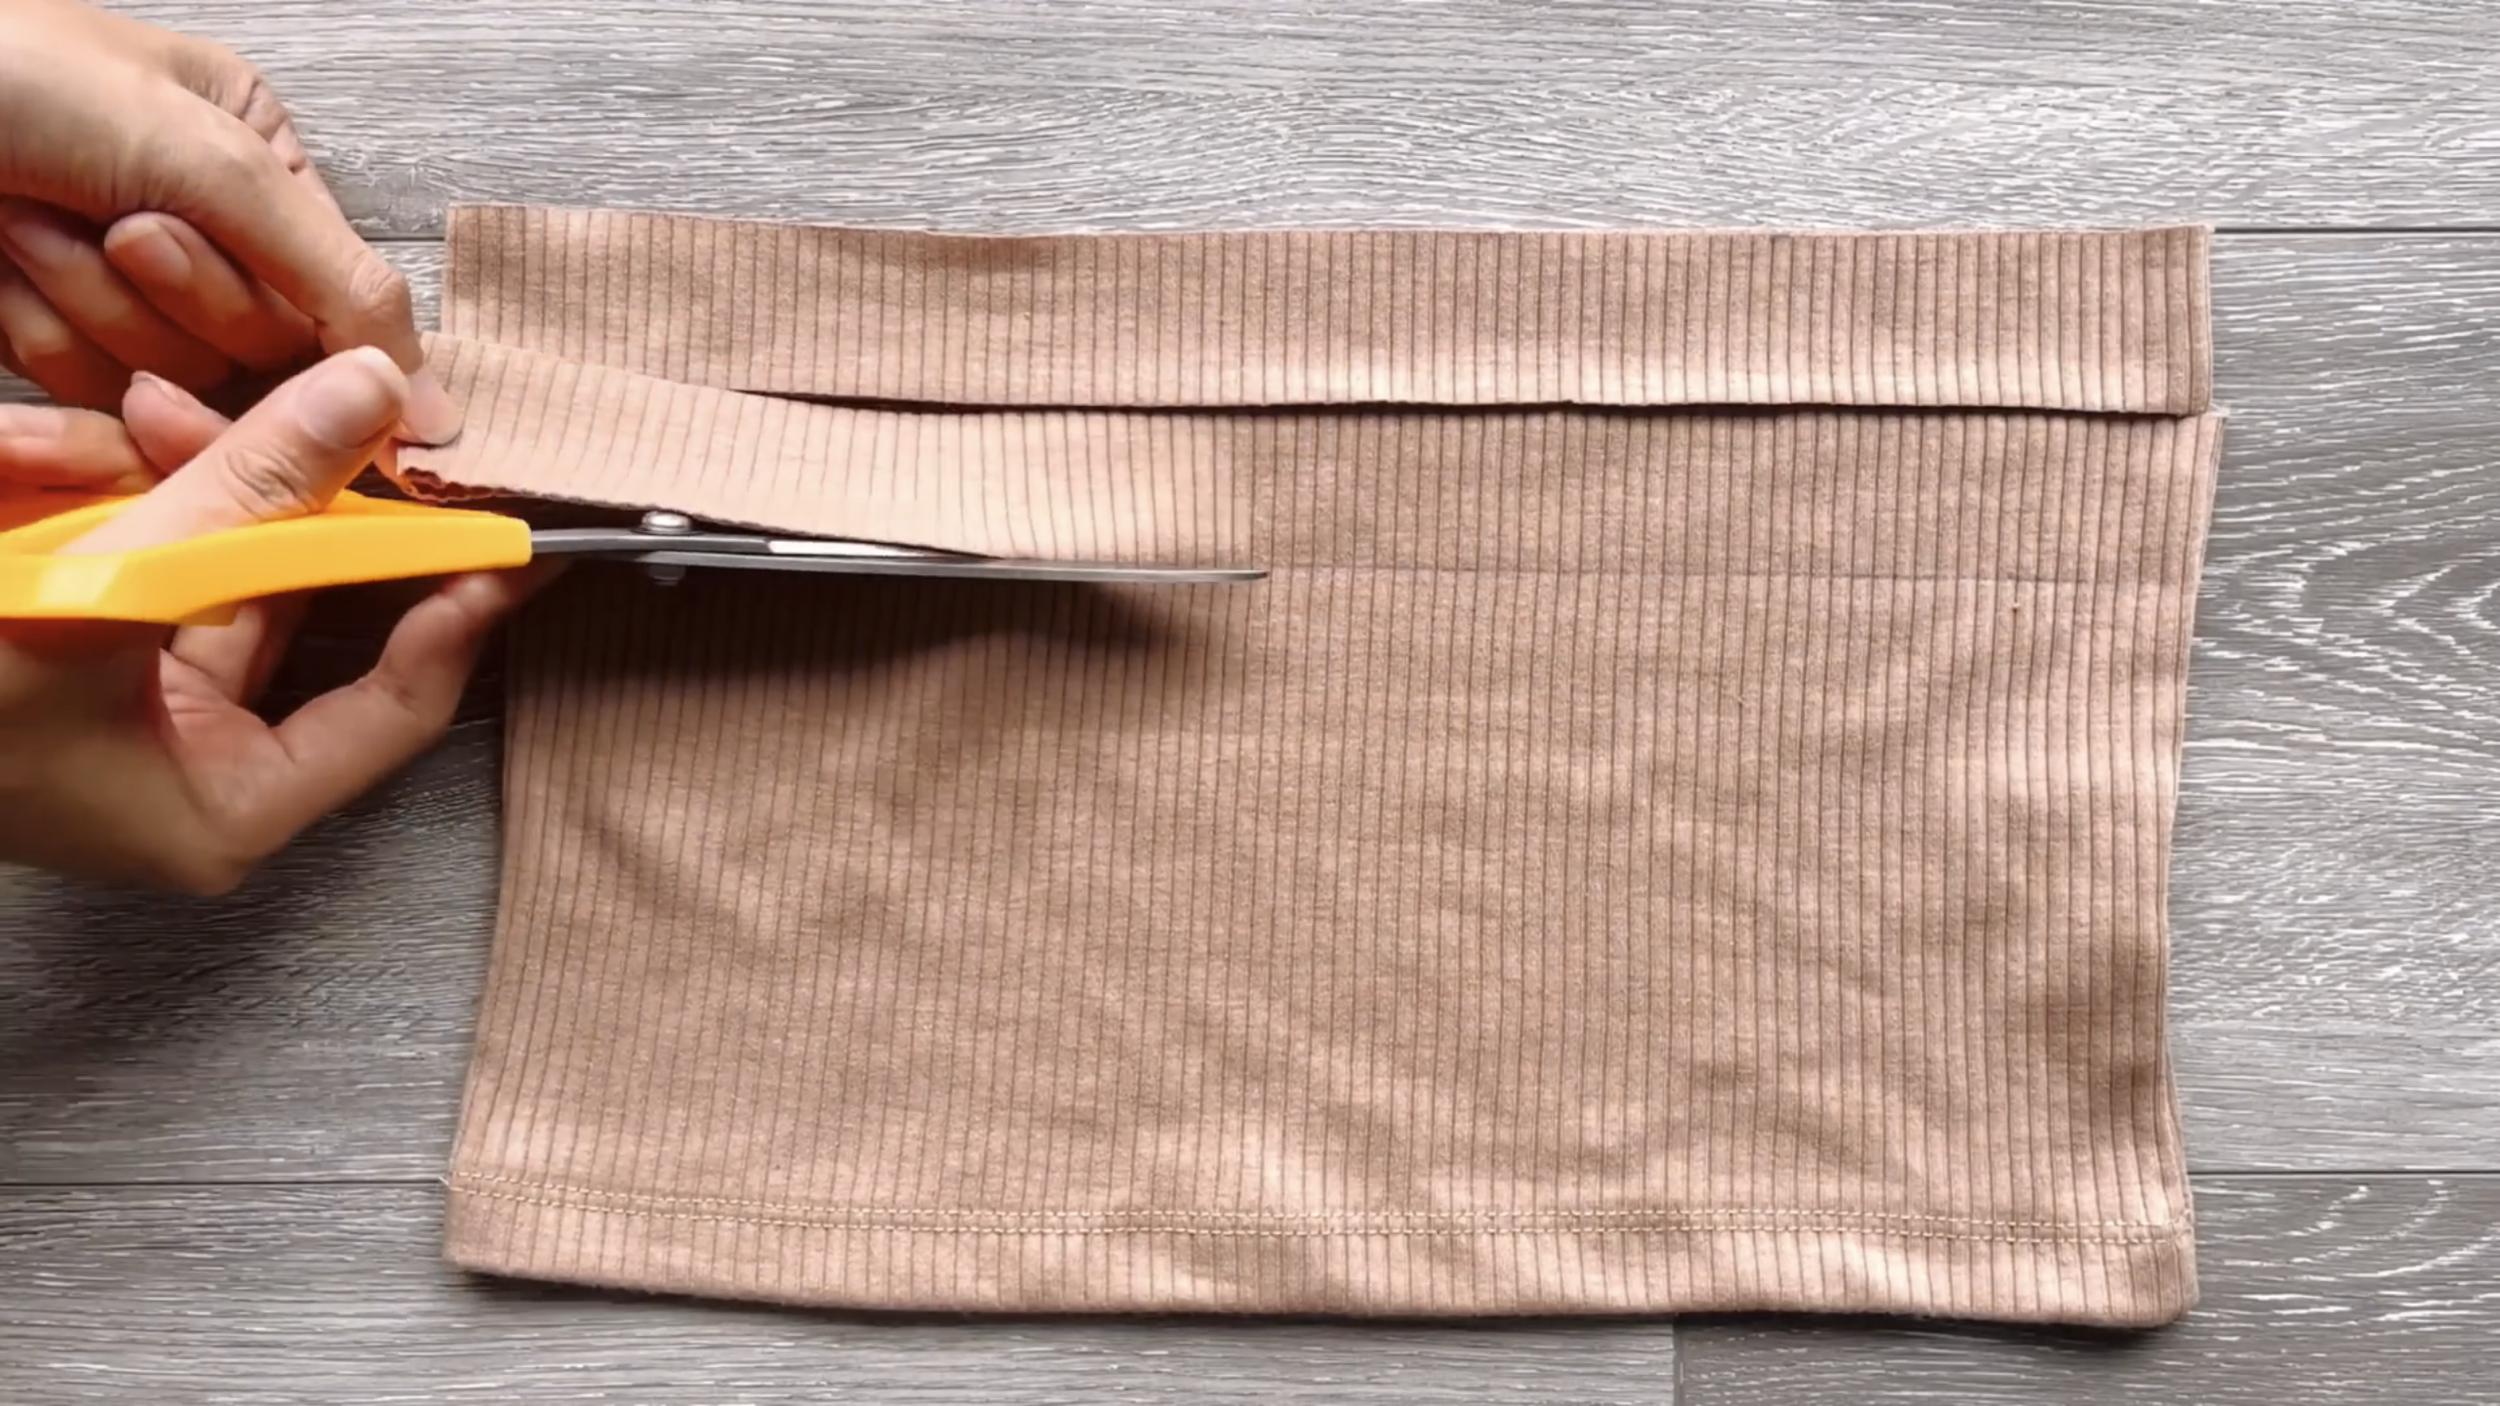
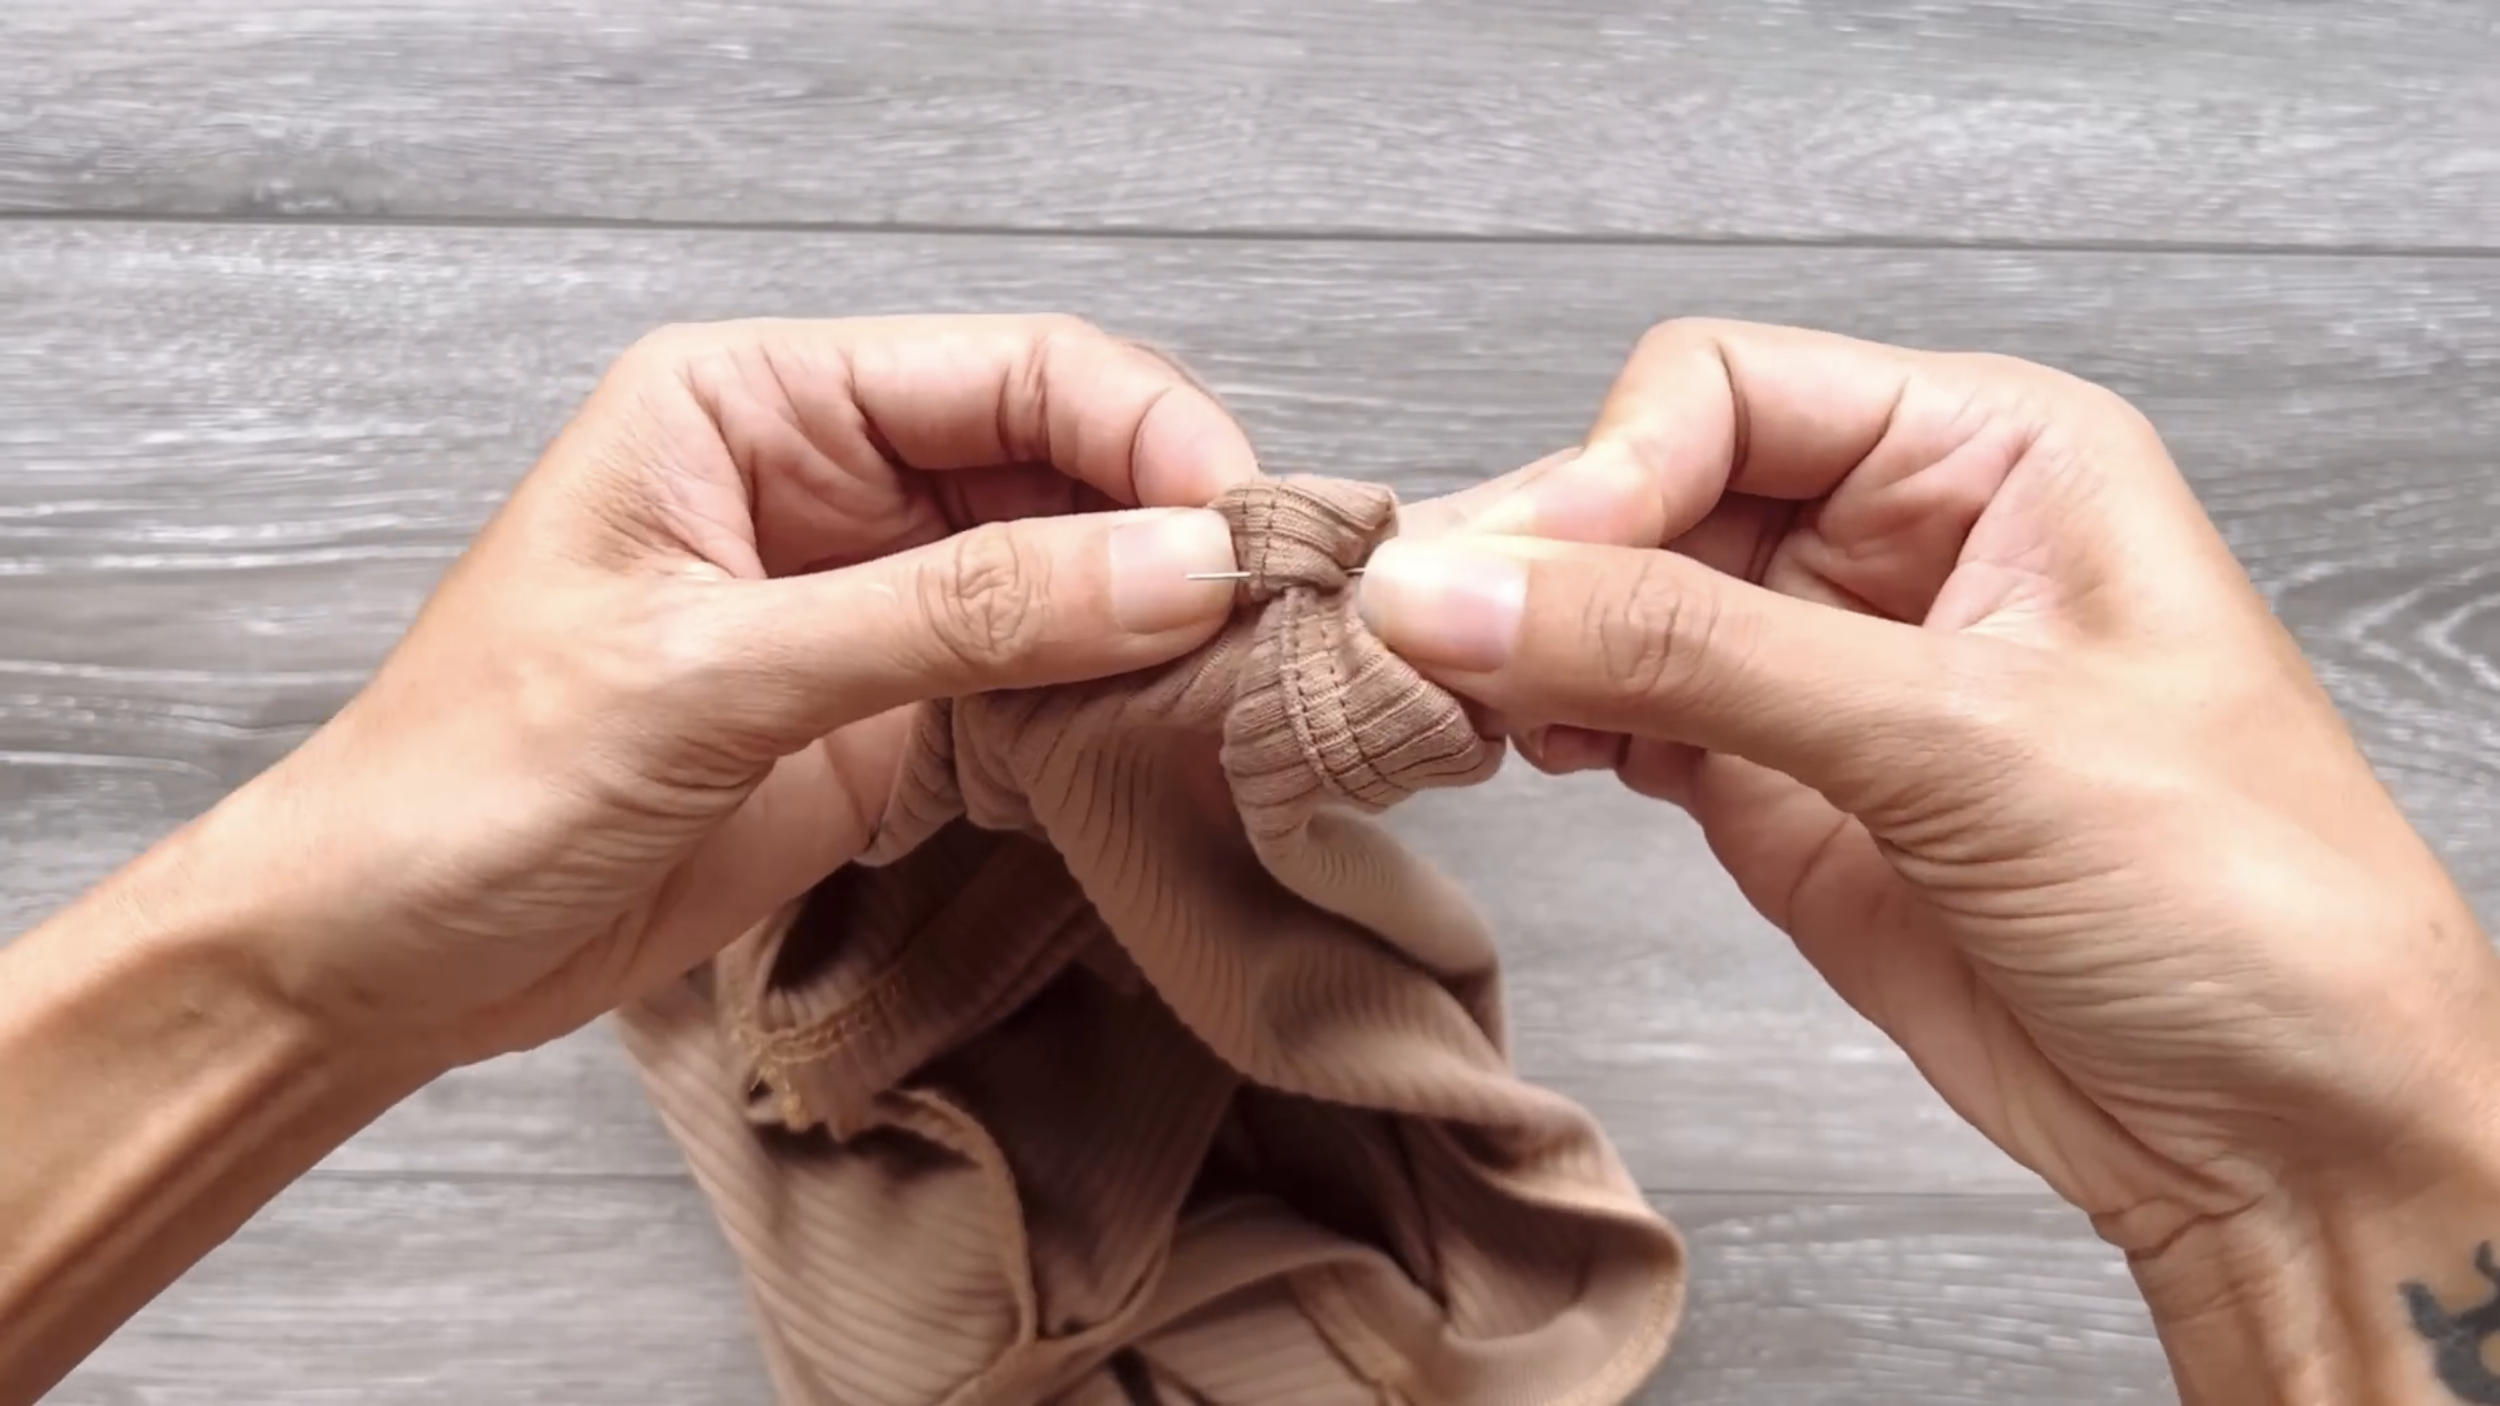
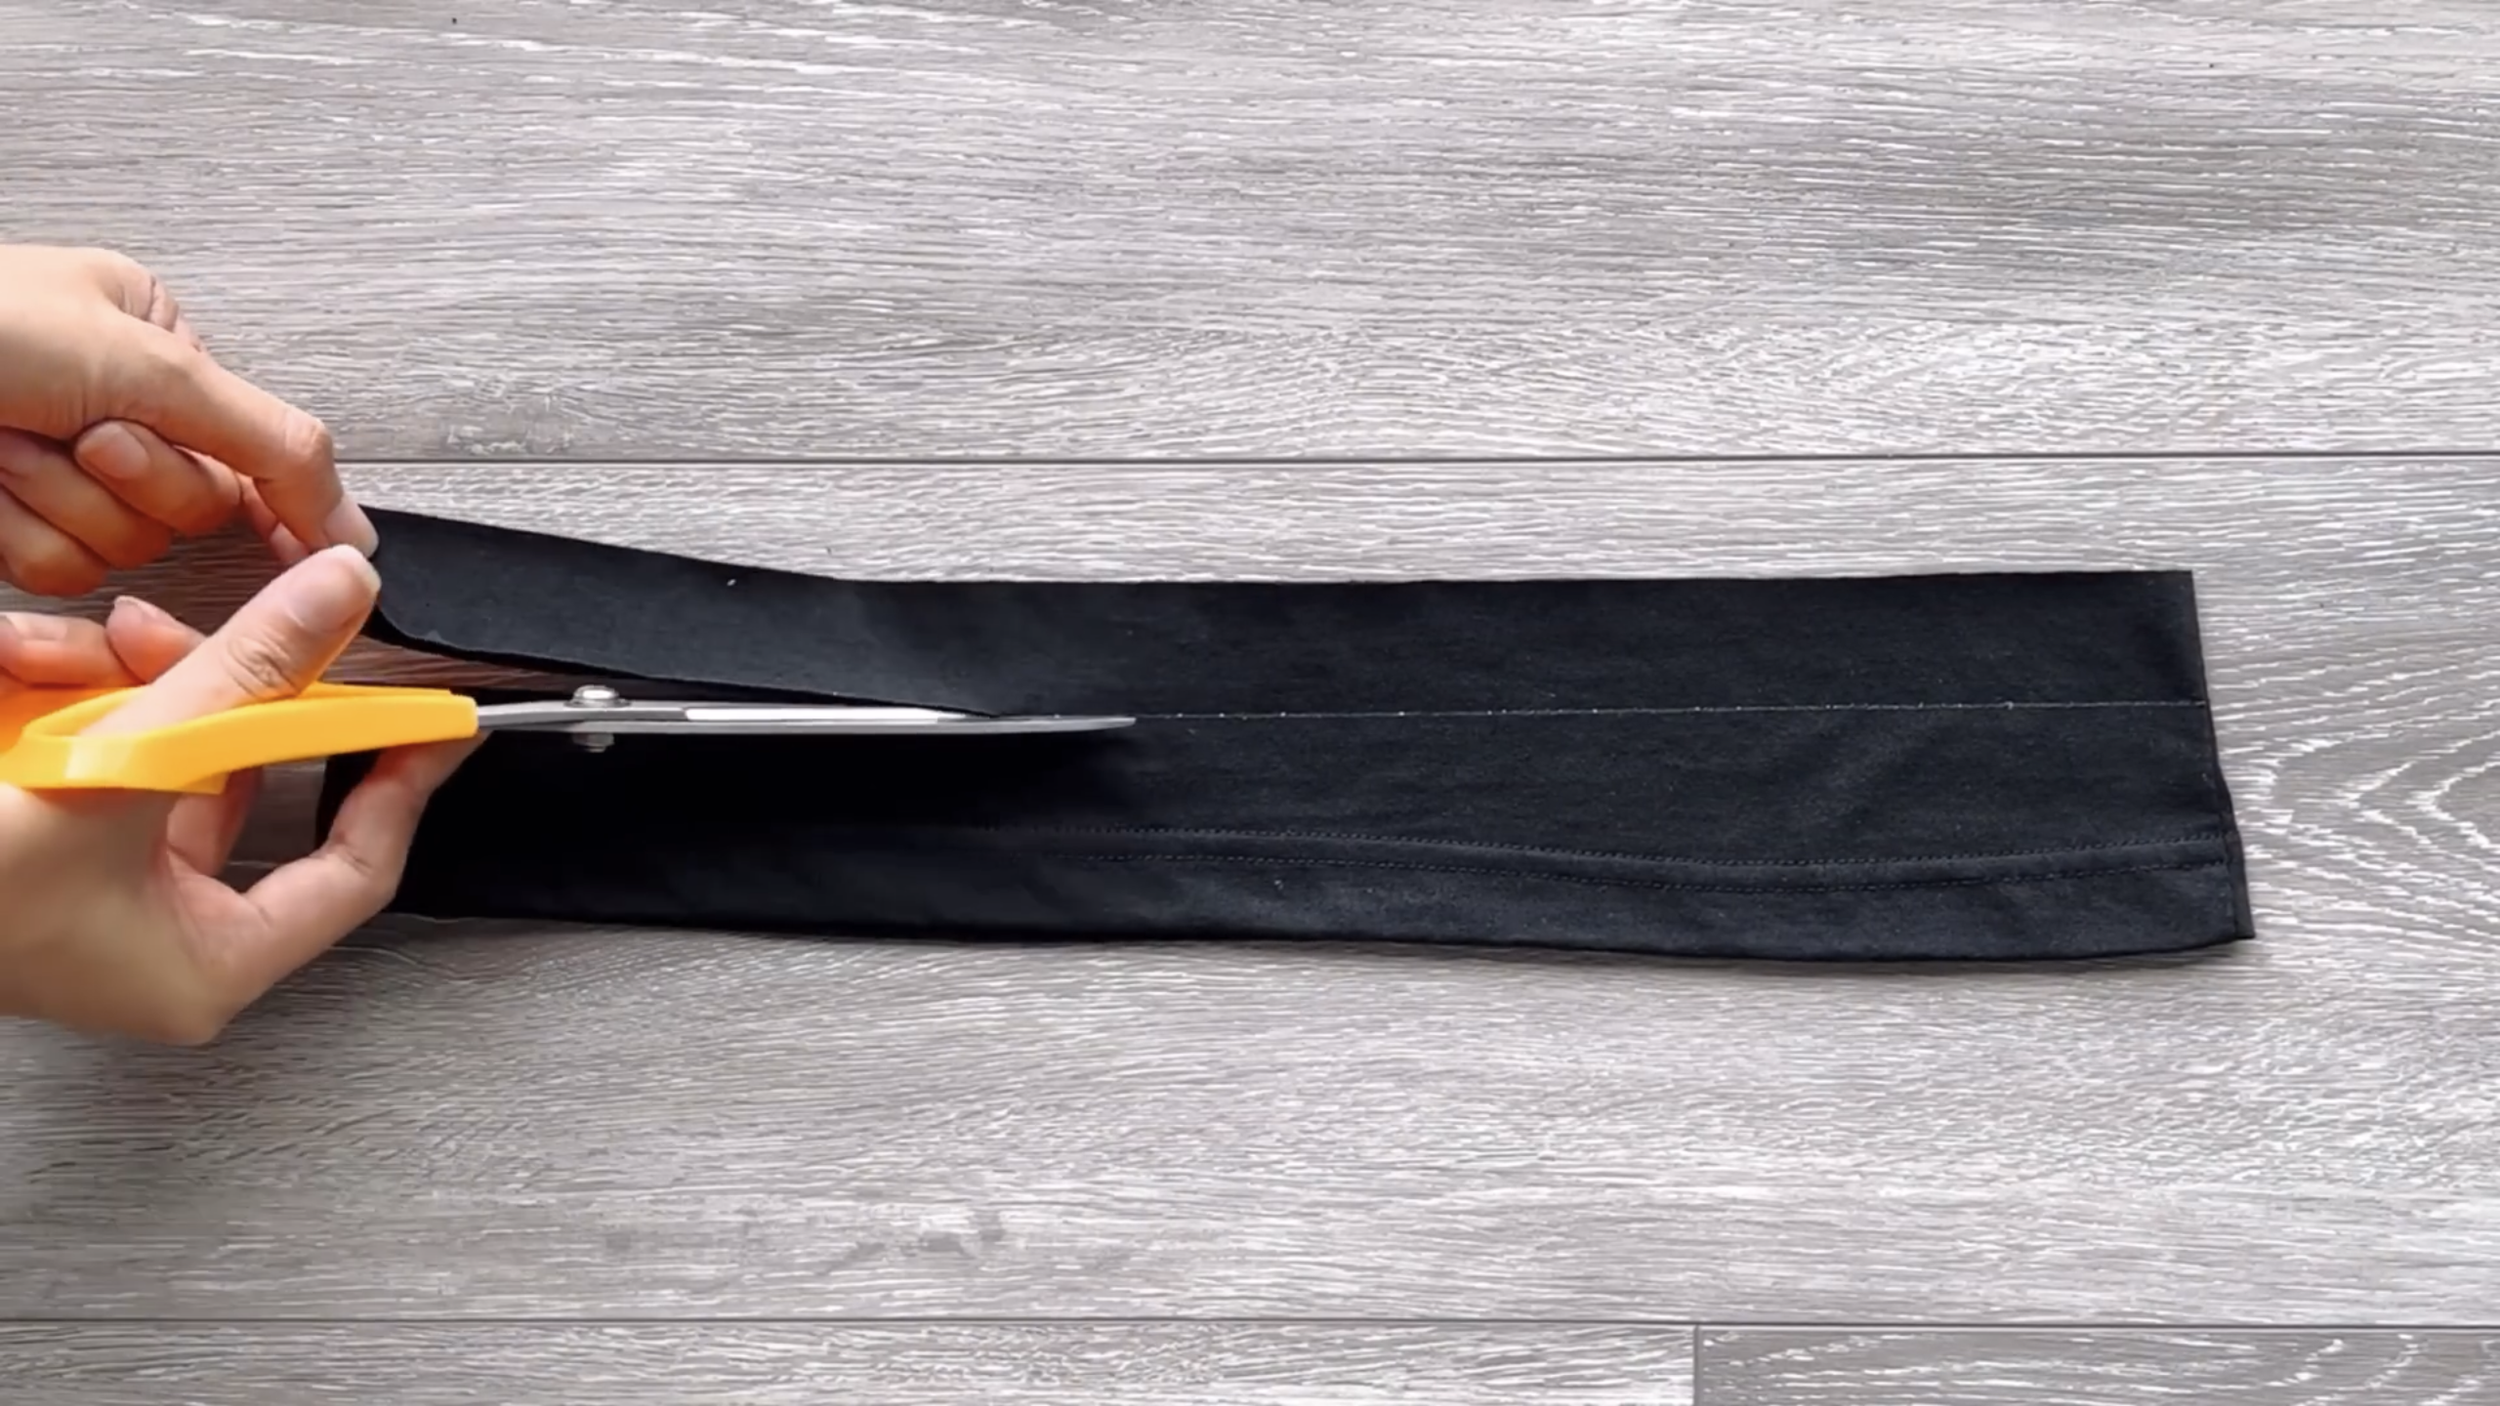
Use the leftover of the t-shirt to cut two long rectangles of fabric with 3.5 cm width in the maximum length you can get.

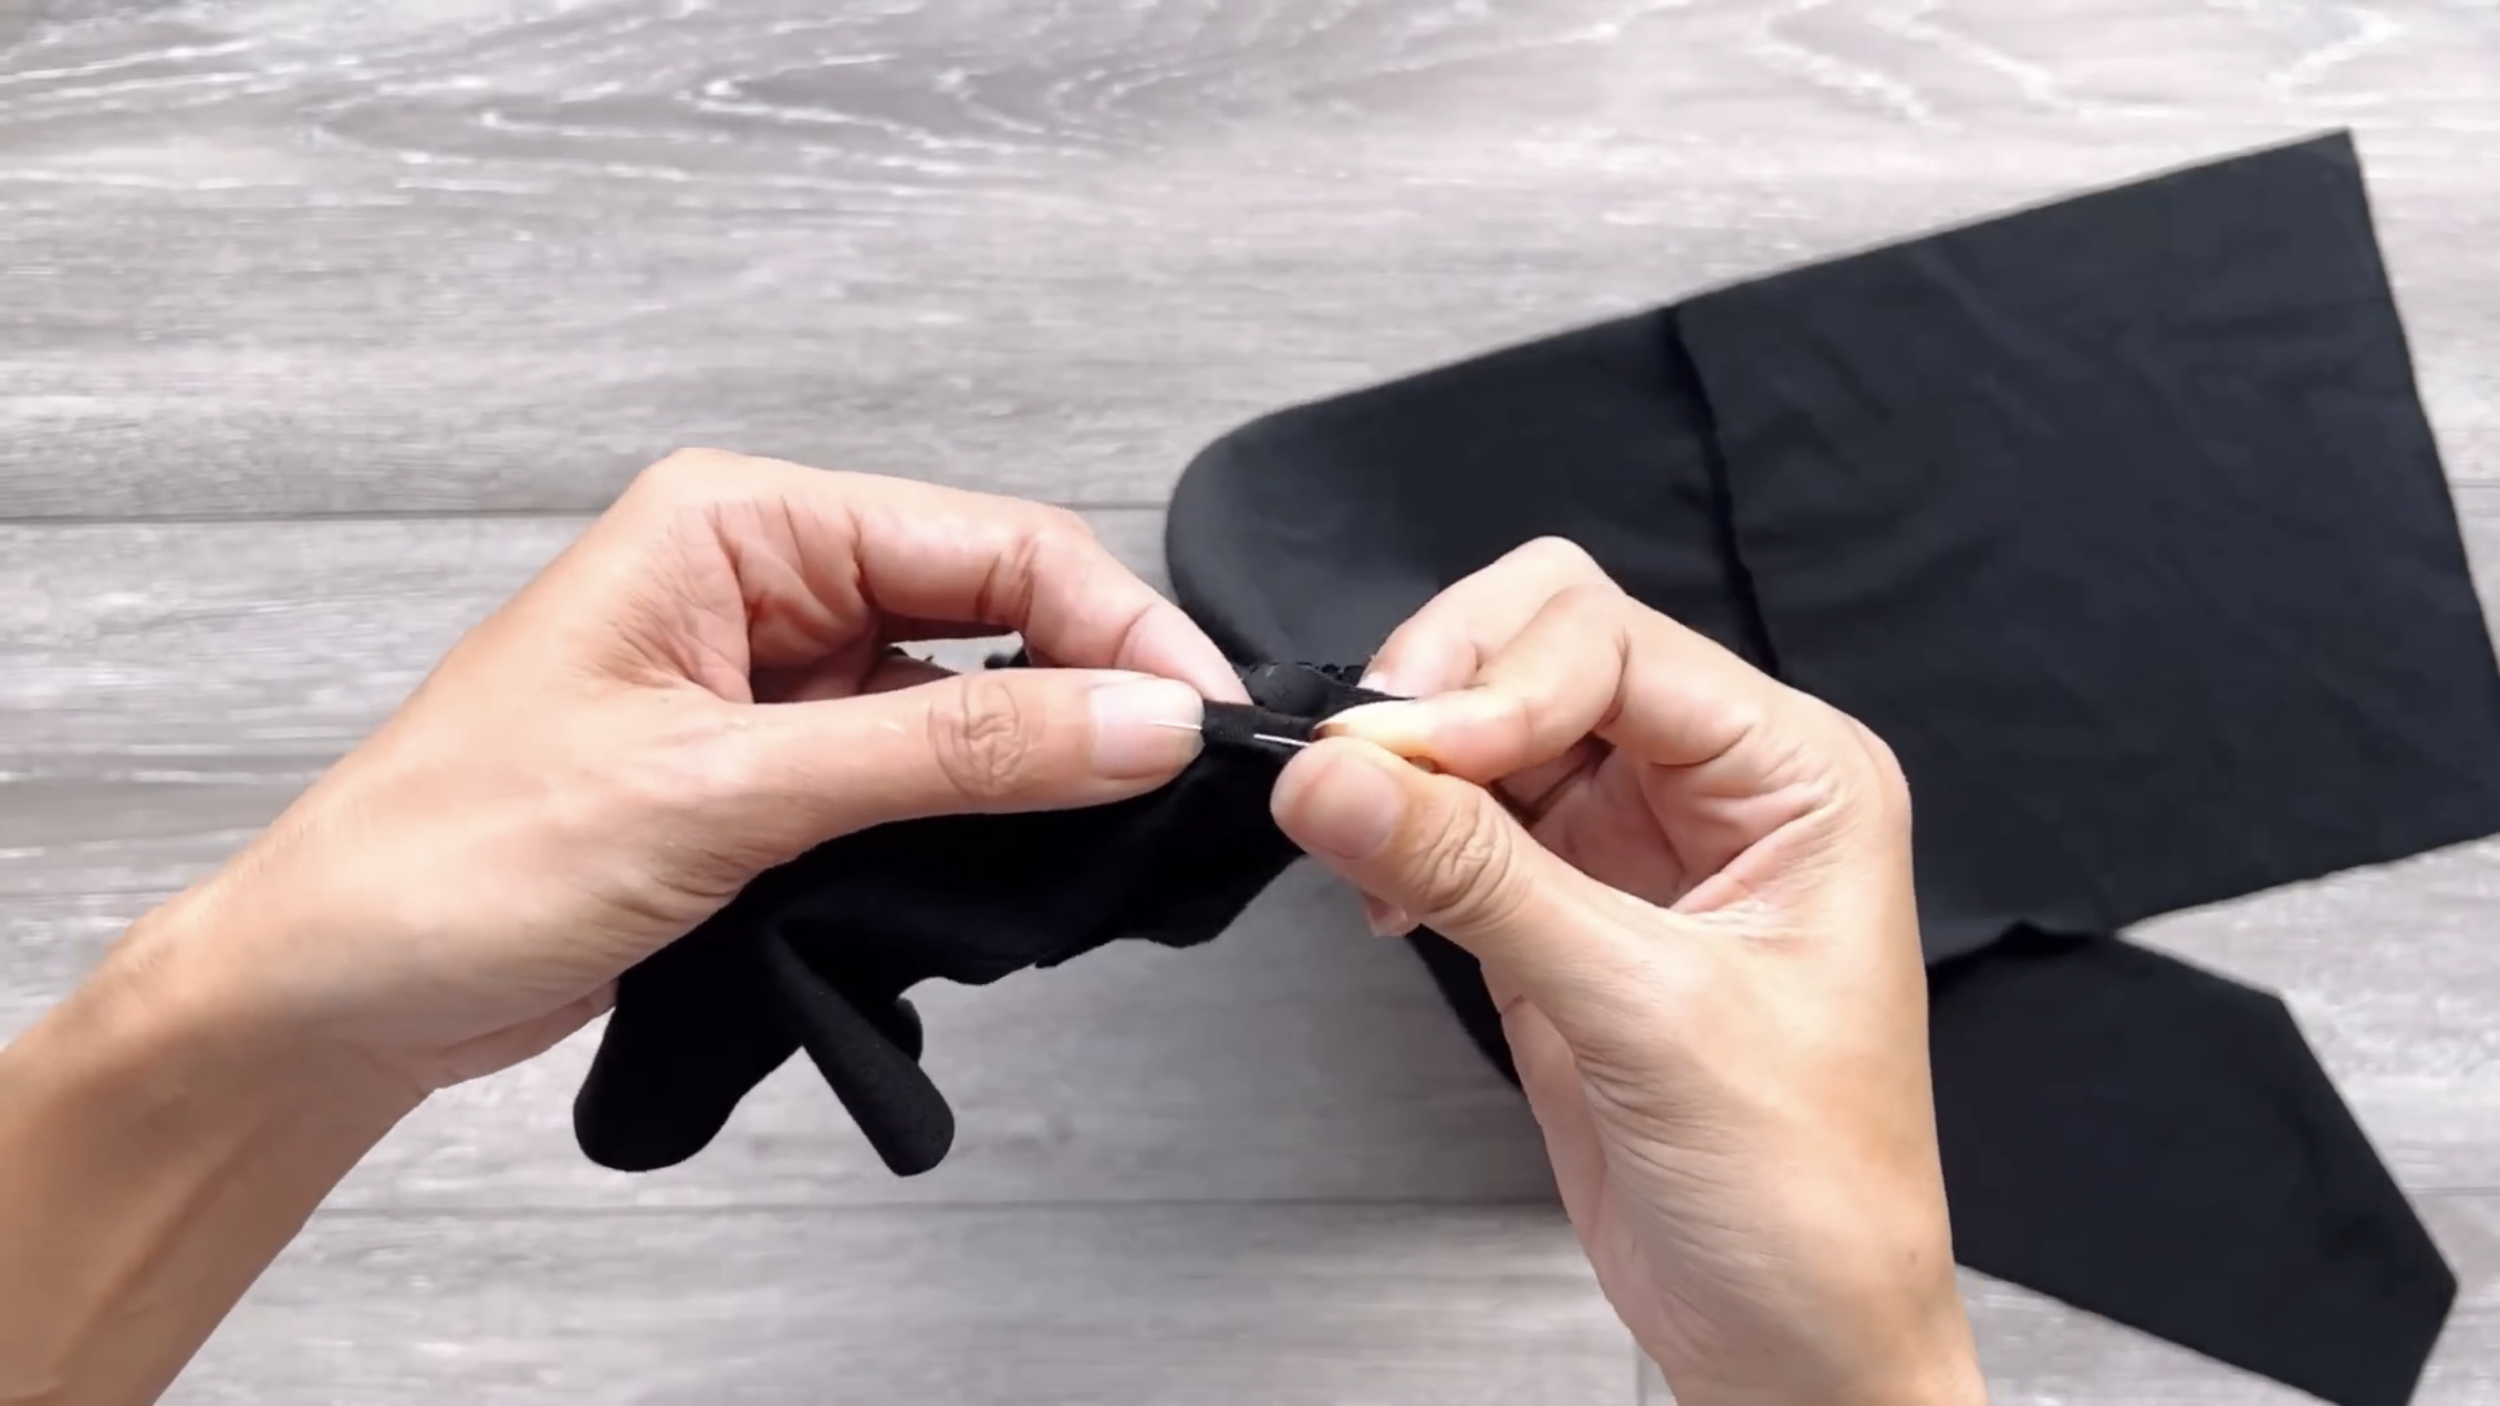
Fold two length lines of the rectangle fabric in the middle first, then keep folding them again and sew to create a tie.
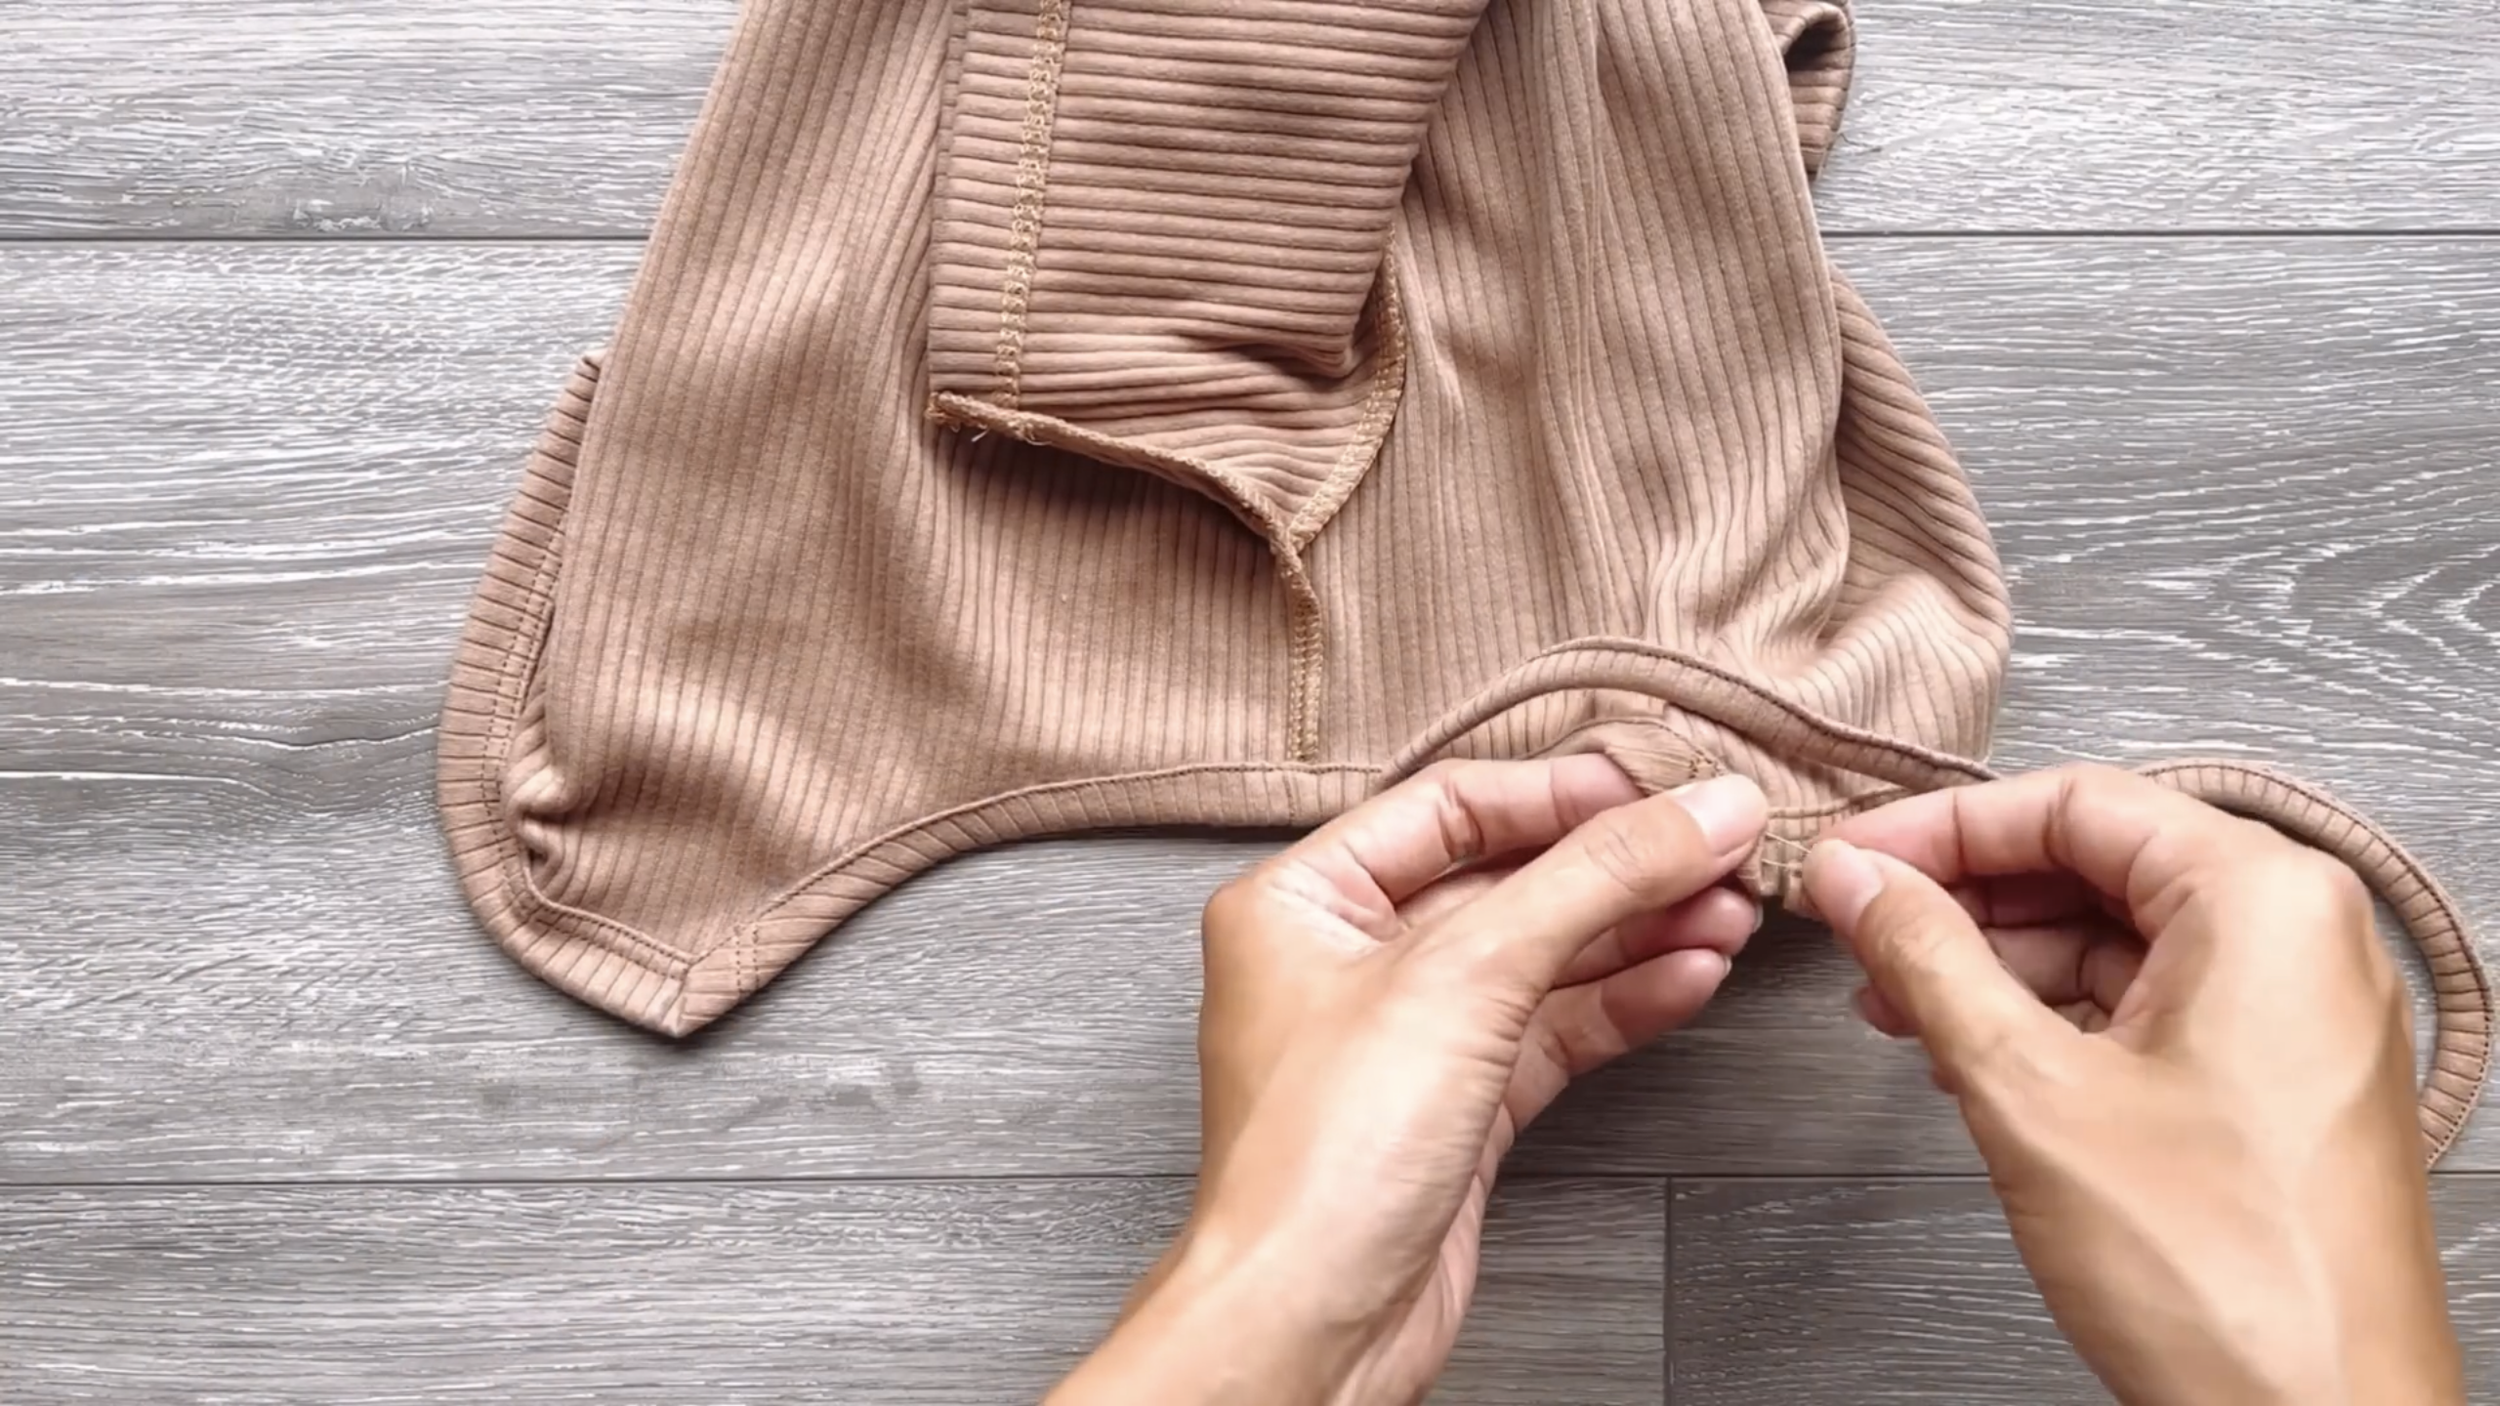
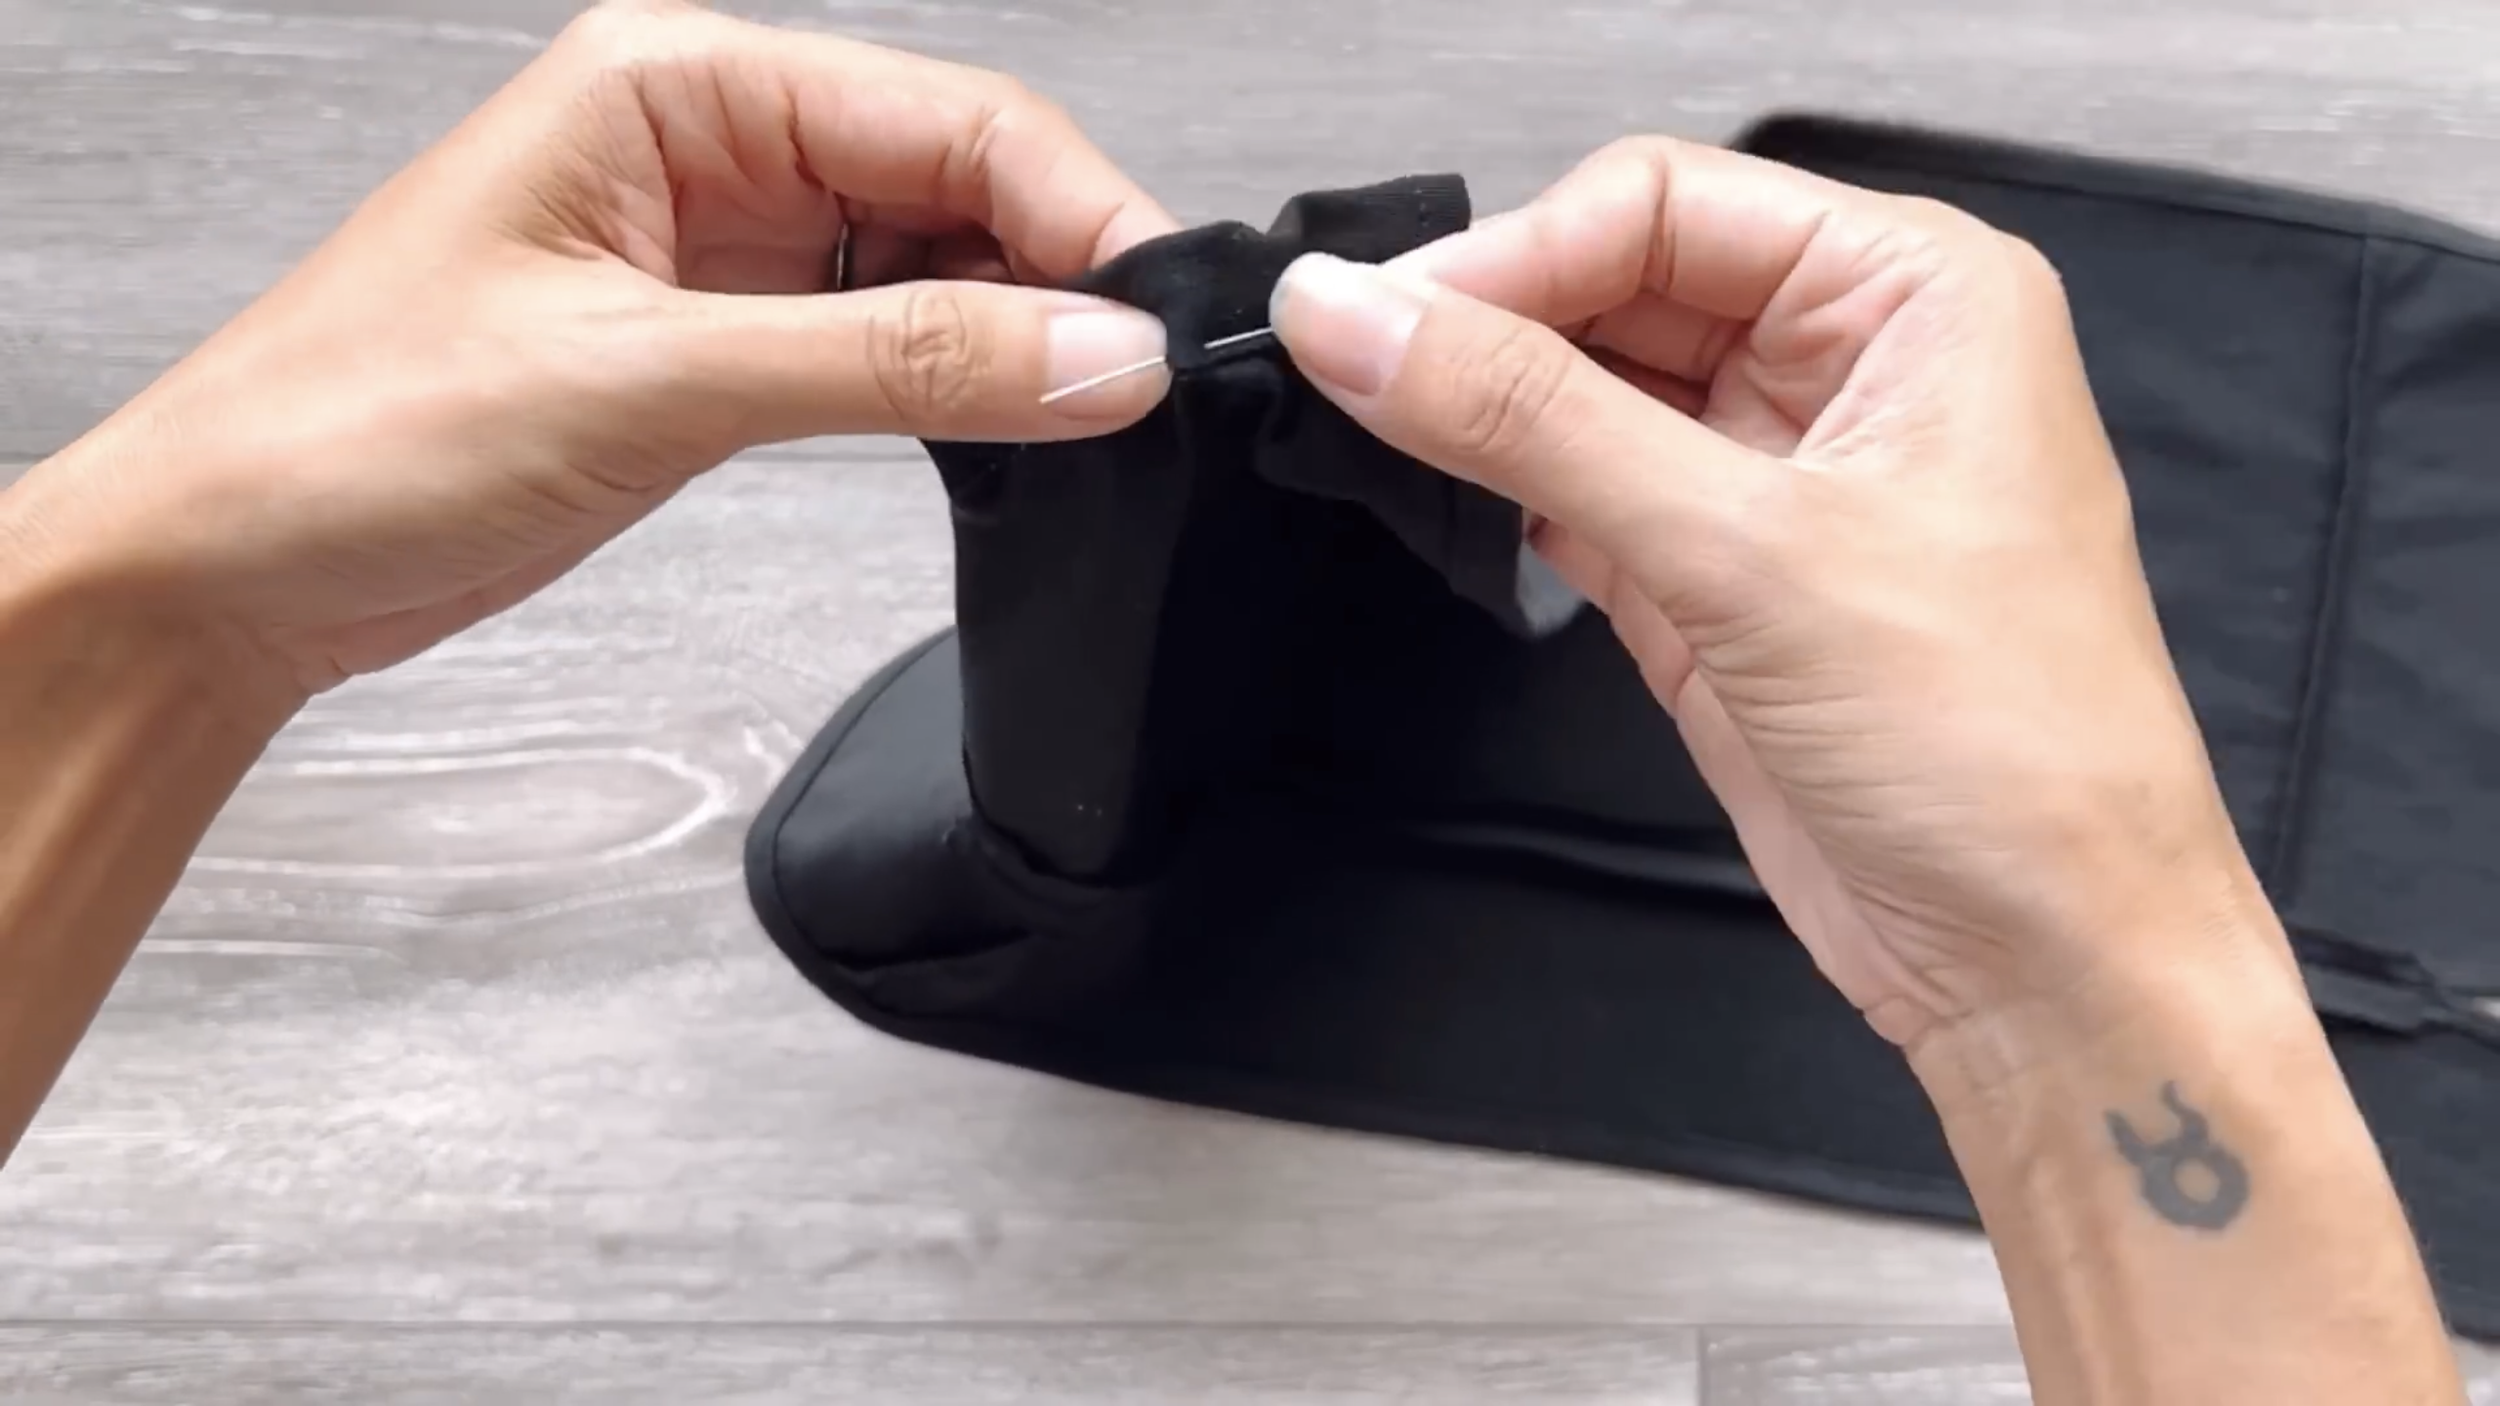
After that, use a small safety pin to have the tie go through the fabric hole.
DIY Cut out crop top from t-shirt | T-shirt transformation ideas | Easy sewing tutorial for beginner
And voila! Here's the final transformation. This crop top is not too sexy but has an attractive look at two sides.
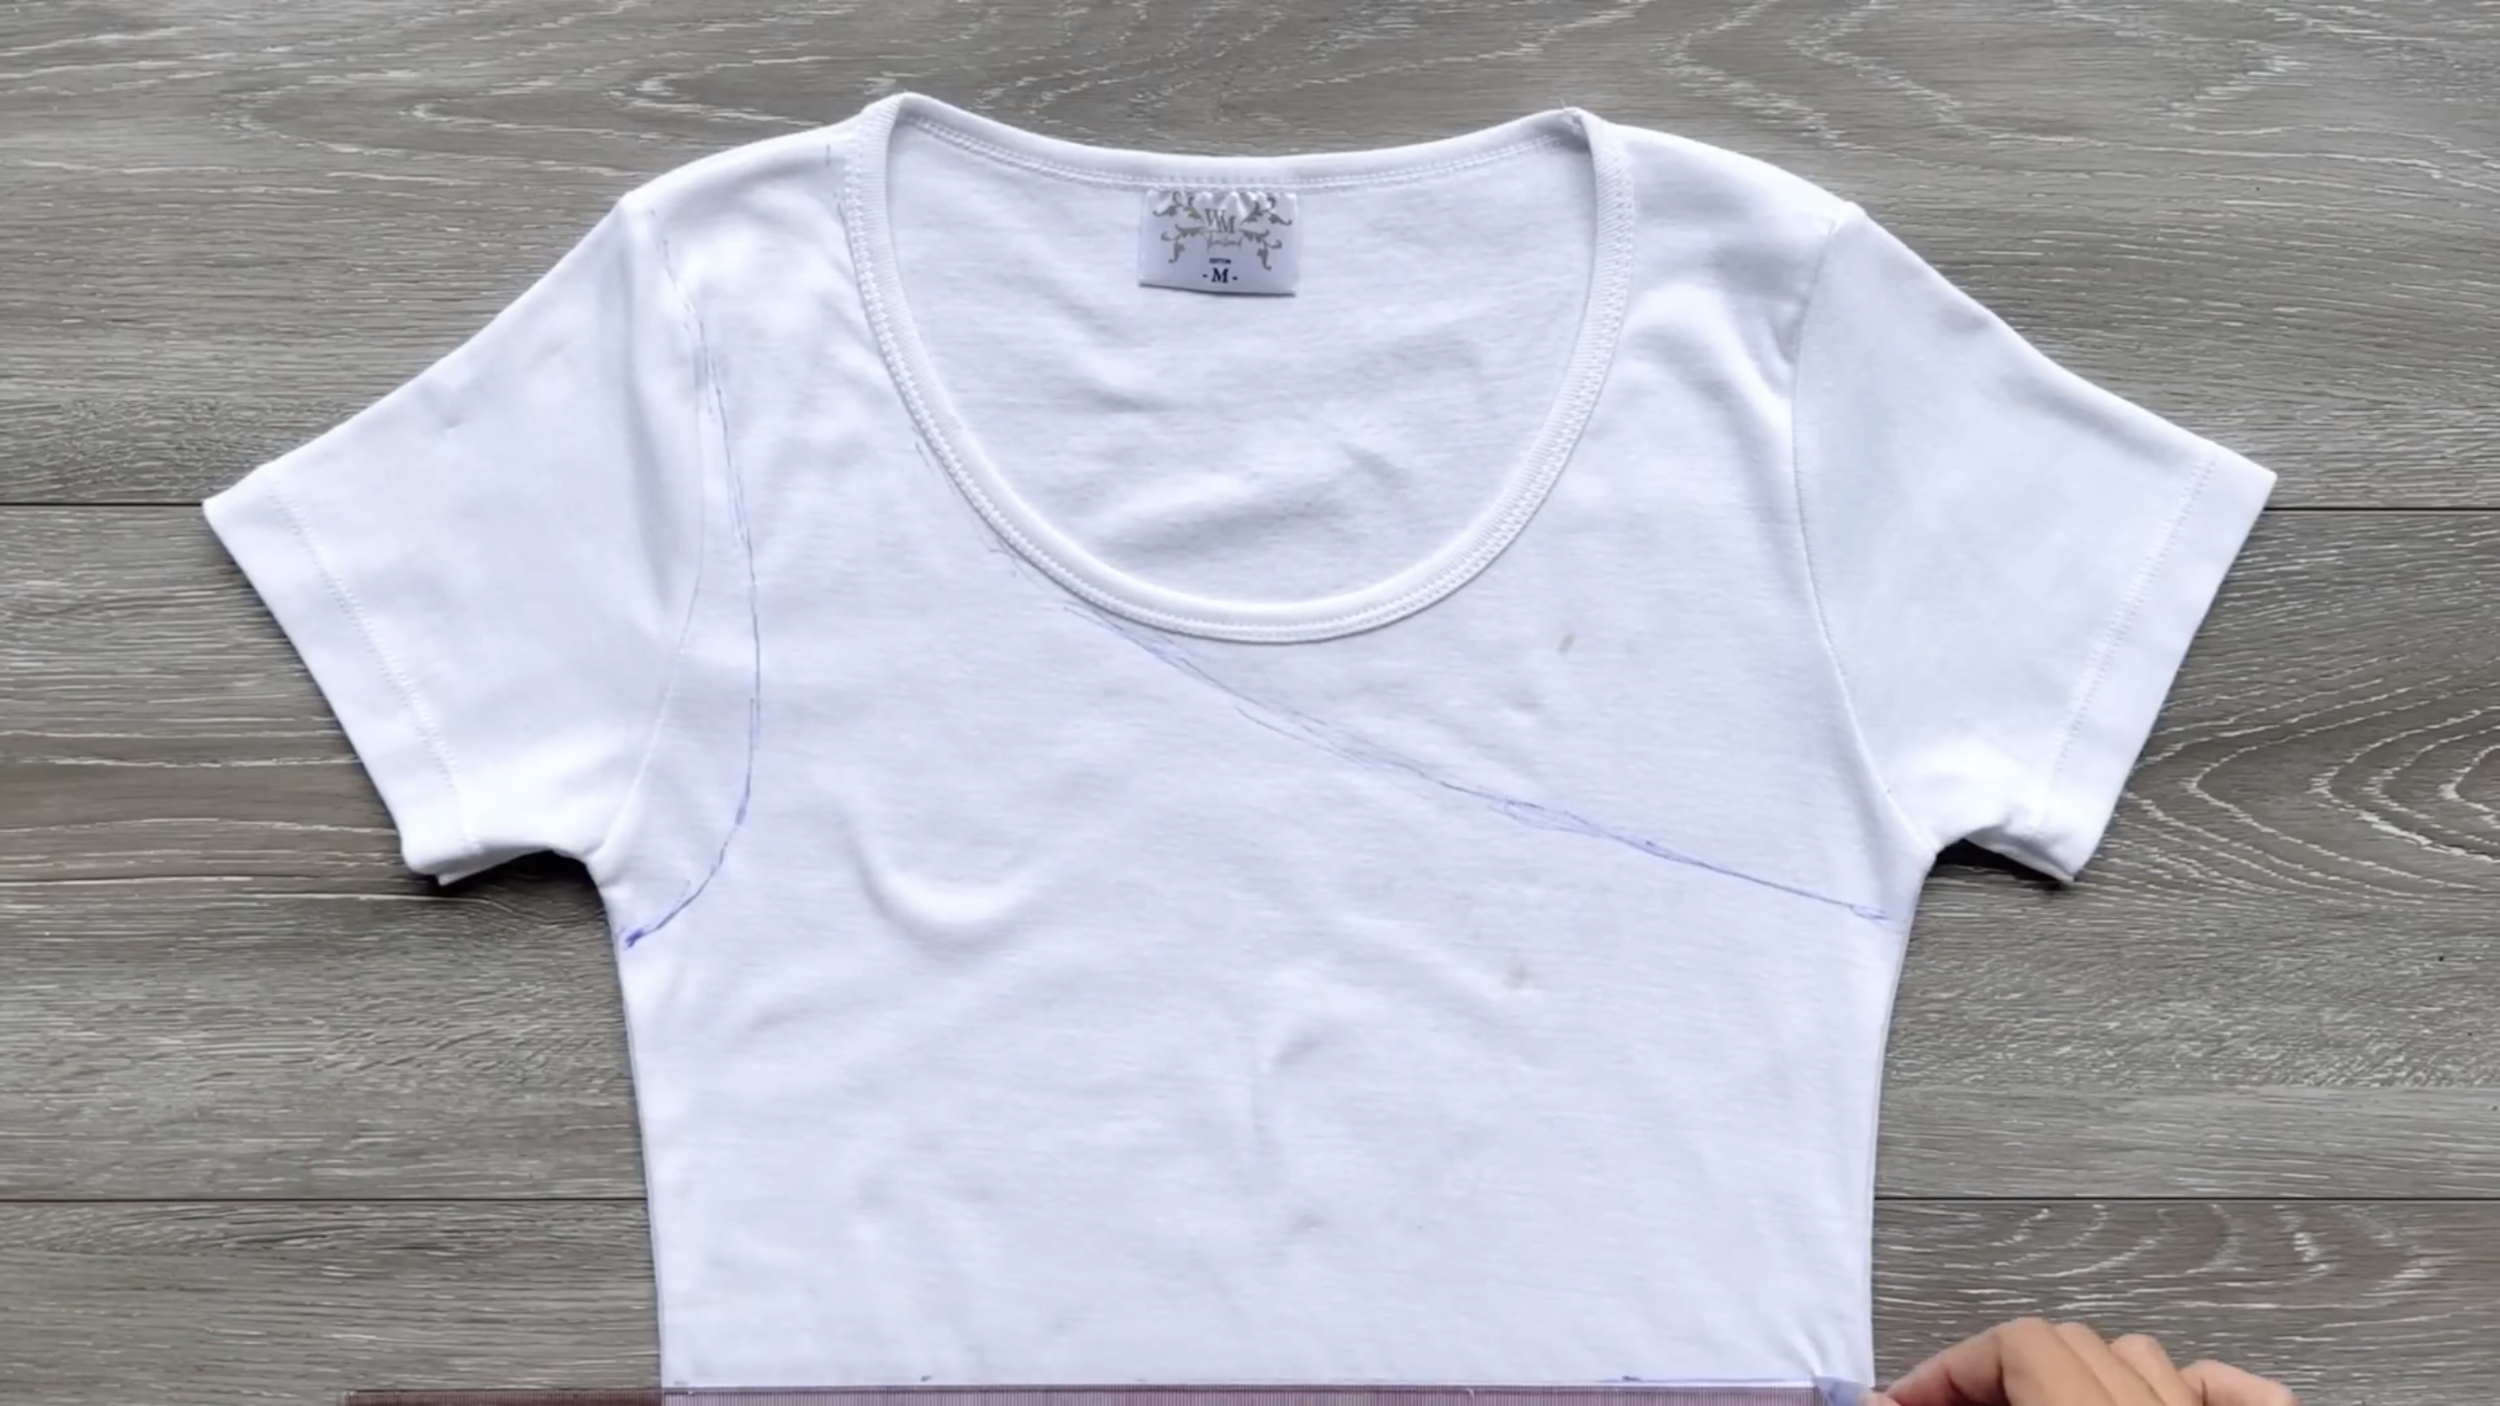
2. HALTER CUT OUT CROP TOP
For this DIY, use a small-size t-shirt.
The first step is drawing a line under two armpits, then cutting.
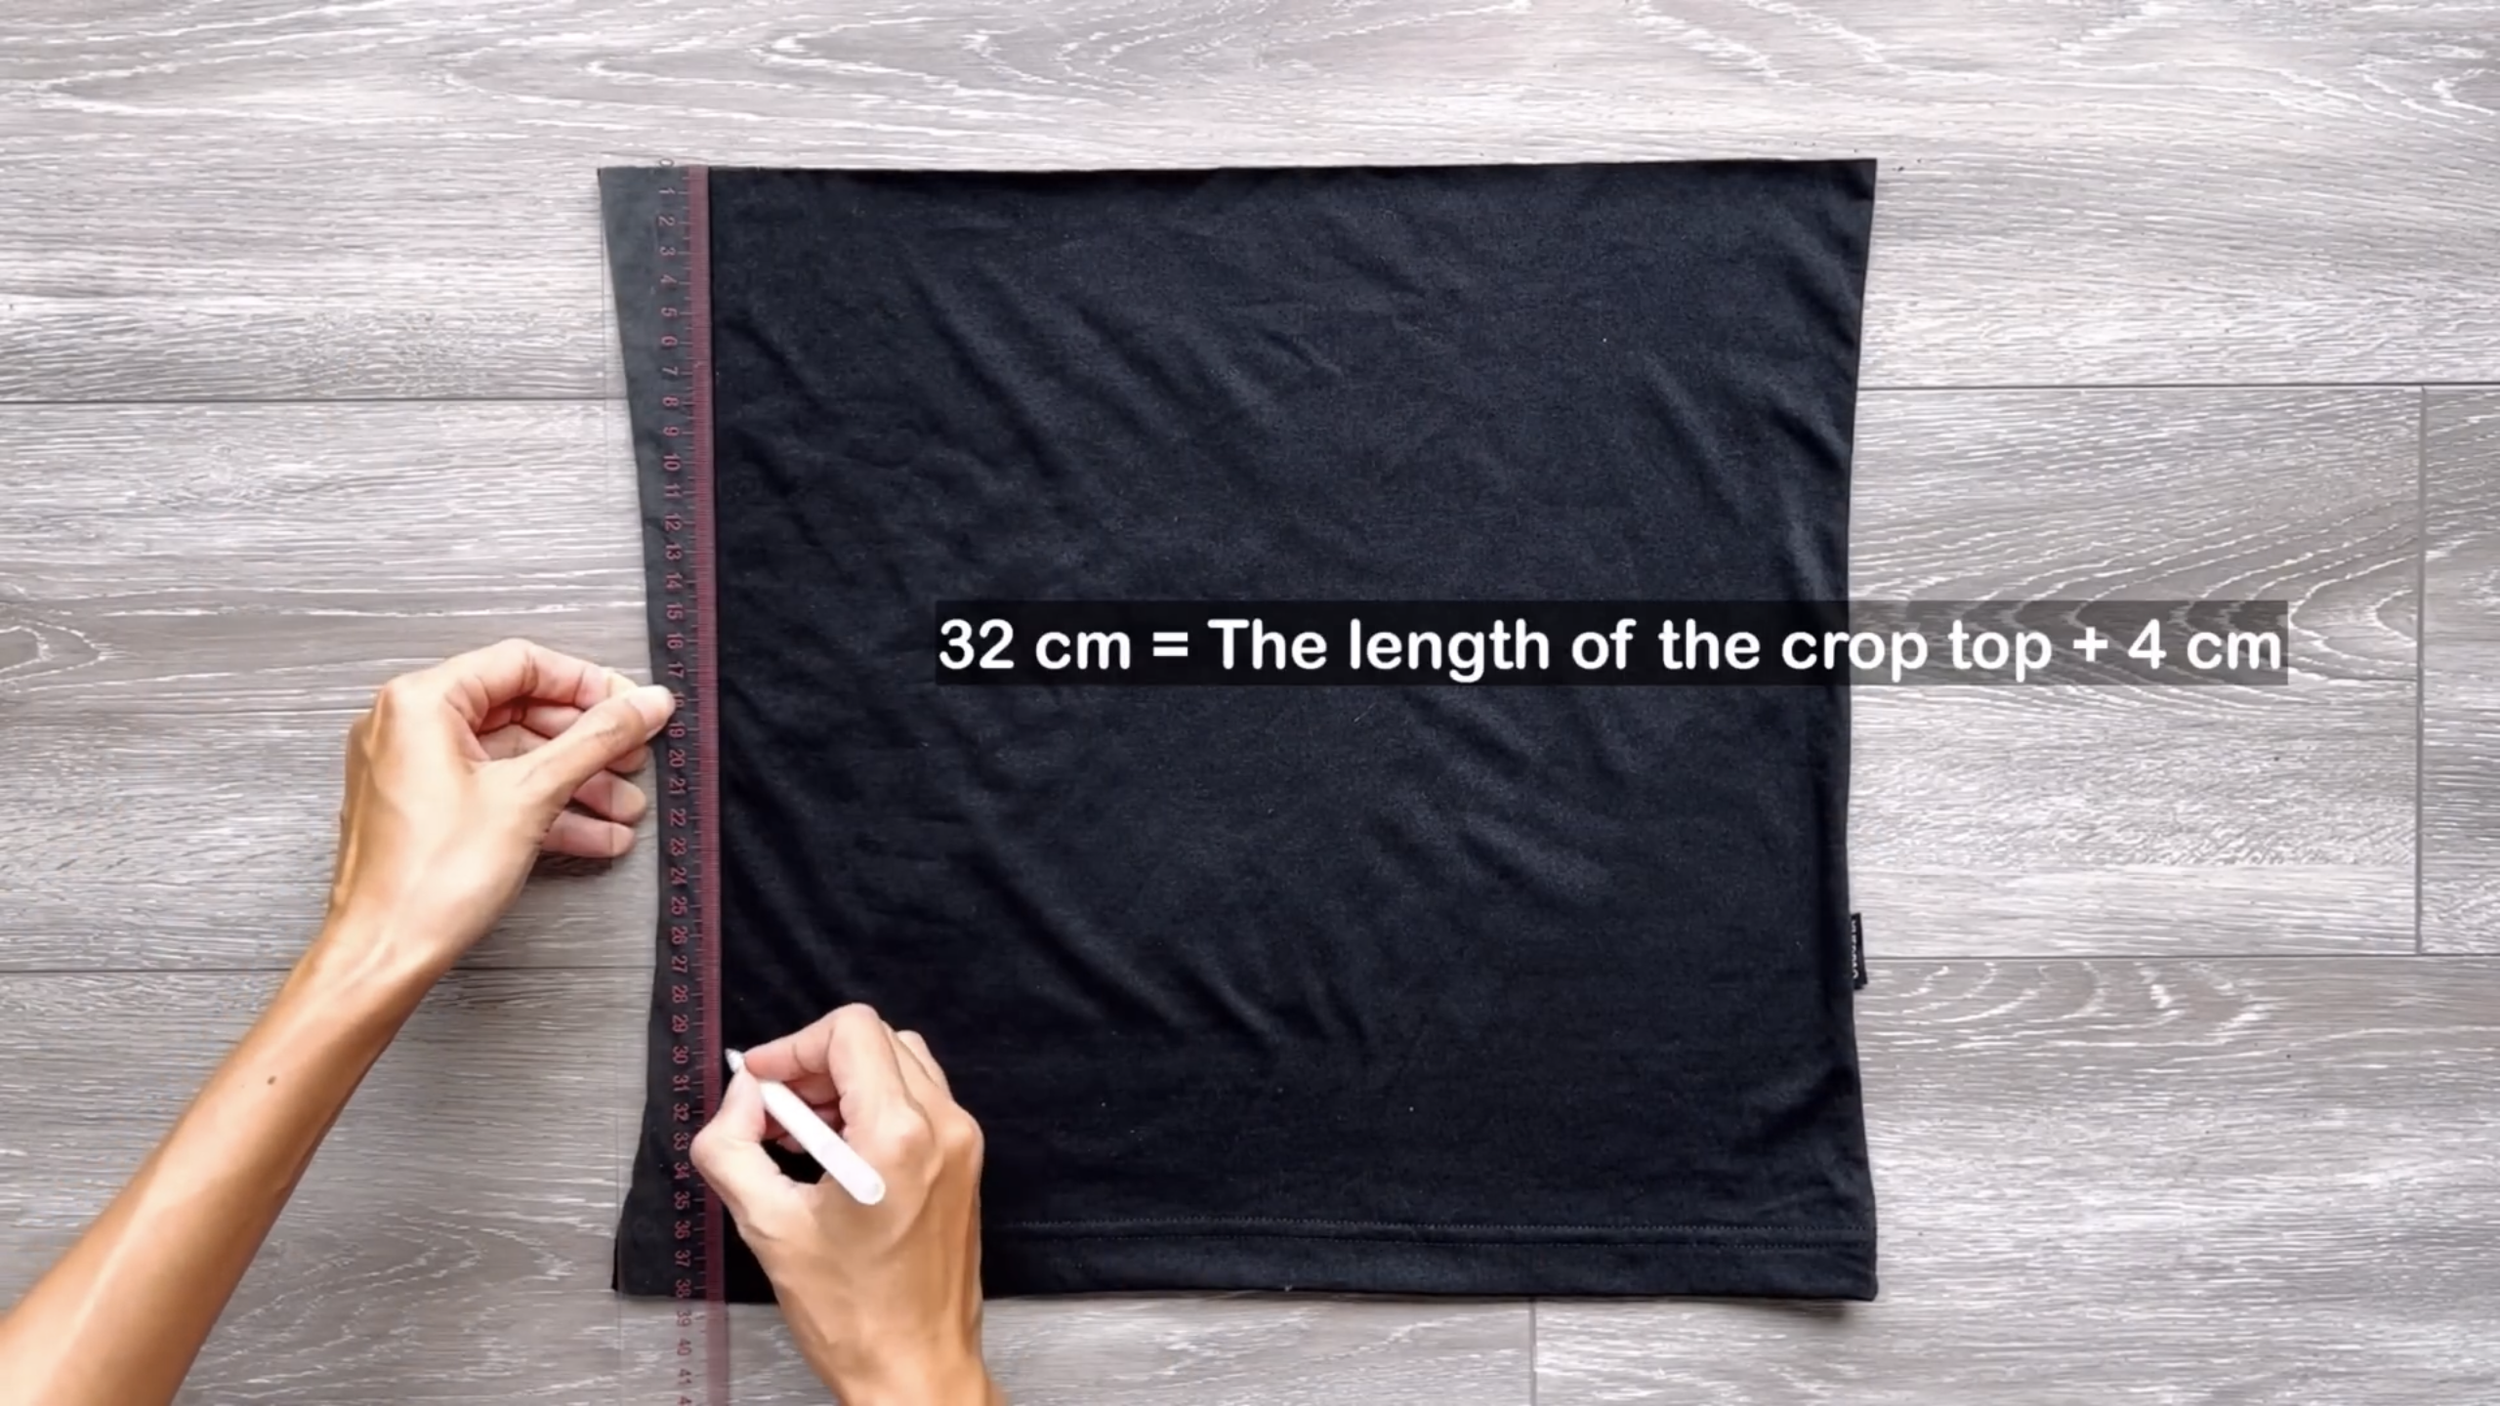
From the top, draw another line 32 cm under it. It's the length of the crop top that is wanted plus 4 cm for seam allowance.
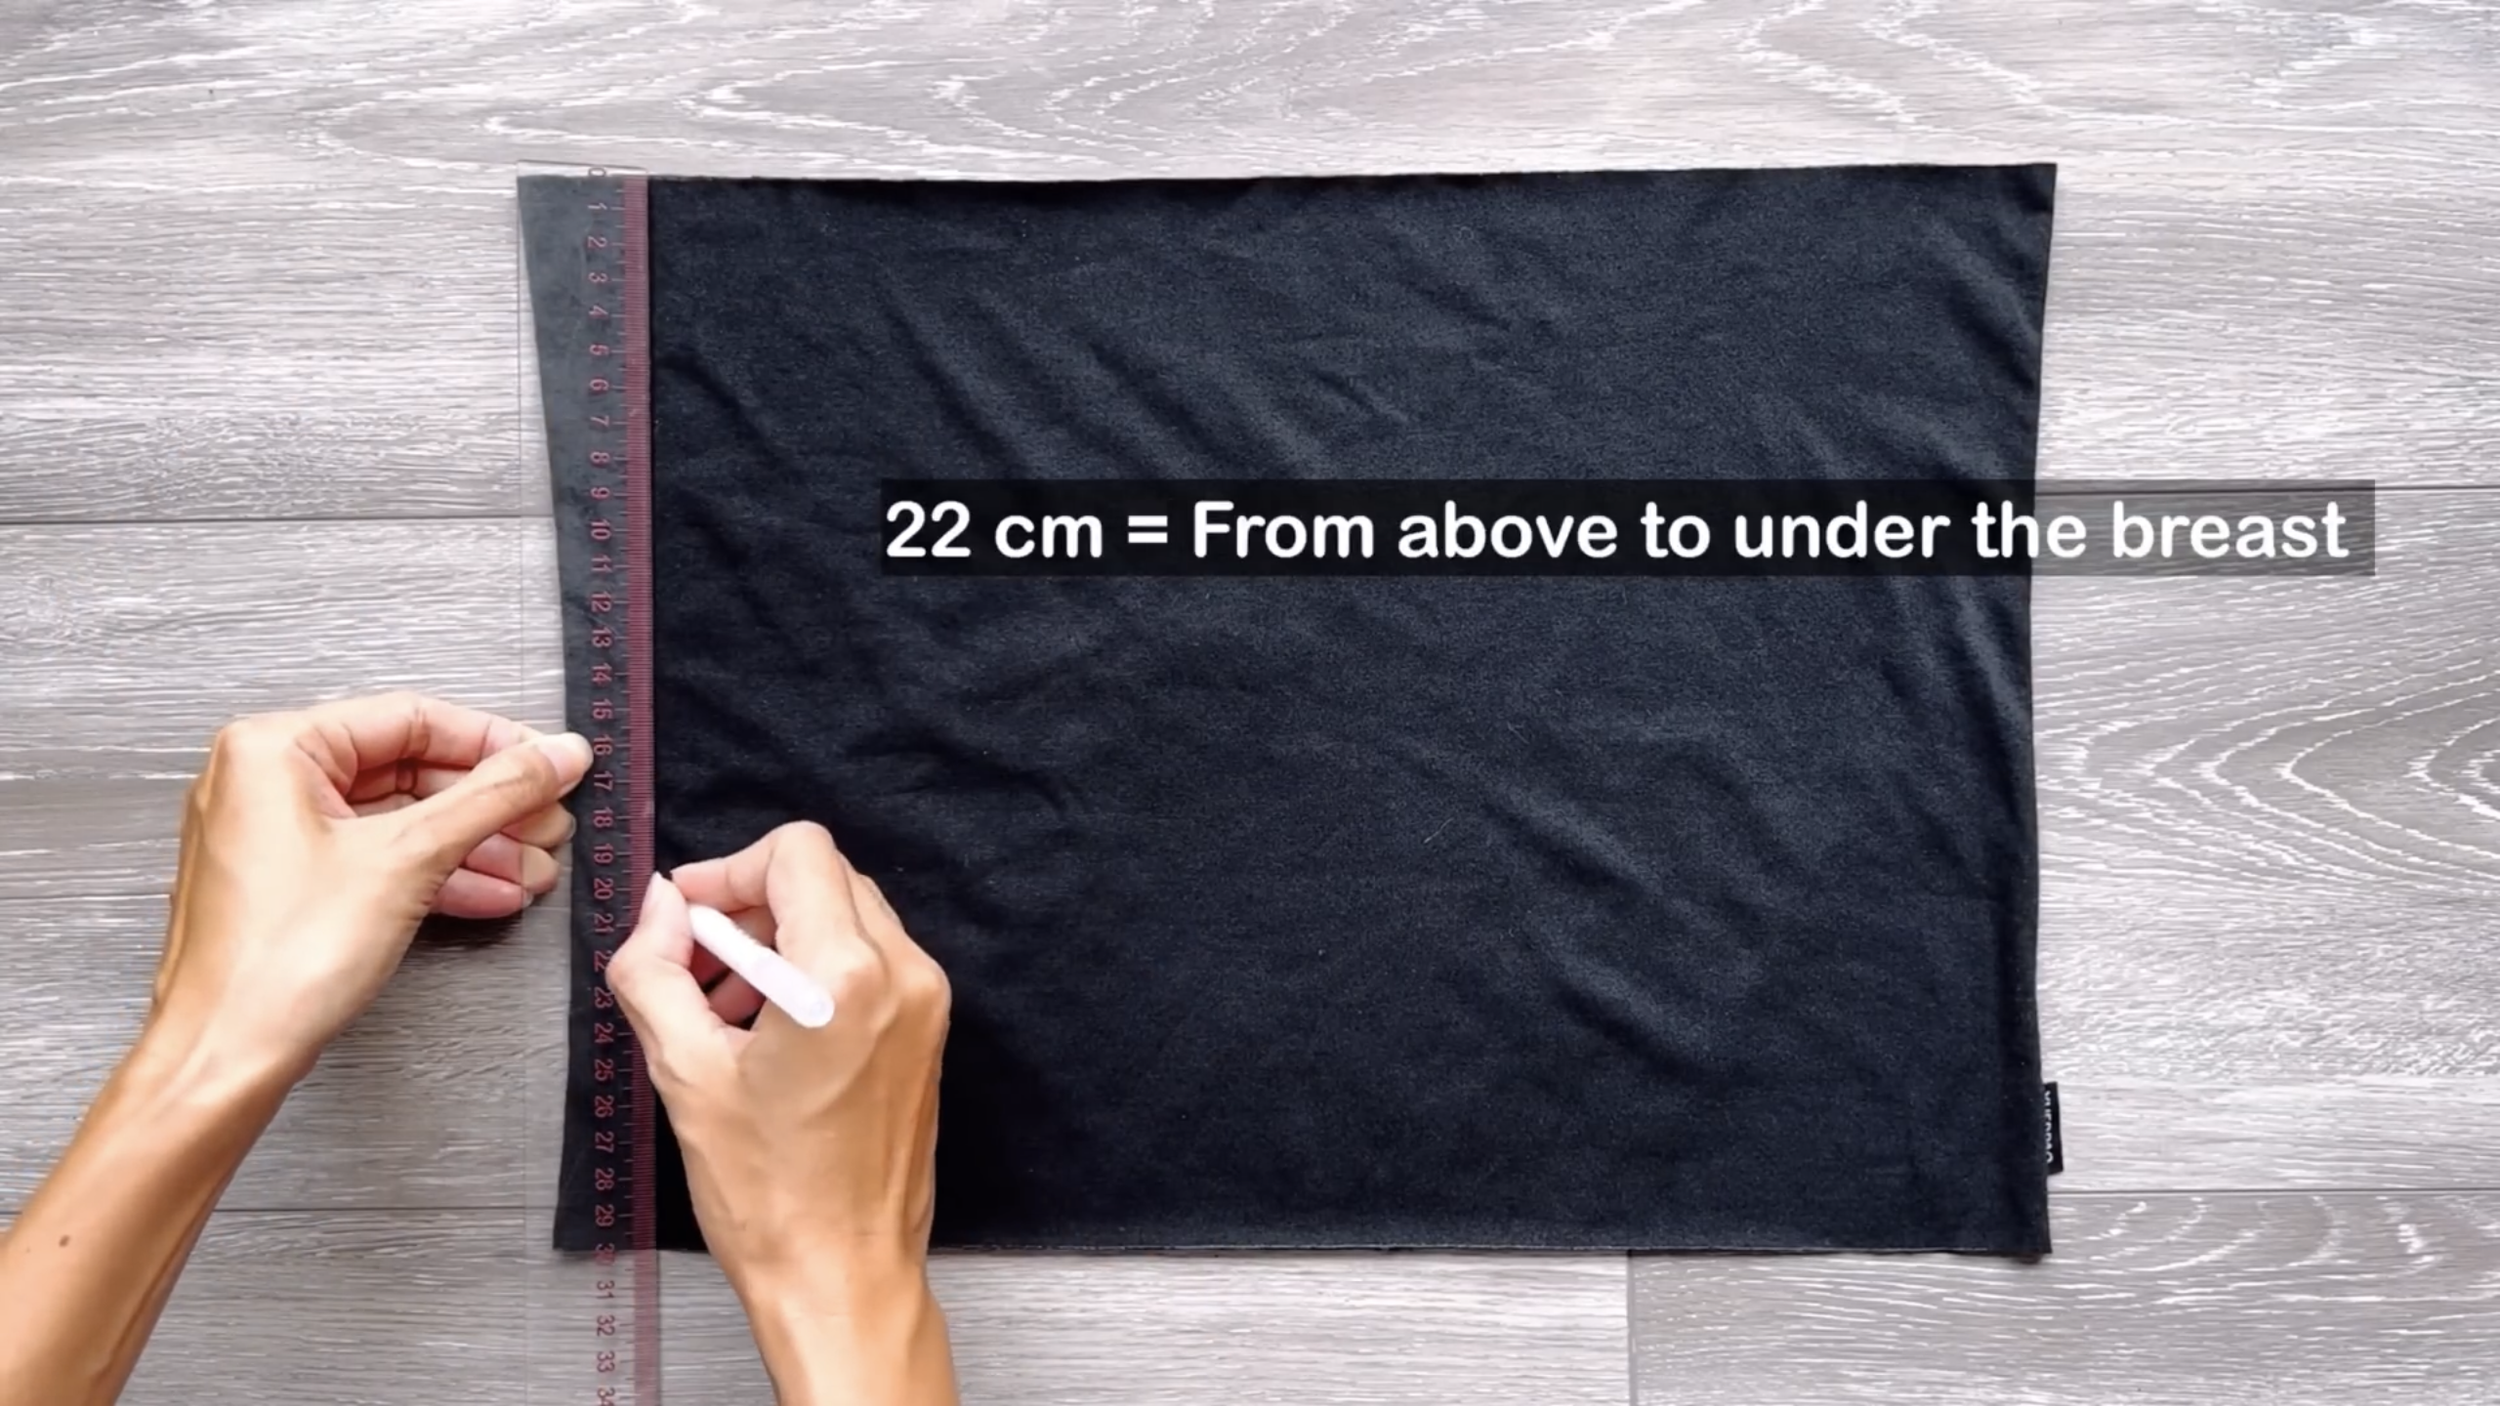
After that, make another line at 22 cm from the top, which is the length of the big part of the crop top plus 2 cm for seam allowance.
Make sure this length can cover your breast.
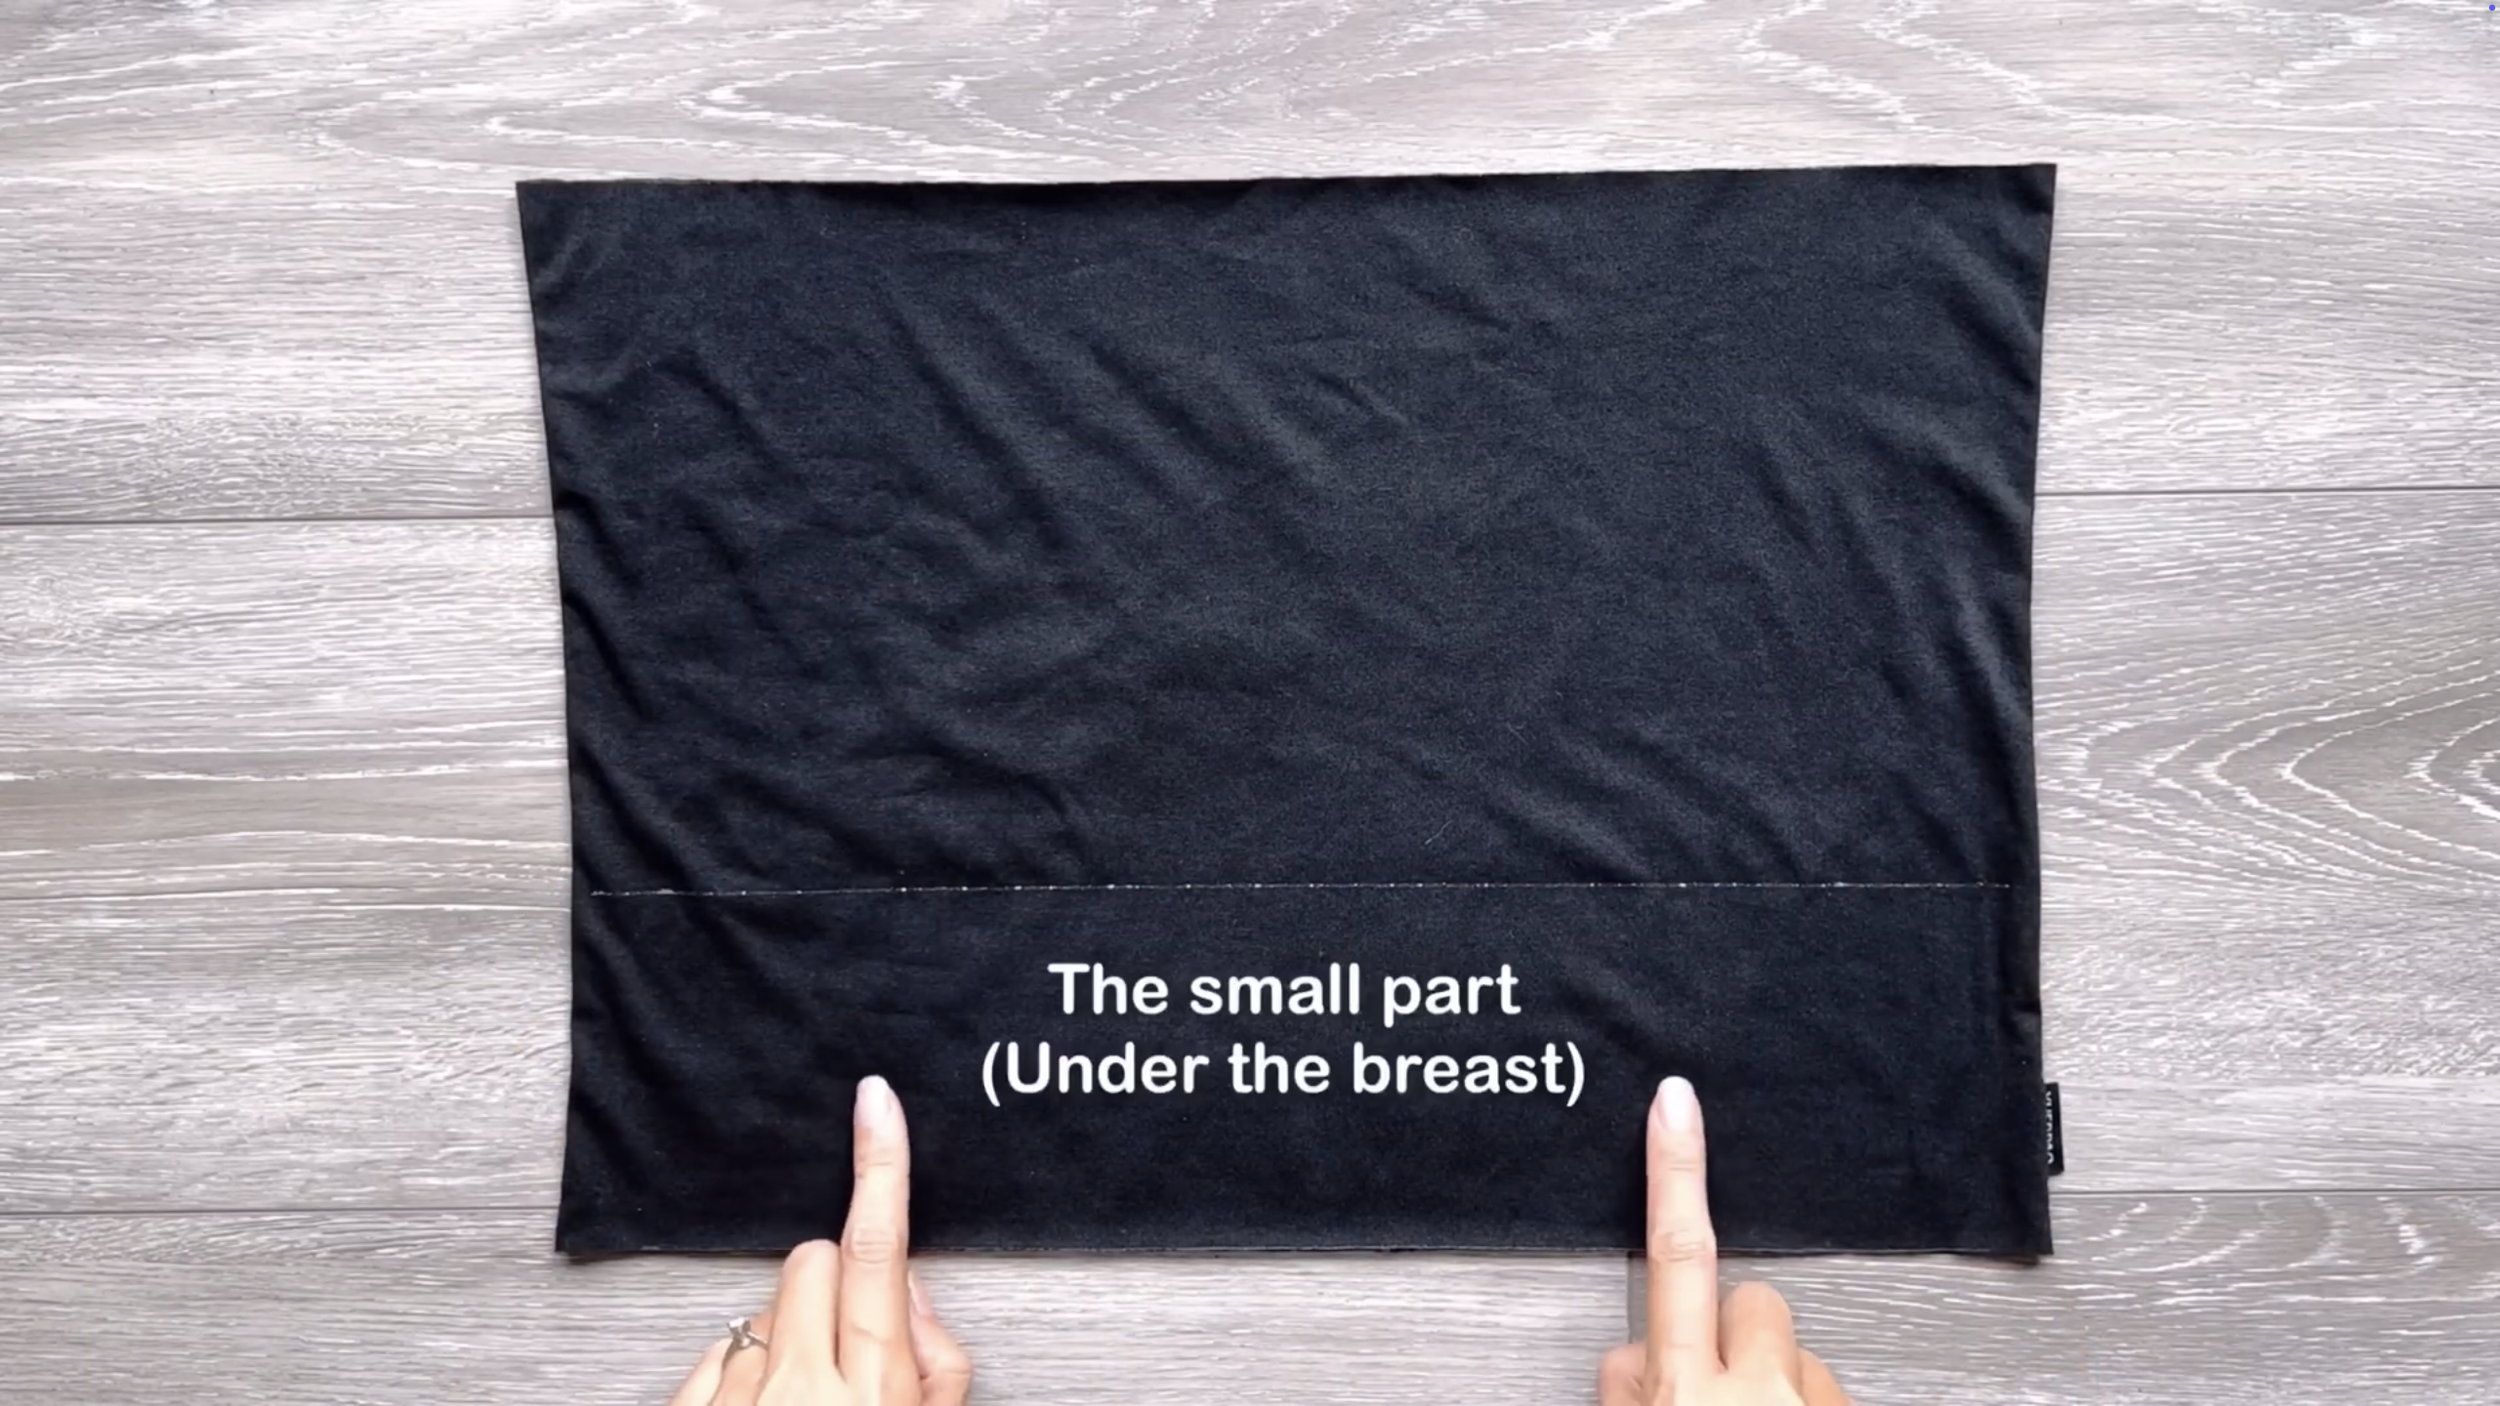
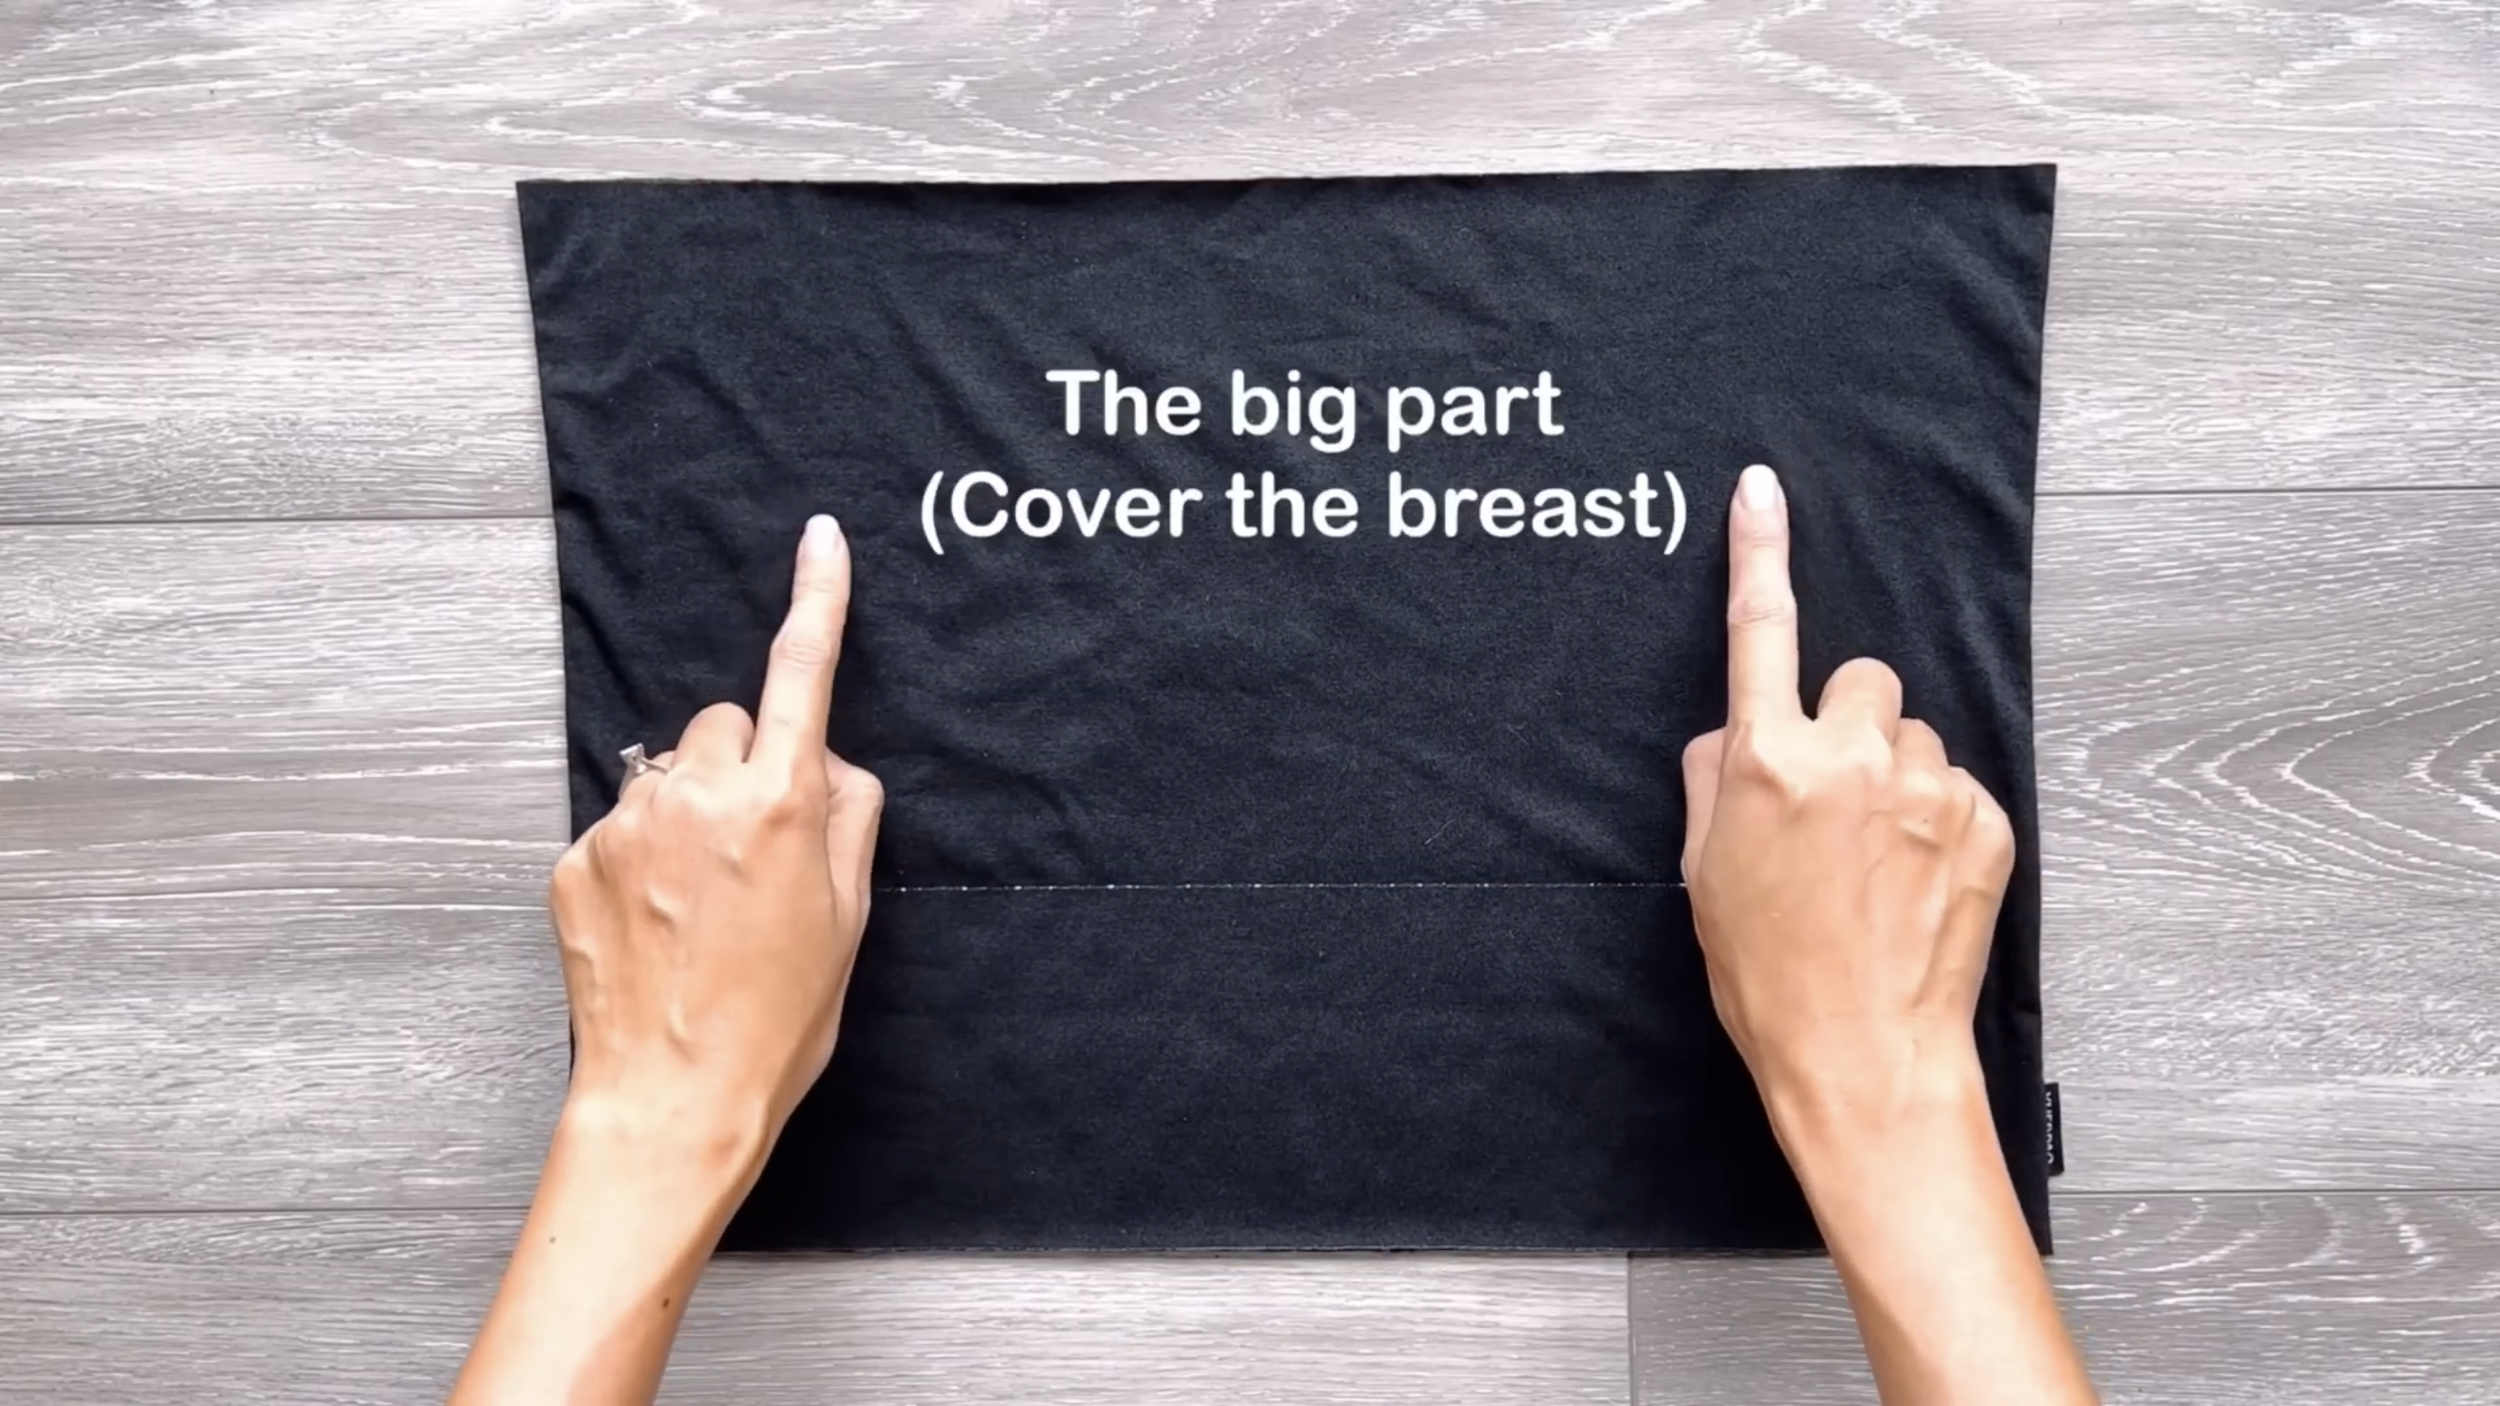
That means the rest of the crop top will be 10 cm, which is the small part of the crop top.
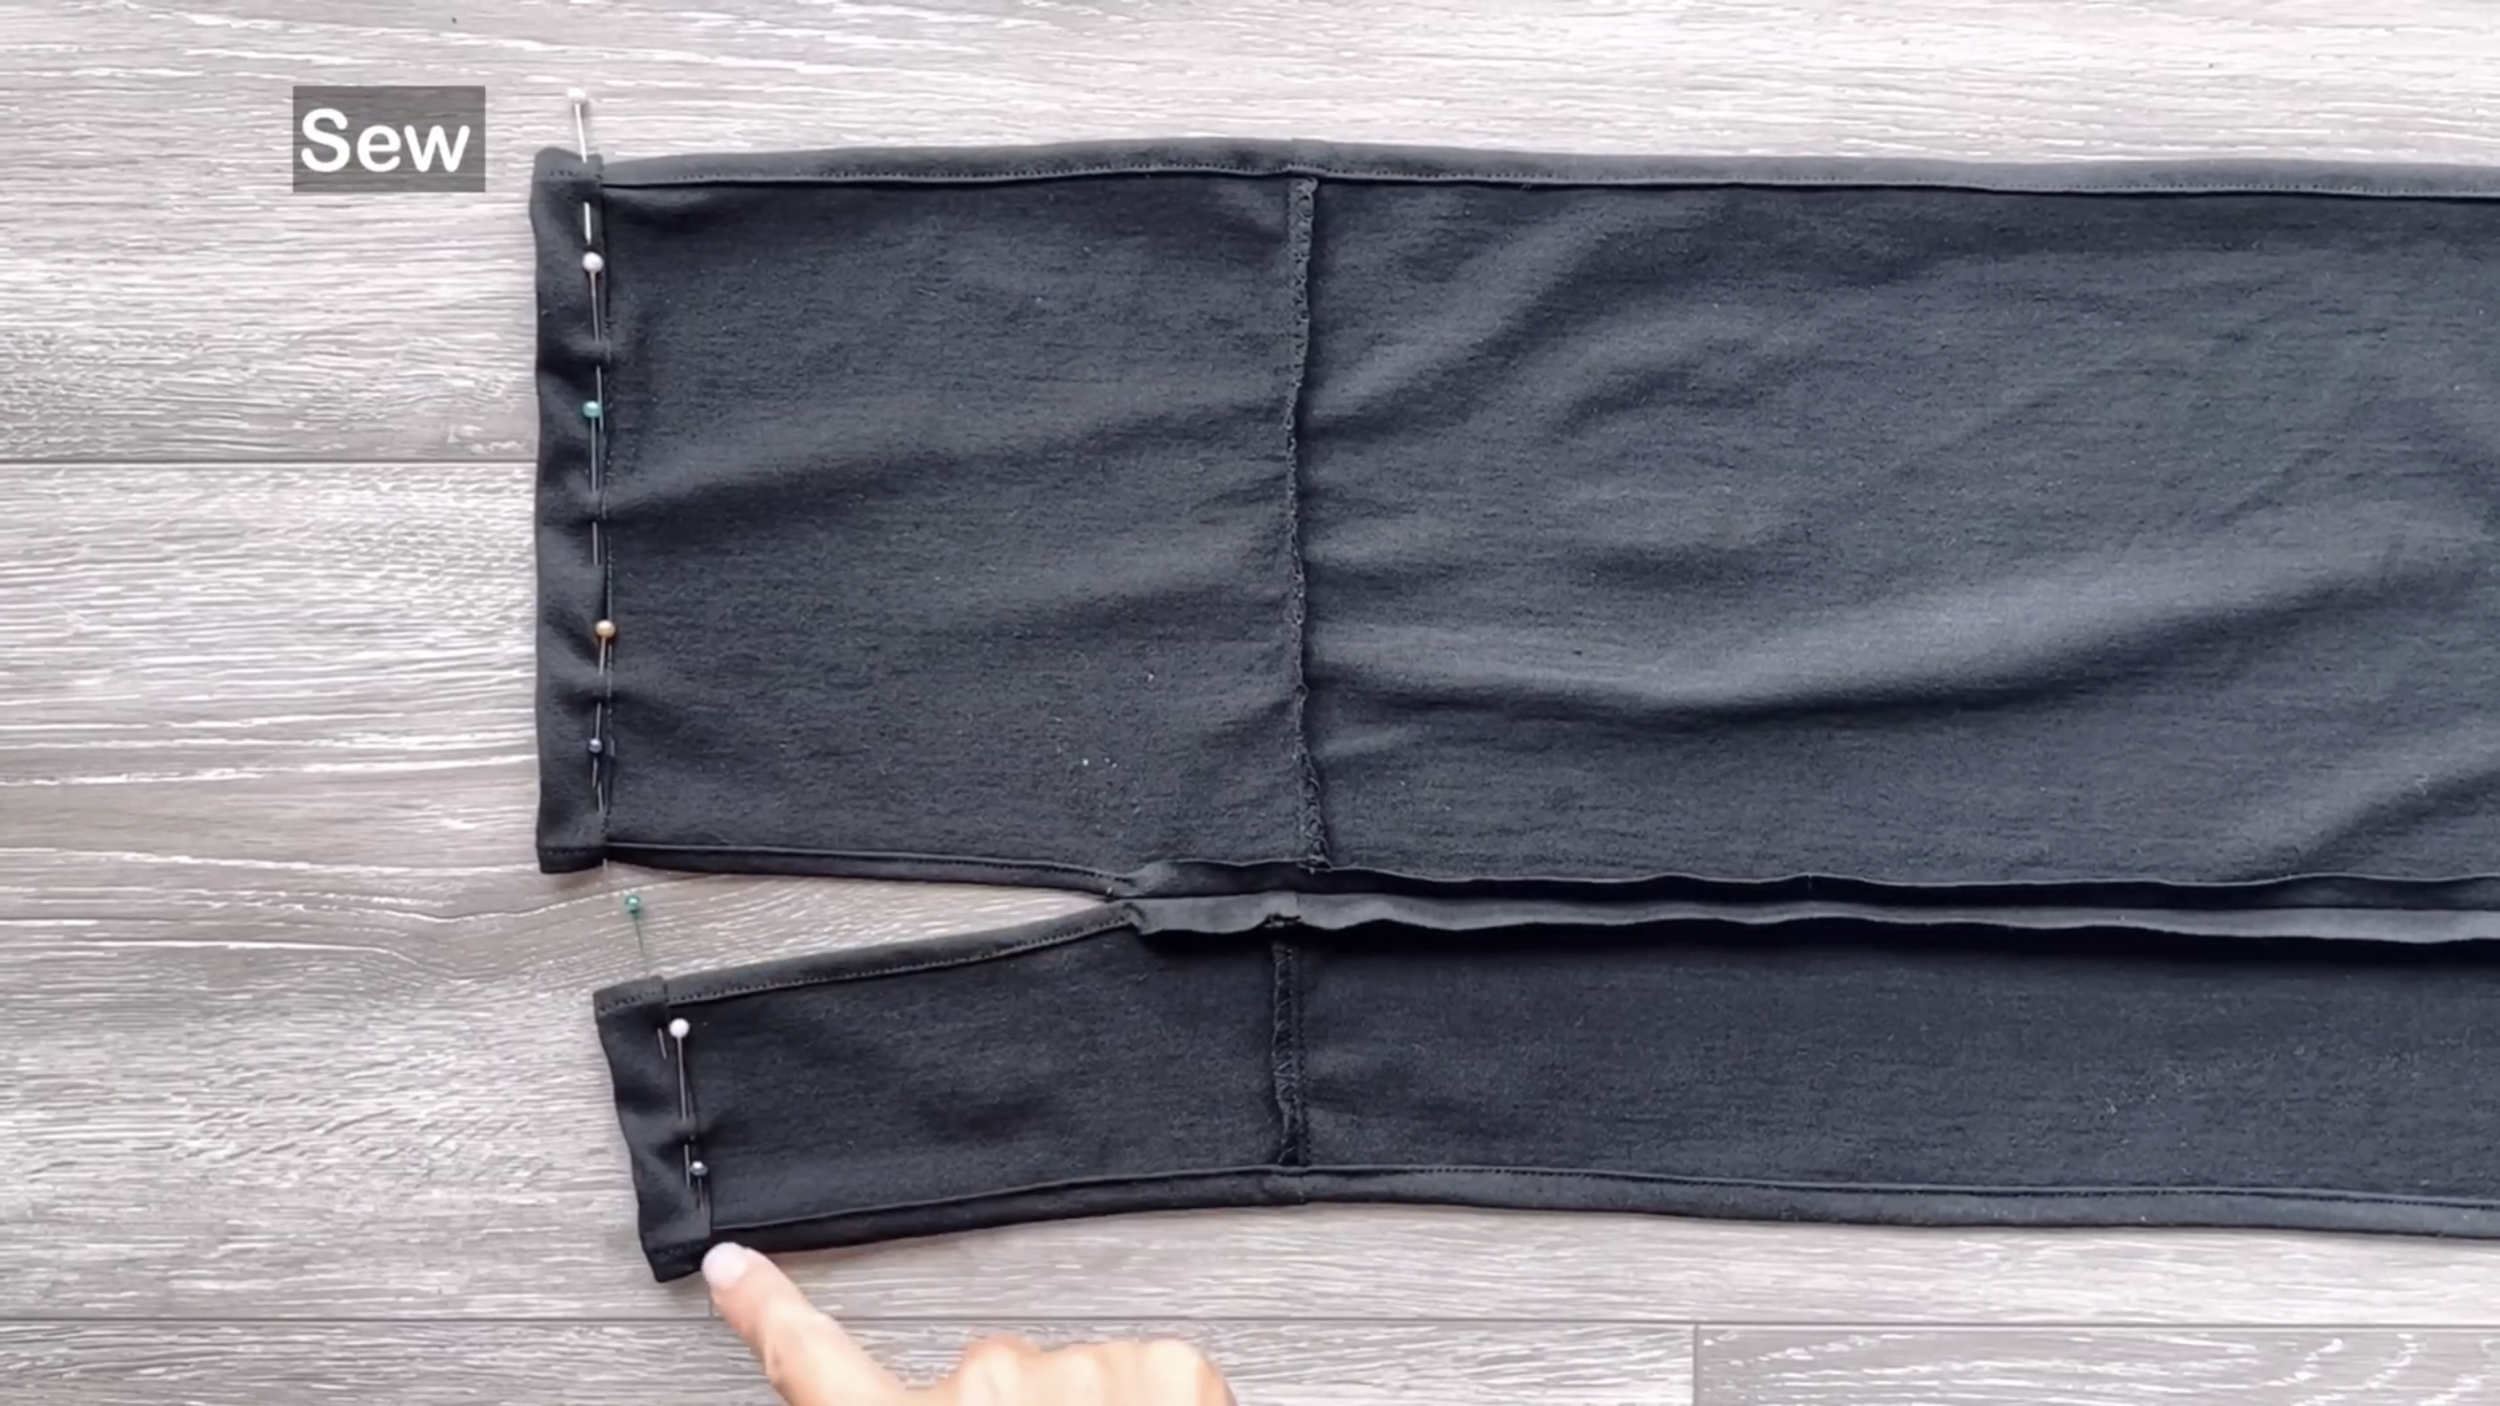
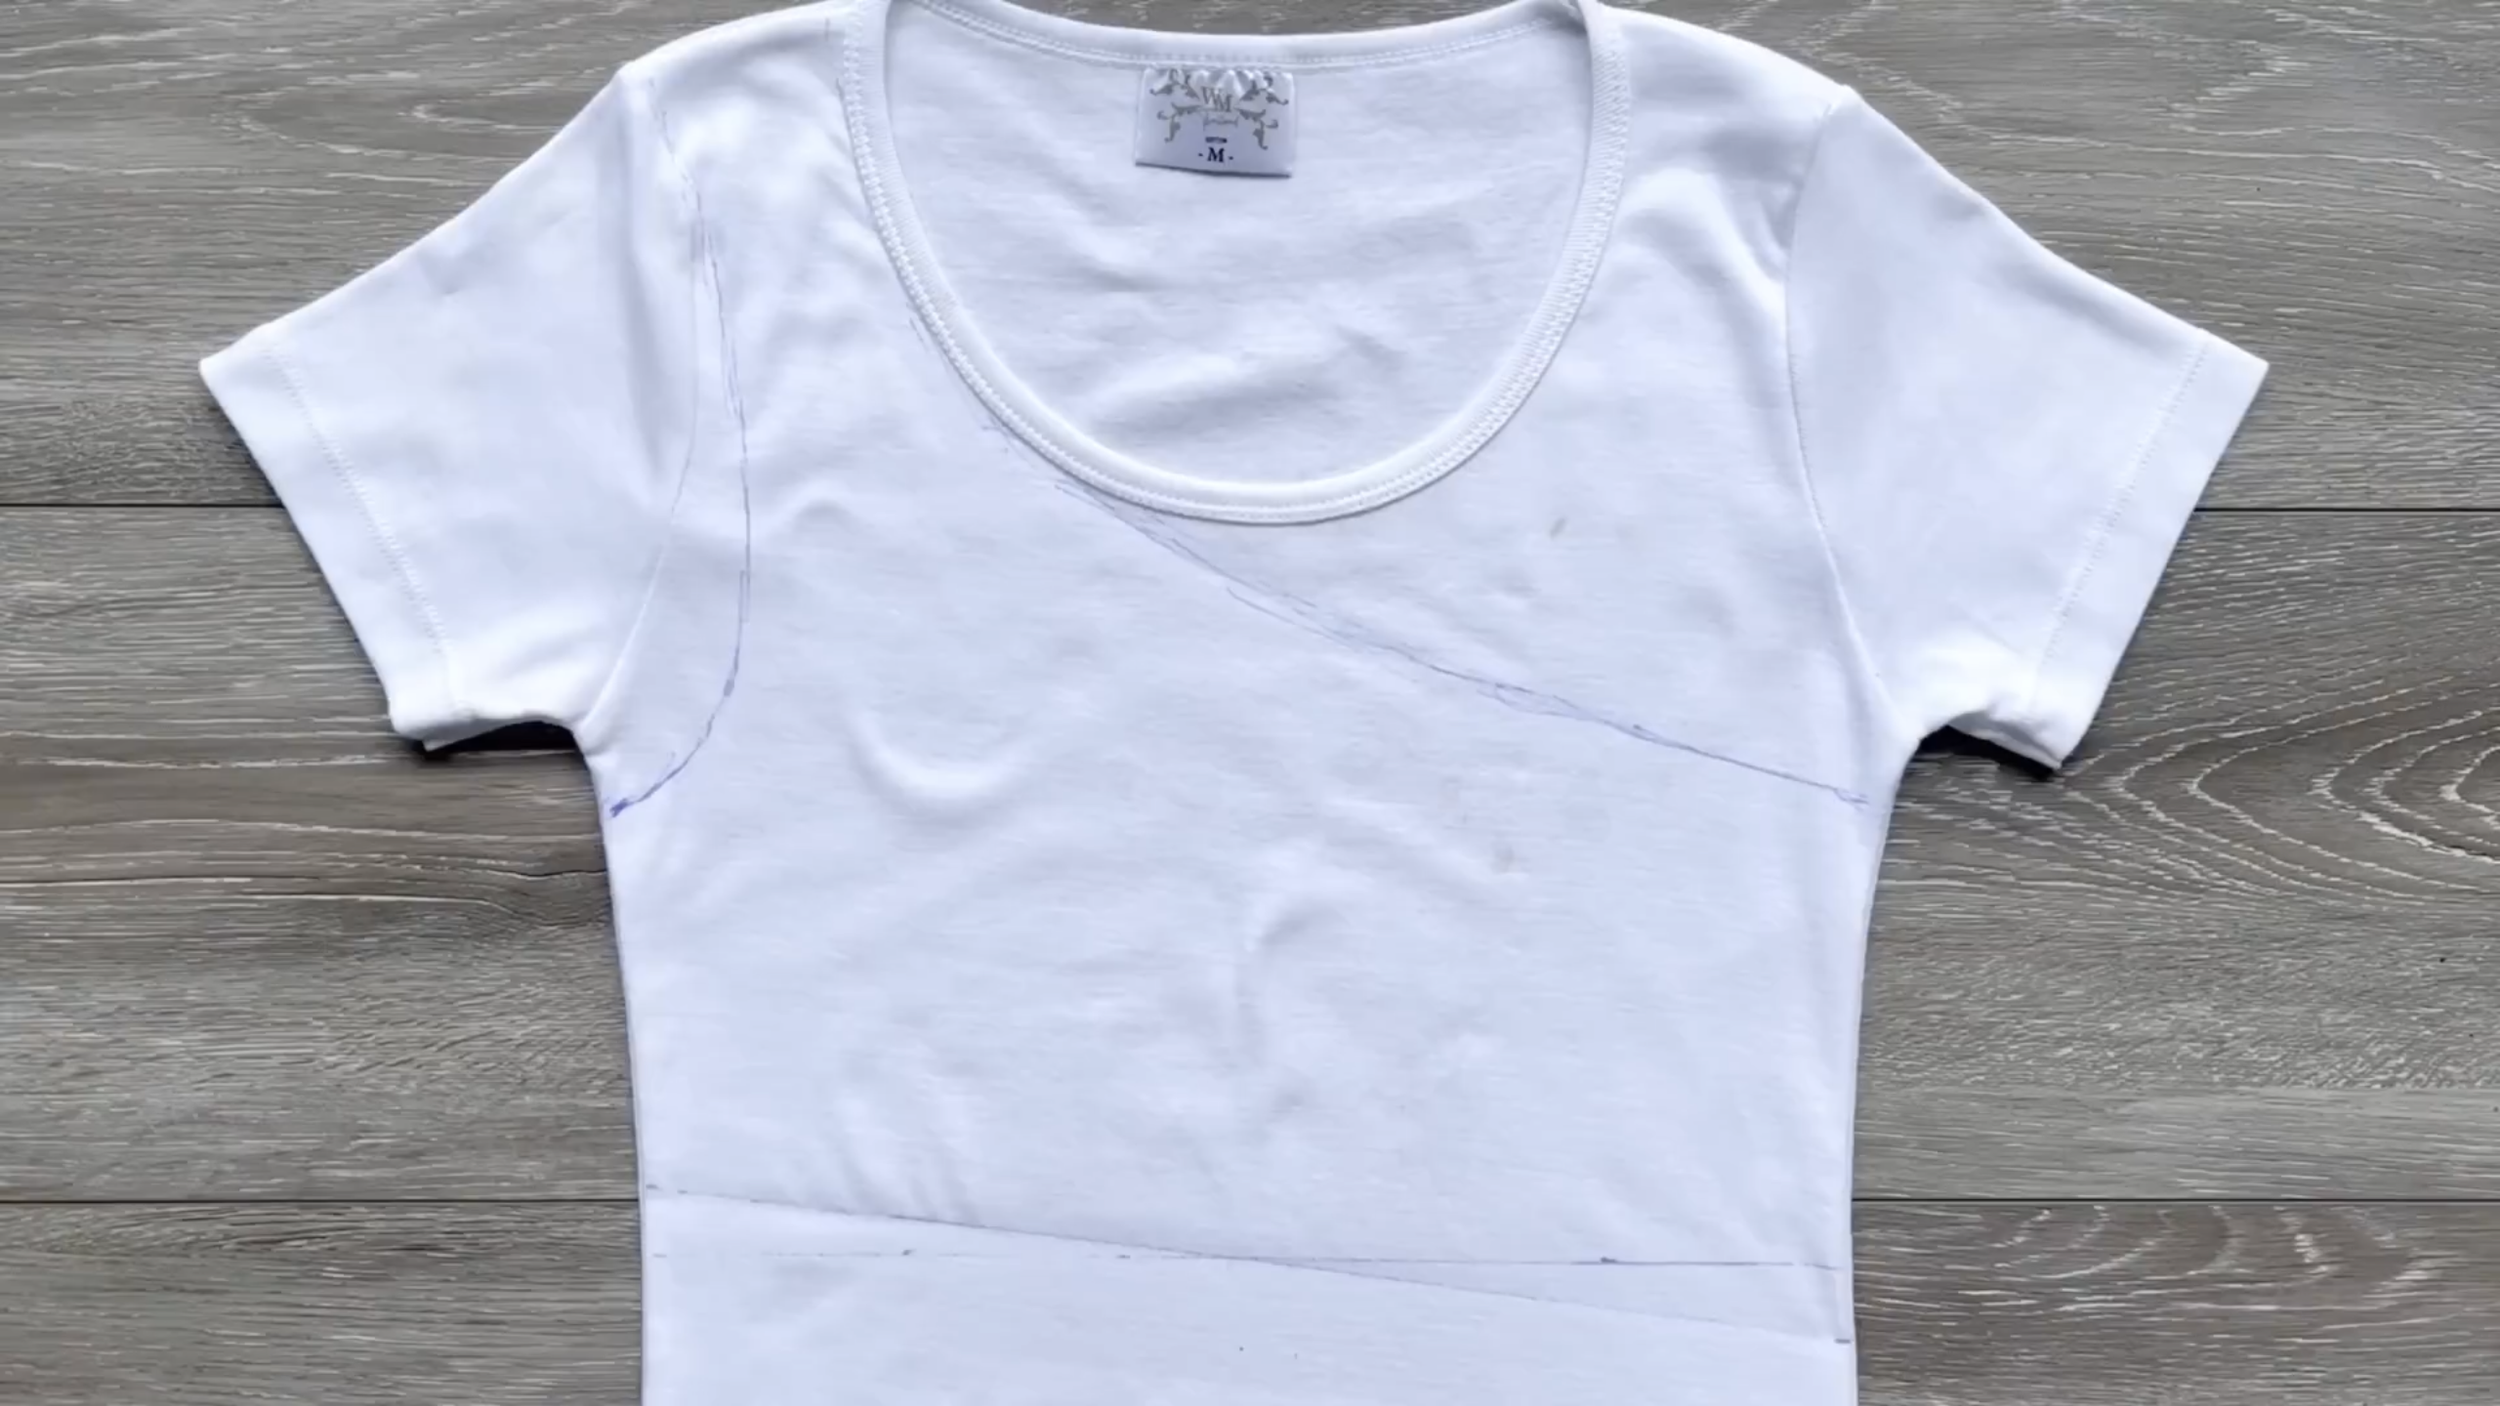
Draw a straight line in the middle of two parts, then cut the front piece only.
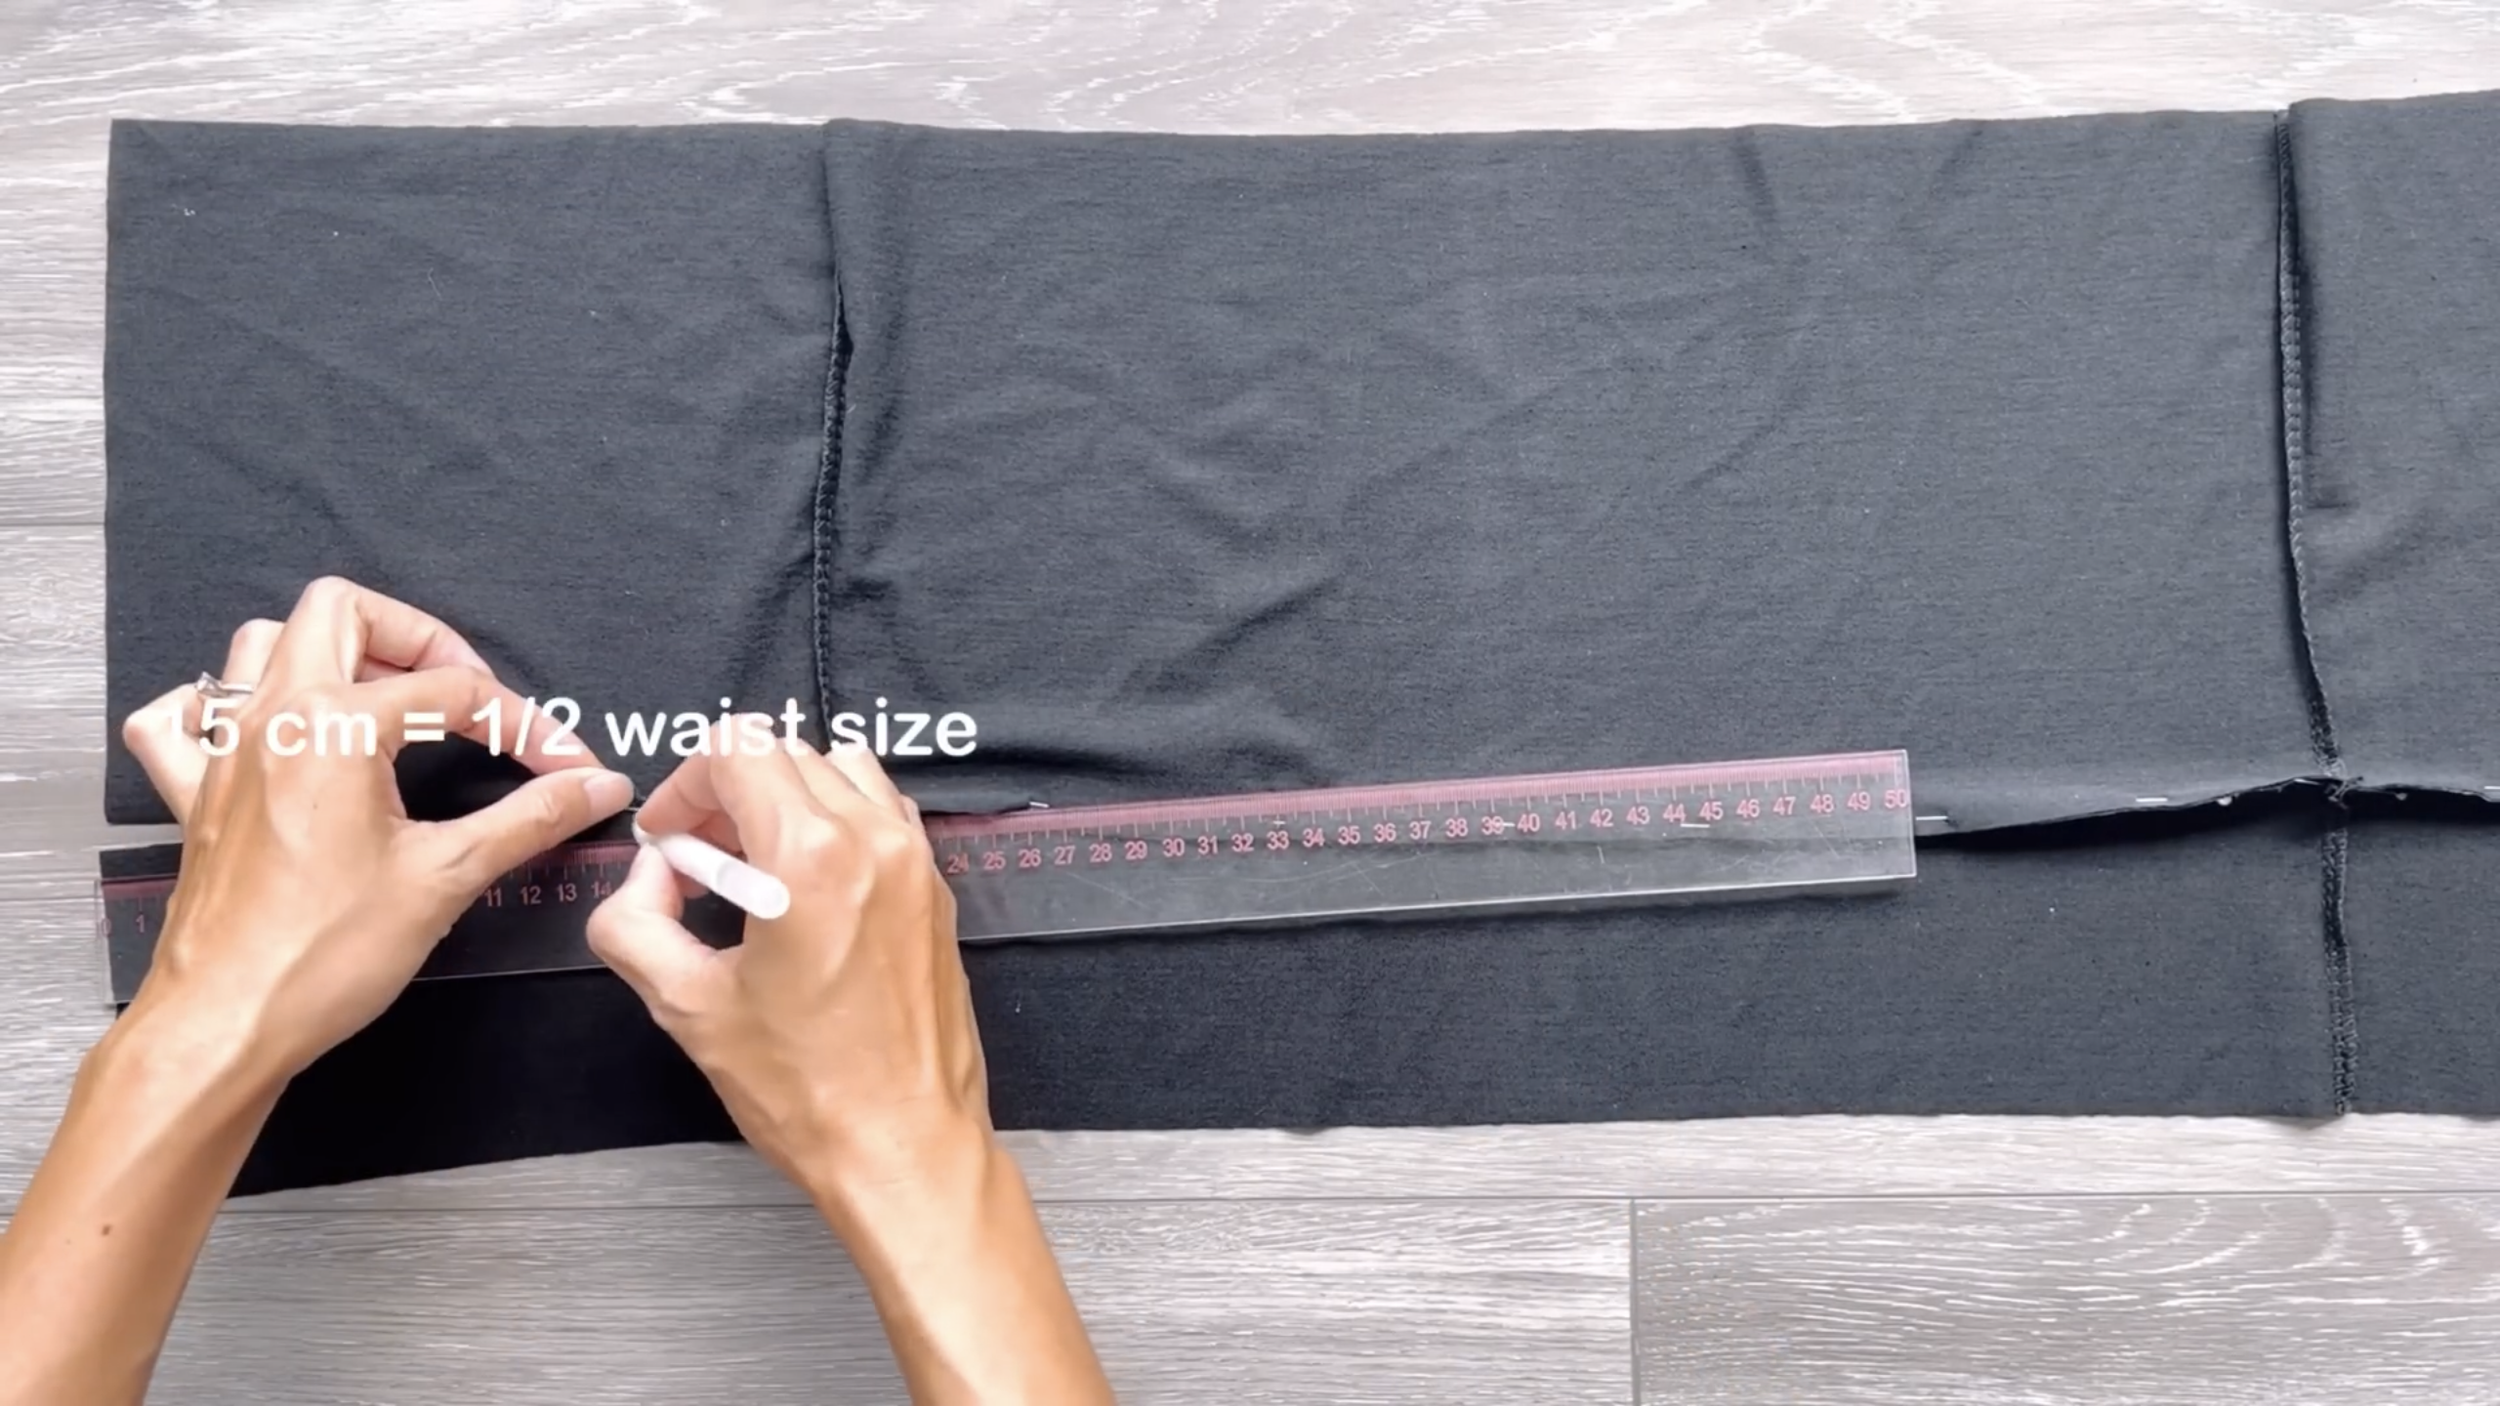
After cutting, connect two parts together at the back and keep around 15 cm open at the front, which is around a quarter of your waist size.
After sewing, finish the open part at the front of the crop top by folding the end fabric inside two times and sewing.
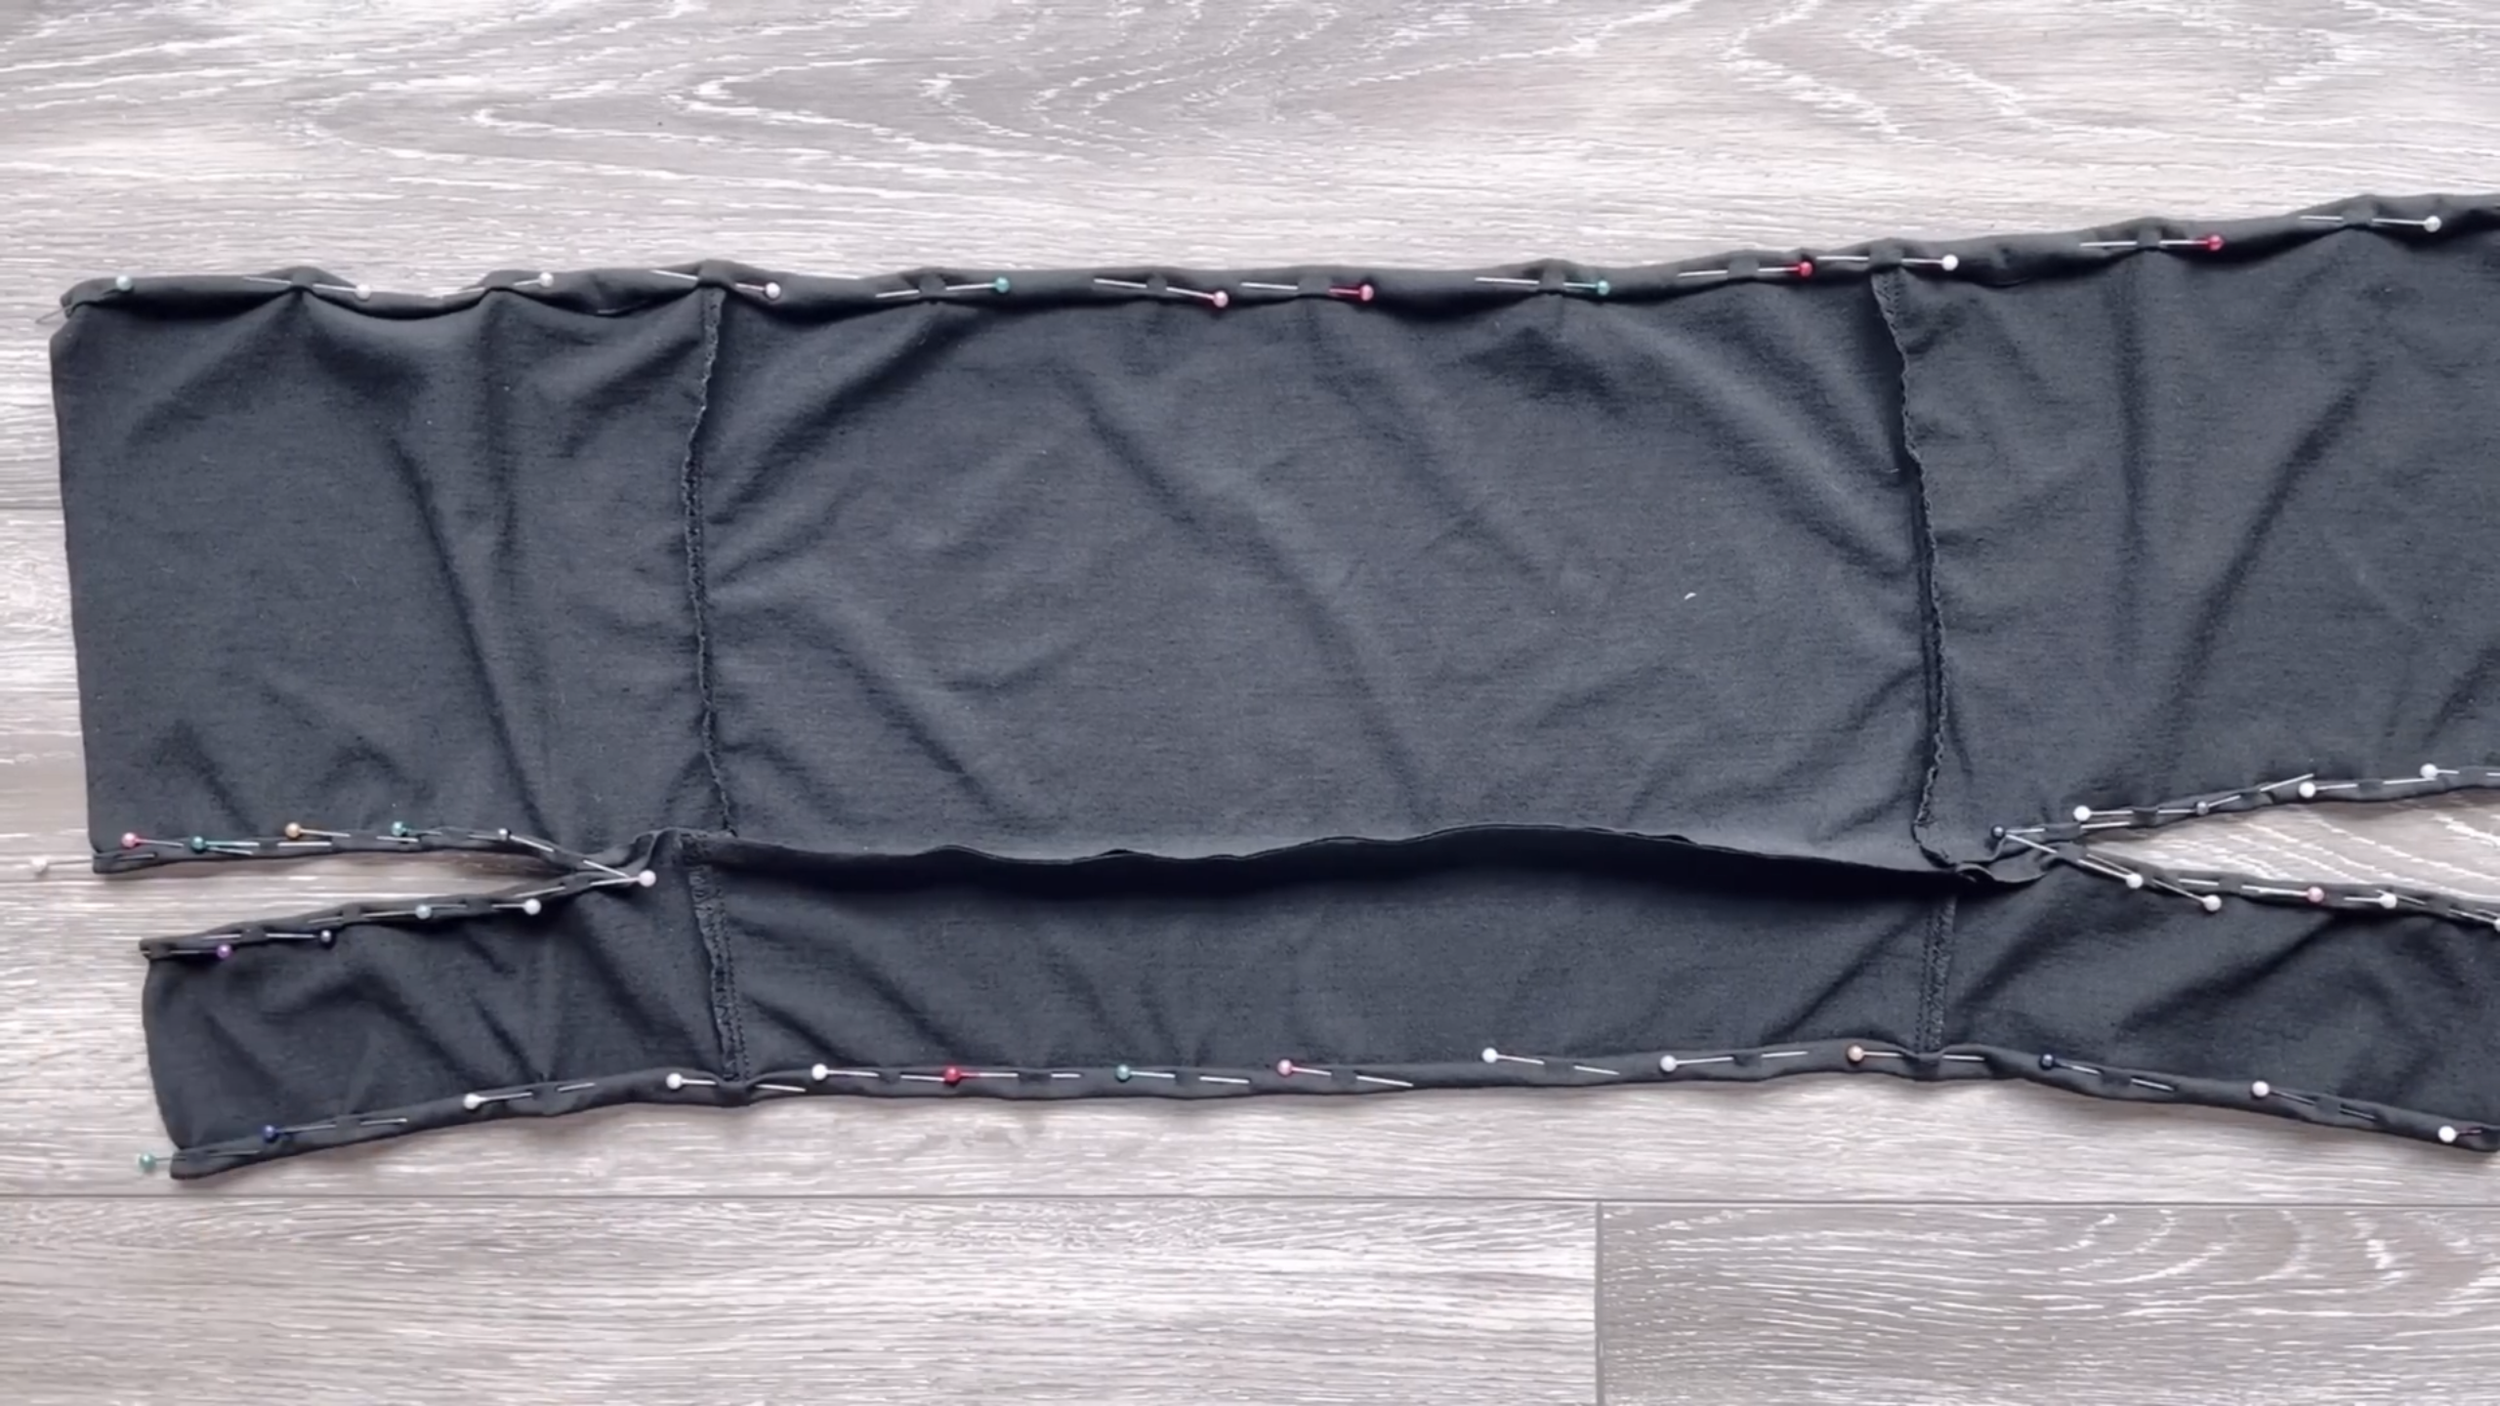
Also, use the same way to finish the top line and the ending line of the crop top.
At the middle of the front part, draw a straight line at 4 cm inside the edge of the fabric.
Fold the edge fabric inside around 0.5 cm first, then keep folding it to the line drawn before it and sew.
Do the same for two sides of the big part and the small part.
And you will have the fabric hole in the middle of the front crop top after all.
To make the tie, use the leftover fabric to cut a long fabric with 3.5 cm width.
Fold two length lines of the fabric in the middle first, then keep folding them again and sew to finish the tie.
Use a small safety pin to put the tie through the fabric hole from the big part to the other hole of the small part.
DIY Cut out crop top from t-shirt | T-shirt transformation ideas | Easy sewing tutorial for beginner
And voila! This DIY is finished. Here's the final transformation. The cut-out design makes this crop top super sexy, and I'm sure you will stand out when you're wearing it.
3. ONE SHOULDER CUT OUT CROP TOP

For this DIY, use a small-size t-shirt.
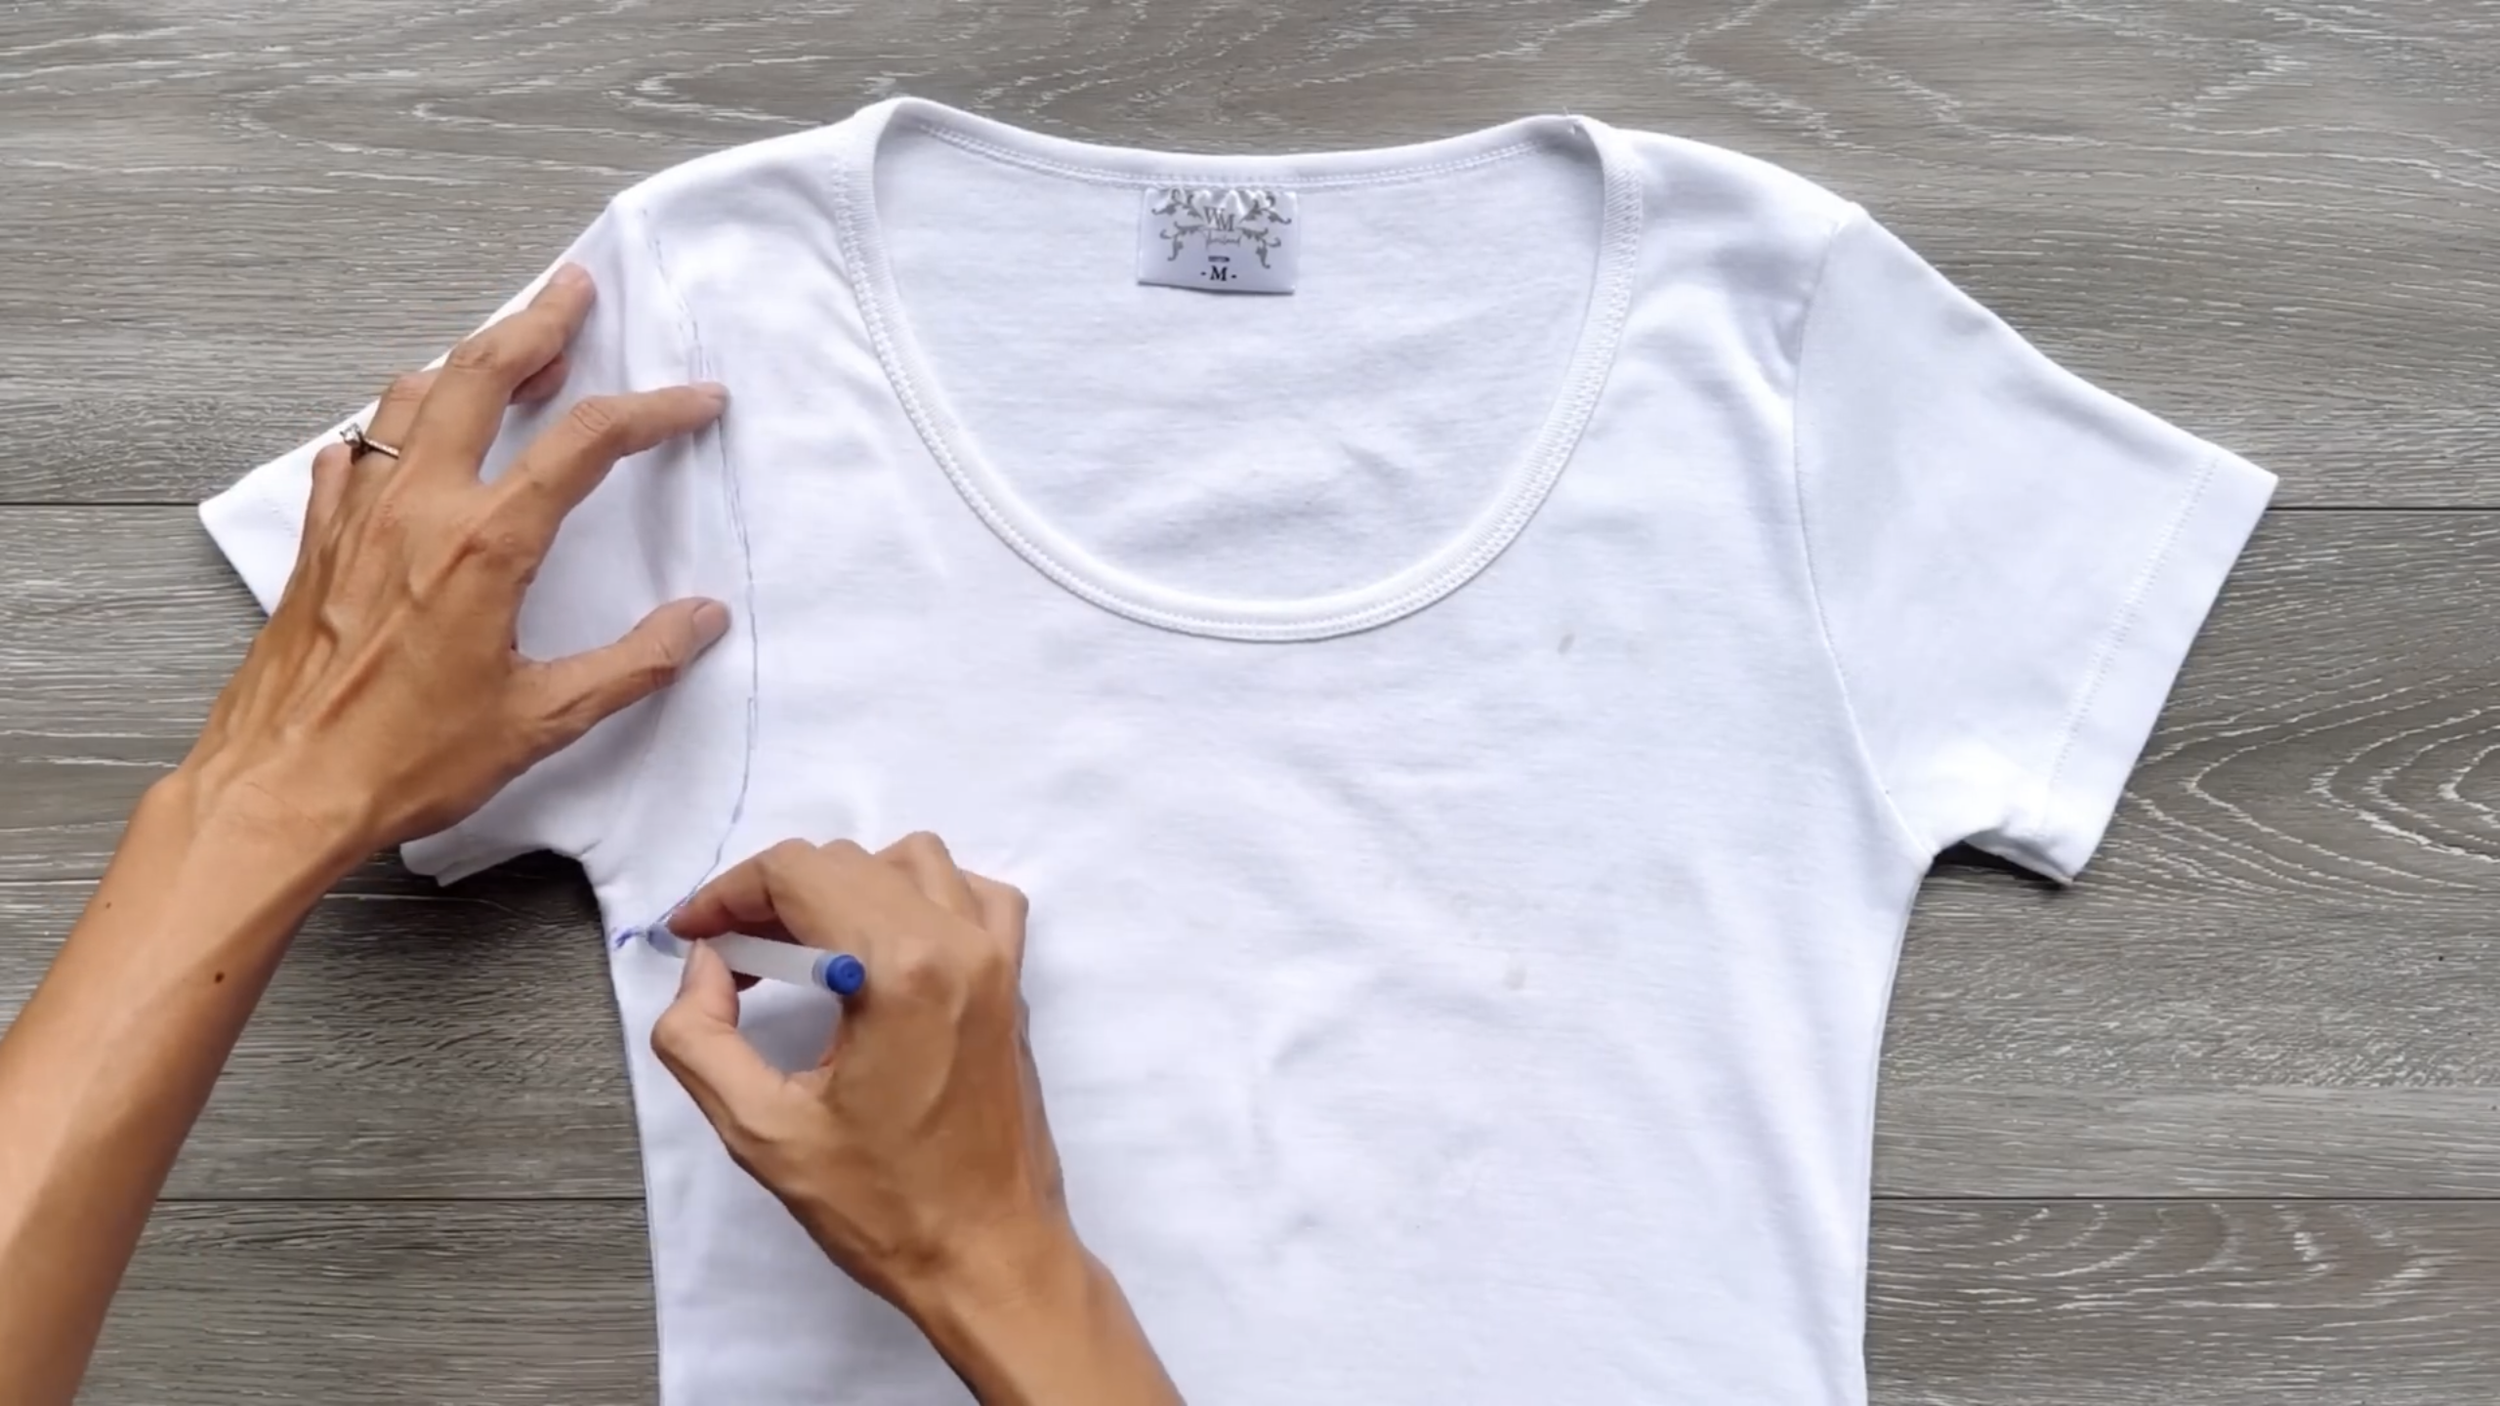
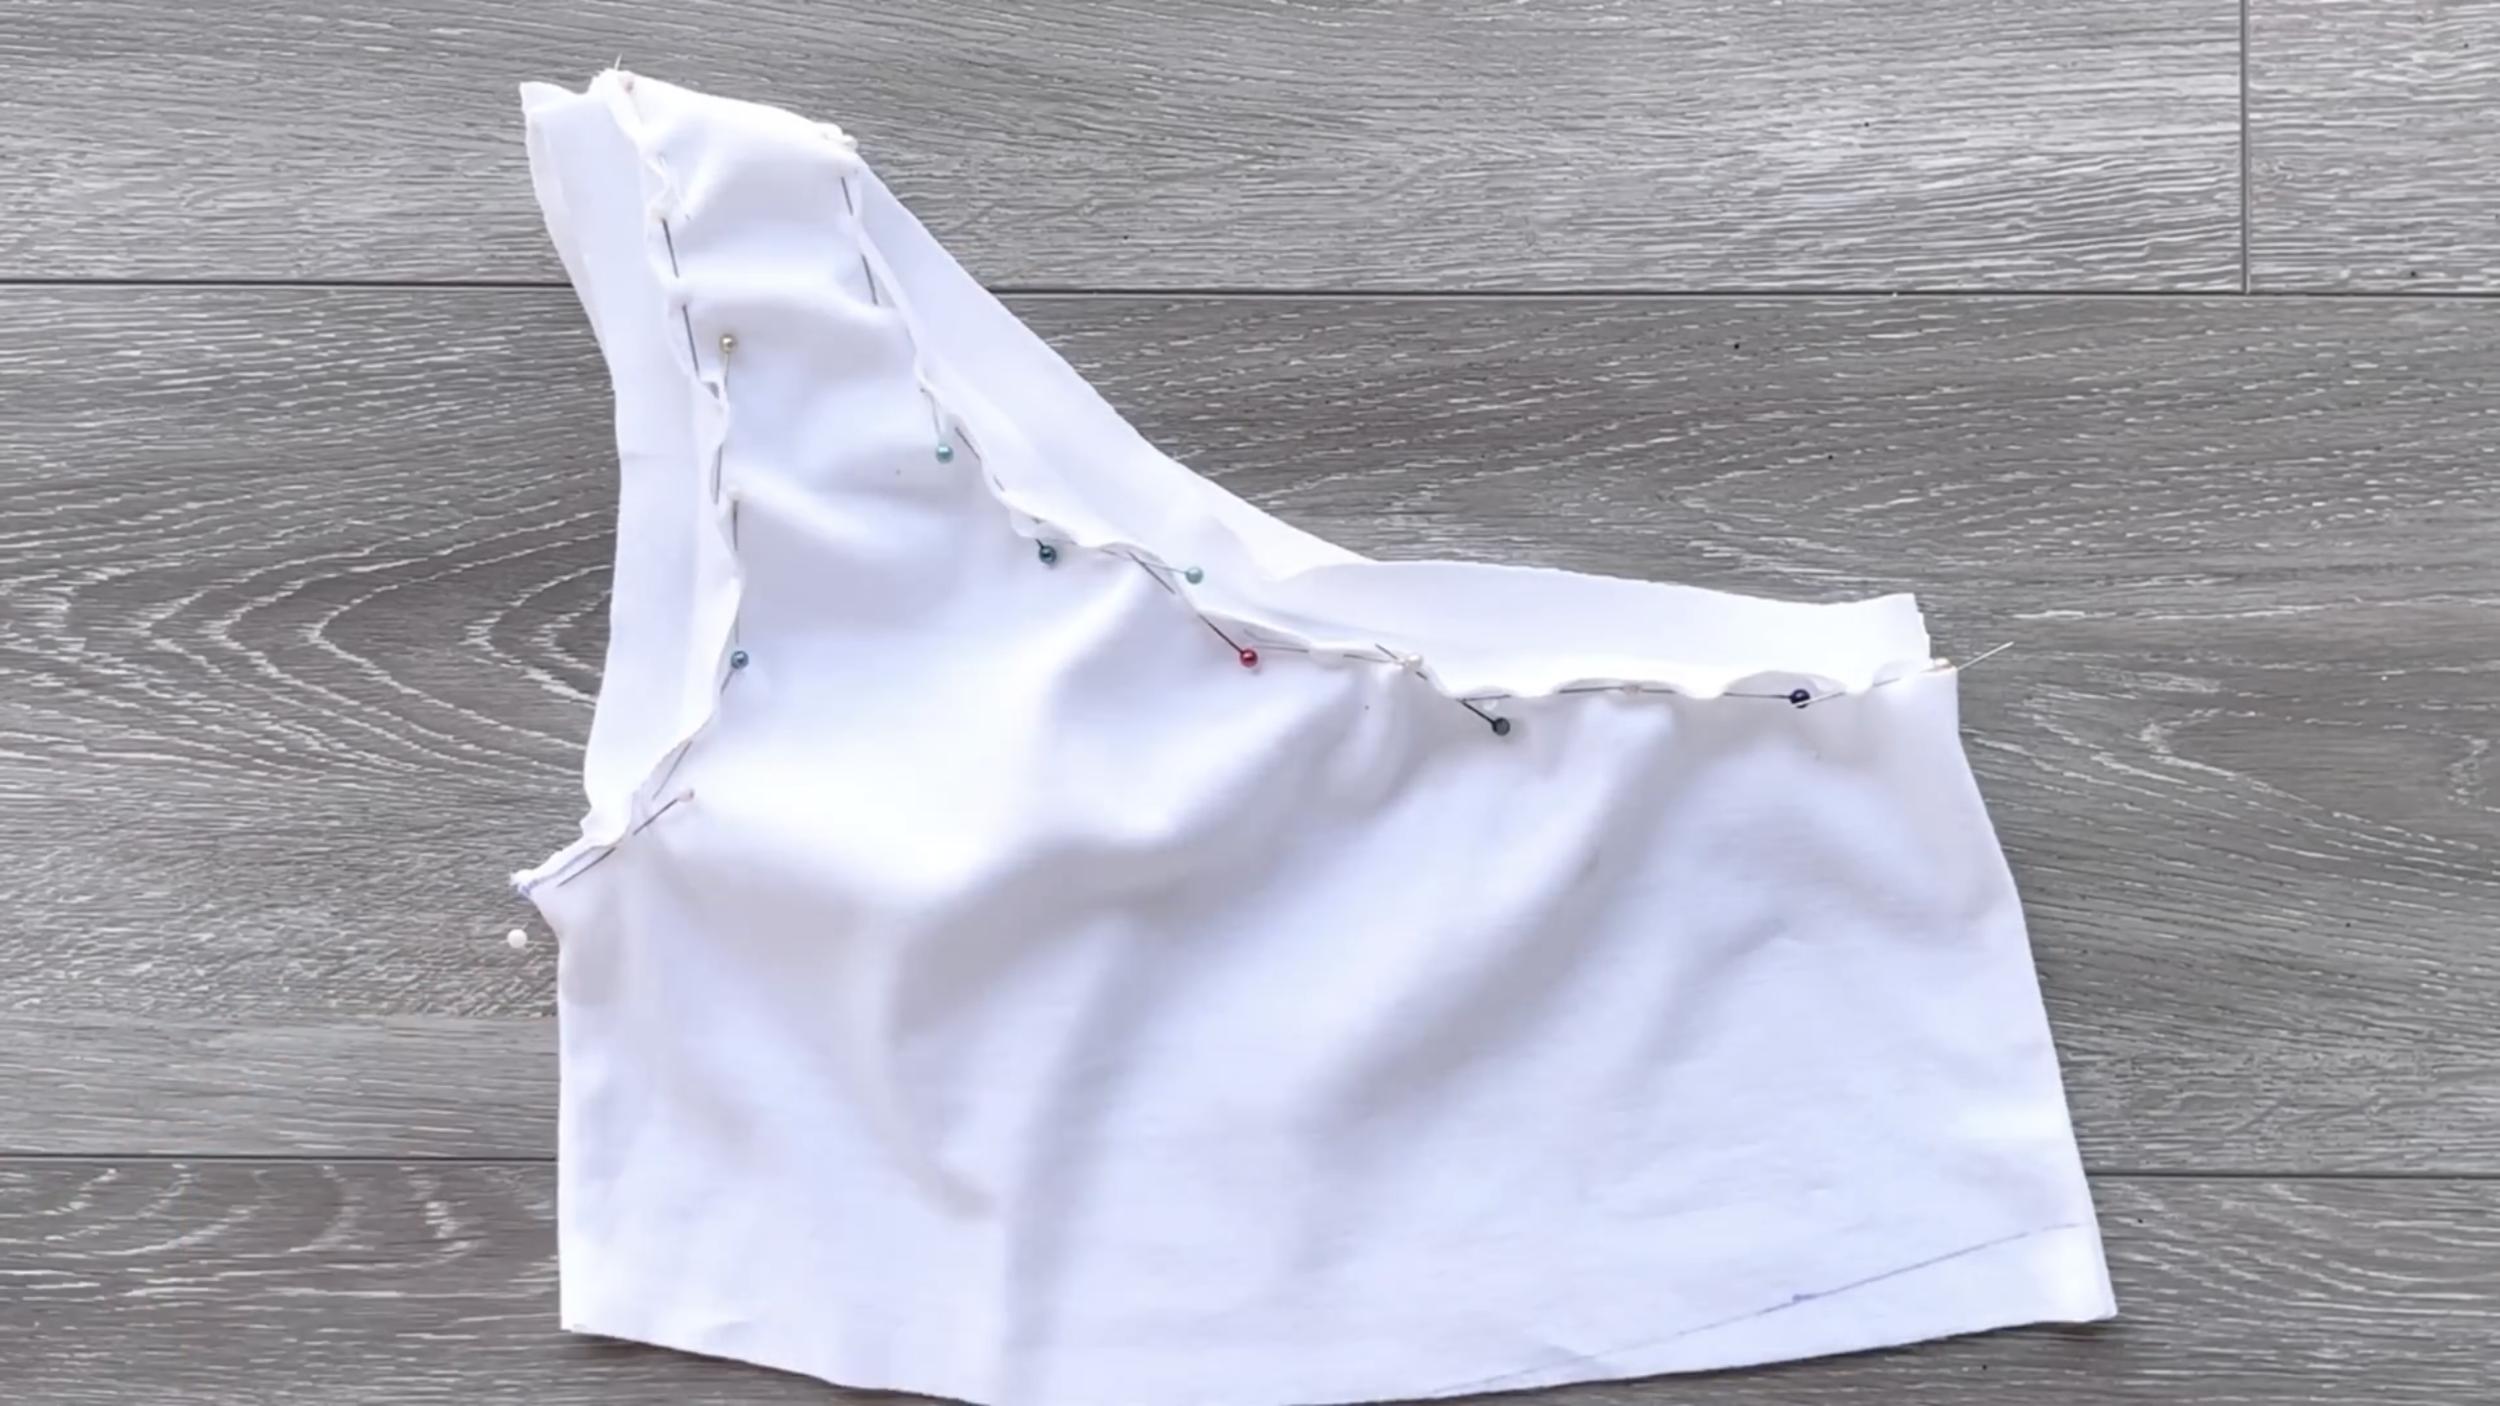
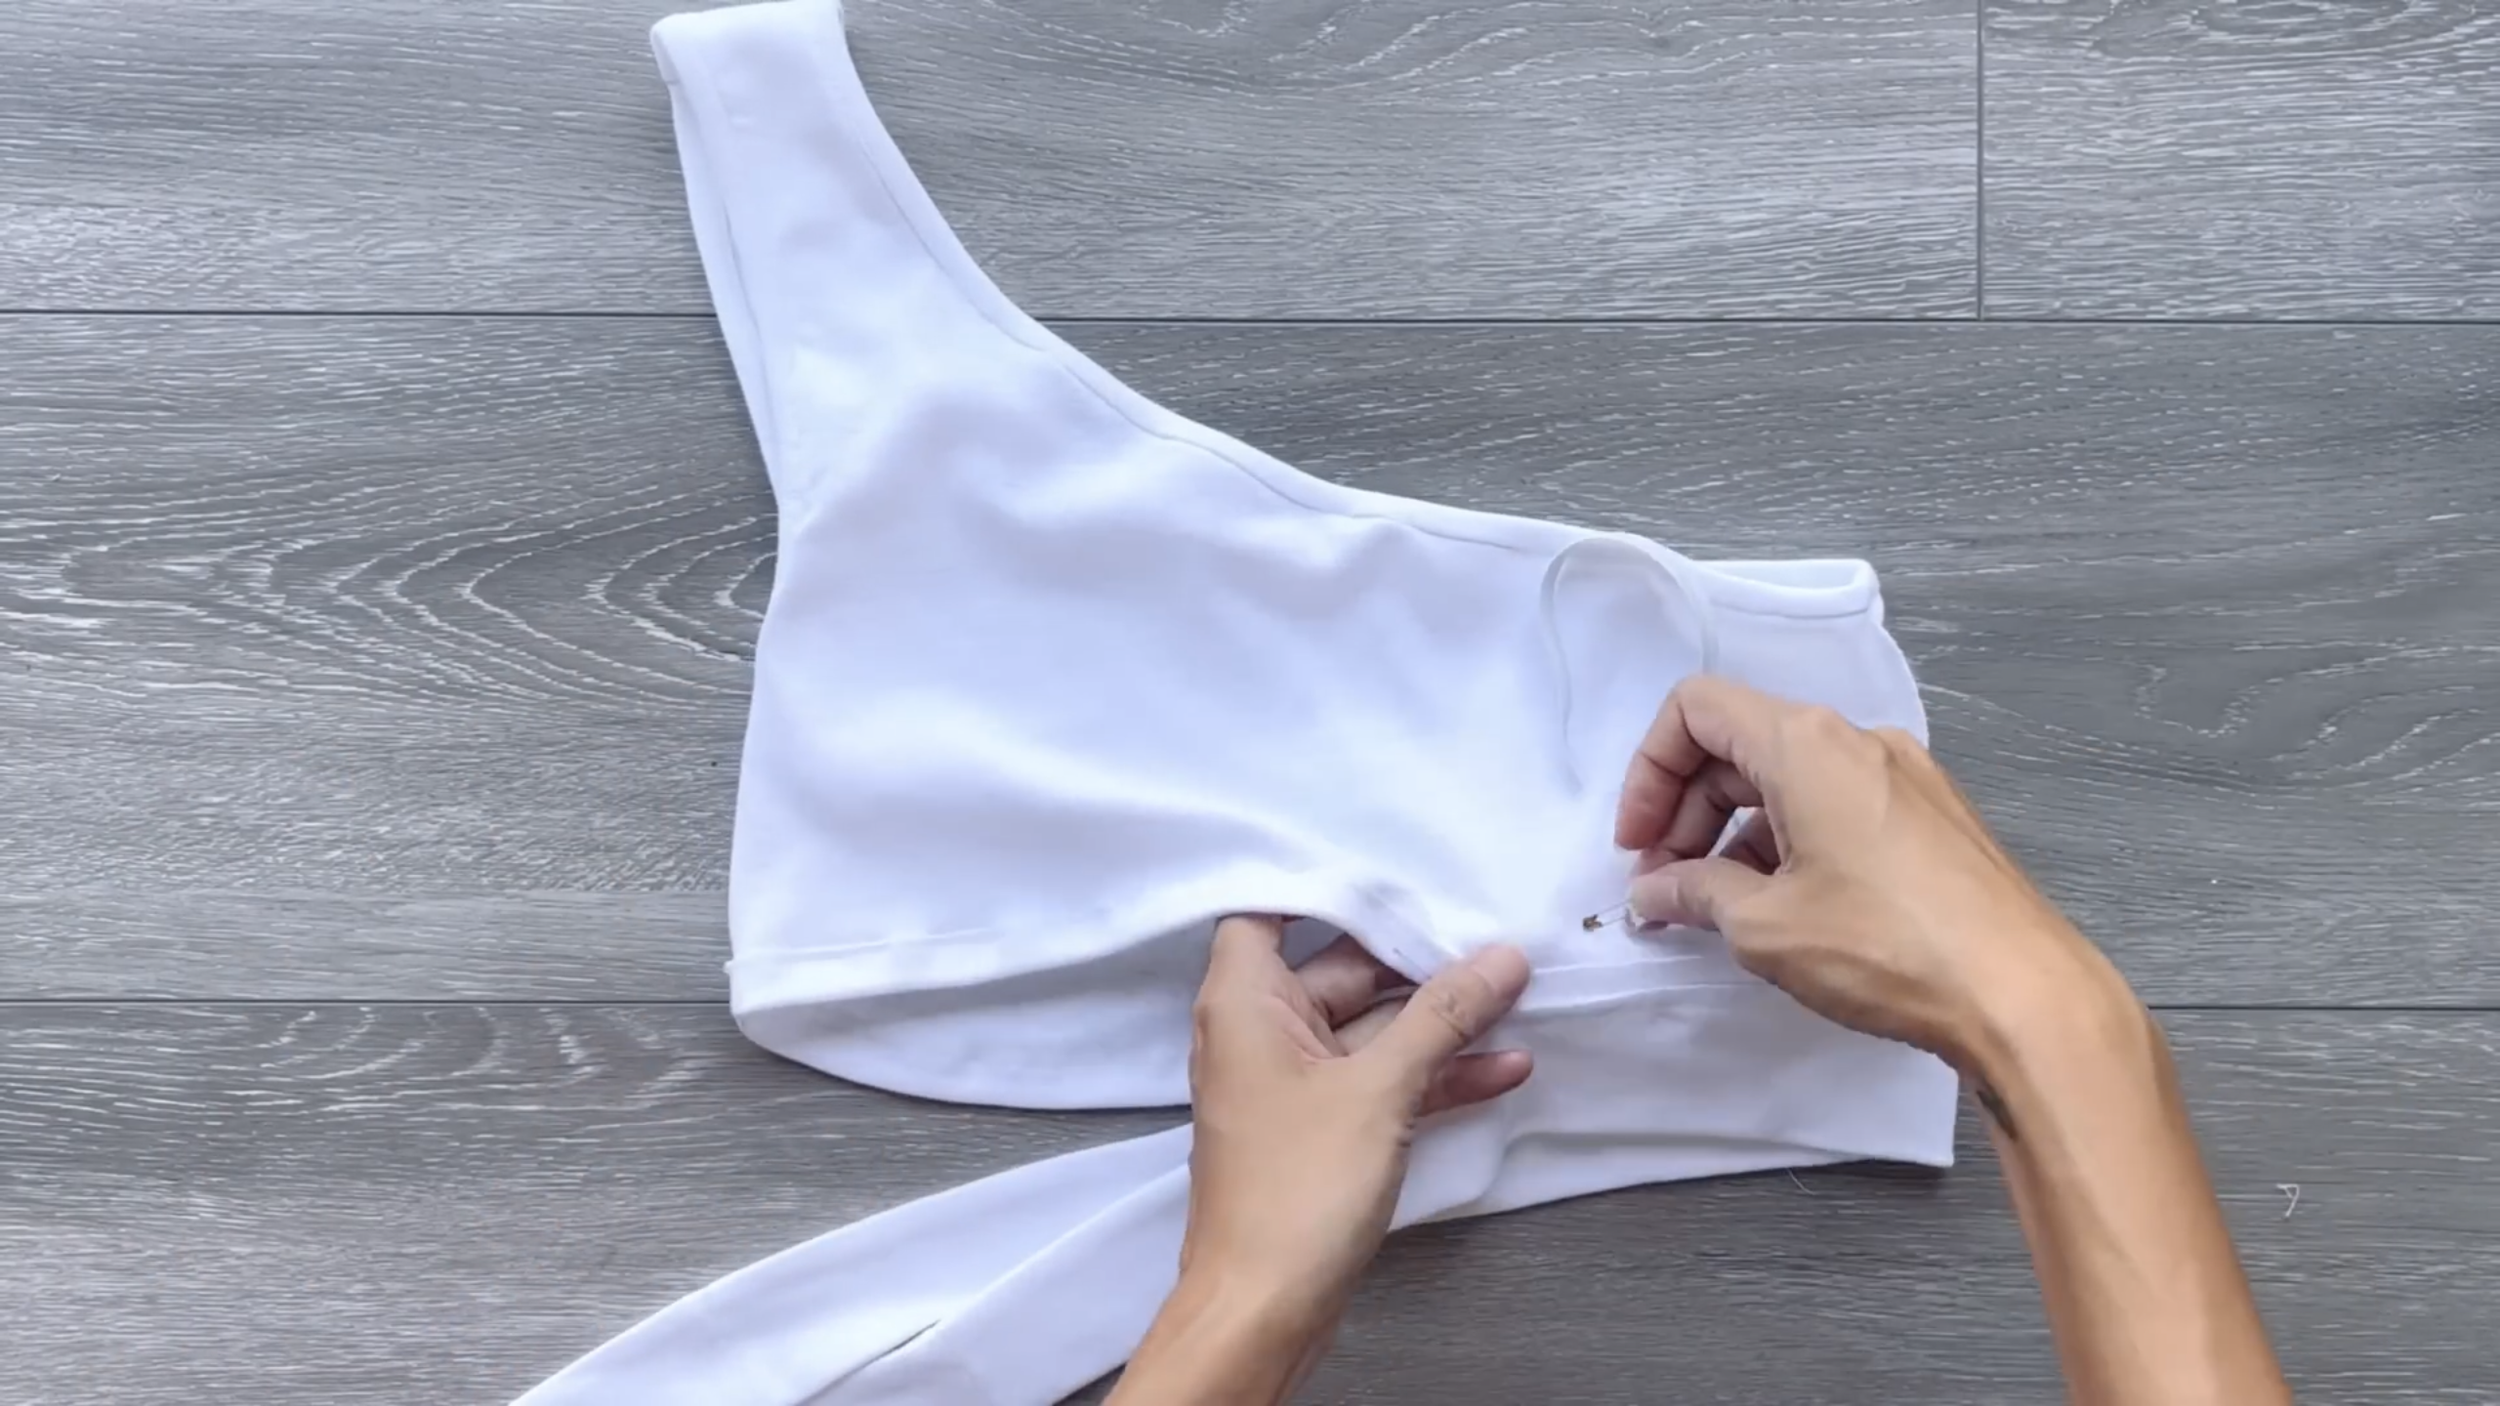
At the sleeve of the t-shirt, redraw the sleeve line to make it become a sleeveless style.

After that, draw a curved line from the shoulder to the end of the other sleeve to create a one-shoulder look for the crop top.
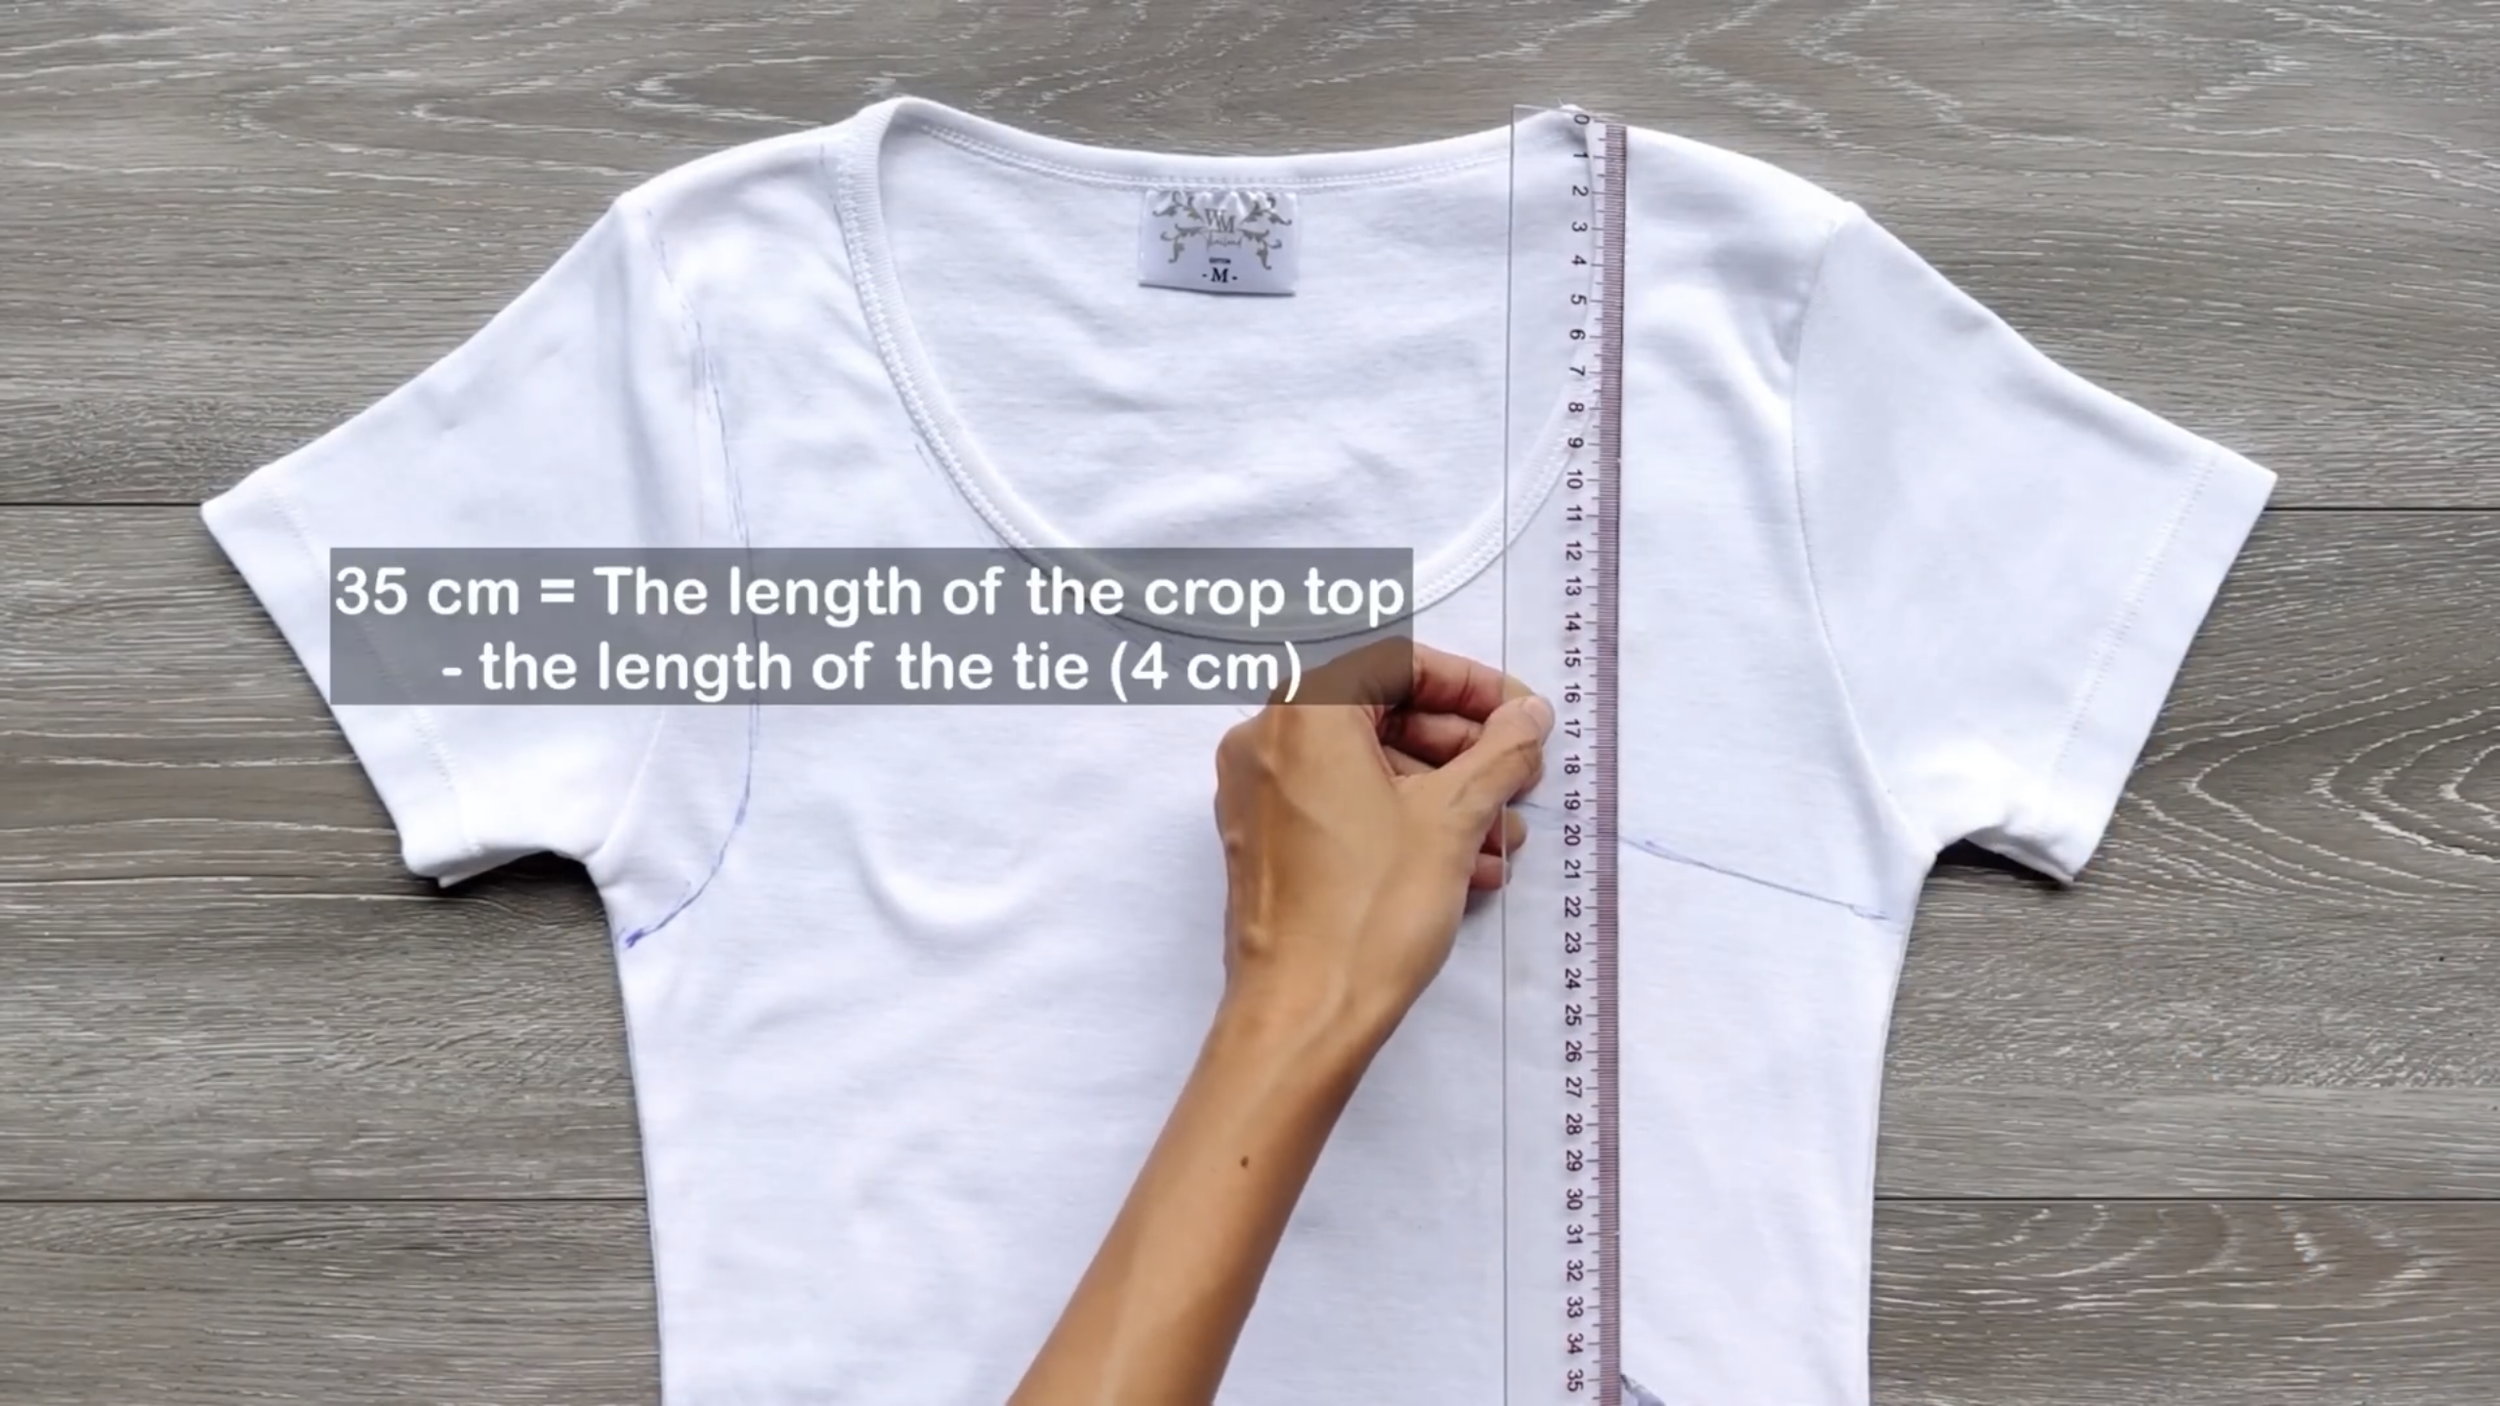
From the top of the t-shirt, mark down 35 cm, which is the length of the crop top that is wanted minus the length of the tie part.
Then, draw a line based on these marks.
To make the cut-out look bigger, make this line a big lean from this sleeve to the other side.
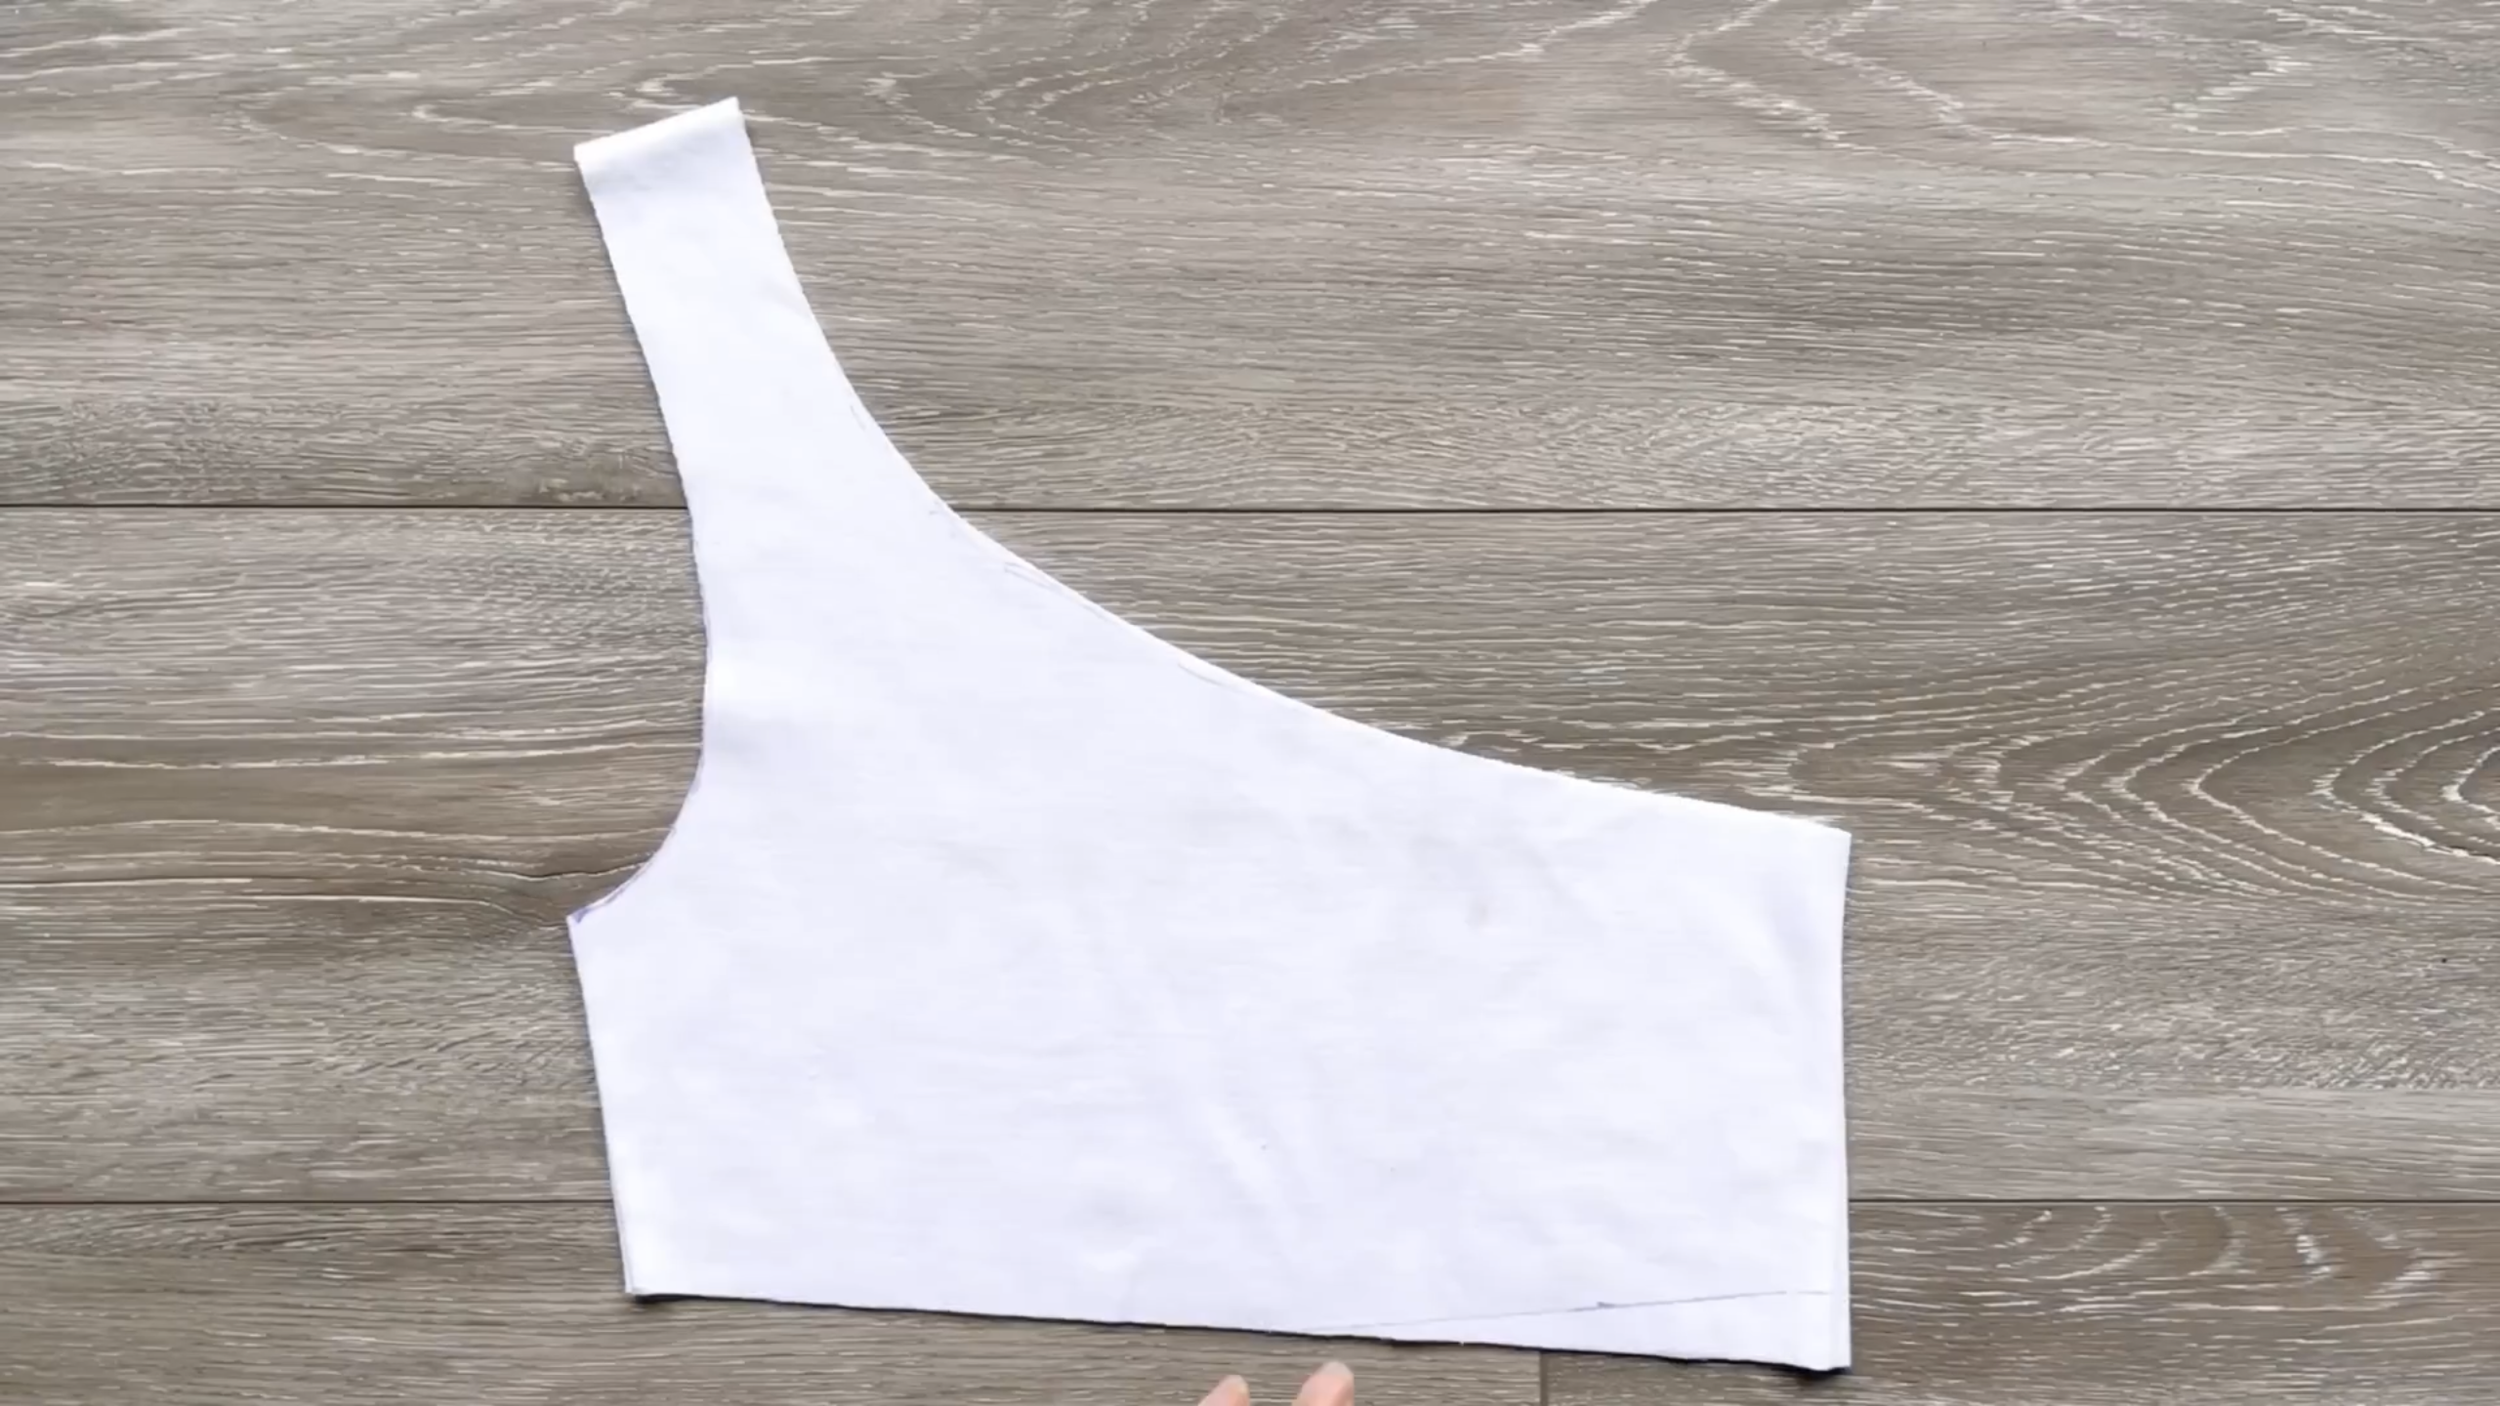
And the body of the crop top will be ready after cutting.
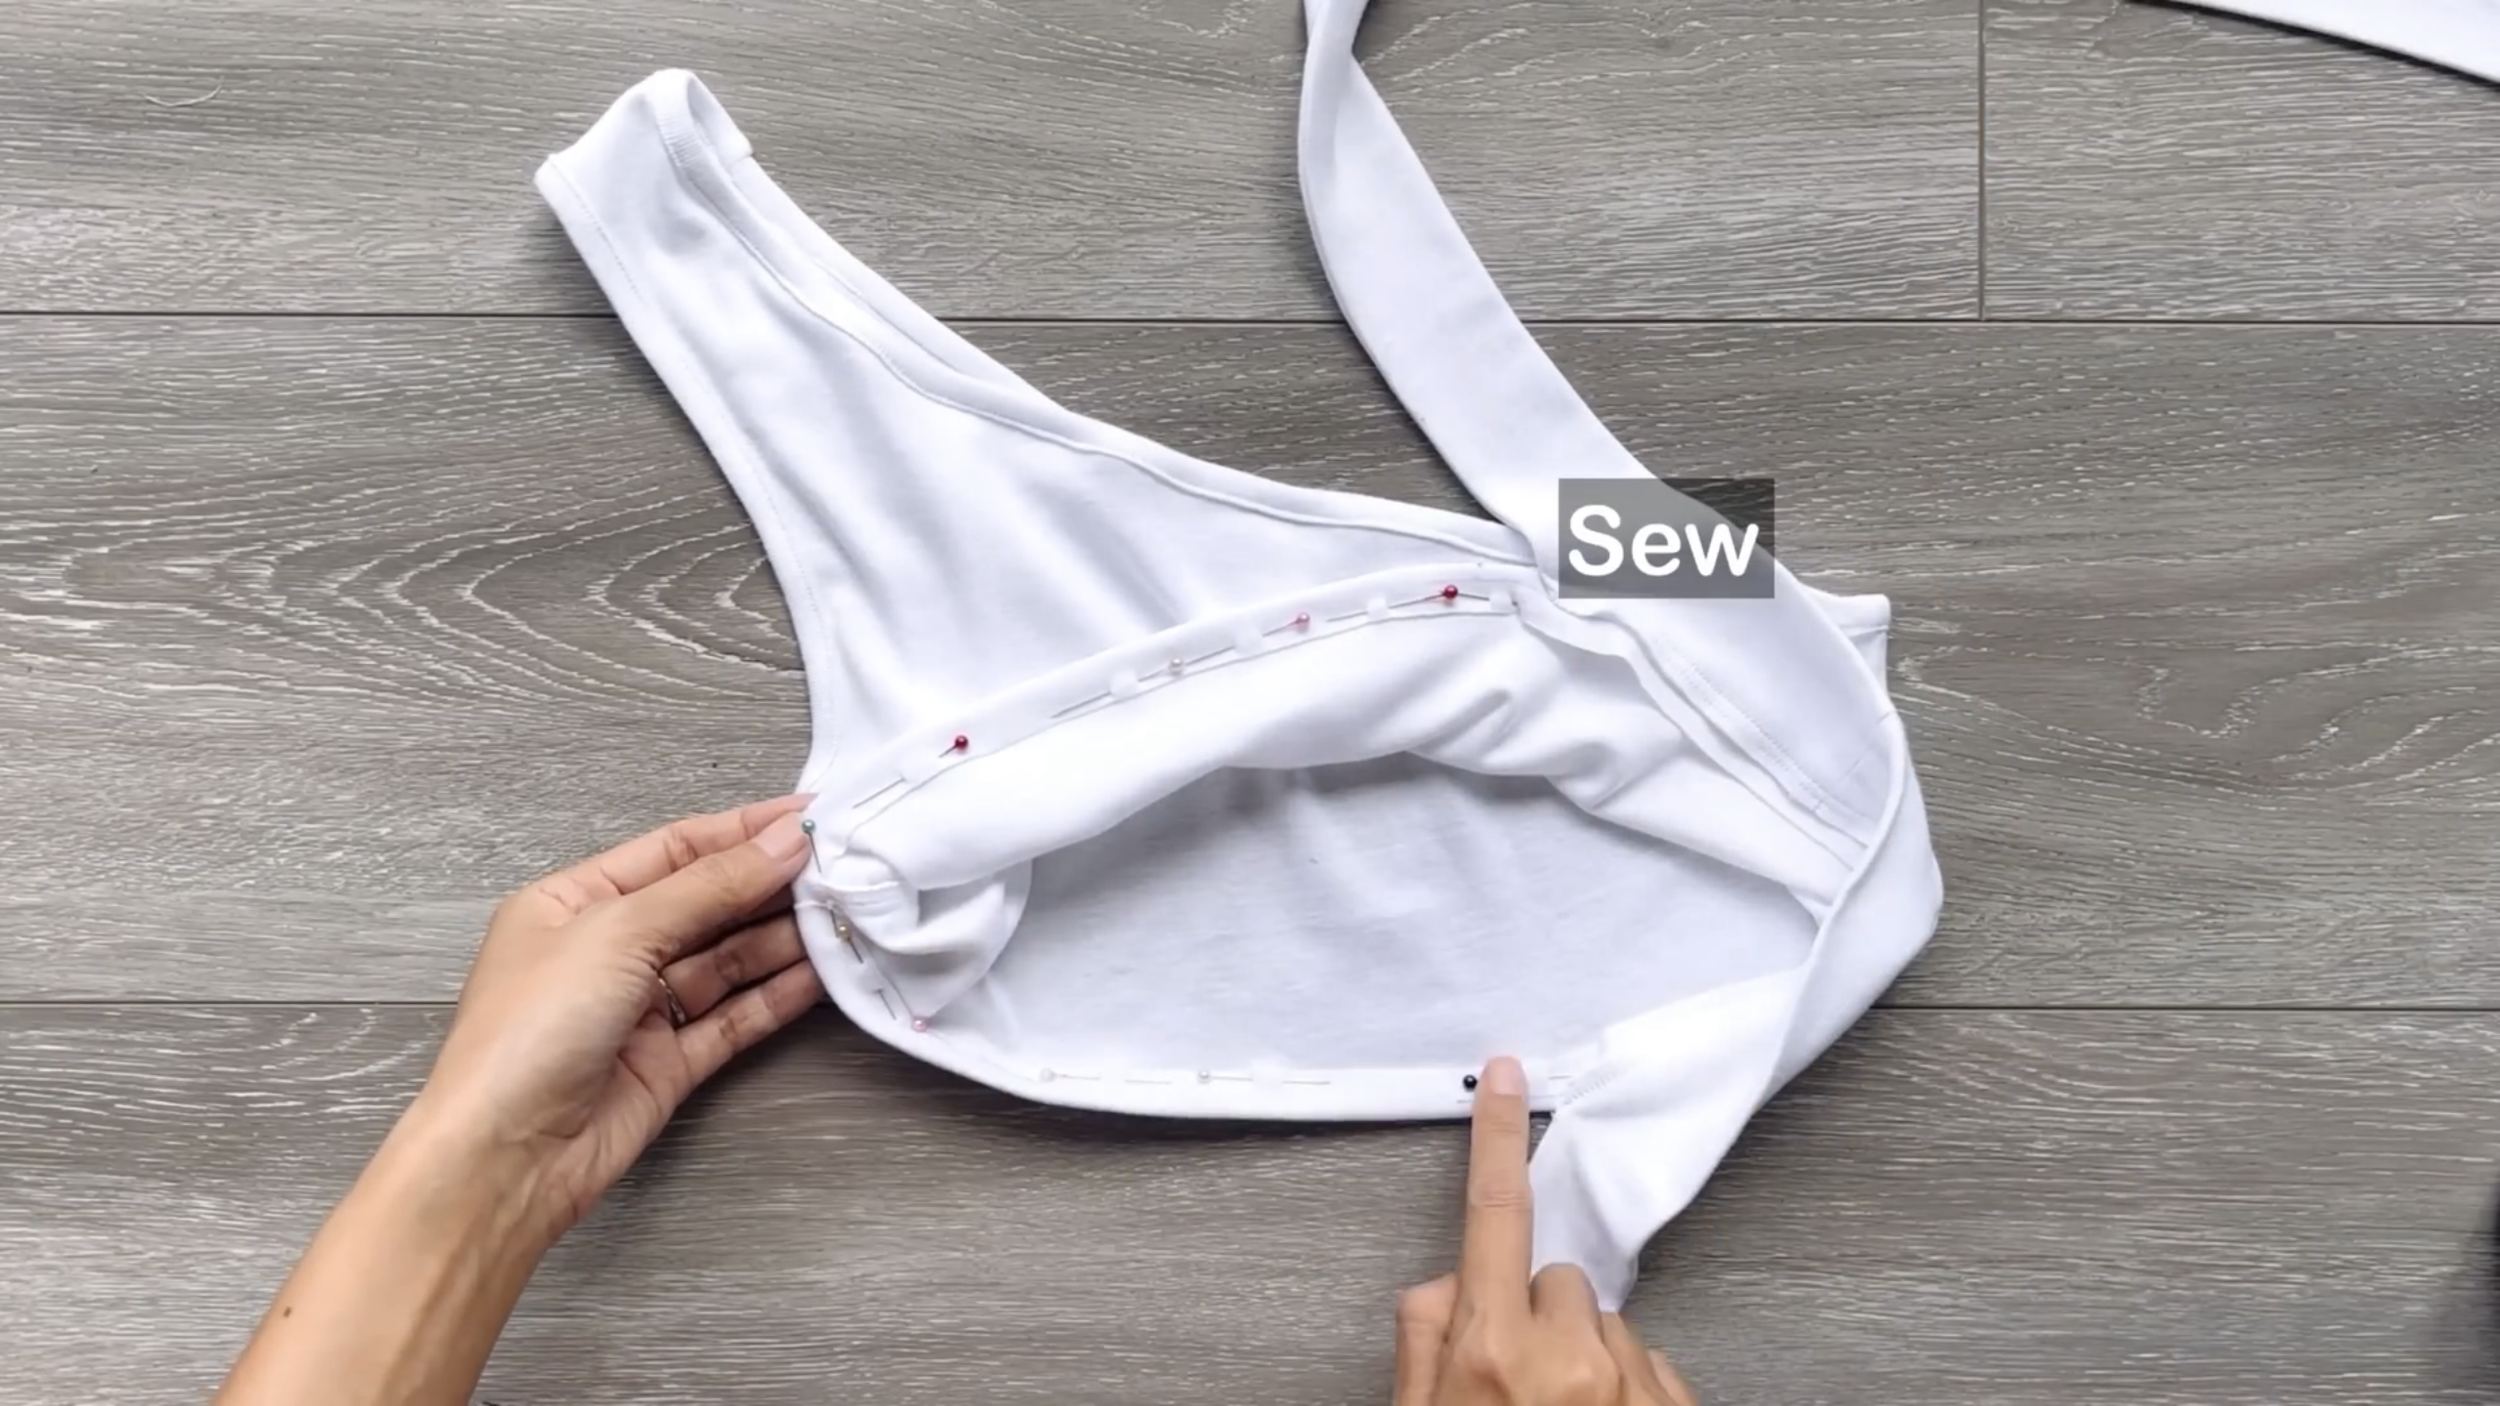
To finish the end of the crop top at the sleeve and the shoulder, use the end fabric at two sleeves and the end of the t-shirt. The width of this long fabric is around 4 cm, and the length is the same or a bit shorter than the length at the sleeve and the shoulder of the crop top.
Connect two width lines of the long fabric together to create a circle fabric.
After that, connect one side of the circle fabric to the sleeve and sew them along.
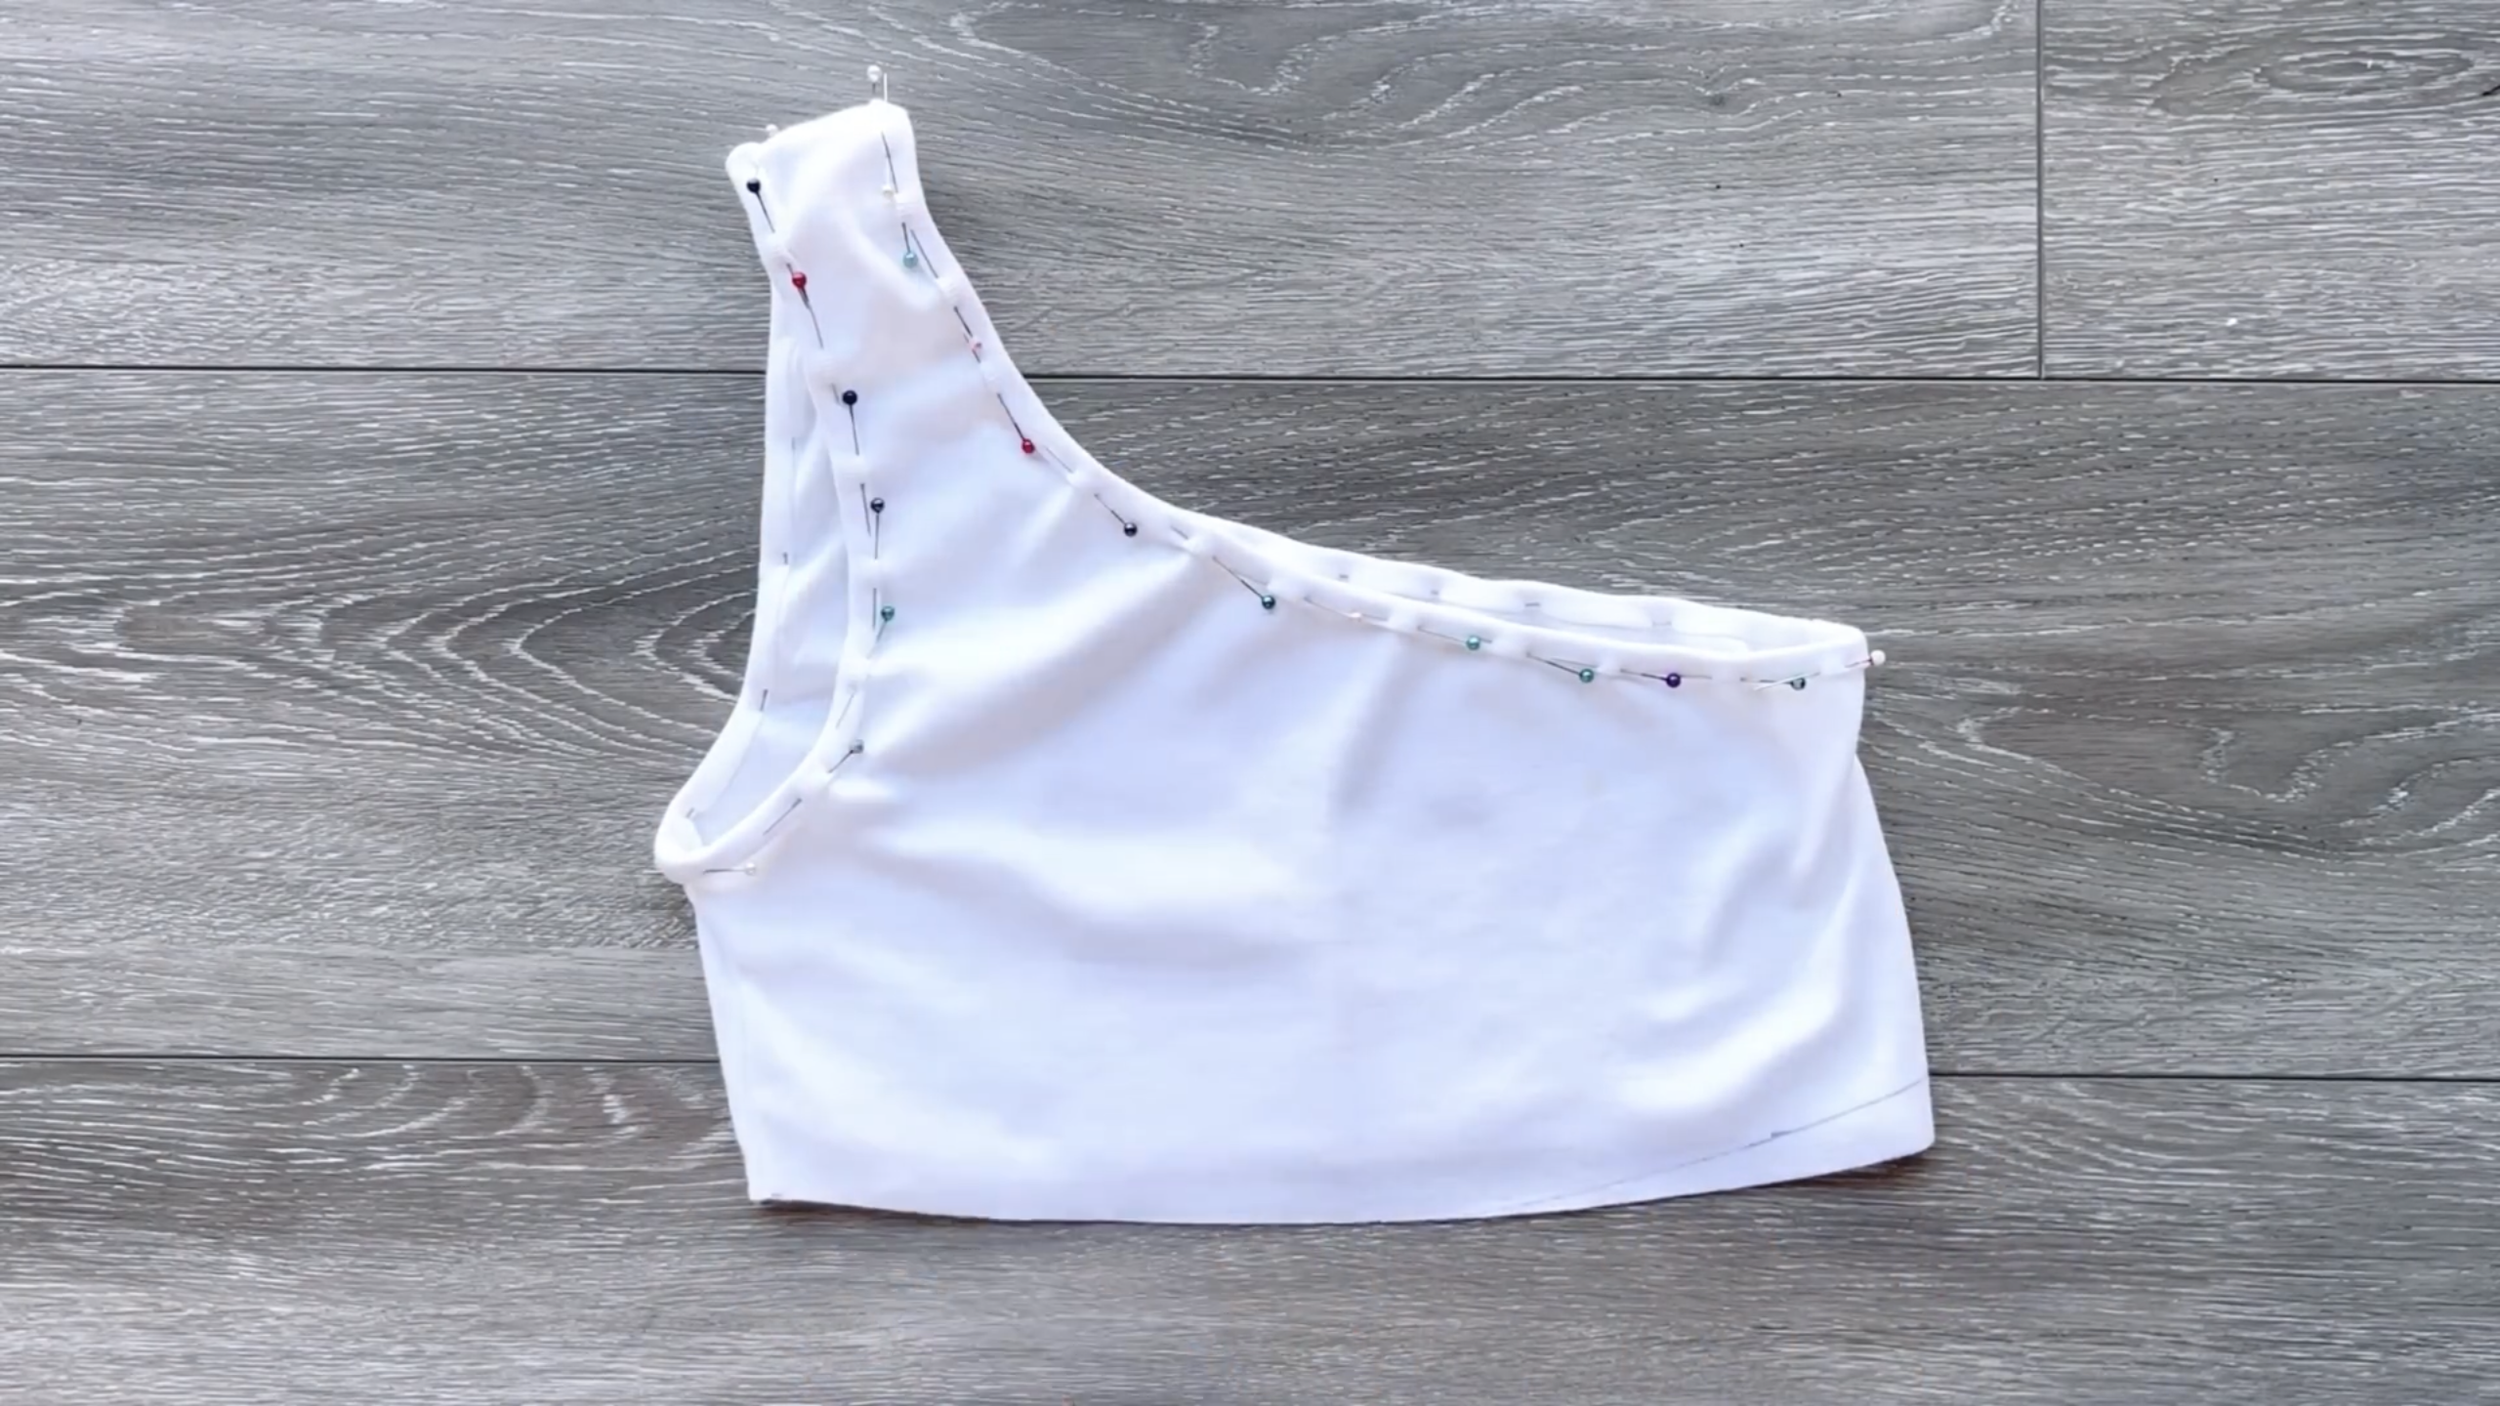
After the first seam, fold the other side of the circle fabric to the inside at the top of the end fabric first, then keep folding it over the first seam and make the second seam. It's the way to hem the end of the fabric.
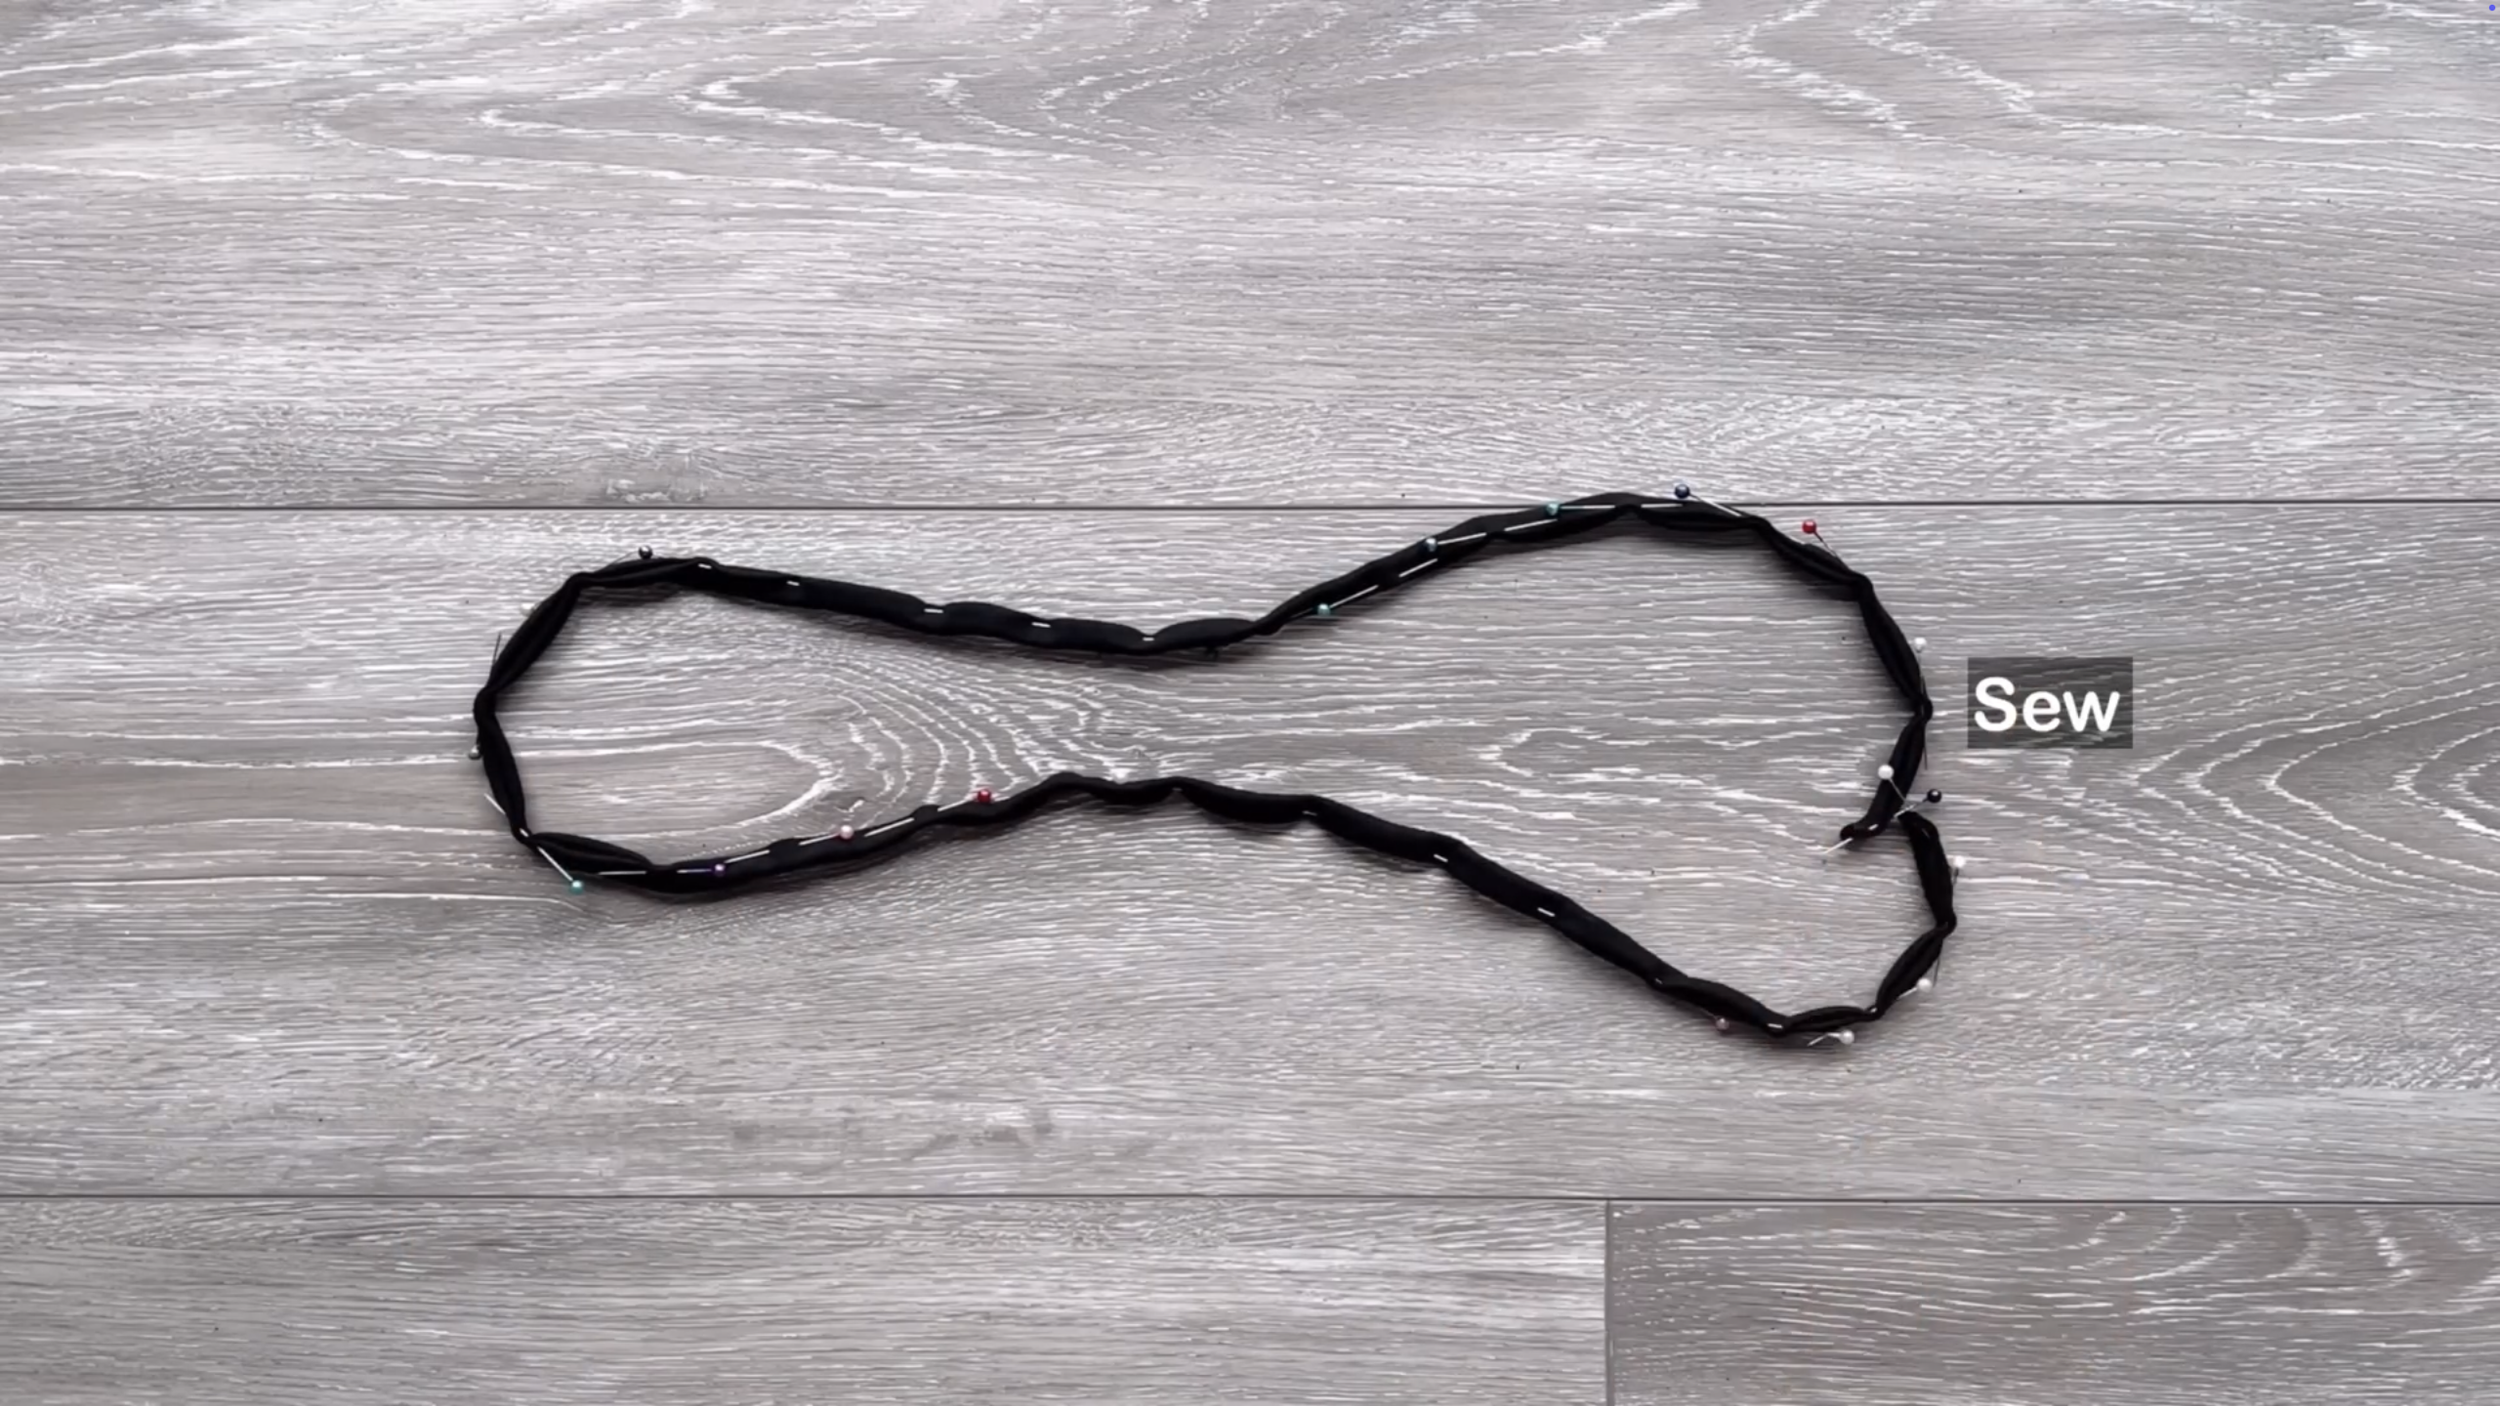
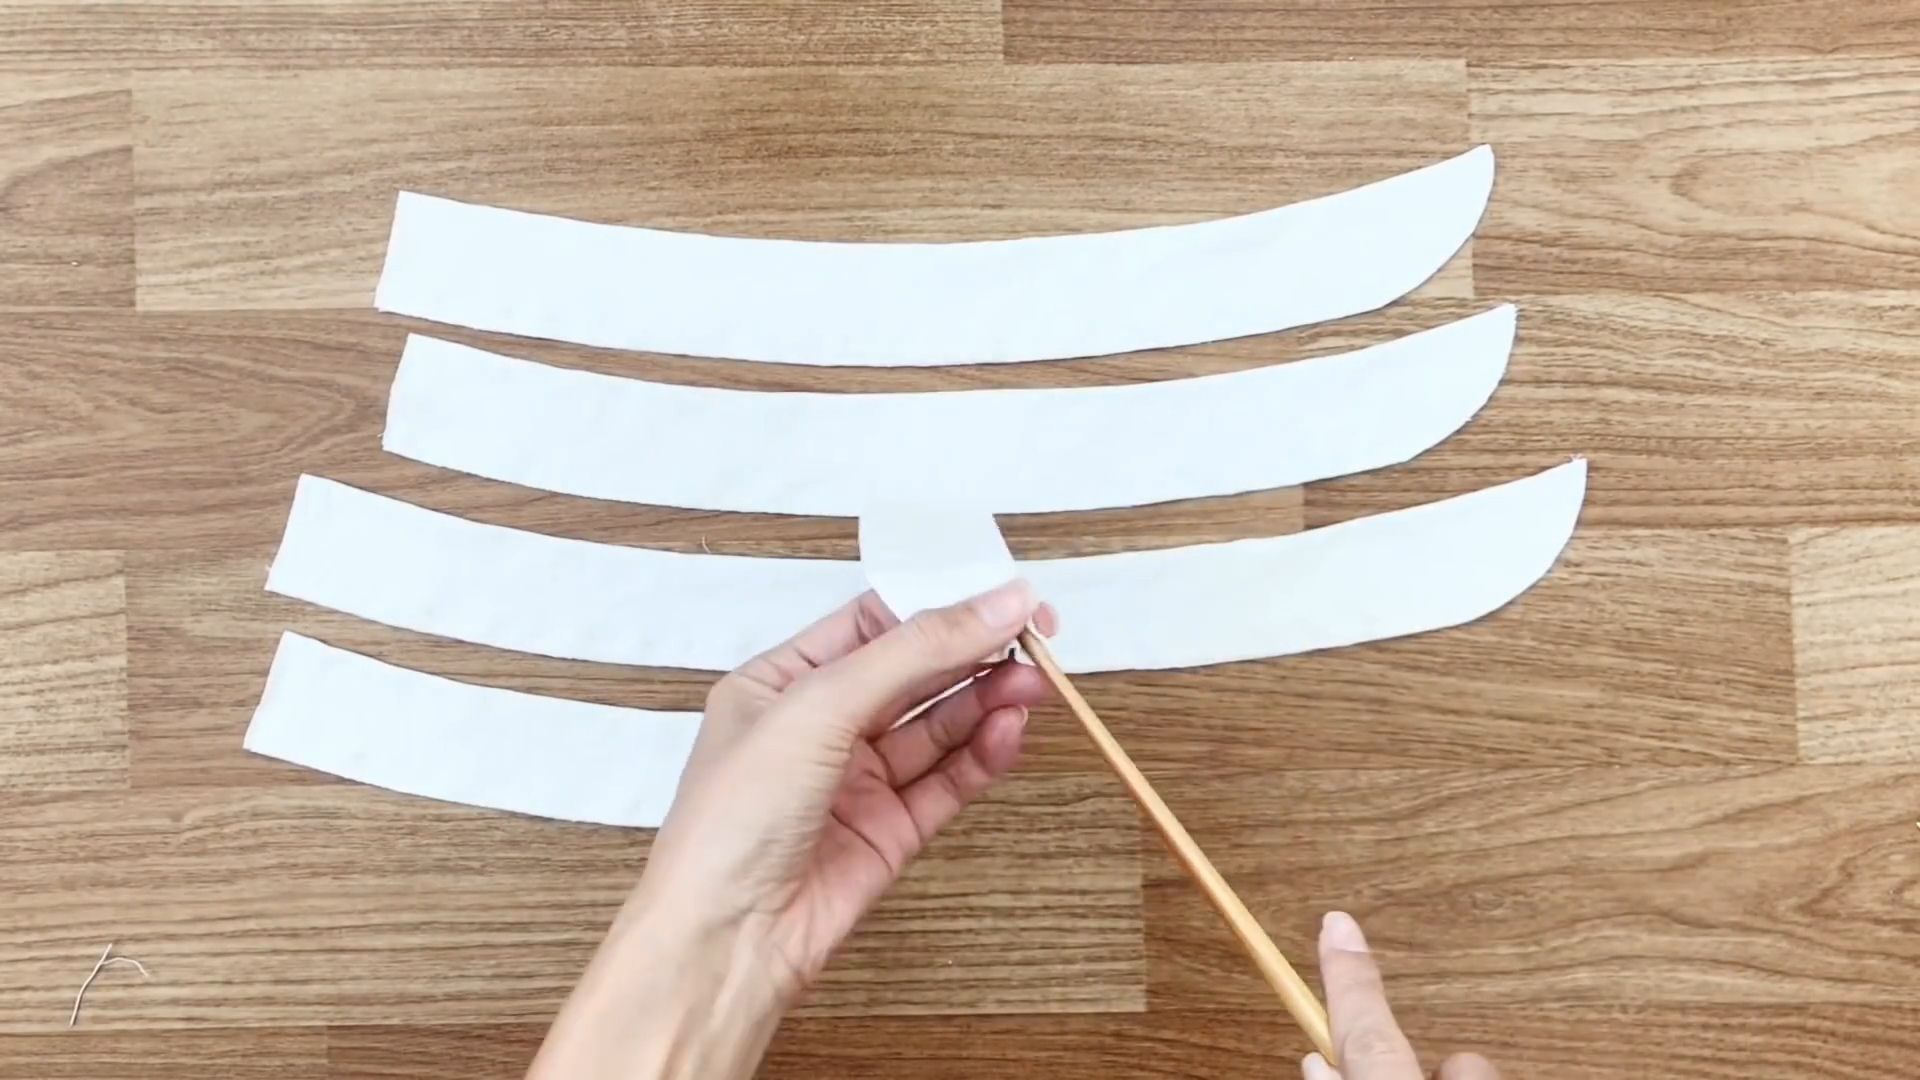
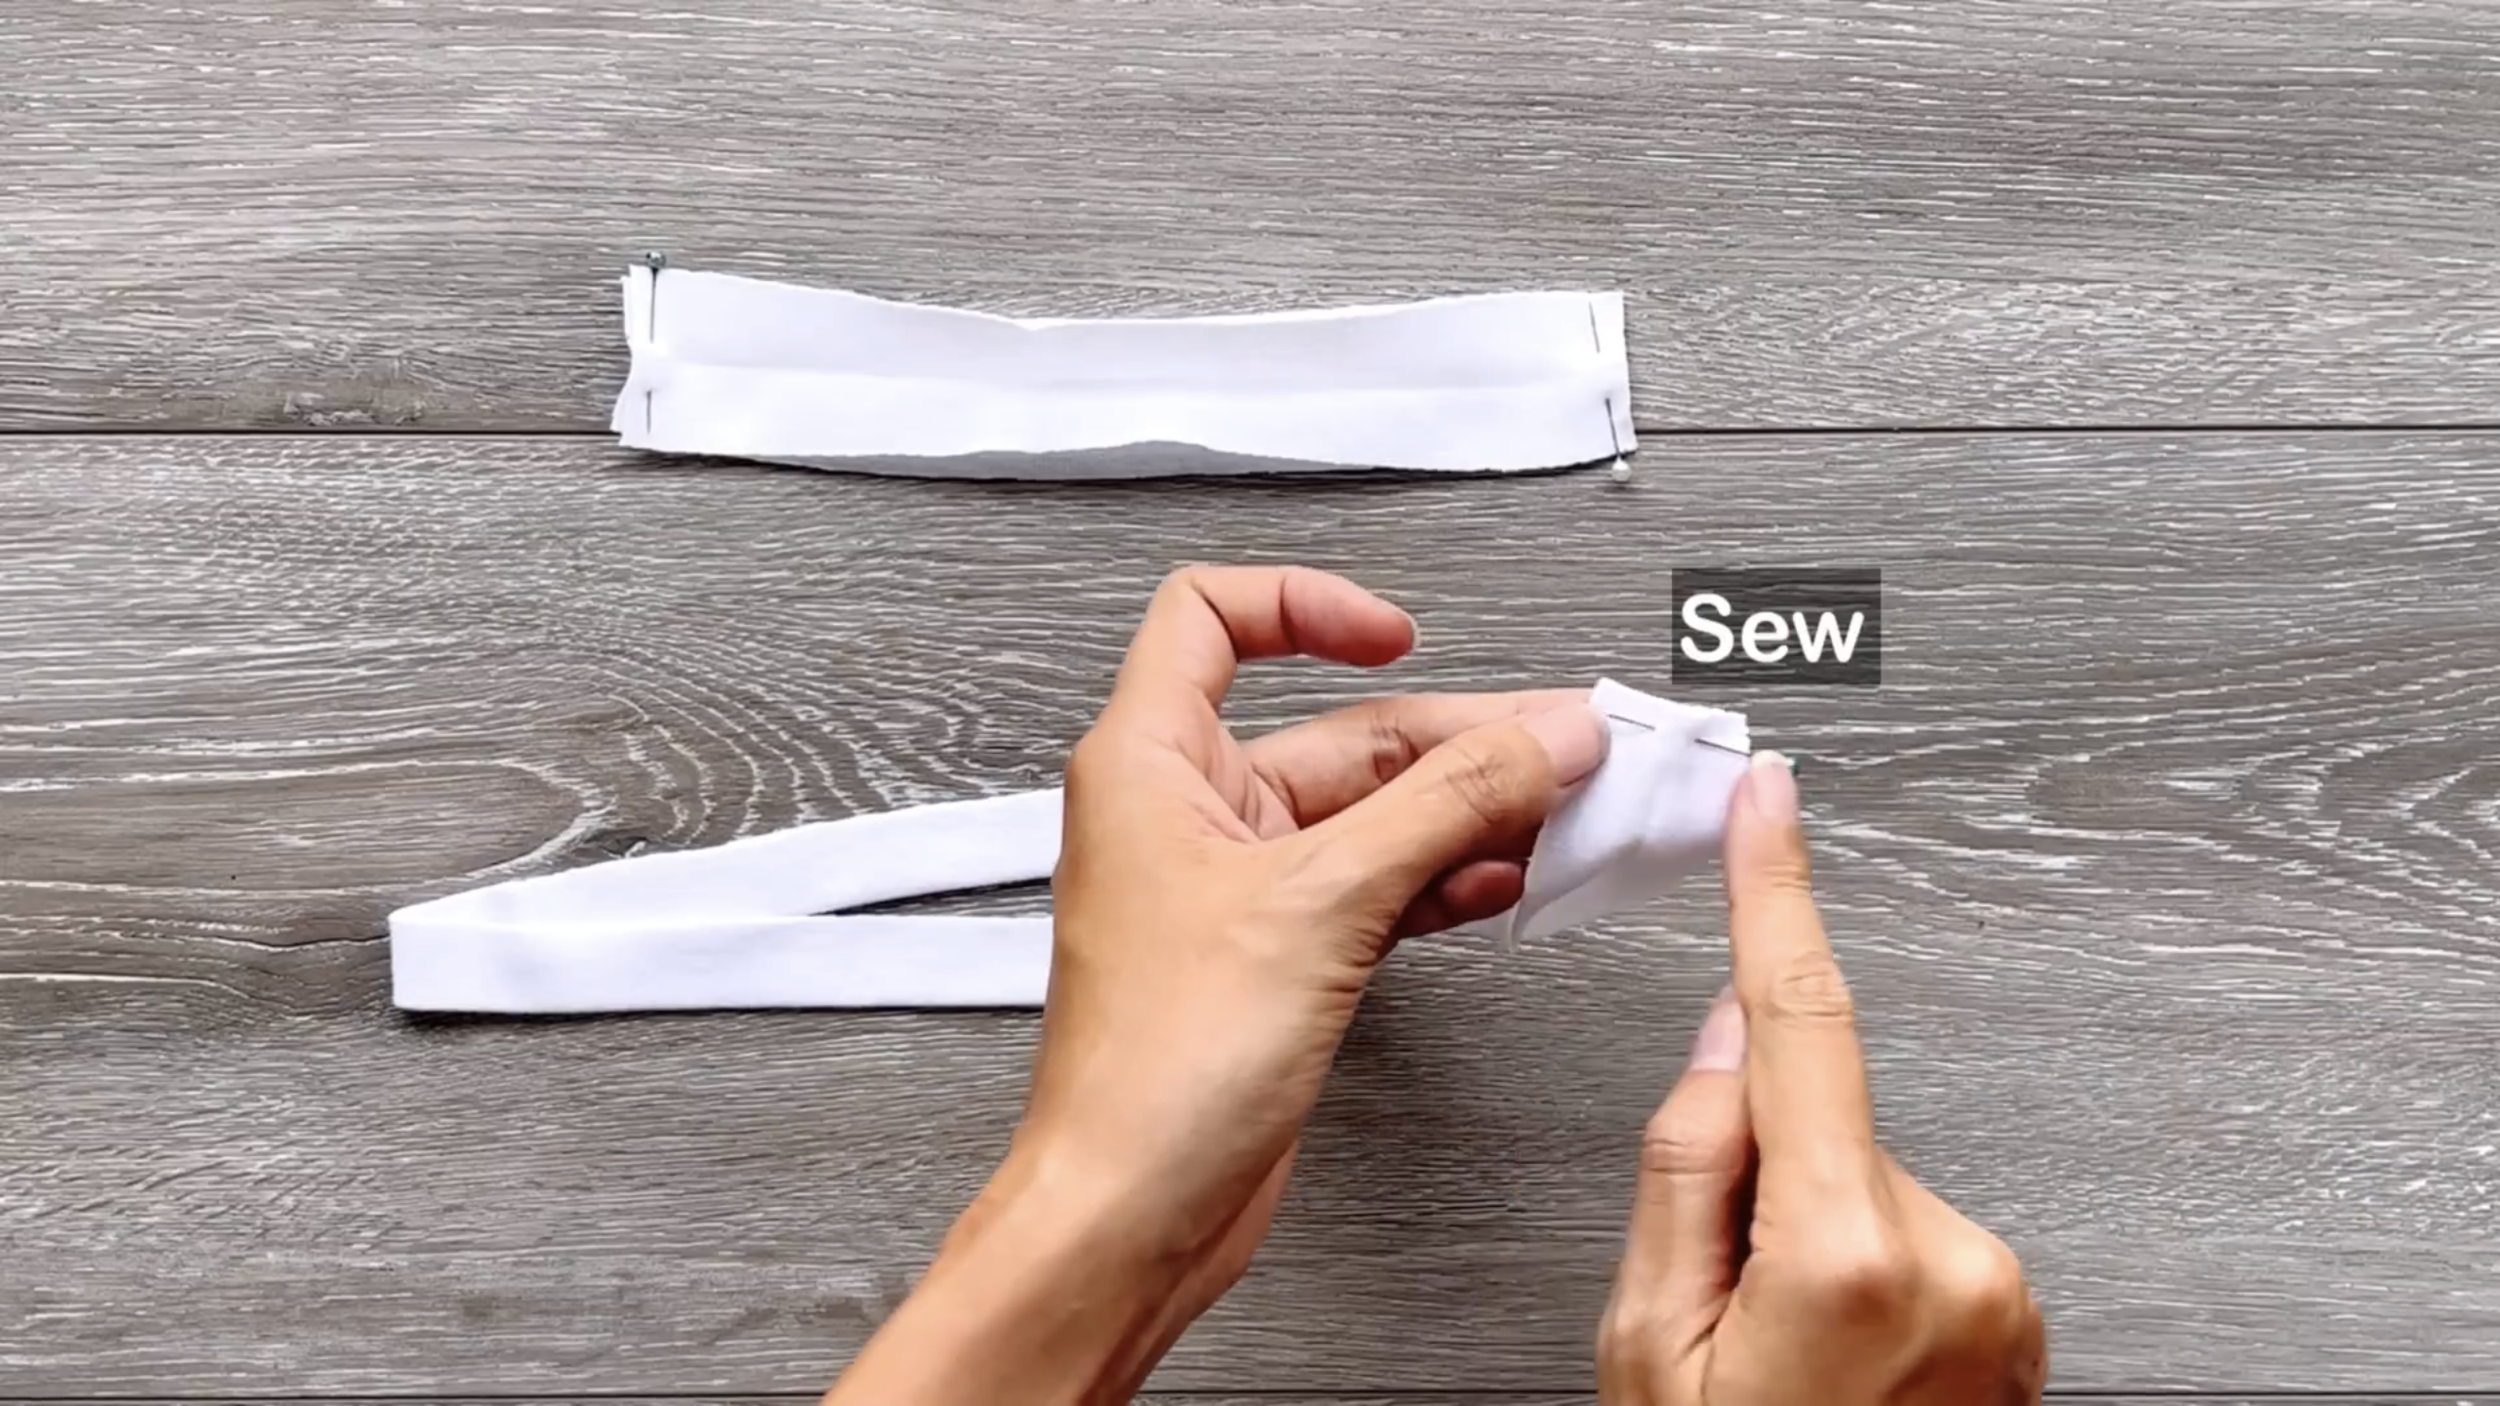
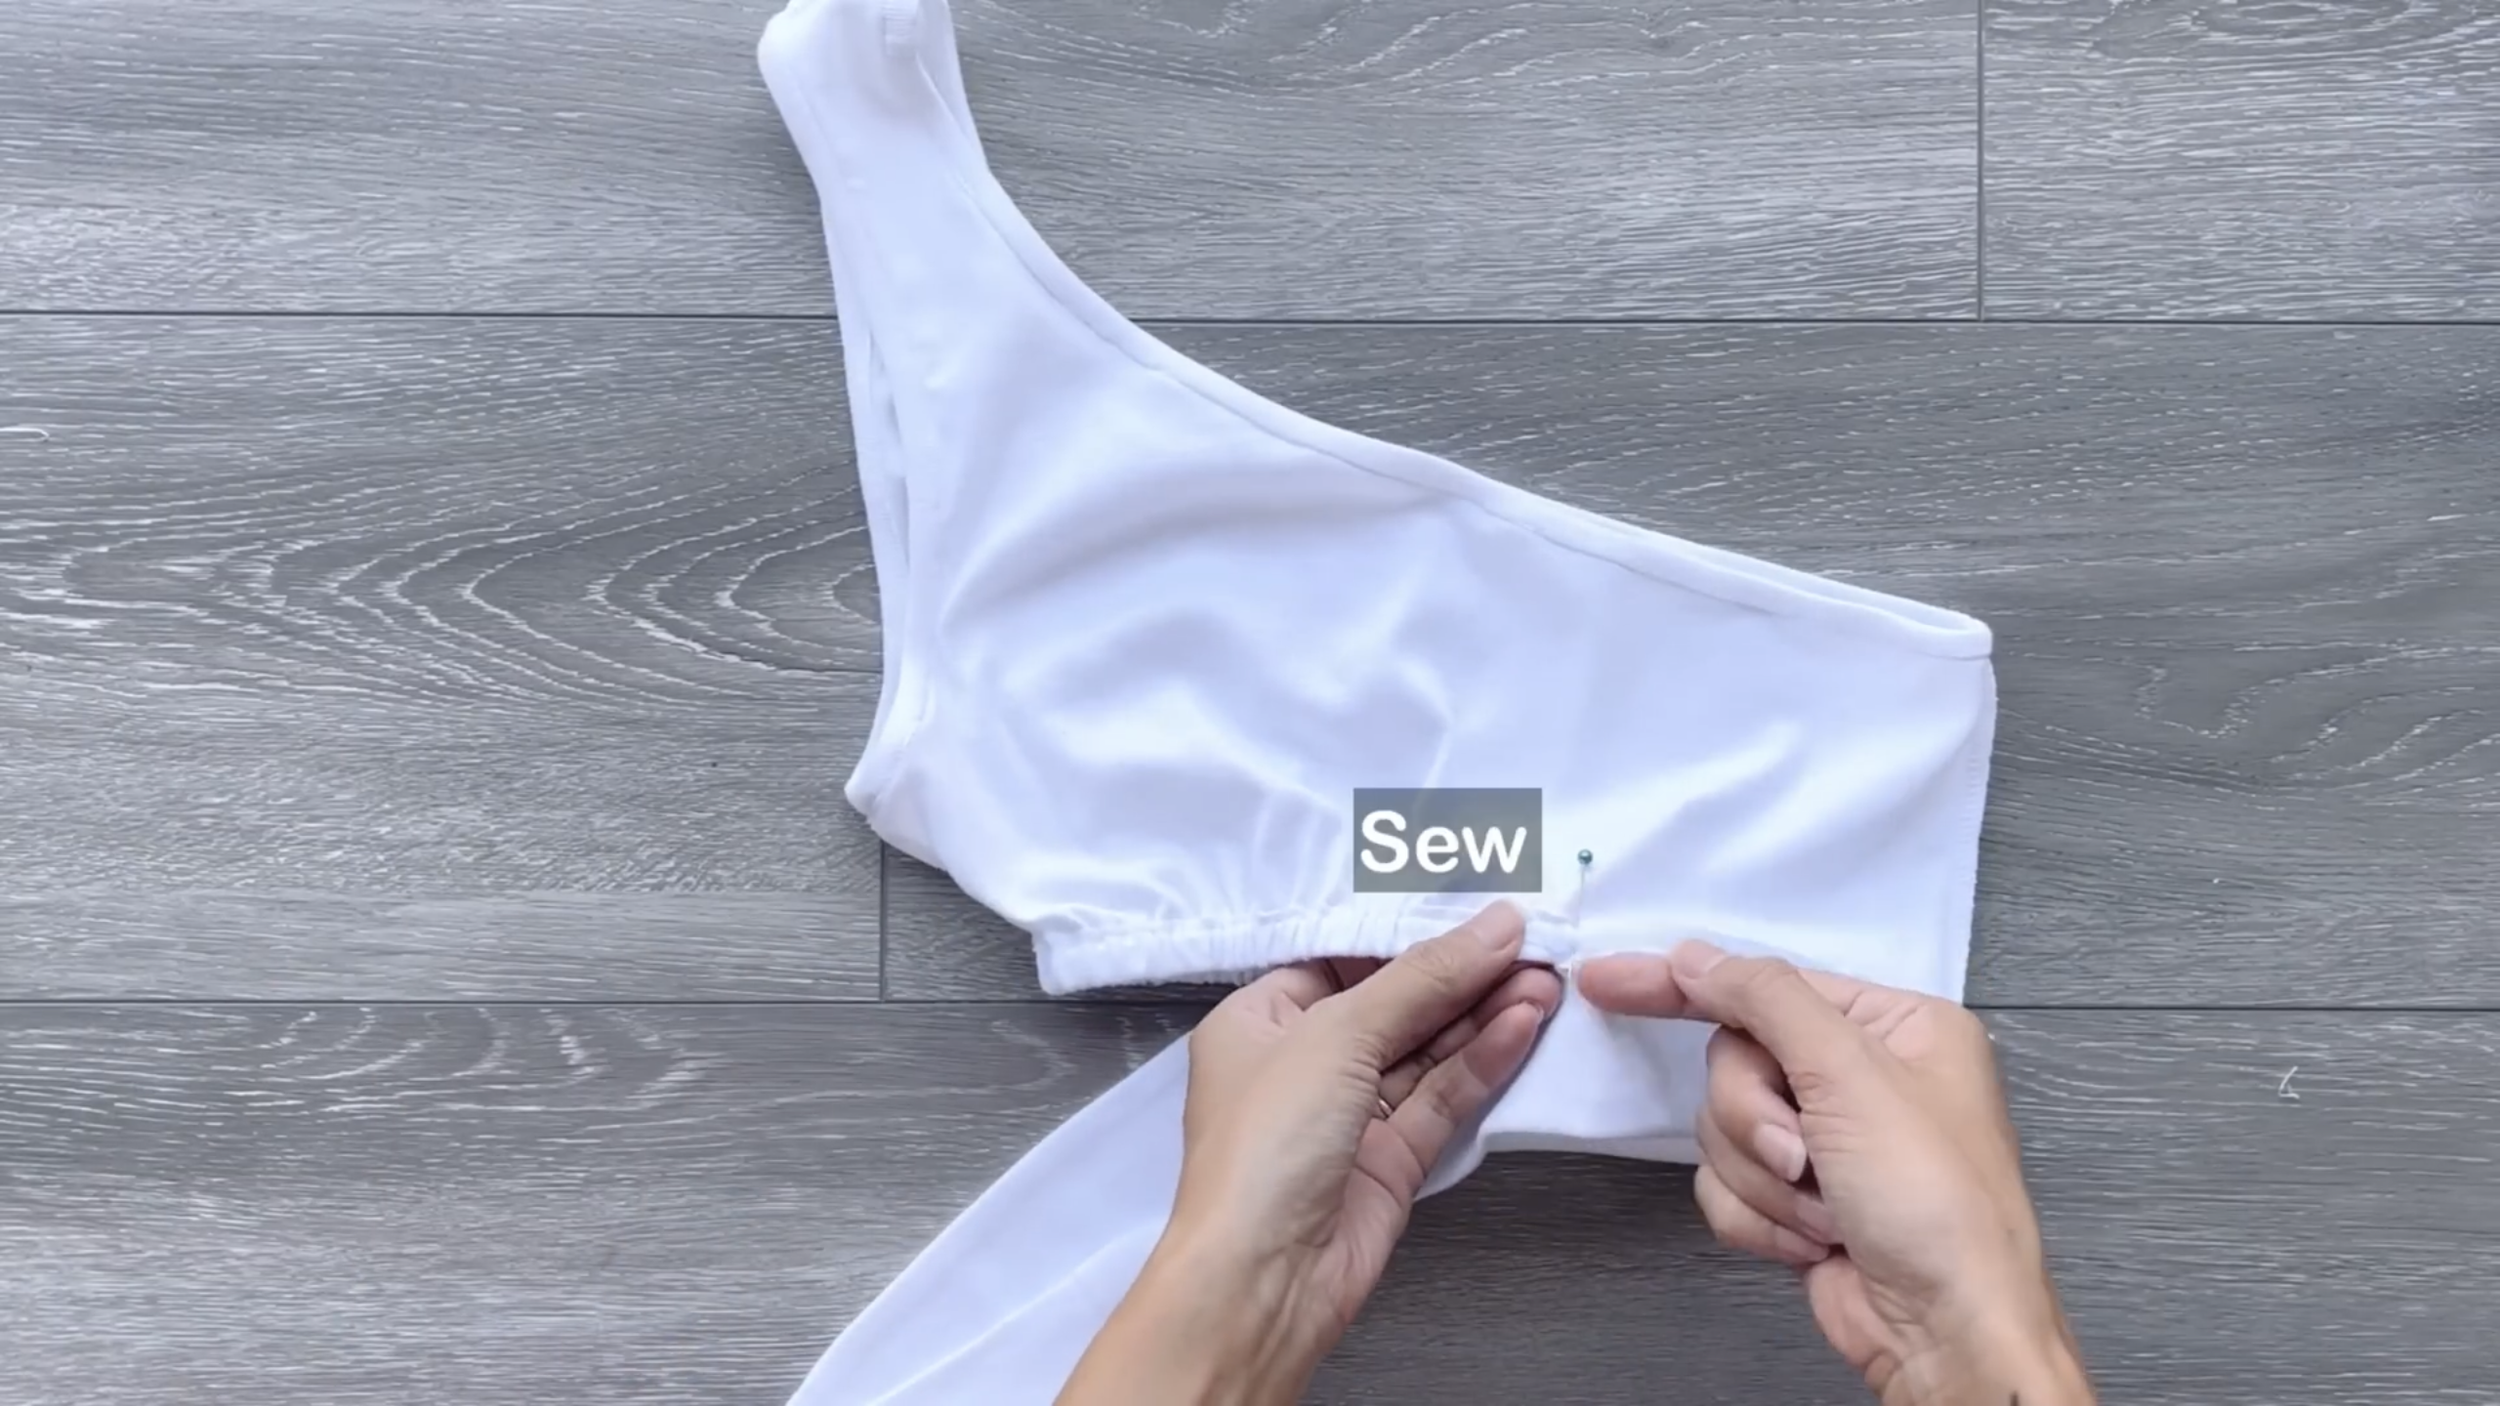
Use the leftover fabric of the t-shirt to make the tie part for the crop top. Cut two rectangles with 10 cm width, which is two times the width of the tie that is wanted plus 2 cm for seam allowance.

After cutting, connect two rectangles together by the width line to have a long fabric line.
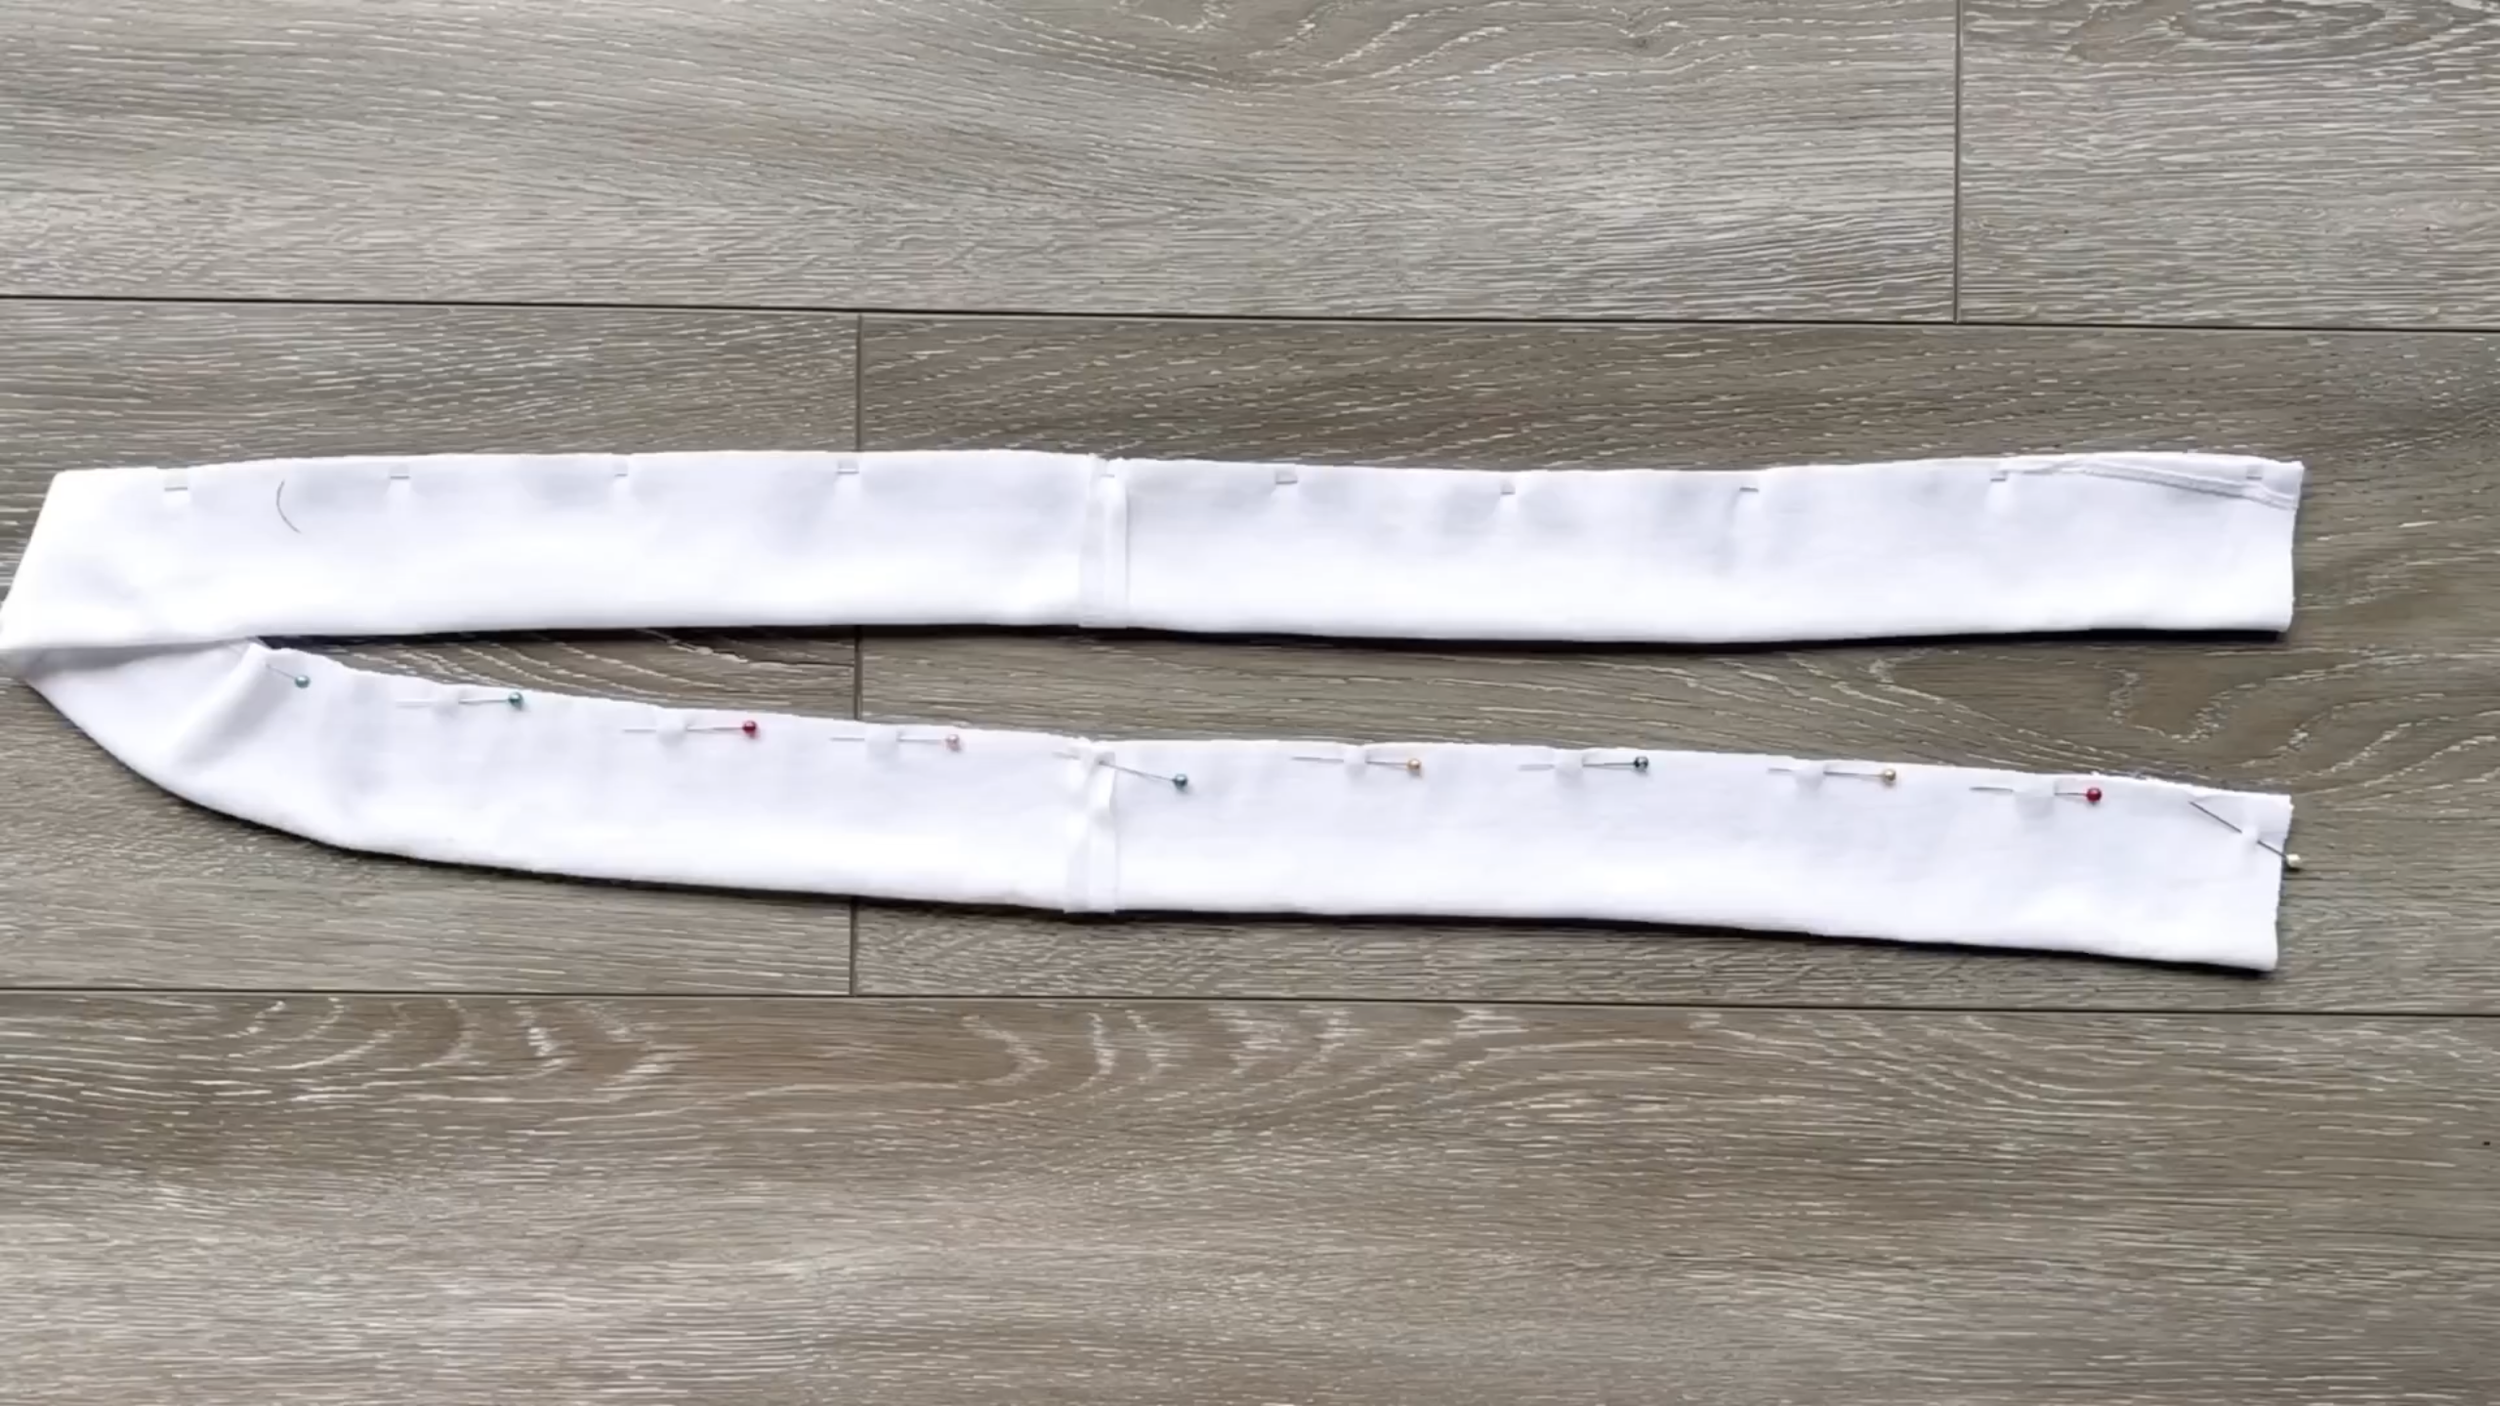
After sewing, connect two length lines of the fabric together with pins first.
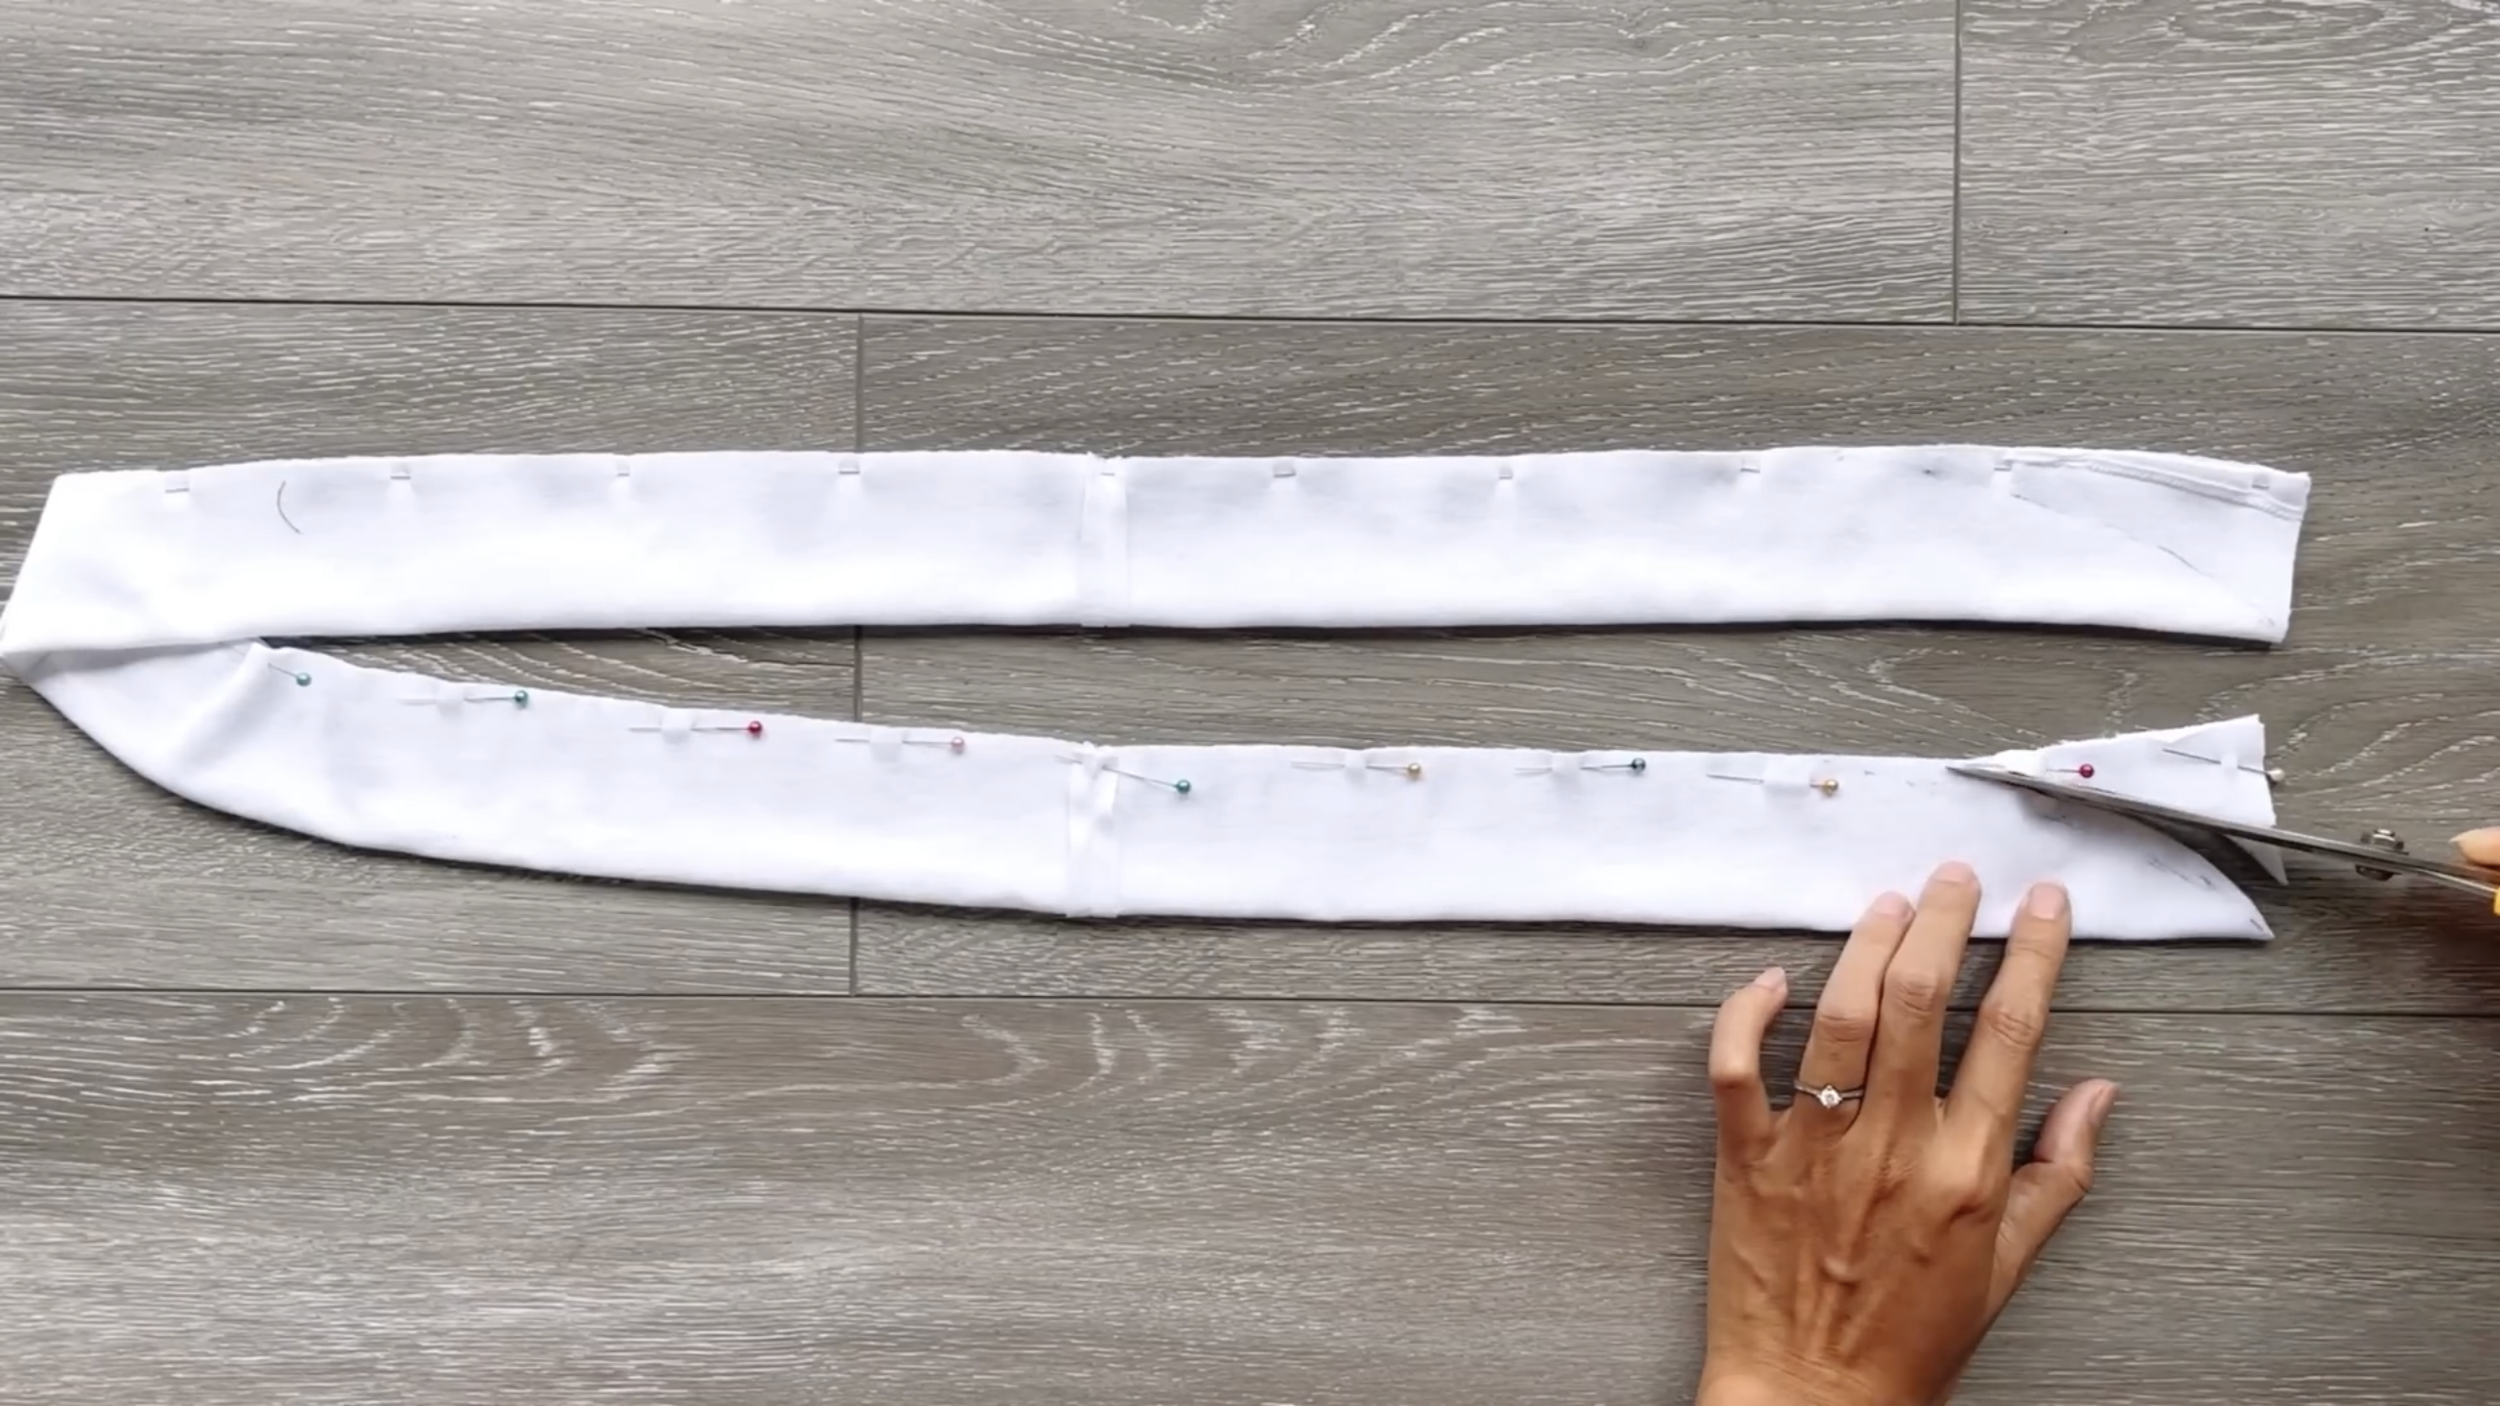
Then, draw a curved line at two sides of the folded fabric to create the look at two ends of the tie and cut.
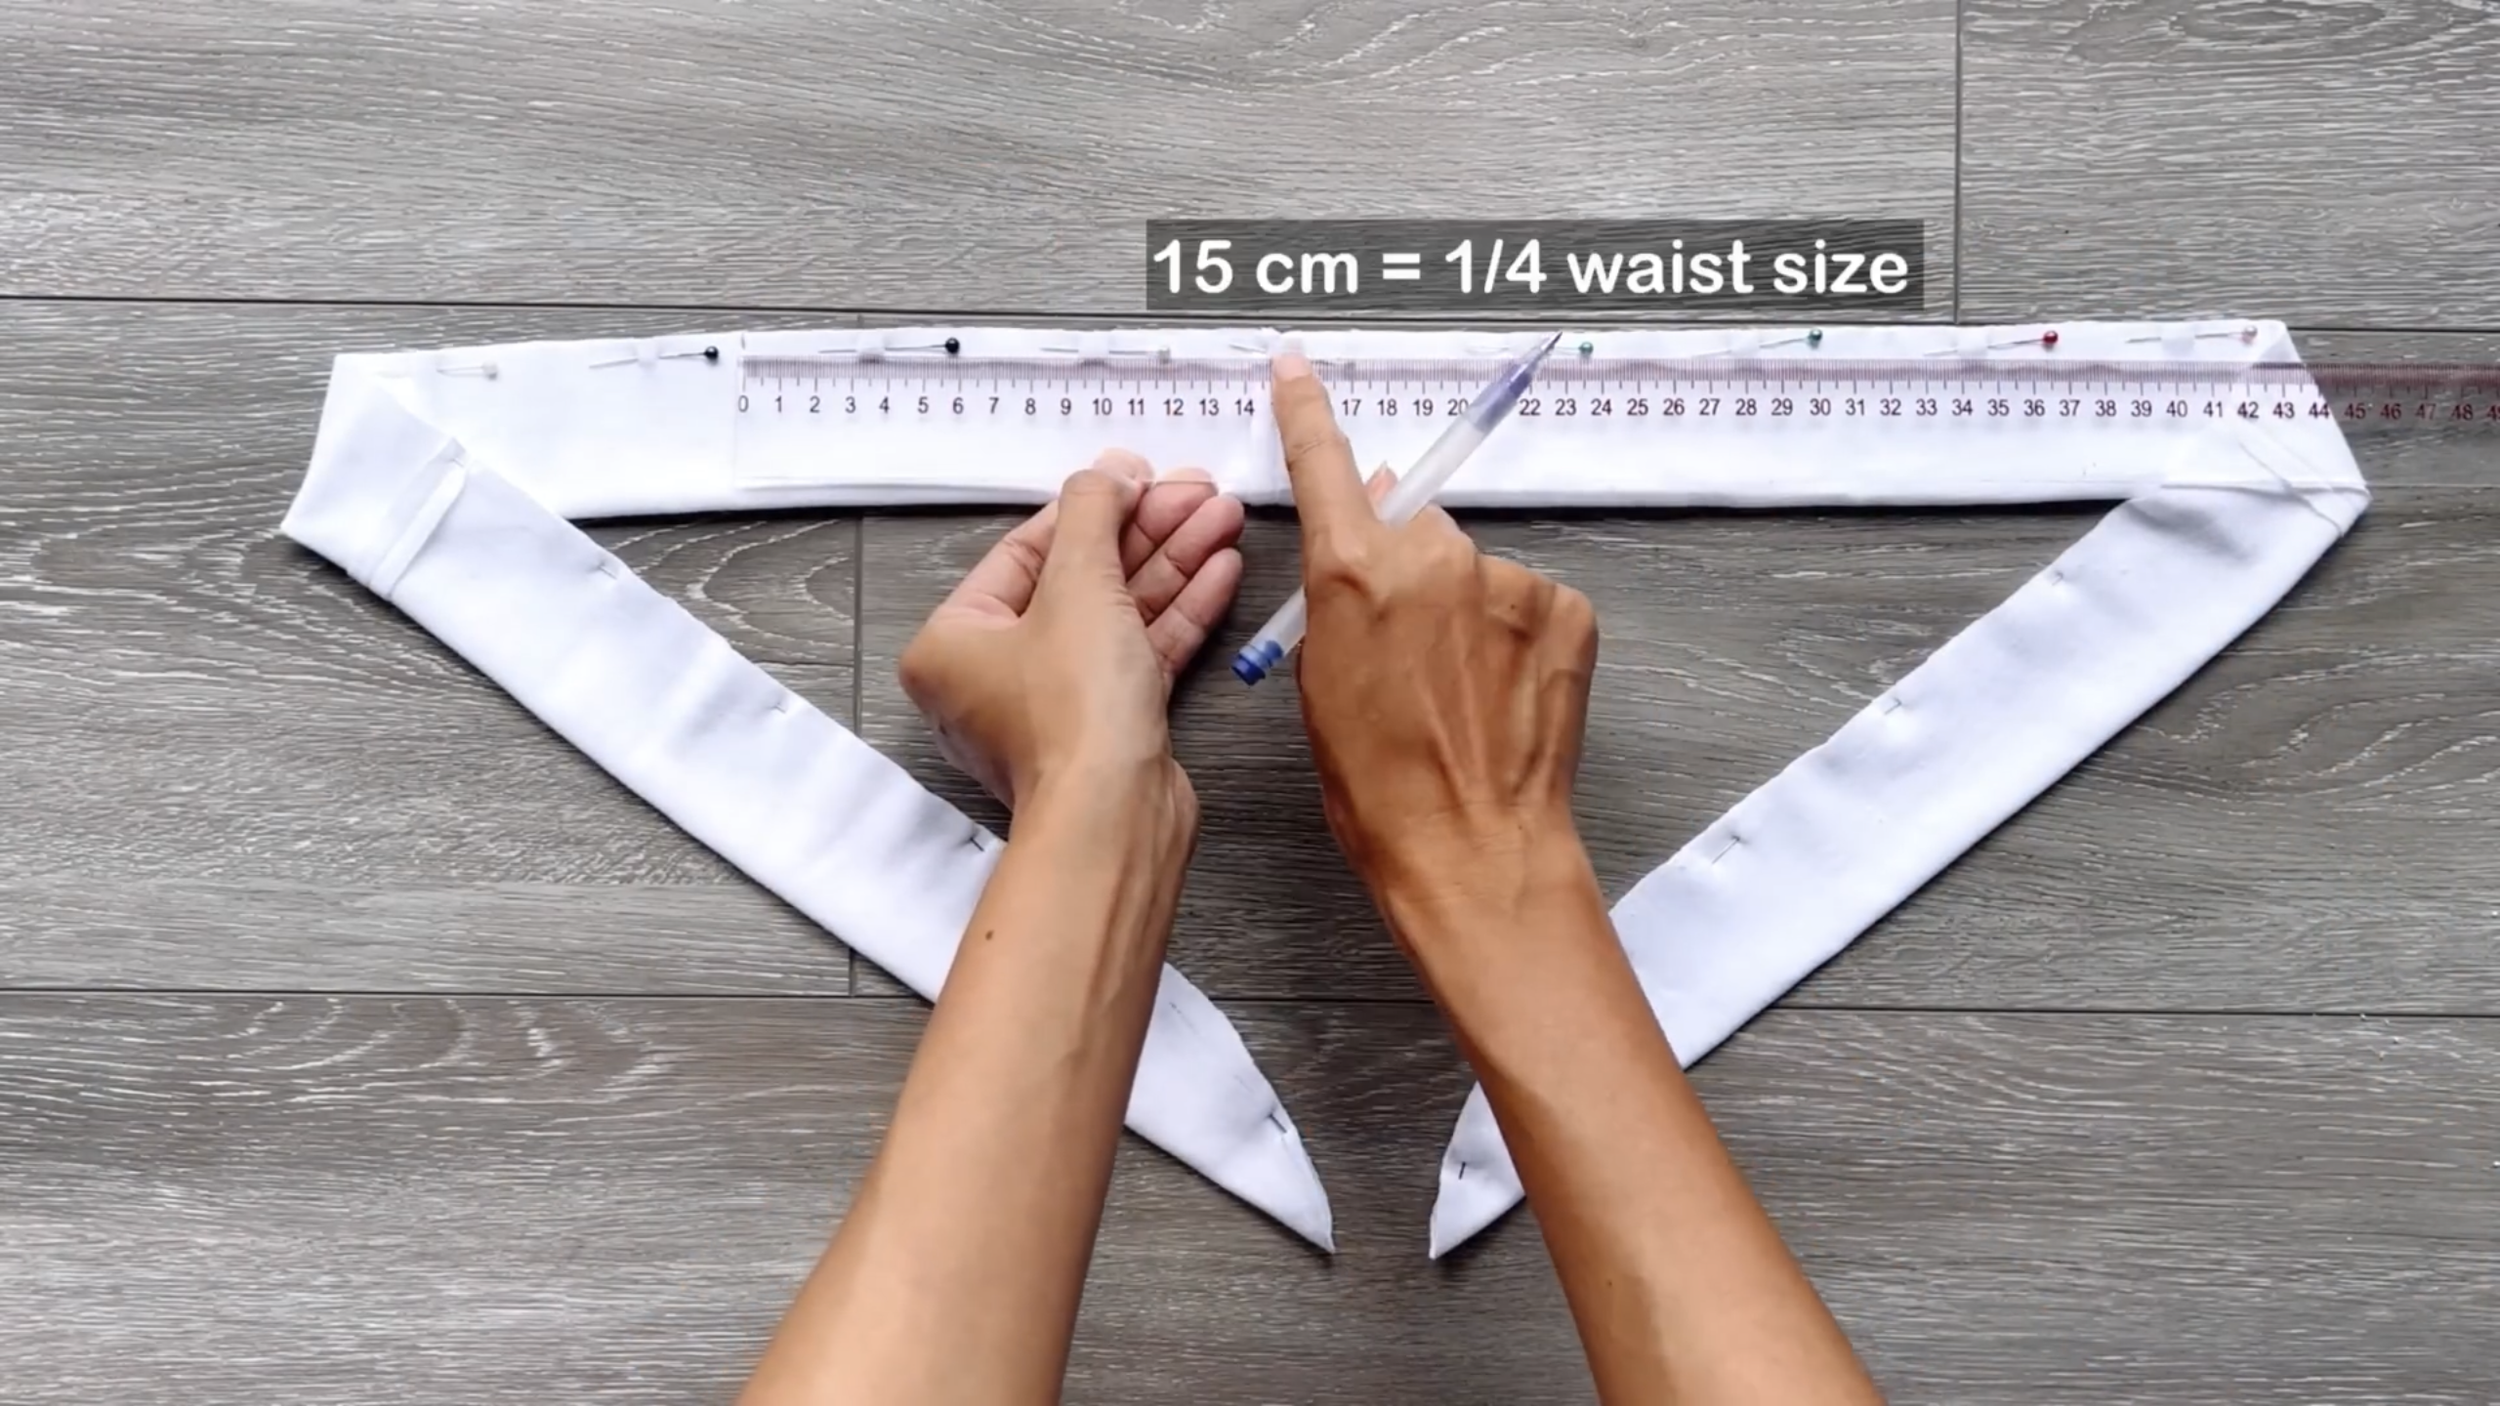
From the middle of the tie, mark two sides 15 cm so the width between two marks will be 30 cm, which is around a half of your waist size.
Then, sew the rest of the tie together and keep that part open.
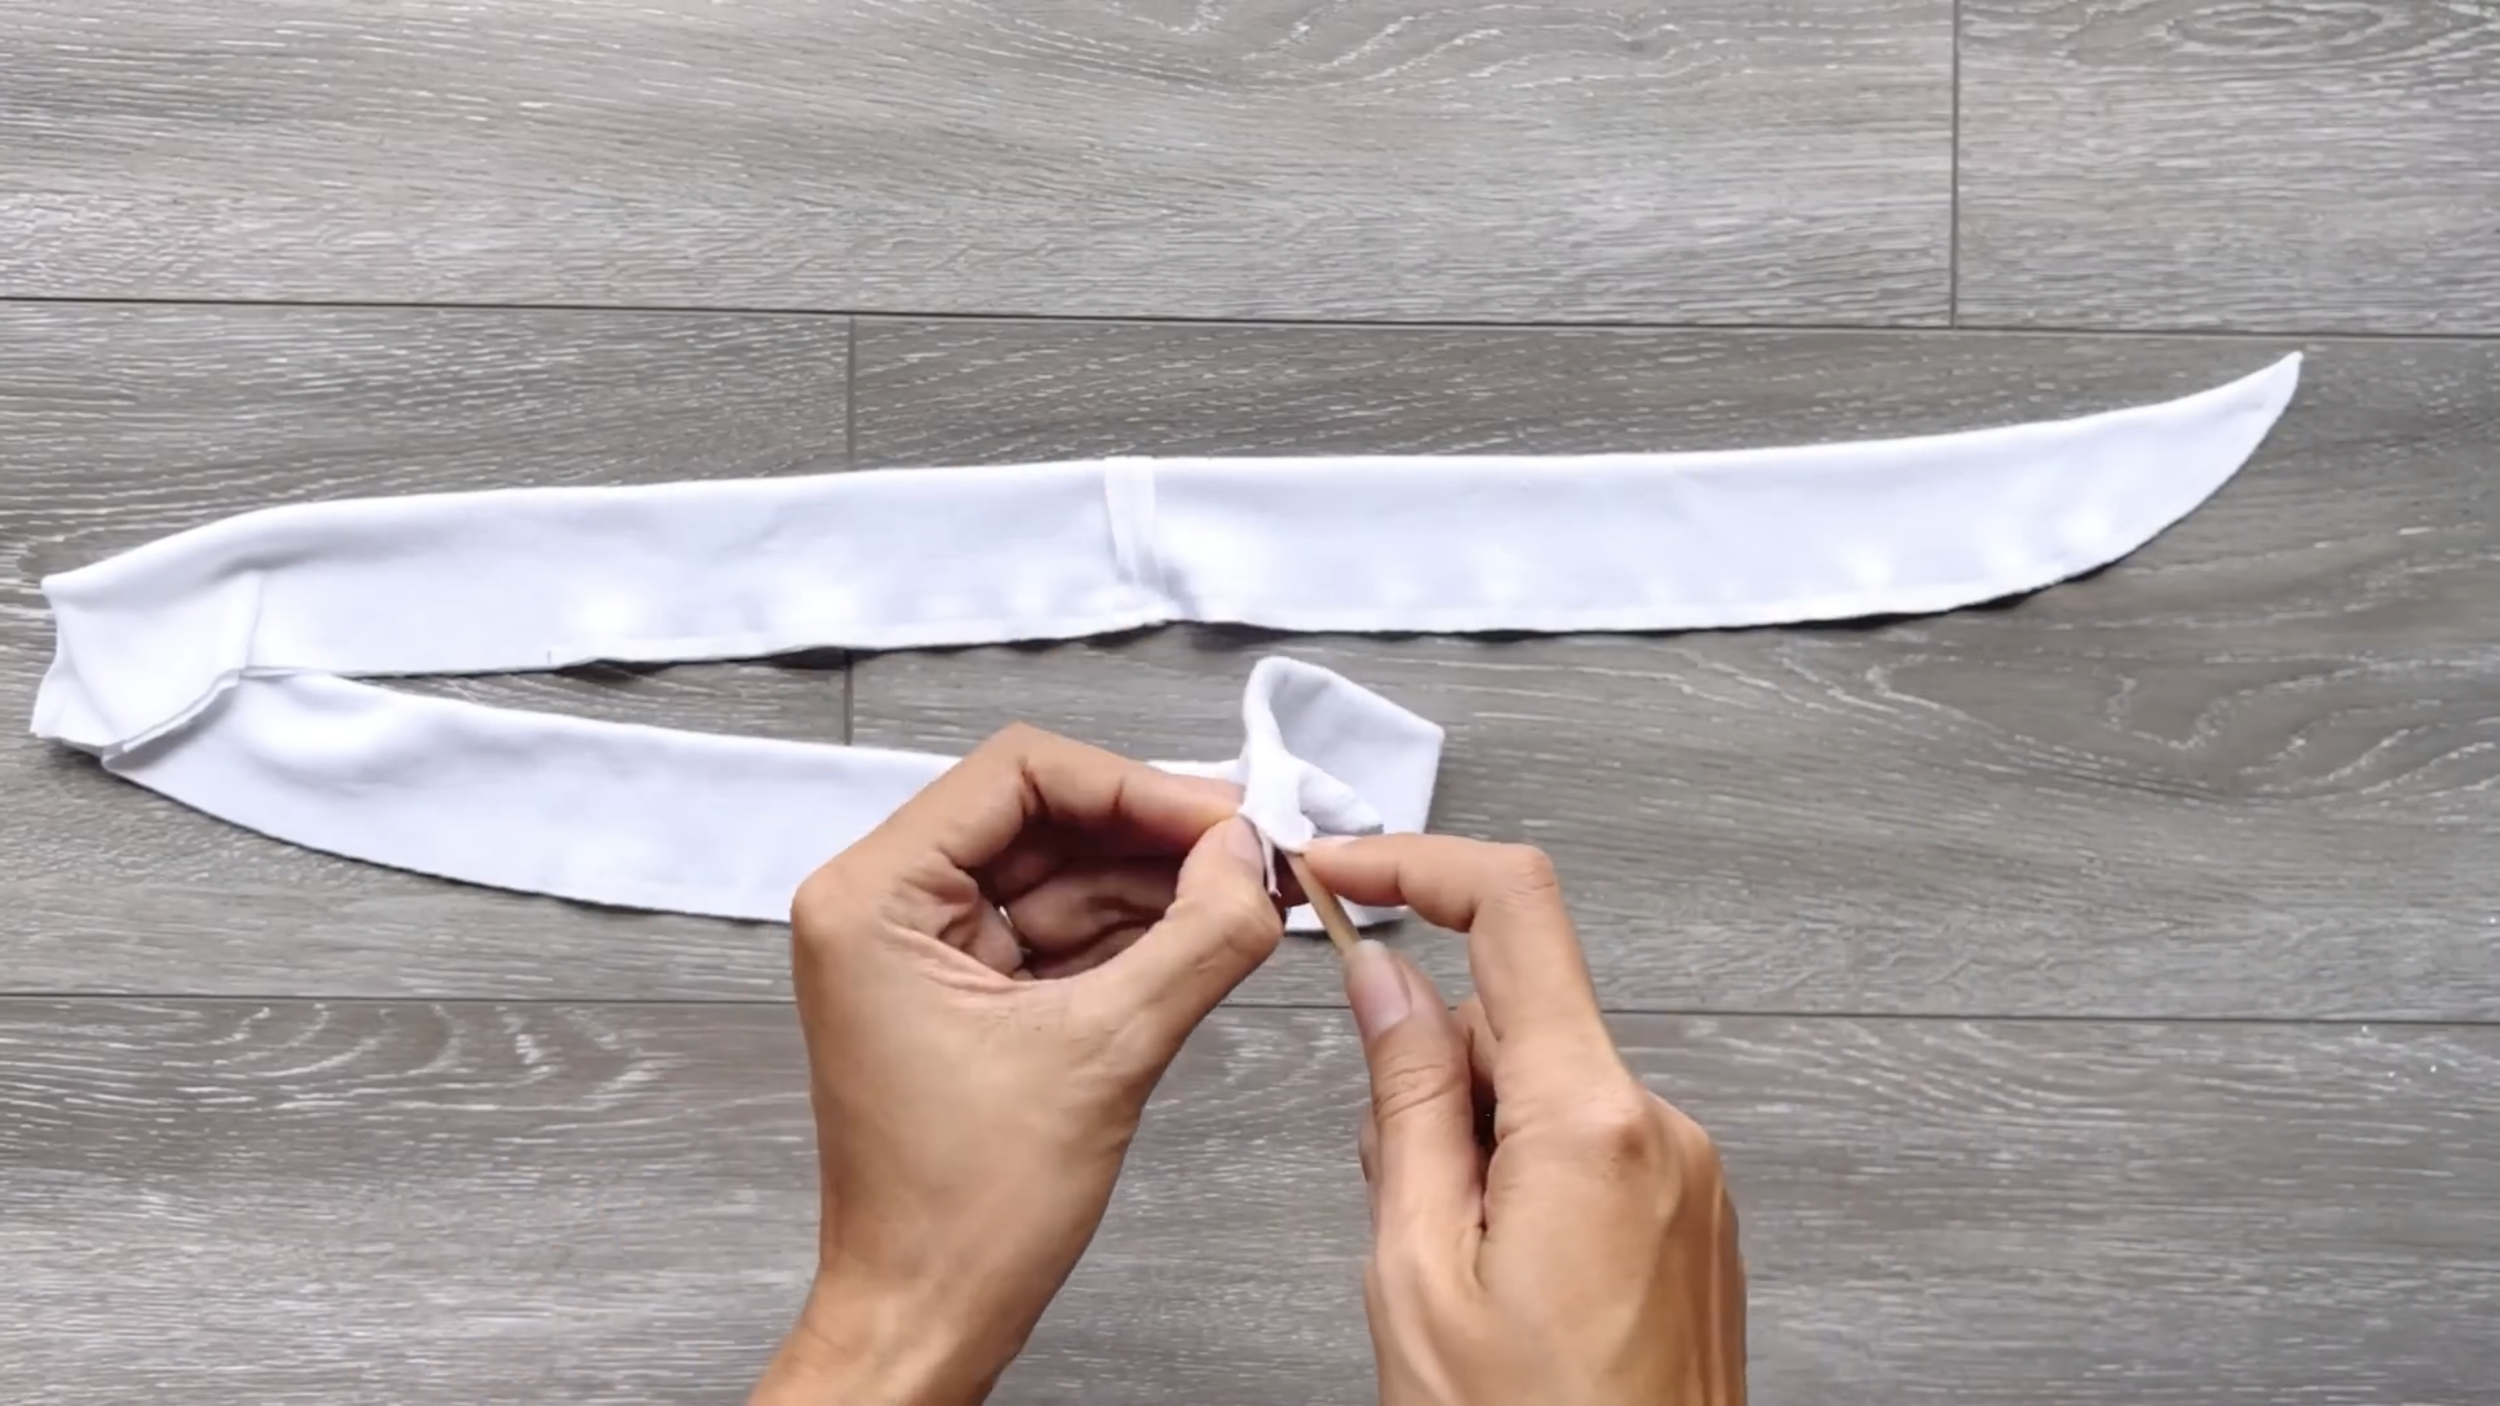
After sewing, use a long stick to turn the tie inside out.
And sew the open part together after that.
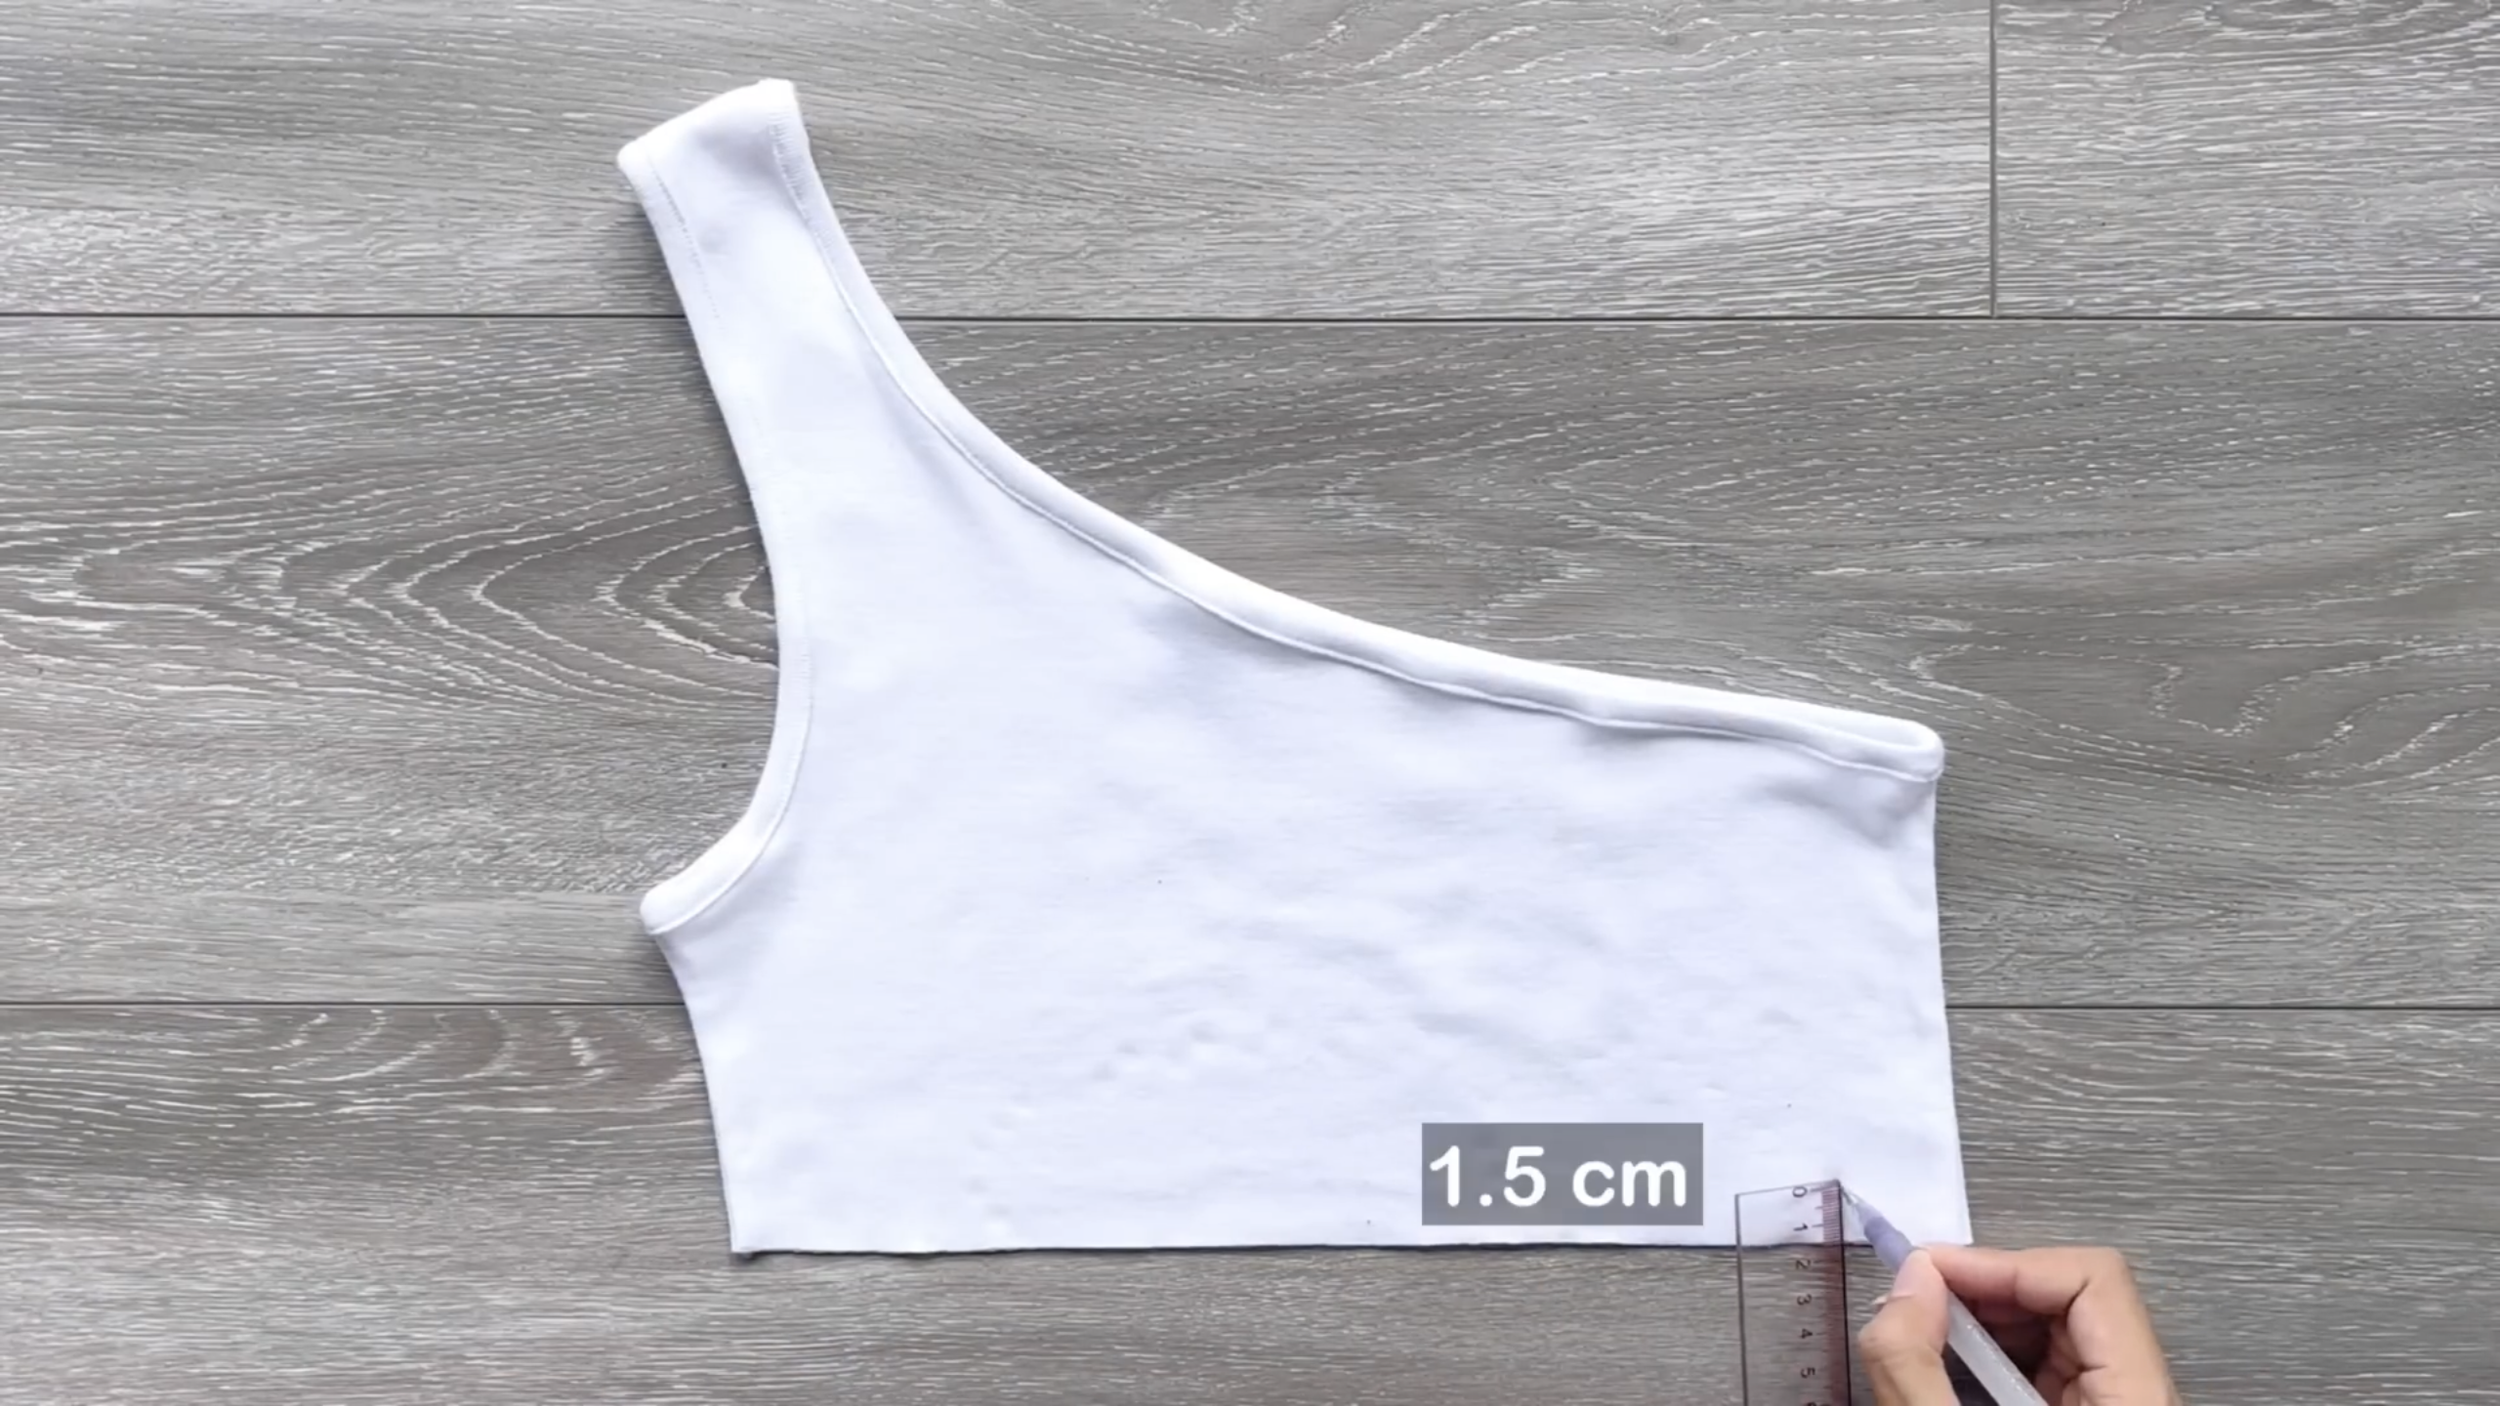
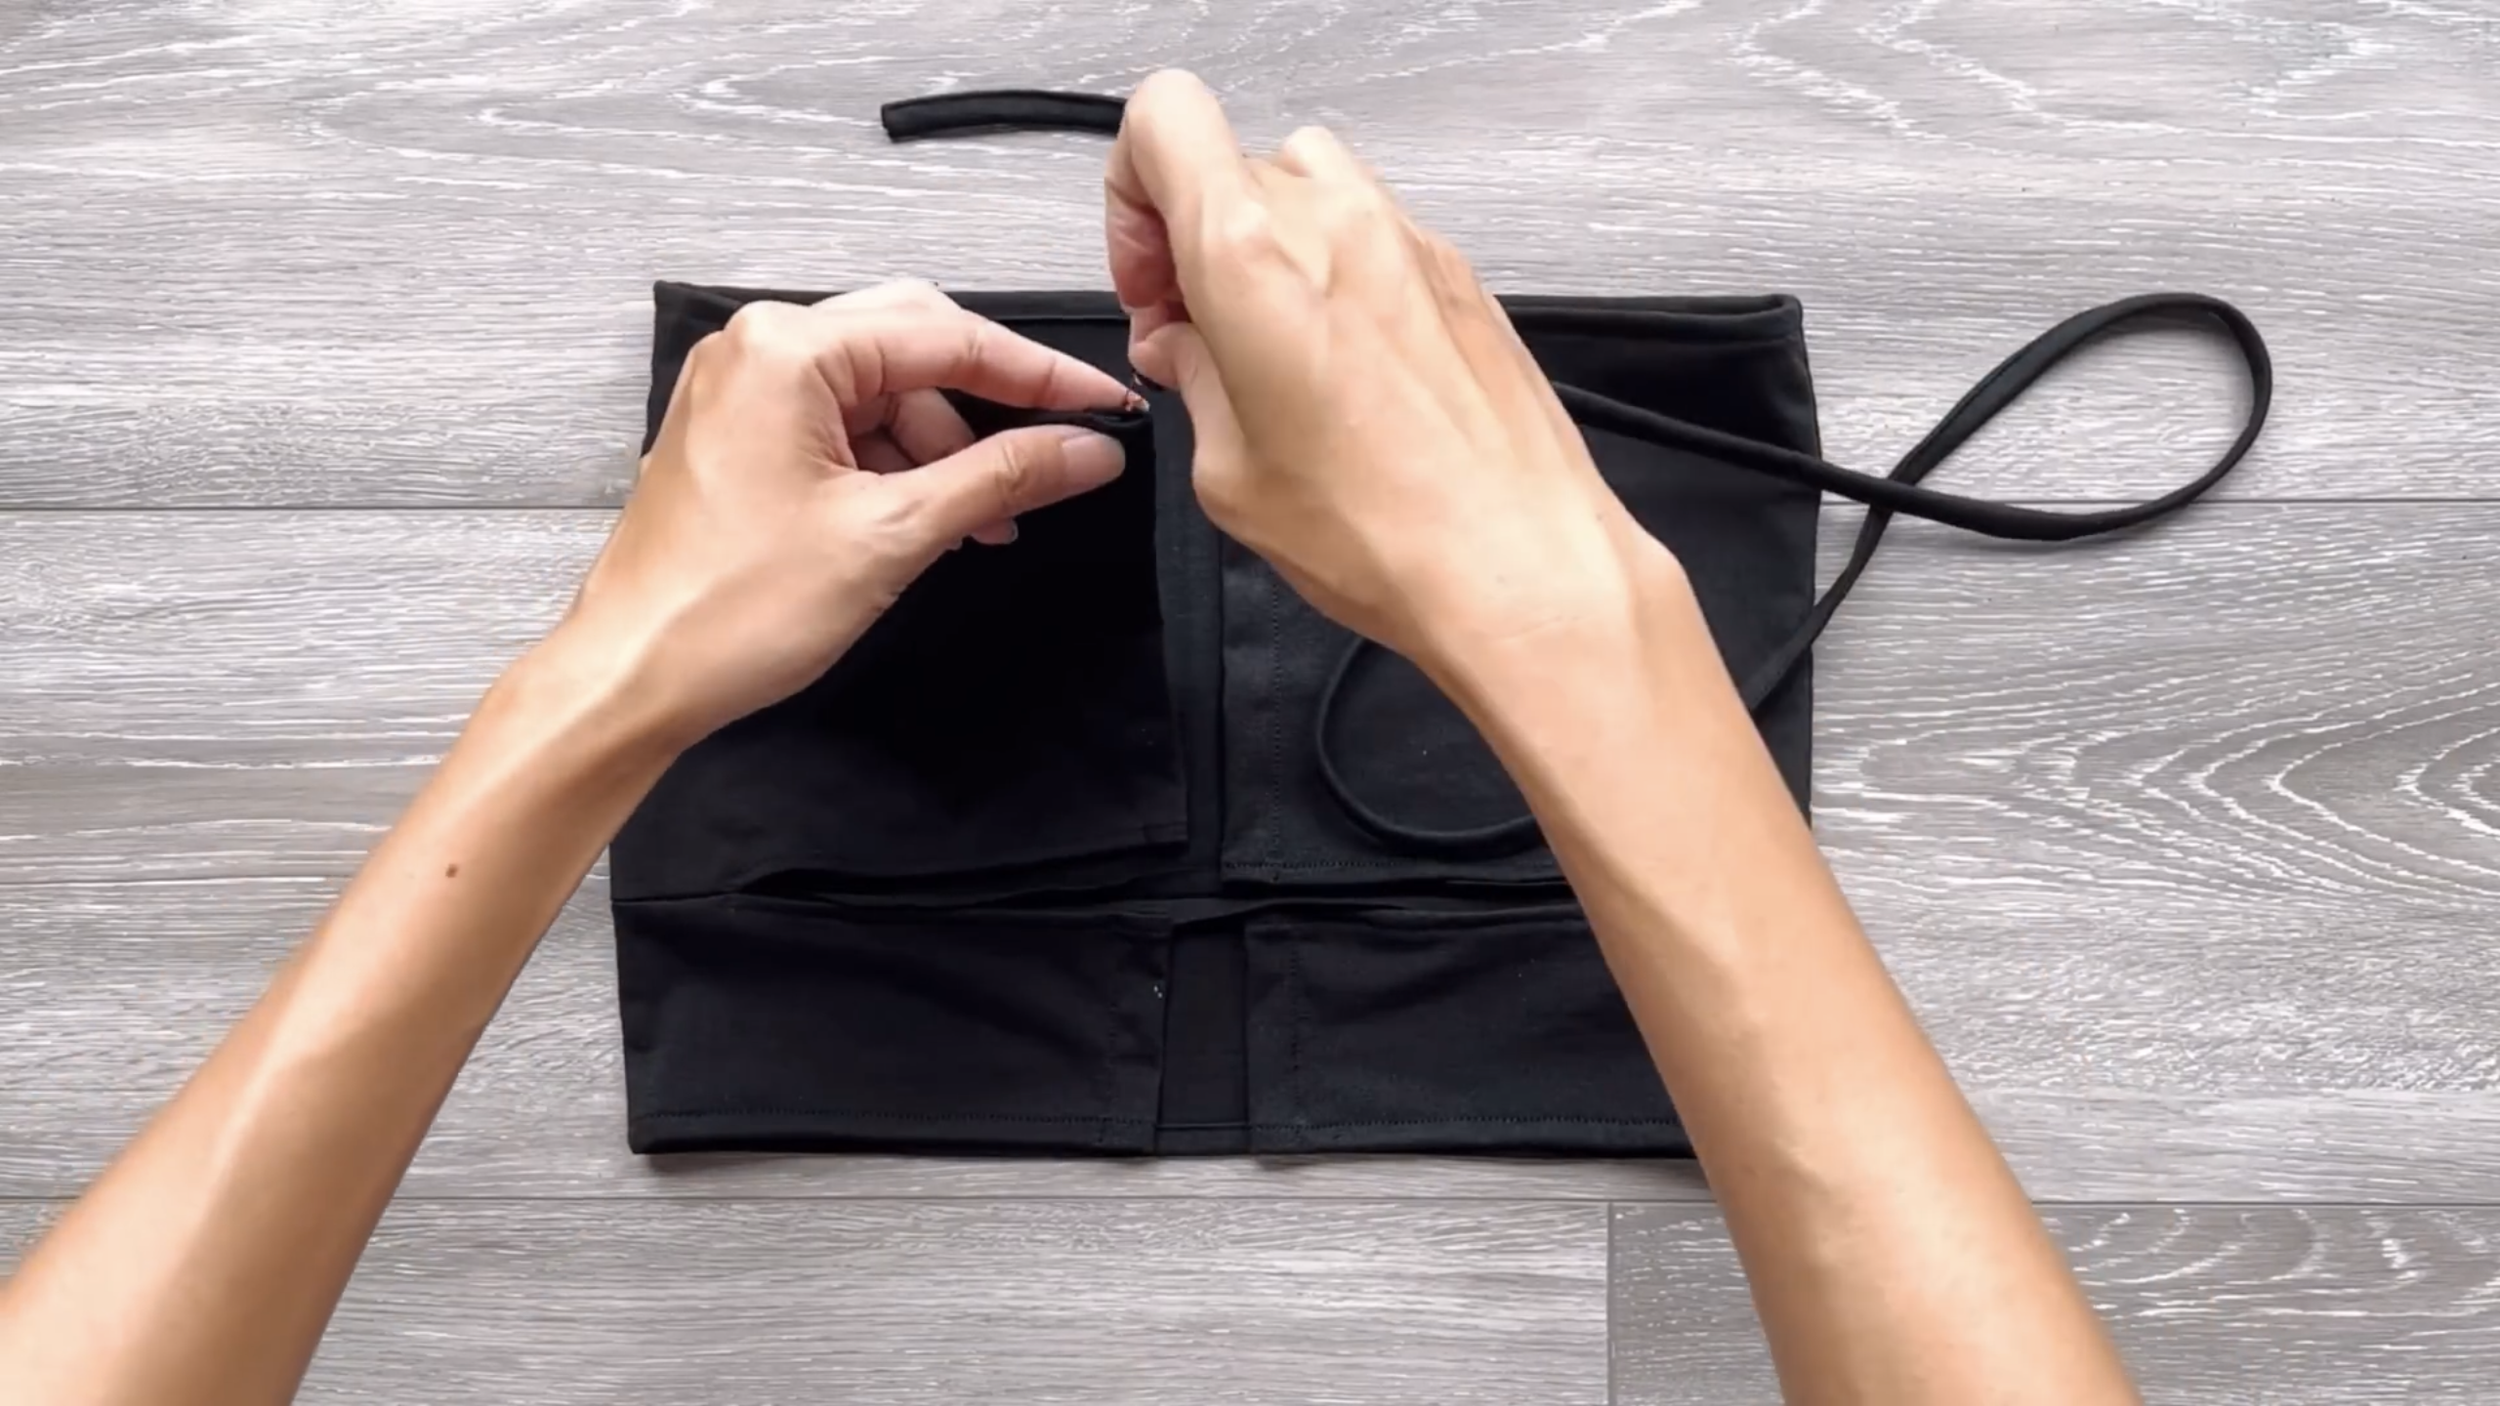
At the end of the crop top, draw a line 1.5 cm above it.
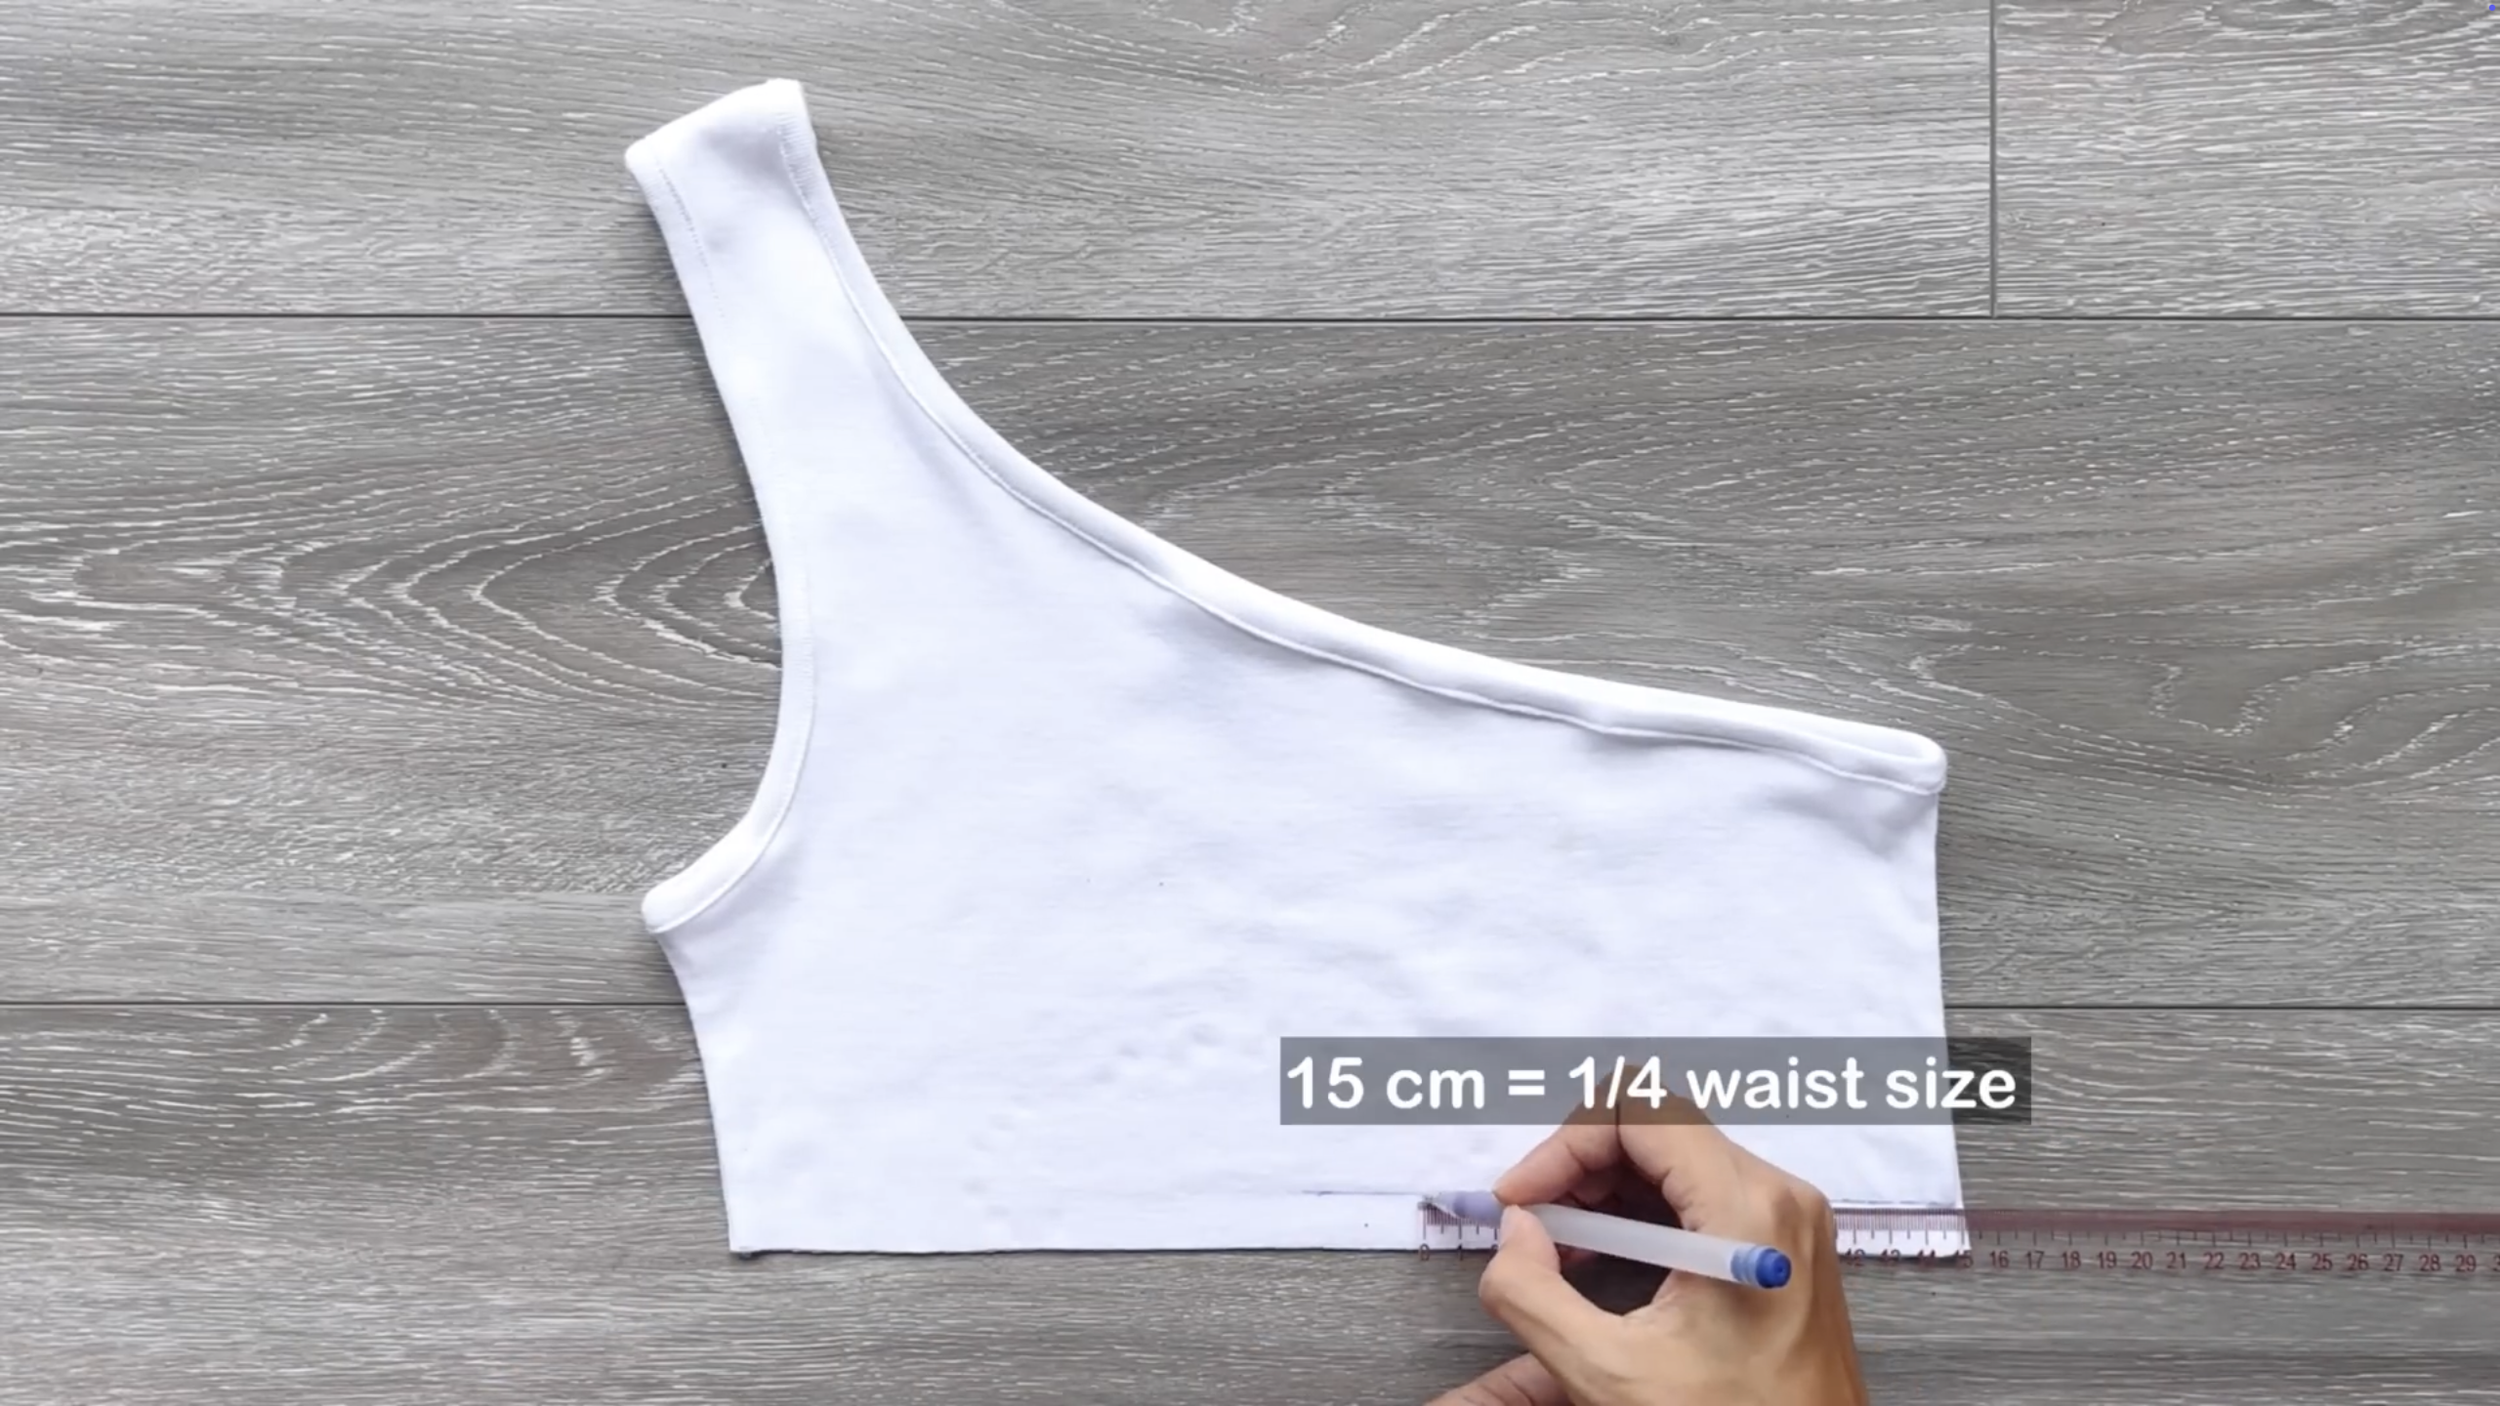
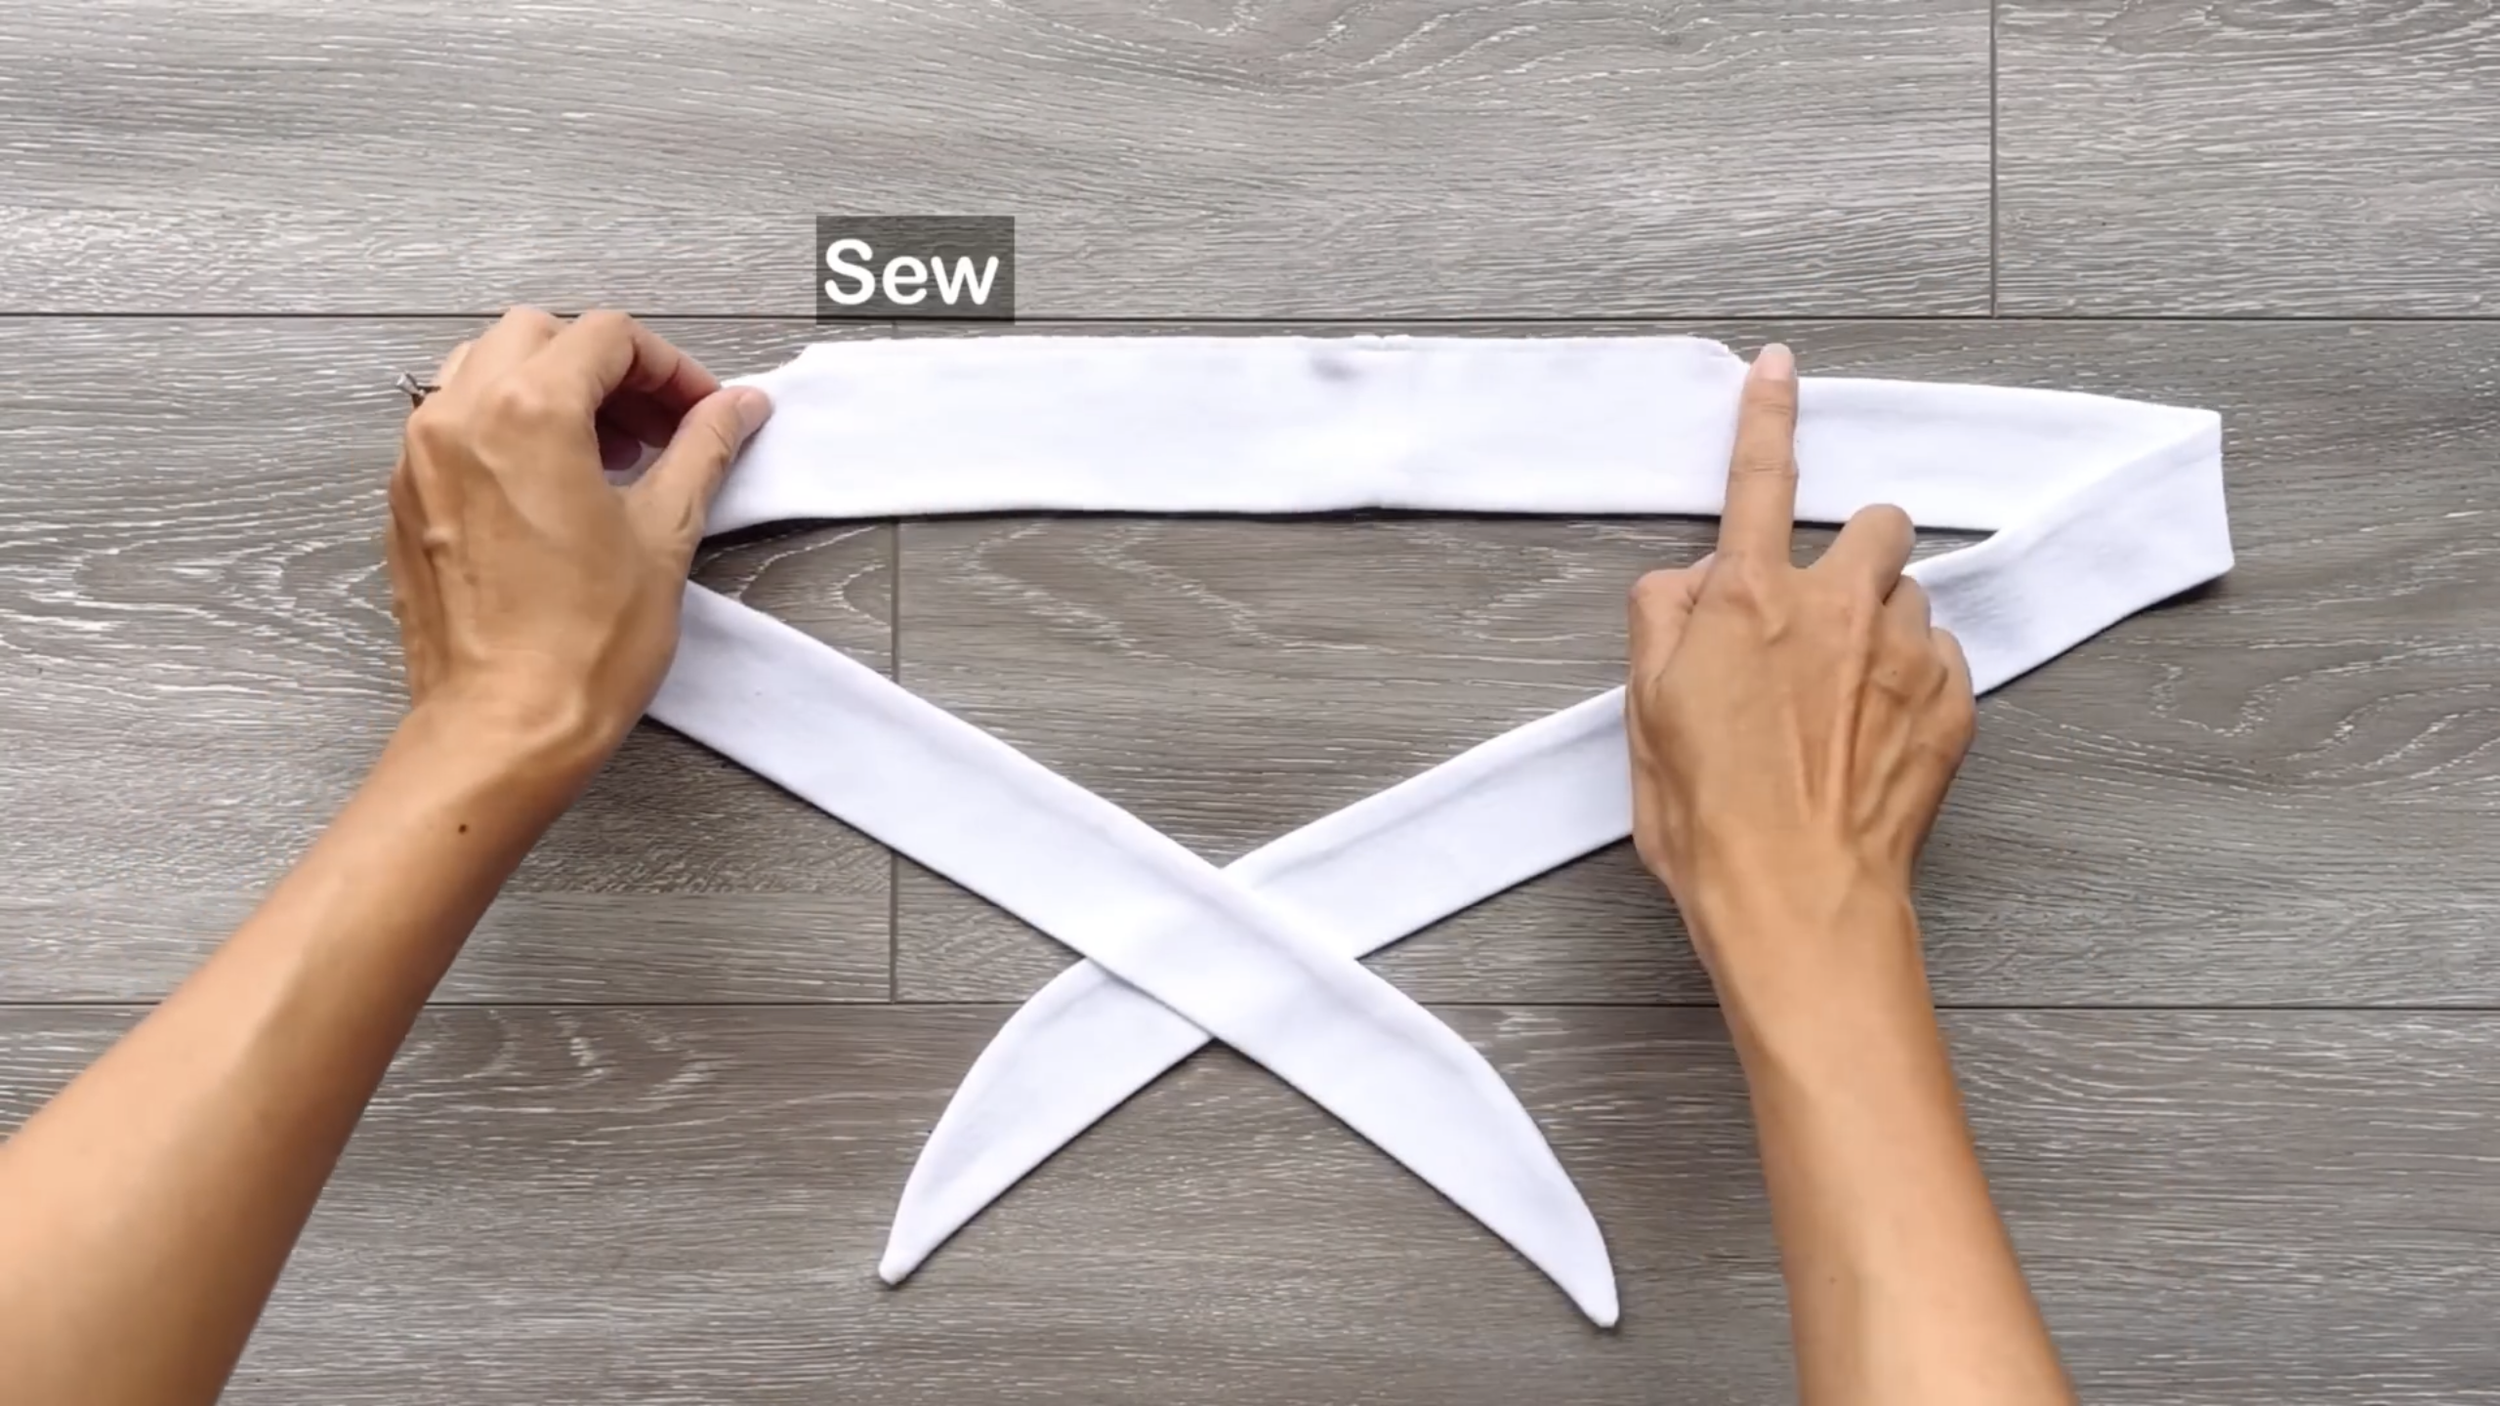
From one side, mark it at 15 cm inside at the front and the back so the width from the mark from the front to the back will be 30 cm, which is the same with the open part at the tie.
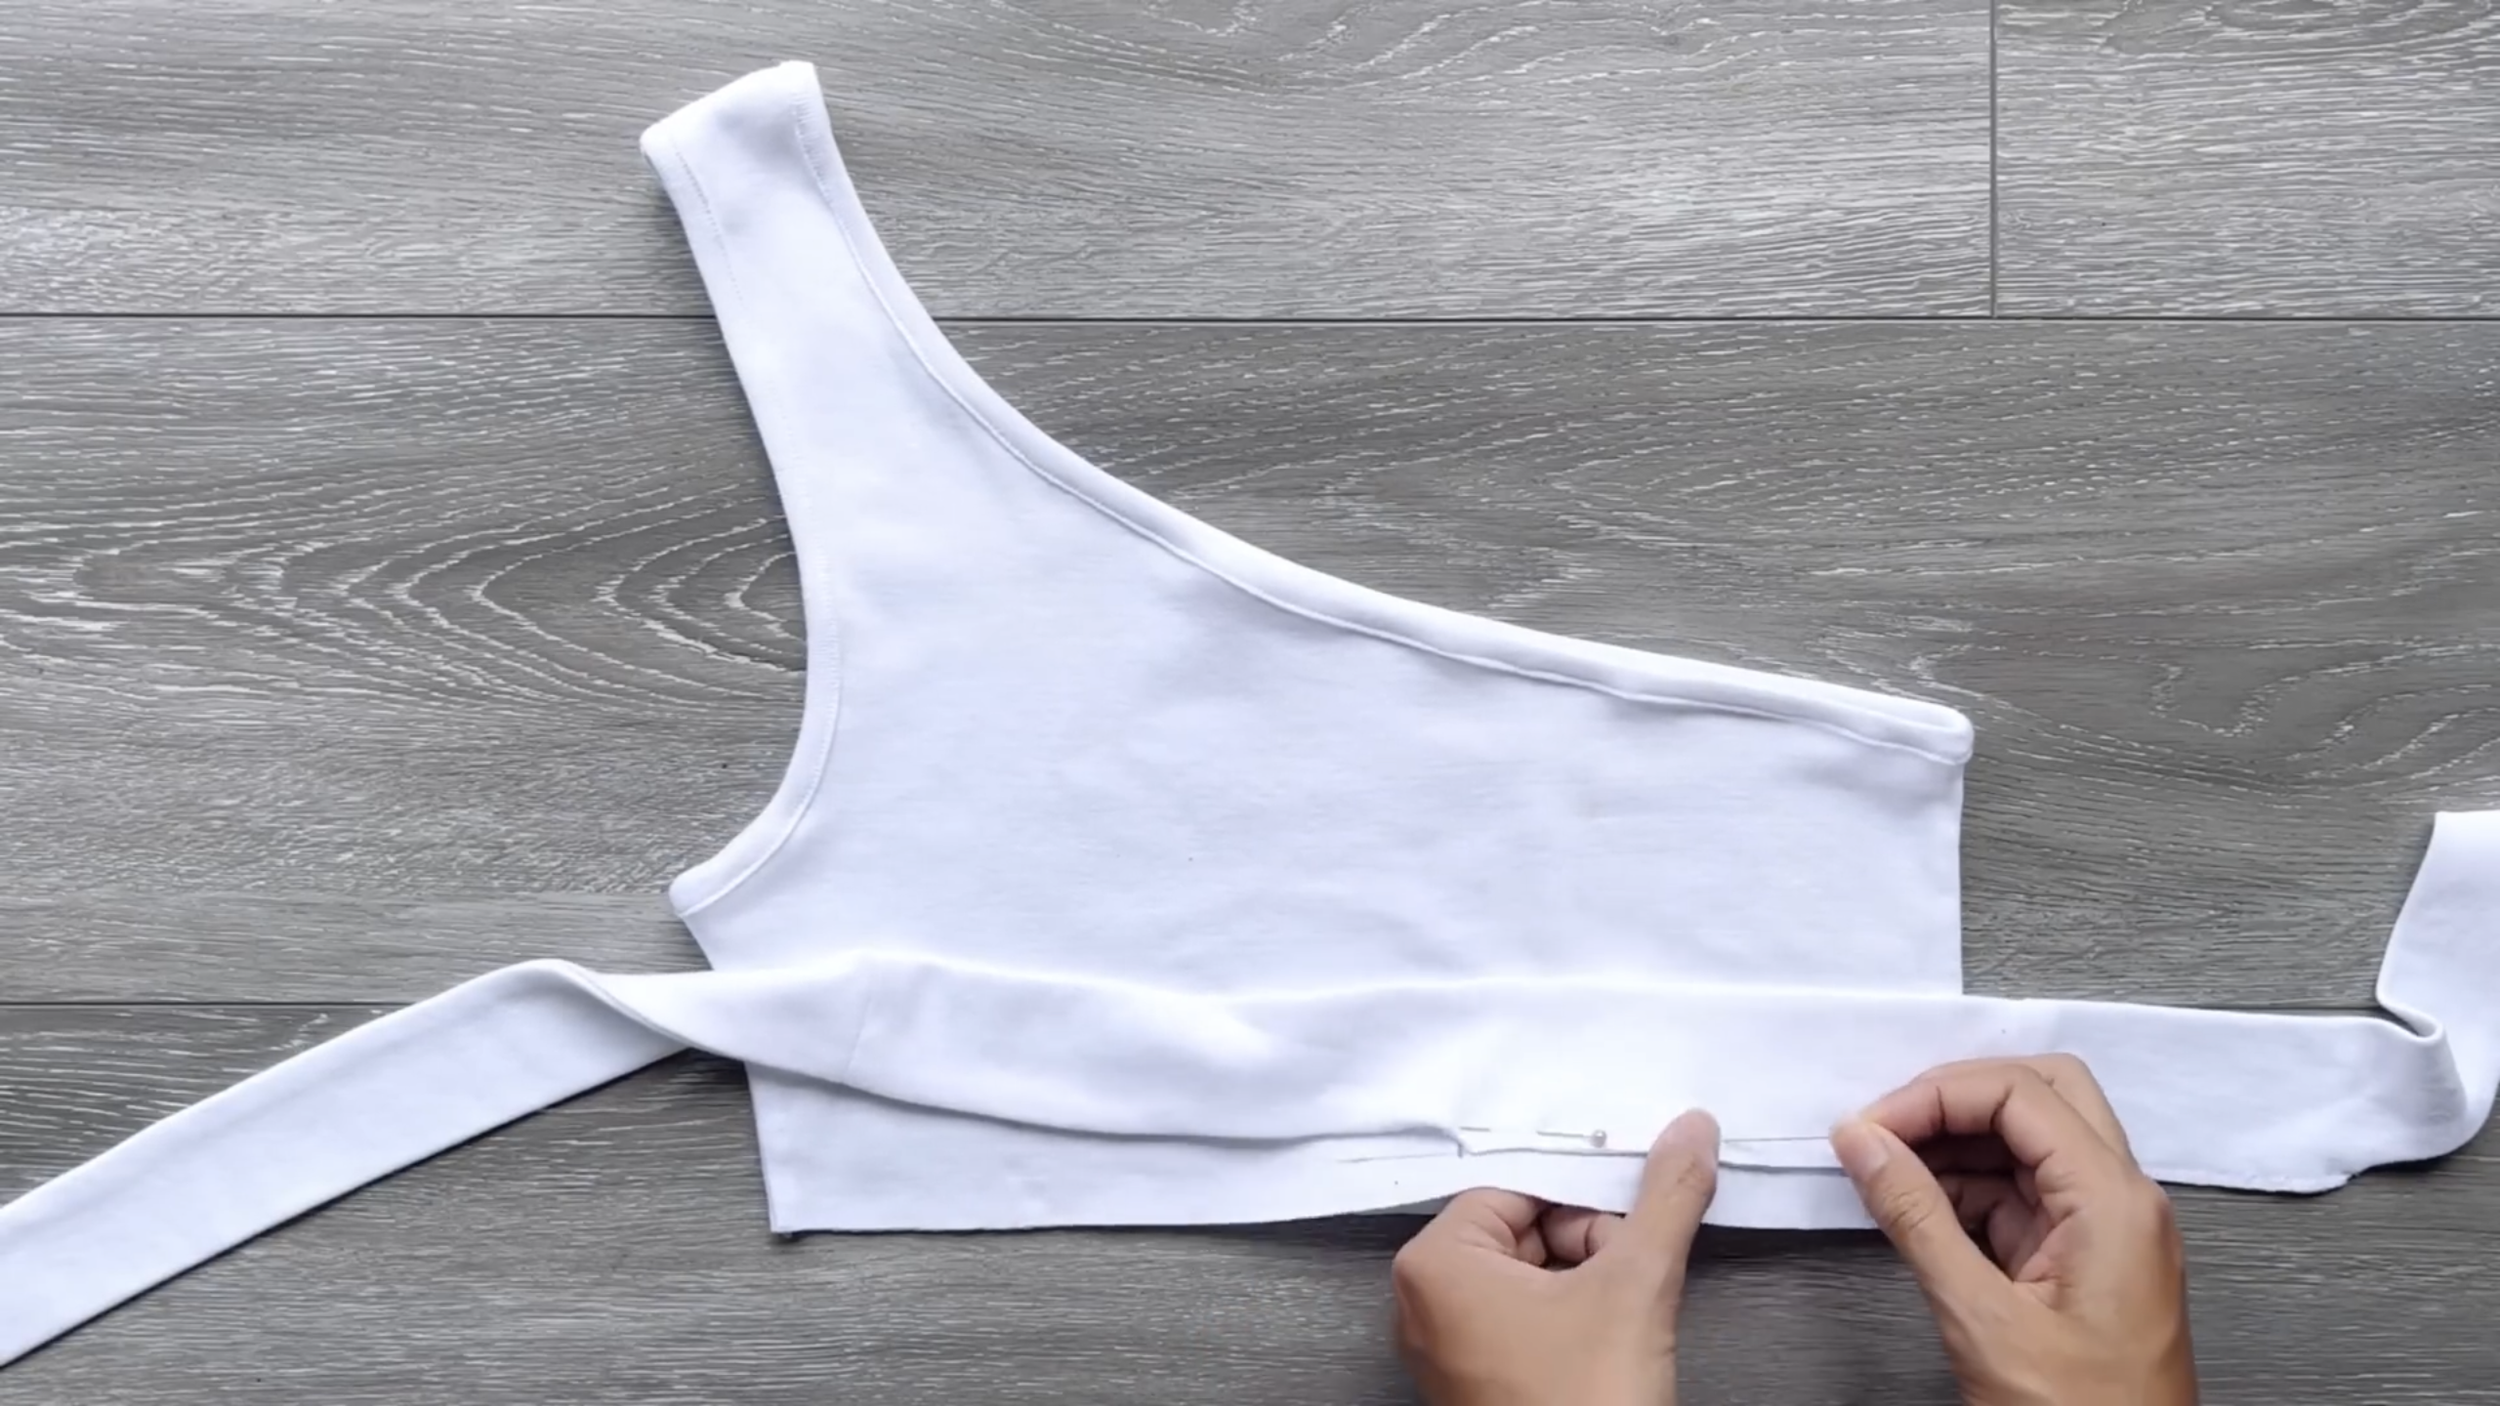
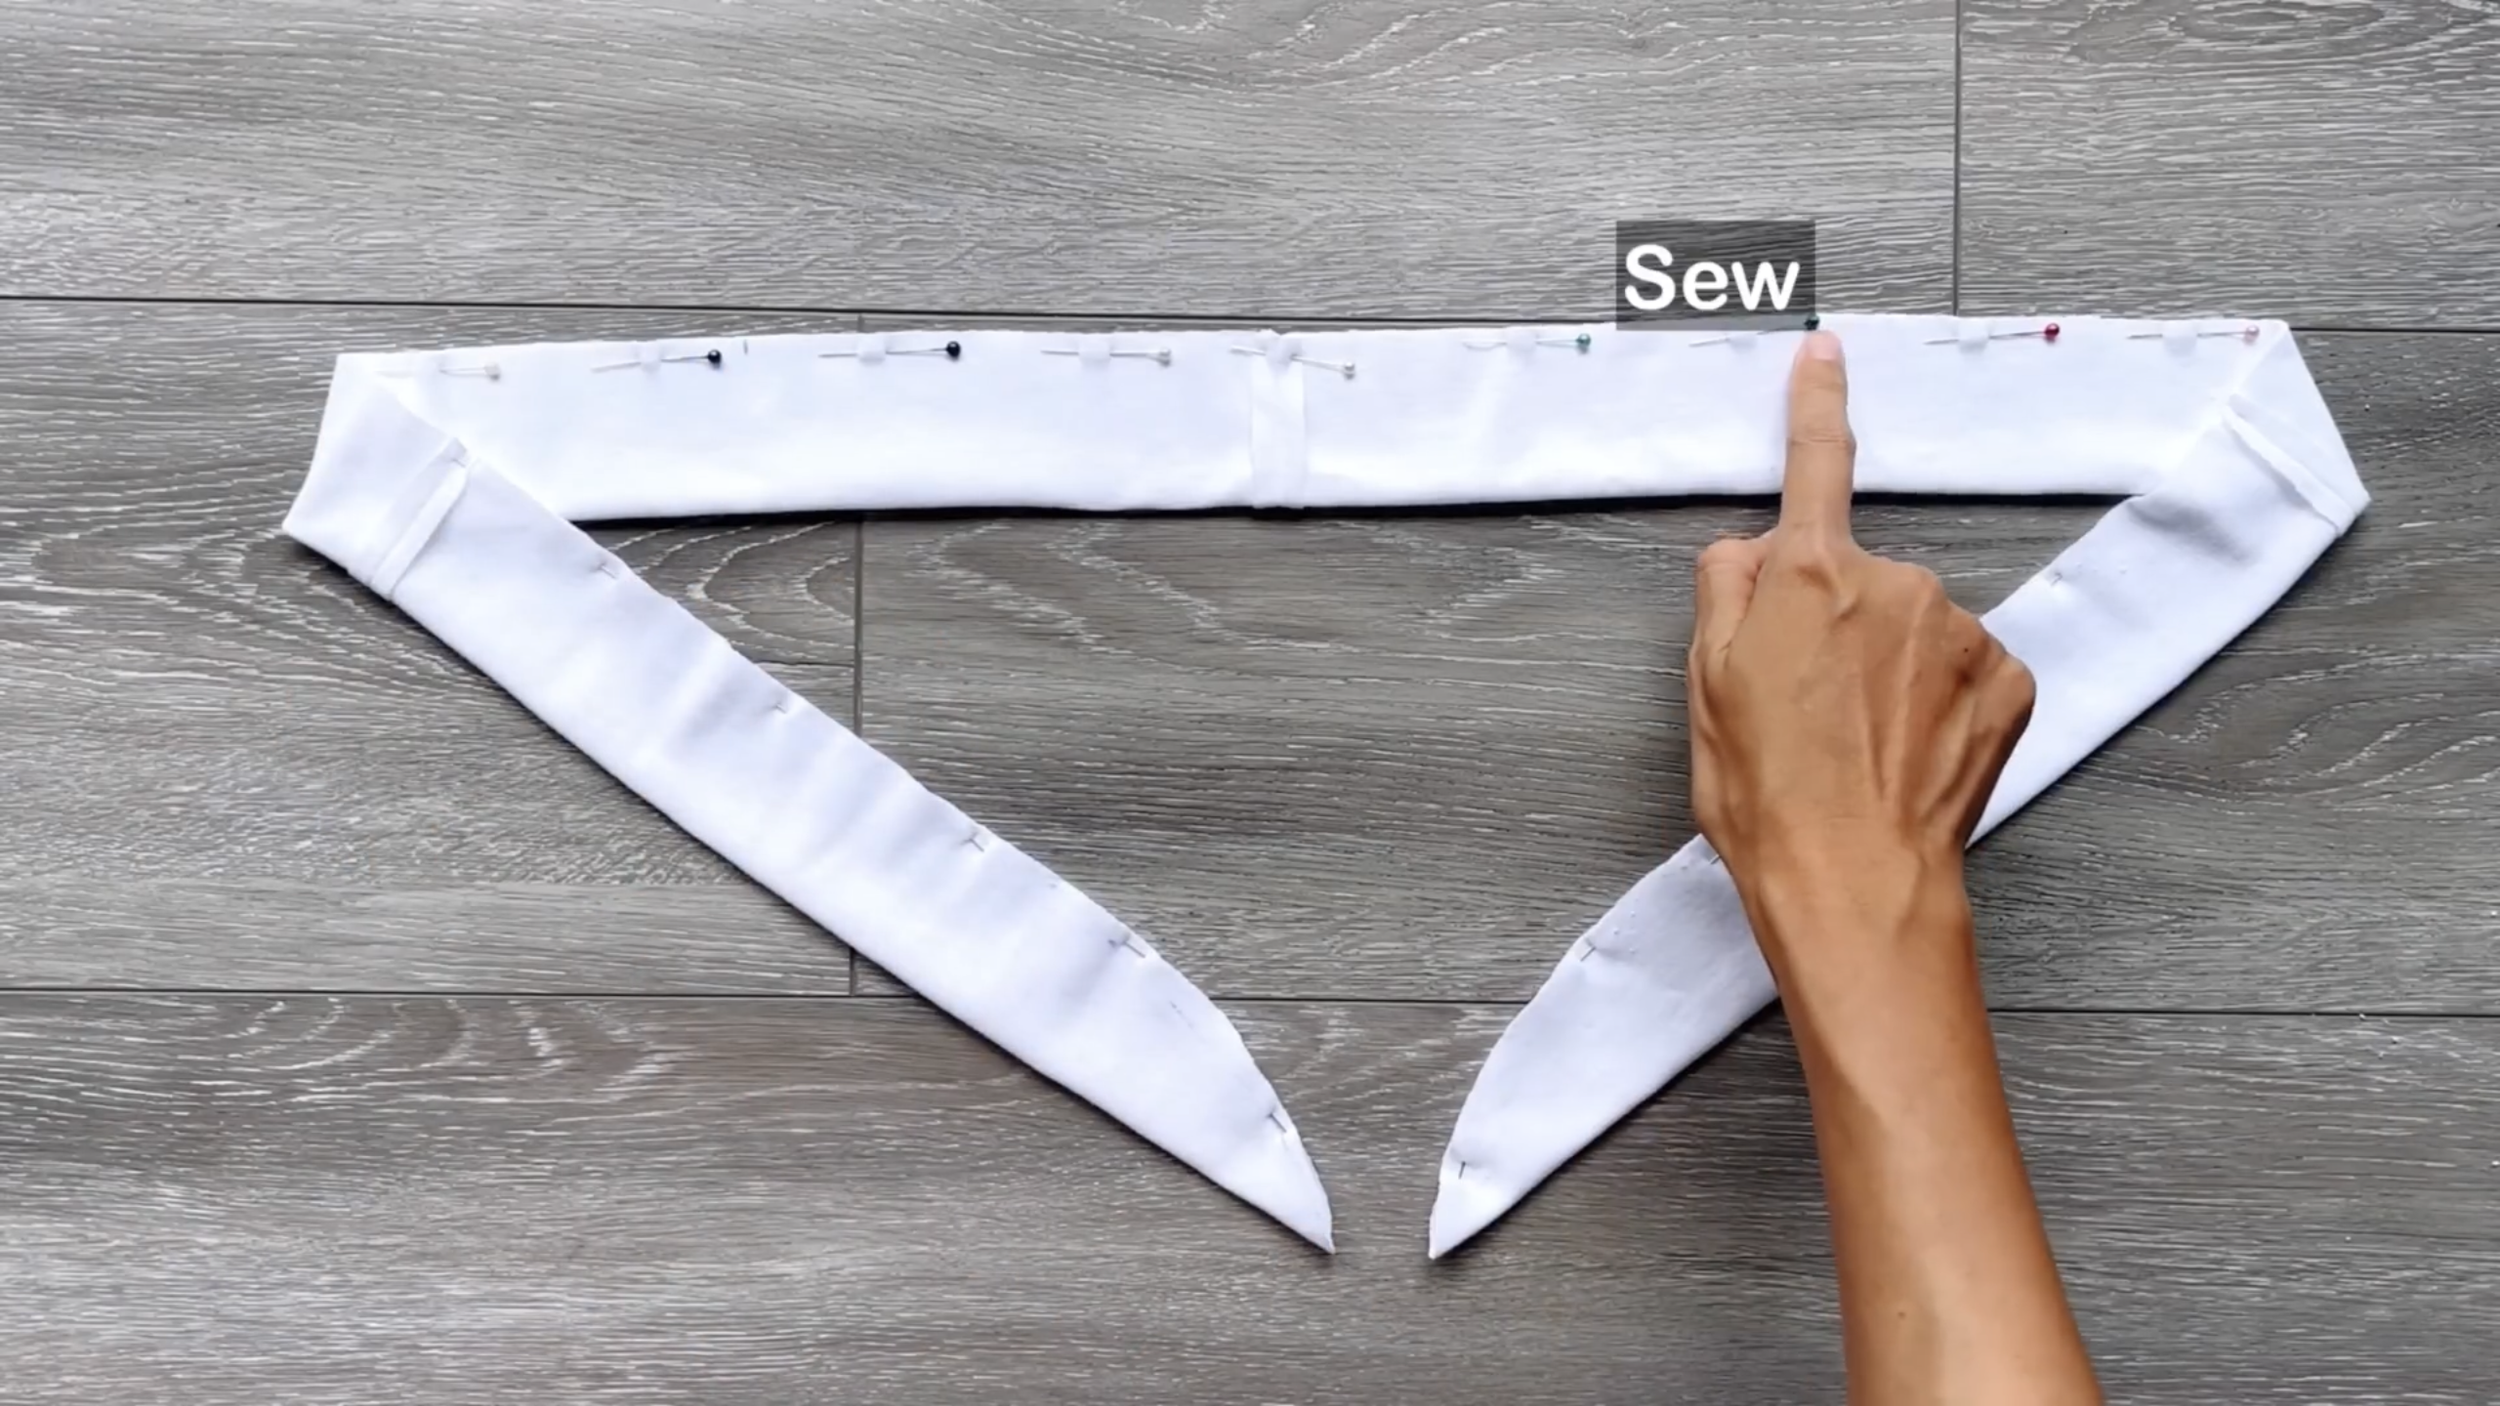
Then connect the tie to the crop top there.
After the first seam, fold the end fabric of the crop top inside and sew to create a fabric hole with around 1 cm width at the leftover part of the end of the crop top.

Cut an elastic band with 30 cm, which is the half of your waist size.
Go through the fabric hole created.
Then, sew two ends of the elastic band to the fabric to keep them from moving.
DIY Cut out crop top from t-shirt | T-shirt transformation ideas | Easy sewing tutorial for beginner
This DIY is finished. Here is the final transformation. This is a cute, sexy crop top.
Which style is your favorite? Let me know in the comments below!