DIY Double faced wool jacket | How to sew with double faced fabric | Step by step sewing tutorial
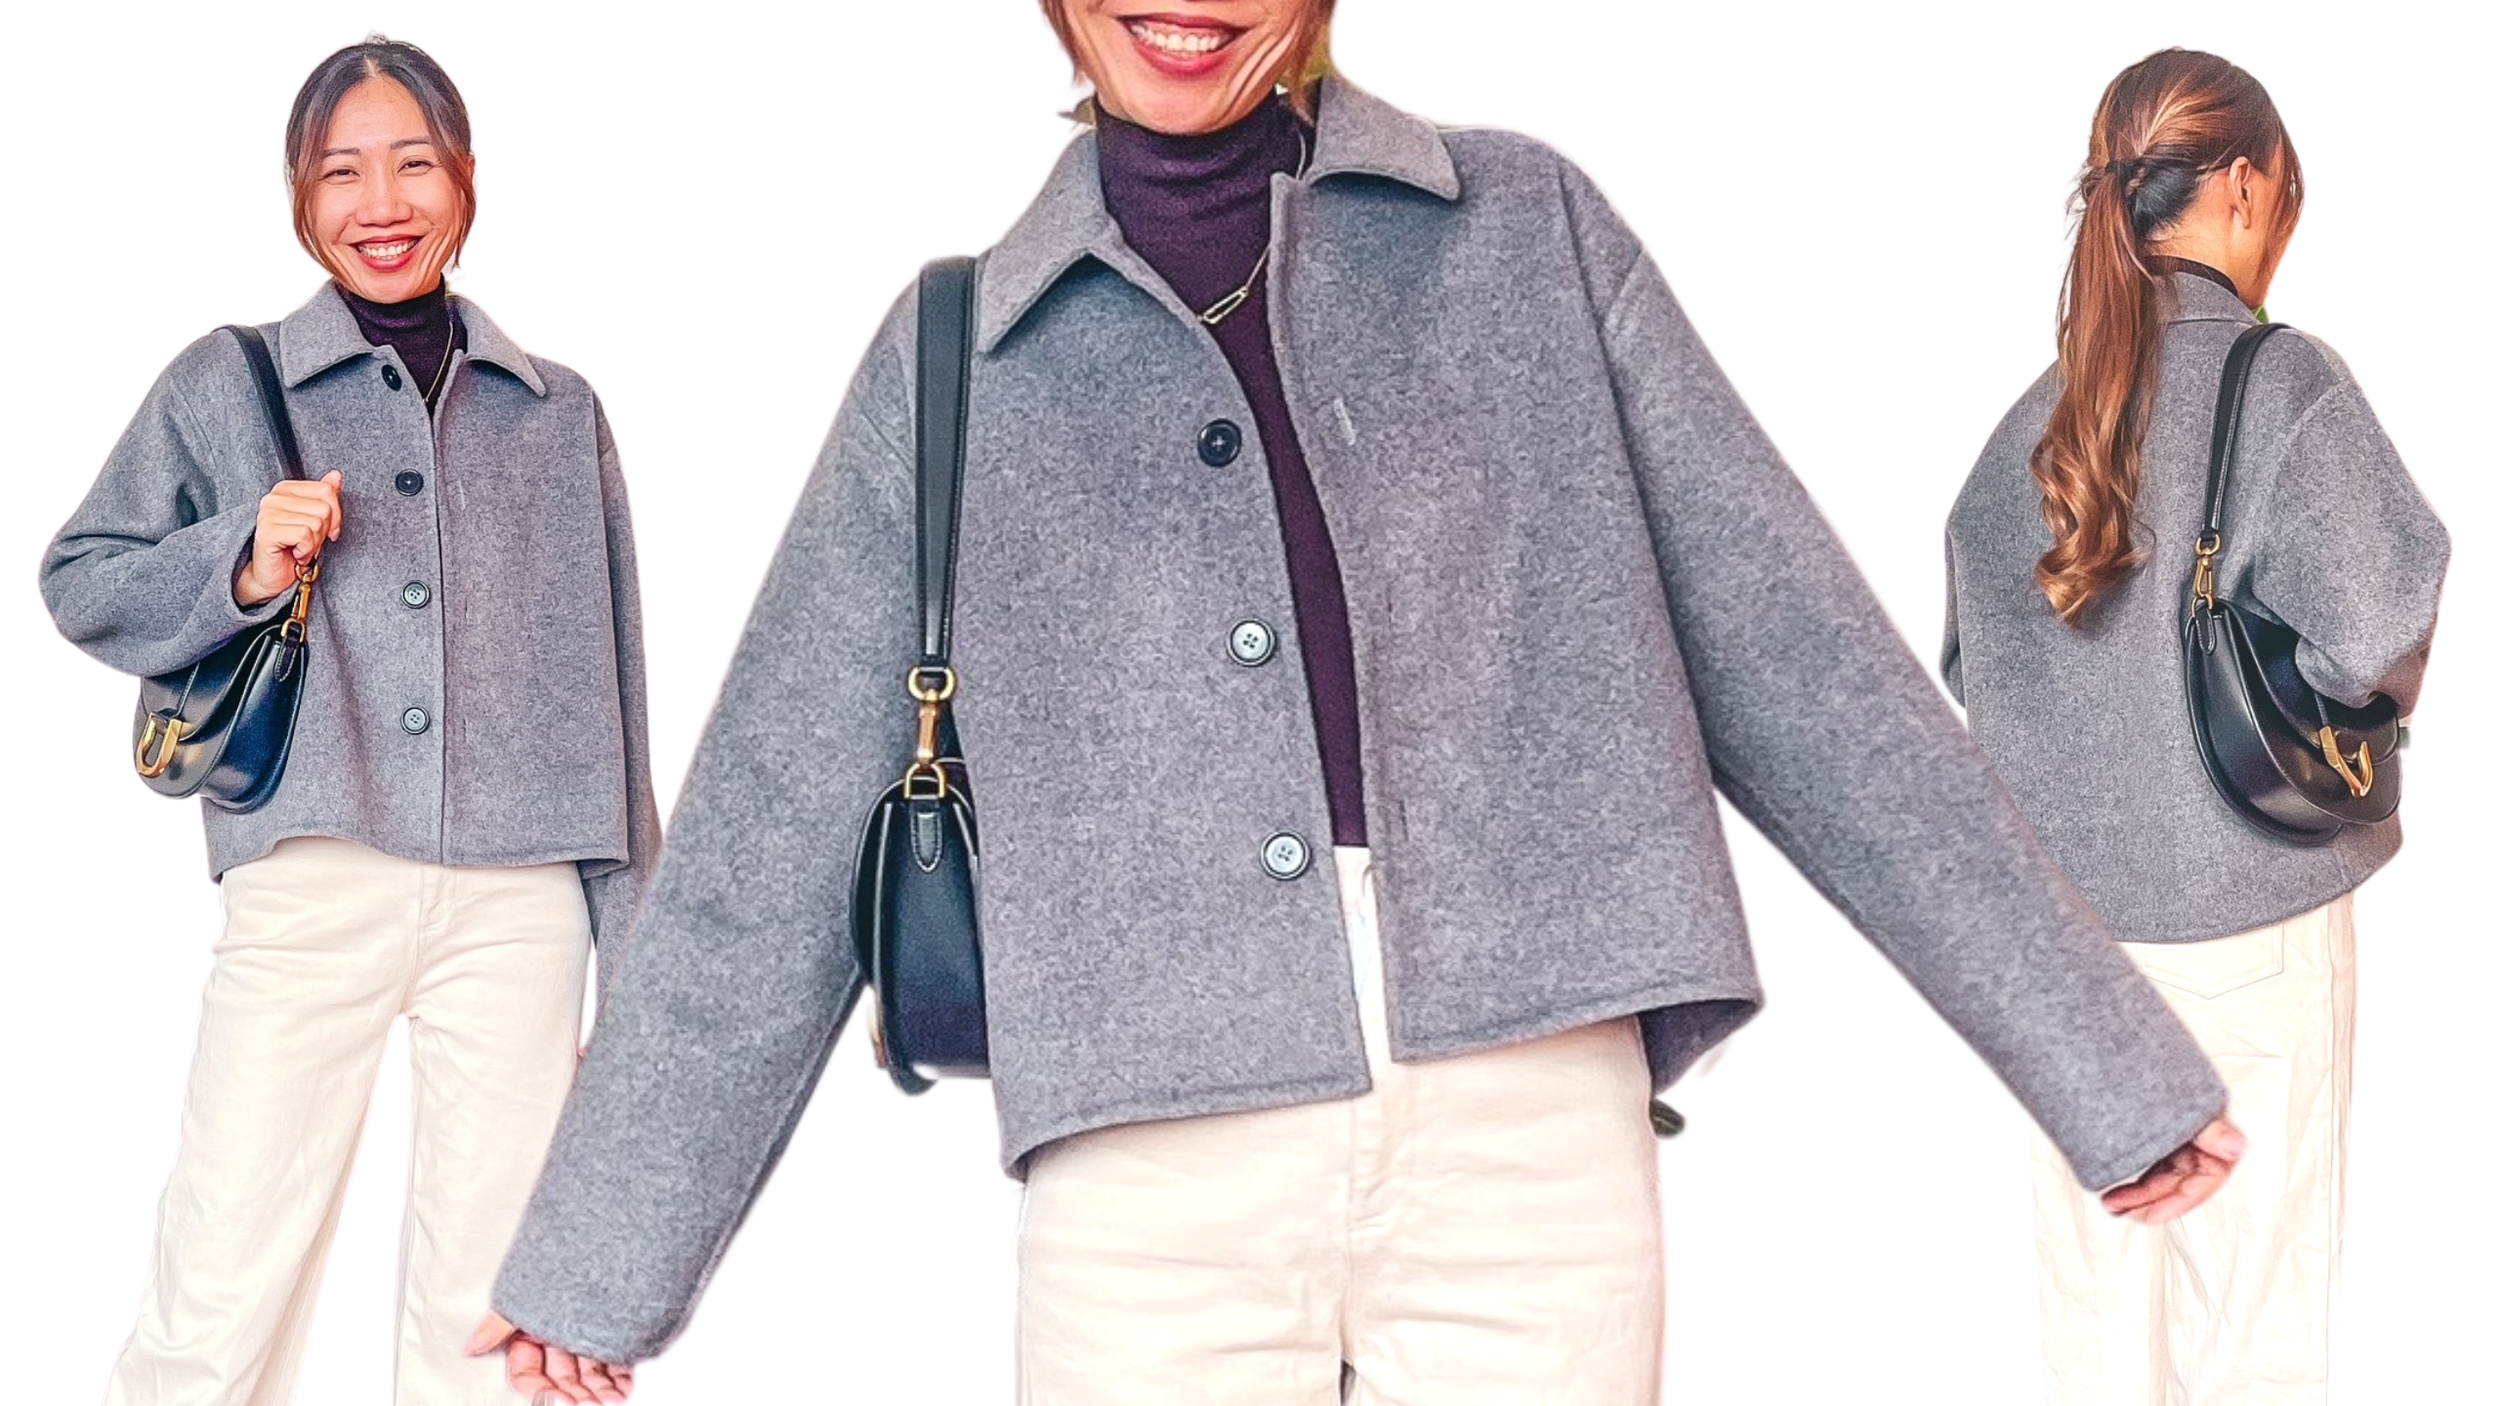
DIY Double faced wool jacket

This is my first time working with double face fabric, so I’ve tried to use simple and basic techniques to make it easy for you to follow along. I’ll walk you through the process of cutting the fabric, sewing the pieces together, and adding the finishing touches. I’ll also share some tips and tricks I’ve learned along the way to help you improve your sewing skills.
Let’s get started!
WHAT YOU’LL NEED
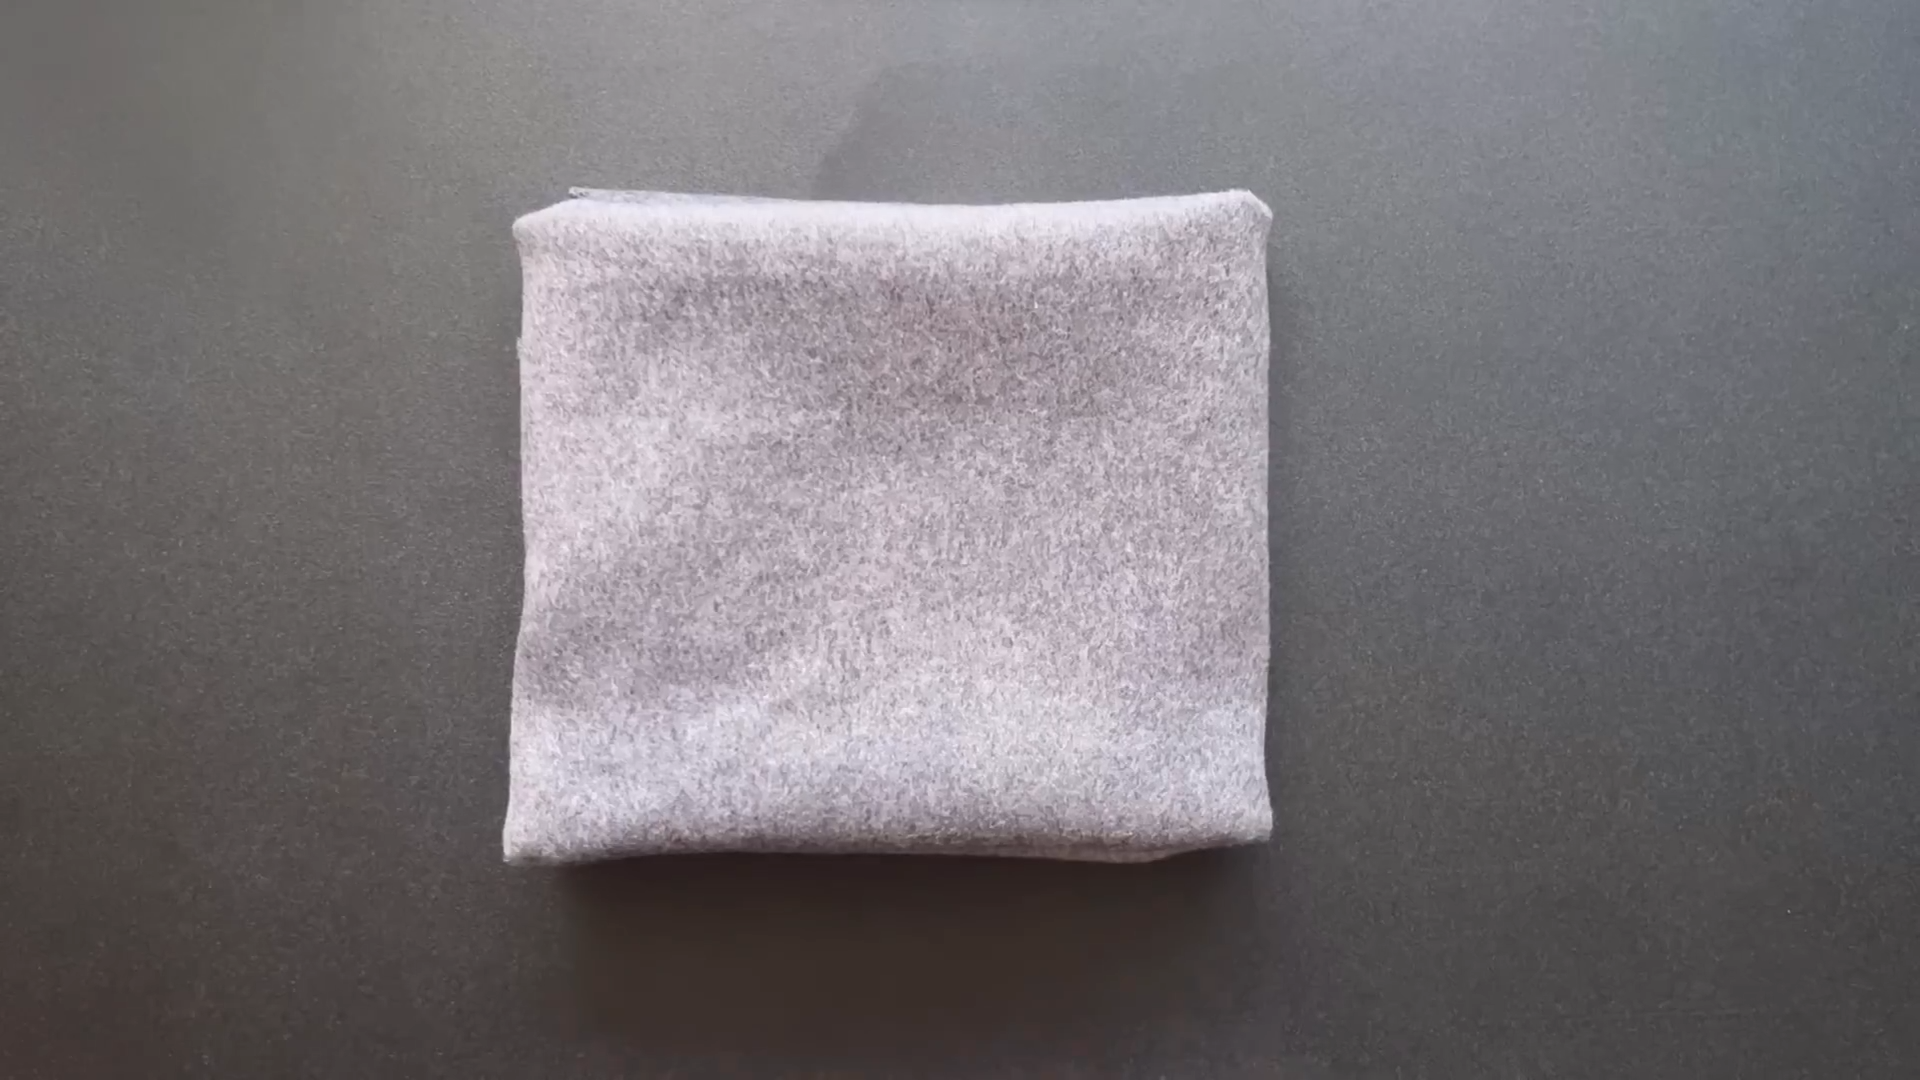
2m of double face wool fabric
Pattern paper
Sewing machine
Pins
Scissors
Ruler
Long stick
MAKING THE PATTERNS
Here’s the pattern for the project. To get a clear understanding of all the measurements needed for the pattern, watch the video from 0:28 to 8:30.
Remember, you can adjust these measurements to fit your own dimensions!
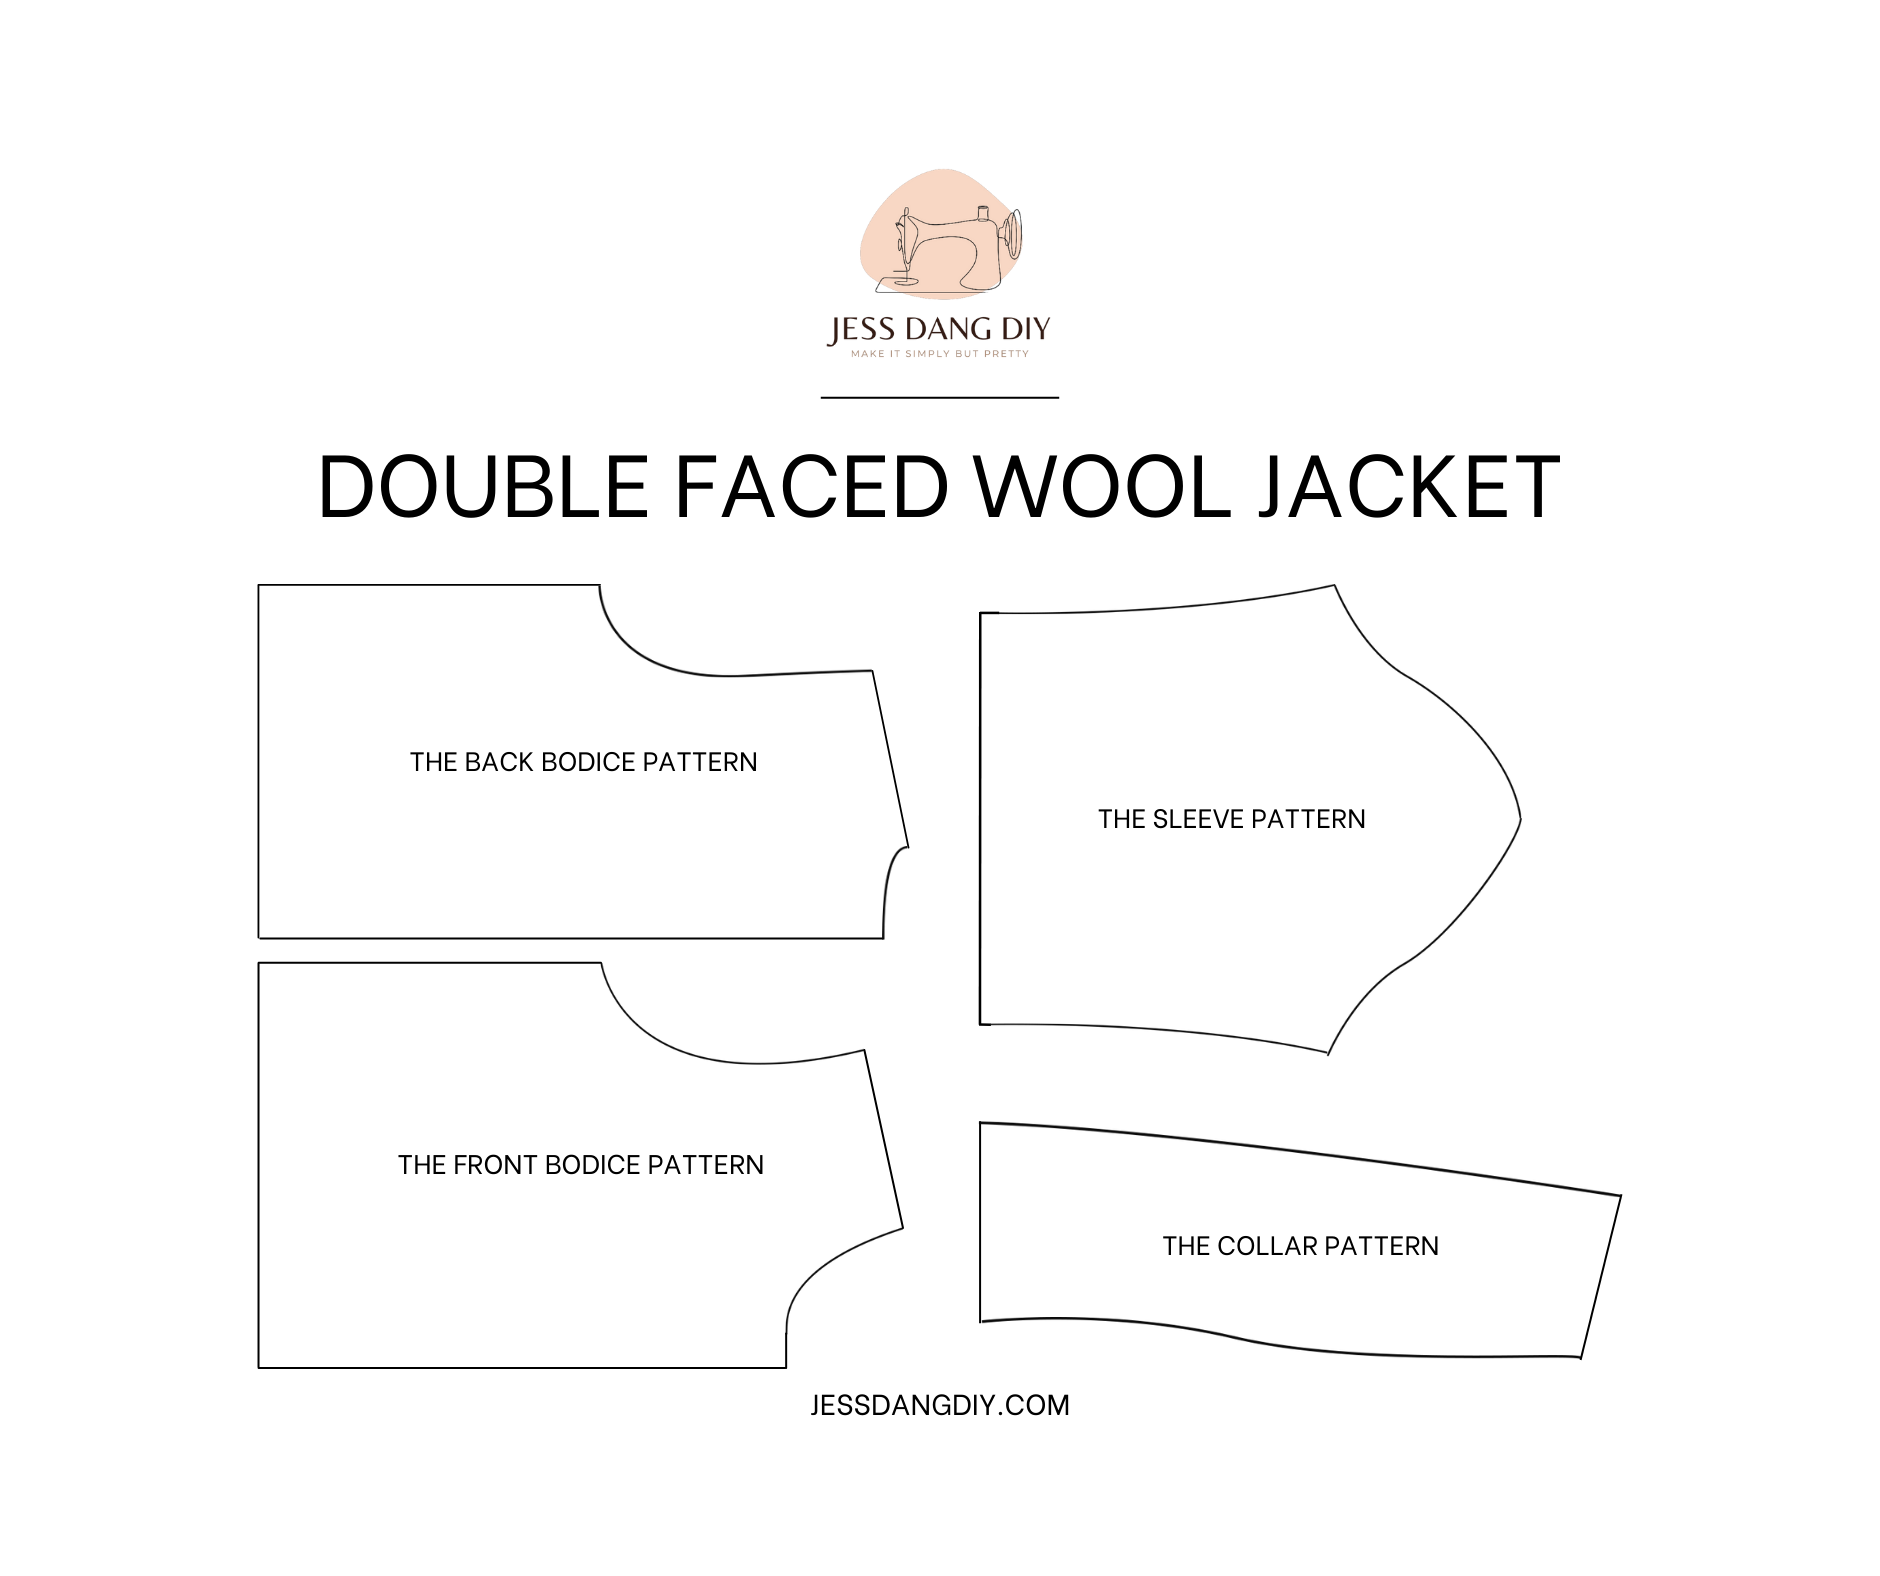
THE BACK BODICE PATTERN
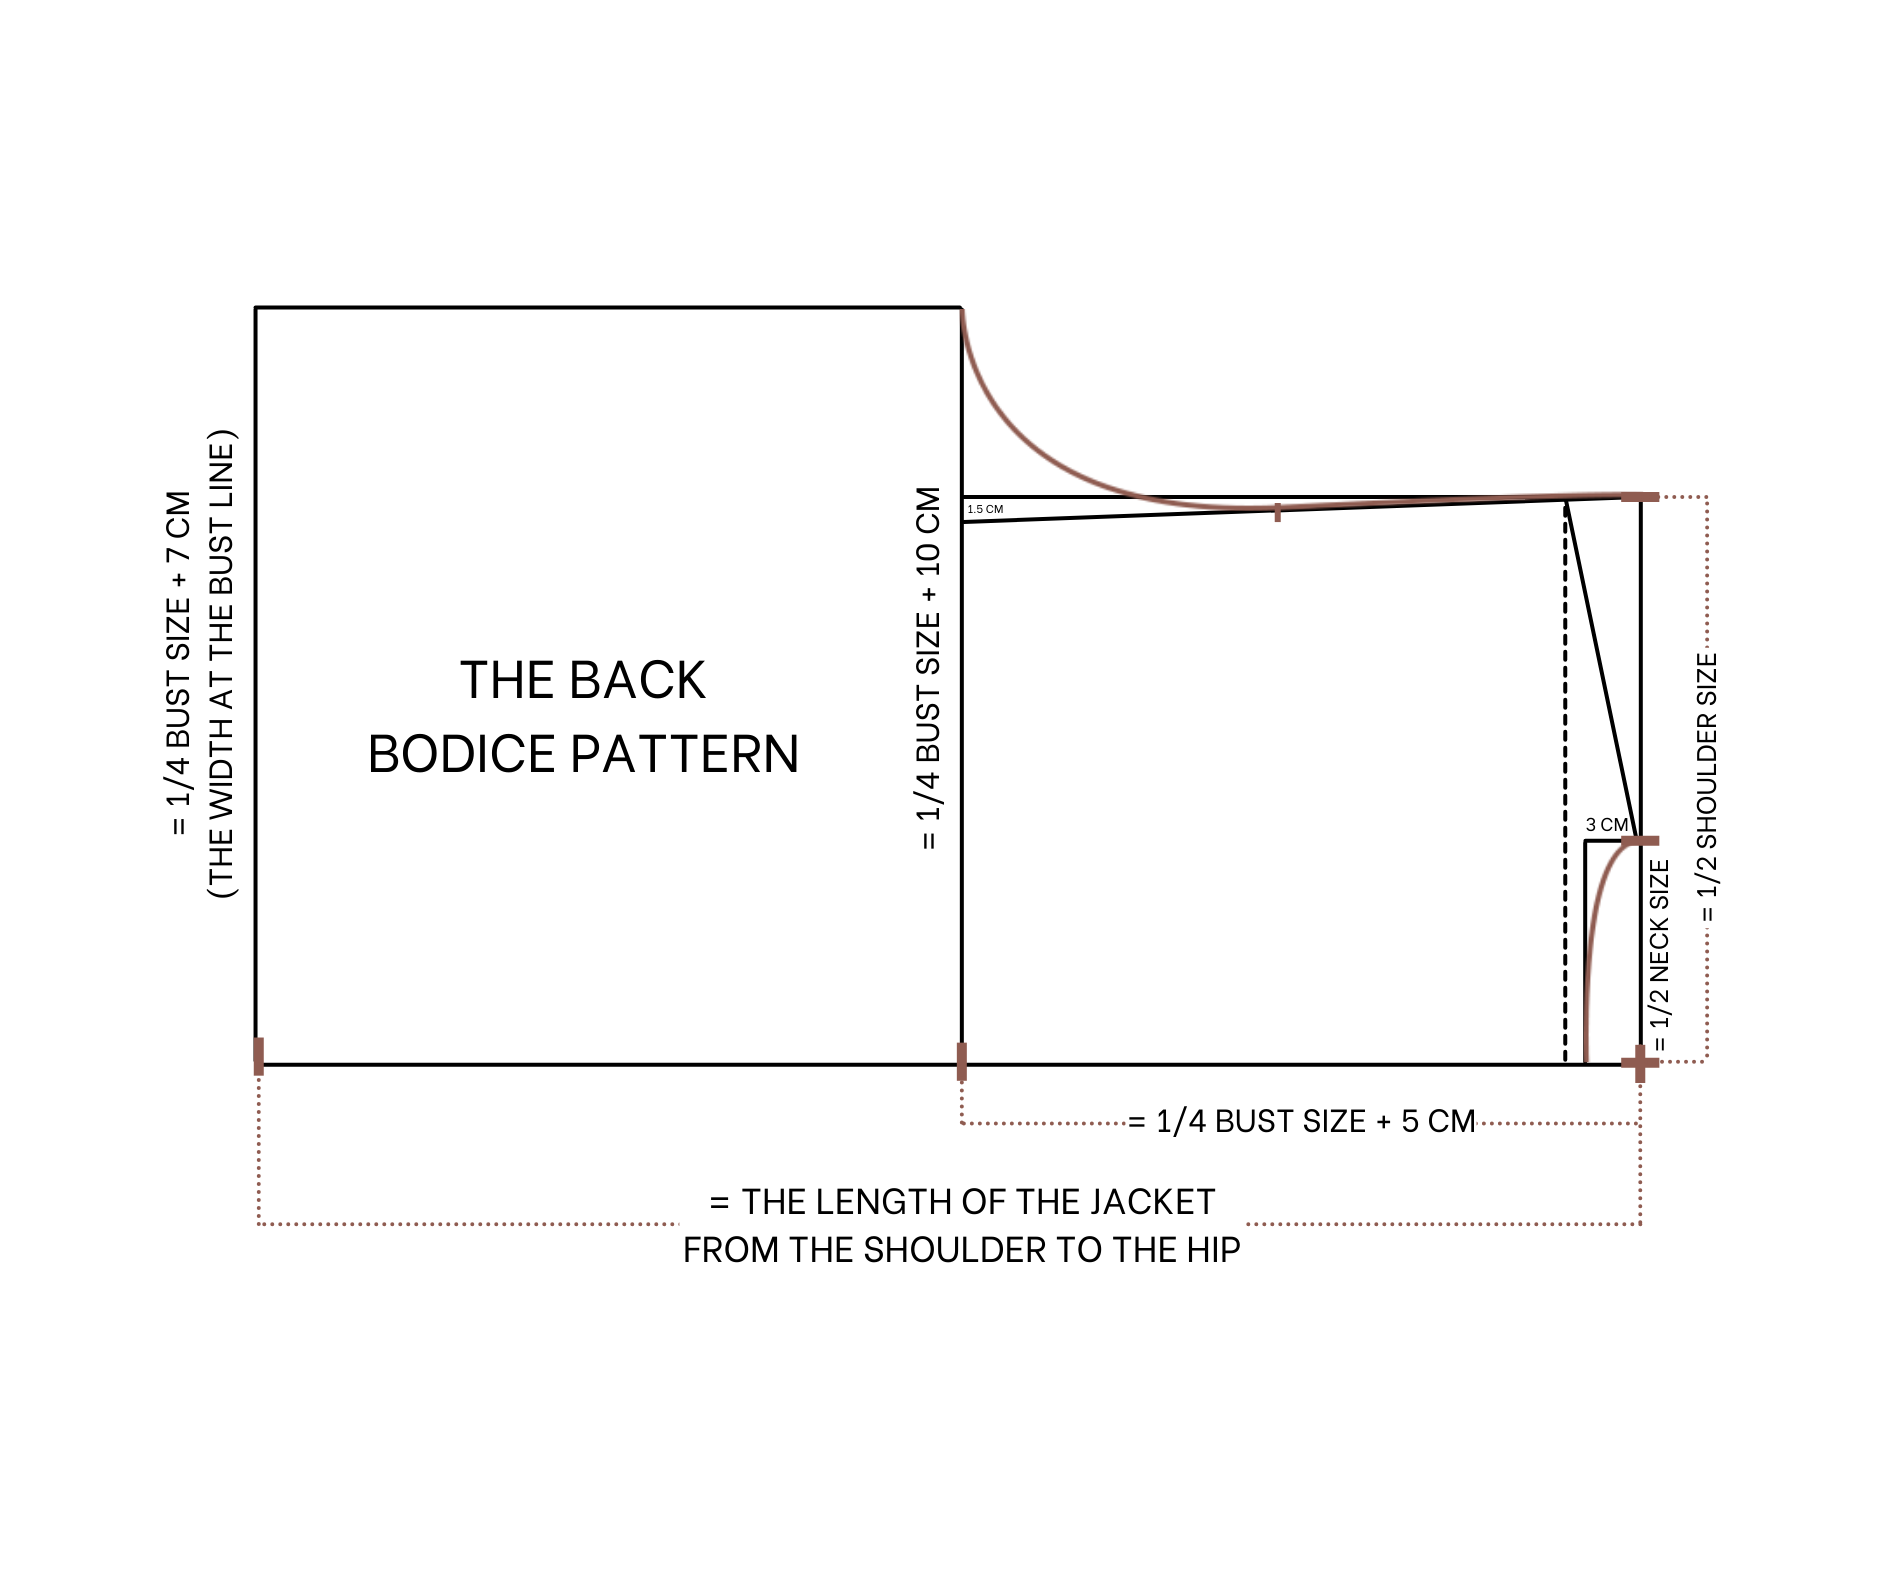

The back bodice pattern
Draw a straight line cutting the edge horizontal line first, from the end of the straight line mark up 9 cm which is a half width of the neck that you want.
Draw a perpendicular line from that mark, the width of this line will be 3 cm which is the depth of the neck of the back bodice.
Draw a straight line from the end of that perpendicular line to cut the edge horizontal line at one point, then draw a curve line to connect this cutting point to the first mark on the first straight line to create the neck line for the back bodice.
From the end of the first straight line keep marking up 24 cm which is a half of the width of the shoulder size. Draw a perpendicular line from that mark, the width of this line will be 3.8 cm which is 1 by 10 the shoulder size minus 1 cm.
Connect the end of the perpendicular line to the top of the neck line to create the shoulder line for the back bodice.
After that, draw a straight line from the end of the shoulder line to cut the edge horizontal line then draw another straight line at 25 cm from it. It's a quarter of the bust size plus 5 cm. This will be the bust line of the back bodice.
From the end of this line mark up 30 cm which is a quarter the bust size plus 10 cm. From this cutting point, mark inside one and a half cm then connect this mark to the end of the shoulder line.
After that, mark in the middle of this slanted line, then draw a curved line from the mark on the bust line to this mark and finish at the end of the shoulder line. It will be the sleeve line of the back bodice.
From the first straight line, keep drawing another line at 58 cm from it. It's the length from the shoulder to the hip and it's also the length of the jacket that you want.
From the end of this line, mark up 30 cm which is the same with as the bust line then connect this mark to the end of the sleeve line to create a side line of the back bodice. Add 1 cm for seam allowance and we will have the back bodice pattern after cutting.
You will need to cut this pattern in folded fabric at the edge horizontal line.
THE FRONT BODICE PATTERN
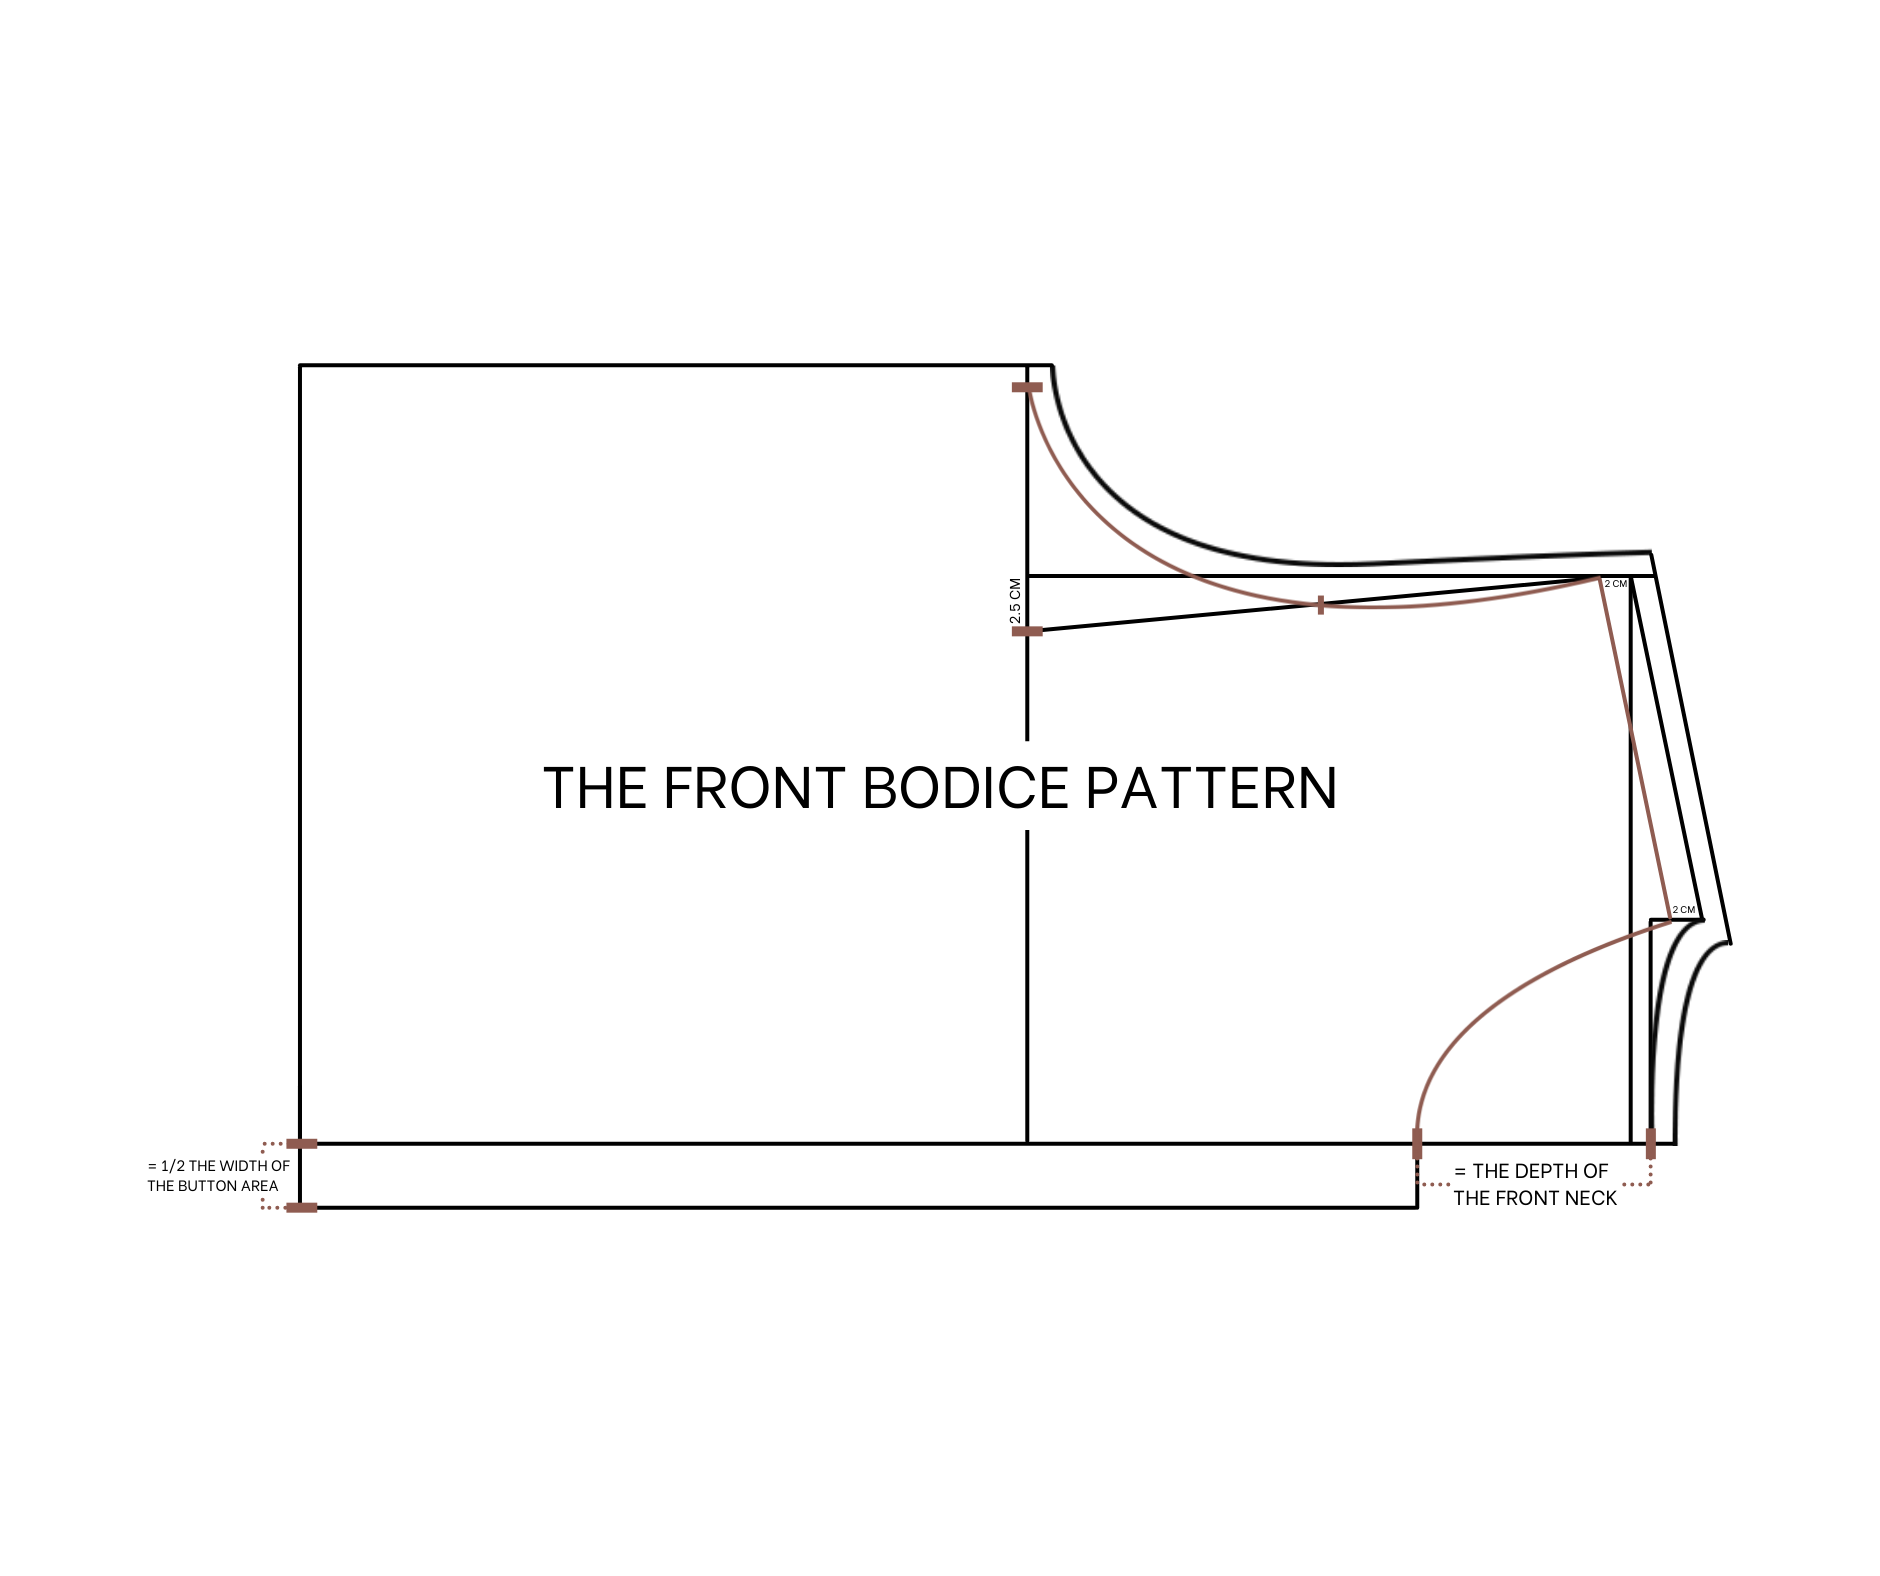
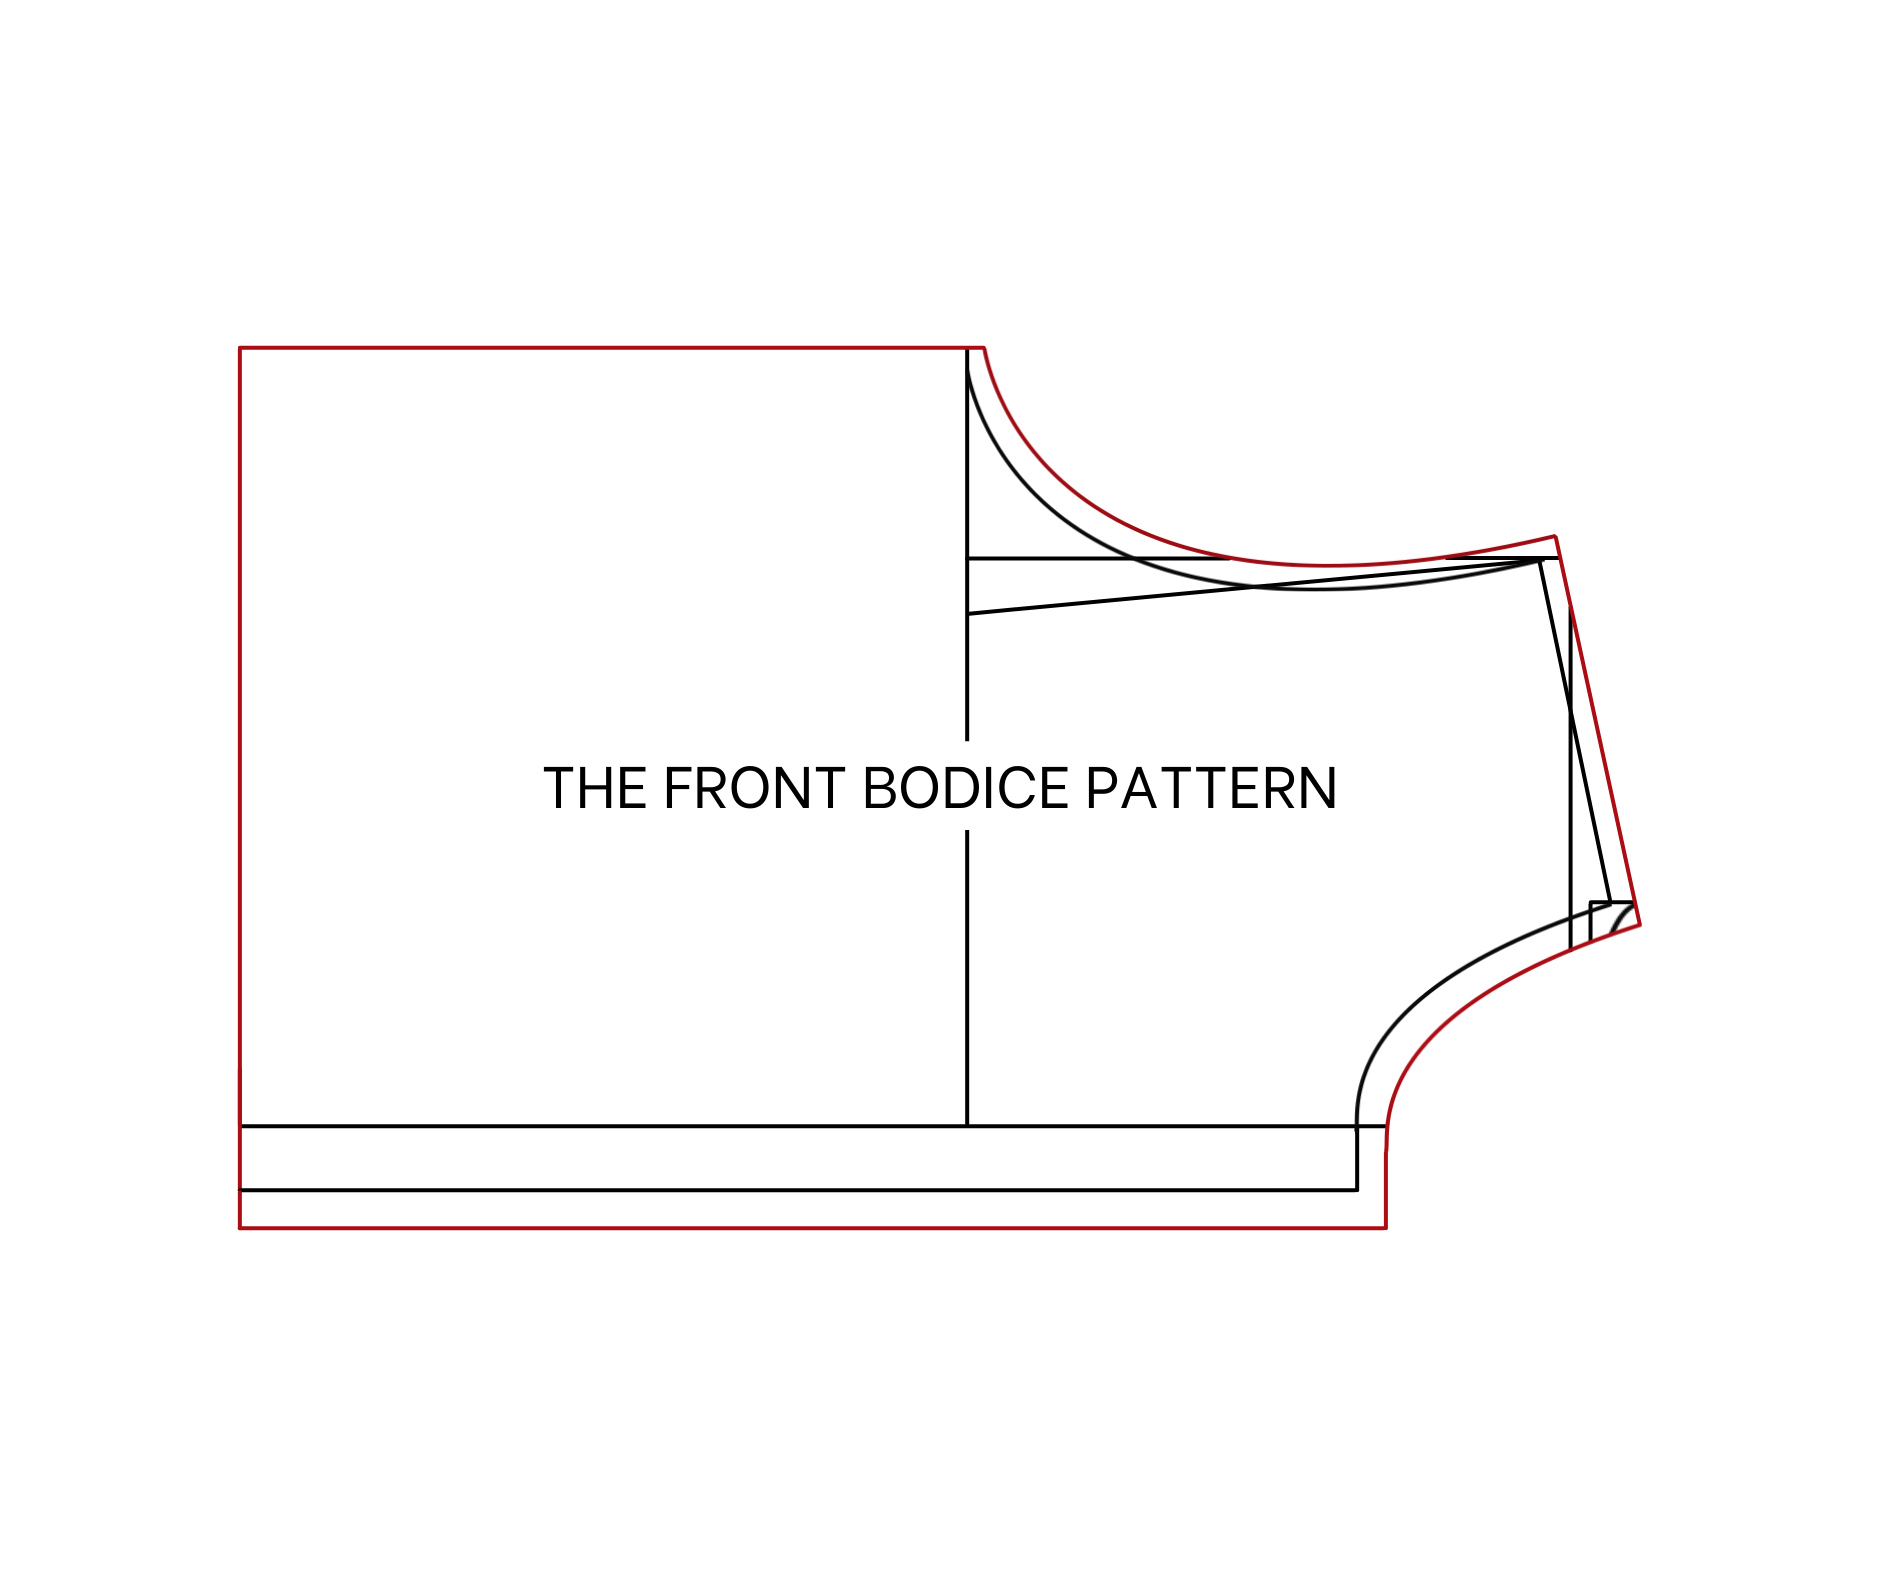
The front bodice pattern
Copy the back bodice pattern first.
From the shoulder line of the back bodice draw another parallel line at 2 cm under it. From the cutting point on the bust line mark to the inside 2 and a half cm then connect this mark to the end of the new shoulder line.
After that, mark at the middle of the new slanted line first, then draw a curve line from the mark on the bust line to this mark and finish at the end of the new shoulder line to create a new sleeve line for the front bodice.
From the end of the back's neck line, mark at 9 cm on the edge horizontal line which is the depth of the front neck that you want. Then draw a curve line from this mark to the top of the new shoulder line to create a new neck line for the front bodice.
At the horizontal line, draw a new one at 2 cm outside the current one. 2 cm is the half width of the button area that you want.
Add 1 cm for seam allowance at the new lines.
THE SLEEVE PATTERN
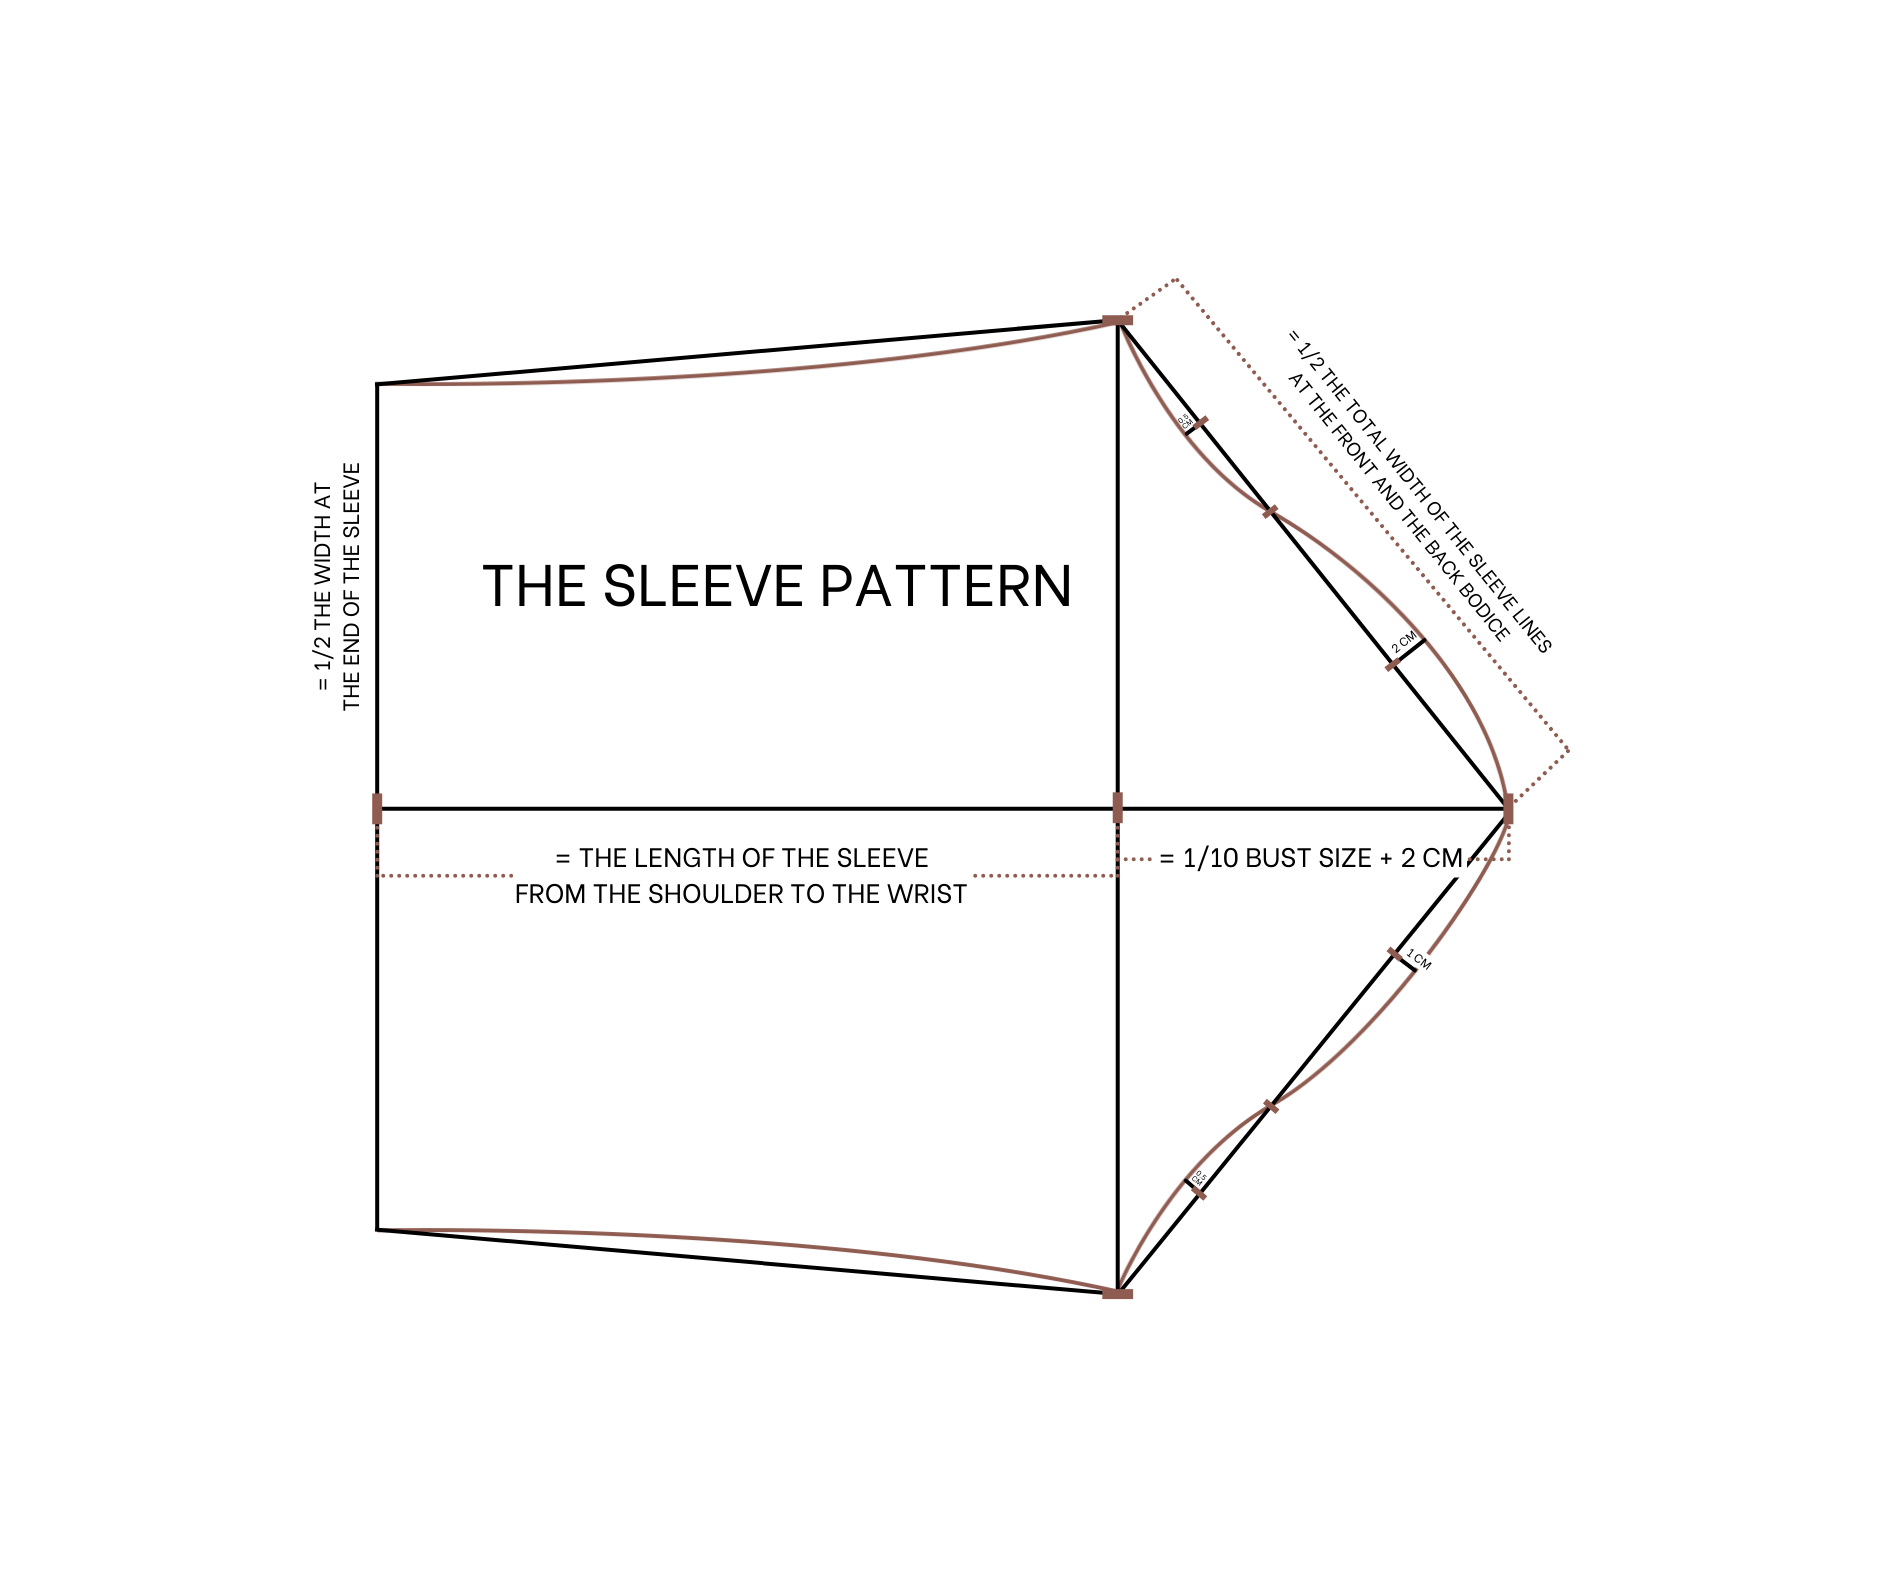
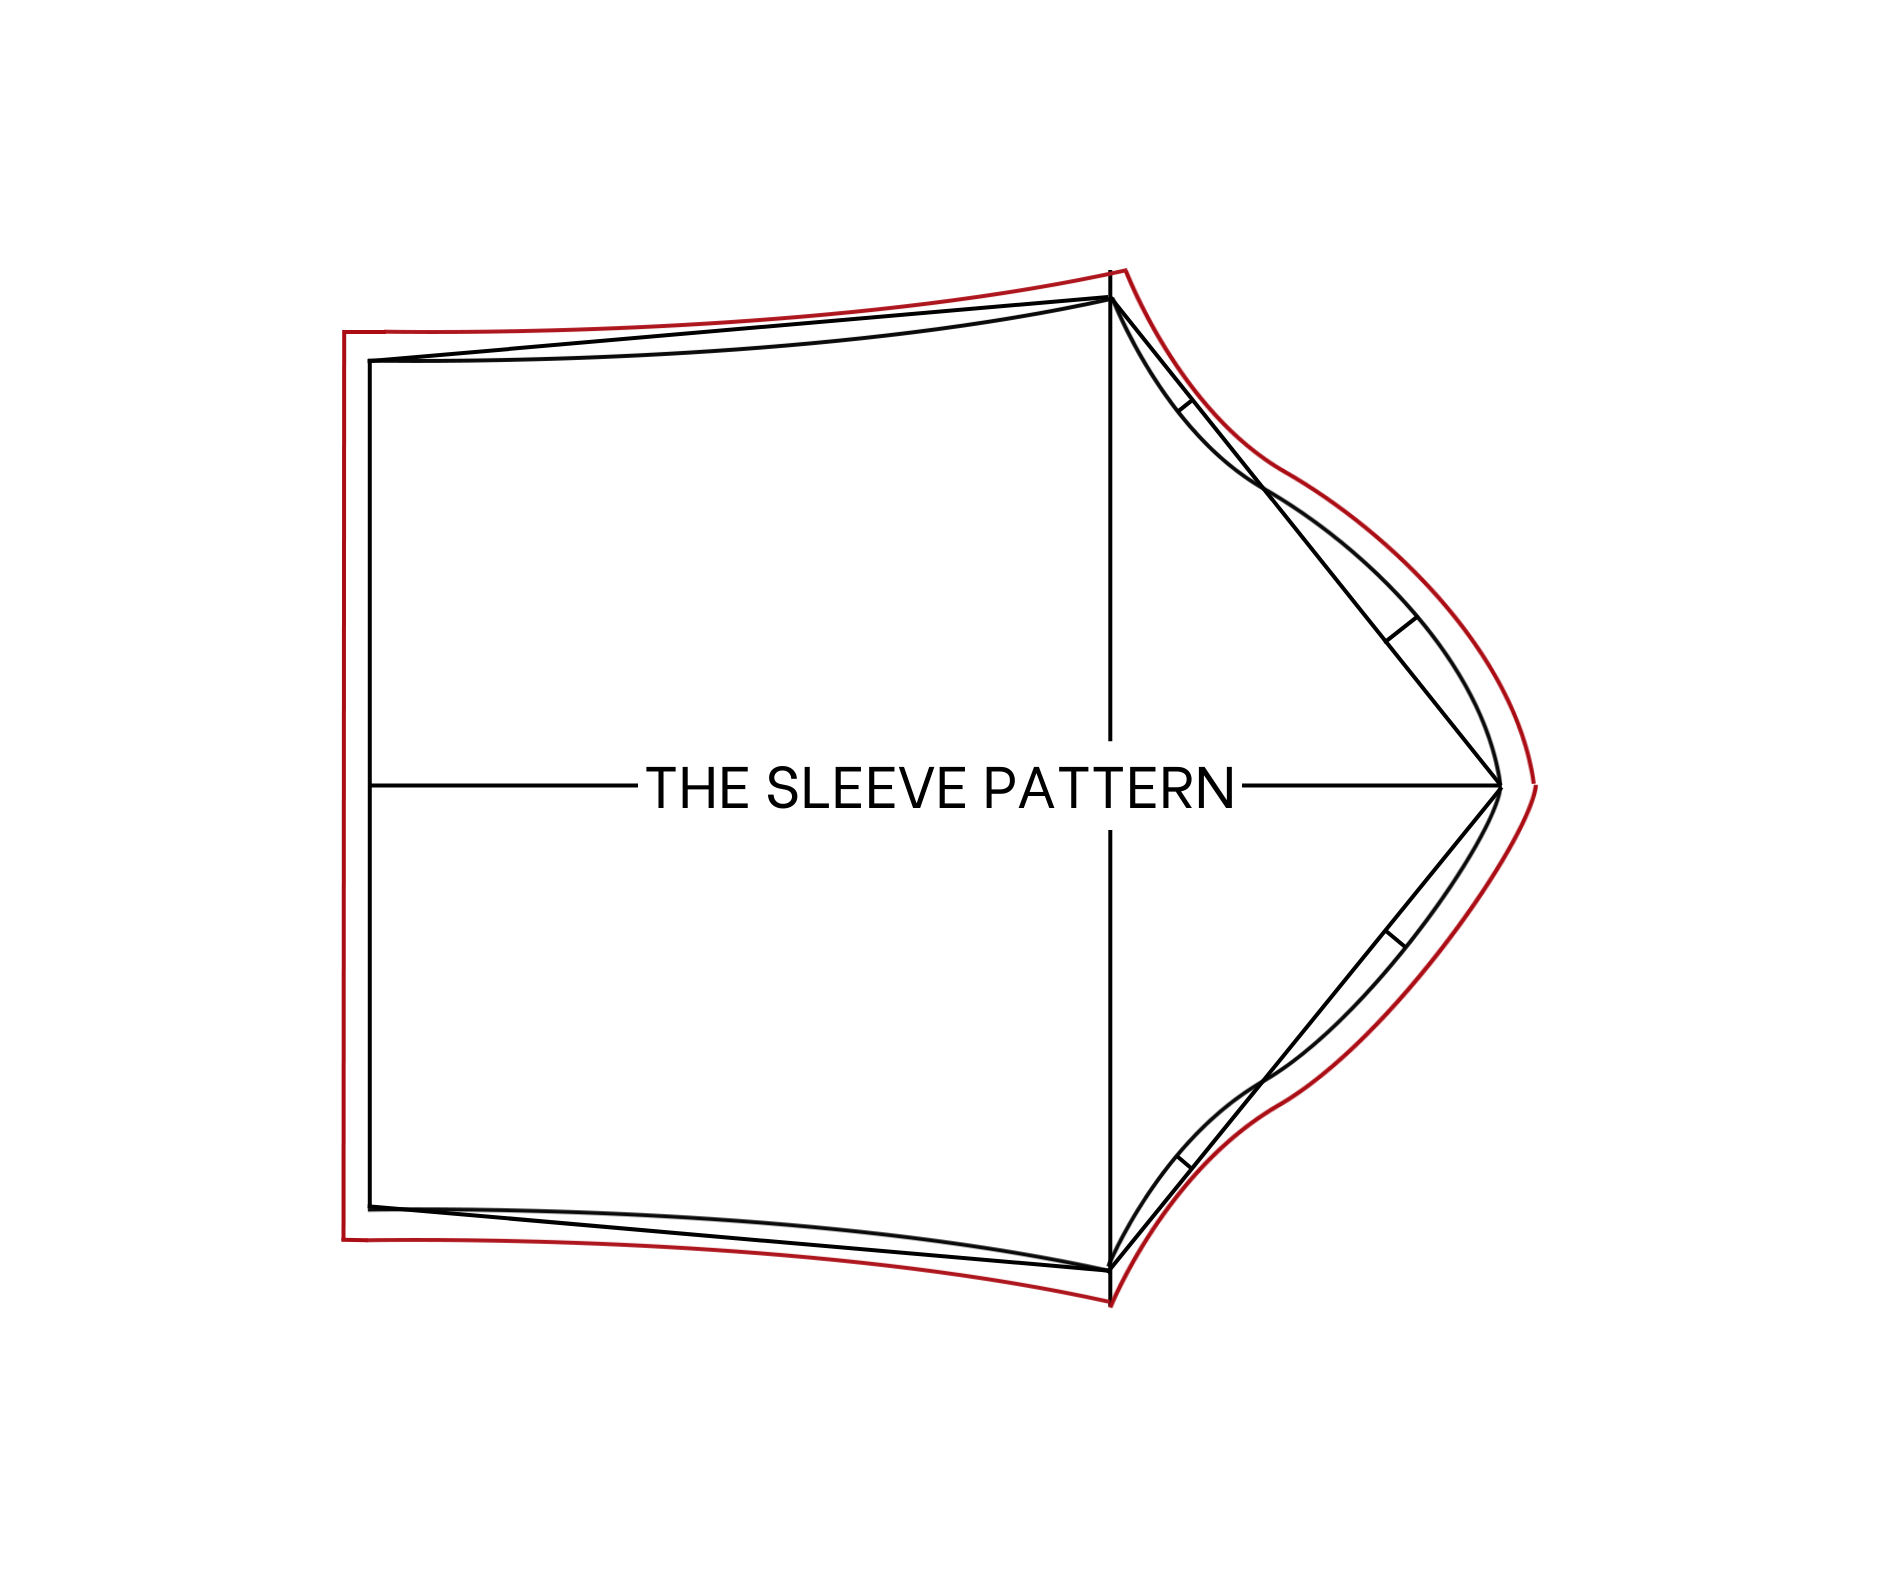
The sleeve pattern
Draw a straight line and a horizontal line cutting each other first.
From the cutting point, mark on the right side of the horizontal line 10 cm which is one per 10 my bust size plus 2 cm. From this mark, draw a slanted line to cut the straight line. The width of the slanted line will be 25.5 cm, which is a half width of the total neck lines at the front and the back bodice.
After that, divide this slanted line into three equal parts. In the middle of the first two top parts, draw an outside perpendicular line with 2 cm width. At the bottom part, mark in the middle first then I draw an inside perpendicular line with a half cm width. Draw a curved line going through these marks to create a sleeve line for the sleeve pattern.
From the top of the sleeve, mark at 55 cm on the horizontal line which is the length from the shoulder to the wrist. It's also the length of the sleeve that you want. Draw a straight line from that mark.
From the end of this straight line, mark up 17 cm which is a half width at the end of the sleeve that you want. Connect this mark to the end of the sleeve line to create the under arm big line which is also the inside sleeve line.
Redraw this line a little bit to make it nicer and repeat the same for the other side of the horizontal line. However, at the sleeve line, move down the outside perpendicular line to 1 cm then redraw the sleeve line a bit to create the back sleeve line of the sleeve pattern.
Add 1 cm for seam allowance.
THE COLLAR PATTERN
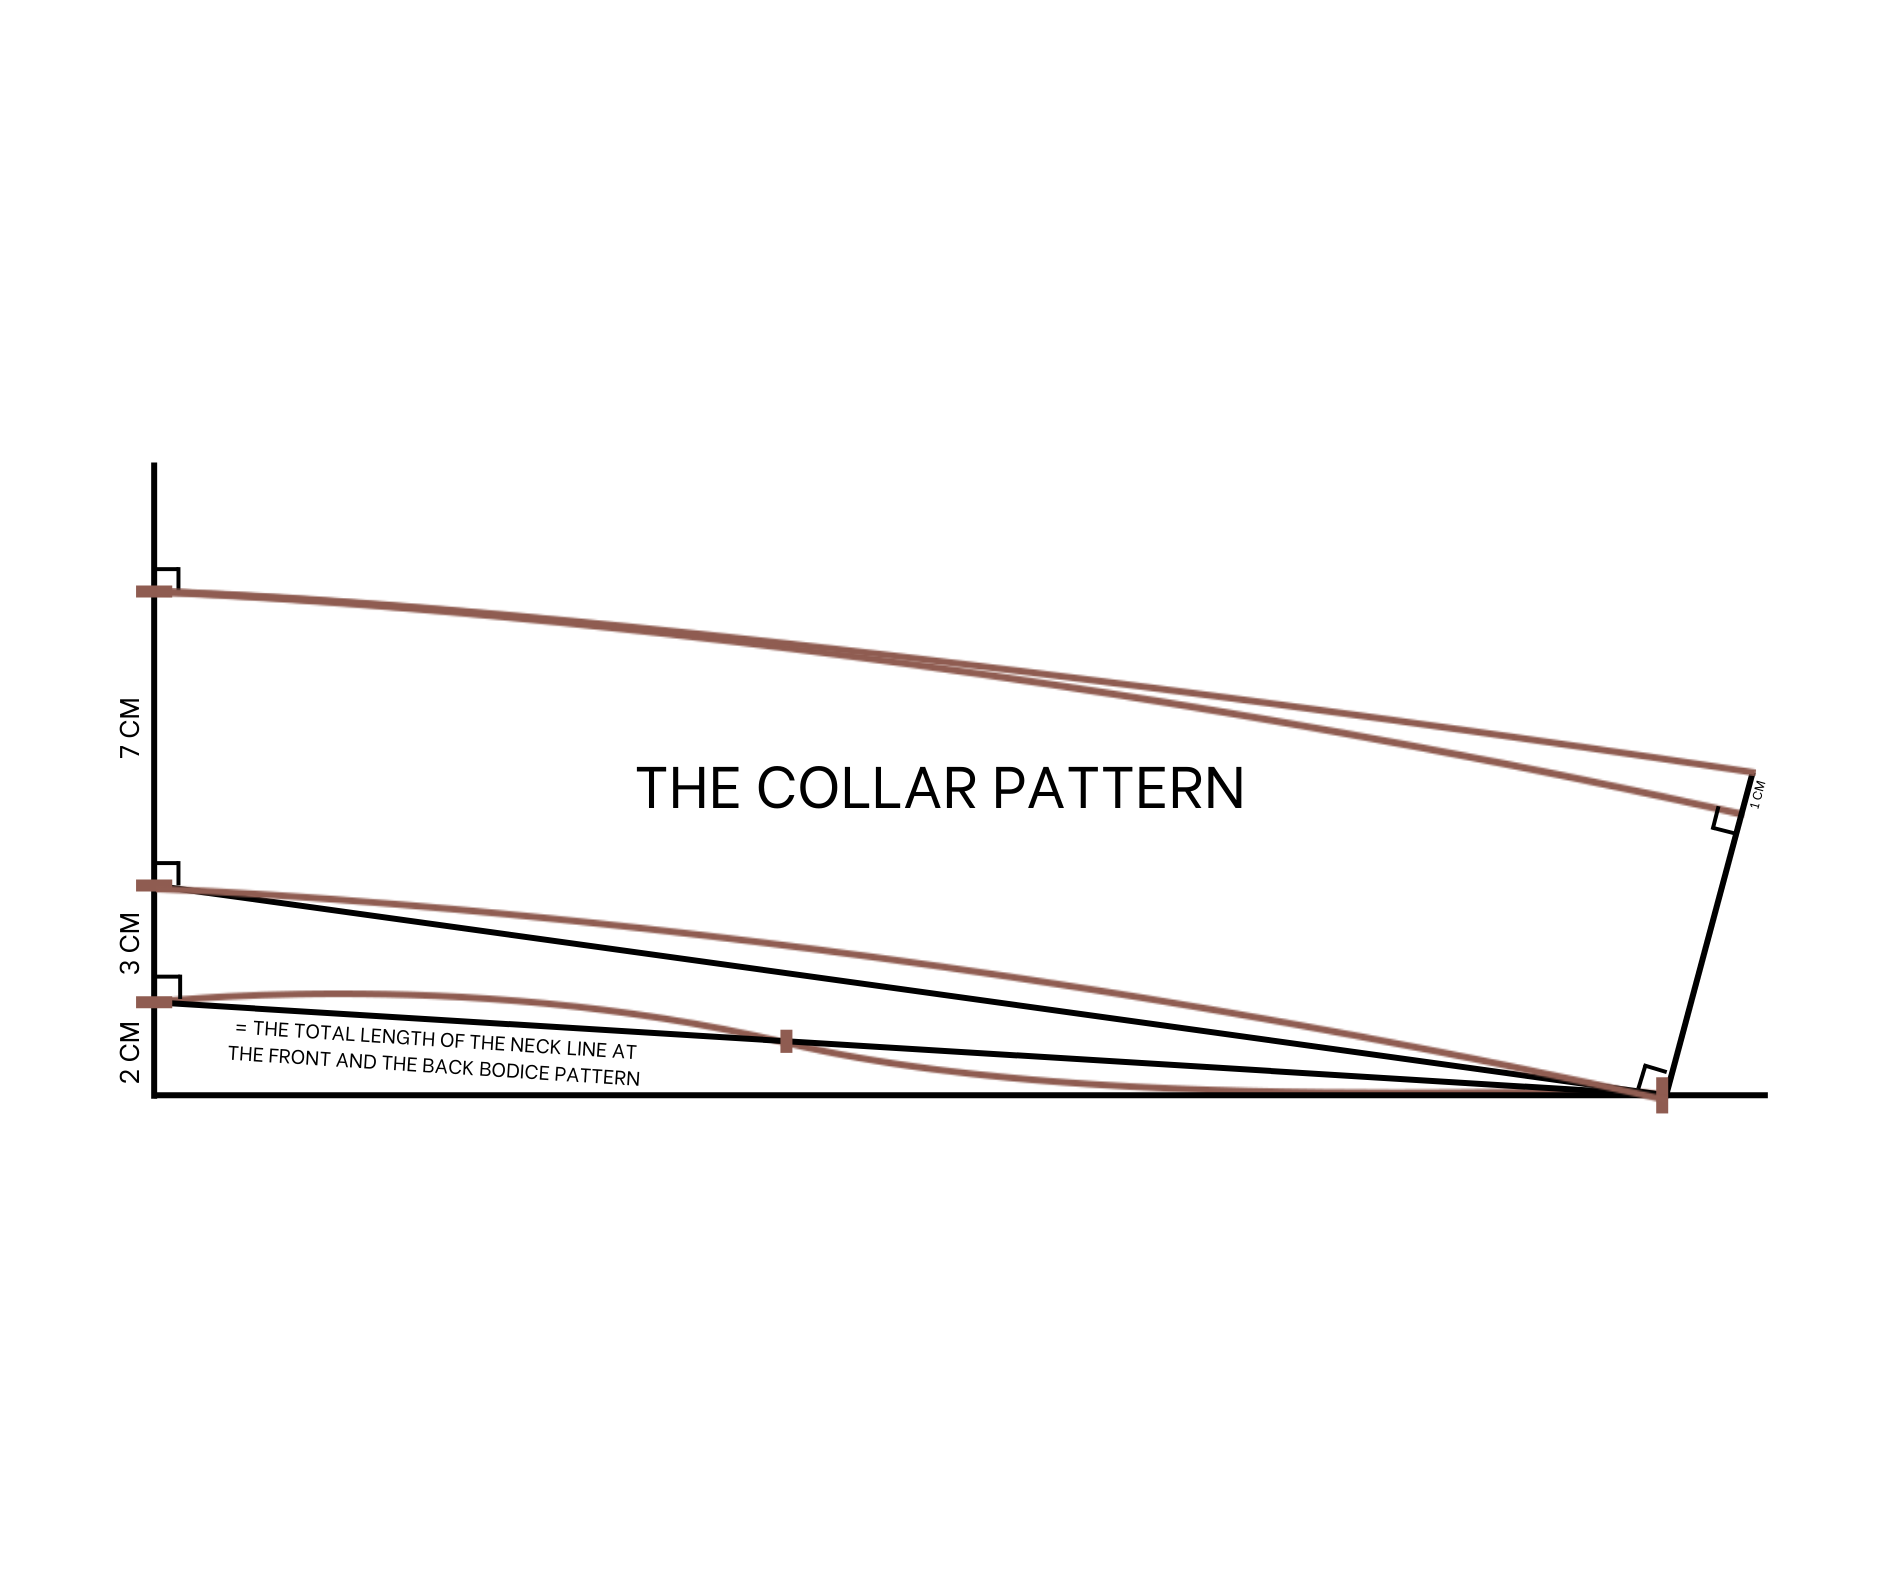
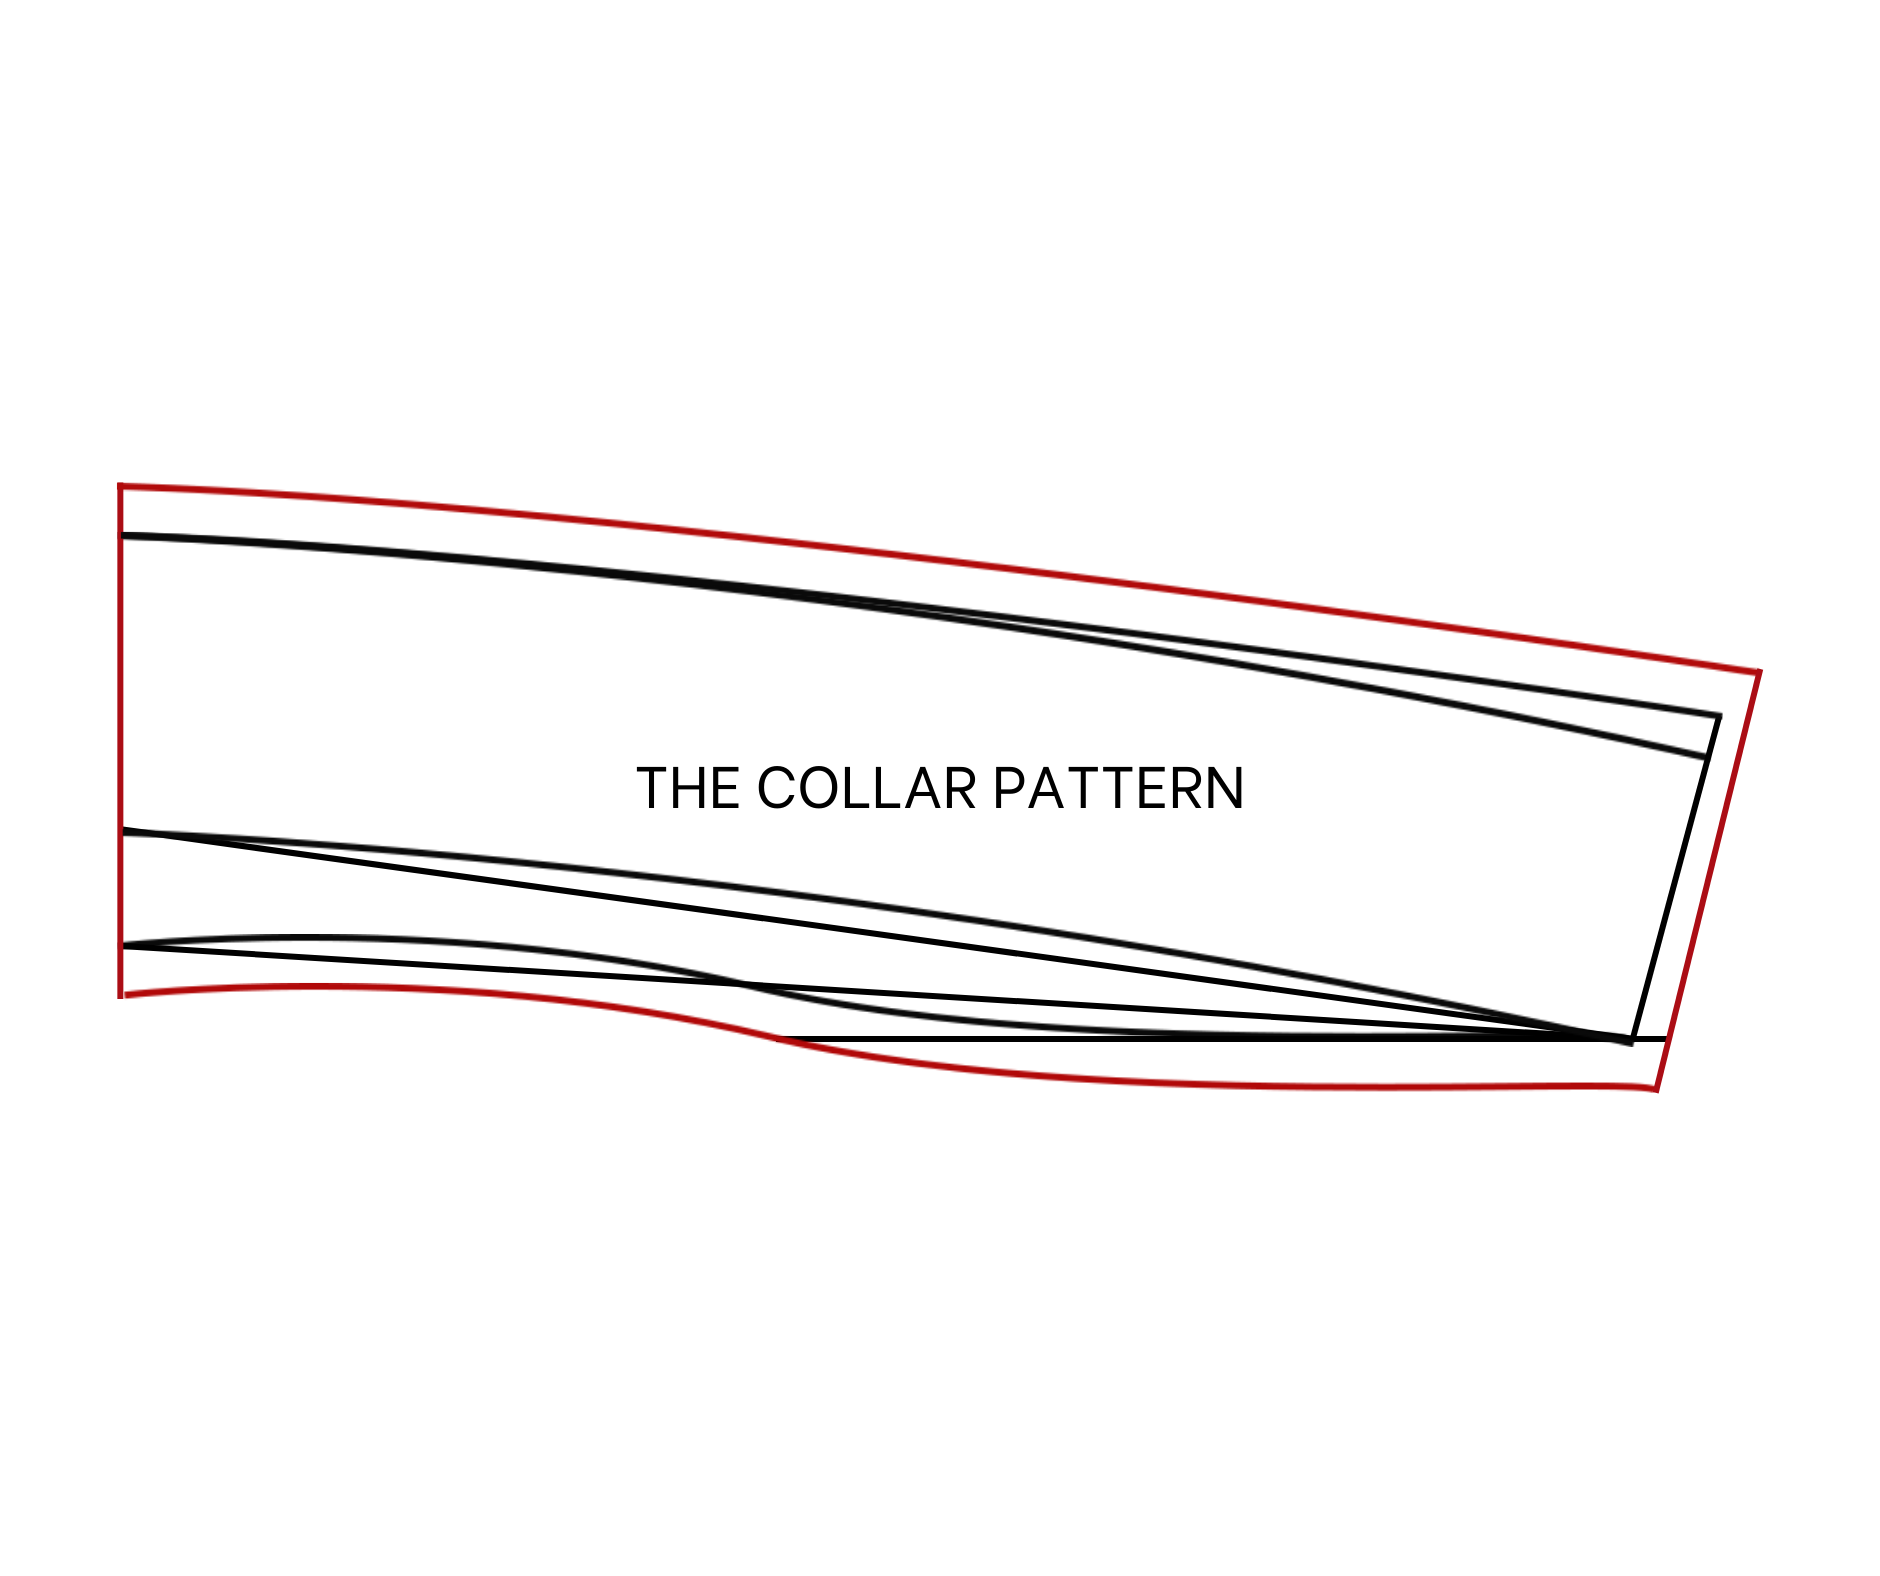
The collar pattern
Draw a straight line and a horizontal line cutting each other first.
From the cutting point, mark up 2 cm on the straight line then draw a slanted line to cut the the horizontal line. Make sure the width of this slanted line will be equal to the total width of the neck lines at the front and the back bodice.
Mark in the middle of this slanted line first, then draw a slightly curved line from the mark on the straight line to this mark and finish at the cutting point on the horizontal line.
From the first mark on the straight line, keep marking up 3 cm which is the height of the collar that you want then connect this mark to the cutting point on the horizontal line. After that, redraw this line to make it a bit curved.
Draw another curved line at 7 cm away from this line and parallel with it. 7 cm is the width of the collar that you want.
At the front collar, draw a perpendicular line with the two curved lines. To make the front collar a bit bigger, continue the perpendicular line 1 cm extra and redraw the outside curve line a bit.
Add 1 cm for seam allowance and you will have the collar pattern after cutting. You will need to cut this pattern into folded fabric at the straight line.
SEWING THE JACKET
SEWING TECHNIQUES
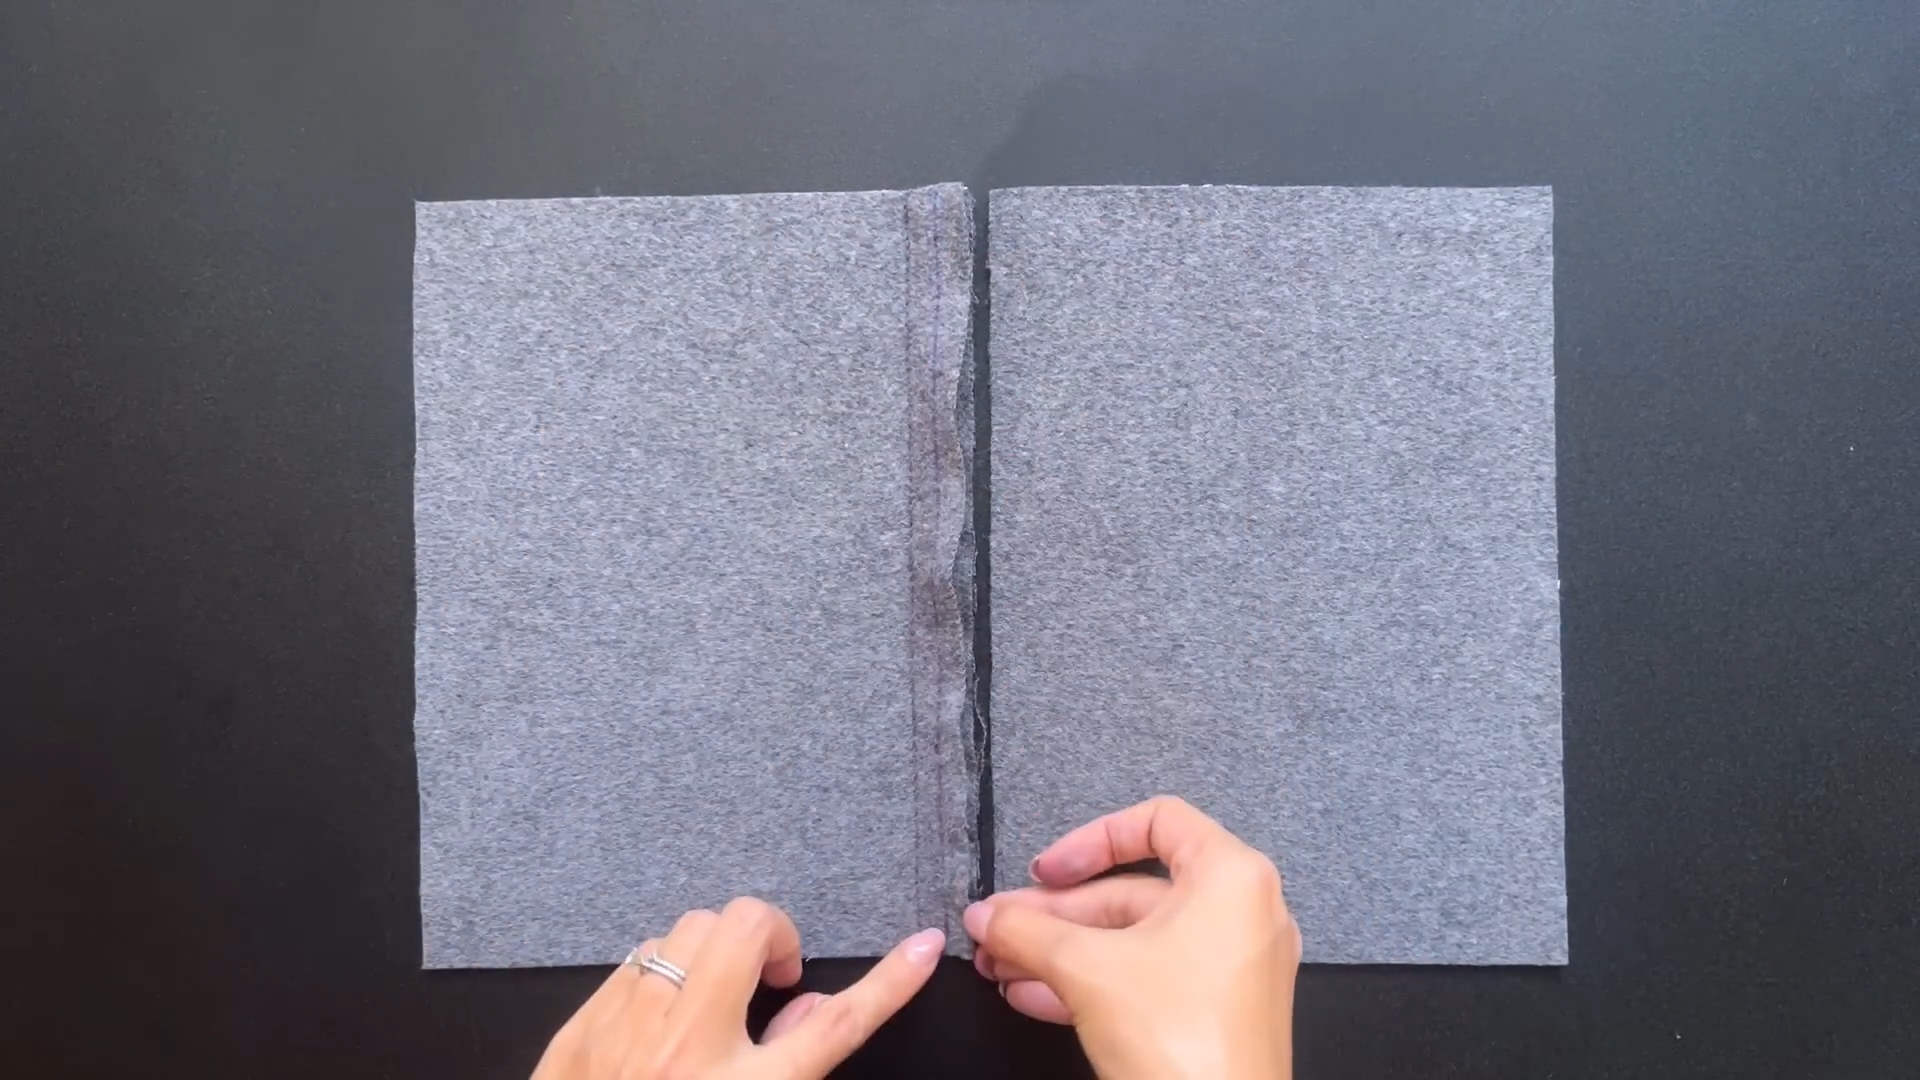
First technique: Connect the seam
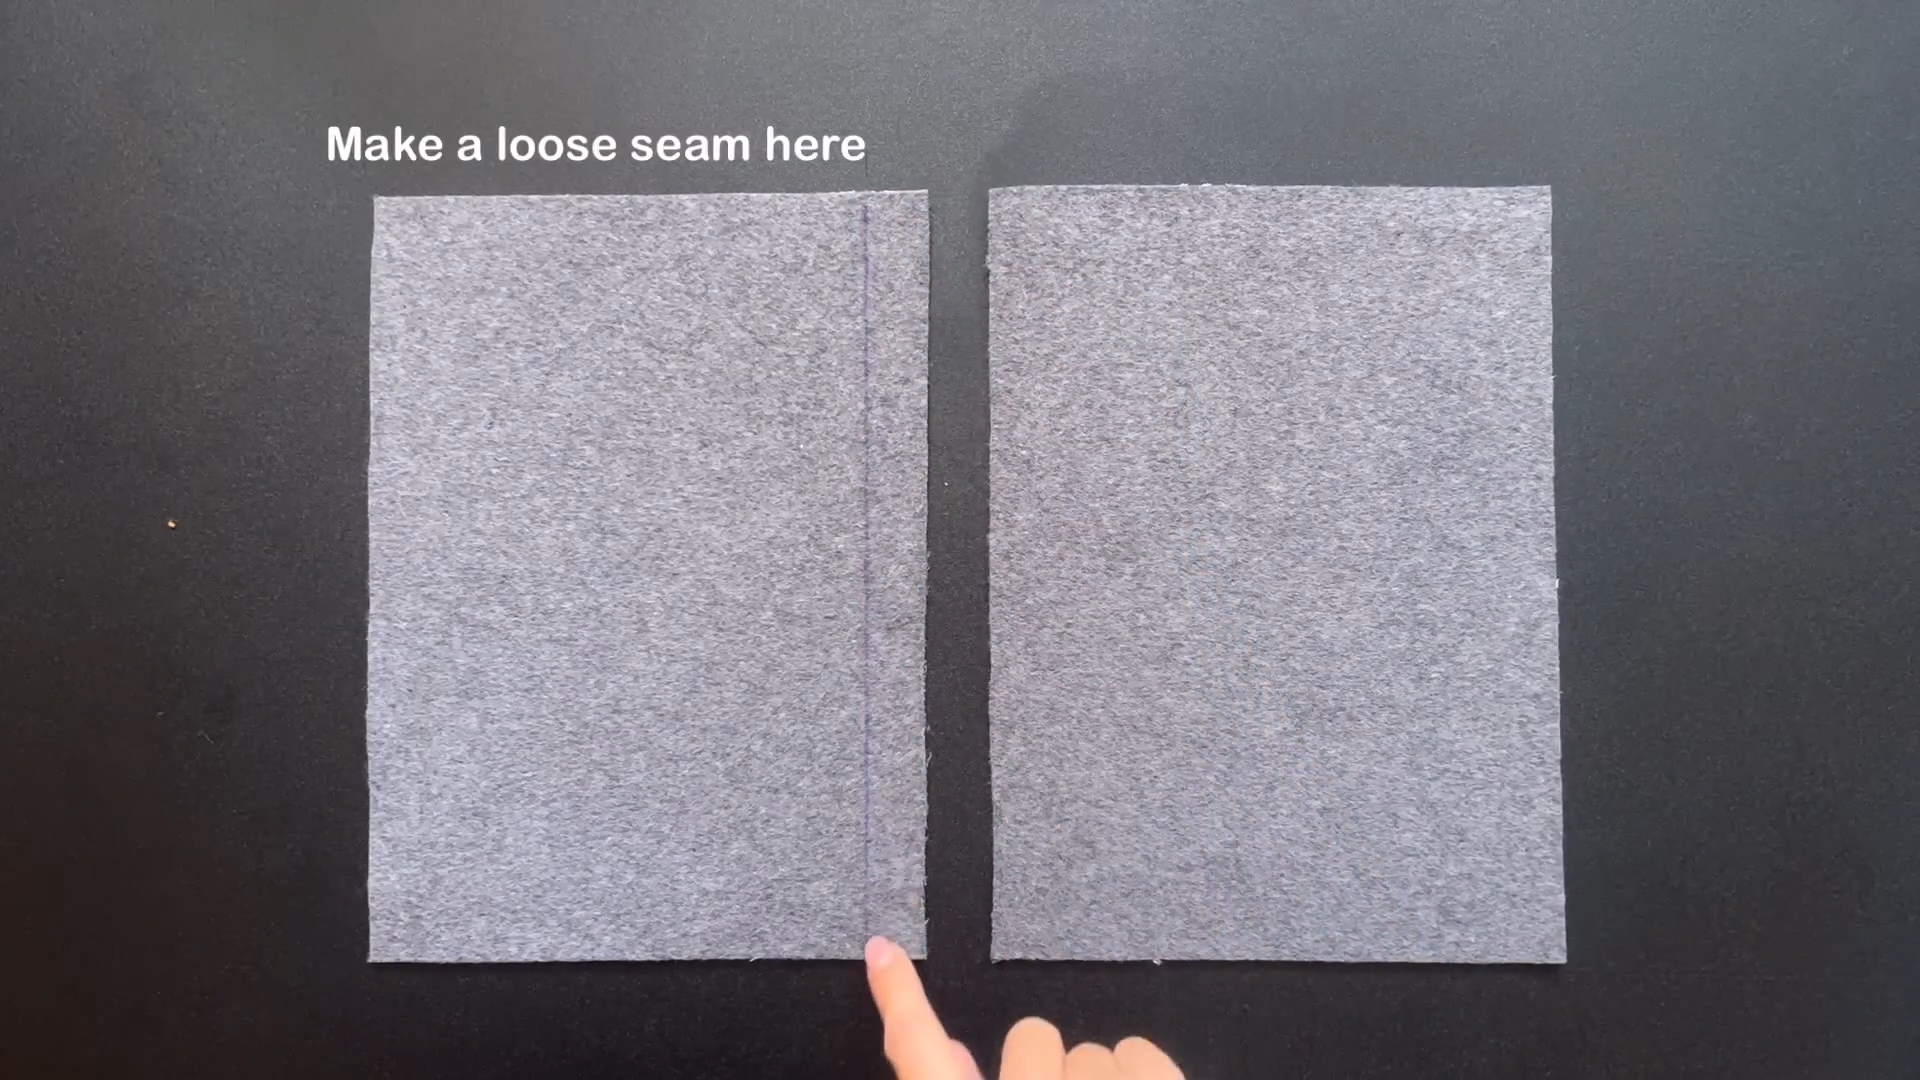
This technique will be used when you connect two edges of the fabric together.
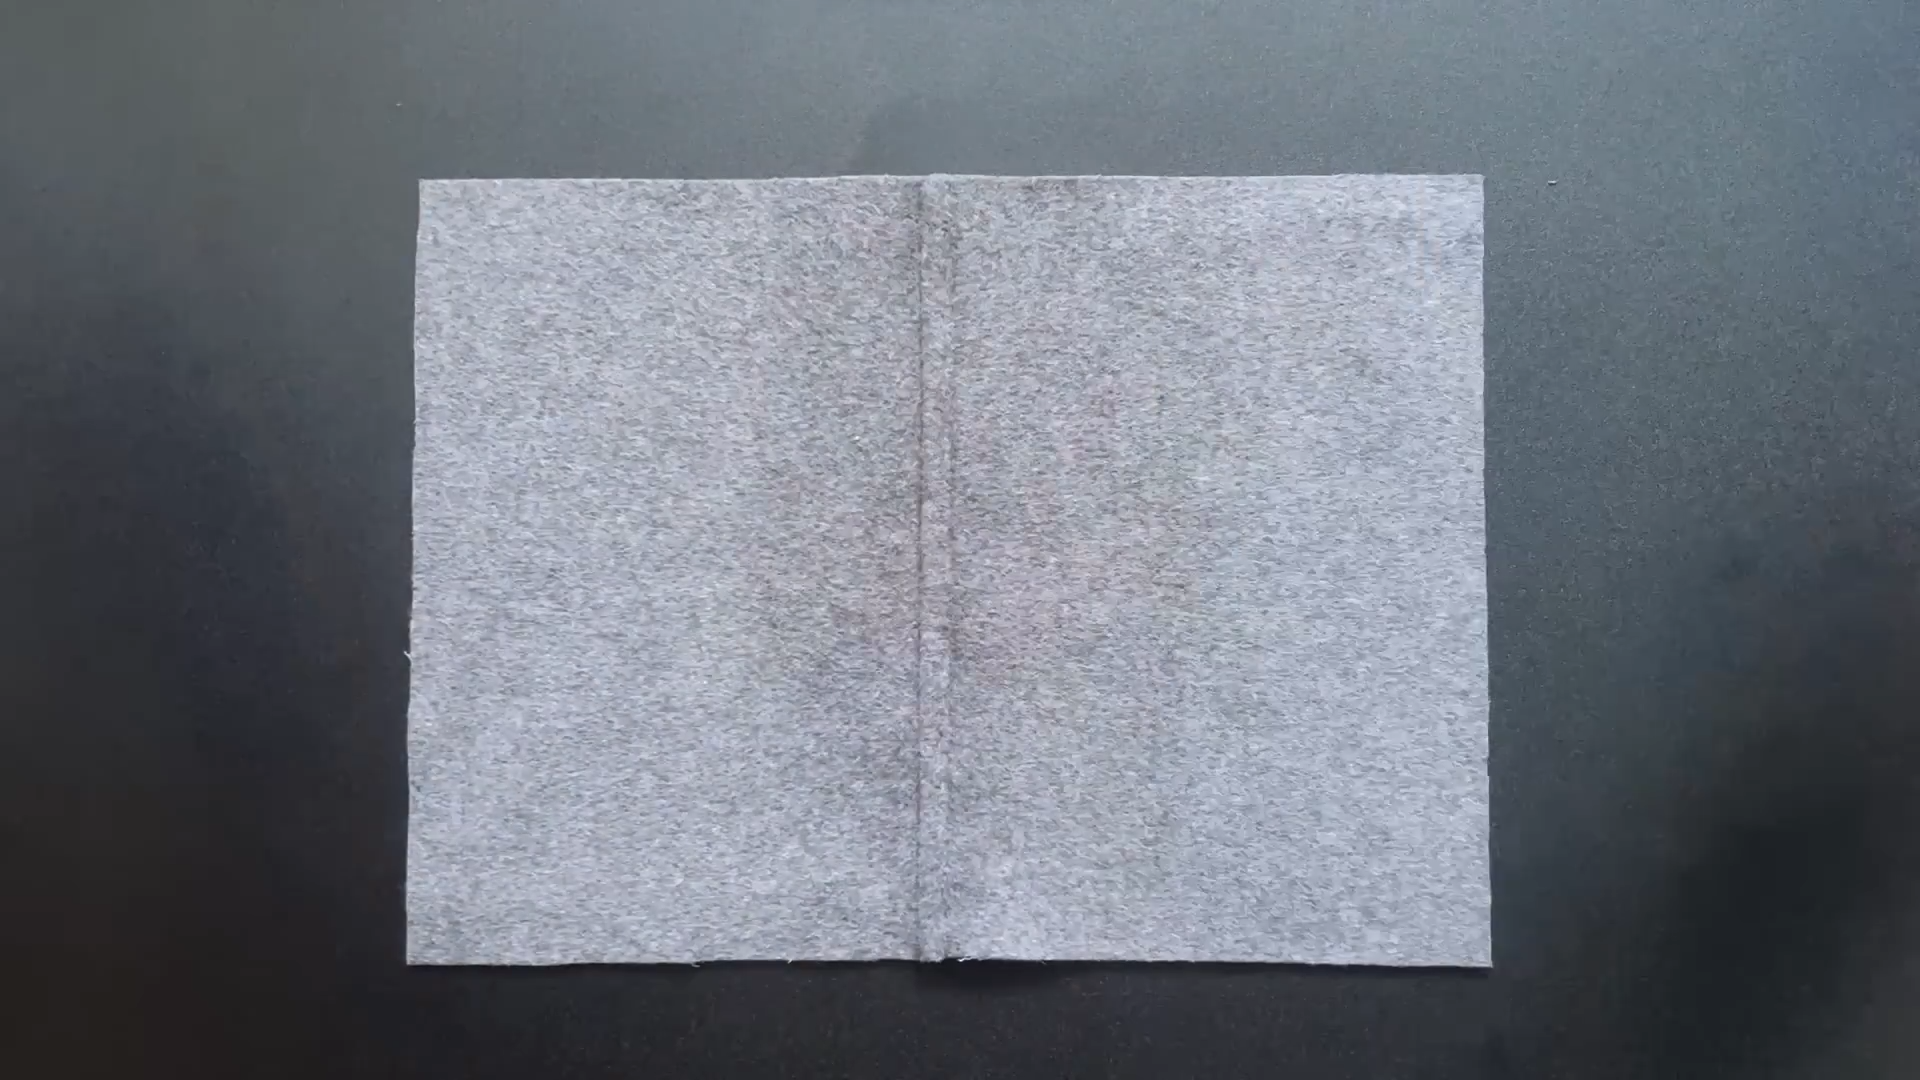
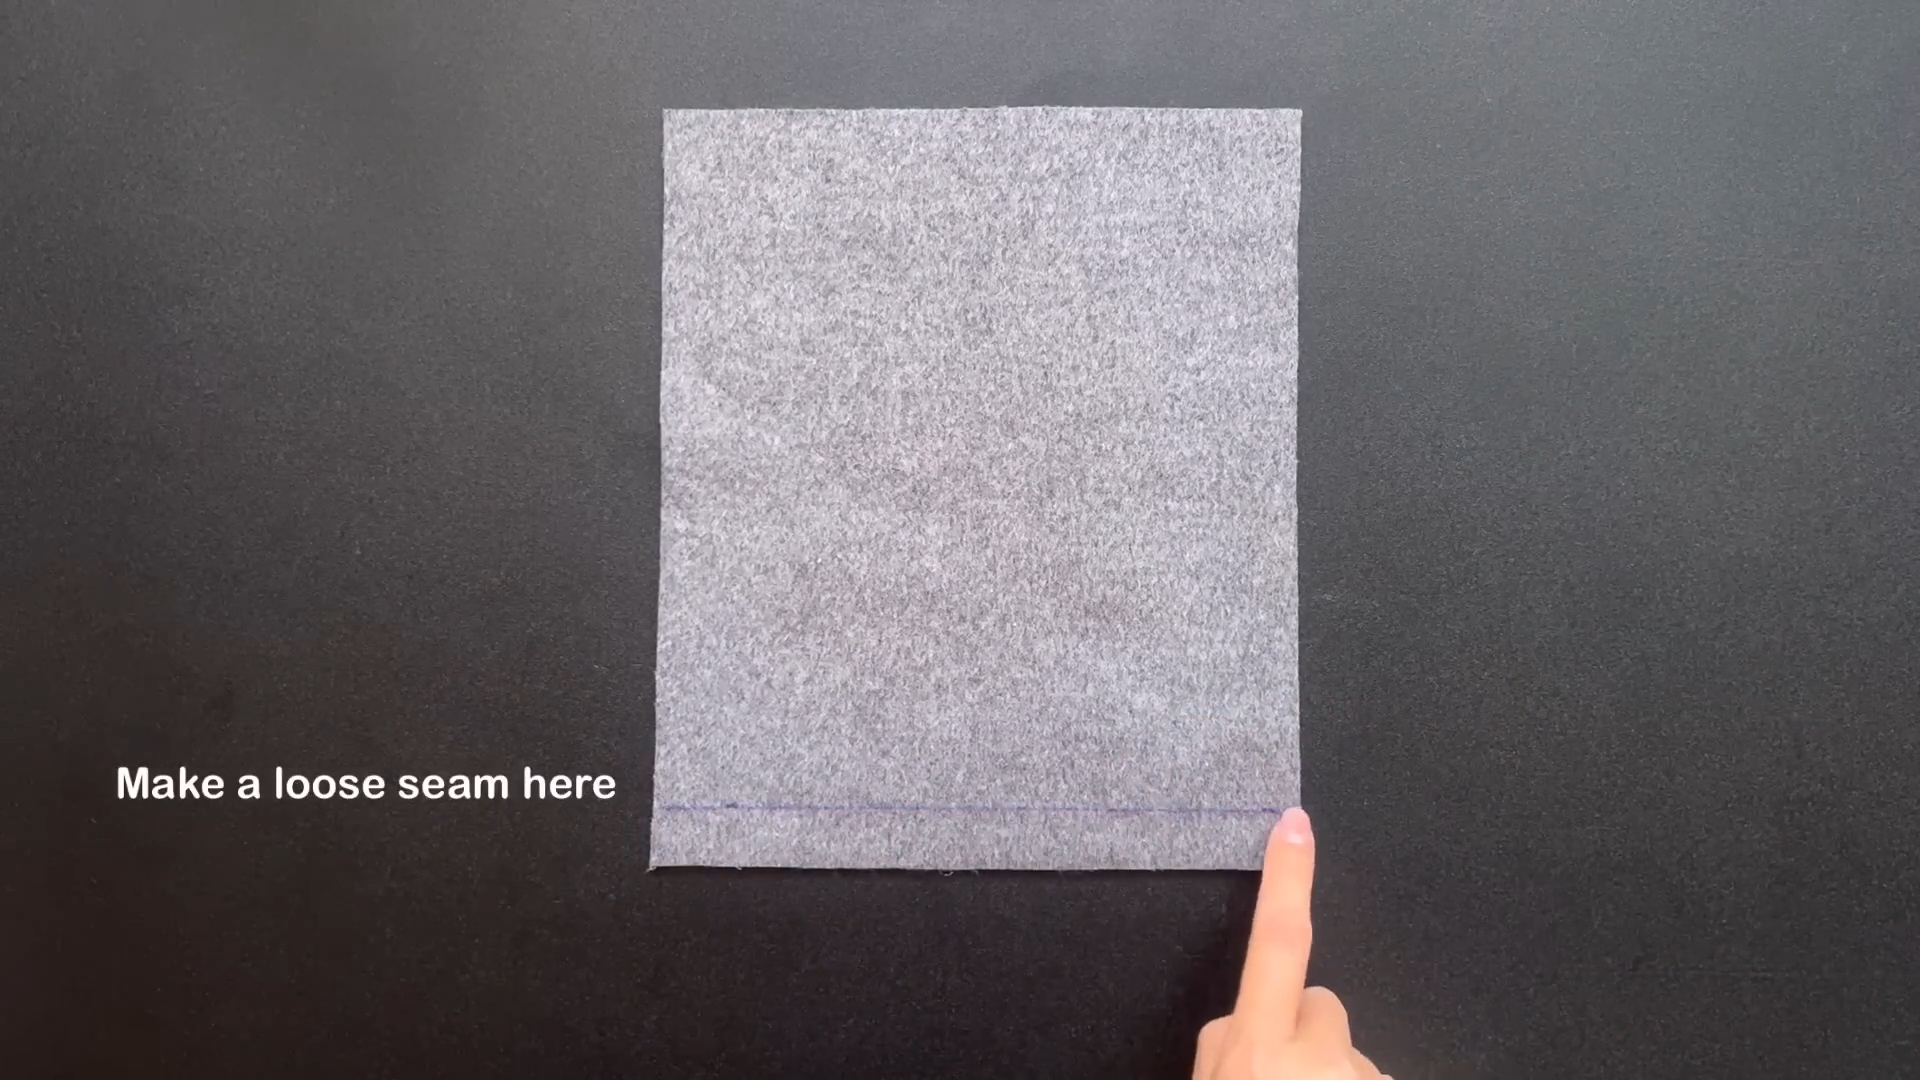
Draw a line at 2 cm inside one edge line. This 2 cm is the seam allowance that we added before when making the pattern plus 1 cm. Sew a loose seam at that line.
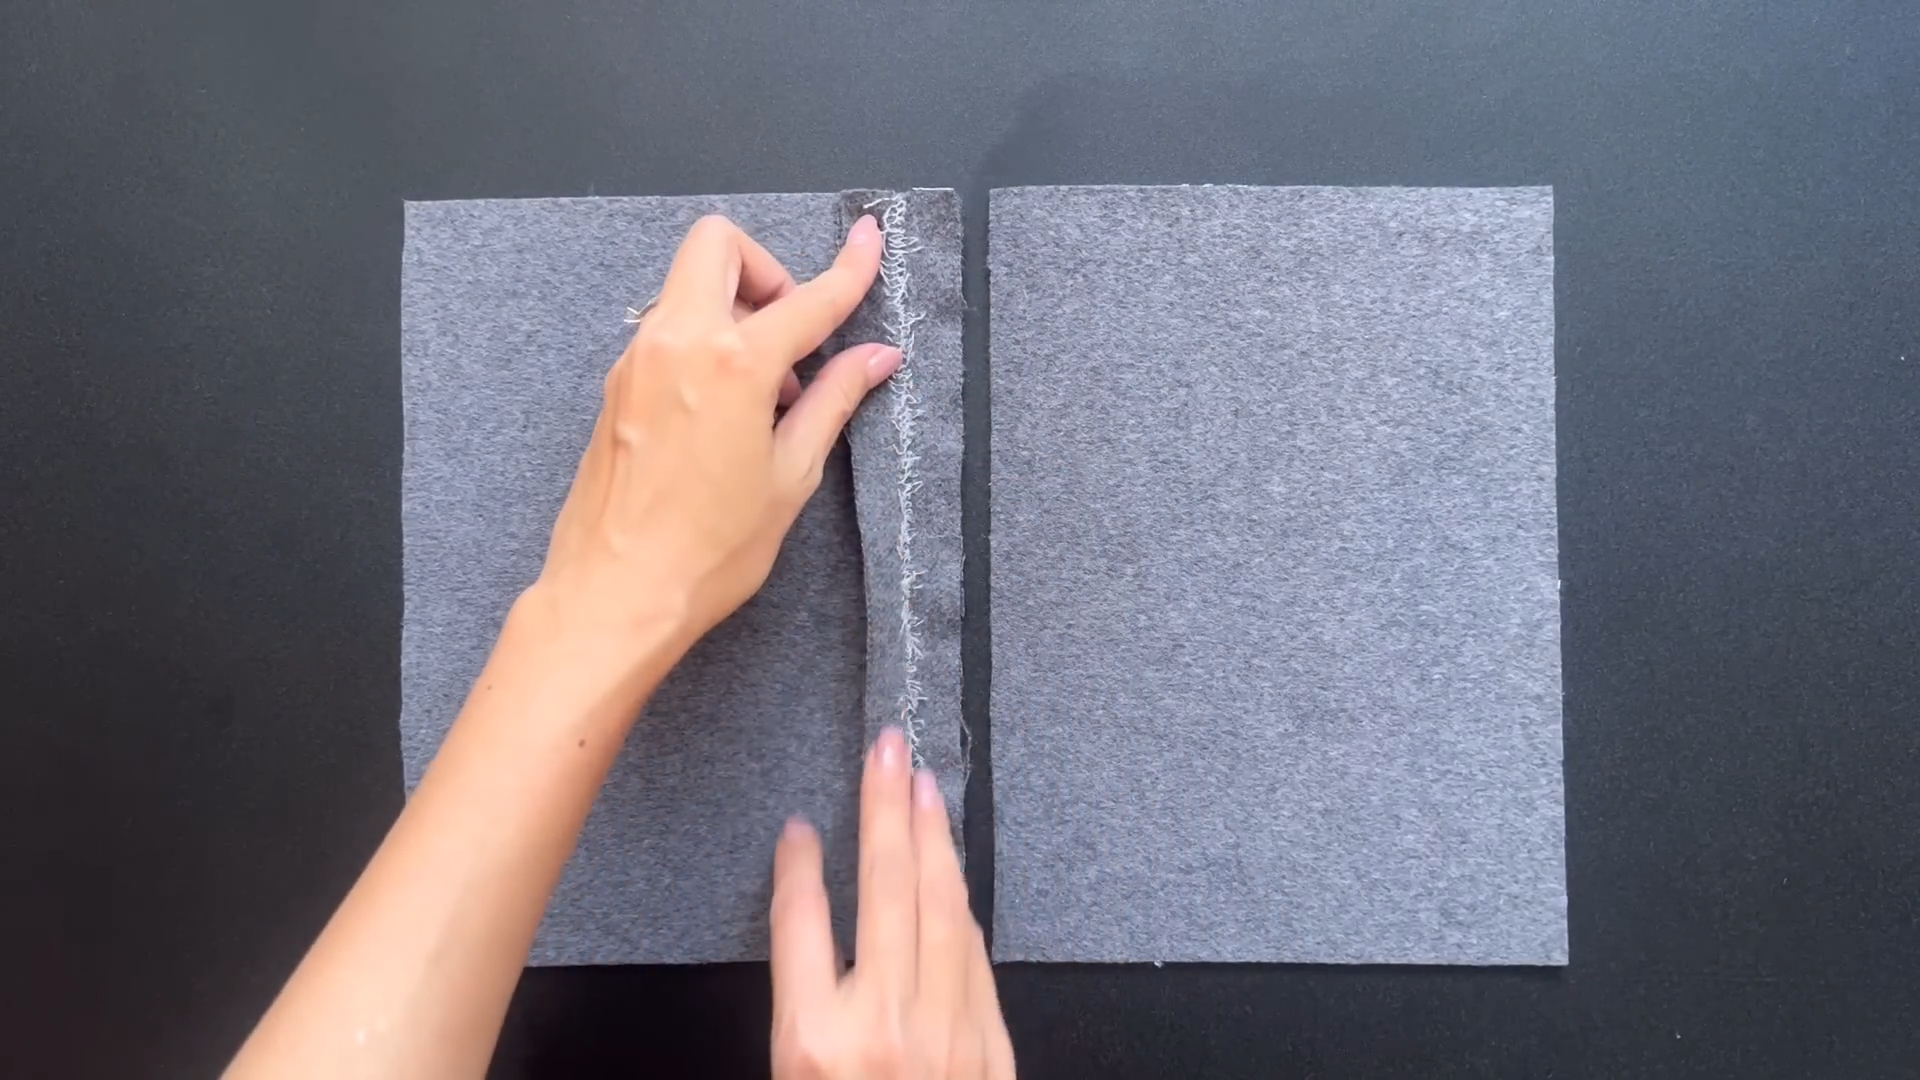
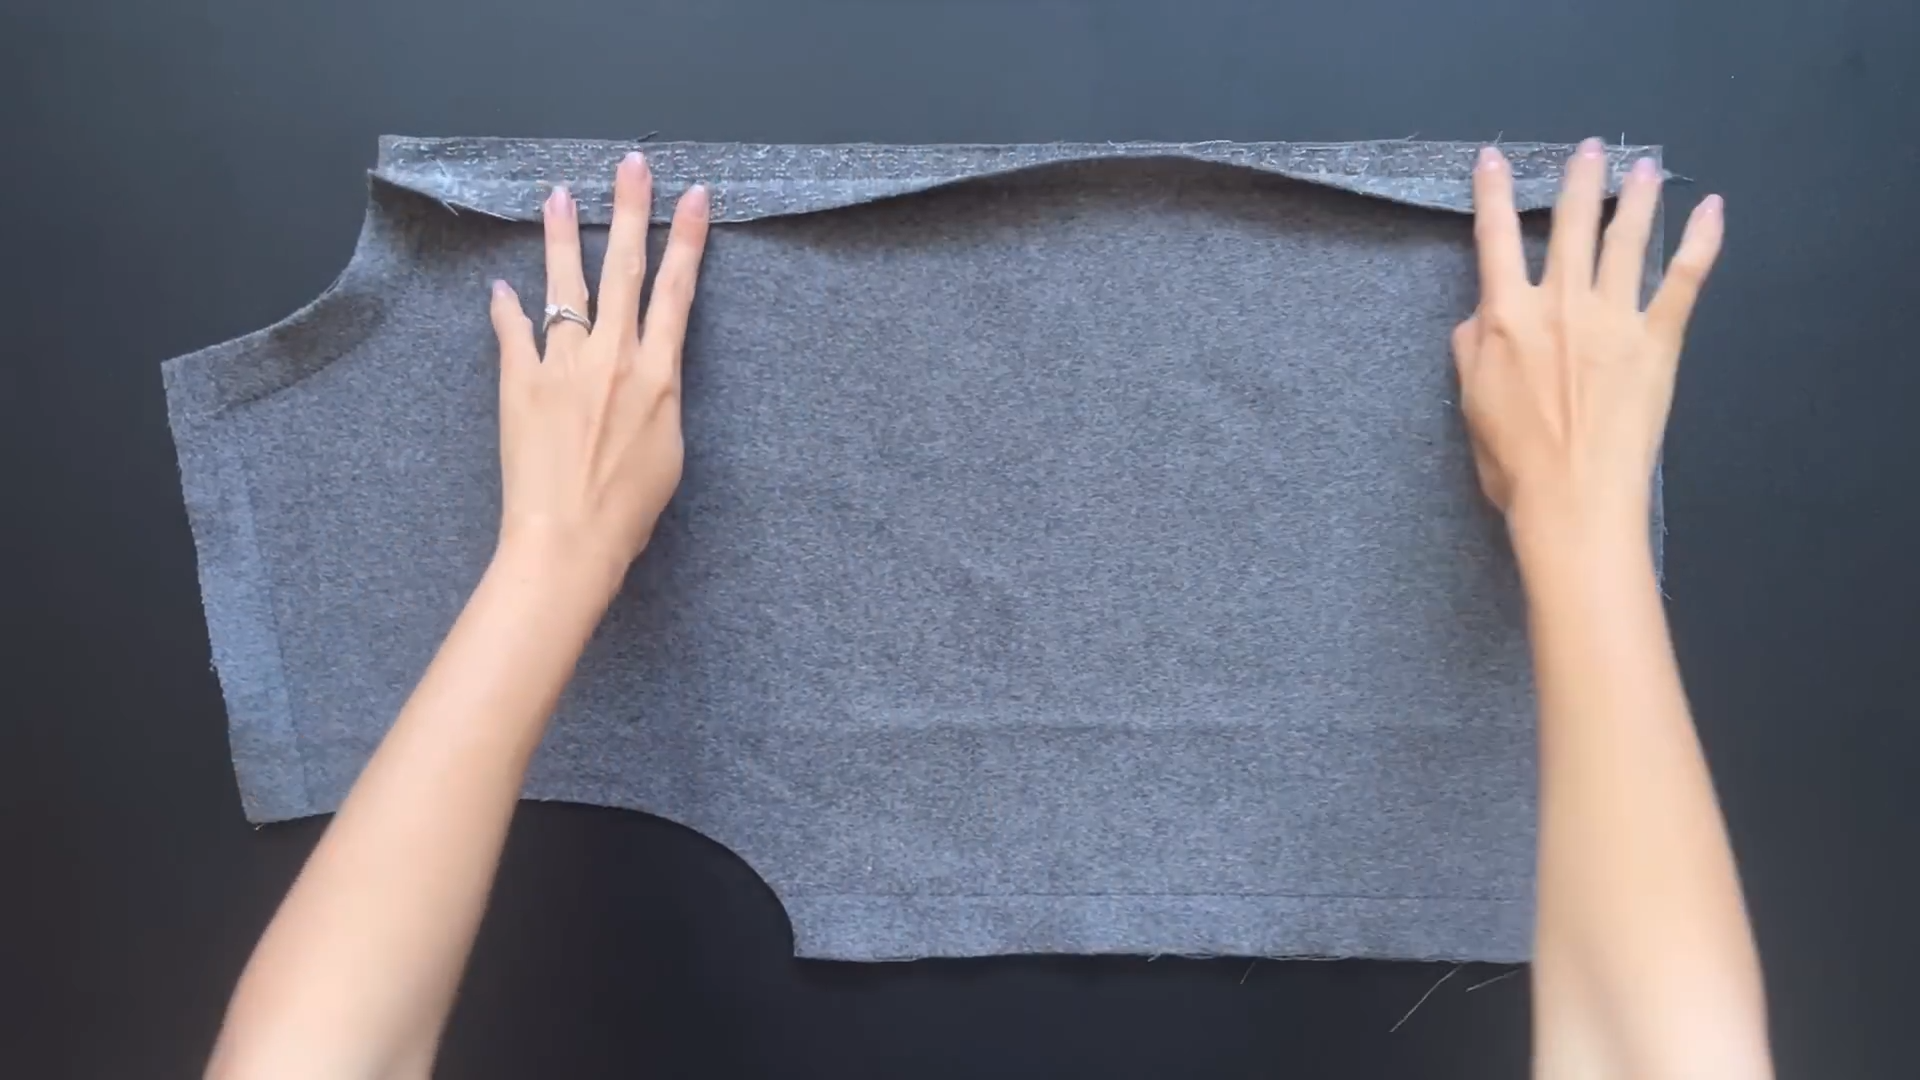
Separate two faces of the fabric to the seam we just sew.
From the first line, draw another line at 1 cm next to it and closer to the edge line and sew. However, just sew at one face of the fabric only.
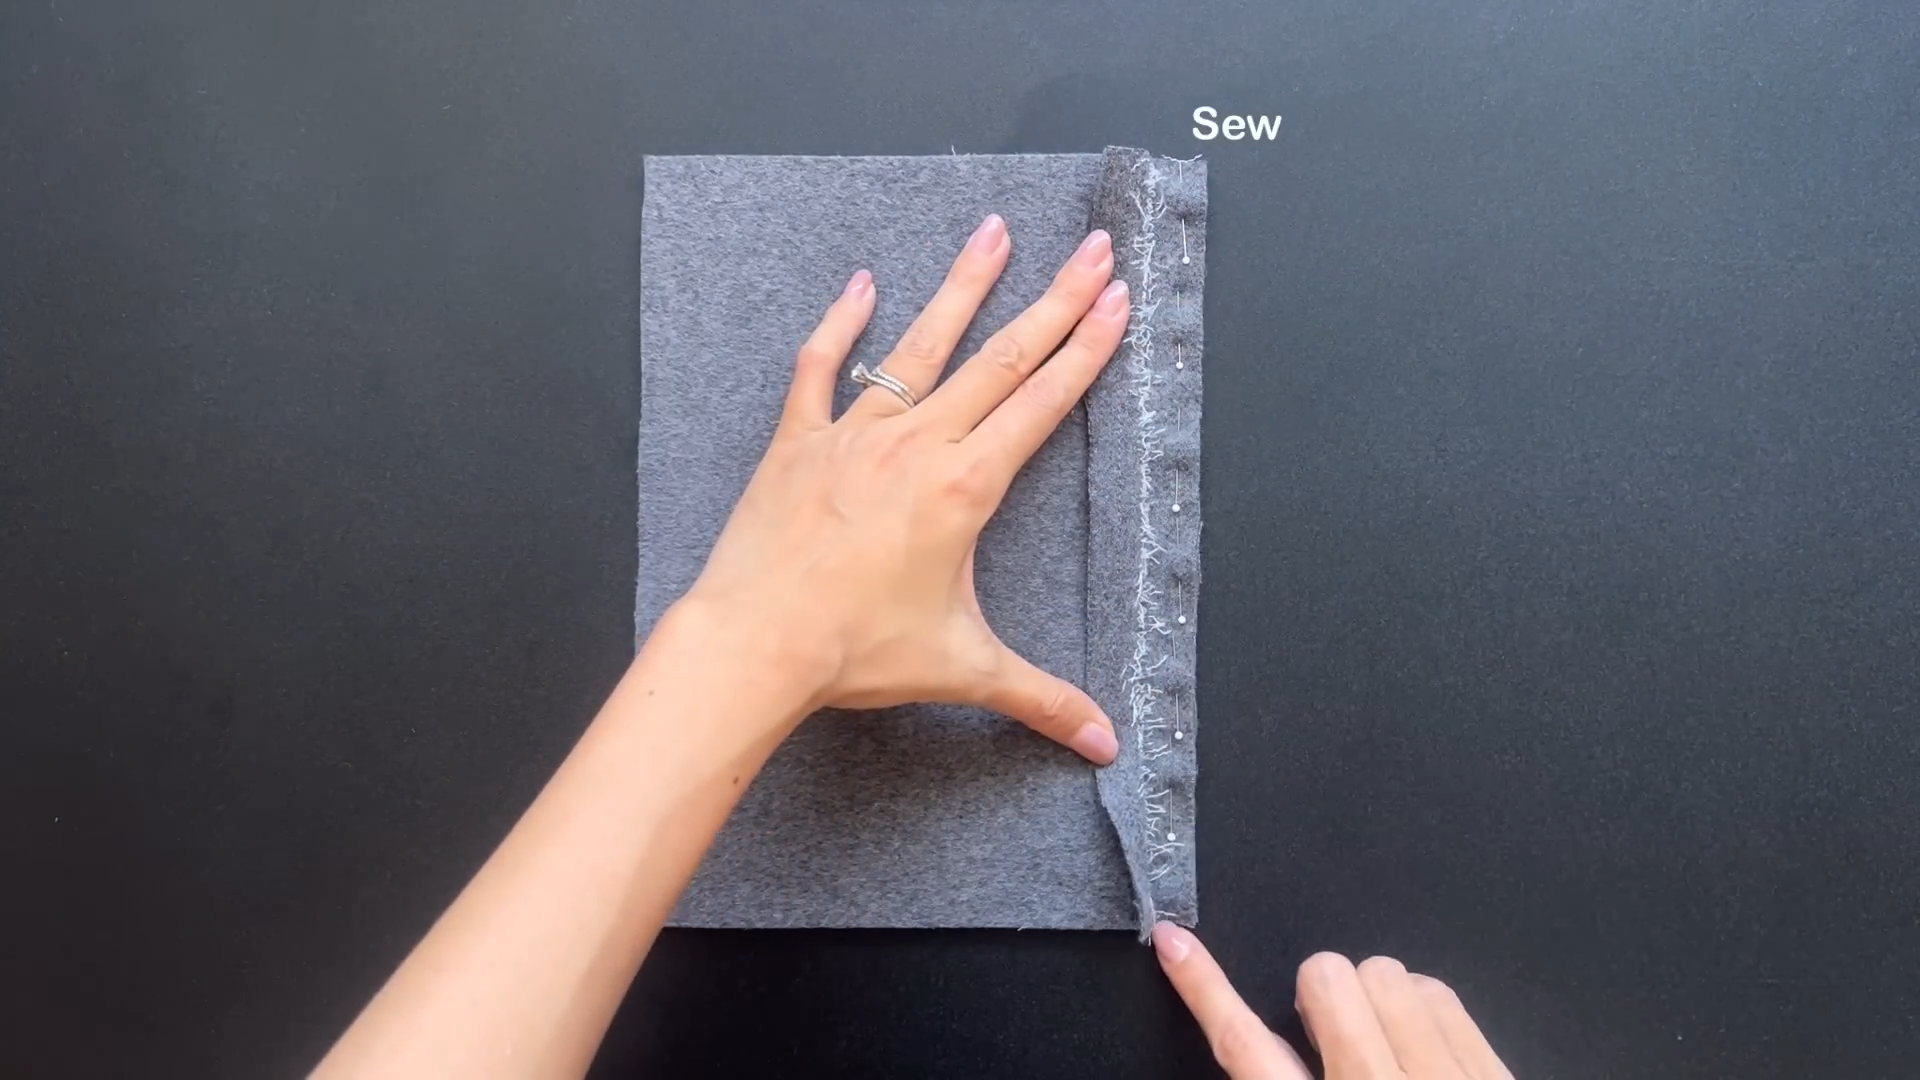
At the other face of the fabric, connect it to the other piece and sew with 1 cm seam allowance.
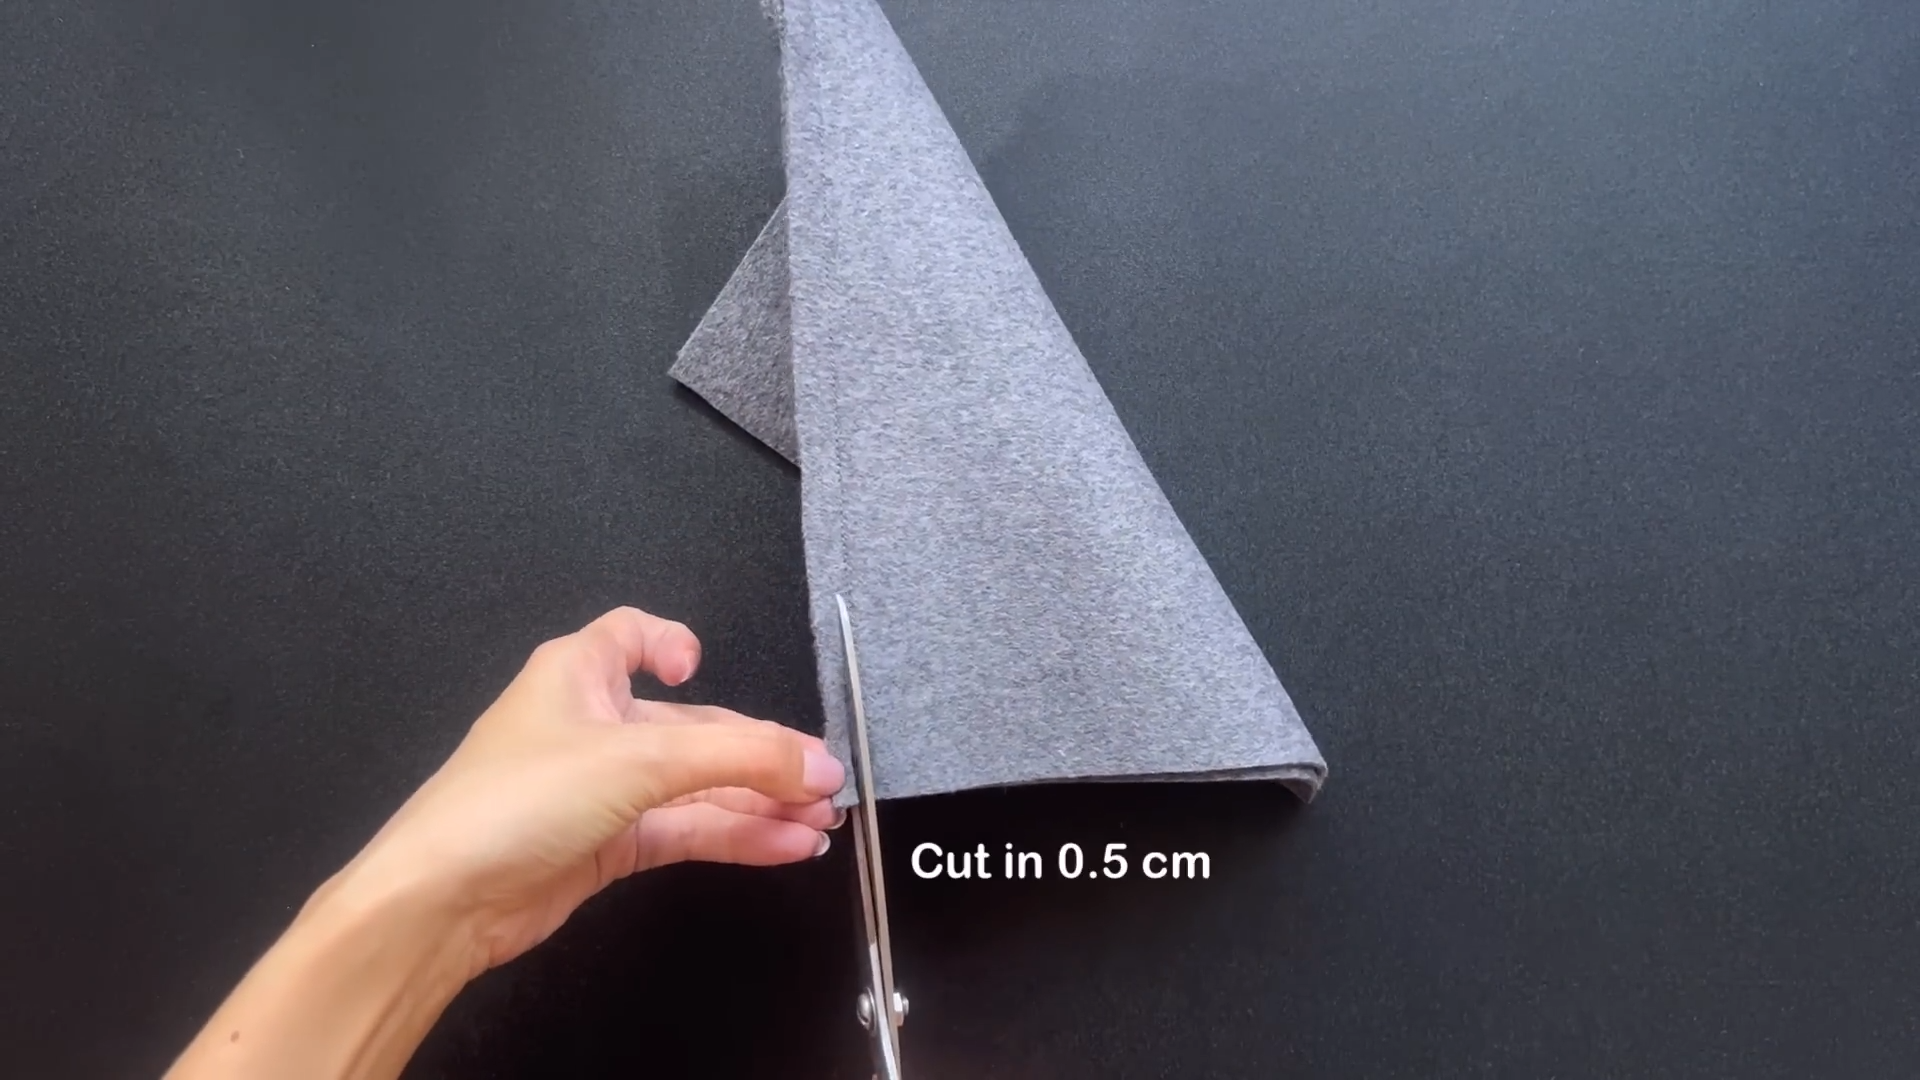
Cut a half of the extra part outside the seam at two faces of the fabric.
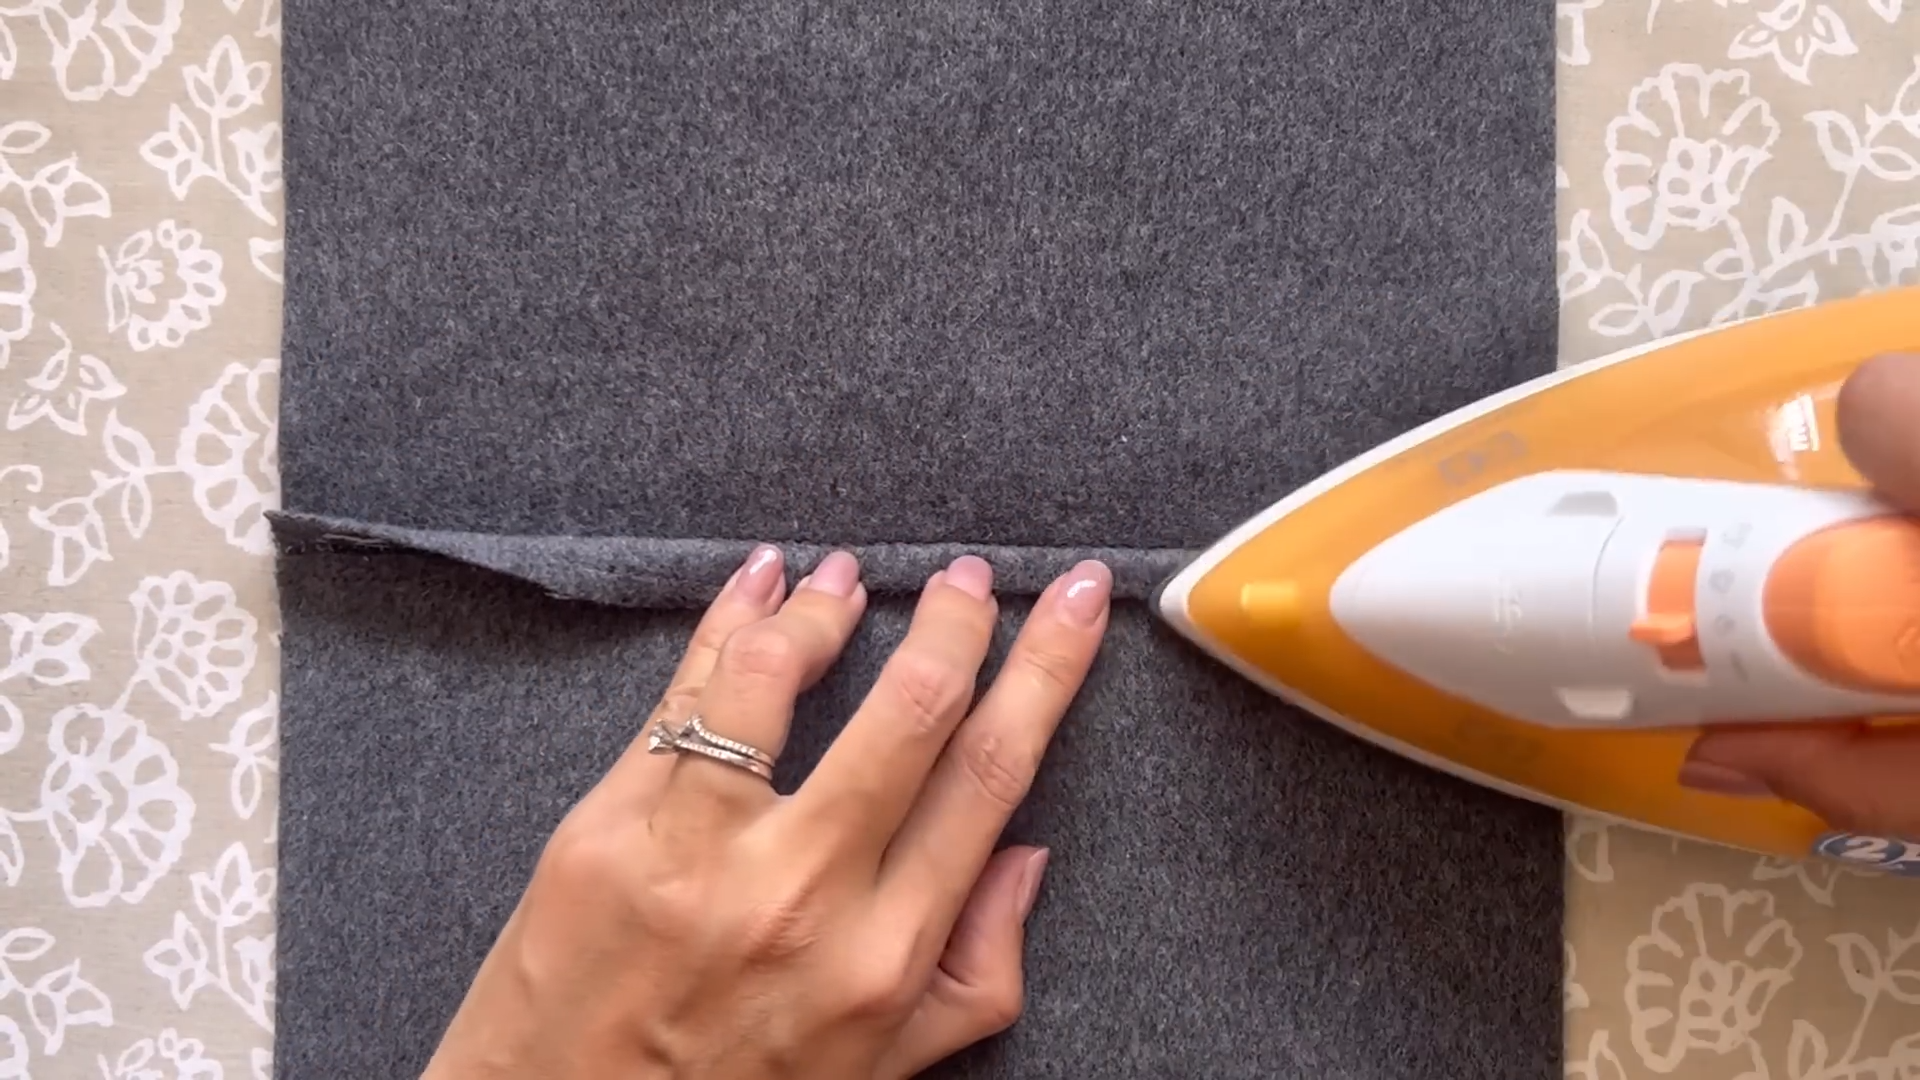
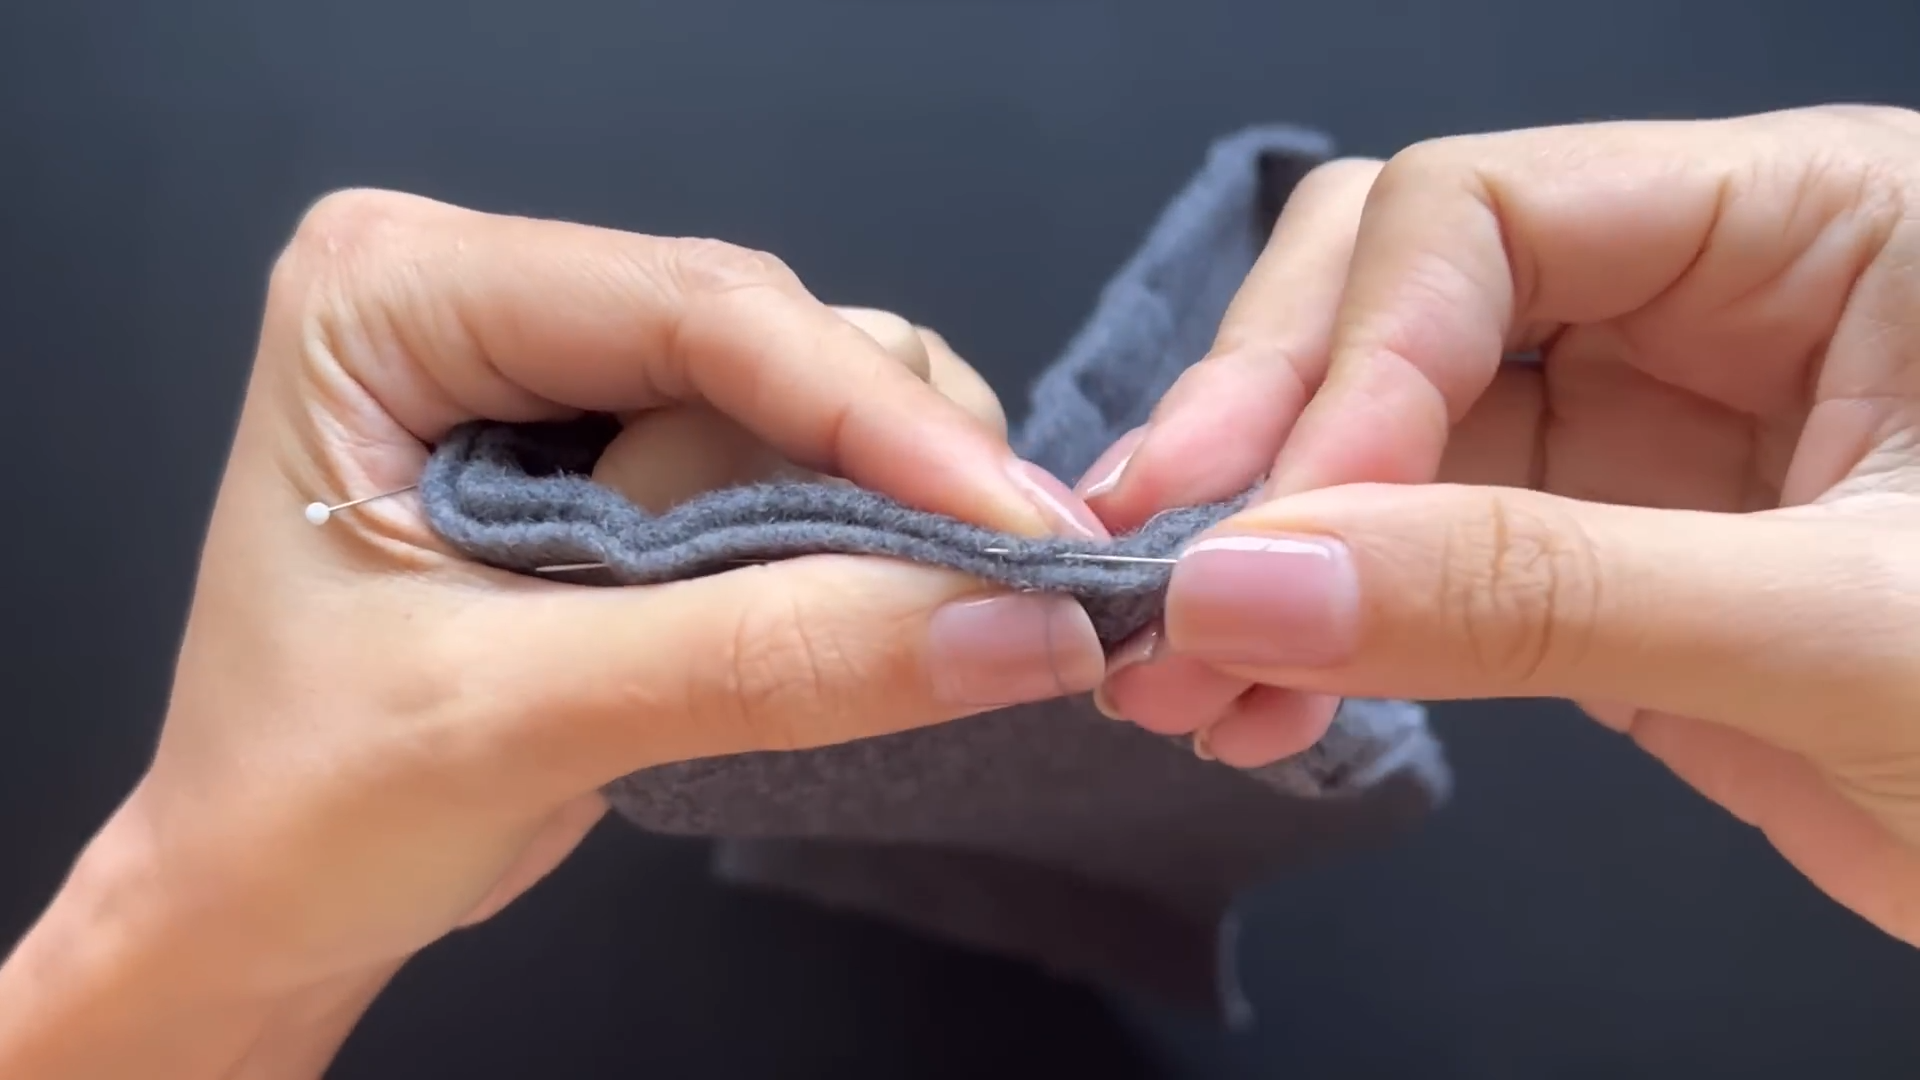
Use the iron to create the fold. Make sure the folding line will be right at the seam you make before.
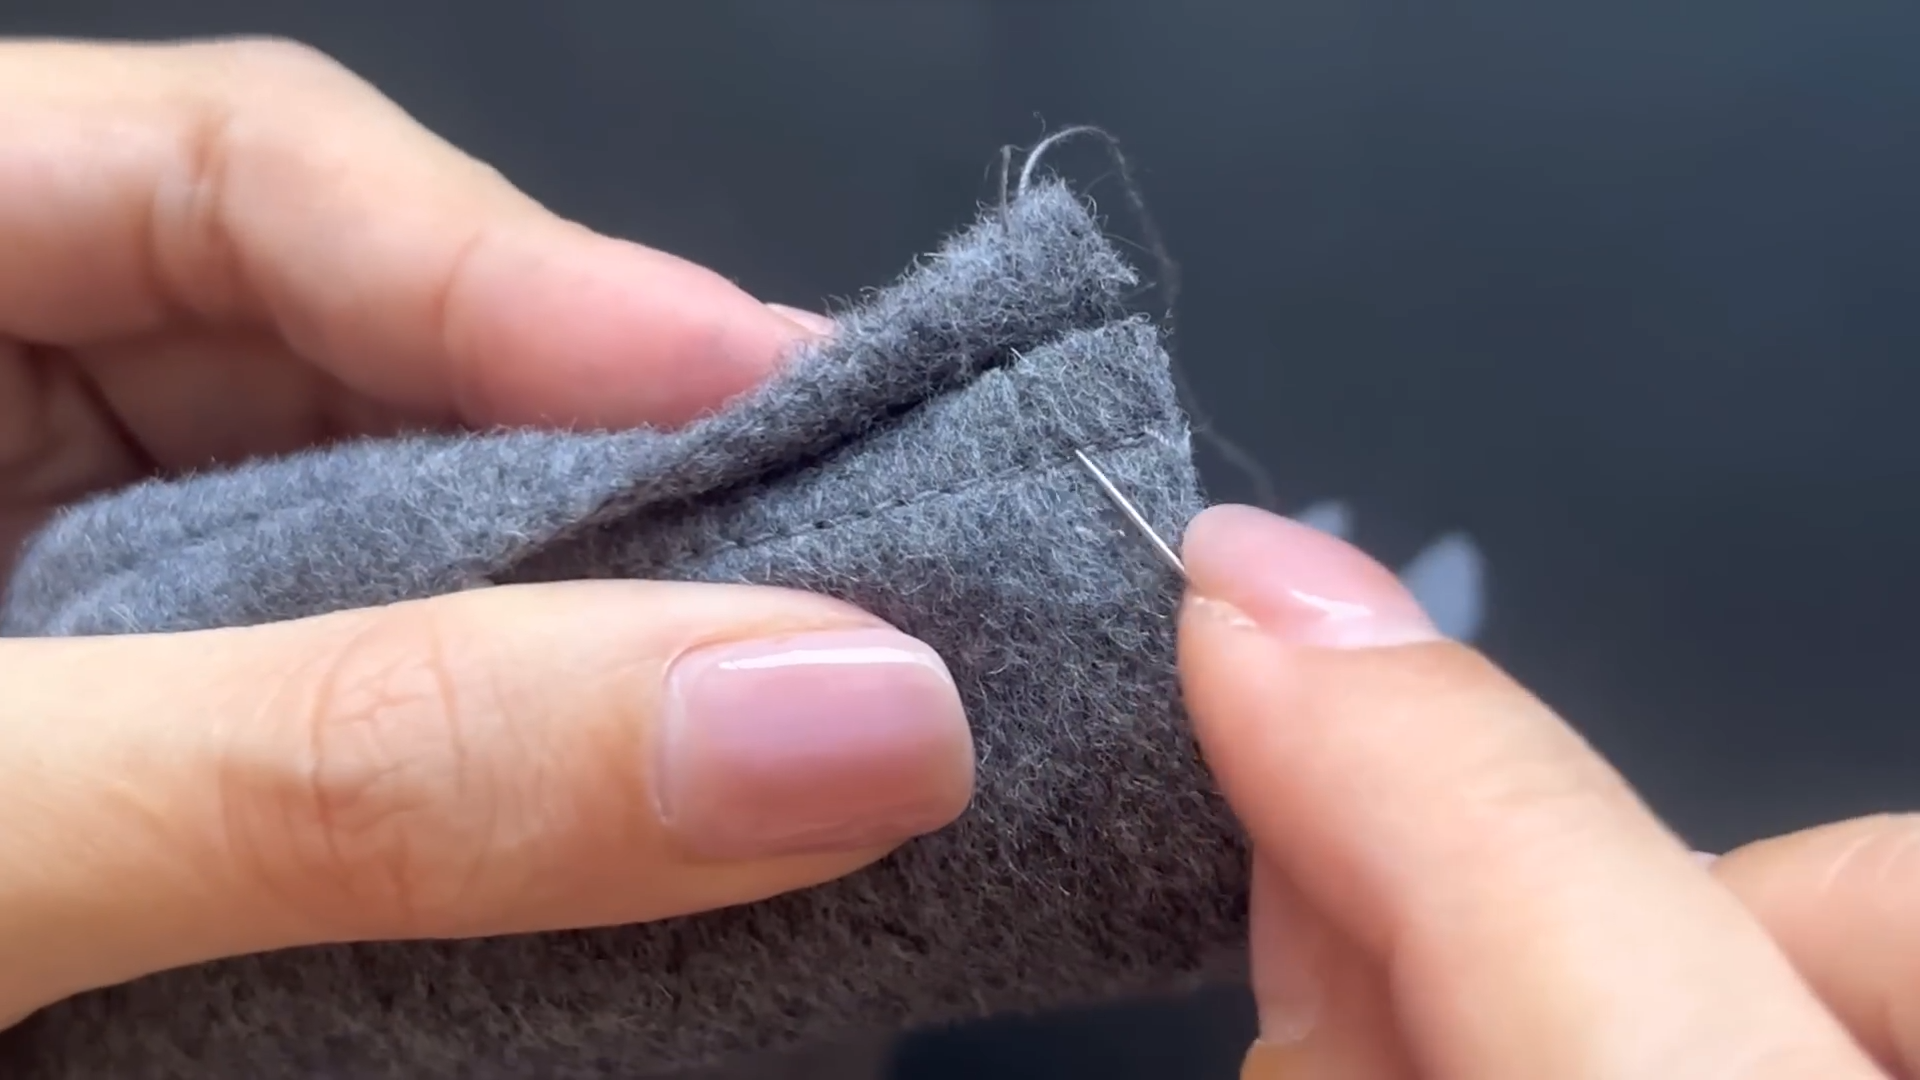
To close this folding part, we will hand sew it. Use a small needle and a single thread for this part based on two seam at the folding line and the other side to sew the parts together.

Remove the loose seam that you make at the beginning and we will finish this technique.
Here is the final look.
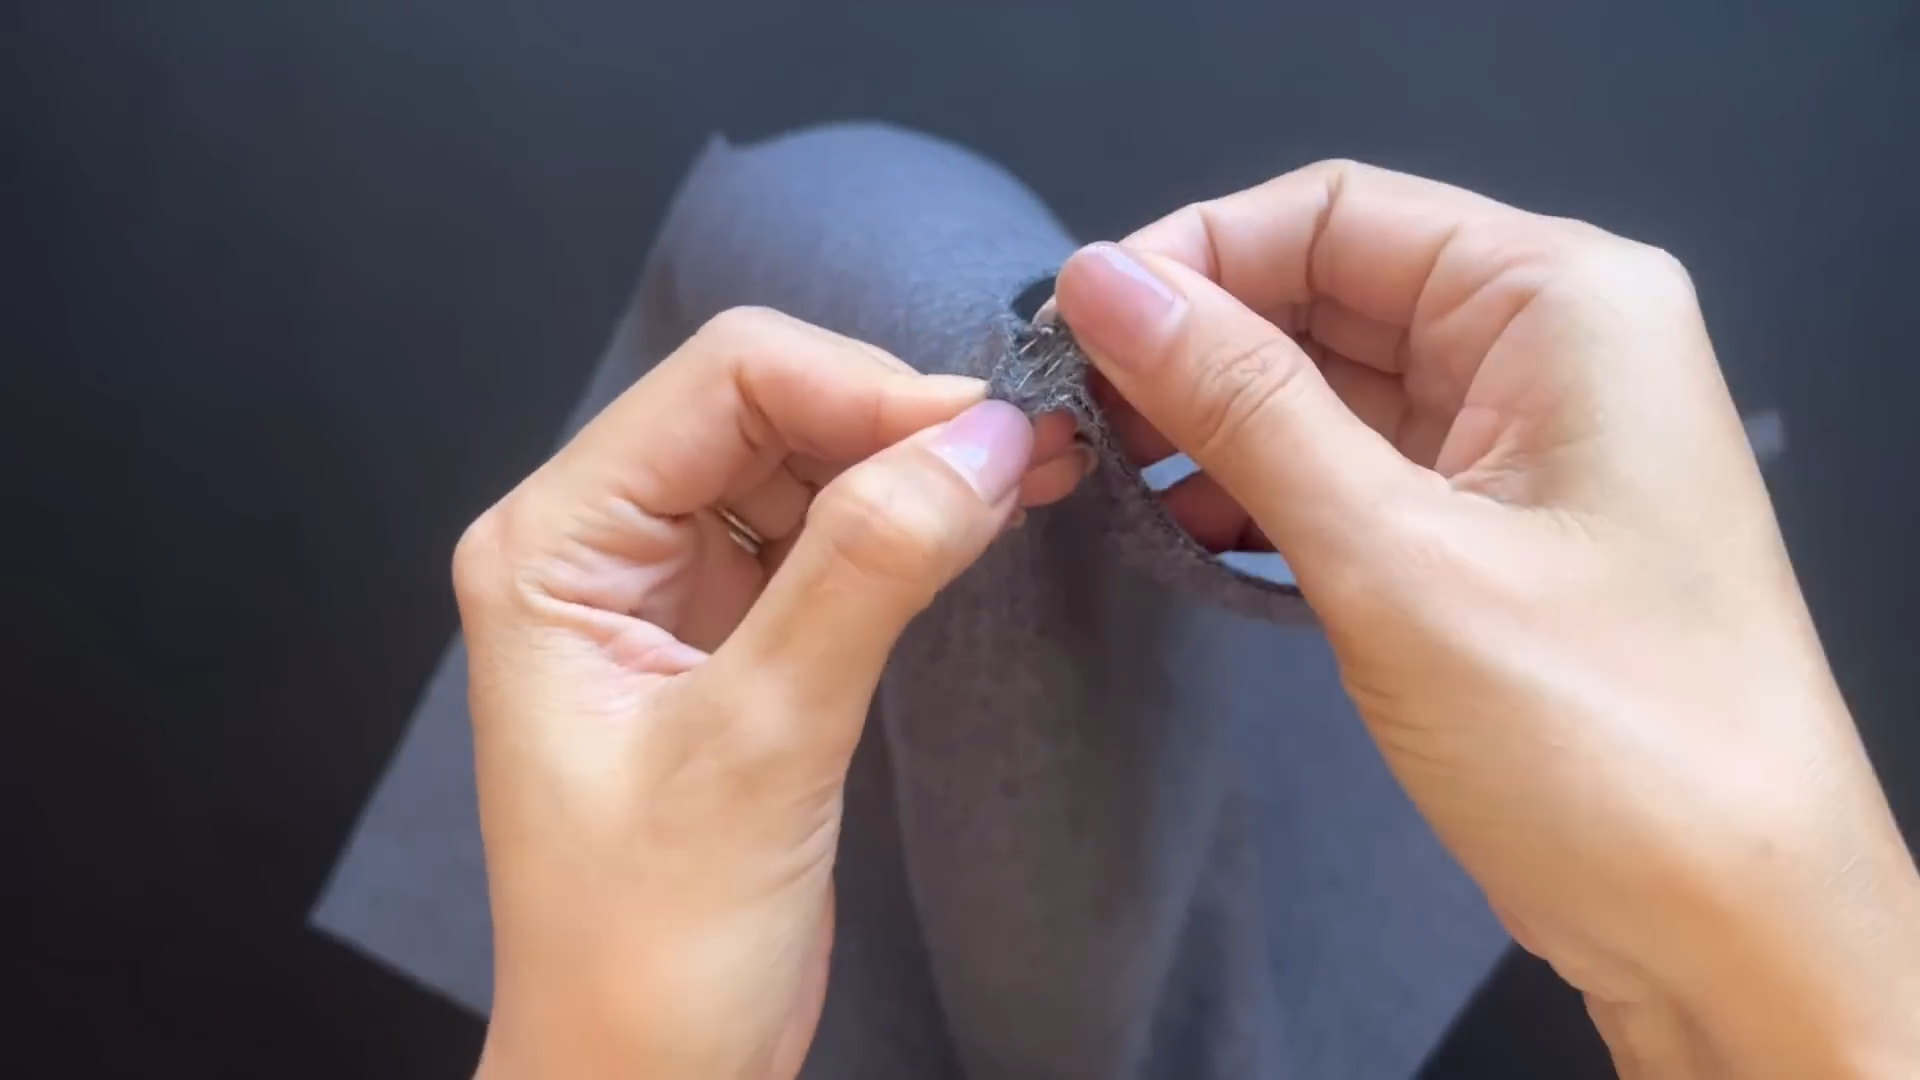
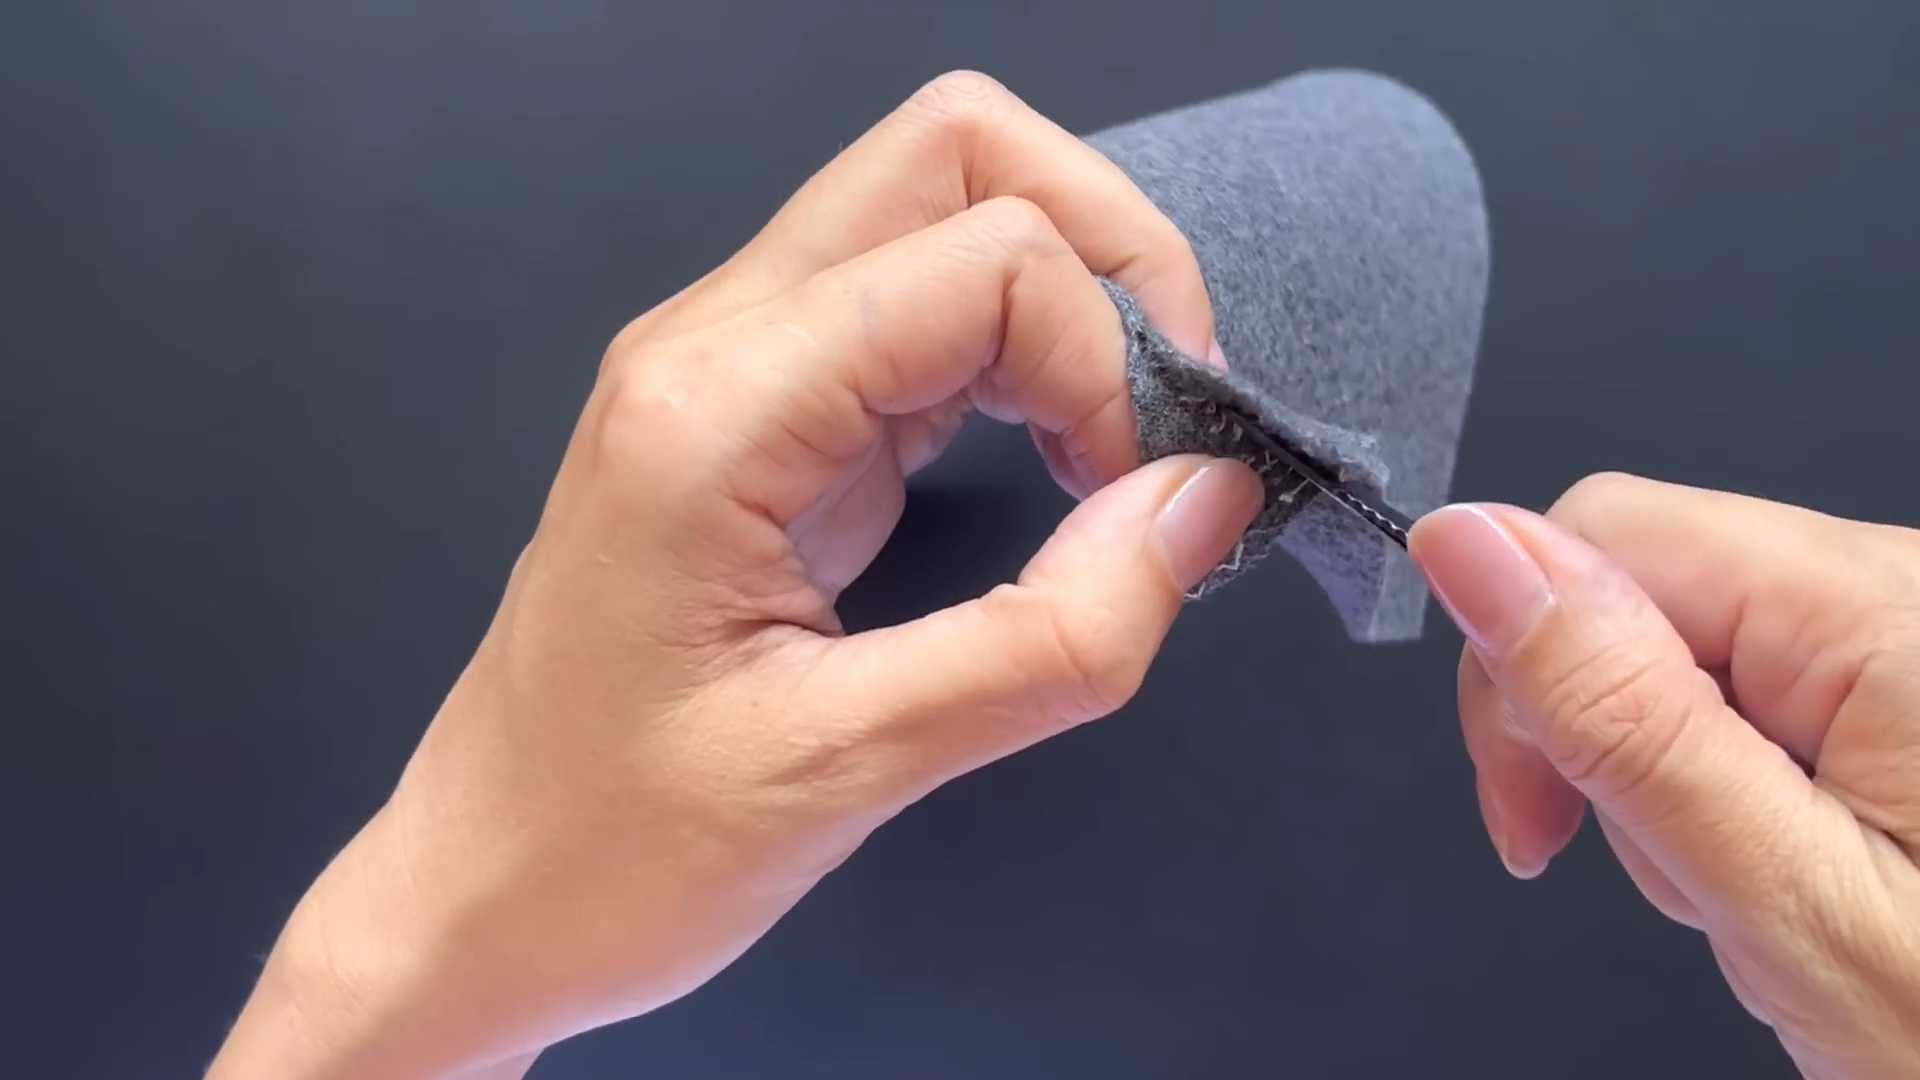
Second technique: Edge seam
The second technique is for finishing the edge of the fabric.
Draw a line at 2 cm at the end of the fabric. This 2 cm is the seam allowance that we kept before when making the pattern plus 1 cm. Sew a loose seam at that line.
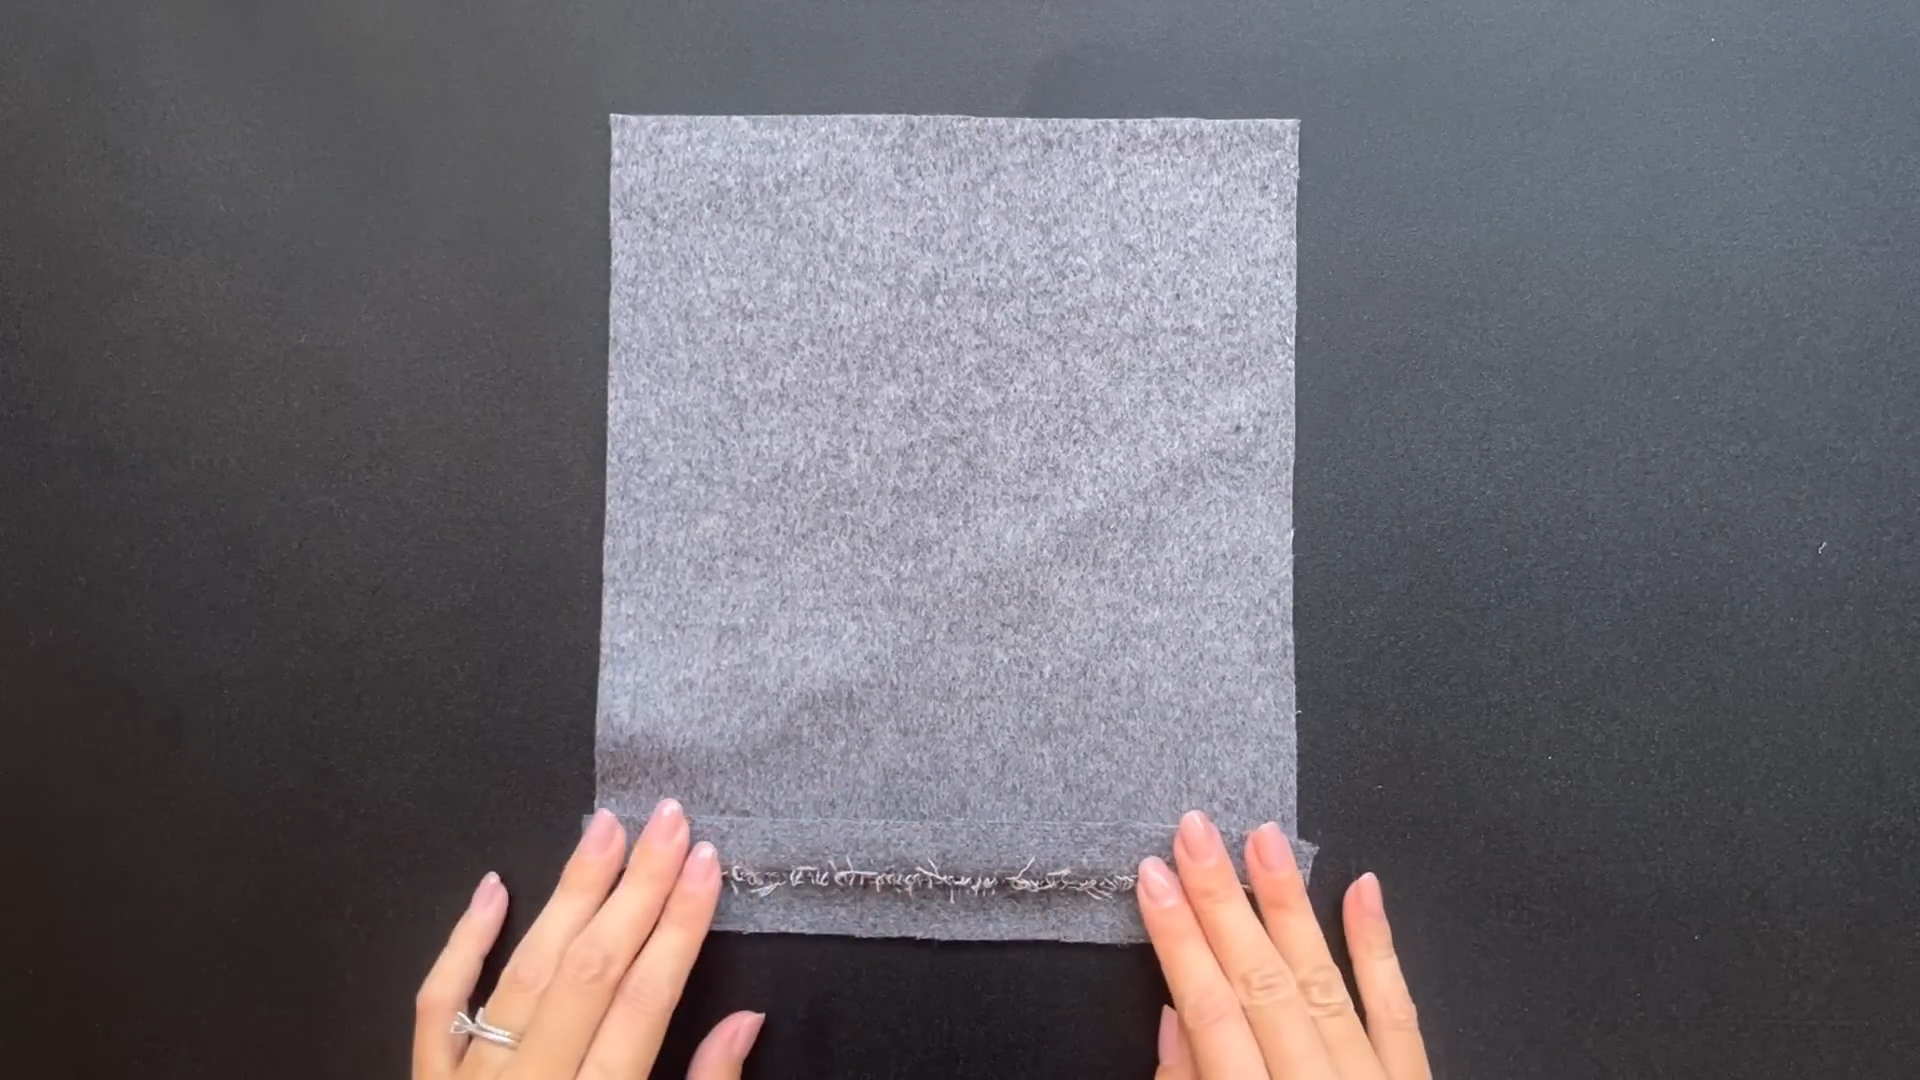
Separate two faces of the fabric to the seam we just sew.
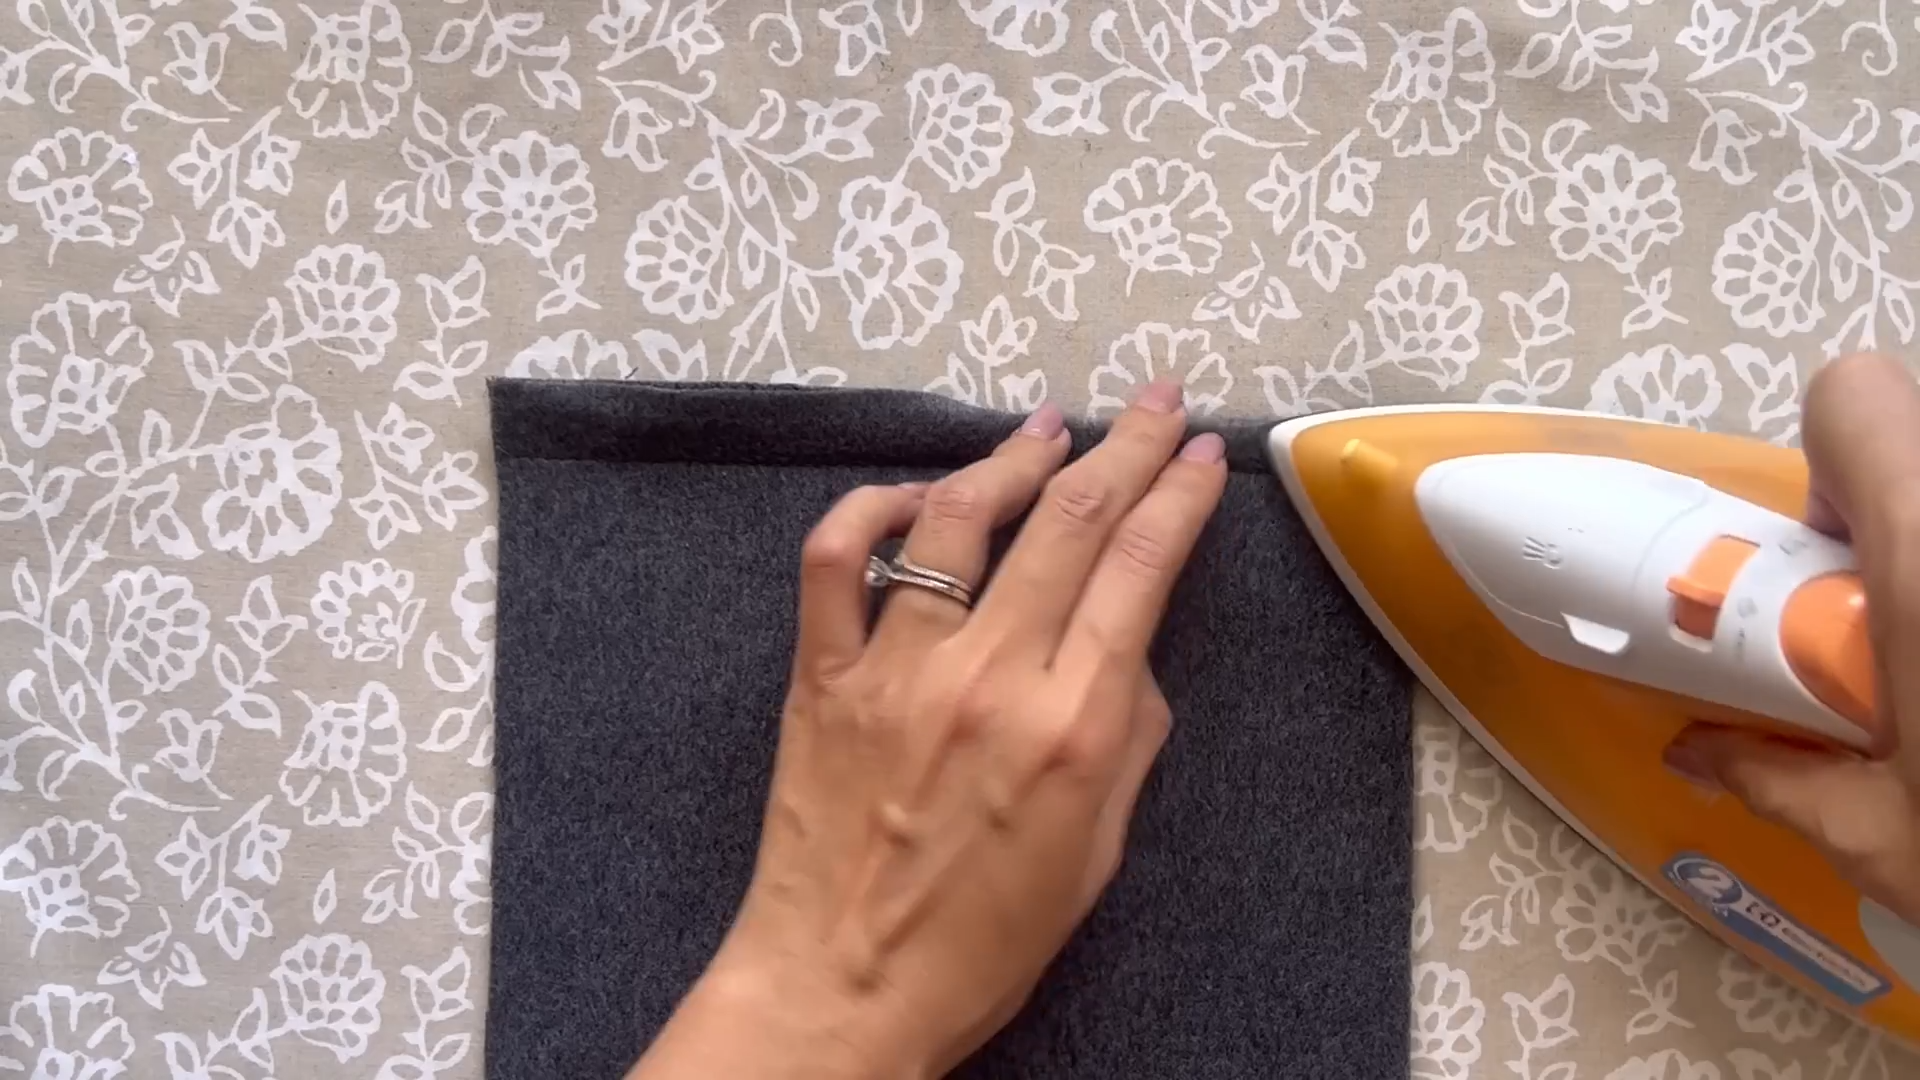
Fold two edge lines at two faces of the fabric to inside around 1 cm. Then use the iron to keep the folding.
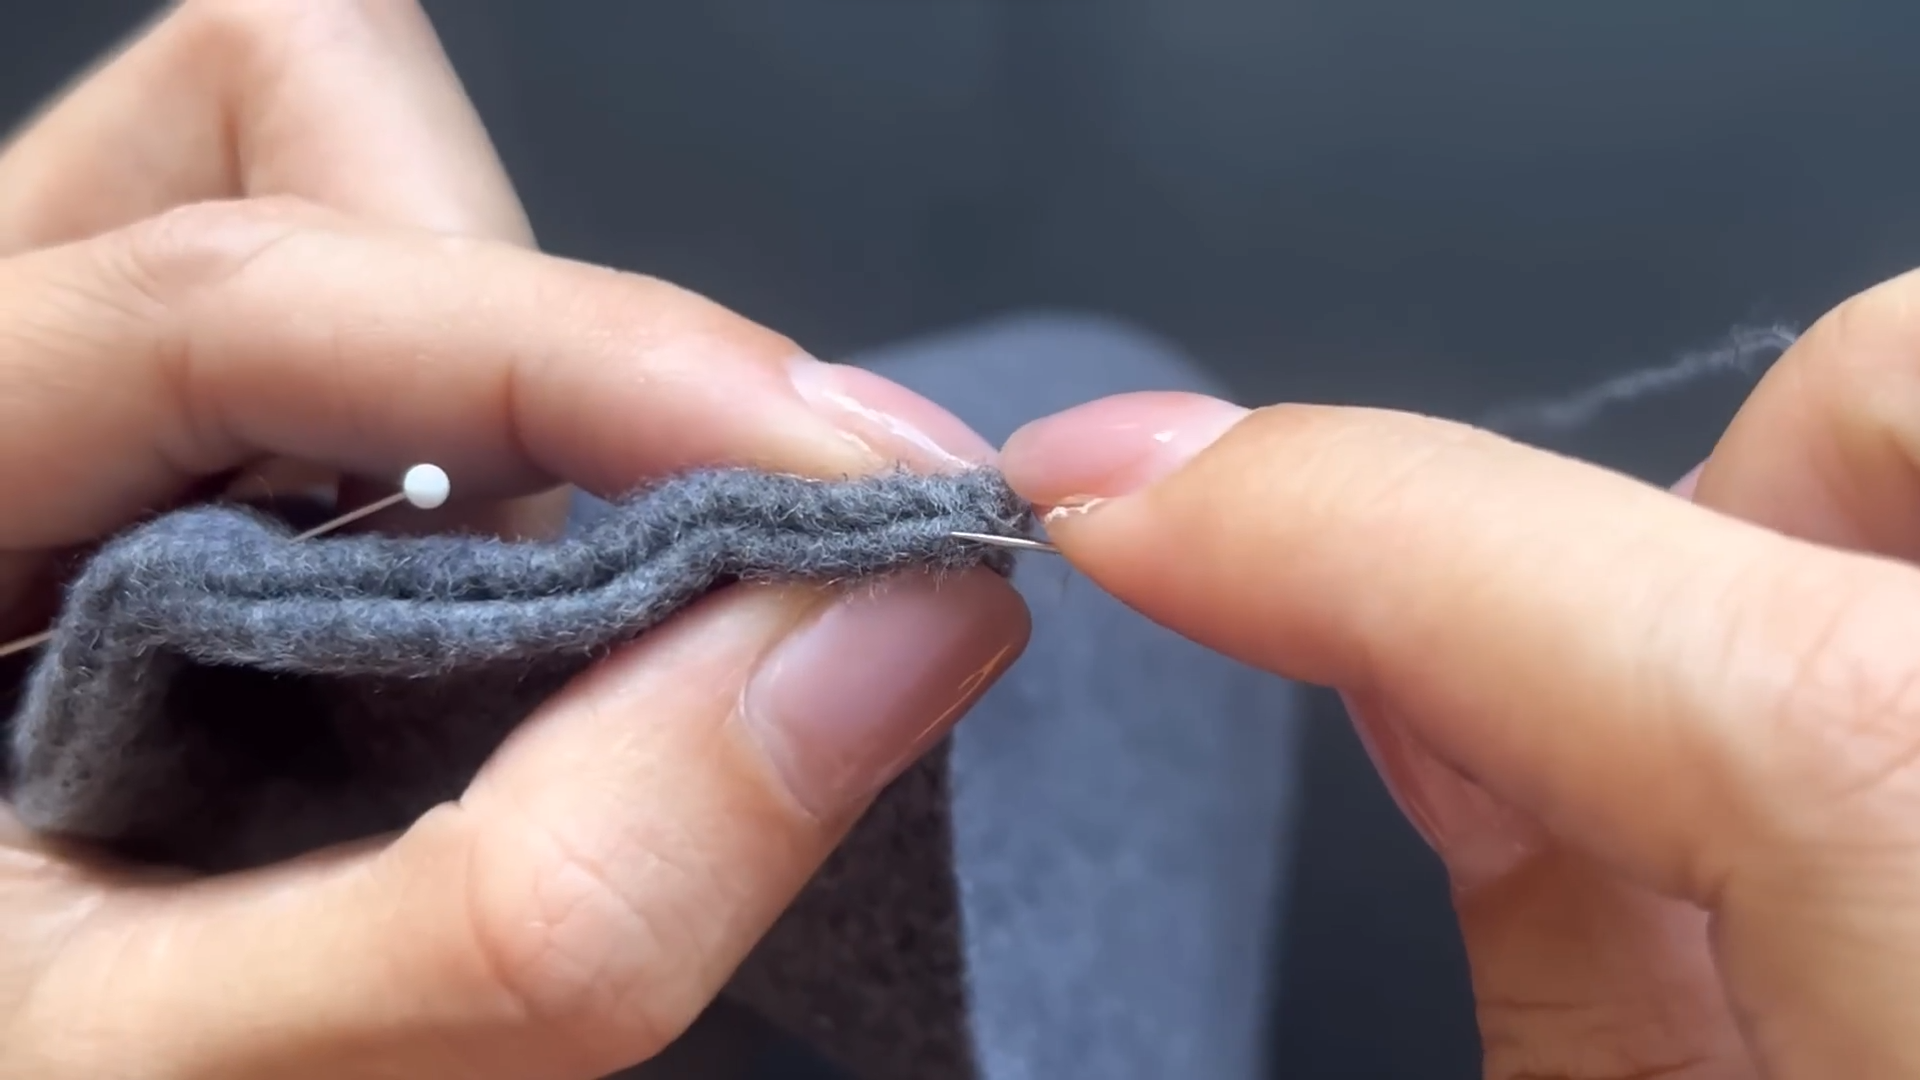
Hand sew the folded edges together using a small needle and a single thread.
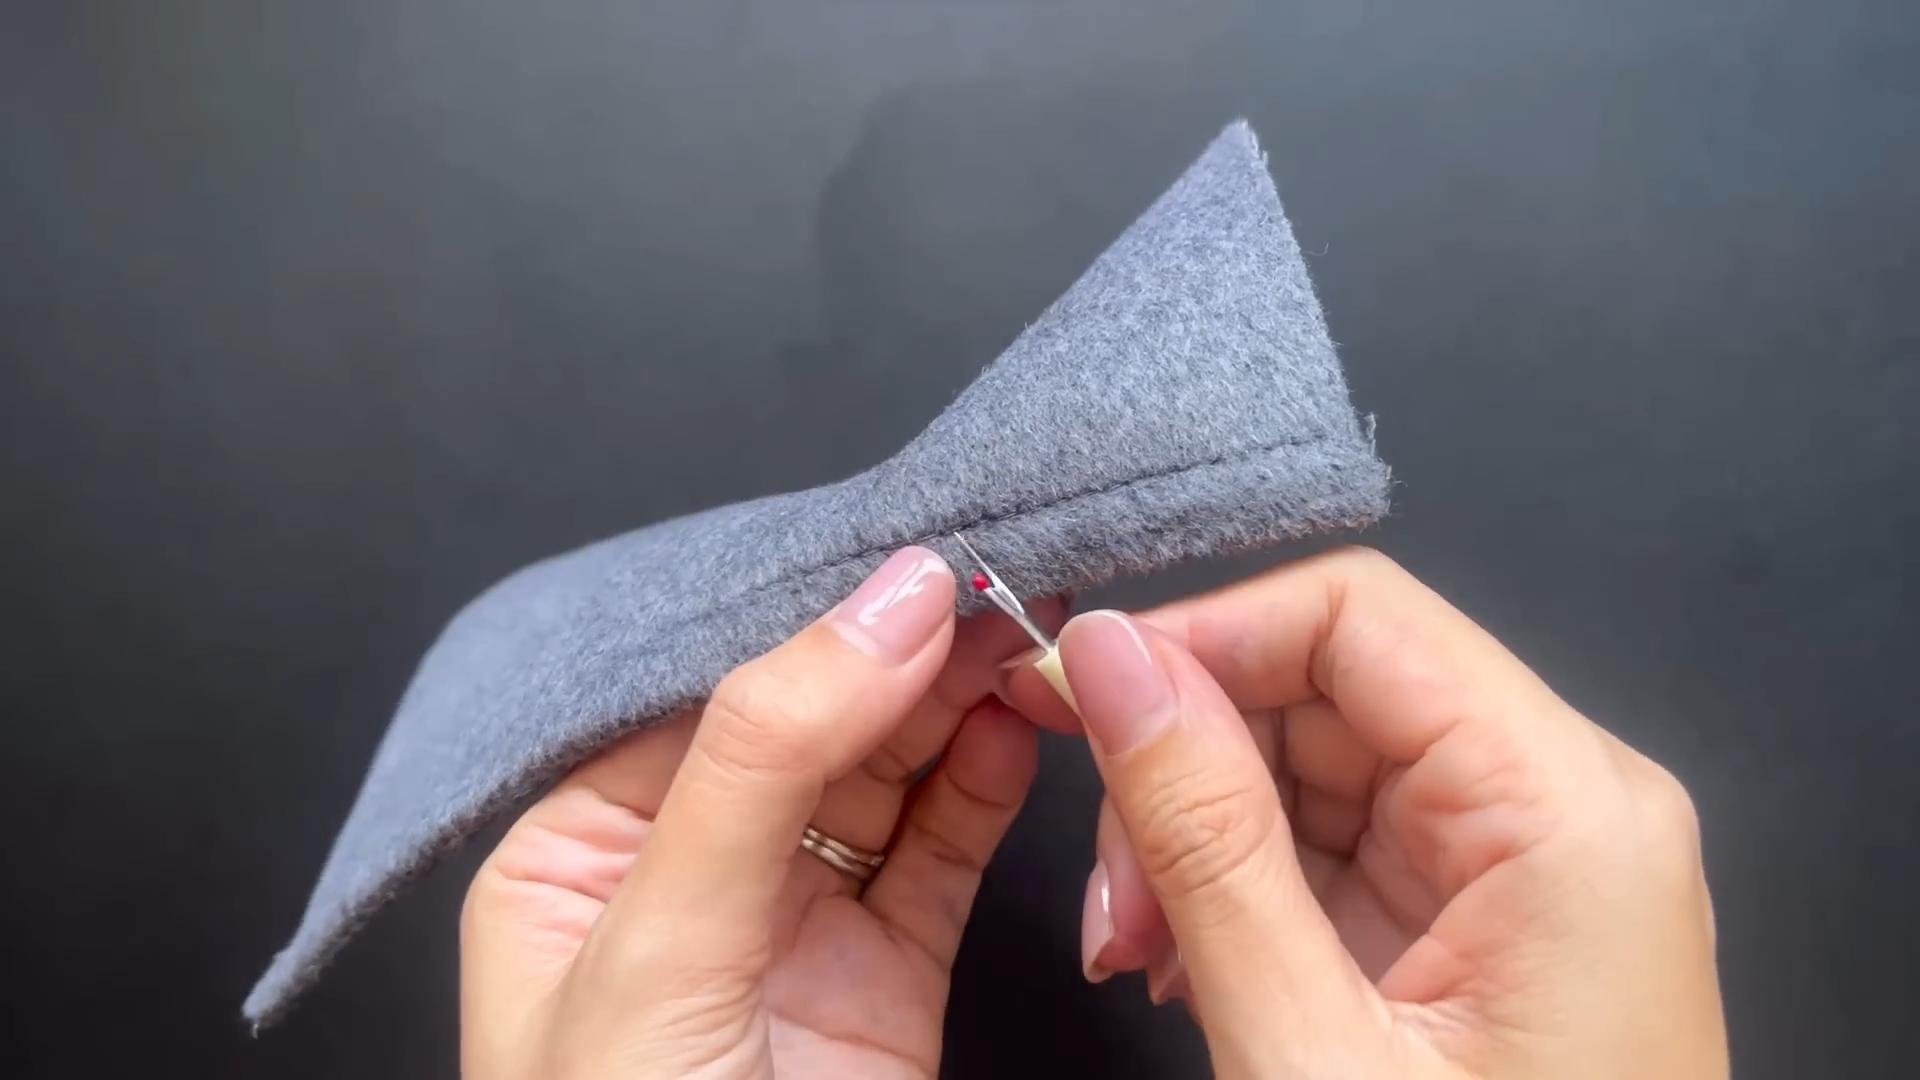
Remove the loose seam that you made at the beginning.
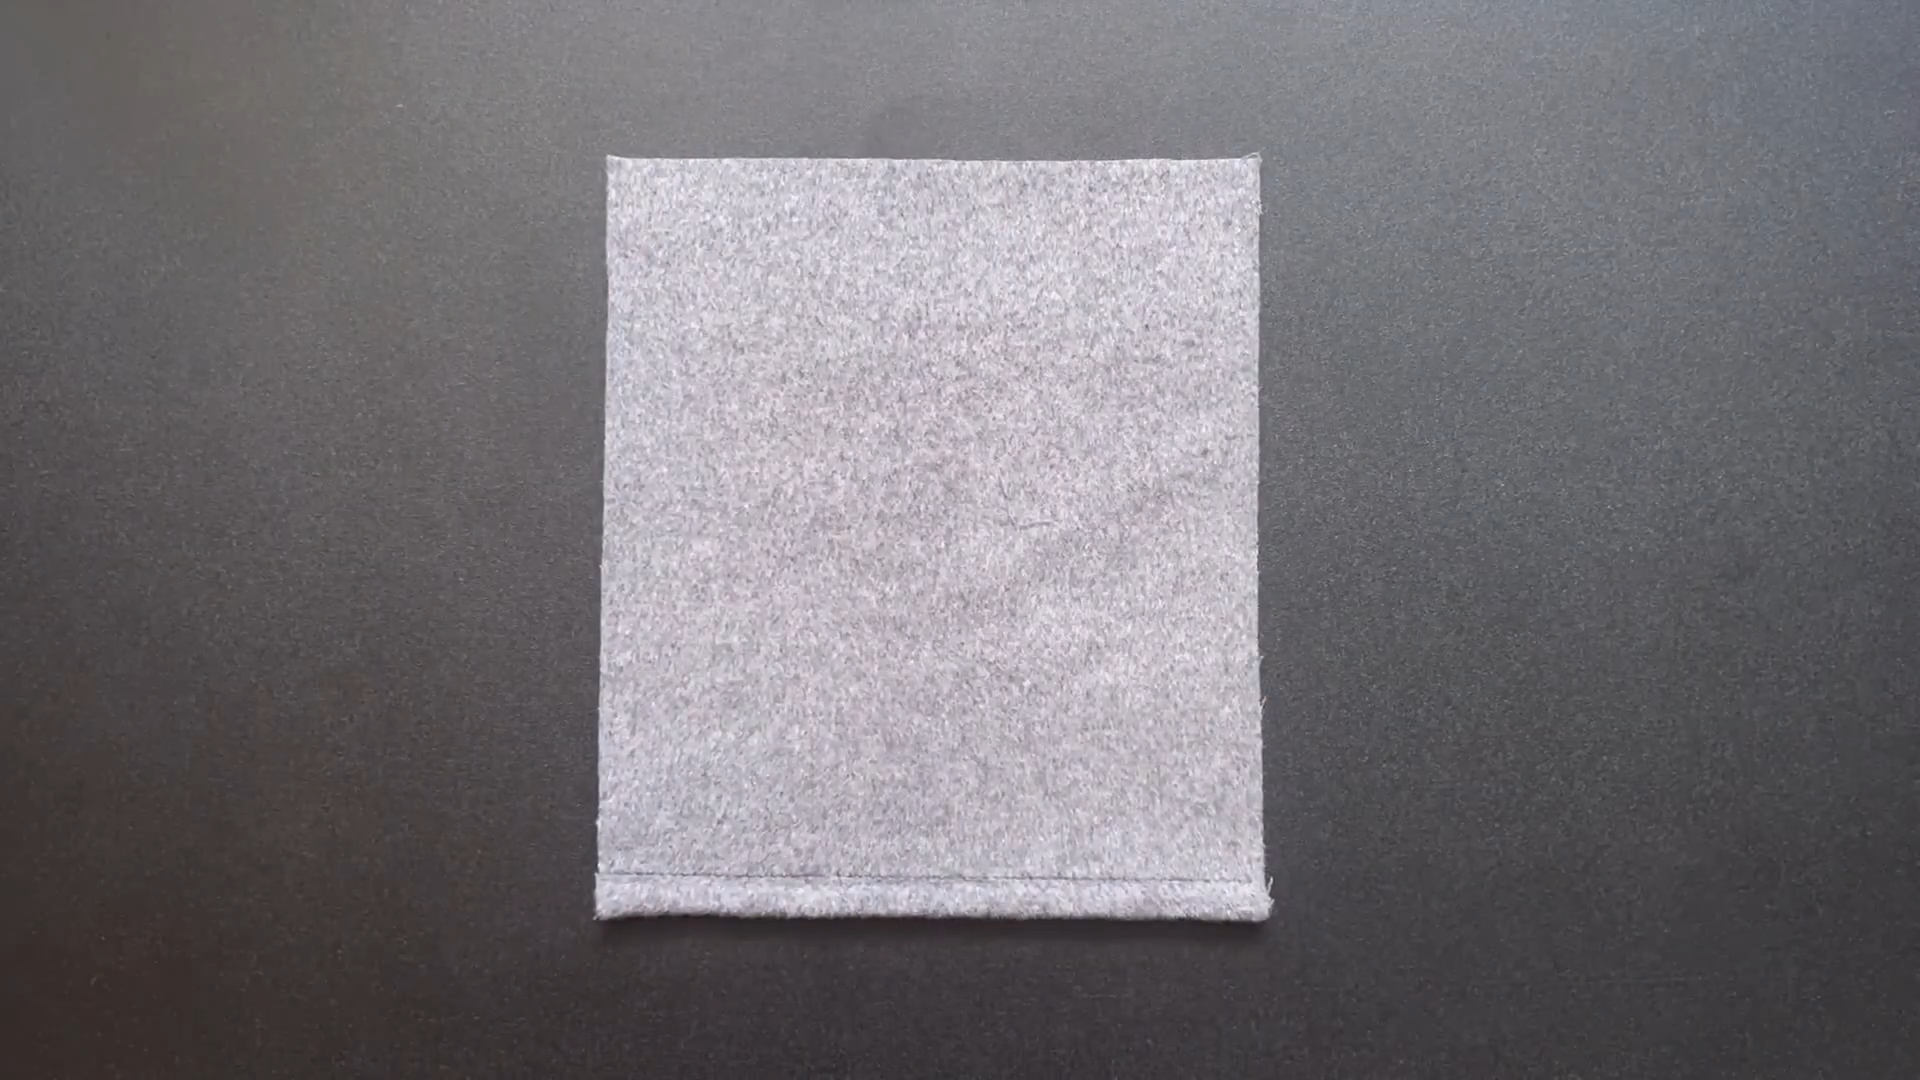
Here's the final look for this technique.
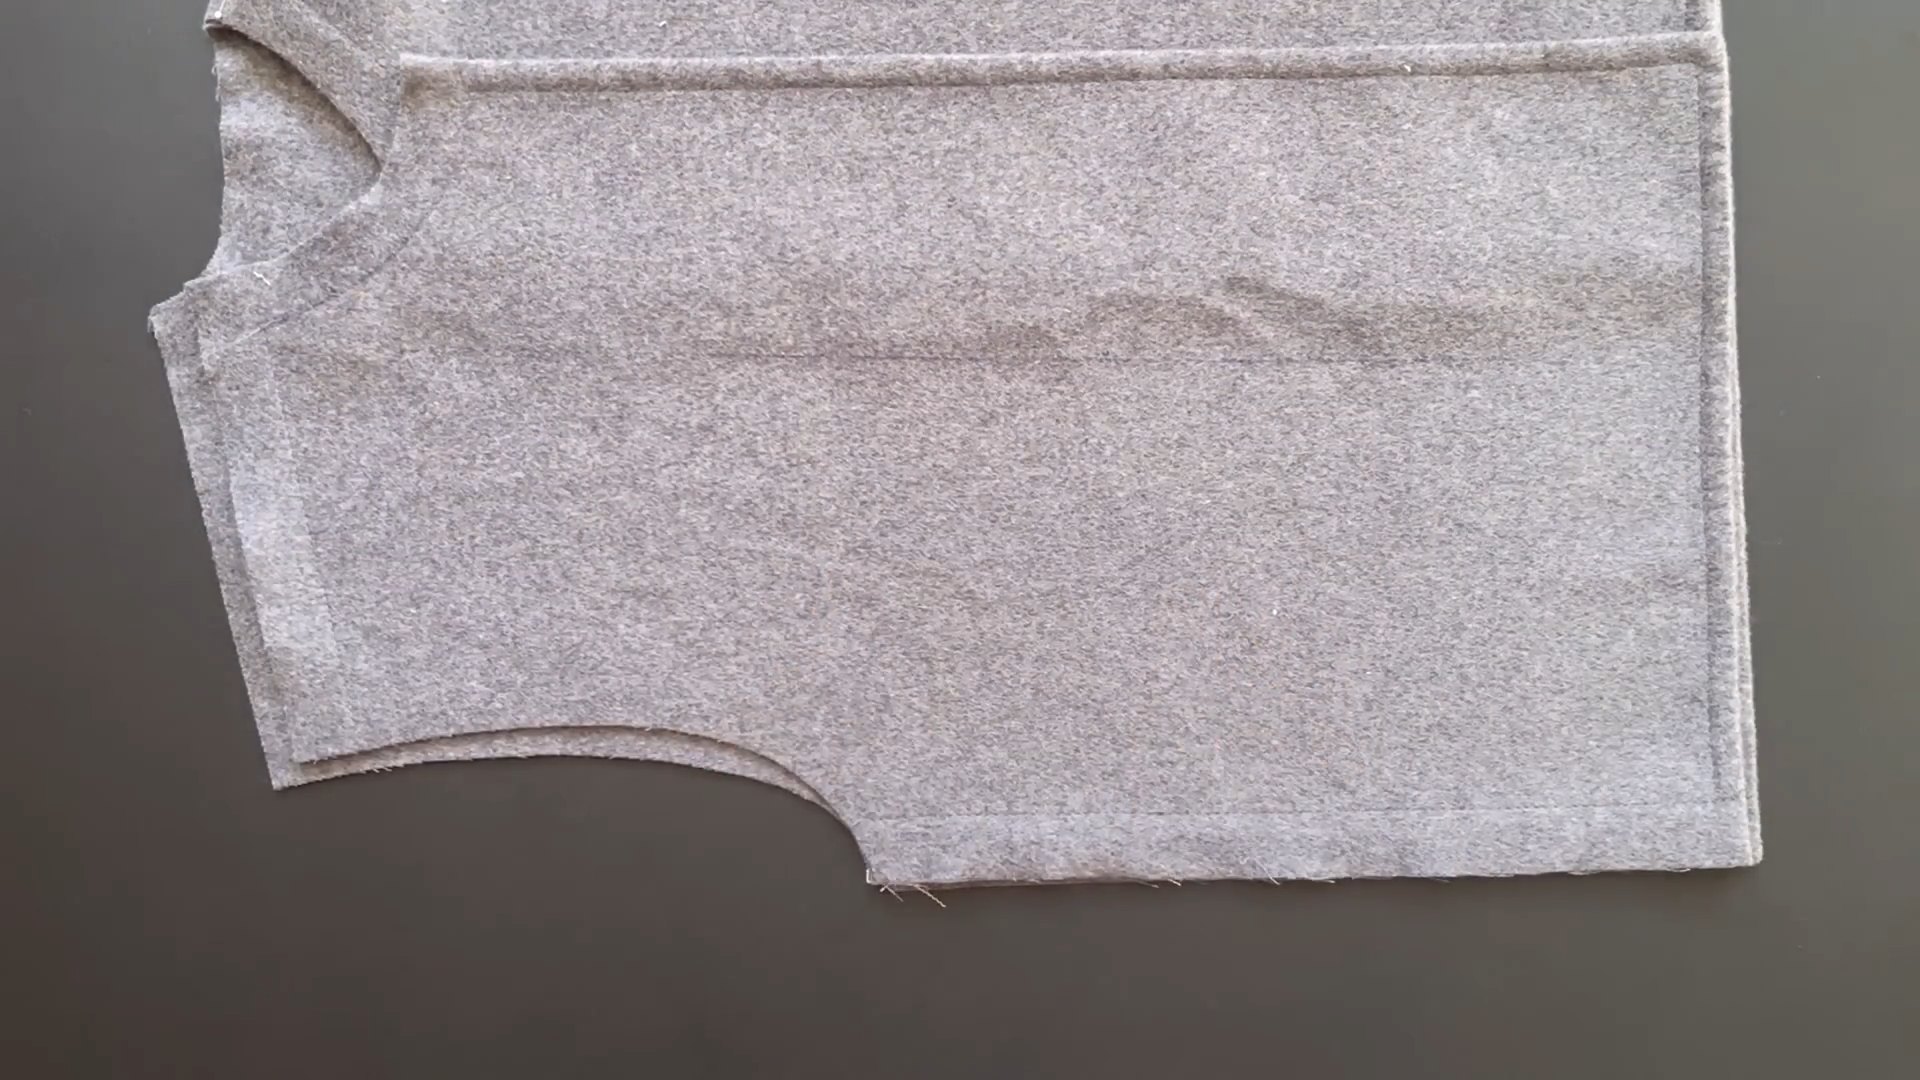
THE FRONT BODICE
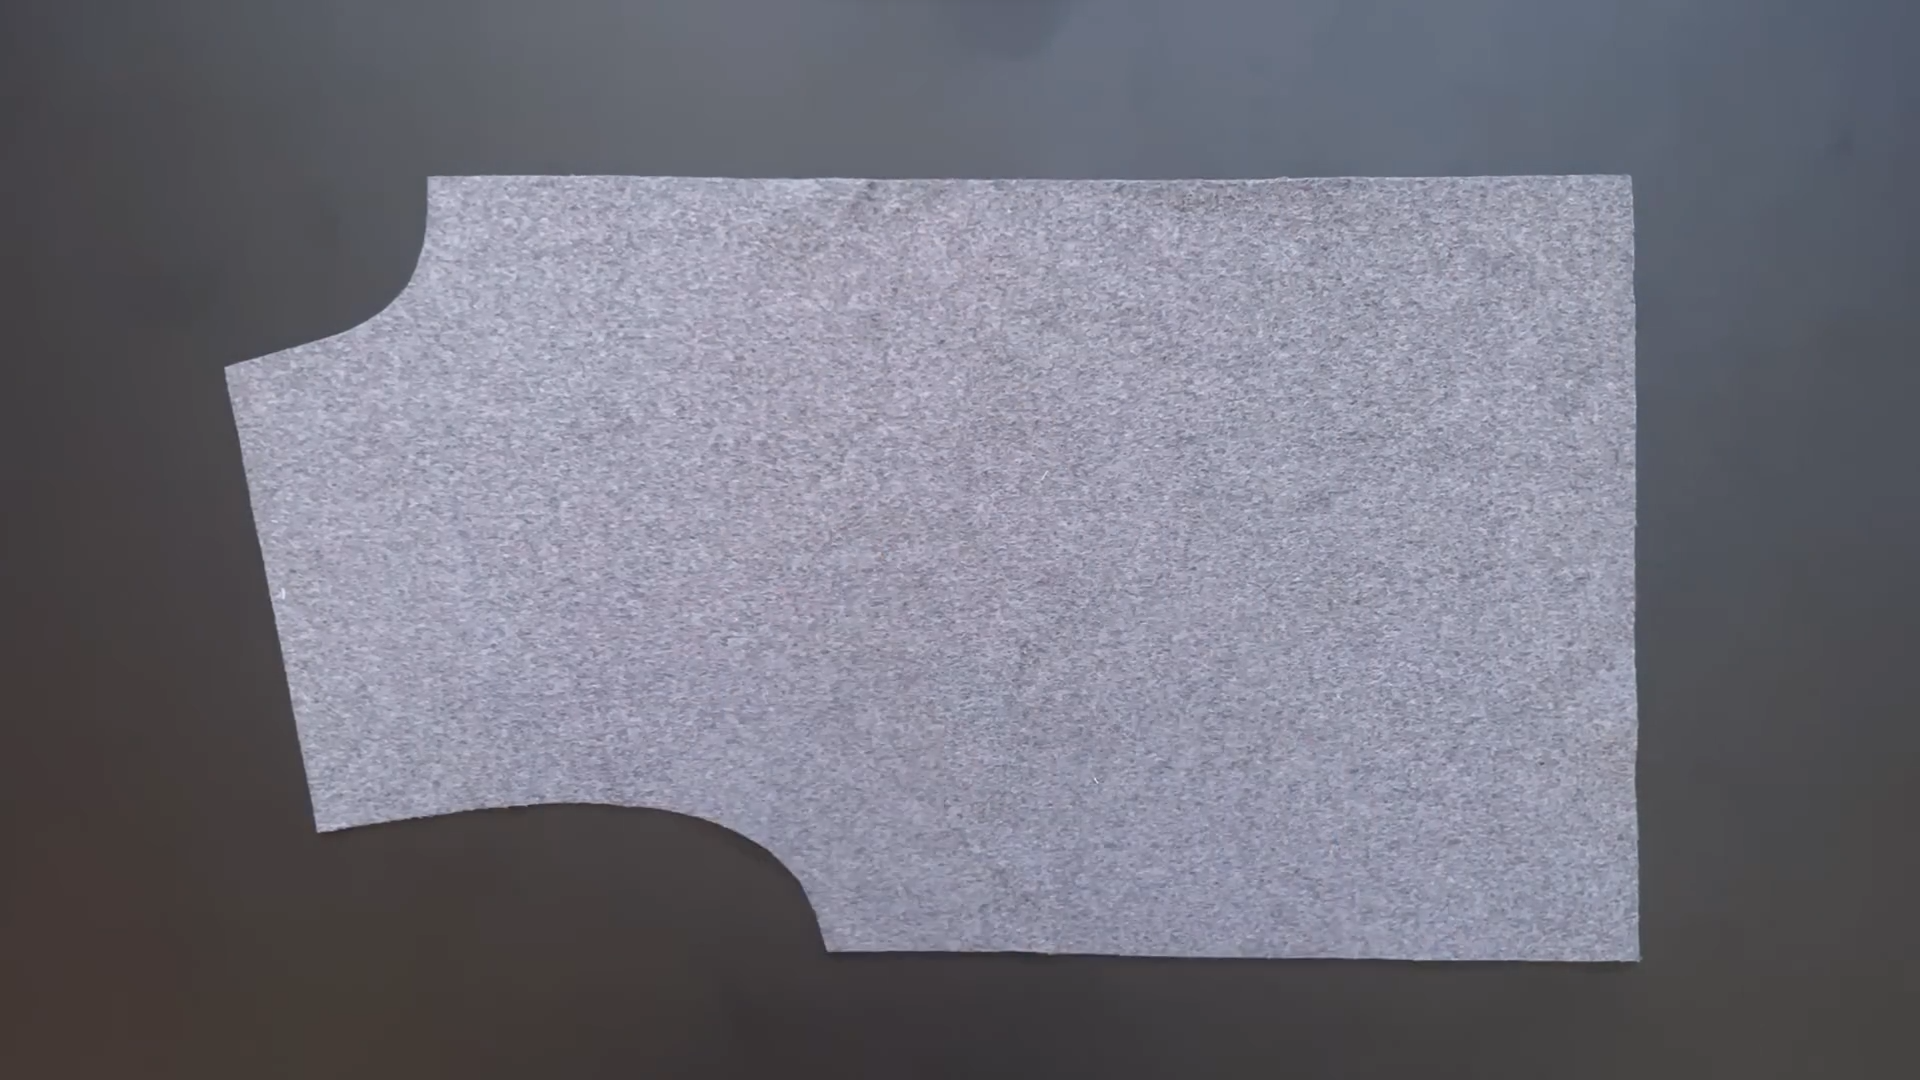
Apply the patterns to the fabric and cut all the pieces you need for the jacket.
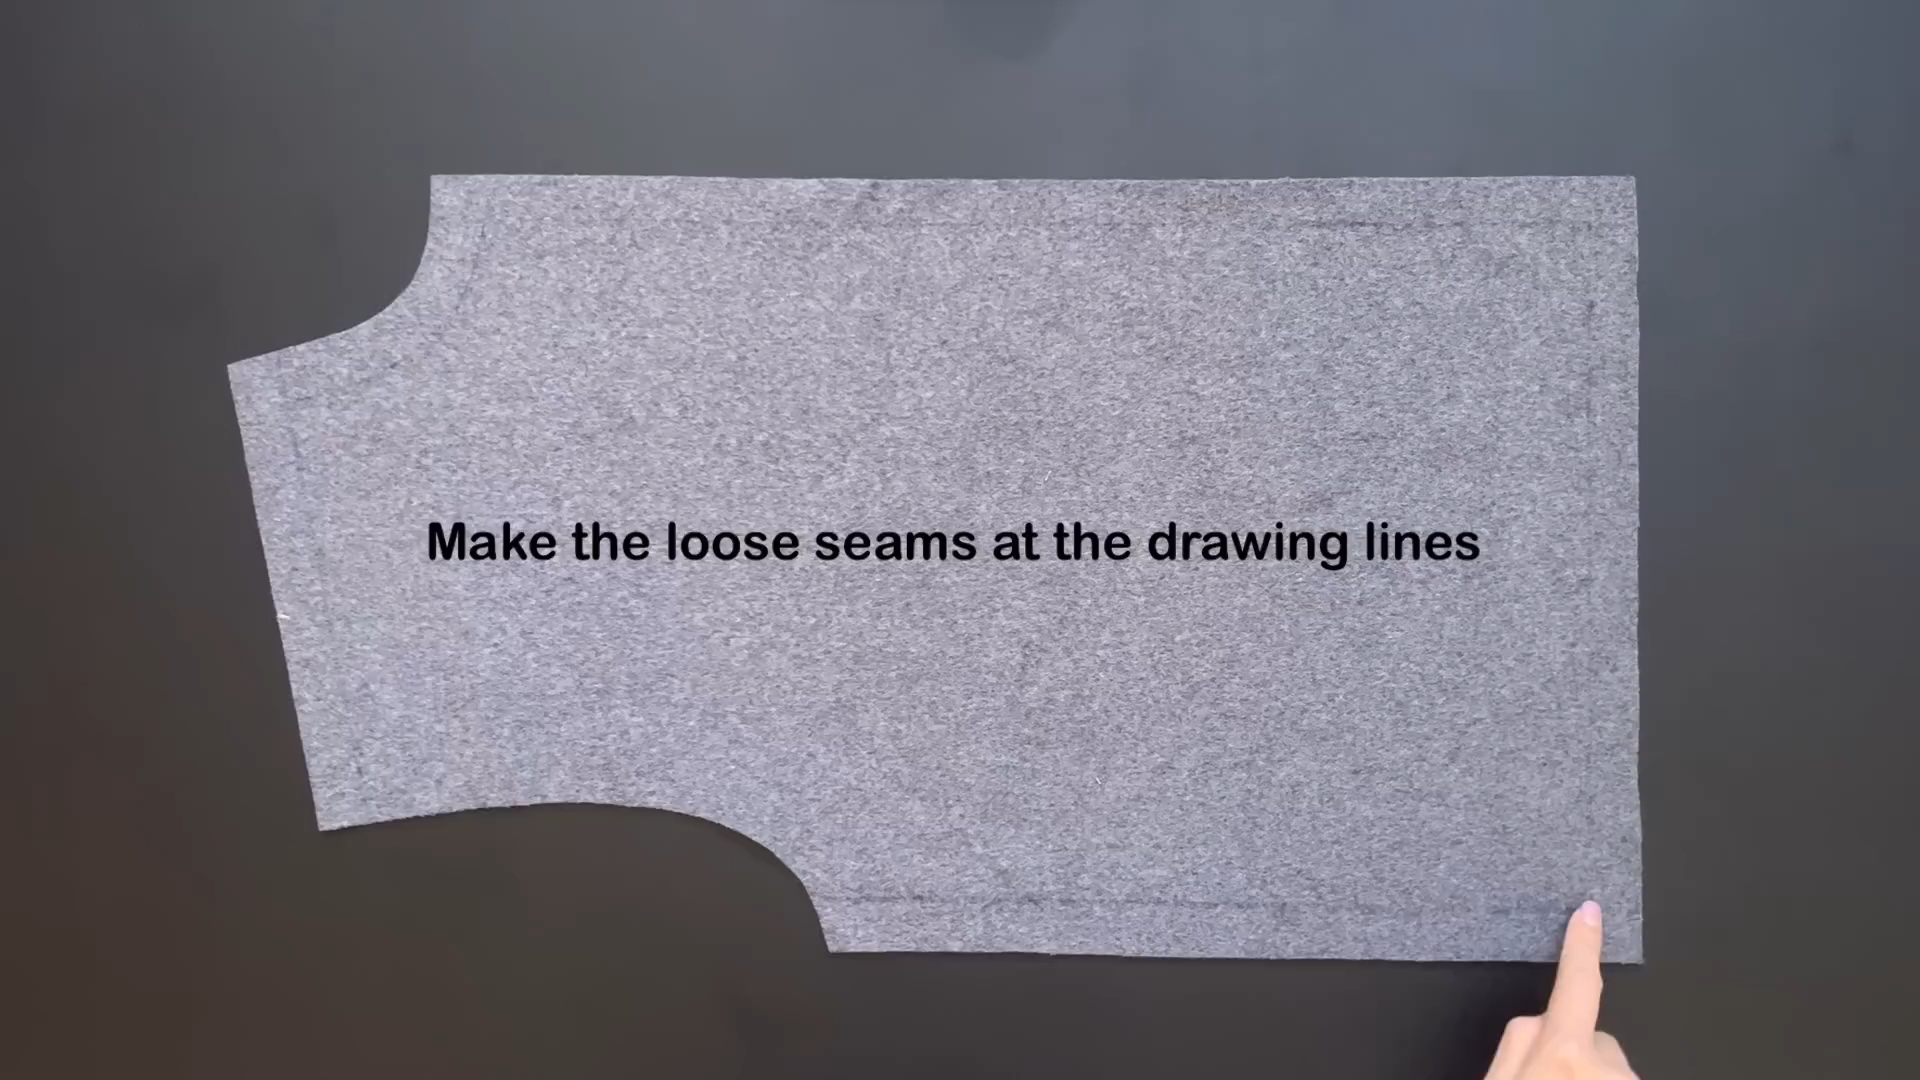
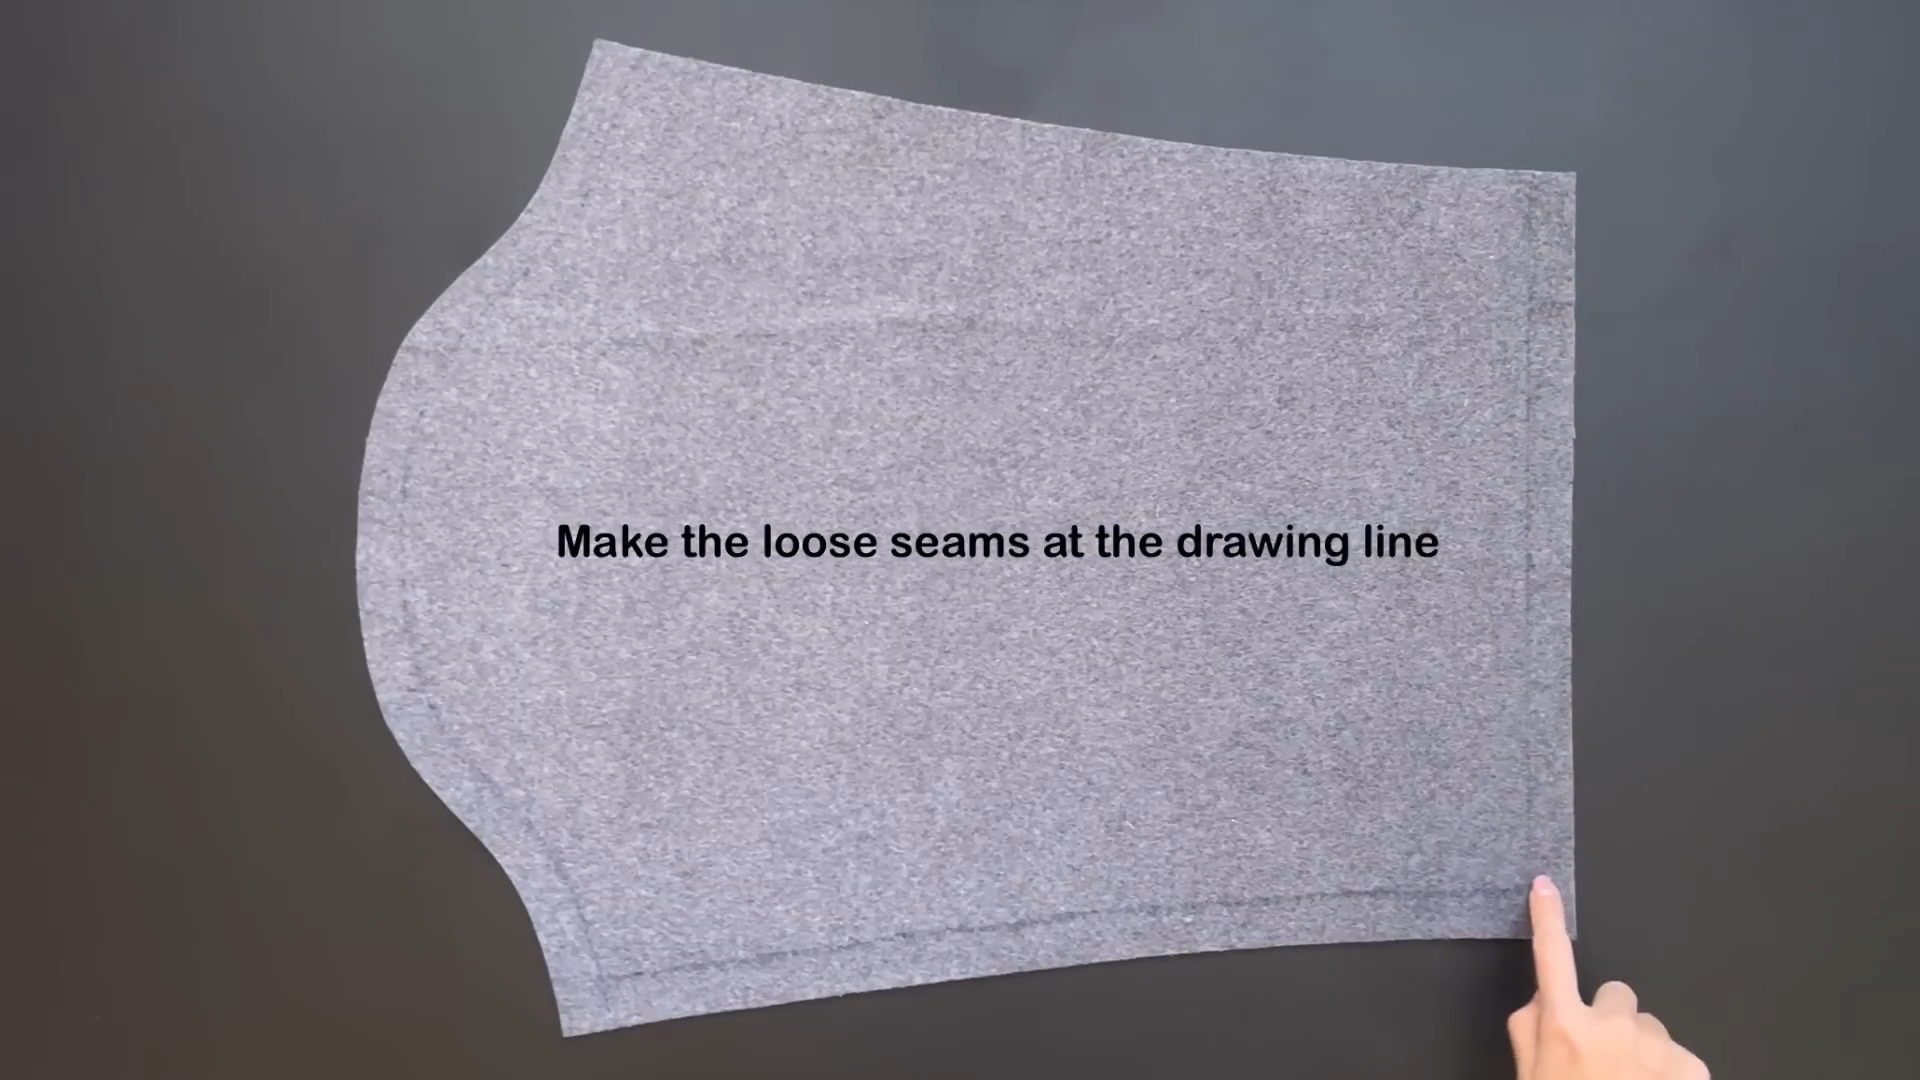
Draw lines at 2 cm inside the edge lines of the front bodice piece, except the sleeve line.
Make a loose seam along the lines you drew.
Separate the two faces of the fabric at the edge of the loose seam.
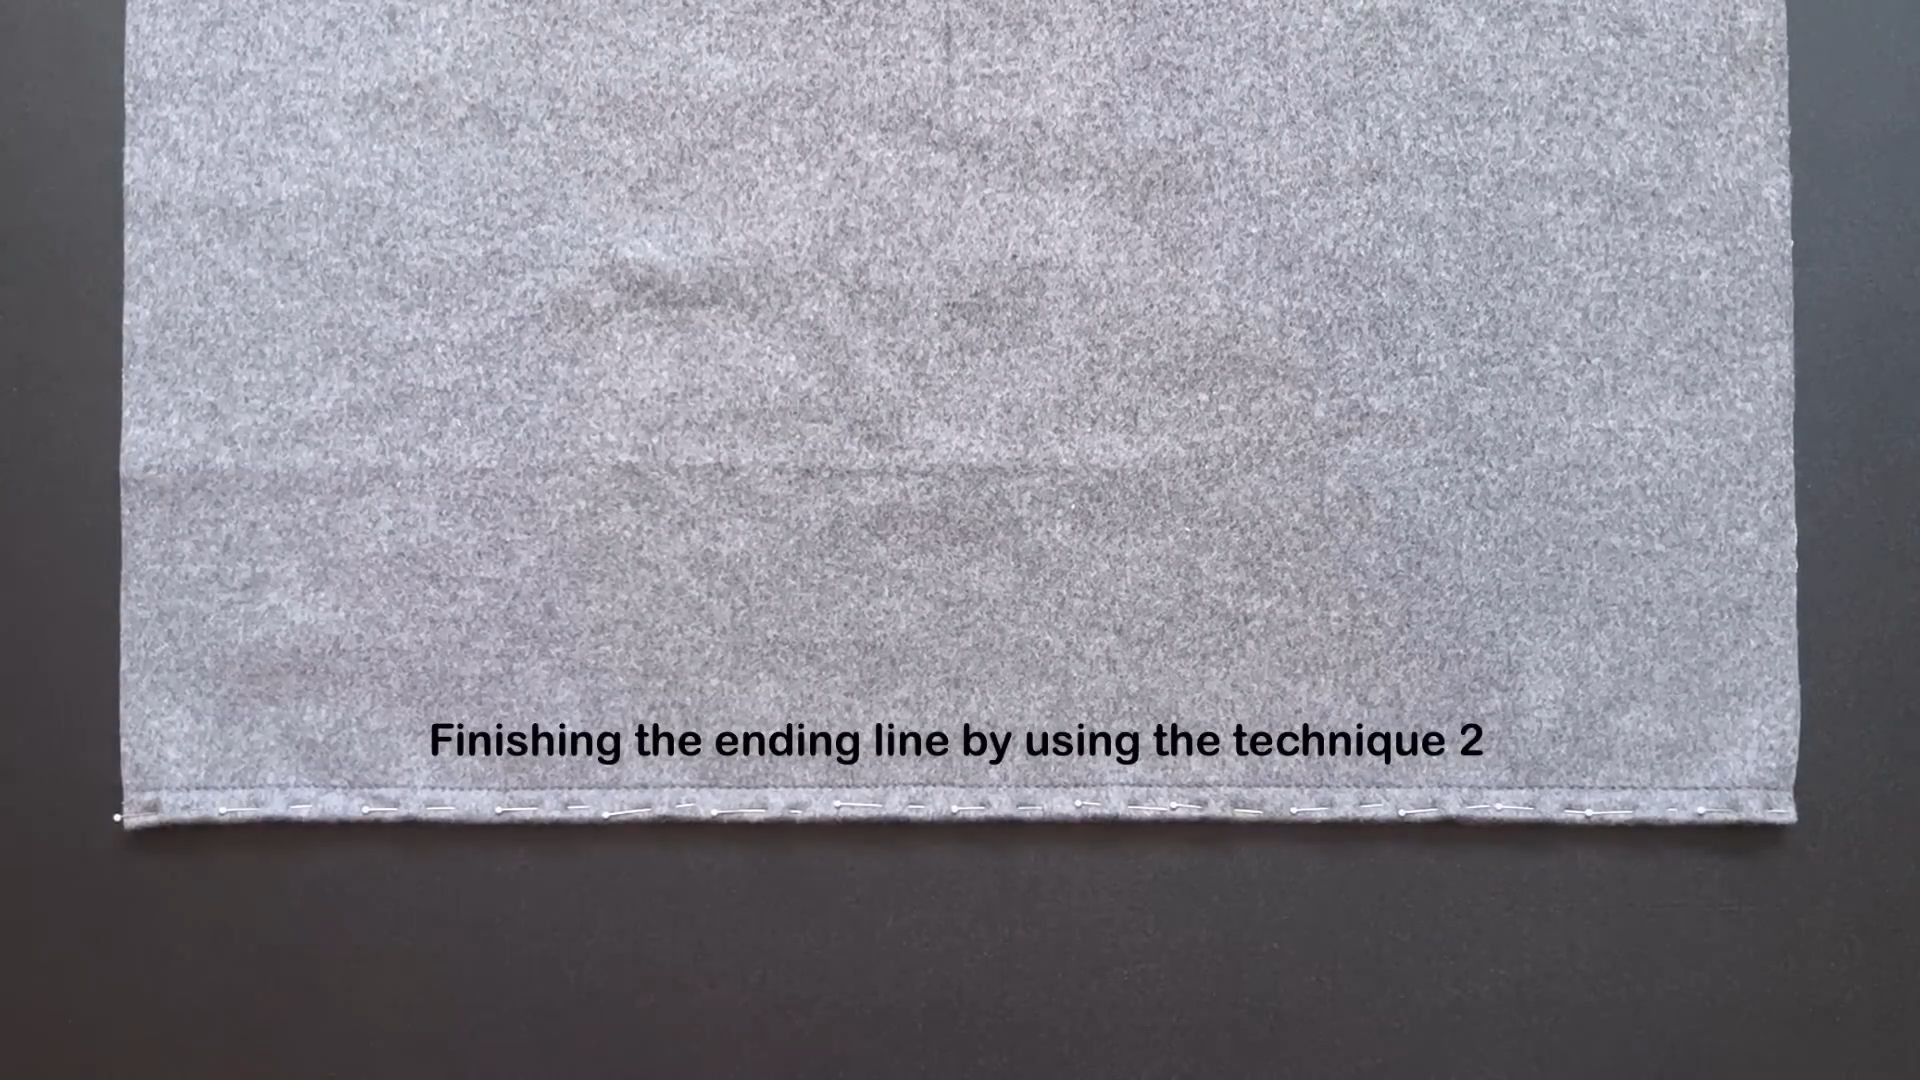
Use the second technique to finish the ending line and the middle line of the front bodice piece.

Use the second technique to finish the ending line and the middle line of the front bodice piece.
THE BACK BODICE

Draw lines 2 cm inside the edge line of the ending line and the neck line of the back bodice piece.
Make a loose seam along the lines you drew.
Separate the two faces of the fabric at the edge of the loose seam.
Use the second technique to finish the ending line of the back bodice piece.
CONNECT THE FRONT AND THE BACK
Connect the front and back bodice pieces together at the shoulder and two side lines with pins.
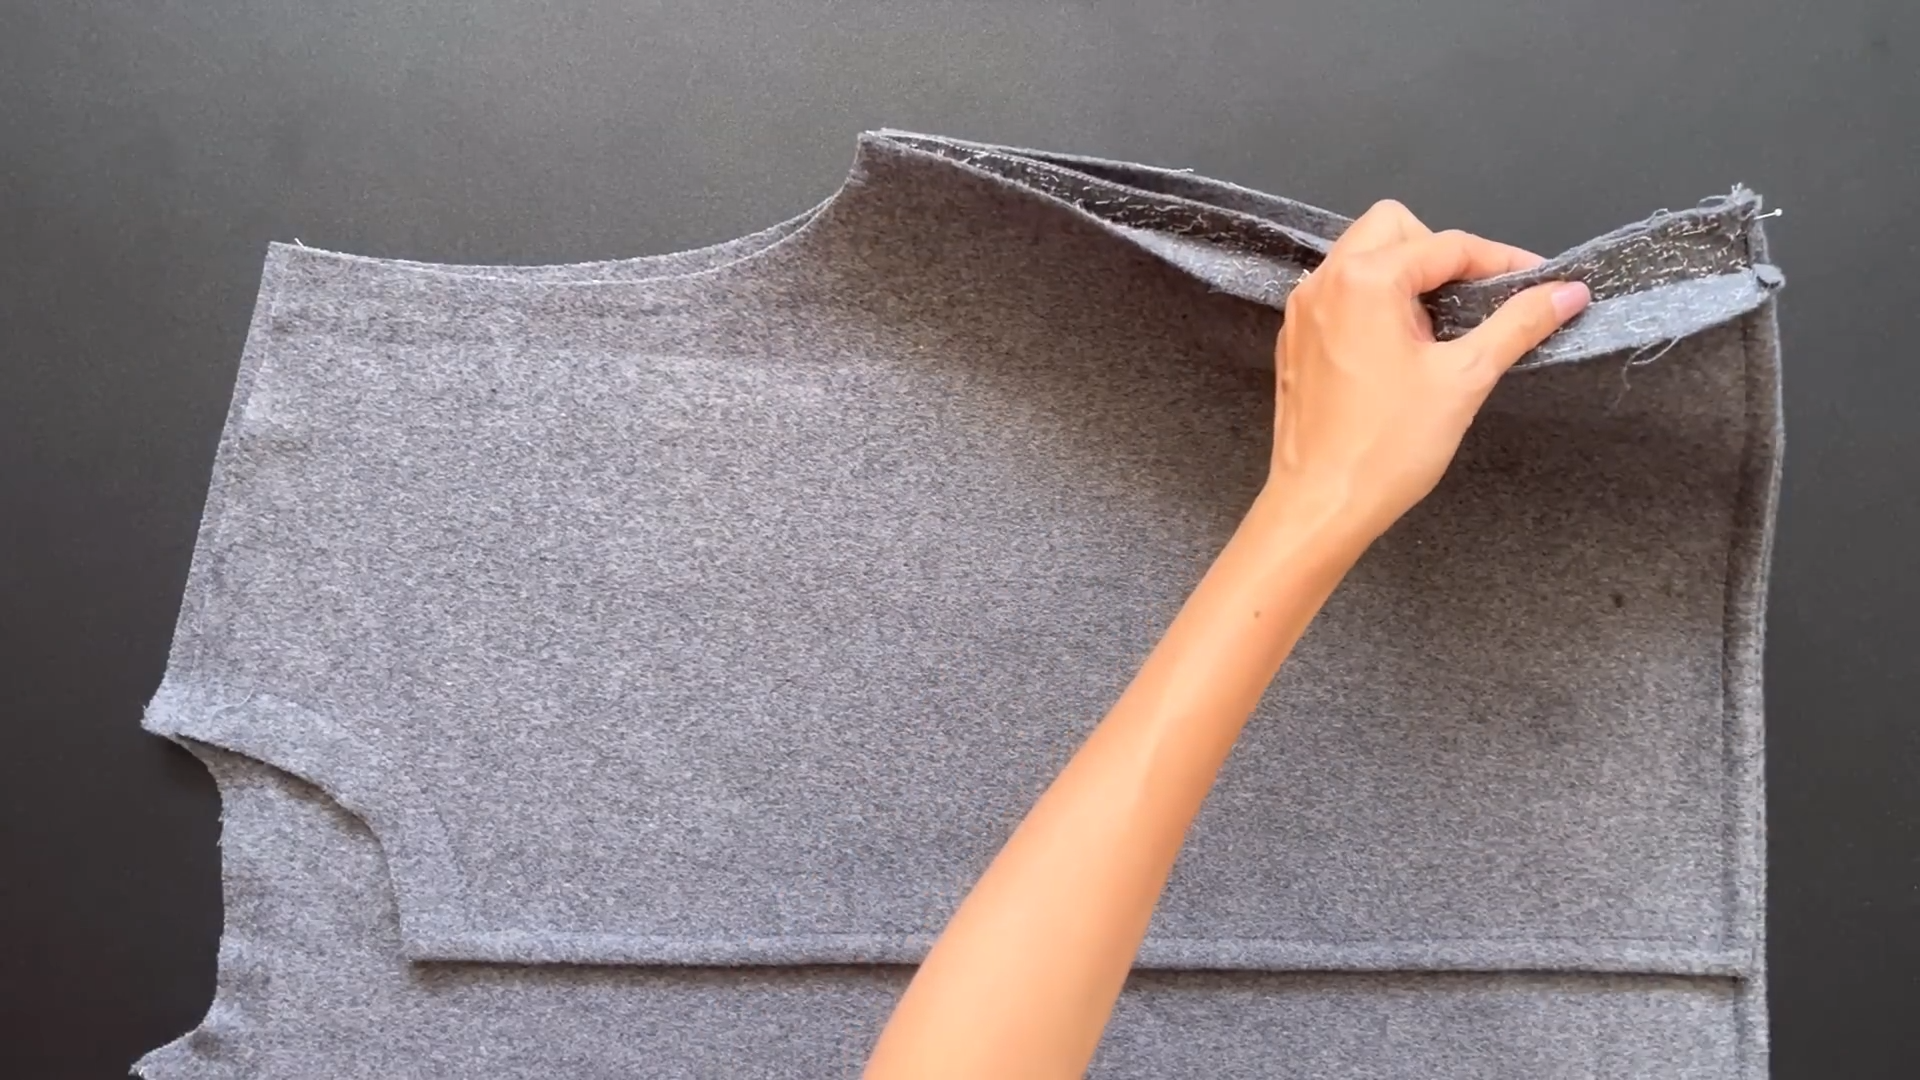
Use the first technique to finish the shoulder and side lines.
Do the same with the other front bodice piece.
THE SLEEVE
At the sleeve, draw lines 2 cm inside along the edge lines including the ending line, the sleeve line, and one inside sleeve line.
Make a loose seam along the lines you drew.
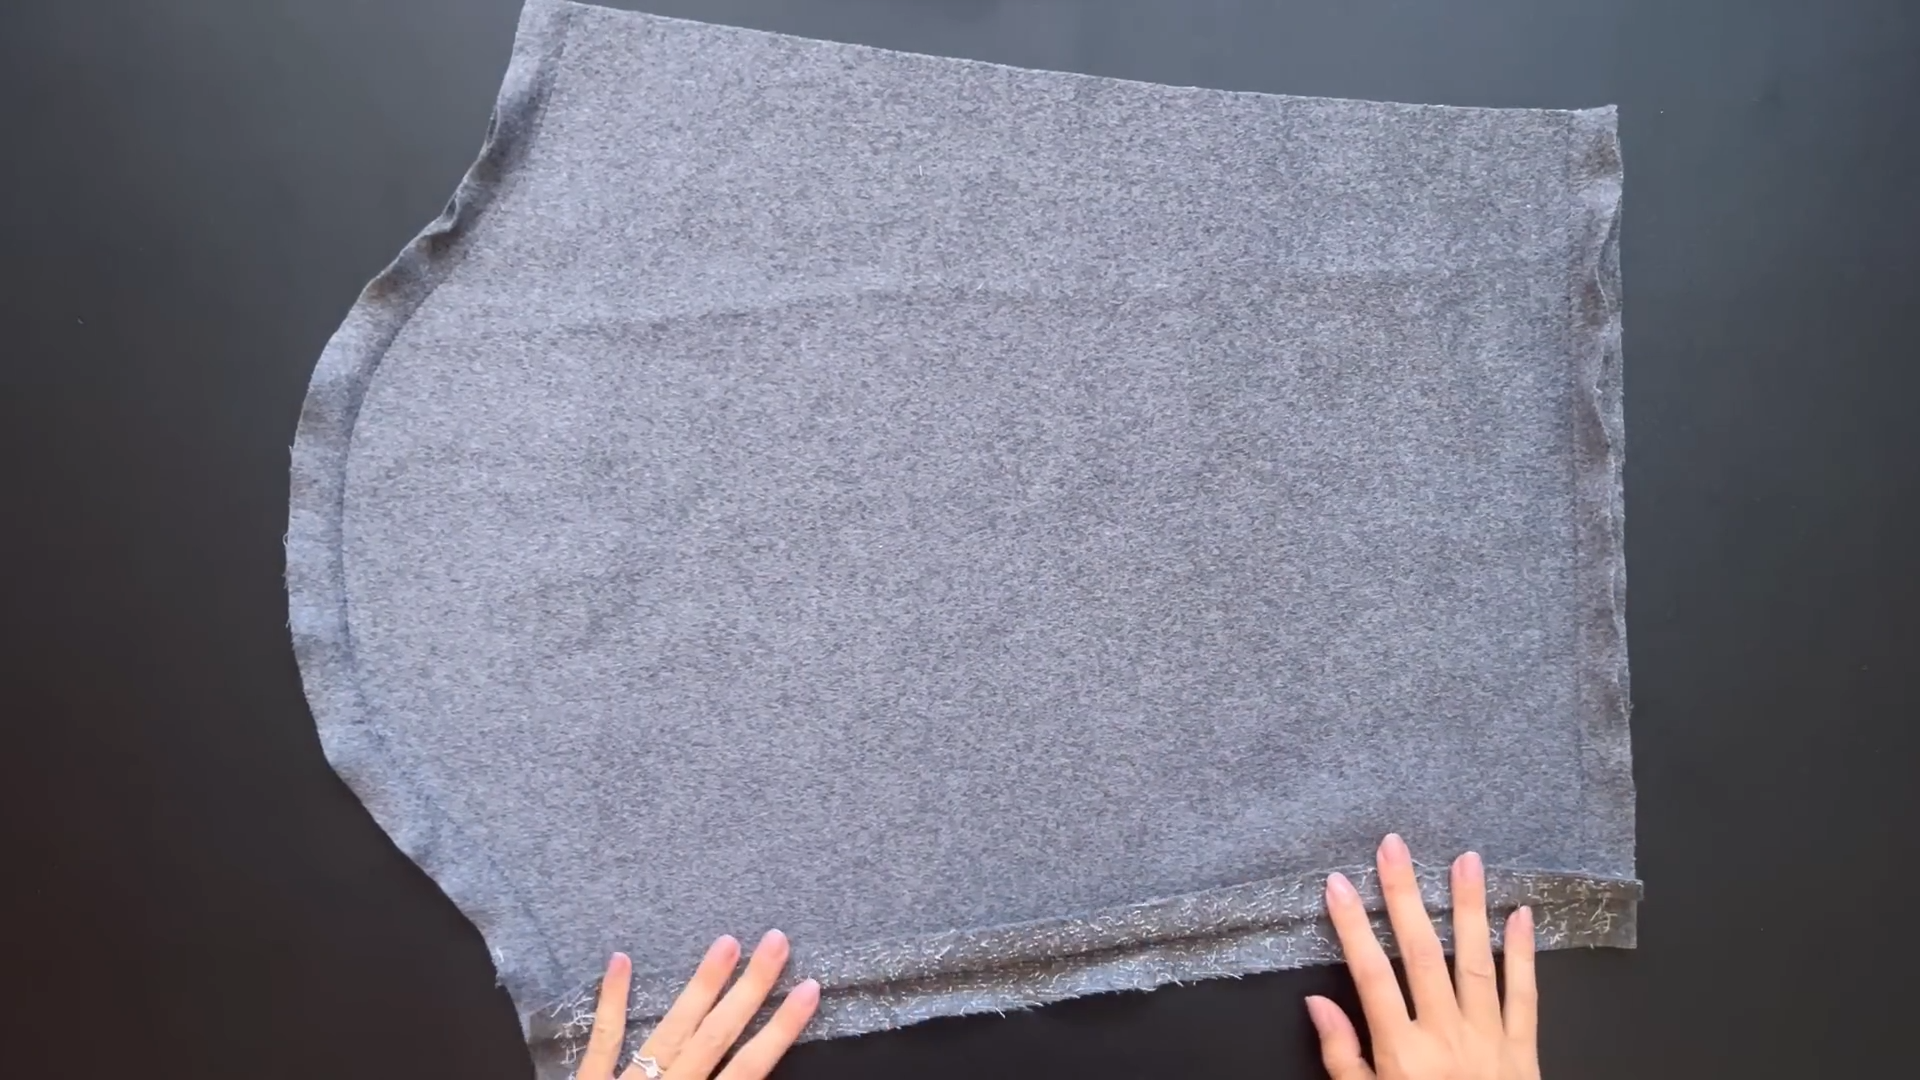
Separate the two faces of the fabric at the edge of the loose seam.
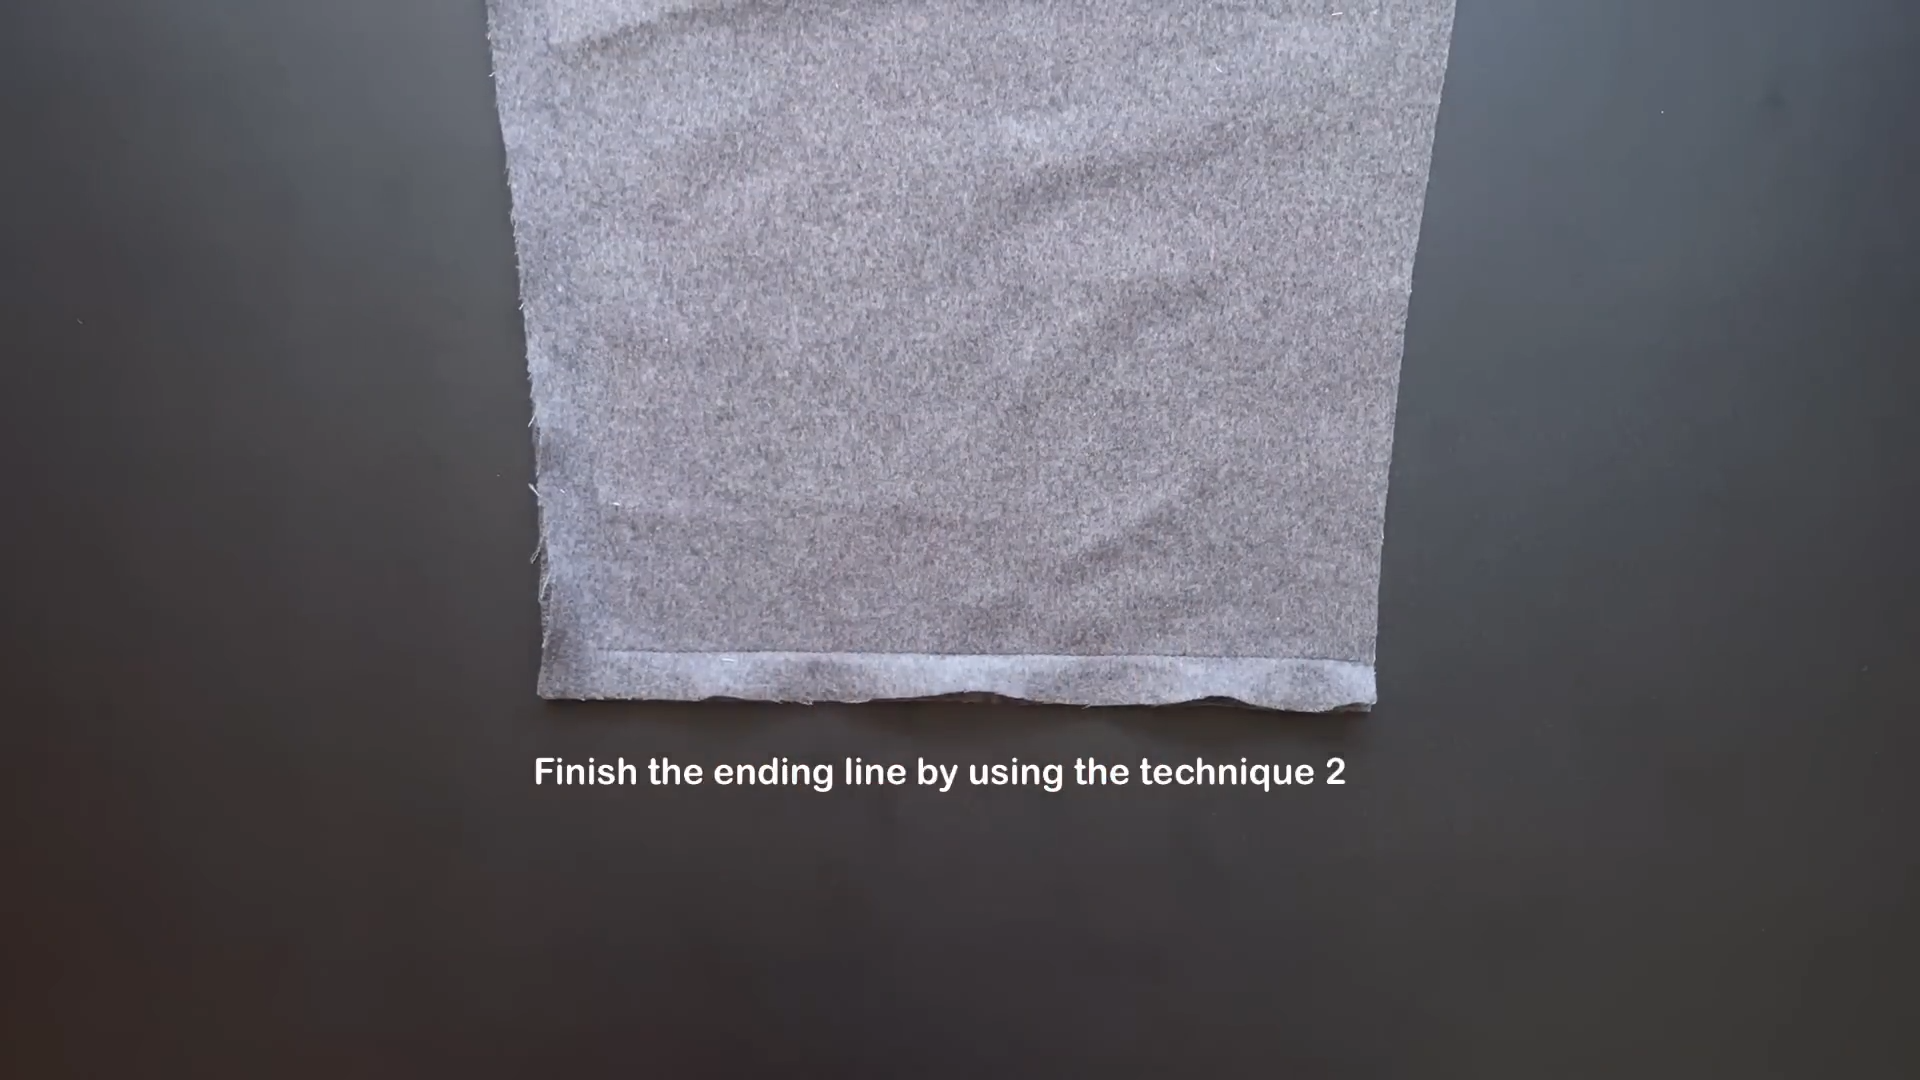
Finish the ending line of the sleeve using the second technique.
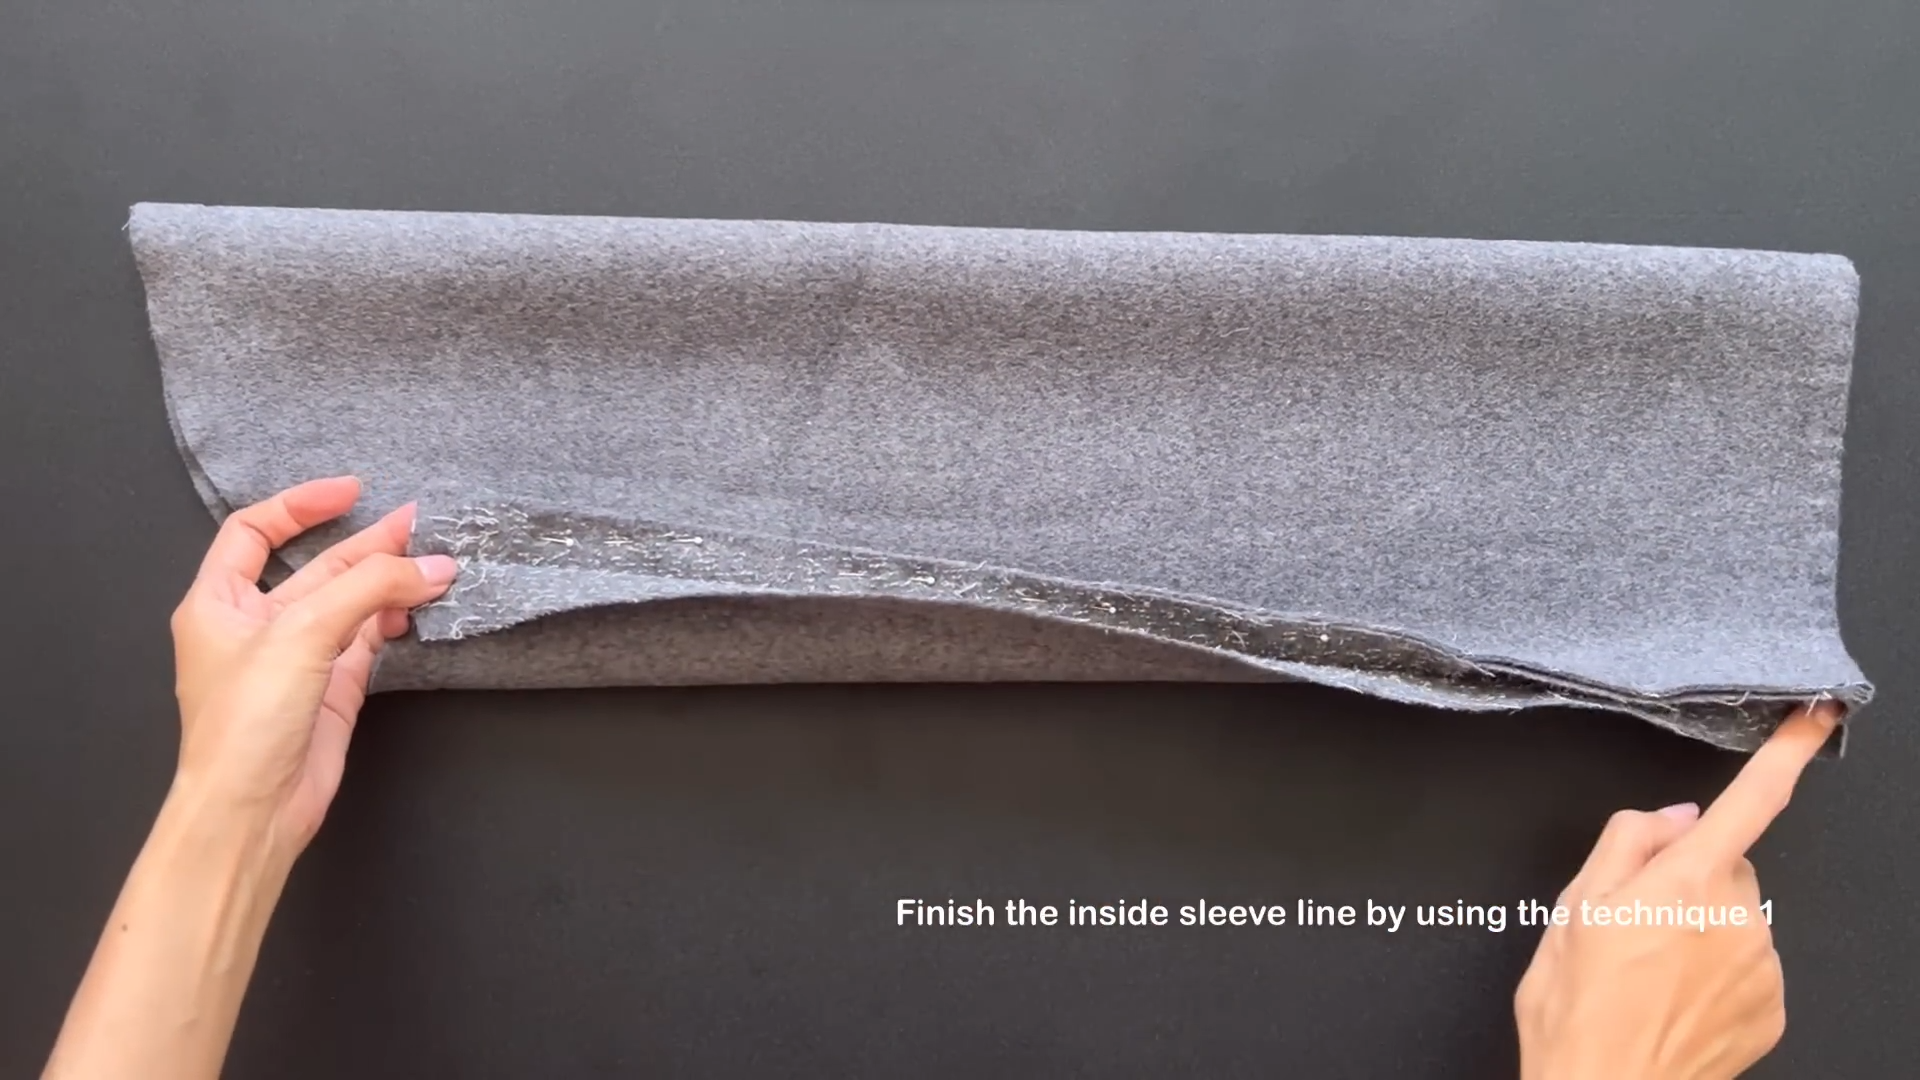
Connect two inside sleeve lines together using the first technique.

At the top of the inside sleeve line, make sure to separate two faces of fabric when connecting them.
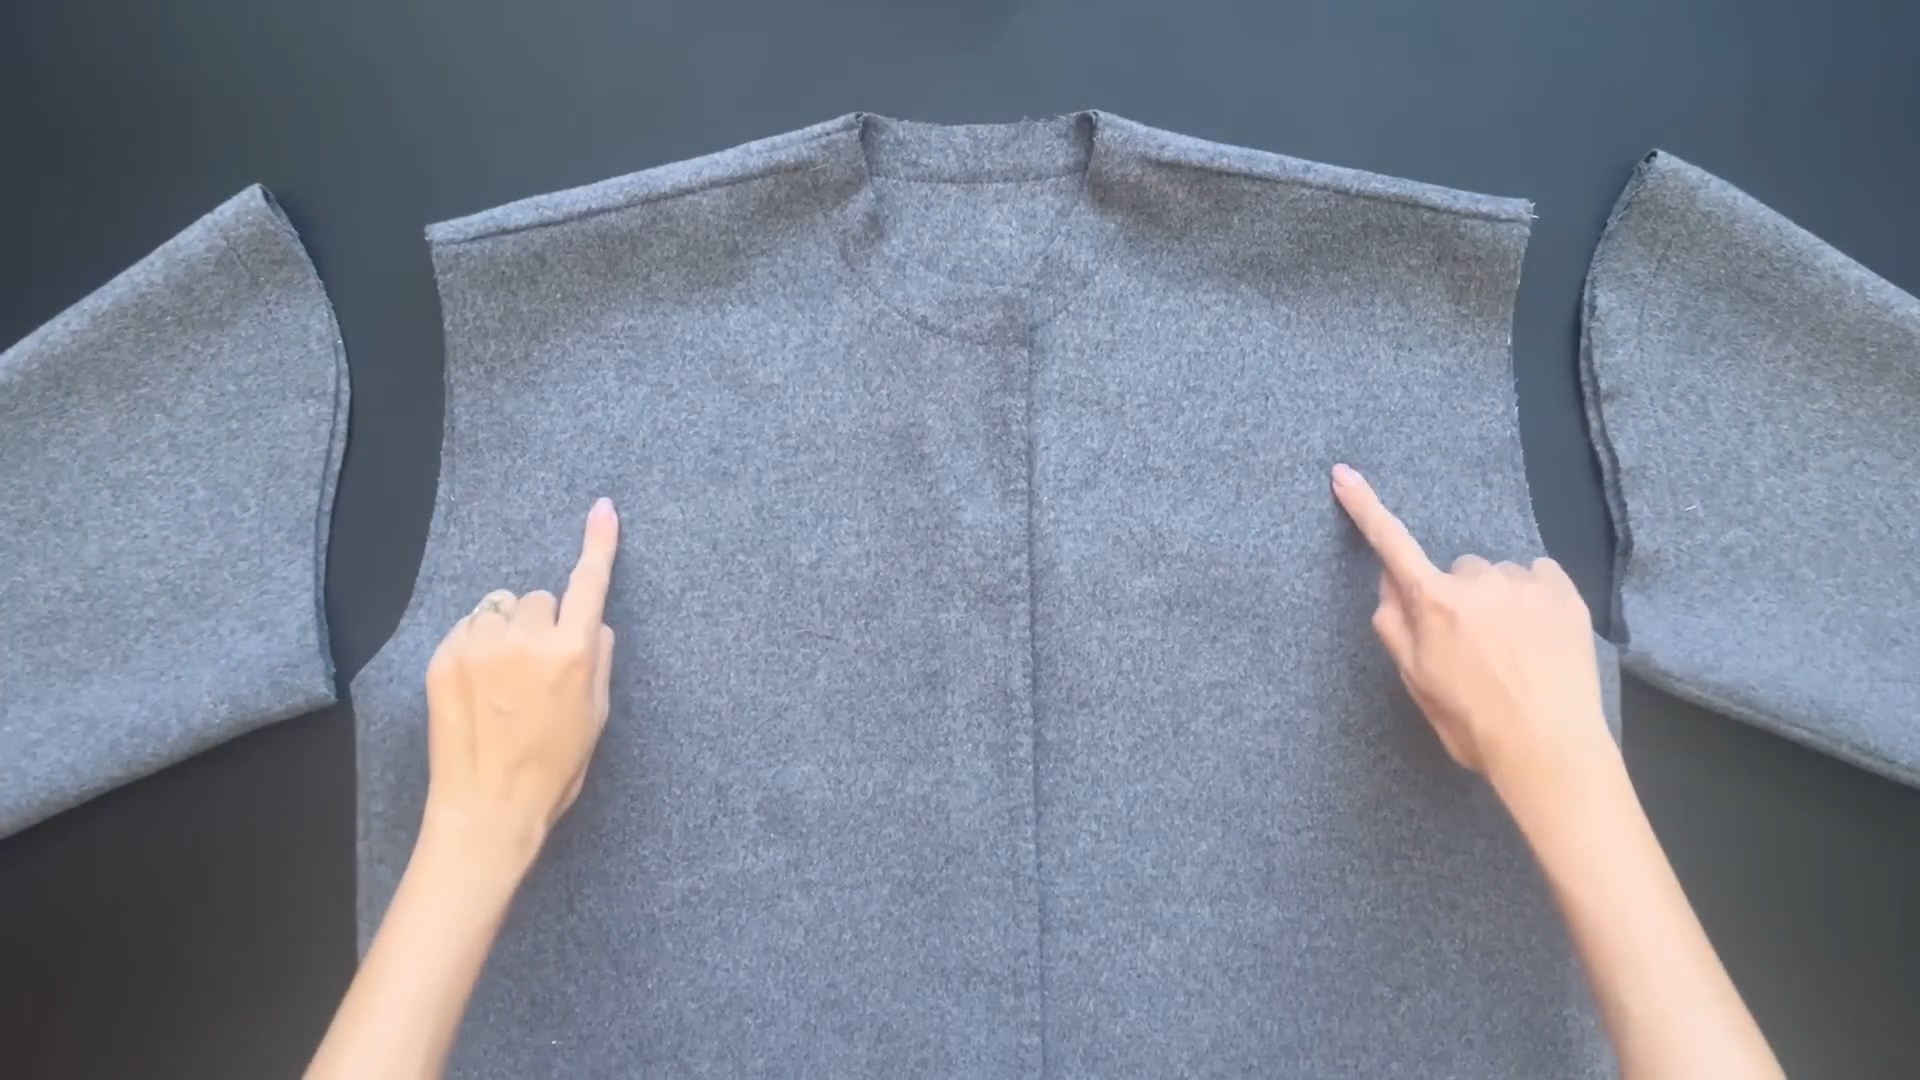
Connect two sleeves to the bodice at their sleeve lines.
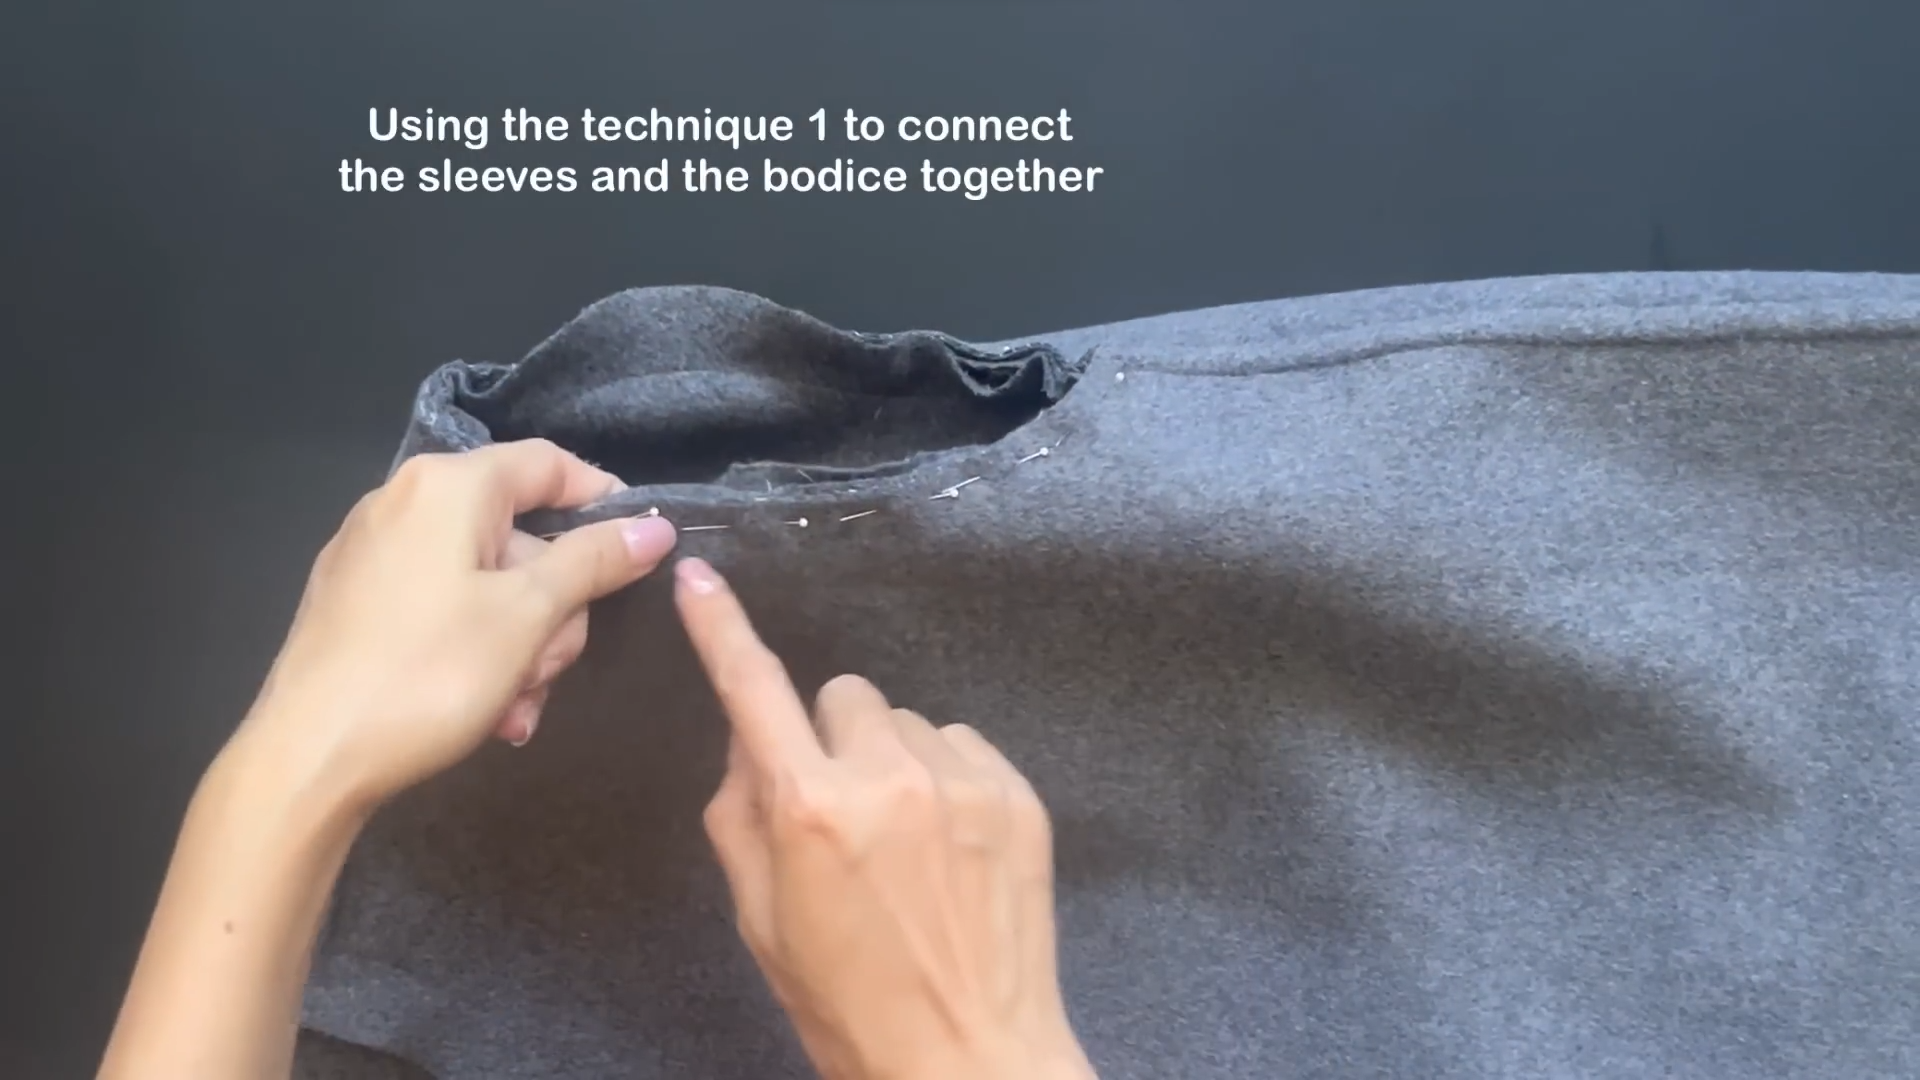
Use technique one to connect the pieces together.
THE COLLAR
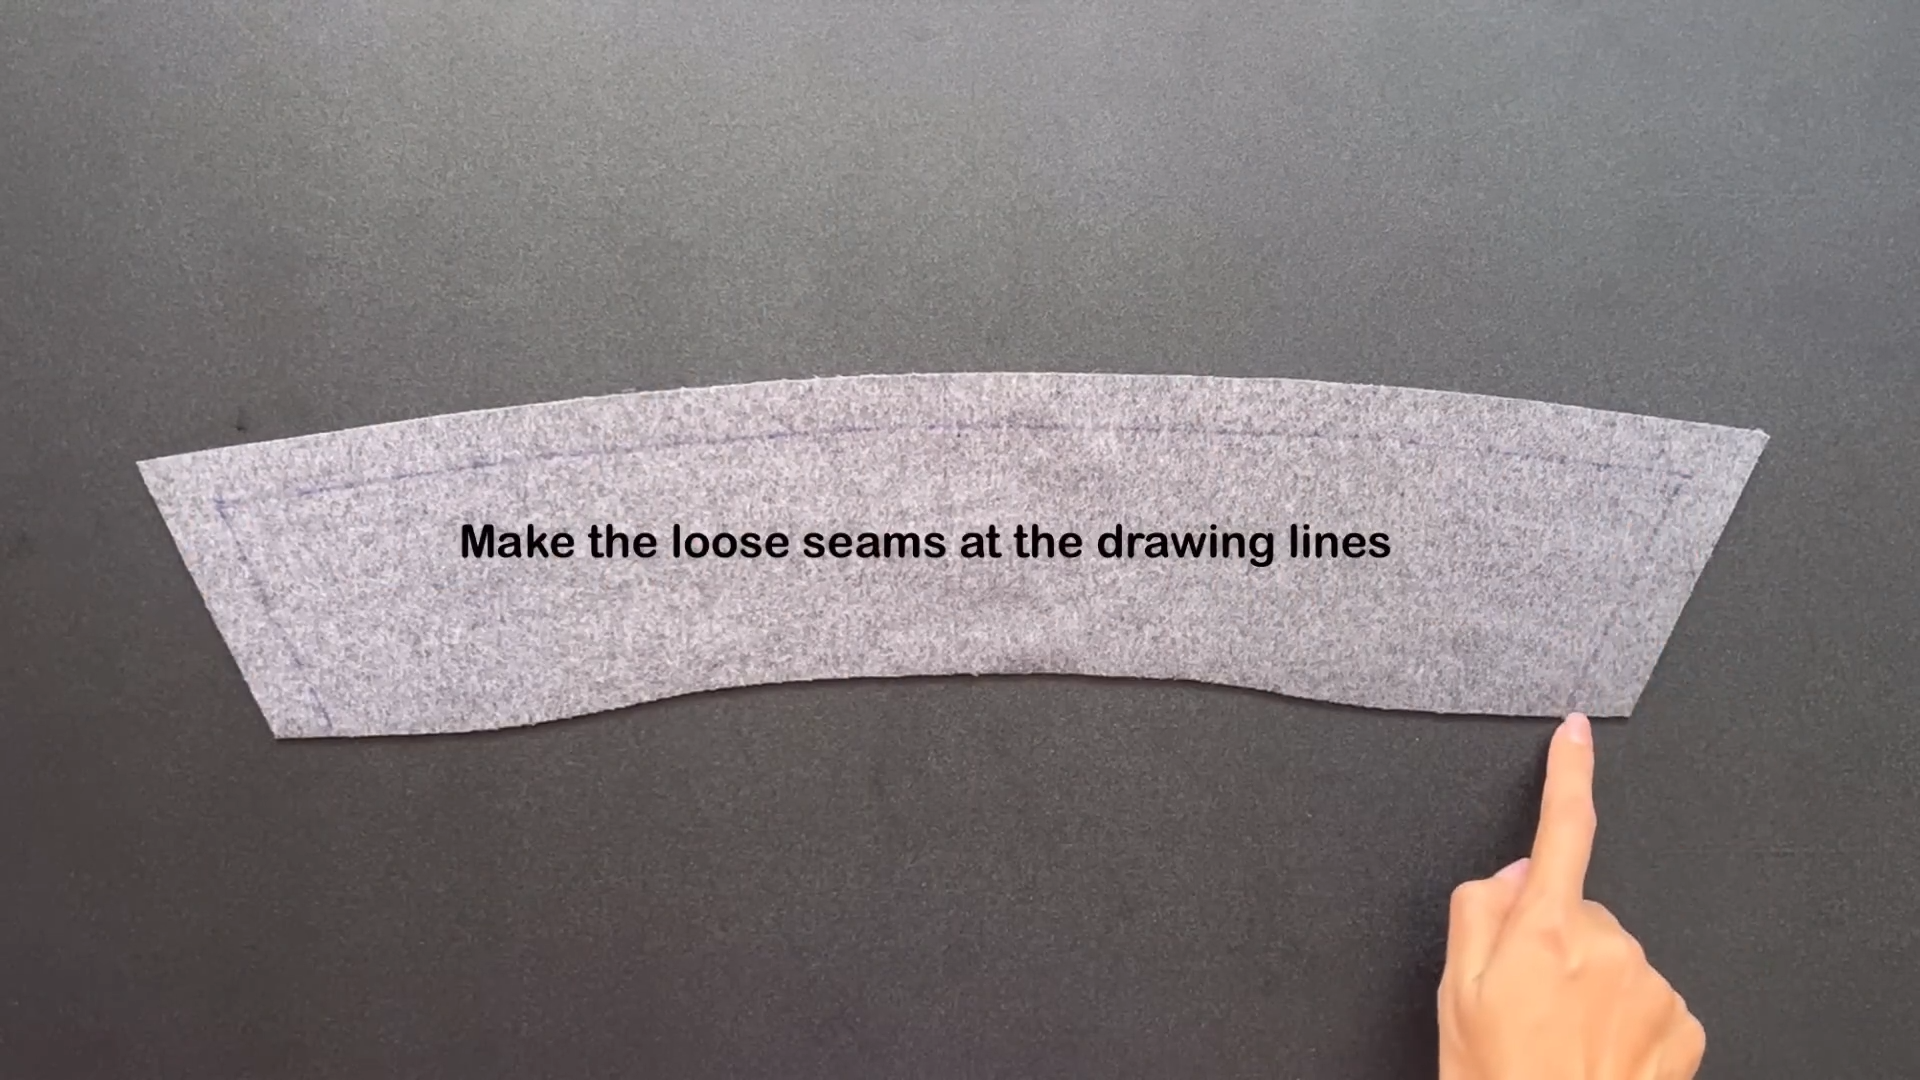
Draw lines at 2 cm inside the edge lines of the collar piece.
Make a loose seam along those lines.
Separate the two faces of the fabric at the edge of the loose seam.
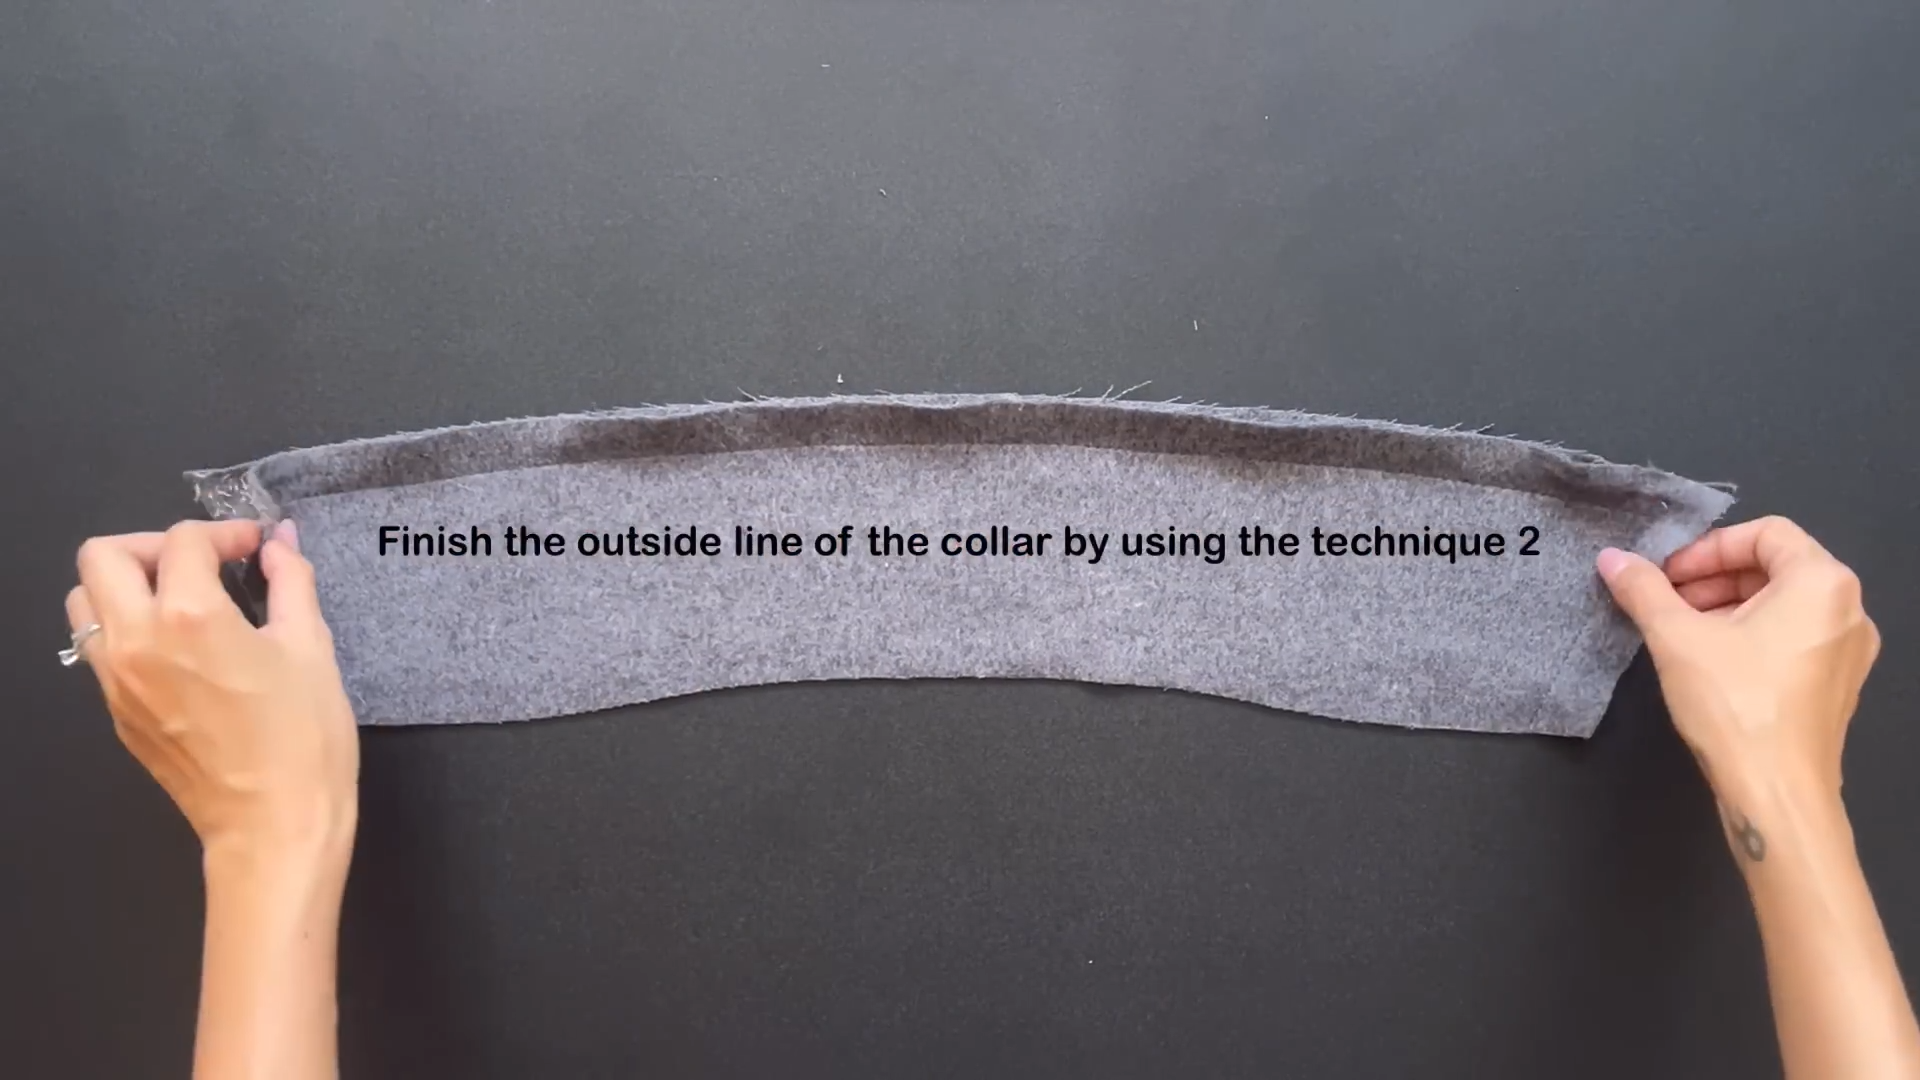
Finish the outside line of the collar using the second technique.
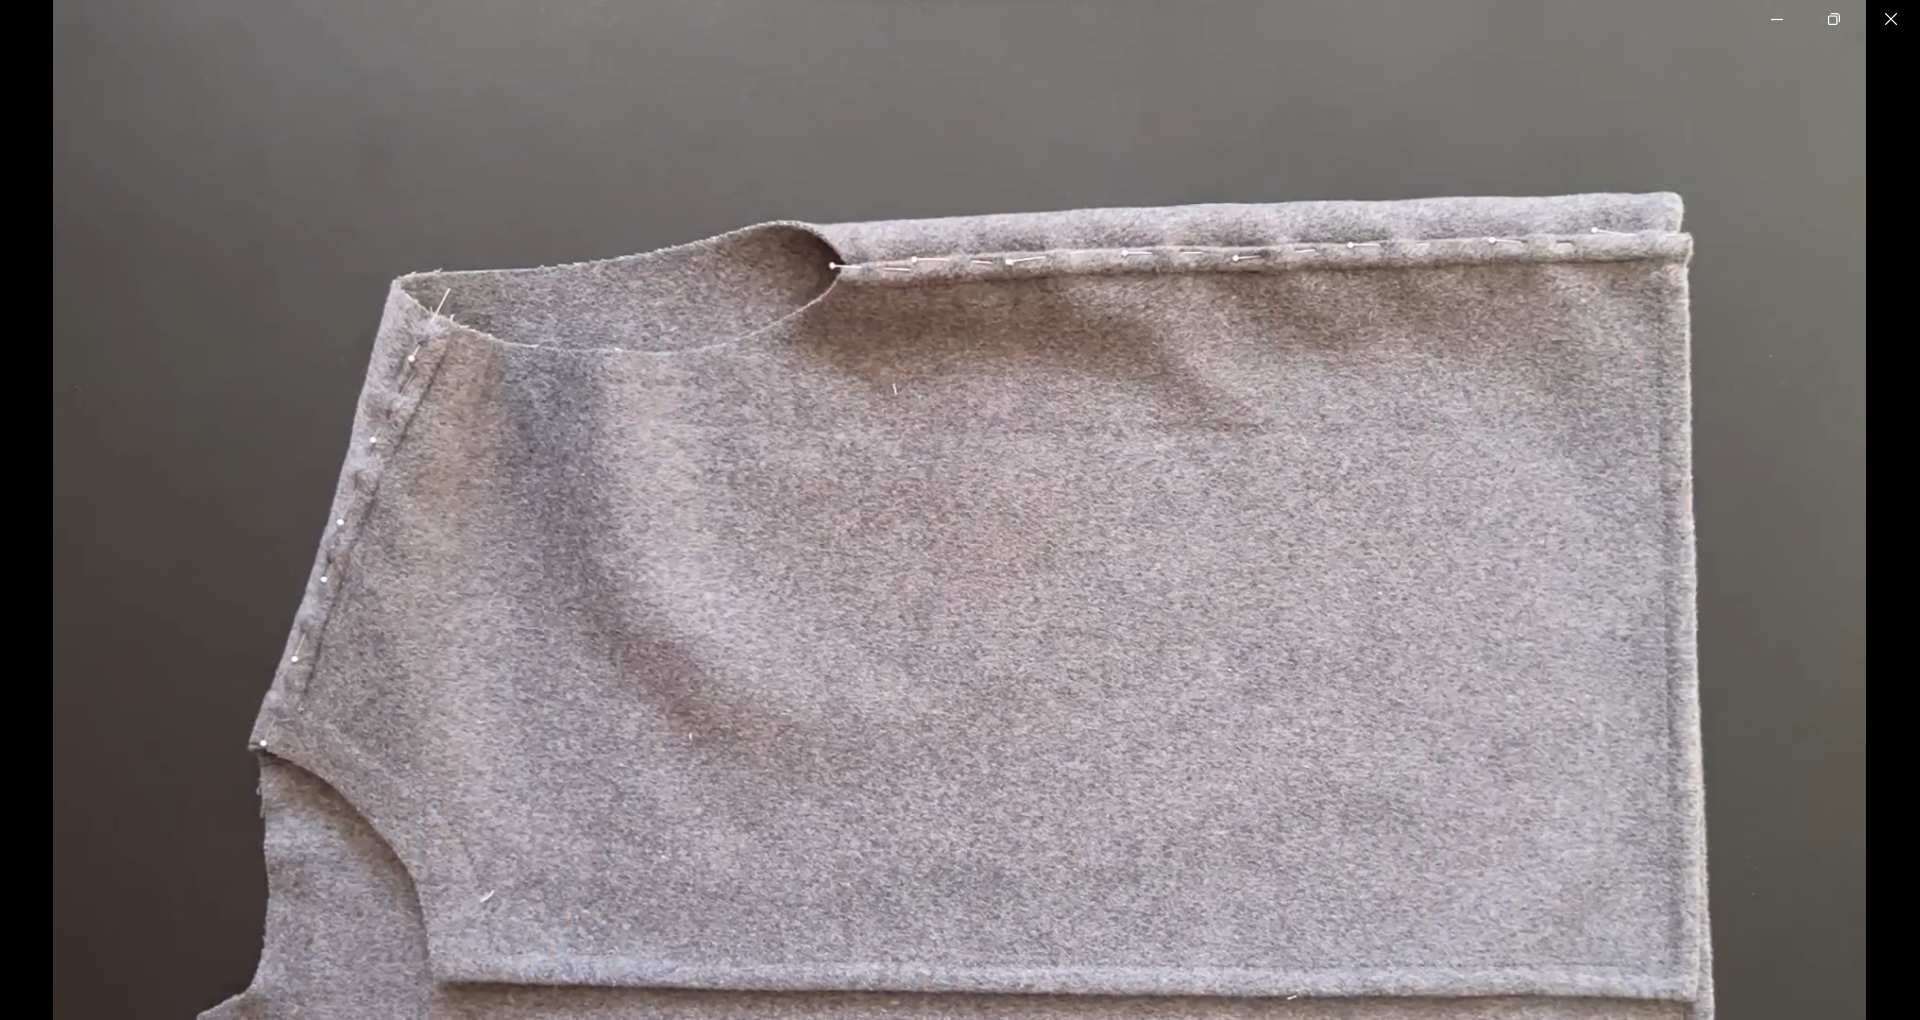
After completing the collar, align it with the neckline of the bodice.
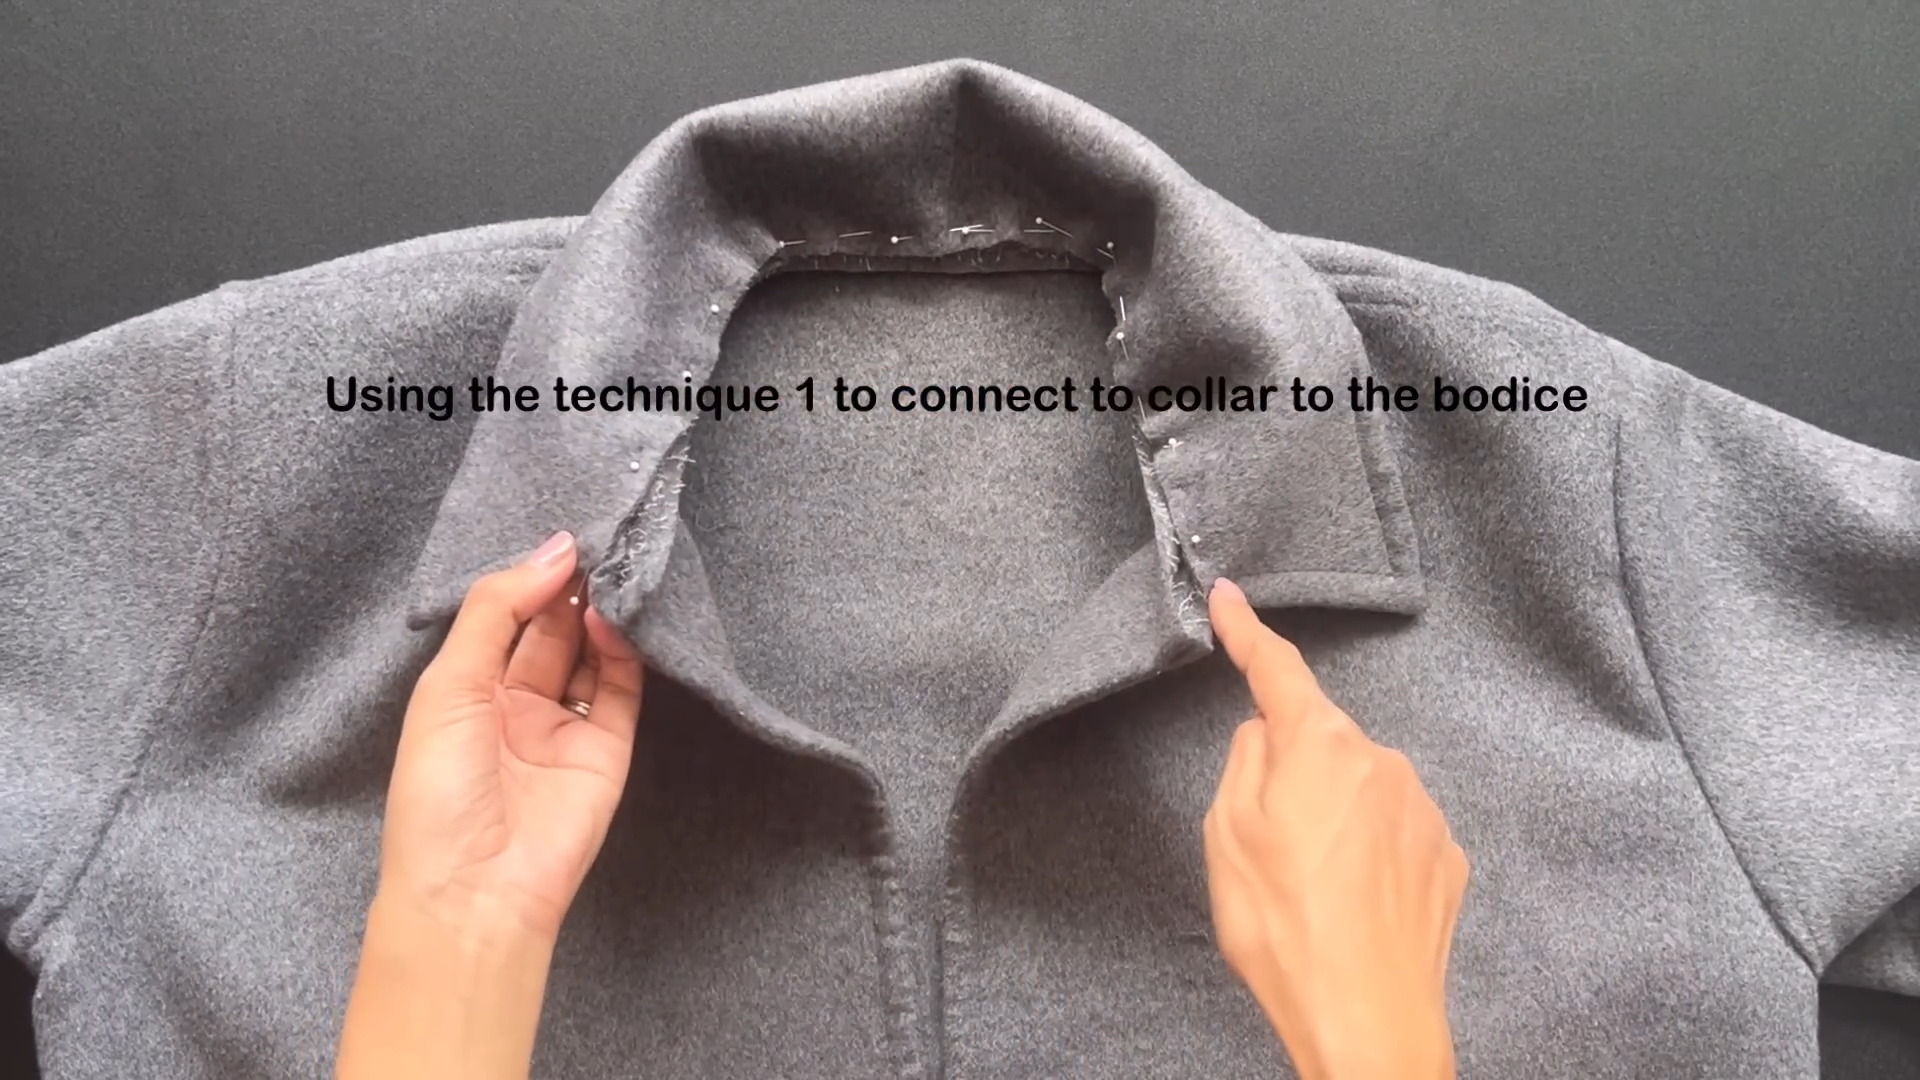
Pin the collar to the neckline, making sure that the right sides of the fabric are facing each other.
Sew the collar to the neckline using the first technique.
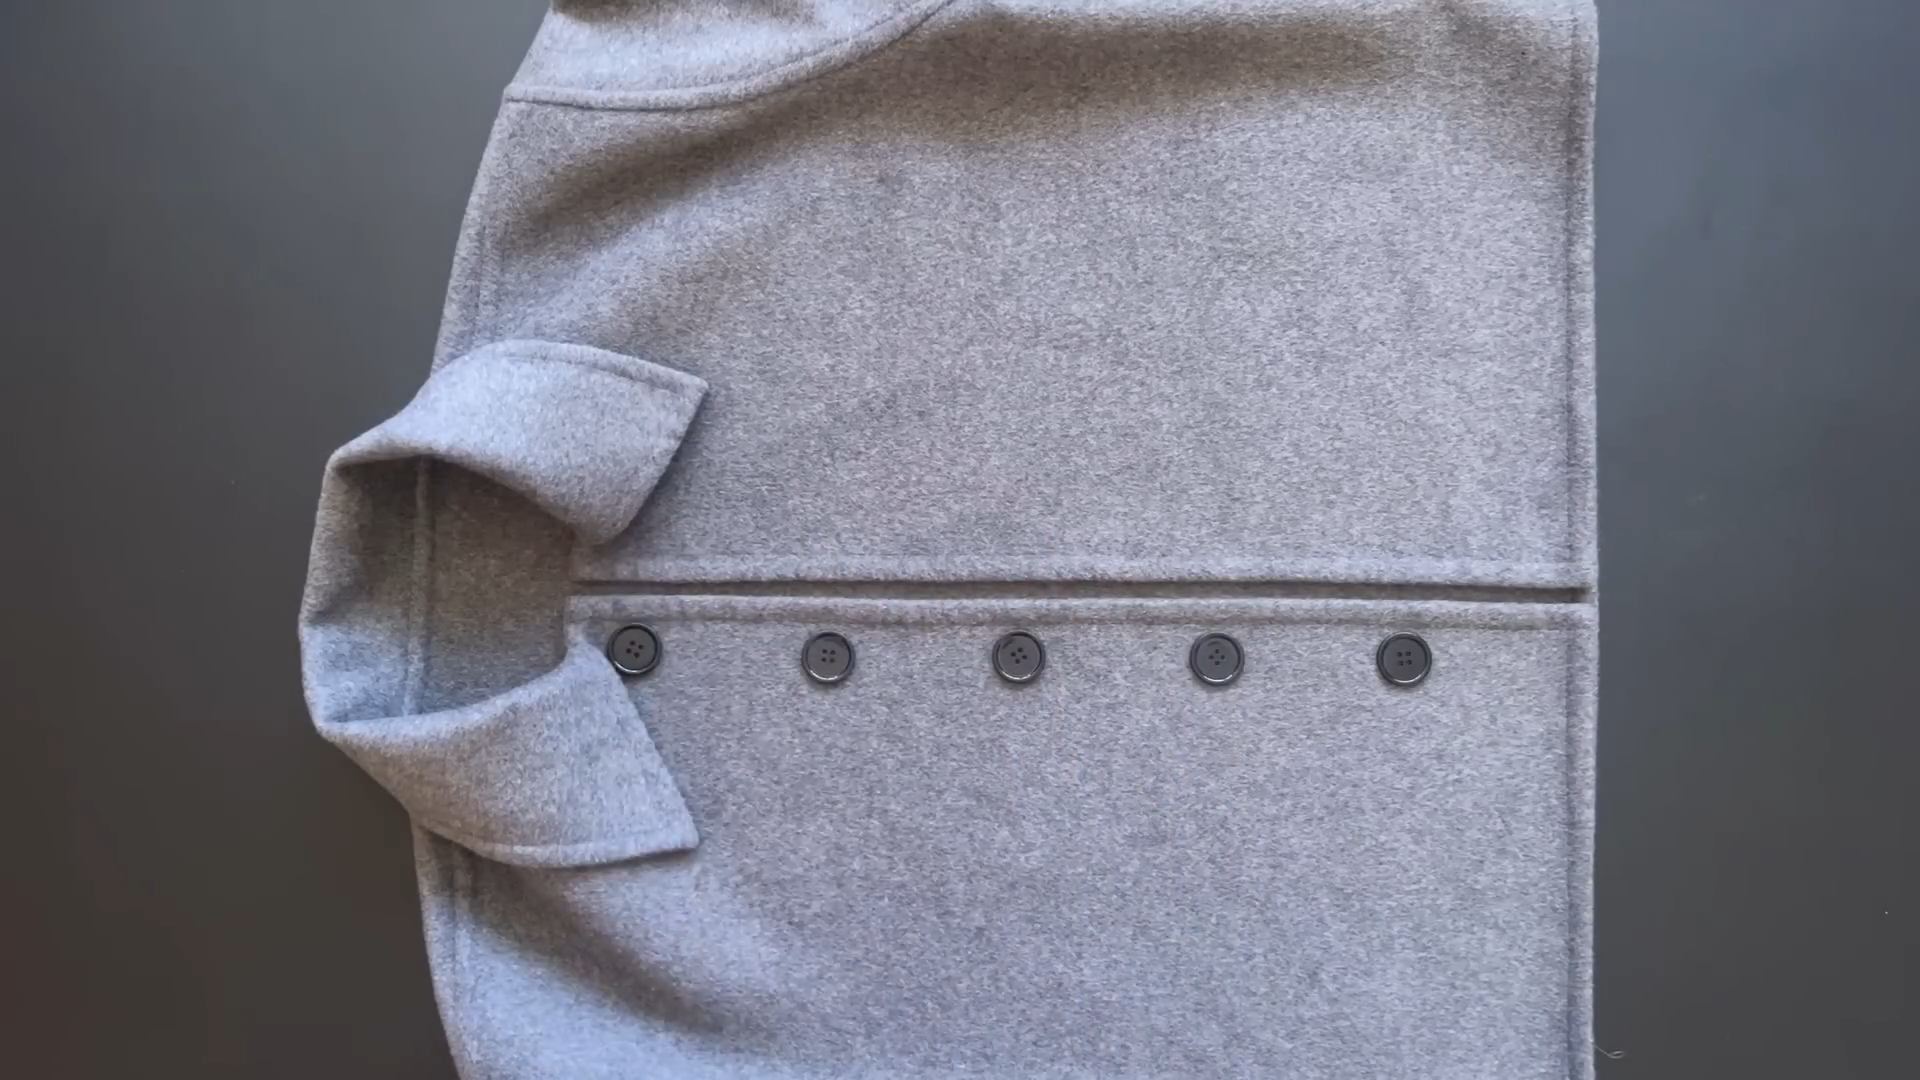
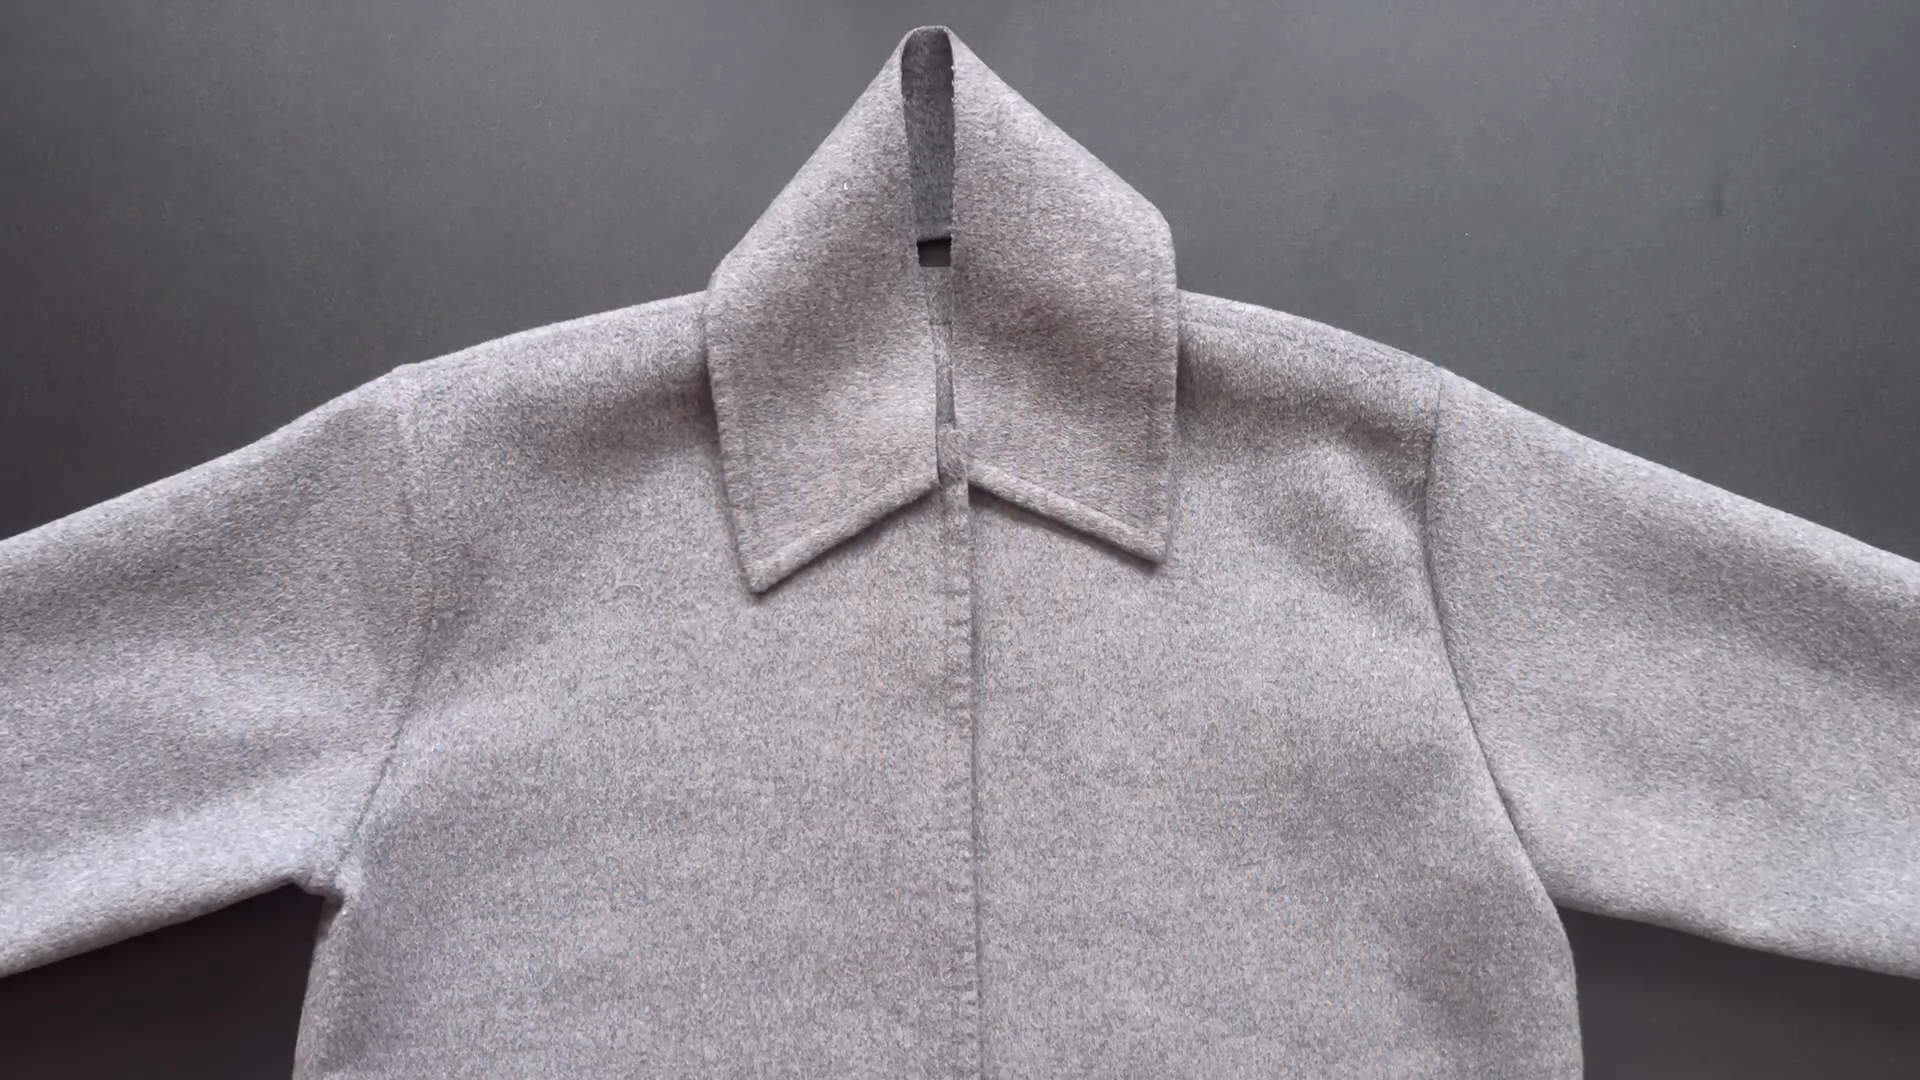
Decide on the placement of the buttons and mark them on the fabric.
Use proper technique to sew the buttons and button holes.

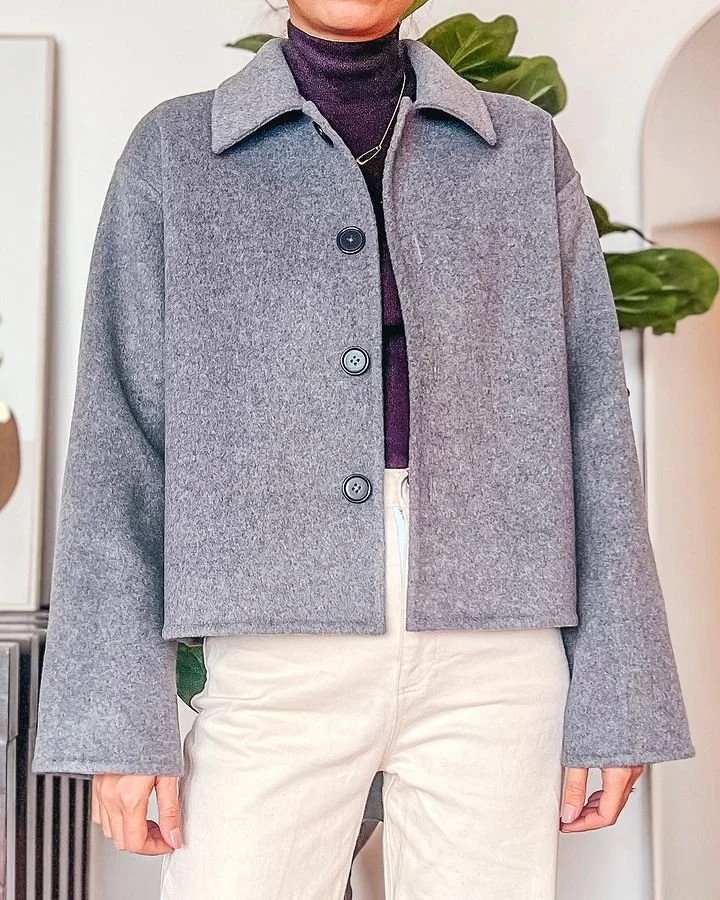
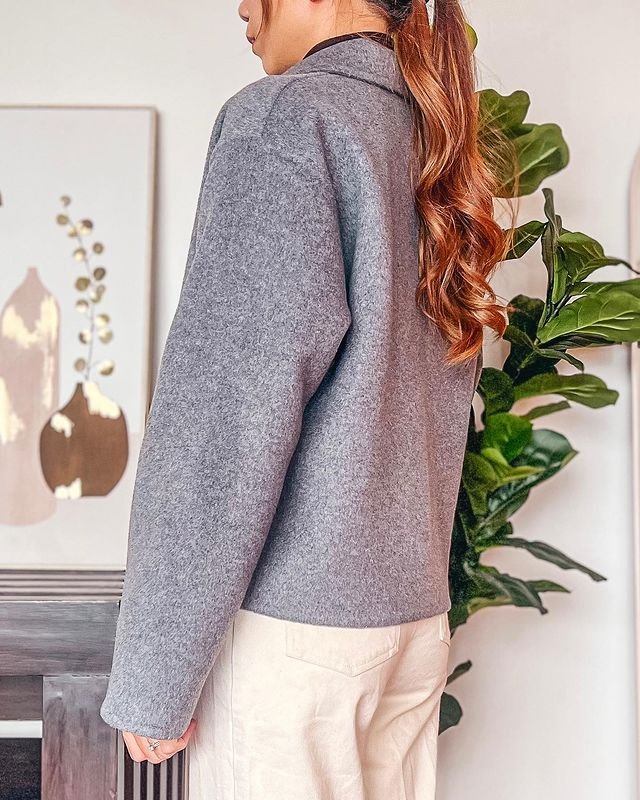
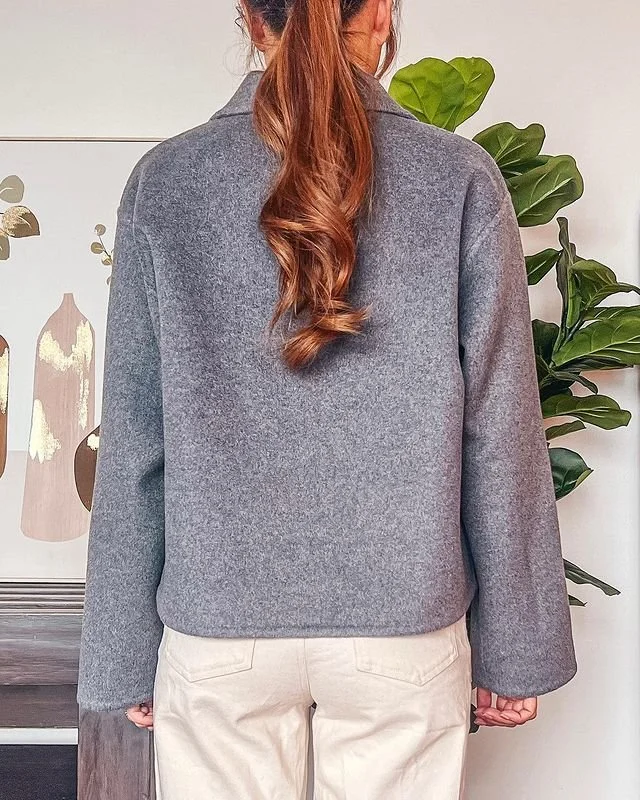
And voila!
You now have a beautiful jacket that is both stylish and warm. The double-faced fabric allows you to wear it on either side, making it a versatile addition to your wardrobe.
Give it a try and let me know how it turns out!
Until then, happy sewing!