DIY Fitted Midi skirt with Leg slit | Step by step sewing tutorial [+ Free Pattern]
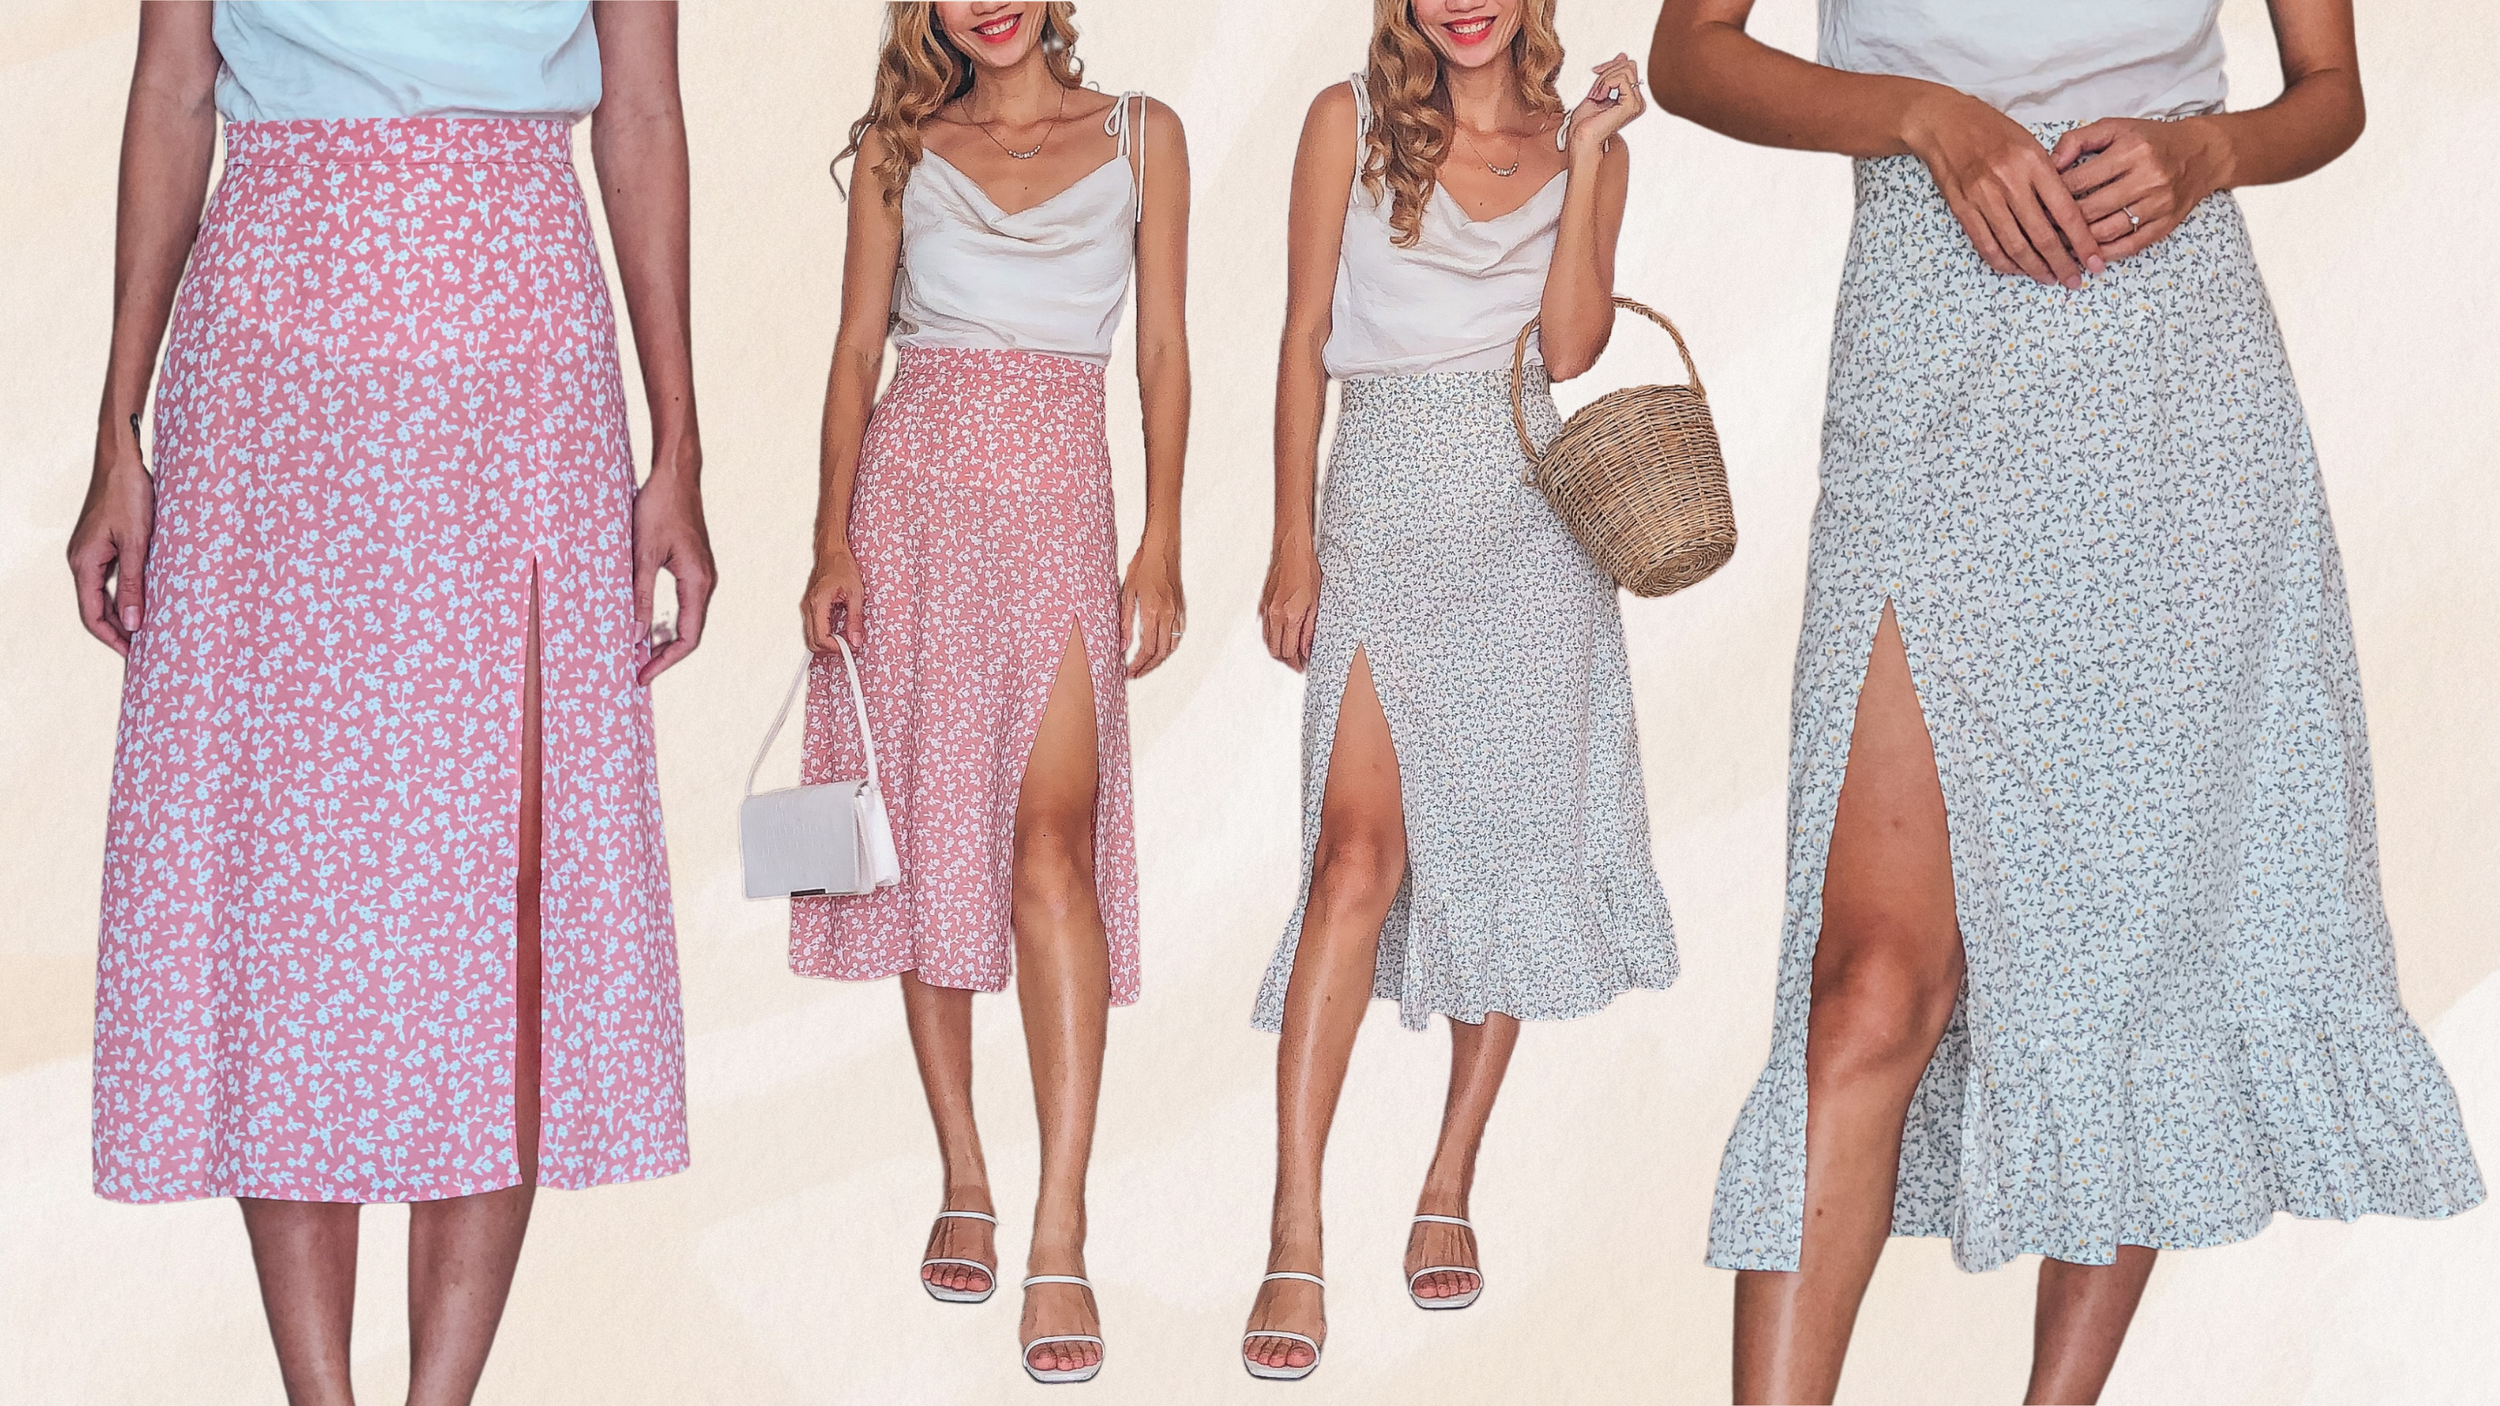
DIY Fitted Midi skirt with Leg slit

Welcome to my sewing blog, where I share with you my passion for making cute and easy skirts. In my previous posts, I showed you how to make two styles of mini skirts without using a zipper. They are very comfortable skirts that you can wear as your everyday outfit. But I know that sometimes you want to dress up a little and have a more fitted waist skirt that you can wear as your going-out outfit. That's why in today's video, I'm going to show you how to make a fitted waist skirt with a zipper.
It's not as hard as you think, and the result is stunning. You'll love how this skirt hugs your curves and makes you feel confident and stylish.
So let's get started!
WHAT YOU’LL NEED
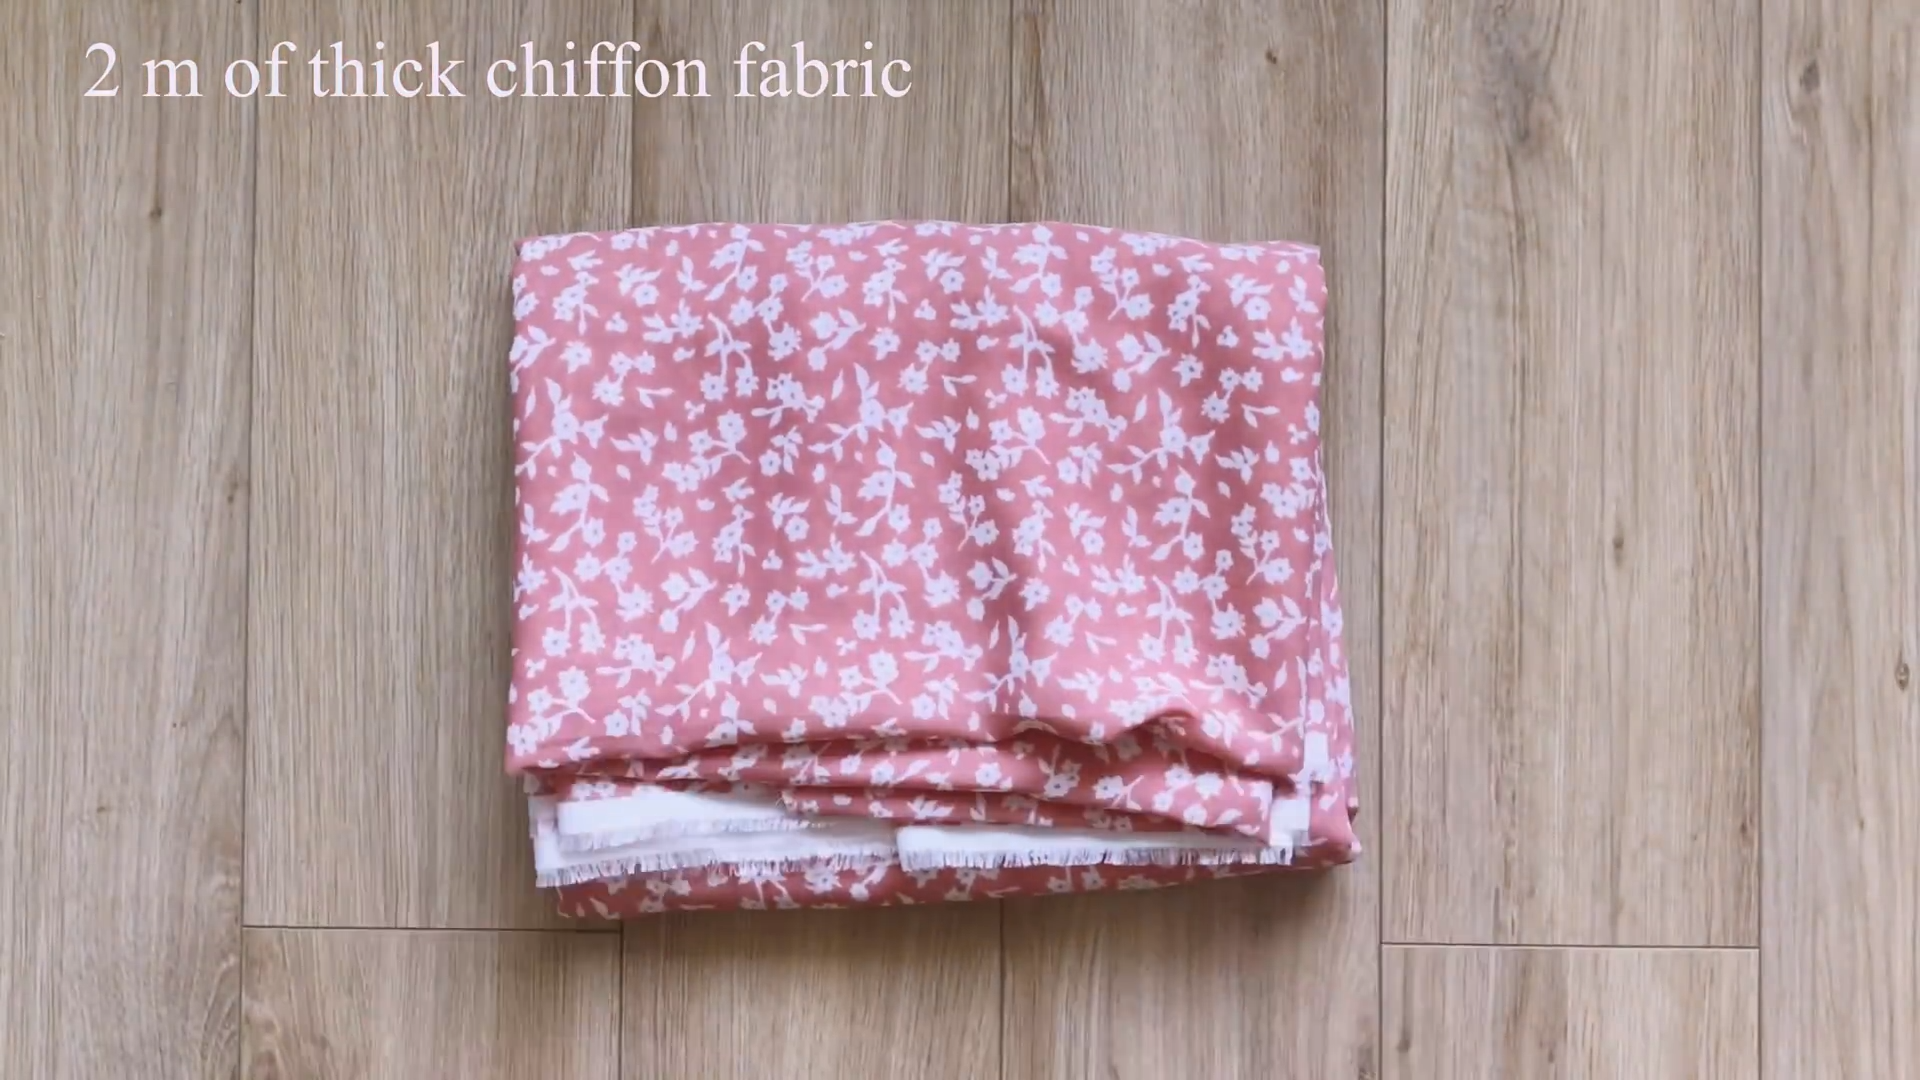
2m of thick chiffon fabric or soft cotton fabric
Pattern paper
Sewing machine
Pins
Scissors
Ruler
Long stick
MAKING THE PATTERNS
Here’s the pattern for the project. To get a clear understanding of all the measurements needed for the pattern, watch the video from 0:51 to 4:05. Remember, you can adjust these measurements to fit your own dimensions!
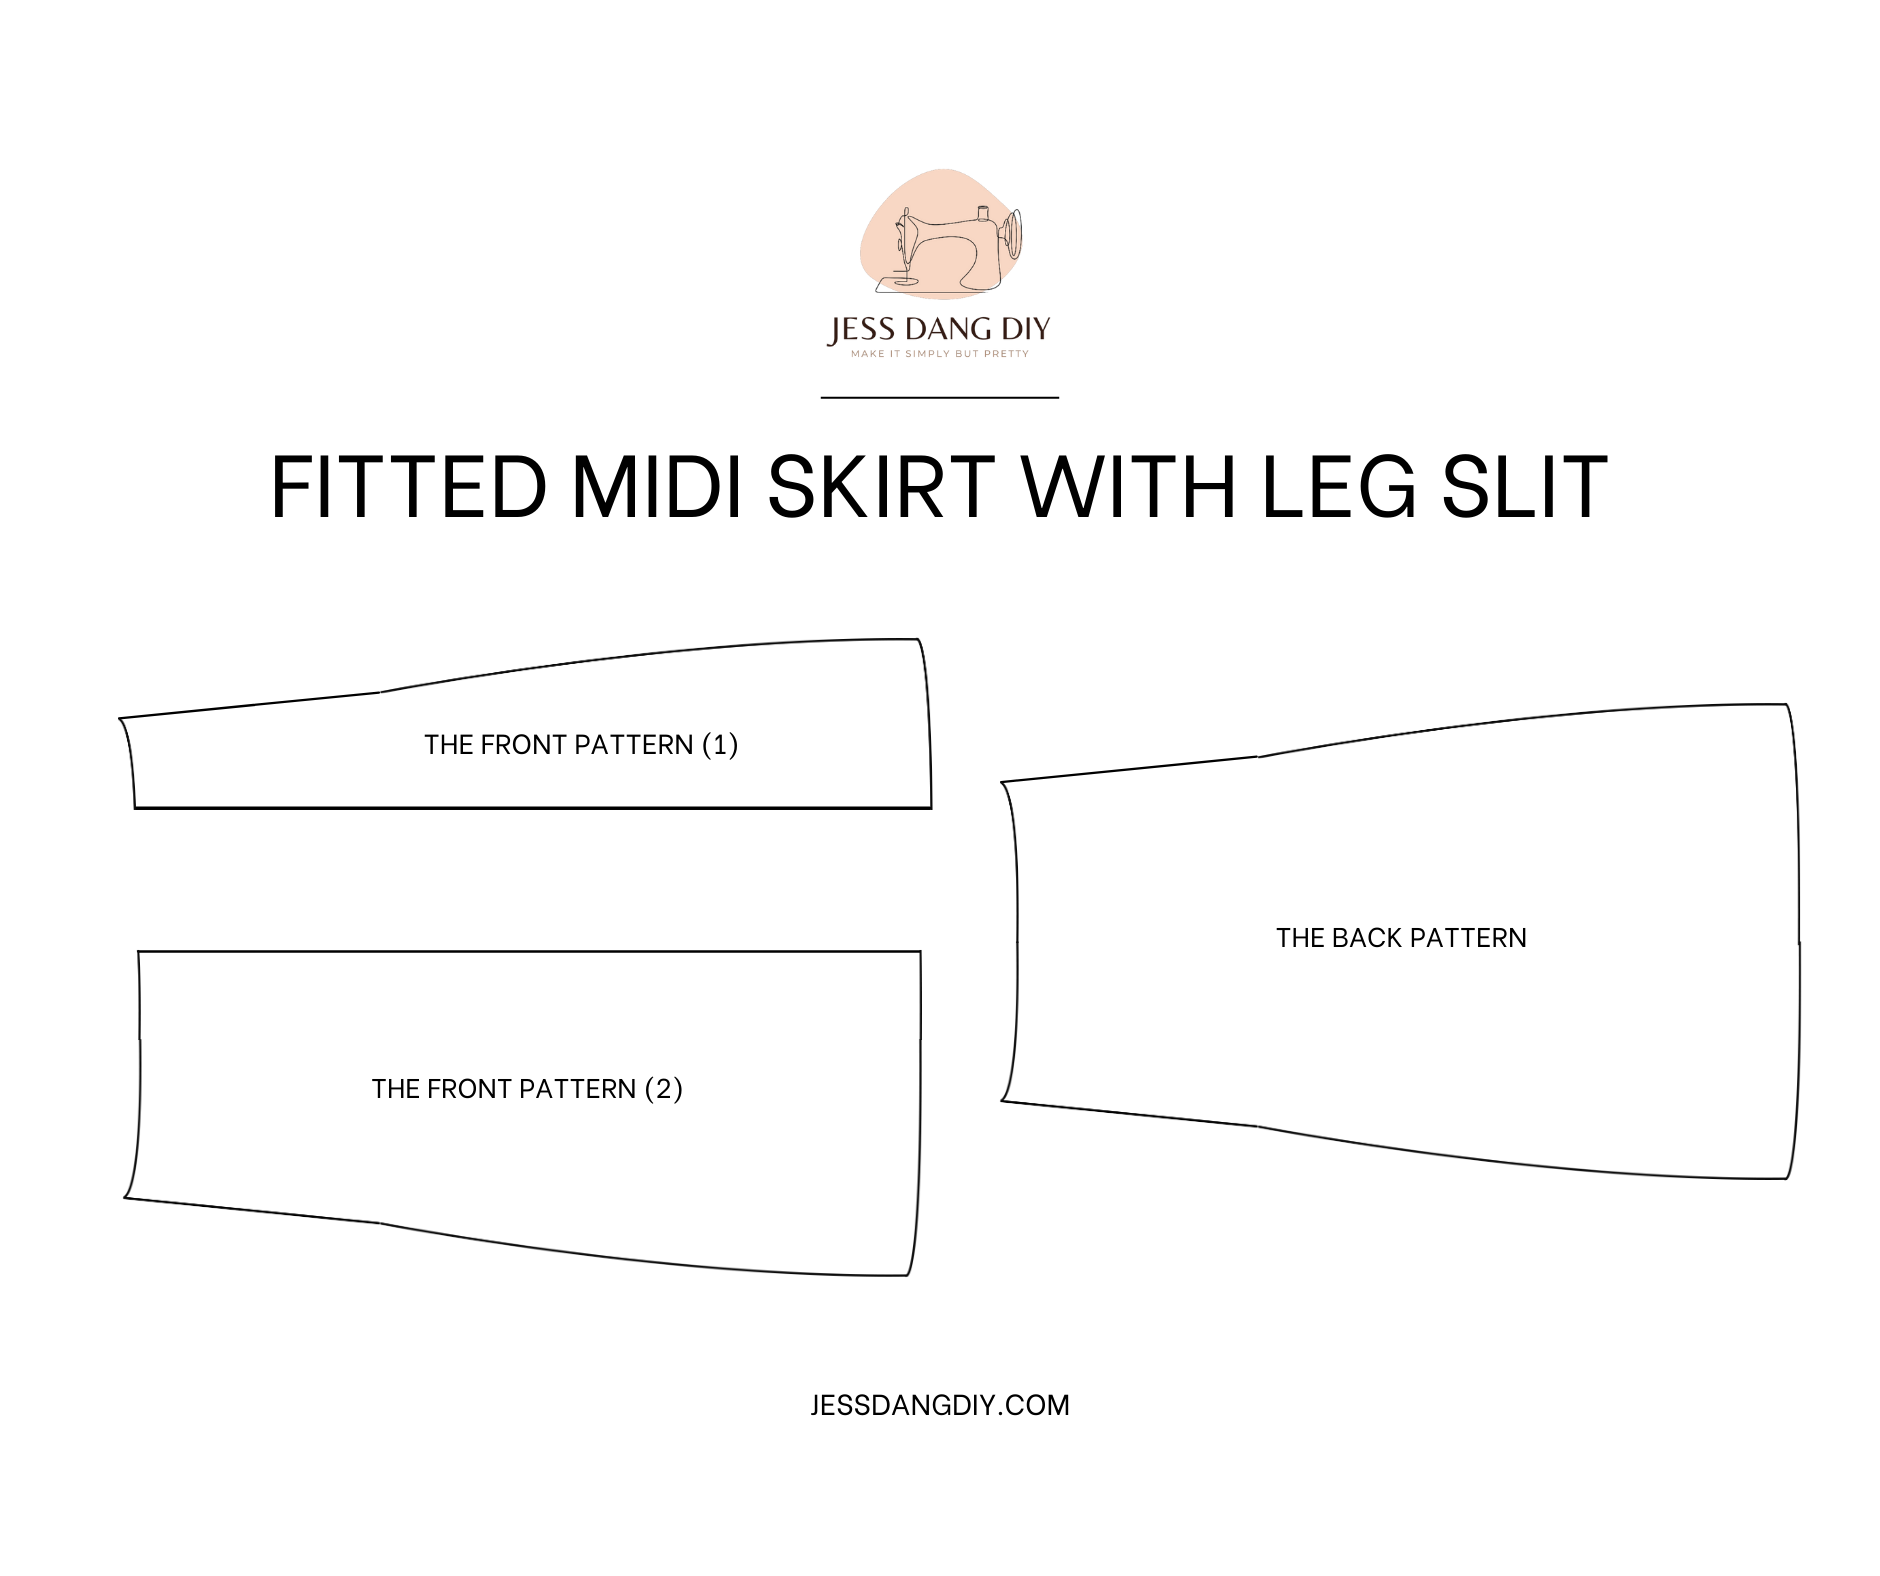
THE BACK PATTERN
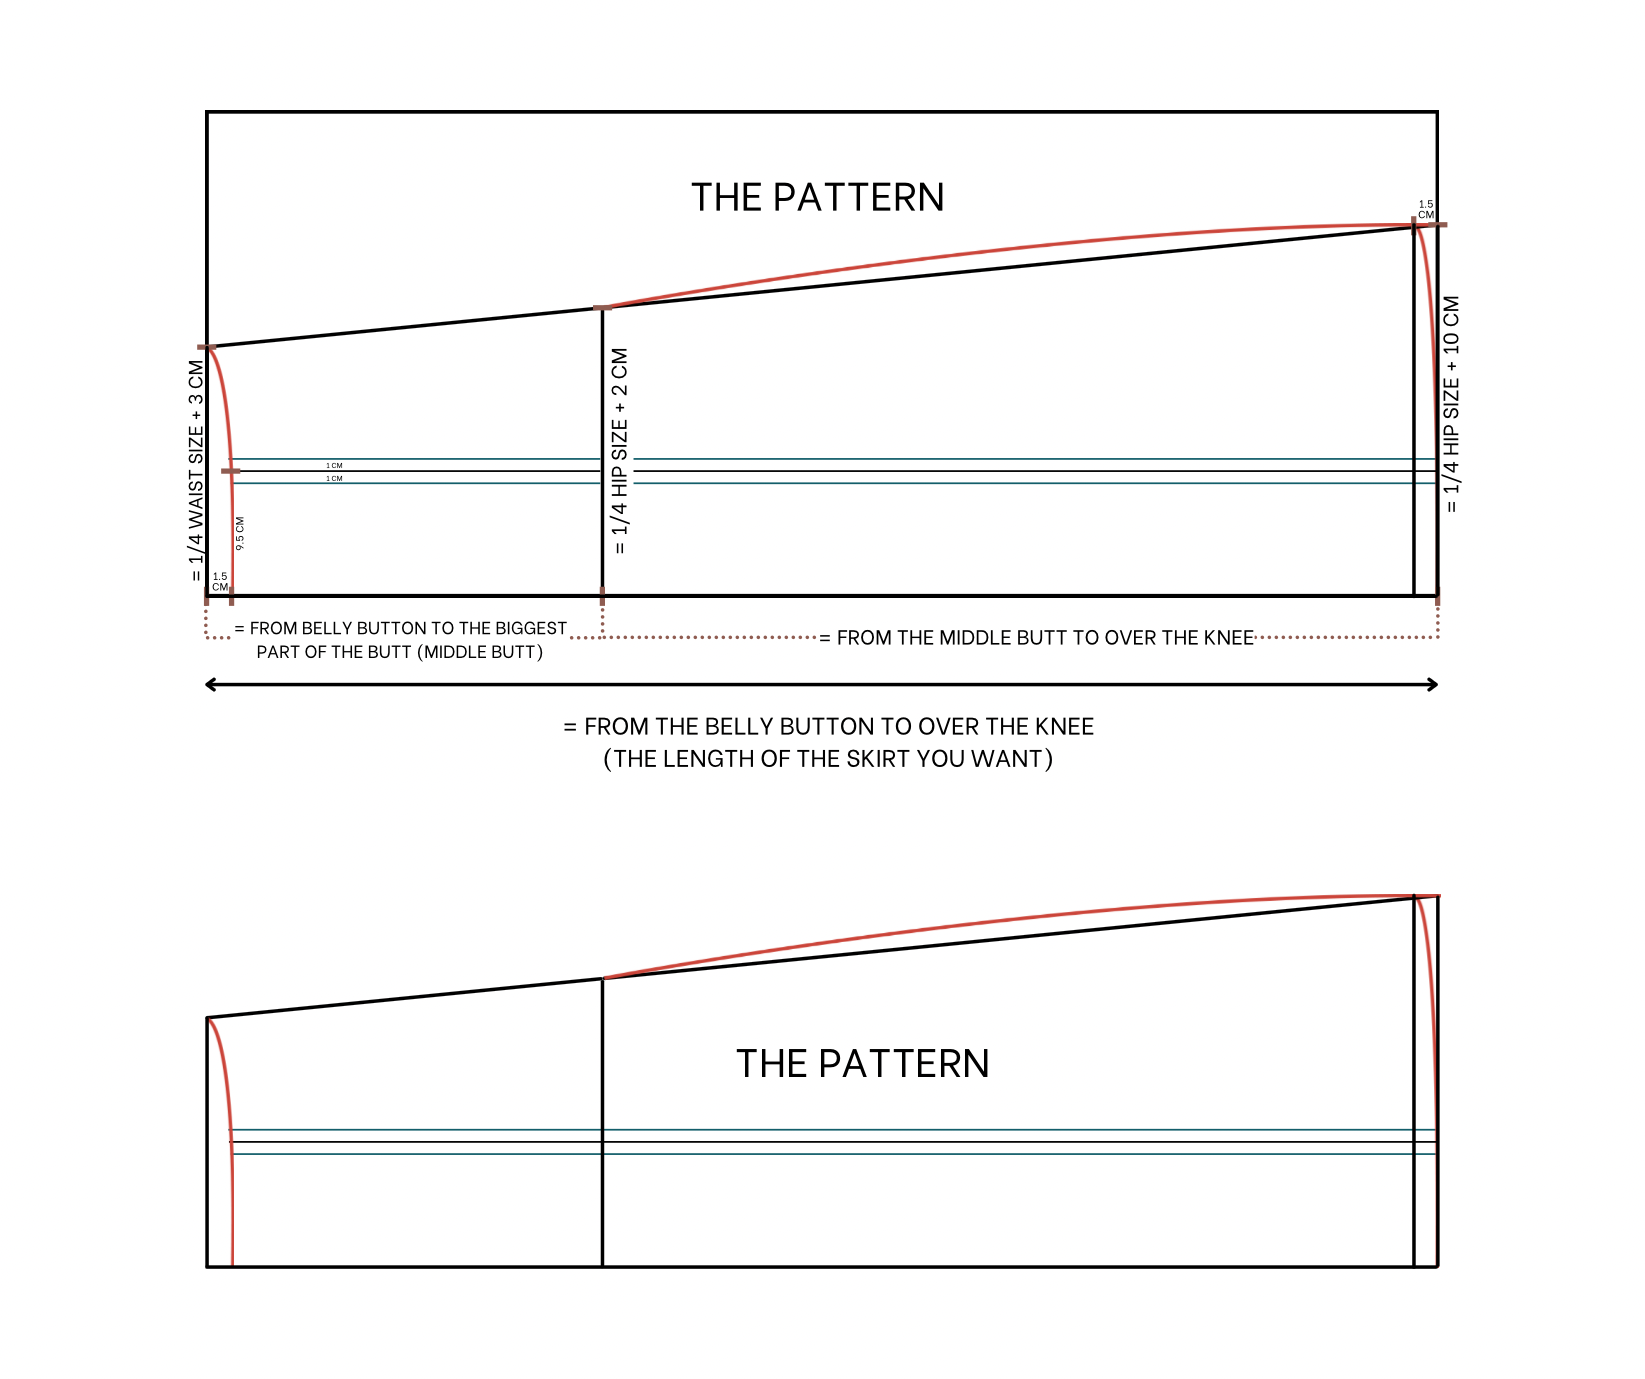

The back pattern
Fold the paper in half first
Then, from the folding line draw a straight line at one side of the paper.
From this line, draw another straight line at 20 cm next to it. It's the length from your belly button to the biggest part of your butt which is also your middle butt.
From the second straight line, draw another straight line at 50 cm next to it. It's the length from your middle butt to over your knee.
So the length from the first to the third straight line will be 70 cm which is the length from the belly button to over your knee. It's also the length of the skirt that you want.
On the second straight line from one end at the folding mark up at 25 cm which is a quarter of your hip side plus 2 cm.
On the first straight line from one end at the folding, mark up at 19 cm which is a quarter of your waist size plus 3 cm. Then connect the two marks together.
On the third straight line from one end at the folding, mark up at 33 cm which is a quarter of your hip side plus 10 cm. Then connect this mark to the mark on the second straight line.
After that, draw a slightly curved line on this line to make the sideline for the skirt.
From the first straight line draw another straight line at one and a half centimeters next to it then draw a slightly curved line from the end of the sideline to this new straight line so you can create a slightly curved line at the waistline of the skirt. Similarly, make the ending line of the skirt a bit curved at the sideline too.
Measure the width of the waistline first and mark at the middle later then draw a horizontal line from this mark to the end of the skirt. After that draw two other horizontal lines 1 cm away from this line.
THE FRONT PATTERN
Fold the back pattern along the two horizontal lines and you will have the front pattern of the skirt
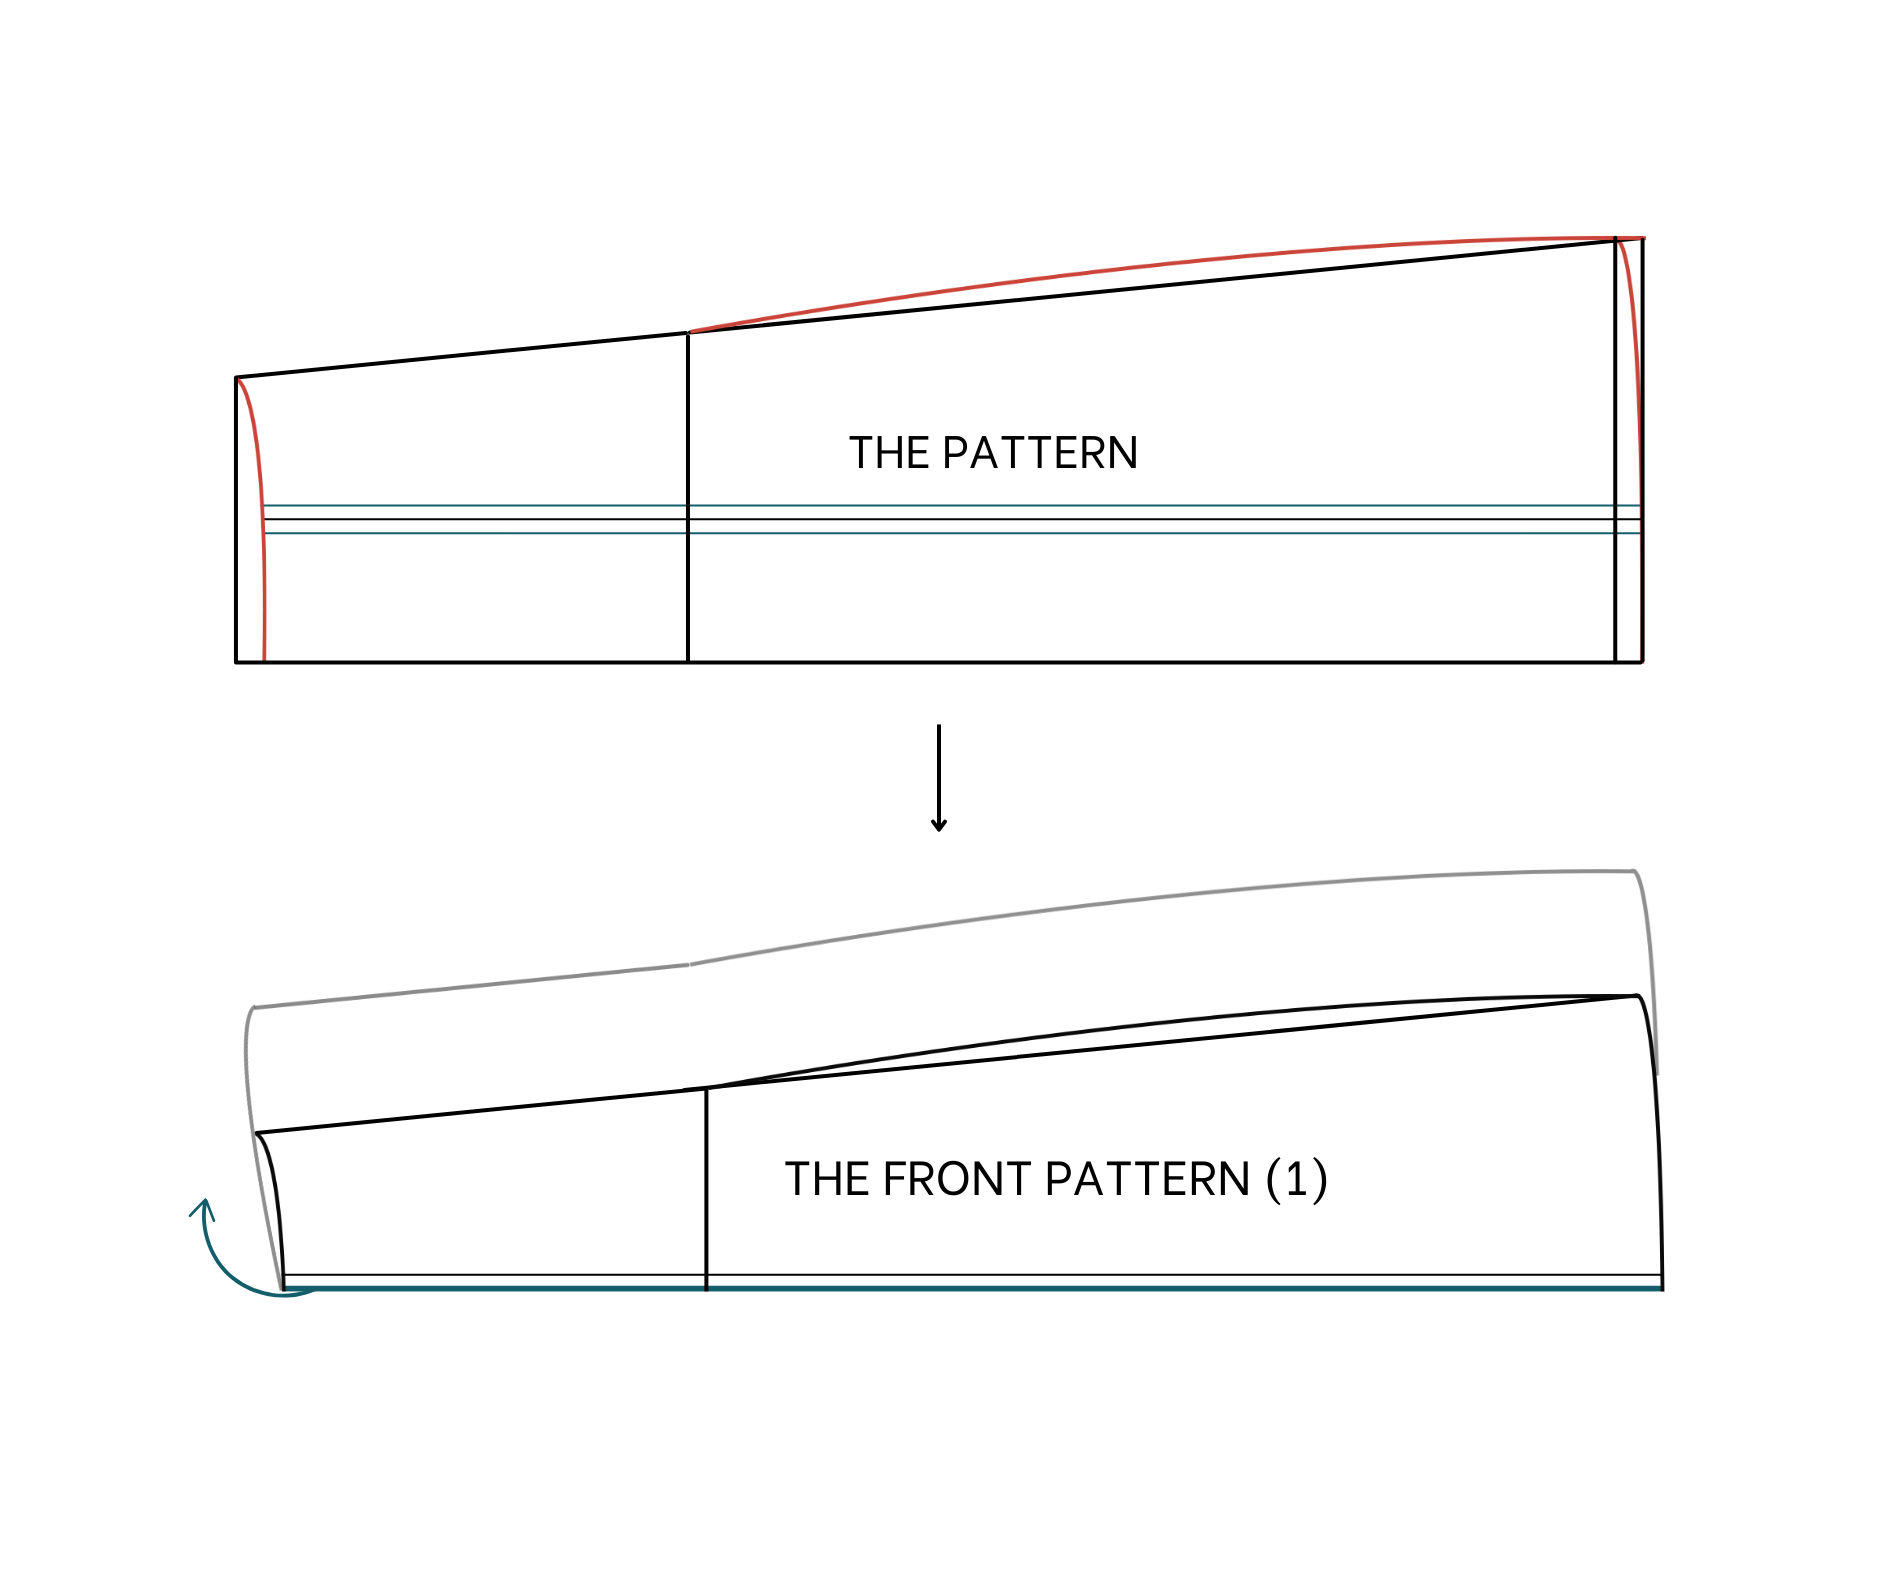
The front pattern (1)
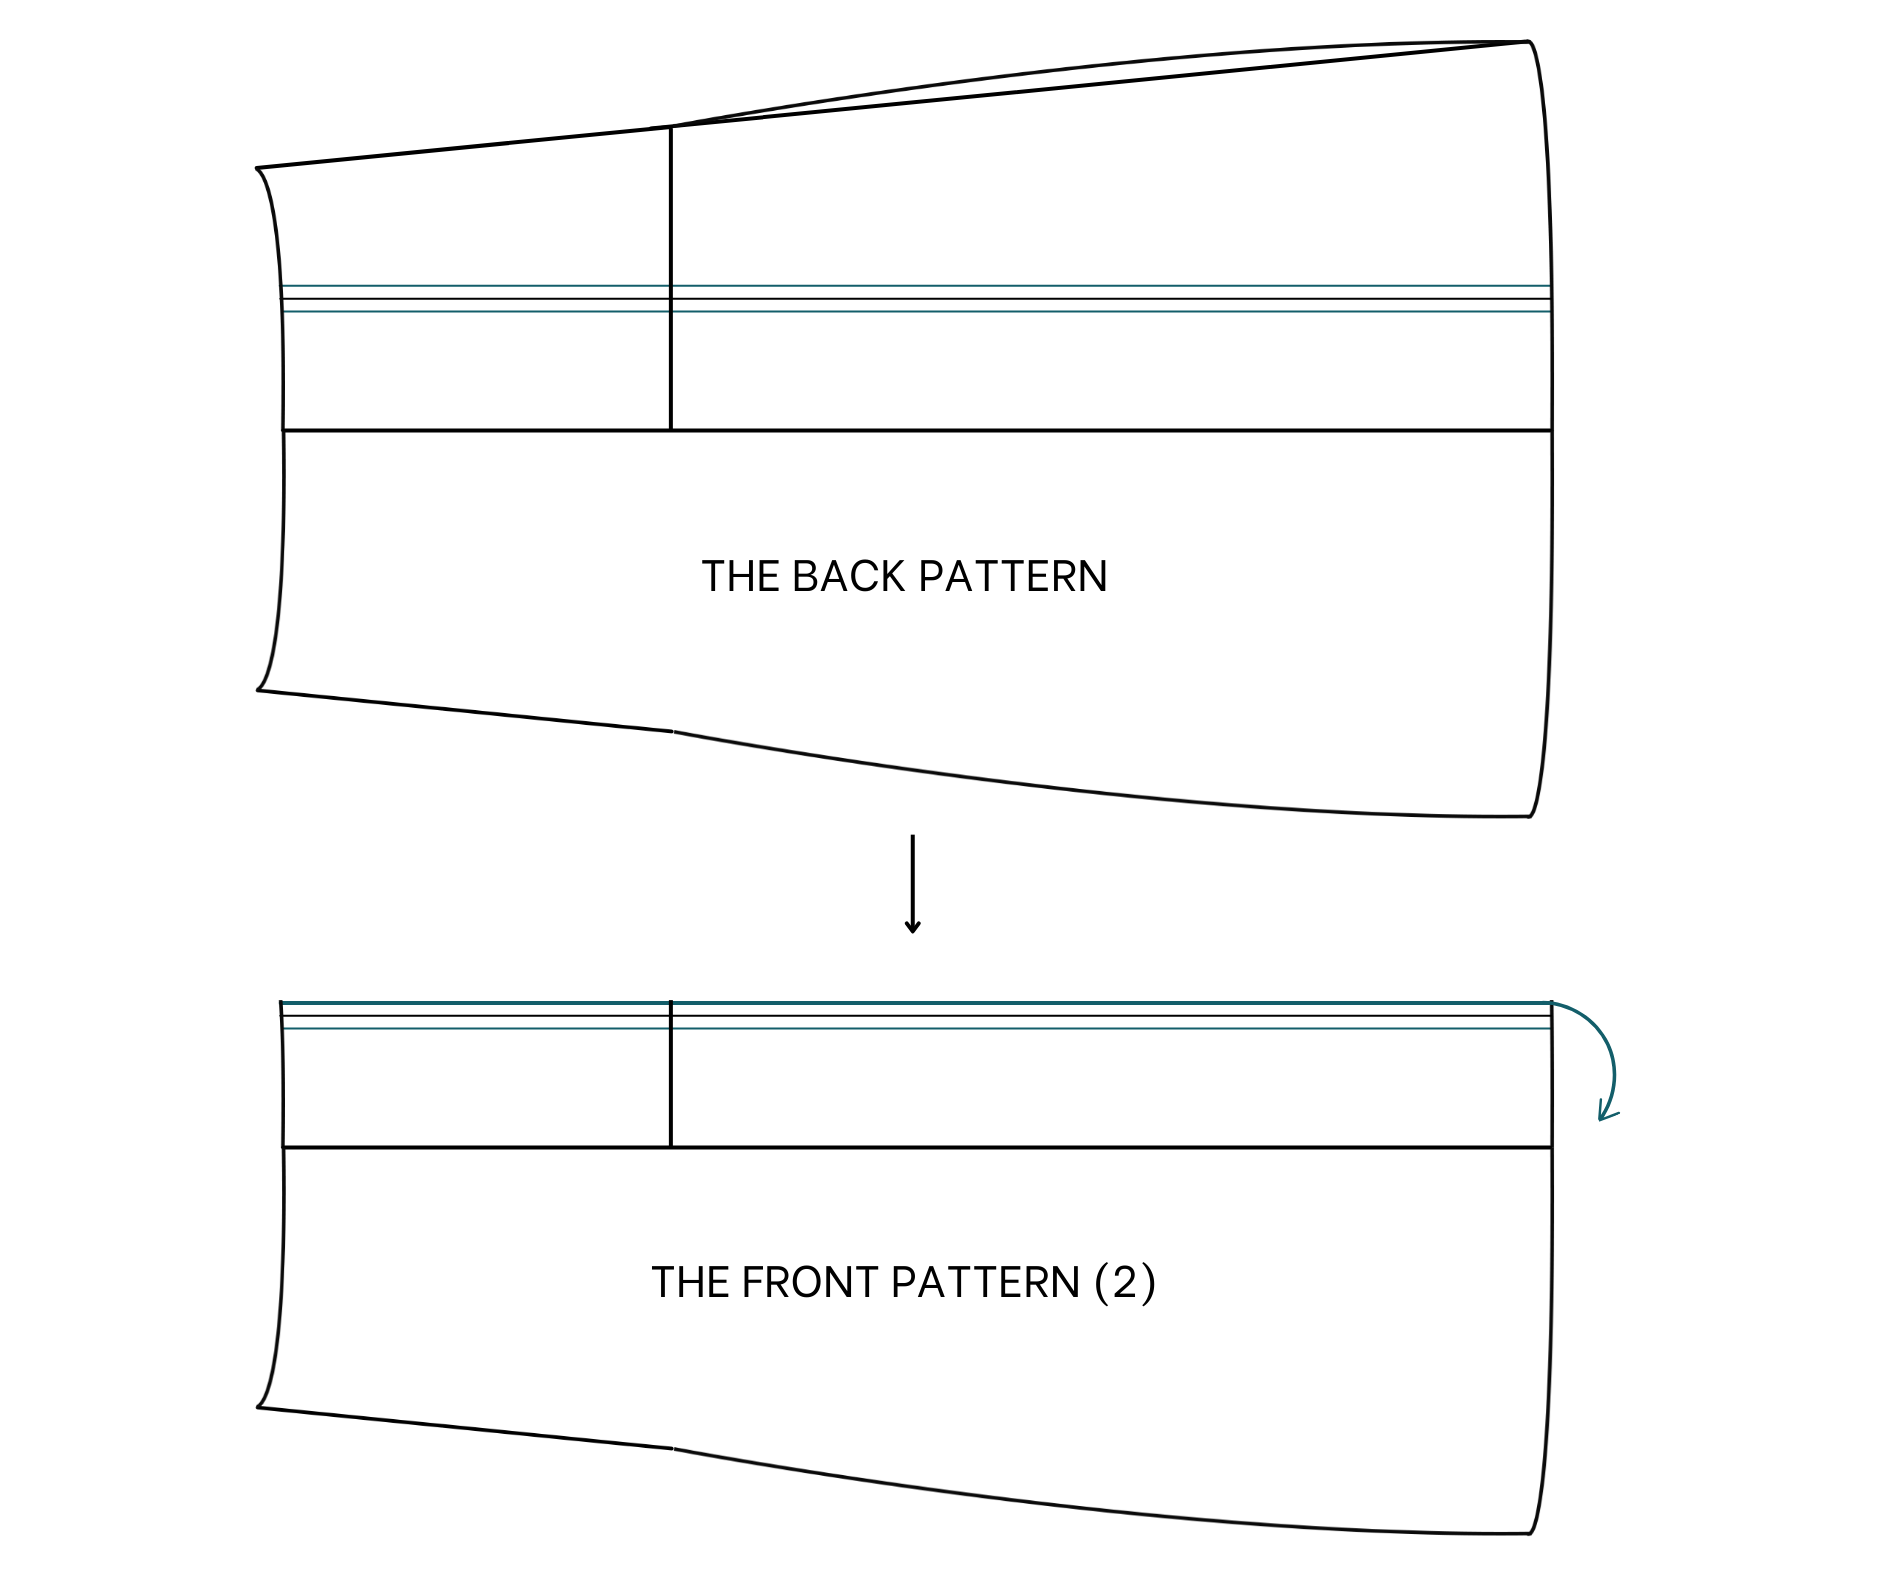
The front pattern (2)
THE MIDI SKIRT WITH LEG SLIT
THE MAIN PART
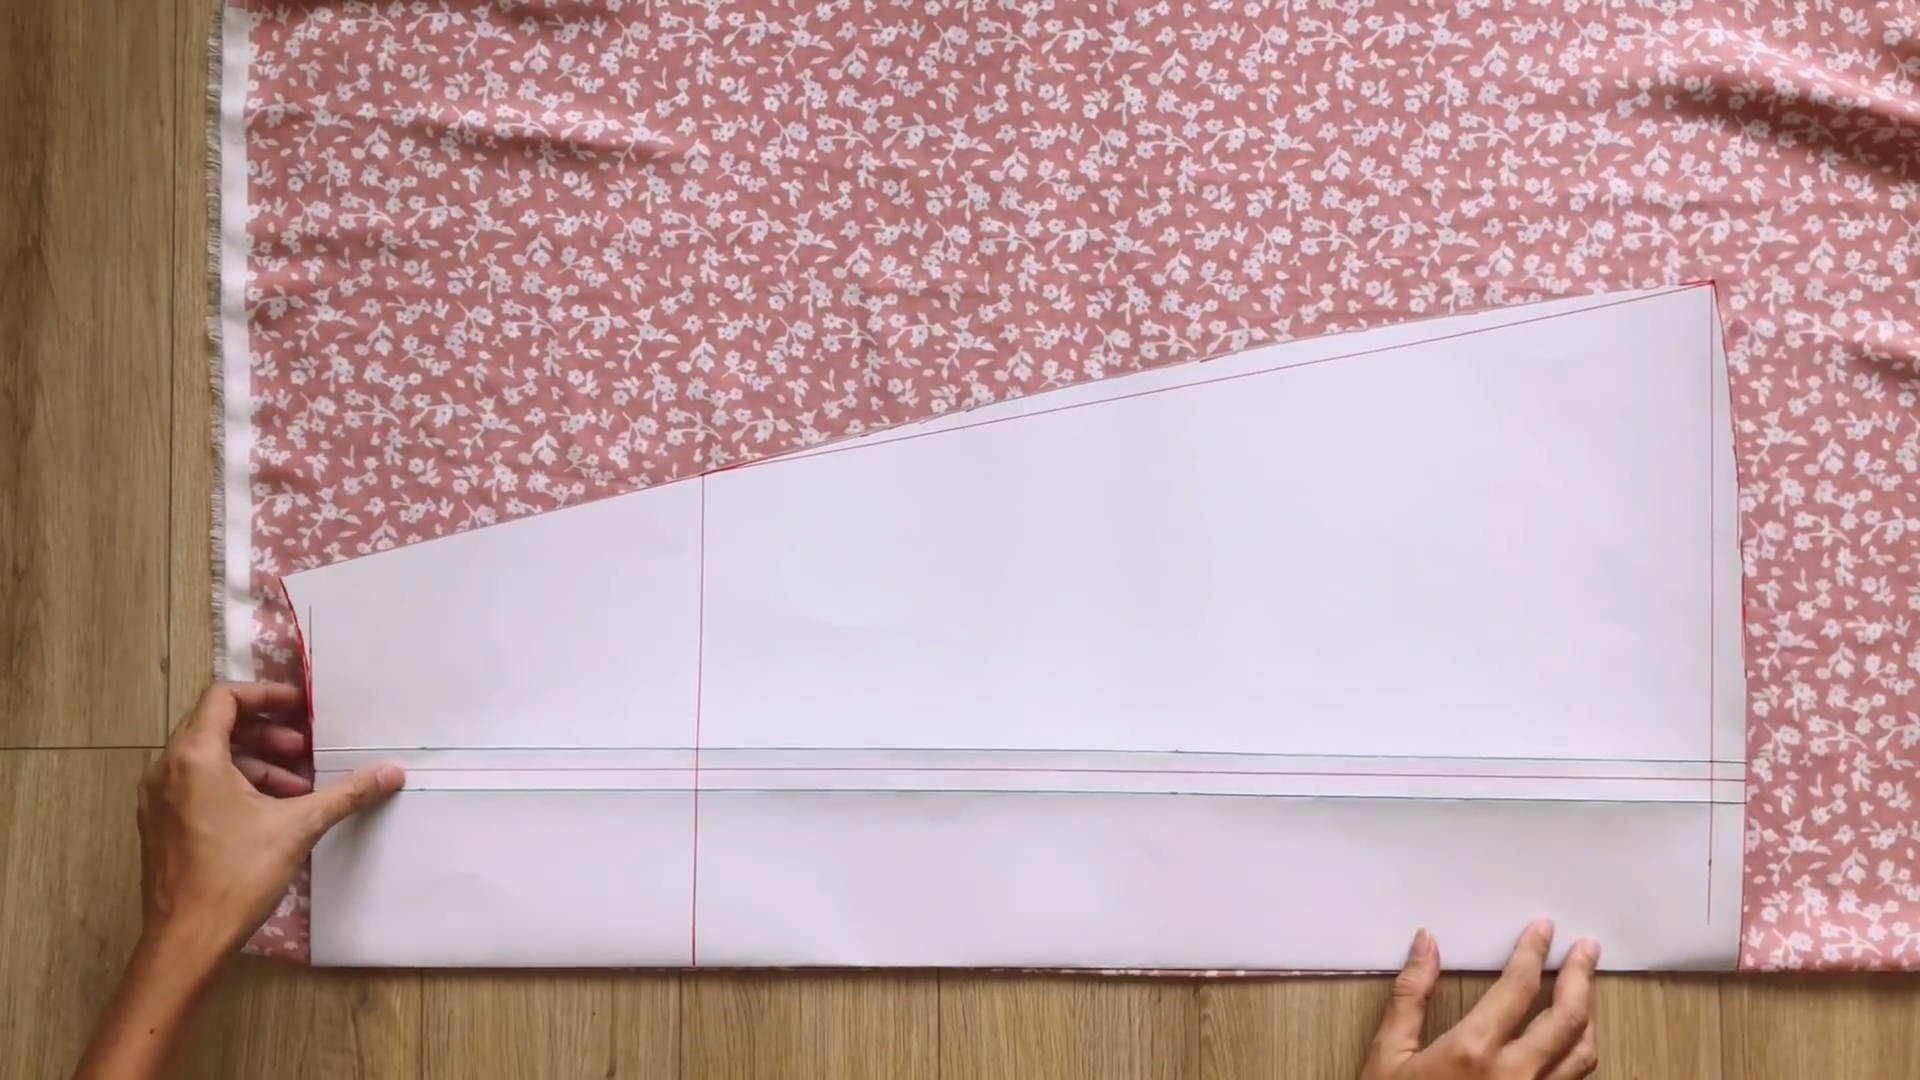
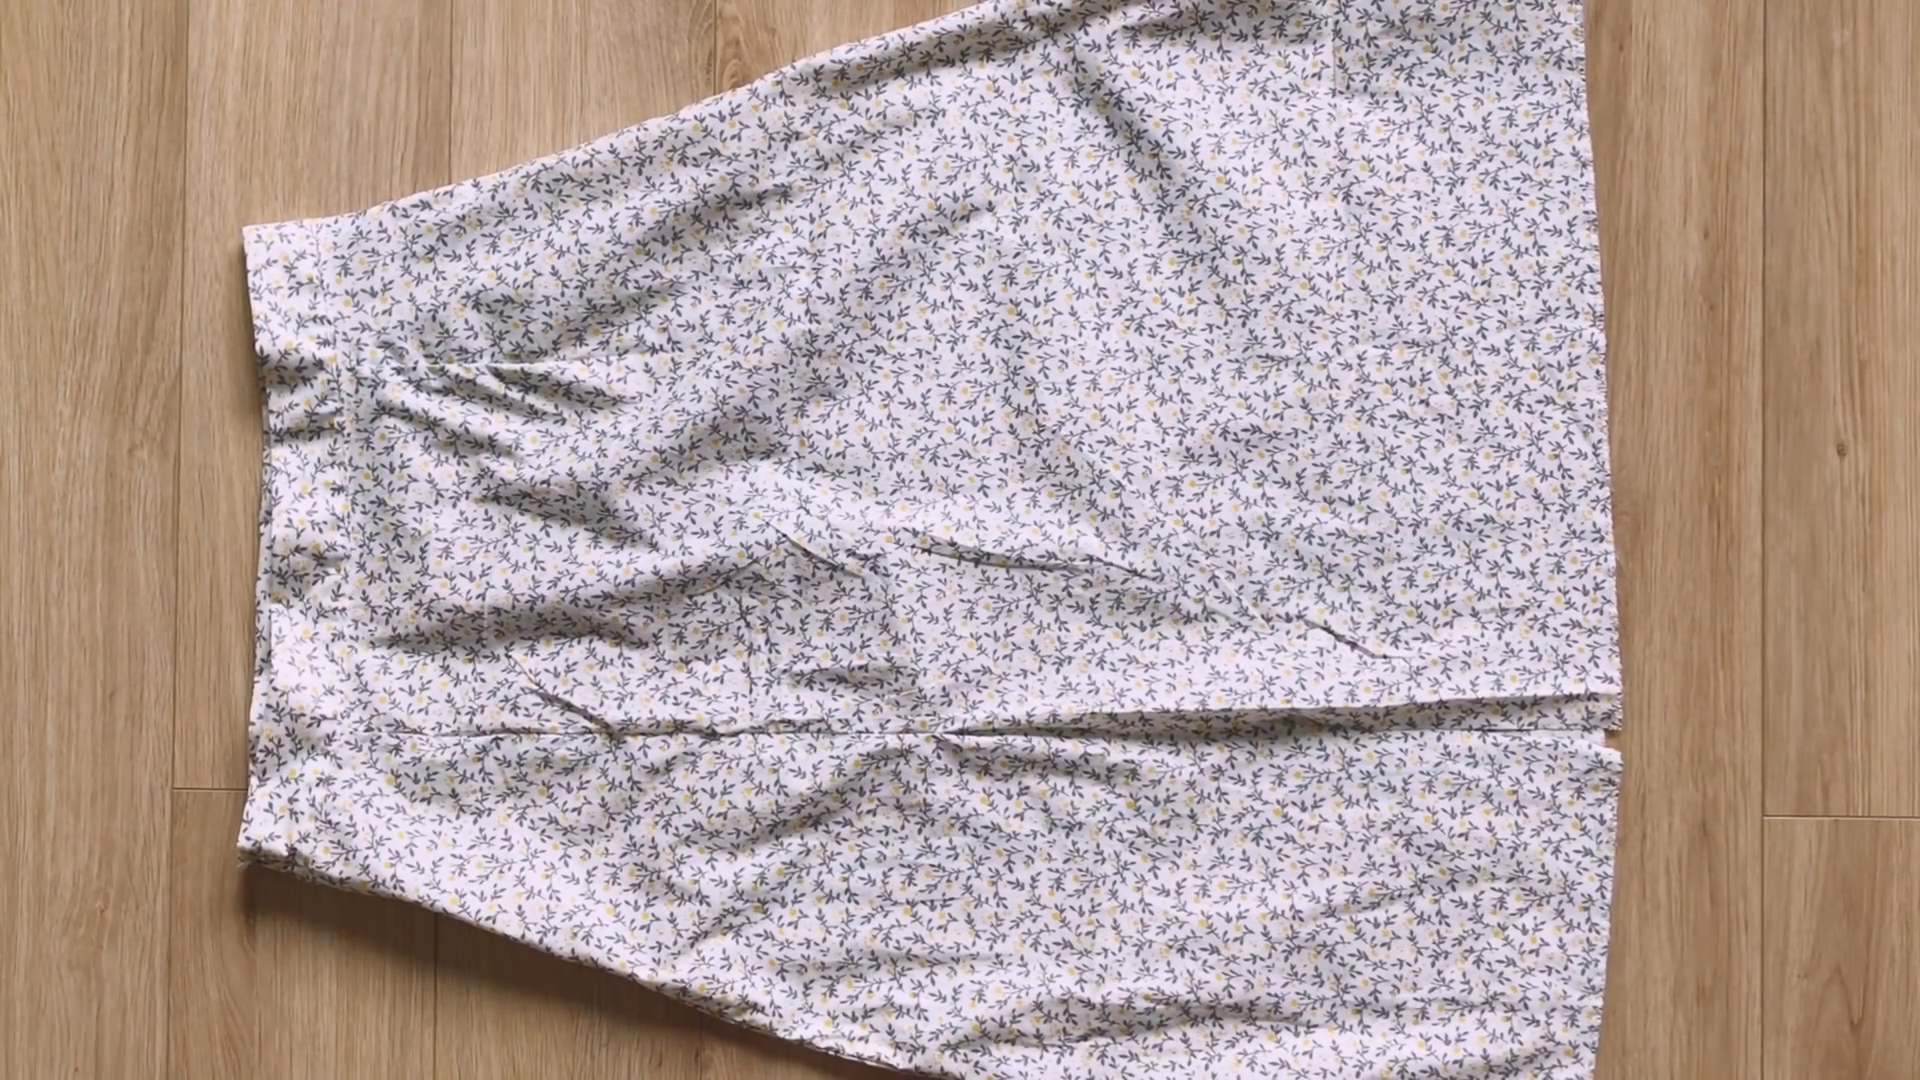
Apply the pattern to the fabric and cut along the edges. You should have four pieces of fabric: two for the front and two for the back of the skirt.

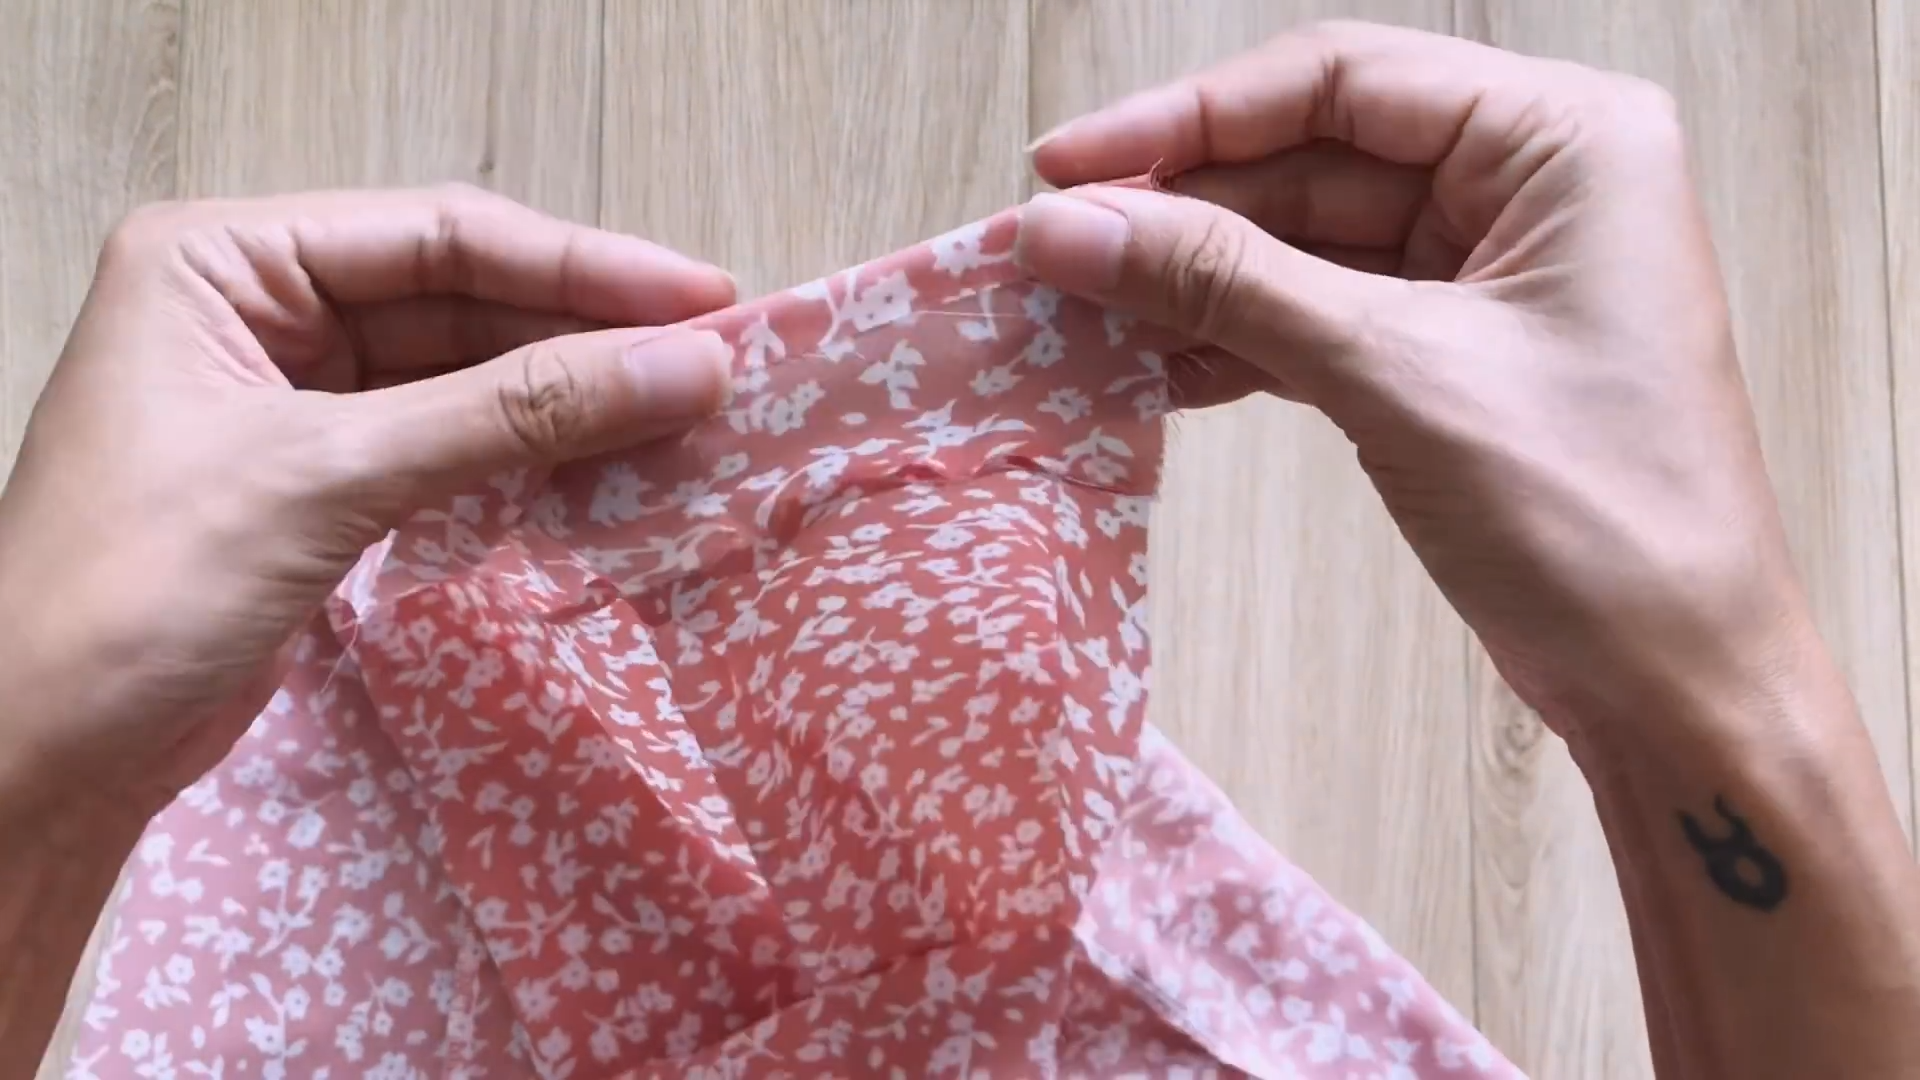
Pin two pieces of the front together, right sides facing each other.
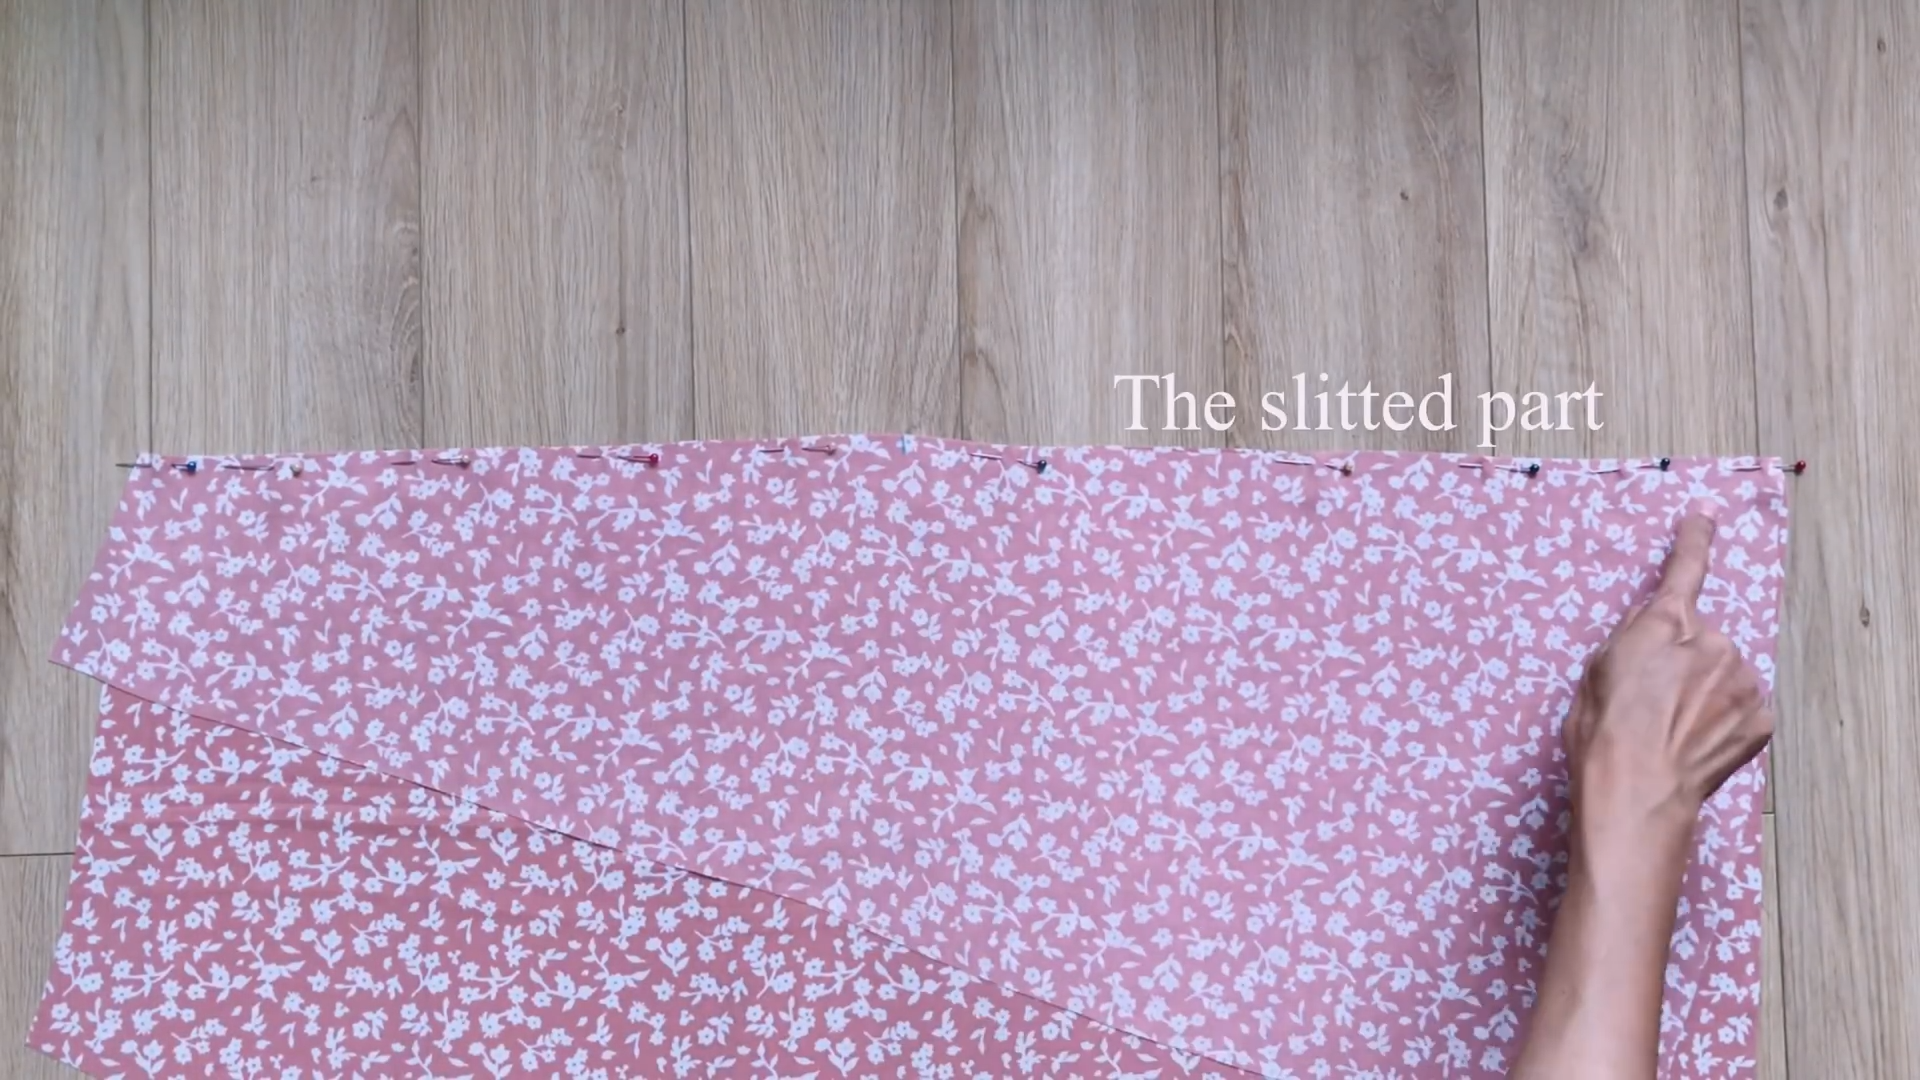
From the waistline, mark 30 cm down, which is the length from the belly button to over the crotch.
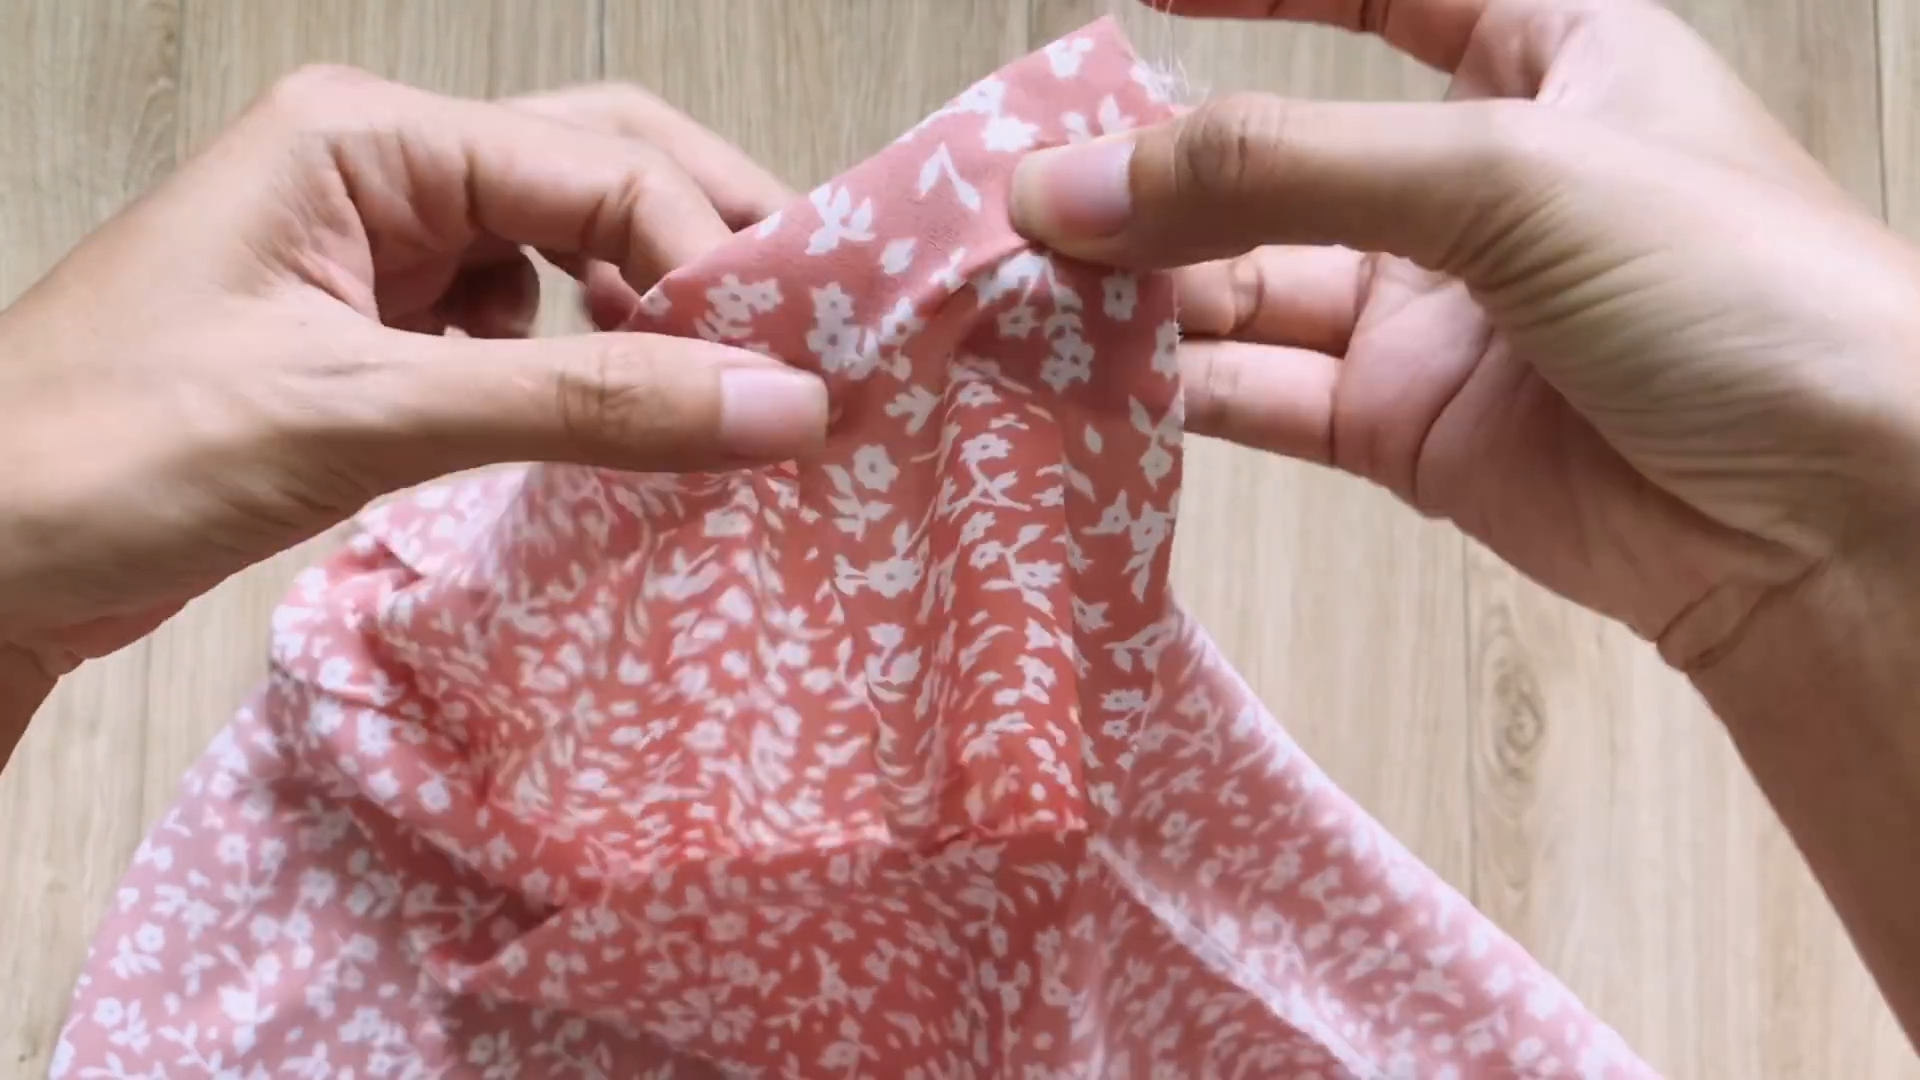
This is where the slit of the skirt will start, so you only need to sew from the waistline to this mark.
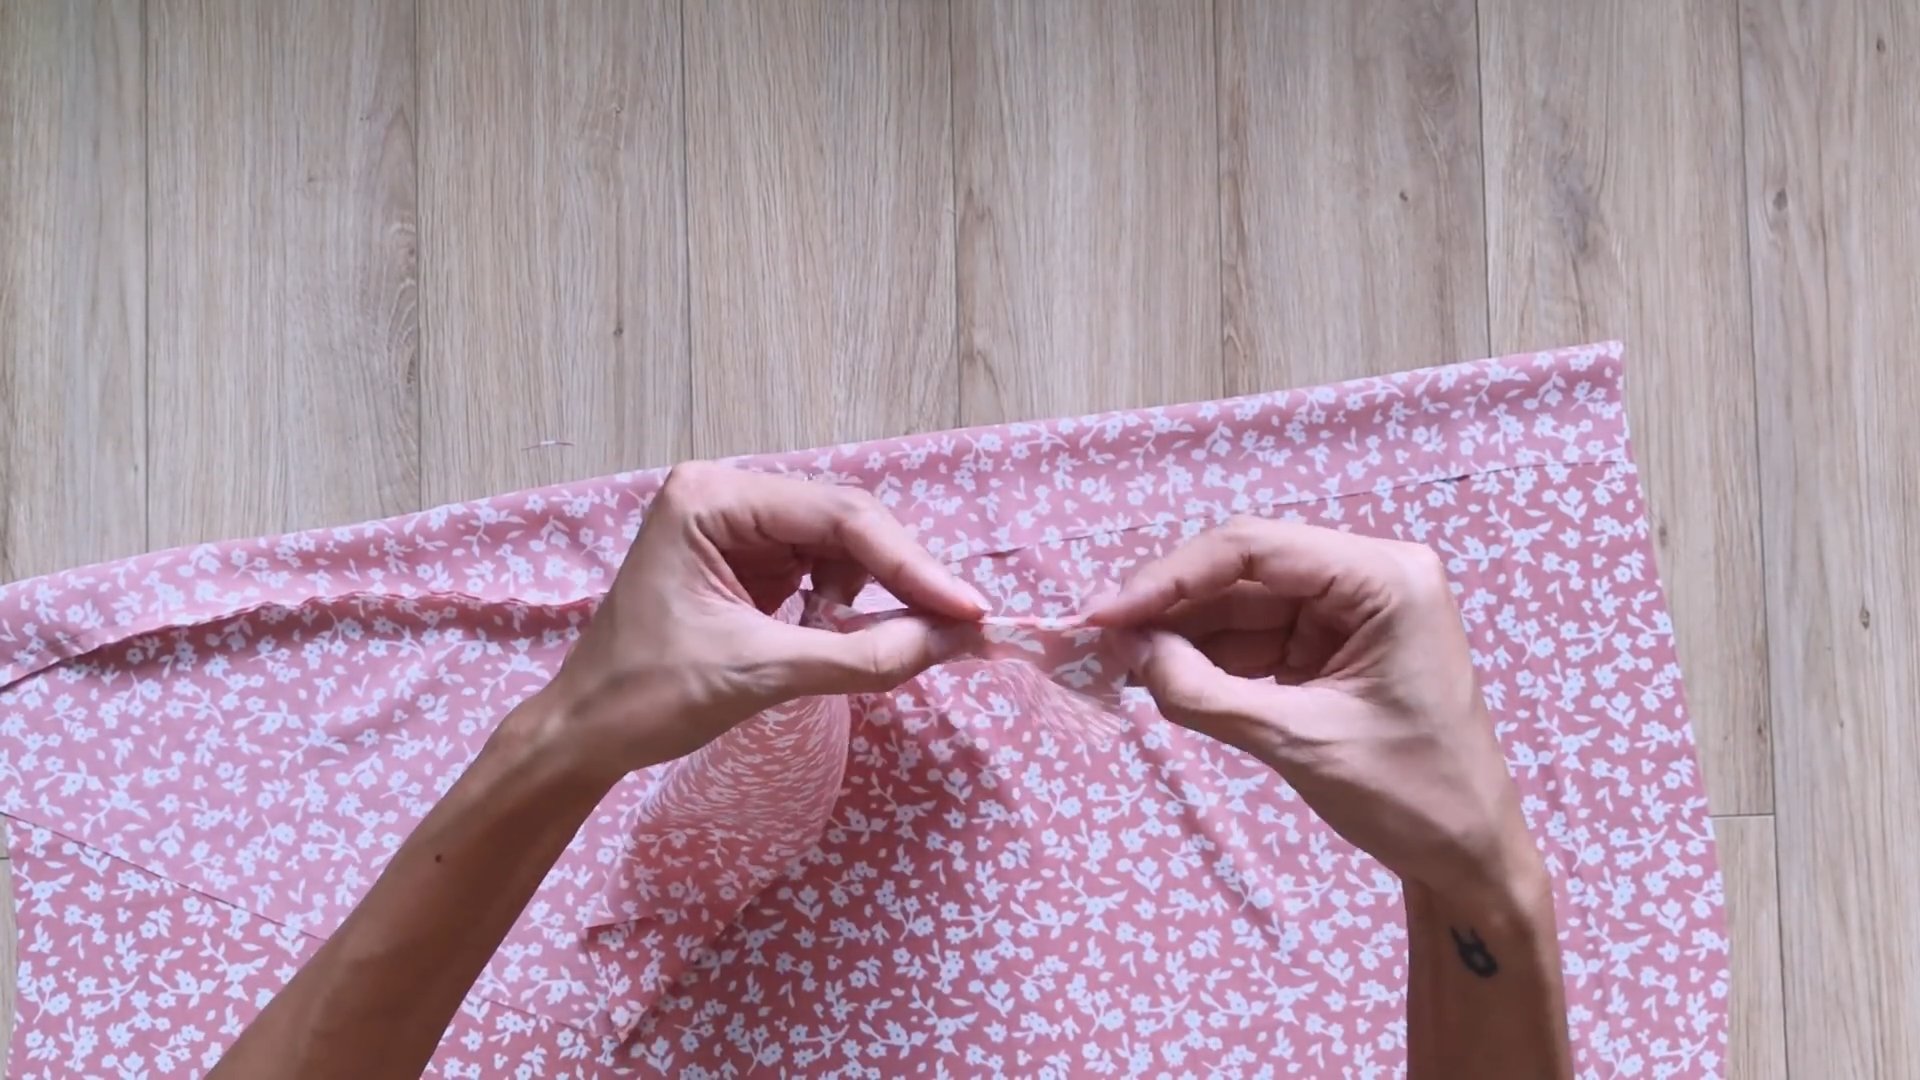
After sewing, fold the end fabric inside twice and sew along the edge to hem the slit.
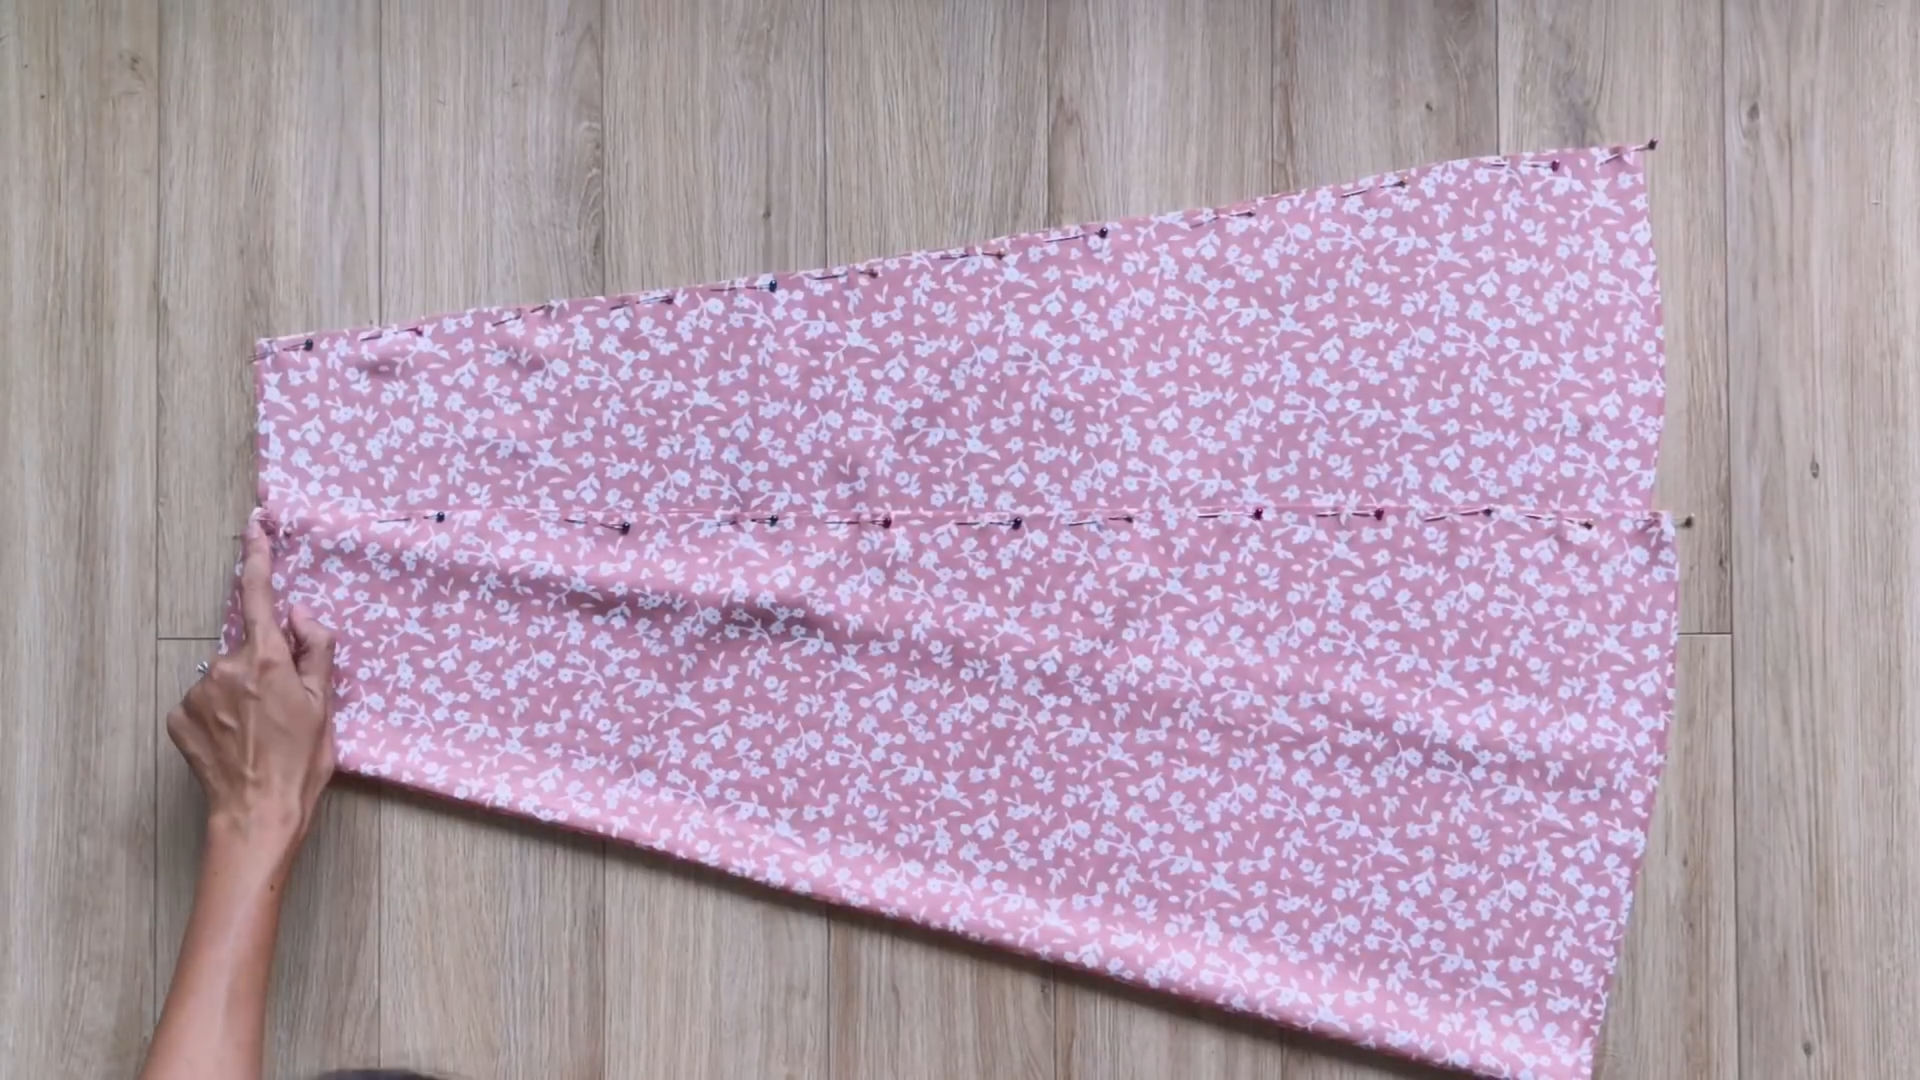
Pin the front and the back of the skirt together at the sidelines, right sides facing each other.
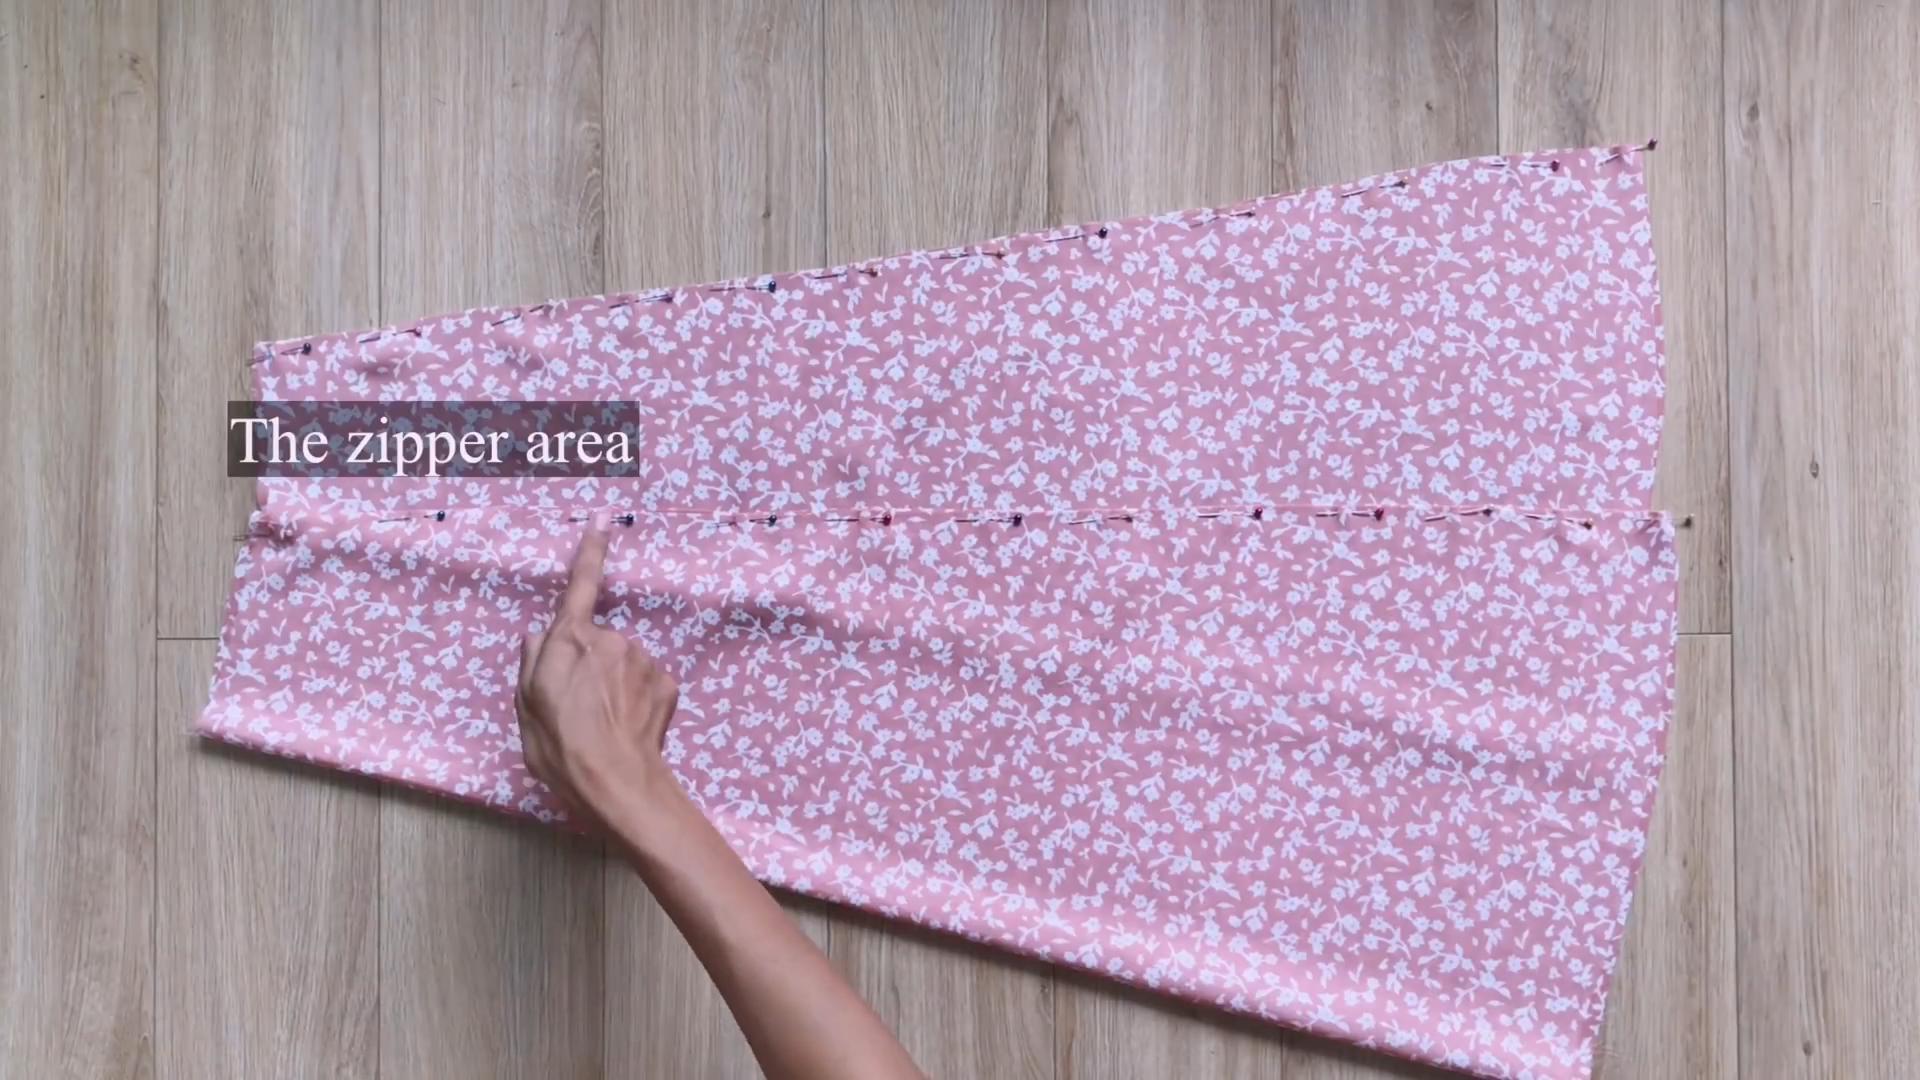
On one sideline, mark 20 cm down from the waistline, which is the length of the zipper you will use.
This is where the zipper will go, so you don’t need to sew this part yet. Just sew the rest of the sideline and the other sideline.
Then, fold the end of the fabric inside twice and sew along the edge to hem the skirt.
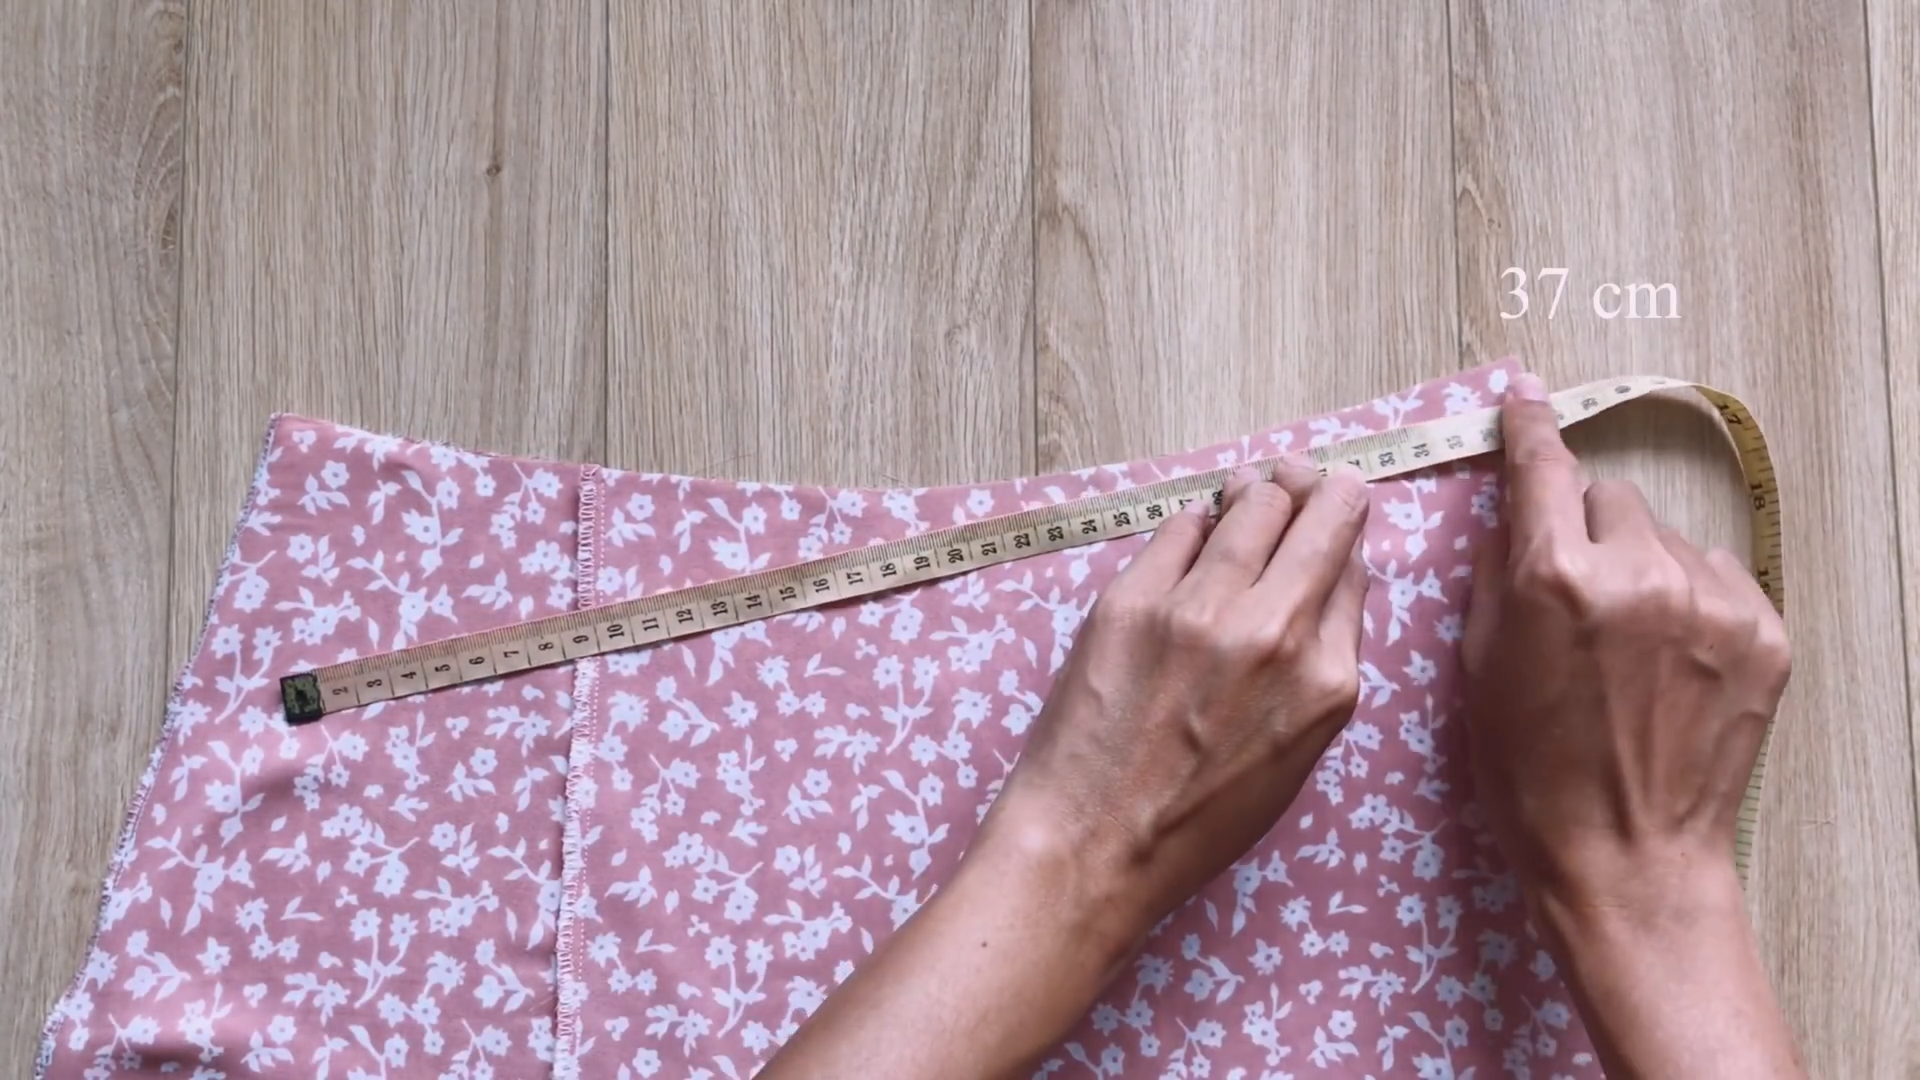
Measure the width of the waistline and compare it to half of your waist size. For example, my waistline is 37 cm, which is 5 cm bigger than half of my waist size. So, I need to take in 4 cm to make it fit.
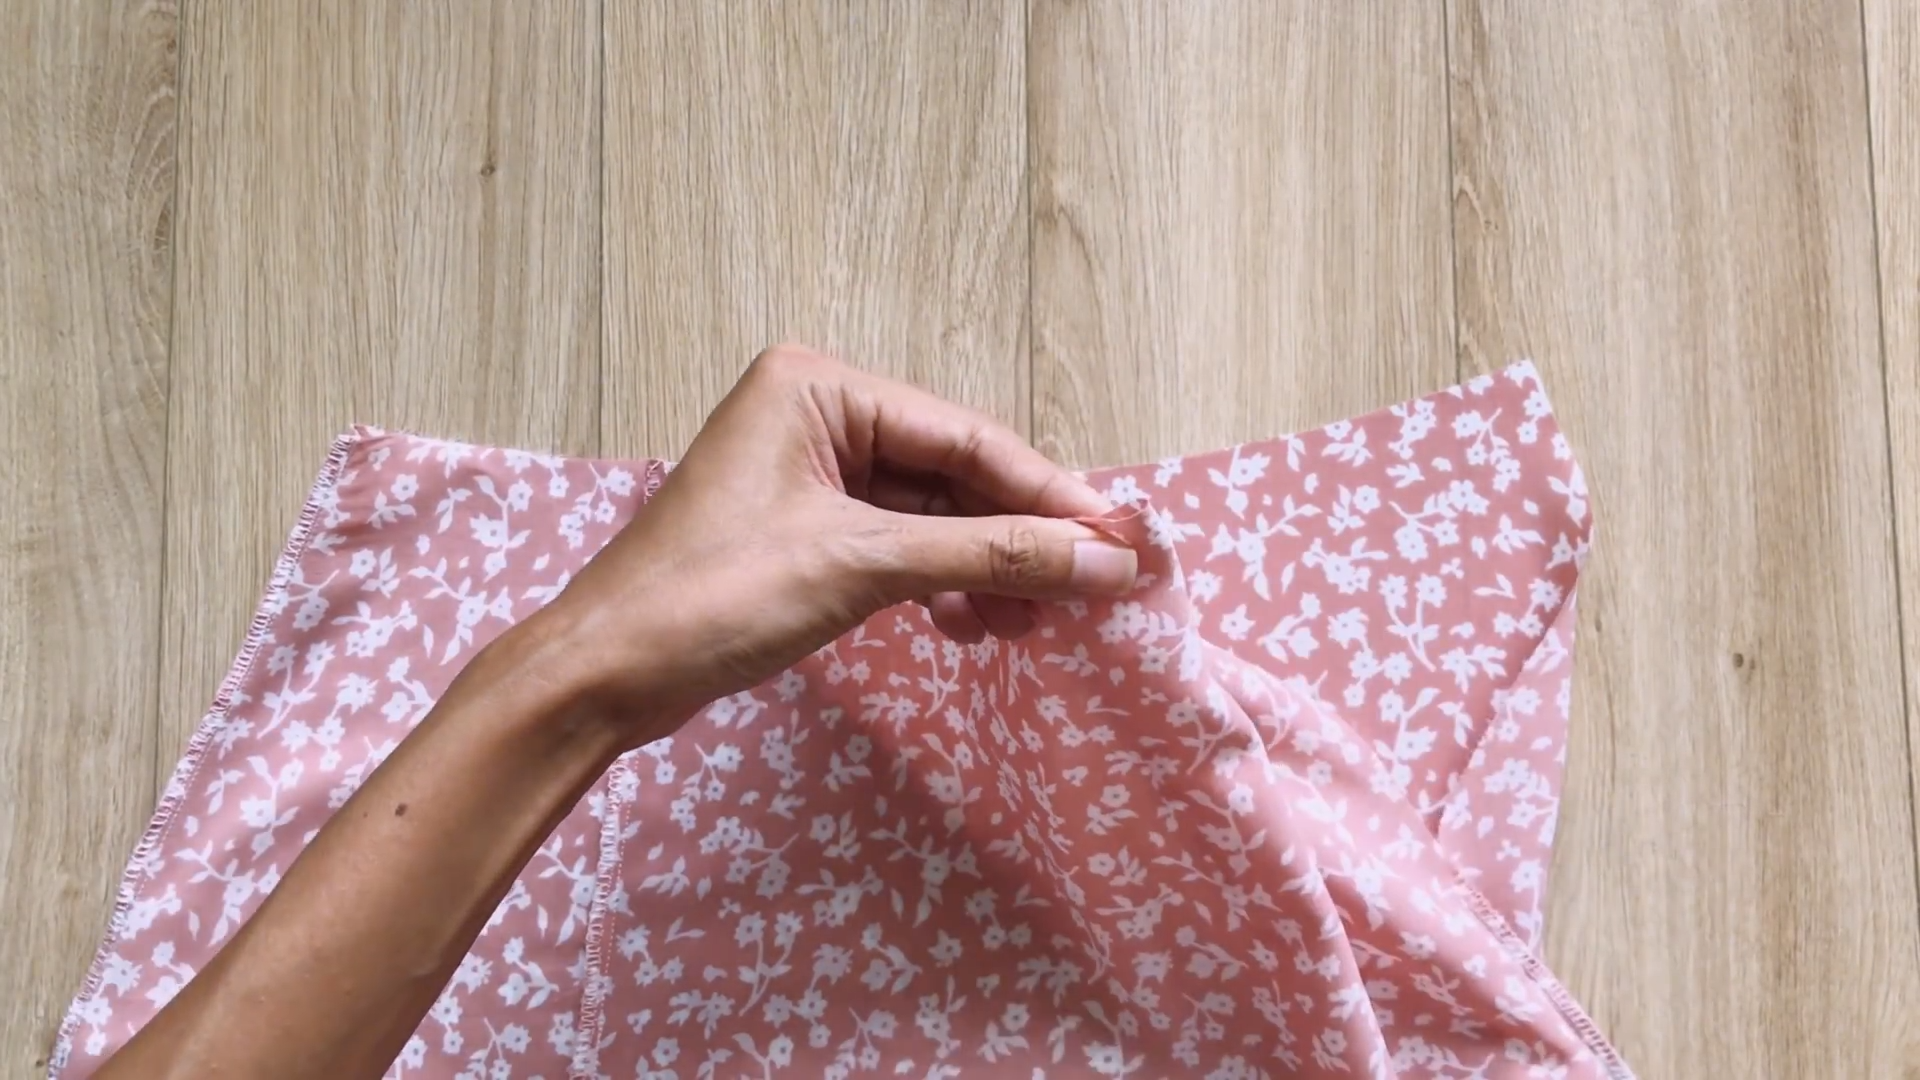
To do this, I make two darts with 1 cm width and 13 cm length on both the front and the back of the skirt. Make sure the final width of the waistline is half of your waist size plus 1 cm for seam allowance.
THE WAISTBAND
Cut a rectangle of fabric for the waistband. The width of the rectangle should be 8 cm, and the length should be your waist size plus 2 cm for seam allowance.
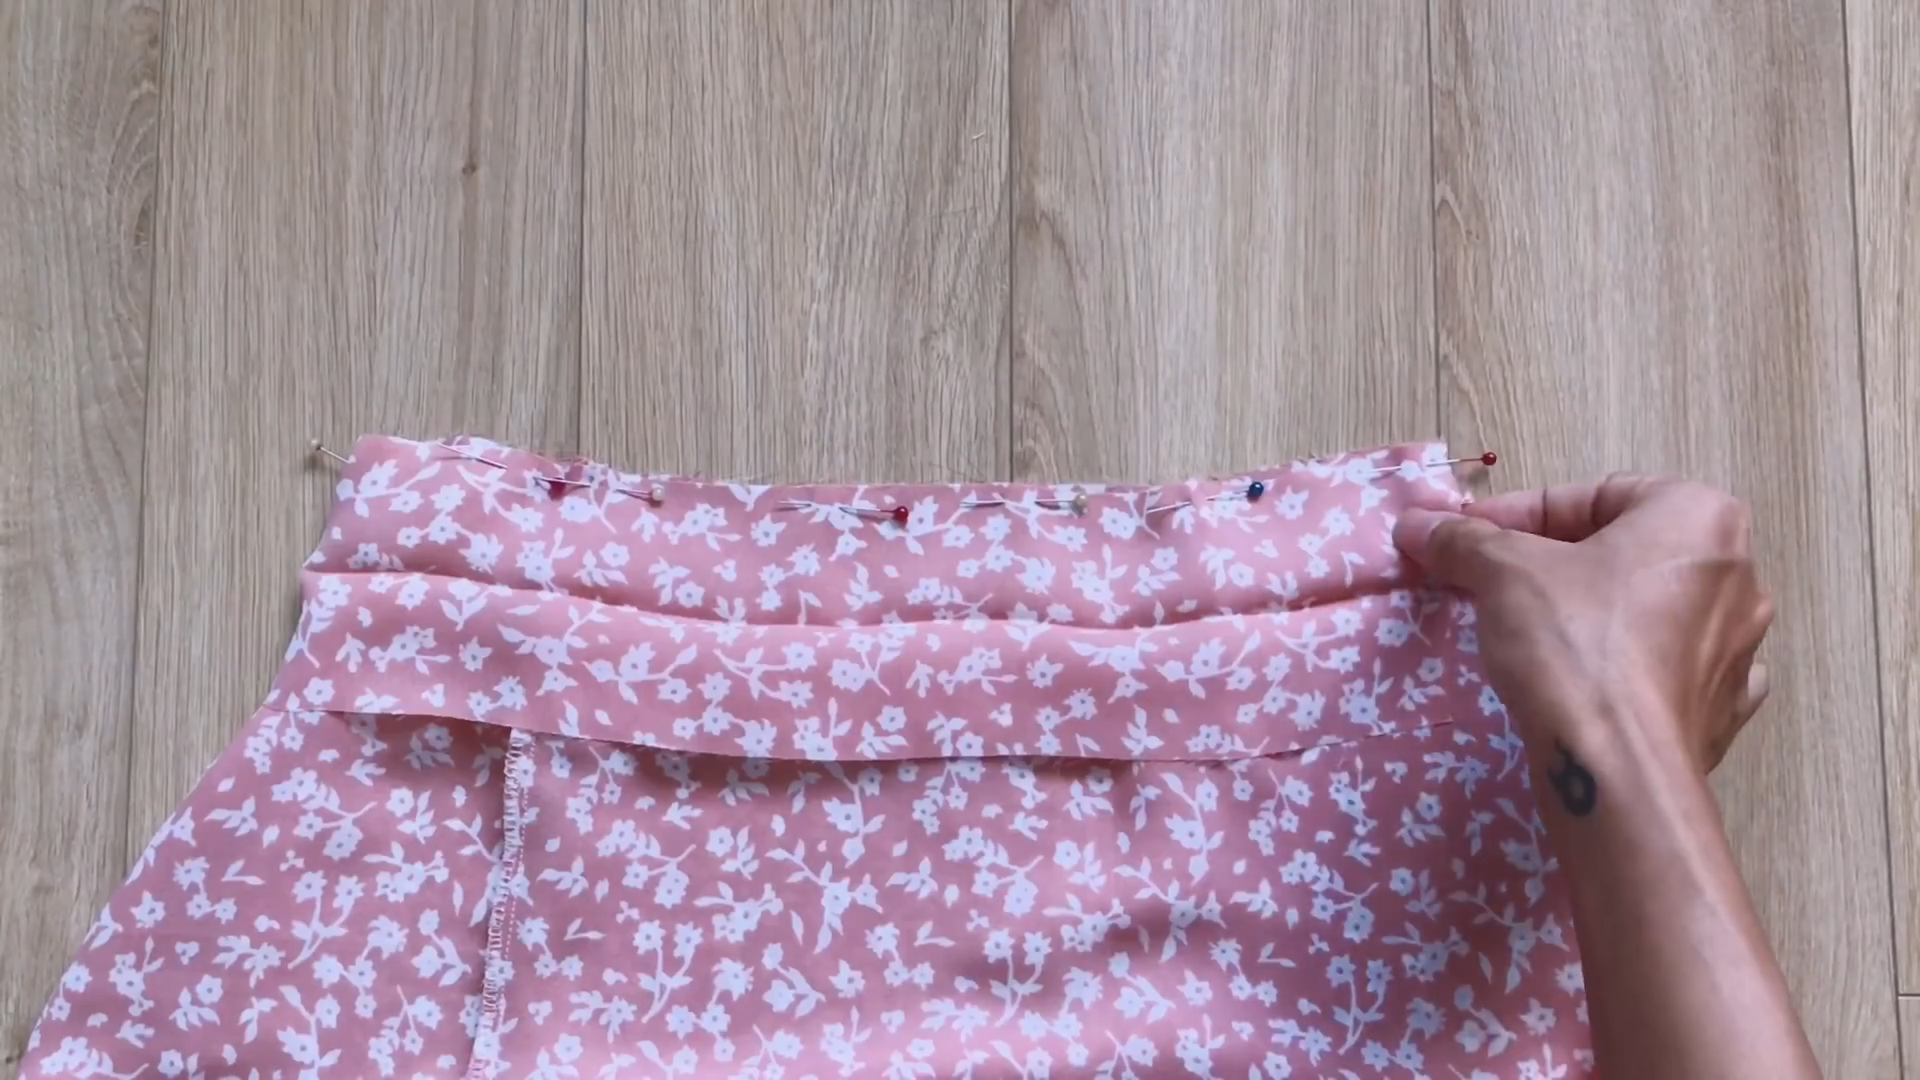
Pin one long side of the rectangle to the waistline of the skirt and sew along the edge.
After that, fold the other long side of the rectangle inside 1 cm.
Then fold it over the first seam and pin it.

Sew along the edge to finish the waistband.
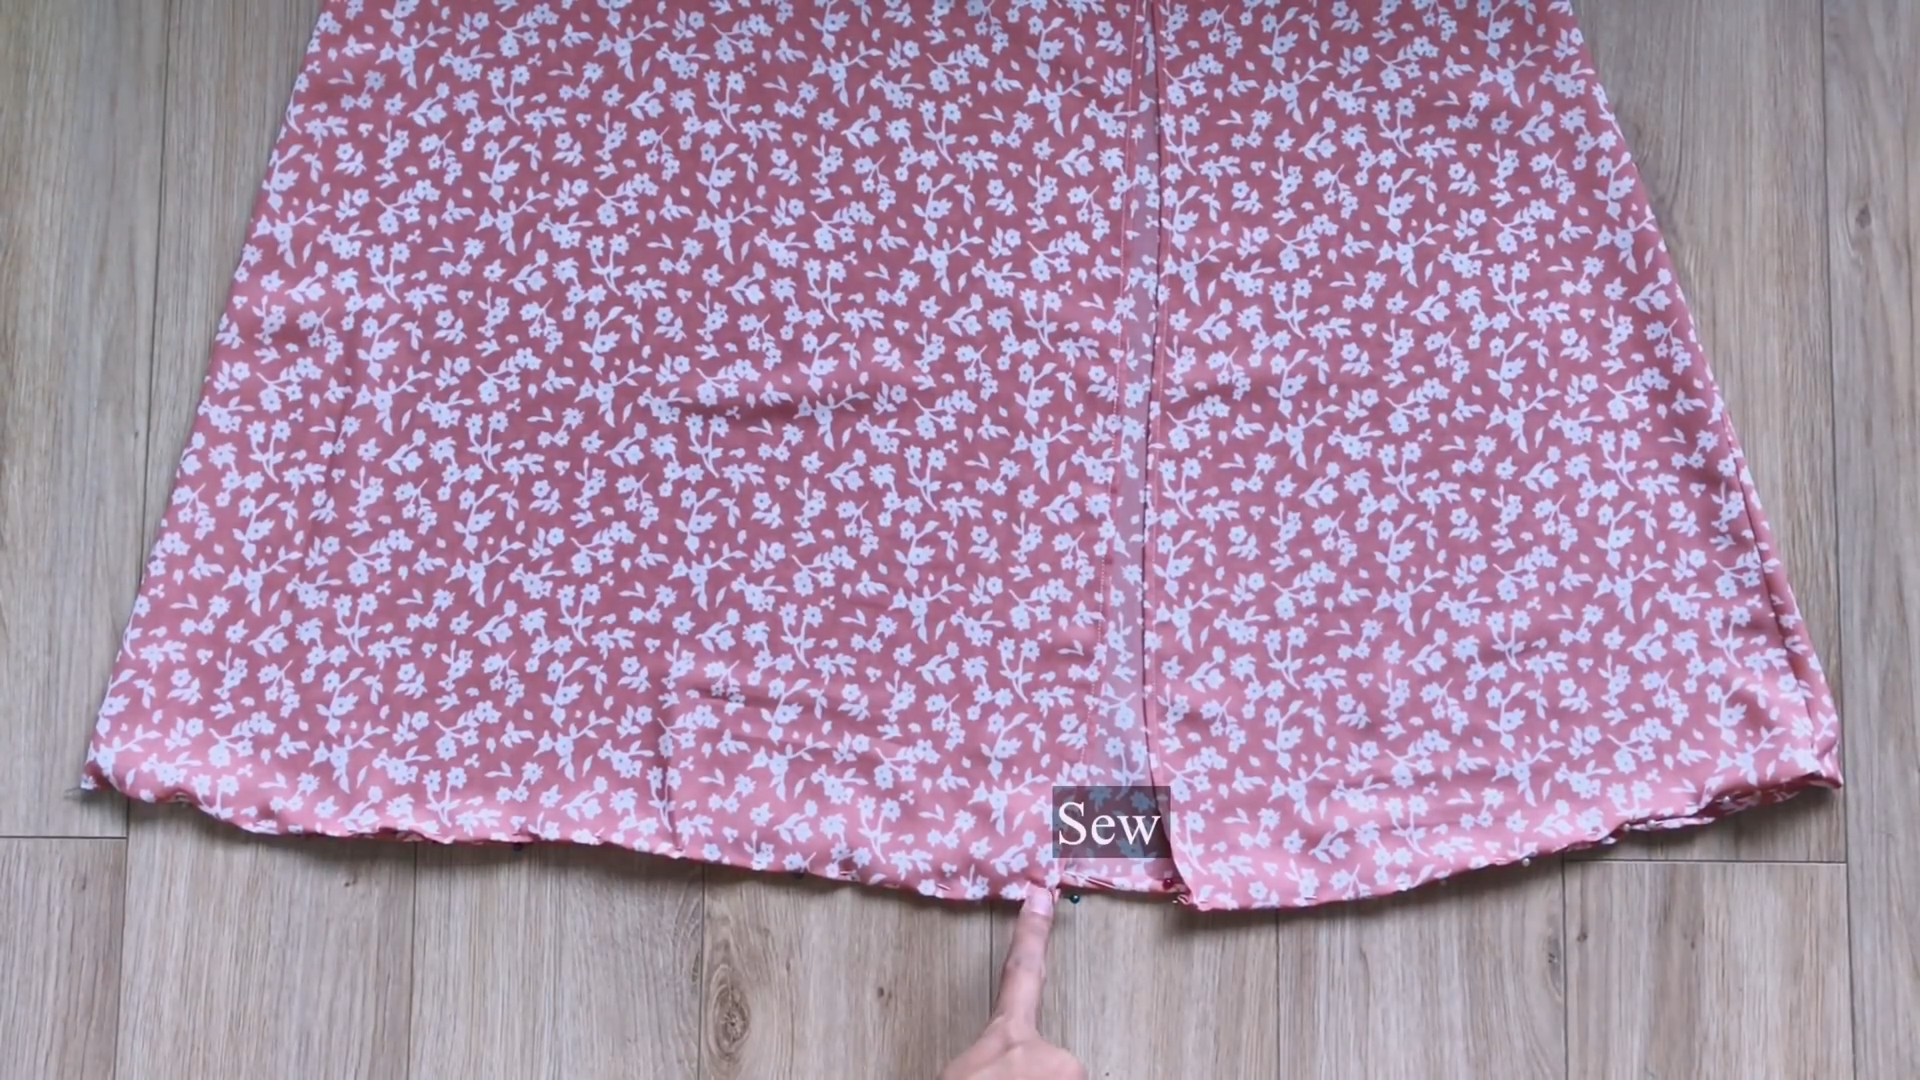
THE ZIPPER
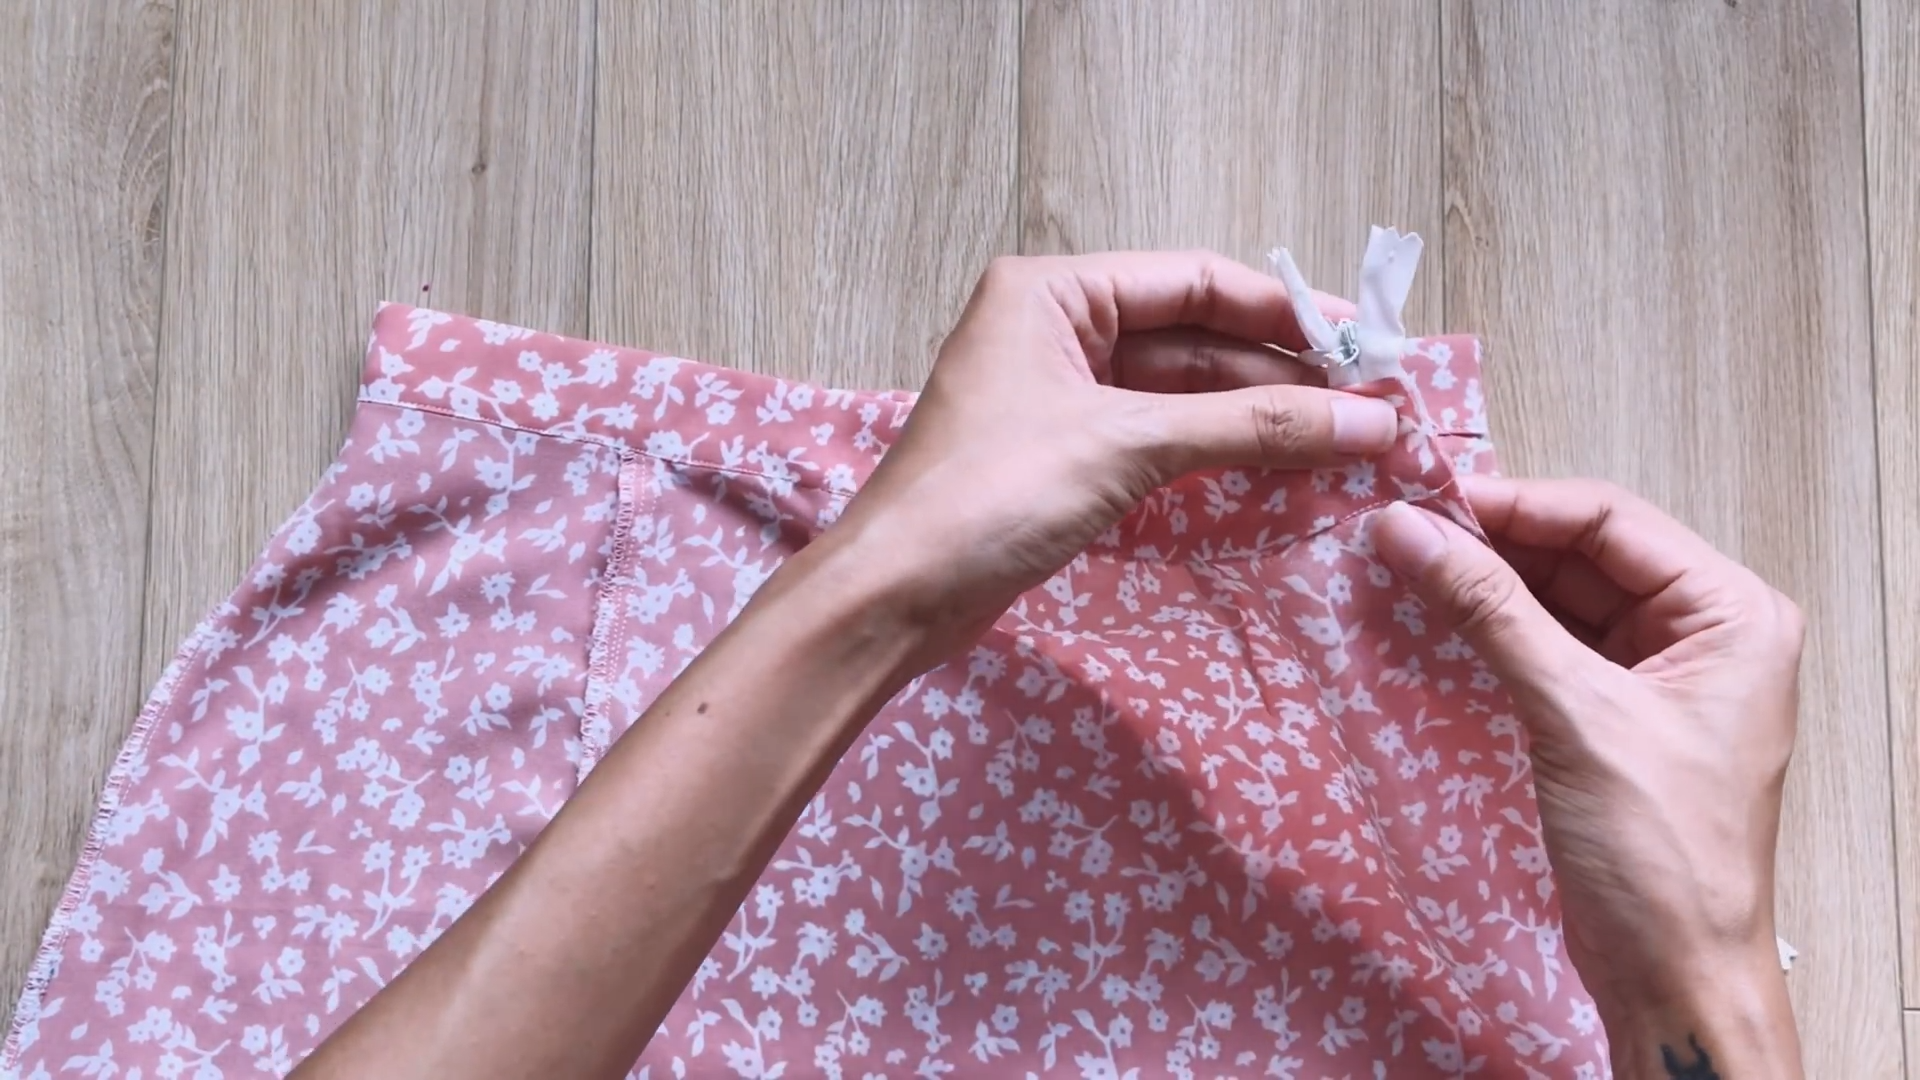
Pin one side of the zipper to the edge of the zipper area created earlier. Sew along the zipper teeth using a zipper foot.
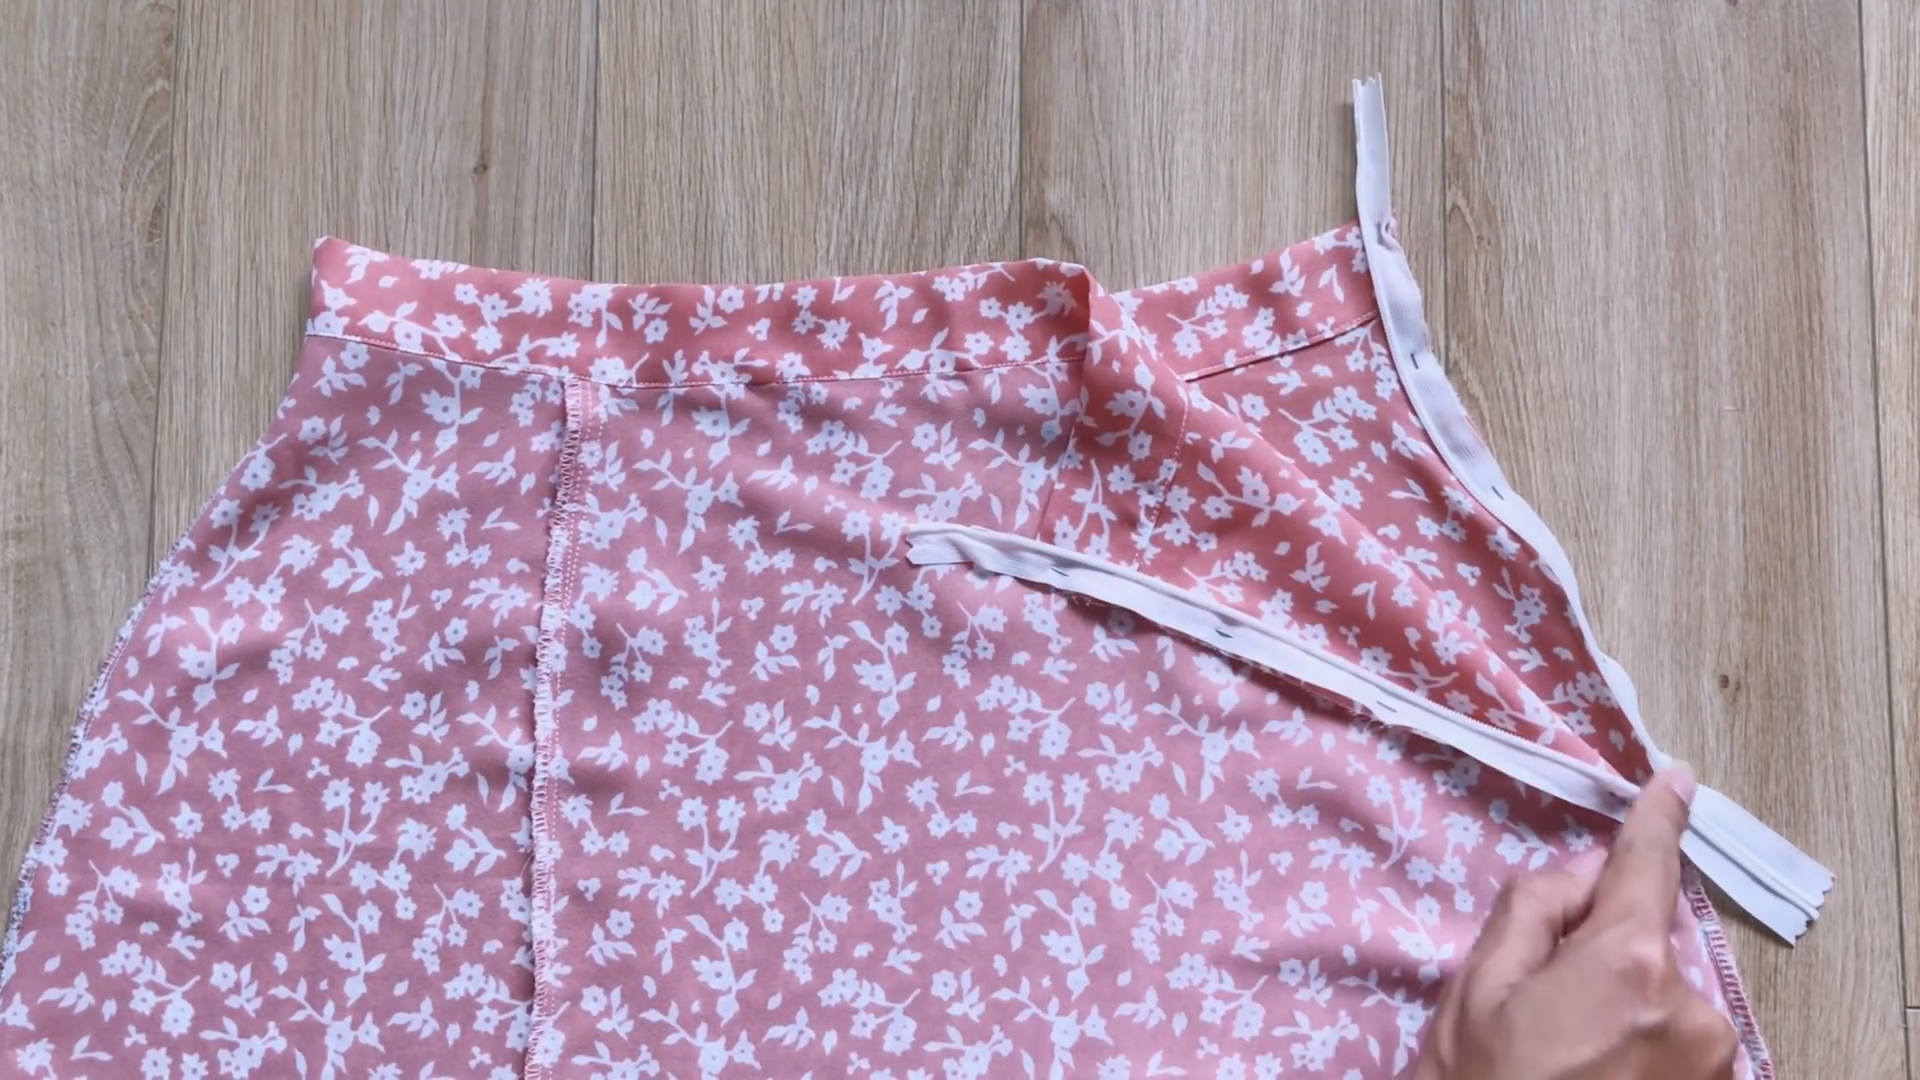
Open the zipper and repeat the same for the other side of the zipper with the other edge of the skirt.
Make sure the zipper is aligned with the waistband and the slit.

DIY Midi skirt with Leg slit
And there you have it ! A fitted waist skirt that will be suitable for your going-out occasions and the slitted legs also make you look sexier as well.
2. THE RUFFLE HEM MIDI SKIRT WITH LEG SLIT
THE MAIN PART
Follow the same steps to make the main part of the skirt but do not sew the slitted part yet.
THE RUFFLE
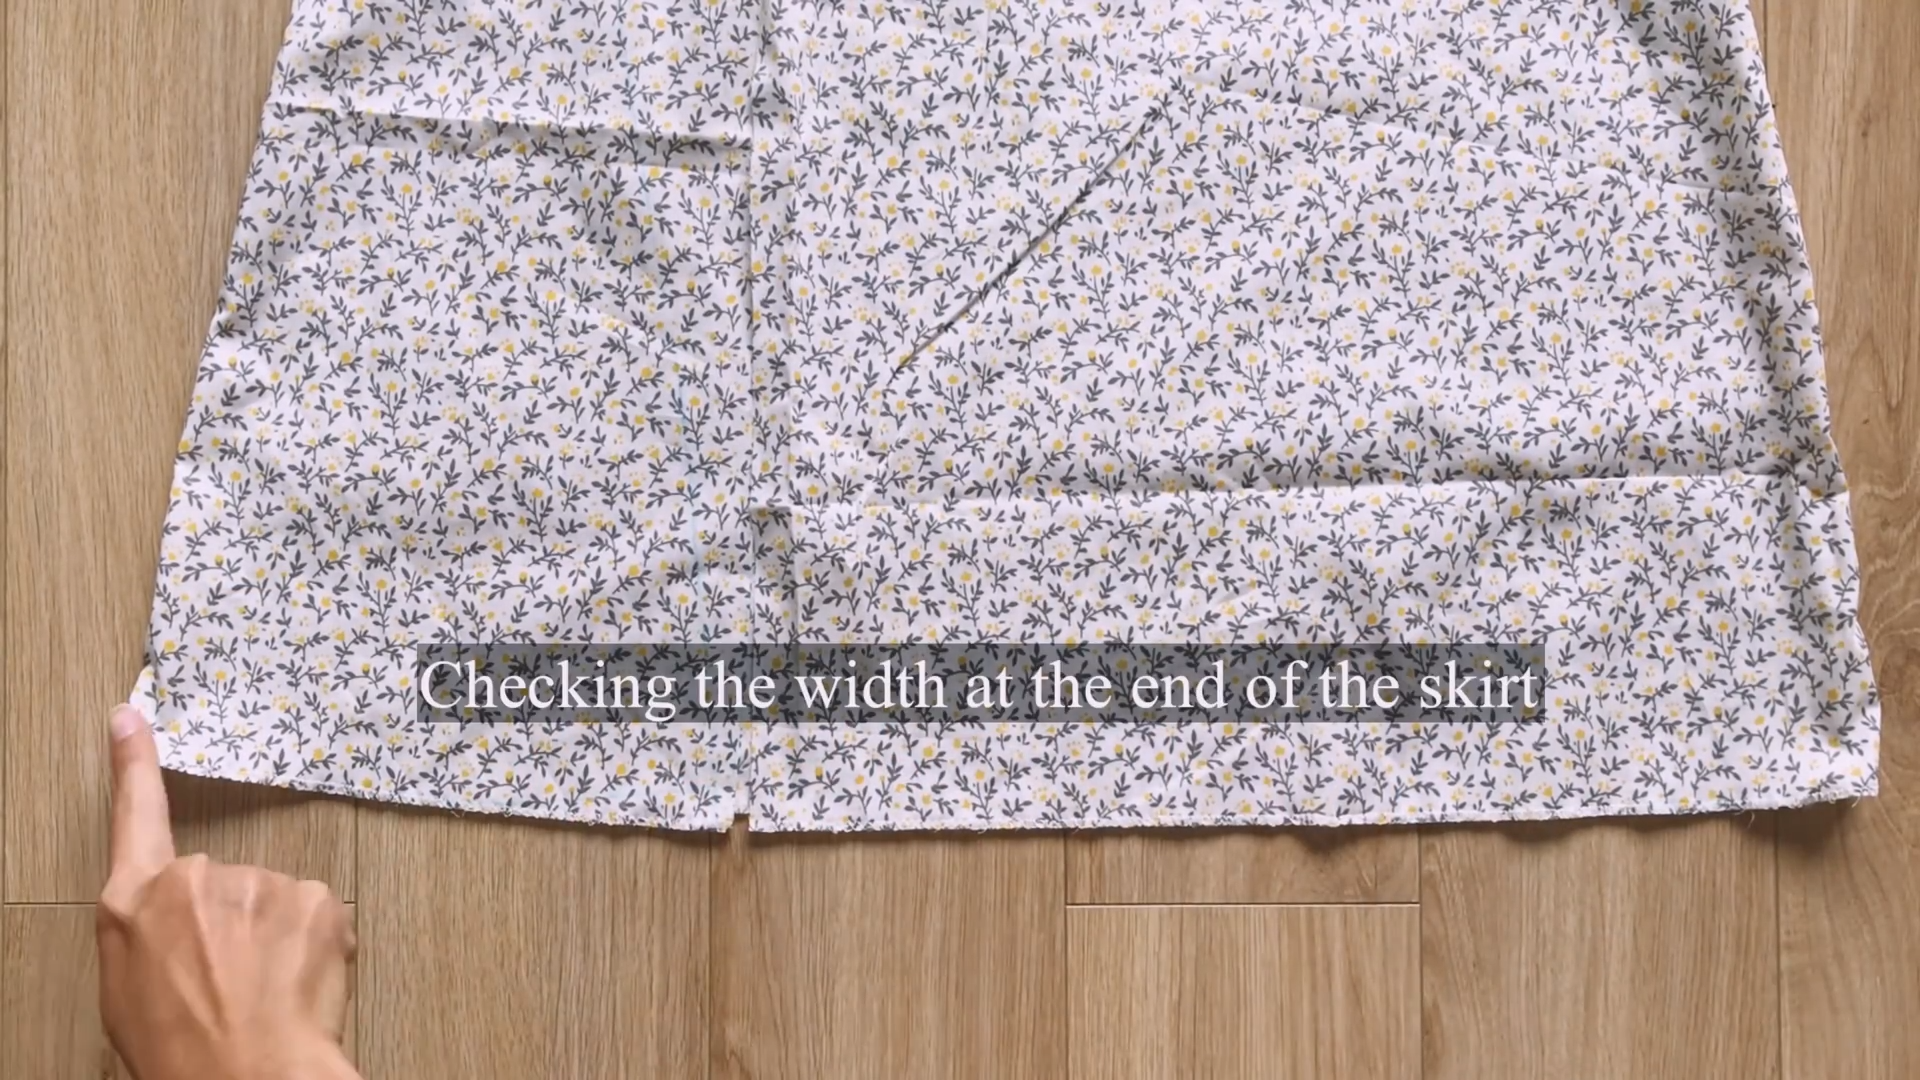
Re-measure the width at the end of the skirt to make sure it’s the right size.
Cut a rectangle of fabric for the ruffle.
The width of the rectangle should be 20 cm, which is the length of the ruffle that you want. The width of the rectangle should be one and a half times the width of the end of the skirt.

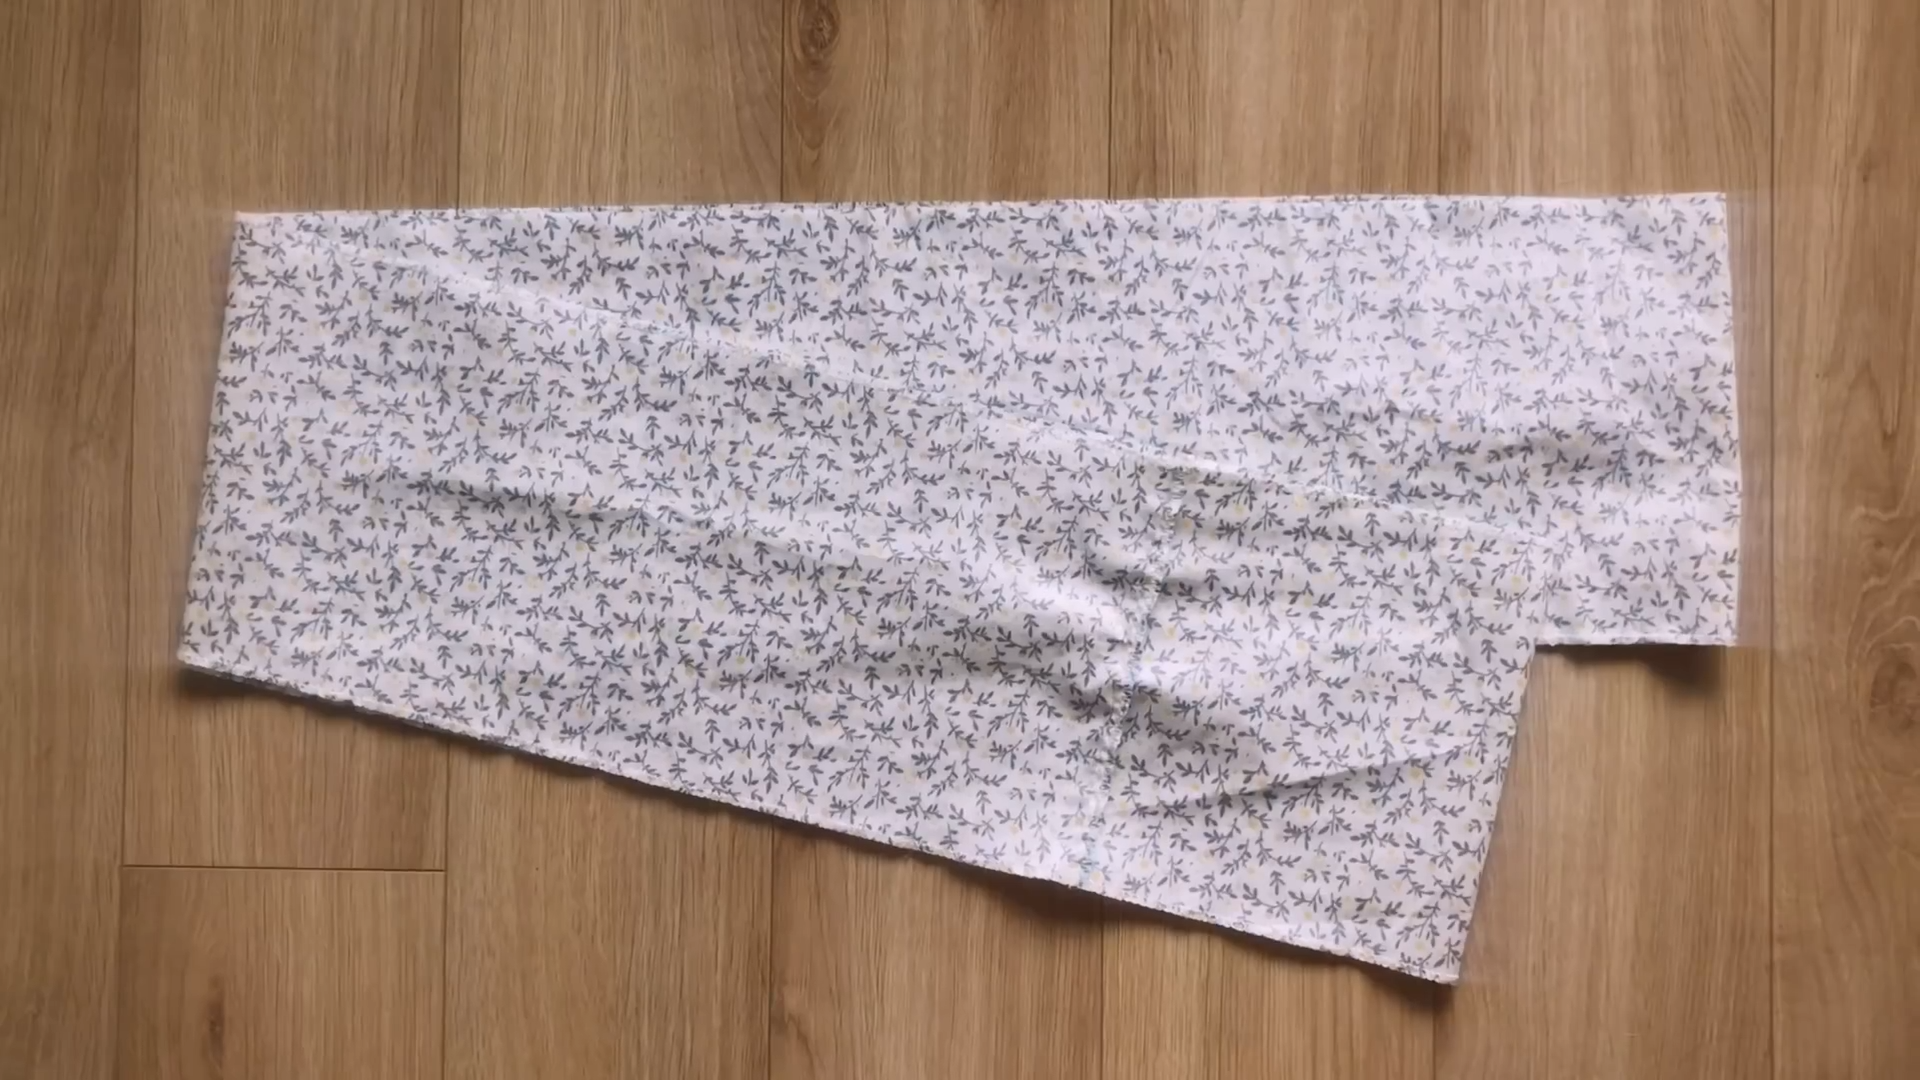
Fold one long side of the rectangle inside twice.

Sew along the edge to hem it.
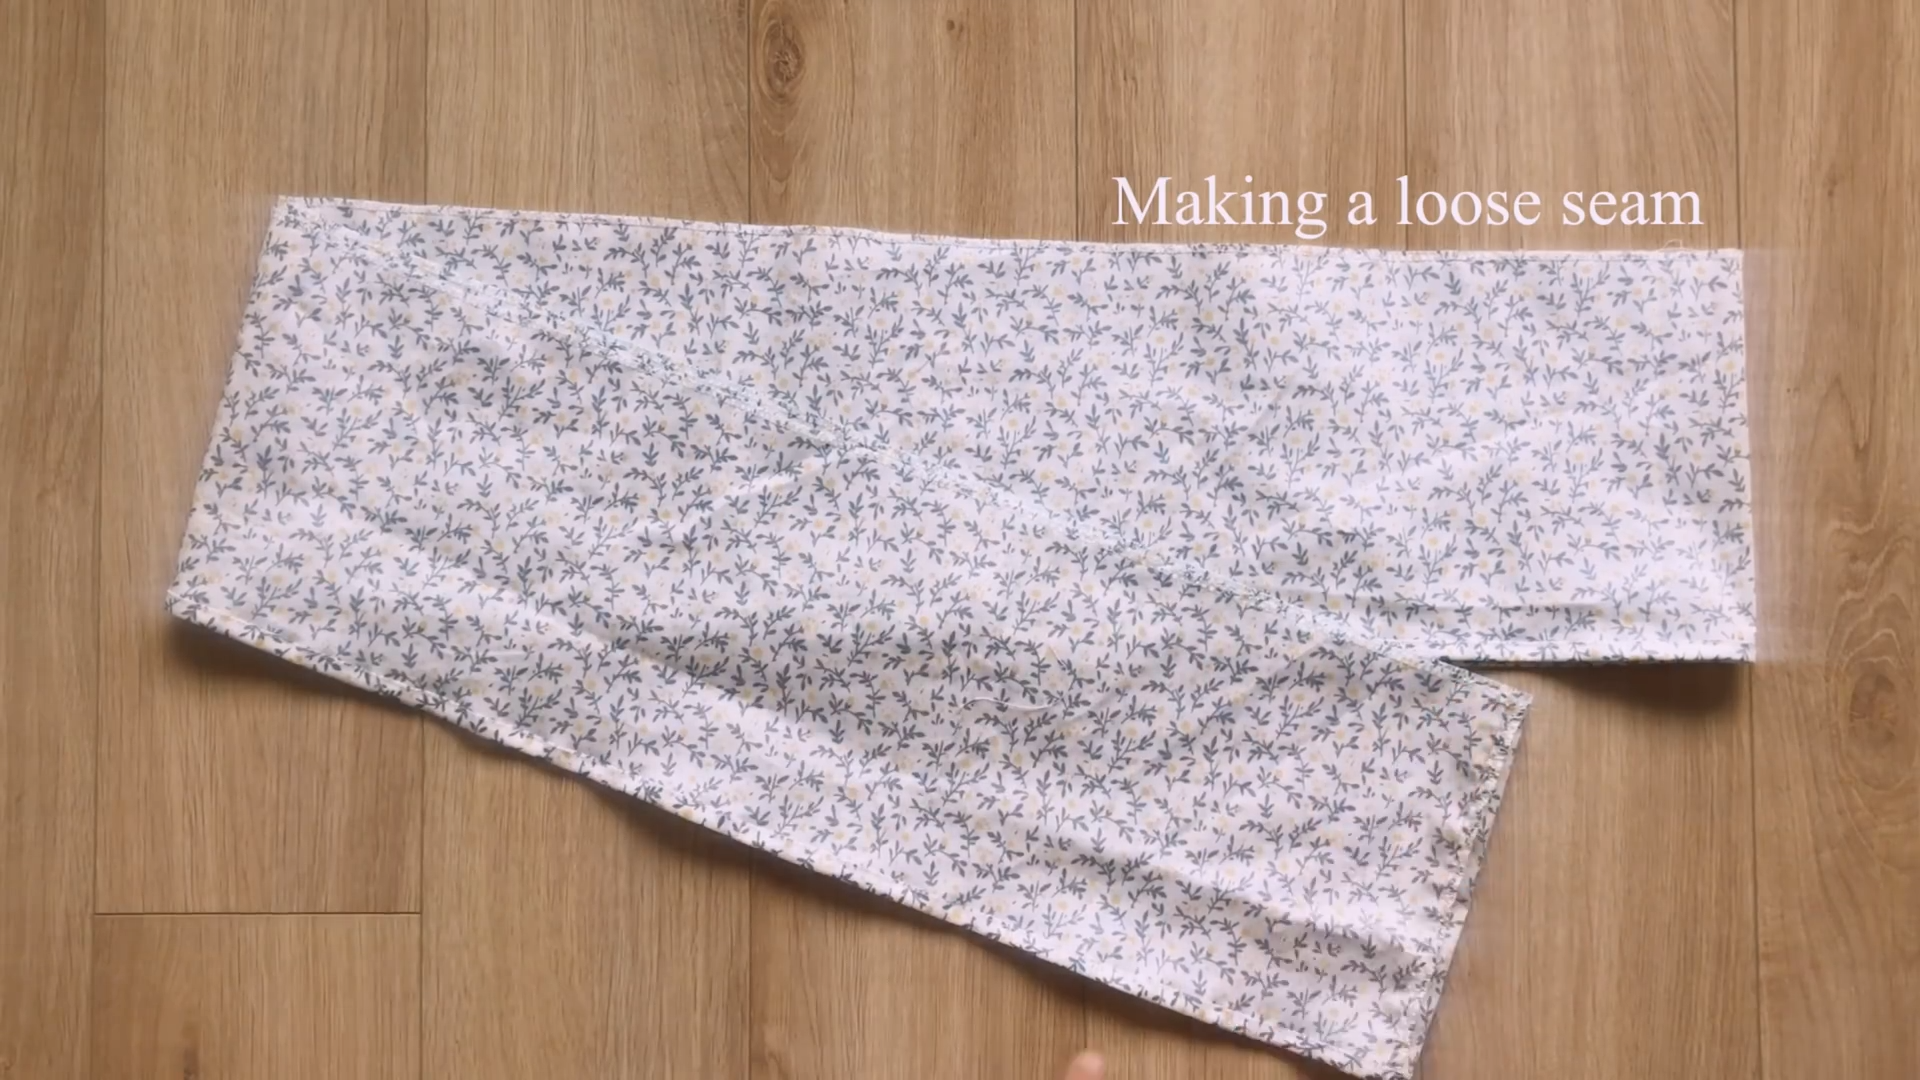
On the other long side of the rectangle, make a loose seam first.

Then create a gathering fabric.
Make sure the final width of the gathering fabric will be the same as the width at the end of the skirt so you can connect them together later.
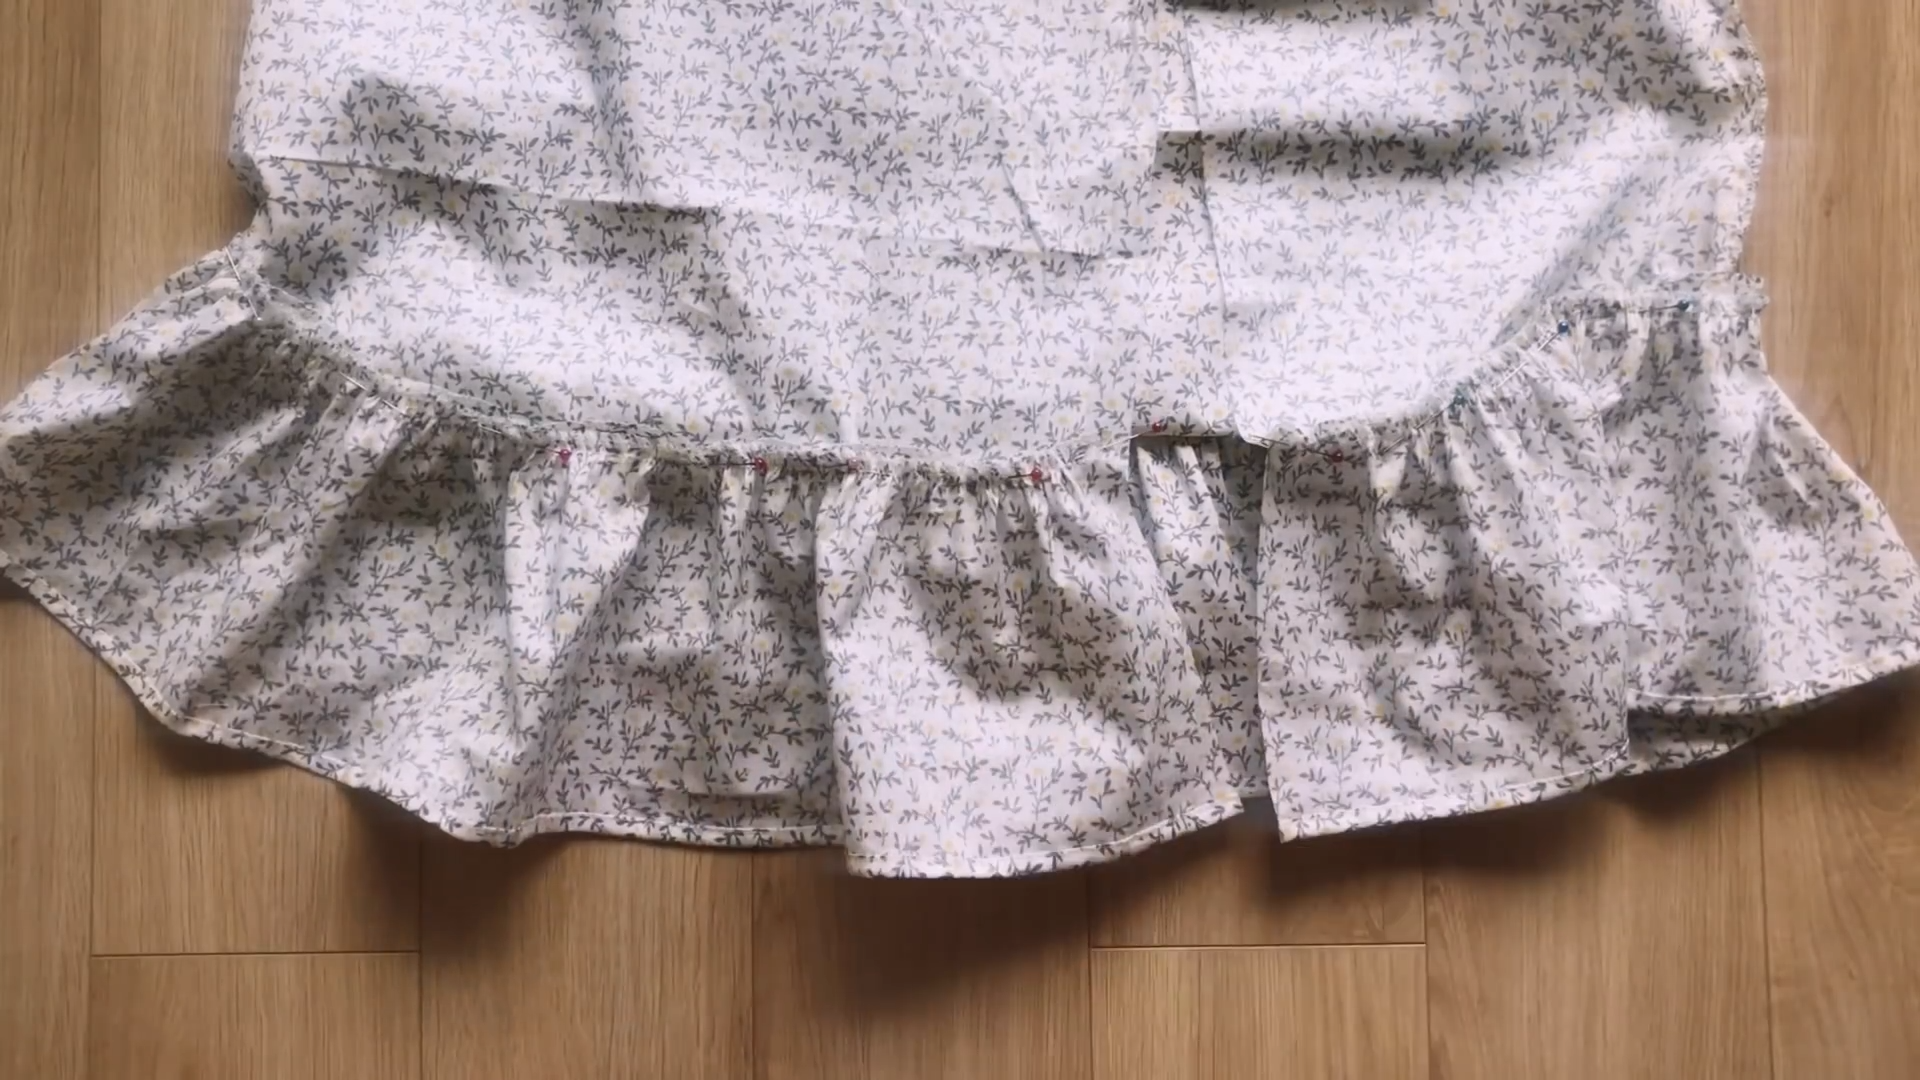
Pin the ruffle fabric to the end of the skirt, right sides facing each other. Then, sew along the edge to connect them together.
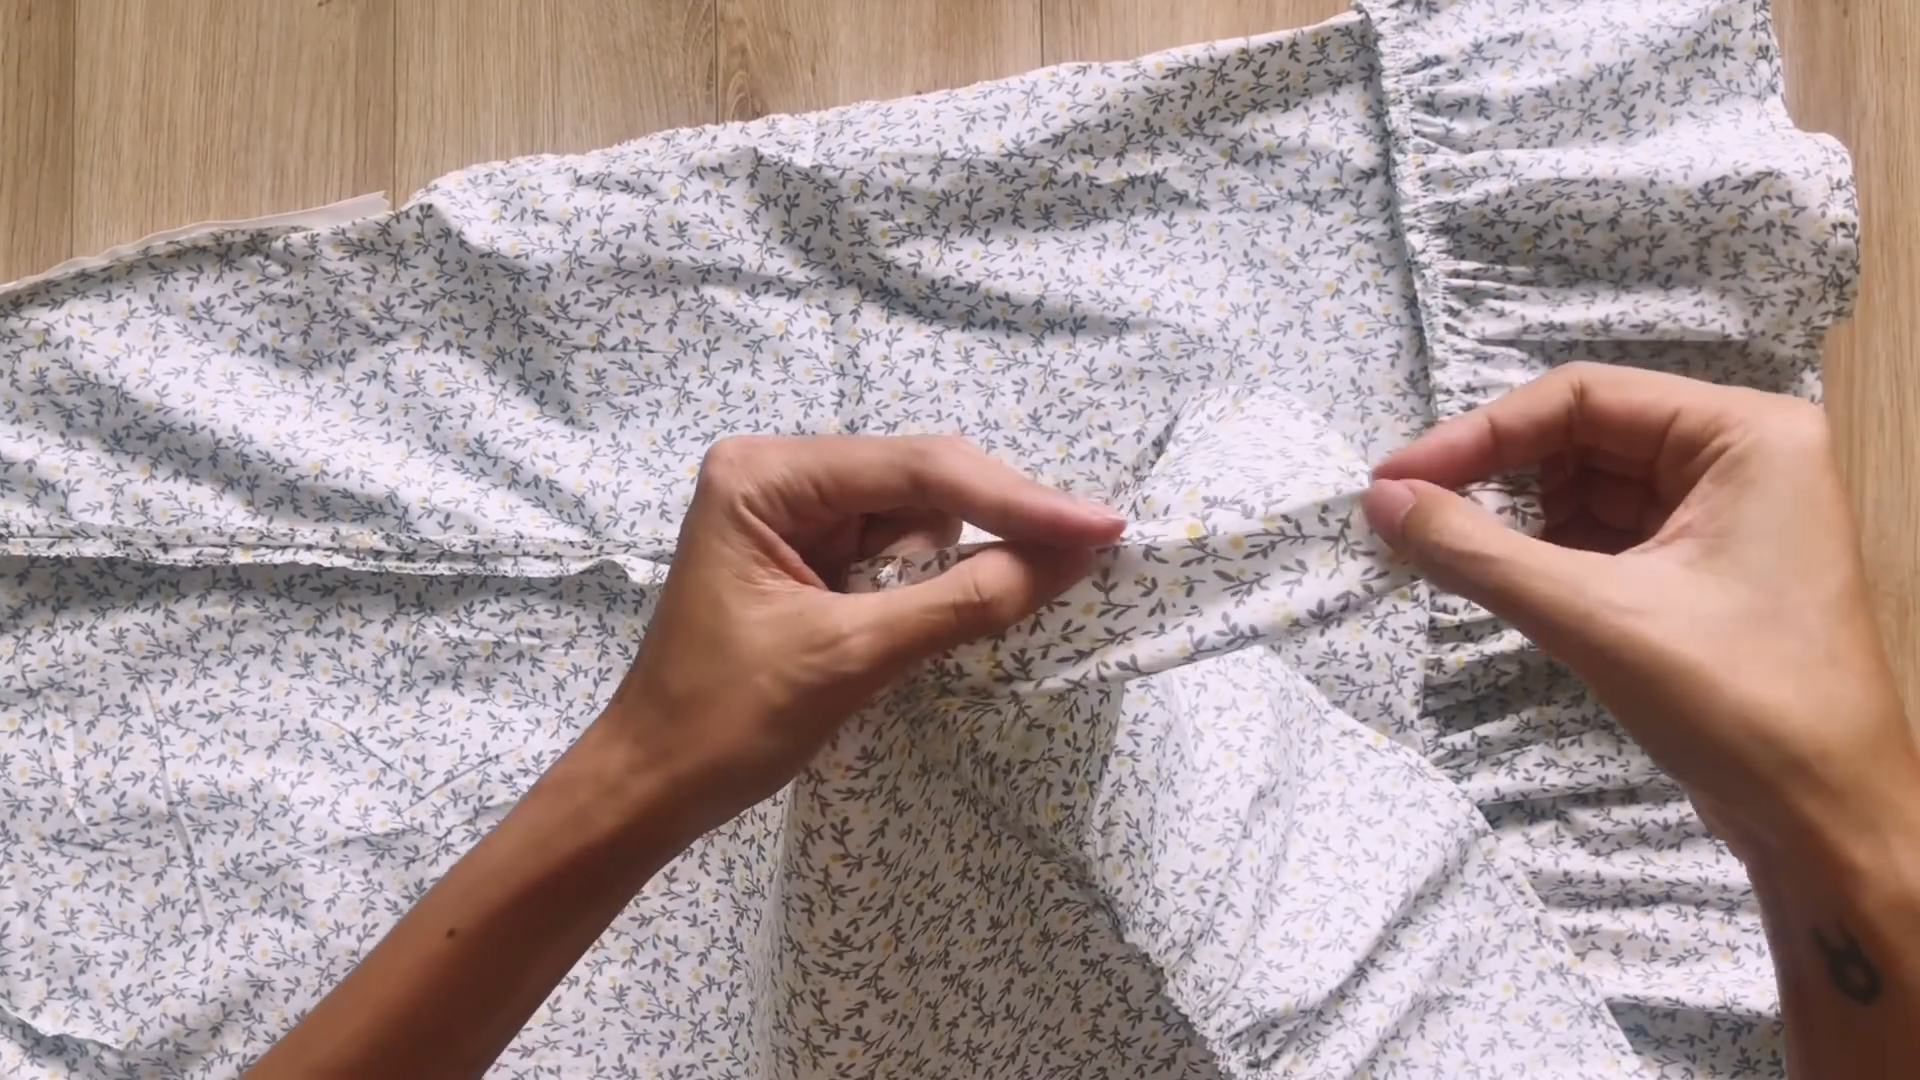
After that, finish the slitted part by folding the edge fabric inside twice and sewing it together.

DIY Ruffle Hem Midi skirt with Leg slit
And voila ! You have made yourself a skirt with vintage feel to it.
You can try both skirt styles to see which suits you better and also experiment with different fabrics and colors.