DIY HIGH WAISTED PANTS from scratch - Me-made summer collection - Ep 4

DIY HIGH WAISTED PANTS from scratch - Me-made summer collection - Ep 4
Welcome or welcome back to my channel. My name is Jess and I love doing DIY, making clothes in a "simply but pretty" way.
Today’s tutorial, I would like to share with you the way I made this high waisted pants for my summer outfit. This's a very casual pants that you can wear in any occasion like loungewear at home, beach day or just a catching up with friends on the weekend at the park. It's also one of my DIY from my "Me-made summer collection"
So I hope you will try it out. Let’s get started!
WHAT YOU’LL NEED
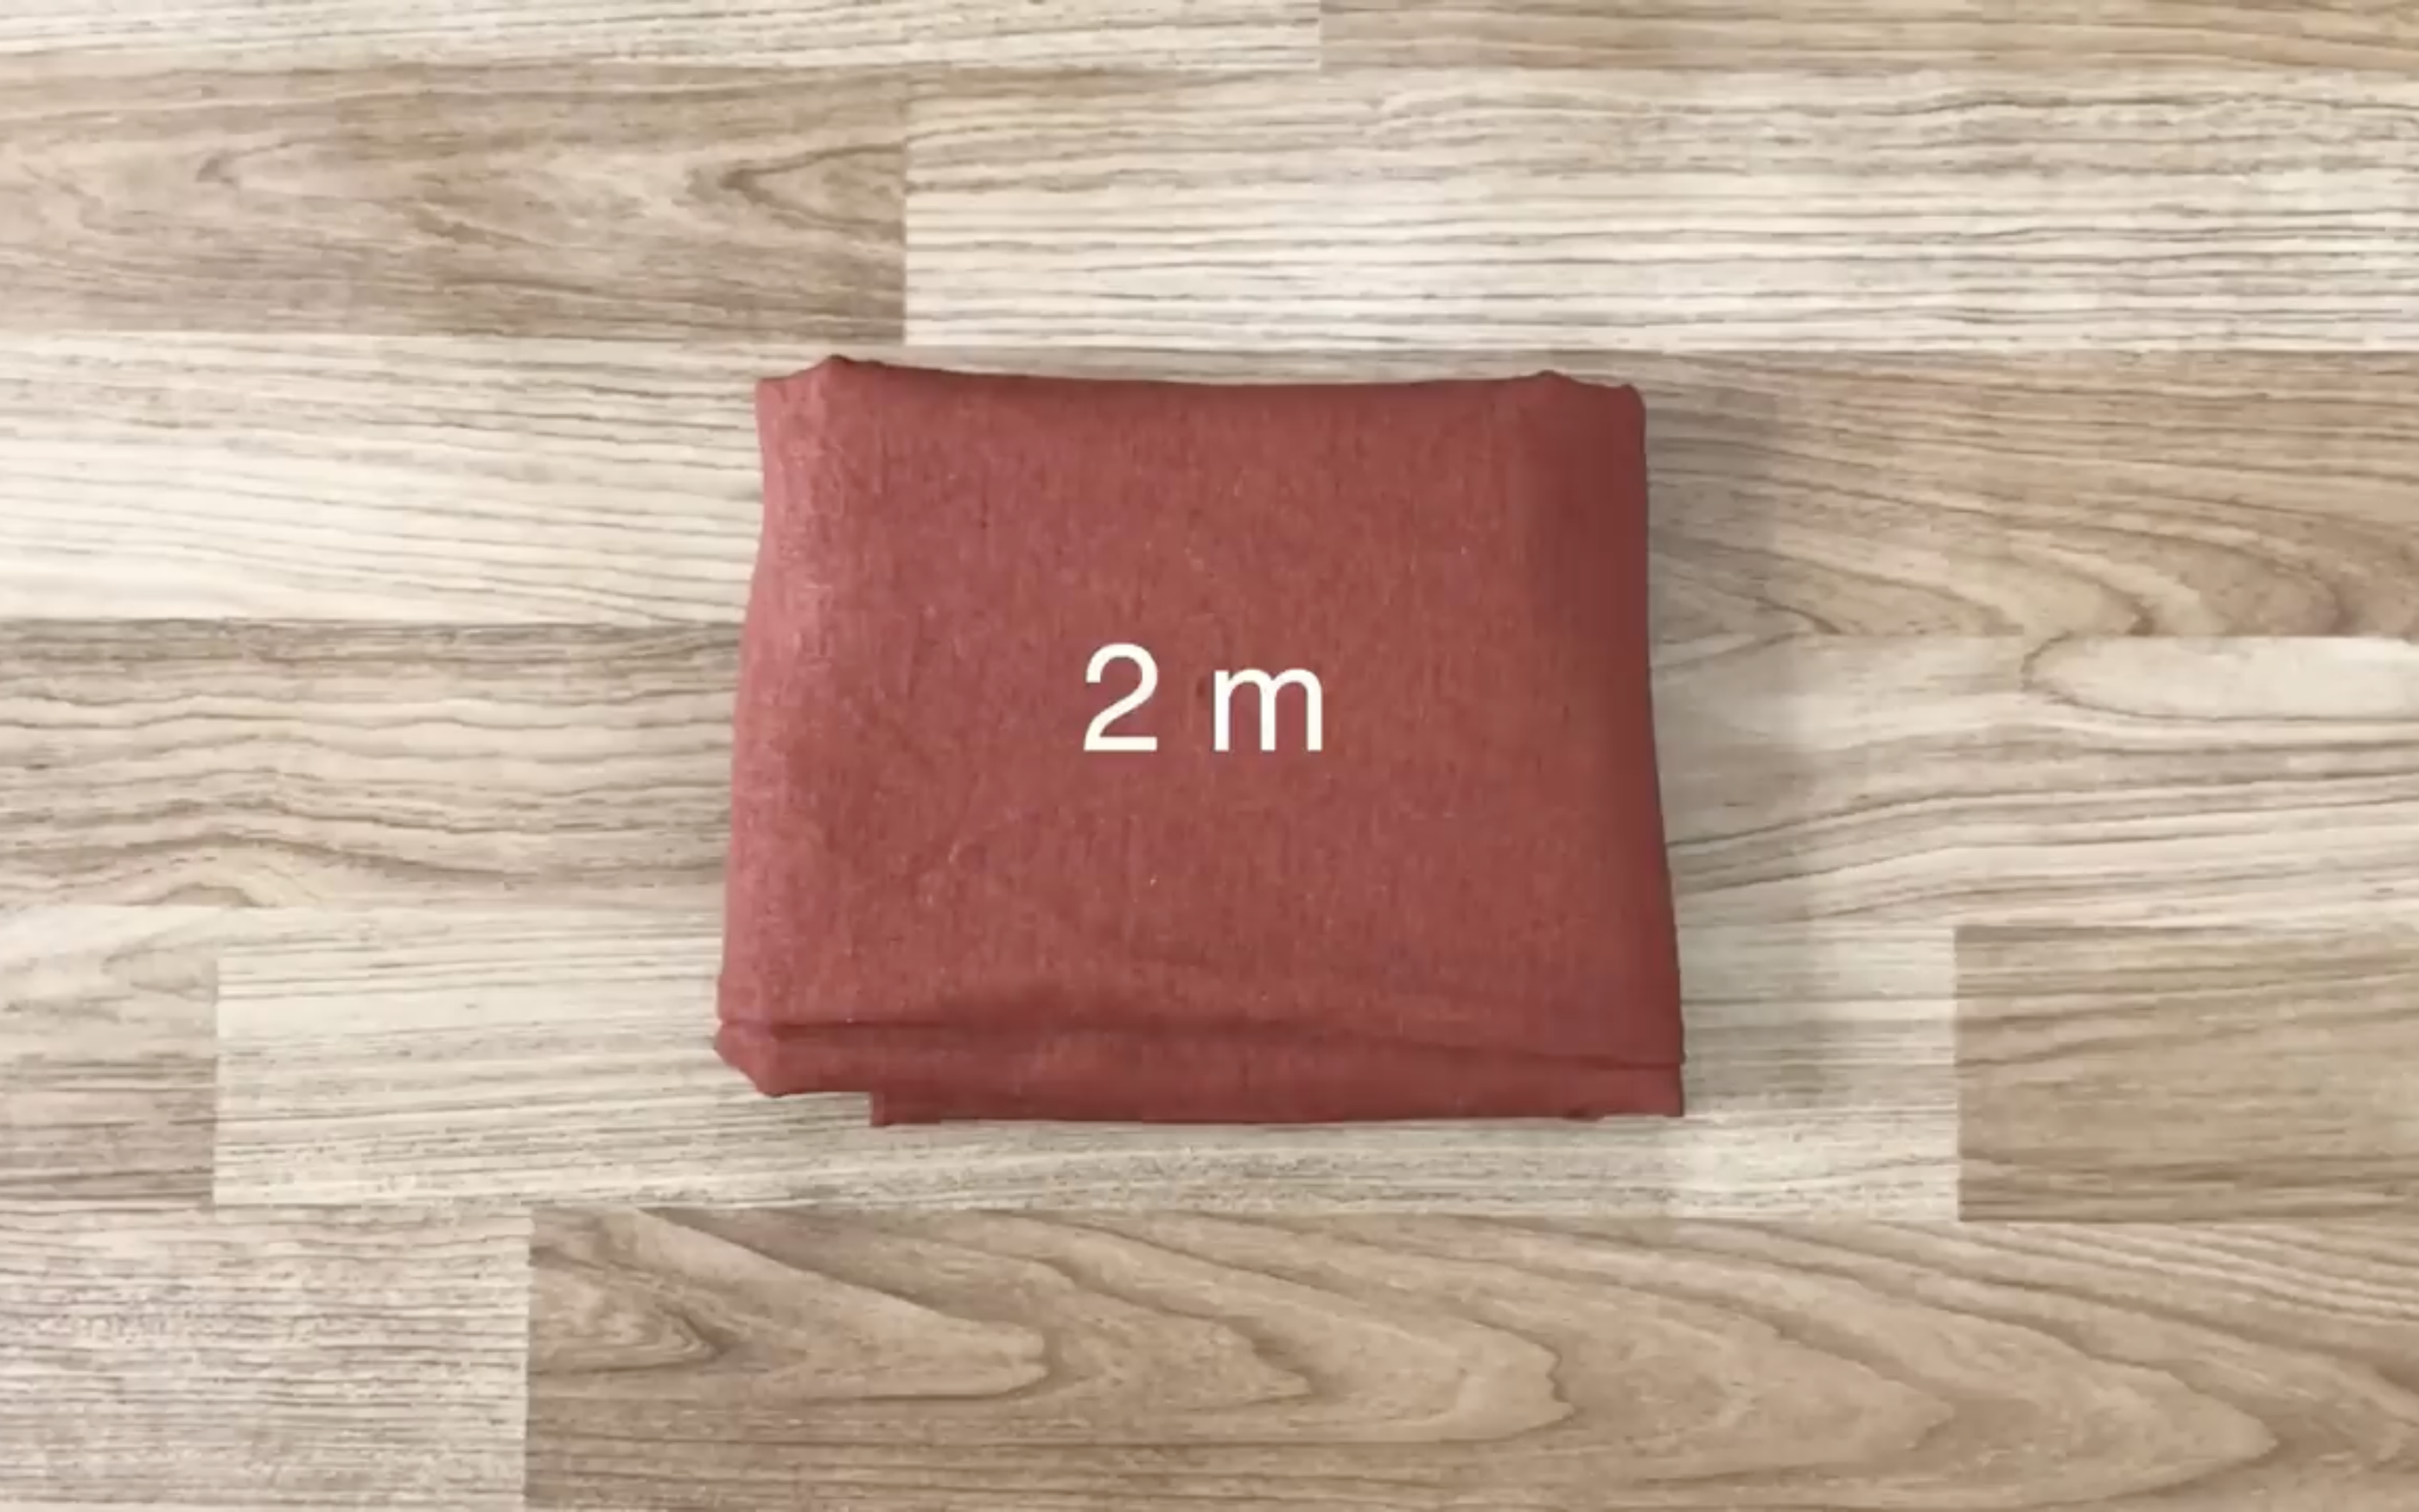
Loose linen with 2m
Pattern paper
Sewing machine
Pins
Scissors
Ruler
Long stick
MAKING THE PATTERNS
Here’s the pattern for the project. To get a clear understanding of all the measurements needed for the pattern, watch the video from 0:18 to 6:46.
Remember, you can adjust these measurements to fit your own dimensions!

THE FRONT PANTS PATTERN

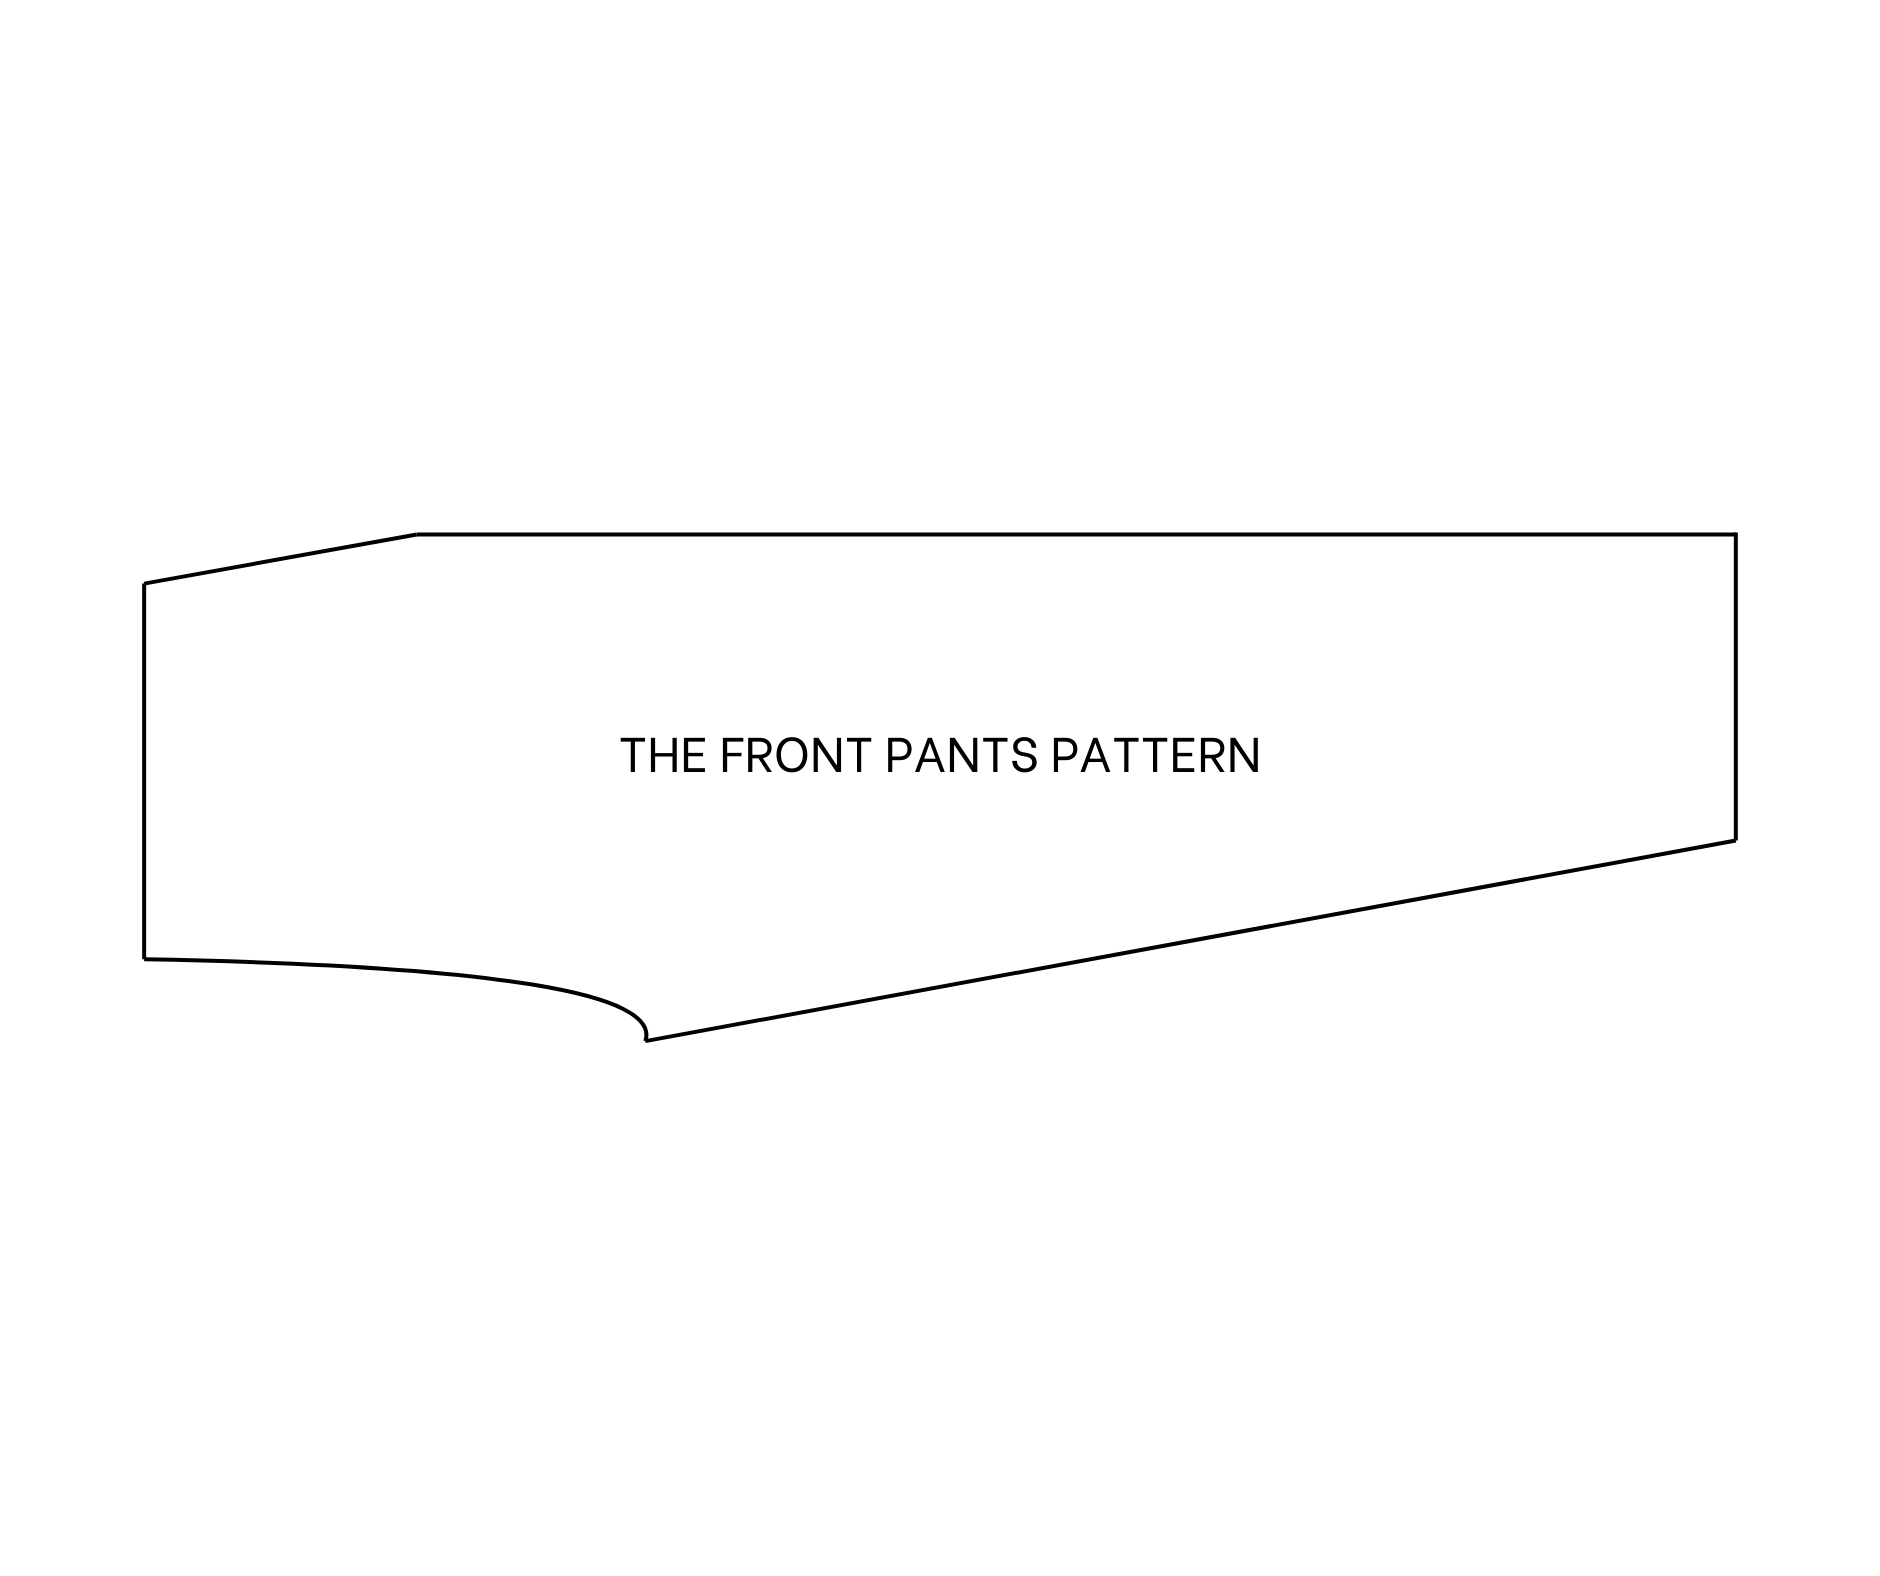
Draw two rectangles with 31 cm which is 1.5 times a quarter of your hip size - 3 cm and 80 cm which is the length of the pants that you want.
At the bottom of the left side, go up 5 cm and mark there.
Then also go to the right 28 cm which is the width from the belly button to over the crotch and make the second mark.
Then connect two marks together.
Based on the line just drew, draw a curved line to create the crotch area for the pants.
At the top of the right, go down 18 cm which is the width of the leg wanted, and make a mark there.
Then connect that mark to the second mark made before that.
At the top of the left, go down 3 cm and mark there.
Also mark at 16 cm from the top to the right.
Then connect two marks together. It will be the pocket area for the pants.
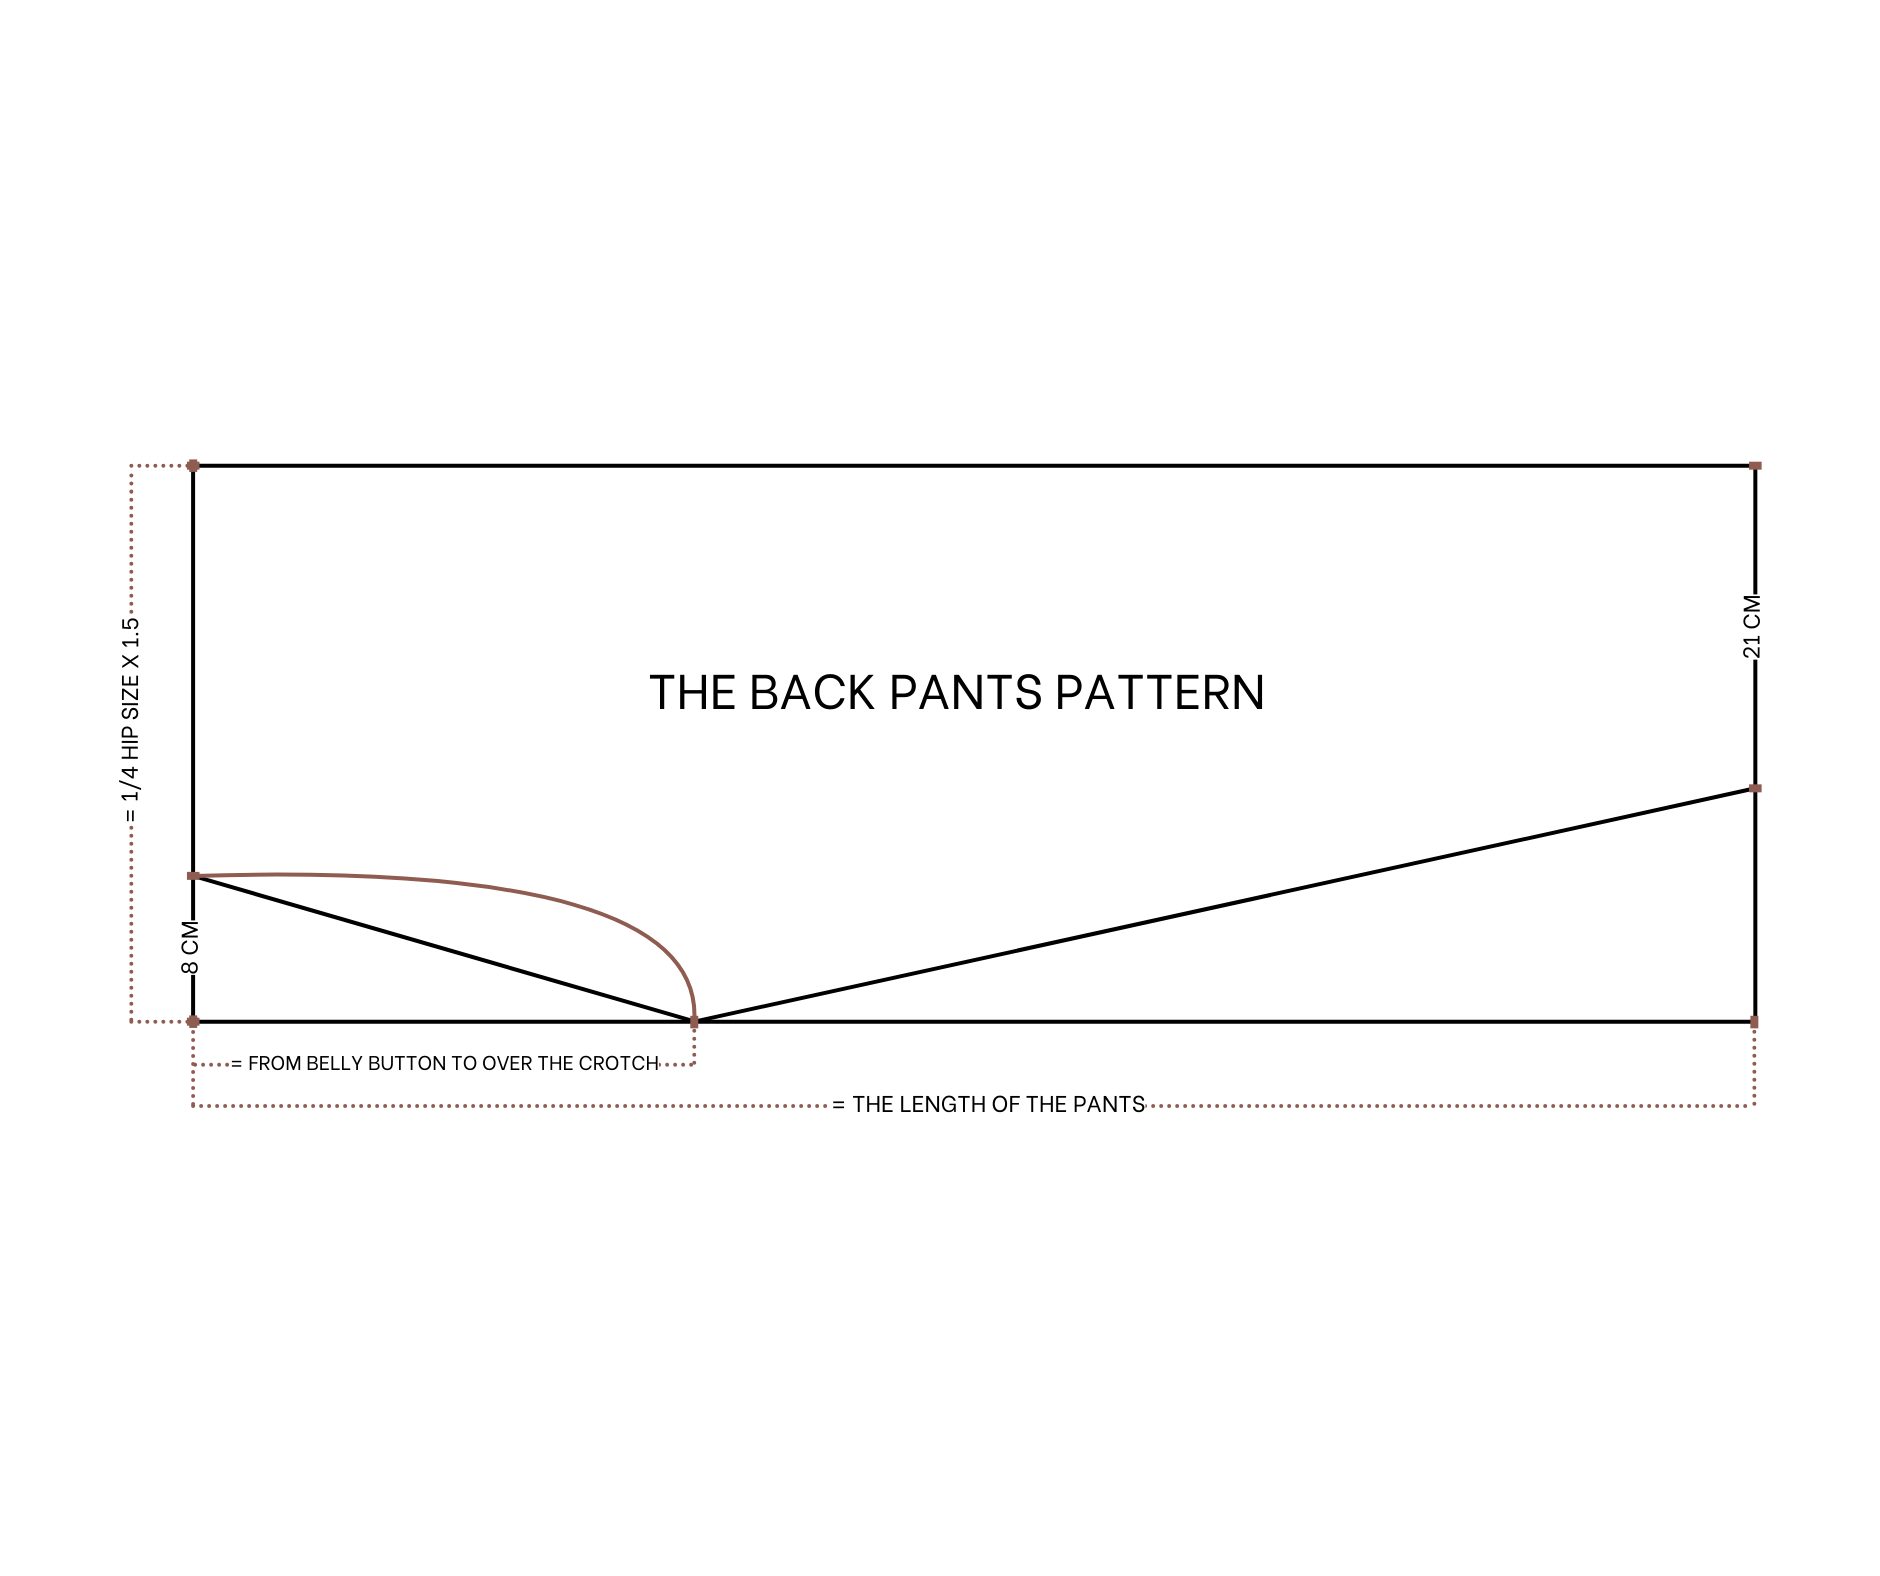
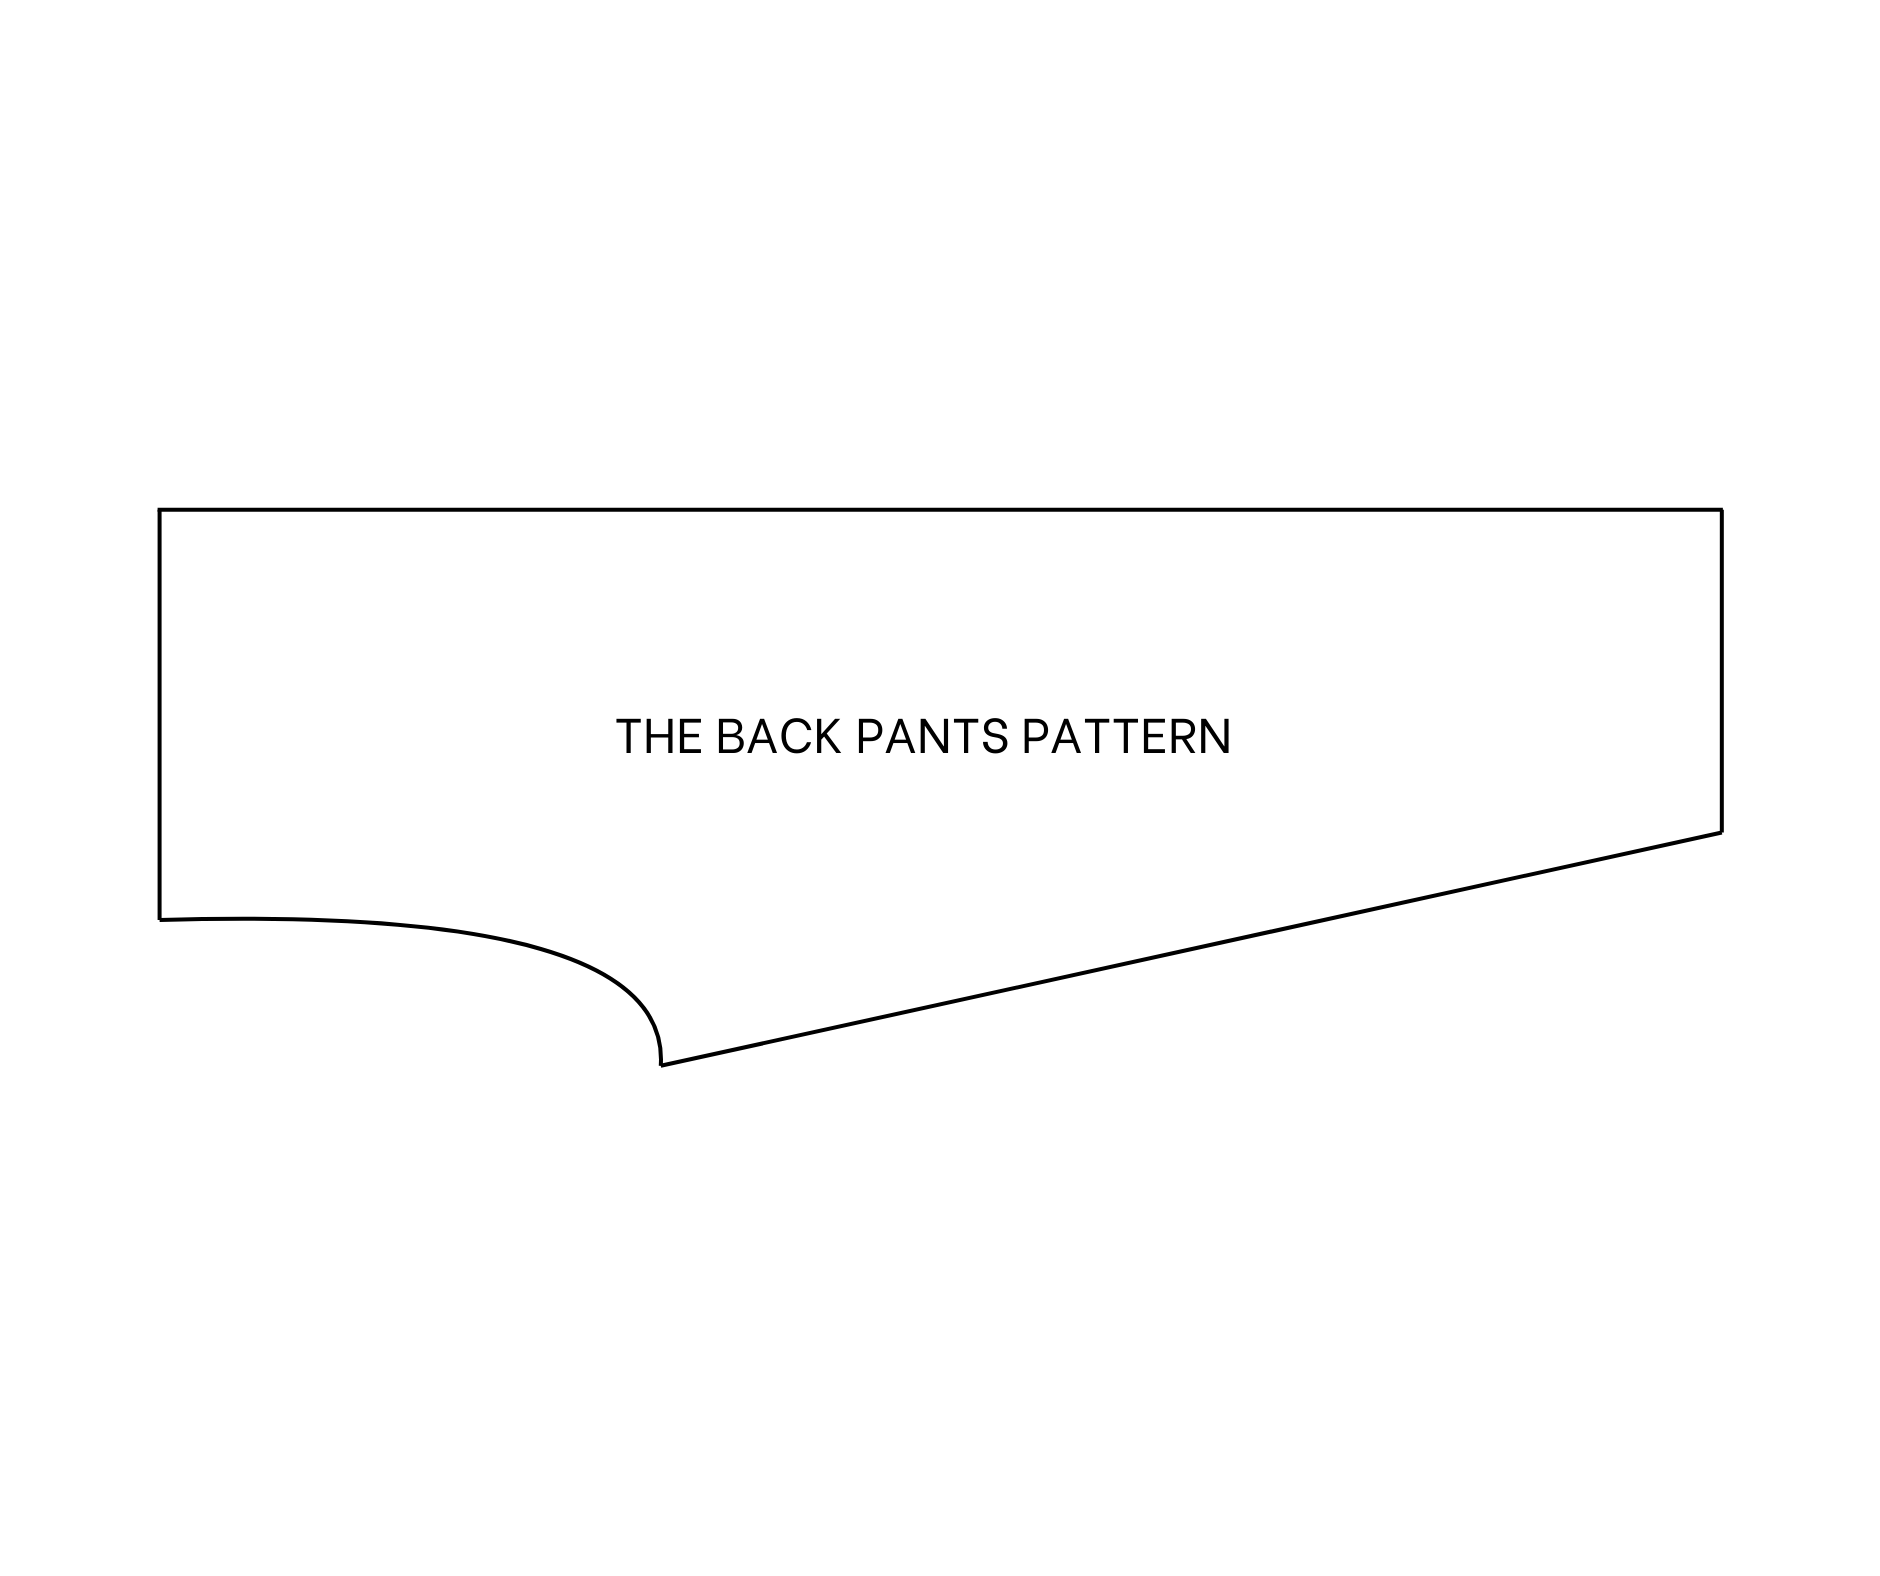
THE BACK PANTS PATTERN
Draw two rectangles with 34 cm width which is 1.5 times a quarter of your hip size and 80 cm length which is the length of the pants that you want.
Because the back of the pants needs to cover the butt, make the curve at the crotch line bigger than the front by going up 8 cm instead of 5 cm like the front.
At the leg, go down 21 cm which is 3 cm bigger than the front.
Because the rectangles made for the back are bigger than the front 3 cm.
THE WAISTBAND PATTERN

Cut a long rectangle with 10 cm width and 98 cm length which is the total width of the front and the back pants.
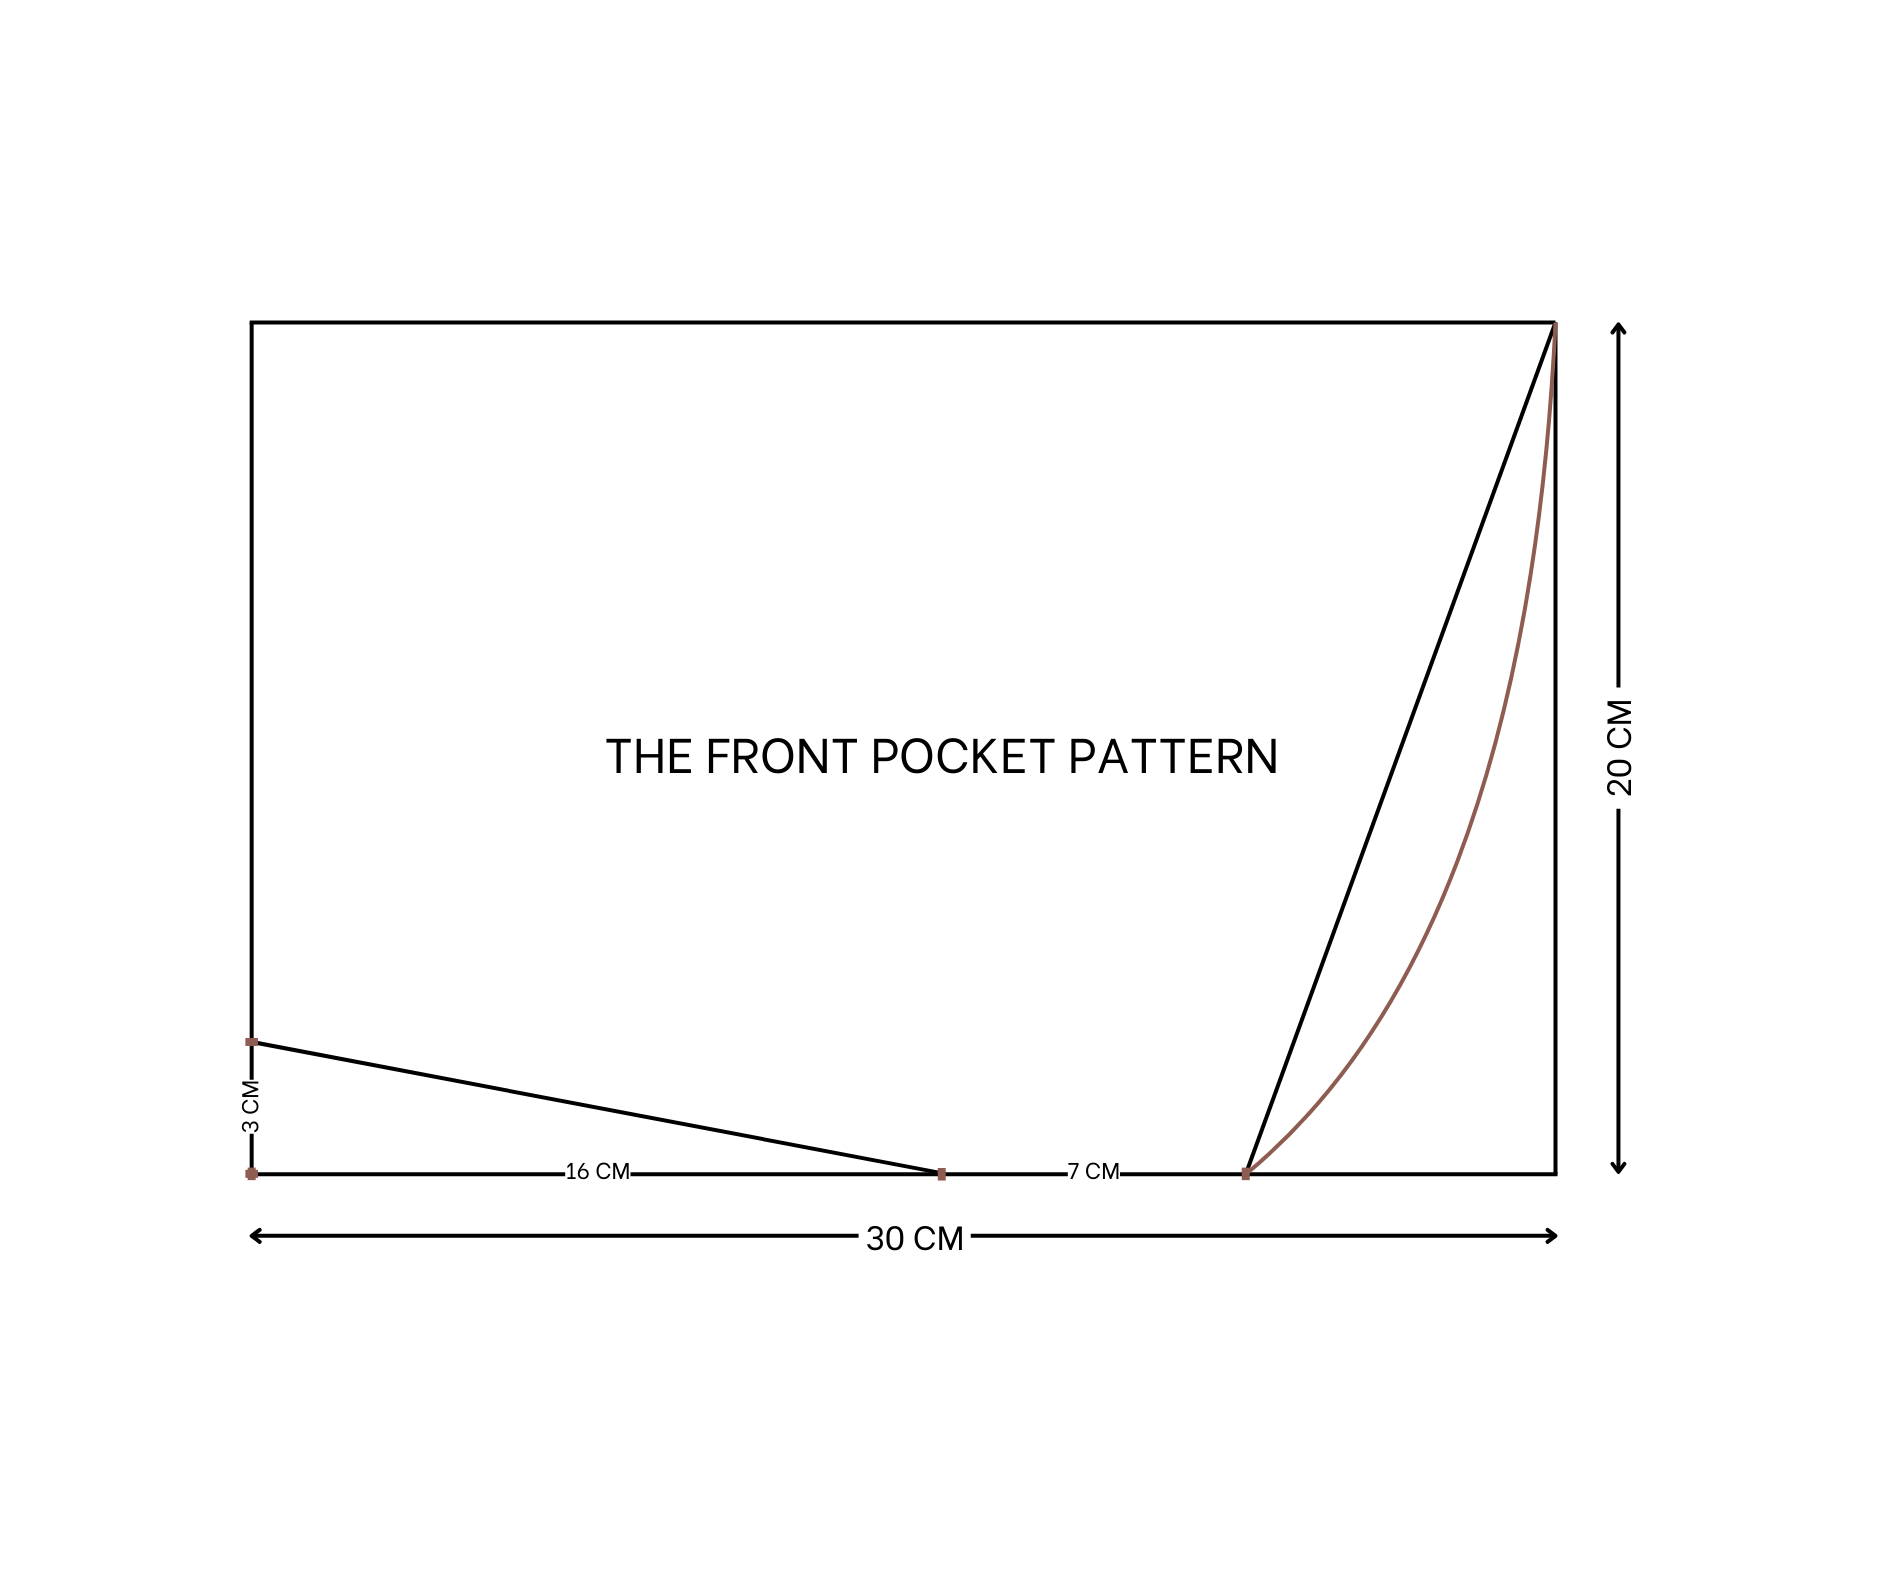
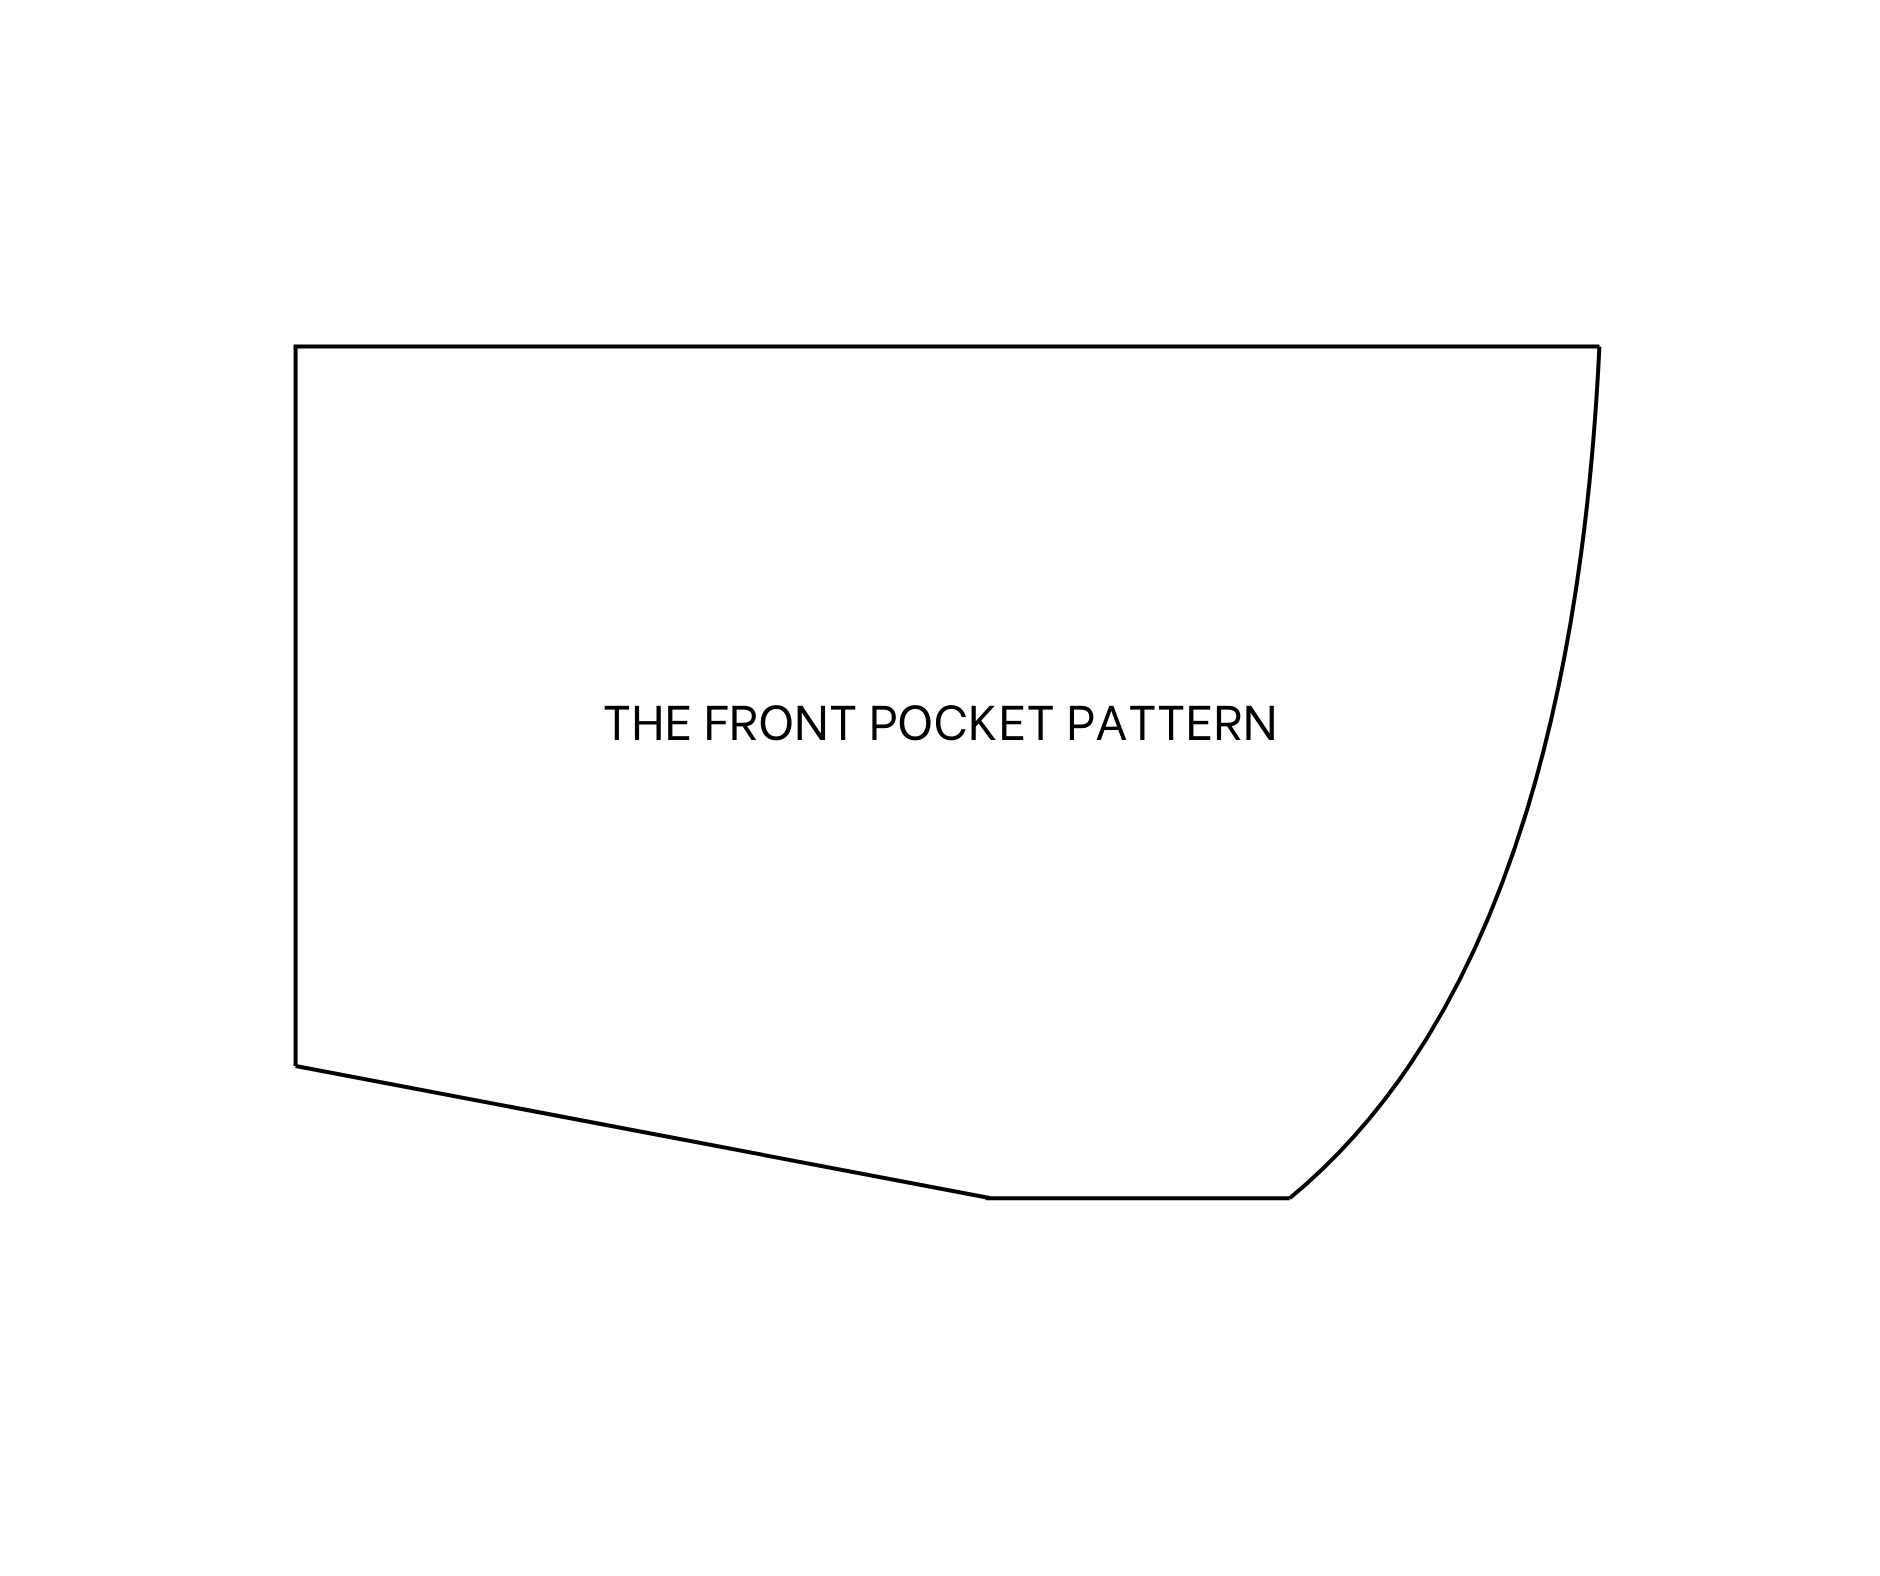
THE POCKET PATTERN
THE FRONT POCKET
Cut two rectangles with 20 cm width and 30 cm length.
At the bottom of the left, go up 3 cm and mark there.
Then connect that mark to the right at 16 cm. It will be the connected area with the pocket of the front pants.
After that, create the depth for the pocket by drawing a curved line.
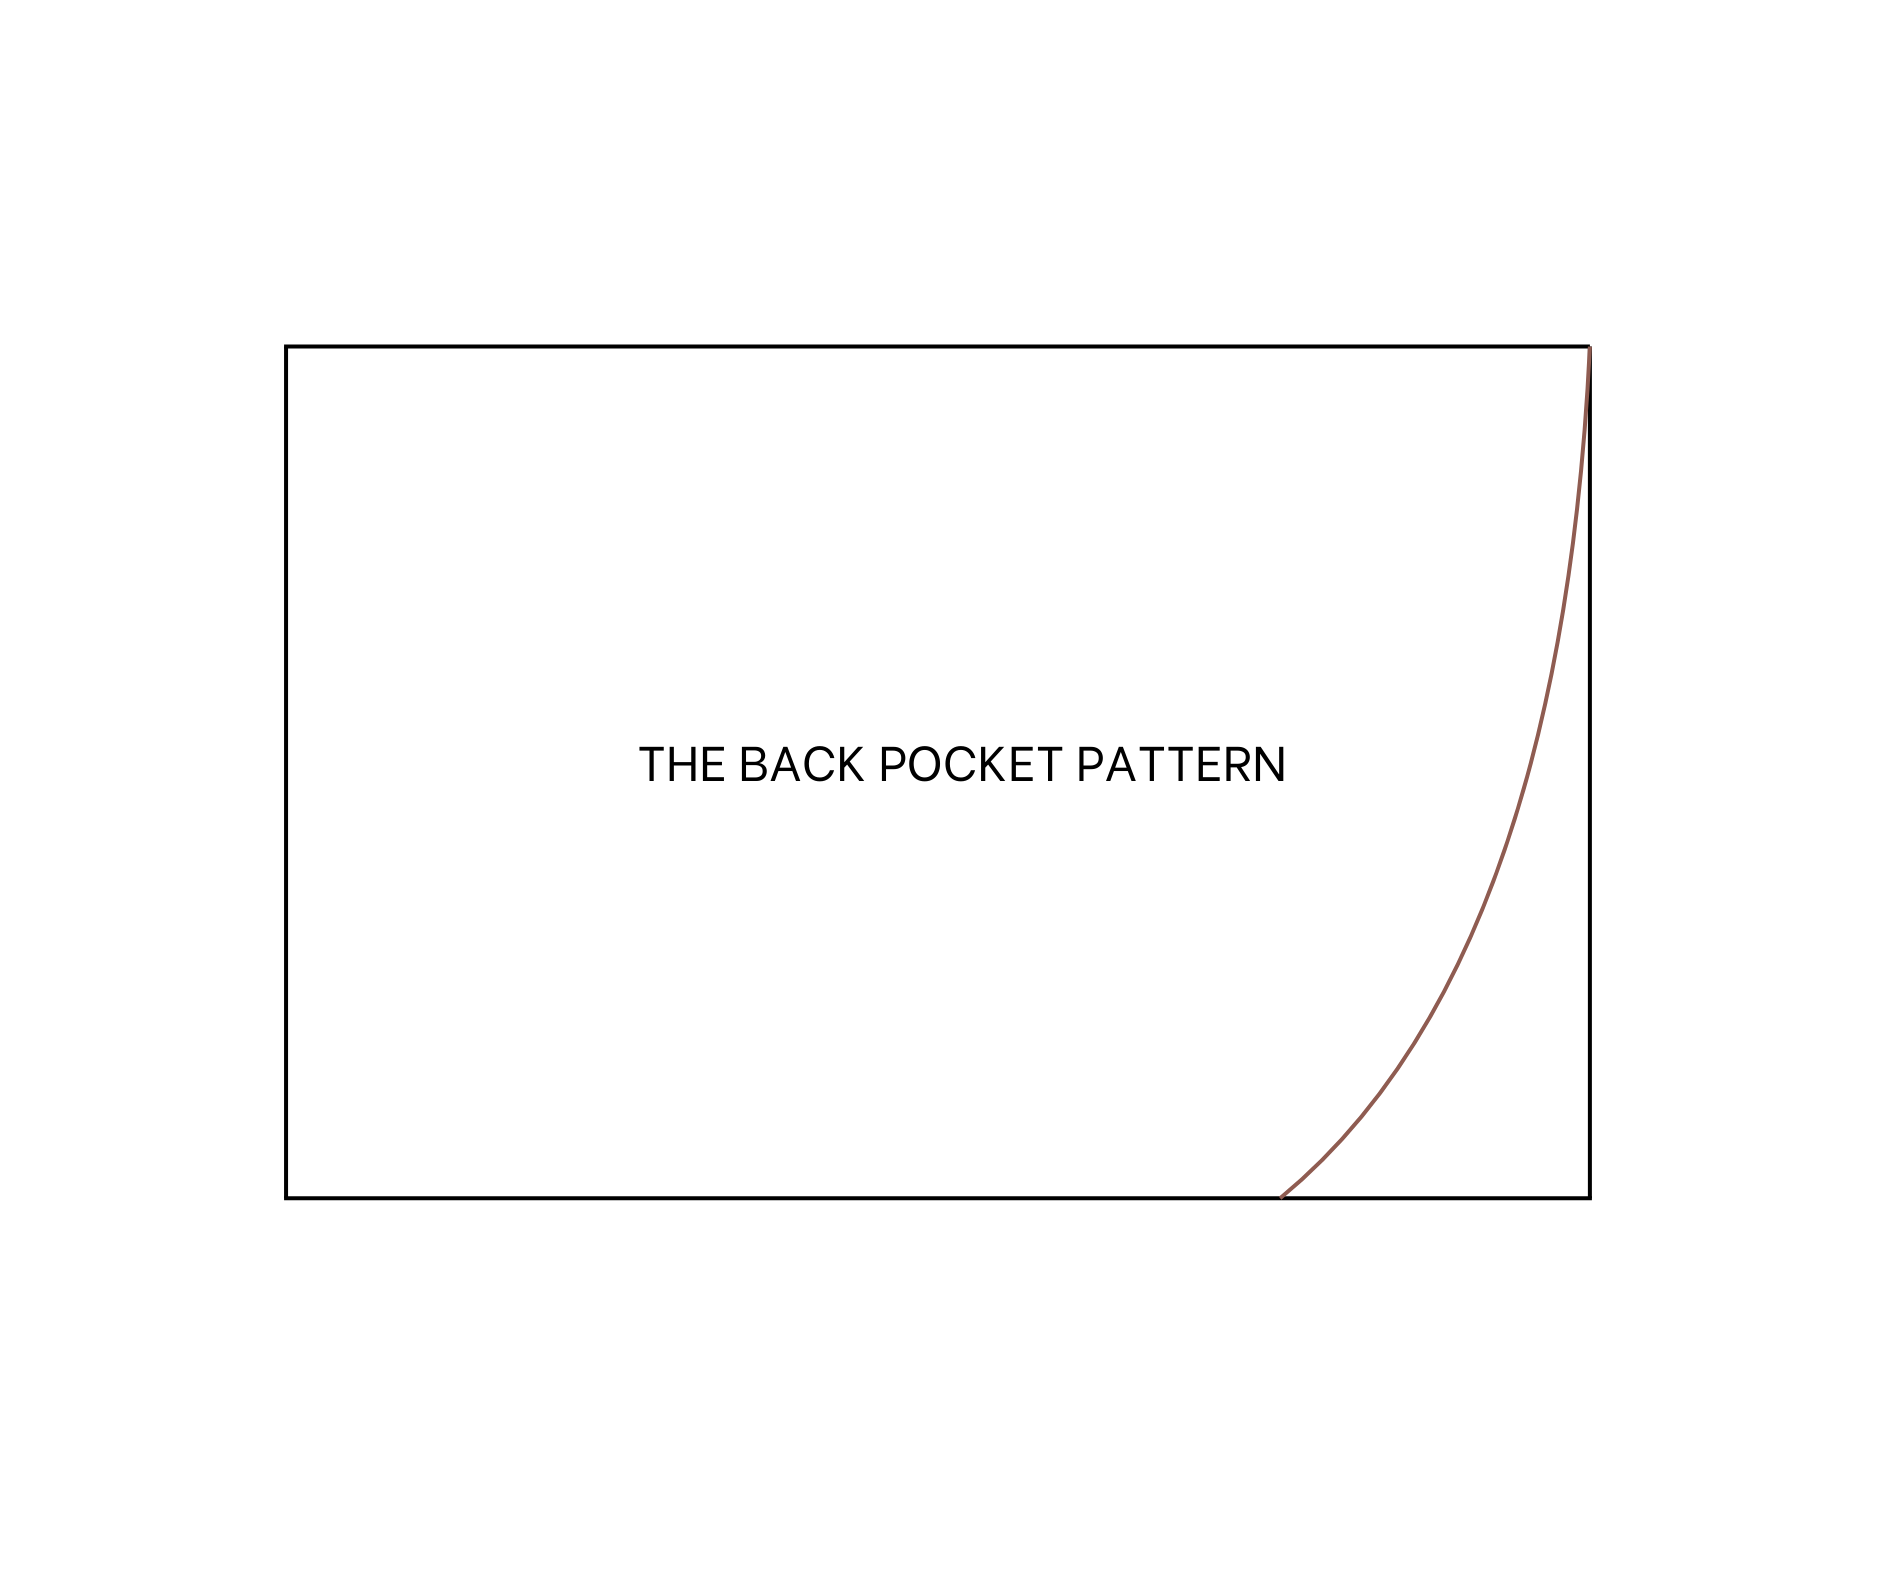
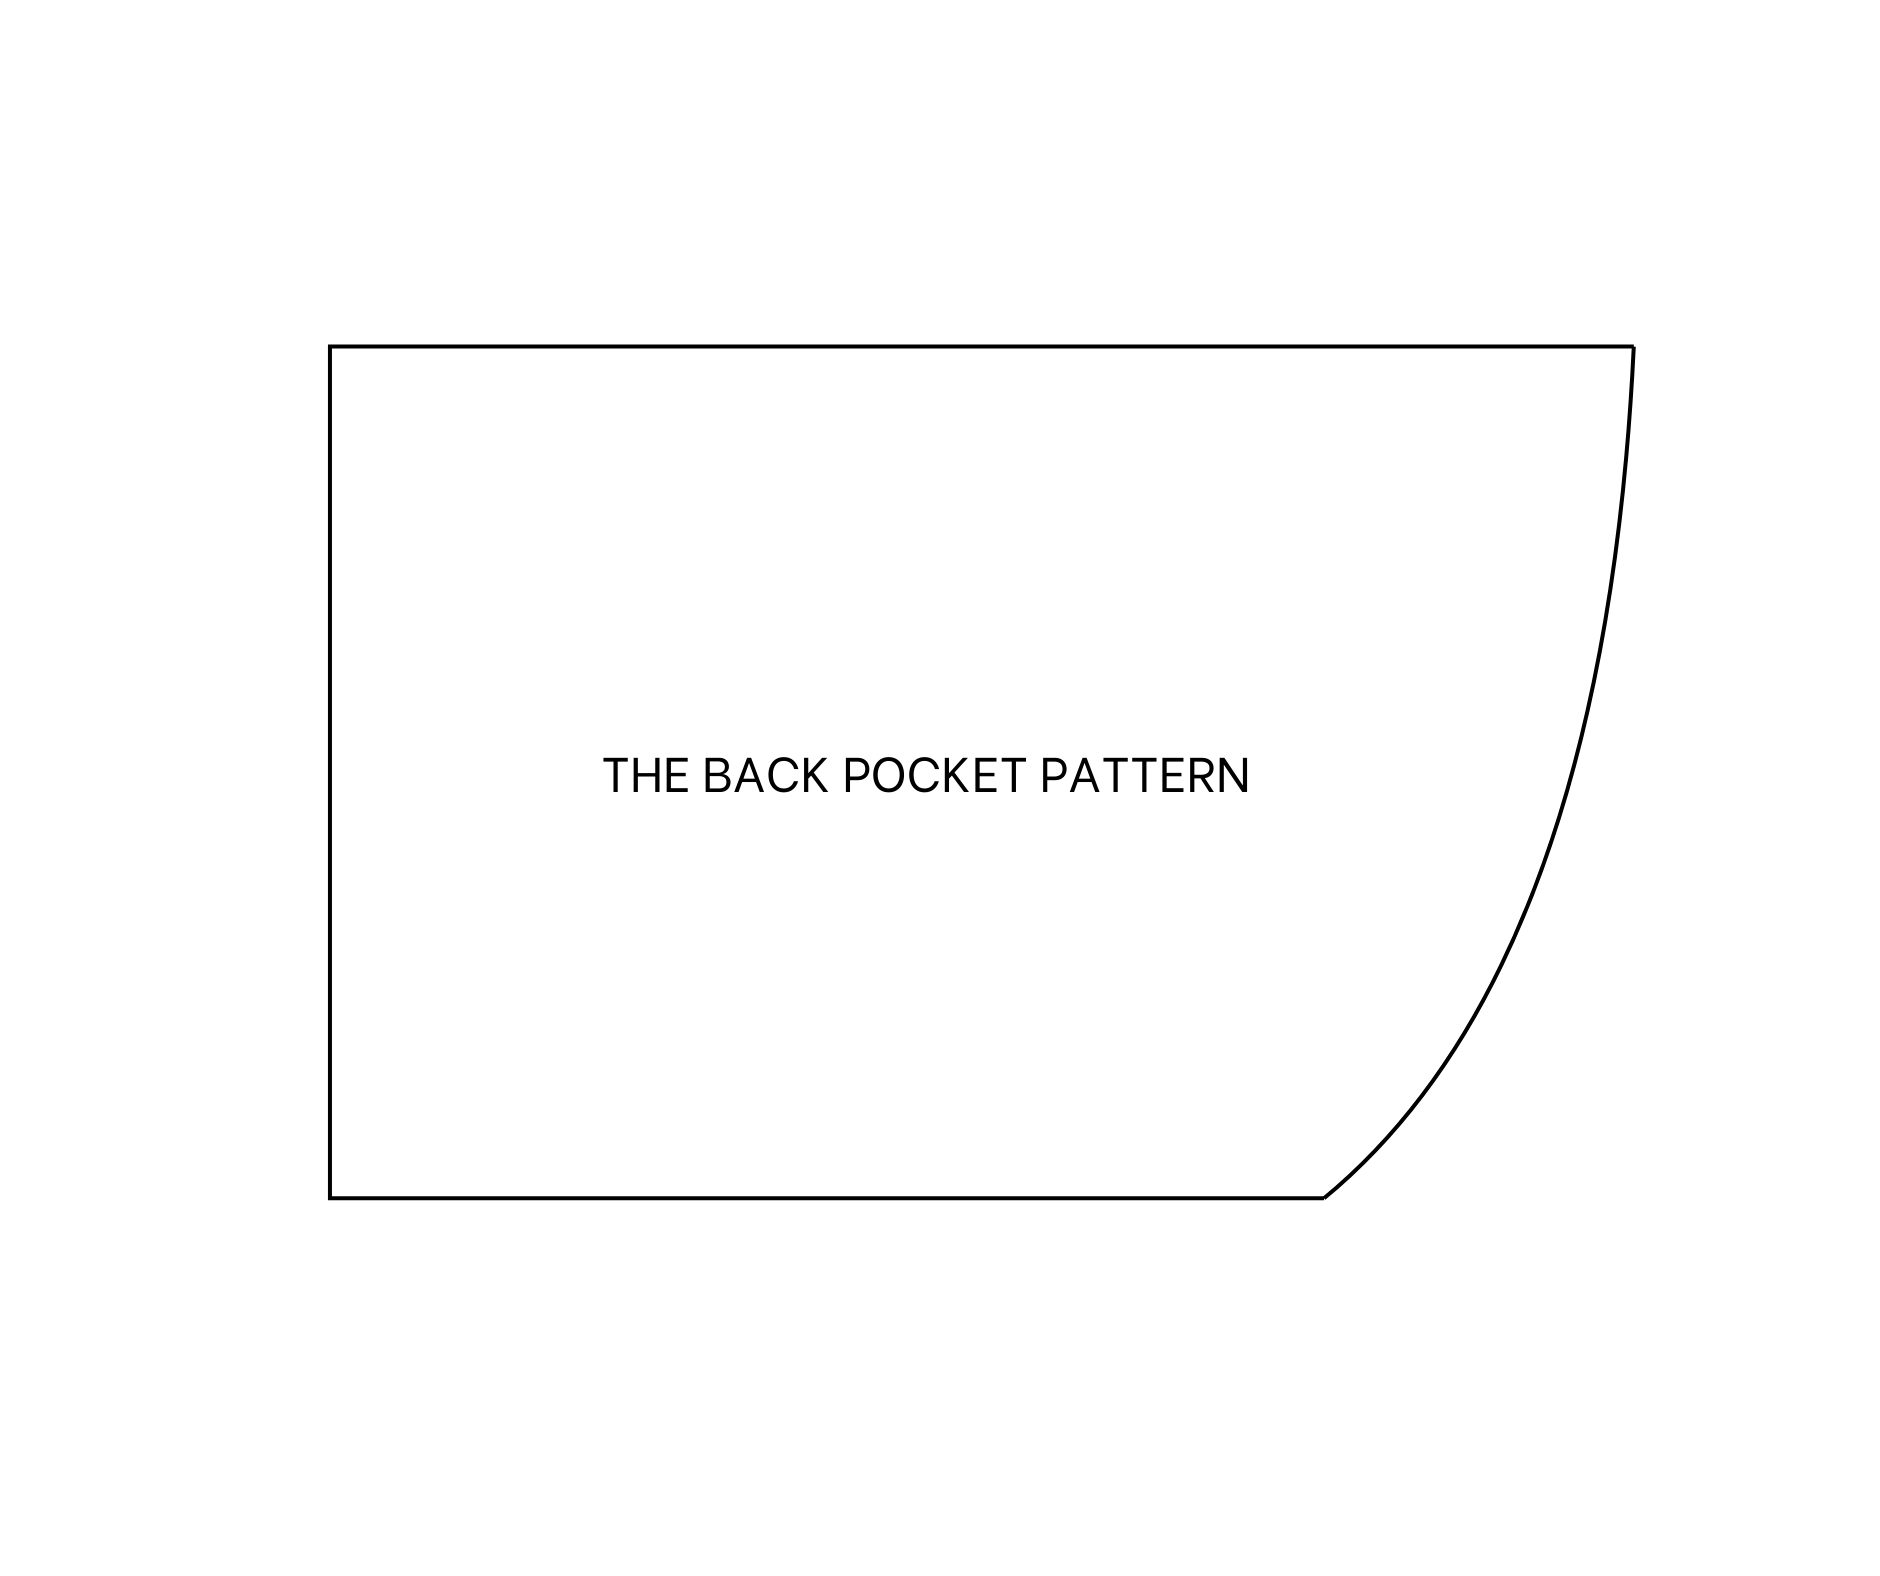
THE BACK POCKET
Apply the same as the front but don't create the connected area.
SEWING THE PANTS
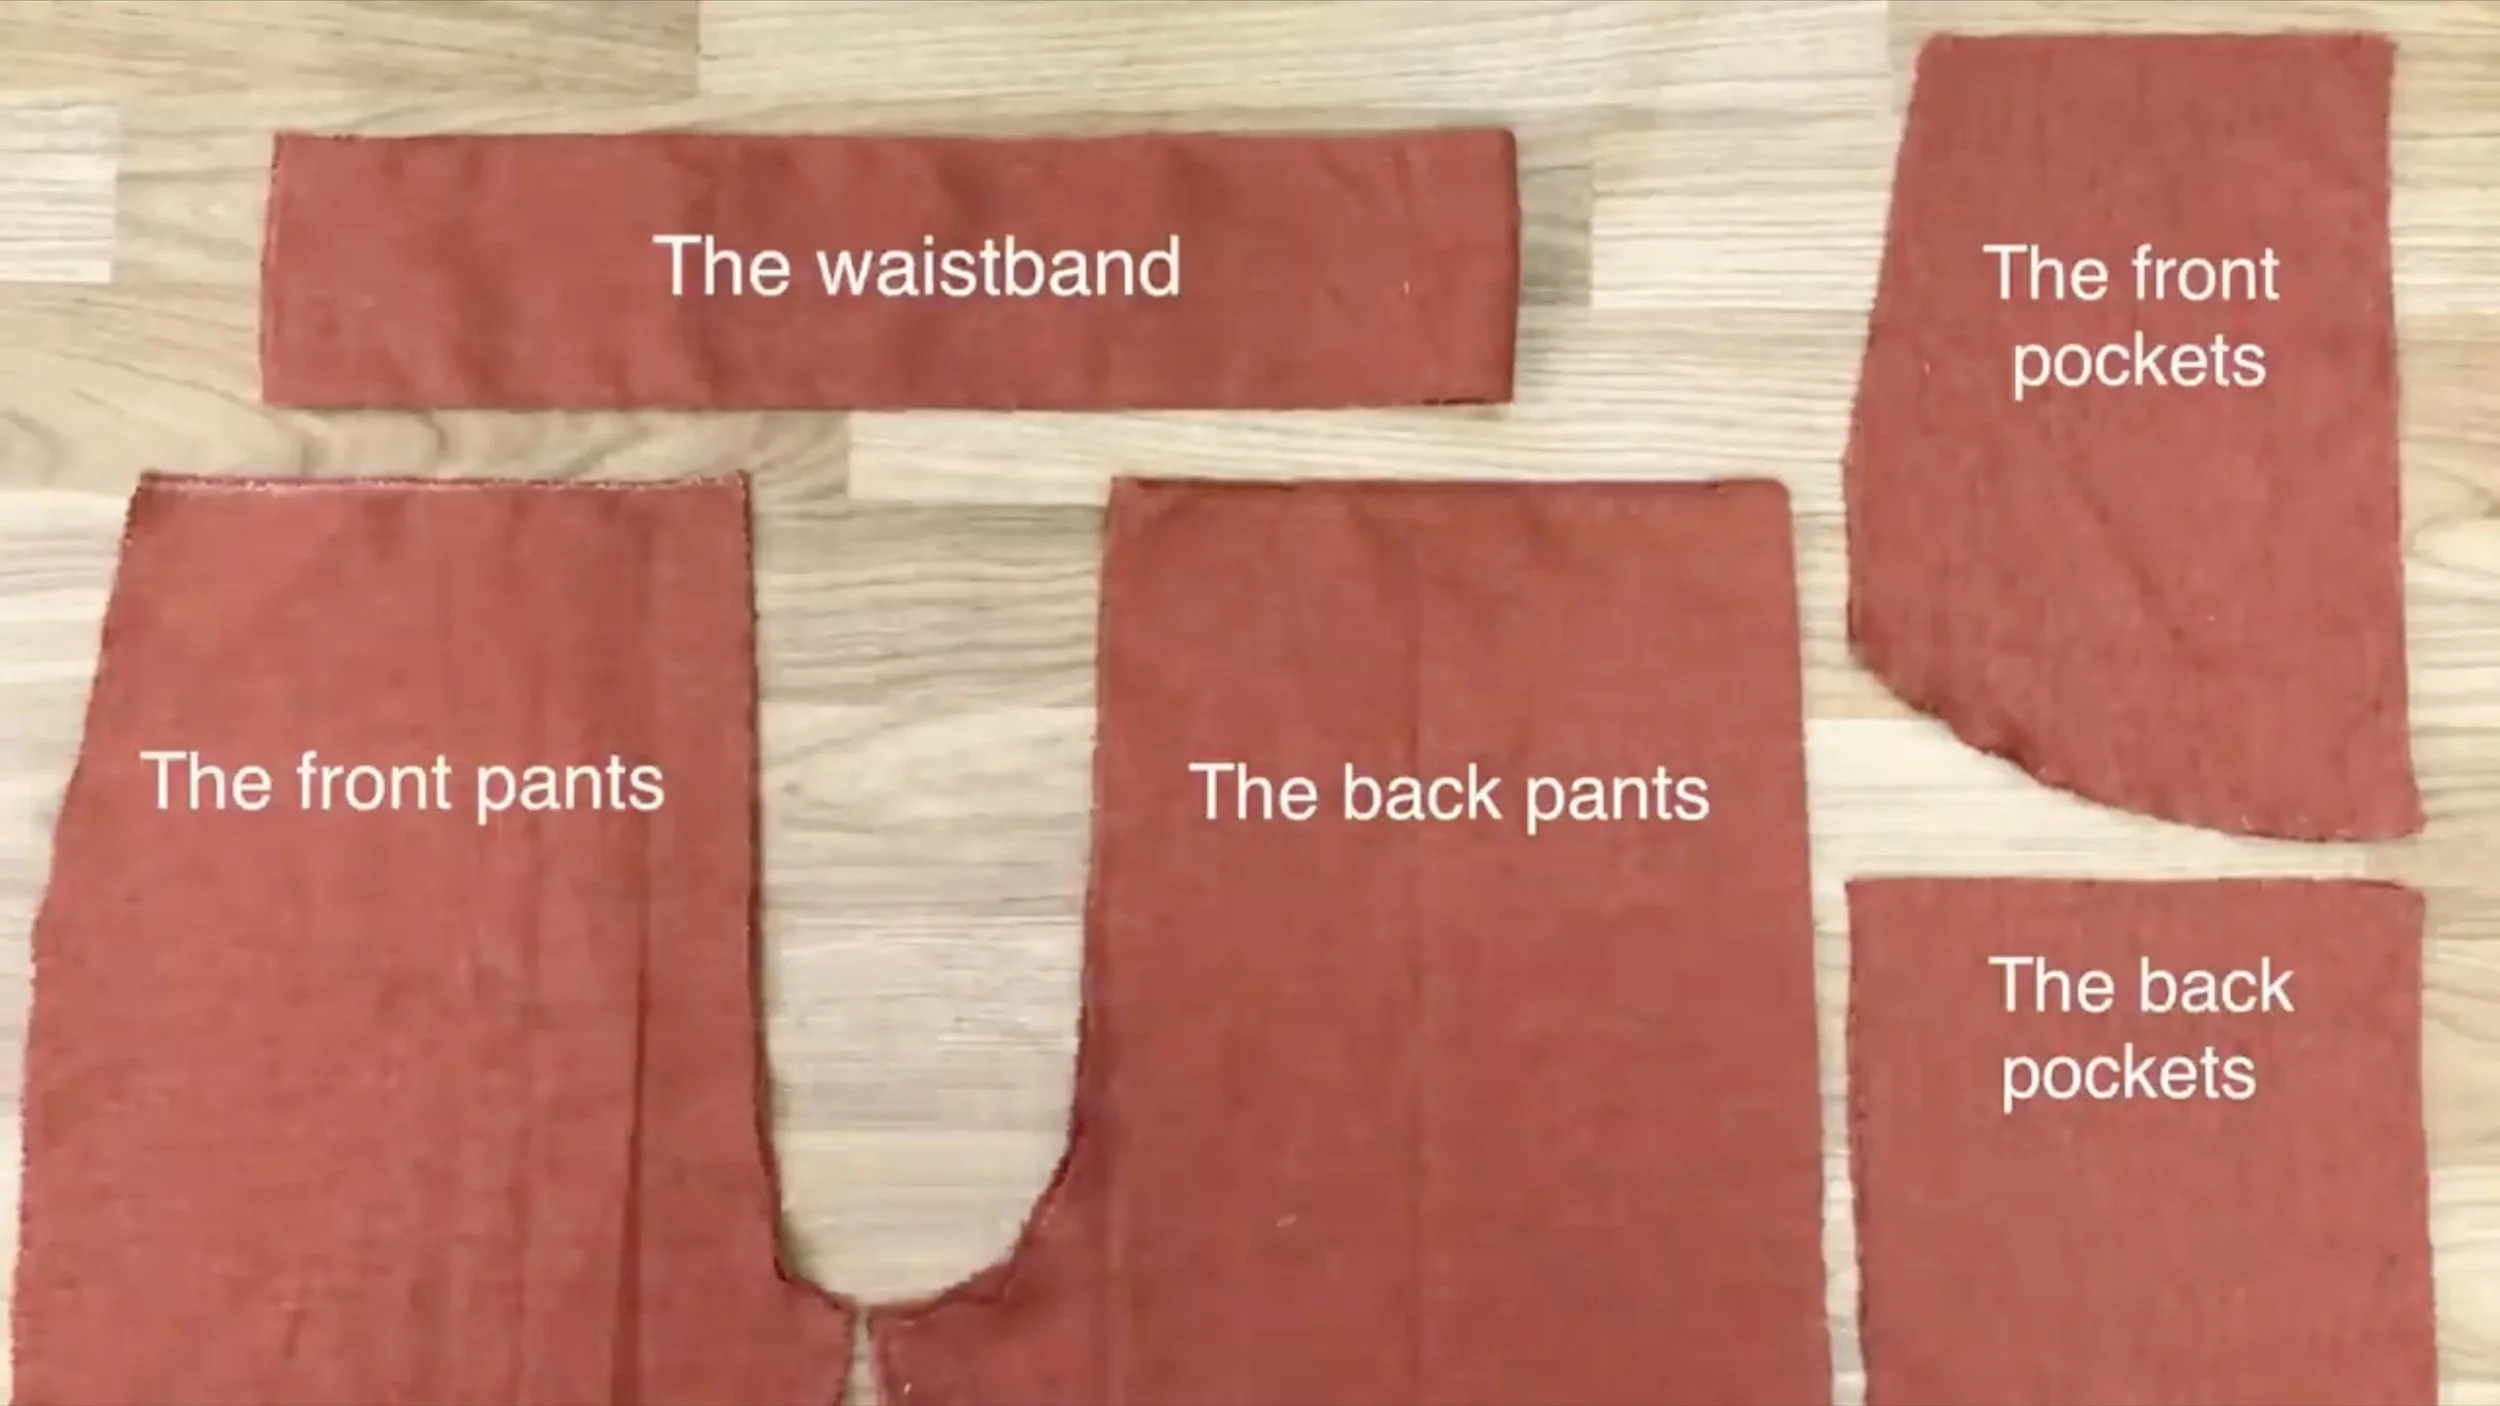
Here are all the pieces needed to make this pants.
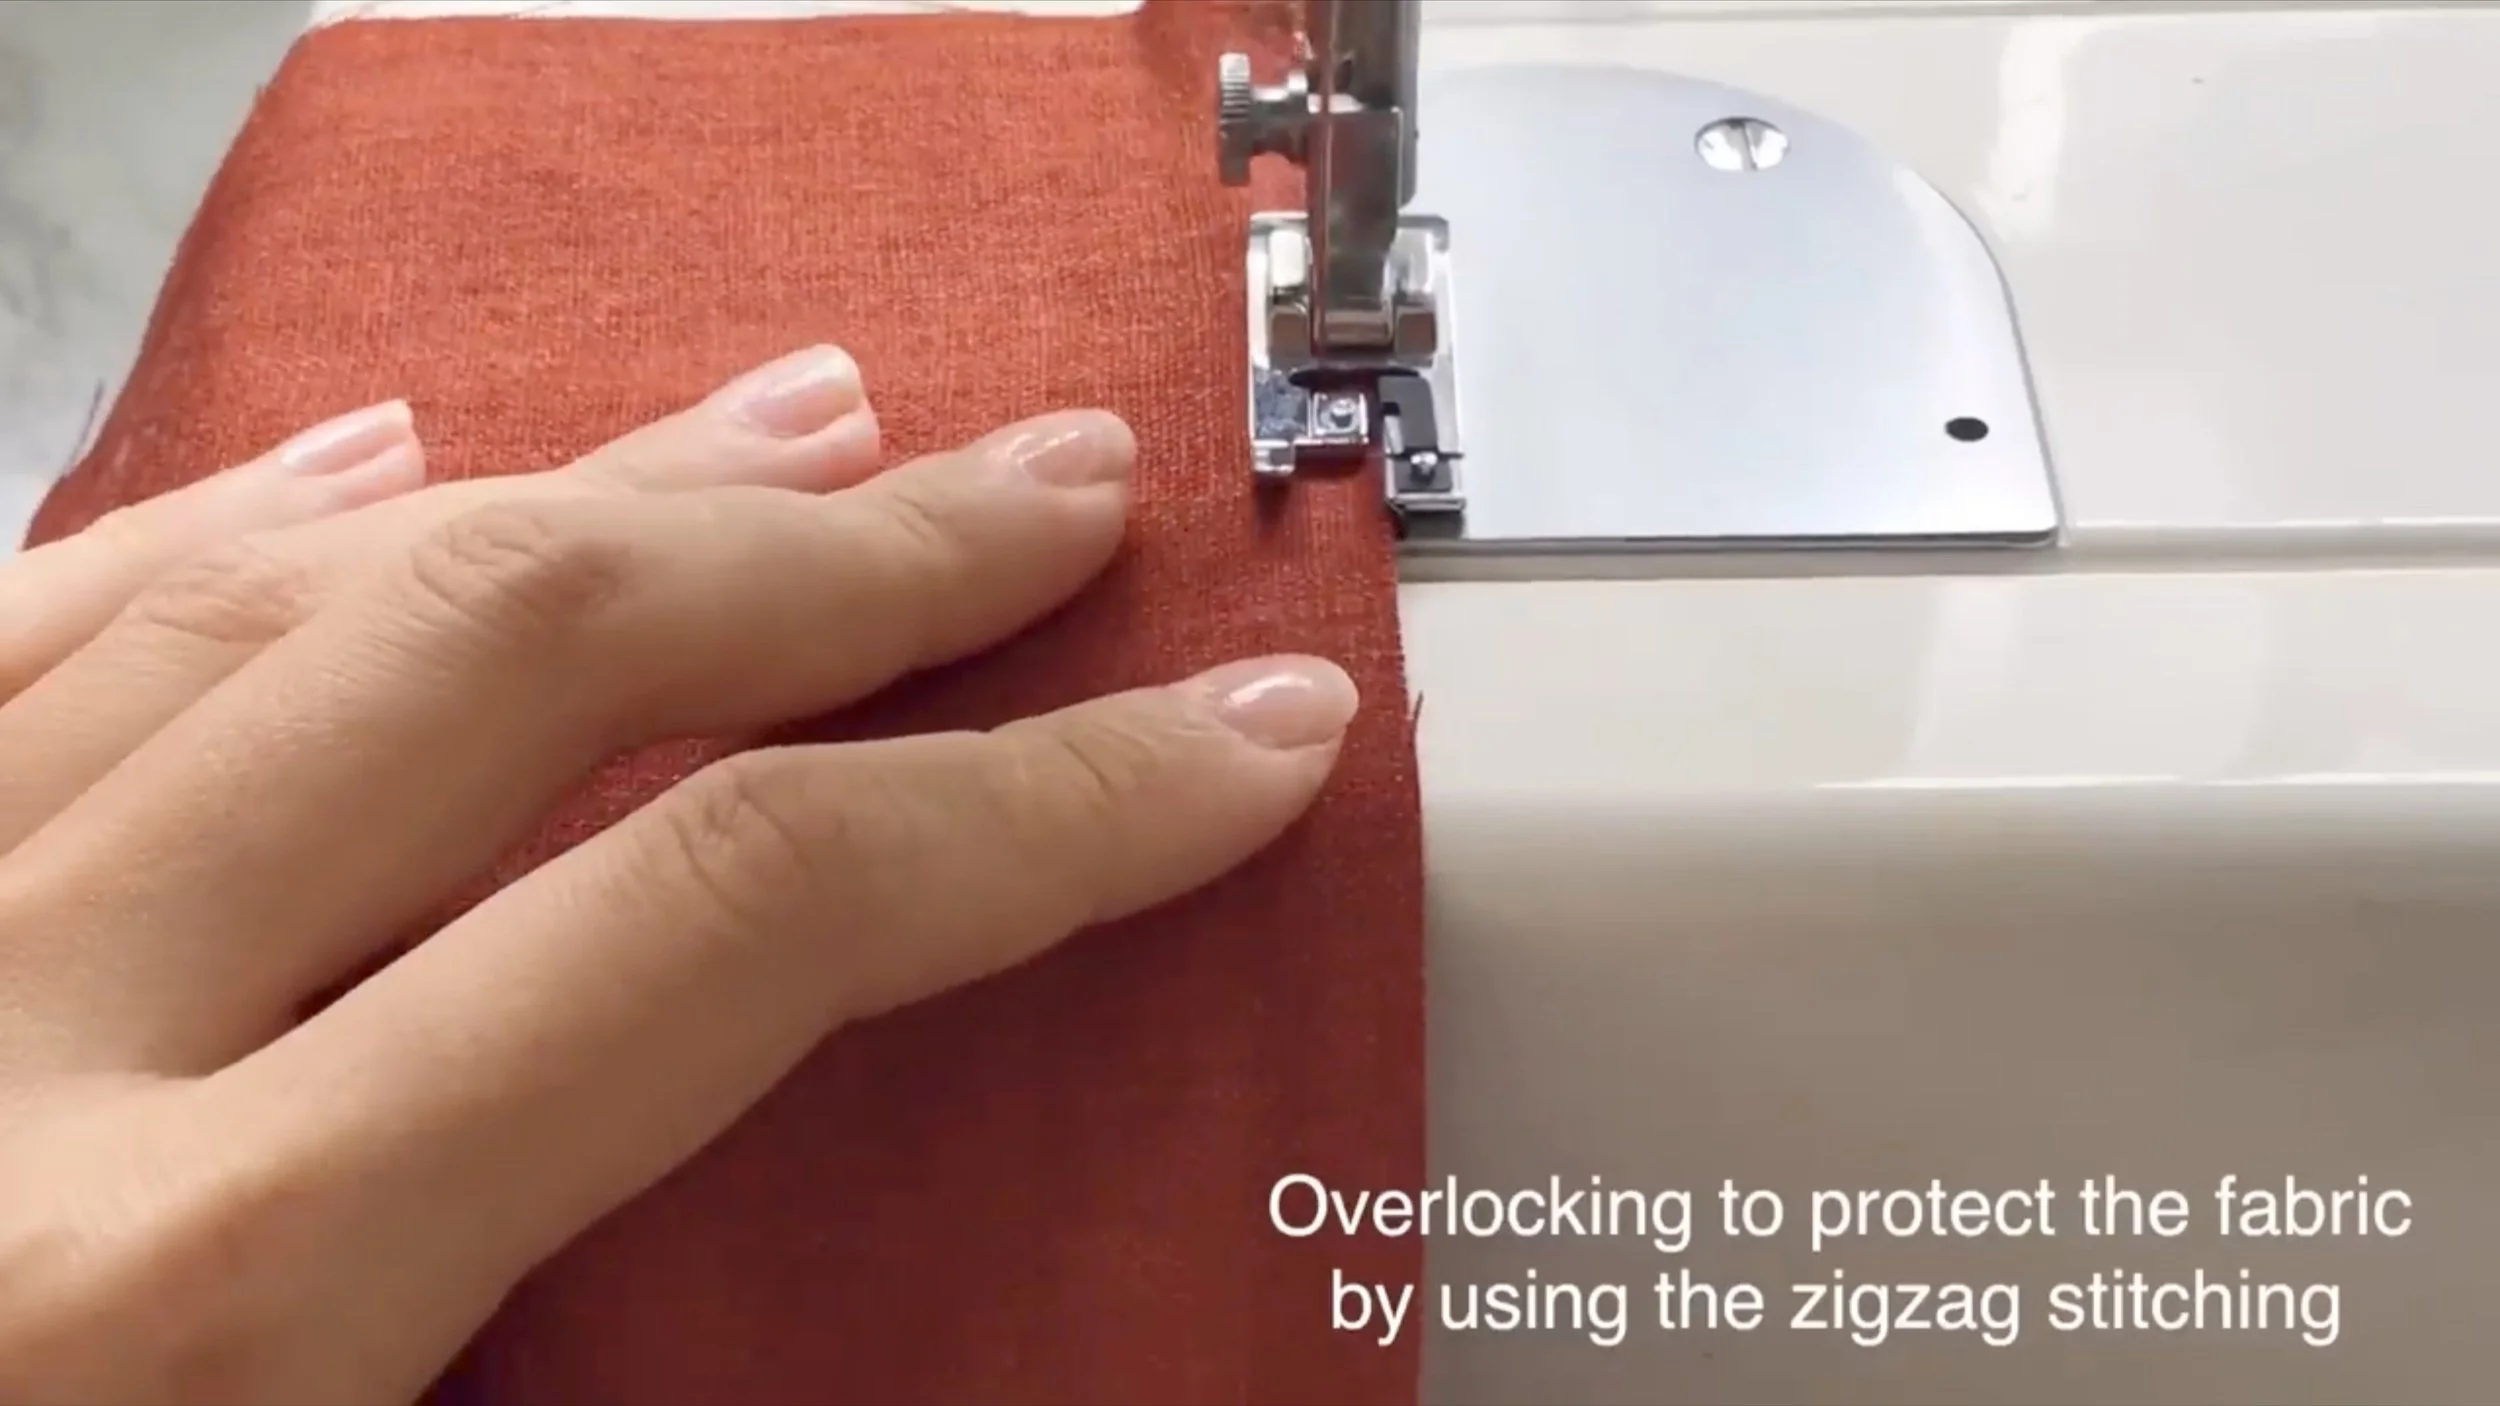
Overlock all of them to protect the fabric.
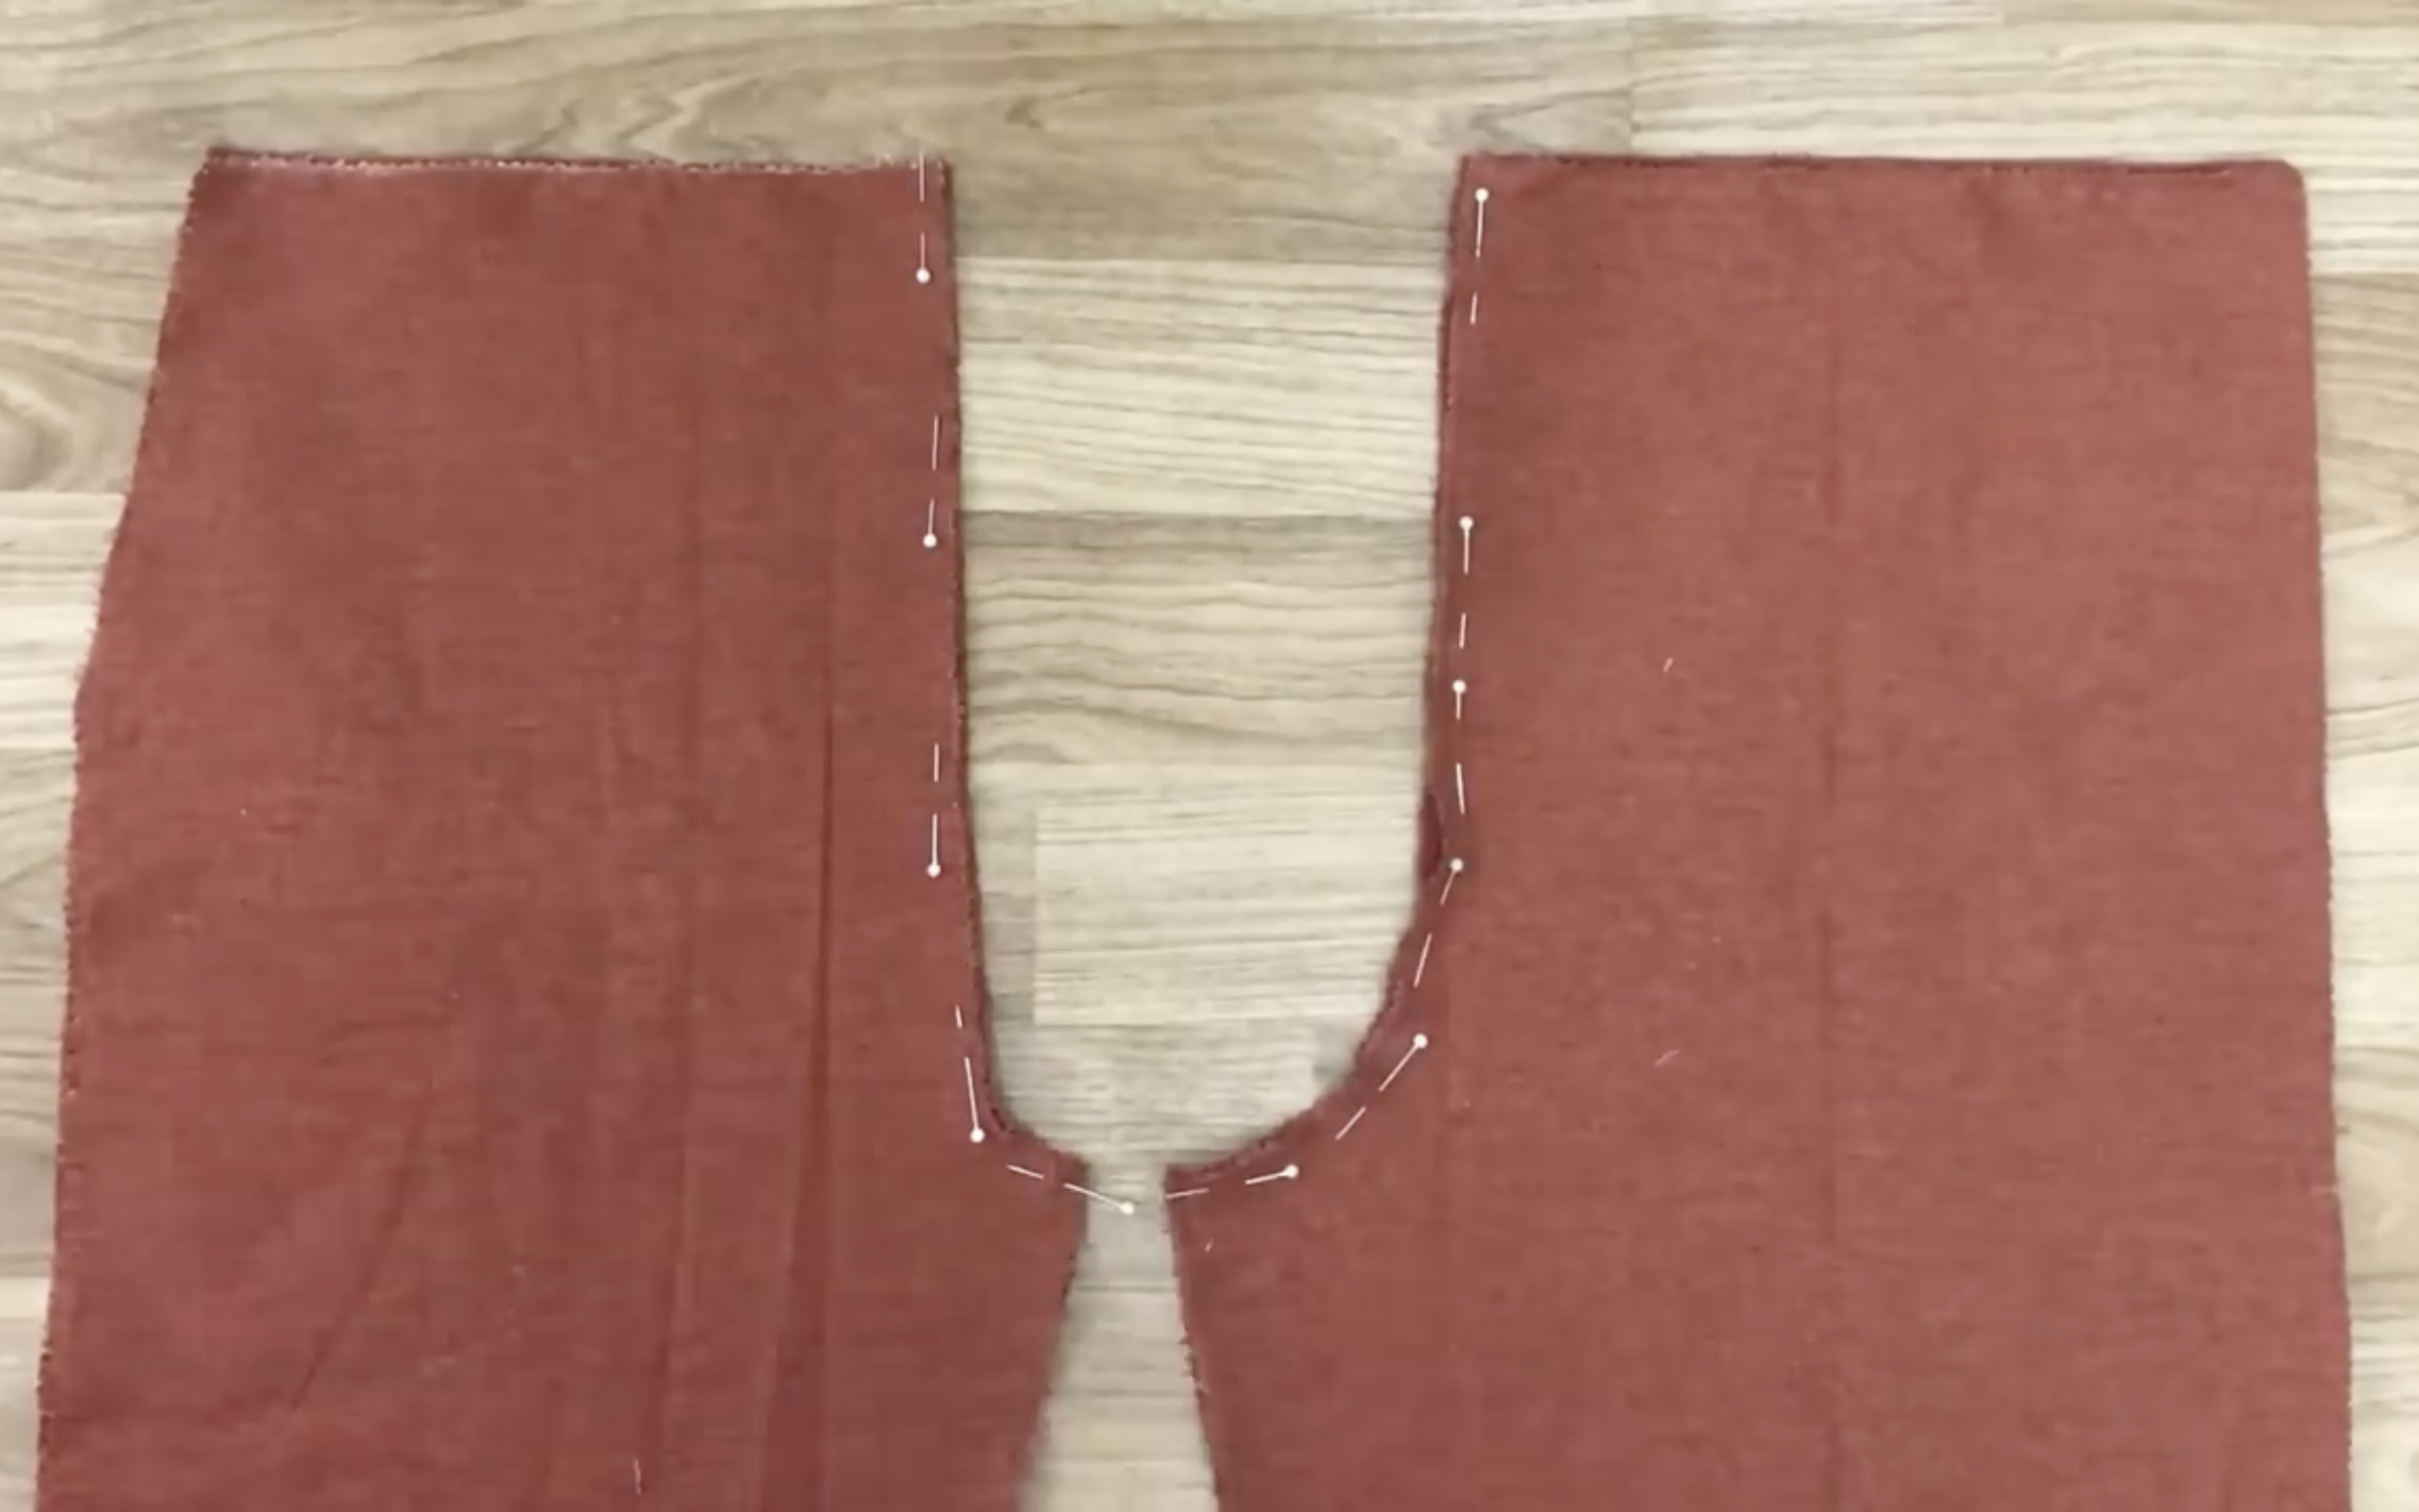
After that, connect two pieces of the front and two pieces of the back pants together at the crotch line.
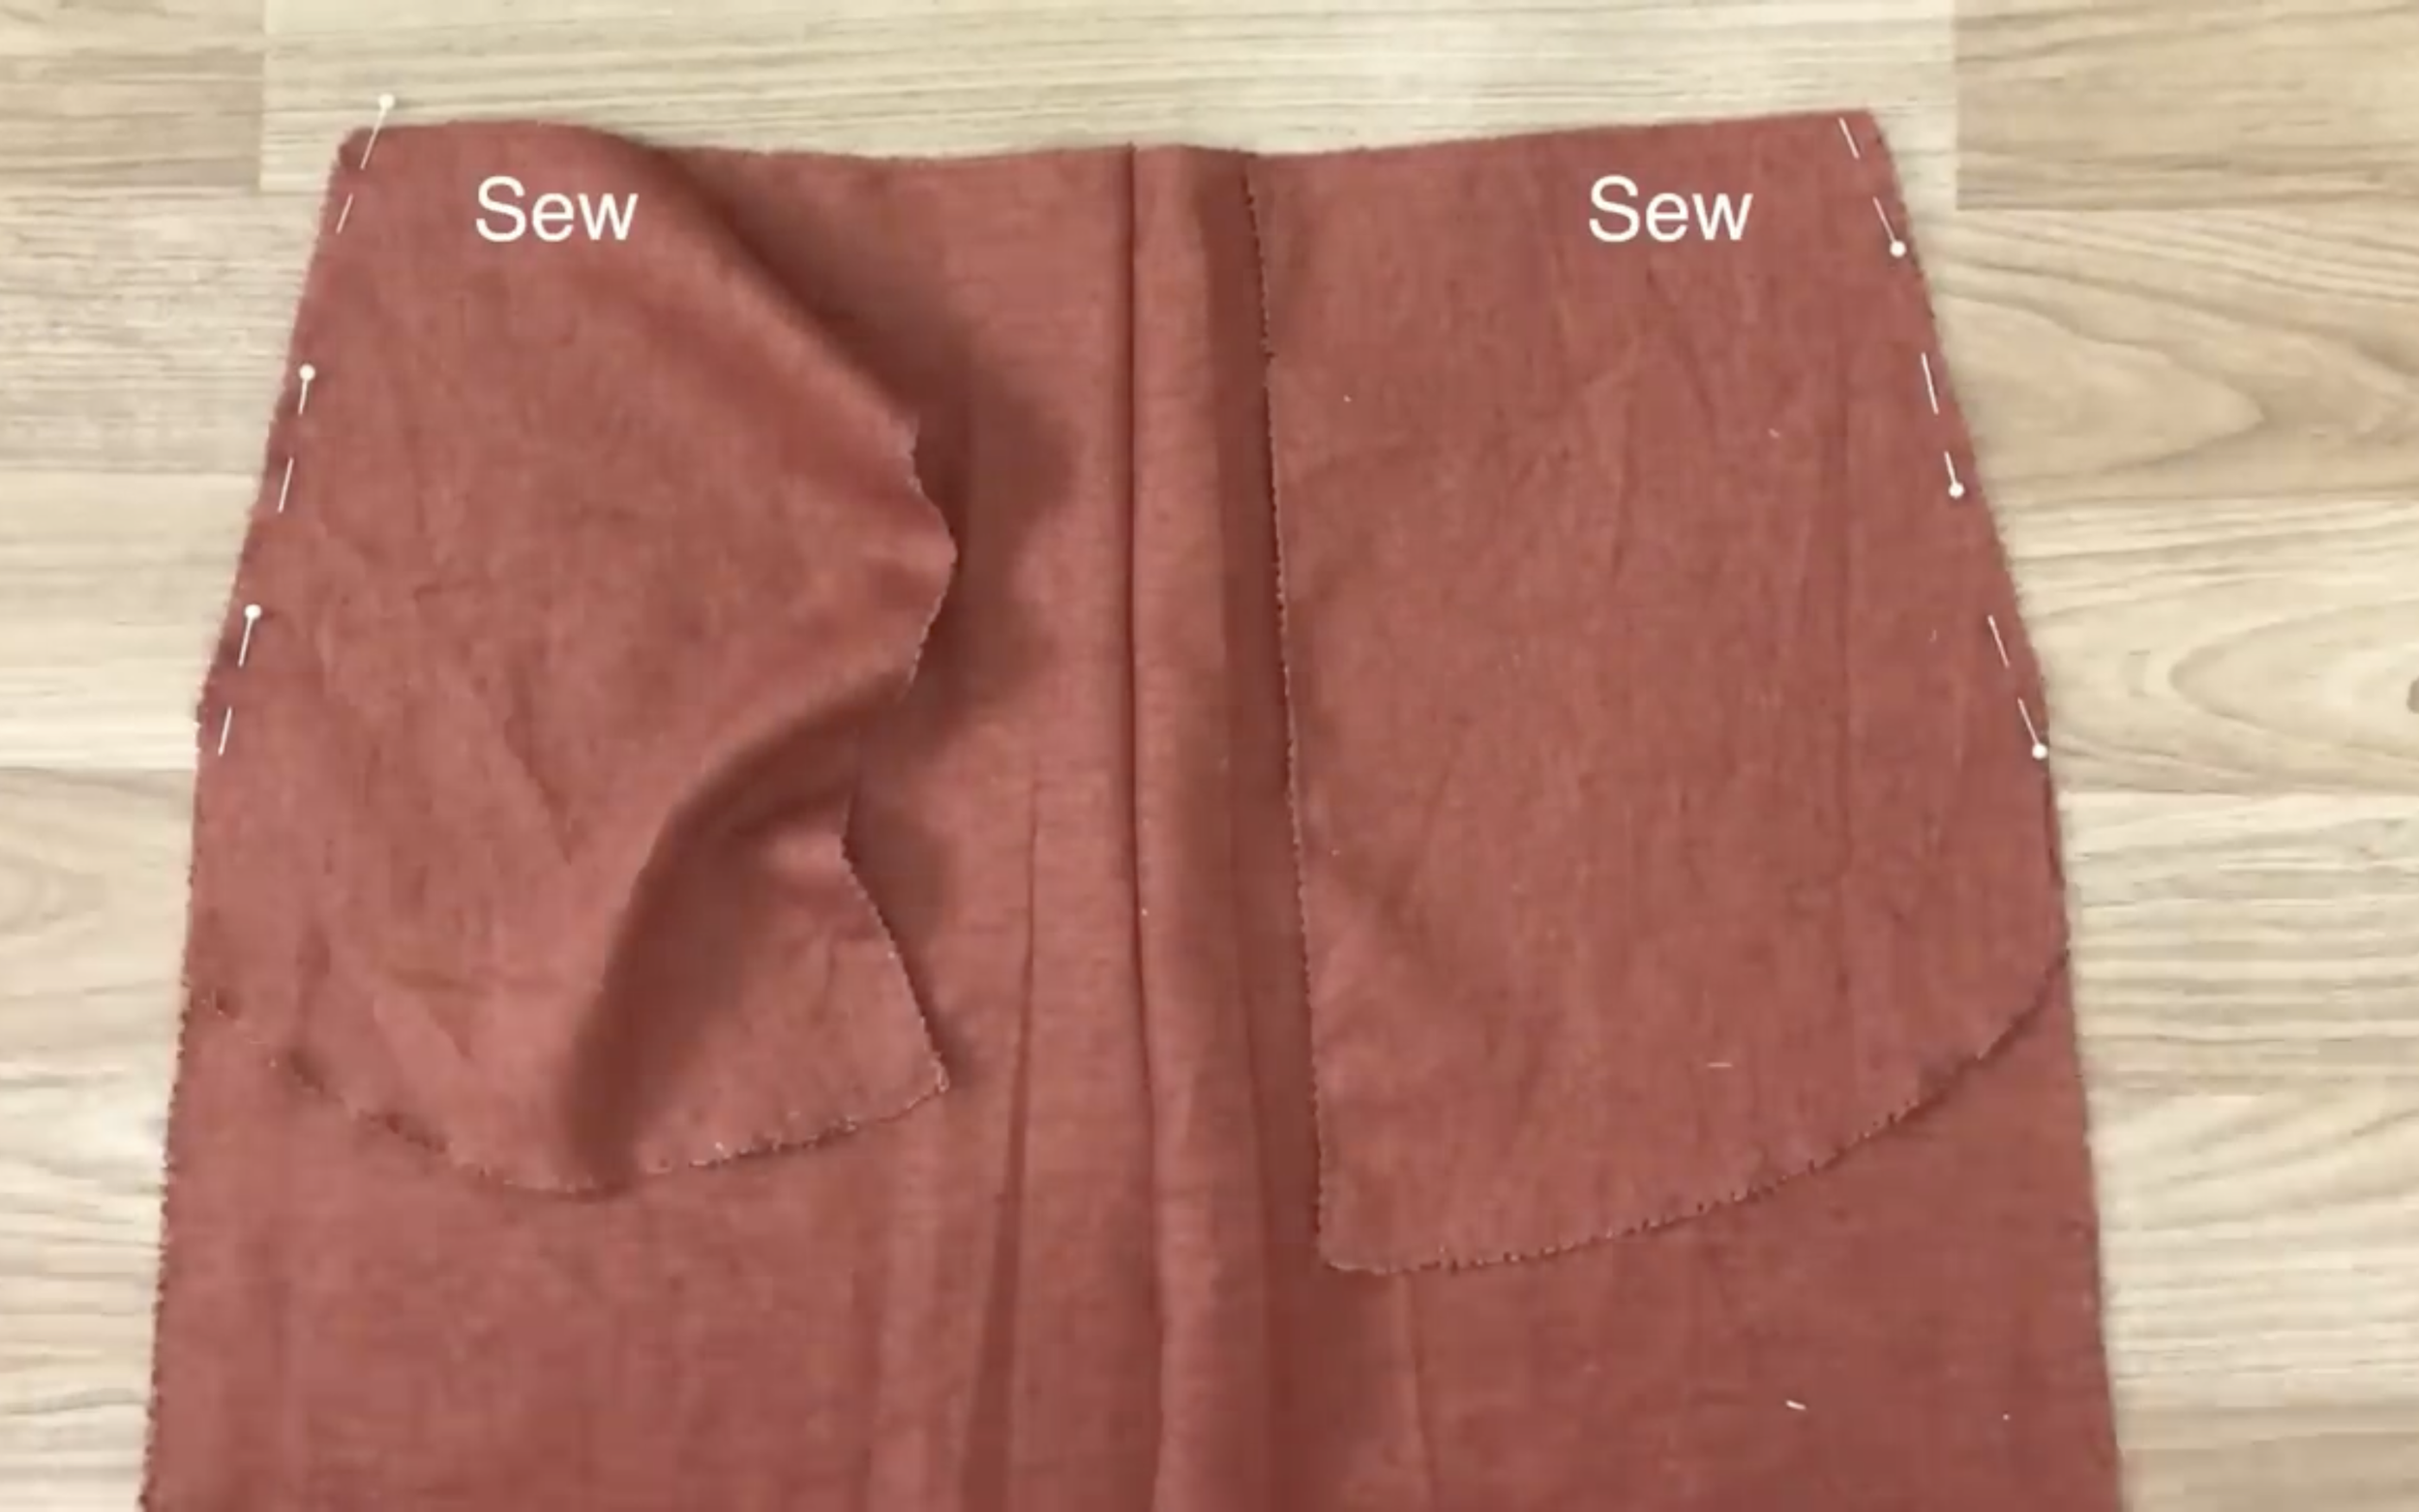
At the front pants, connect the front pockets to the pocket area and sew.
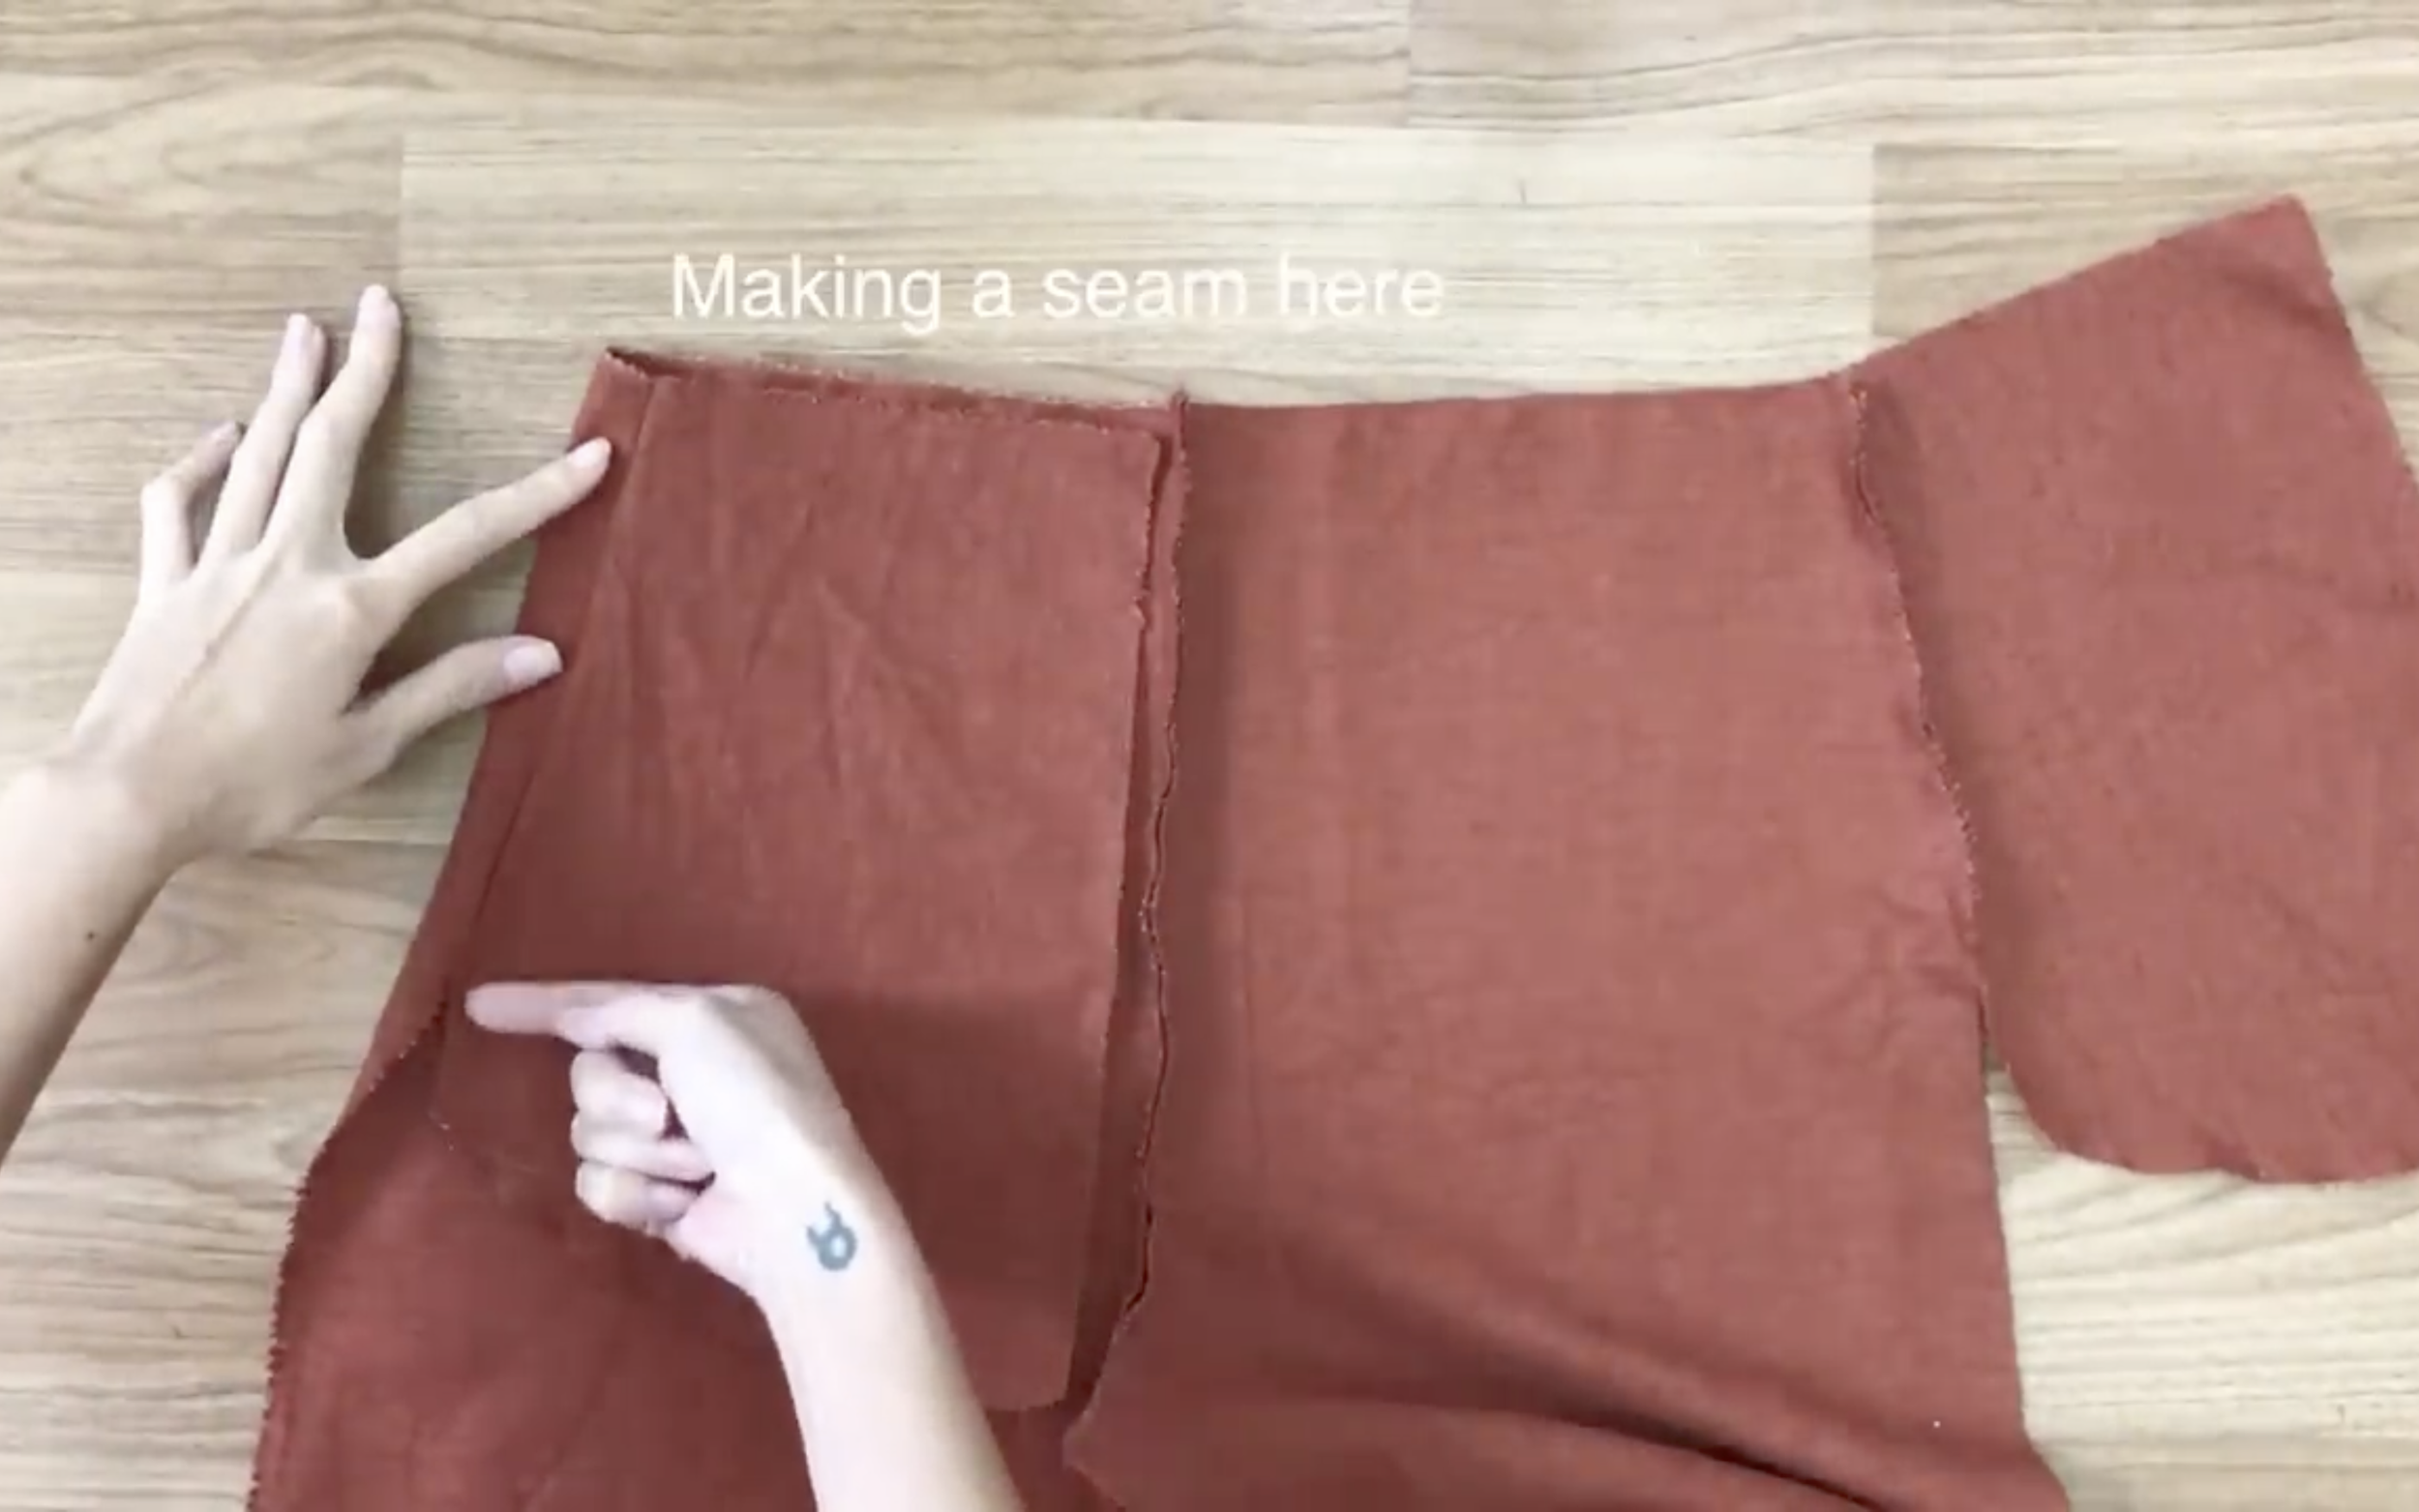
After the first seam, make the second seam next to it to gather the extra fabric to one side.
Do similar to the back pants.
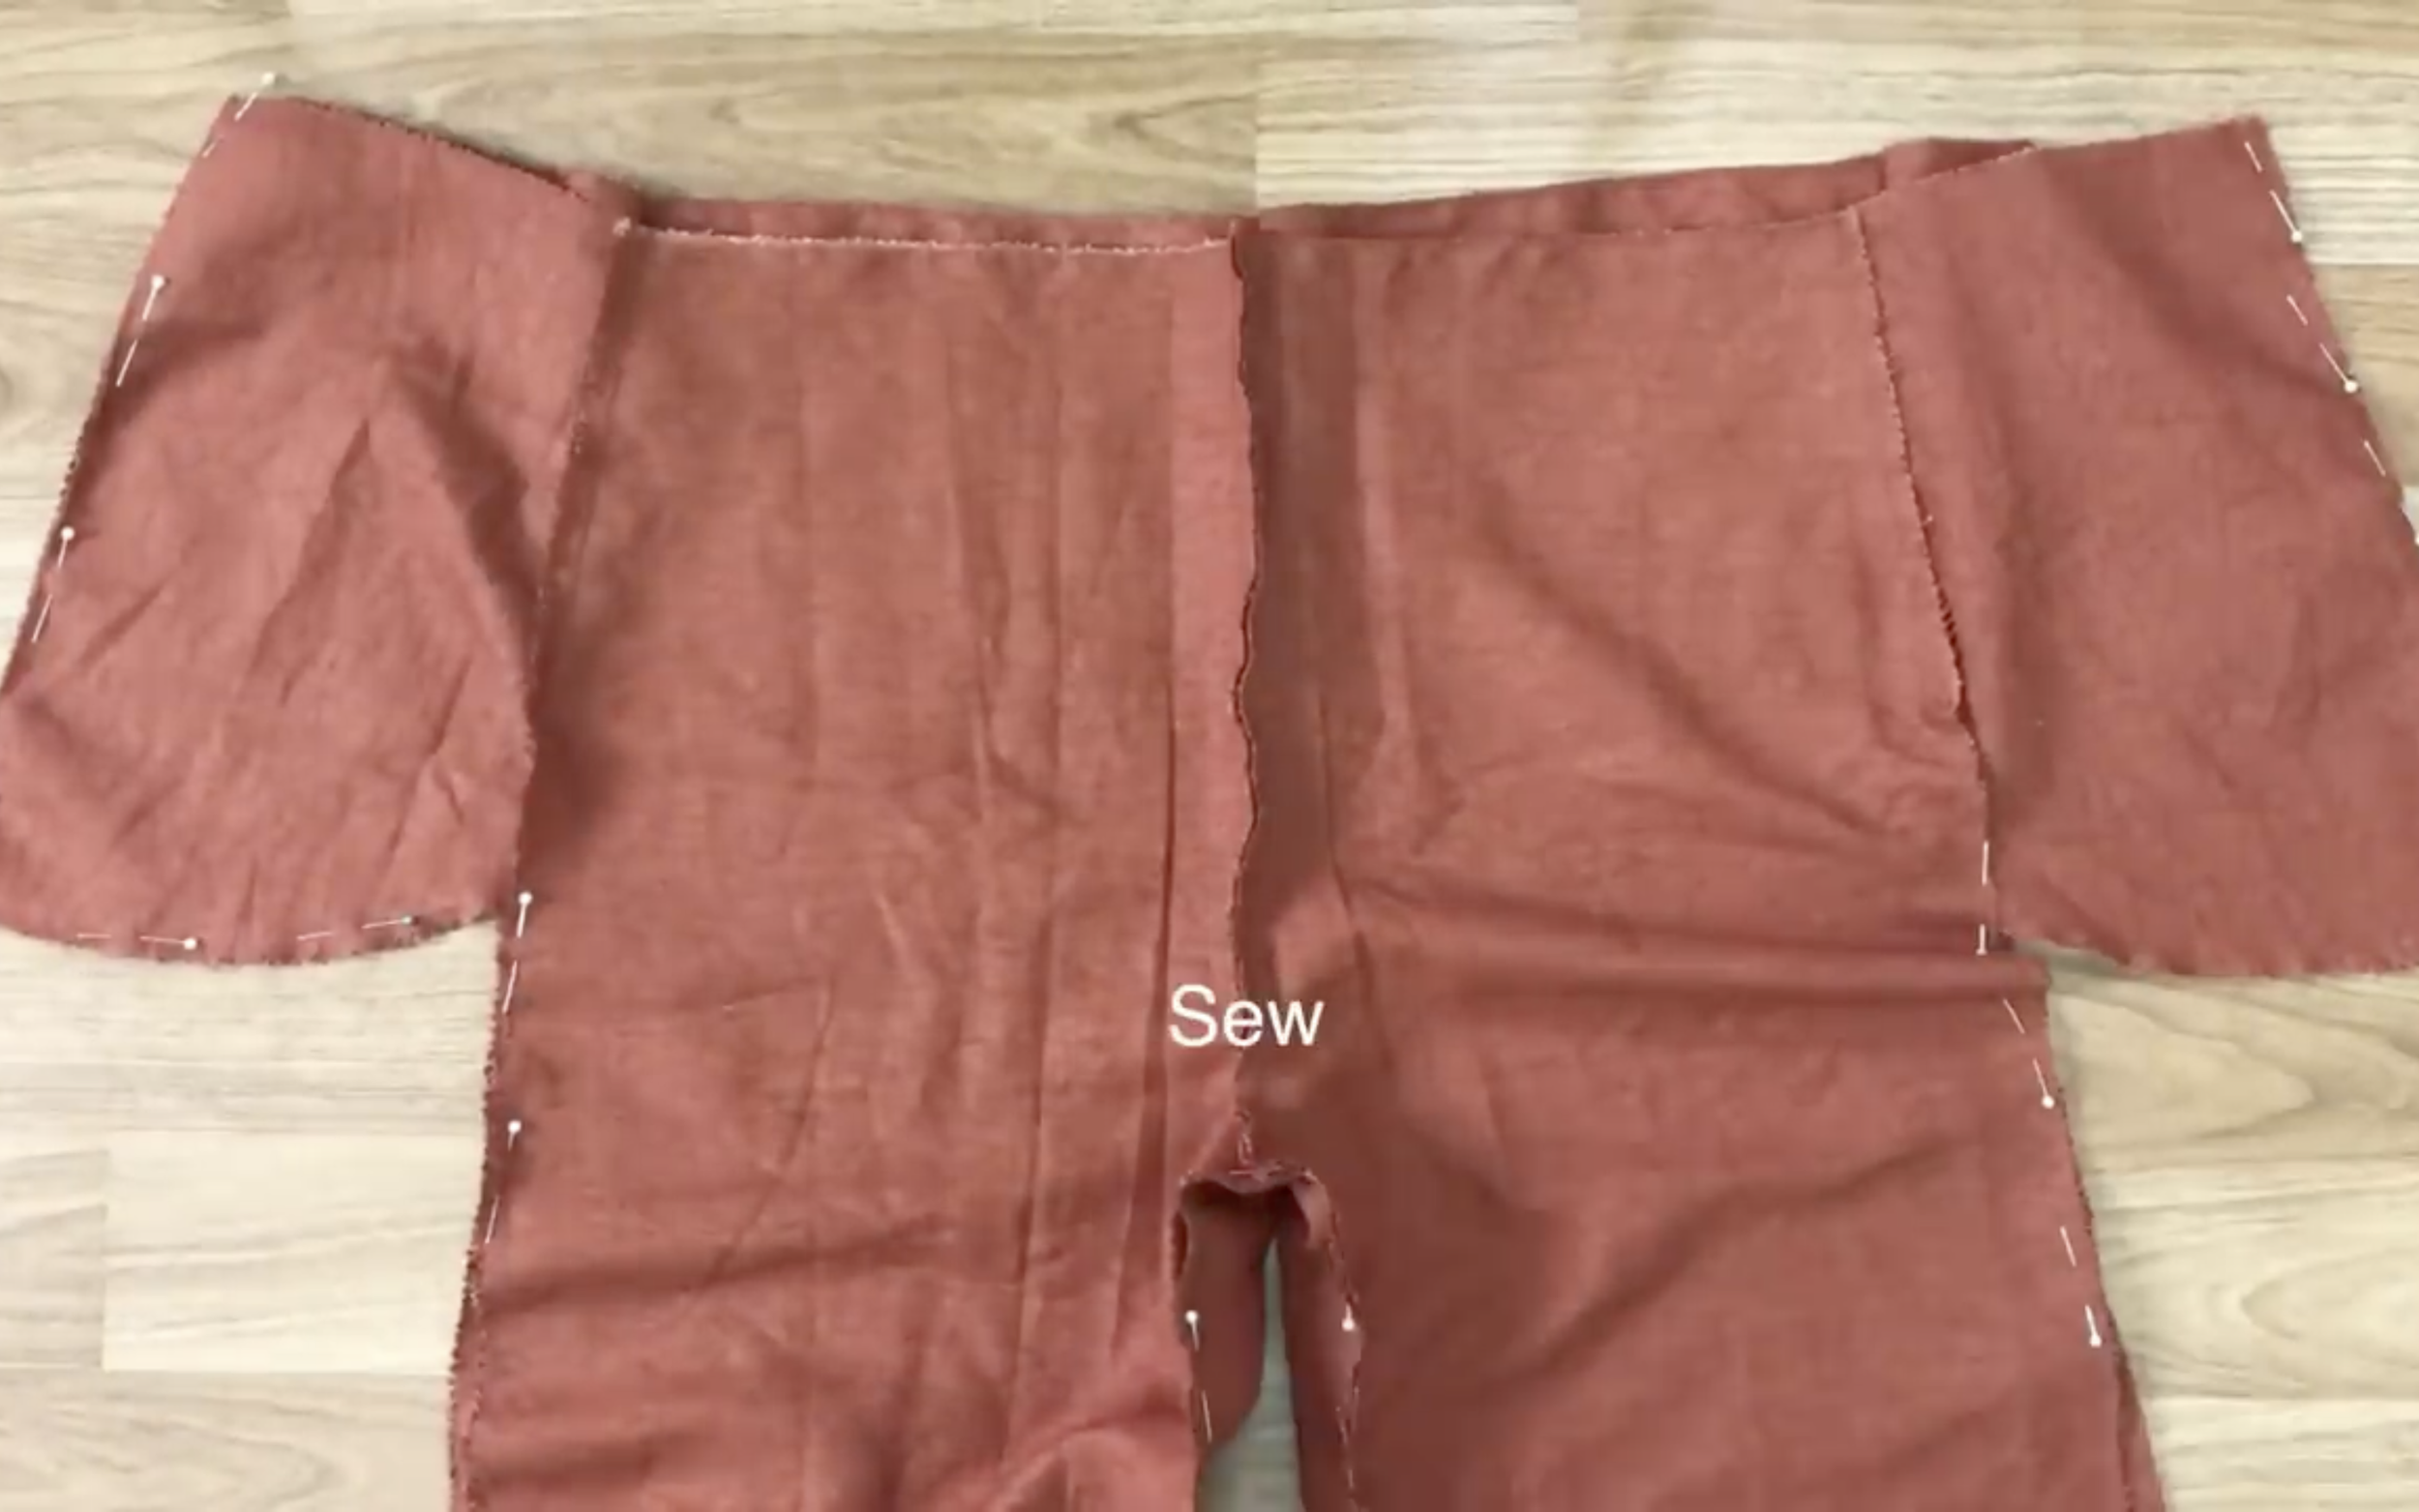
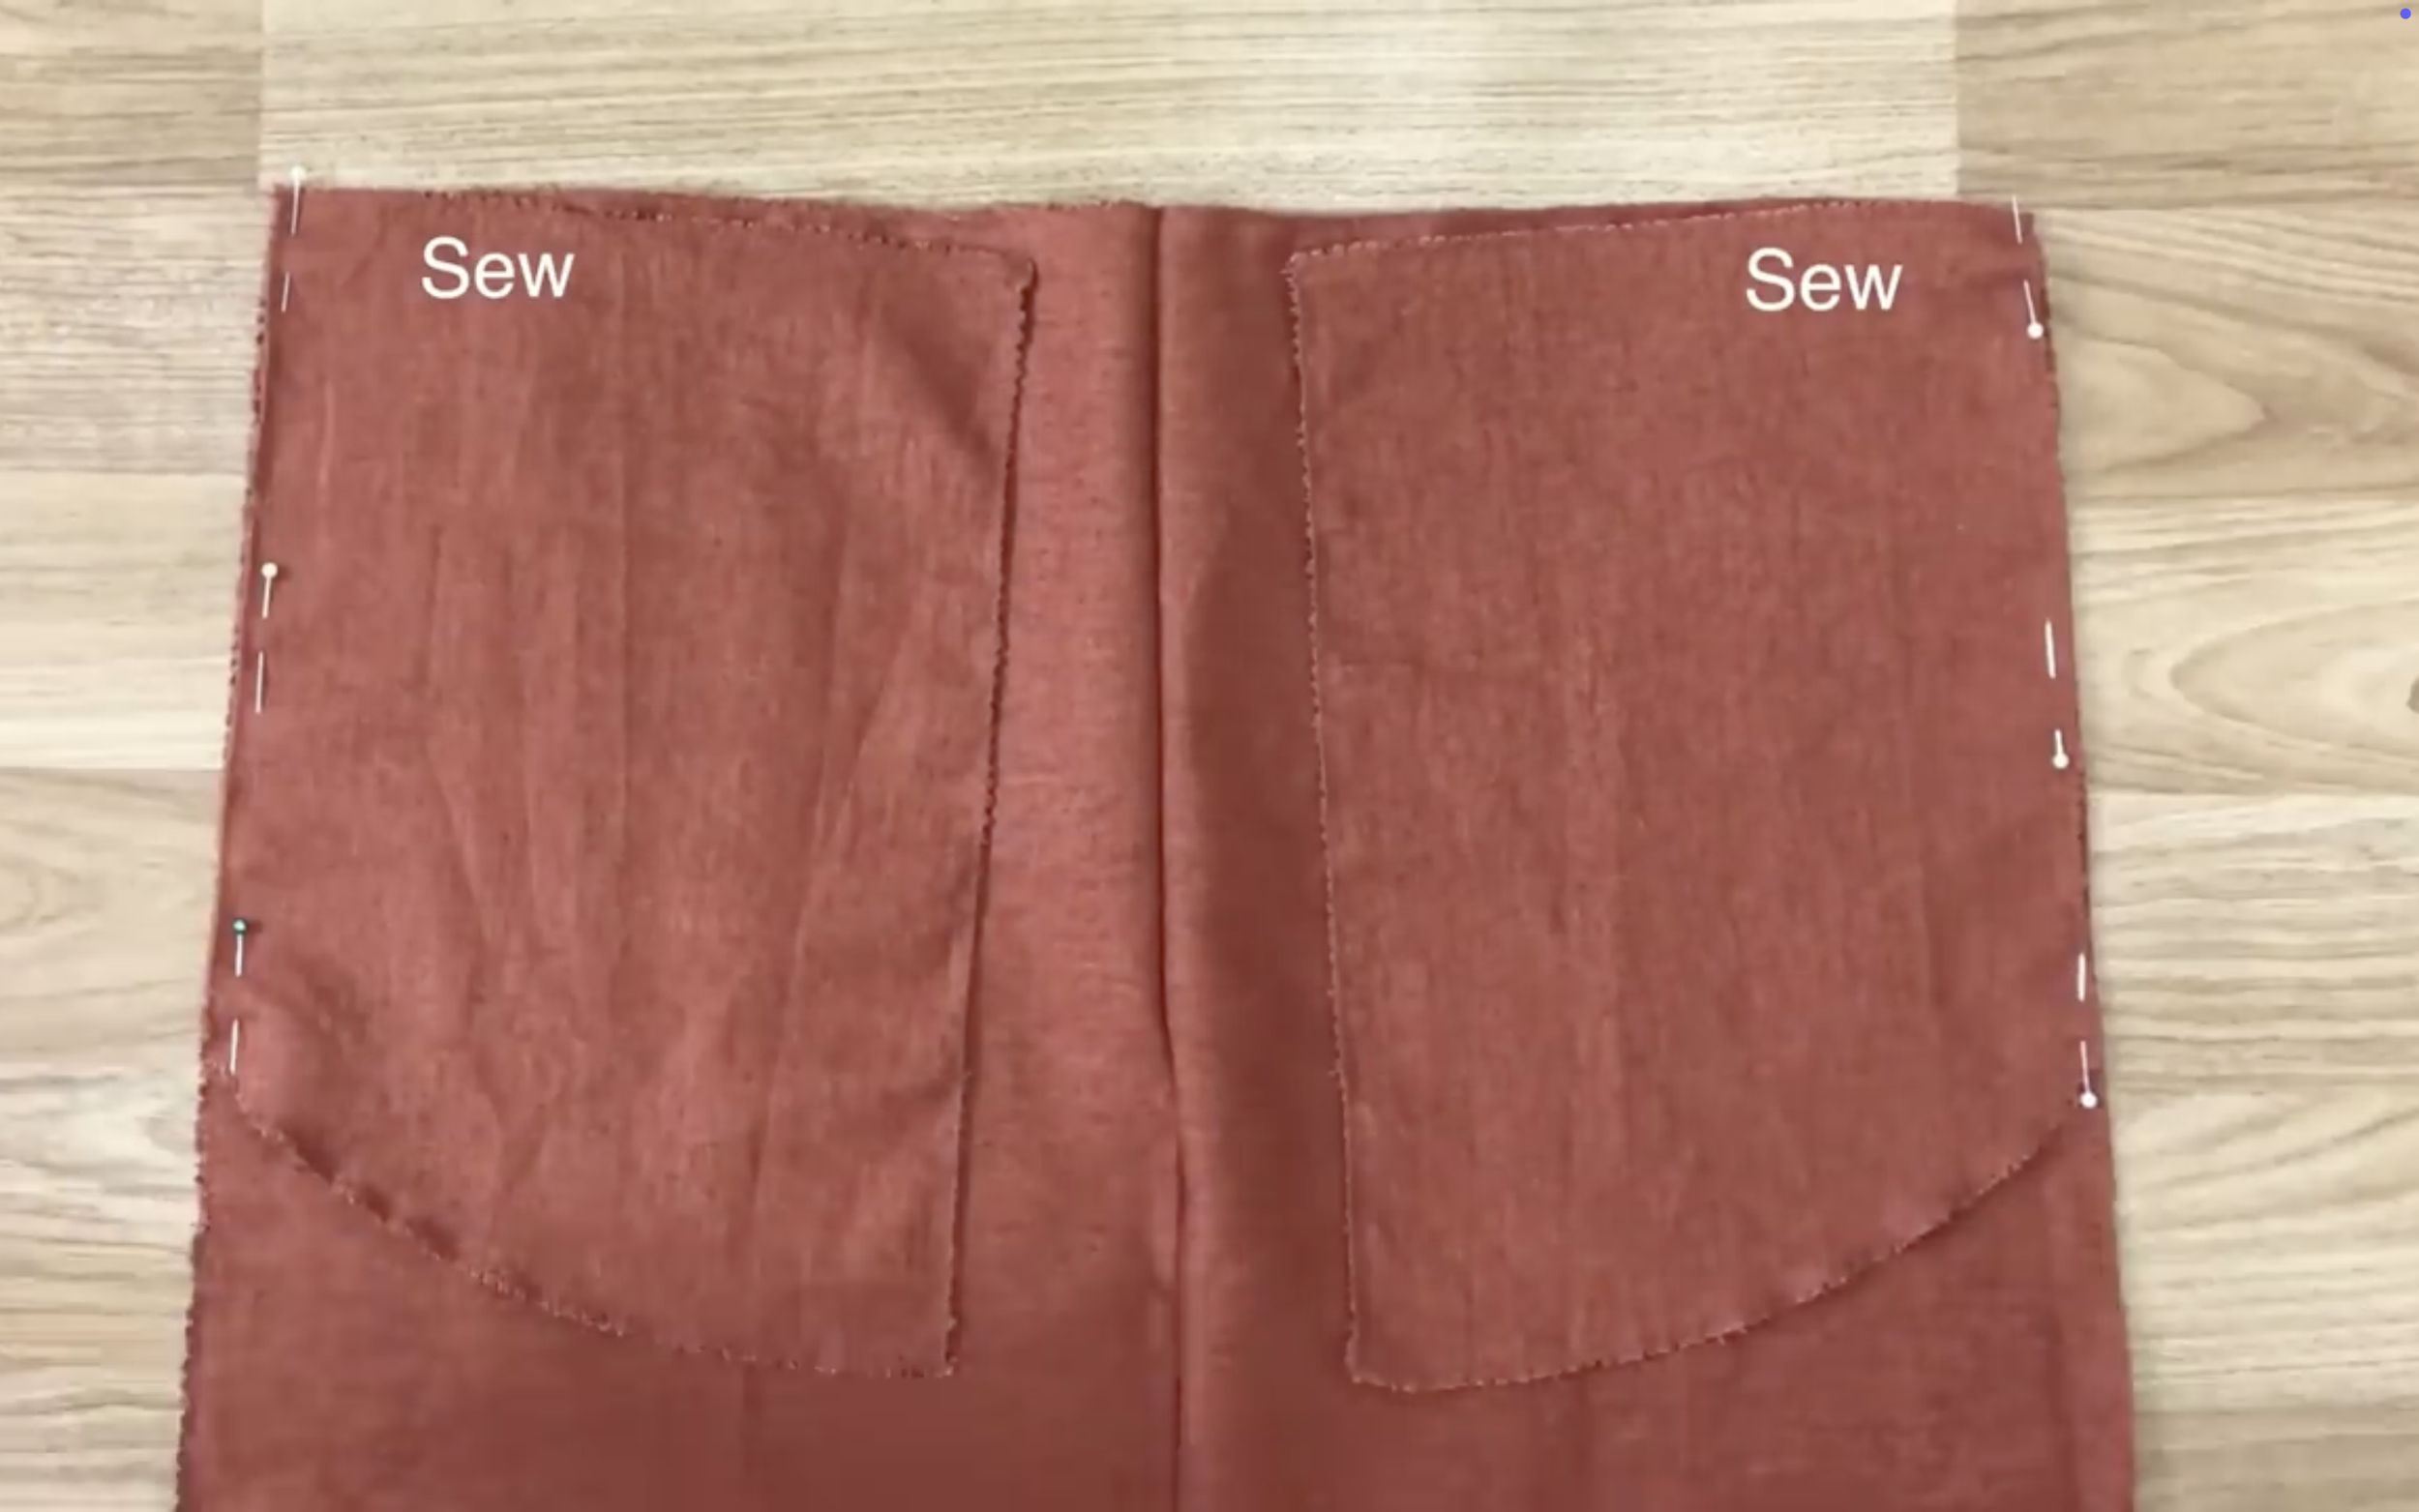
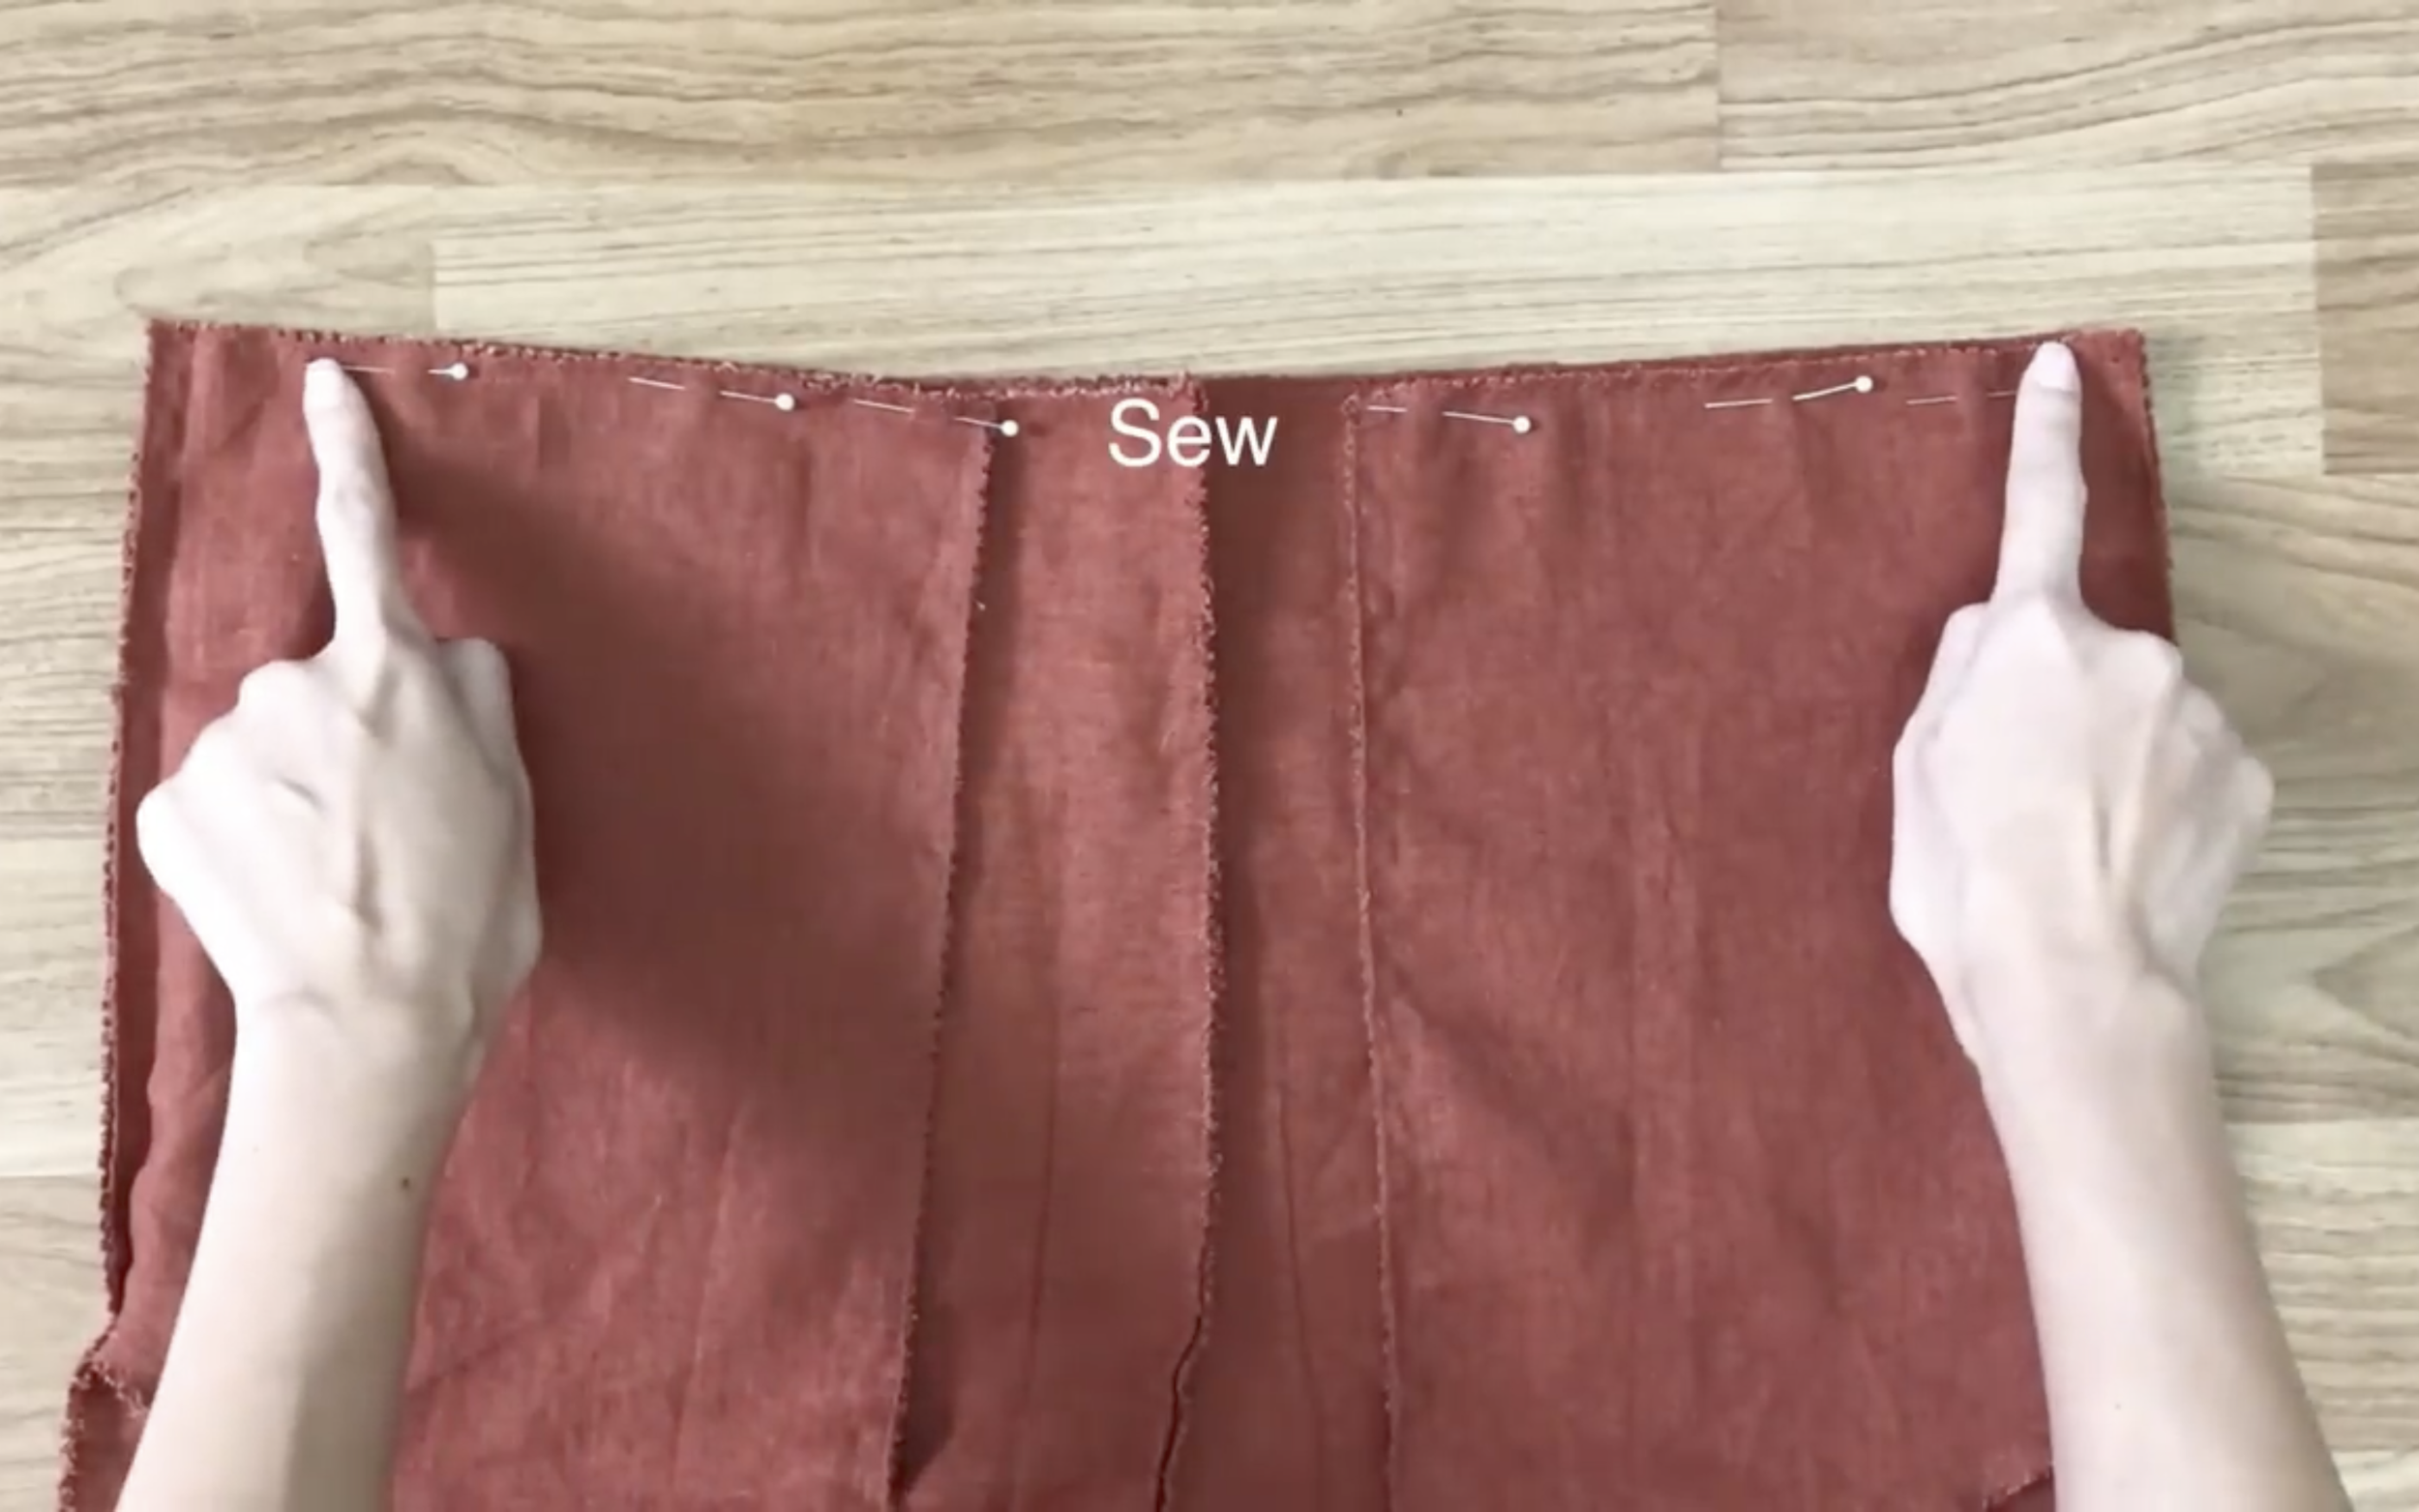
Now connecting the front and the back pants together from the pockets down to two sides of the pants and from the crotch to two legs. Then sew.
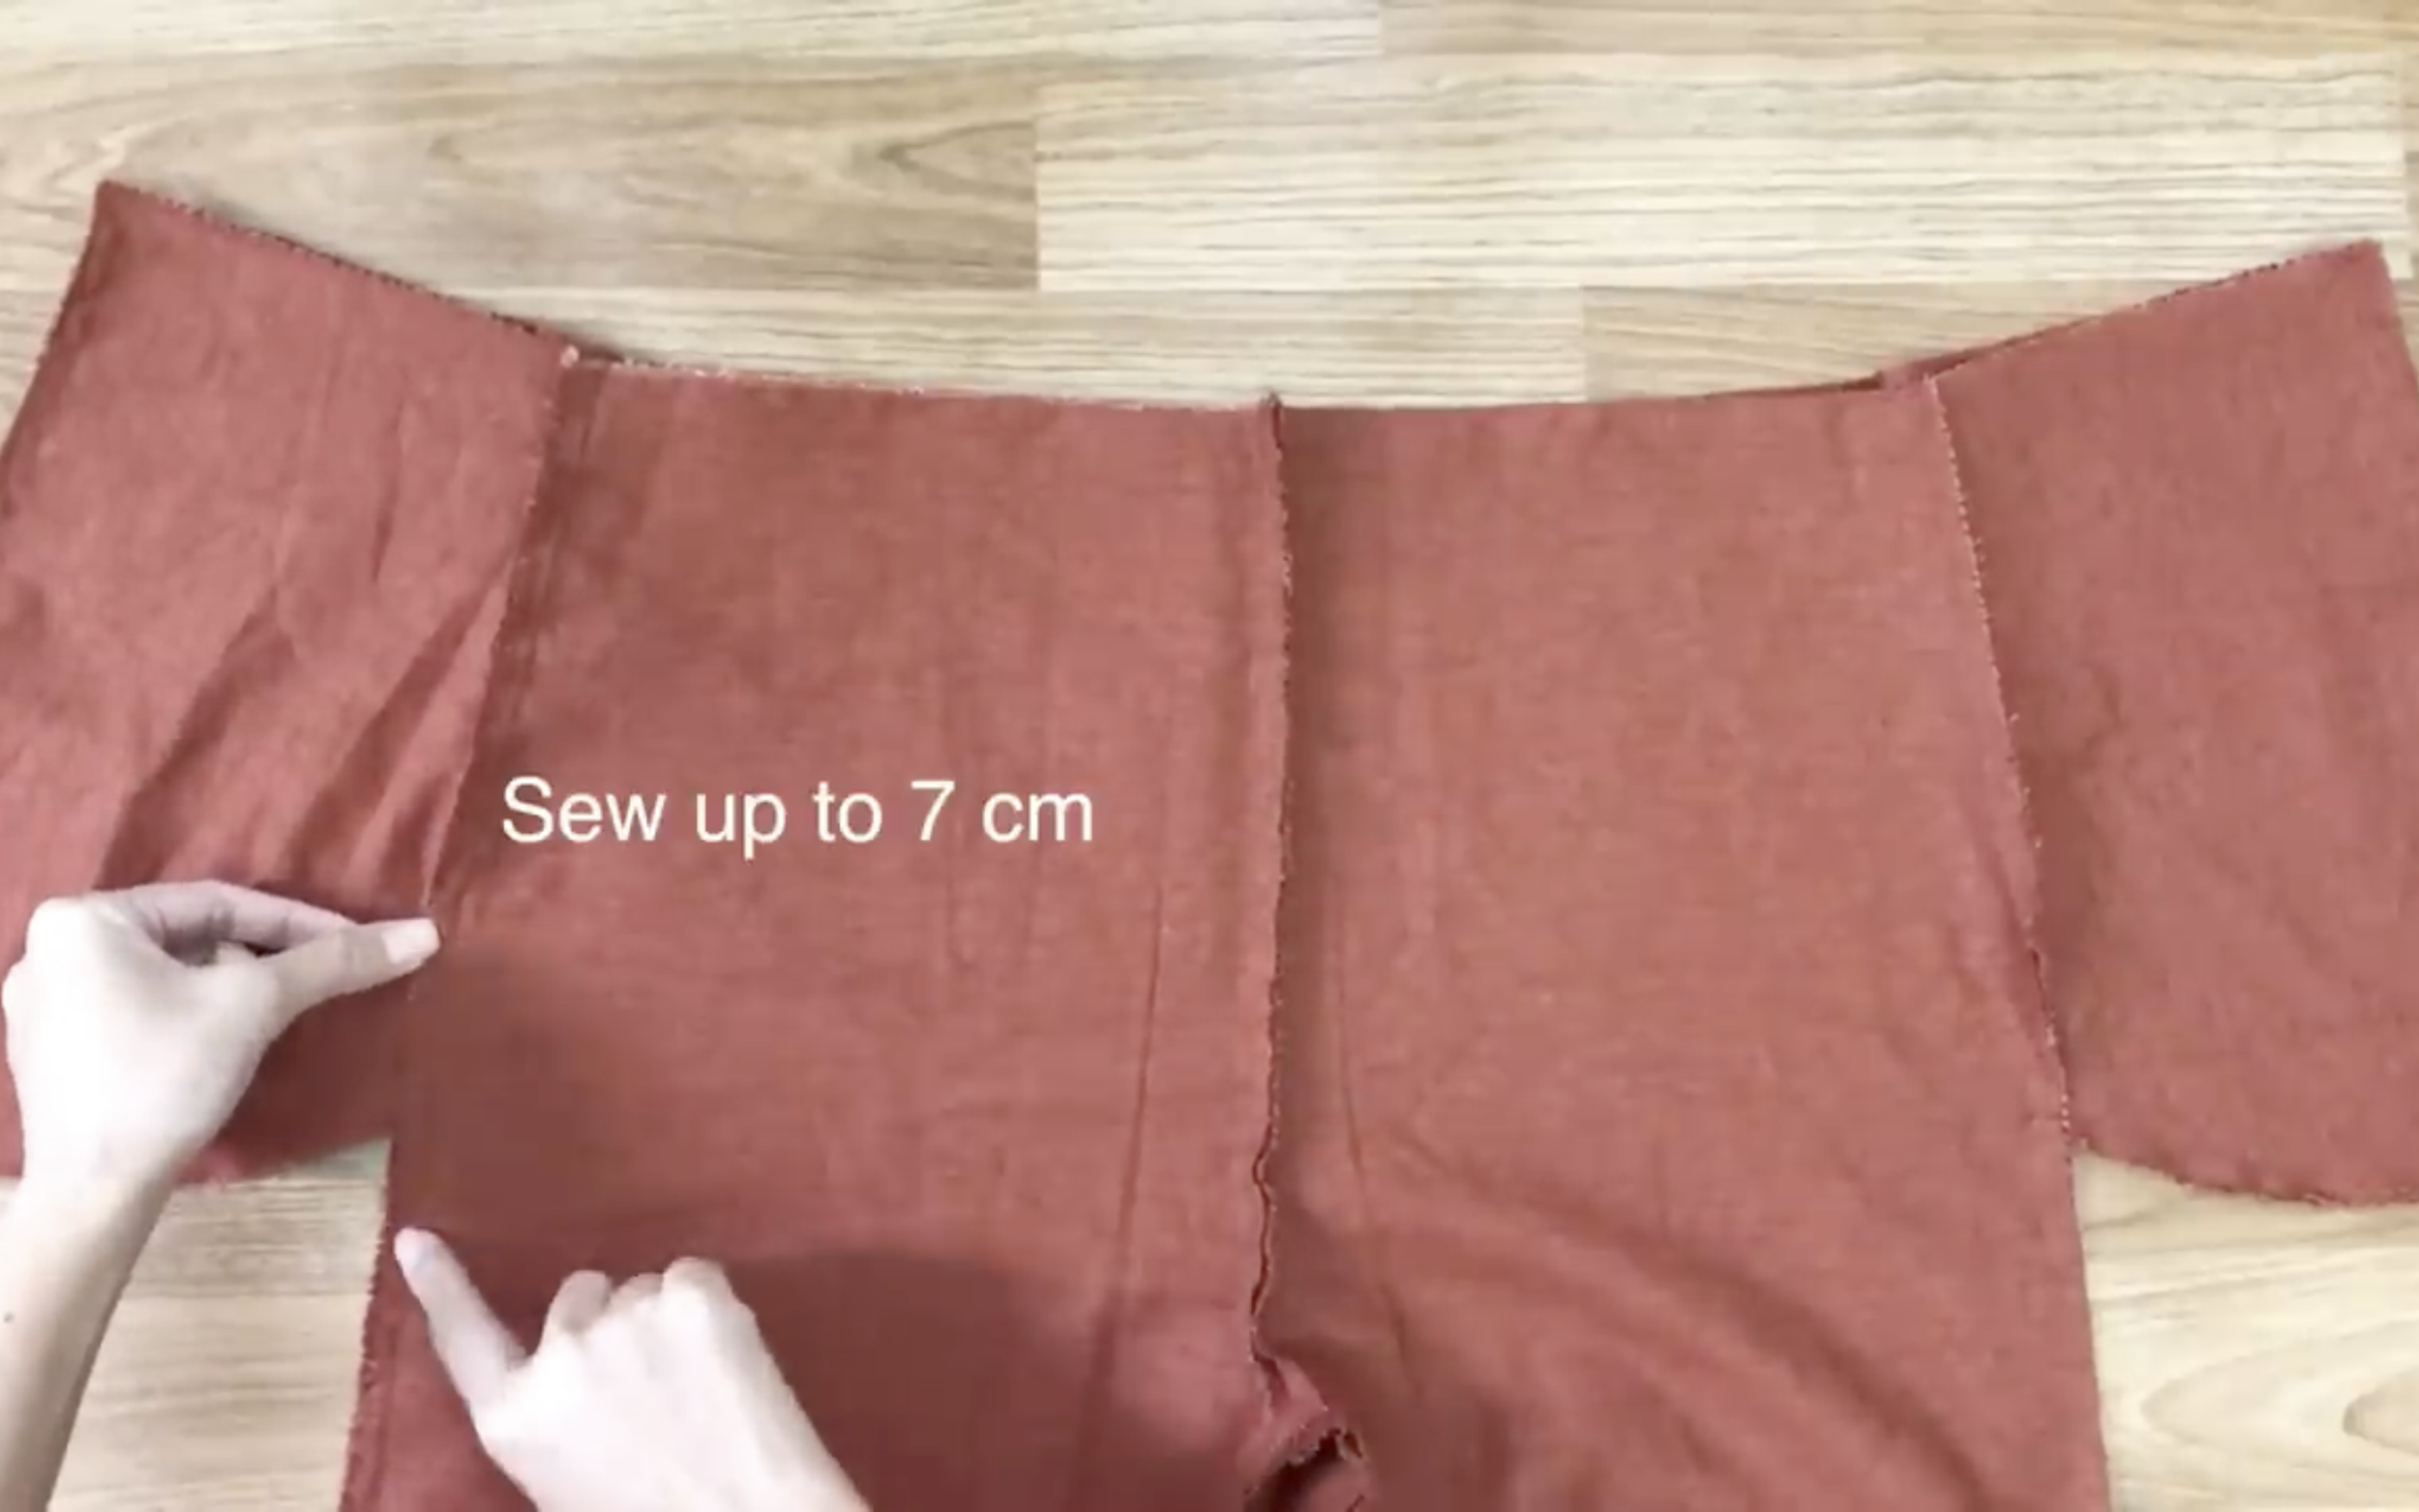
To create the depth for the pockets, sew up to 7 cm from the end. Make sure this seam is close to the seam made before to make the pocket look nicer.
At the top of the pants, fix the pockets to the front pants by the pins. Then sew.
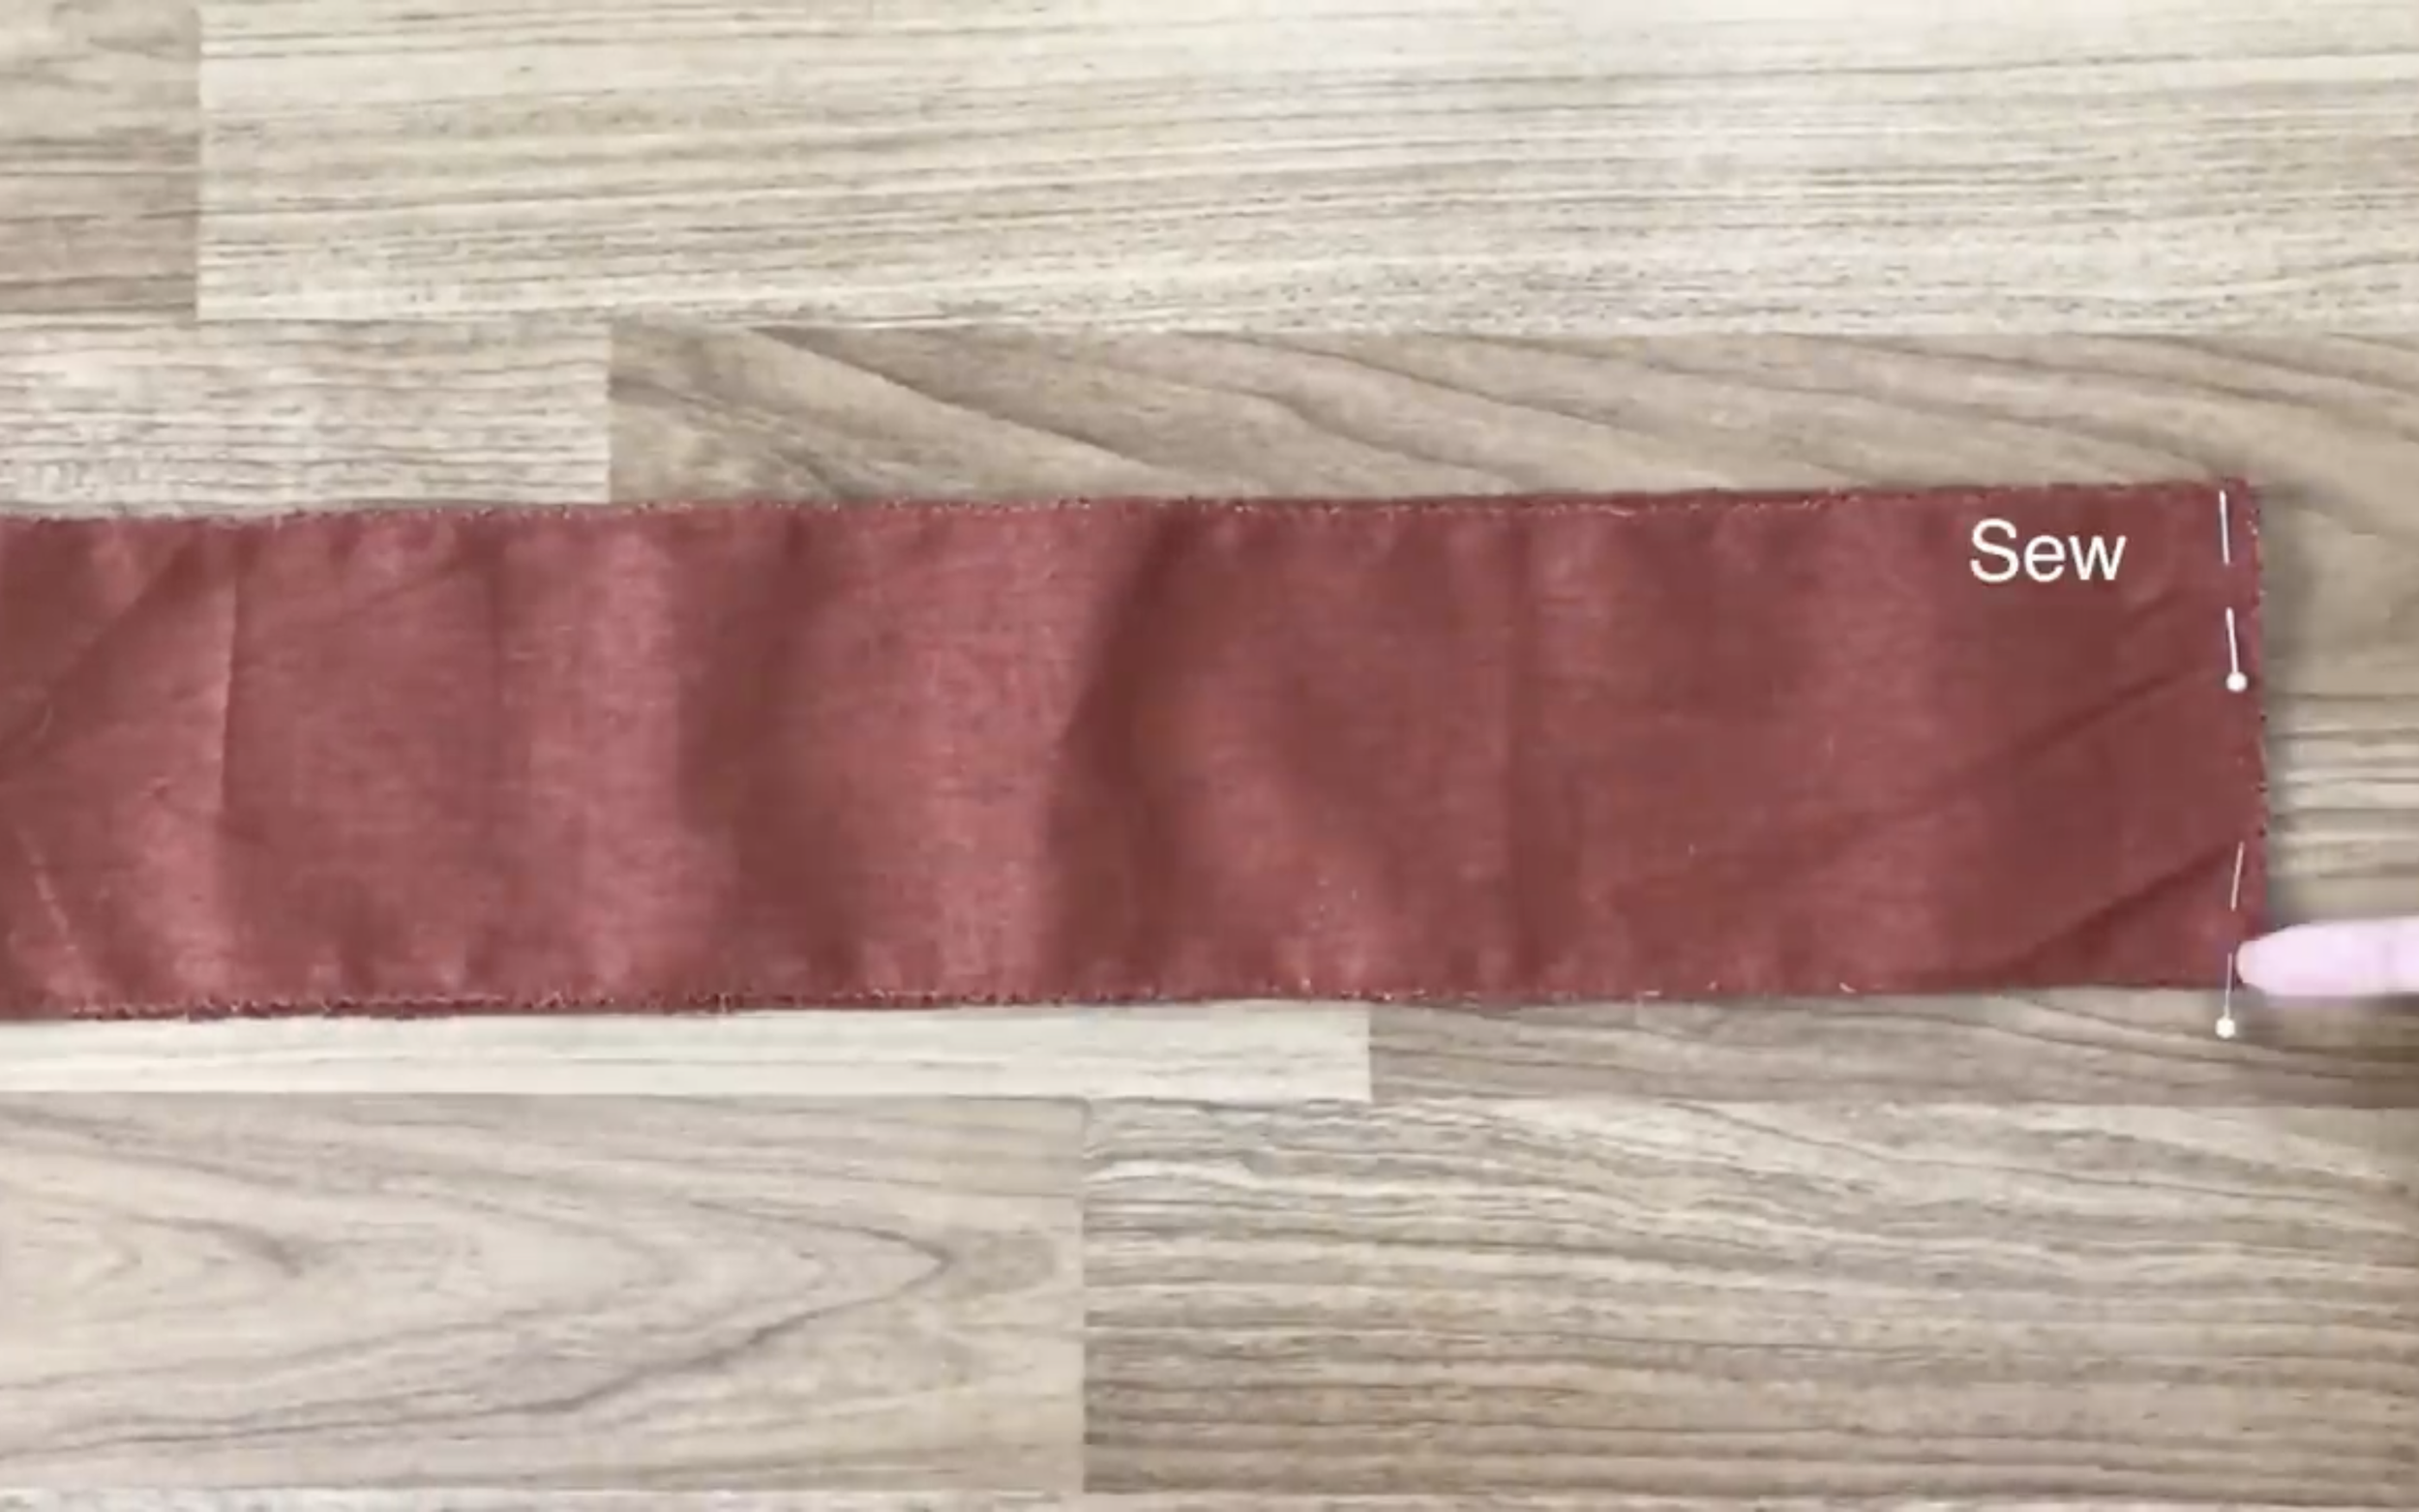
To the waistband of the pants, connect two ends of the rectangle together.
Better check the final width at the top of the pants first to make sure it's the same with the width of the waistband after sewing.
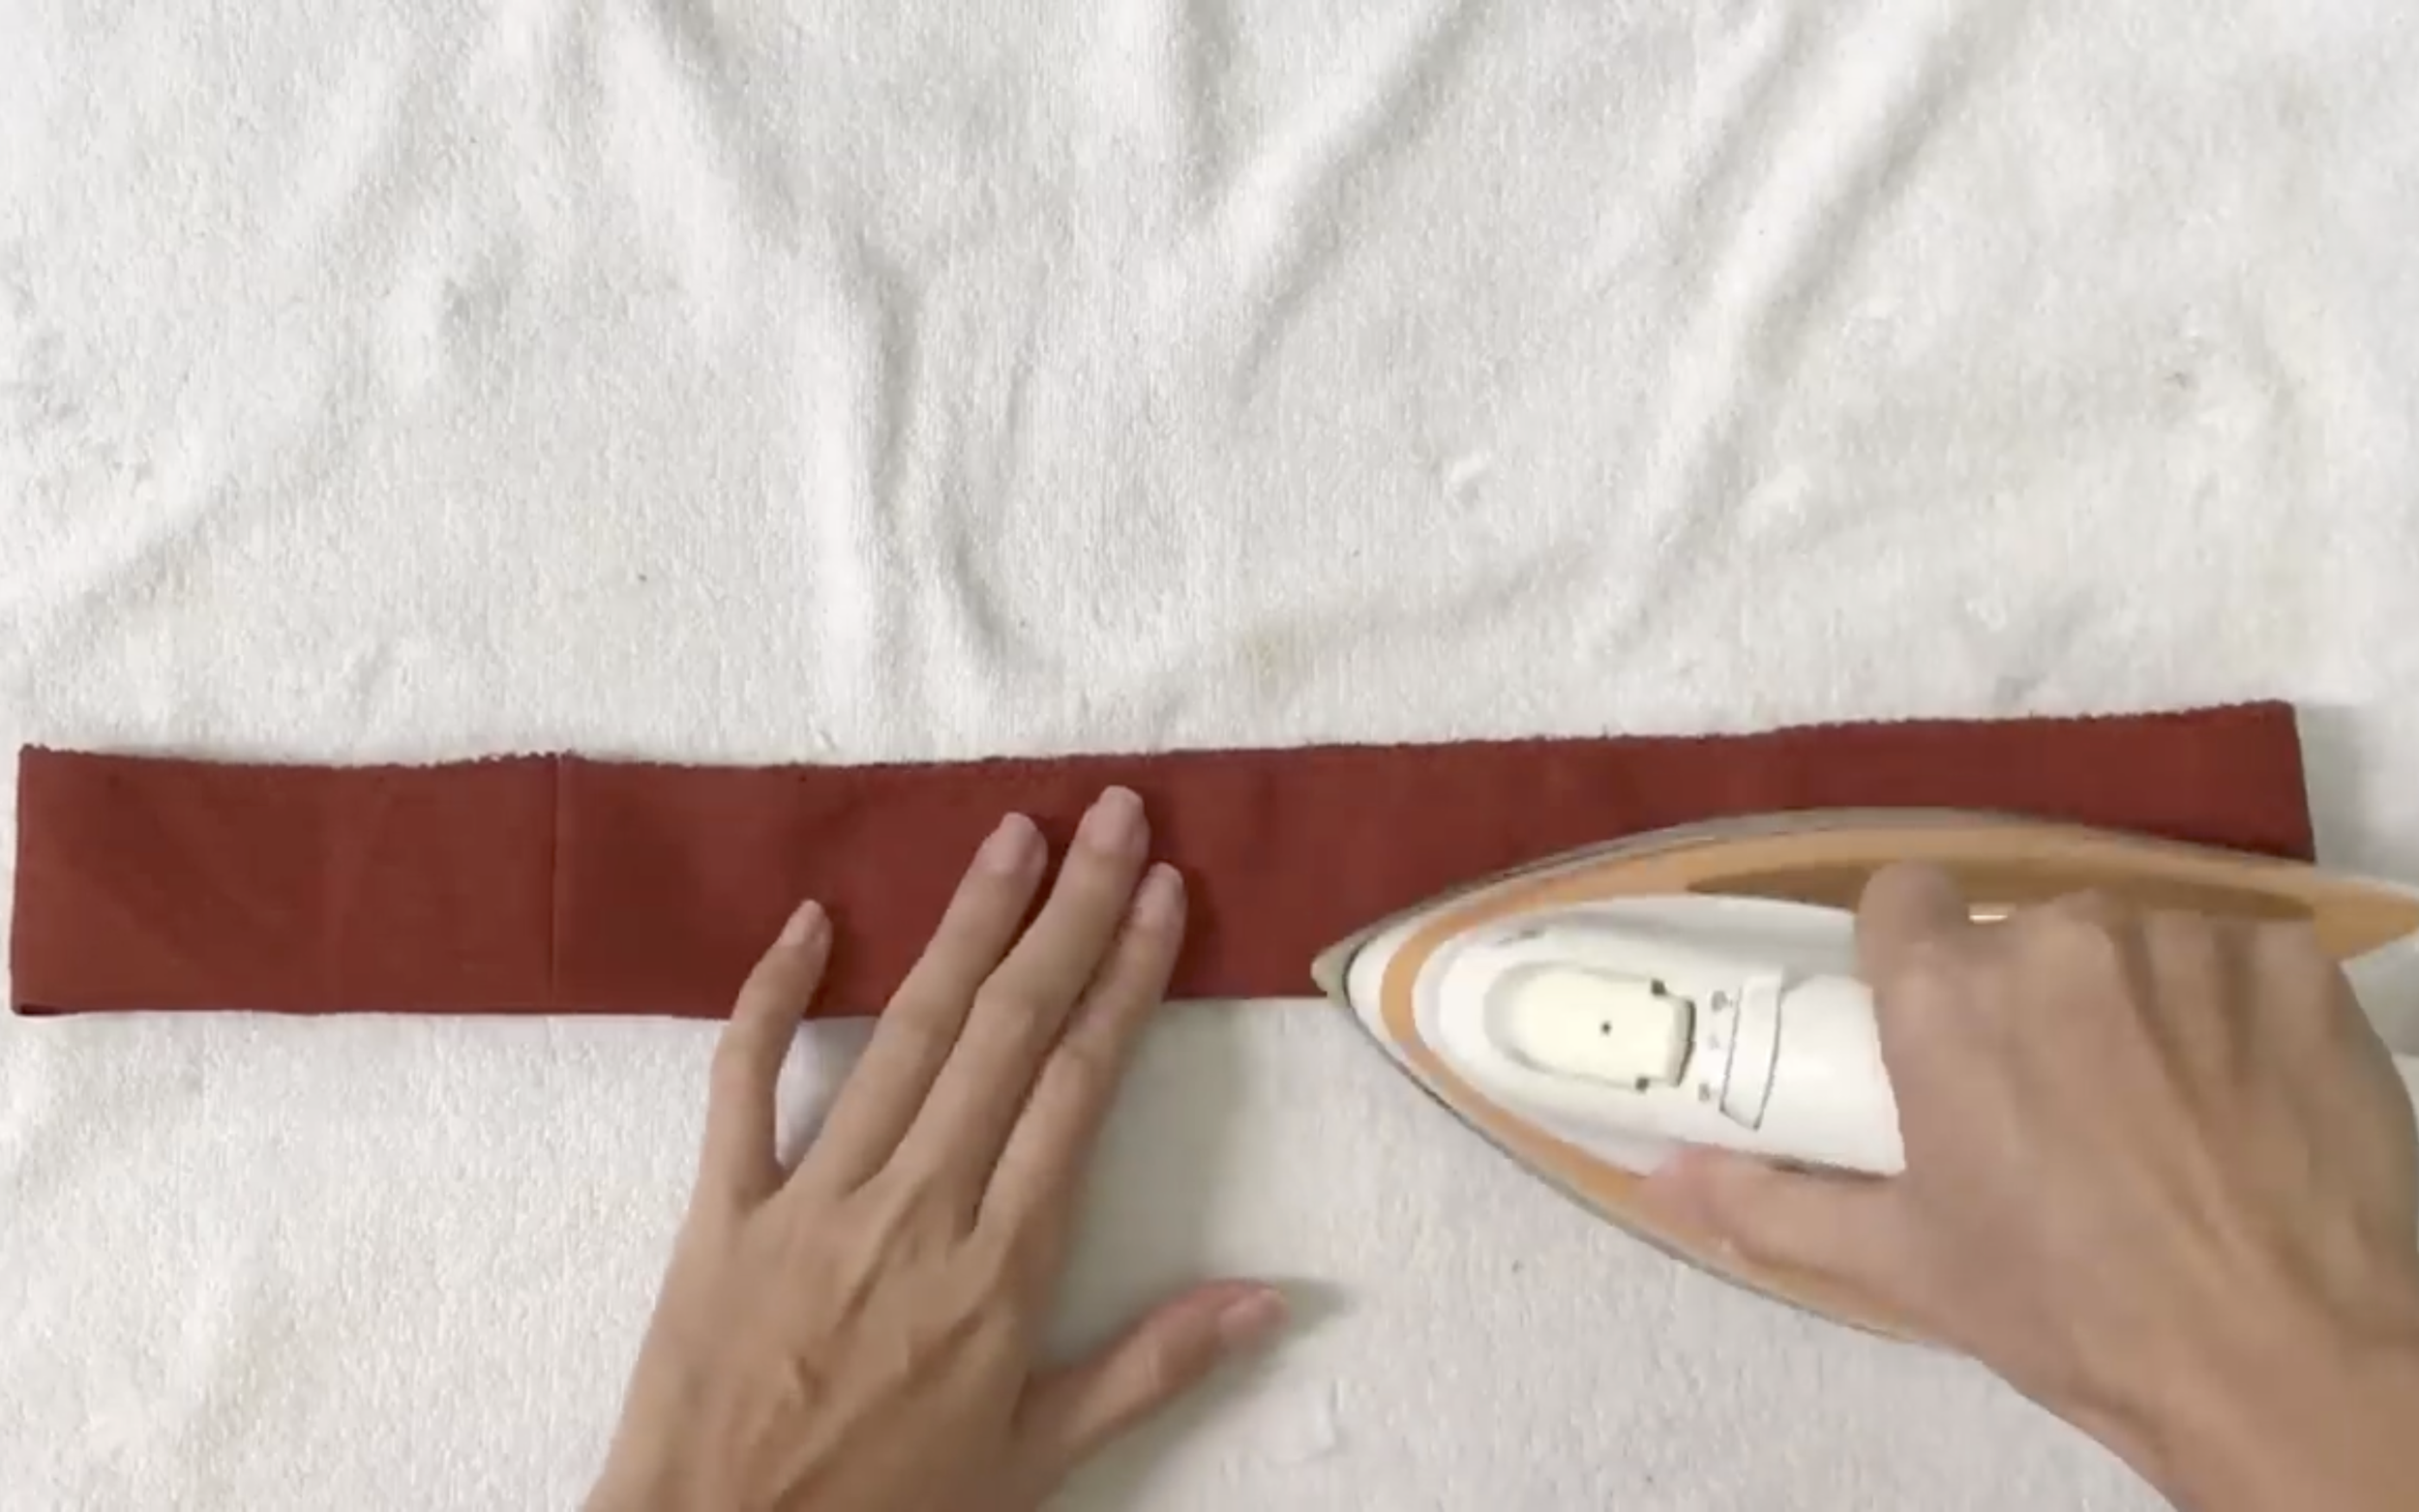
Then fold the waistband in half and use the iron to keep the folding.
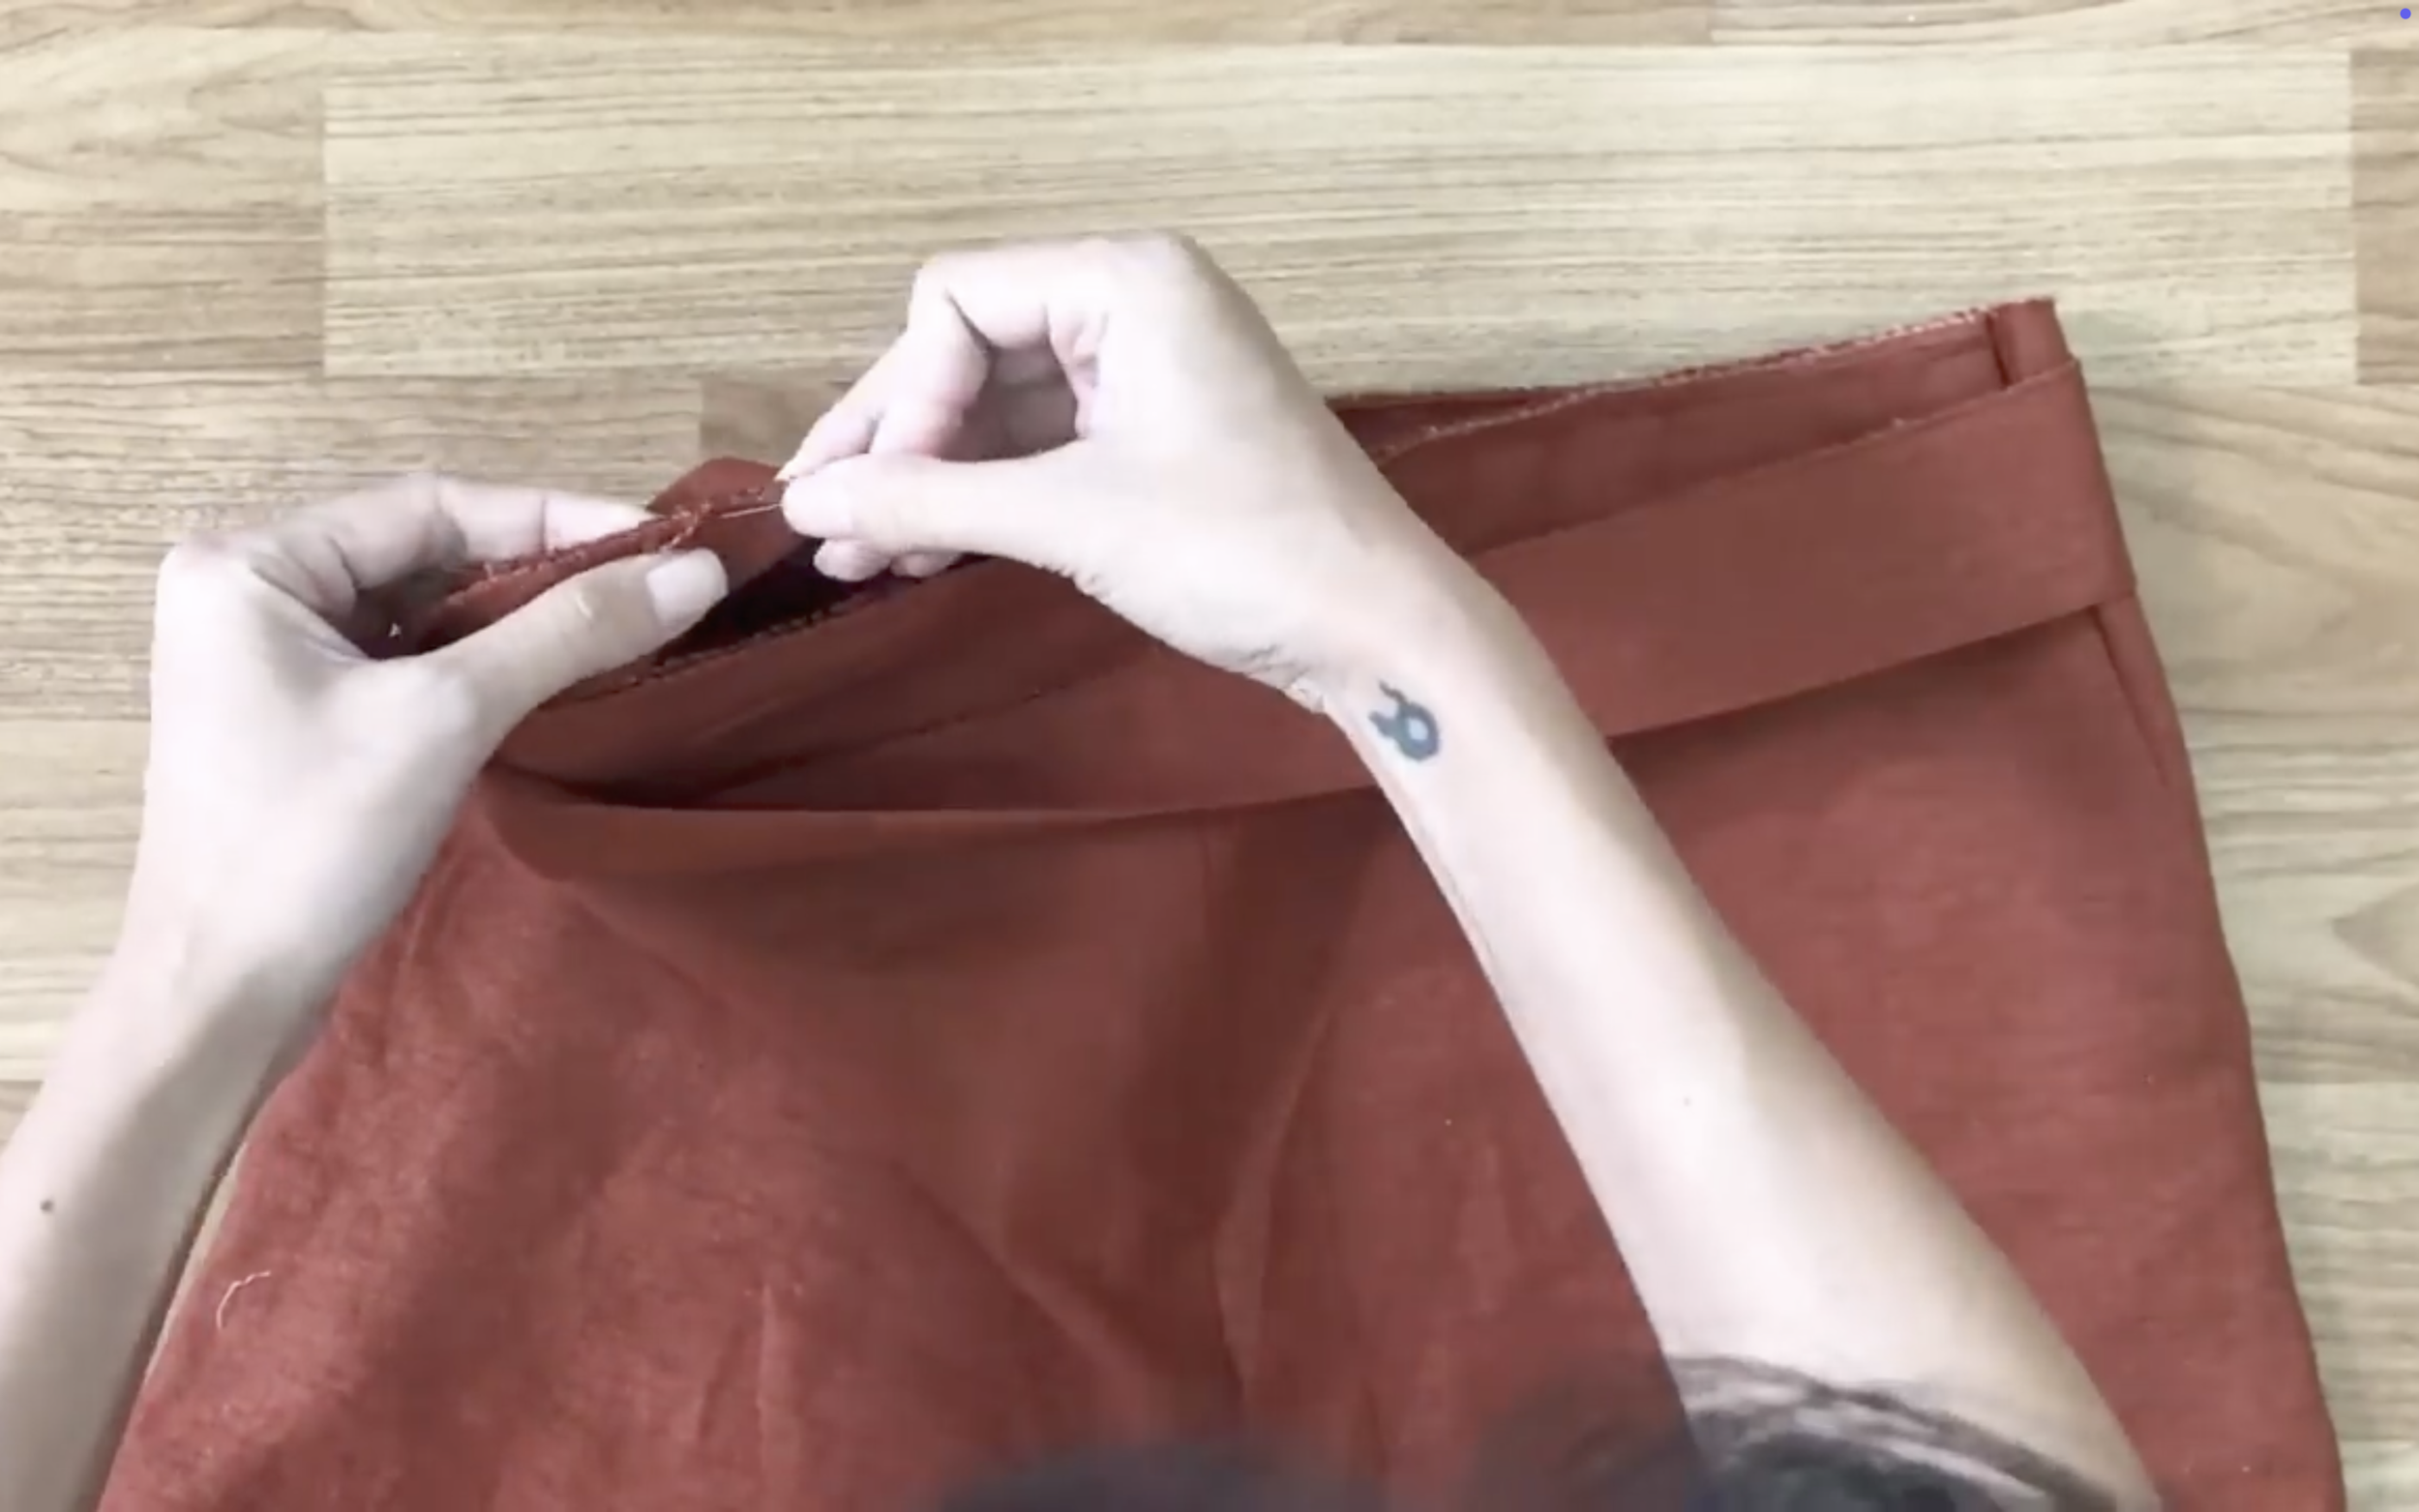
Now connecting the waistband to the pants.
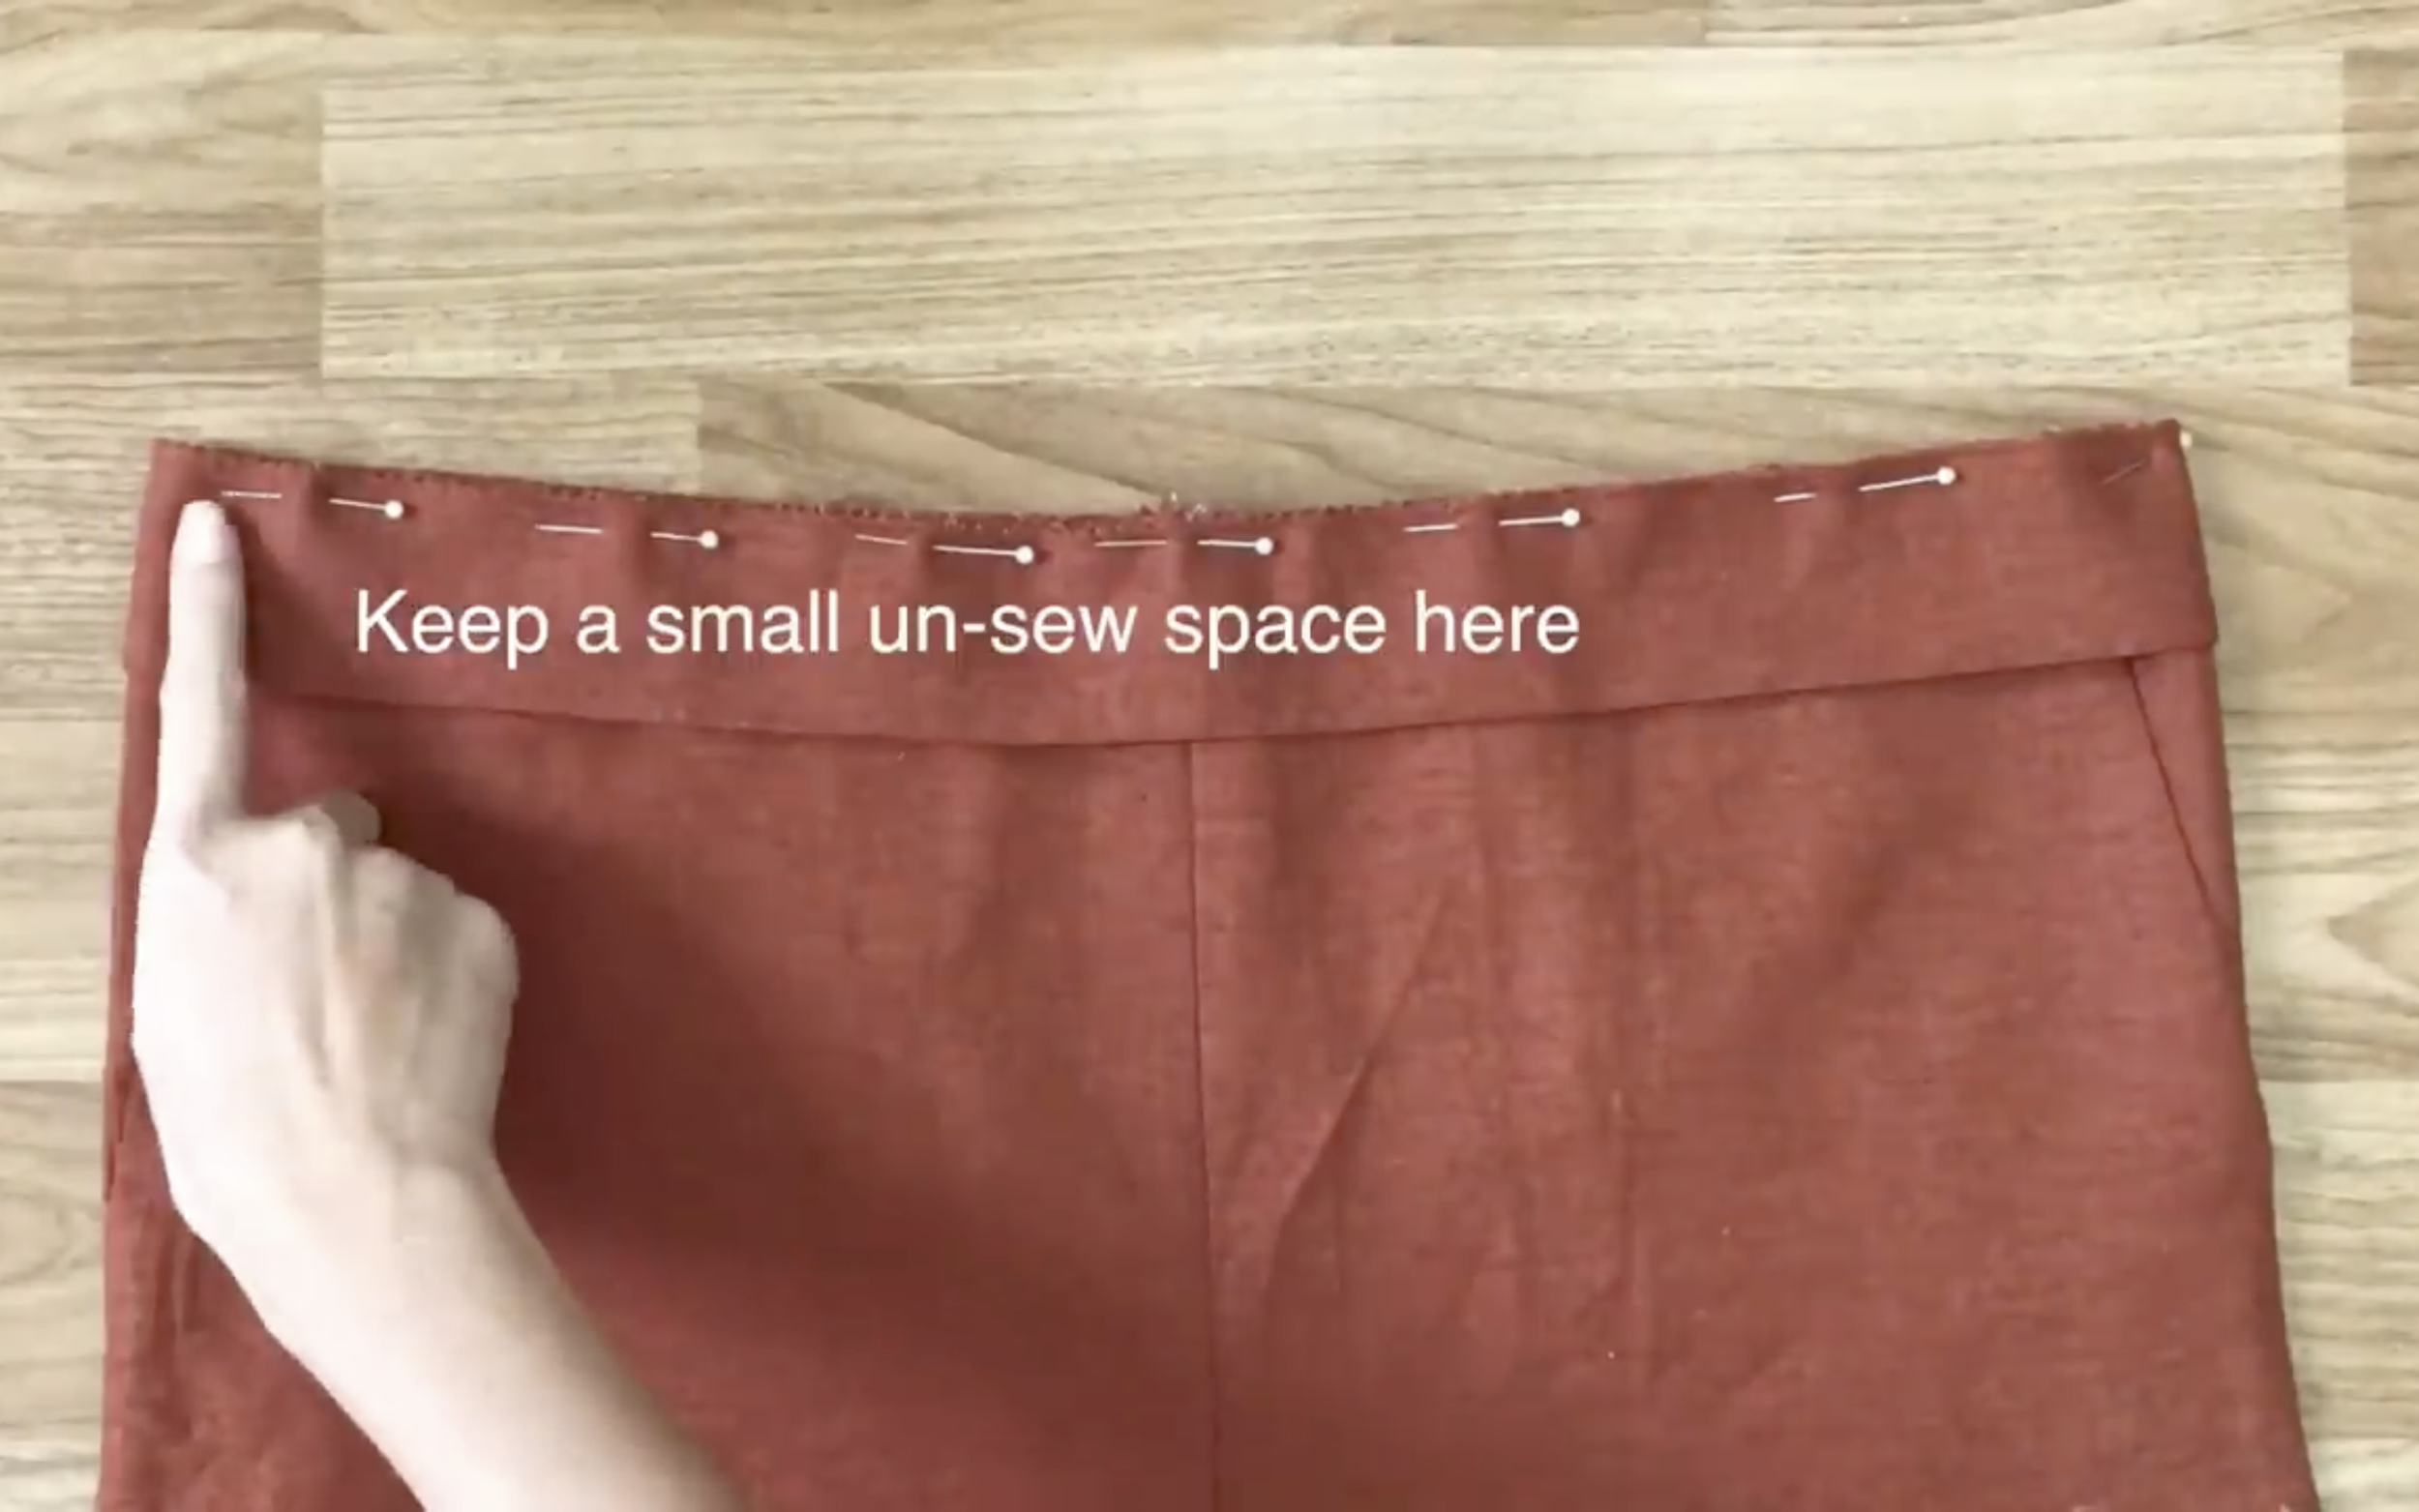
Remember to keep a small un-sew space when sewing to put the elastic band inside later.
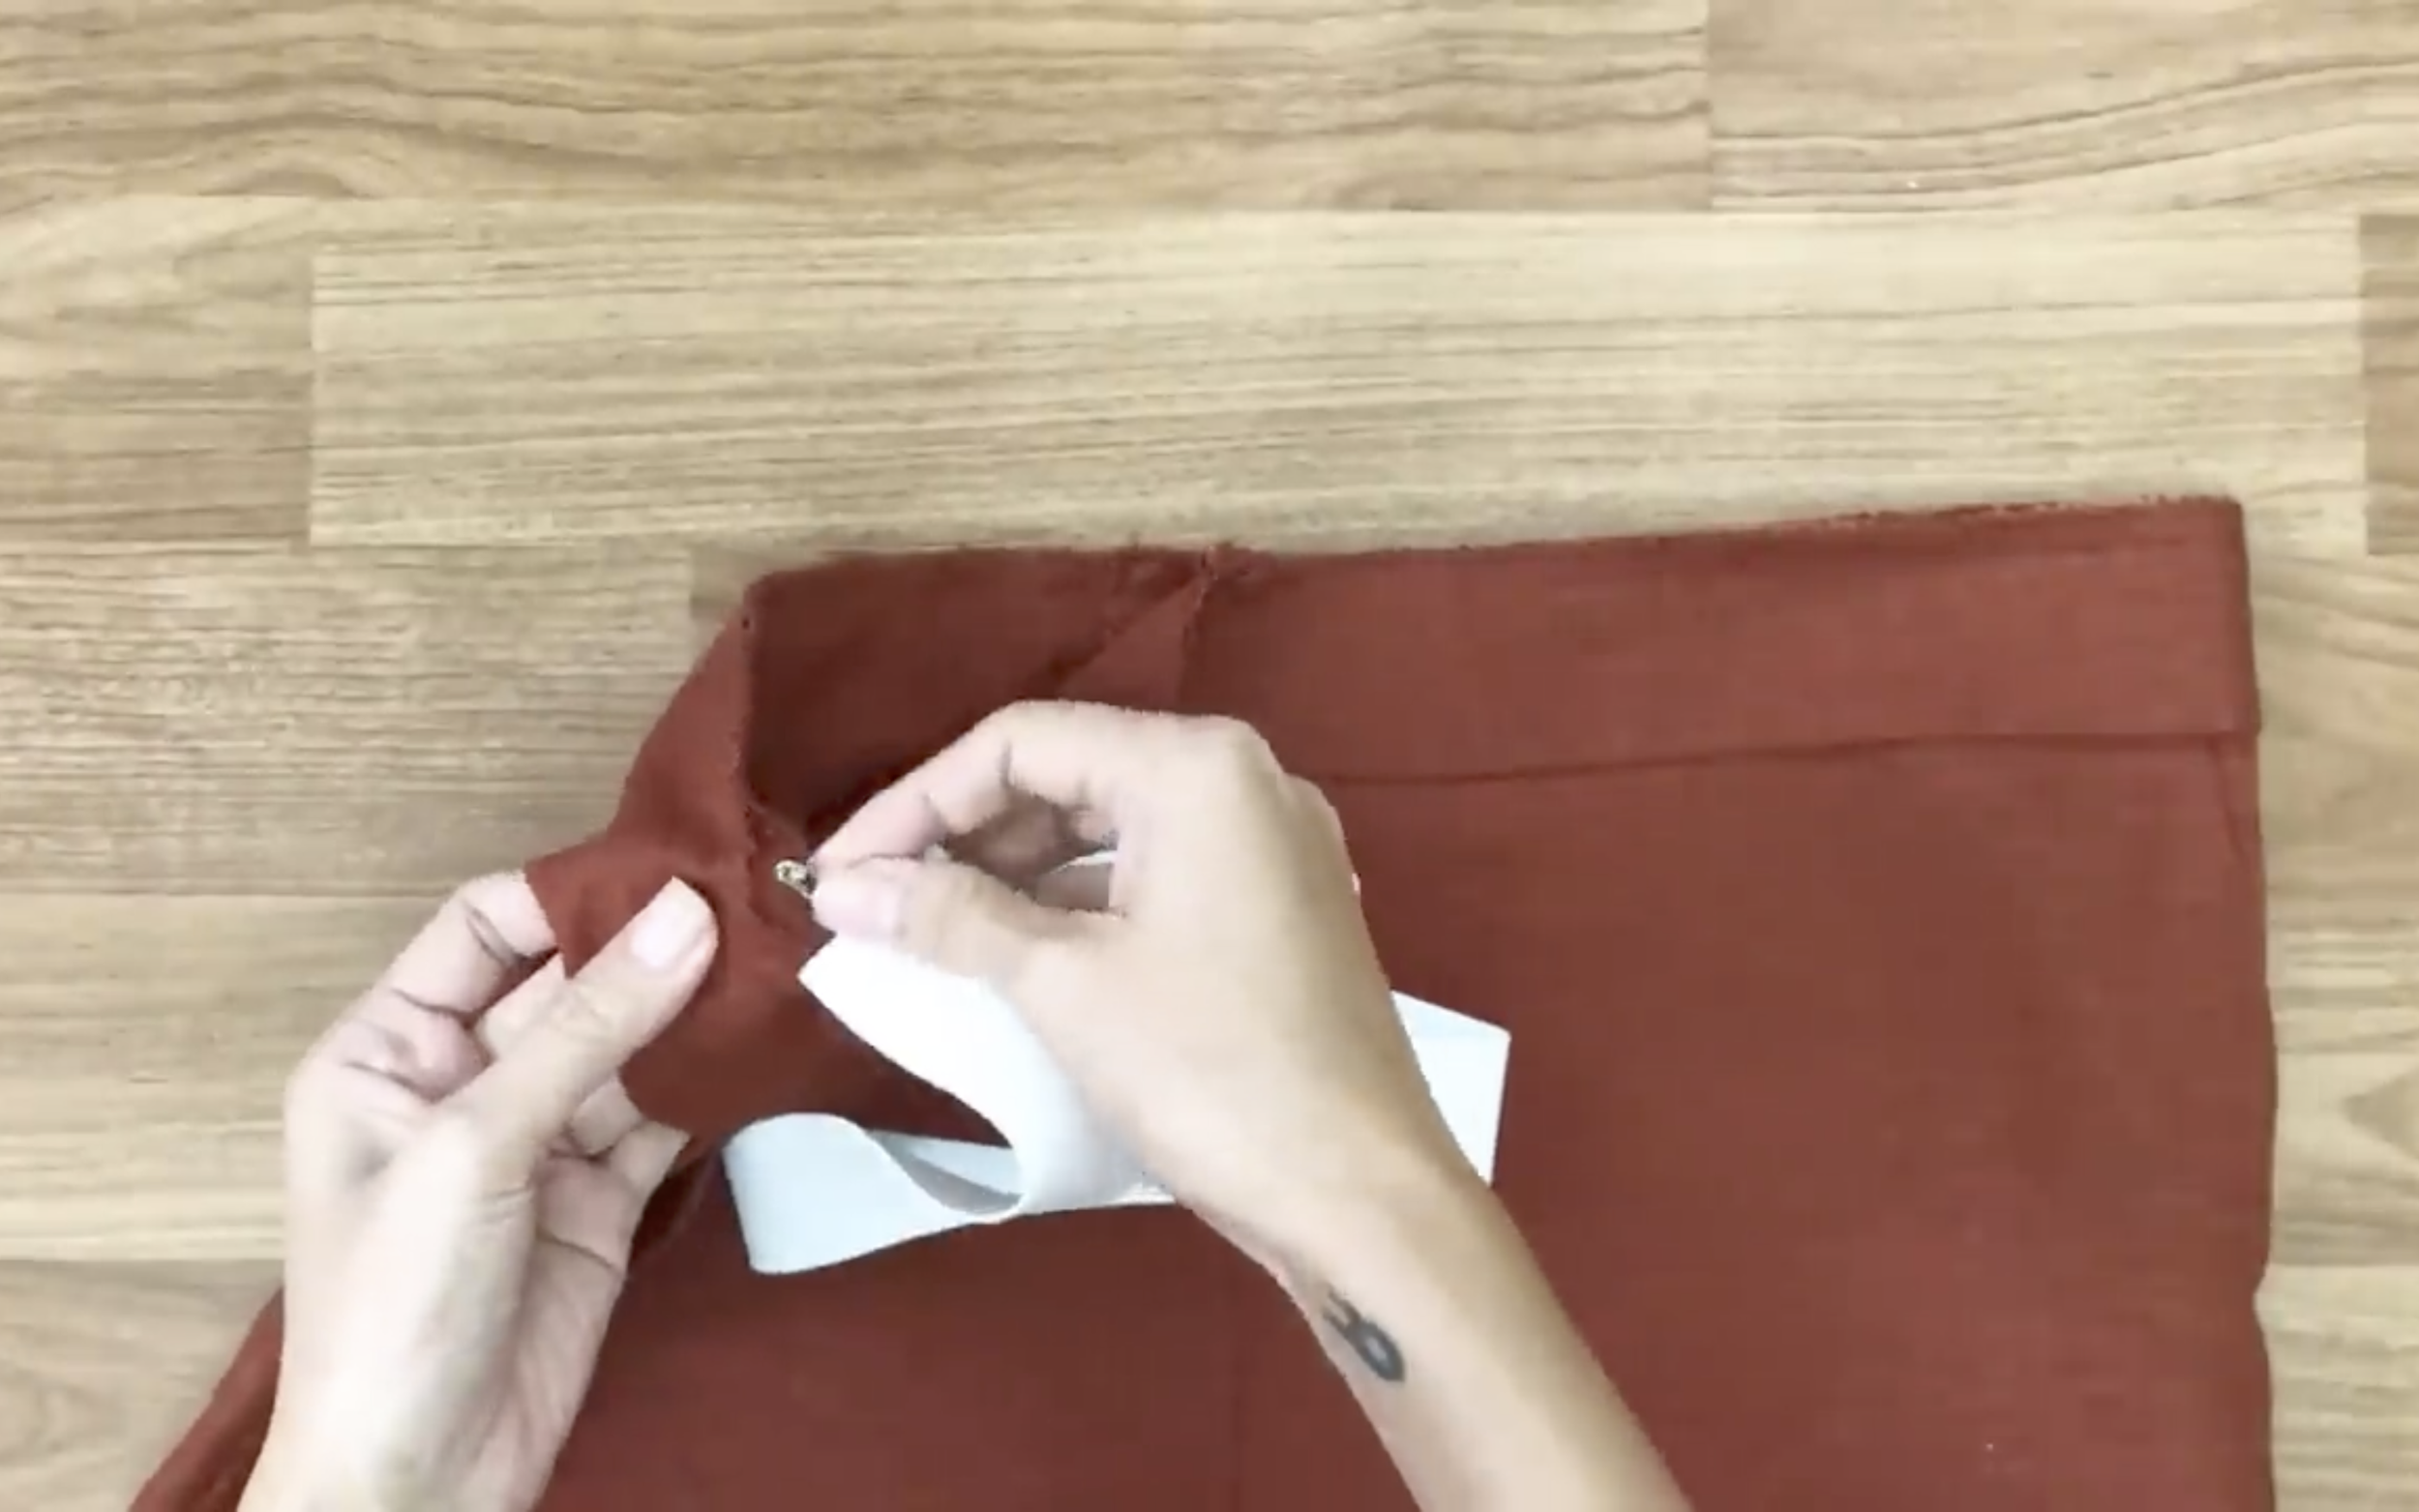
Use two safety pins to put the elastic band through the waistband.
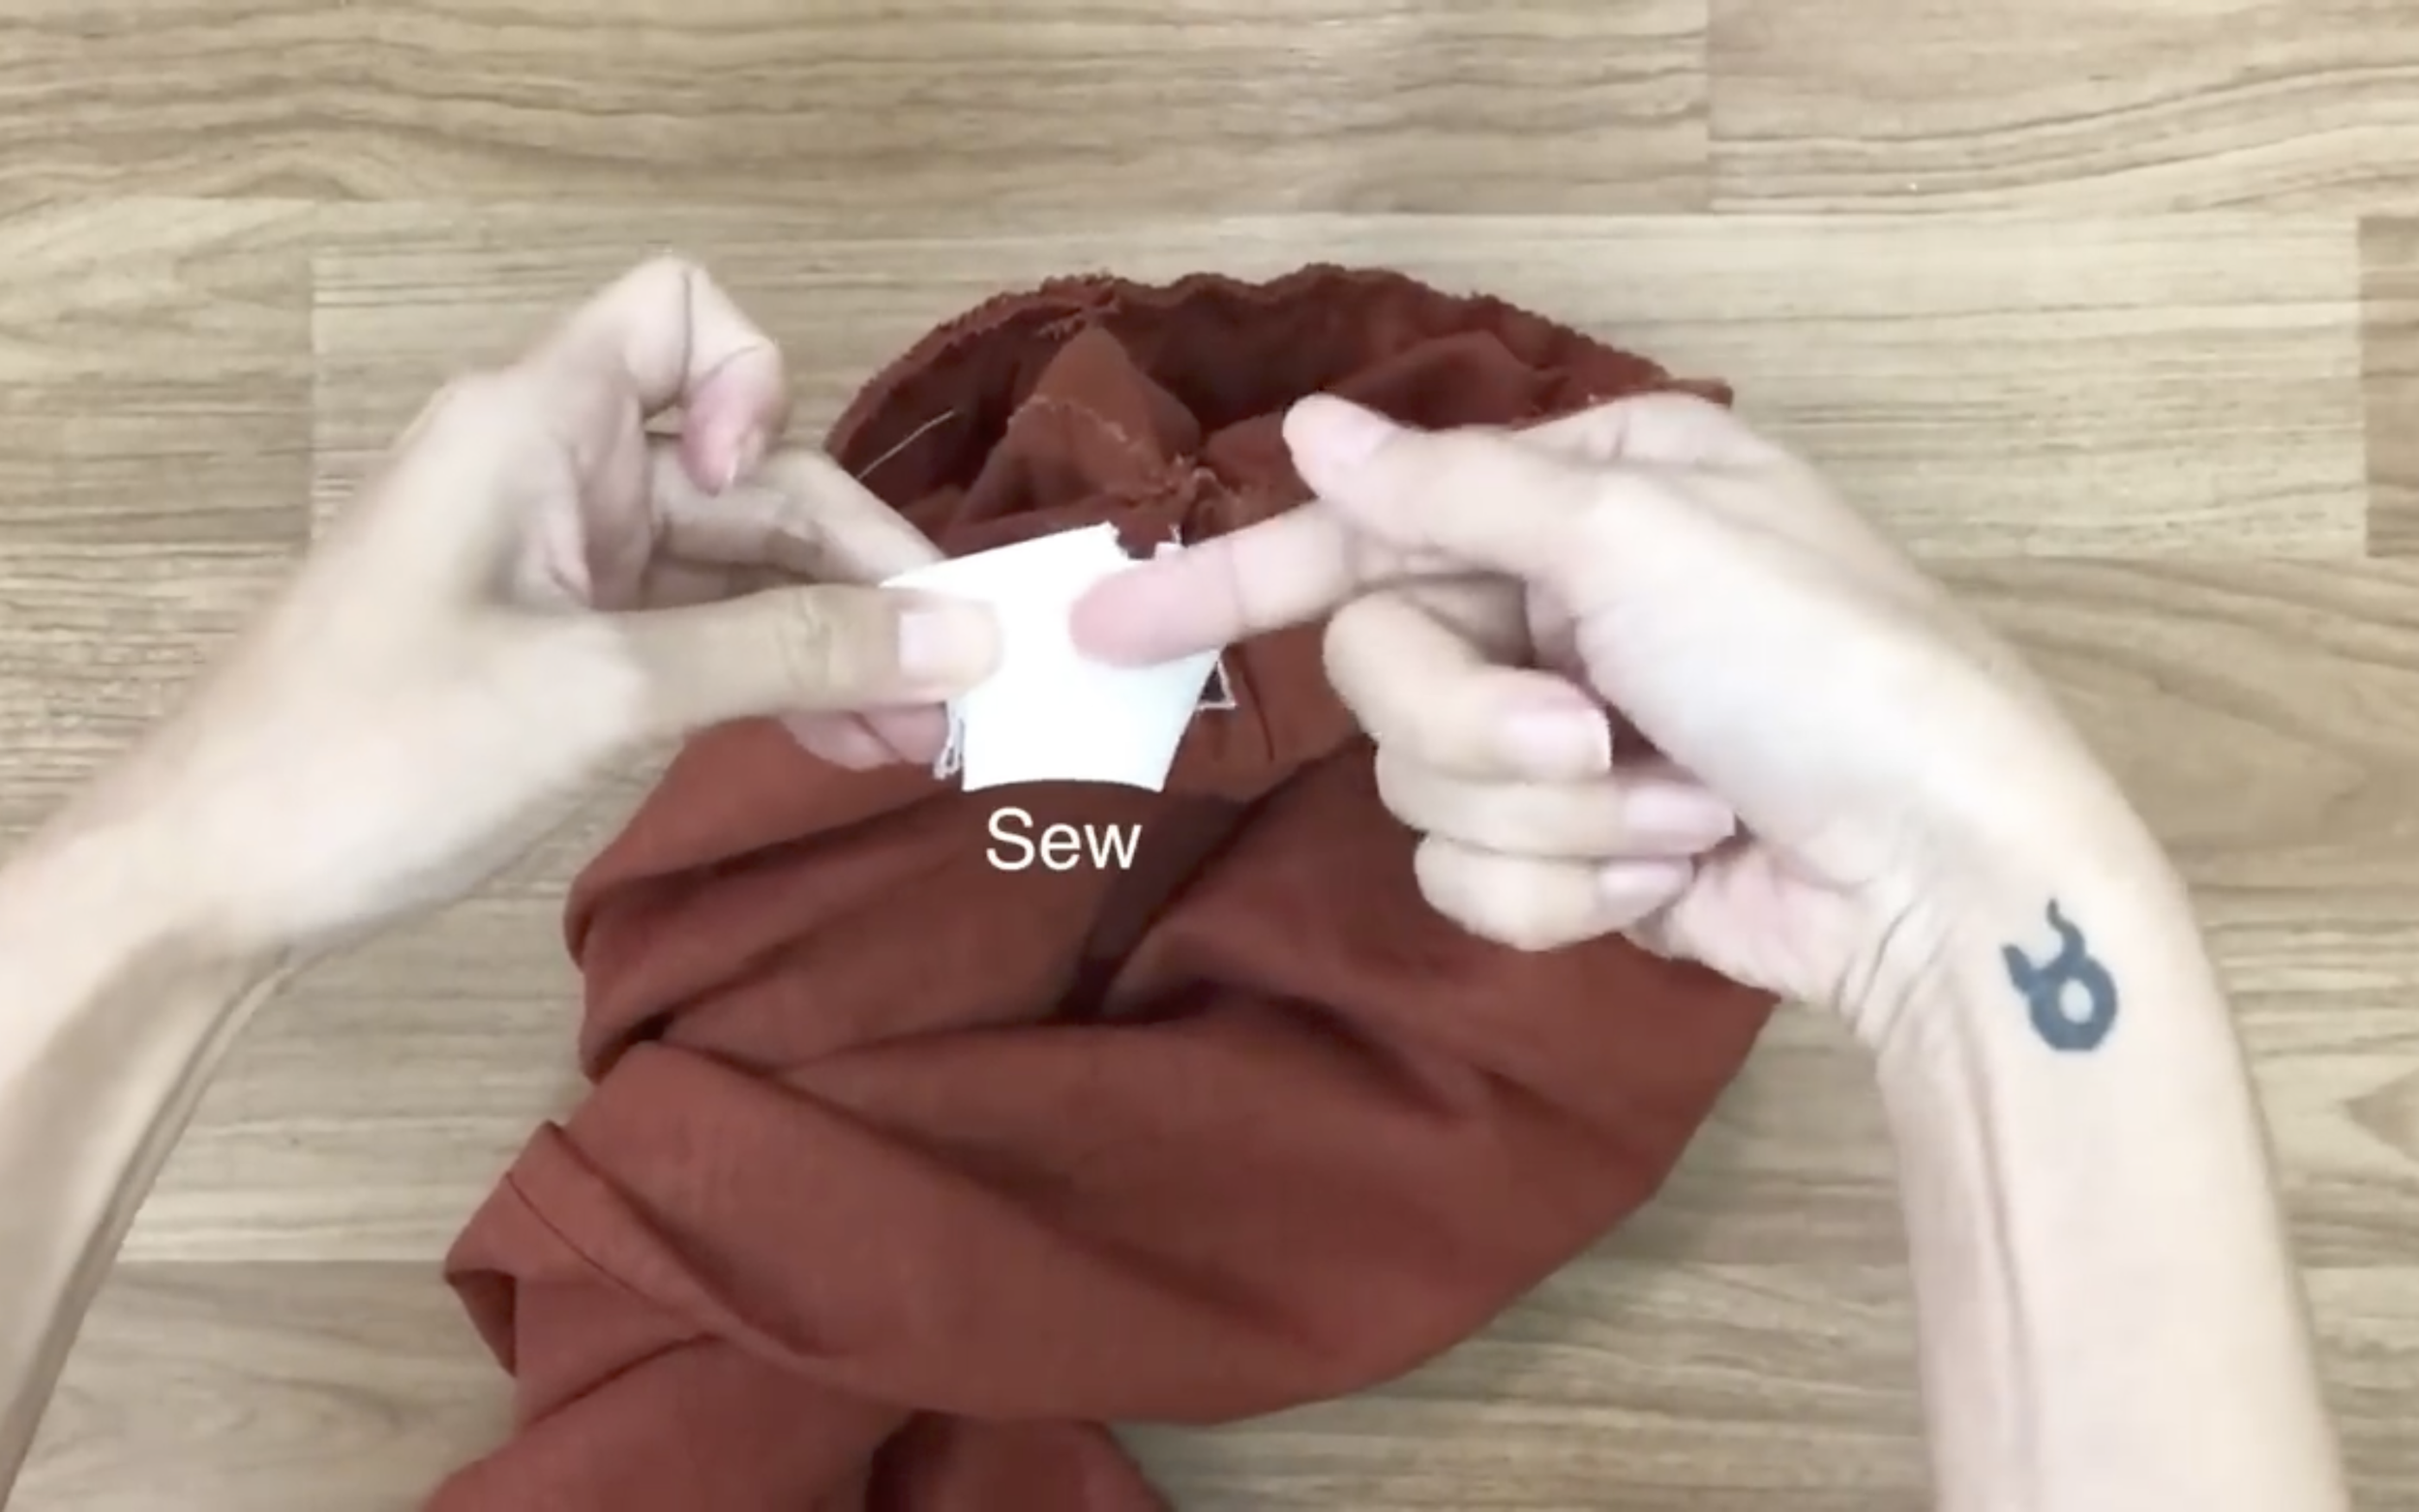
Then sew two ends of the elastic band after that.
Also close the un-sew space.
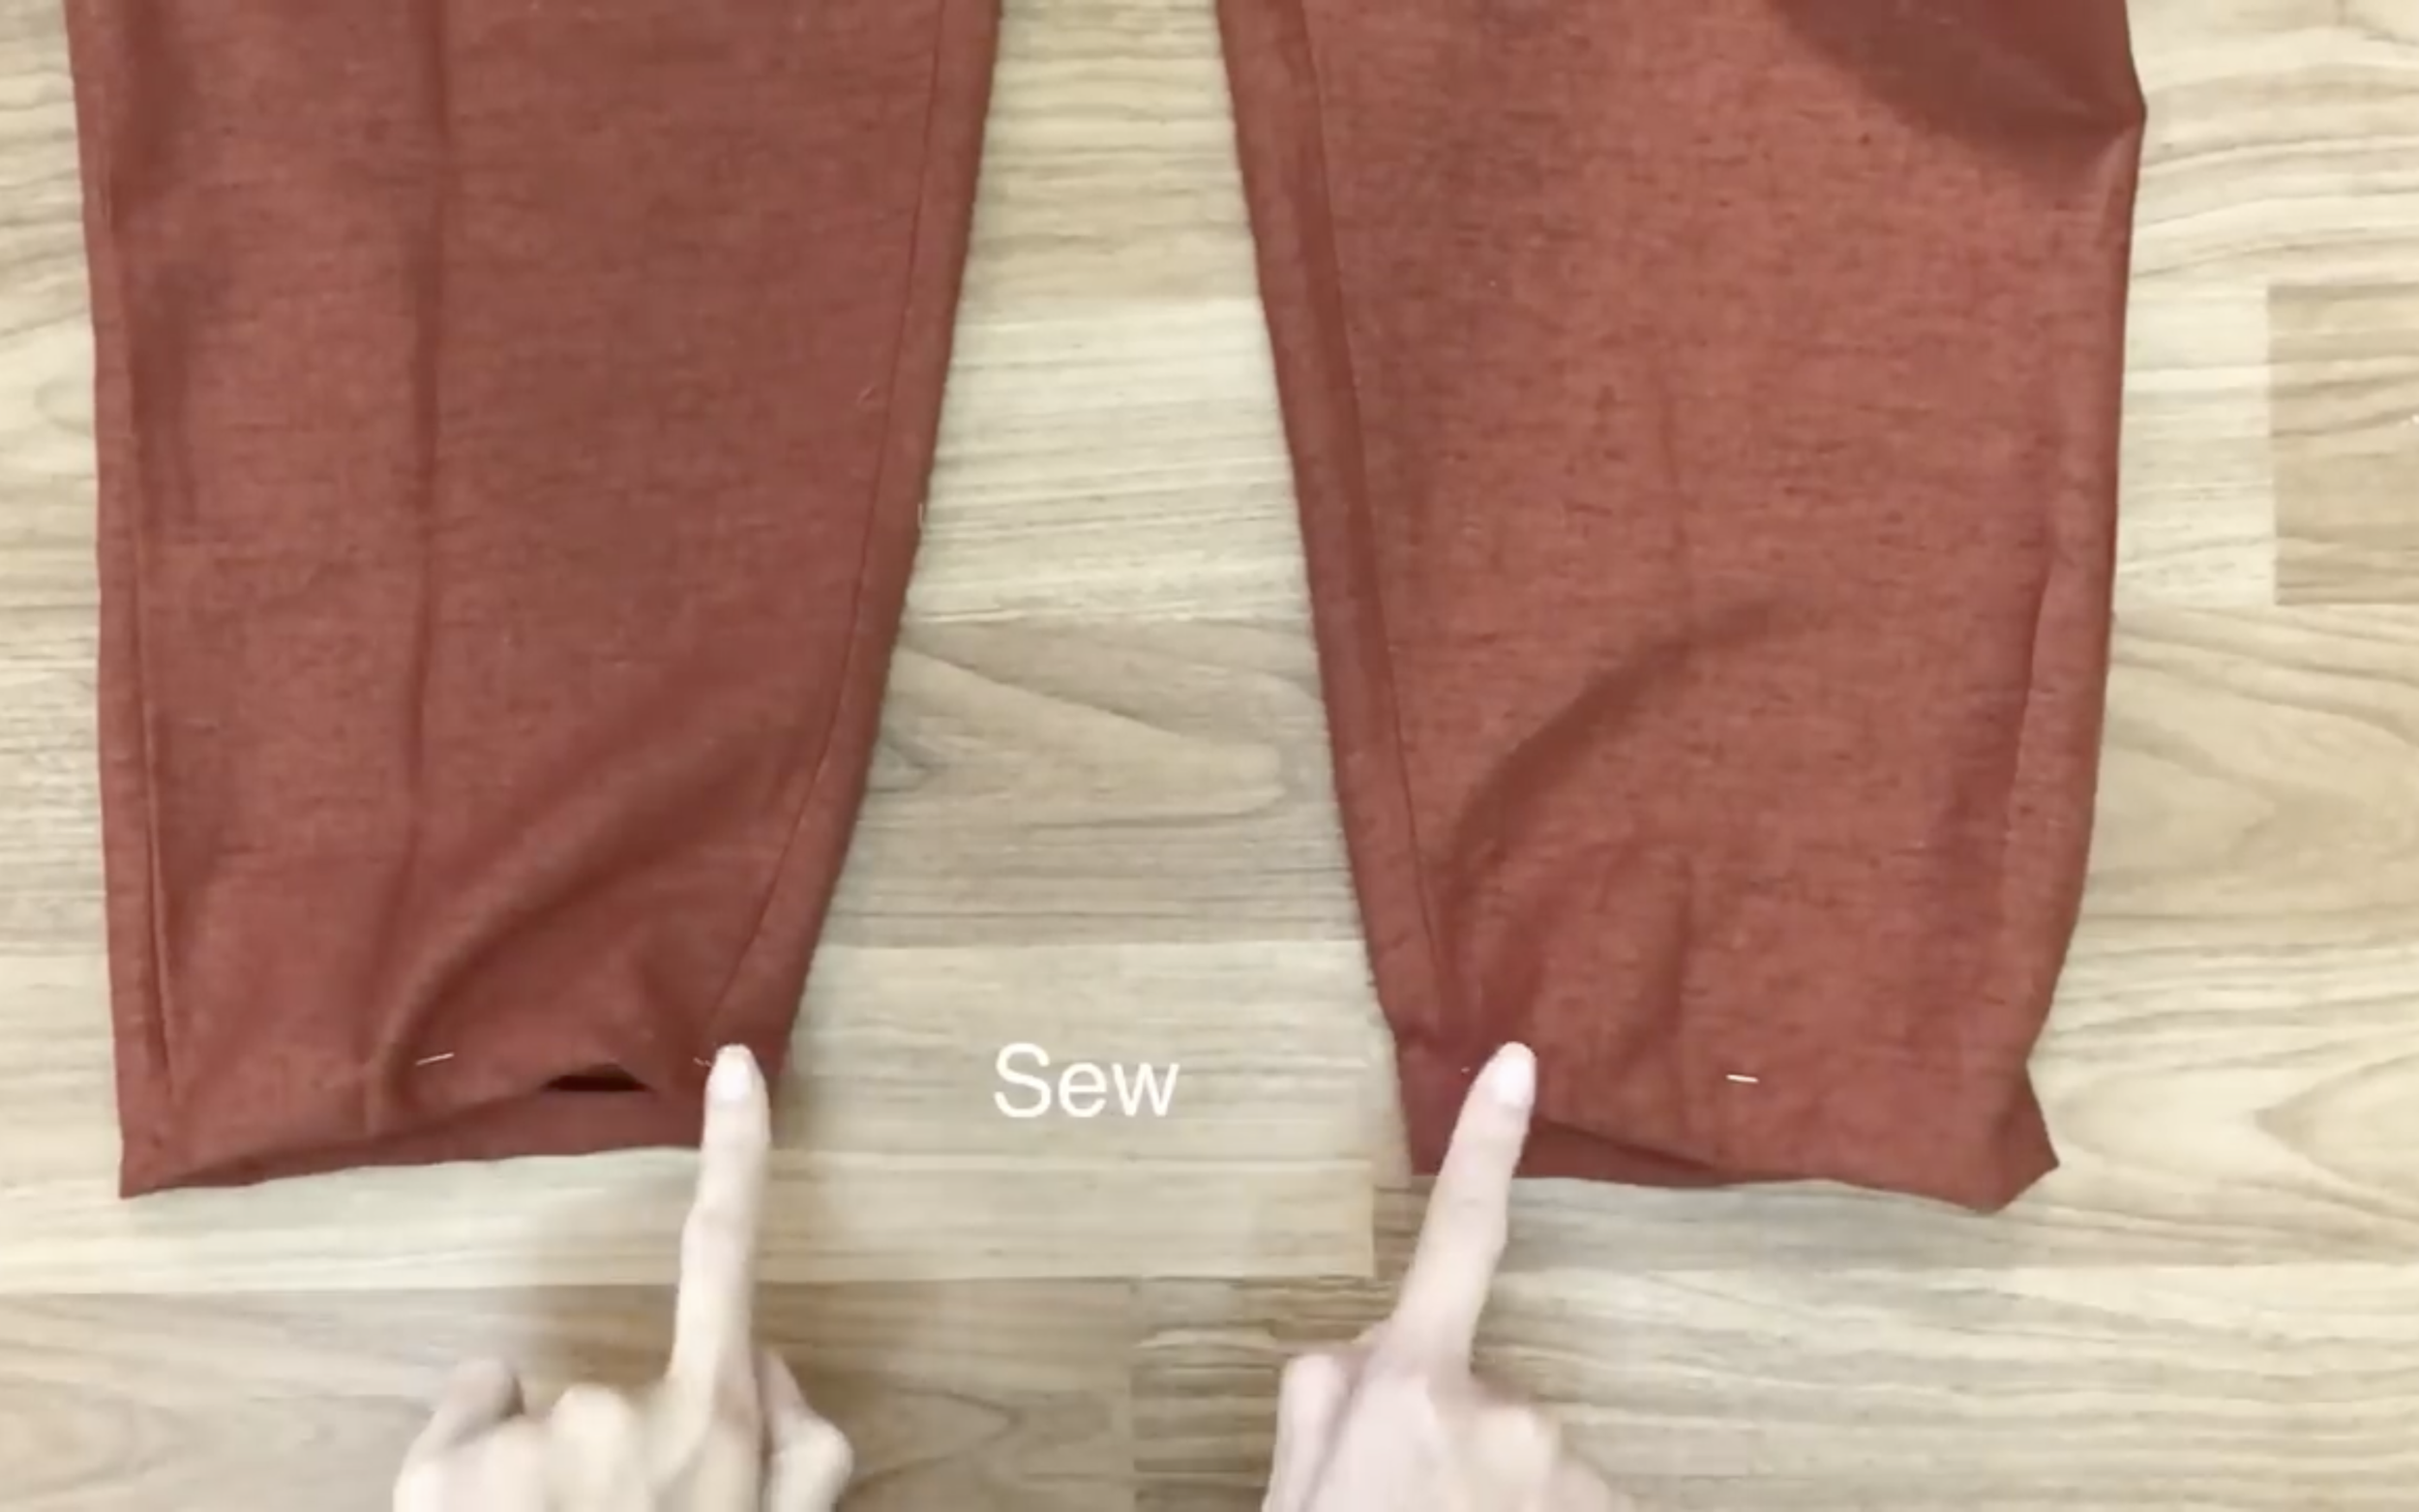
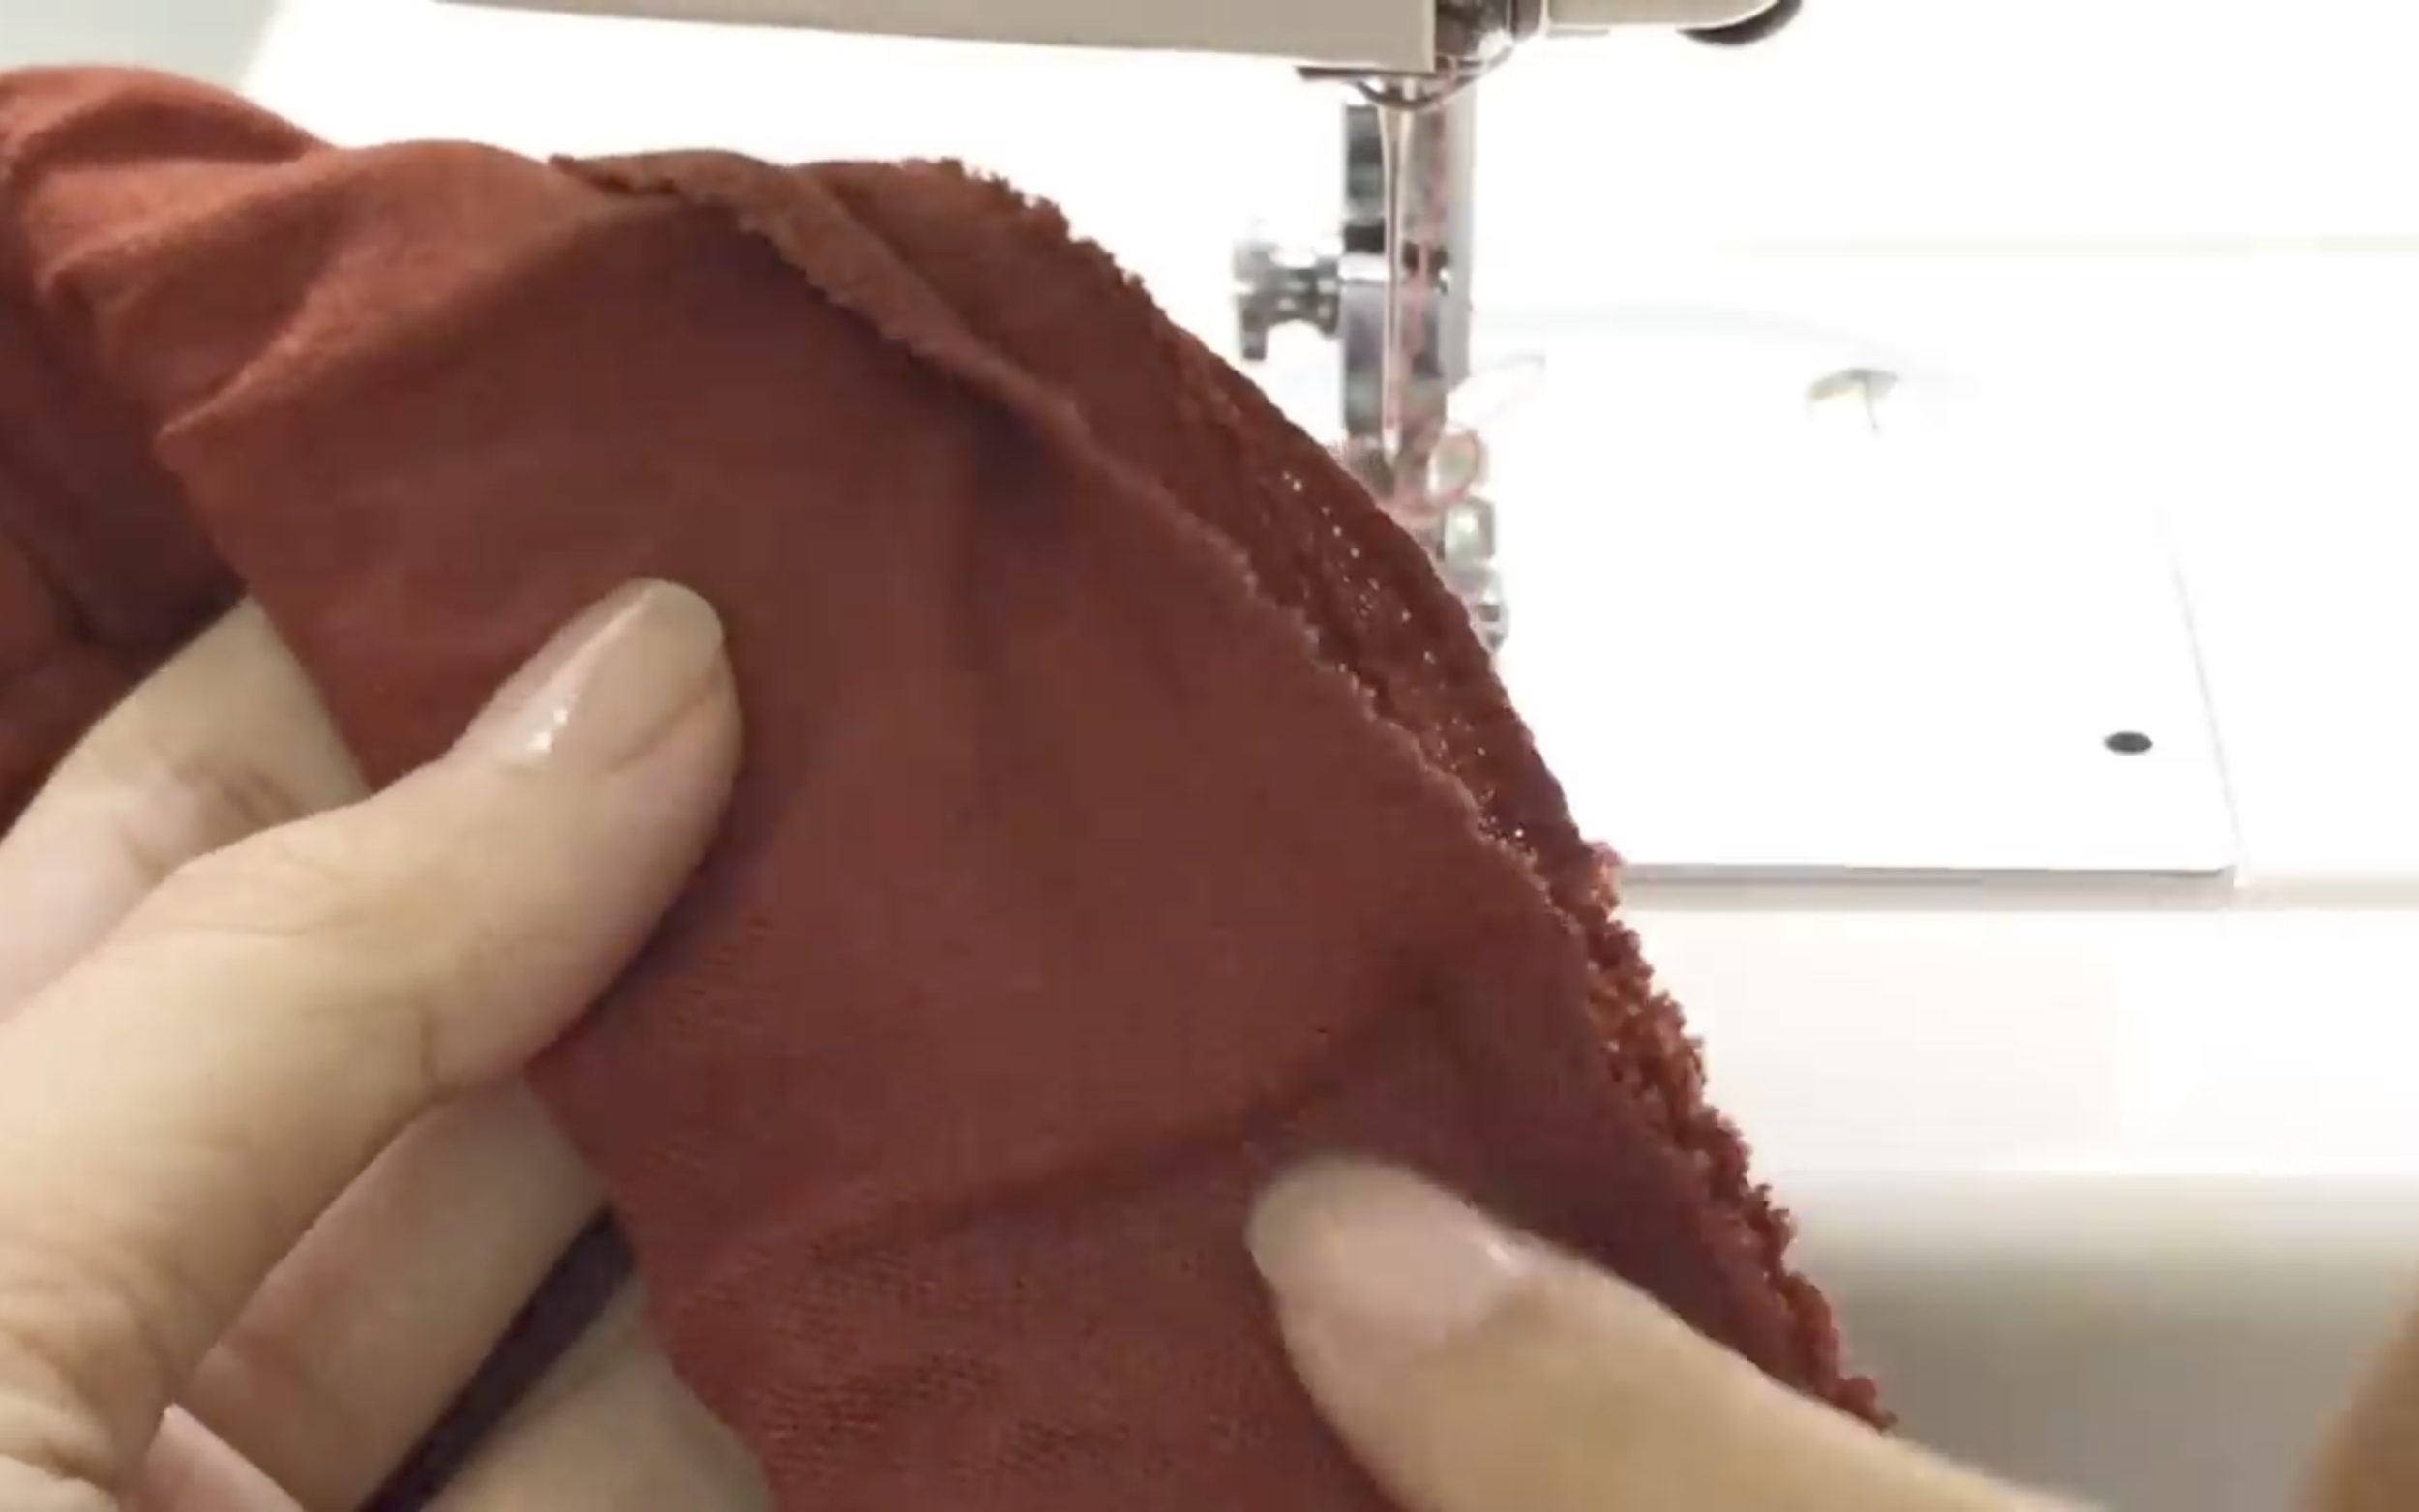
The last step is finishing the end of the legs.
Fold the end of the fabric inside to hide the cutting, then sew.

DIY HIGH WAISTED PANTS from scratch - Me-made summer collection - Ep 4
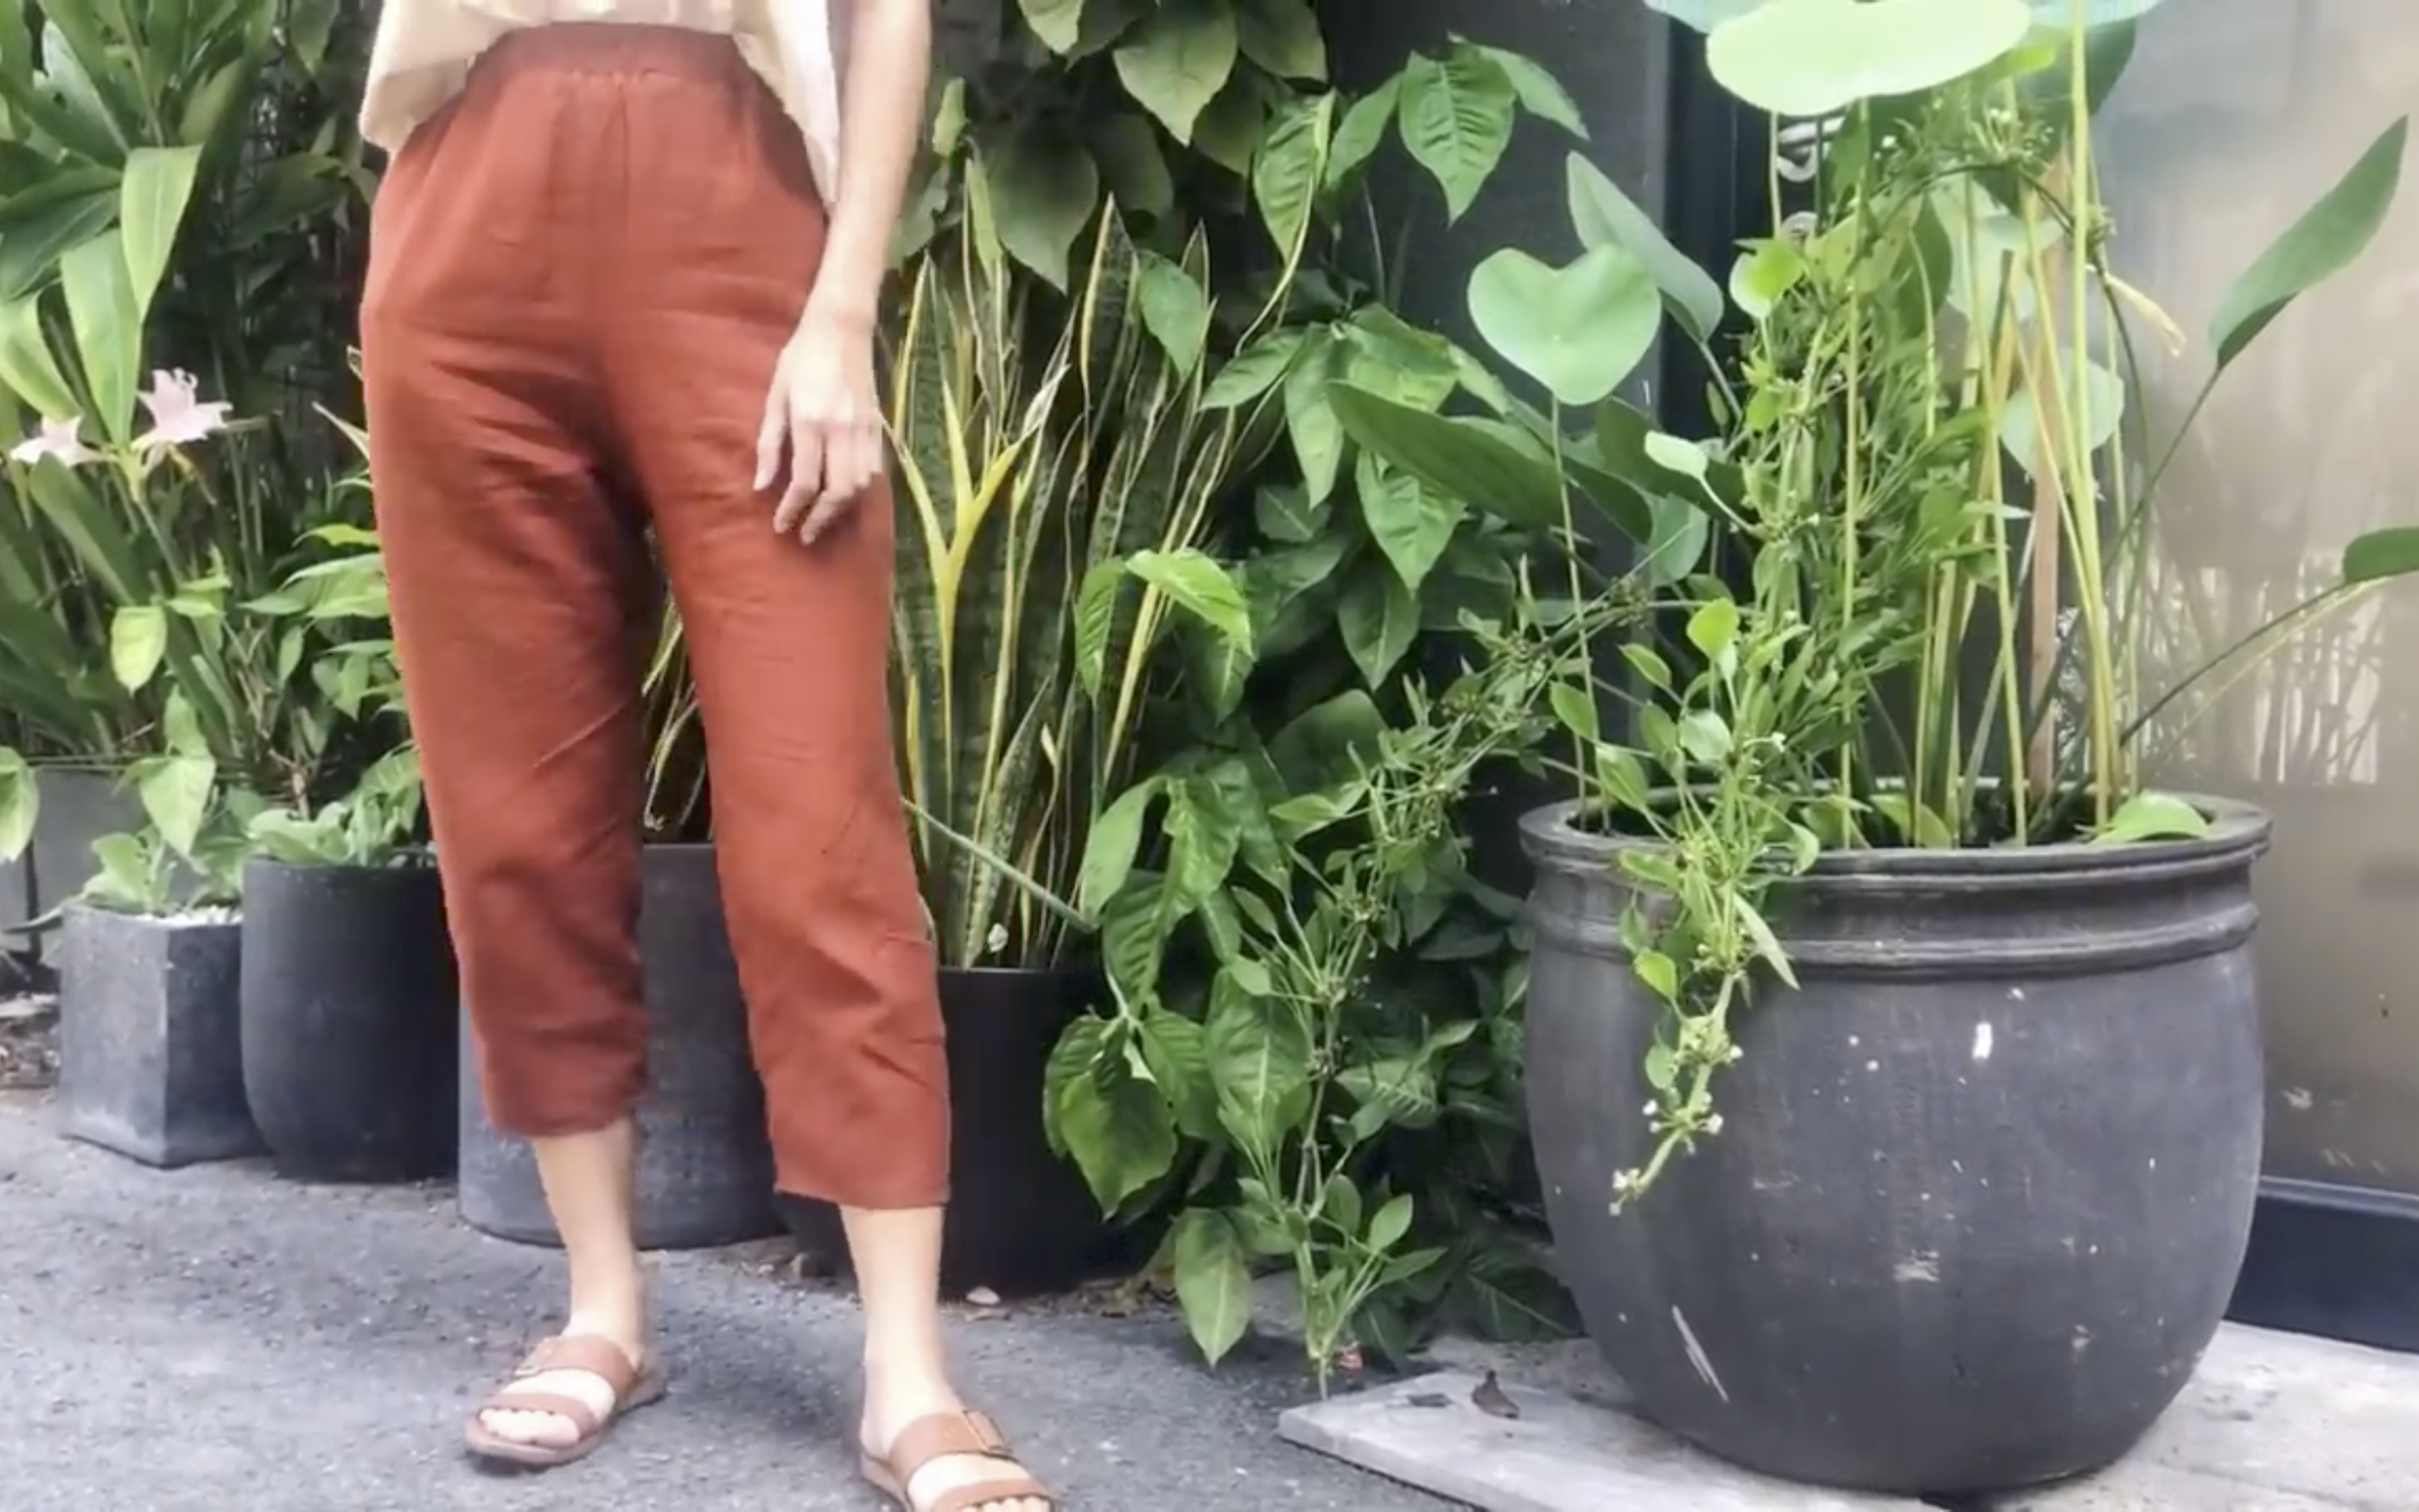
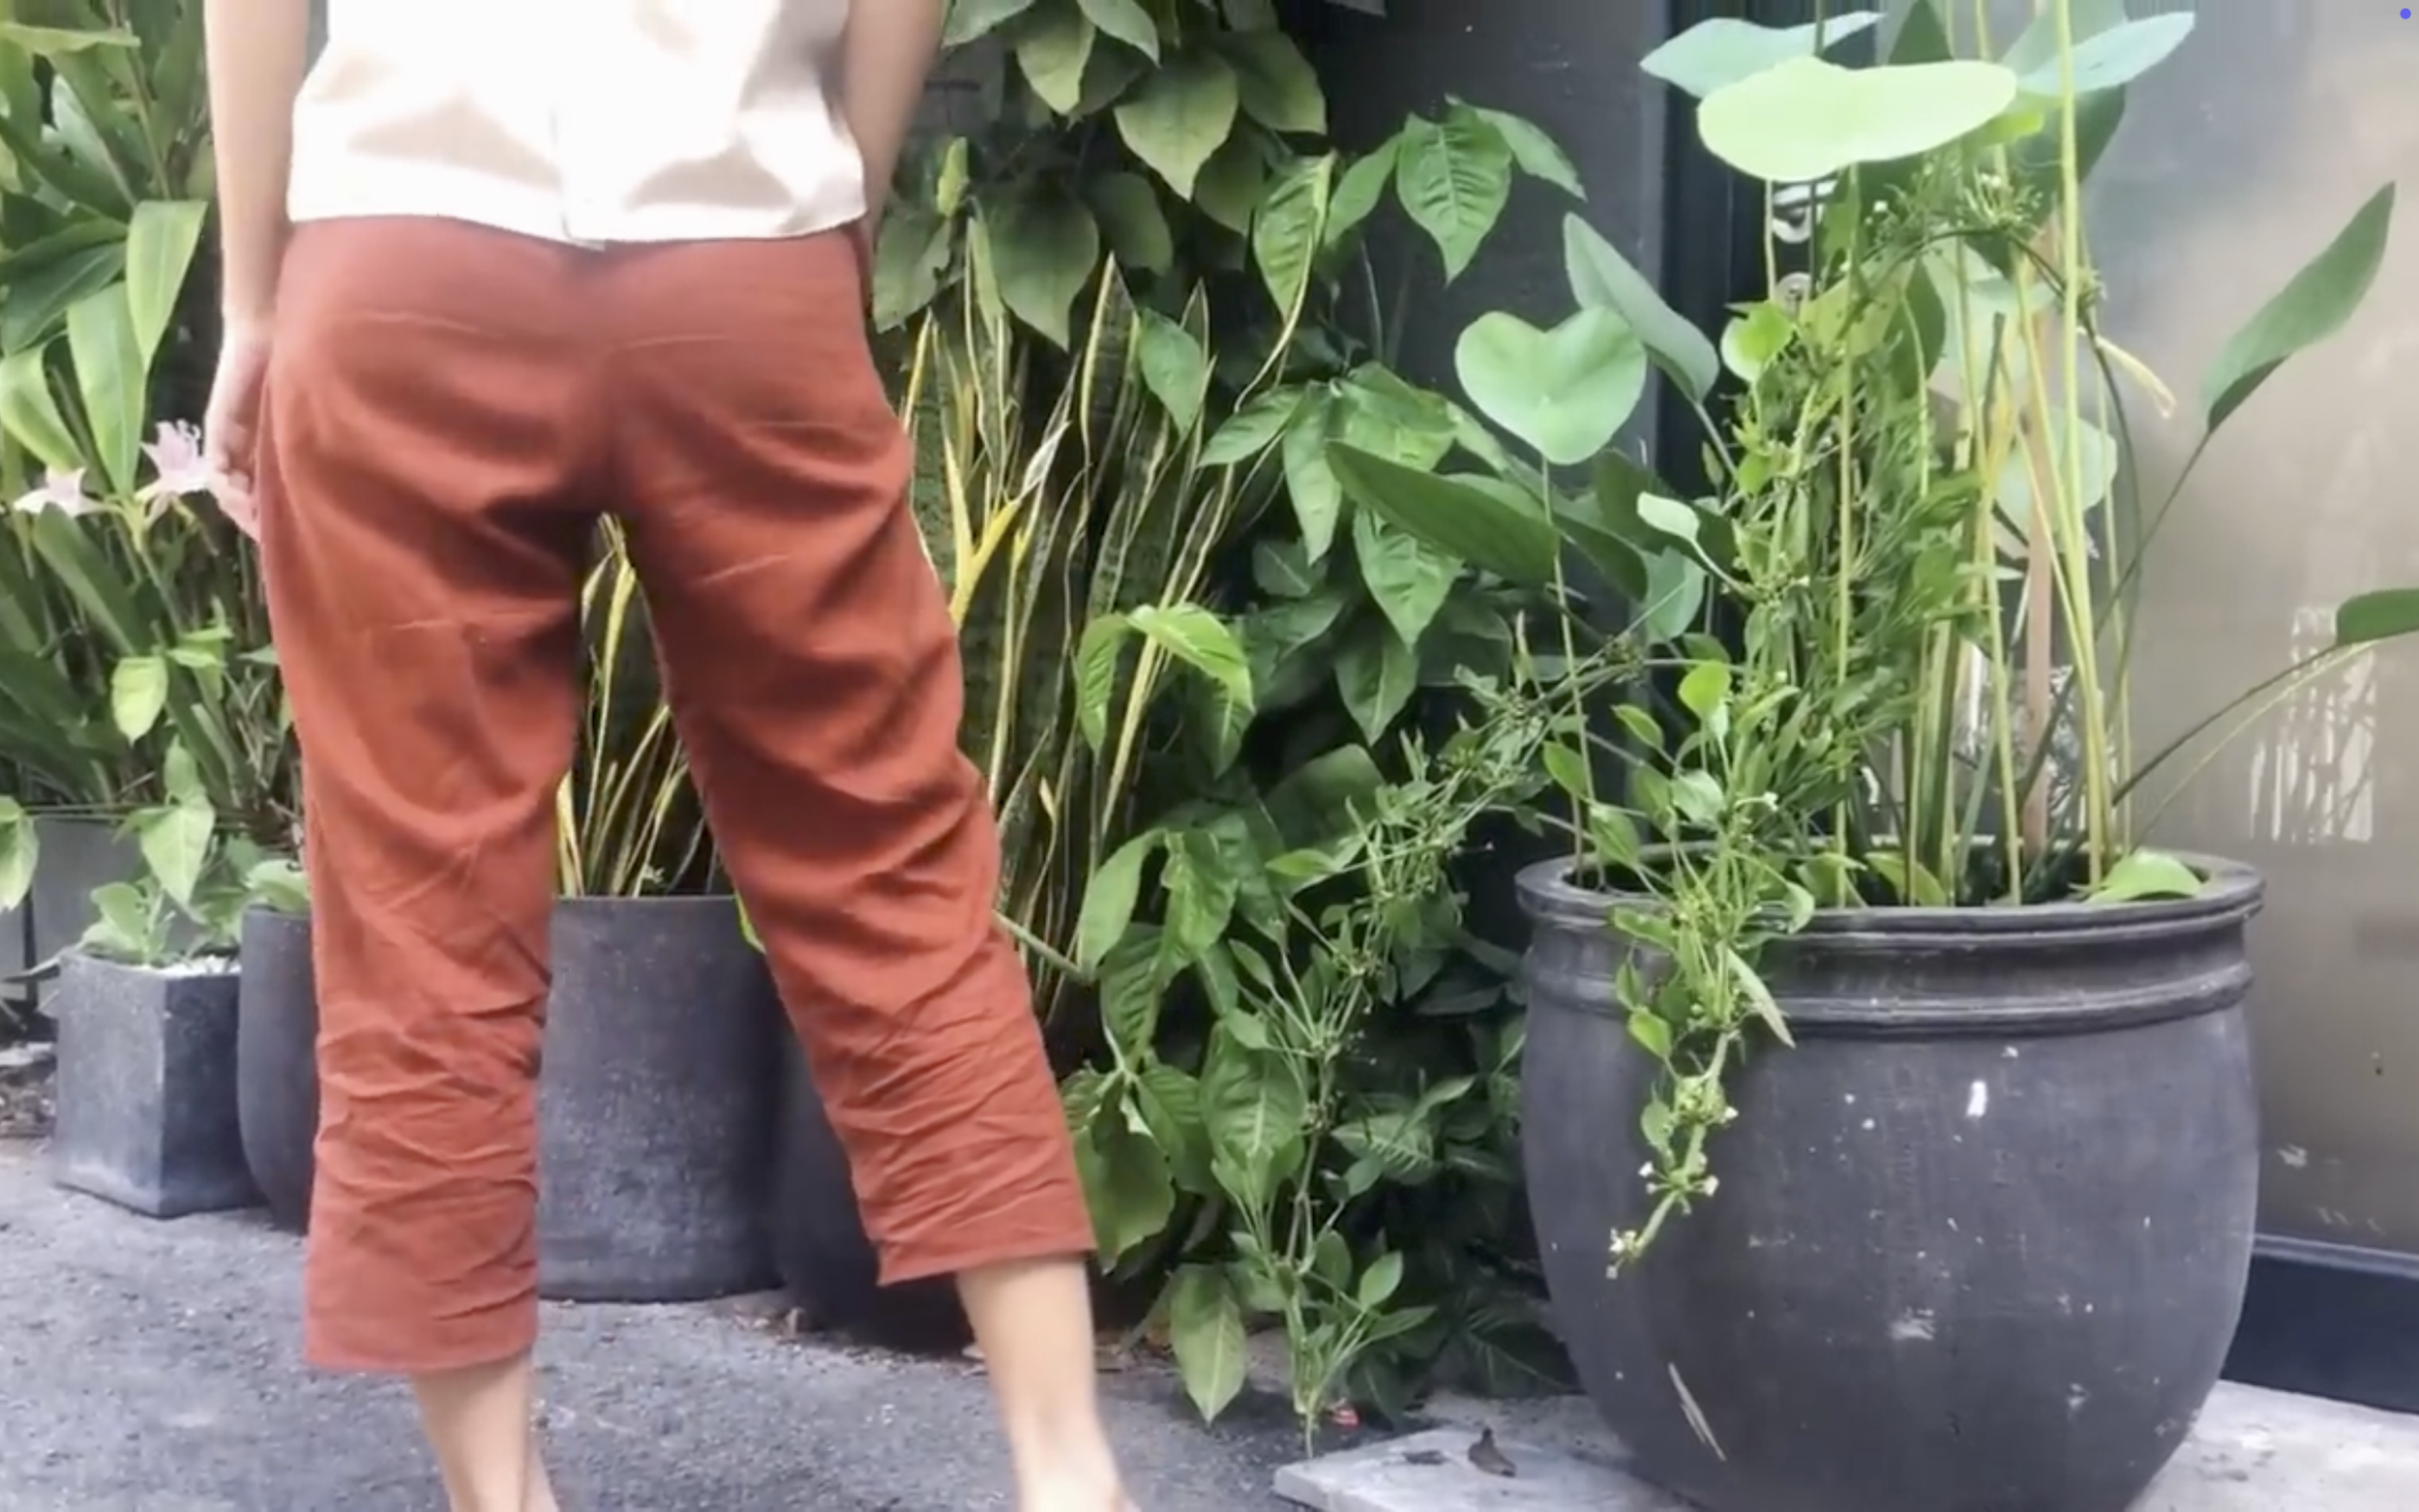
And that’s it for this DIY!
Here’s my final result — I really love how these pants turned out. They’re super comfy and fit my style perfectly.
I hope you found my step-by-step guide helpful and inspiring.
If you’re interested in making your own, give it a try and let me know how it goes!
Until then, happy sewing!