DIY Long sleeve shirt wrap dress | Clara dress pattern hack | Step by step sewing tutorial

DIY Long sleeve shirt wrap dress
Welcome or welcome back to my sewing blog!
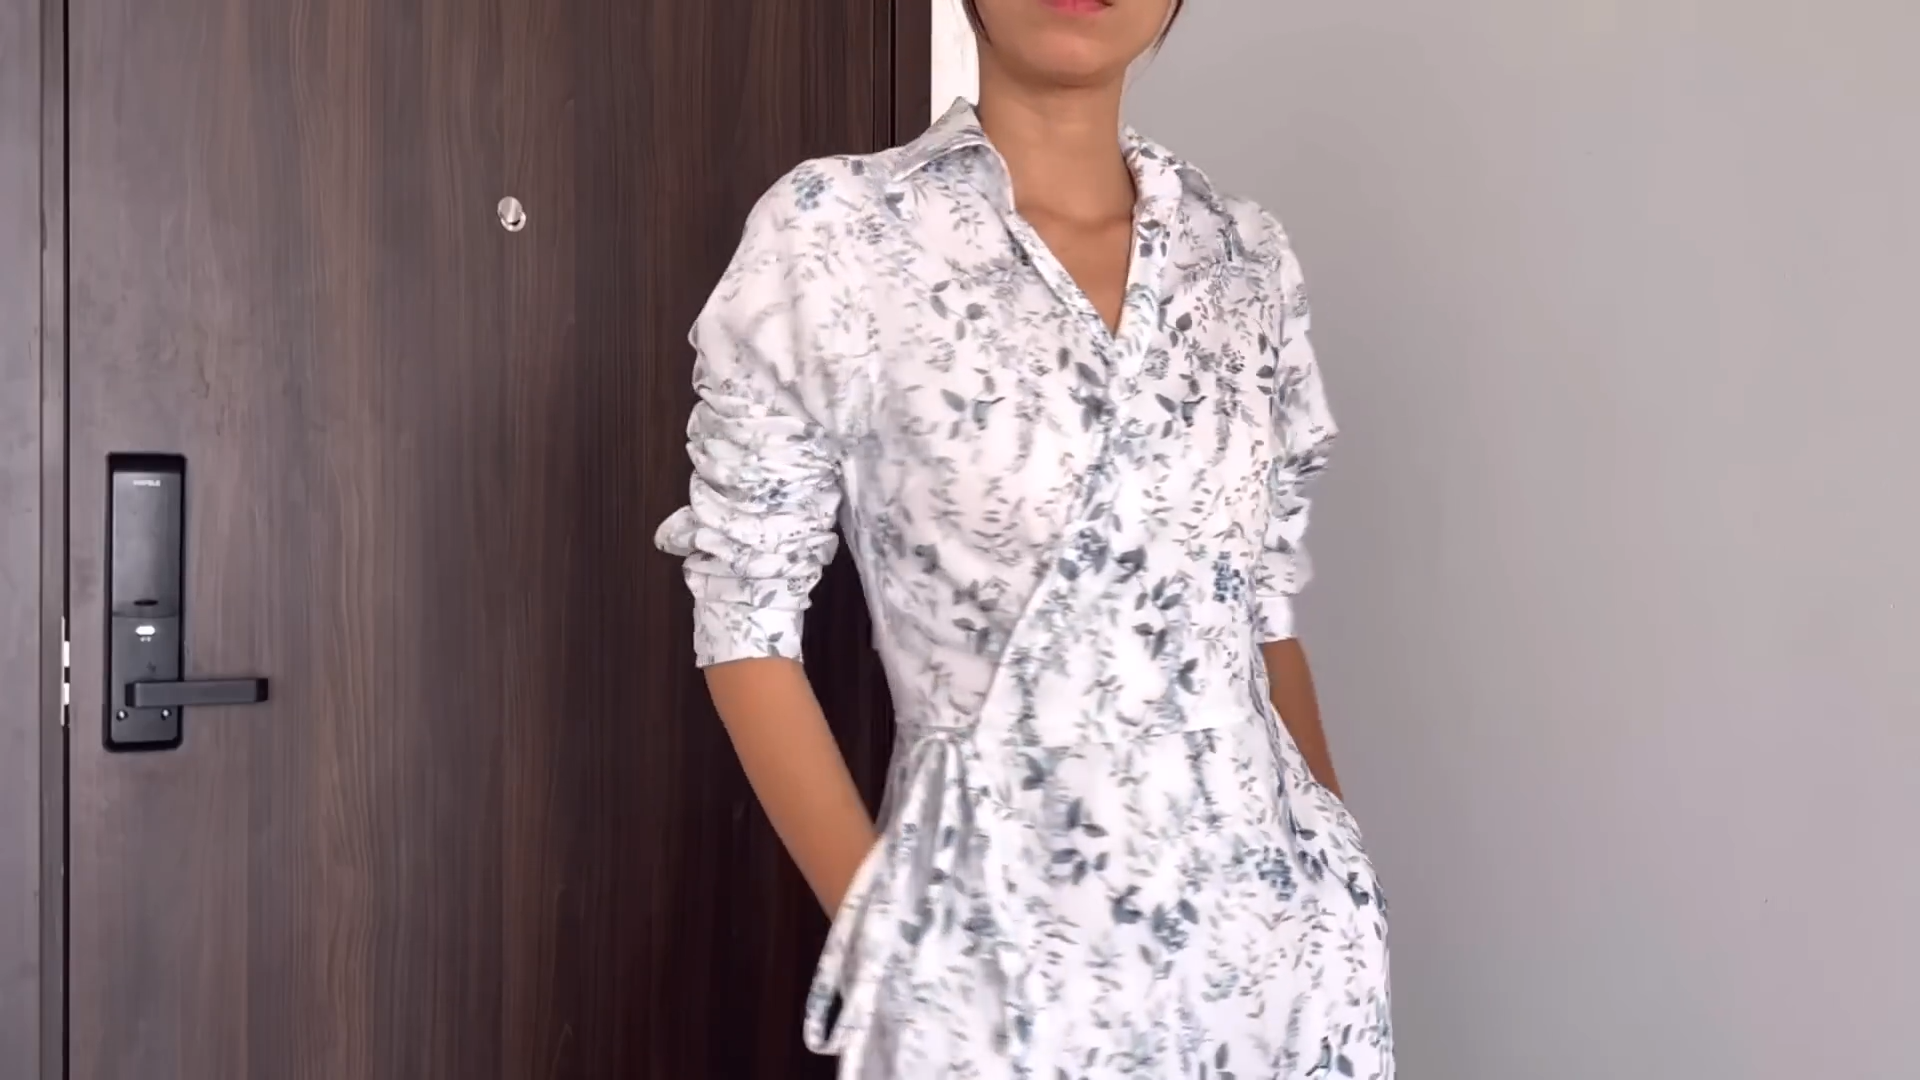
Today’s tutorial, I'm going to share with you how I made a long sleeve short wrap dress. I actually made this dress from my Clara dress pattern with some hacks. The long sleeve goes with the shirt collar make the dress look so elegant.
That's why I hope you like it and try it out soon.
So, let’s get started!
WHAT YOU’LL NEED
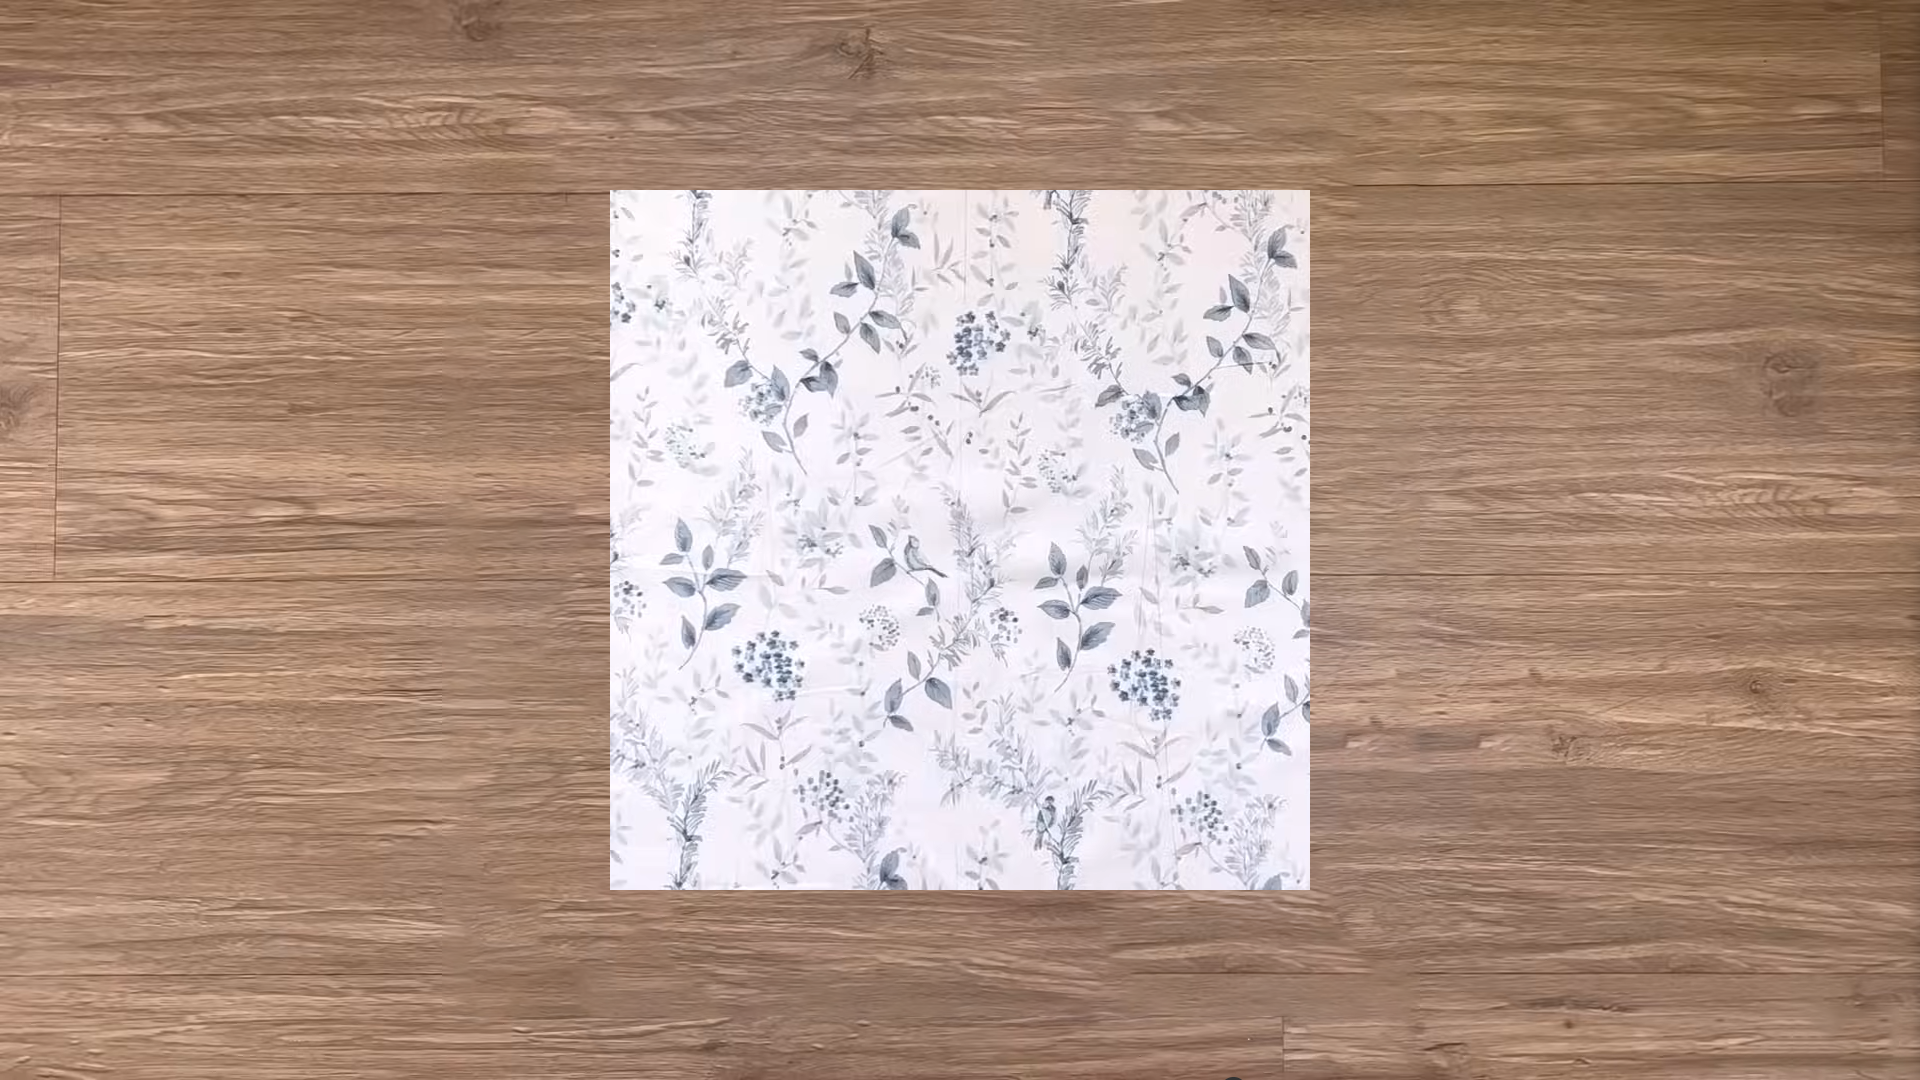
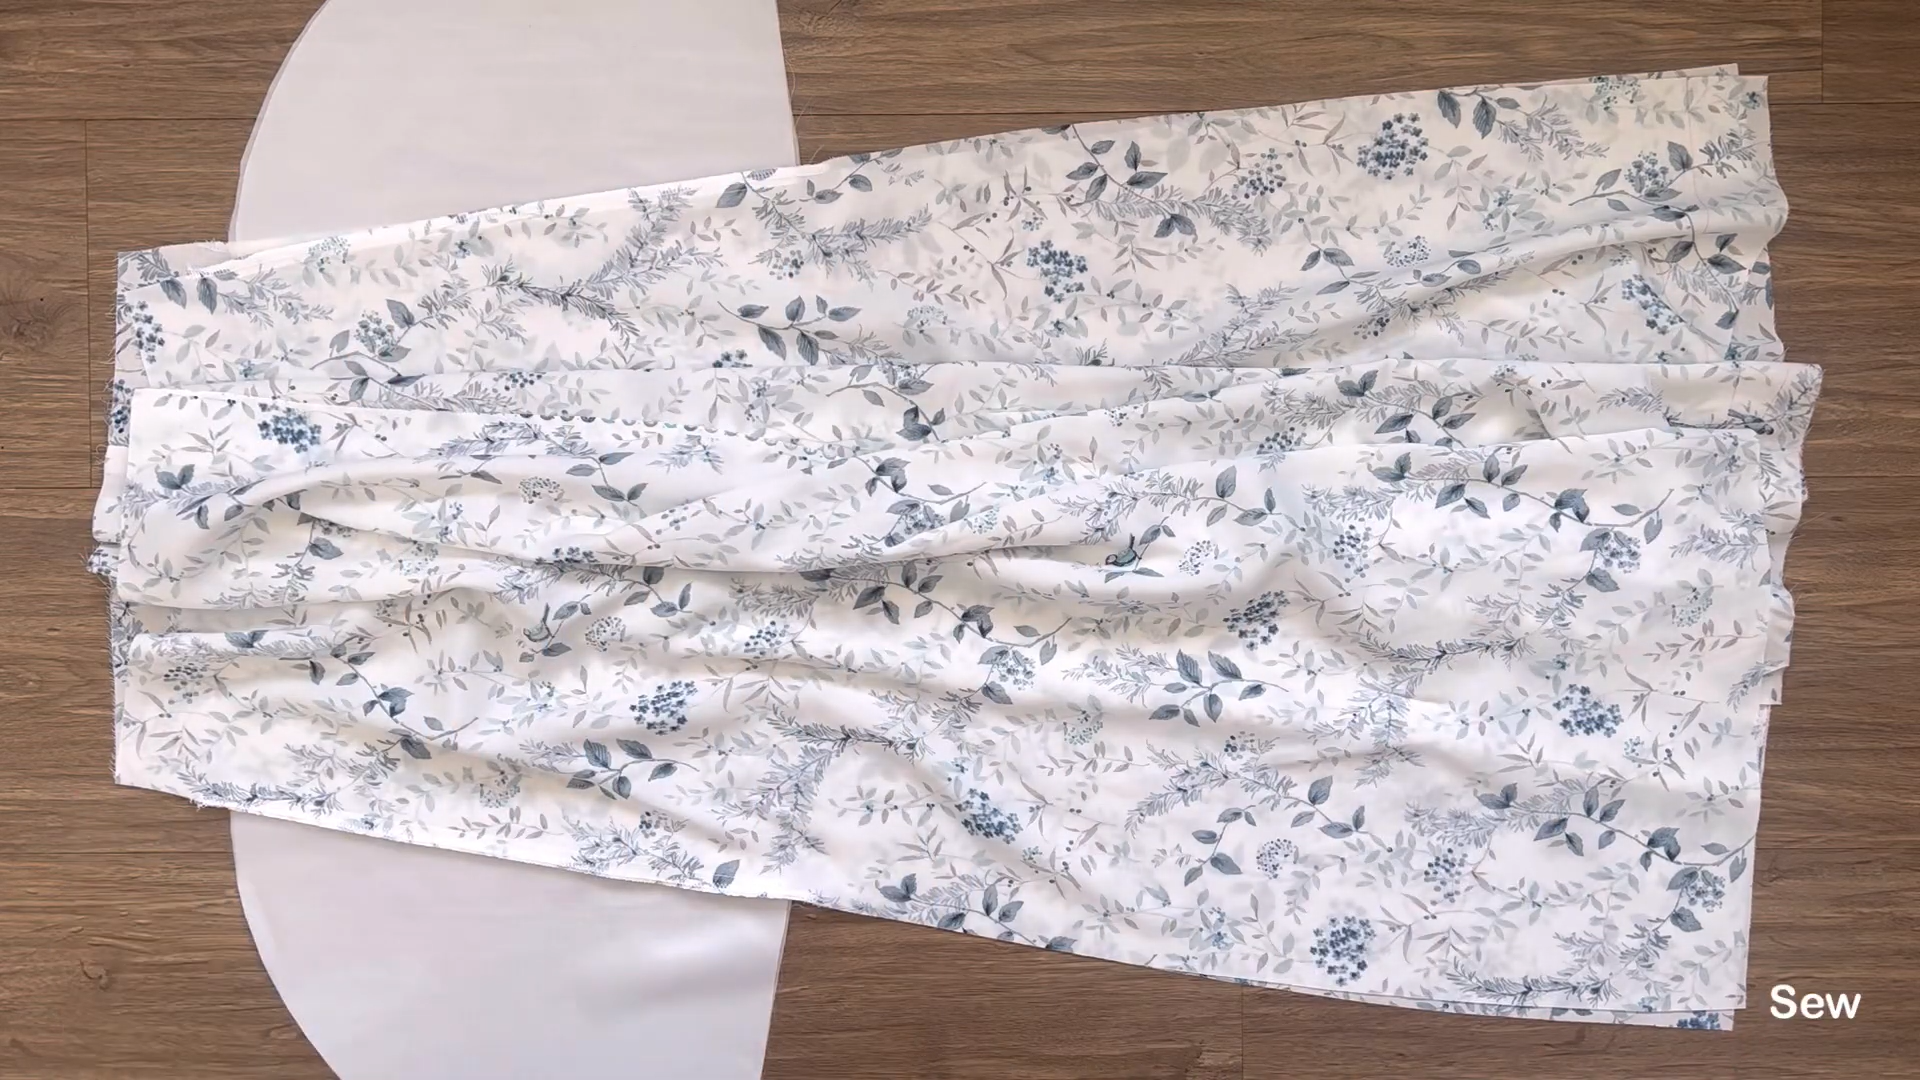
3m of cotton silk fabric
Pattern paper
Sewing machine
Pins
Scissors
Ruler
Long stick
MAKING THE PATTERNS
Here’s the pattern for the project. To get a clear understanding of all the measurements needed for the pattern, watch the video from 0:35 to 6:52.
Remember, you can adjust these measurements to fit your own dimensions!

THE BACK BODICE PATTERN
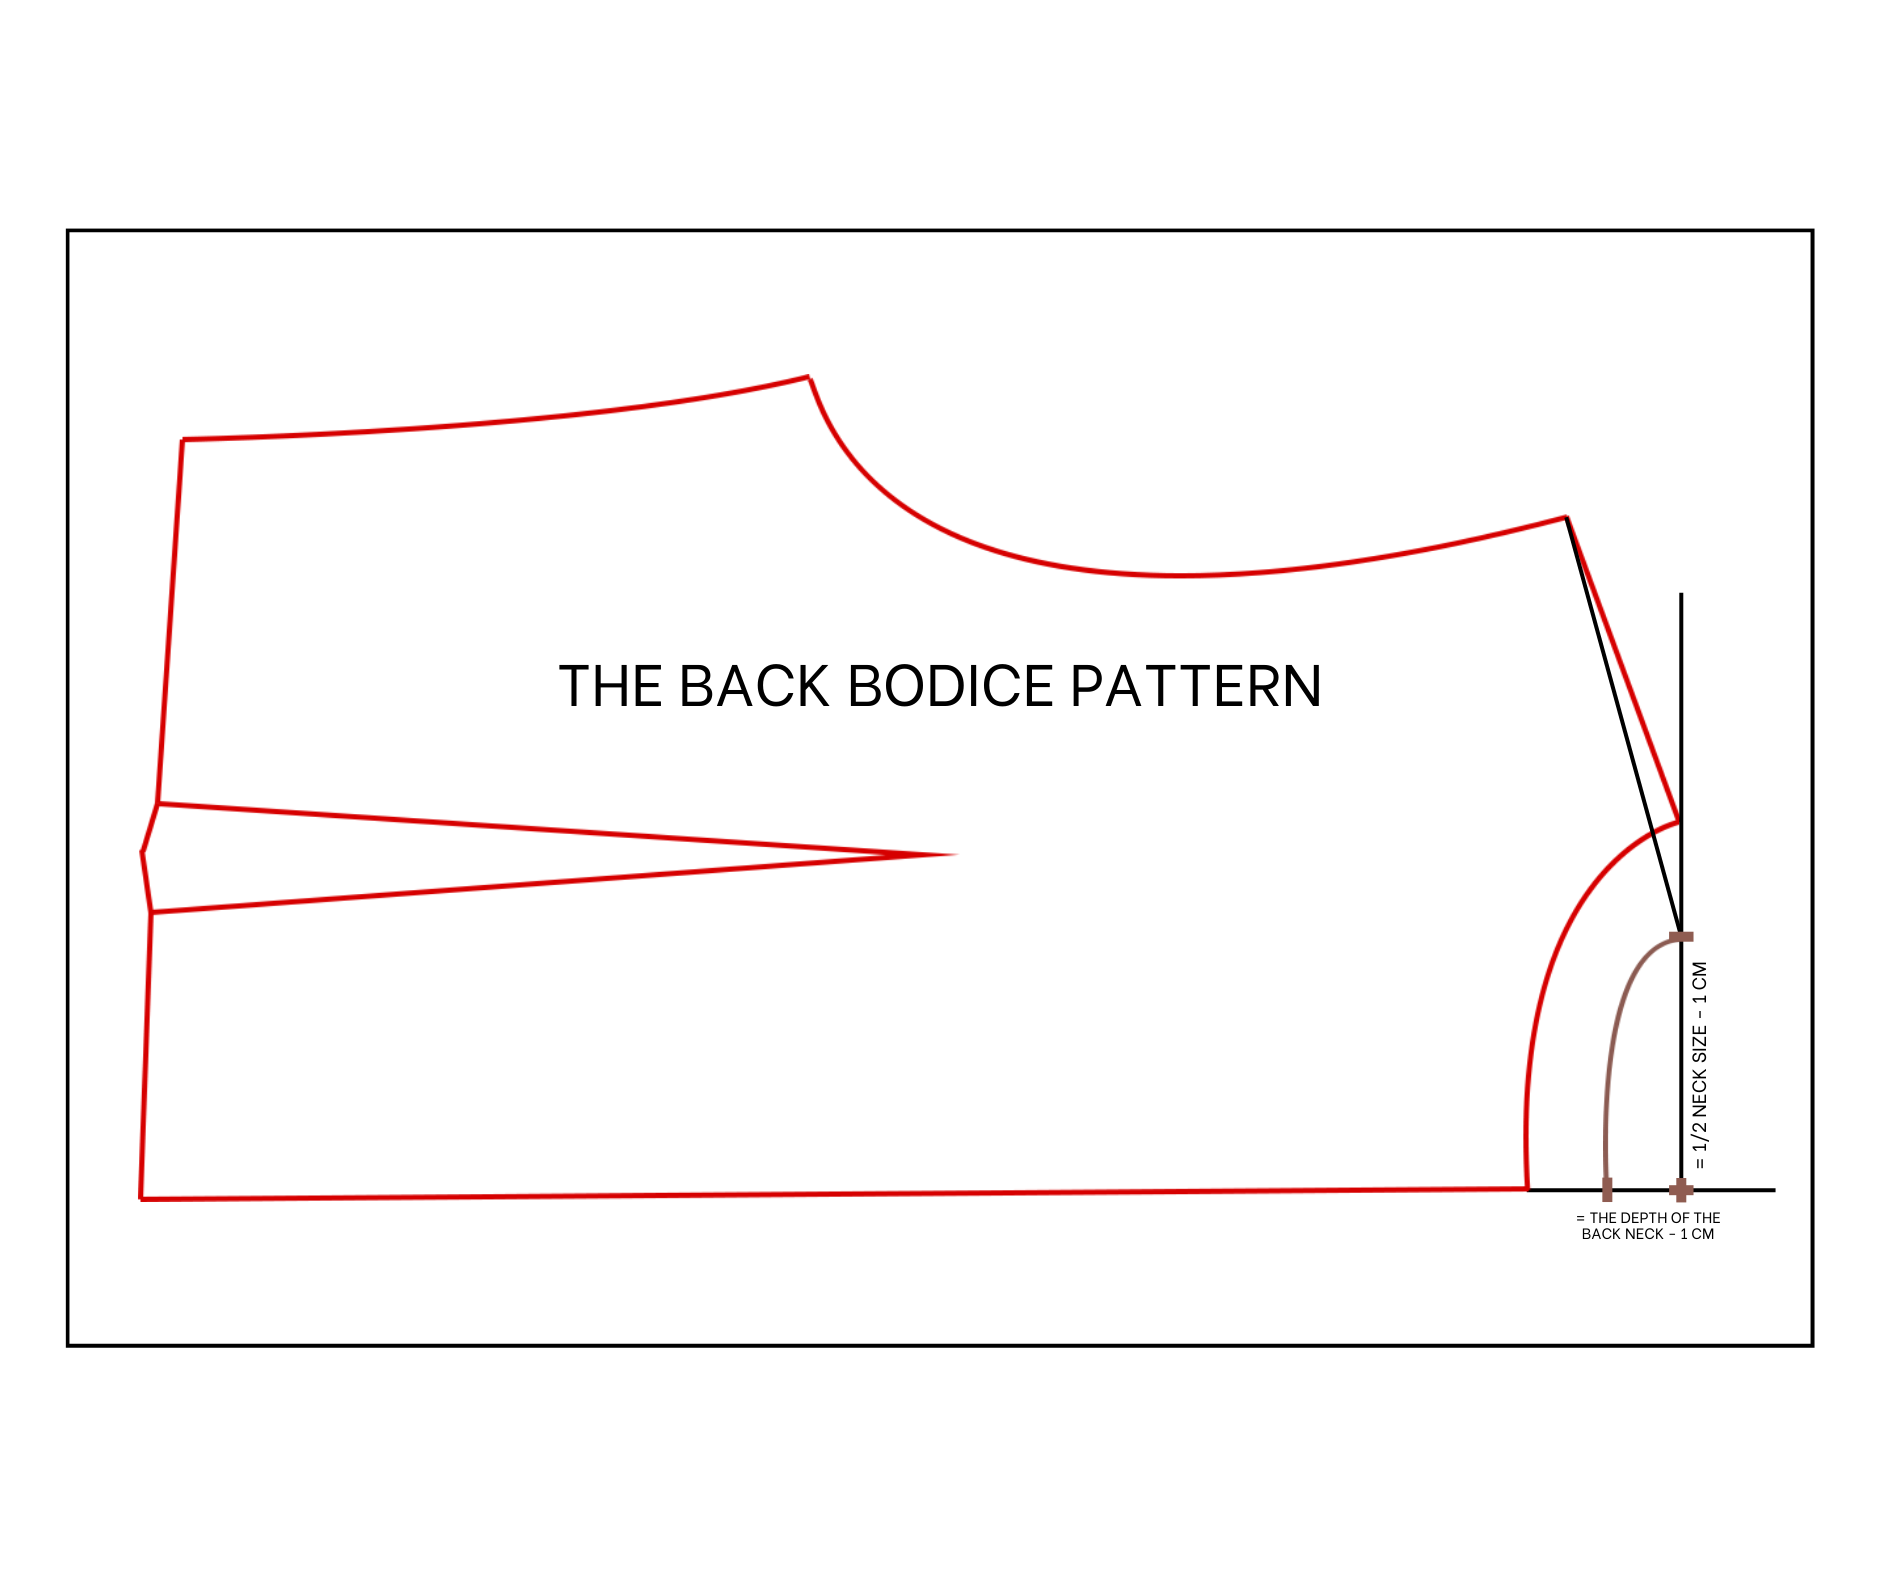
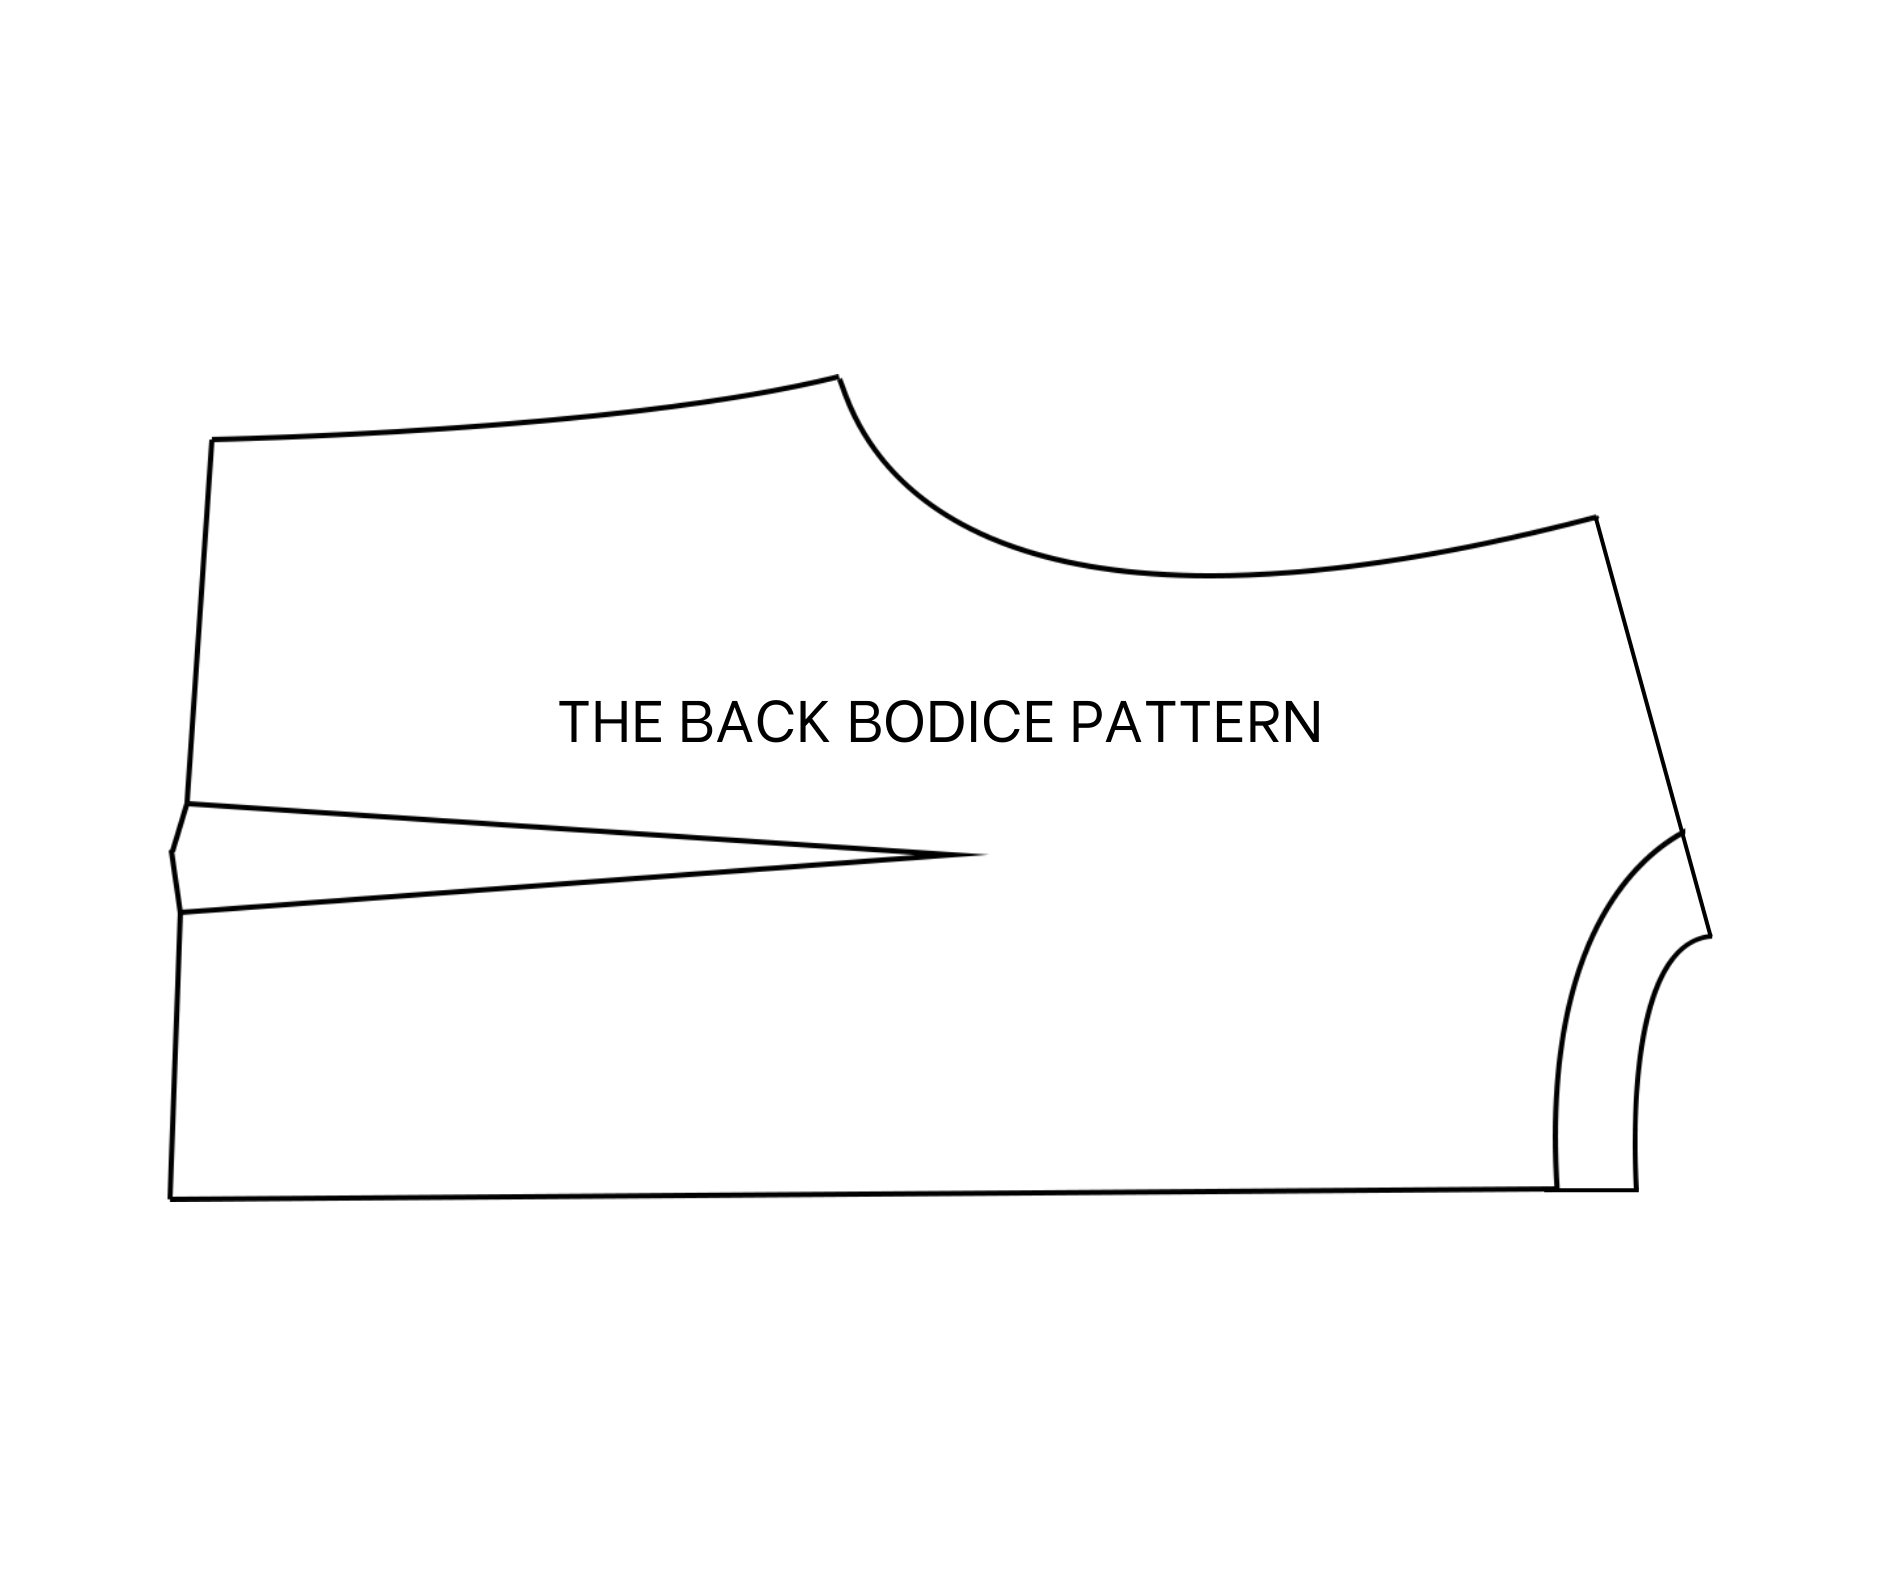
The back bodice pattern
The first step is making the pattern for the dress. Copy a half of the back bodice pattern of the Clara dress to the paper first.
After that, continue the middle horizontal line of the pattern then draw a straight line from the top of the shoulder line to cut this horizontal line at one point. From the cutting point, mark up 7 cm which is a half the width of the neck of the new dress that you want minus 1 cm for seam allowance then connect this mark to the end of the shoulder line to create a new shoulder line for the back bodice.
From the cutting point, mark to the left of the horizontal line 2 cm then draw a curve line from that mark to connect to the top of the shoulder line.
We will have the new back bodice pattern after cutting.
THE FRONT BODICE PATTERN


The front bodice pattern
Moving to the front bodice pattern, copy the pattern to the paper first. After that, use the new back bodice pattern that you’ve just made before to copy the shoulder line, the neck line and the horizontal line to the front bodice pattern.
From the end of the back neckline, mark at 6 cm on the horizontal line which is the depth of the front neck of the bodice that you want. Then draw a curved line to connect that mark and the top of the shoulder line to create a new front neck line for the bodice.
From this mark, extend it 2 cm to outside for the button area then connect the end of the front neckline to the end of the bodice.
We will have the front bodice pattern after cutting.
THE SLEEVE PATTERN

The sleeve pattern
To make the sleeve pattern, copy a half of the sleeve pattern to the paper first.
After that, draw a straight line from the end of the sleeve line to cut the horizontal line. From the top of this line, mark down at 20 cm on the straight line which is a quarter of the bust size of the dress then draw a horizontal line through that mark.
From this mark, also mark at 13 cm on the new horizontal line, it's one per ten the bust size plus 4 cm. After that, use the sleeve pattern from the Clara dress to copy the sleeve line to the new sleeve pattern. Don't forget to check the final sleeve line of the new sleeve pattern.
From the top of the new sleeve line, mark on the horizontal line 55 cm which is the length of the new sleeve that you want then draw a straight line to that mark. From this mark, mark up 16 cm on the new straight line then connect this mark to the end of the sleeve line to create the under arm big line.
Redraw that line a little bit to make it nicer and we will have the sleeve pattern after cutting. You will need to cut this pattern in the full fabric at the horizontal line.
To create a sleeve placket, mark at 7 cm on the ending line from the end of the under arm big line then draw a horizontal line from that mark. The width of this line will be 13 cm, then keep drawing two horizontal lines at 1 cm on 2 sides of the current one.
At the top of the middle horizontal line, mark down 1 cm then connect it to two ends of the two horizontal lines at two sides a bit.
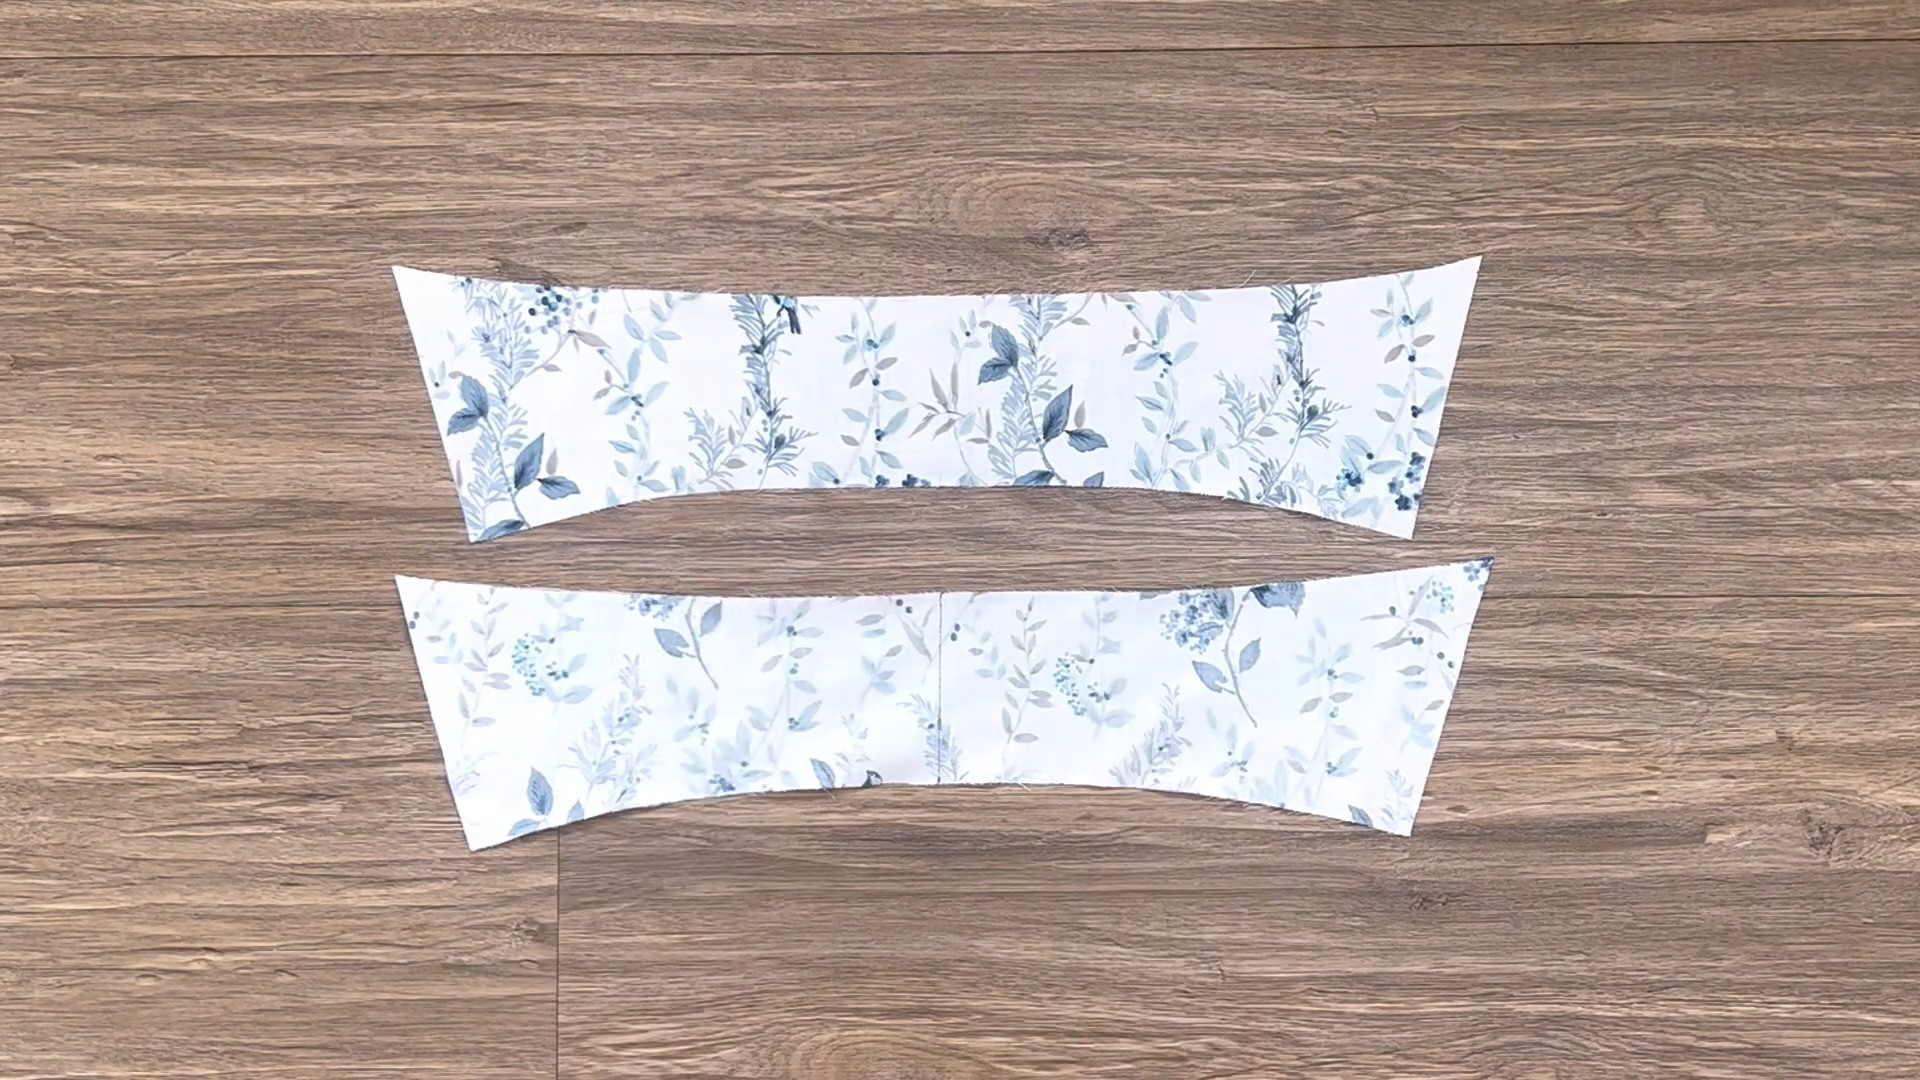
THE COLLAR PATTERNS

The collar patterns
To make the collar pattern, measure the neckline at the front and the back bodice patterns first. Make sure you deduct the seam allowance after measuring.
Draw a straight line and a horizontal line cutting each other after that. From the cutting point, mark to one side of the horizontal line 24 cm then draw a straight line to that mark.
From the cutting point between the new straight line and the horizontal line, mark up 2 cm then mark in one per three the width between two marks on the horizontal line before drawing a curve line to this mark and finish at the one on the second straight line.
Based on this curve line, draw another one at 3 cm away and parallel with it, 3 cm is the height of the collar stand that you want.
From the second straight line, draw another one at 2.5 cm from it. This new line will cut the second curved line at one point then connect that cutting point to the end of the first curved line.
After that, measure the length from the cutting point to the horizontal line to mark the same length from the horizontal line to the first straight line. Measure again the length from this new mark to the cutting point between the straight line and the second curved line, then make another mark with the same length.
After that, draw a curve line that is opposite with the second one, also mark up 4.5 cm from this cutting point which is the length of the collar that you want. Based on that mark, draw a new horizontal line. This new horizontal line will cut the second straight line at one point.
From that cutting point, mark up 1 cm then connect that mark to the one on the second curve line. Mark in one per three the last horizontal line first then draw a curve line from that mark to the one on the second straight line that you’ve just made before.
And we will have 2 collar patterns after cutting. Add 1 cm for seam allowance after that except the first straight line and you will cut this pattern in full fabric at that line.
THE SKIRT PATTERN
Keep the same skirt pattern from the Clara dress for the skirt part of the dress.
THE POCKET PATTERN

The pocket pattern
Add a side pocket to make the dress more functional. To make the pocket pattern, draw a rectangle with 20 cm width and 30 cm length.
Mark in the middle of one length line first then draw a curved line from that mark to one end of the other length line and we will have the pocket pattern after cutting.
SEWING THE DRESS
THE BODICE
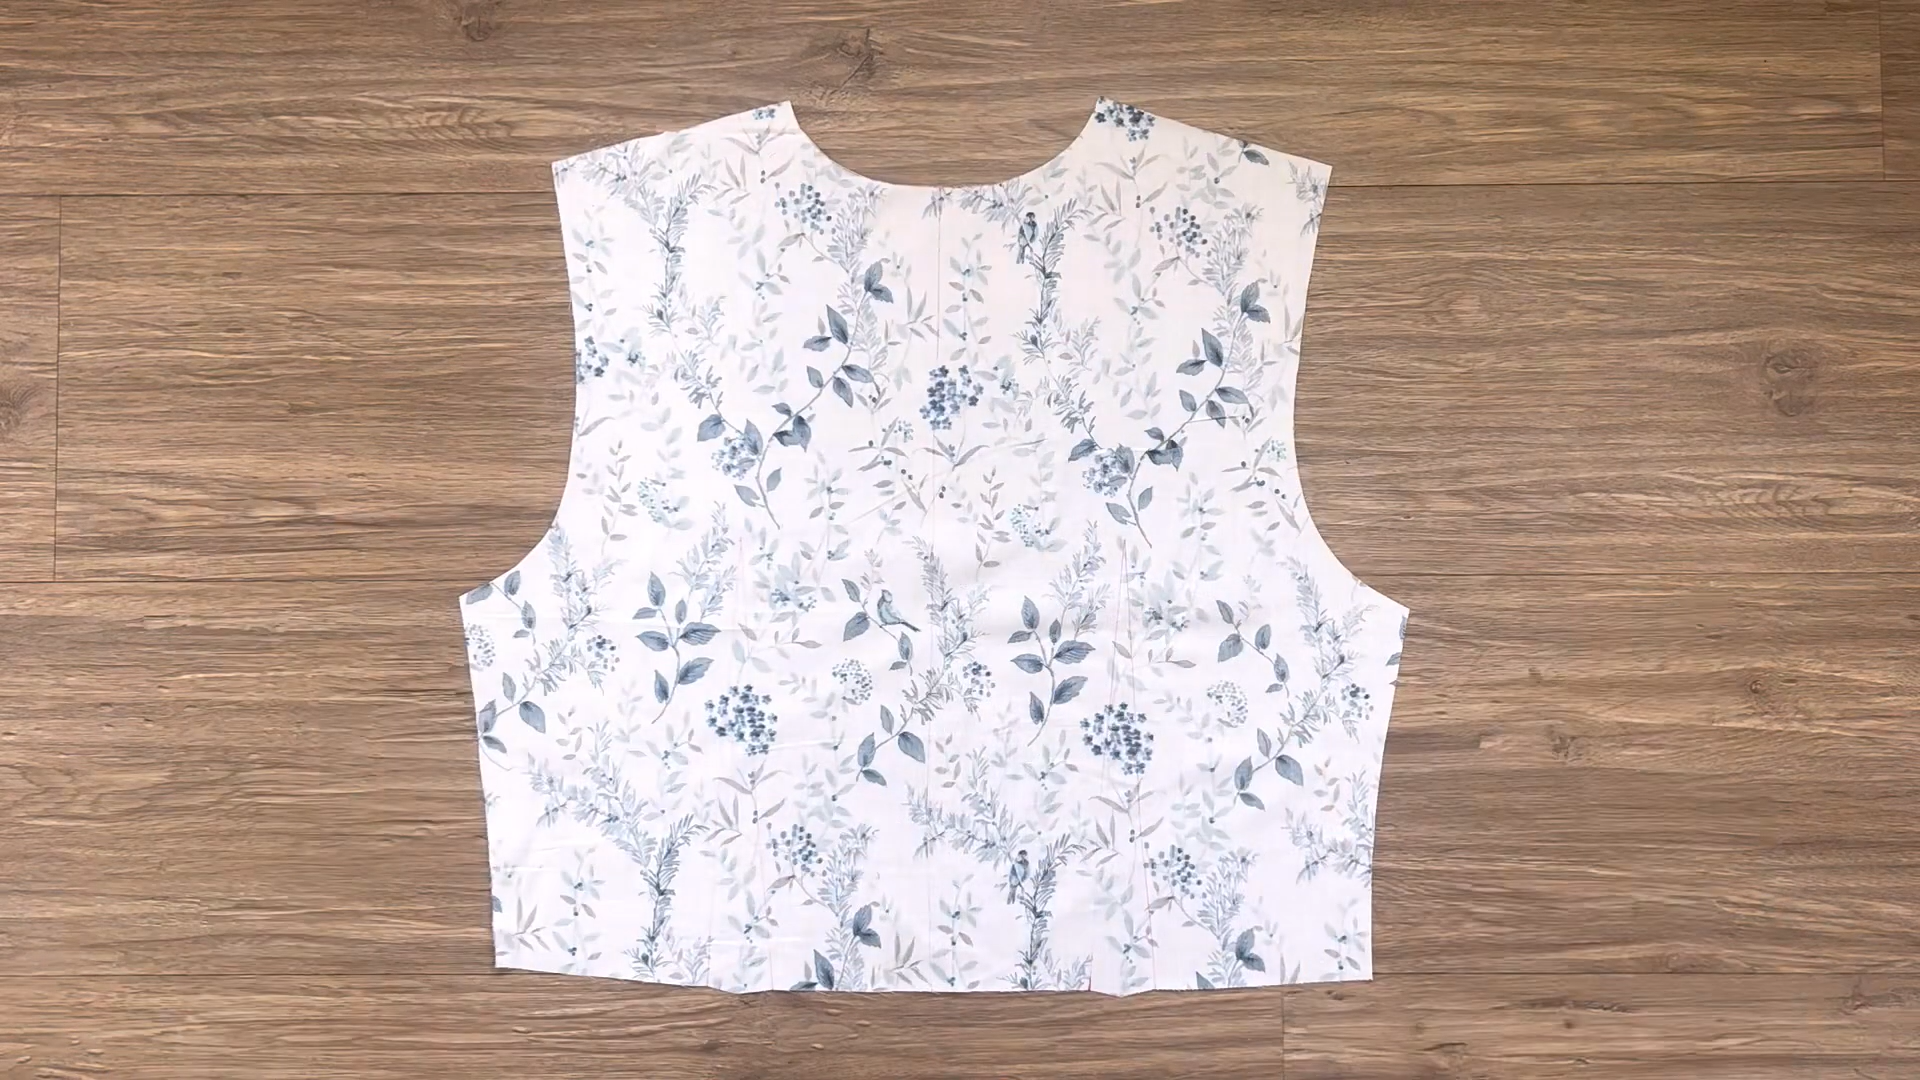
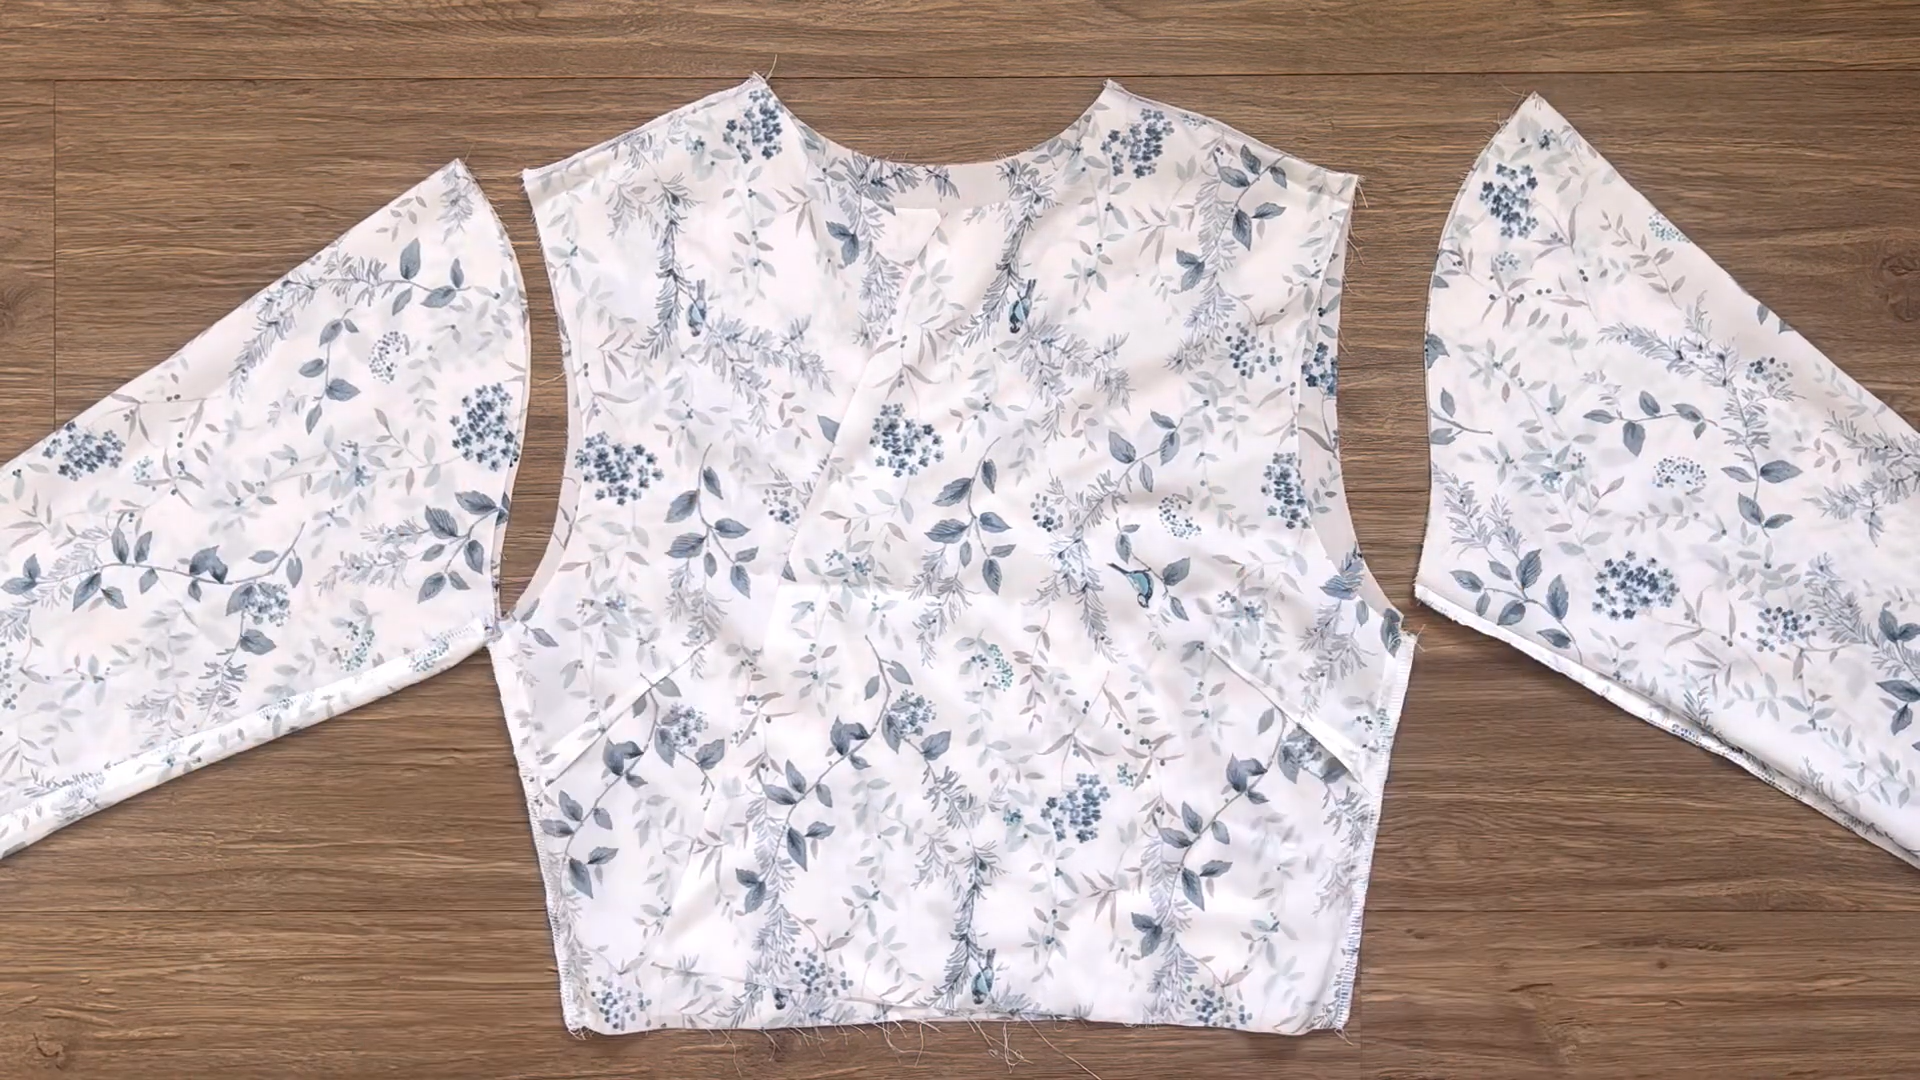
Apply the patterns to the fabric to draw and cut out the pieces for the back bodice.
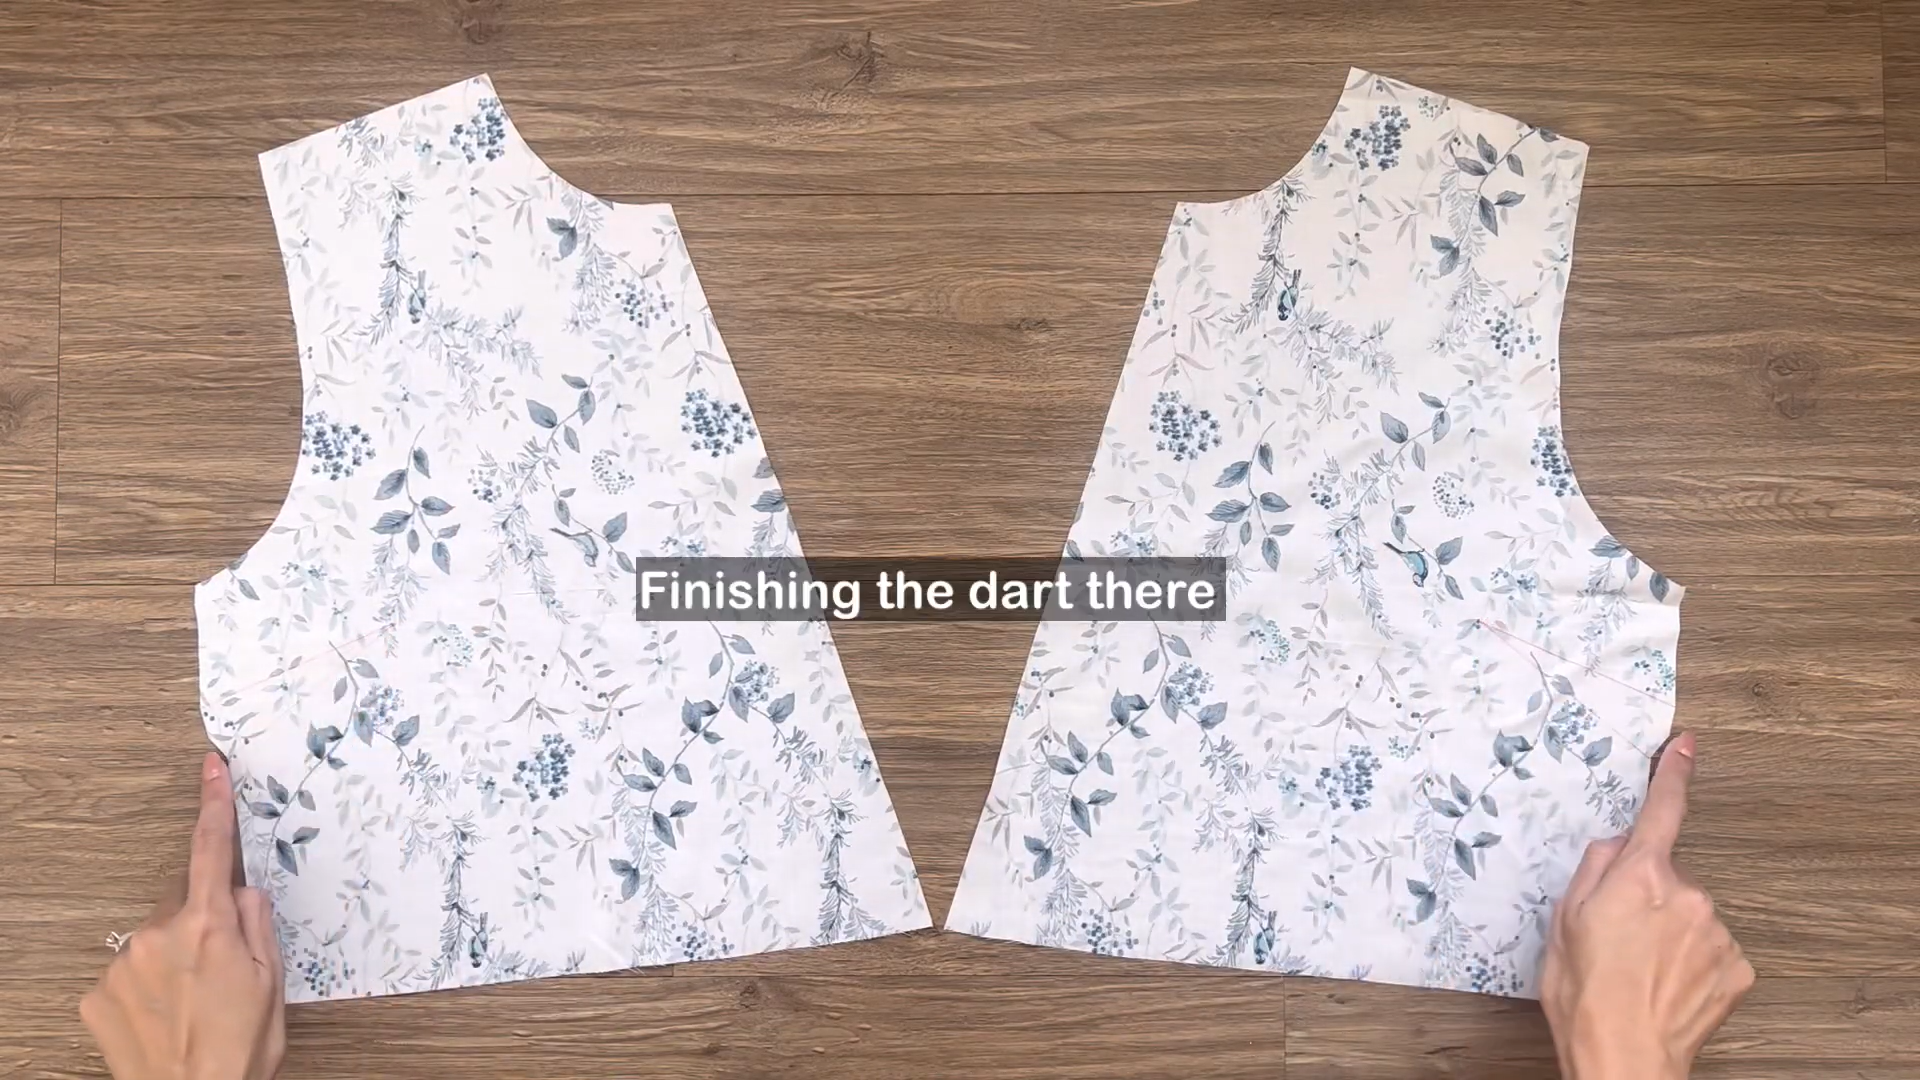
Fold and stitch the darts on the back bodice piece.
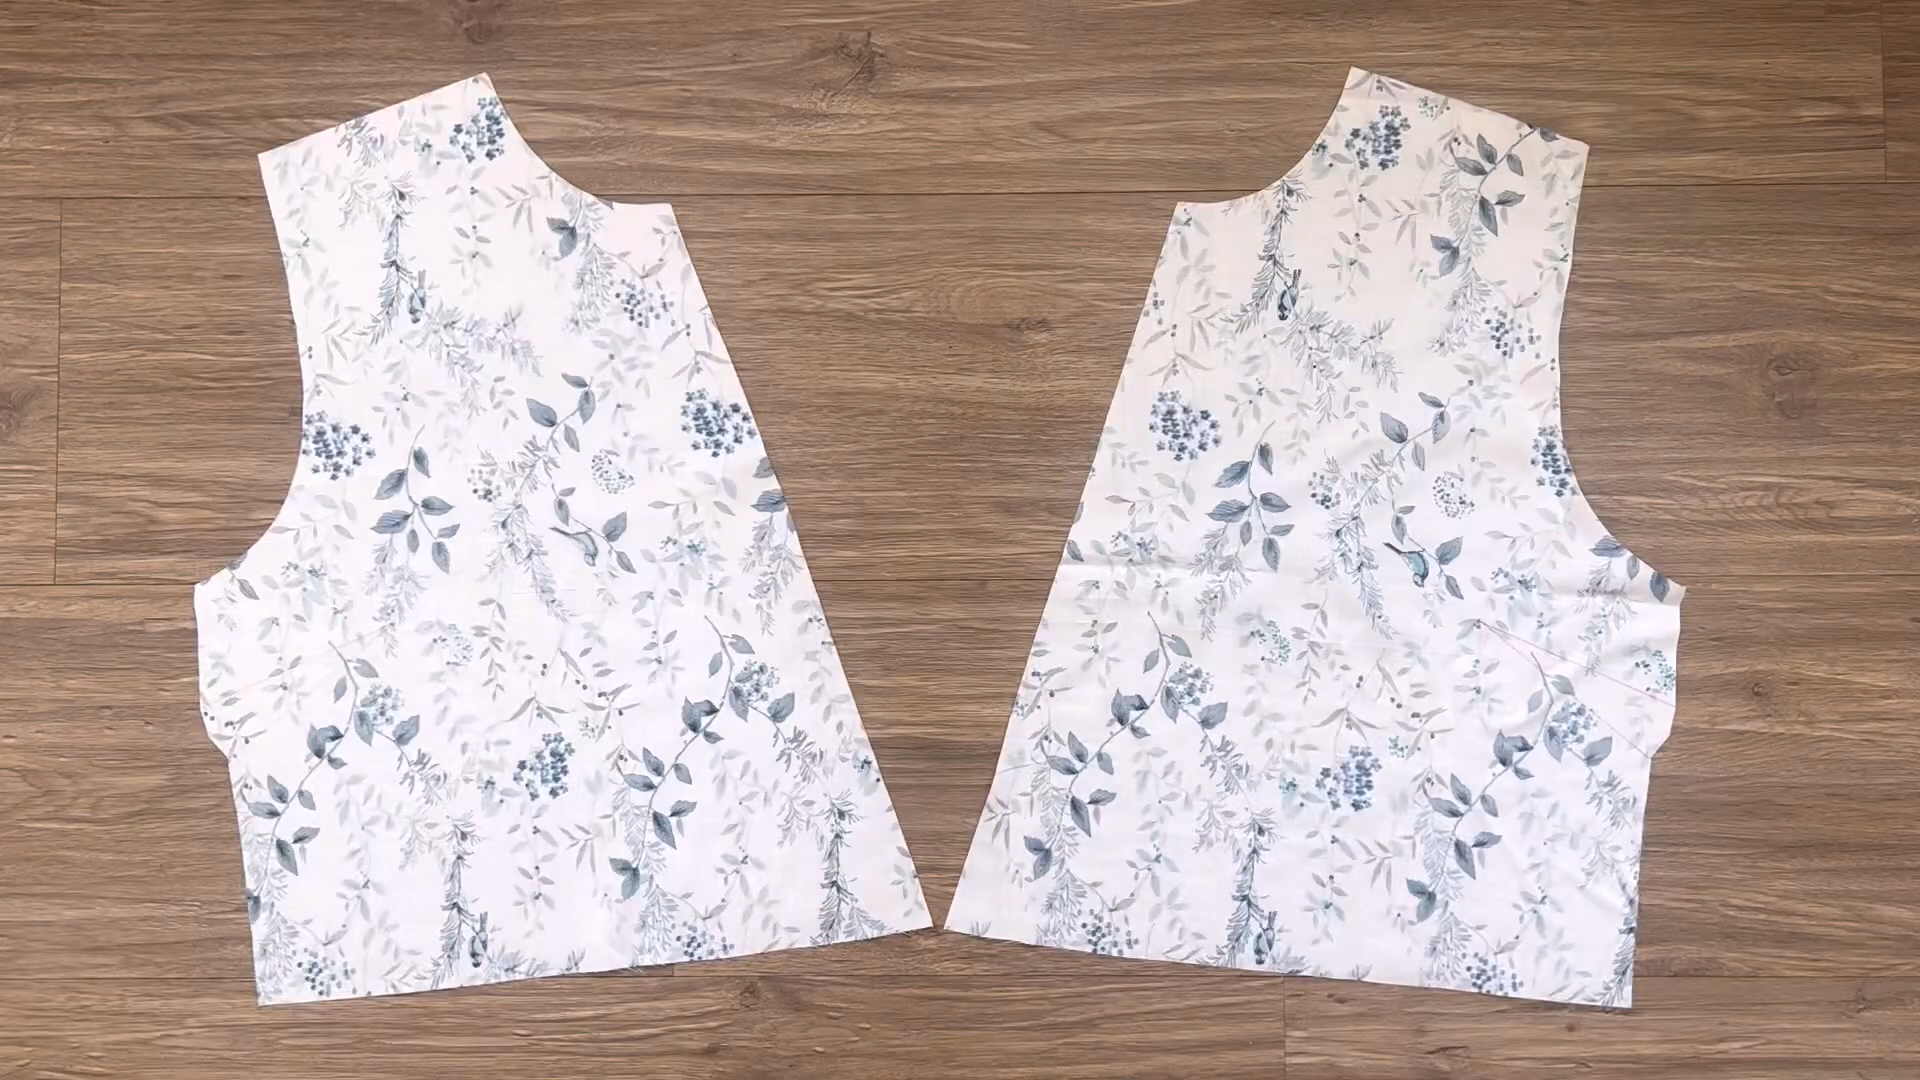
Cut out the pieces for the front bodice.
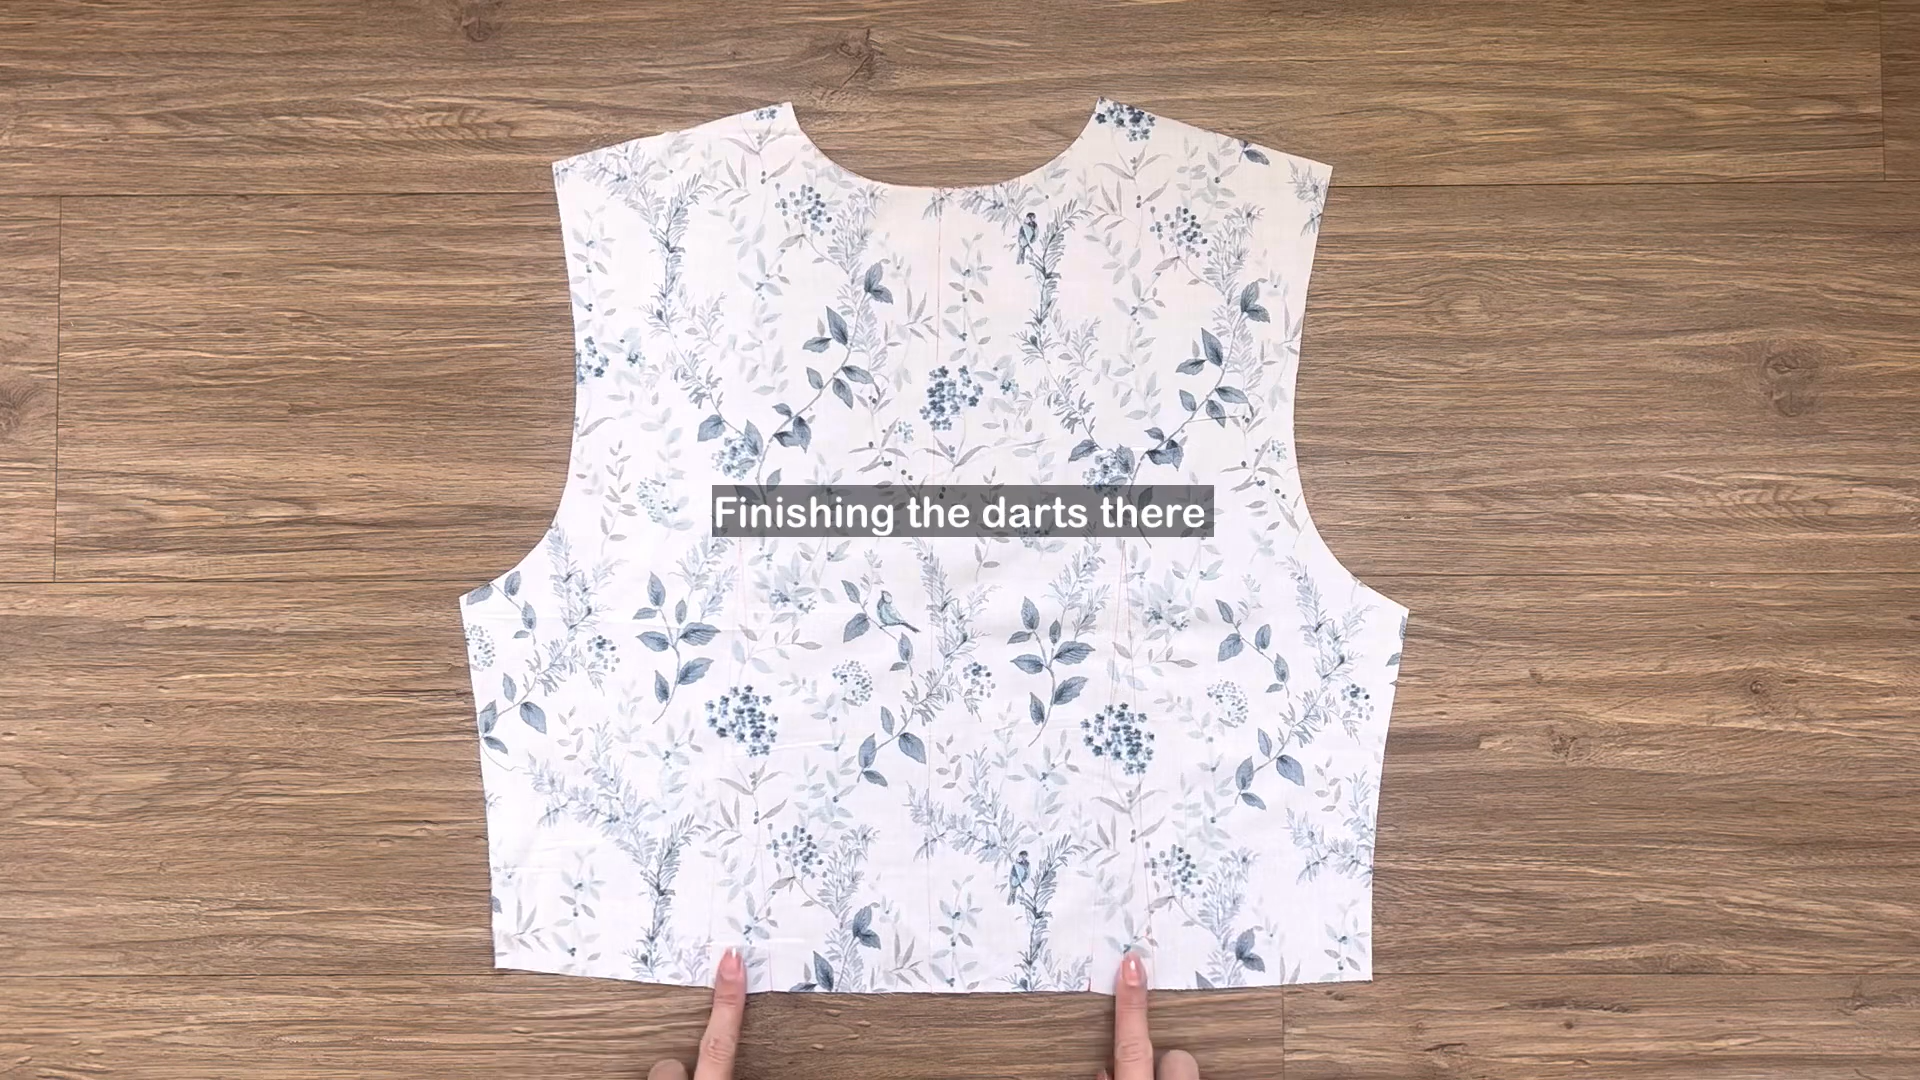
Finish the darts on the front bodice, too.
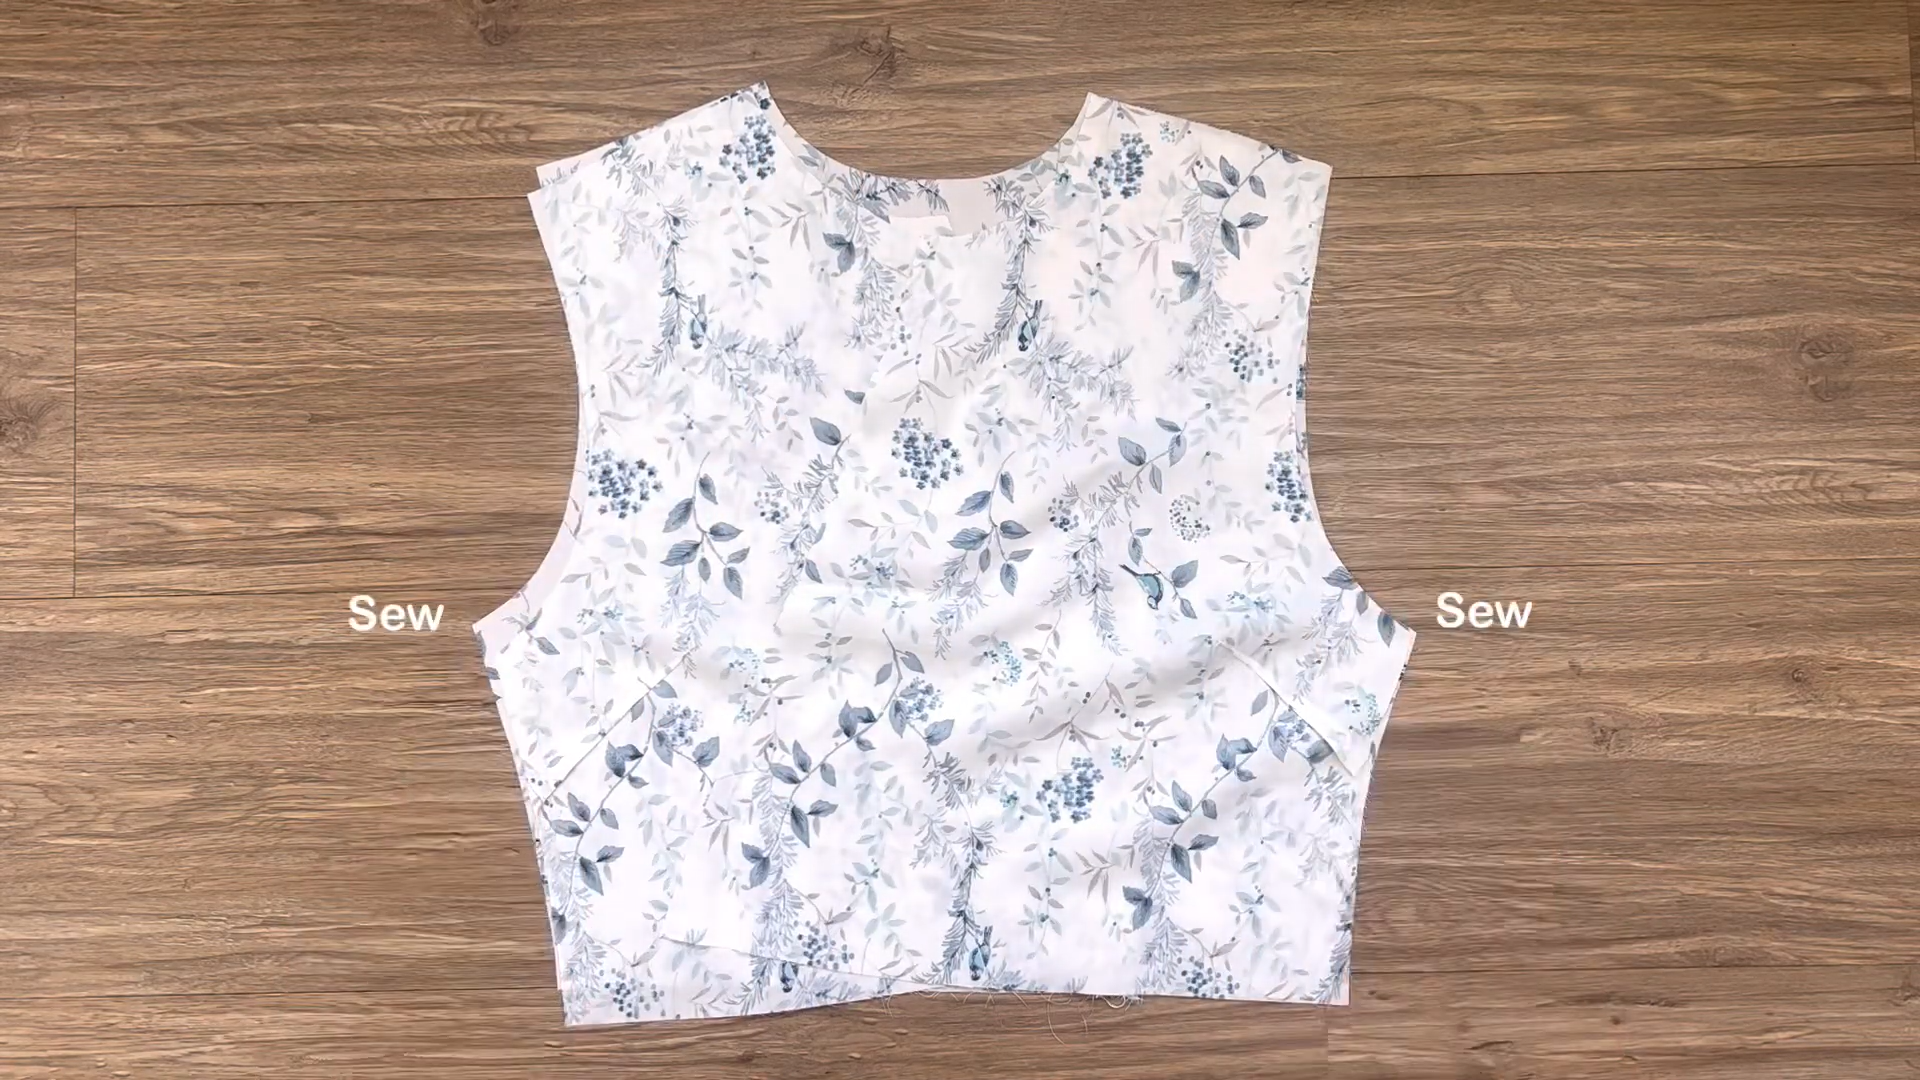
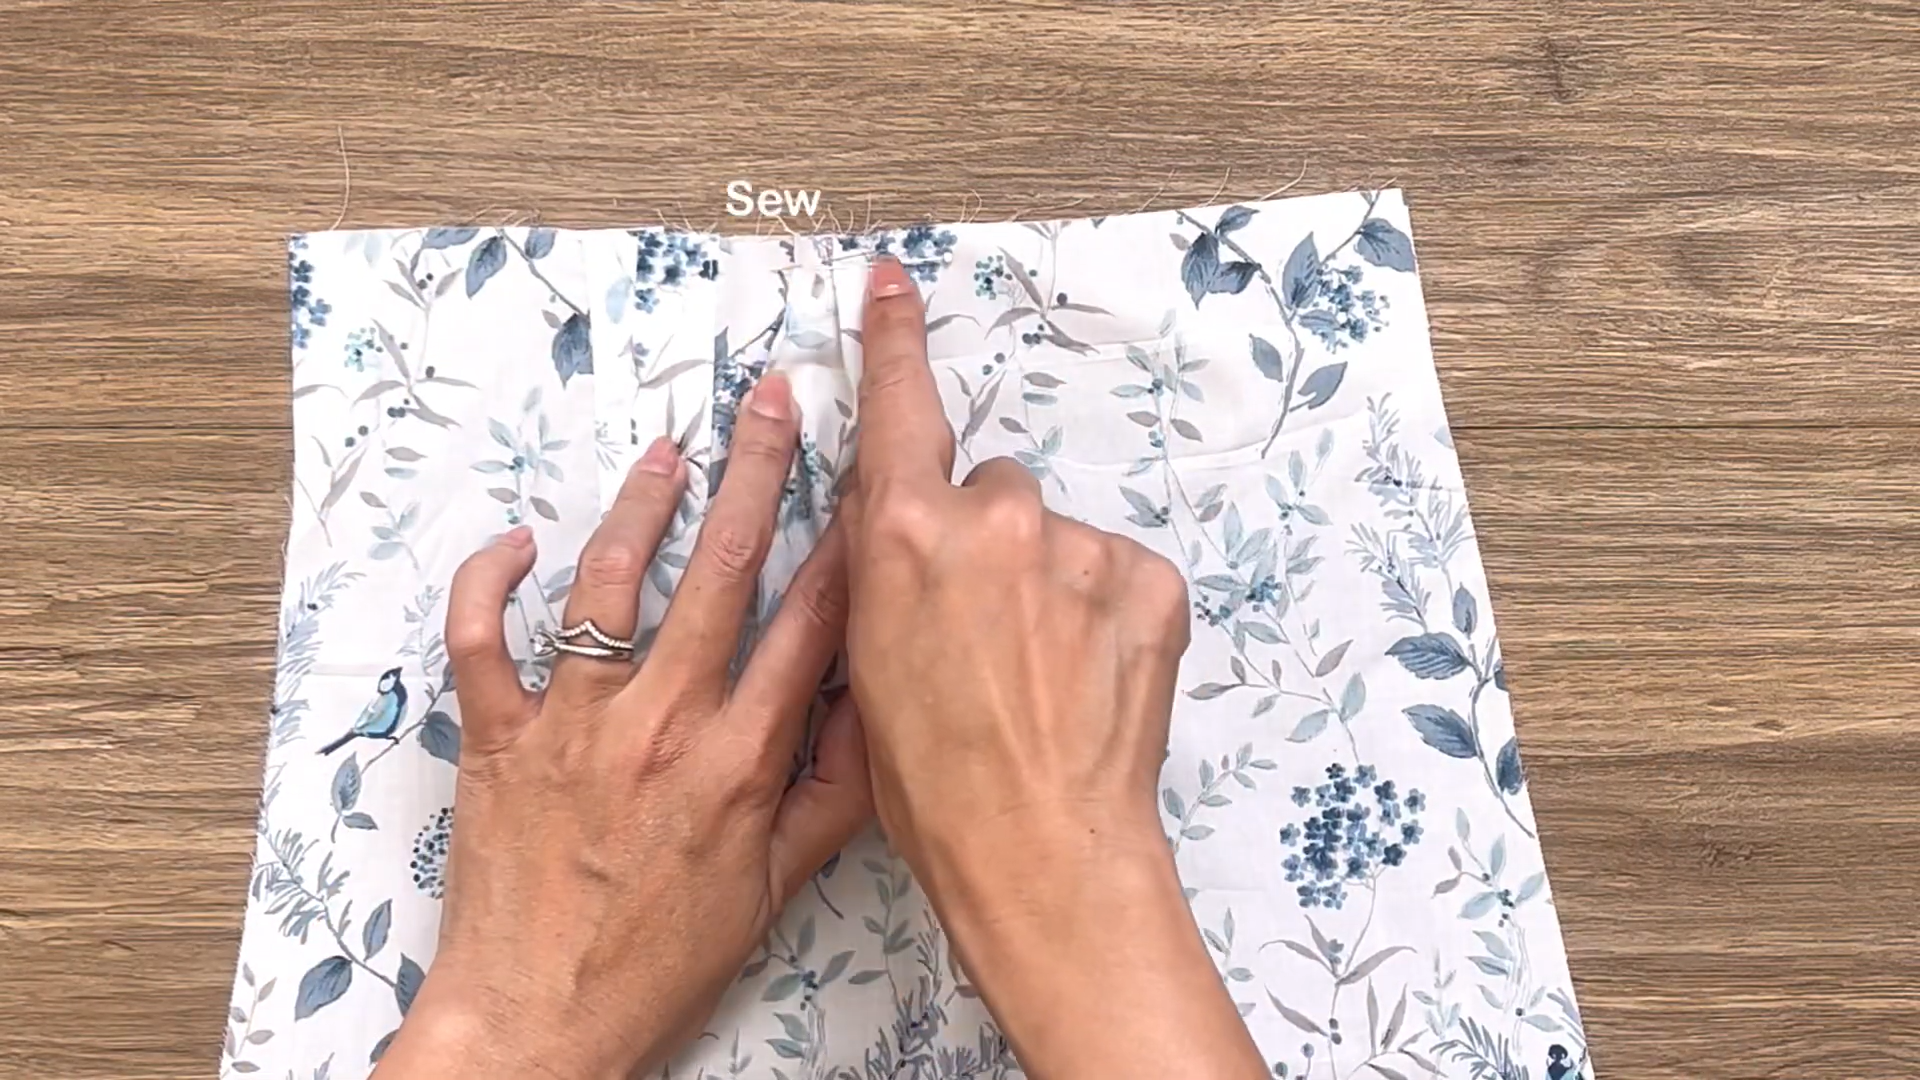
Connect the bodice pieces together at the shoulder lines and two sidelines.
THE SLEEVE
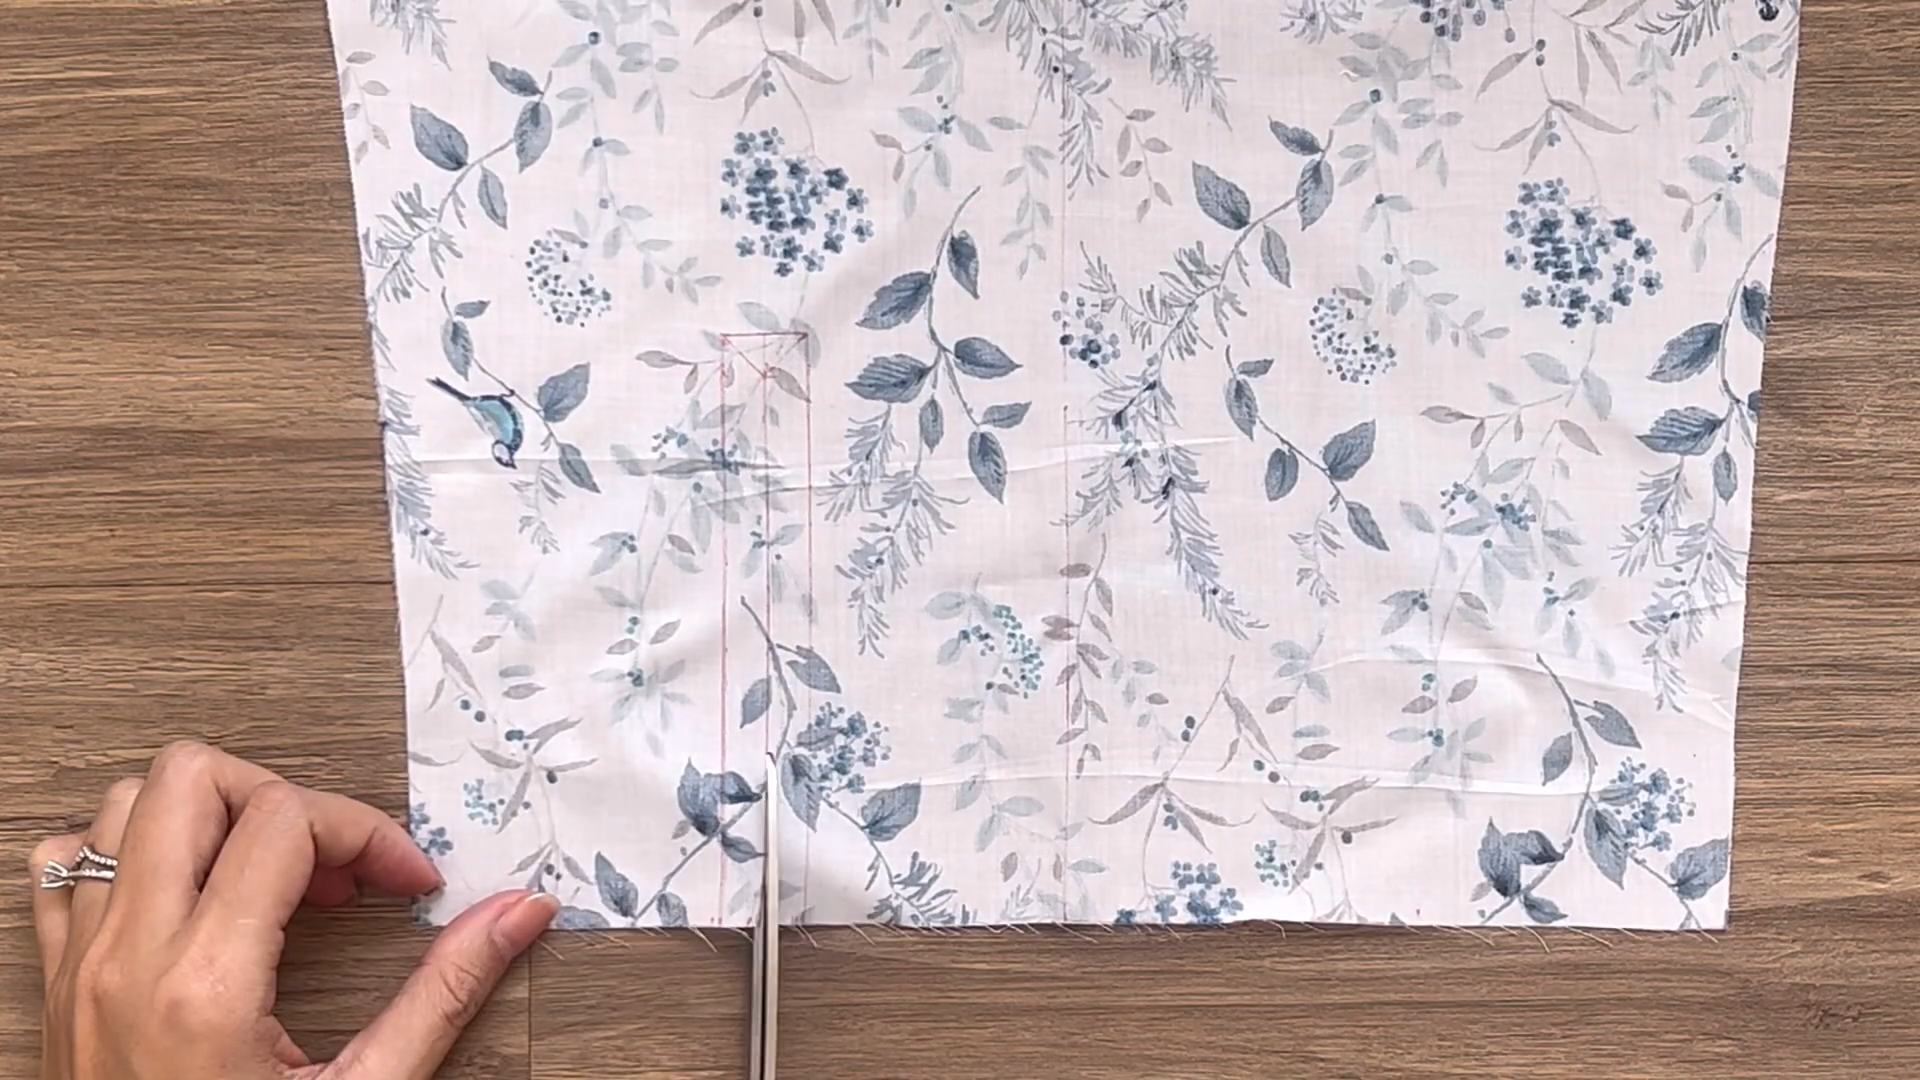
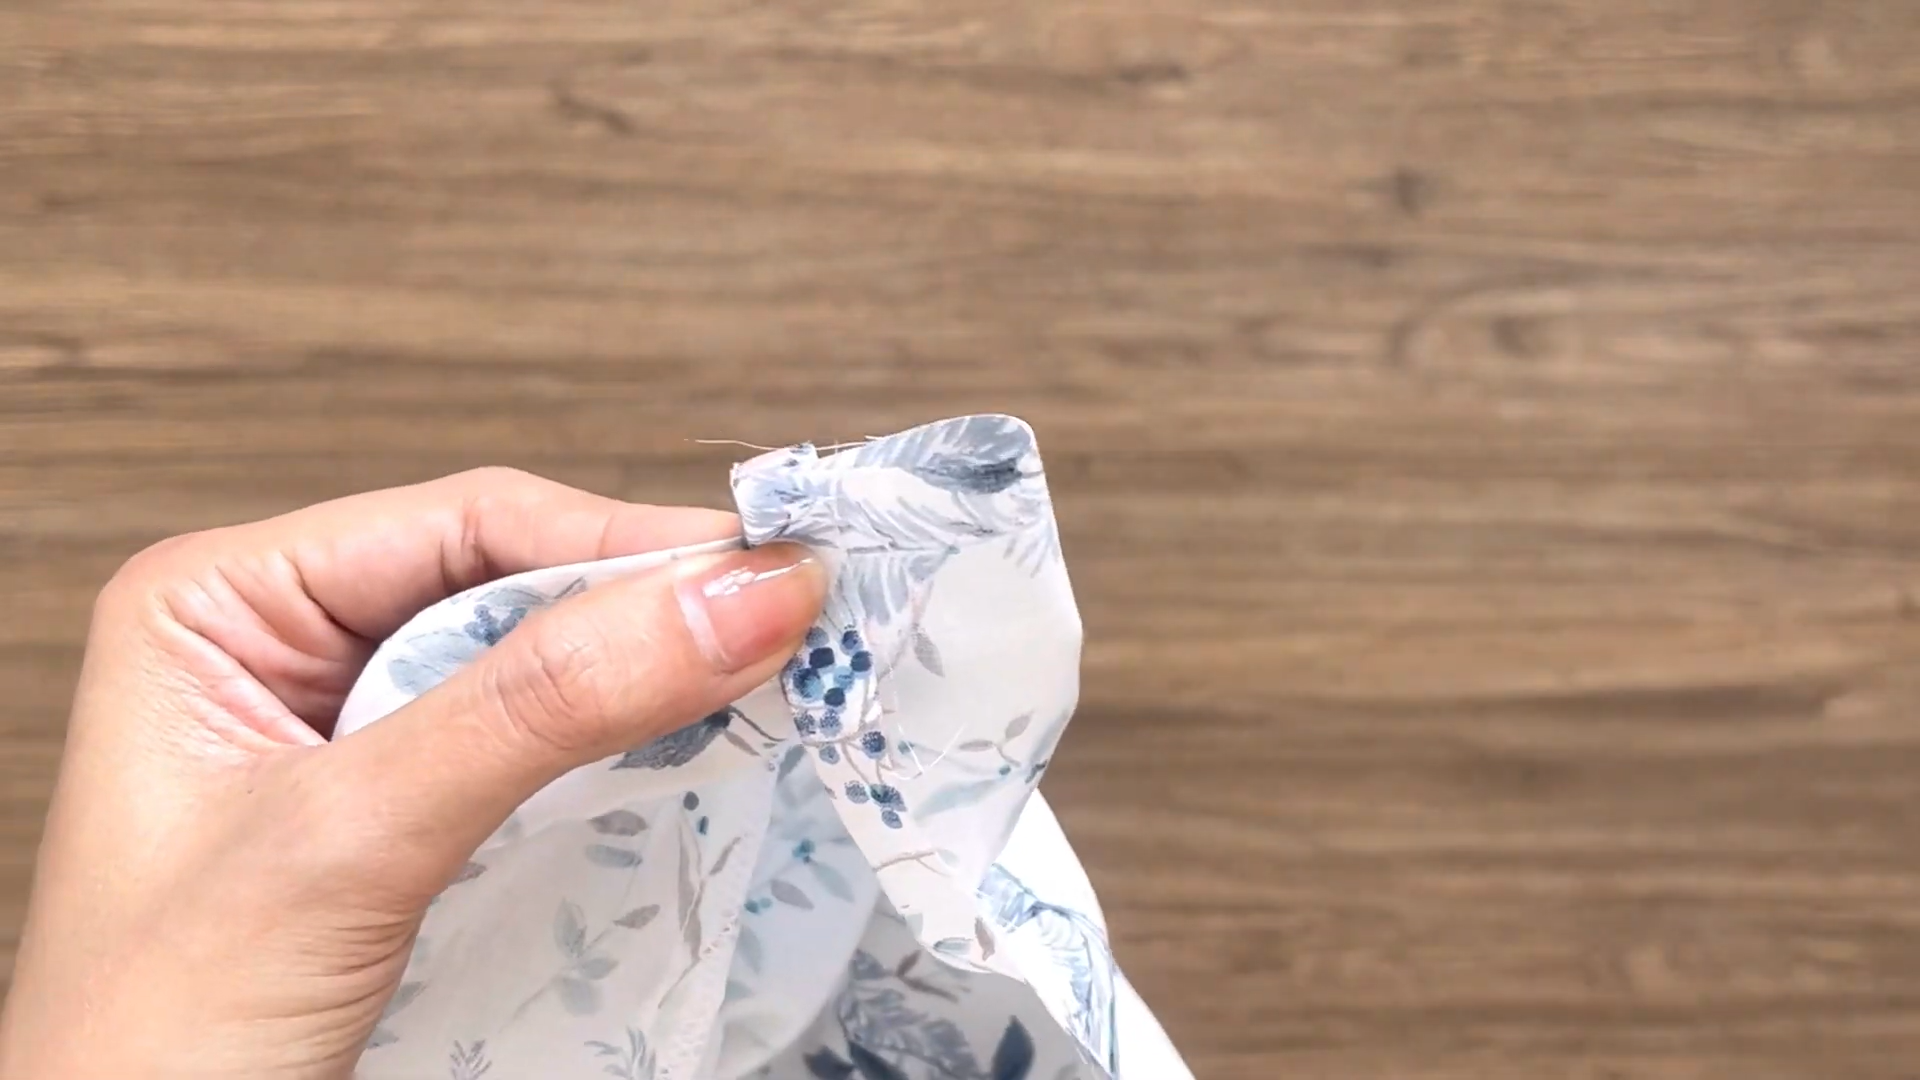
Identify the sleeve placket area of the sleeve and cut along the marked line.
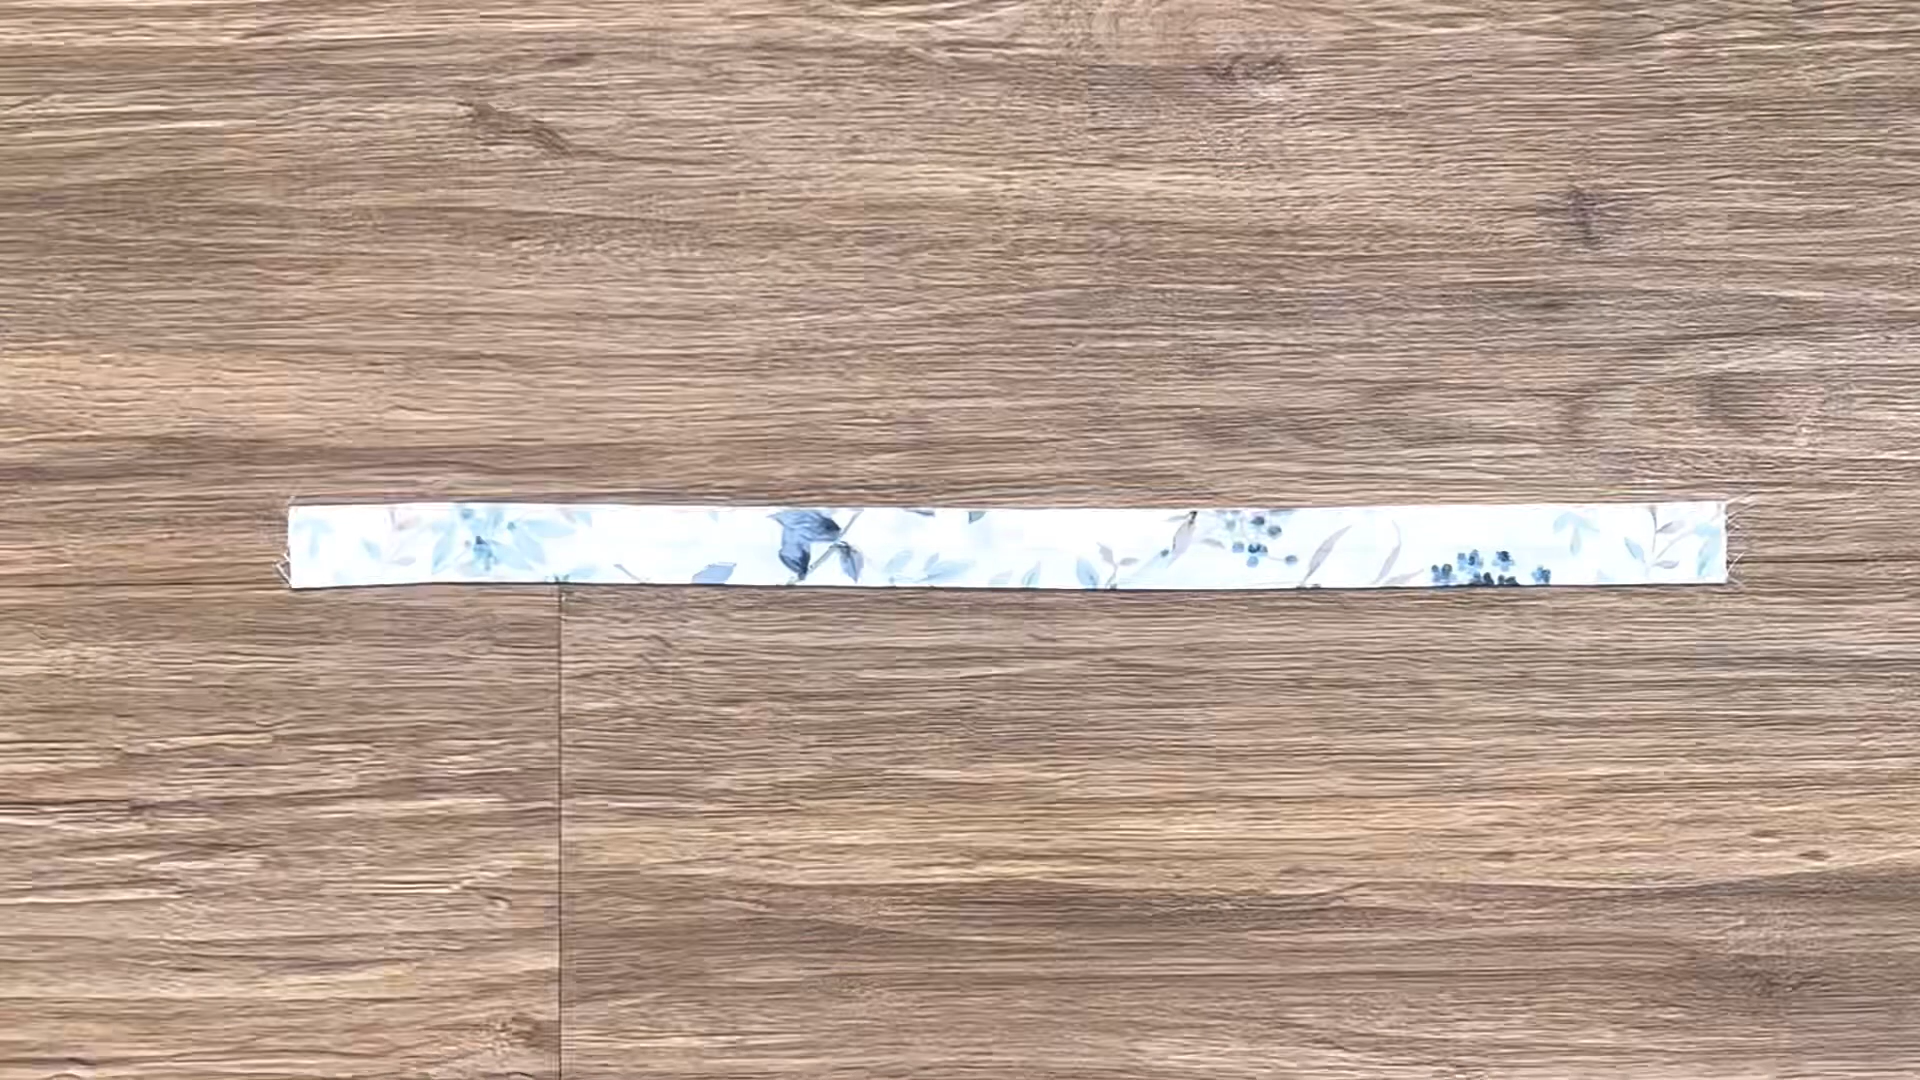
Take a strip of binding fabric with 2 cm width and double the length of the placket.

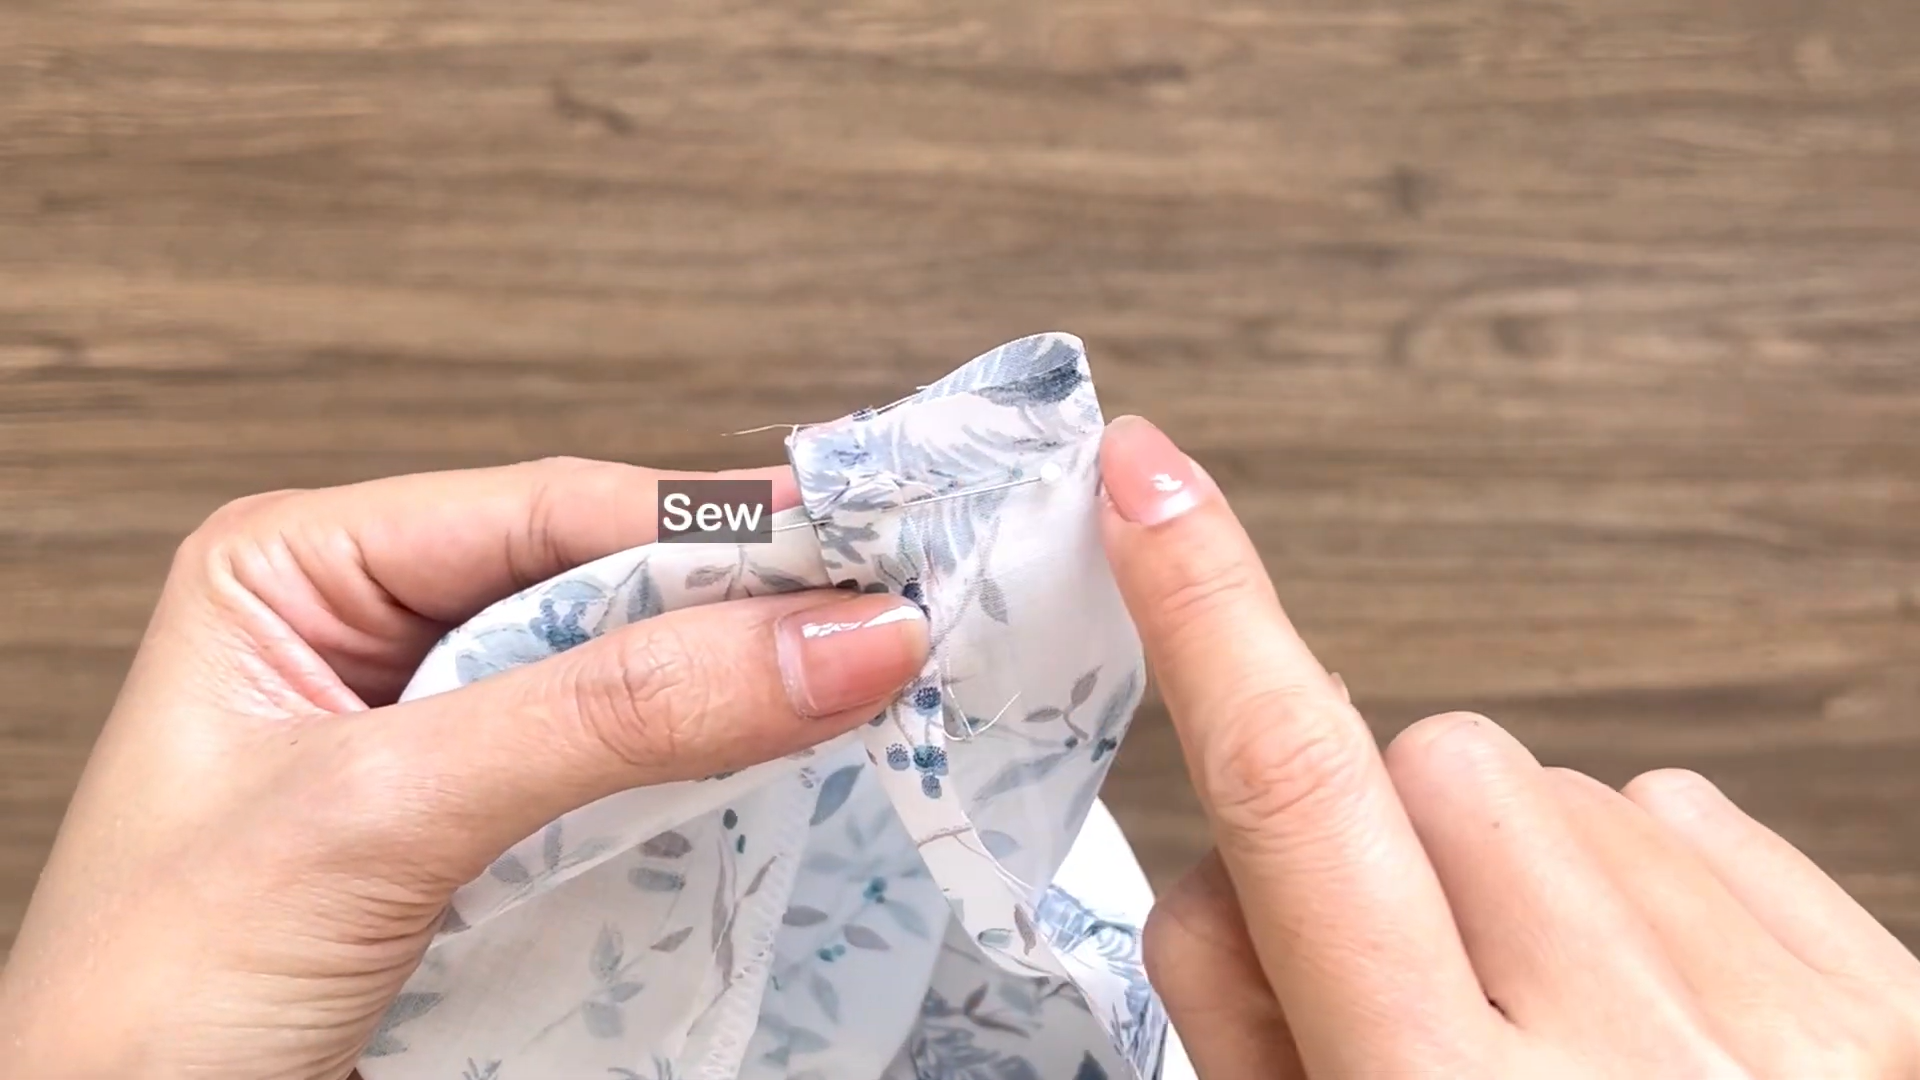
Align the binding fabric with the edge of the sleeve placket. Stitch them together.
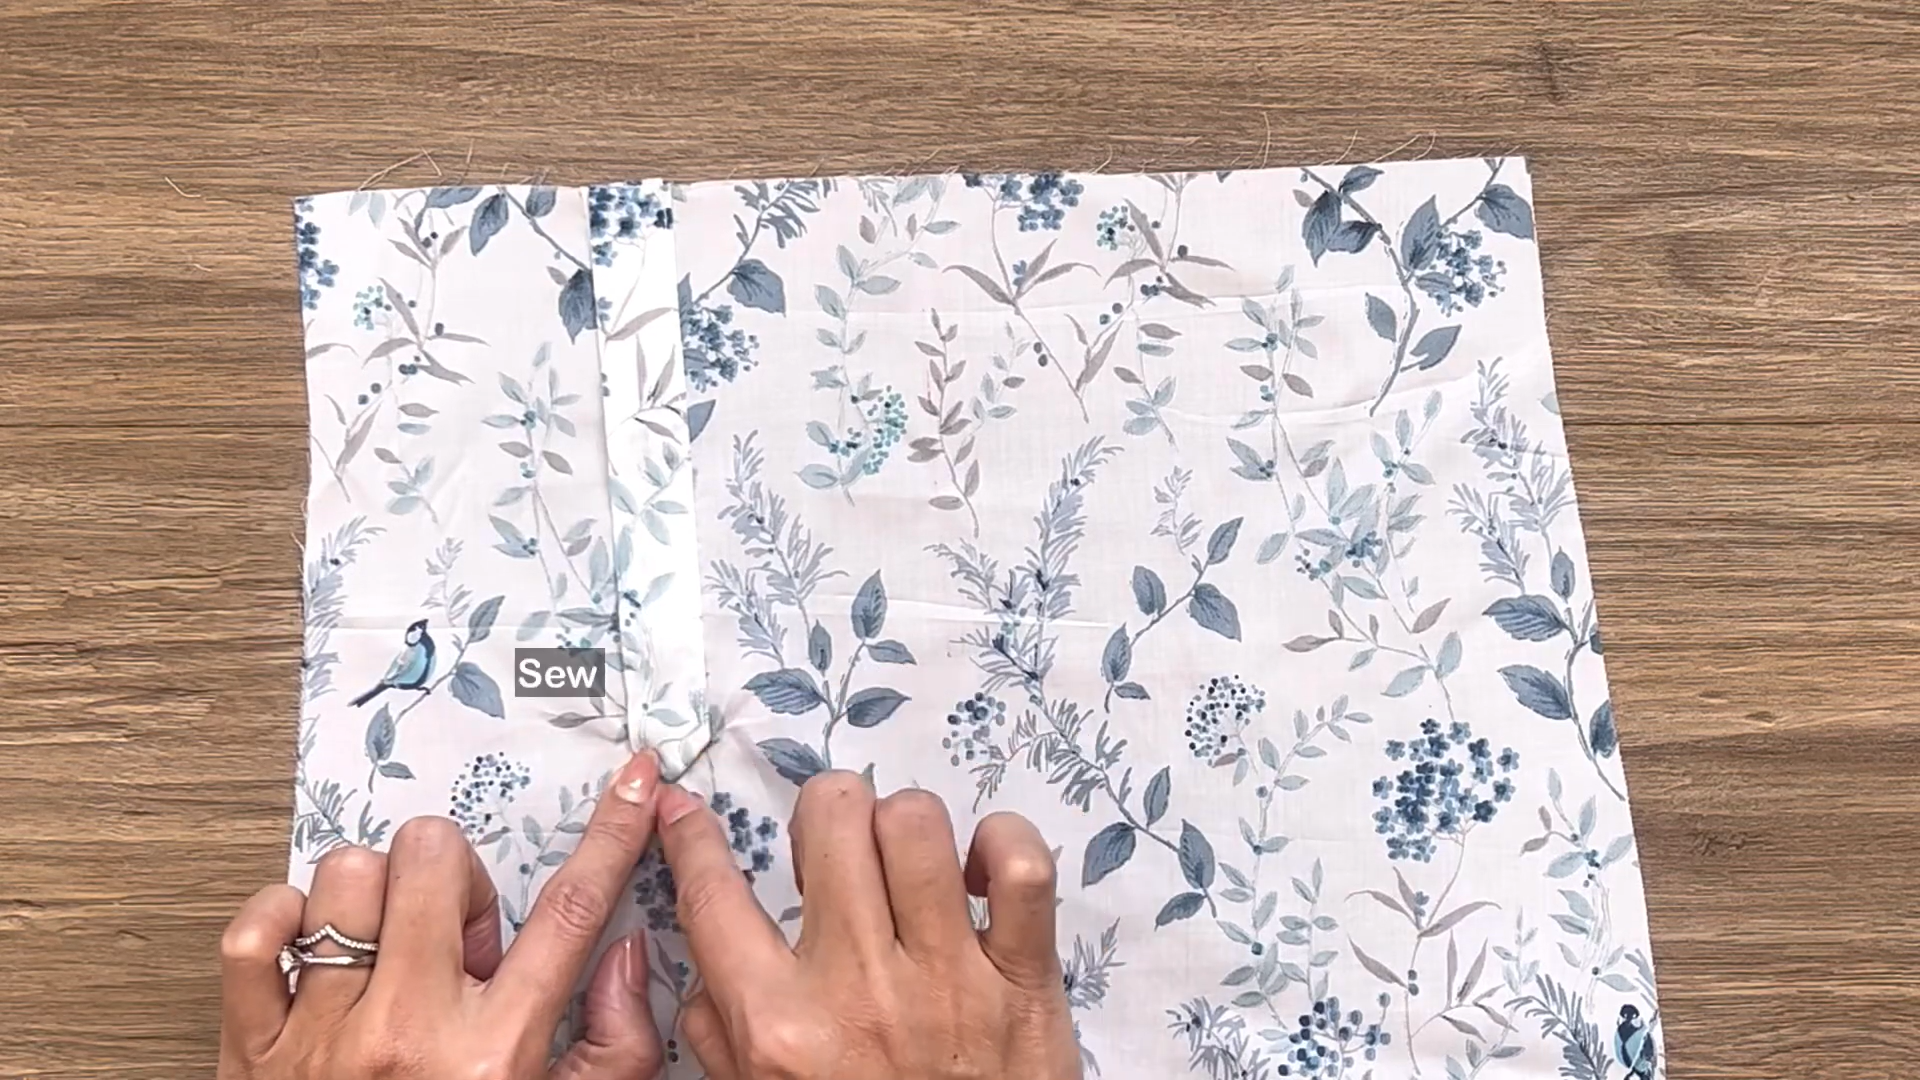
After that, fold and sew to finish the end of the planket.
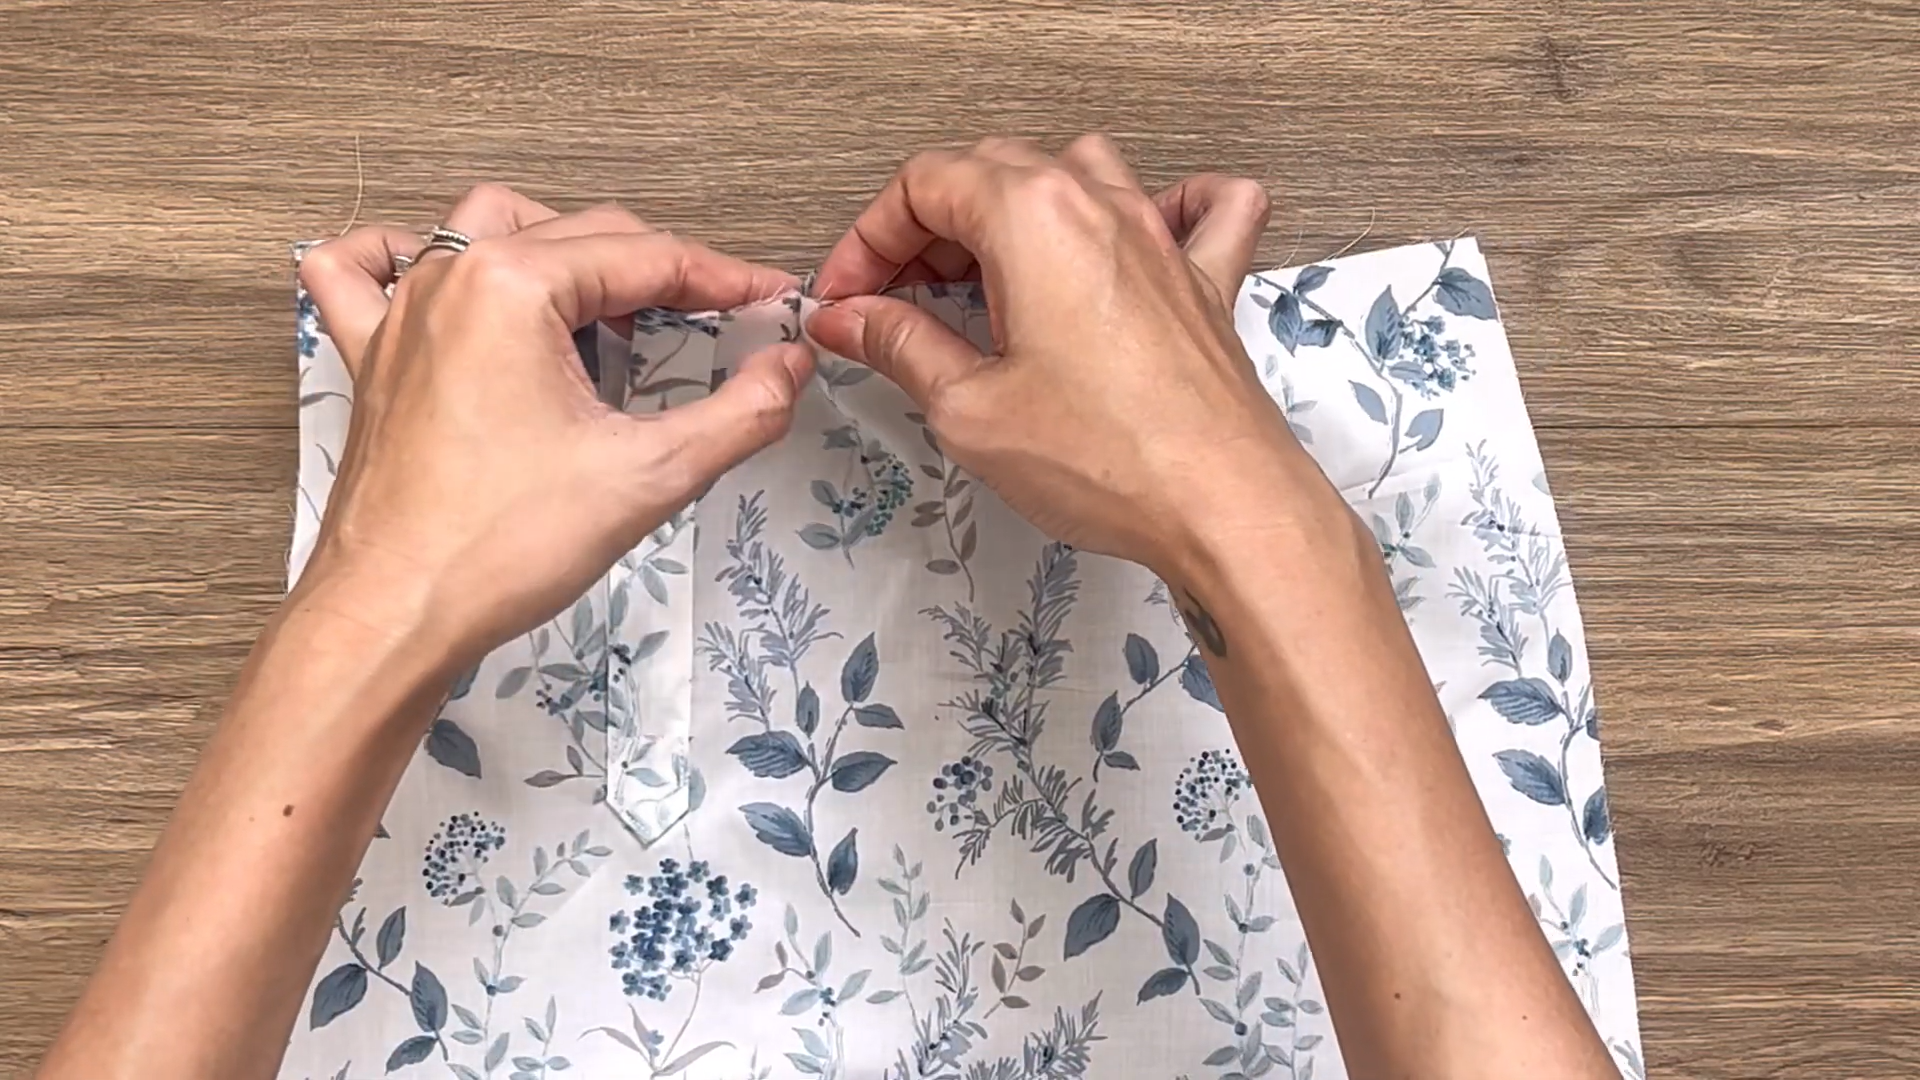
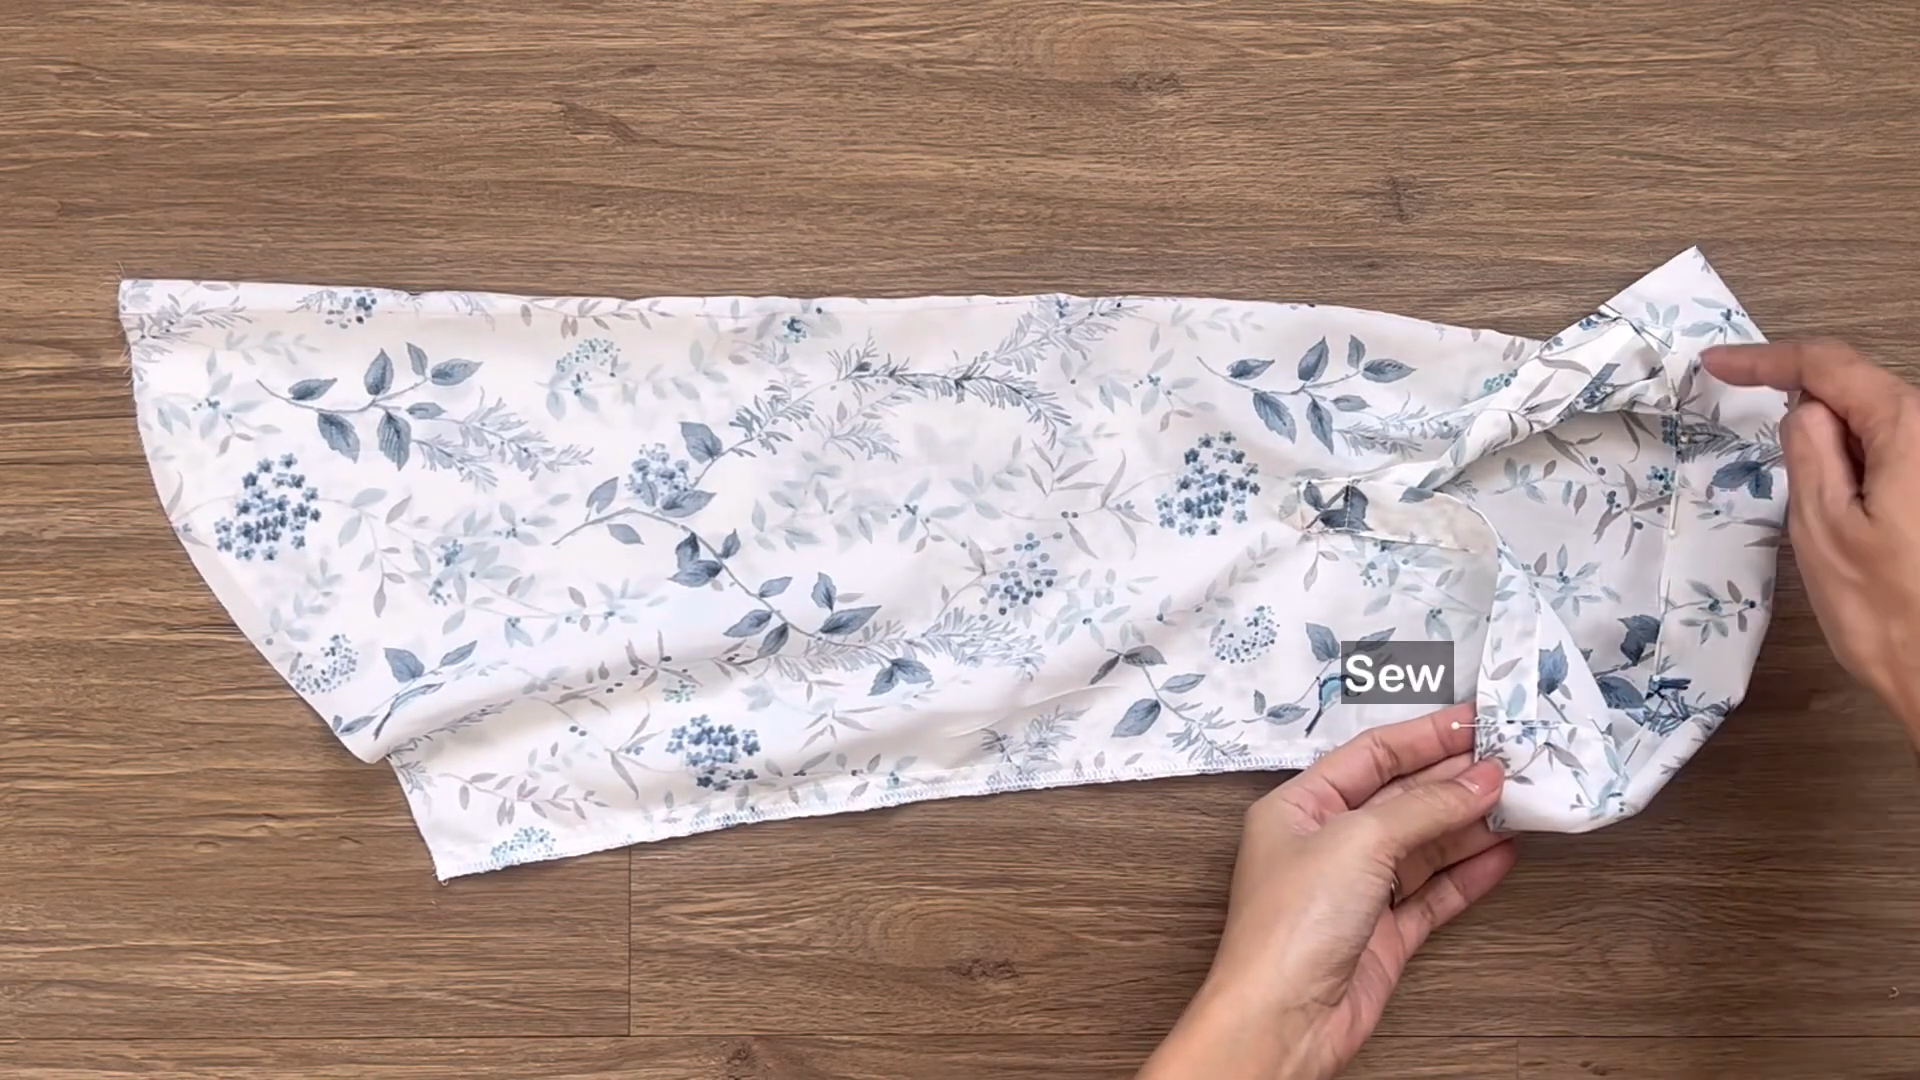
At the end line, create two folds at 3 cm from the placket. Each fold is 1 cm wide.
Sew to make the folds fixed. The final width of the sleeve’s end is equal to the width of your arm.
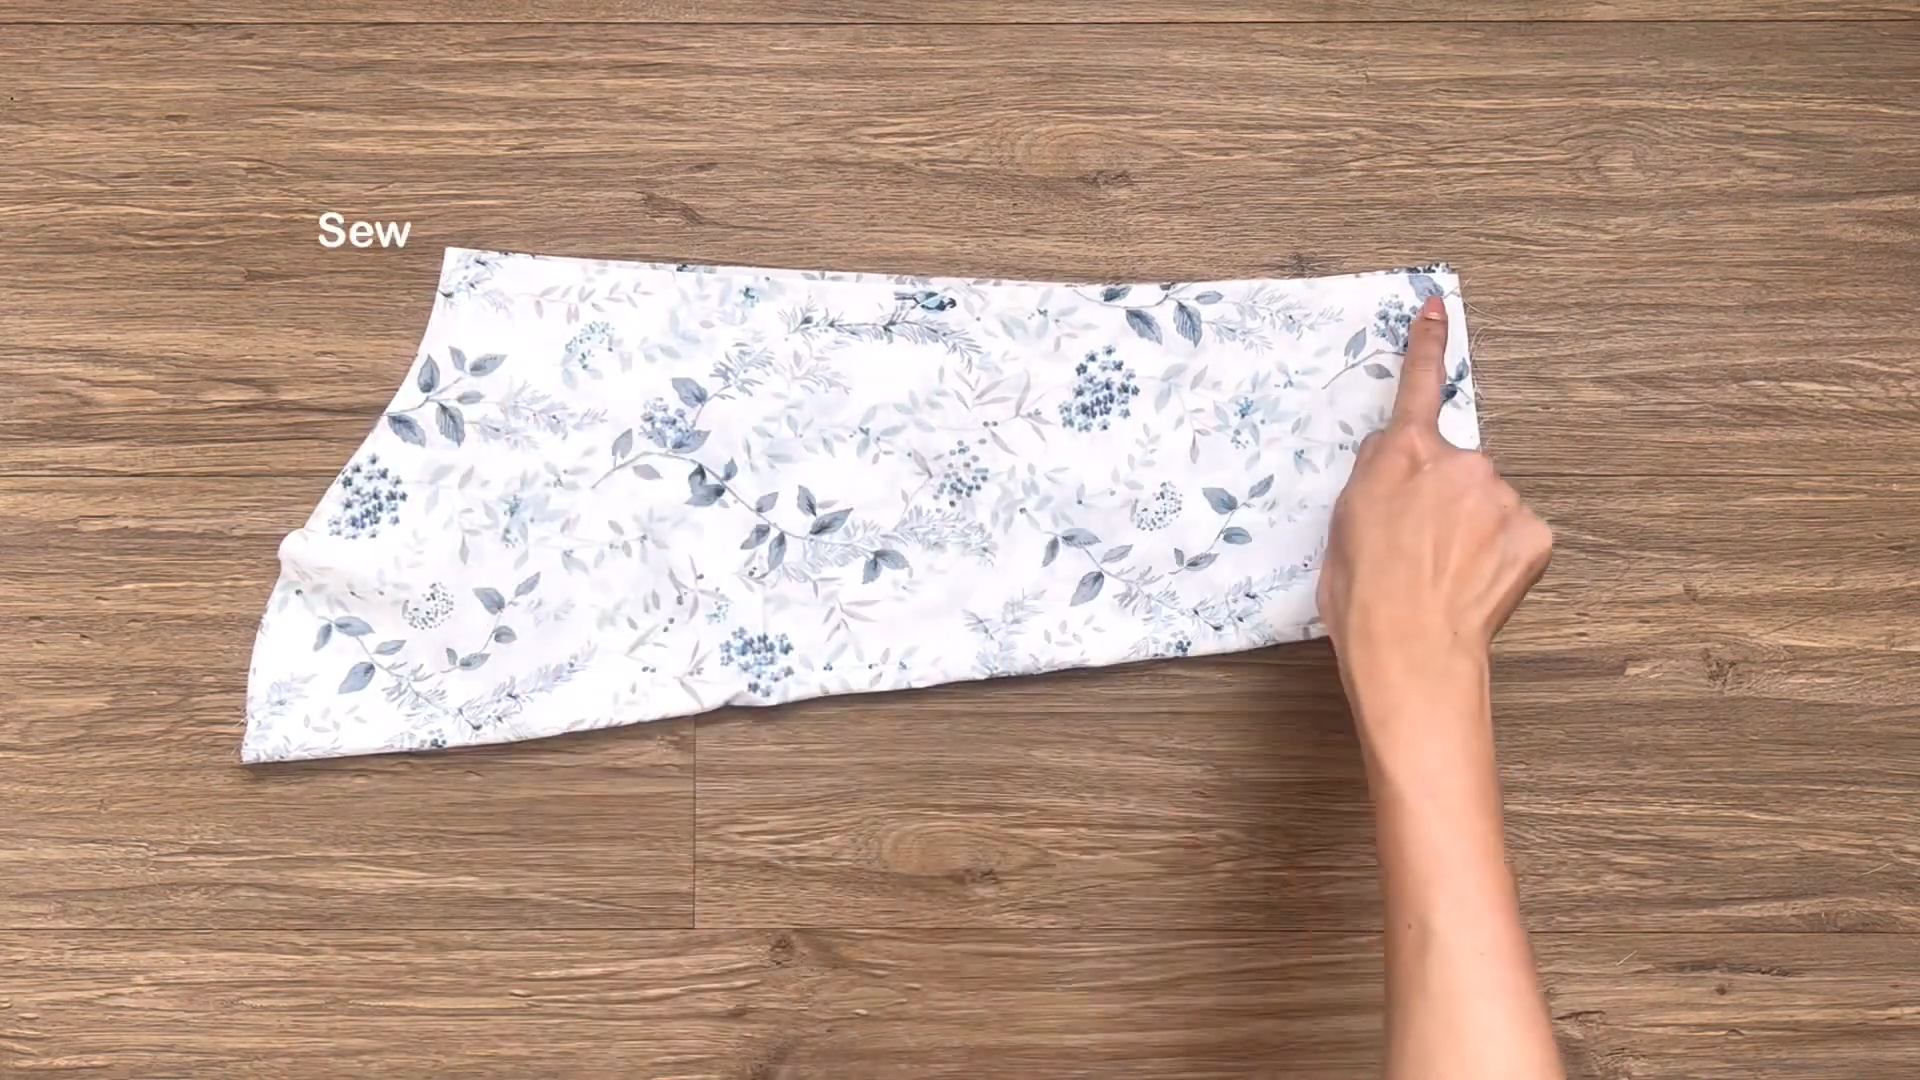
Connect two under arm big lines together.
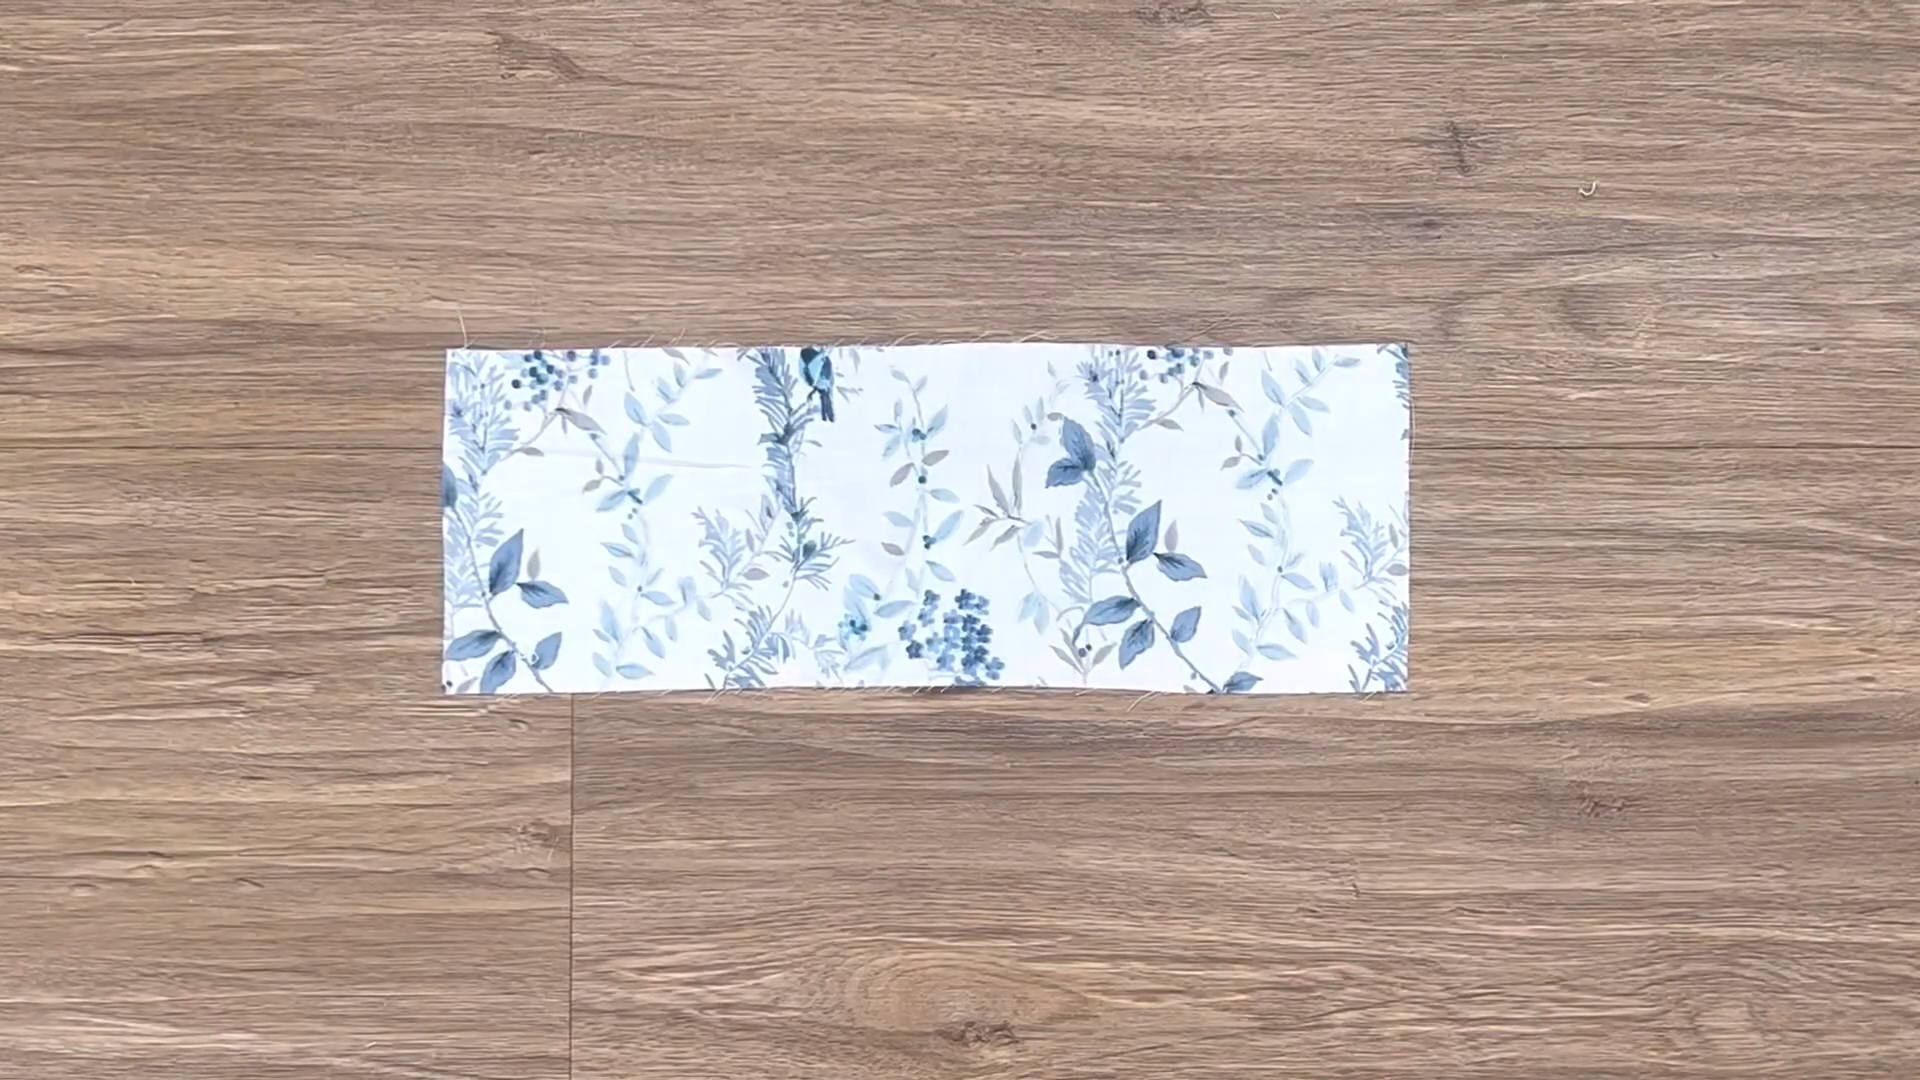
To make the cuff, cut a rectangle with 8cm width. Its length is the length of the end of the sleeve plus 2 cm.
Attach one lengthwise edge of the rectangle to the end of the sleeve. Keep 1 cm extra at both ends for seam allowance.
At the connecting part between the curve and the placket, fold the other lengthwise edge of the rectangle inward by 1 cm.
Then fold it outward, aligning it with the first seam. Stitch along the width line of the rectangle to secure both ends of the curve.
Turn the cuff inside out. Finish the remaining curve by folding the fabric inward by 1 cm. Keep folding it toward the first seam before sewing.
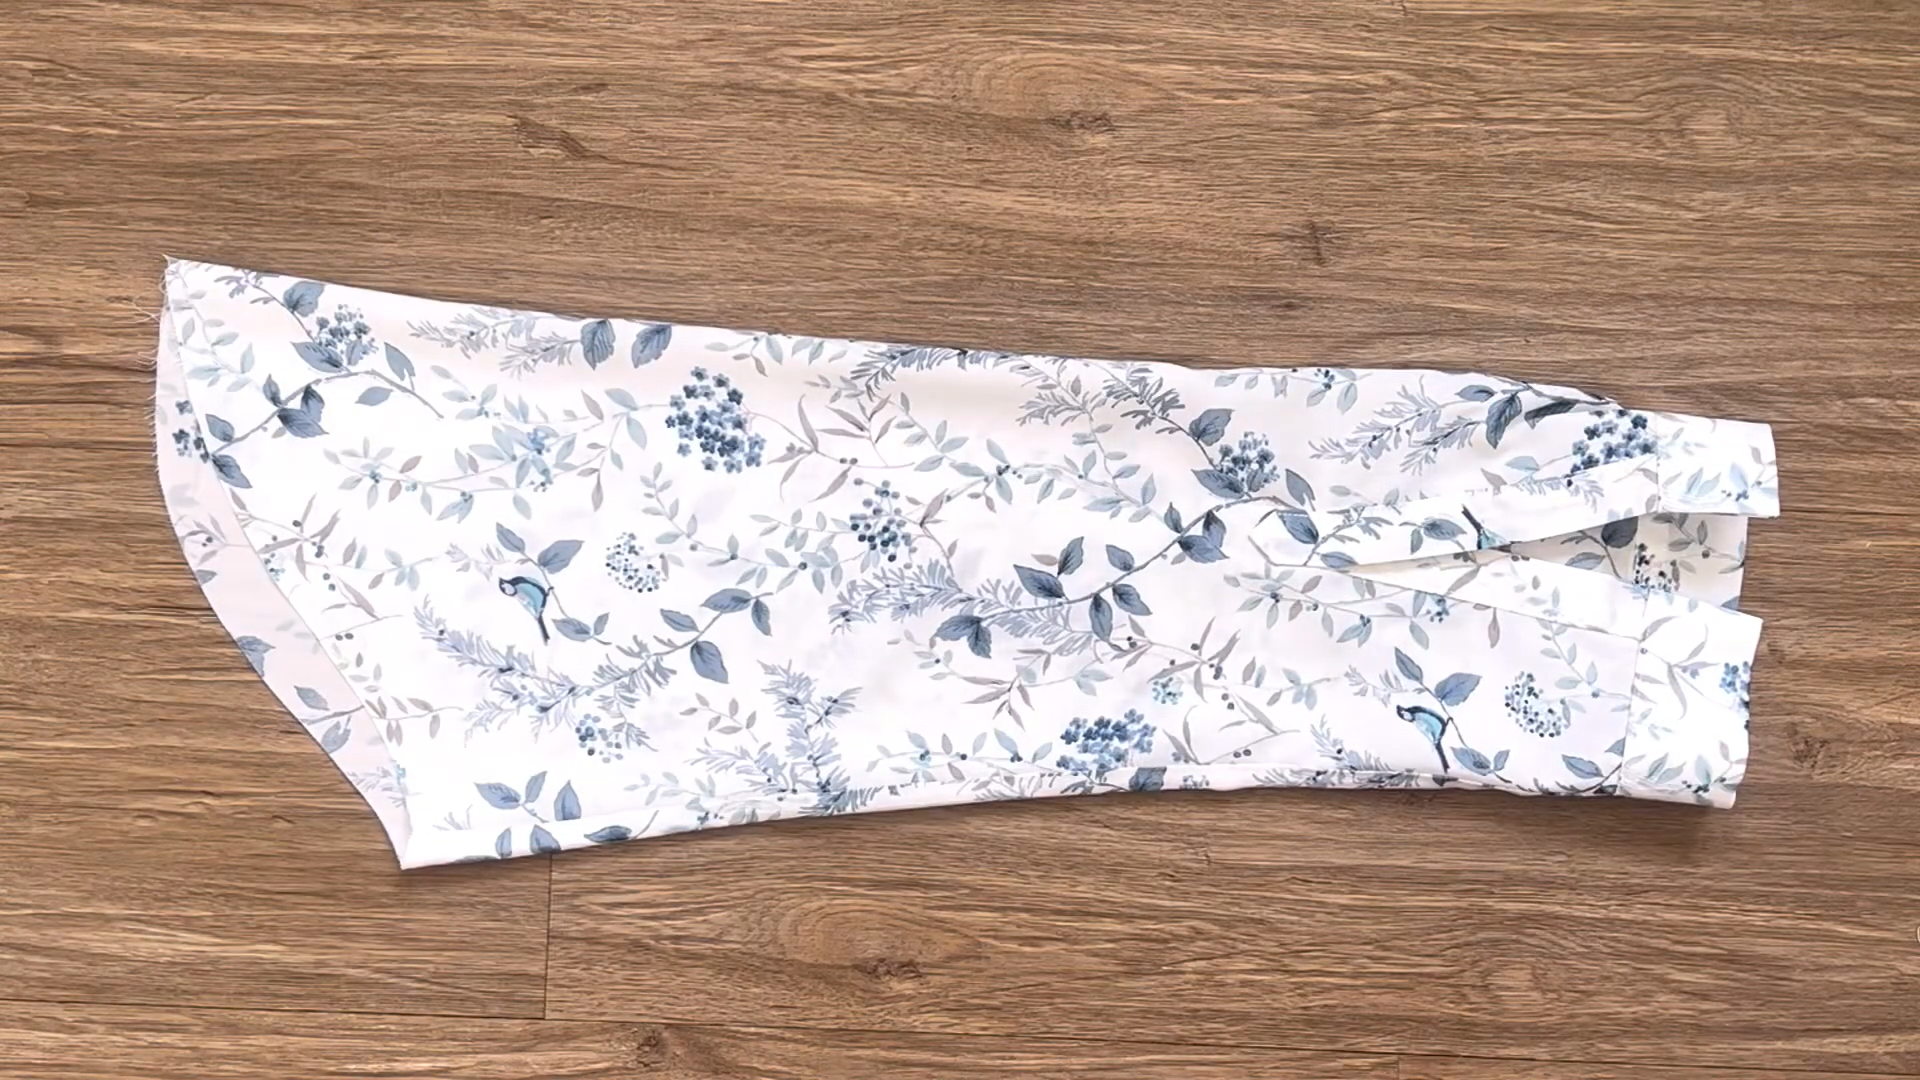
And you will have the sleeve of the dress.
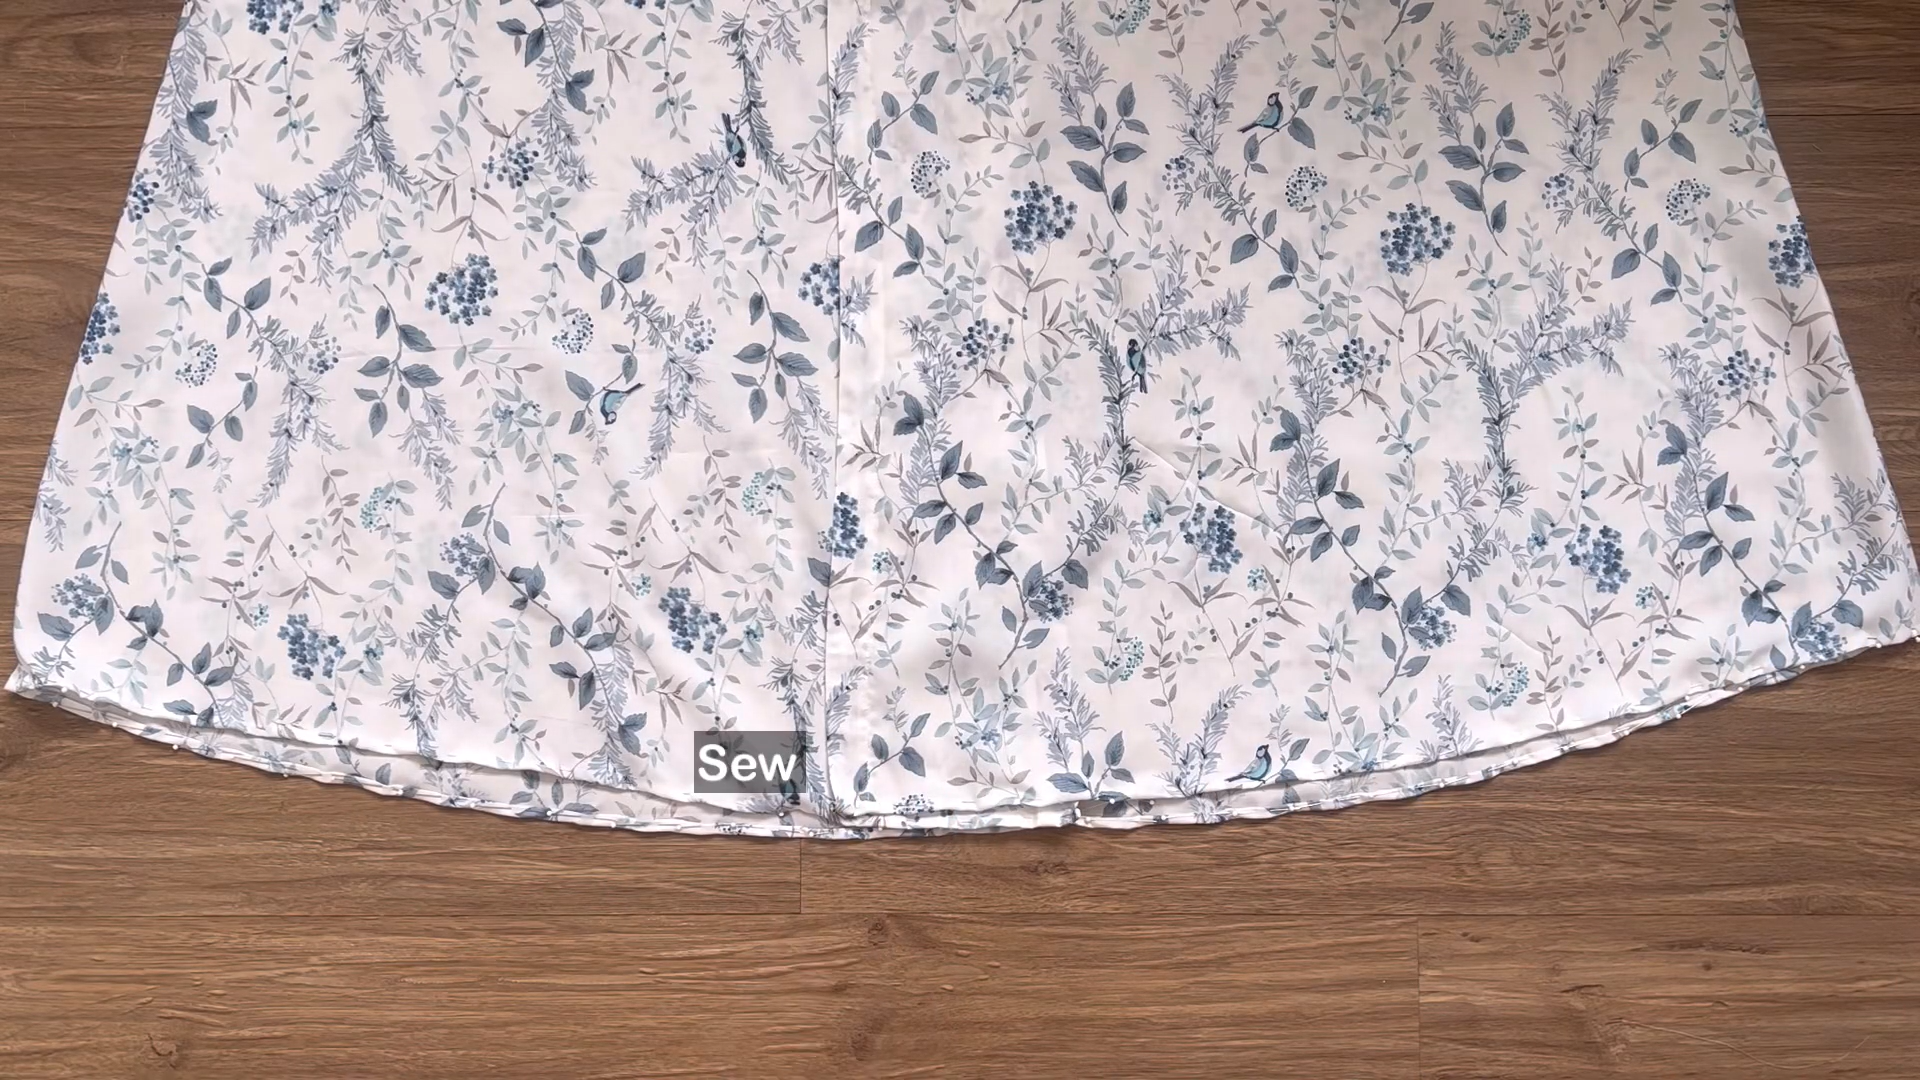
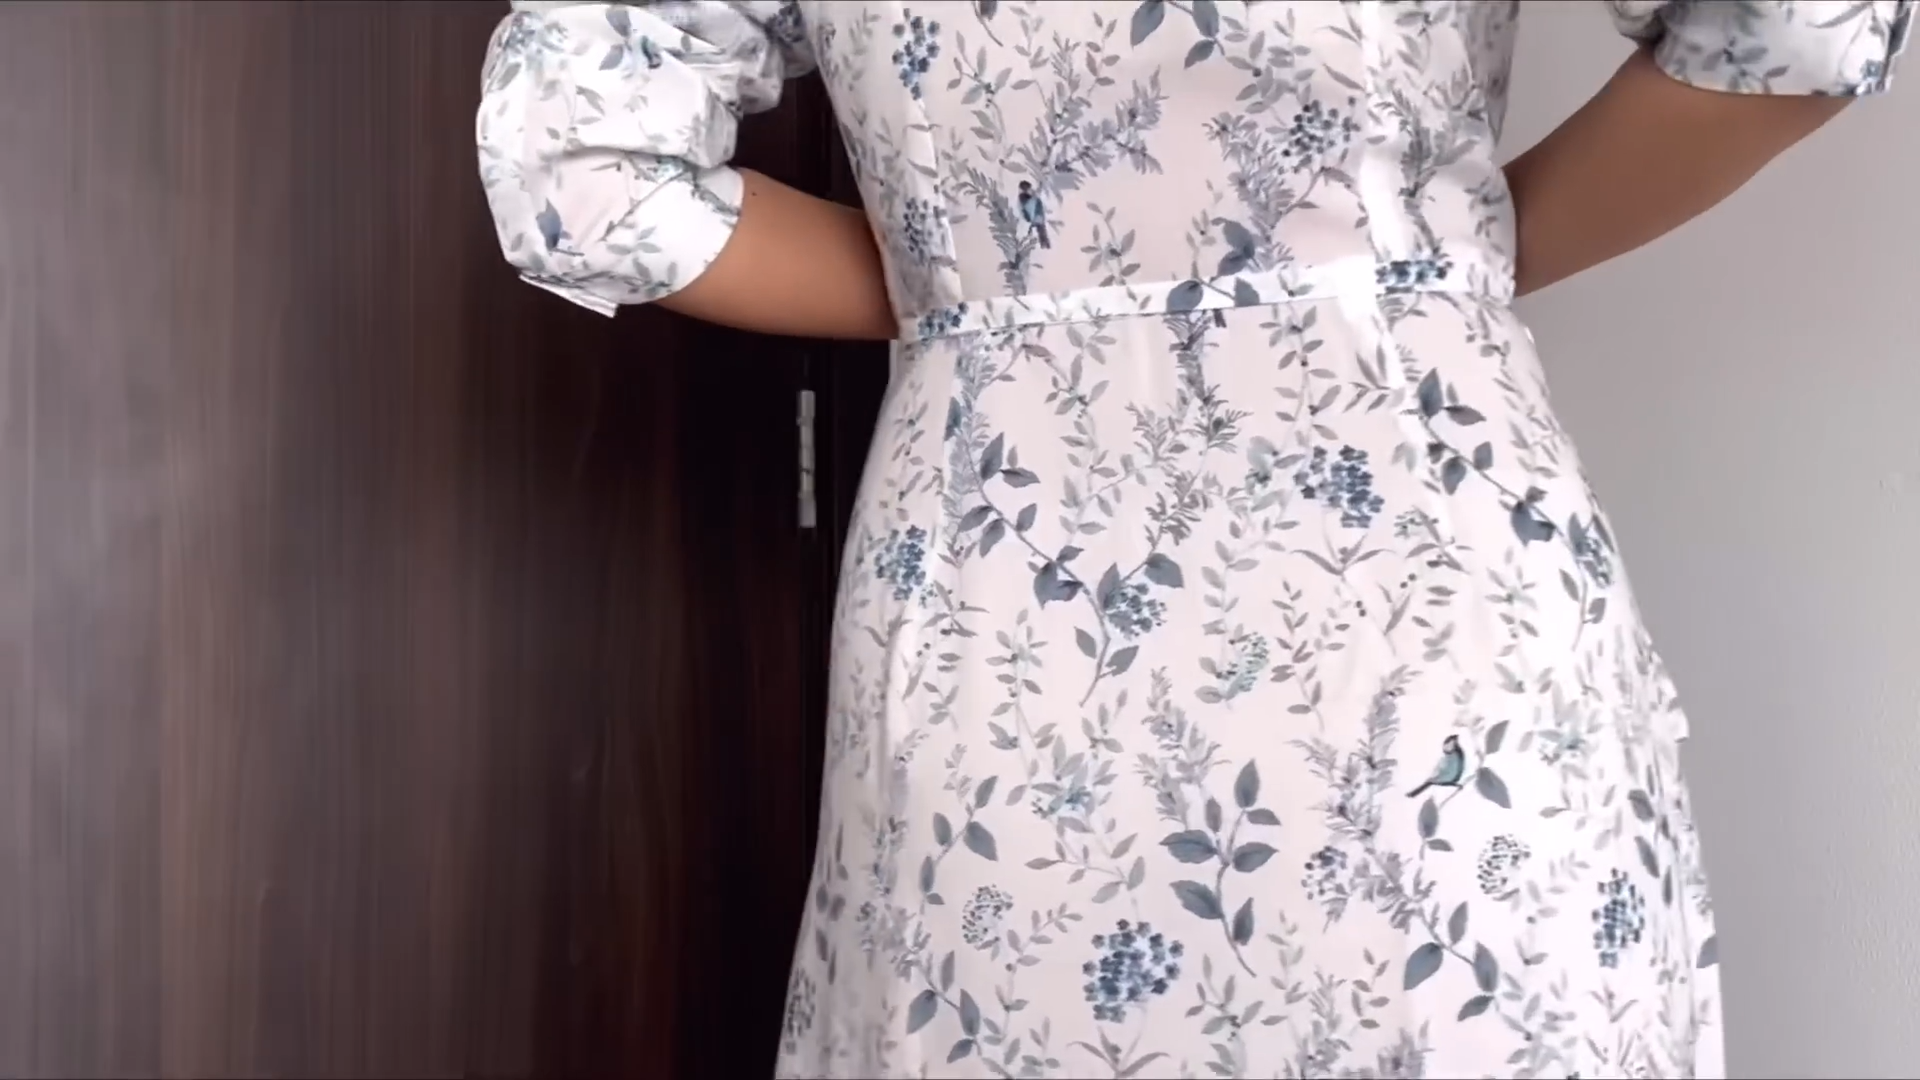
THE SKIRT
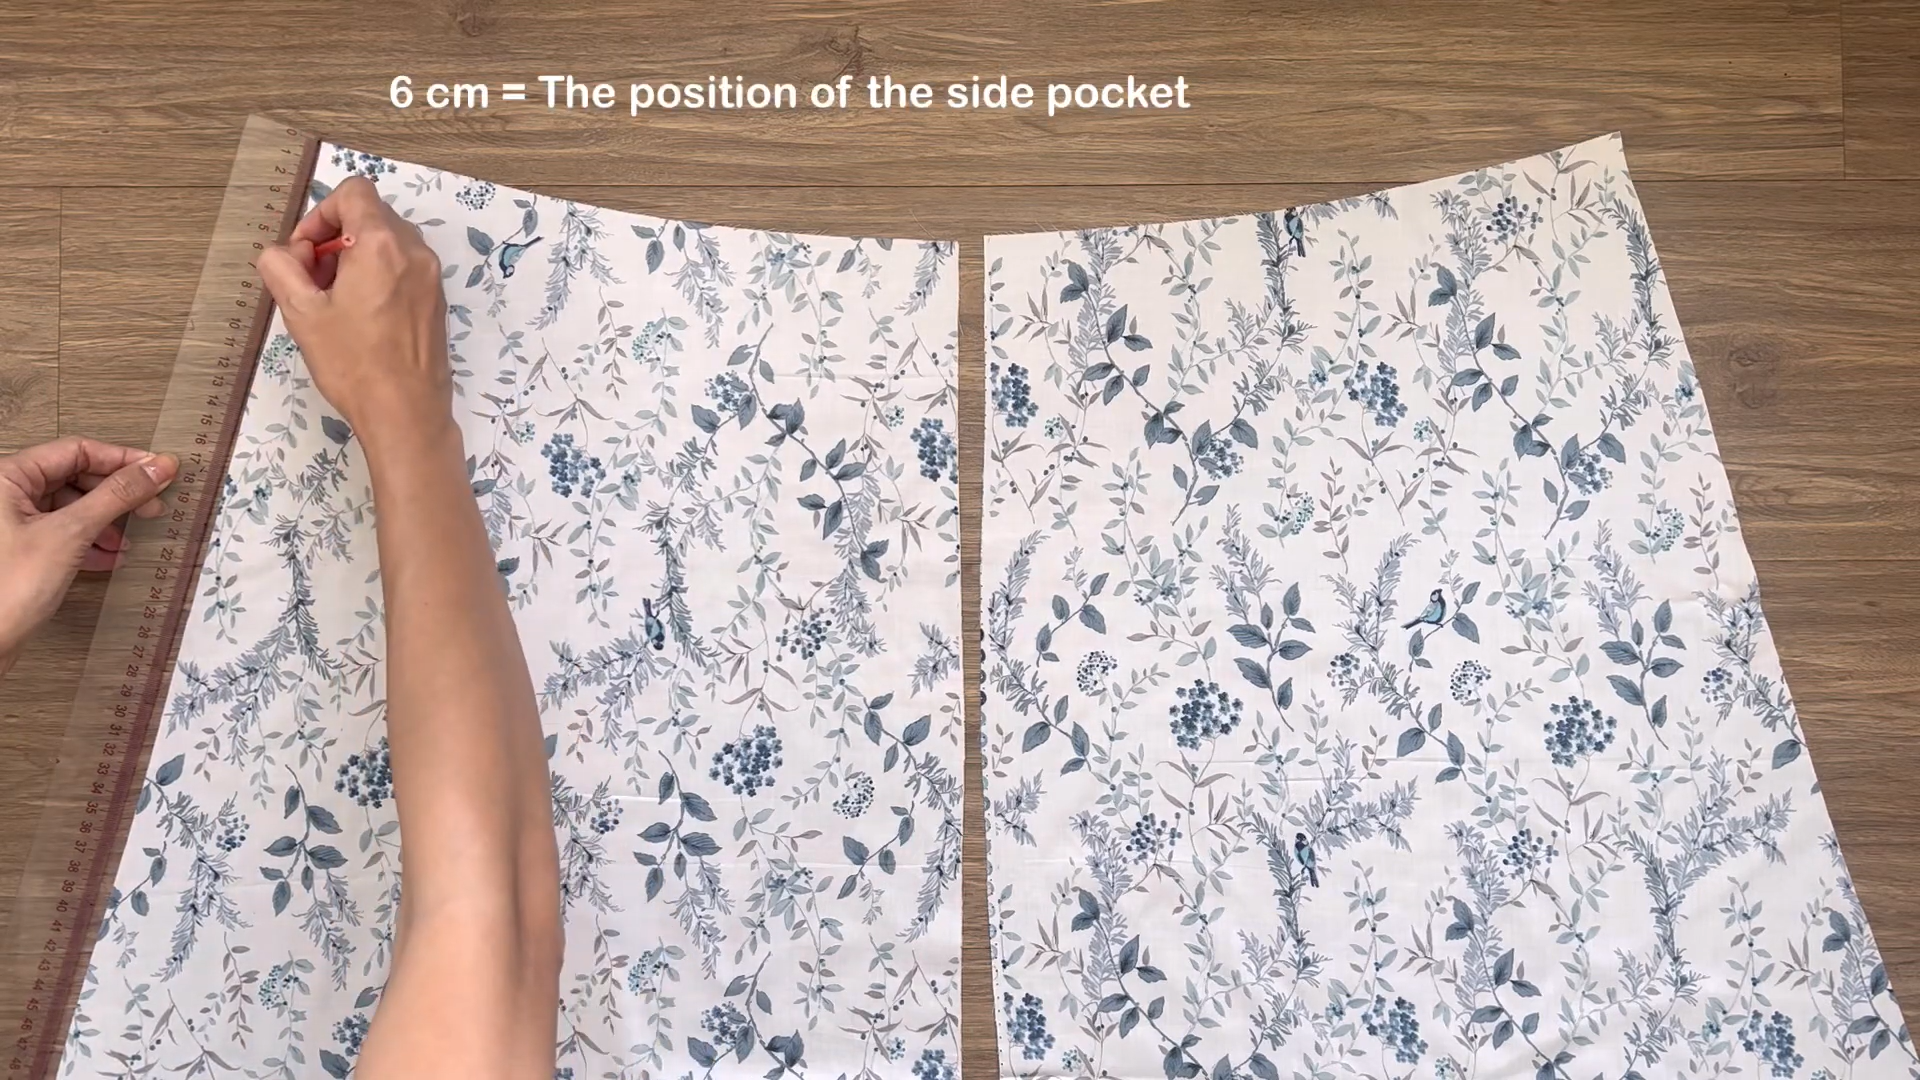
Measure 6 cm down from the top edge of the front skirt piece along the side seam. This is where the pocket starts.
Align the pocket edges with the side seams of the skirt. Sew them together.
Do the same on the other side.
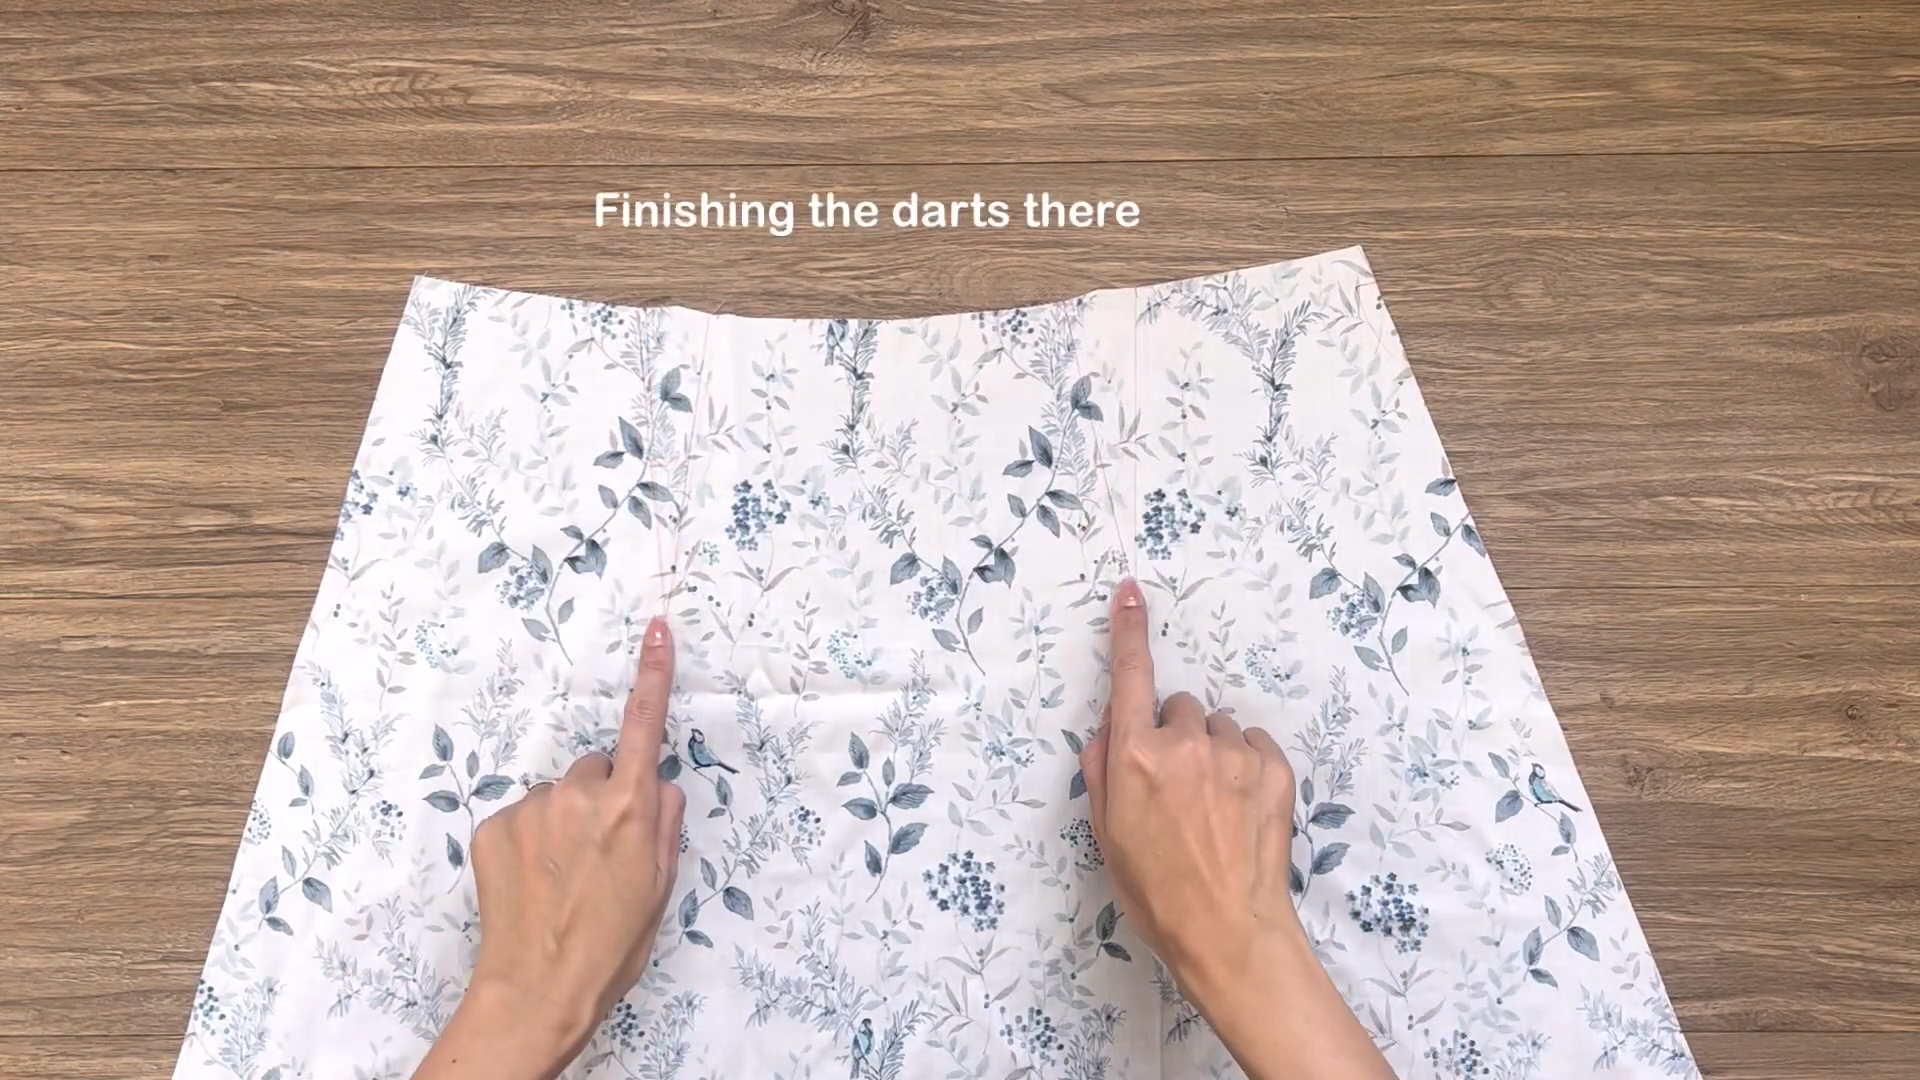
Finish the darts on the back skirt piece before adding the pockets.
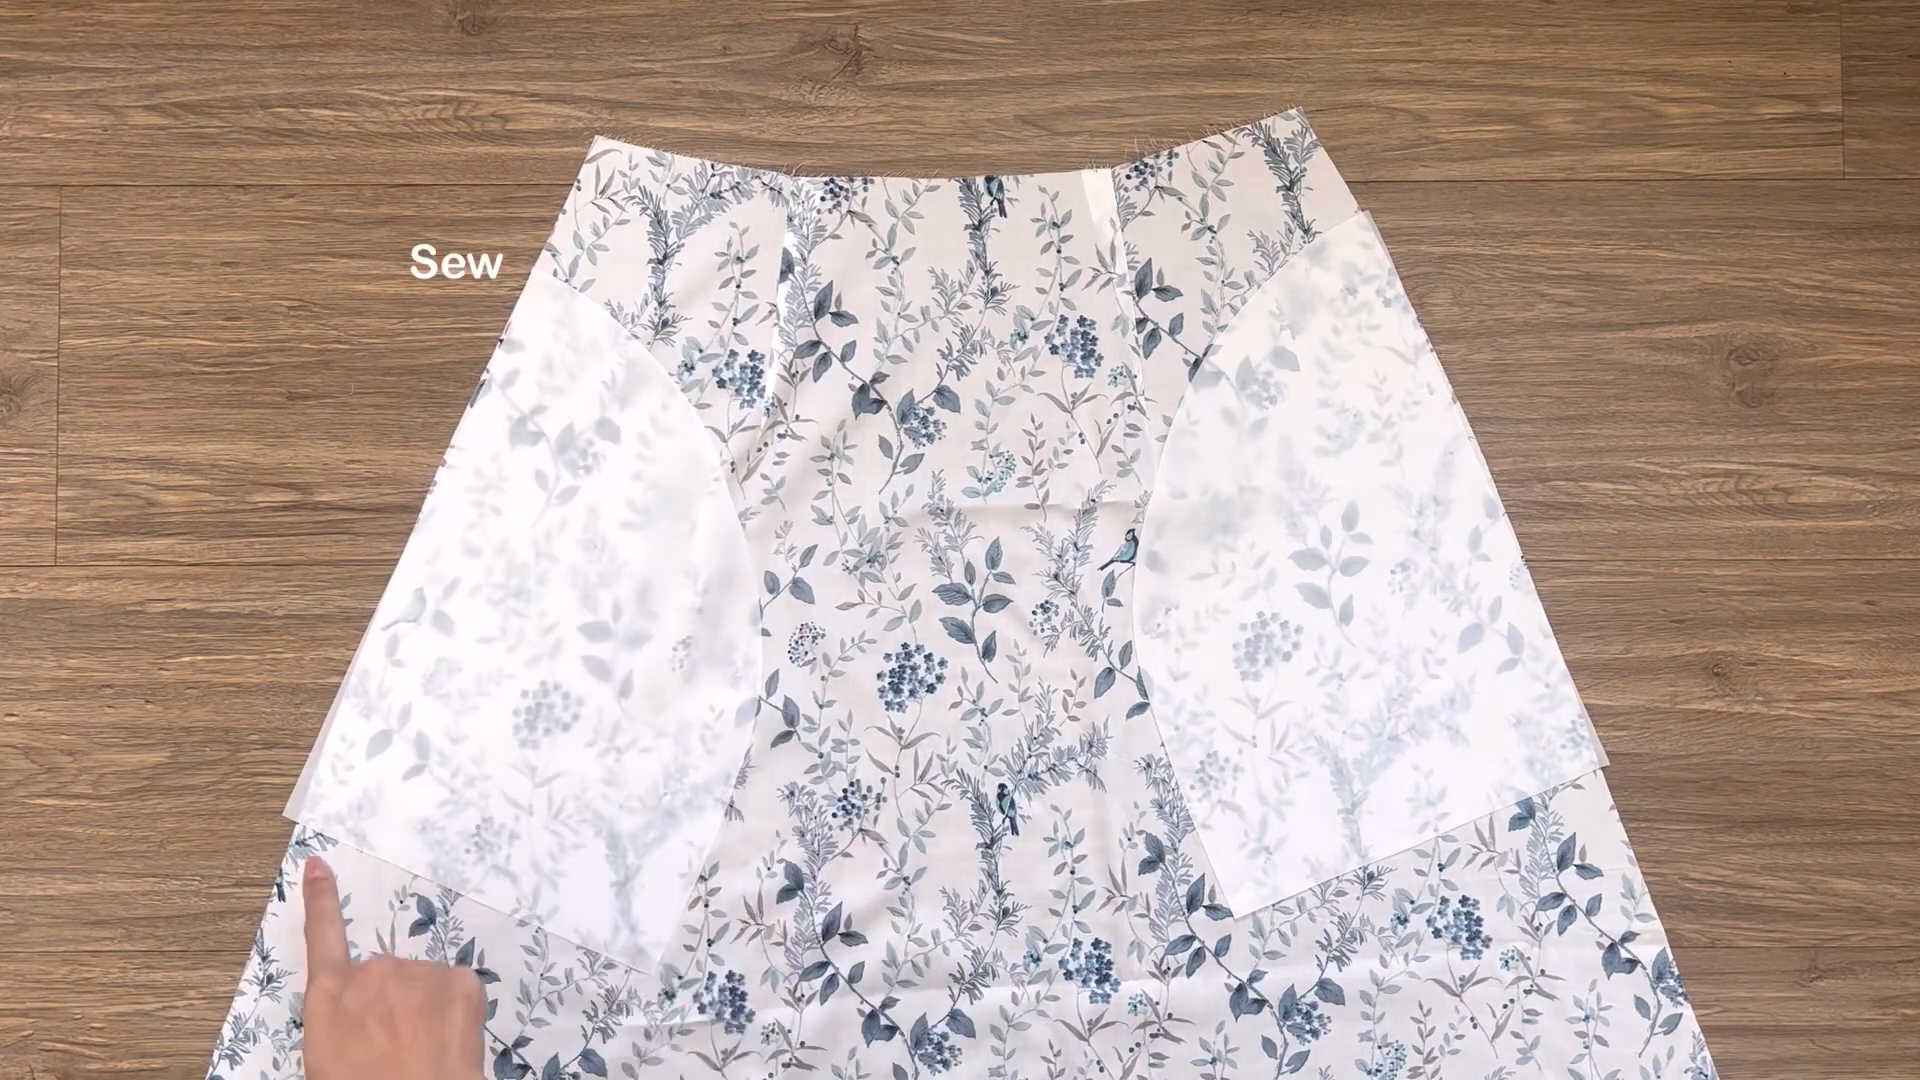
Attach the pockets at 6 cm below the top edge on the back skirt also.
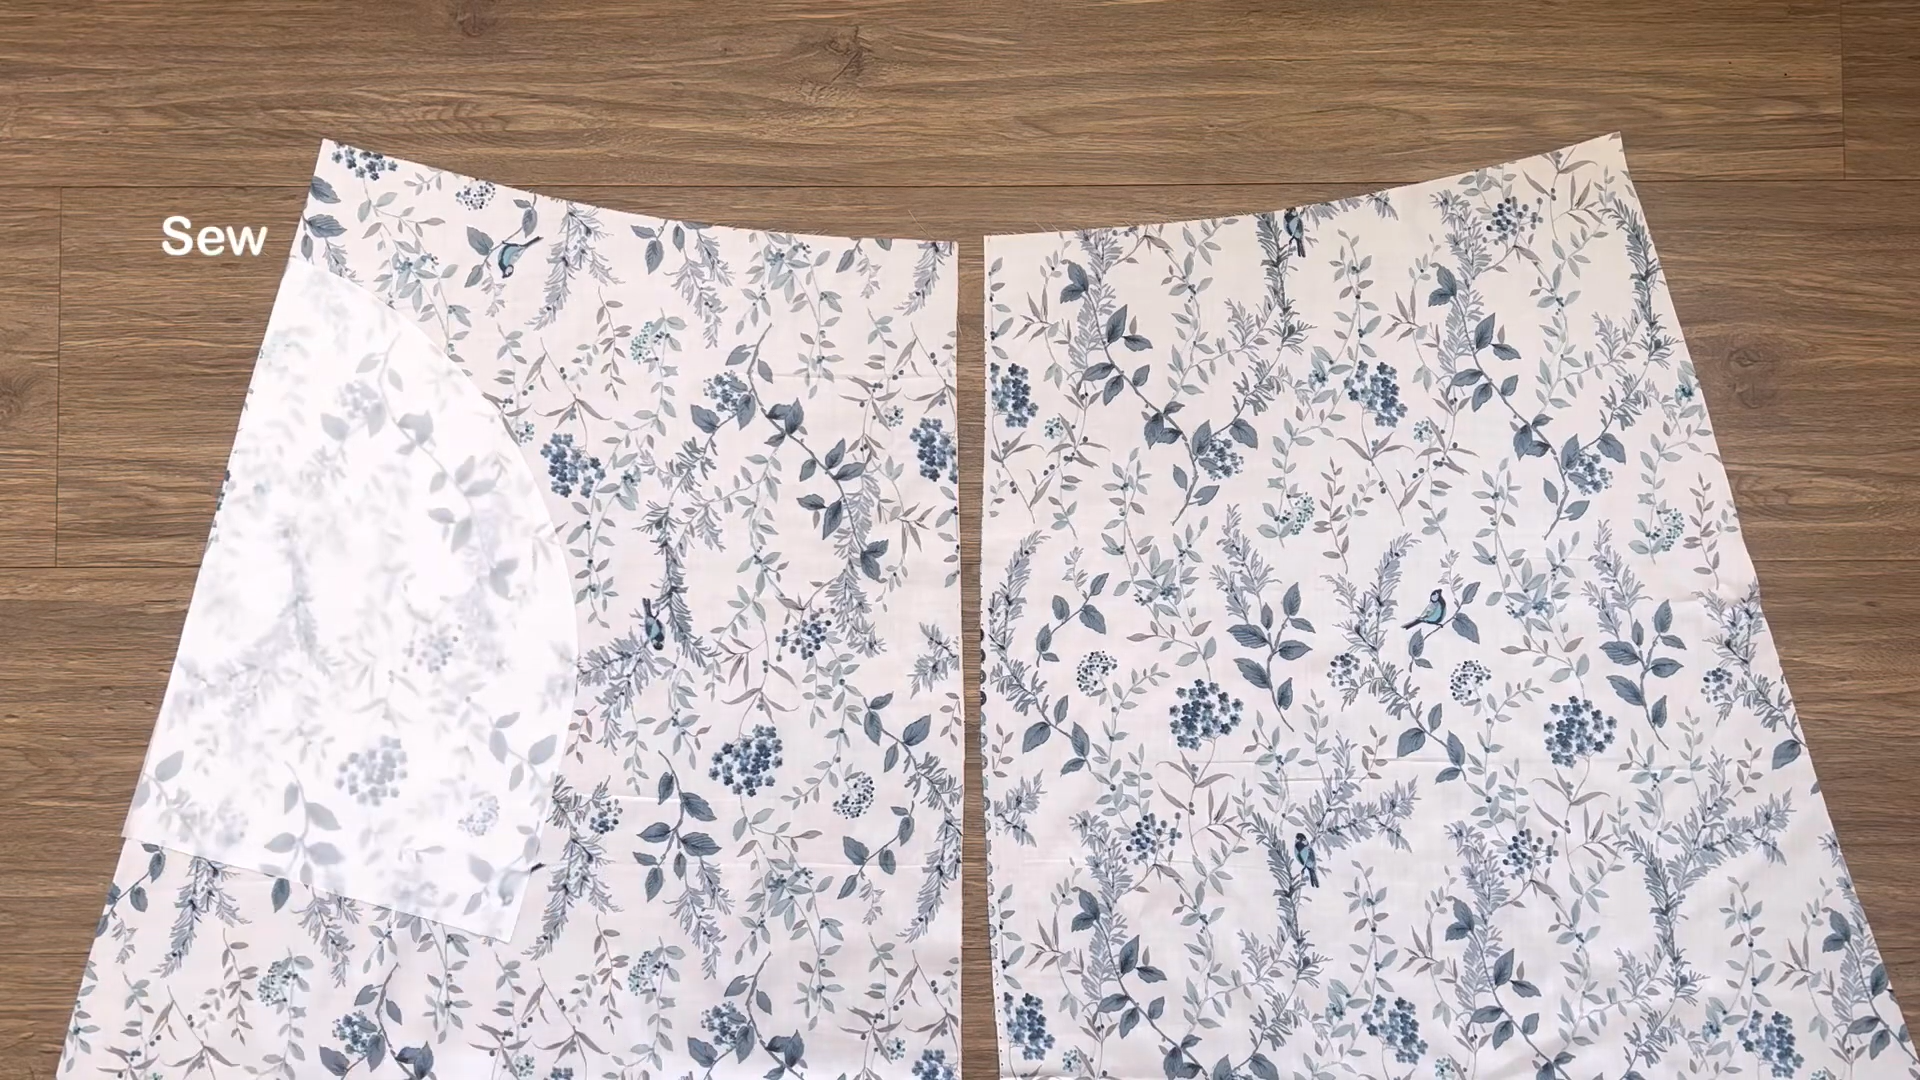
Sew the front and back skirt together along the side seams.
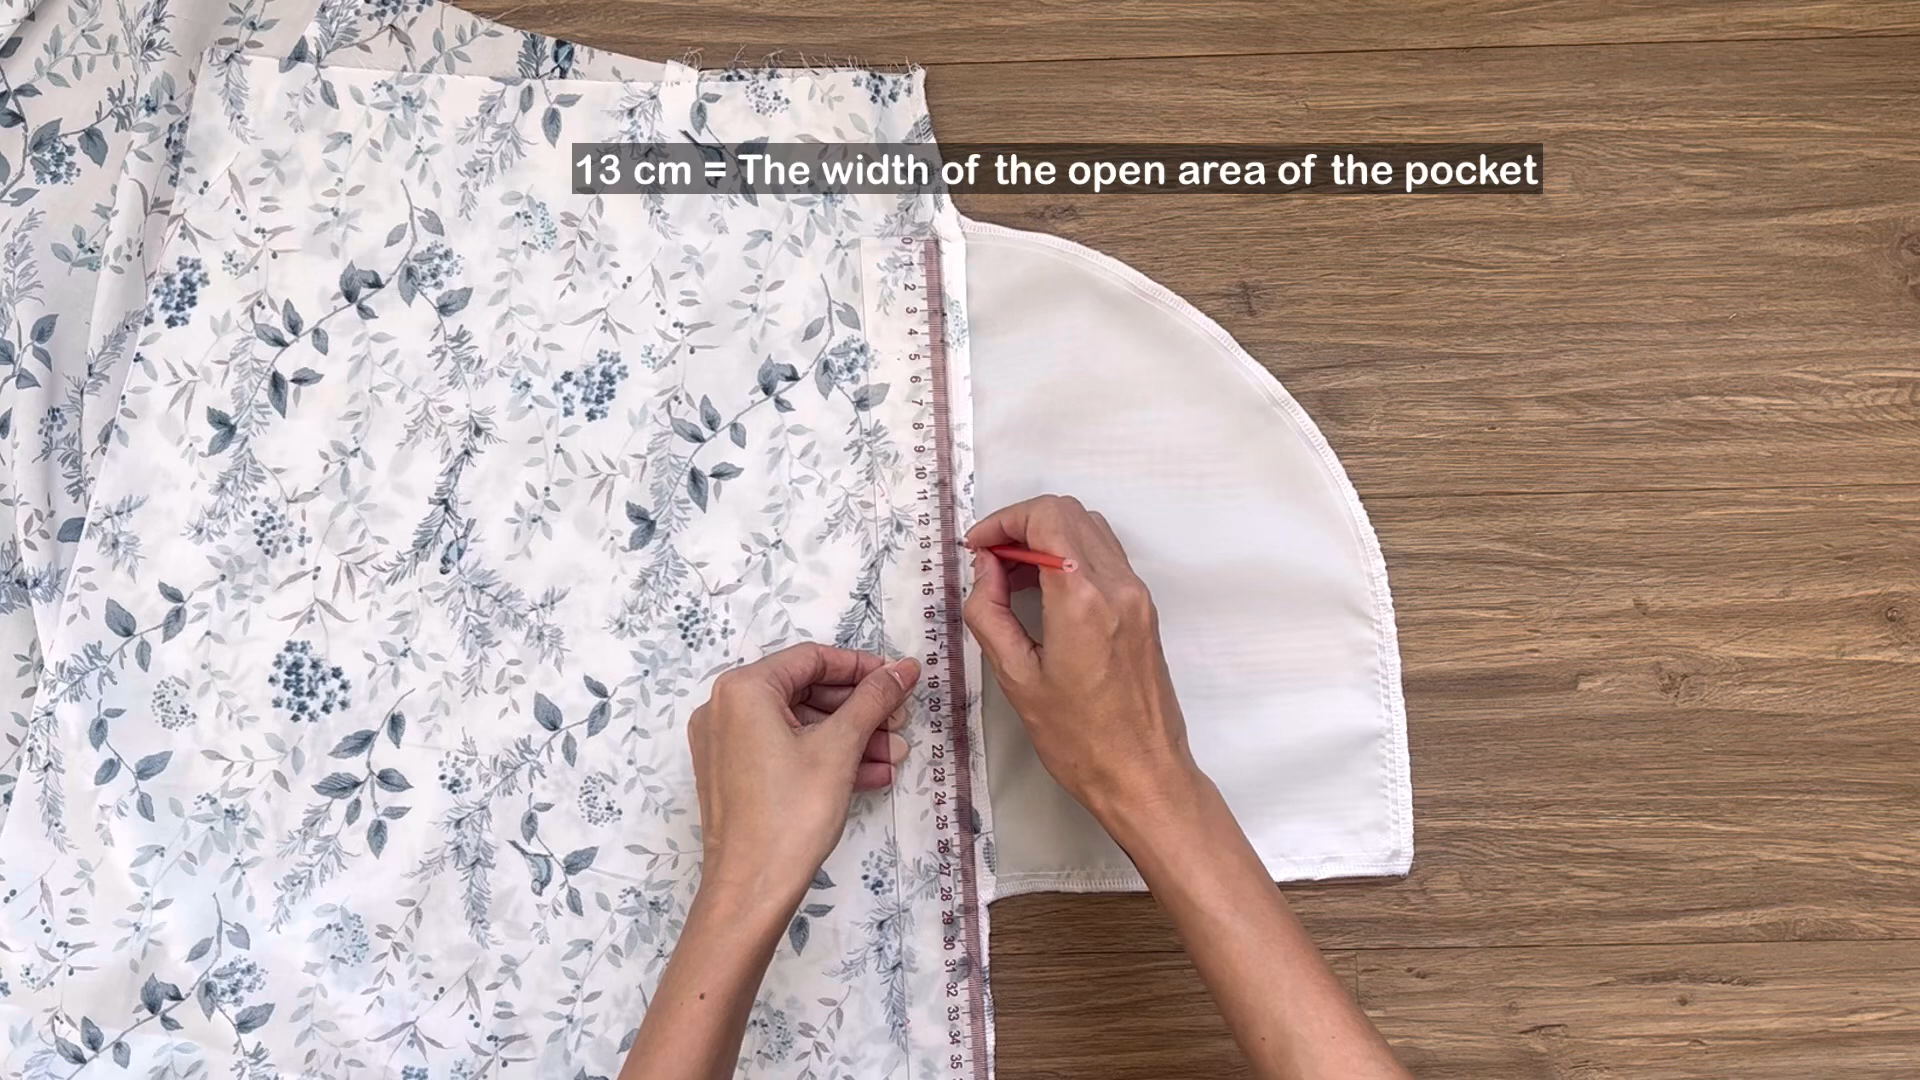
Measure 13 cm down from the top of each pocket opening and mark with a pen. This is the open area of your pocket.
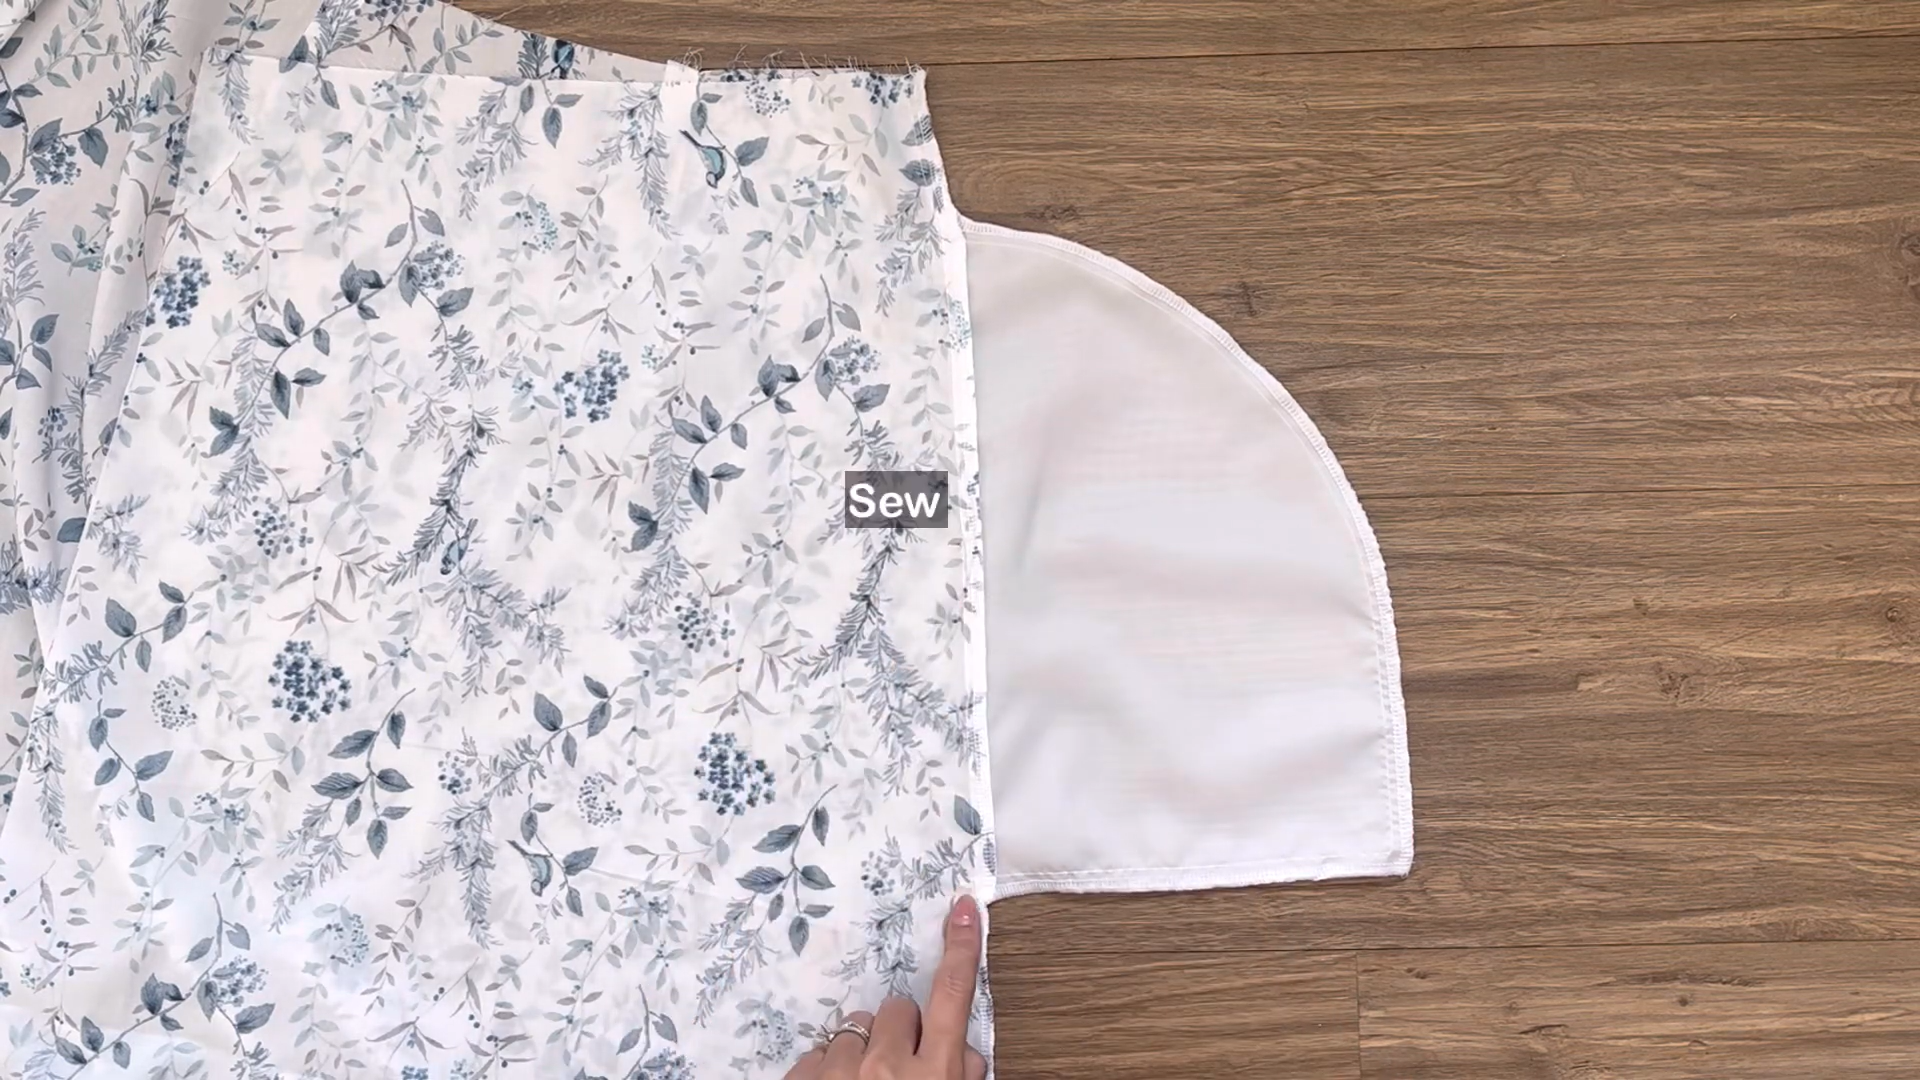
Sew the rest of the pocket starting from the mark down to the pocket’s end.
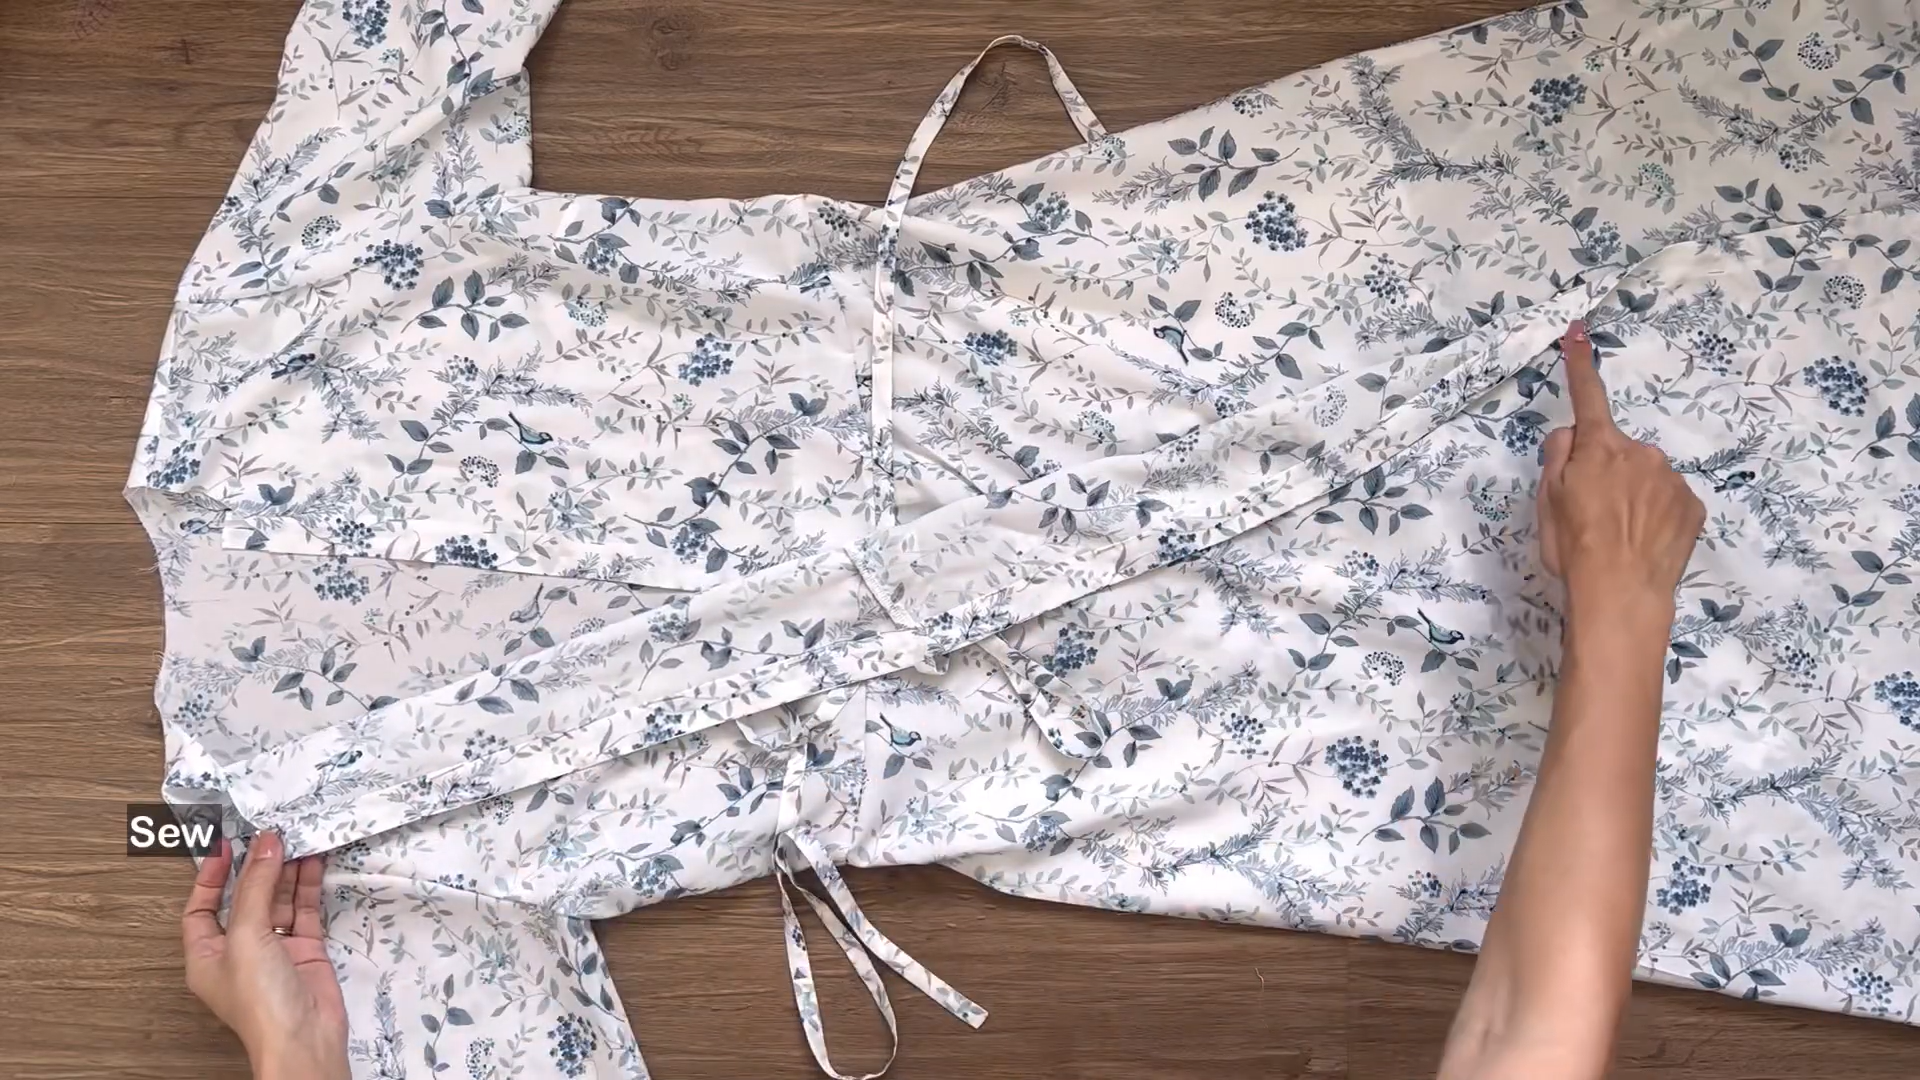
CONNECT THE PARTS TOGETHER
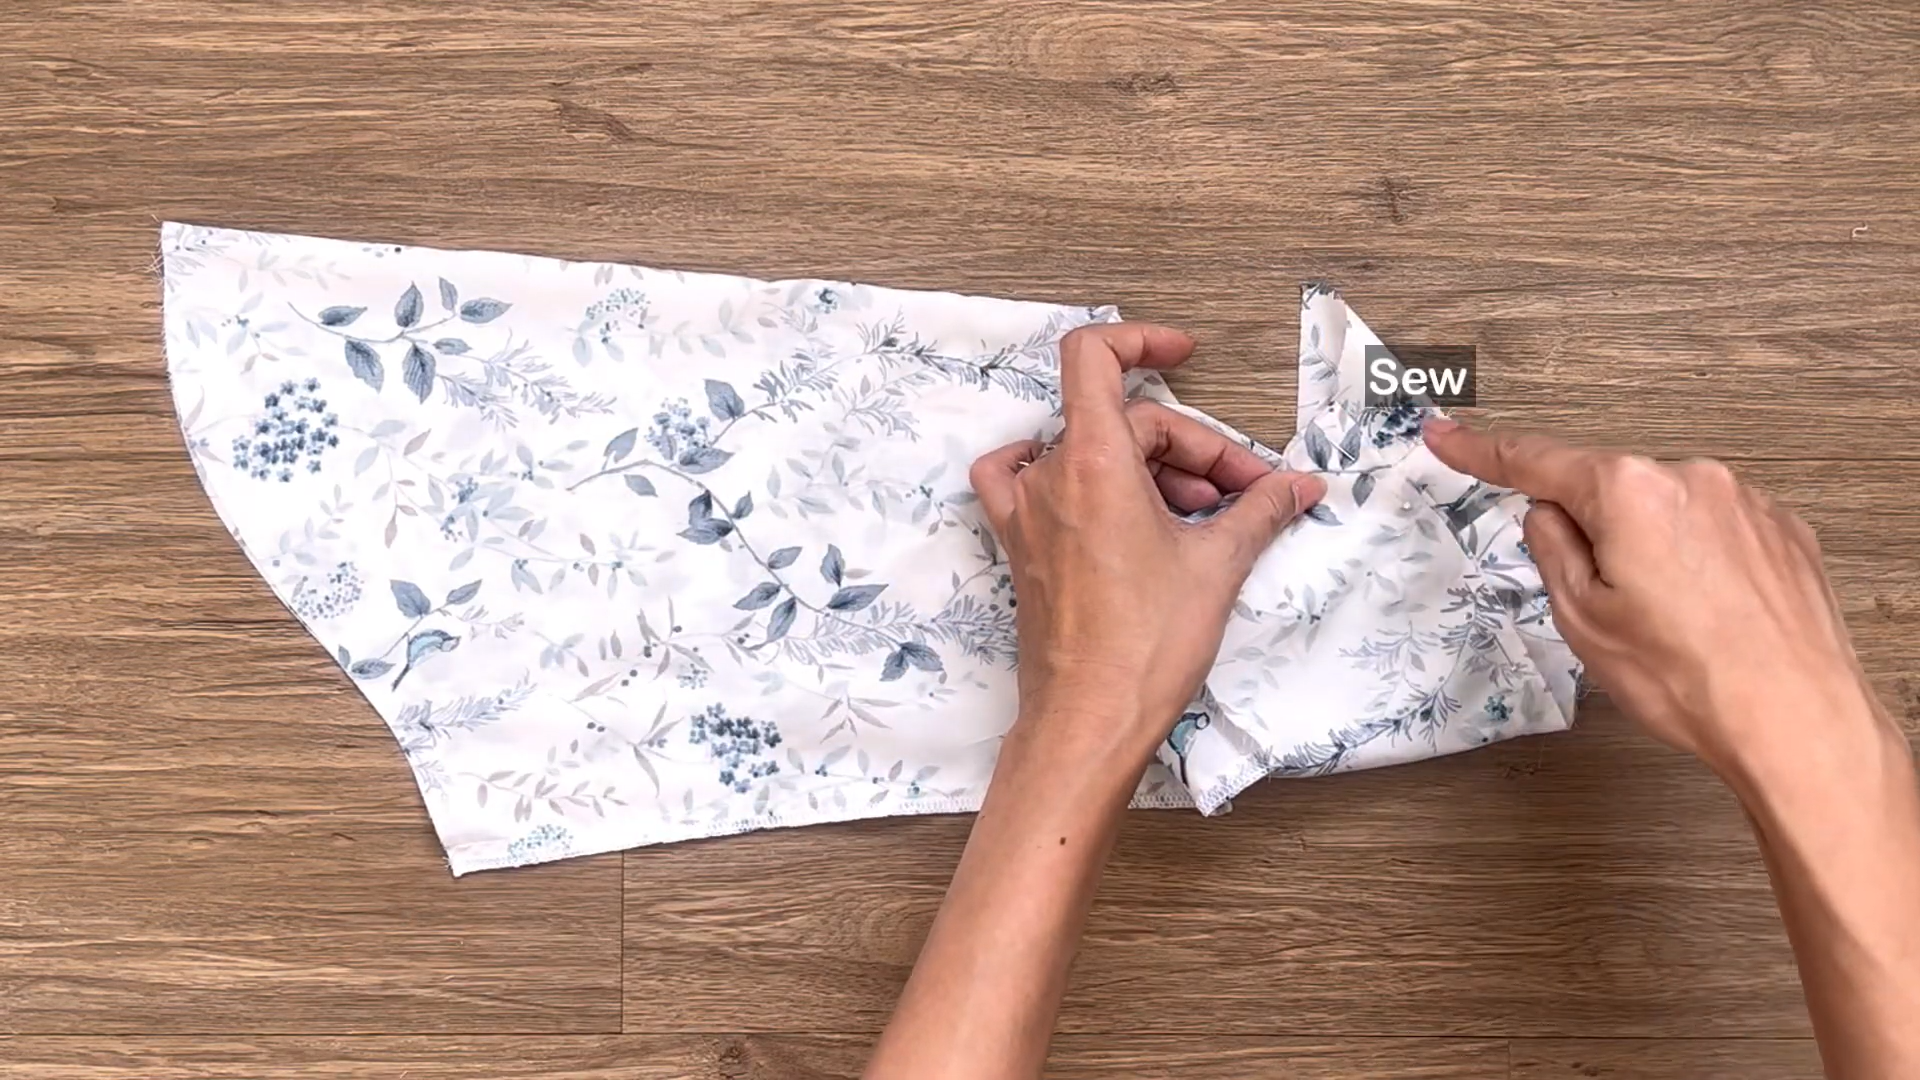
Connect the sleeves to the main bodice at the sleeve lines.
Cut a fabric strip with 4 cm width and the length is larger that the length of the dress.
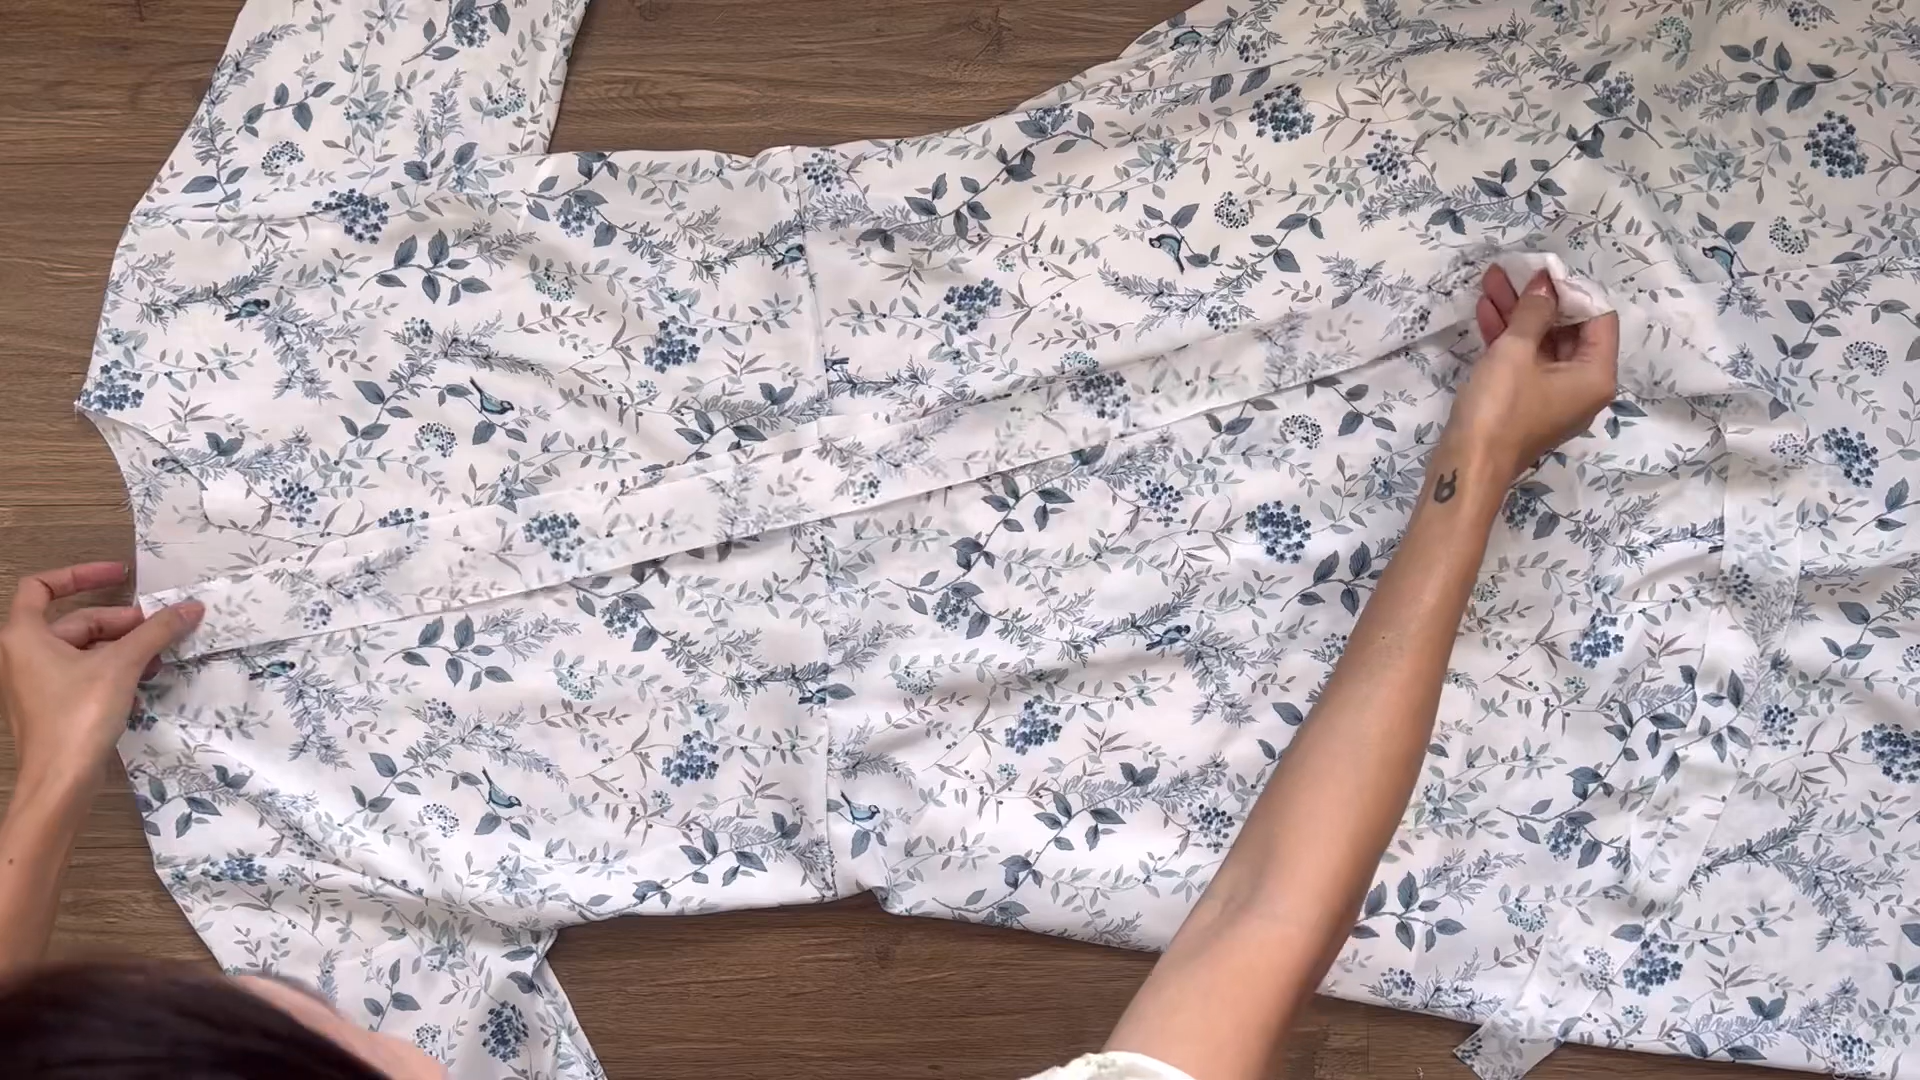
Attach one side of the fabric strip to the edge line of the front dress, starting from the bodice and extending down to the skirt.
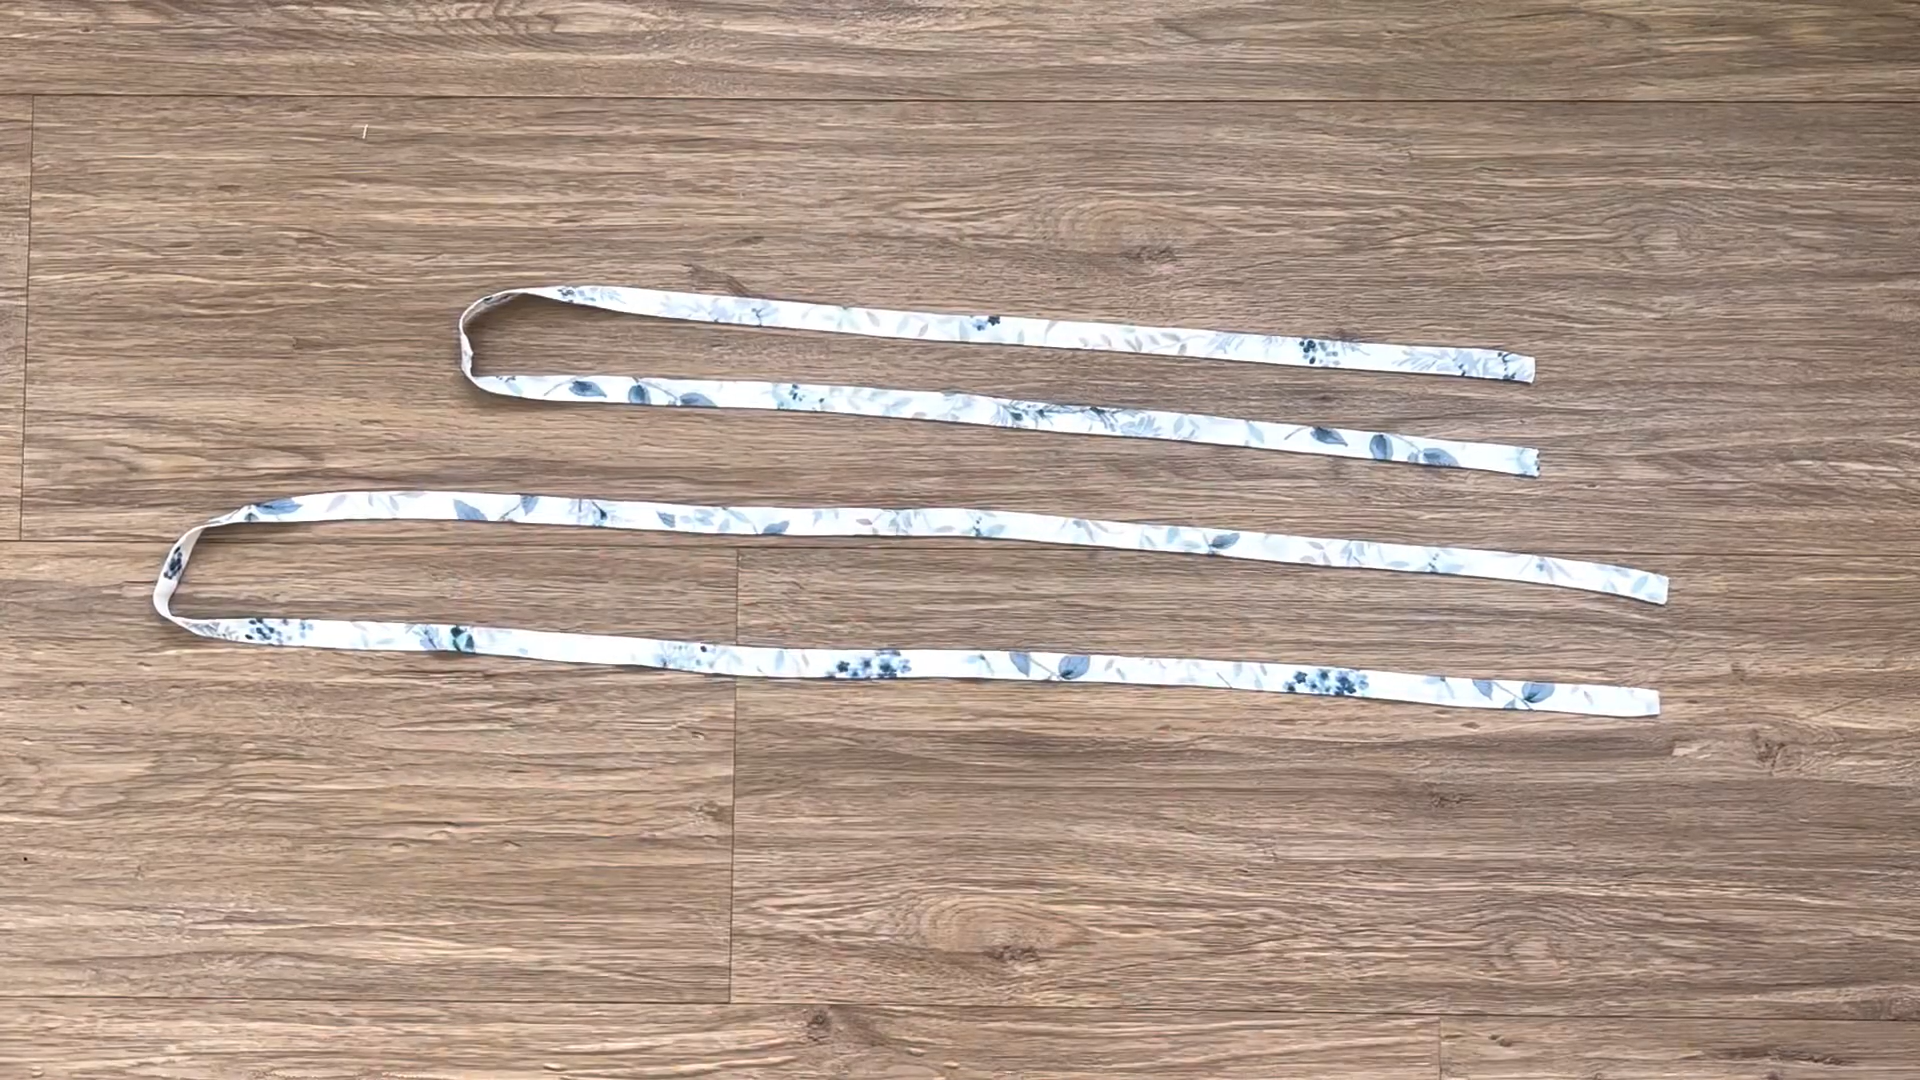
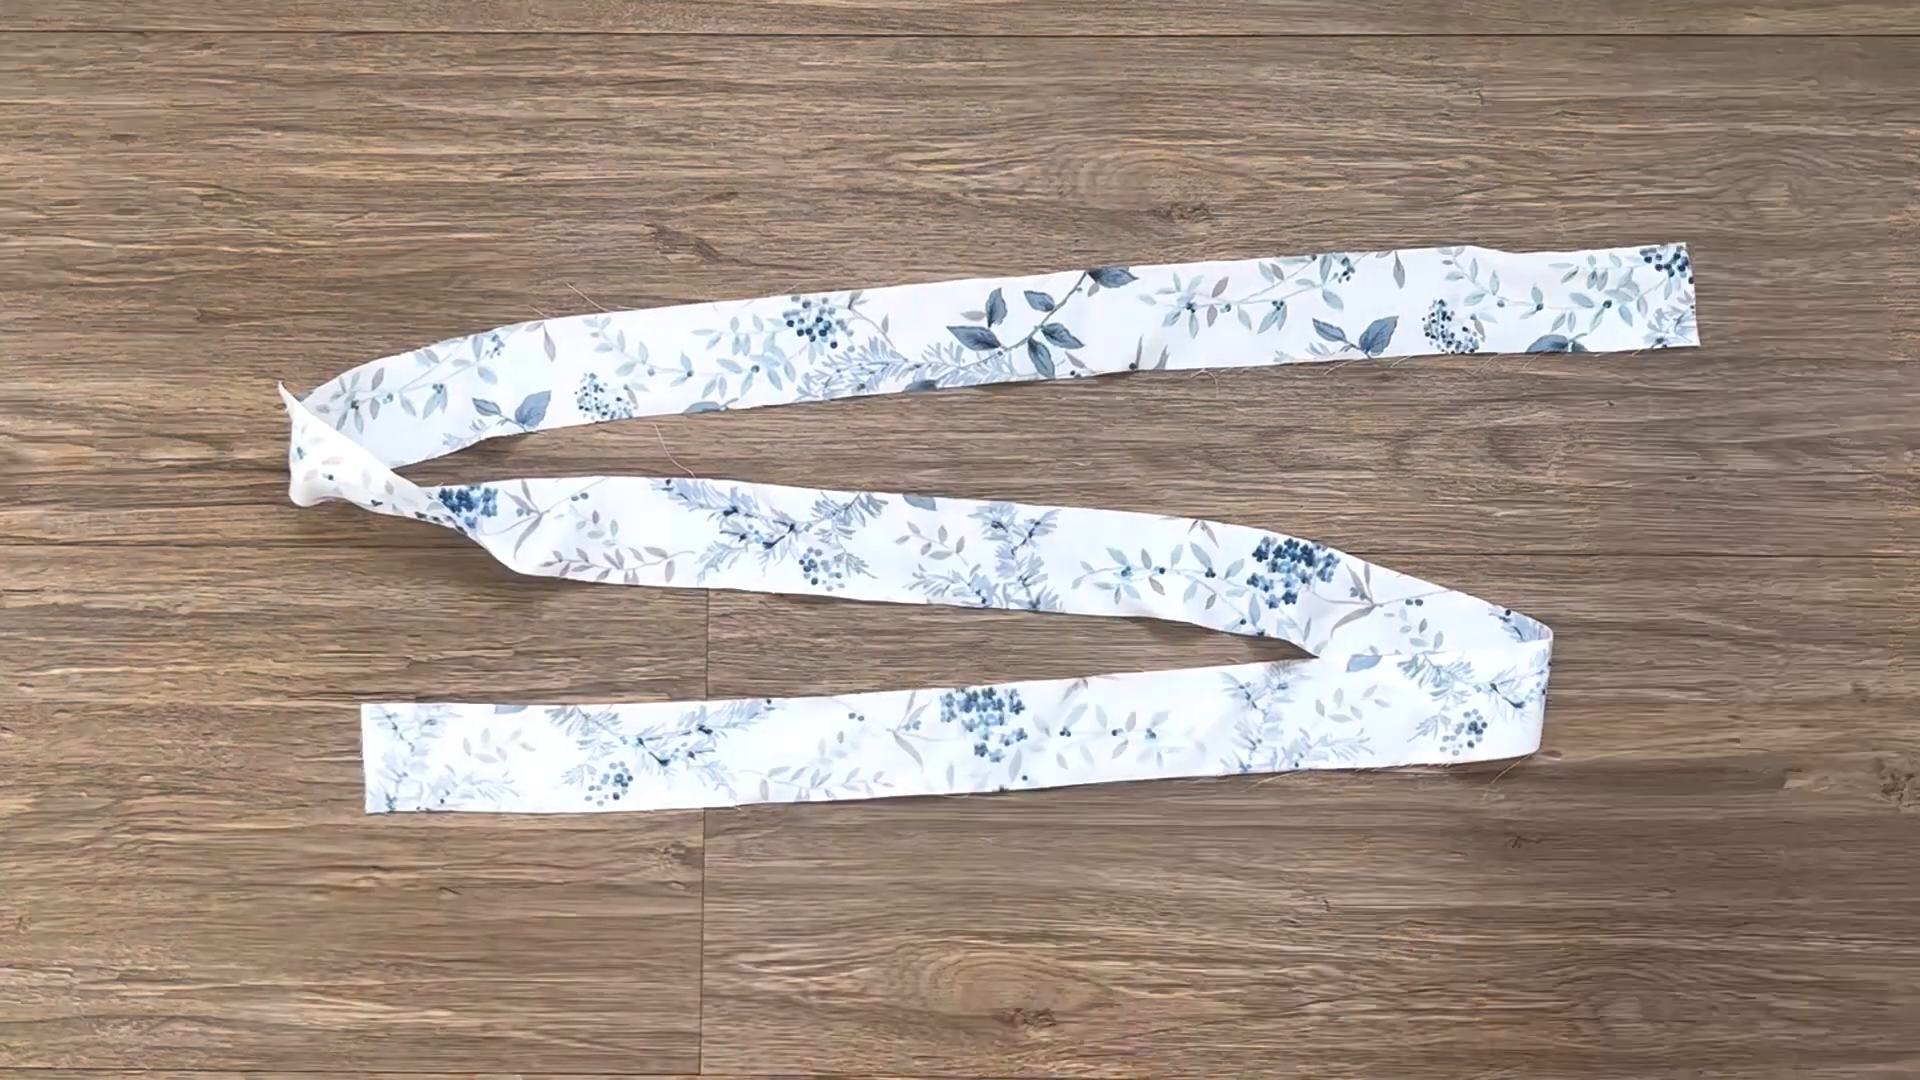
Cut 2 thin fabric strips to make the ties for the dress.
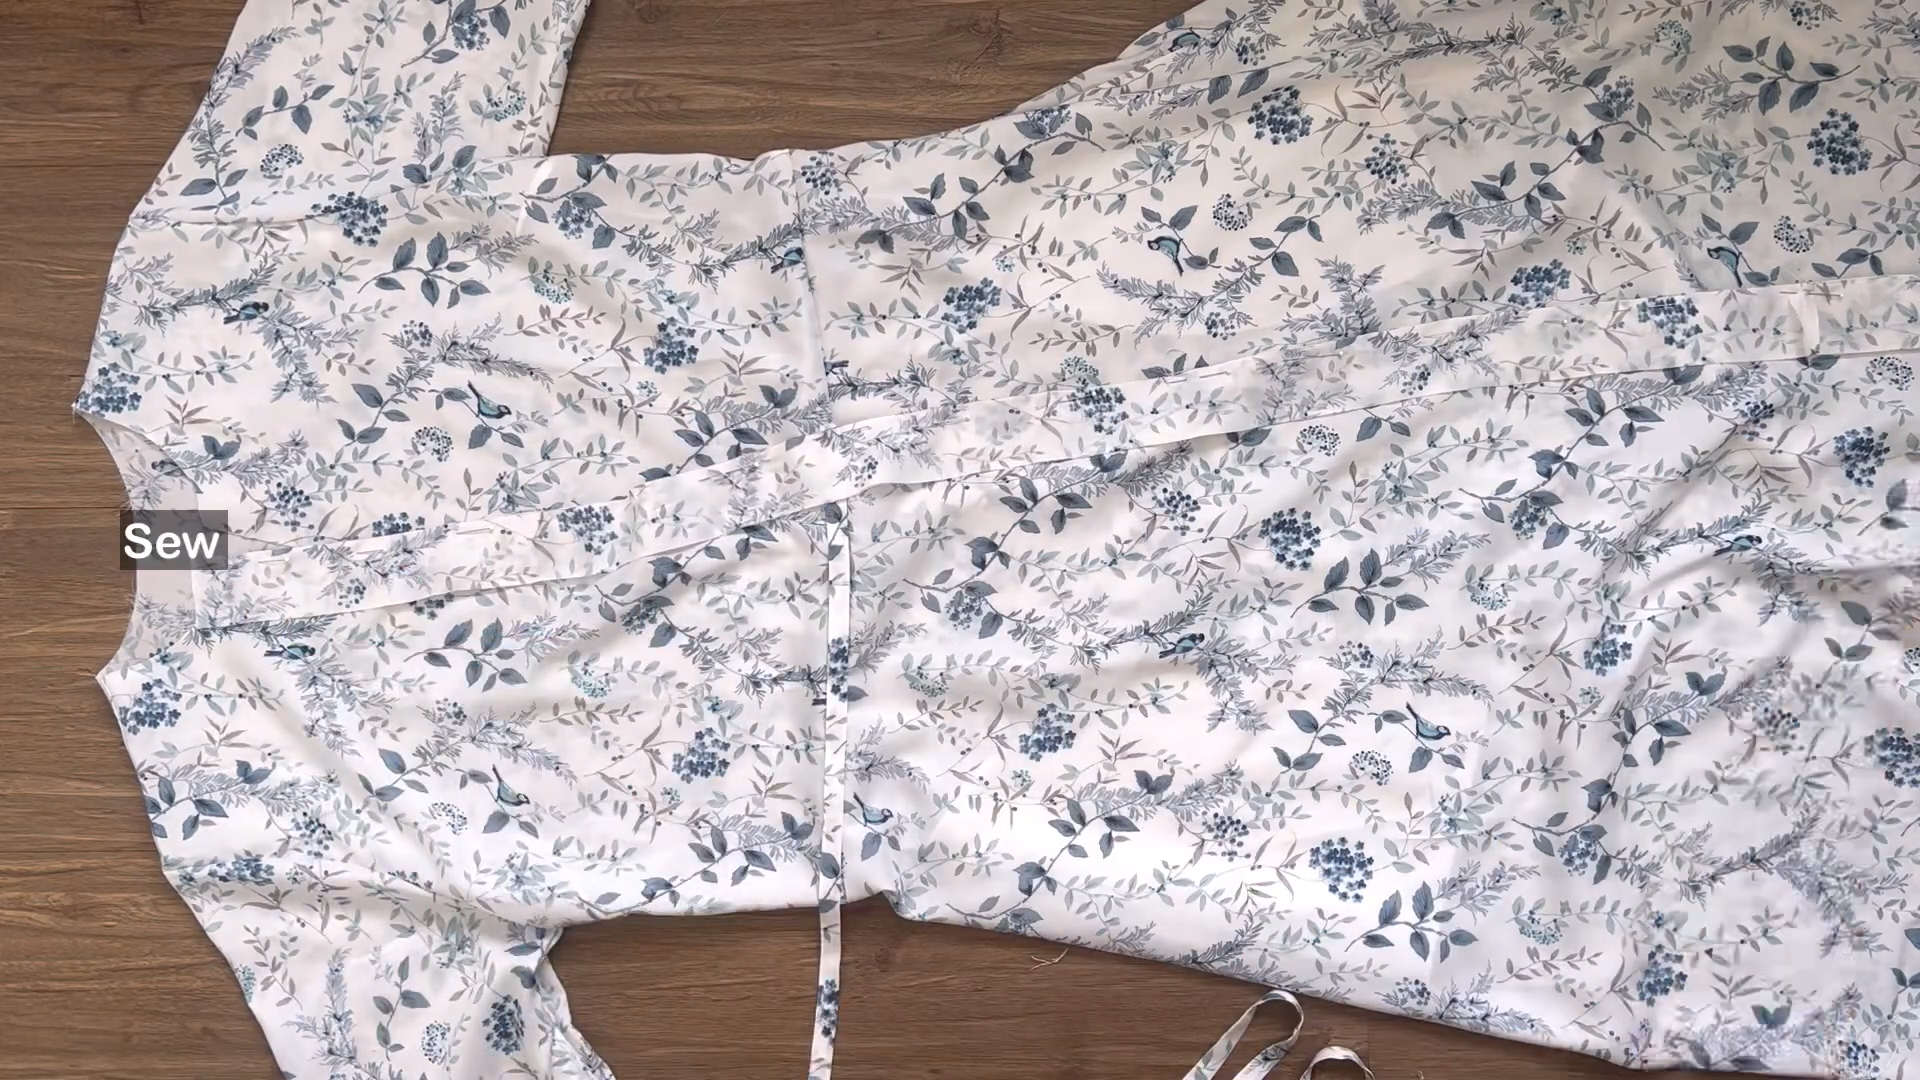
Place the ties to the middle between the fabric line and the front dress. Sew them together along the fabric line.
After sewing, fold the other side of the fabric strip inward by 1 cm.
Turn the fabric strip to the inside of the front dress and stitch it in place.
Fold the end fabric inside twice with 0.5 cm each.
Stitch along the folded edge to secure the hem.
THE COLLAR
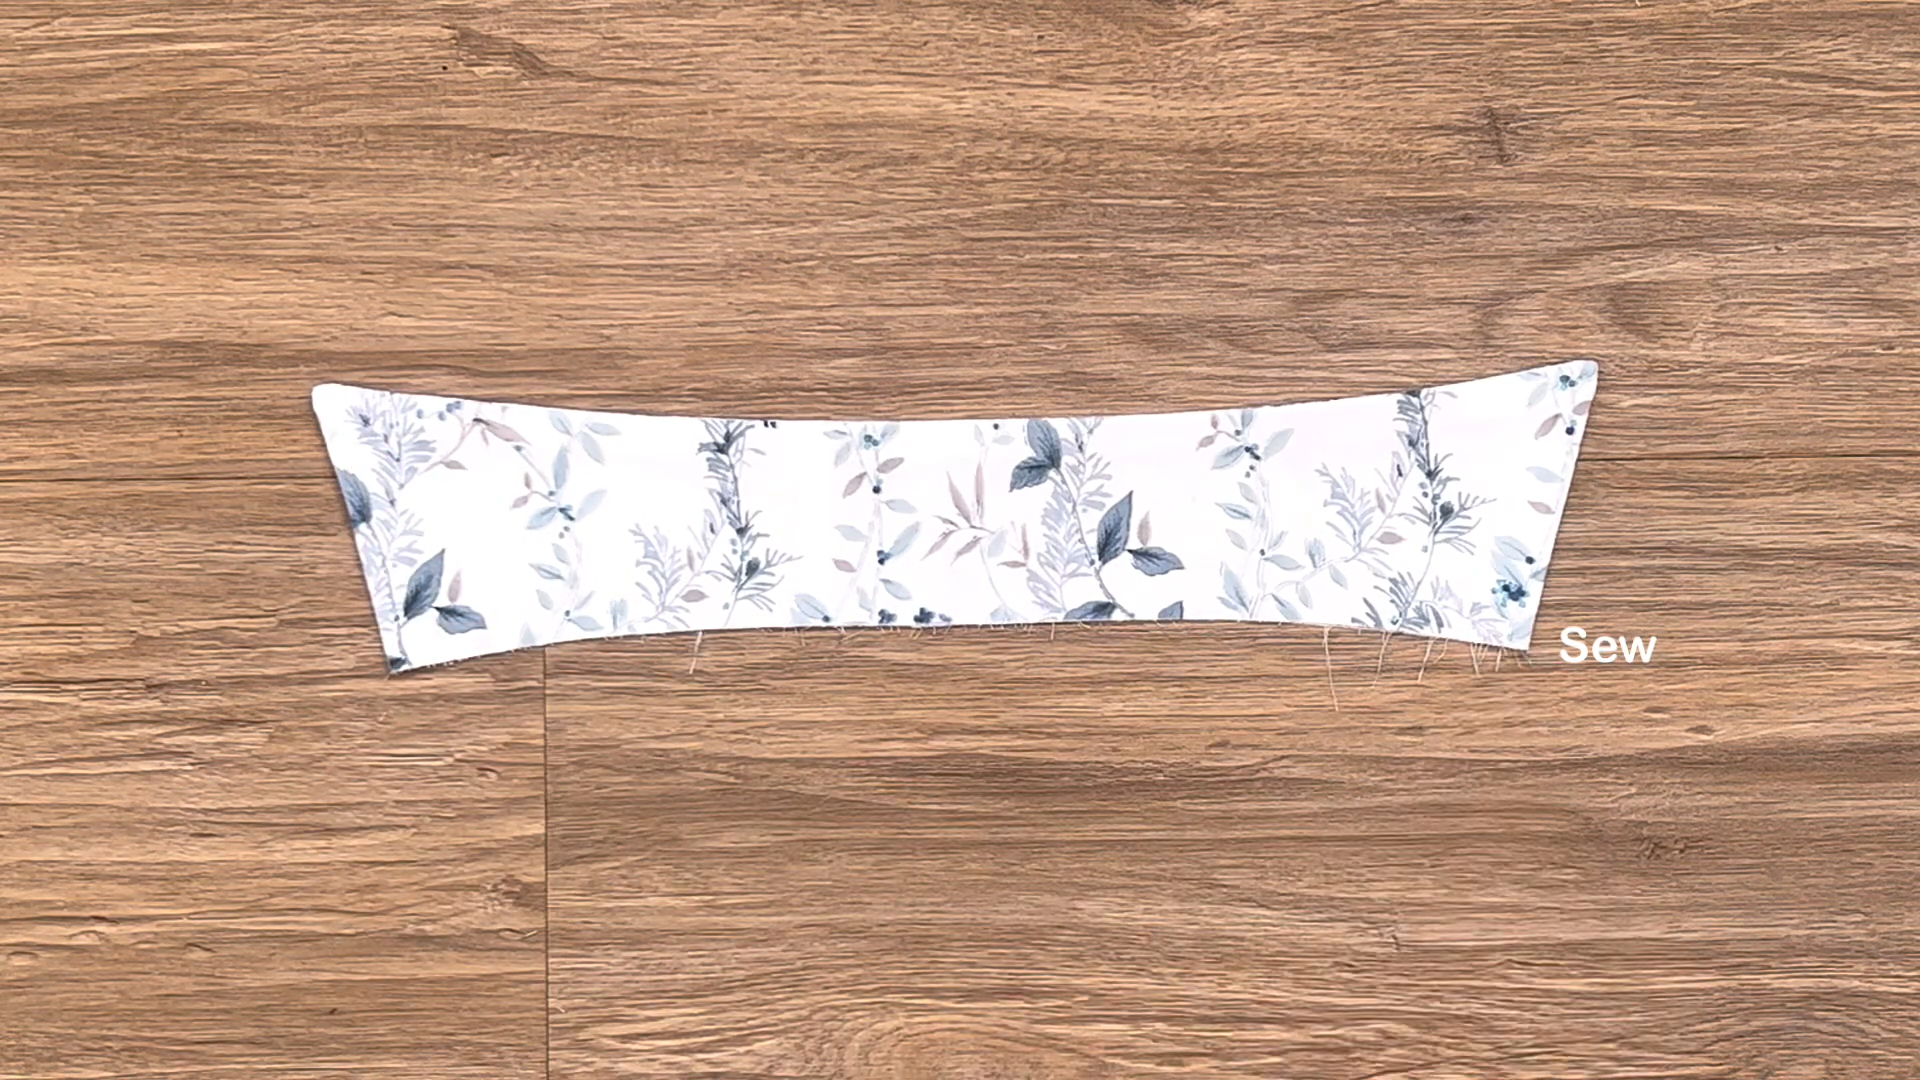
Cut 2 top collar pieces with the collar pattern.
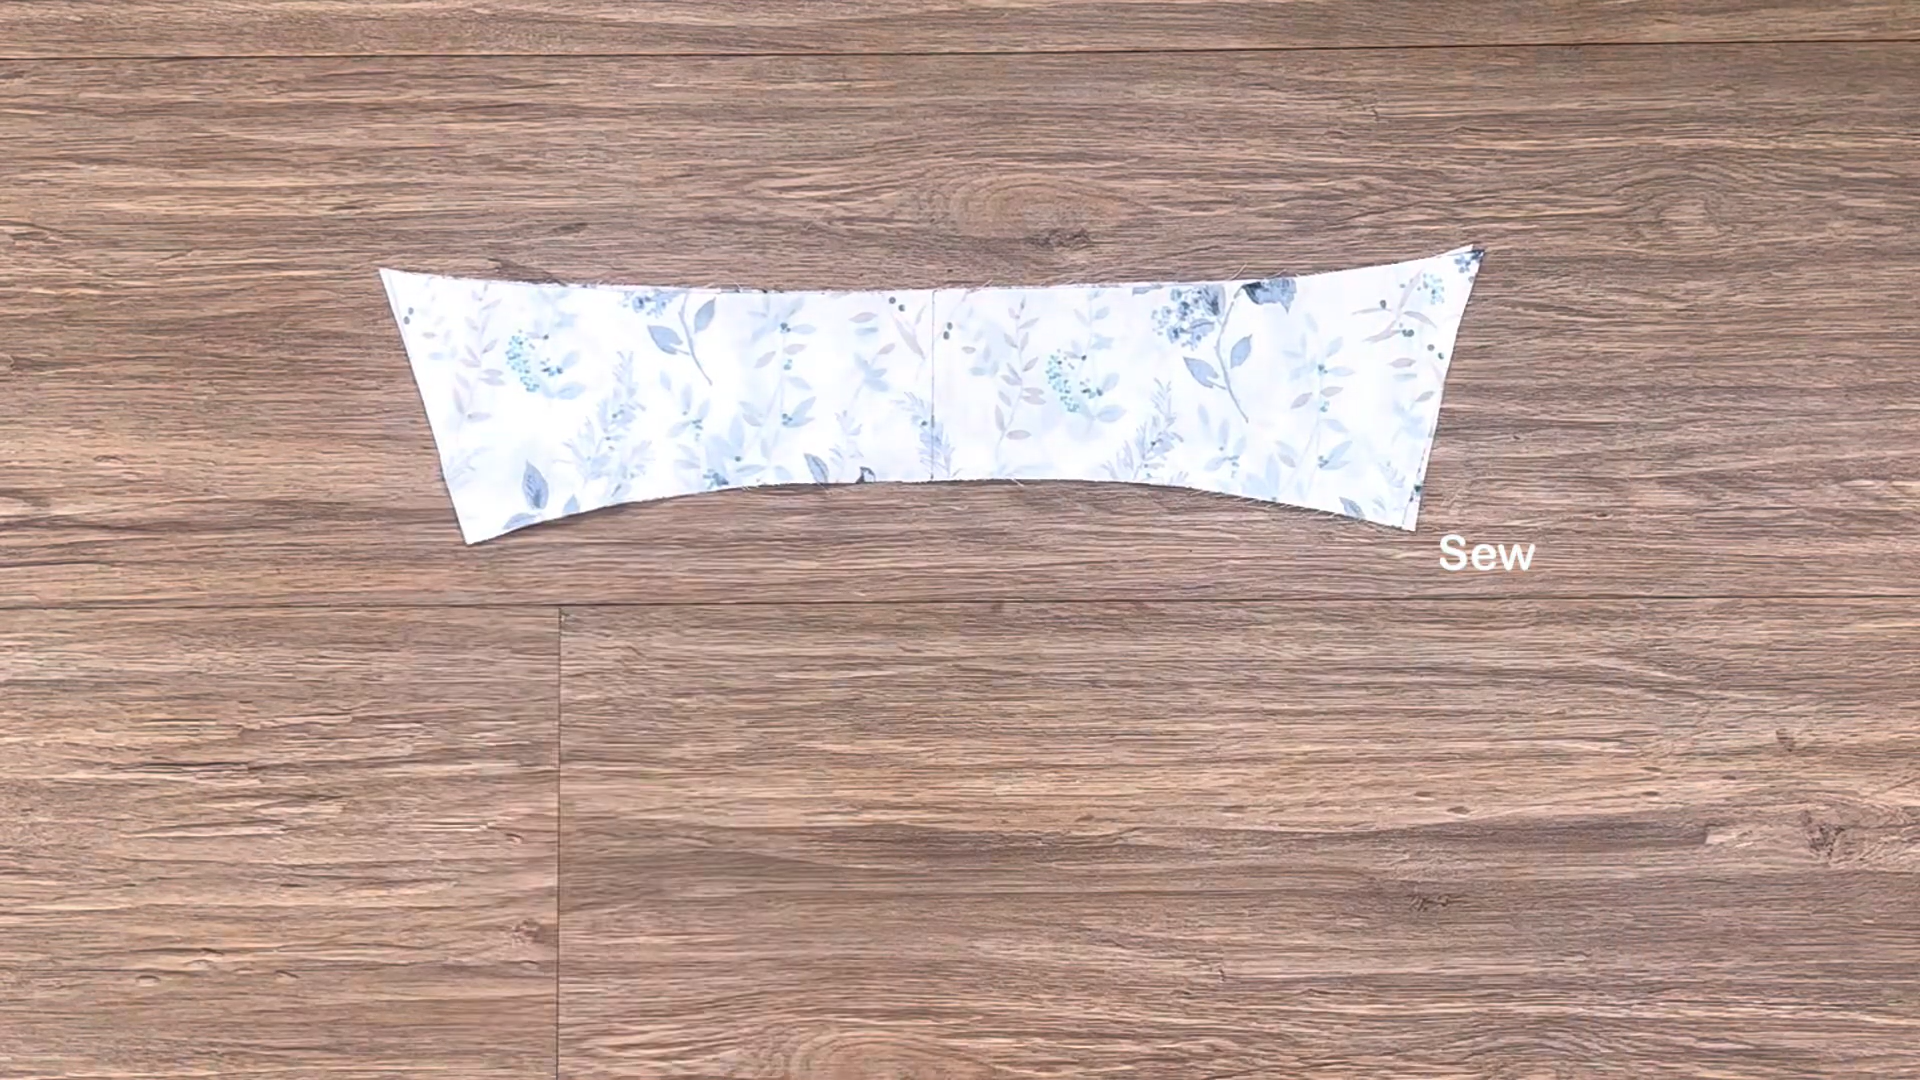
Align the pieces at the top edge and along the side lines.
Stitch along the top and side lines.
Turn the collar pieces inside out (right side facing out). Create a second seam along the edges to reinforce the collar.
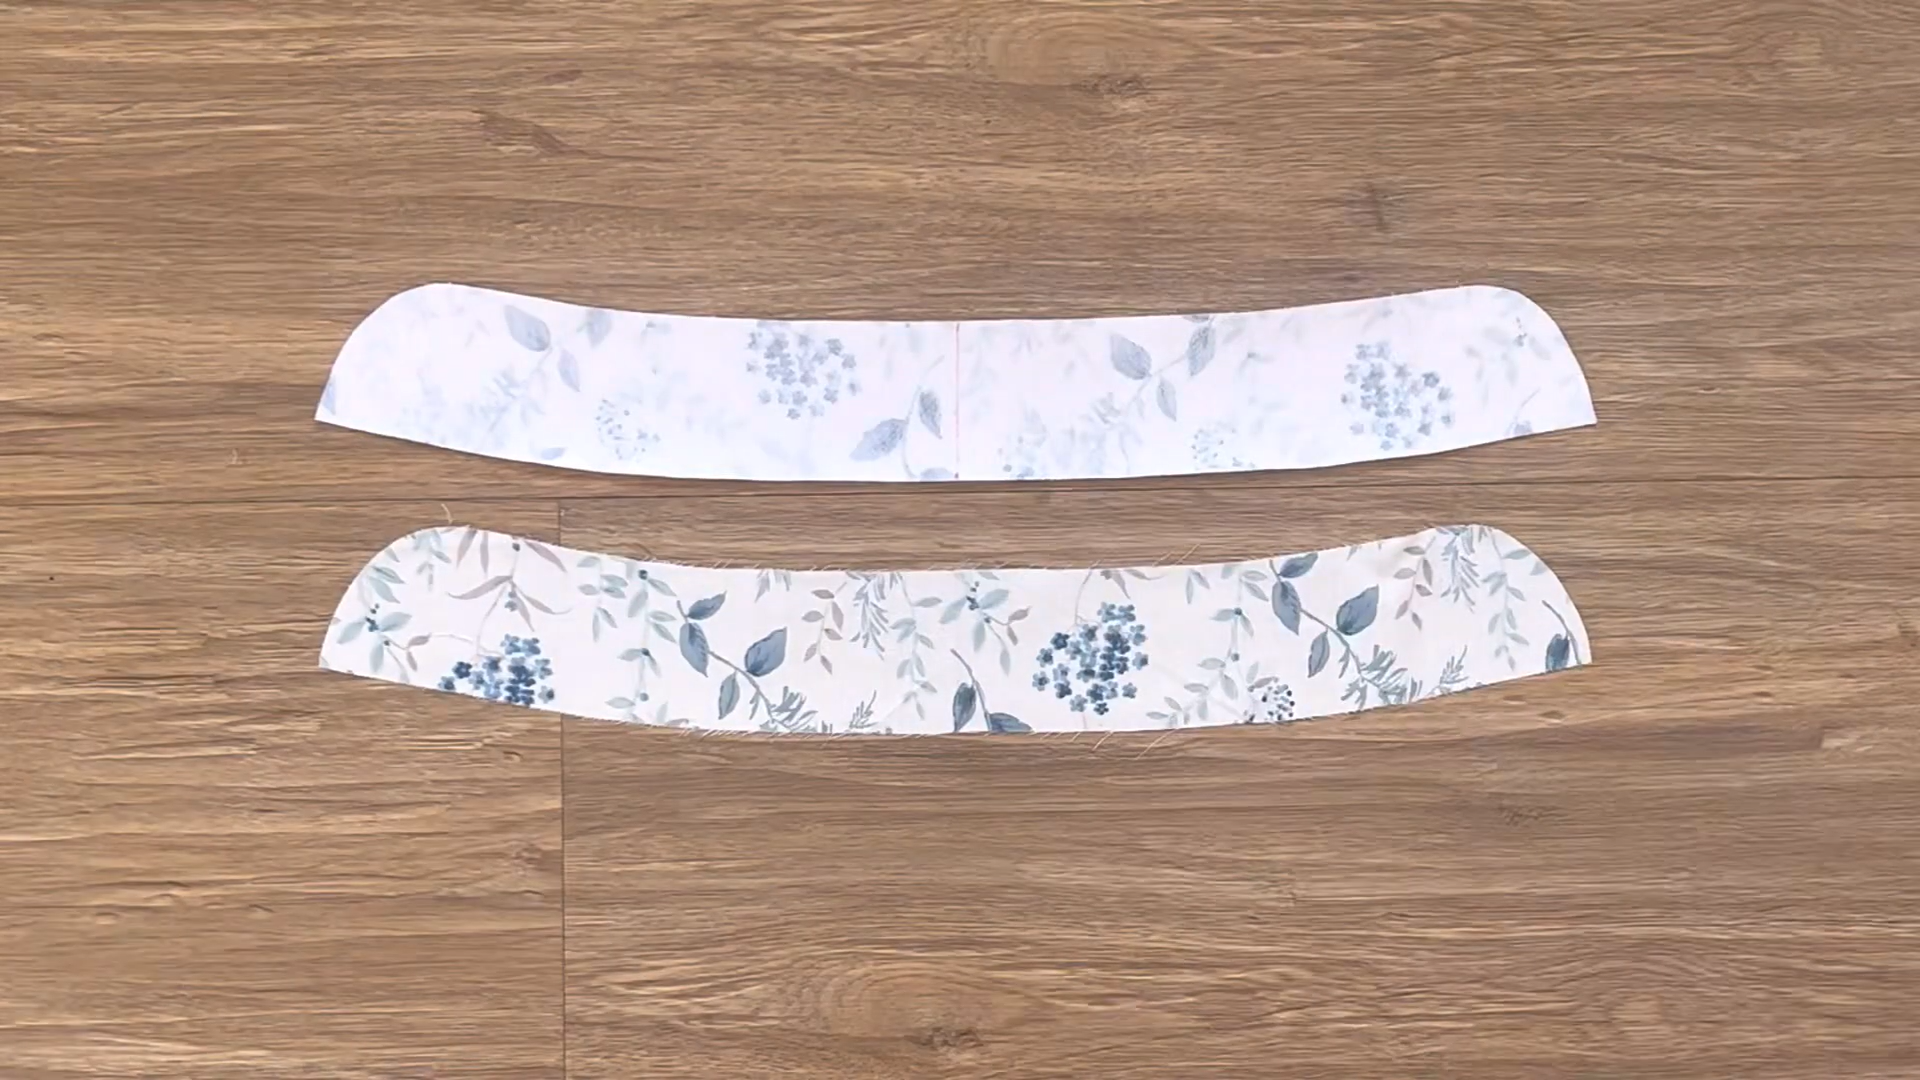
Cut out two bottom collar pieces.
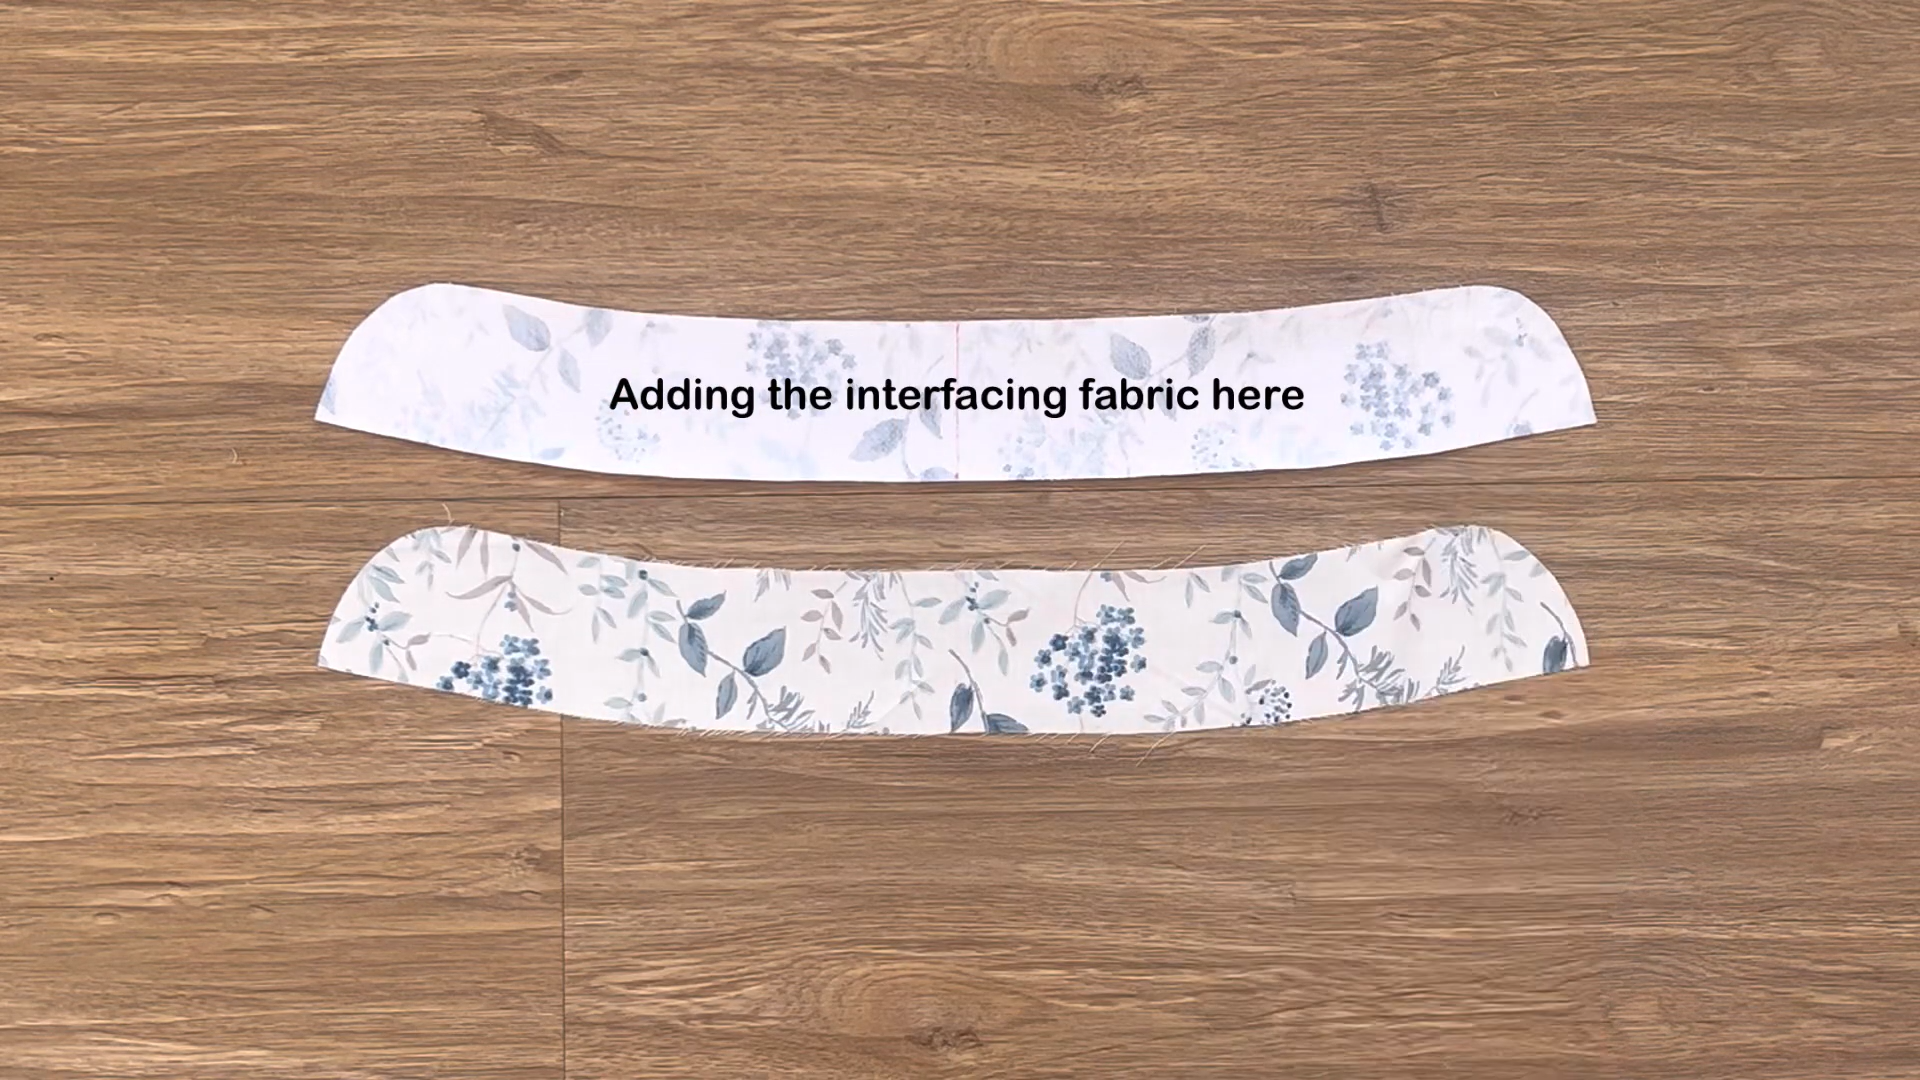
Add interfacing to one piece of the bottom collar part.
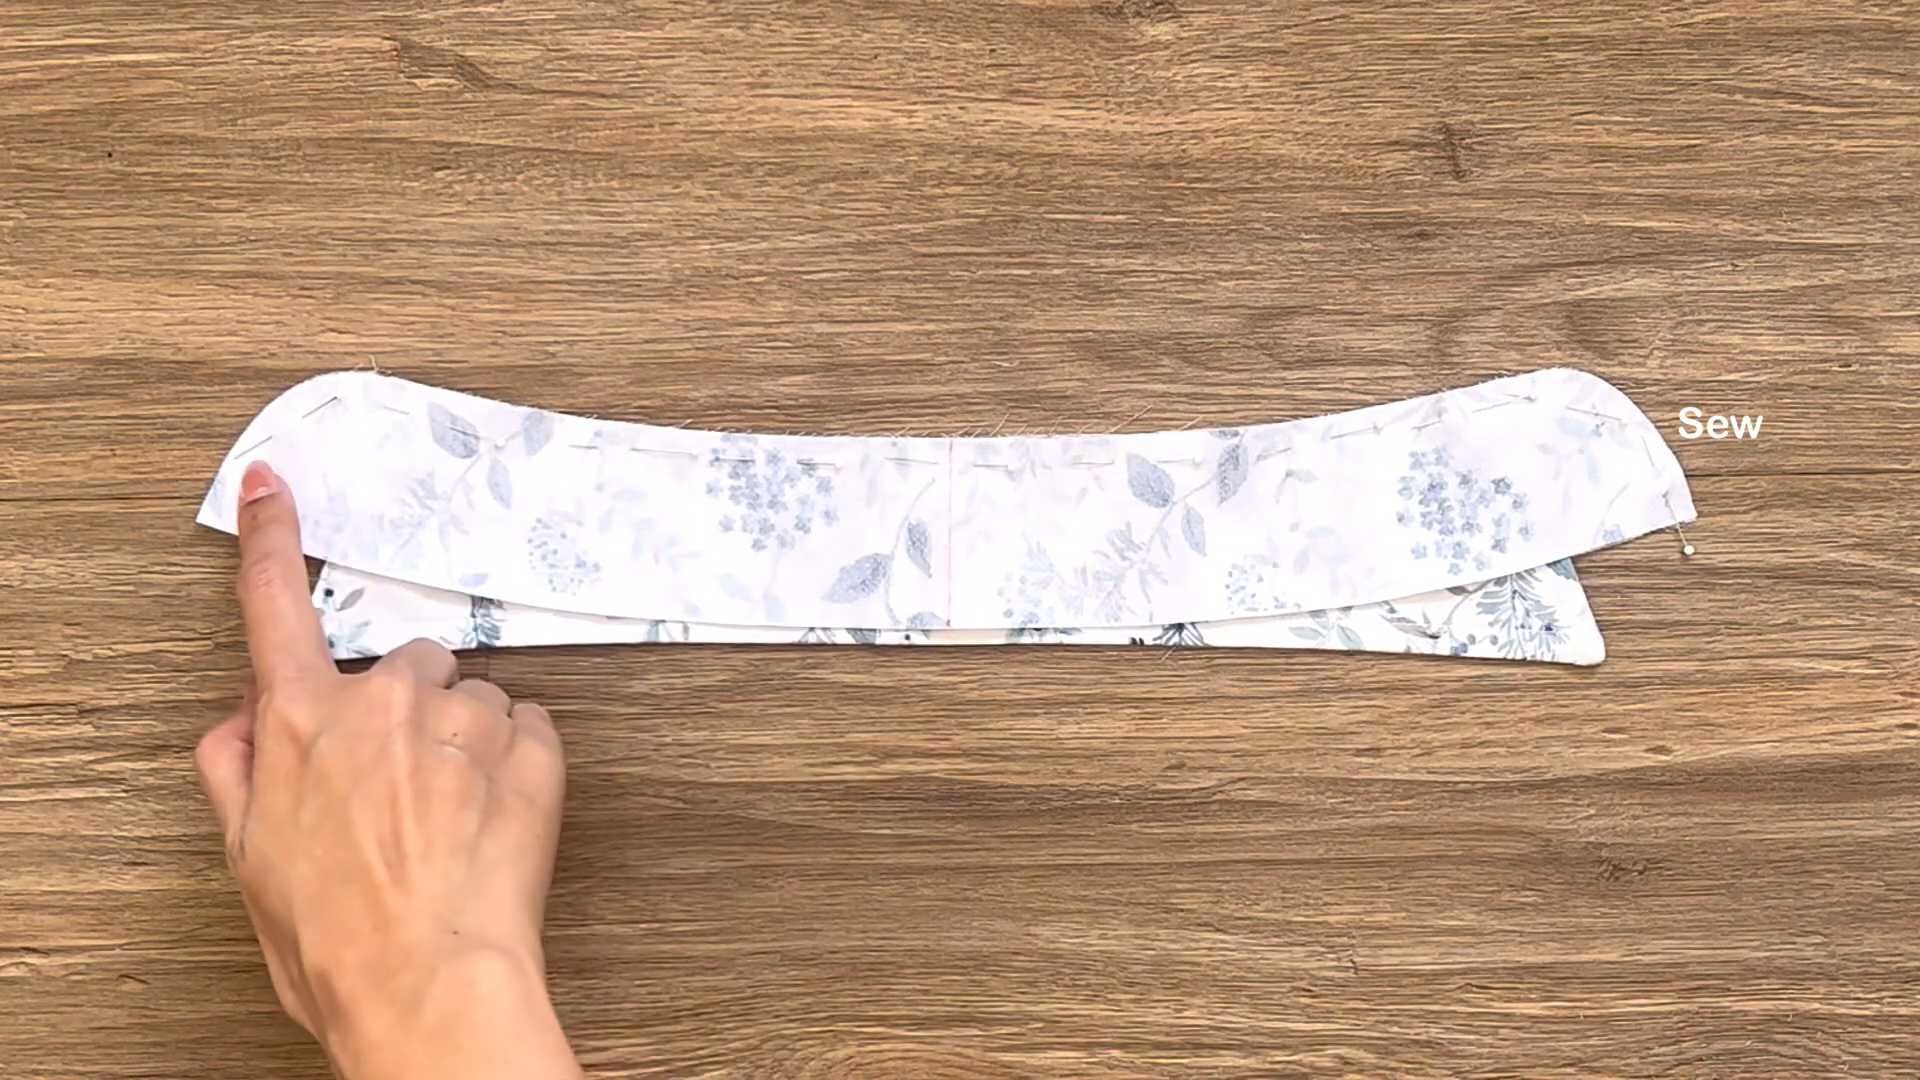
Connect the top collar part with the two bottom collar pieces. Make sure the top sits in the middle between the two bottom pieces.
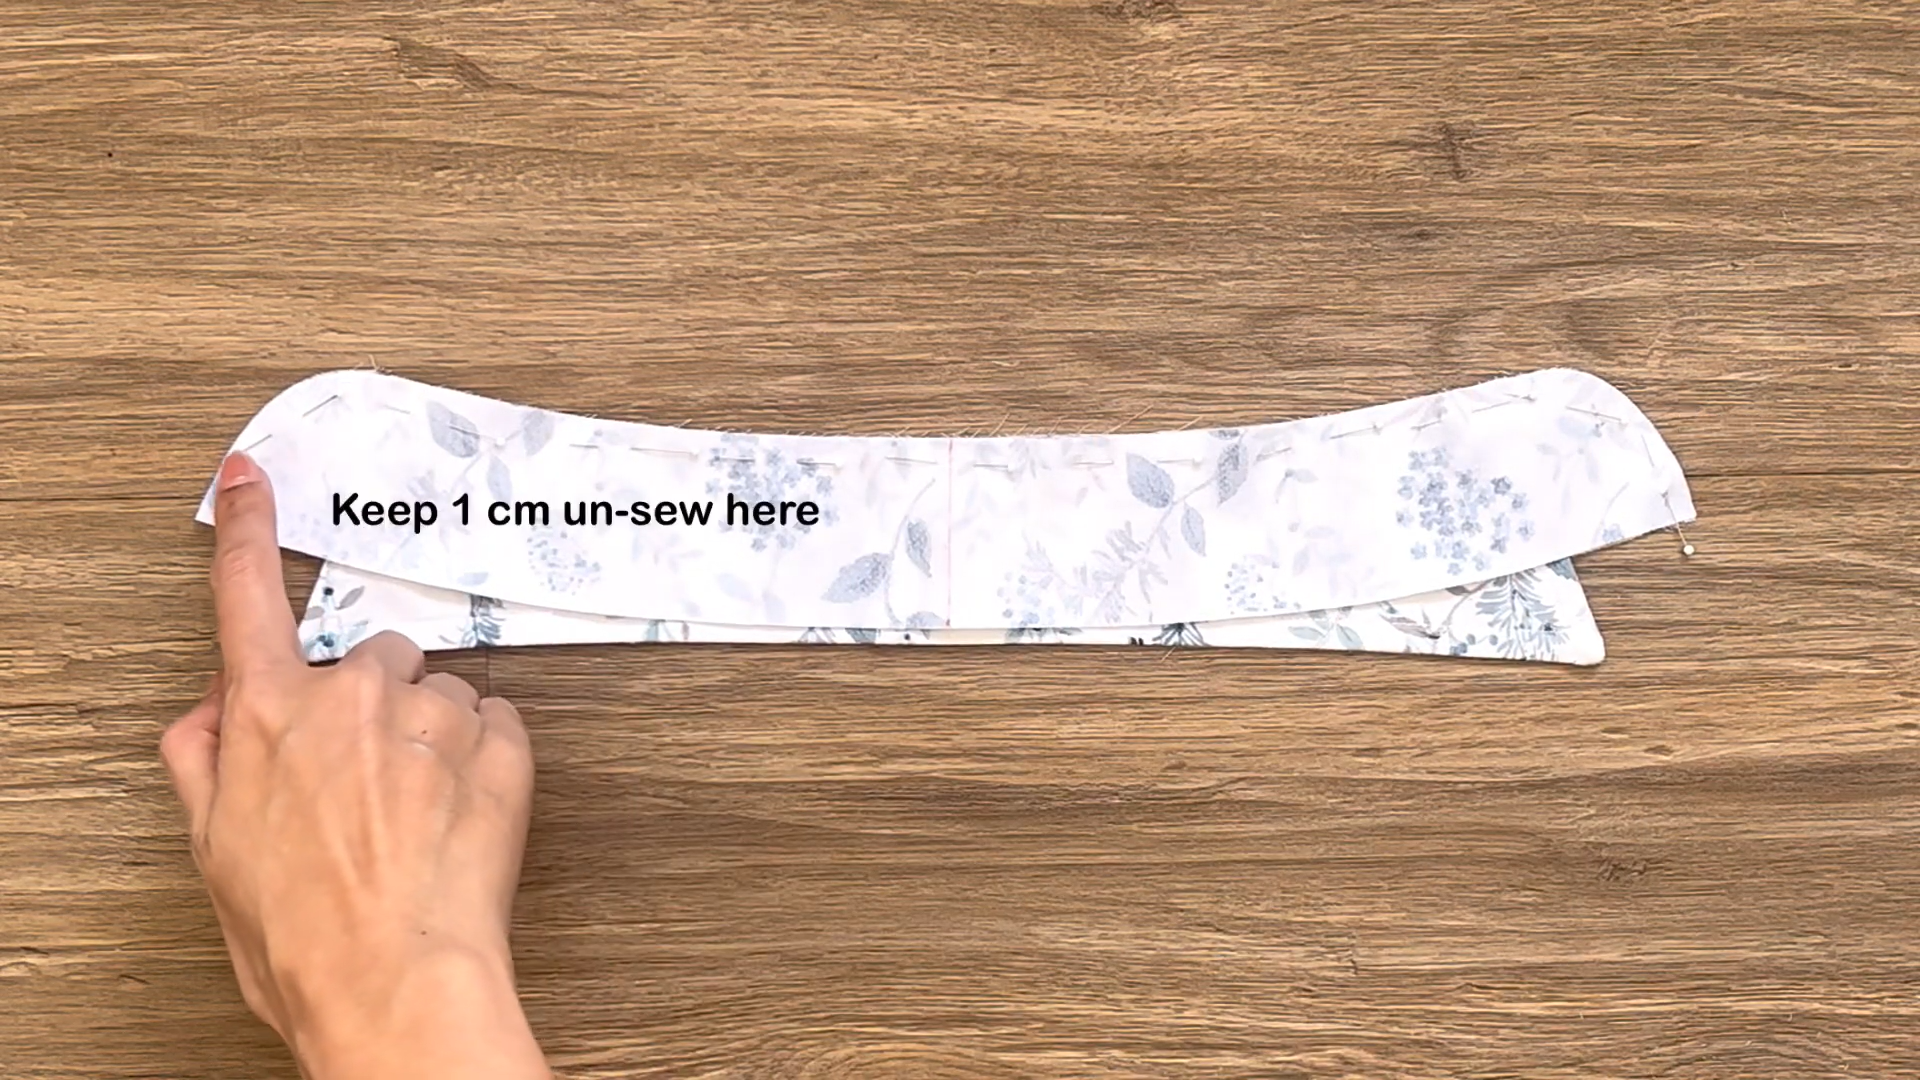
Keep approximately 1 cm unsewn at both ends of the bottom part.
Turn the bottom collar part inside out.
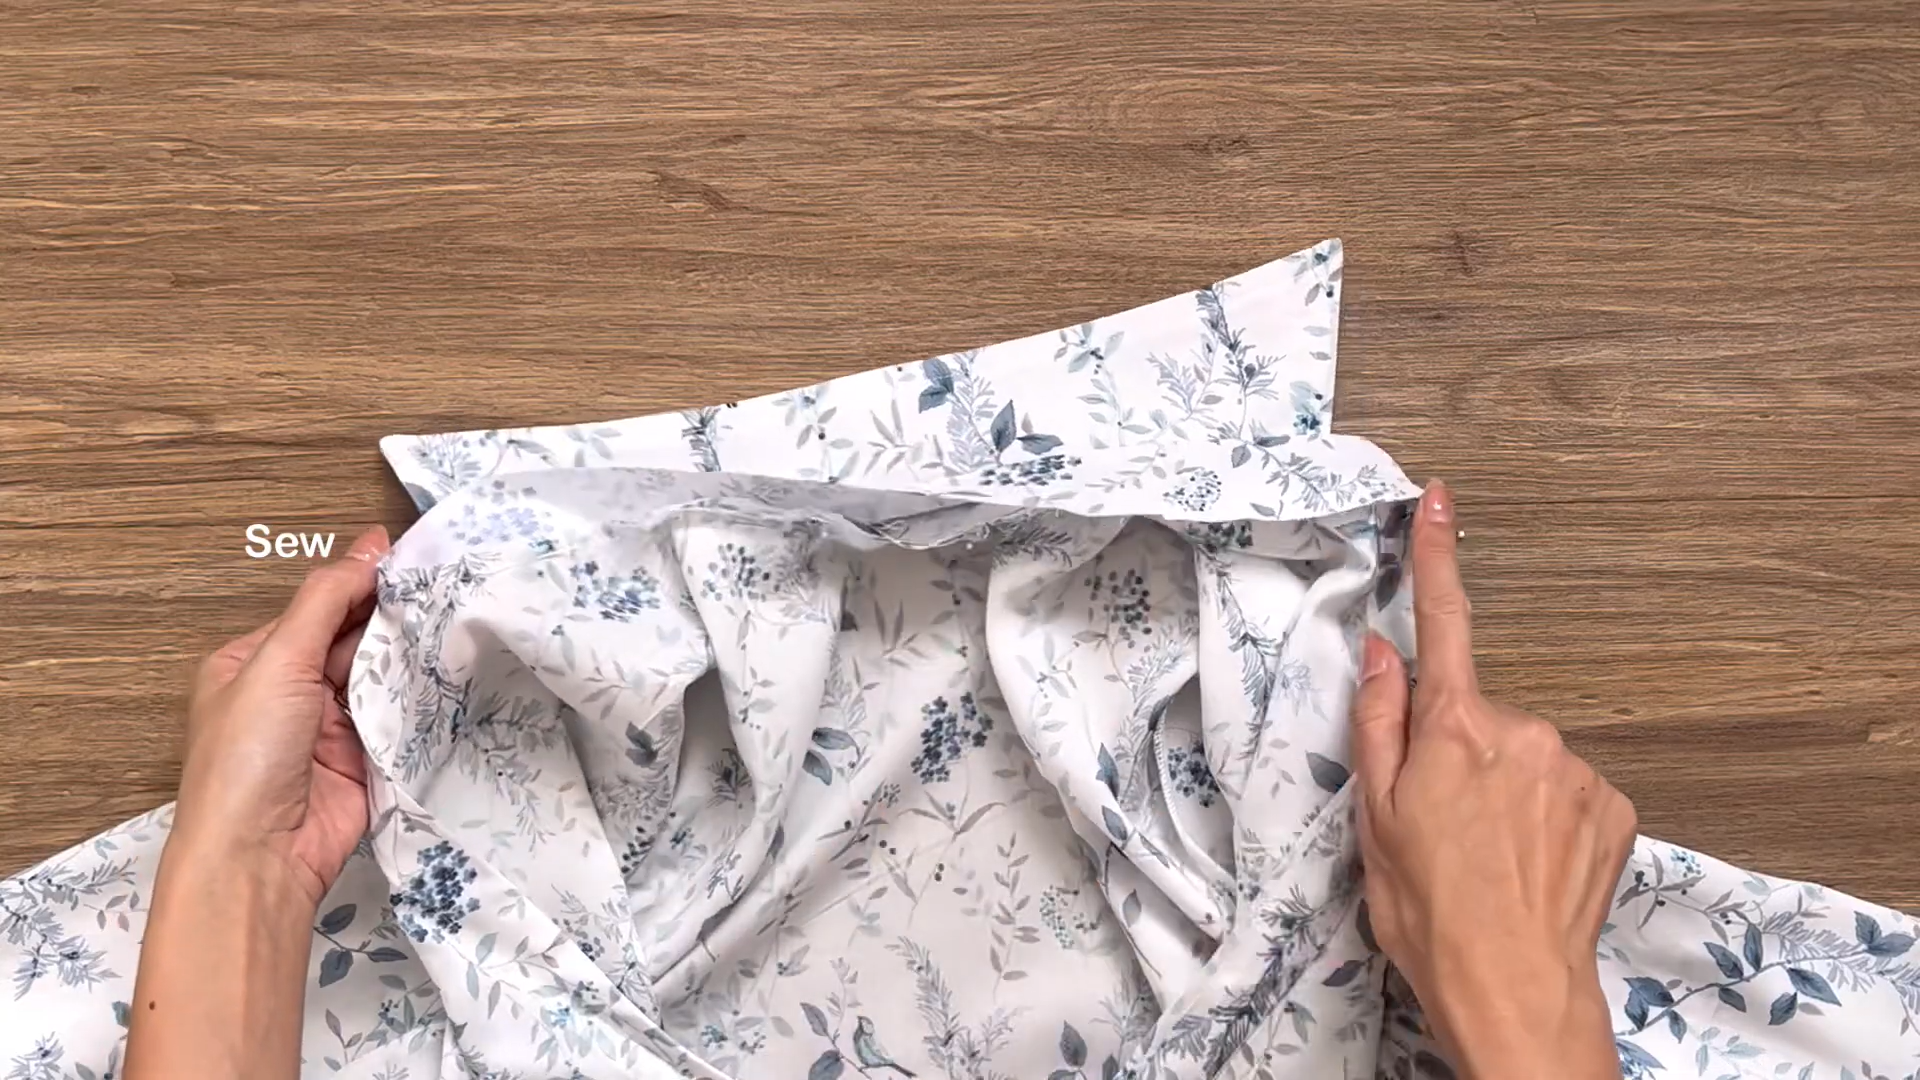
Connect one piece of the bottom collar to the neckline of the dress.
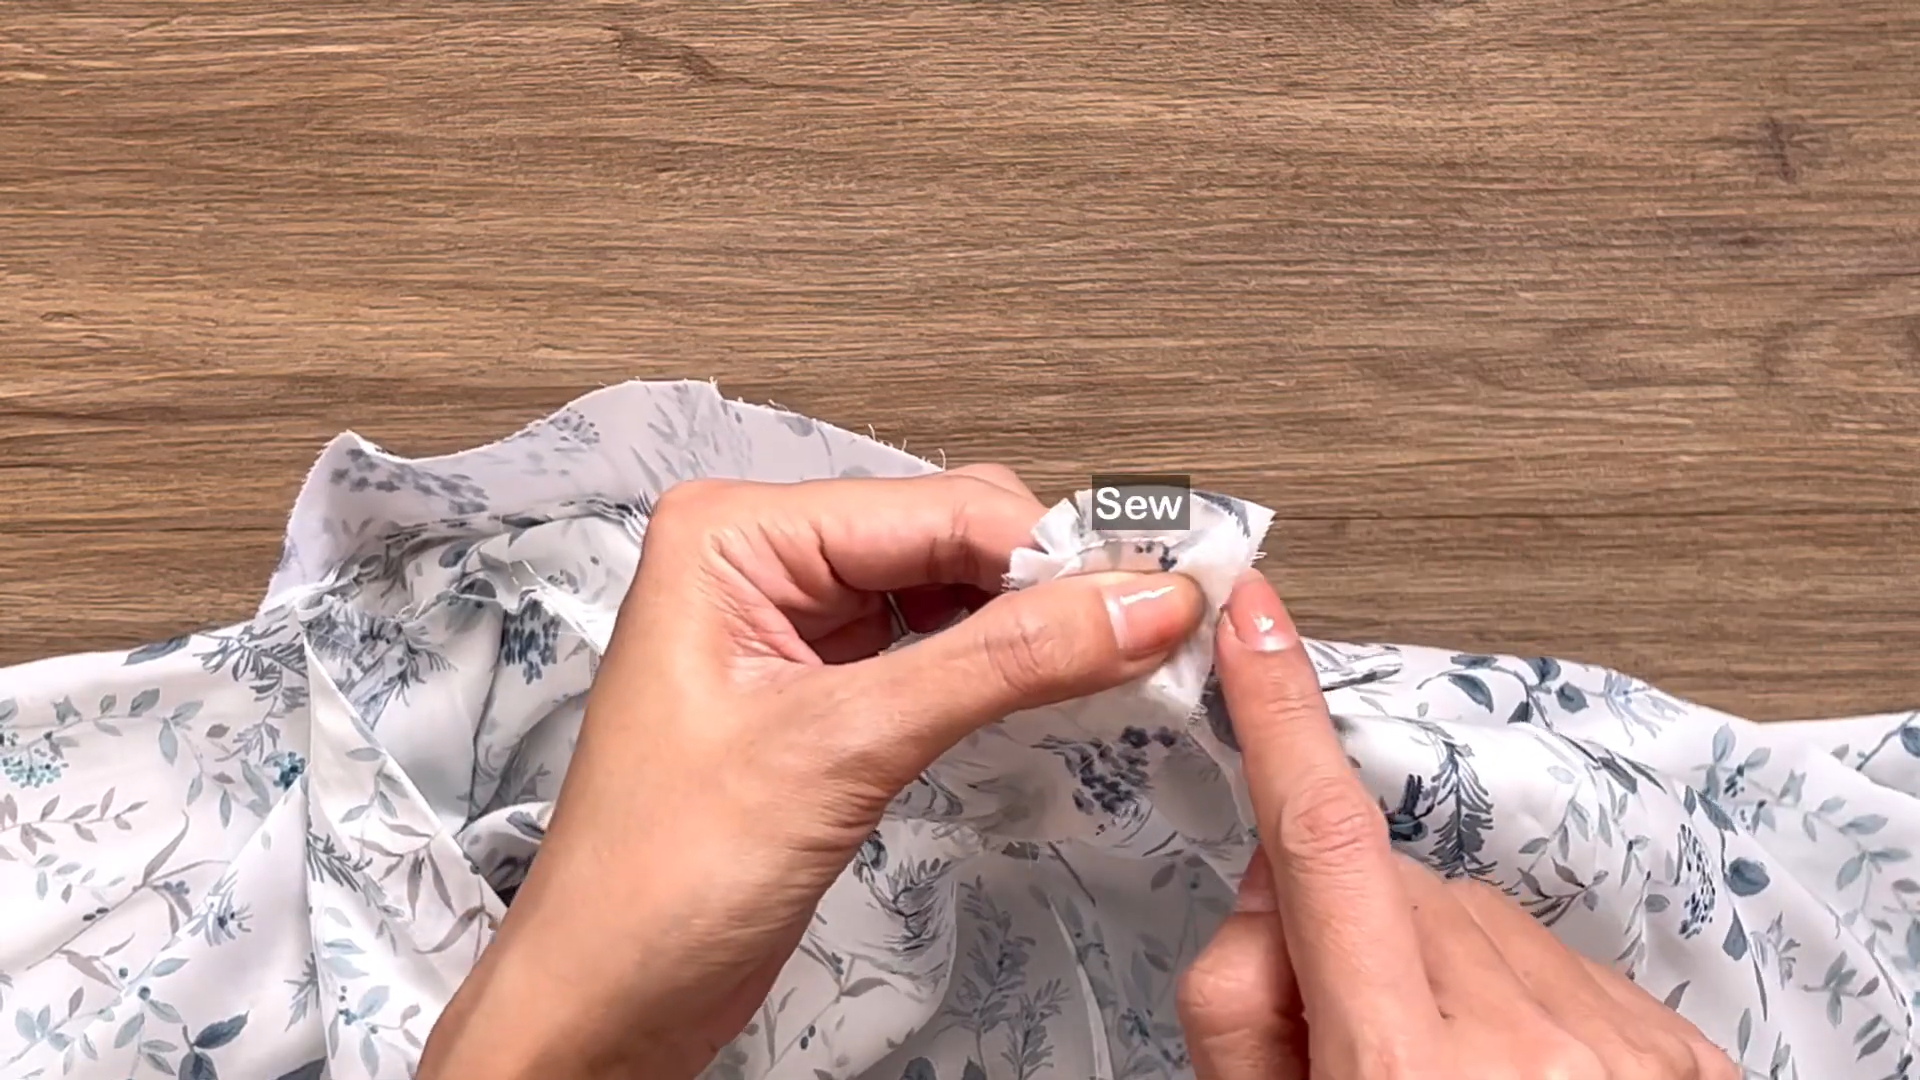
Finish the seam at both ends of the bottom collar part that you left unsewn earlier.
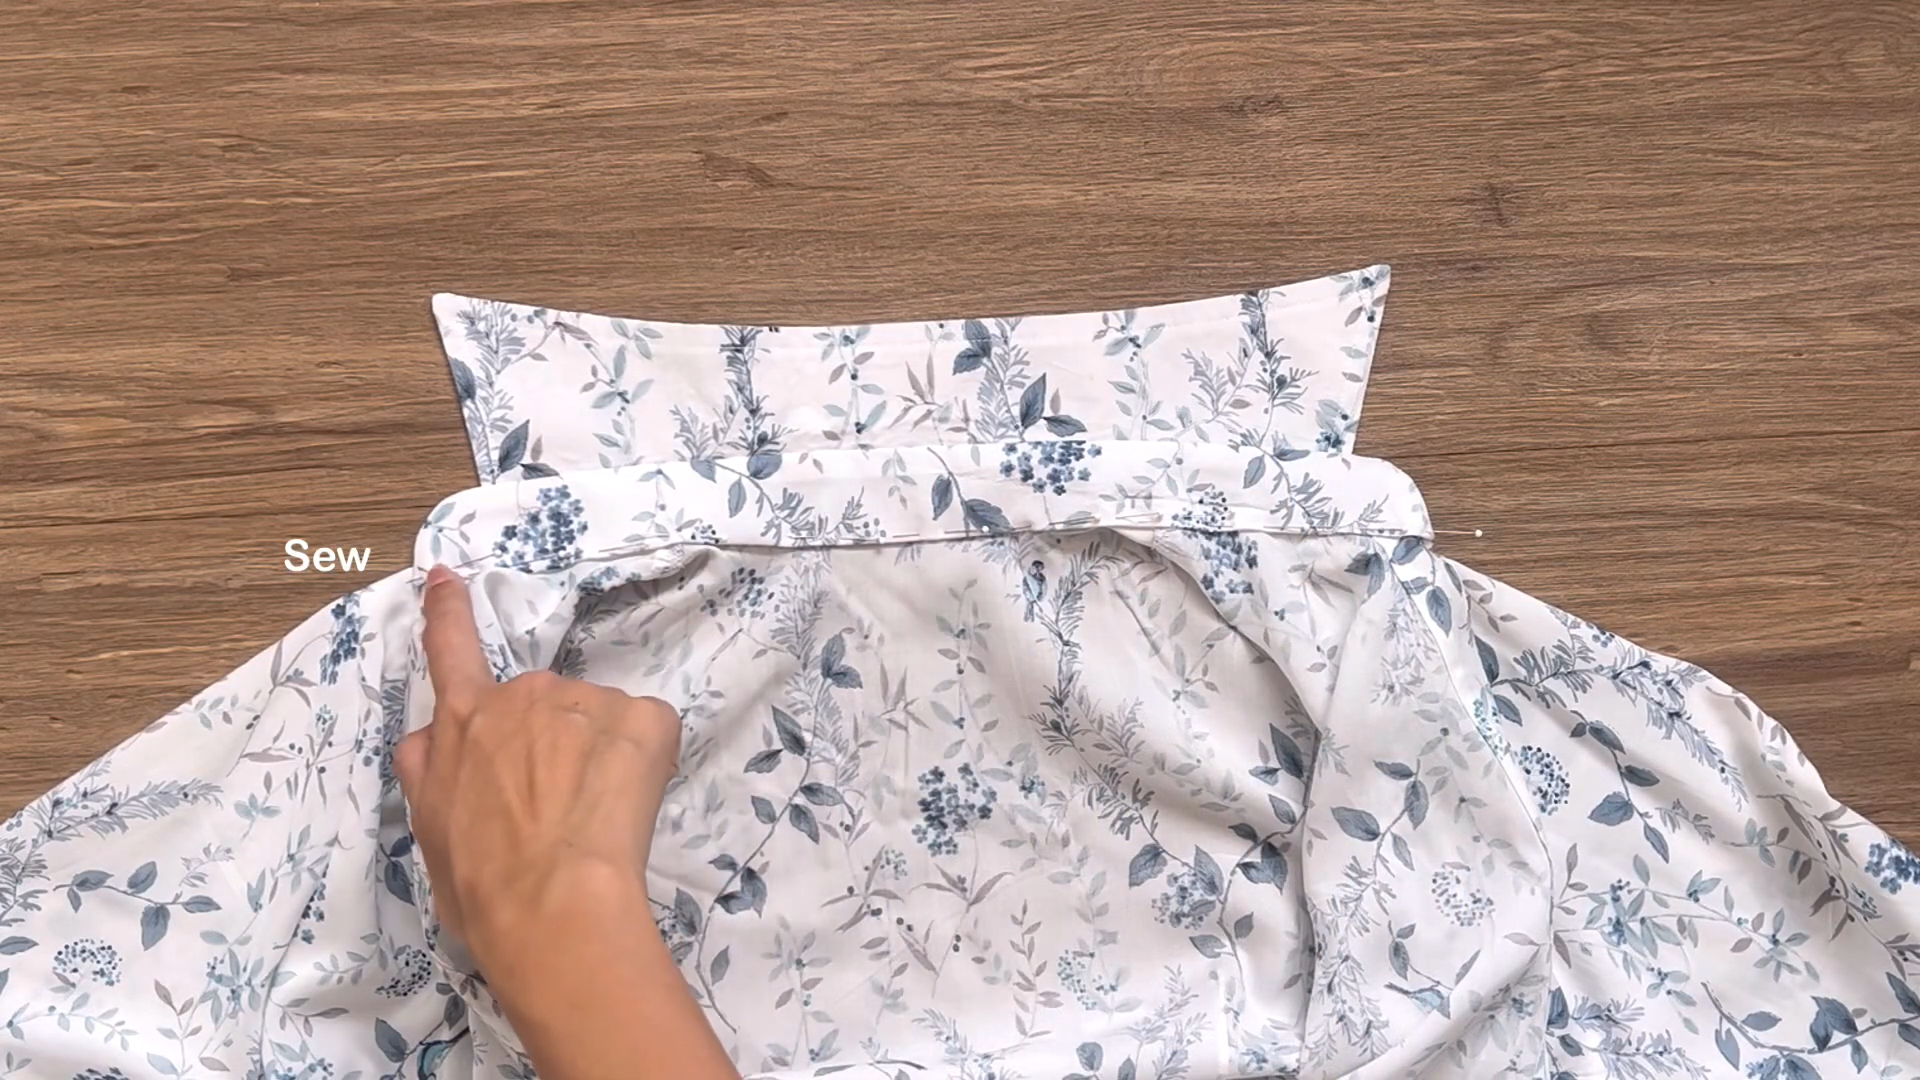
Fold the other piece of the bottom collar to the first seam.
Make a second seam around the bottom collar part to secure it in place.
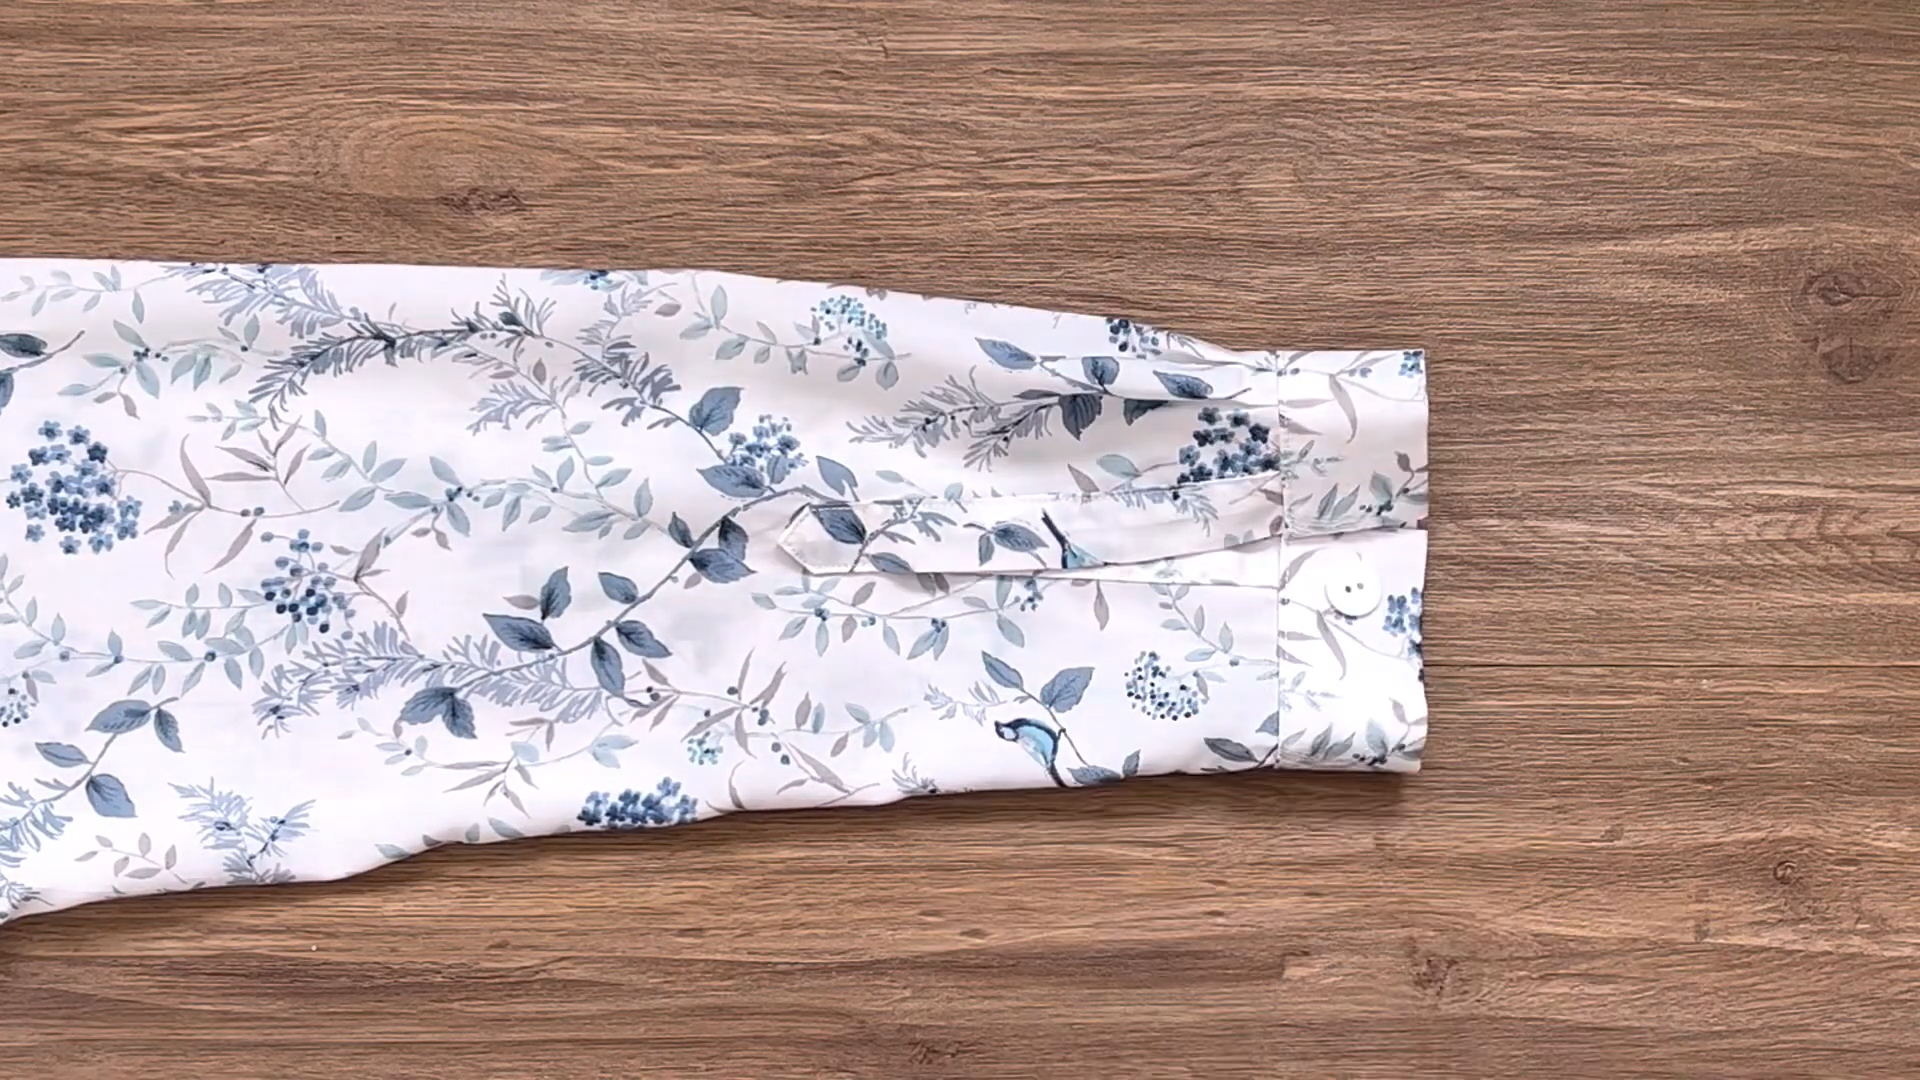
Add a button to the end of each sleeve.

DIY Long sleeve shirt wrap dress
And there you have it!
My Clara dress transformation is complete, and I’m thrilled to share the final result with all of you. By adding details like the long sleeves, wrap-style closure, and the collar, we’ve taken the casual vibe of the original pattern and elevated it to make it more elegant.
Whether you’re attending a special event or simply want to feel fabulous during your everyday, this dress has got you covered.

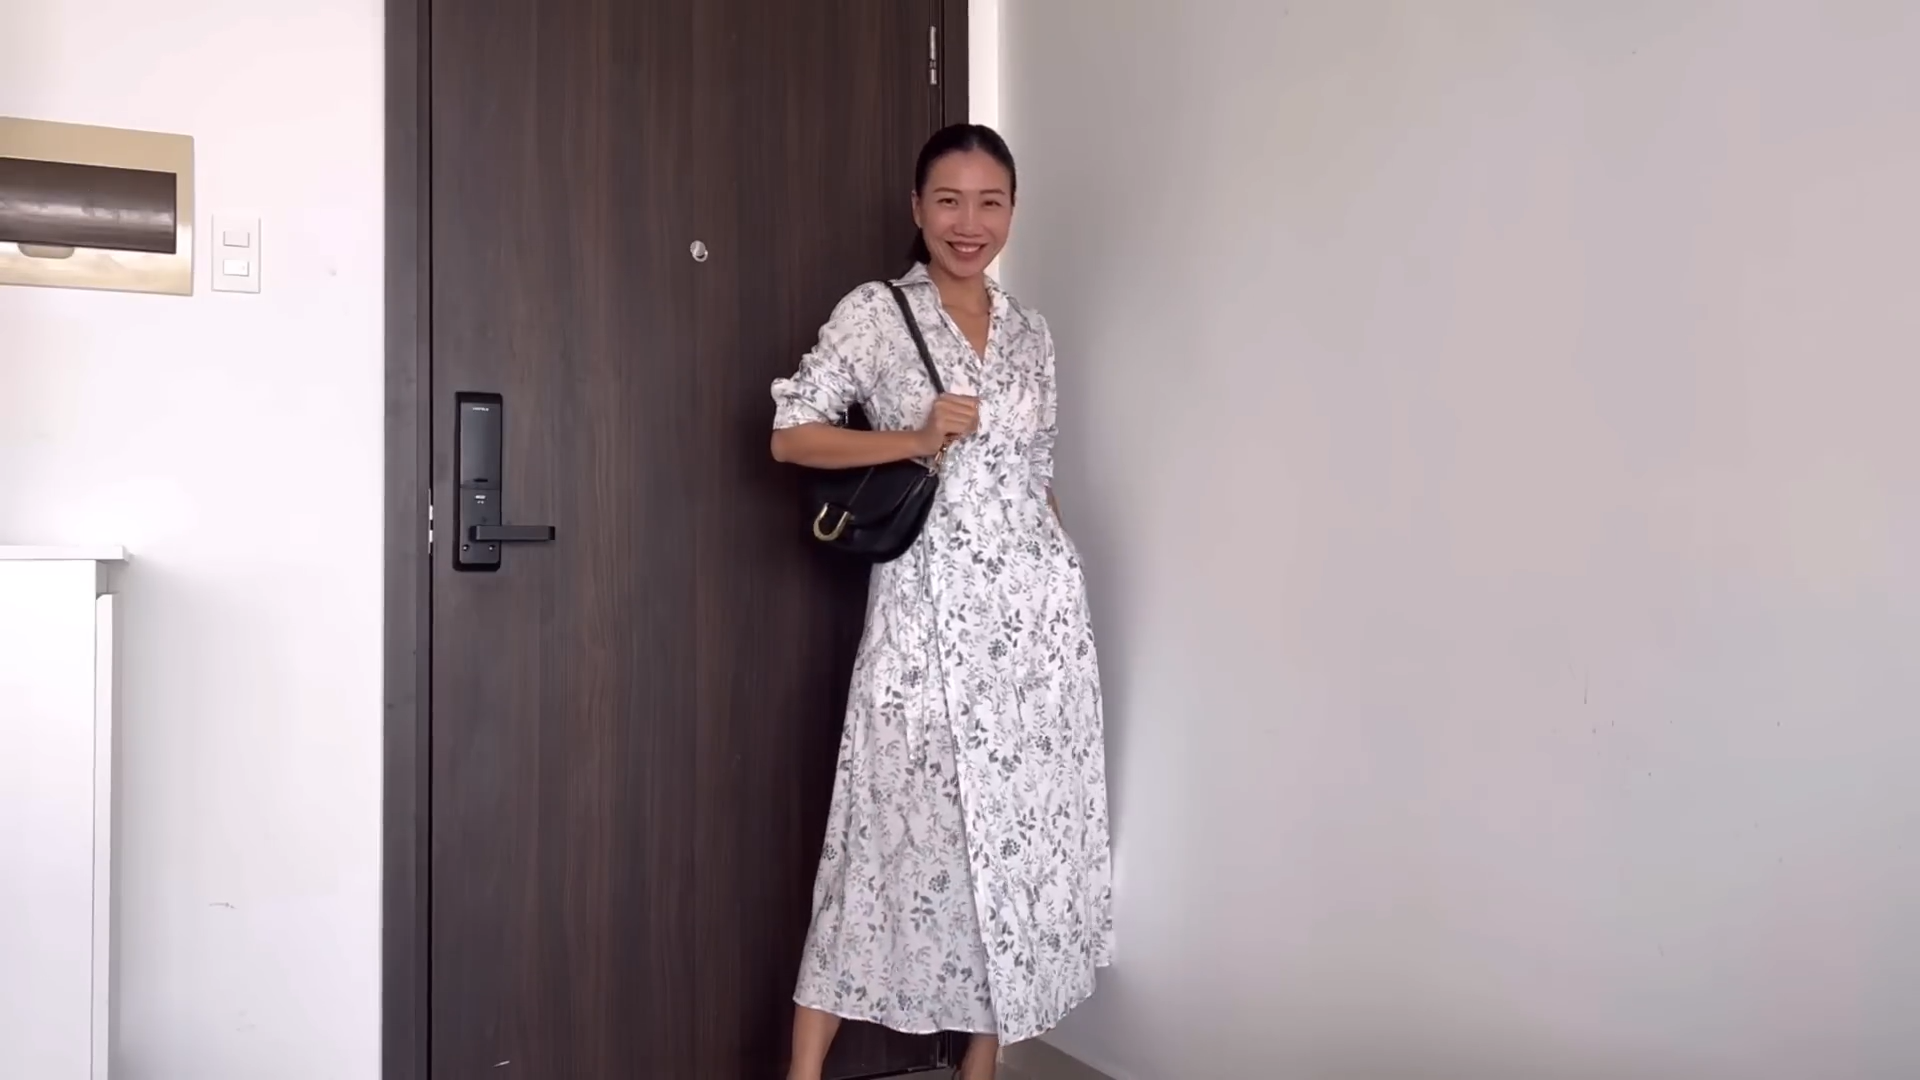
I hope you found my step-by-step guide helpful and inspiring. If you’re interested in making your own long sleeve dress, give it a try and let me know how it goes!
Until then, happy sewing!