DIY My perfect everyday dress (It has everything I want in one dress) | Step by step sewing tutorial

DIY My perfect everyday dress

Welcome or welcome back to my sewing blog!
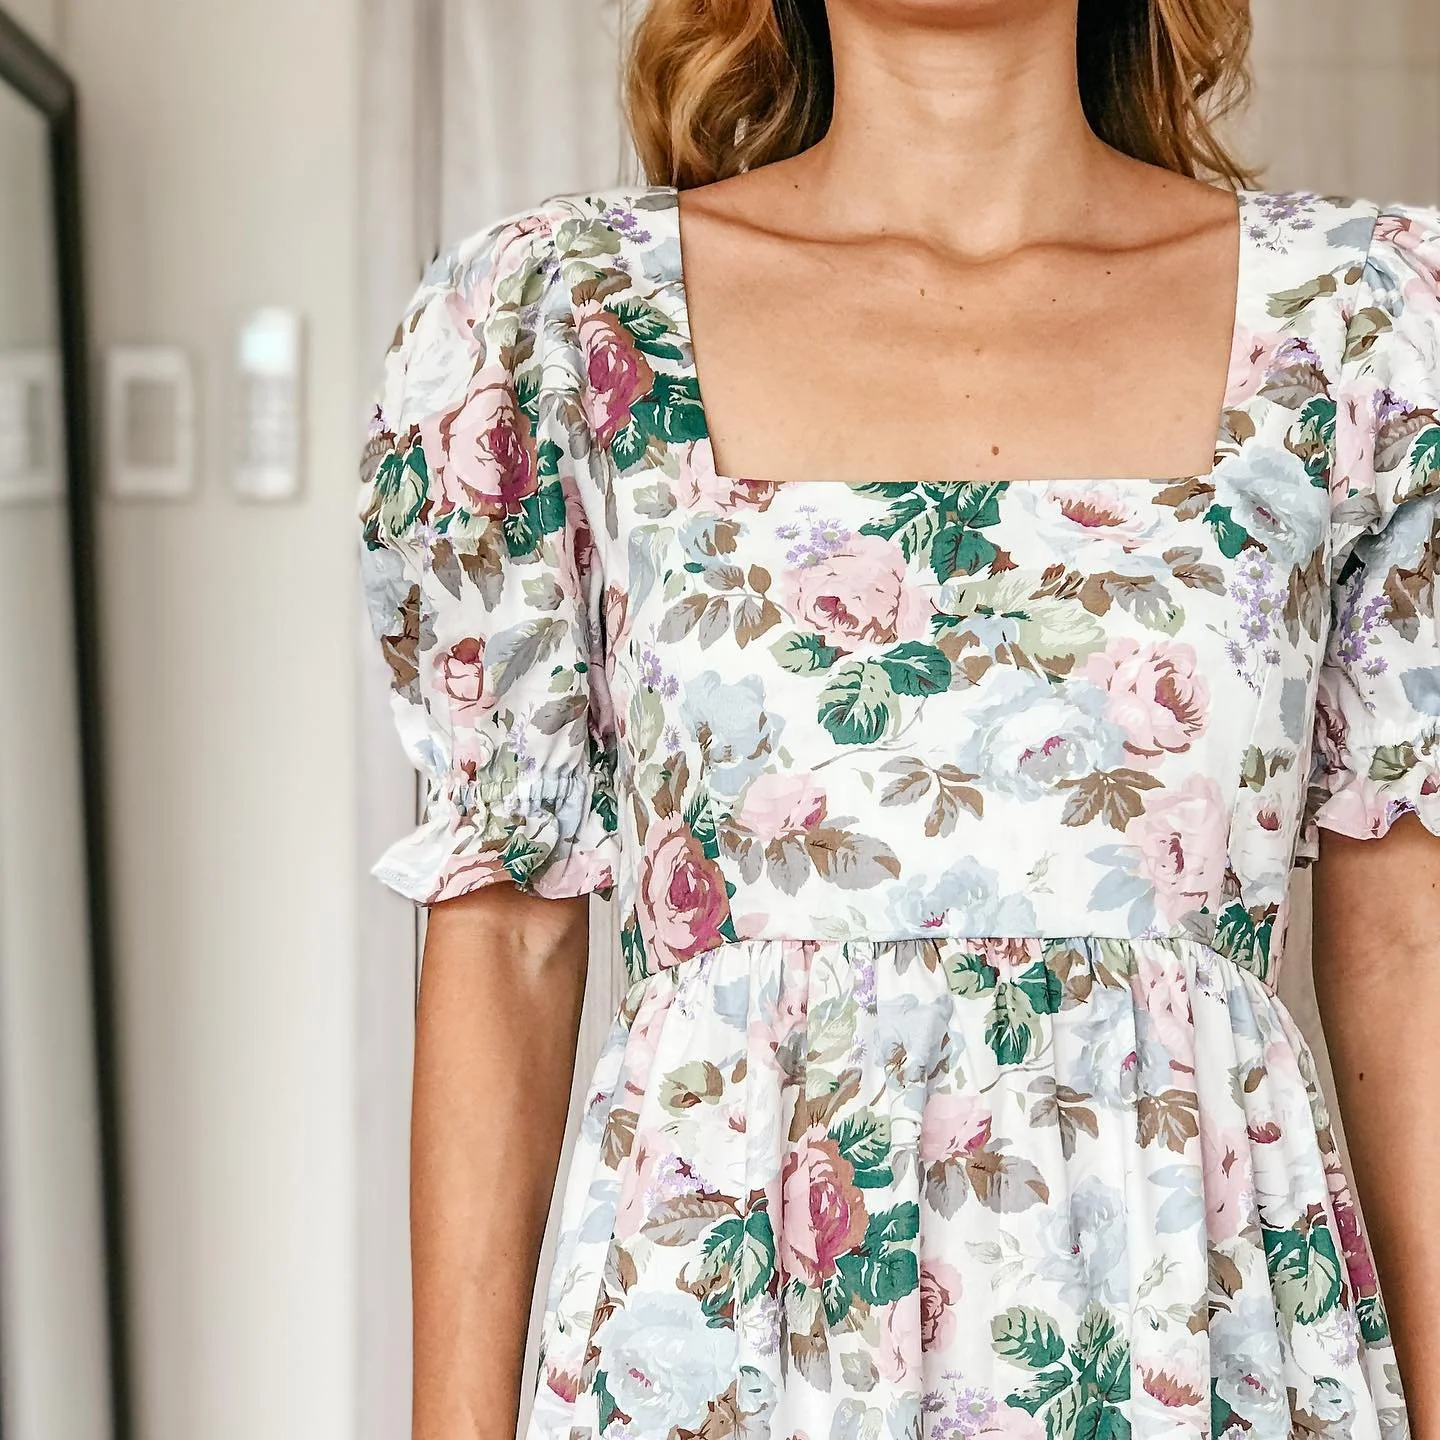
In today’s tutorial, I'm going to share with you how I made my Perfect everyday dress from scratch. This is the dress that has everything I need in one design. Puff sleeve, square neck, open back, midi length, side pockets and no zipper. It's the dress that I would choose for my everyday outfit. So I hope you will like this tutorial and try it out.
Let’s get started!
WHAT YOU’LL NEED

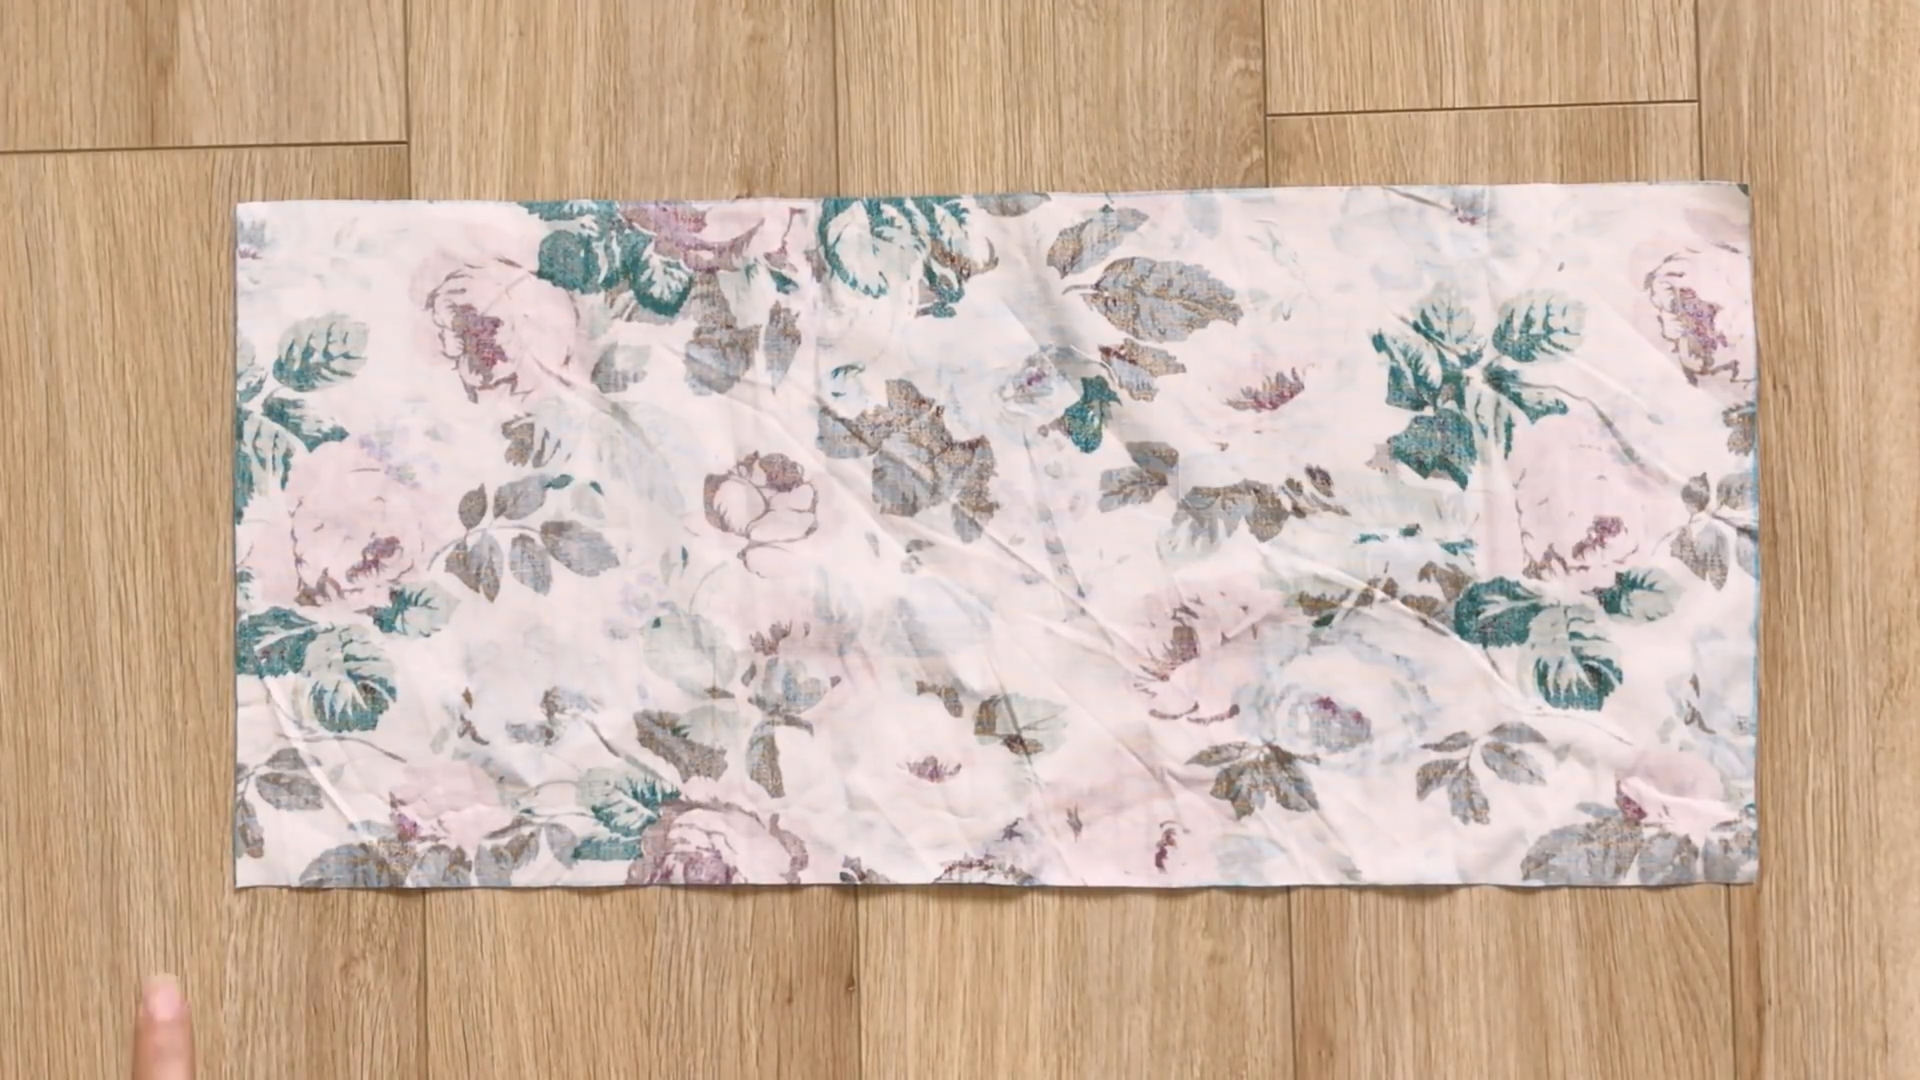
2.5m of cotton fabric in floral printing
Pattern paper
Sewing machine
Pins
Scissors
Ruler
Long stick
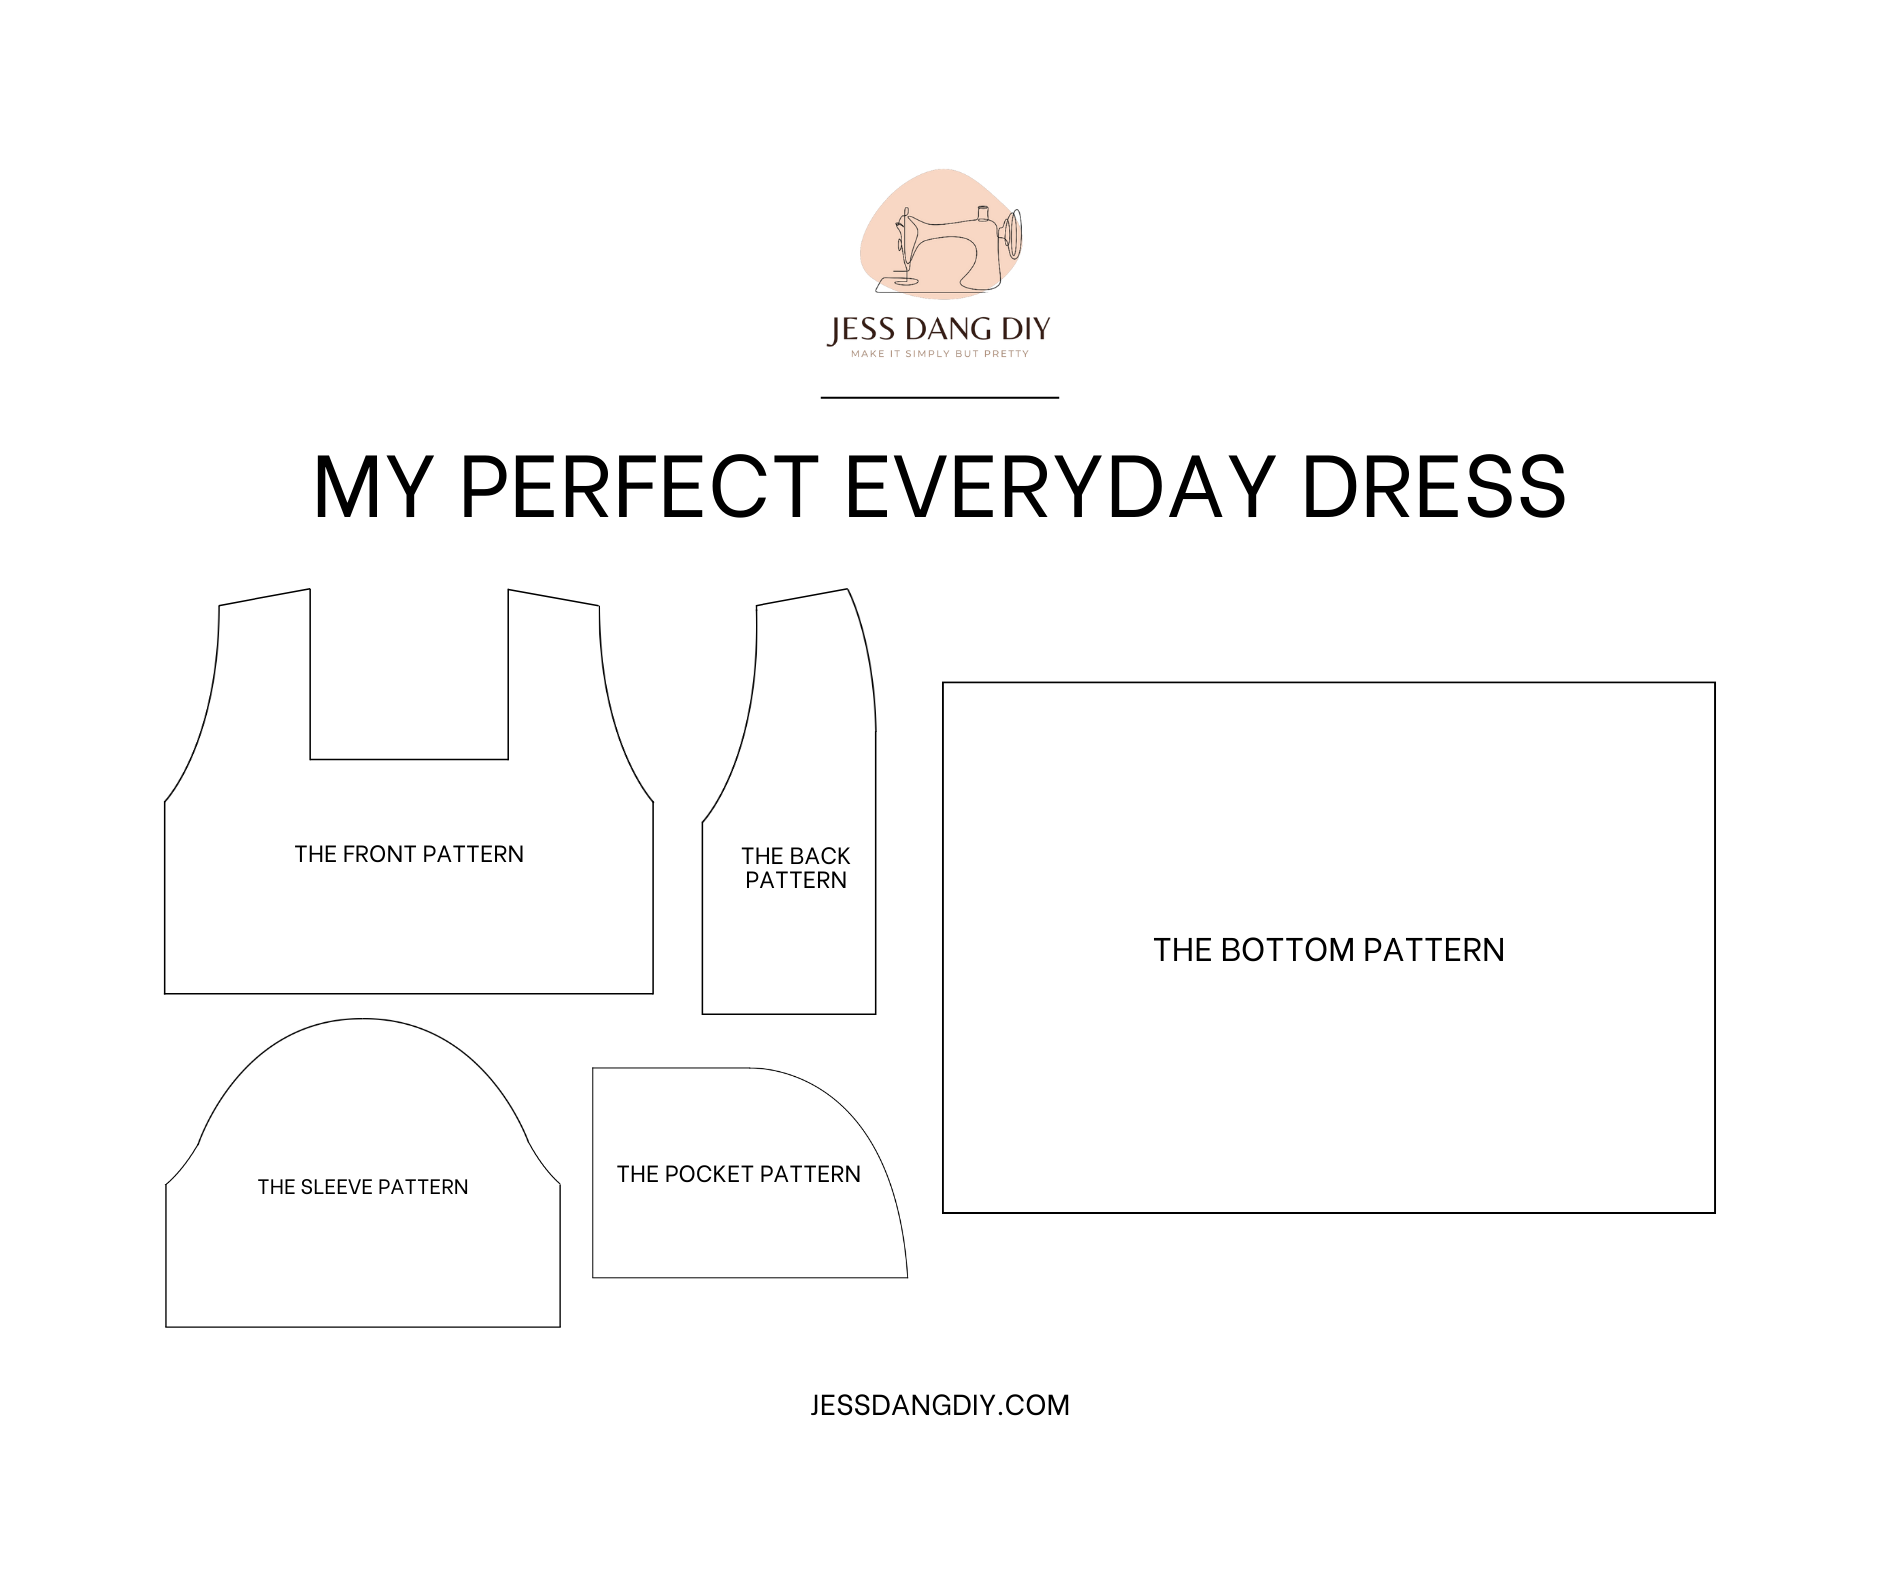
MAKING THE PATTERNS
Here’s the pattern for the project. To get a clear understanding of all the measurements needed for the pattern, watch the video from 1:46 to 6:40.
Remember, you can adjust these measurements to fit your own dimensions!
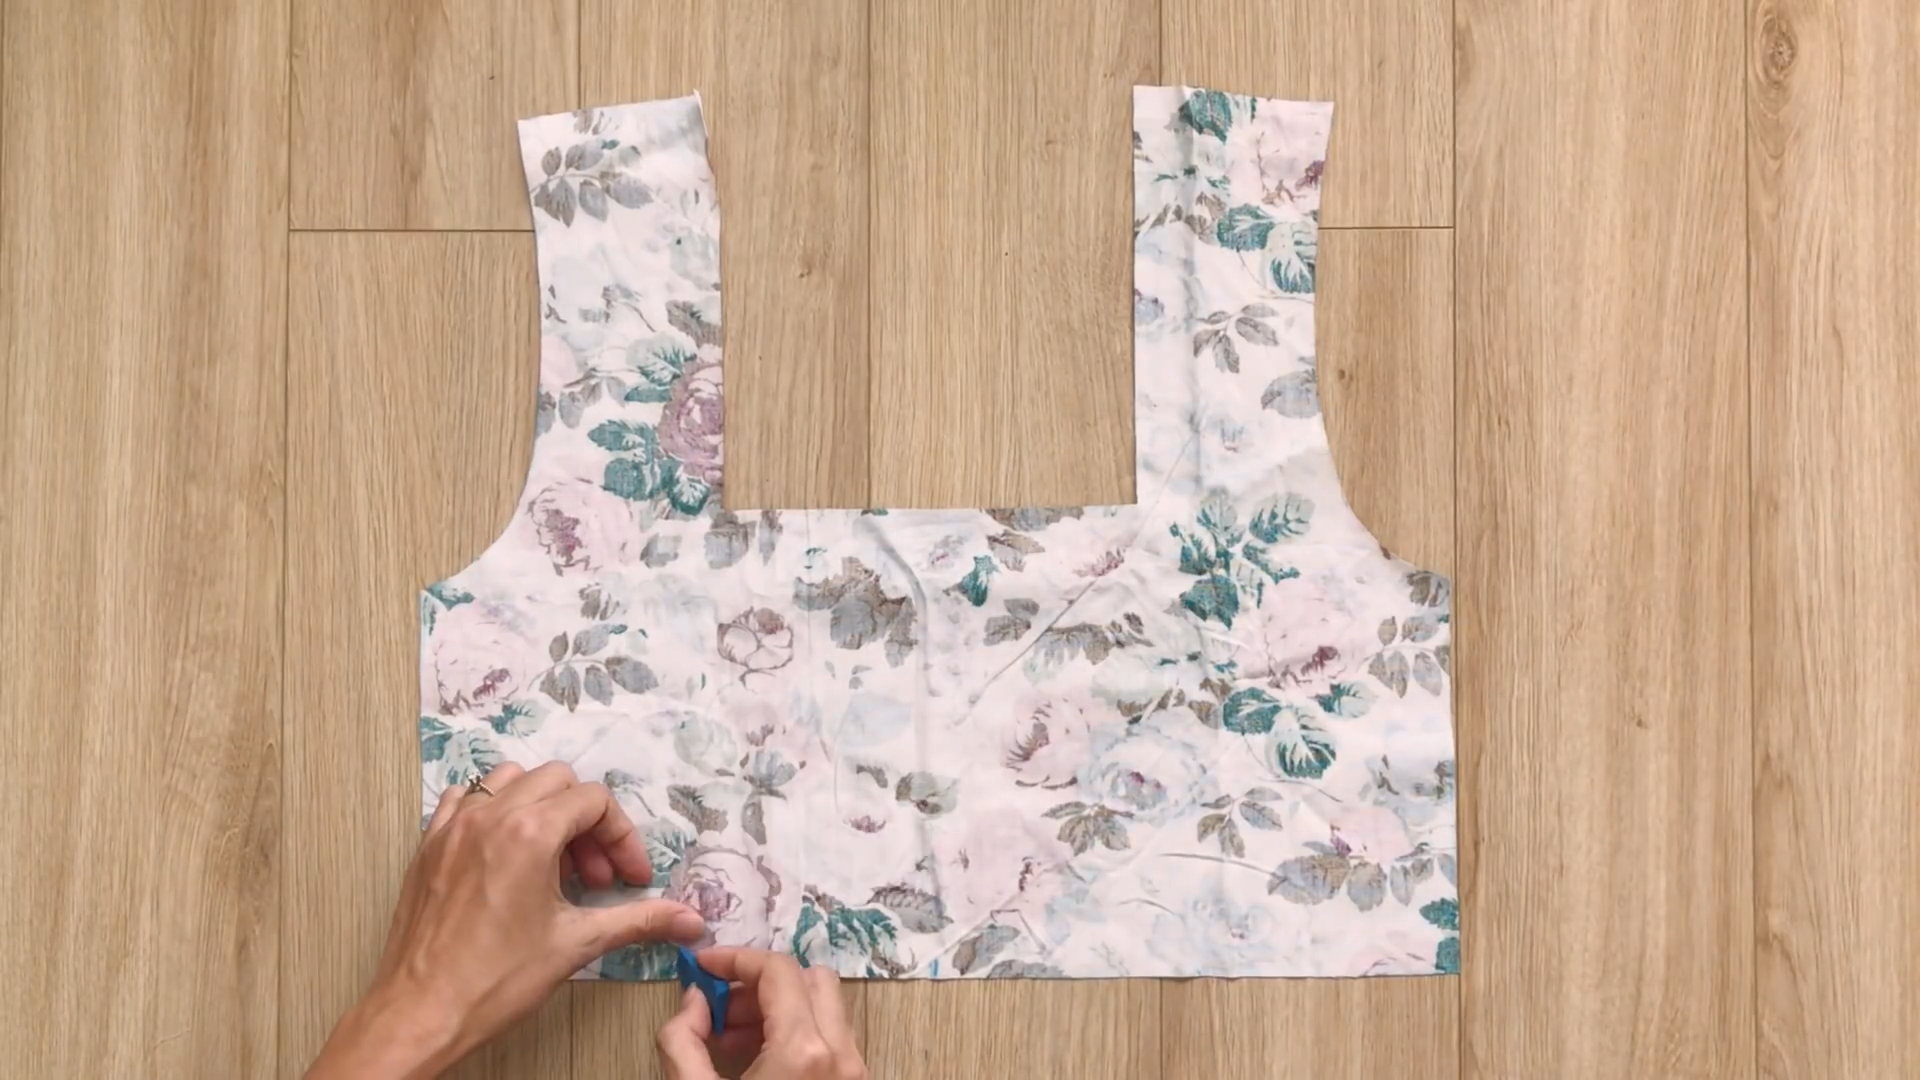
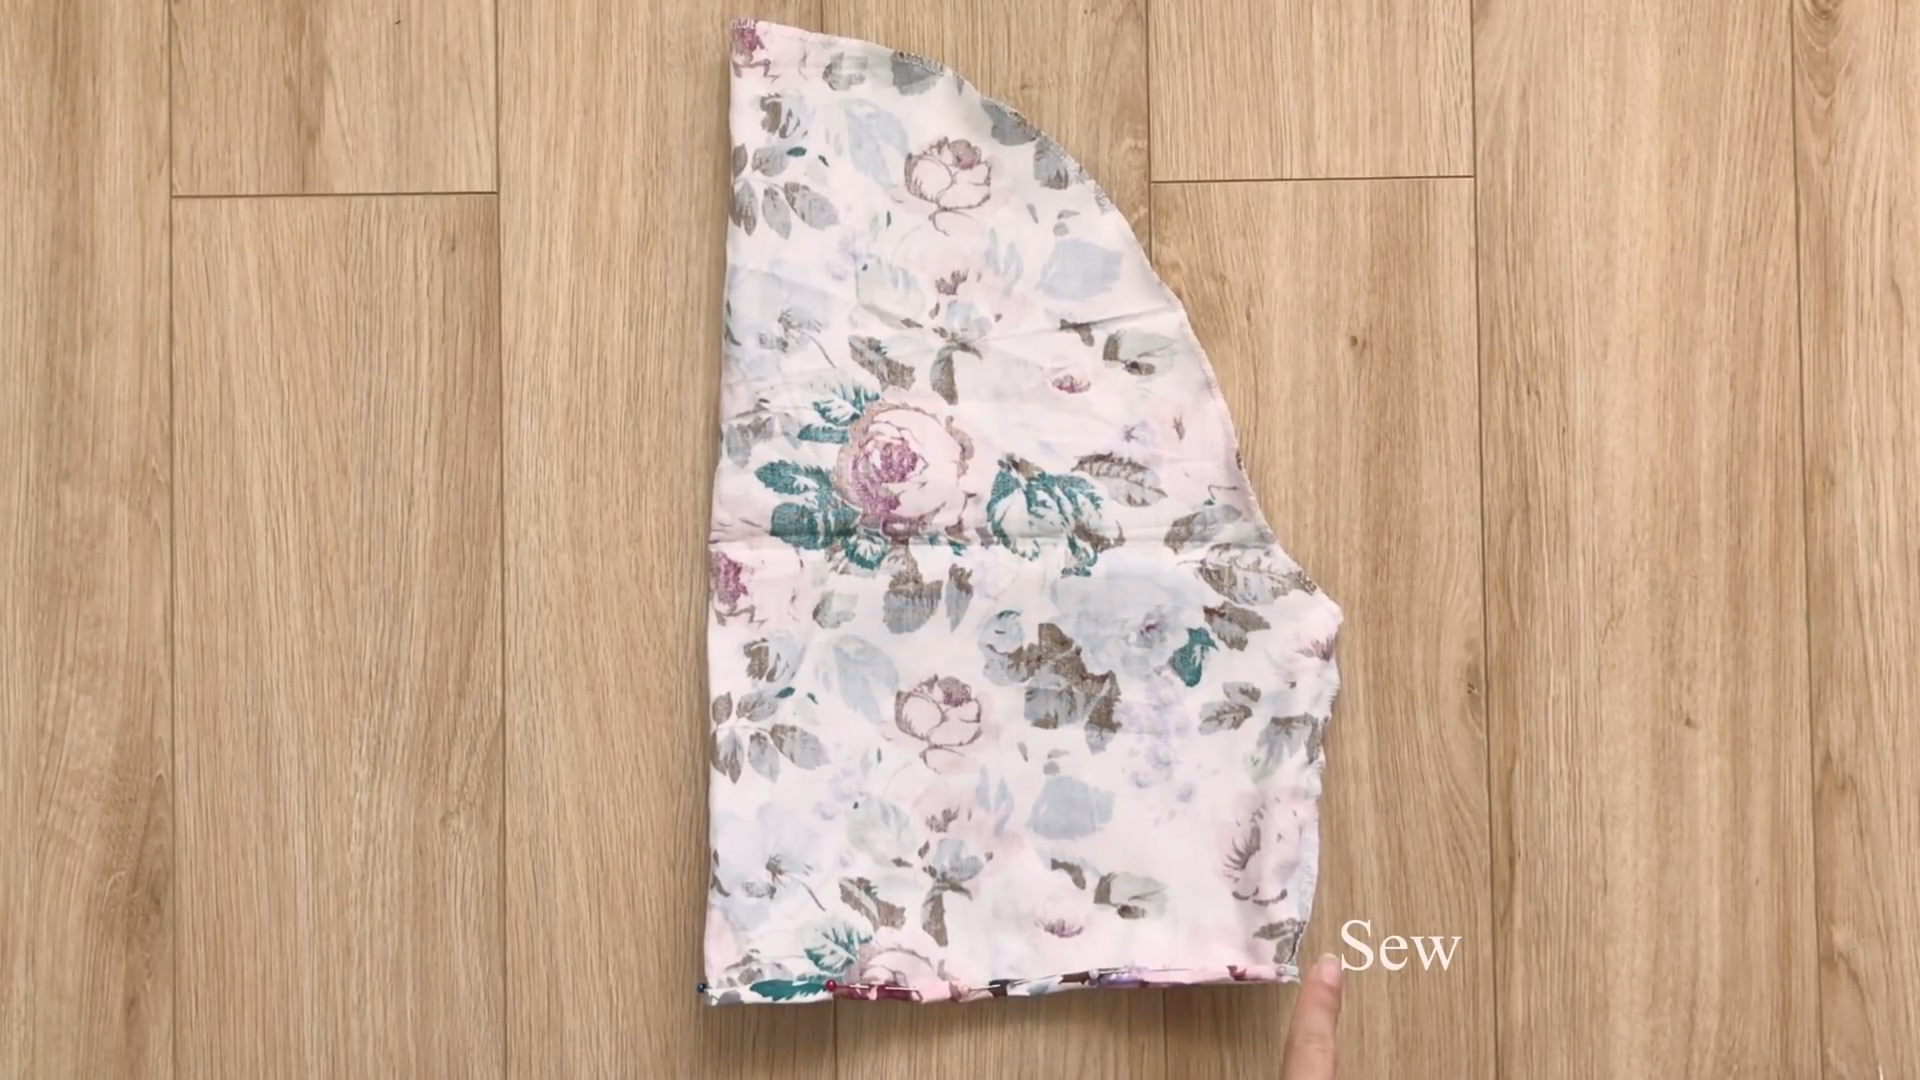
THE FRONT PATTERN

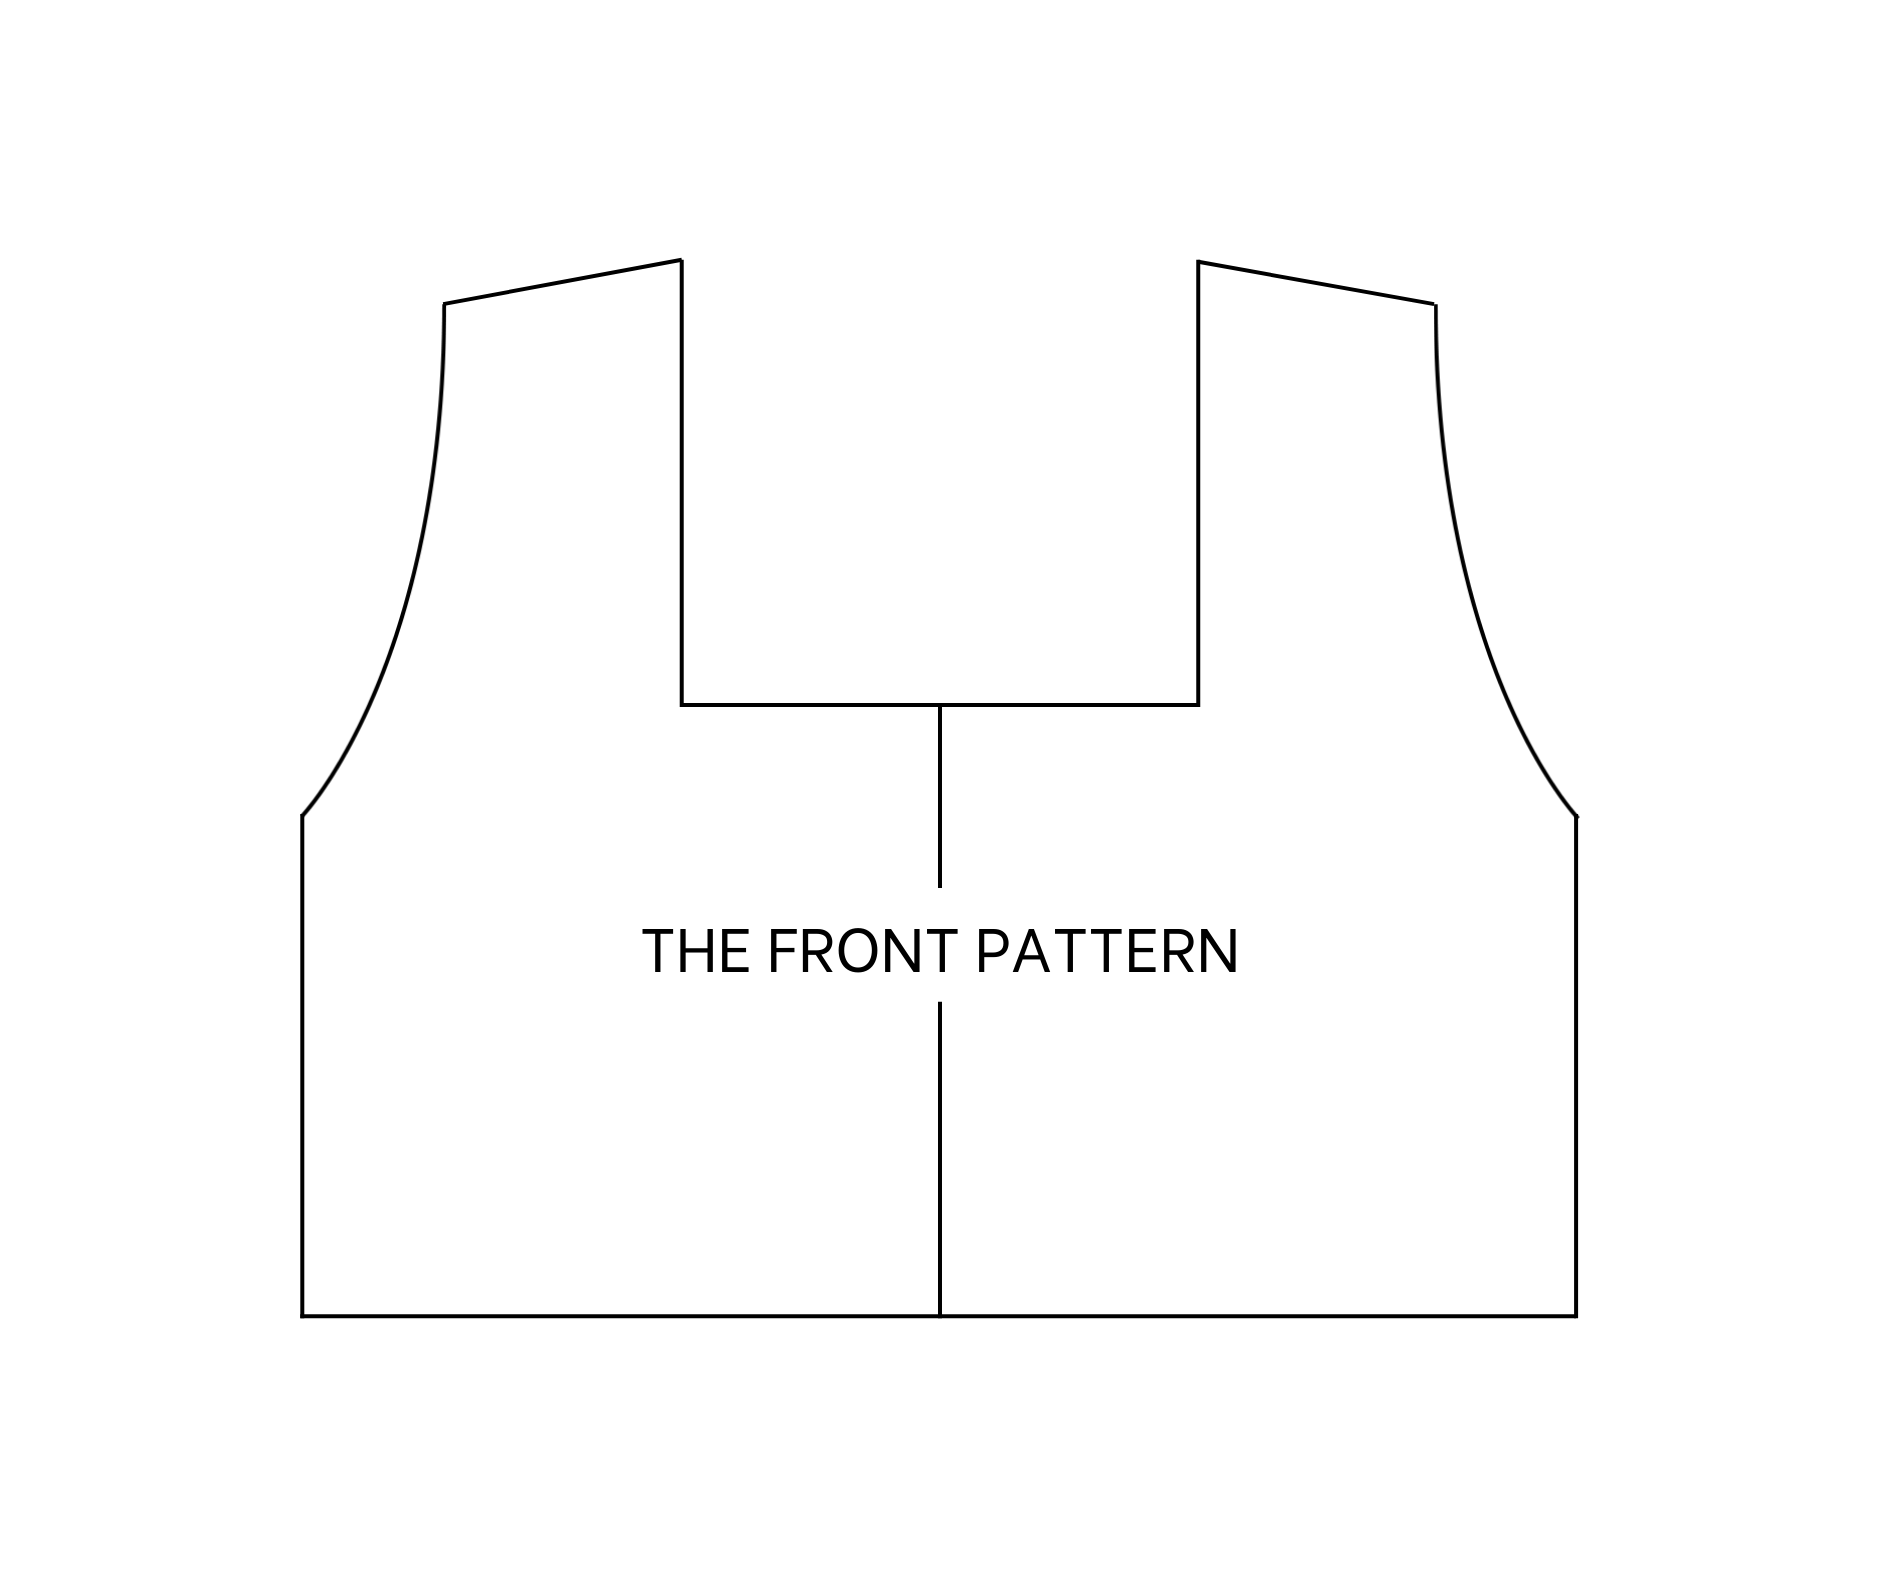
The front pattern
To make the front pattern, cut a rectangle with 38 cm length which is the length from the shoulder to under the breast, above the belly button, and 43 cm width which is a half of the bust size plus 2 cm for seam allowance.
Draw a straight line in the middle to divide the rectangle into two smaller ones. At the top of the straight line, mark at two sides 10 cm so the width between two marks will be 20 cm which is the width of the neck.
From these marks, draw down a straight line with 18 cm each side, it's the depth of the neck that you want. Make sure it is above your breast then draw a horizontal line to connect two straight lines together and create a square neck look.
From too marks on the top width line, keep marking to outside 9 cm so the width between two new marks will be 38 cm which is the width between two shoulders plus 2 cm for seam allowance.
From the top of the length line, mark down at 21 cm which is the width from the shoulder to under the armpit and the middle of the breast.
Then draw a curved line to connect this mark to the mark on the width line so you will have the sleeve line of the front pattern.
From the top of the sleeve line, mark down at 2 cm then connect it to the mark on the width line to create a new shoulder line.
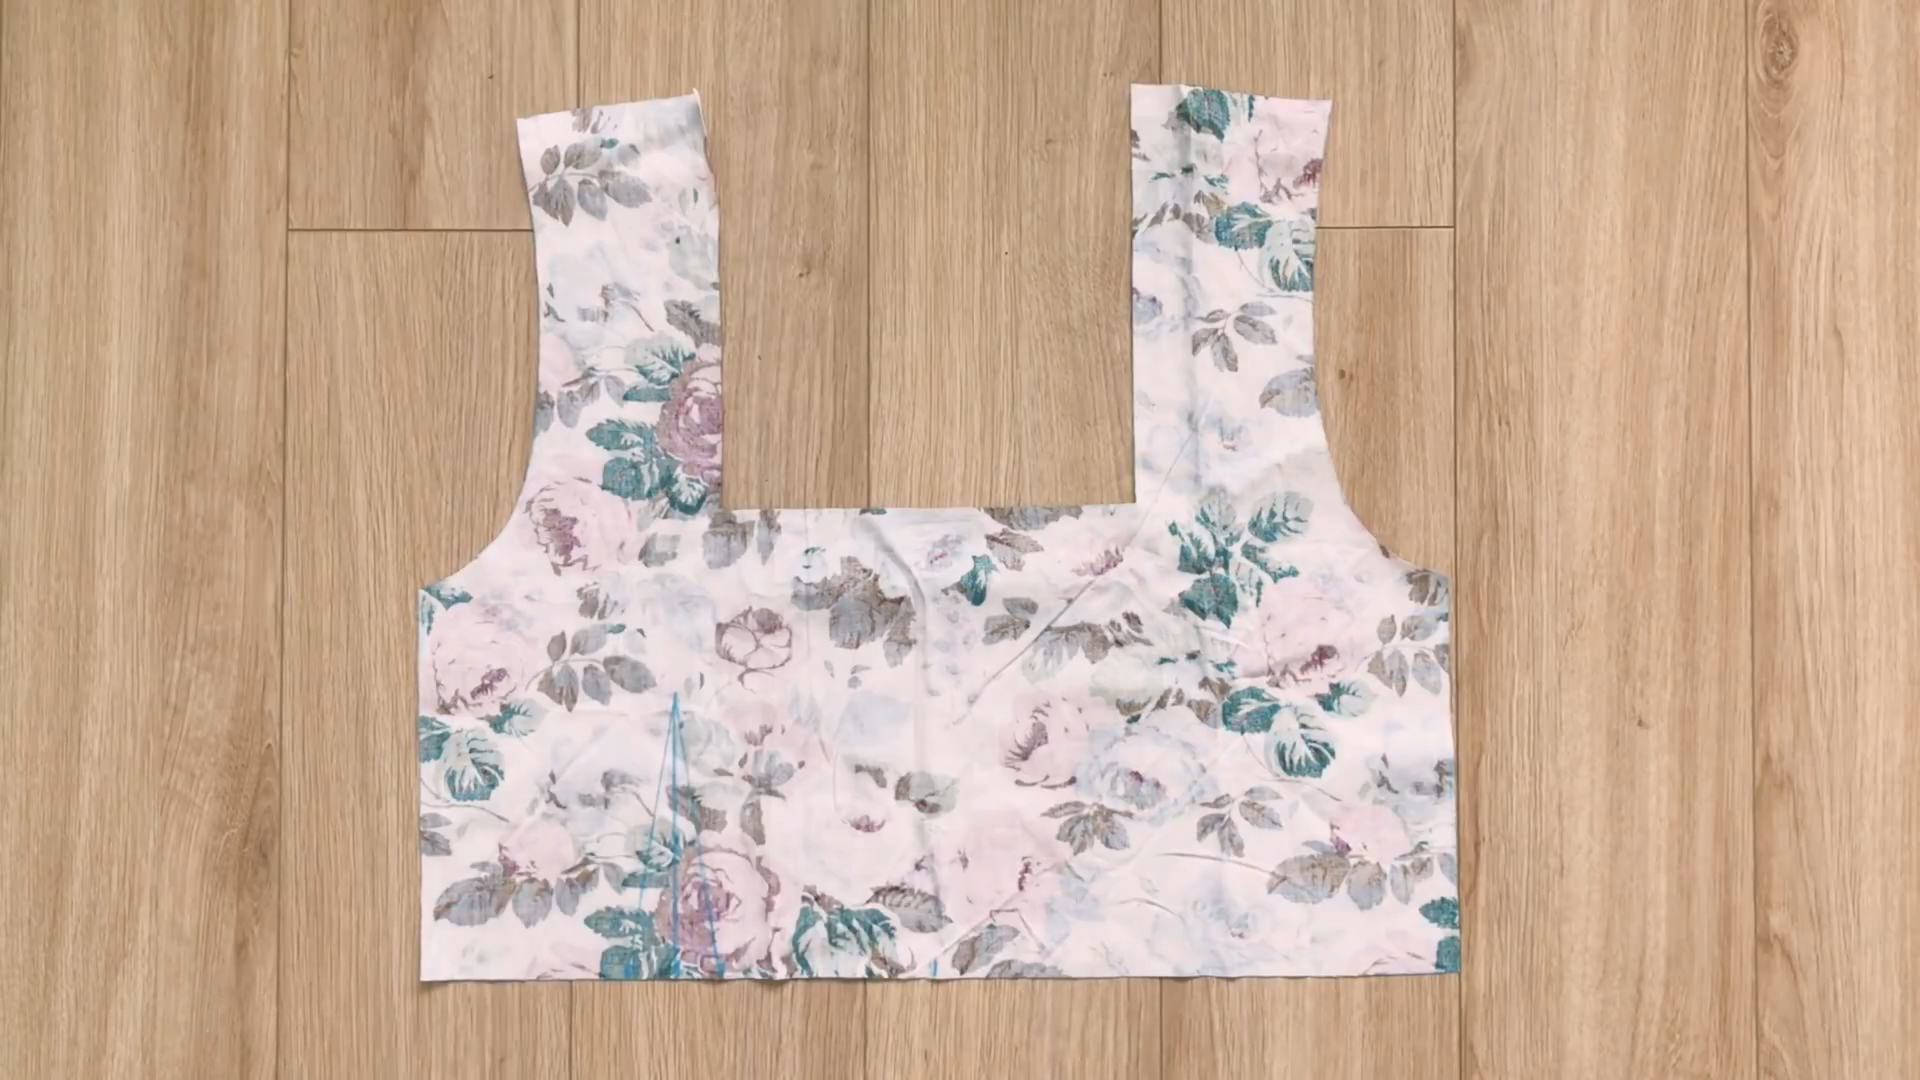
We will have the front pattern after cutting.
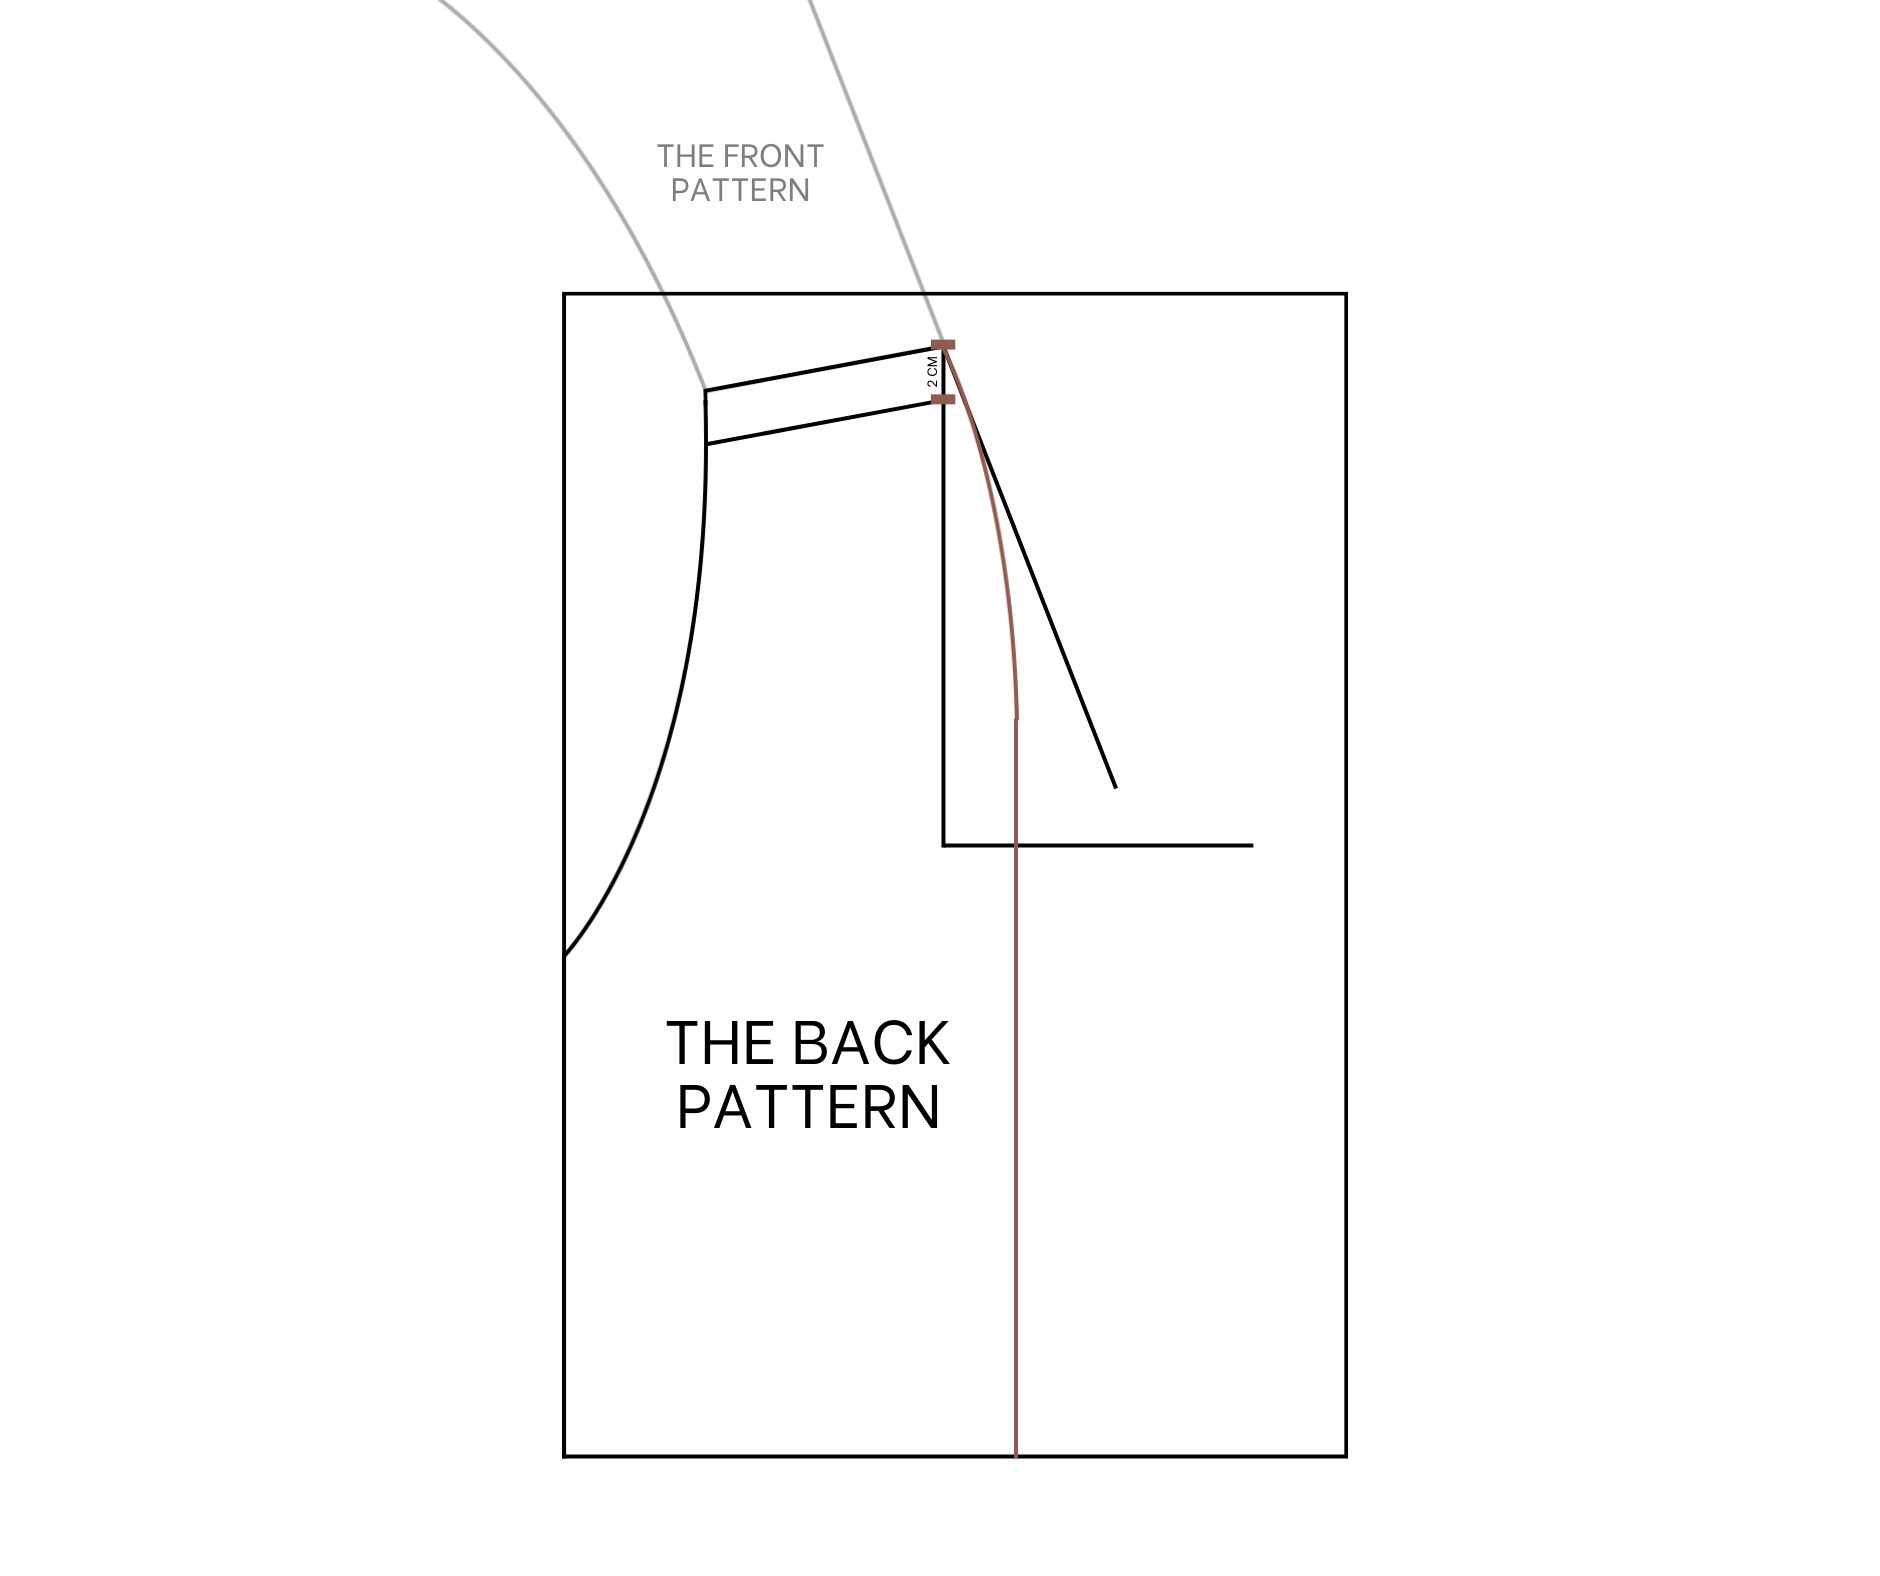
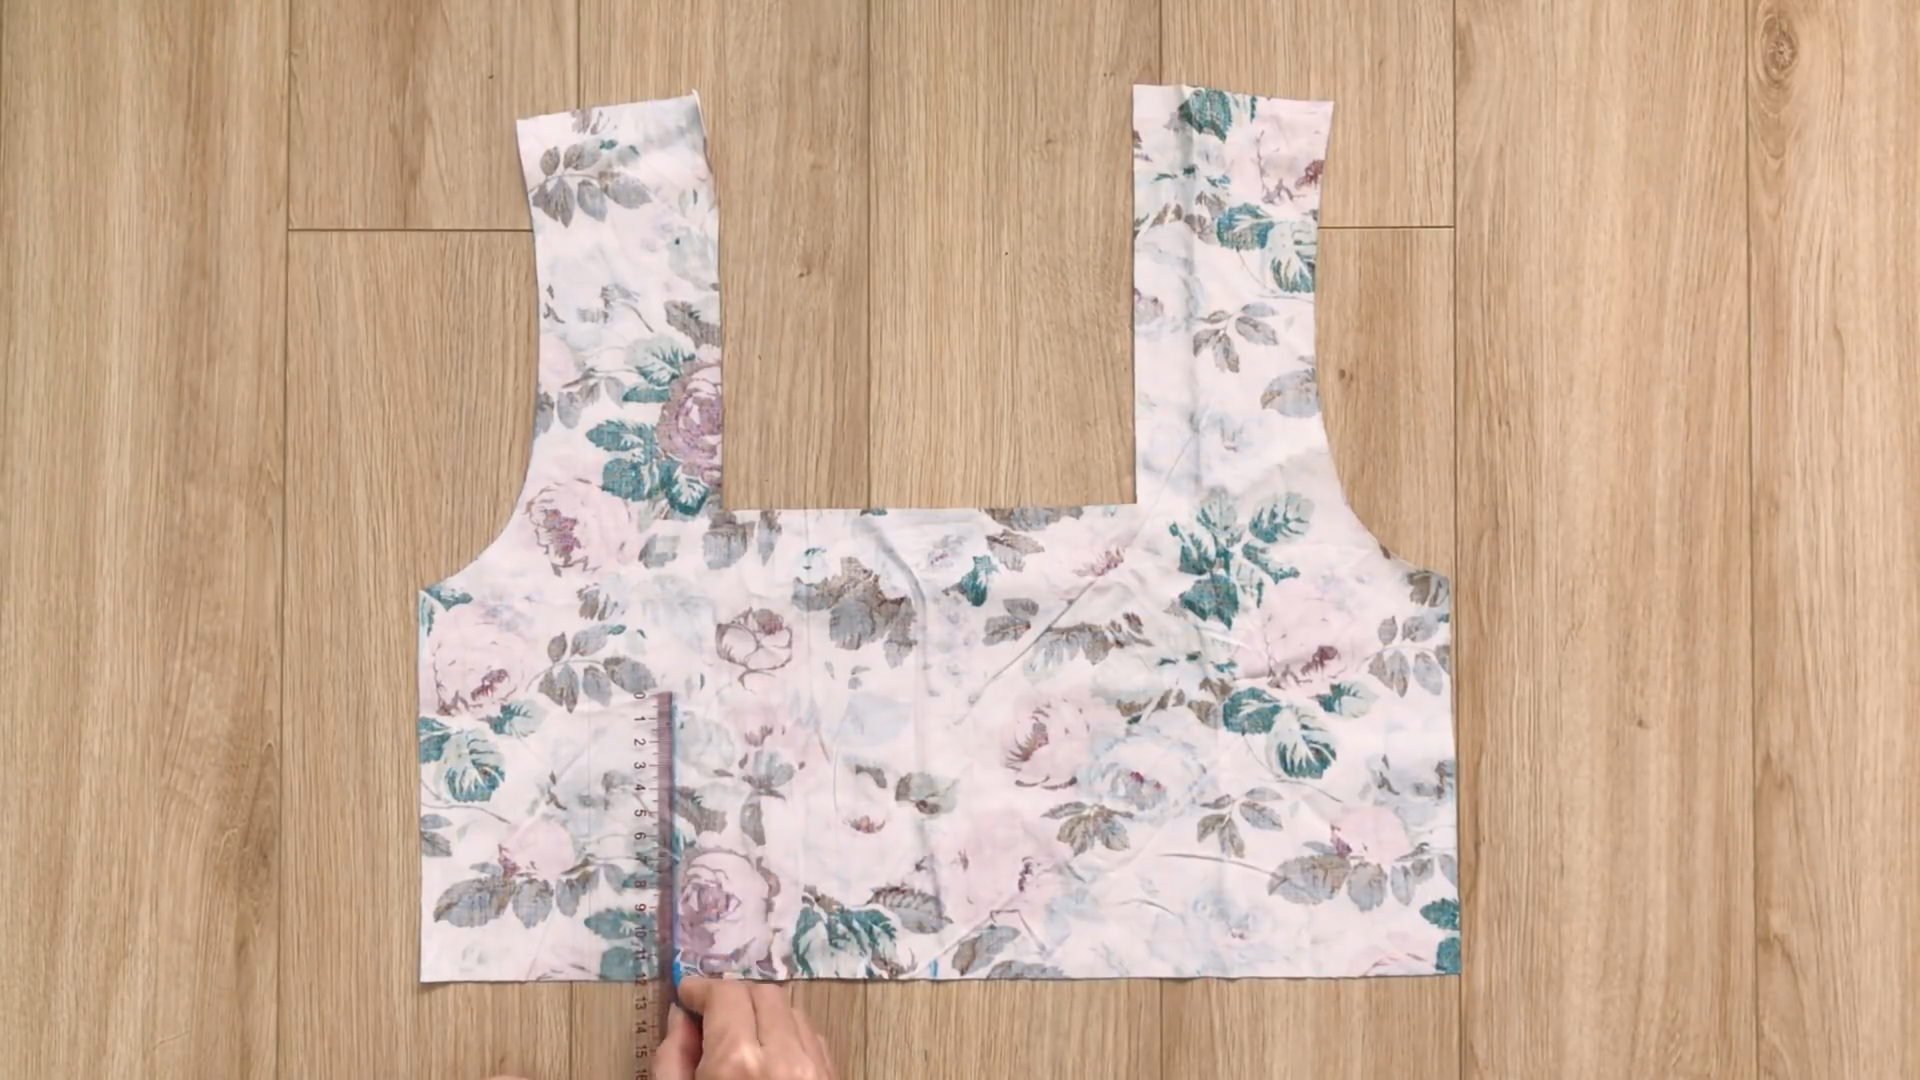
THE BACK PATTERN
To make the back pattern, use the front pattern to copy the sleeve line and the neckline. After drawing, move the shoulder line up 2 cm.
Then connect the front and the back pattern at the shoulder line to draw a straight line of the neck from the front to the back.
After that, slightly turn that line straight down to the end.
We will have the back pattern after cutting.

THE SLEEVE PATTERN
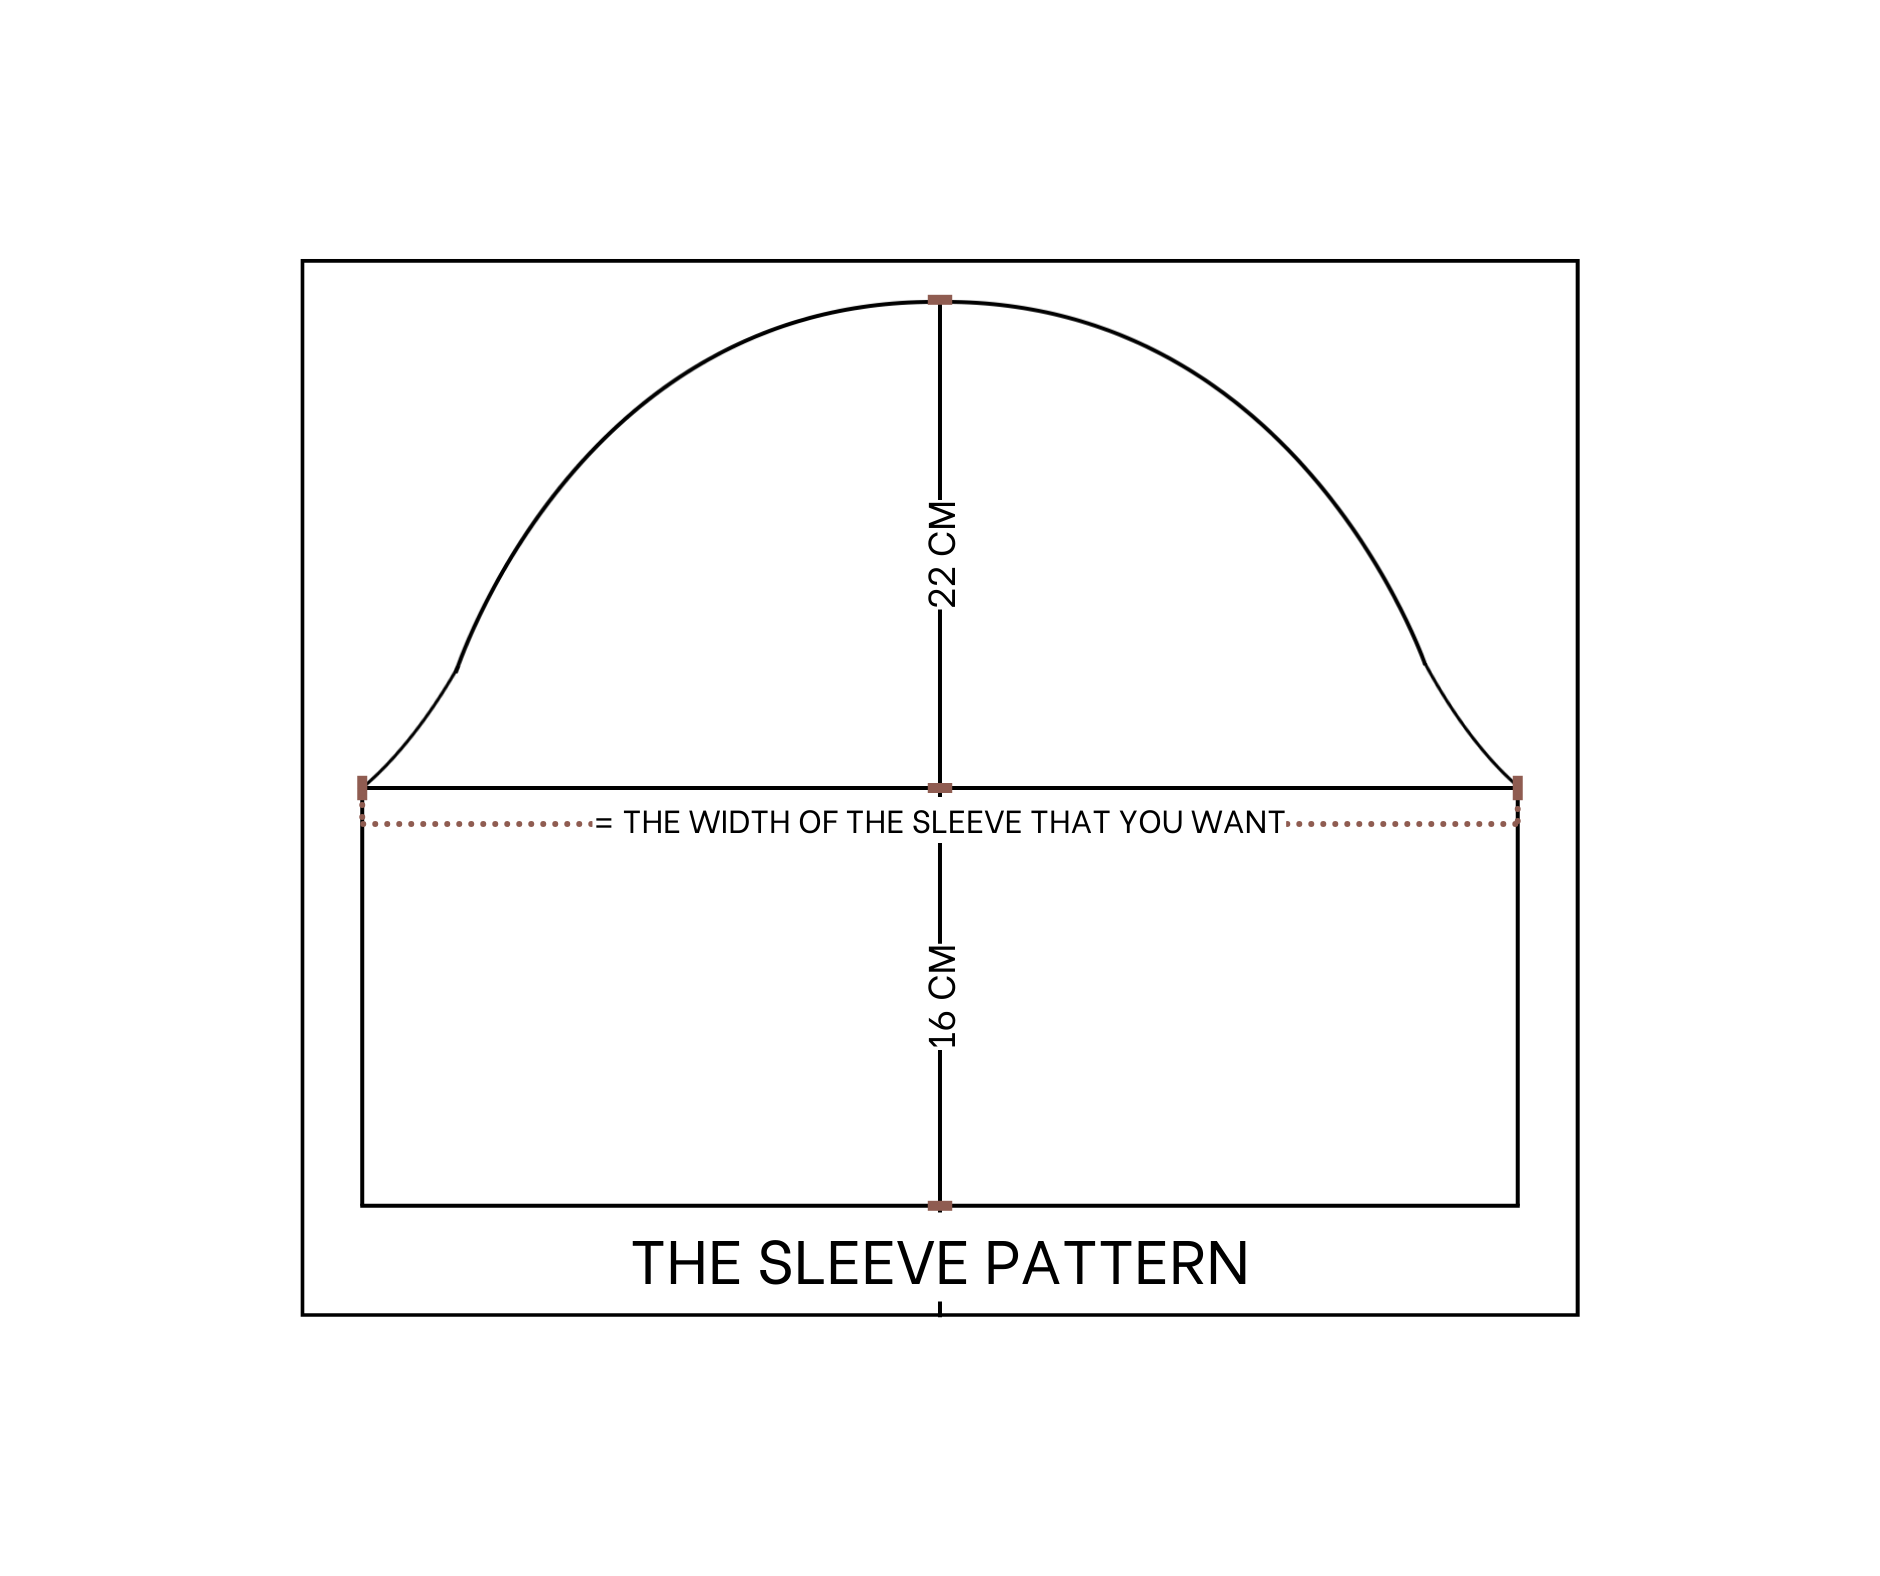
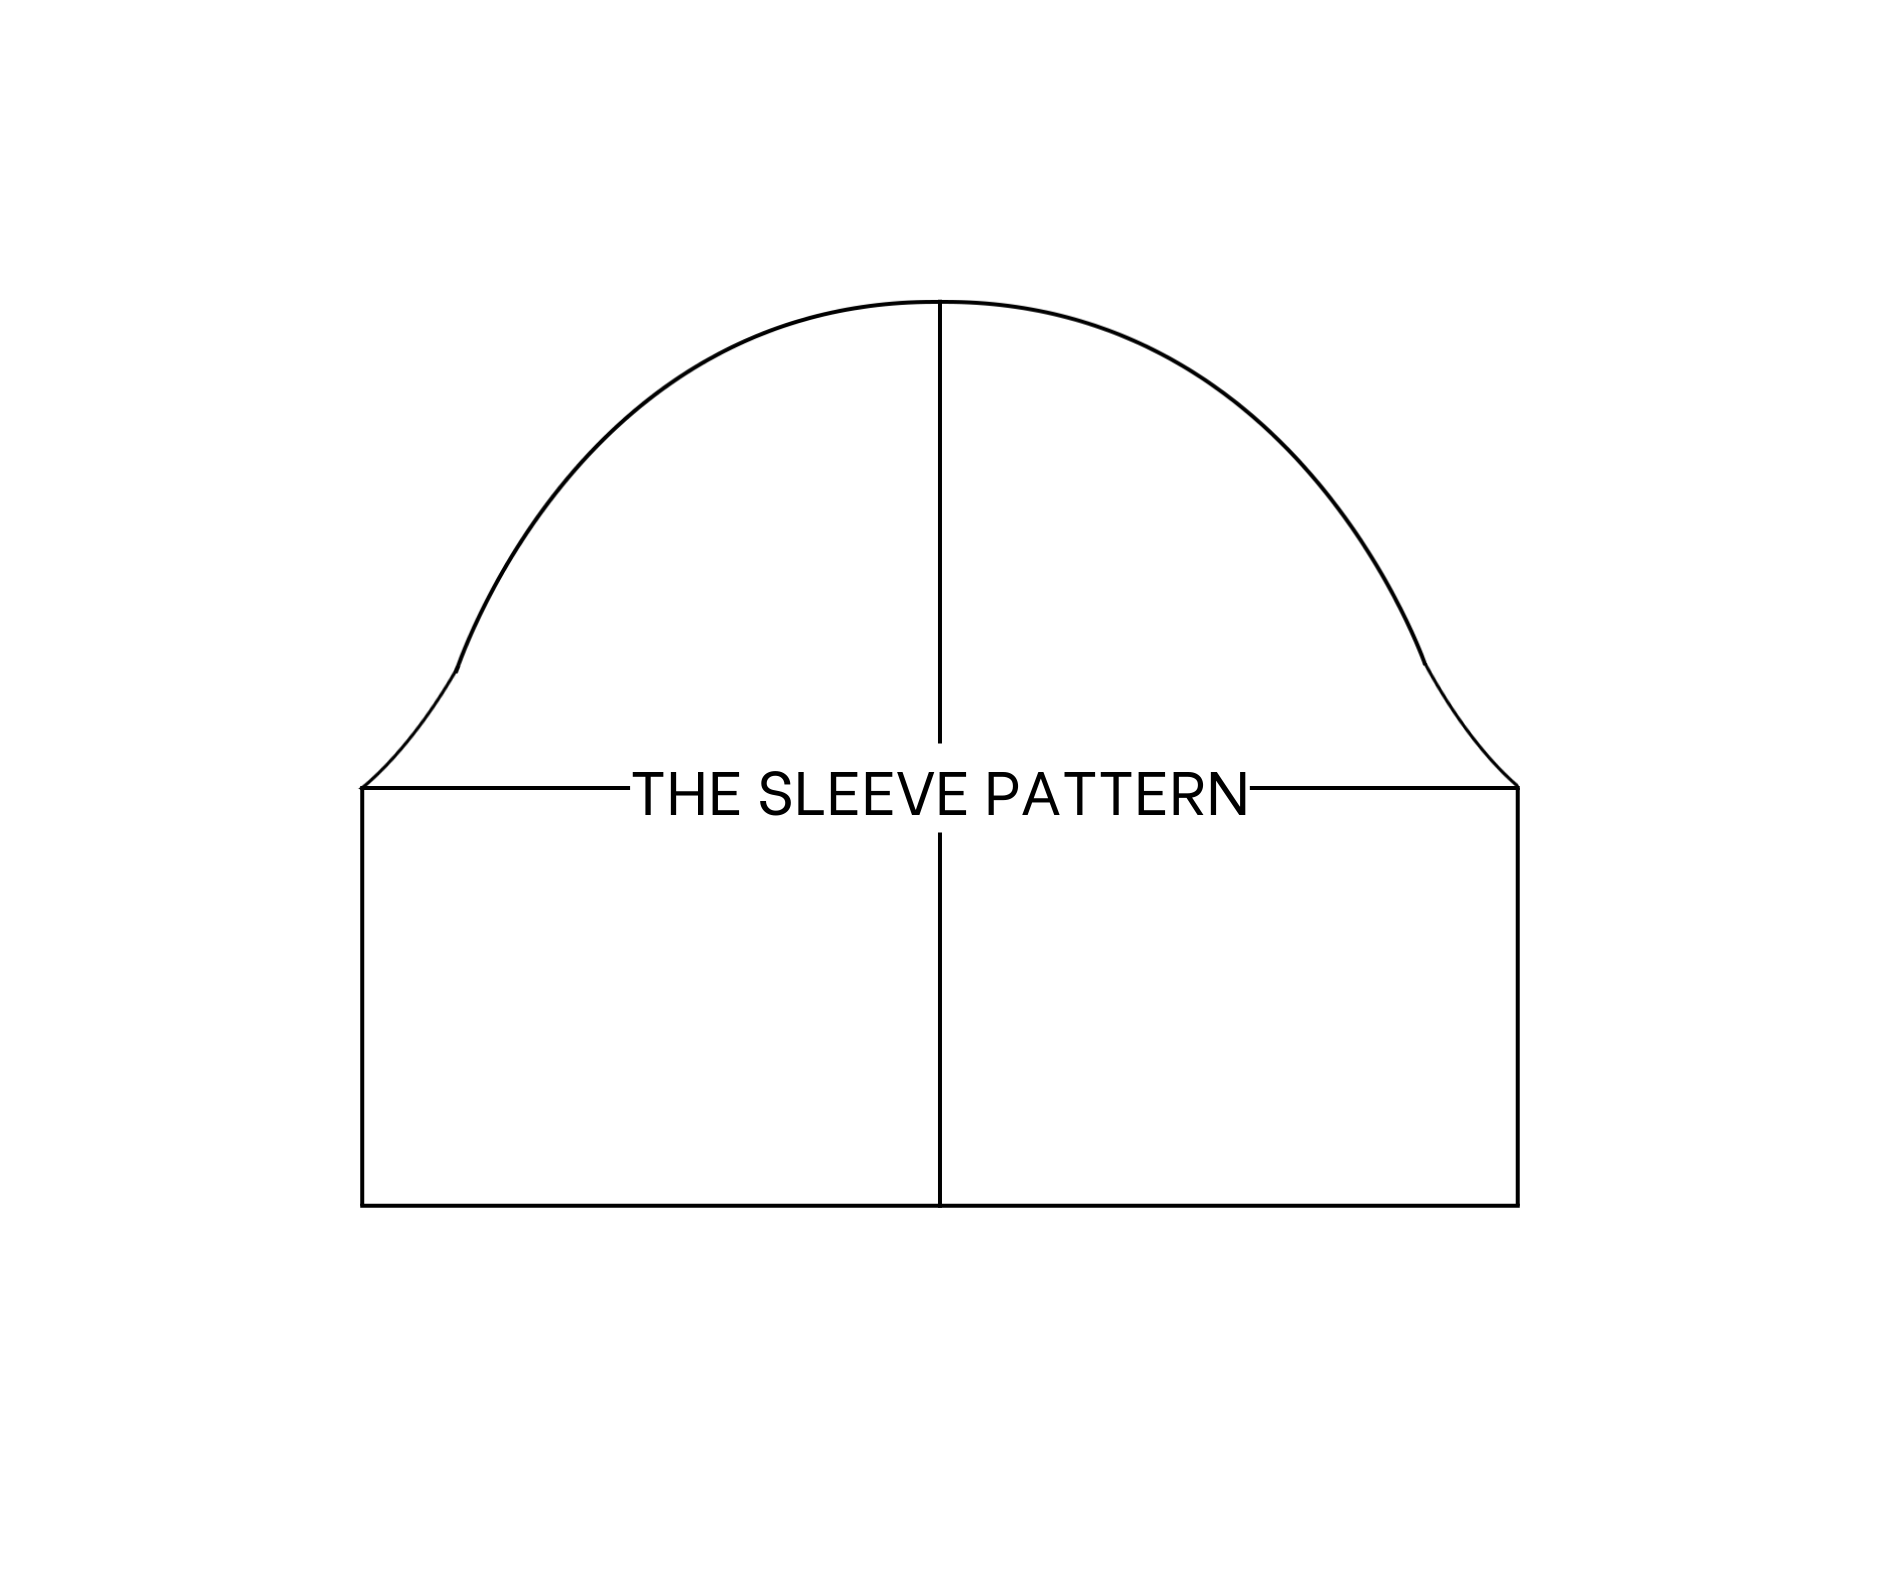
The sleeve pattern
To make the sleeve pattern, draw a horizontal line with 42 cm width which is two times the width from the shoulder to under the armpit.
Then use the front pattern to copy a part of the sleeve line to two ends of the horizontal line.
Draw a straight line at the middle of the horizontal line first, then from the middle point of the horizontal line, mark up 22 centimeters. After that, draw a curved line from two sleeve lines to this mark to finish the sleeve line of the pattern.
From the horizontal line, draw another one 16 cm under it so the width between this line and the mark at the top of the sleeve will be 38 cm, which is the length of the sleeve that you want.
Then draw a straight line from two ends of the first horizontal line to the second one to connect them together.
We will have the sleeve pattern after cutting.
THE POCKET PATTERN
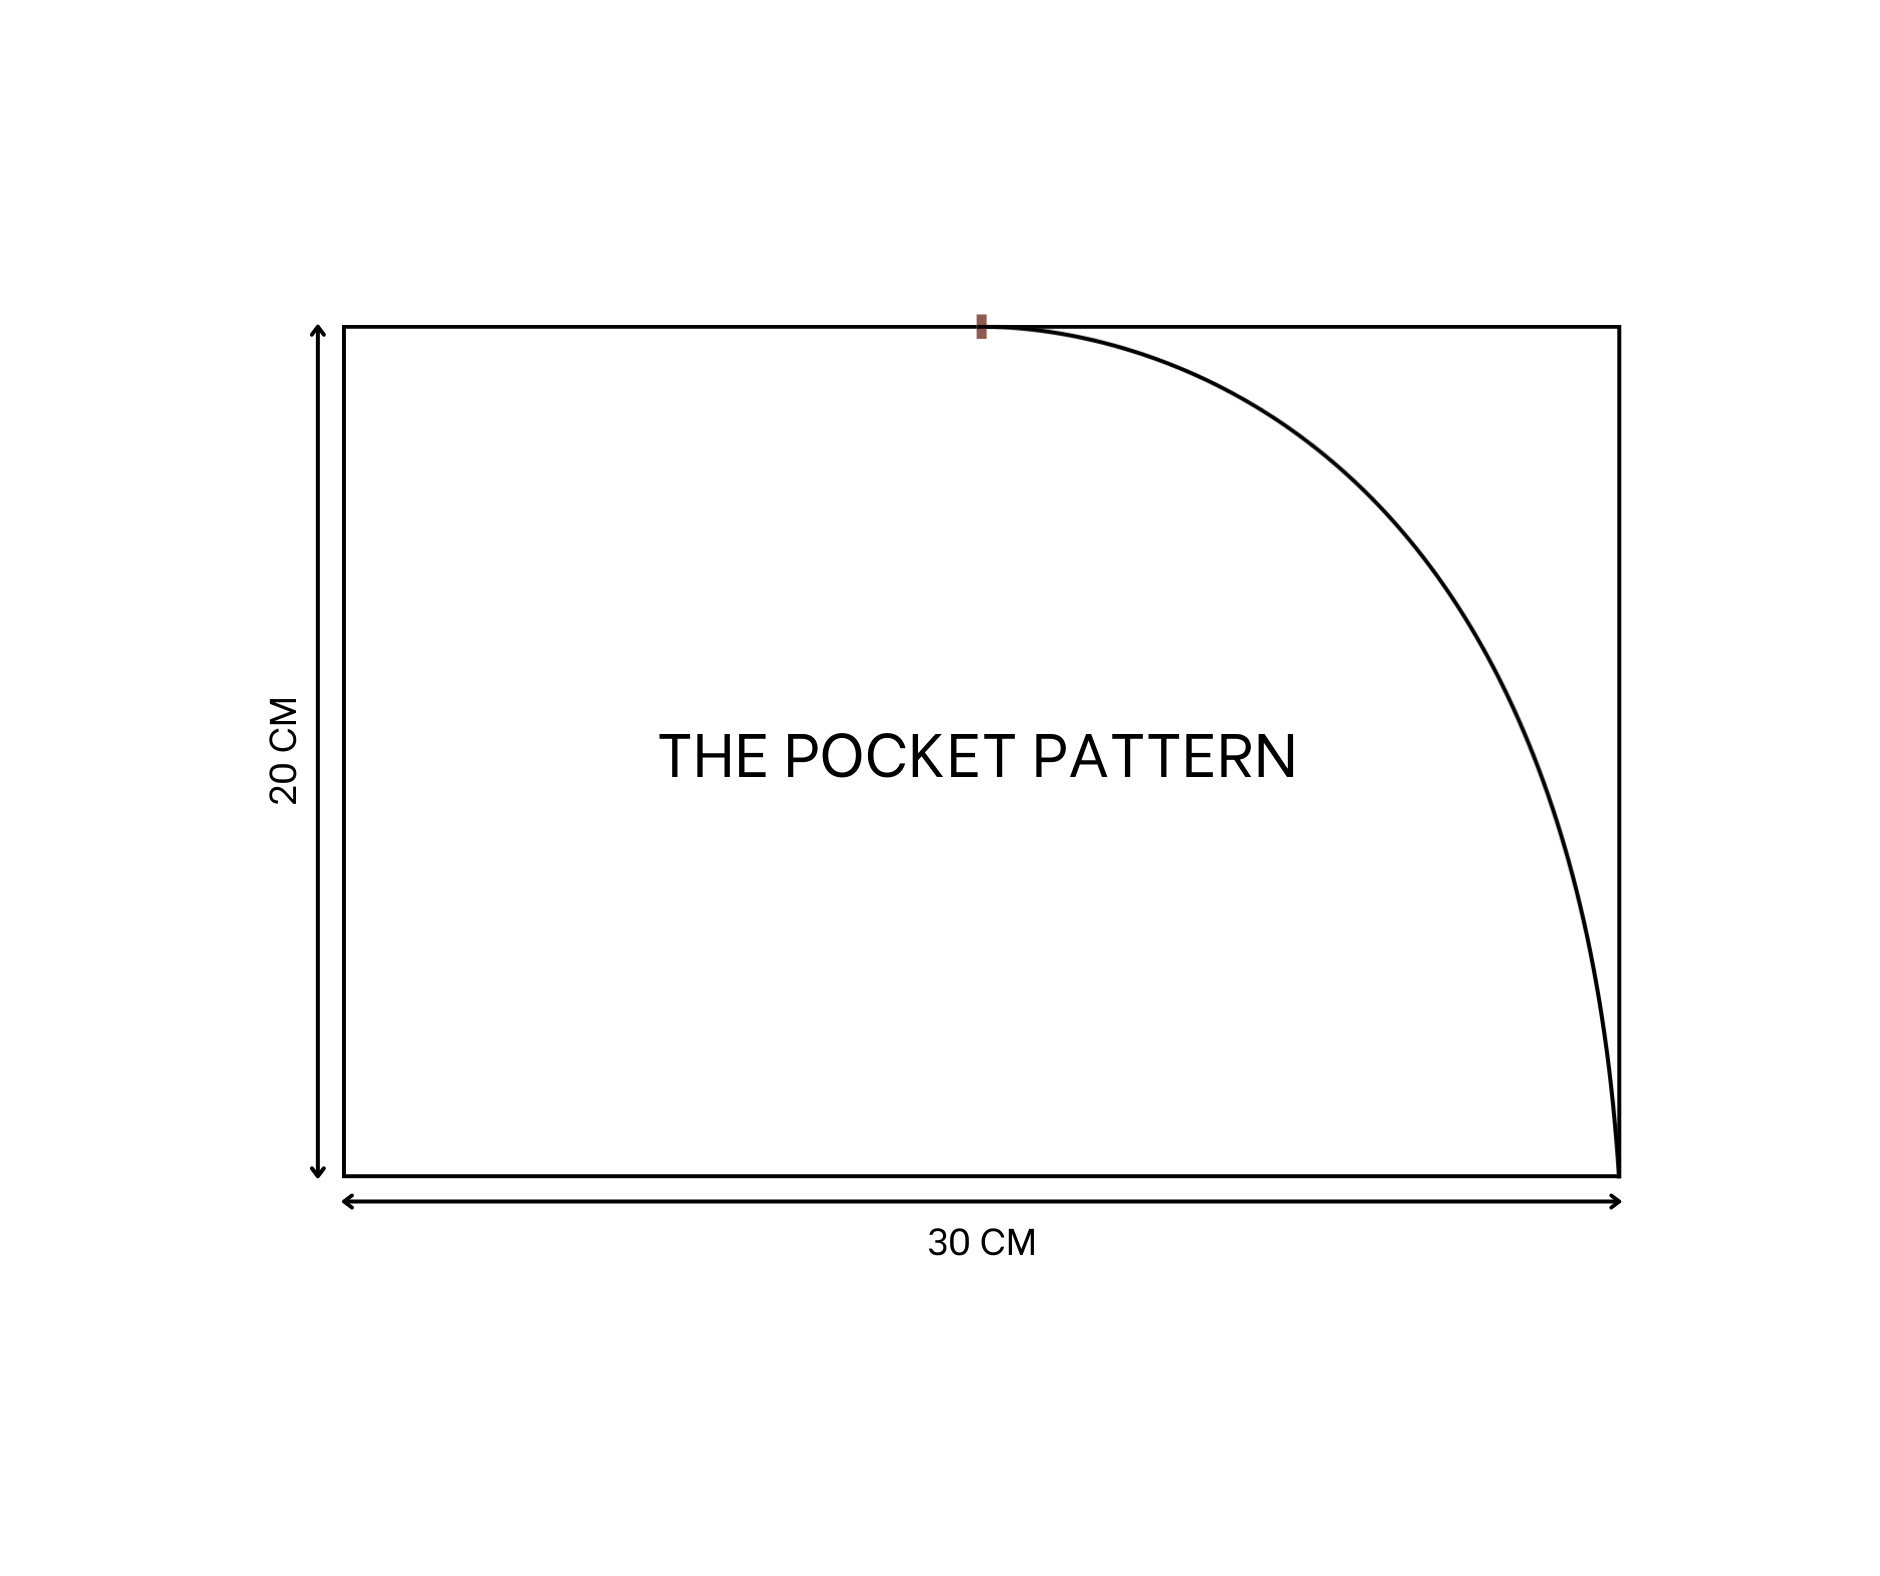
The pocket pattern
To make the pocket pattern, cut a rectangle with 20 cm length and 30 cm width.
On one width line, mark at the middle first, then from this mark draw a curved line to connect to one end at the same side on the other width line.
We will have the pocket pattern after cutting.
THE BOTTOM PATTERN

The bottom pattern
Moving to the bottom of the dress, cut two rectangles with 67 cm width which is the same with the width of the back at the top dress and 80 cm length which is the length from the under butt to over my knee.
We will have the bottom pattern after cutting.
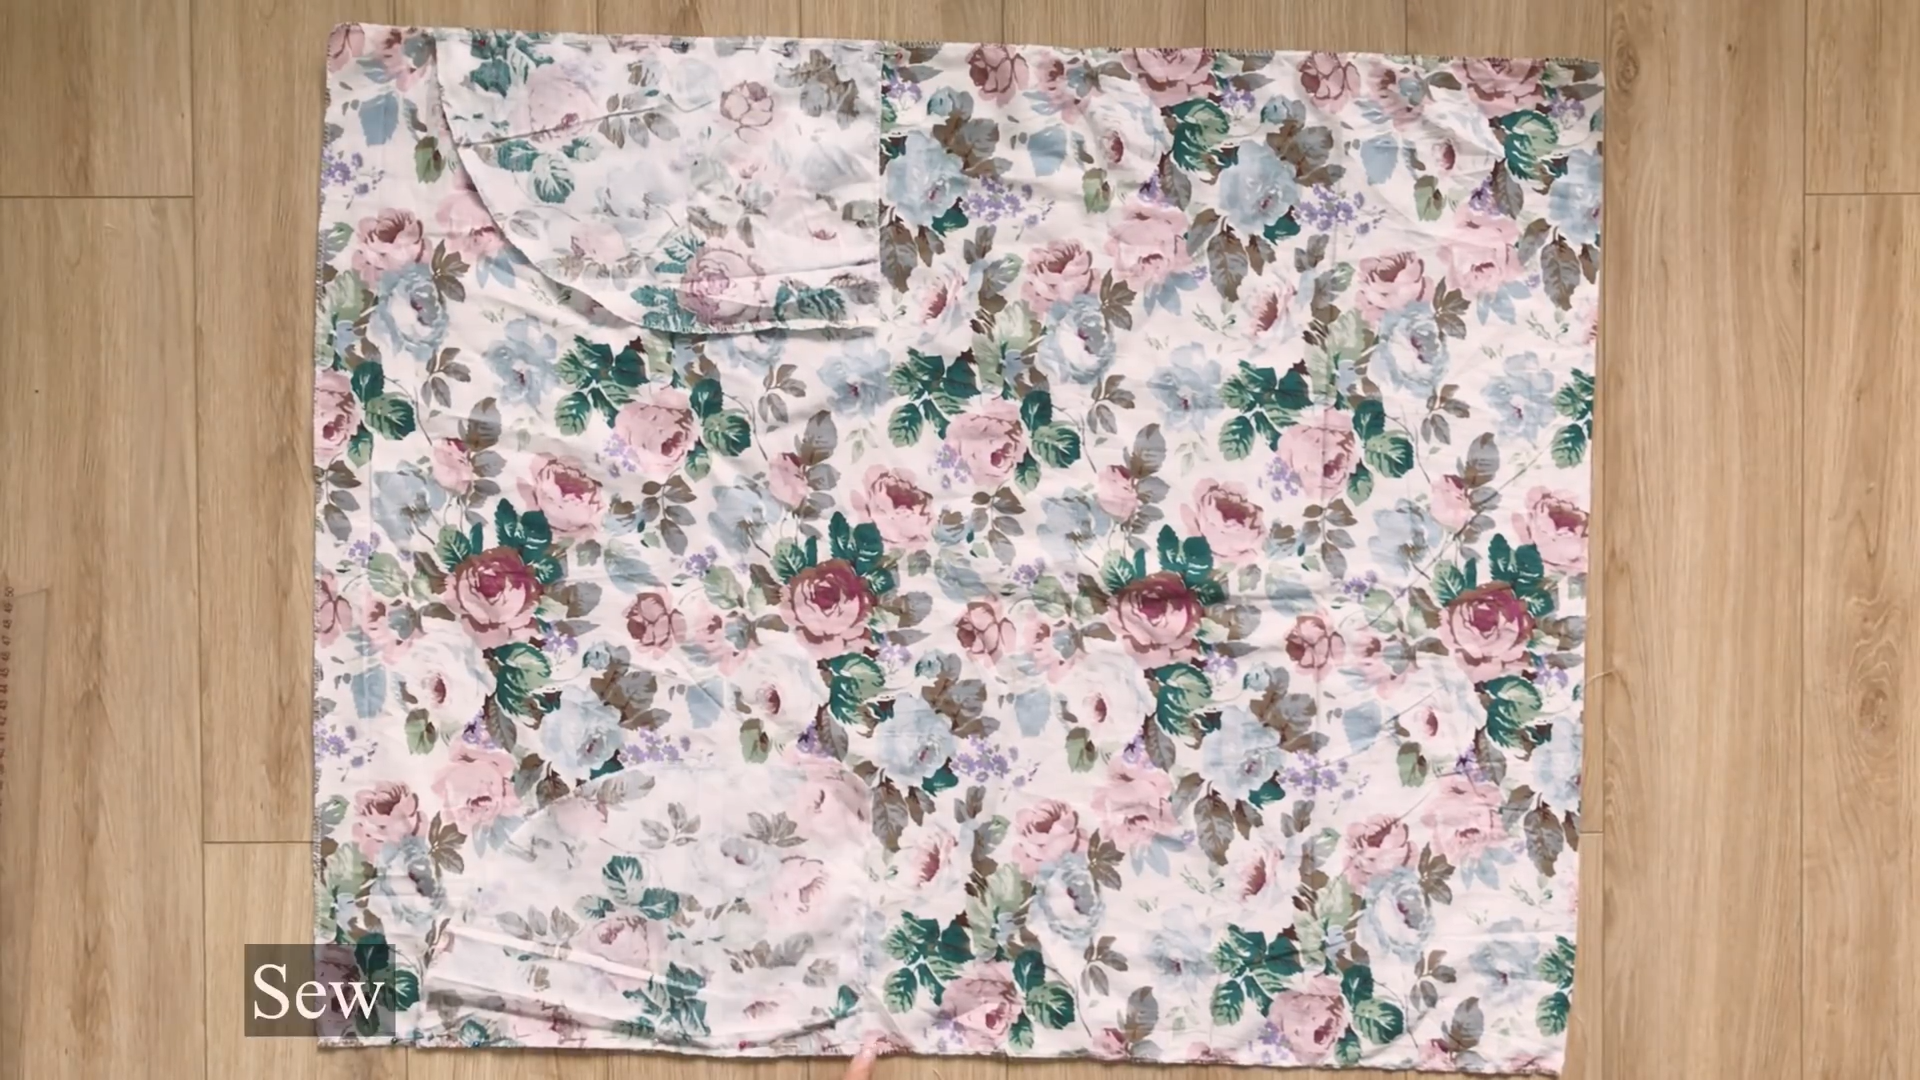
SEWING THE DRESS
CUT OUT THE PARTS
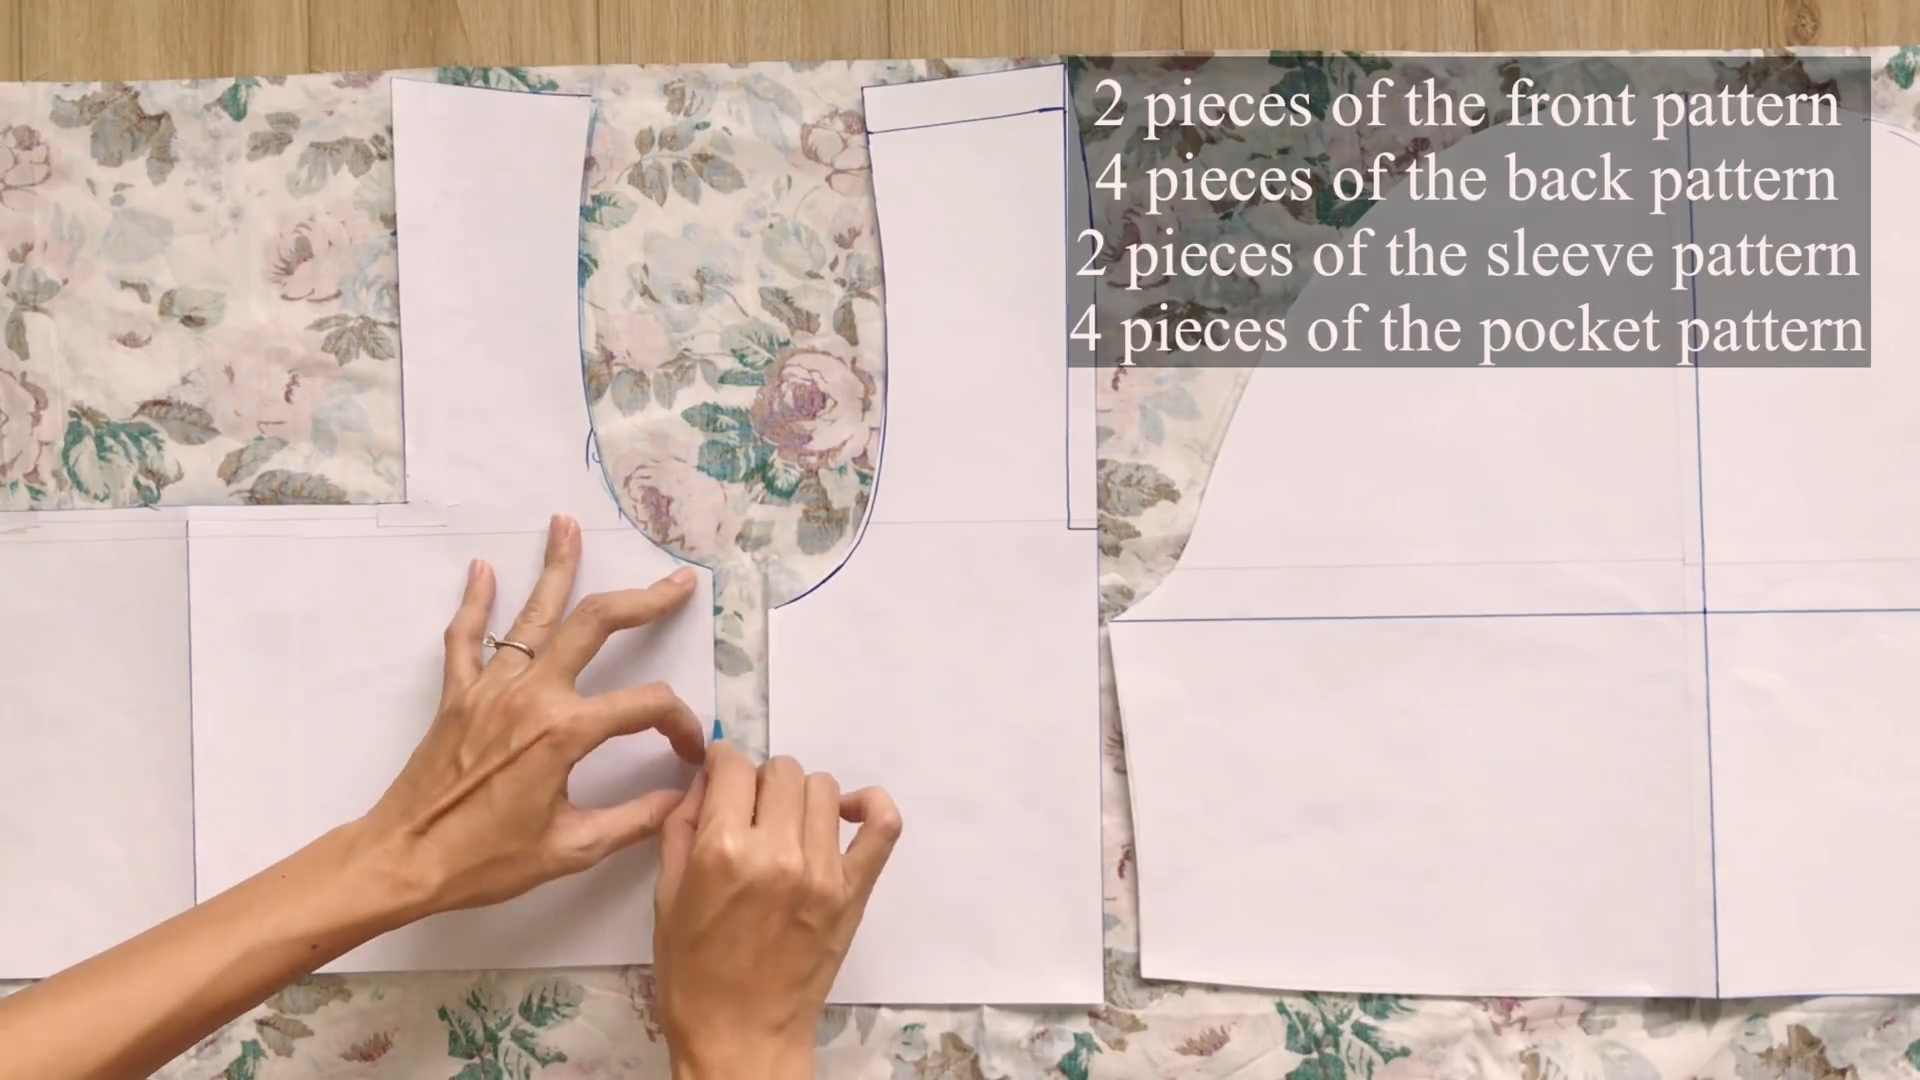
Apply the patterns to the fabric to cut out the parts.
THE BODICE PART
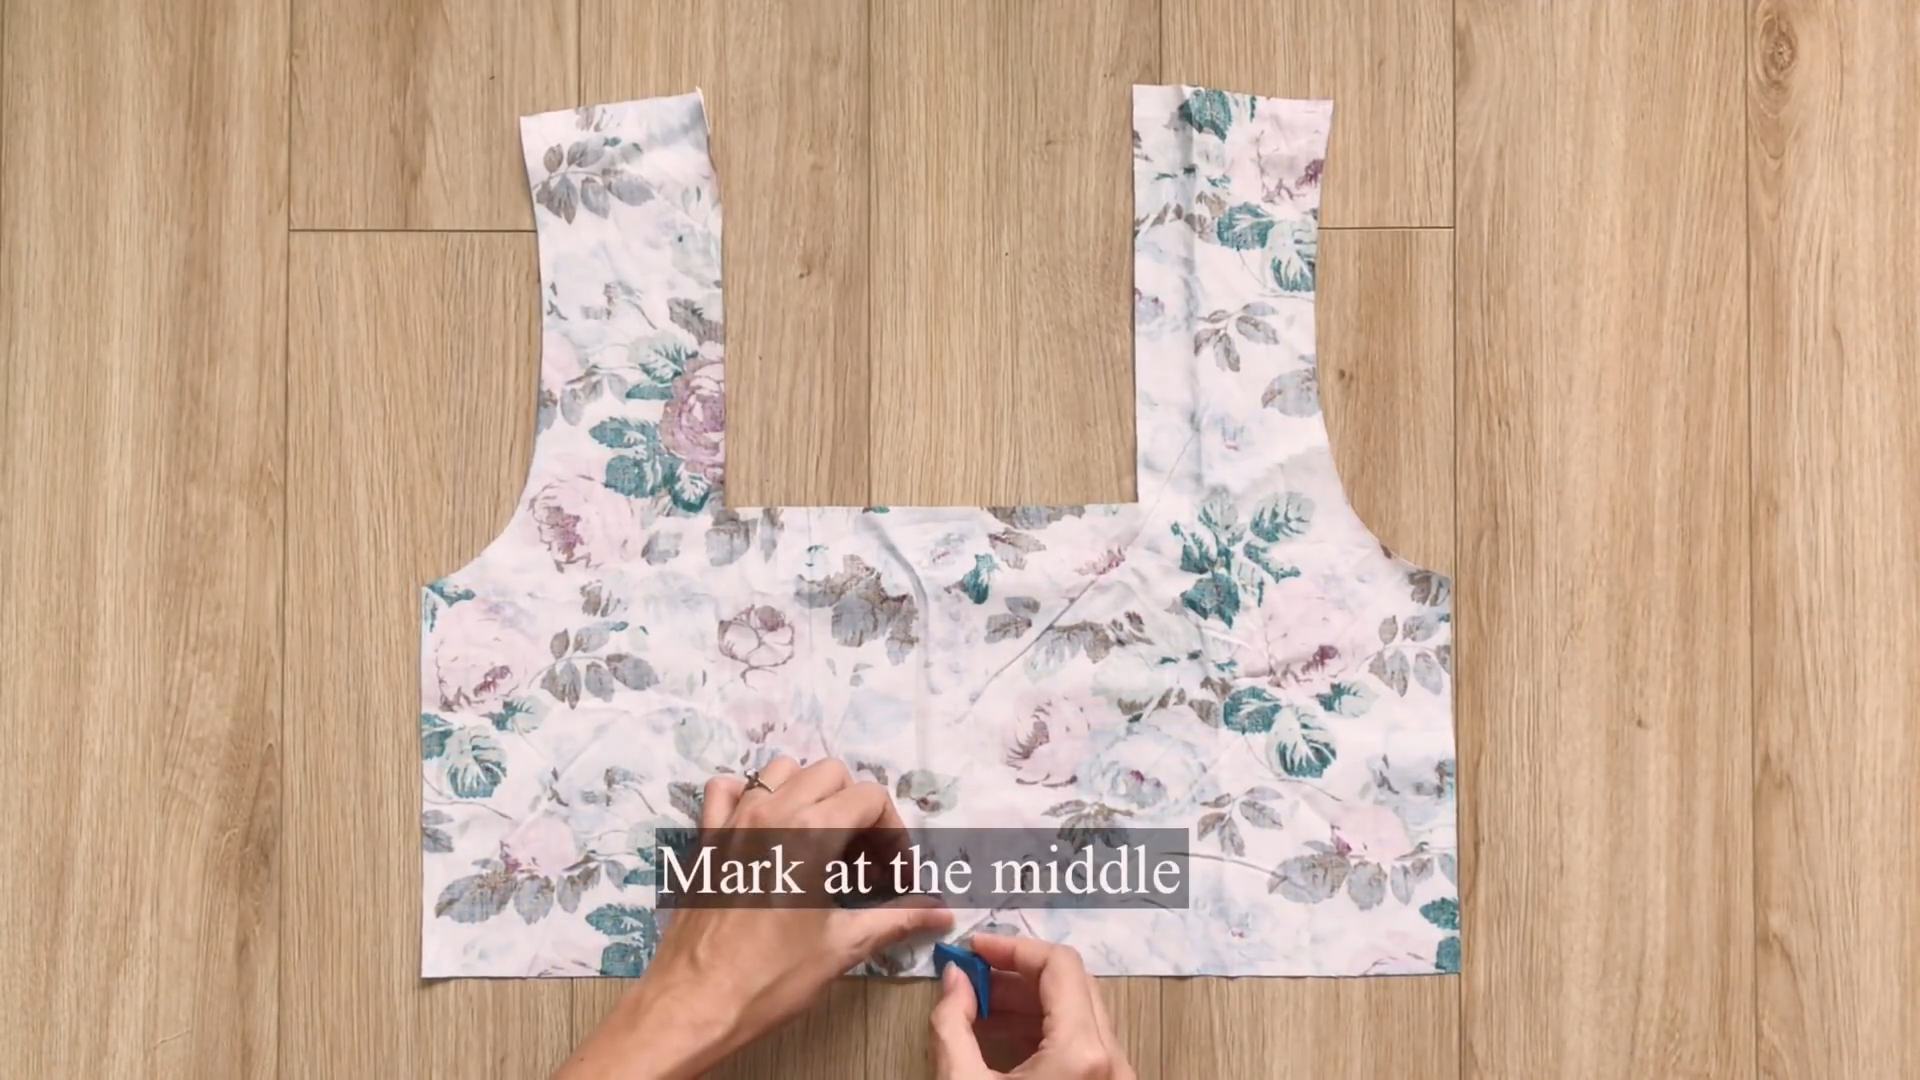
Mark the midpoint of the front piece.
Continue halving each section to mark for darts.
Draw a 12cm line upwards from the midpoint mark.
Create two 2cm-wide triangles at the top of this line.
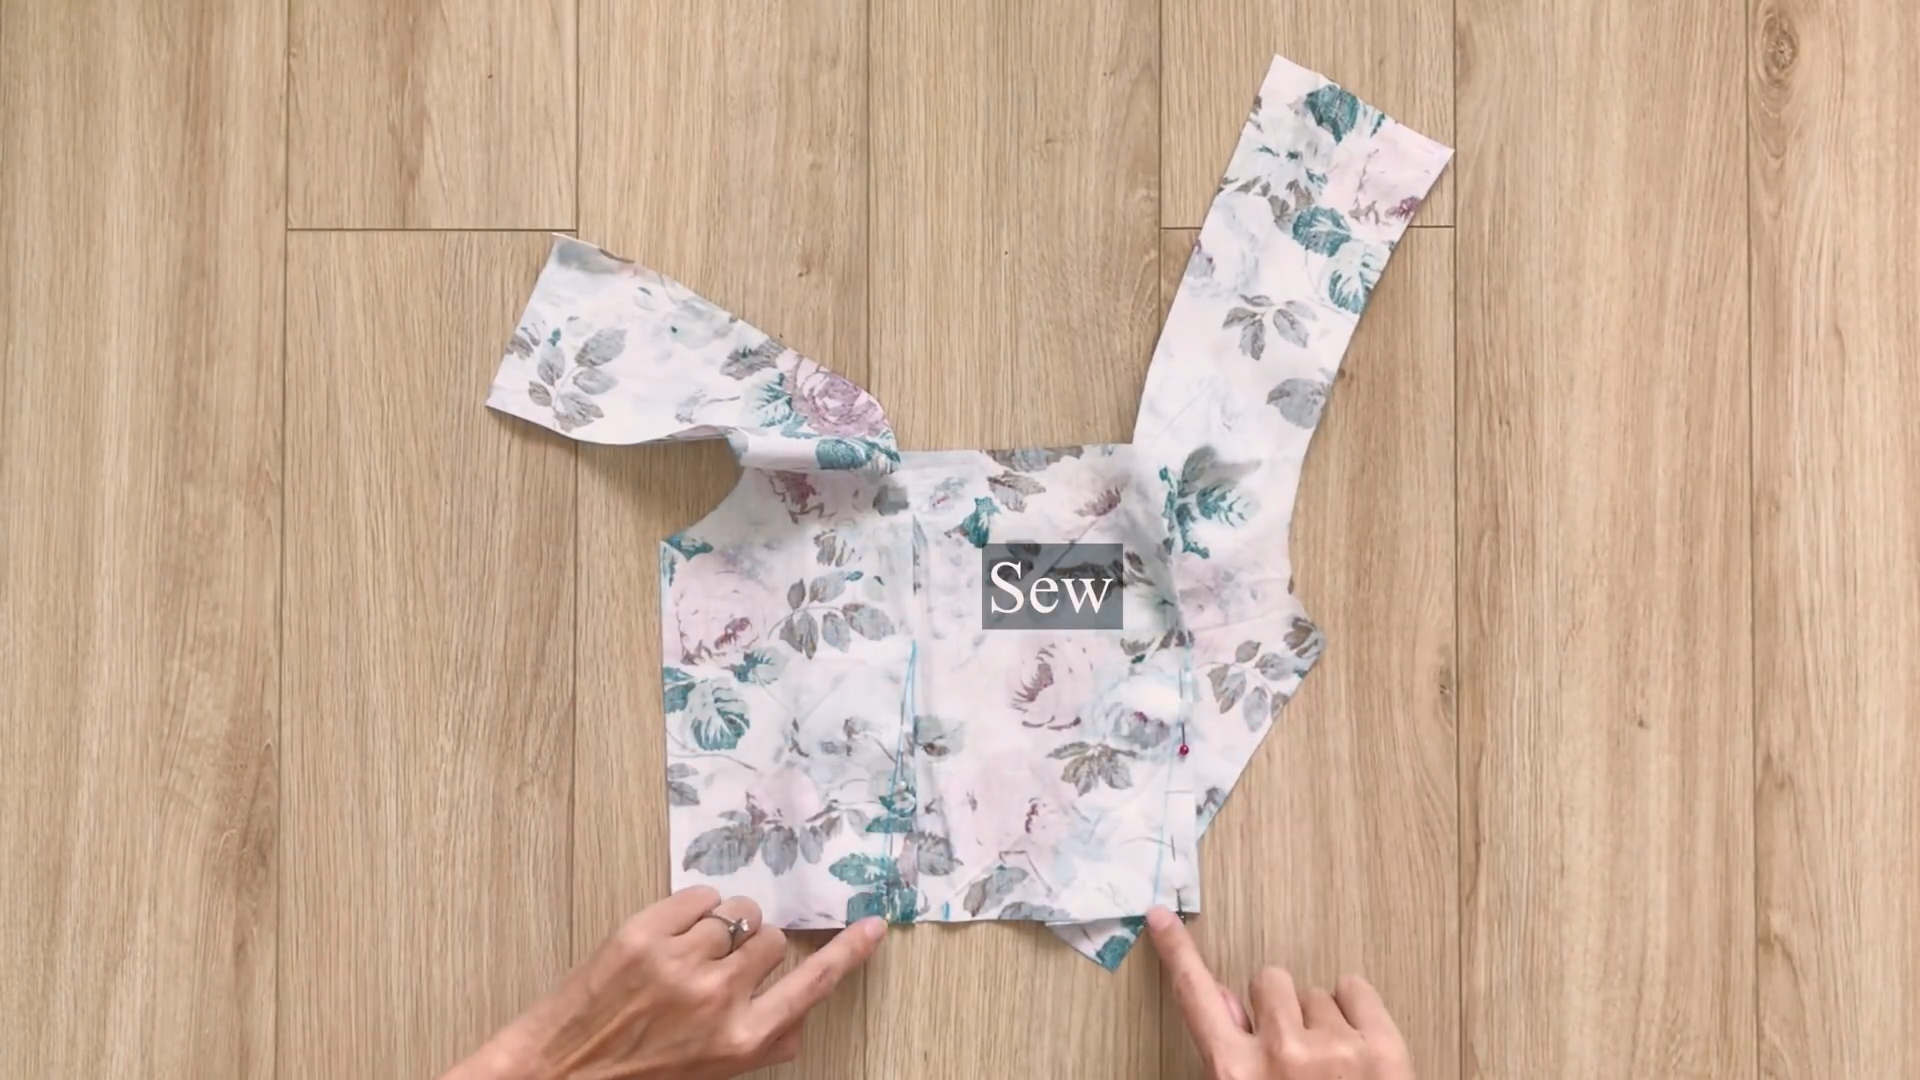
Fold the triangles inward along the initial line.
Stitch along the fold to create a neat dart.
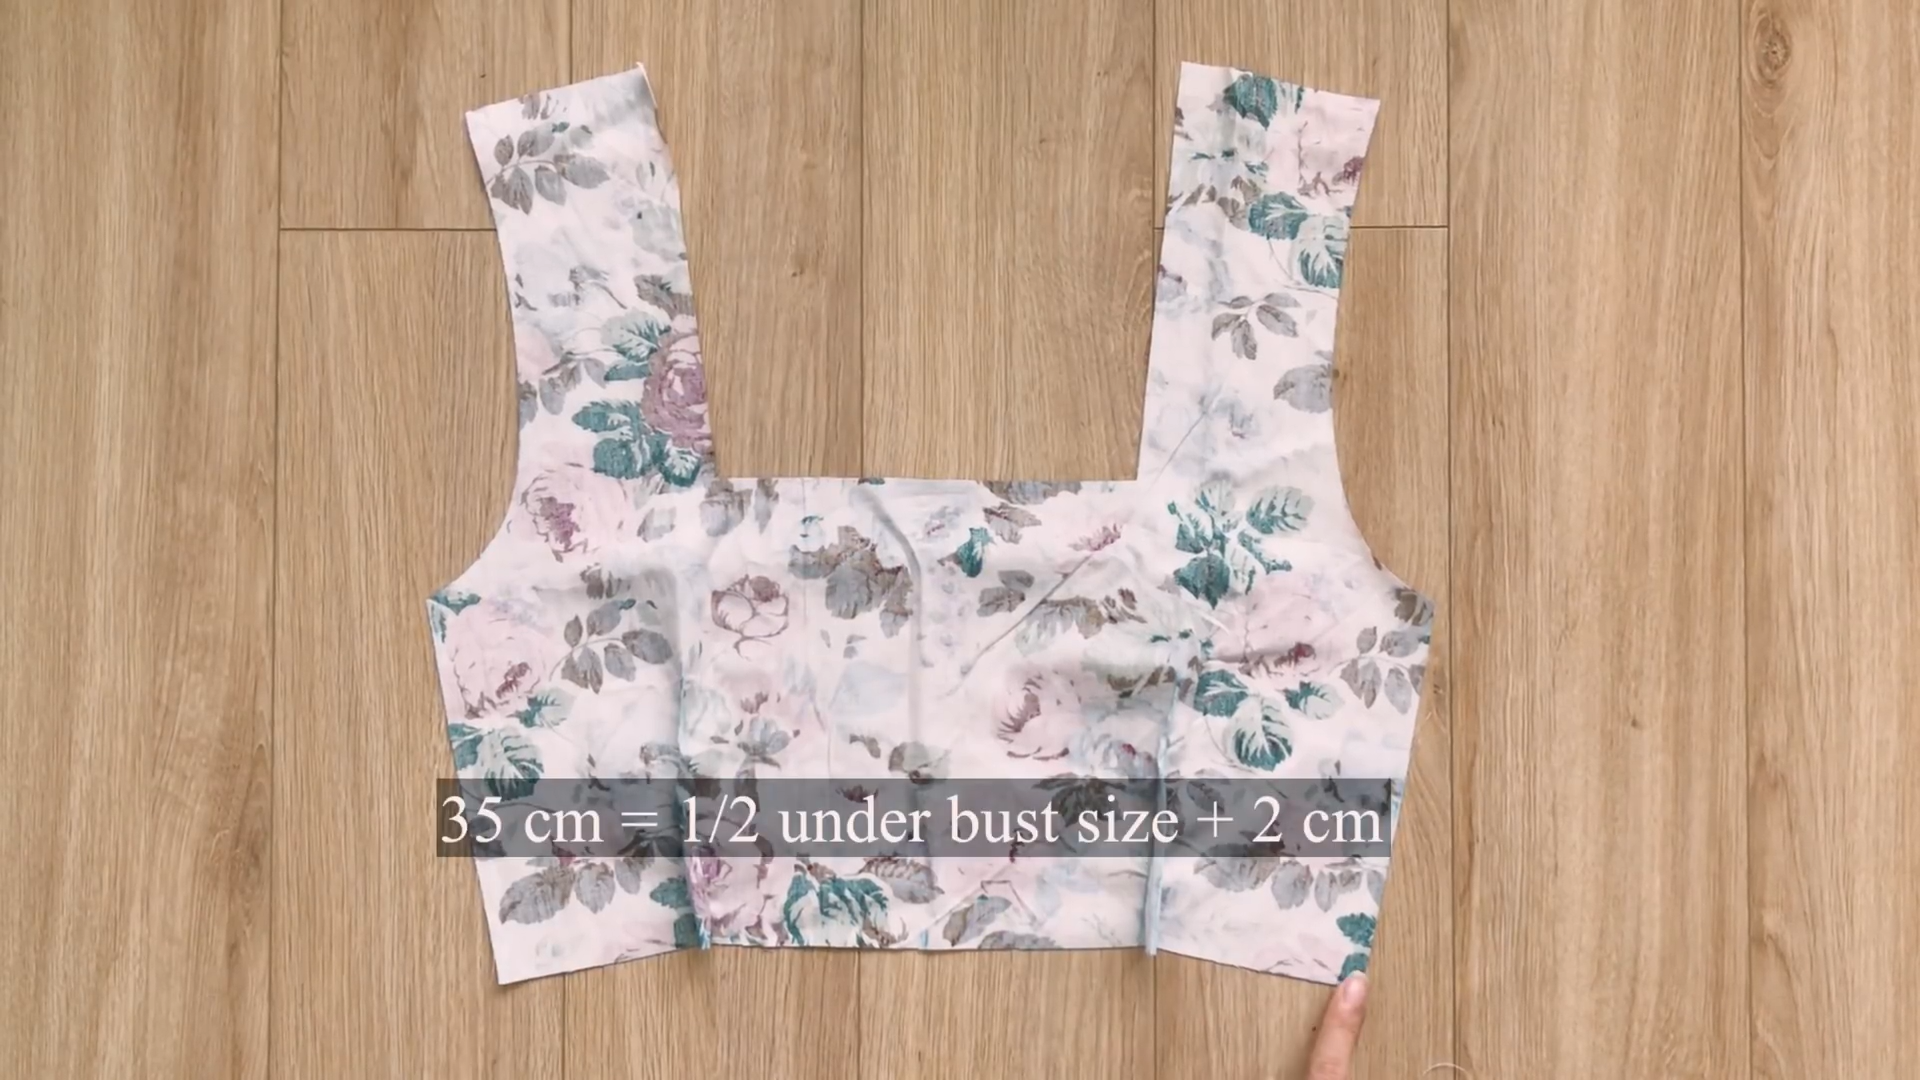
The end width of the front part will be 35cm which is half of the under-bust size plus seam allowance.

Repeat the process for the second front piece.
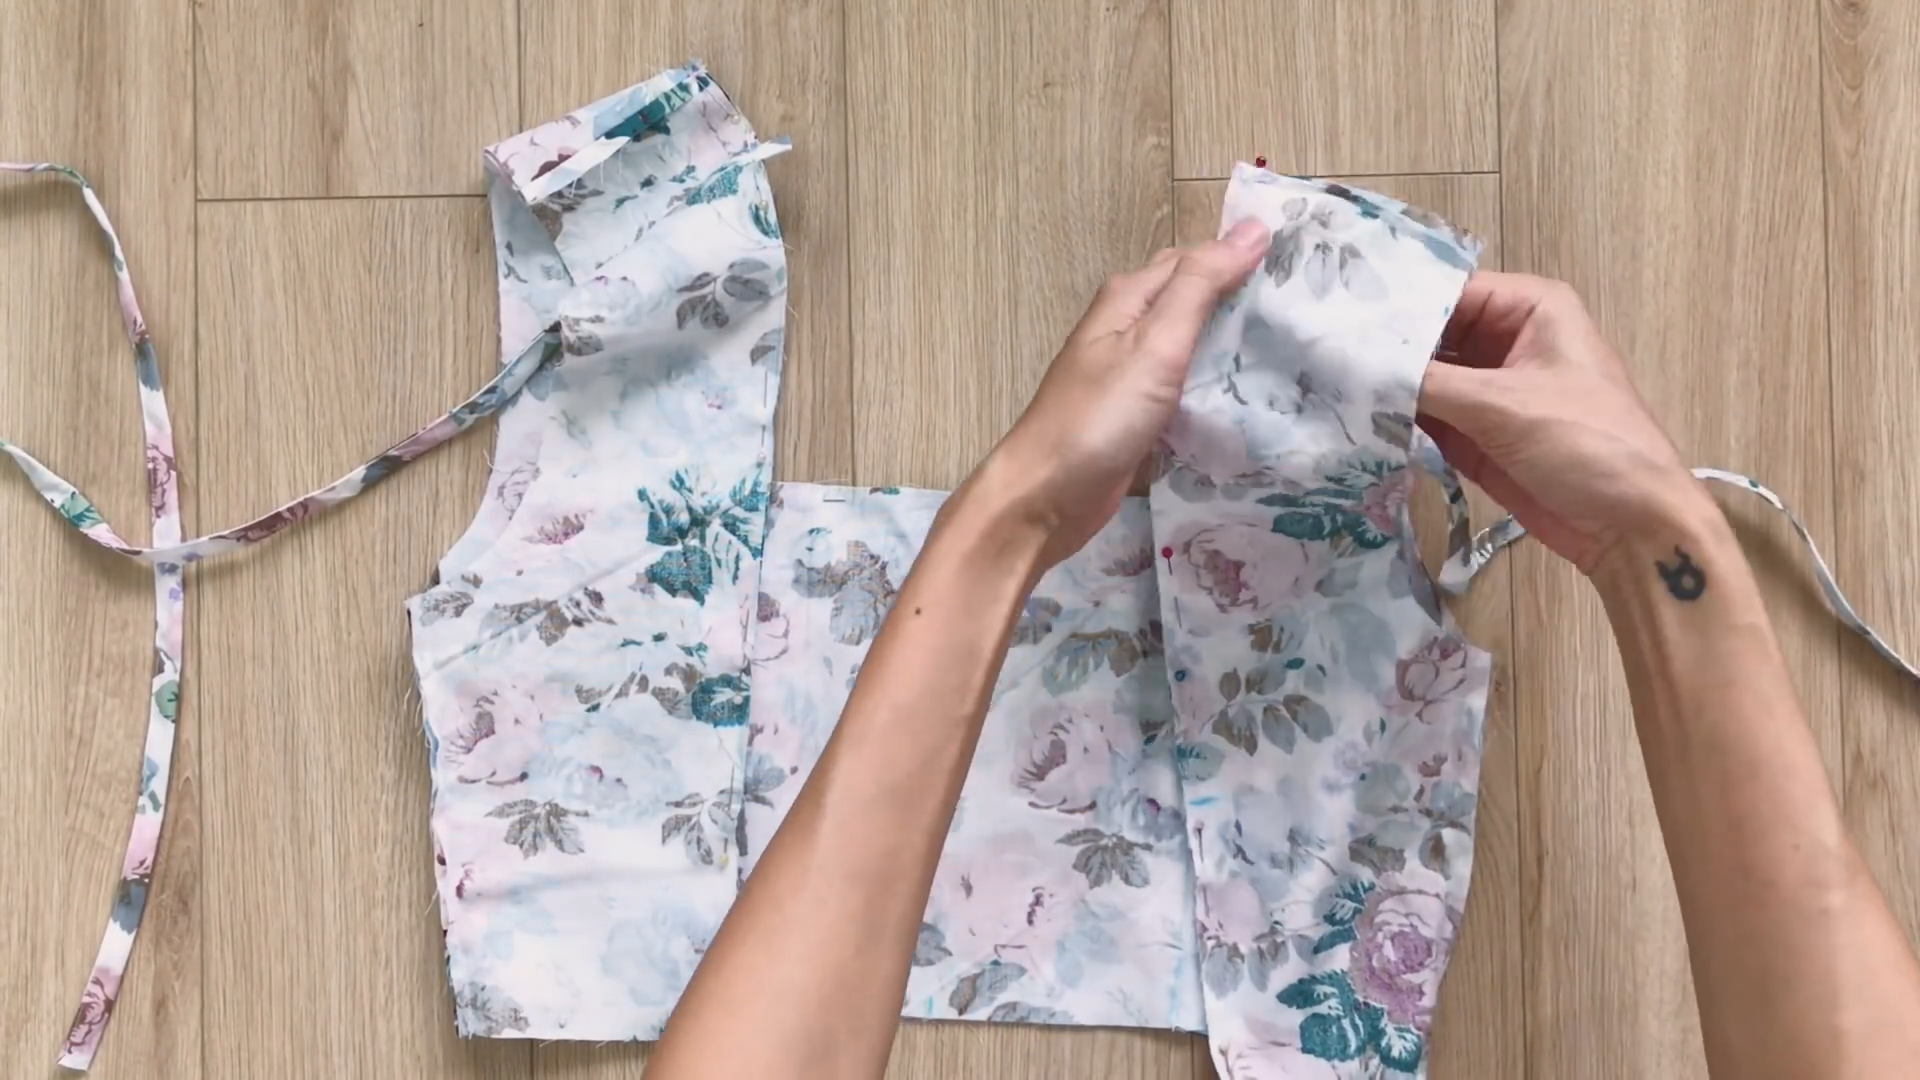
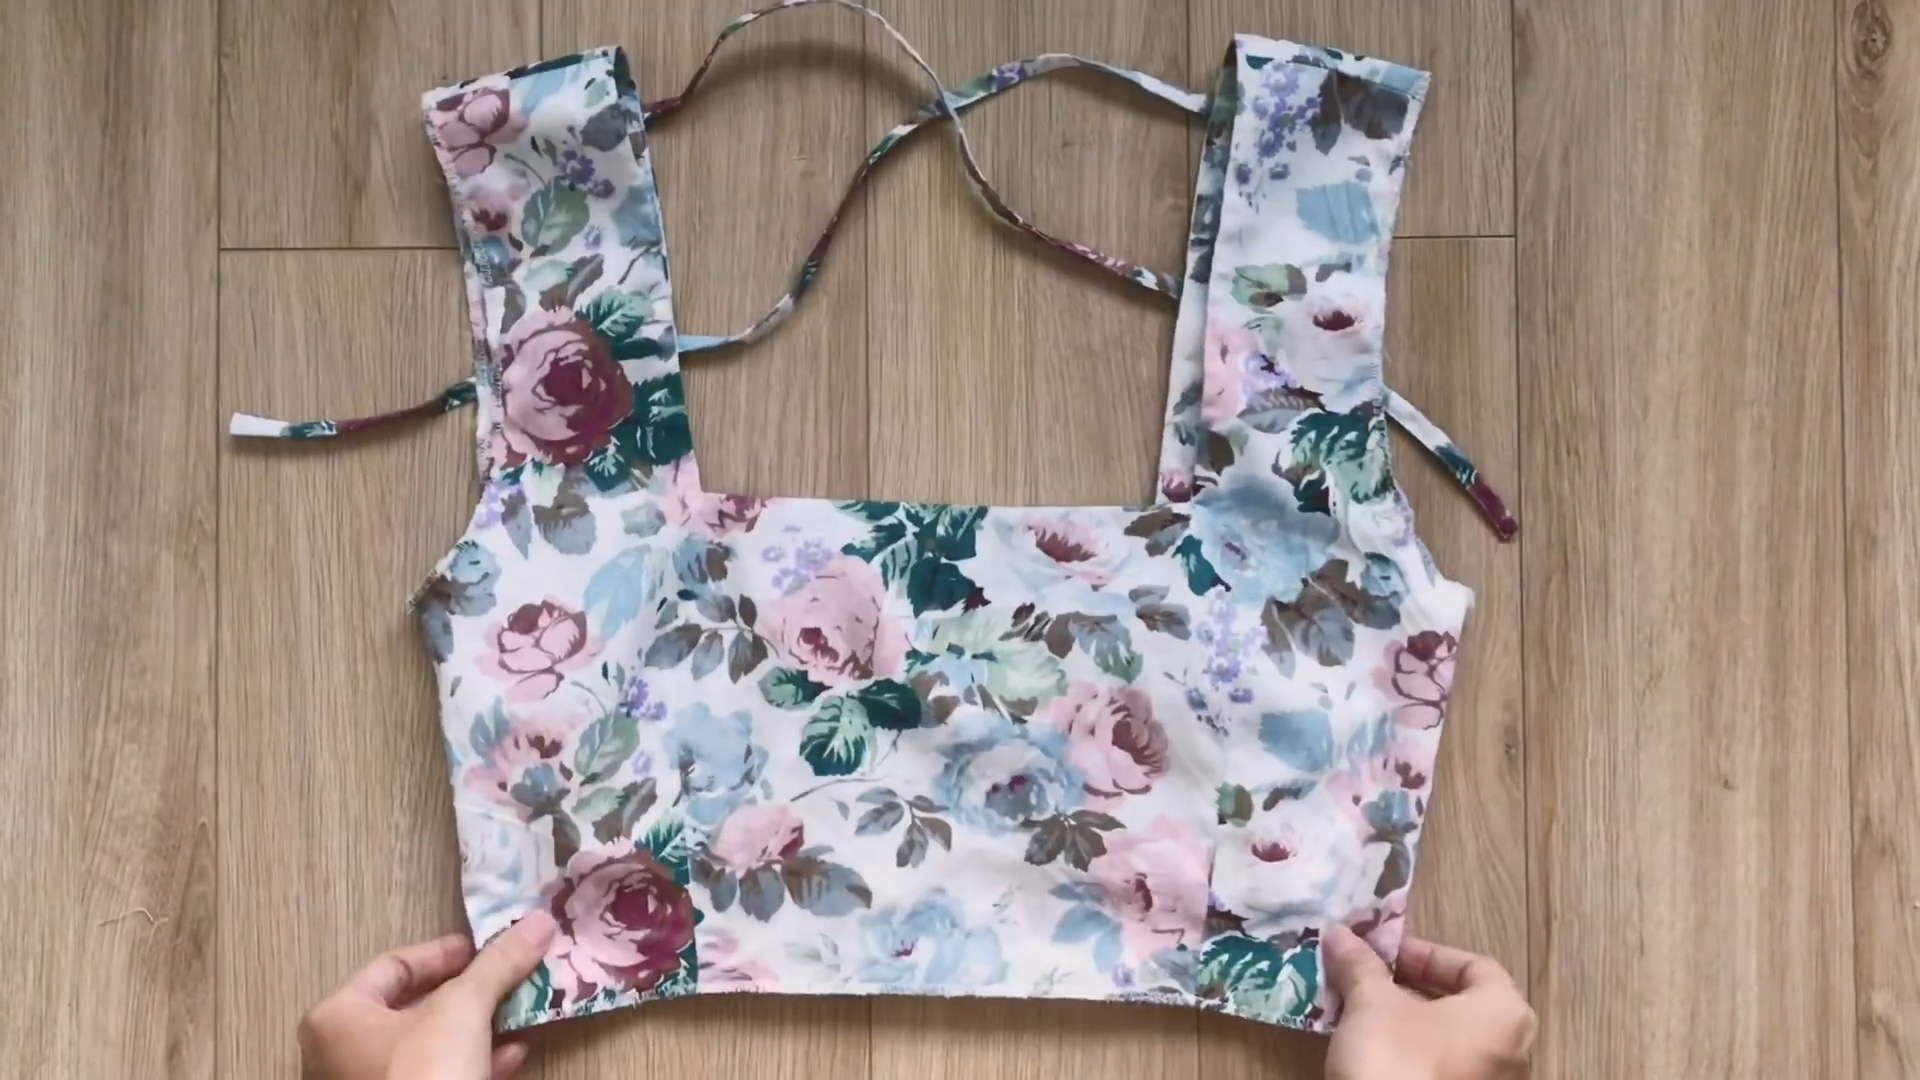
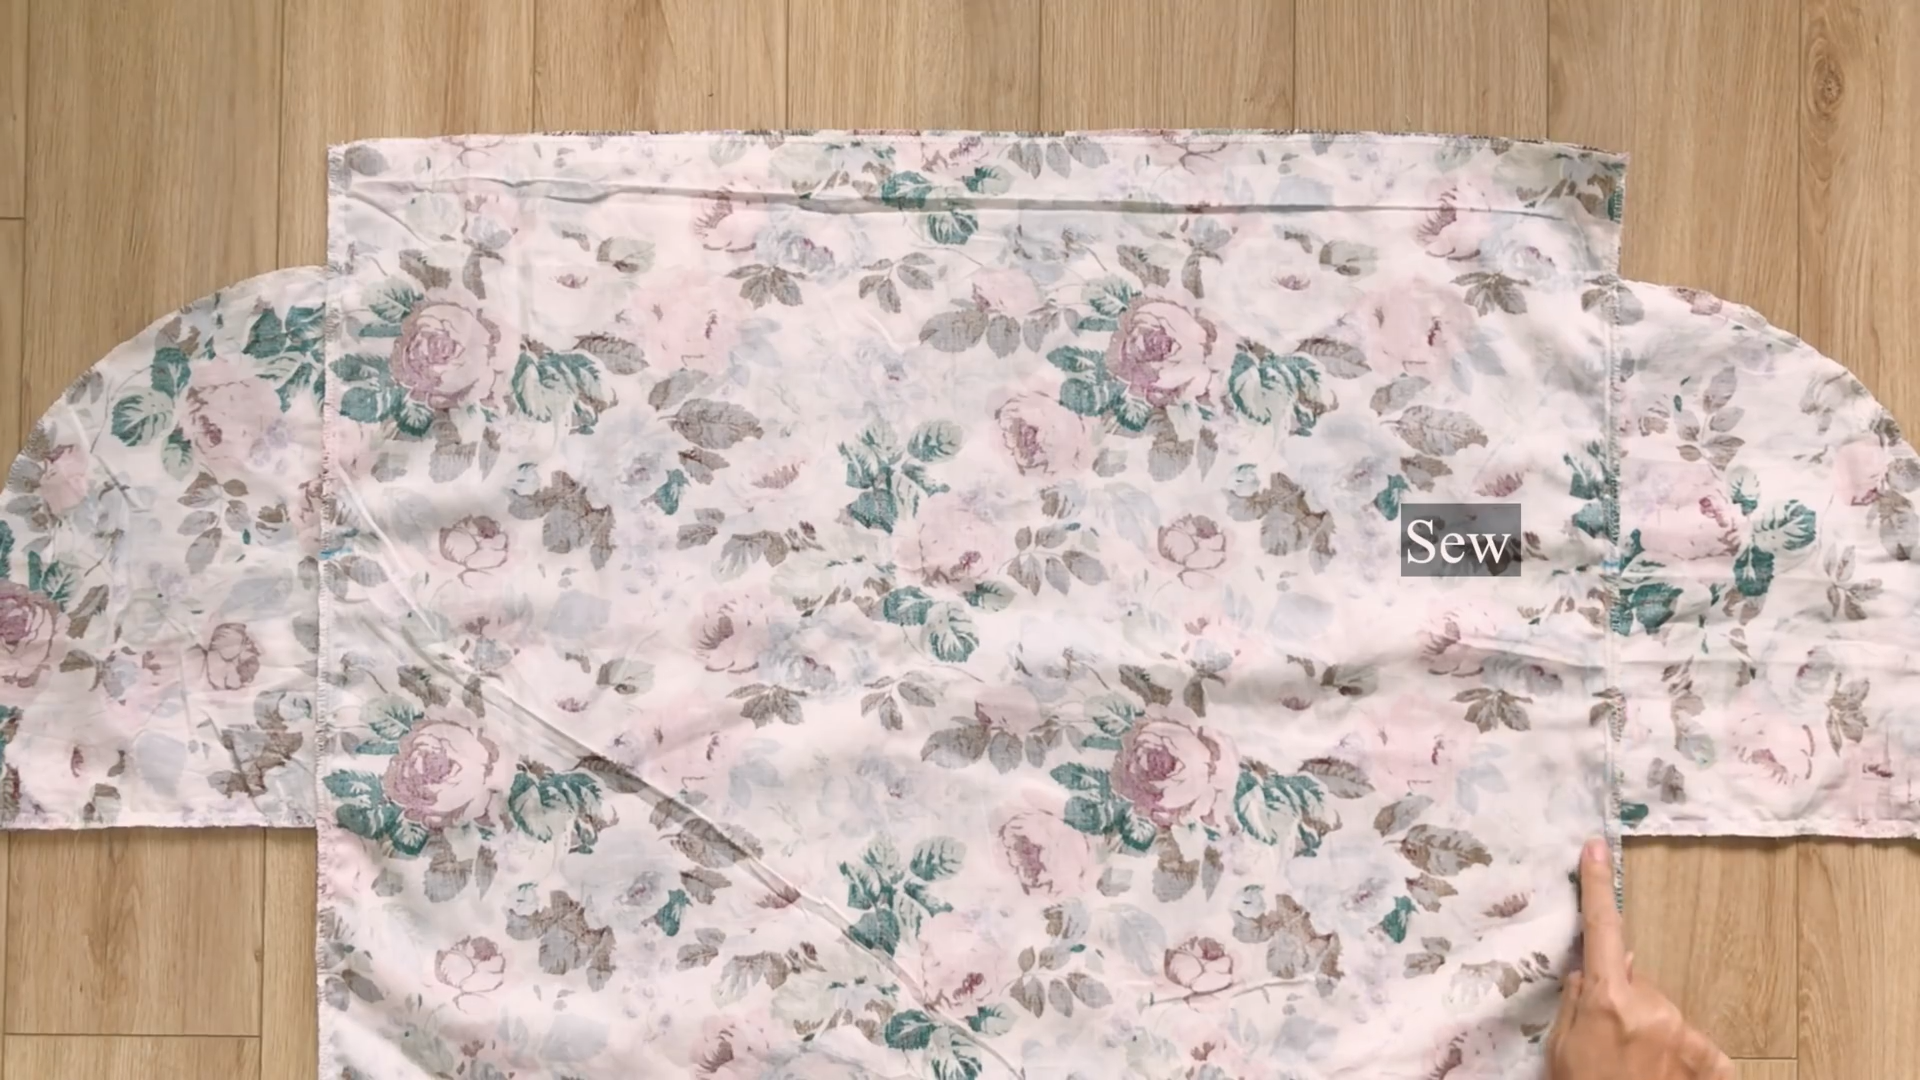
Attach front and back pieces at the shoulders.
Trim back piece if necessary to match front due to dart placement.
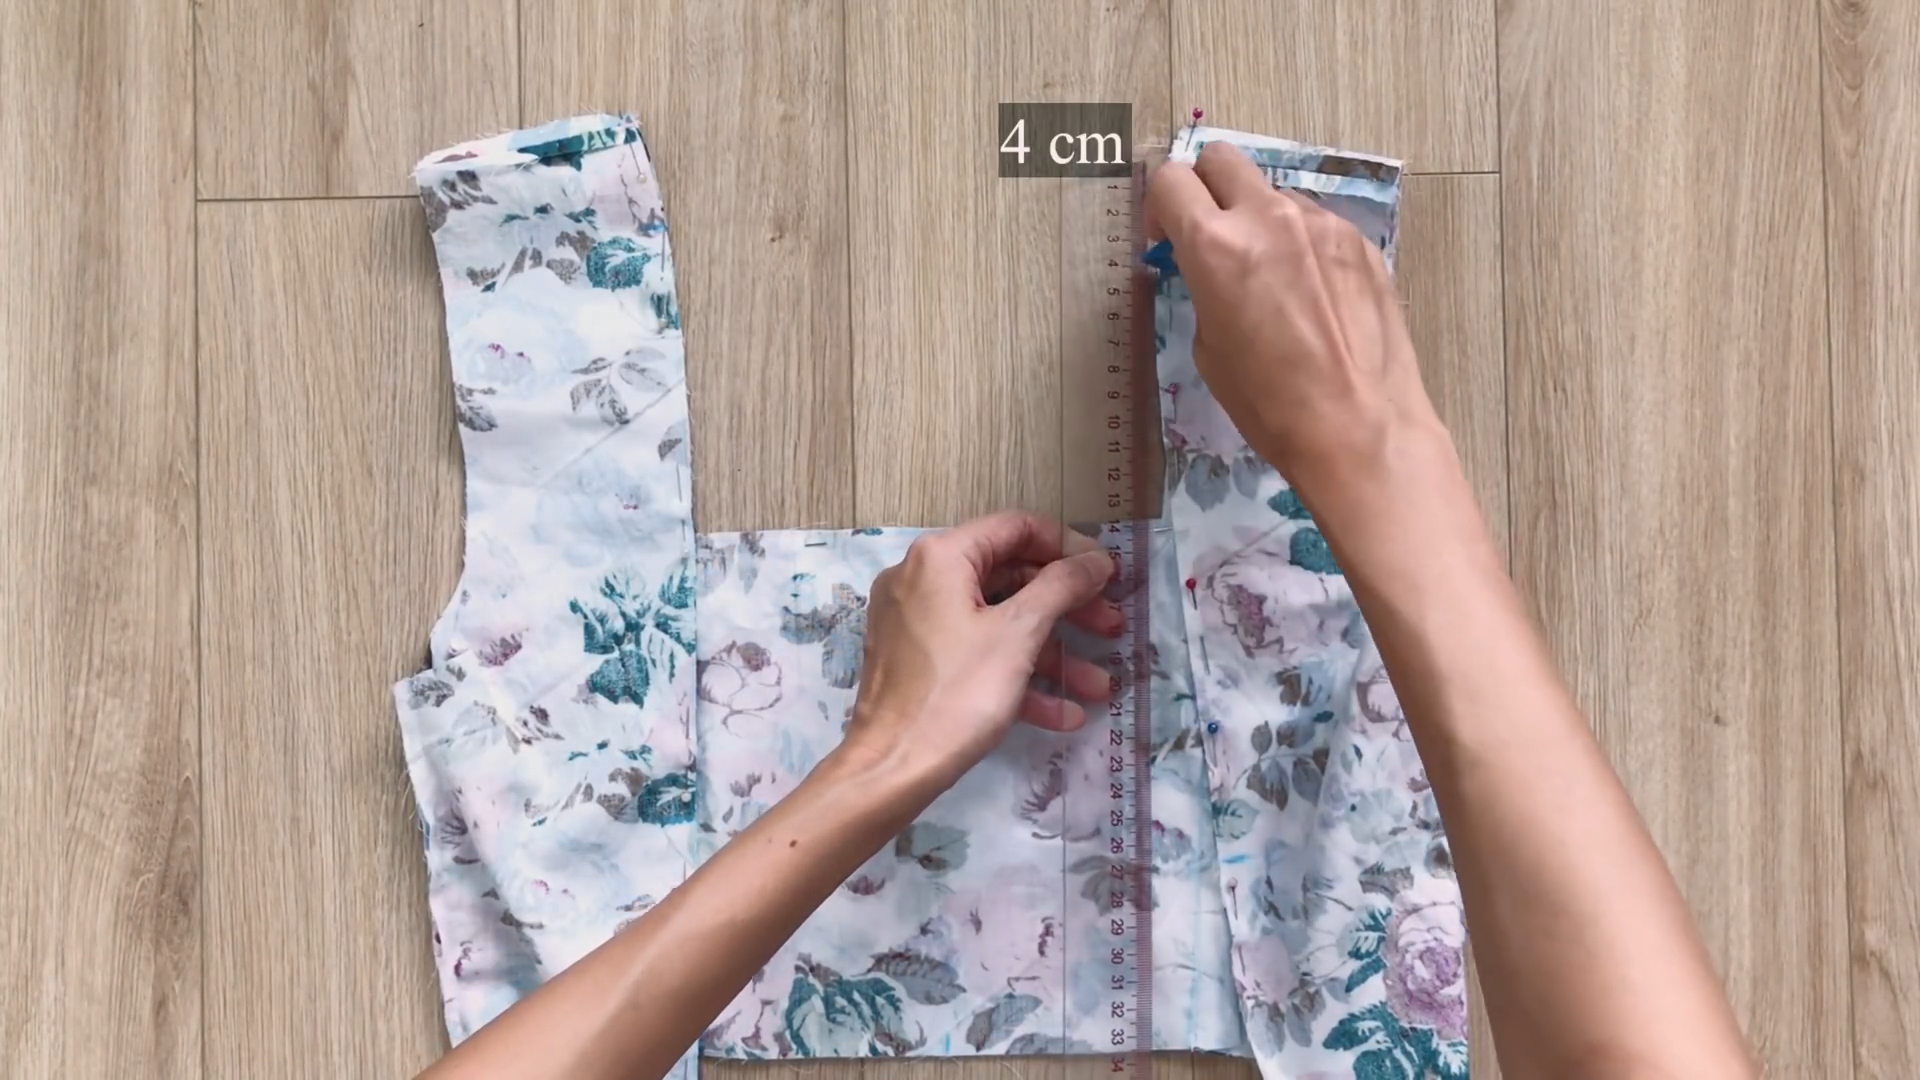
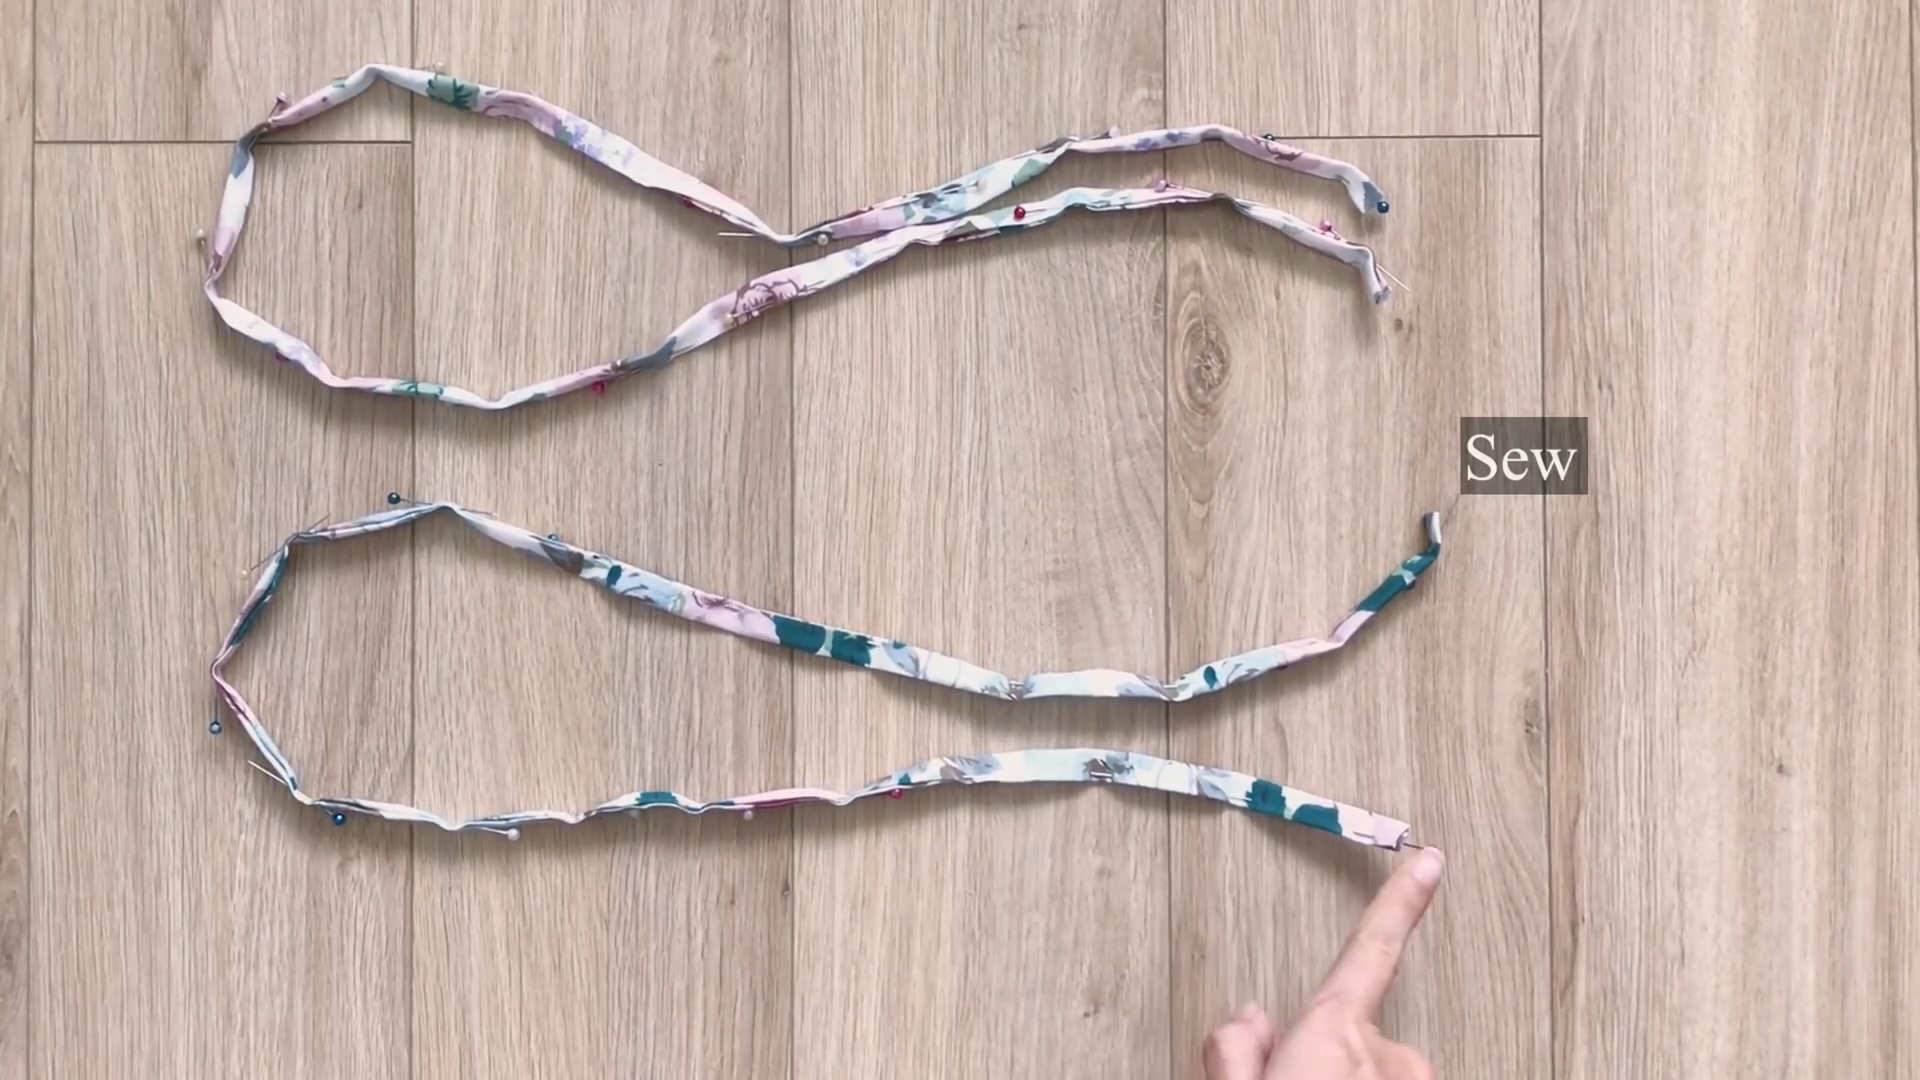
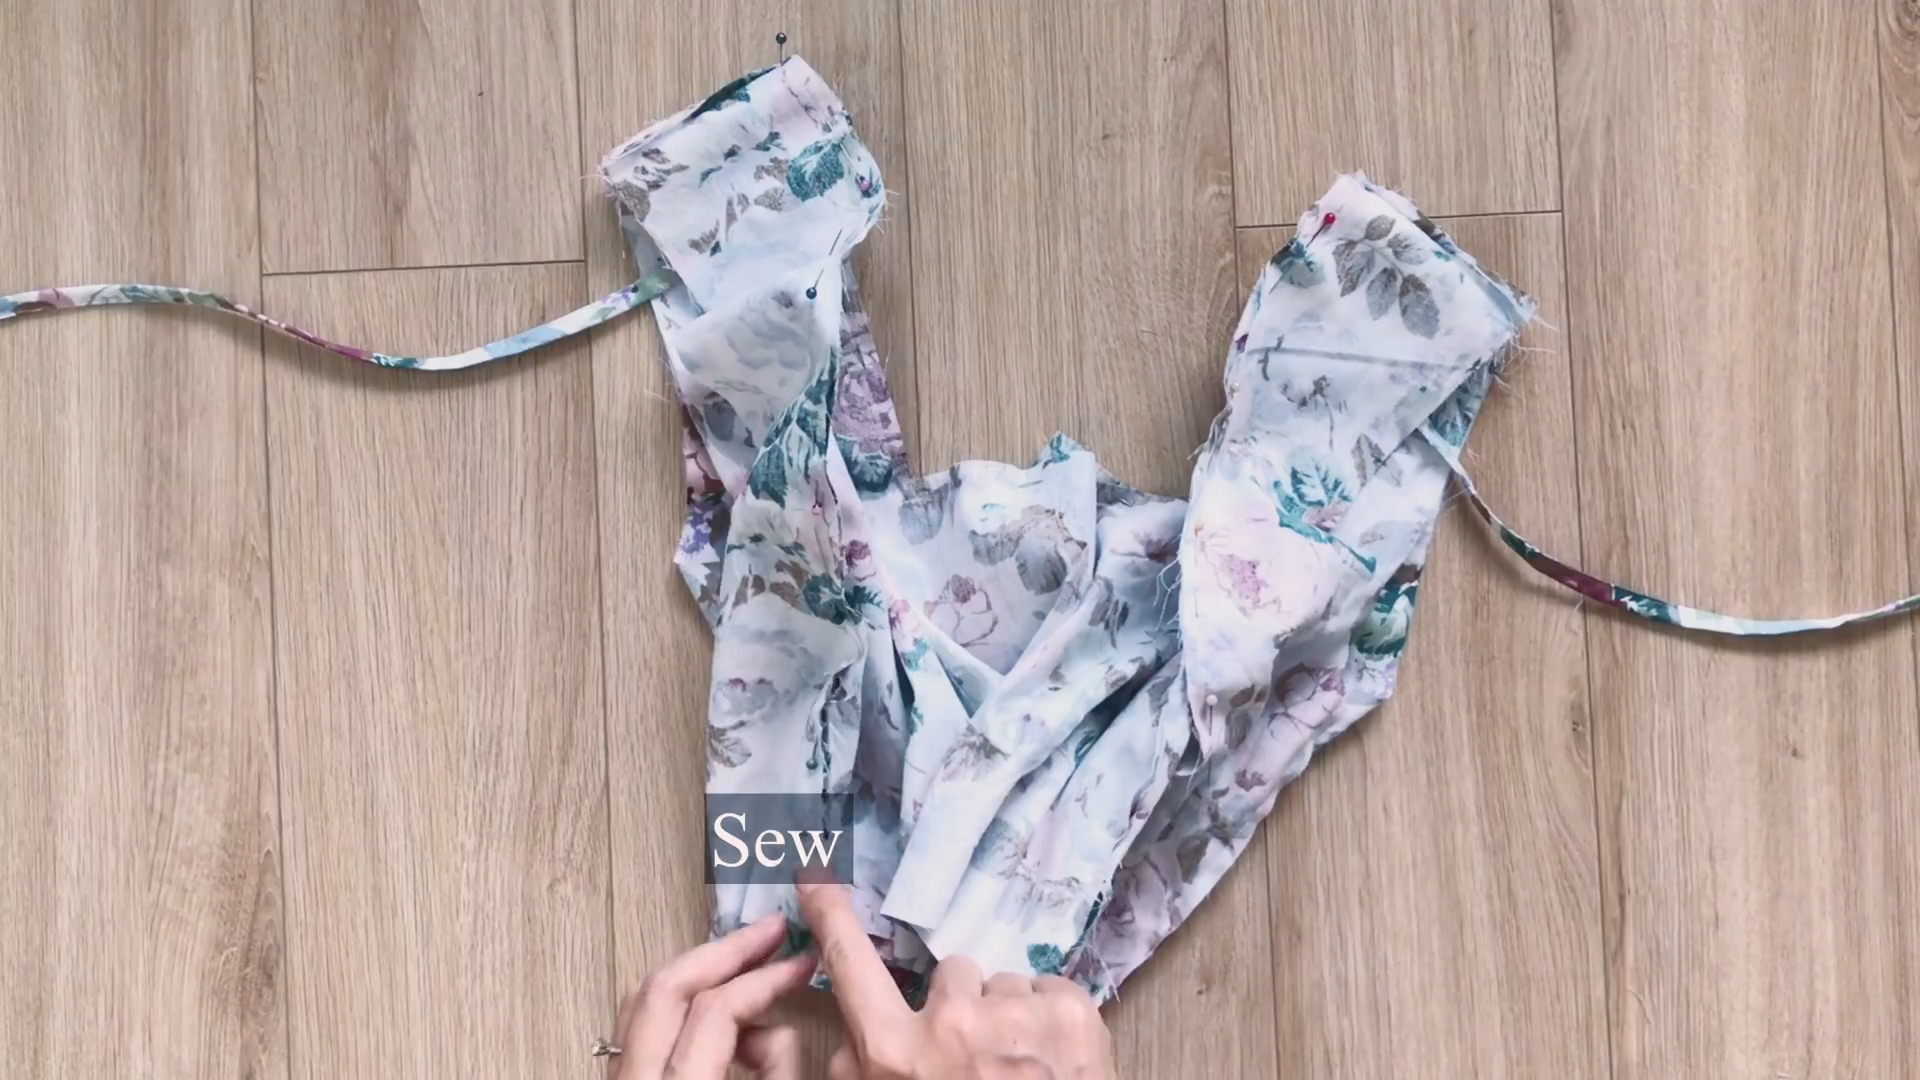
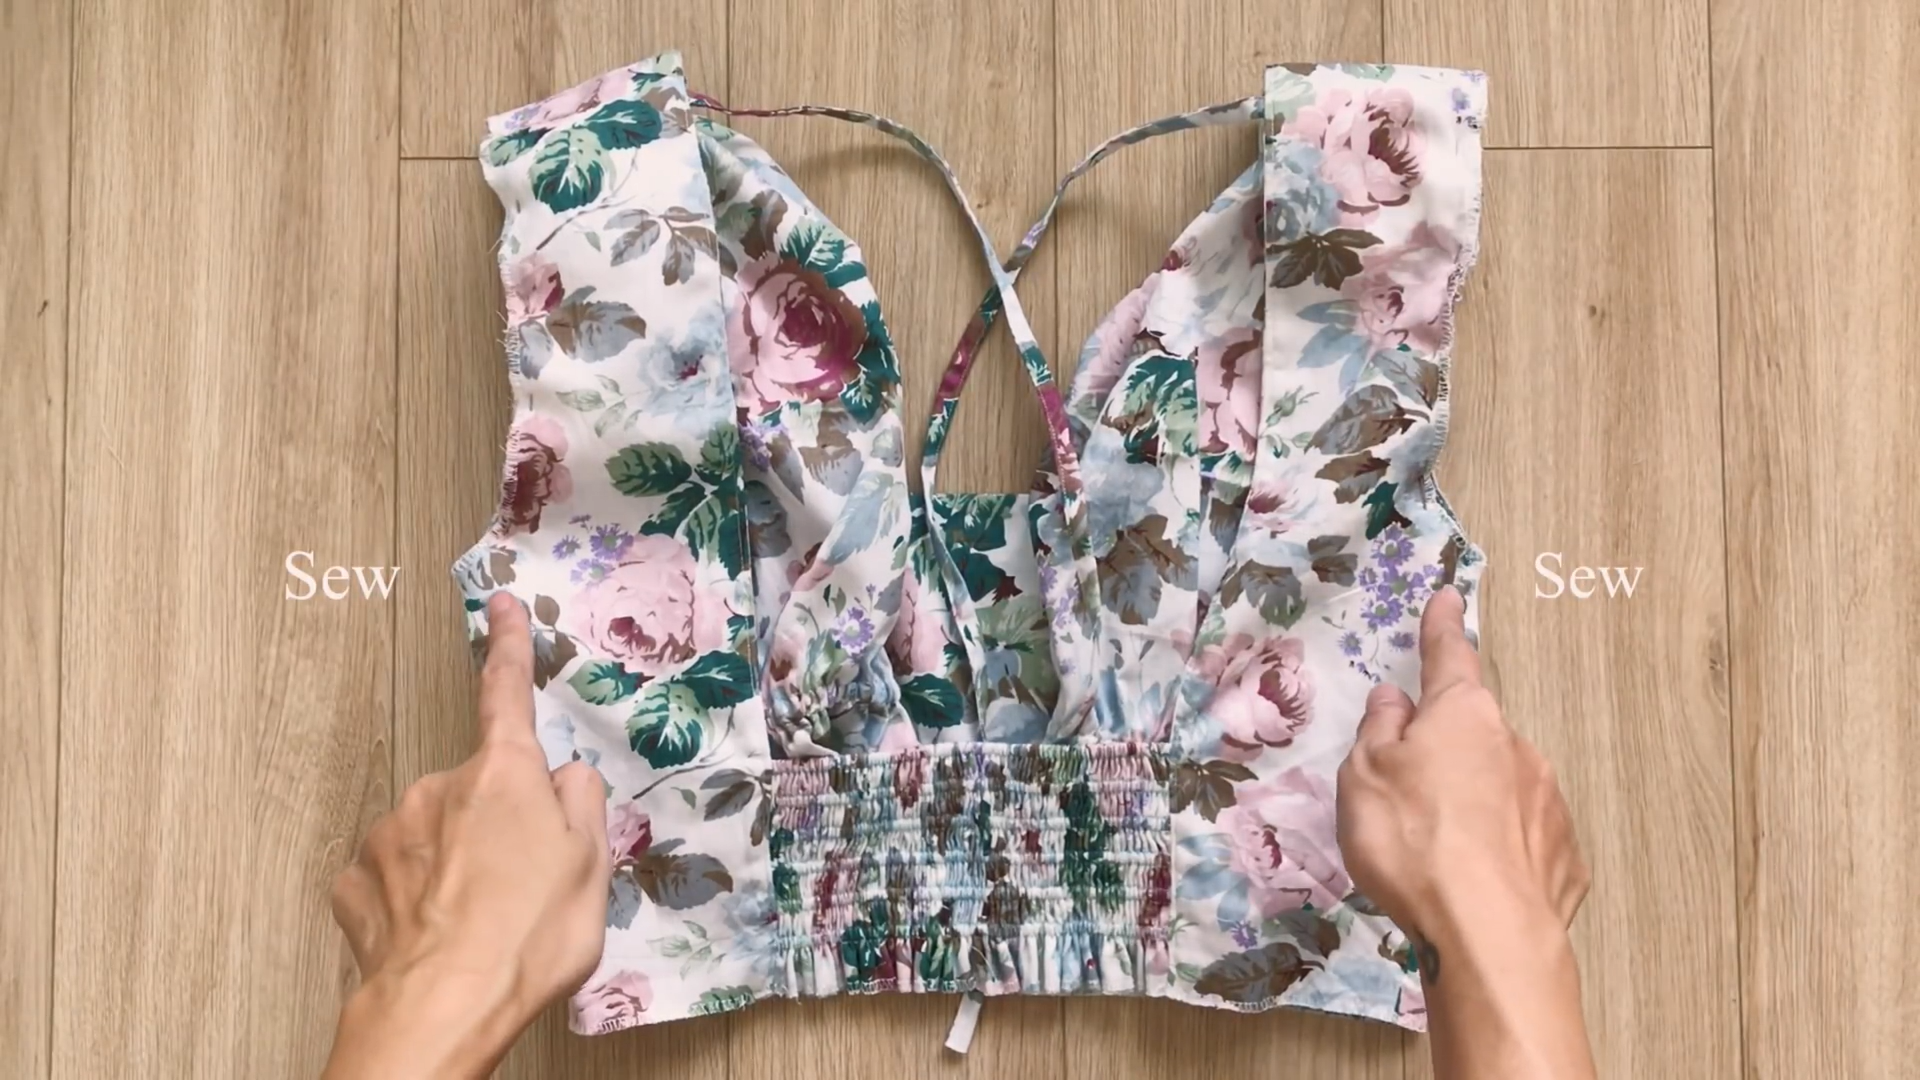
Connect two pieces of the main bodice together at the neck by the pins.

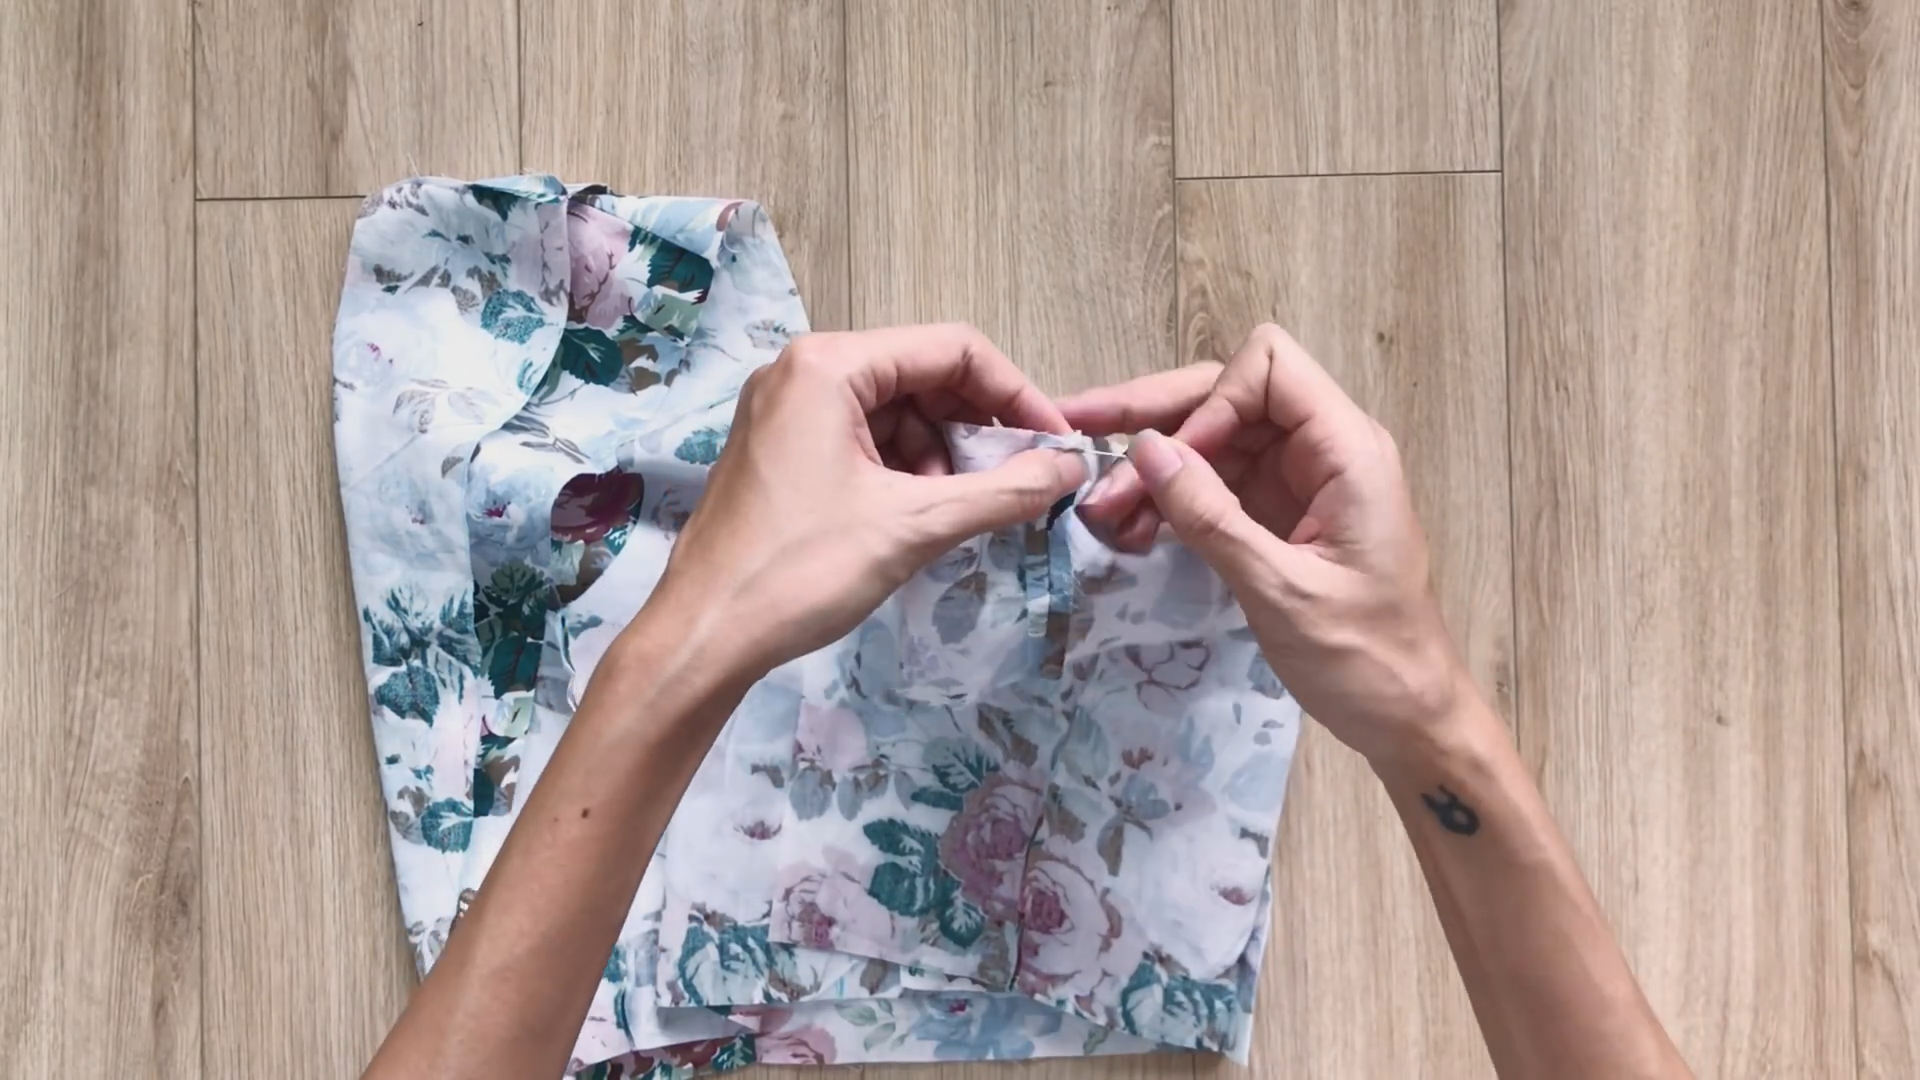
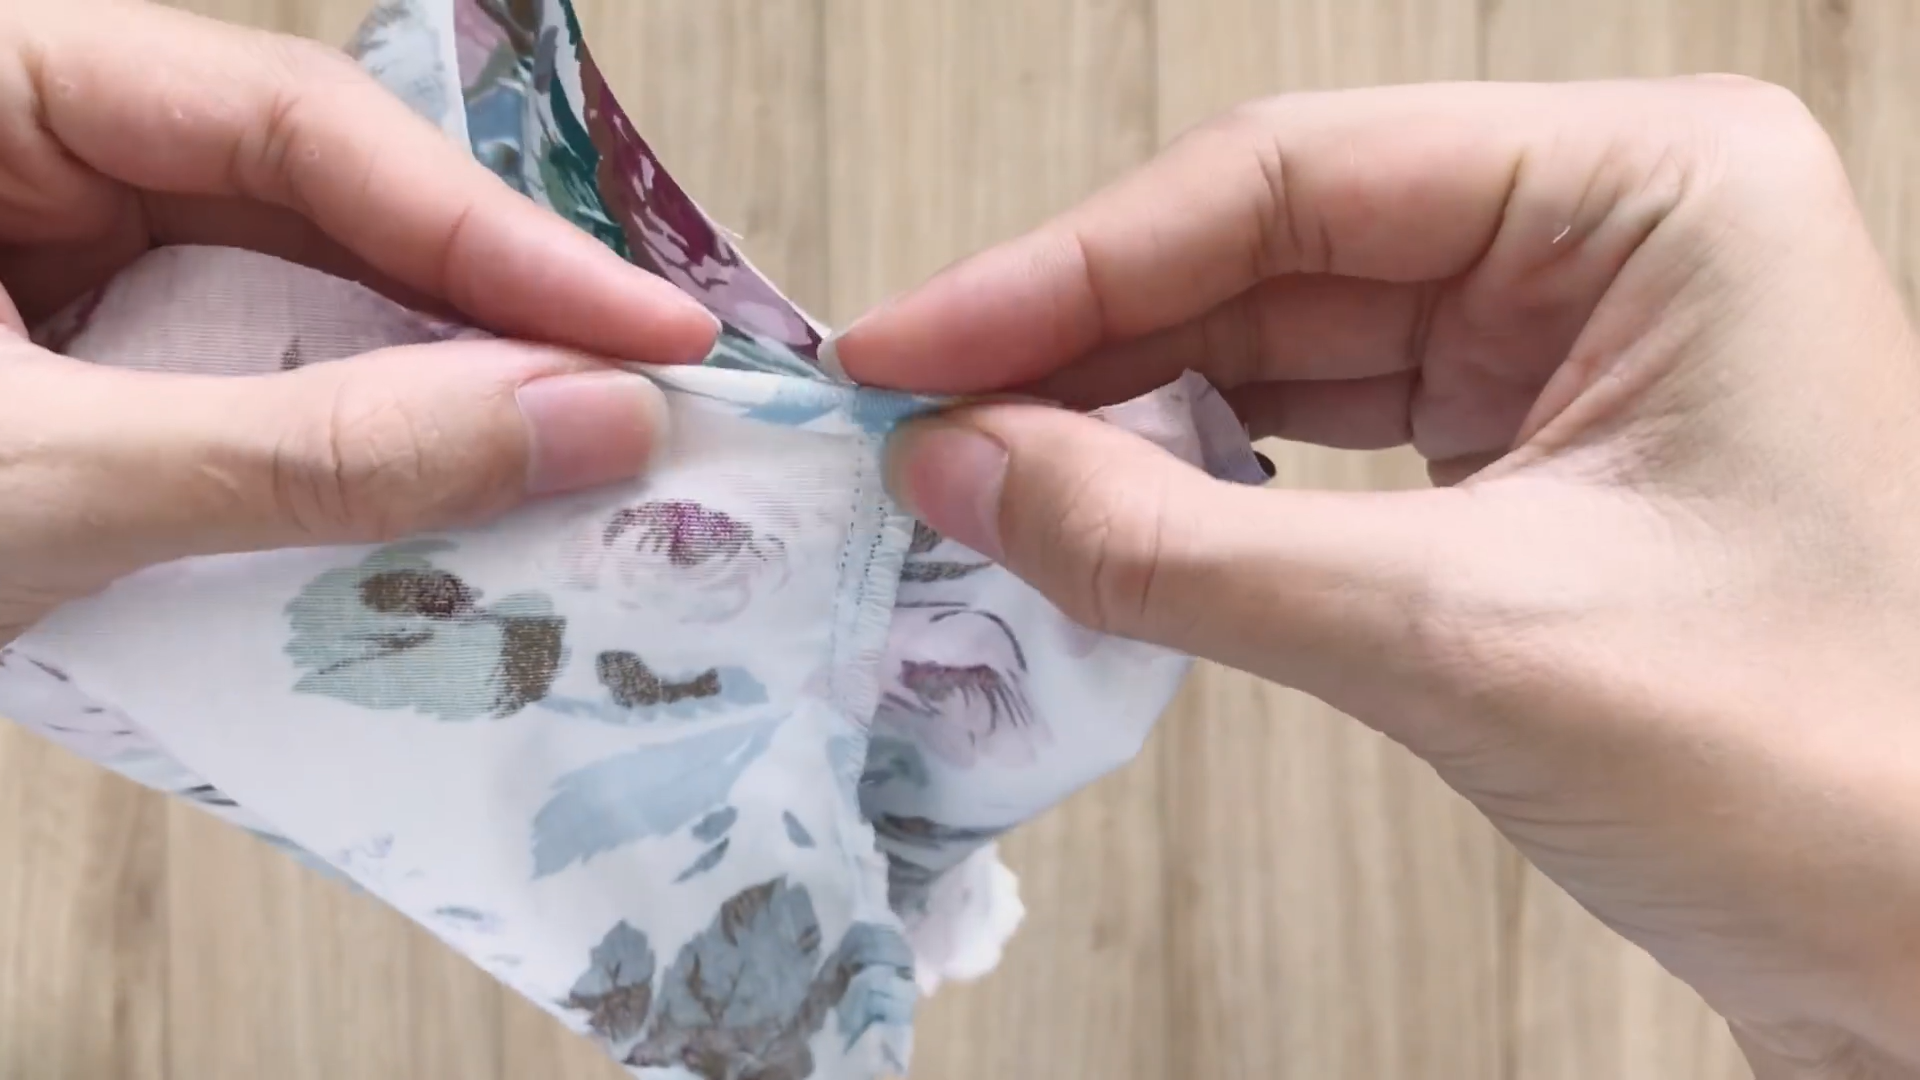
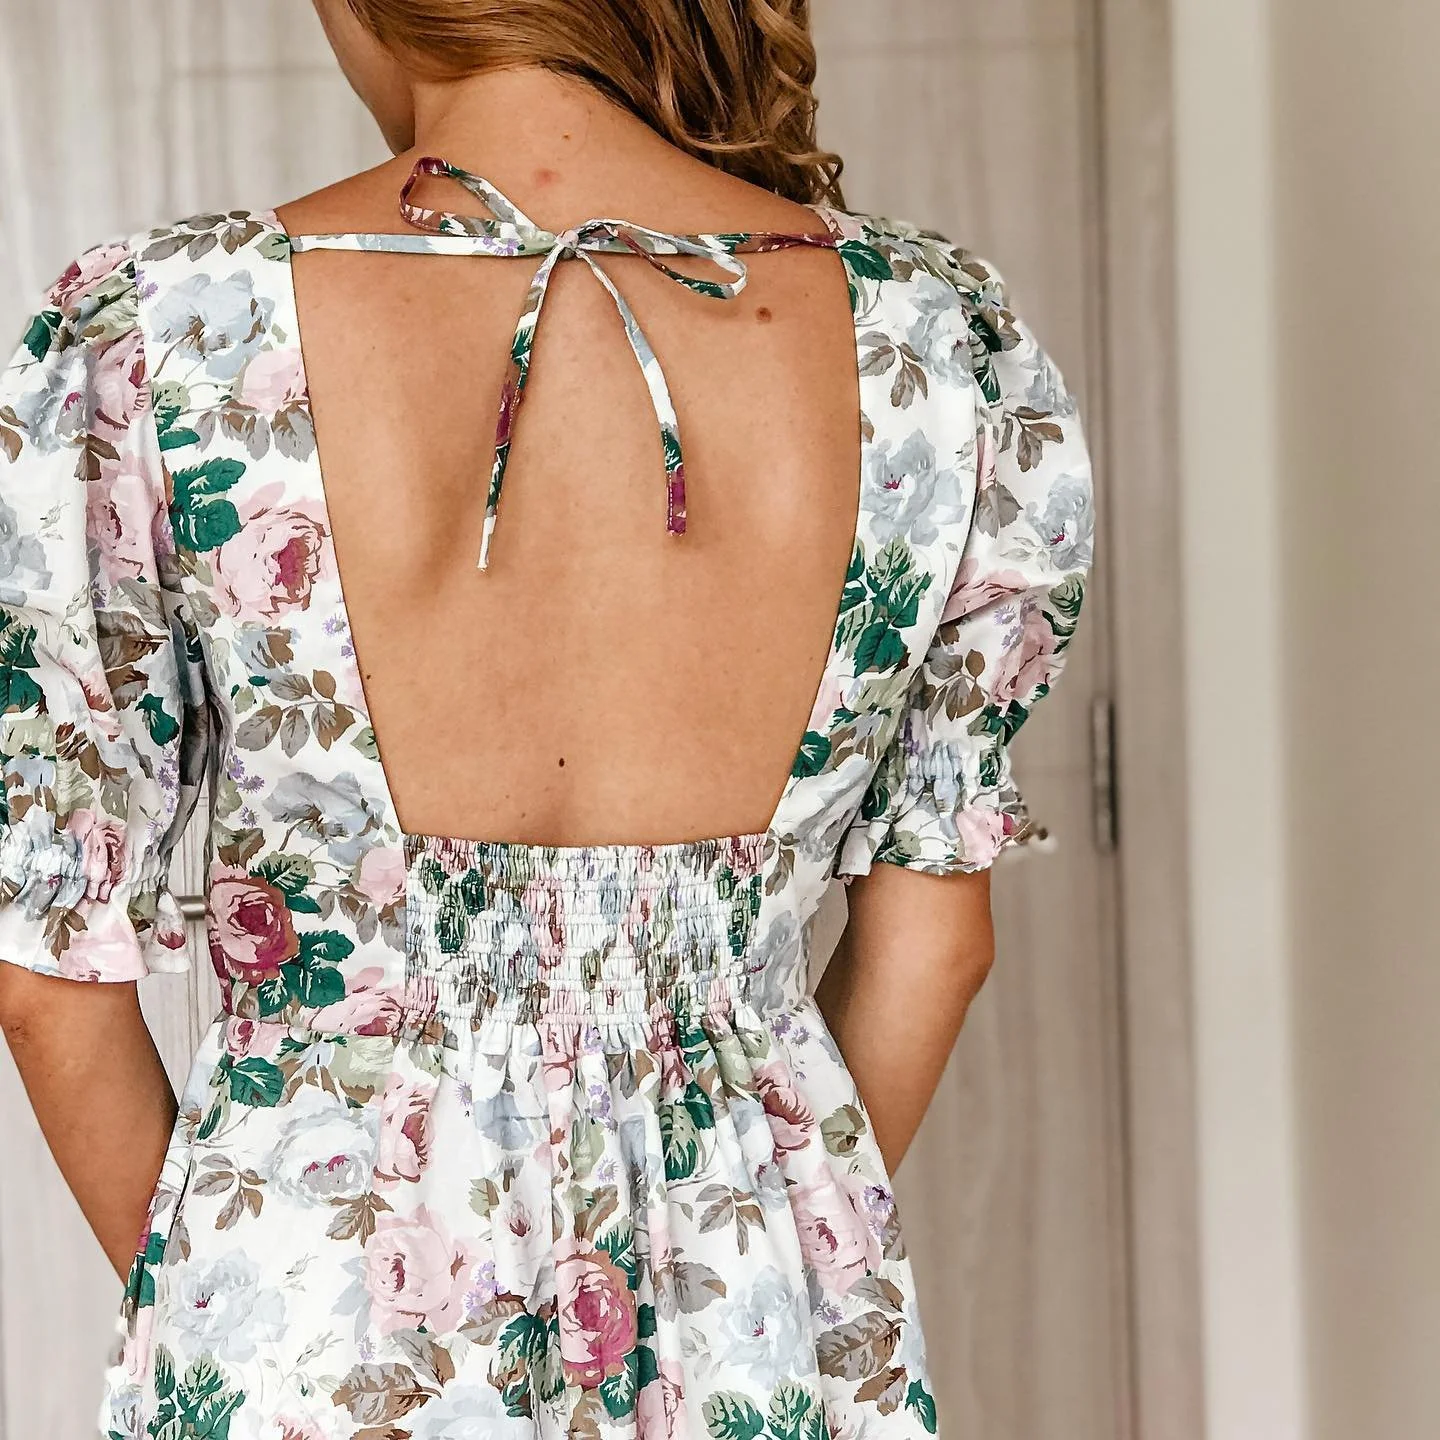
Mark 4cm down from the shoulder on the back neck for tie placement.
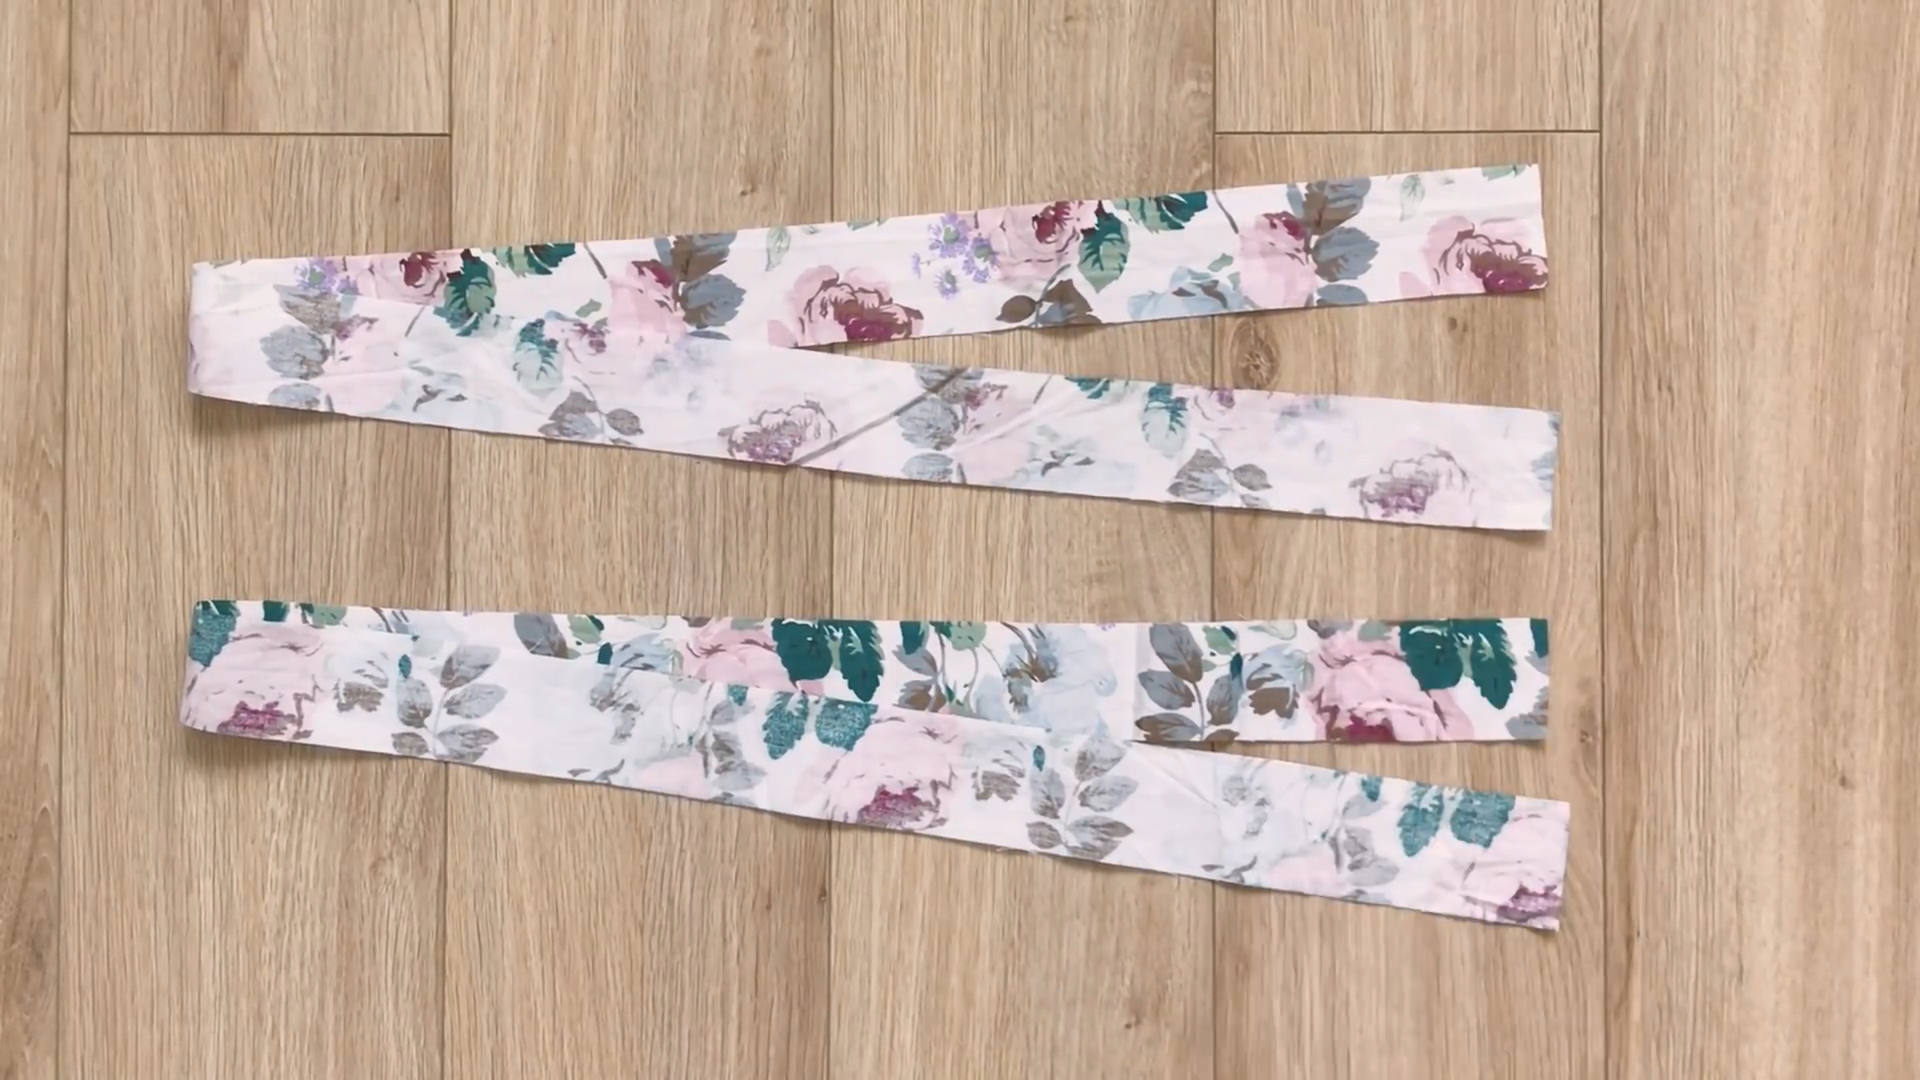
Cut two rectangles for ties. Each is 3 cm wide and 50 cm long.
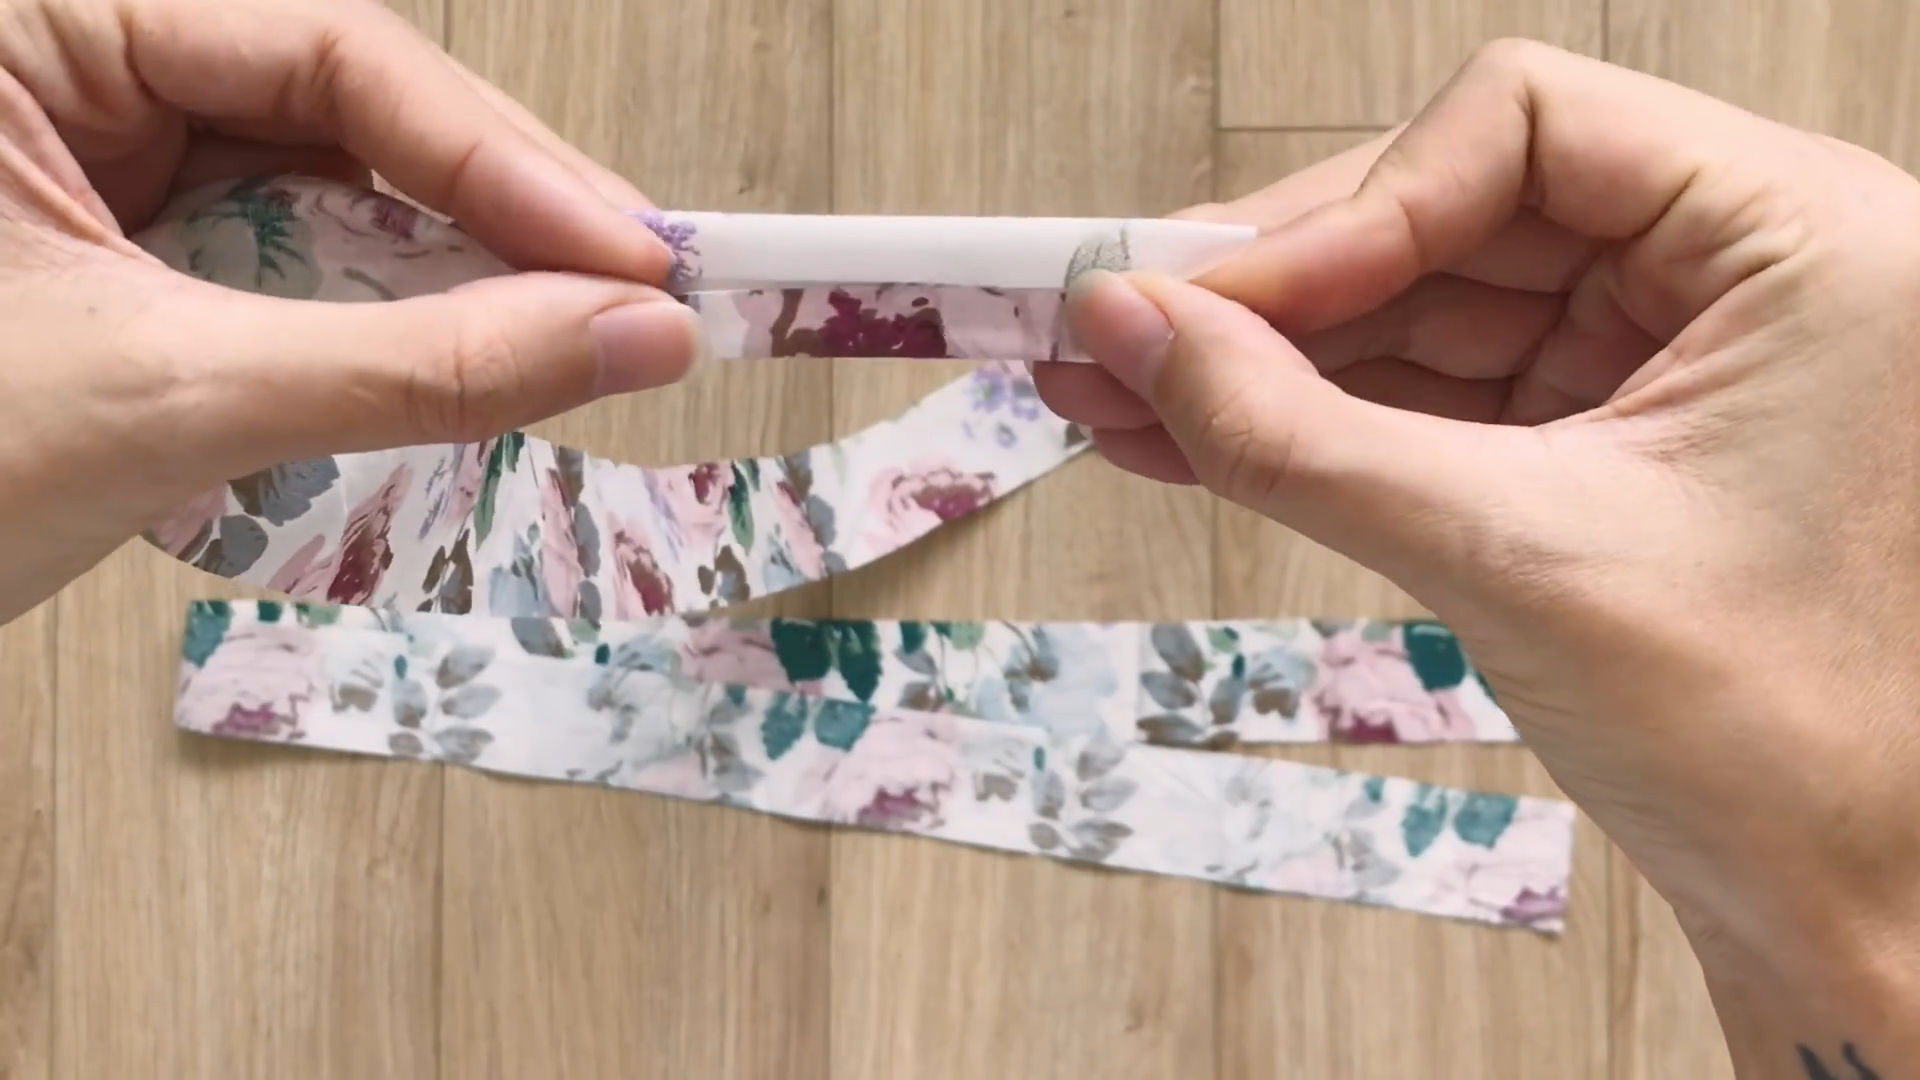
Fold two length lines to the middle before folding the tie in half.
Sew along the folded line to finish the tie.
Attach ties to marked positions on the back neck.
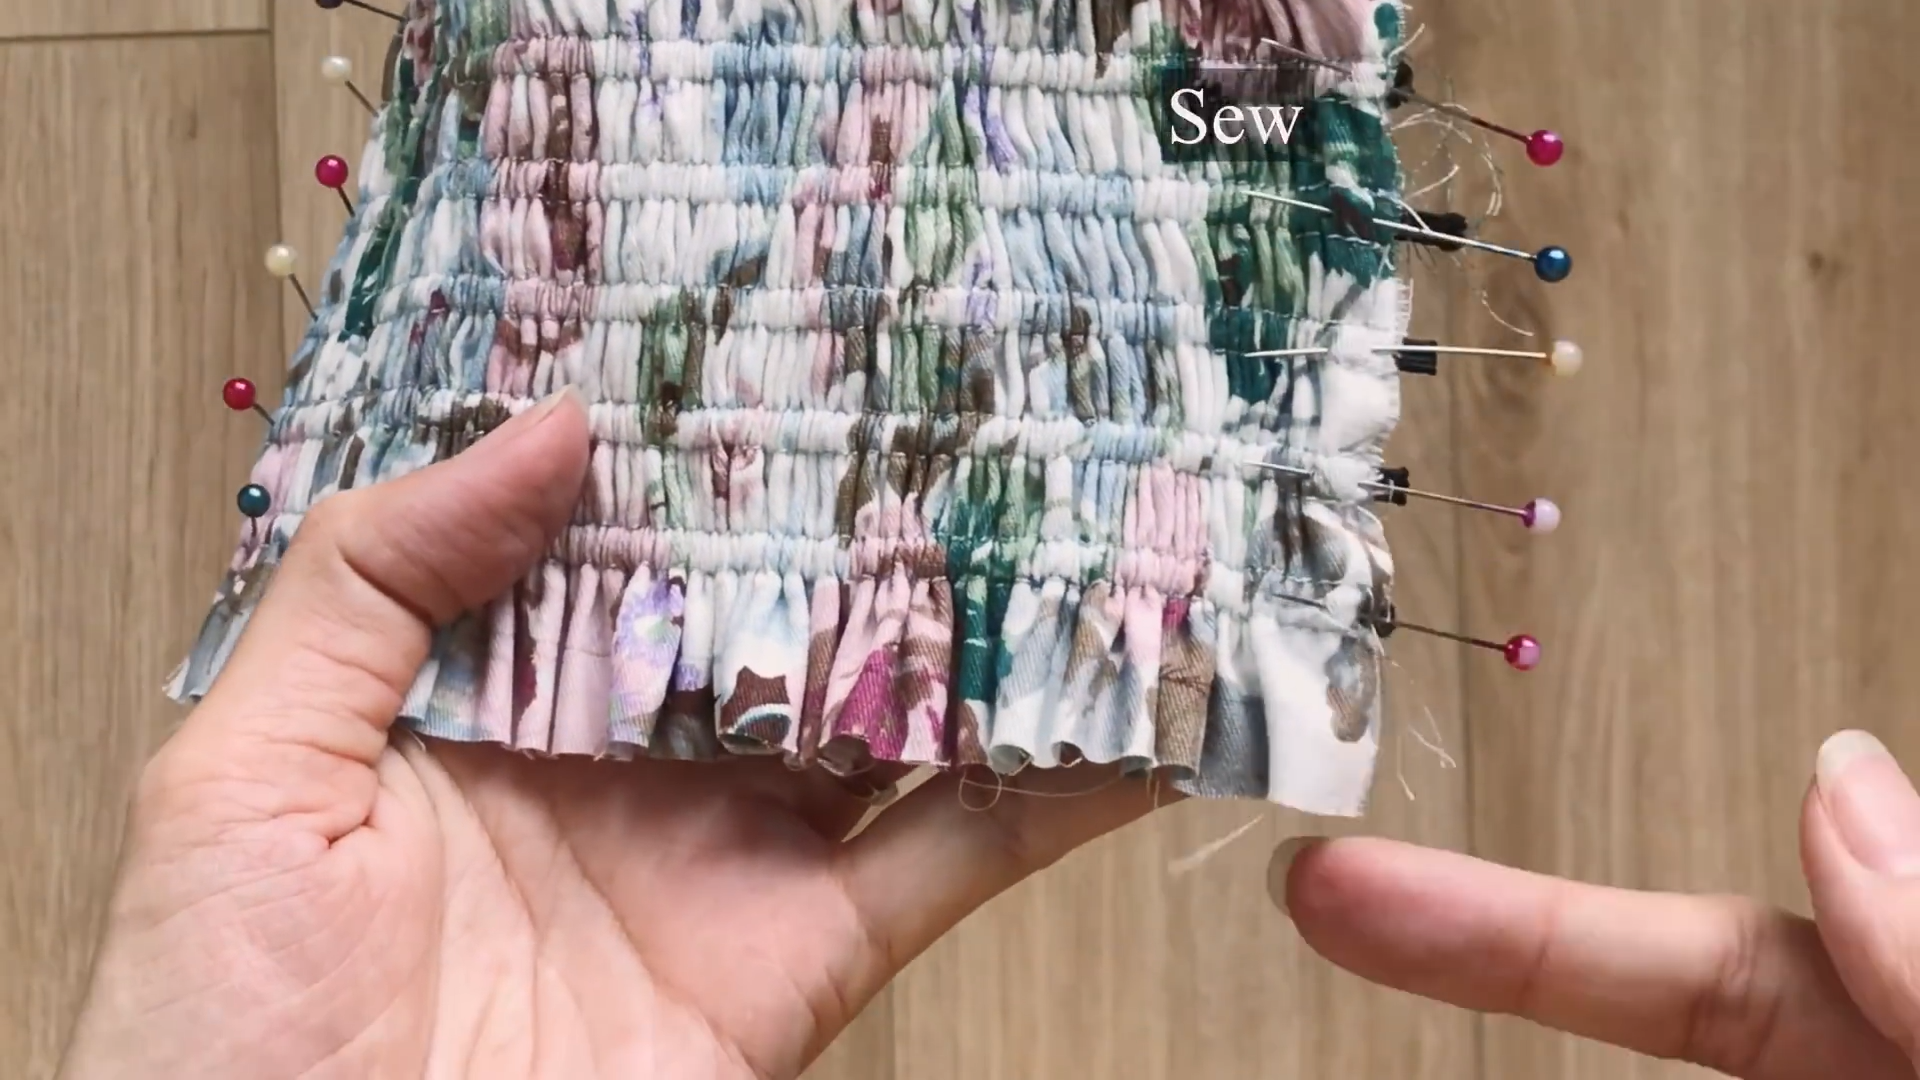
Cut a rectangle double the length and triple the width of desired shirring plus seam allowance.
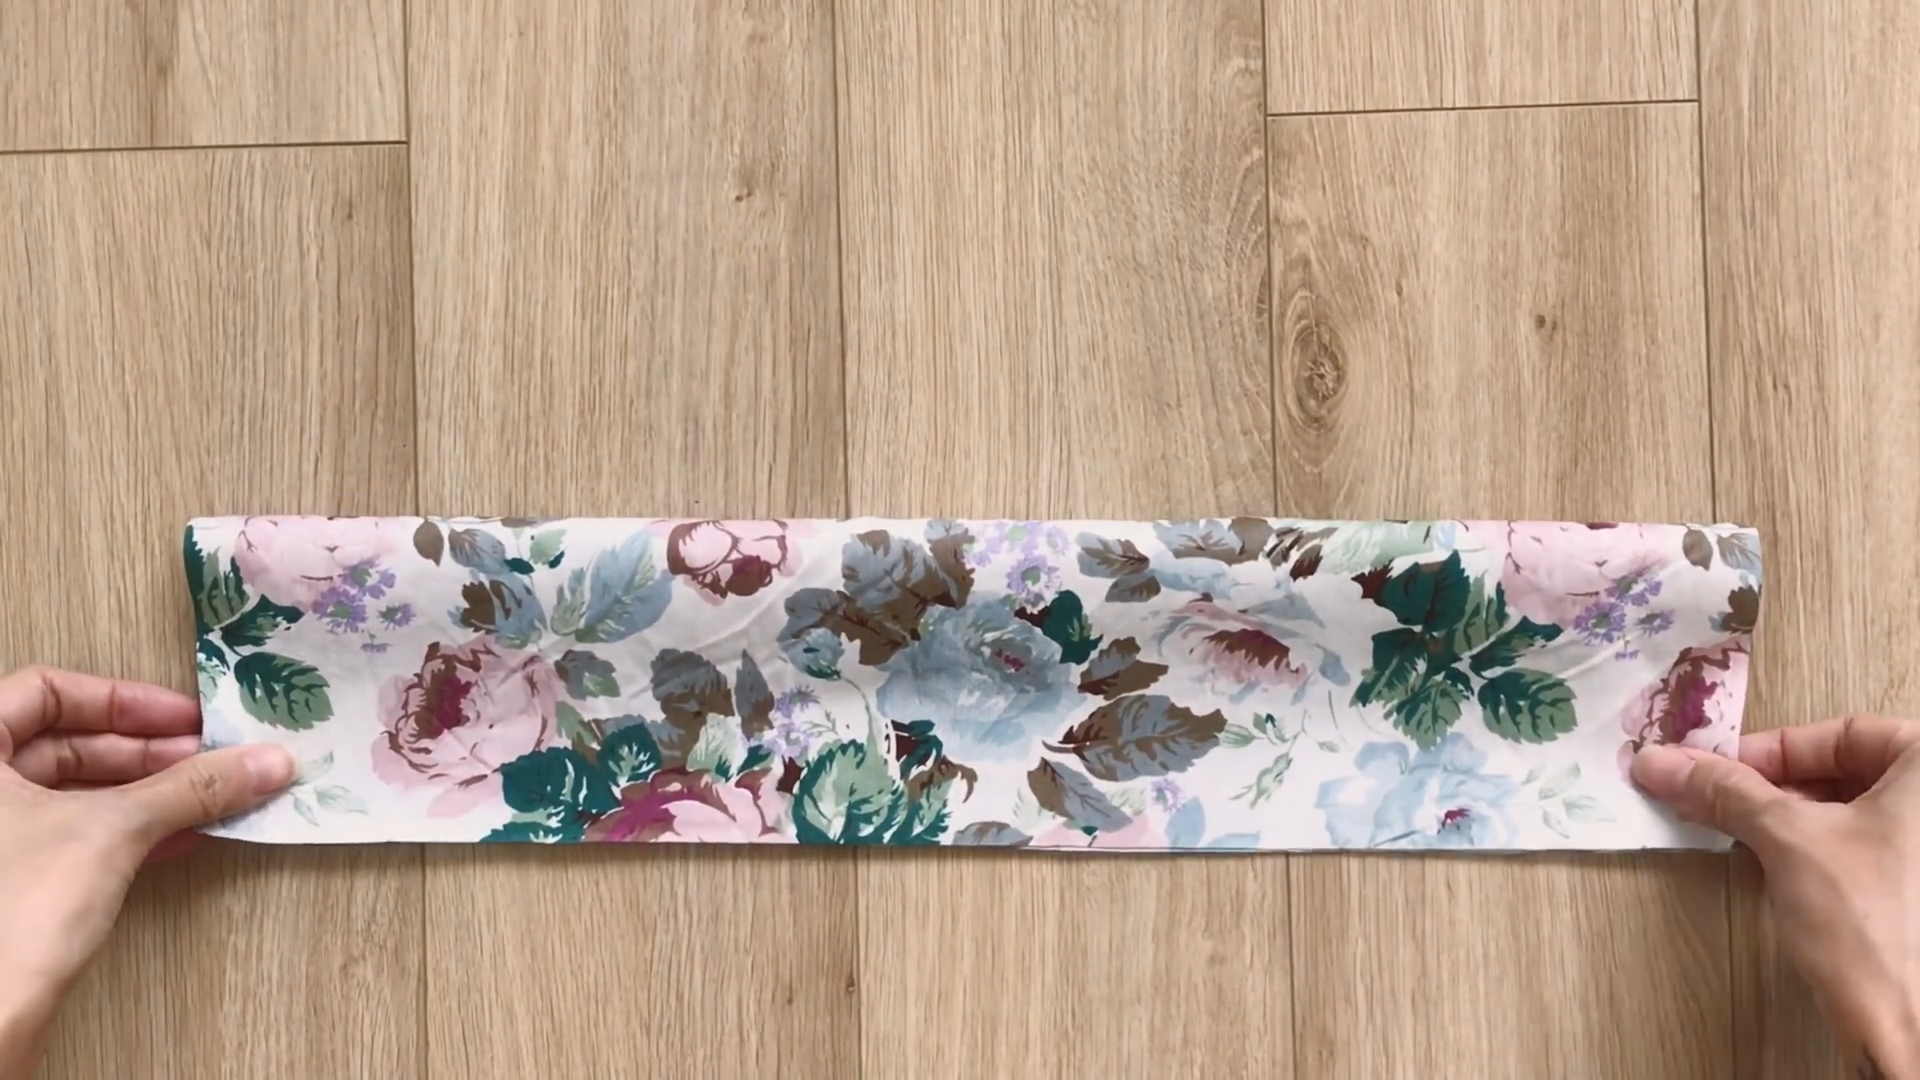
Fold the rectangle in half.
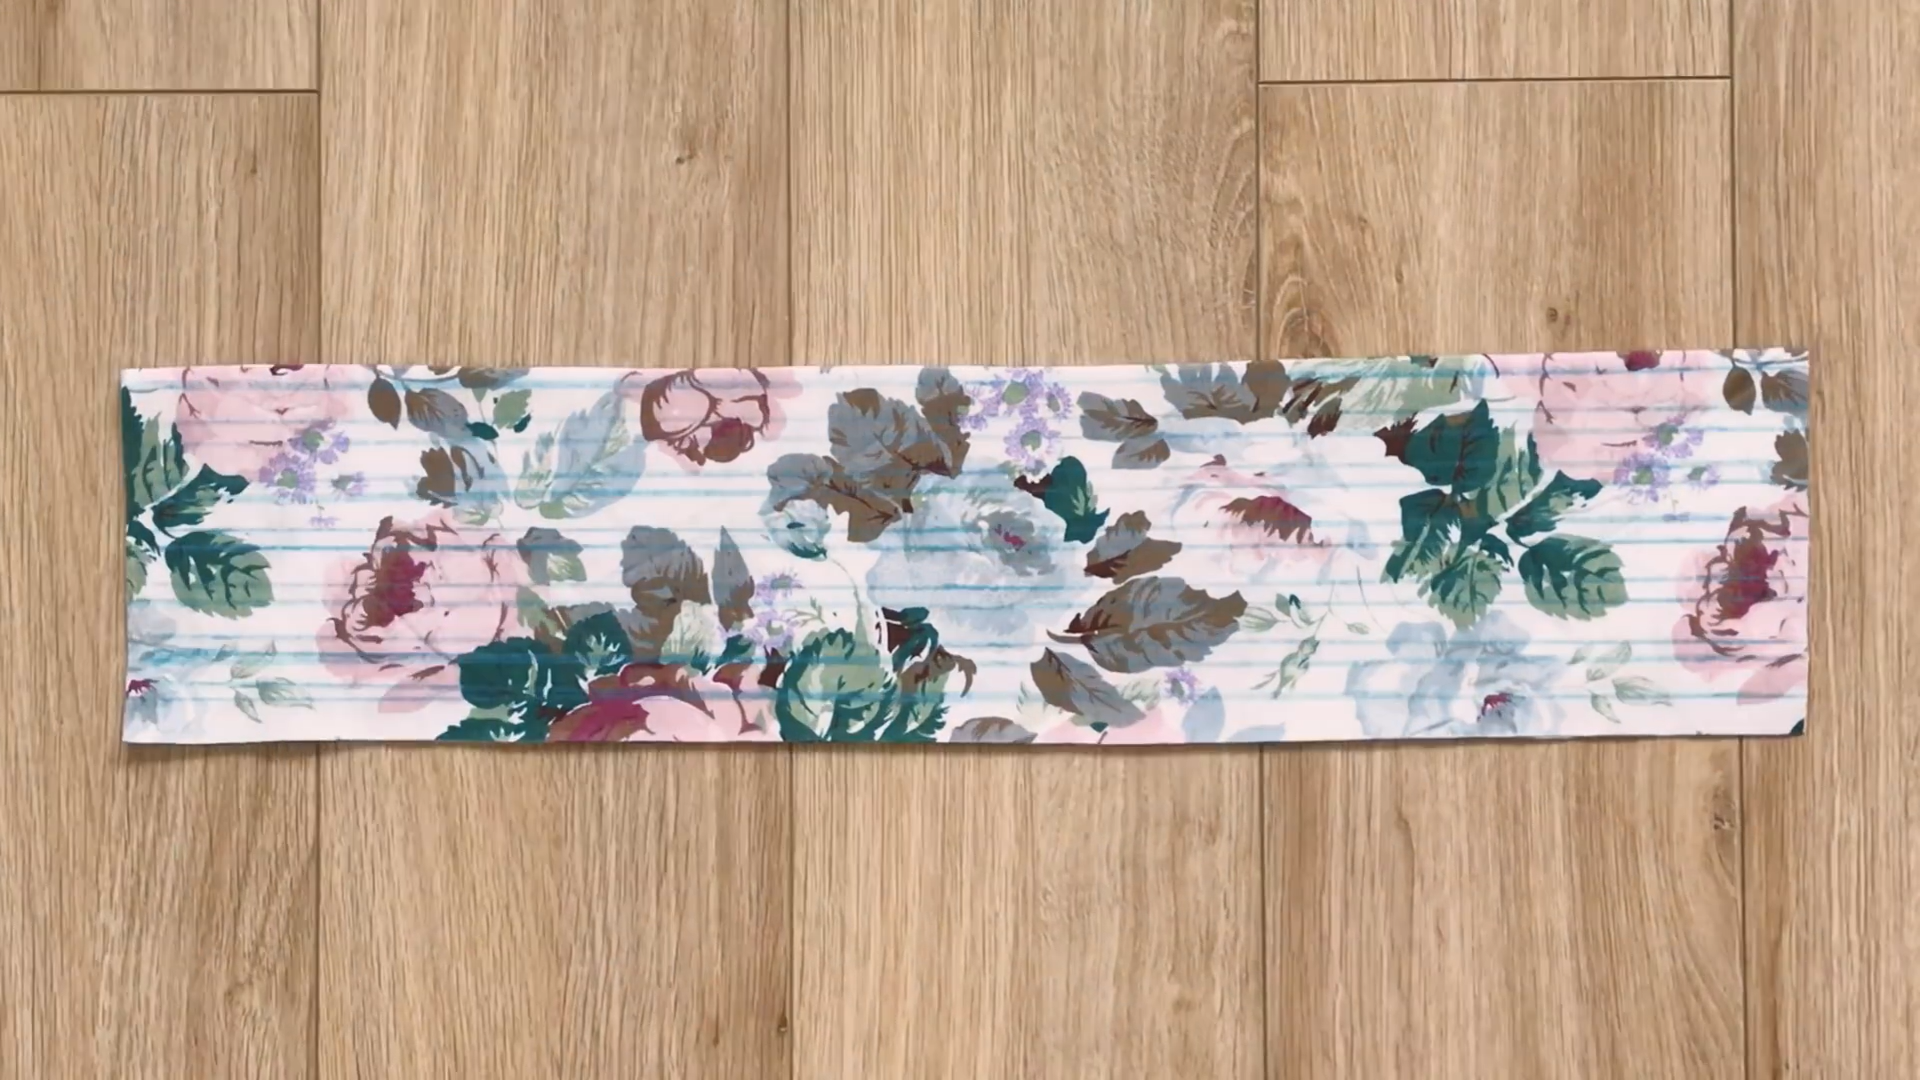
Draw the horizontally parallel lines 0.5 cm and 1 cm away from each other.
Sew along the lines to create holes for the elastic bands.
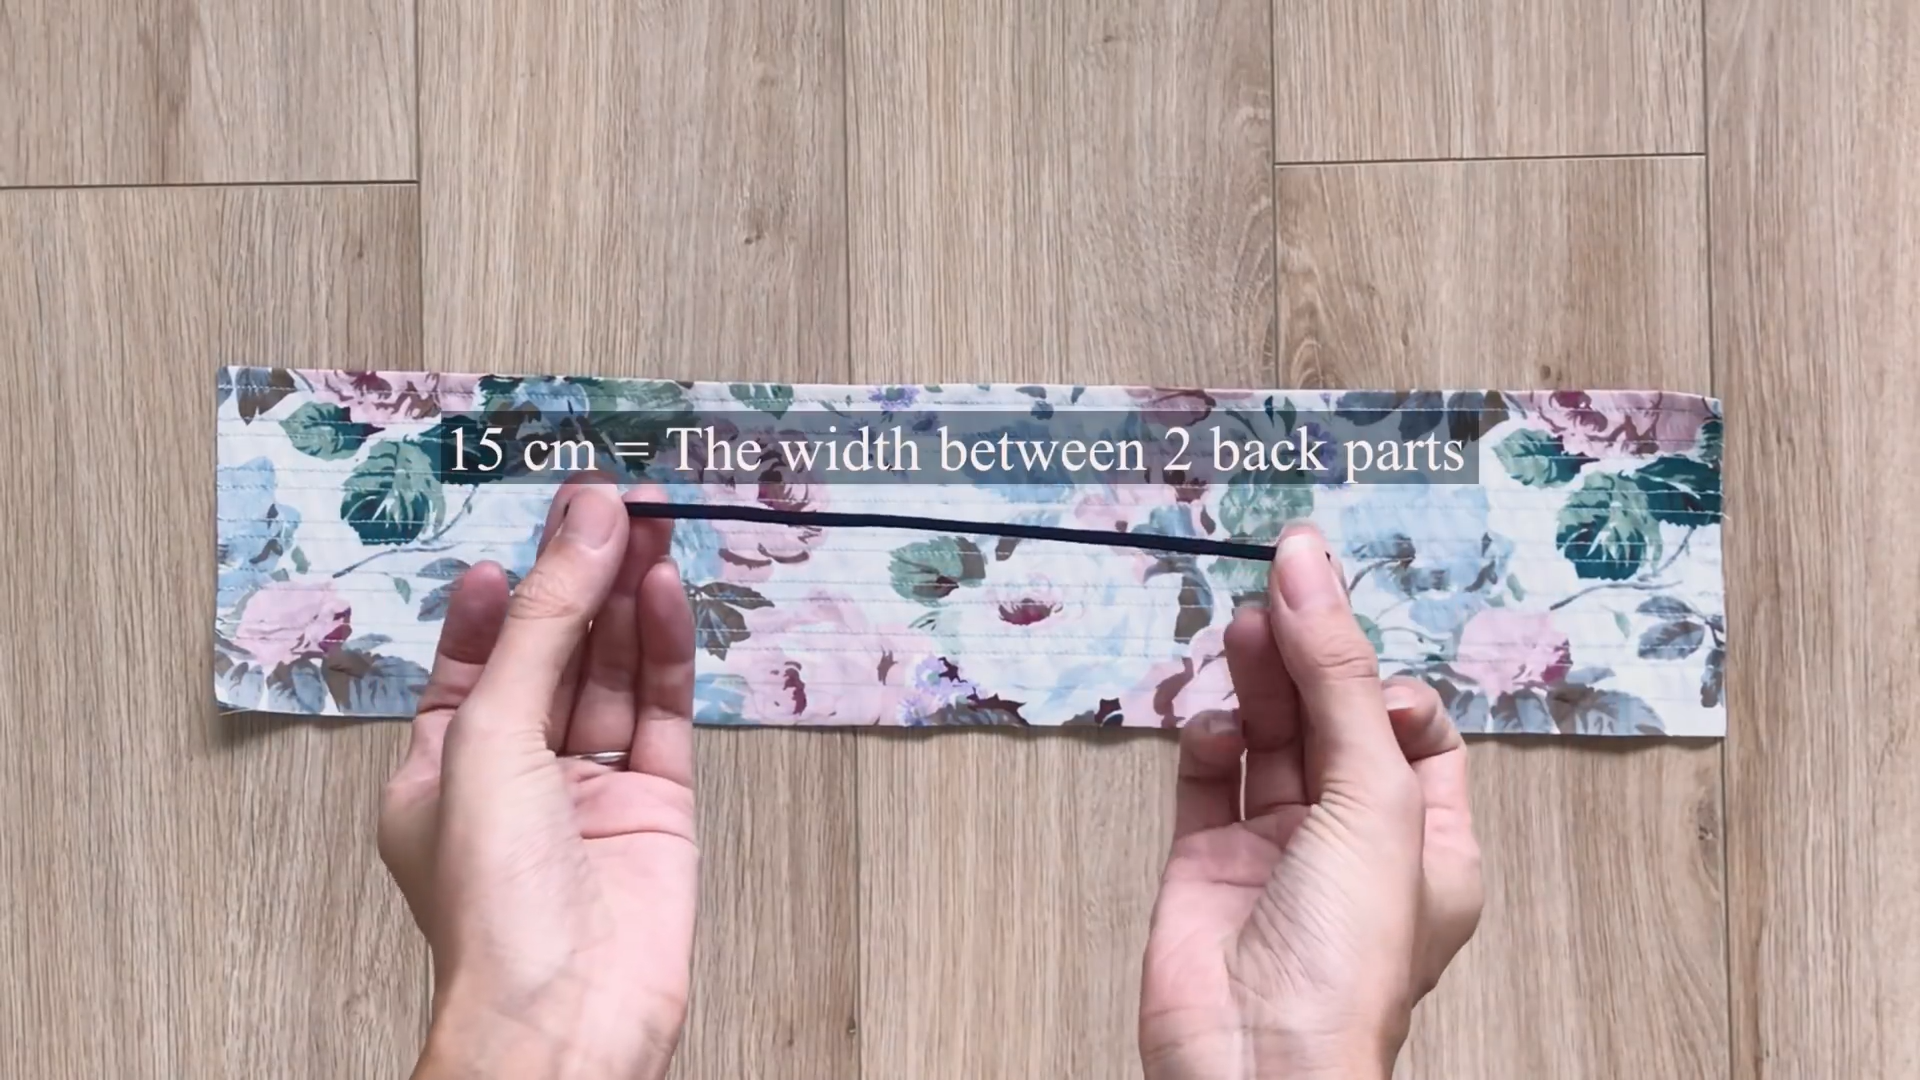
Cut multiple elastic bands that are 15 cm long. It’s the width between two back parts of the bodice.
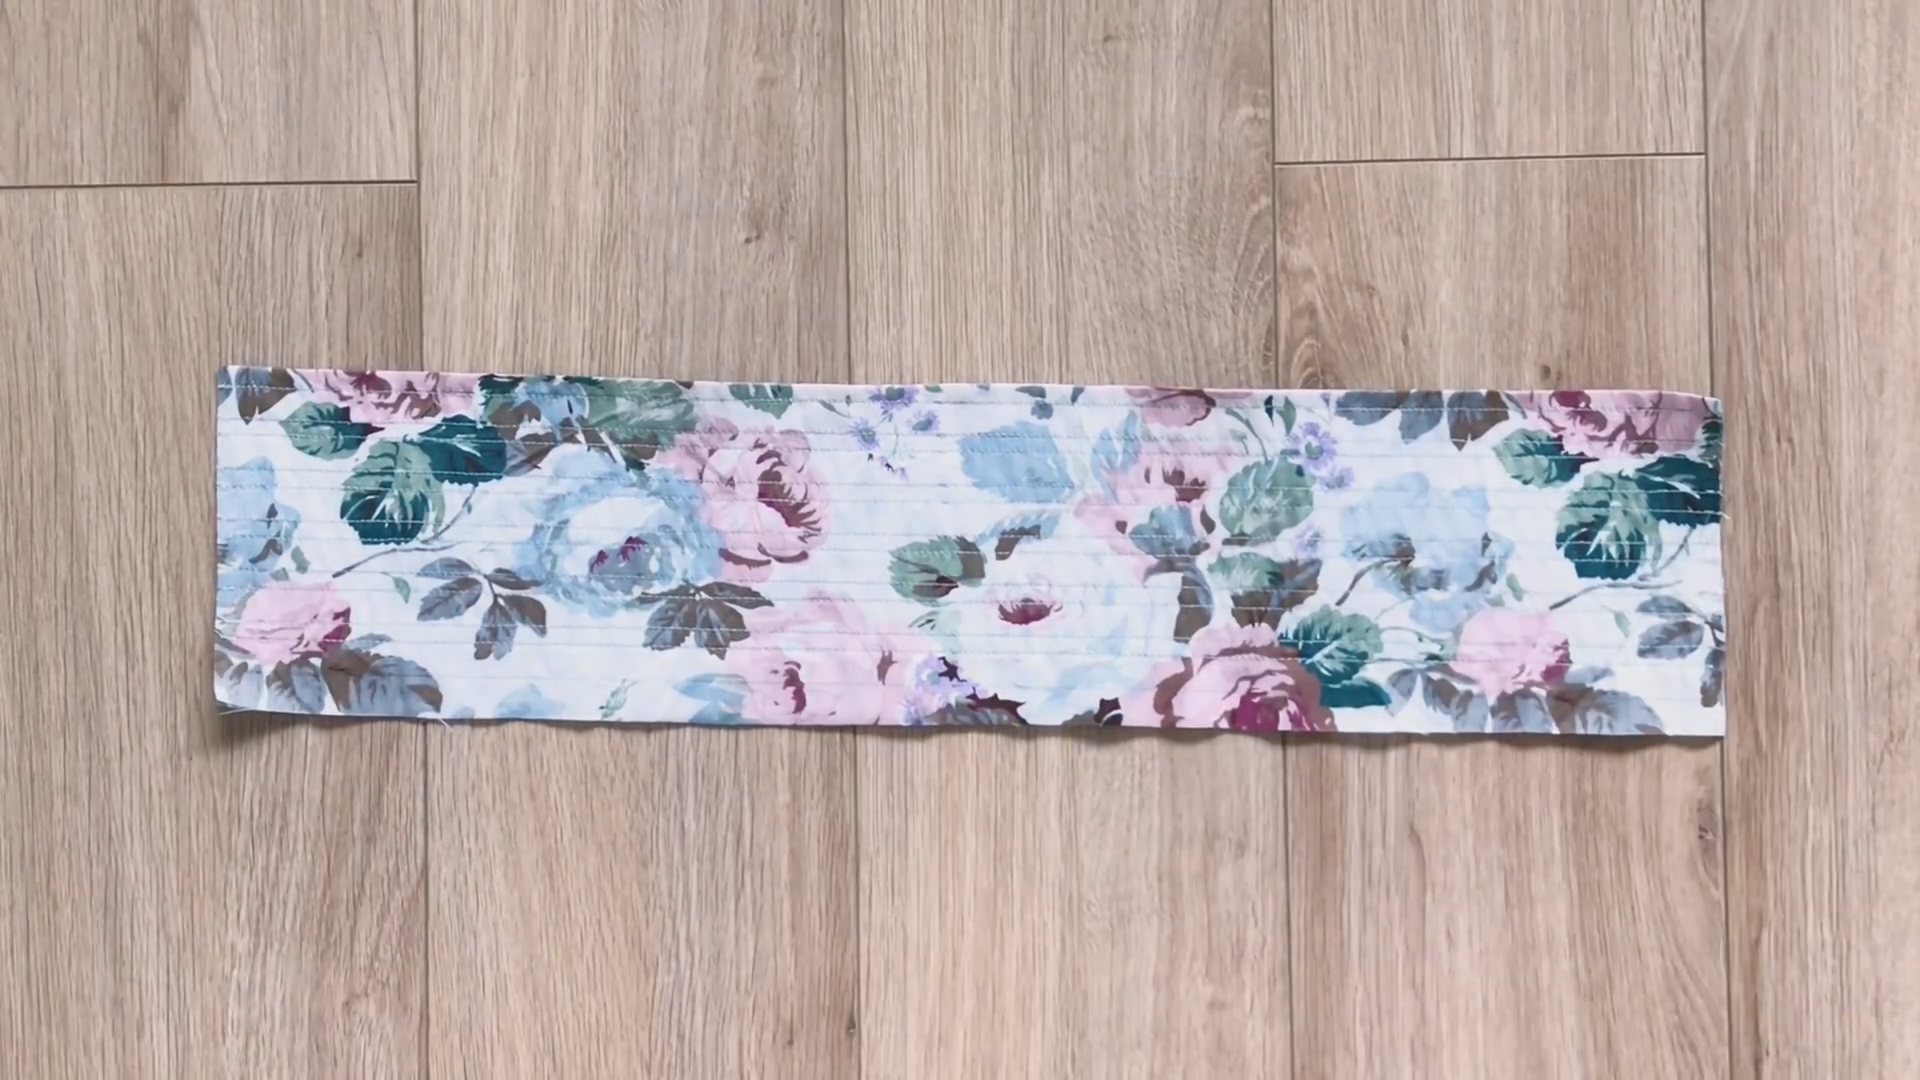
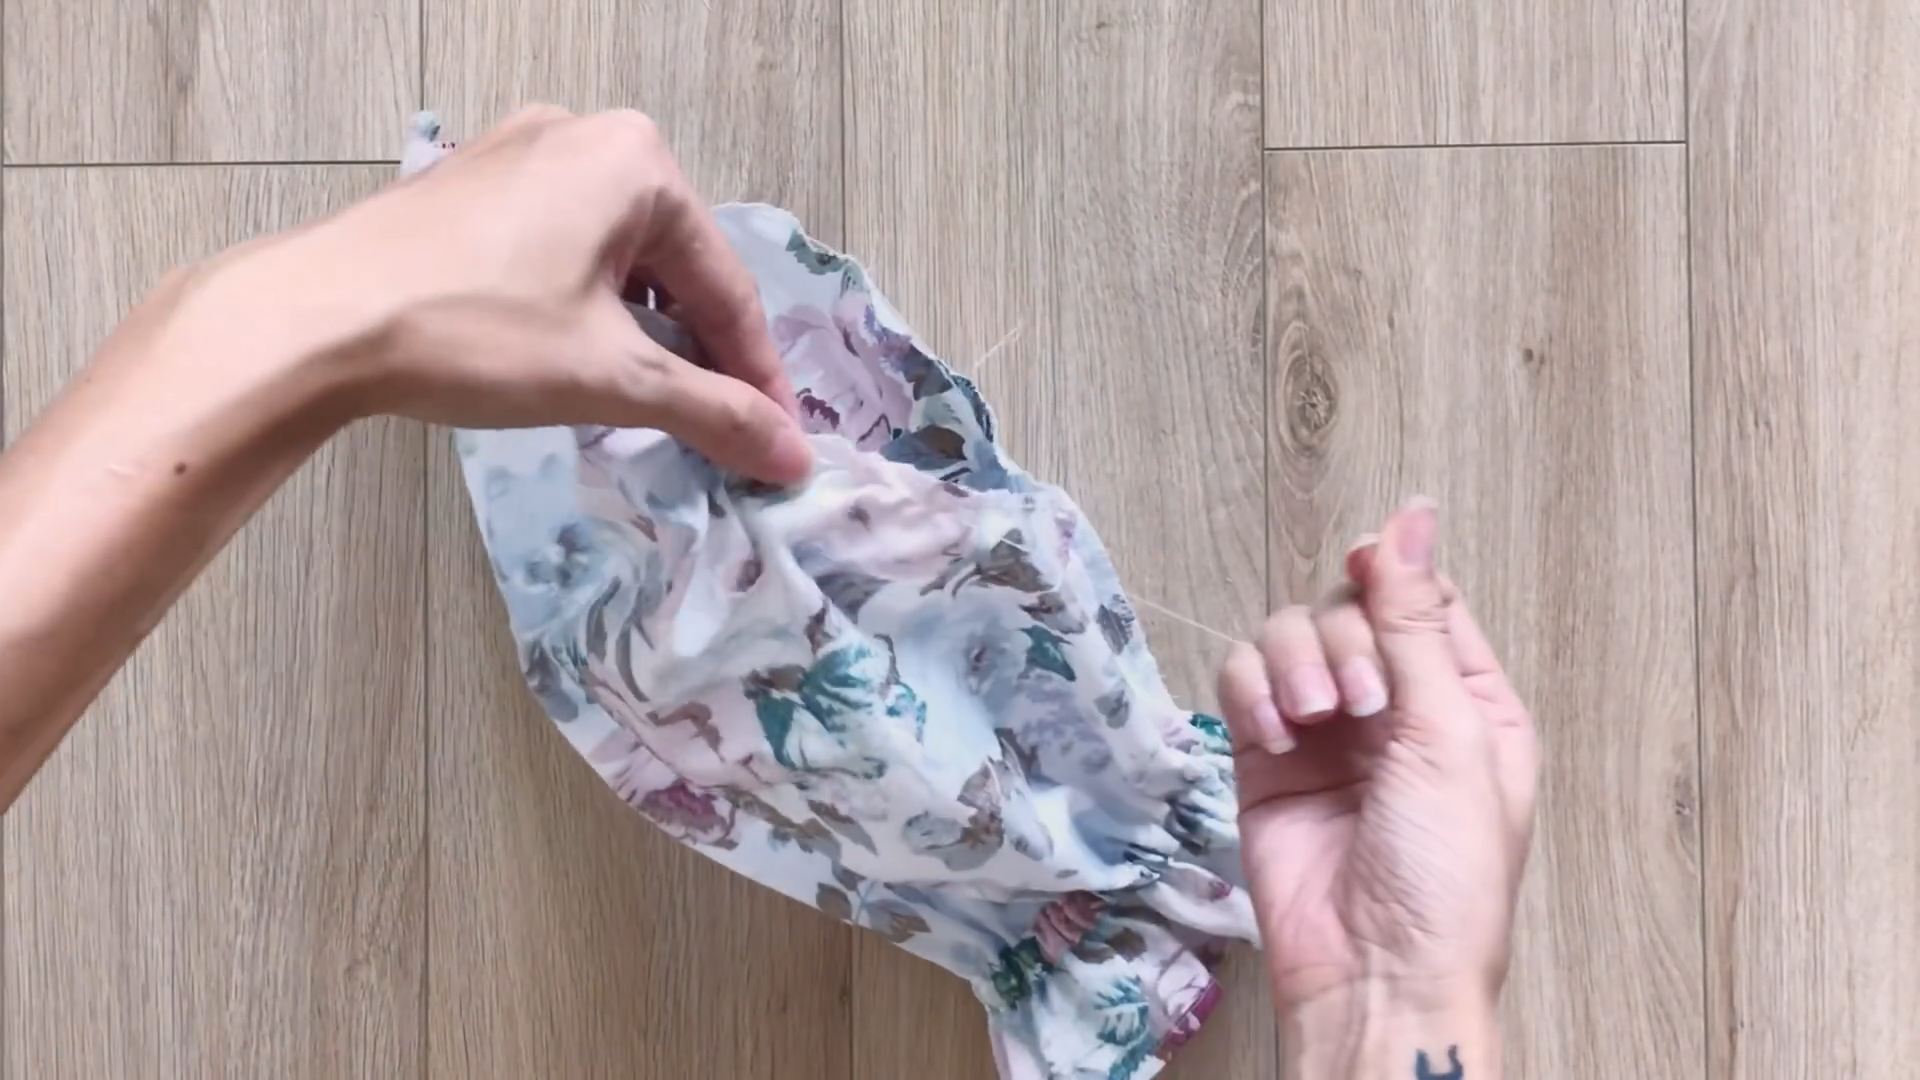
Thread the elastic bands through the holes to create the shirring.
Sew at two ends of the elastic bands to keep them in place.
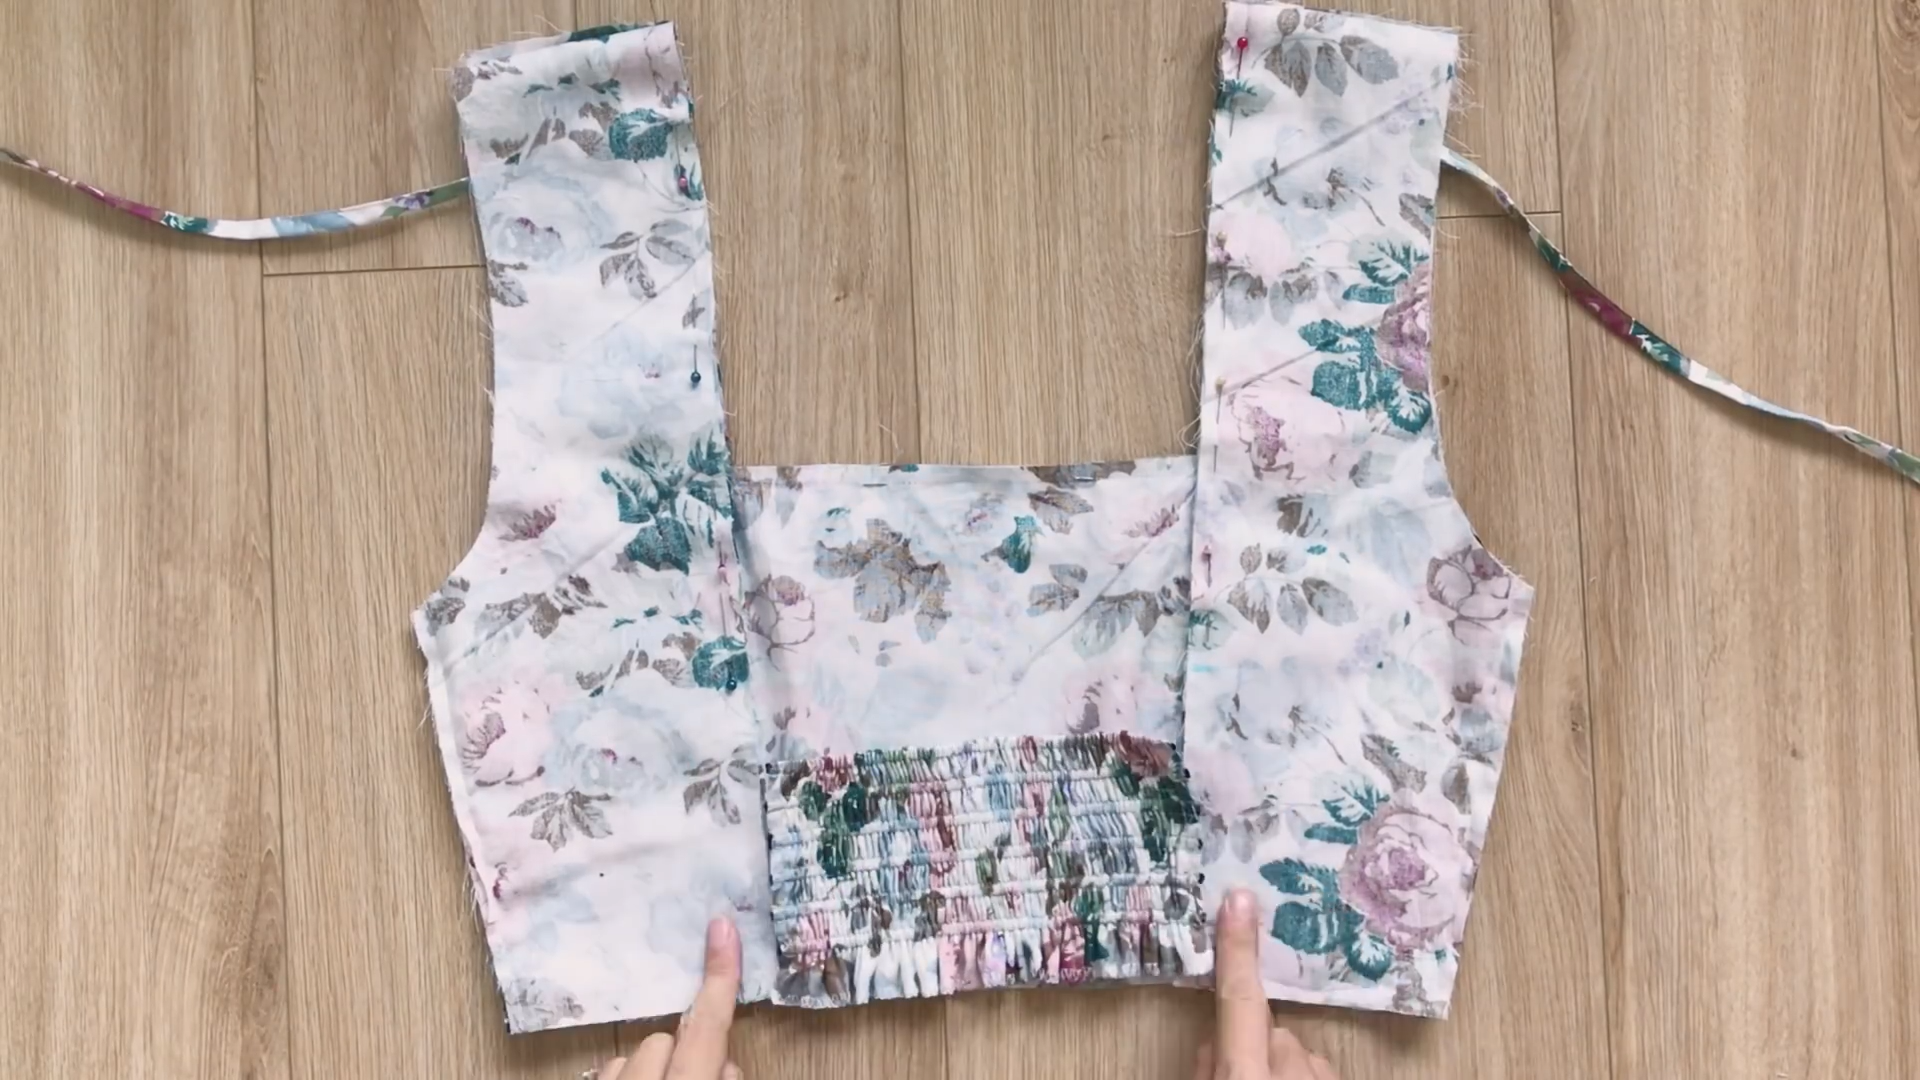
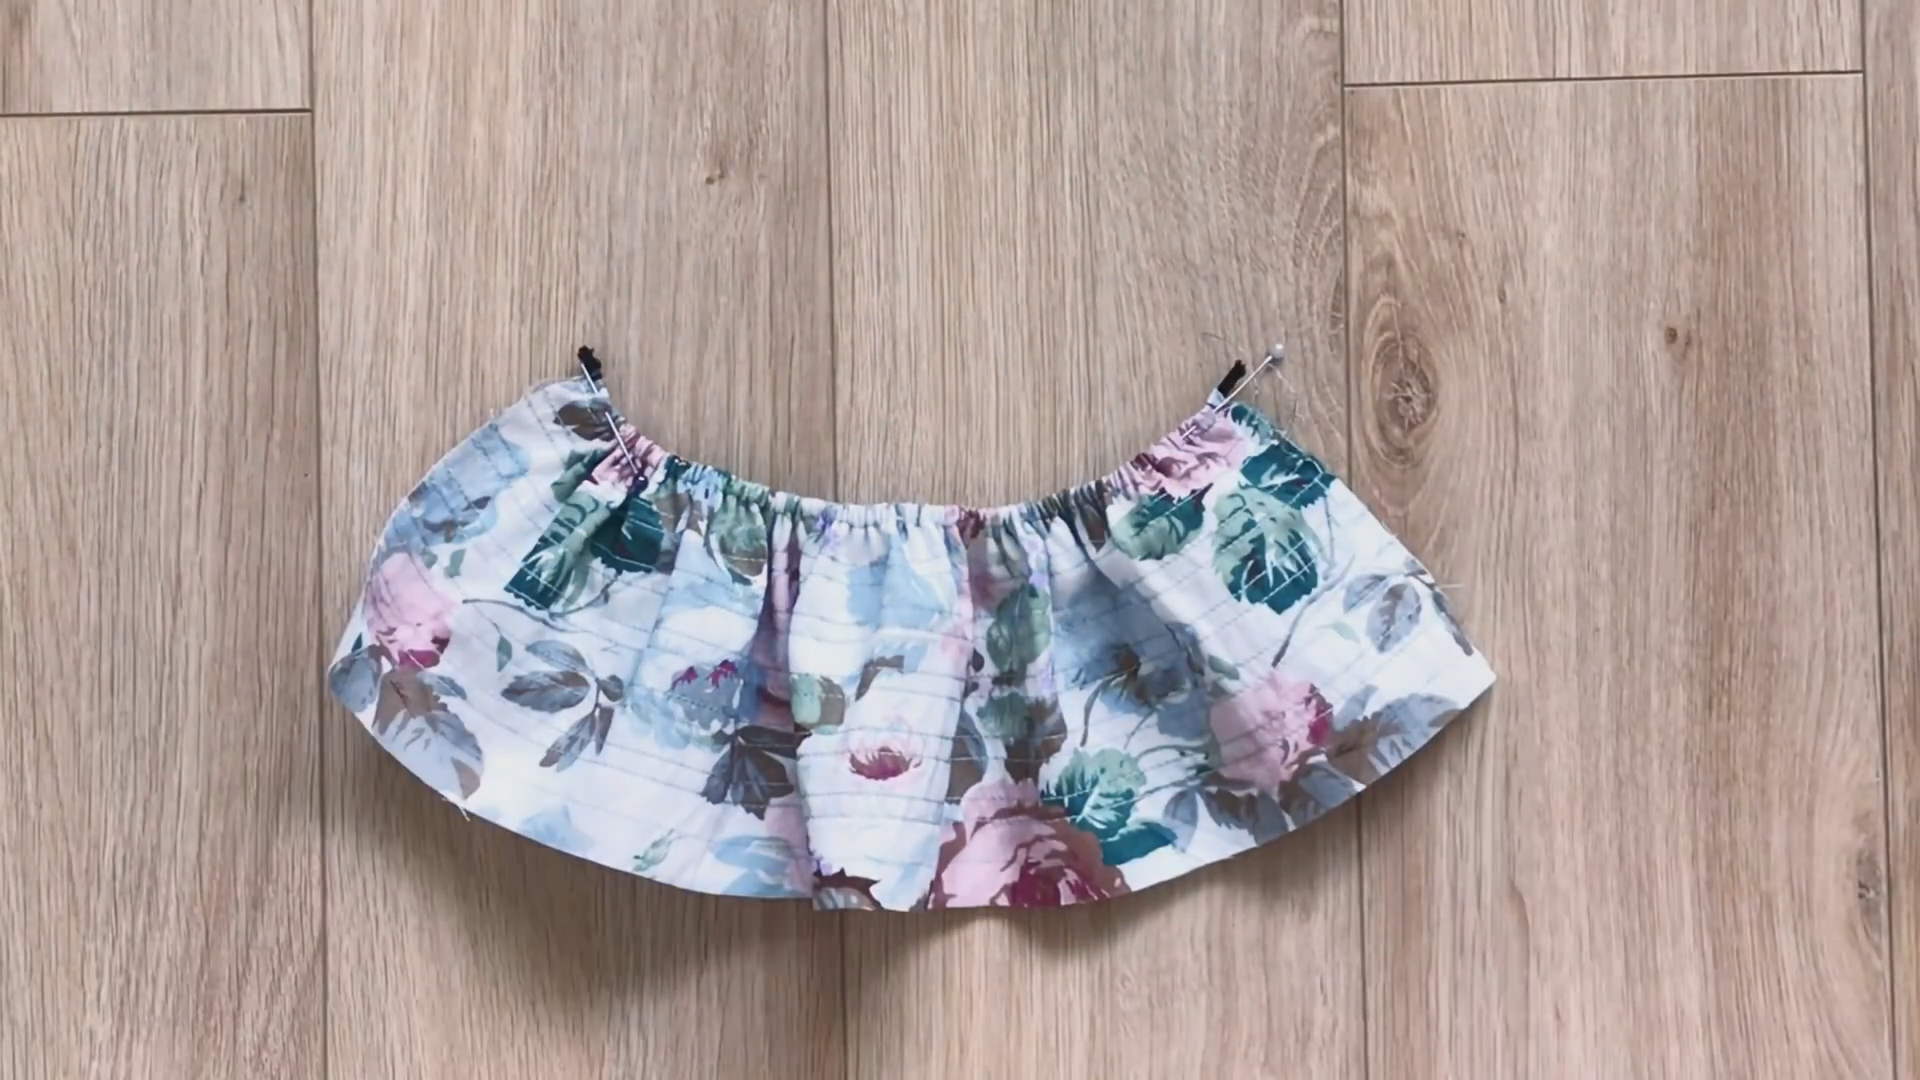
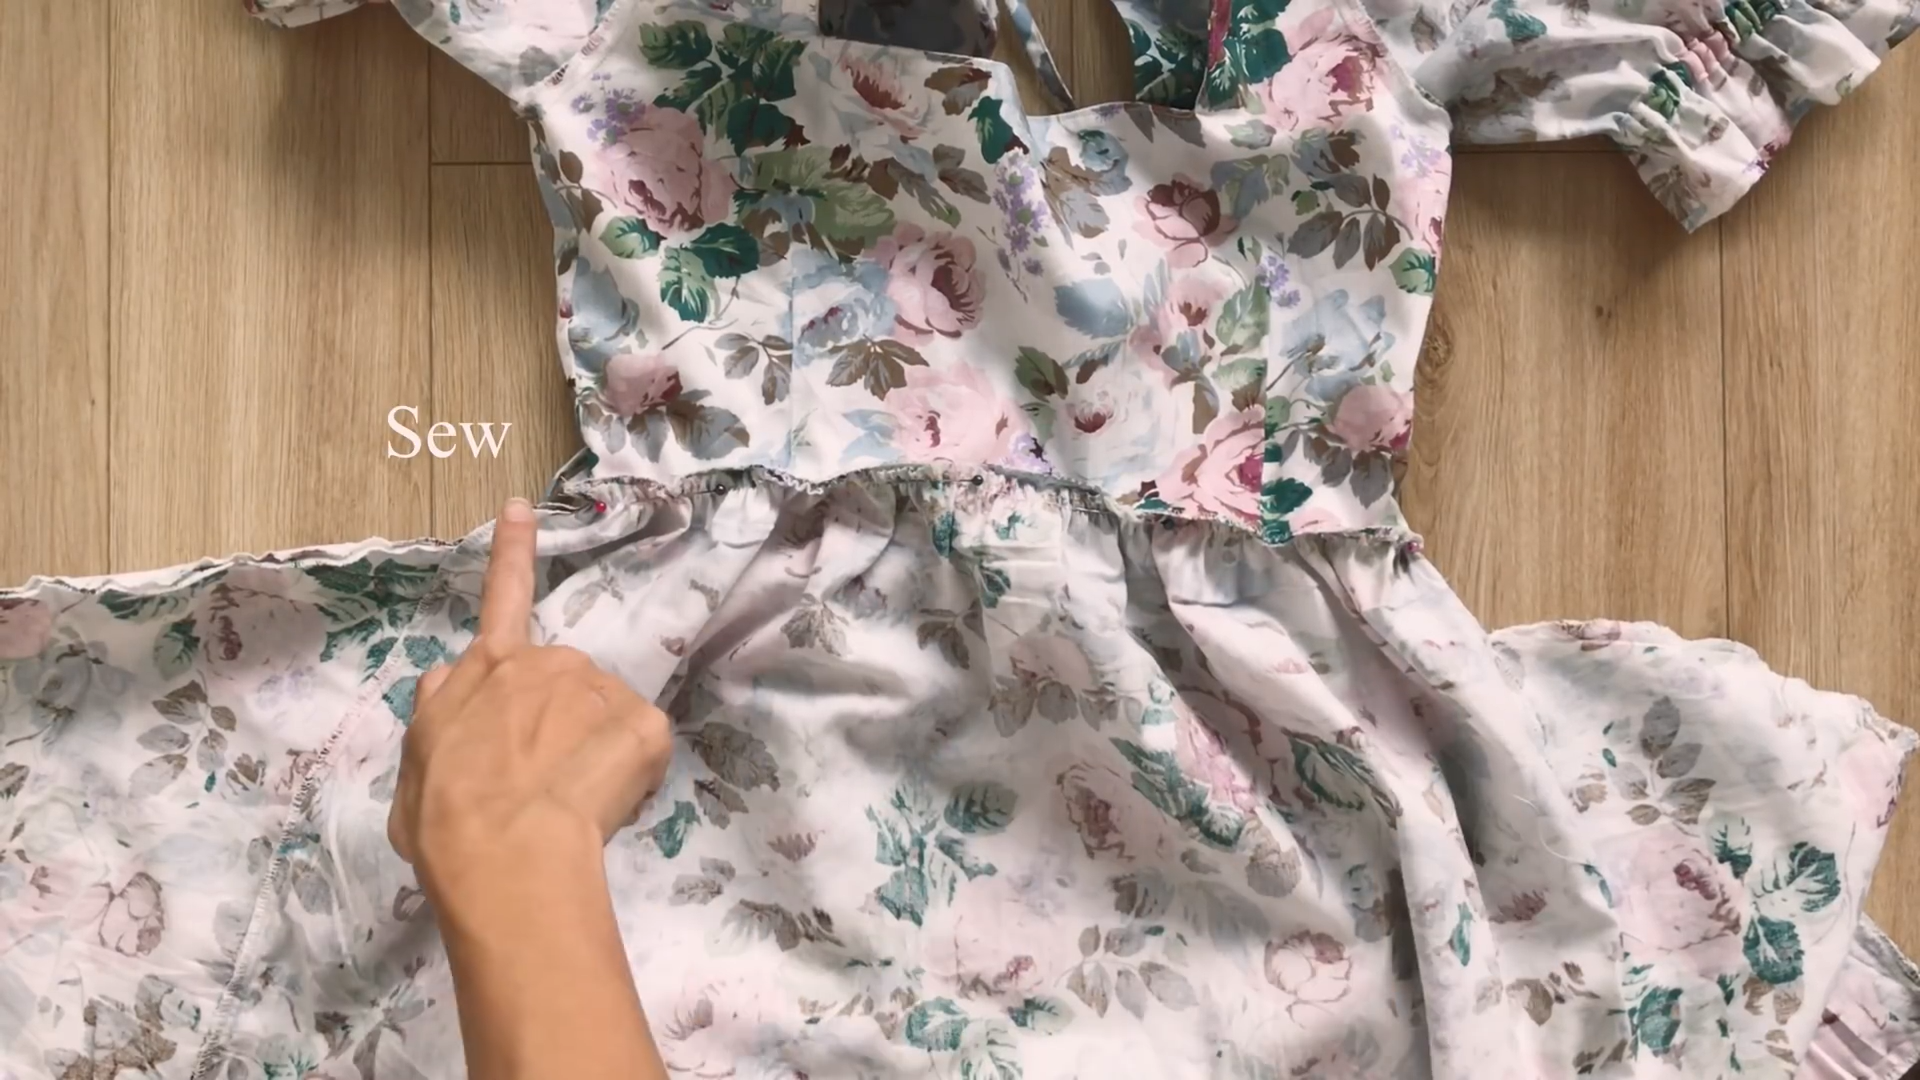
Position the shirred panel between two back parts.
Make sure the shirring have to be in the middle of two pieces of the top bodice. Sew it to the bodice.
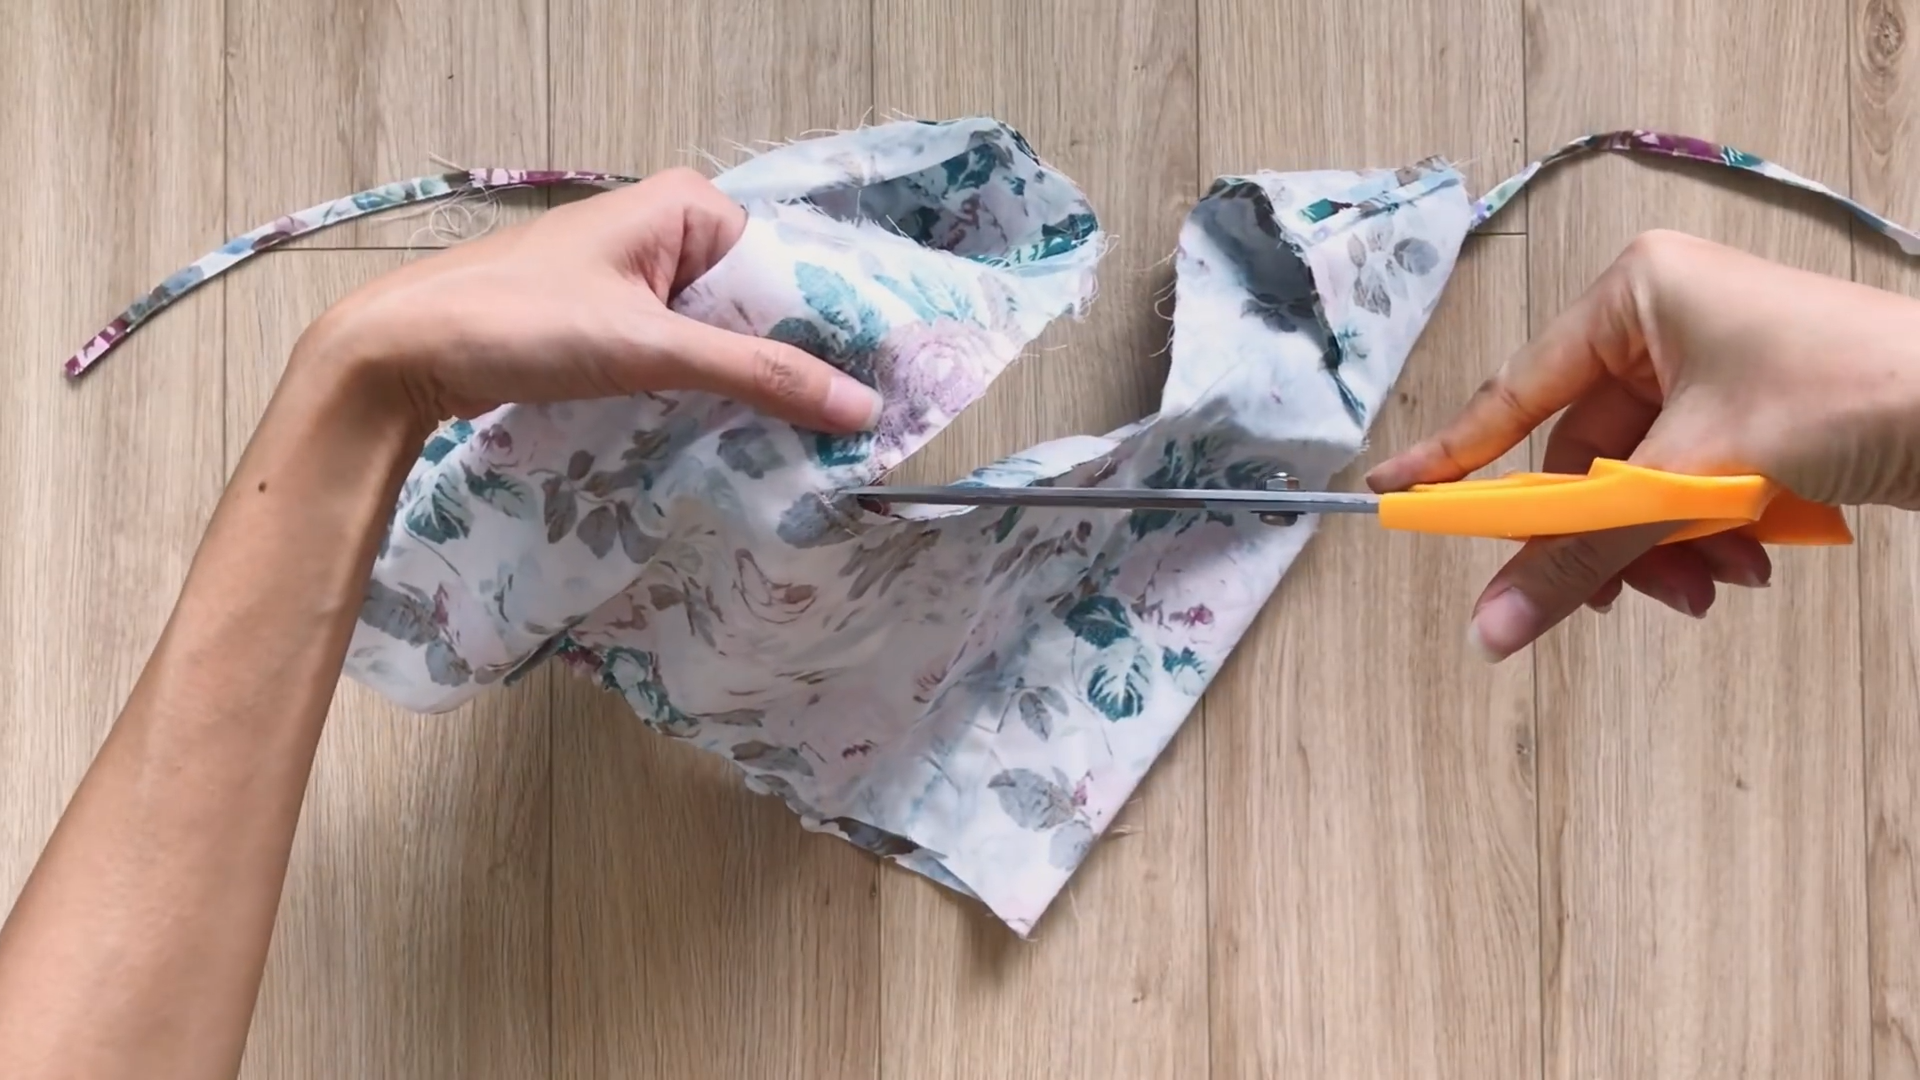
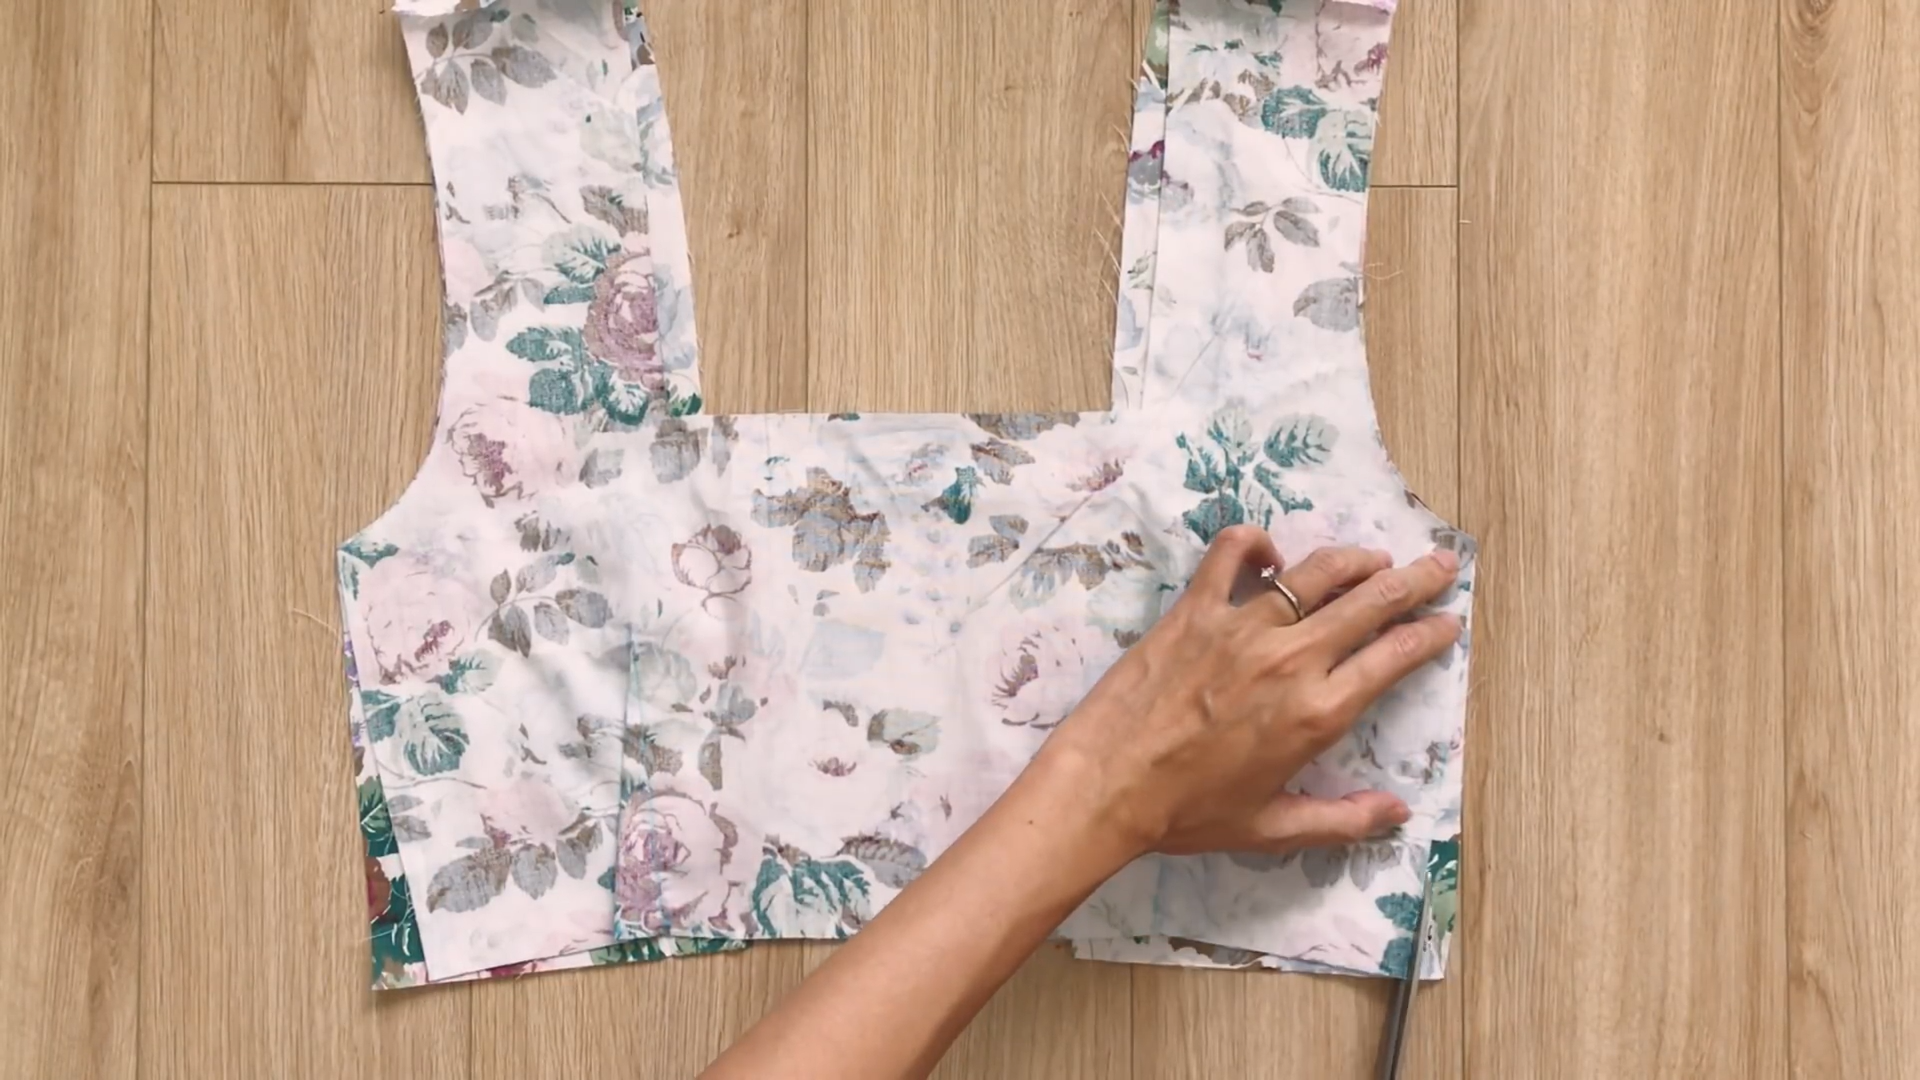
Make small cuts at the square neck base for turning.
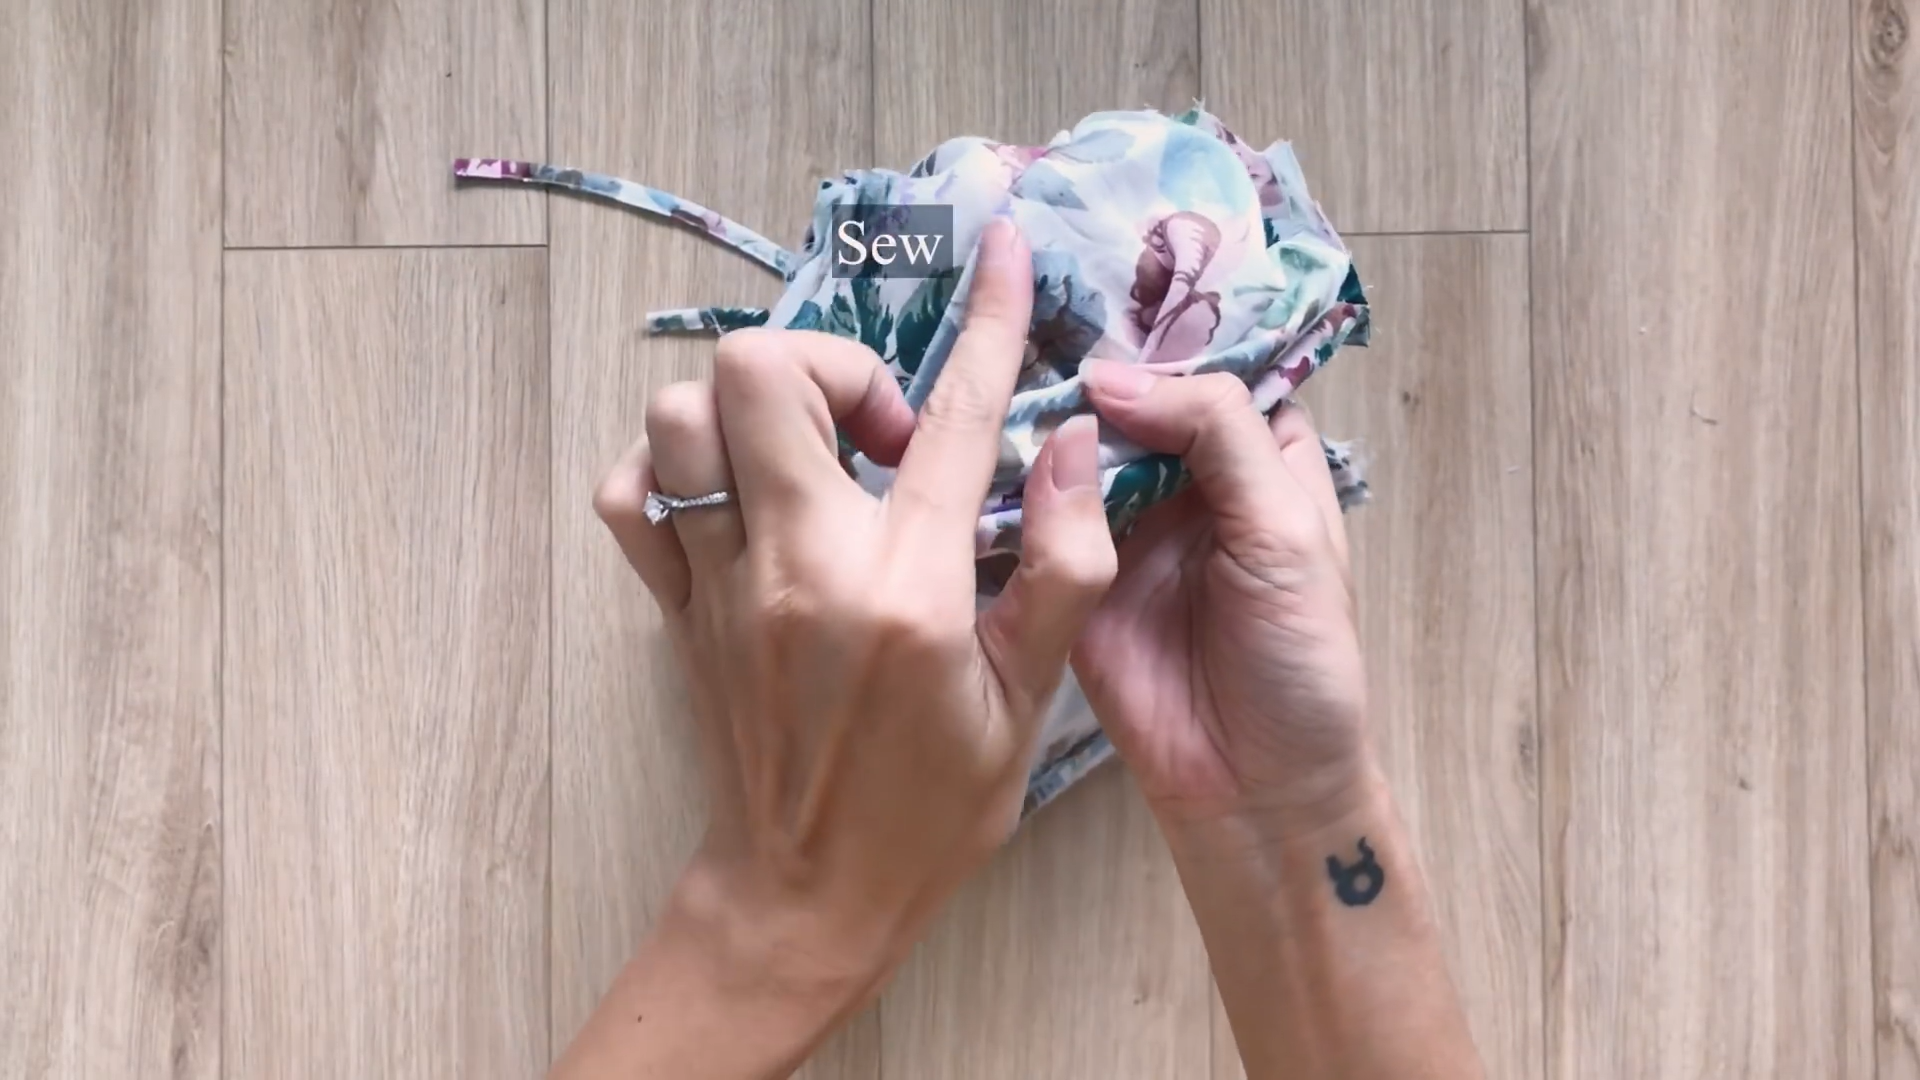
Turn the the right side of the fabric out.
Make a second seam at one piece of the top part to get all the end fabric to one side.
Overlock the ending and the sleeve lines to connect two pieces of the top bodice together.
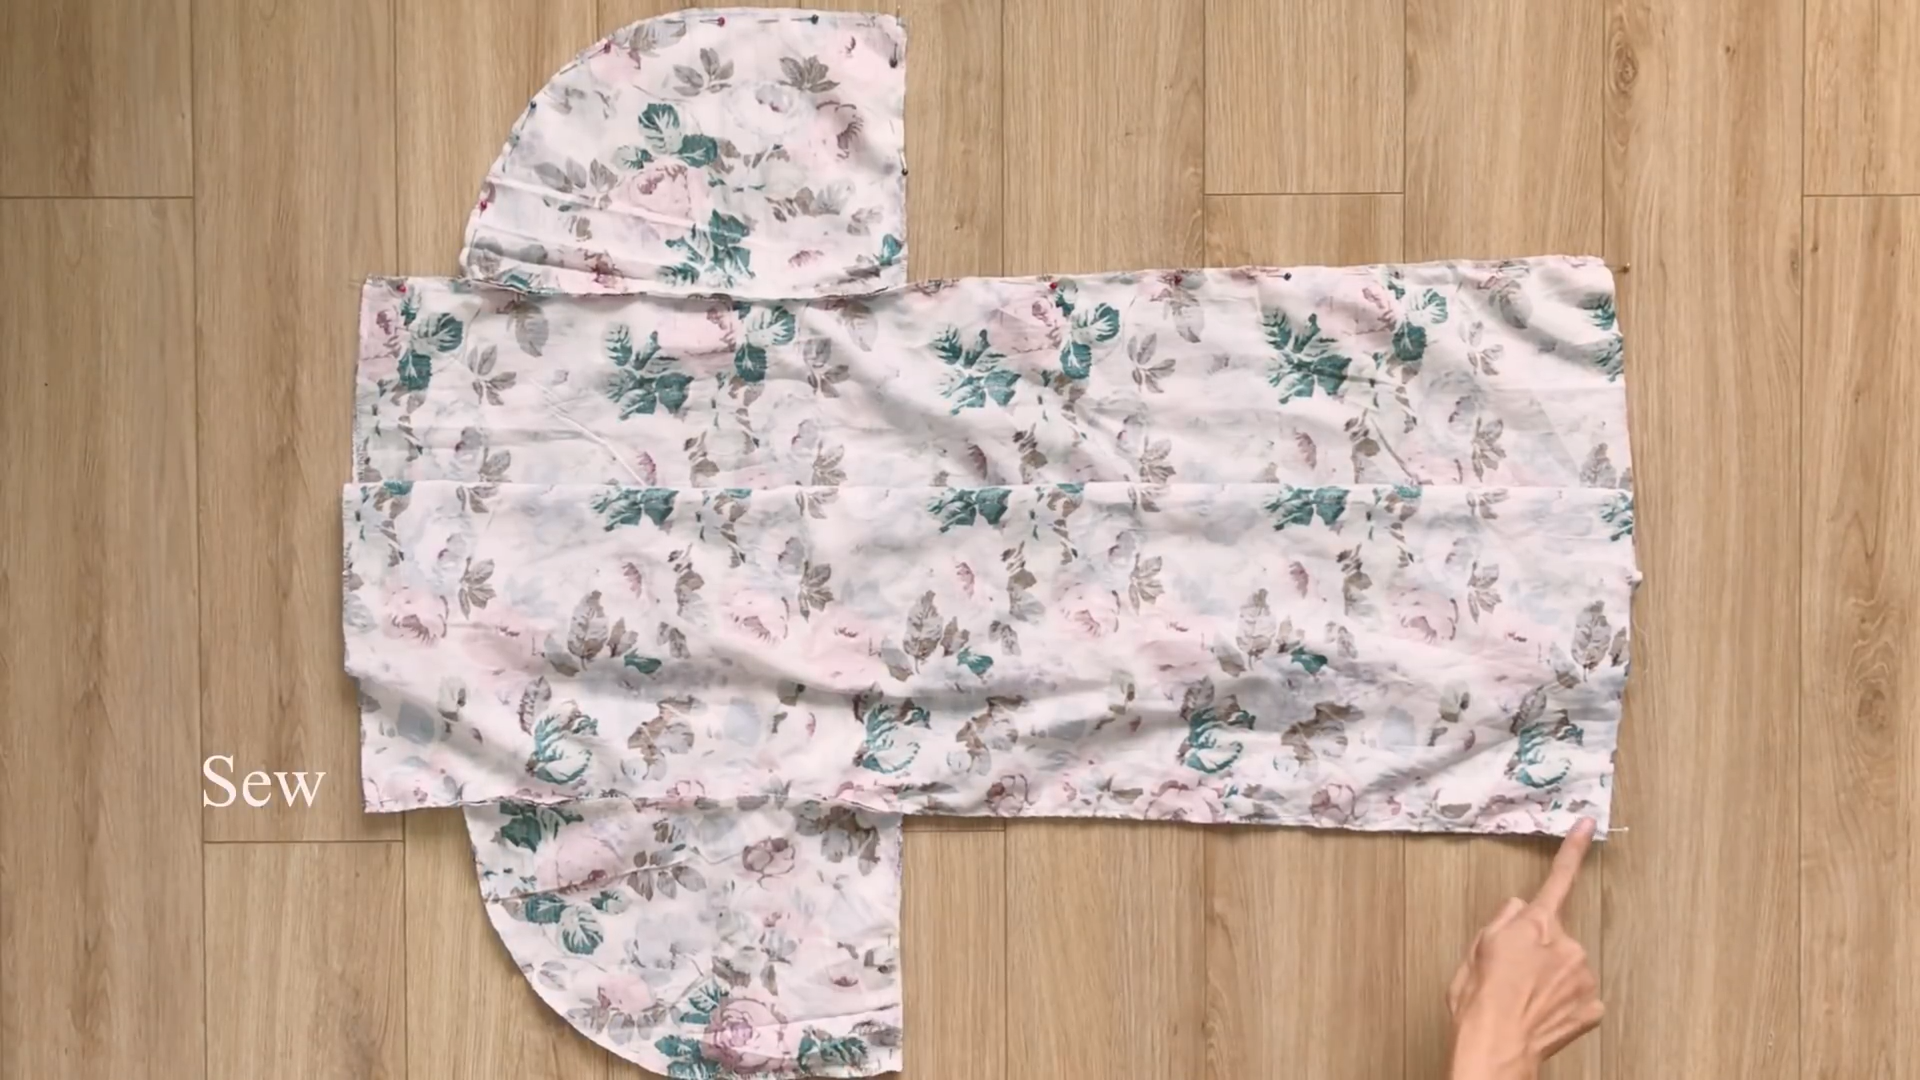
THE SLEEVE

Join the underarm lines of your sleeve pieces.
Fold the fabric at the sleeve end twice.
Secure the fold neatly with stitches.
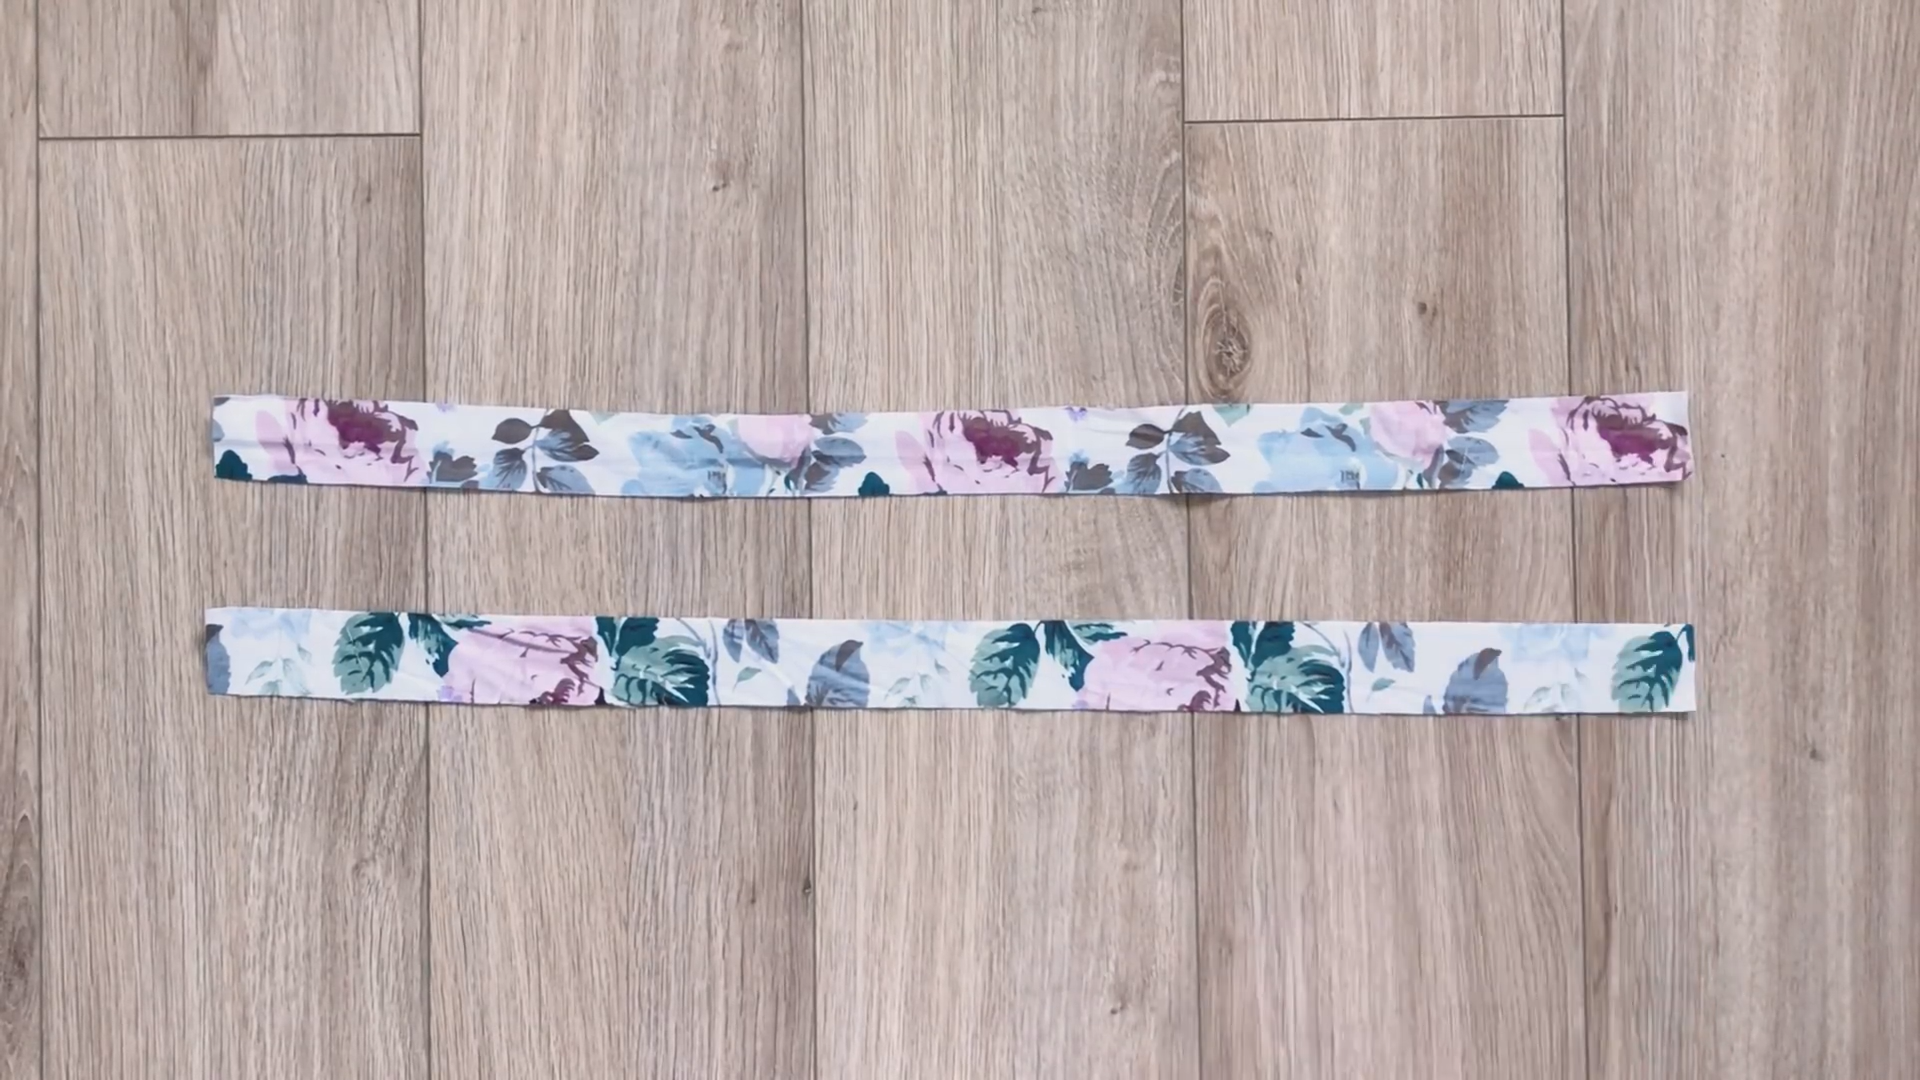
Cut two rectangles measuring 4cm in width and 42cm in length.
Connect the short ends of the rectangle to form a fabric circle.

Fold both sides of the circle inward by approximately 1cm, ironing them down.
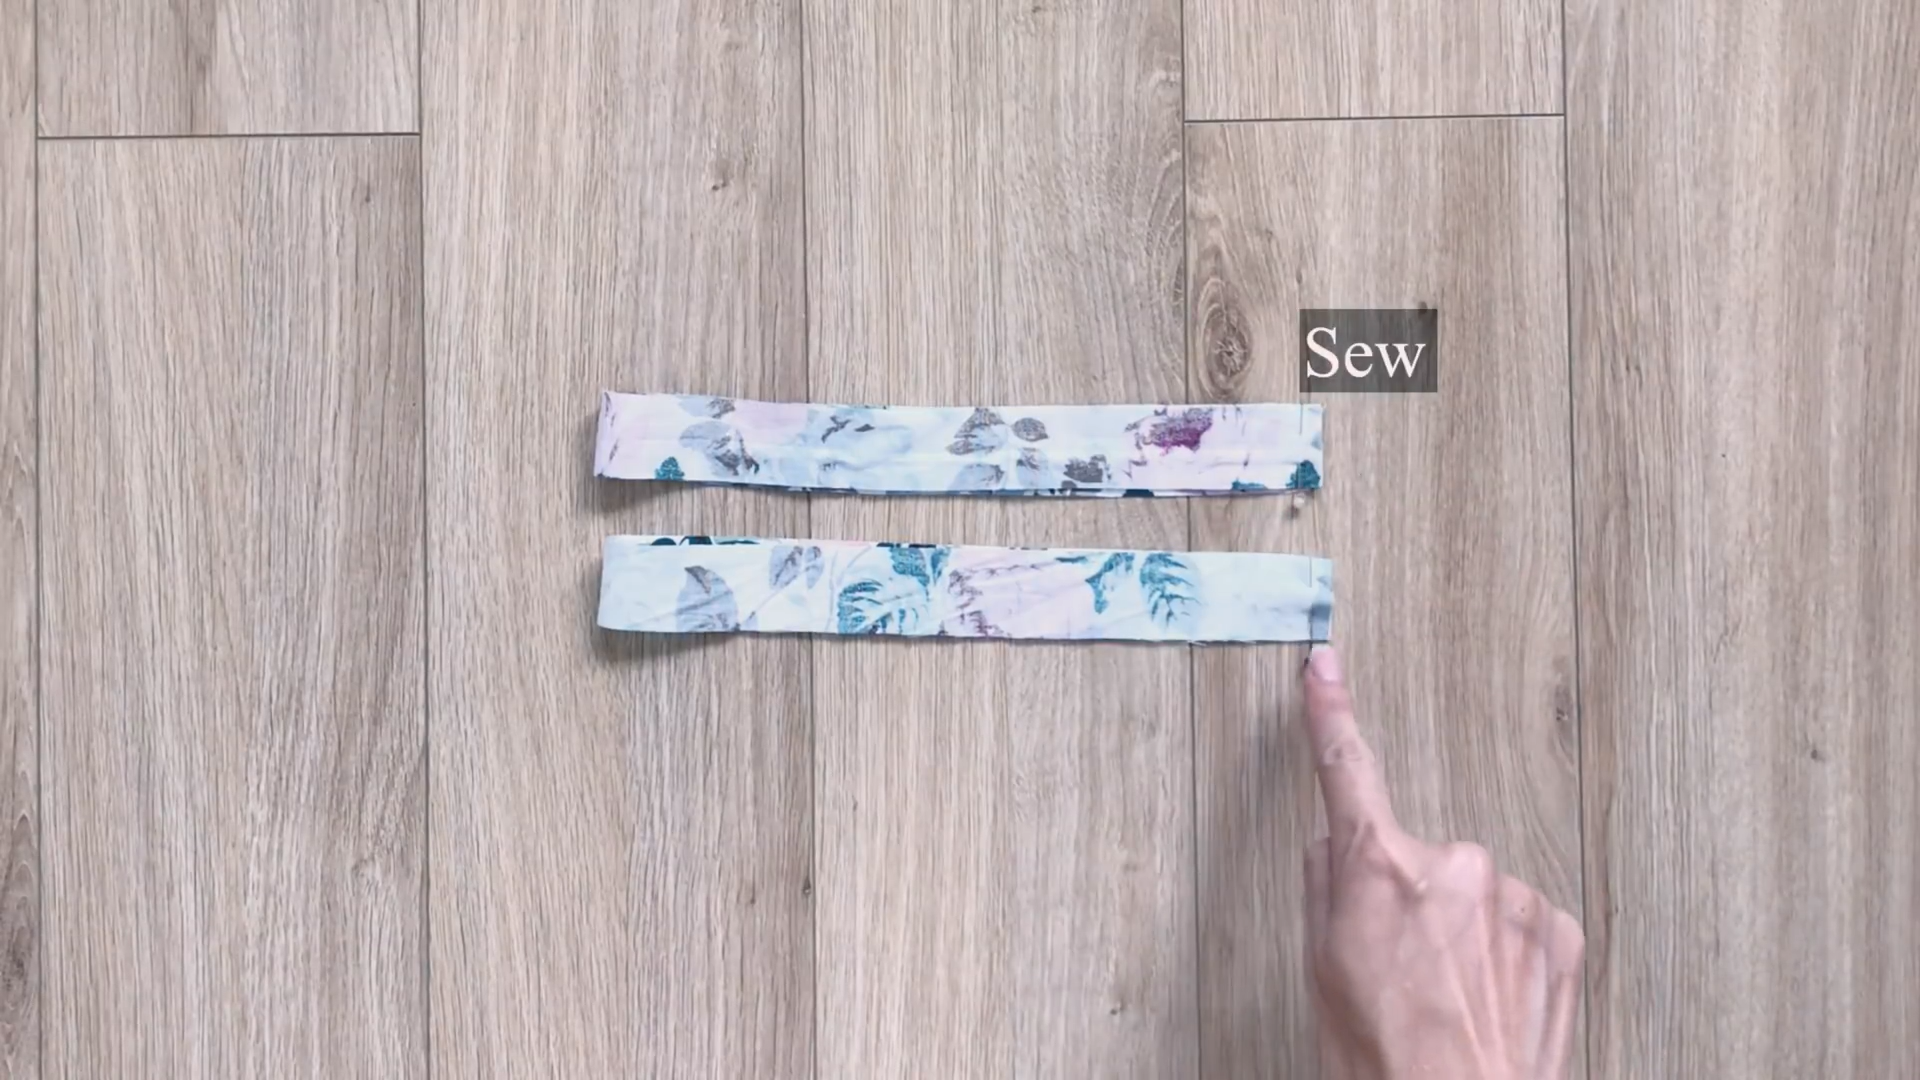
Position the circle fabric 4cm from the sleeve end.
While sewing the circle to the sleeve, leave a small unsewn gap for inserting the elastic band.
Cut a 1cm-wide elastic band, approximately 22cm in length.
Thread the elastic band through the gap you have made.
Stitch the elastic ends together.
Glue the previously left gap to secure the elastic in place.
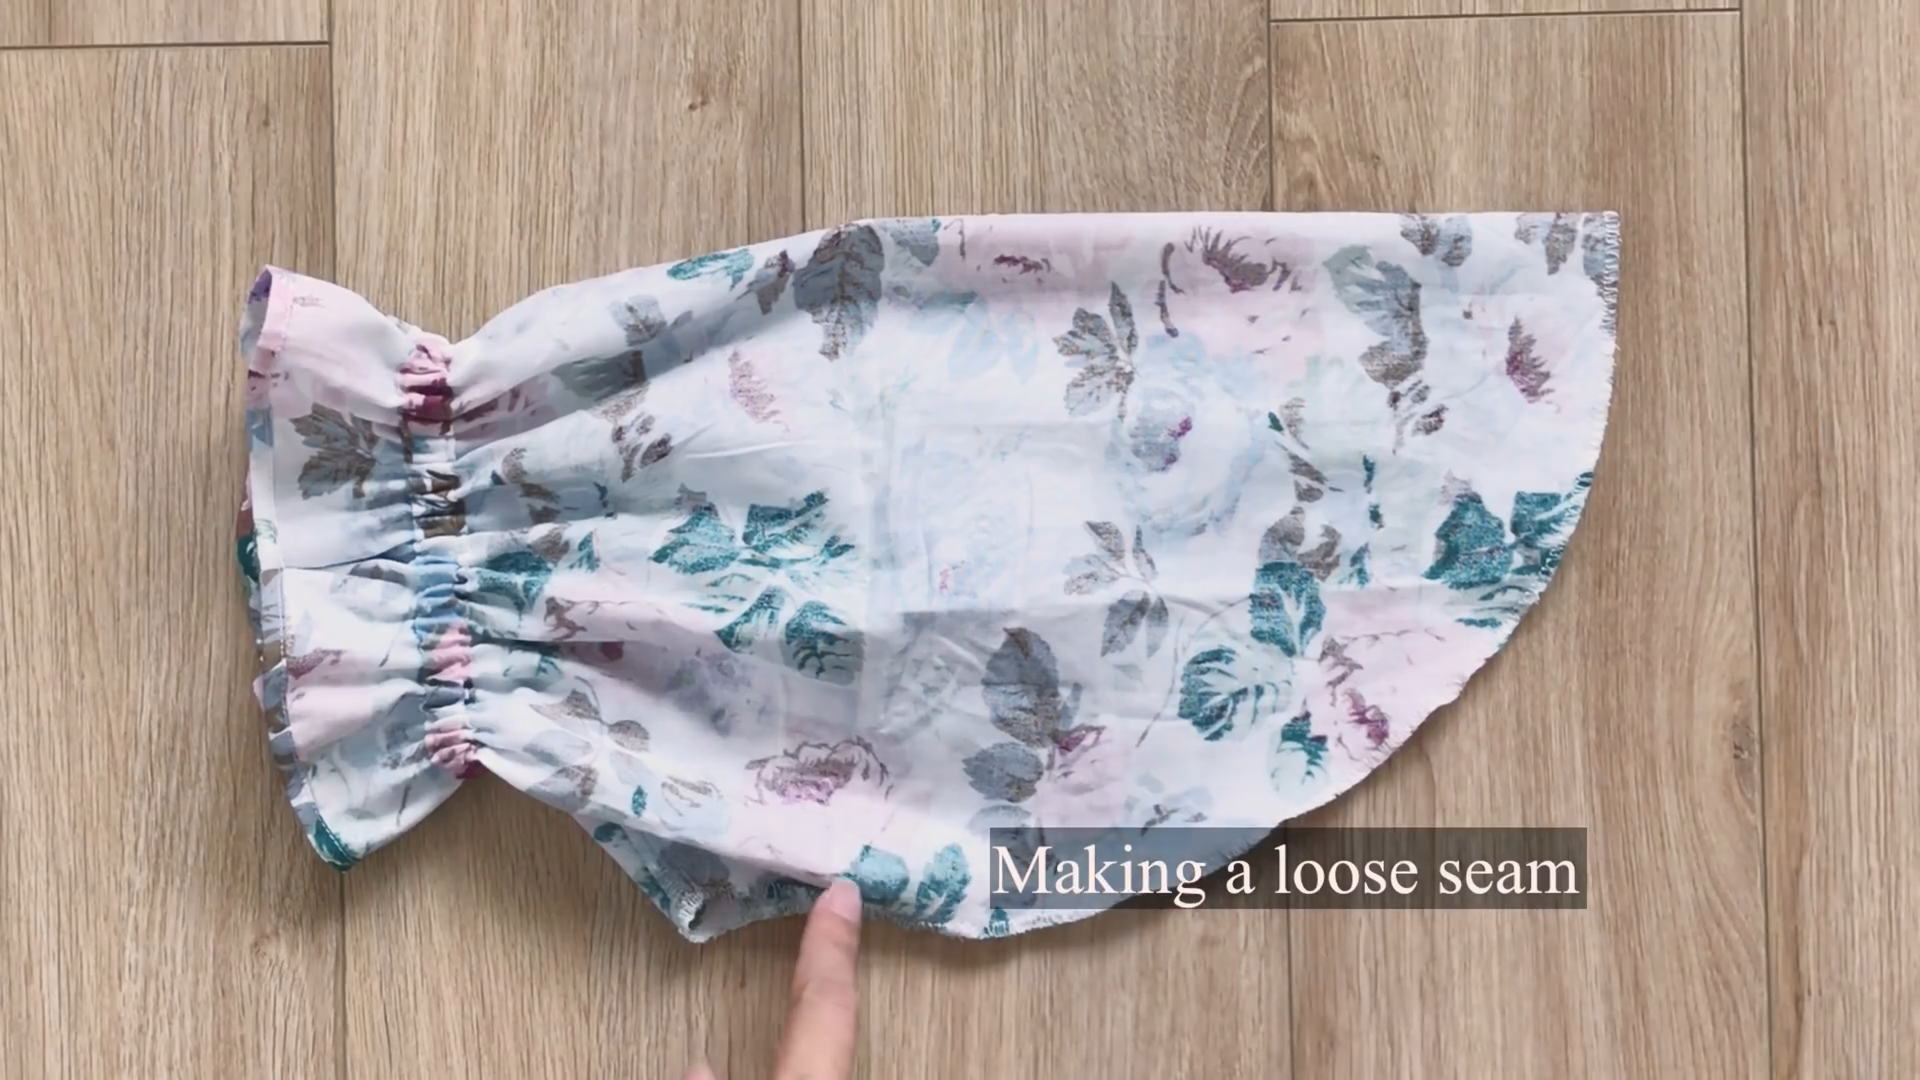
Create a loose seam at the top of the sleeve.
Gather the fabric at the sleeve’s upper edge.
Attach the sleeves to the top part along the sleeve lines.
THE SKIRT
Cut two rectangles—each 67 cm wide and 80 cm long.
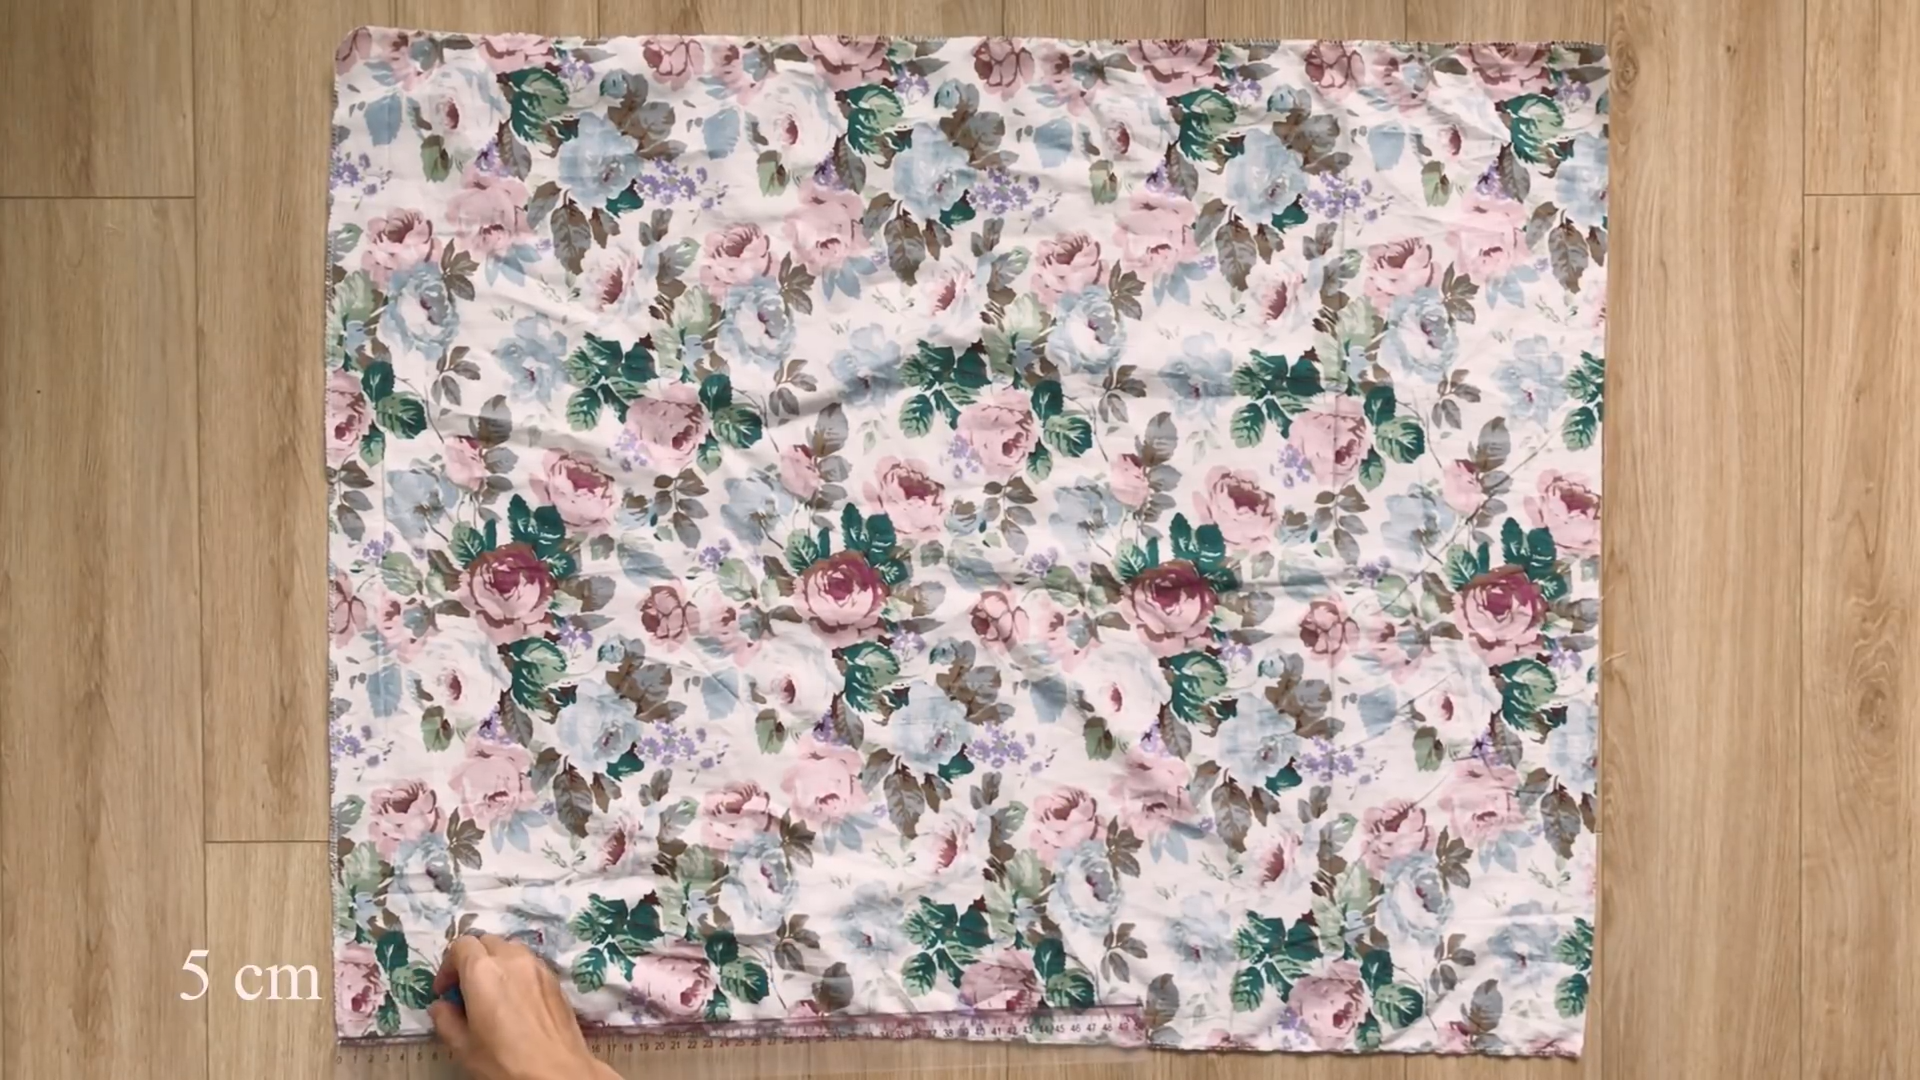
From one width line, mark 5 centimeters down along both length lines.
Attach the pockets to their designated spots and sew them in place.
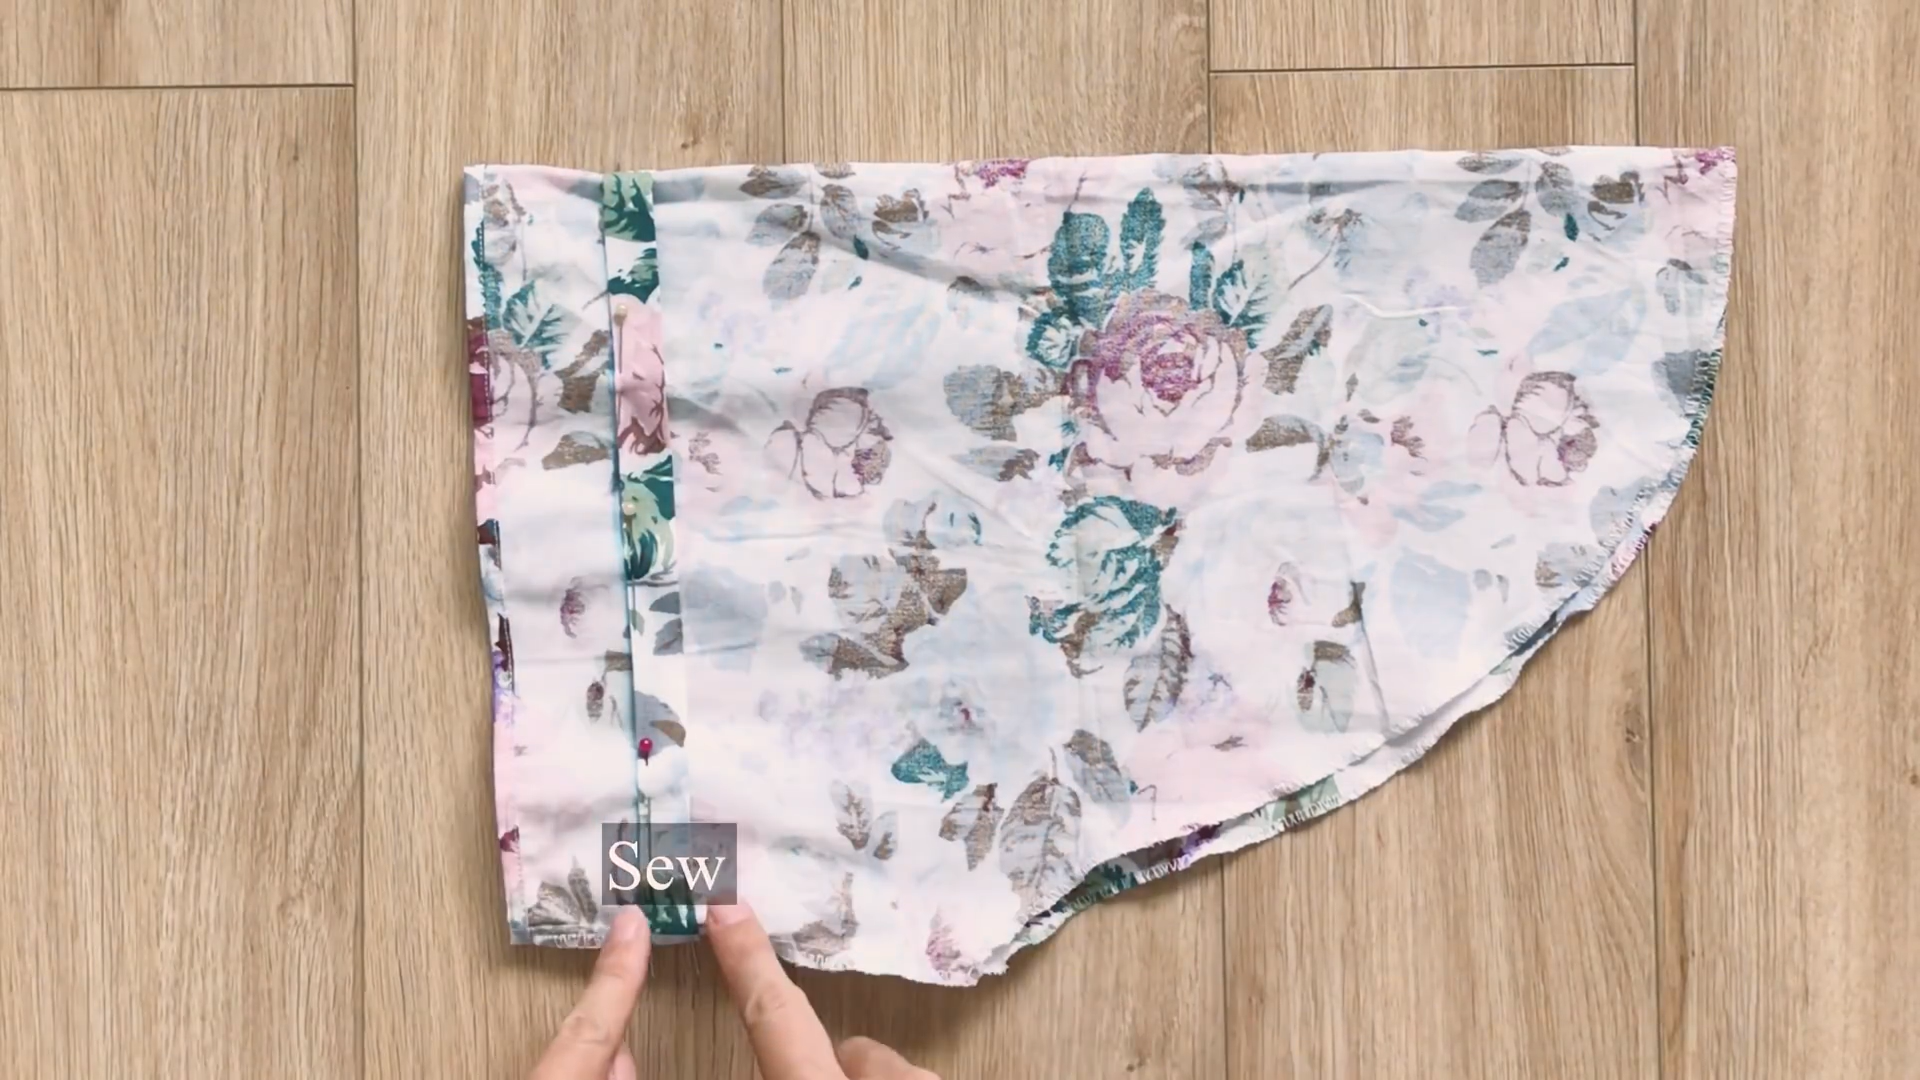
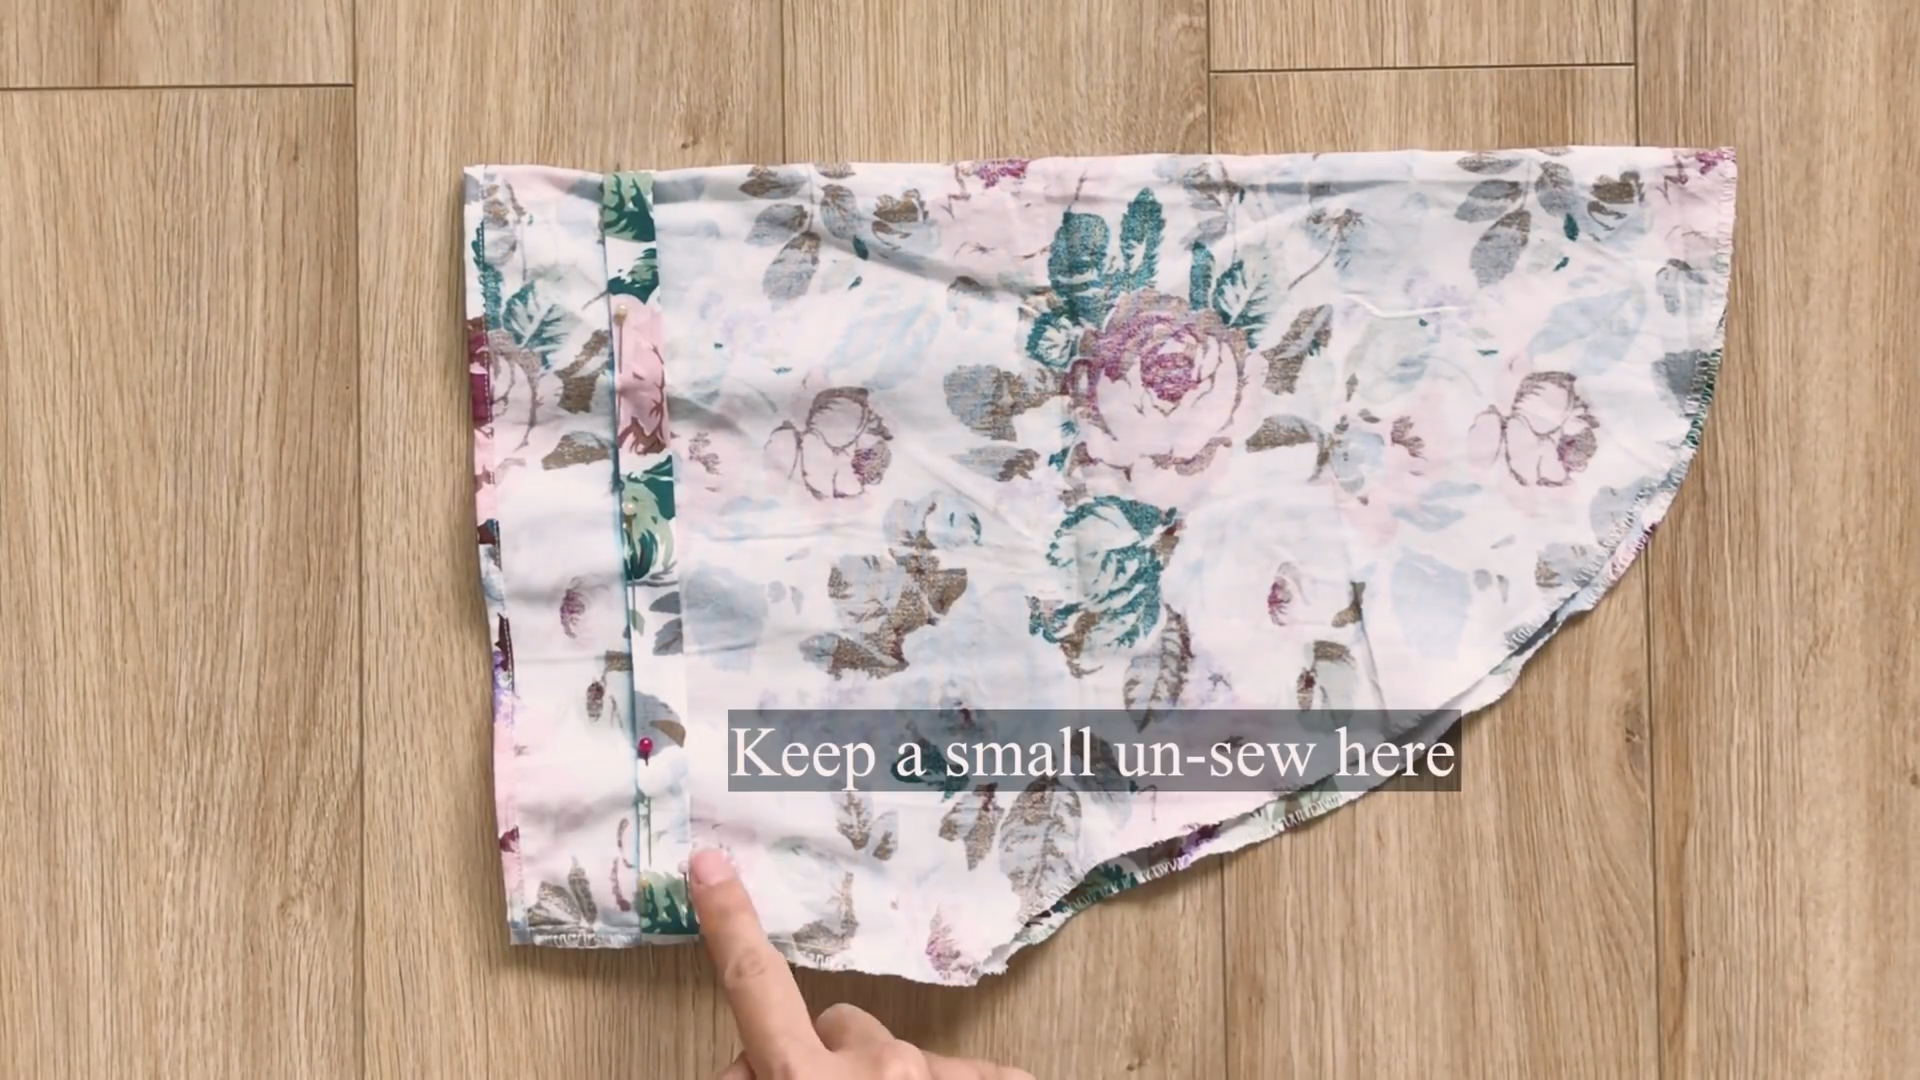
Connect the two bottom dress pieces along their sidelines.
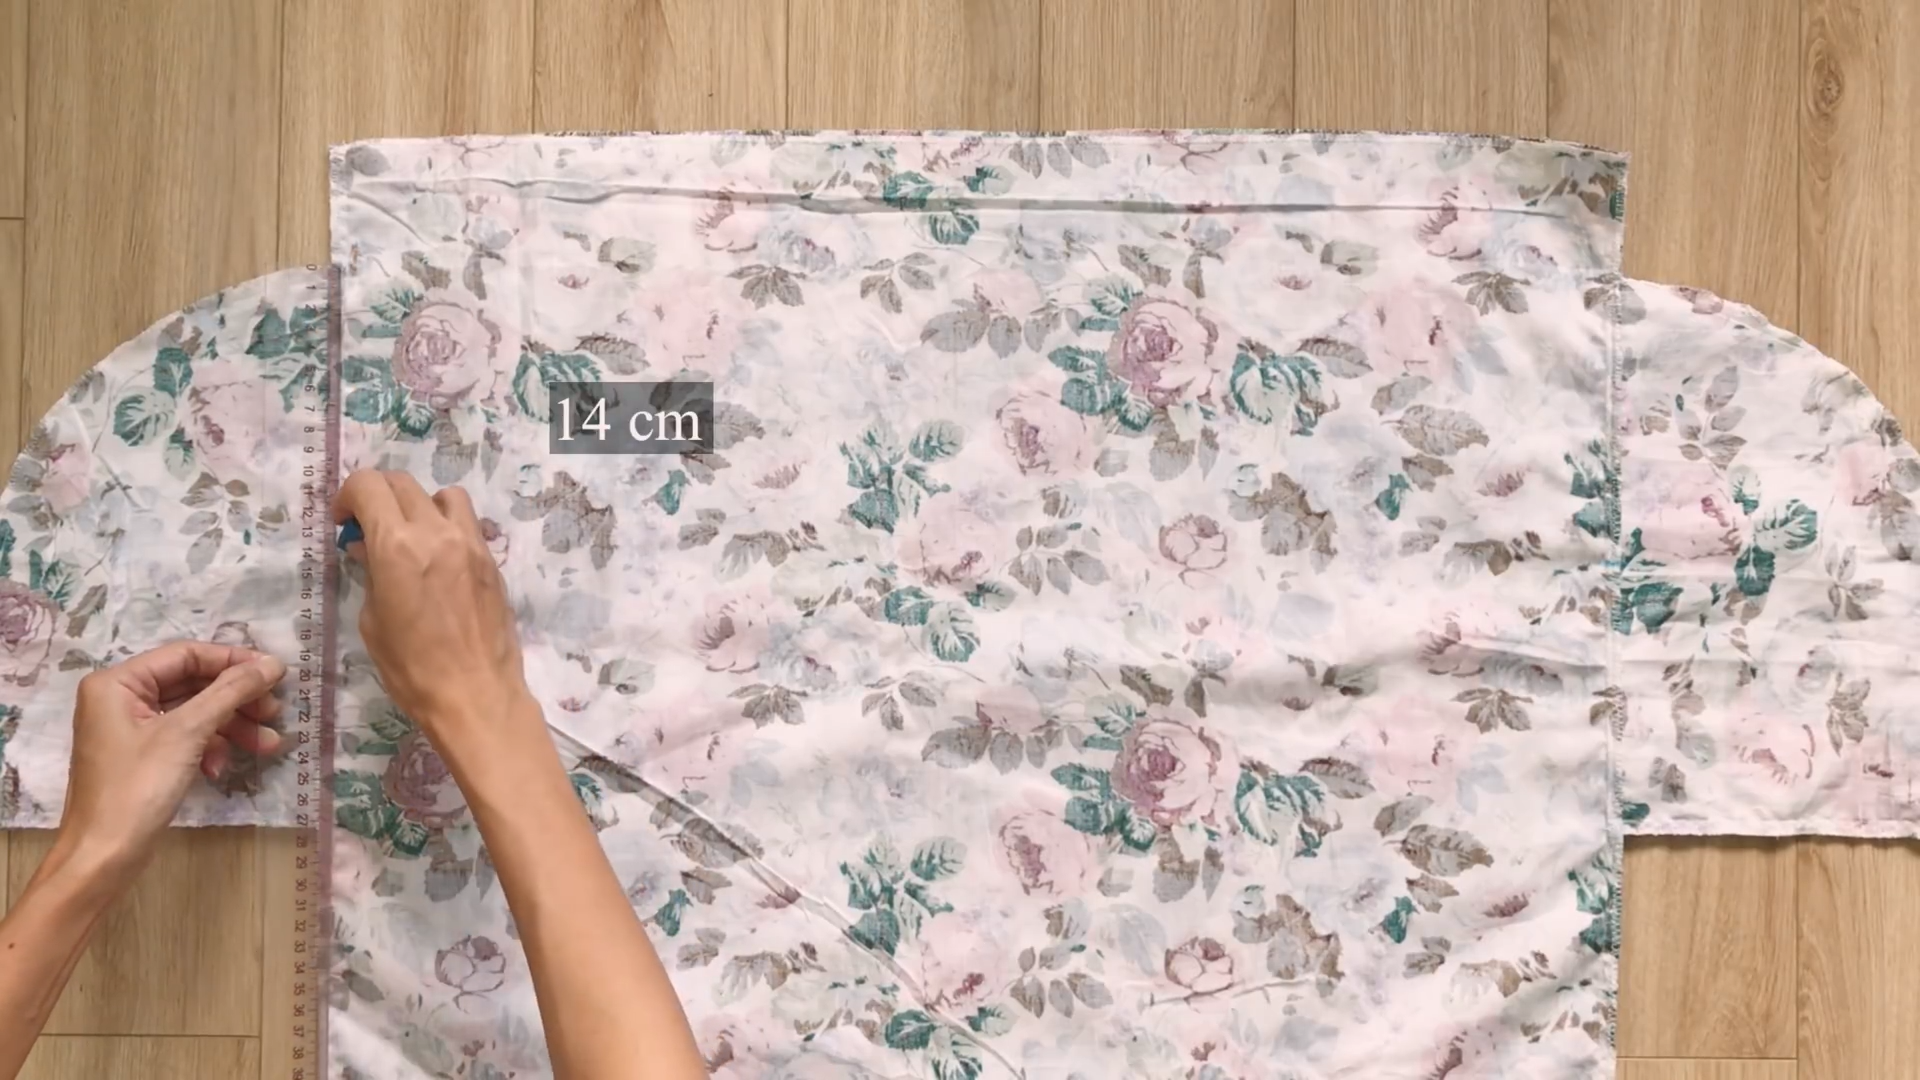
Mark down 14 cm from the top of the pocket. This area will be the pocket opening.
Sew the remaining pocket fabric together to complete the pocket depth.
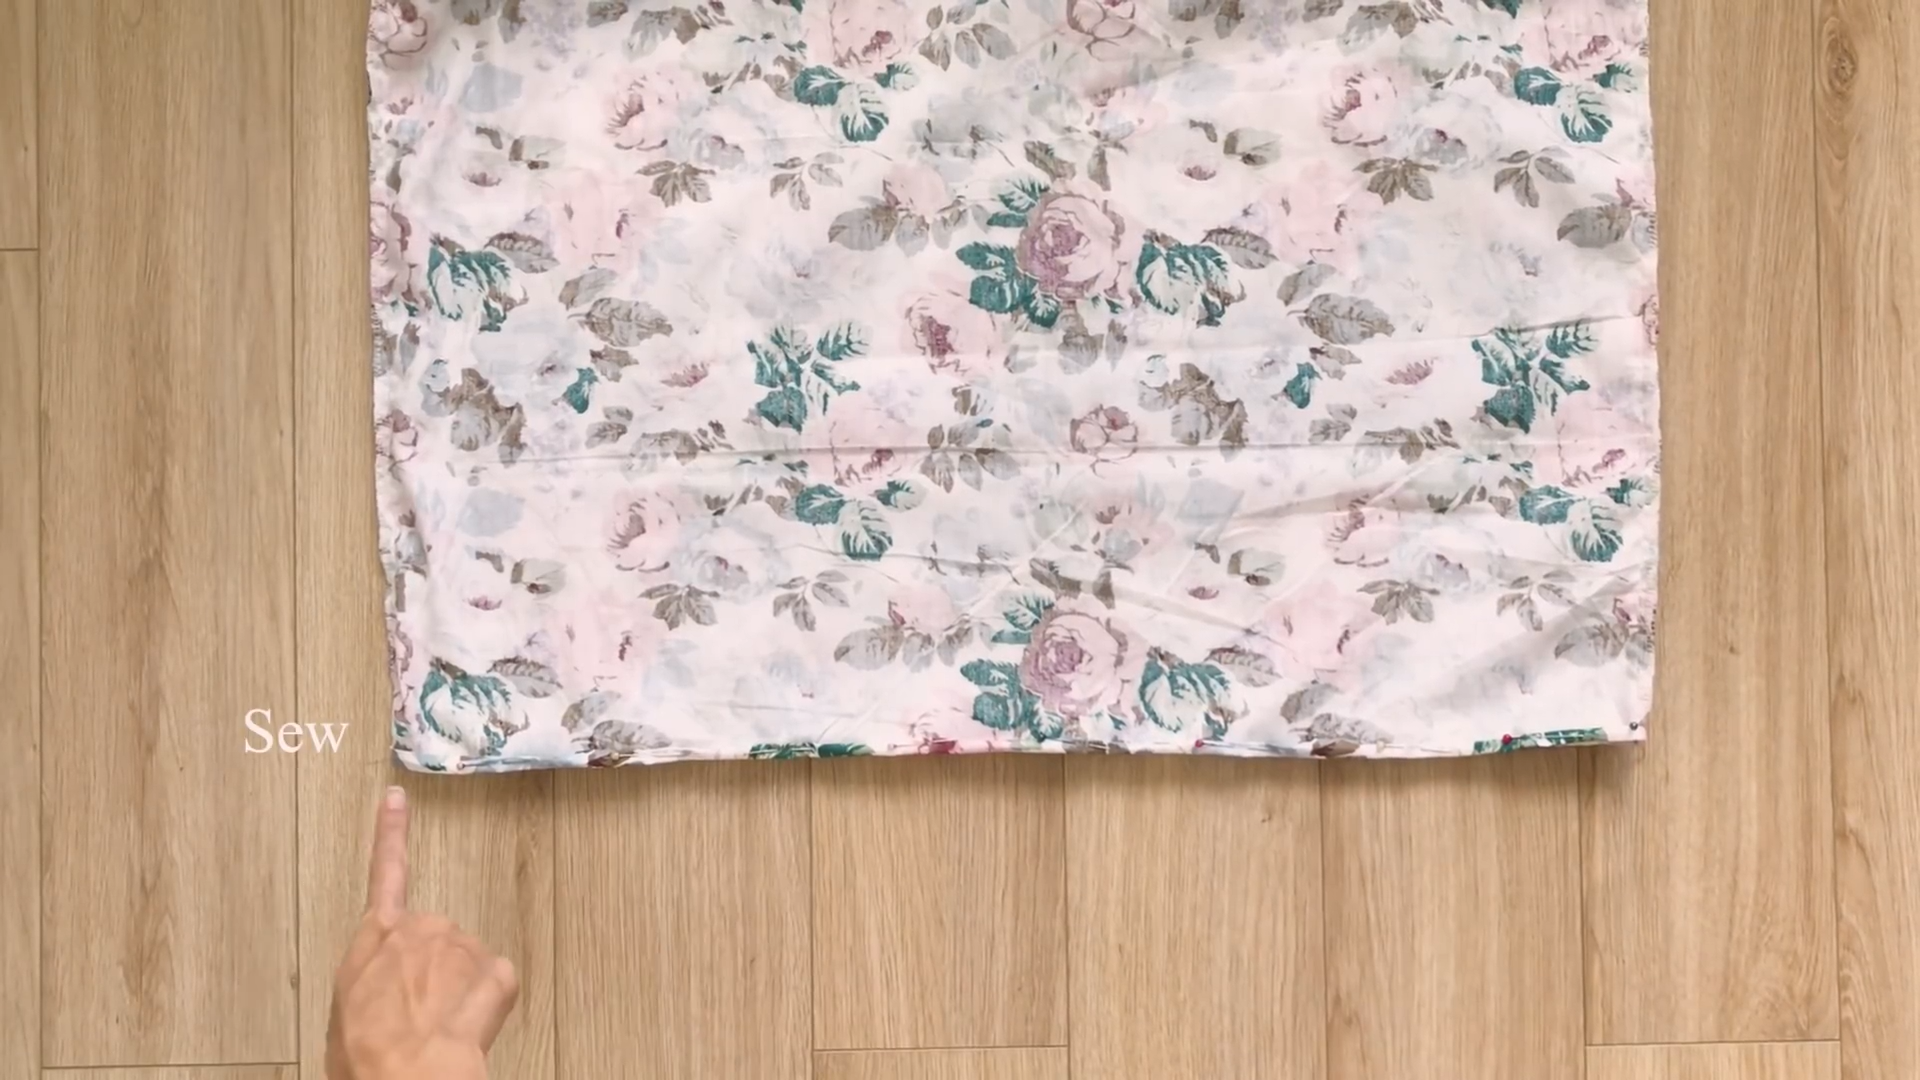
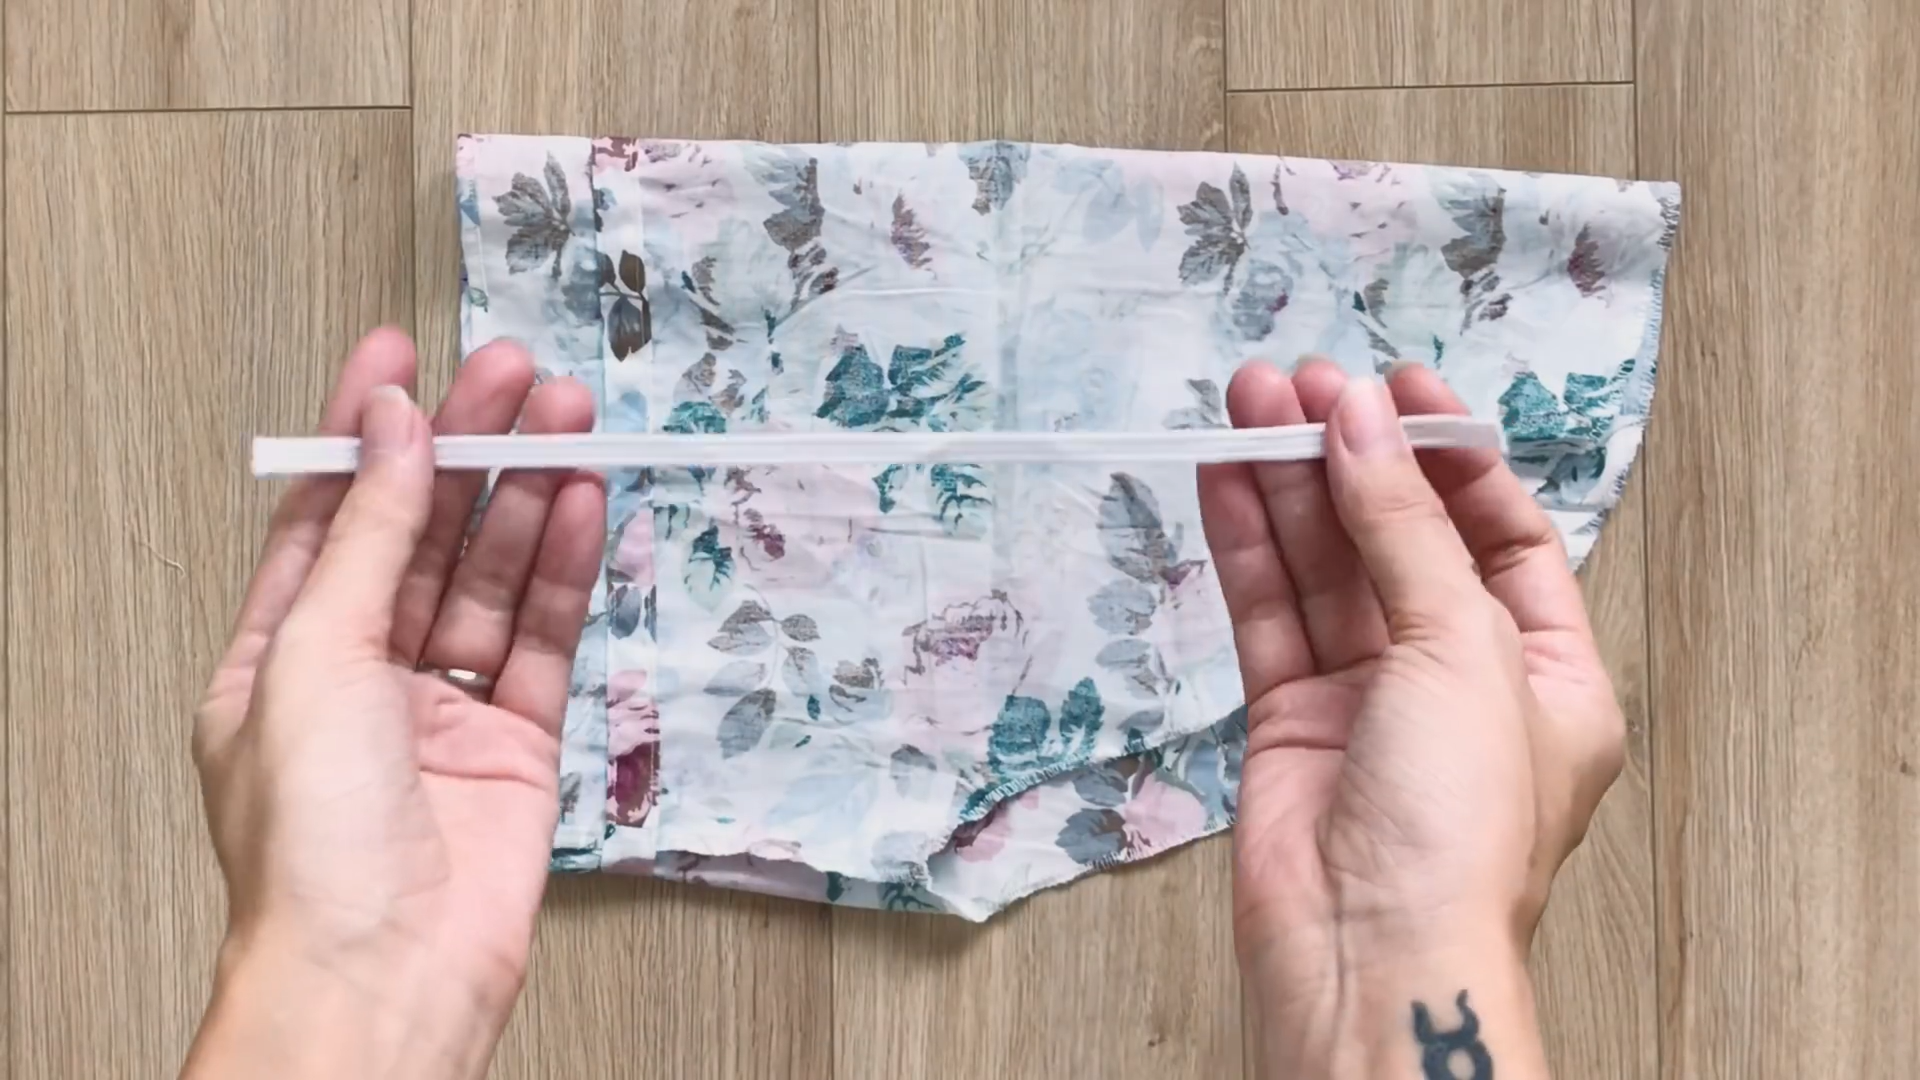
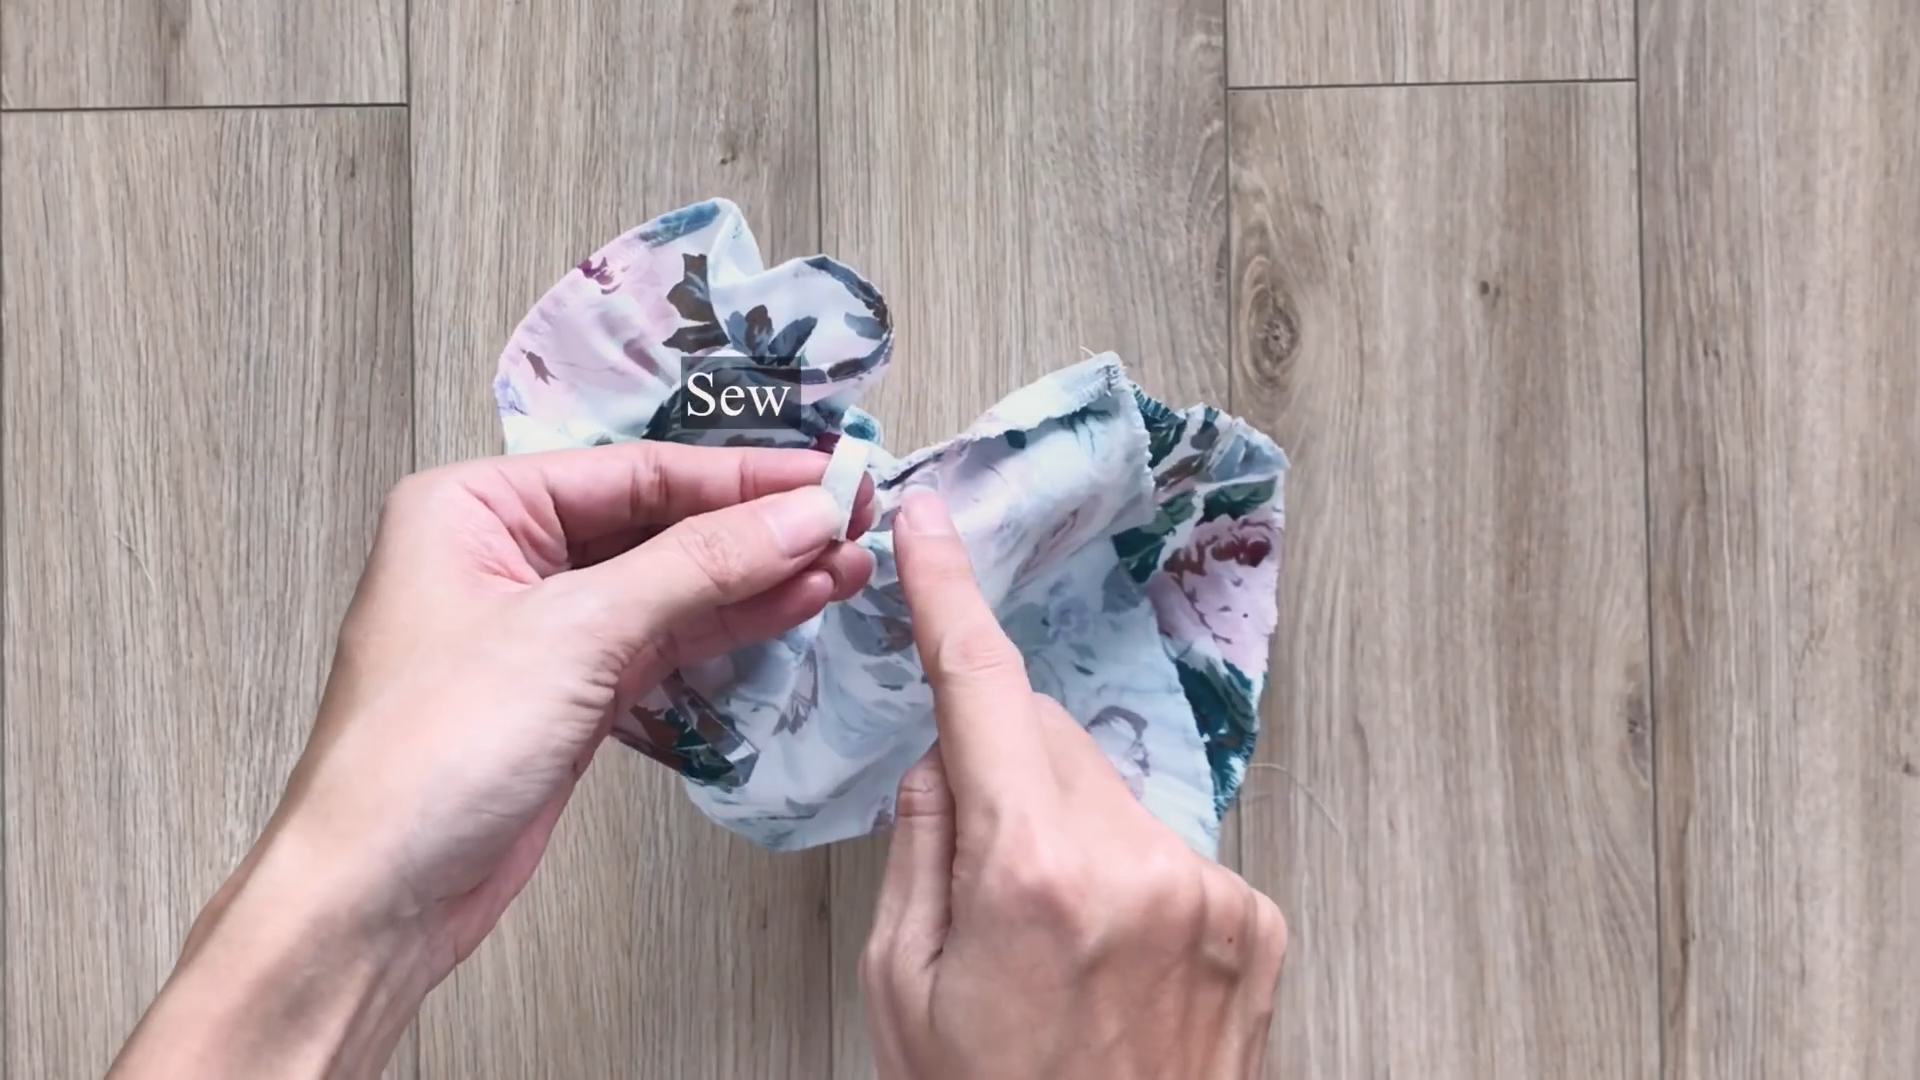
Fold the end fabric at the bottom dress twice and secure it with stitches.
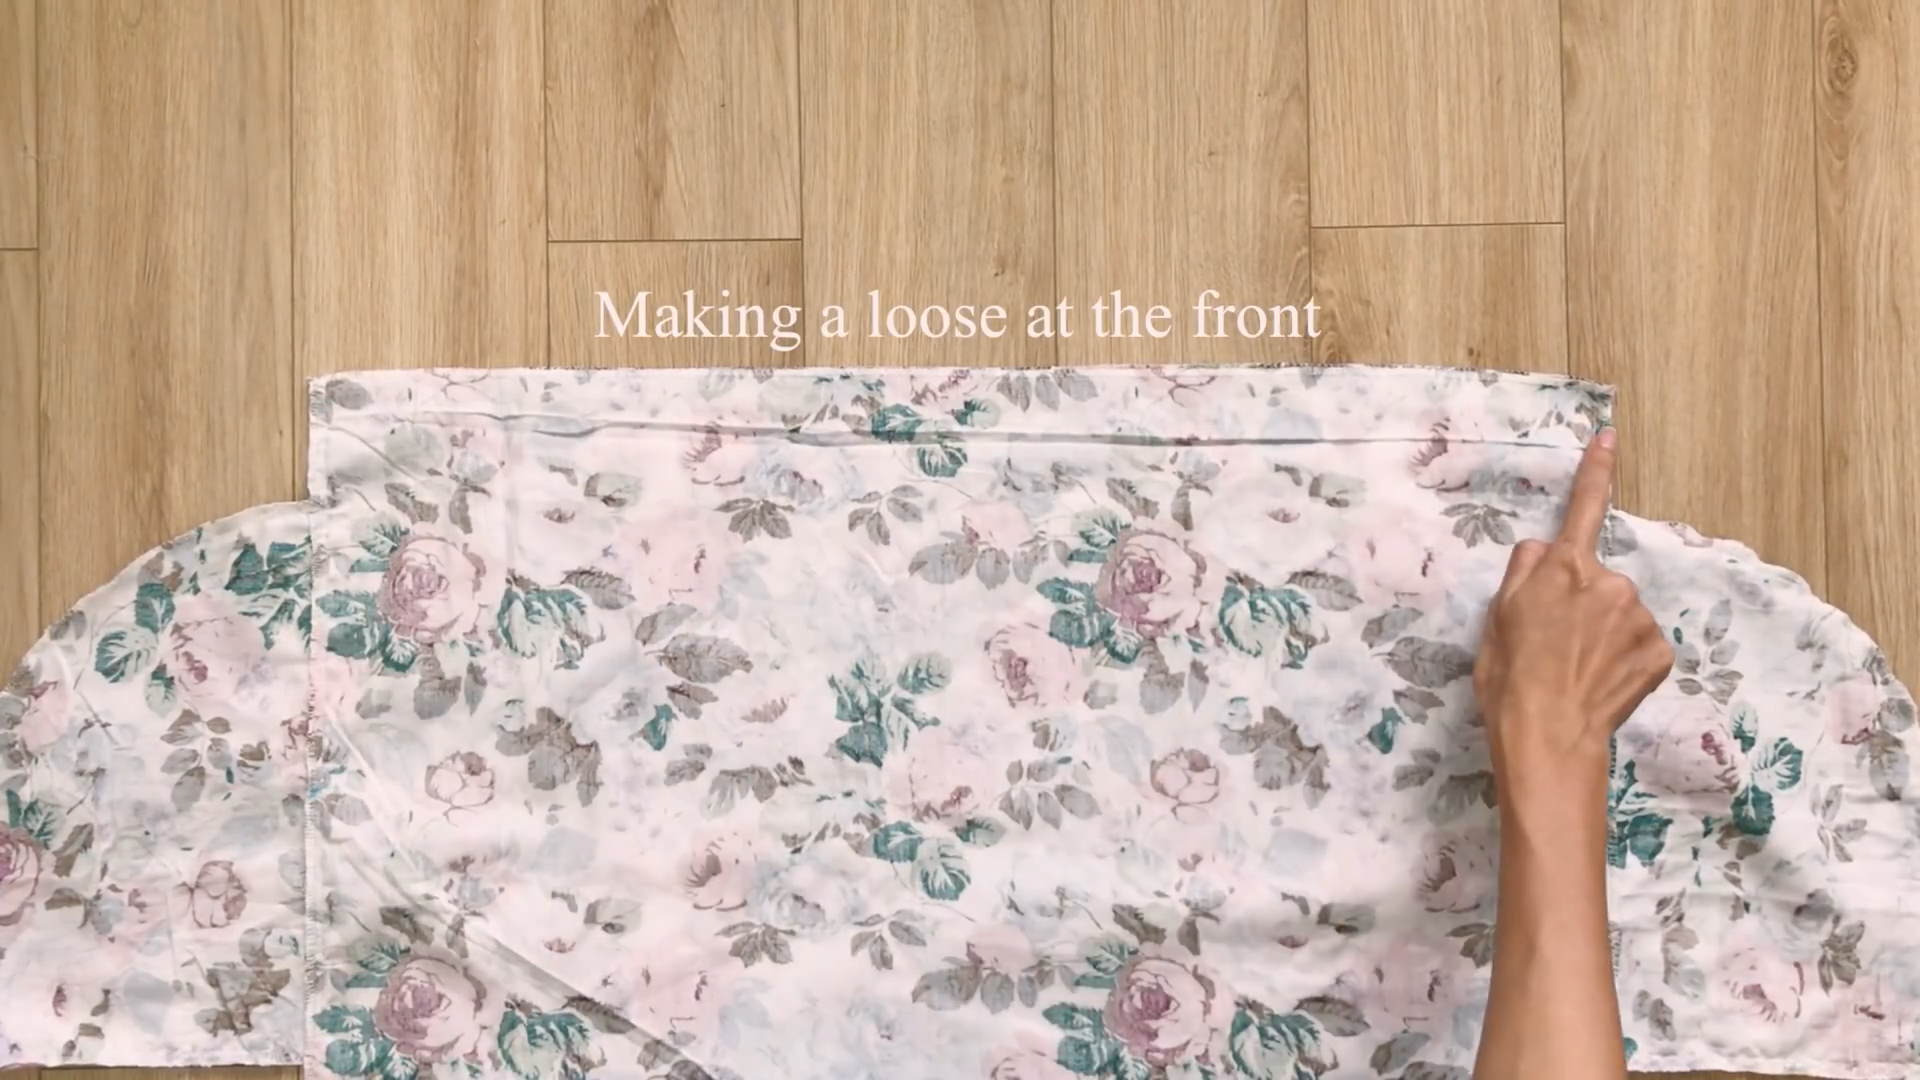
At the top of the bottom dress, create a loose seam at the front only.
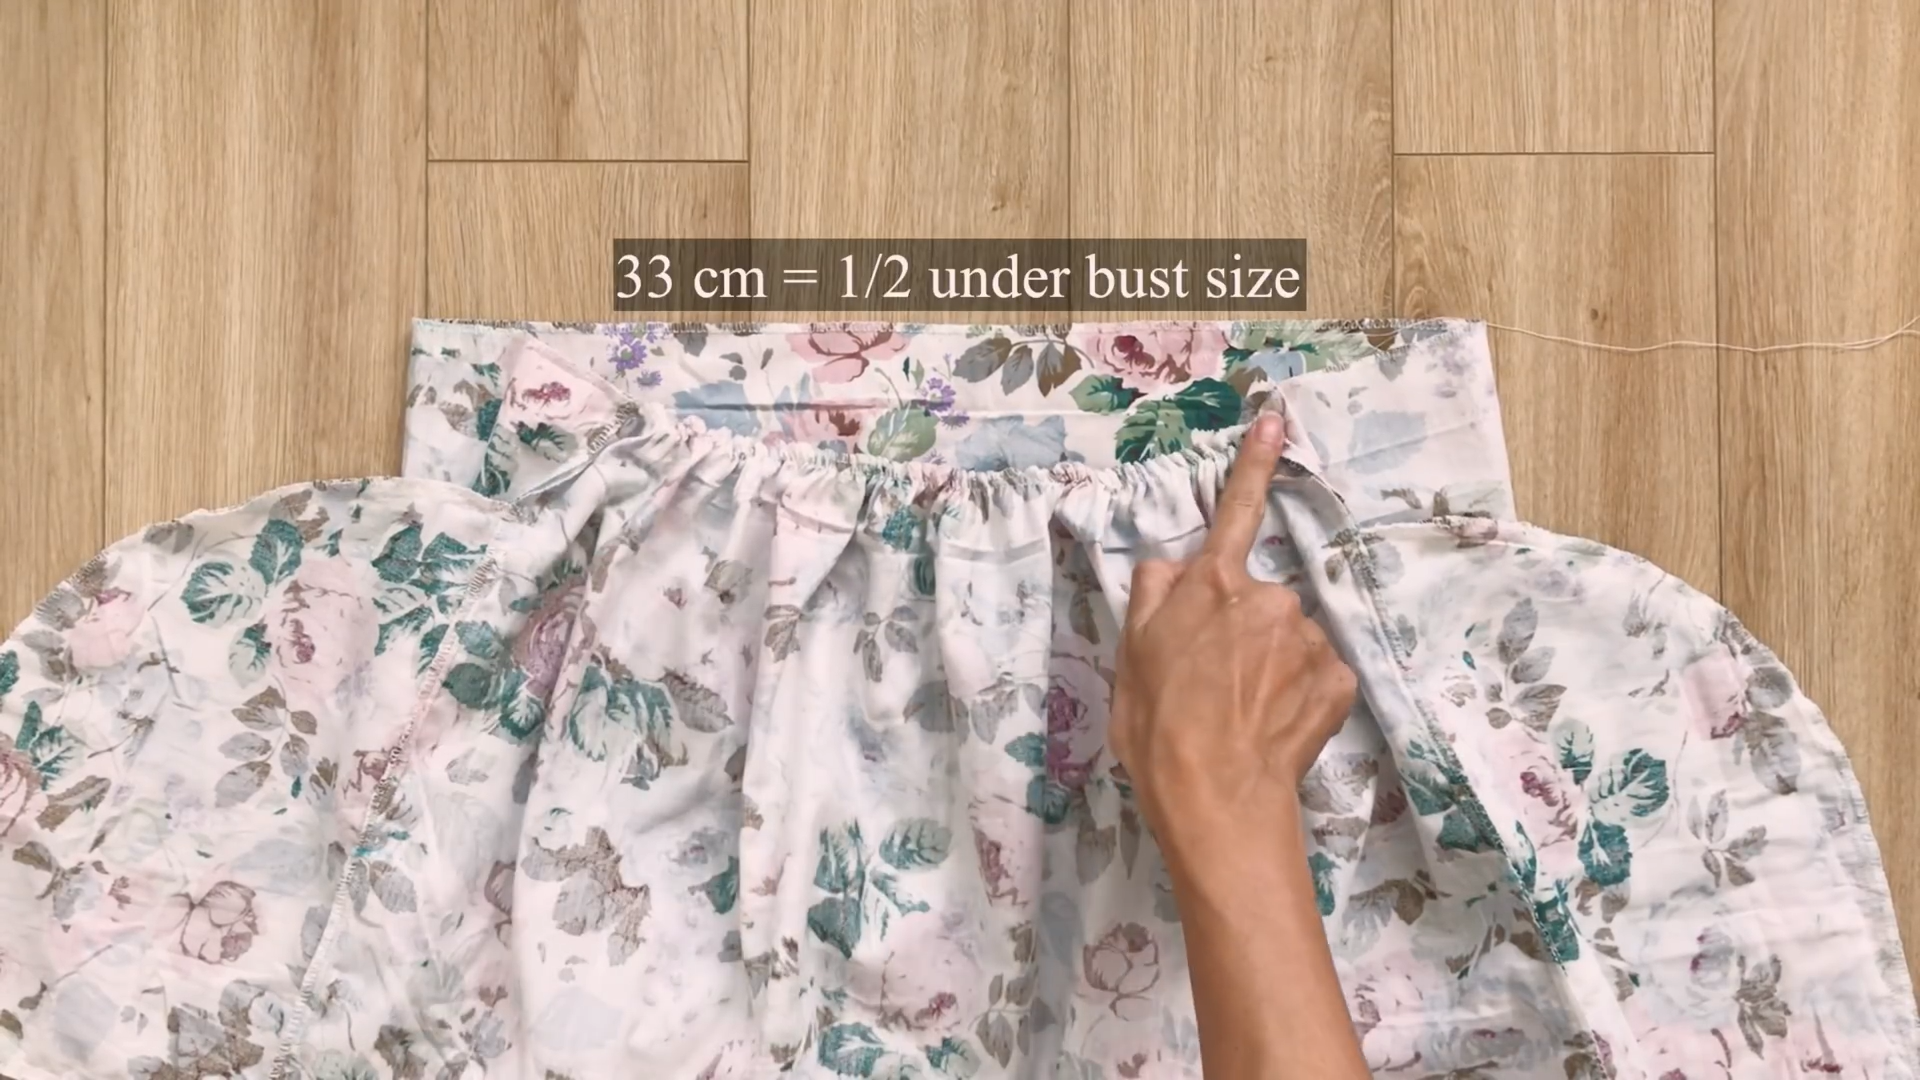
Add a gathering fabric here, matching the width of the front end of the top dress.
Connect the top and the bottom dress together to finish.

DIY My perfect everyday dress
And There you have it!
This dress is basically my new best friend. Square neckline, open back – so comfy, no muss, no fuss. Plus, no annoying zippers to mess with. Perfect for for those lazy Sundays or whenever I need to look put-together in a hurry.
It's my go-to for anything!
I hope you found my step-by-step guide helpful and inspiring.
If you’re interested in making your own, give it a try and let me know how it goes!
Until then, happy sewing!