DIY Pajamas set | Beginner friendly sewing tutorial step by step [+Free Pattern]

DIY Pajamas set
Welcome or welcome back to my sewing blog!
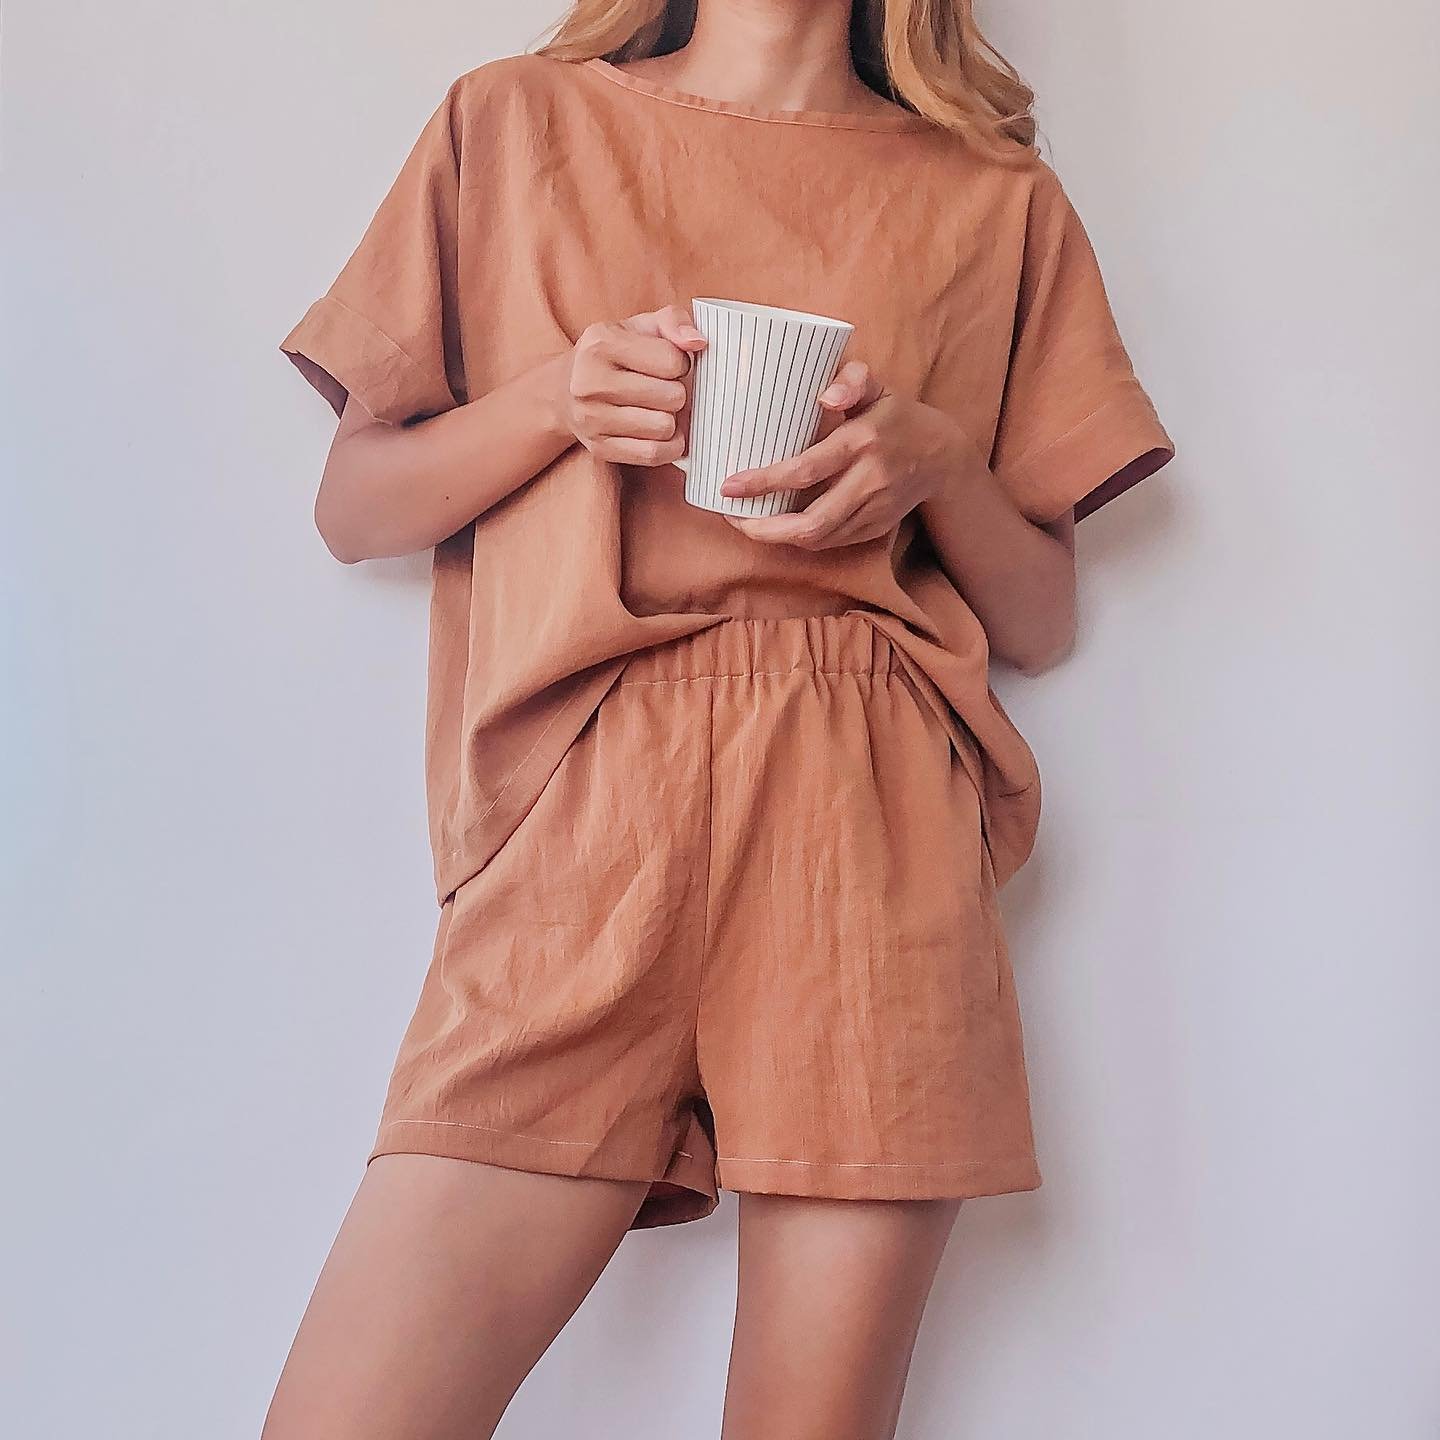
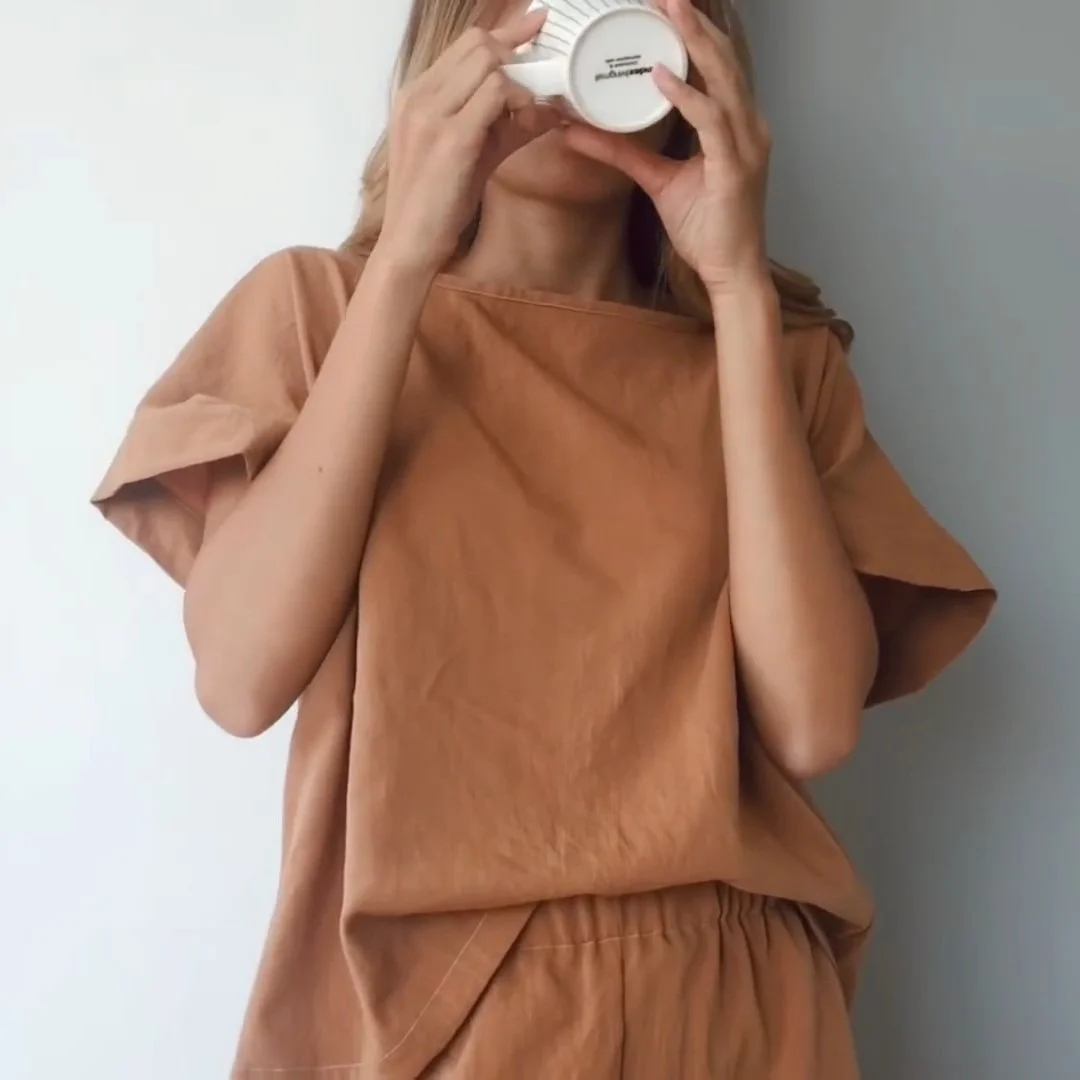
In today's video, I'm going to share with you how I made my sleepwear clothes. It's a pajamas set with a shorts and a middle length sleeve top. This set is quite active and in the modern style. So you also can wear it as your loungewear. It's a very beginner friendly DIY. So I hope you like it and try it out.
Let’s get started!
WHAT YOU’LL NEED
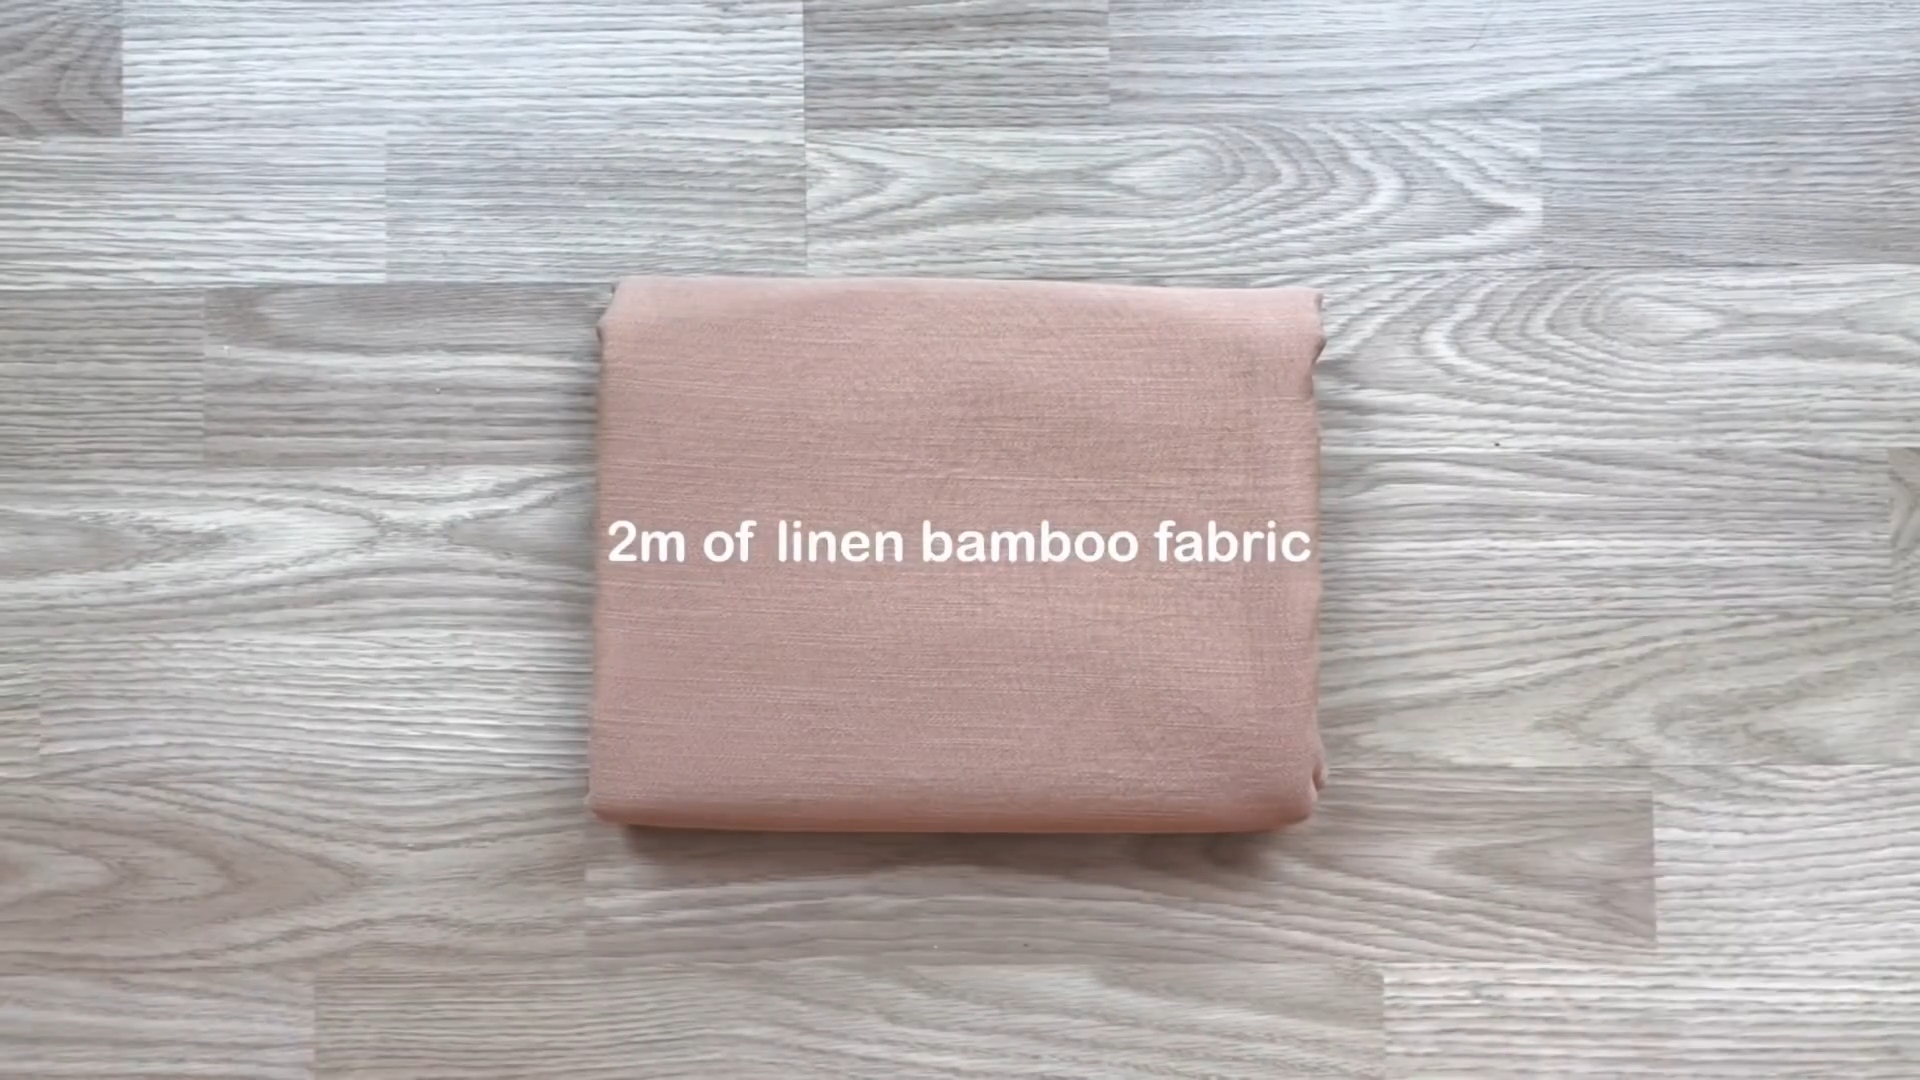
2m of linen bamboo fabric
Pattern paper
Sewing machine
Thread
Pencil
Pins
Scissors
Ruler
SEWING THE PAJAMAS
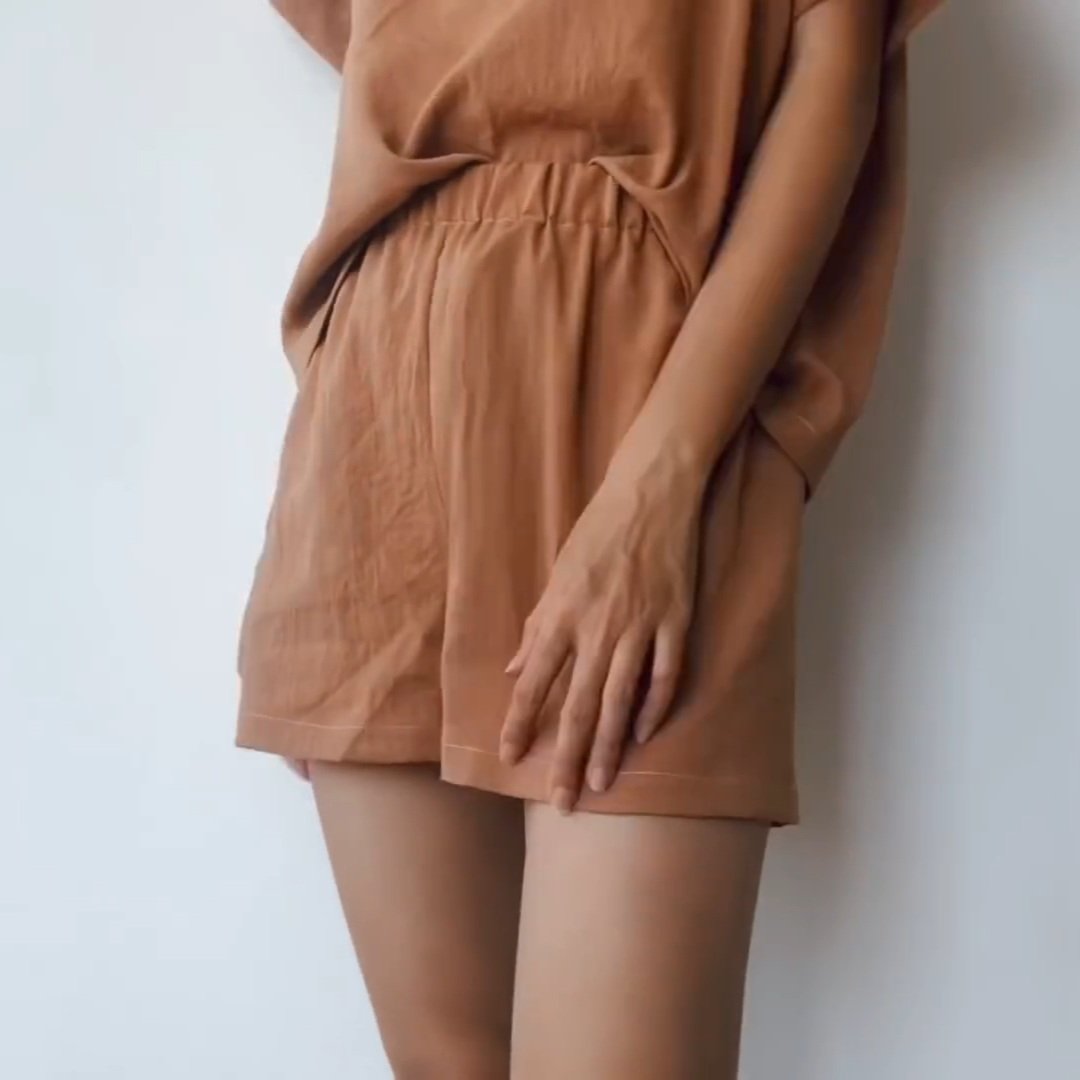
THE SHORTS
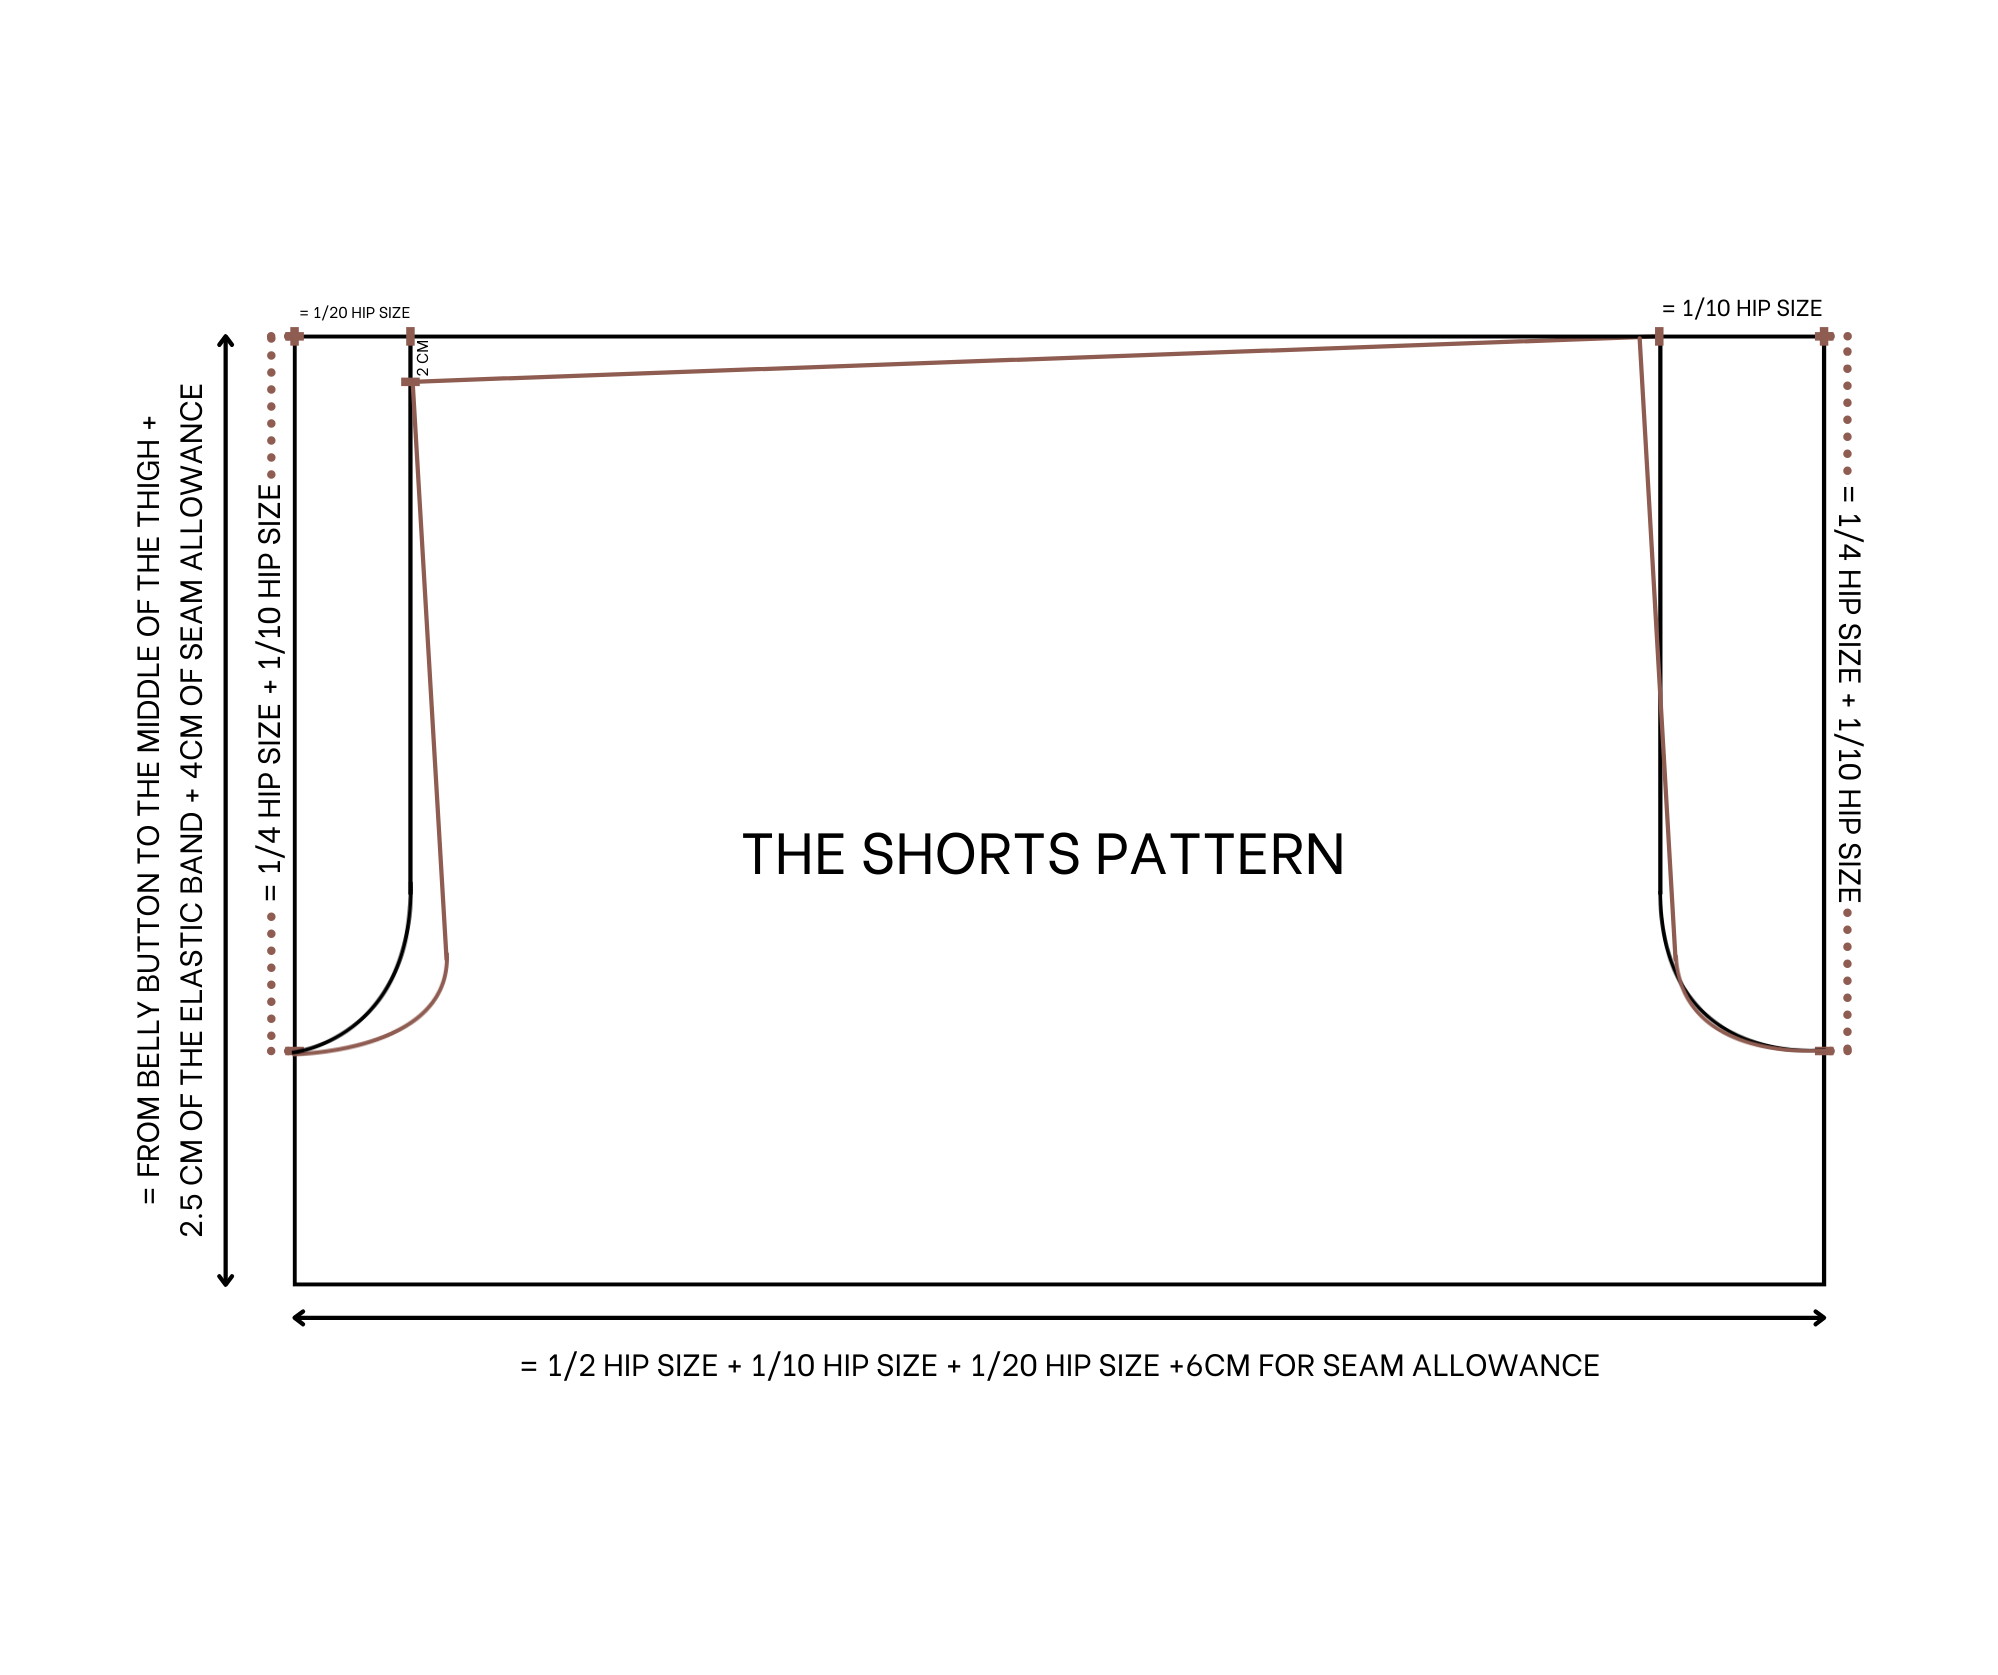
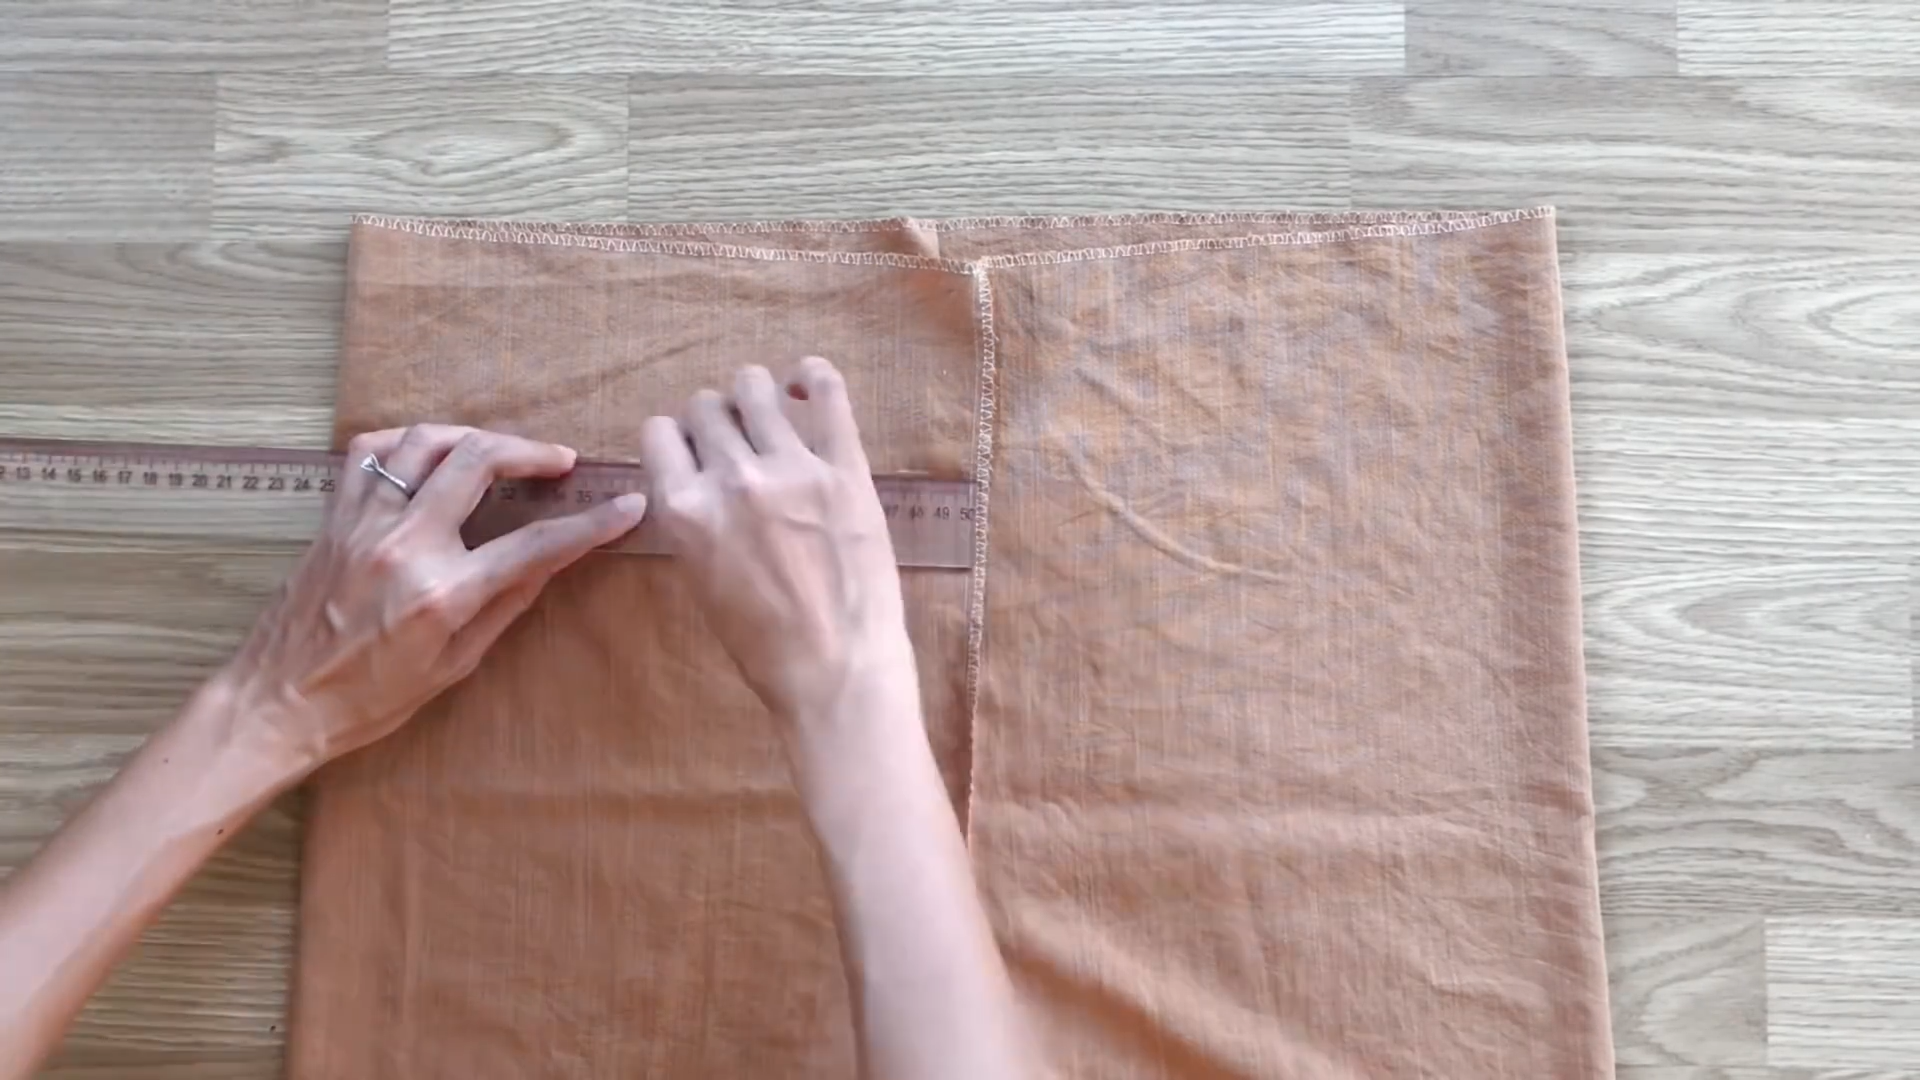
The shorts pattern
Cut two rectangles with a length of 47 cm (which is the length from your belly button to the middle of the thigh plus 7 cm for the width of the elastic band you will use and 4 cm for seam allowance) and a width of 66 cm (which is half of your hip size plus 1/10 of your hip size plus 1/20 of your hip size plus 6 cm for seam allowance).
From one lane line, draw another straight line inside and 4.6 cm away from it. This is 1/20 of your hip size.
From the top of the lane line, mark down 38 cm (which is a quarter of your hip size plus 1/10 of your hip size) then connect this mark to the straight line you just drew before that by a curved line to finish the cross line for the front shorts.
At the other lane line, draw another straight line at 9.2 cm (which is 1/10 of your hip size) then mark down at 38 cm (which is a quarter of your hip size plus 1/10 of your hip size) on this lane line.
After that, connect this mark to the straight line you just drew before by a curved line to finish the cross line for the back of the shorts.
On the cross line of the front, mark out 2 cm then connect this mark to the top of the cross line of the back to create the waistline for the shorts.
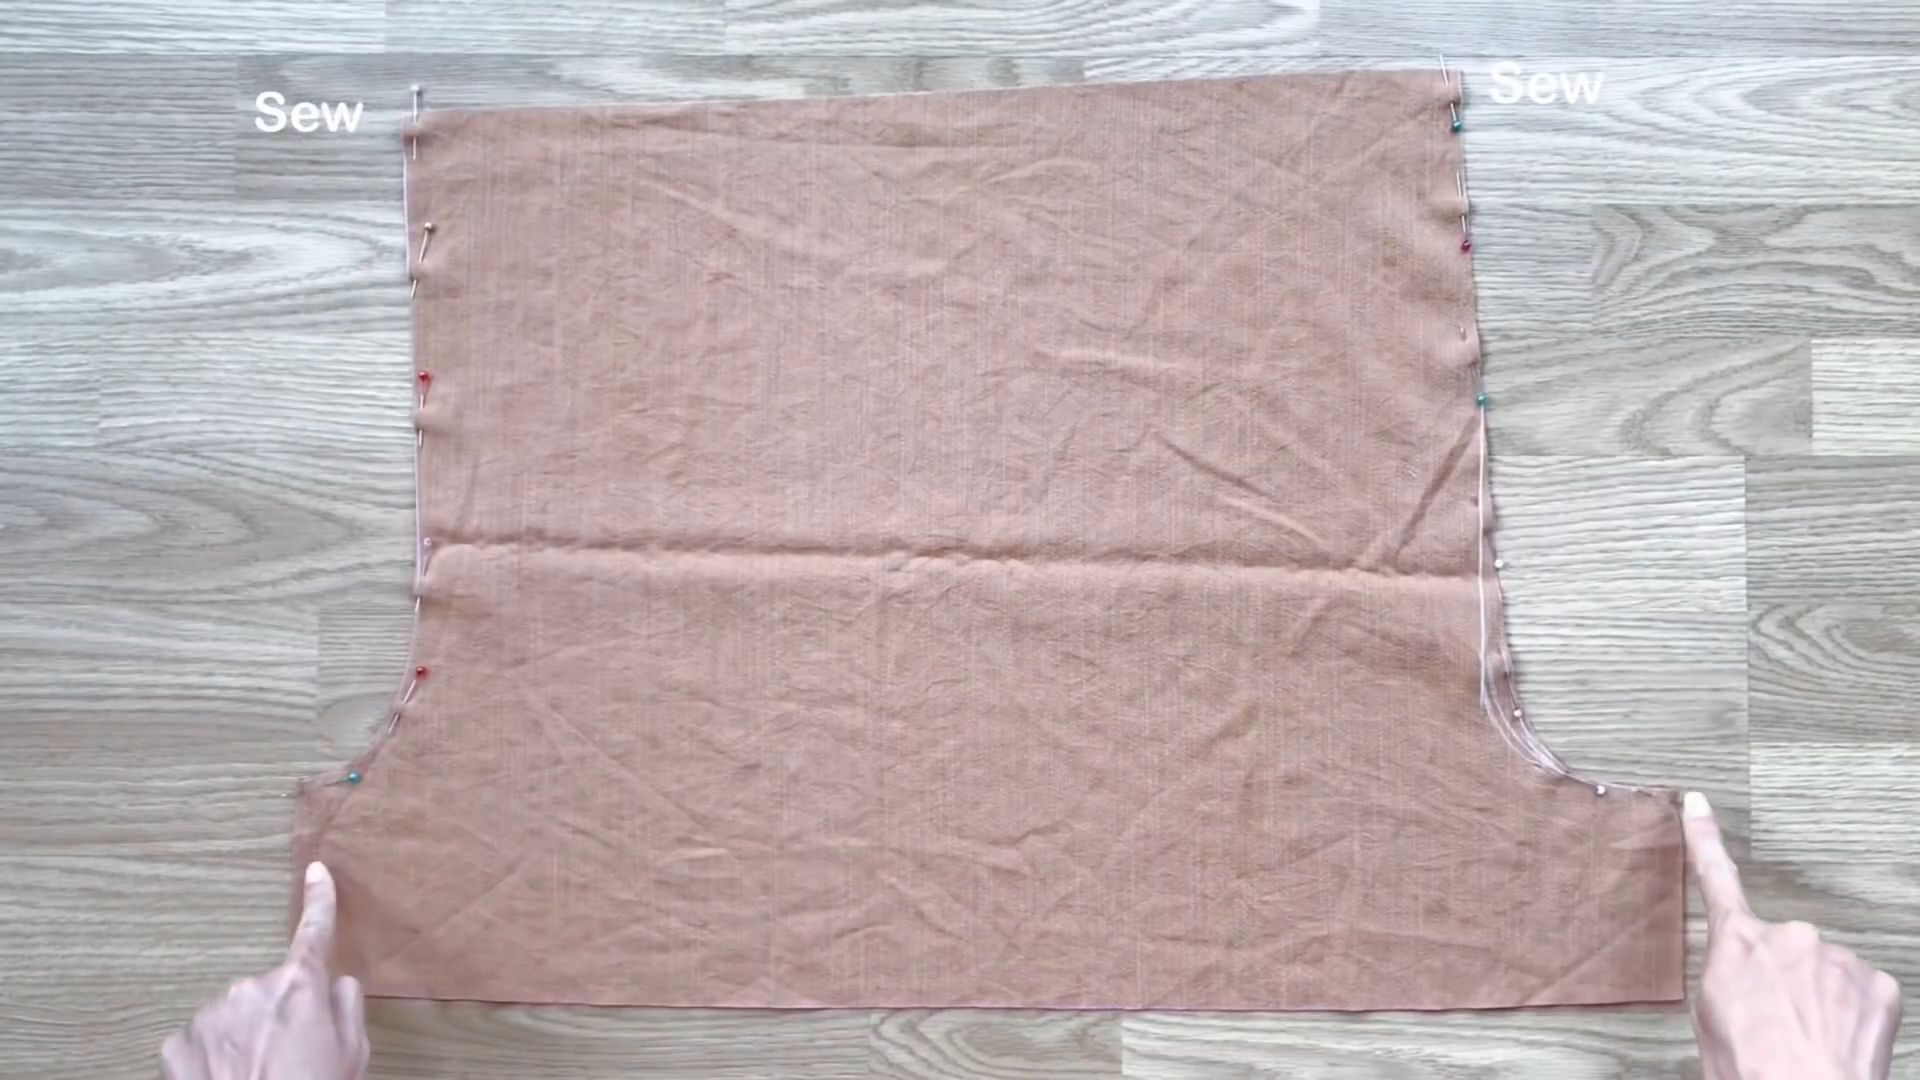
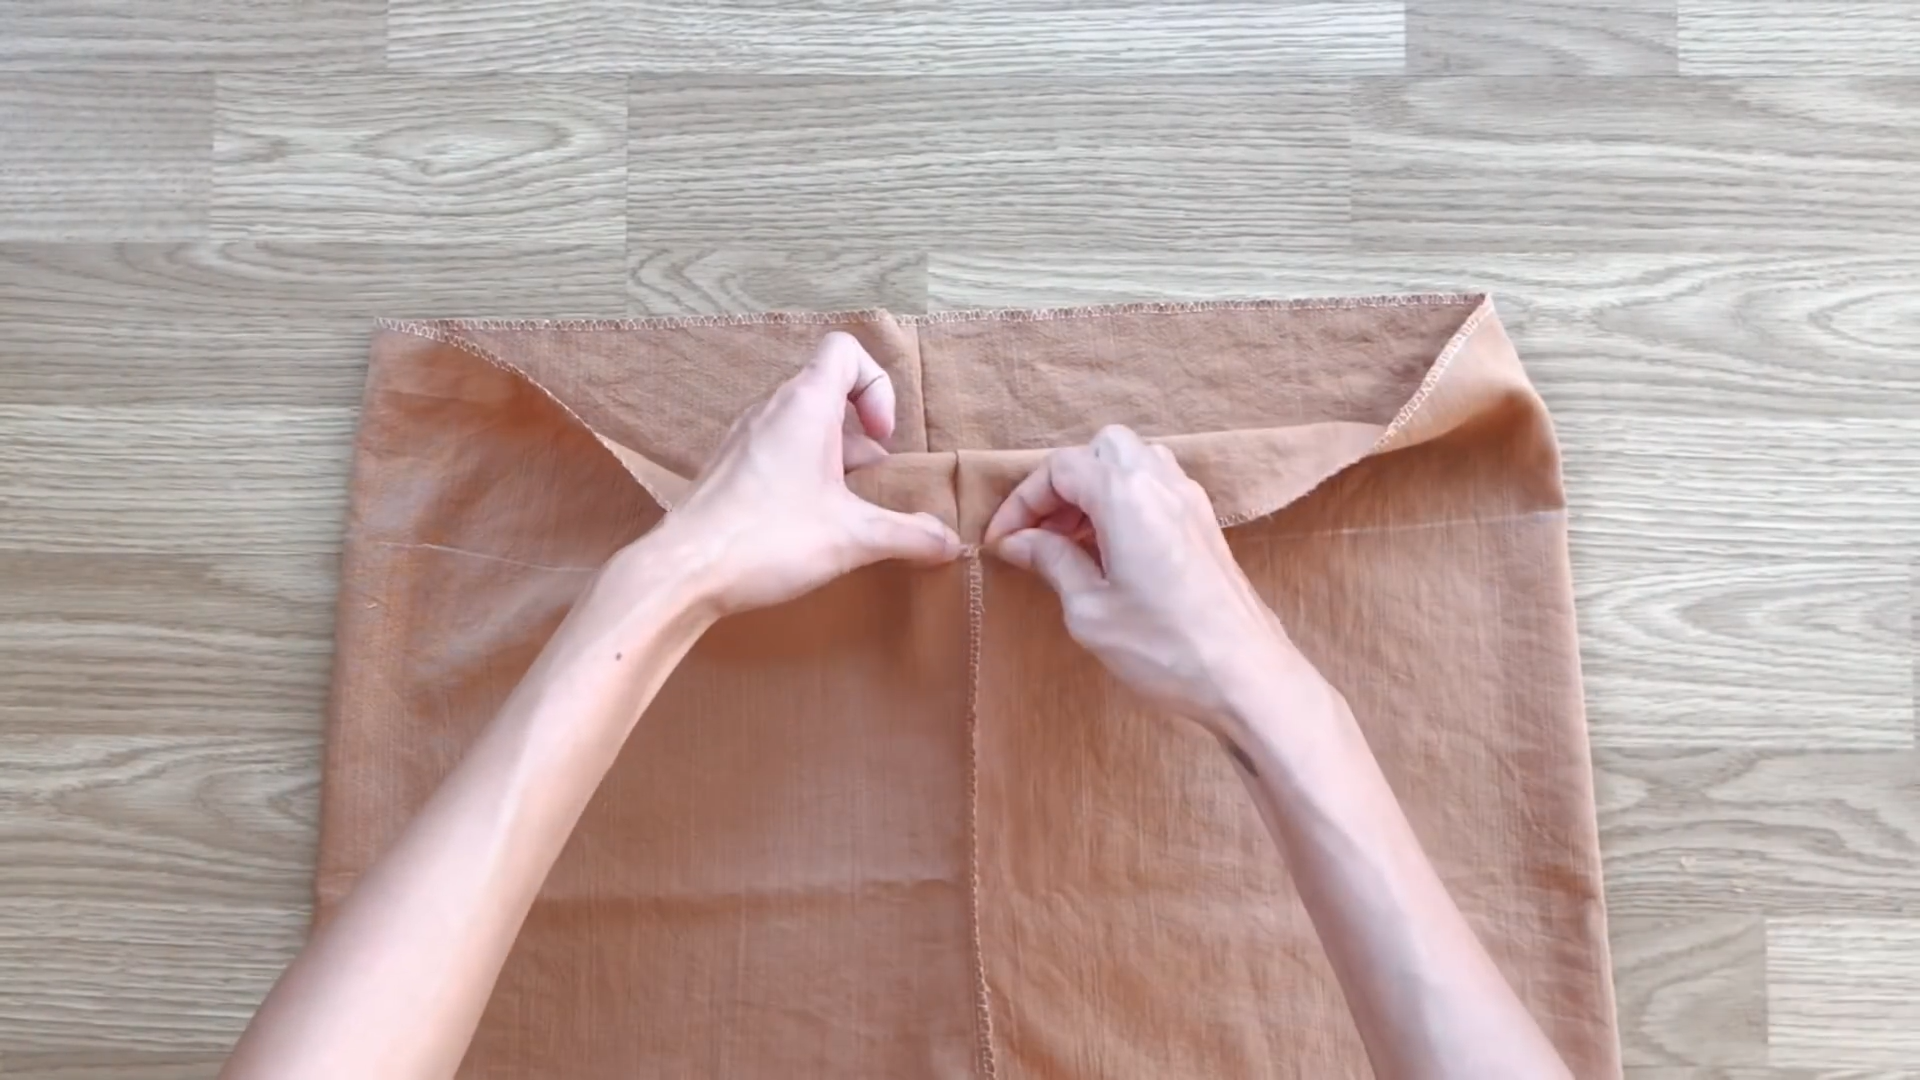
After cutting, connect two pieces of the shorts together at the cross line.
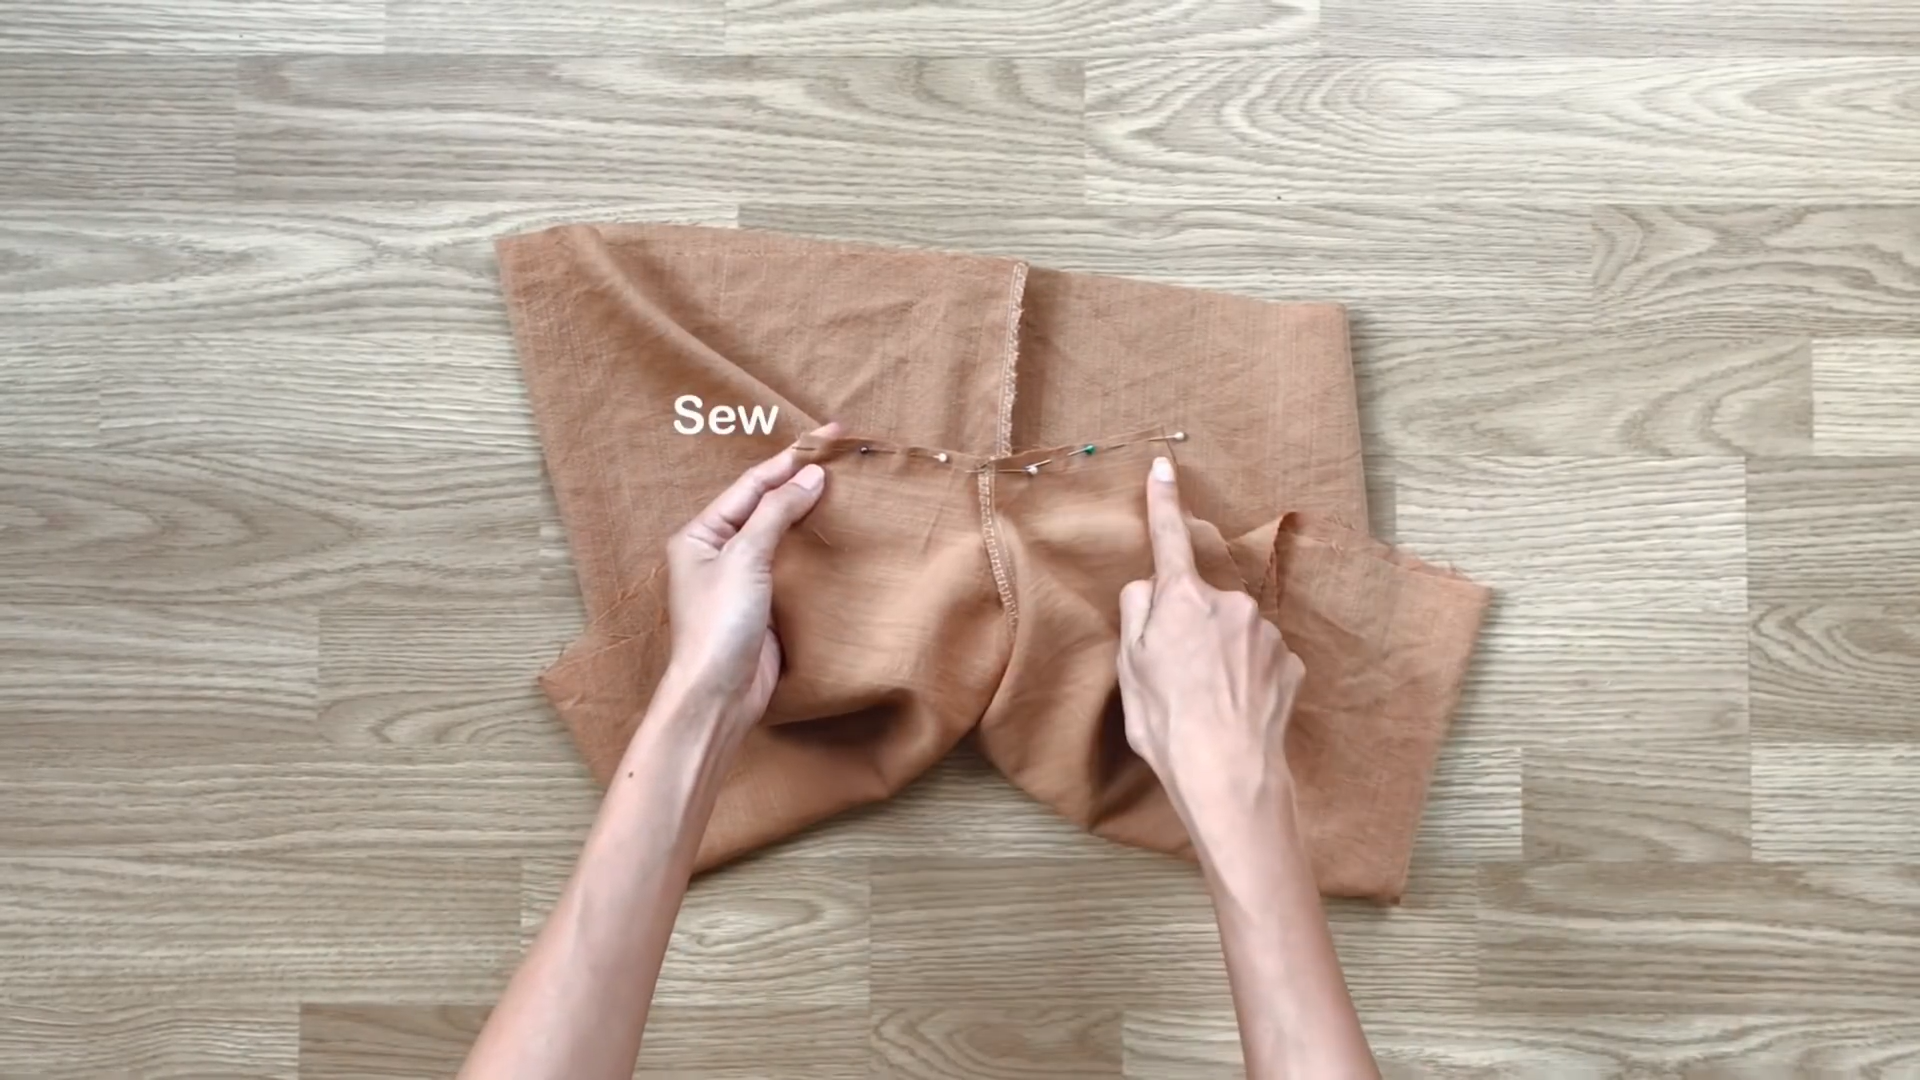
Then, connecting two inside lane lines together.
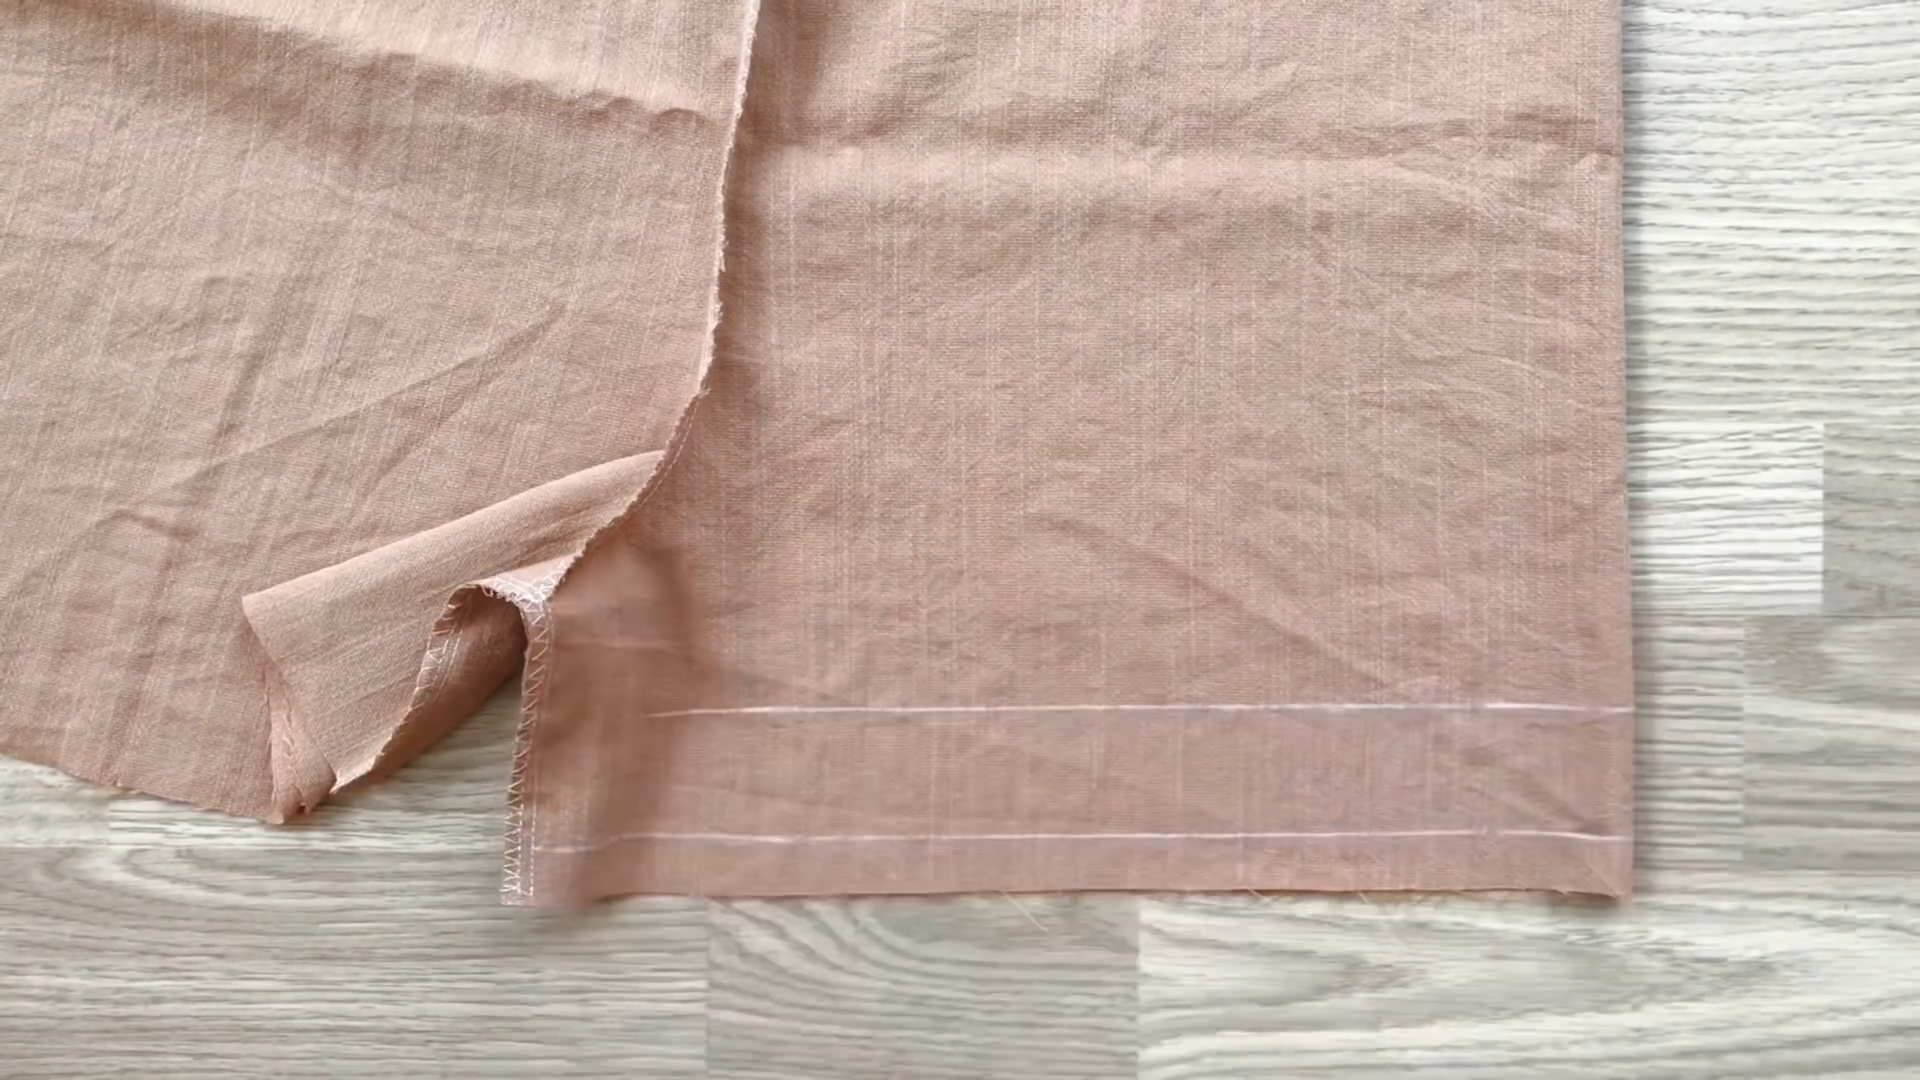
At the end of the shorts, draw two lines with one and a half centimeters and 5 centimeters from the end of the shorts.
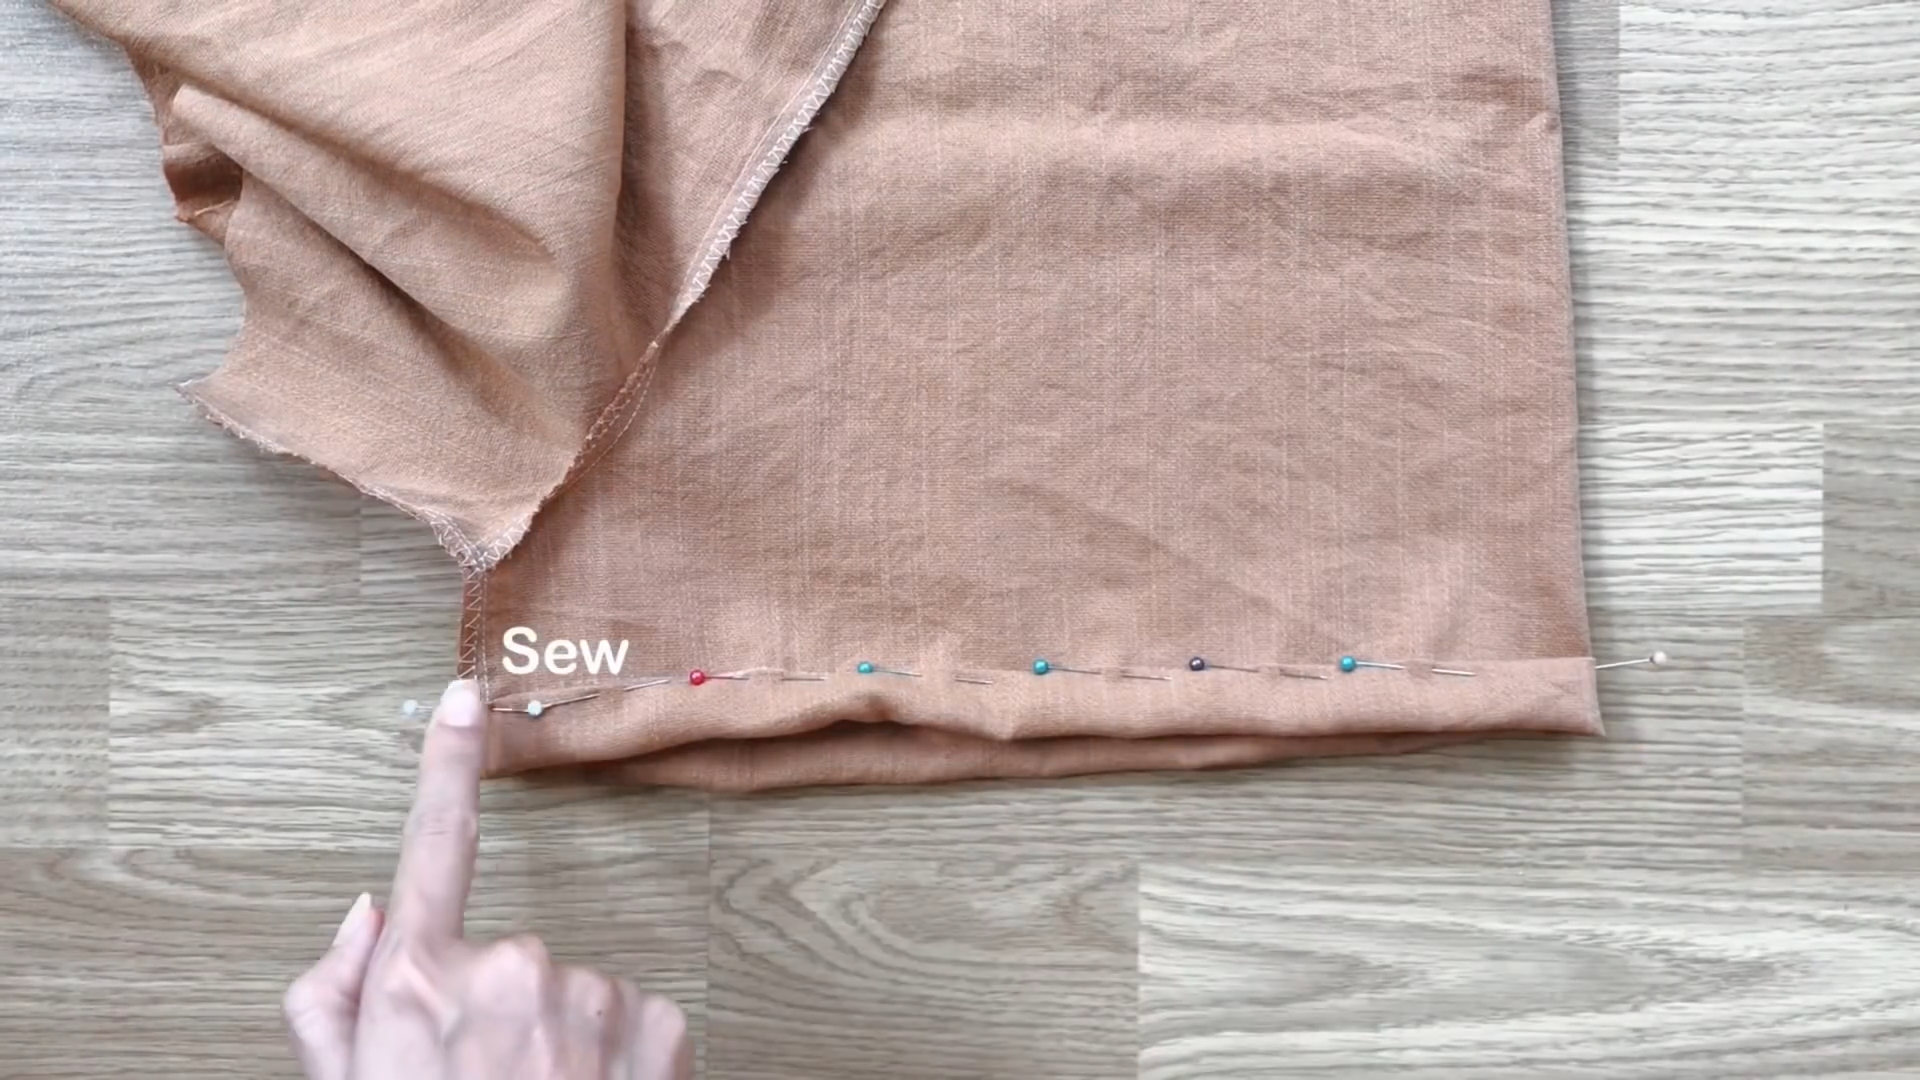
After that, fold the ending line to the first line first then keep folding it to the second line then sew to finish the end of the shorts.
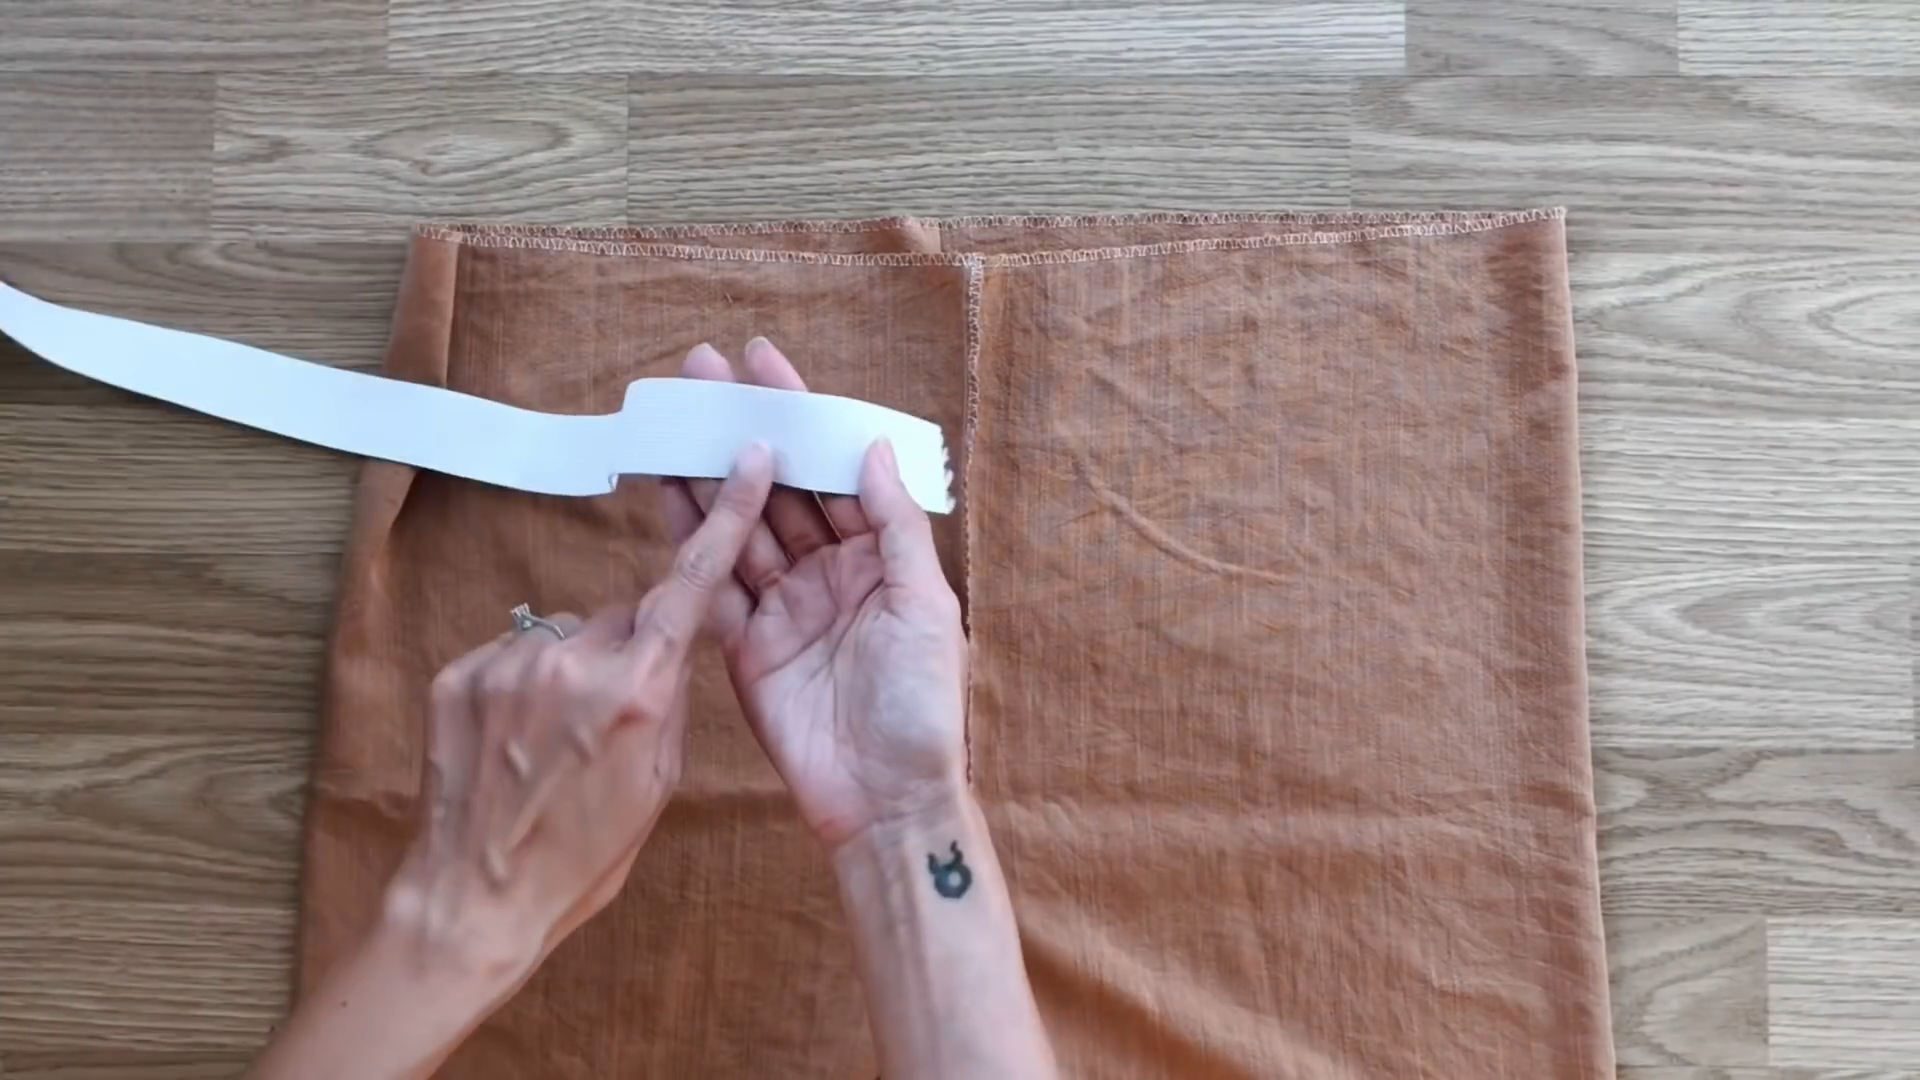
Moving to the waistline of the shorts, use the elastic band with two and a half centimeter width.
Measure and mark the width of the fabric you need to fold in to create a fabric hole for the waistband first.
Then, drawing a line based on that mark.
After that, fold the end of the waistline into the line you just drew then sew.
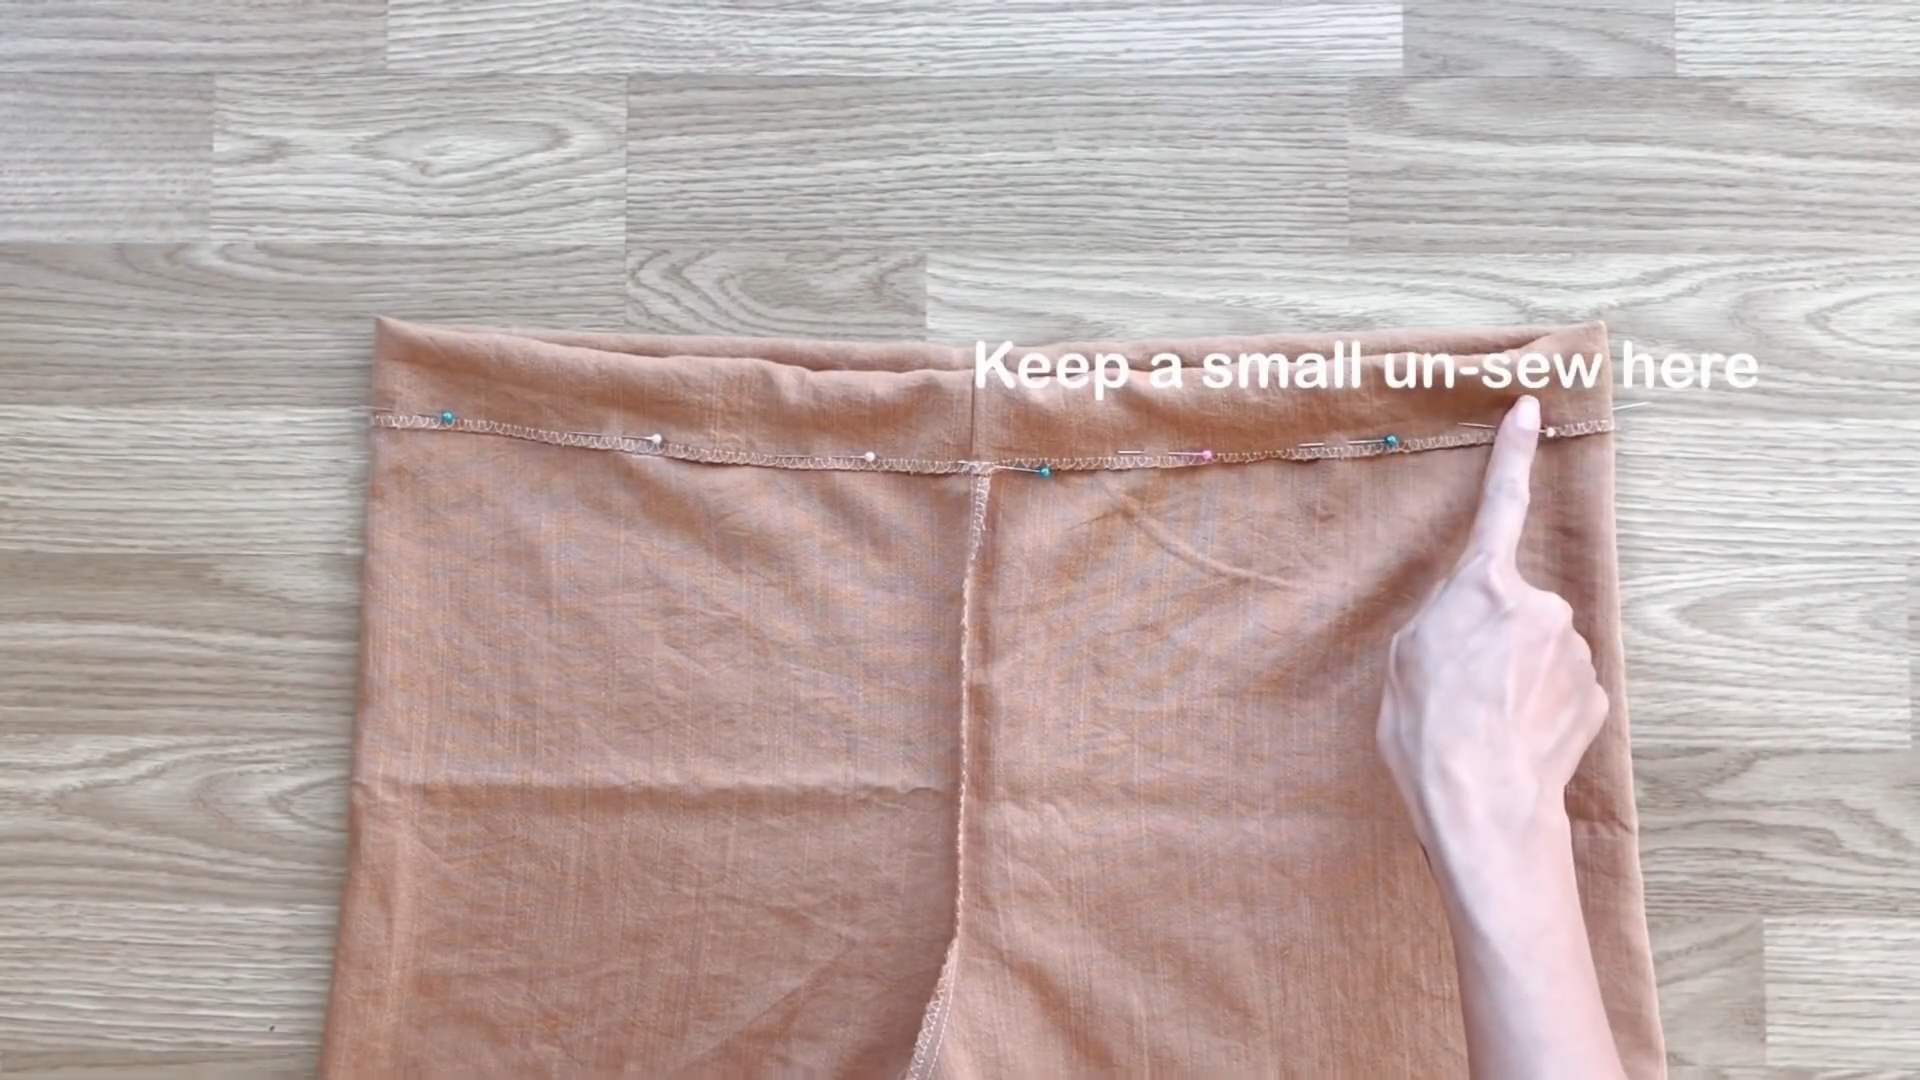
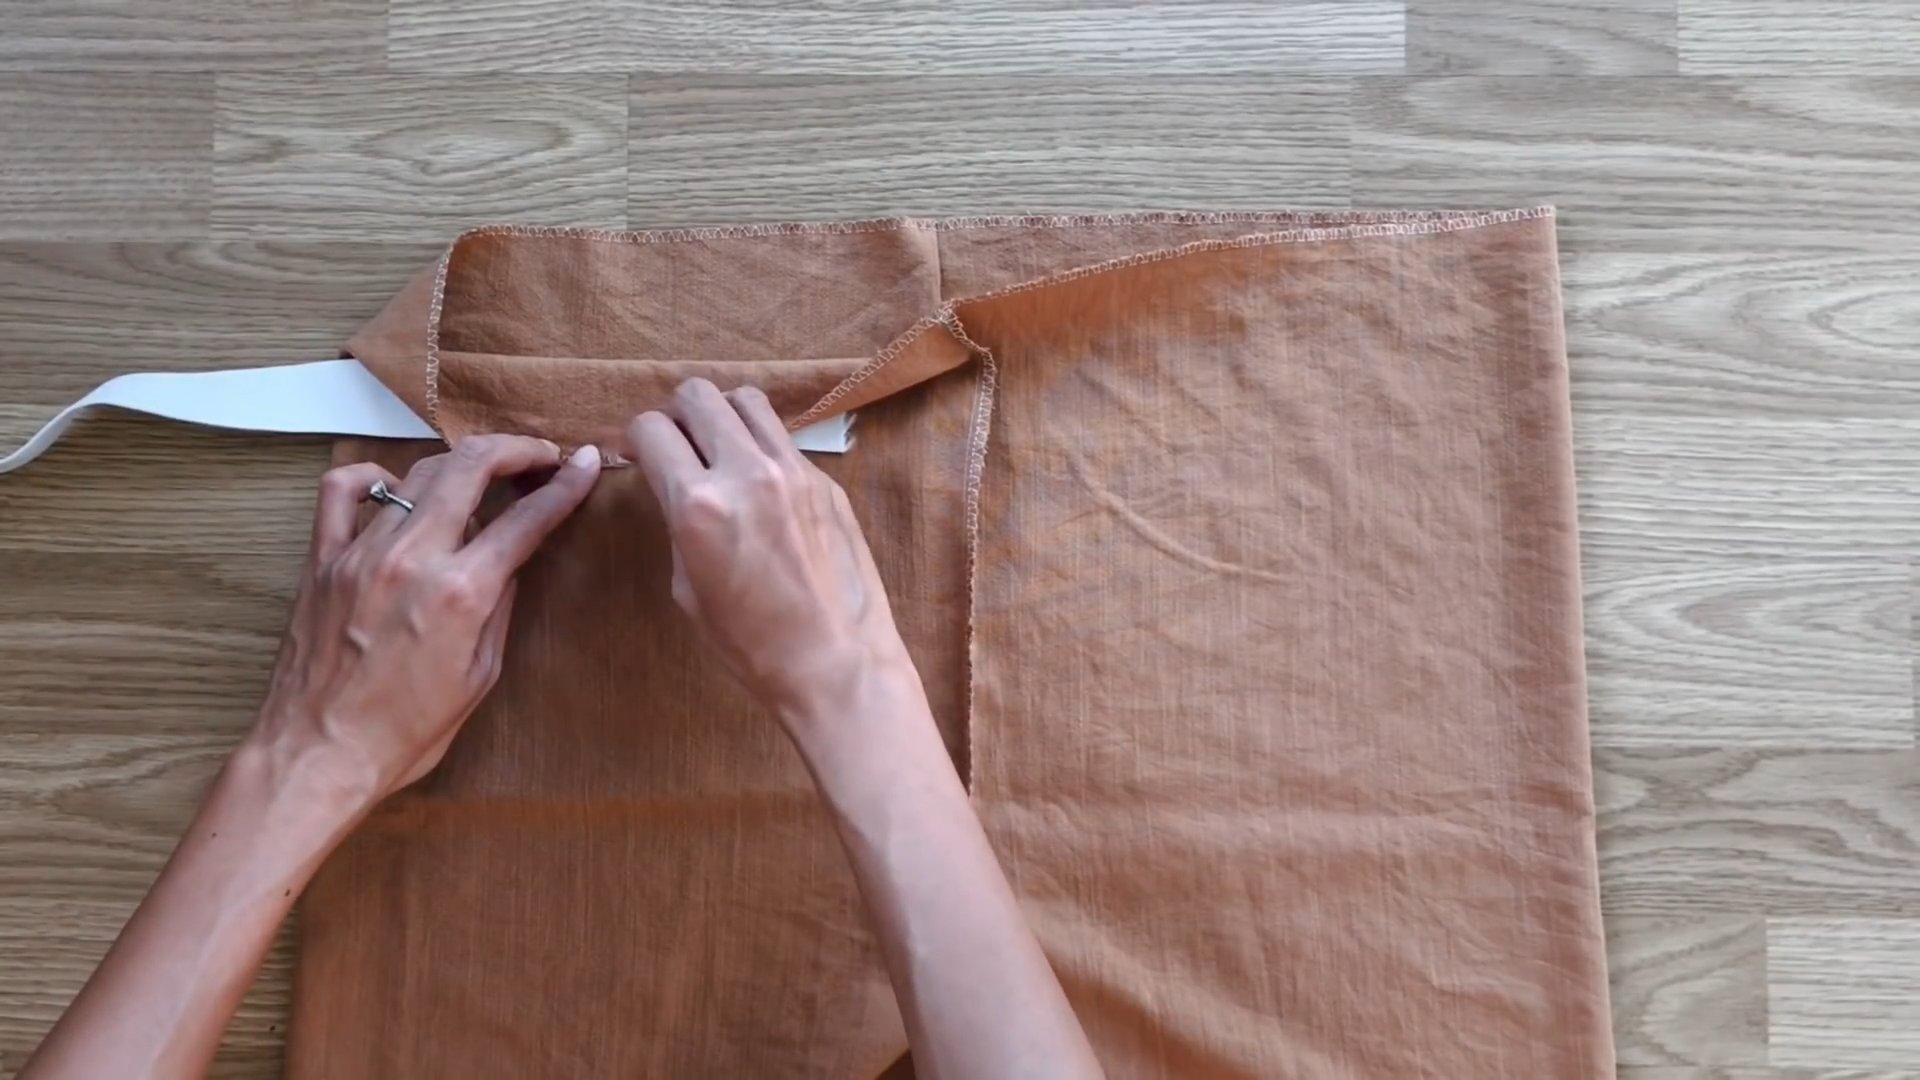
Remember to keep a small un-sew space for the elastic band to go through later.
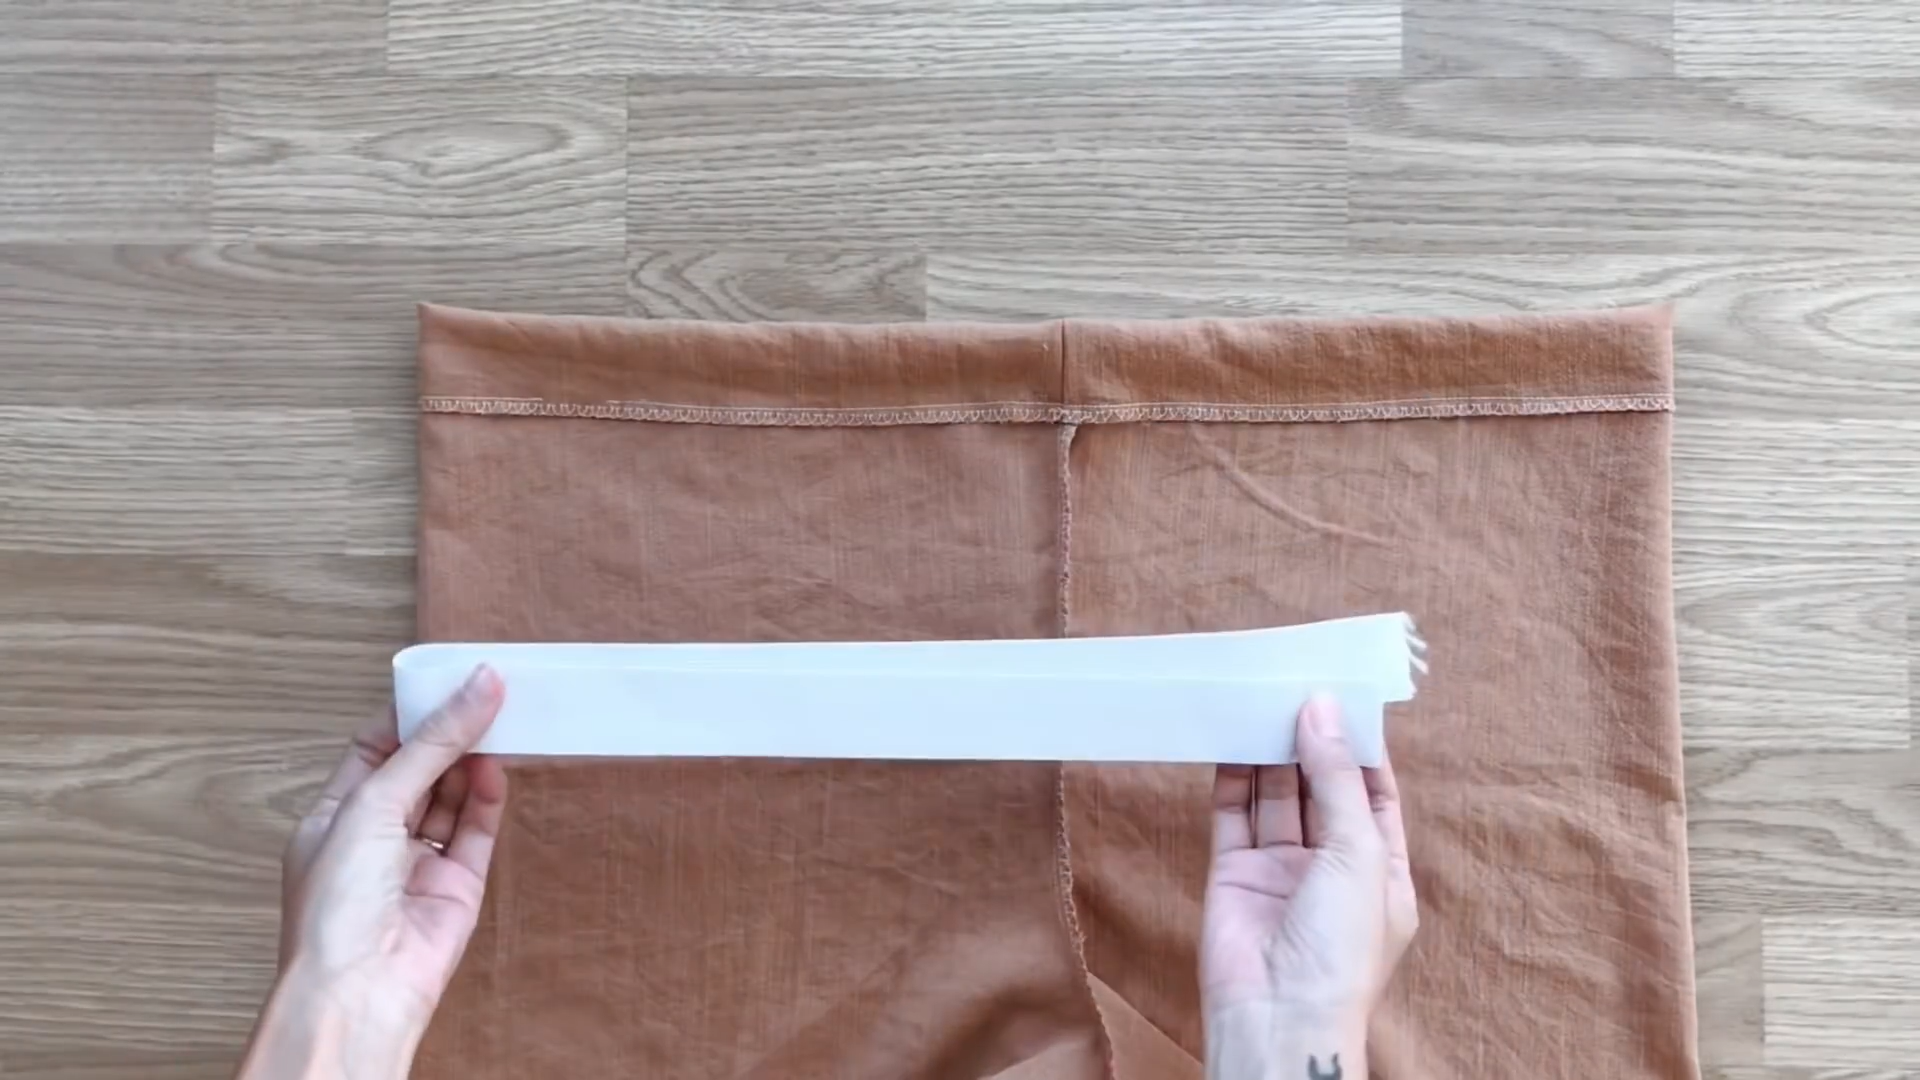
Cut a 64 cm elastic band which is your waist size.
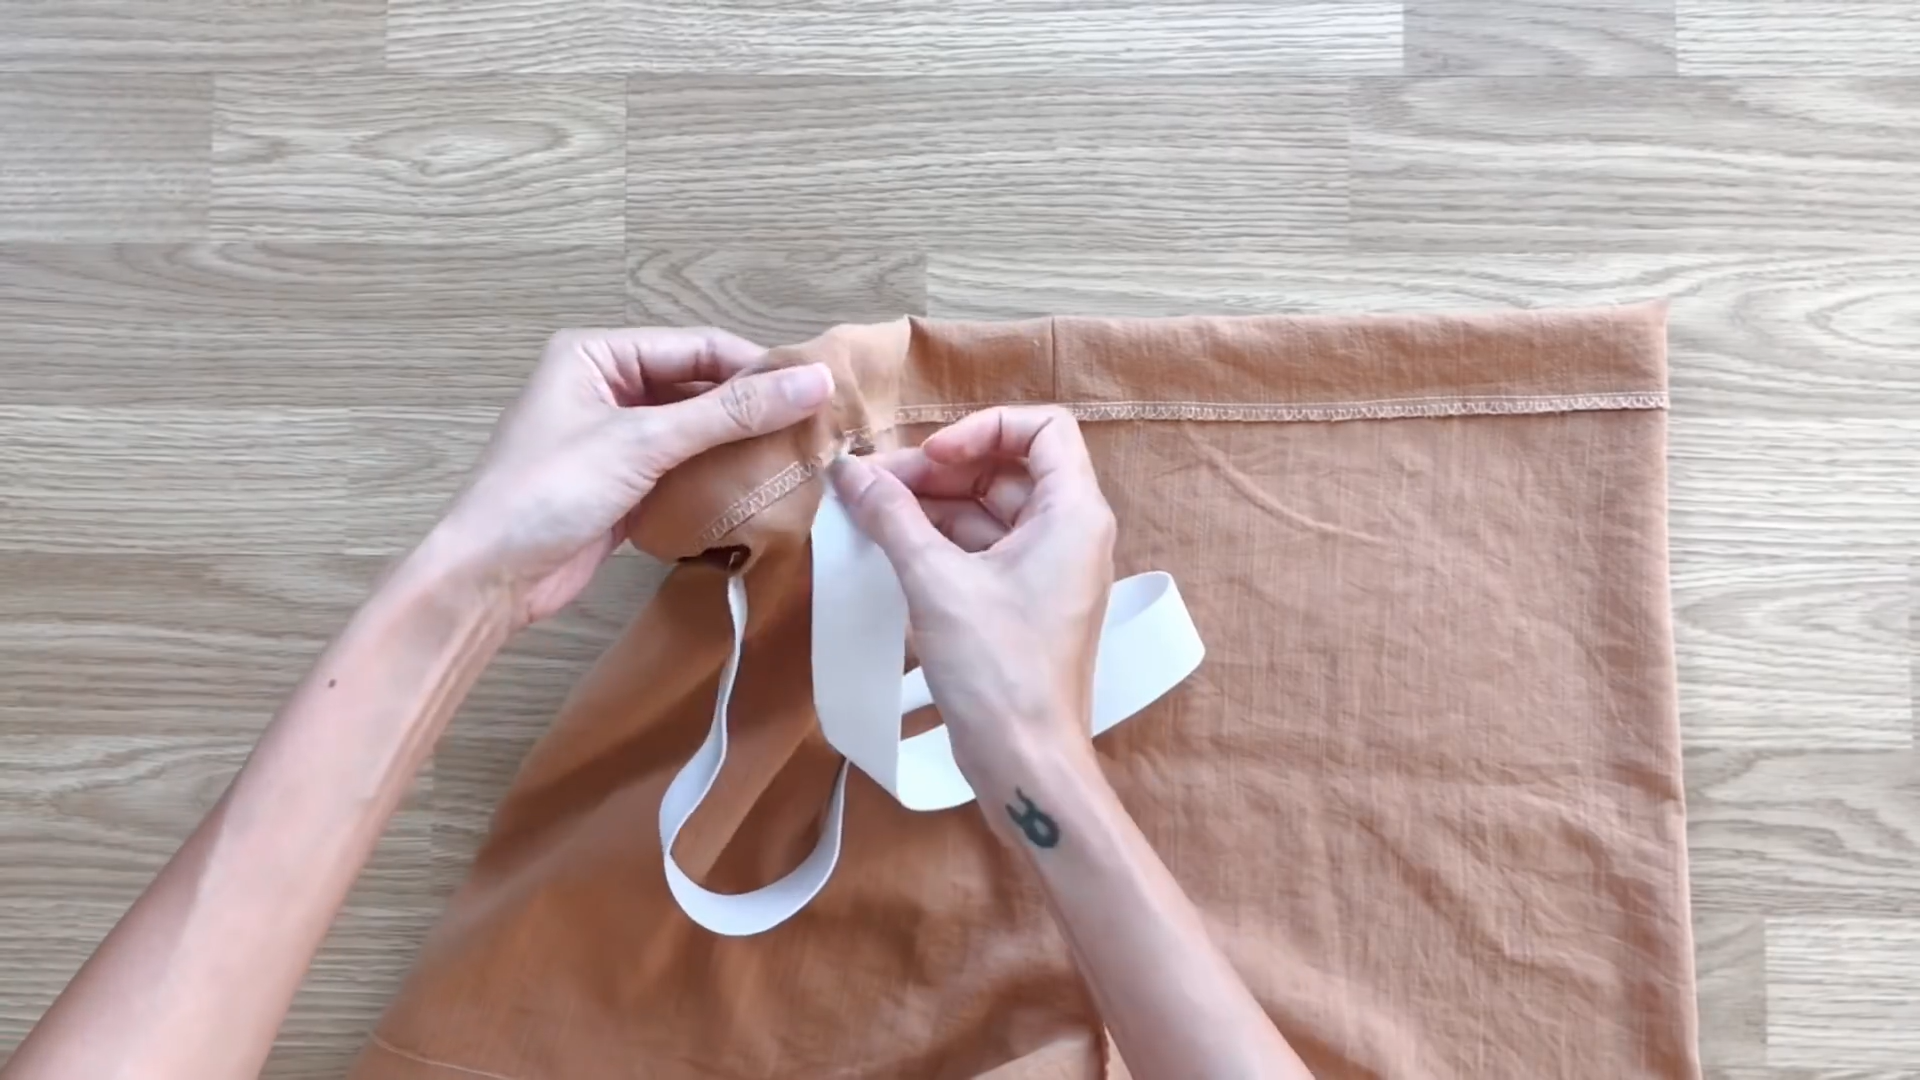
After connecting two ends of the elastic band together, close the fabric hole.
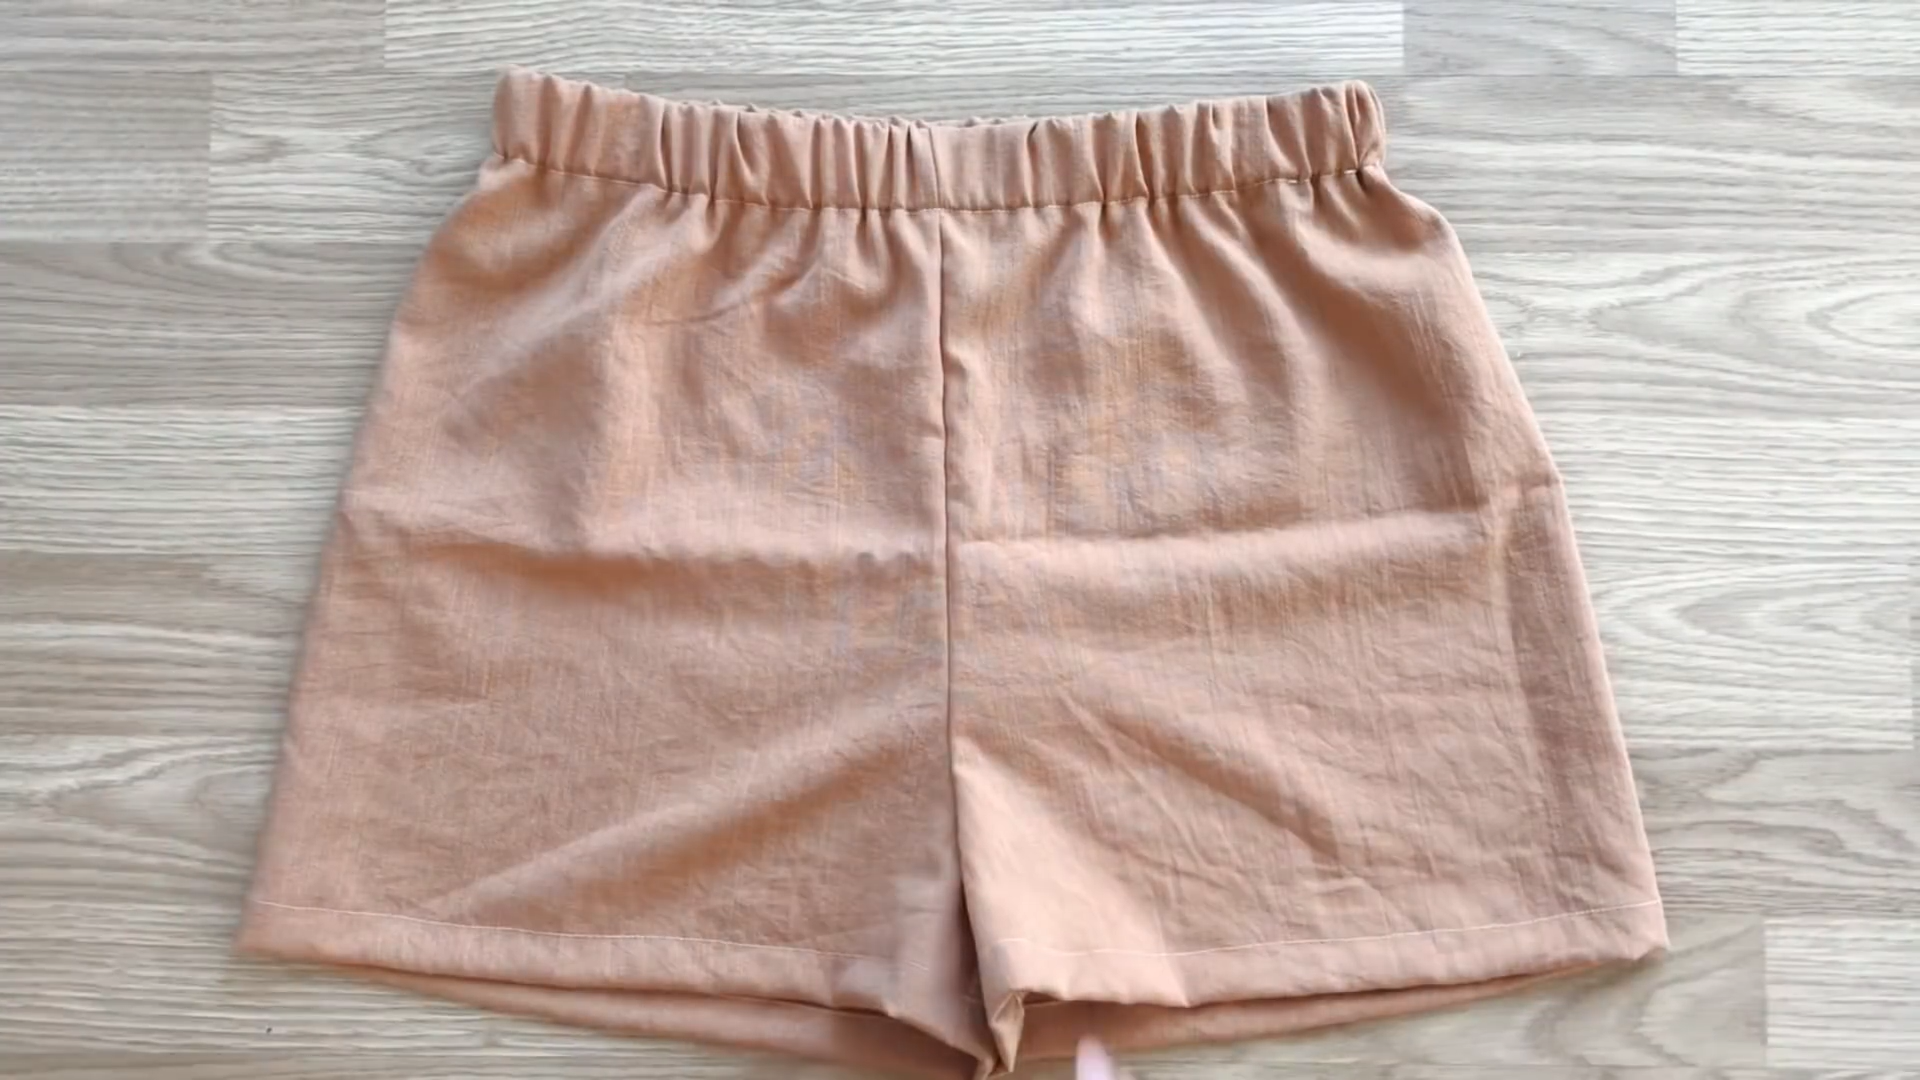
And you’ve finished the shorts of the pajama set!
THE TOP
The top pattern
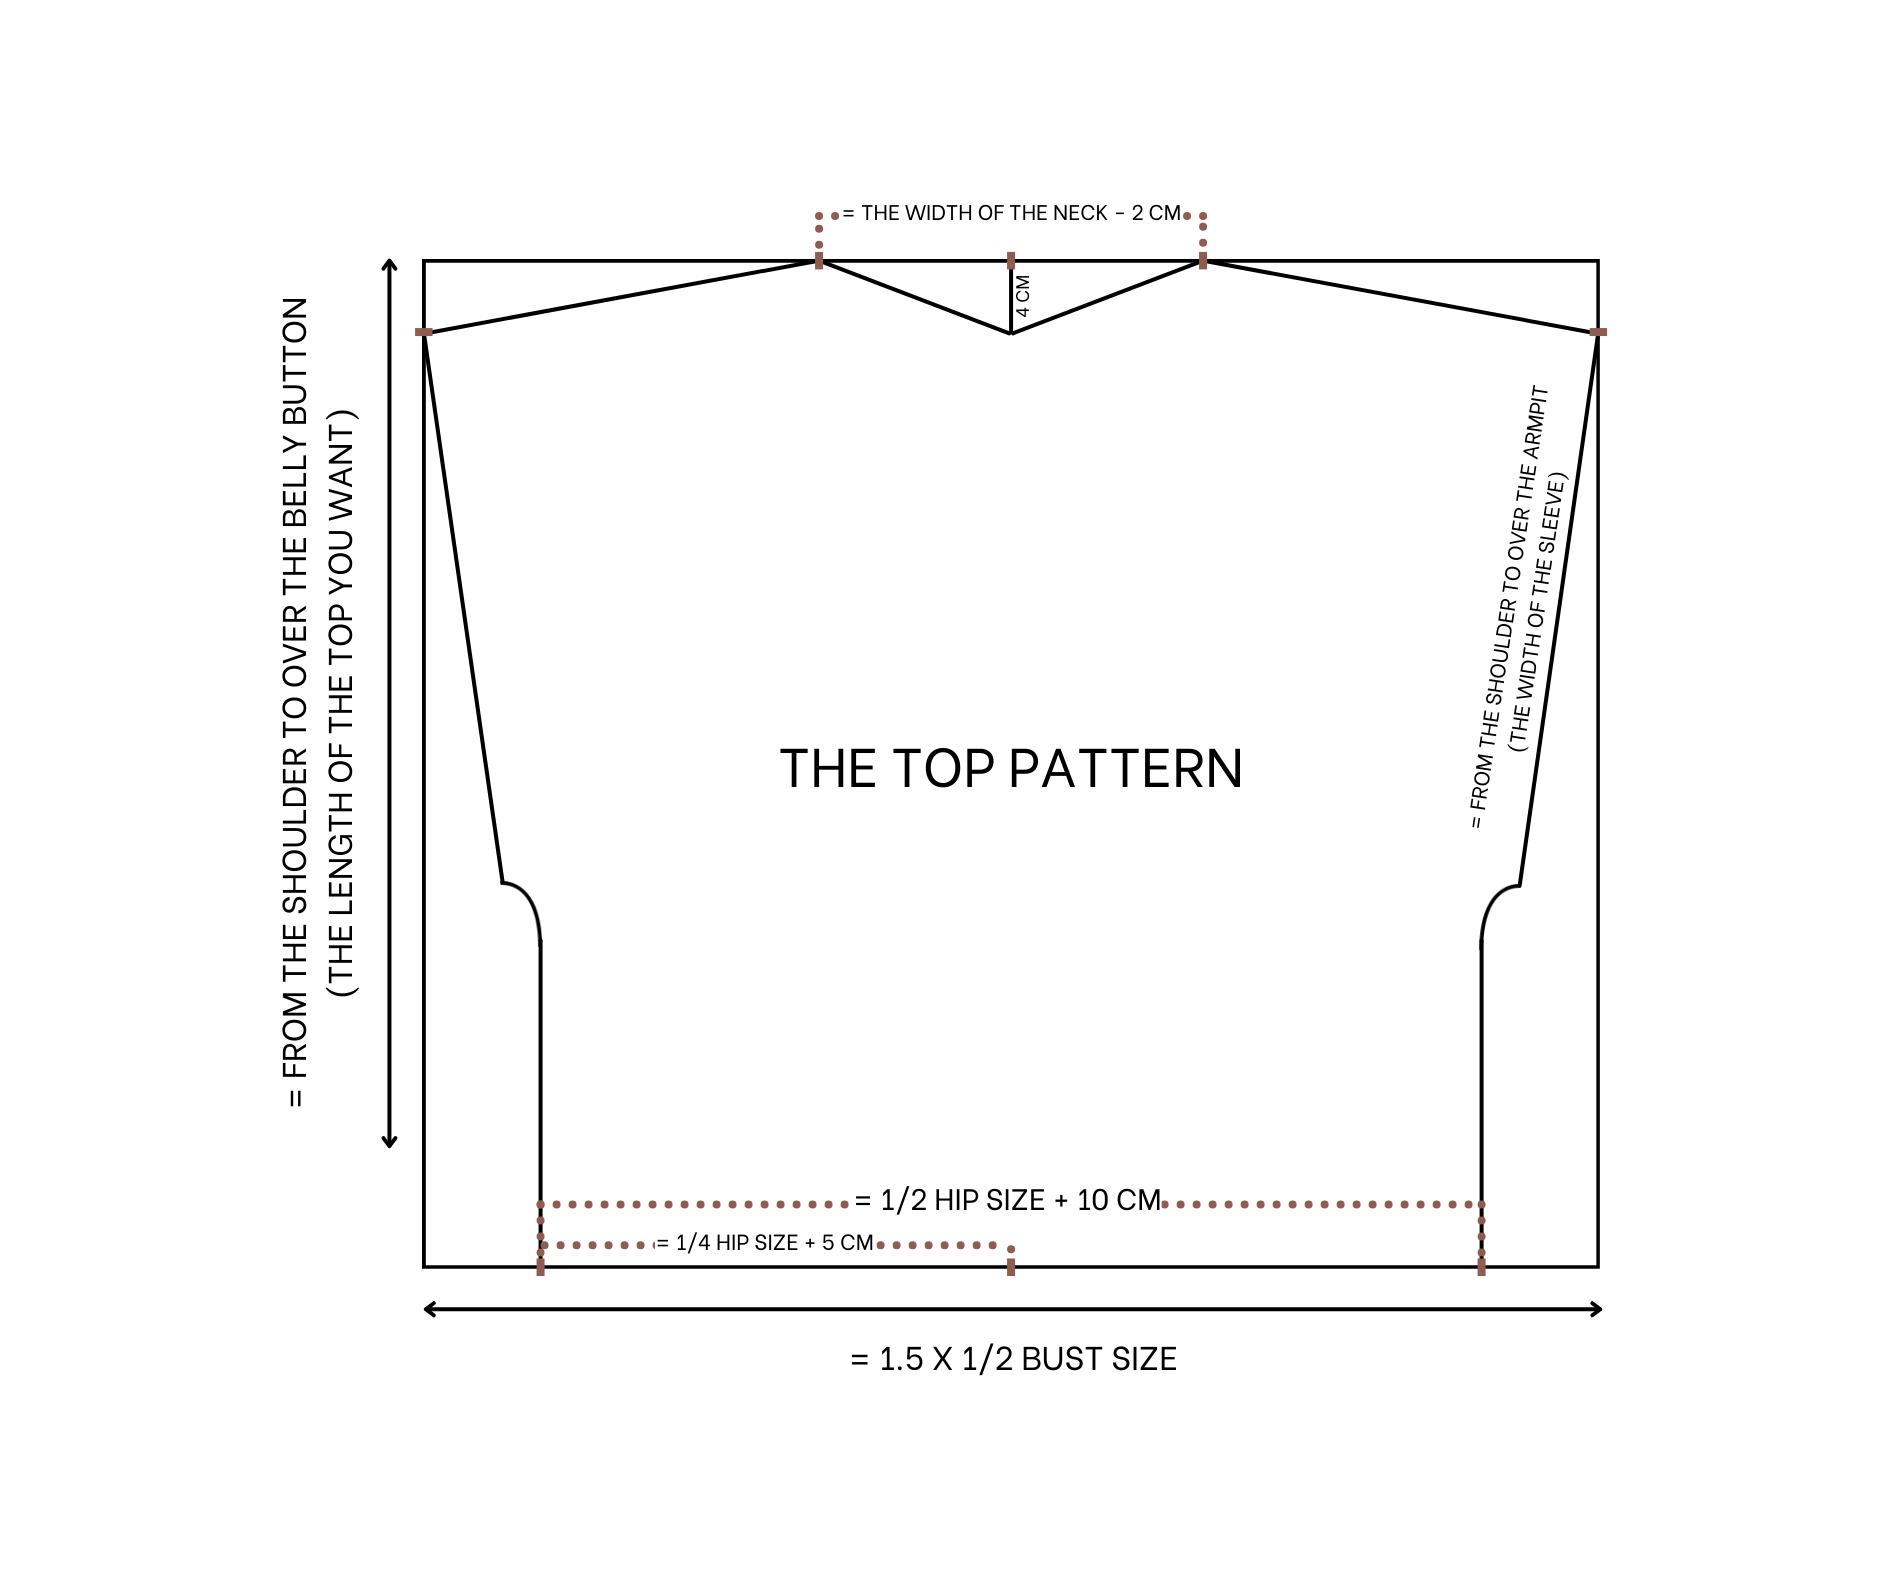
Cut two rectangles with a length of 60 cm (which is the length from your shoulder to over your belly button) and a width of 69 cm (which is one and a half times half of your bust size).
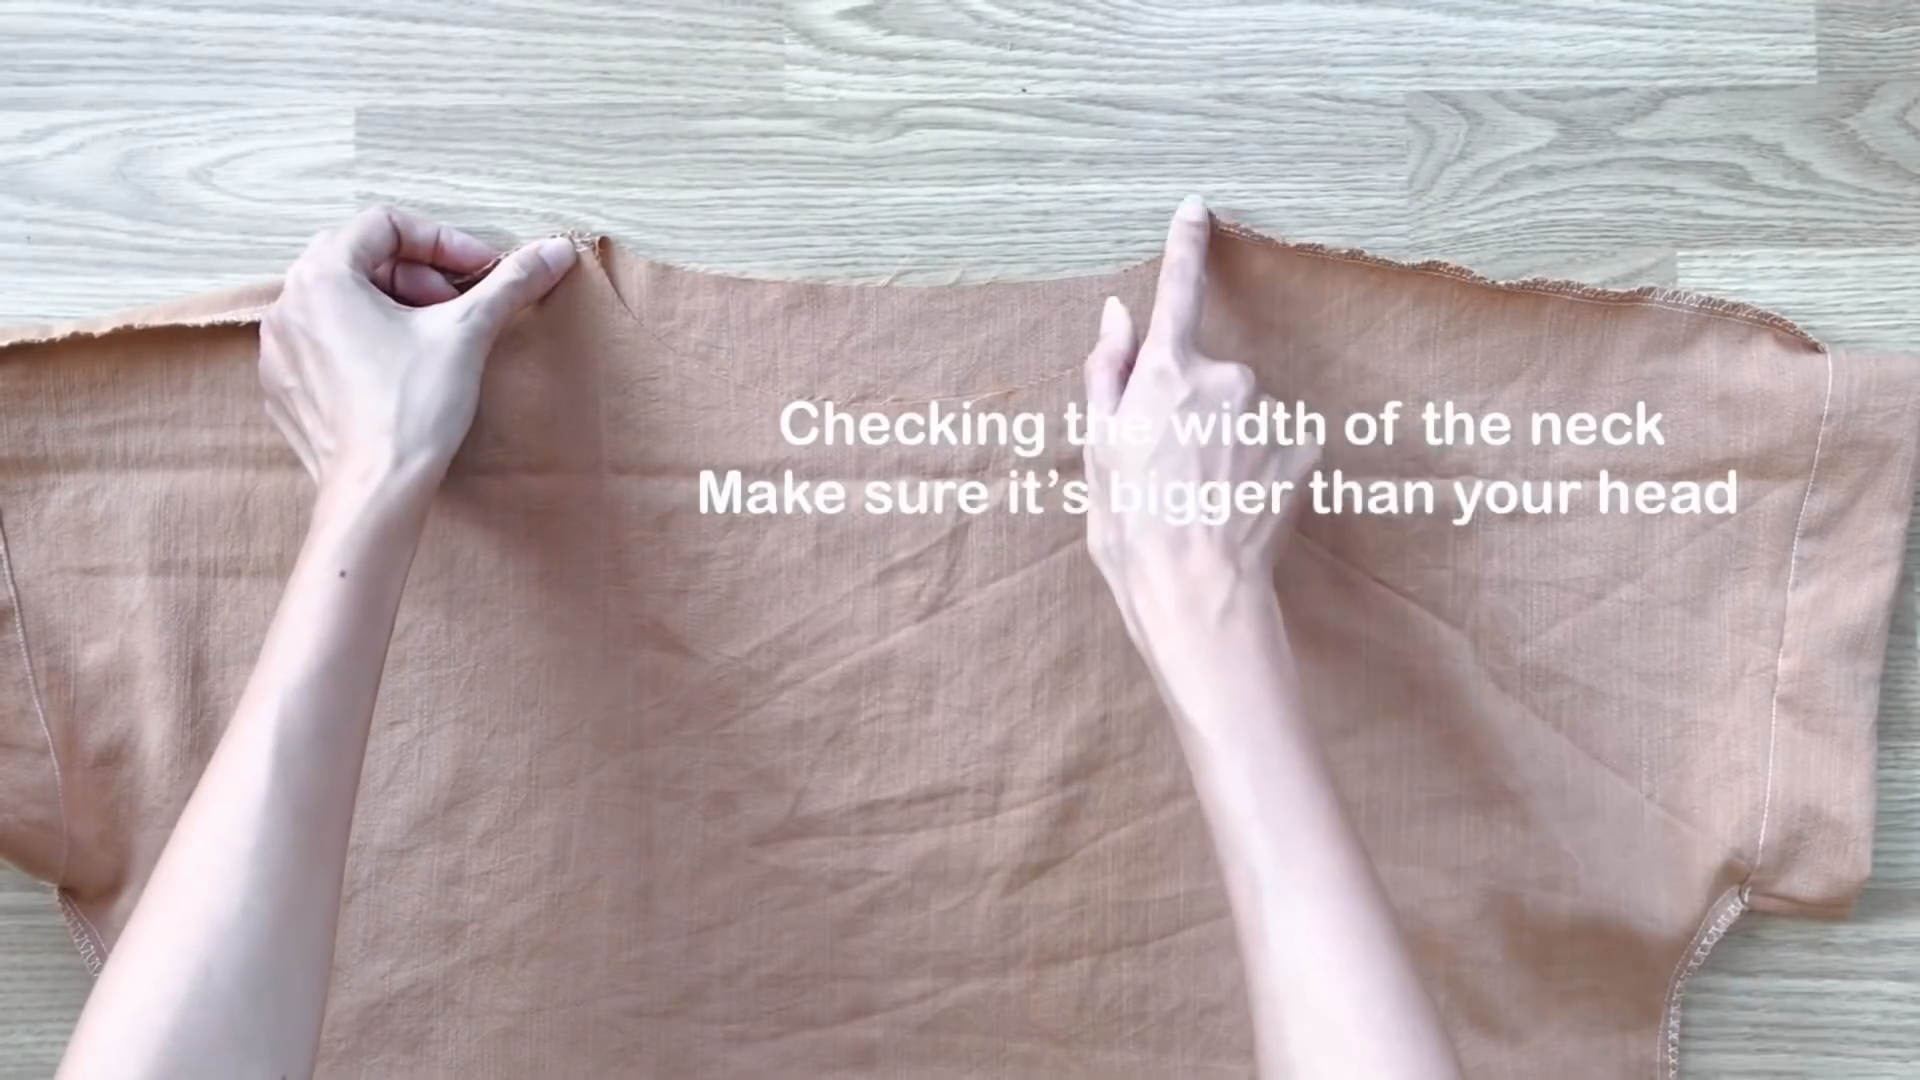
At the top width line, mark at the middle first then make two marks with 11 cm outside of it so the width between two marks will be 22 cm (which is the width of the neck that you want minus 2 cm for seam allowance).
From the mark at the middle, mark down 4 cm then connect it to two marks of the neck. Based on this line, draw a curved line to finish the neckline of the top.
From the top of the landline, mark down 4 cm then connect it to the mark on the neck to finish the shoulder line for the top.
From the end of the shoulder line, draw a perpendicular line with 22 cm in width from the shoulder to over your armpit. This is also the width of the sleeve that you want.
From the middle at the end of the top, mark two sides 28 cm (which is a quarter of your hip size plus 5 cm) so the width between two marks will be 56 cm (which is half of your hip size plus 10 cm) then draw a straight line from this mark and connect to the end of the sleeve line by a curved line.
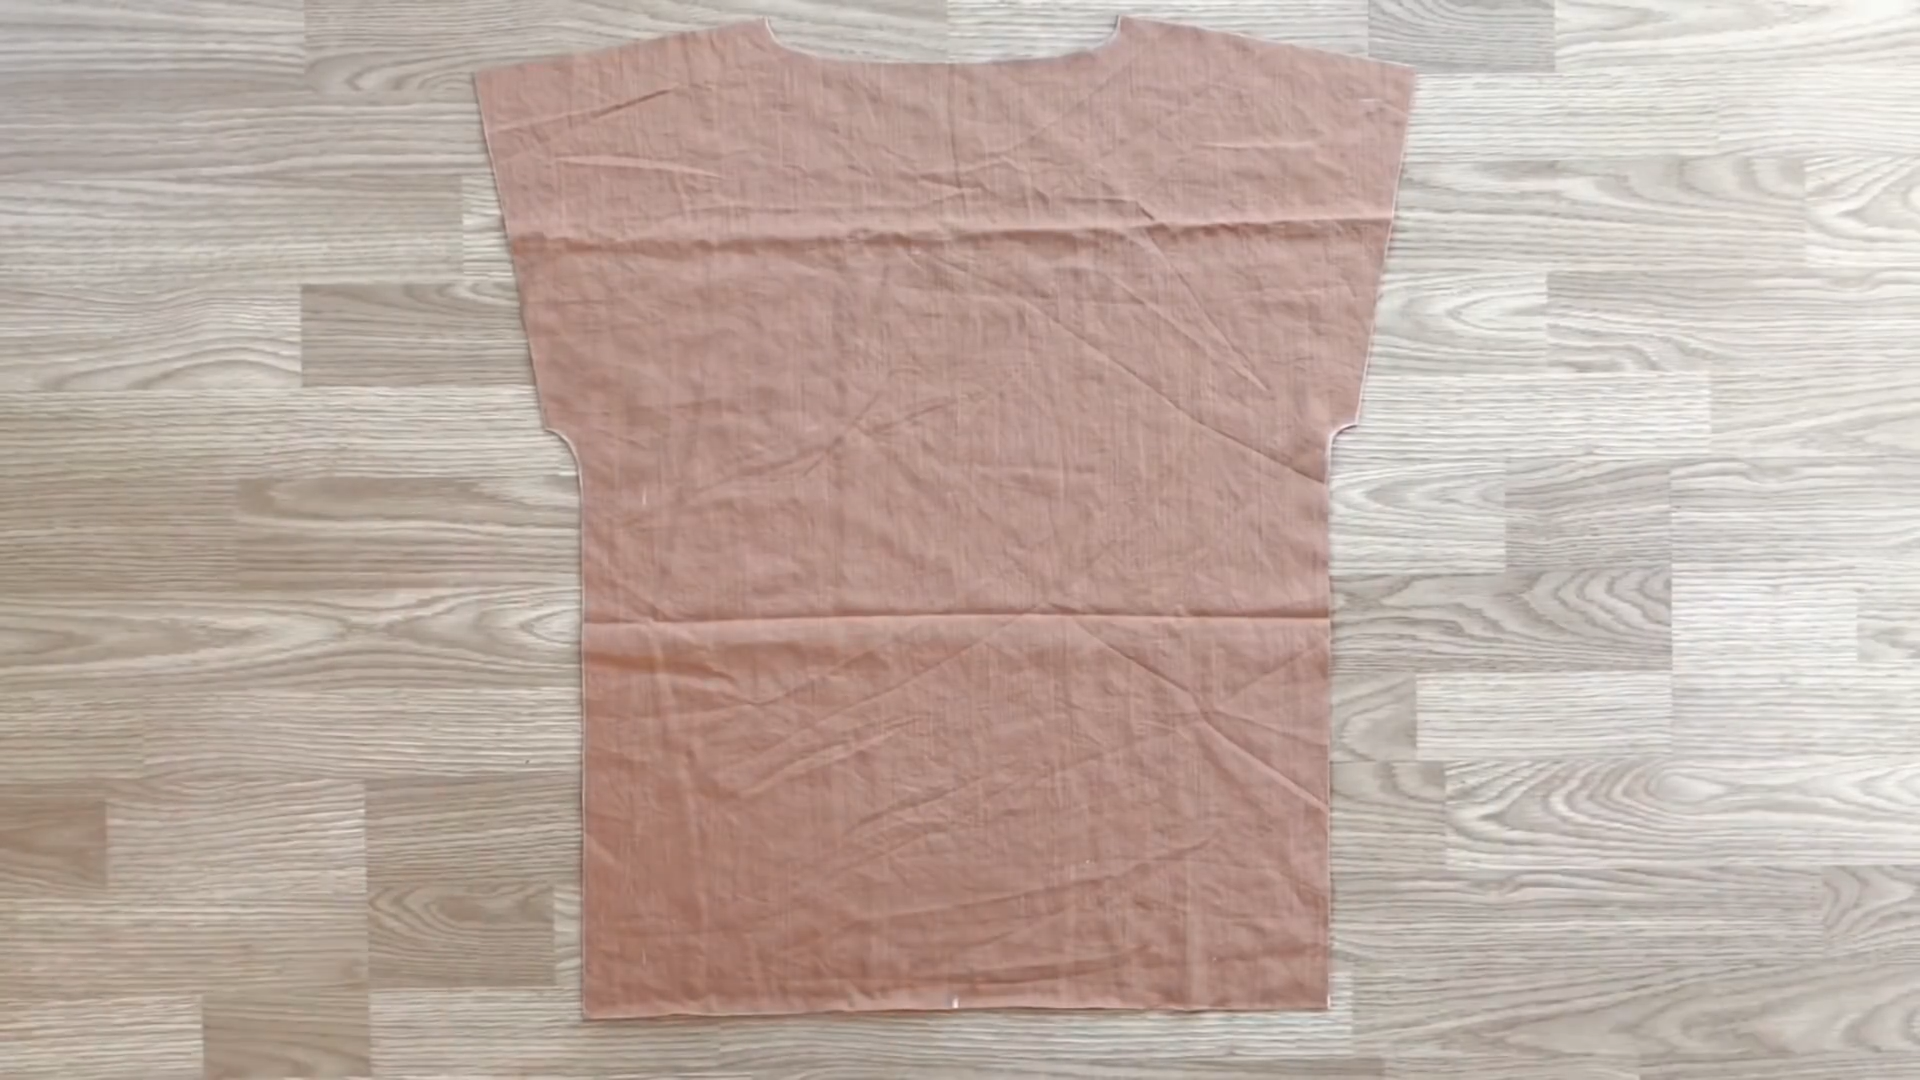
Here’s the top after cutting.
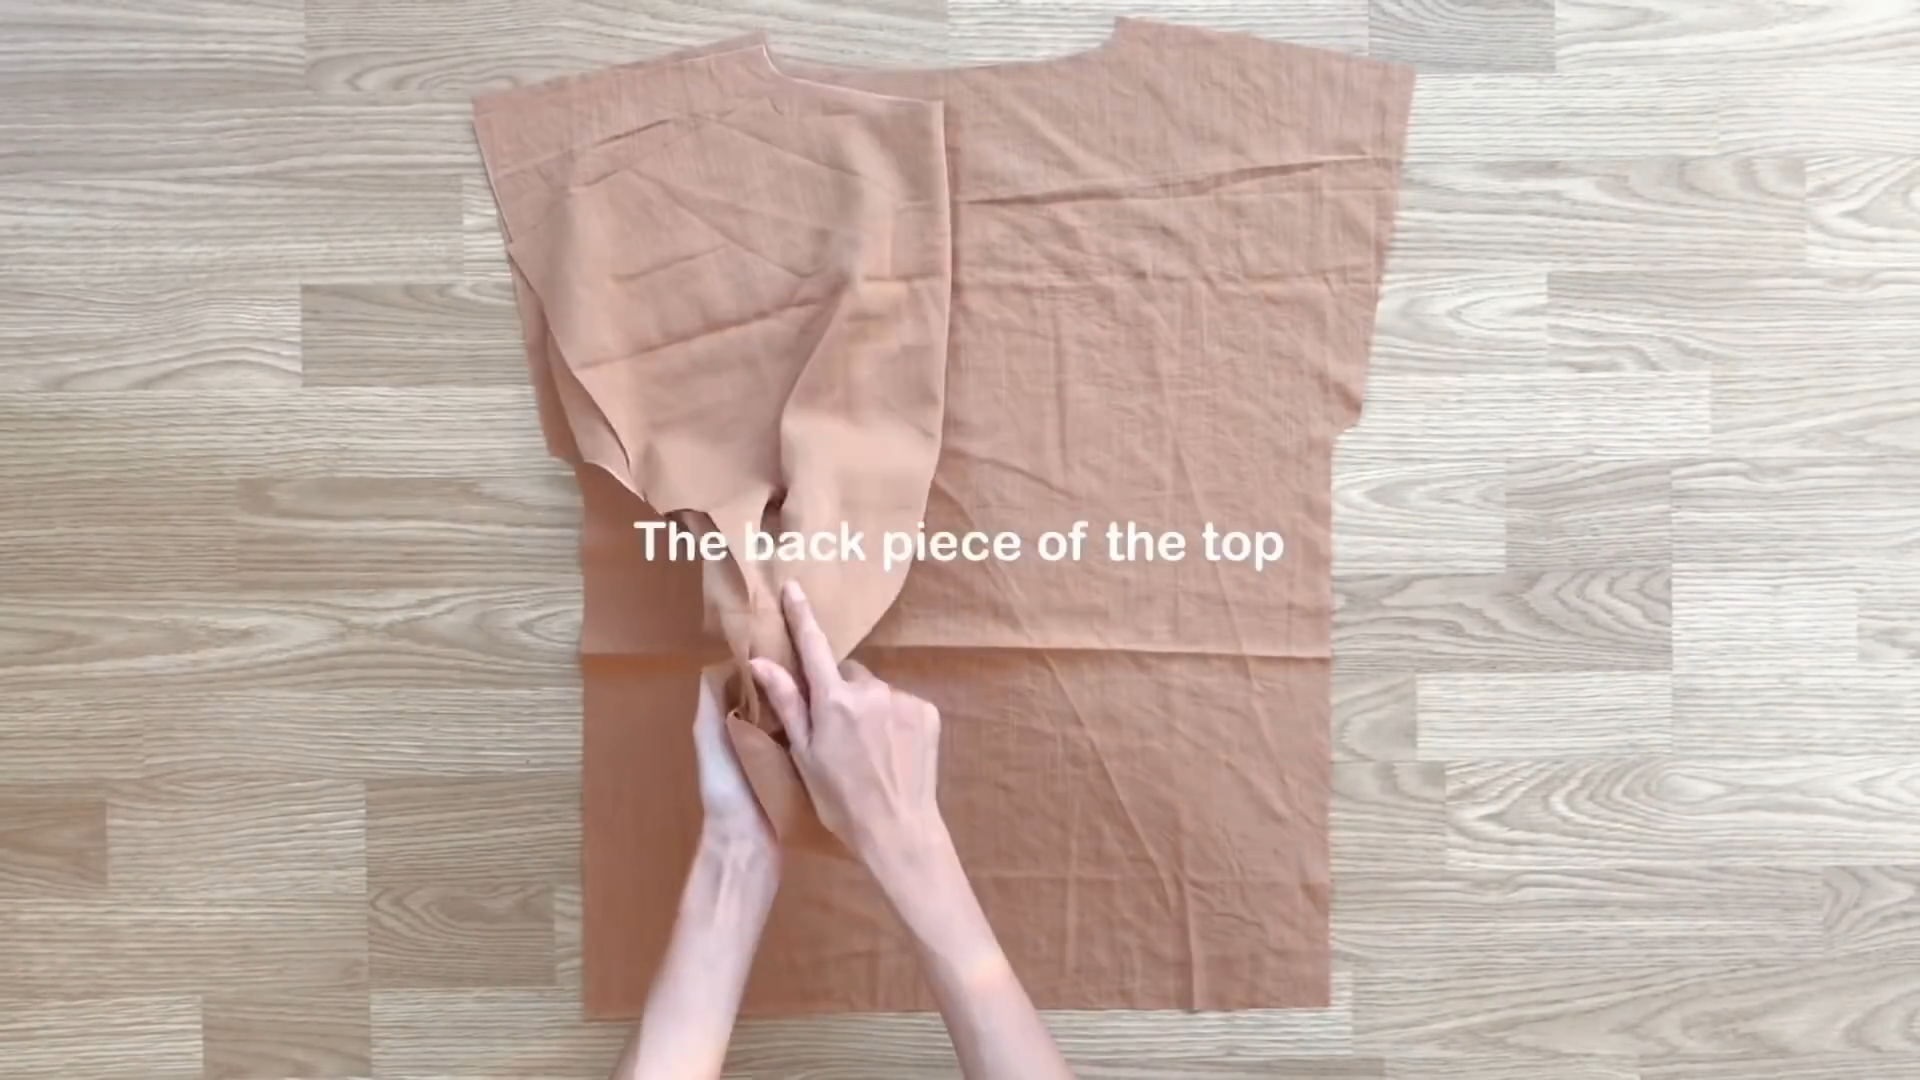
Keep one piece for the back of the top and keep working on the other piece to finish the front of the top.
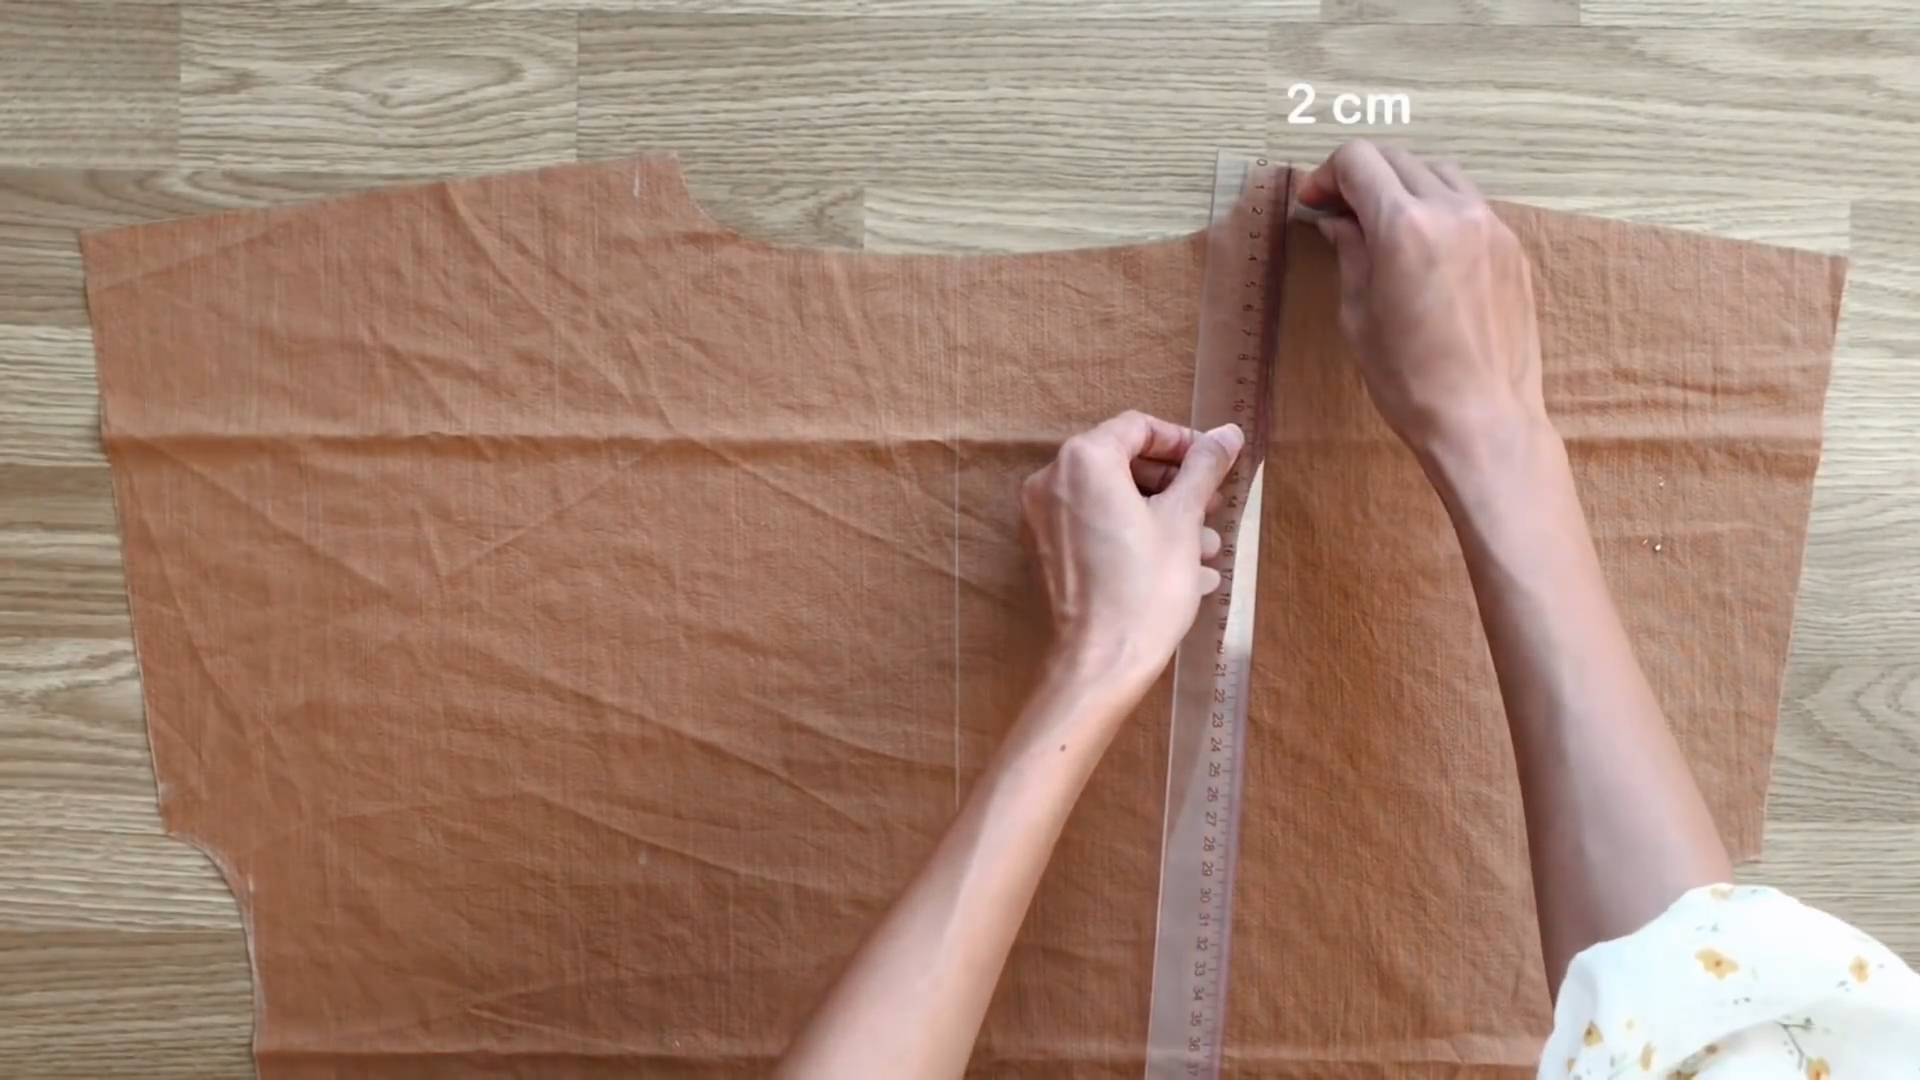
Move the shoulder of the top 2 cm lower than the back.
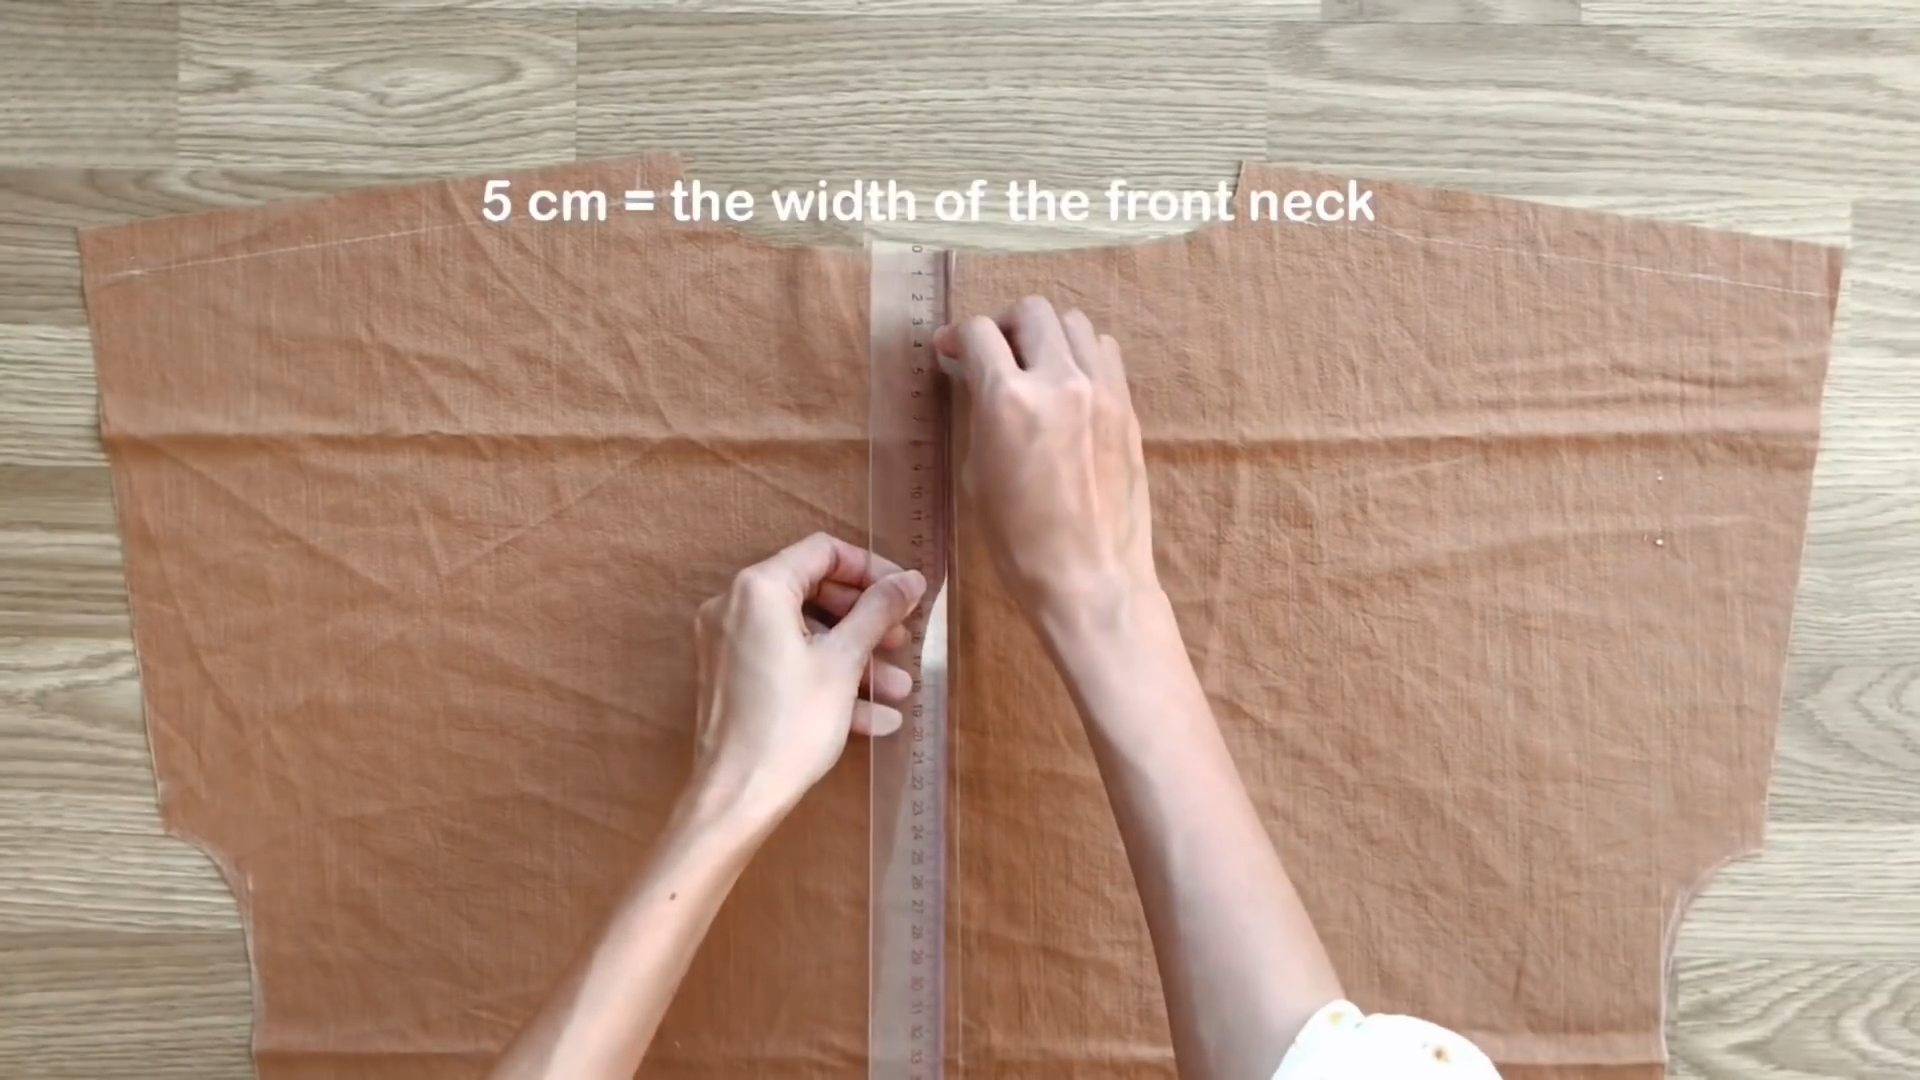
At the middle of the neck, mark down 5 cm (which is the width of the front neck that you want).
Then, connect it to two ends of the neckline by a curved line to finish the new neckline for the front.
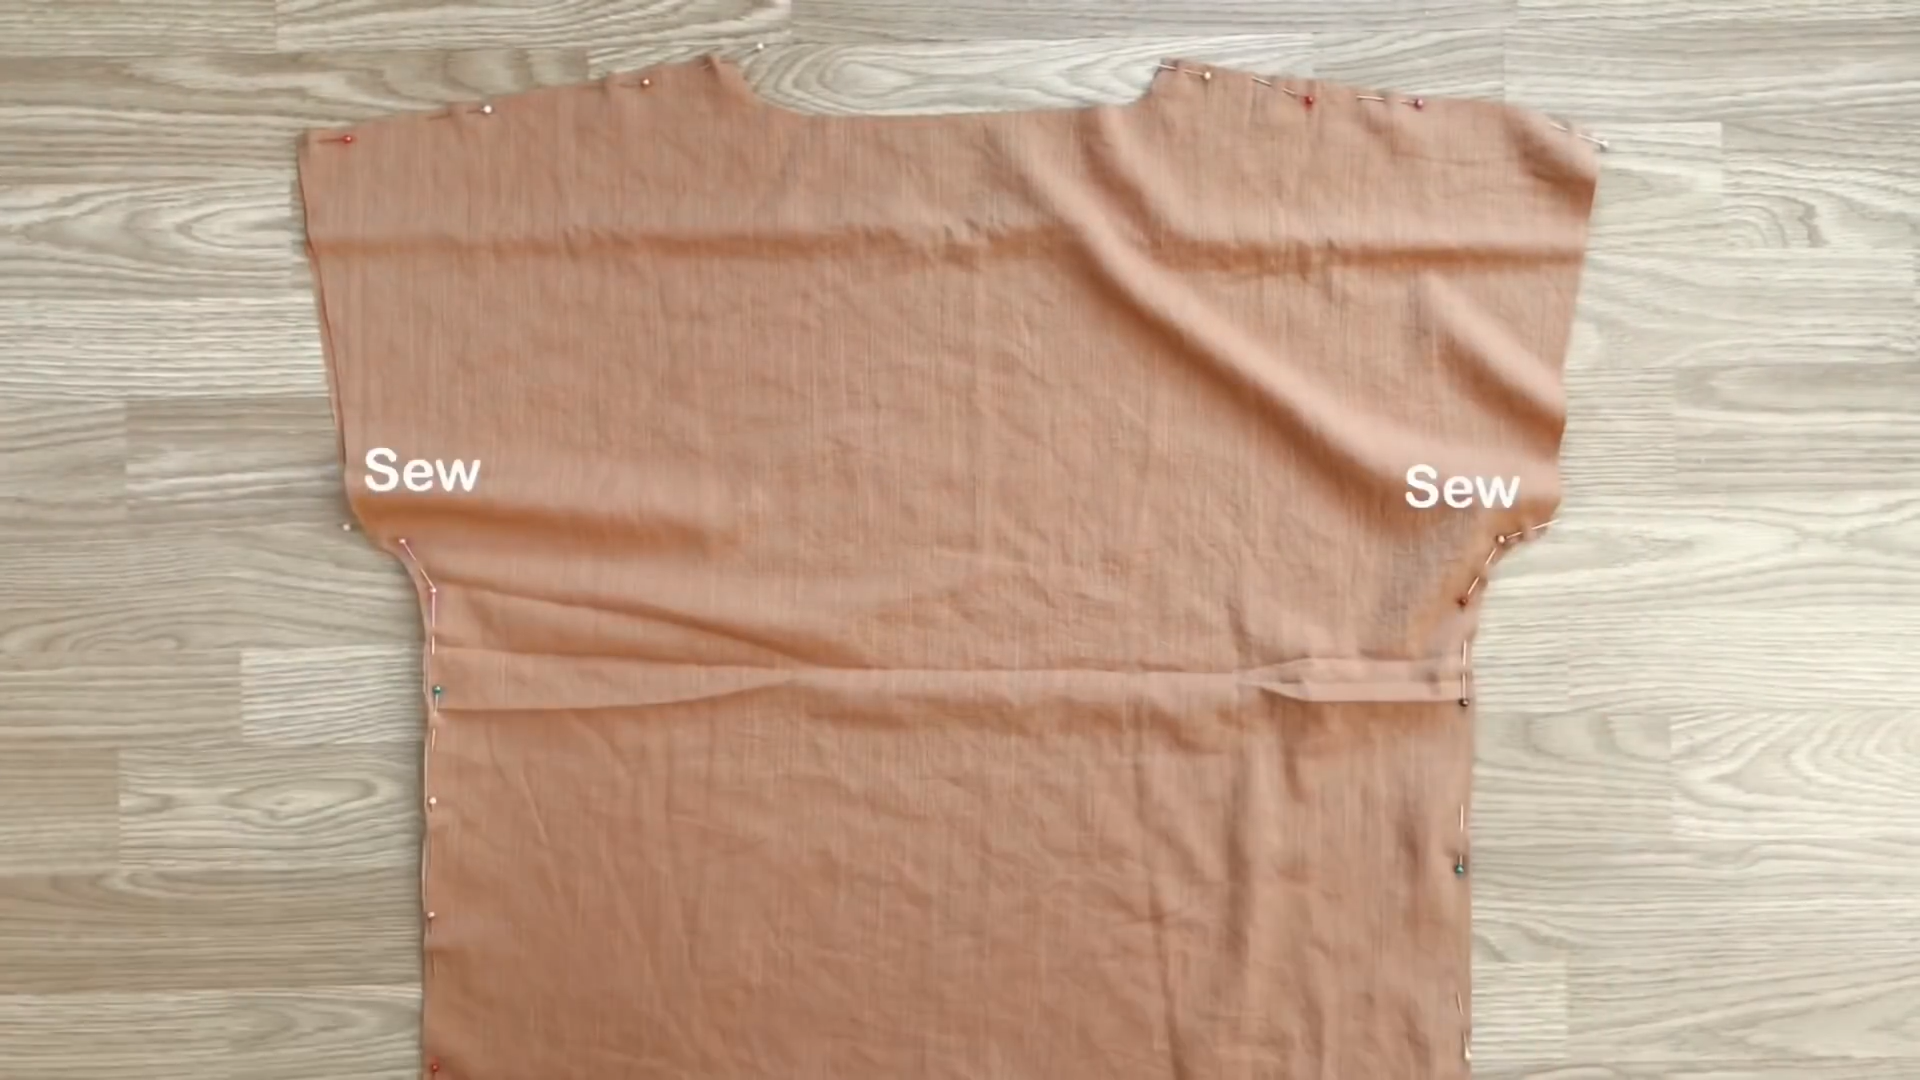
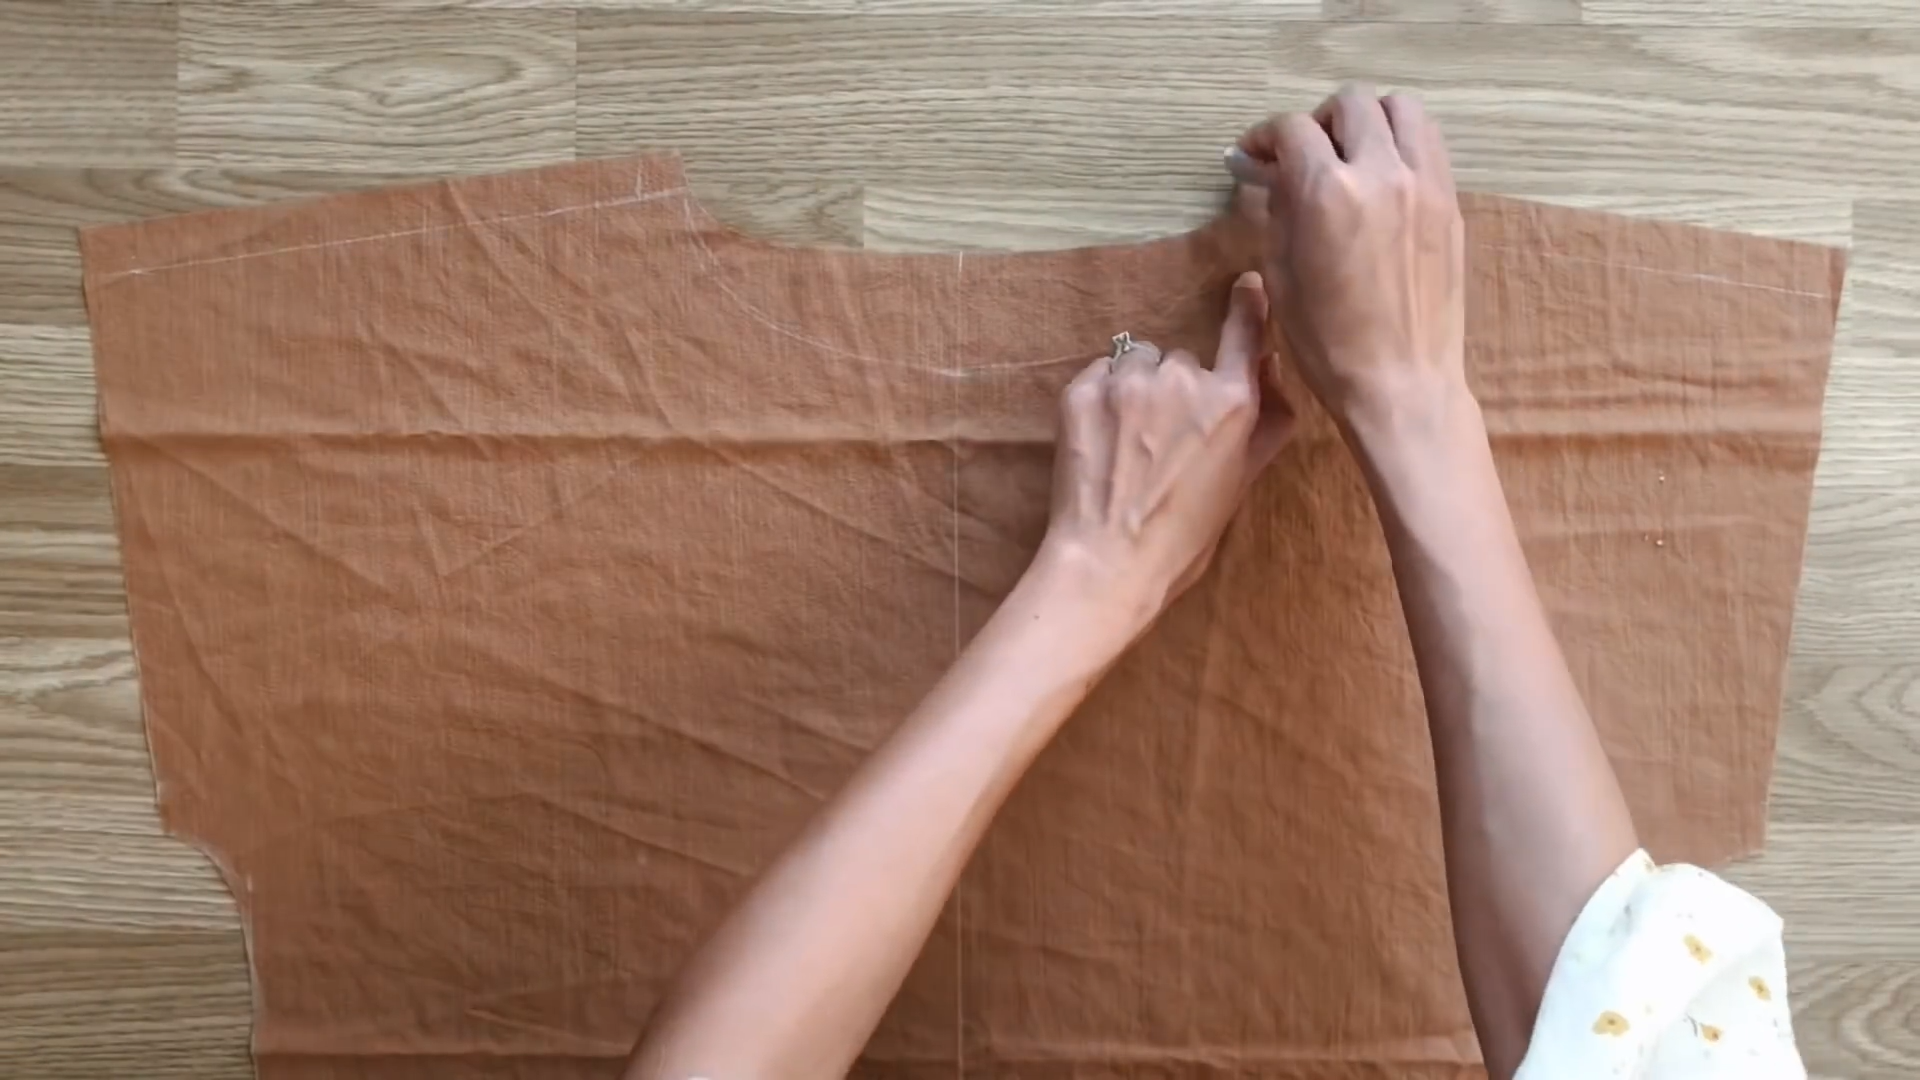
Now, connect two pieces of the top together at the shoulder on two sides.
THE SLEEVE
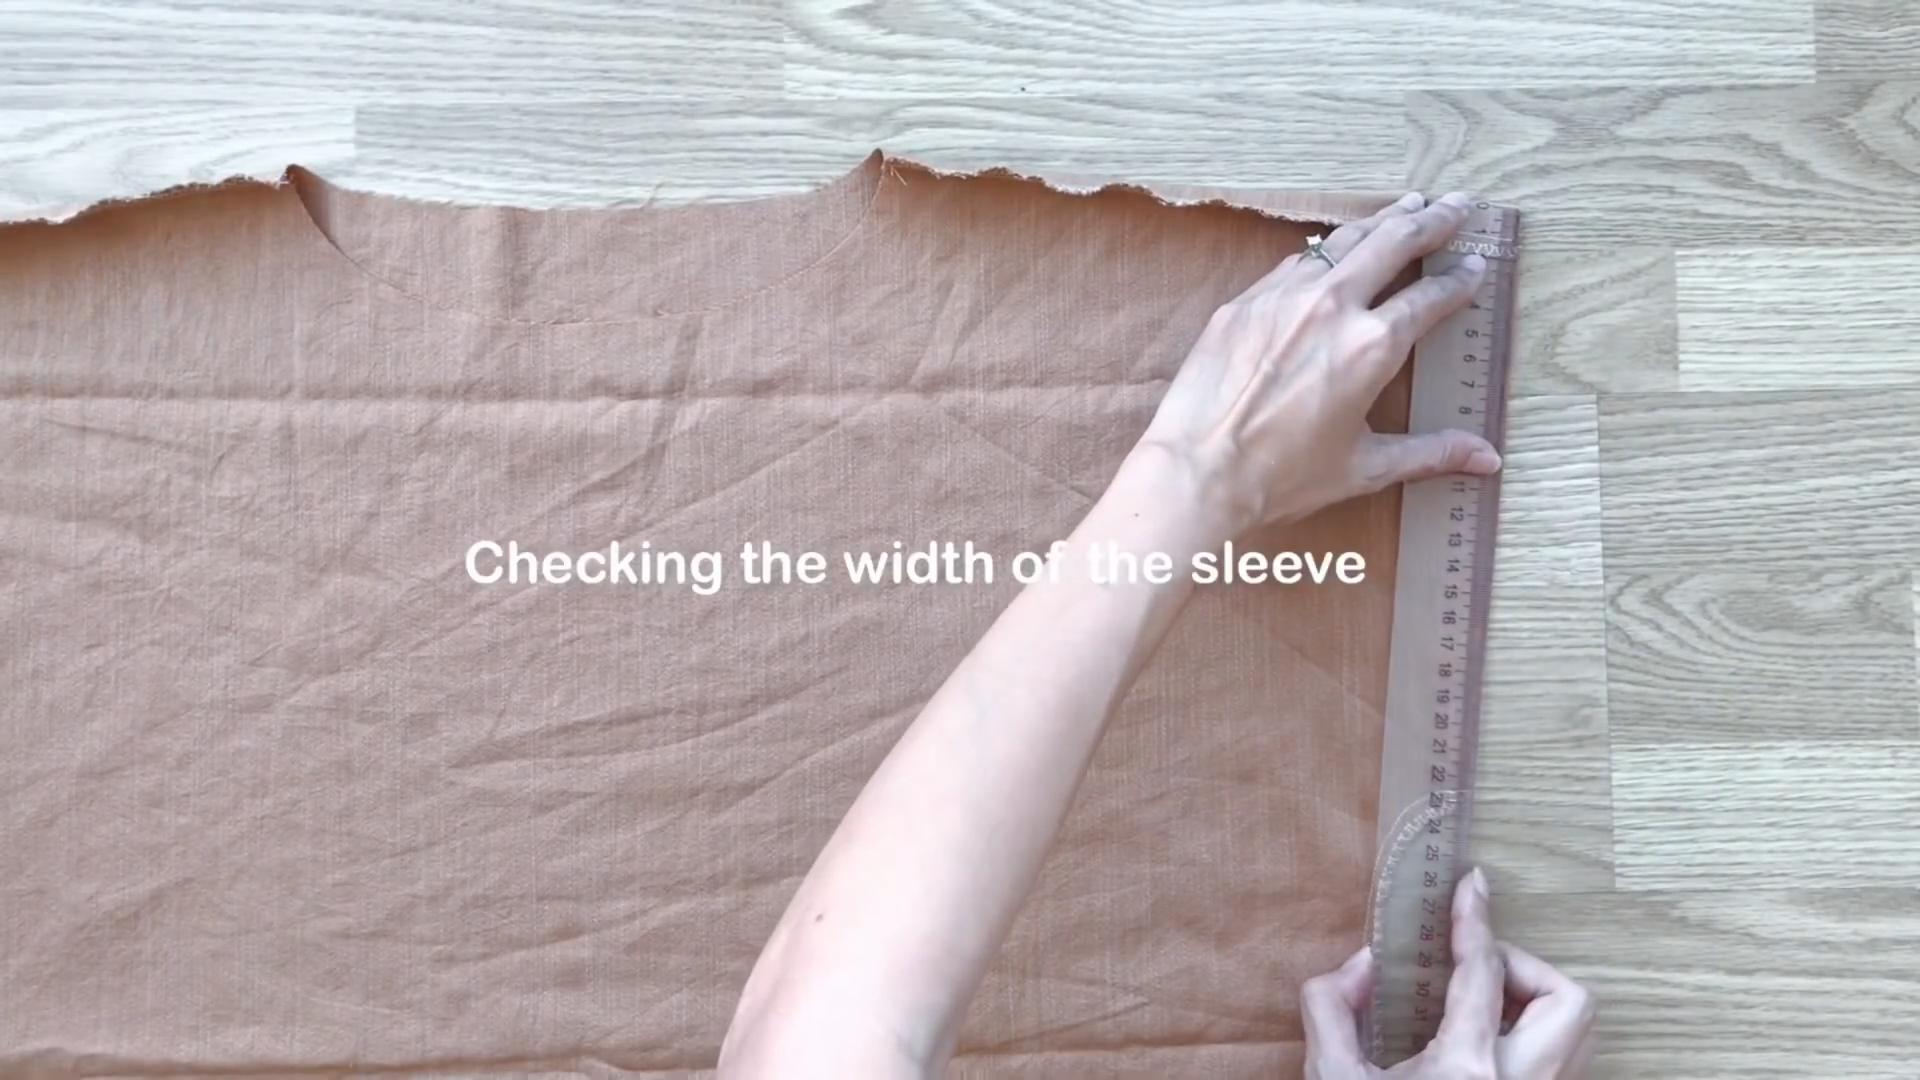
After sewing, measure the width of the sleeve.
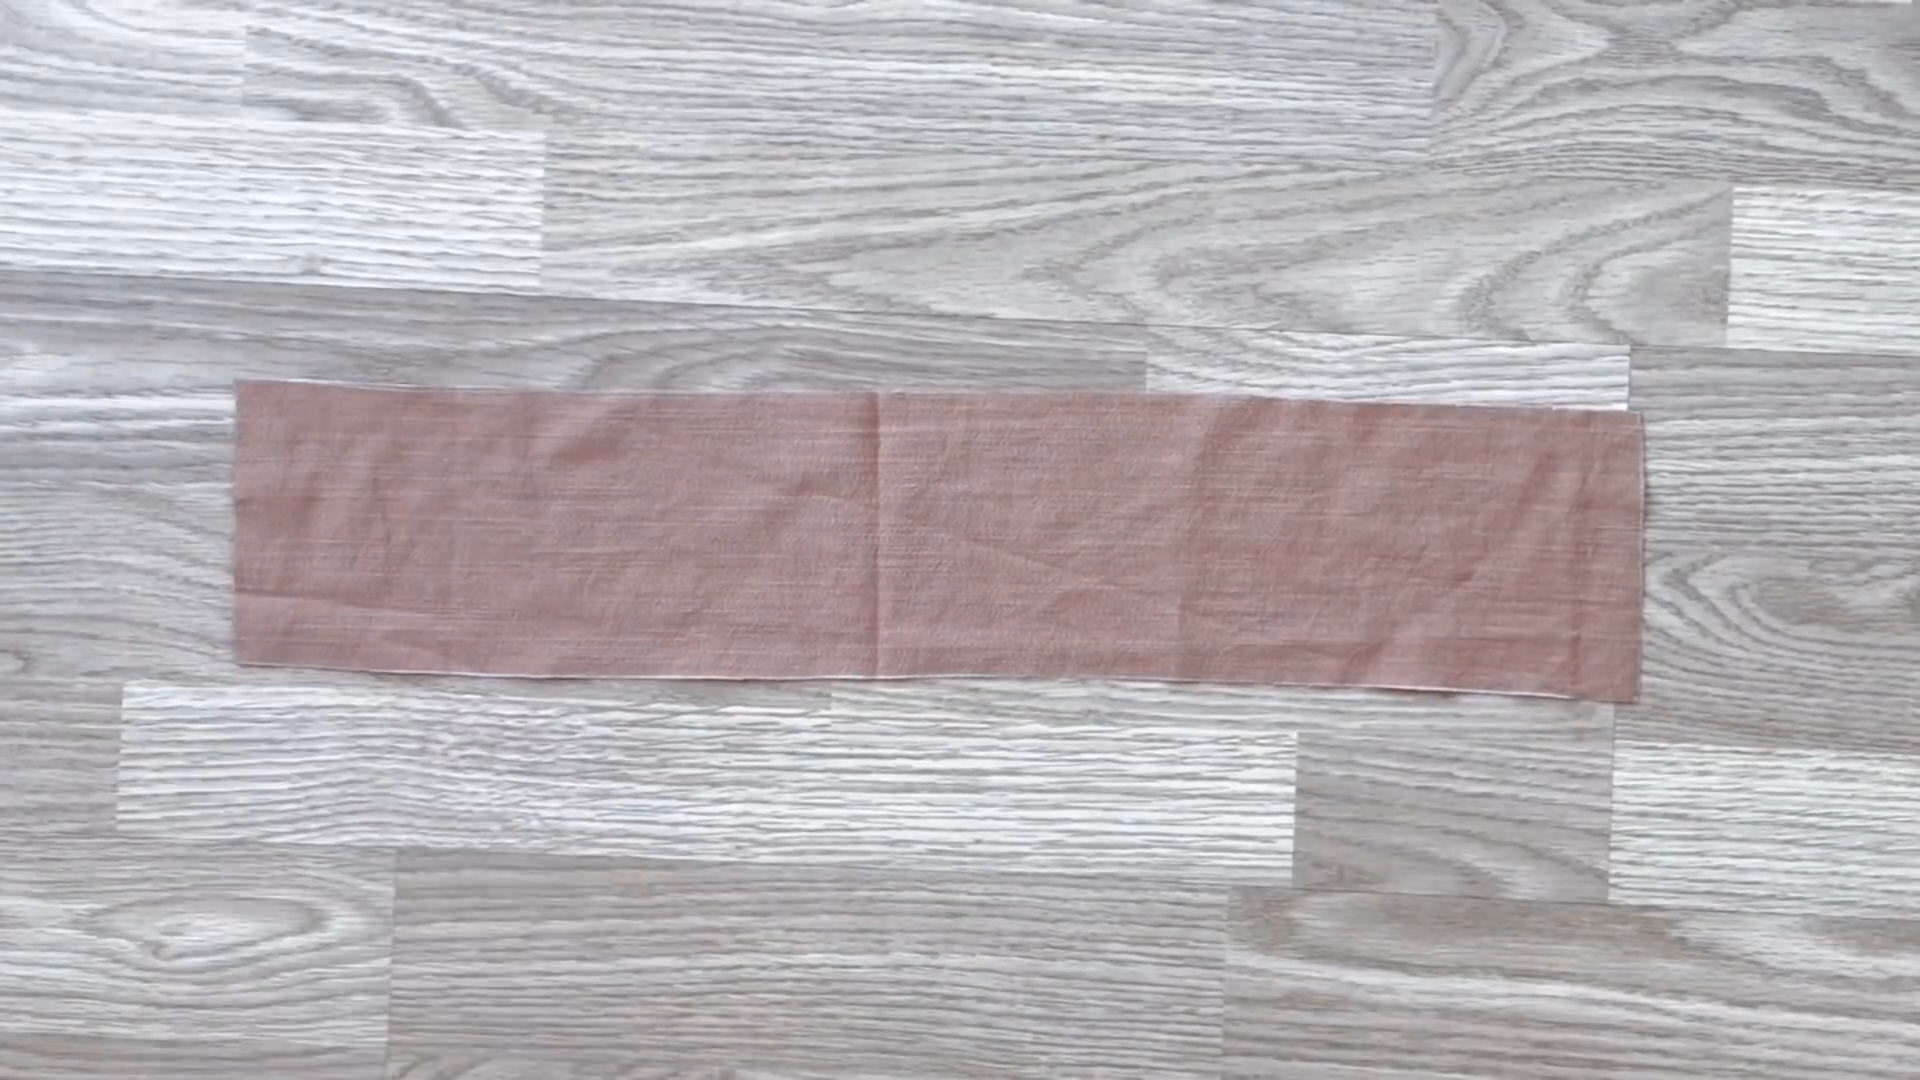
Then, cut a rectangle with the length is 2 cm longer than the width of the sleeve and 8 cm width.
Connect two width lines together to create a circle fabric first.
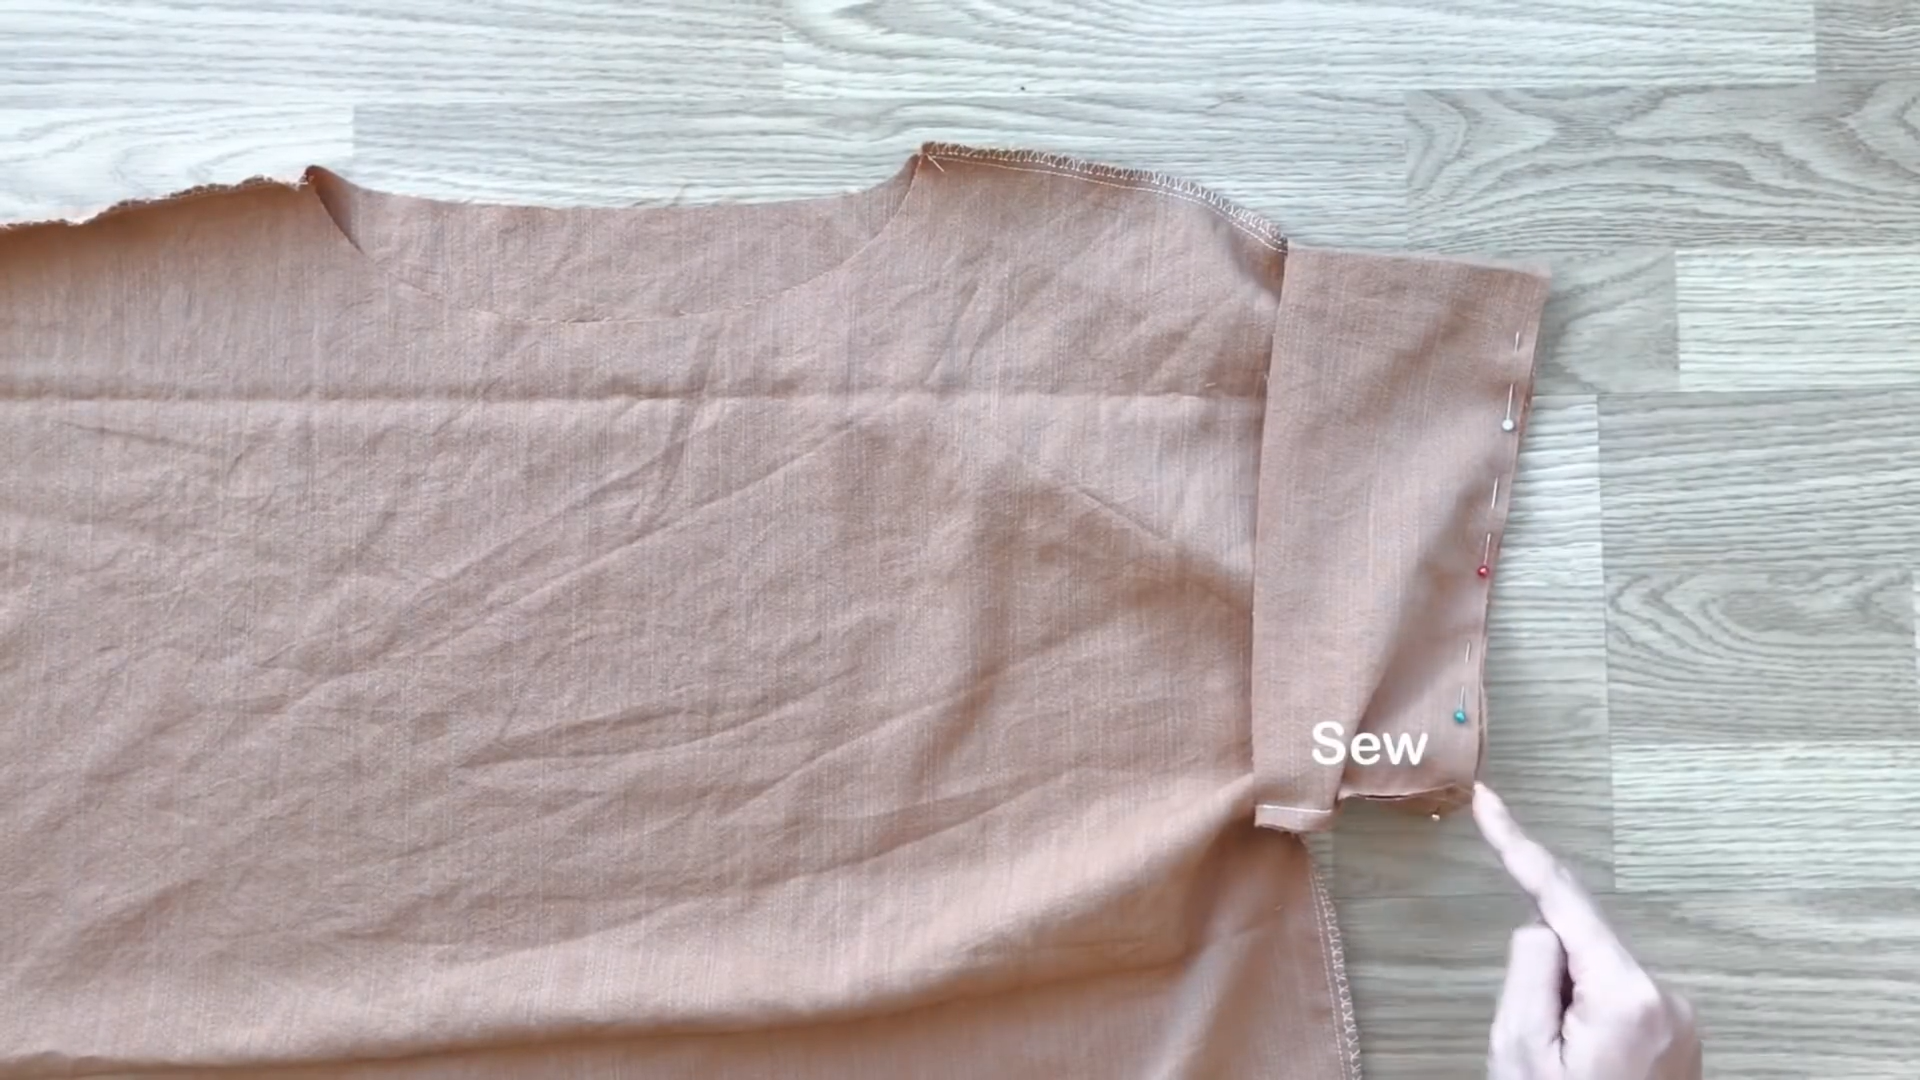
Then connect one lane line of the circle fabric to the sleeve and make the first seam.
After that, fold the other lane line of the circle fabric inside 1 cm first then keep folding it over the first seam to hide the end fabric inside and make the second seam.
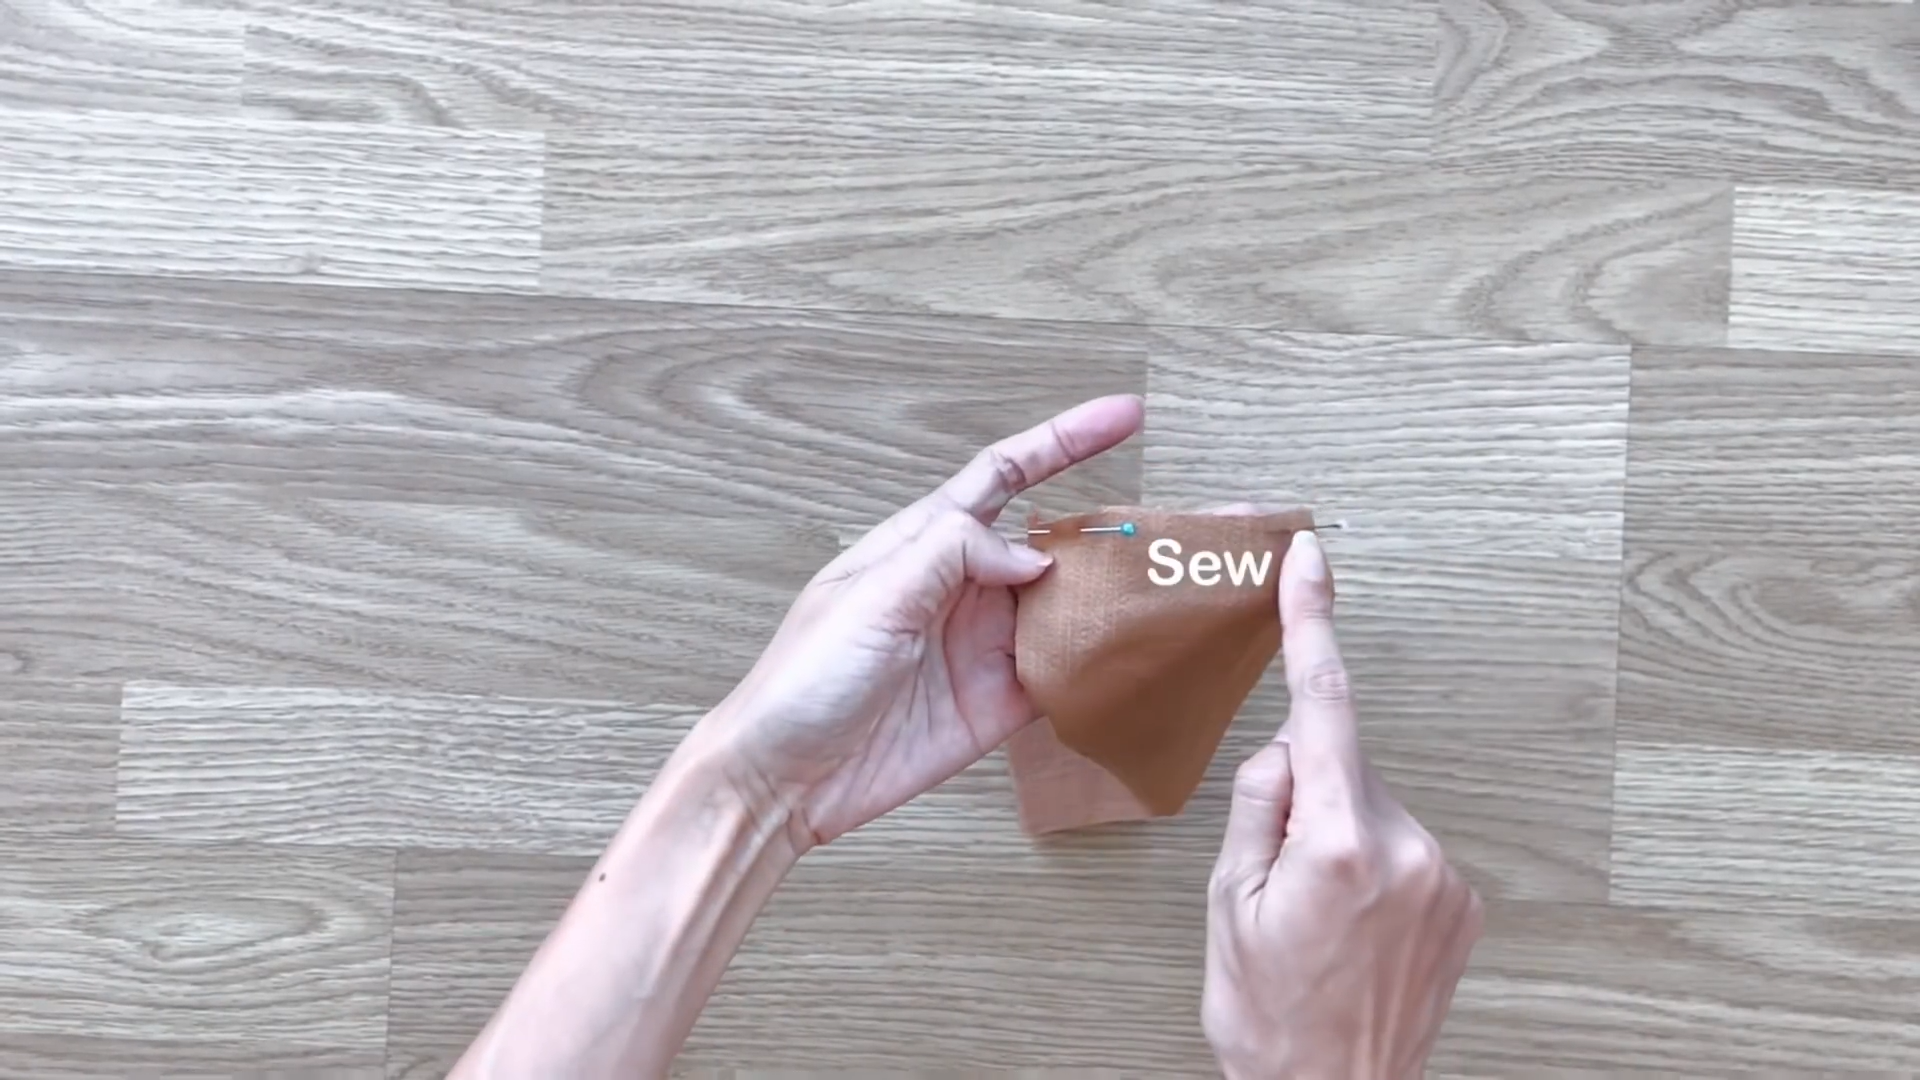
THE NECK
Use the same technique to finish the neck of the top.
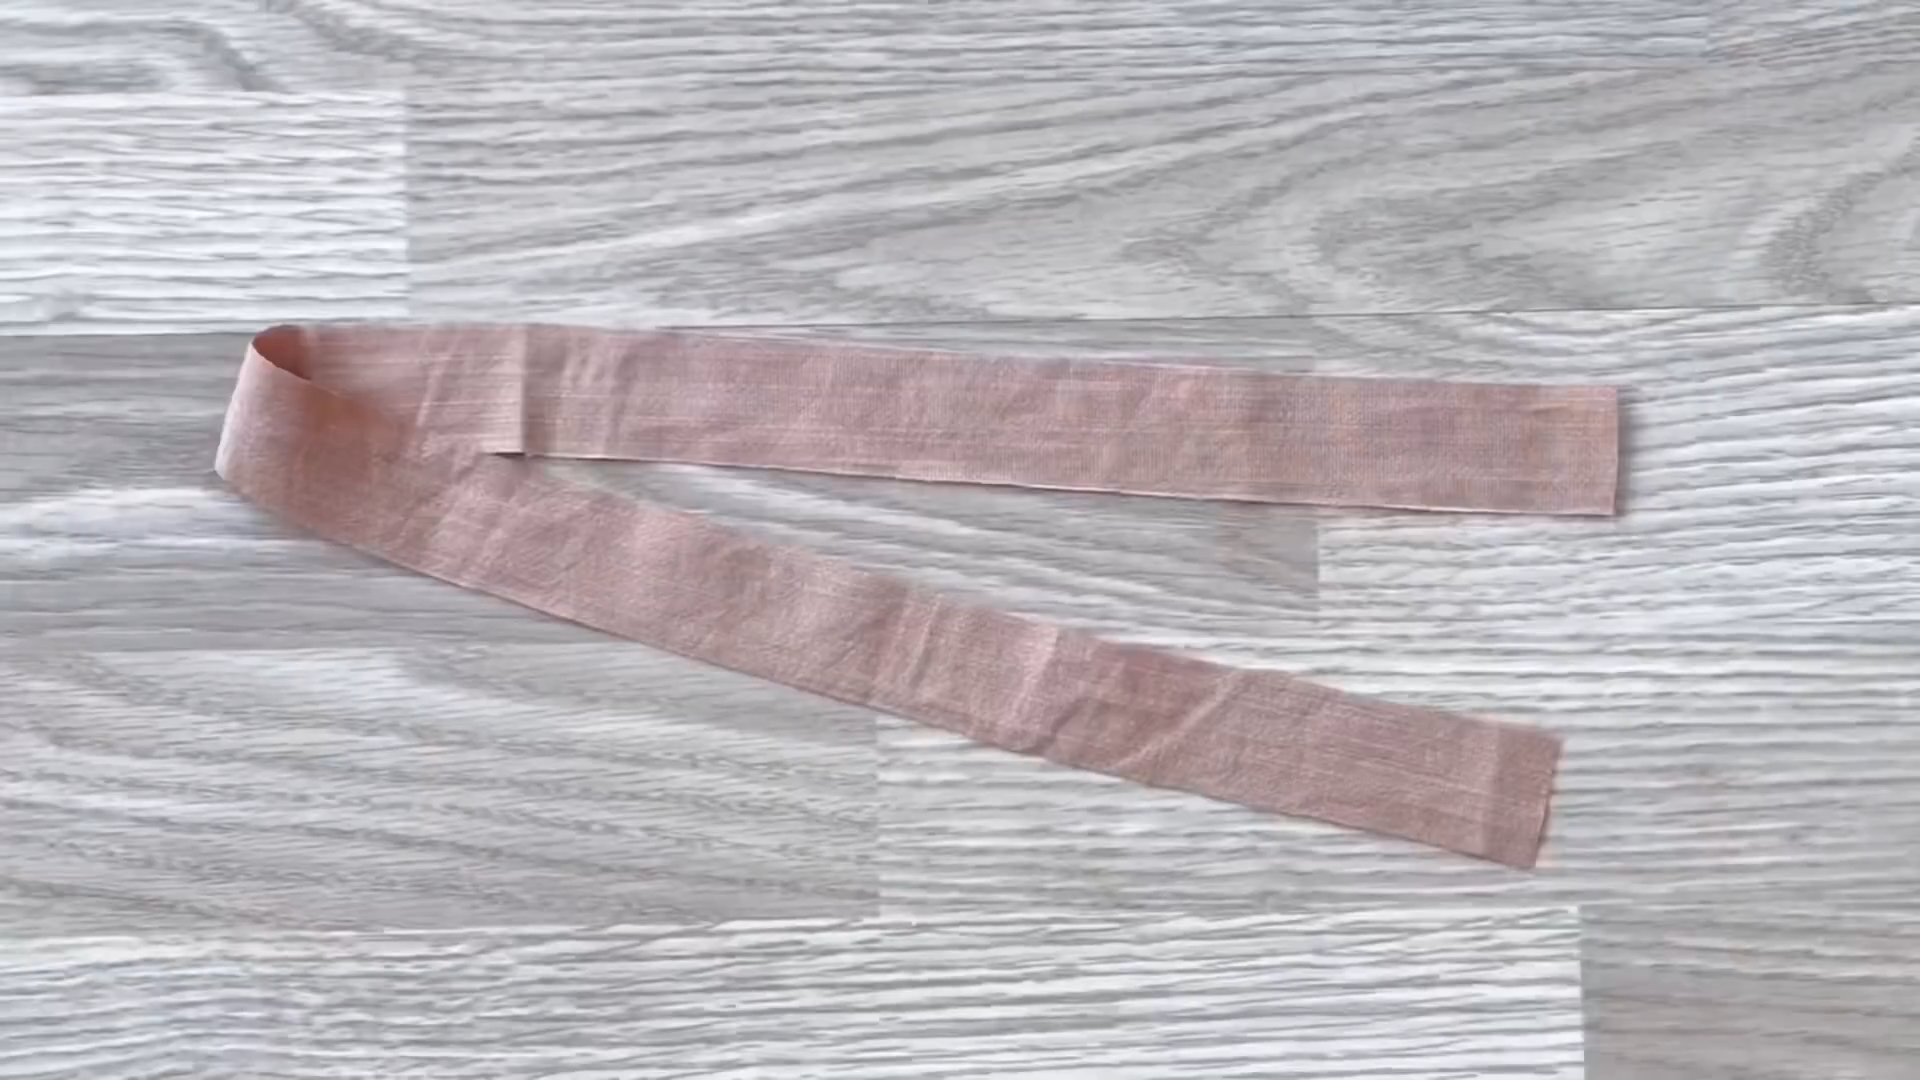
However, the width of the rectangle you cut is 3 cm.
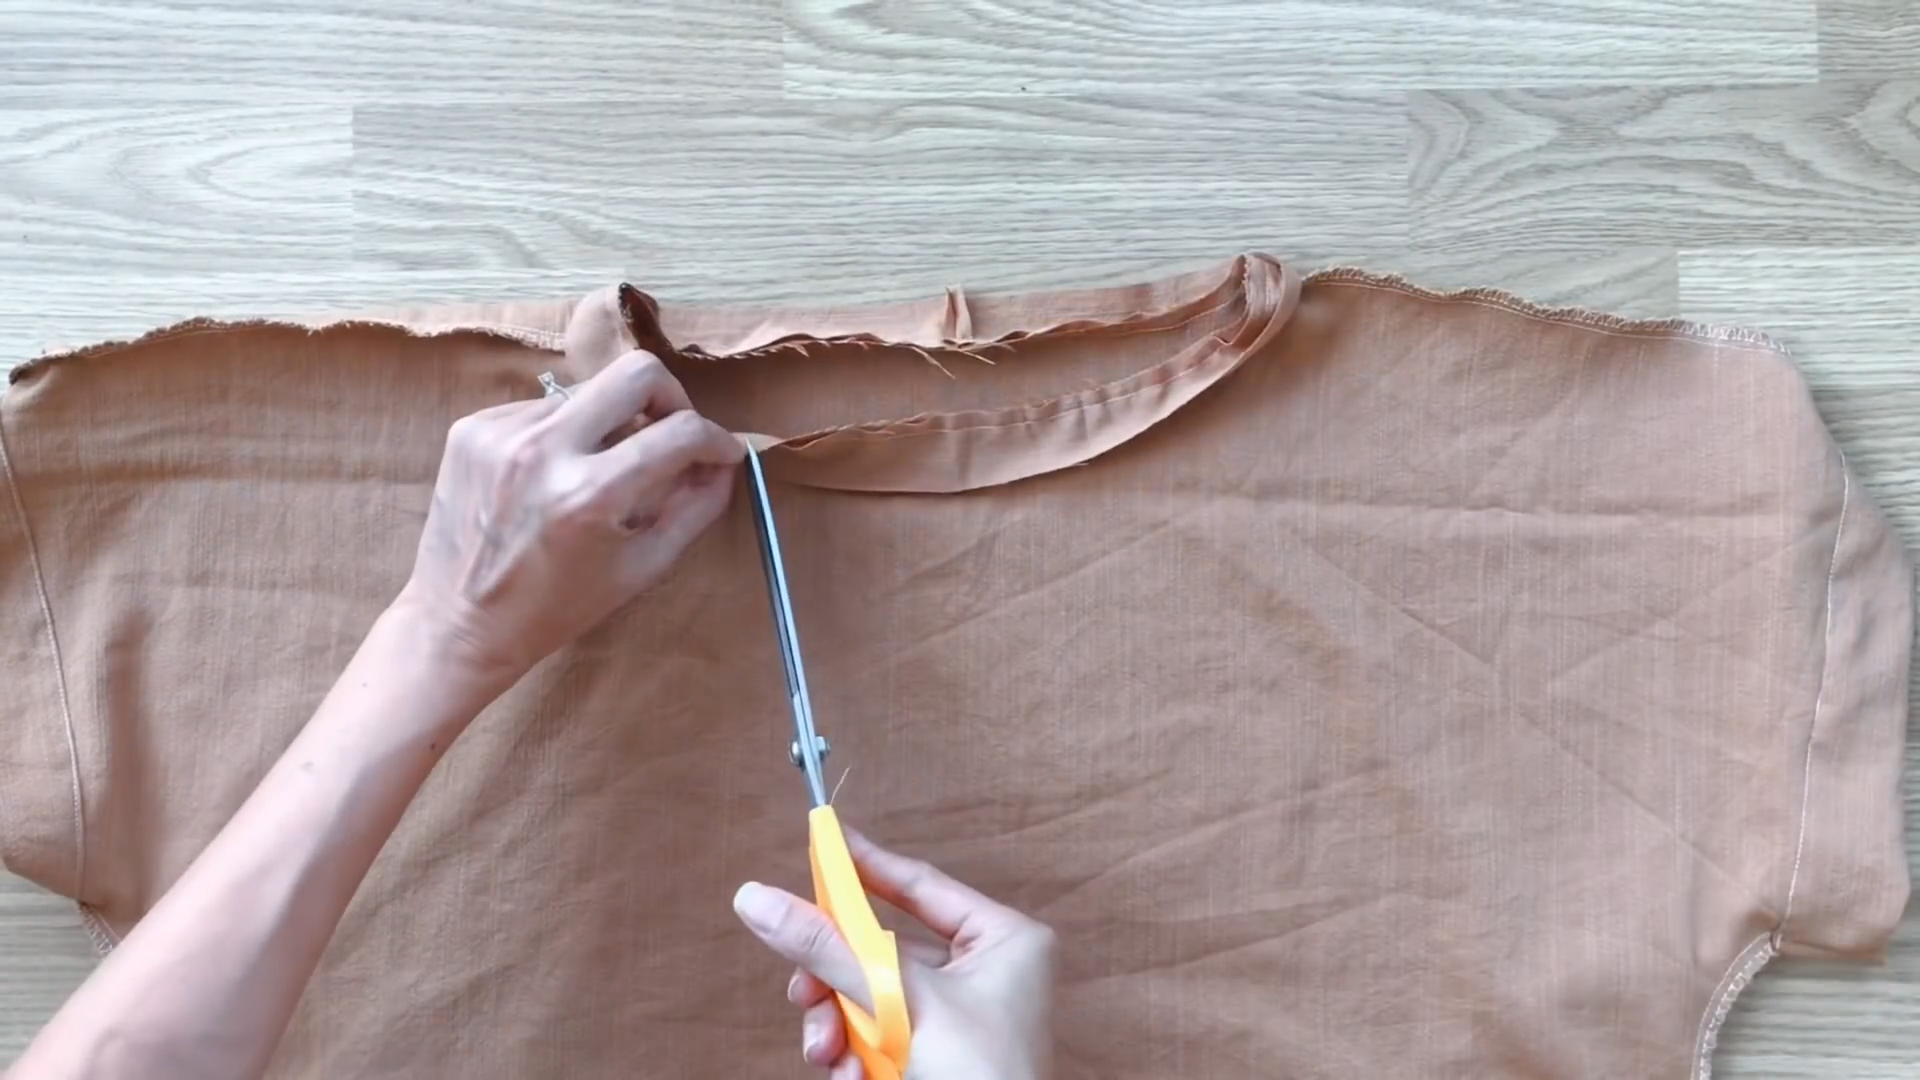
After the first seam, make a few small cuts at the curve of the neck first. This will make the neck look nicer when you fold the fabric in.
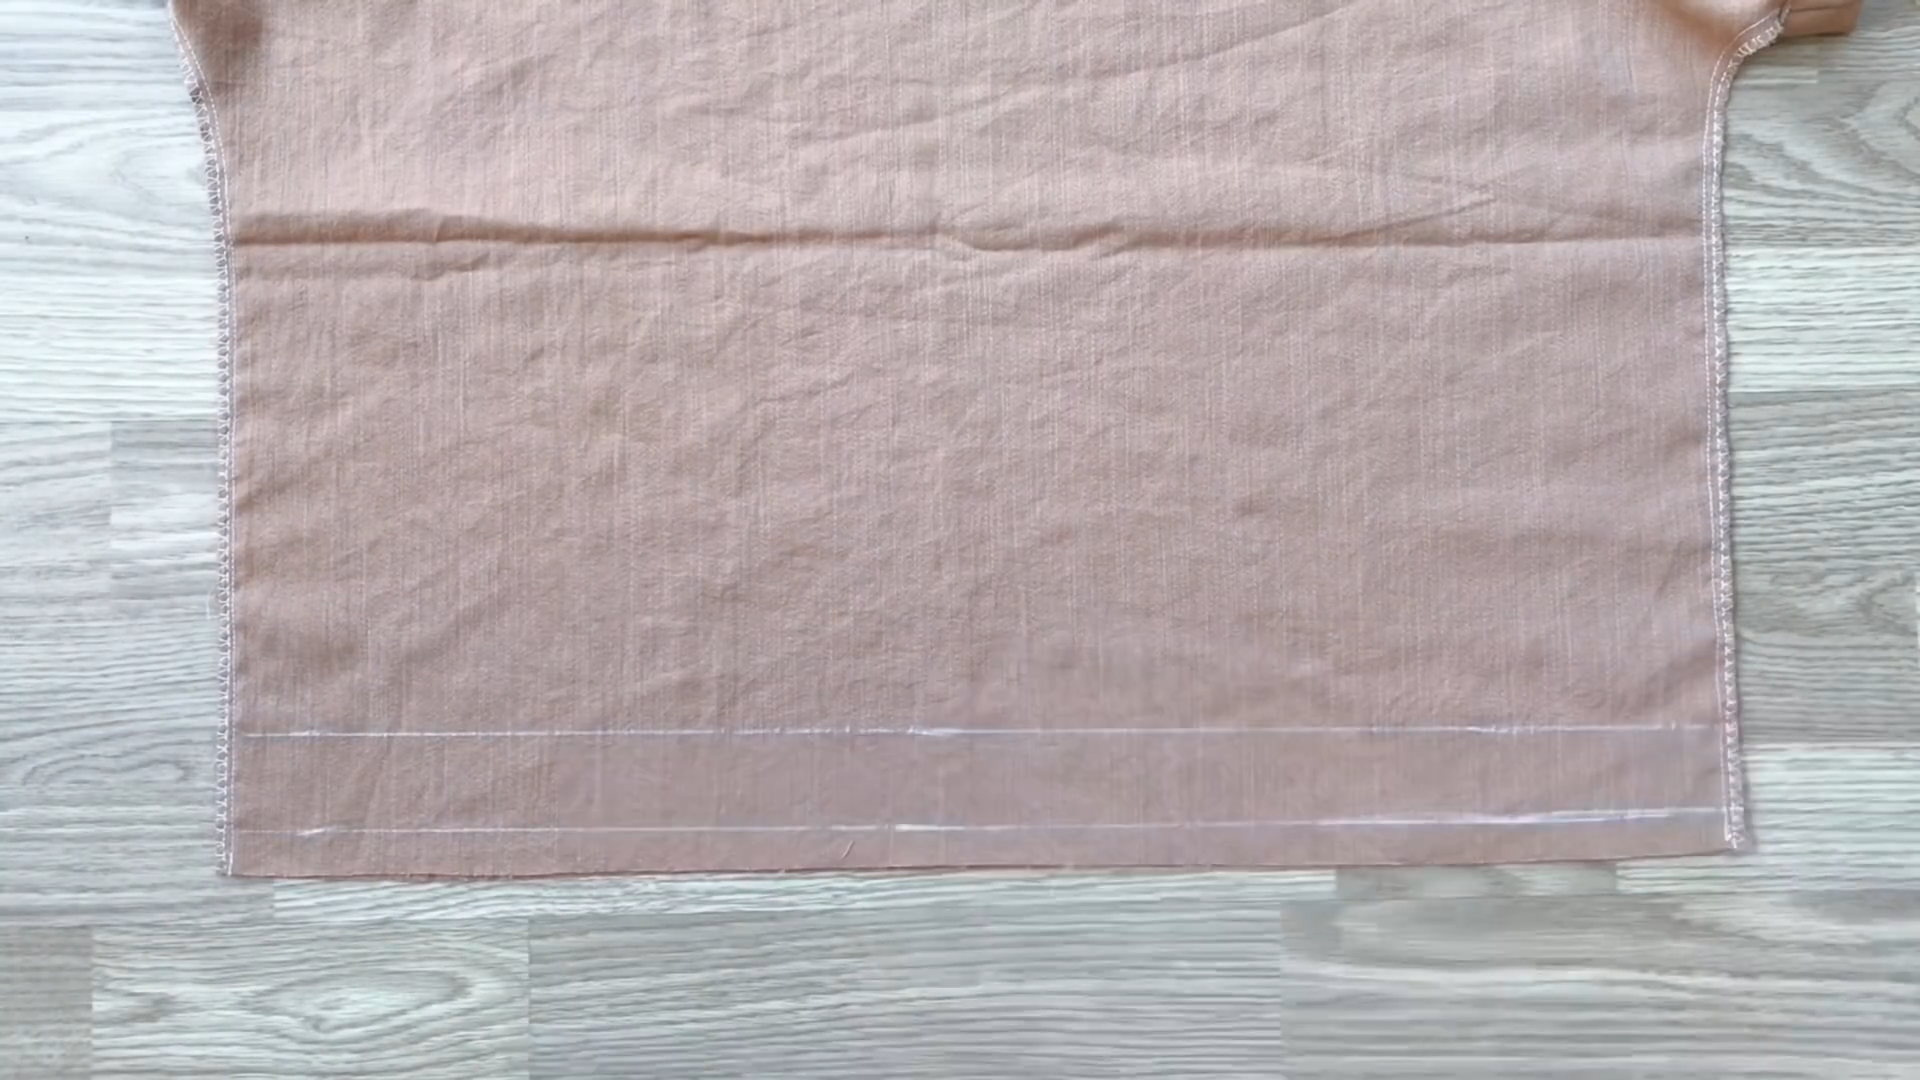
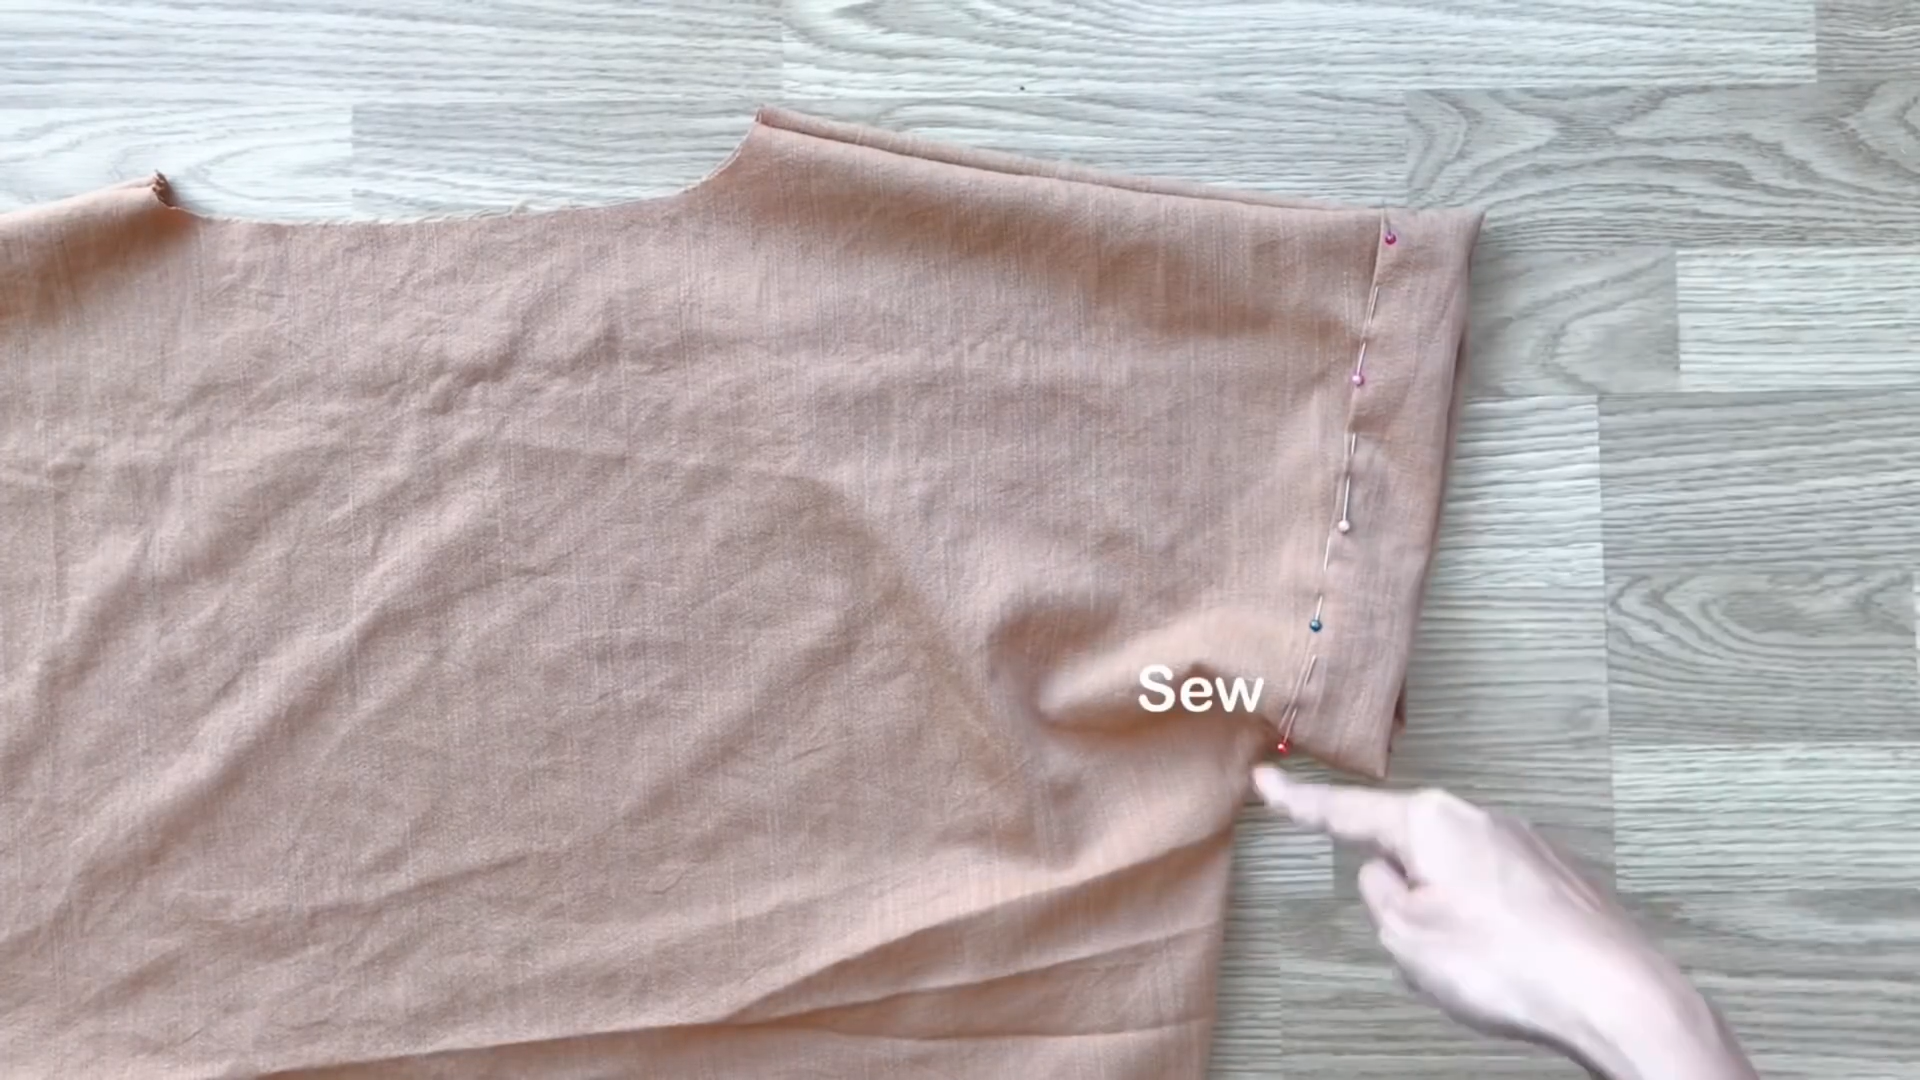
To finish the end of the top, draw two lines with one and a half centimeters and 5 centimeters from the ending line.
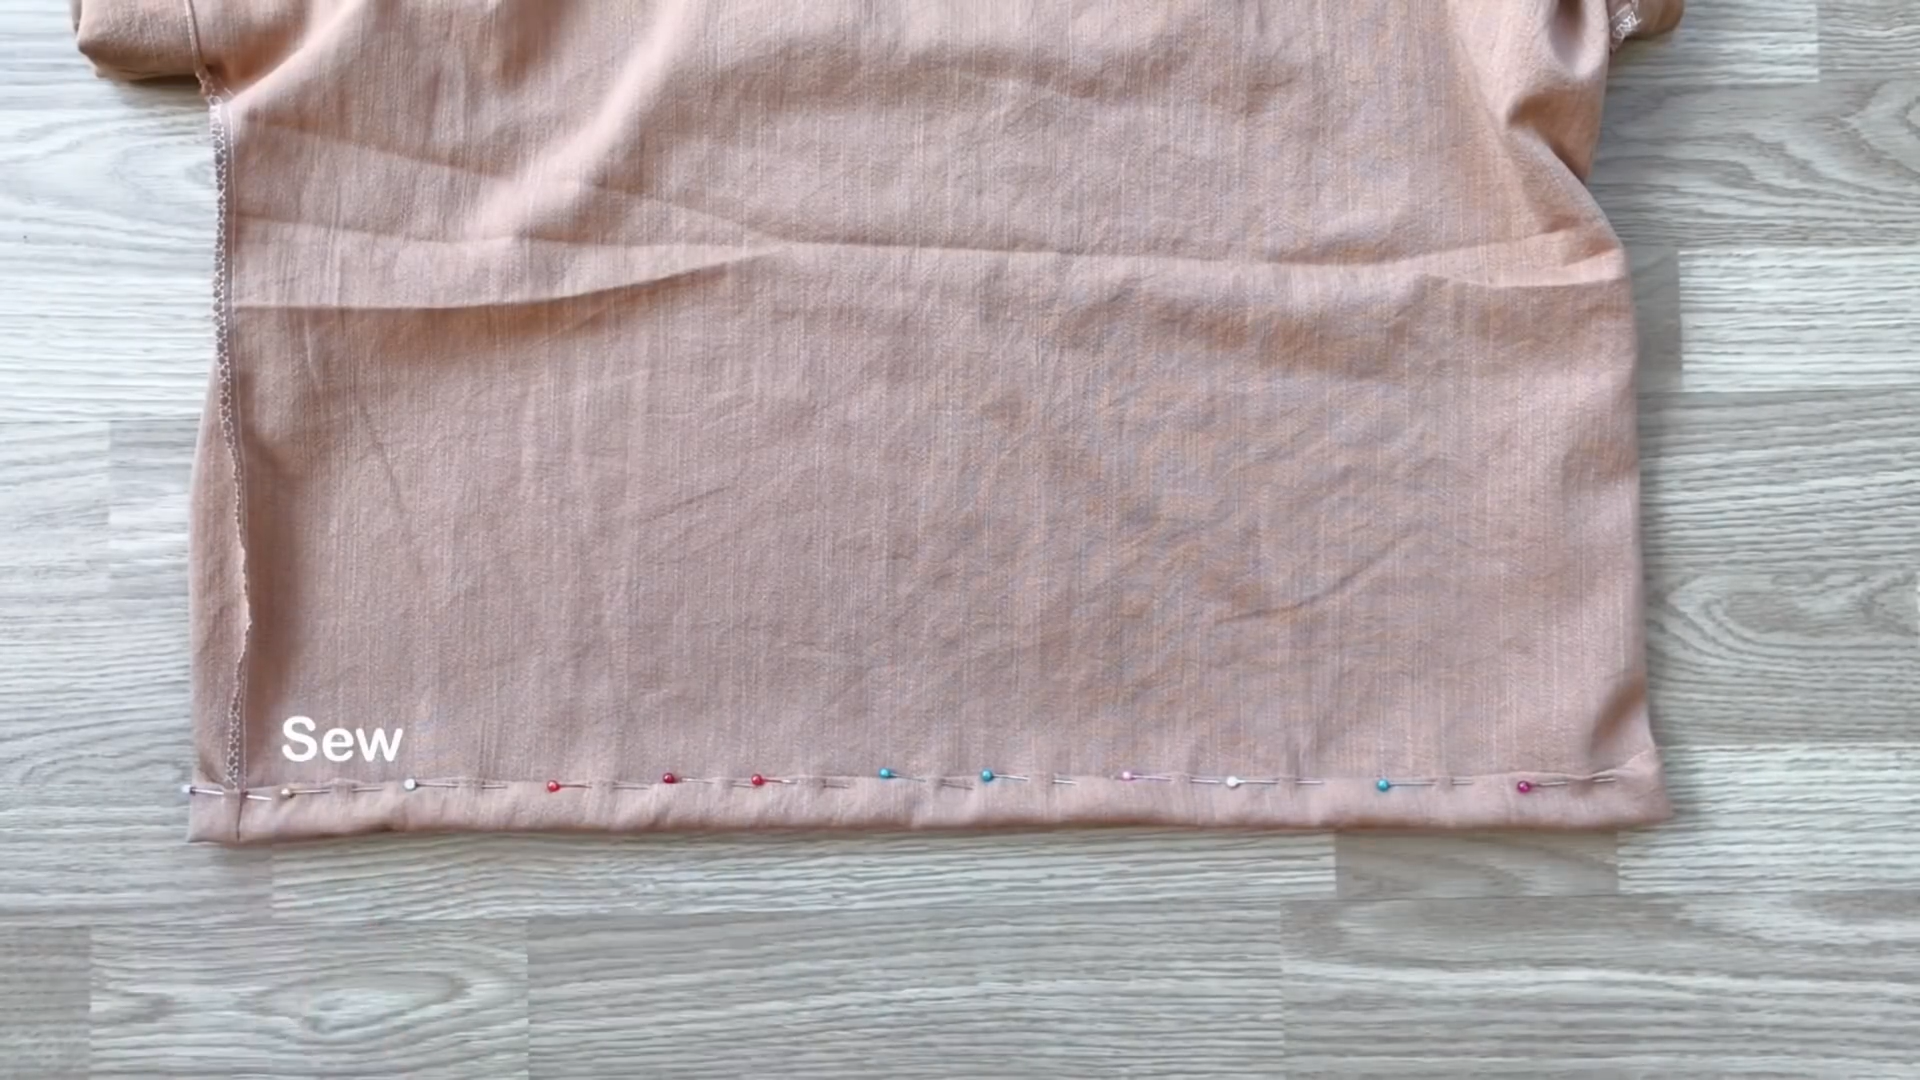
Fold the ending light to the first line first then keep folding it to the second line and sewing.
DIY Pajamas set
And that's a wrap!
This DIY pajama set turned out super cute and comfy.
Give it a try—it's easier than you think!
I hope you’ve enjoyed this journey as much as I have. If you’ve found this DIY helpful and enjoyable, please check it out and try it for yourself.
Until then, see you next week!