DIY PEARL BRA - Step by step tutorial for beginners

DIY PEARL BRA - Step by step tutorial for beginners
Welcome or welcome back to my channel. My name is Jess and I love doing DIY, making clothes in a "simply but pretty" way.
Today's tutorial, I'm going to share with you how I made this Pearl bra. It was a big trend last year and I really love it. So even it's a little late update now, I still want to make it.
So let’s get started!
WHAT YOU’LL NEED
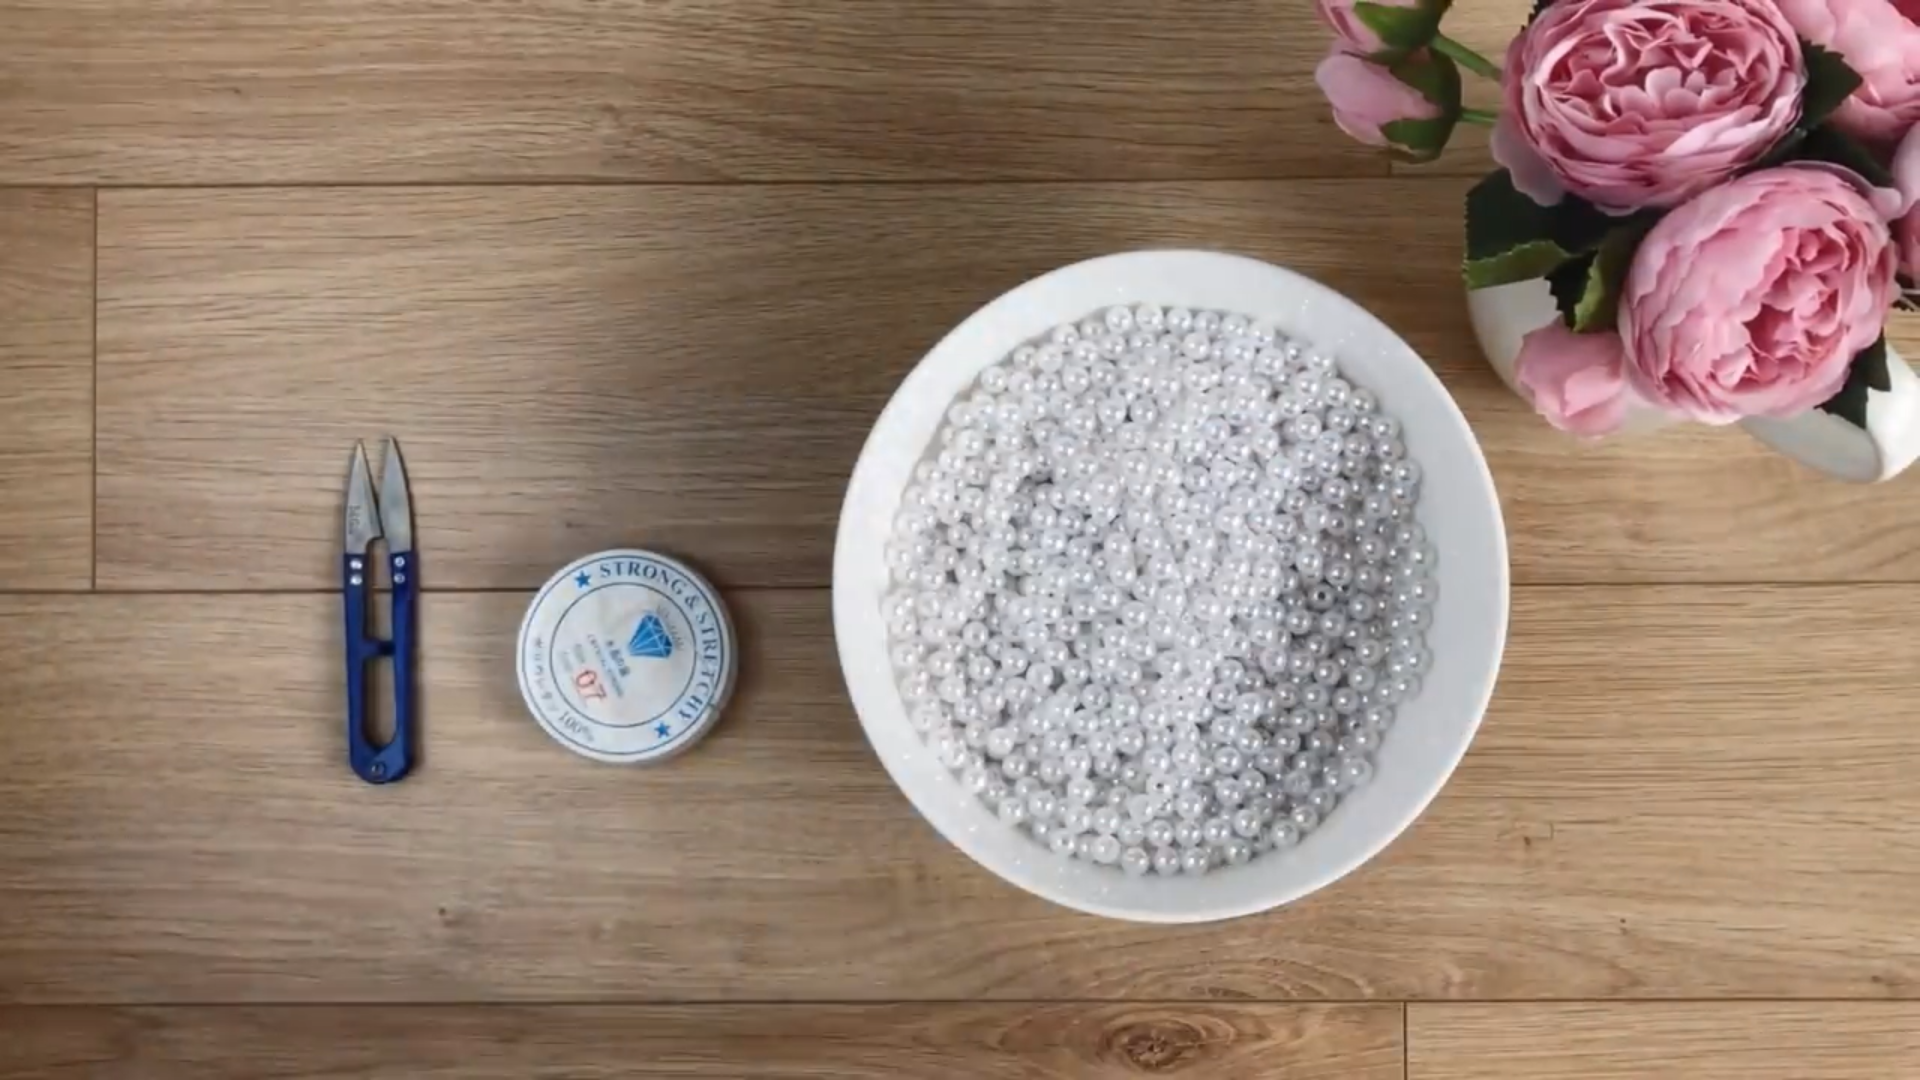
Pearl (around 0.8 cm for the width of the pearl)
Crystal string (non or not too stretchy)
Scissors
SEWING THE BRA
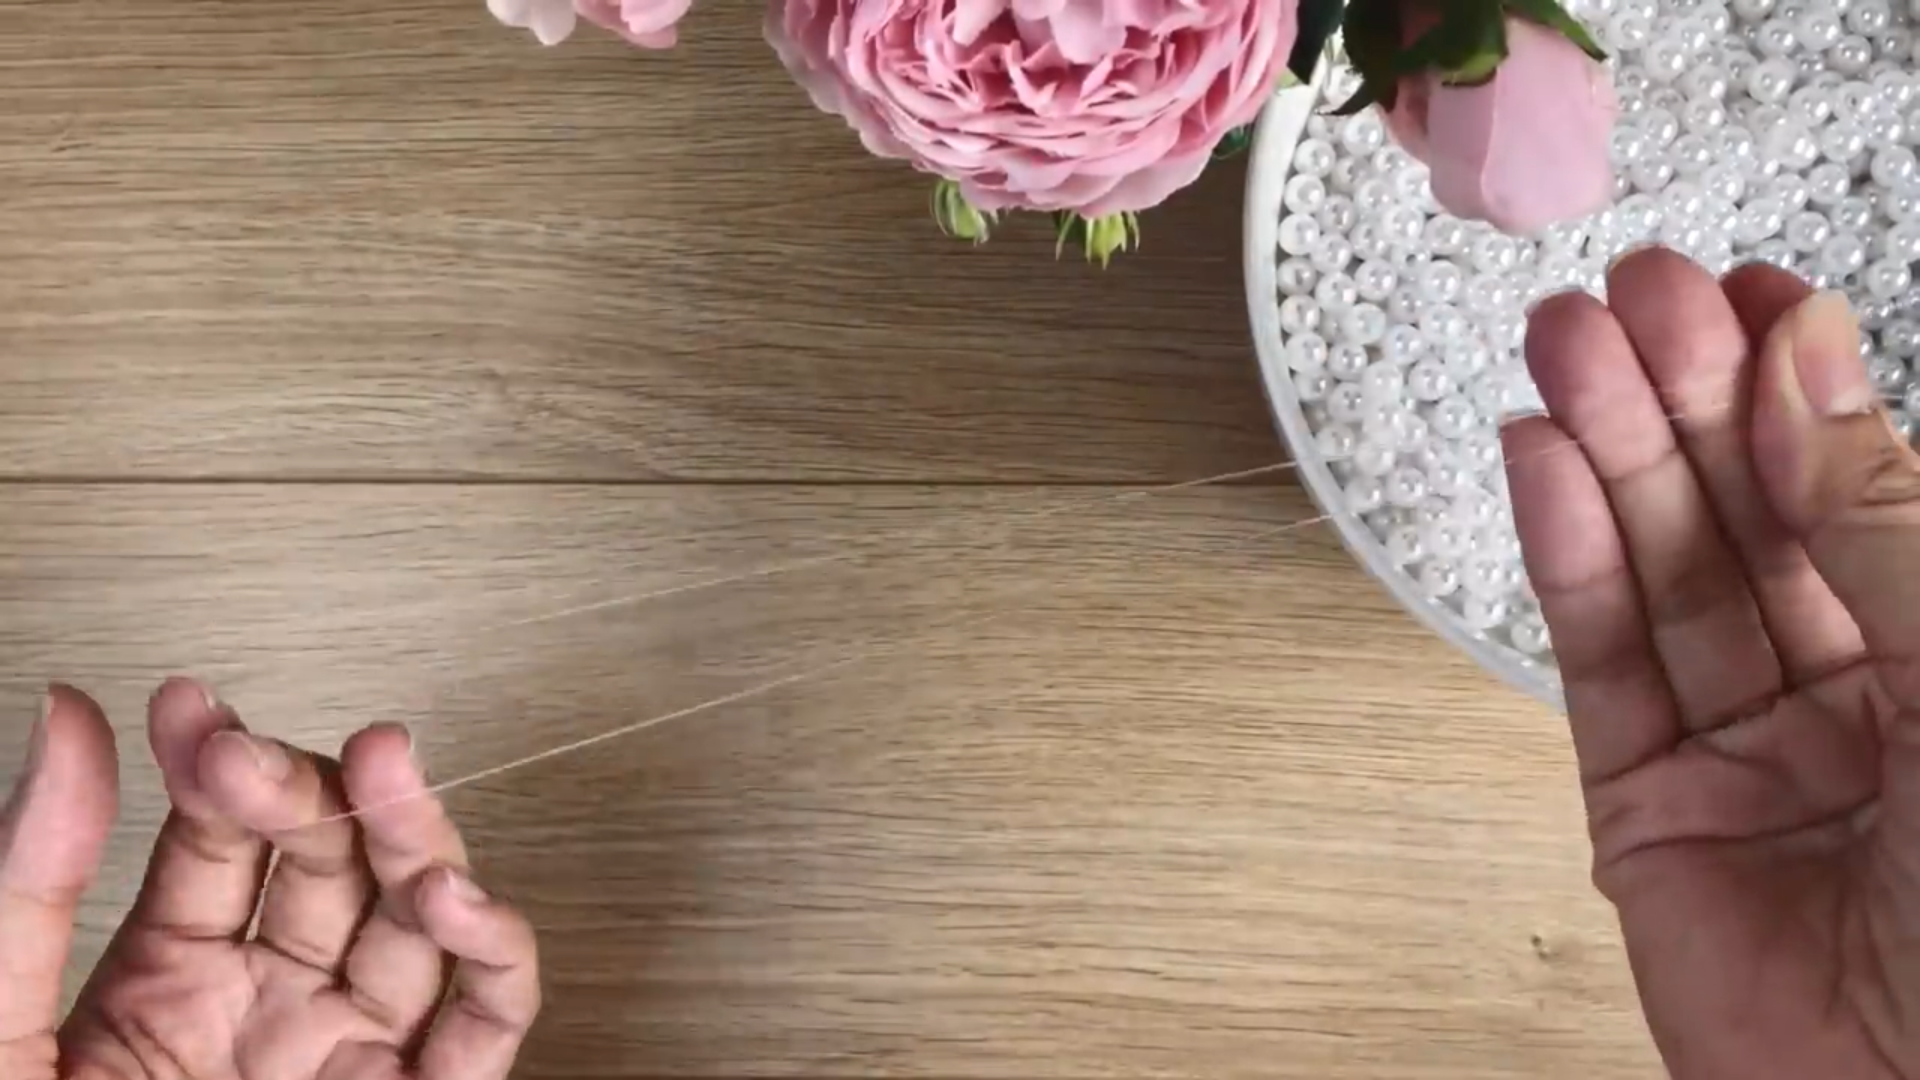
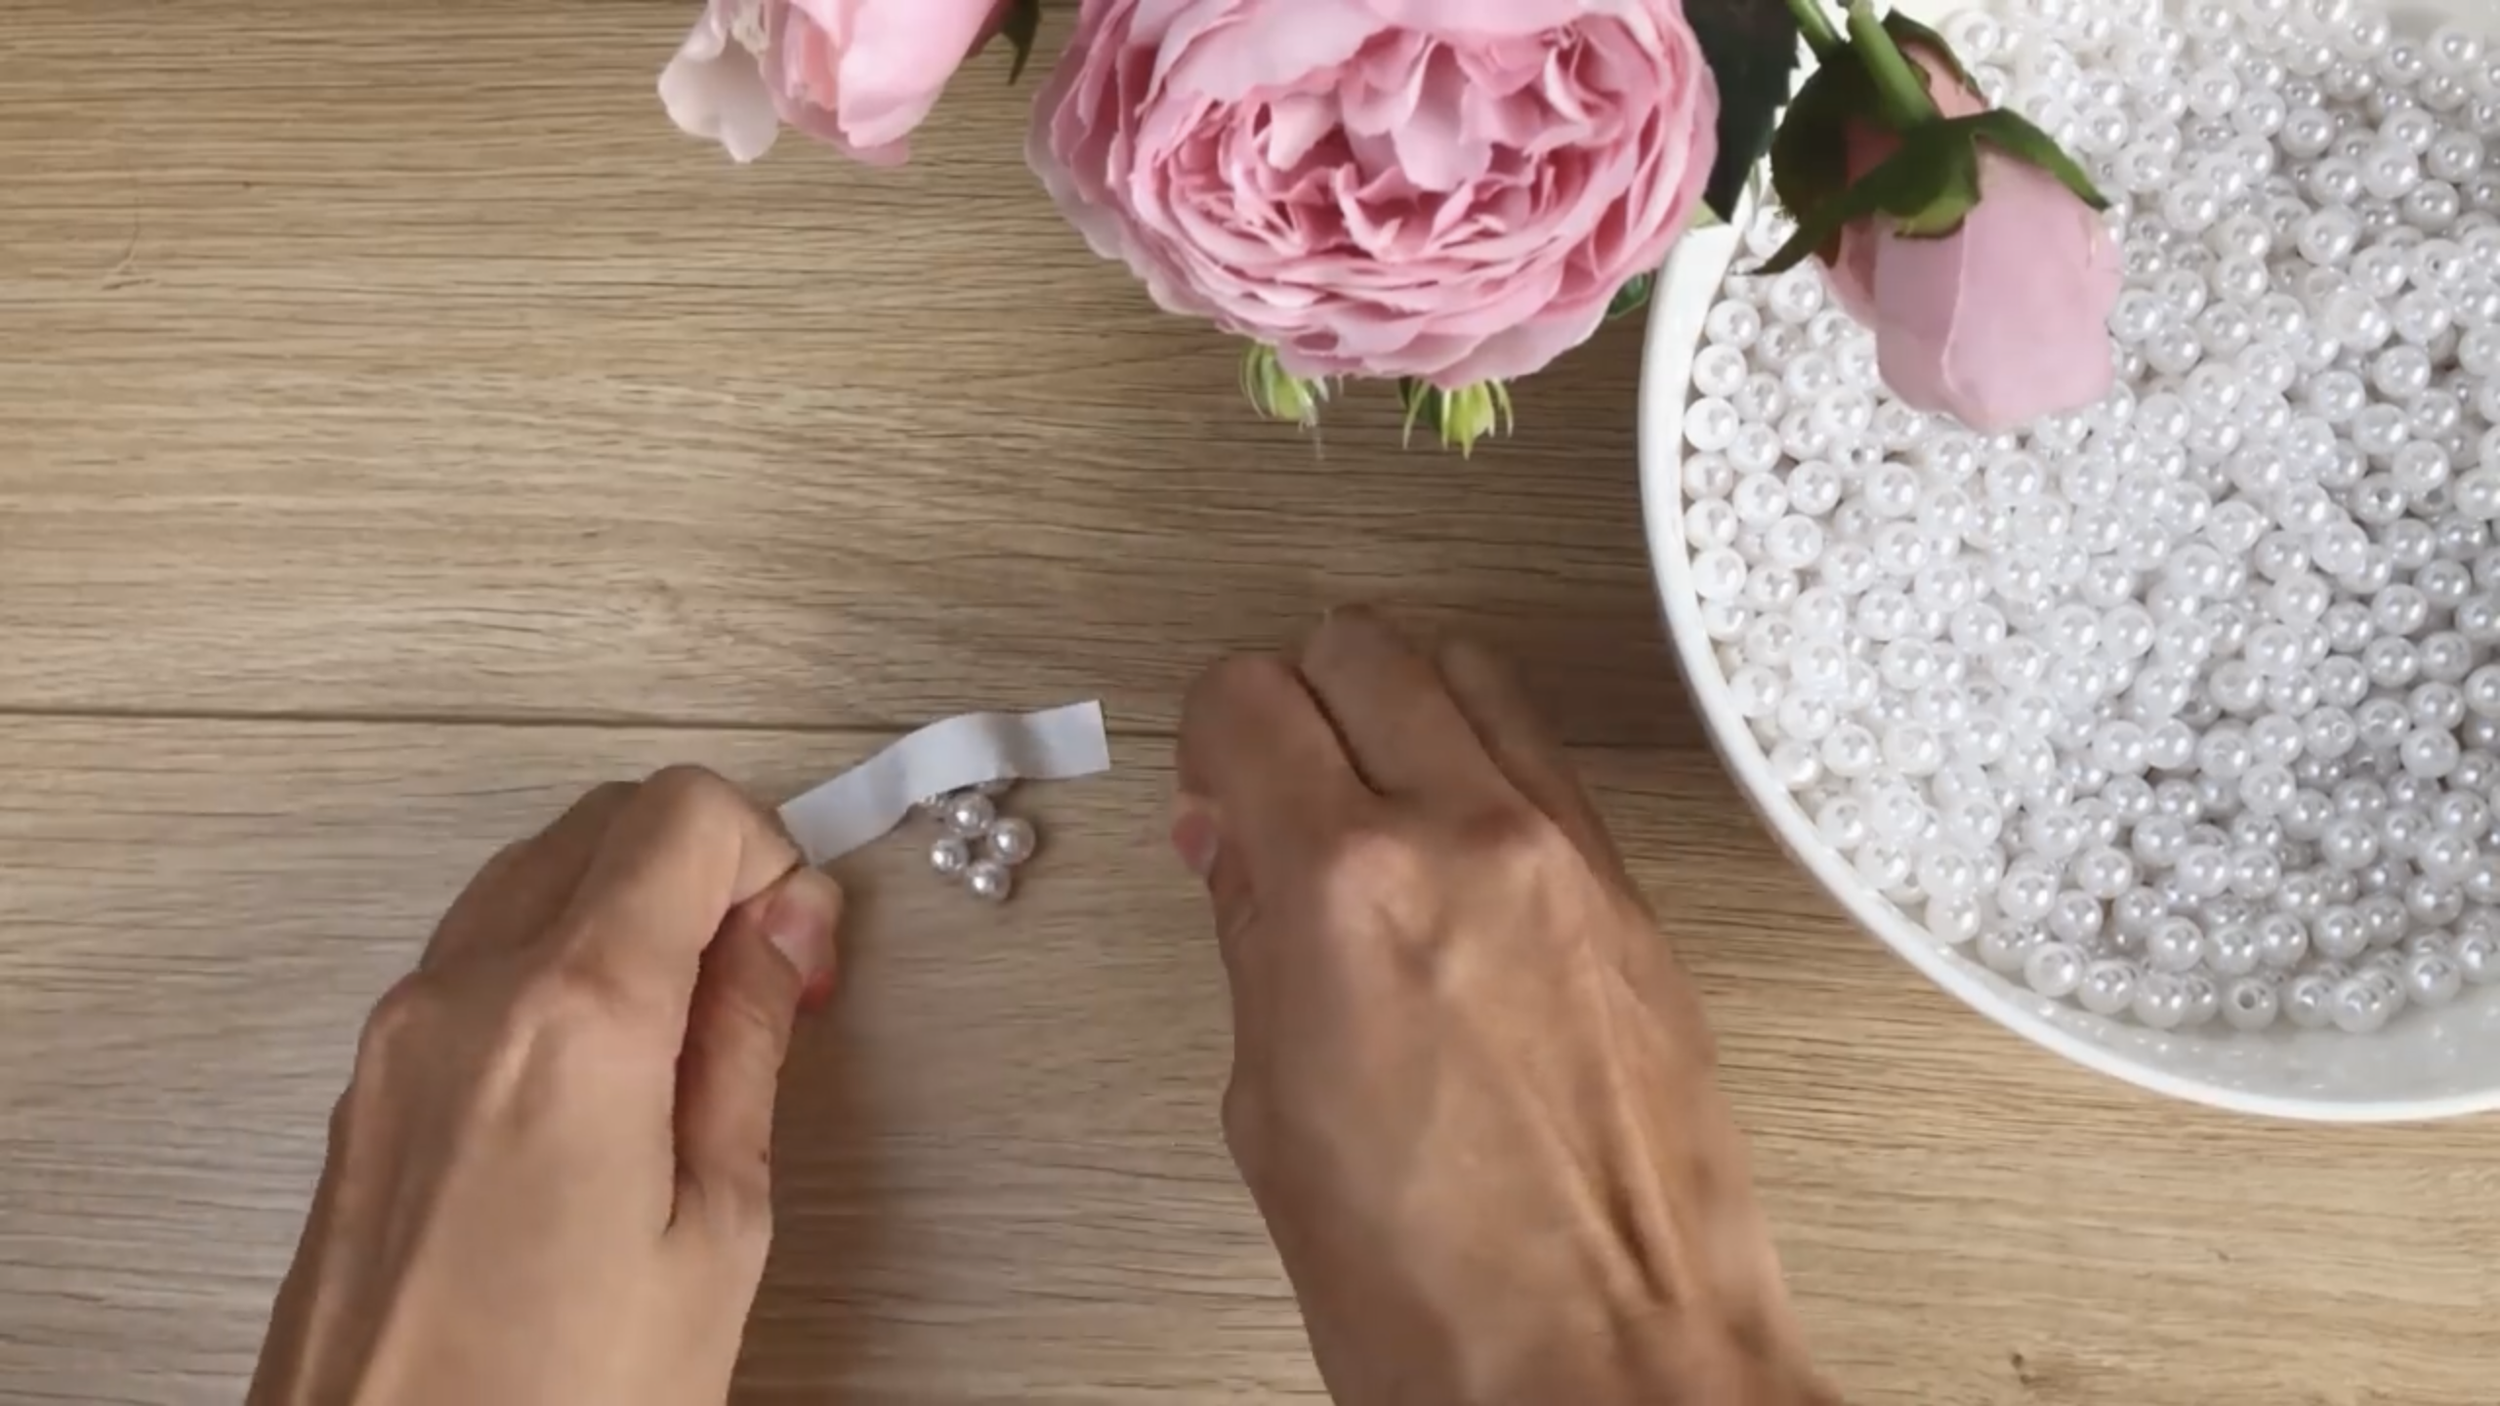
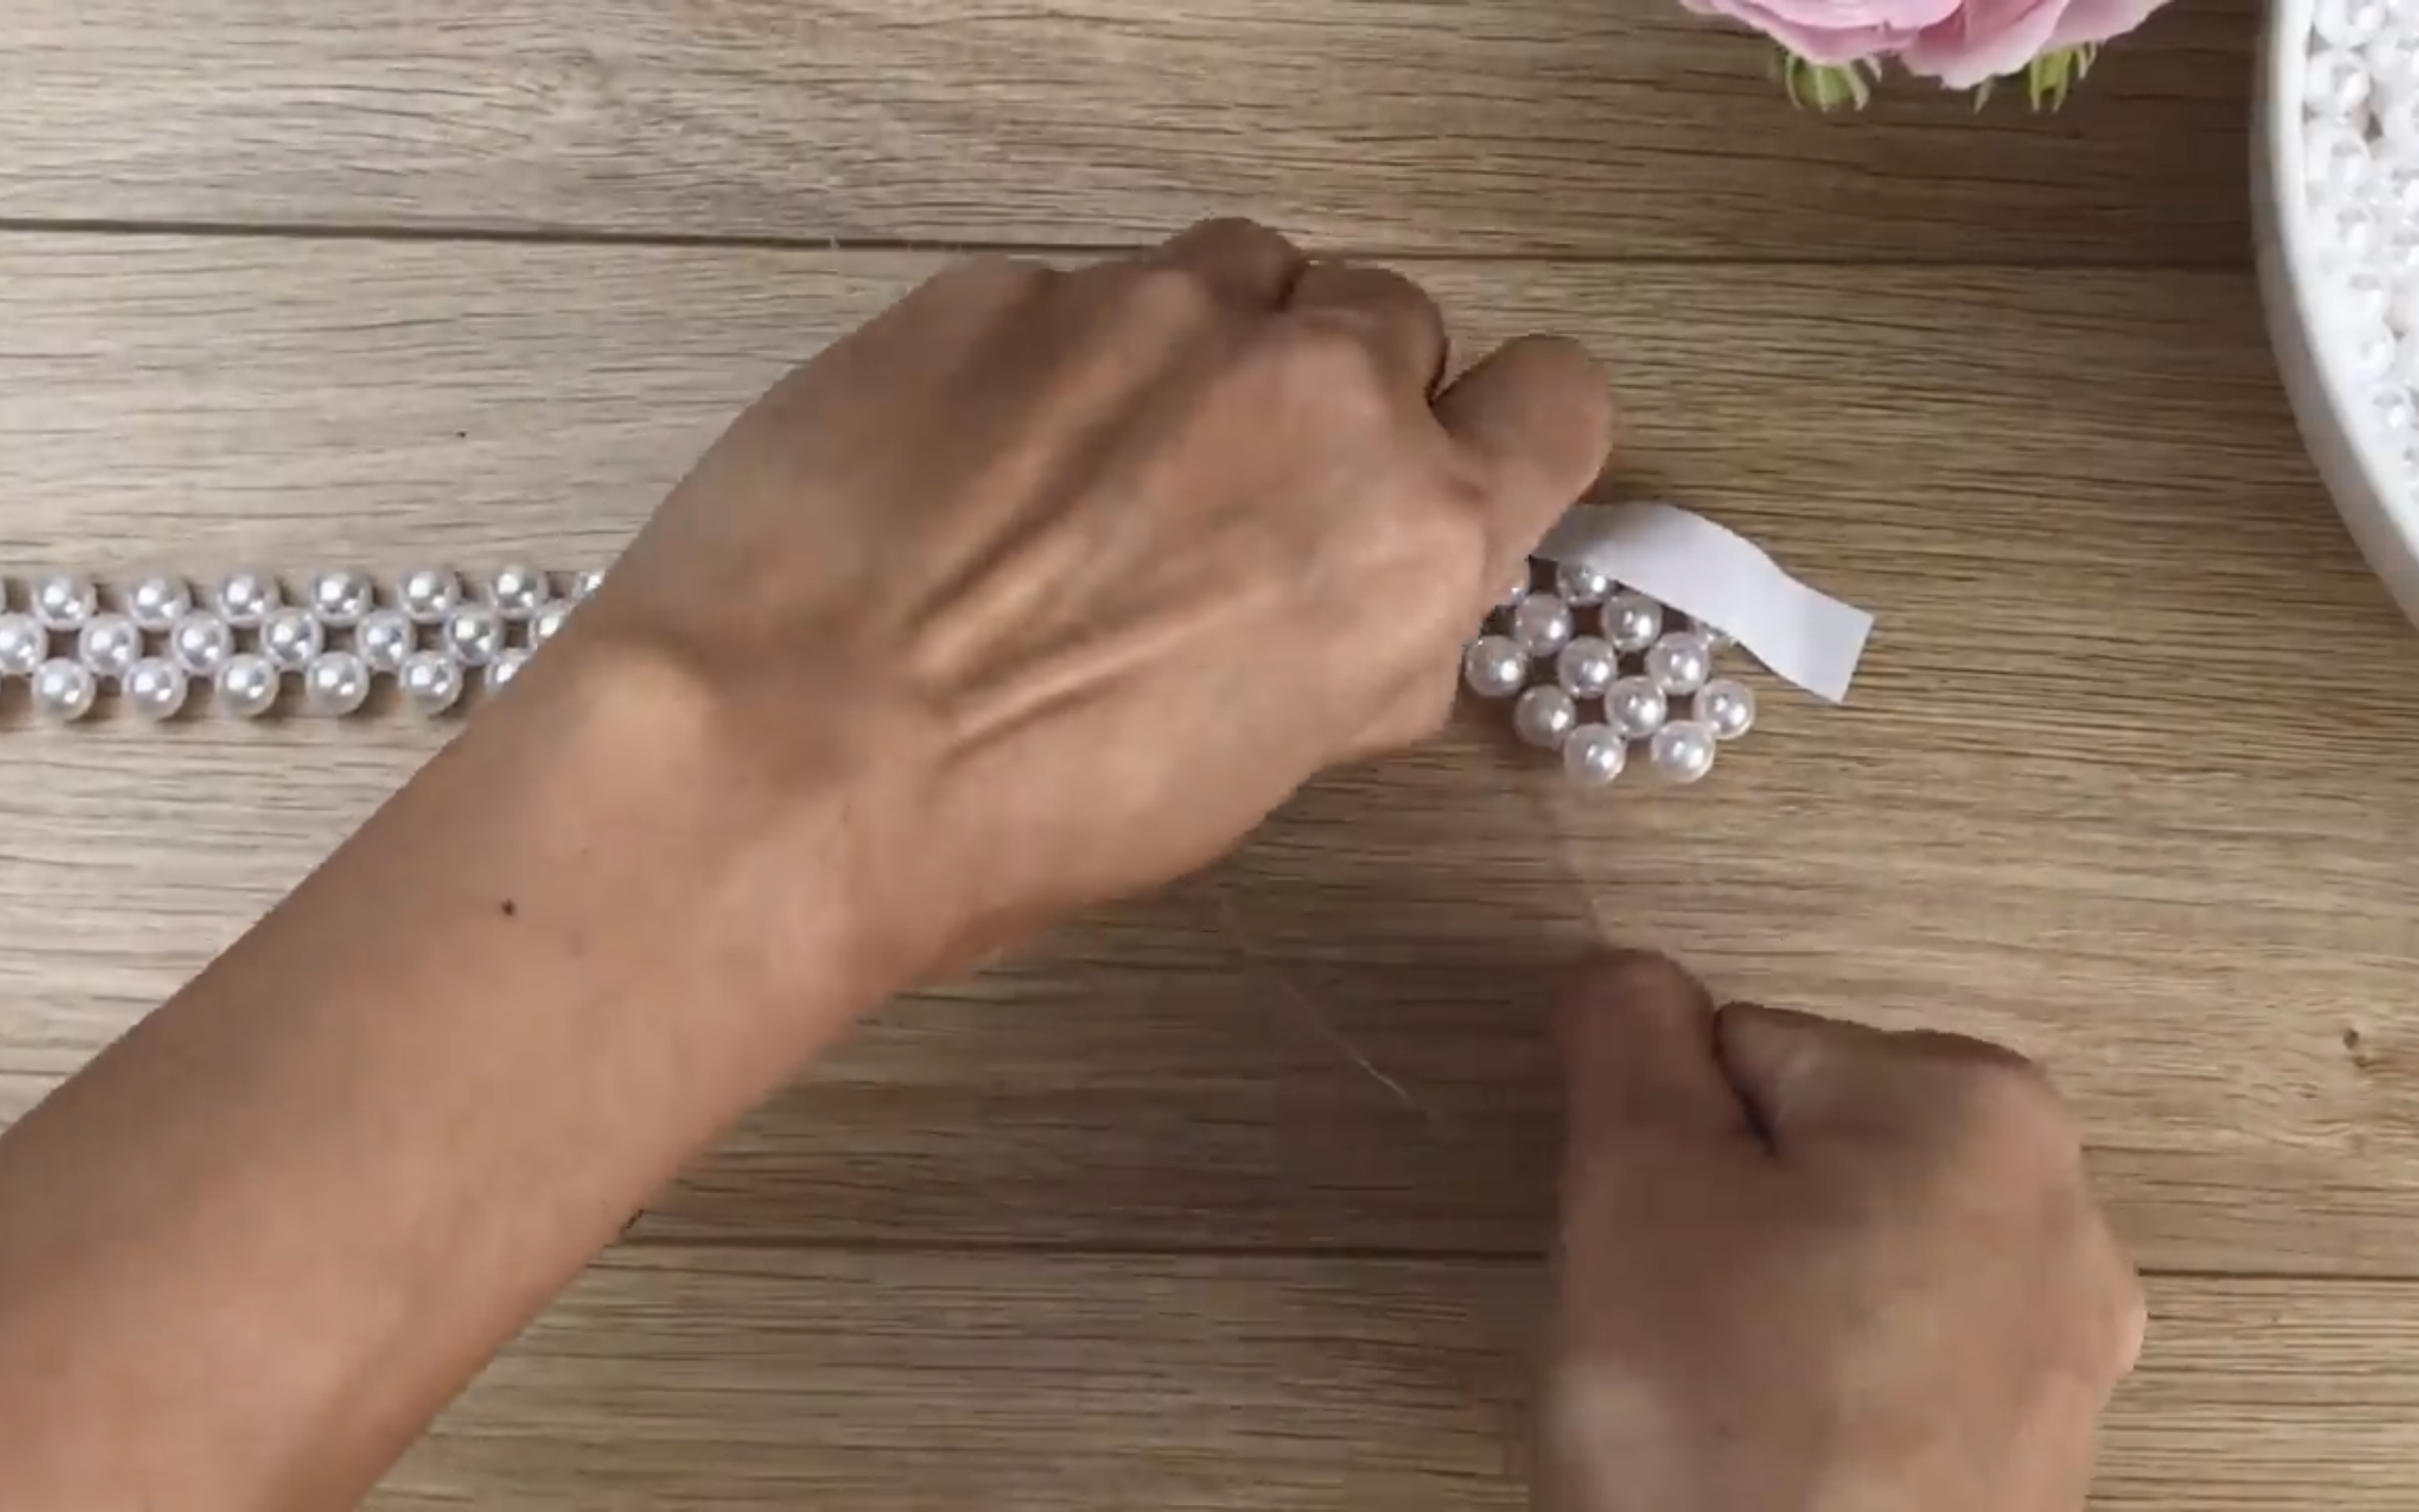
The first step, cut around 30 cm of crystal string.
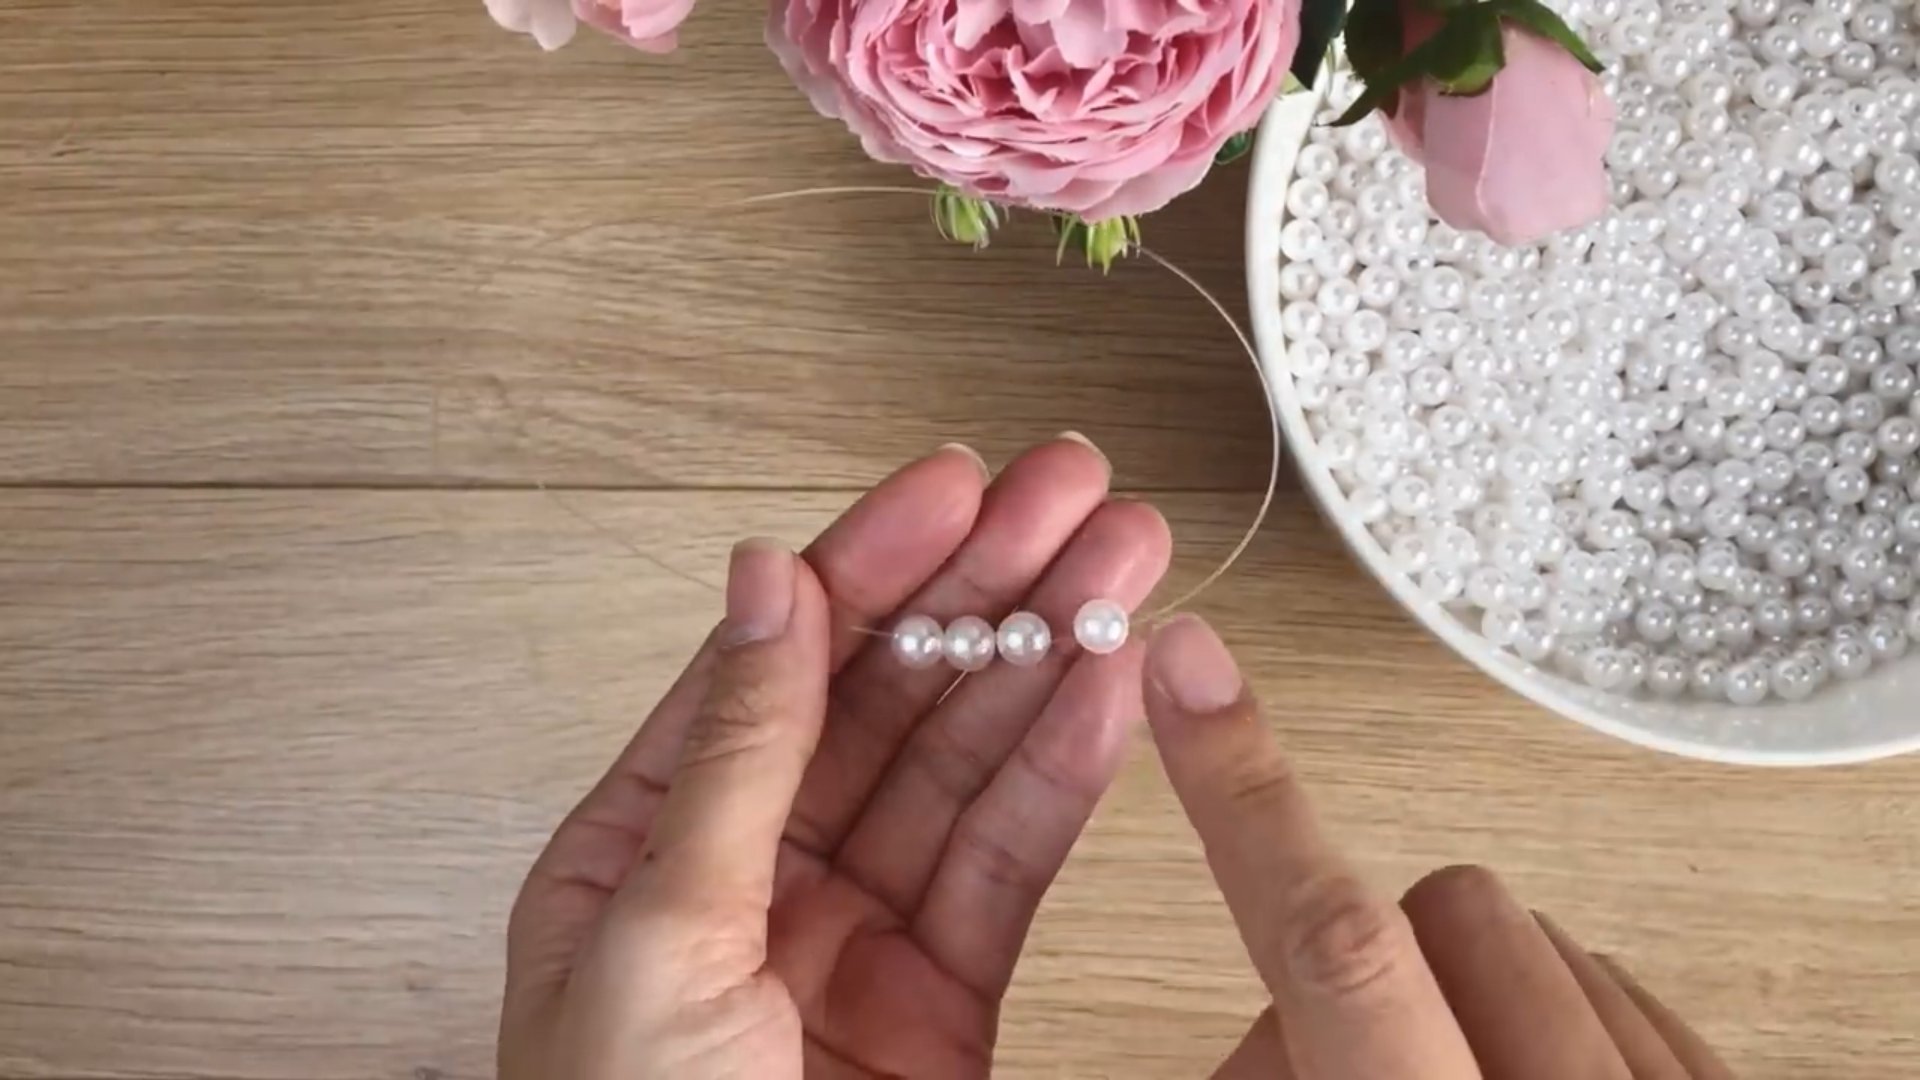
Then, put 4 pearls into the middle length of the string.
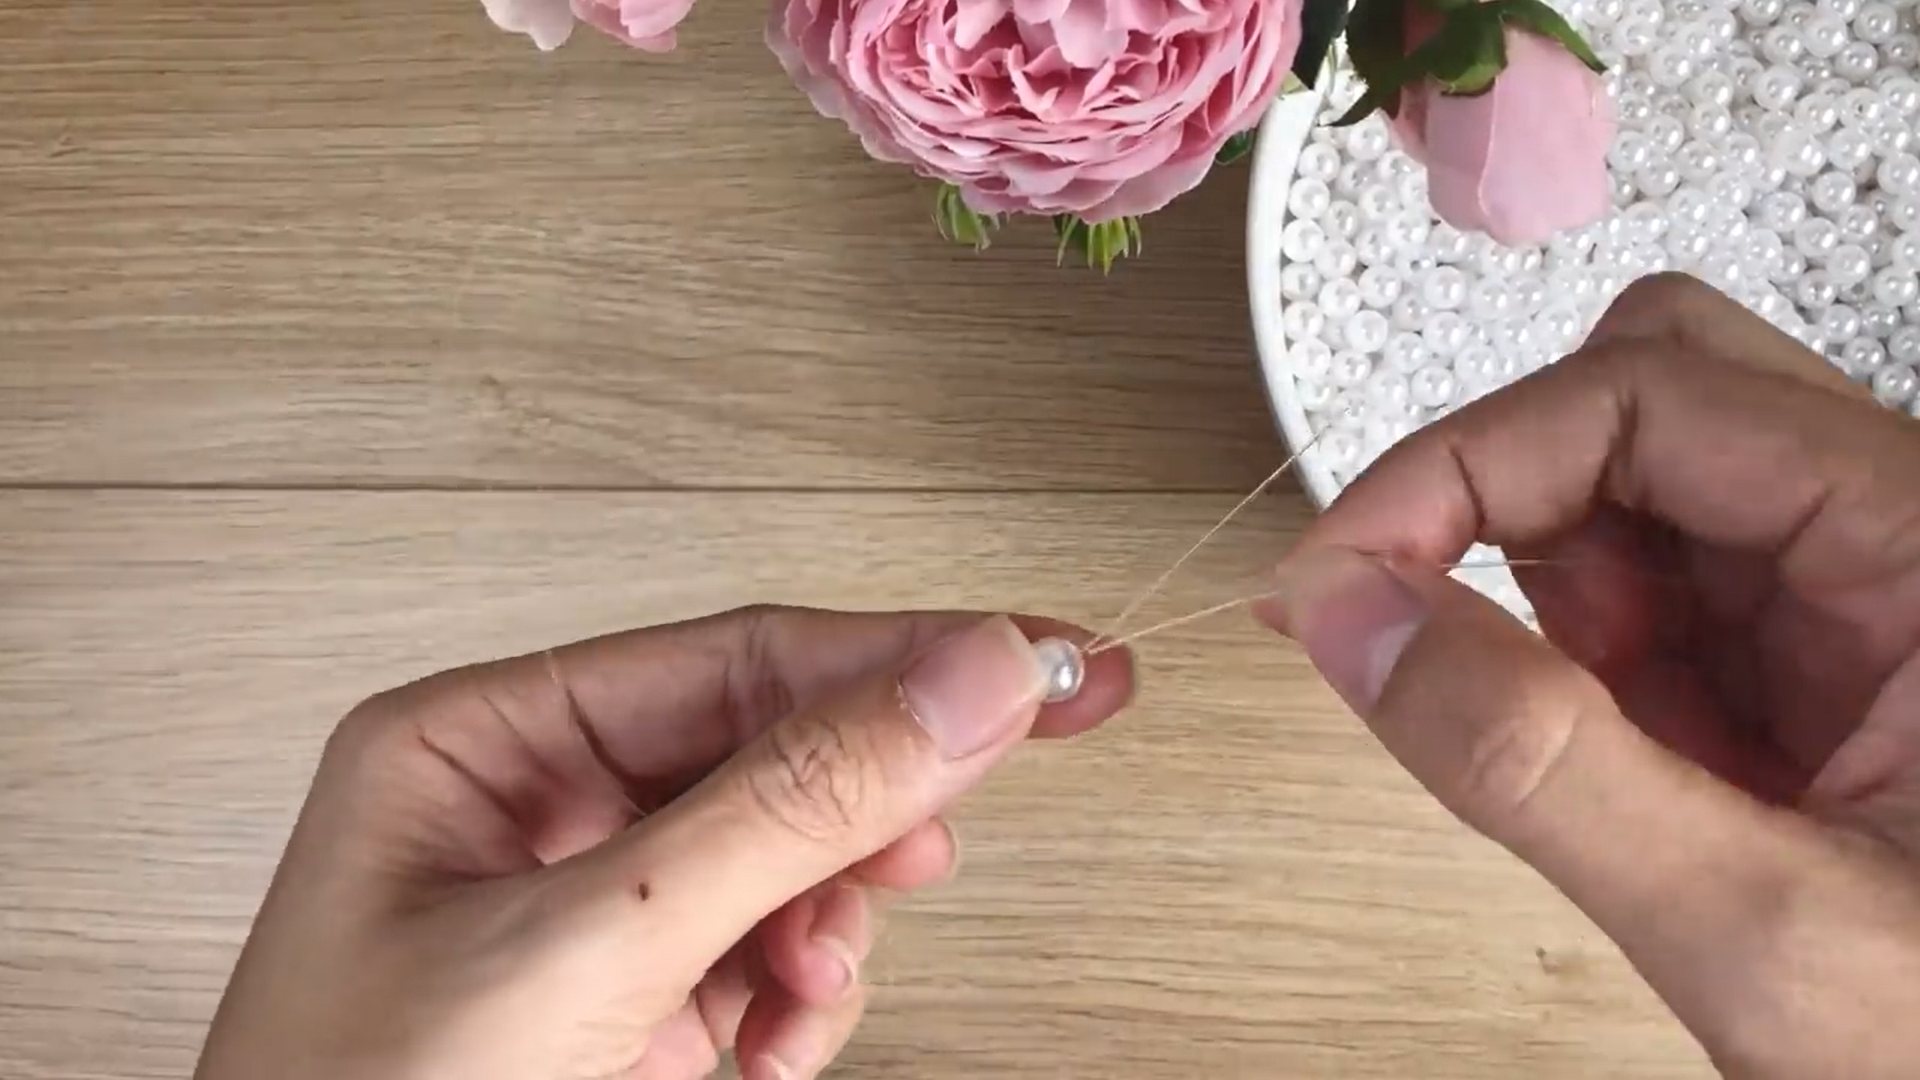
Put one end of the string back into one pearl on the same side to create a little hole. So, you can put the other end of the string through it after that.
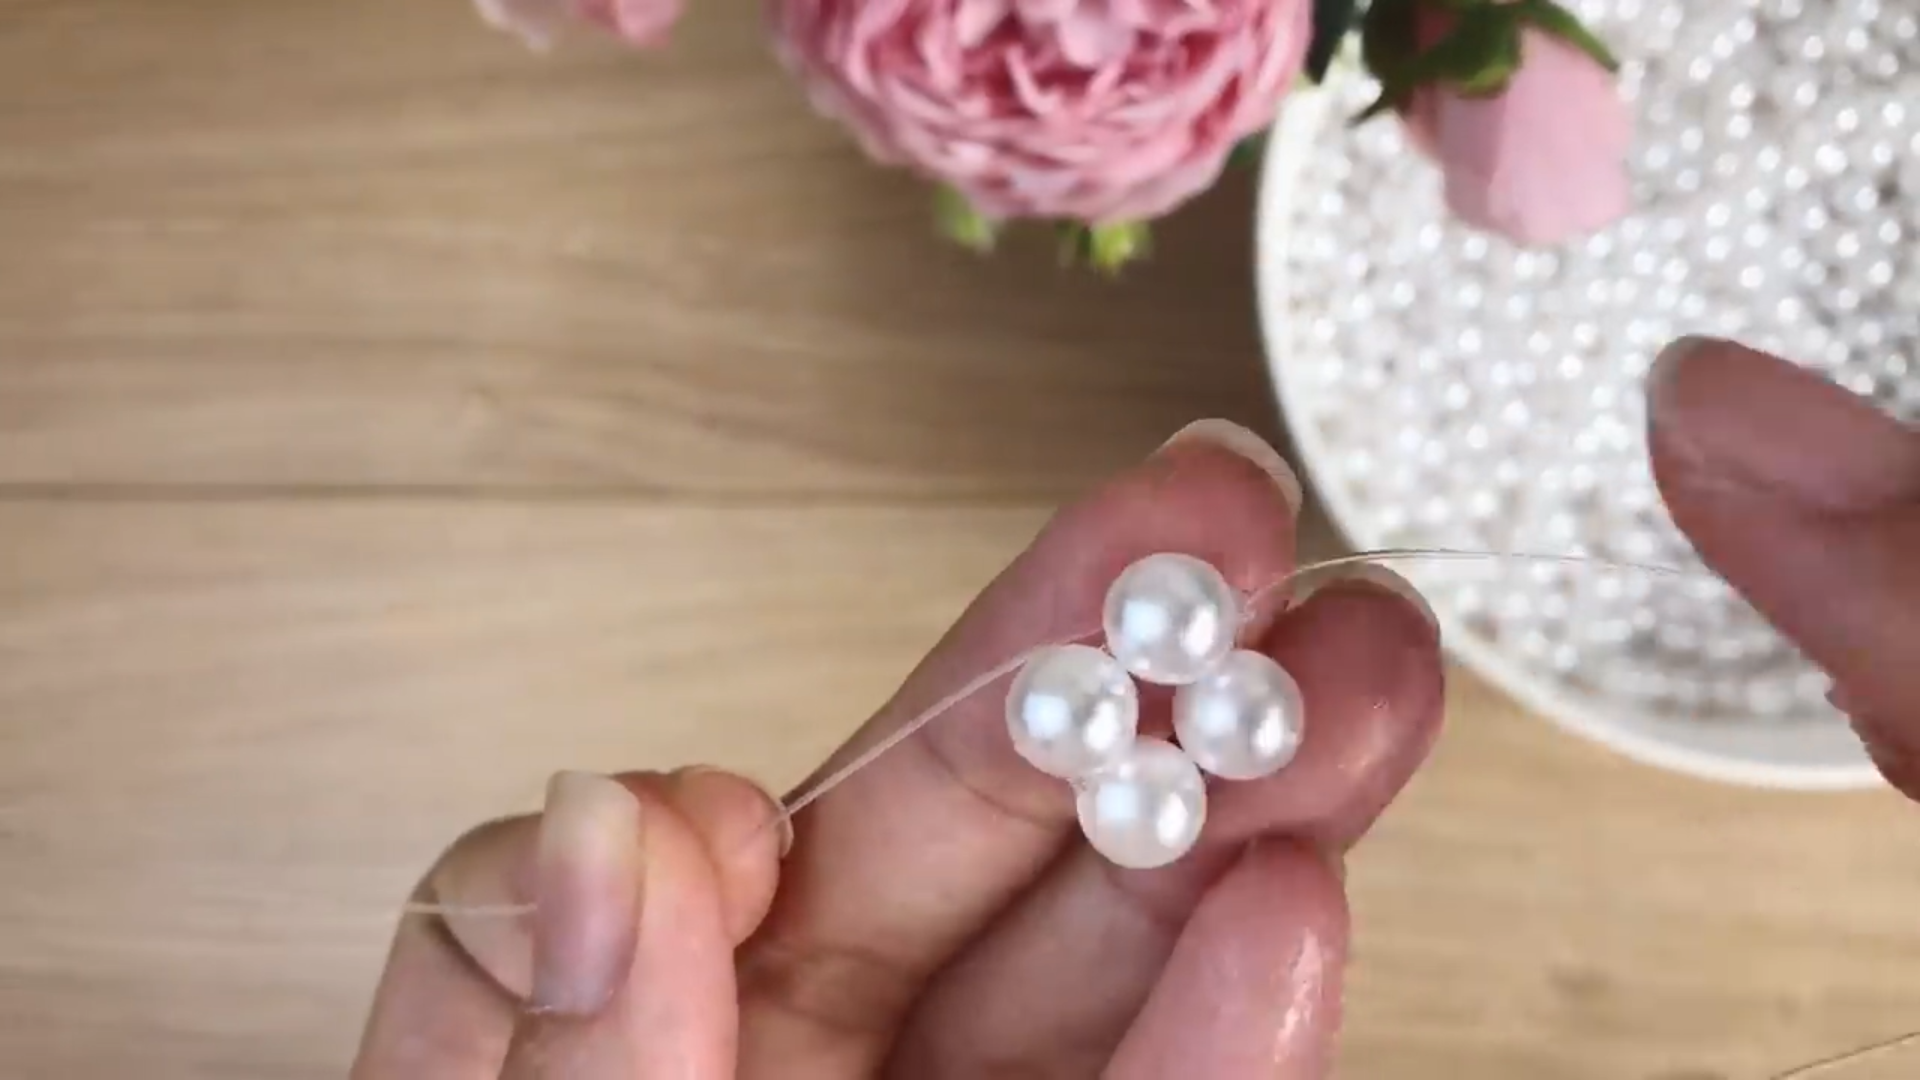
Use your hands to hide the connected part between 2 sides of the string inside the pearl. This is the first knot type.
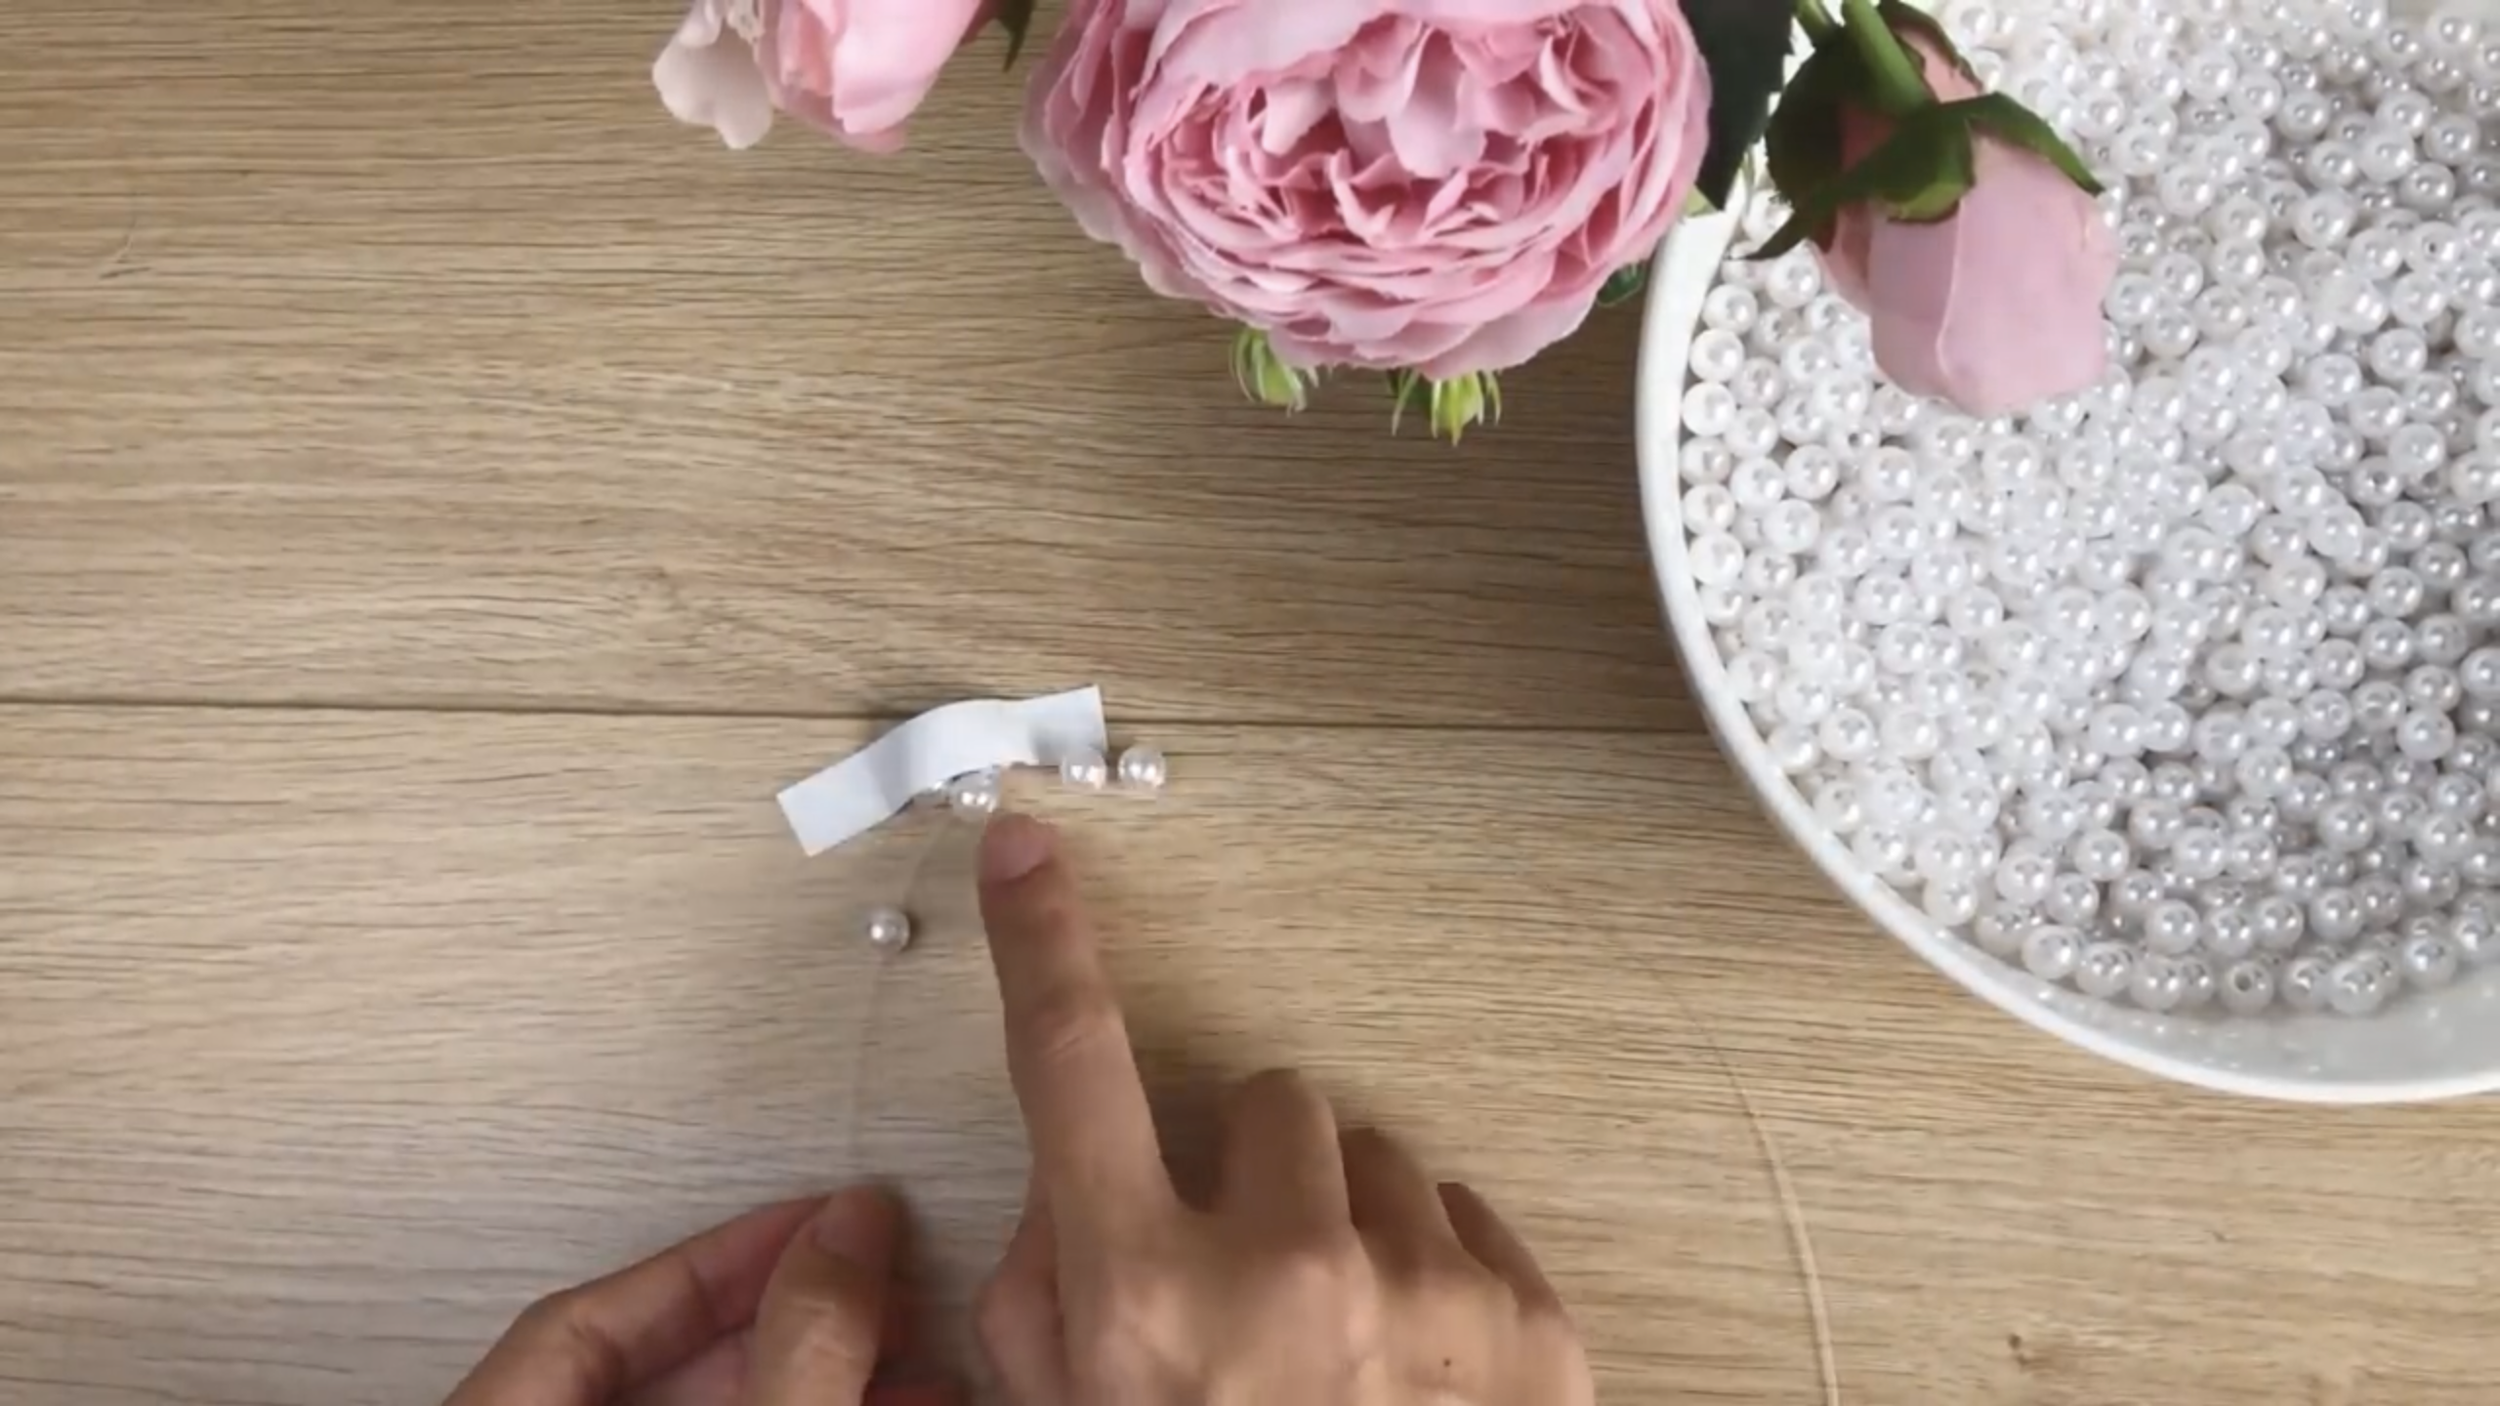
The next step, put 2 pearls on one side and one pearl on the other side.
And create the hole at the side of 2 pearls.
Then, put the end of the string at the other side through it. This is the second knot type.
This is the second knot type.
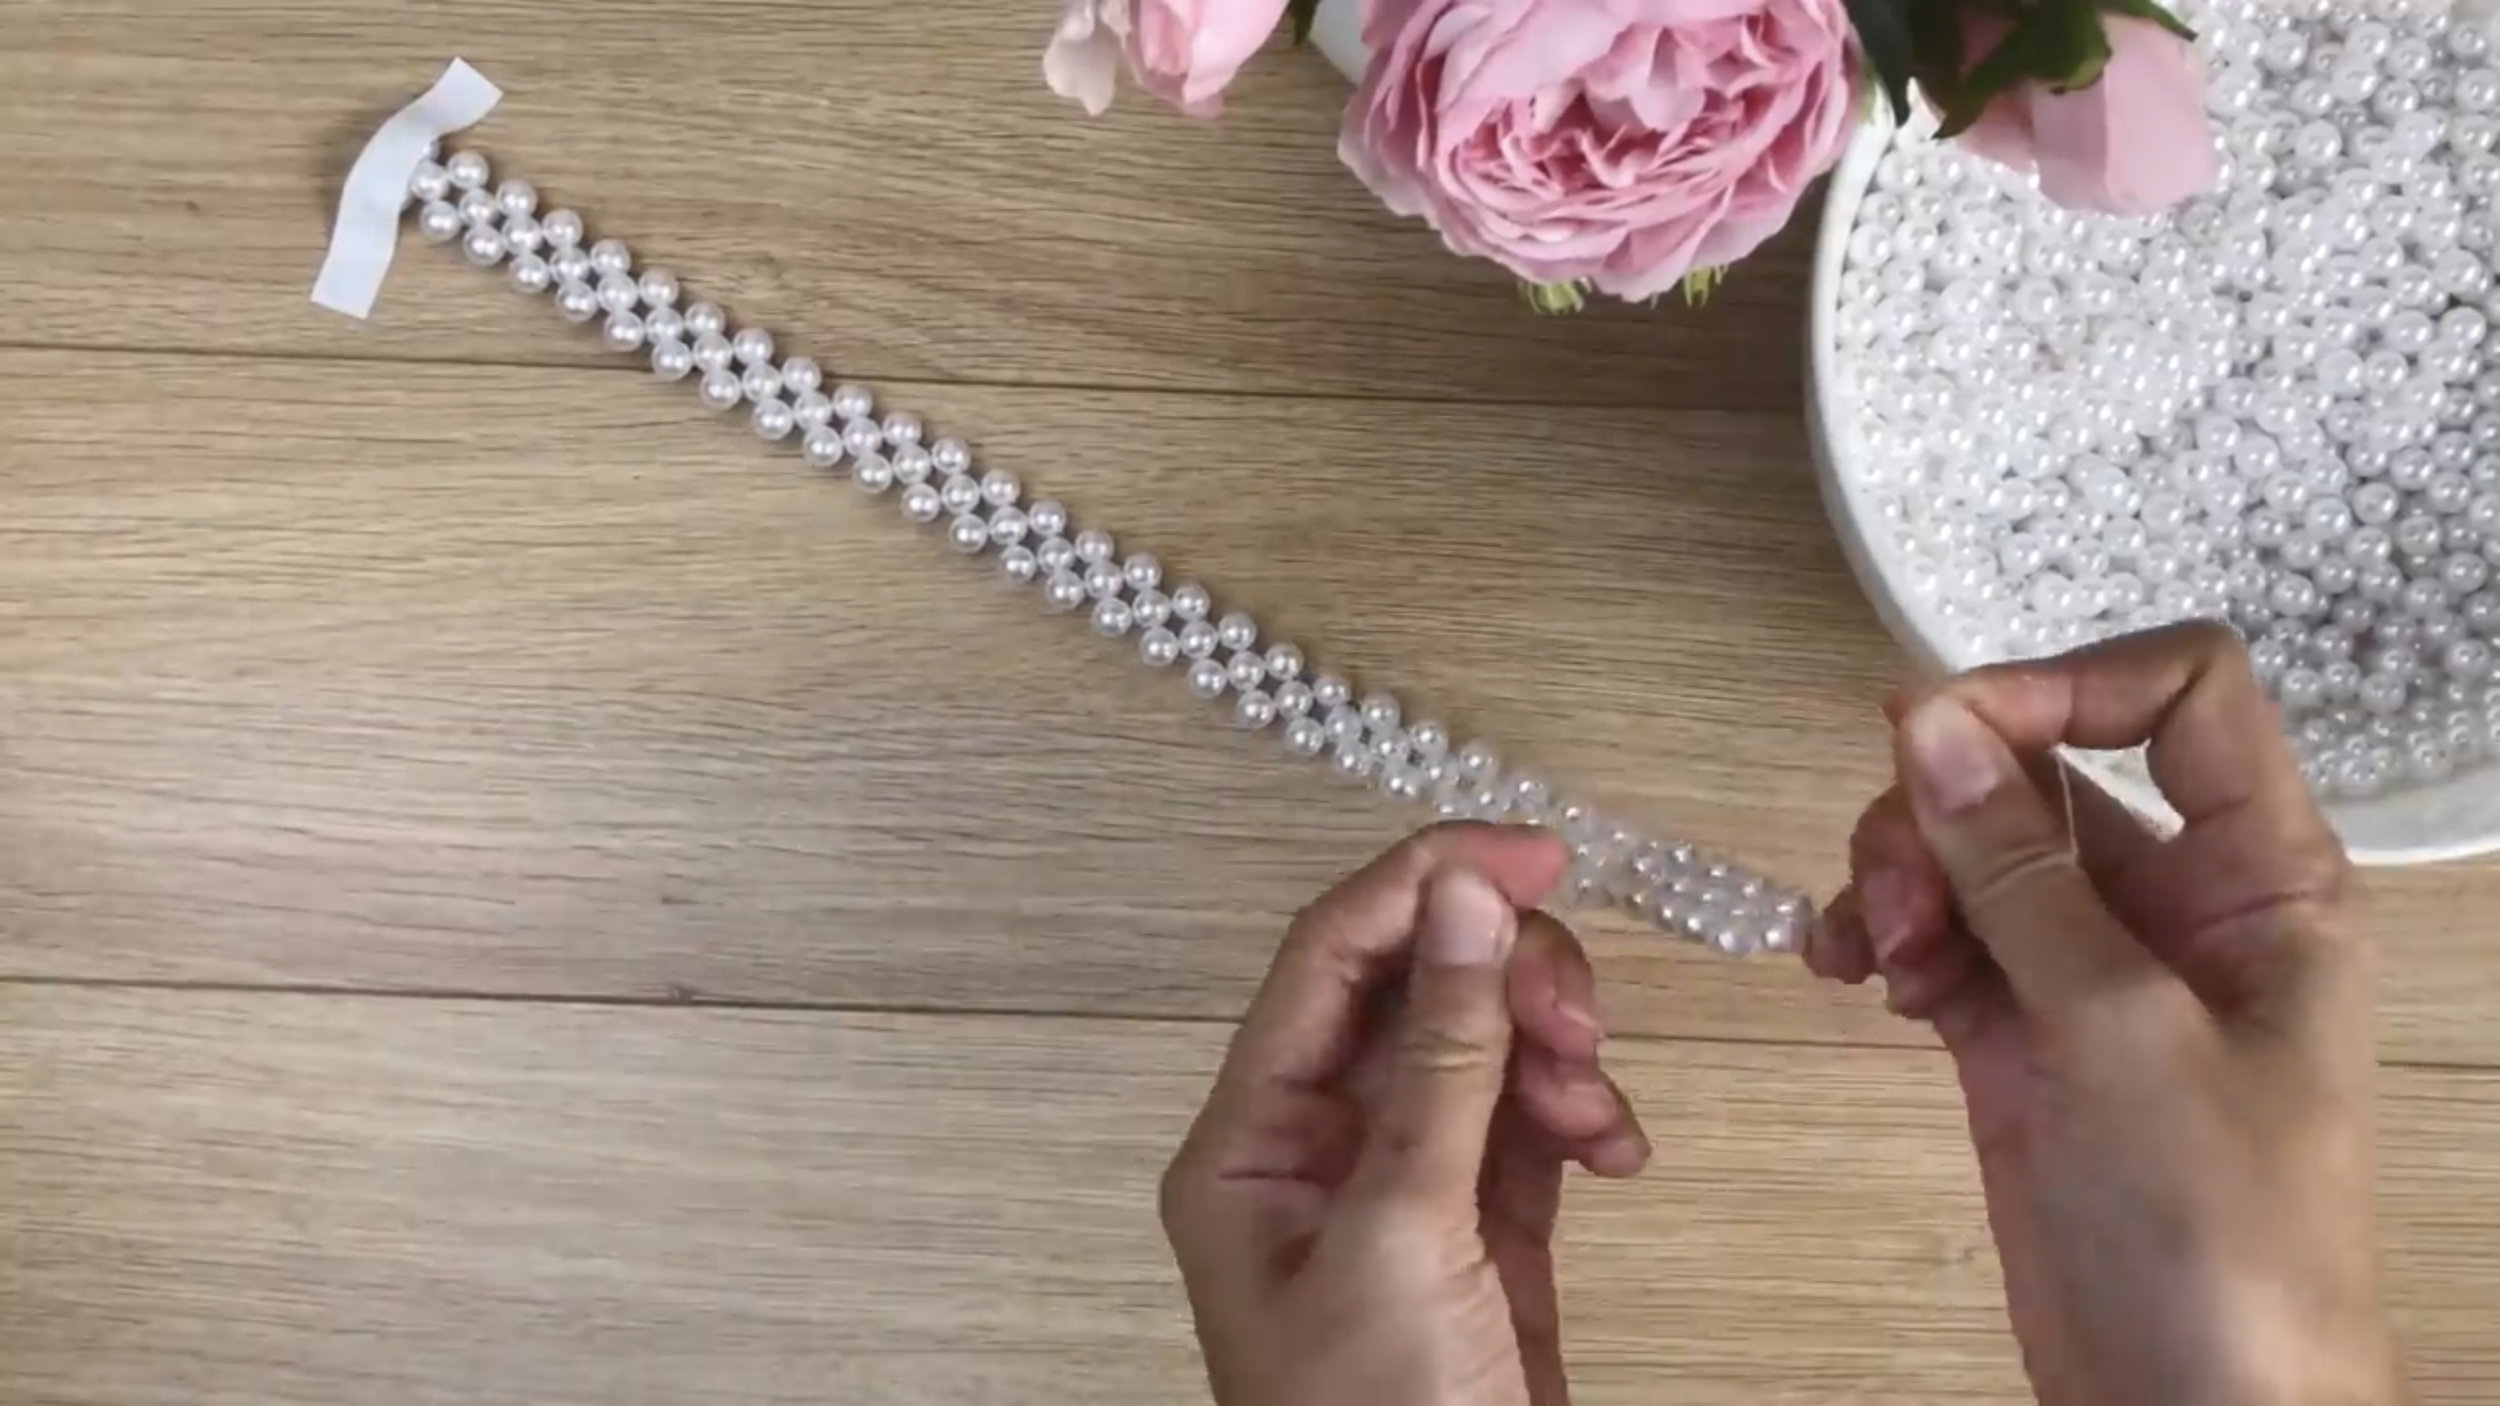
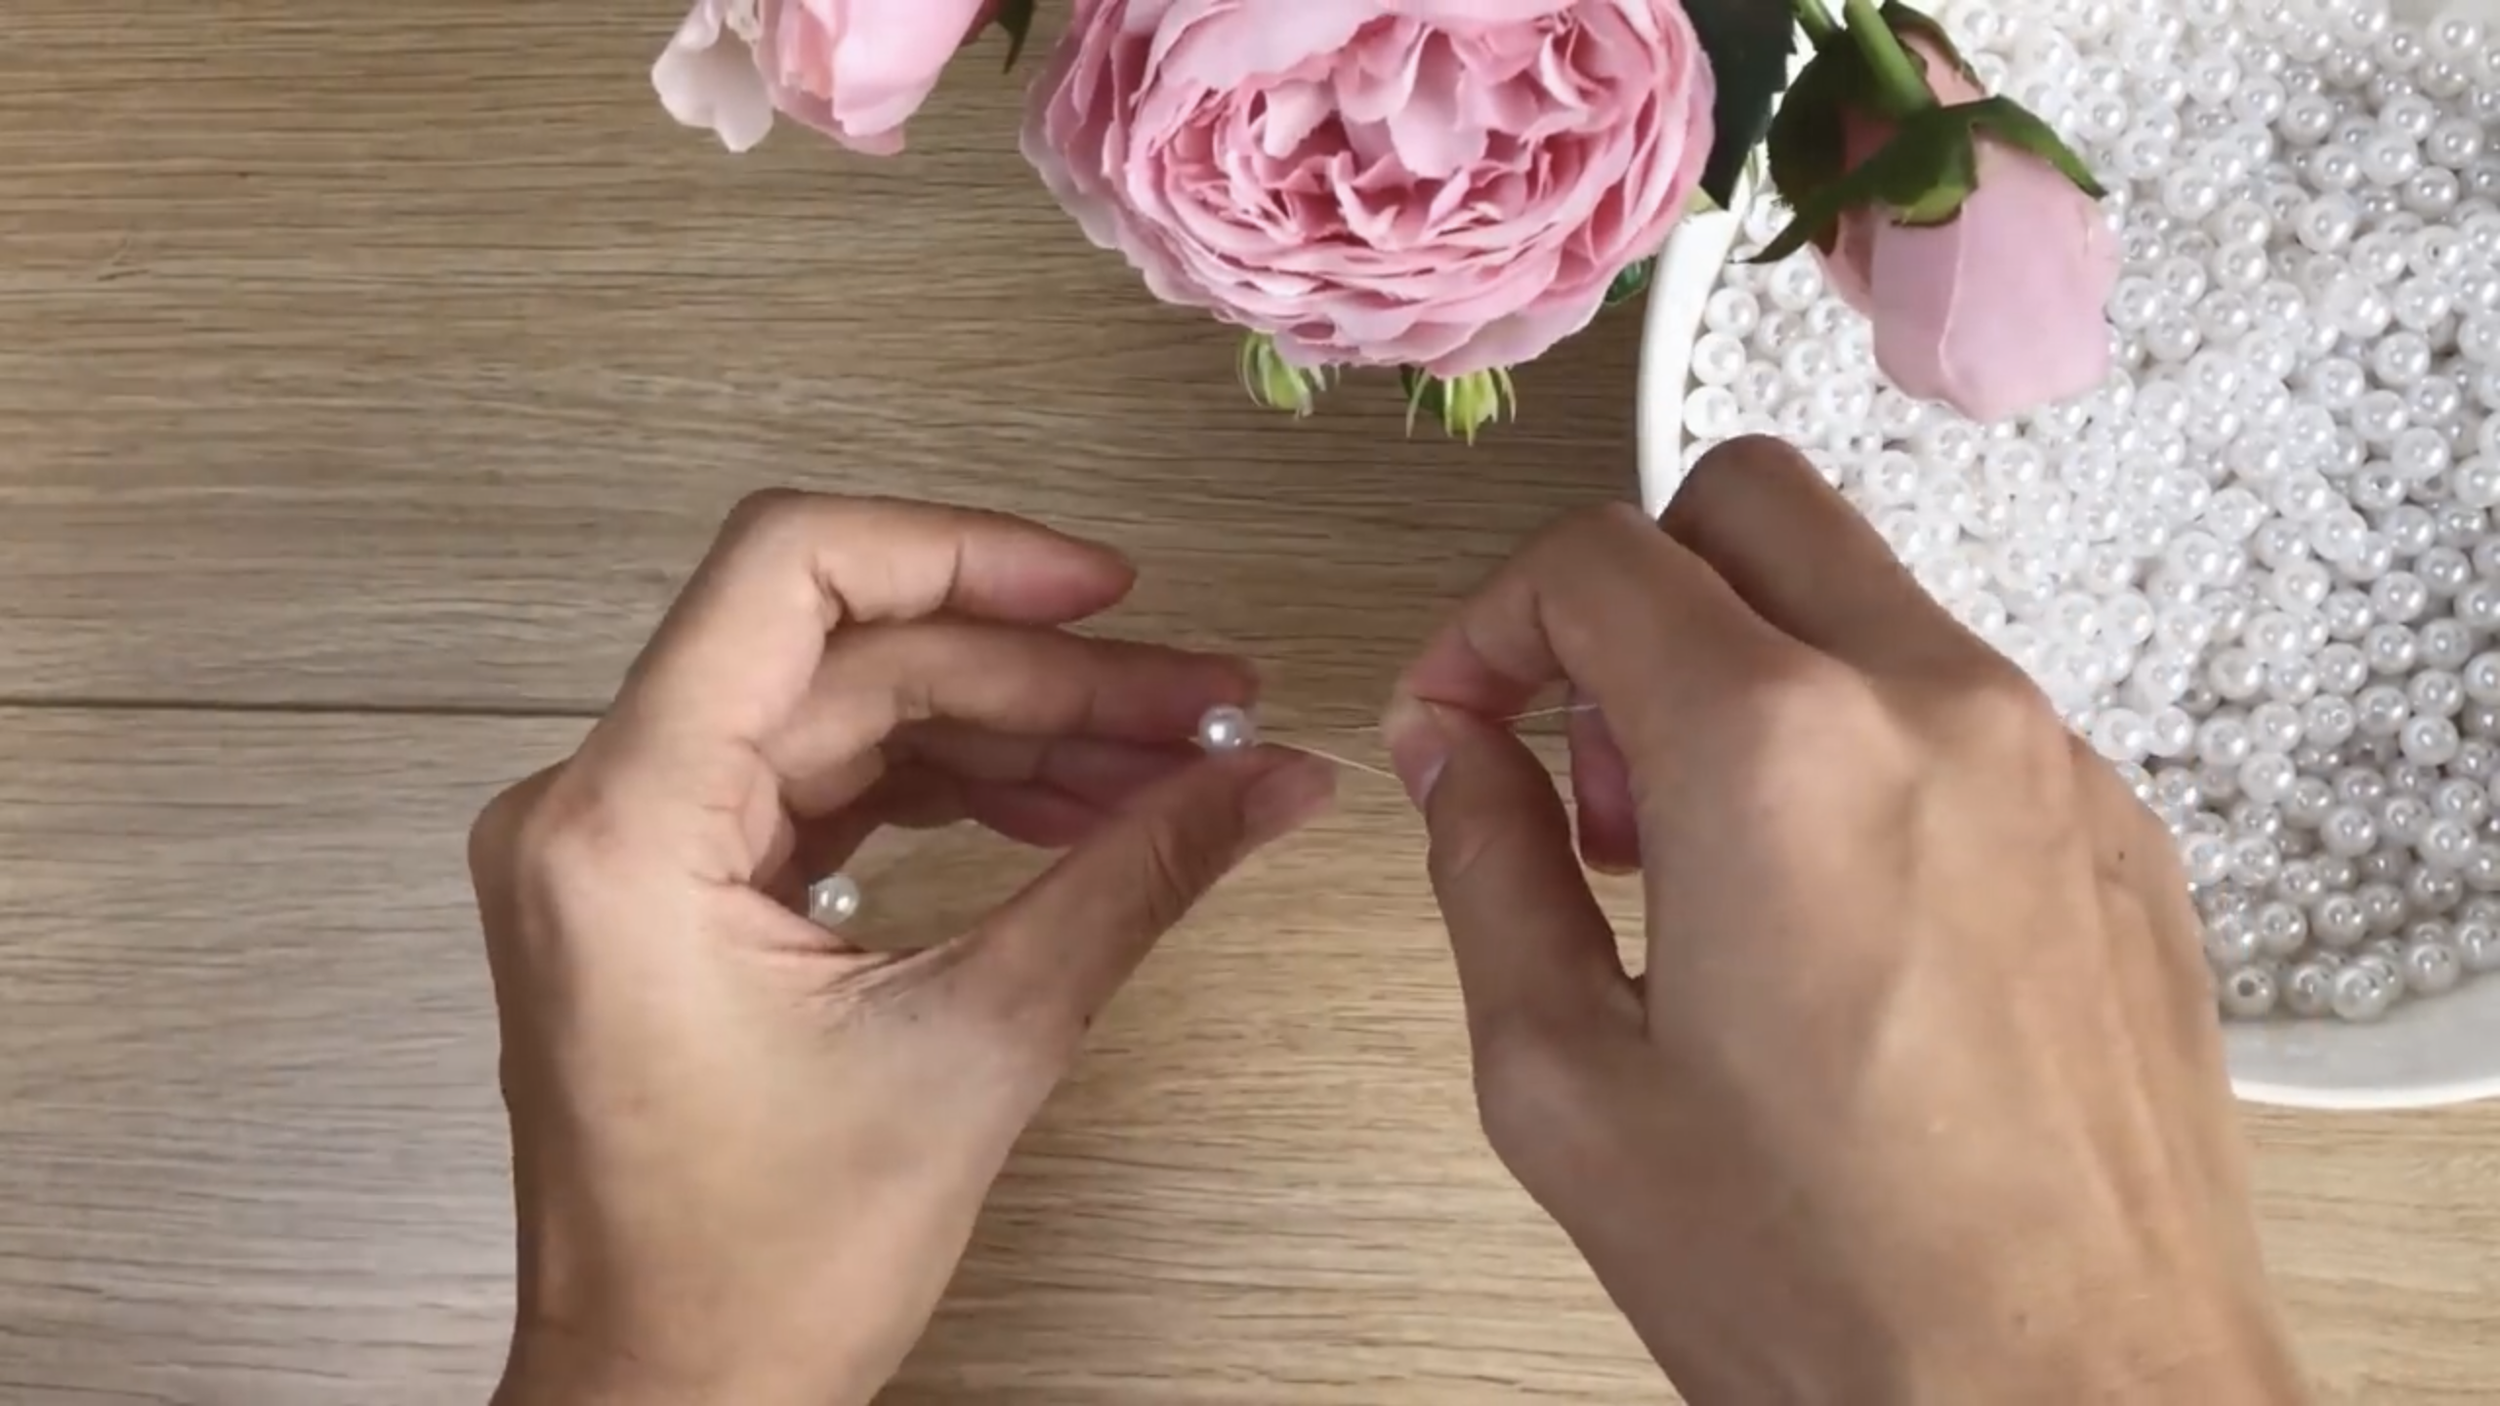
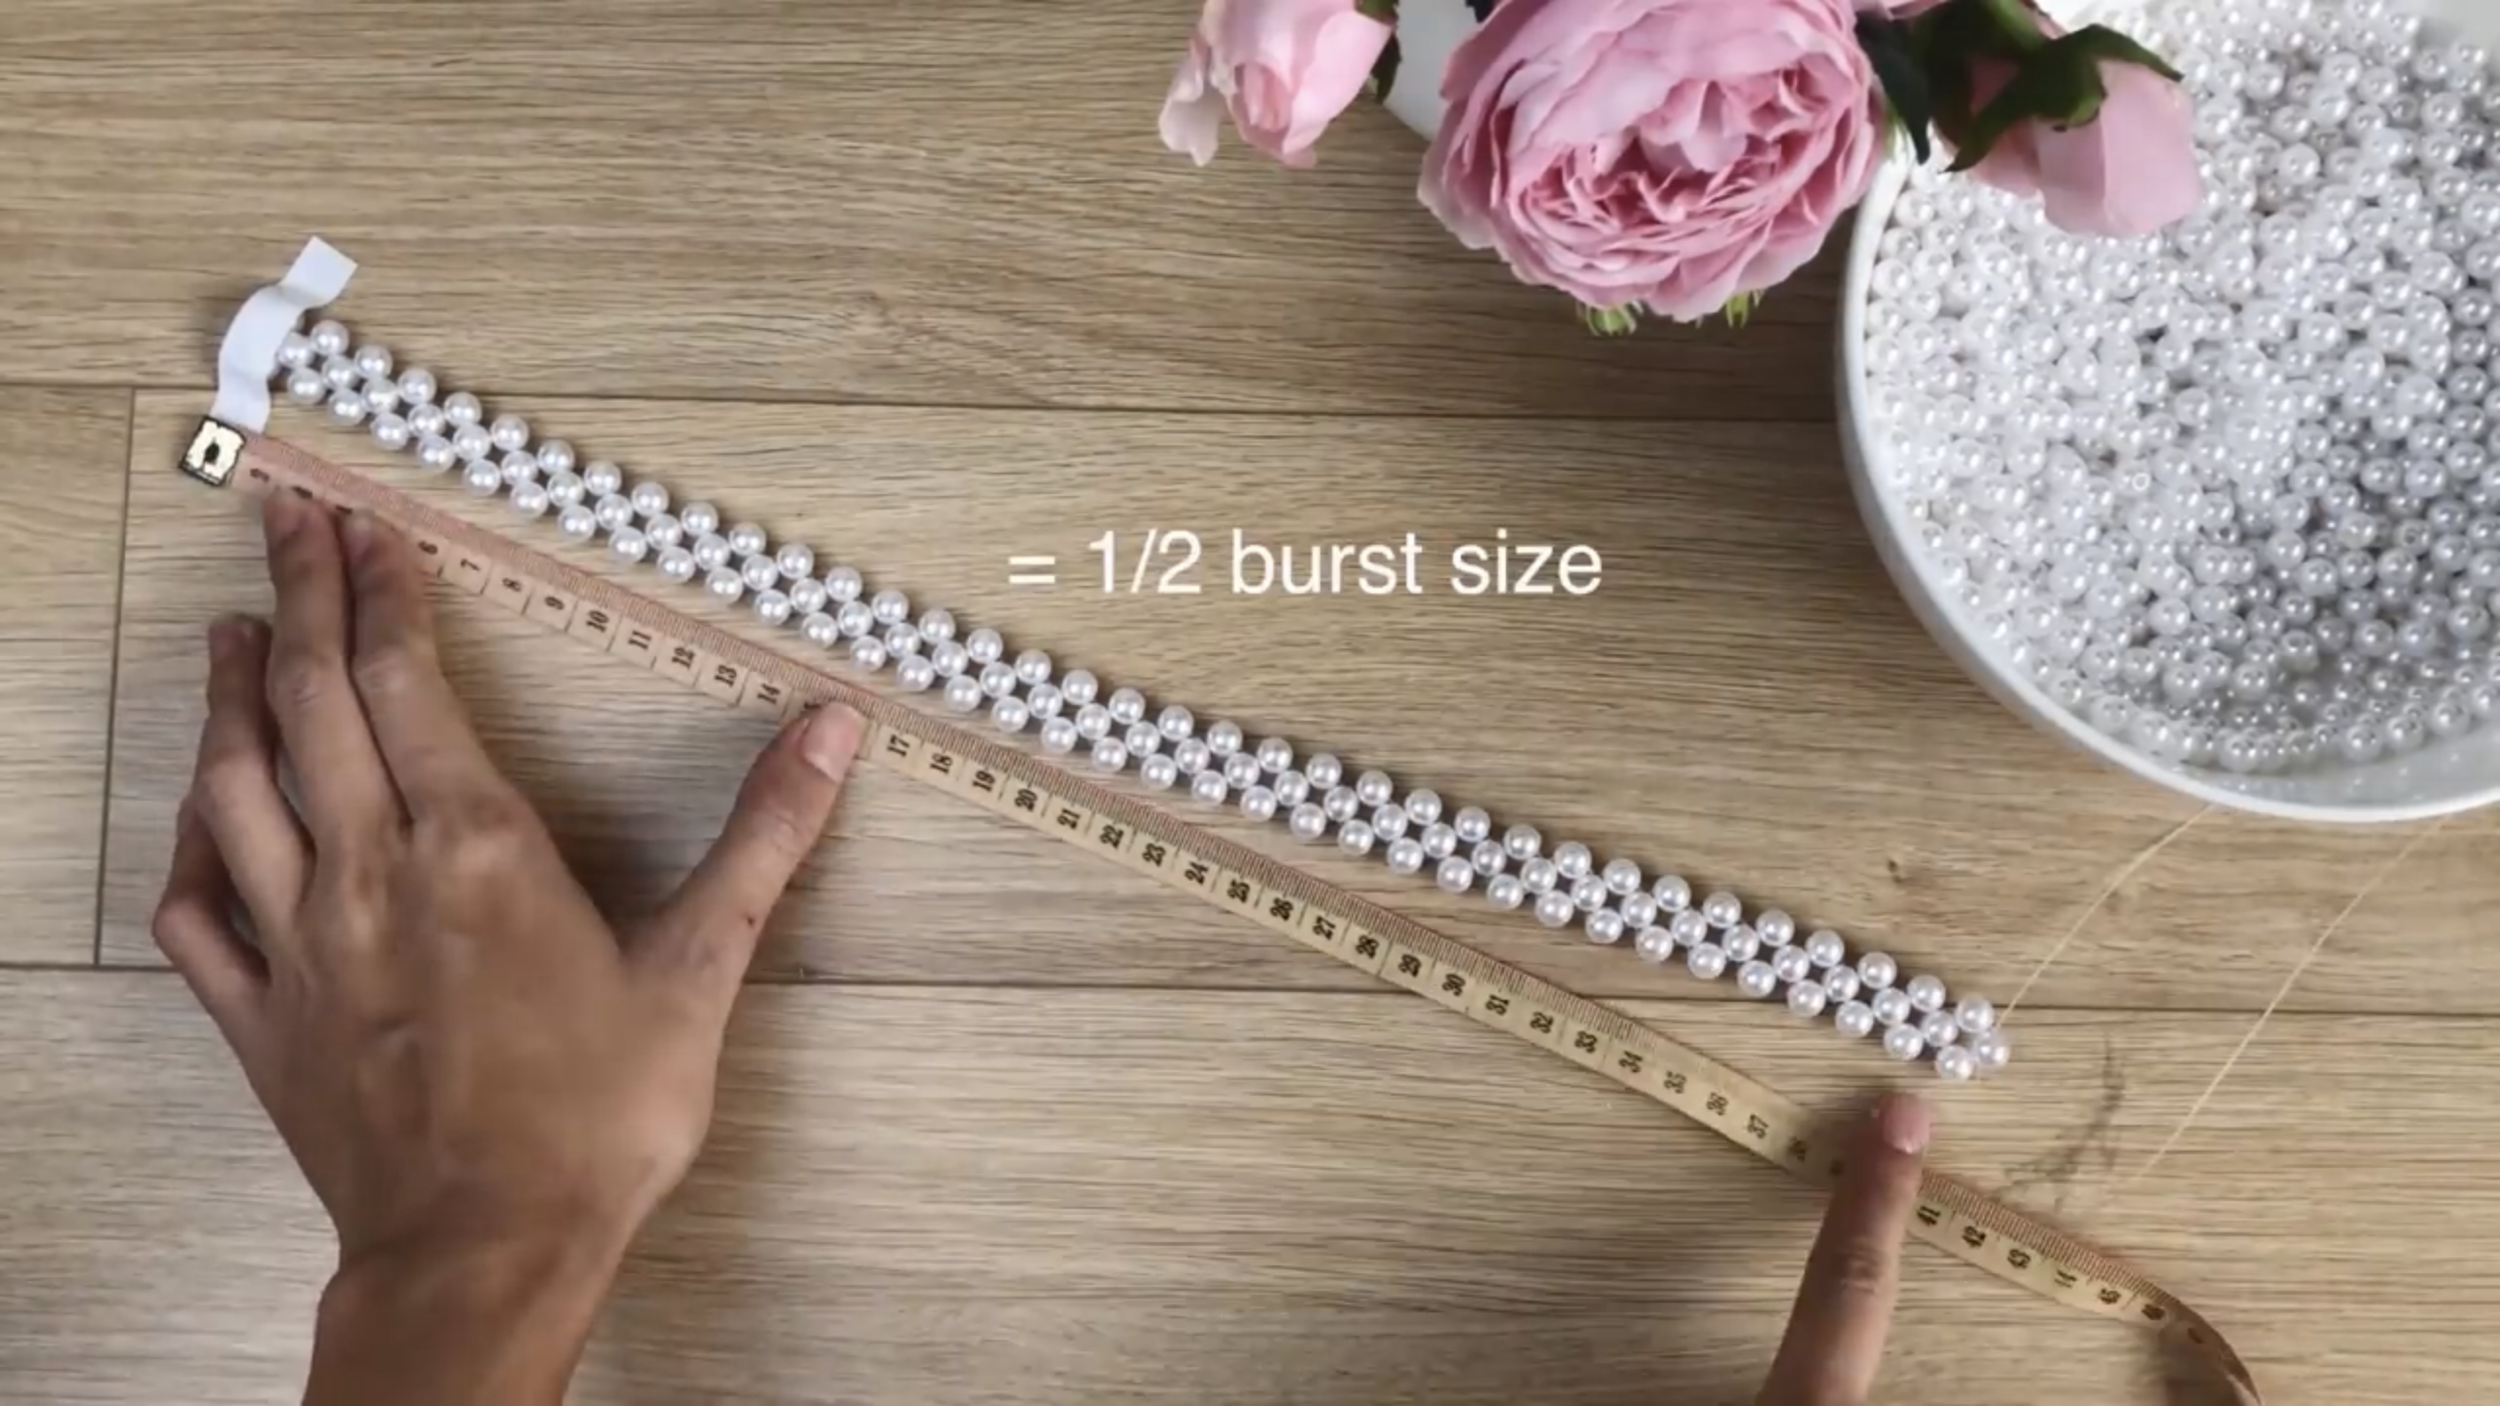
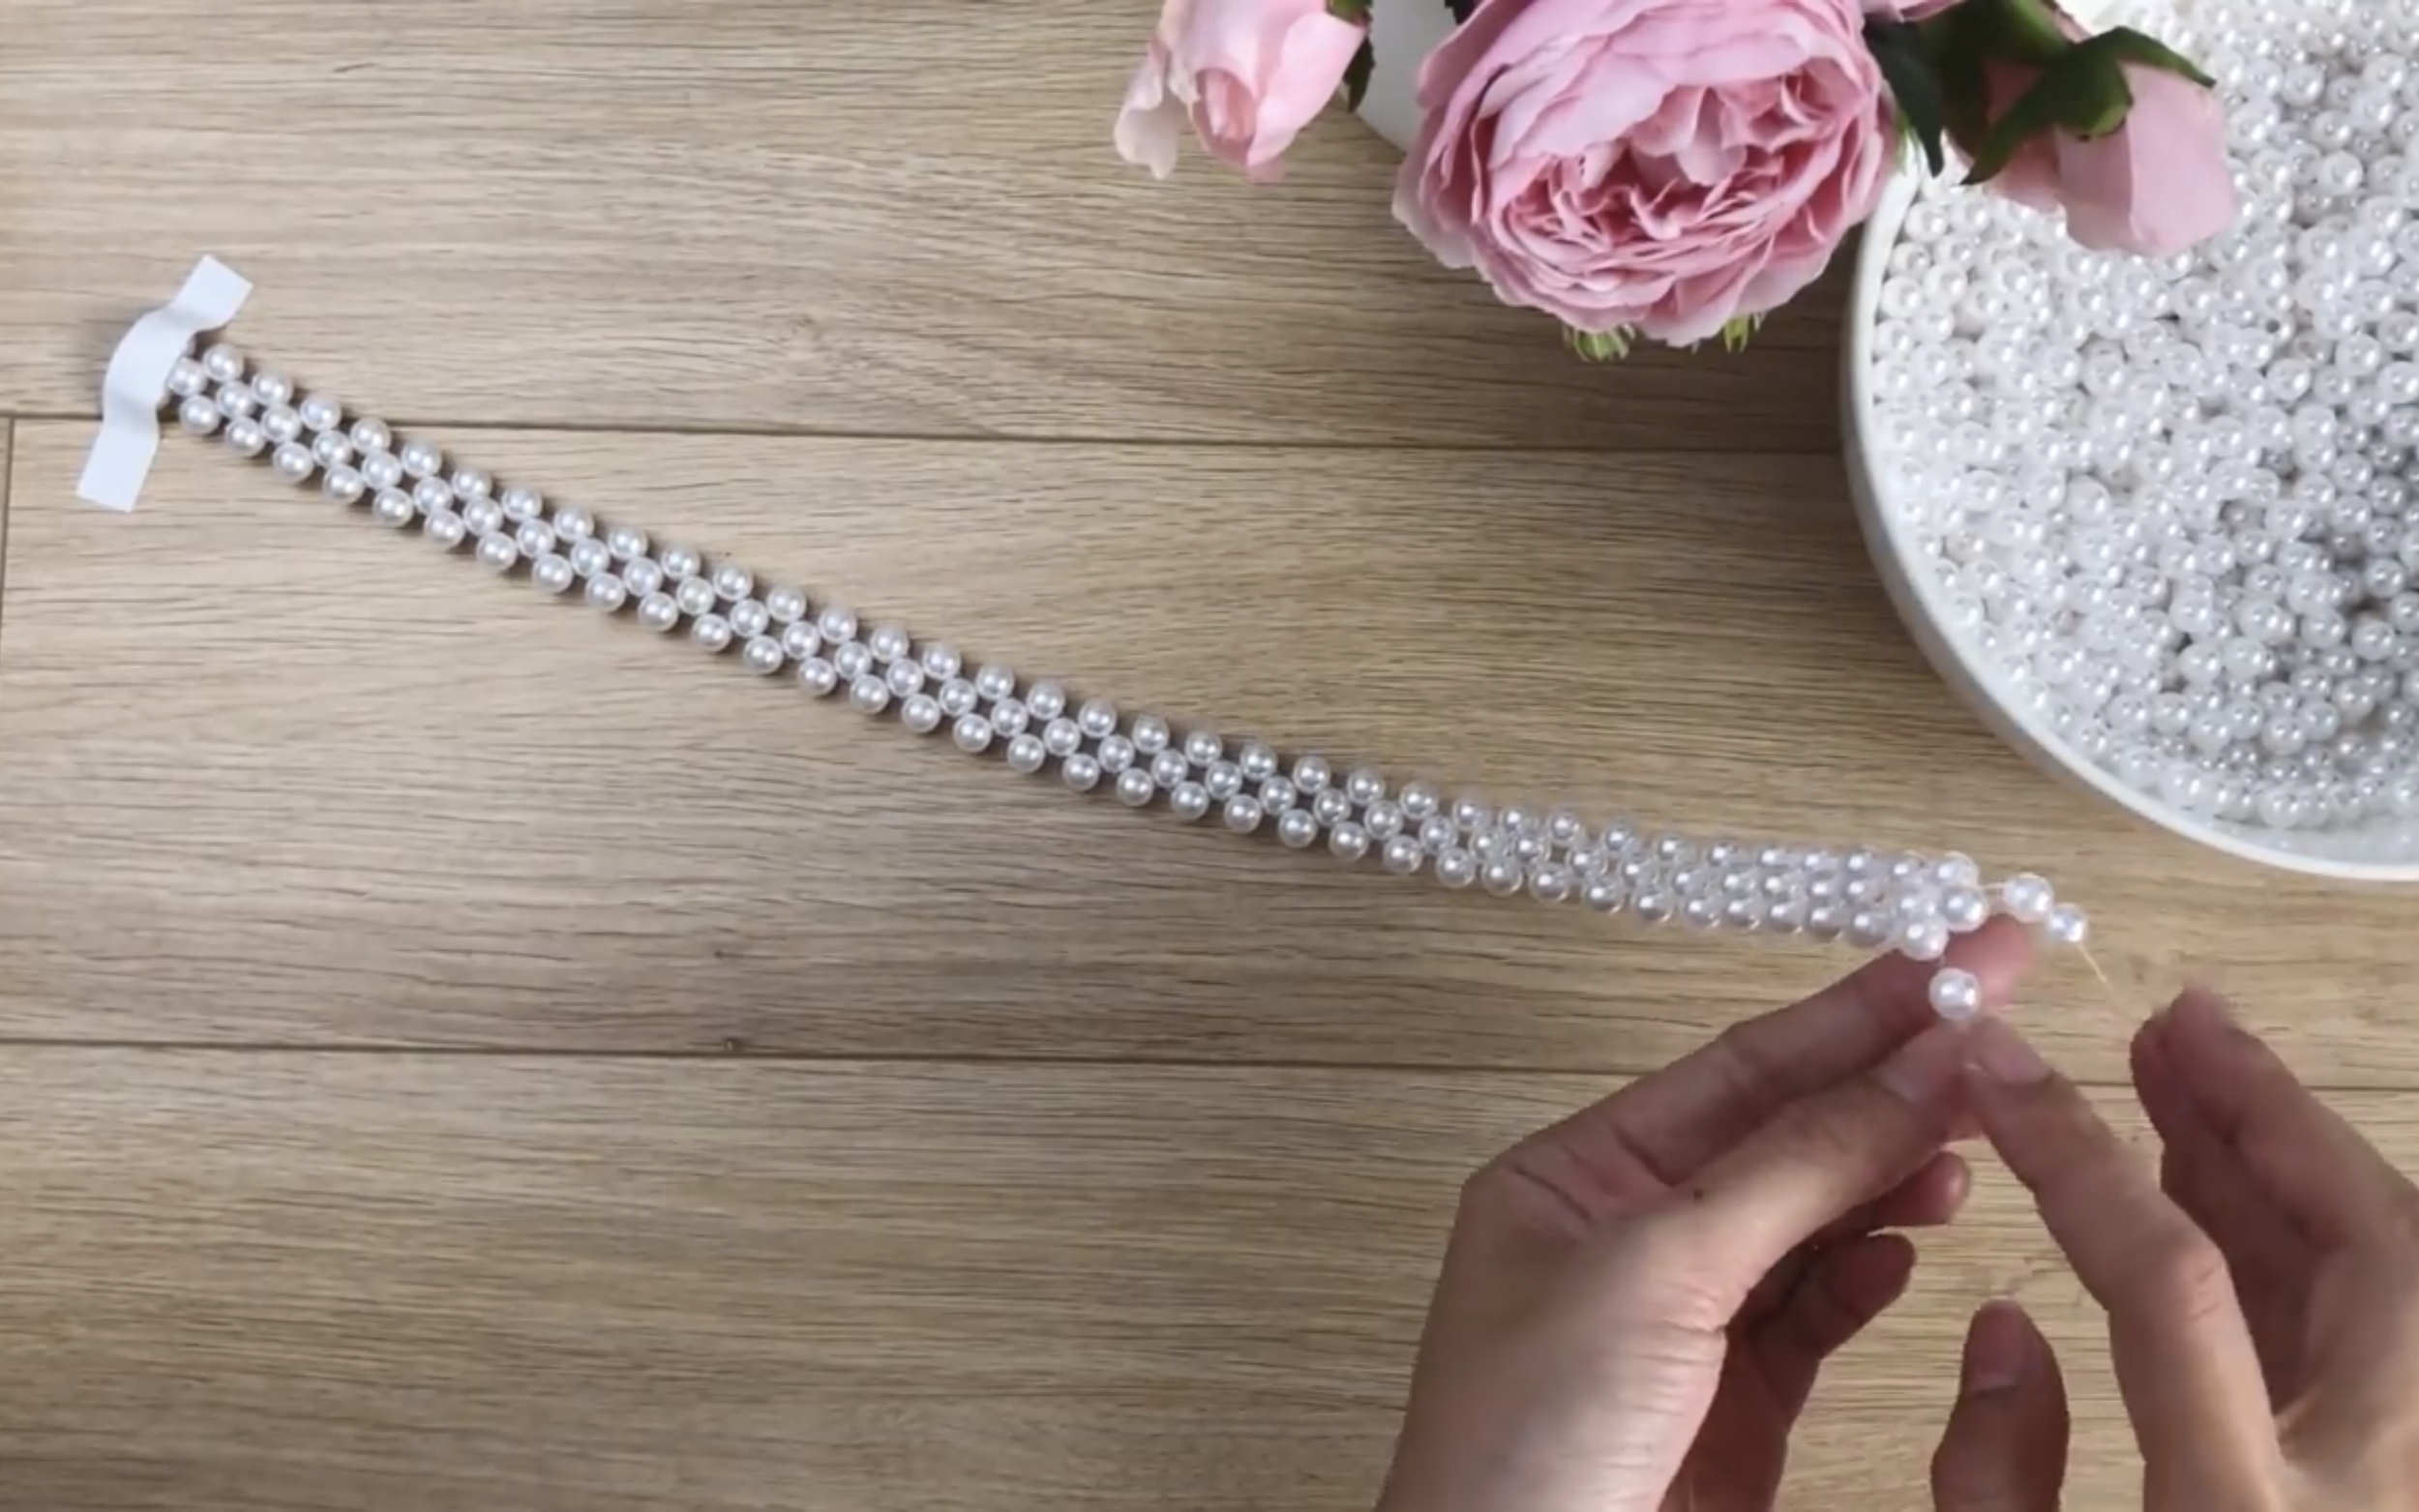
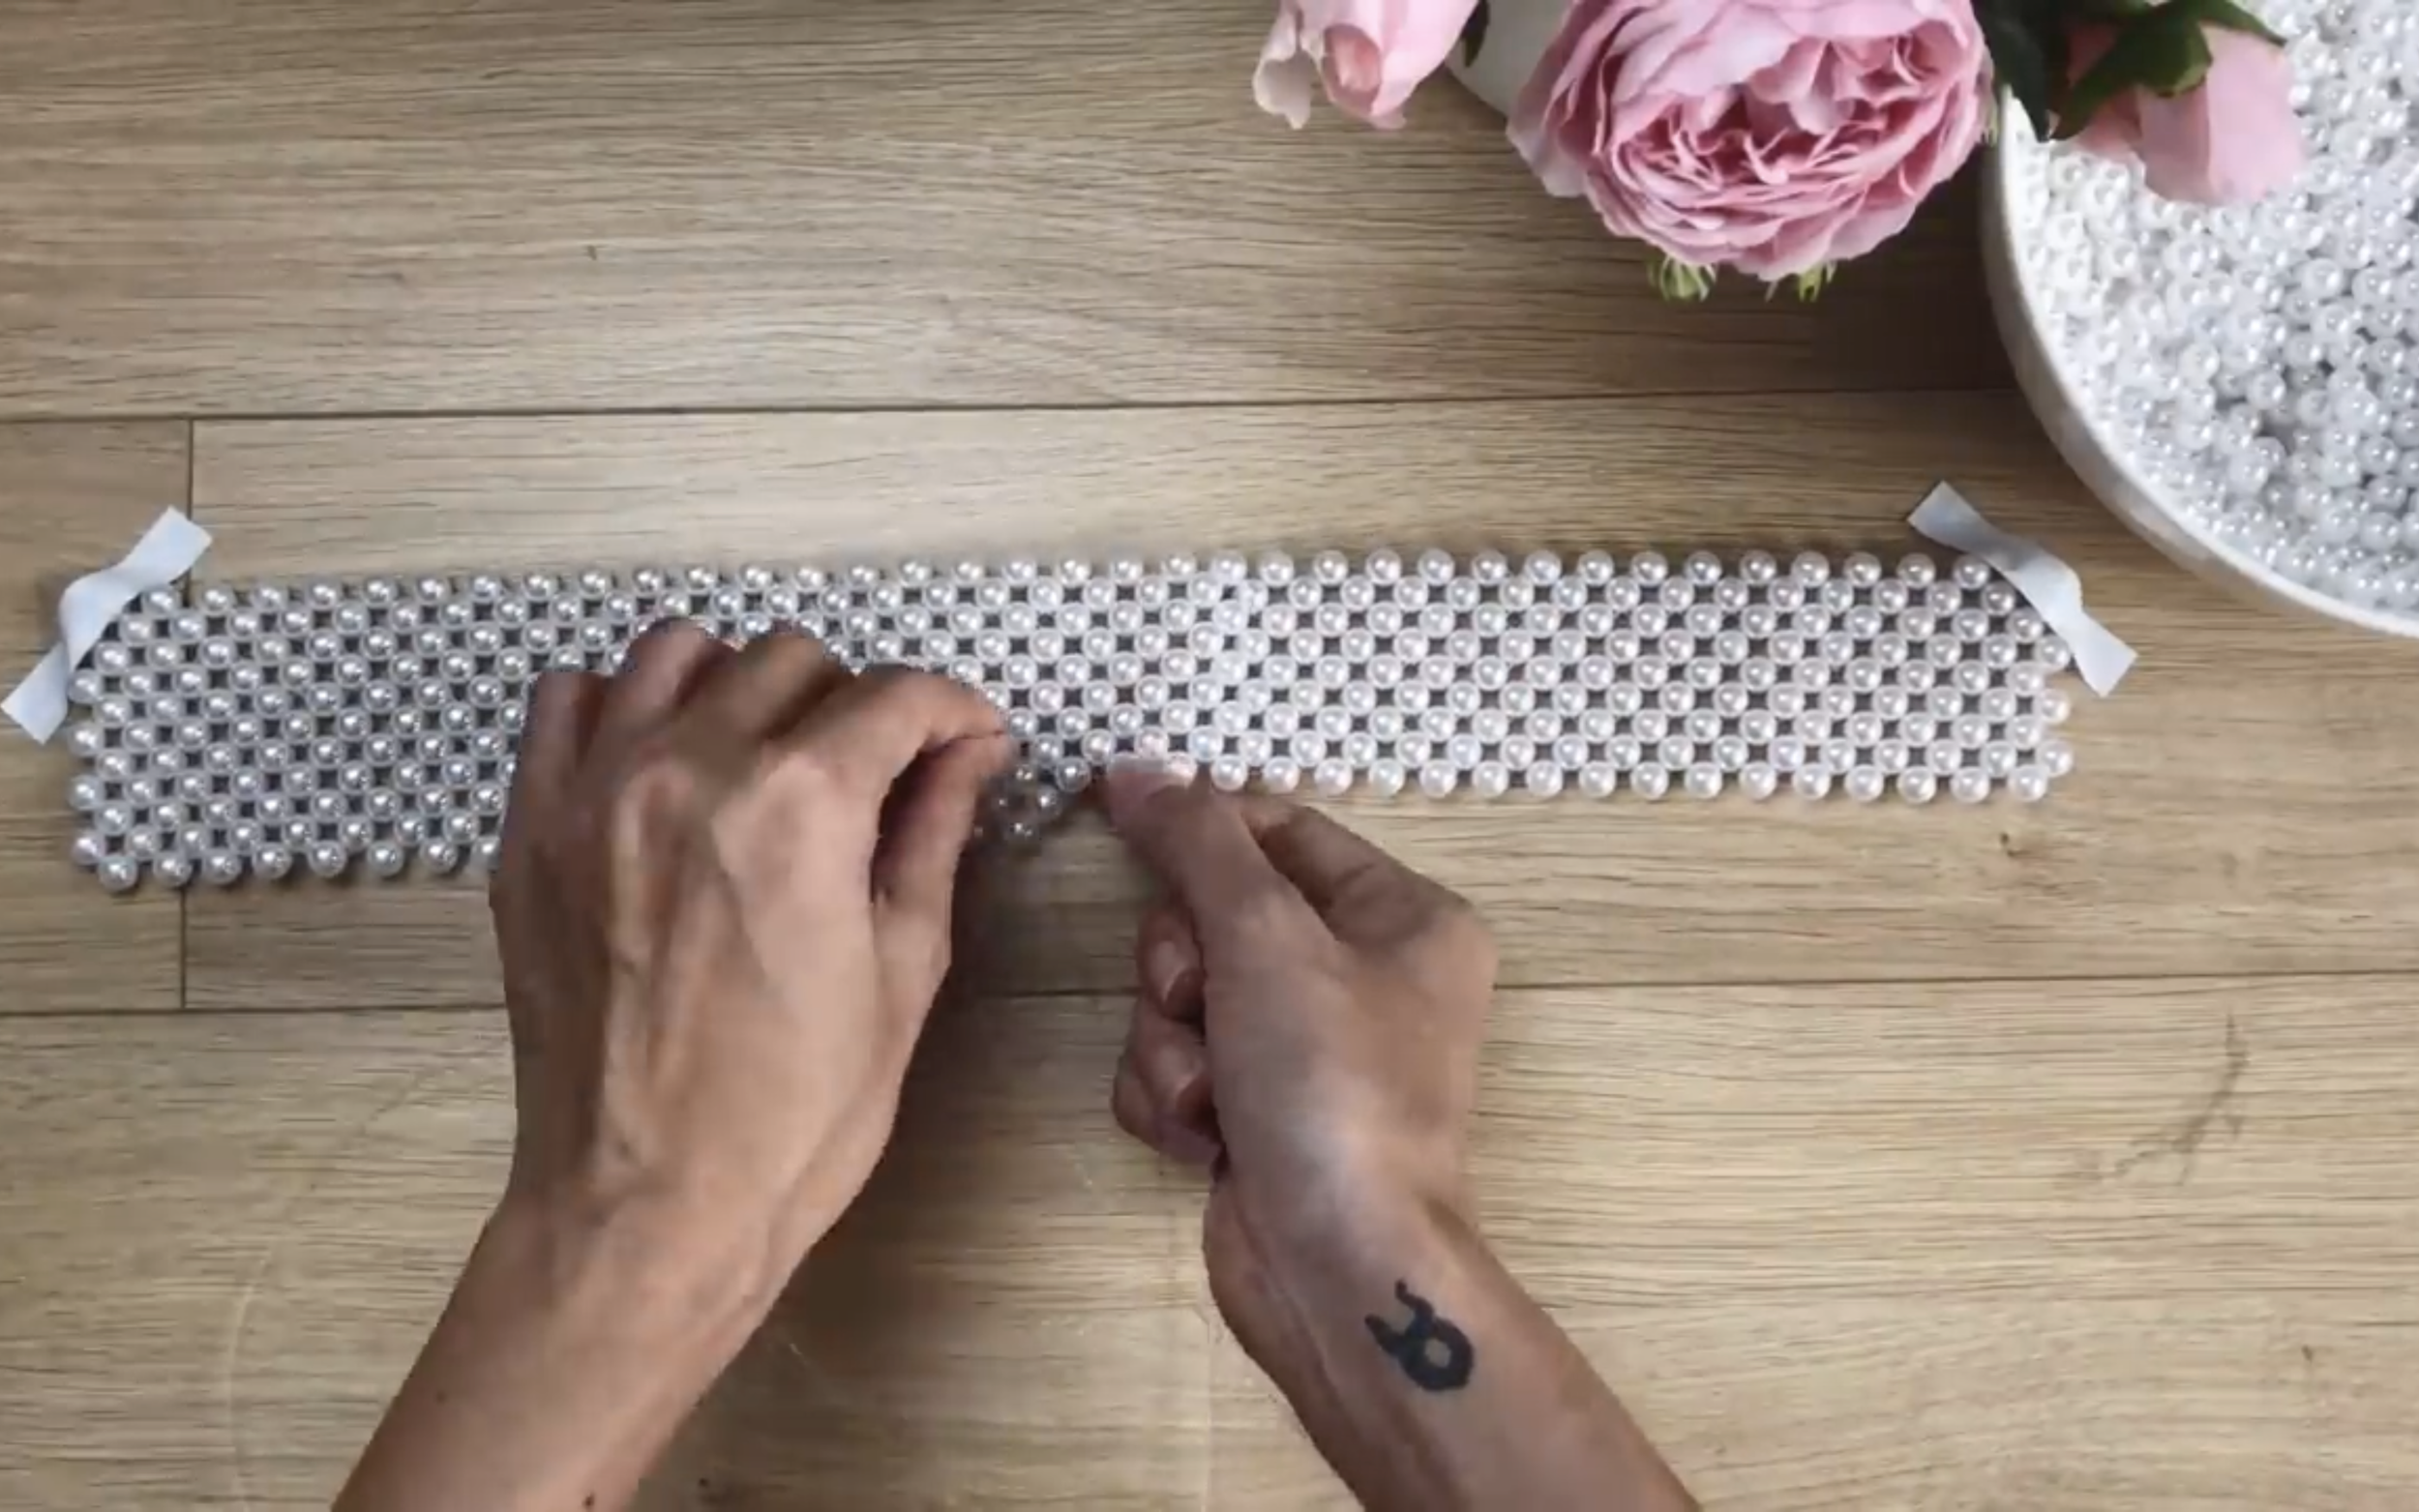
Keep doing it until the length of the pearl line is the same as your bust size.
Don't worry if your string gets shorter while doing it. You just need to hide it by piercing 2 ends of the string through the pearls.
Then, cut the new string and continue with your work.
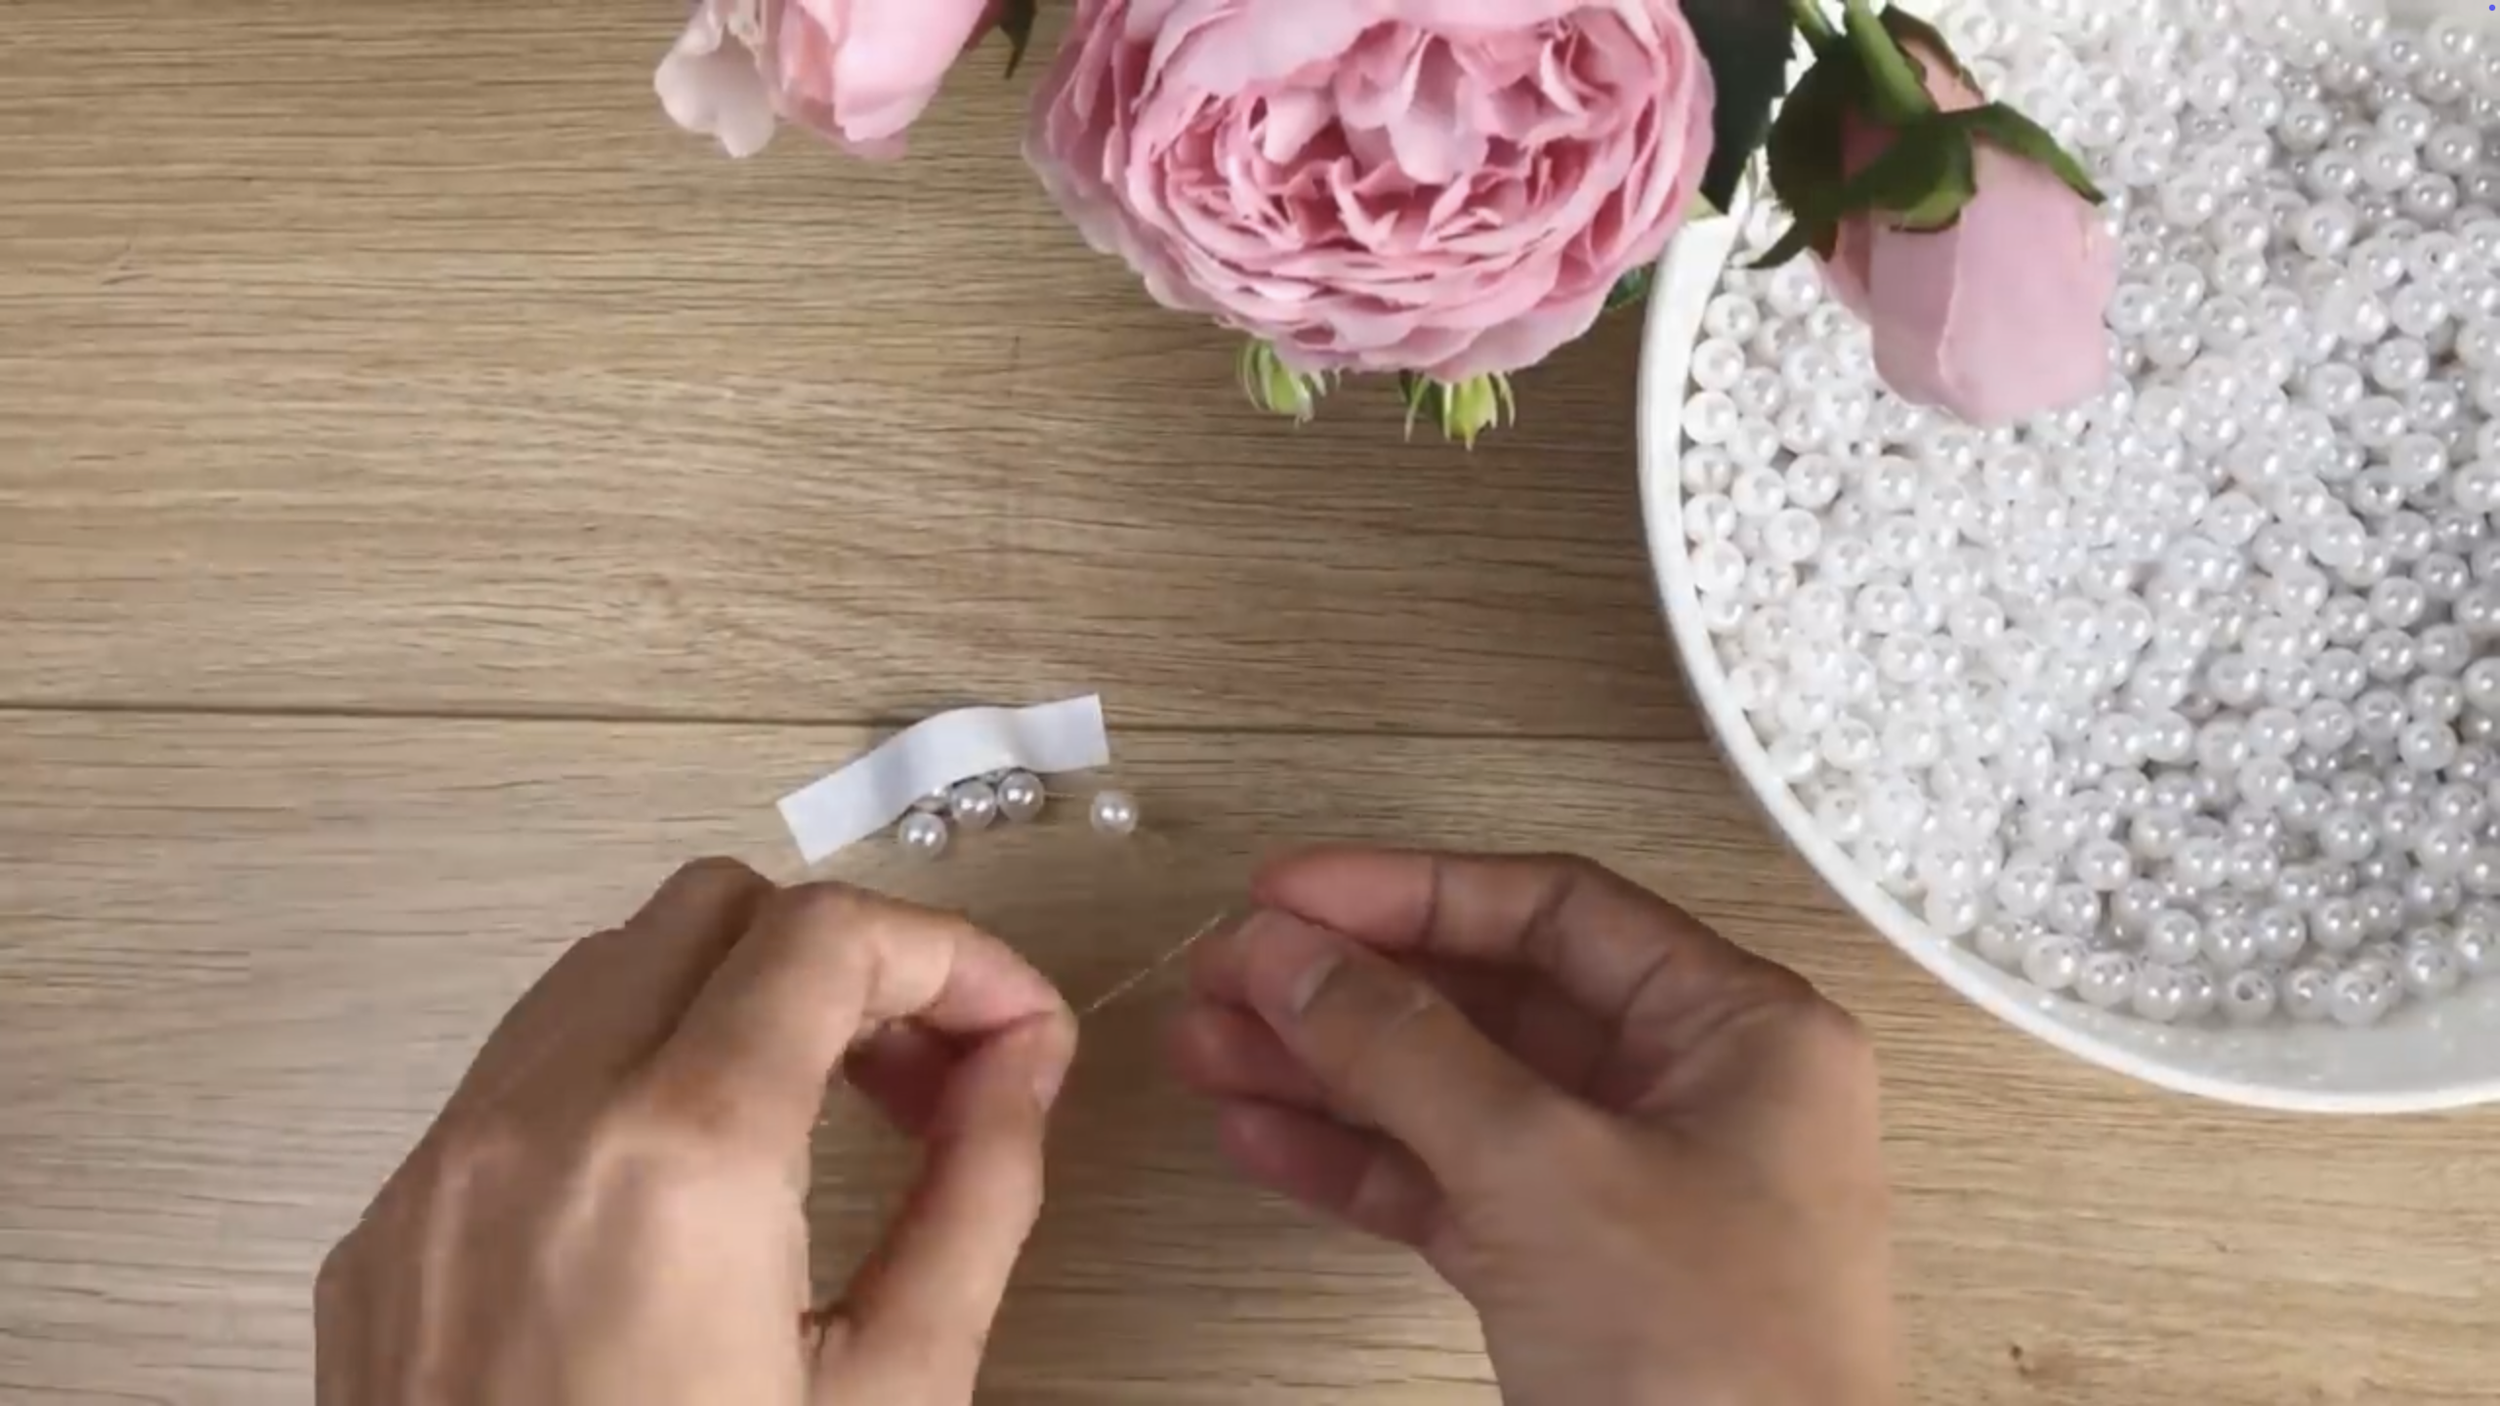
When it gets to the length of your bust, it's time to change the direction.
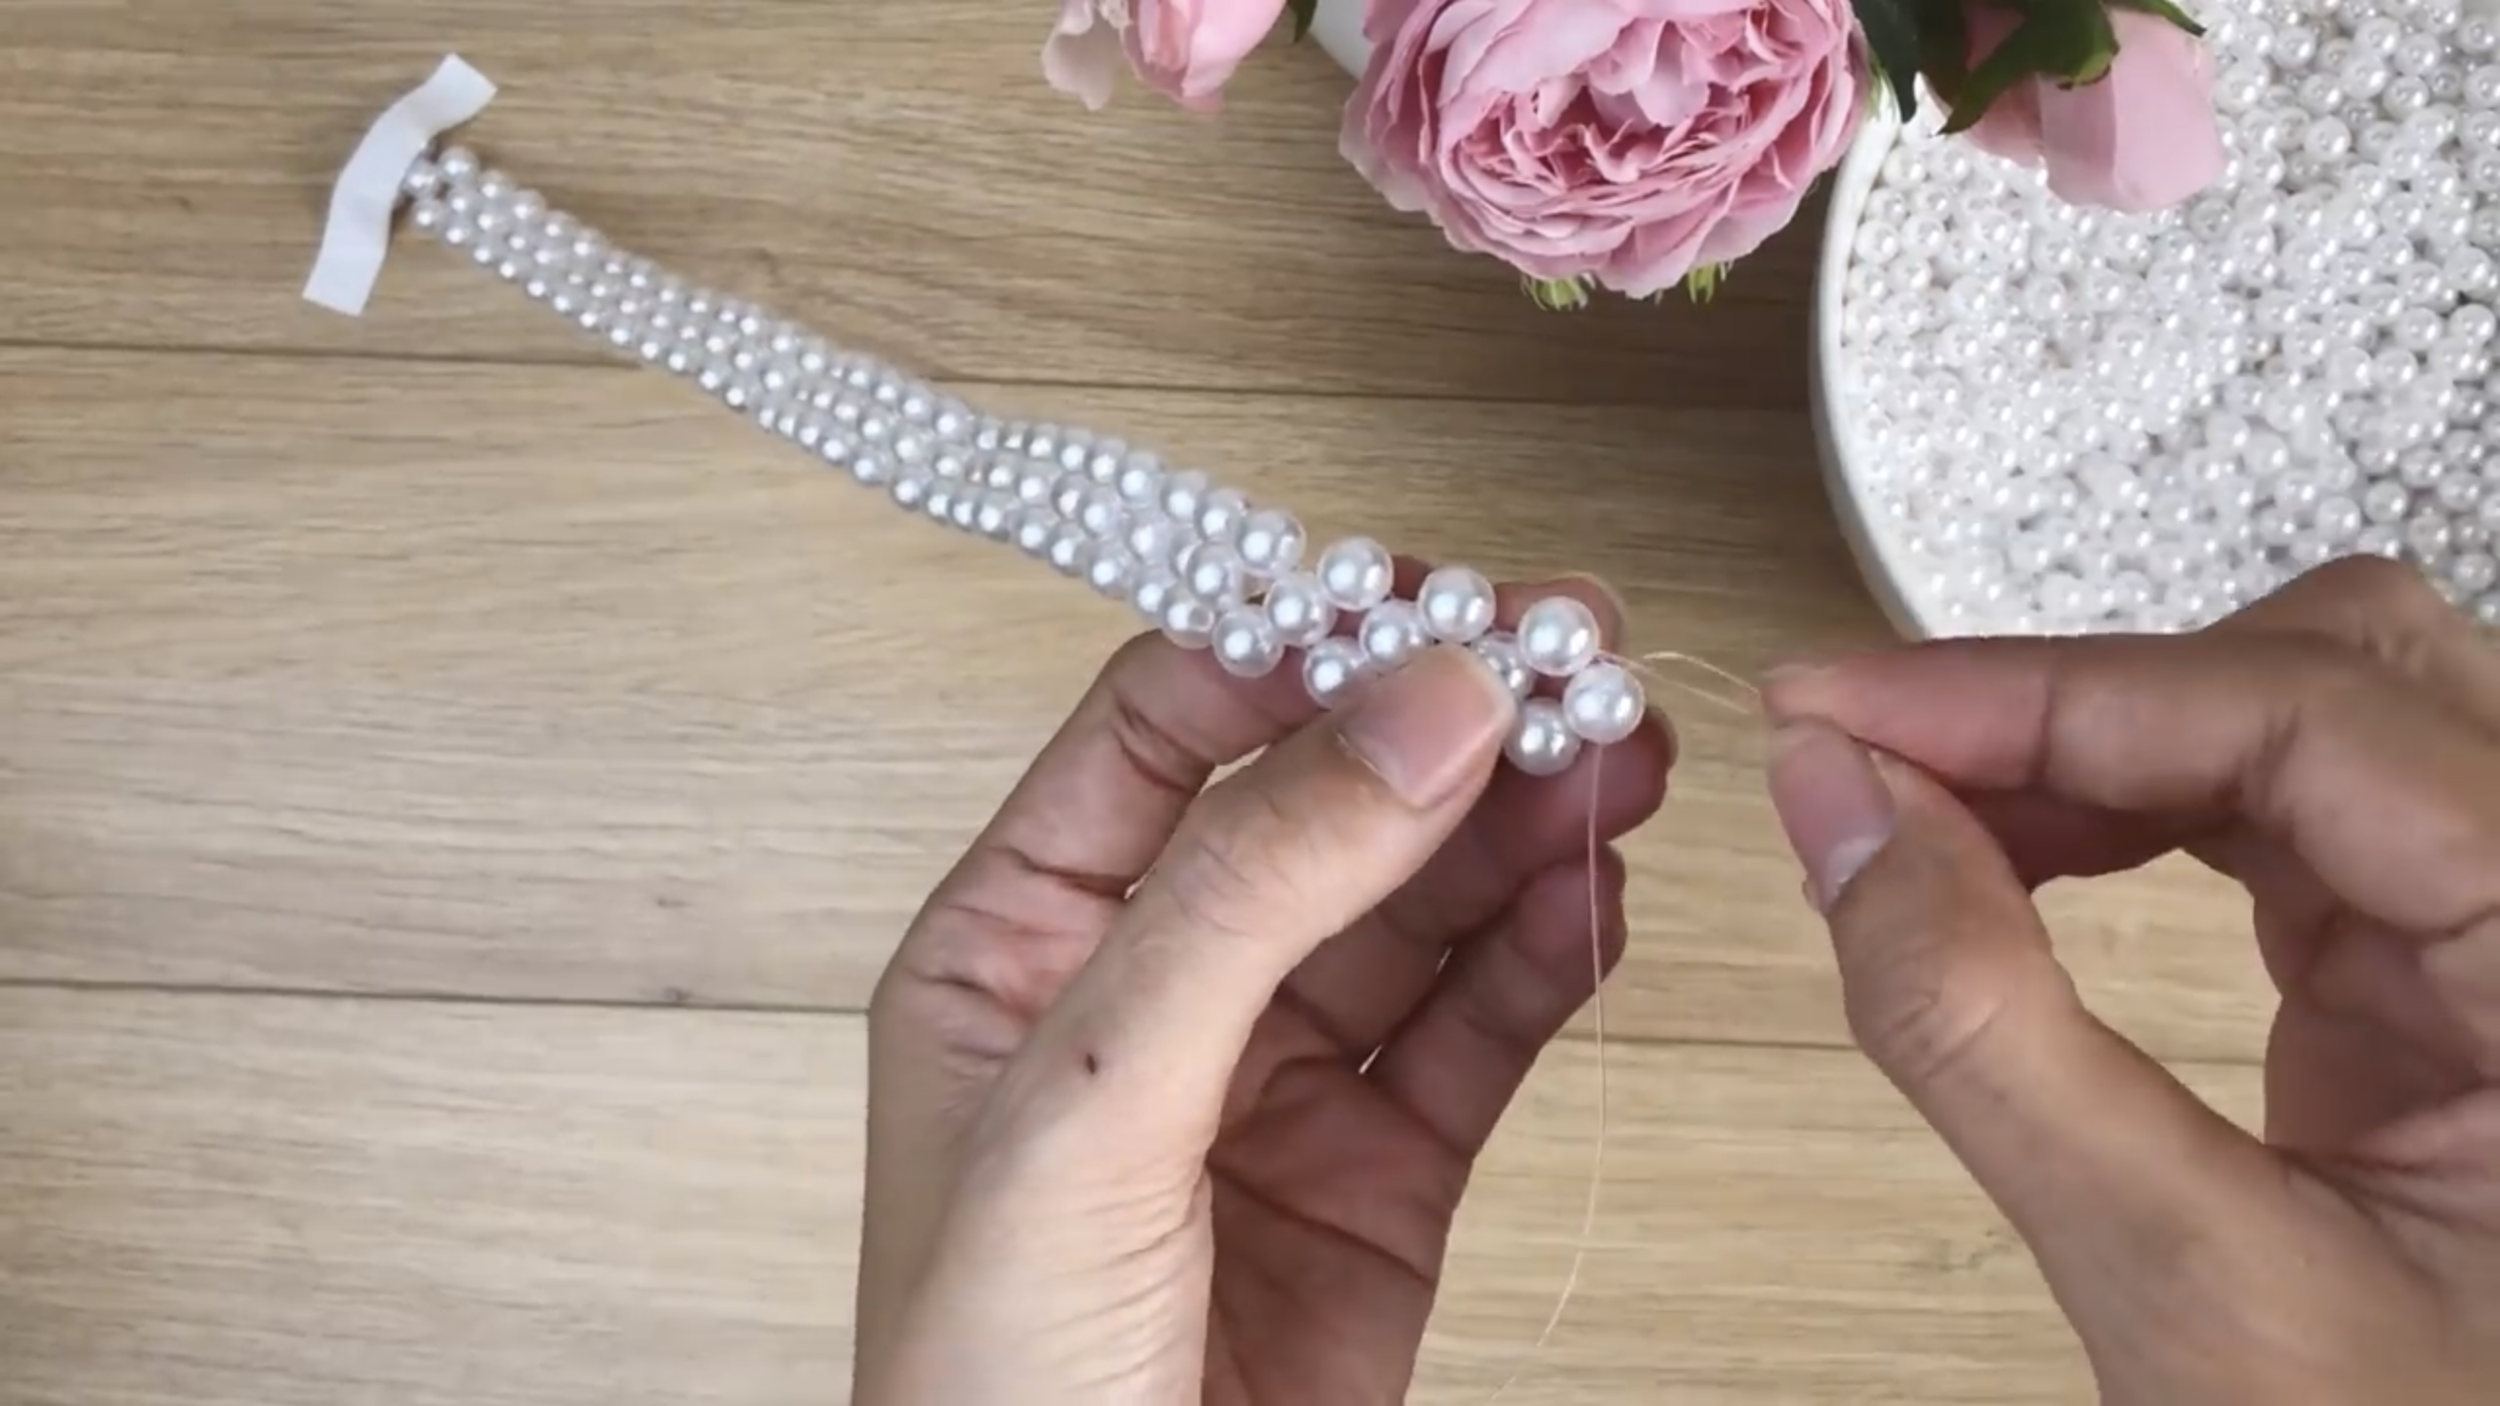
Instead of making the hole at the 2-pearls side, do it at the other side.
Do it one more time like that and you will see that you're already at the second line.

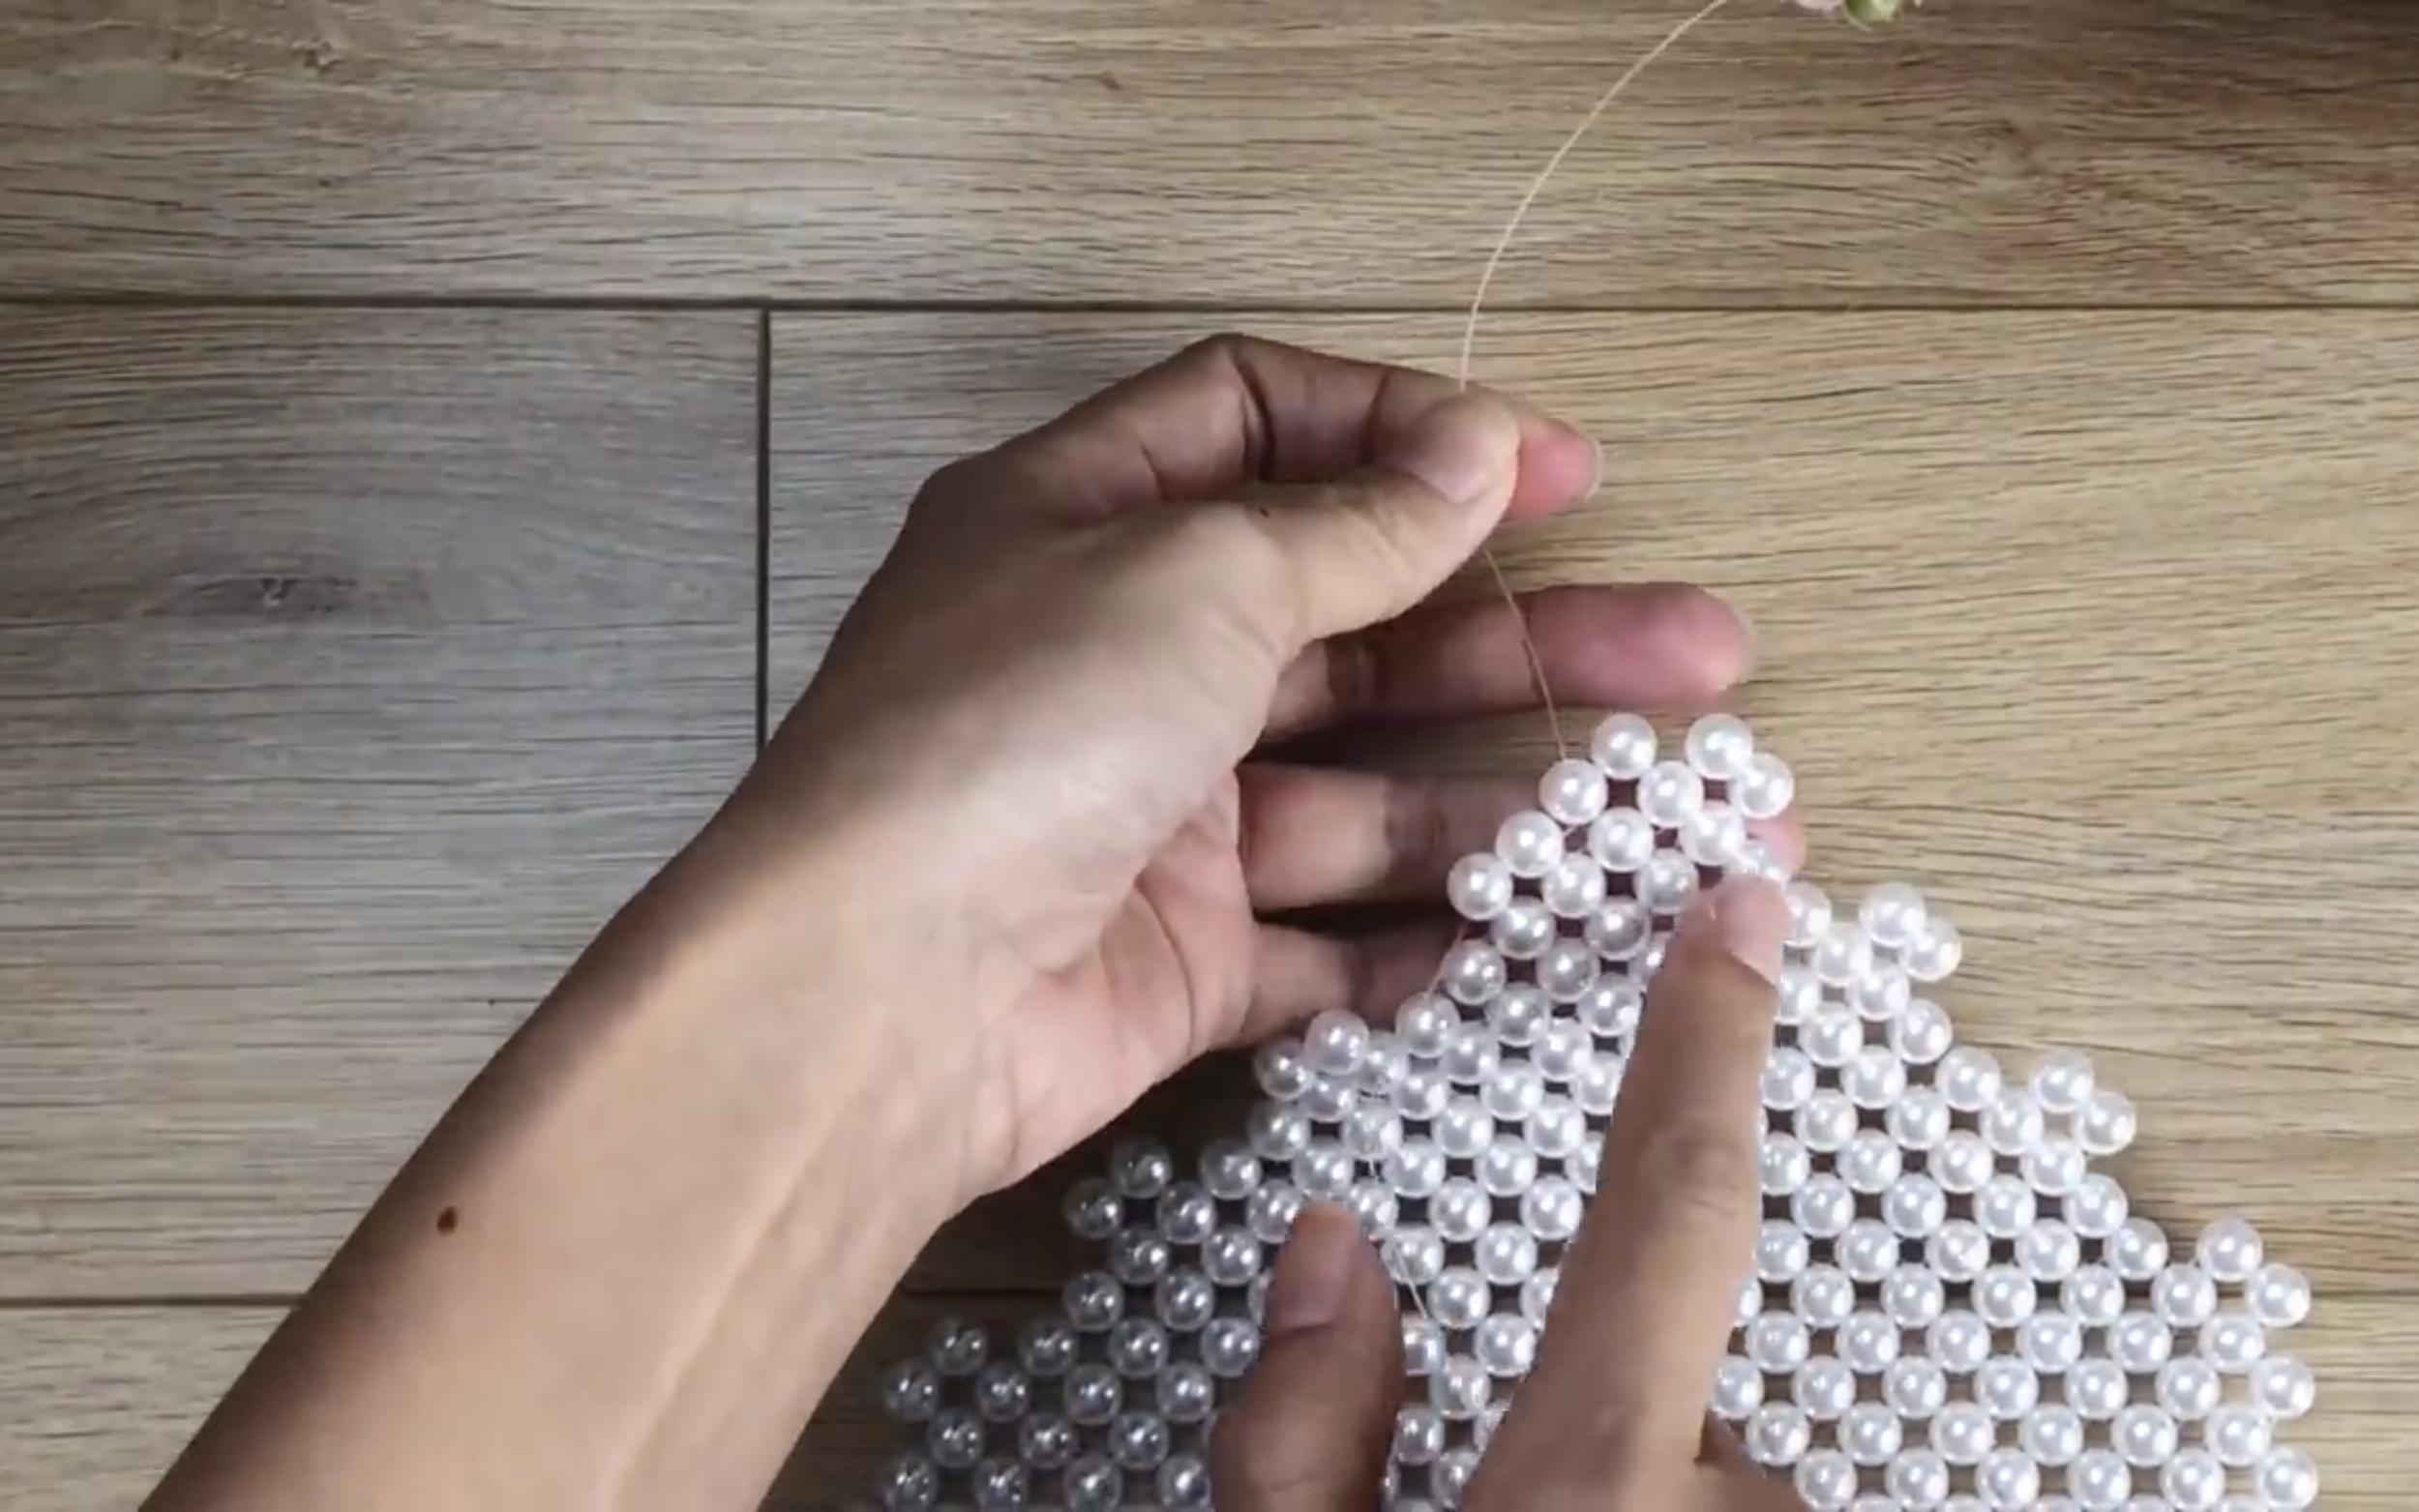
Put one end of the inside string through the pearl next to it at the first line to connect them together.
After that, instead of 3 pearls, you just need 2 pearls with 1 pearl at each side of the string.

And make the hole at the inside pearl.
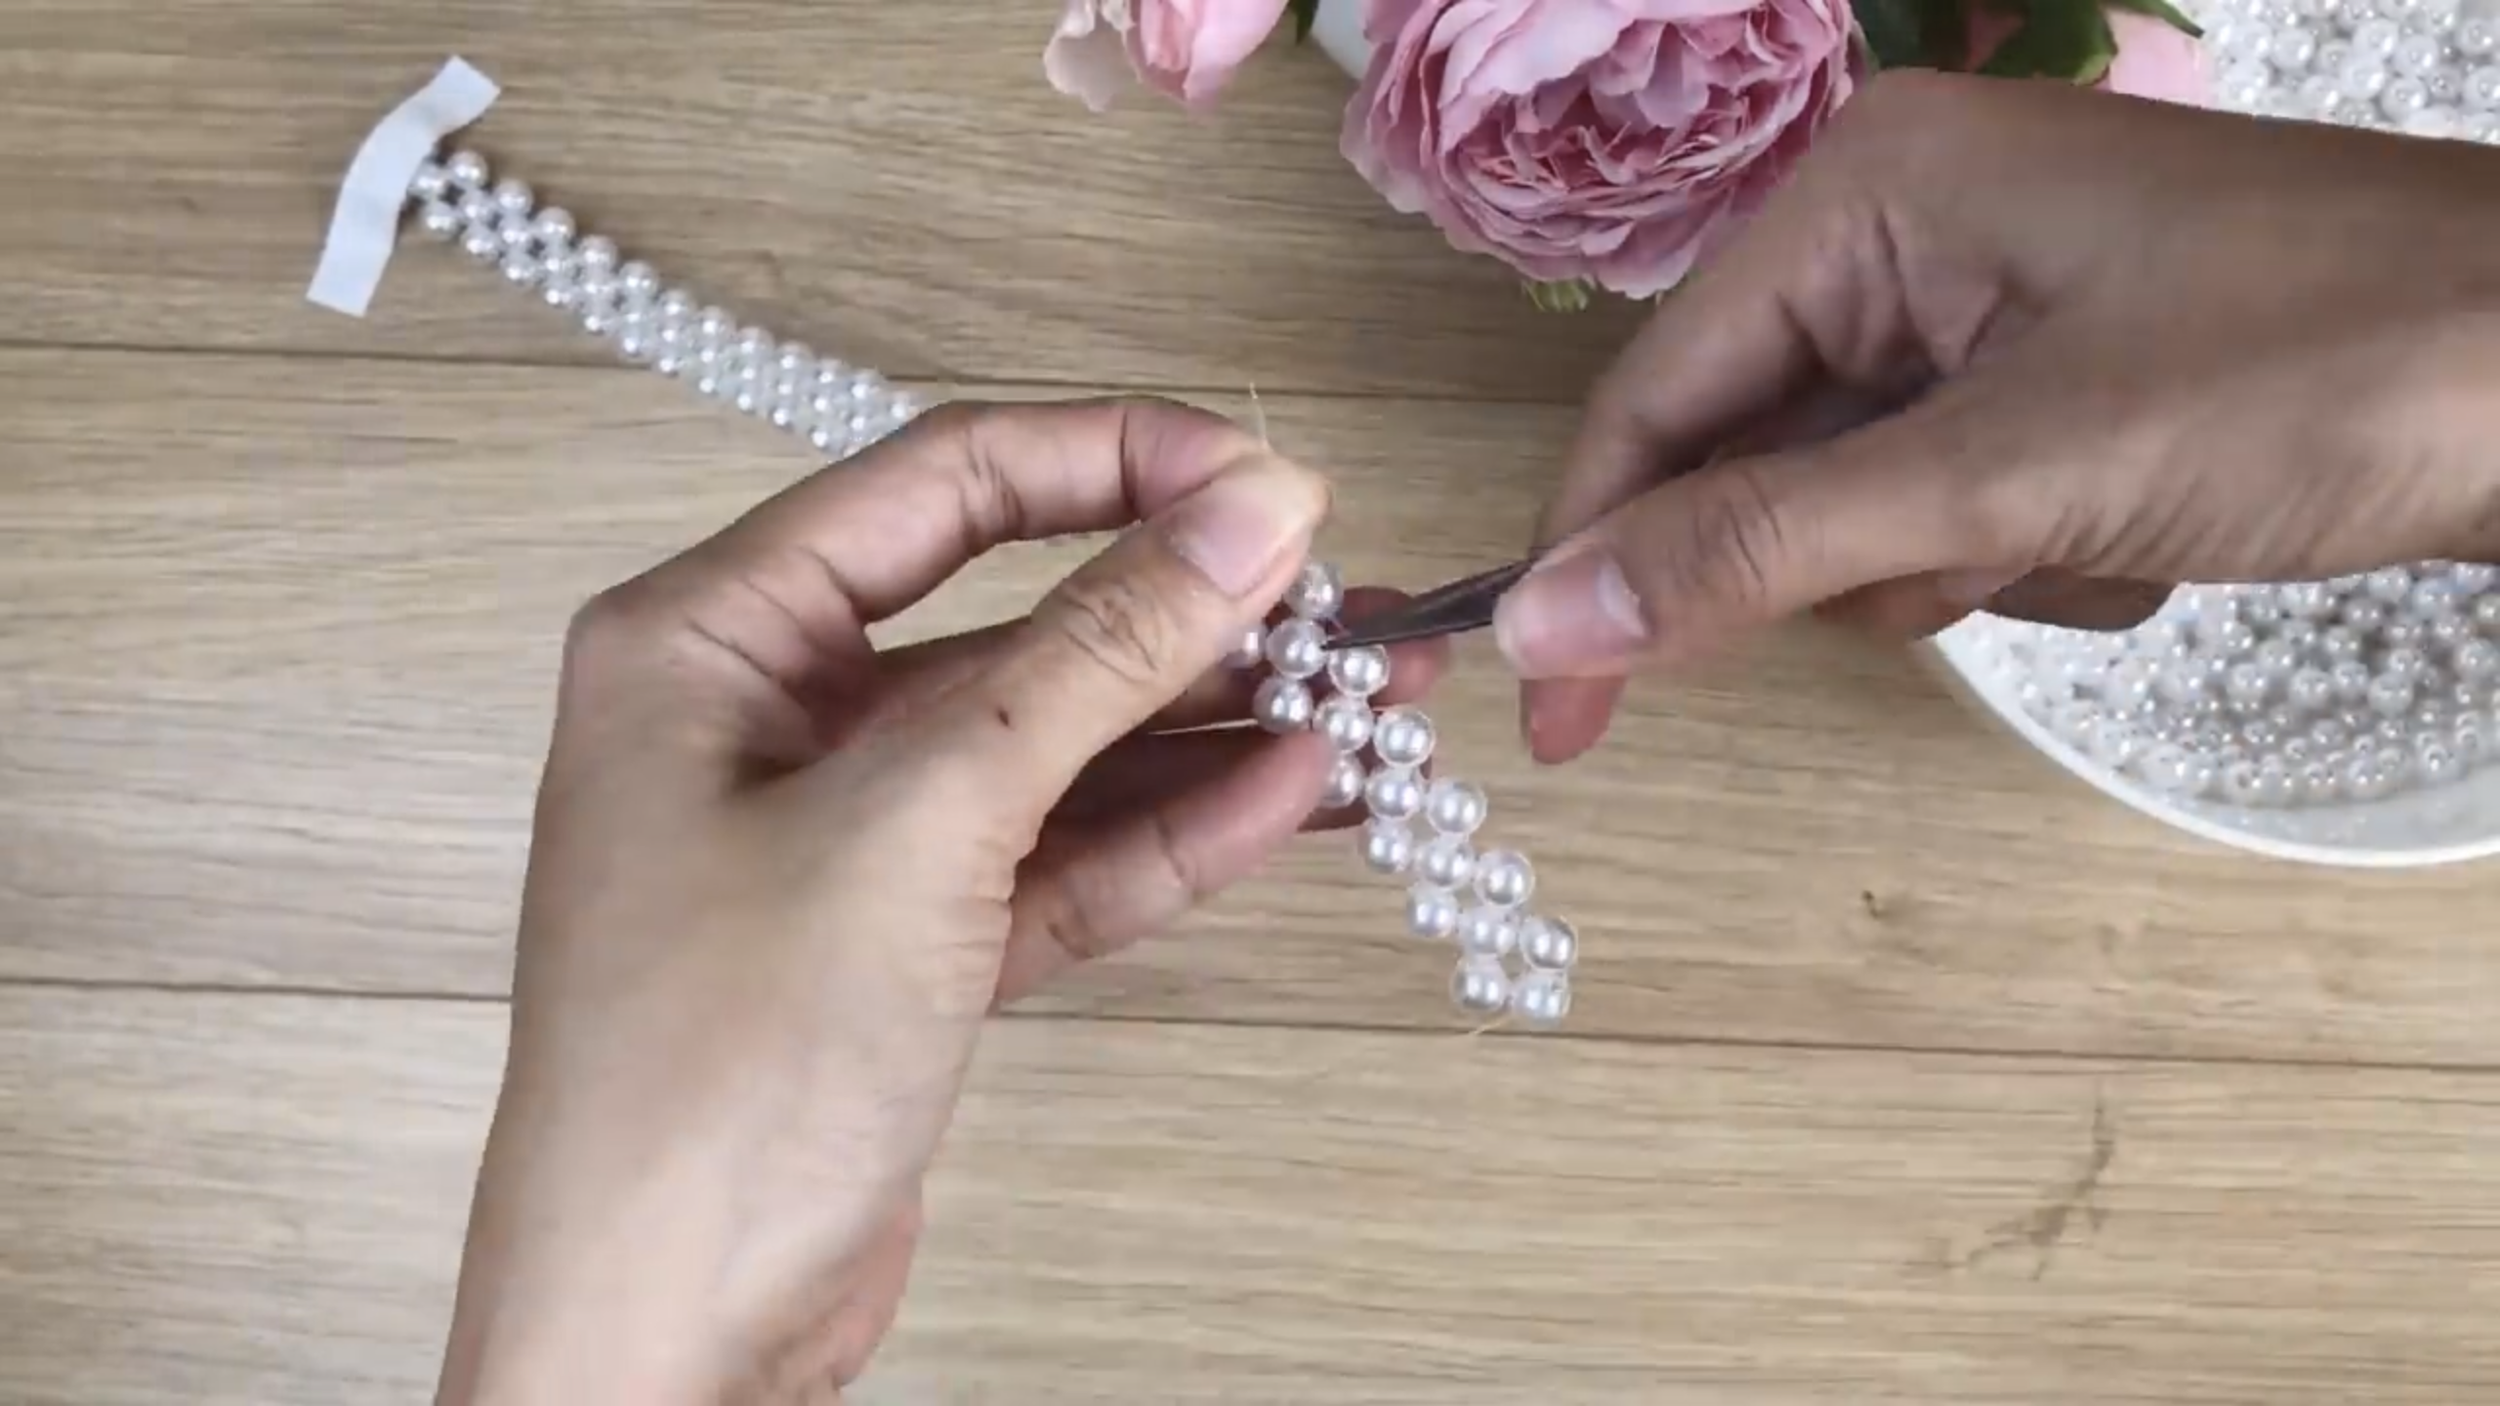
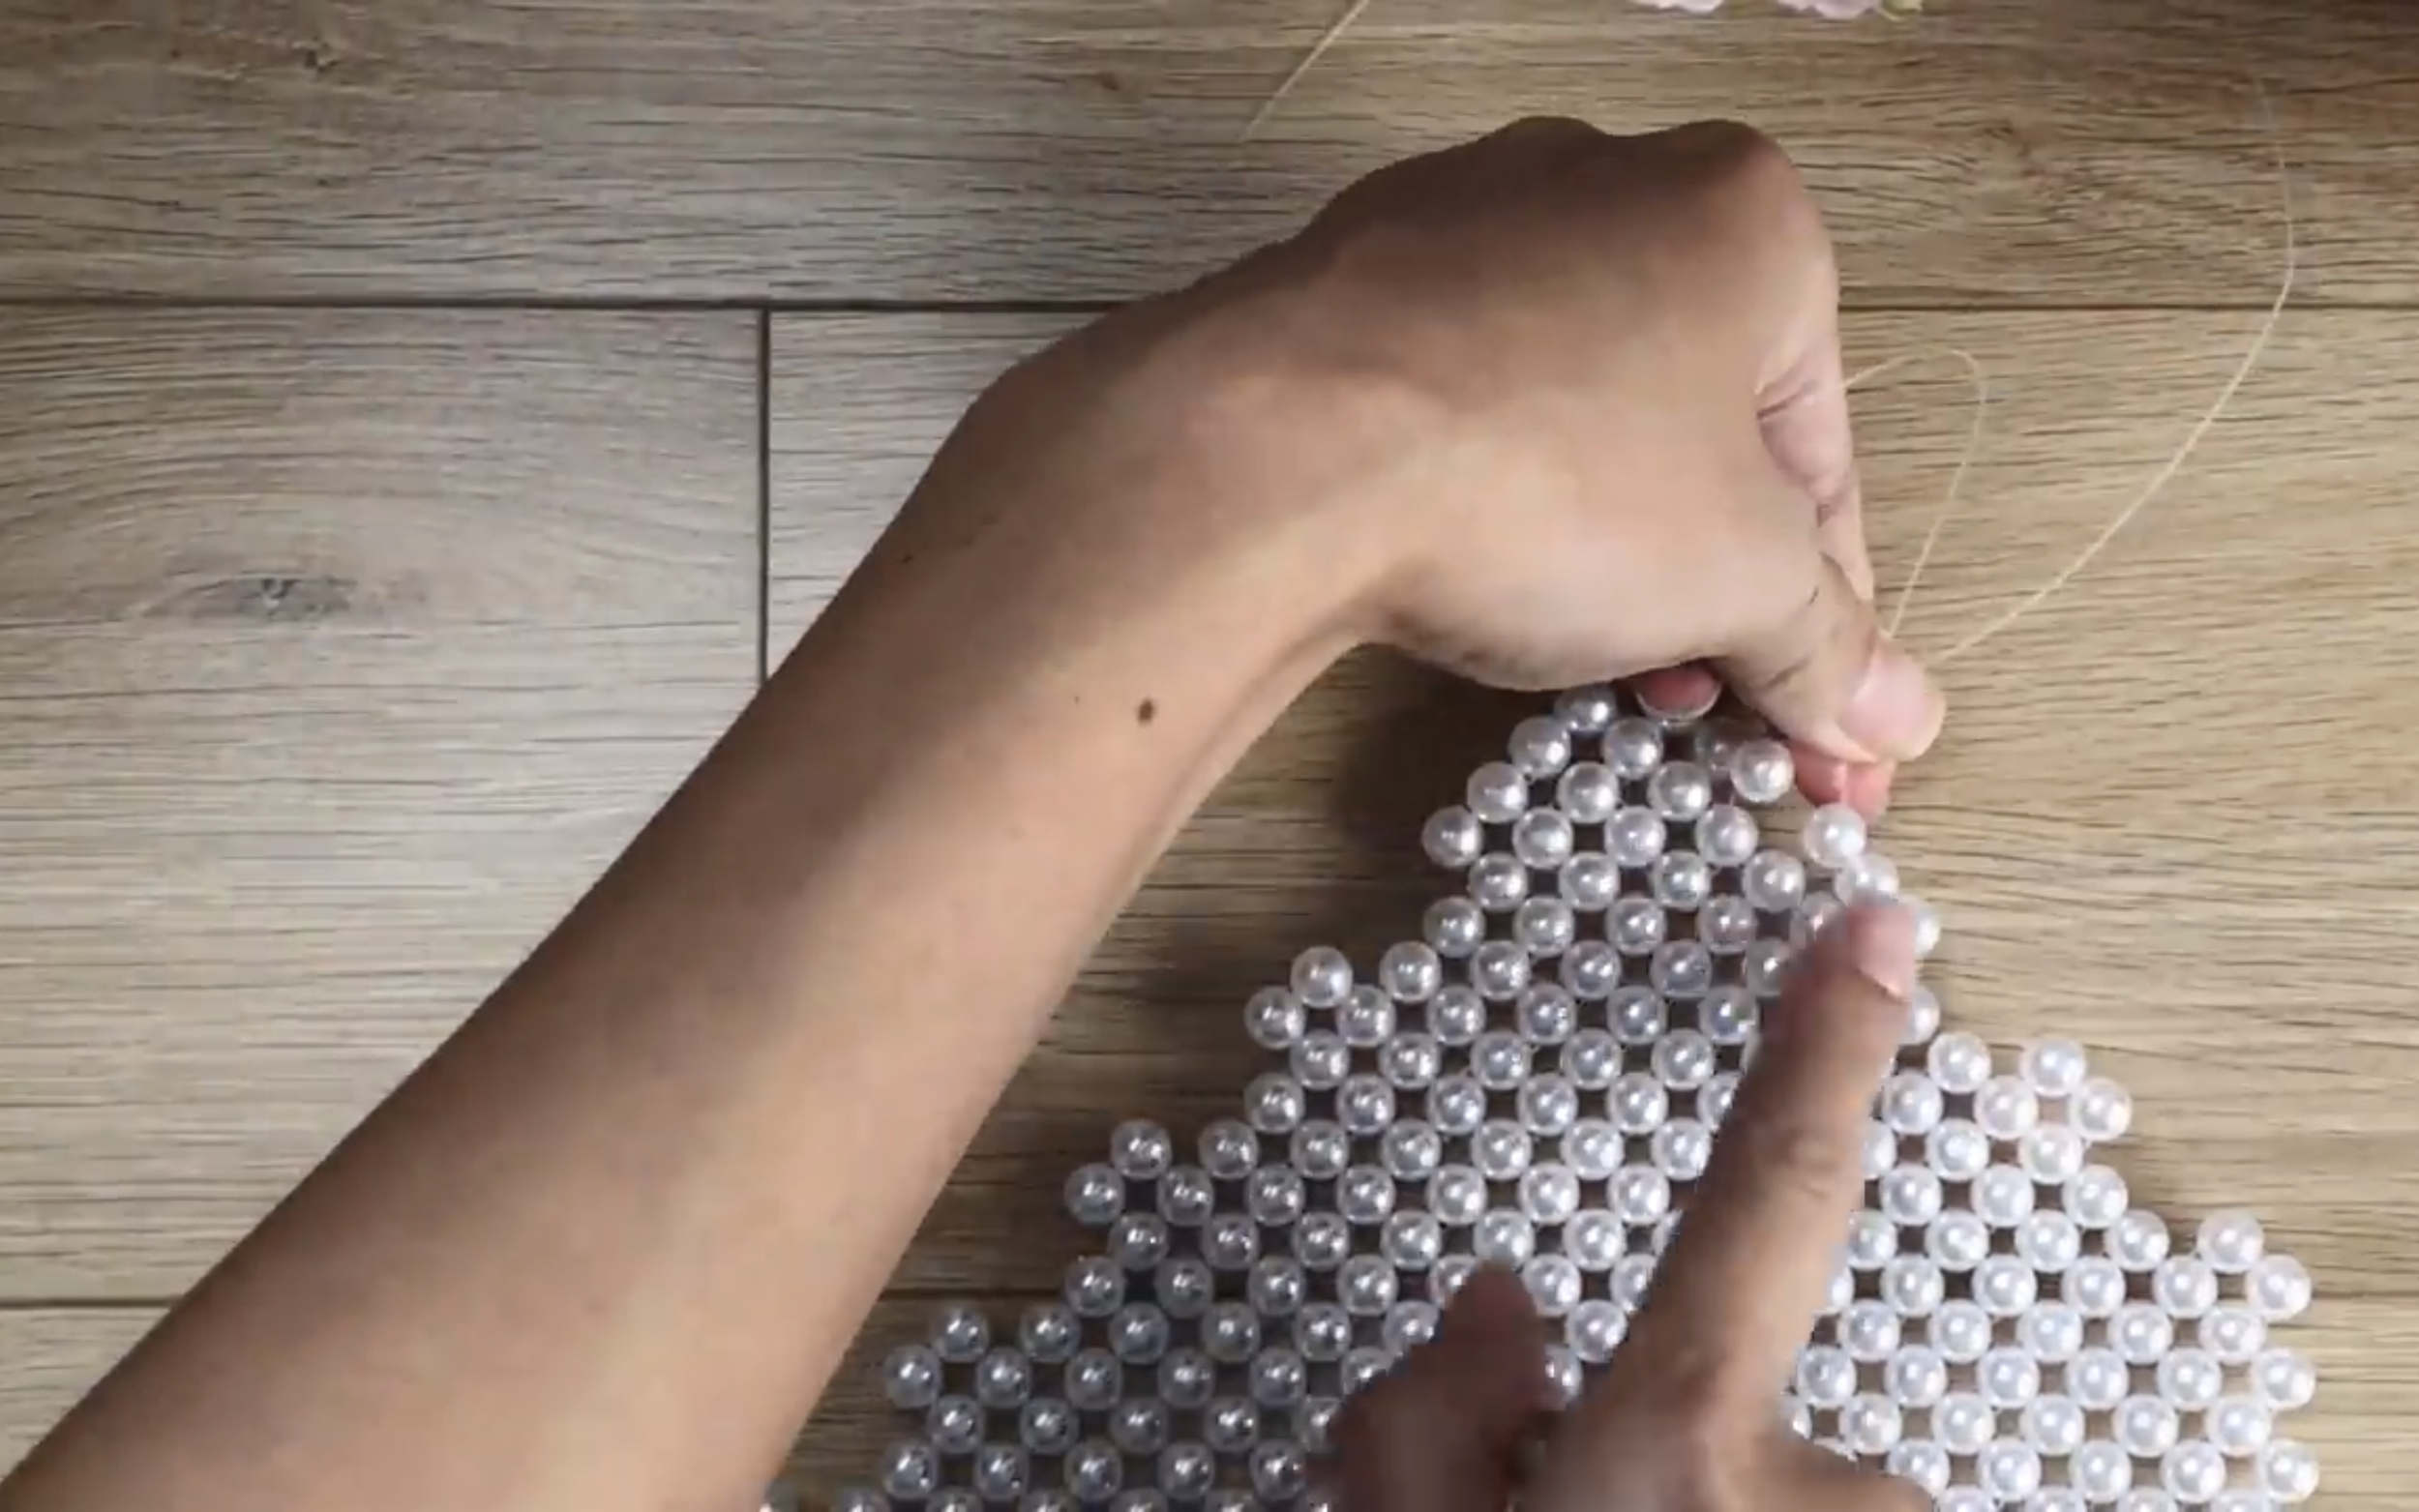
This is the third knot type.
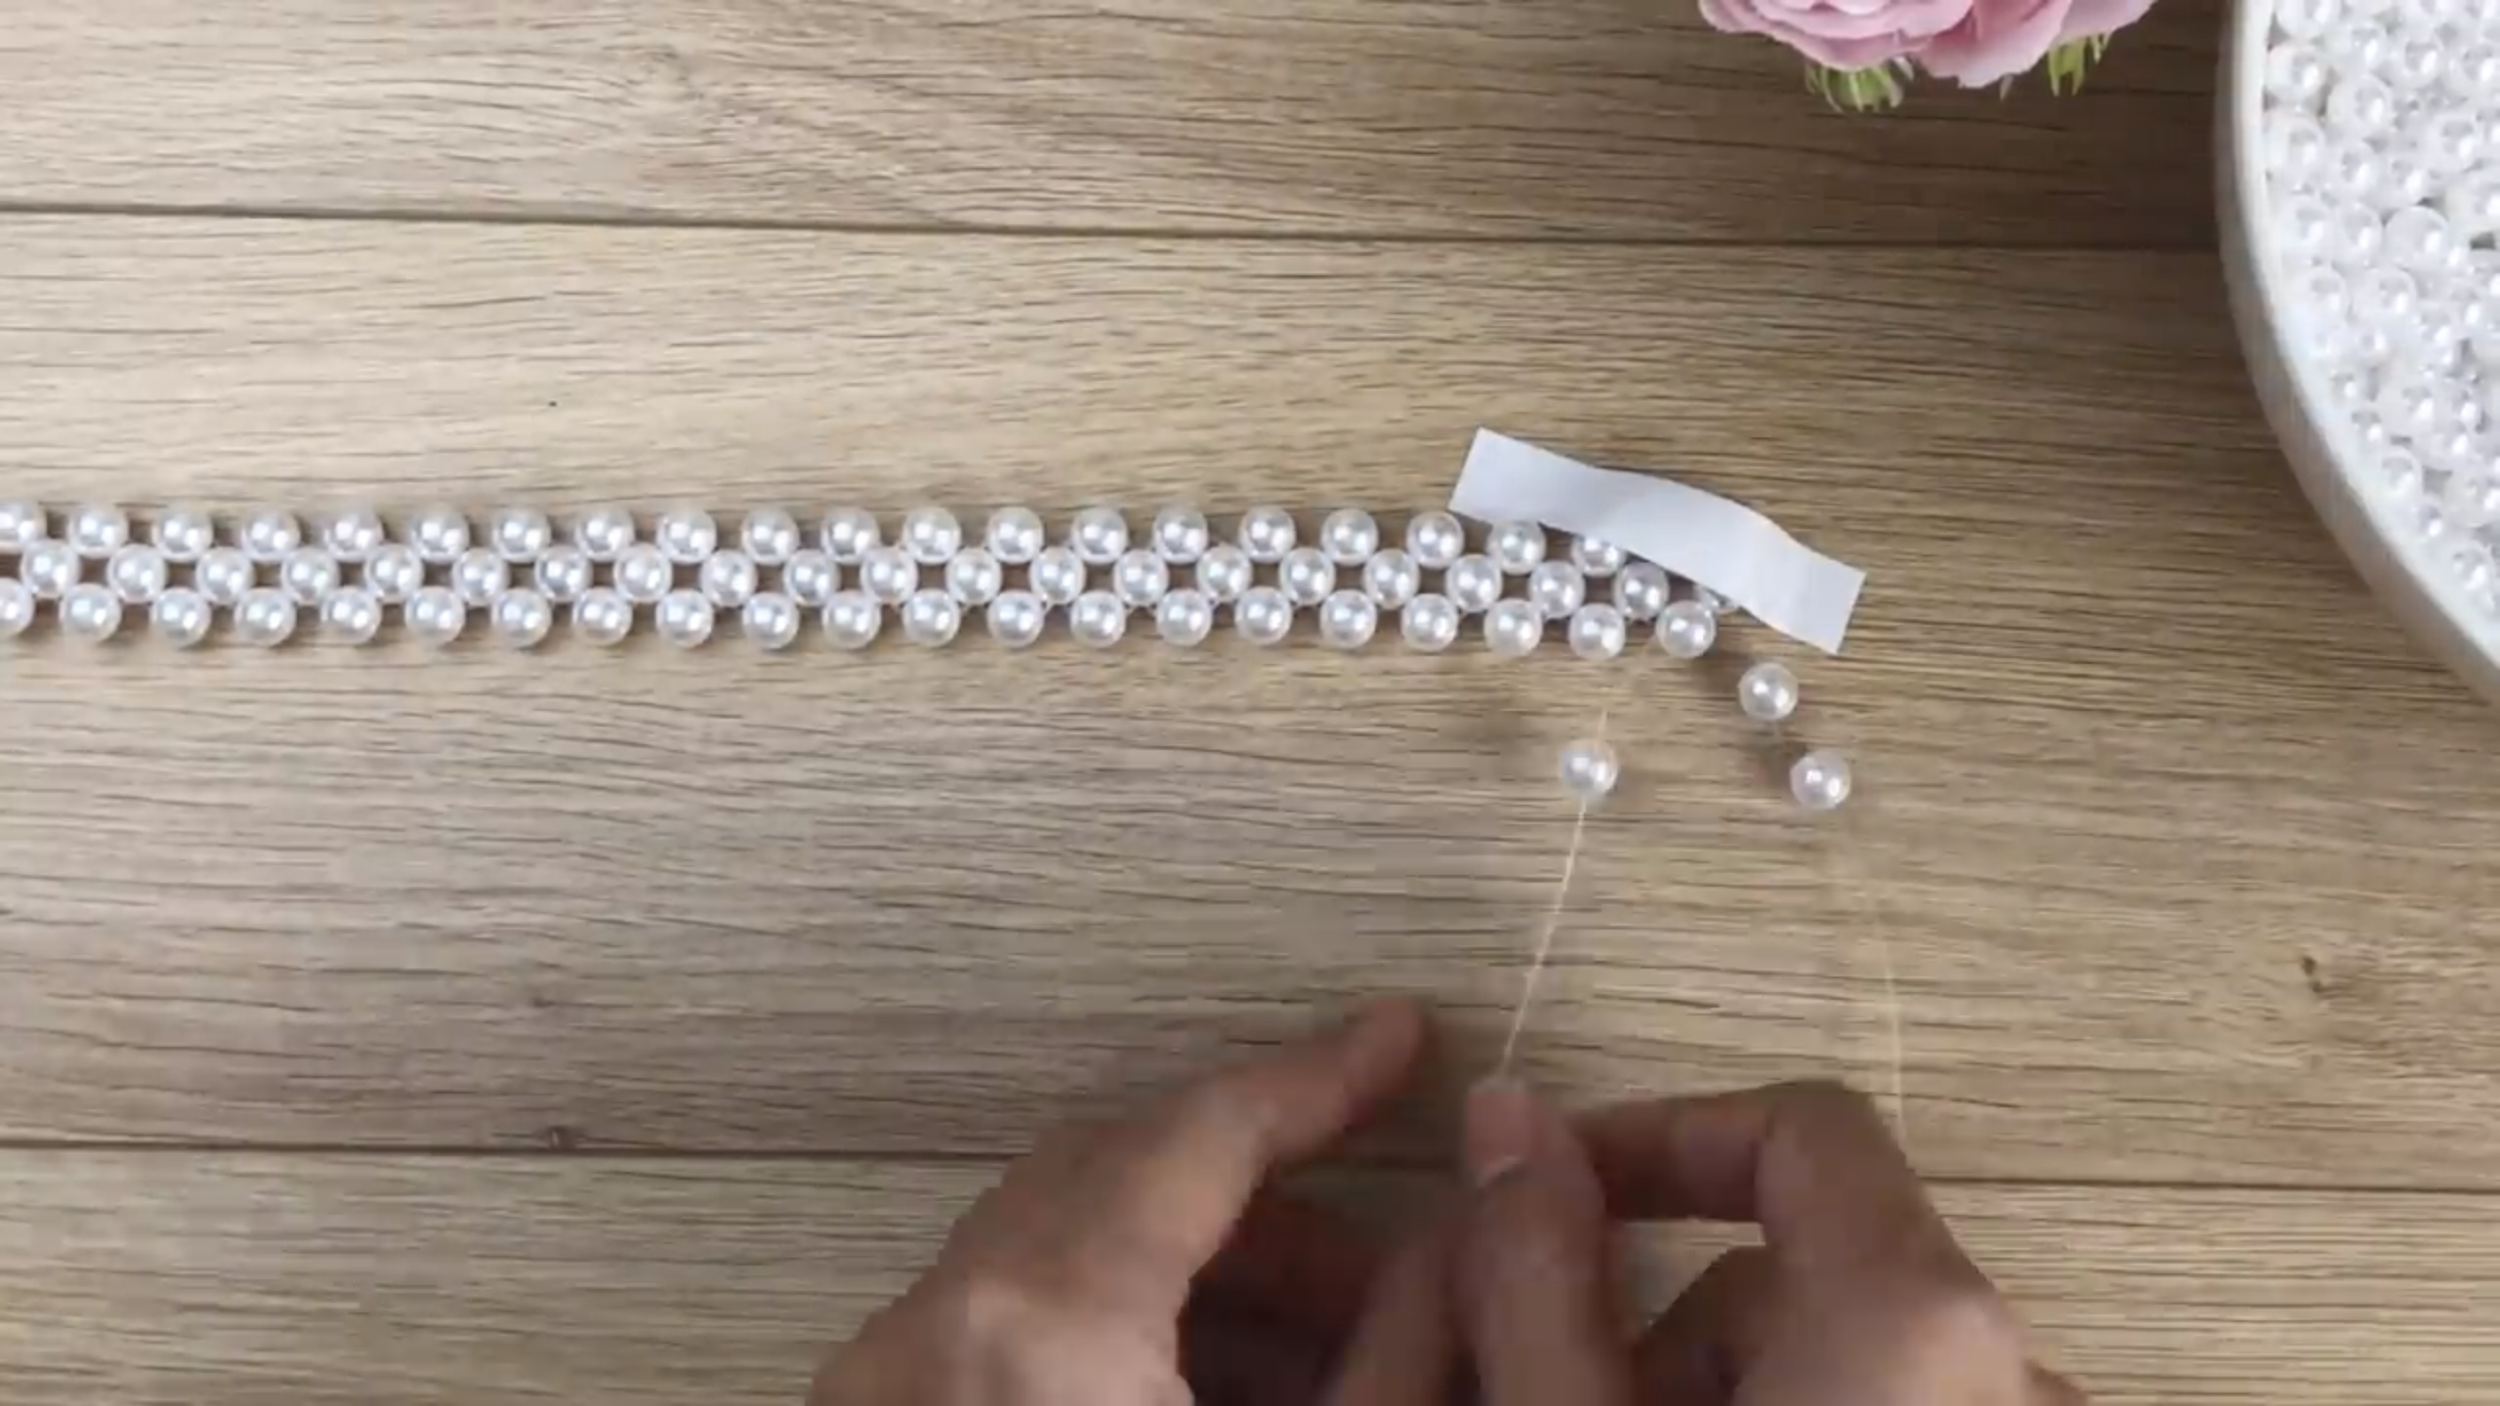
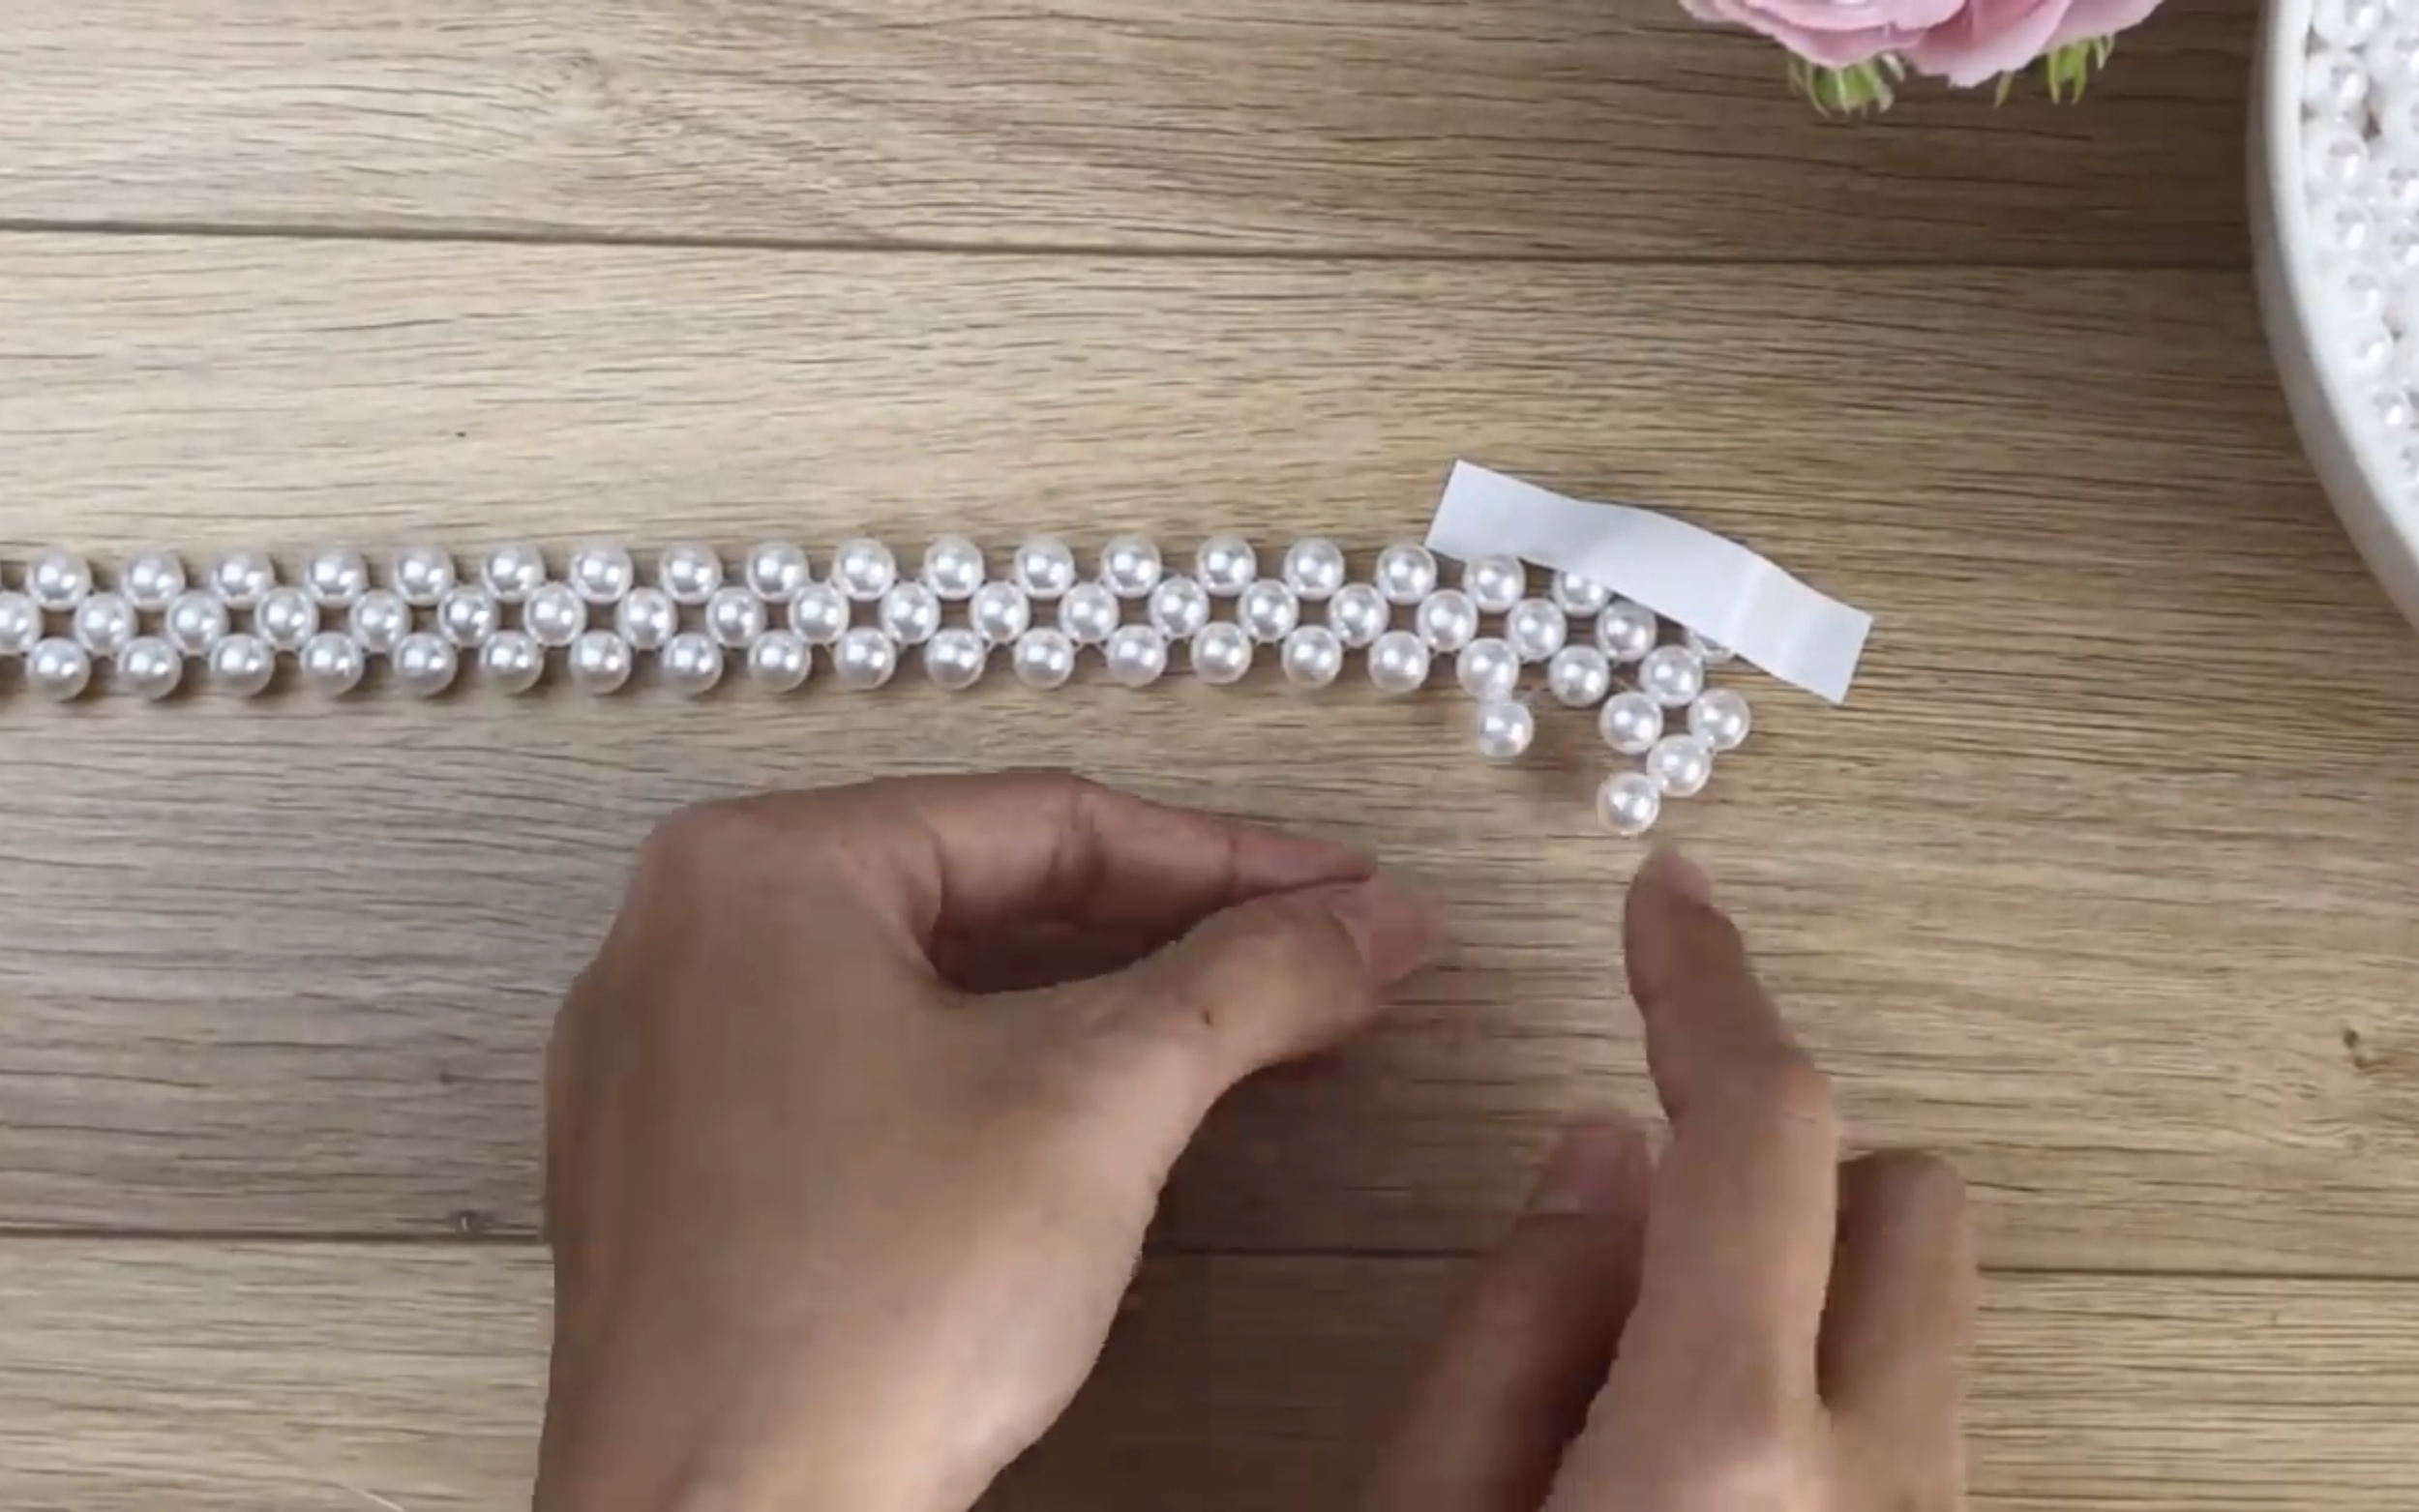
Keep doing this knot type until you get to the width of 12 cm. It's around 10 lines of pearls.
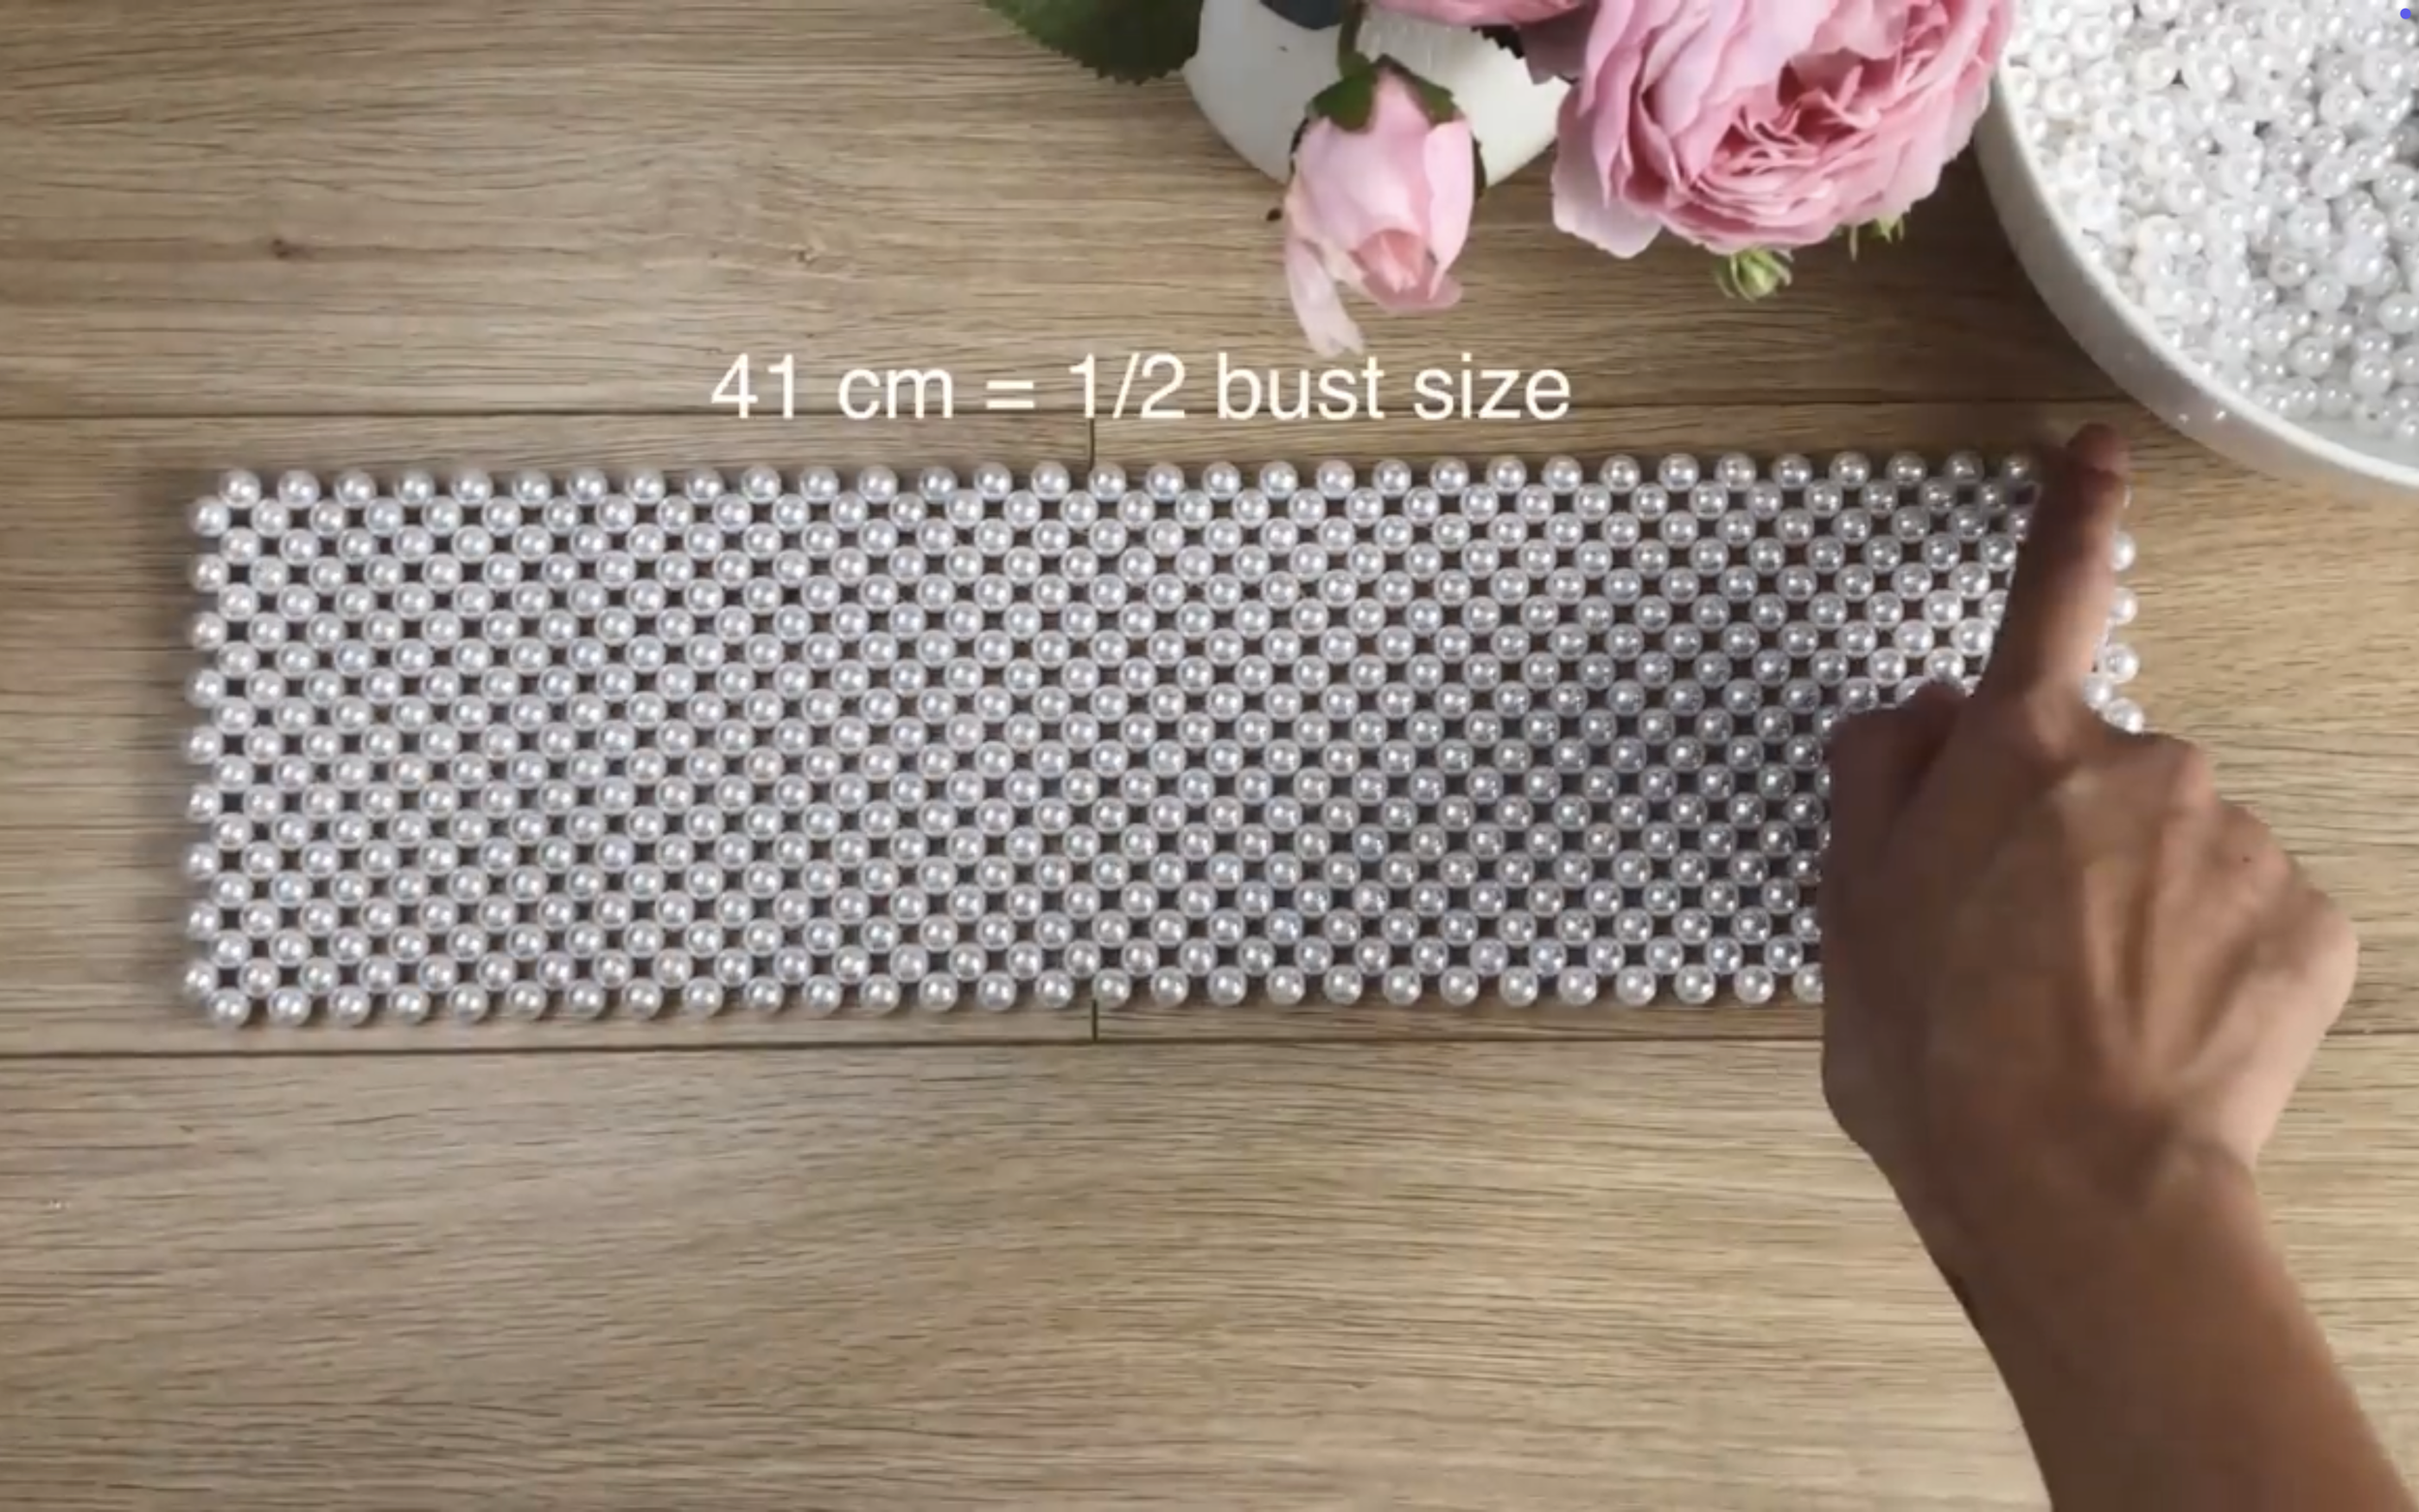
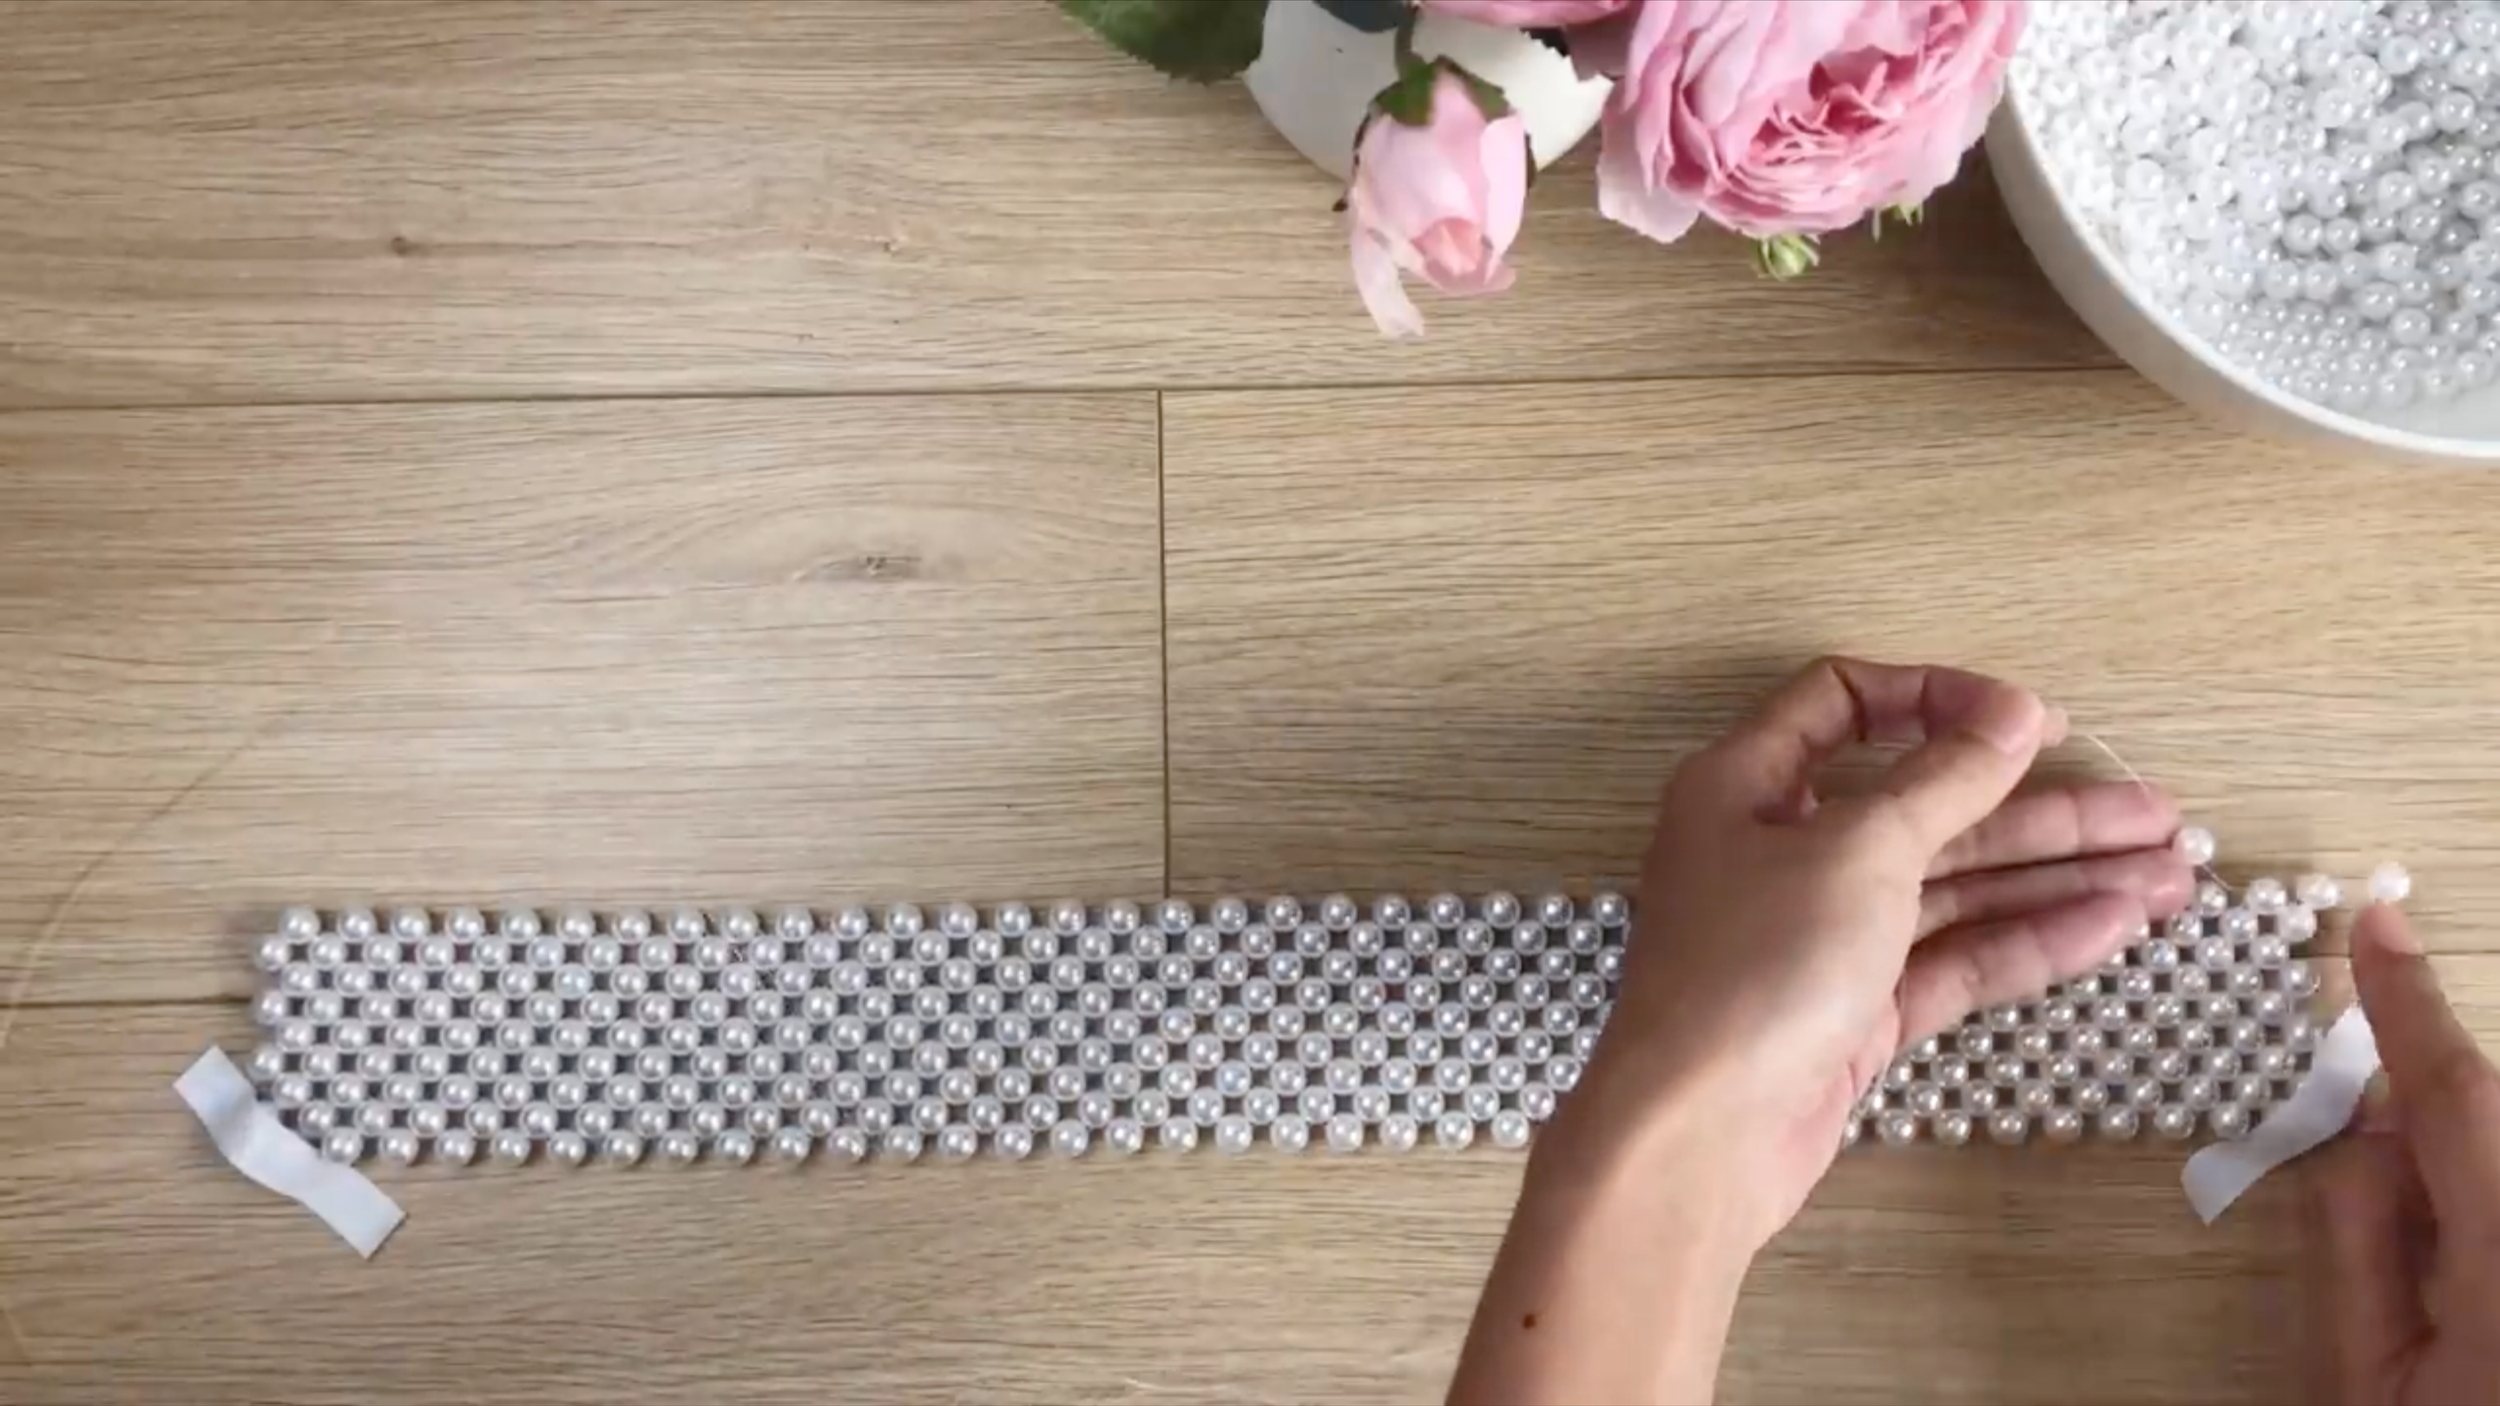
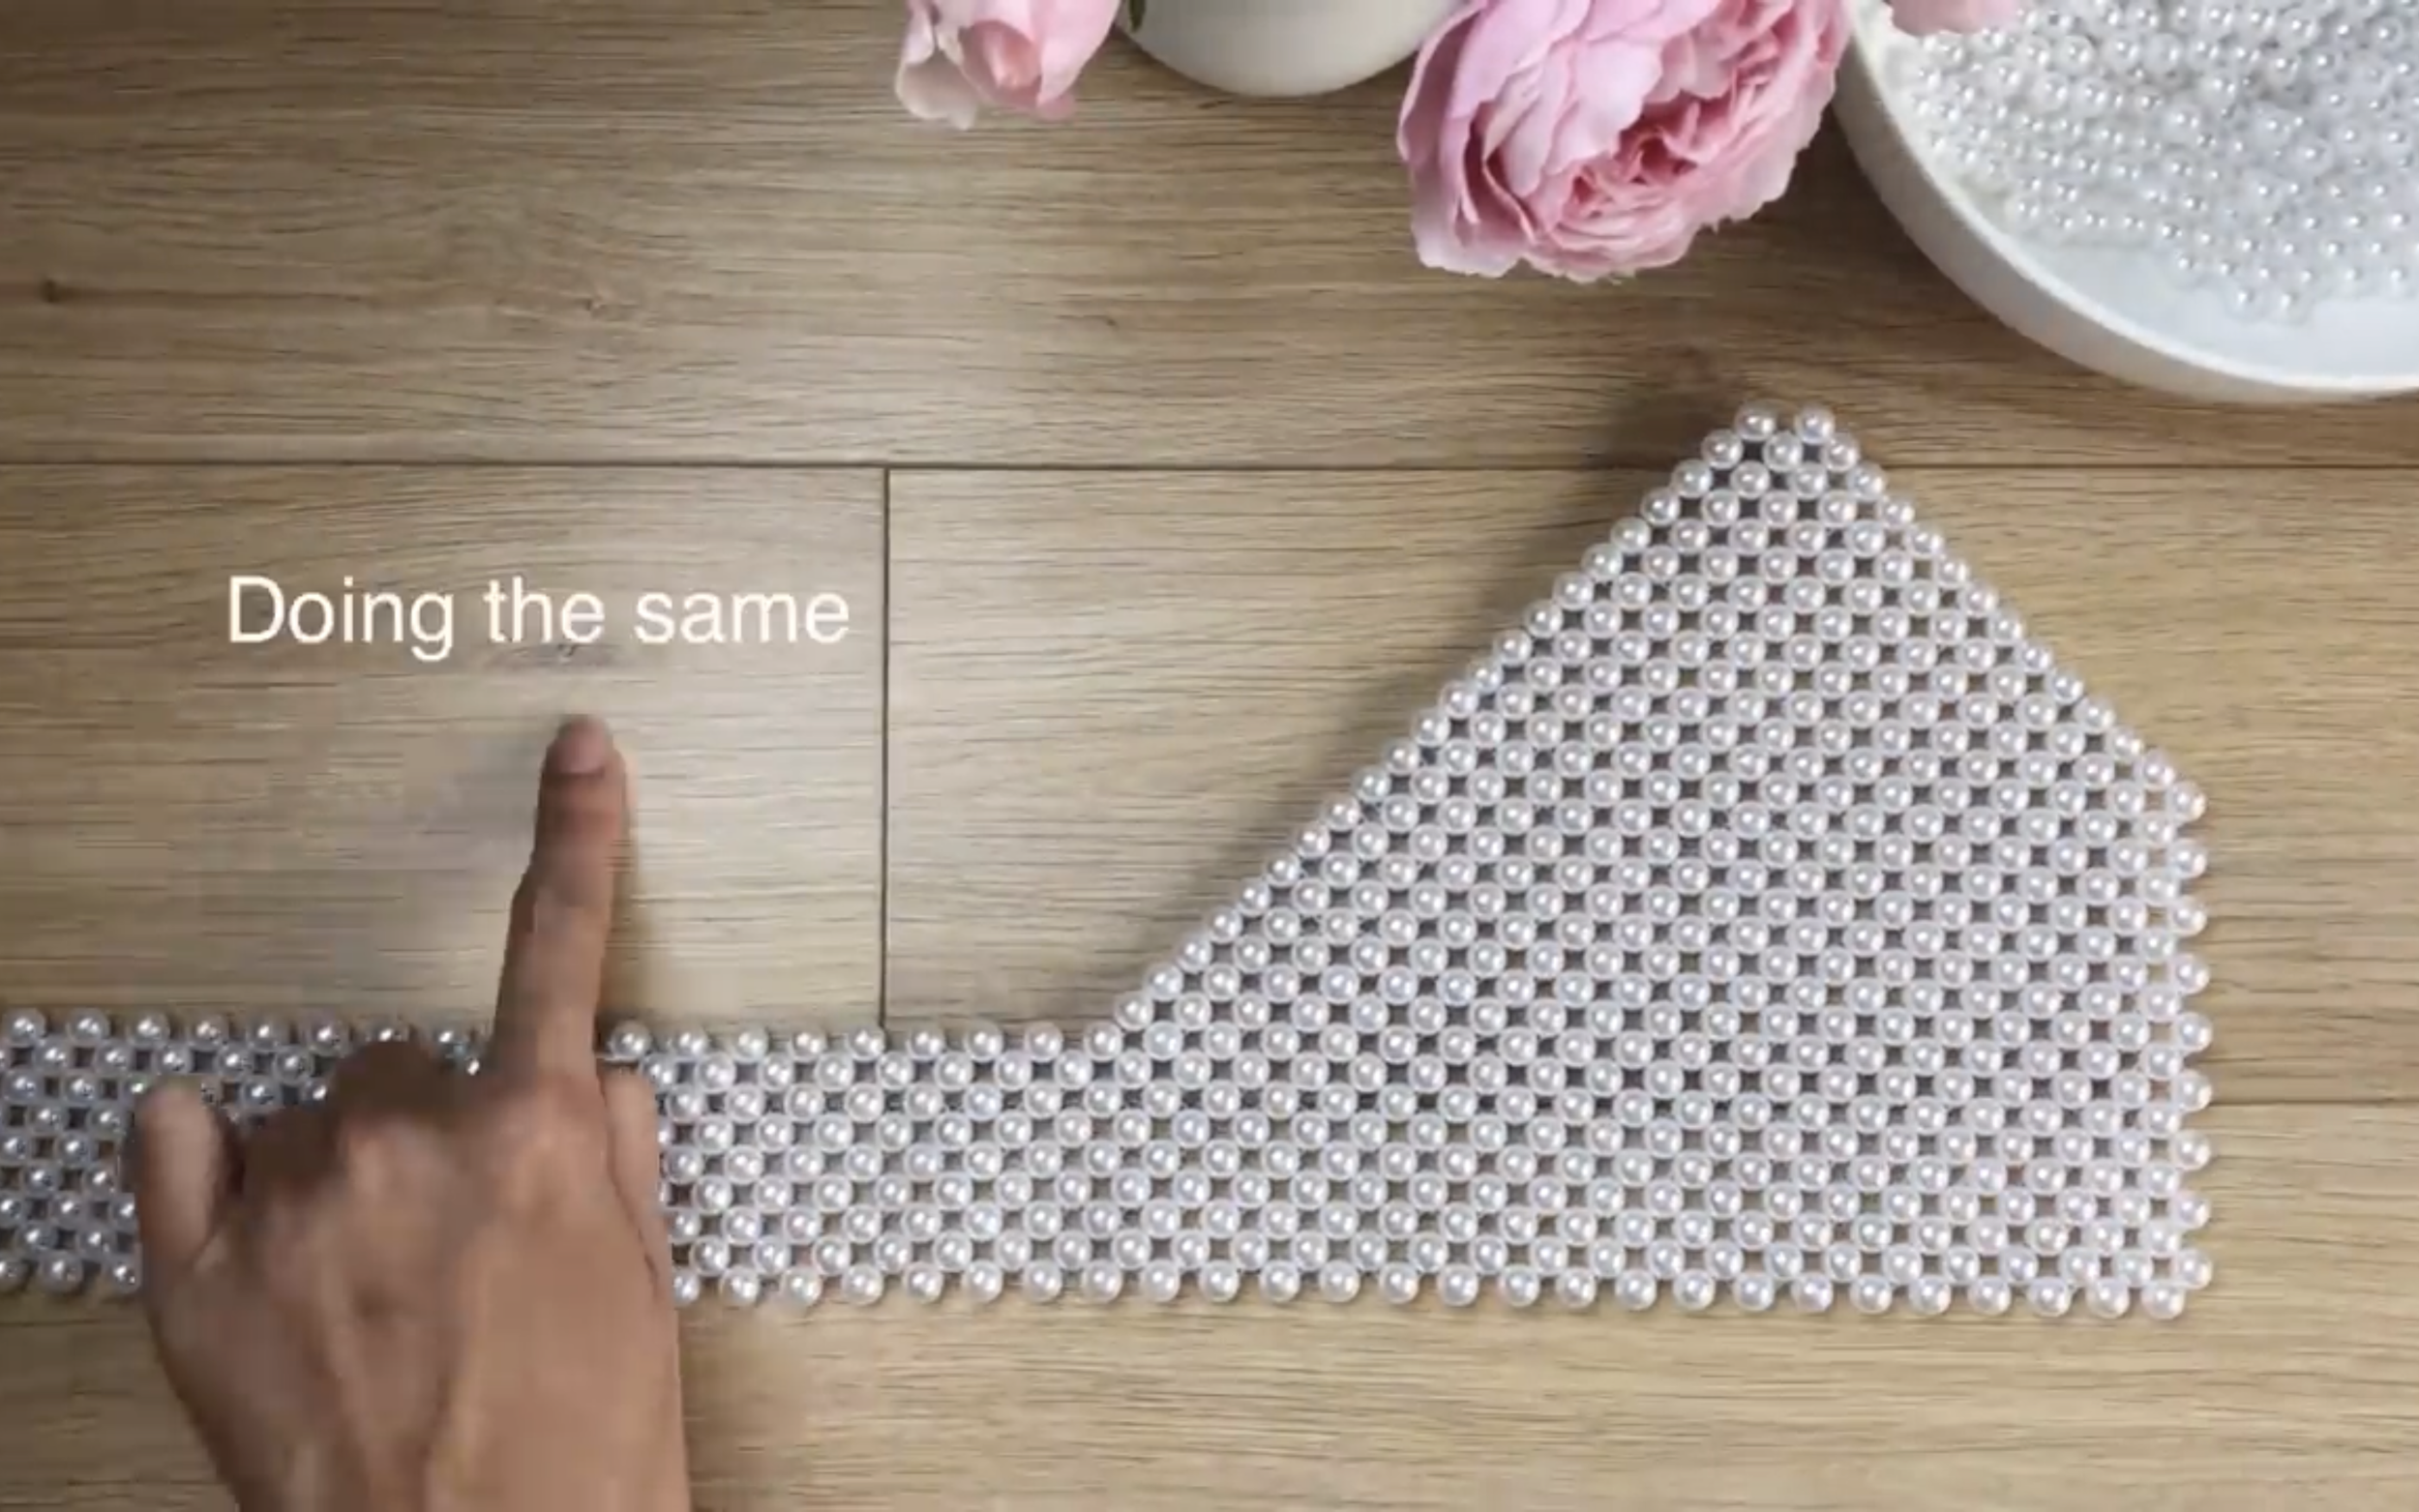
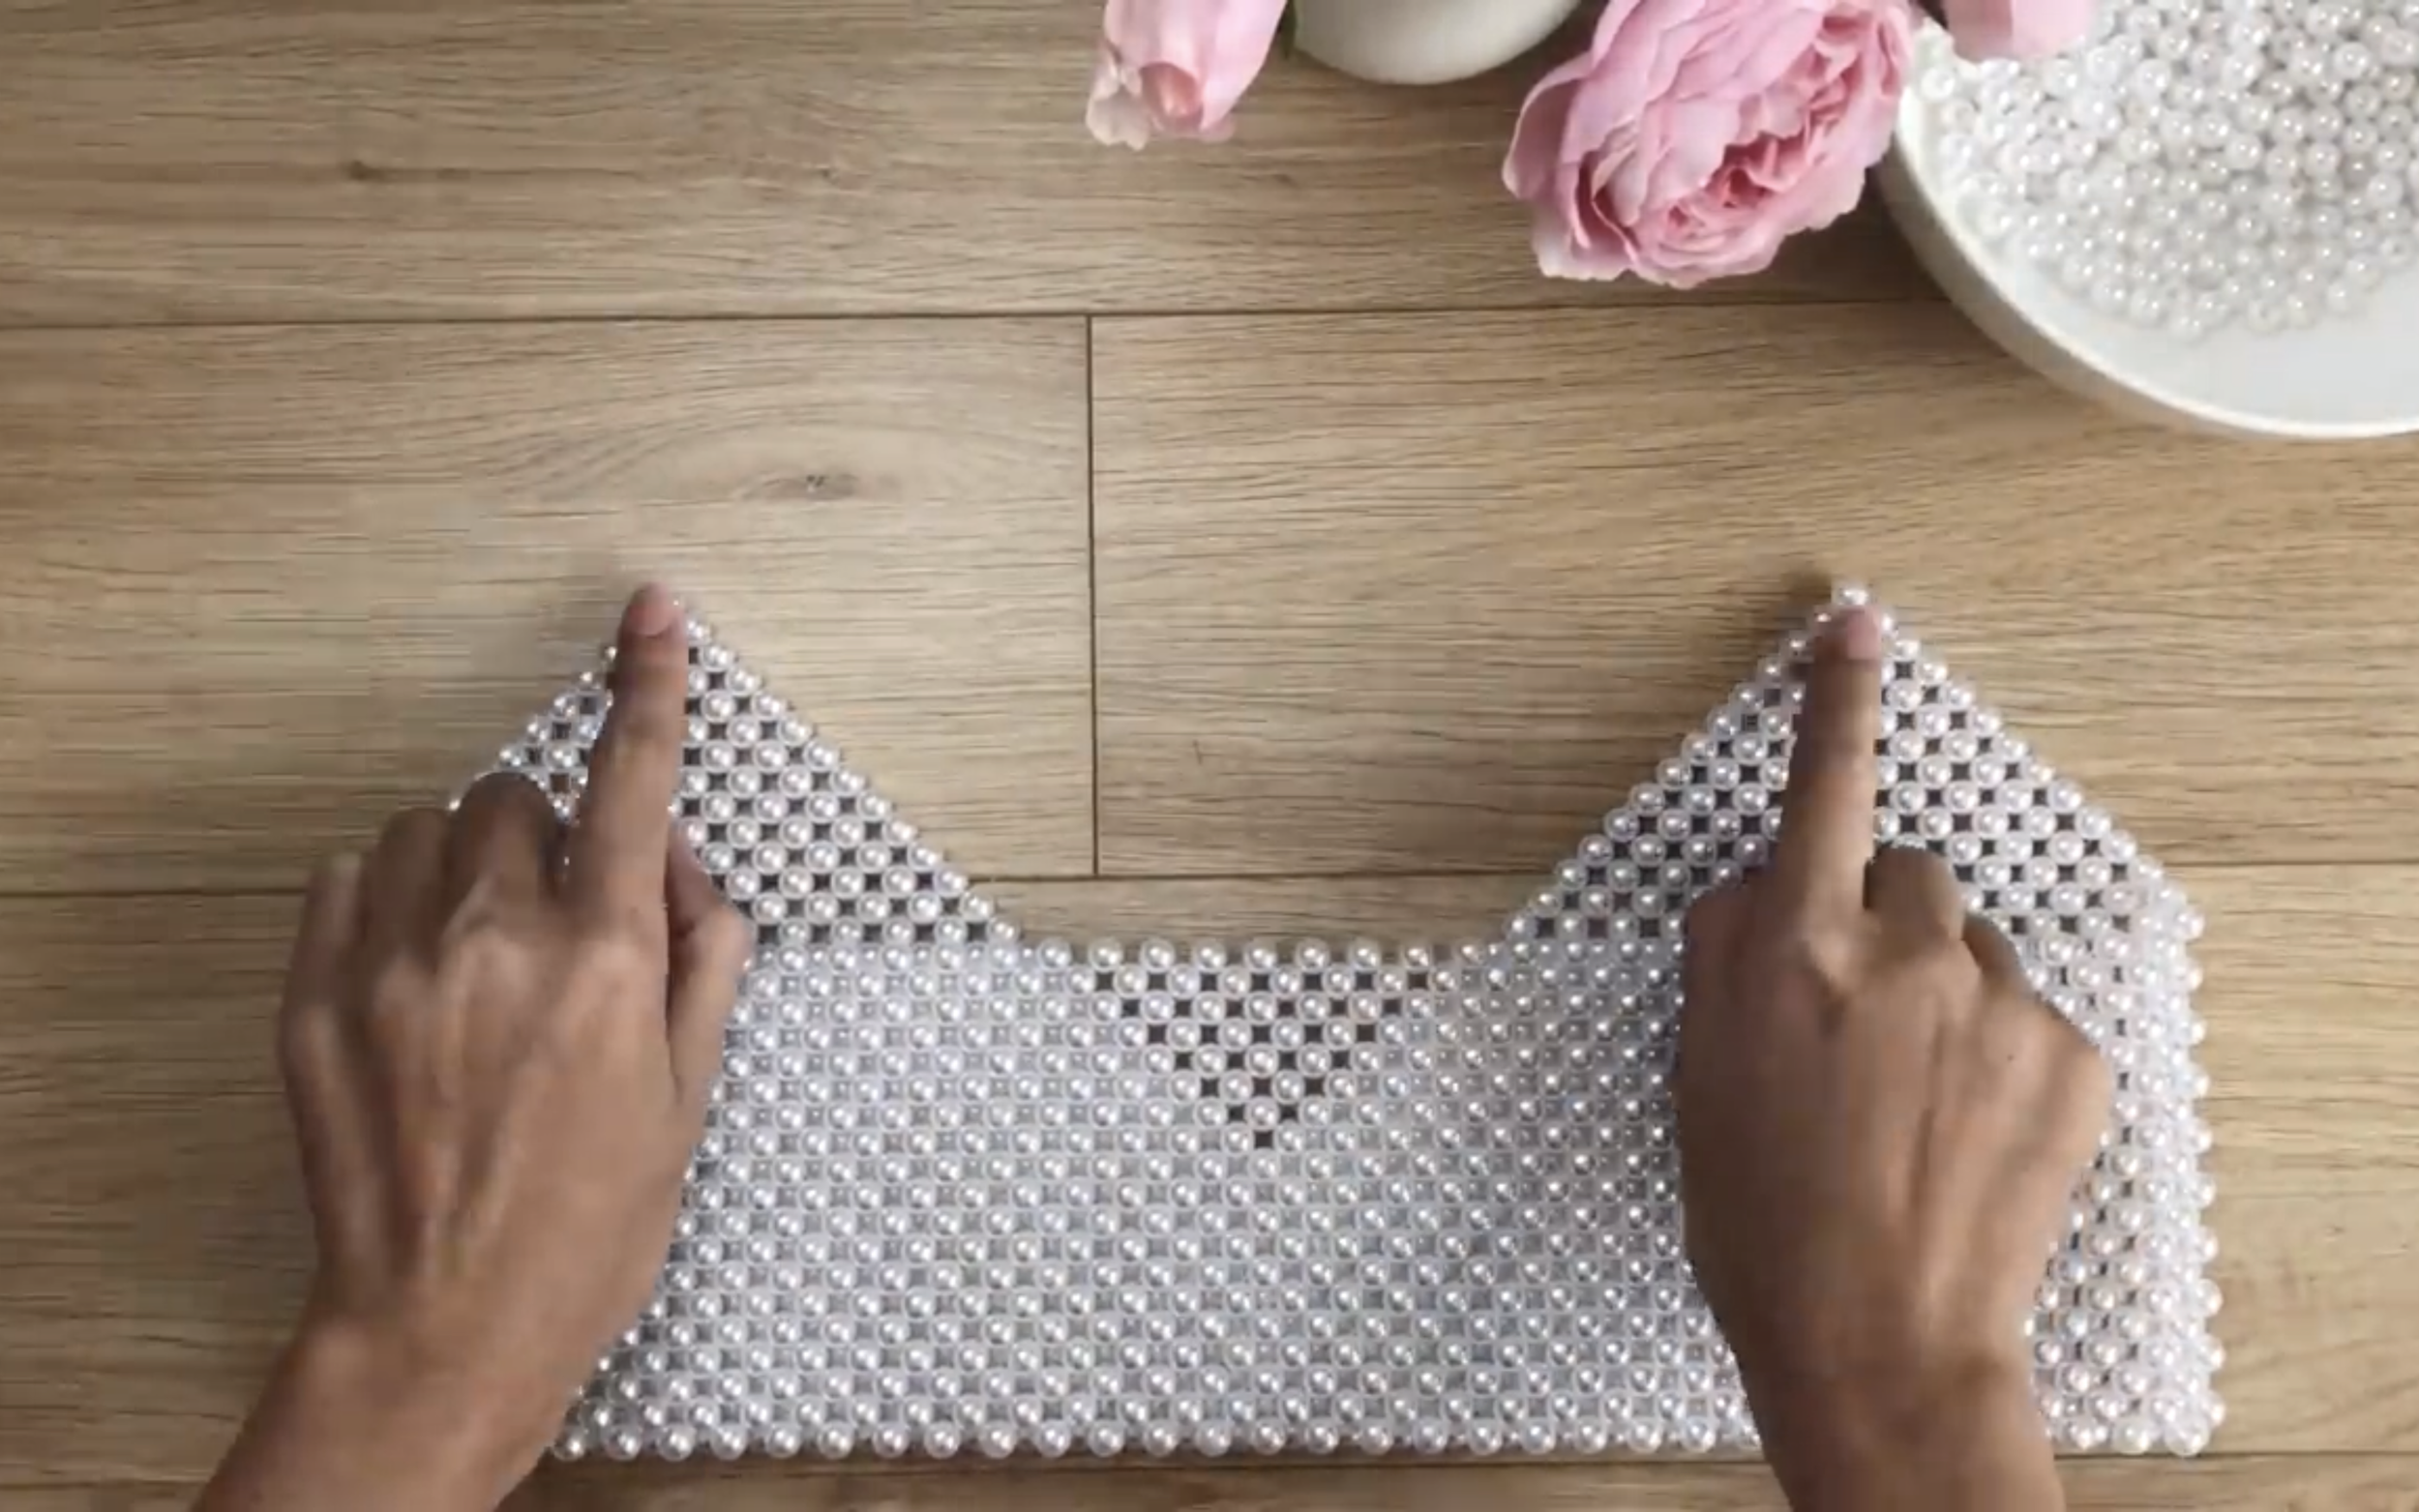
So you'll have a rectangle with 41 cm length, which is half of the bust size, and 12 cm width. And it'll be the back of the bra.
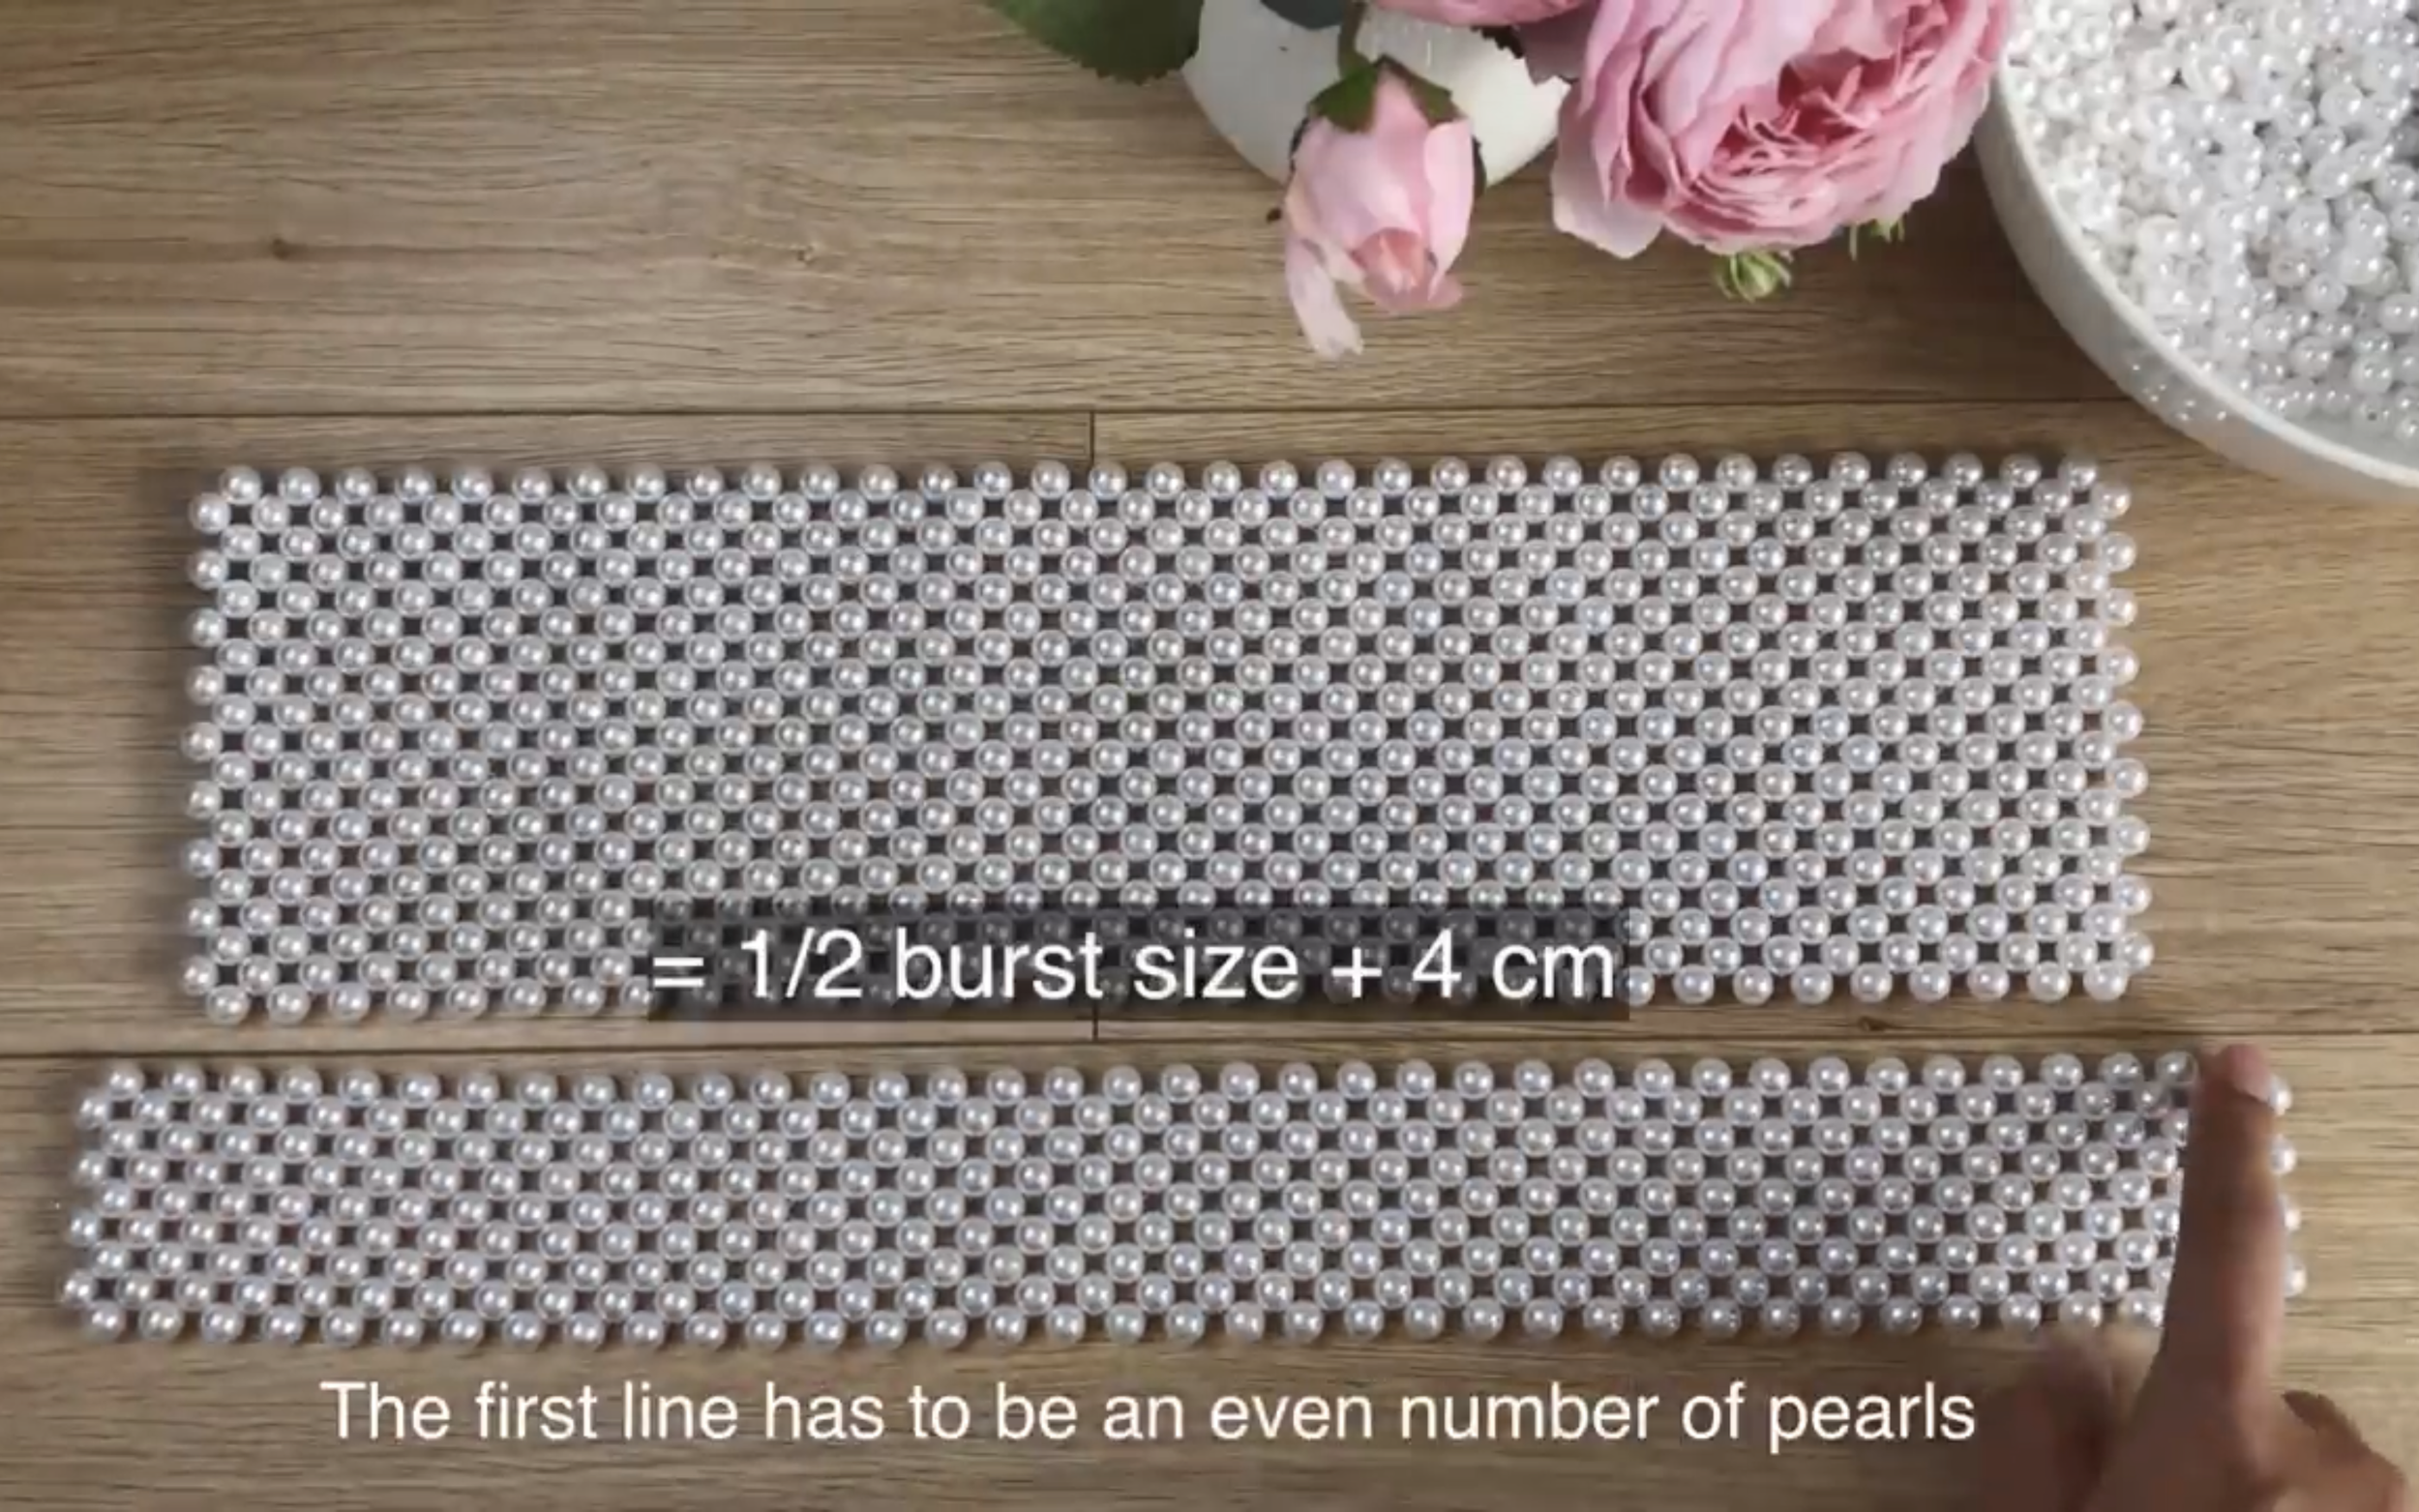
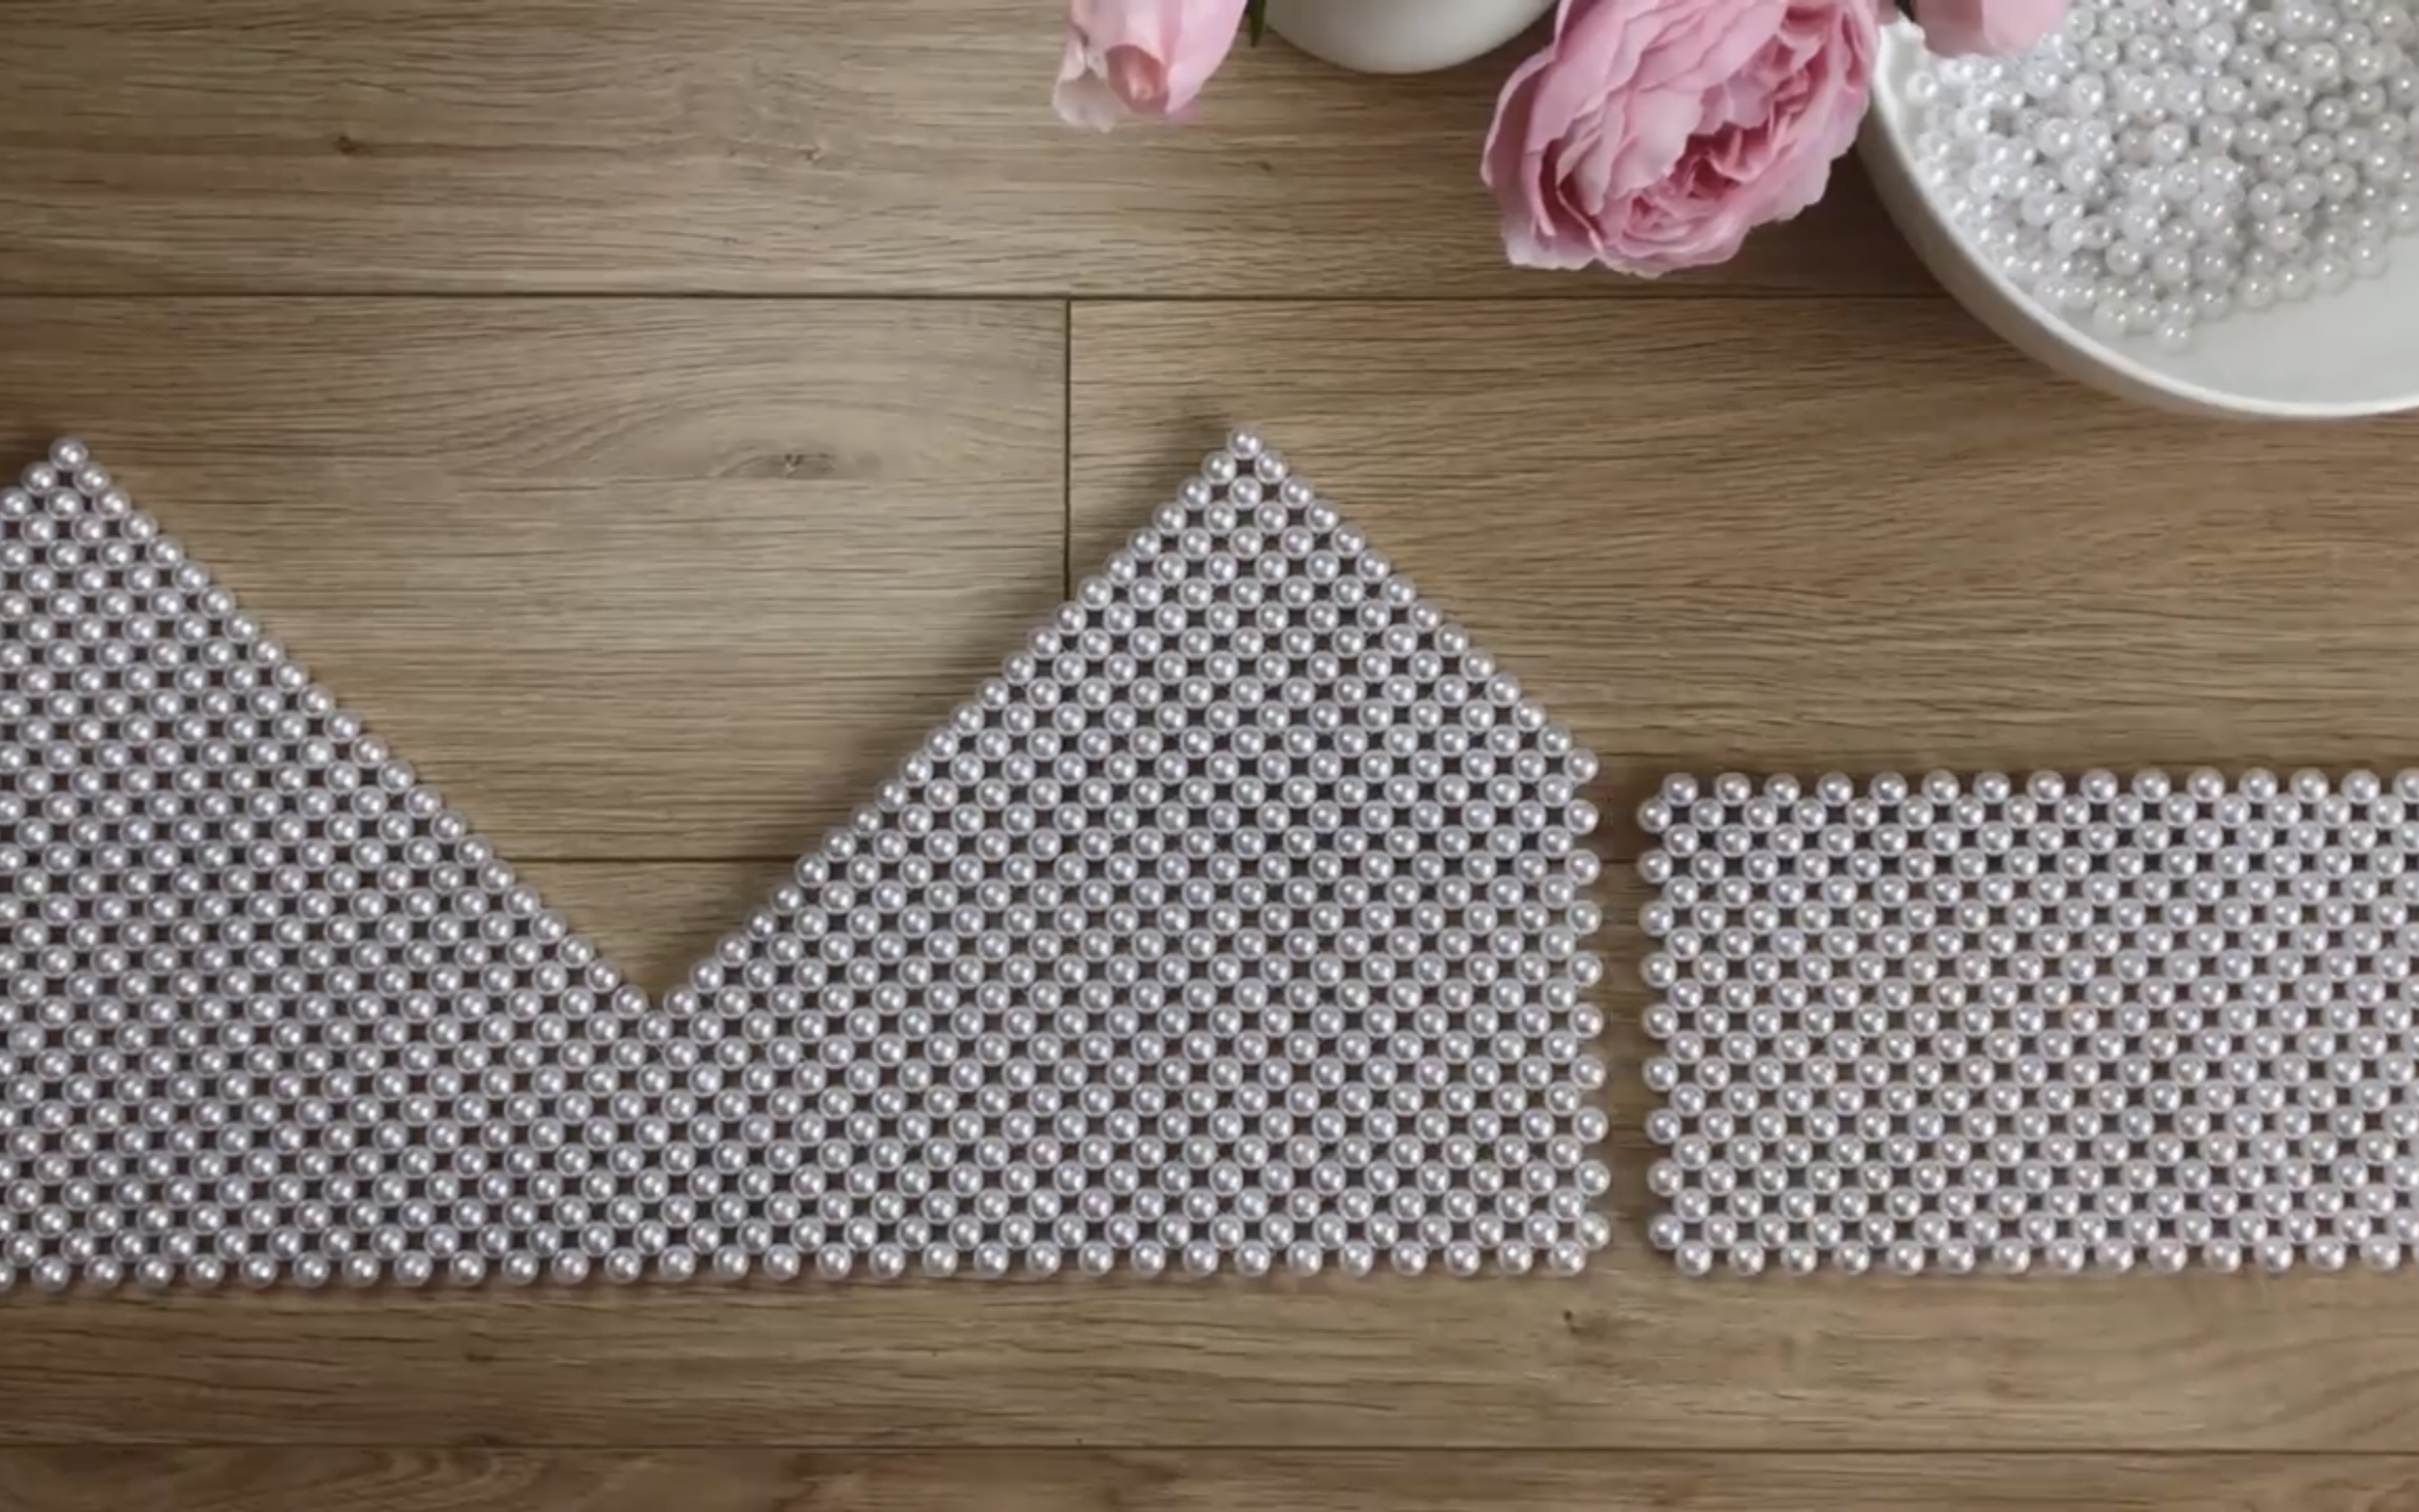
Using the same method, make another rectangle with a 45 cm length, which is half of the bust size + 4 cm, and 6 cm width. It'll be the front of the bra.
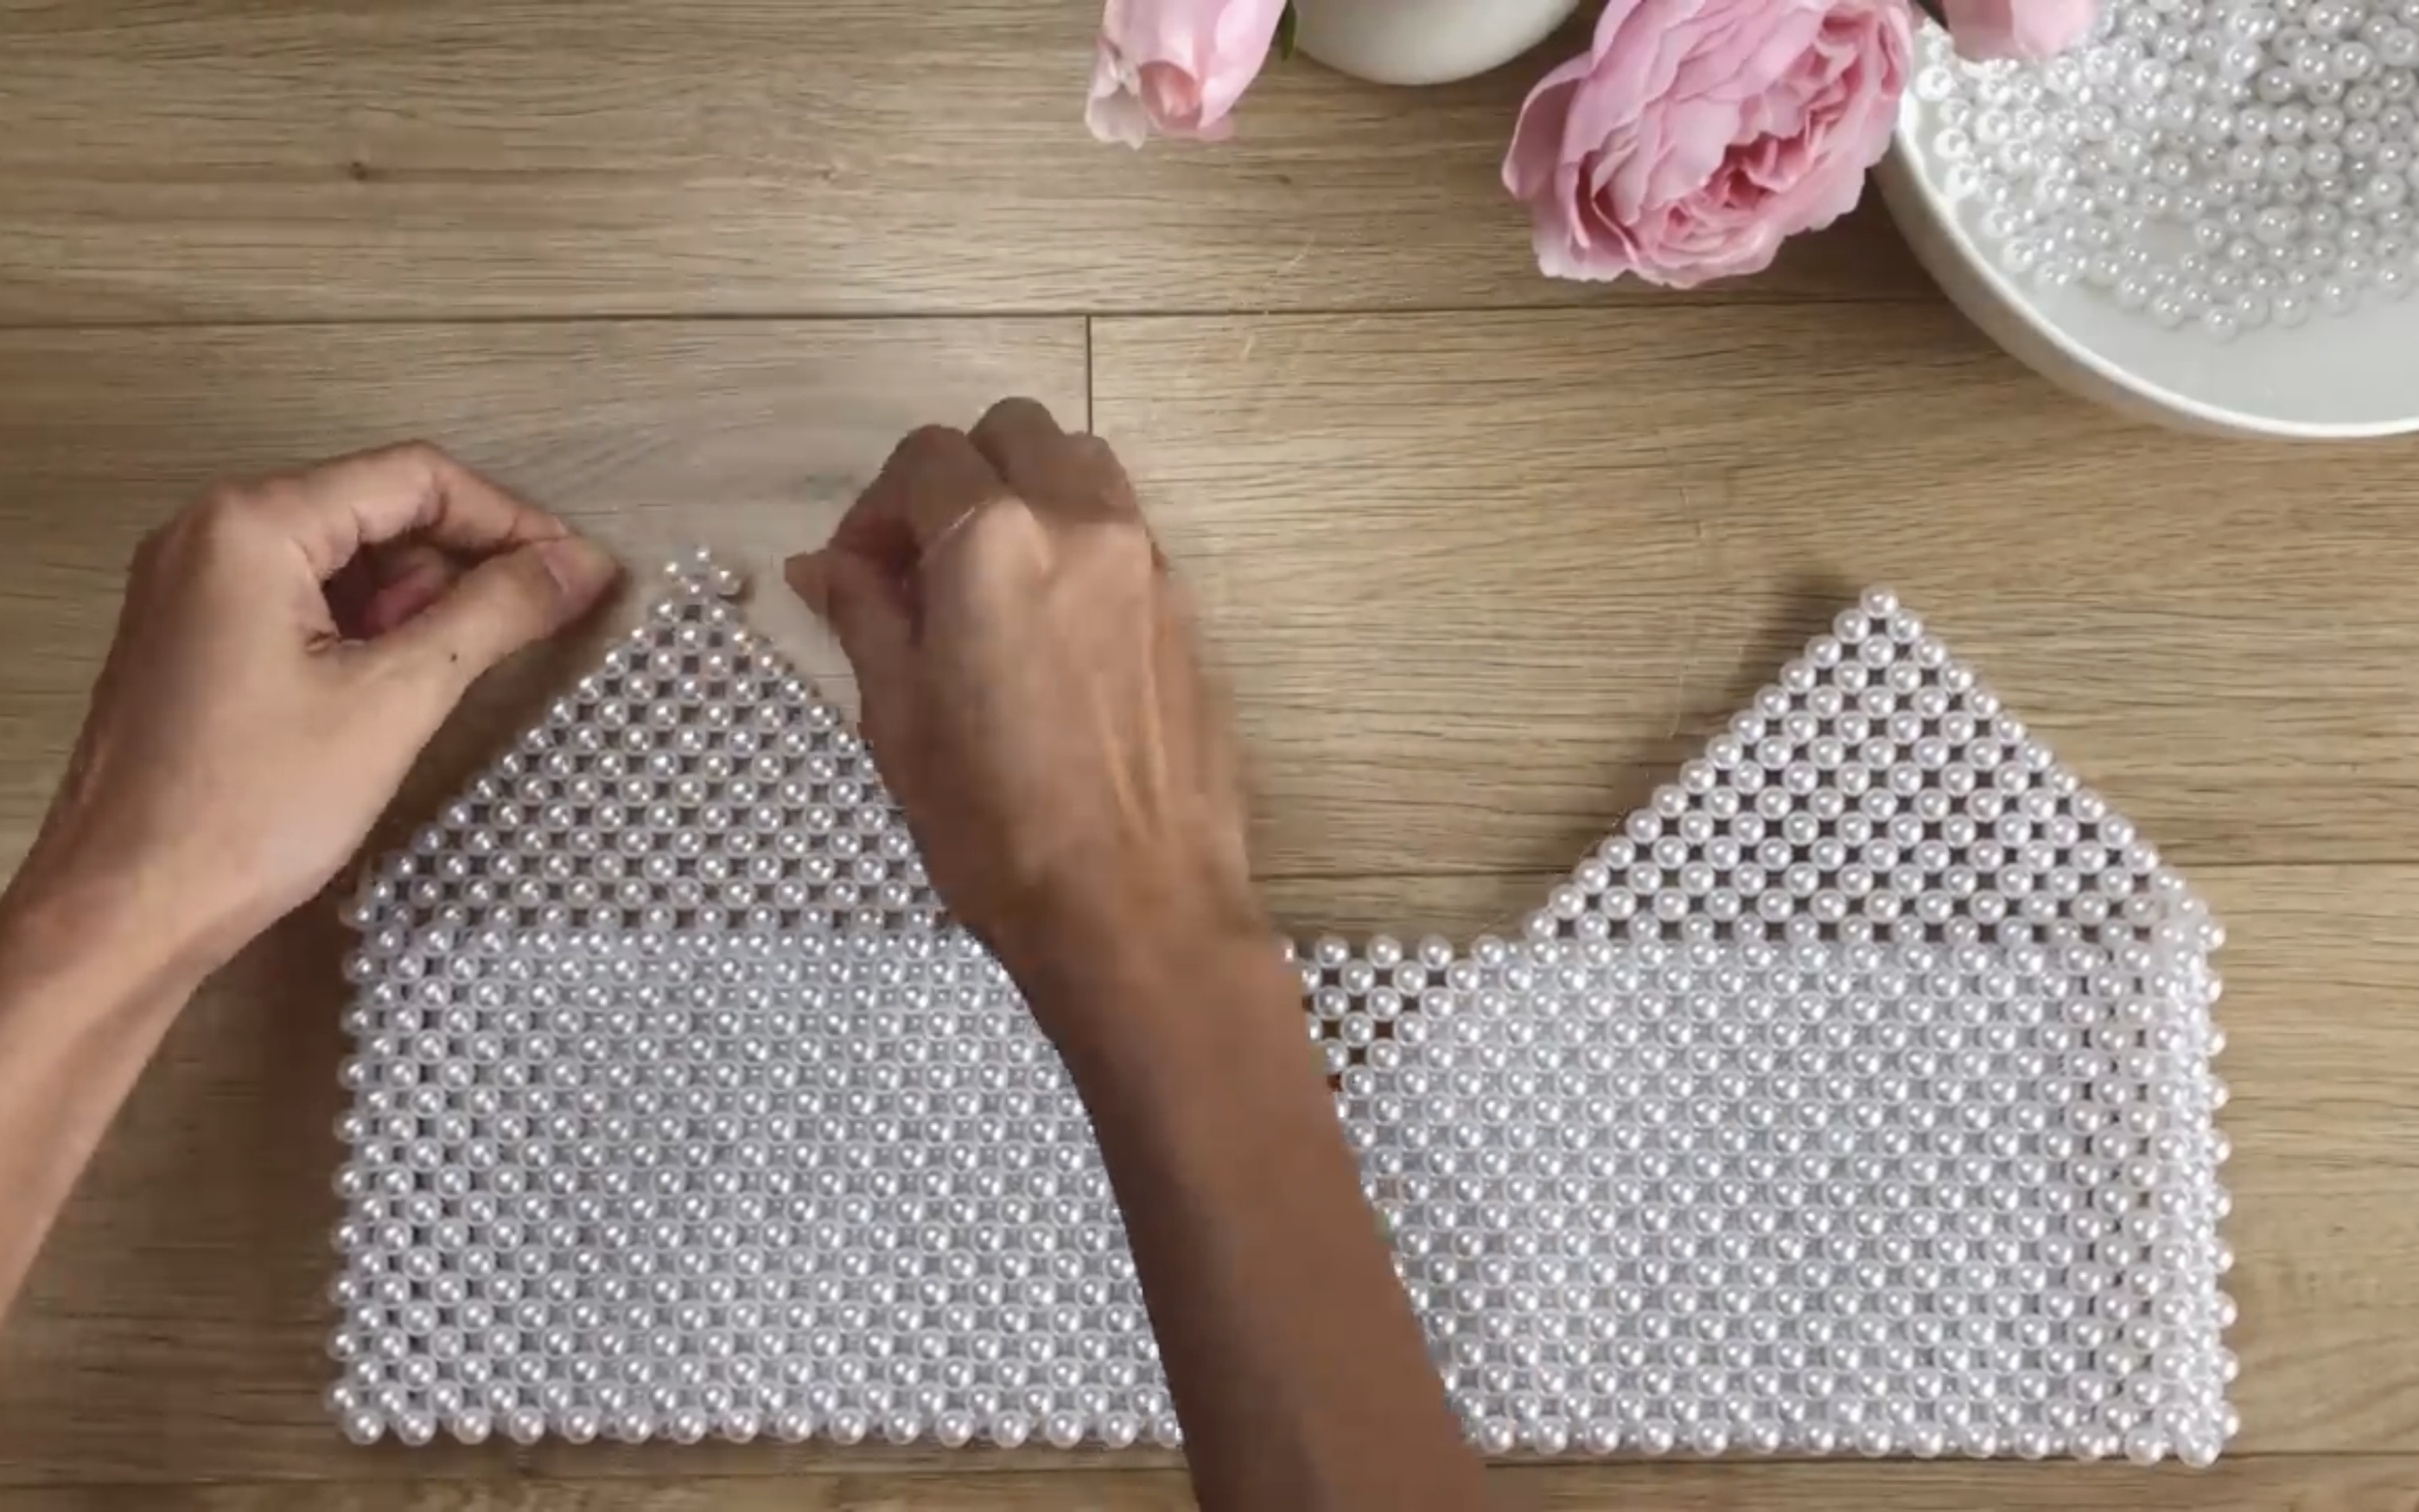
Make sure the first line of this rectangle has to be an even number of pearls, so you can create two breast parts after.

At the front of the bra, use the same method to create one more line.
However, stop this line at one pearl before the middle line.
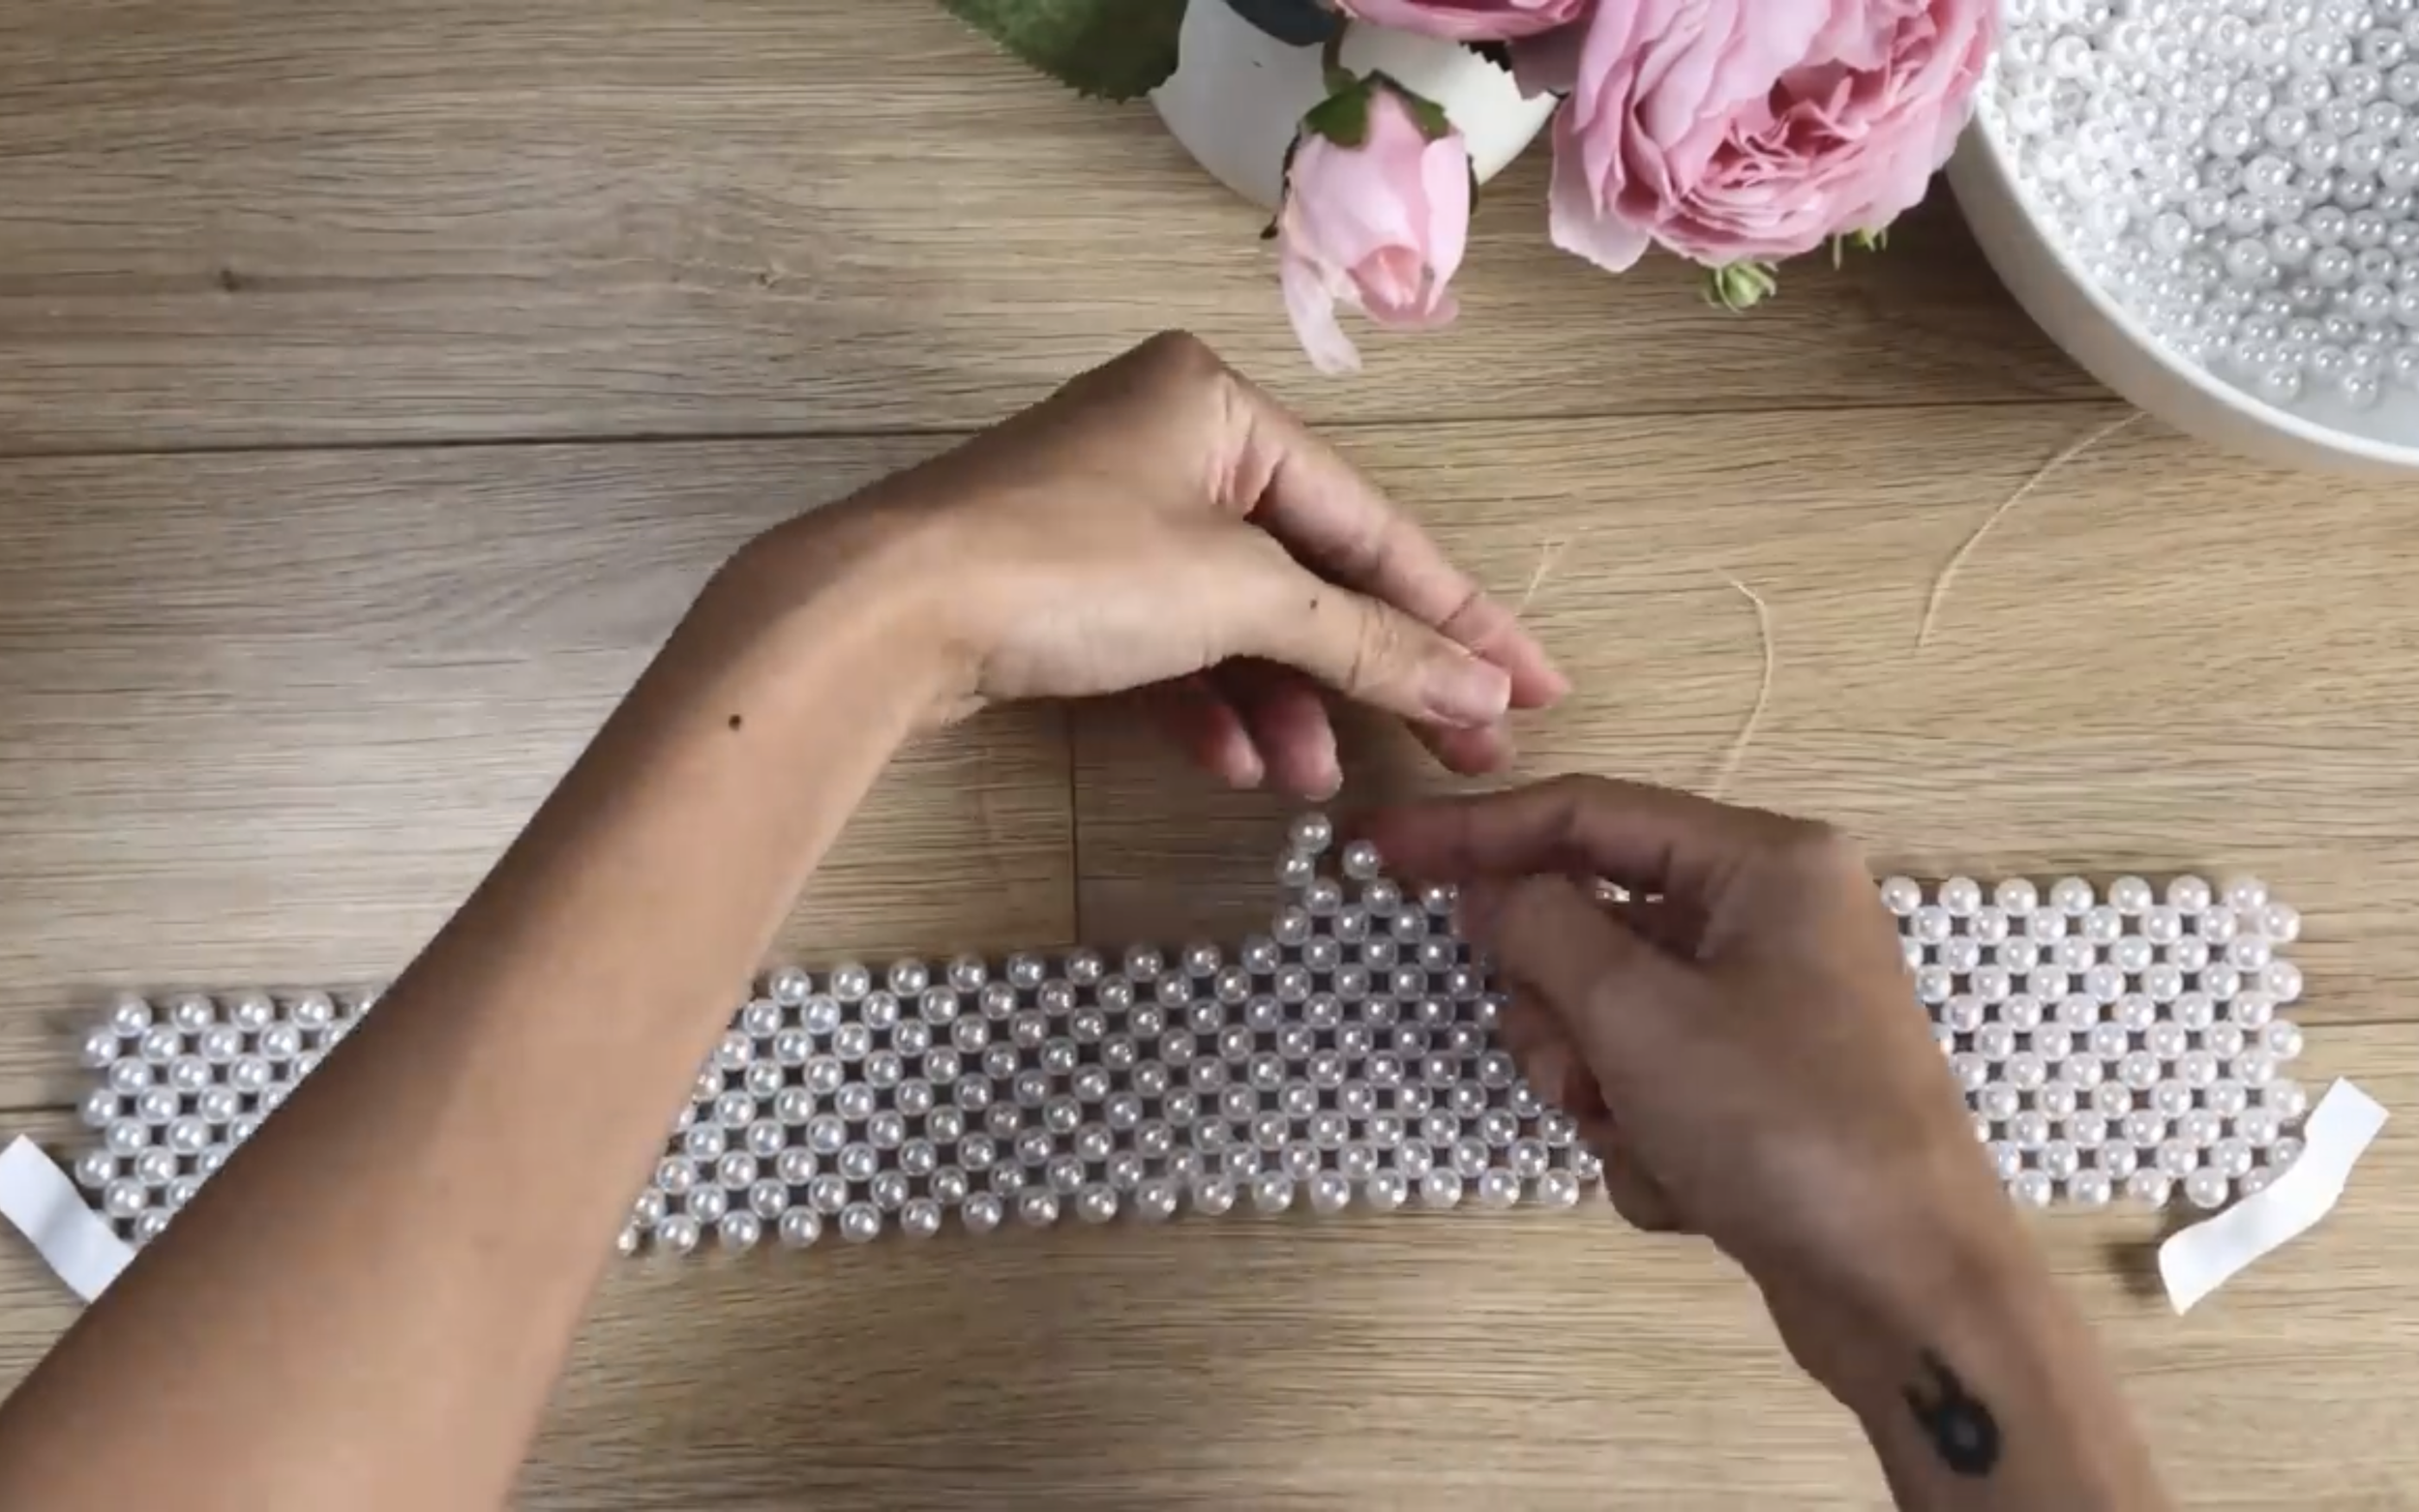
Then, move up and make another line. It'll create the gap between the middle line and this line. But don't worry, you can fill it up later.
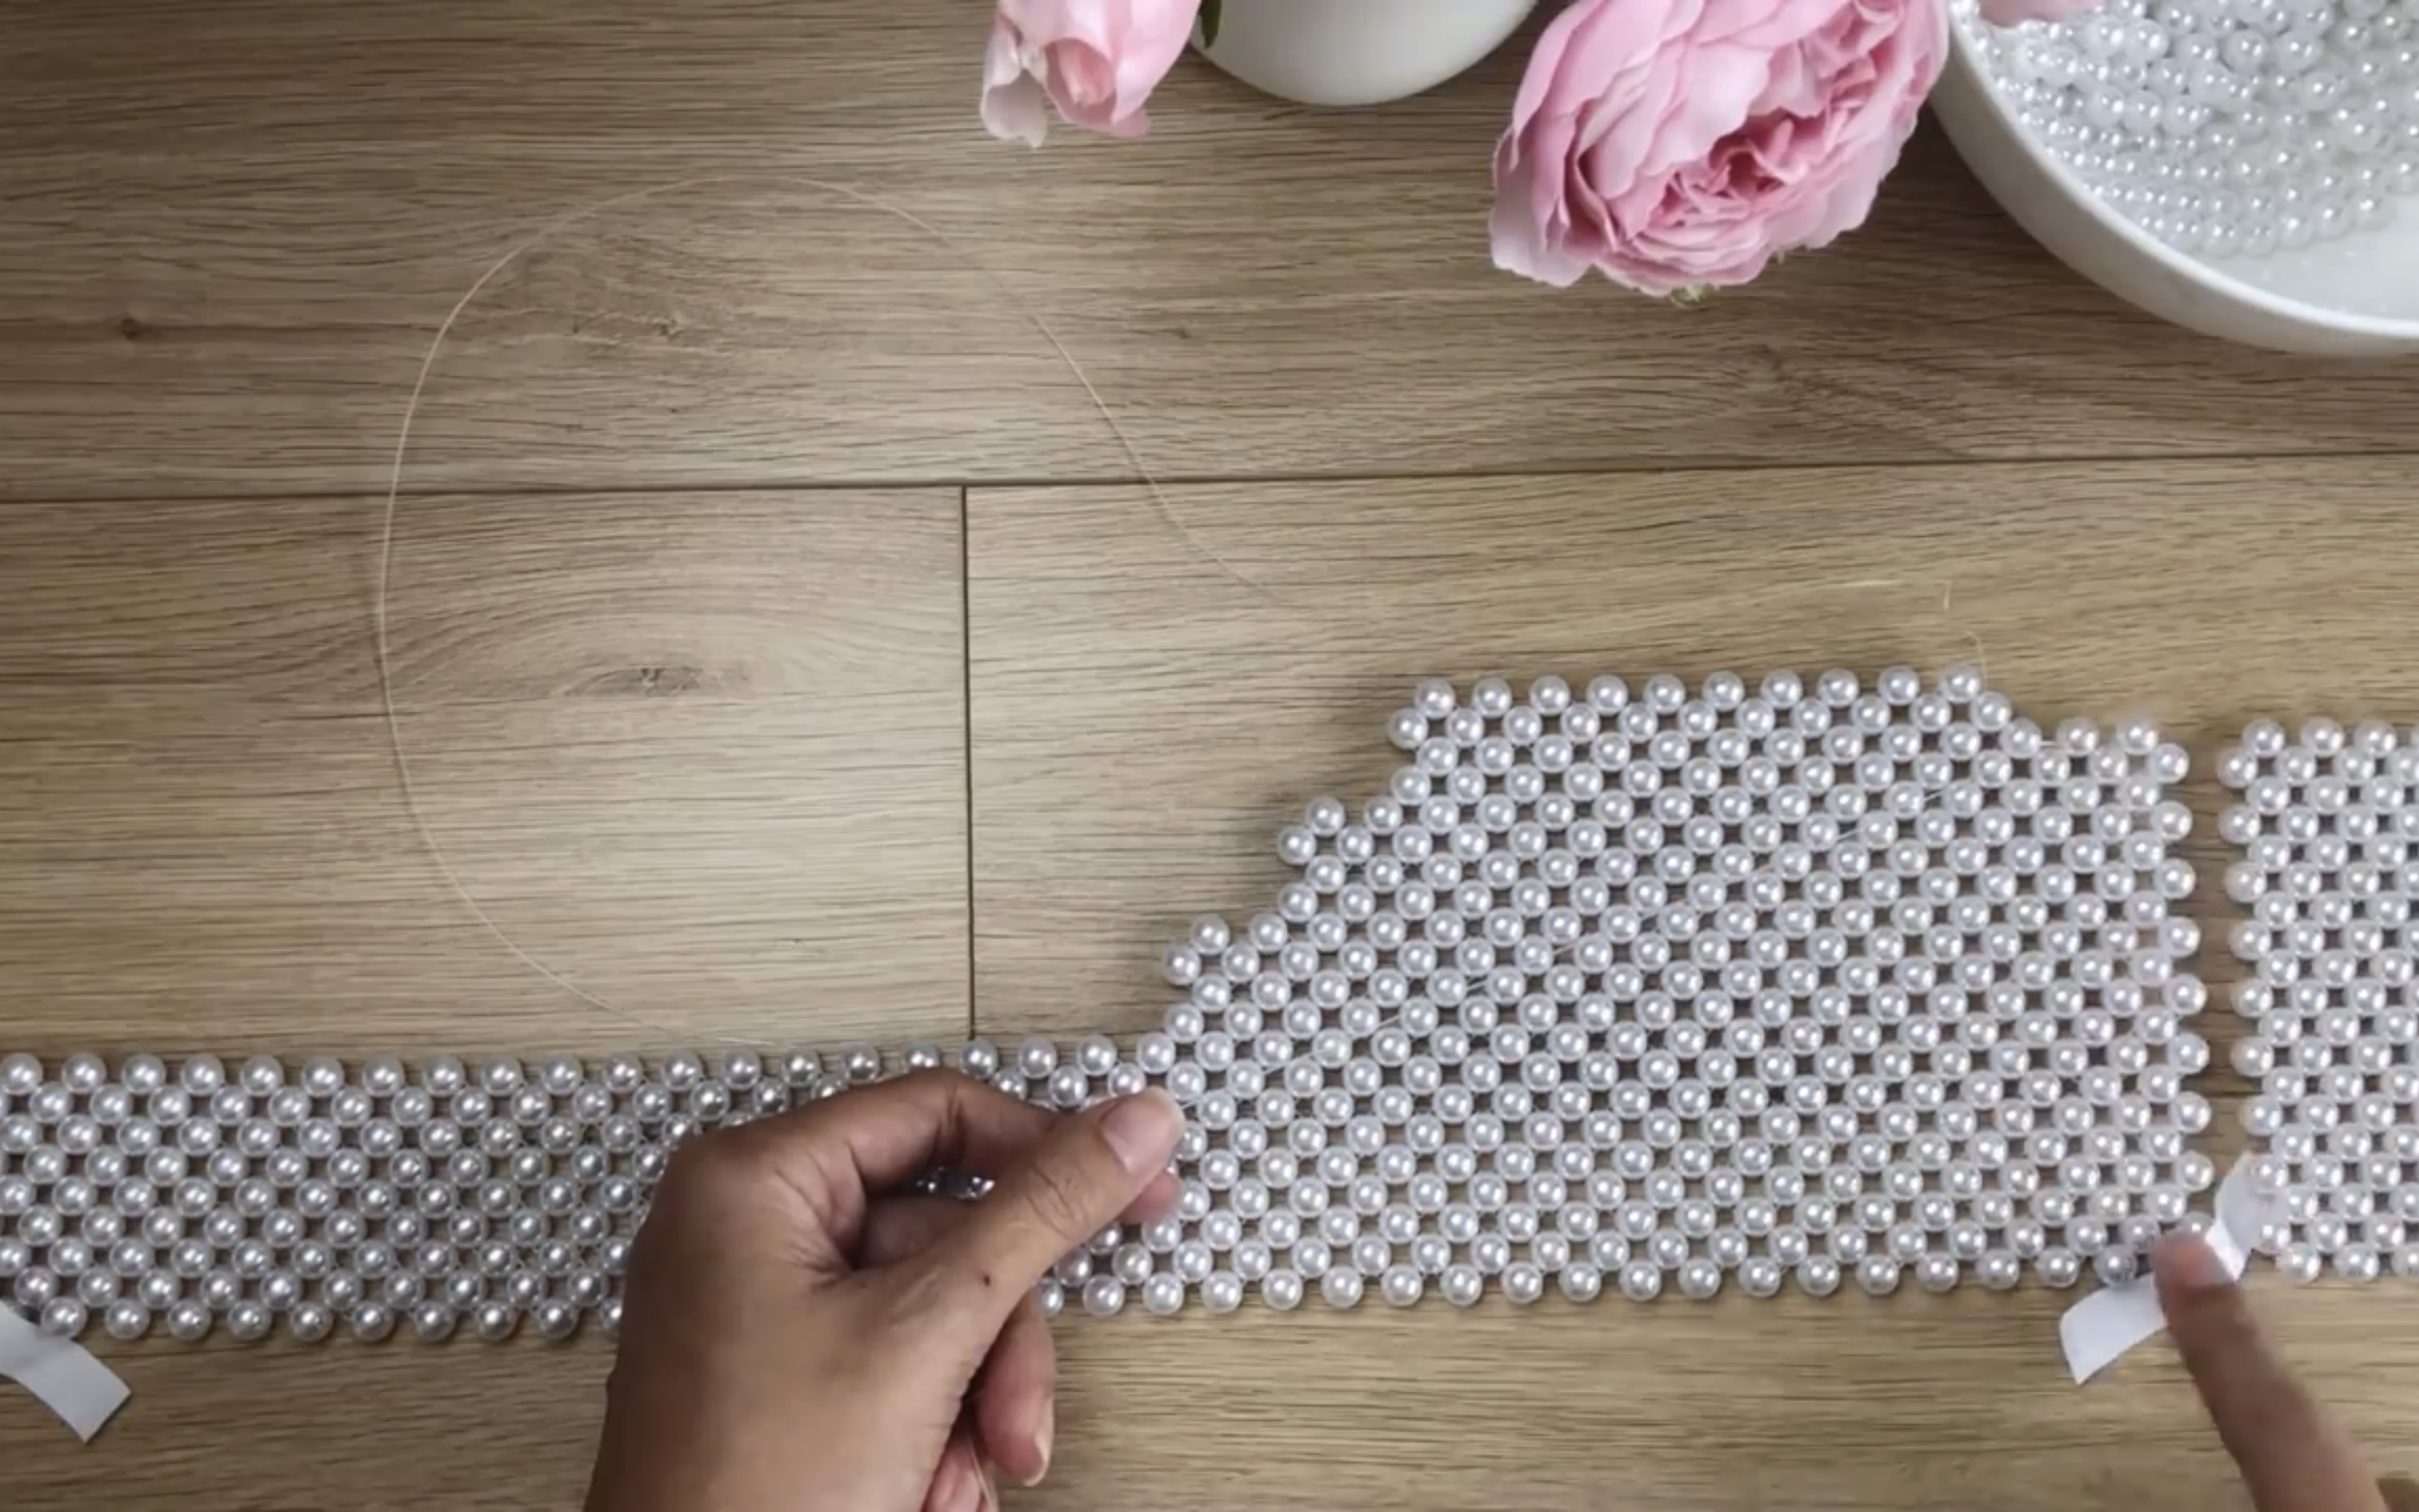
Keep doing the same thing until the width of the outside line is 12 cm, which is the same as the back part.
So, at the next line, you need to stop at 1 pearl before the end. It's the same way as the middle line that was done before that.
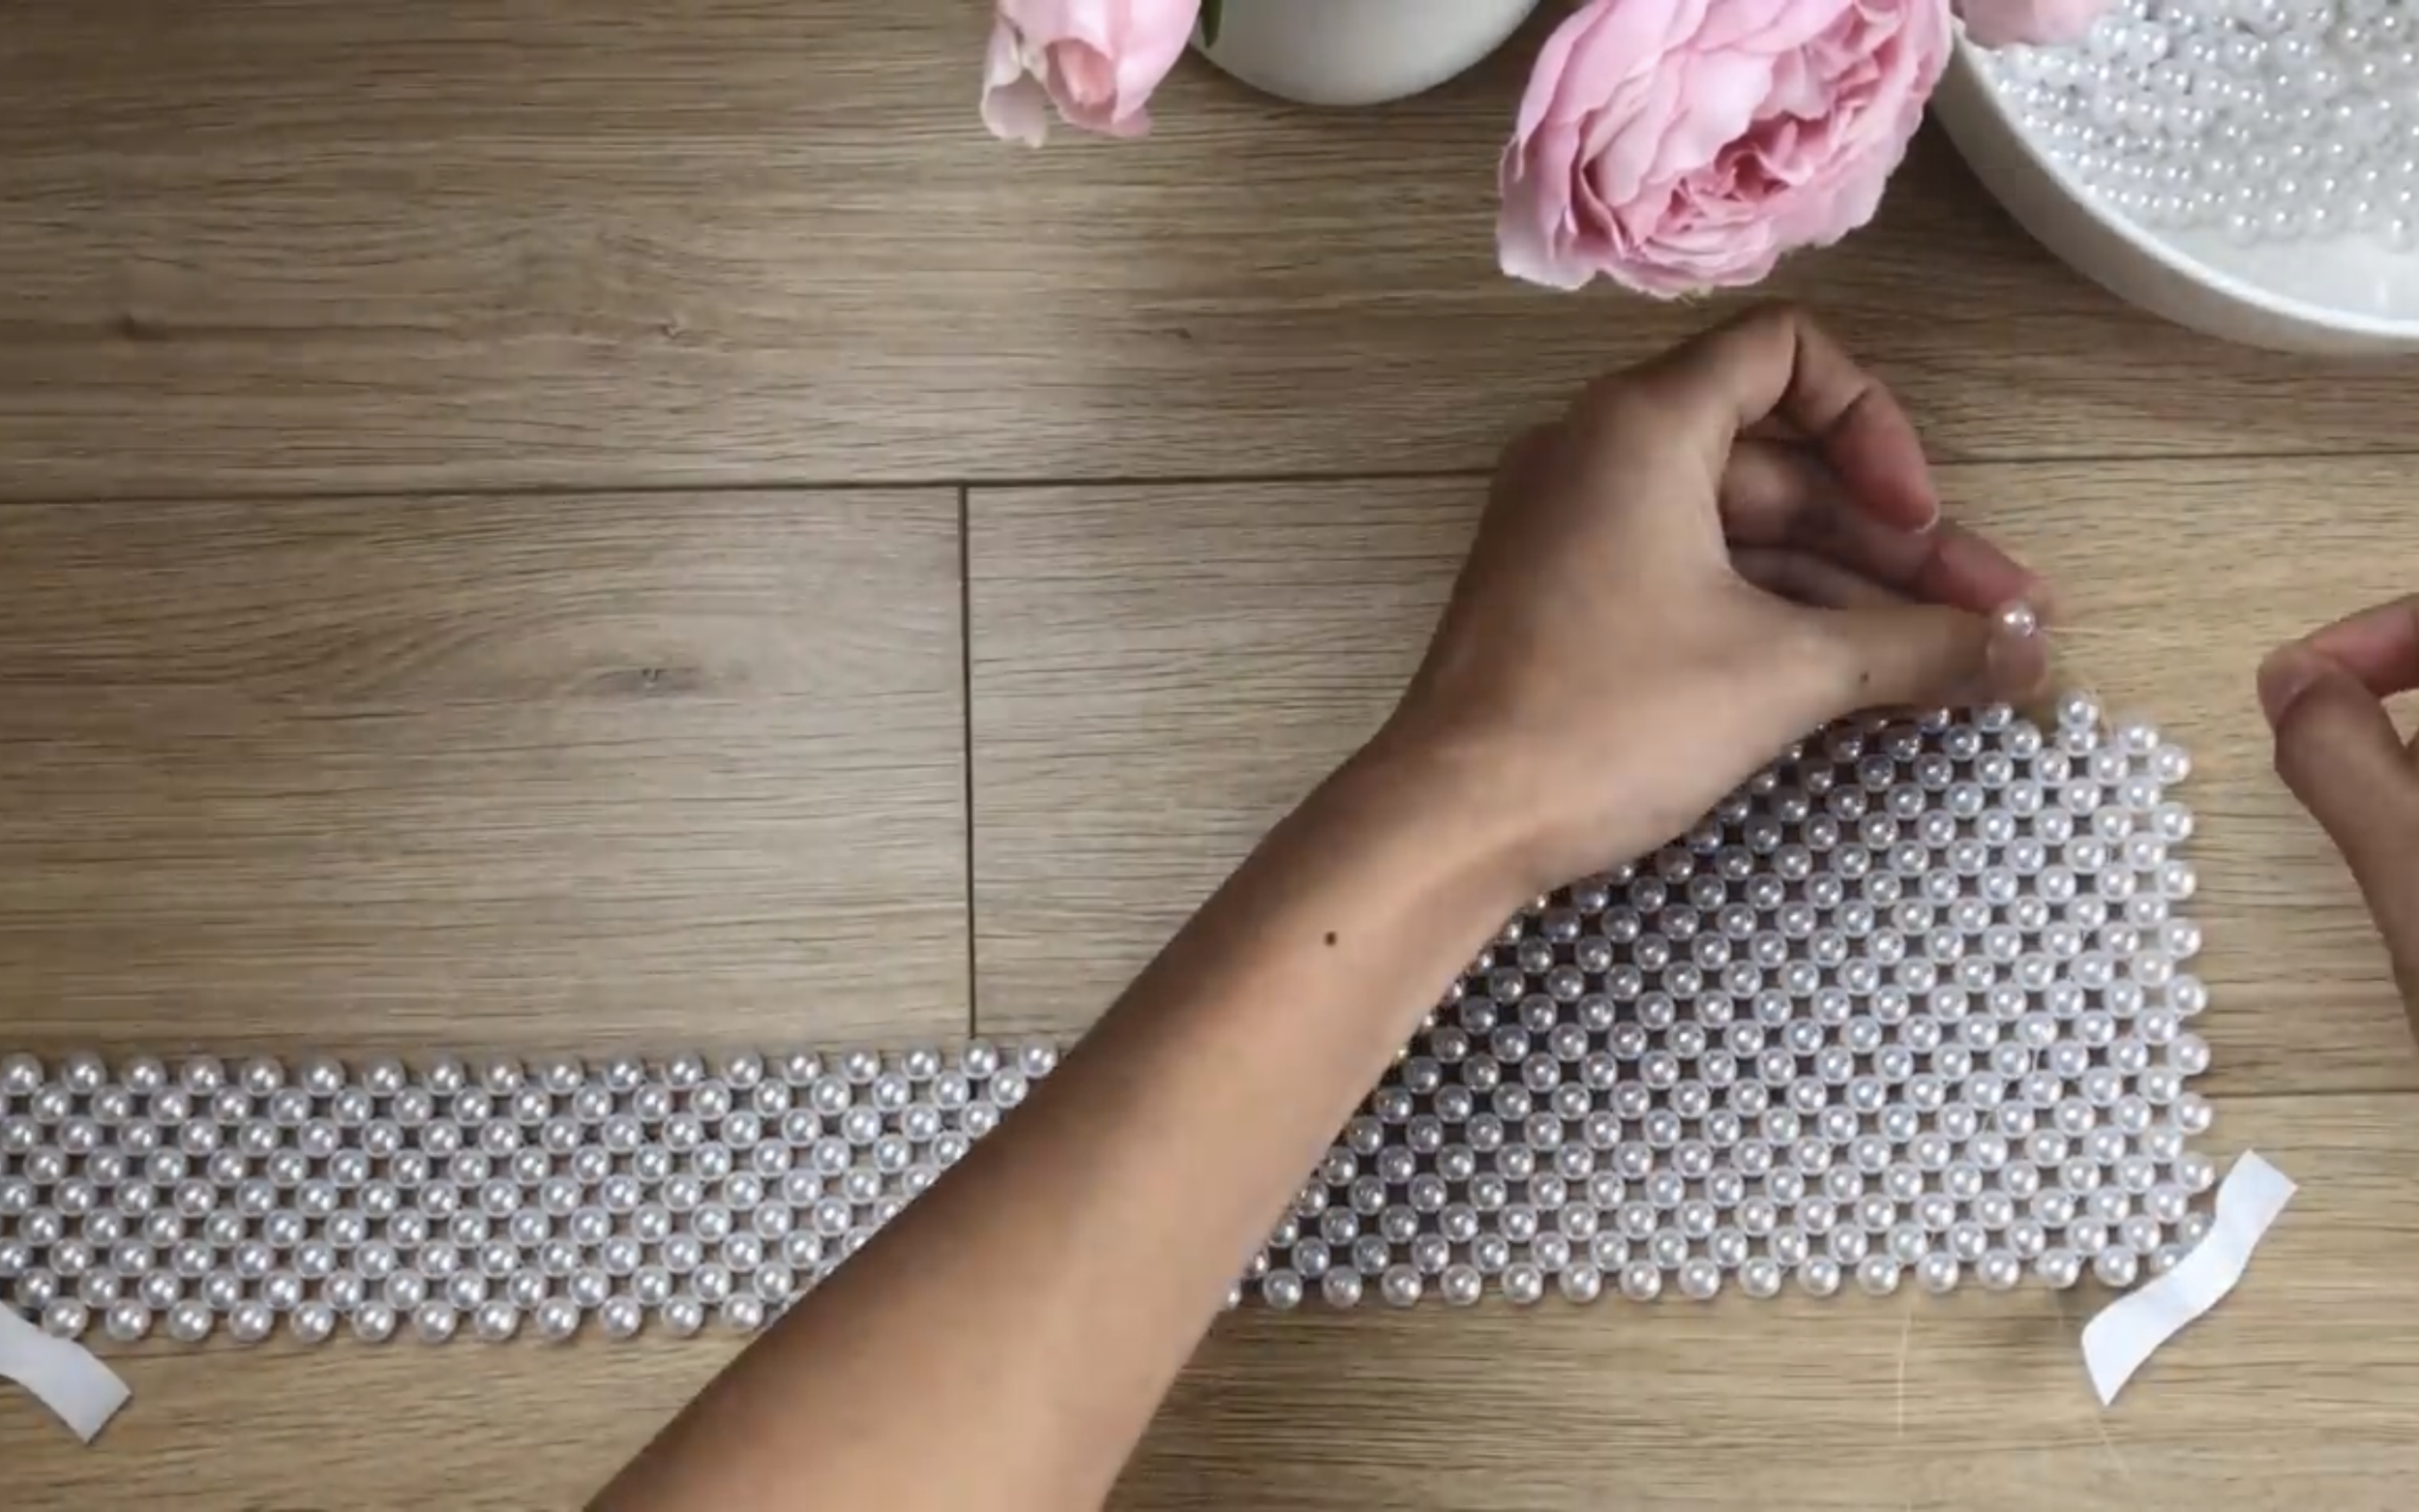
Keep doing until you go to the top point. It's time to fill up the gaps. You can use the same string you have used or a new one is okay.
Just remember to use 2 sides of the string to connect all the pearls together.
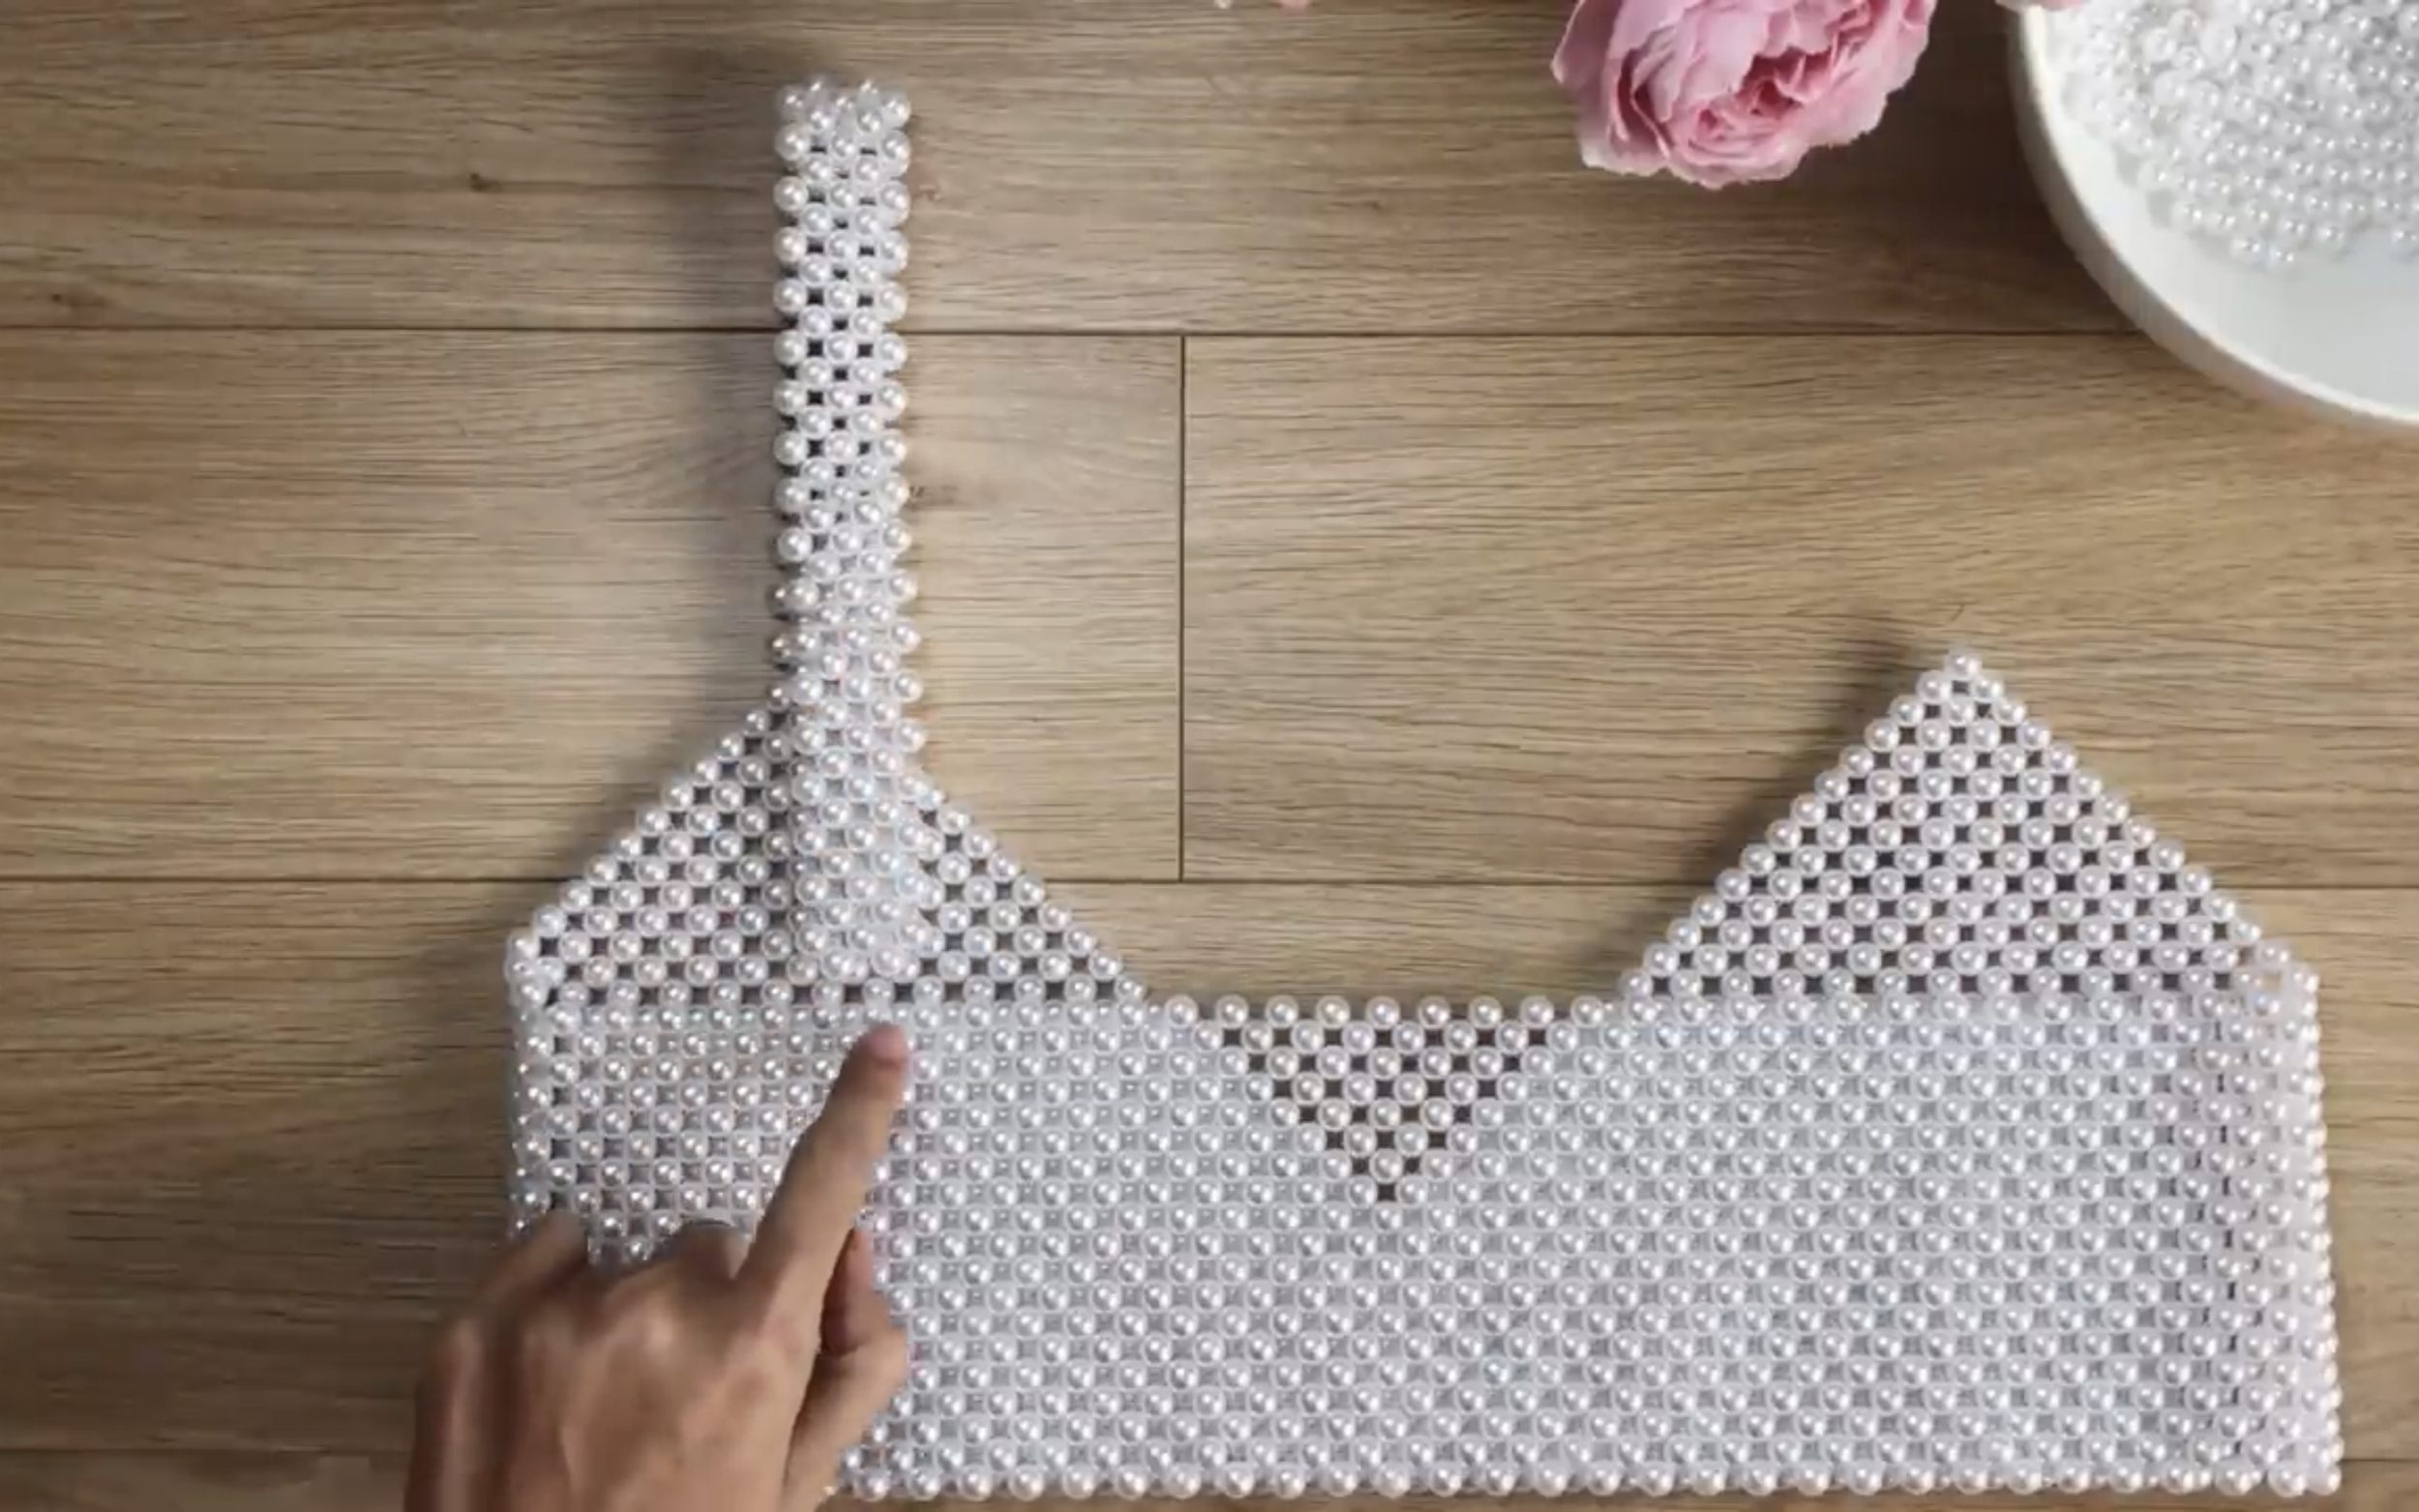
Do the same for the other side to finish the front part of the bra.
Now, connect the front and the back part together at two sides.
The next step is making the shoulder ties for the bra.
At the top of the breast part, use the second knot type to create the tie.
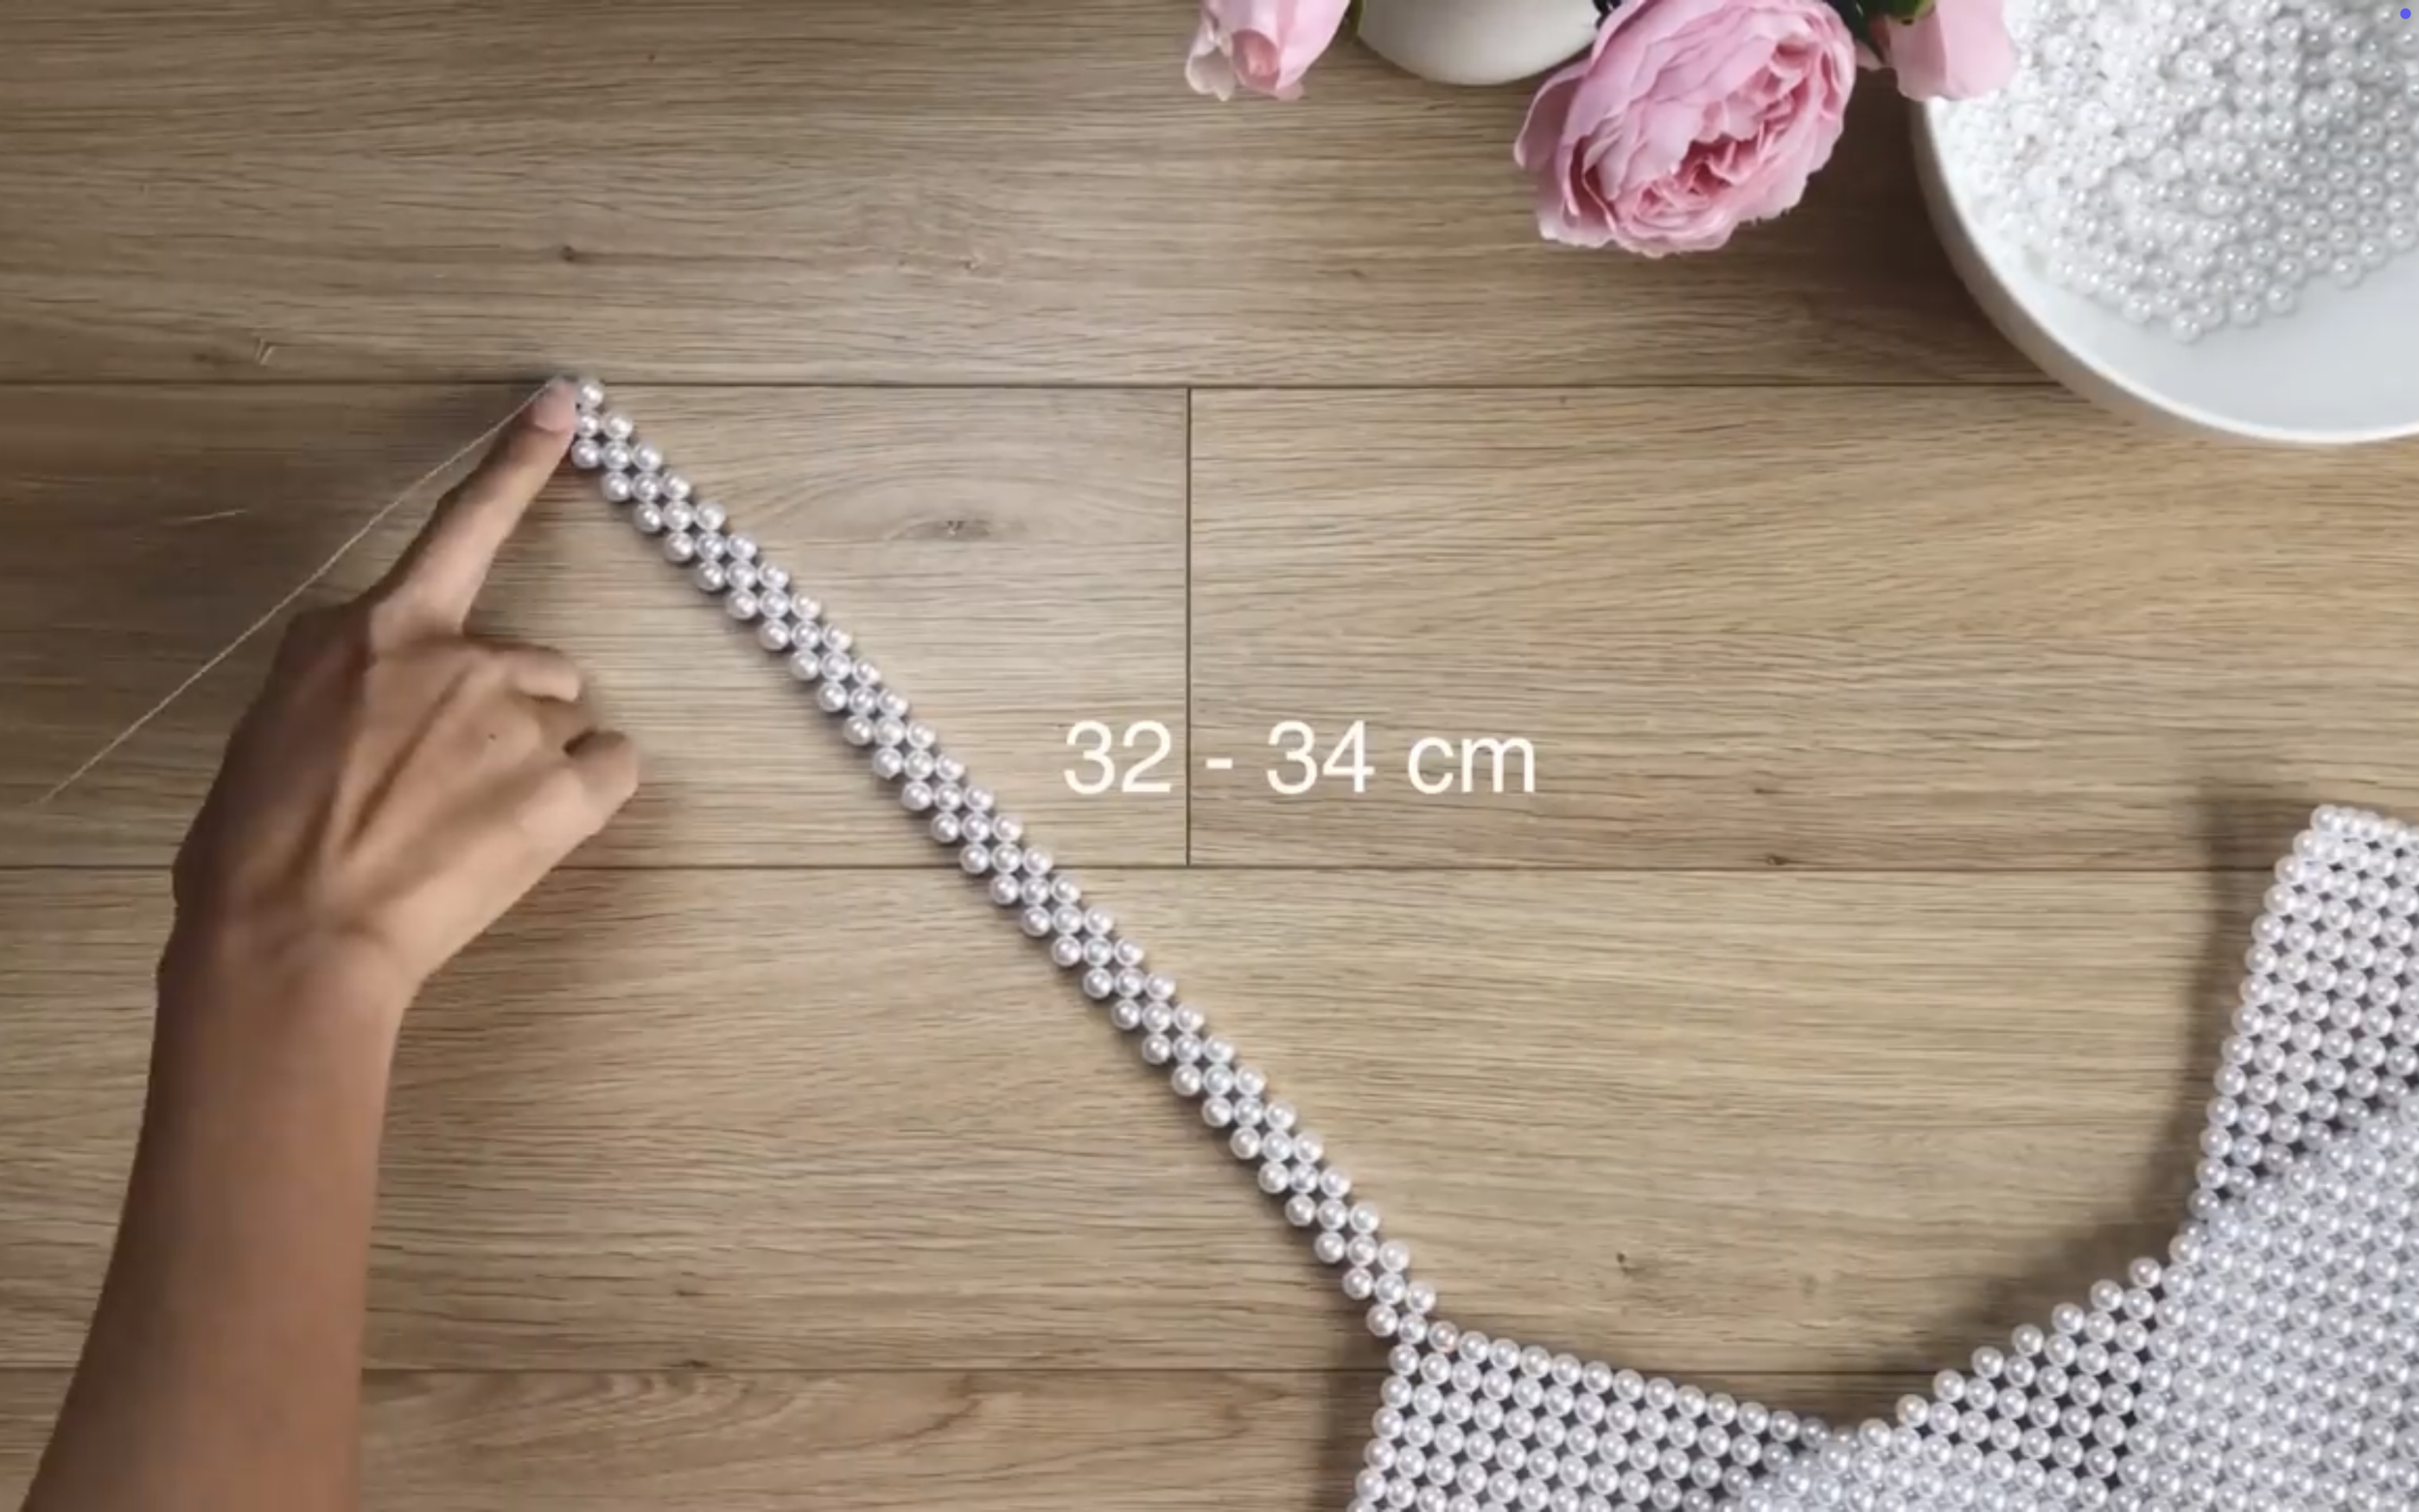
Keep doing until the length of the tie is around 32-34 cm, which is 2 times the length from your shoulder to under the armpit.
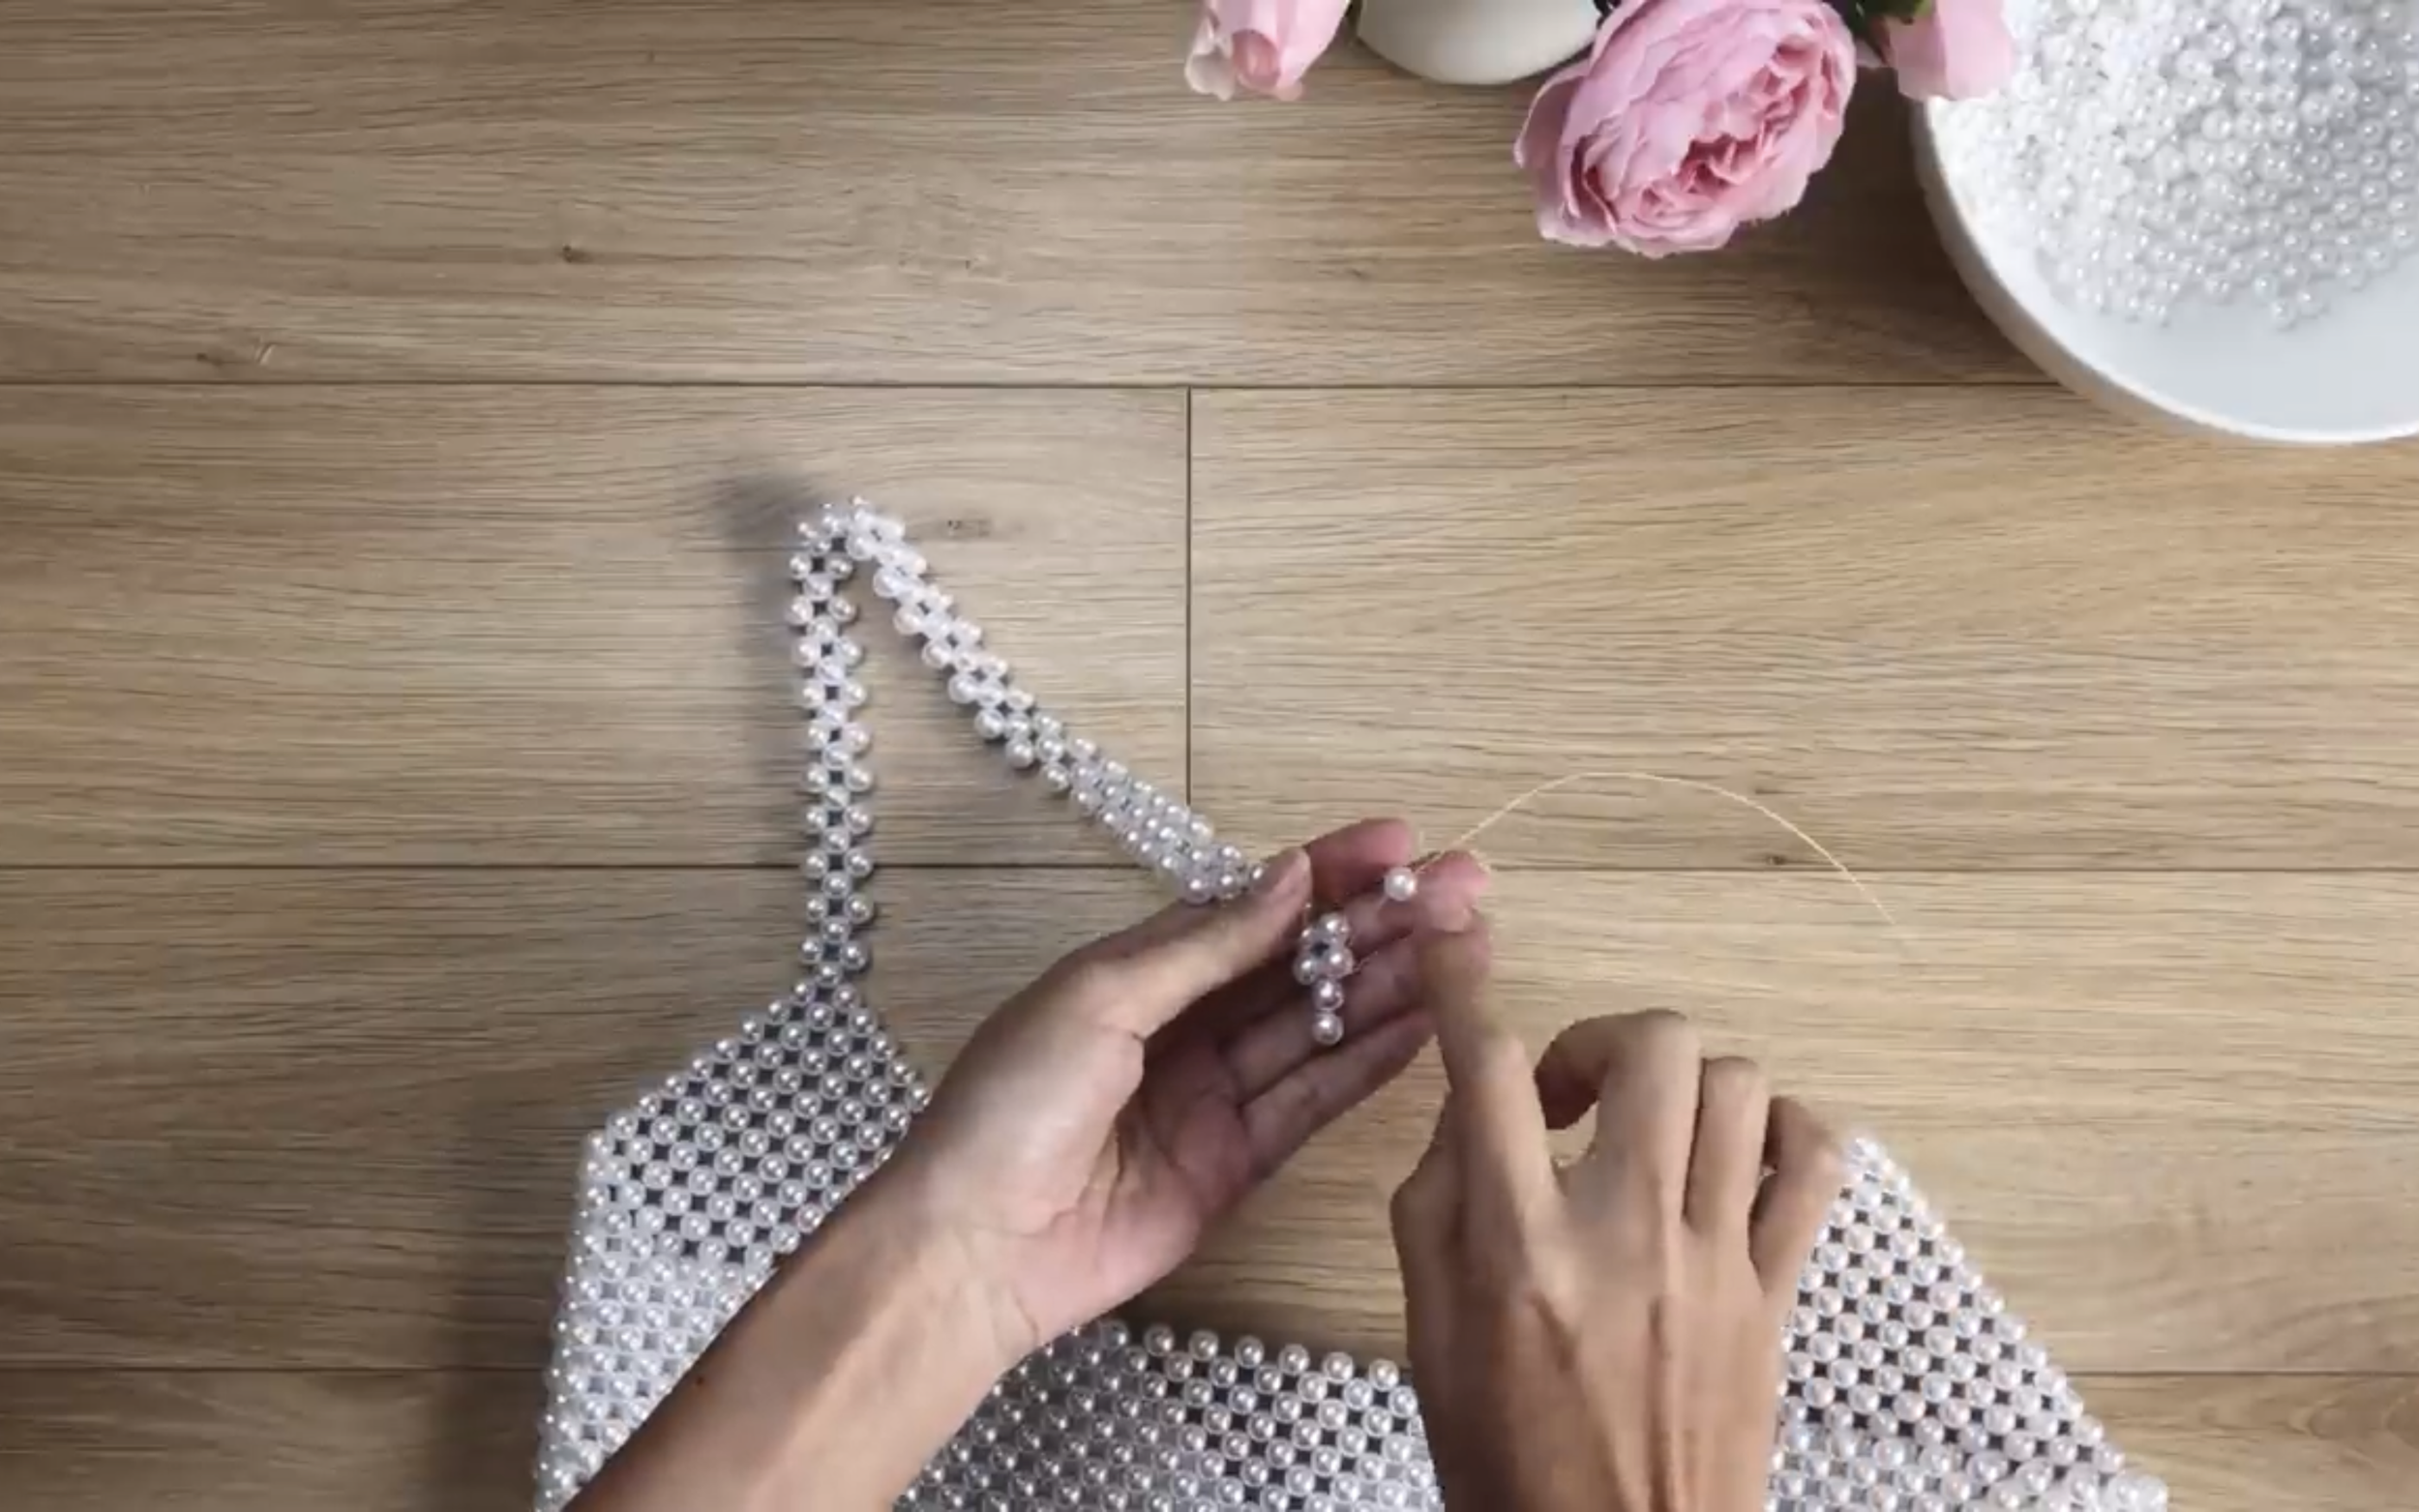
At the end of the tie, turn the direction to make the next line.

Then, use the third knot type to make the shoulder ties wider. So the width of the ties will be 3 lines of pearls.
Now, connect one end of the tie to the back of the bra. Move it inside a bit. So the tie won't fall off your shoulder when wearing.
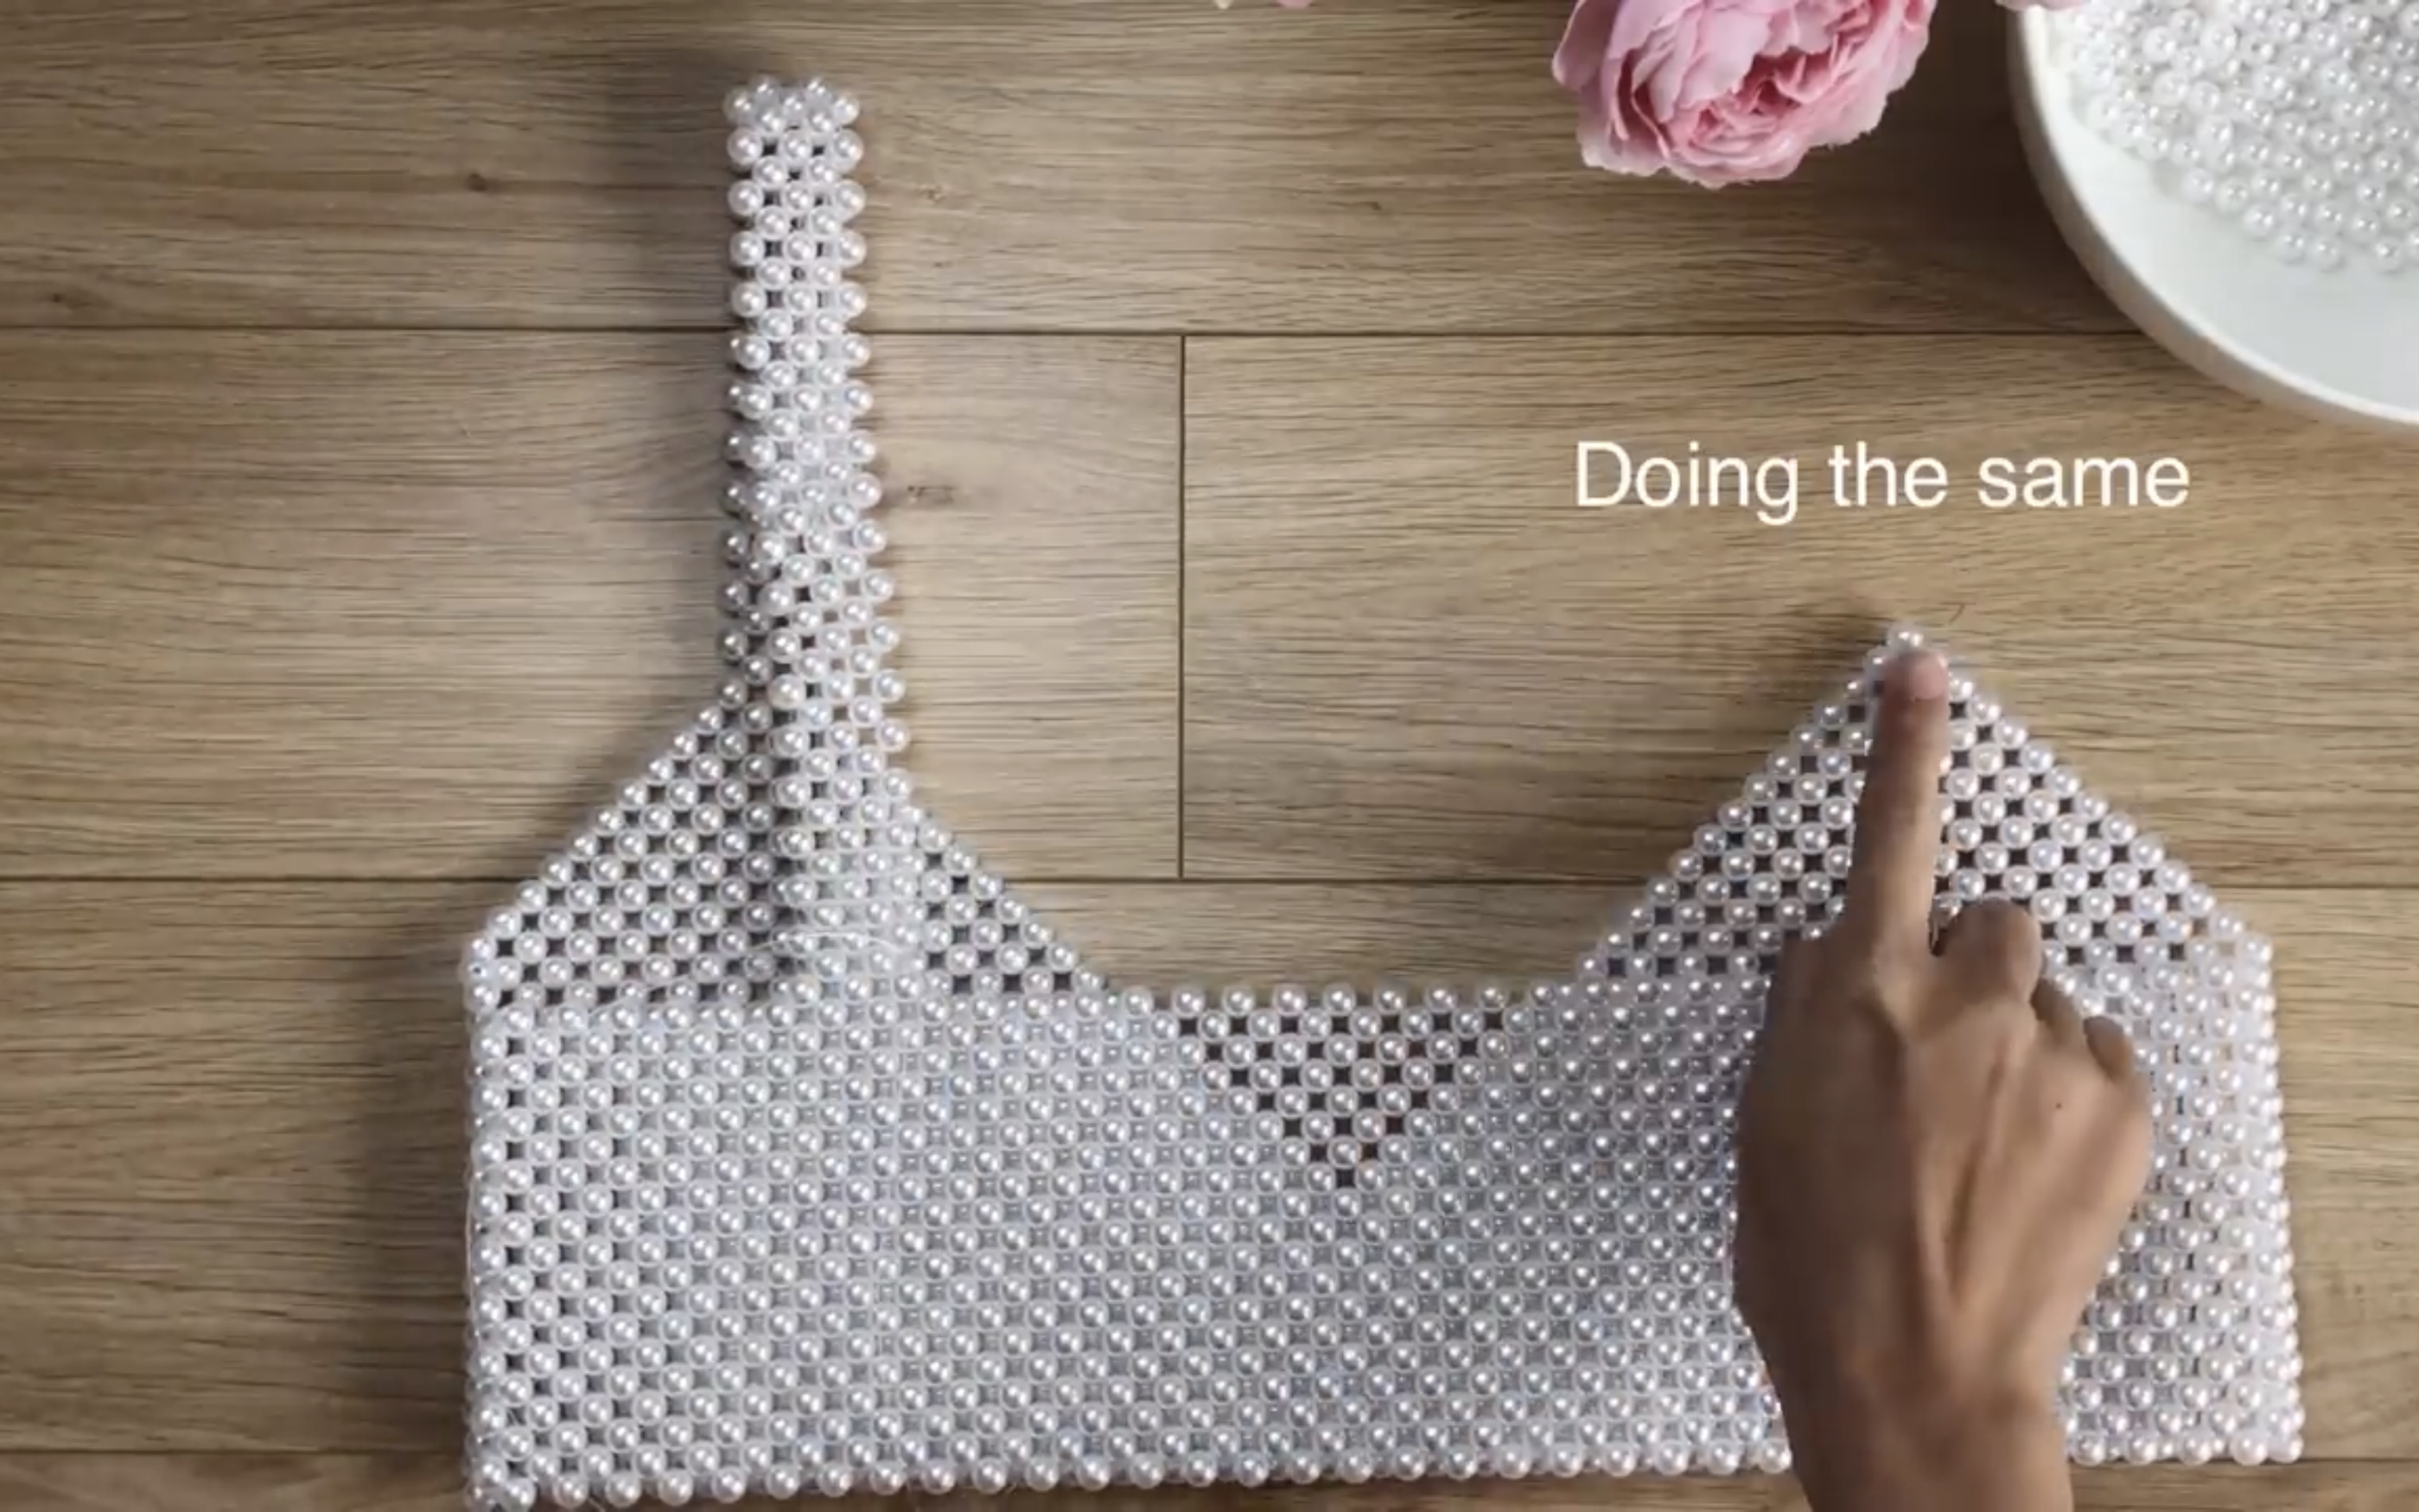
Do the same to make the other tie.

DIY PEARL BRA - Step by step tutorial for beginners
And we finish this DIY. Here’s my final result!
This bra looks so elegant and makes the outfit feel really fashionable.

DIY PEARL BRA - Step by step tutorial for beginners
I hope you found my step-by-step guide helpful and inspiring.
If you’re interested in making your own, give it a try and let me know how it goes!
Until then, happy sewing!