DIY Puff sleeve cardigan that you can wear as a Wrap dress

DIY Puff sleeve cardigan that you can wear as a Wrap dress
Welcome or welcome back to my channel!
Today's tutorial, I'm sharing with you how I made a Puff sleeve cardigan that you can wear as a Wrap dress.
Let’s get started!
WHAT YOU’LL NEED
3m of wool fabric
Pattern paper
Sewing machine
Pins
Scissors
Ruler
Long stick
Zipper
Buttons
MAKING THE PATTERNS
Here’s the pattern for the project. To get a clear understanding of all the measurements needed for the pattern, watch the video from 0:58 to 6:23.
Remember, you can adjust these measurements to fit your own dimensions!

THE BODY PART
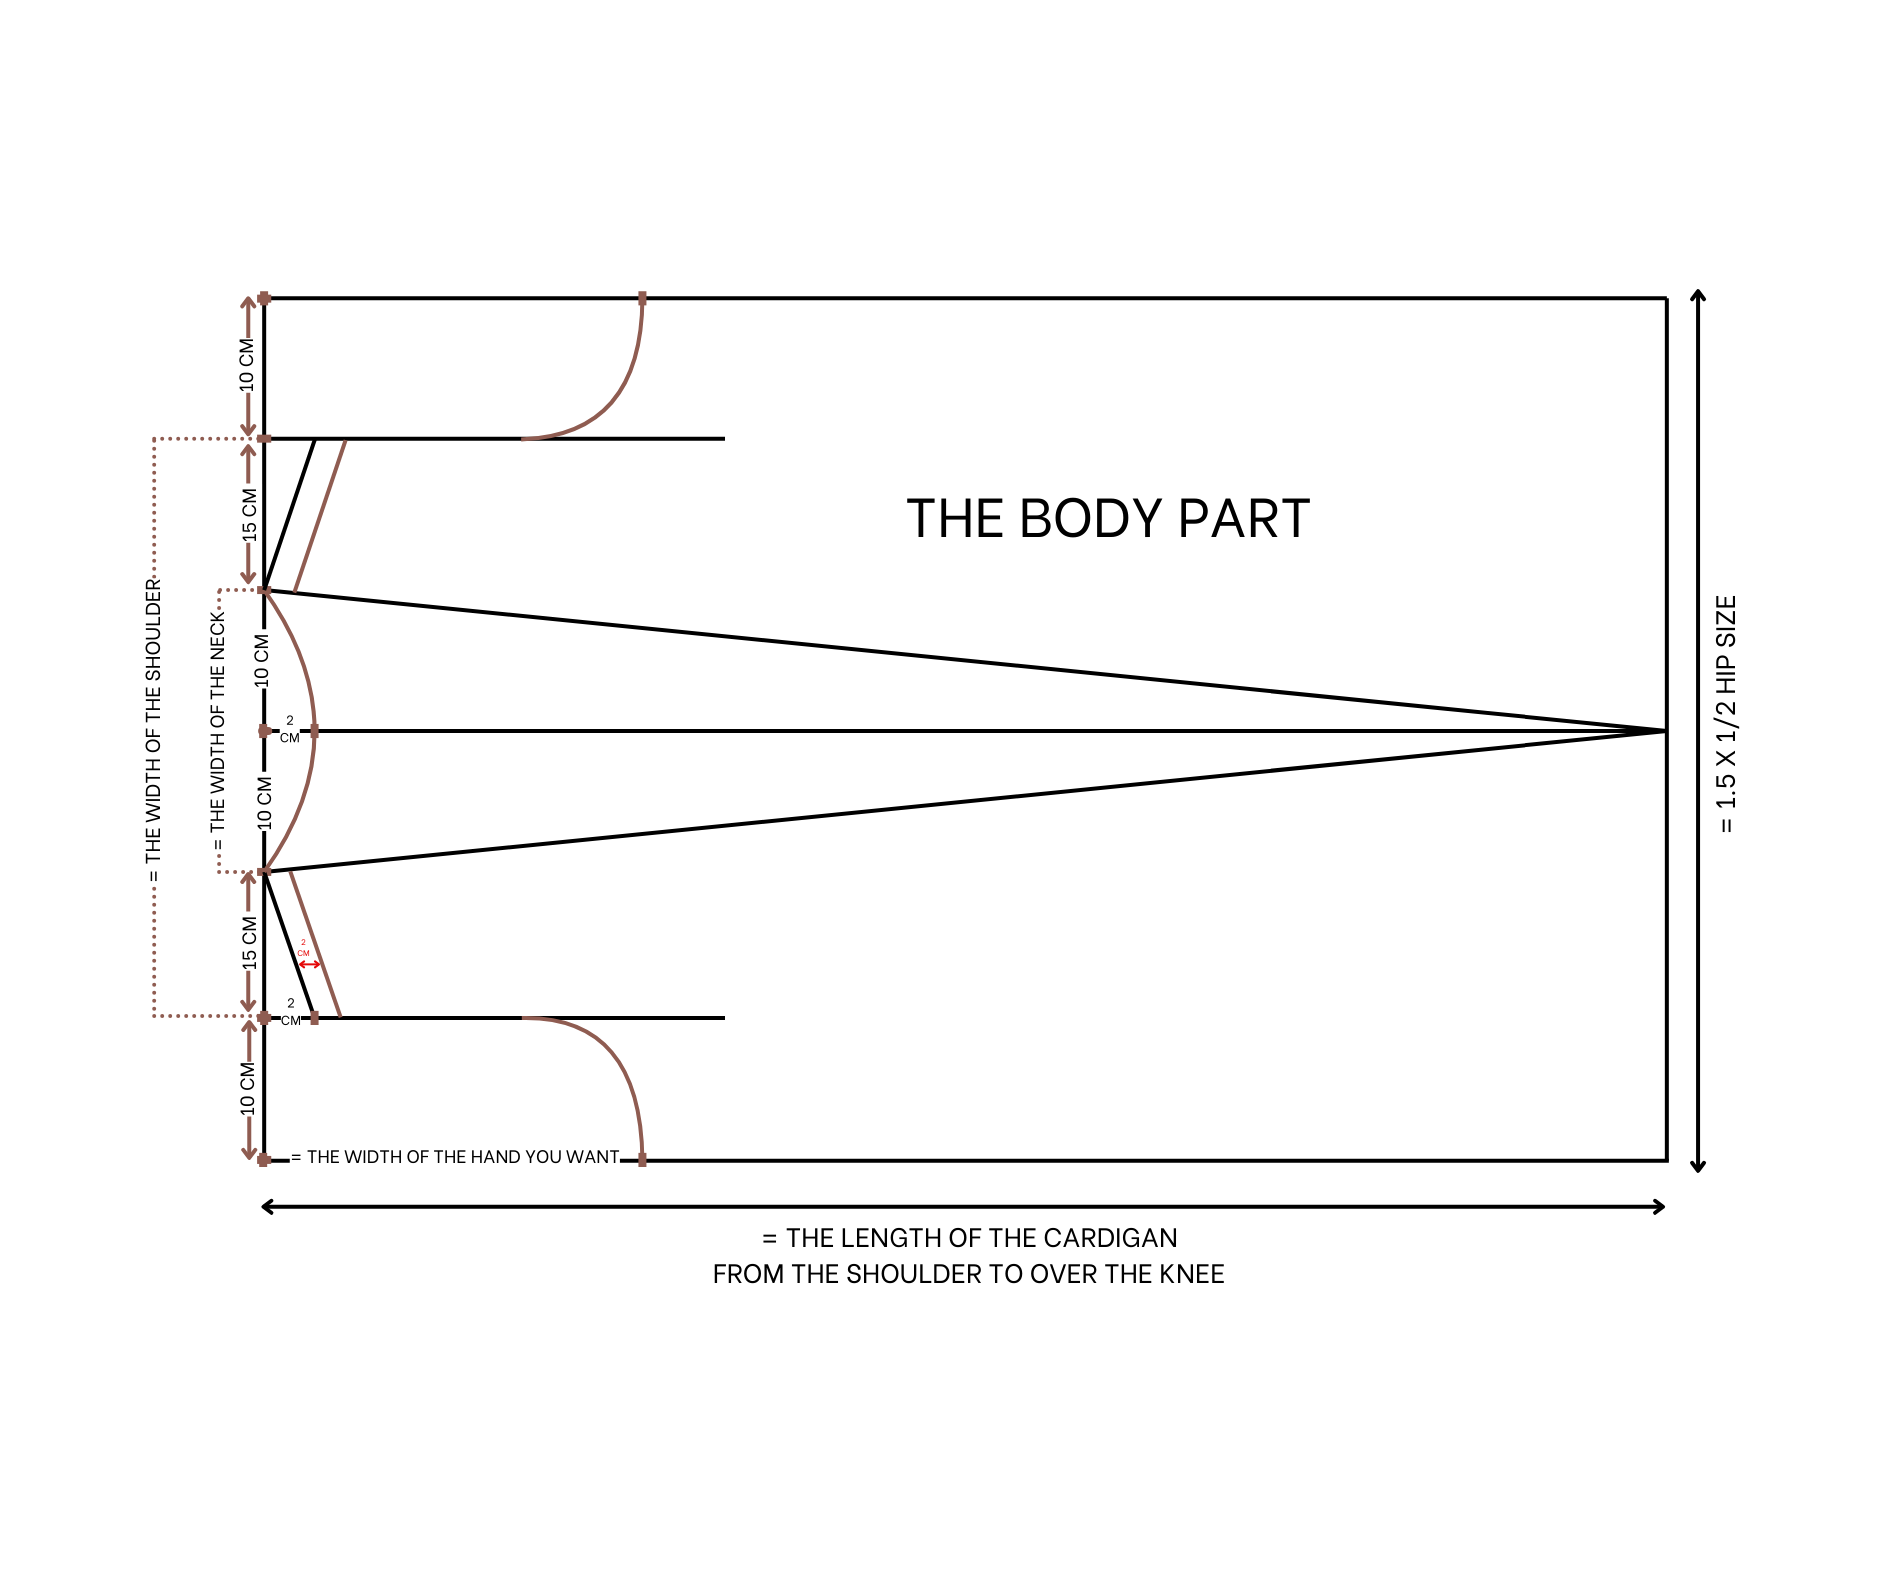
Cut two rectangles with 110 cm length, which is the length of the cardigan desired. This is the length from the shoulder to over the knee, and 70 cm width, which is 1.5 times half the hip size.
At the width line, draw a line in the middle to divide the rectangle into two smaller ones.
From that line, mark 10 cm on both sides of the width line so the width between the two marks will be 20 cm, which is the width of the neck.
From both sides of the neck, continue outward and mark 15 cm so the width between these marks will be 50 cm, which will be the width of the shoulder.
At the ends of the shoulder line, draw a straight line down.
On that line, mark 2 cm under the shoulder line and connect that mark to the mark at the neck to create the shoulder part of the cardigan.
At the landline, mark 28 cm, which is the width of the hand desired for the cardigan. Then, draw a curved line from there to connect to the straight line drawn earlier. This forms the hand part of the cardigan. Repeat the same for the other side.
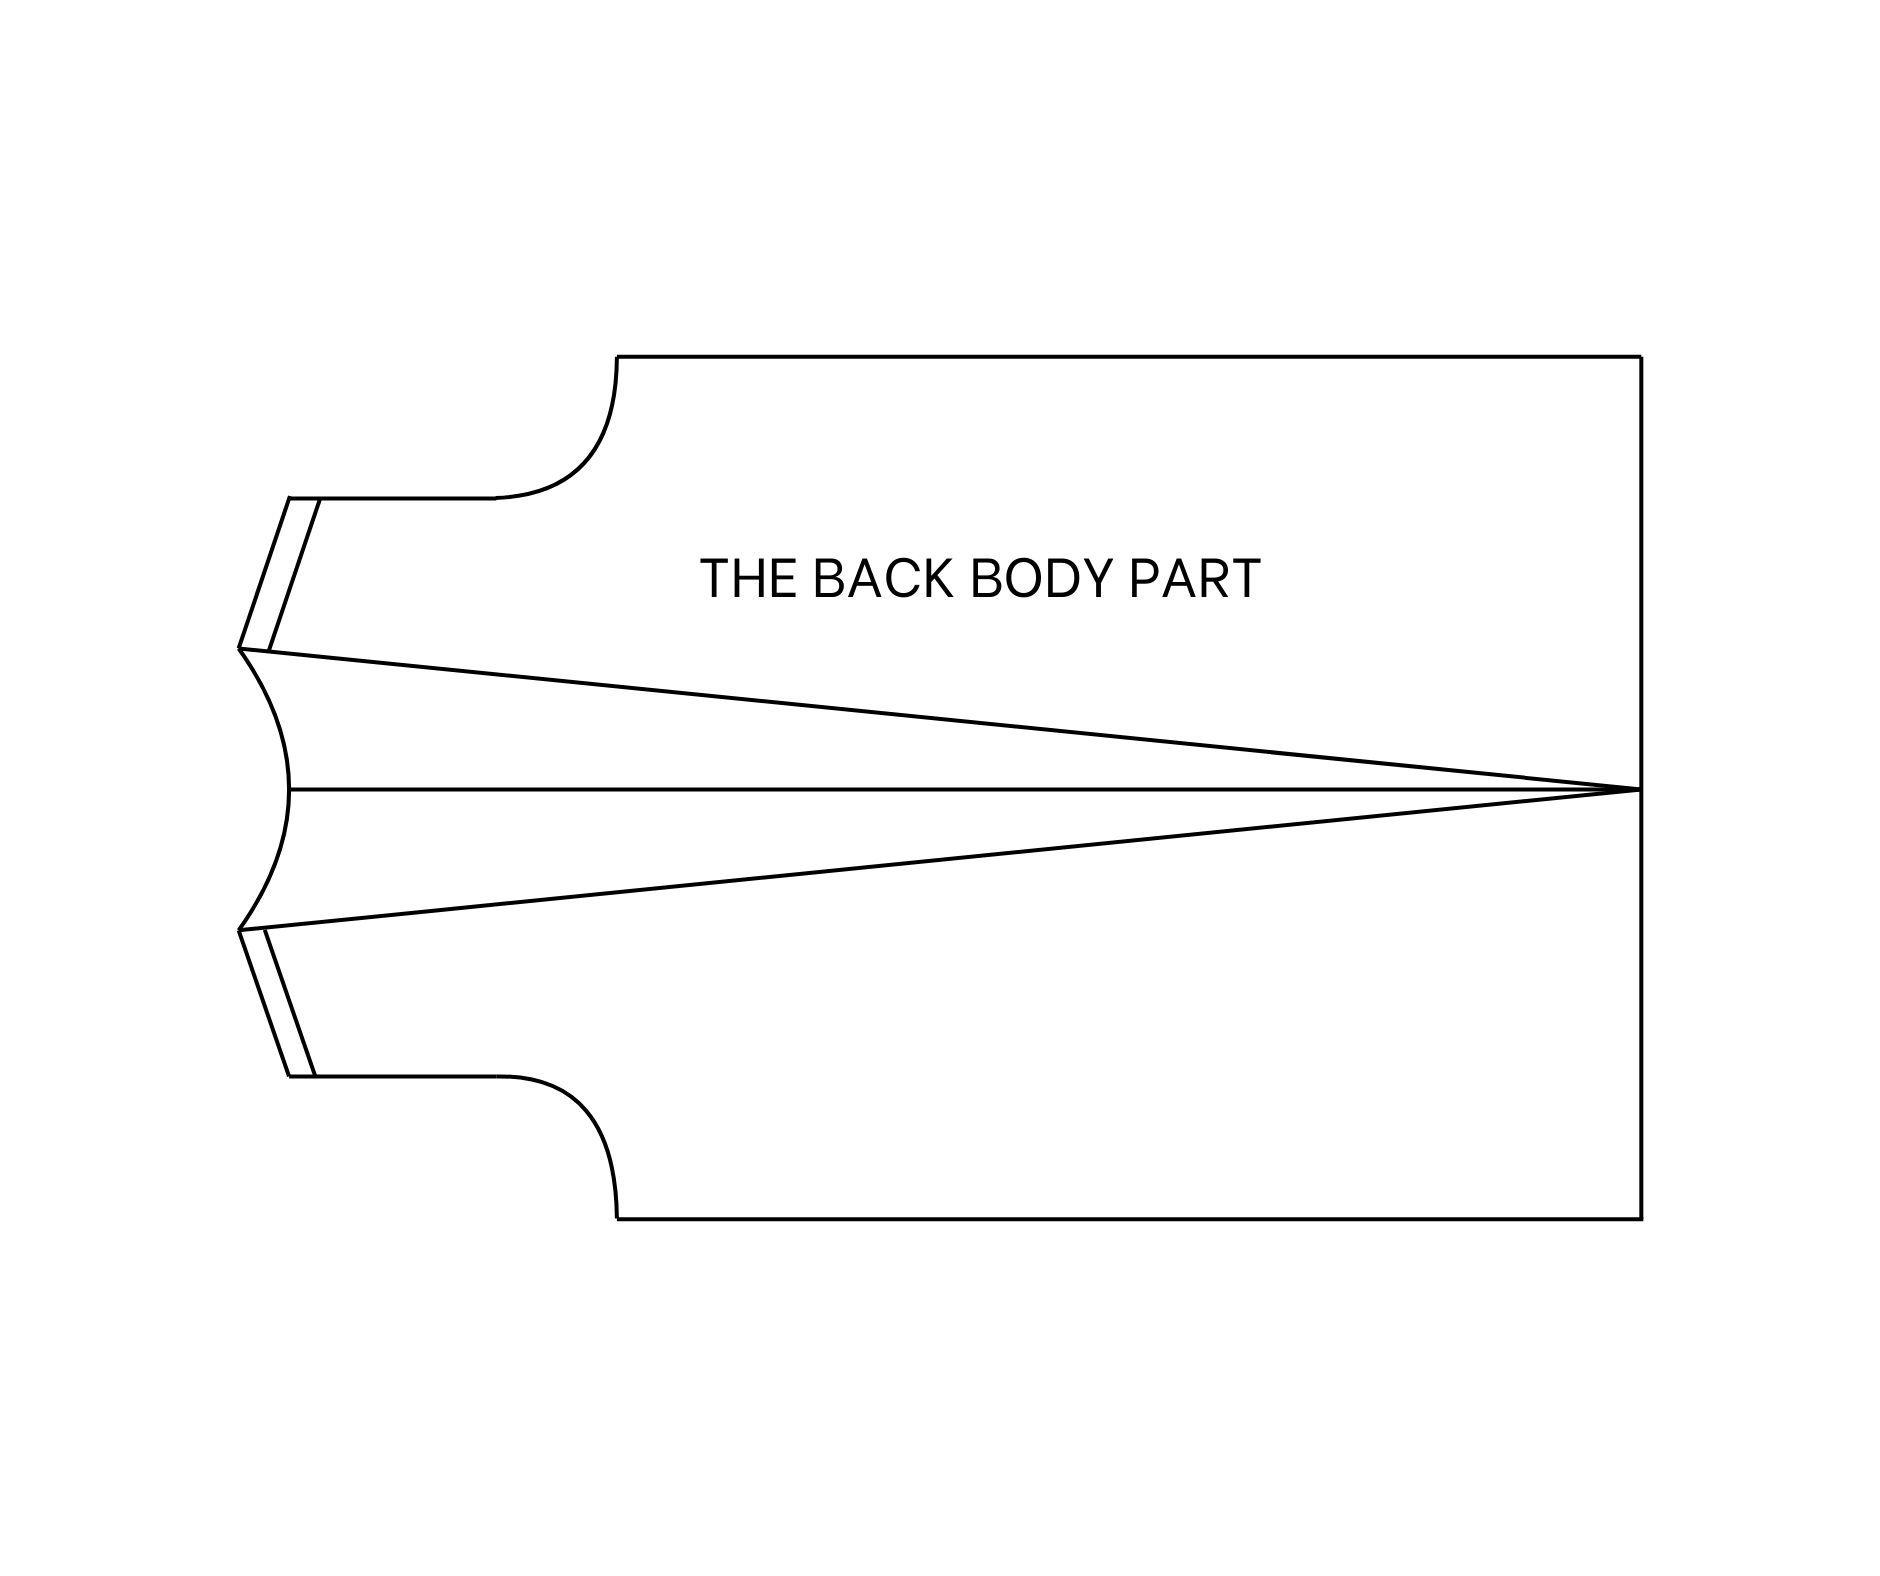
At the middle line, which is also the middle of the neck area, mark 2 cm under the neckline, then draw a curved line to connect to the two ends of the neck to finish the neck part of the back body.
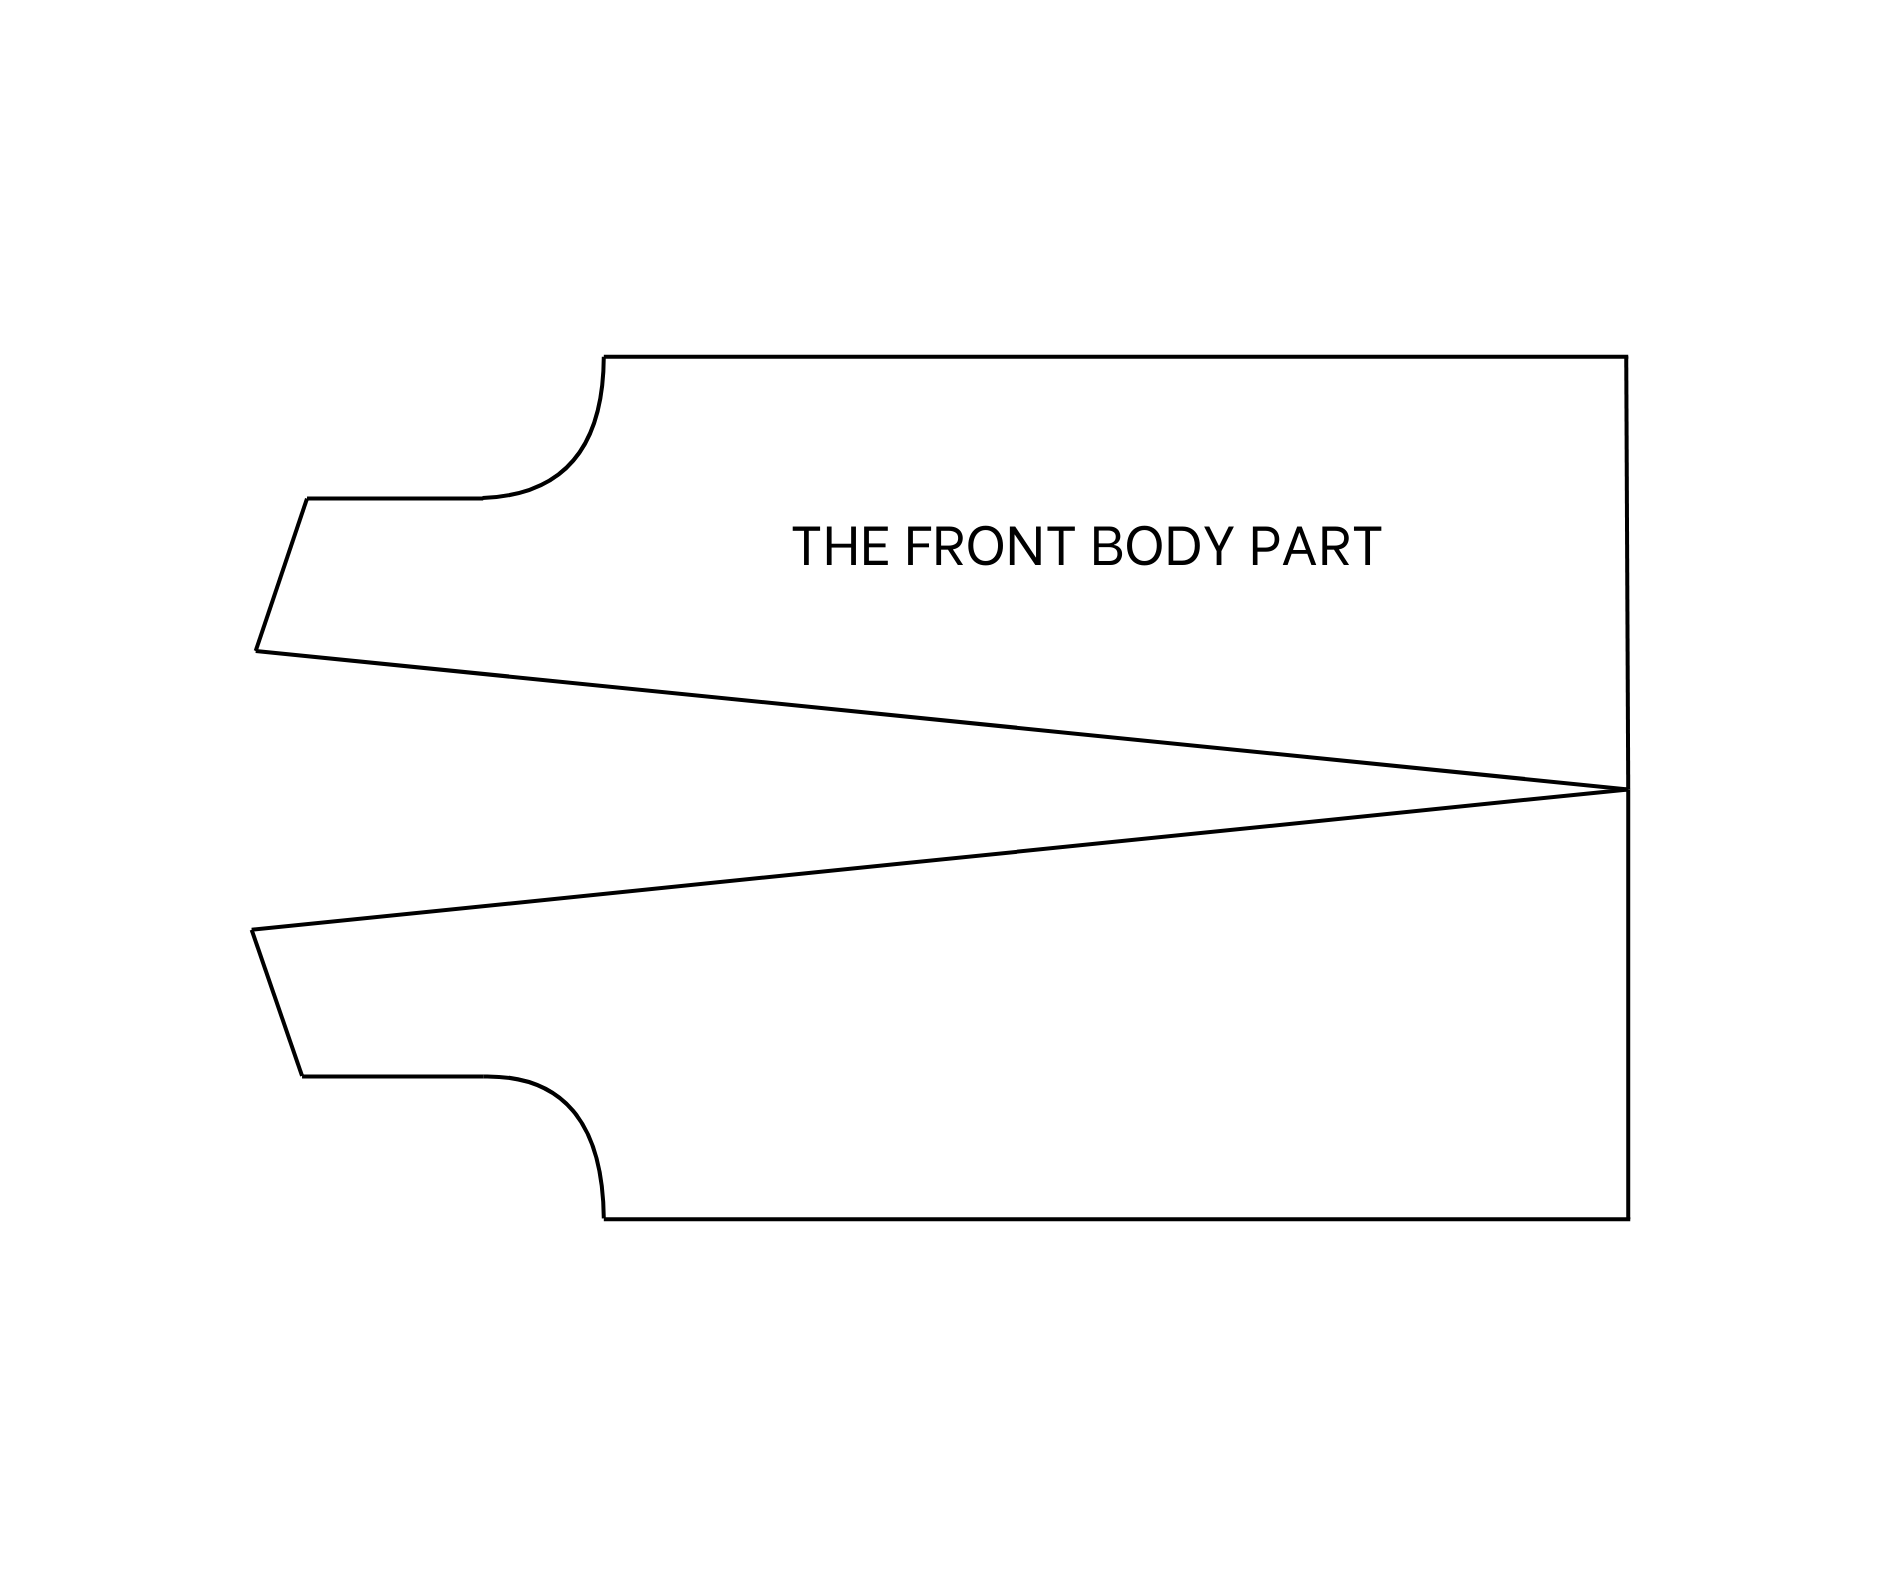
From the two ends of the neck, draw a line to connect to the end of the middle line to finish the neck part of the front body.
Since the front will be shorter than the back body at the shoulder, make the shoulder lines at the front body 2 cm shorter than the back.
When cutting, cut along the drawing lines of the back part first, then cut for the front part afterward.
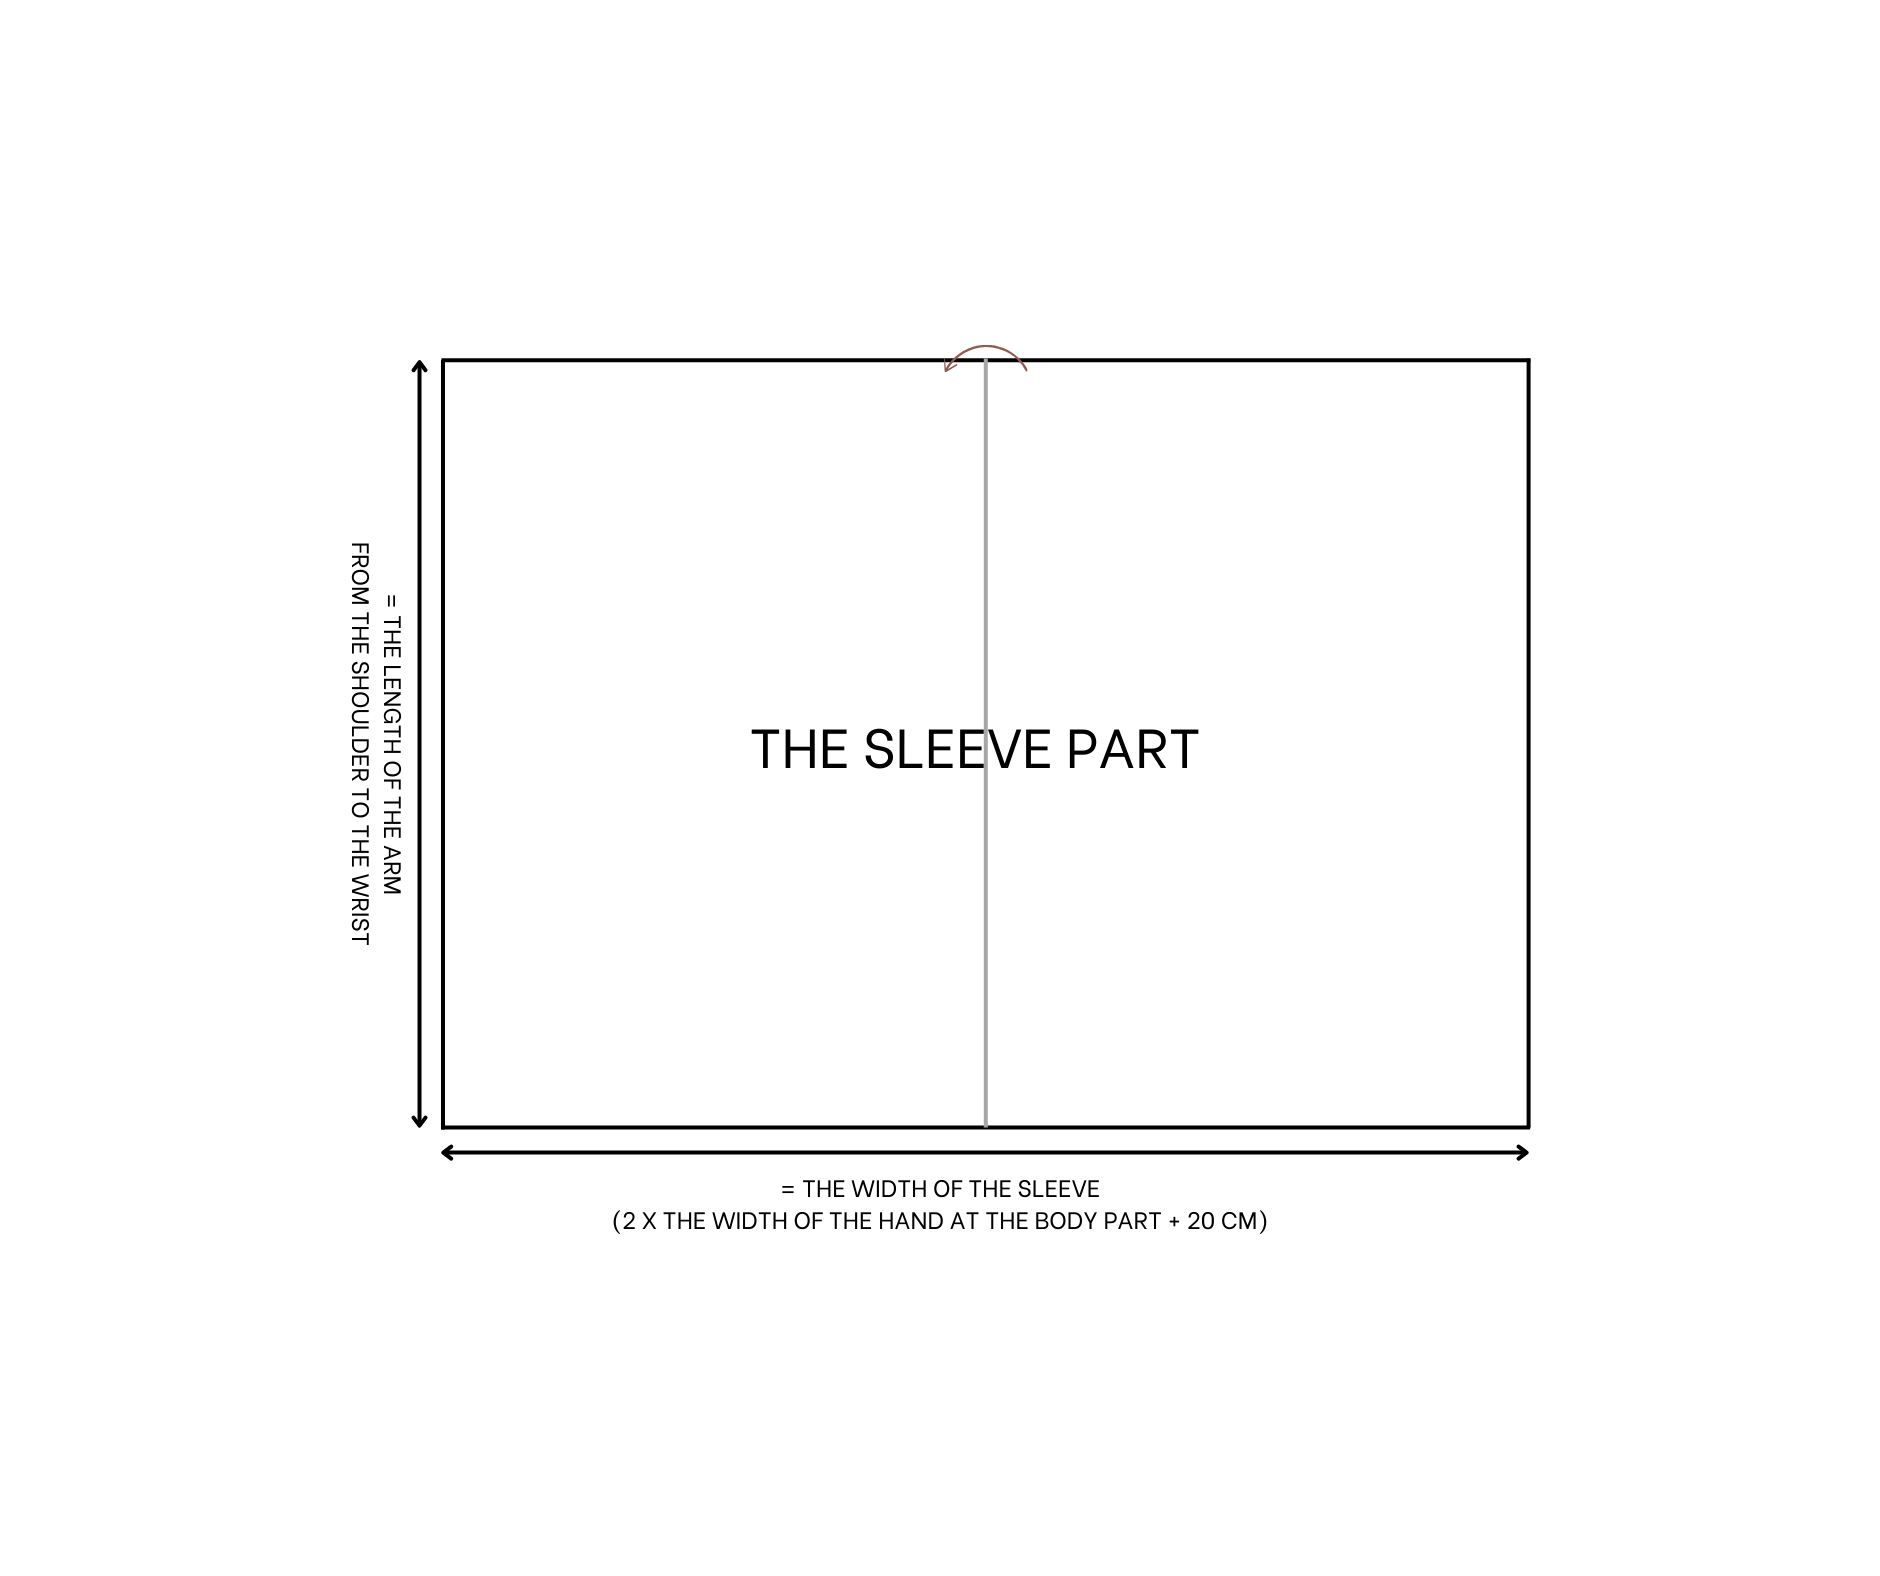
THE SLEEVE PART
Cut two rectangles with 45 cm length, which is the length from the shoulder to the wrist, and 60 cm width, which is twice the width of the hand at the body part plus 20 cm.
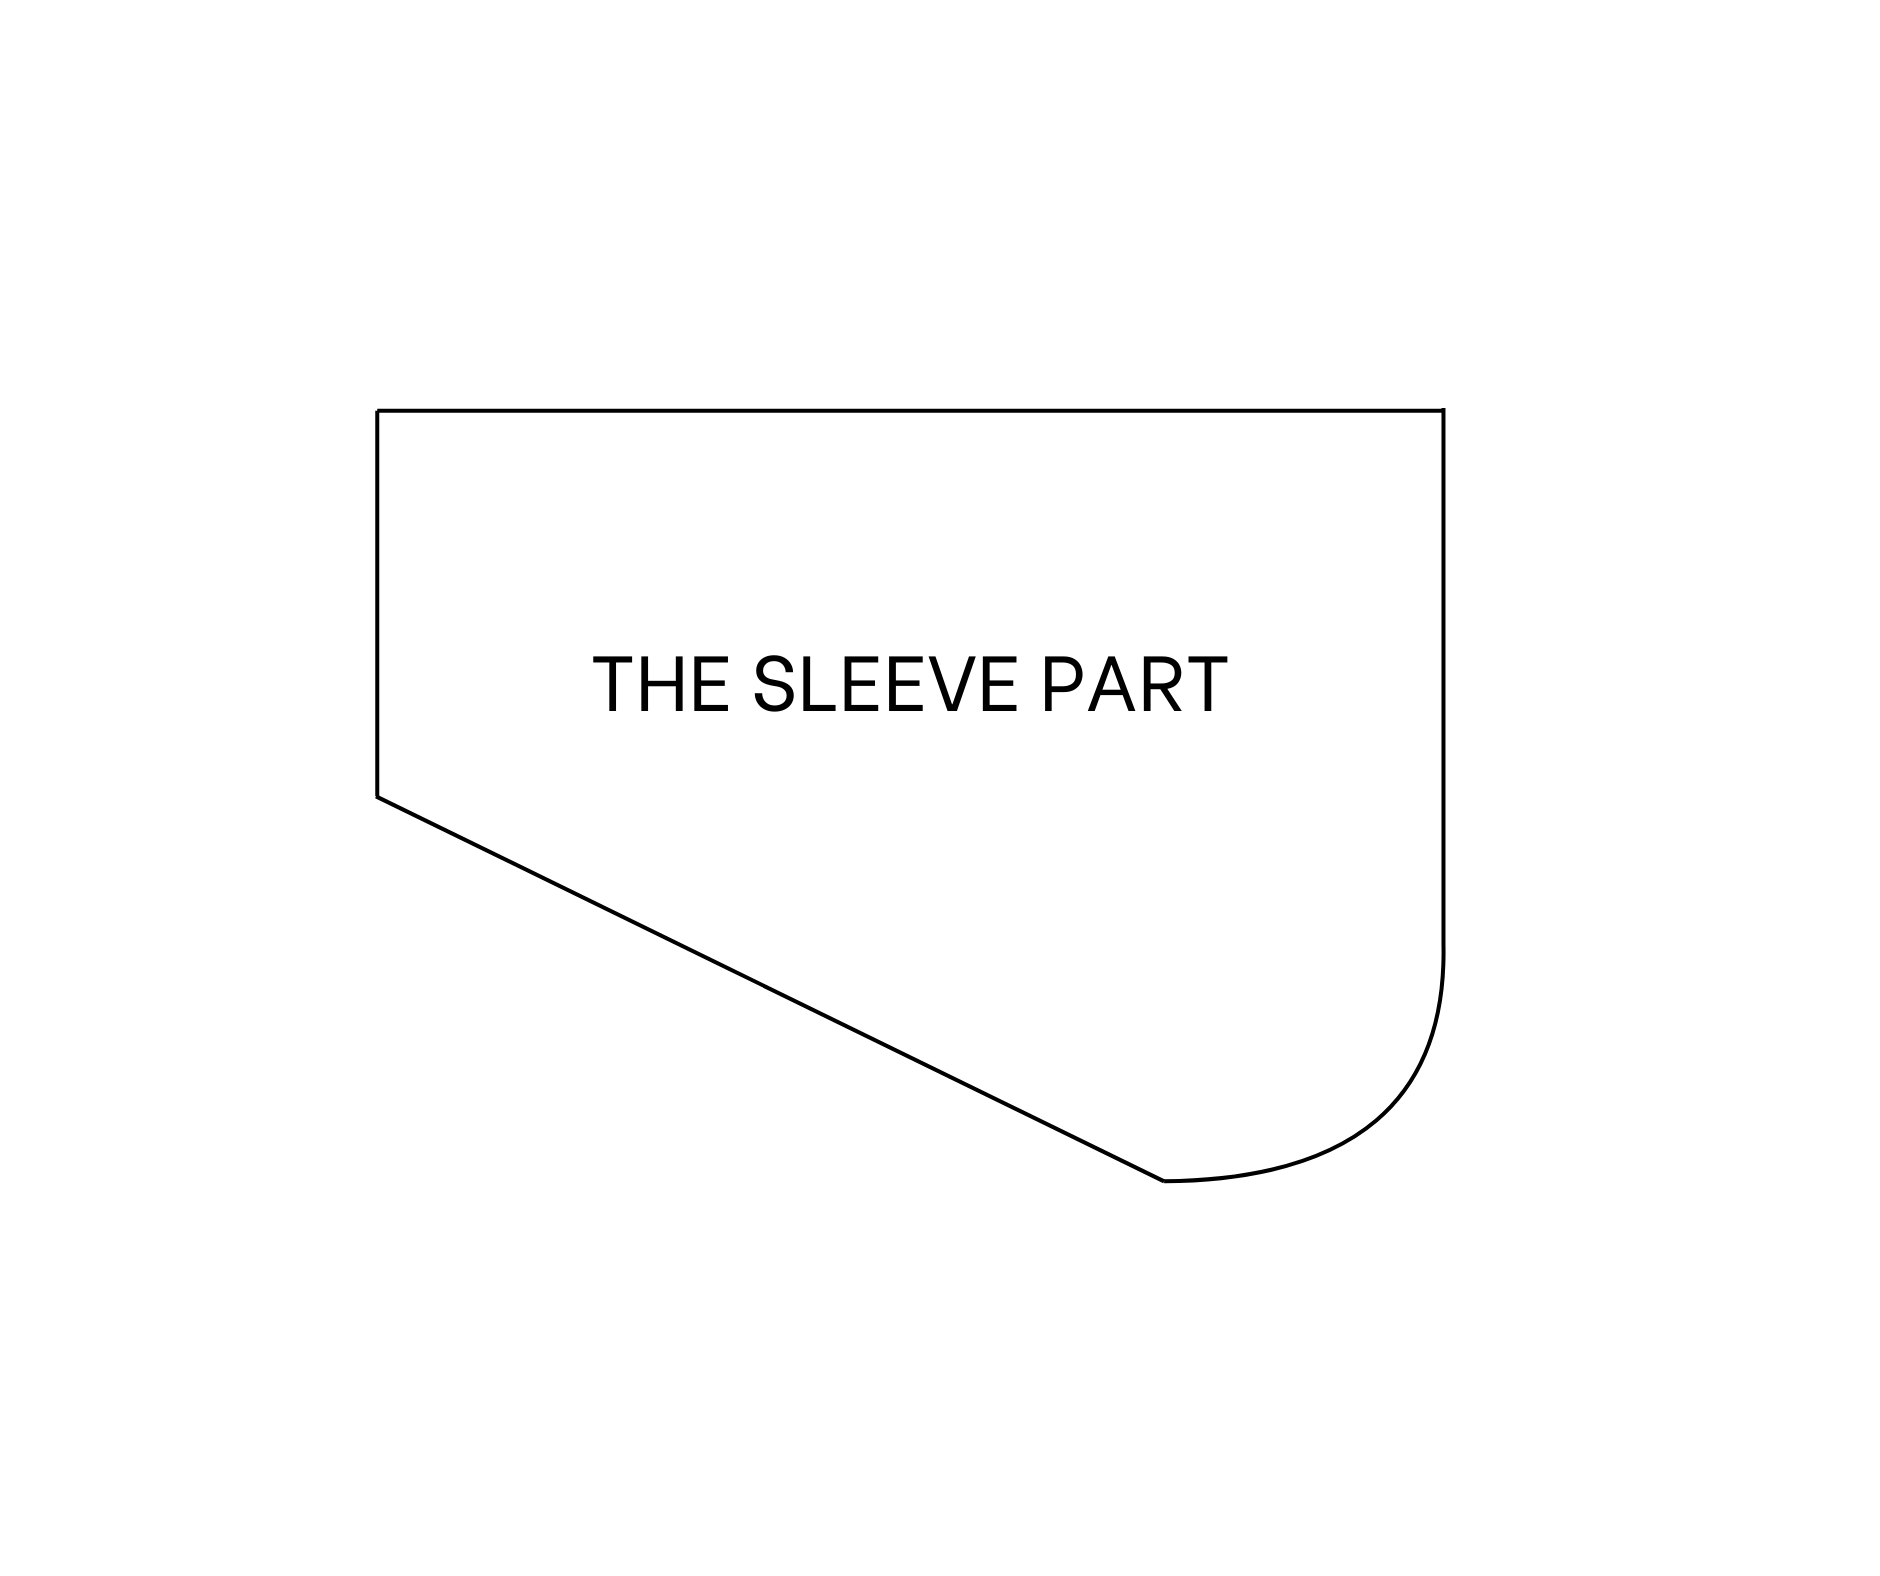
Fold the rectangle in half at the width line first, then apply the hand at the body part to one side of the sleeve to draw a curved line there. This is the connected part with the hand of the body later.
At the end of the sleeve, mark 20 cm, then connect it to the end of the curved line to form the sleeve after cutting.

SEWING THE CARDIGAN
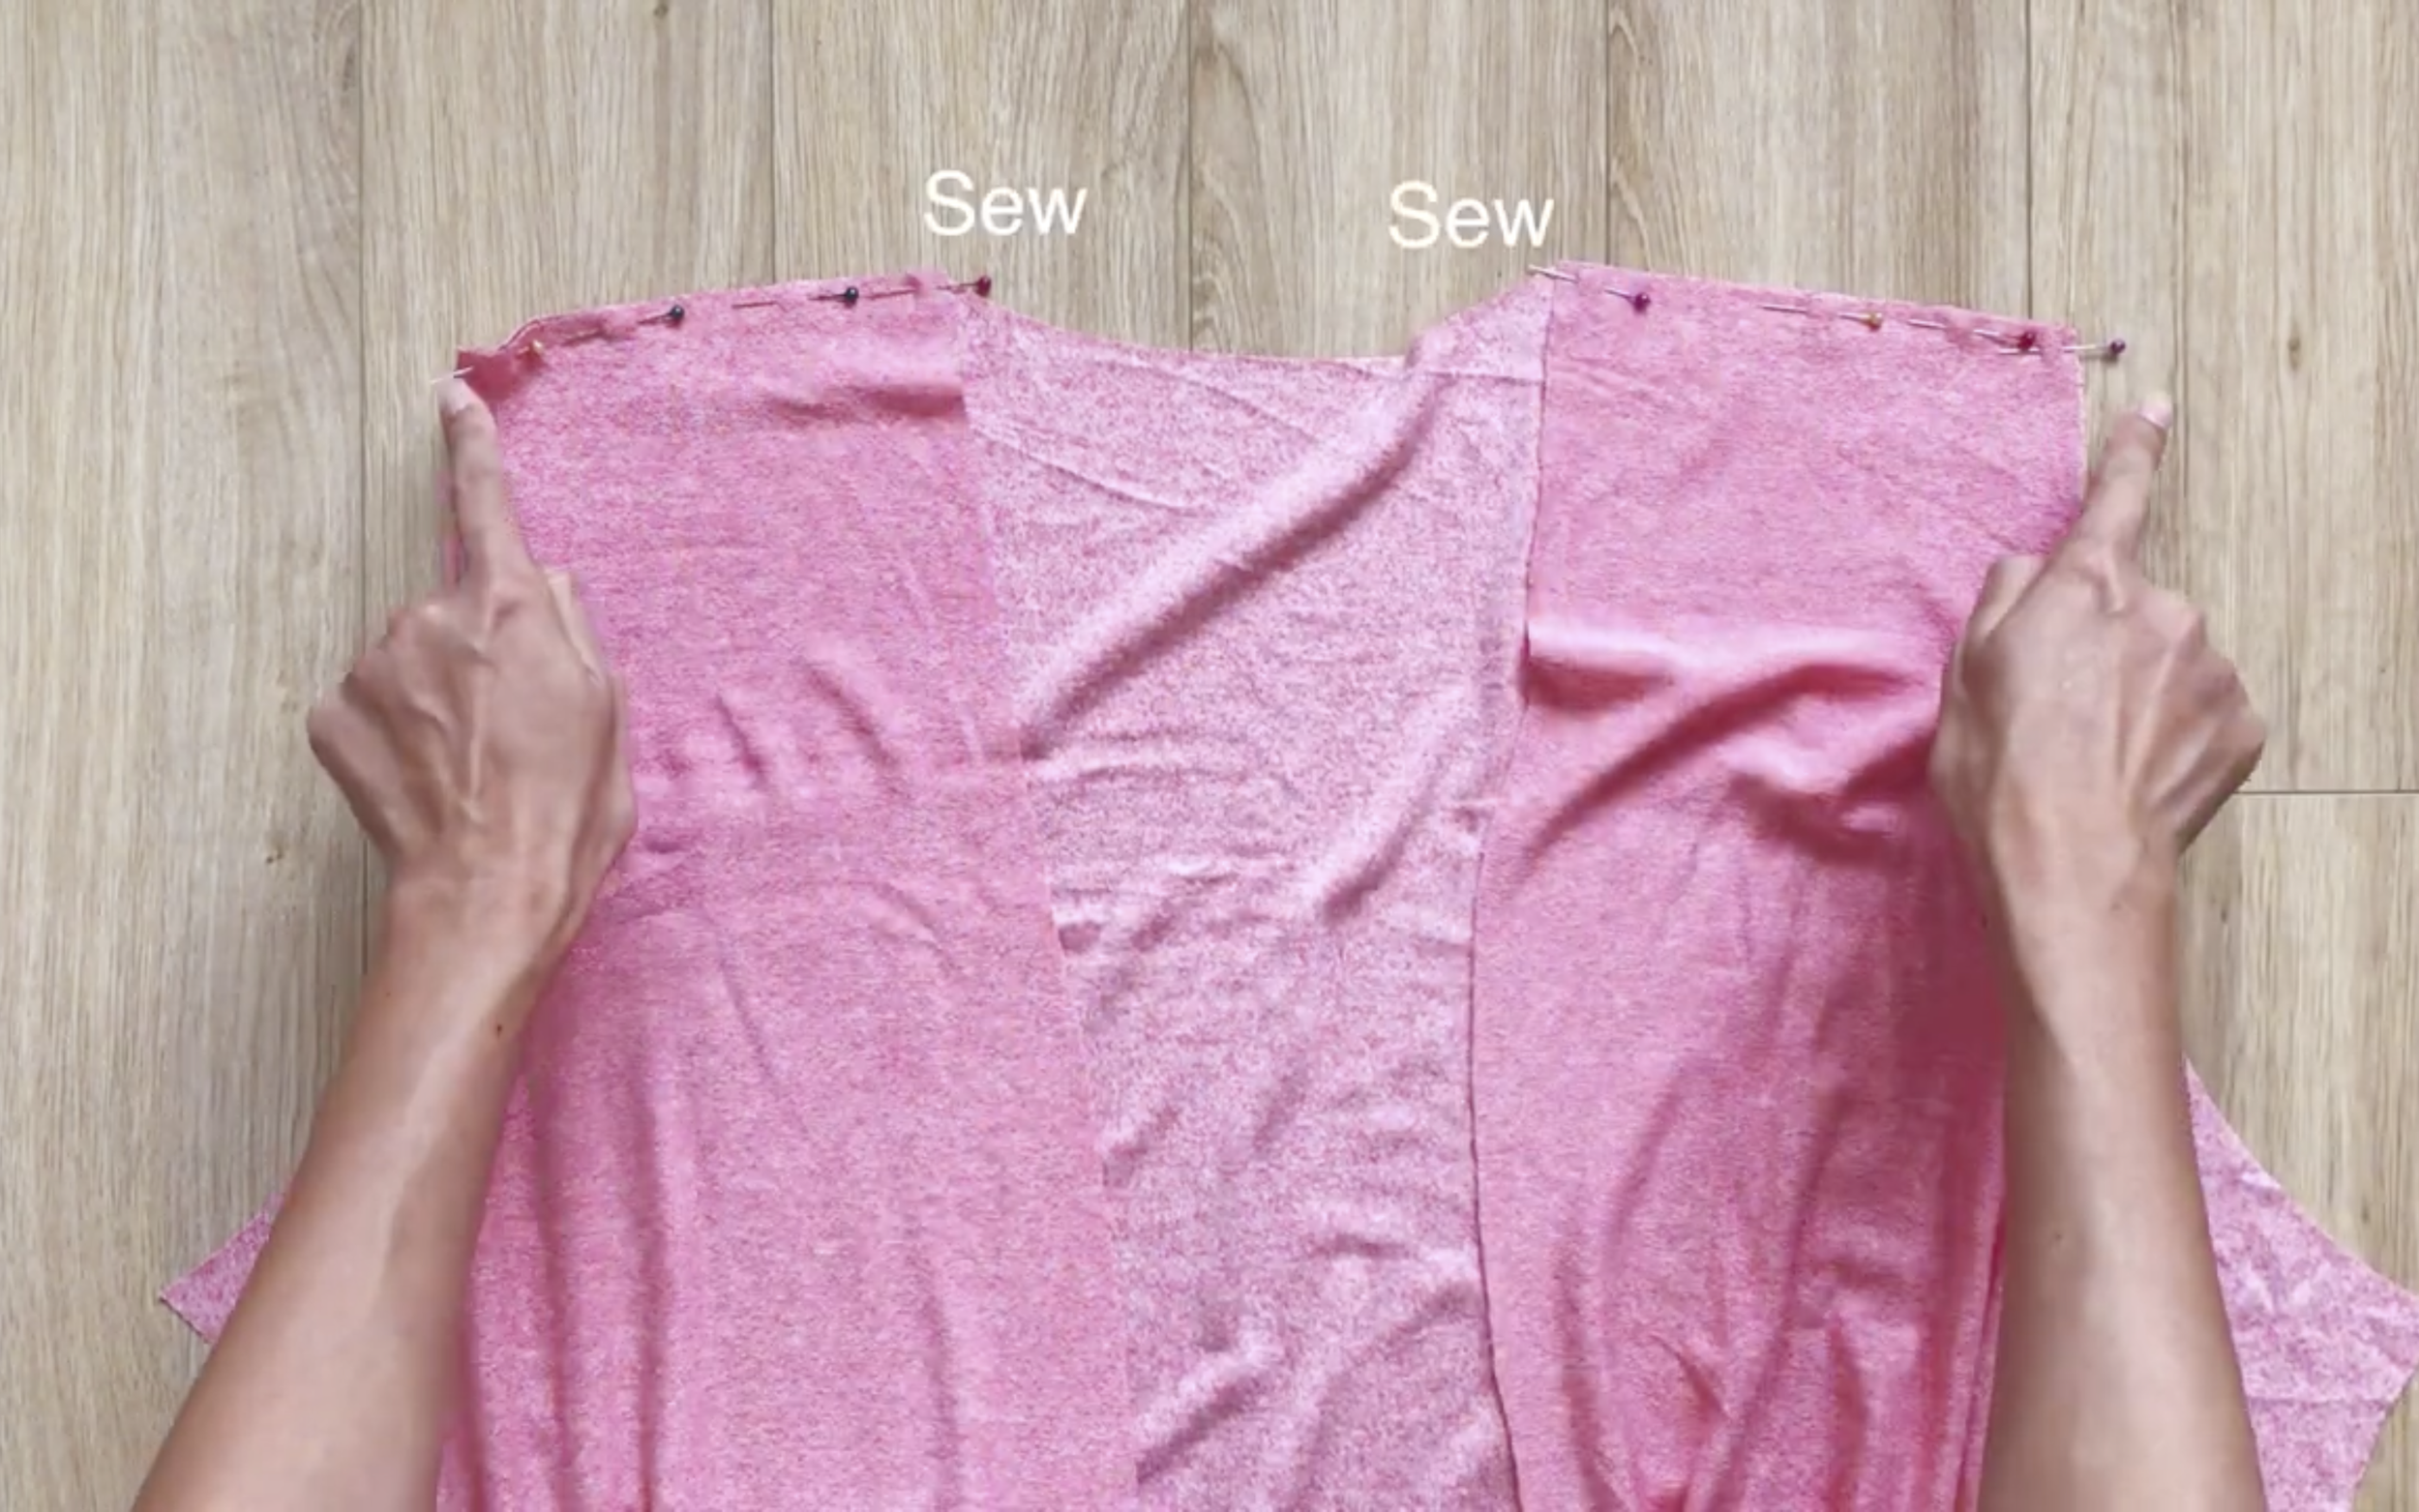
Connect the back and front body of the cardigan together at the shoulder.
Overlock after sewing.

After that, make a loose seam at the curved line of the sleeve to create the puffiness at the middle of the sleeve later.
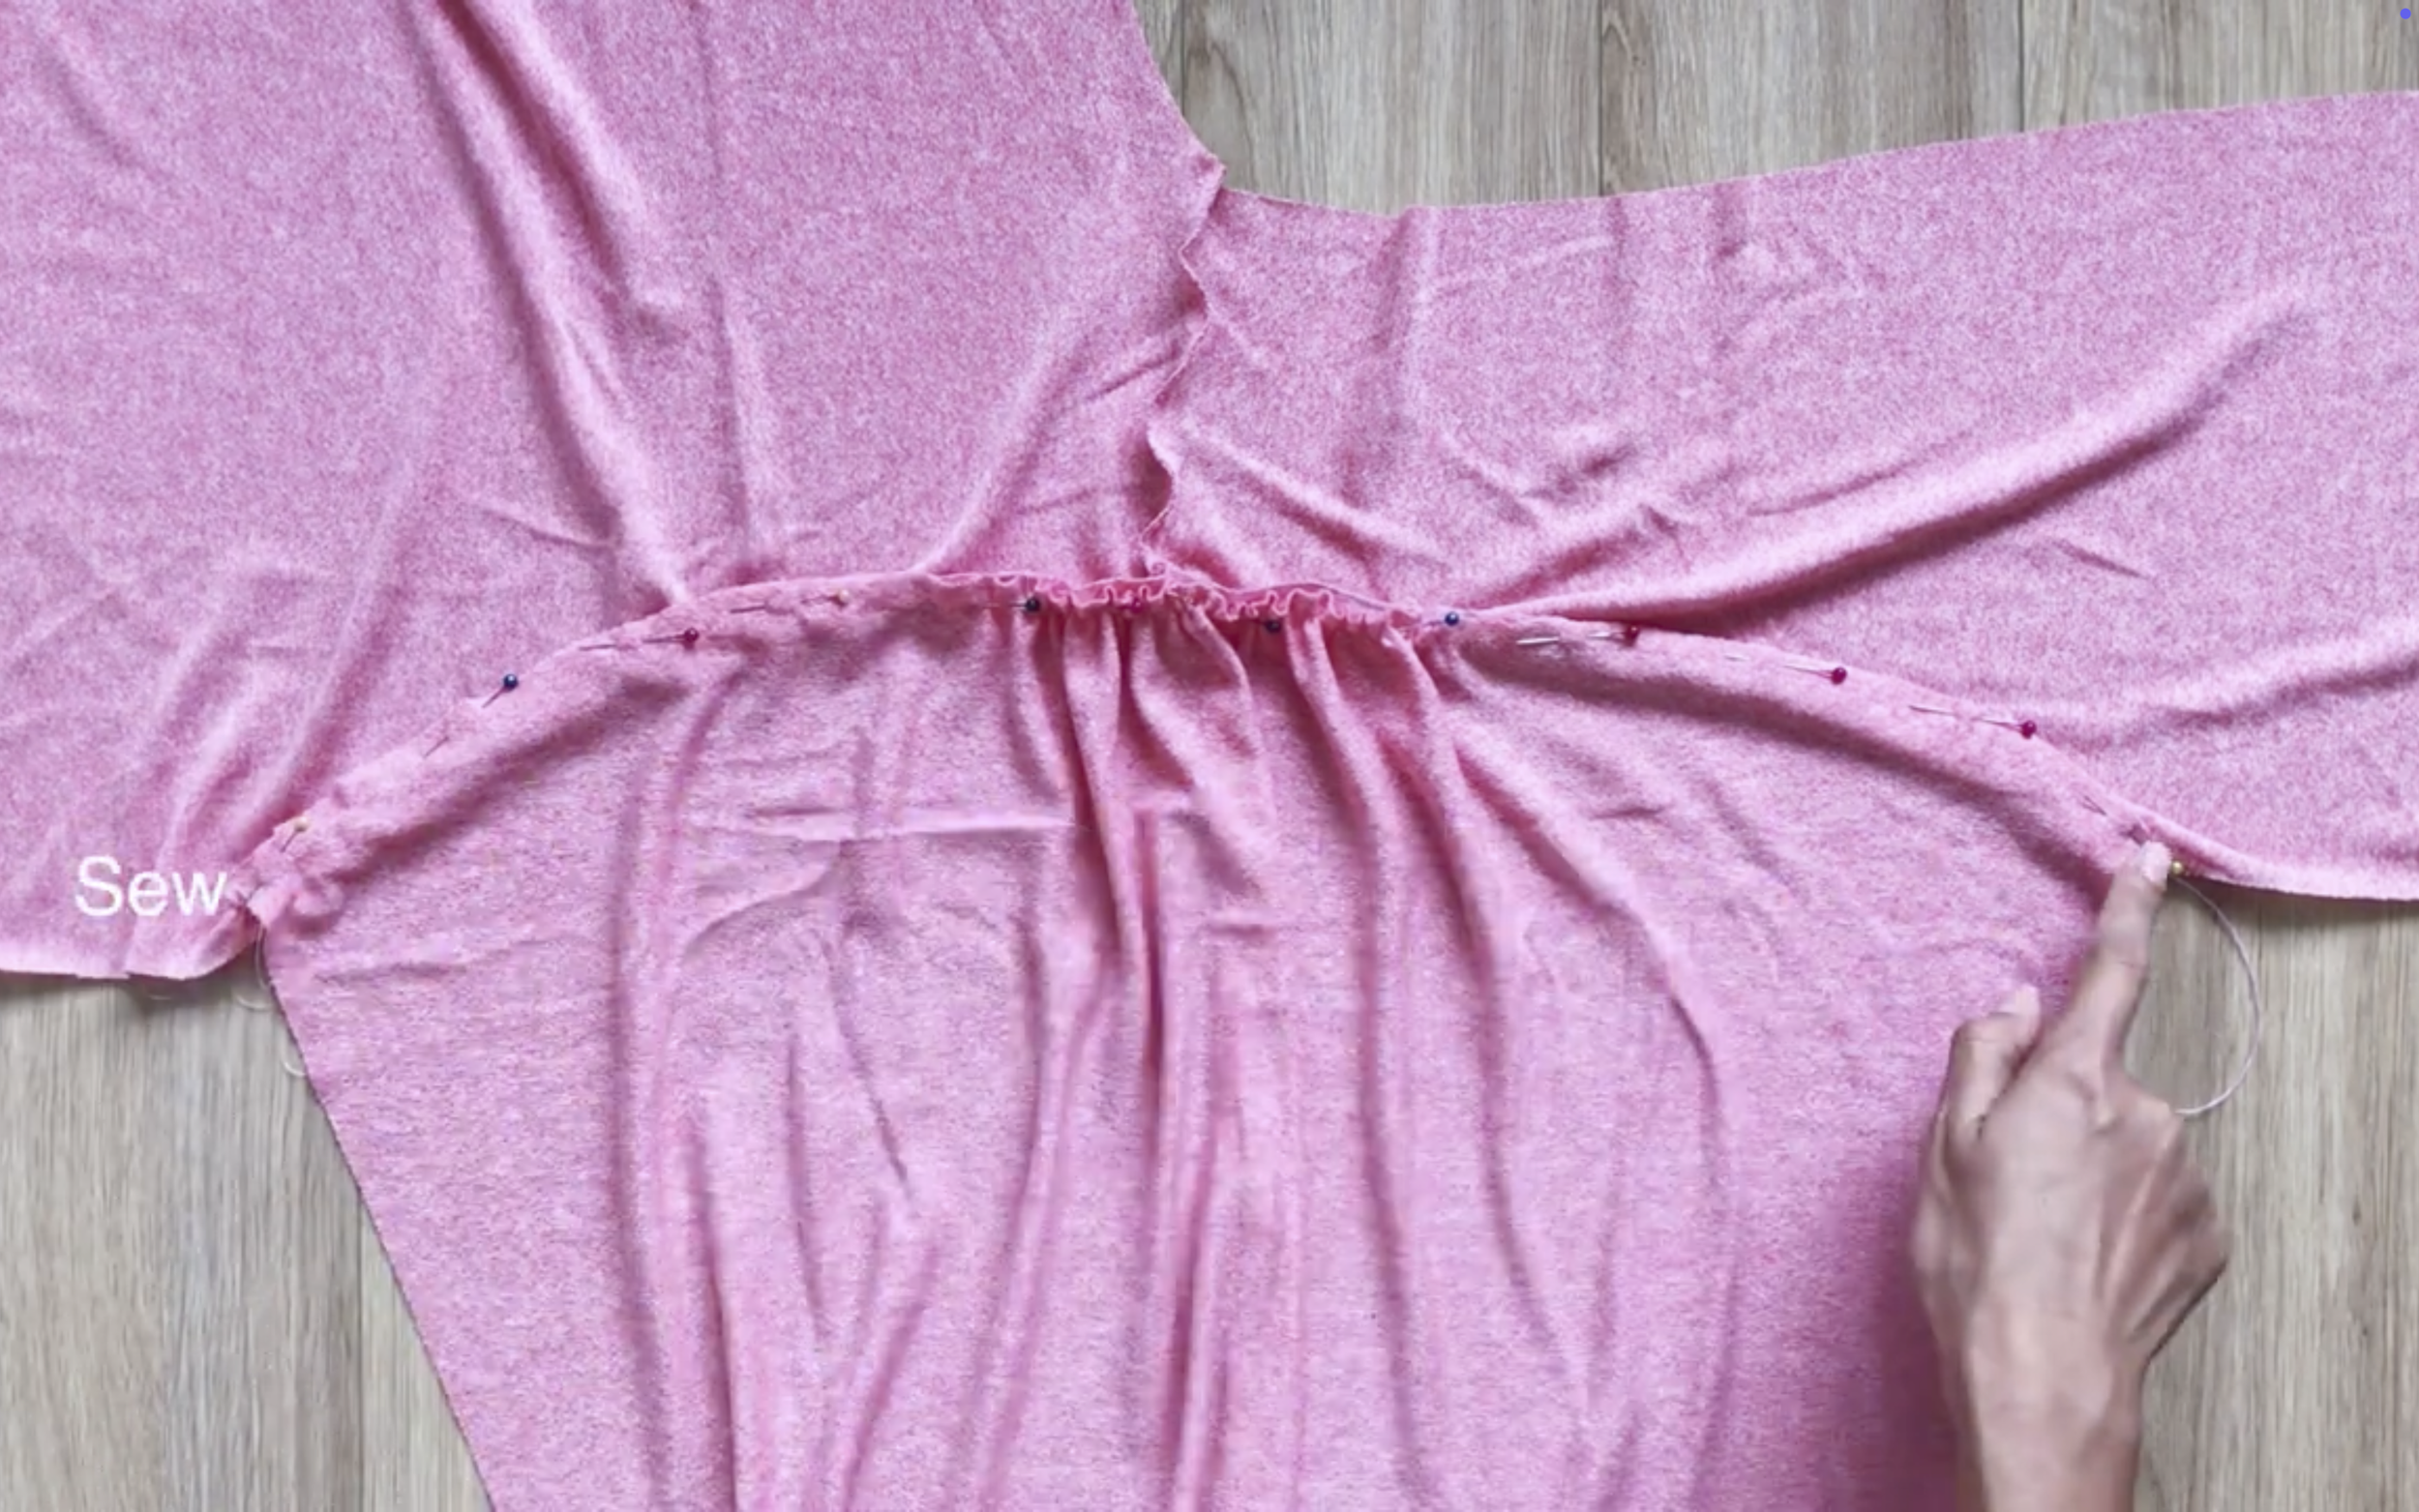
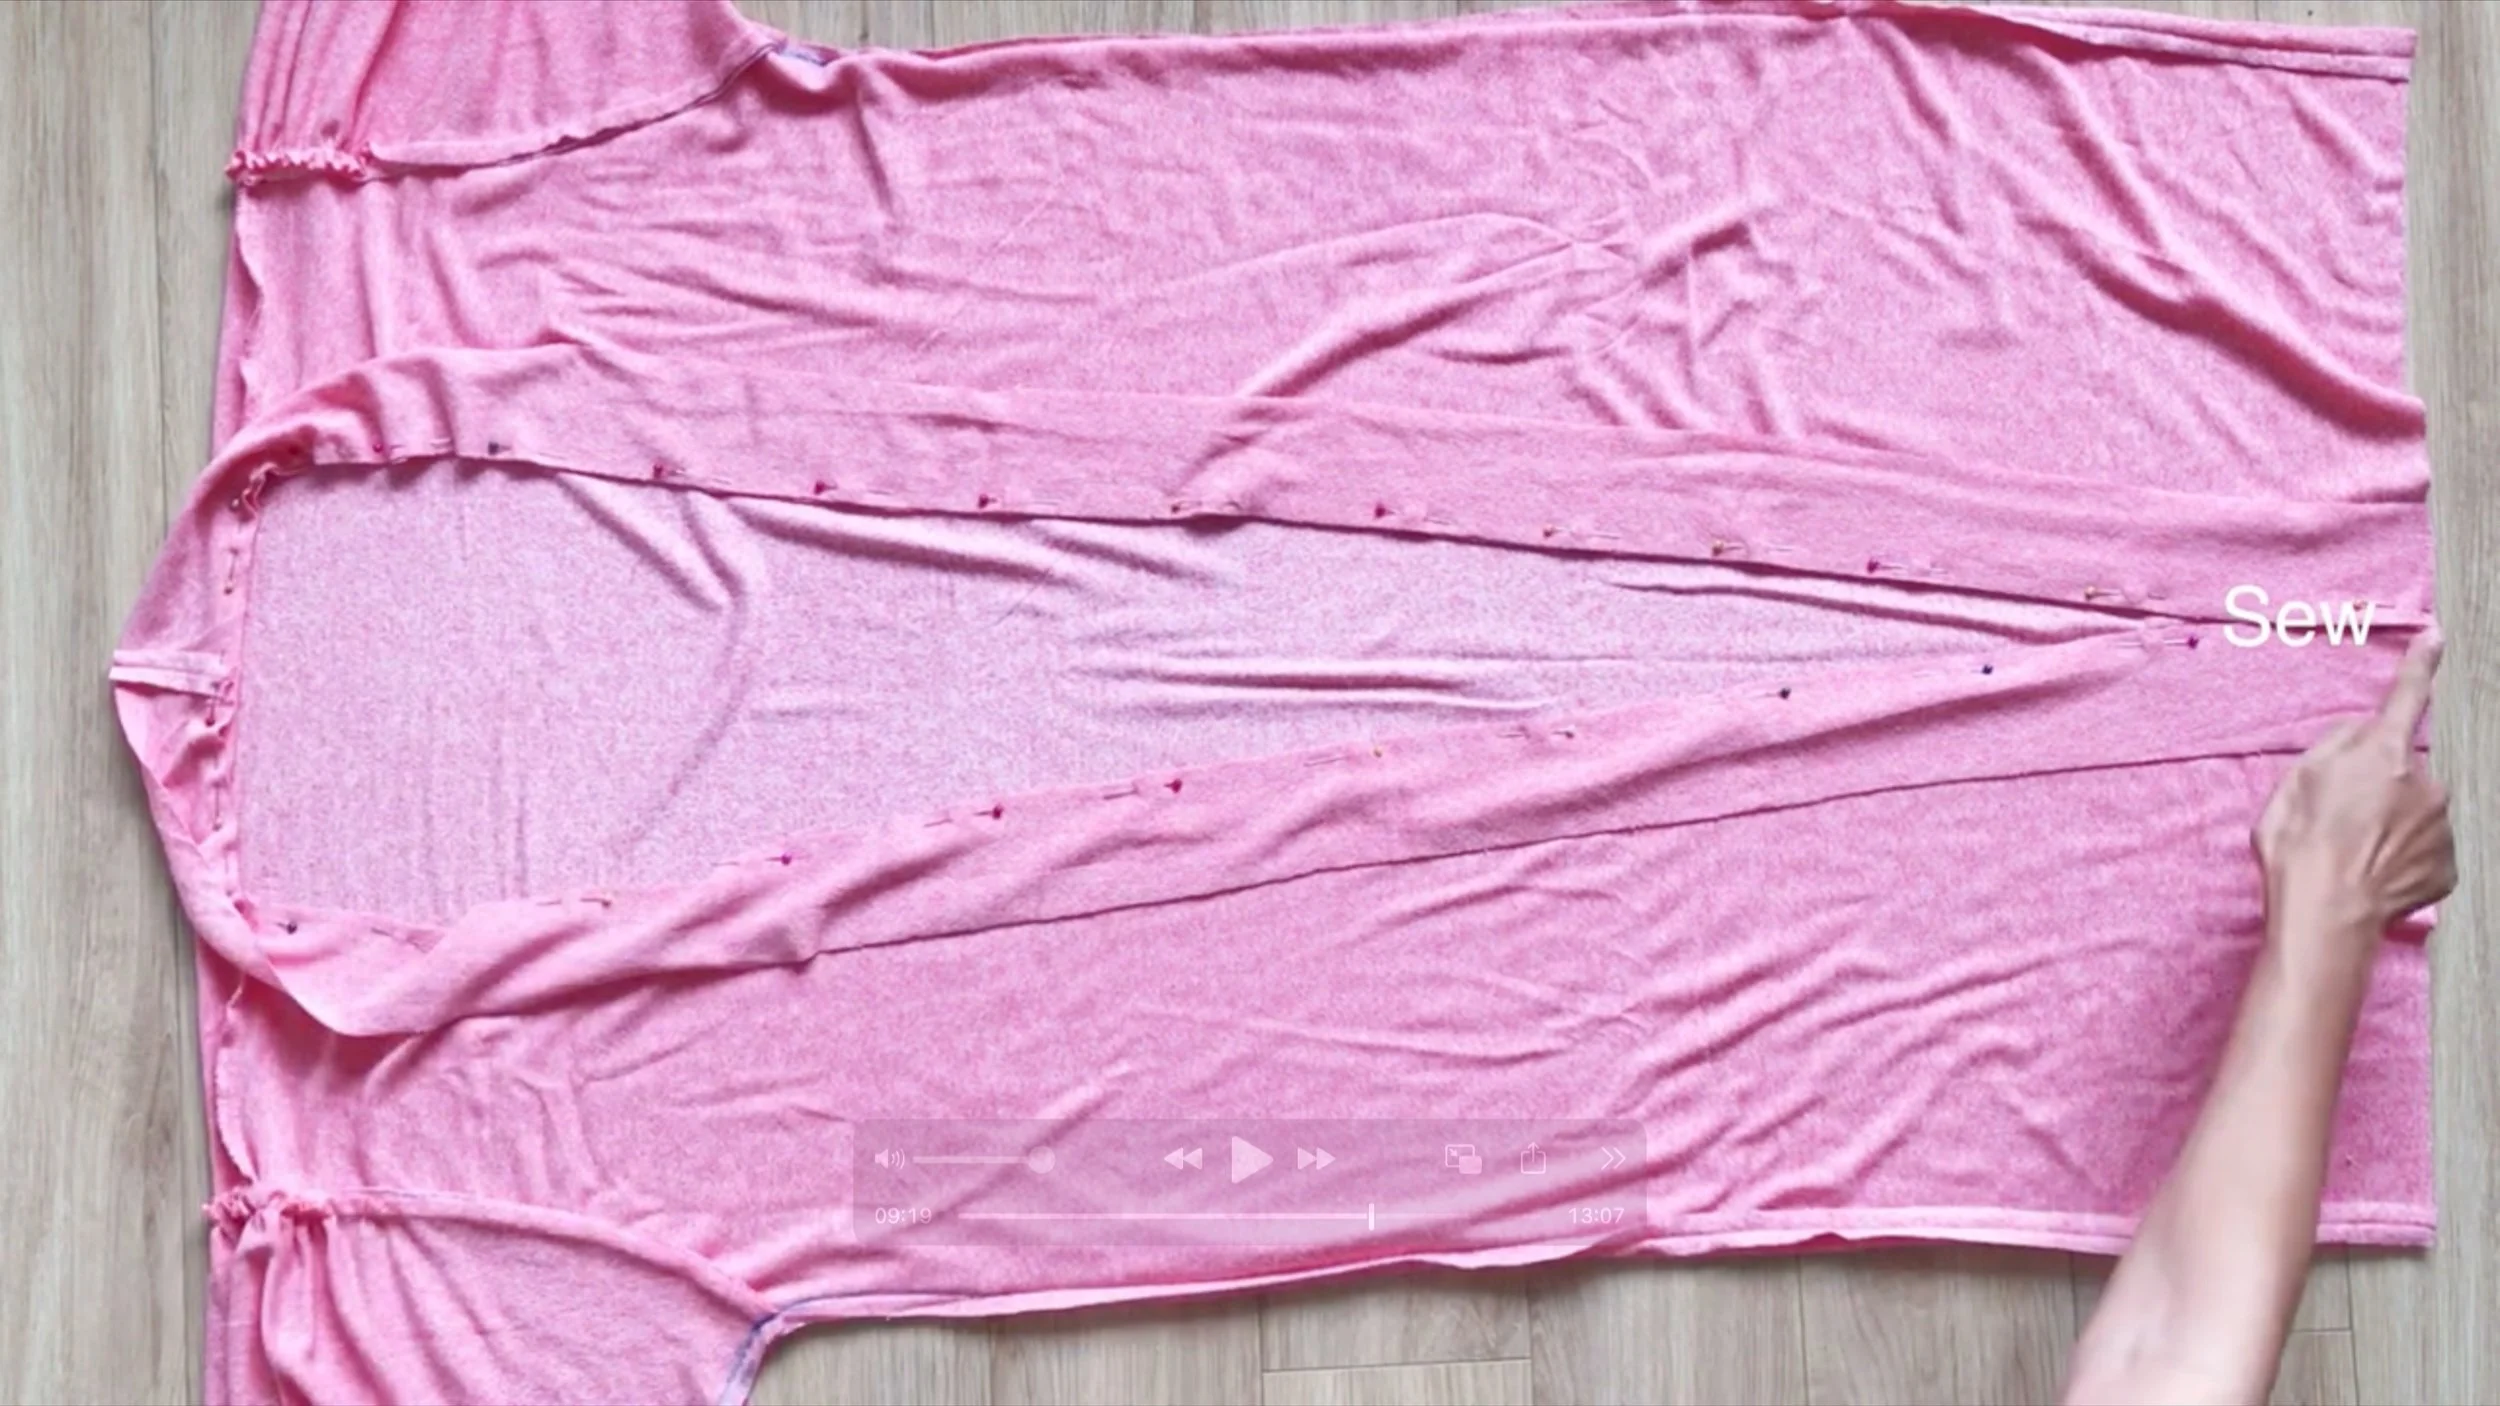
Connect the sleeve to the body of the cardigan at the curved line, starting with the two sides first, then connect the rest.
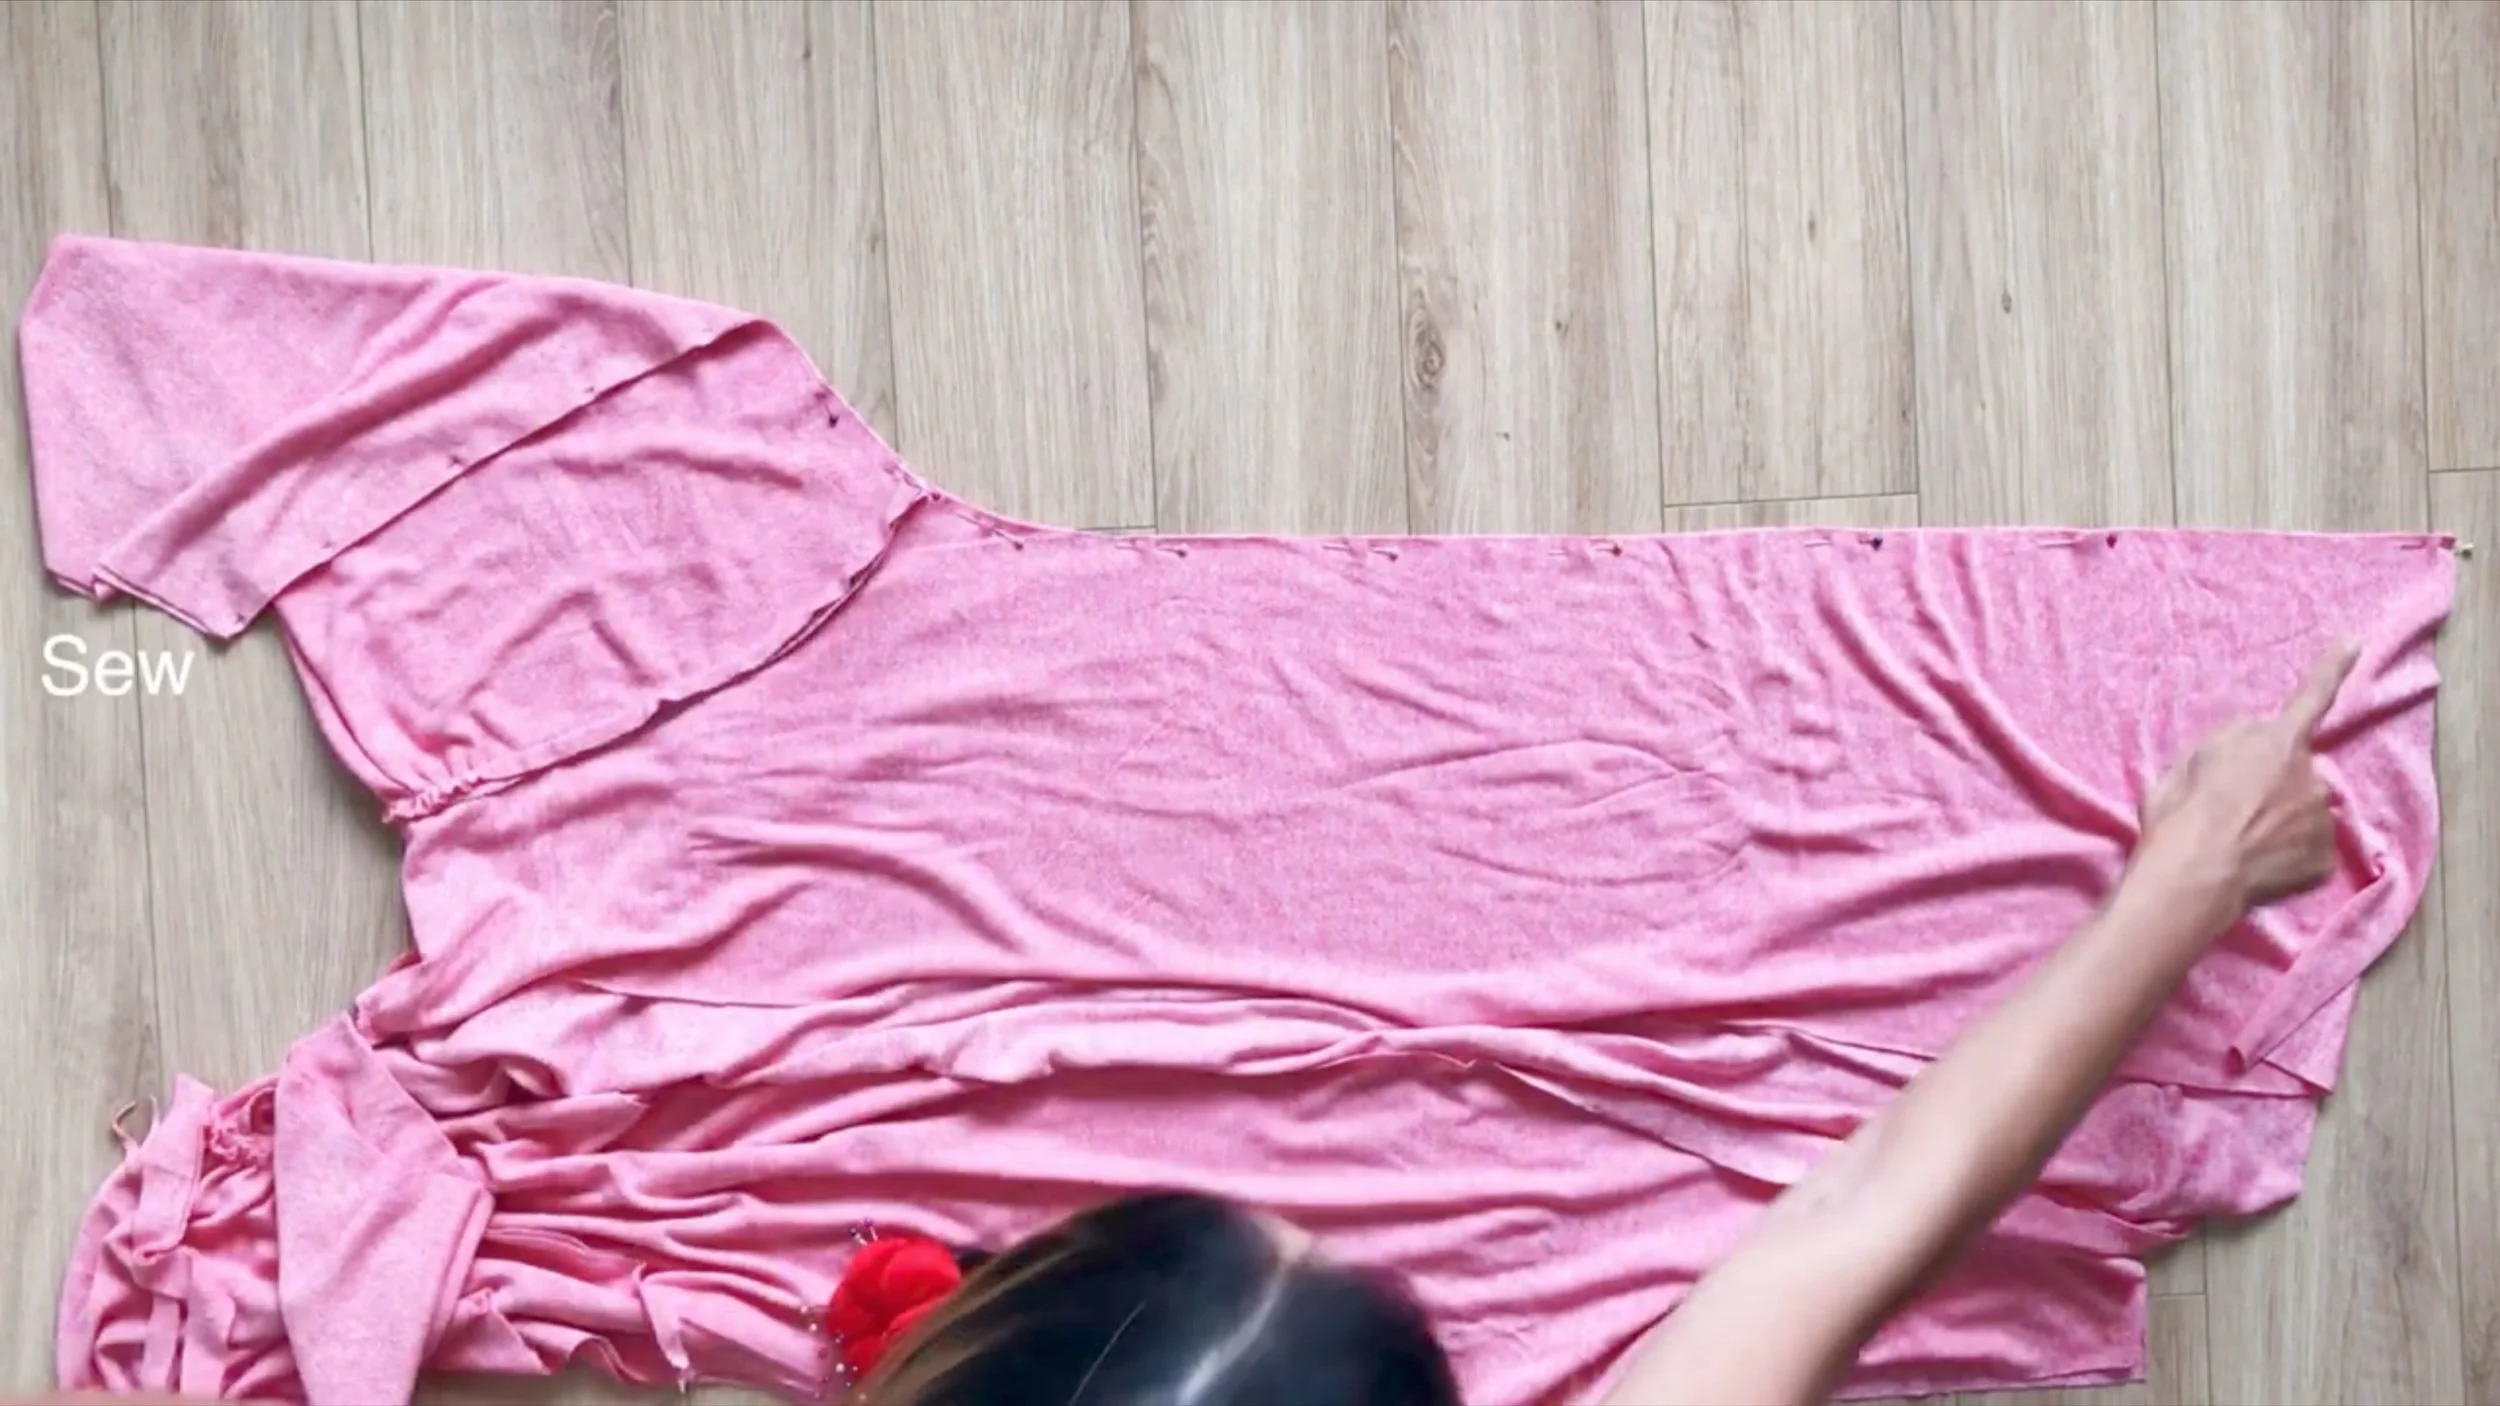
Afterward, connect the two sides of the cardigan together from the sleeve to the body.
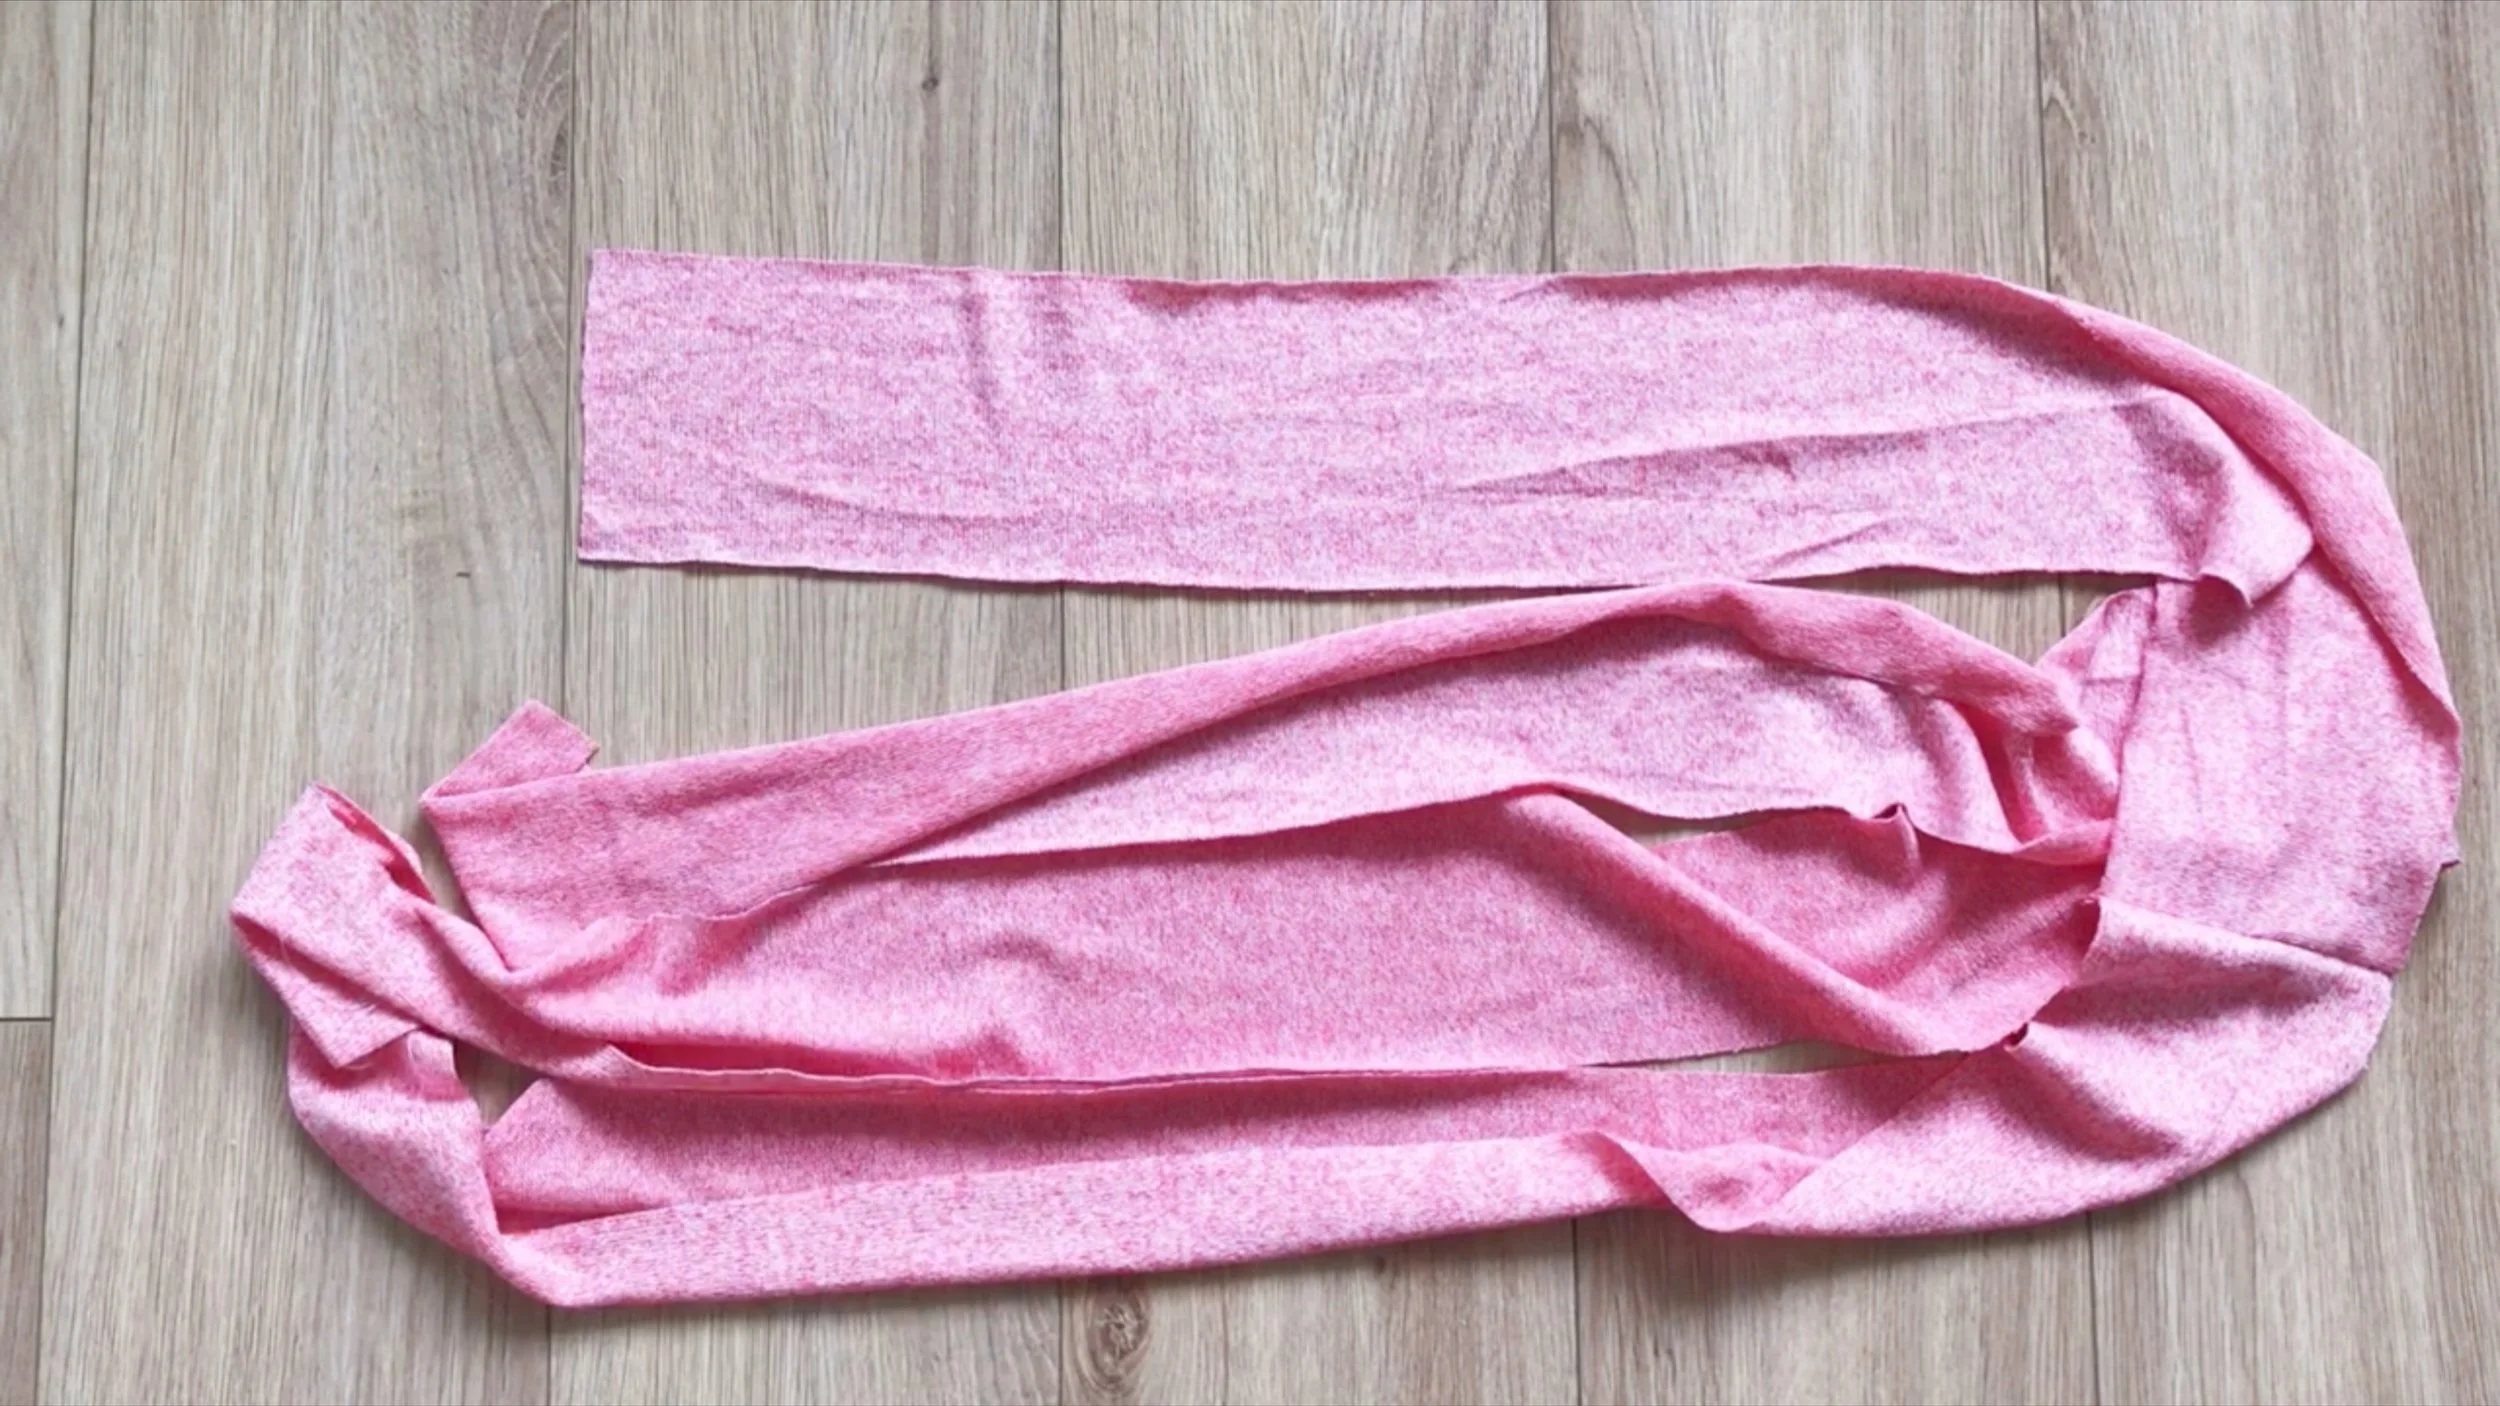
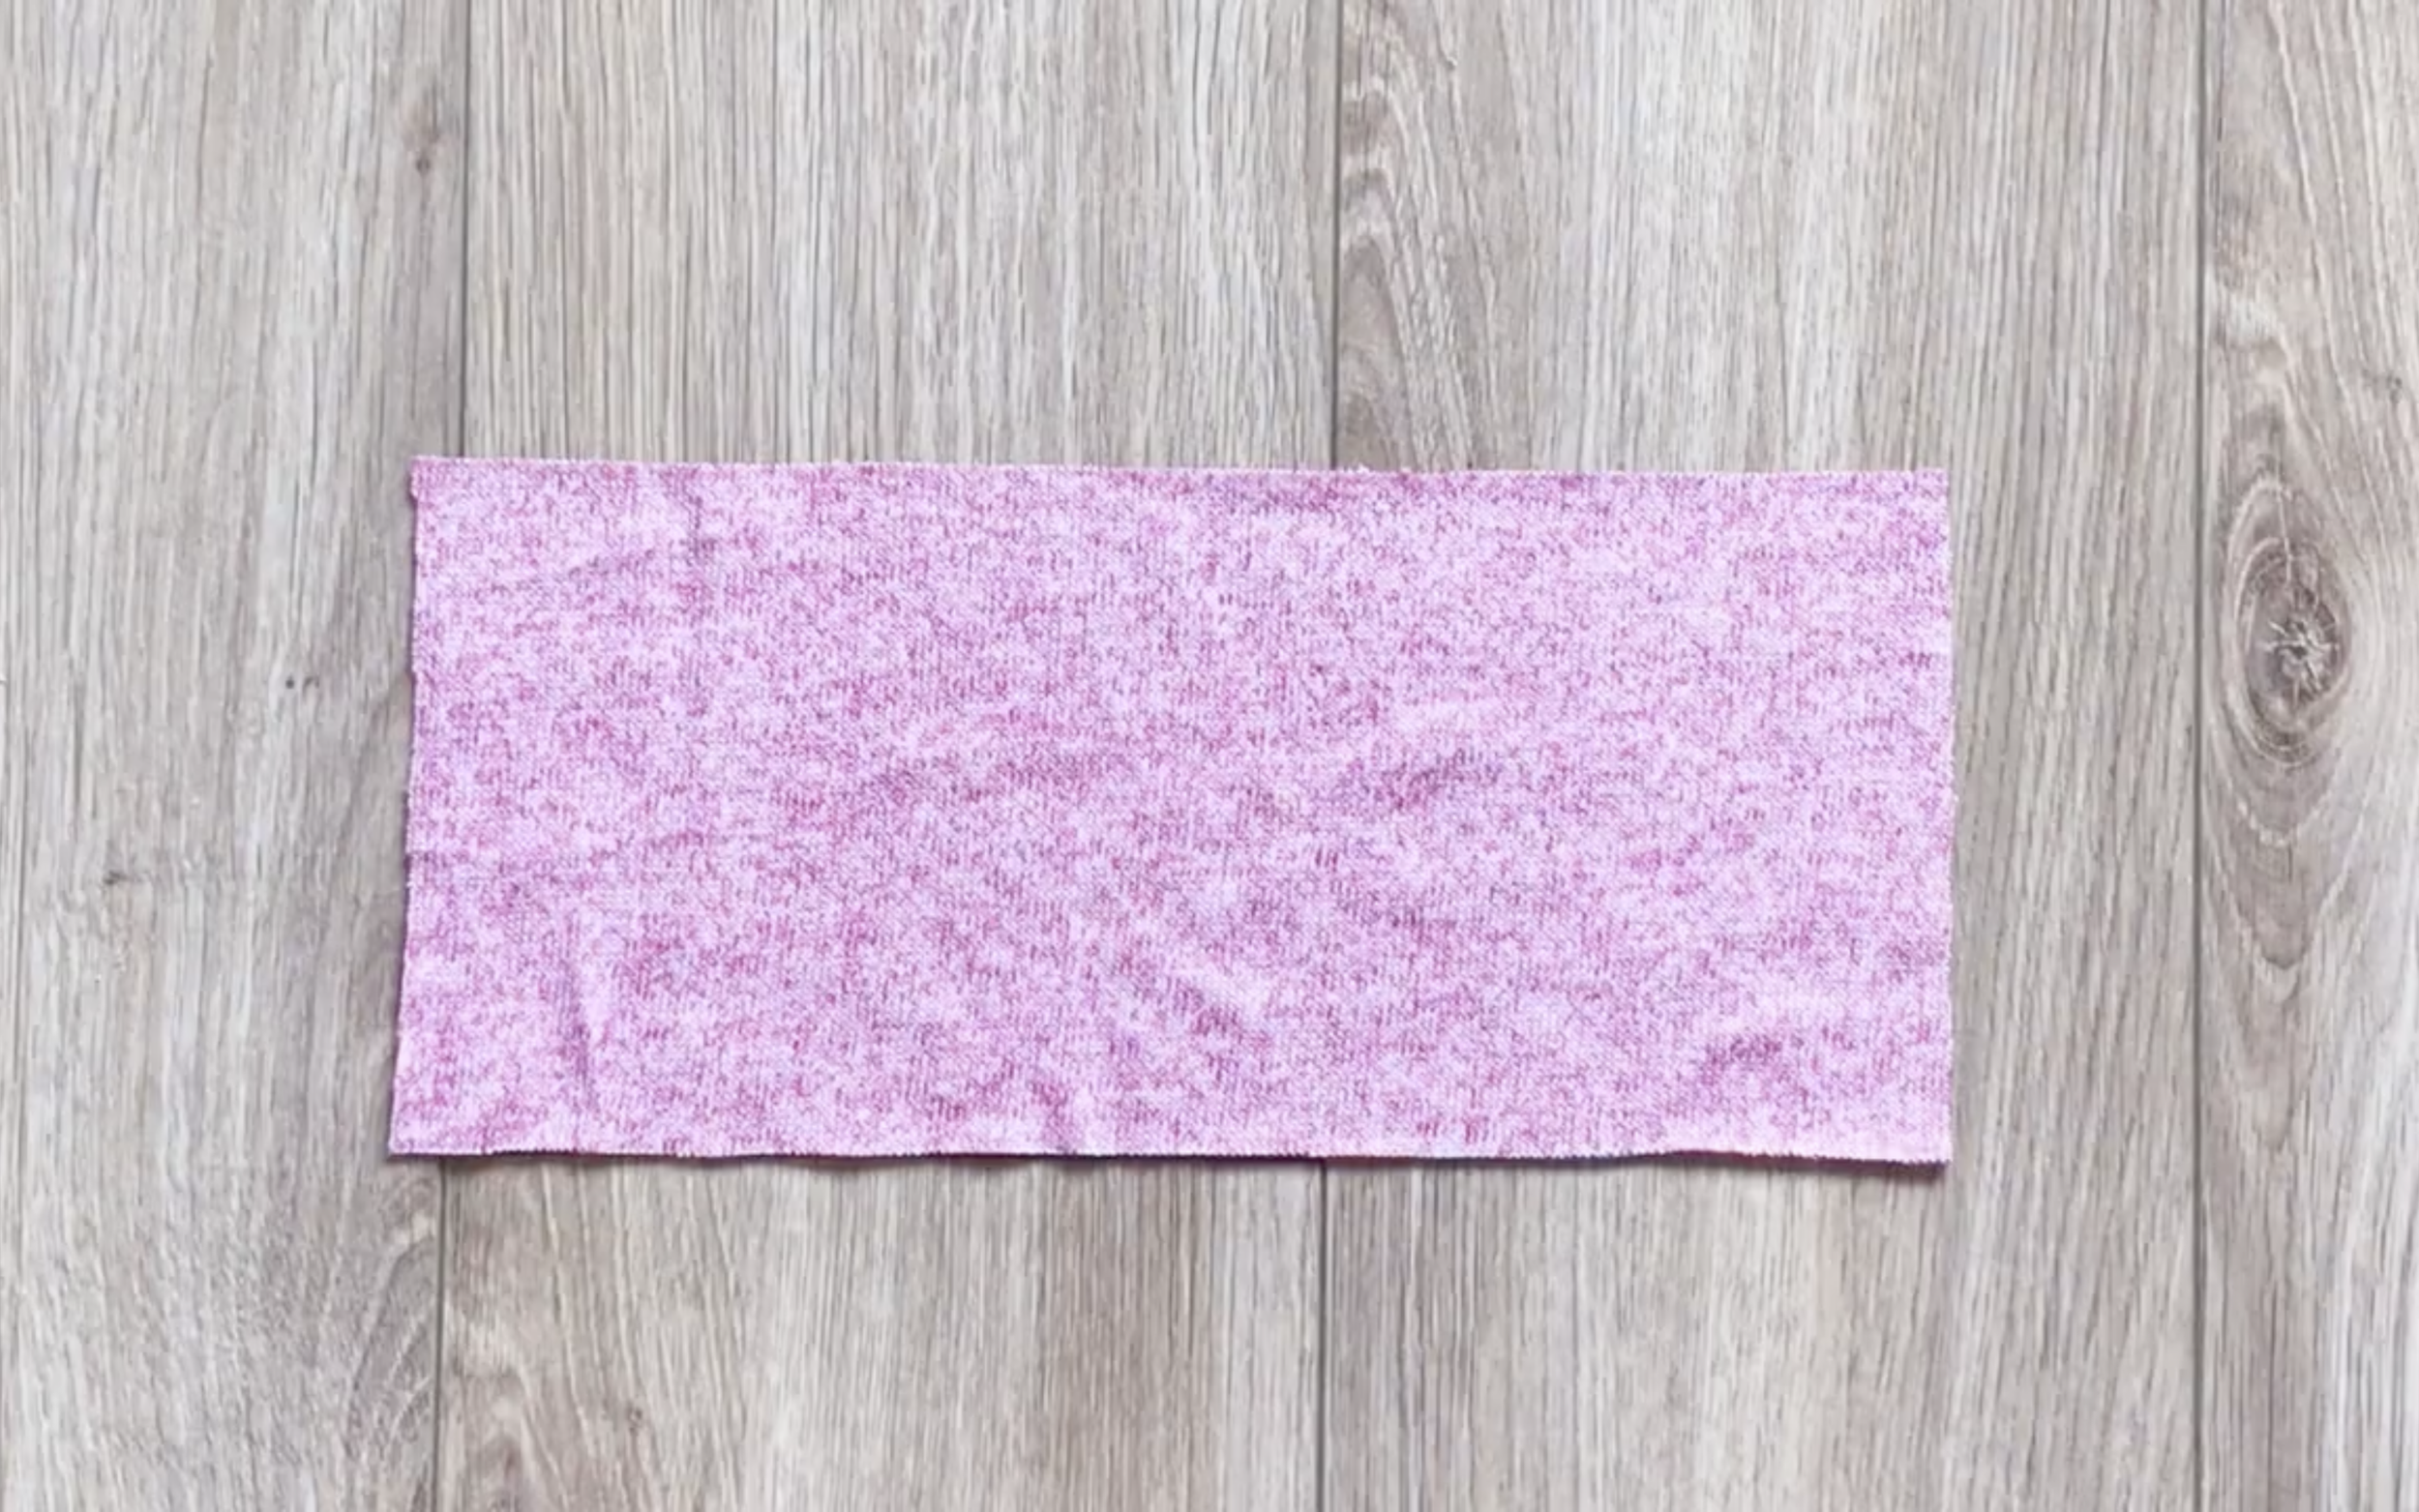
To finish the neck of the cardigan, cut a long fabric with 6 cm width and approximately 250 cm length, which is twice the length of the cardigan plus 30 cm.
Connect the long fabric to the neck of the cardigan and make the first seam.

After that, fold the long fabric twice to create a bias tape to finish the neck, then make the second seam.
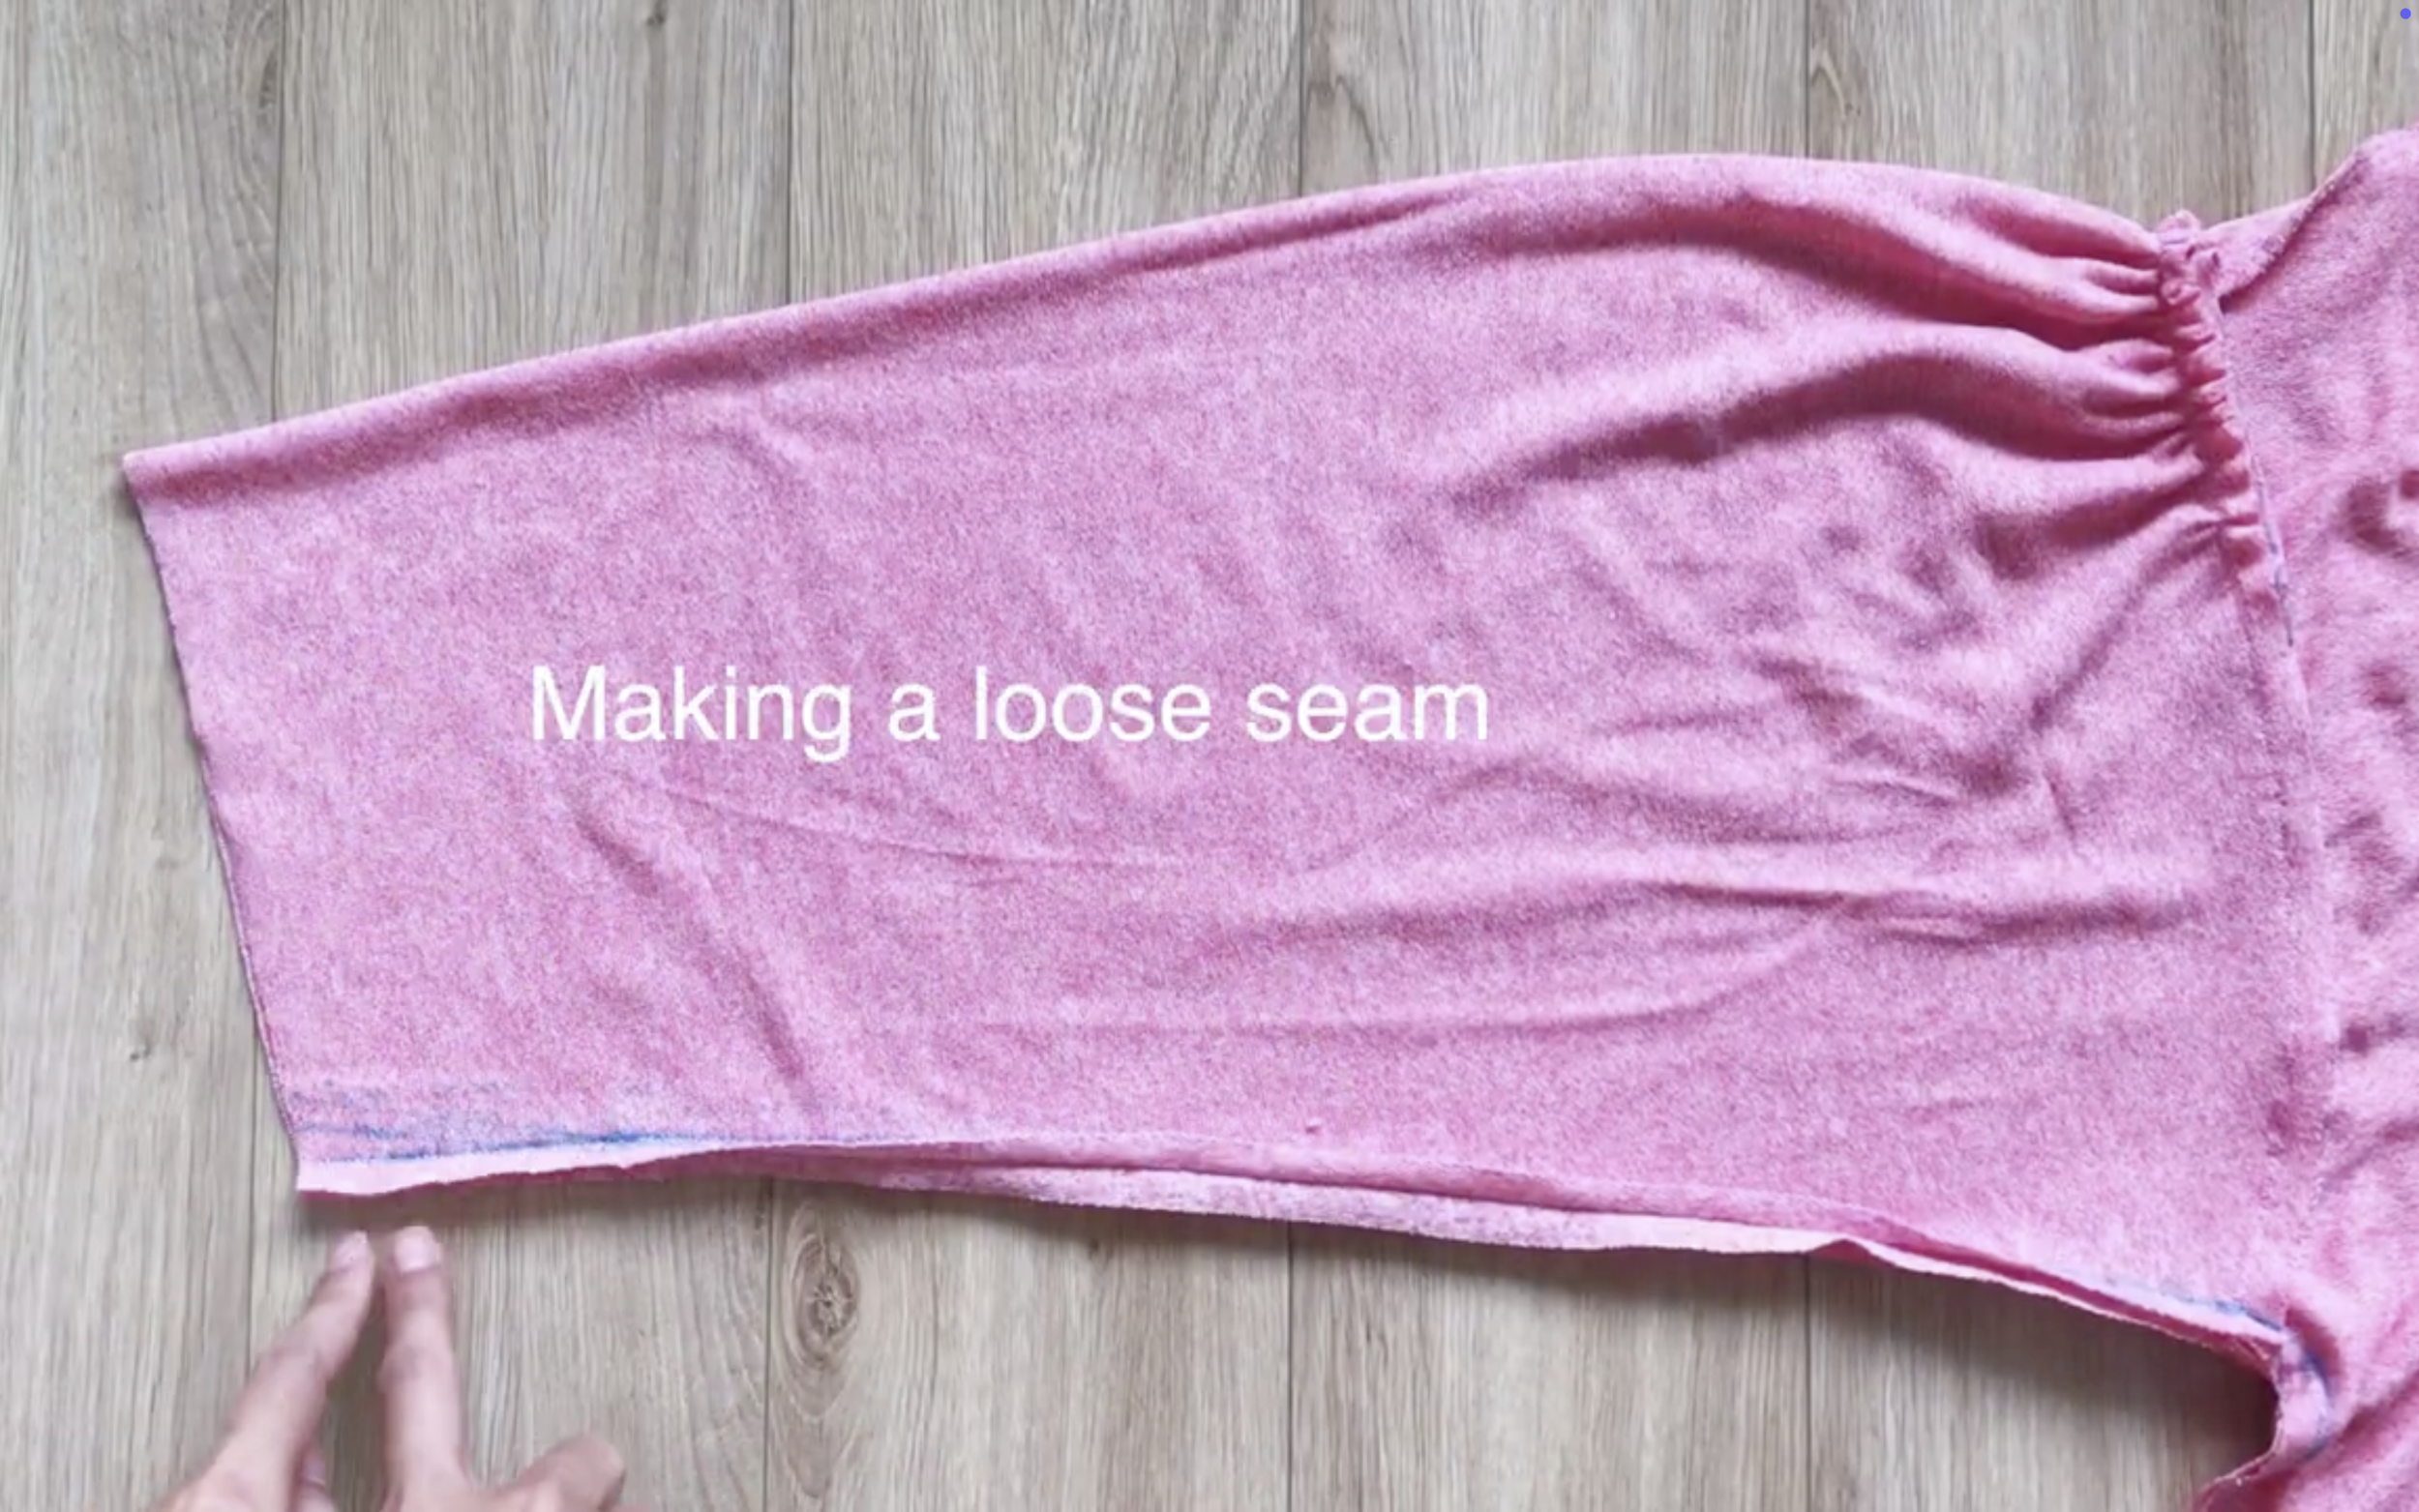
At the end of the sleeve, make a loose seam to gather it and create the puffy effect.
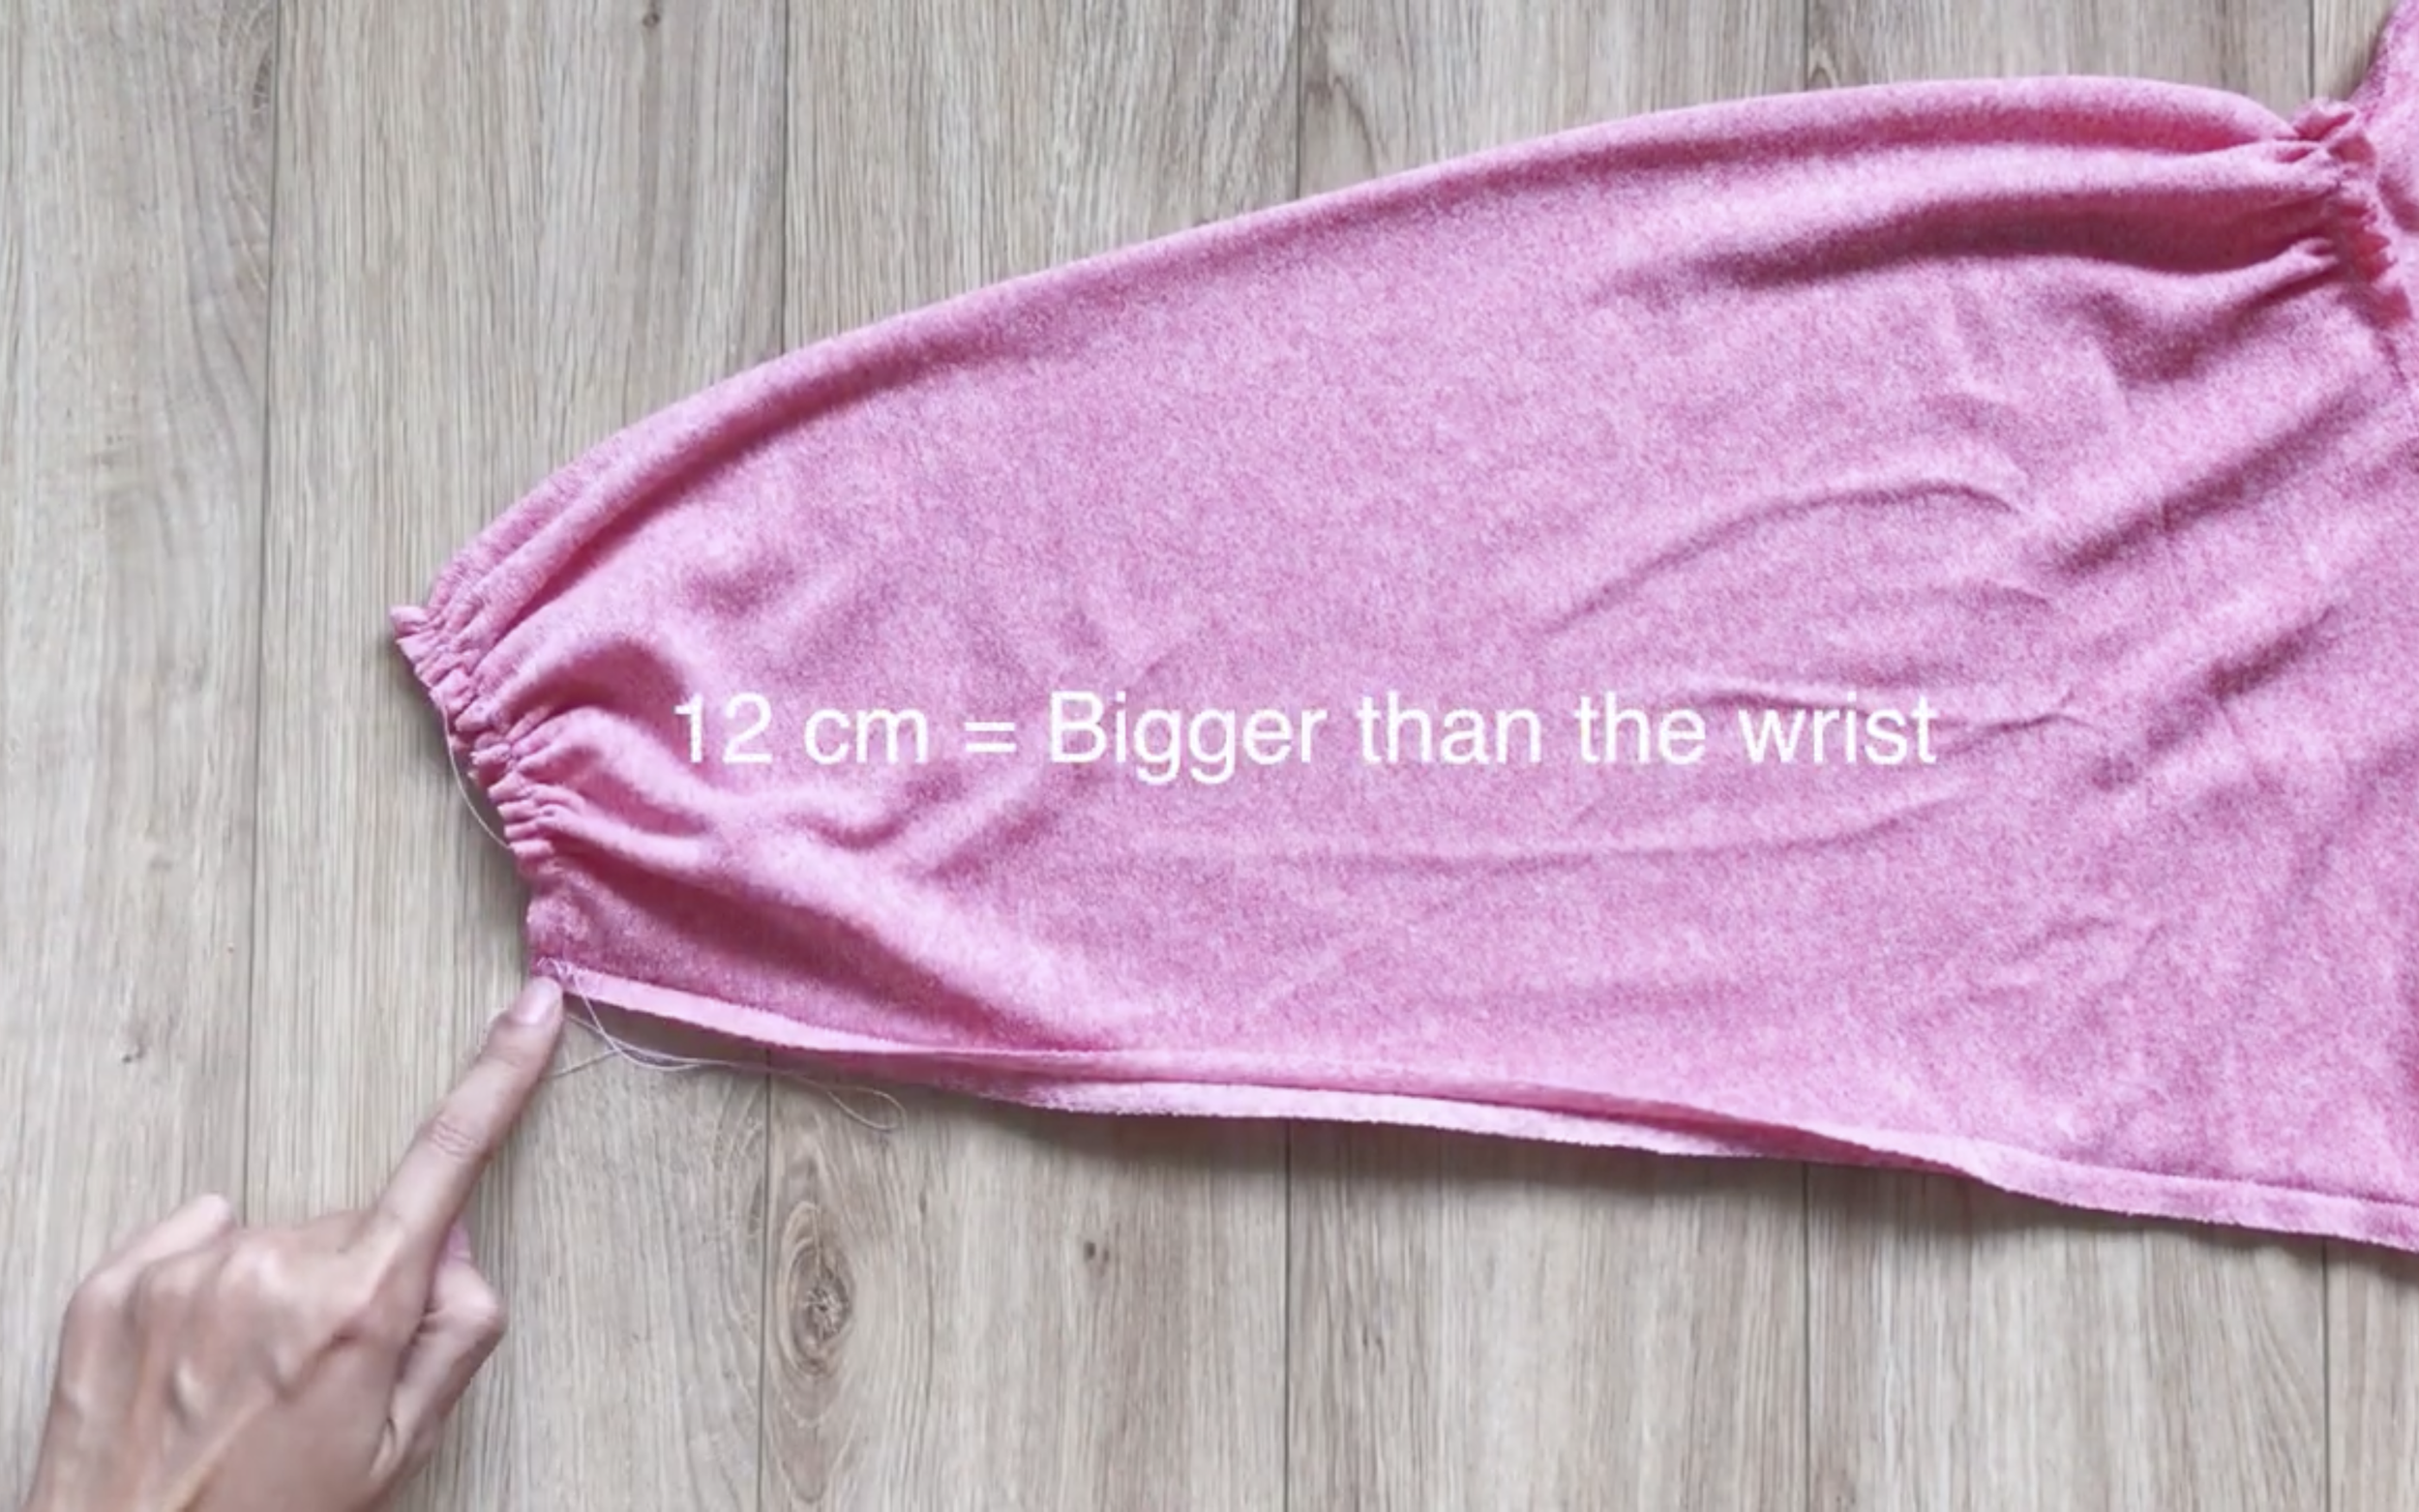
Make sure the final width is bigger than the wrist.
Use a rectangle with 8 cm width and 26 cm length to connect to the end of the sleeve.
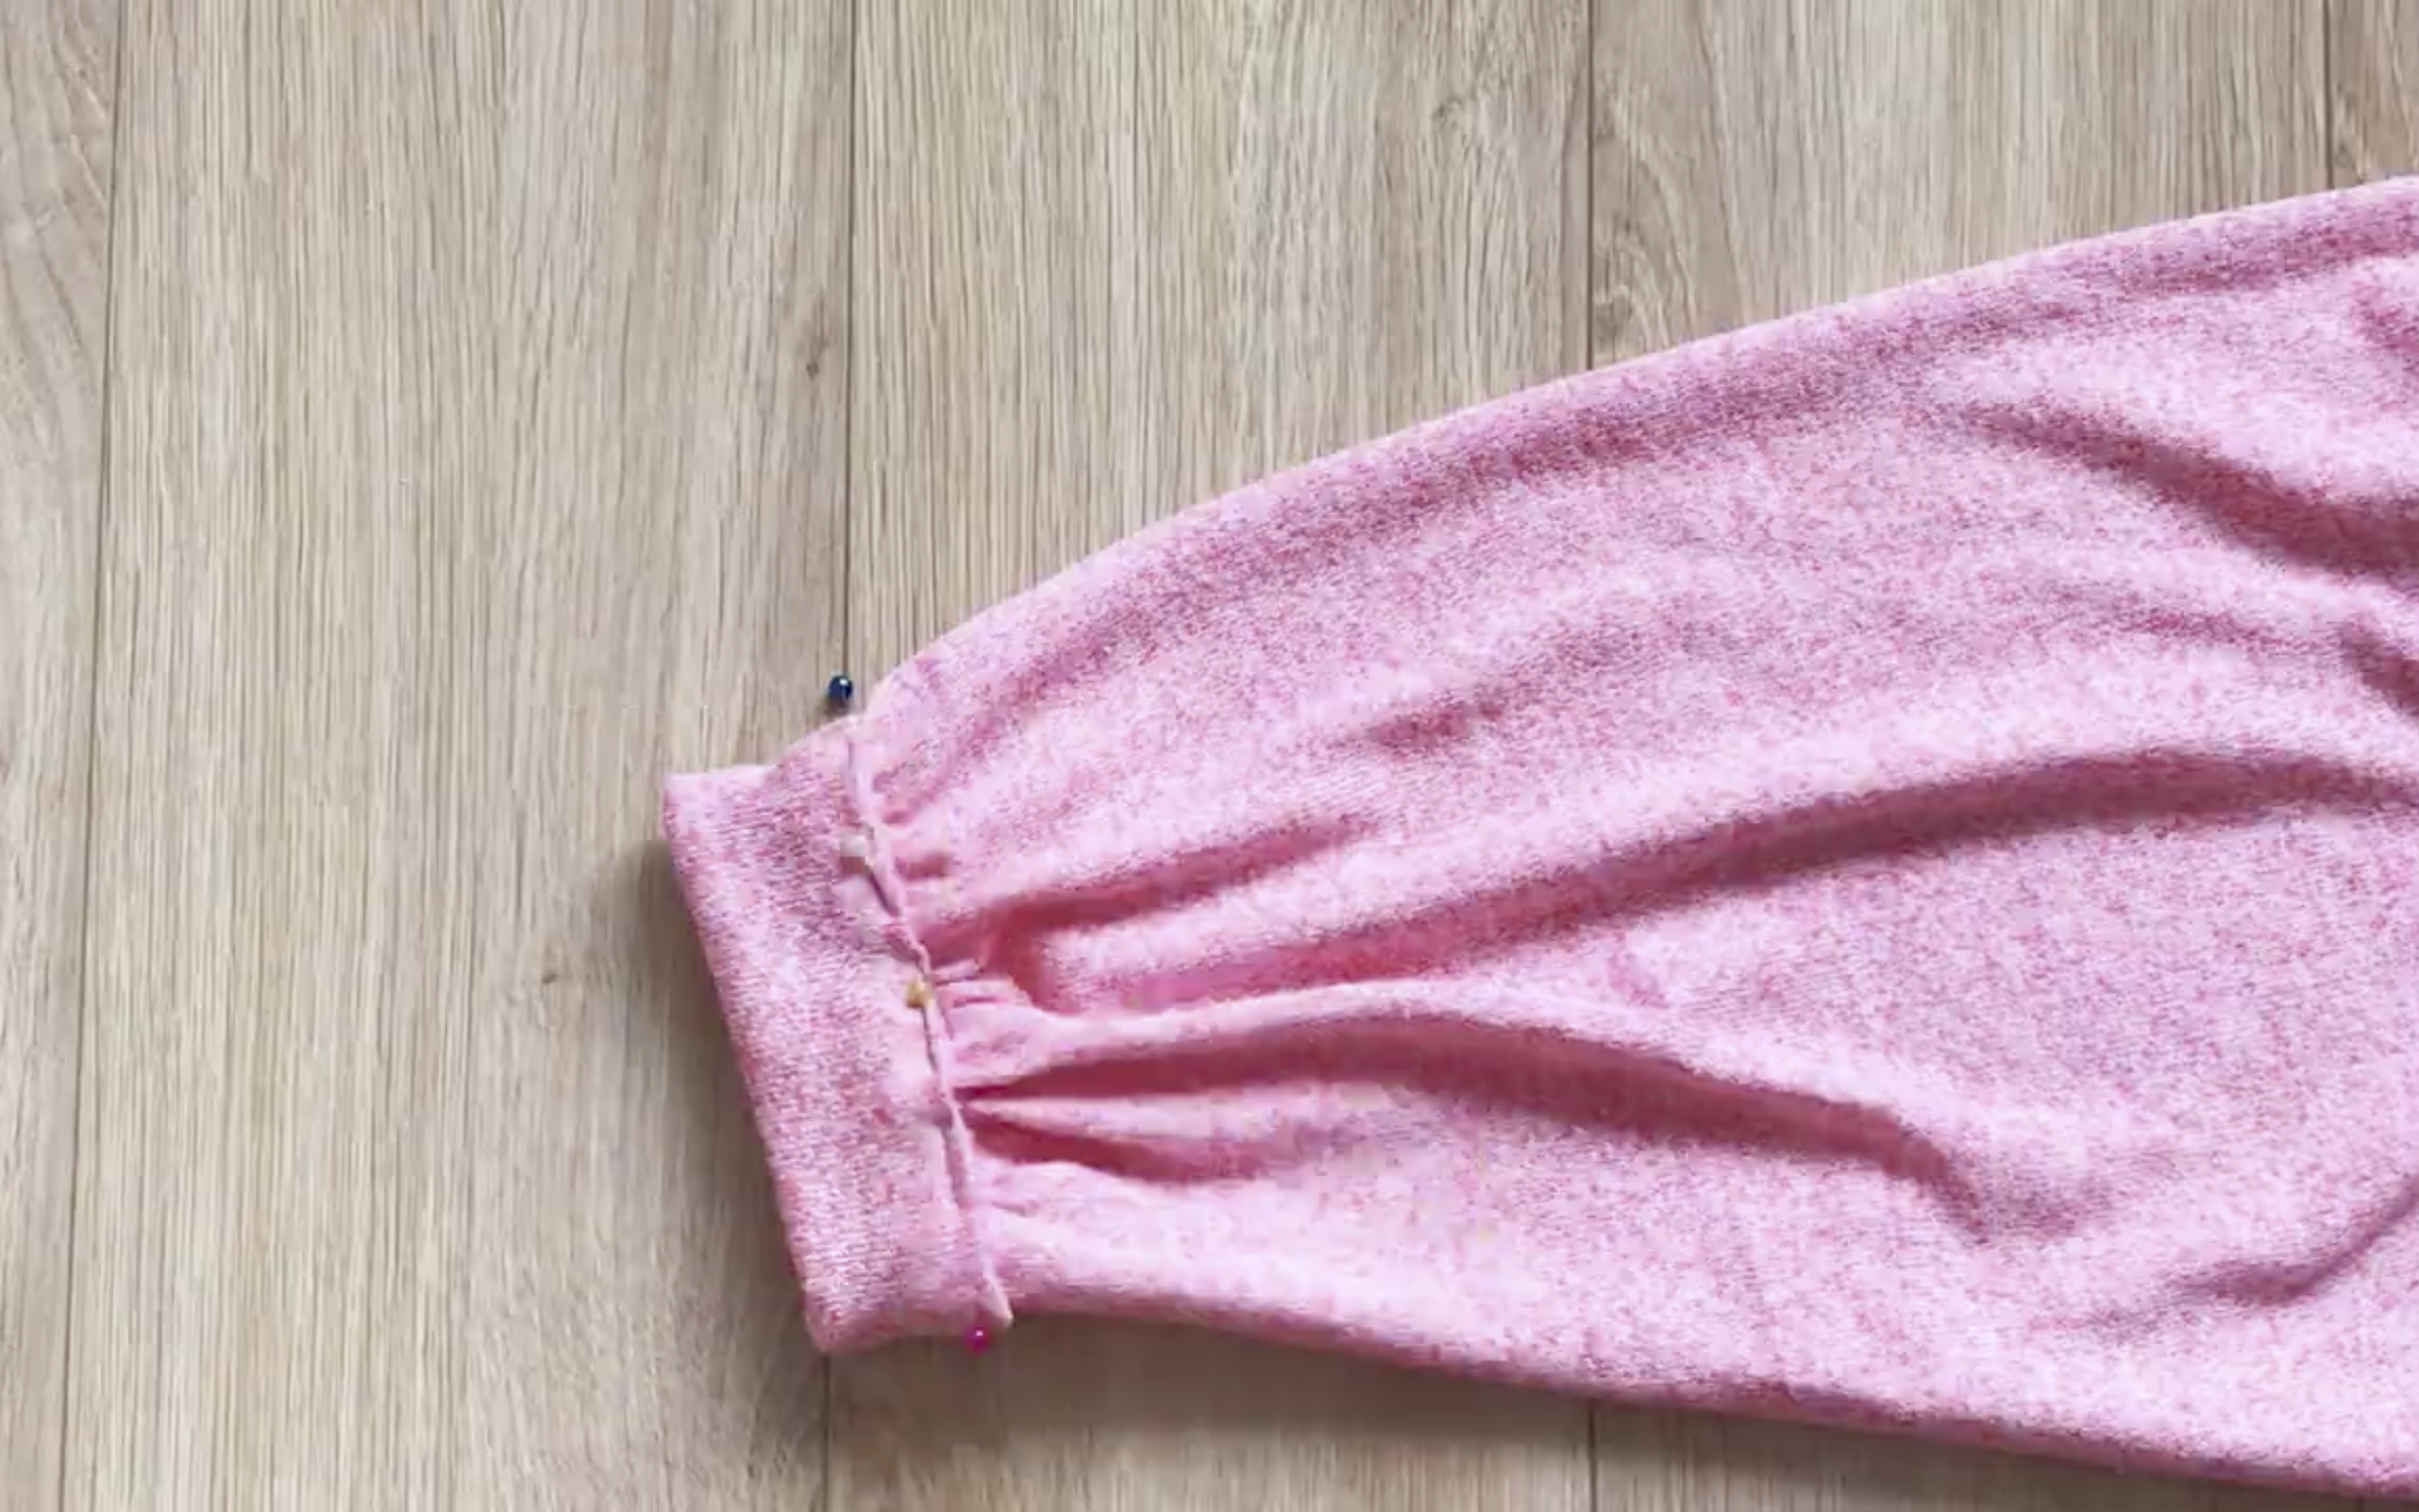
Use the same method as for the neck to finish the end of the sleeve.

The last step is finishing the end of the cardigan. Fold the end fabric inside twice and sew to complete it.

DIY Puff sleeve cardigan that you can wear as a Wrap dress
And that’s it for this DIY!
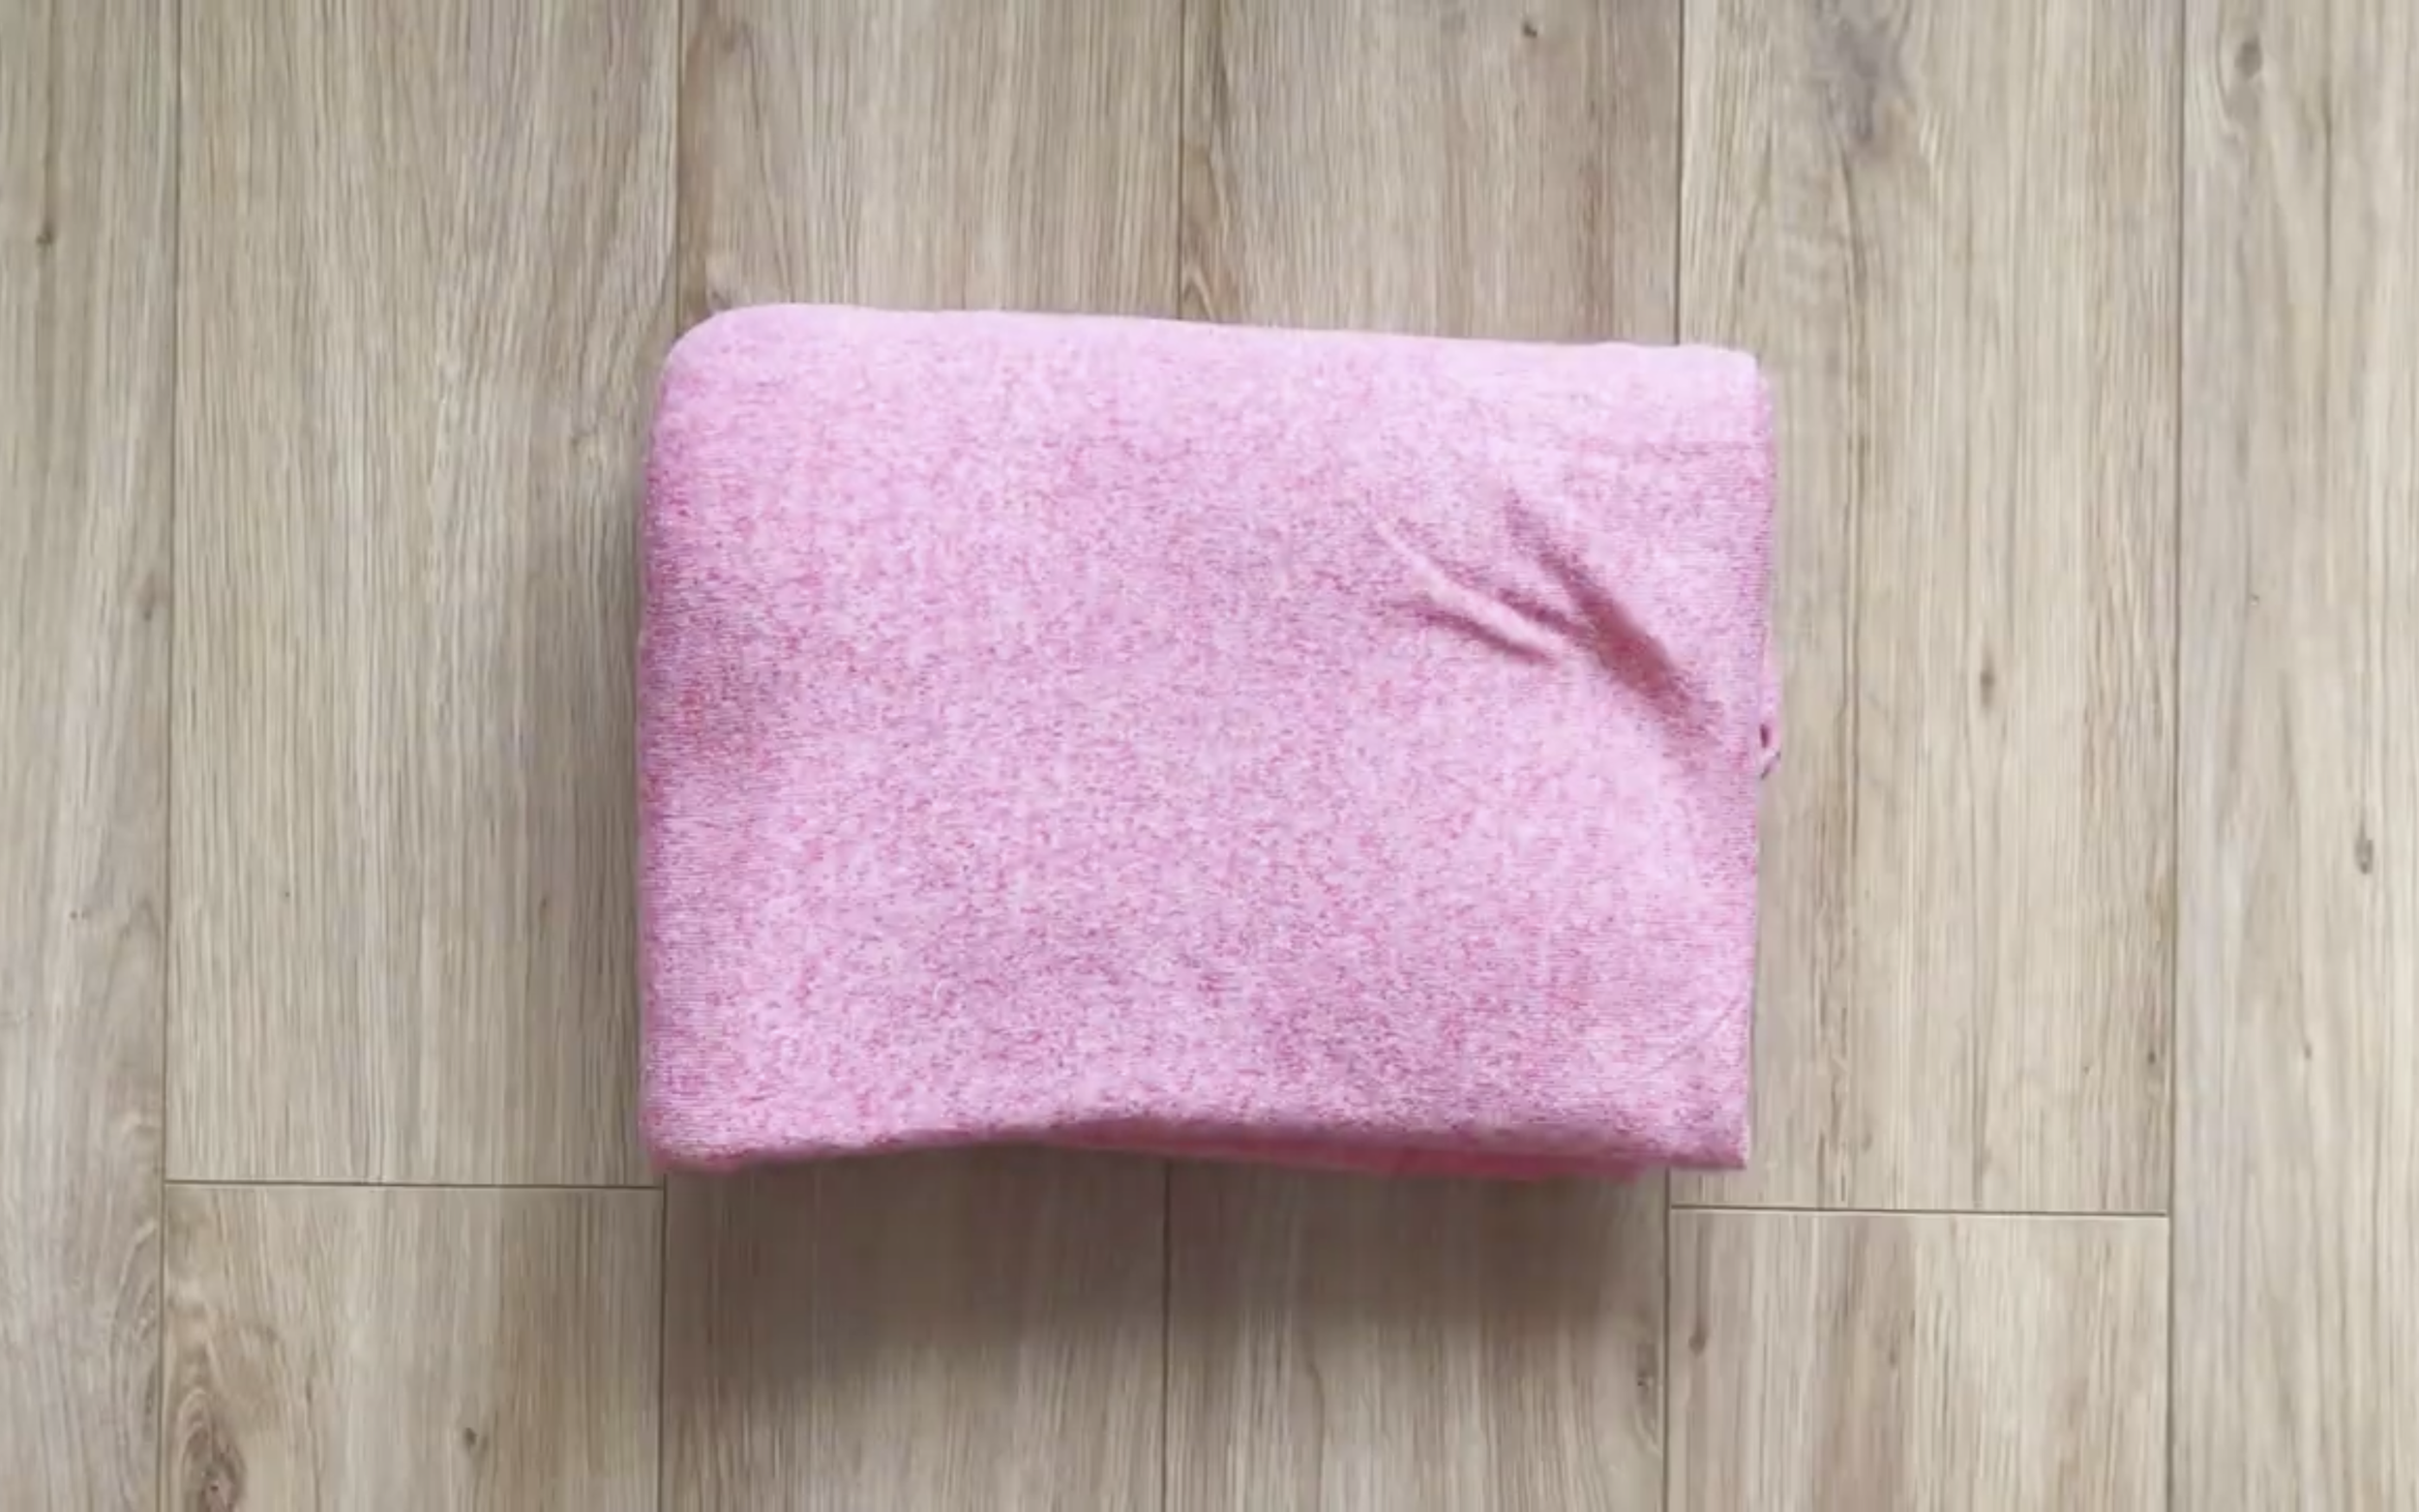
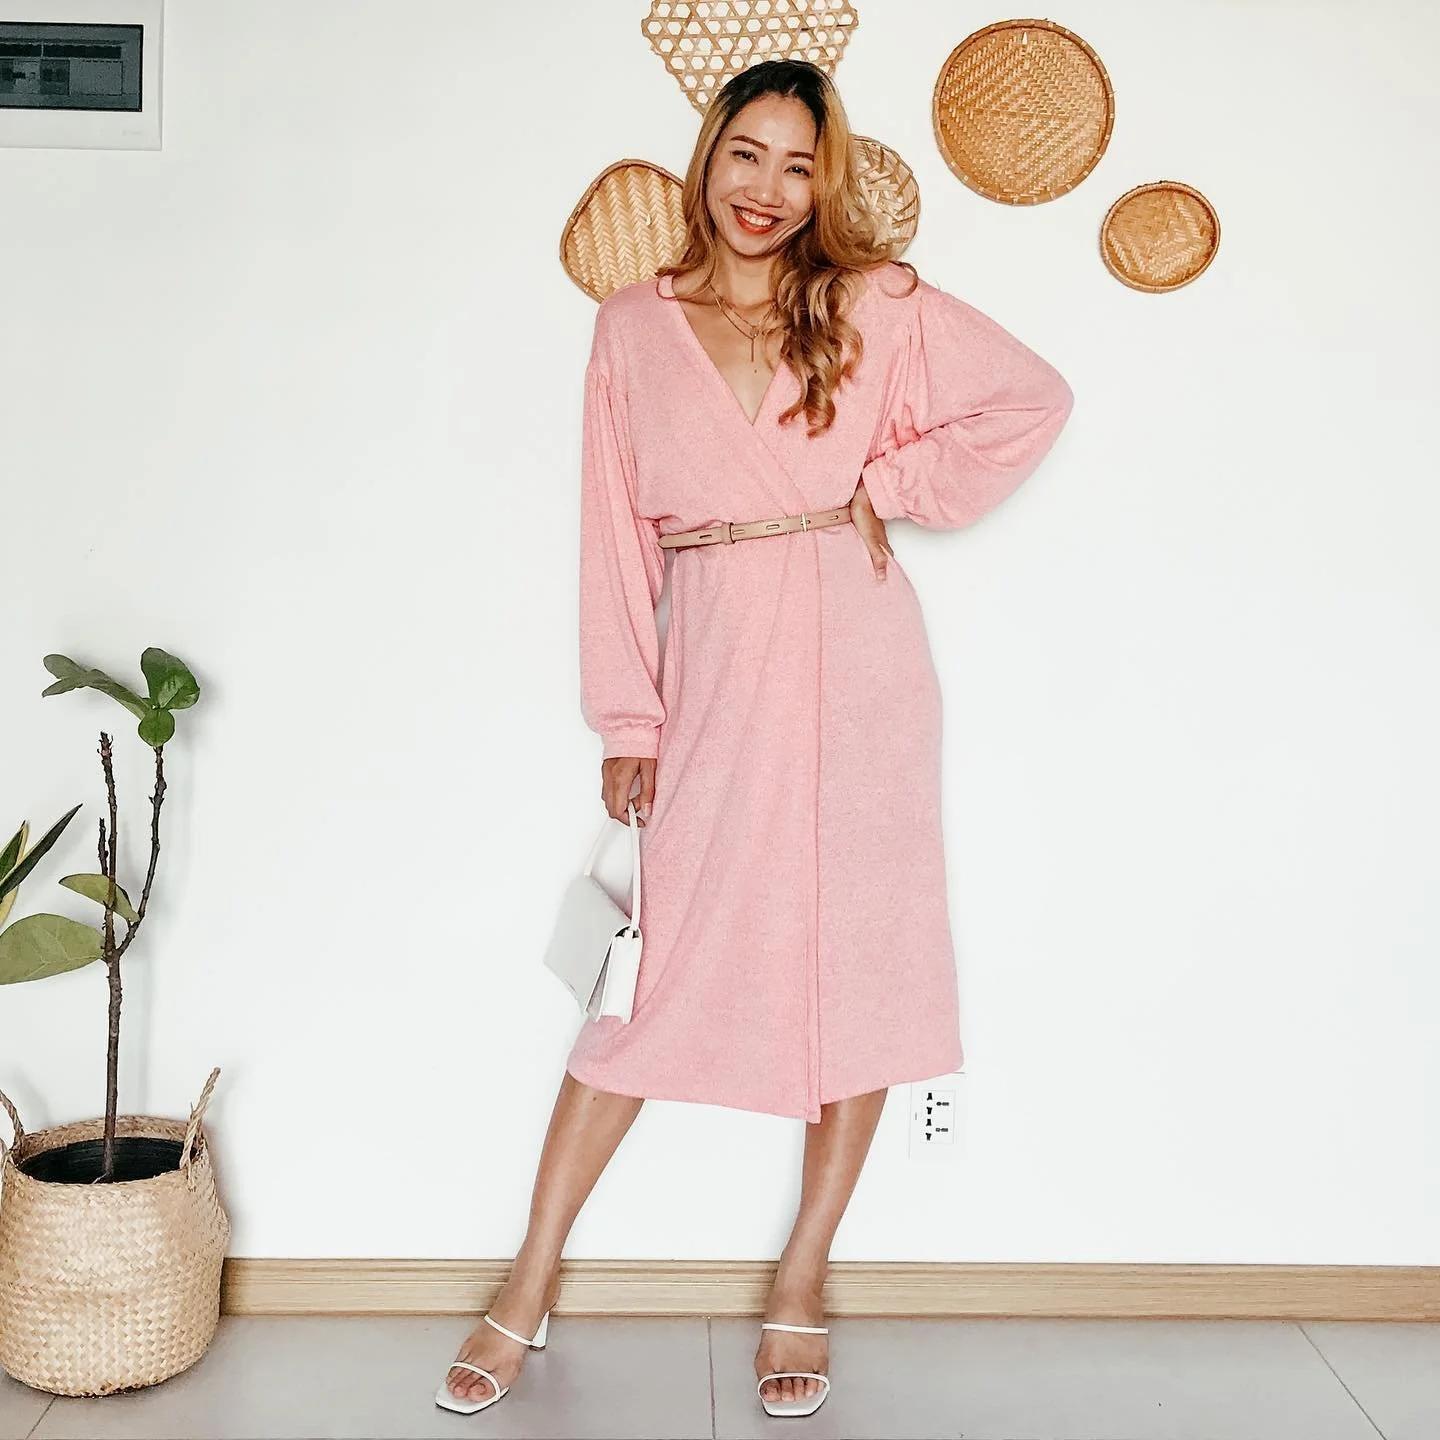
Here’s the final result—this cardigan is just perfect for the weather right now. You can wear it as a classic cardigan or style it as a wrap dress with the belt—it looks amazing both ways!


I hope you found my step-by-step guide helpful and inspiring.
If you’re interested in making your own, give it a try and let me know how it goes!
Until then, happy sewing!