DIY refashion T-Shirt into Jumpsuit - Idea to reuse old T-Shirt

DIY refashion T-Shirt into Jumpsuit
Welcome and welcome back to my sewing blog!
In today's blog, I'm so happy to share with you my transformation a T-Shirt into a Jumpsuit. This's a very easy DIY with a supper cute result. So I hope you will like it.
Let’s get started!
WHAT YOU’LL NEED

T-shirt (preferably oversized)
Sewing machine or needle and thread
Elastic band
Pins
Scissors
Macrame rope (for the tie)
SEWING THE JUMPSUIT
THE BODY
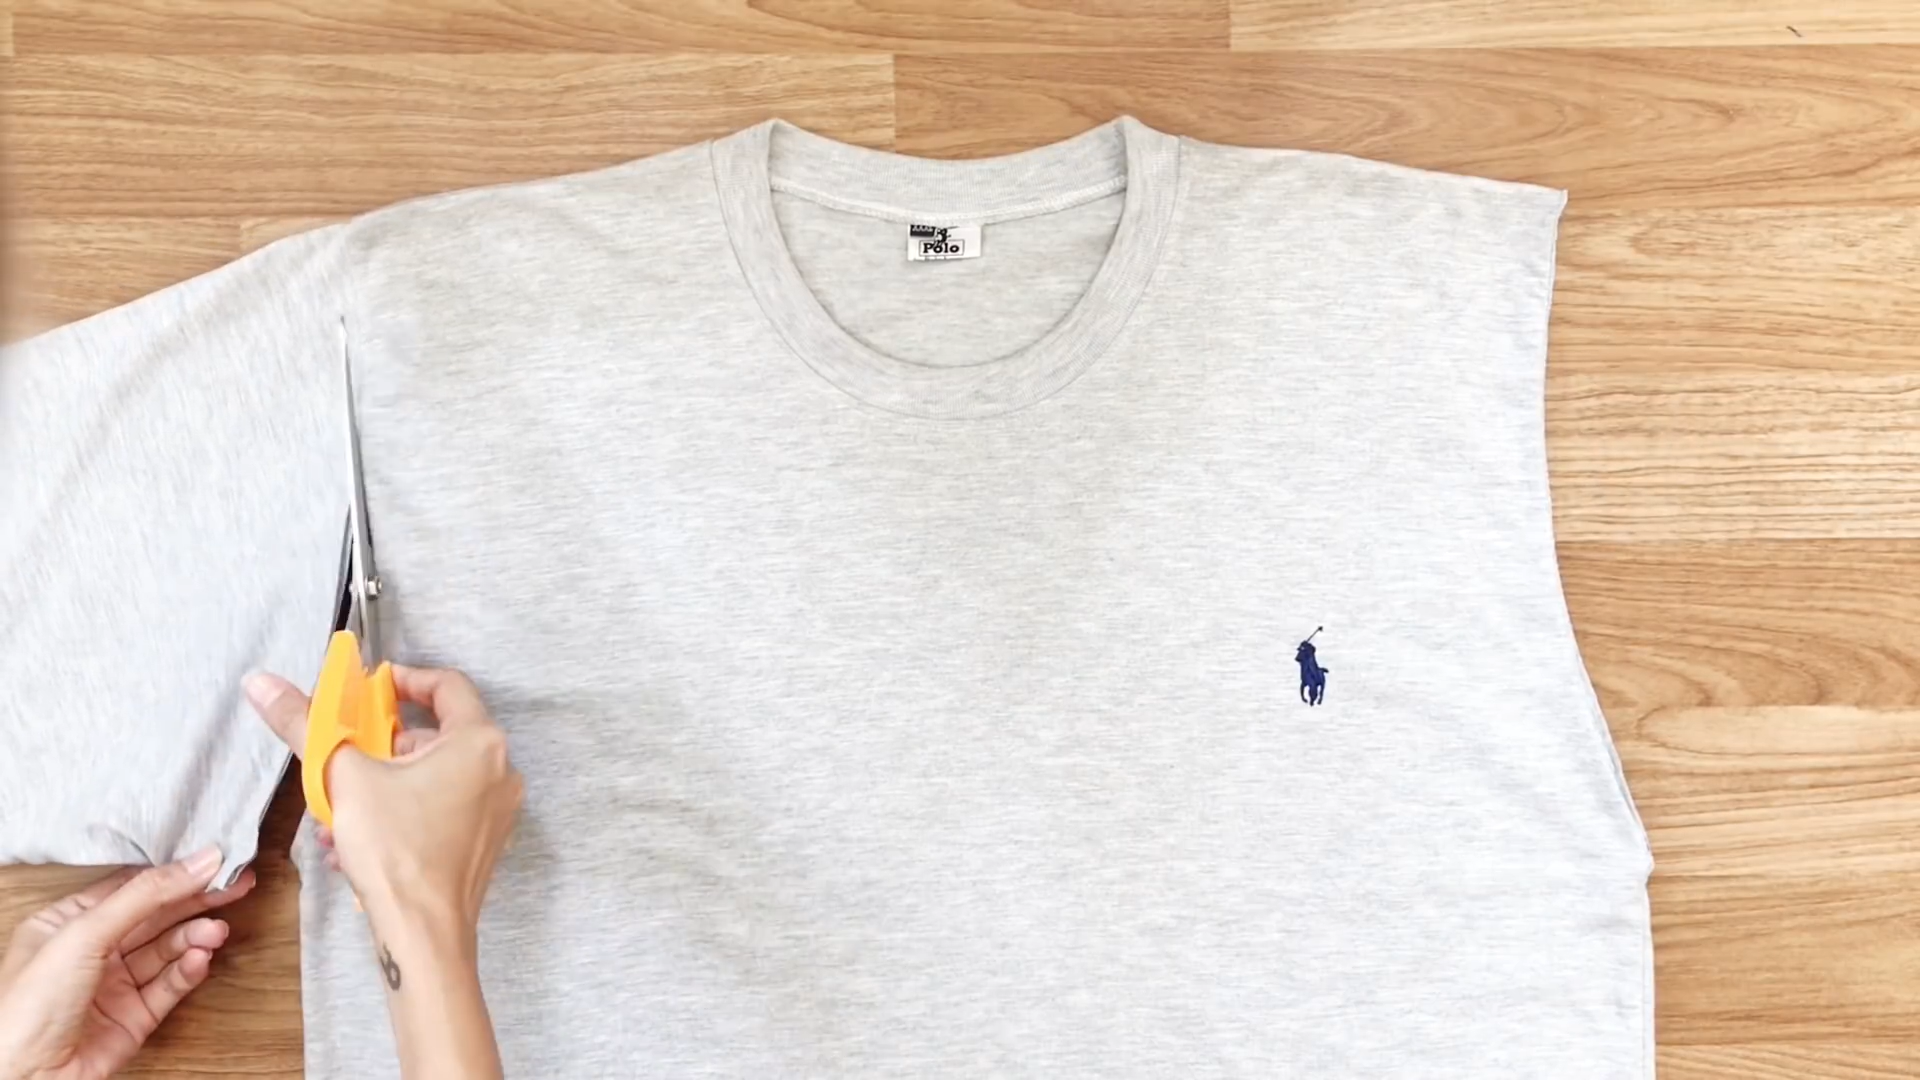
The first step is to cut two hands of the T-Shirt.
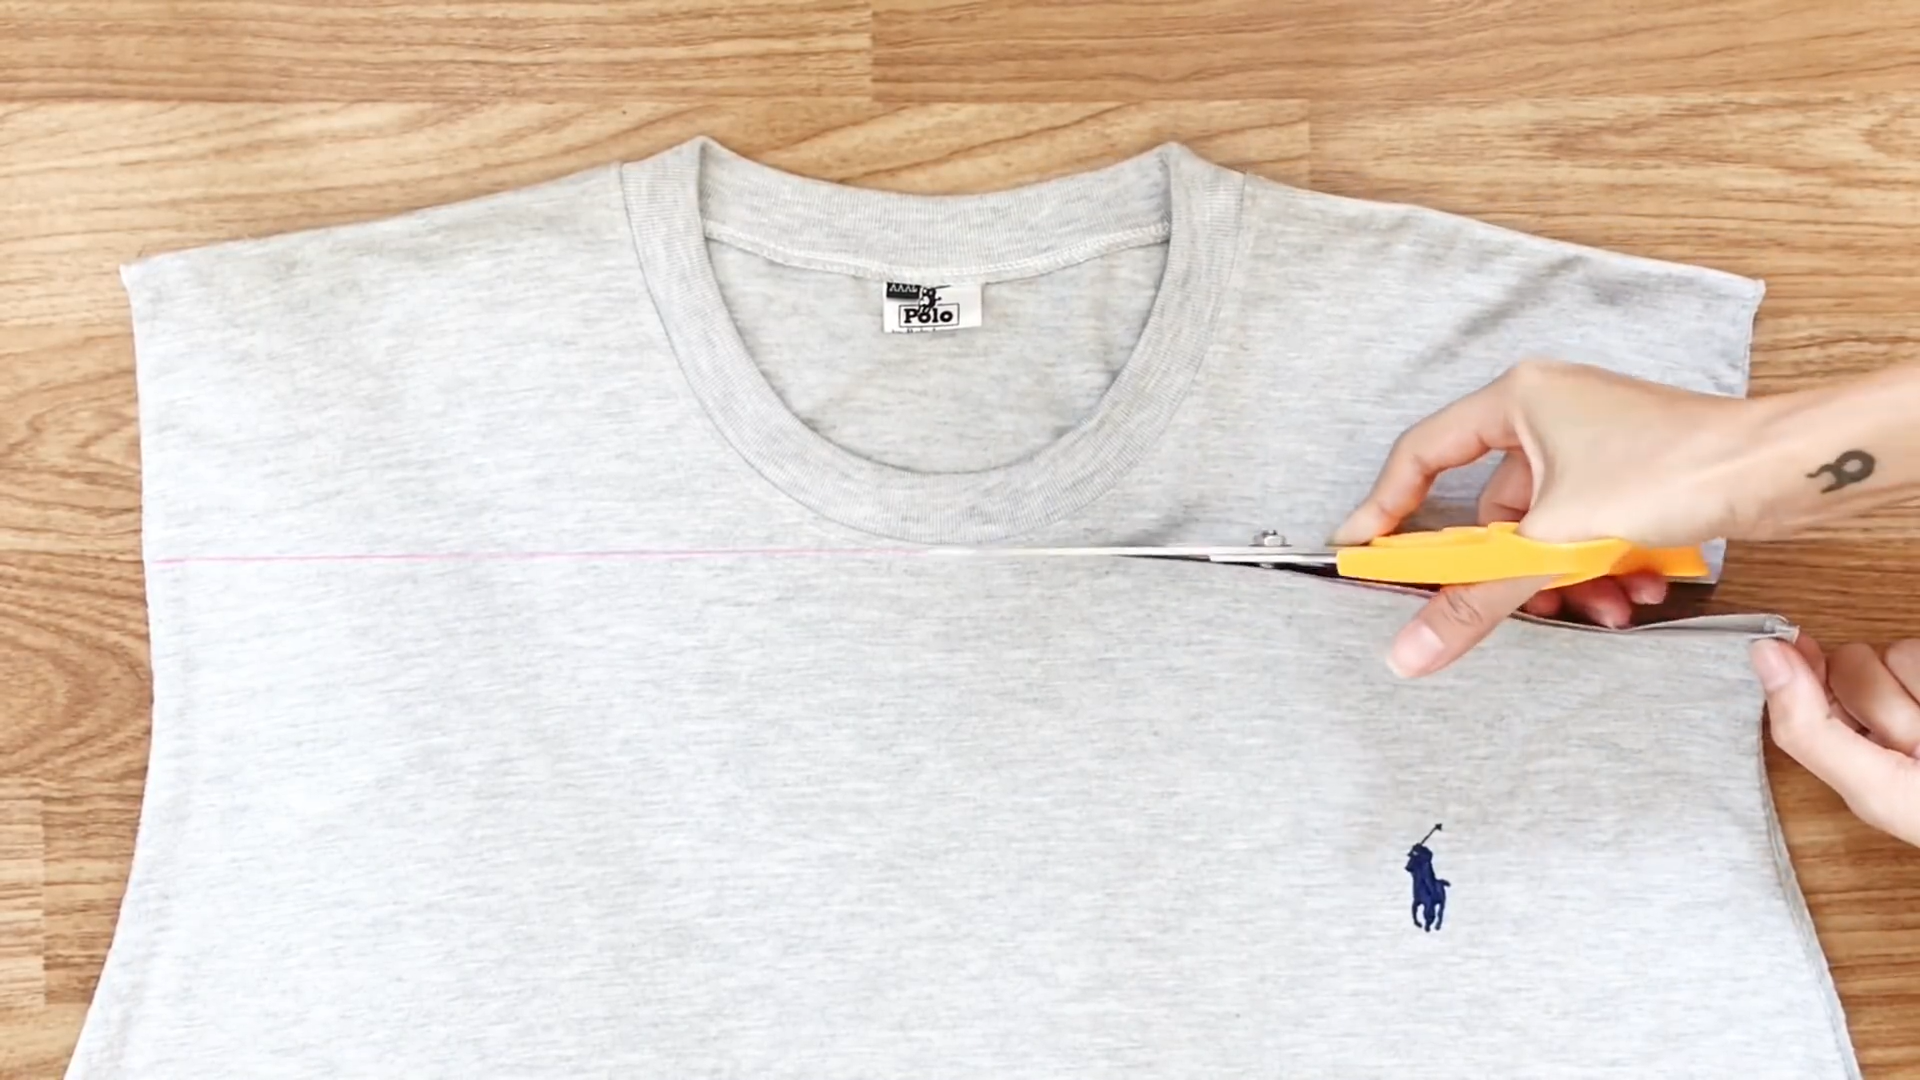
Then, draw a straight line right under the neck and cut along that line.
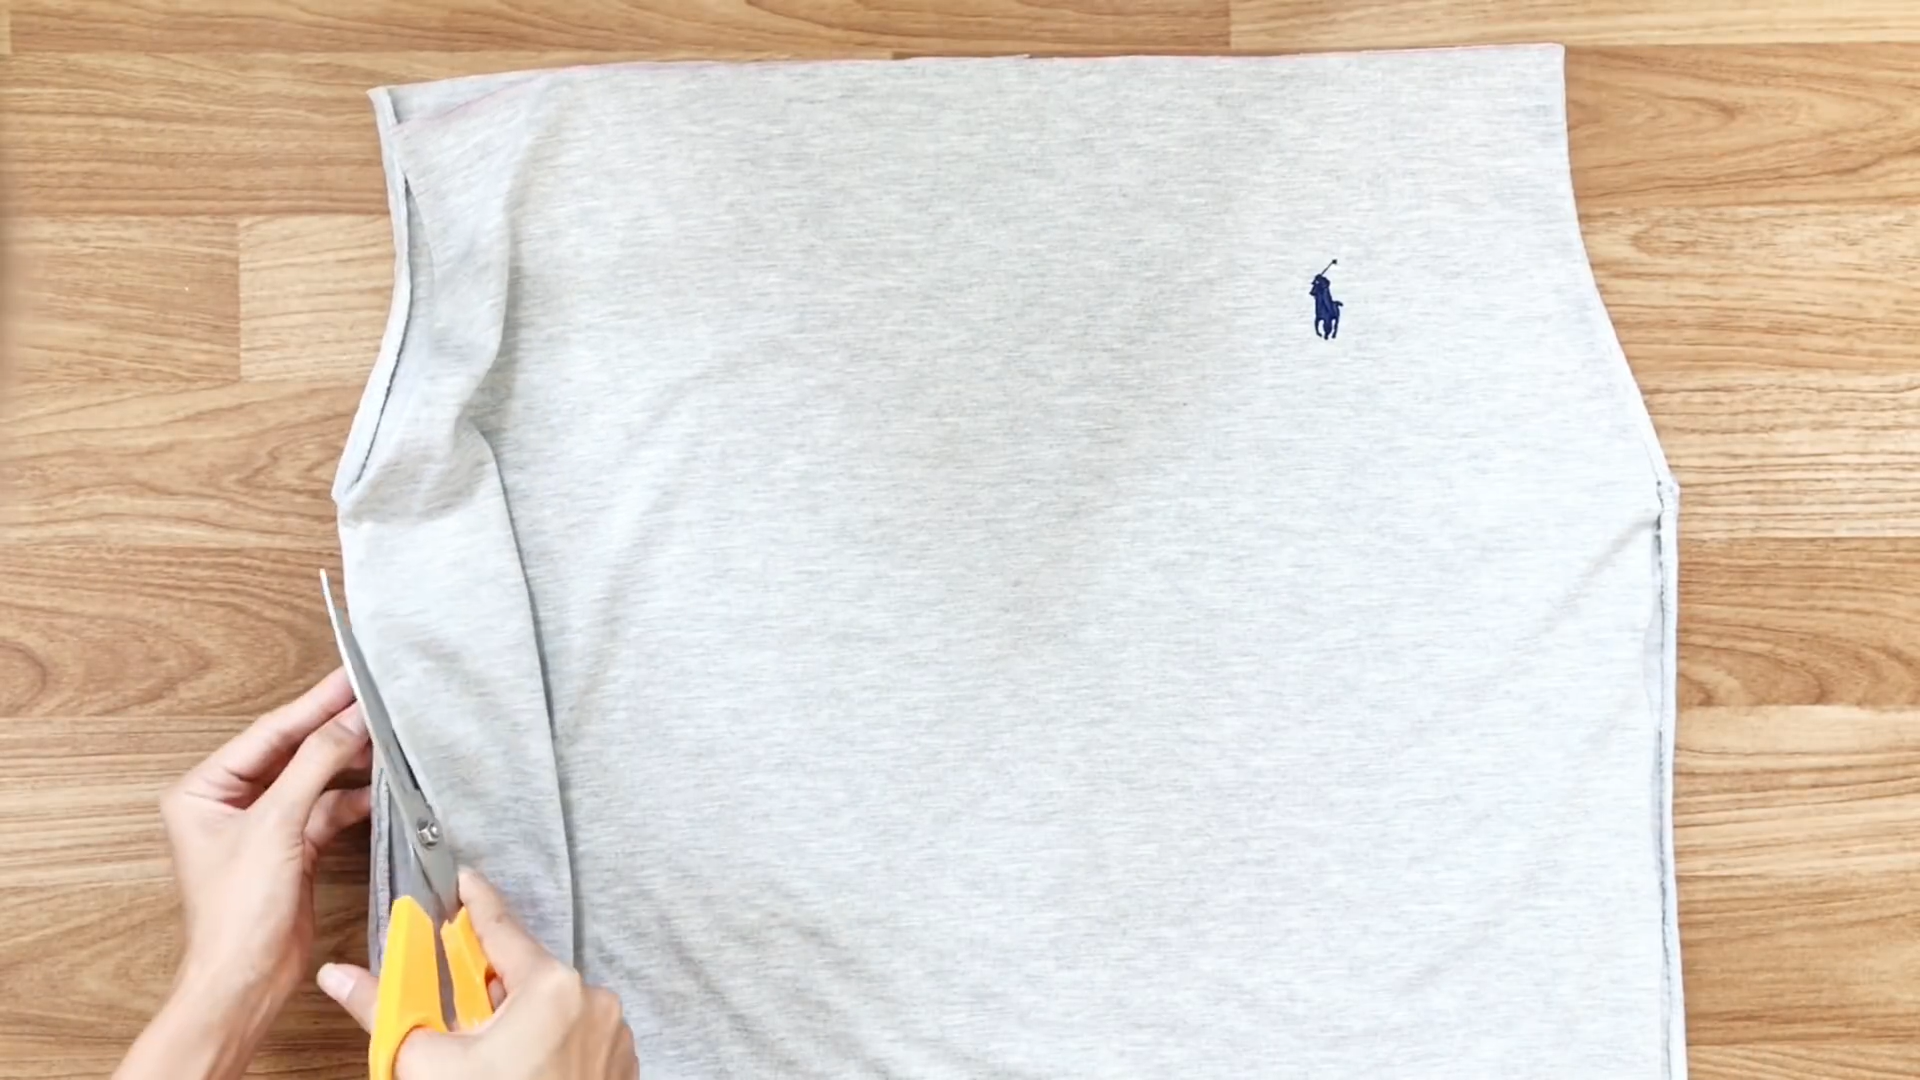
Also, cut the T-shirt into two pieces—one for the front and one for the back of the jumpsuit.
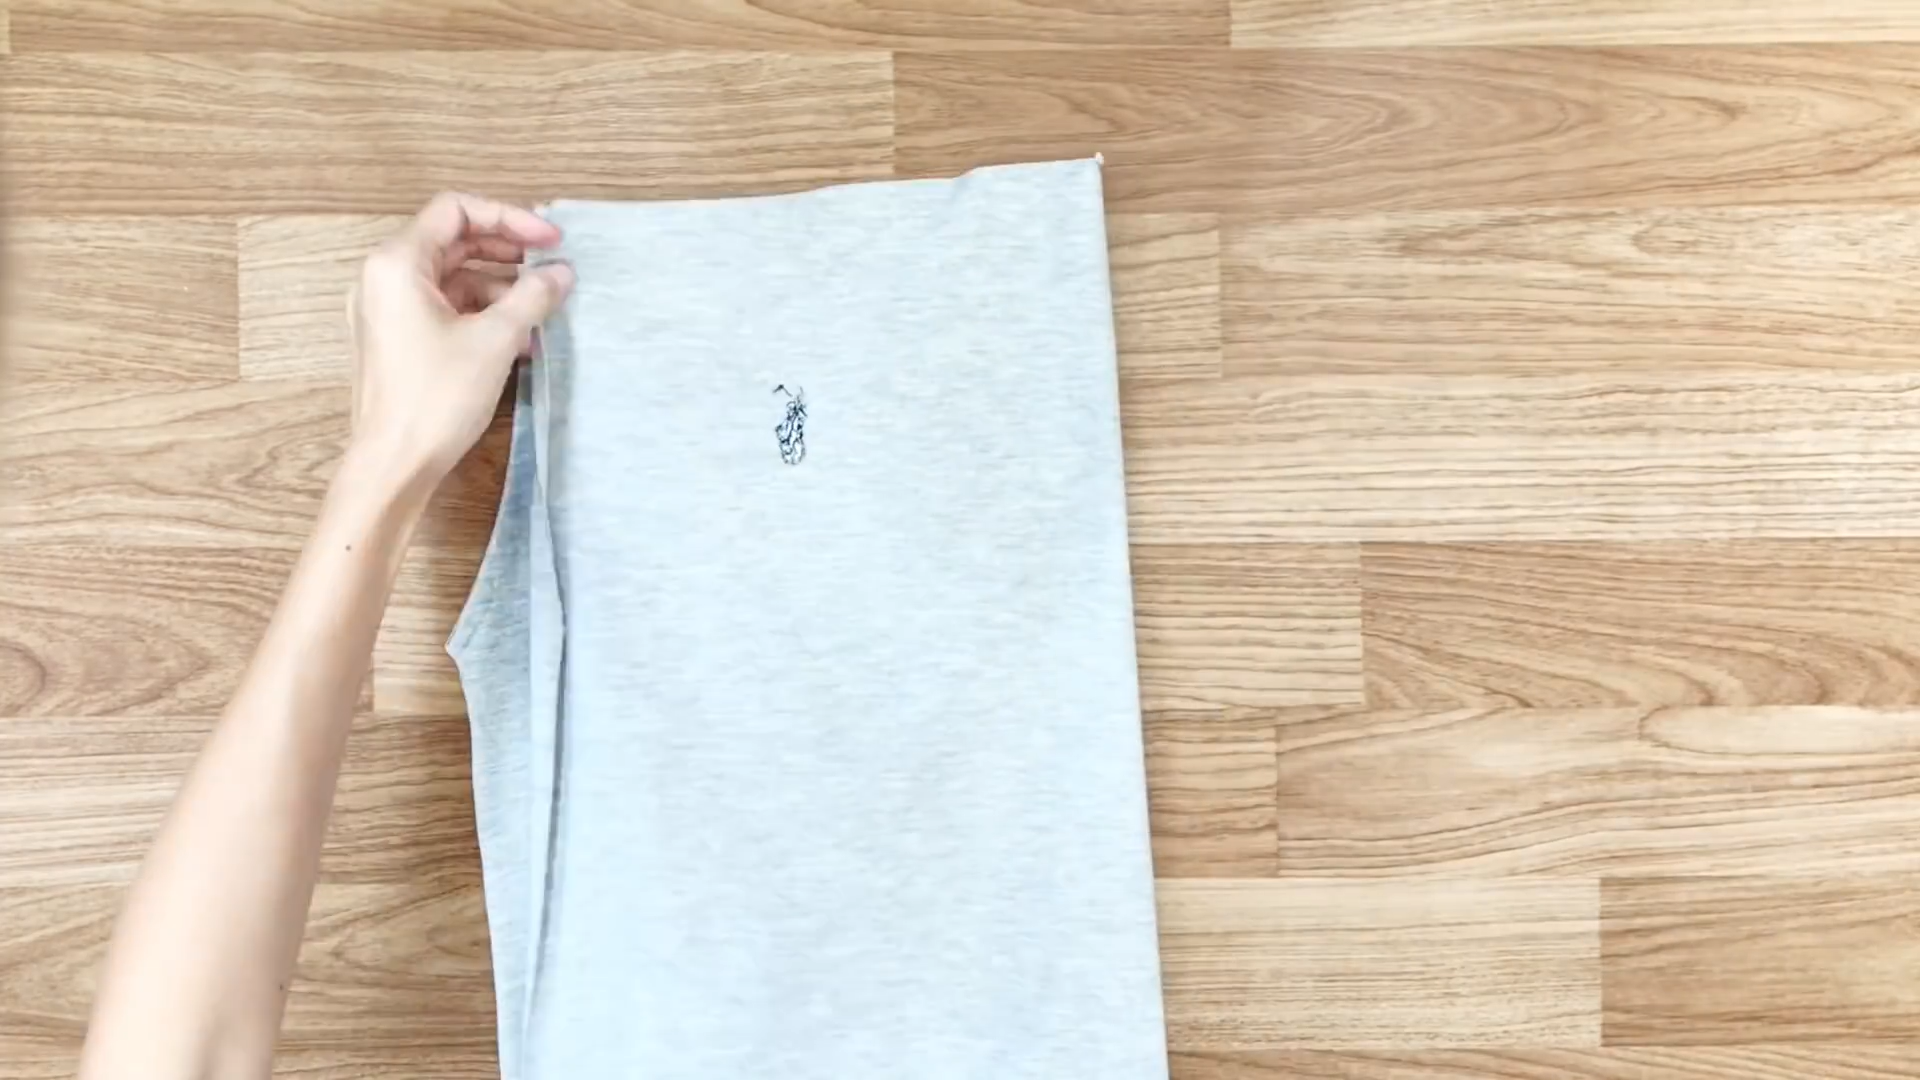
For the front piece, fold it in half and start drawing the pattern.
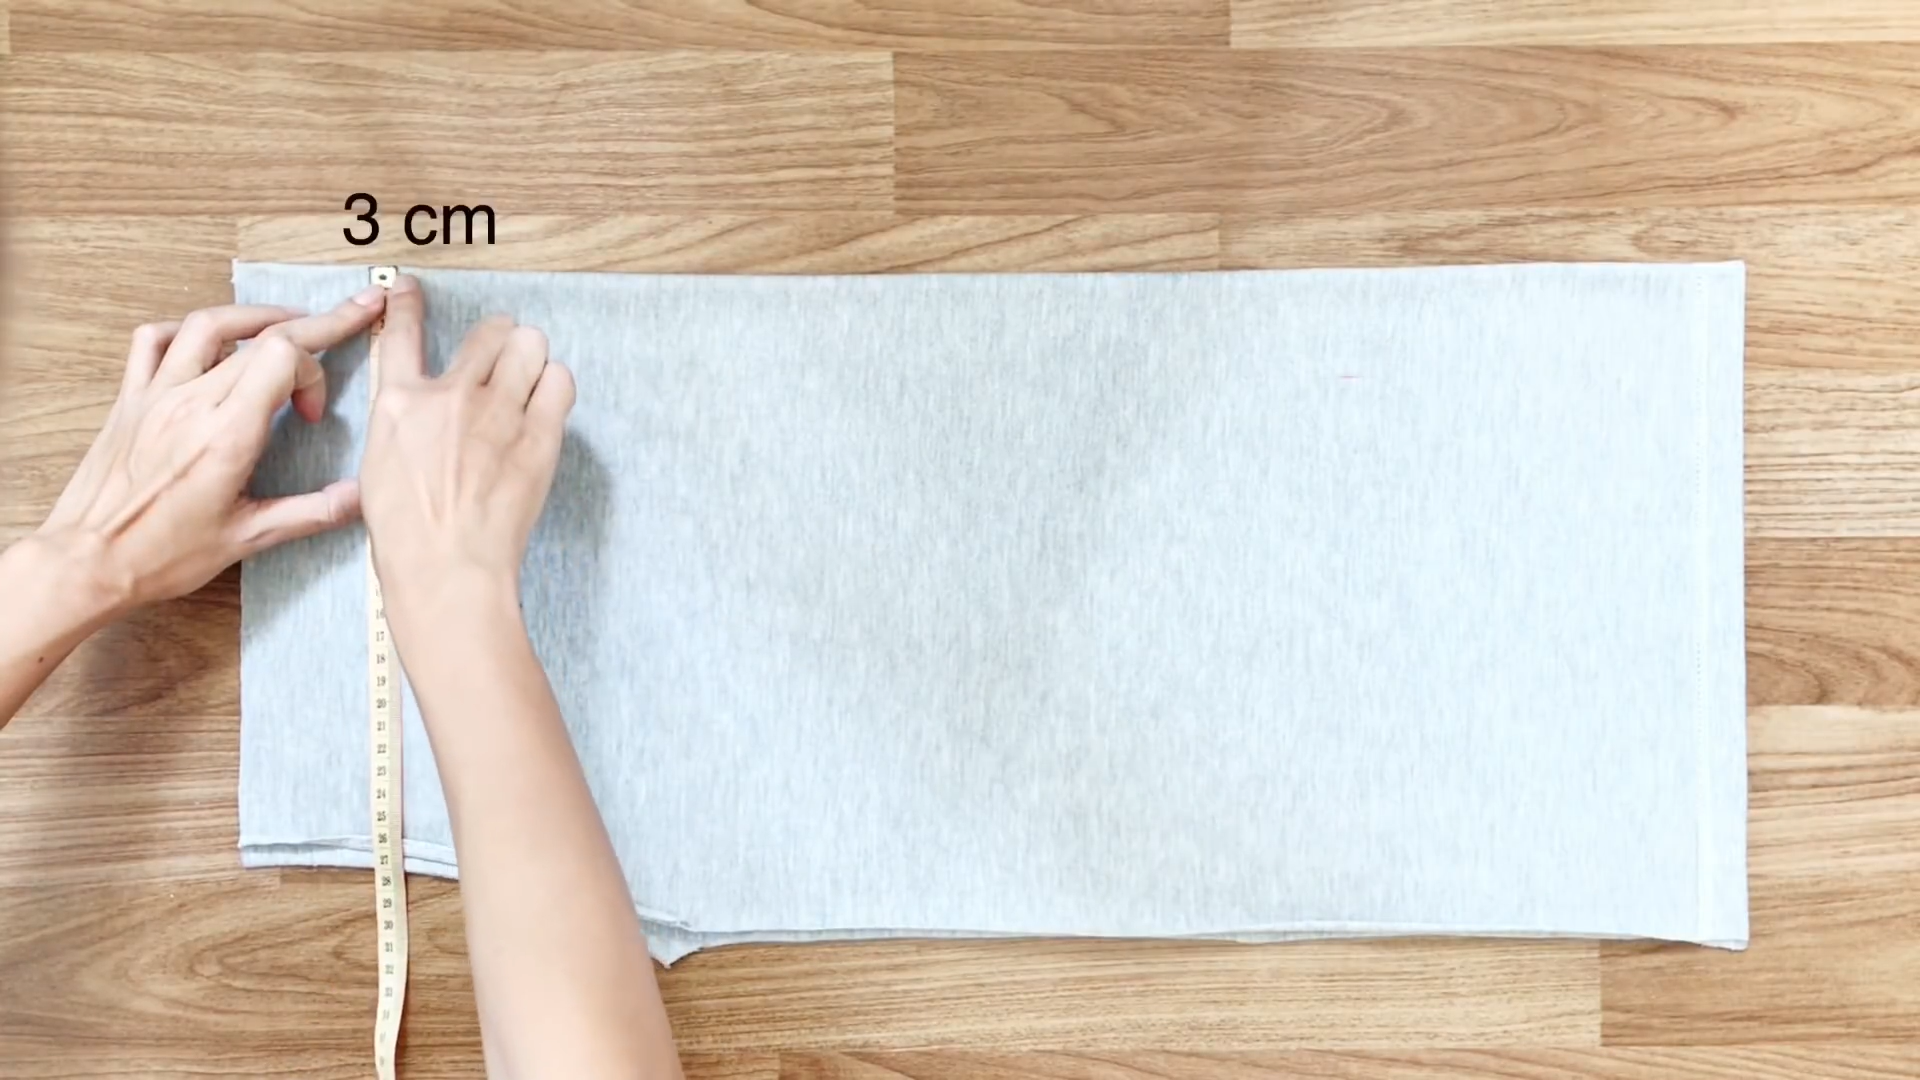
Draw a straight line 3 cm away from the border.
At the end of the border line, go up 6 cm and draw a curved line to connect it to the straight line.
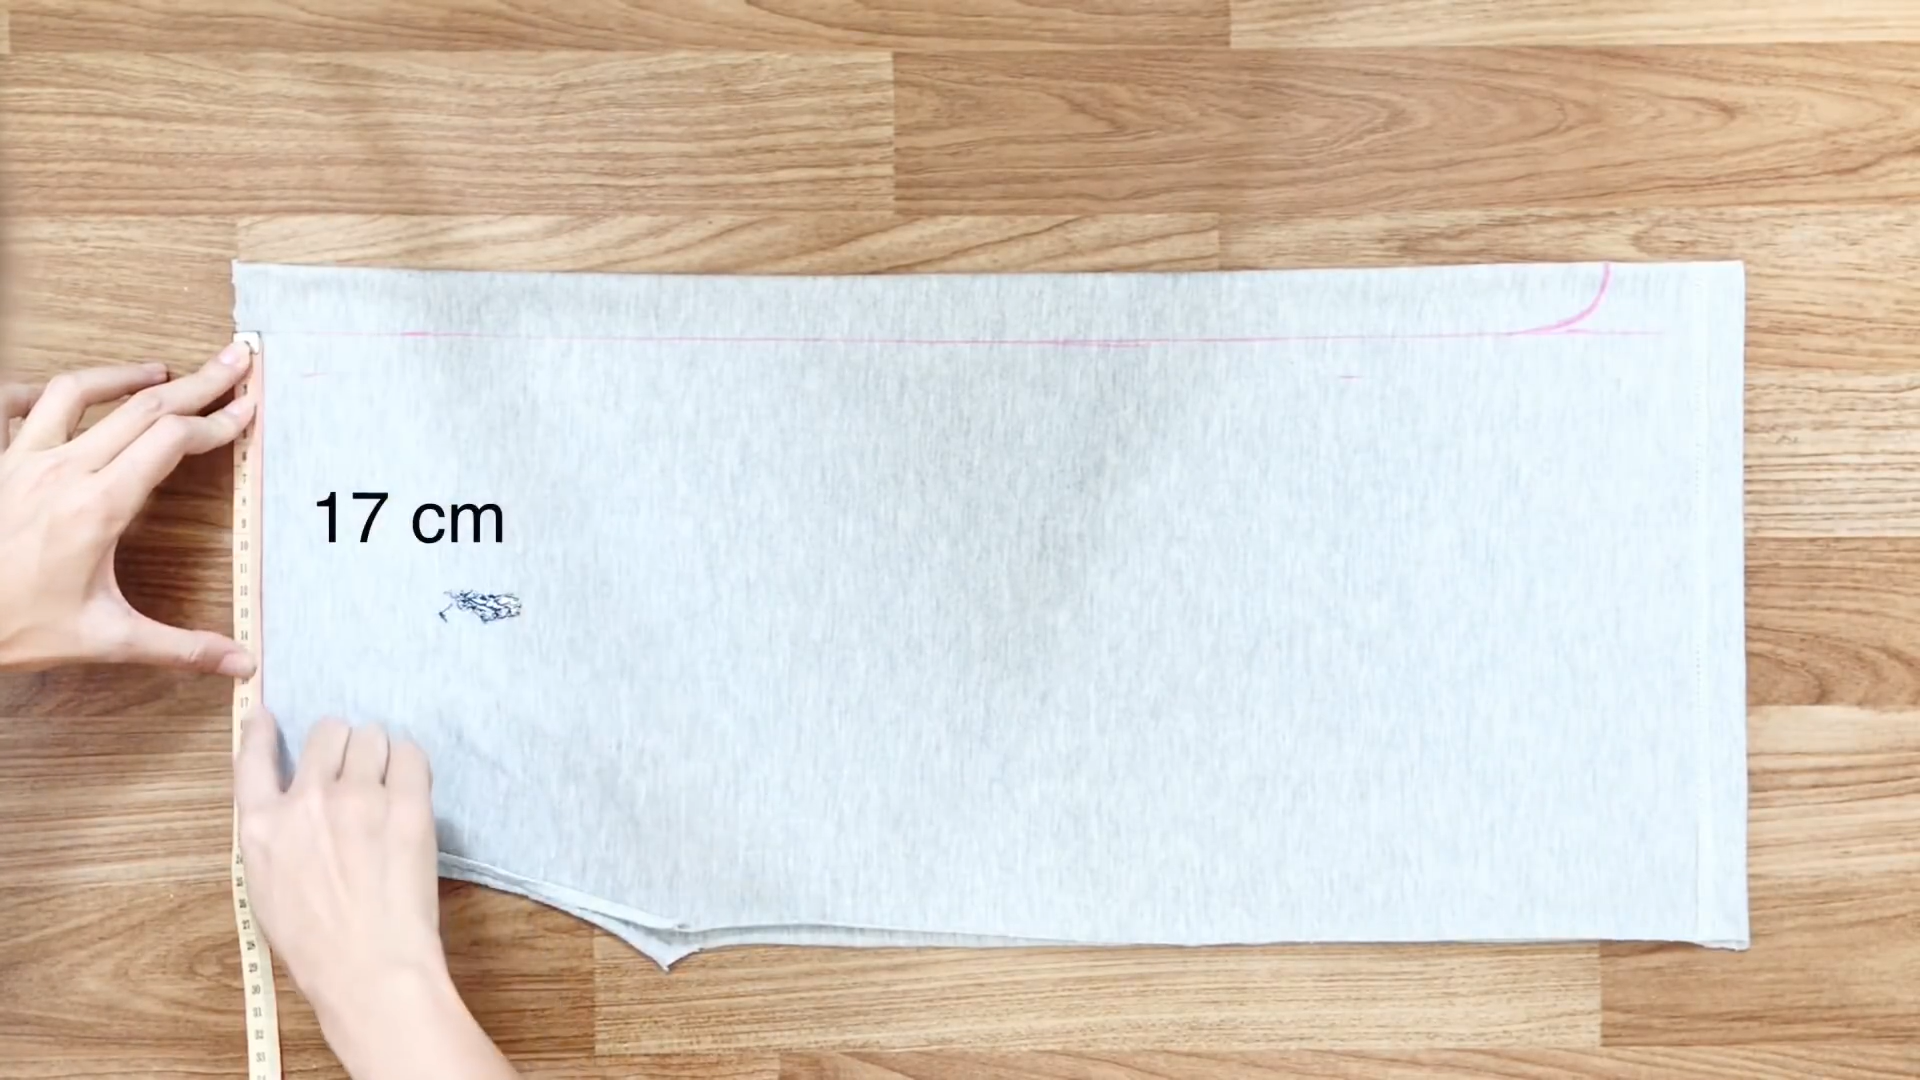
From the top of the straight line, go down 17 cm and mark there.

From the border, go inside 13 cm and mark another point.
Then, connect the two marks with a curved line.
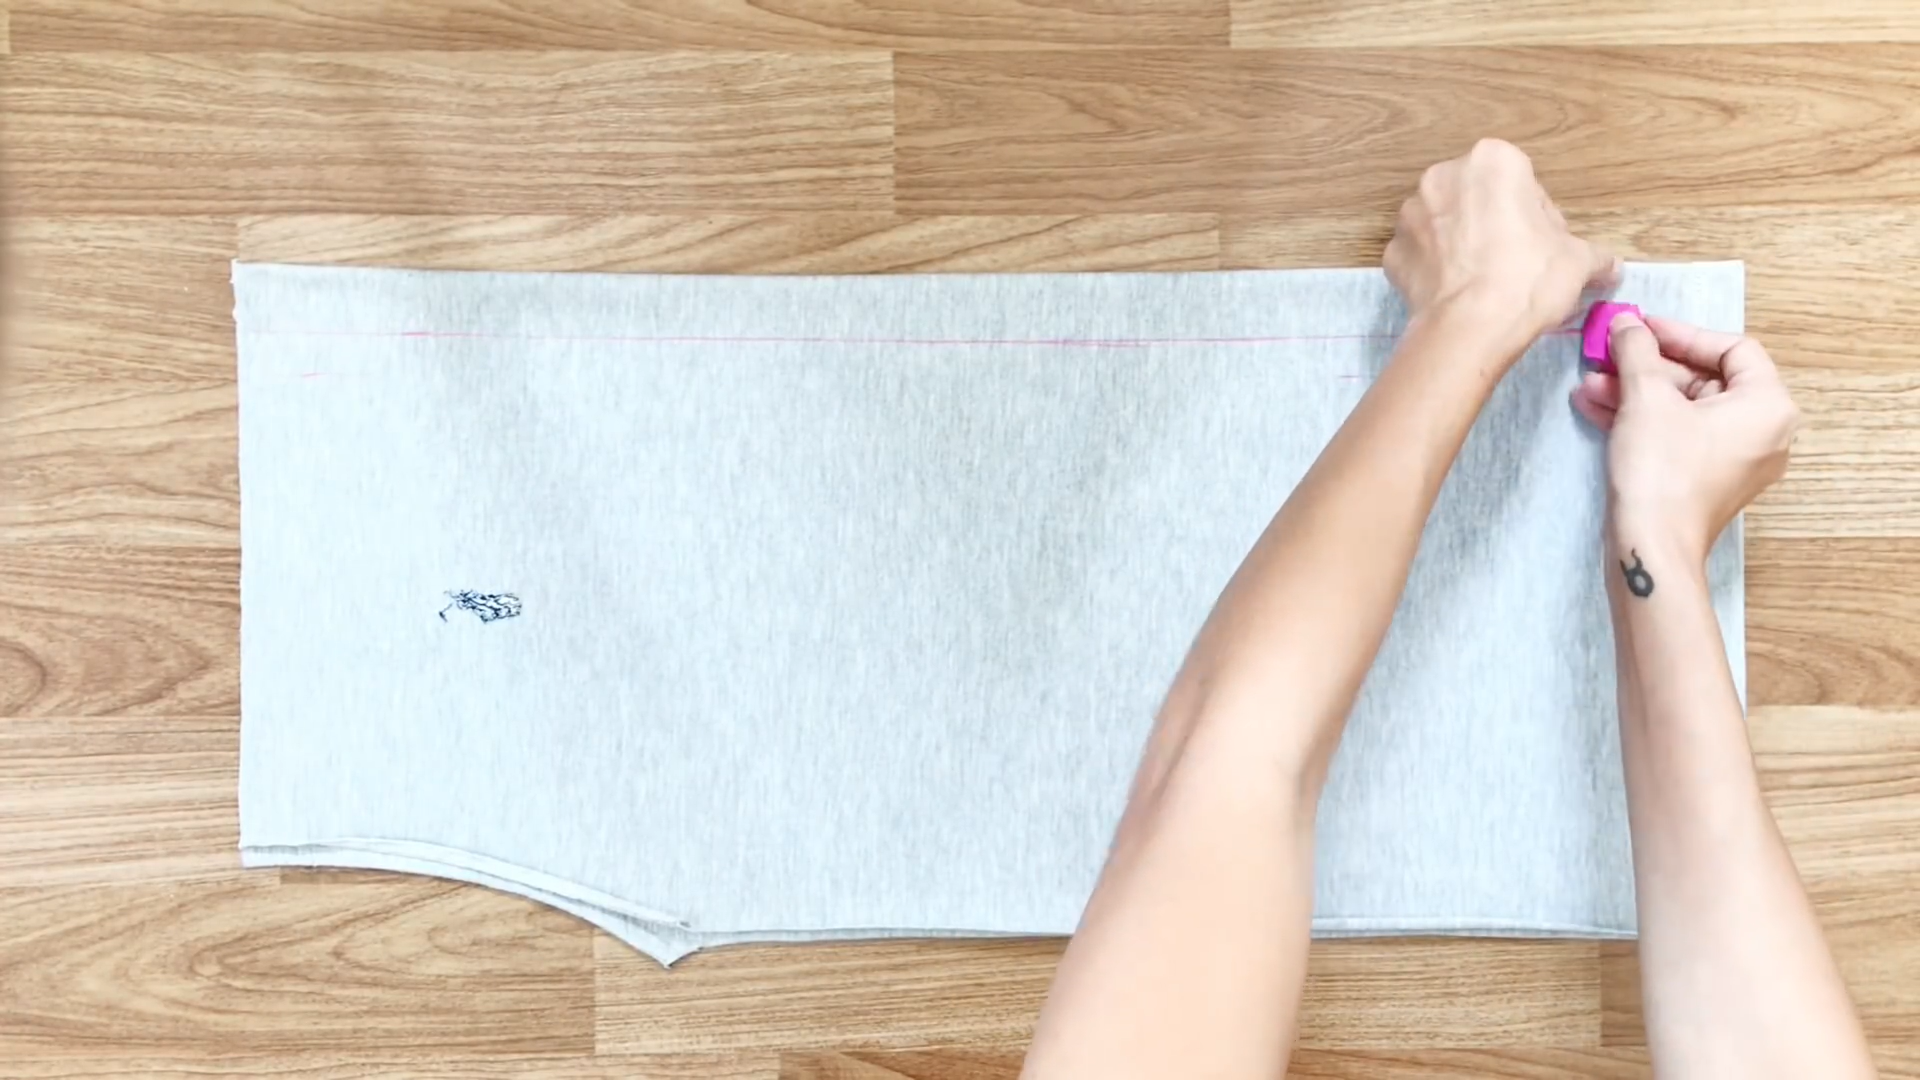
Then, draw from the second mark to the end of the T-shirt.
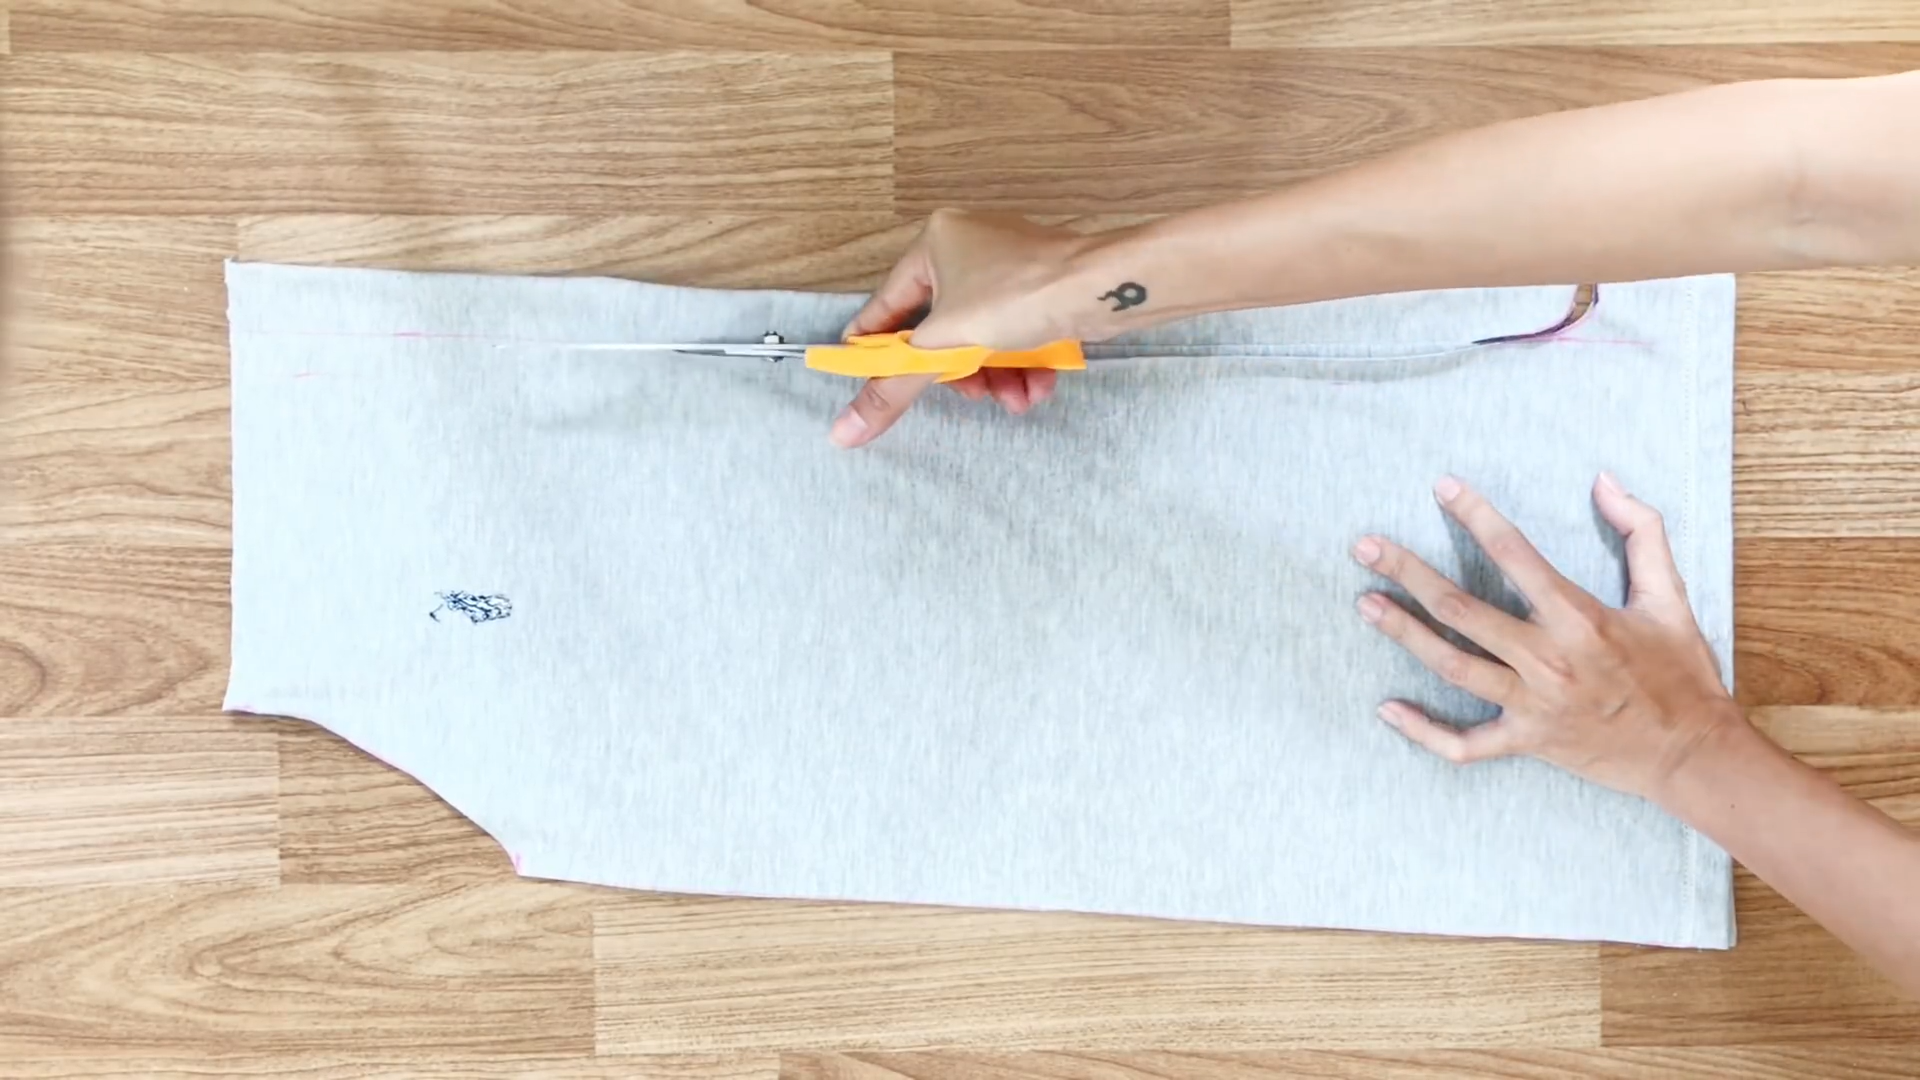
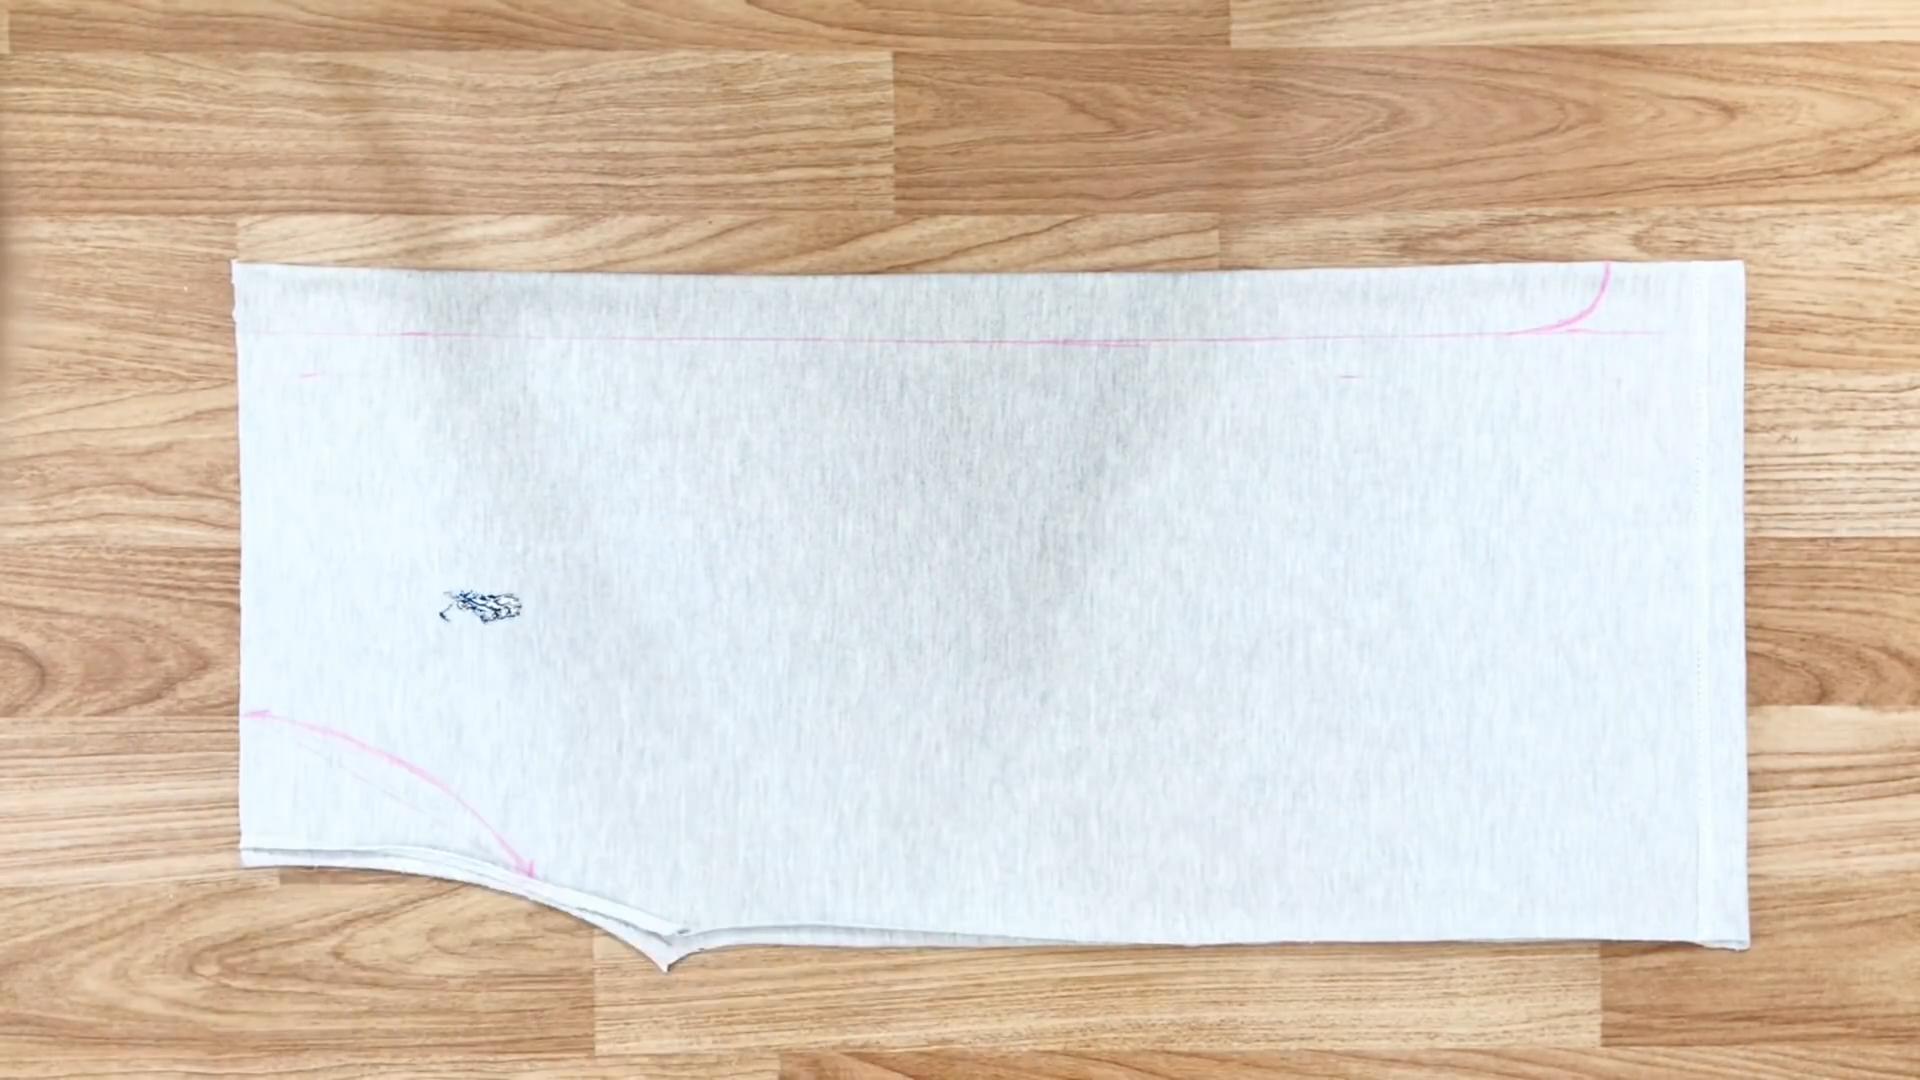
Cut along the drawn lines to create the front body of the jumpsuit.
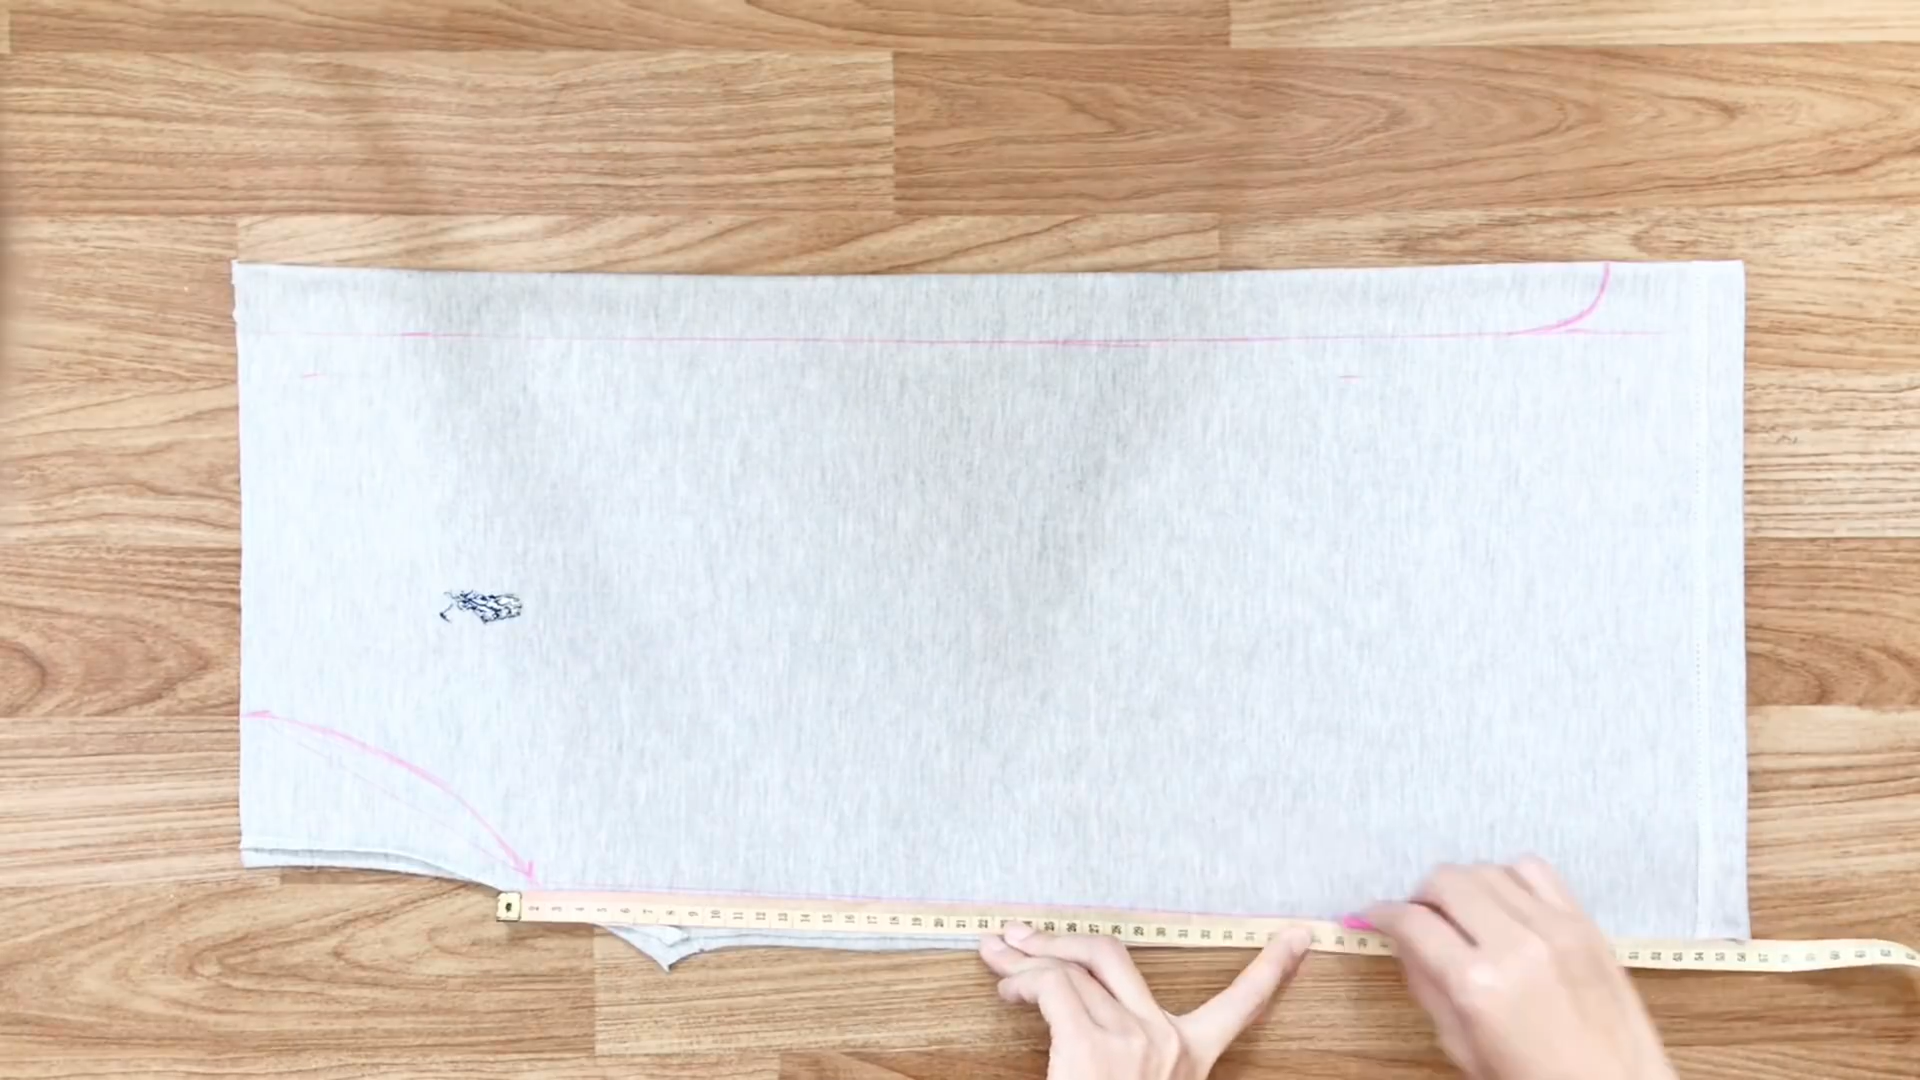
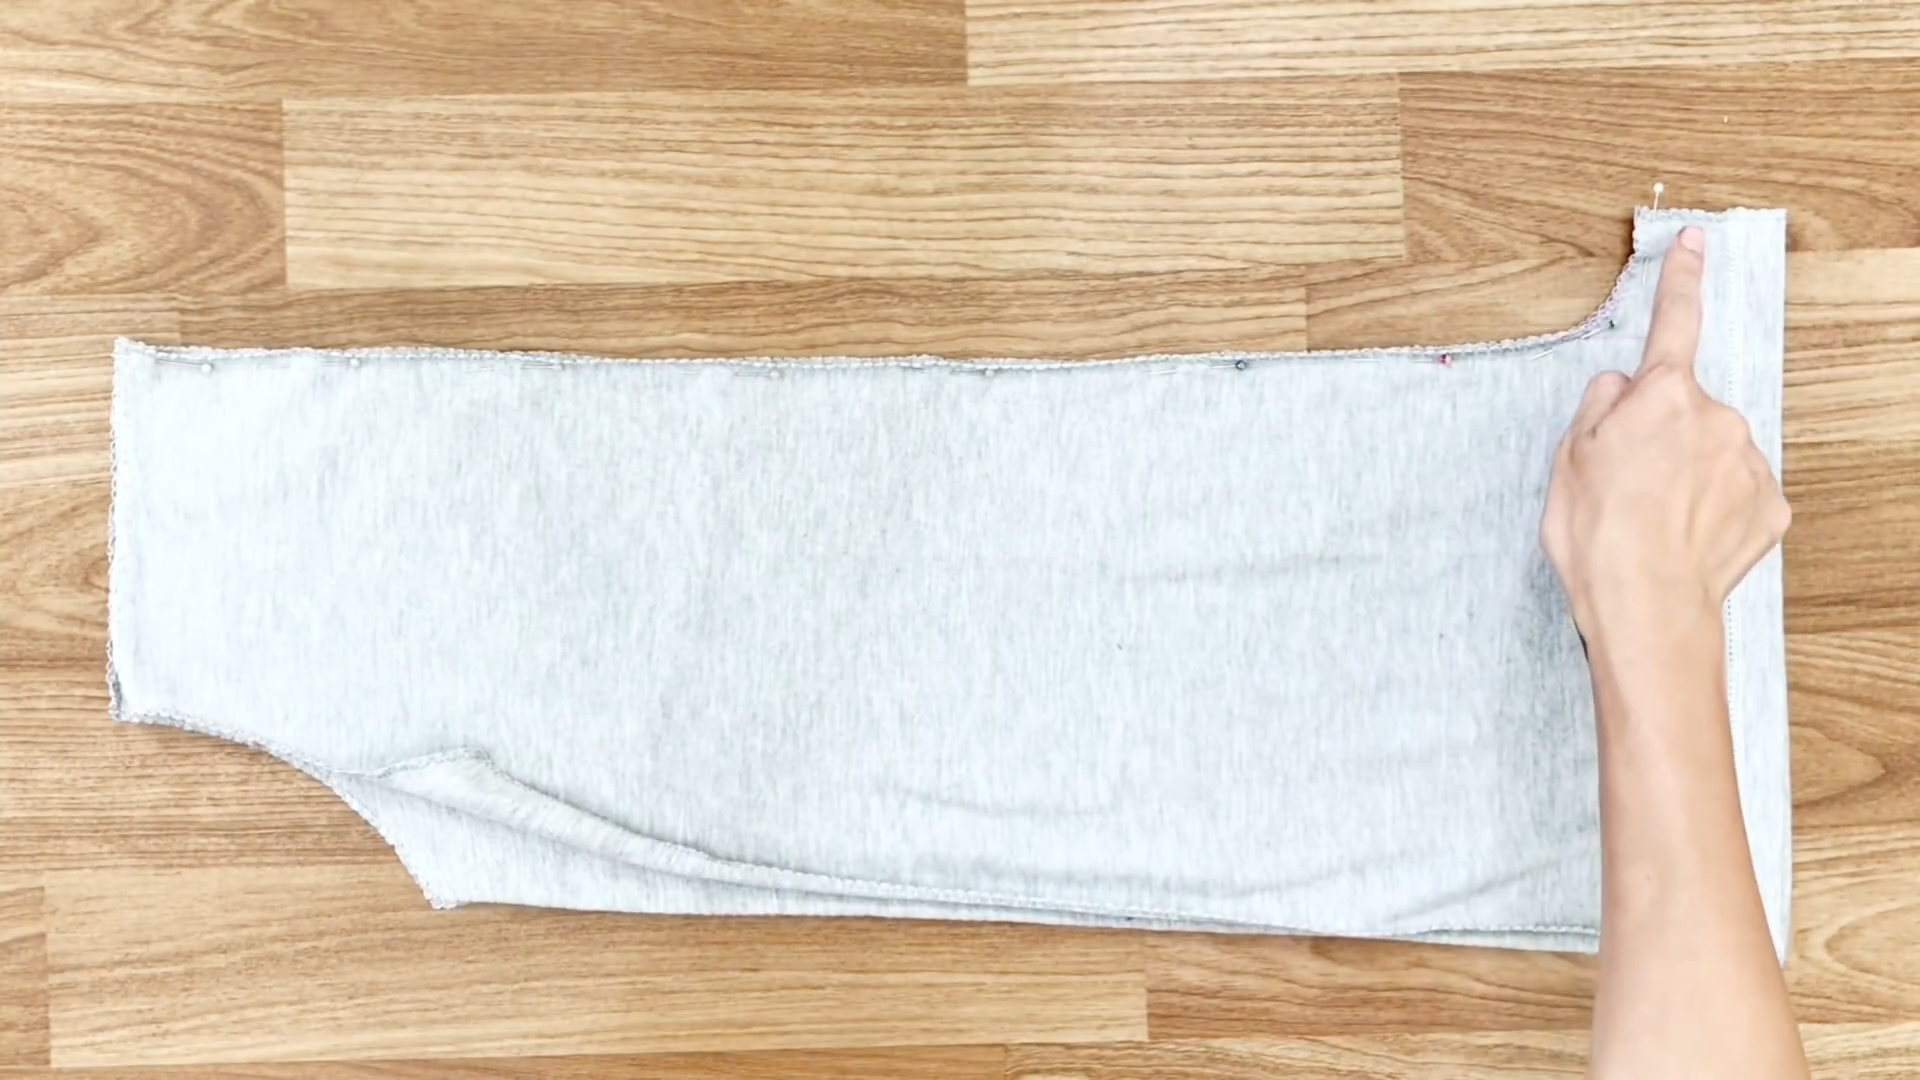
Repeat a similar process for the back body, adjusting the curve line for the legs (inside 5 cm from the border).
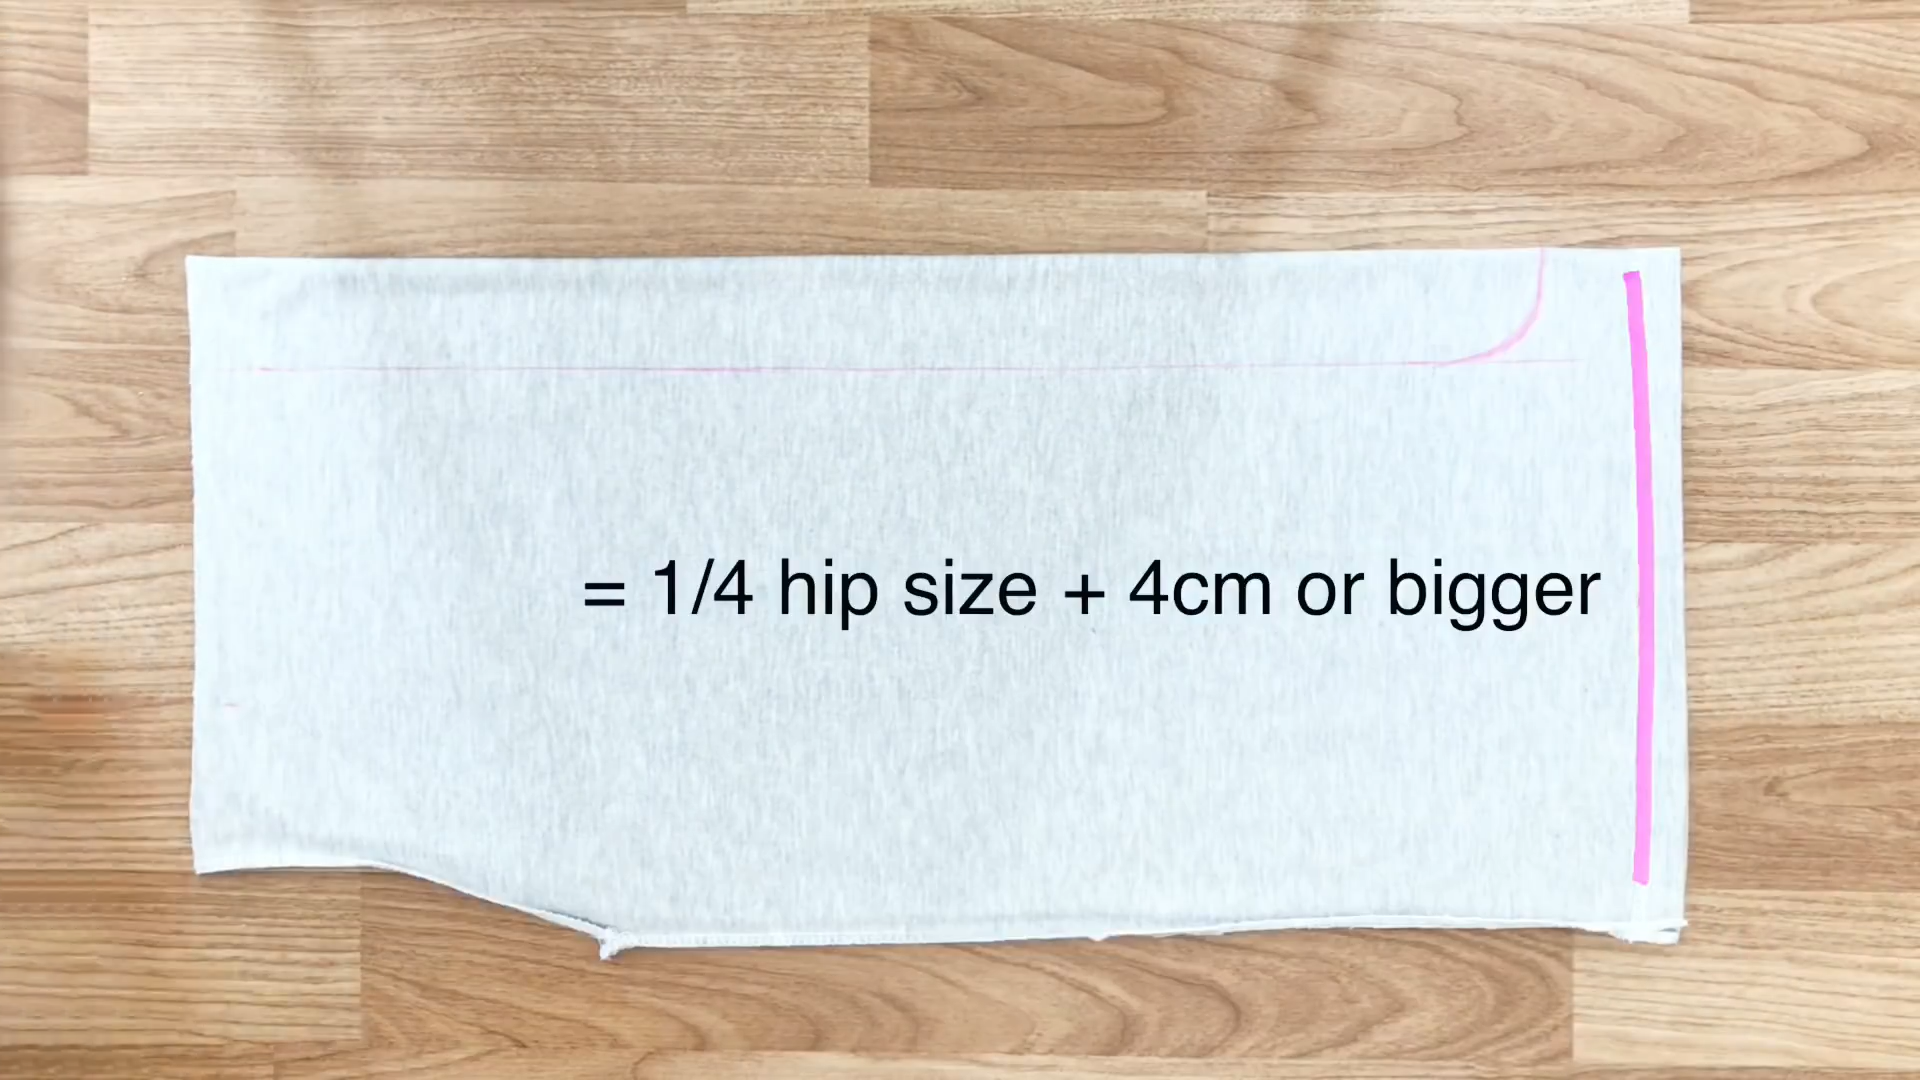
Make sure the width of the legs is 1/4 of your hip size plus 4 cm or bigger.
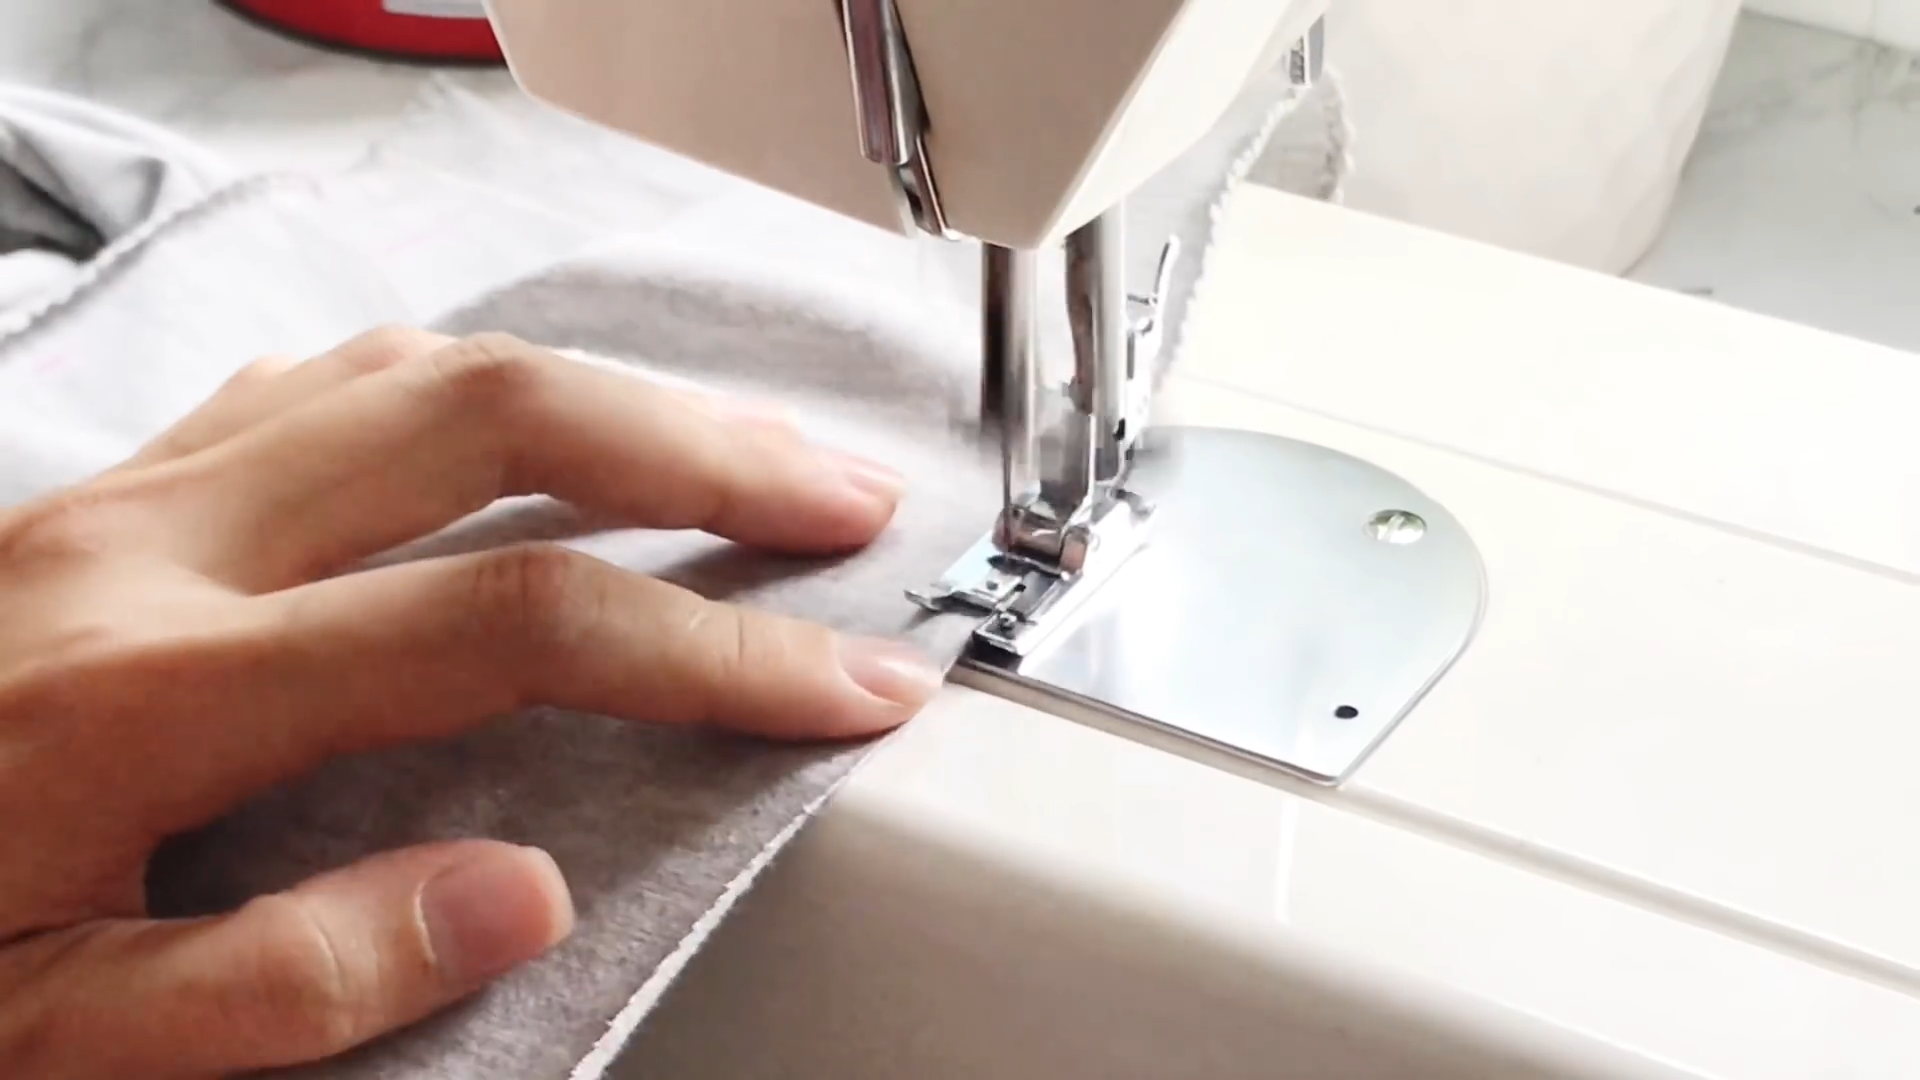
Then, overlock the pattern to protect the cutting.
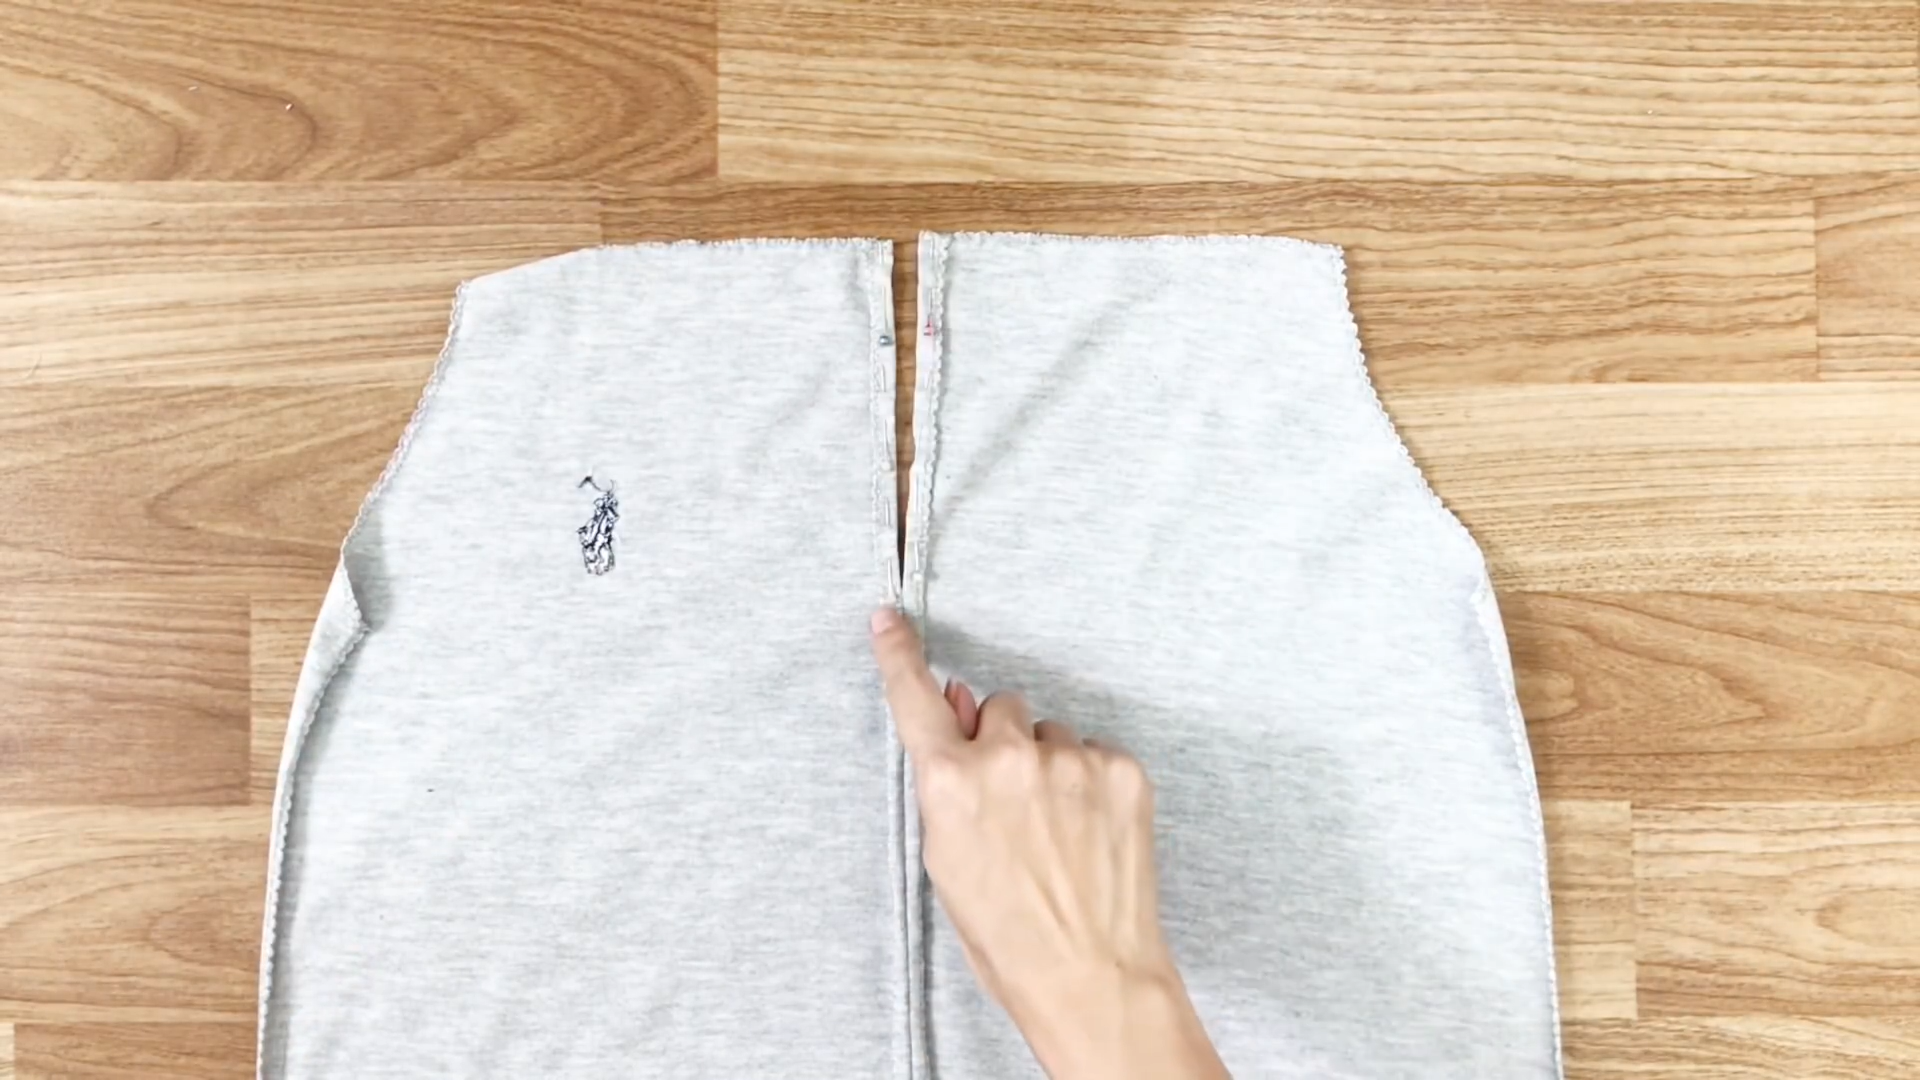
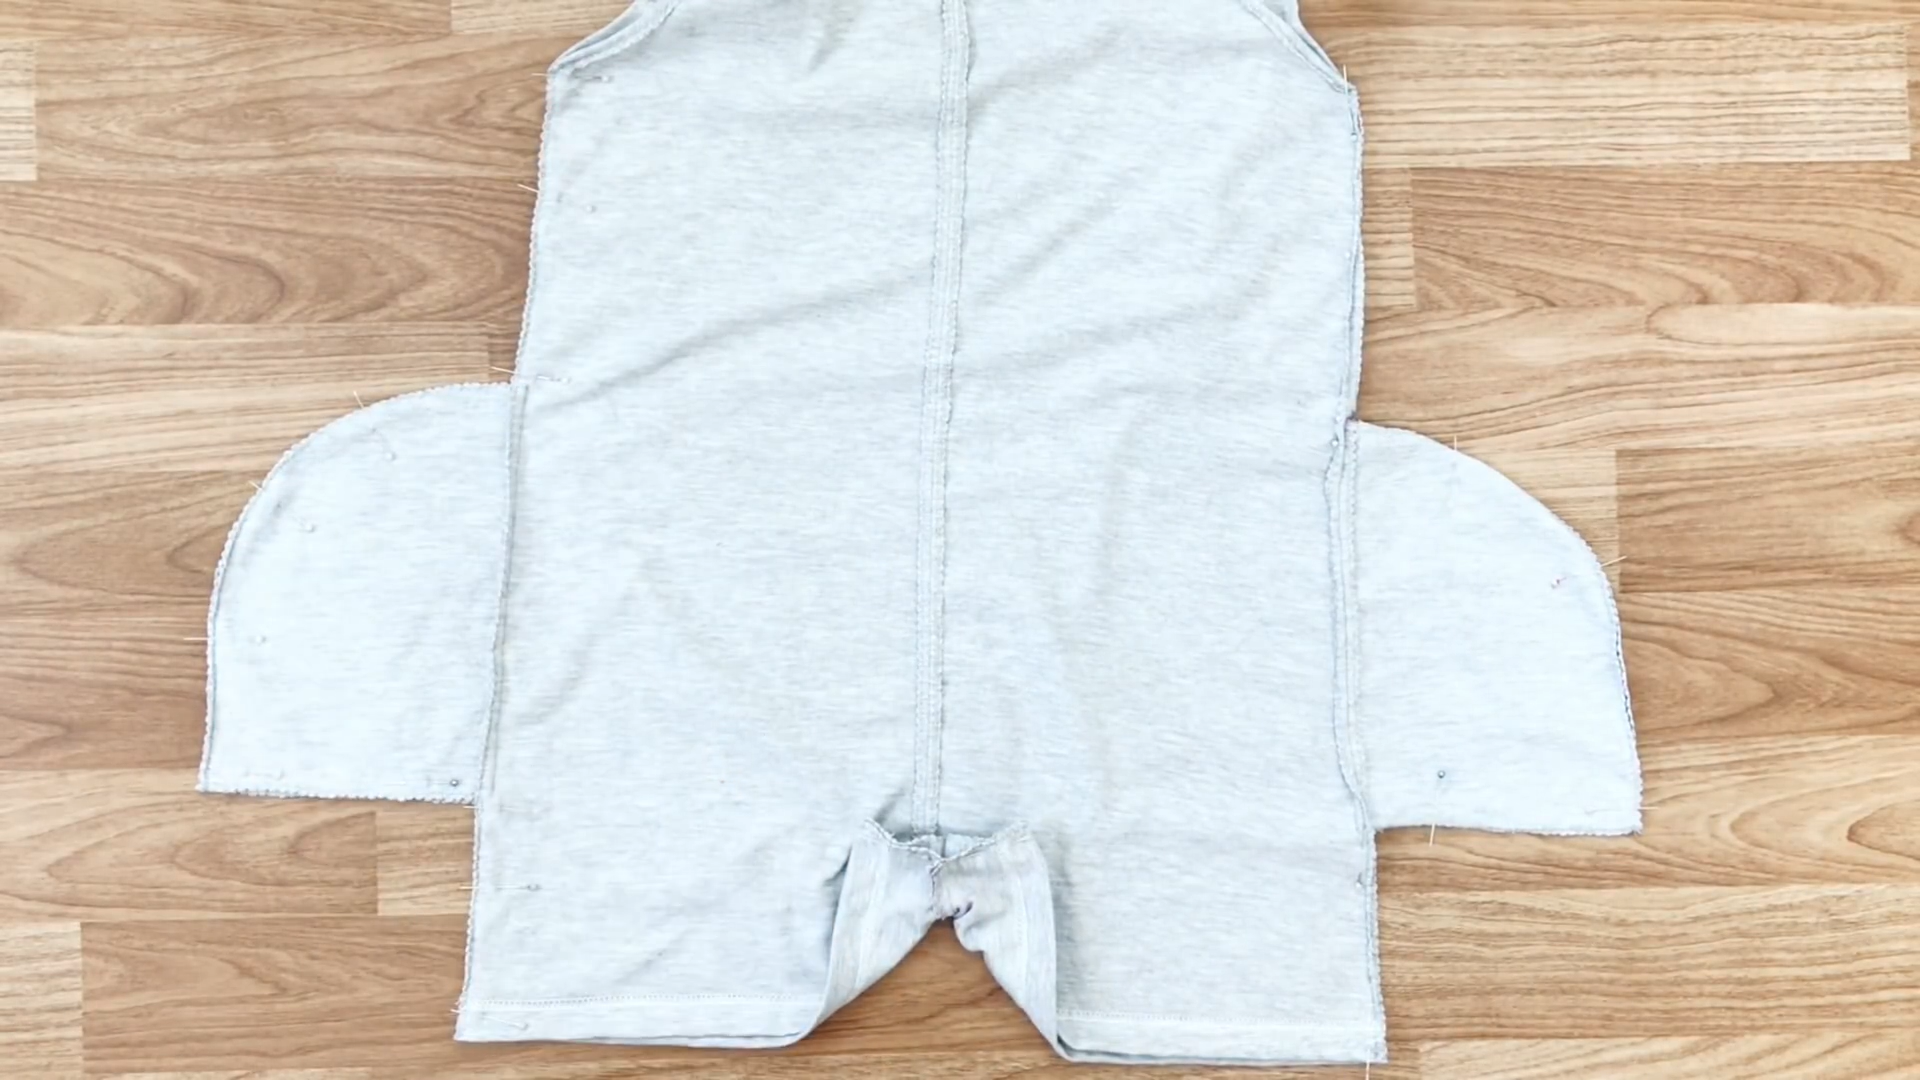
Sew the two pieces of the back jumpsuit together at the crotch line.

For the front, keep 13 cm open from the top and sew the rest of the crotch line.
Fold the fabric inside at the top of the front and sew to close the open area.
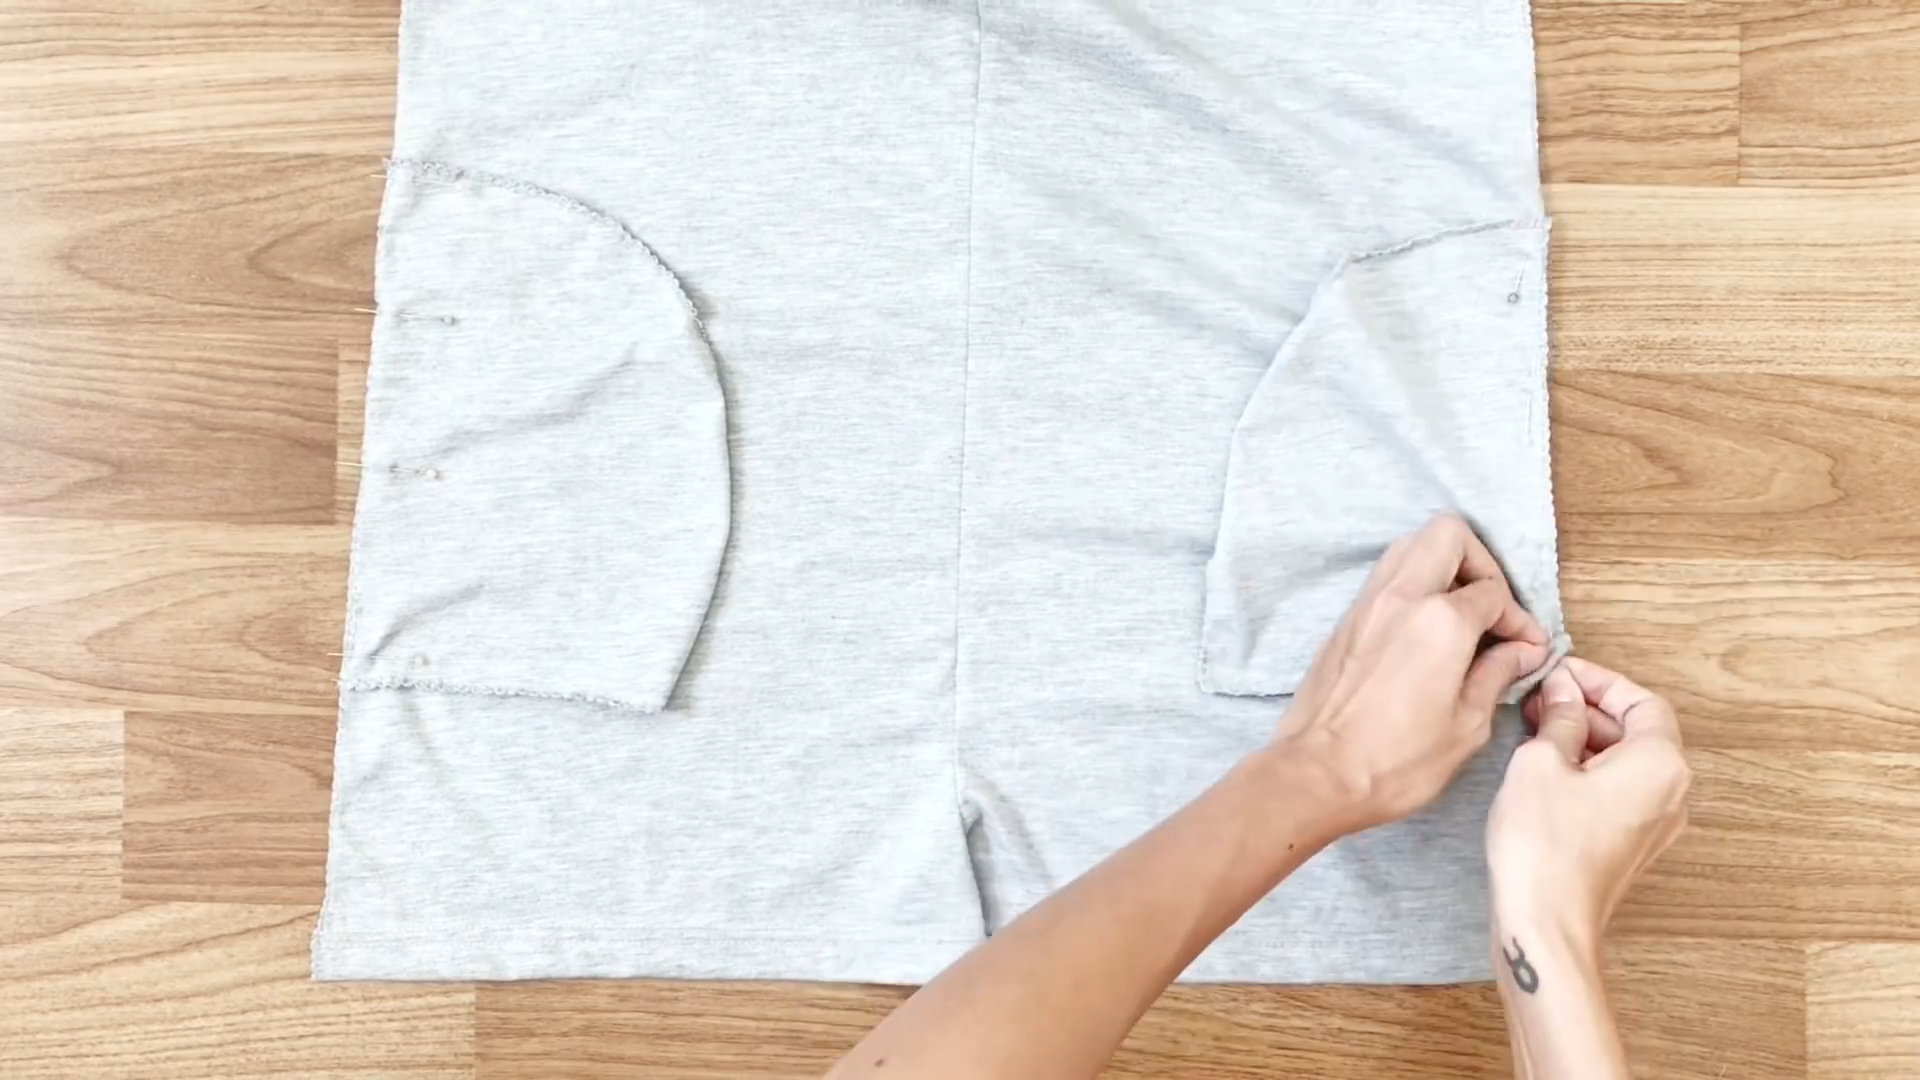
Sew the hand areas similarly for both front and back.
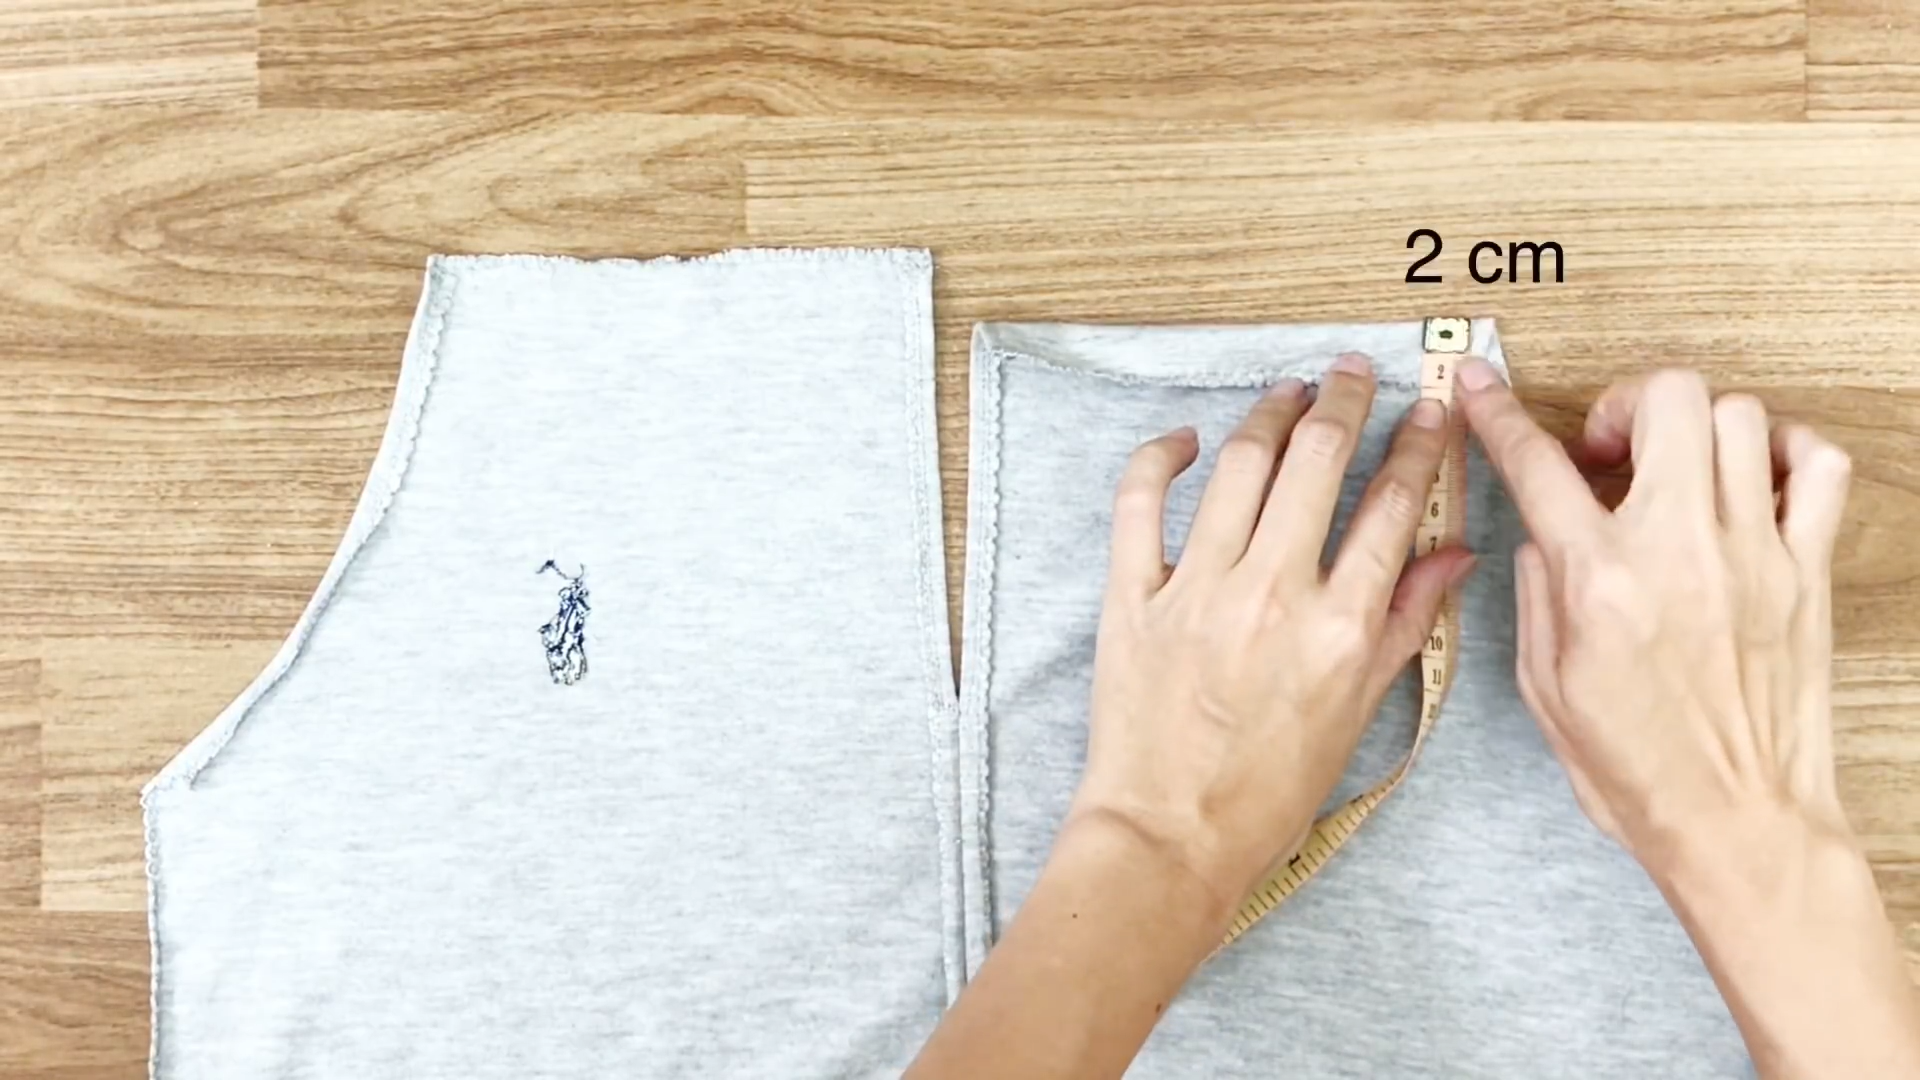
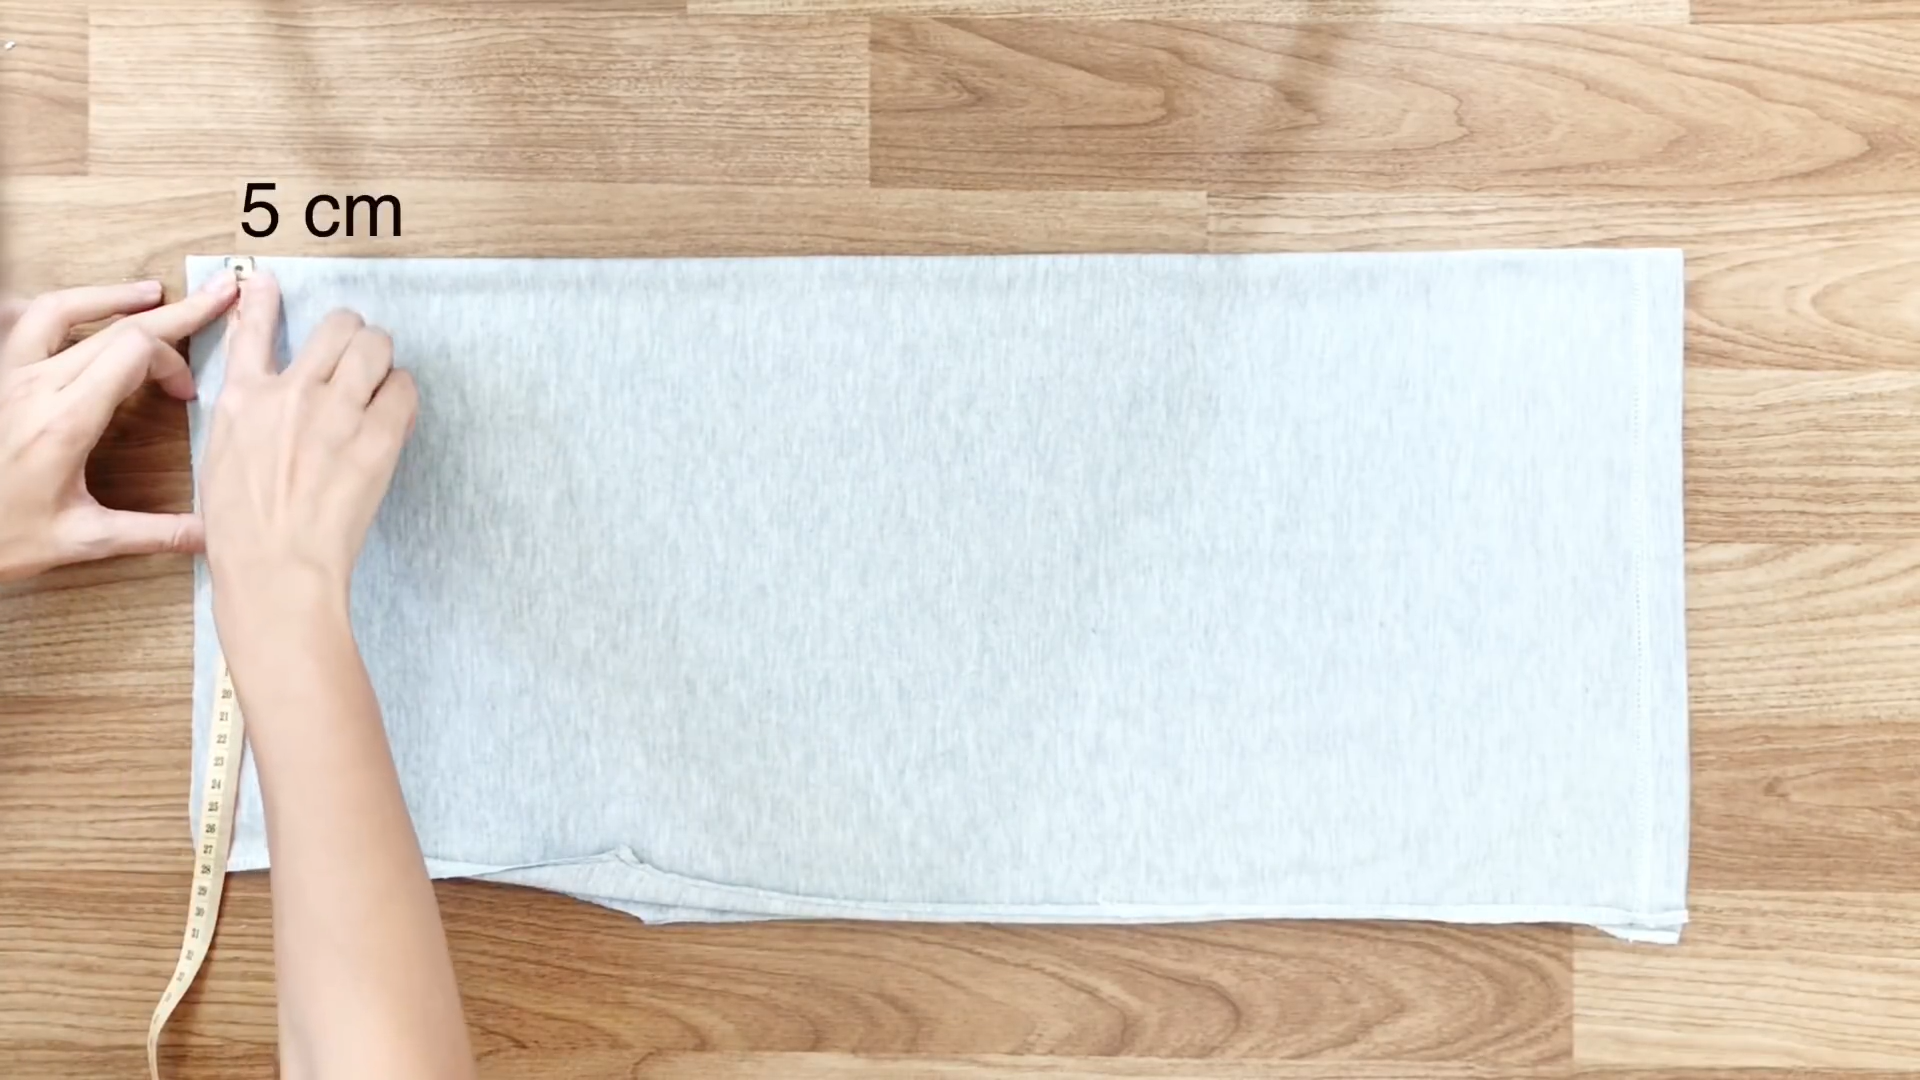
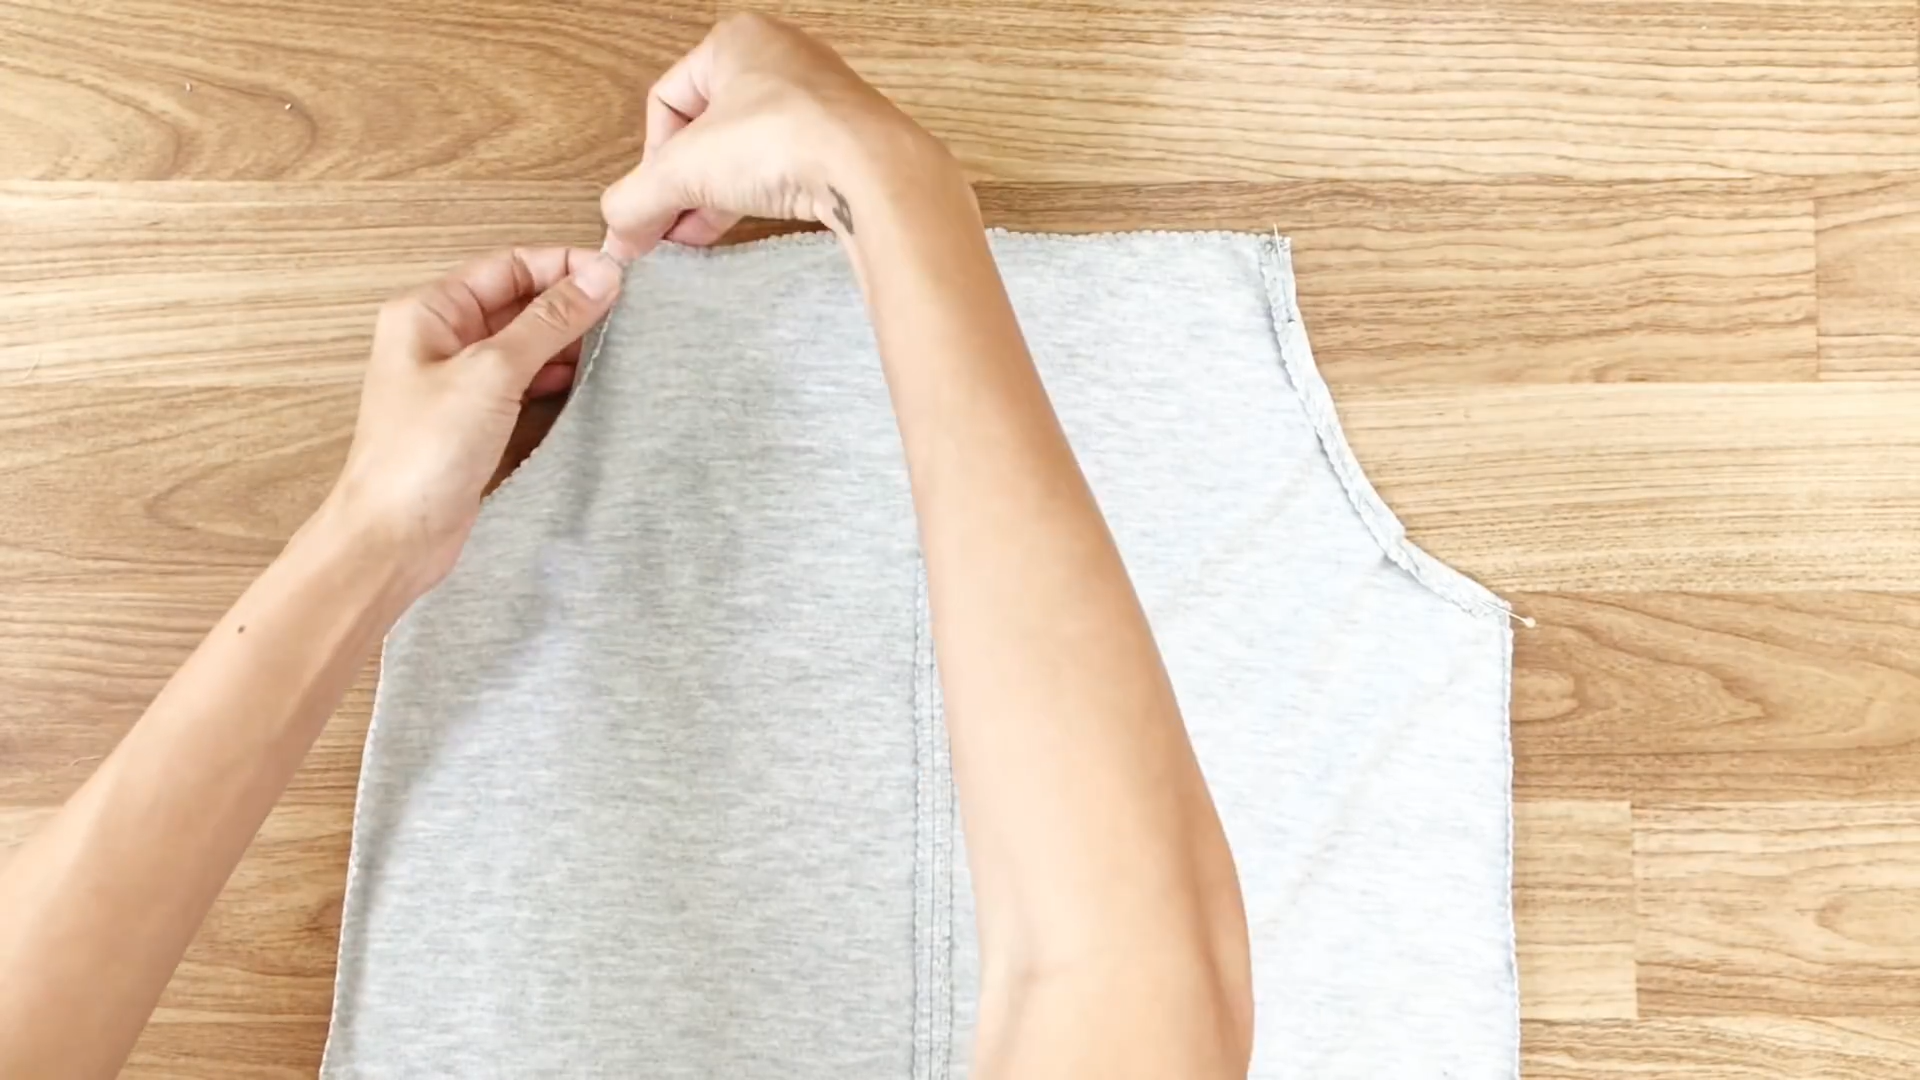
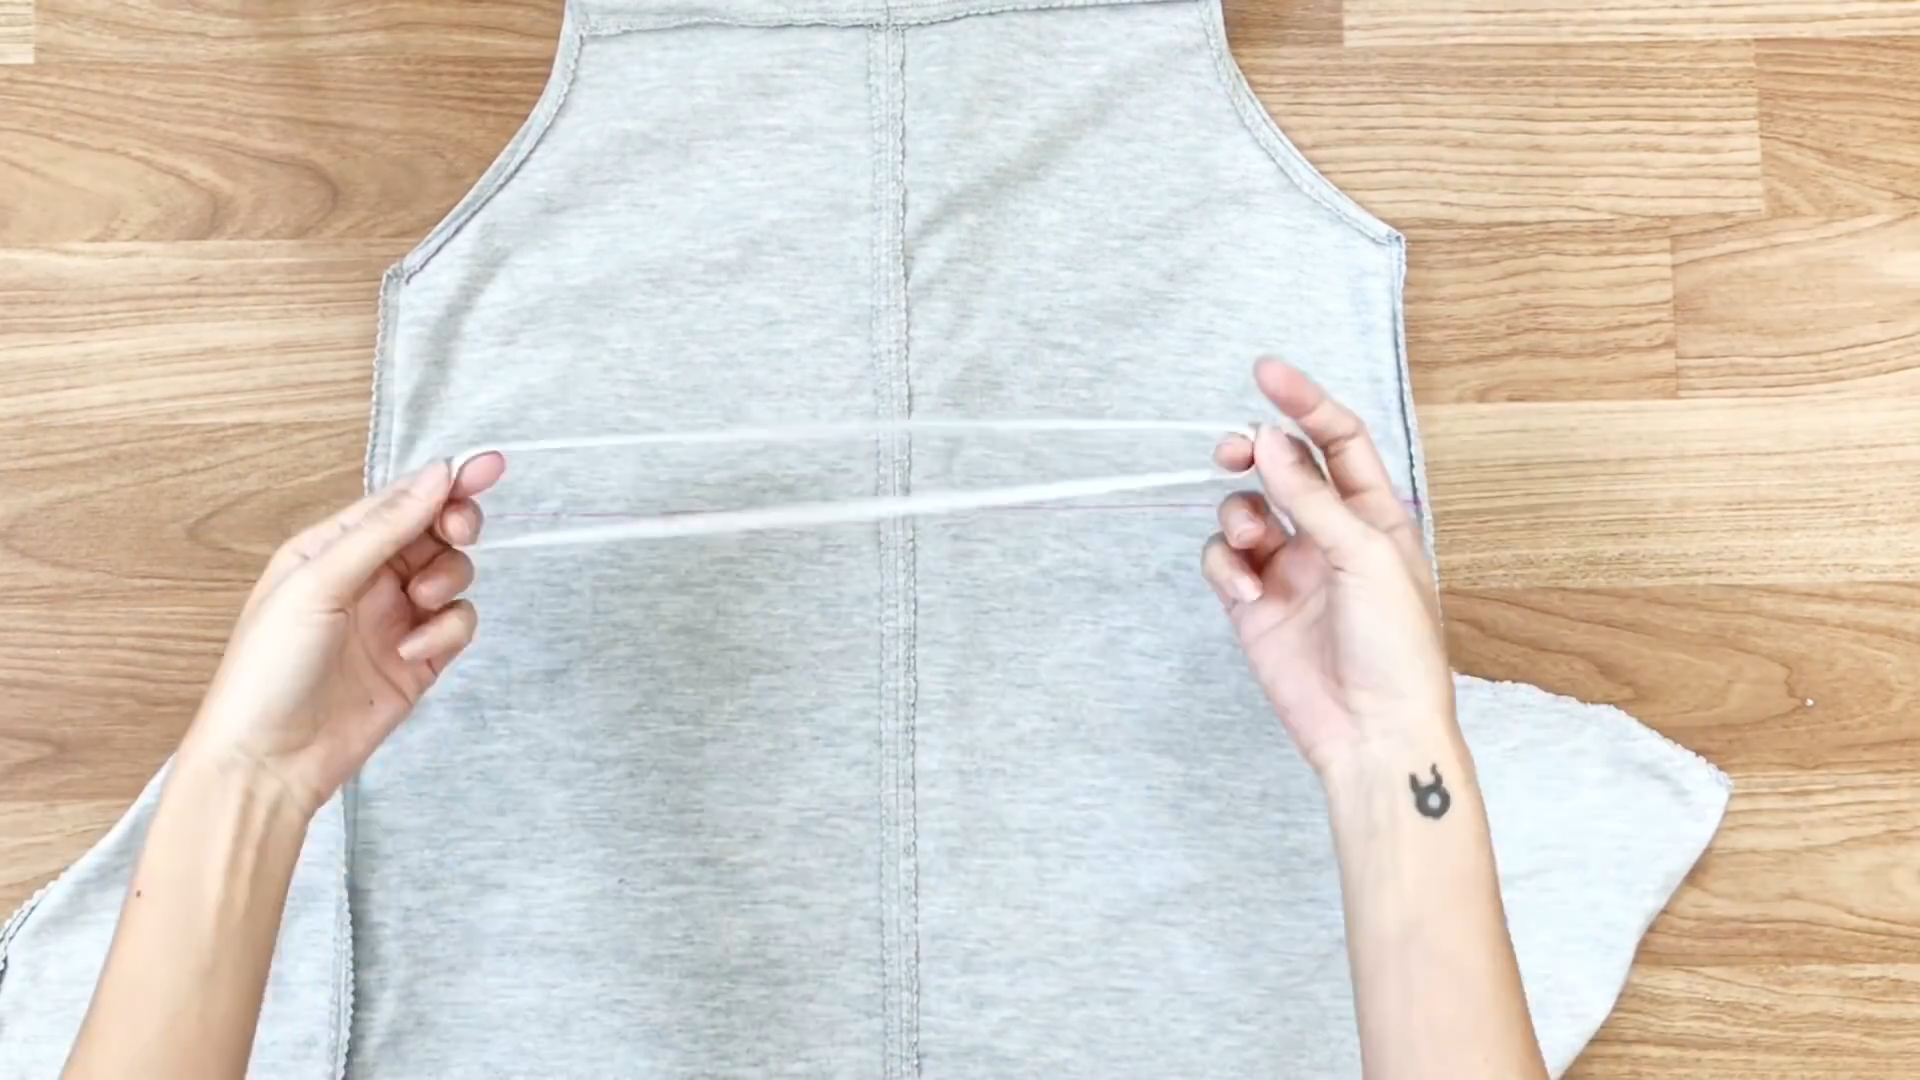
At the top of the jumpsuit, fold the fabric inside 2 cm to create a small hole to put the band inside later.
THE POCKET
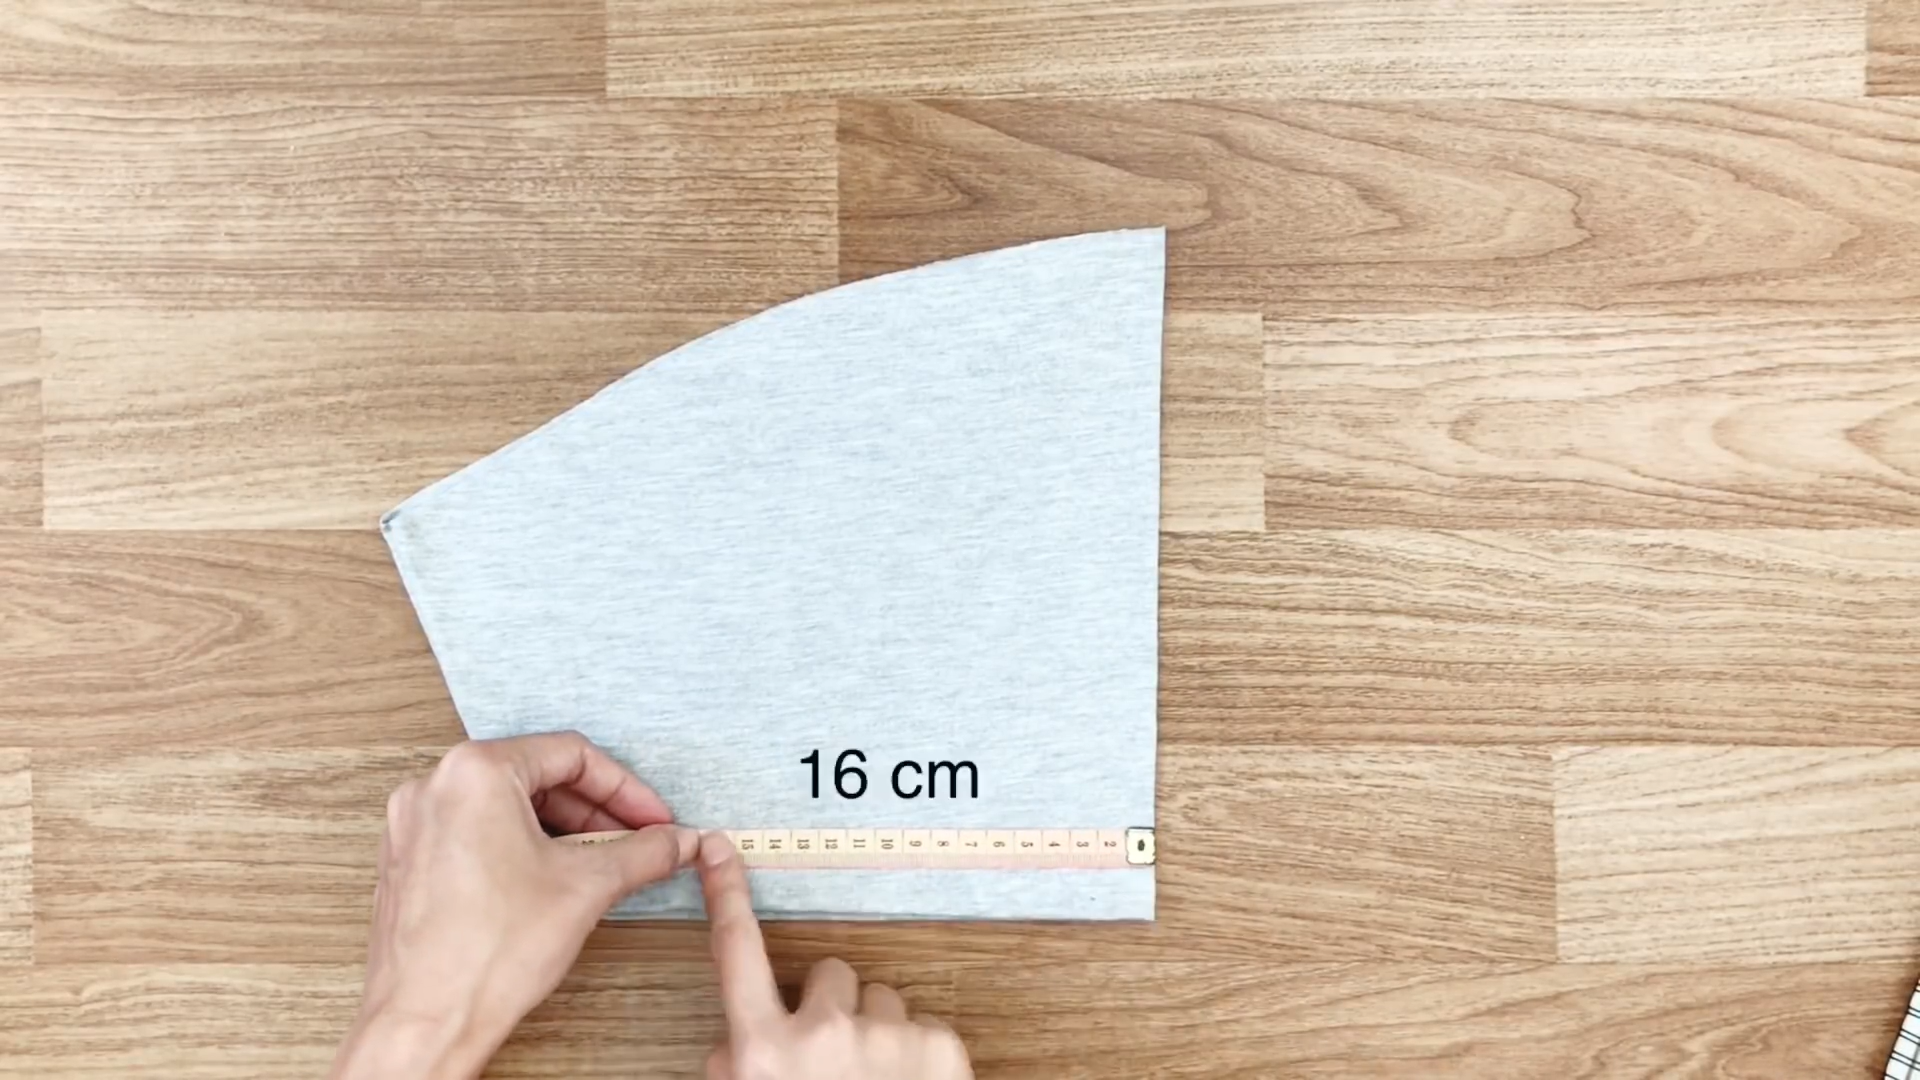
Next, create pockets using fabric from the T-shirt sleeves. Draw a rectangle with a width of 16 cm.
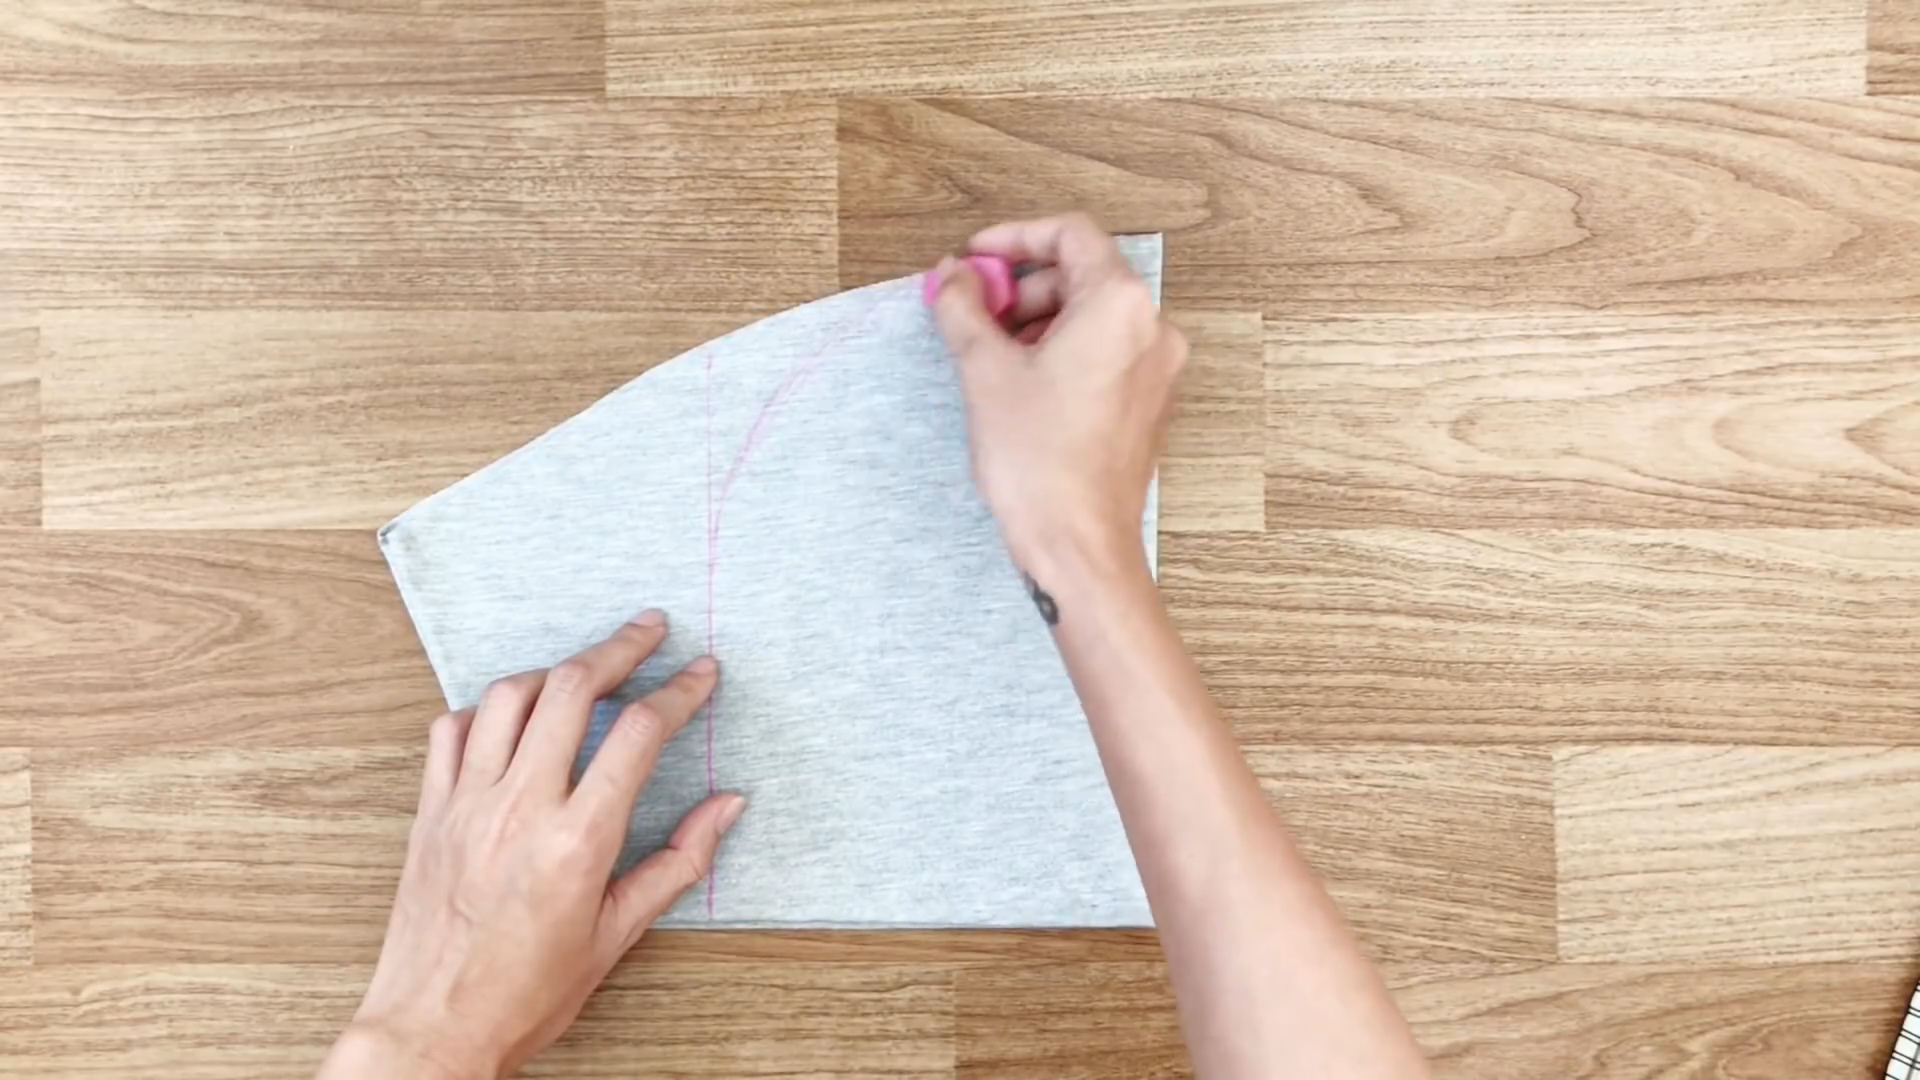
Then, add an arc line to one edge.
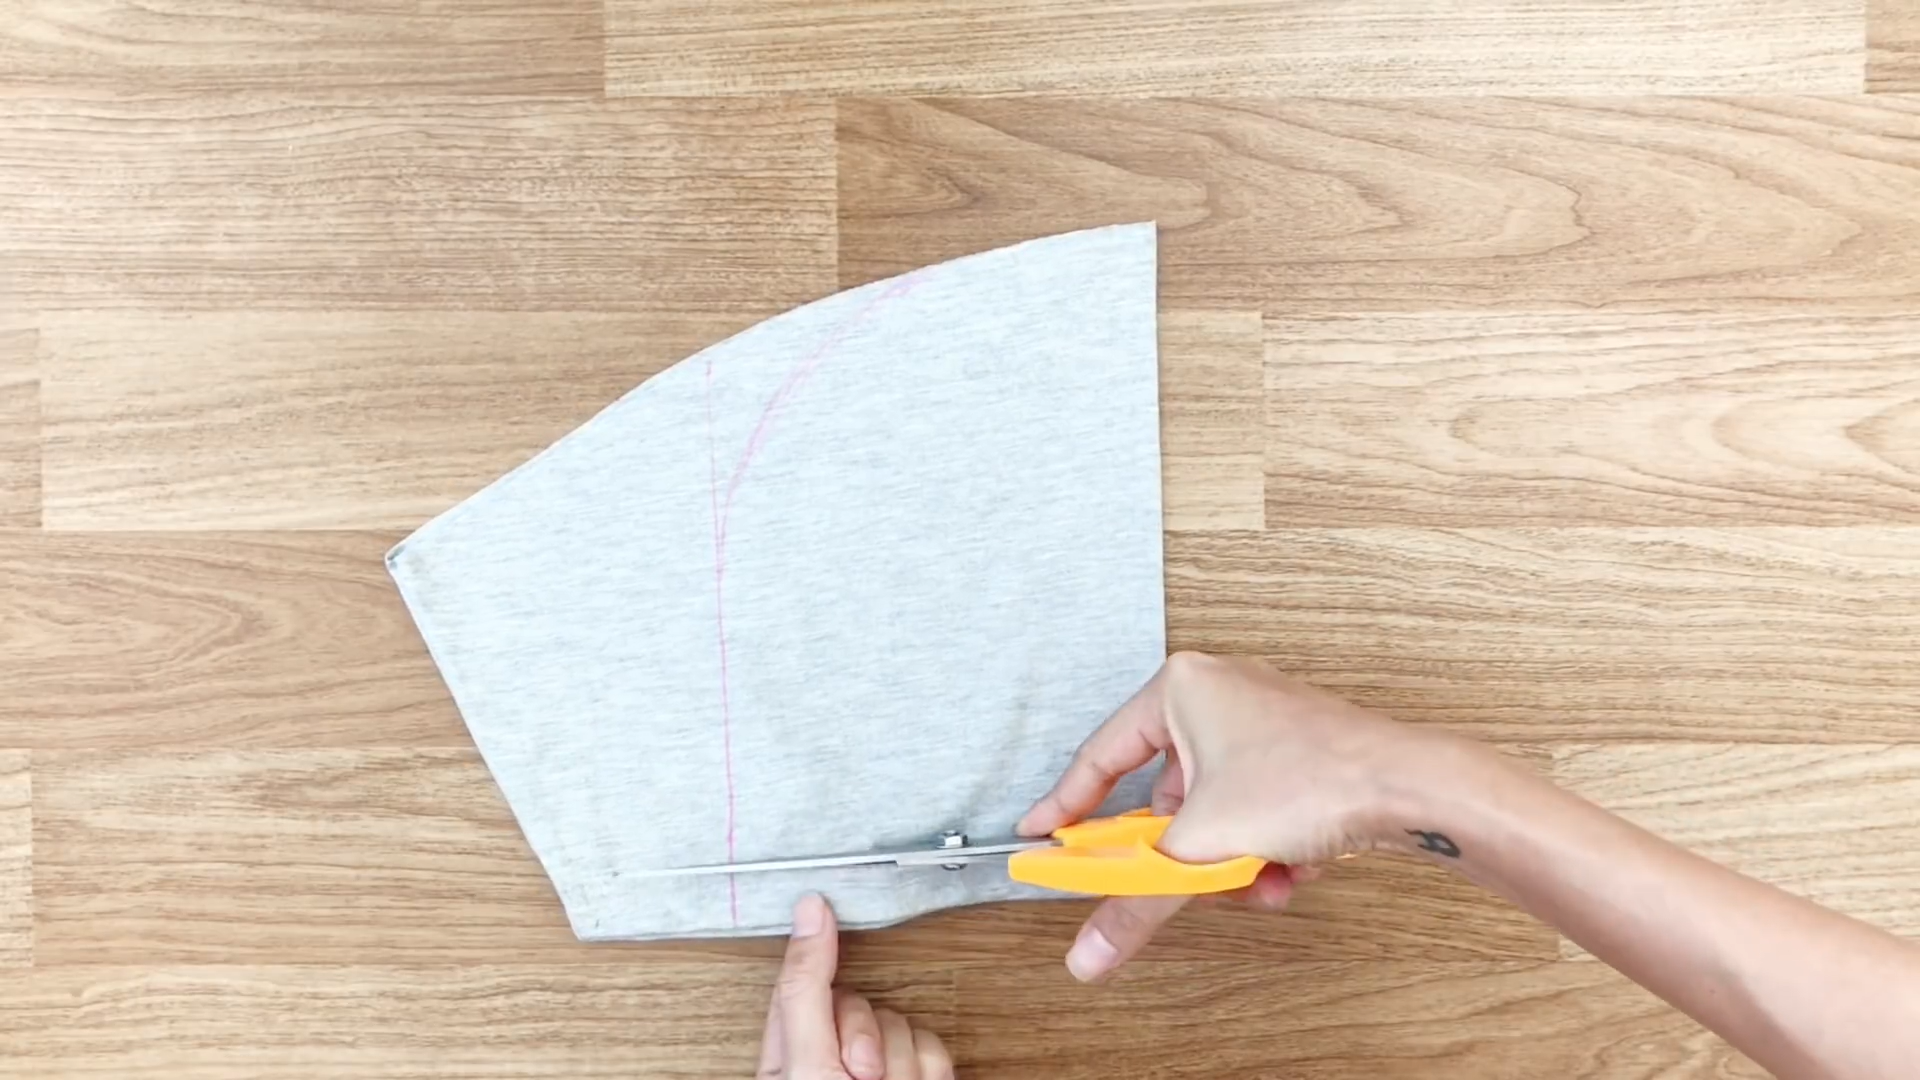
Cut along the arc to form the pocket shape, and don’t forget to overlock the edges.
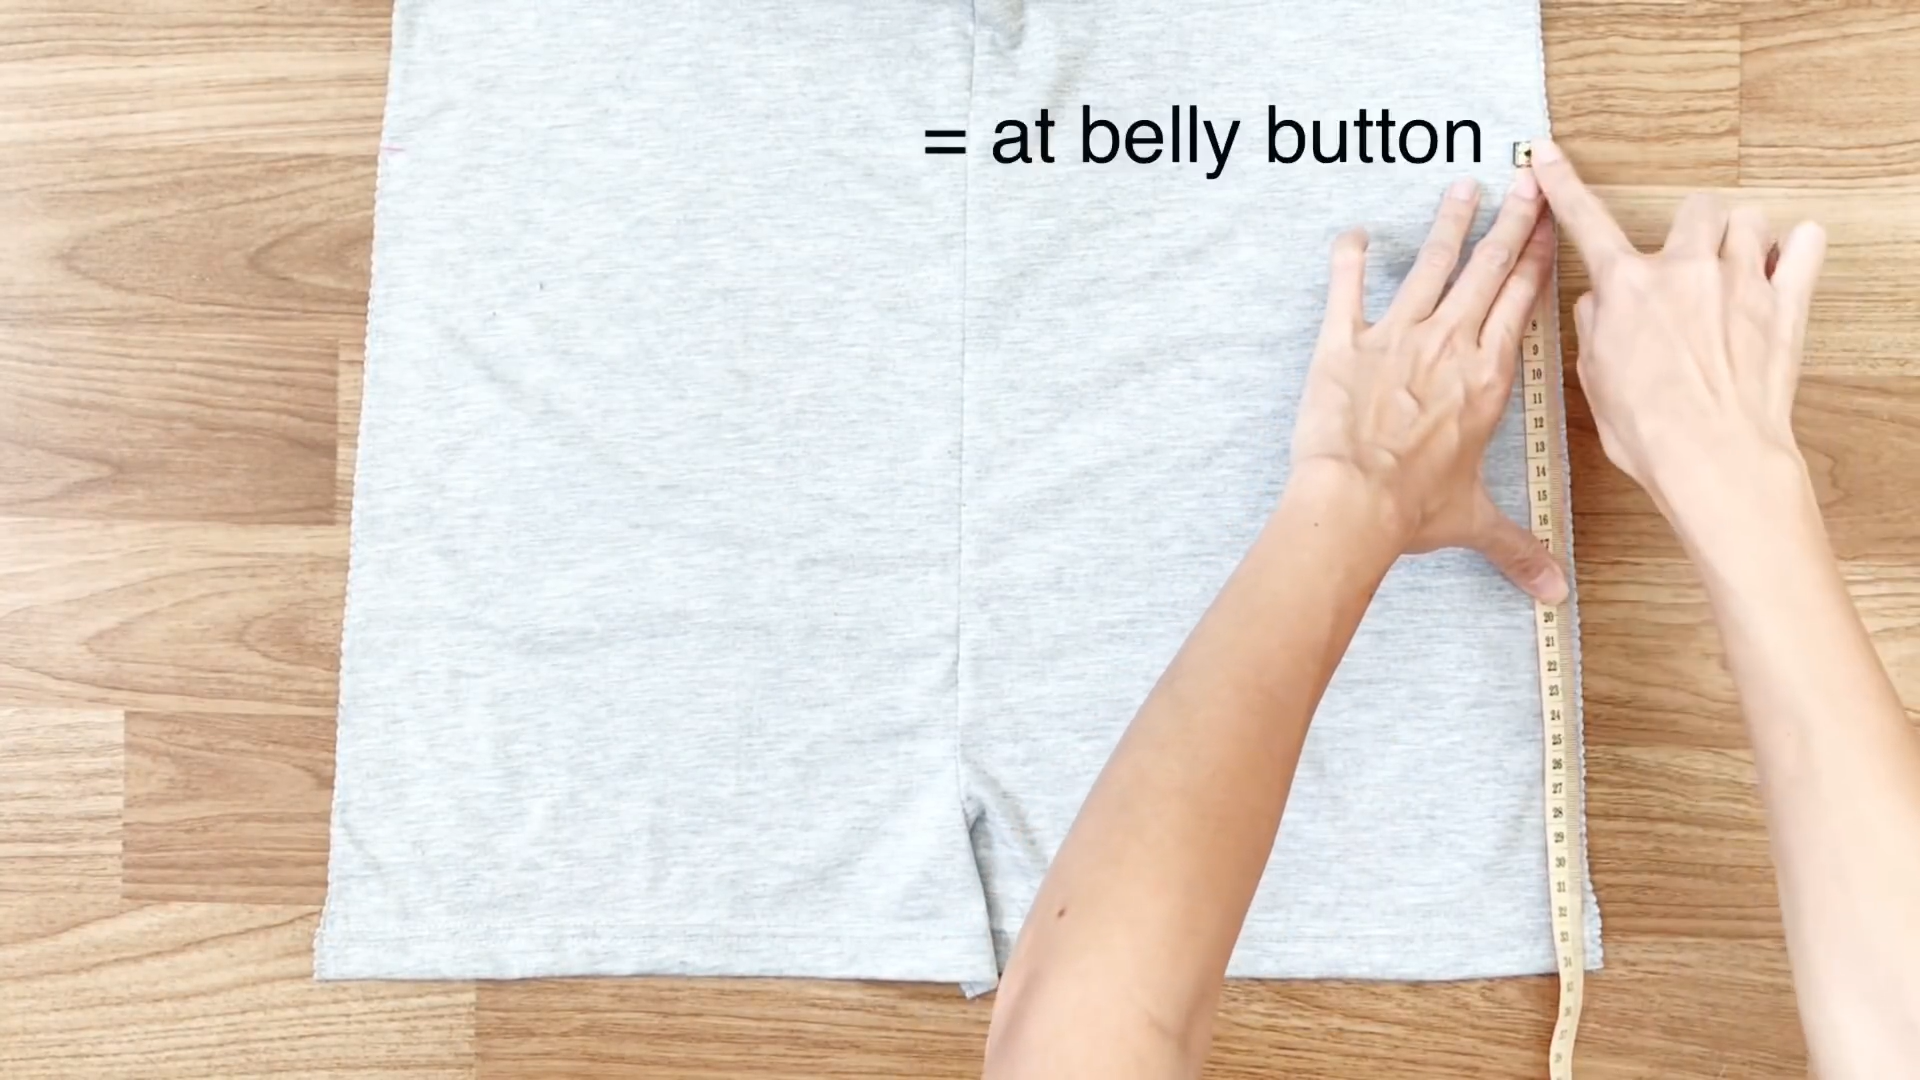
Position the pockets approximately 34 cm from the jumpsuit’s end, right around the belly button area.
Pin the pockets to both the front and back pieces, then sew them in place.
Now, connect the front and back pieces at the sides, sewing through the pockets and crotch.
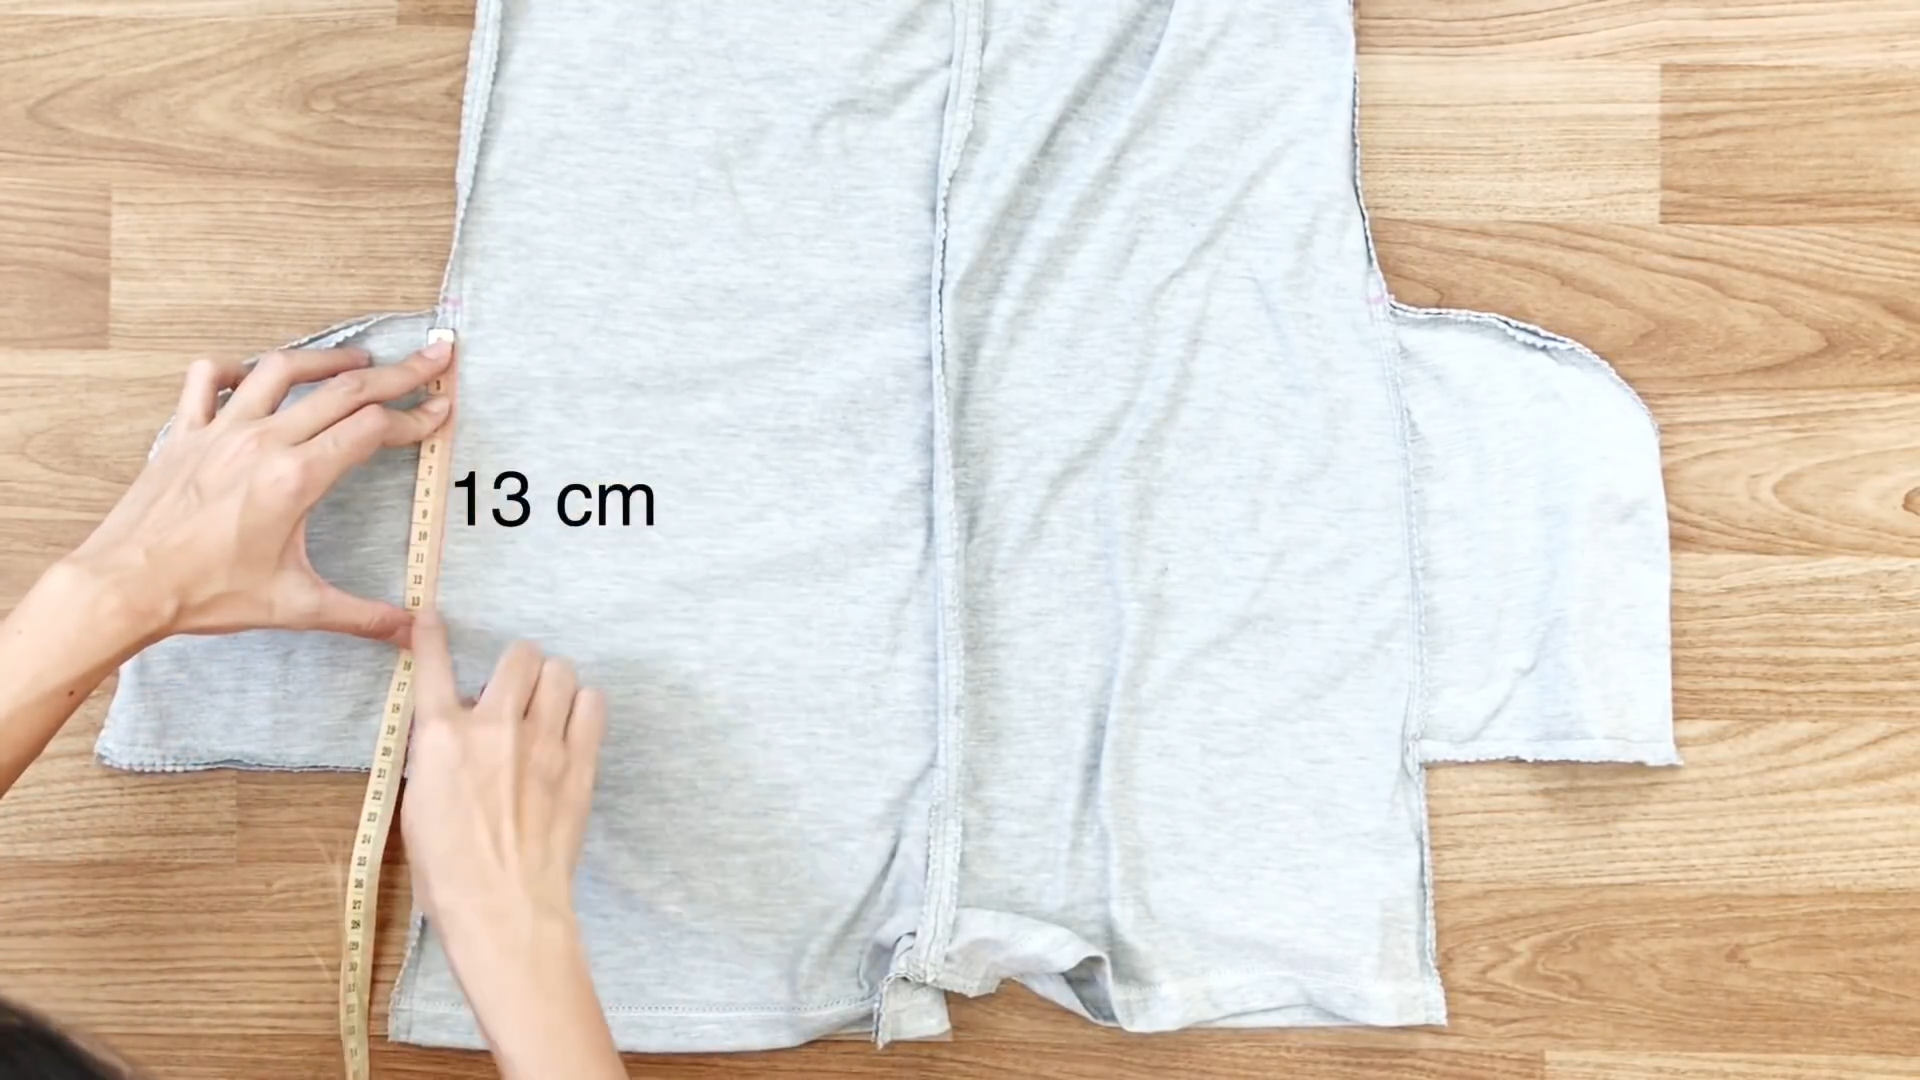
To create the pocket bottoms, leave a 13 cm opening and sew the remaining fabric to the end.
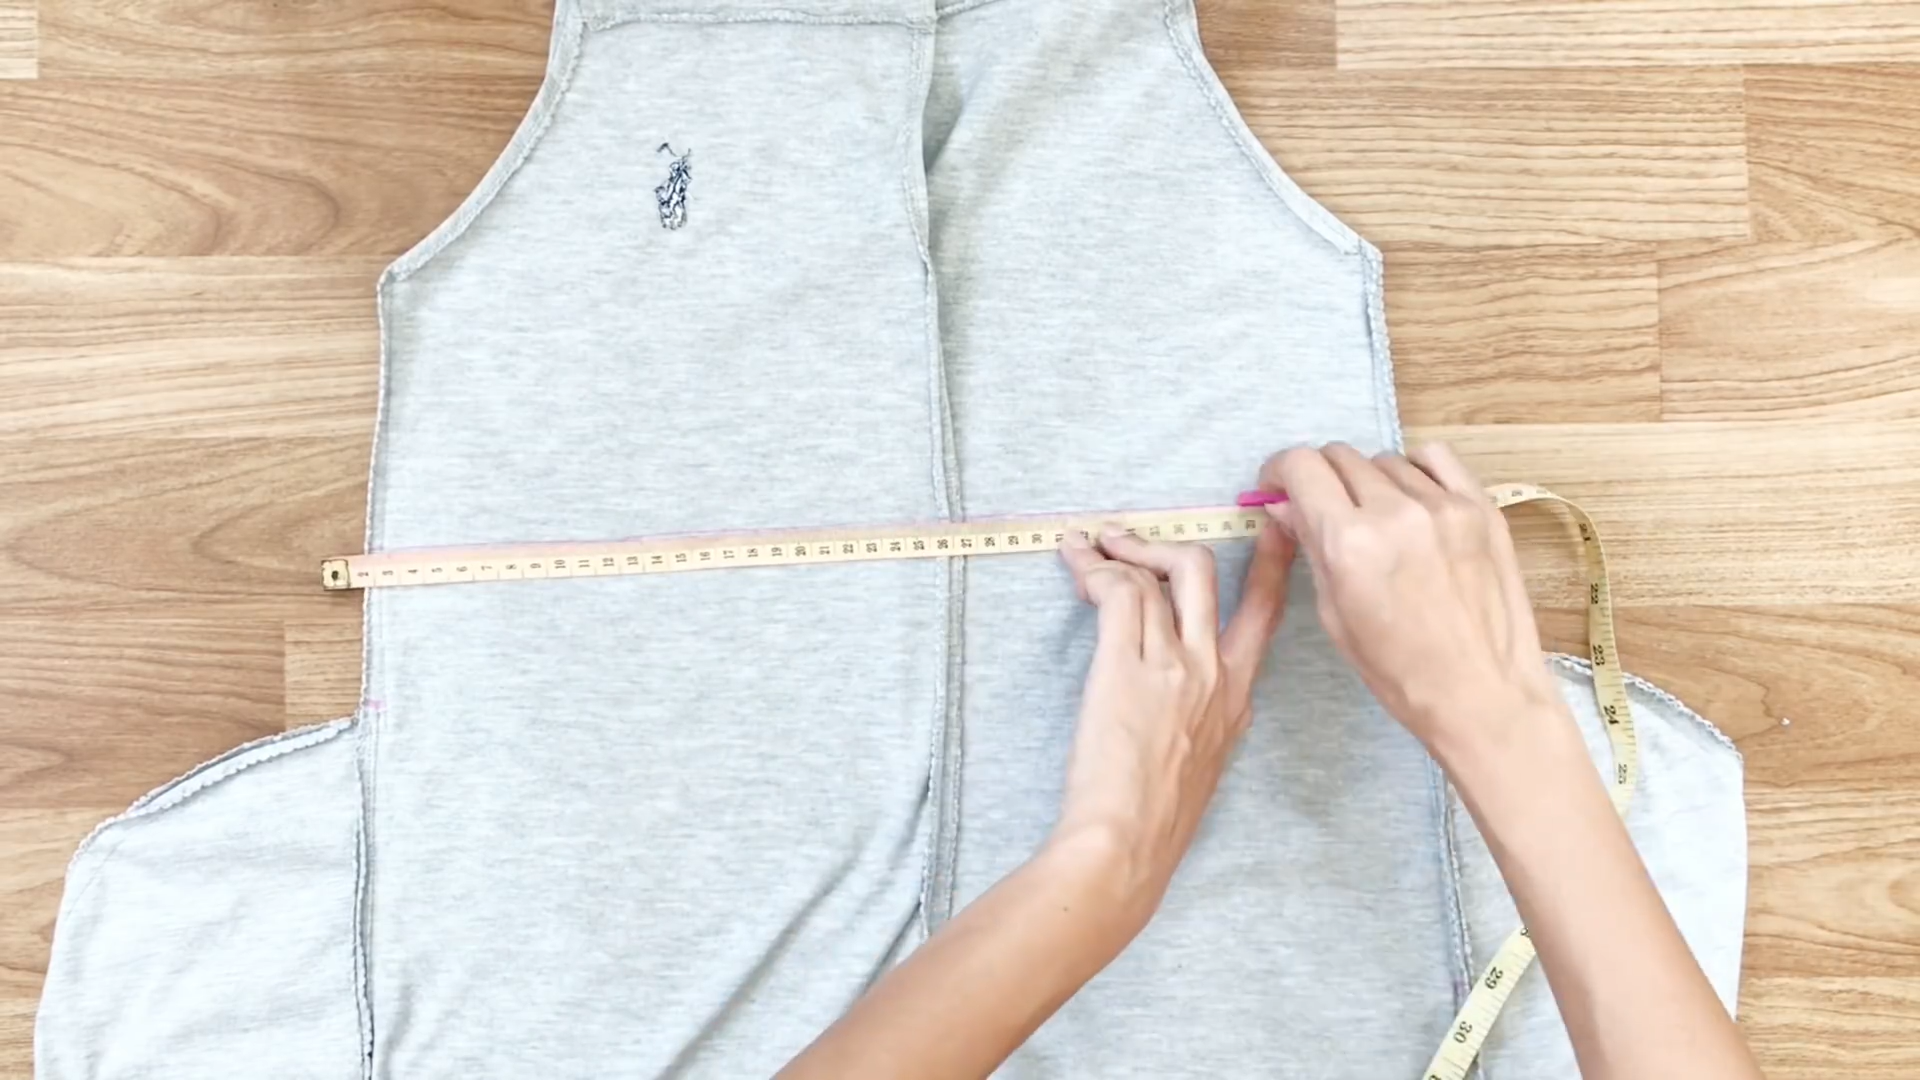
Measure 7 cm up from the pocket tops and draw a straight line—this will be where you attach the elastic band.
Measure the length of the elastic band to fit your upper belly.
Then, sew it to the jumpsuit at both sides.
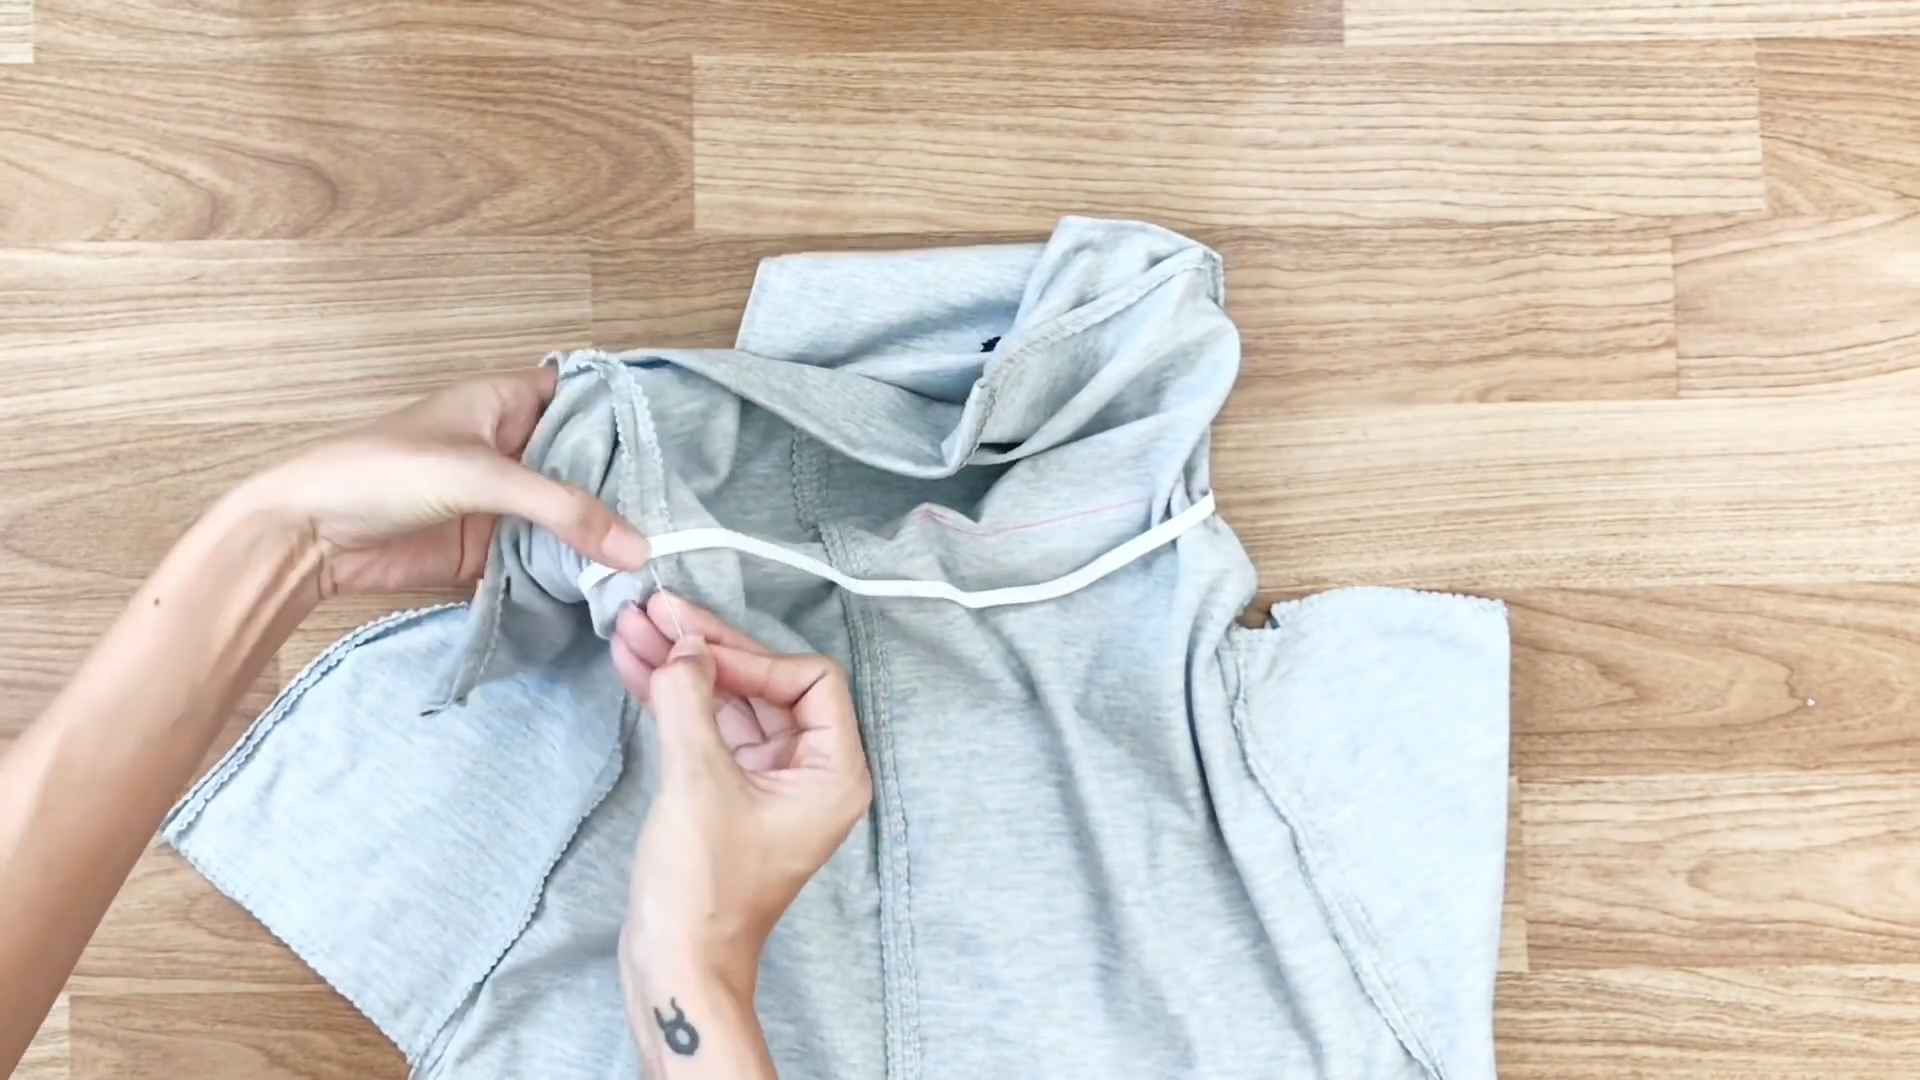
Finally, thread the band through the small hole at the top of the jumpsuit.
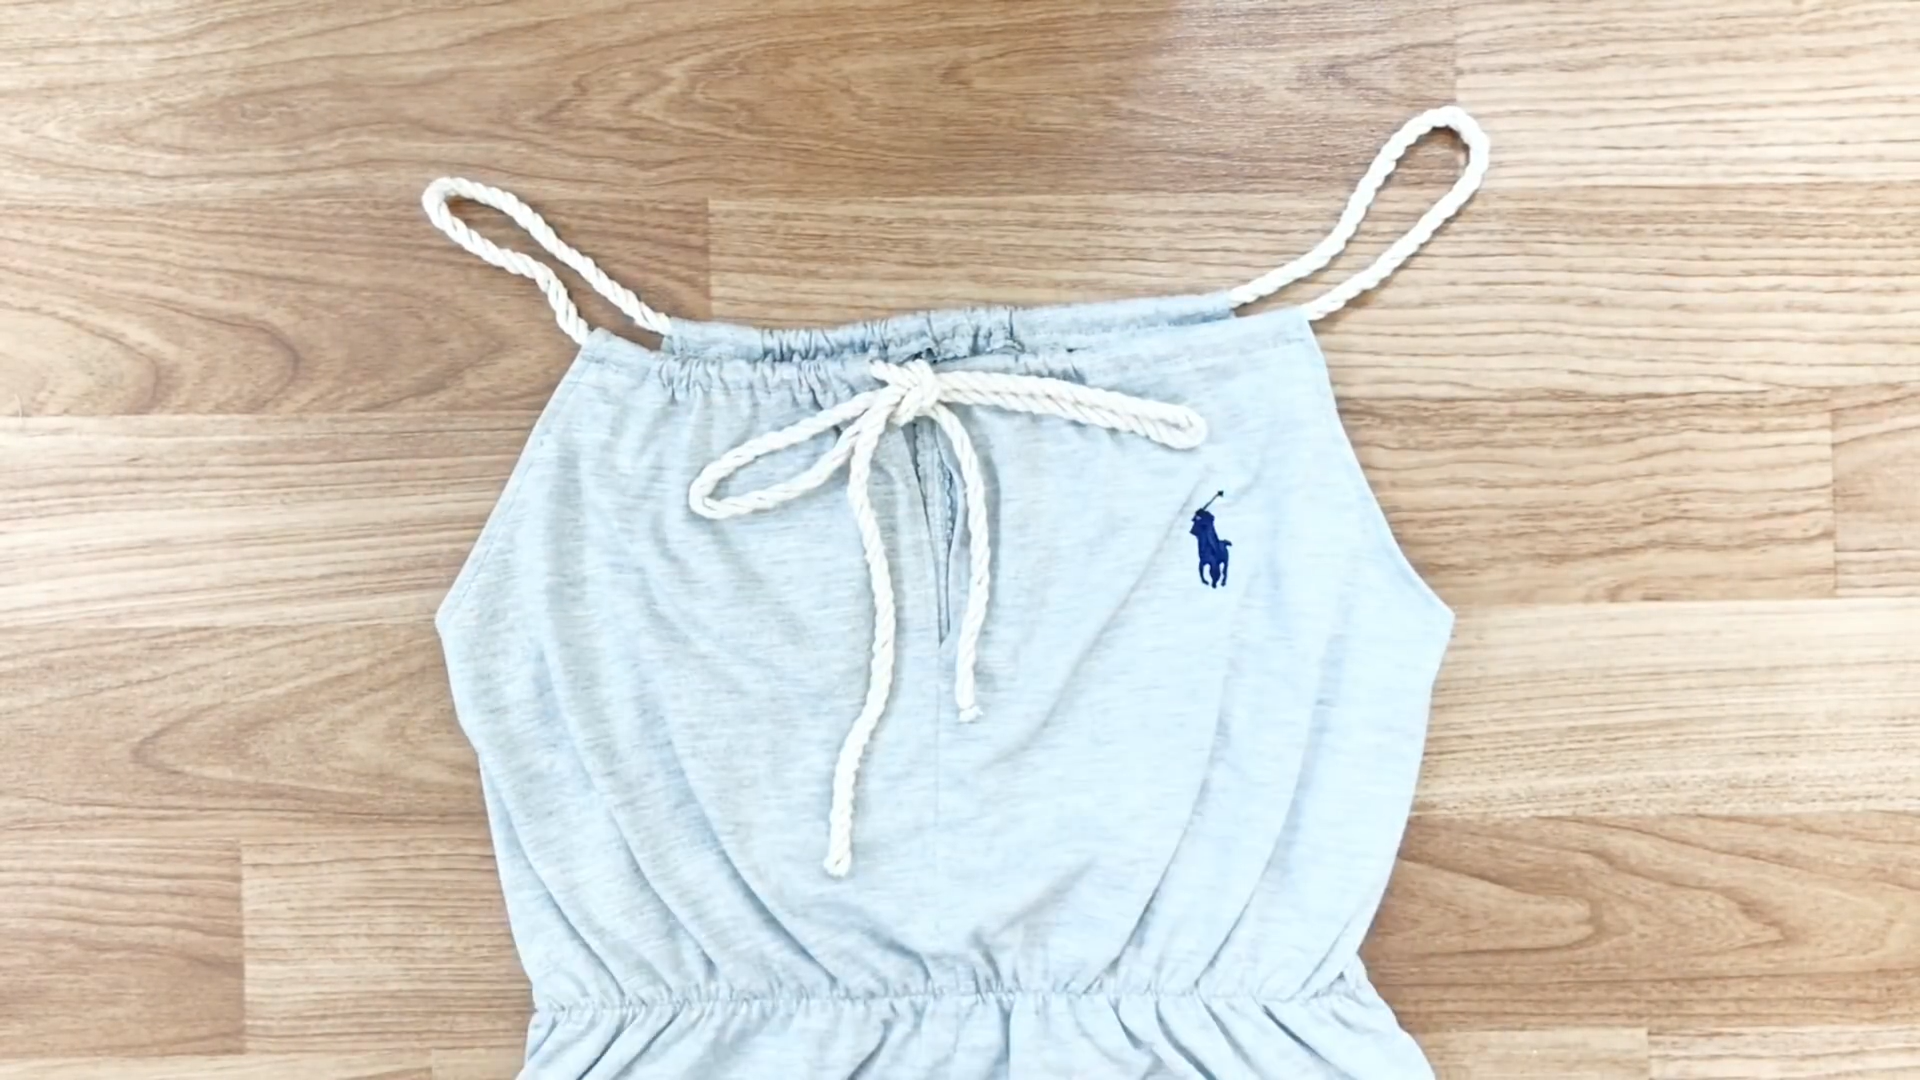
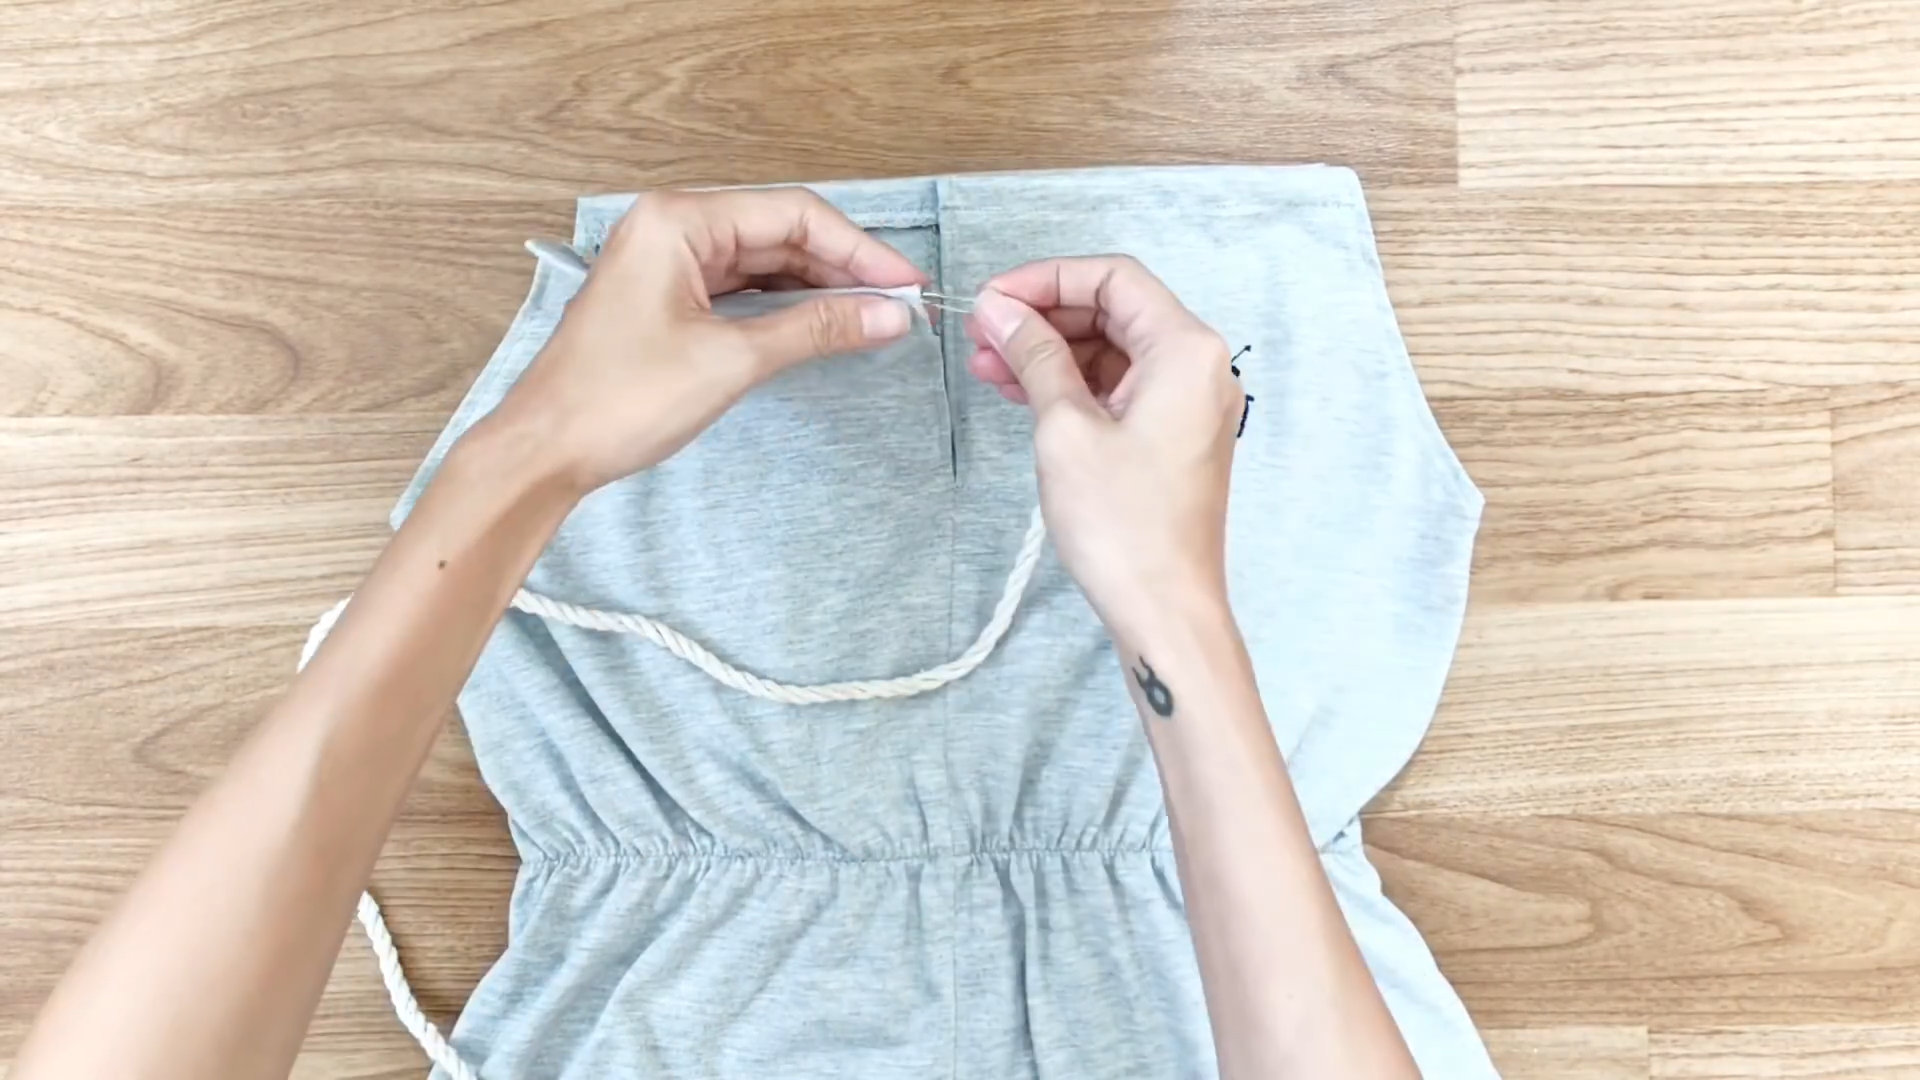
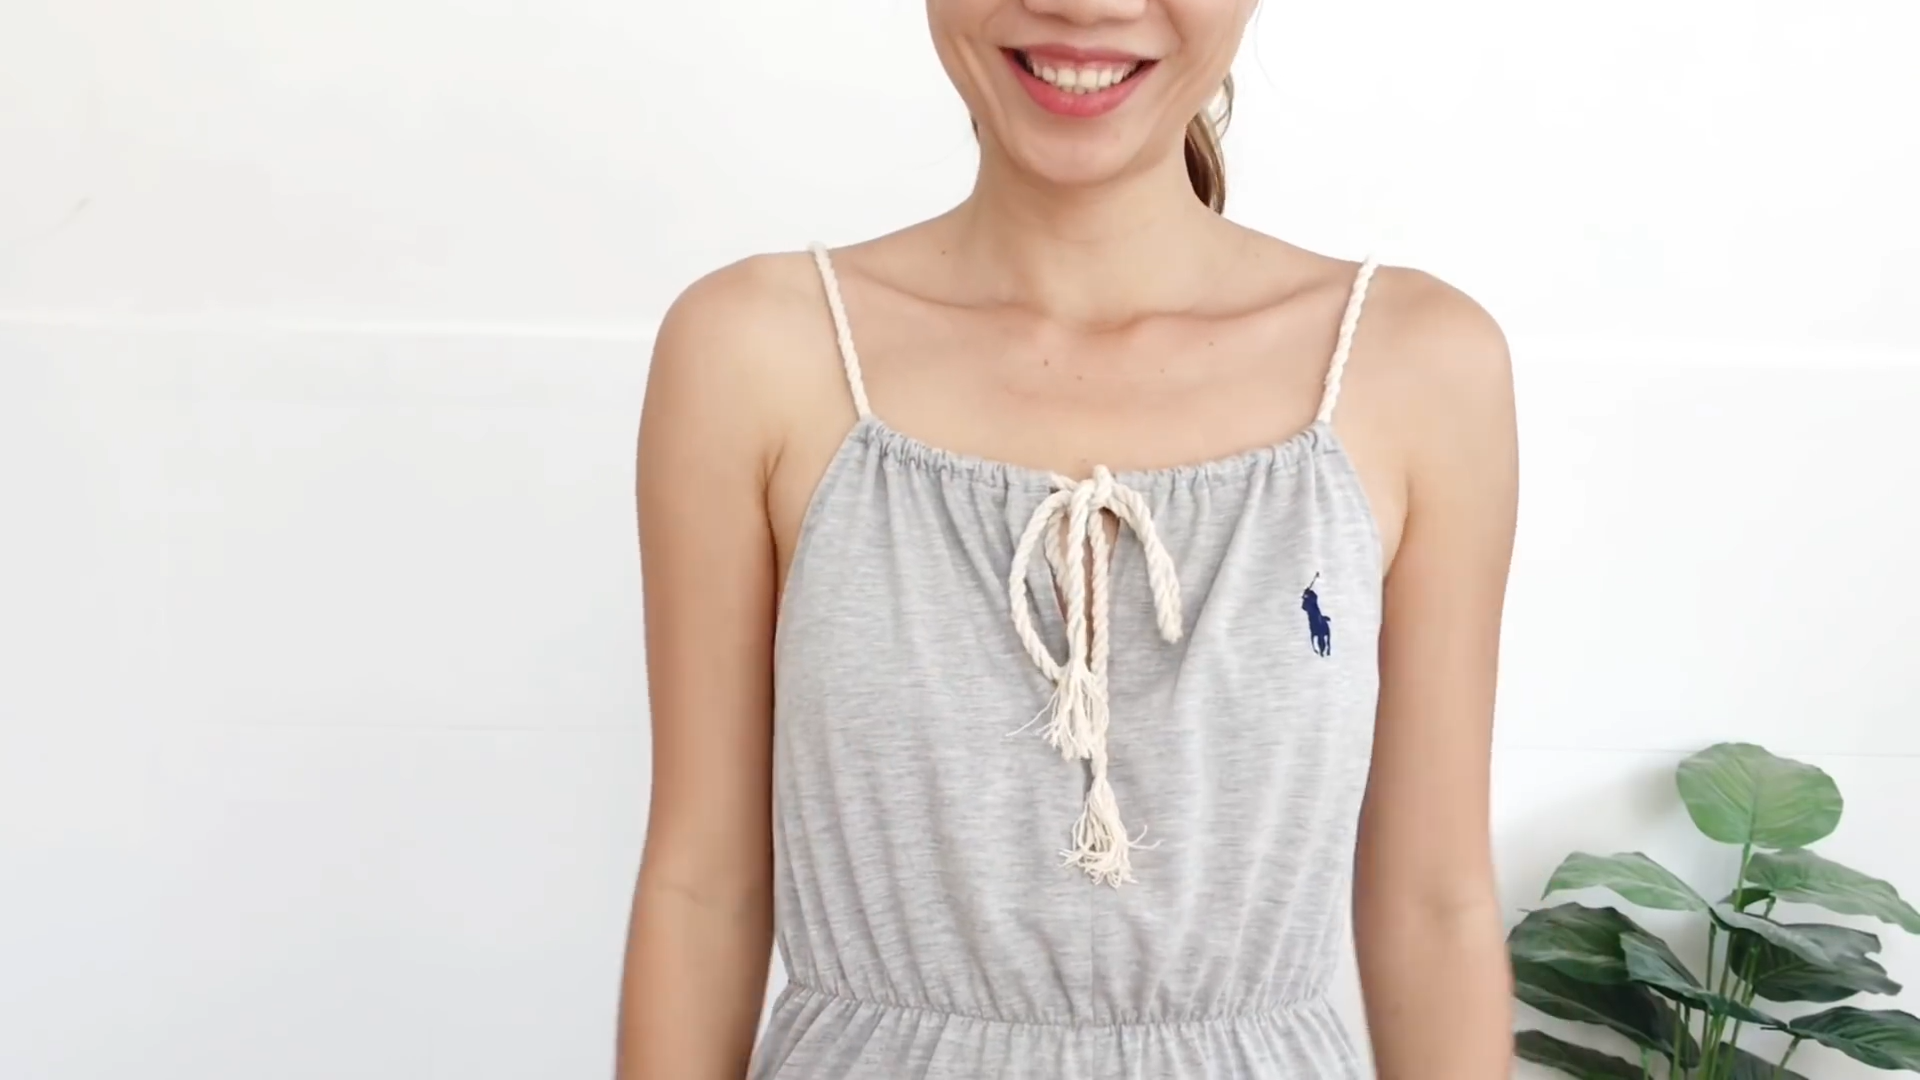
Instead of using a fabric band, consider using a macrame rope for a unique touch.

DIY refashion T-Shirt into Jumpsuit
Voilà! And I've finished this DIY. Here's my final transformation!
This jumpsuit is very cute and comfortable. It's also one of the reasons why I love jumpsuit. The macramé rope and the pockets make it so sporty.


And it won't be too difficult to make. So I hope you will give it a try.
If you liked this project, please share it and subscribe to my channel so you won’t miss any of my upcoming DIYs.
Until next week, happy sewing!