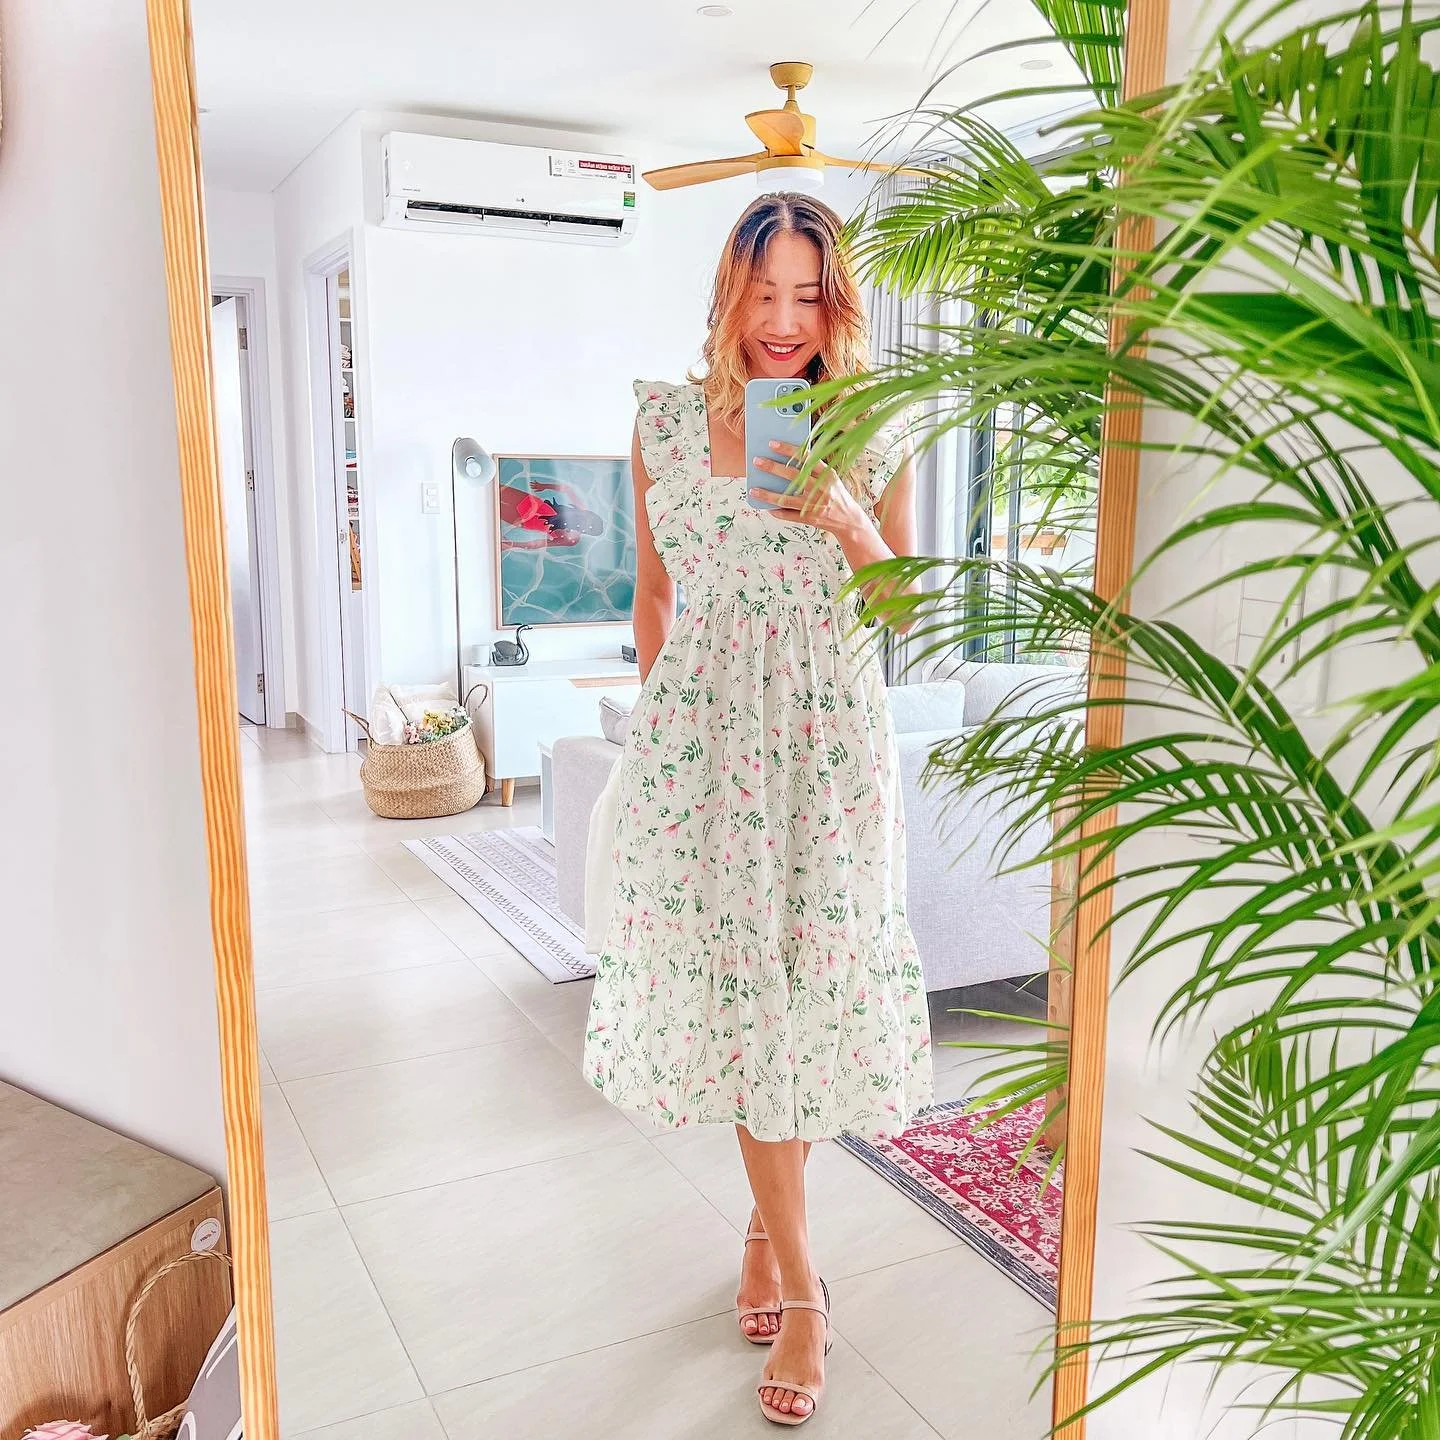
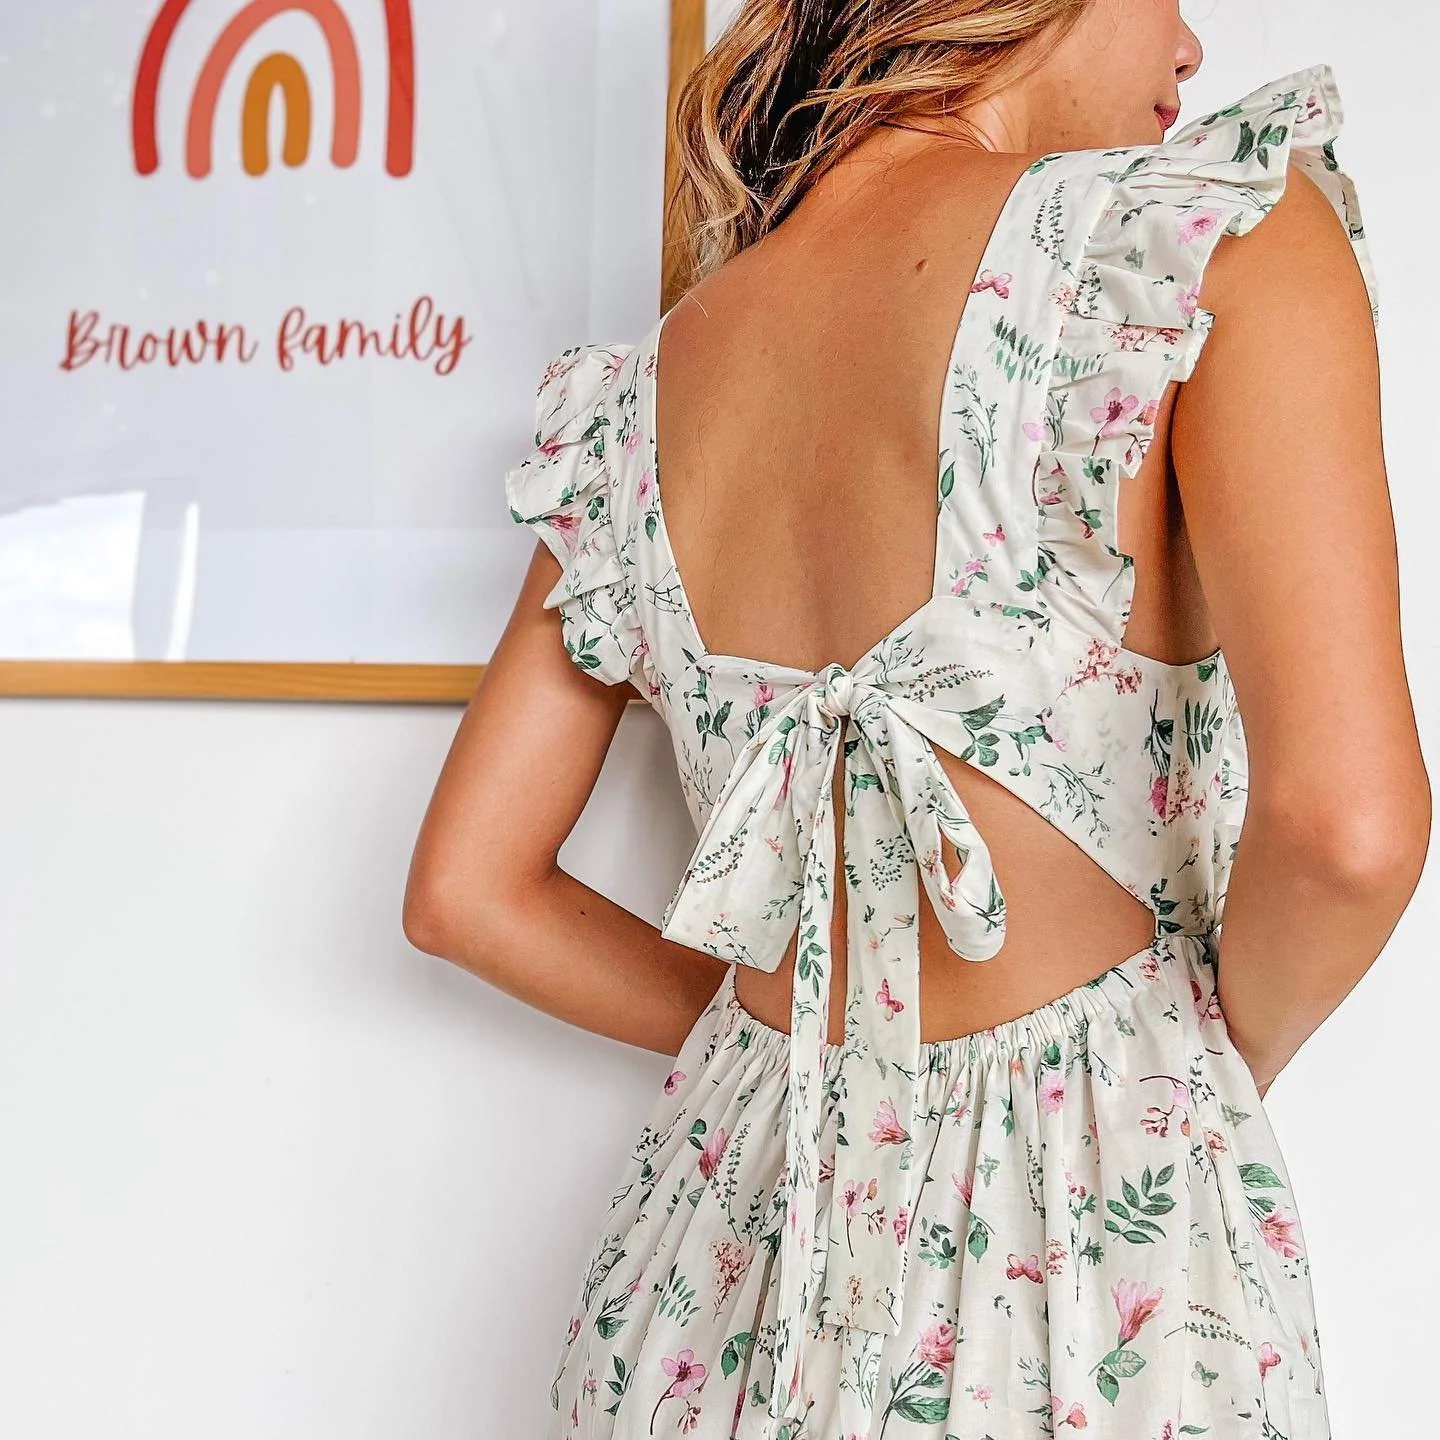
DIY Ruffle square neck bow tie open back dress | Making my birthday dress | Sewing tutorial

DIY Ruffle square neck bow tie open back dress | Making my birthday dress | Sewing tutorial
Welcome or welcome back to my channel. My name is Jess and I love doing DIY, making clothes in a "simply but pretty" way.
It's my birthday month. And I want to make something special for myself. So I chose a few designs that I really love for the tutorials this month. I hope you will enjoy all of them.
In today's tutoria;, I'm going to share with you how I made my birthday dress. It's a dress with ruffle shoulder strap, square neck and bow tie open back. It's not only pretty but also a bit sexy. And it's the perfect combination for the dress that I want to wear on my birthday.
So I hope you like it and try it out. Let’s get started!
WHAT YOU’LL NEED
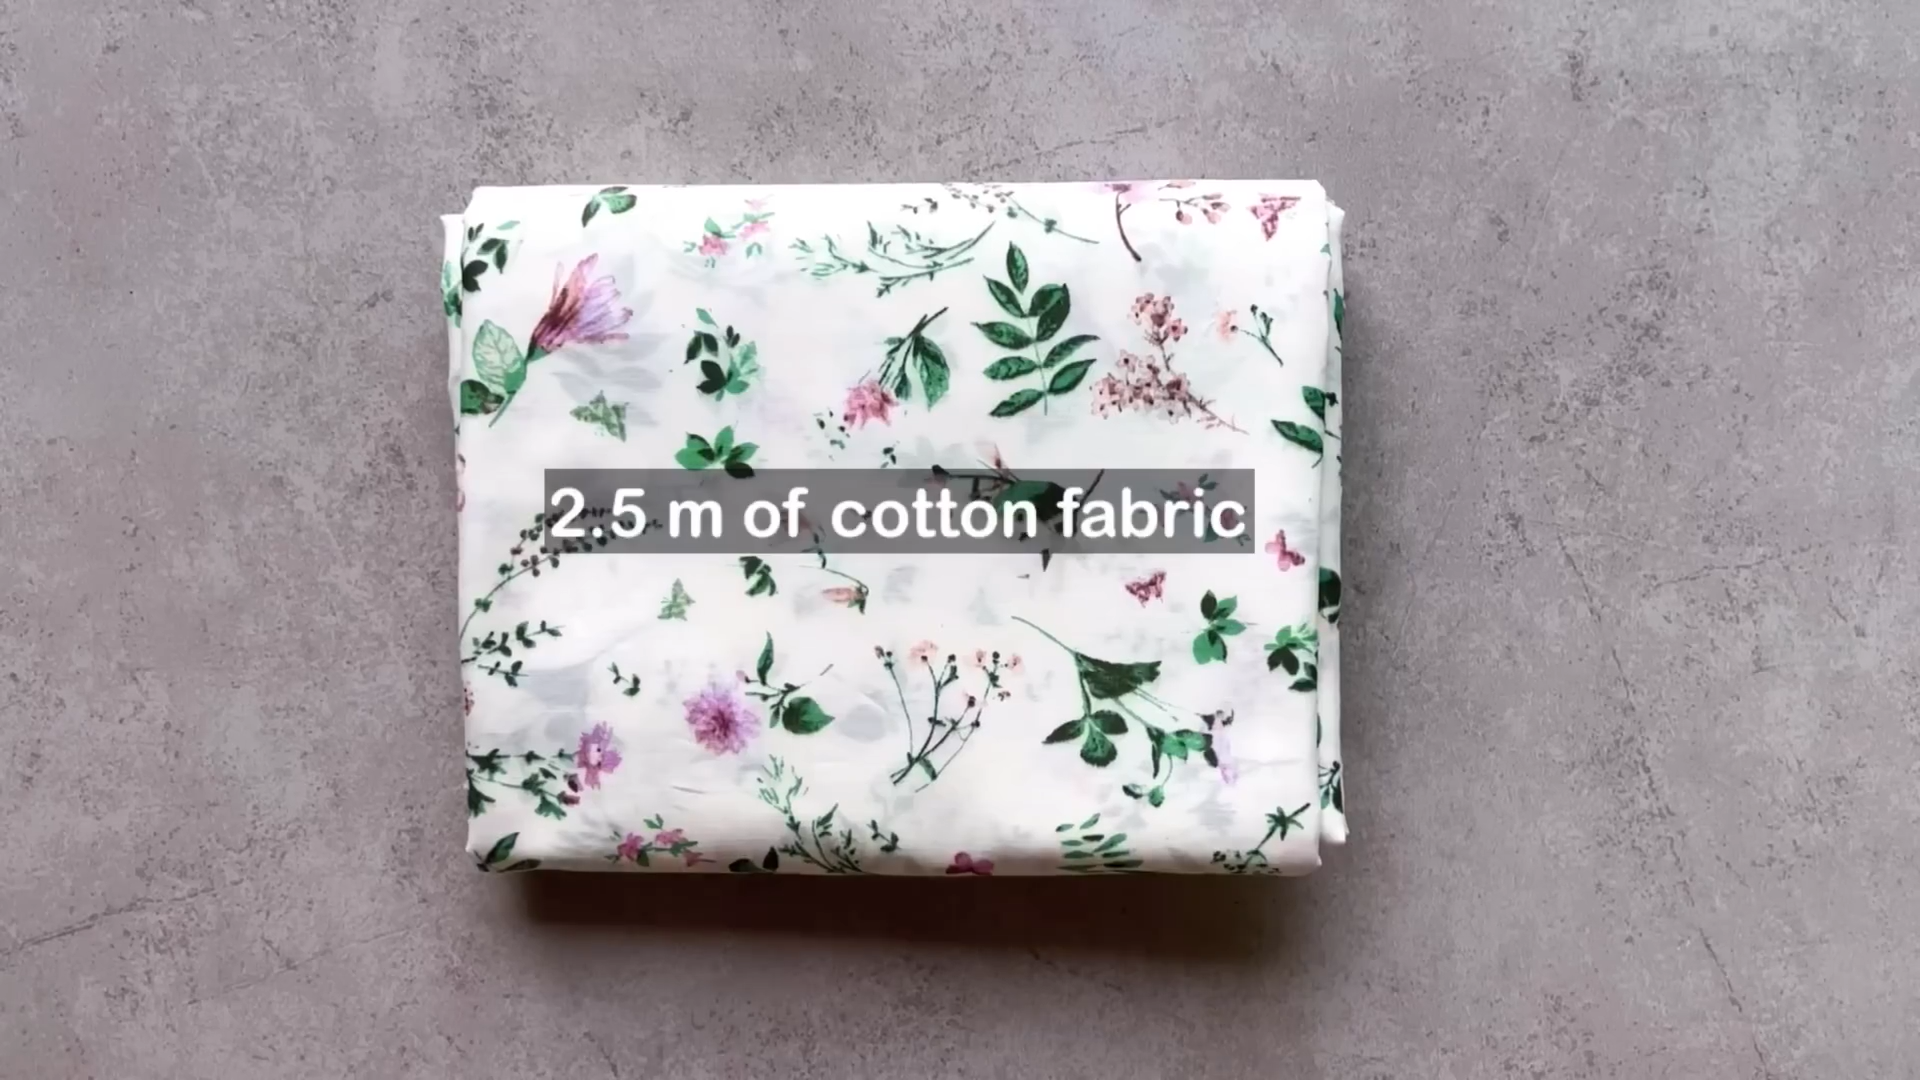
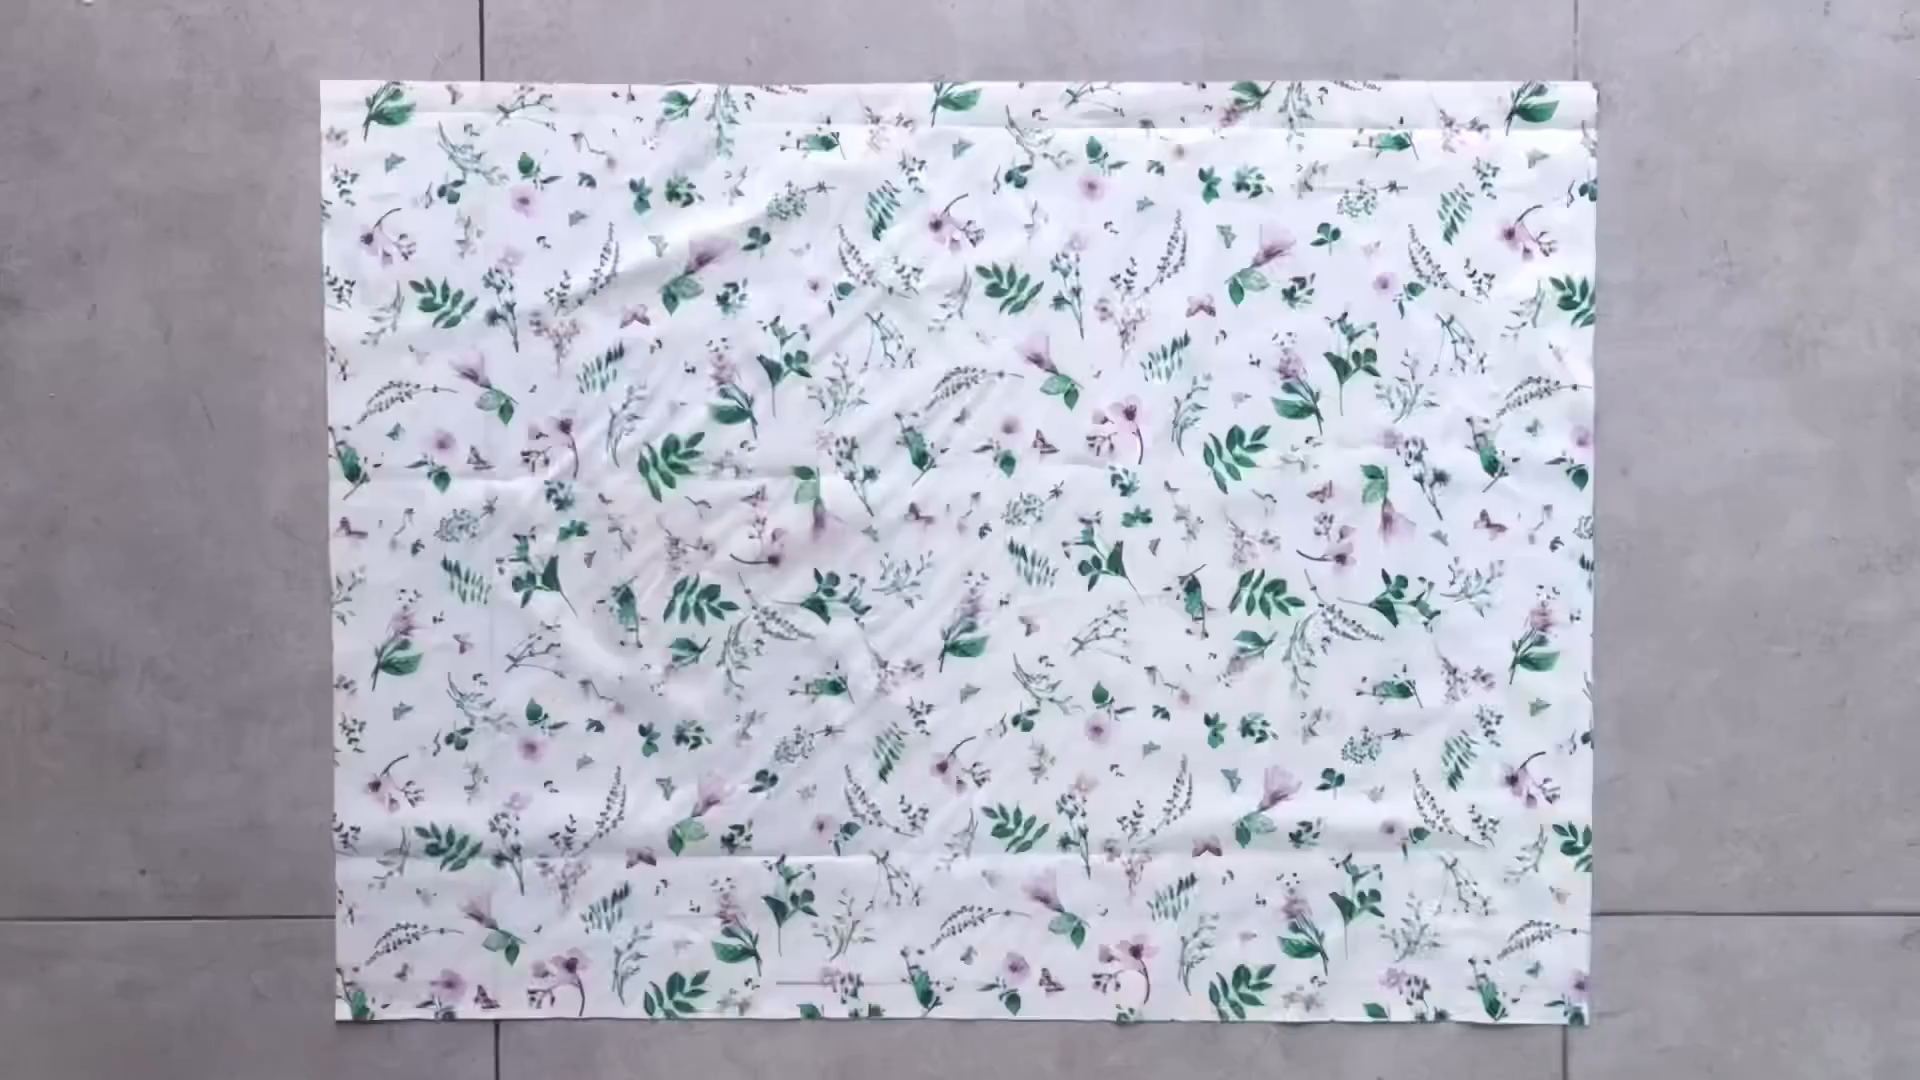
2.5m of cotton fabric in floral printing
Pattern paper
Sewing machine
Pins
Scissors
Ruler
Long stick
MAKING THE PATTERNS
Here’s the pattern for the project. To get a clear understanding of all the measurements needed for the pattern, watch the video from 0:40 to 3:49.
Remember, you can adjust these measurements to fit your own dimensions!

THE FRONT BODICE PATTERN
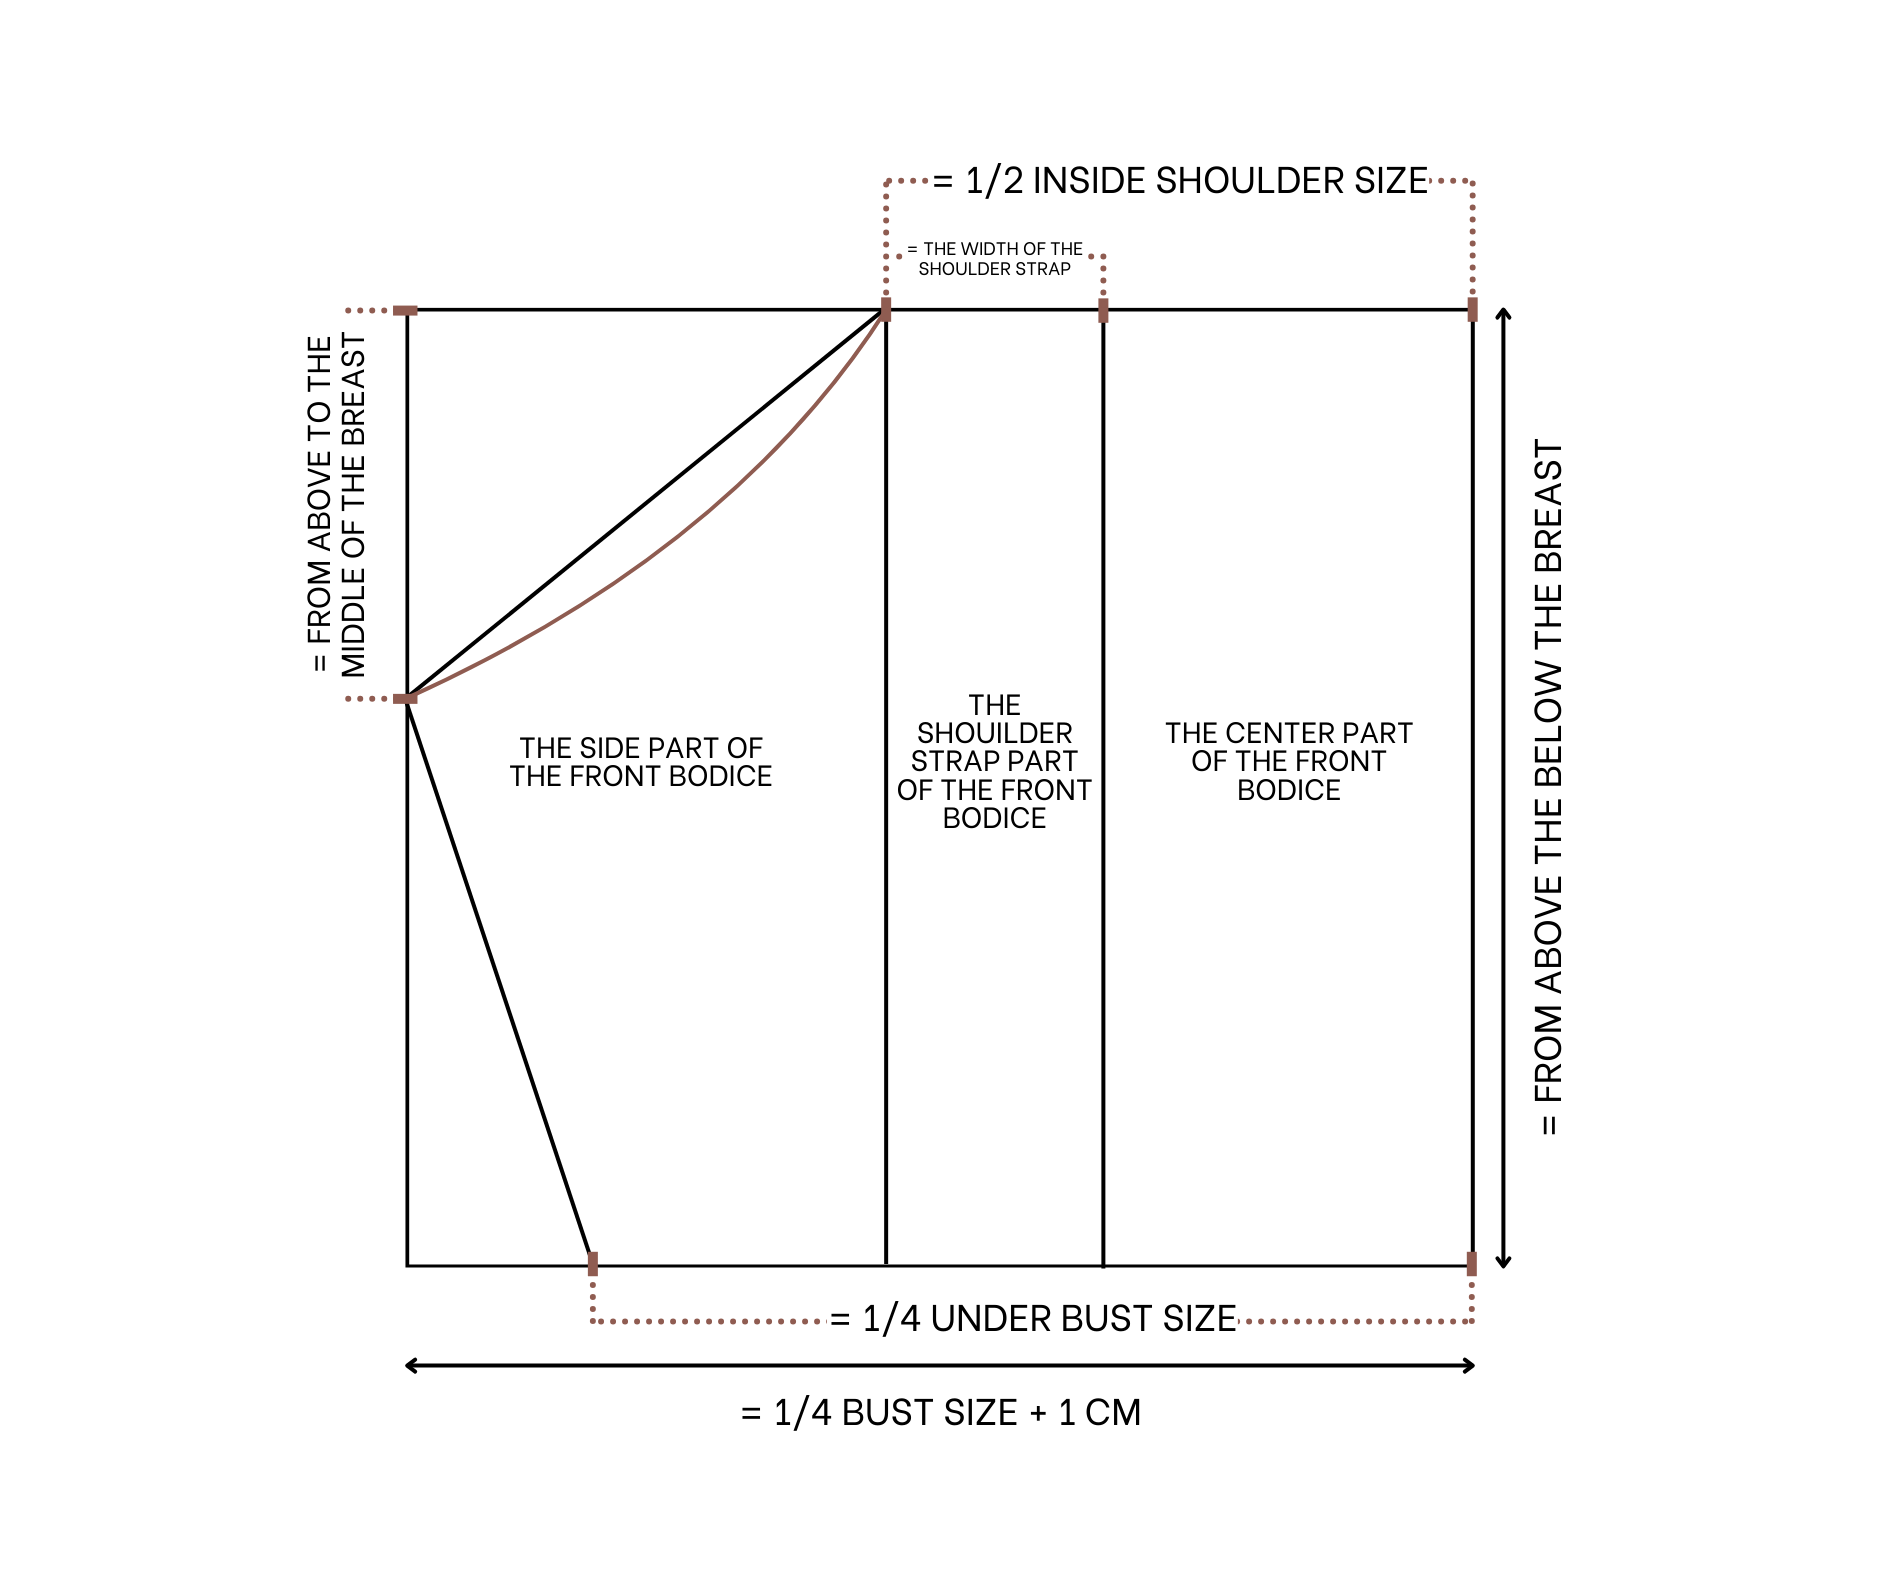

To make the top bodice pattern, draw a rectangle with 18 cm length which is the length from above to below your breast, and 21 cm width which is a quarter of your bust size plus 1 cm.
From the top of one length line, mark at 12 cm on the top width line next to it. It's a half of your inside shoulder where the position of the shoulder strap will be.
From another end of the top width line, mark down on the length line 7 cm which is the width from above the breast to the middle of the breast. This will be the lowest position of the sleeve.
Then connect two marks together.
Based on it, draw a slightly curved line to finish the sleeve line of the front bodice.
From the end of the length line, mark at 18.5 cm on the width line next to it, it's a quarter of your under bust size plus 1 cm.
Then connect this mark to the end of the sleeve line to finish the sideline of the front bodice.
From the top of the sleeve line, draw a straight line to cut another width line.
After that, draw another straight line 4 cm away from it, 4 cm is the width of the shoulder strap that you want.
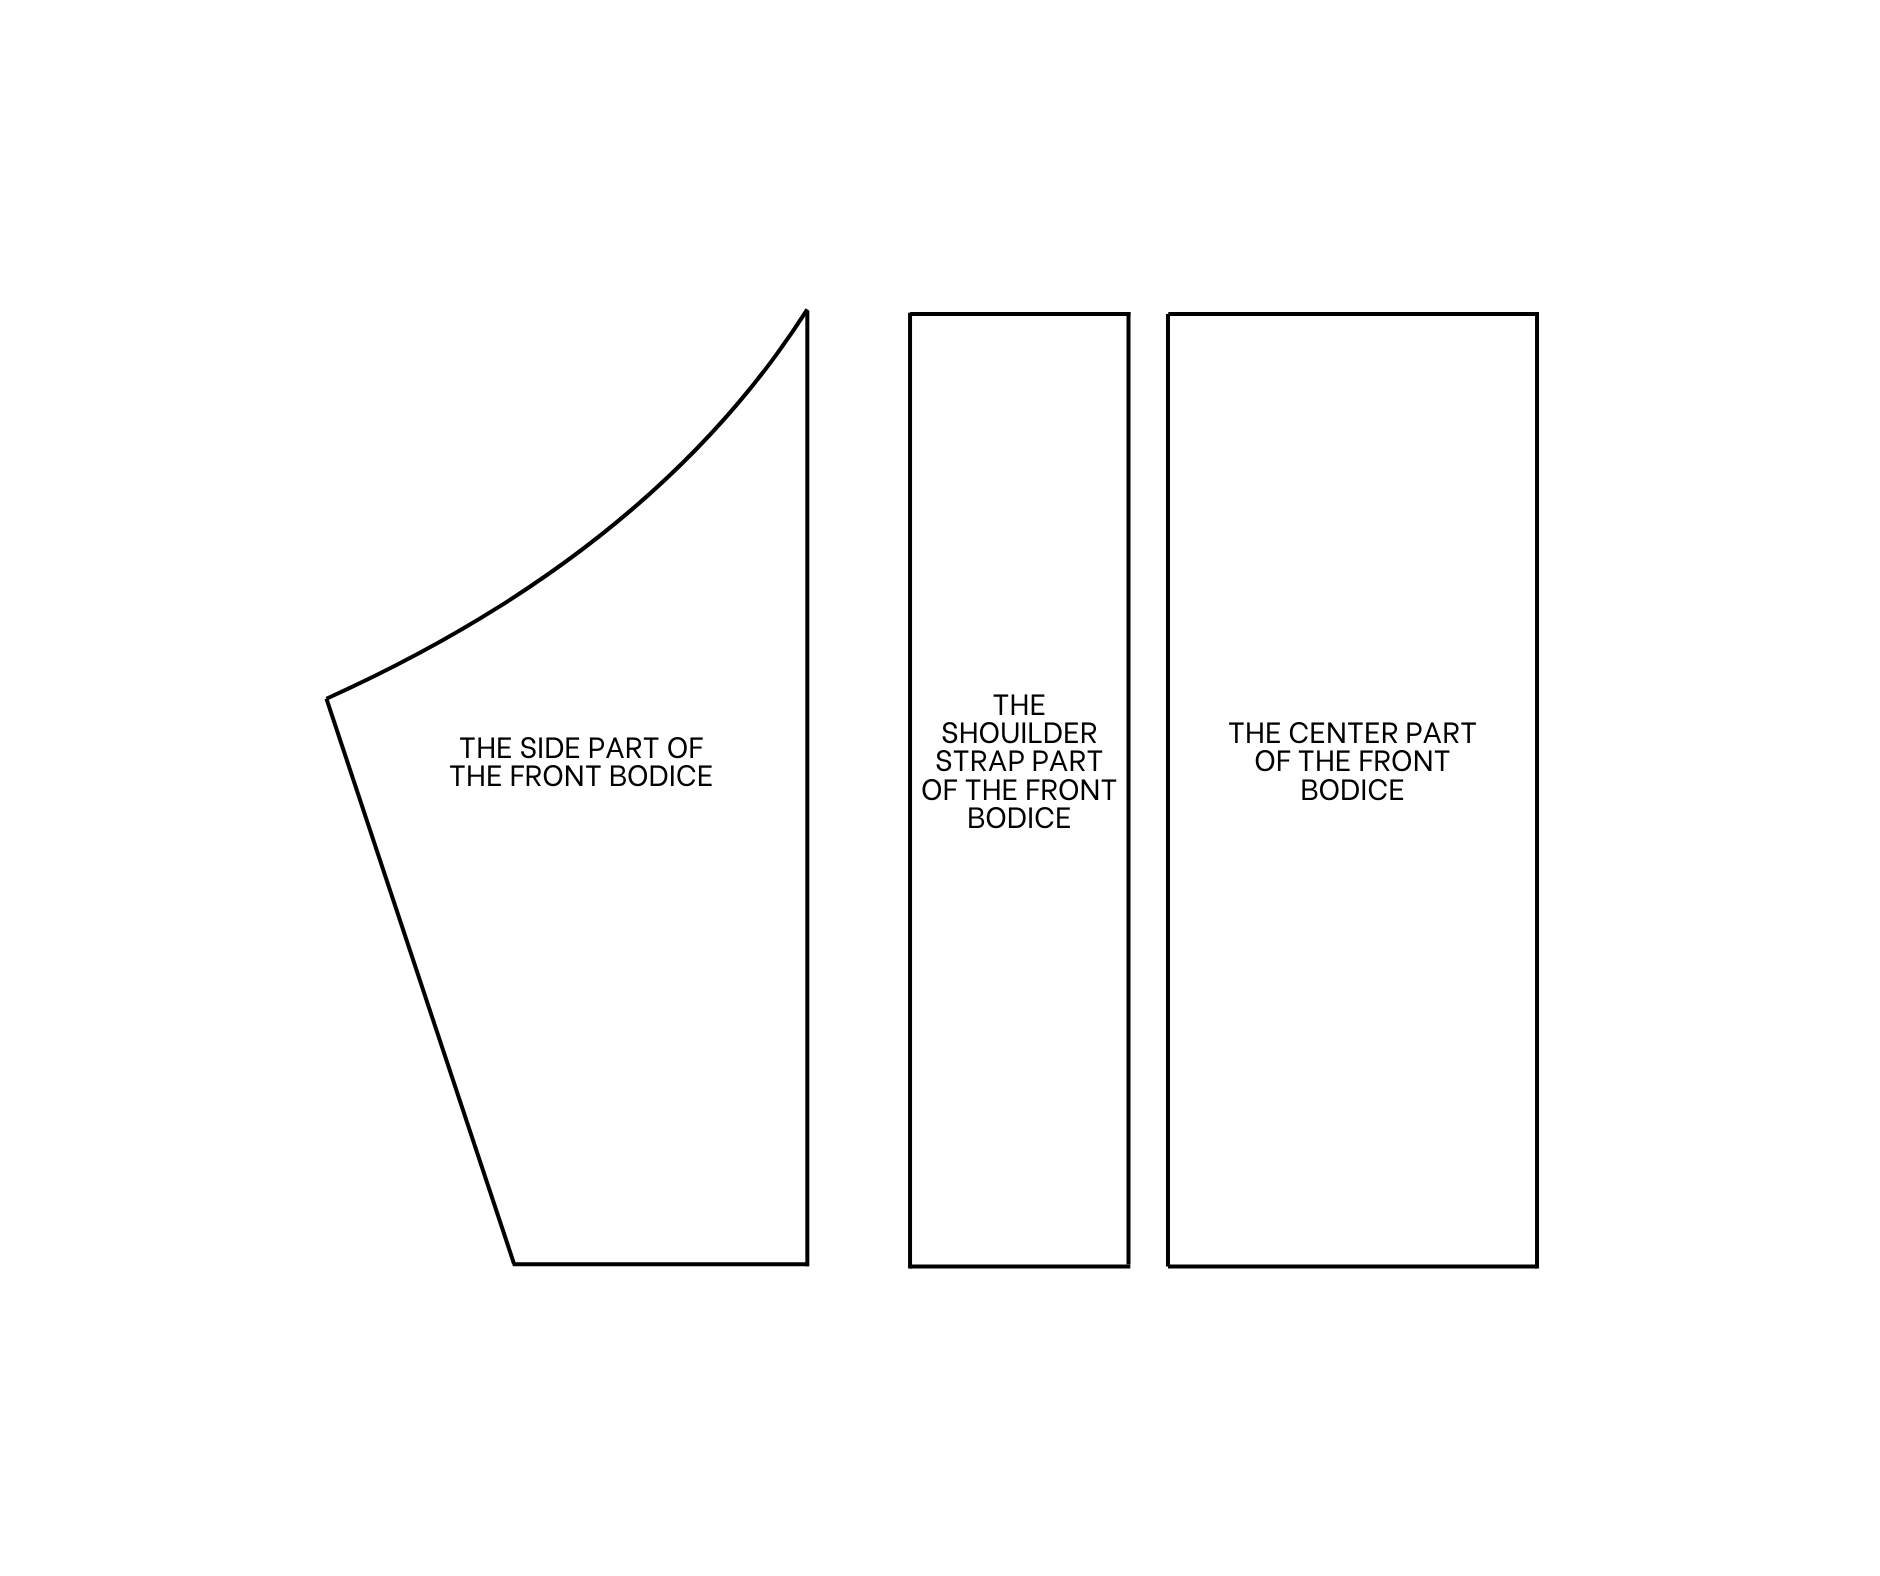
So you can see three different parts of the front bodice.
After cutting, make another piece like this so the front bodice of the dress will be combined from the side parts.
The two smaller rectangles will be the shoulder strap part.
Combine two bigger rectangle pieces together to become the center part of the front bodice.
Add seam allowance for them later.
THE BACK BODICE PATTERN
Moving to the back bodice, use the side pattern to copy the side line first.
After that, draw a horizontal line going to the top of the sideline.
Then keep drawing another horizontal line at 6 cm under the first one. It's the width of the tie at the back of the dress you want plus 2 cm for seam allowance.
But at the top of this line, draw a curved line to connect it to the end of the sideline.
After cutting, make a rectangle with 6 cm width to make the length of the back bodice pattern longer for the tie.
The total length of your back bodice pattern is around 70 cm.


THE POCKET PATTERN
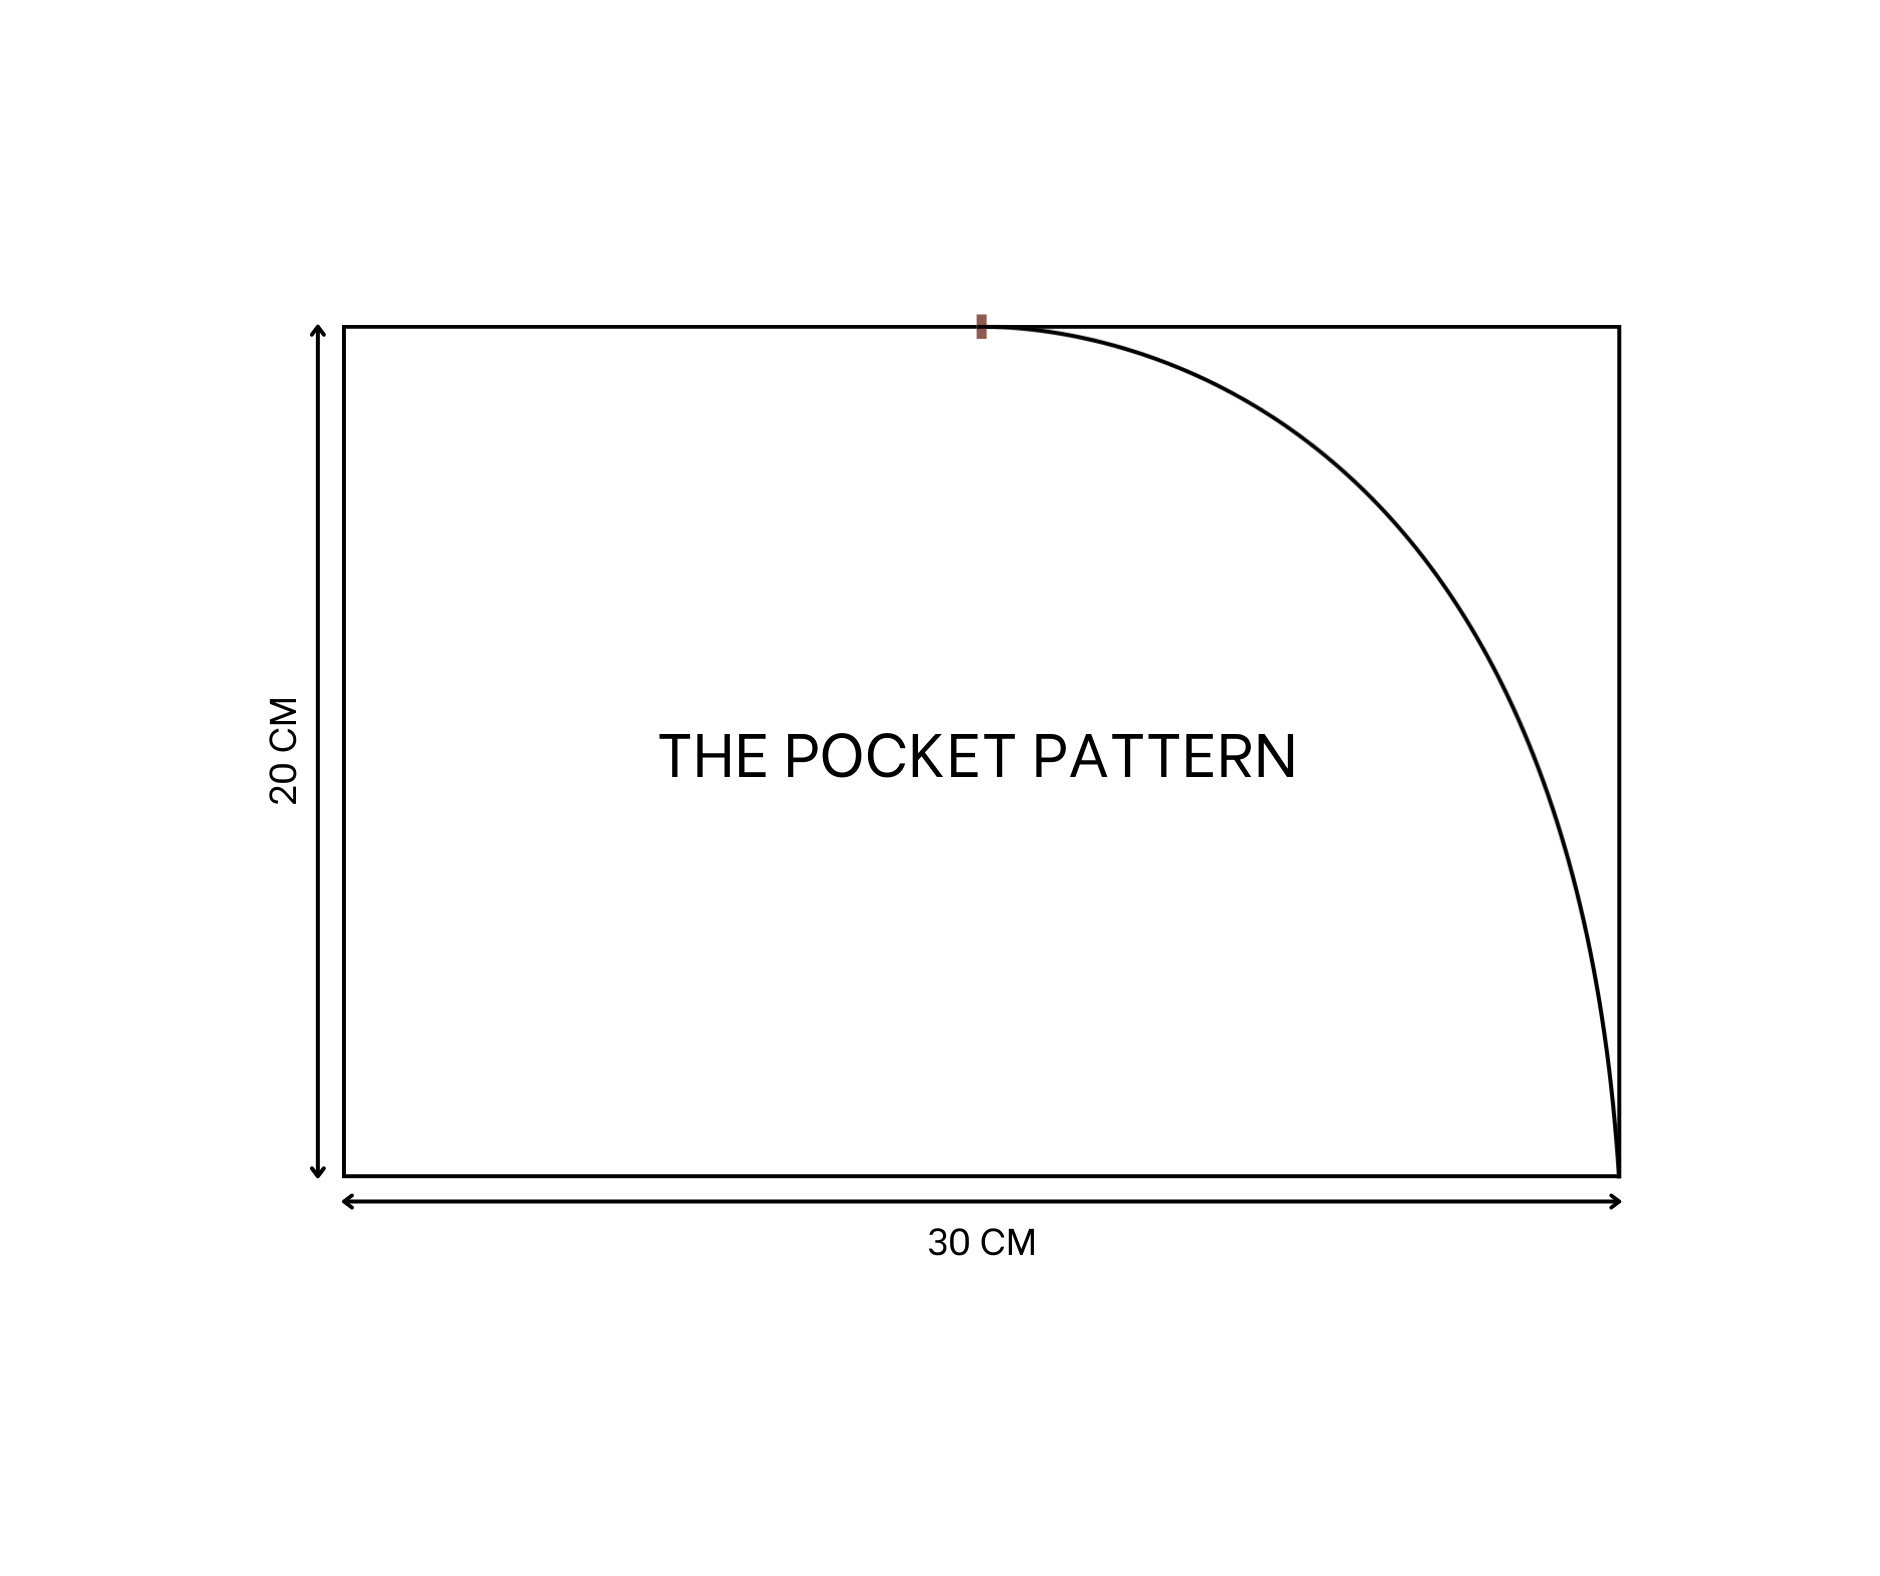
To make the pocket pattern, cut a rectangle with 20 cm width and 30 cm length.
On one length line, mark in the middle first then draw a curved line from this mark to one end of the other length line.
THE SKIRT PATTERN
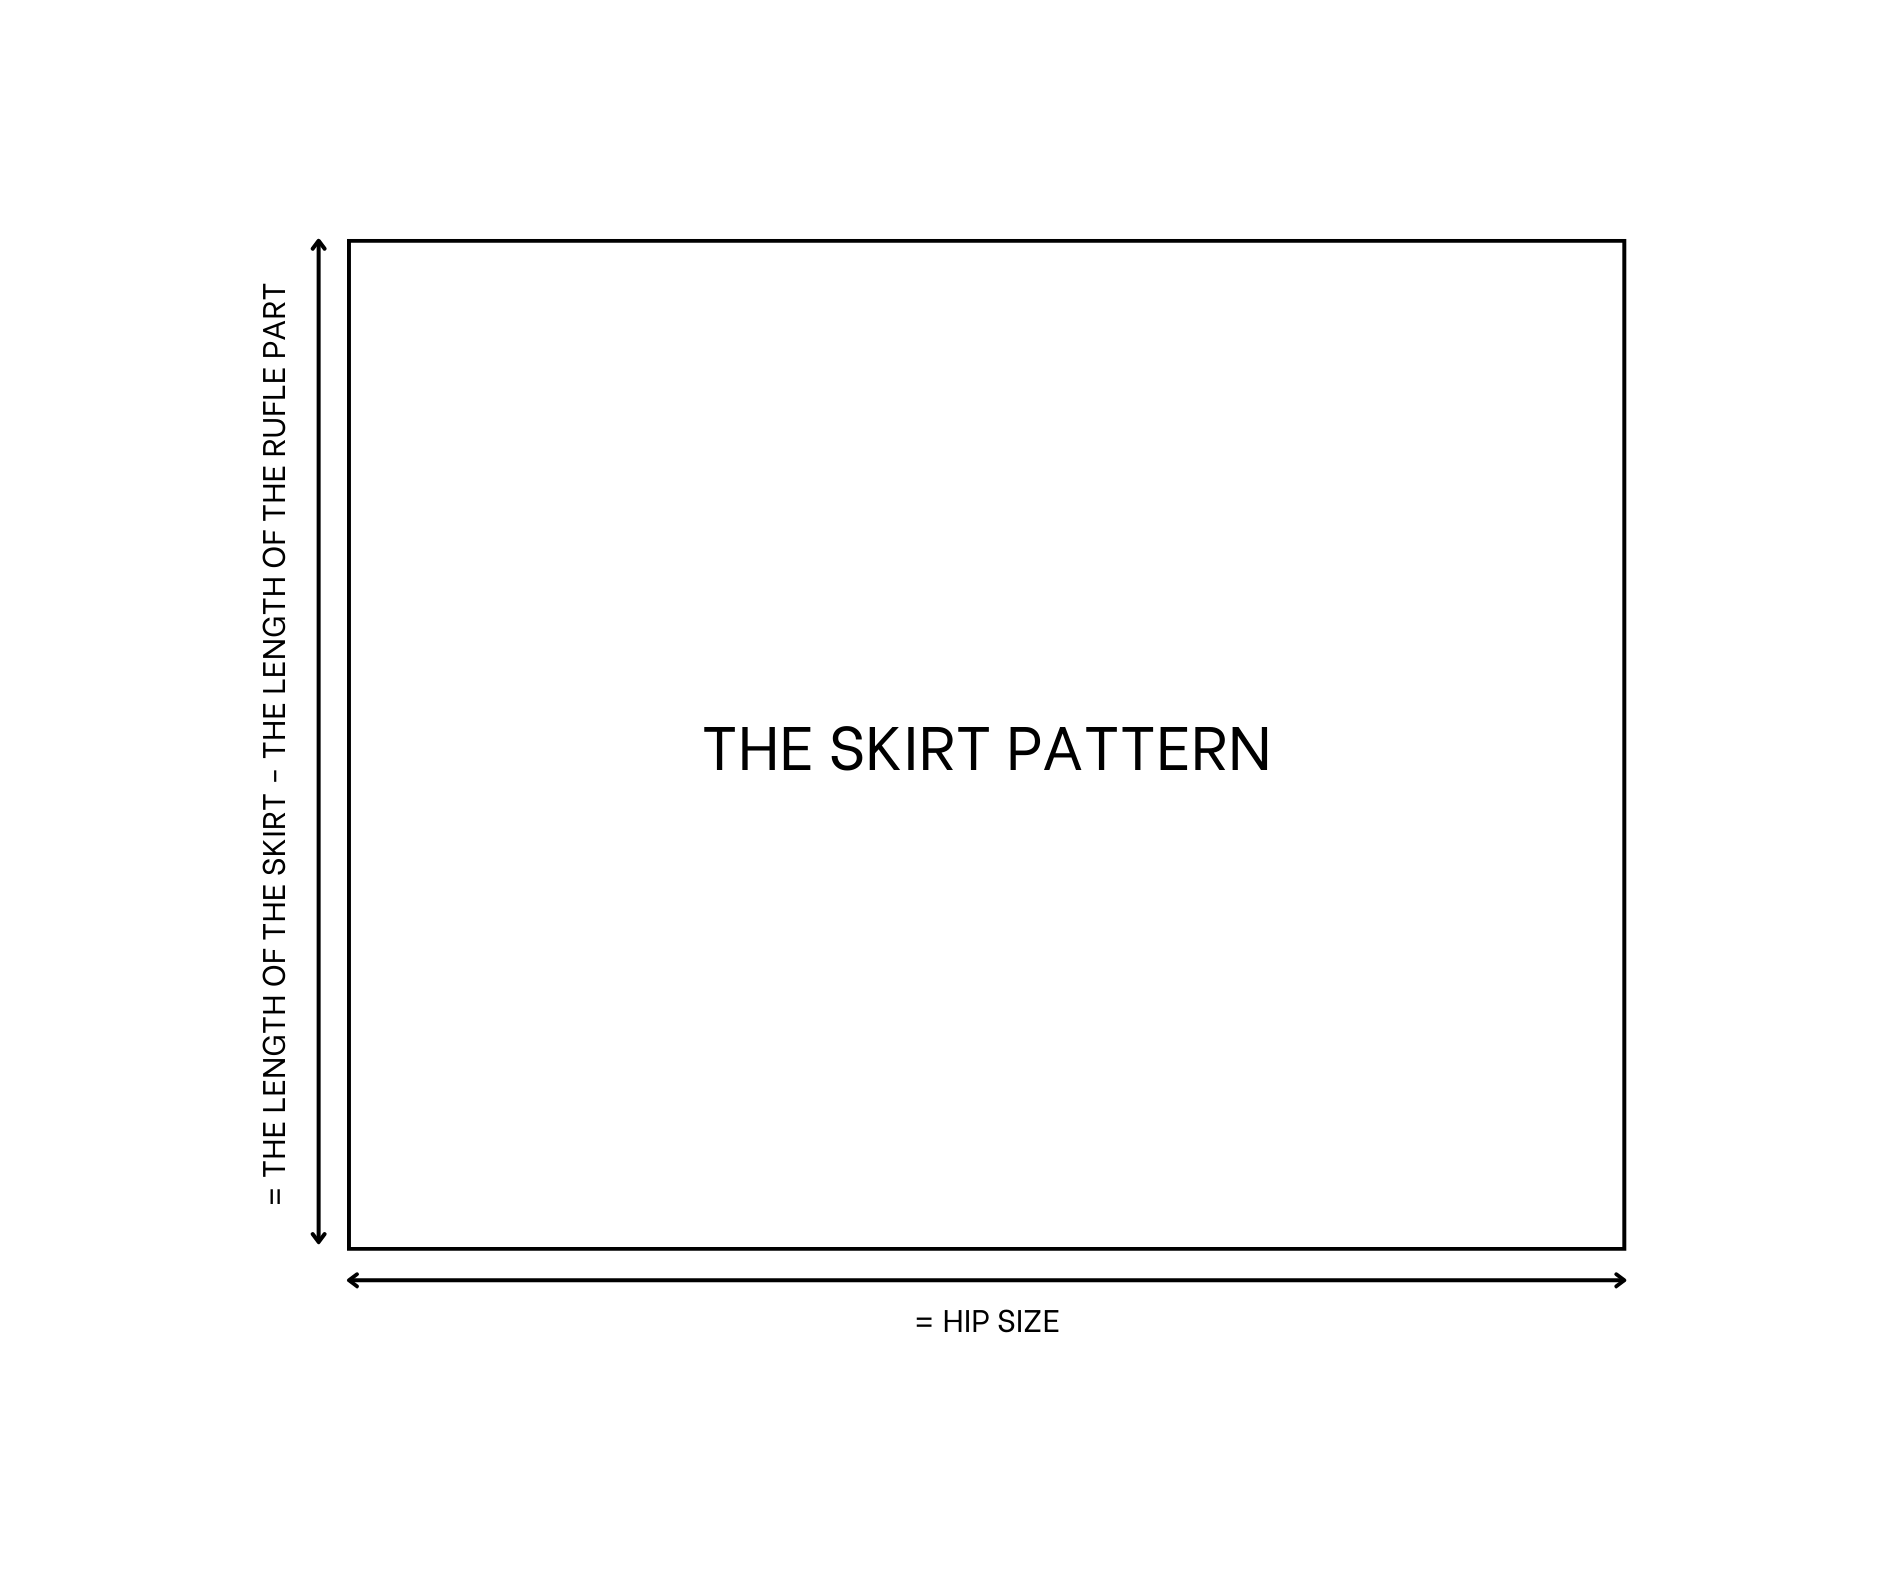
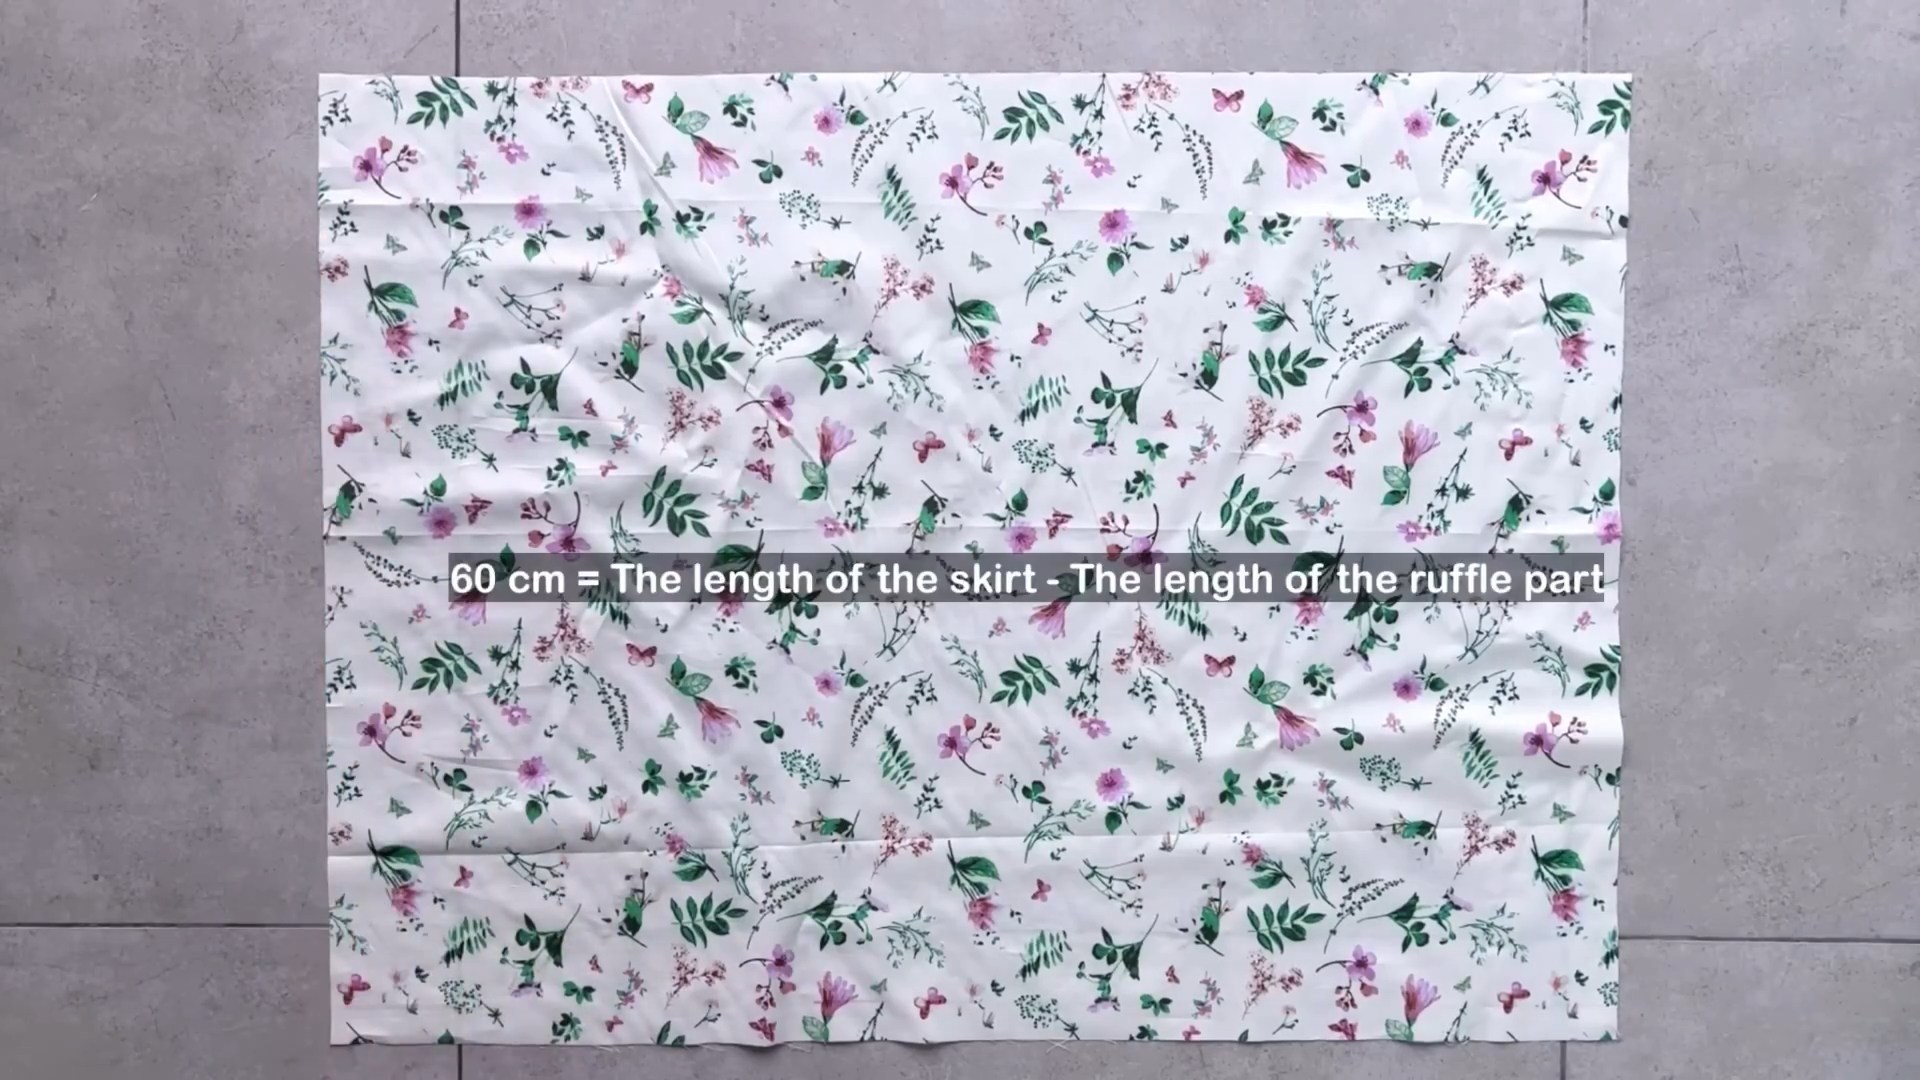
Moving to the skirt of the dress, cut a big rectangle with 60 cm length which is the length of the skirt minus the length of the ruffle part plus 2 cm for seam allowance, and 92 cm width which is my hip size.
SEWING THE DRESS
THE TOP PART
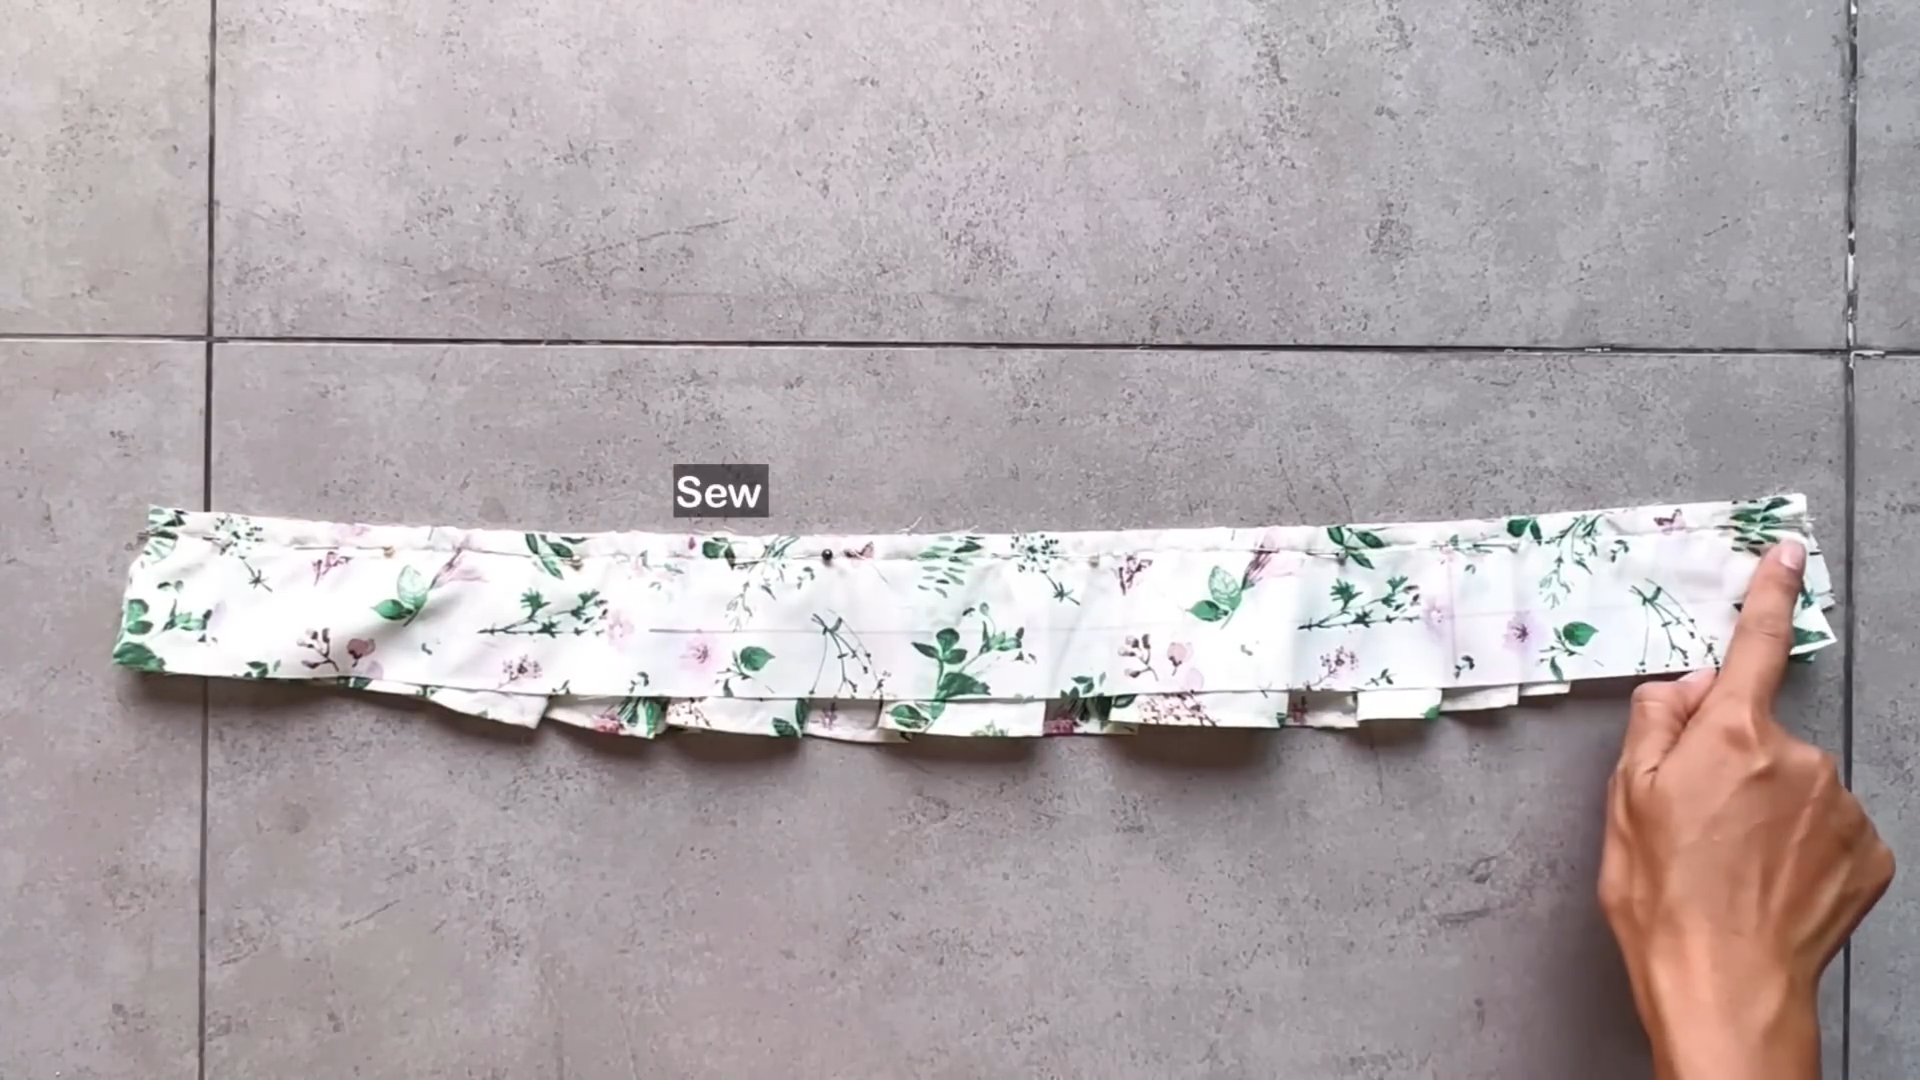
Cut a long rectangle for the ruffle. It is is 8.5 cm wide and 80 cm long.
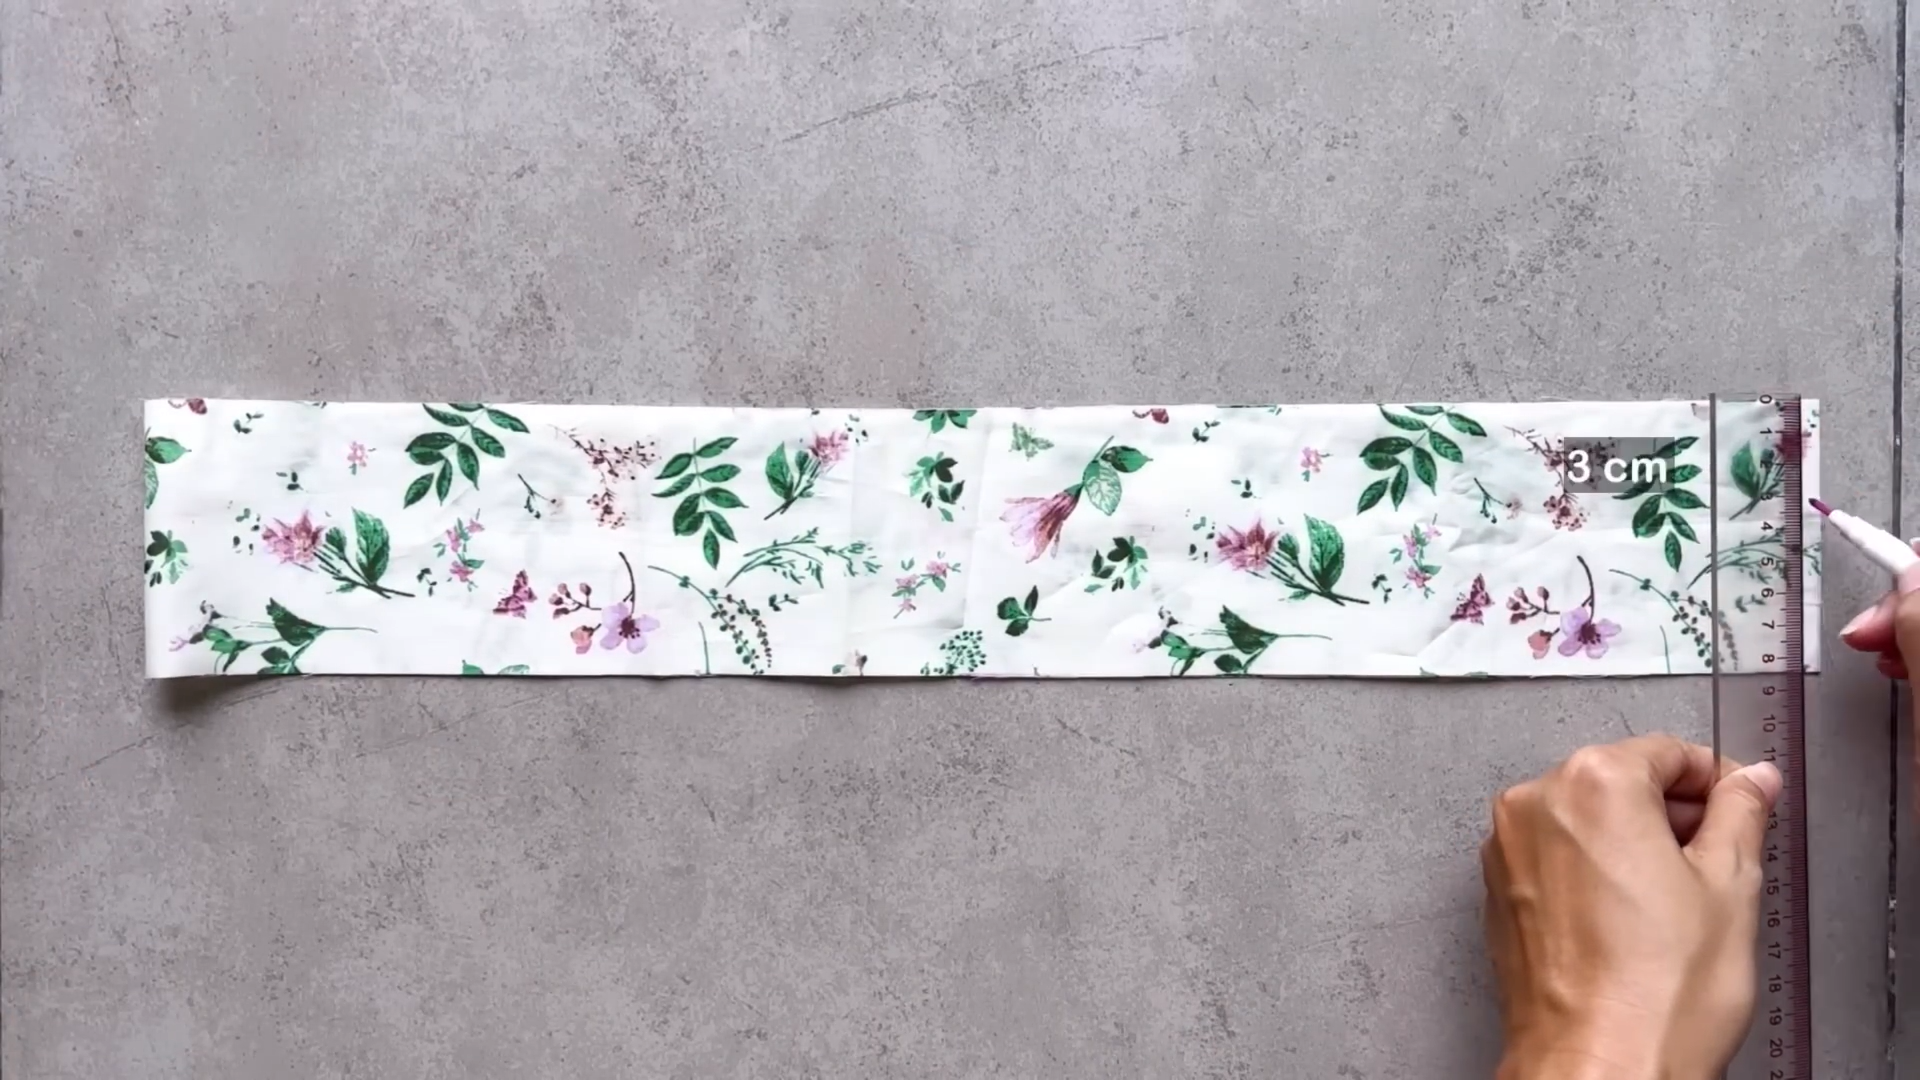
Fold rectangle in half, mark 3 cm down from each end.
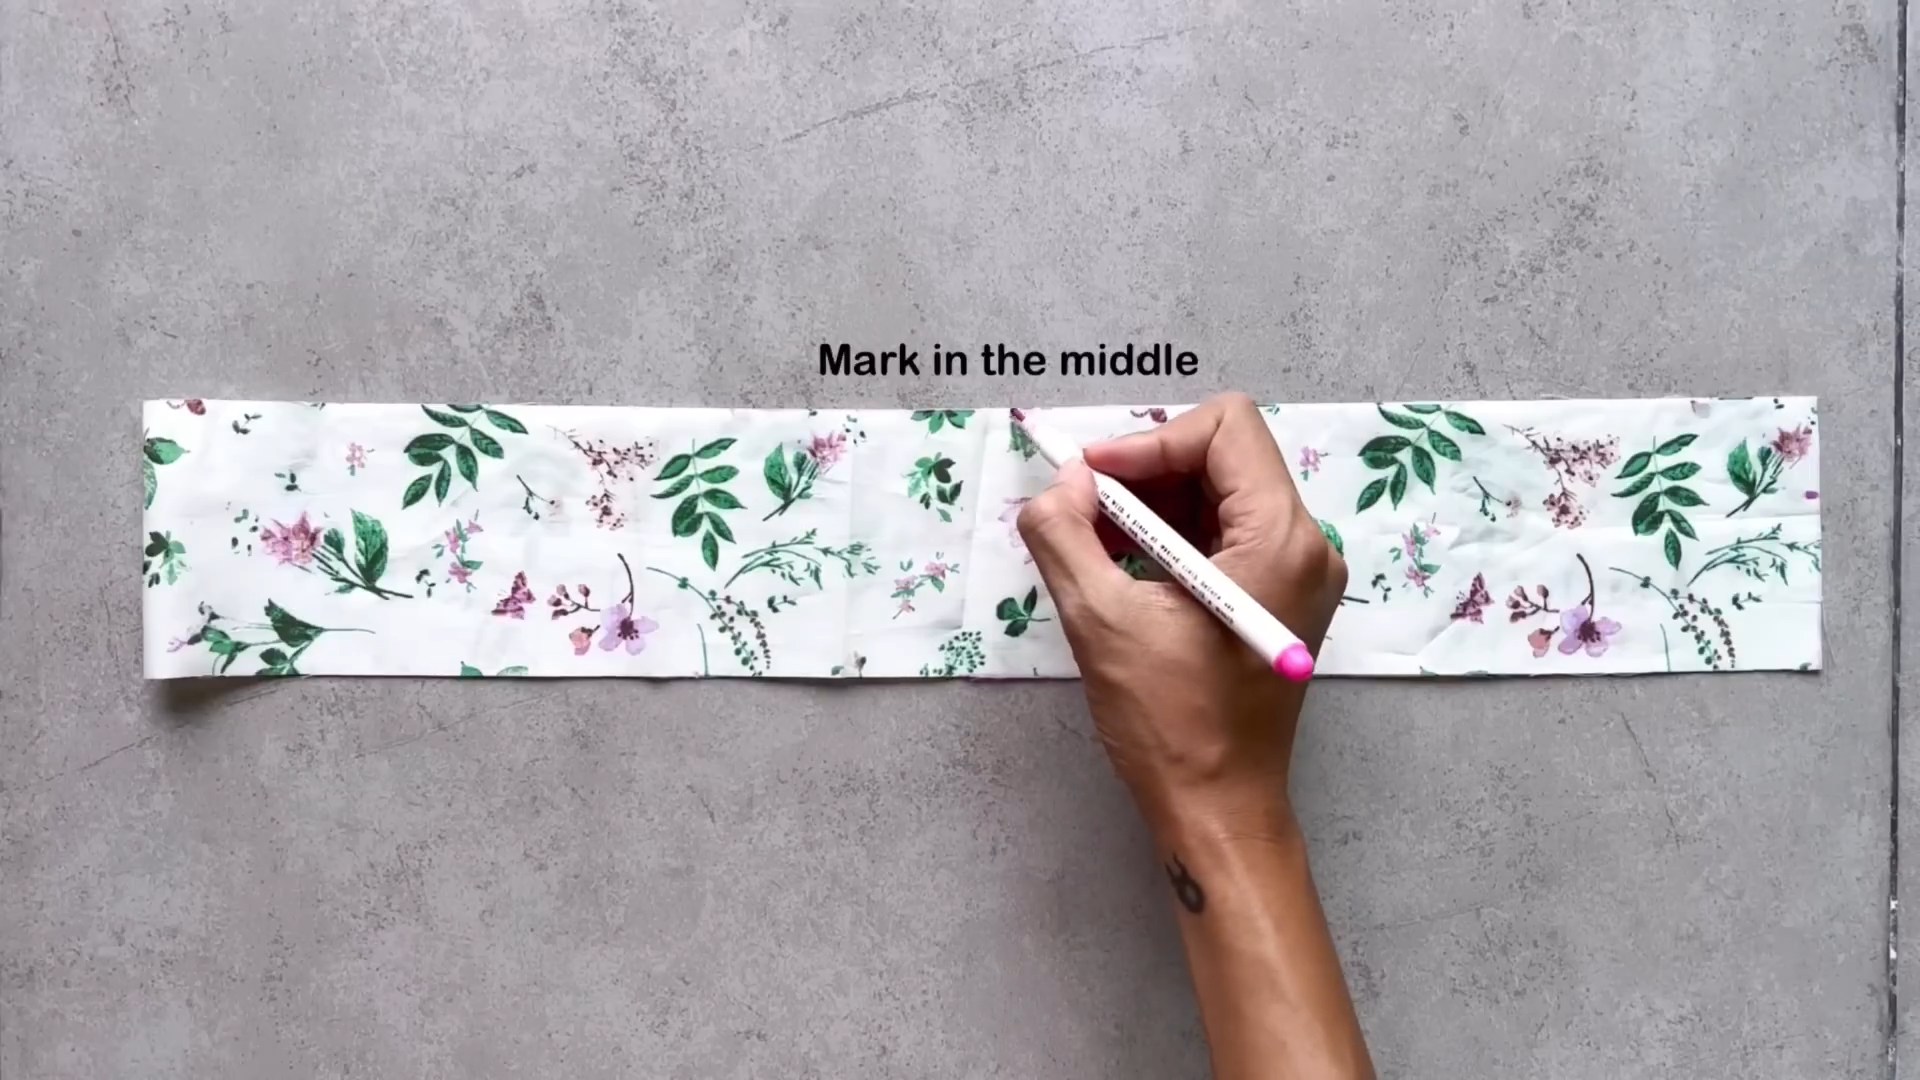
Mark at the center of folded rectangle, connect two marks with a slight curve.
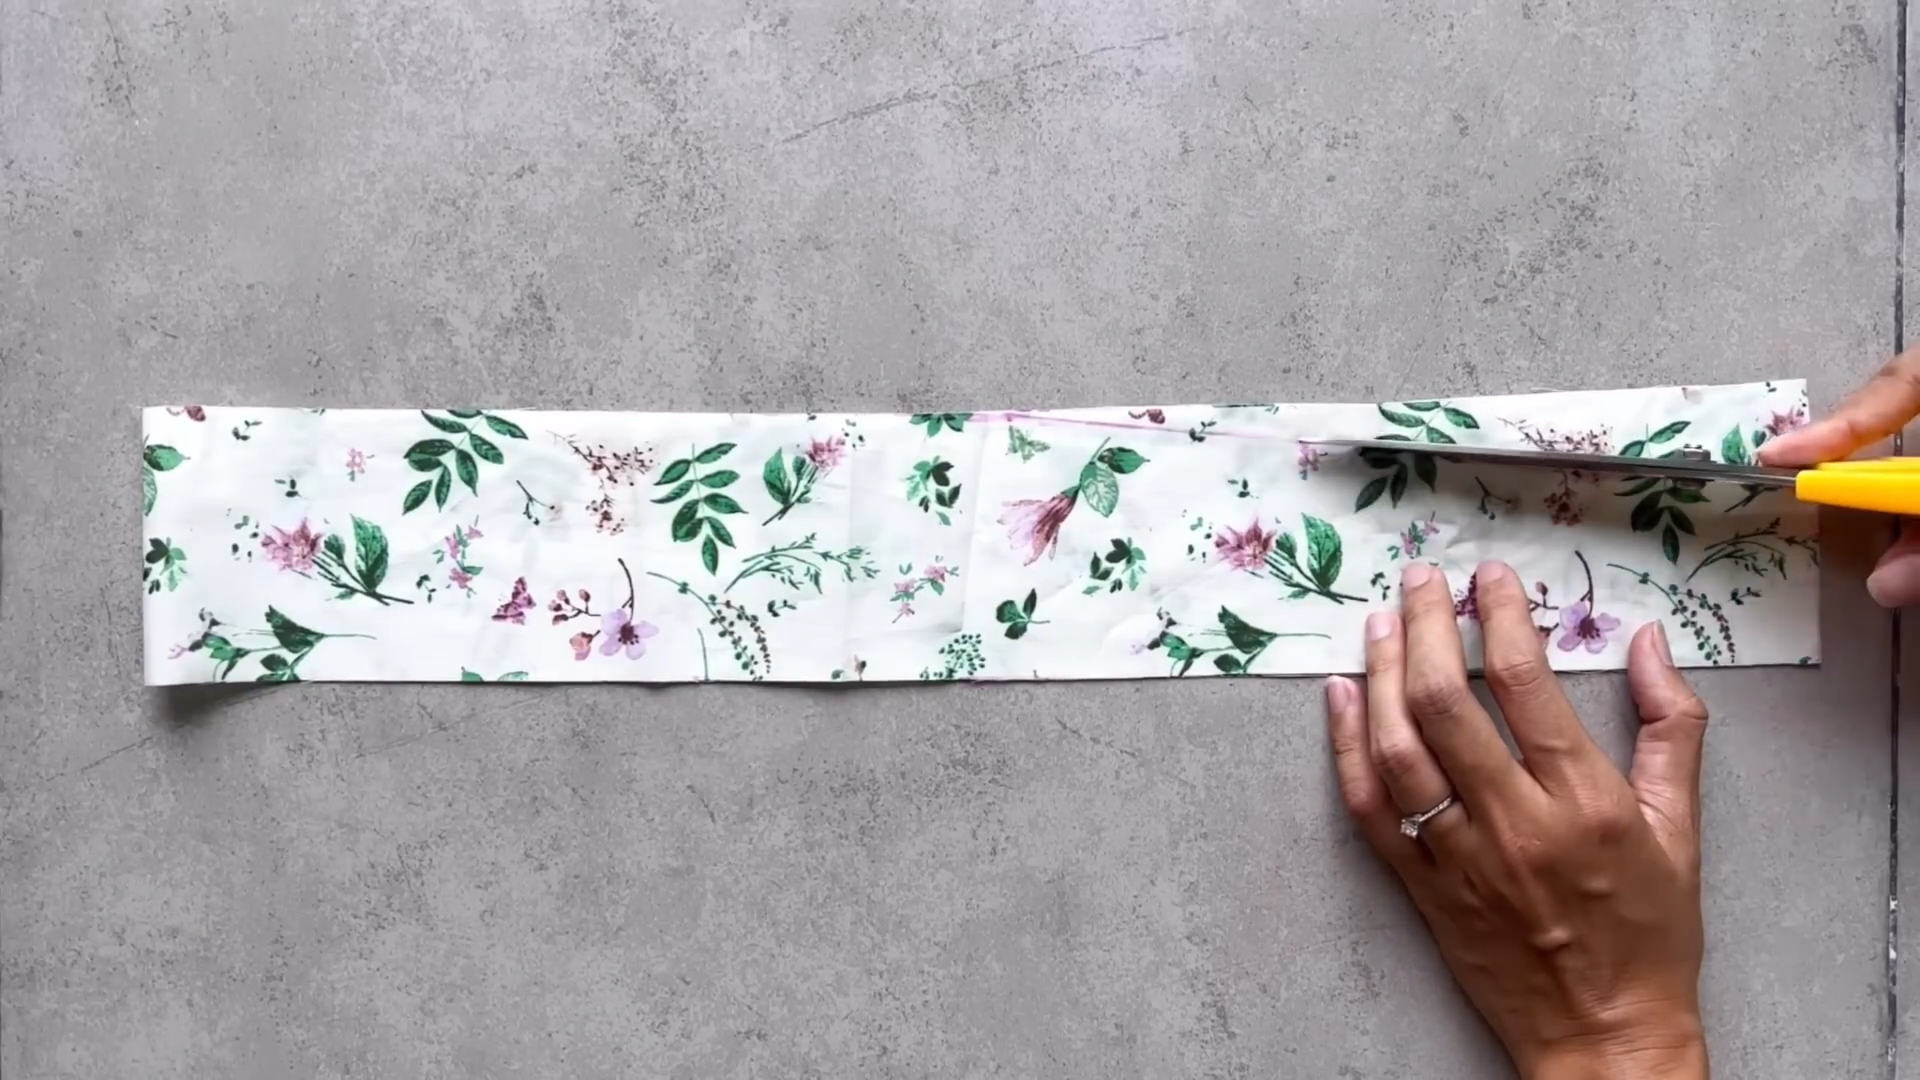
Cut along the curved line.
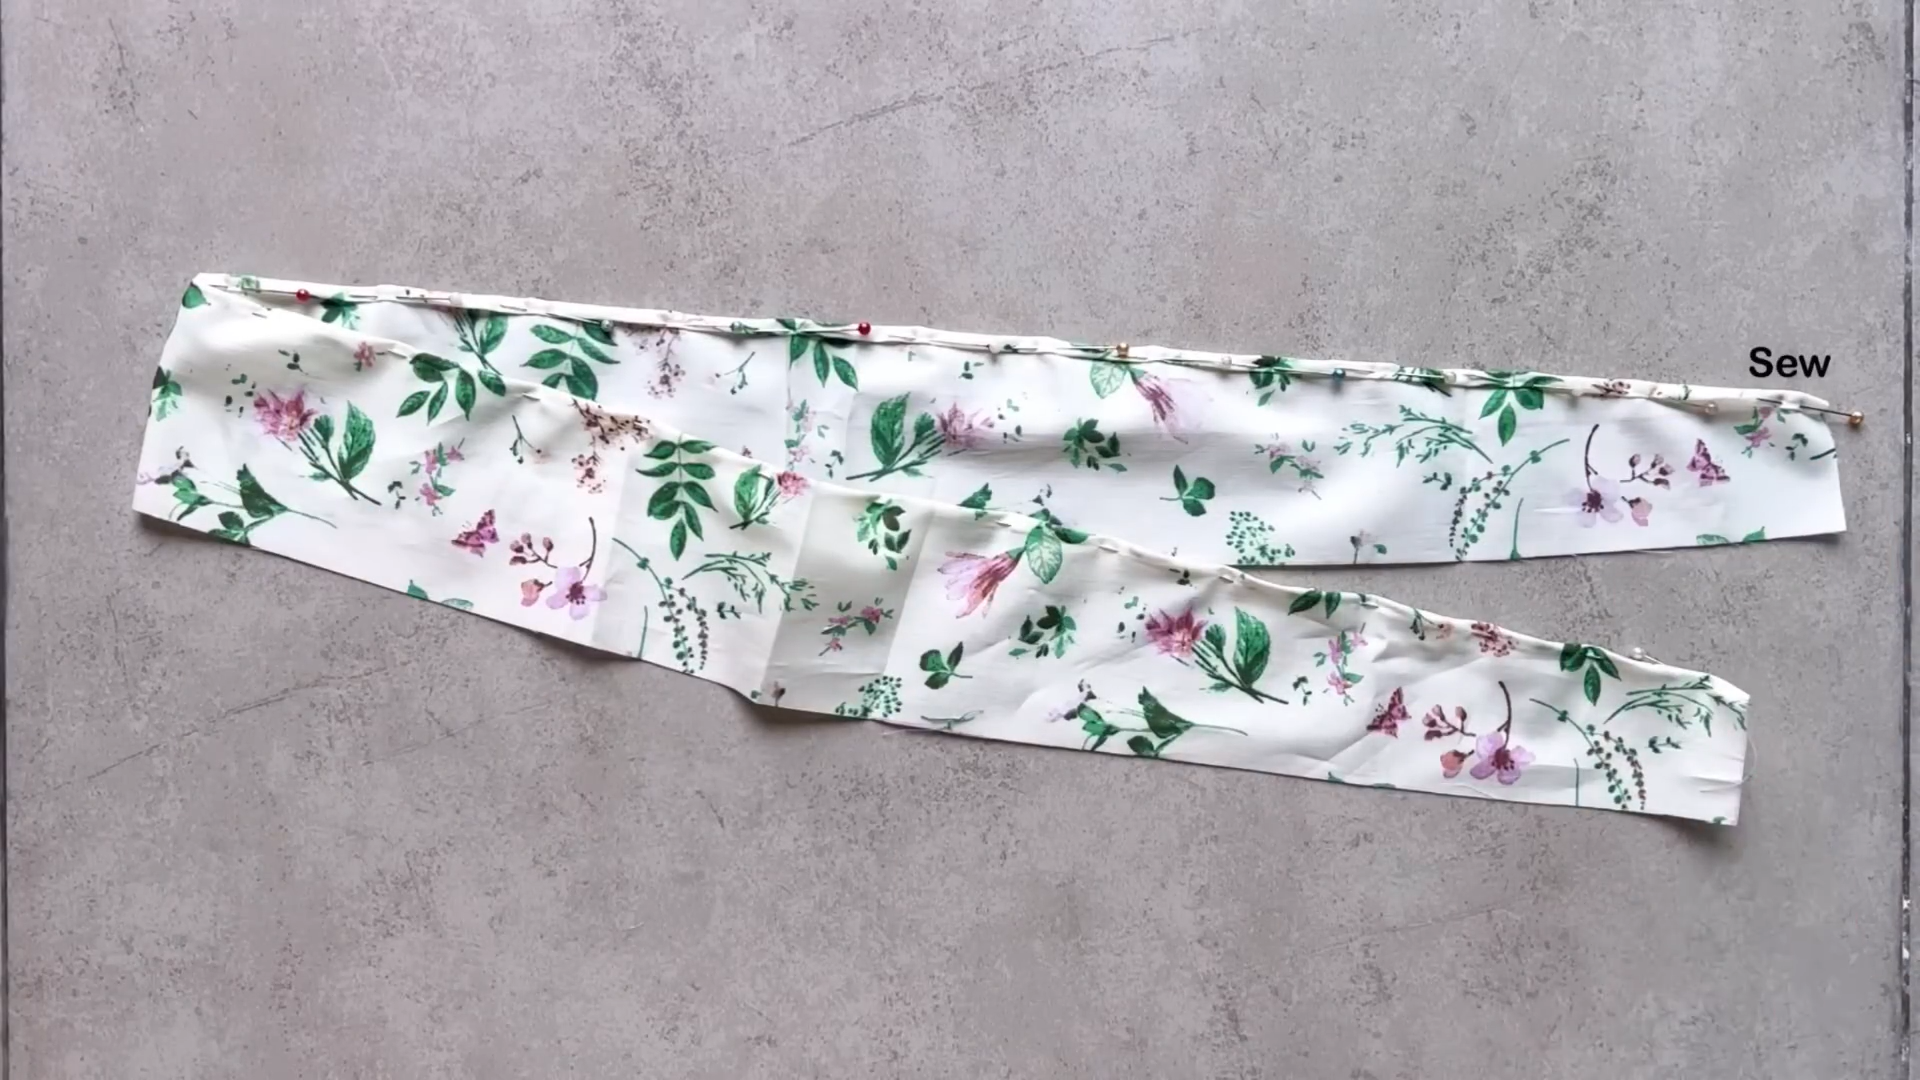
Finish the edge by folding inwards twice (0.5 cm each fold) and stitching.
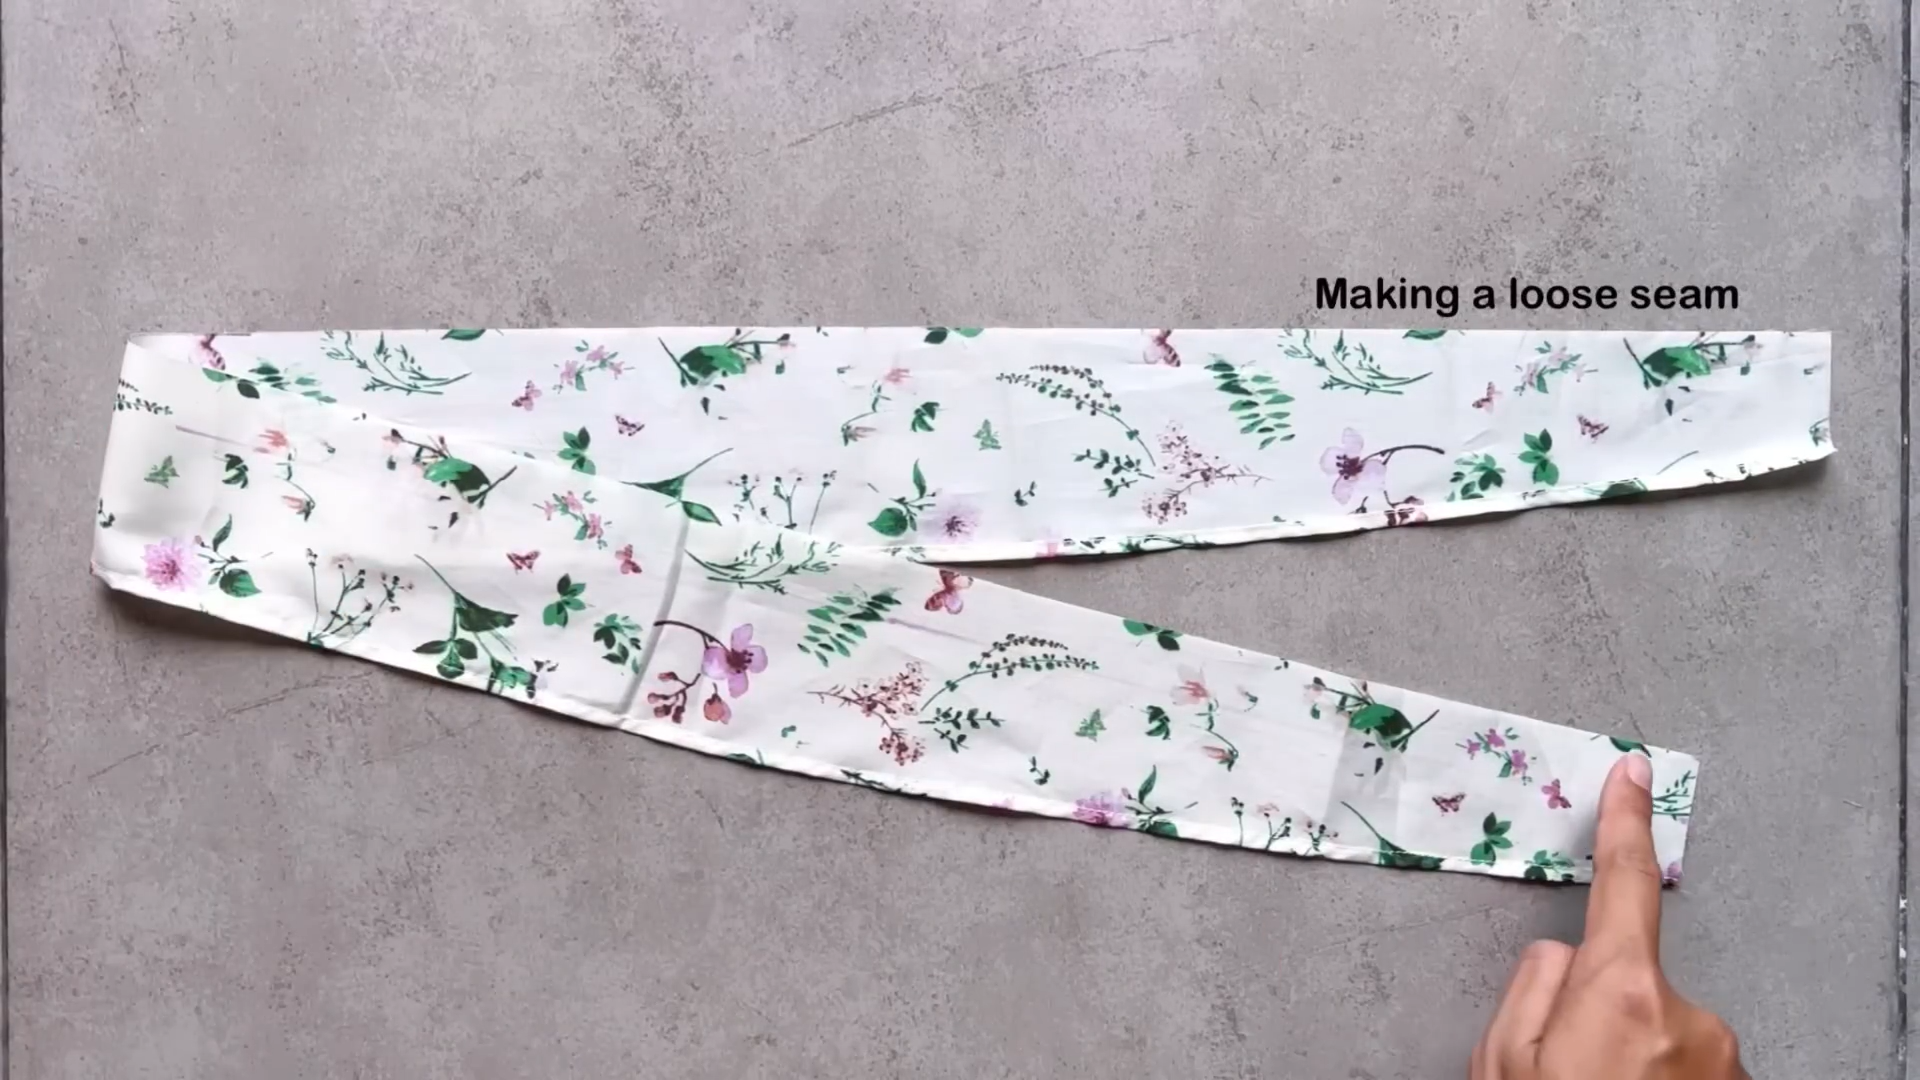
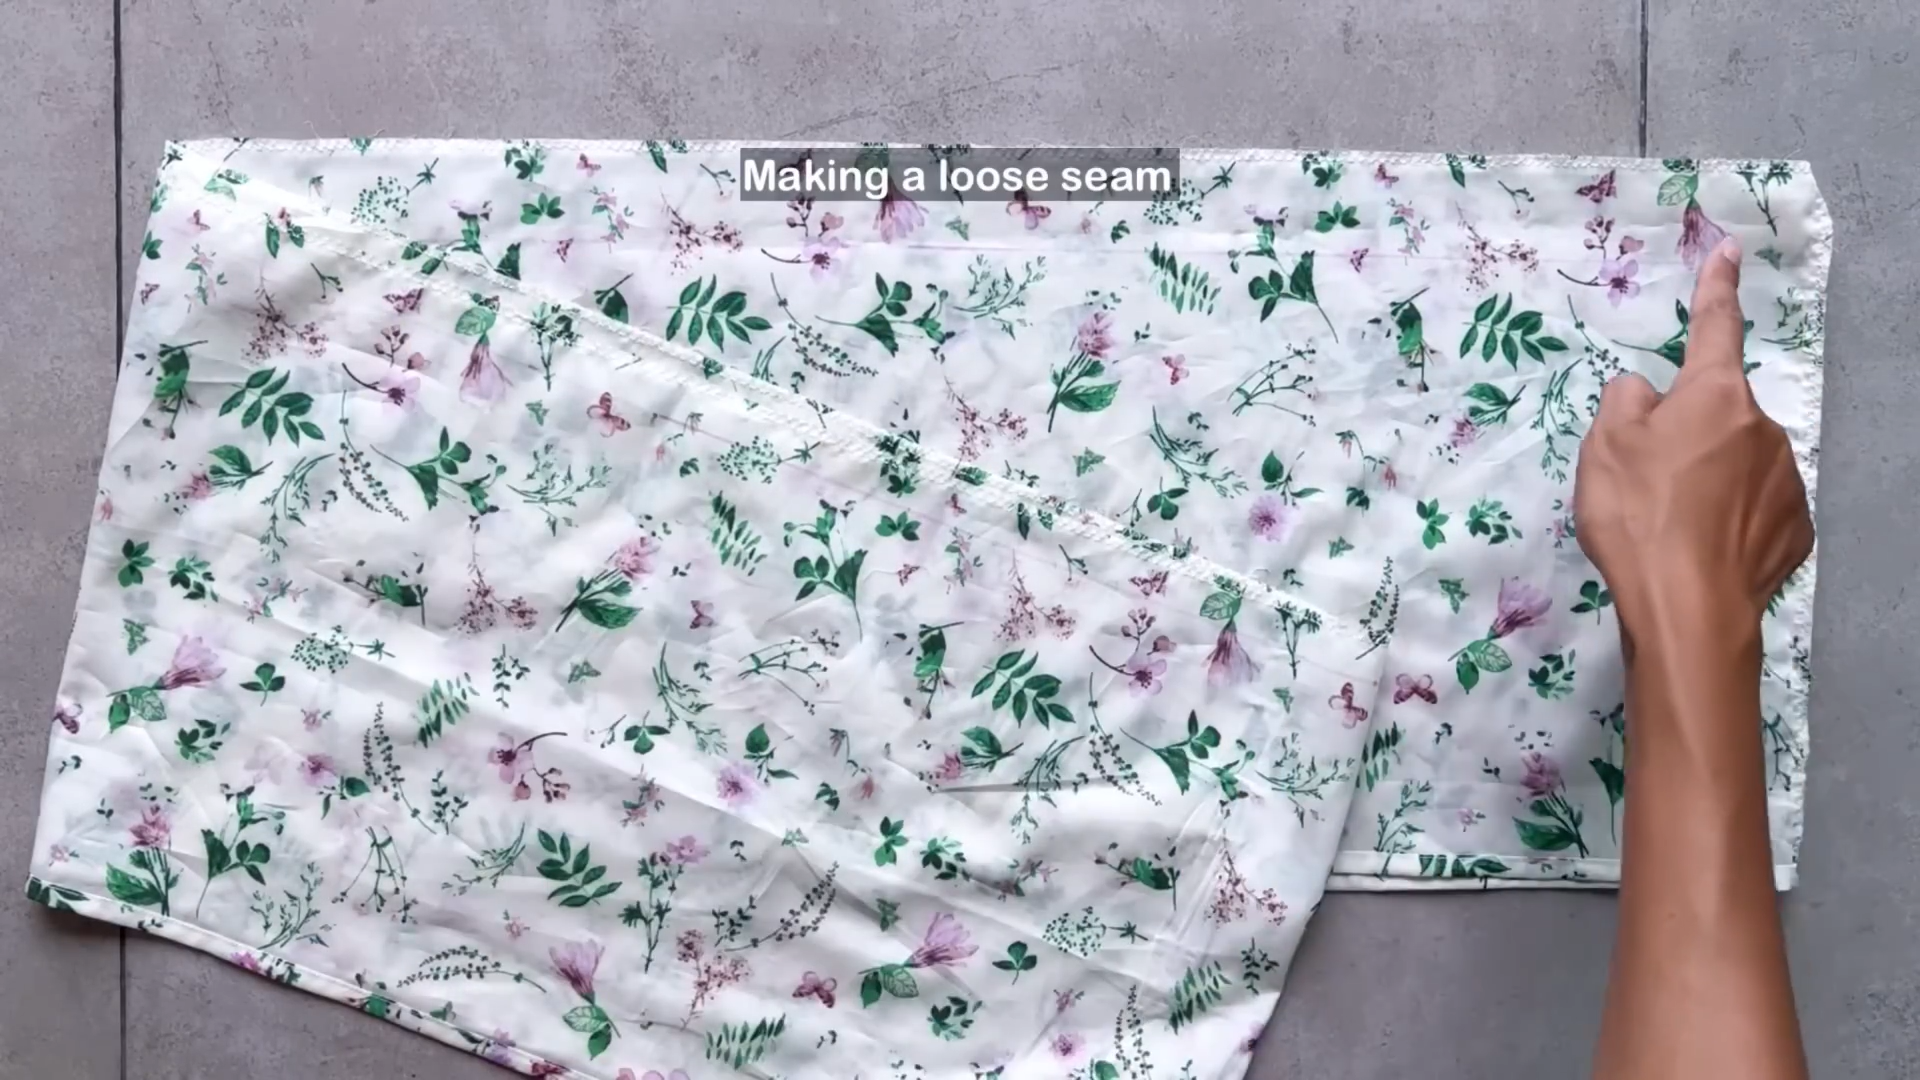
Sew a loose seam on the other fabric side.
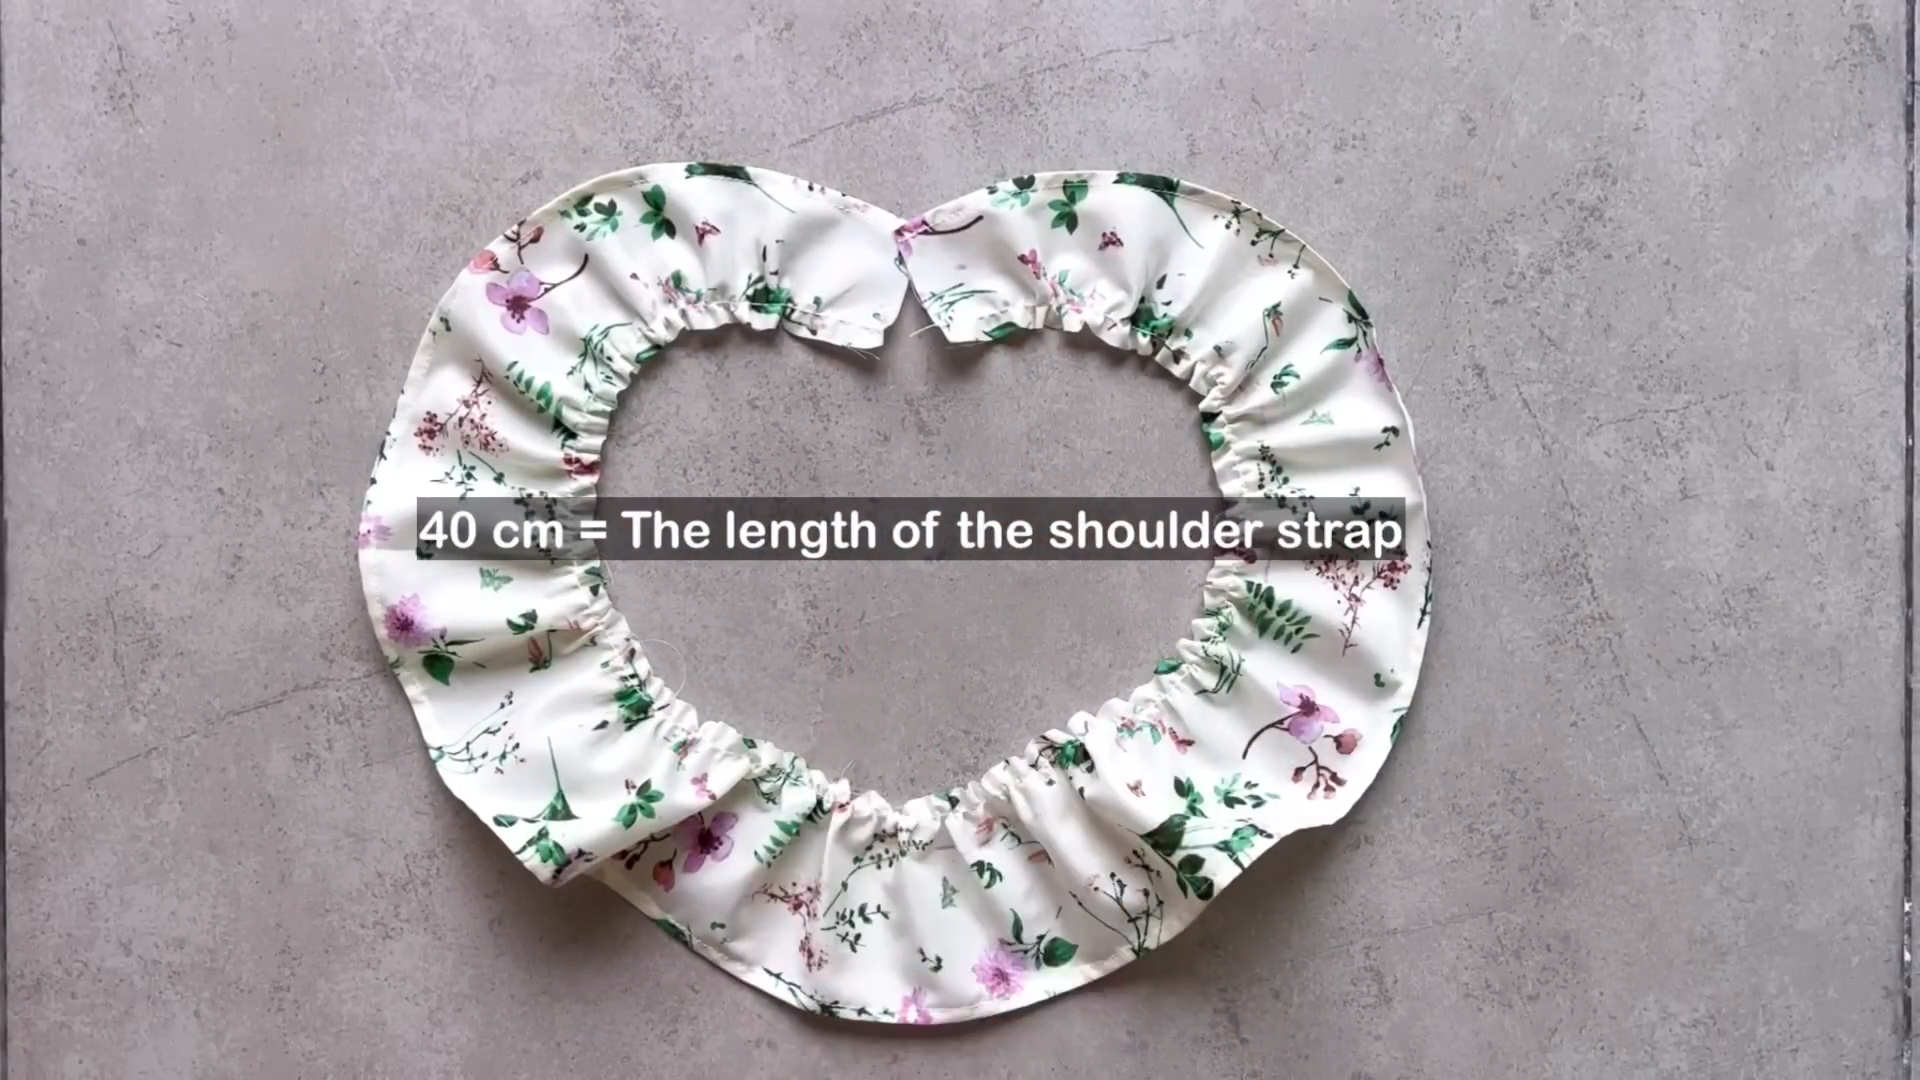
Create a gathering fabric from the seam. Adjust later to match strap length.
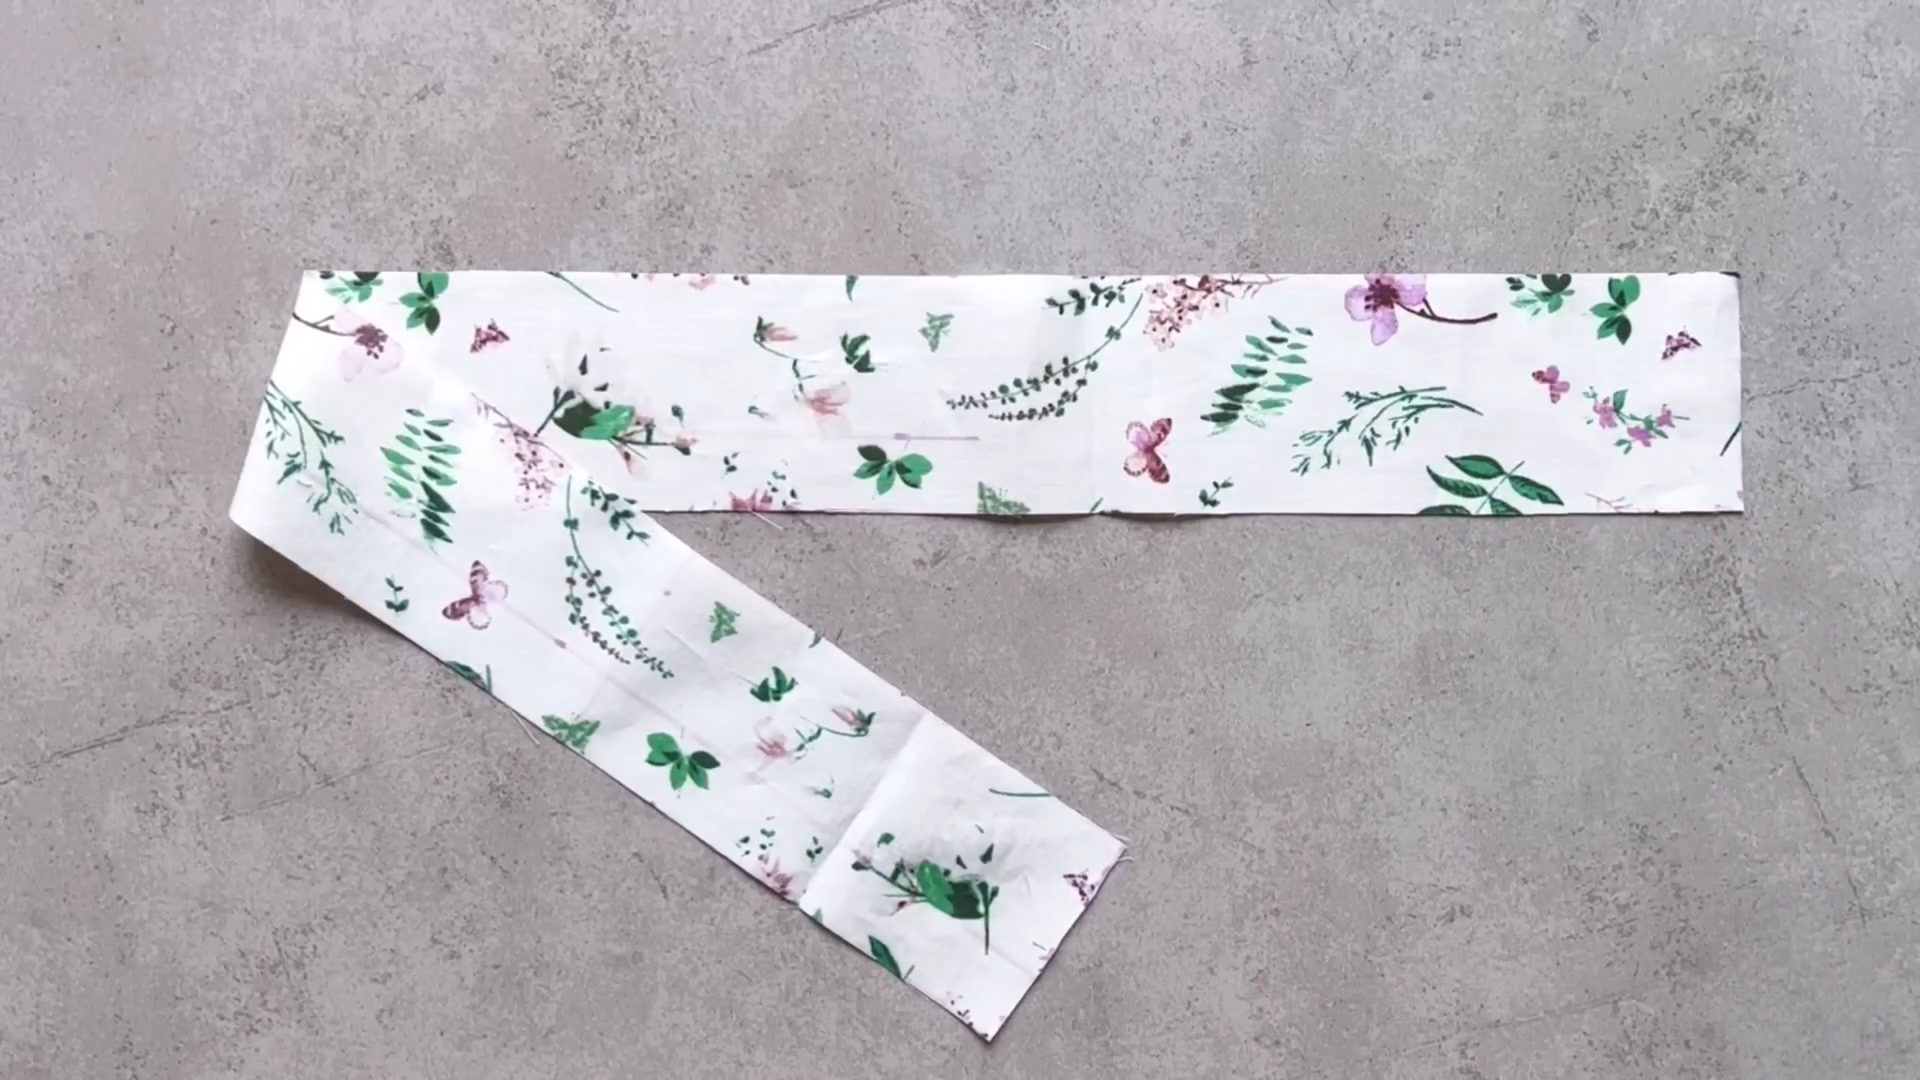
Cut another rectangle for the strap with 6 cm width and 40 cm length.

Sew the ruffle to one side of the strap rectangle.
Cut another rectangle of the same size and connect it to the other side, encasing the ruffle.
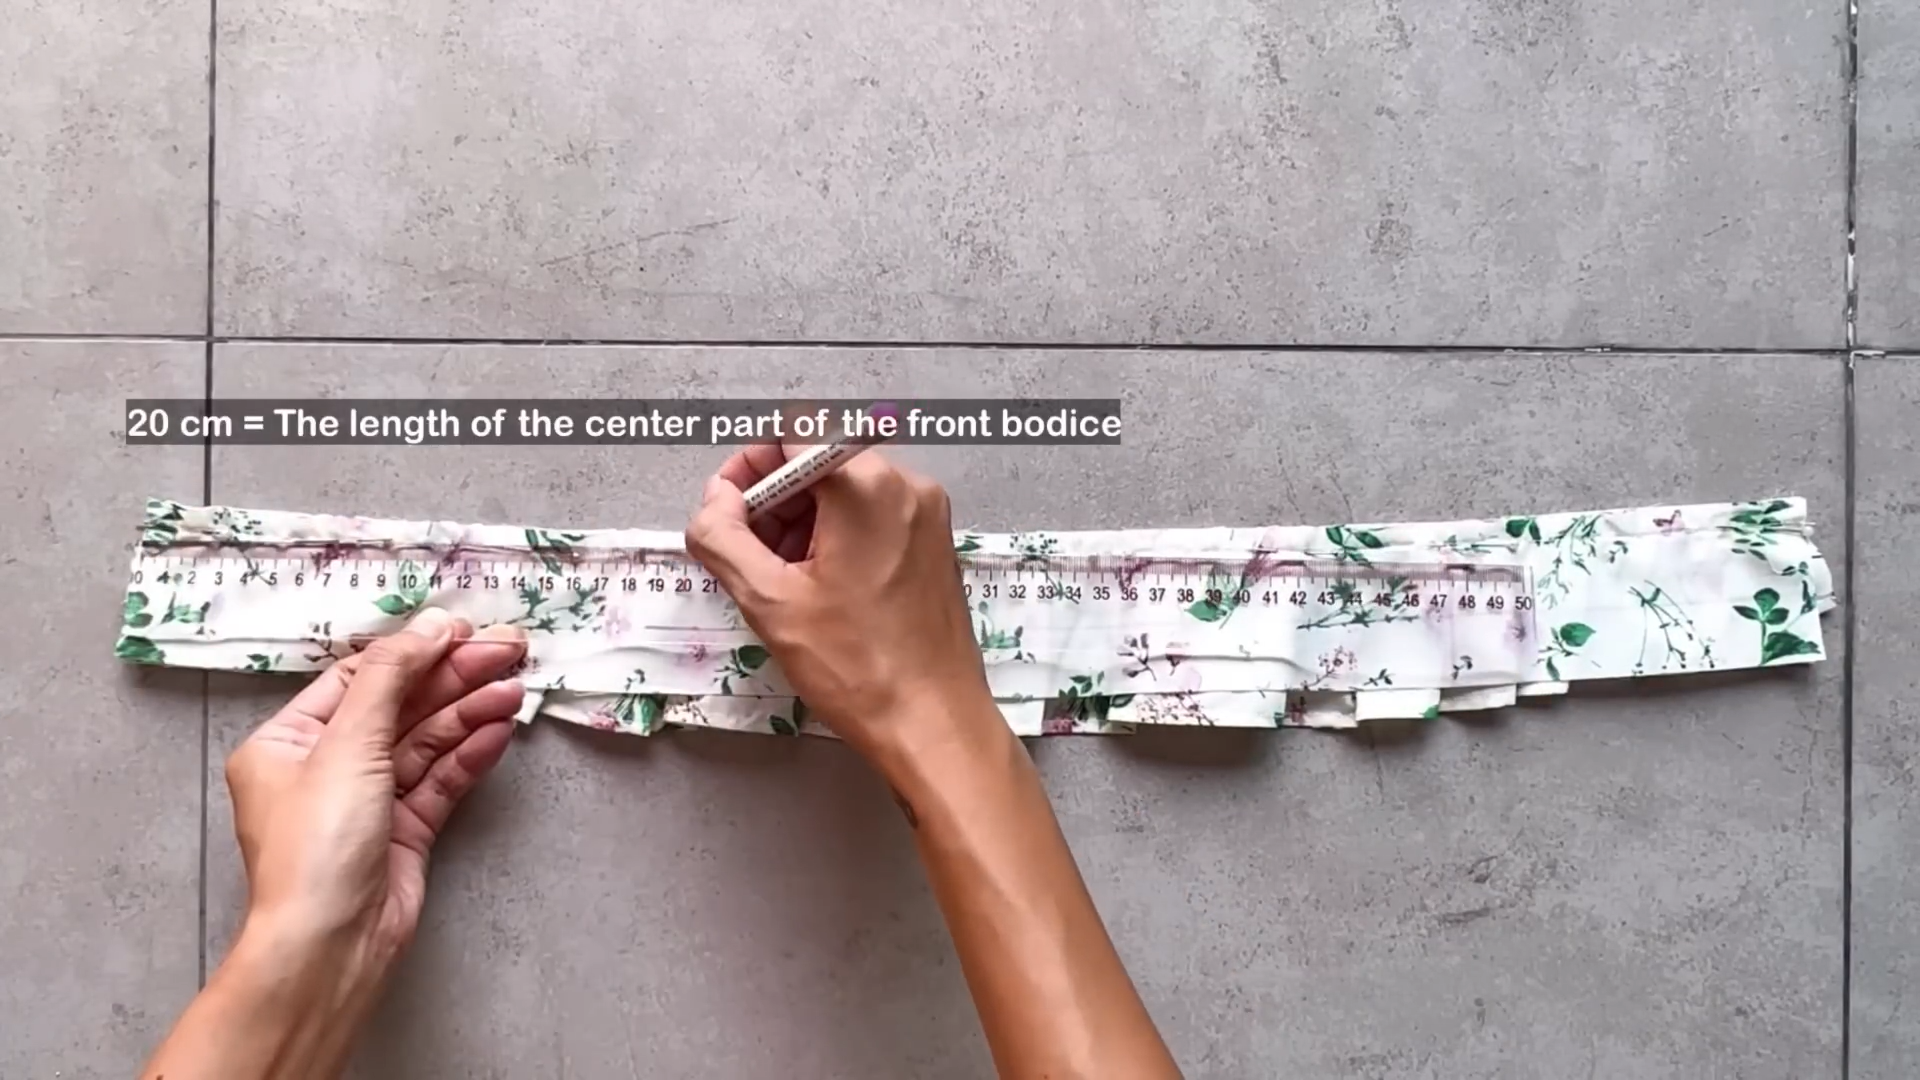
Leave a 20-cm opening for the center part of the front bodice.
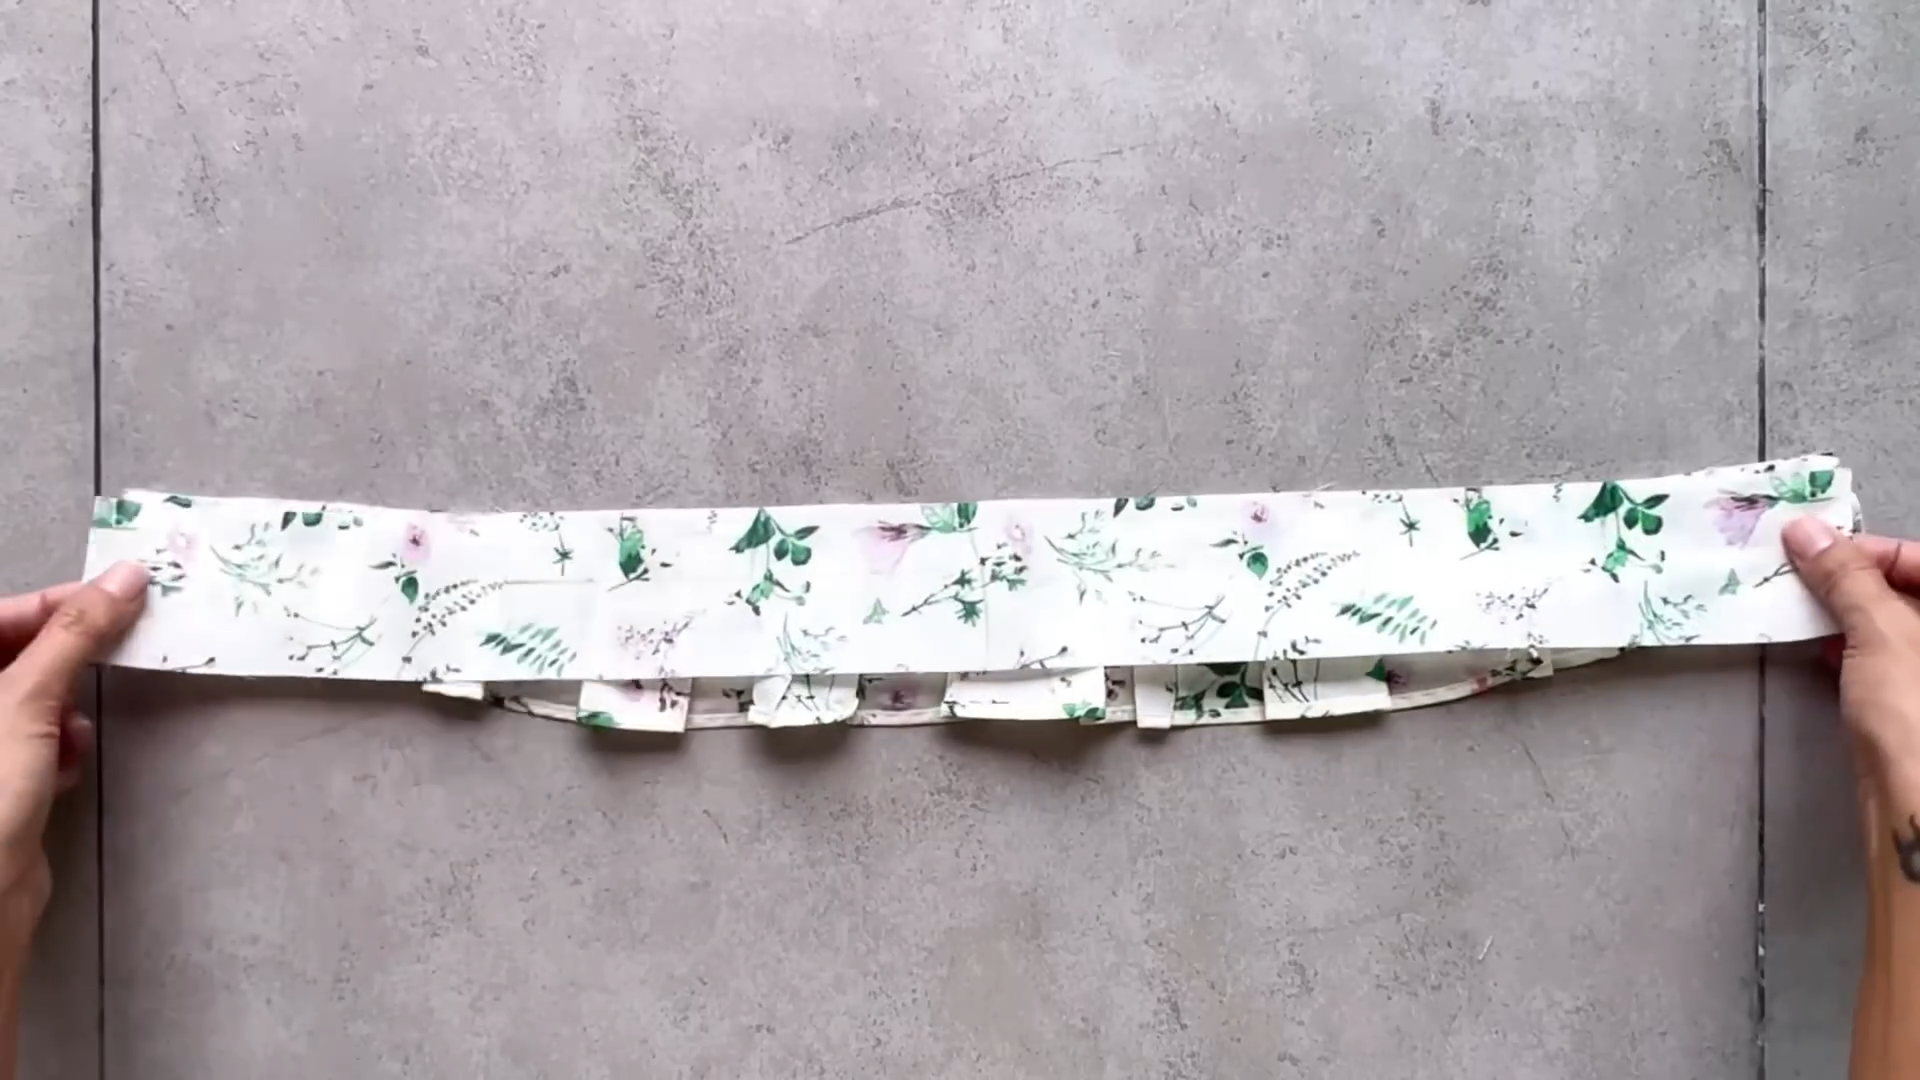
Sew the rest of the rectangle strap and the ruffle together.
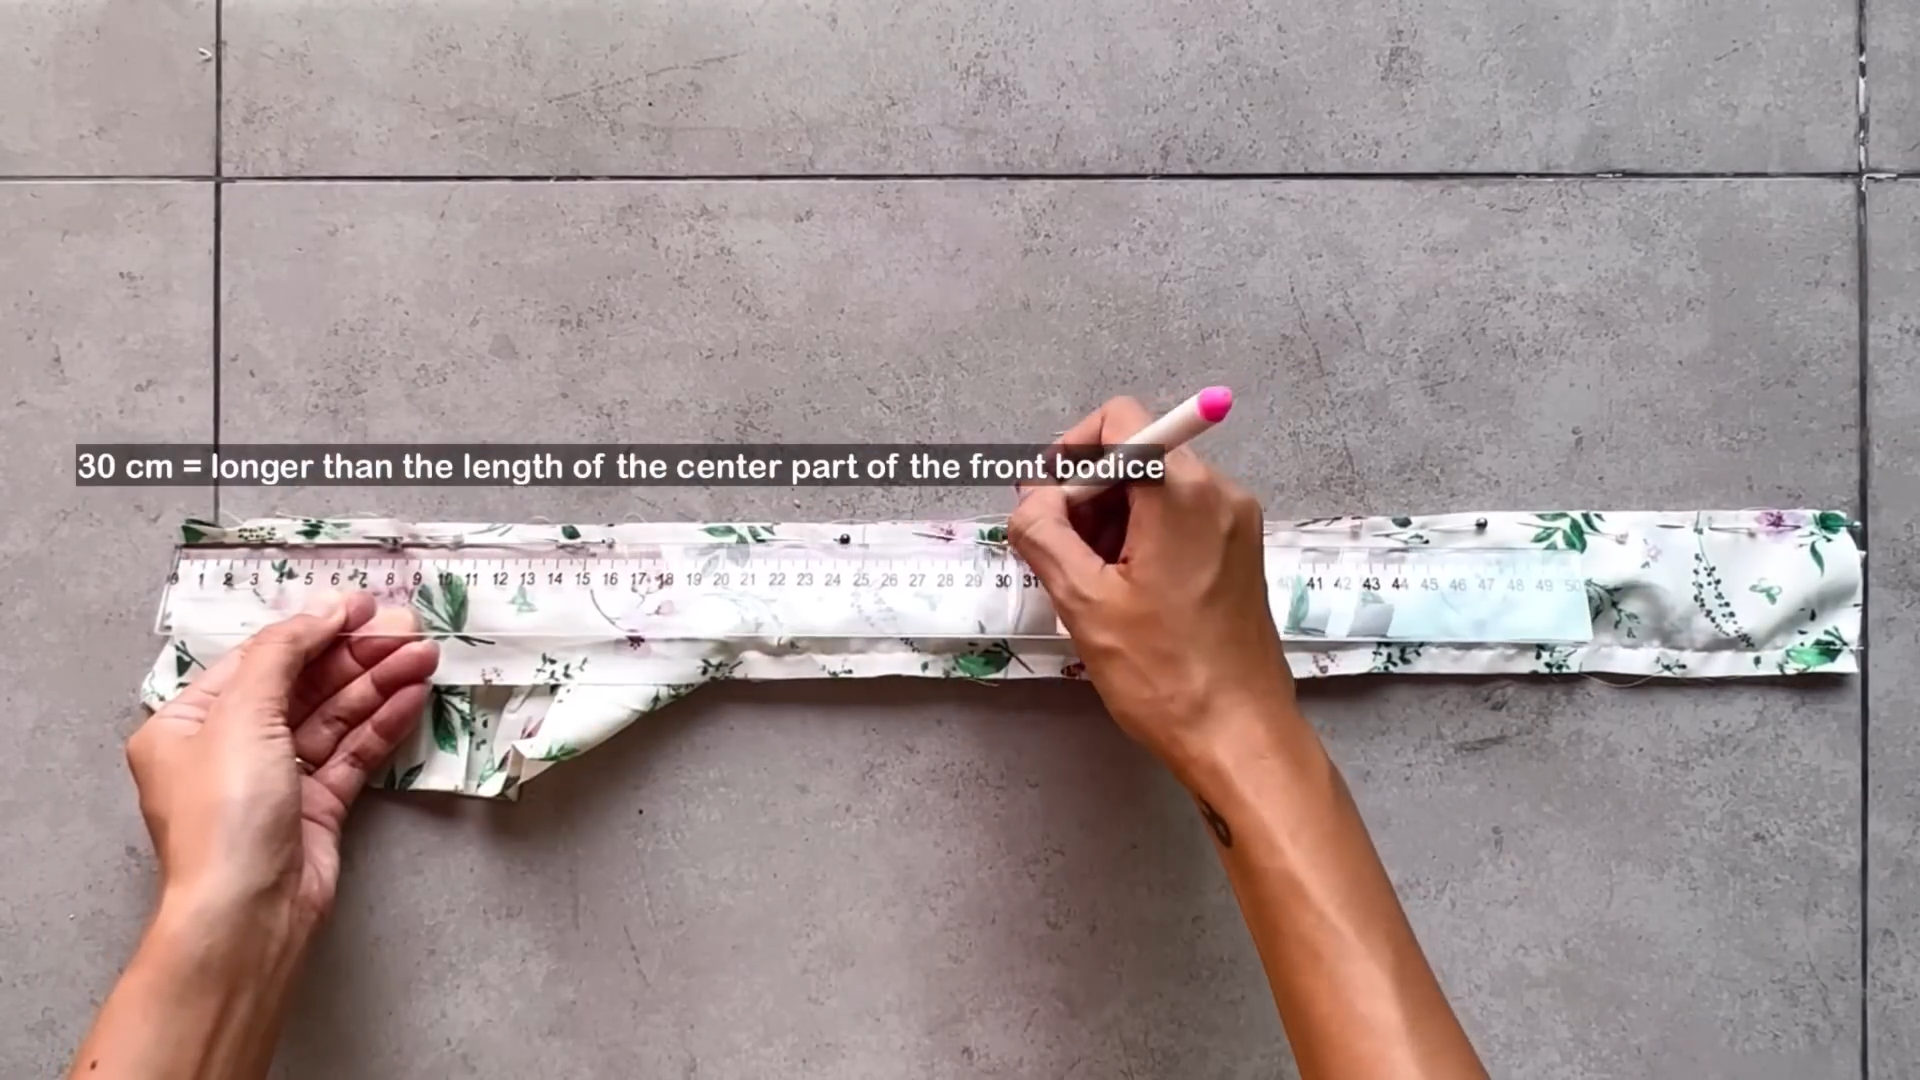
Put all the ruffle inside to connect the other side of two rectangles together.
Leave a 30-cm opening.
Sew the remaining fabric together.

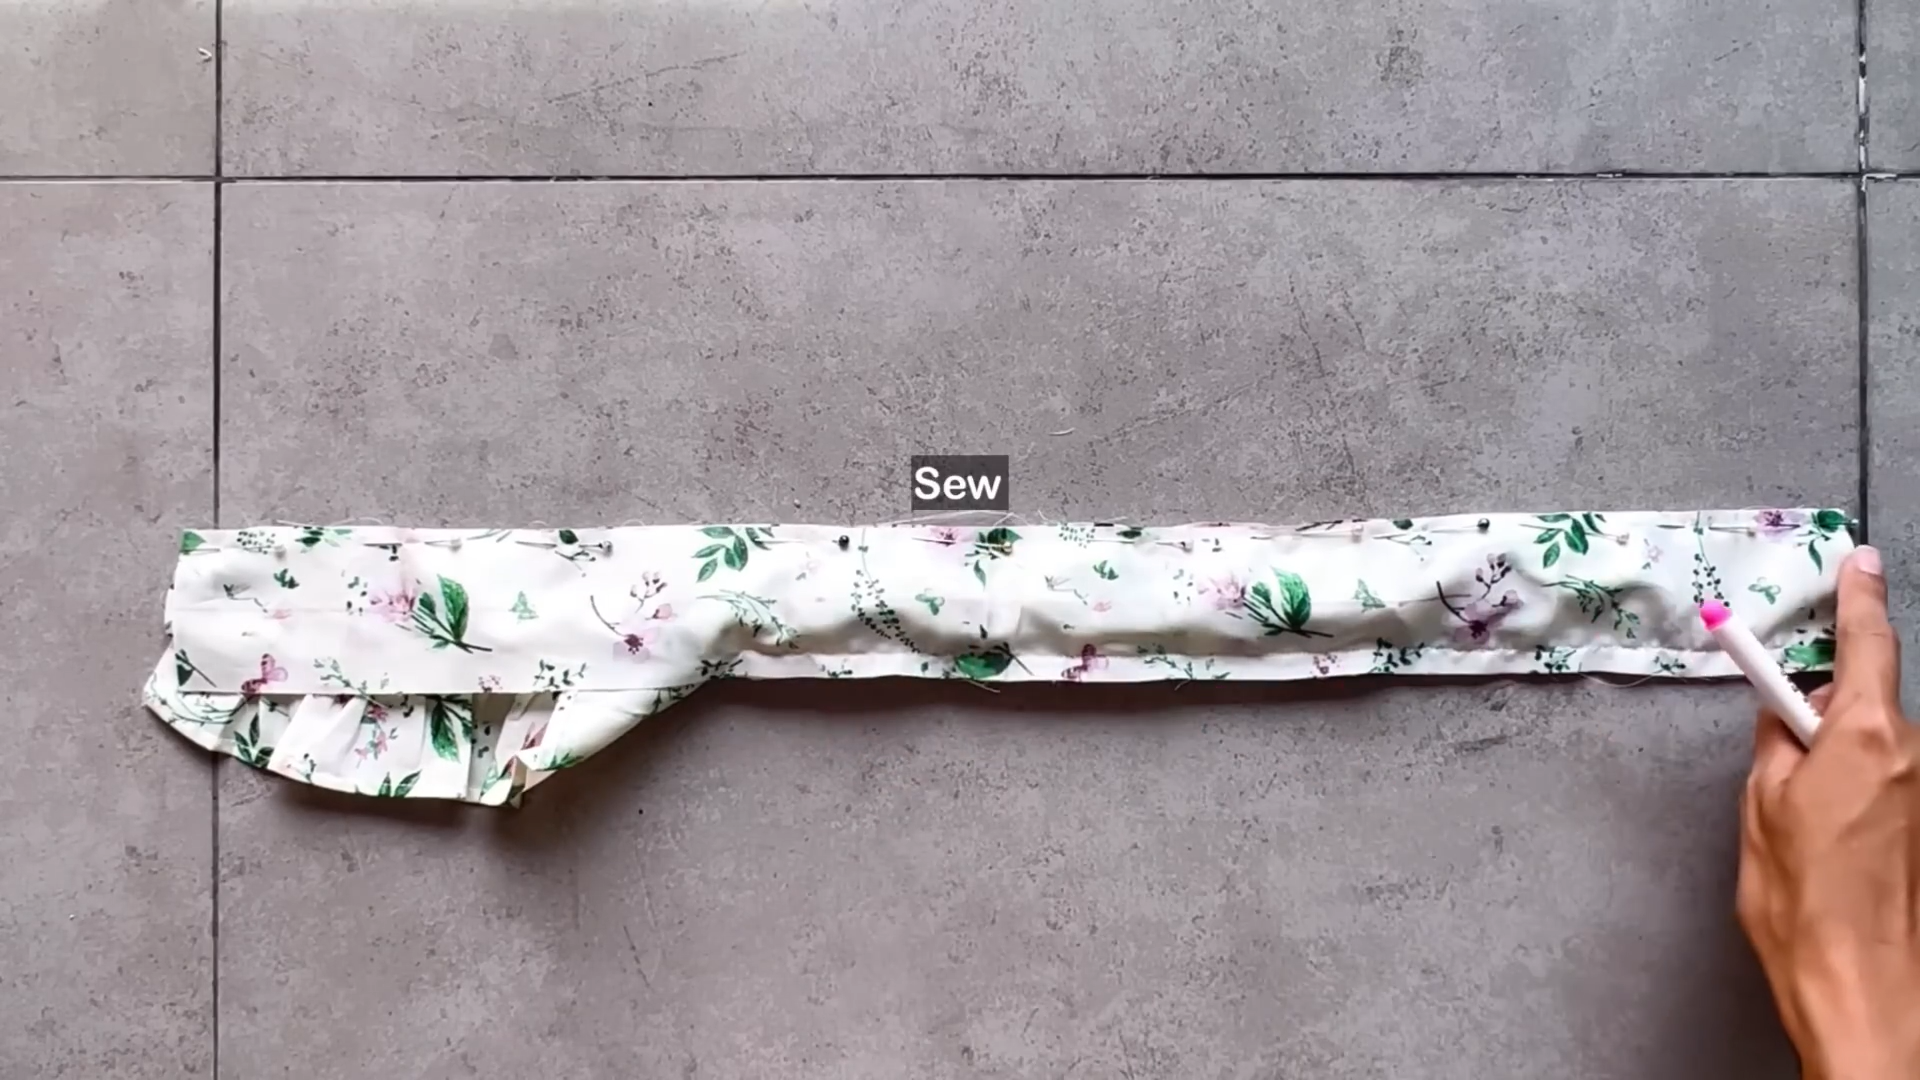
Turn the ruffle side out and iron flat.
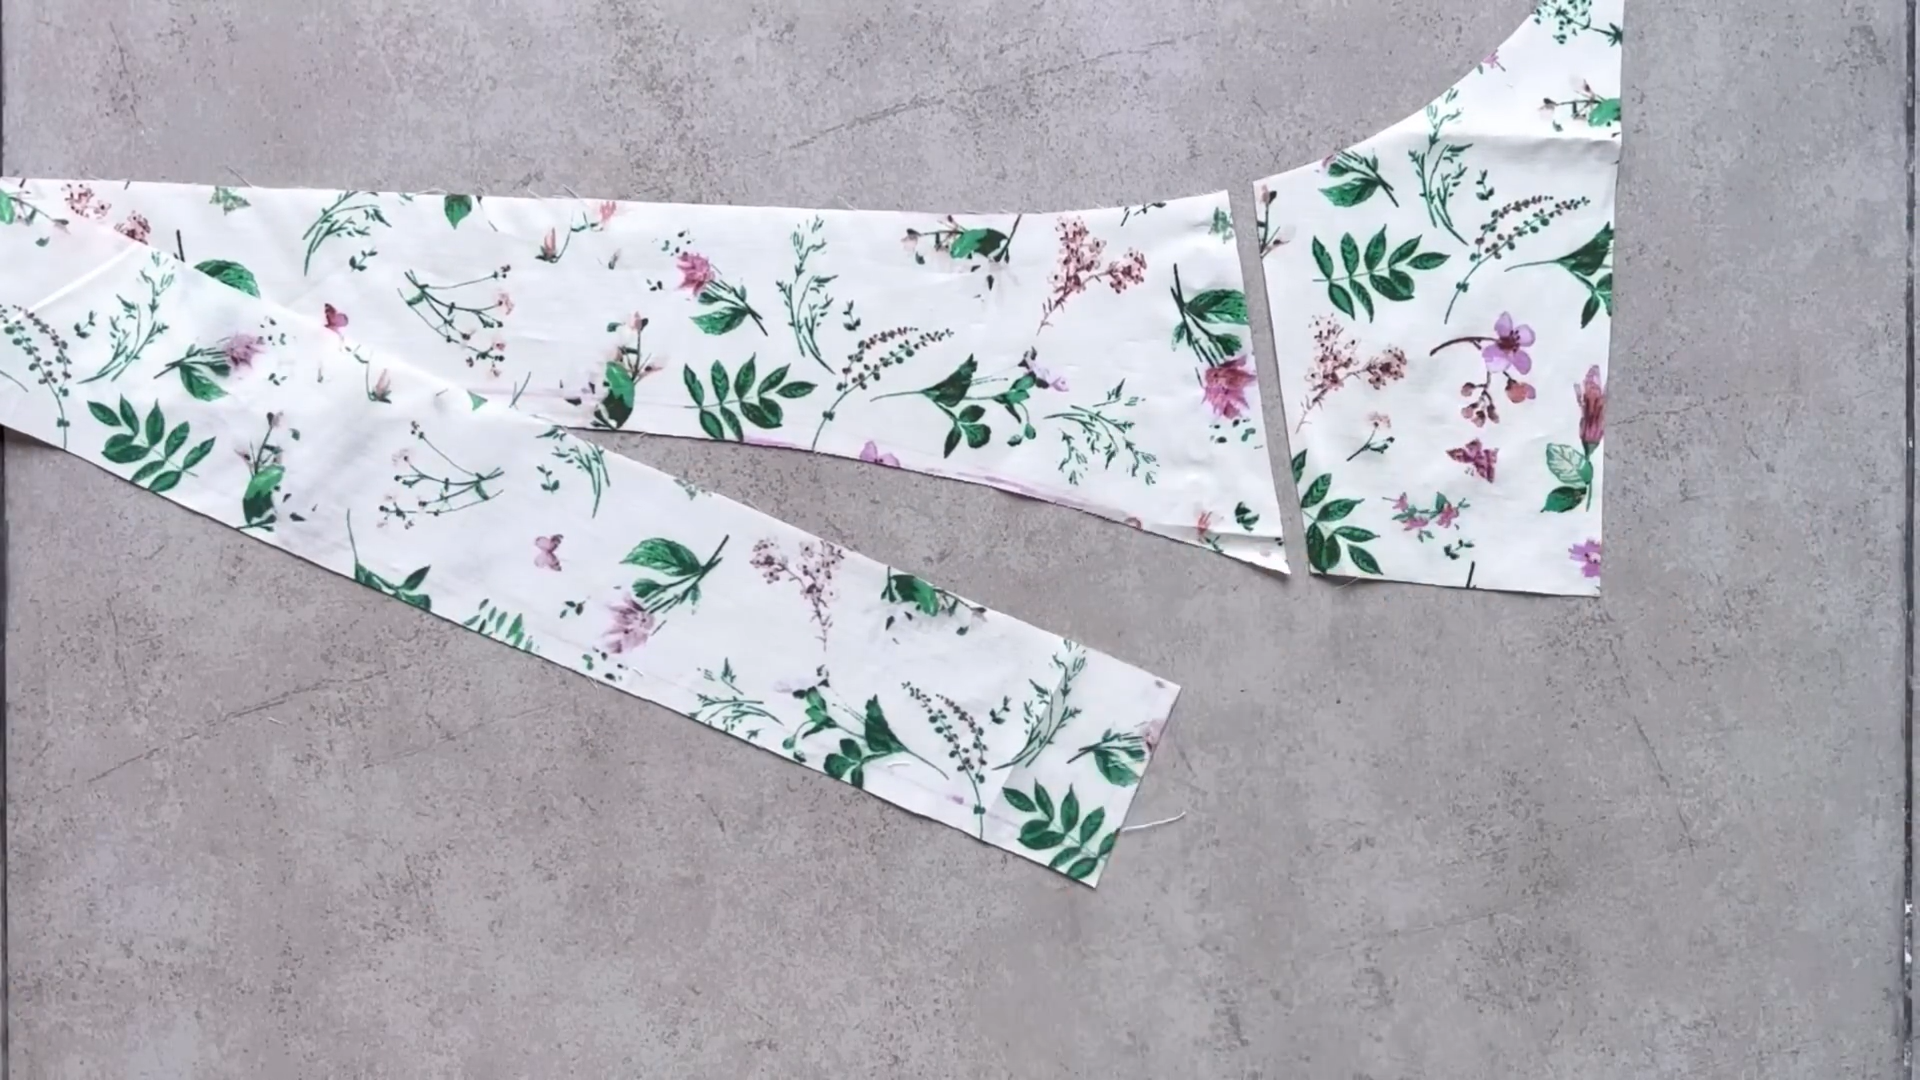
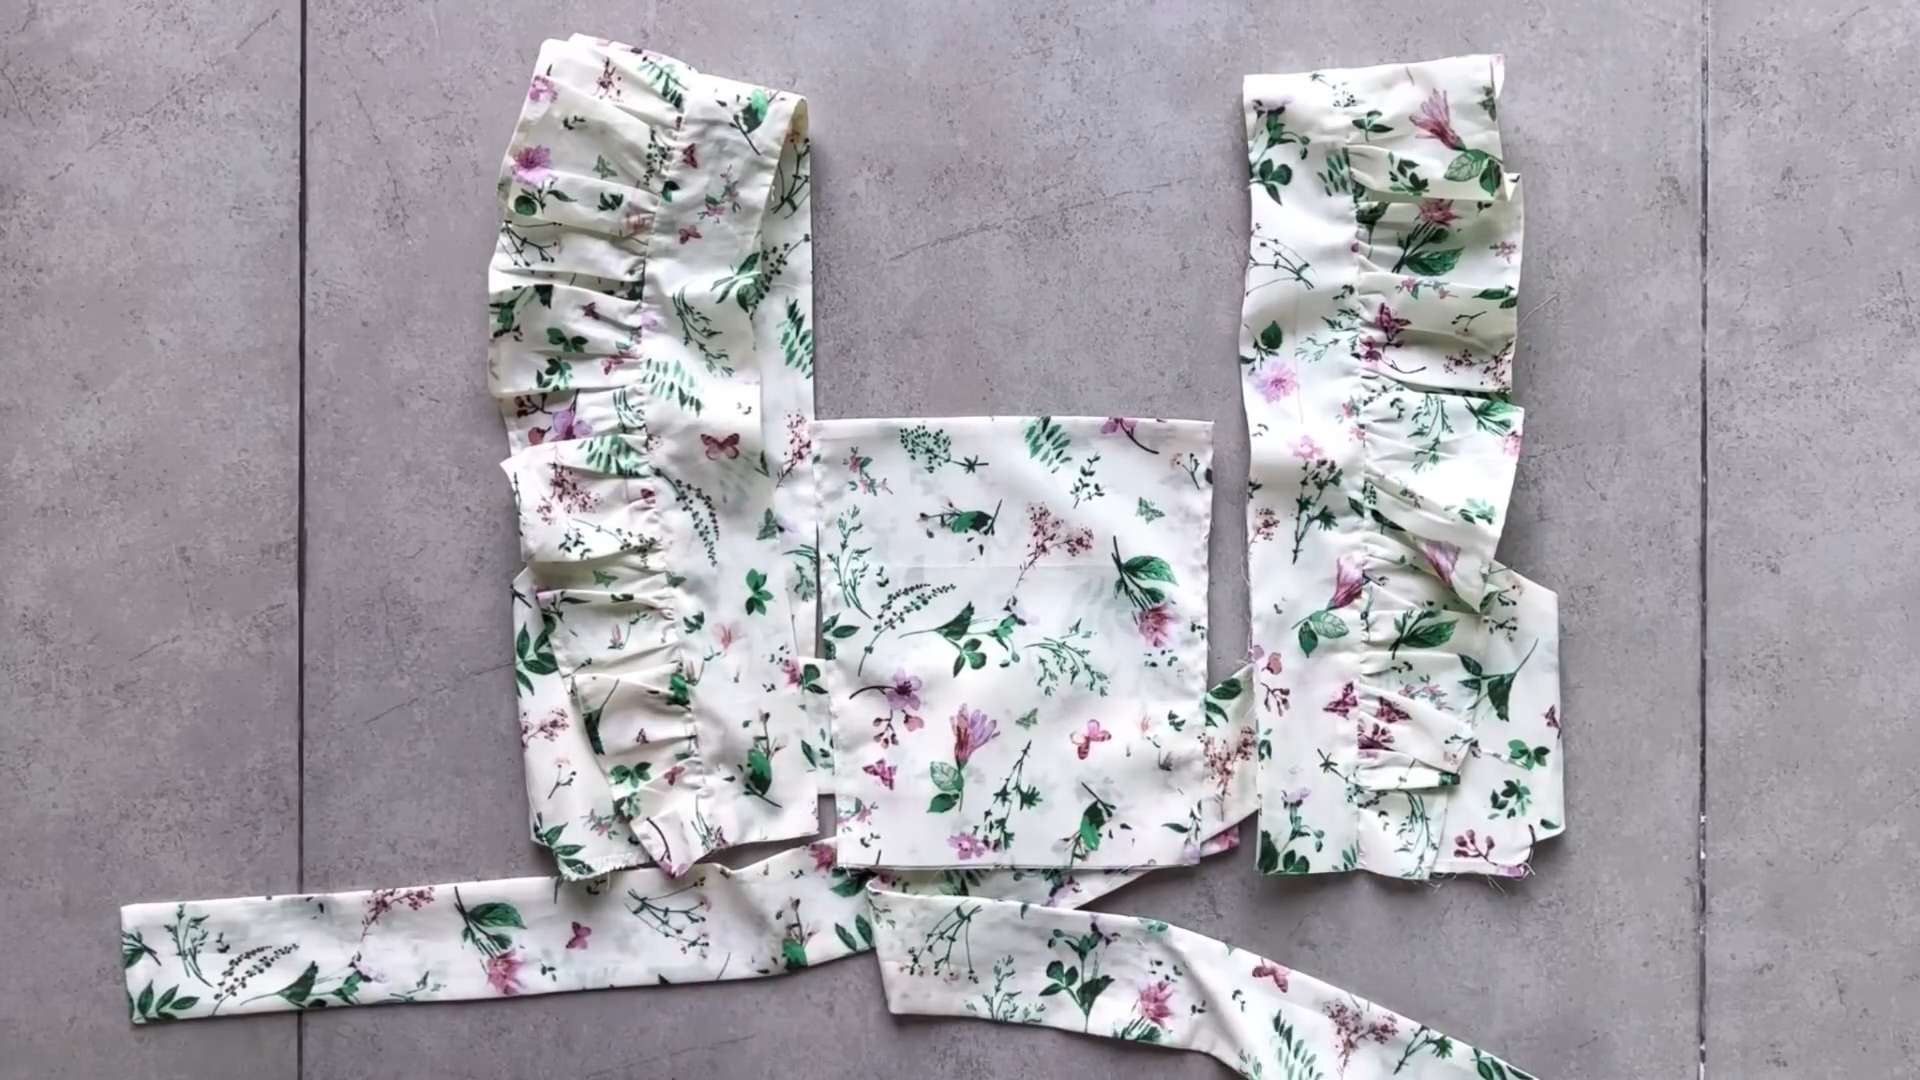
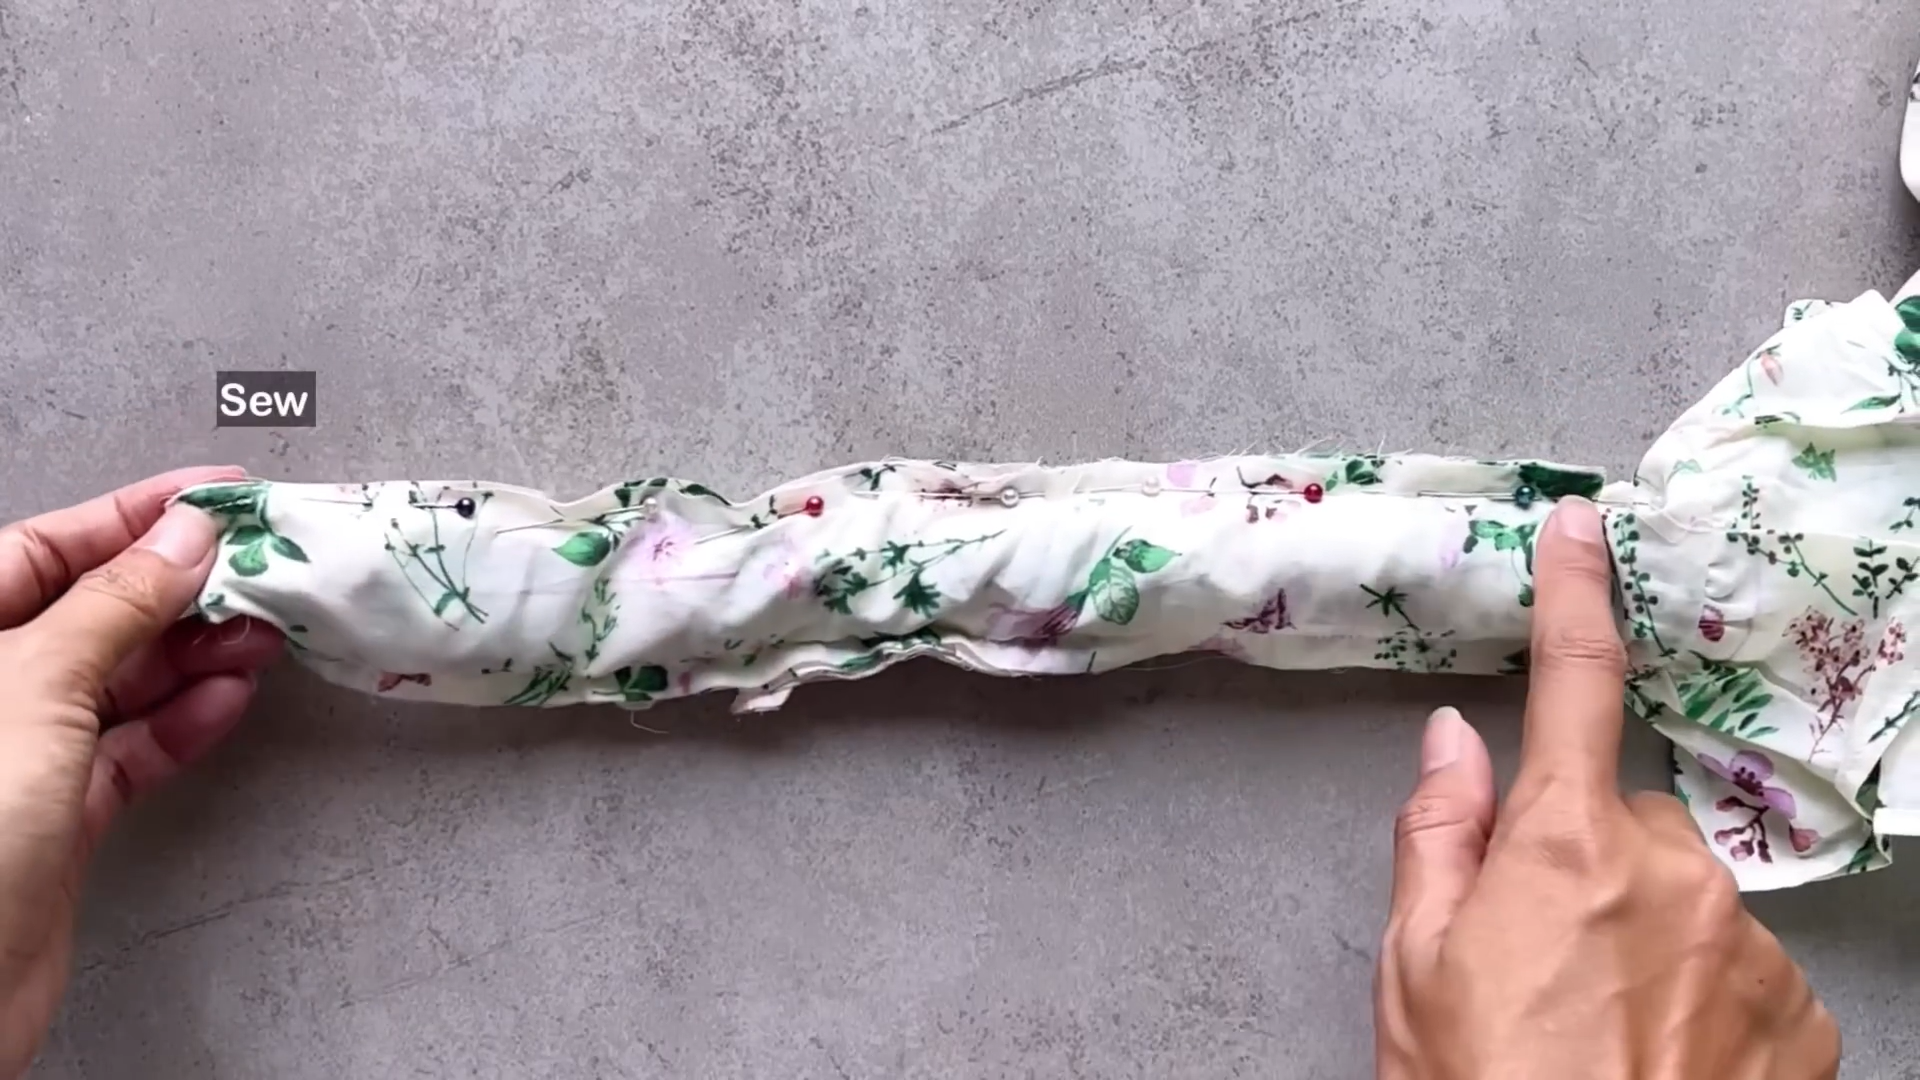
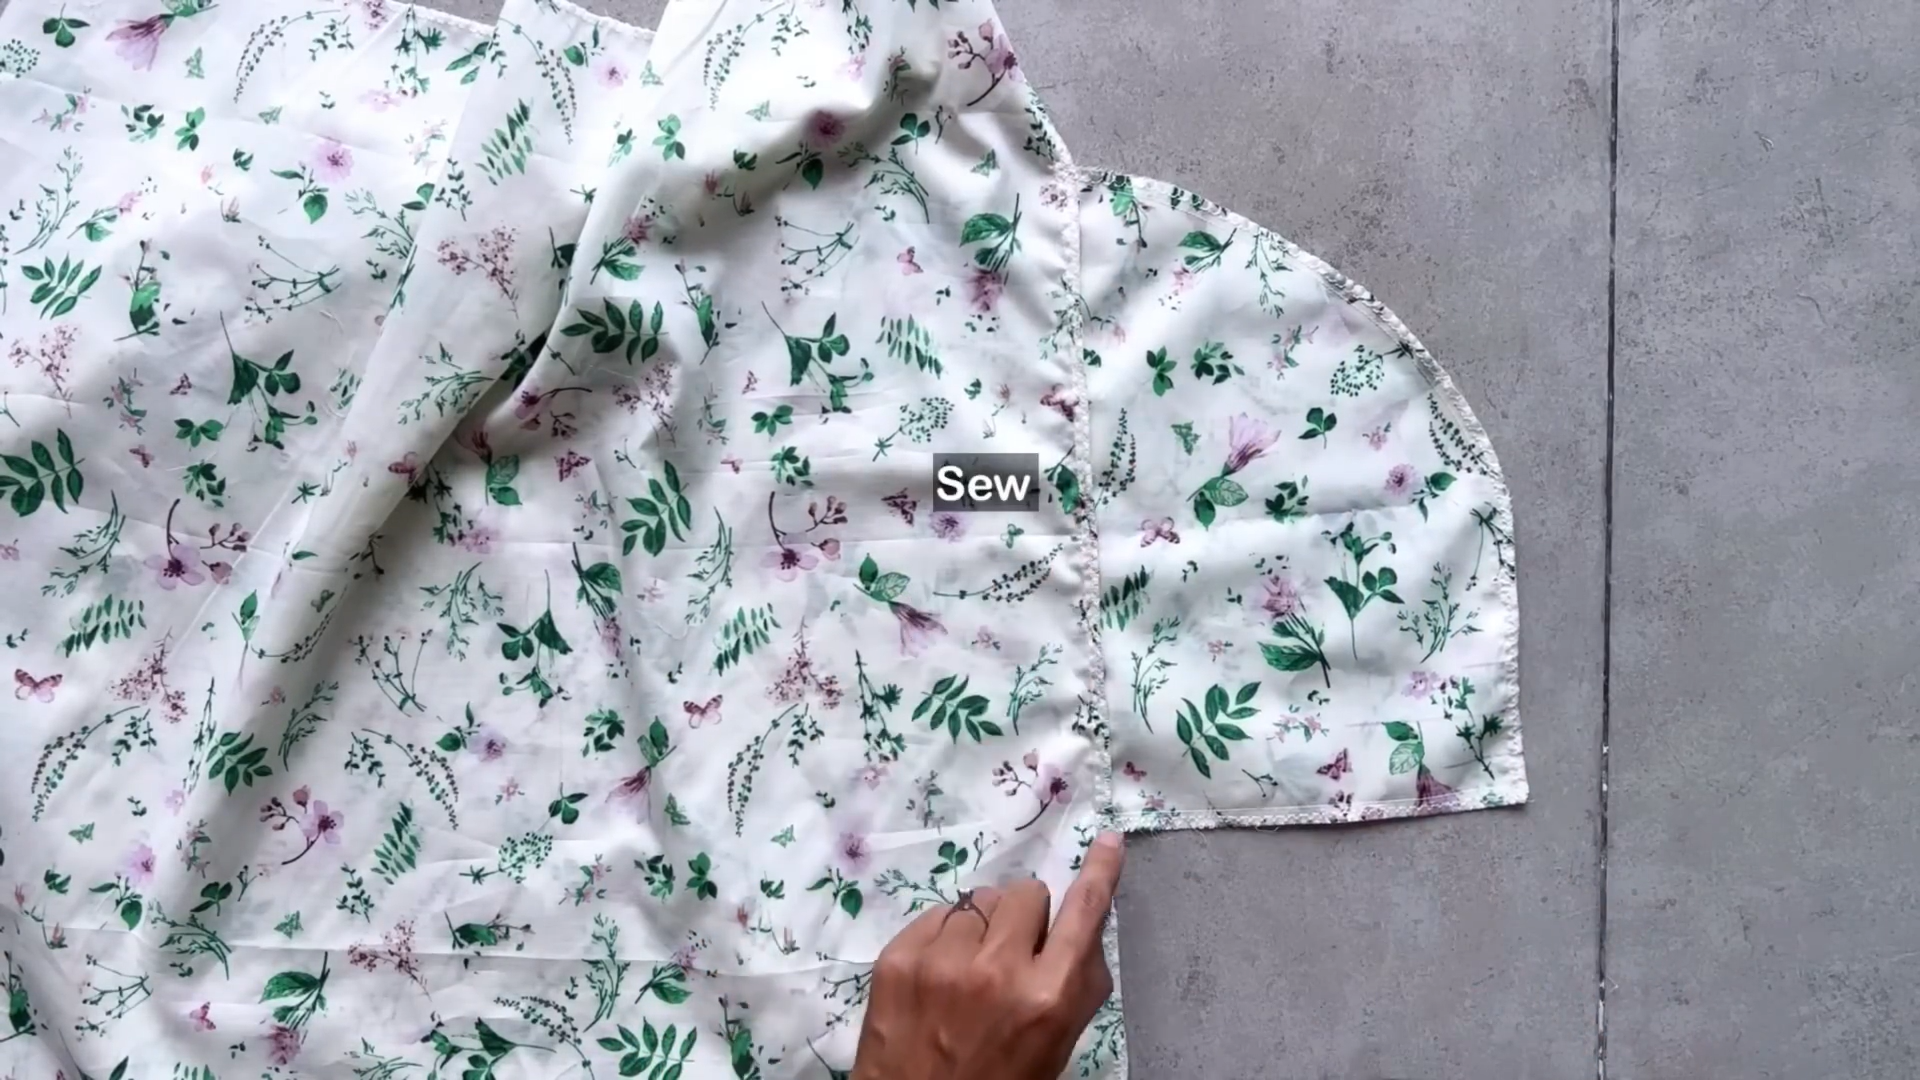
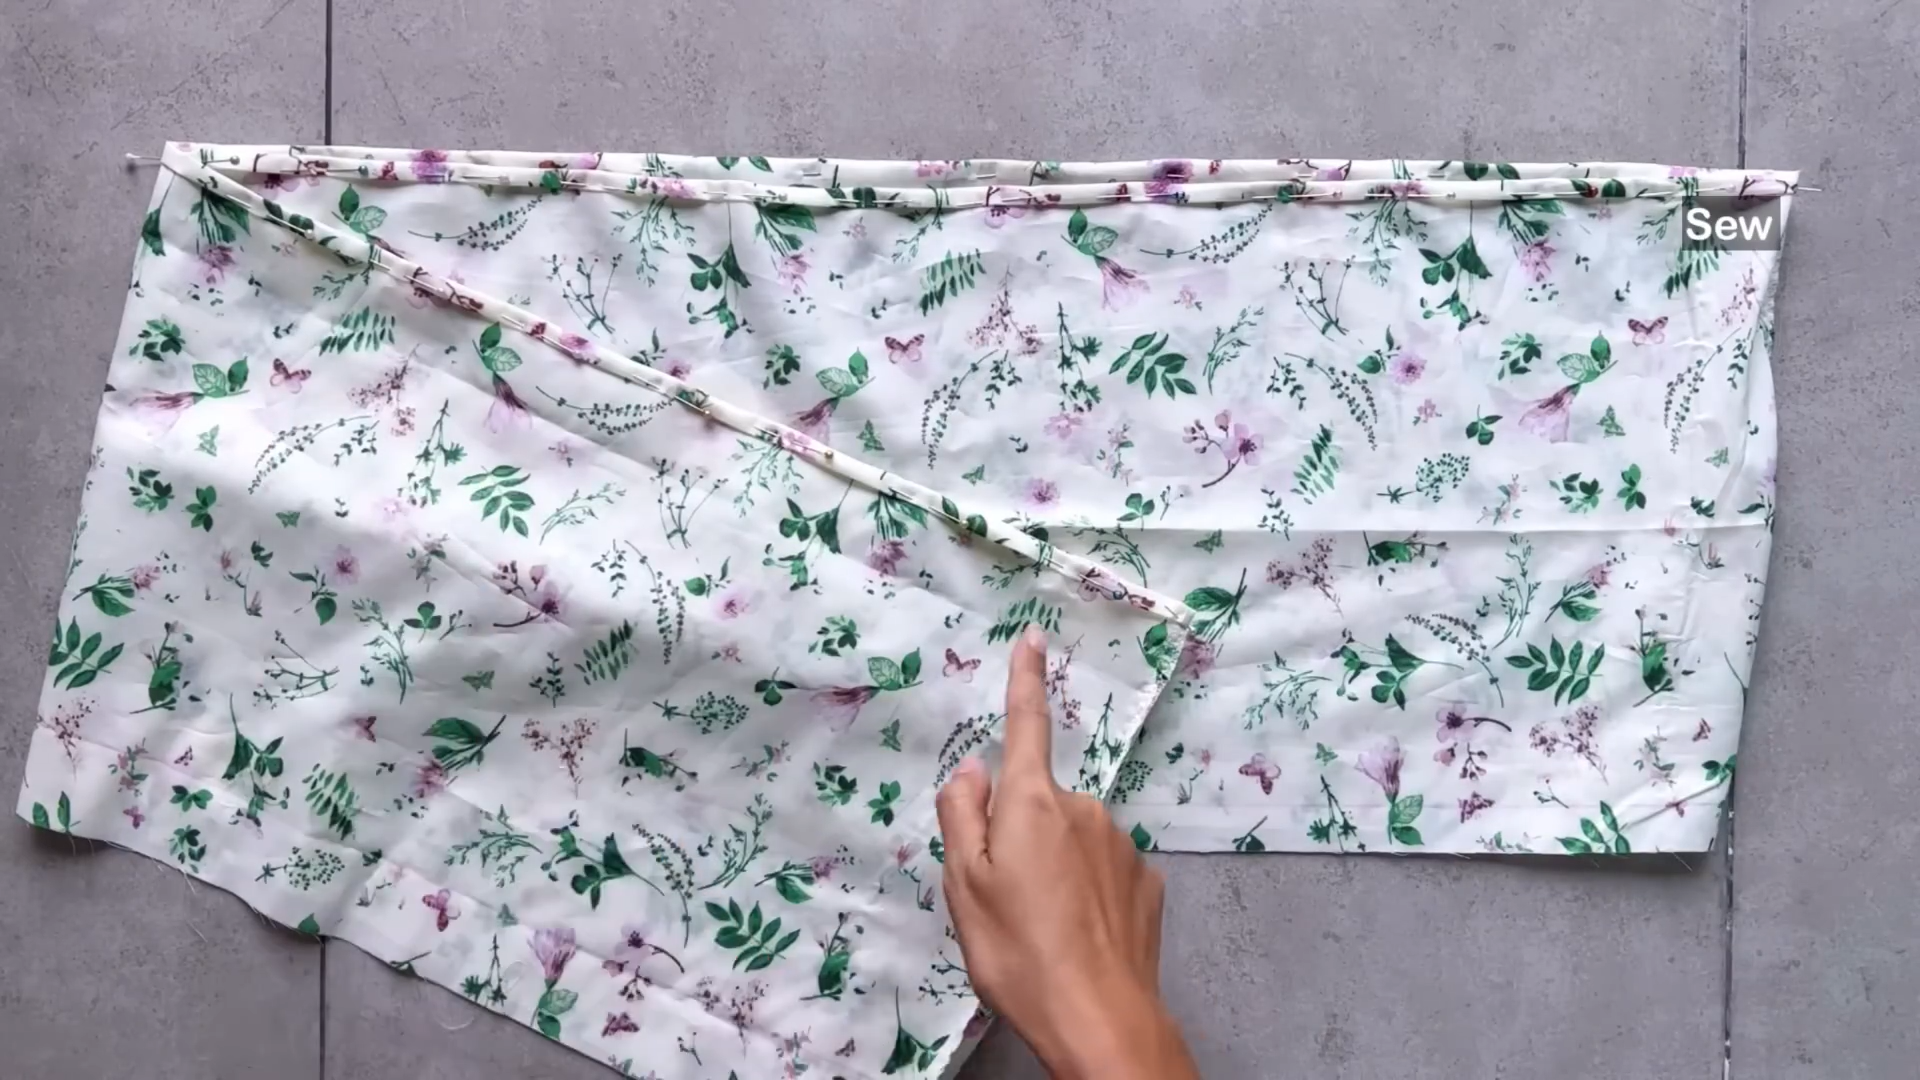
Cut out the tie and the side part of the bodice based on the pattern.
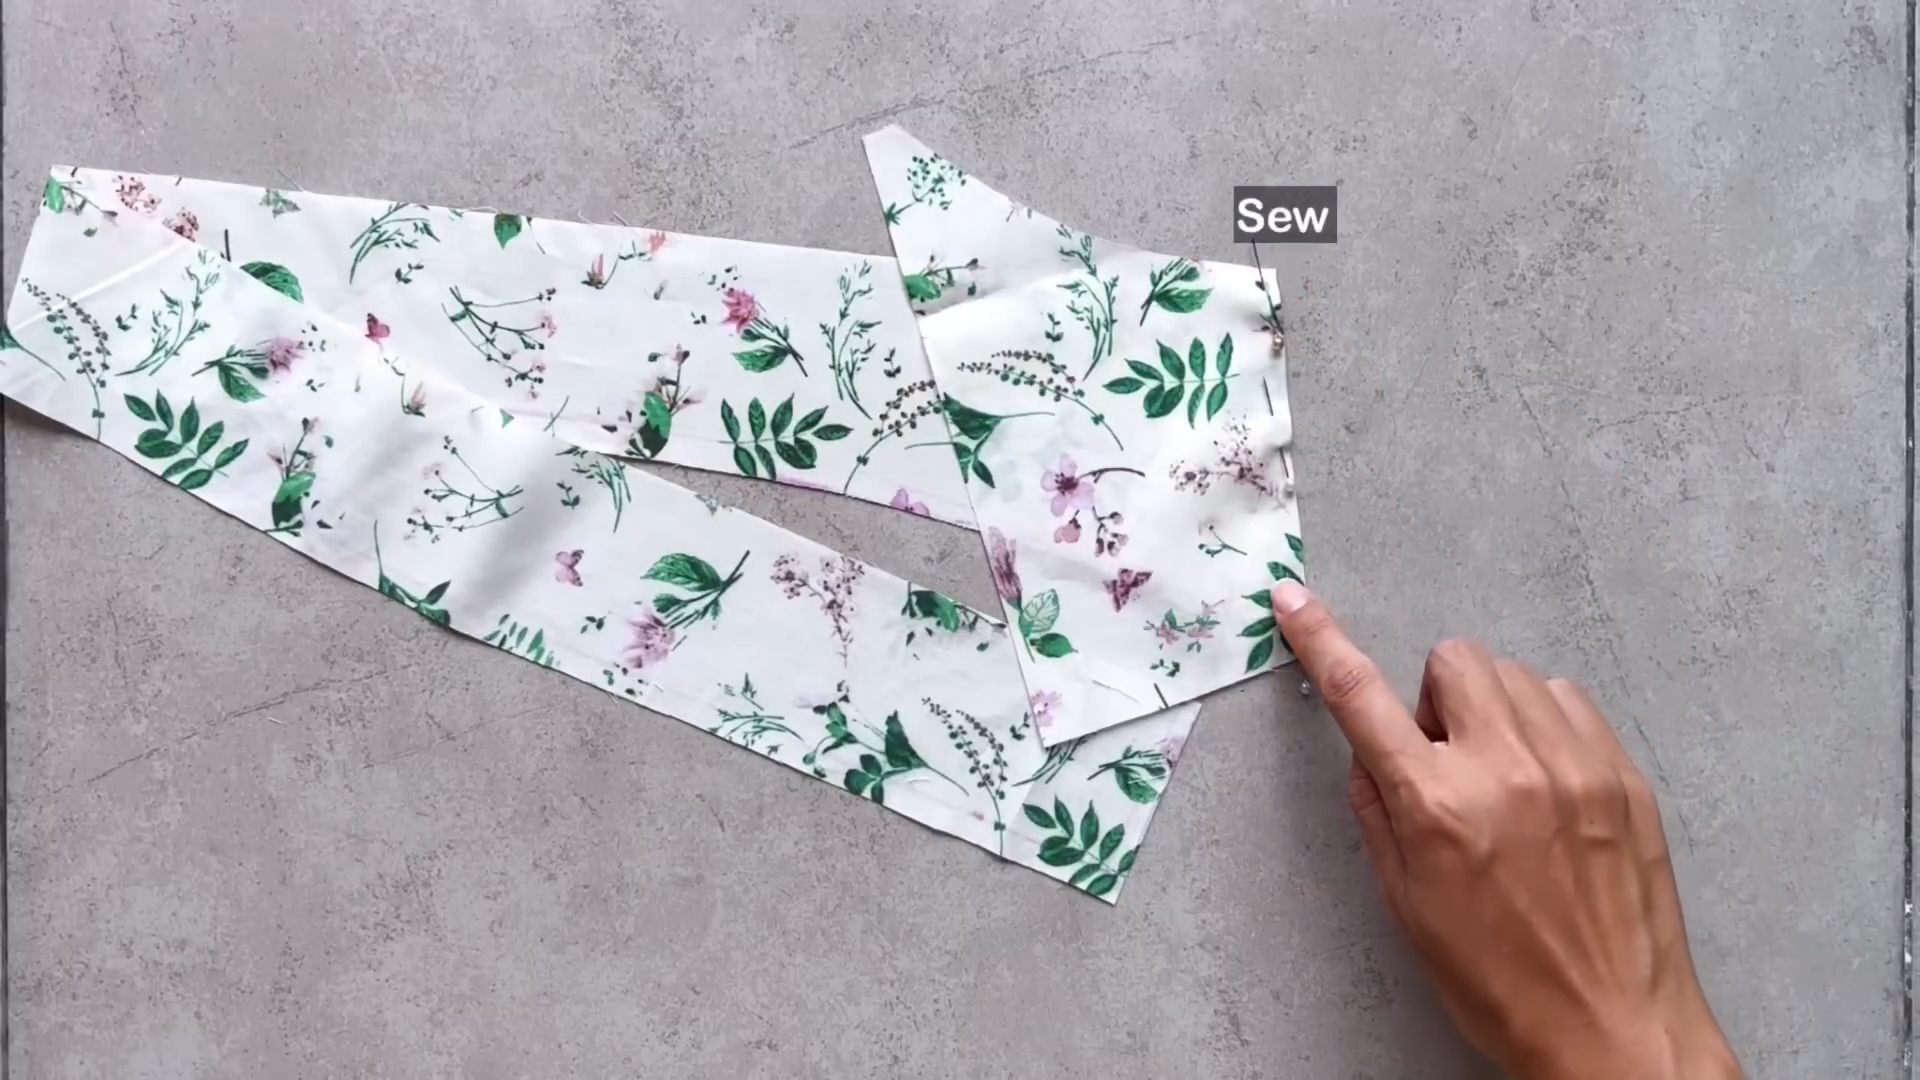
Connect the side and tie pieces at the side seams.
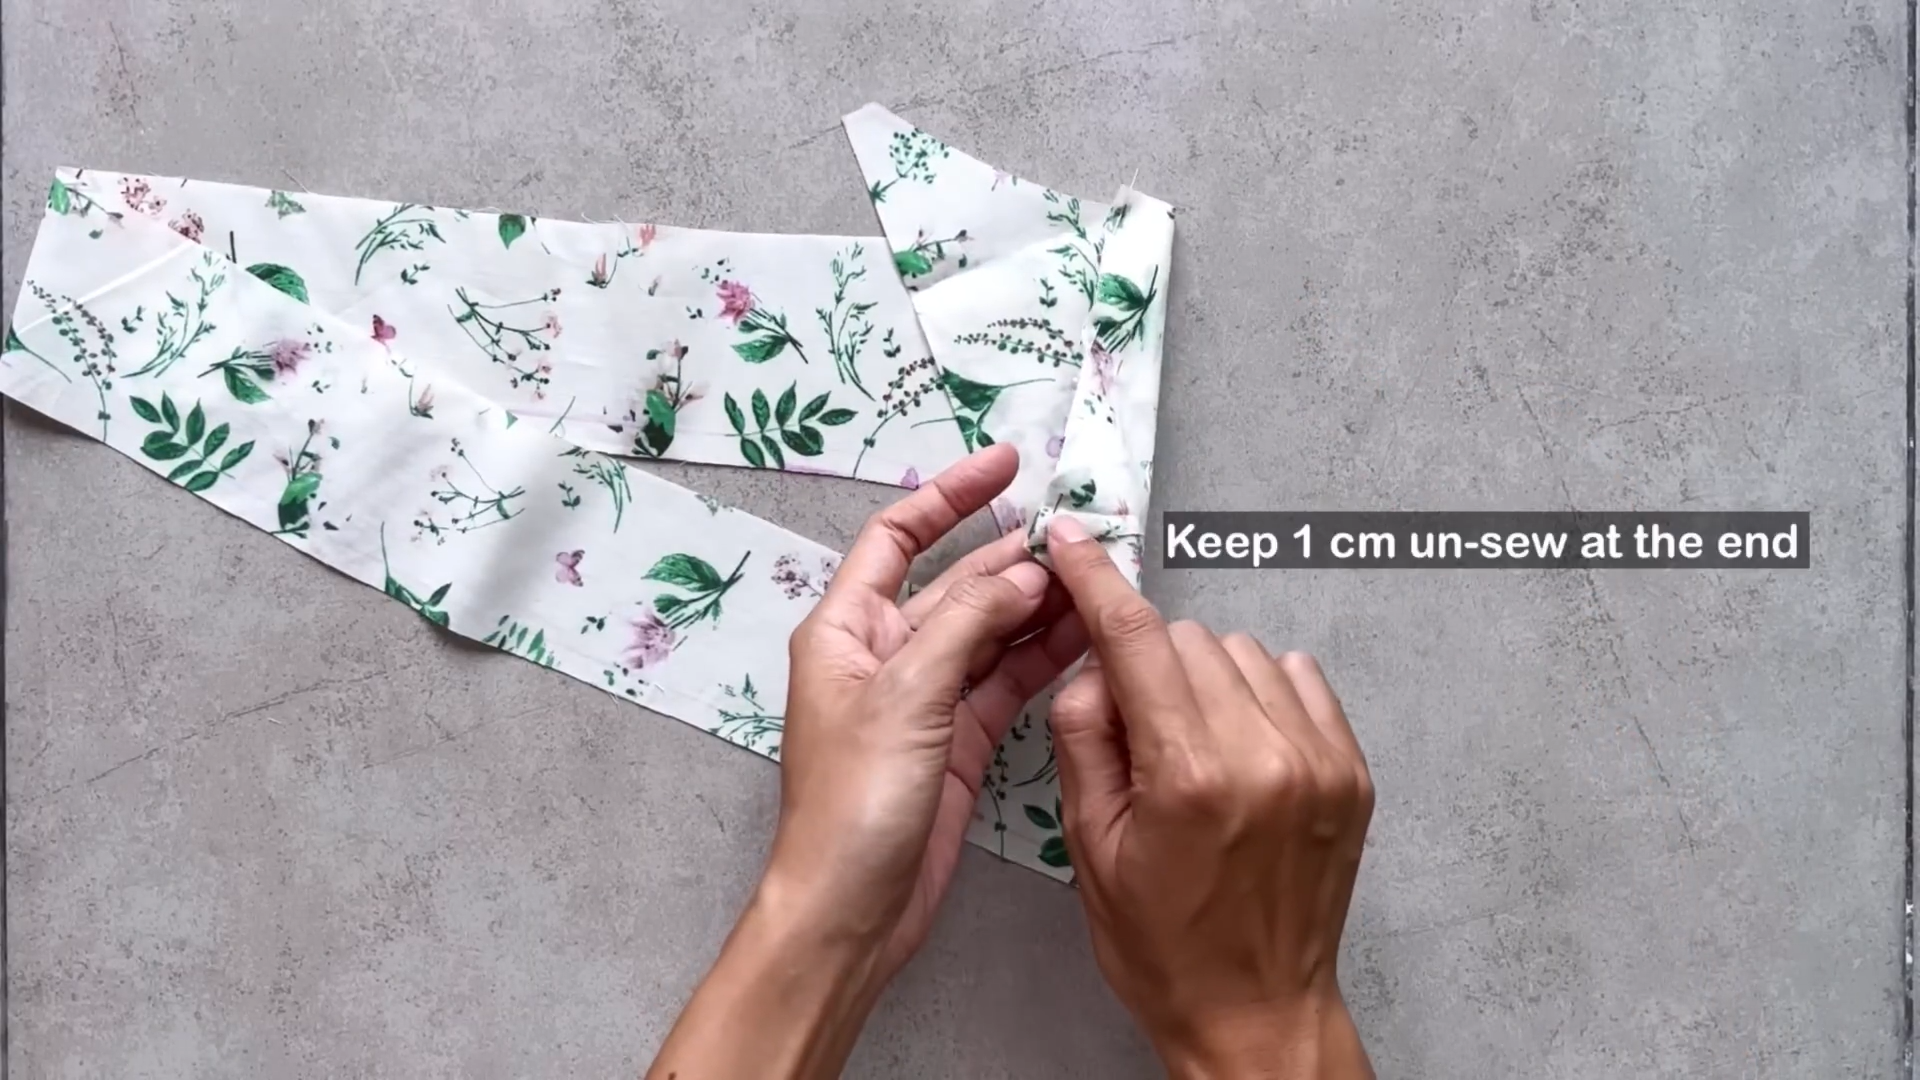
Leave 1 cm un-sew at the end of the seam.
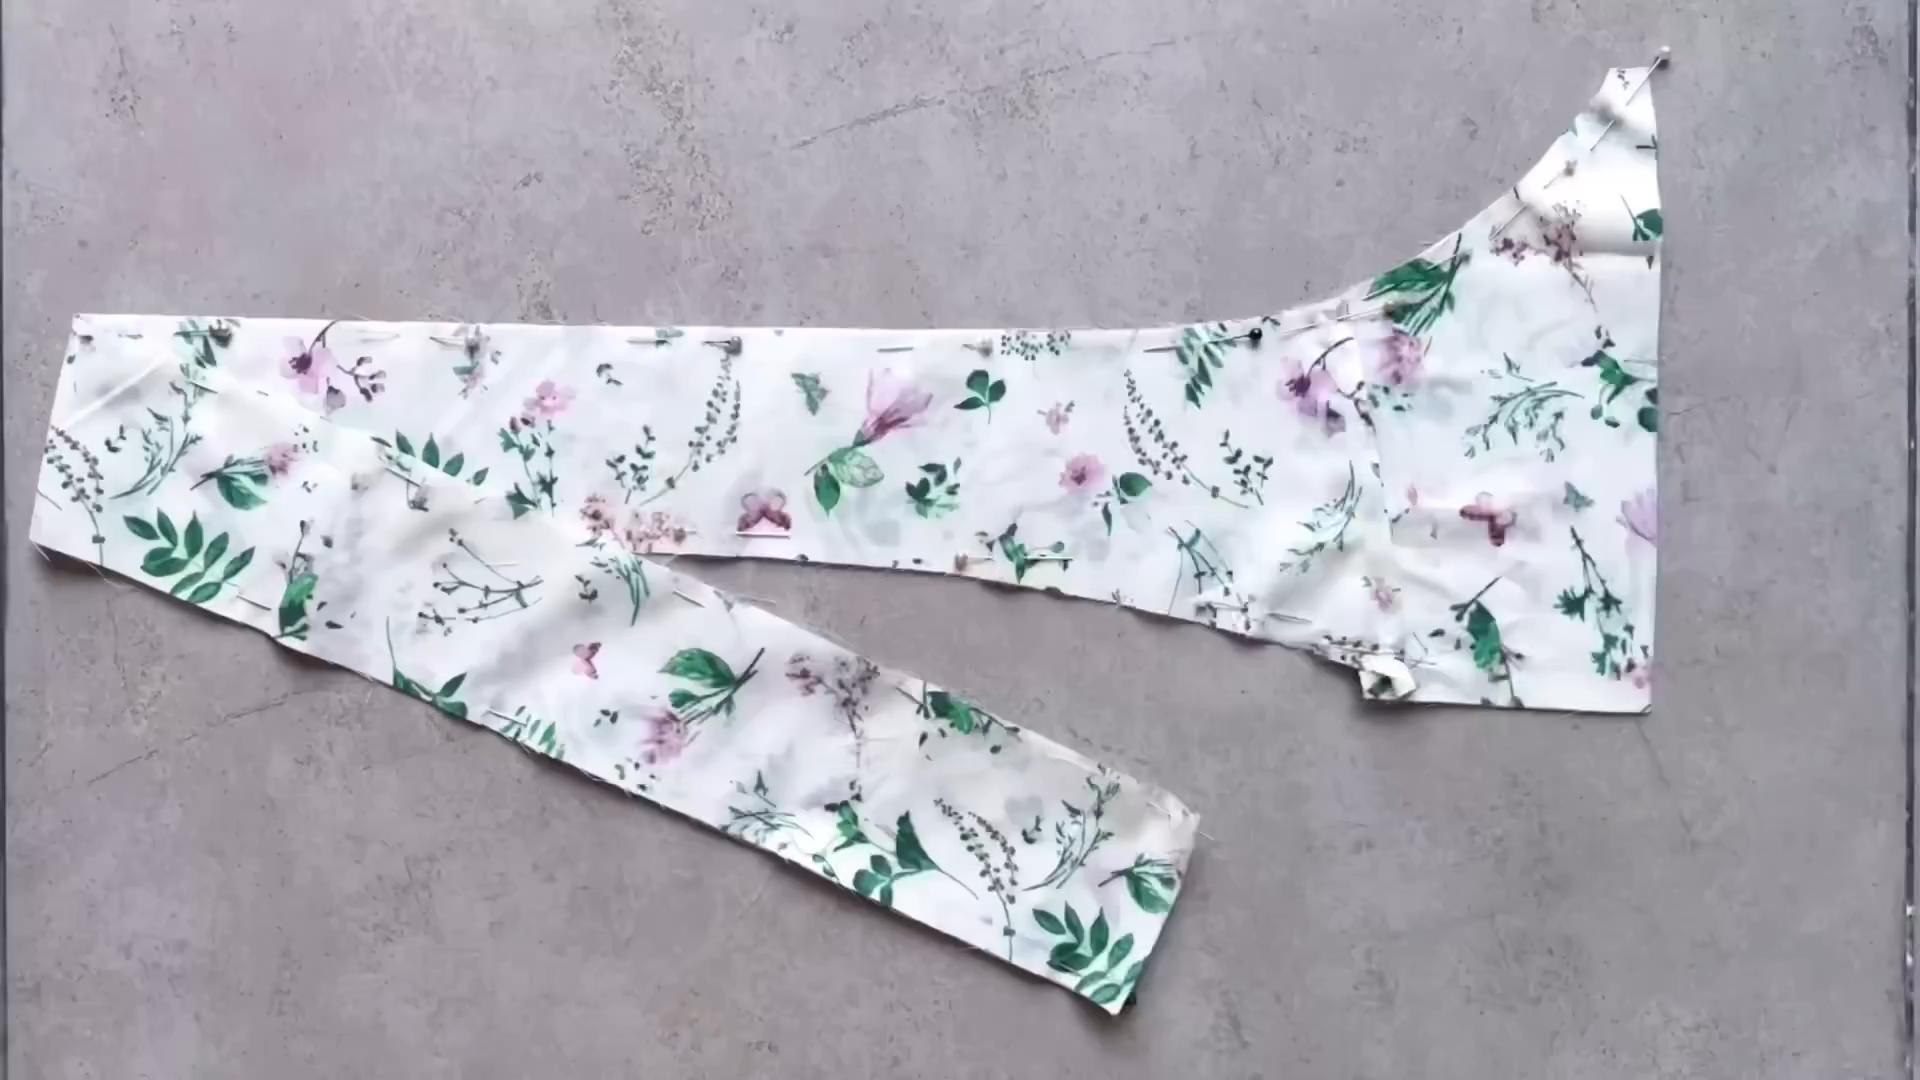
Make another tie piece and pin them together.
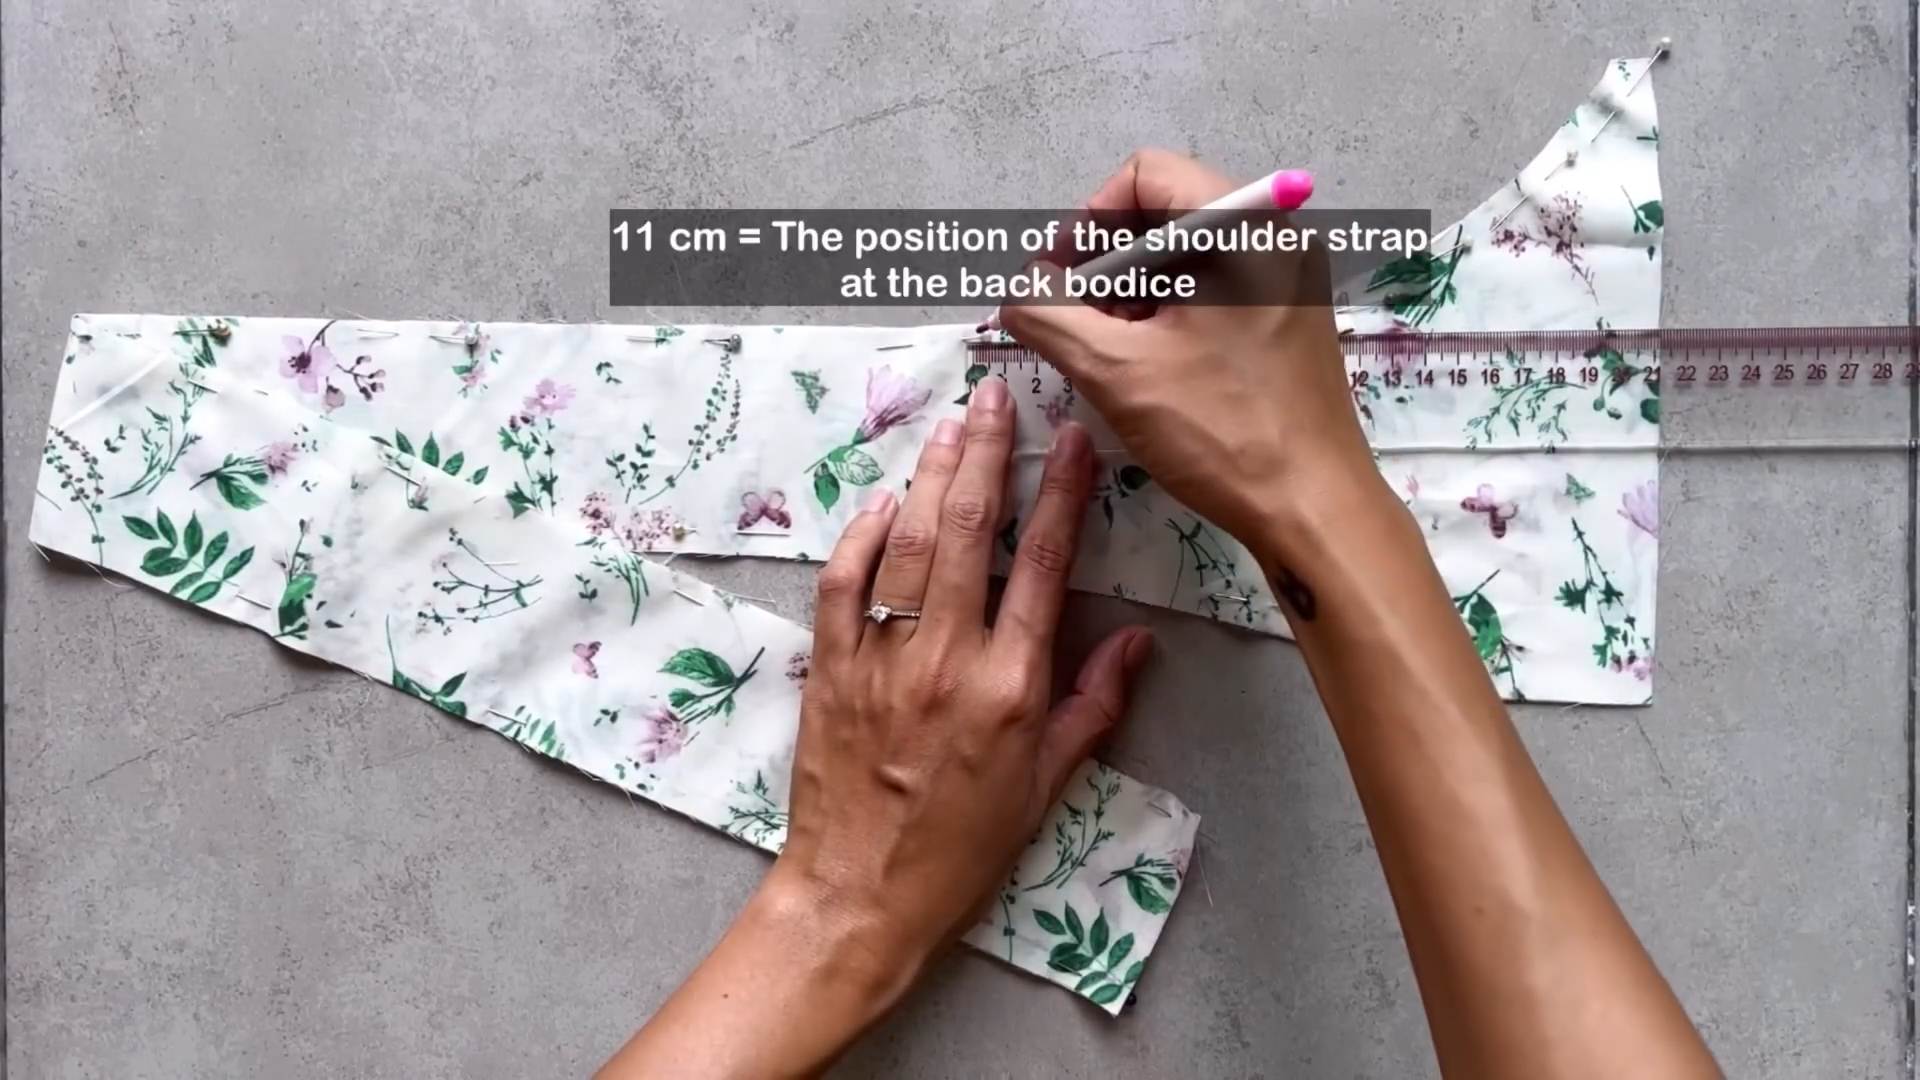
Mark 11 cm from the top on the tie which is the shoulder strap attachment point
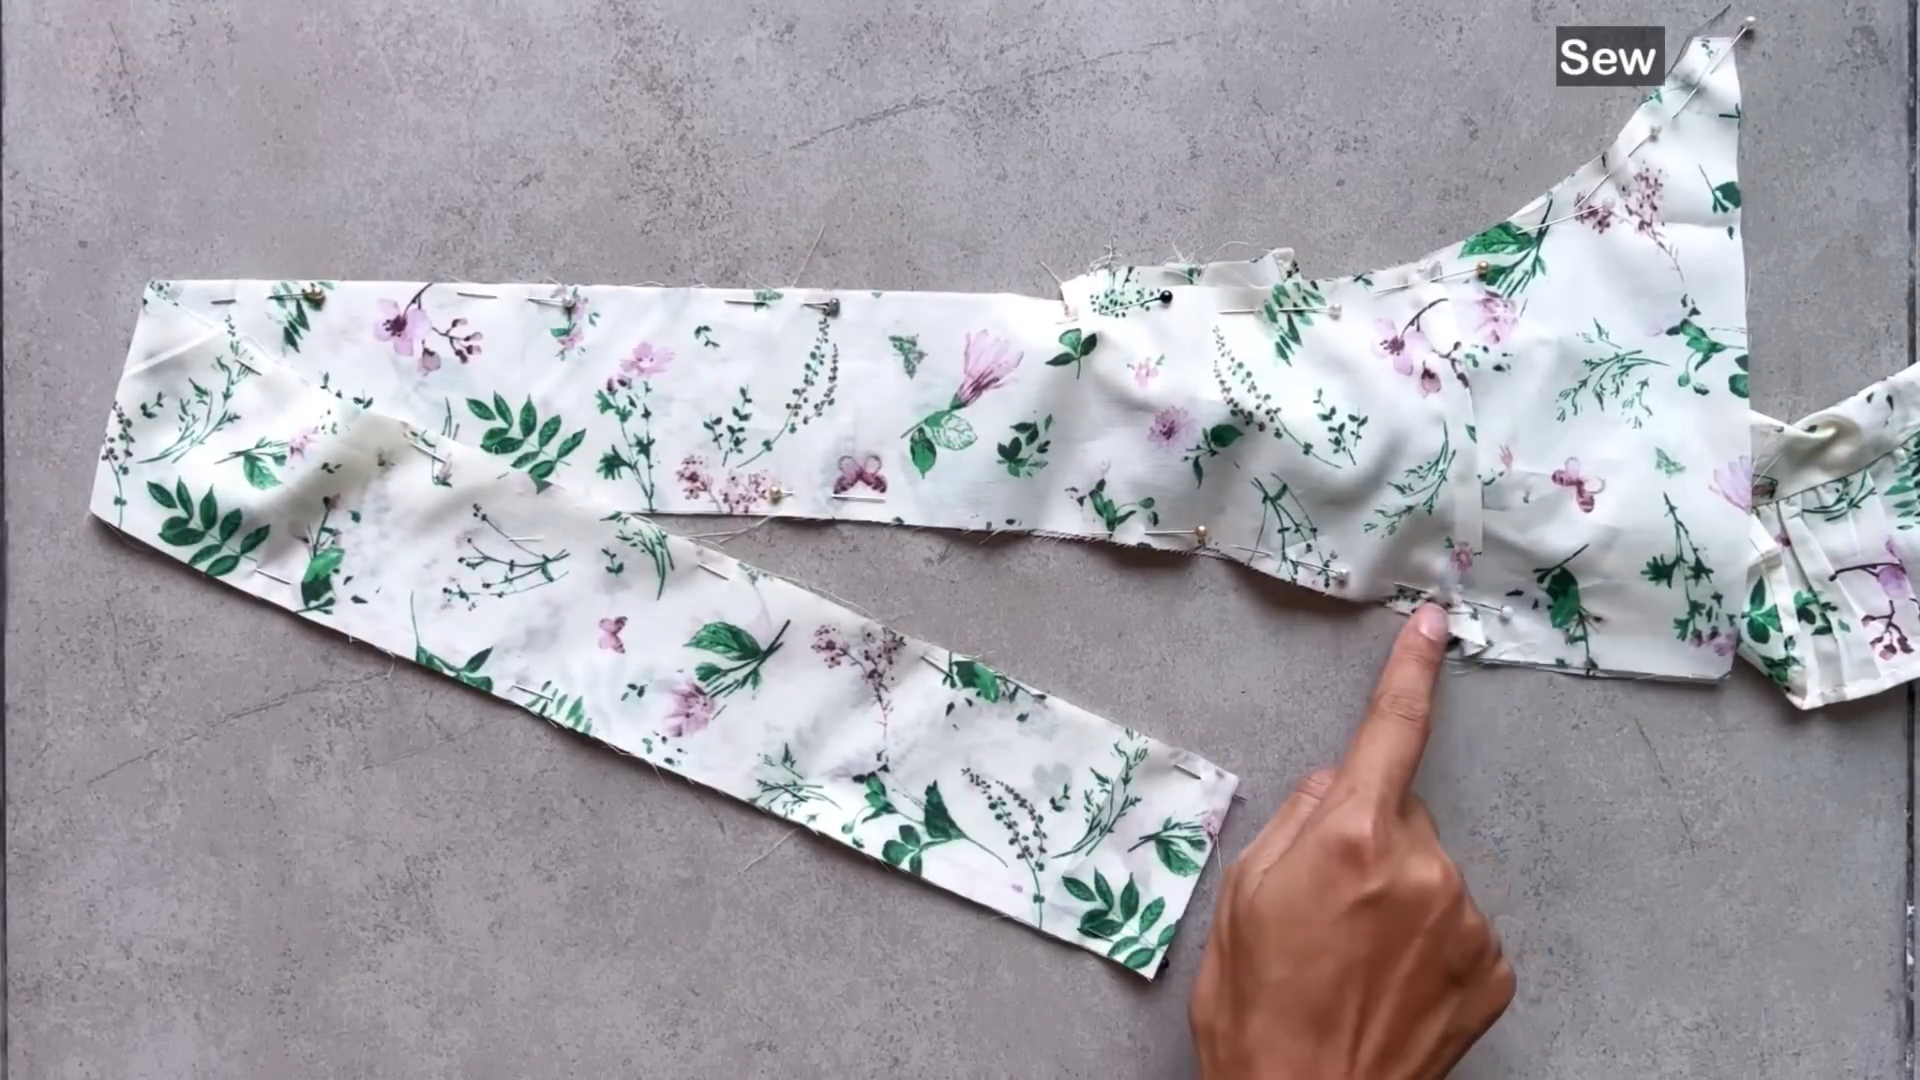
Sew the shoulder straps in between the tie pieces.
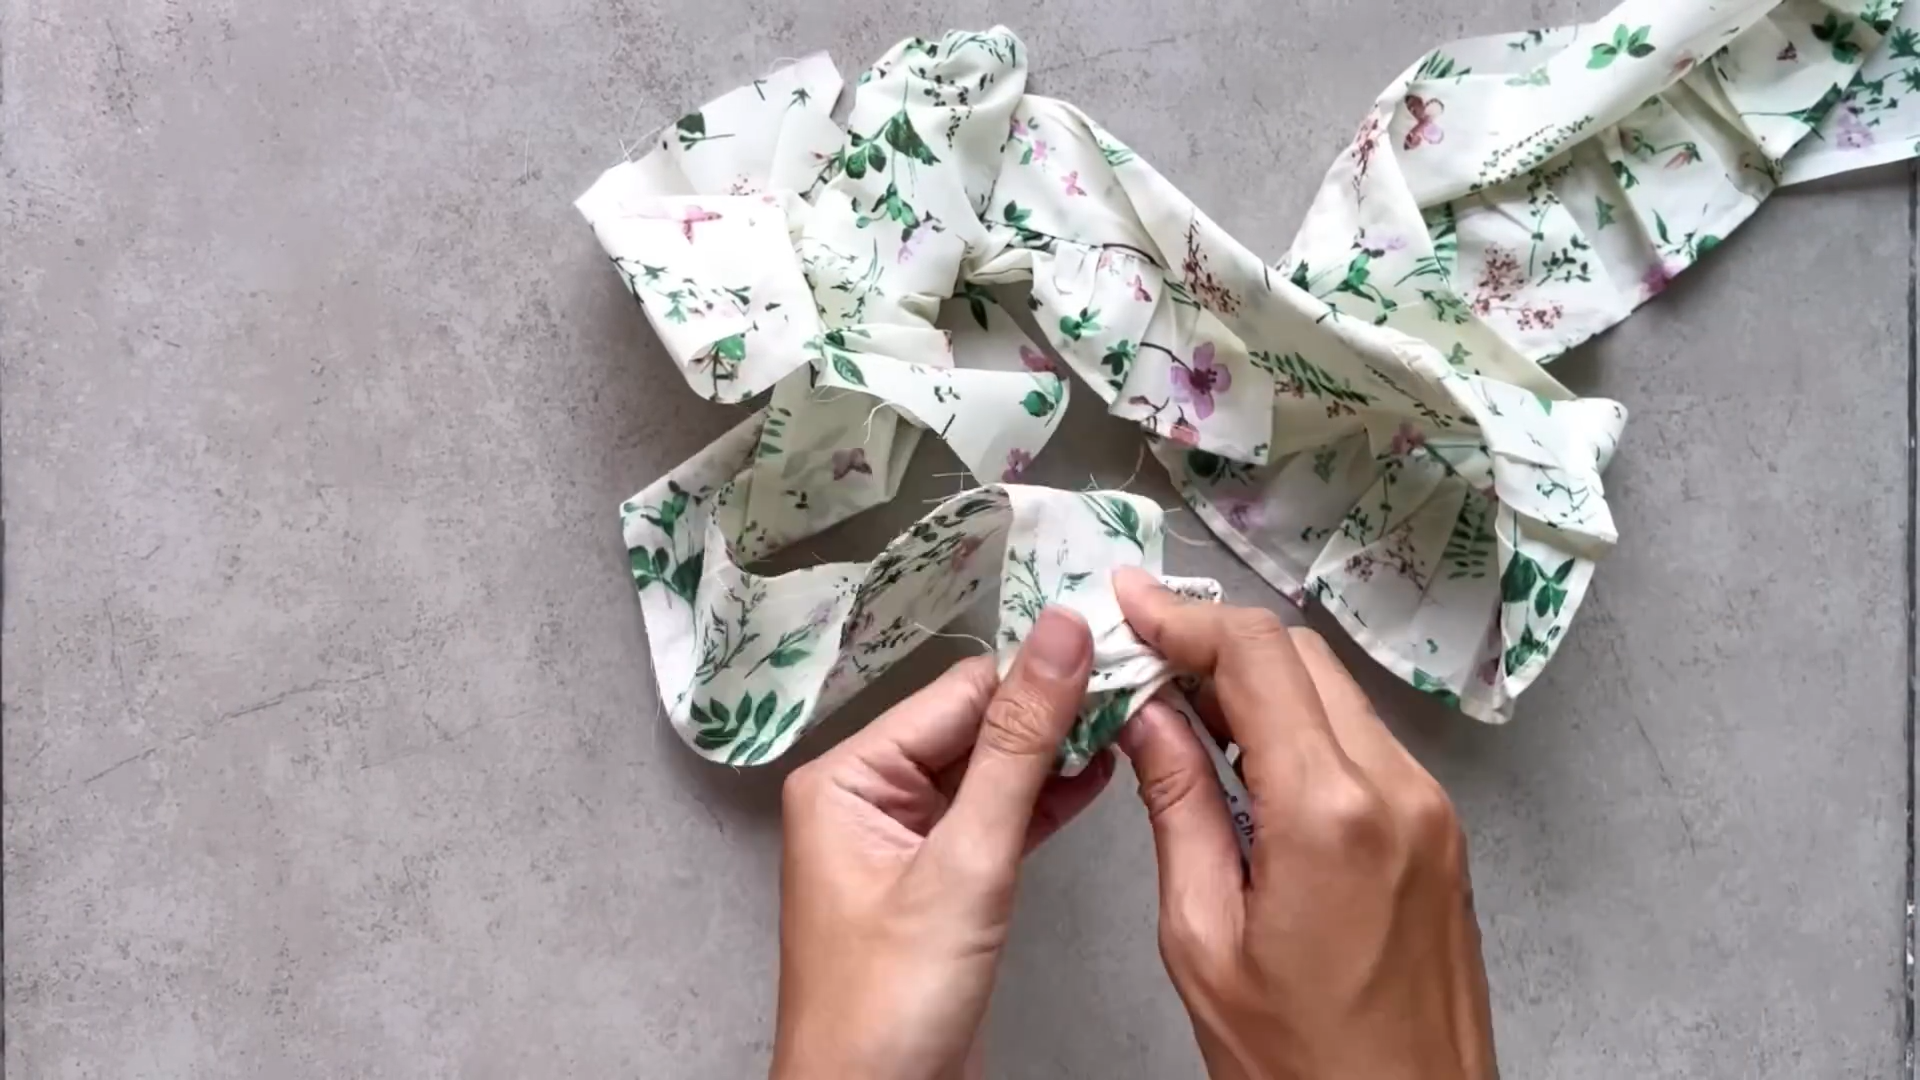
Turn the piece right-side out and iron for a crisp finish.
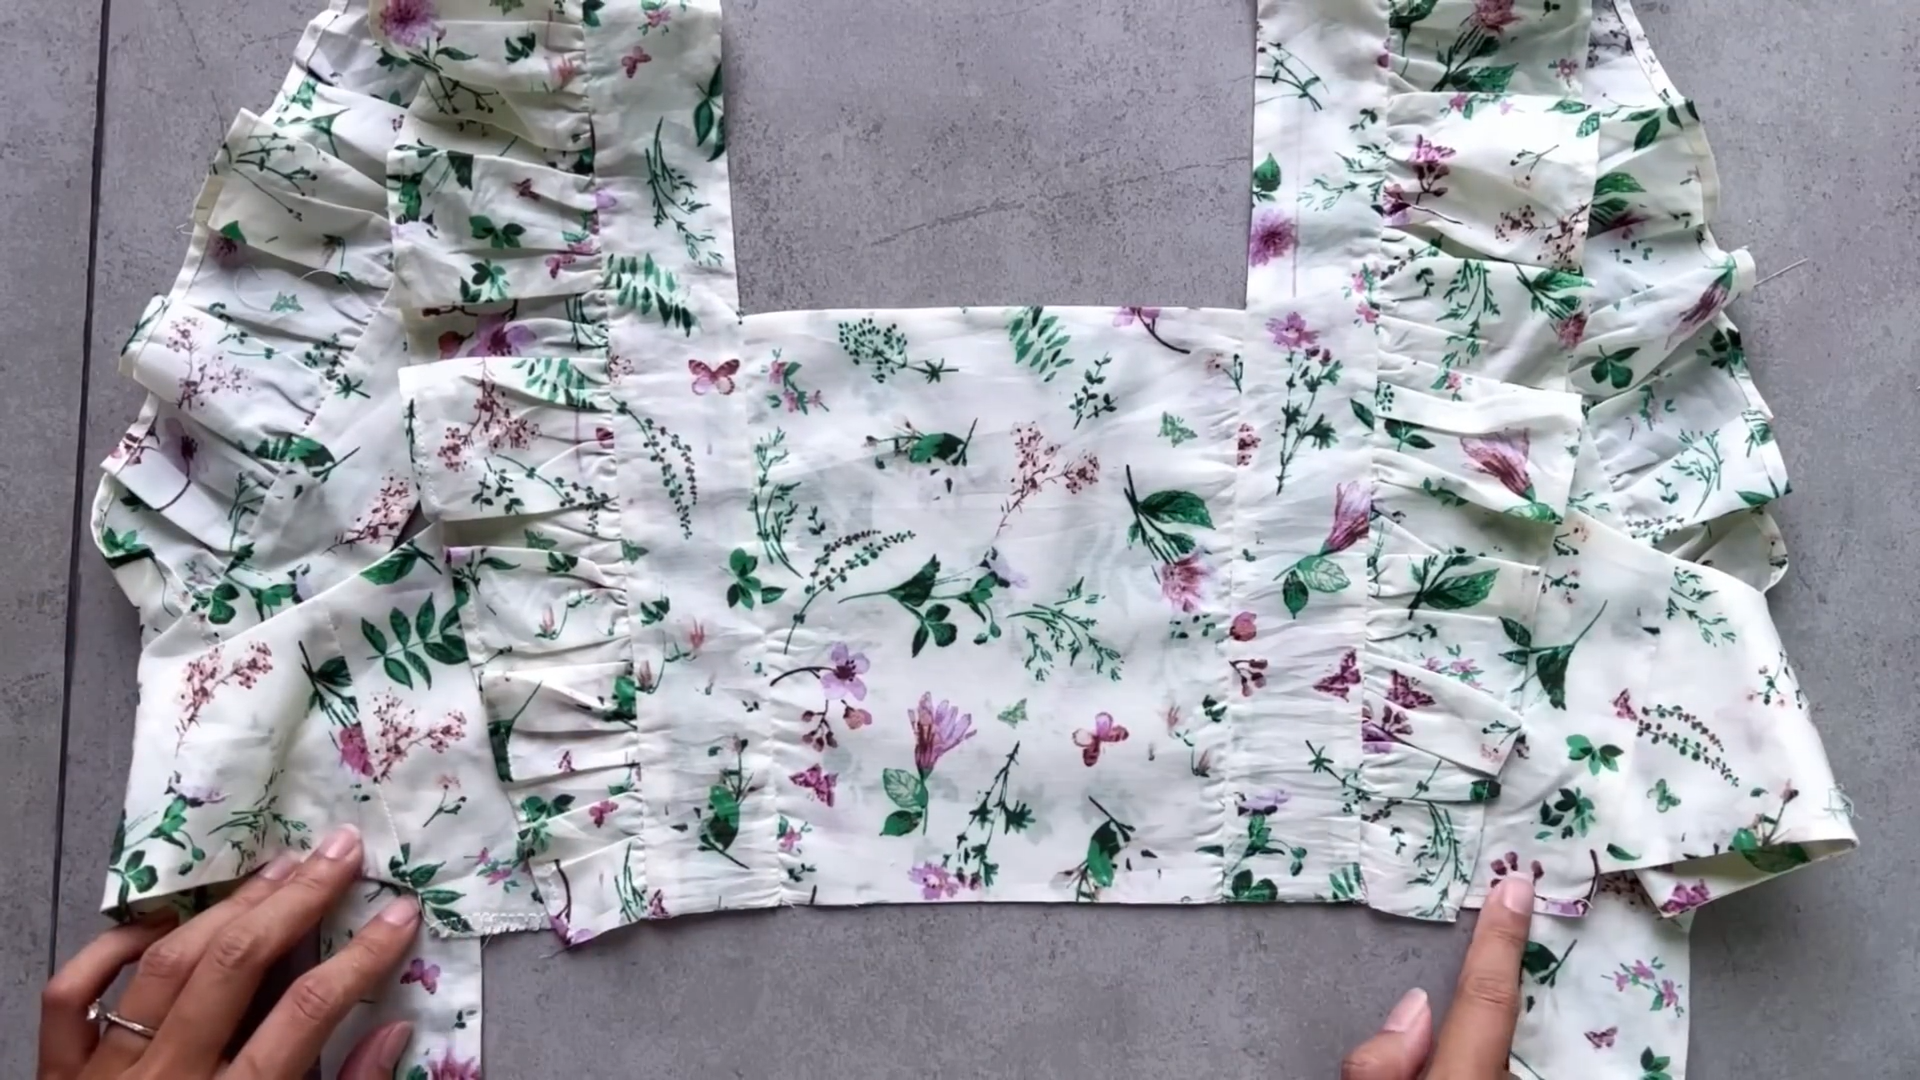
Overlock the remaining seam of the side part.
Sew one end of the shoulder strap to the side bodice piece.
Then connect the other strap end. Make sure the side piece nestled between the straps.

Repeat the steps to create a mirrored piece for the other side of the bodice.
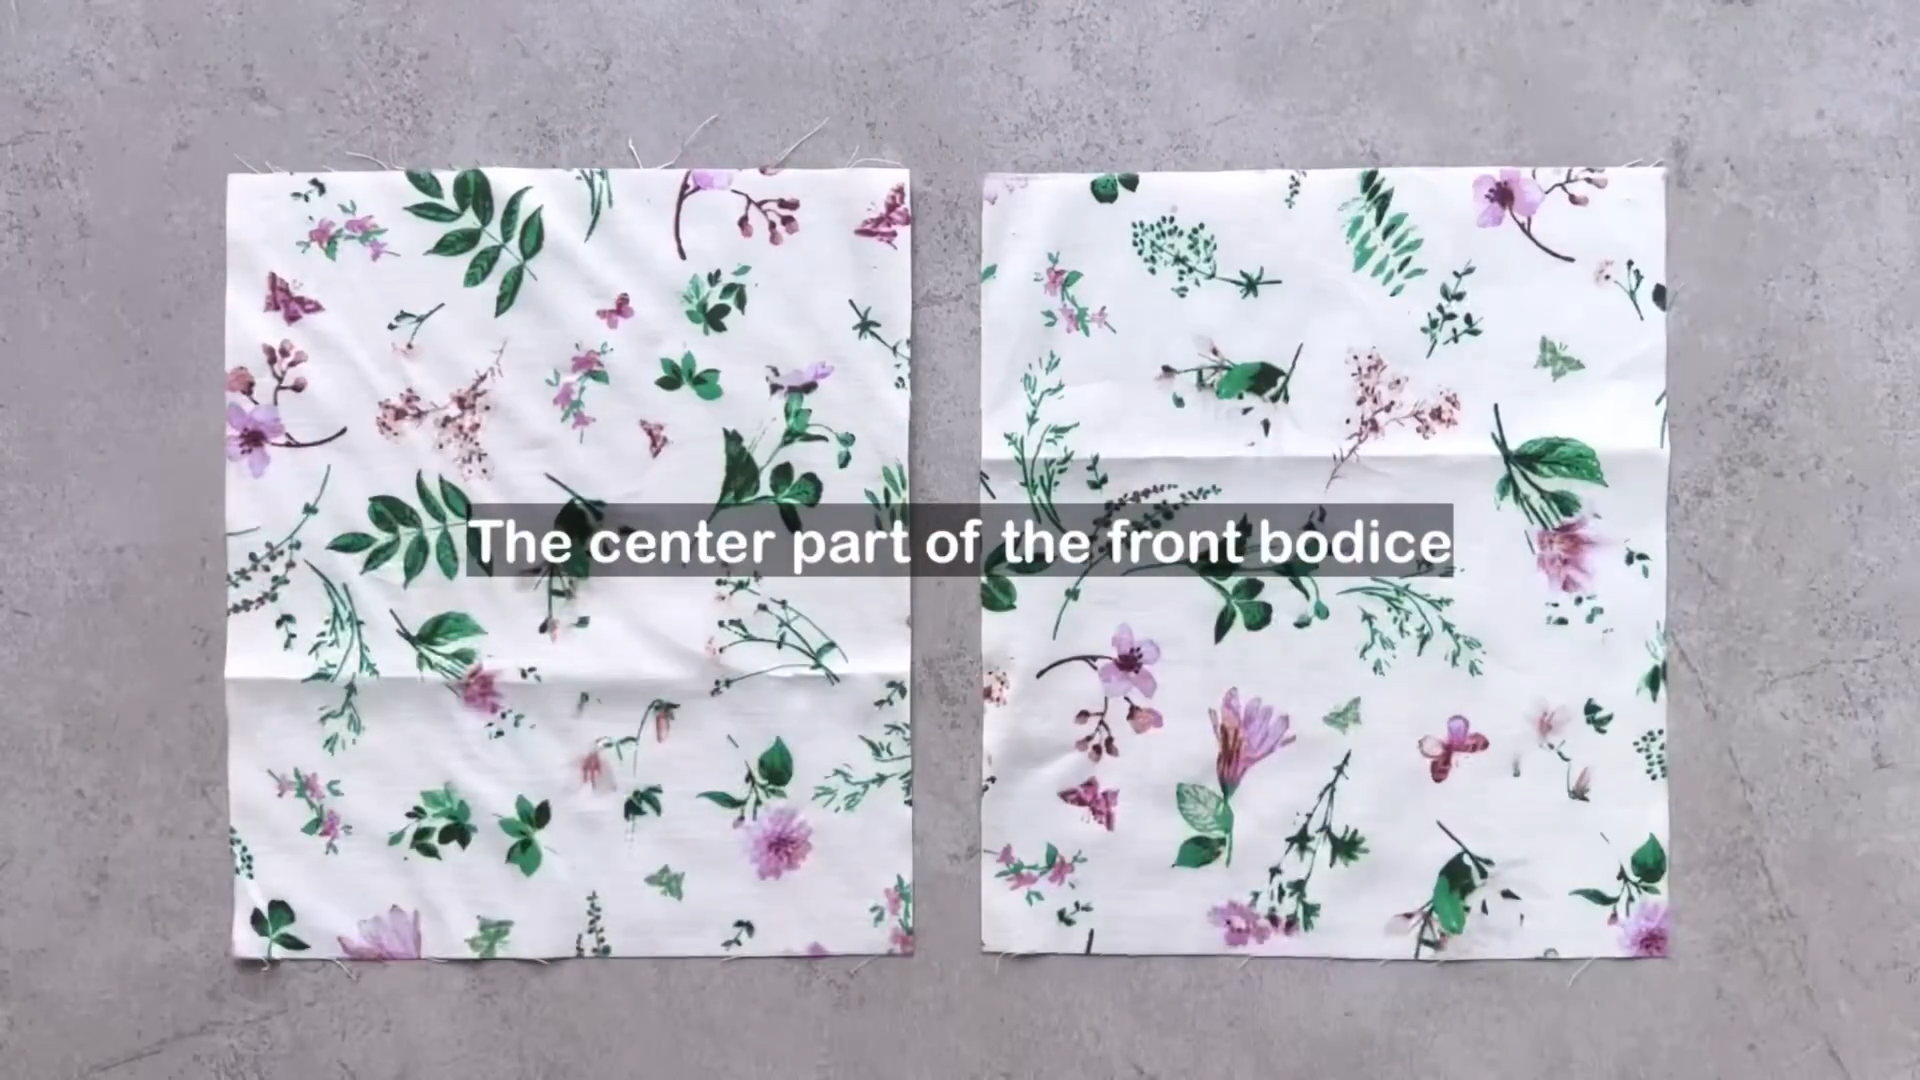
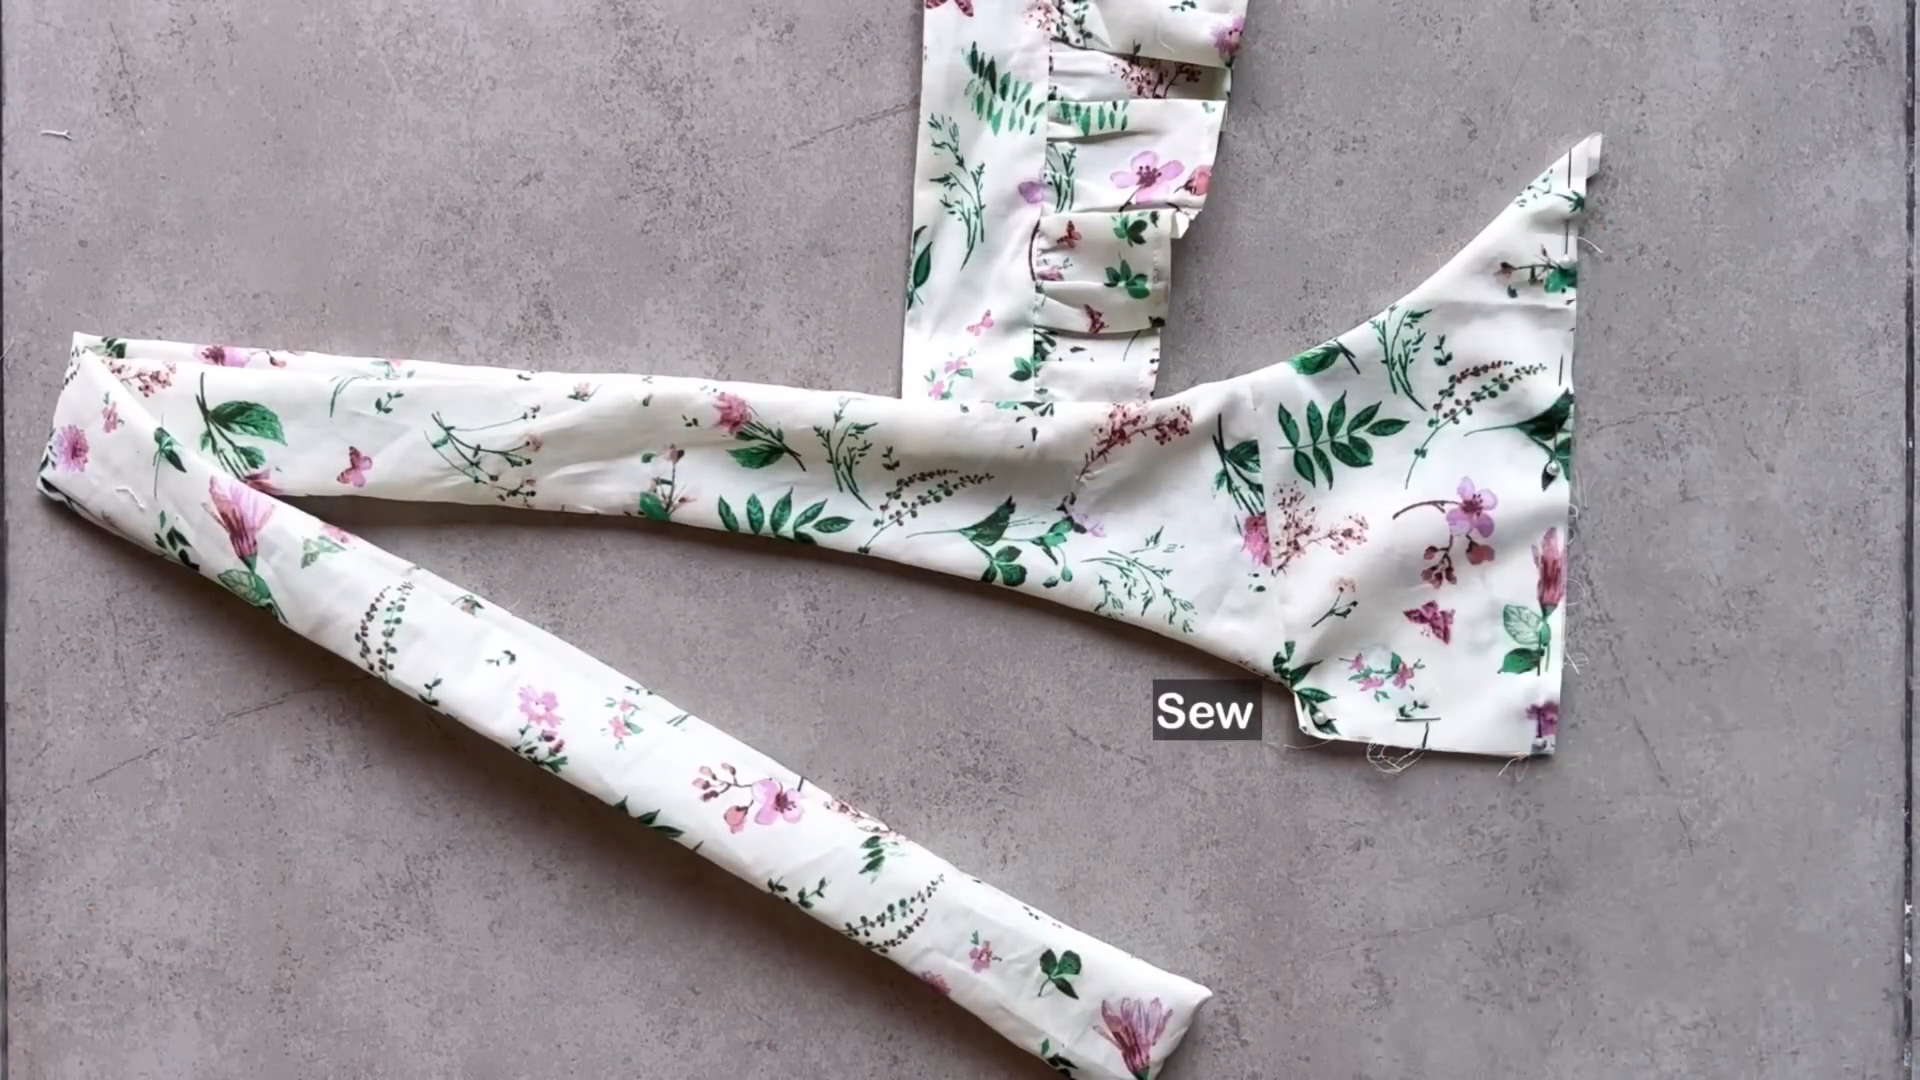
Cut two pieces for the center bodice section.

Sew them together along one width line.
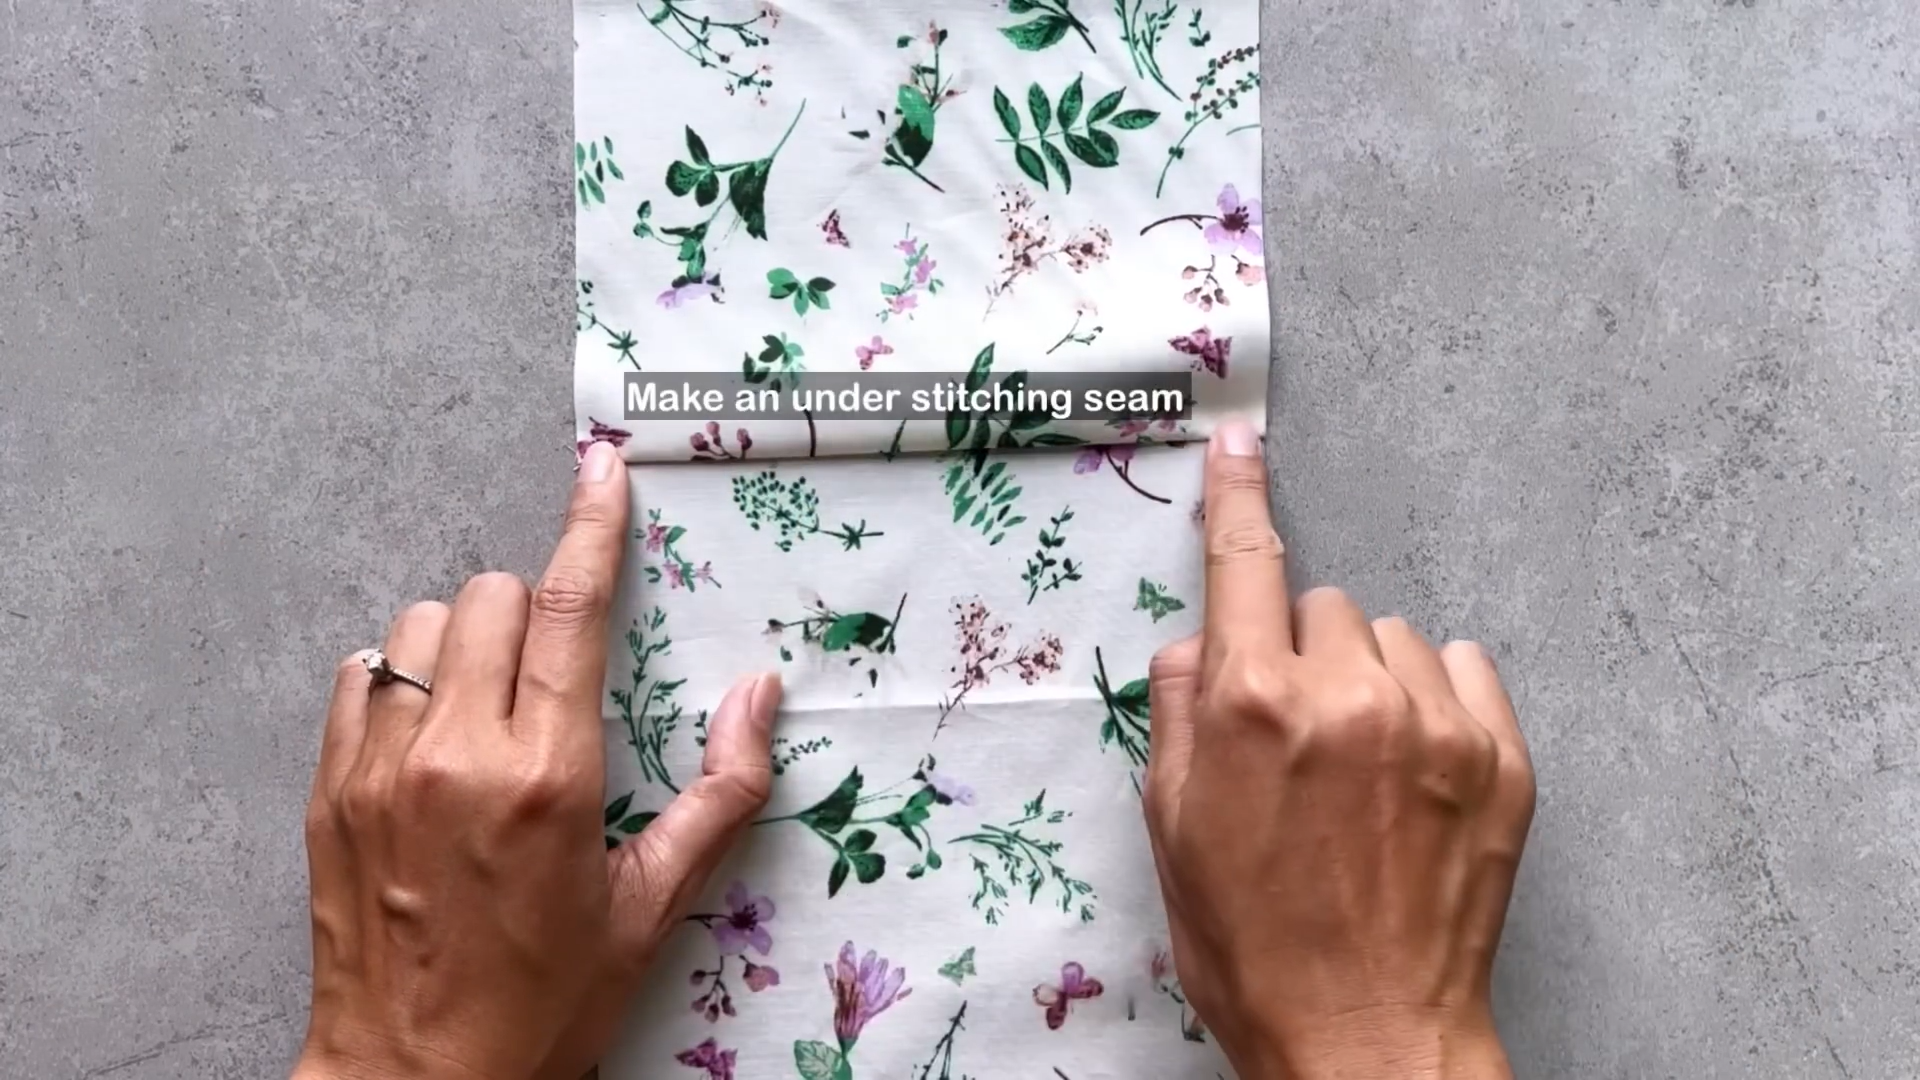
Create an understitching seam on the inside piece.
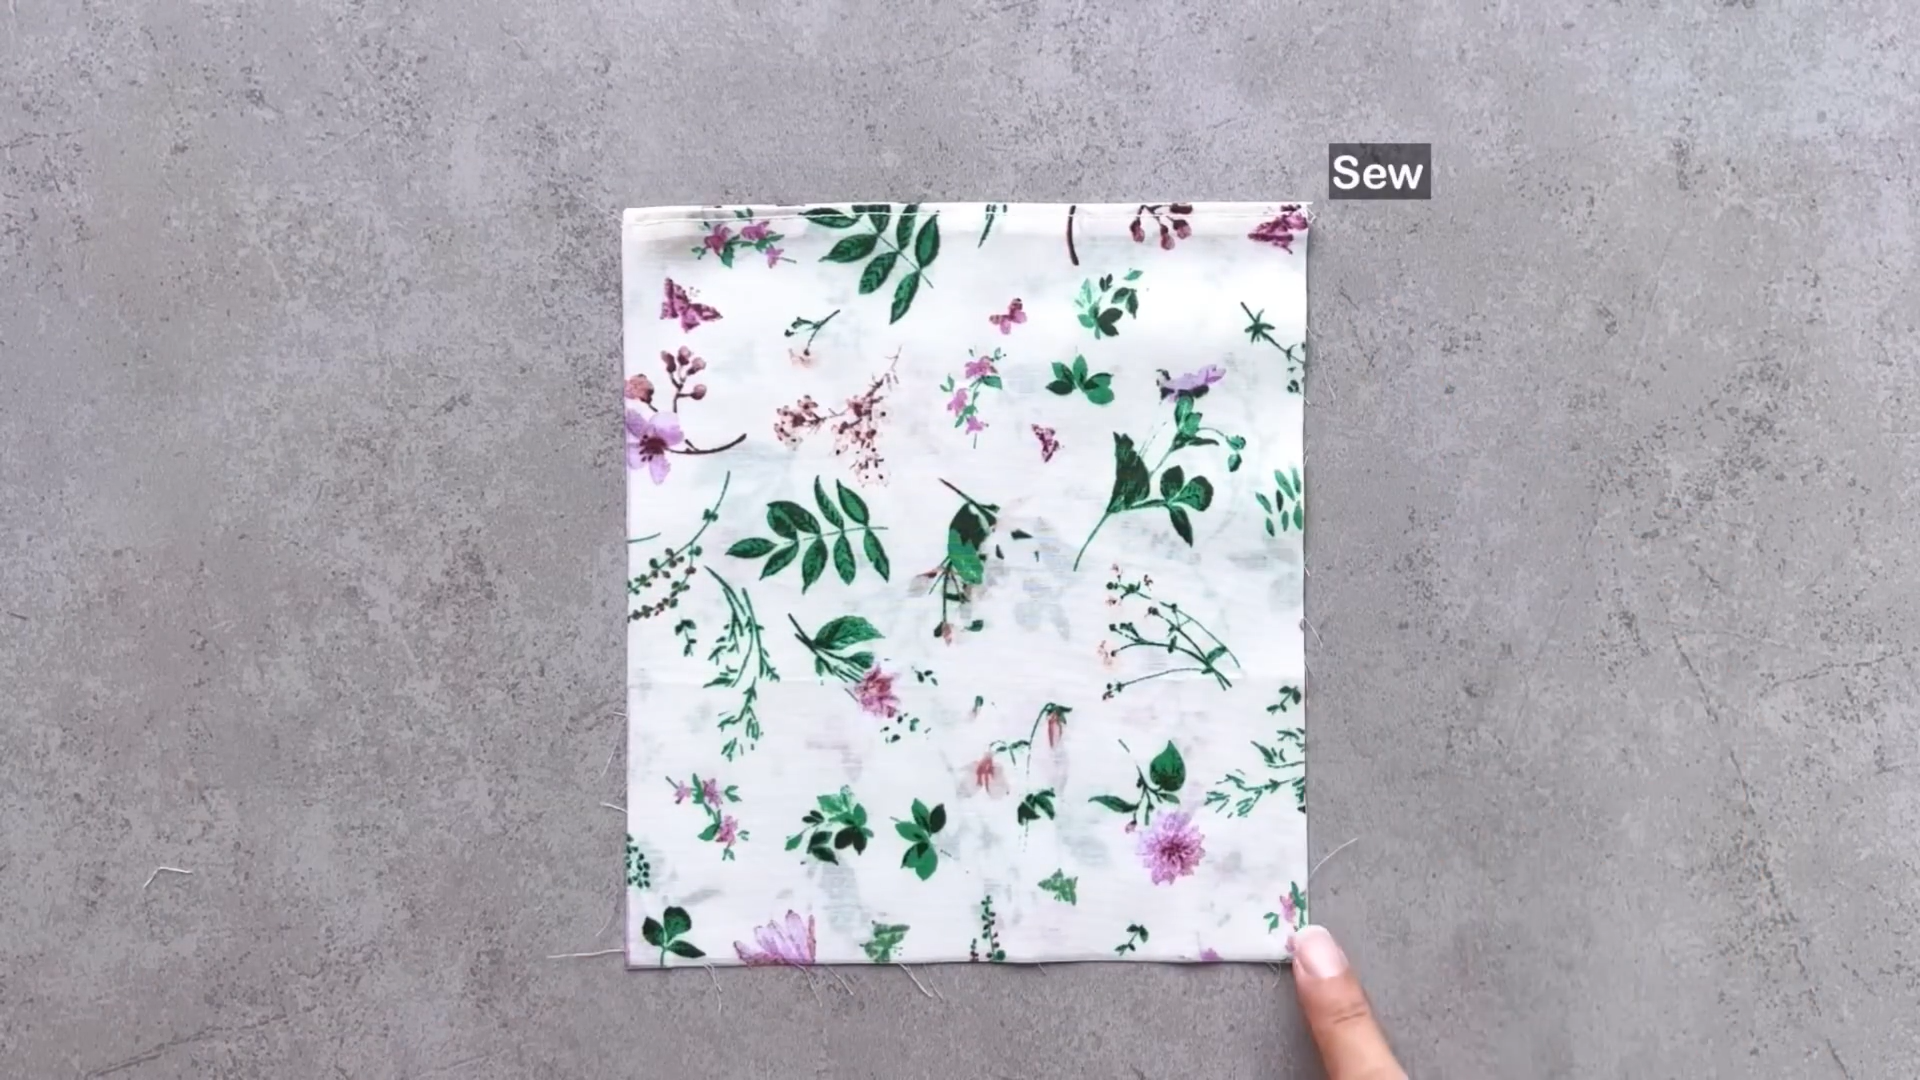
Overlock the remaining raw edges.
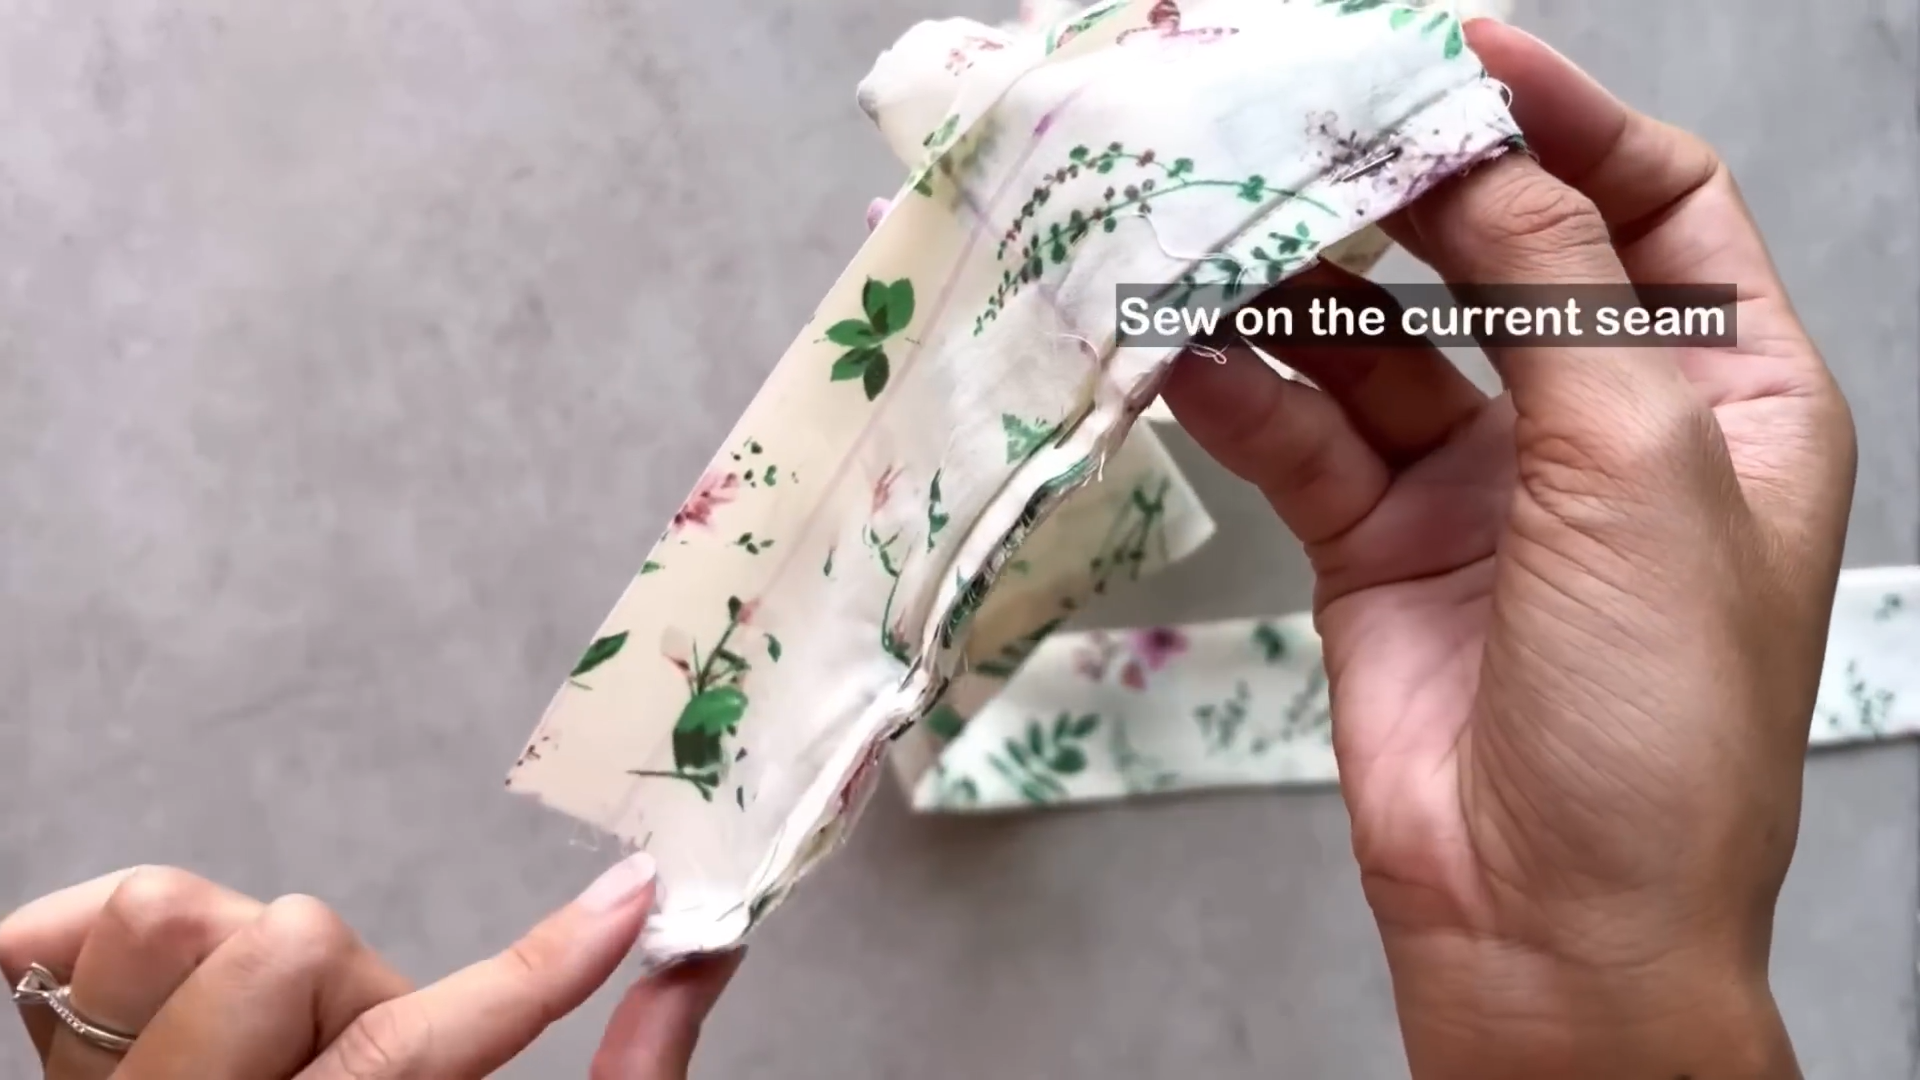
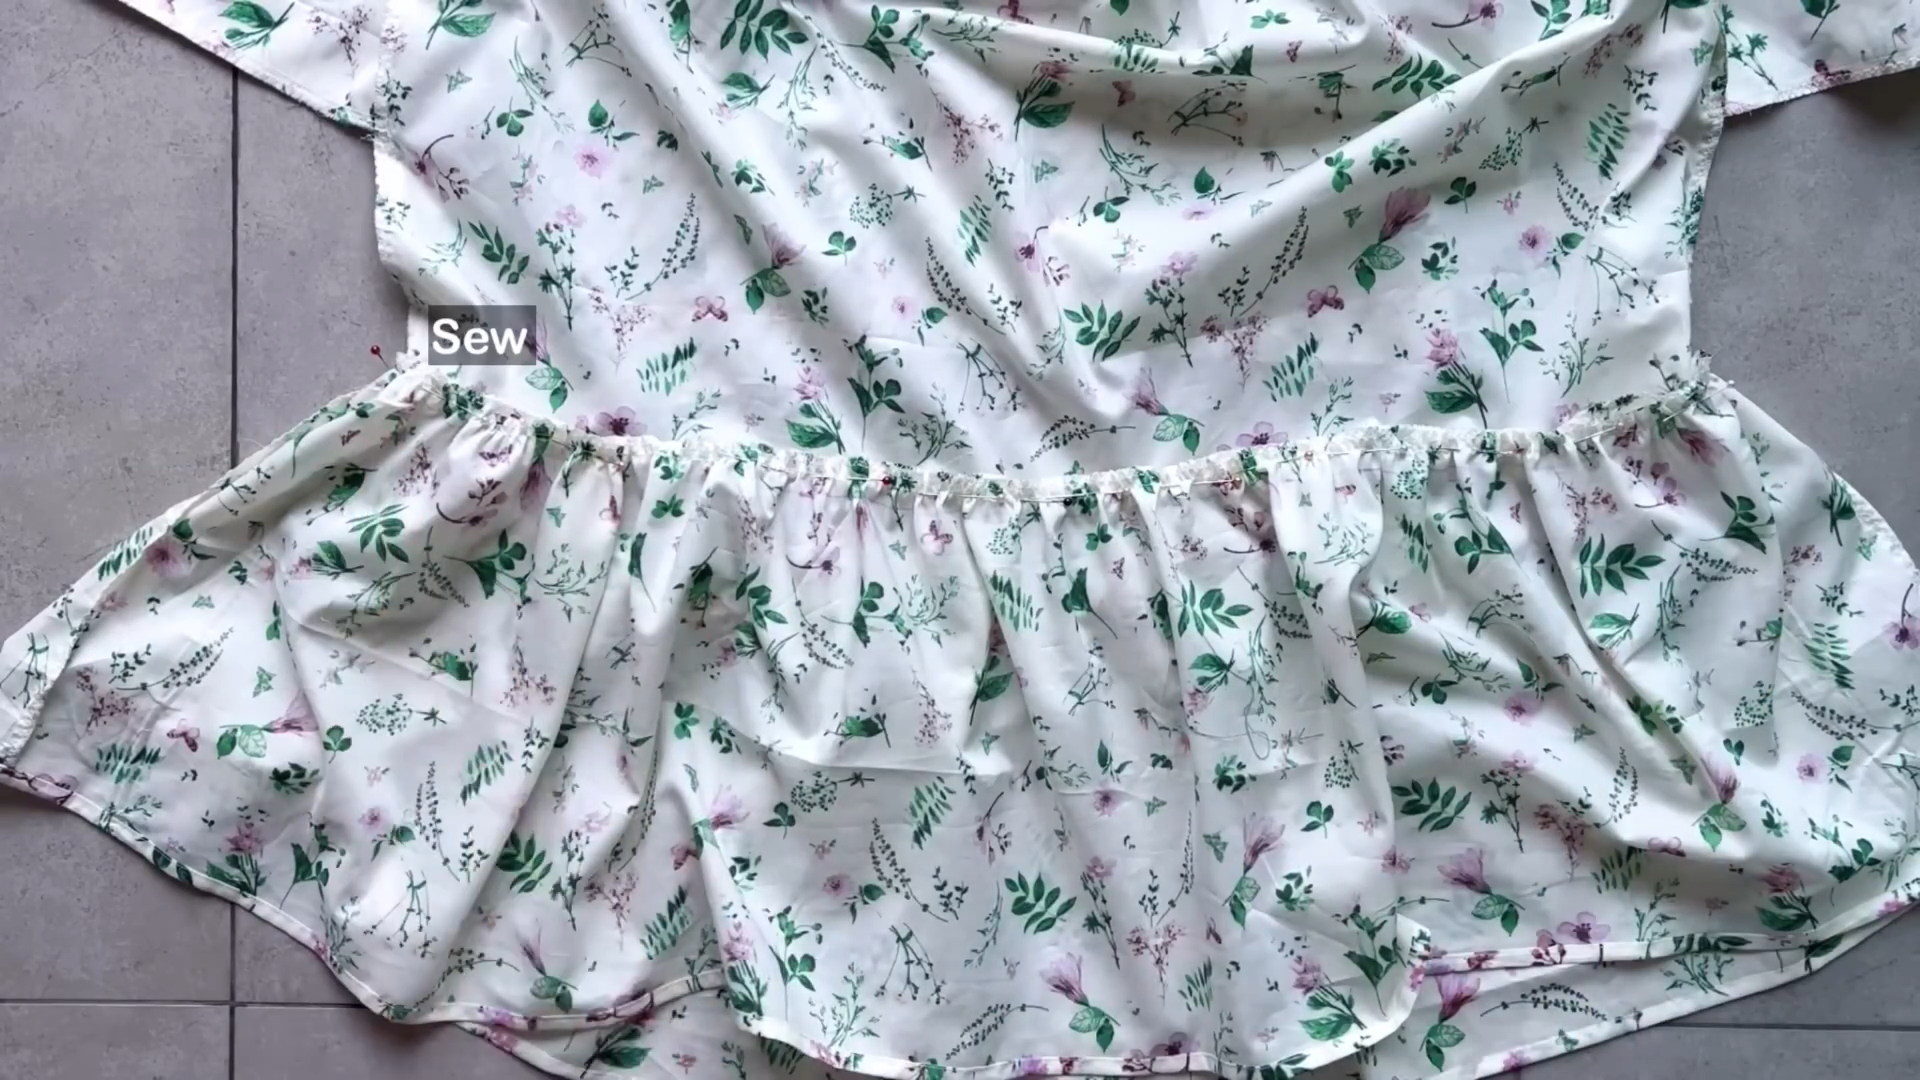
Sew the center piece to the side and strap sections.
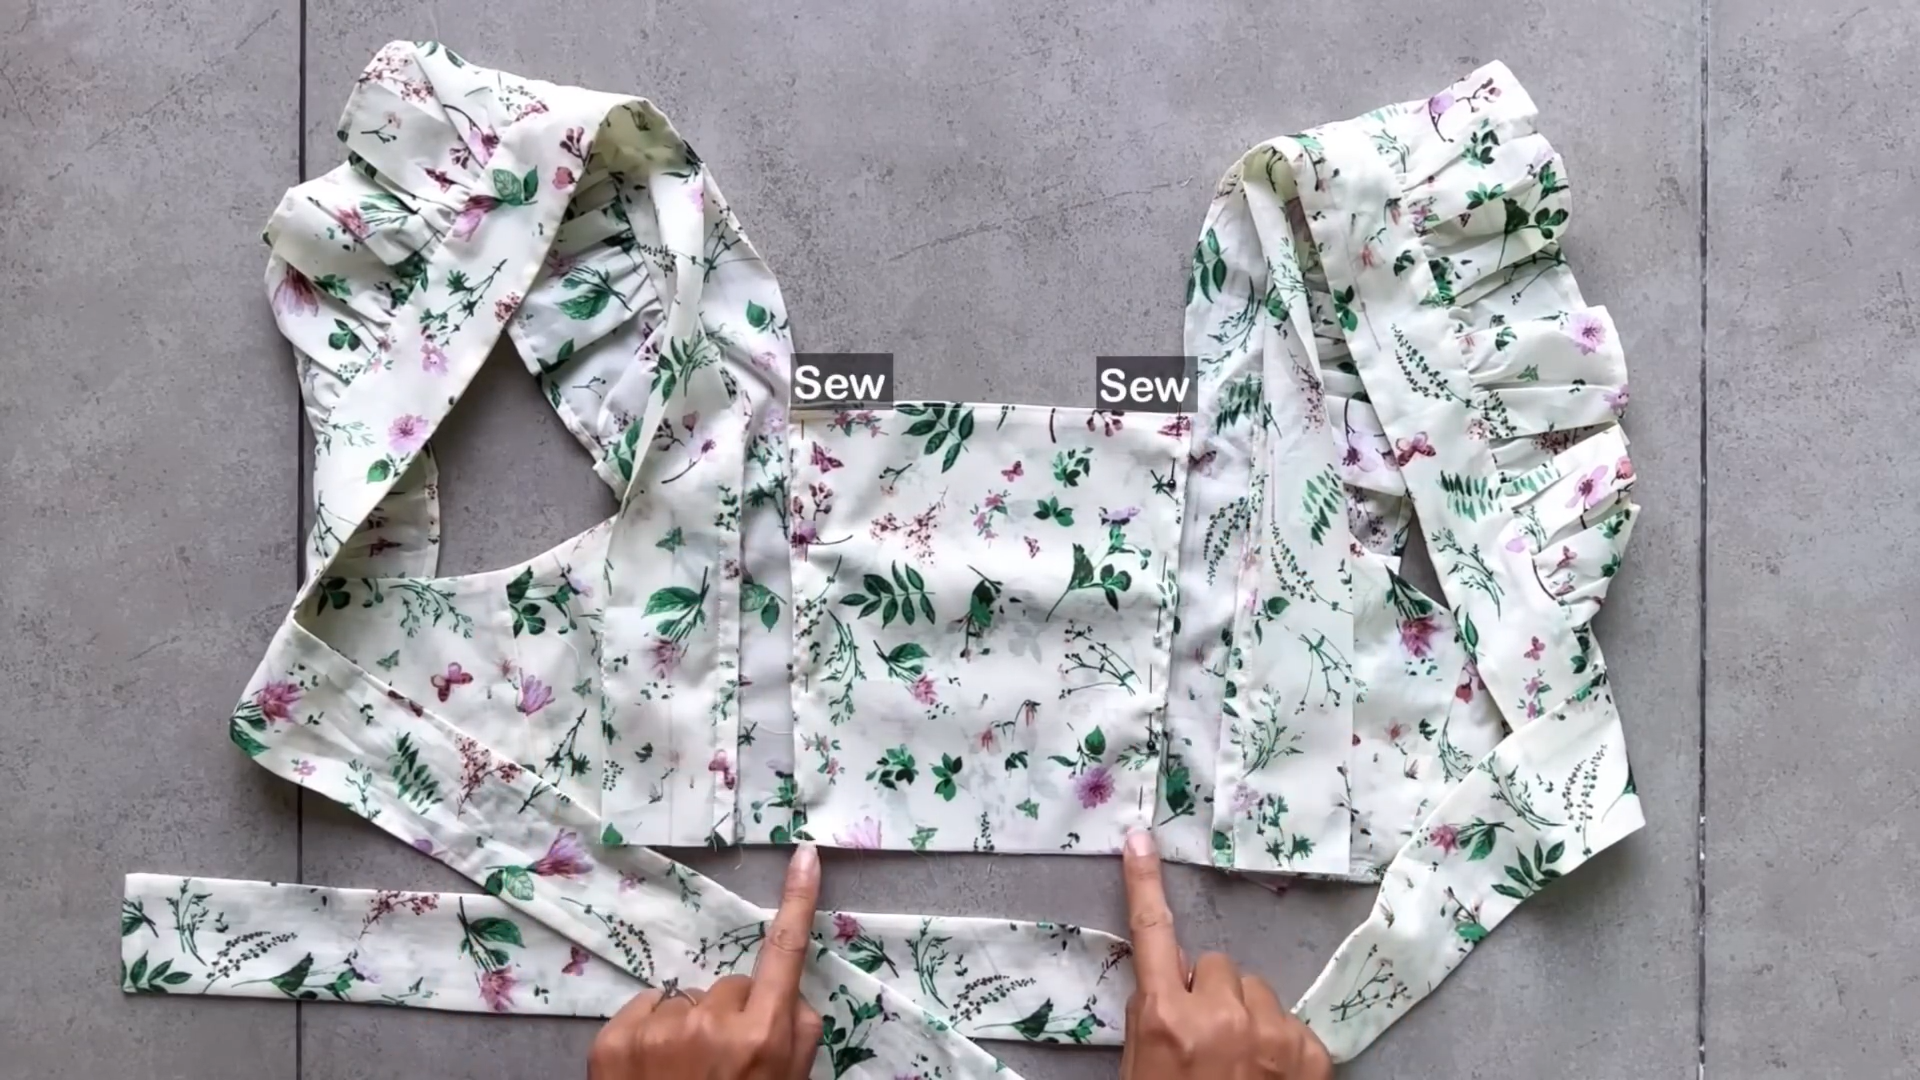
Start by sewing it to the inside piece of the shoulder strap.
Maneuver the outer strap piece and back part over the ruffle to connect with the previously sewn seam.
Turn them inside out after to hide all the seam inside.
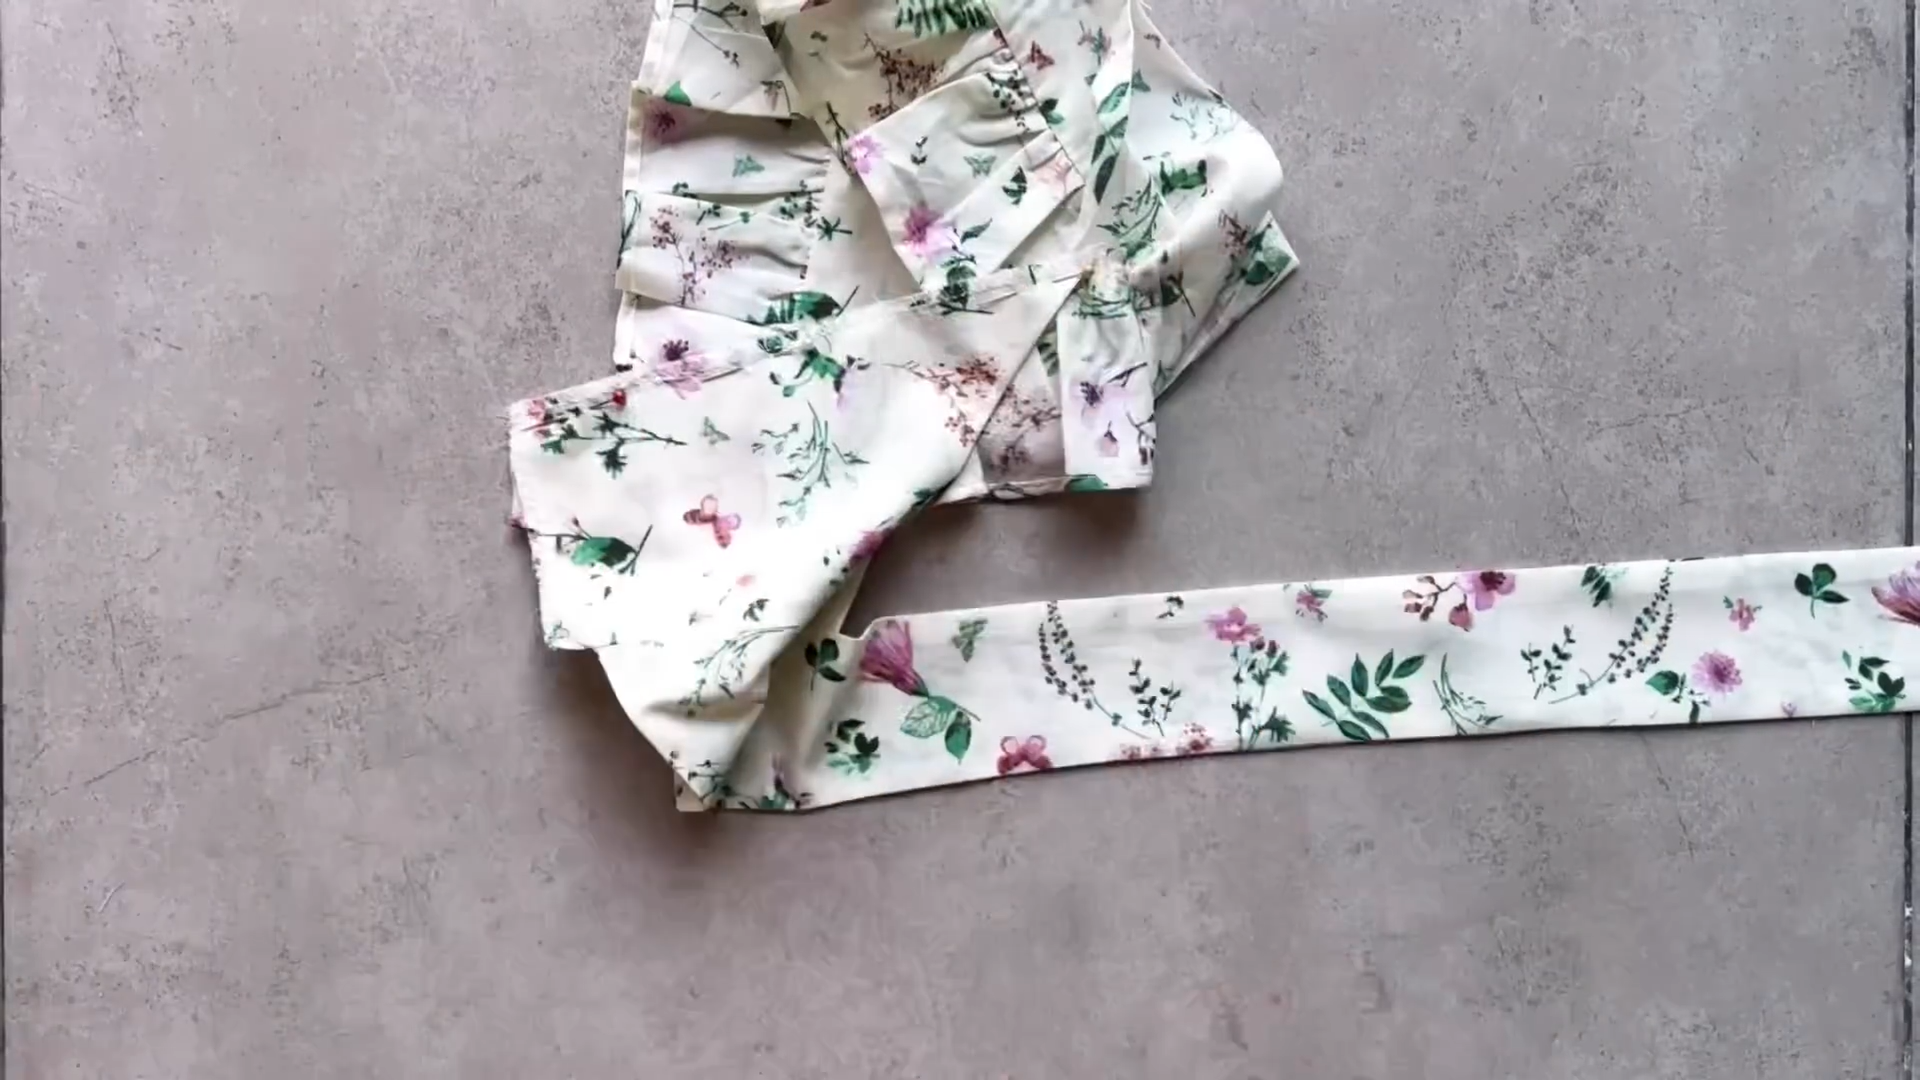
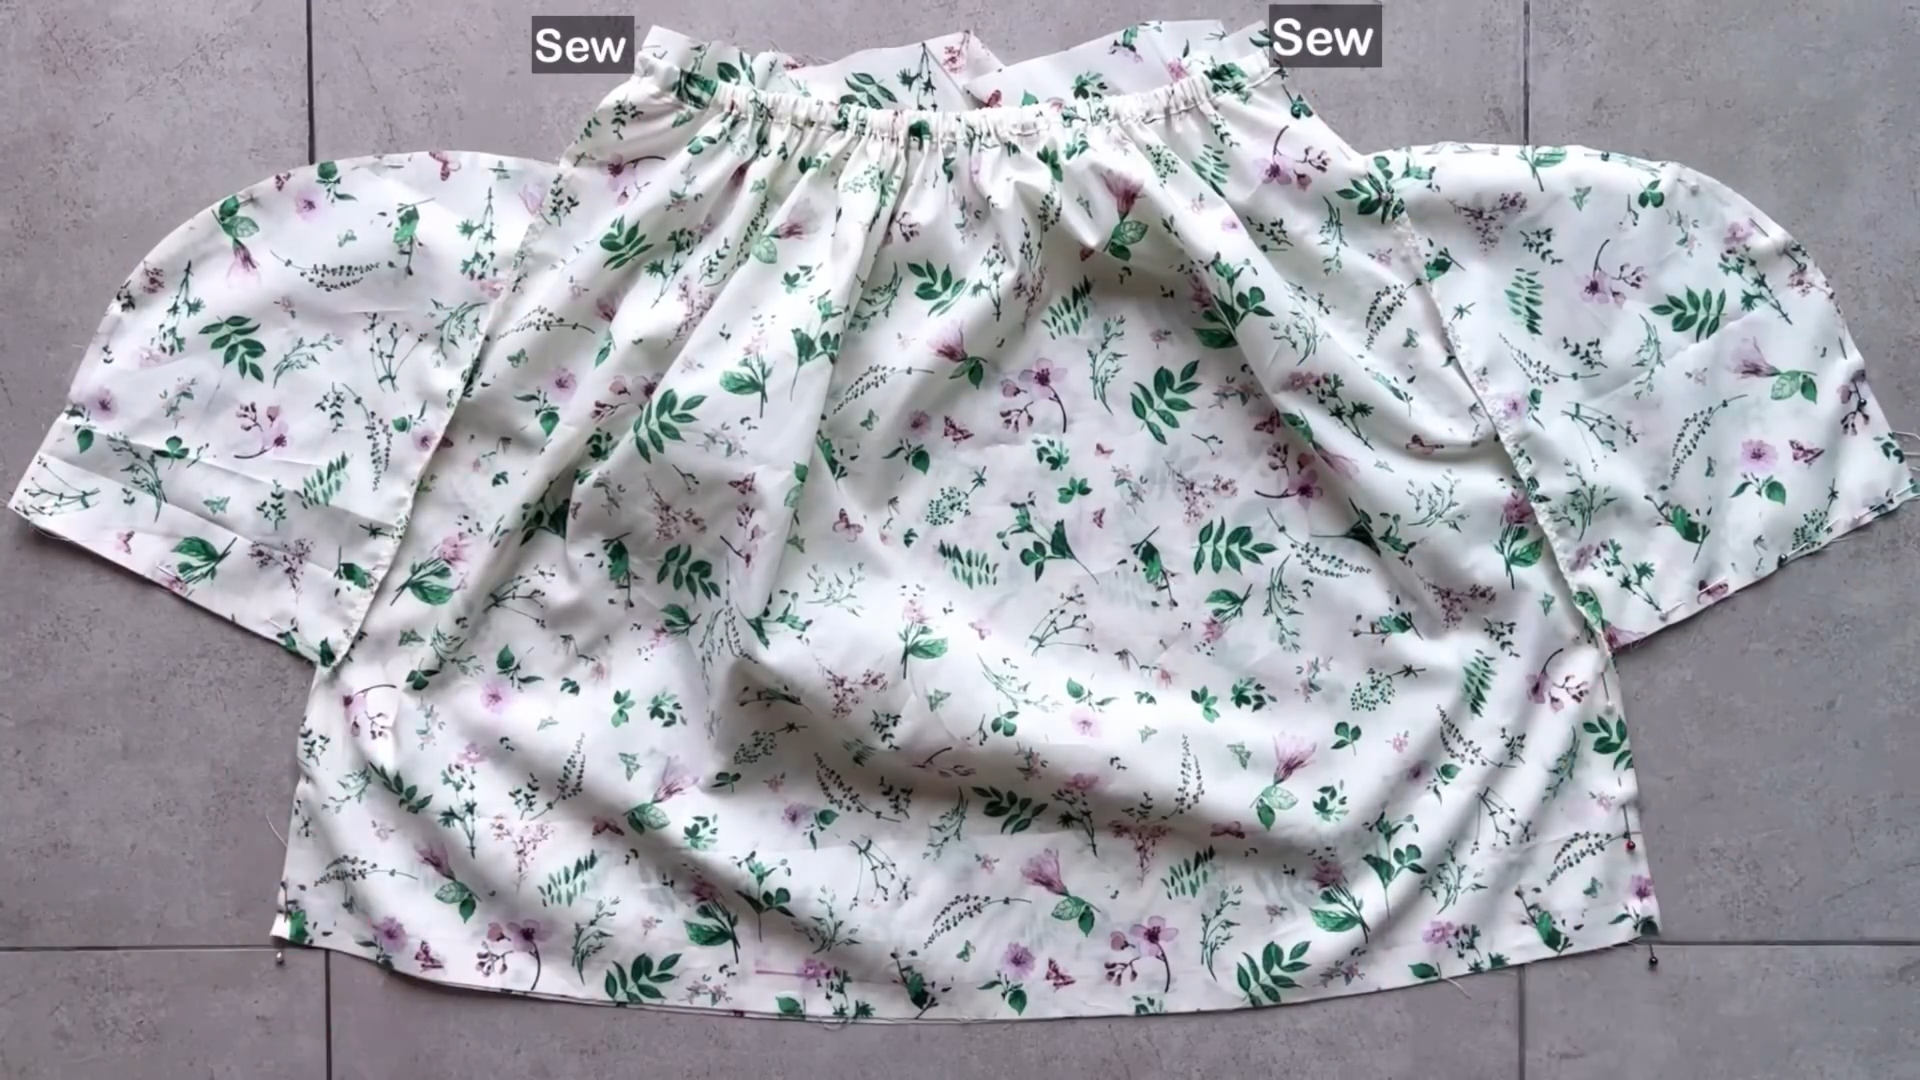
Sew the two ends of the top bodice together.
THE SKIRT PART
Cut a large rectangle for the front skirt piece. The length is your desired skirt length minus the ruffle length, plus 2 cm.
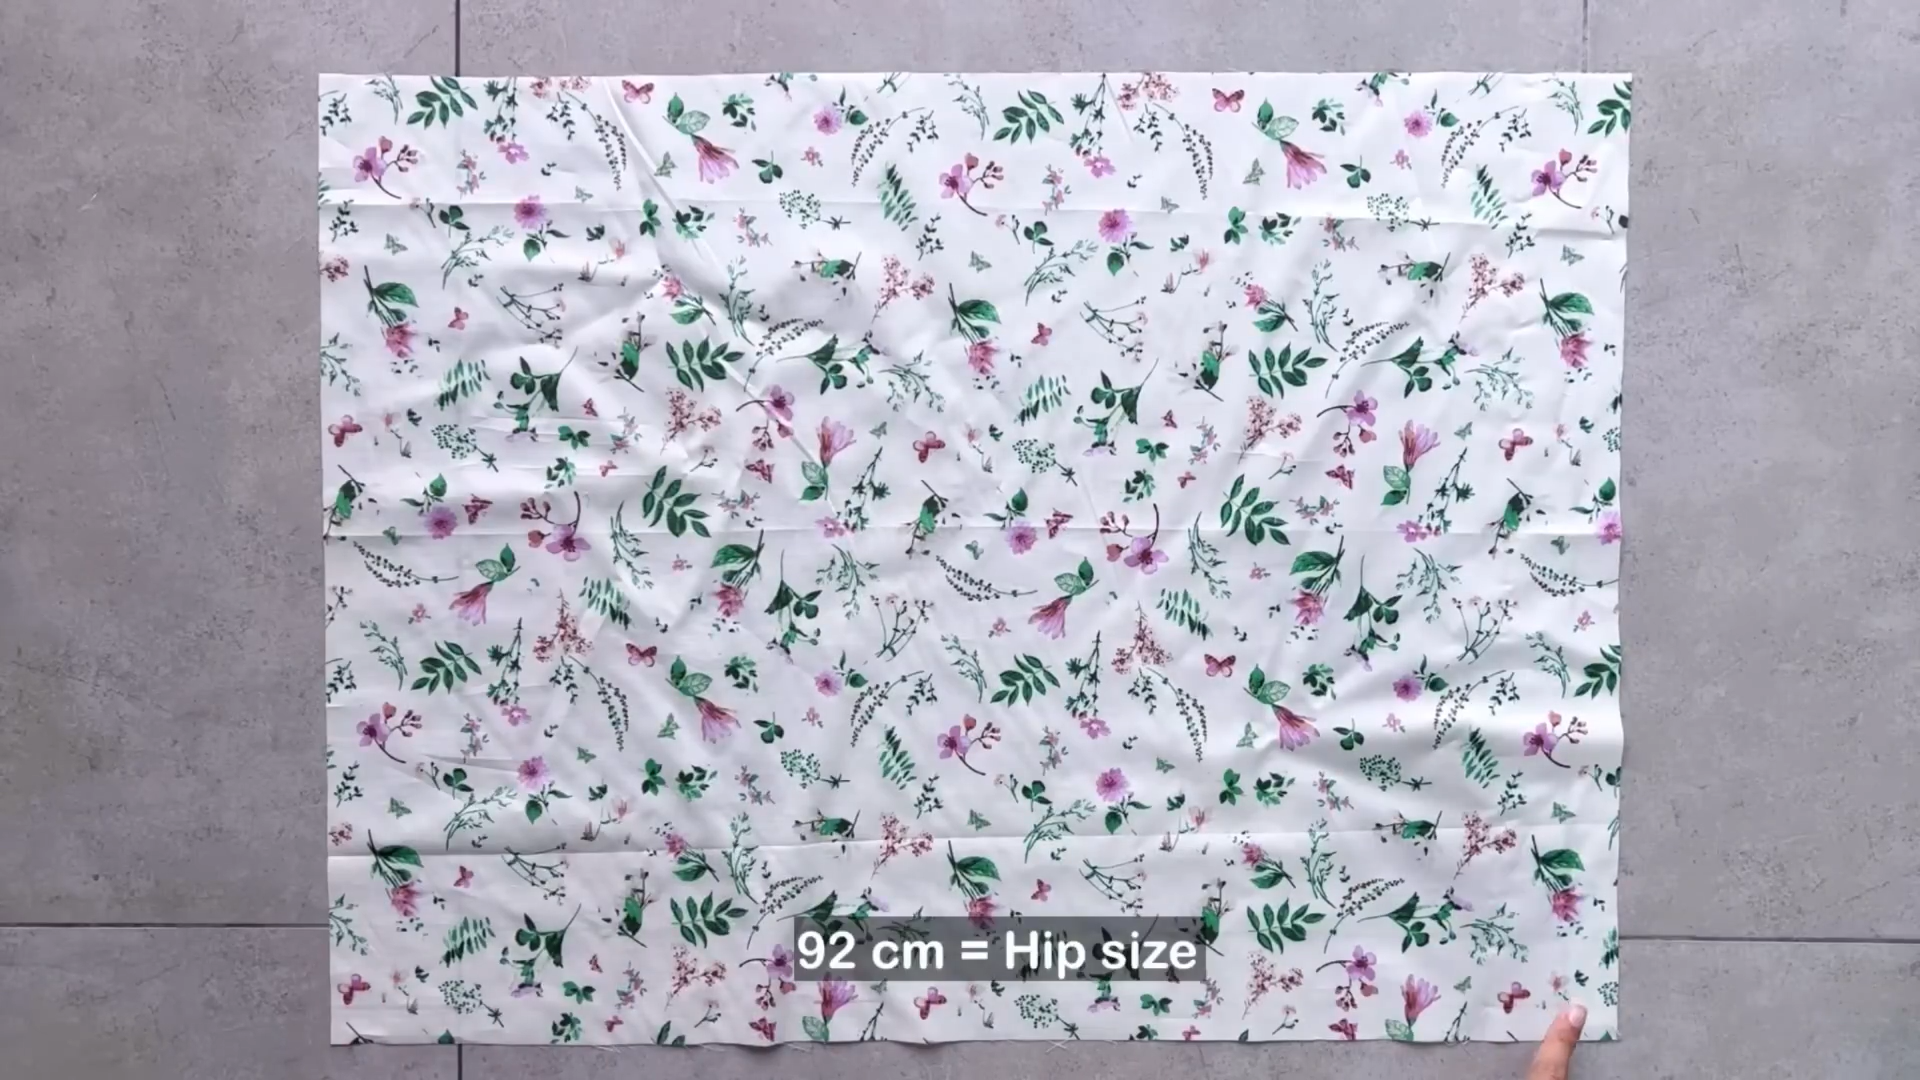
The width should match your hip measurement.
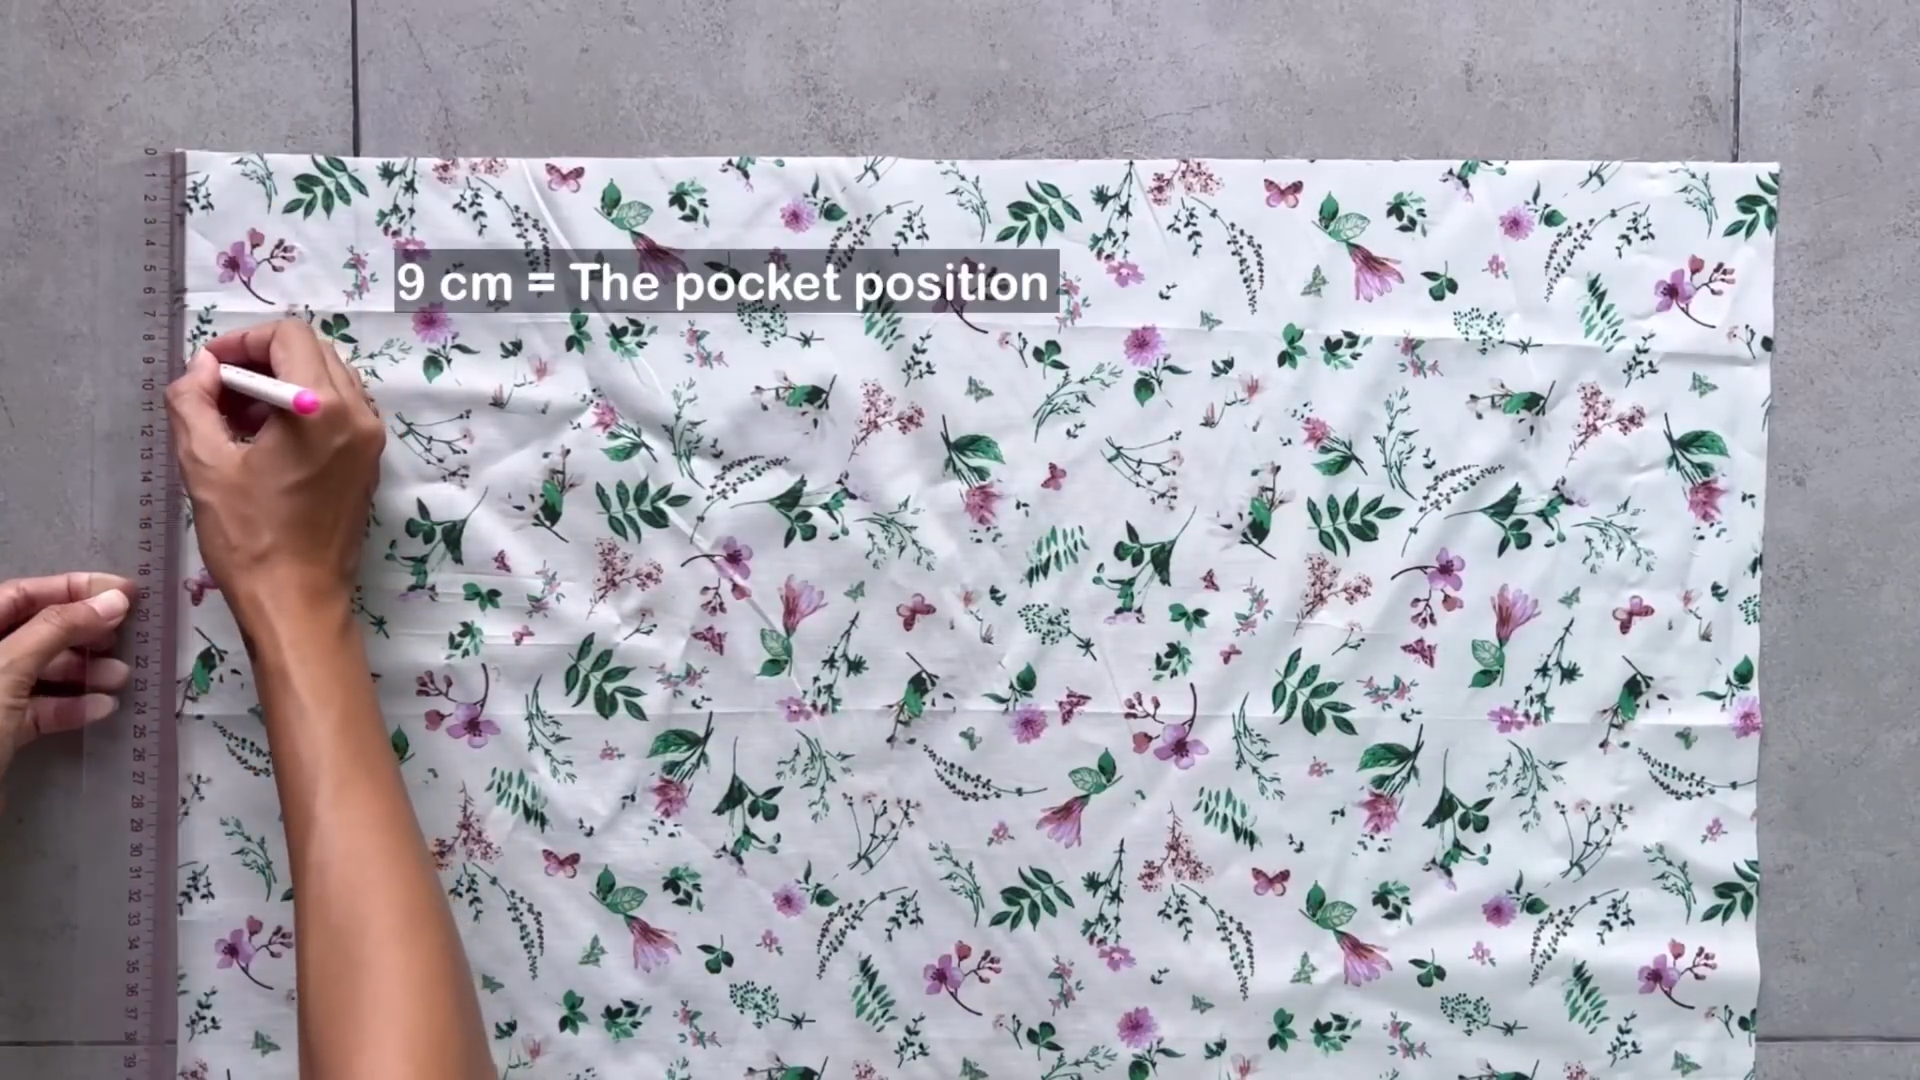
Mark at 9 cm down on the length line for the pocket position.
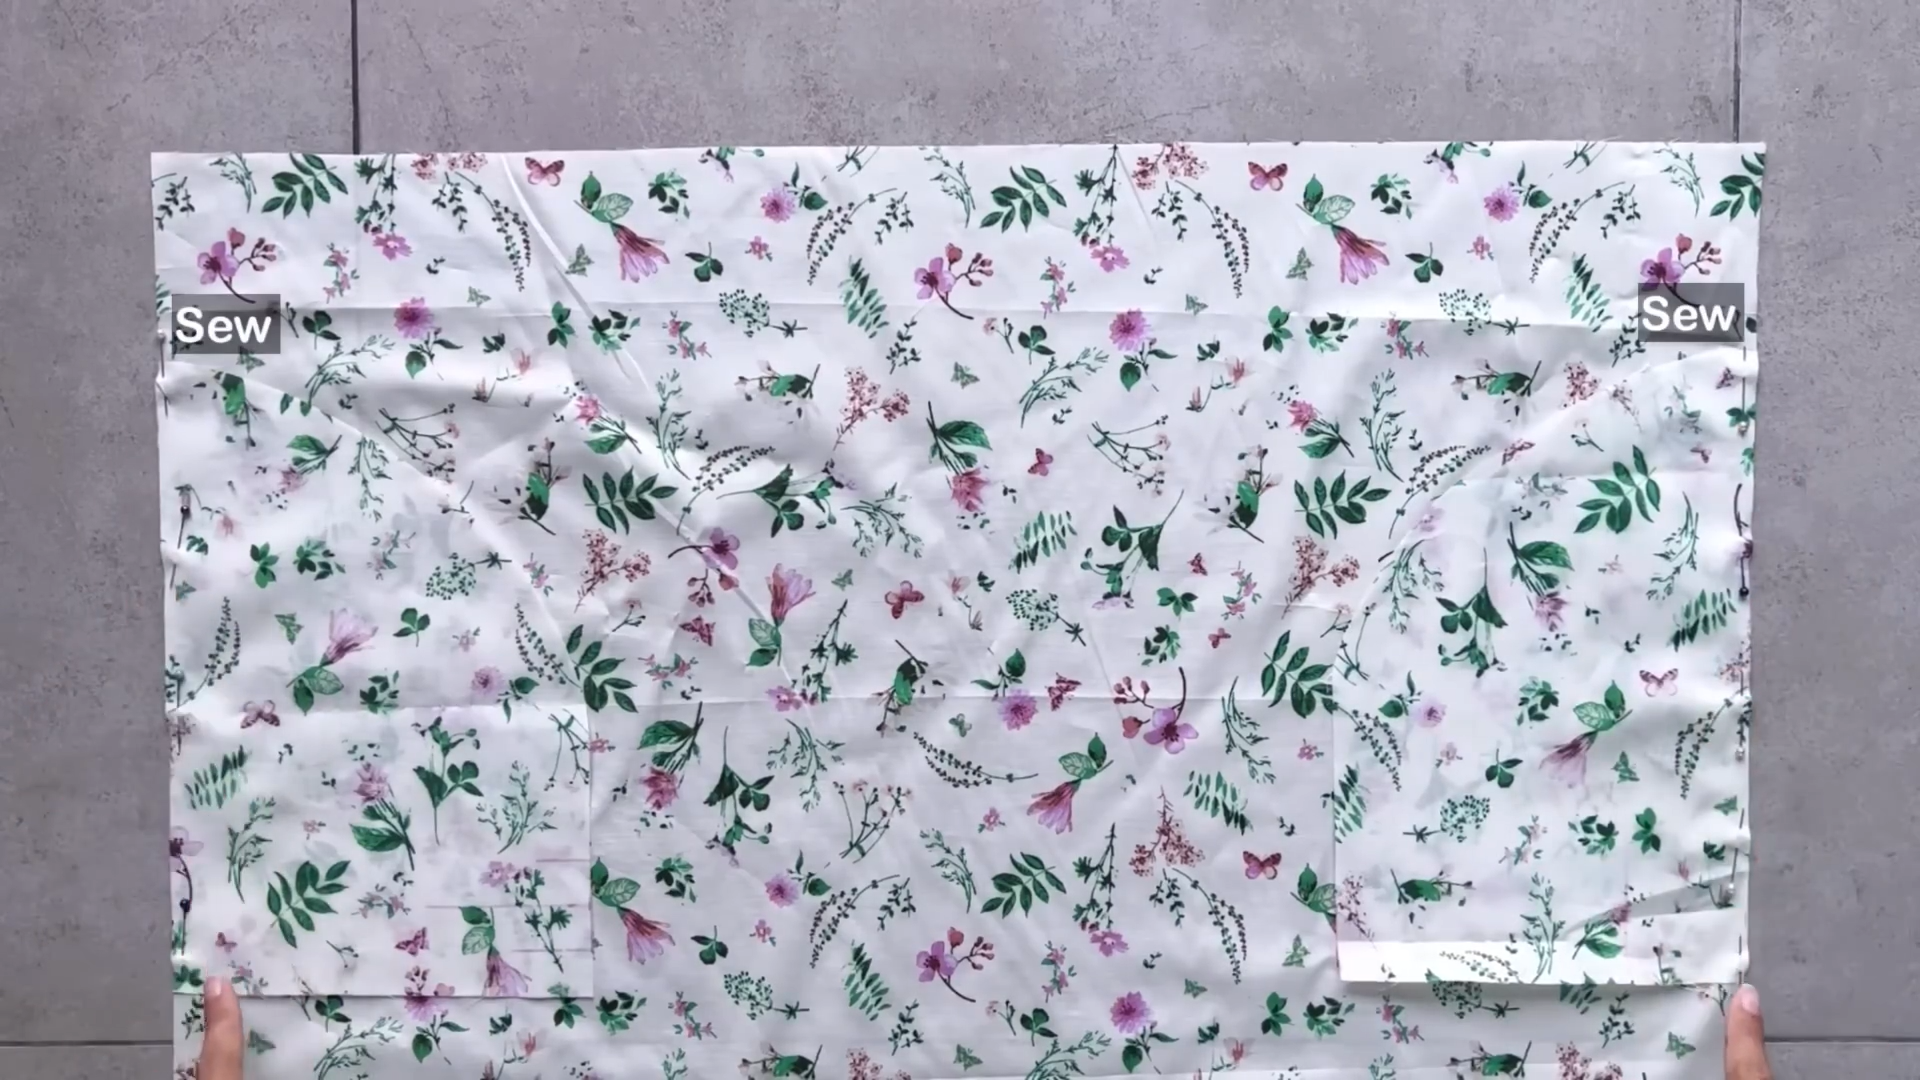
Attach a pocket piece at the marked position.
Repeat on the other side.
Cut another rectangle for the back skirt with the same width as the front but slightly longer for the elastic band.
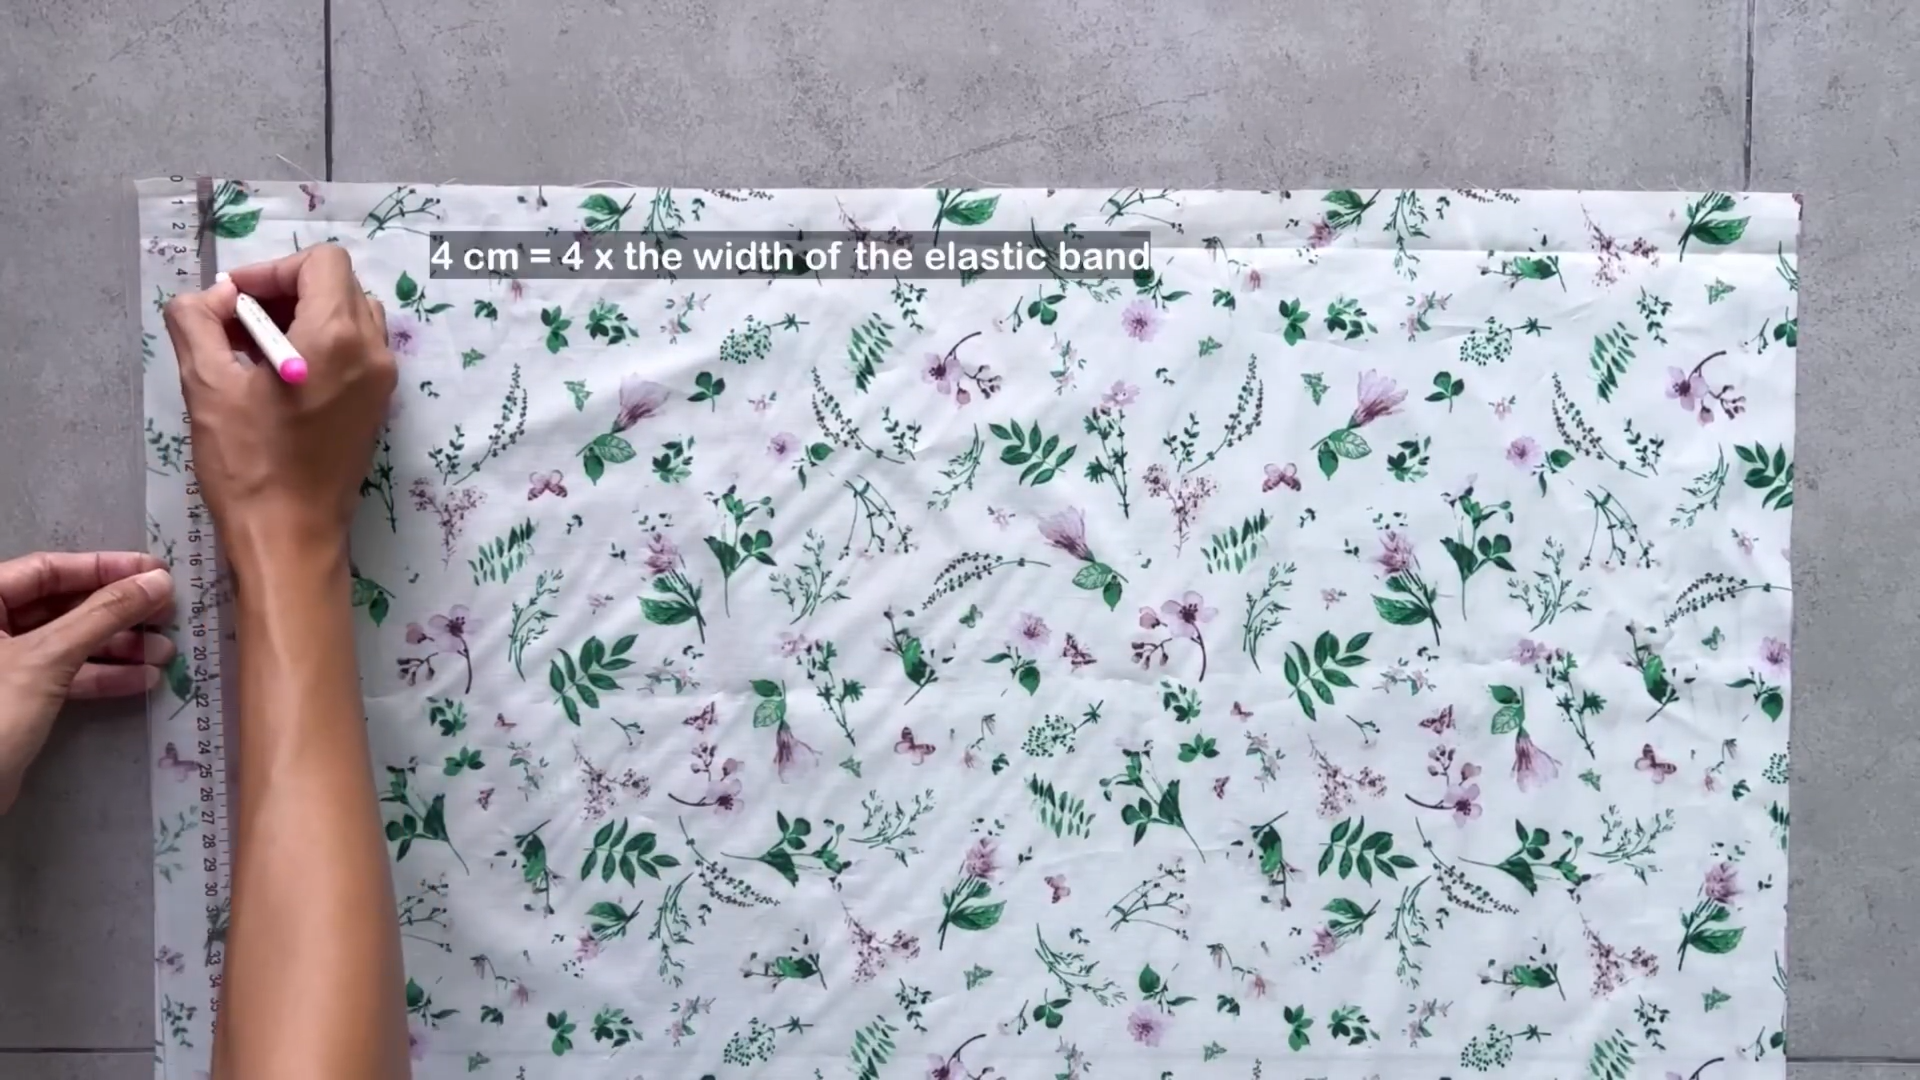
From the top width line, draw another line at 4 cm under it.
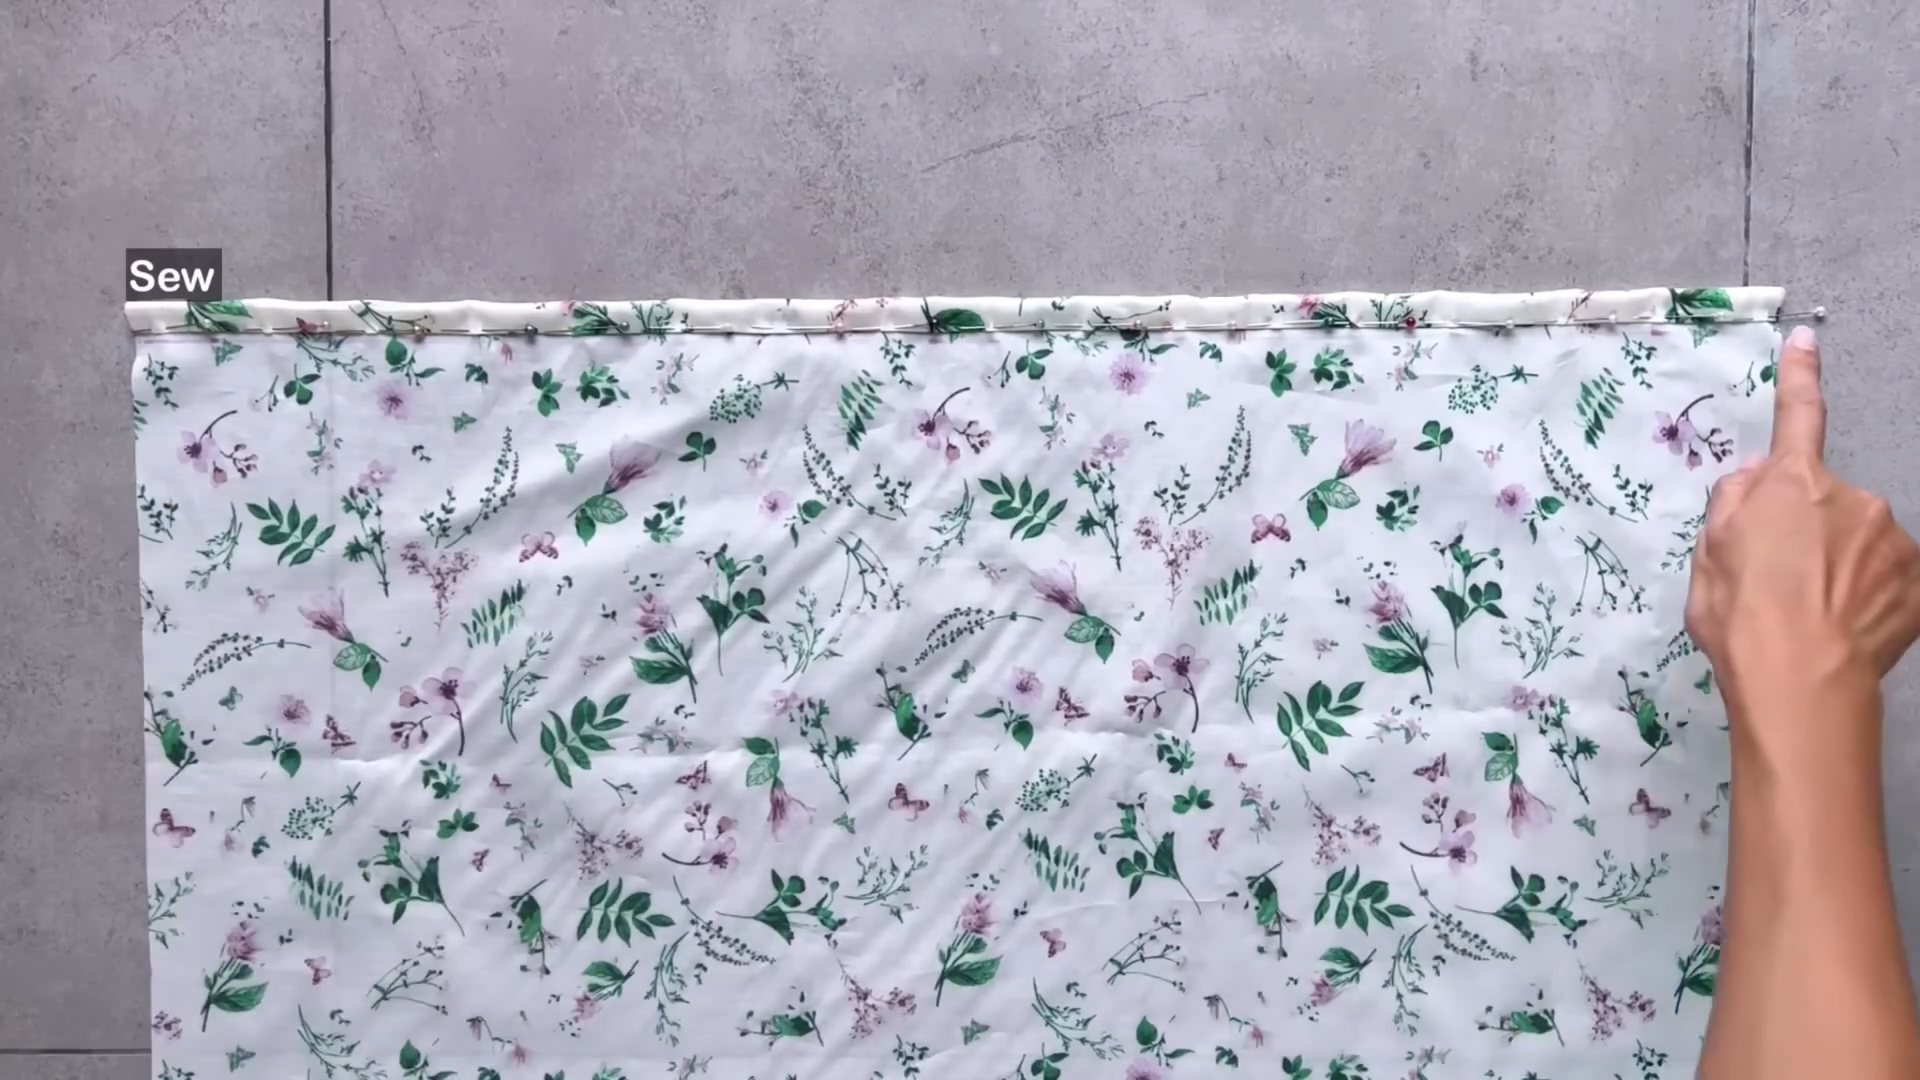
Fold the top edge inwards 0.5 cm. Then, fold again down to the line and sew to form a casing for the elastic band.
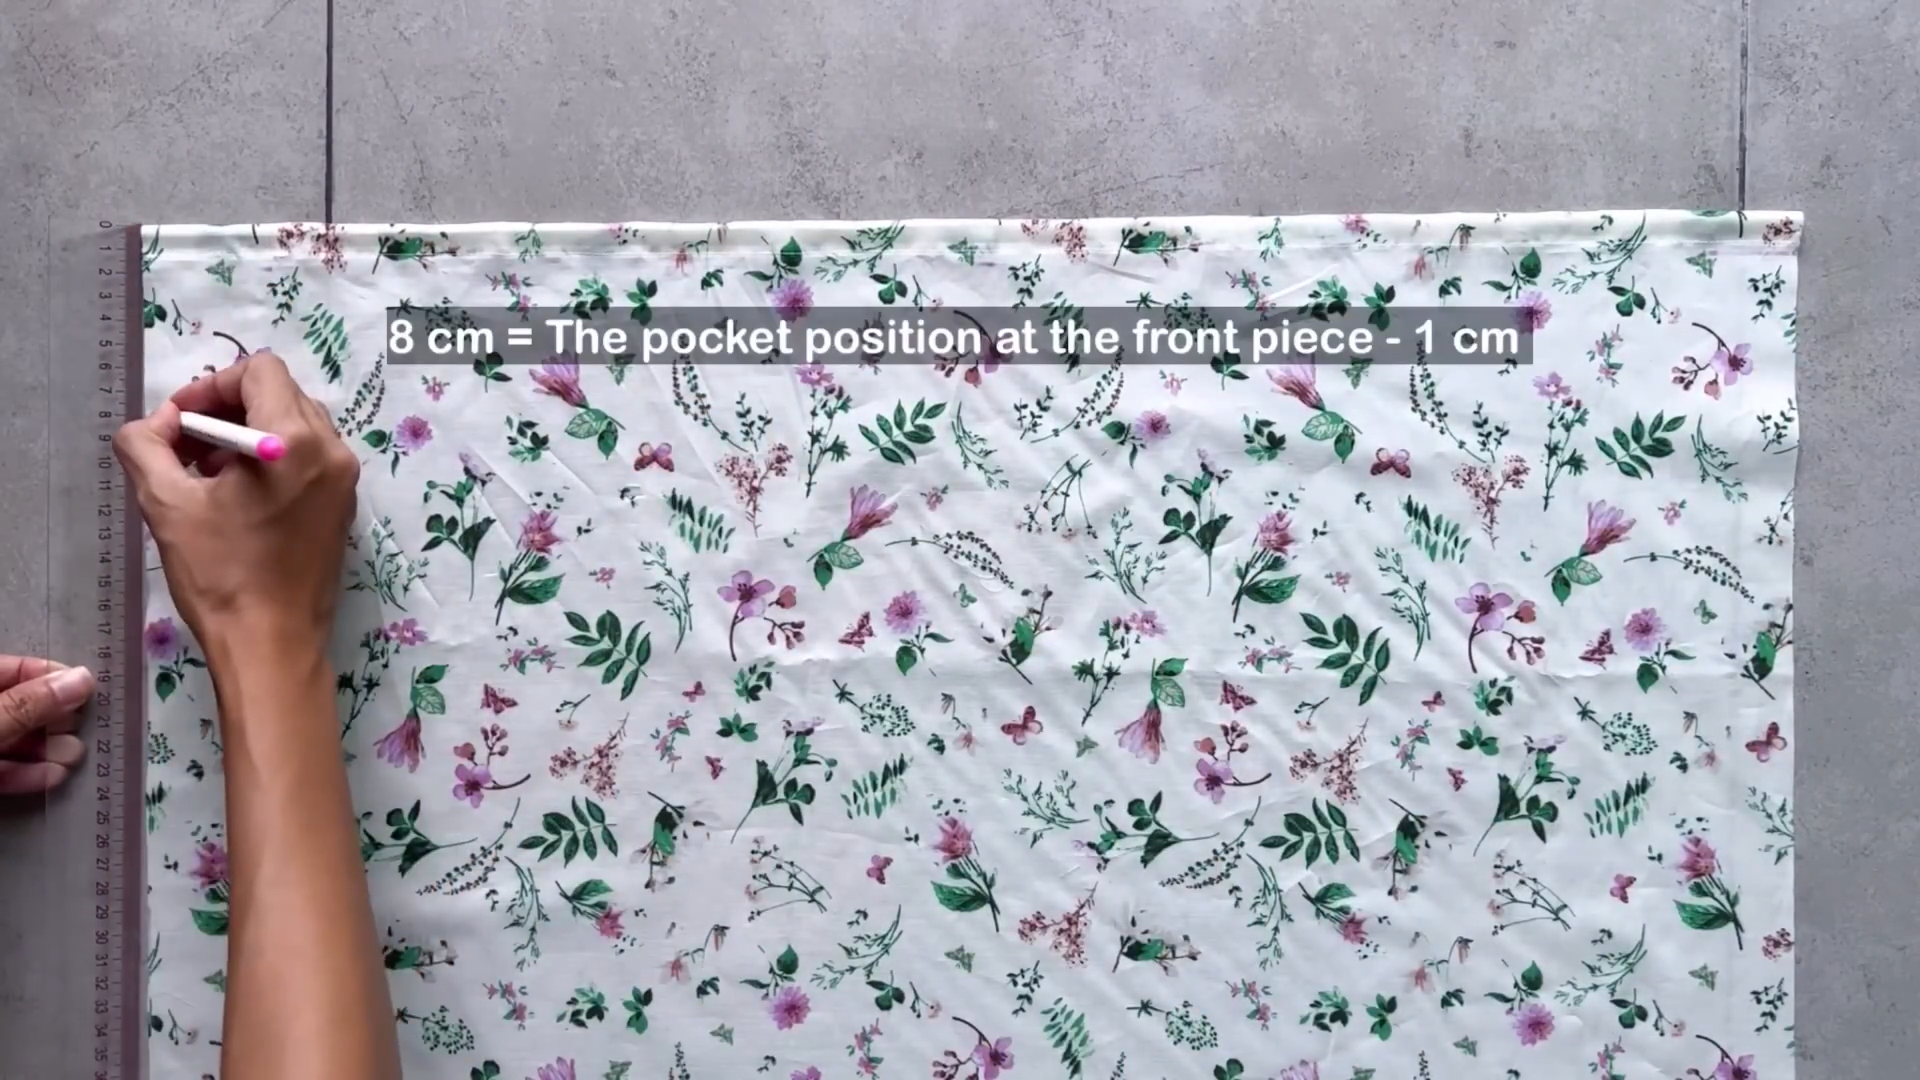
Mark pocket positions which are 1 cm lower than the front pocket placement.
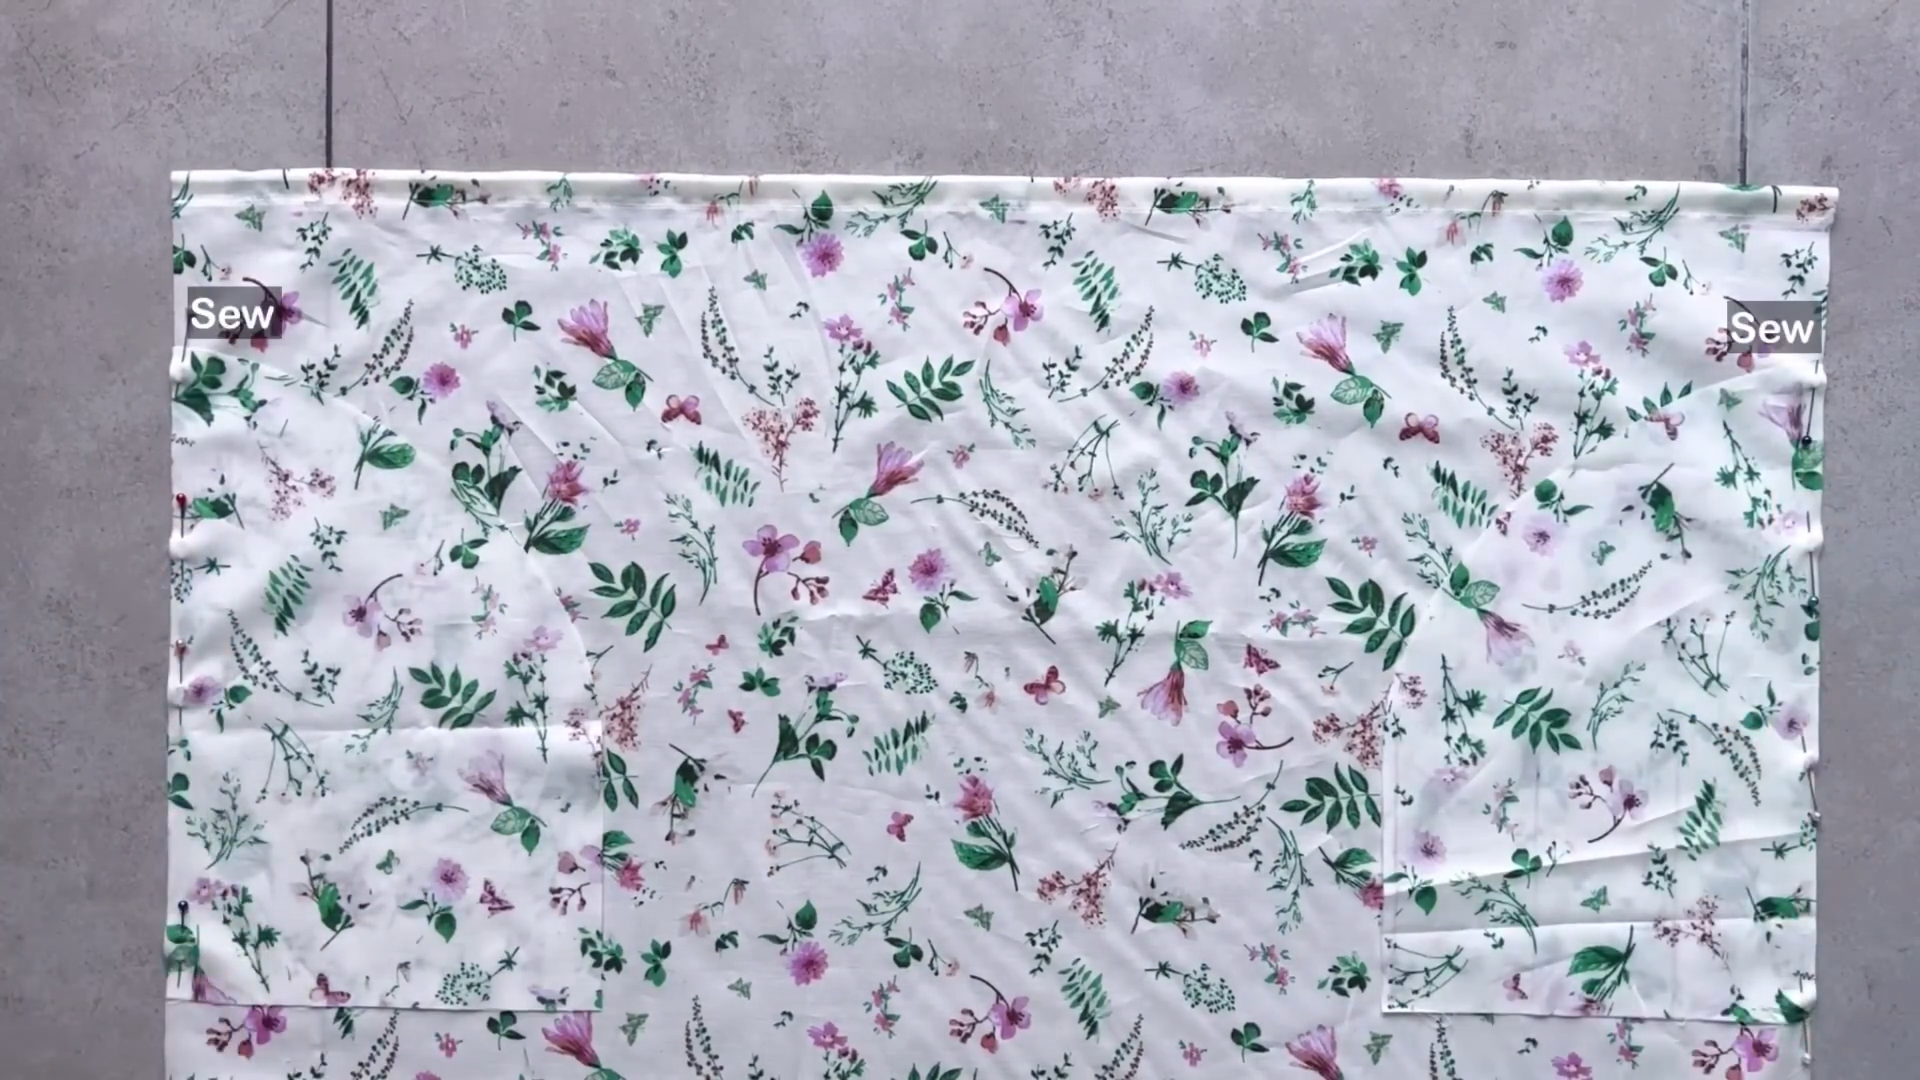
Add pockets on both sides and stitch them in place.
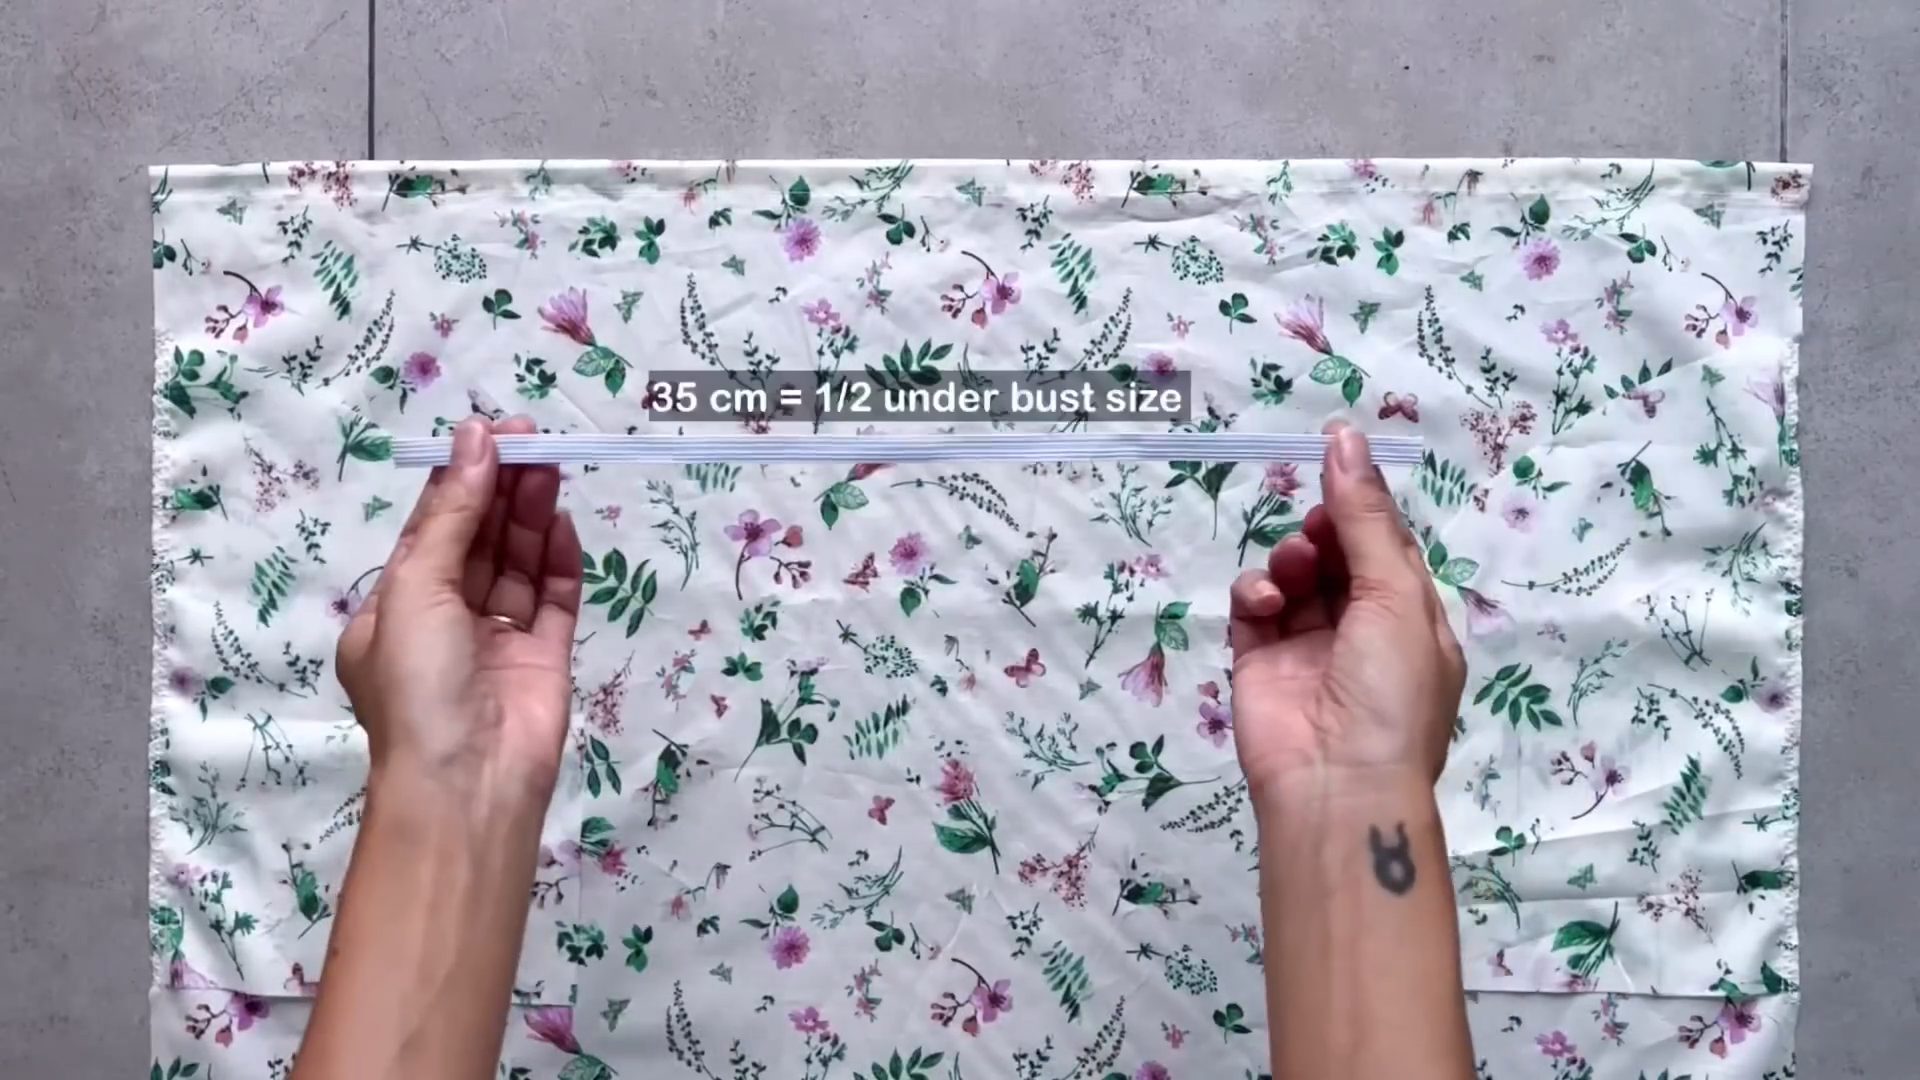
Cut a piece of elastic with a width of 1 cm and a length half your under bust measurement
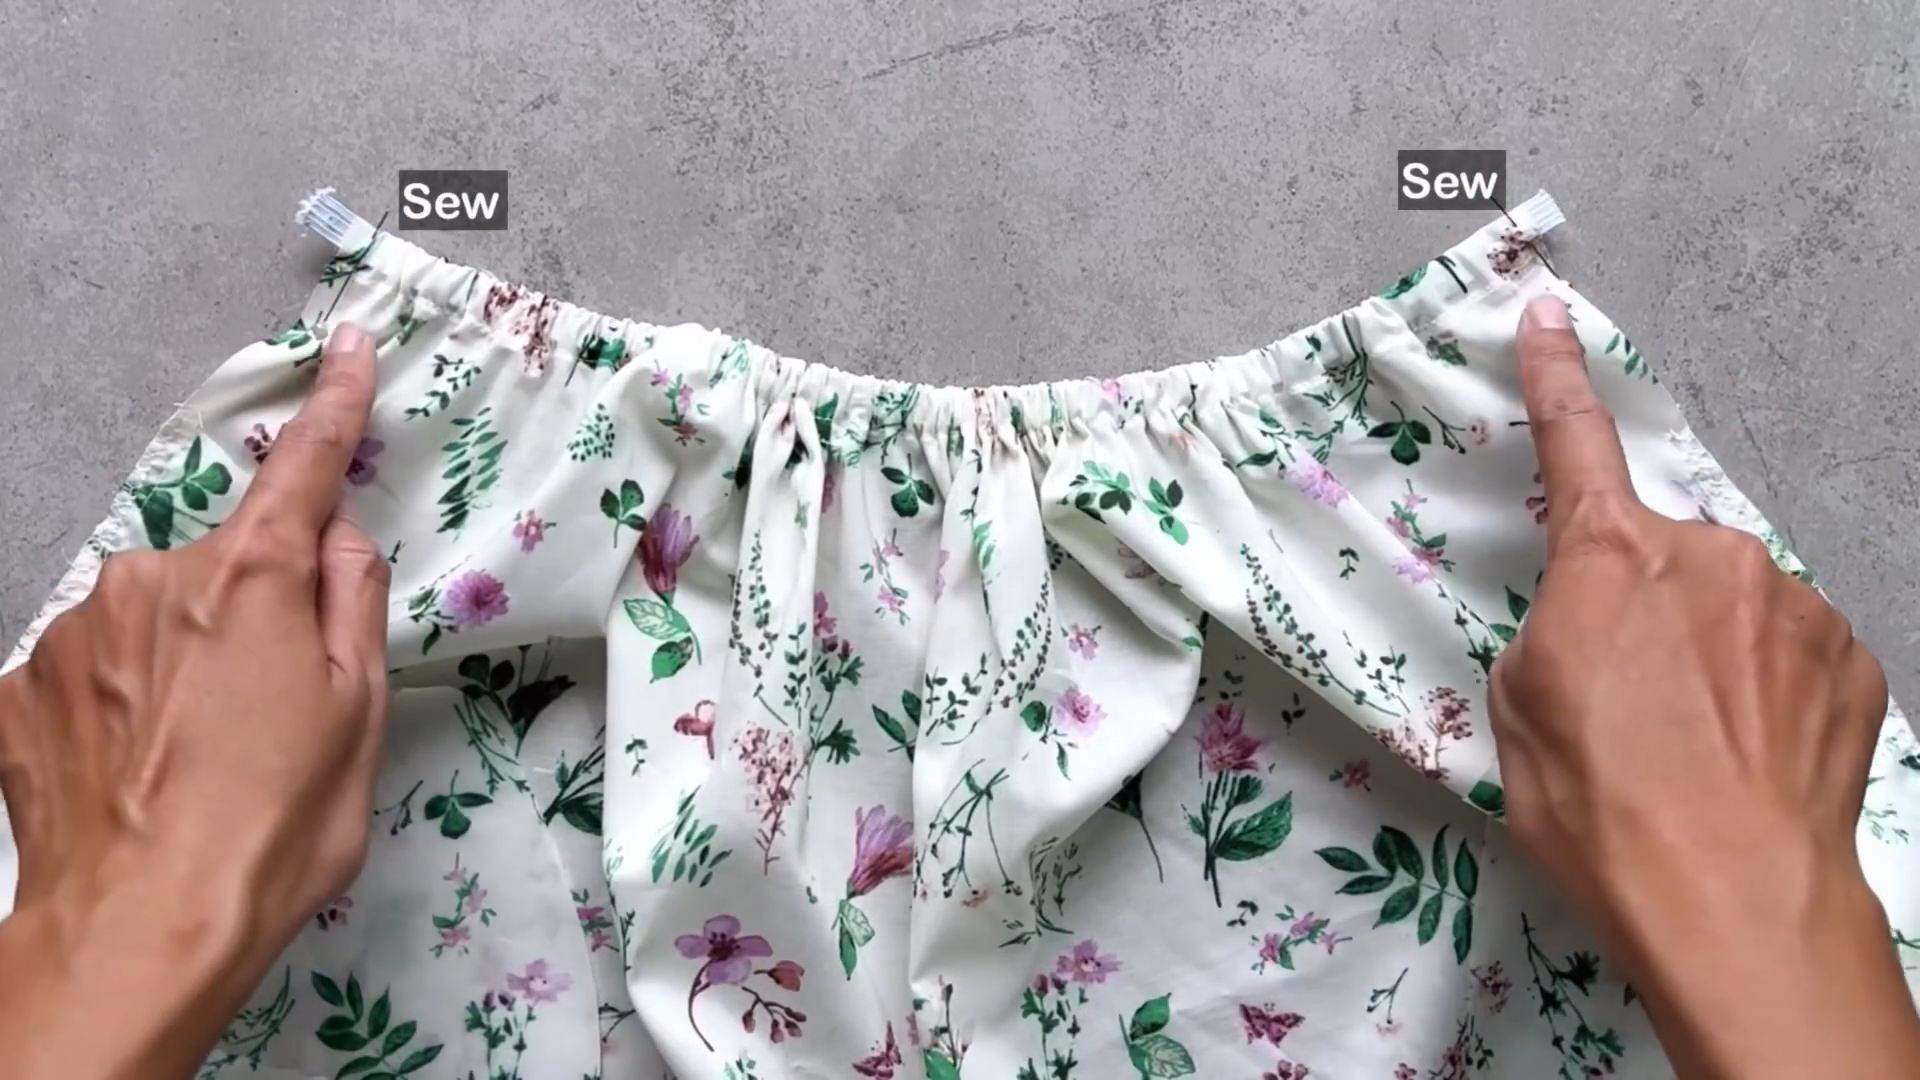
Thread the elastic through the casing and sew the ends together to secure it.
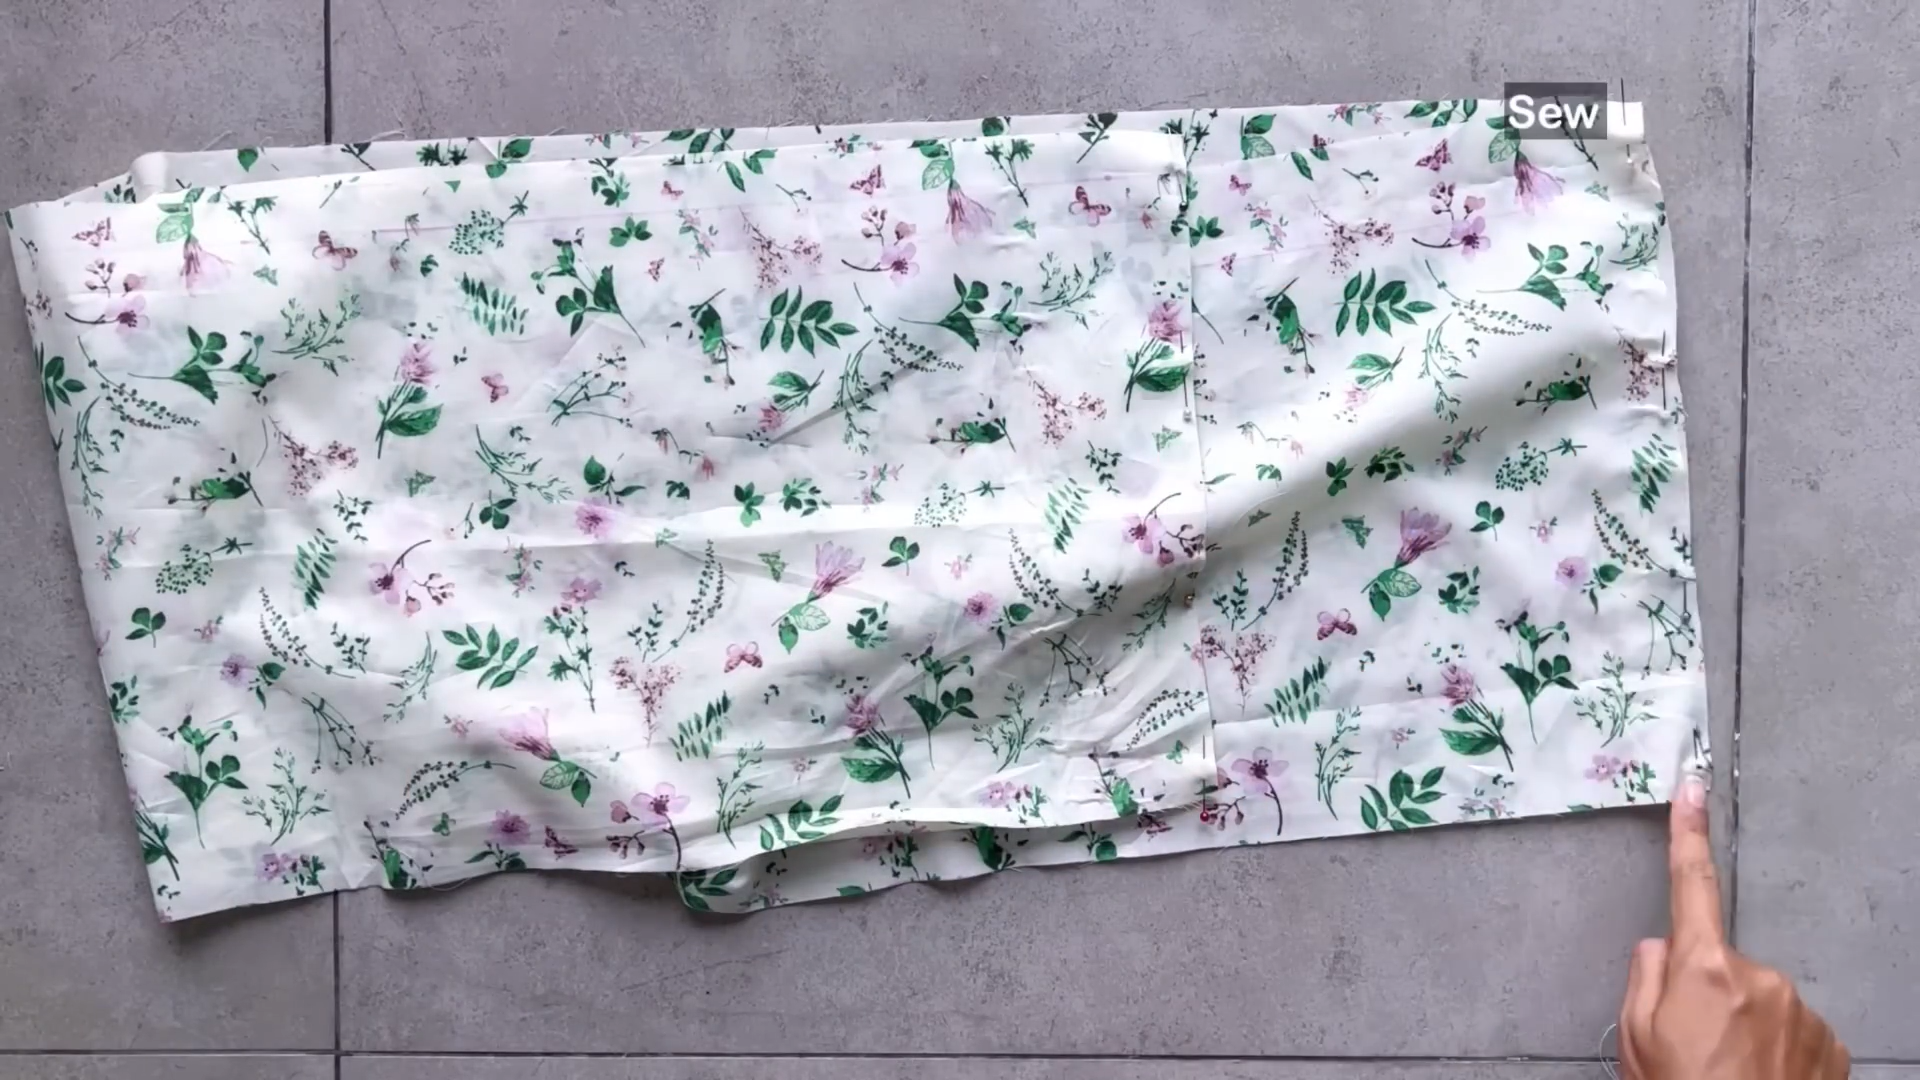
Sew the front and back skirt panels together at the side seams.
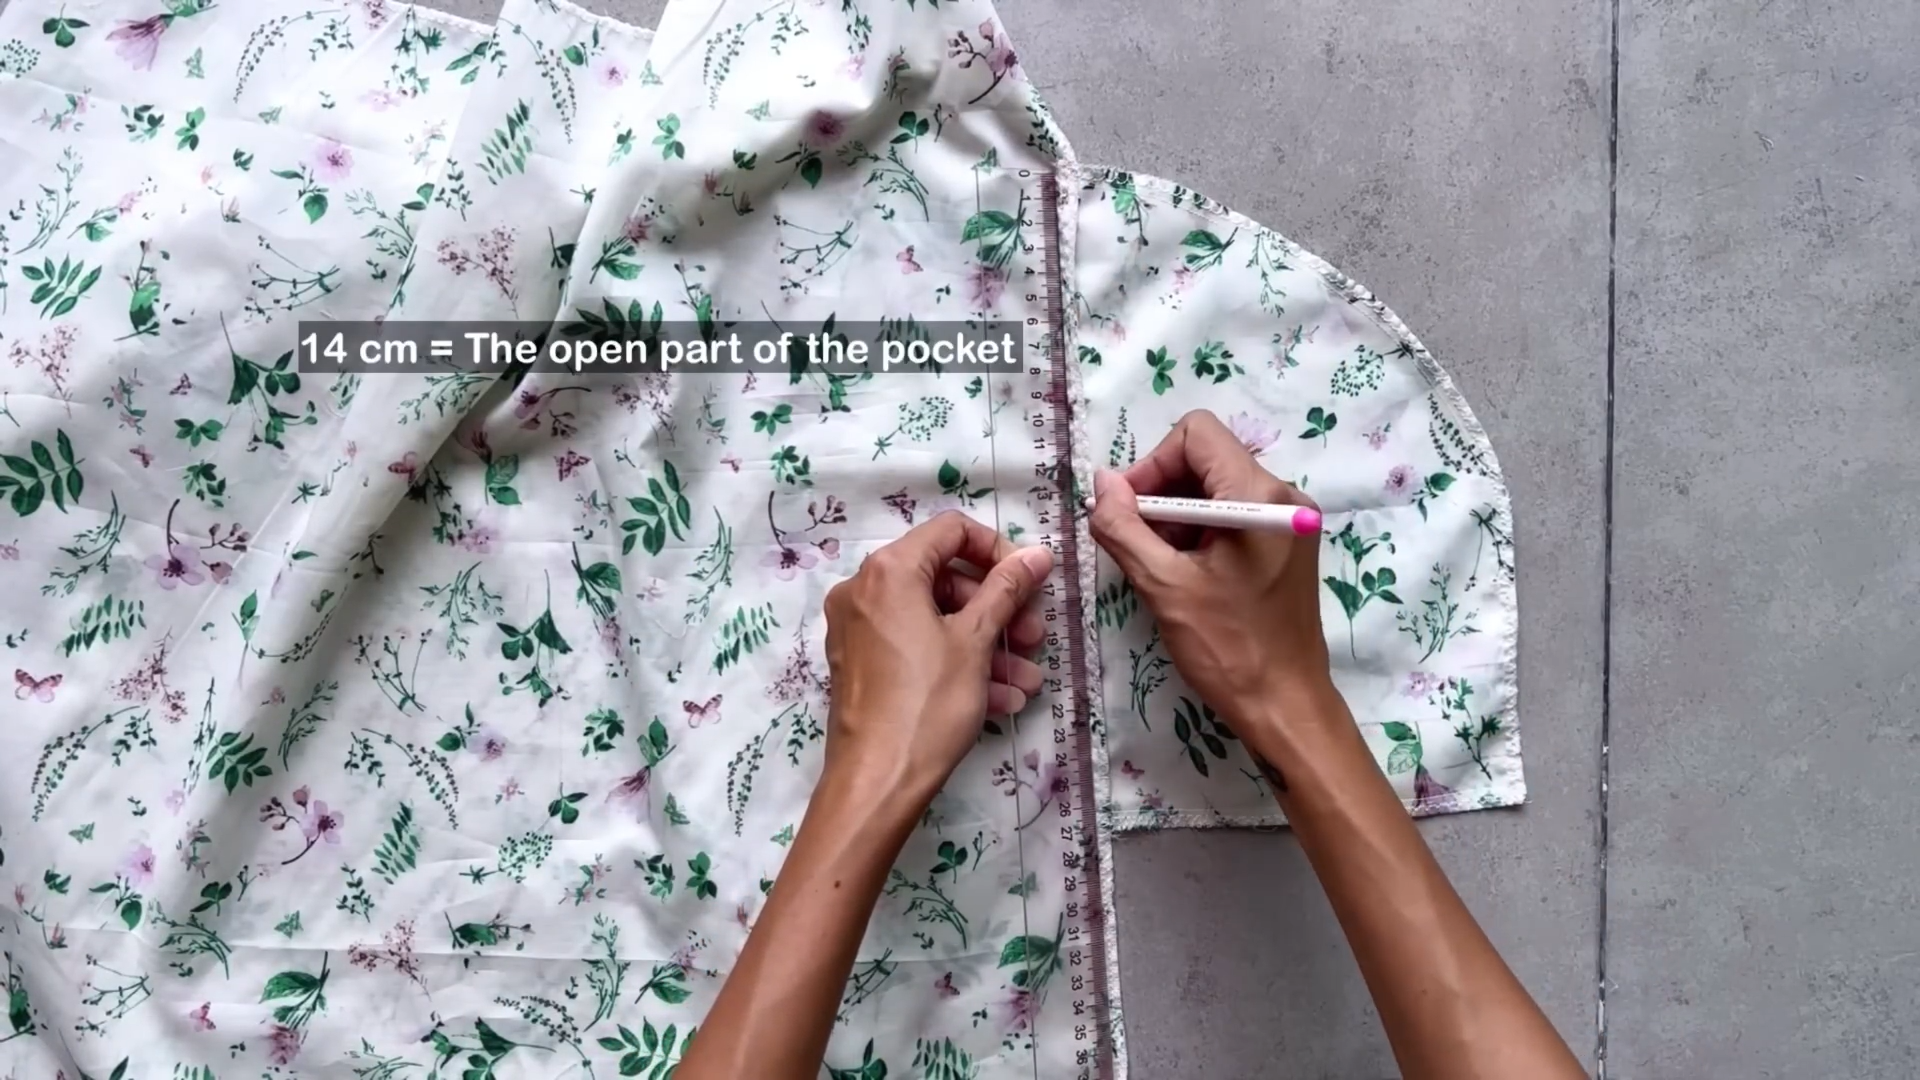
Mark 14 cm down from the top of the pocket (the open part).
Sew from the mark to create the pocket depth.
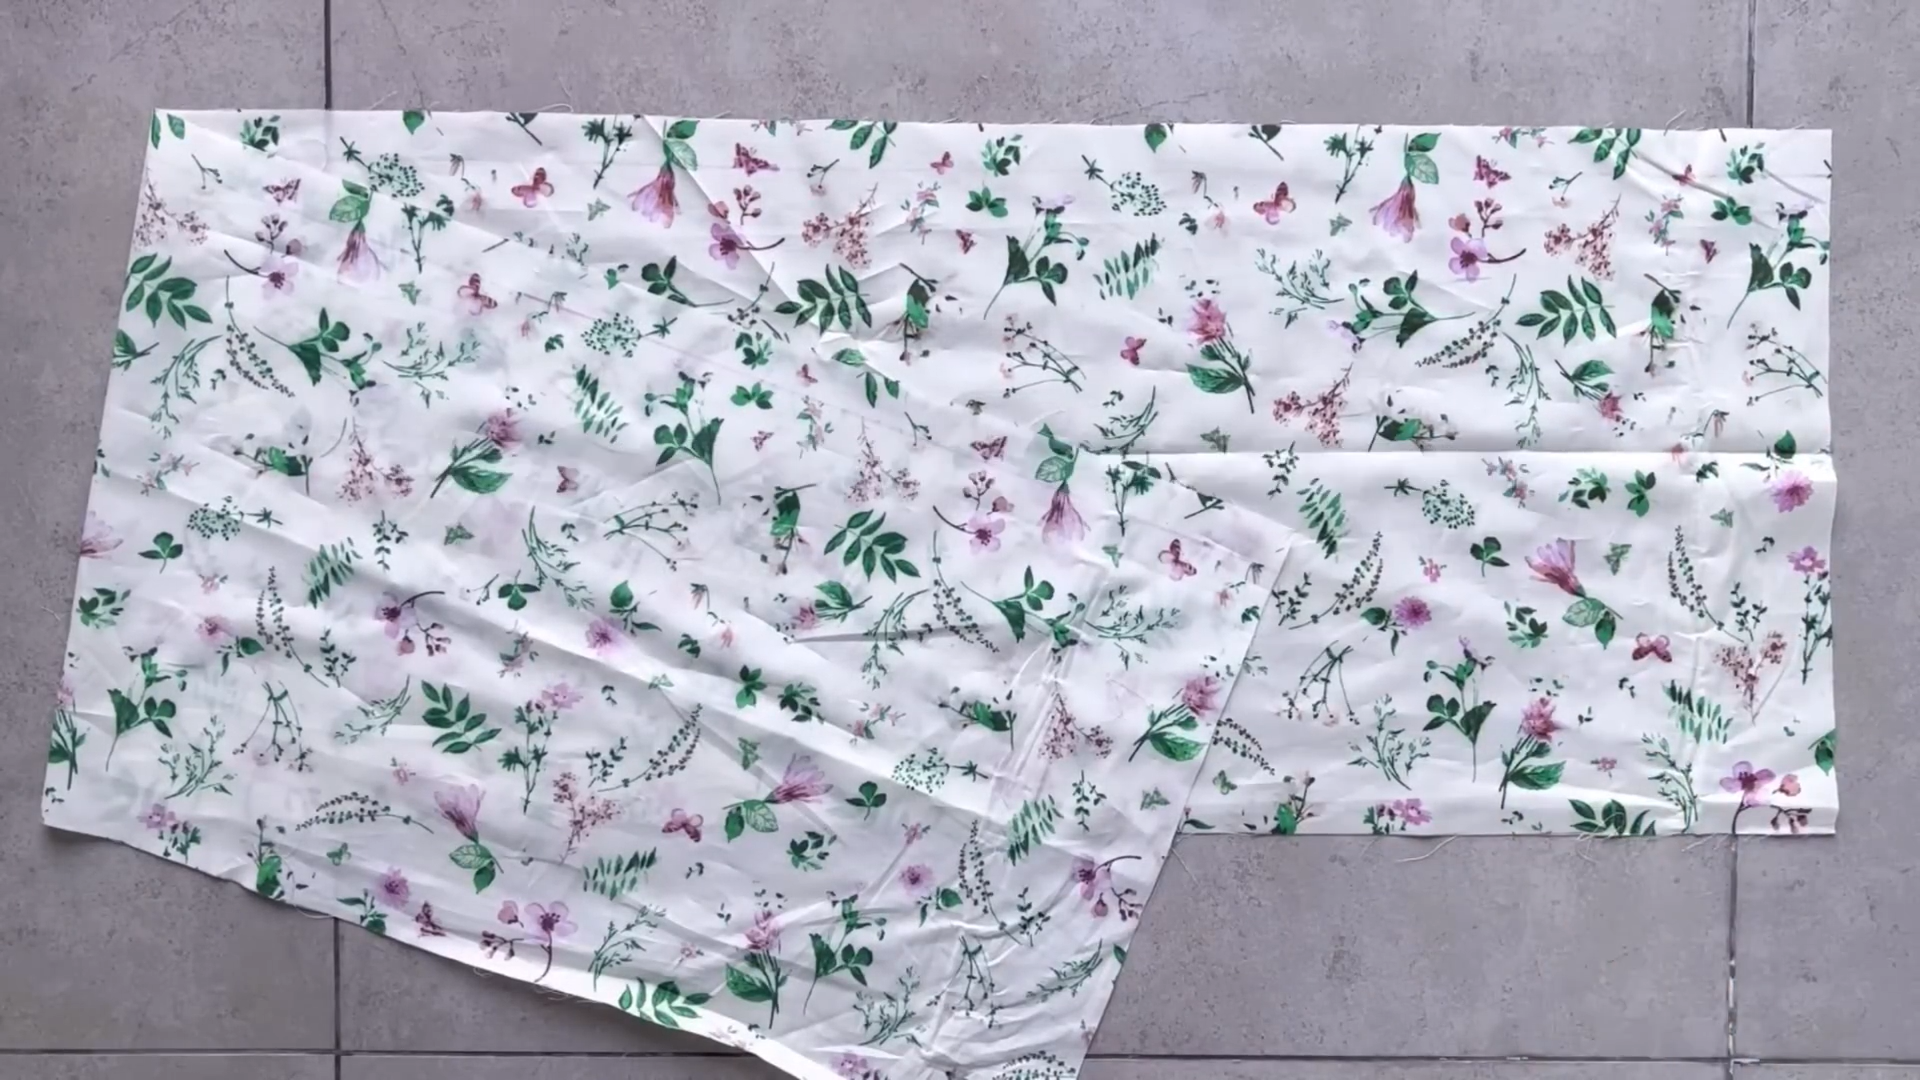
Cut two rectangles with a length of 27 cm and a width of 138 cm.
Sew these rectangles together along their lengths to form a circle of fabric.
Finish one edge of the circle by folding the fabric inwards twice (1 cm each fold) and stitching.
On the other side, sew a loose seam first.
Create a gathering fabric from the seam.
The final gathered width should match the top of the skirt.
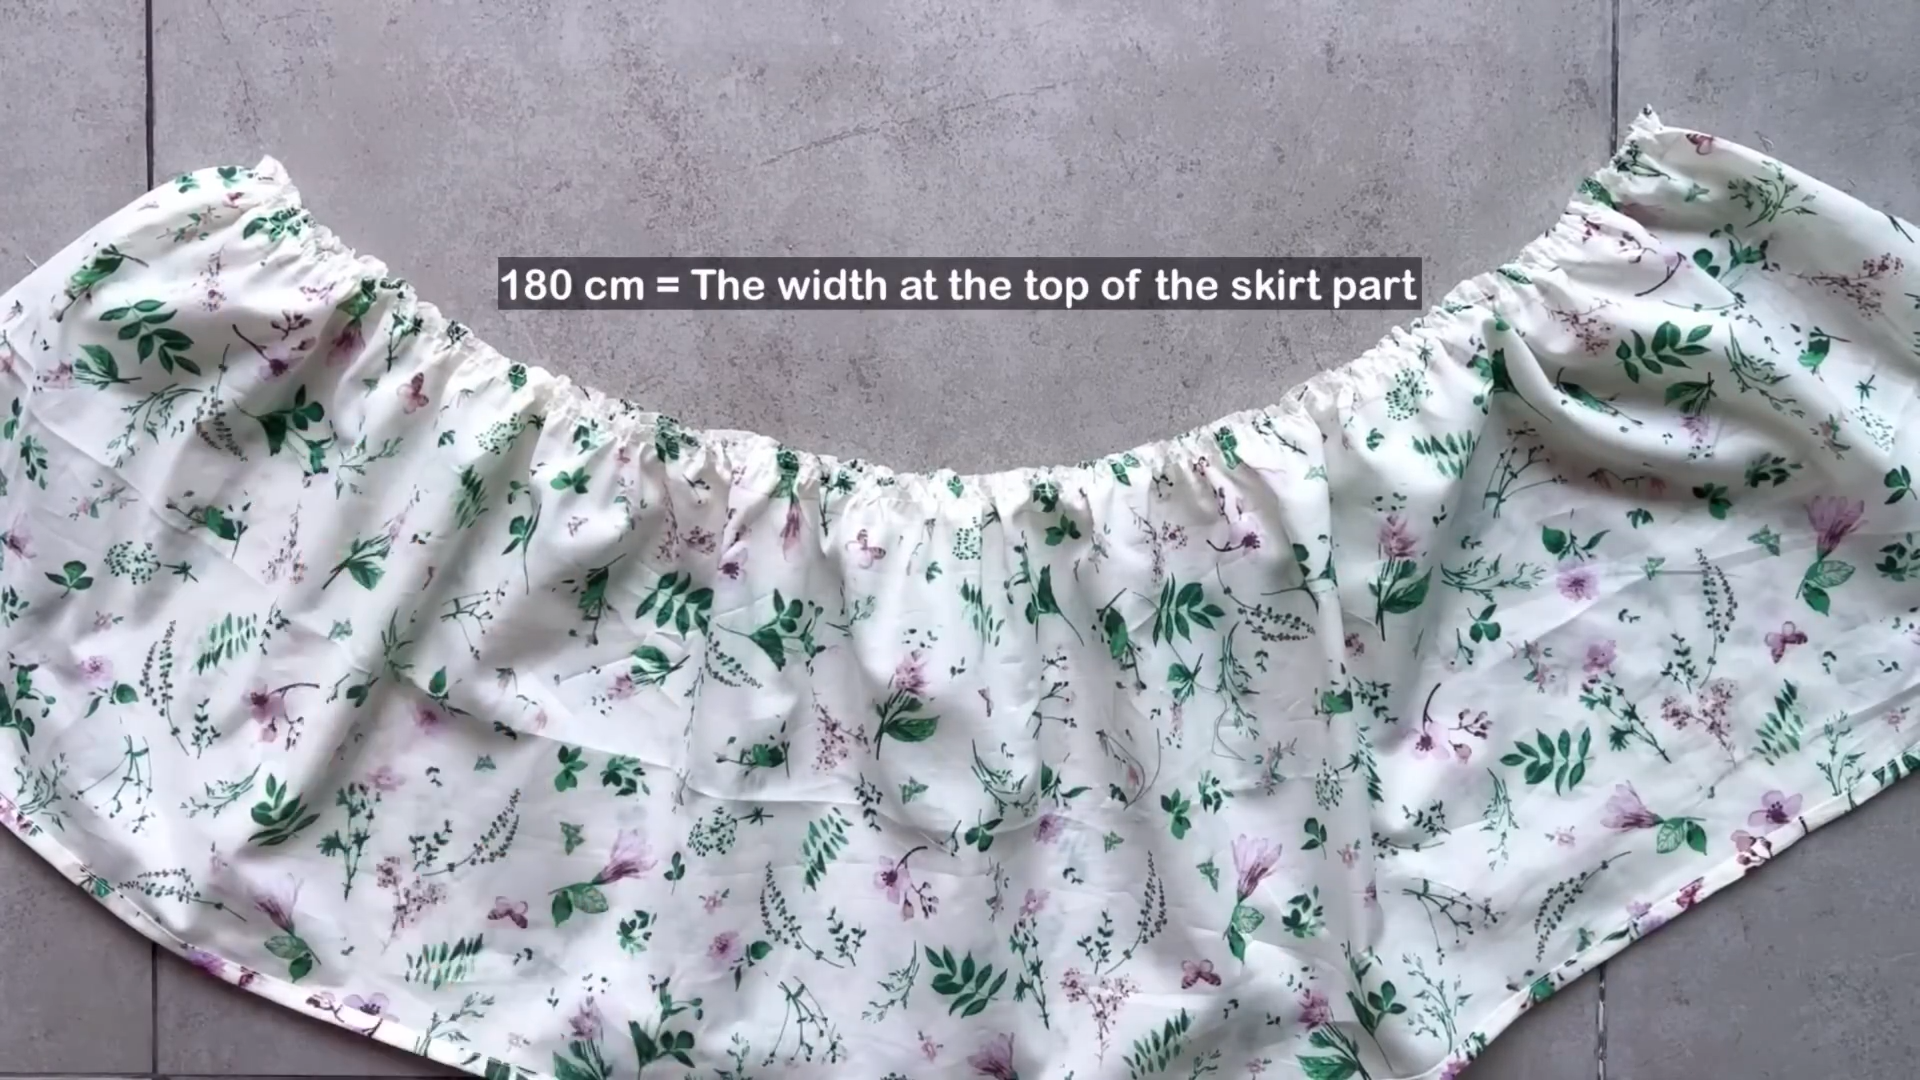
Connect the bottom section of the skirt to the top part.
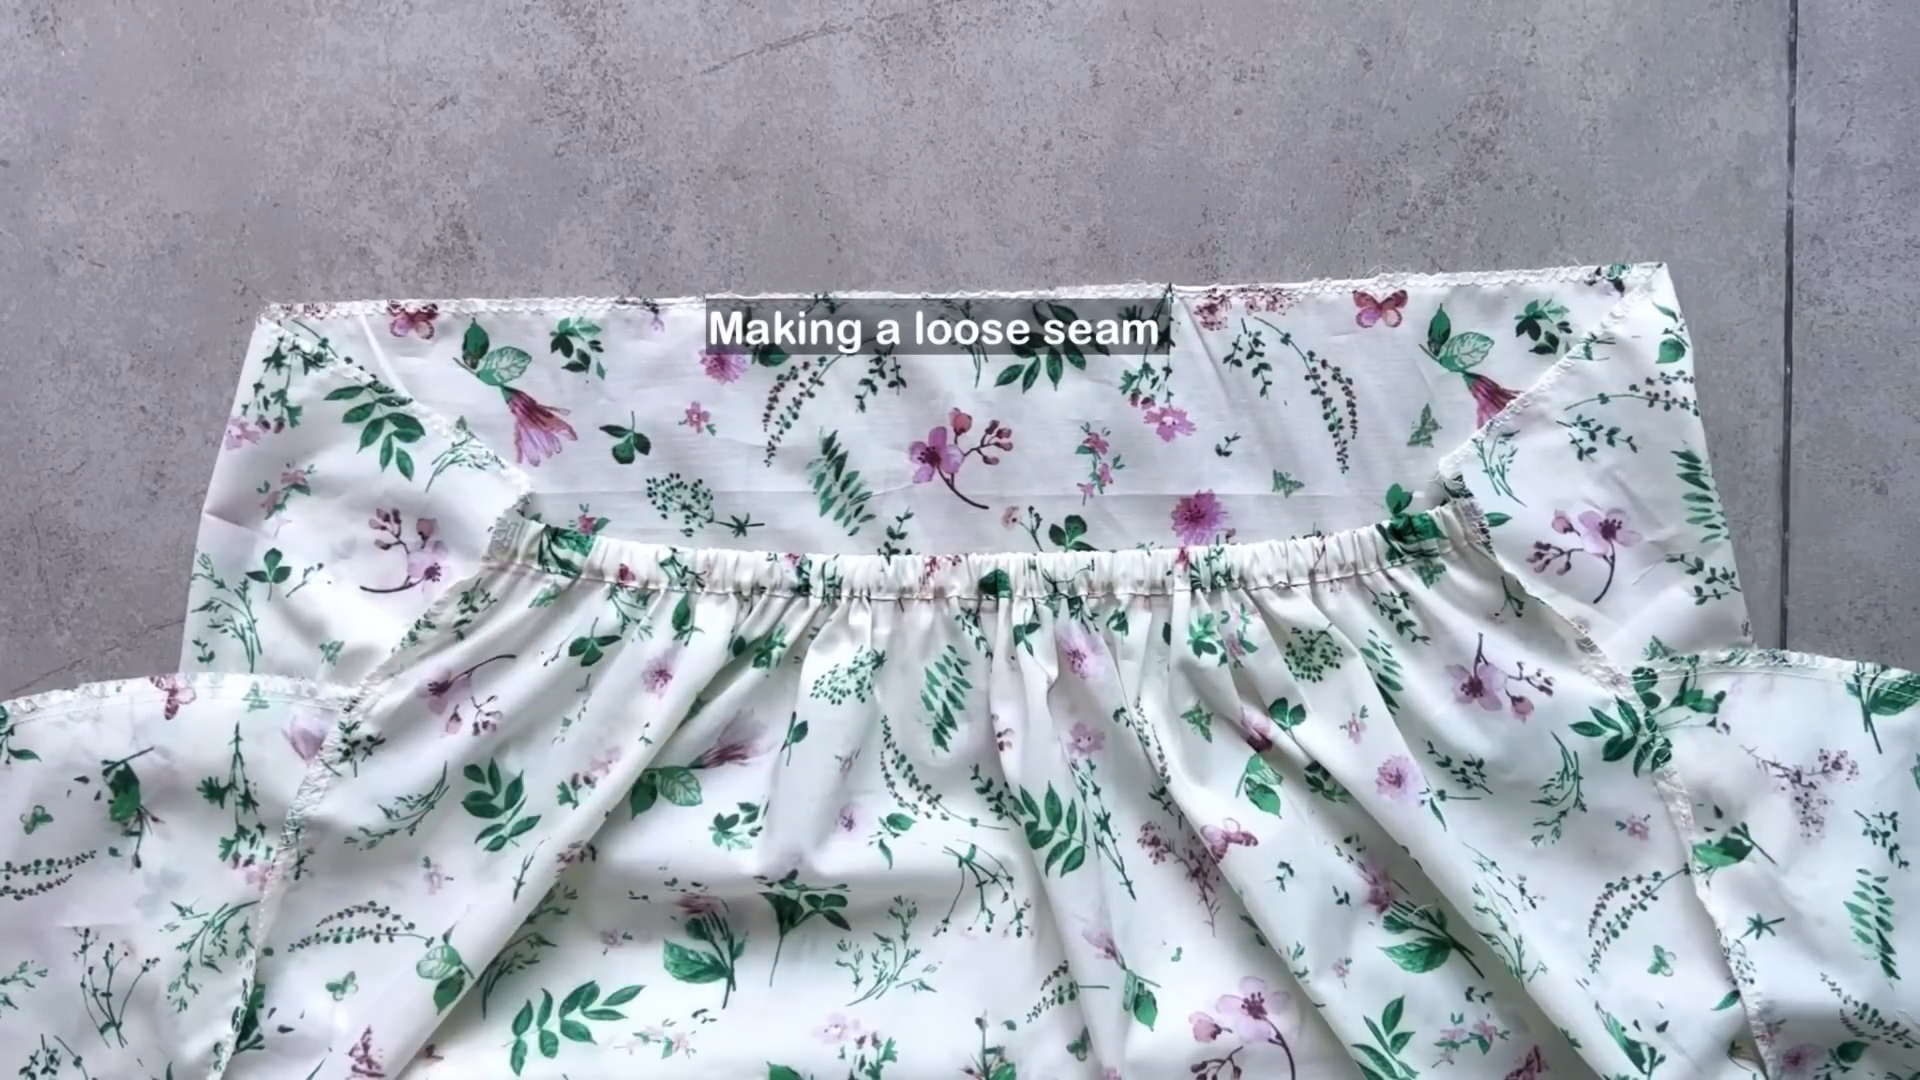
On the top edge of the front skirt, sew a loose seam to create gathering.
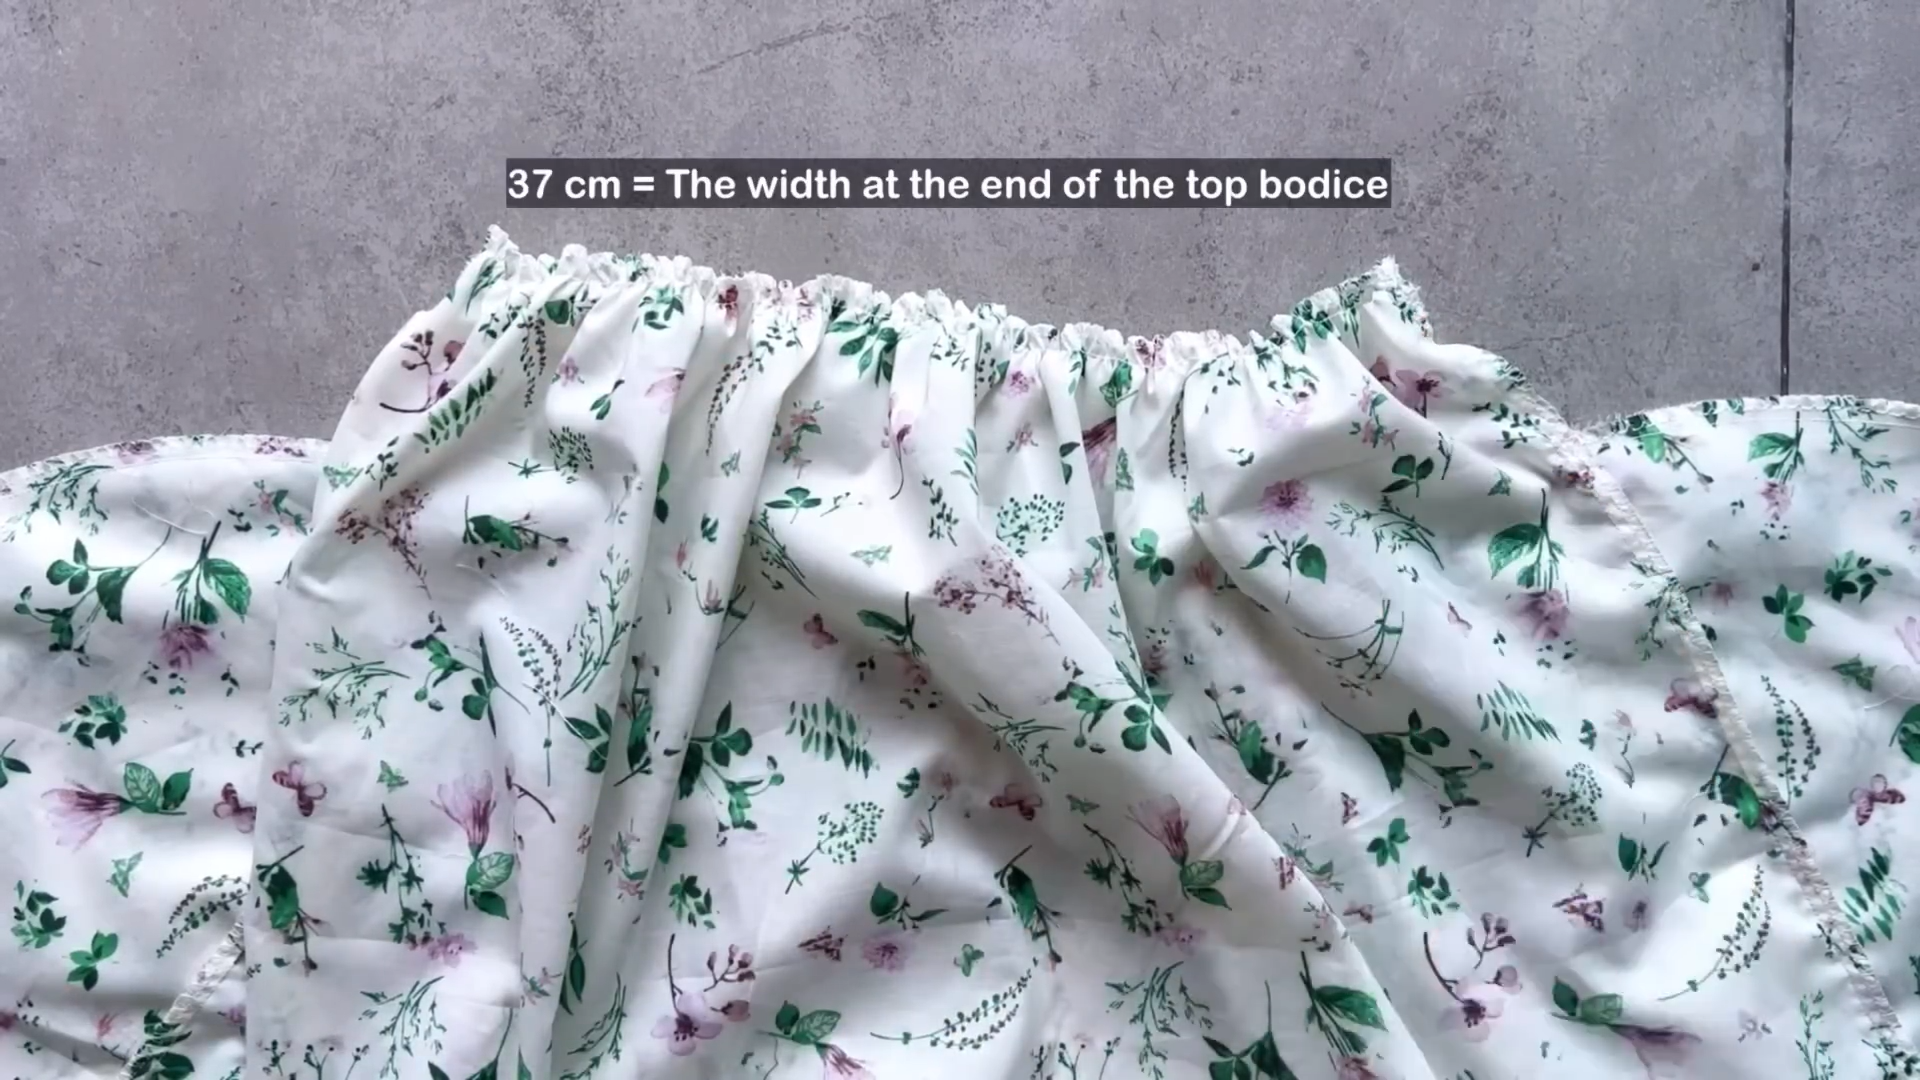
The final gathered width should match the width of the top bodice.
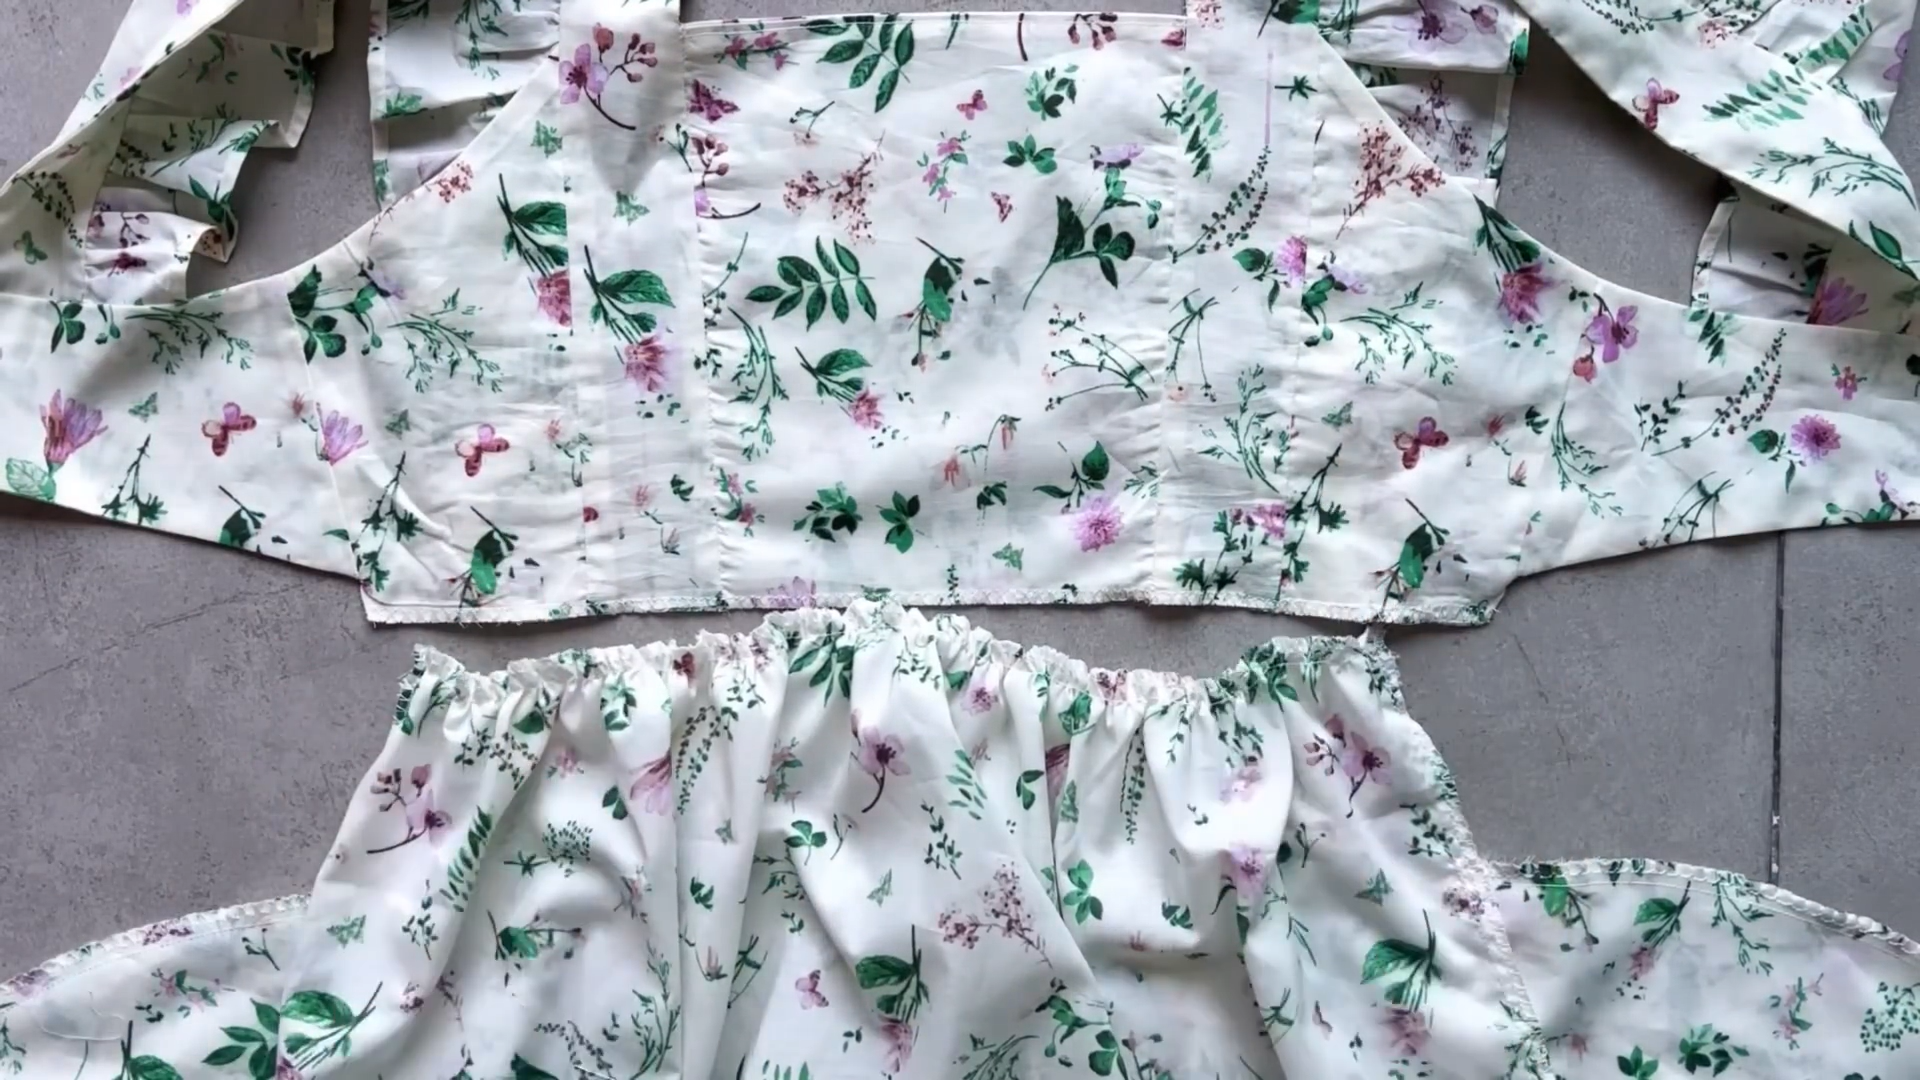
Connect the top and the bottom dress together to finish.


DIY Ruffle square neck bow tie open back dress
And there you have it!
This dress turned out to be a total dream, and I absolutely adore how it looks and feels. It's the perfect combination of fun, flirty, and elegant – everything I wanted for a birthday celebration!

I hope you found my step-by-step guide helpful and inspiring.
If you’re interested in making your own, give it a try and let me know how it goes!
Until then, happy sewing!