DIY Ruffle neck crop top from Men's shirt - Men's shirt refashion idea - Step by step tutorial

DIY Ruffle neck crop top from Men's shirt
Welcome and welcome back to my sewing blog!
In today blog, I'm going to share with you another idea on how to transform a men's shirt into a ruffle neck crop top. You can wear this crop top in 2 ways: puff sleeve or off the shoulder. So it'll be great to mix&match with the different clothes.
Le't’s get started!
WHAT YOU’LL NEED
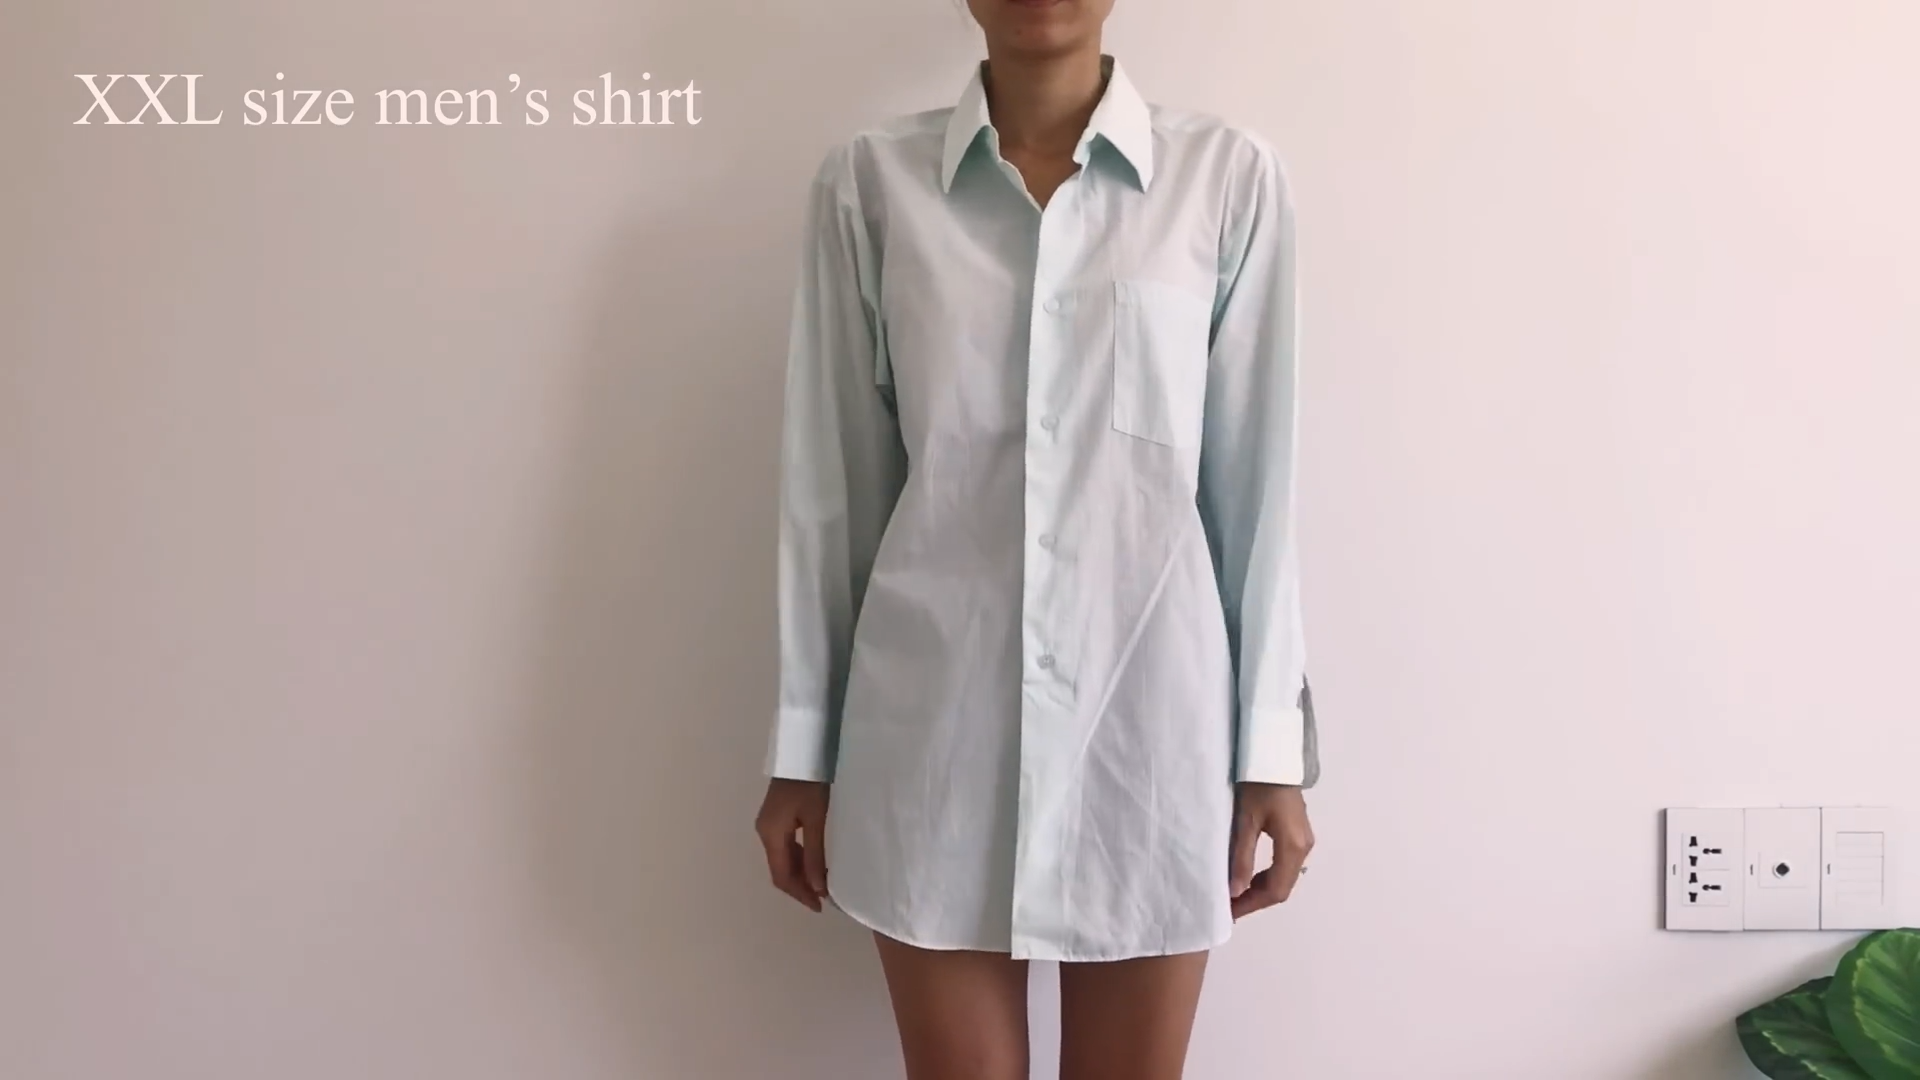
XXL size Men's shirt in cotton fabric
Sewing machine
Pins
Scissors
Ruler
SEWING THE CROP TOP
THE TOP
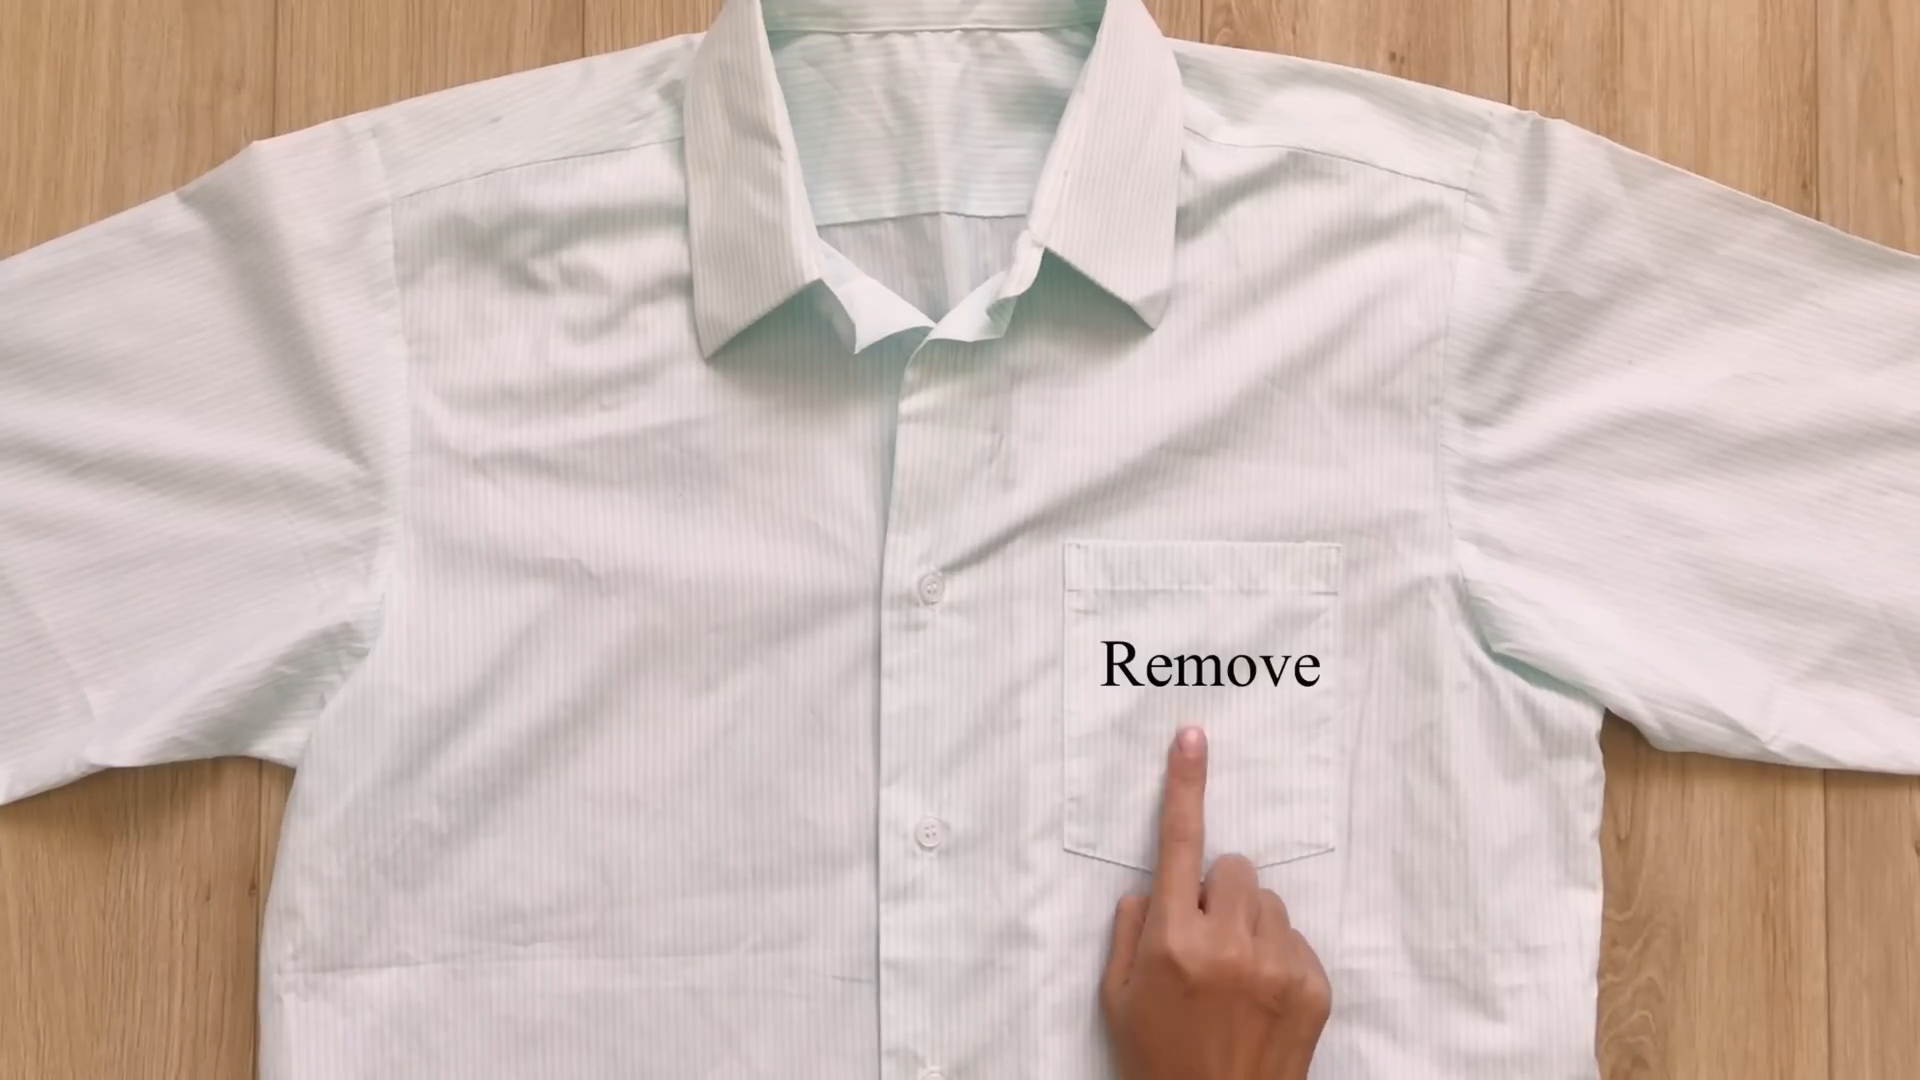
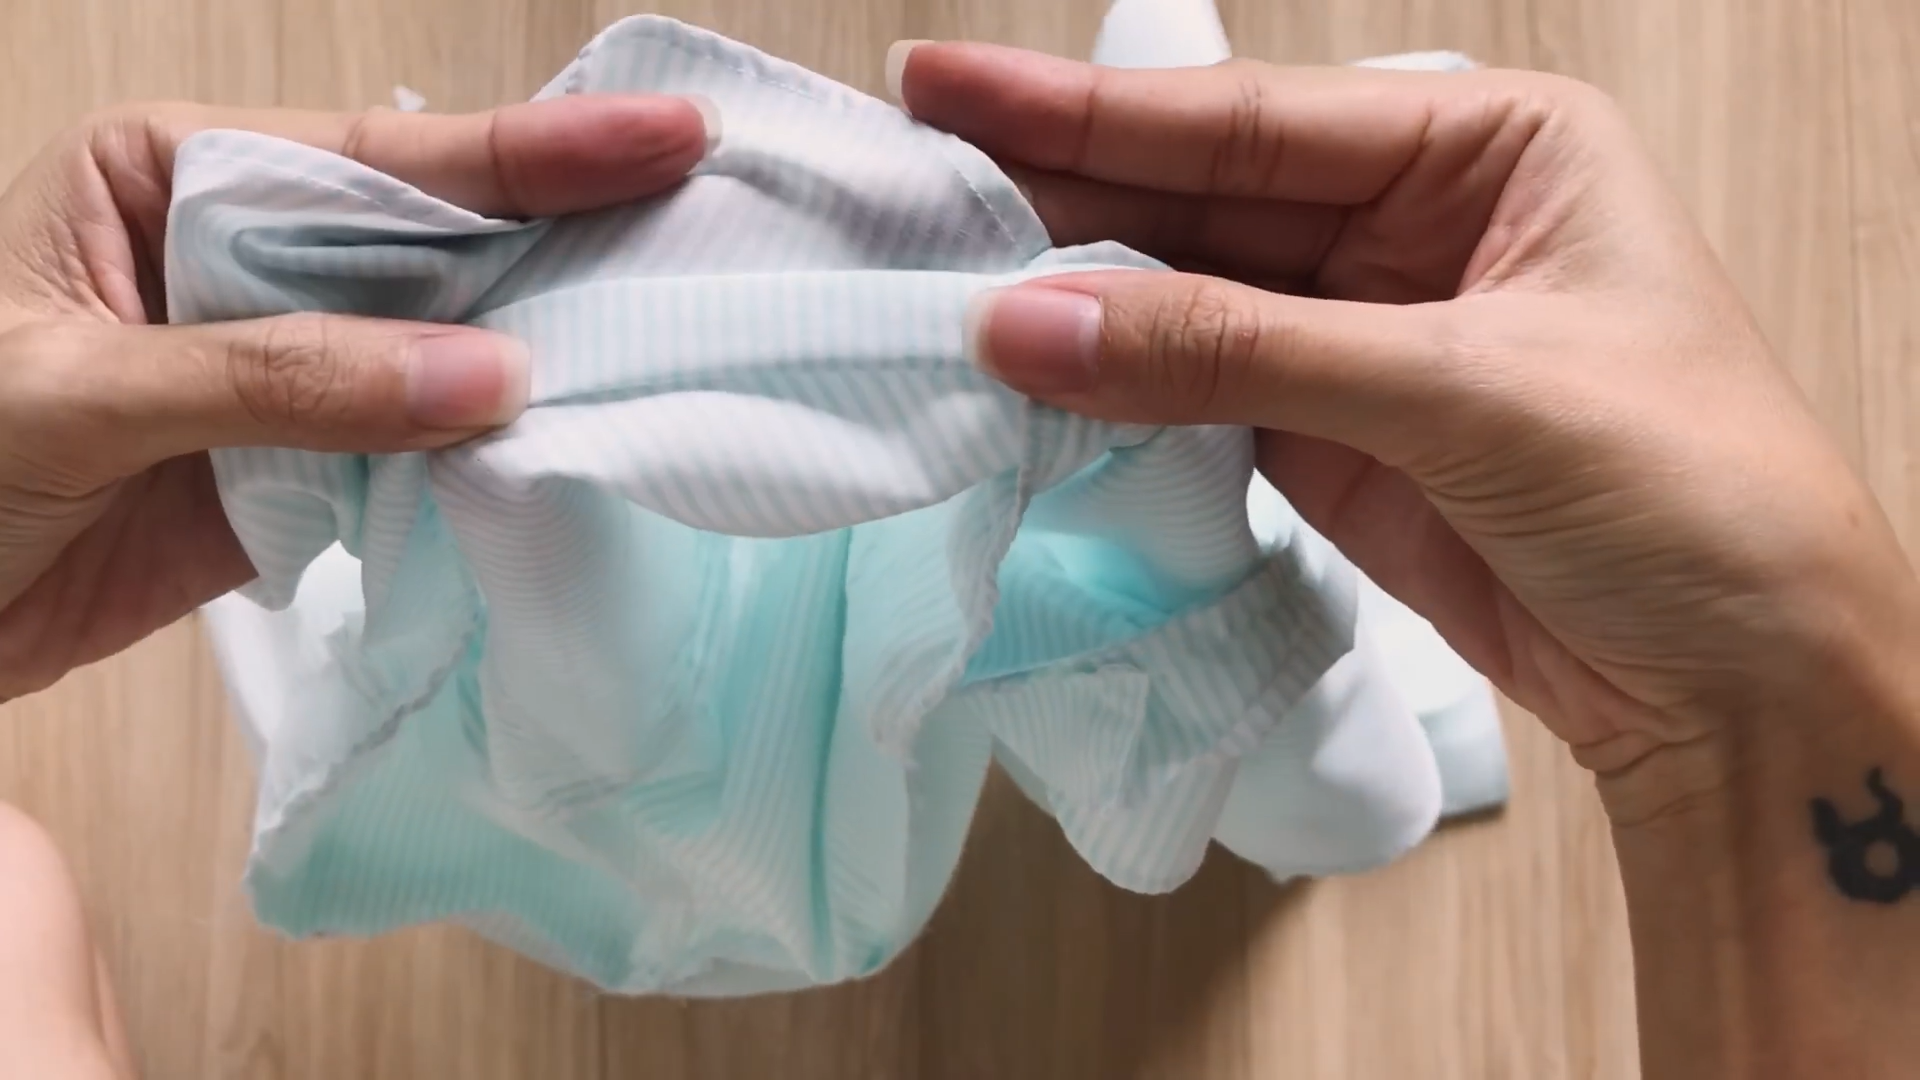
The first step is to remove the front pocket.
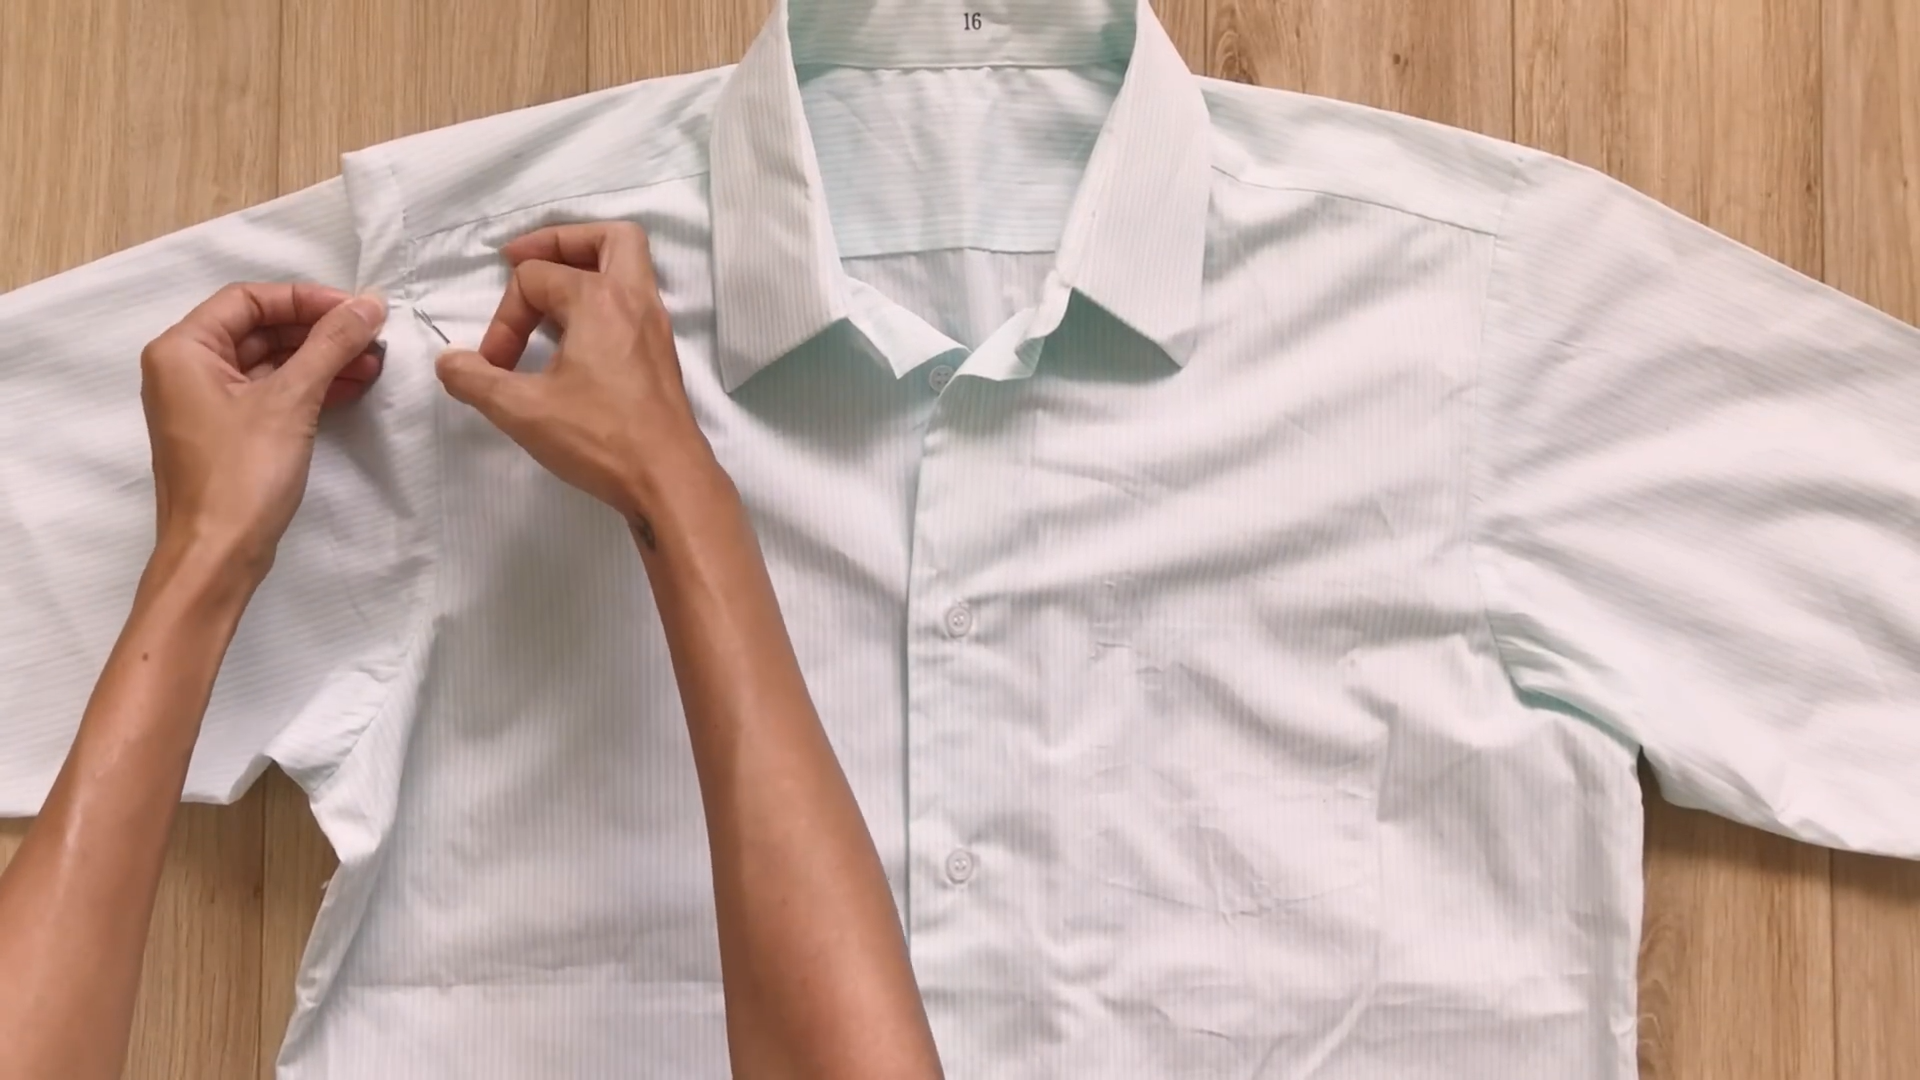
After that, un-sew the seam at the sleeves from the top to the middle.
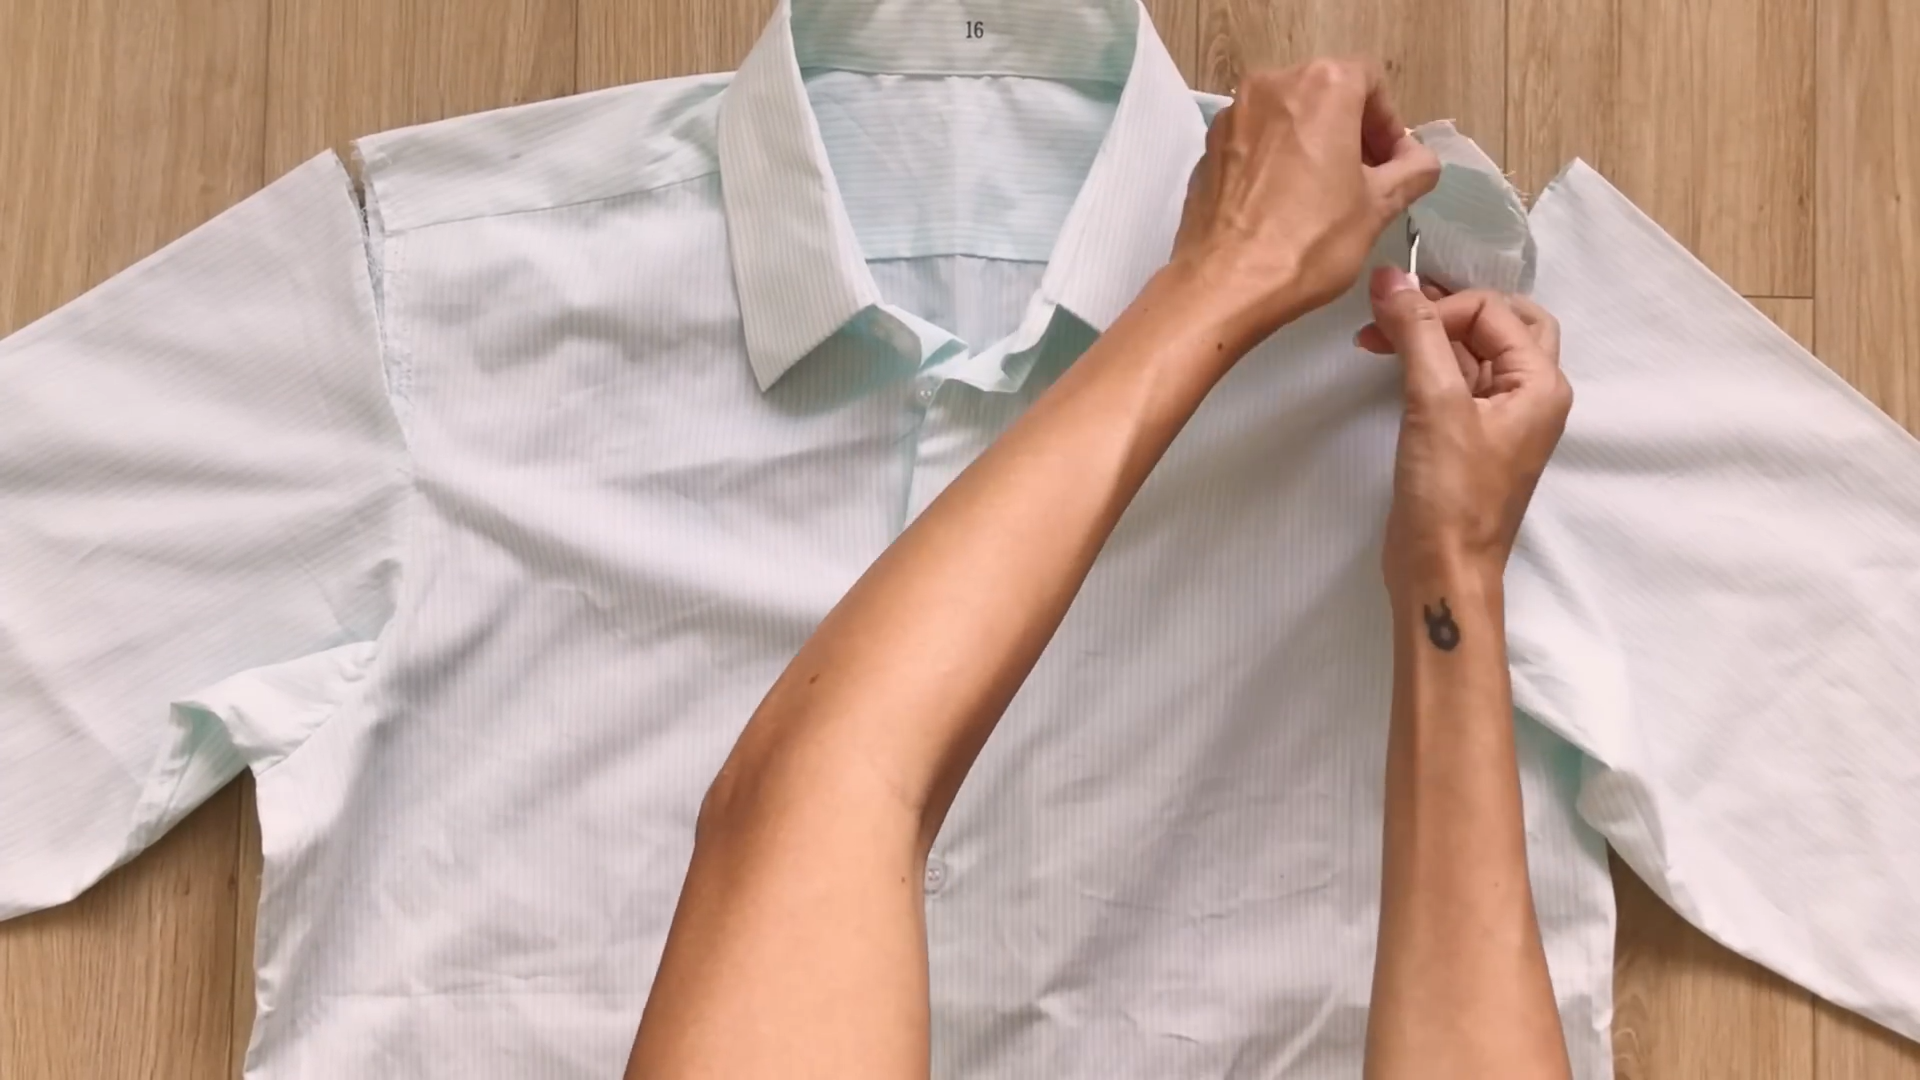
Then, remove the shoulder and the neck part.
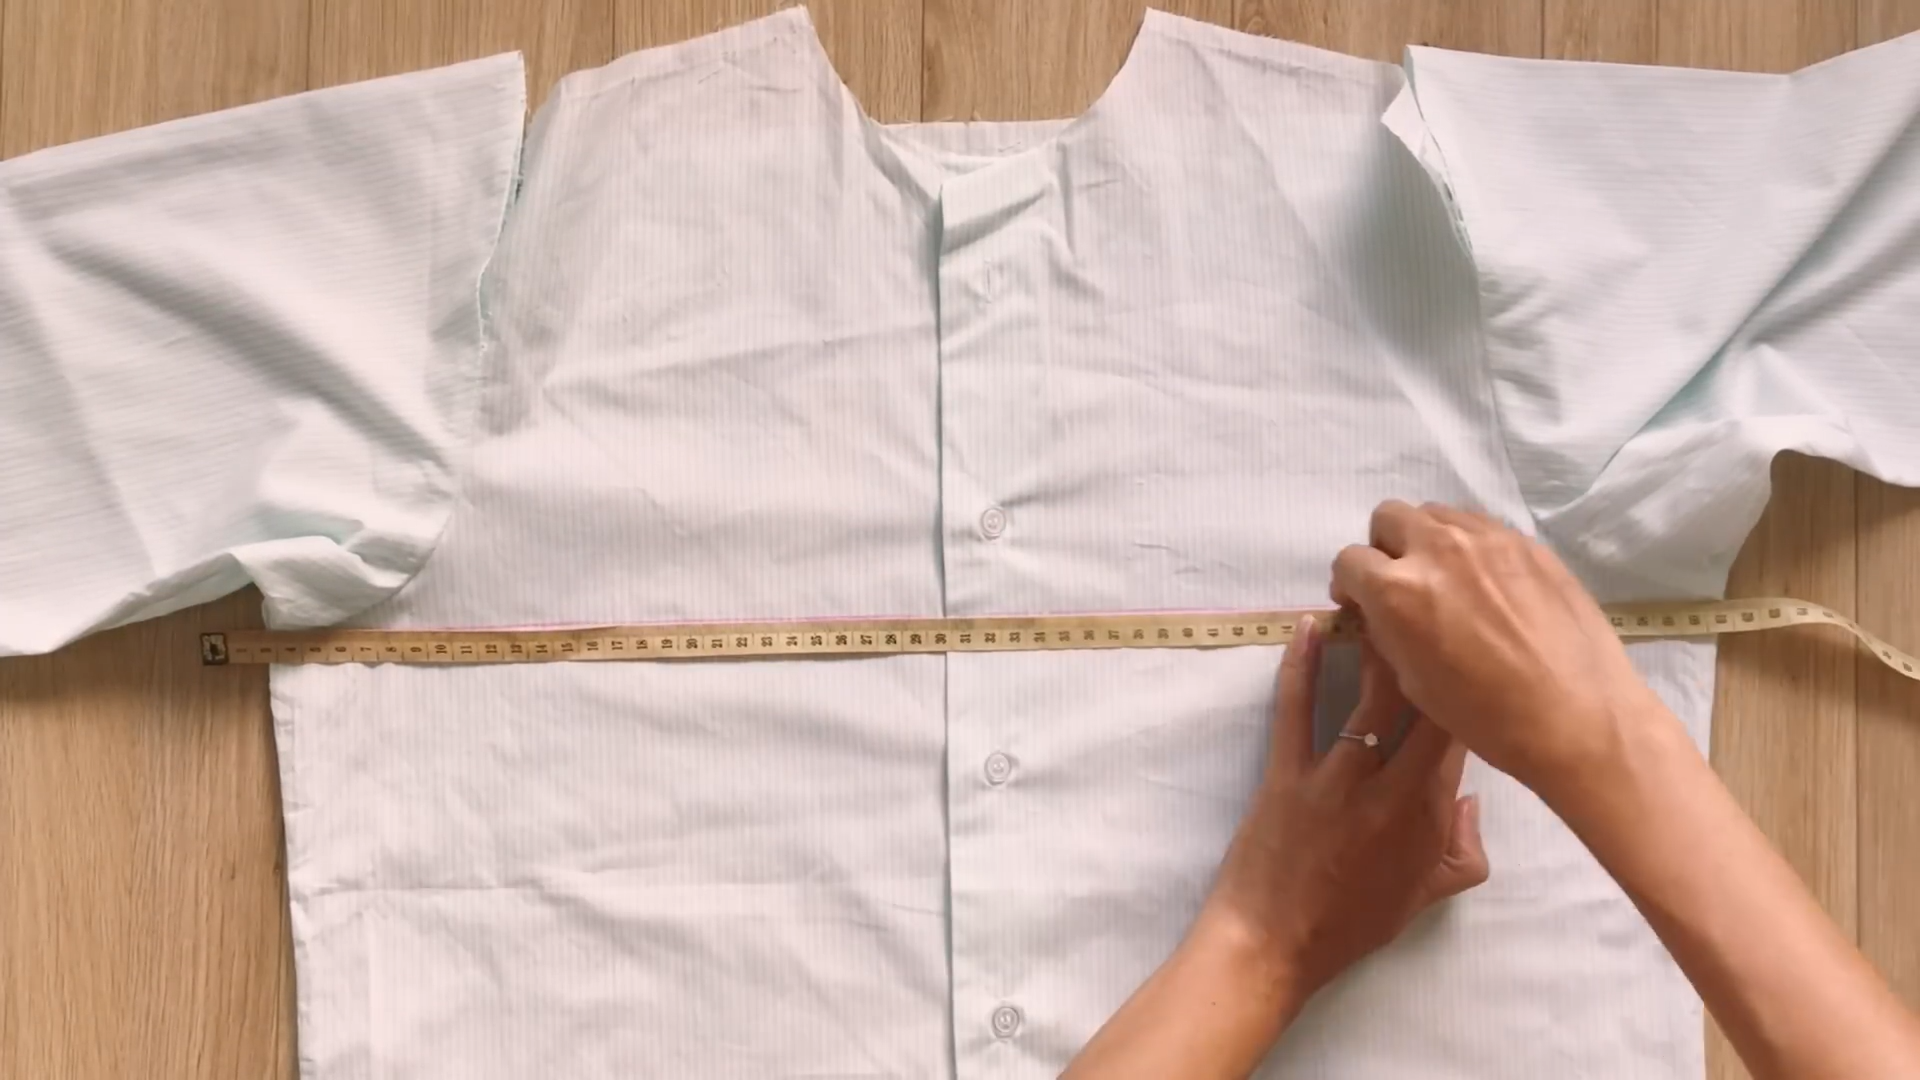
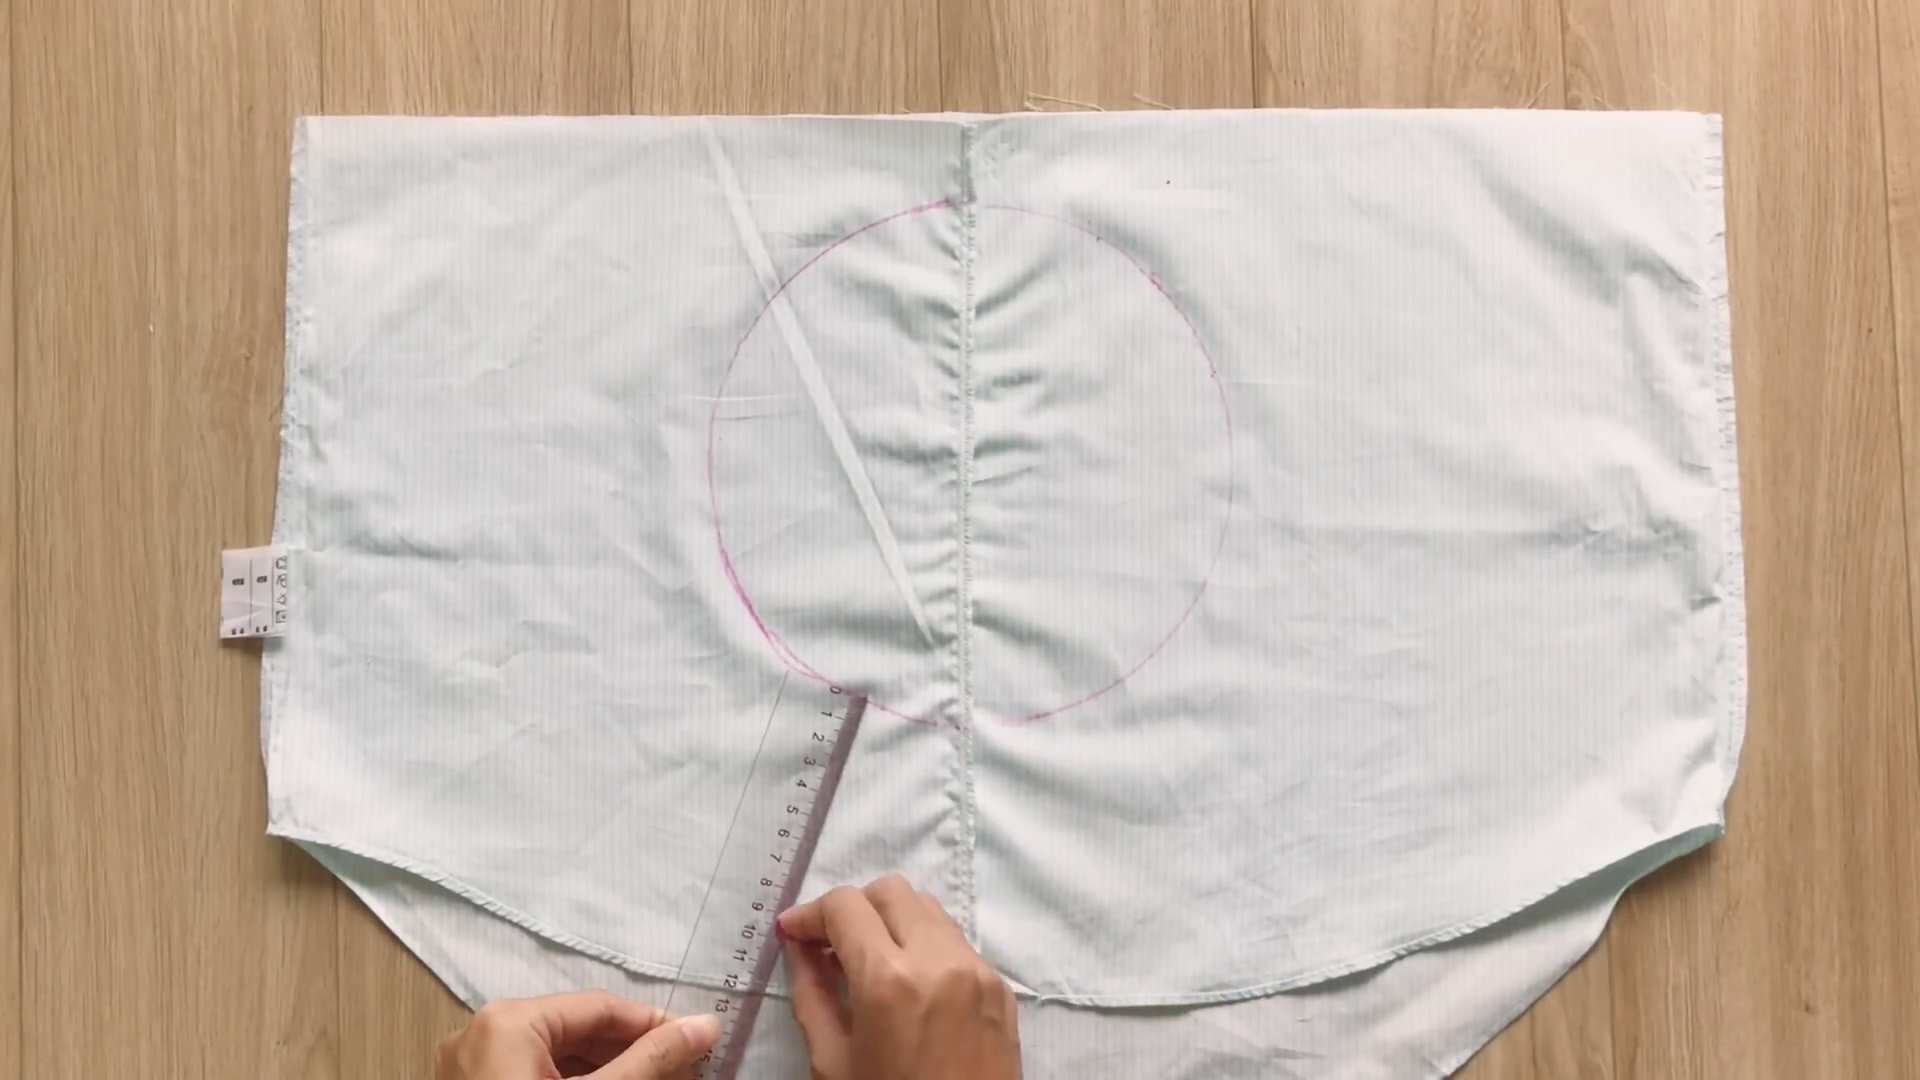
Draw a horizontal line right under the armpit of the sleeve.
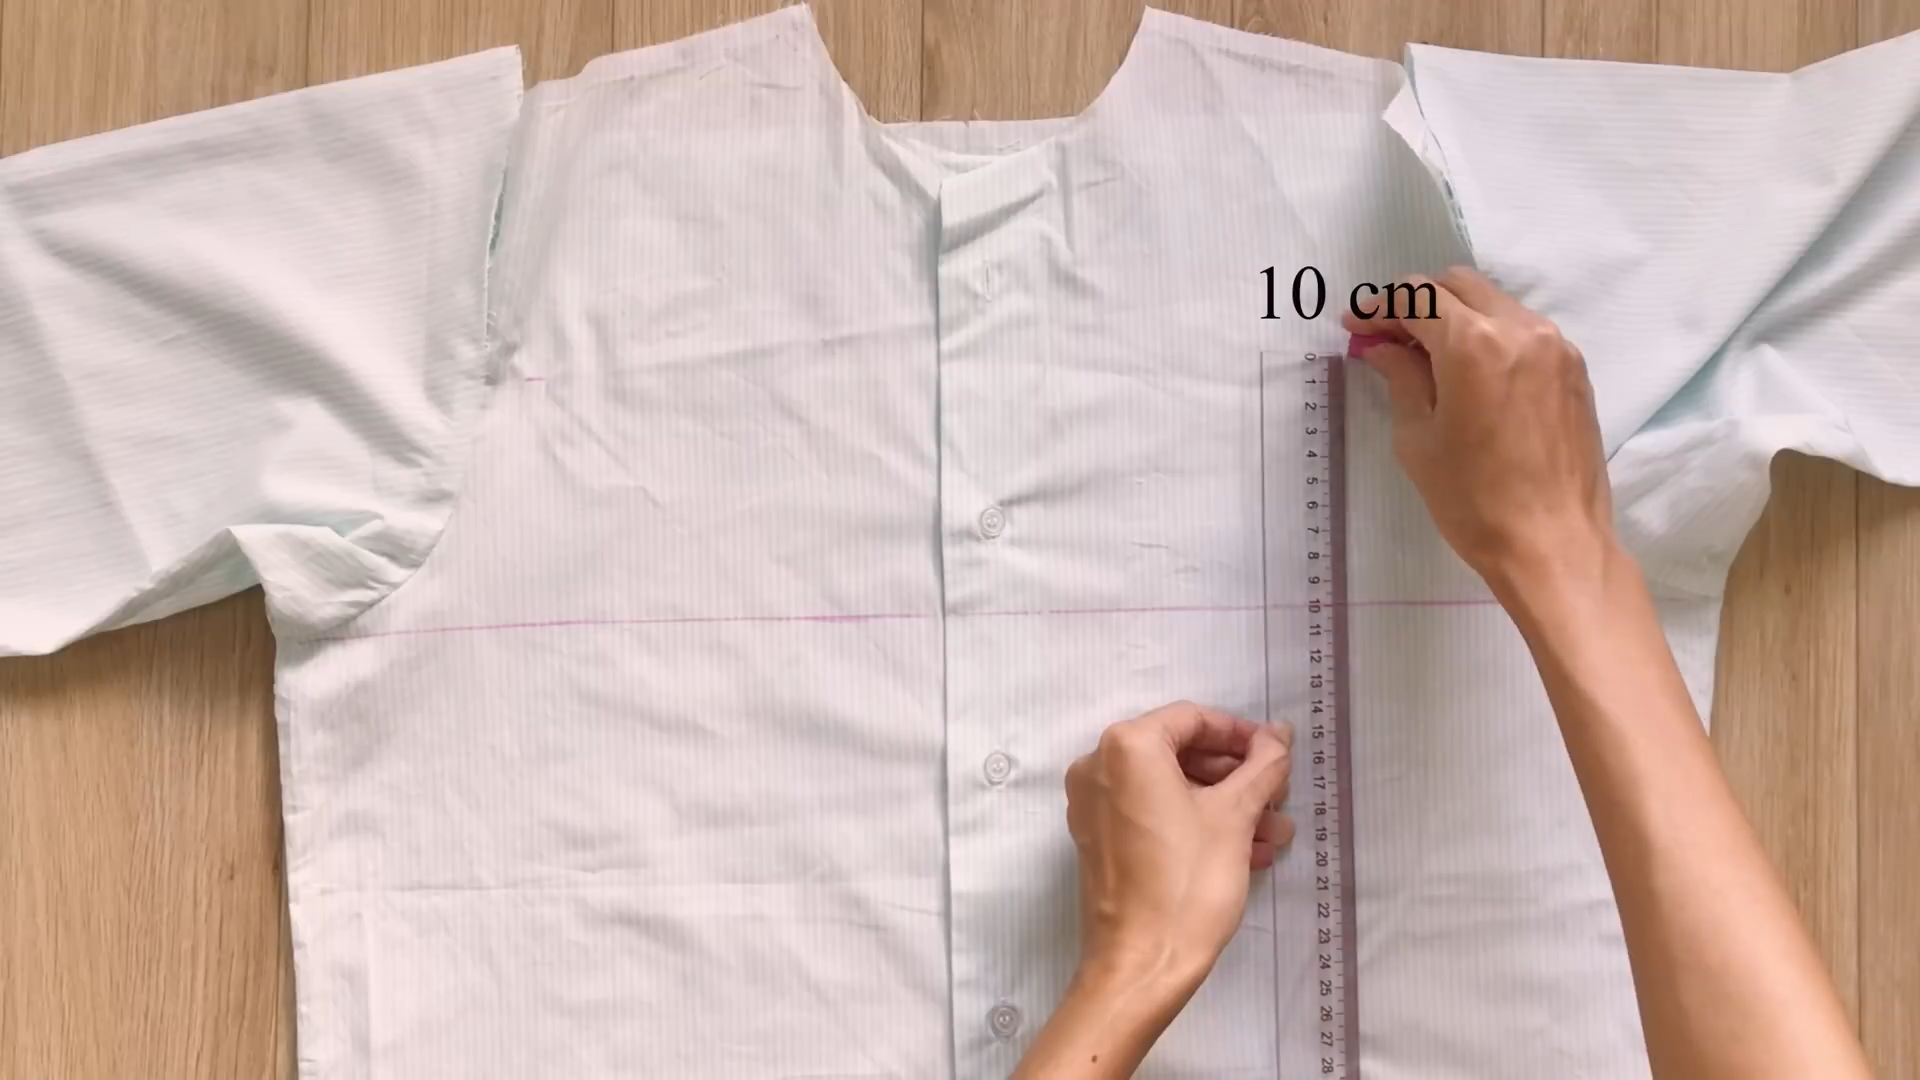
From this line, draw one horizontal line at 10 cm above it…
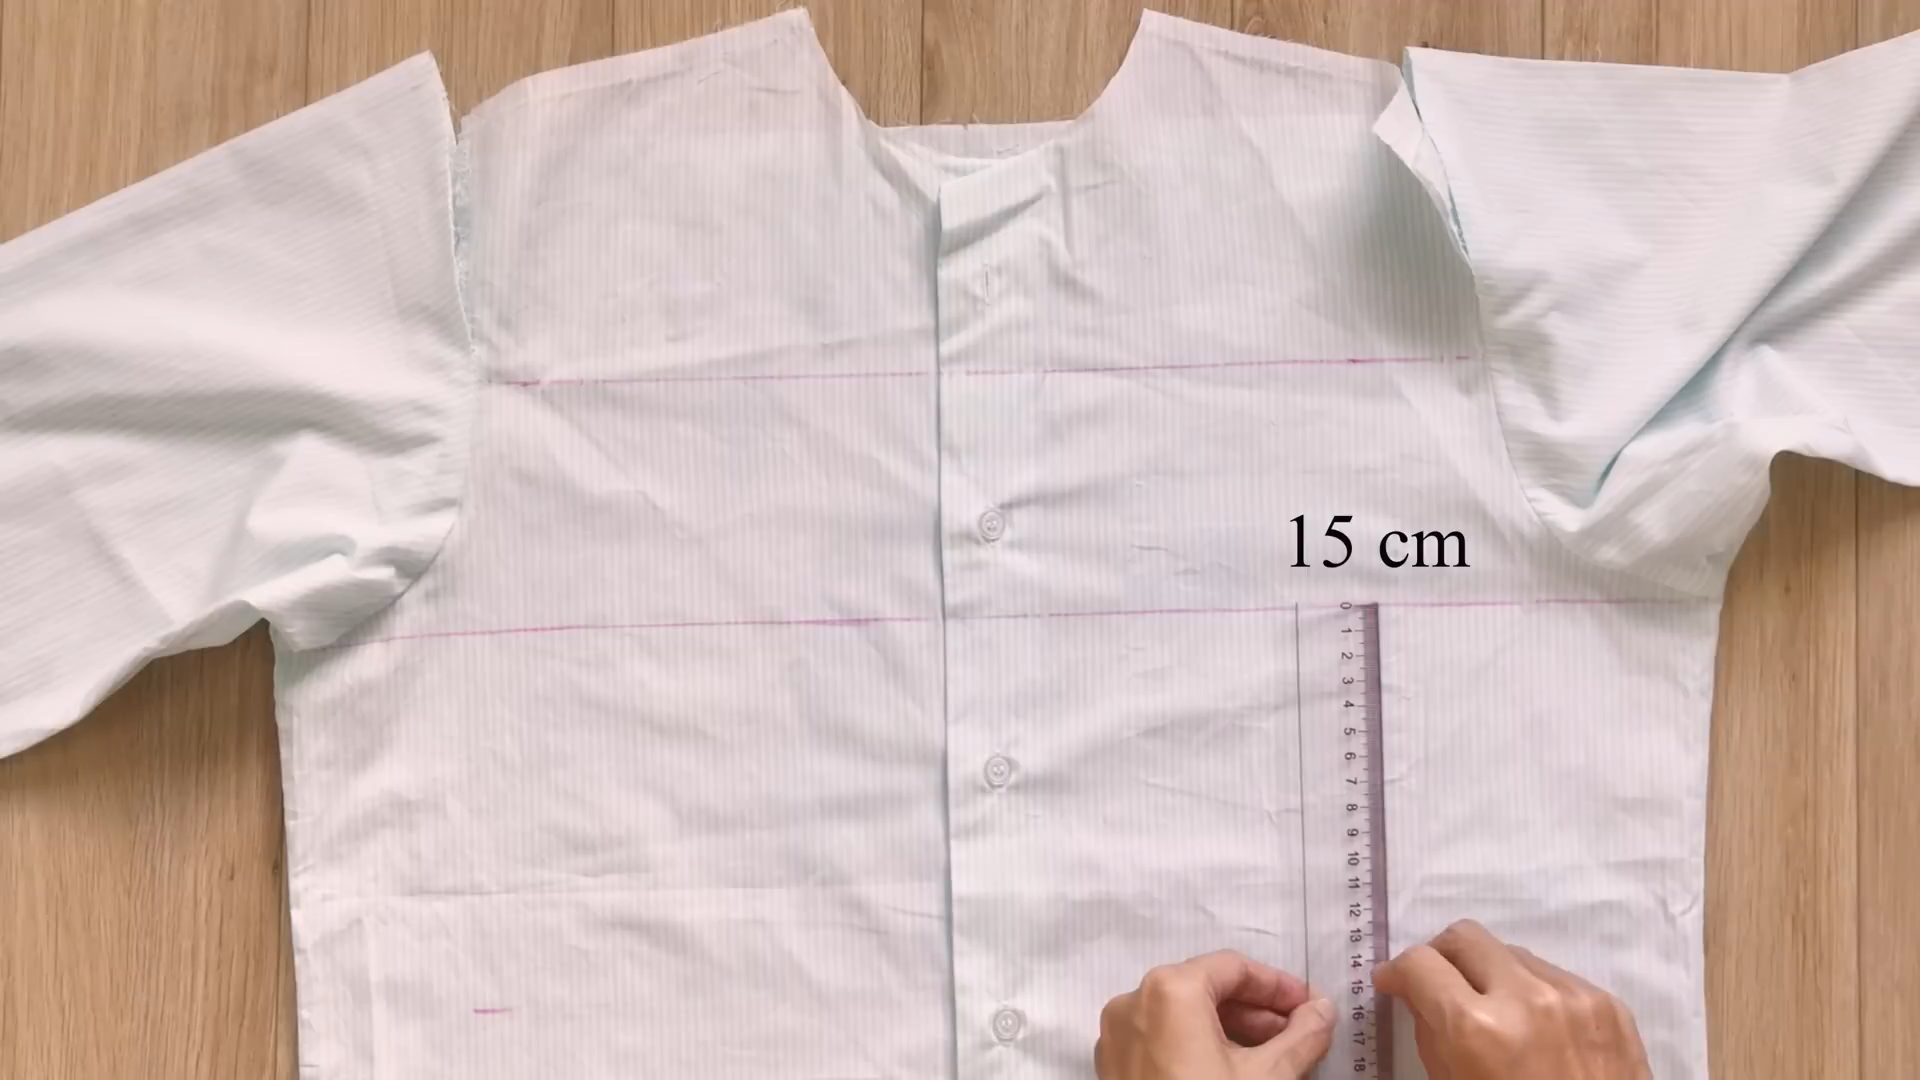
…and one horizontal line at 15 cm under it.
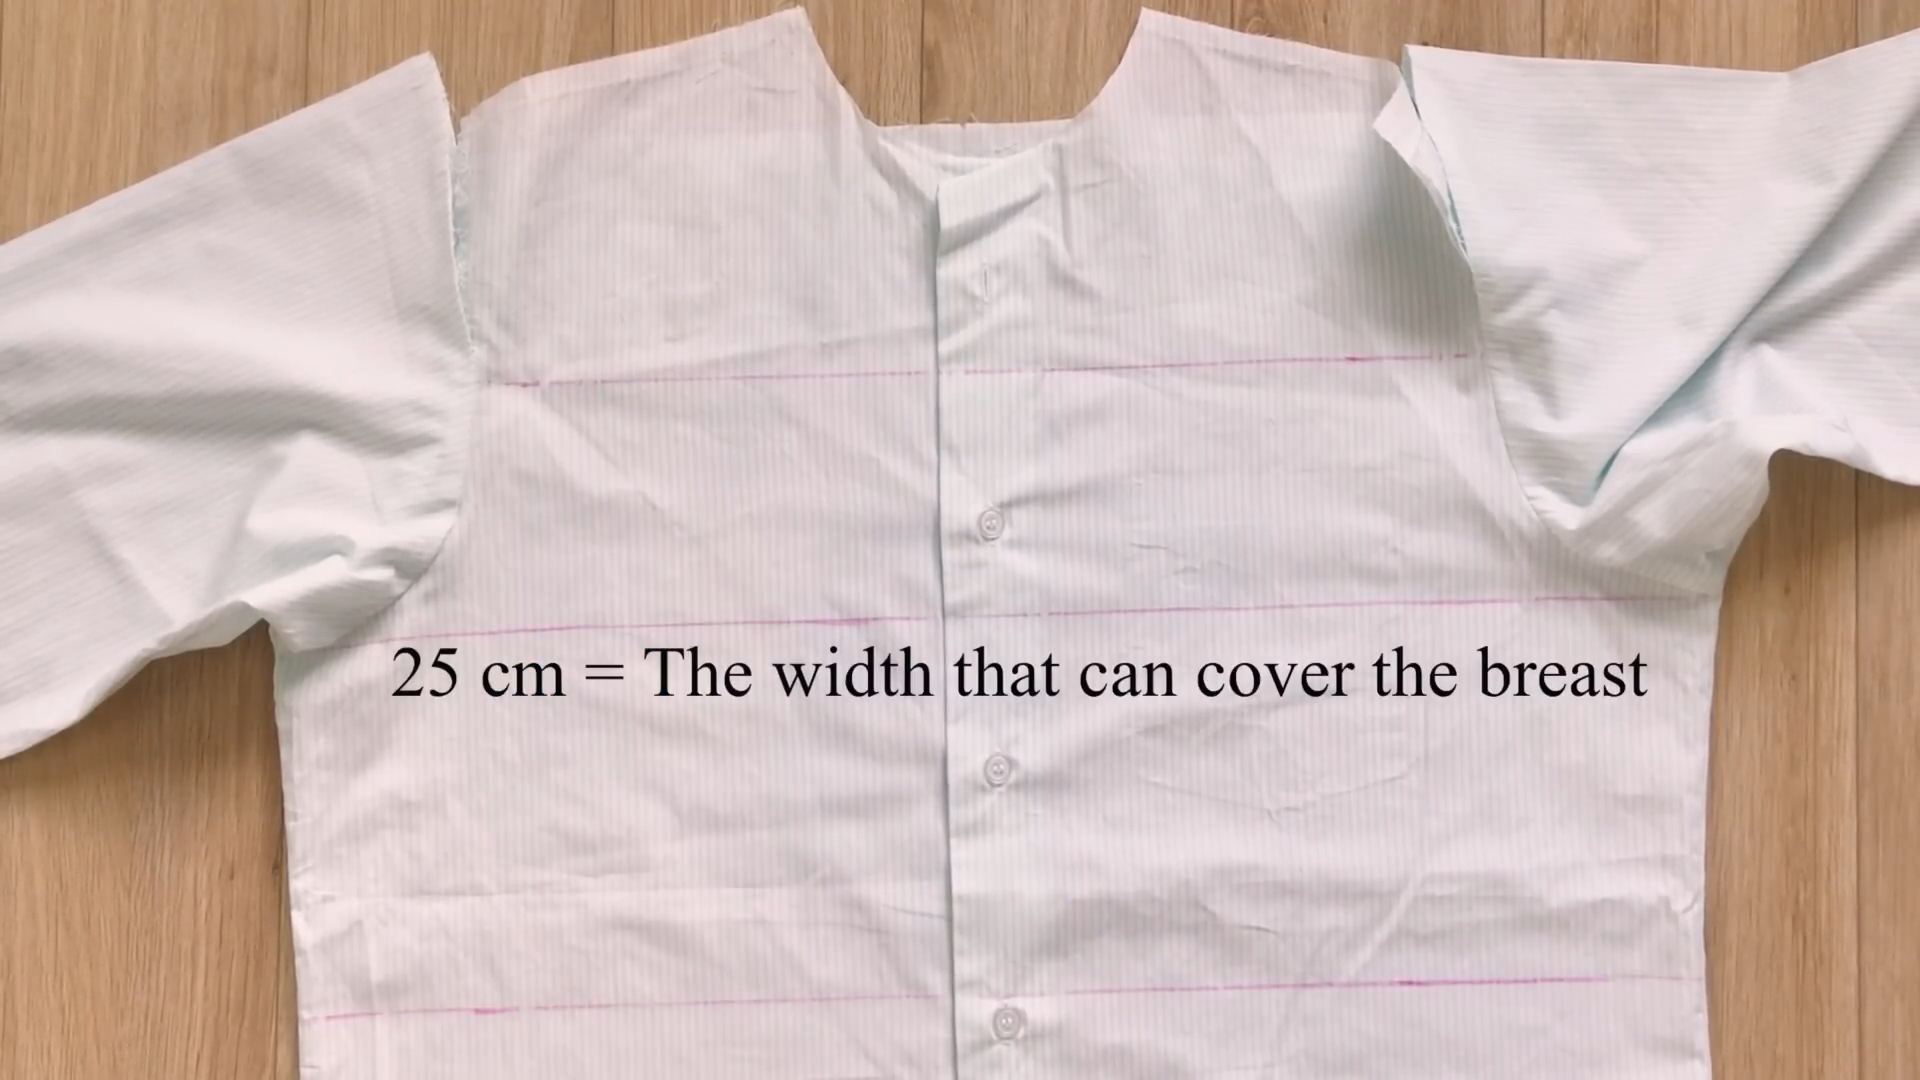
The width between two new horizontal lines will be 25 cm, which is the width from above to below the breast. This is the width of the crop top that you want.
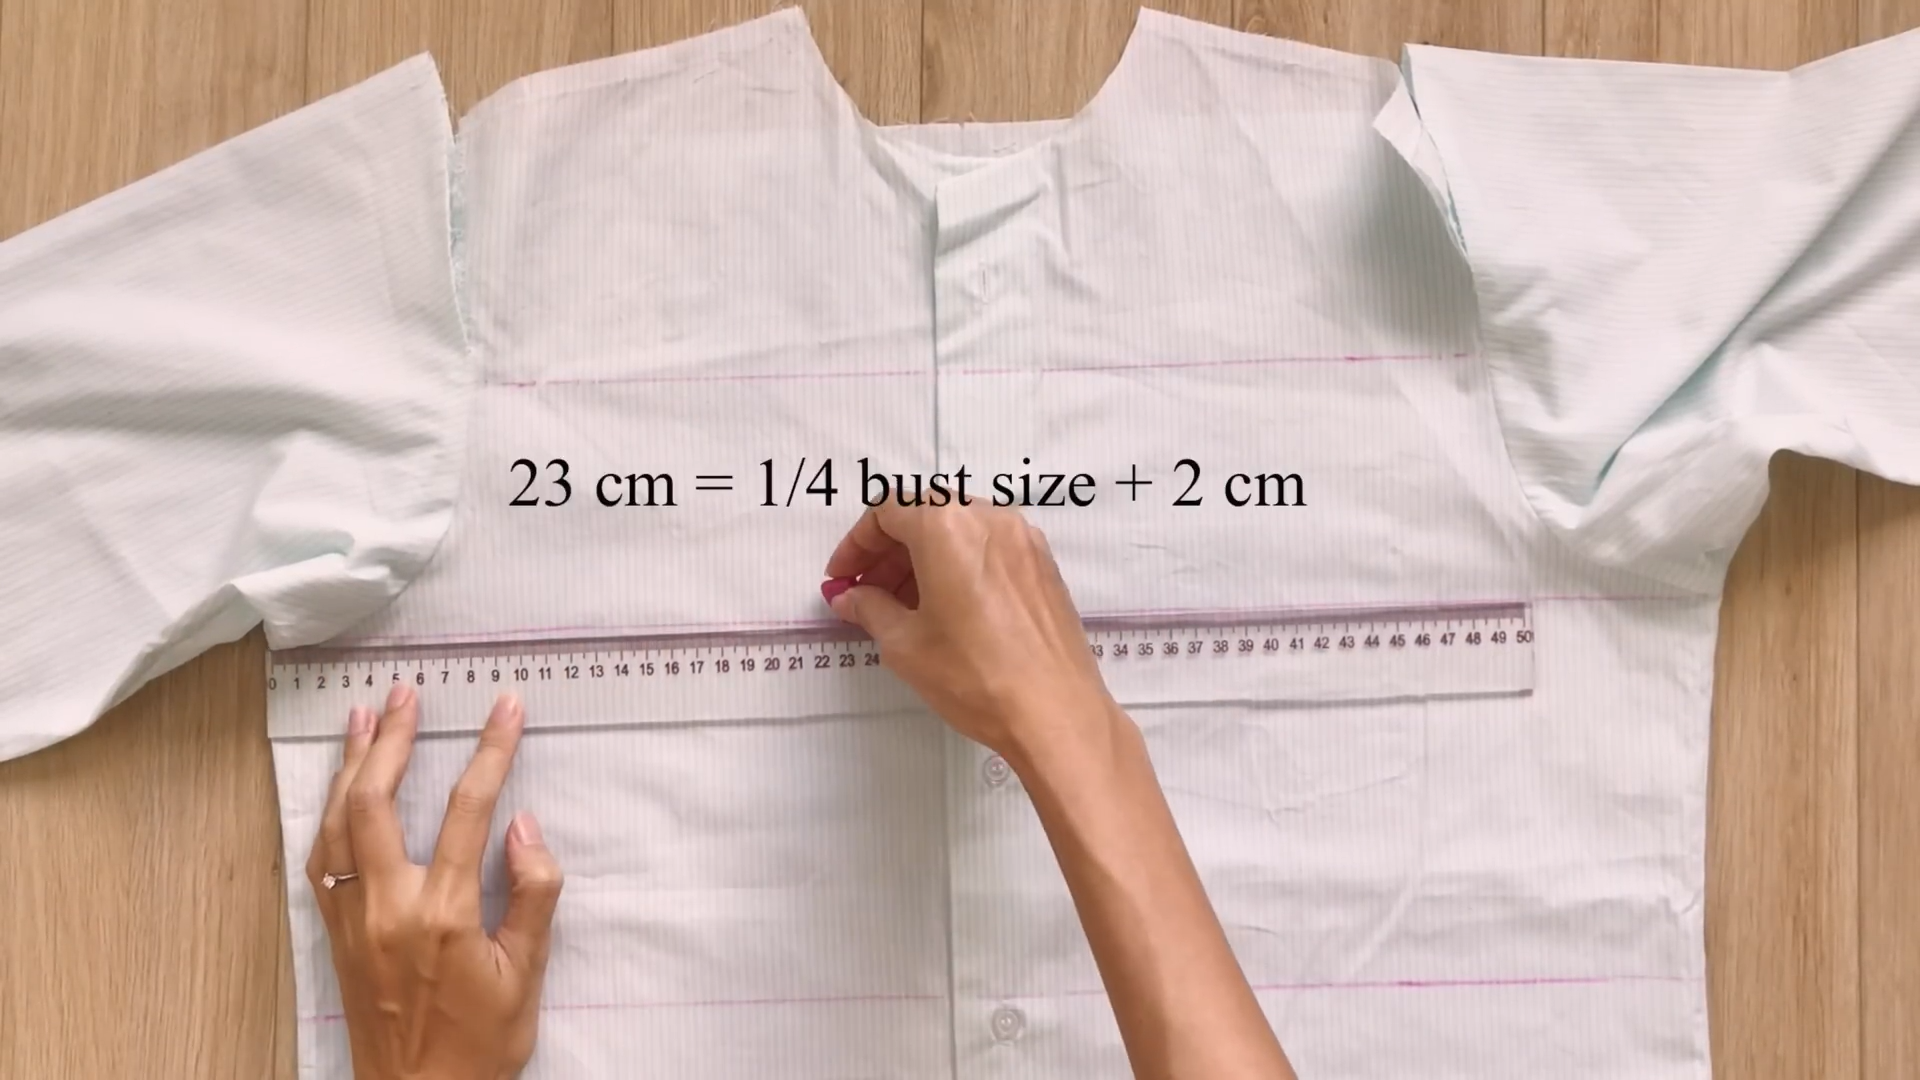
From the end of the armpit, mark inside 23 cm, which is a quarter of the bust size plus 2 cm for seam allowance.
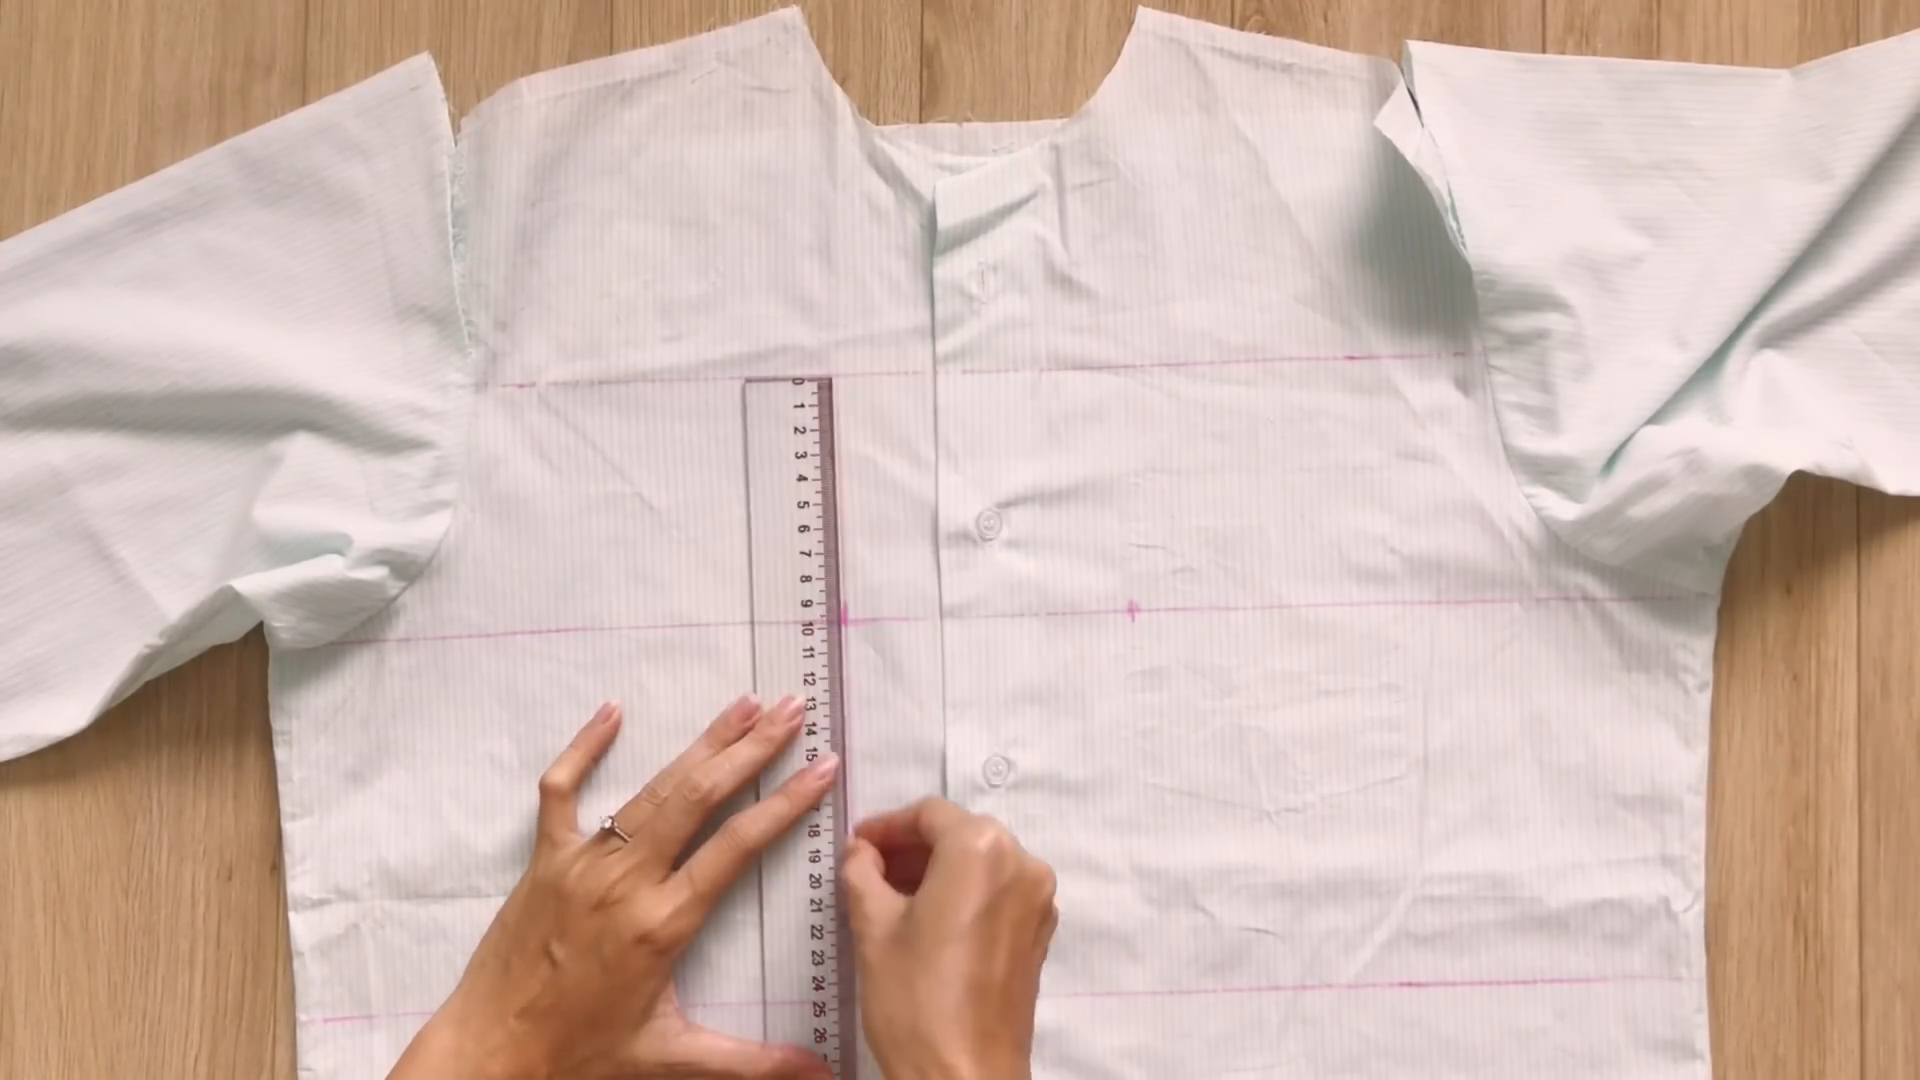
Then, draw a straight line from that mark.
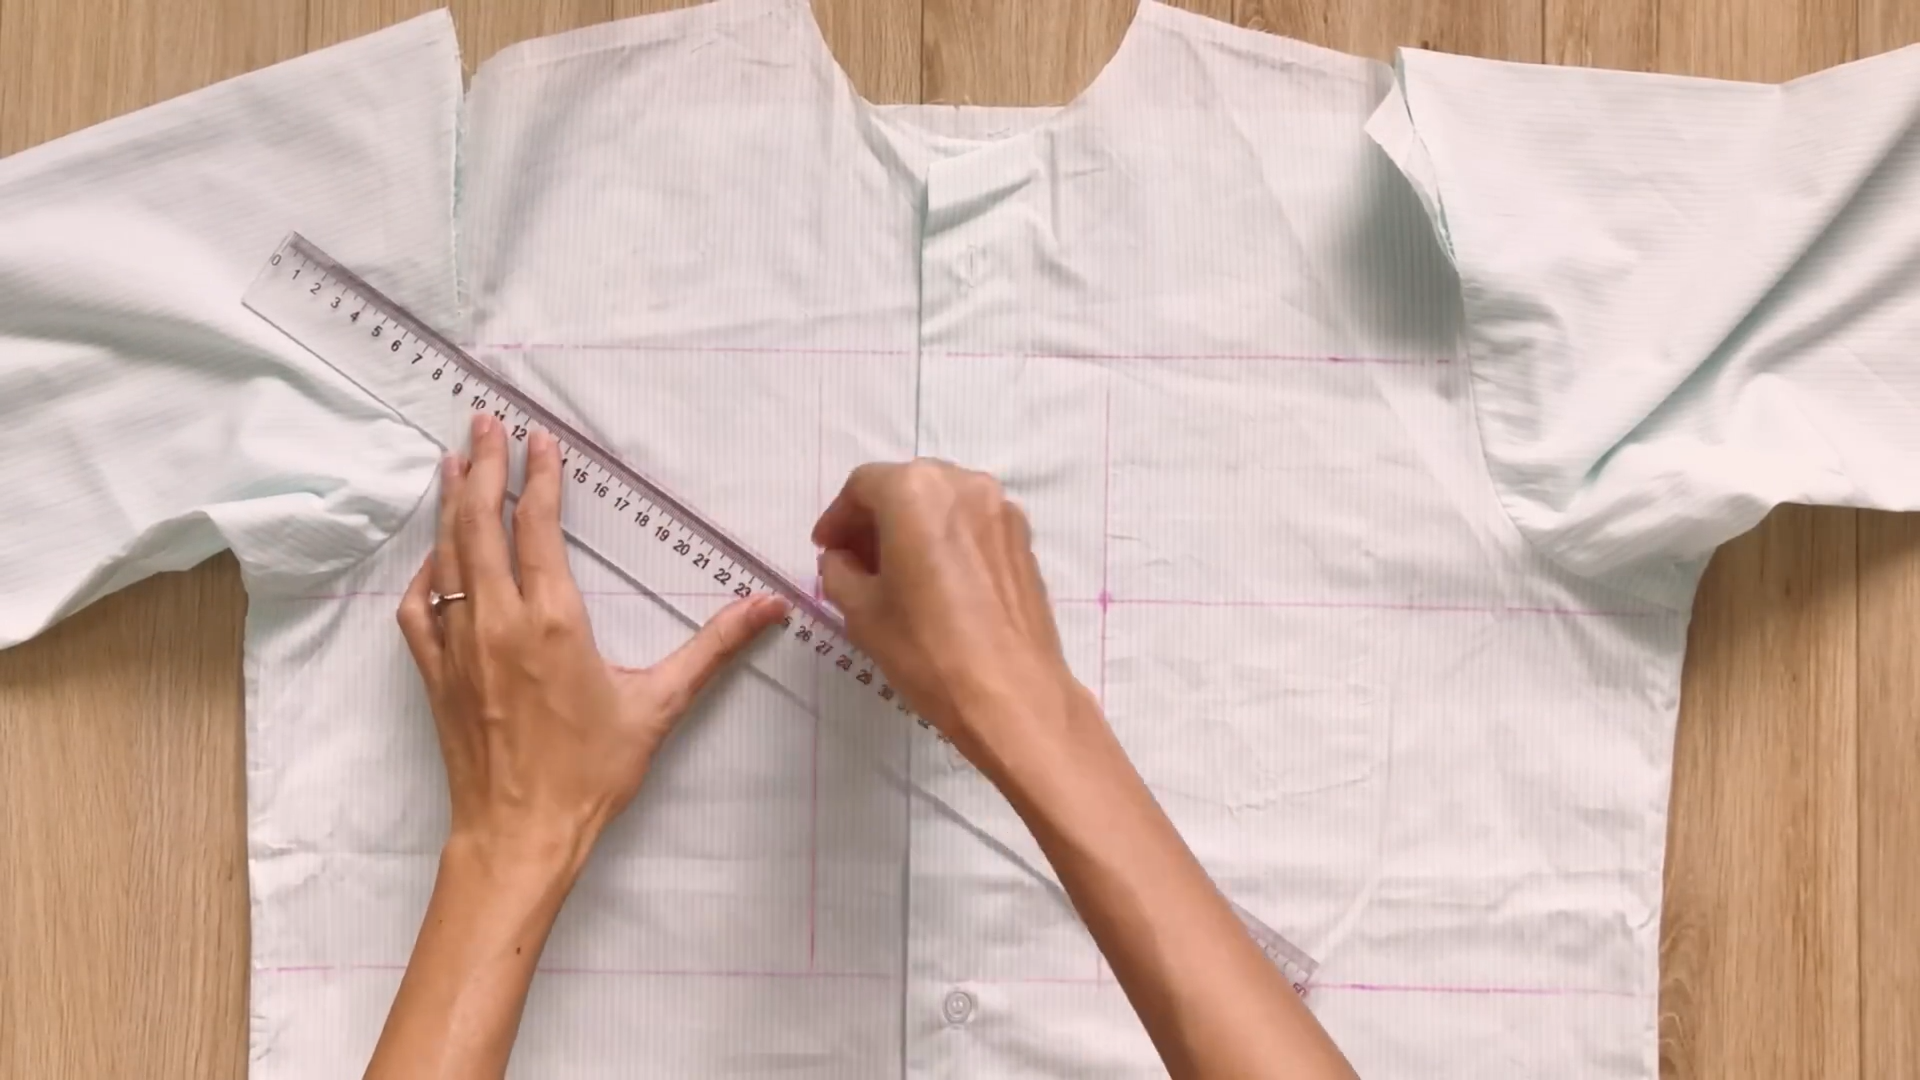
After that, draw a line to connect two cutting points of the top horizontal line with the sleeves in the straight line.
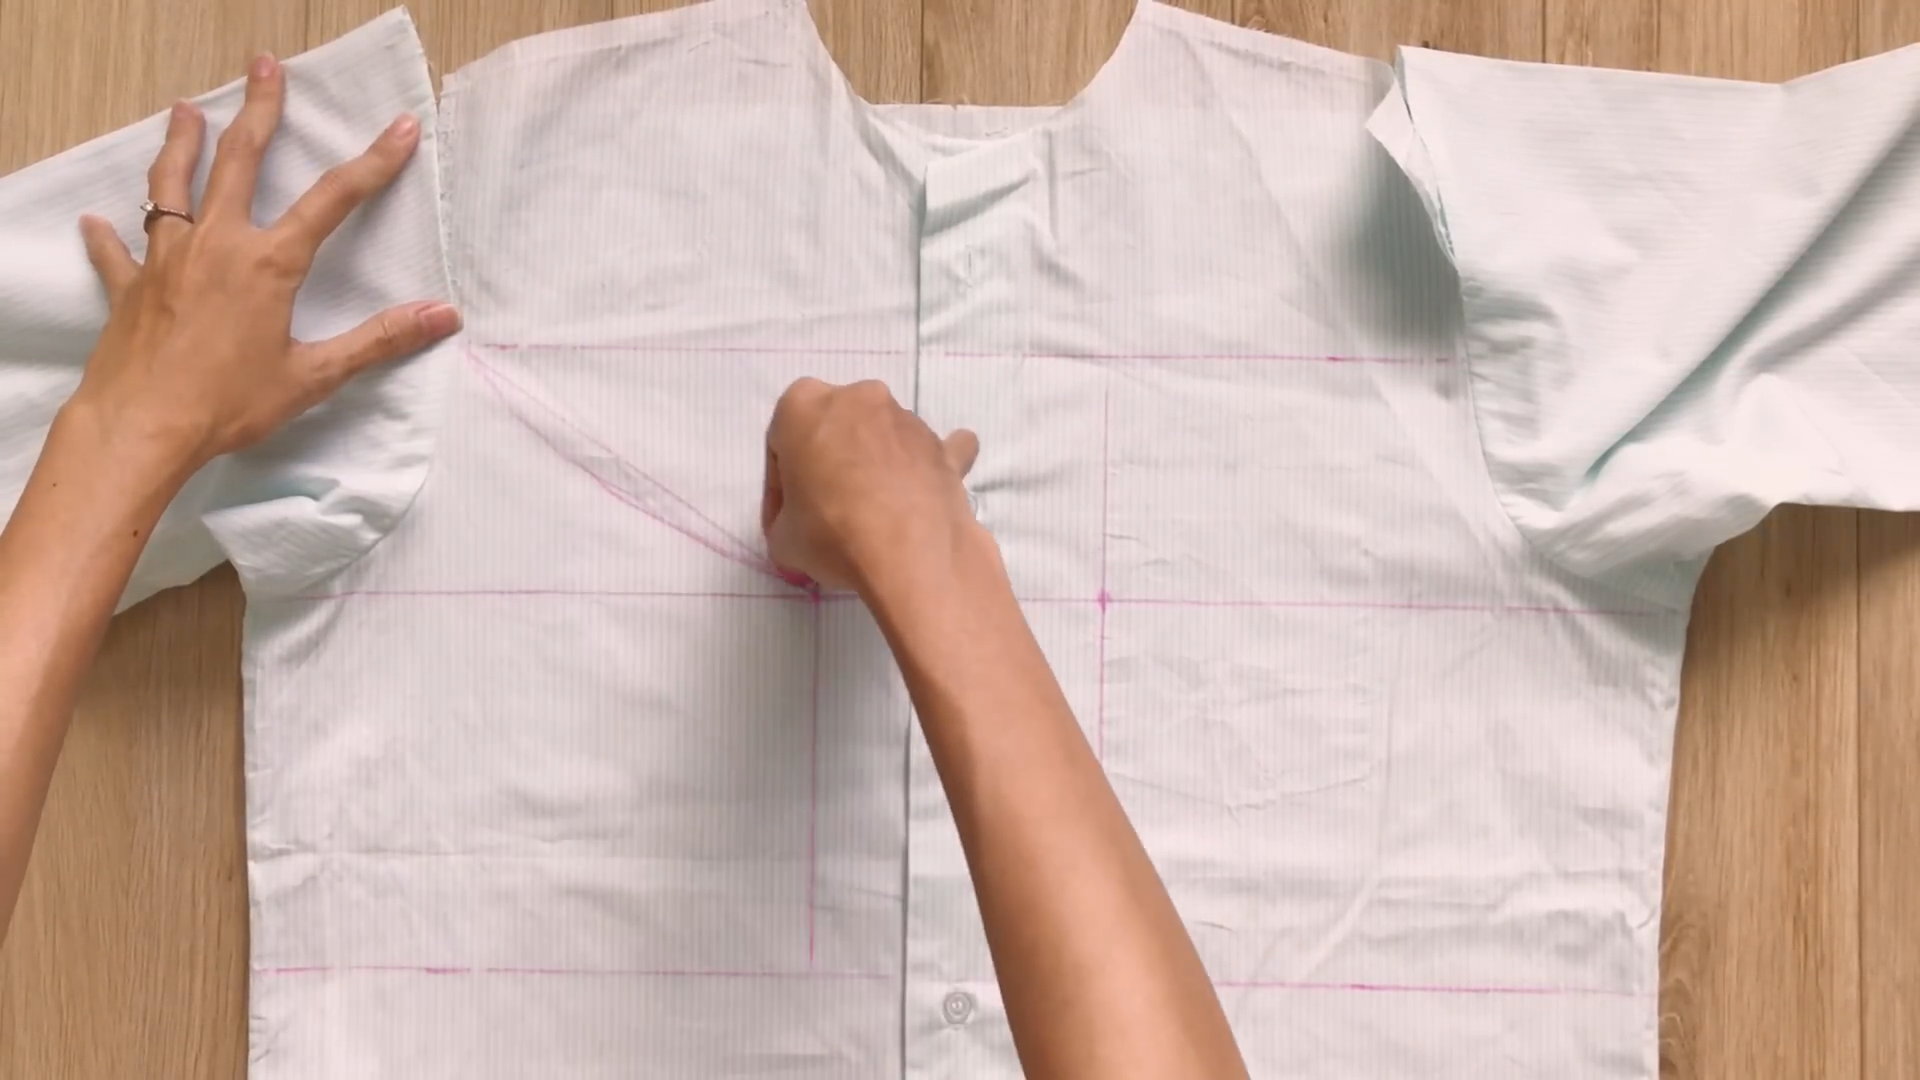
Then, draw a curved line based on it. This will create the curved line for the neck of the crop top.
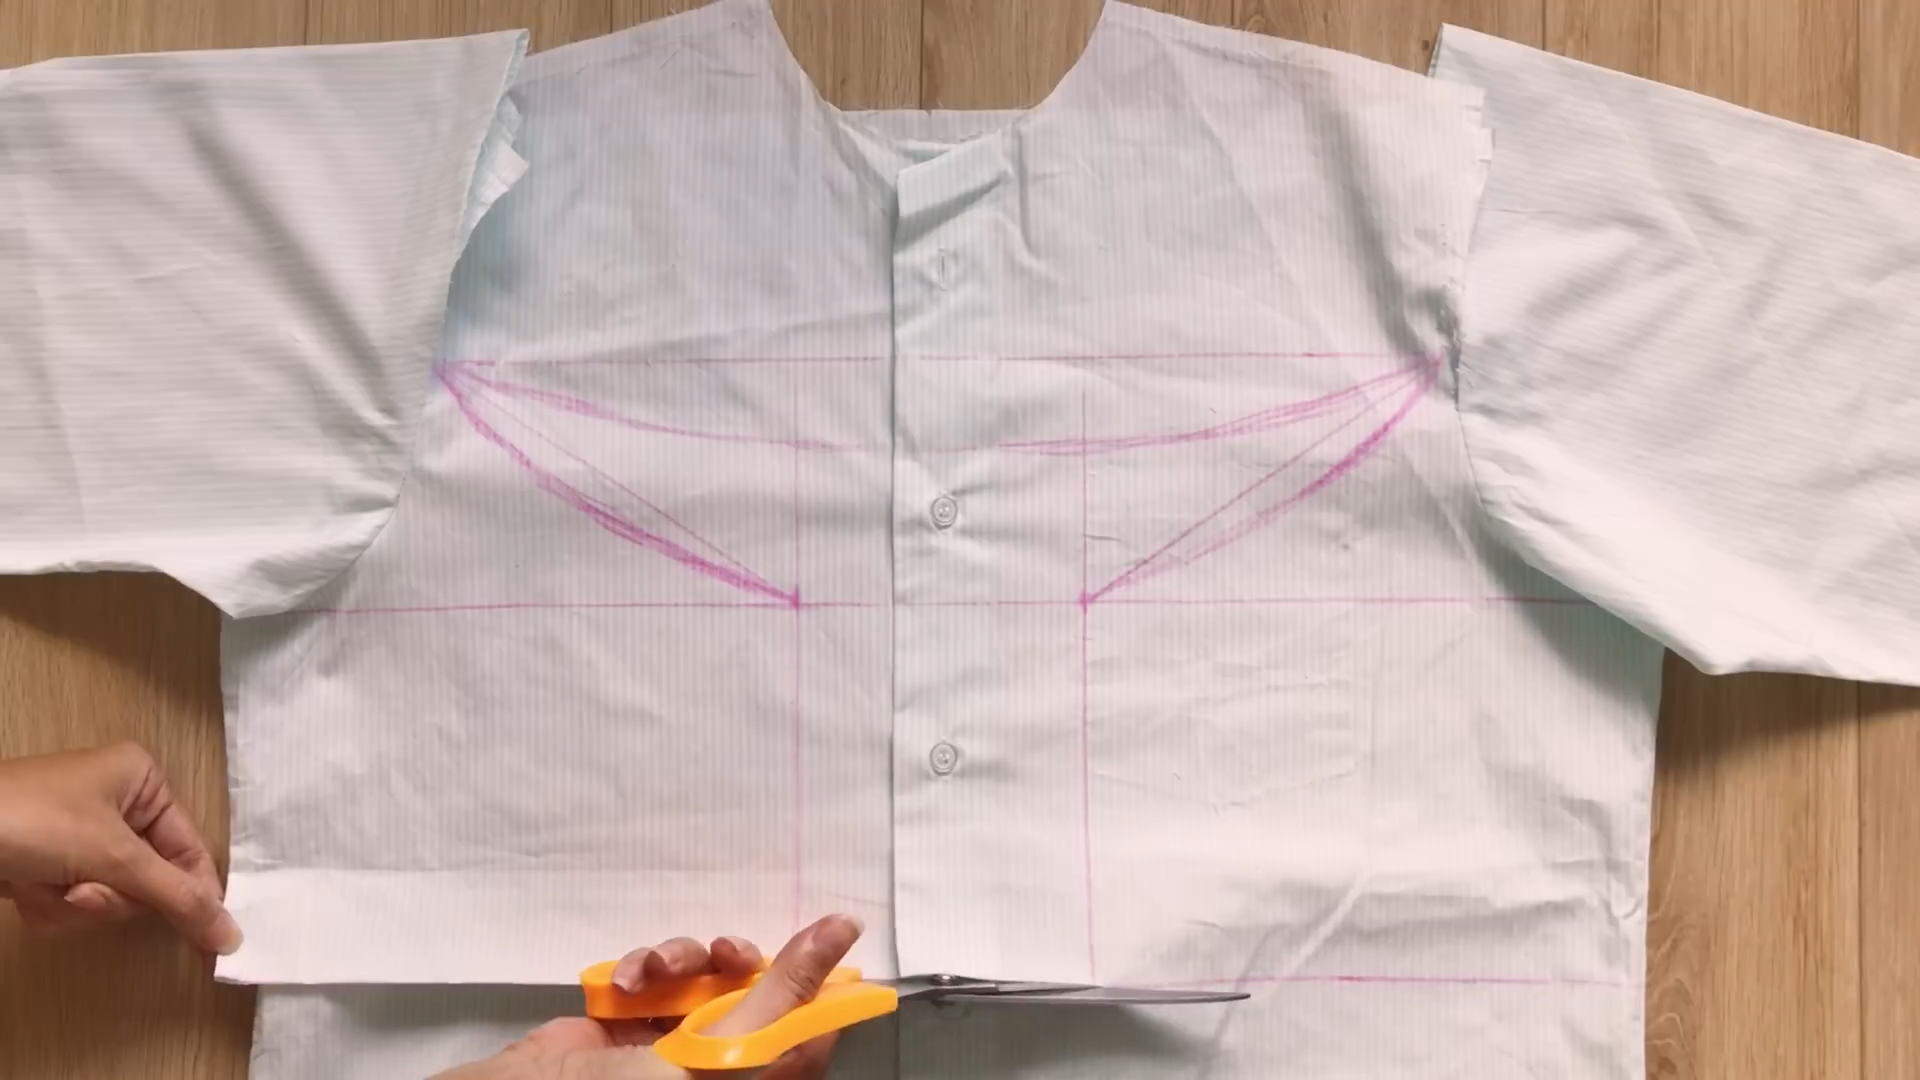
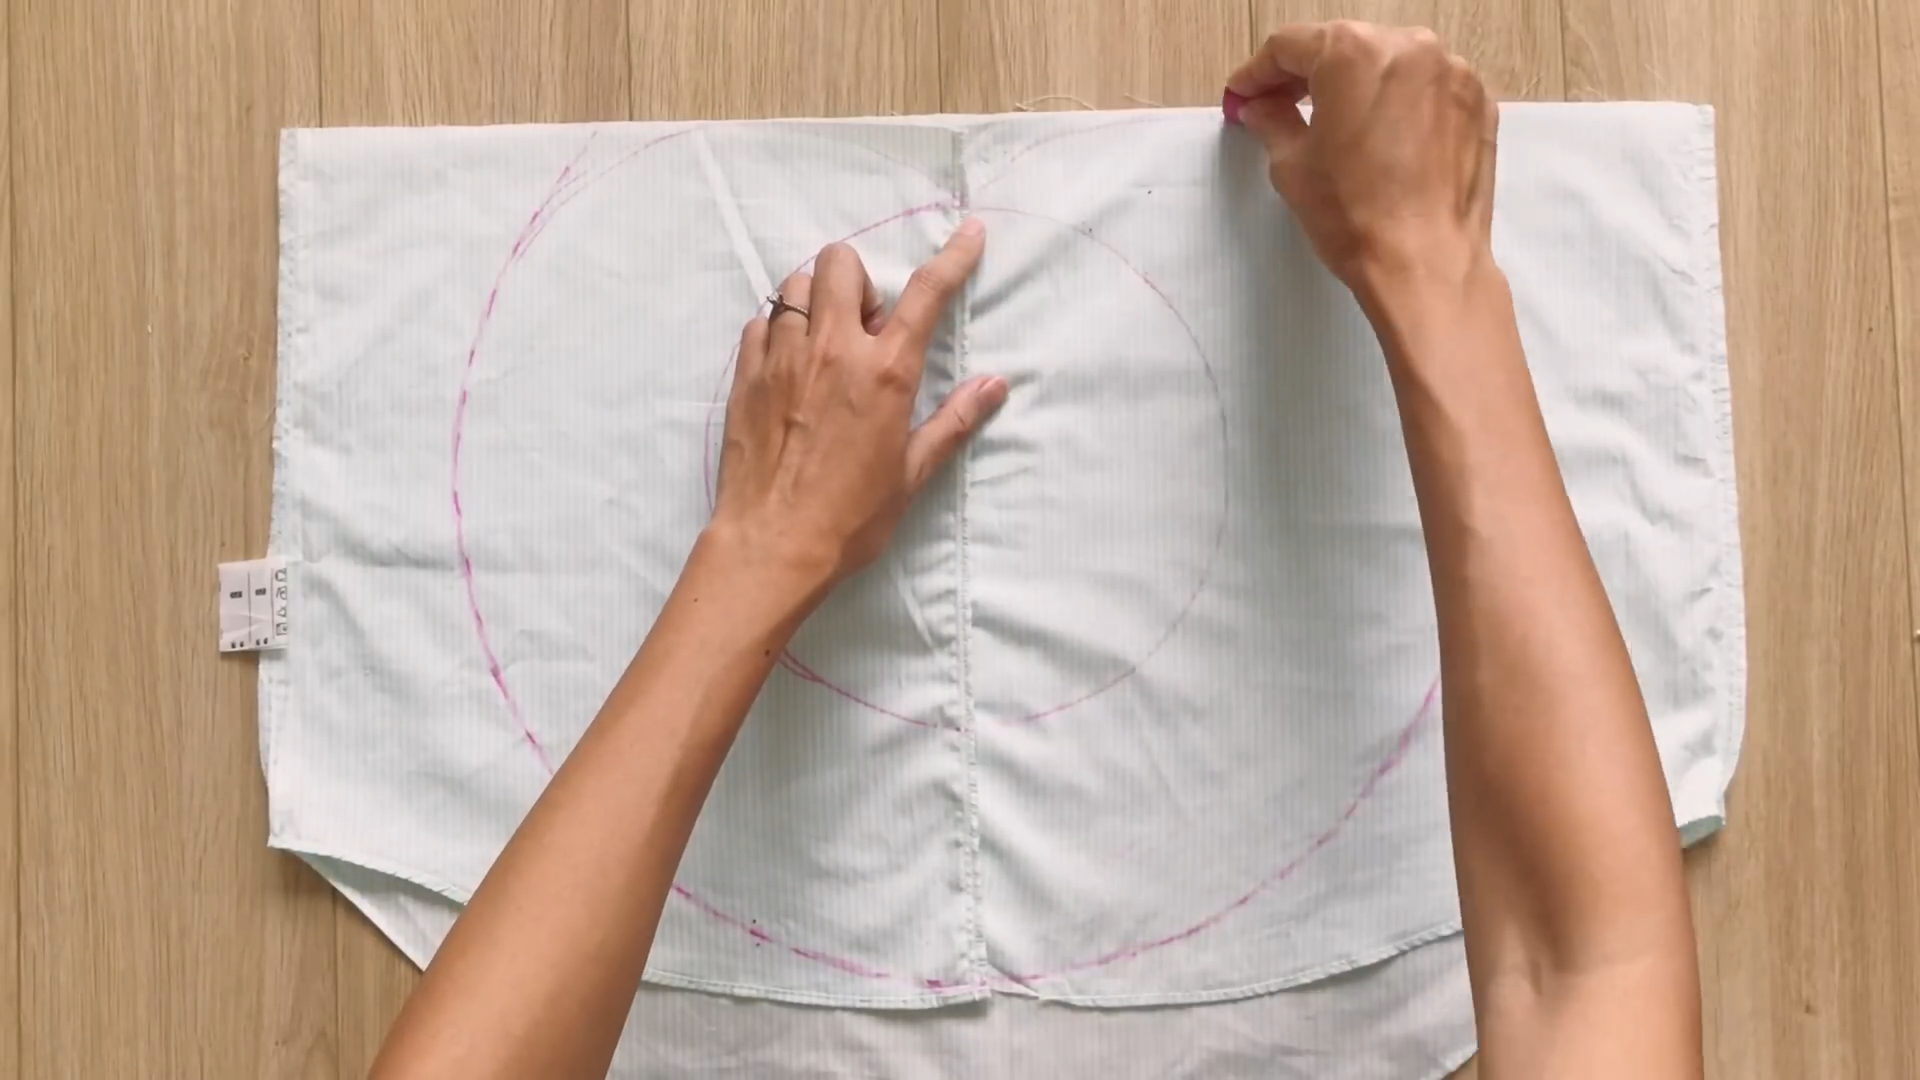
Then, cutting by the drawing line.
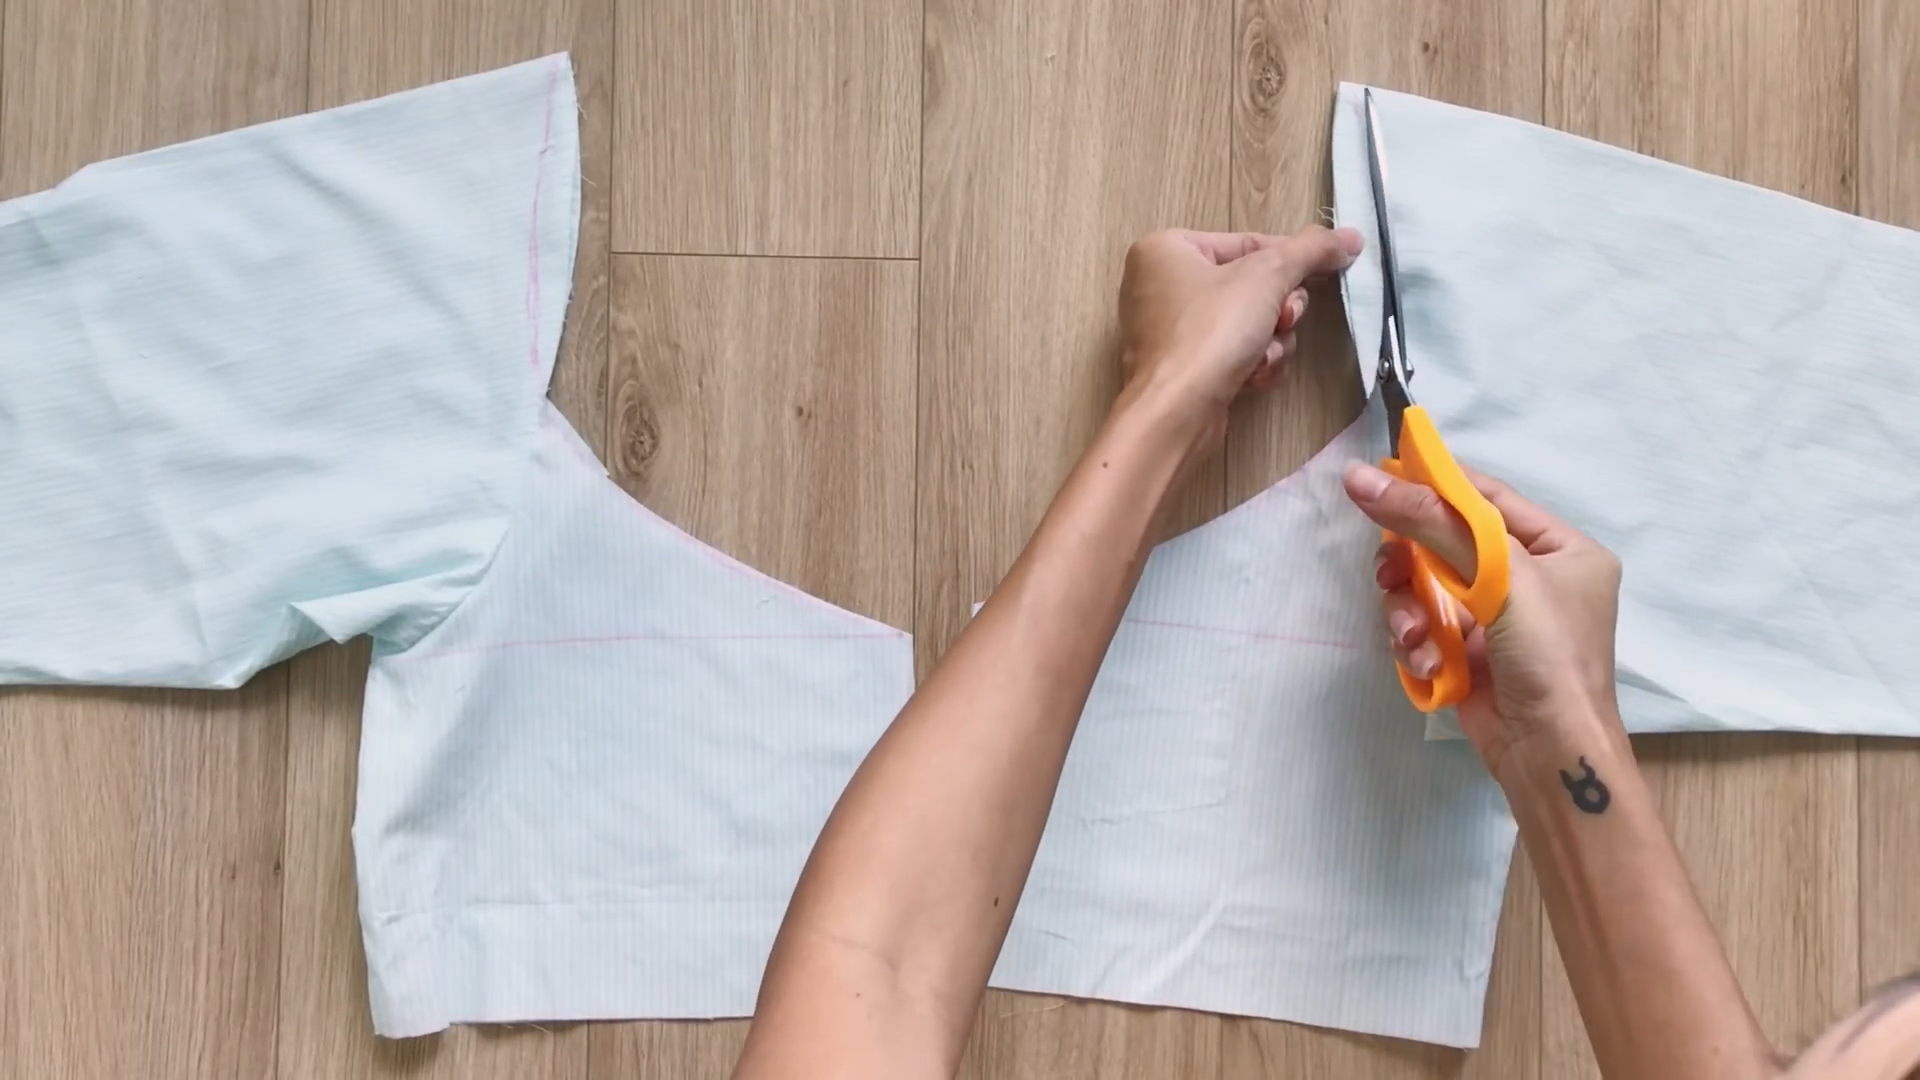
Also cut a bit at the top of the sleeve to make it become a connecting curved line with the neck.
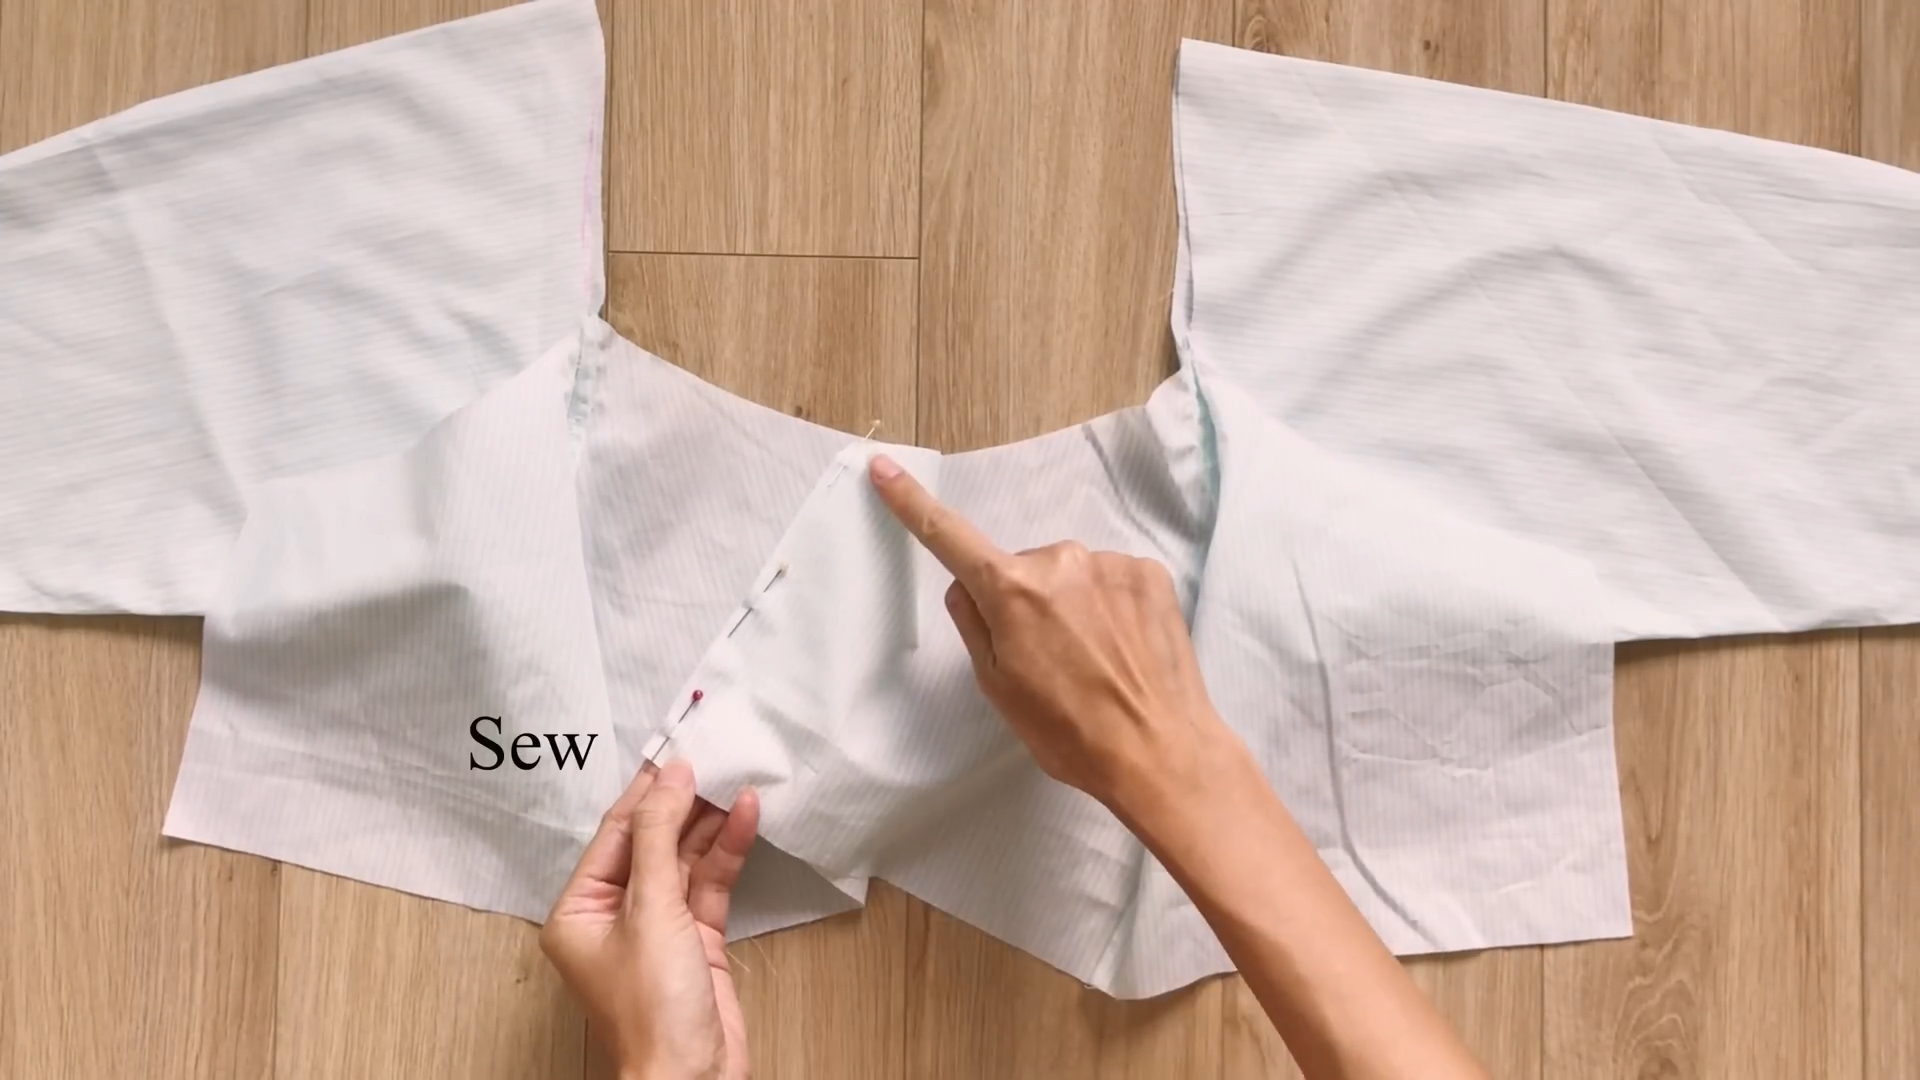
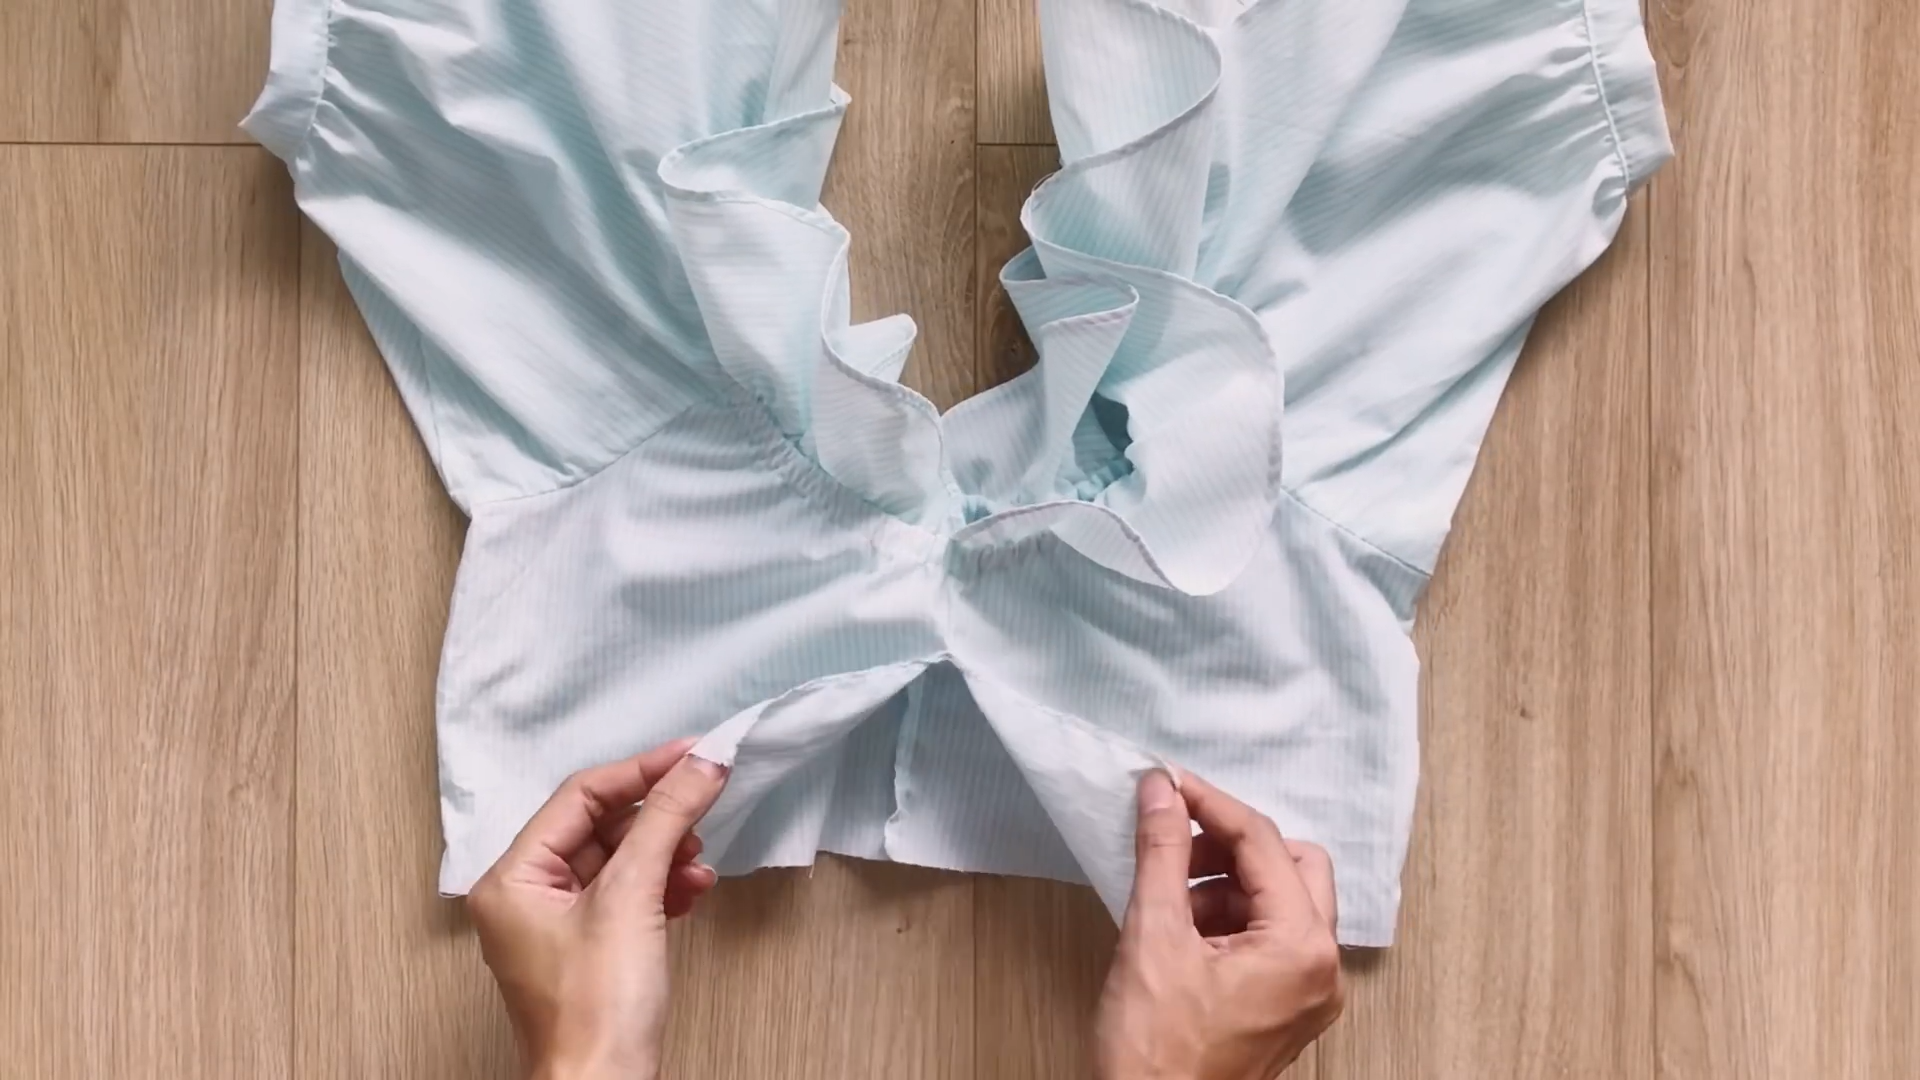
After that, connect two pieces of the crop top together in the middle and sew.
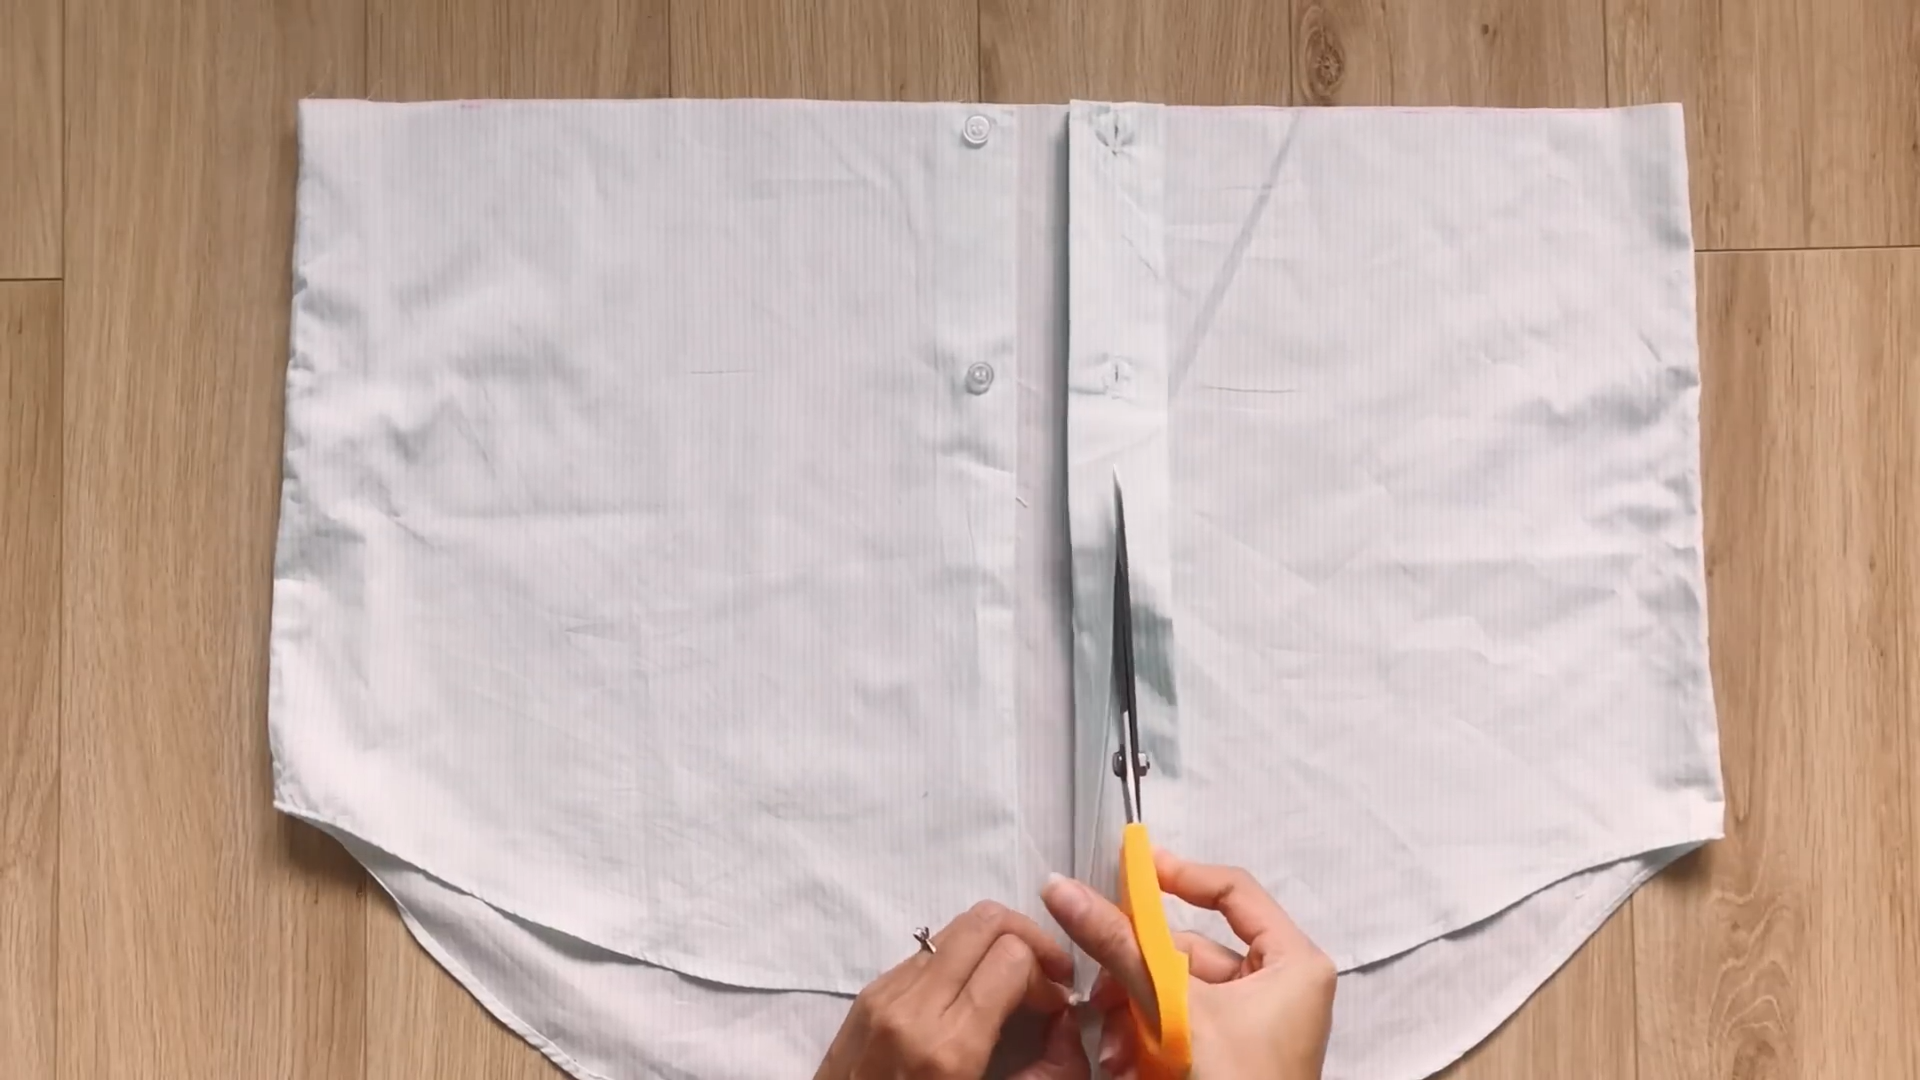
At the bottom of the man shirt, cut the buttonhole area and remove the button.
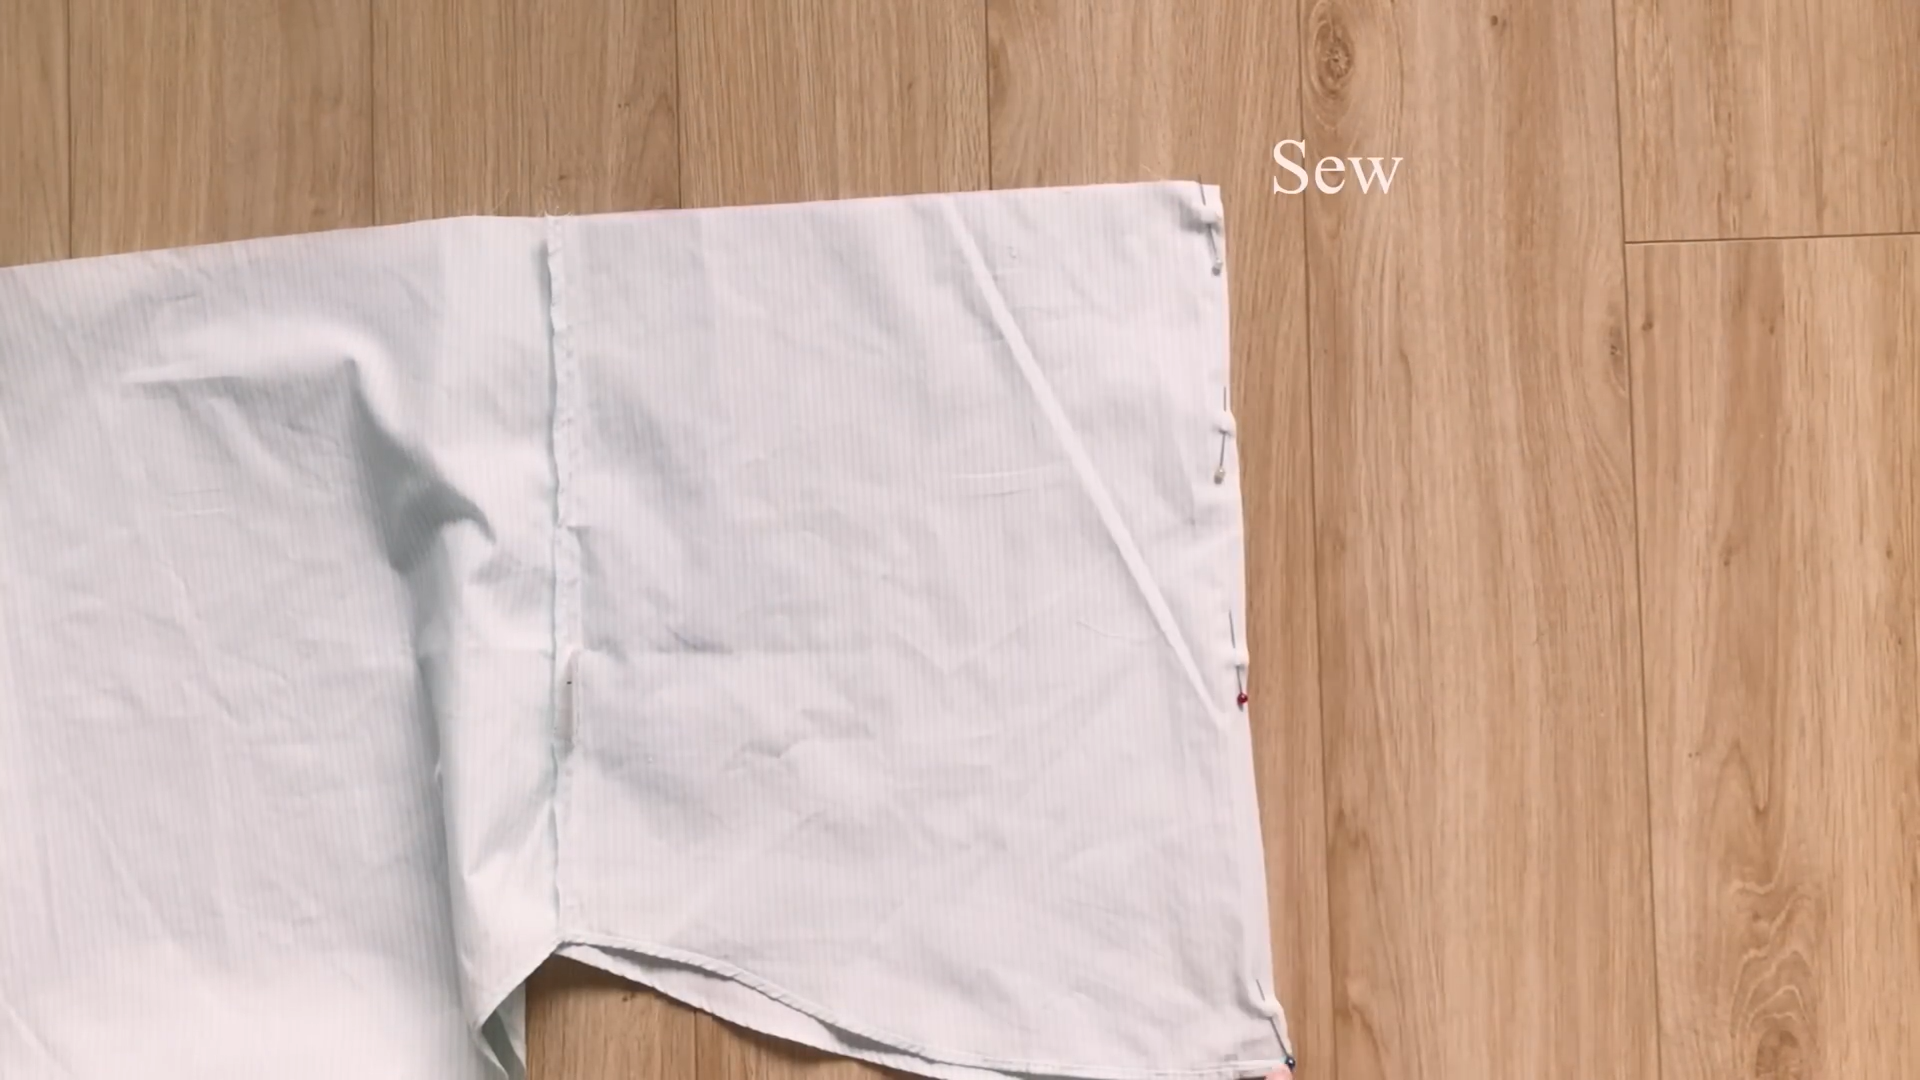
Then, connect two sides of the button lines together.
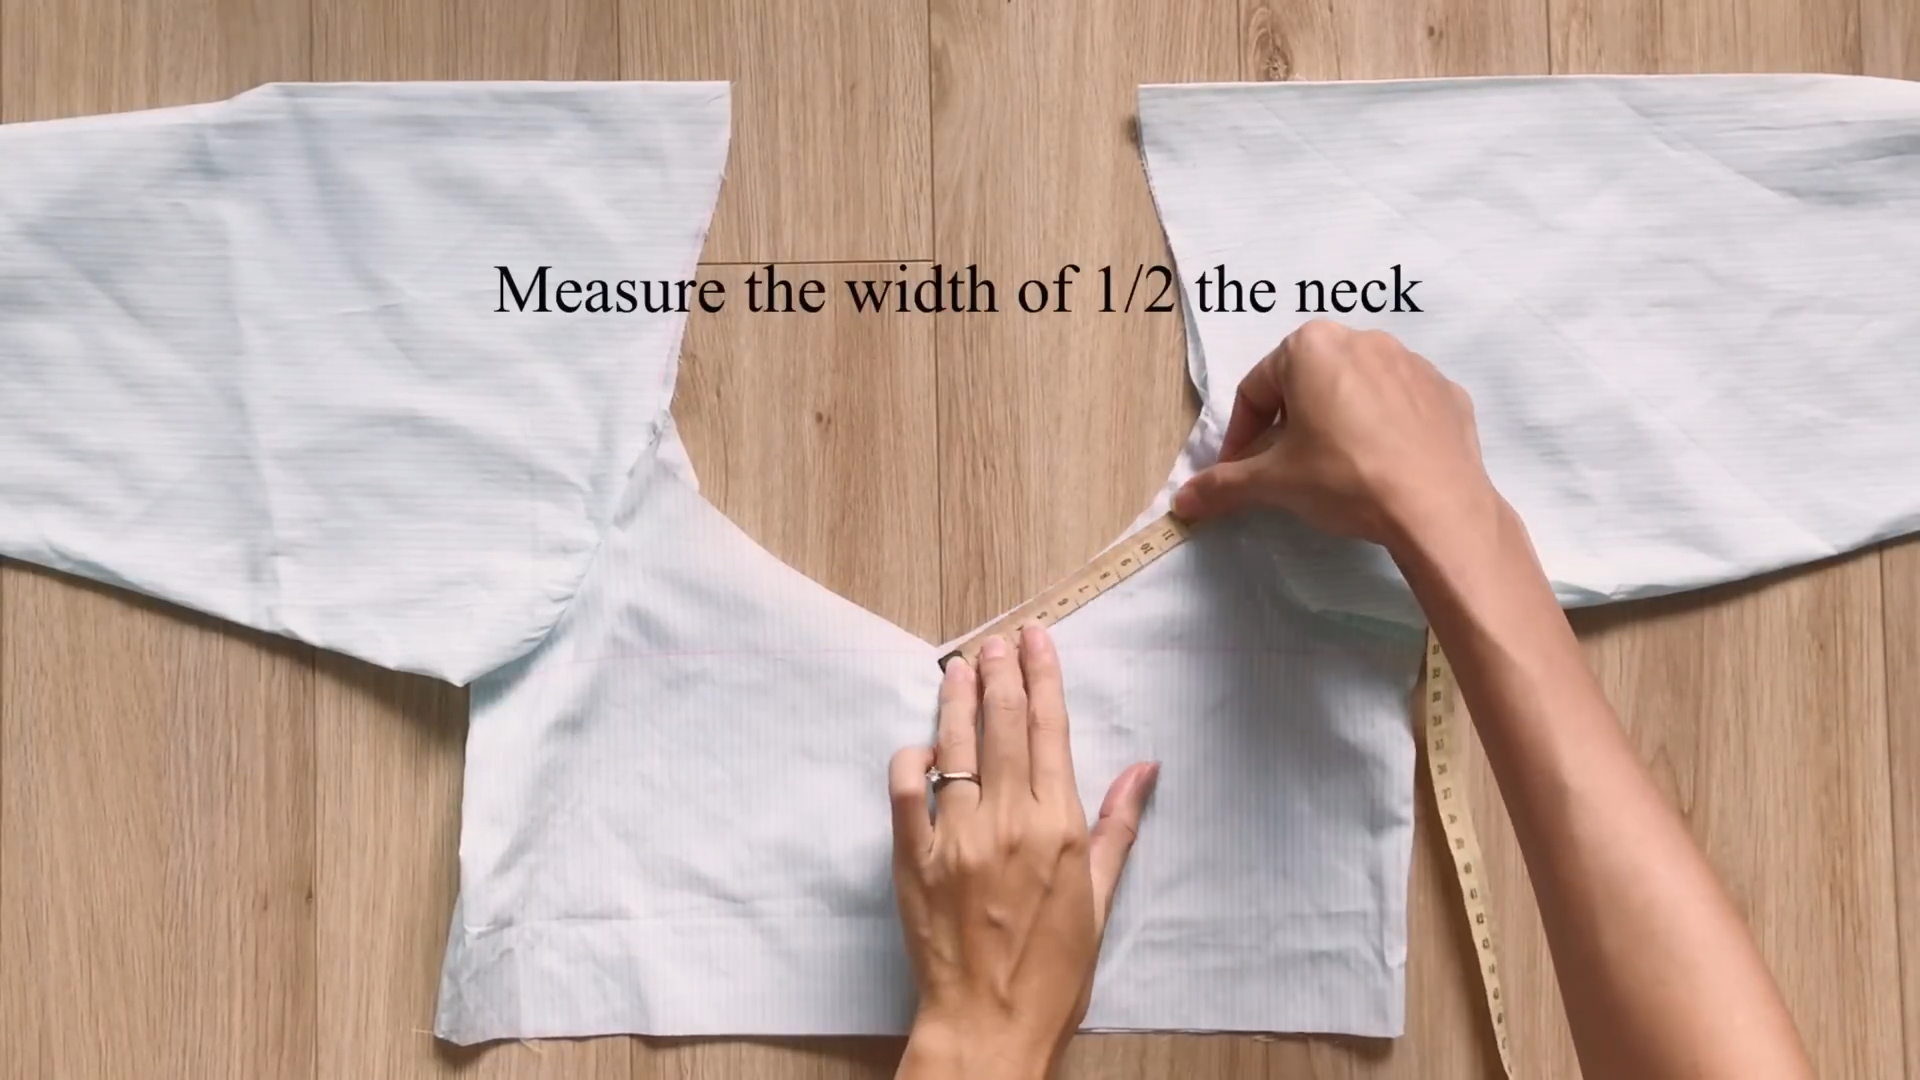
After that, measure the width of the neck of the crop top.
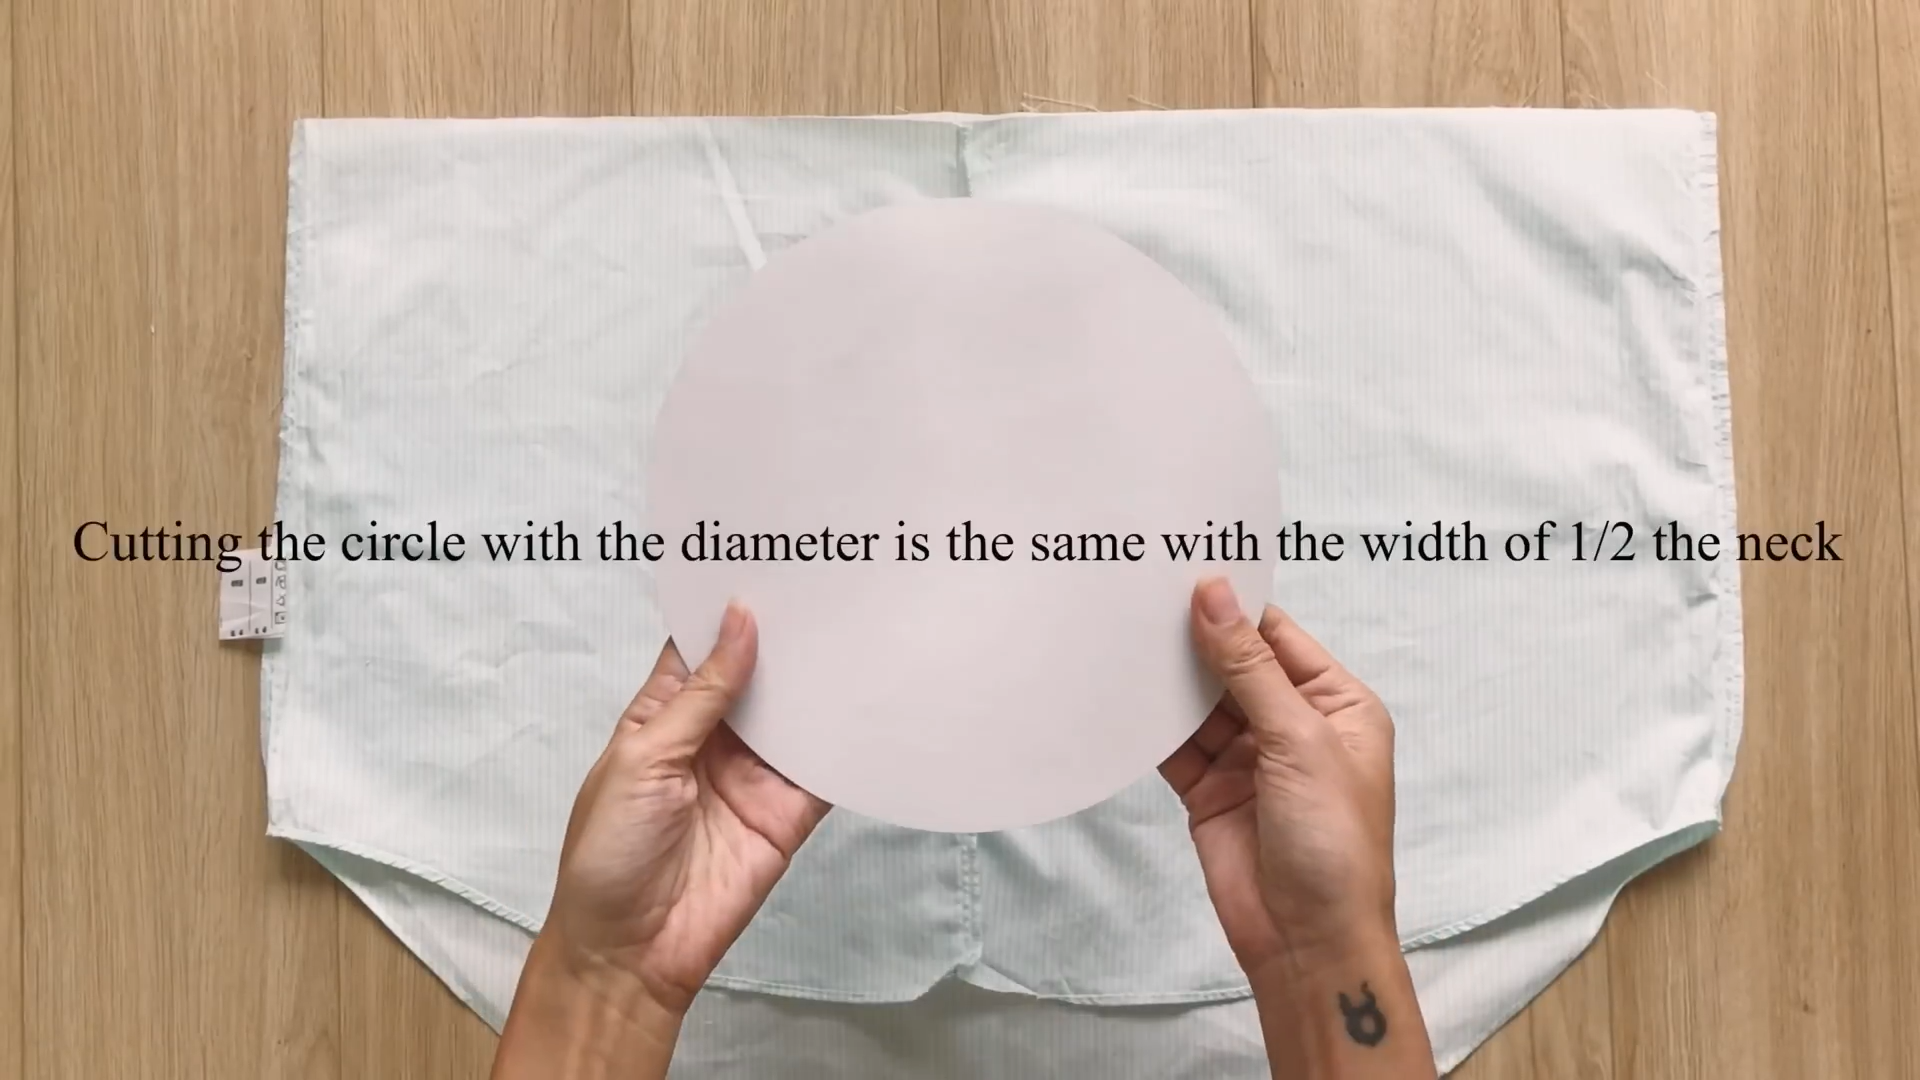
Then, cut a circle with the diameter the same as it.
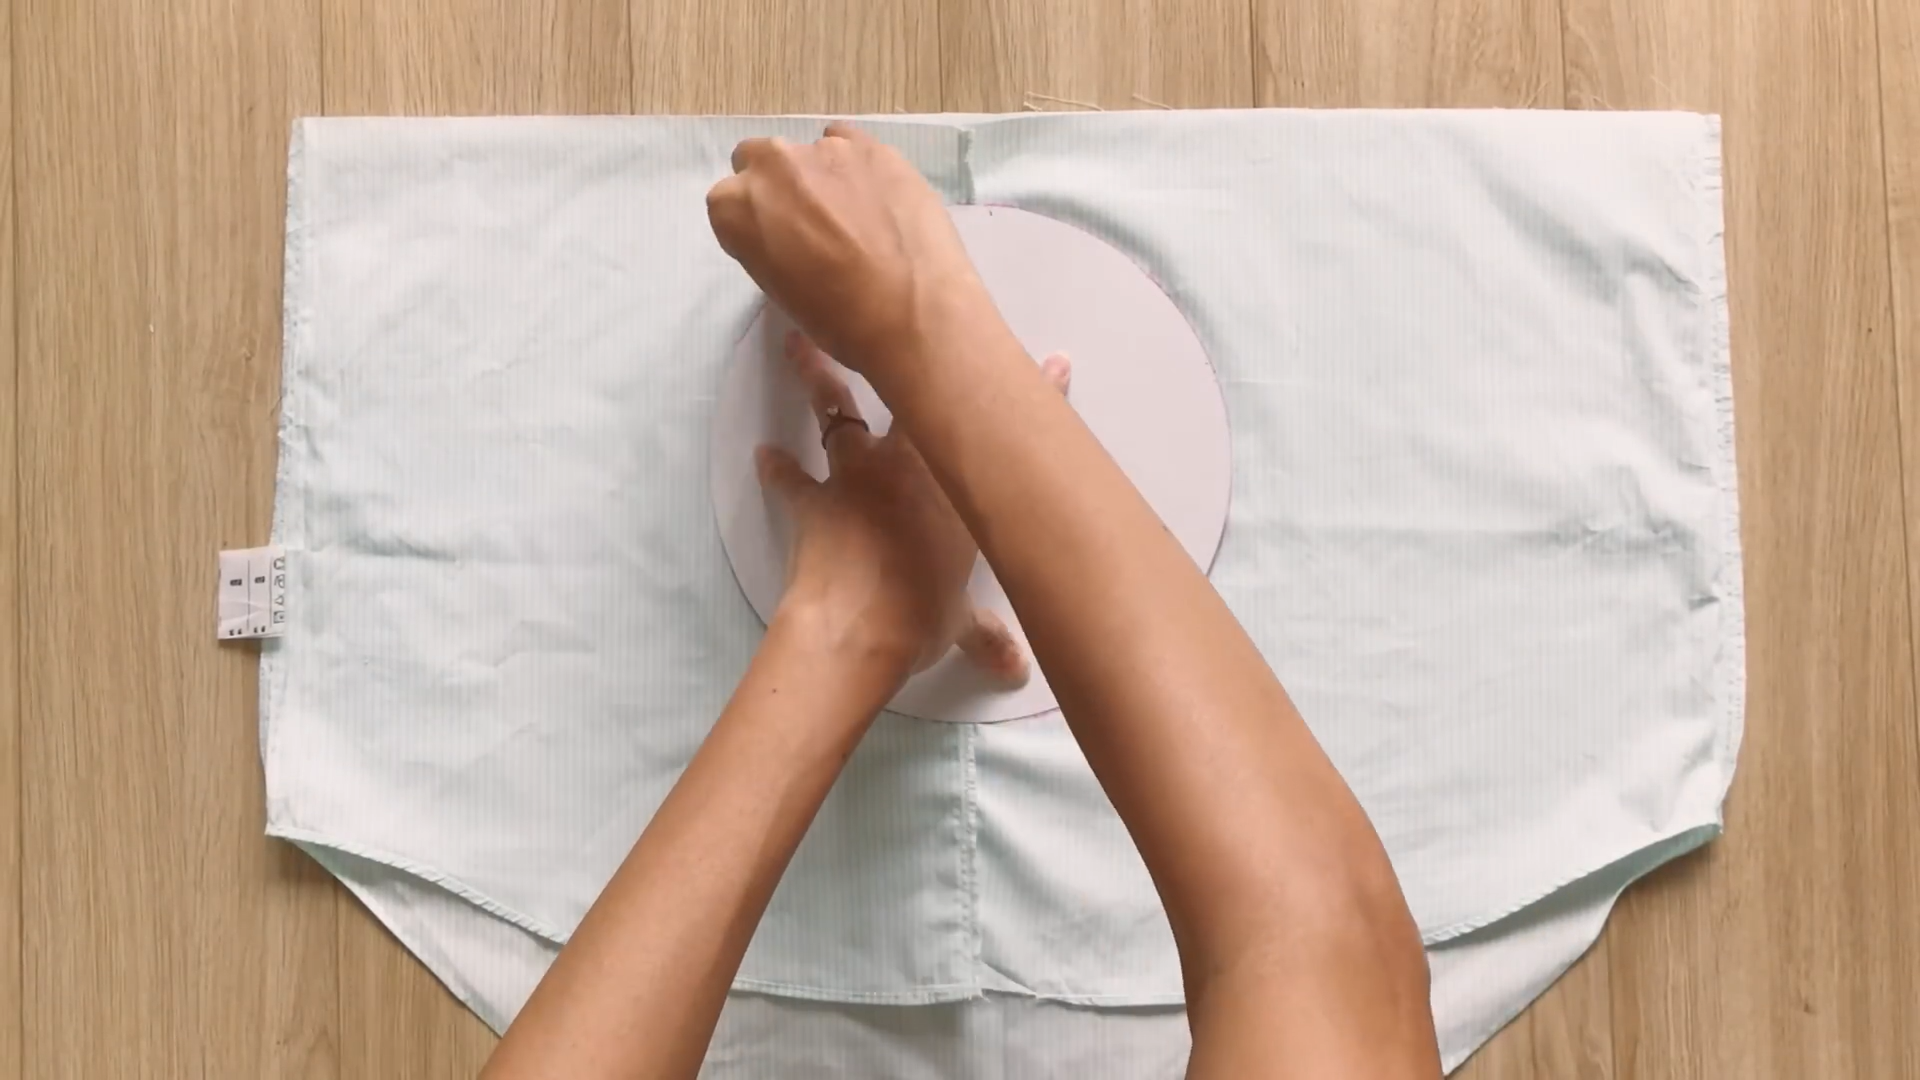
Apply the circle on the fabric and draw along.
After that, measure the rest of the fabric that is needed to draw another circle outside of the previous one.
The missing part of the second circle will be connected to the first one.
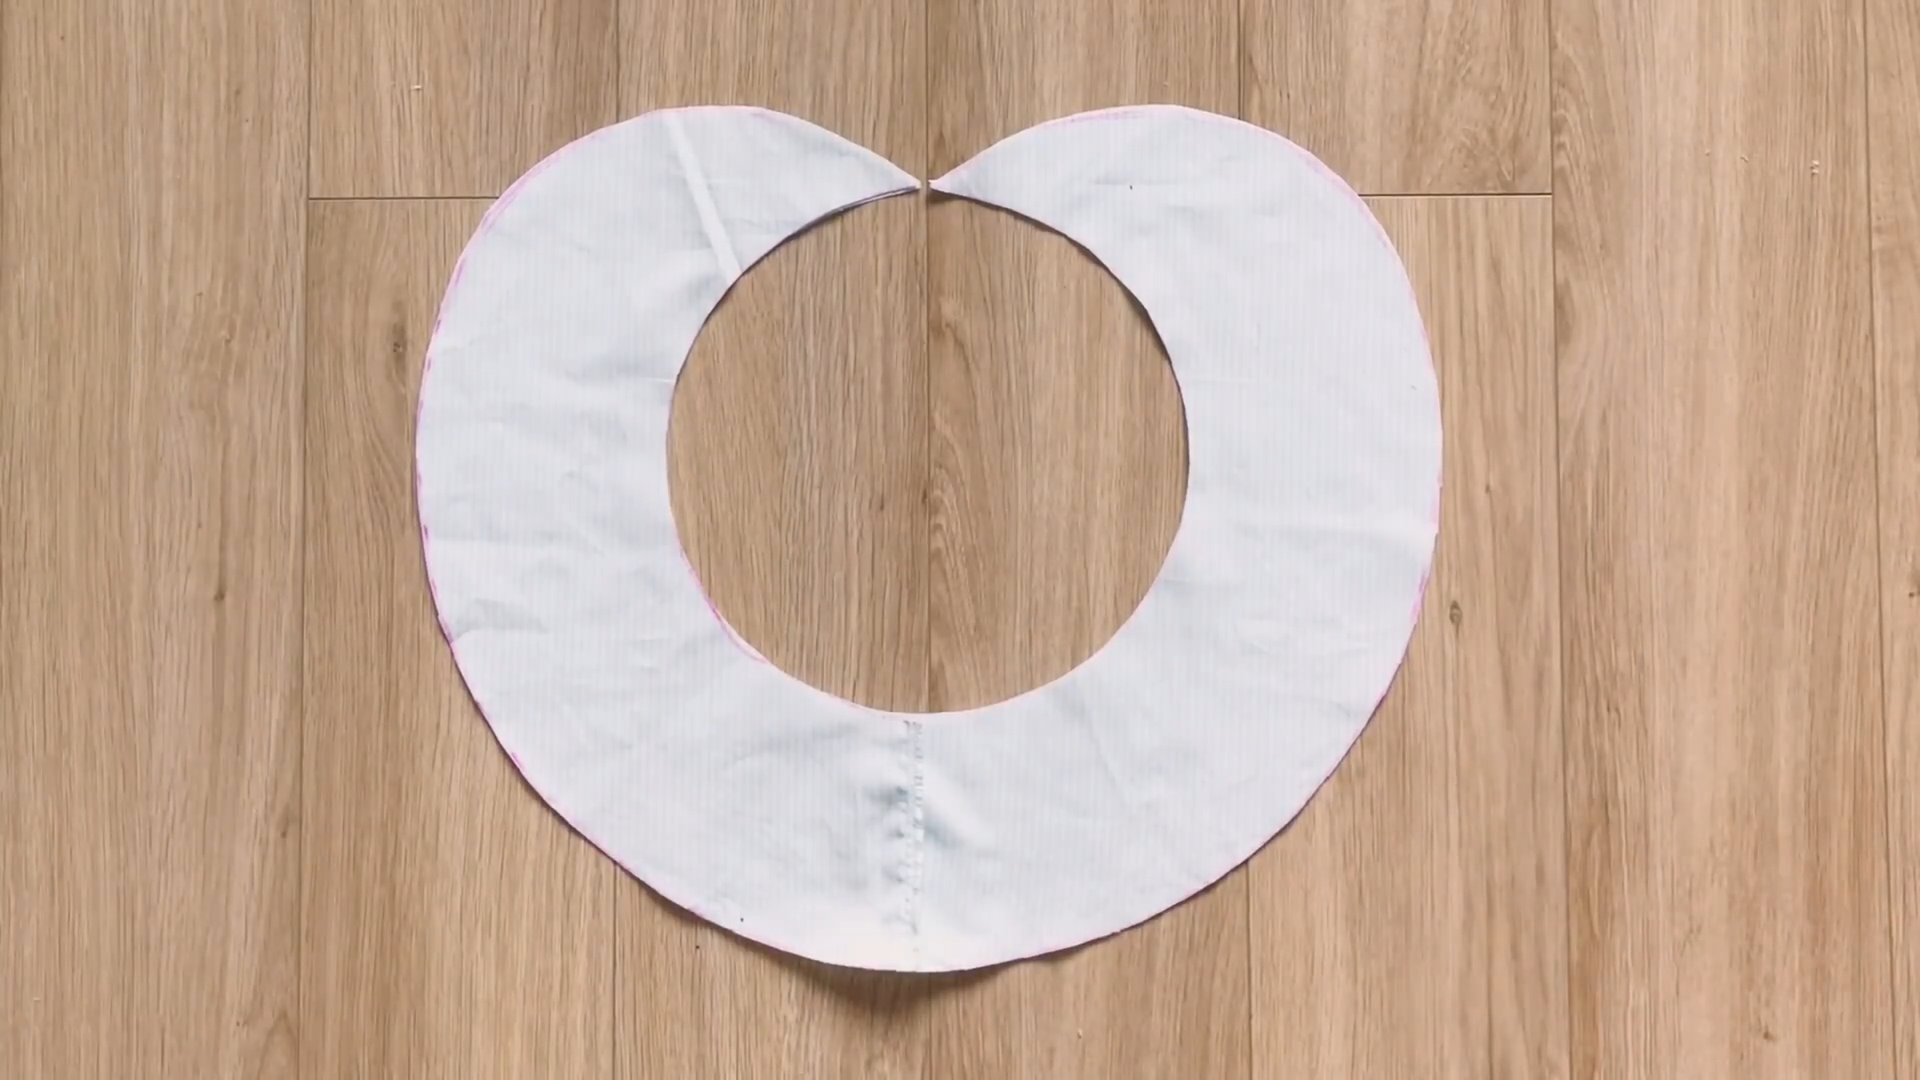
So after cutting, you will have the ruffle part of the crop top.
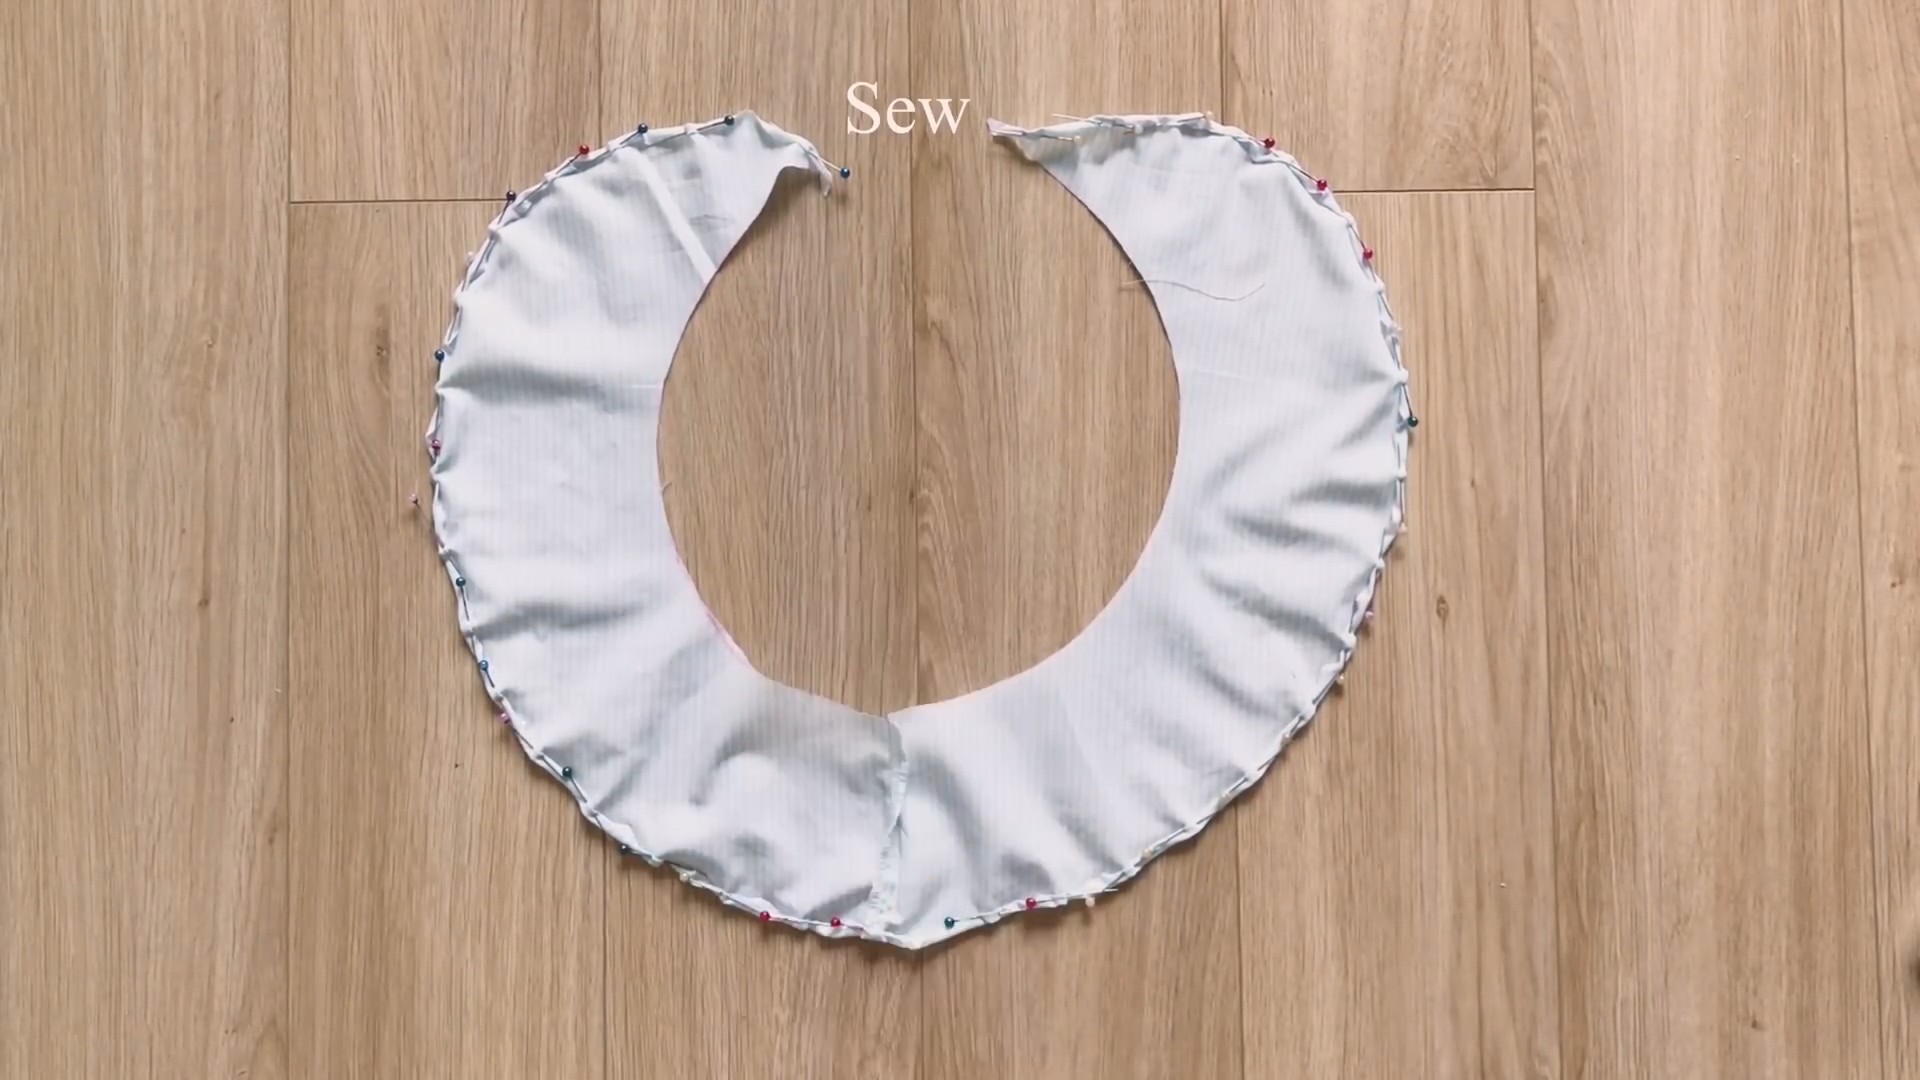
Fold the end fabric and the second circle inside two times and sew to finish it.
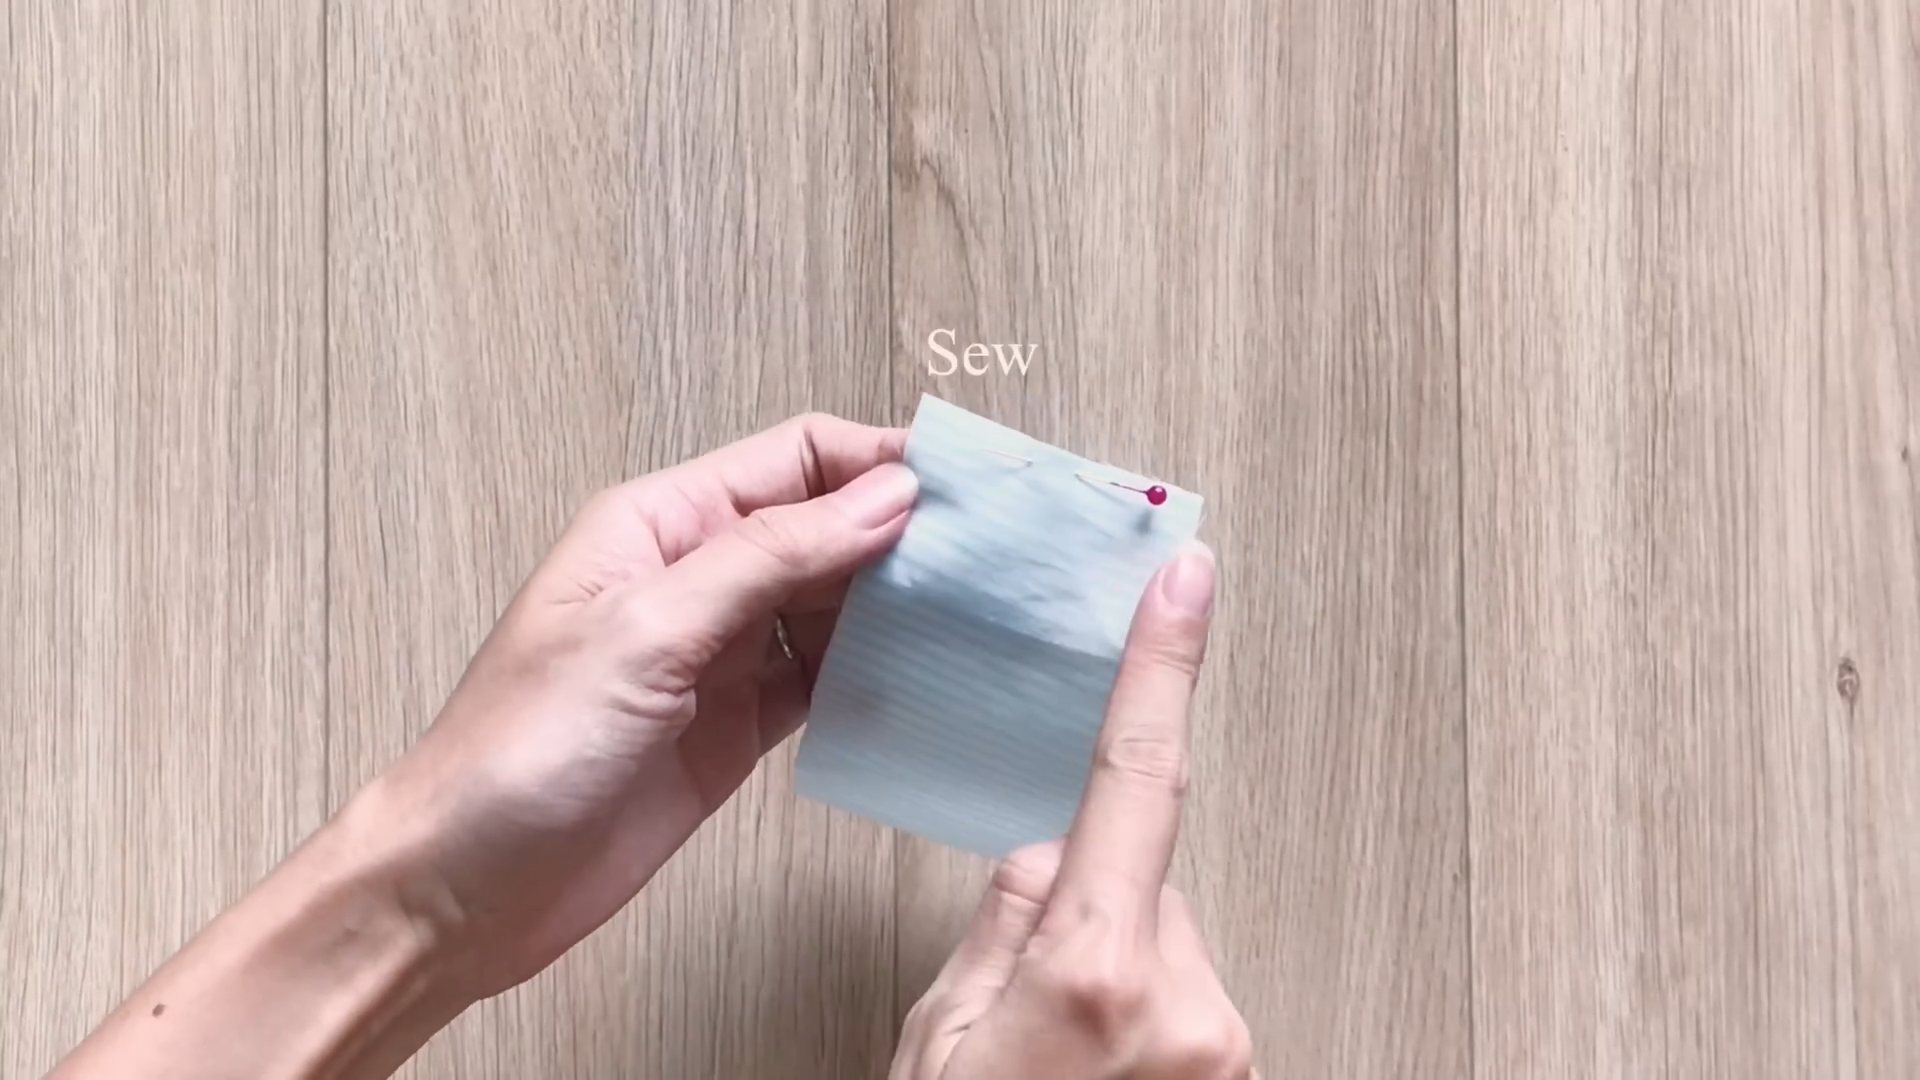
After that, cut a long rectangle with 3 cm length and two times the diameter of the first circle plus 2 cm for seam allowance. This is also the width of the neck plus 2 cm.
Then, connect two ends of the length lines together to create the circle fabric with the same width as the neck.
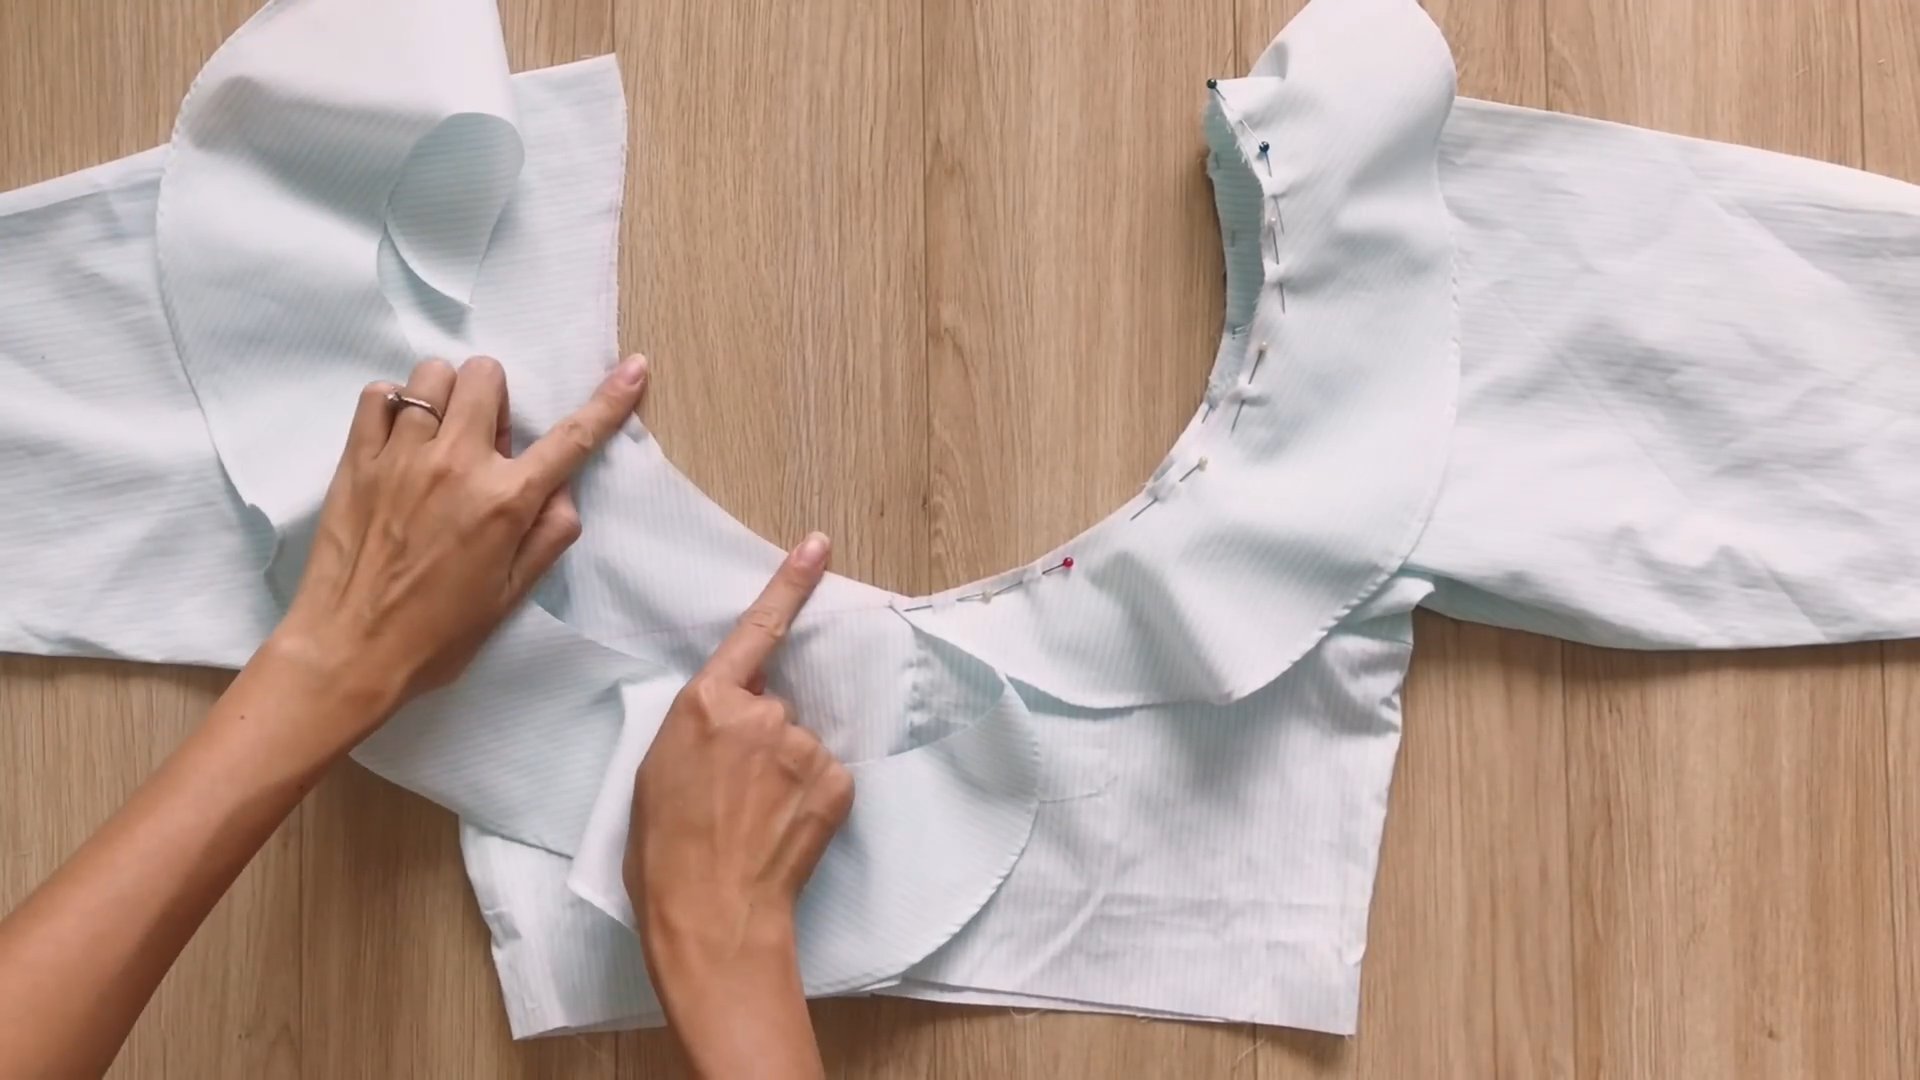
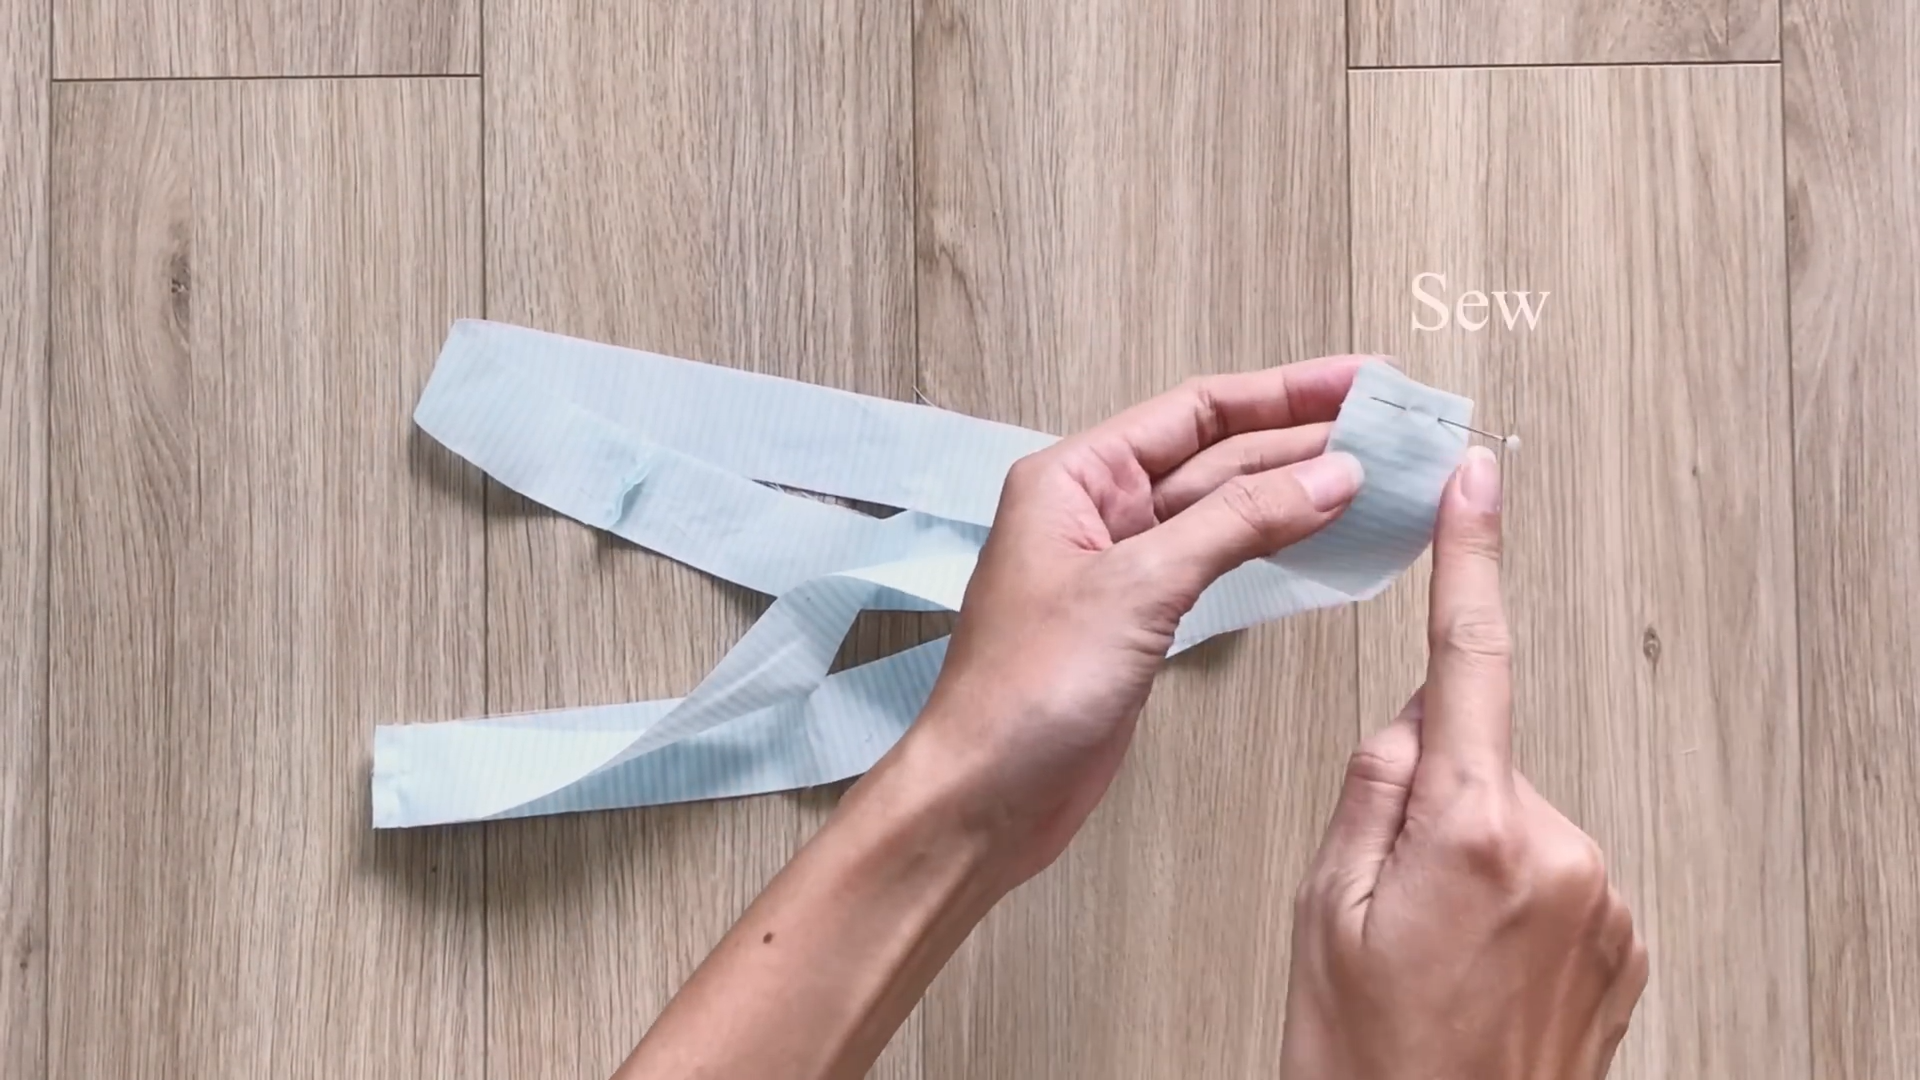
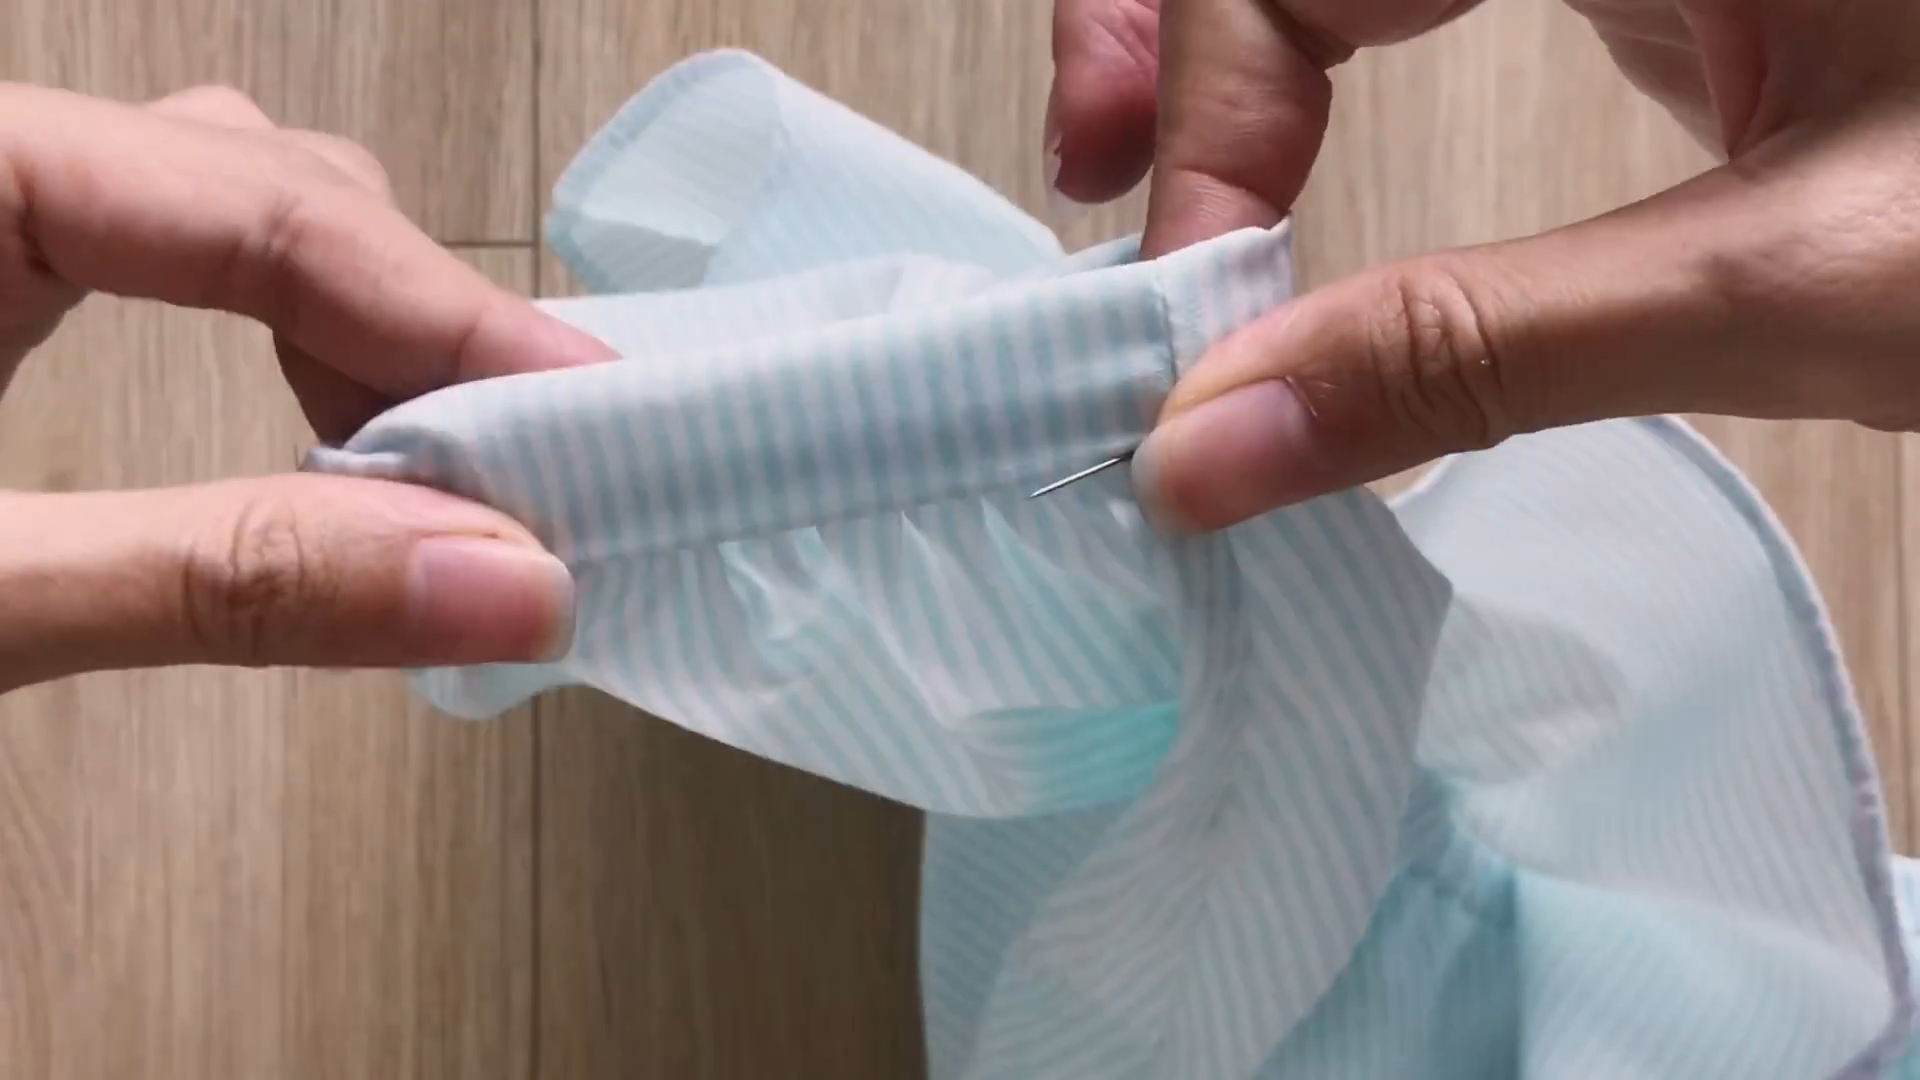
Now, connect the ruffle to the neck and keep them together by the pins.
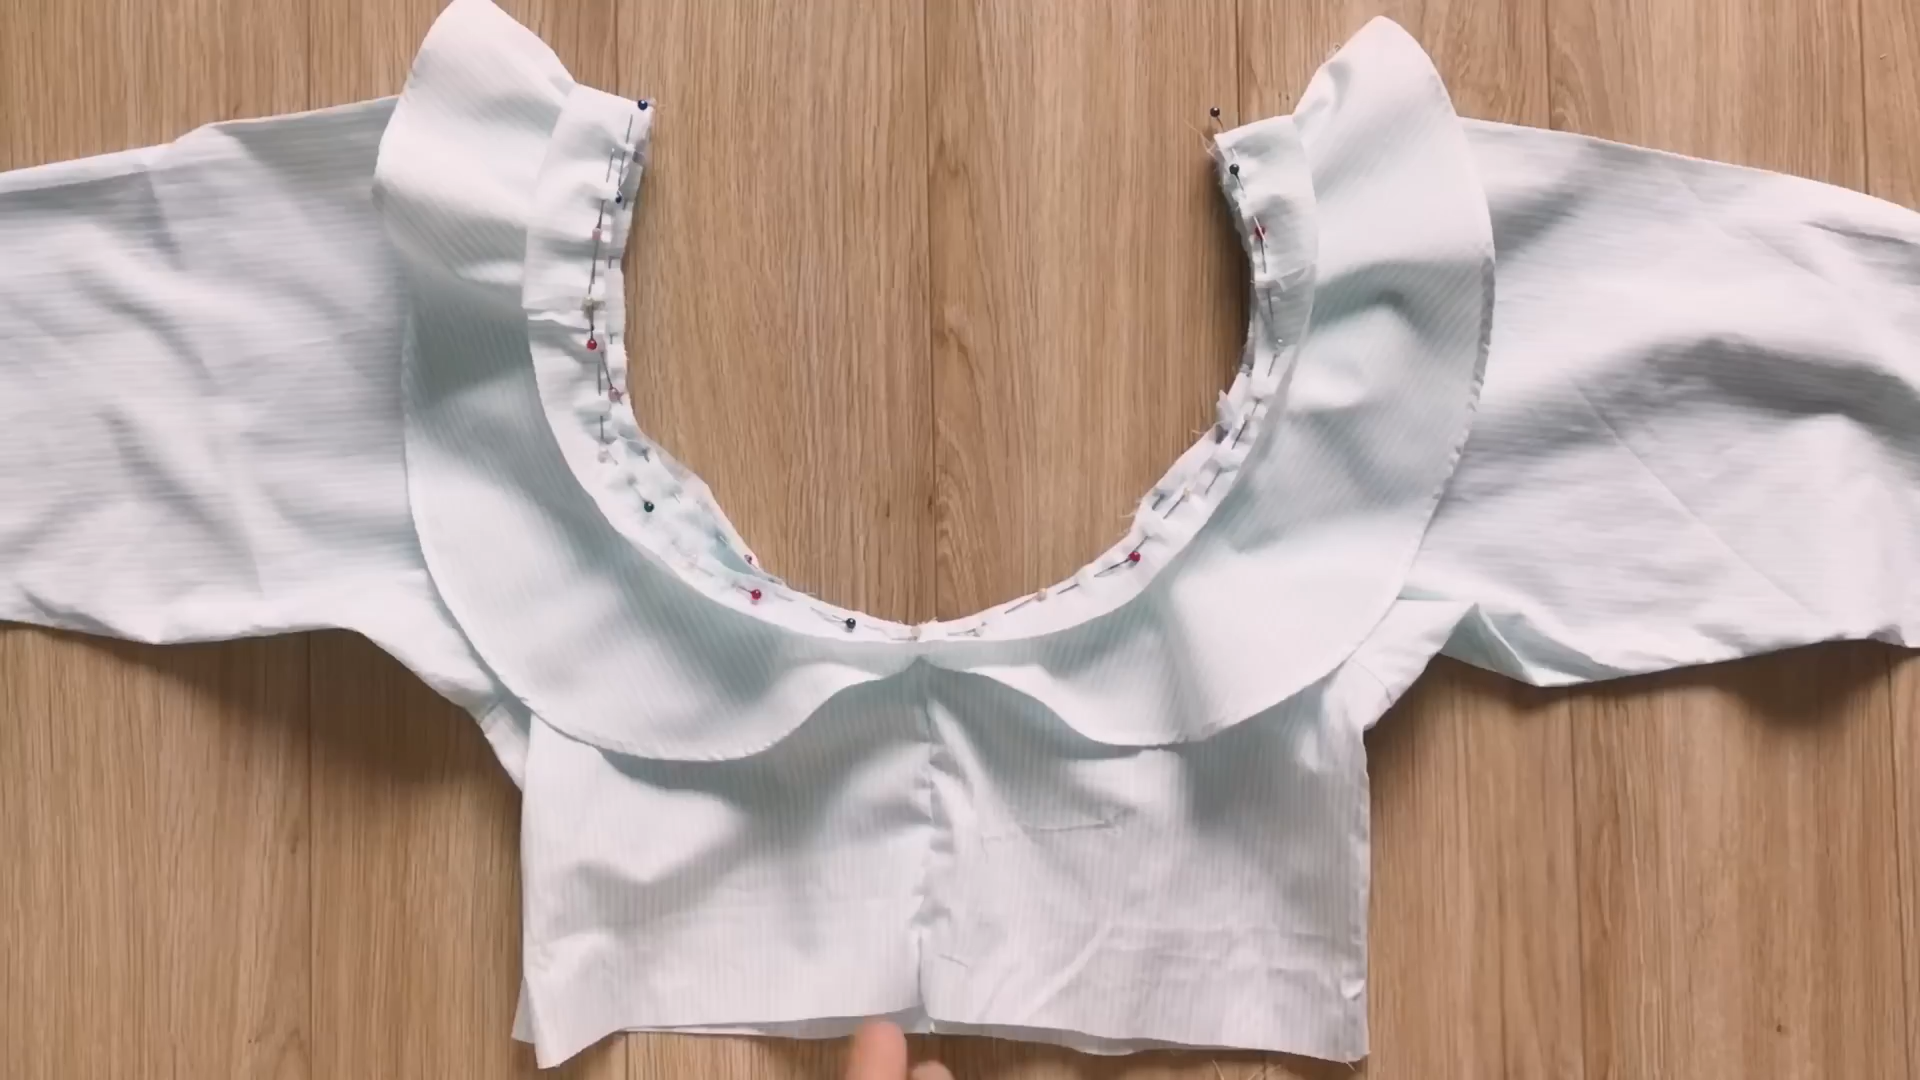
Then, keep adding the circle fabric to there later. Make sure the ruffle will be in the middle and sew to keep them all together.
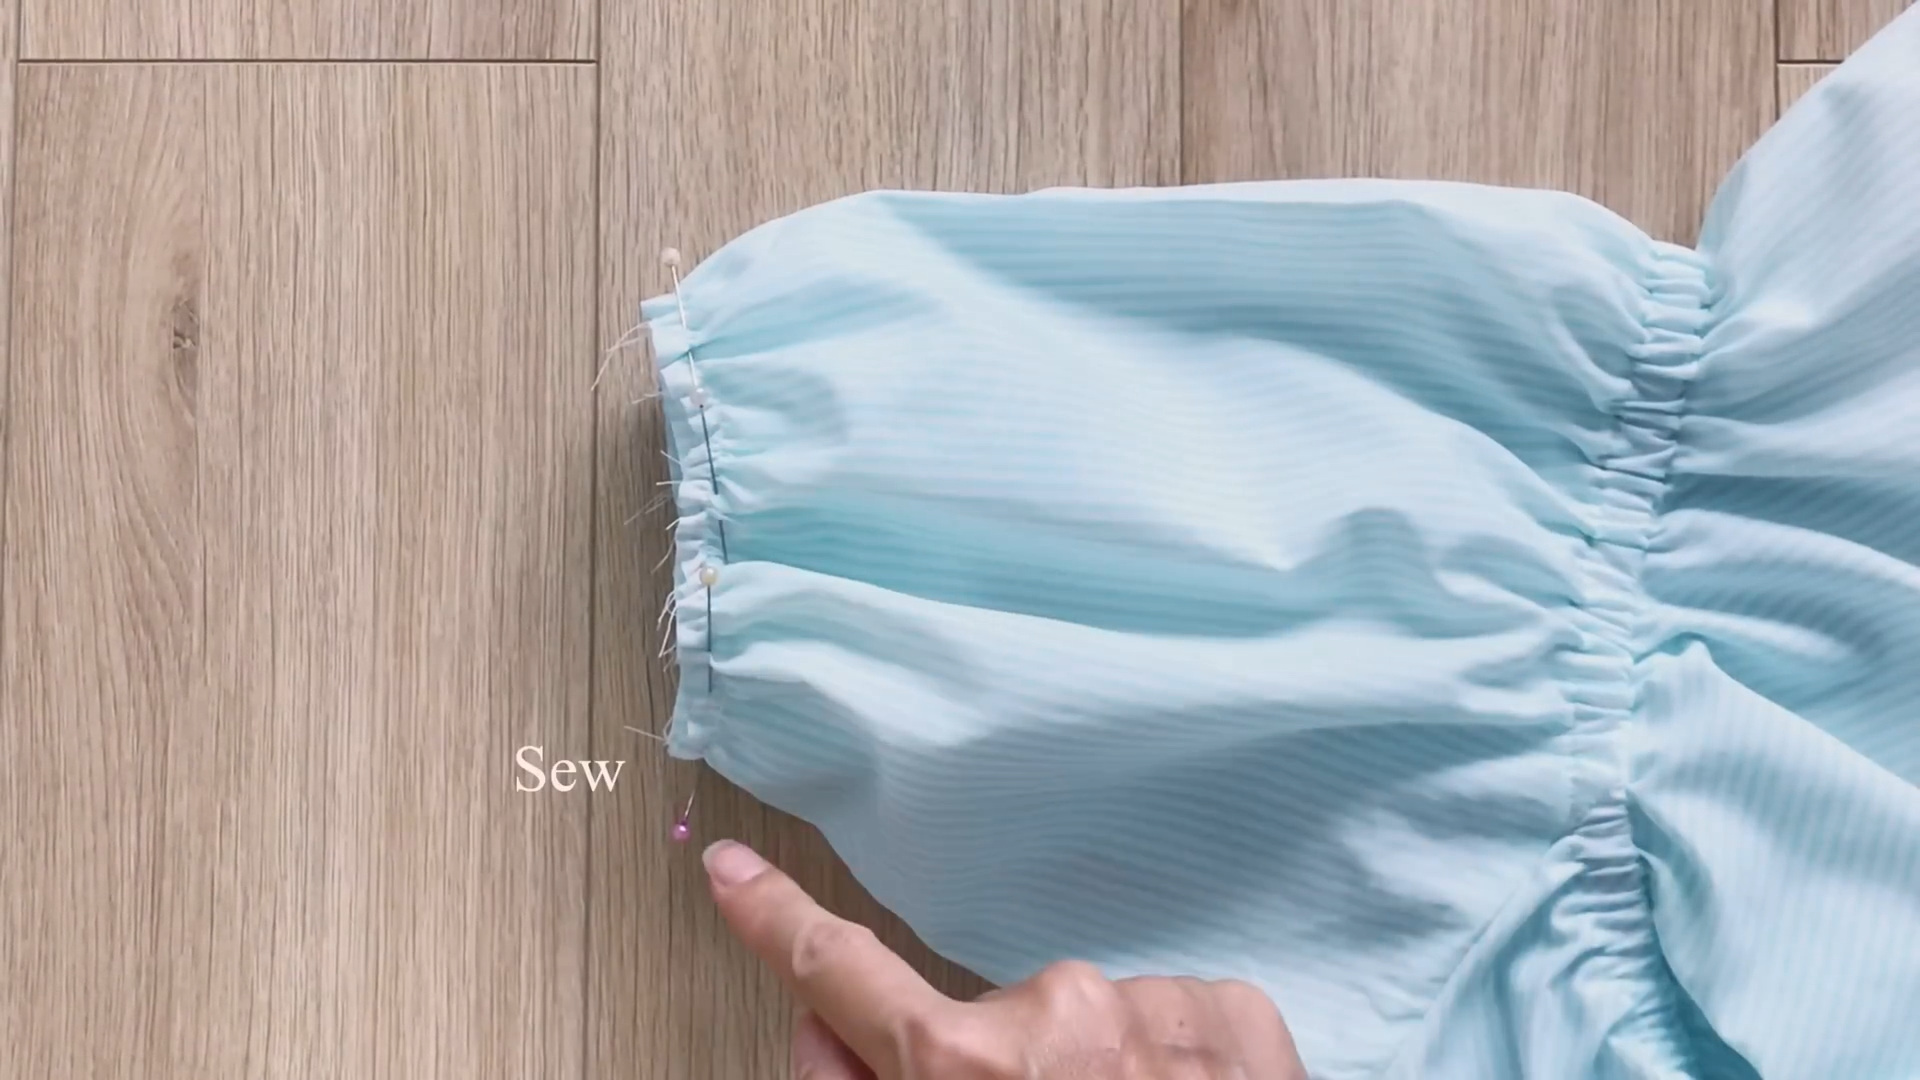
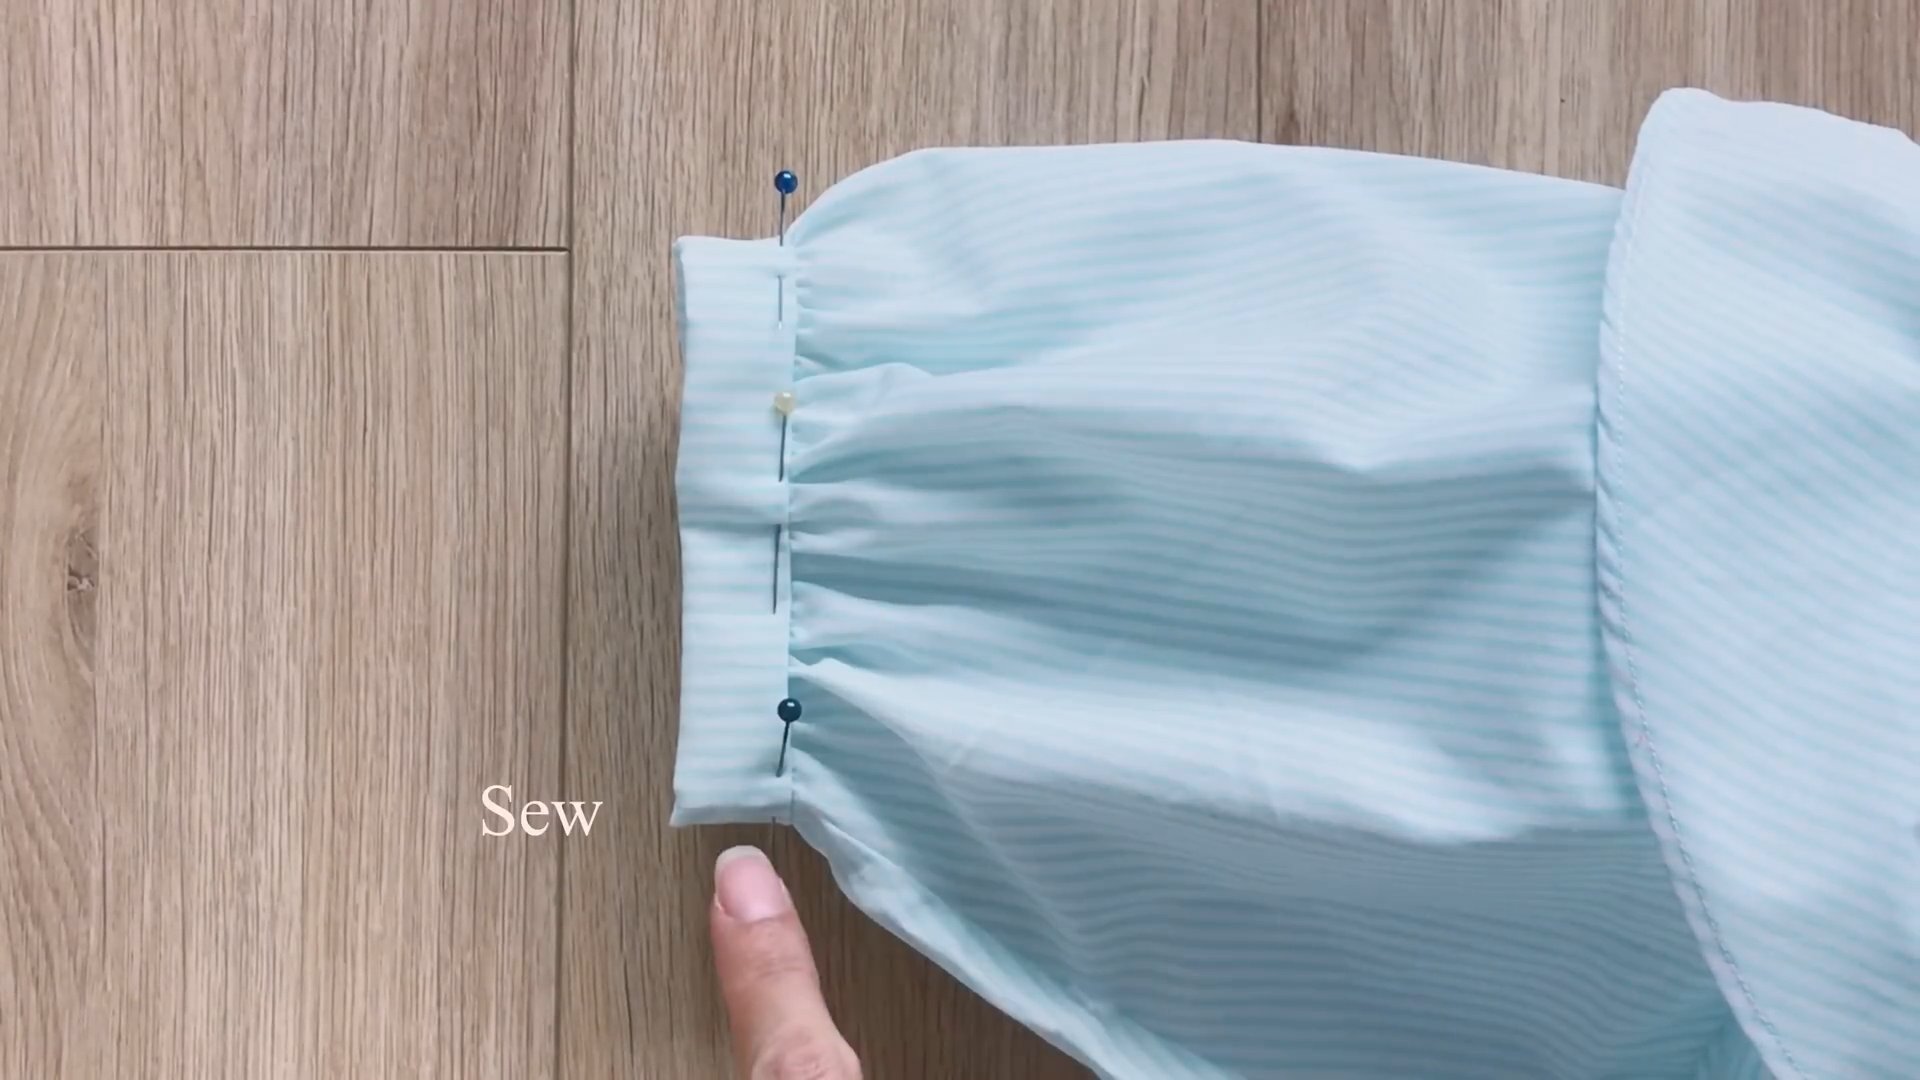
After that, fold the other side of the circle fabric inside around 1 cm then keep folding it again. This will create a fabric hole inside the neck where the elastic band can go through later.
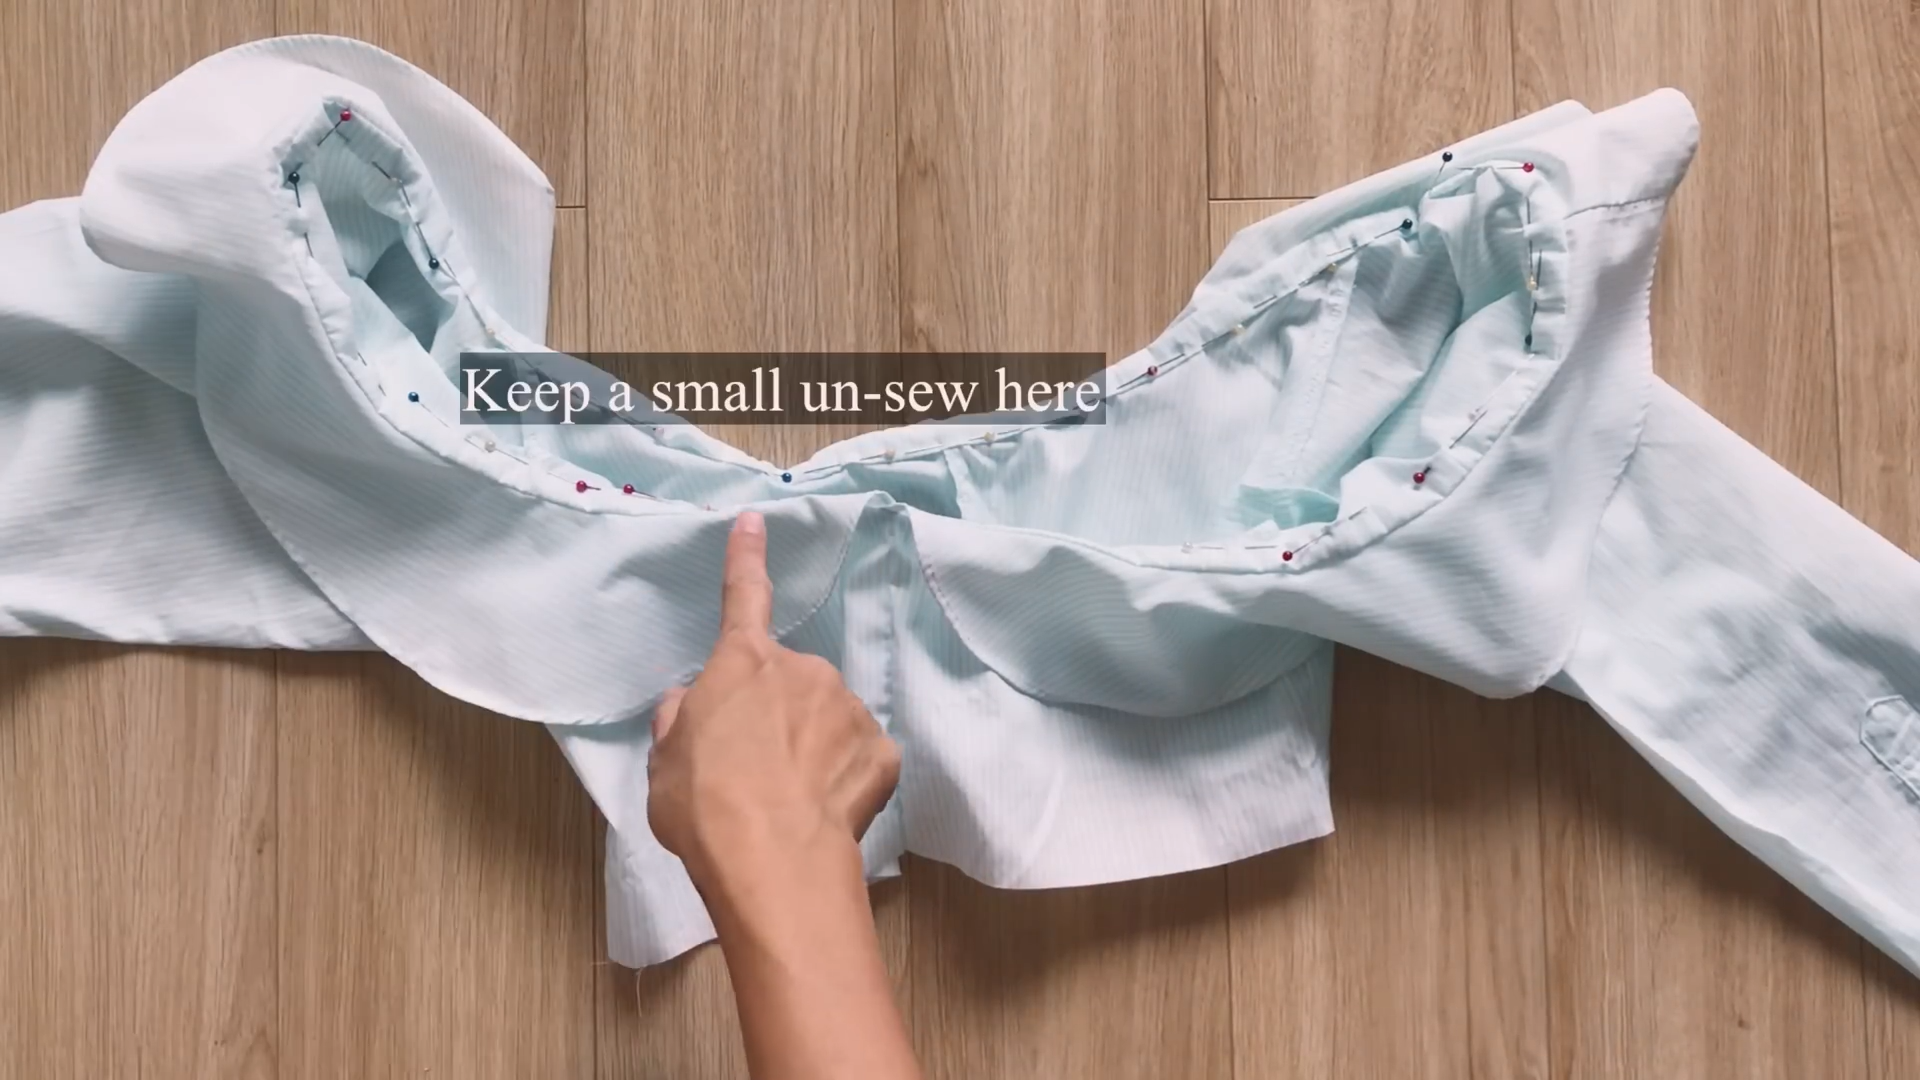
Therefore, don’t forget to keep a small un-sewn space when sewing and make sure the width of the fabric hole is big enough for the elastic band to go through.
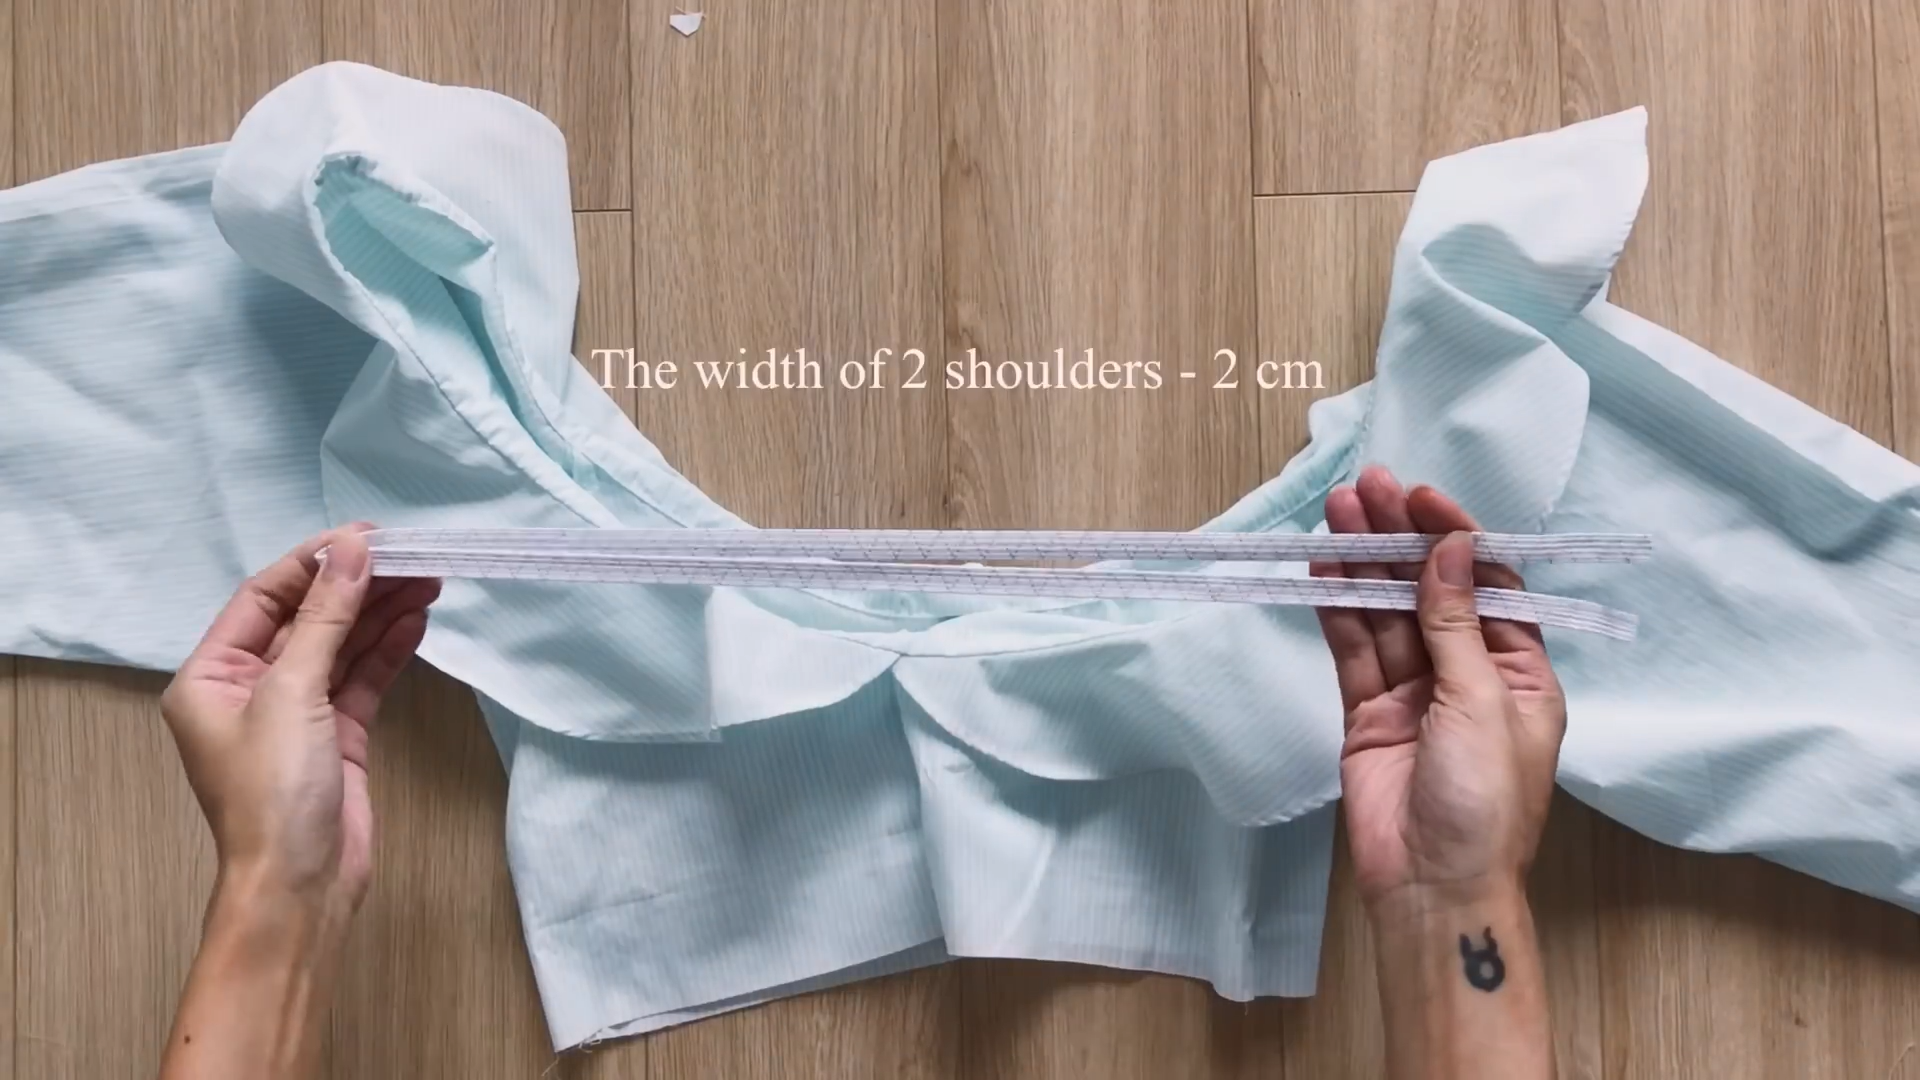
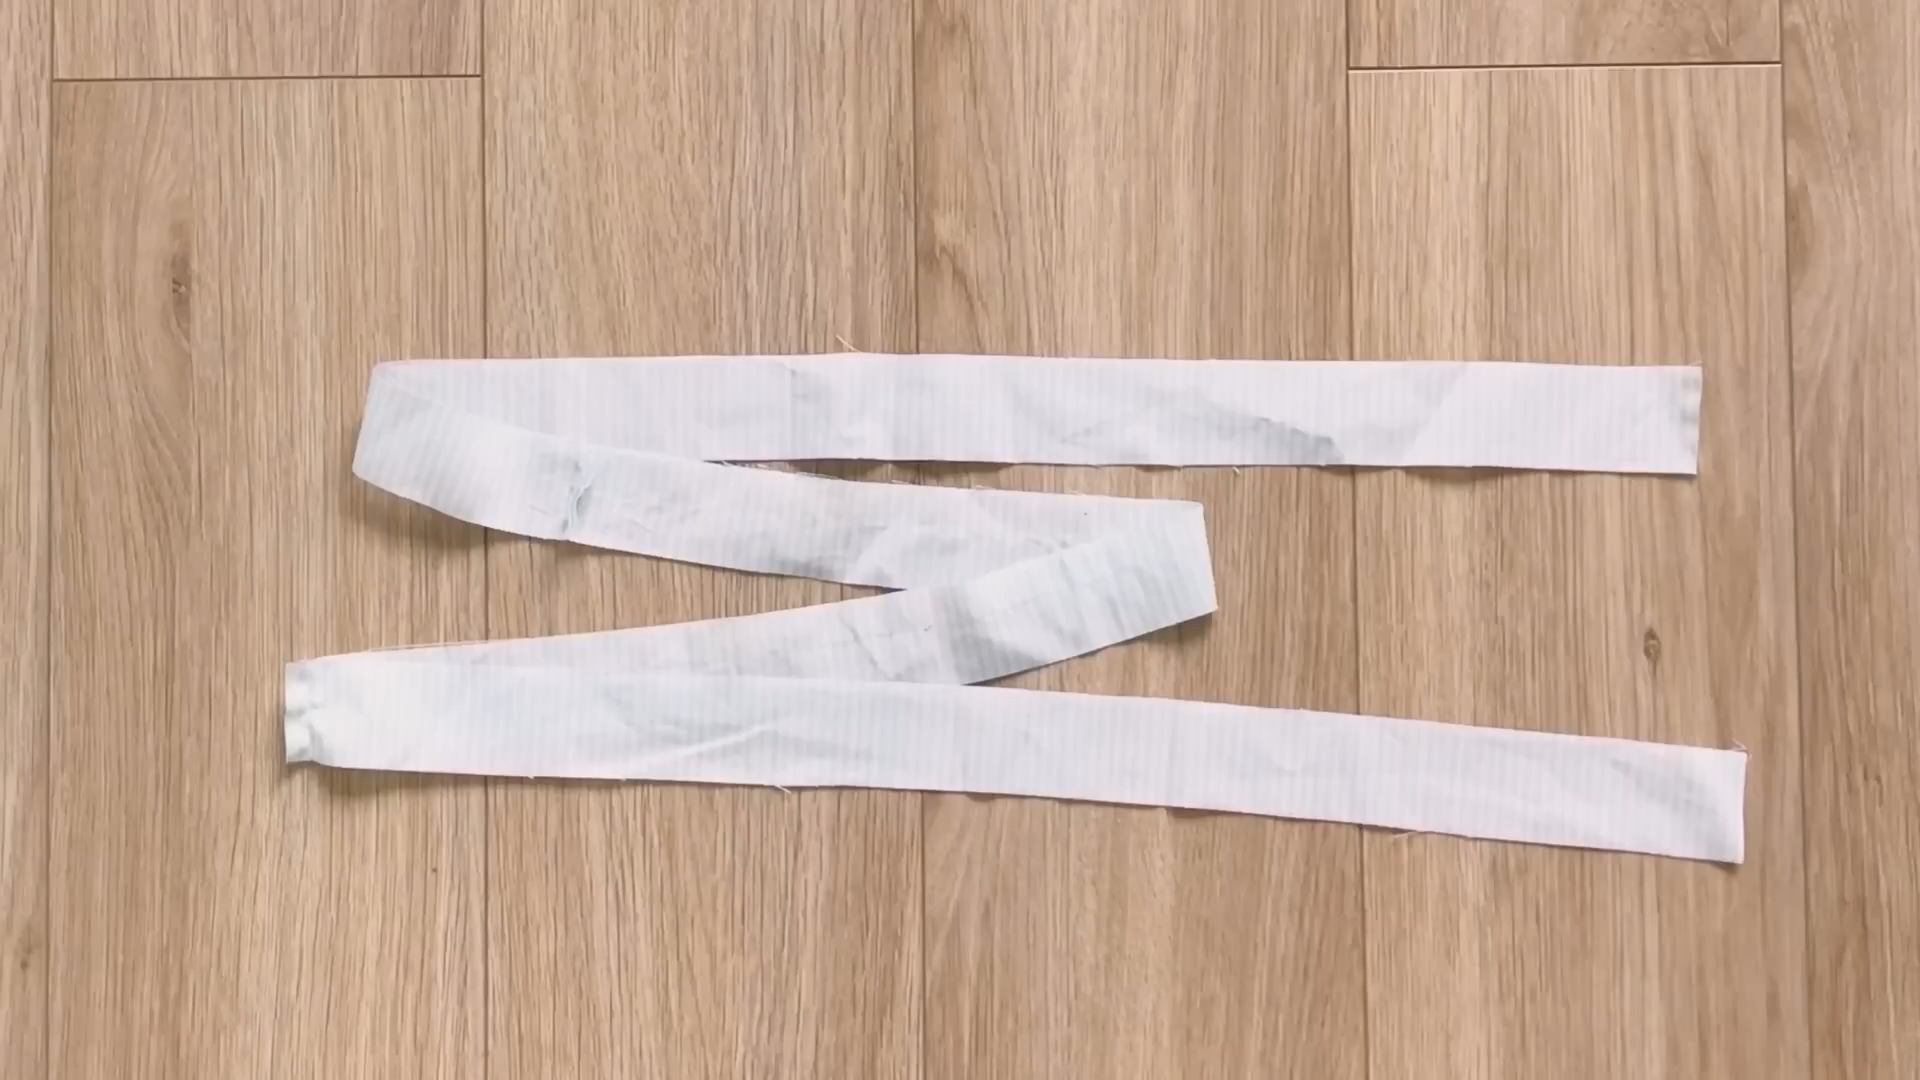
Cut the elastic band 1 cm width and around 96 cm length which is the width around the shoulder off minus 2 cm.
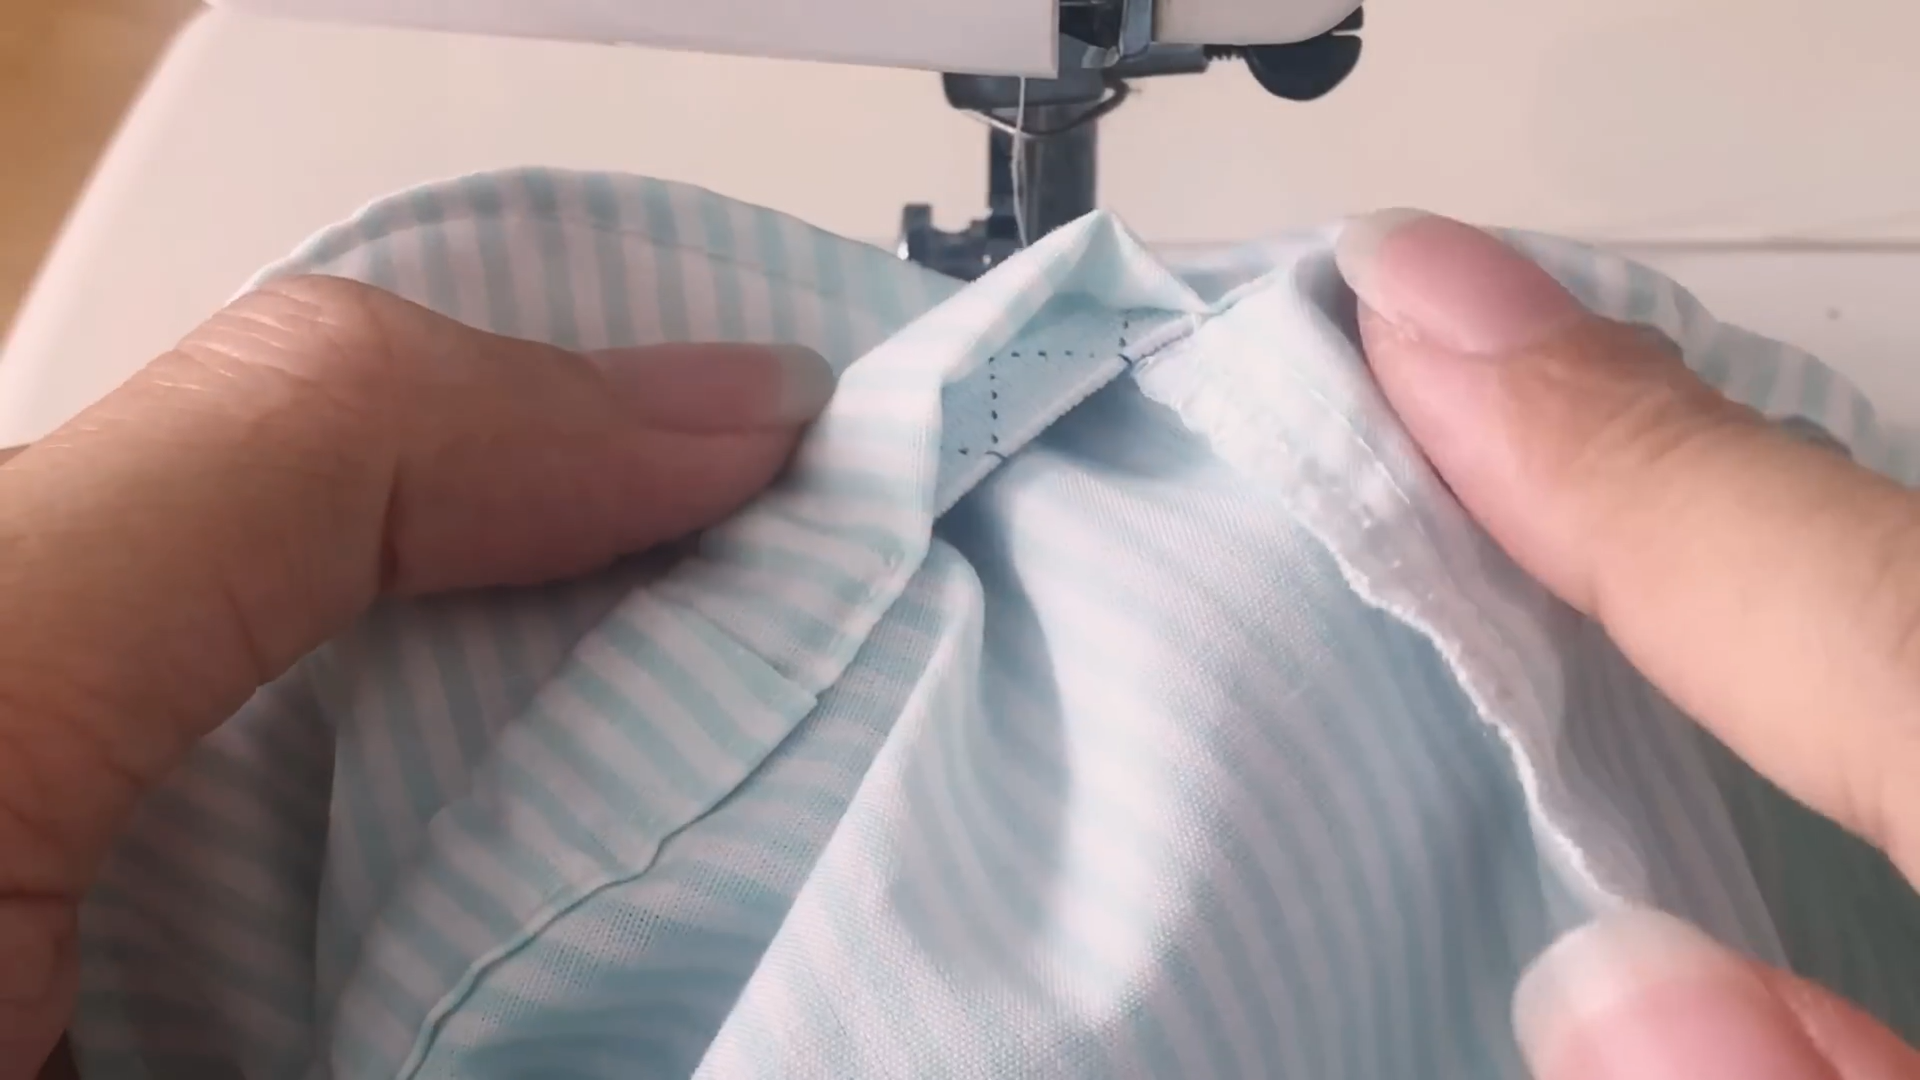
After connecting two ends of the elastic band together, don’t forget to close the un-sewn space.
THE SLEEVE
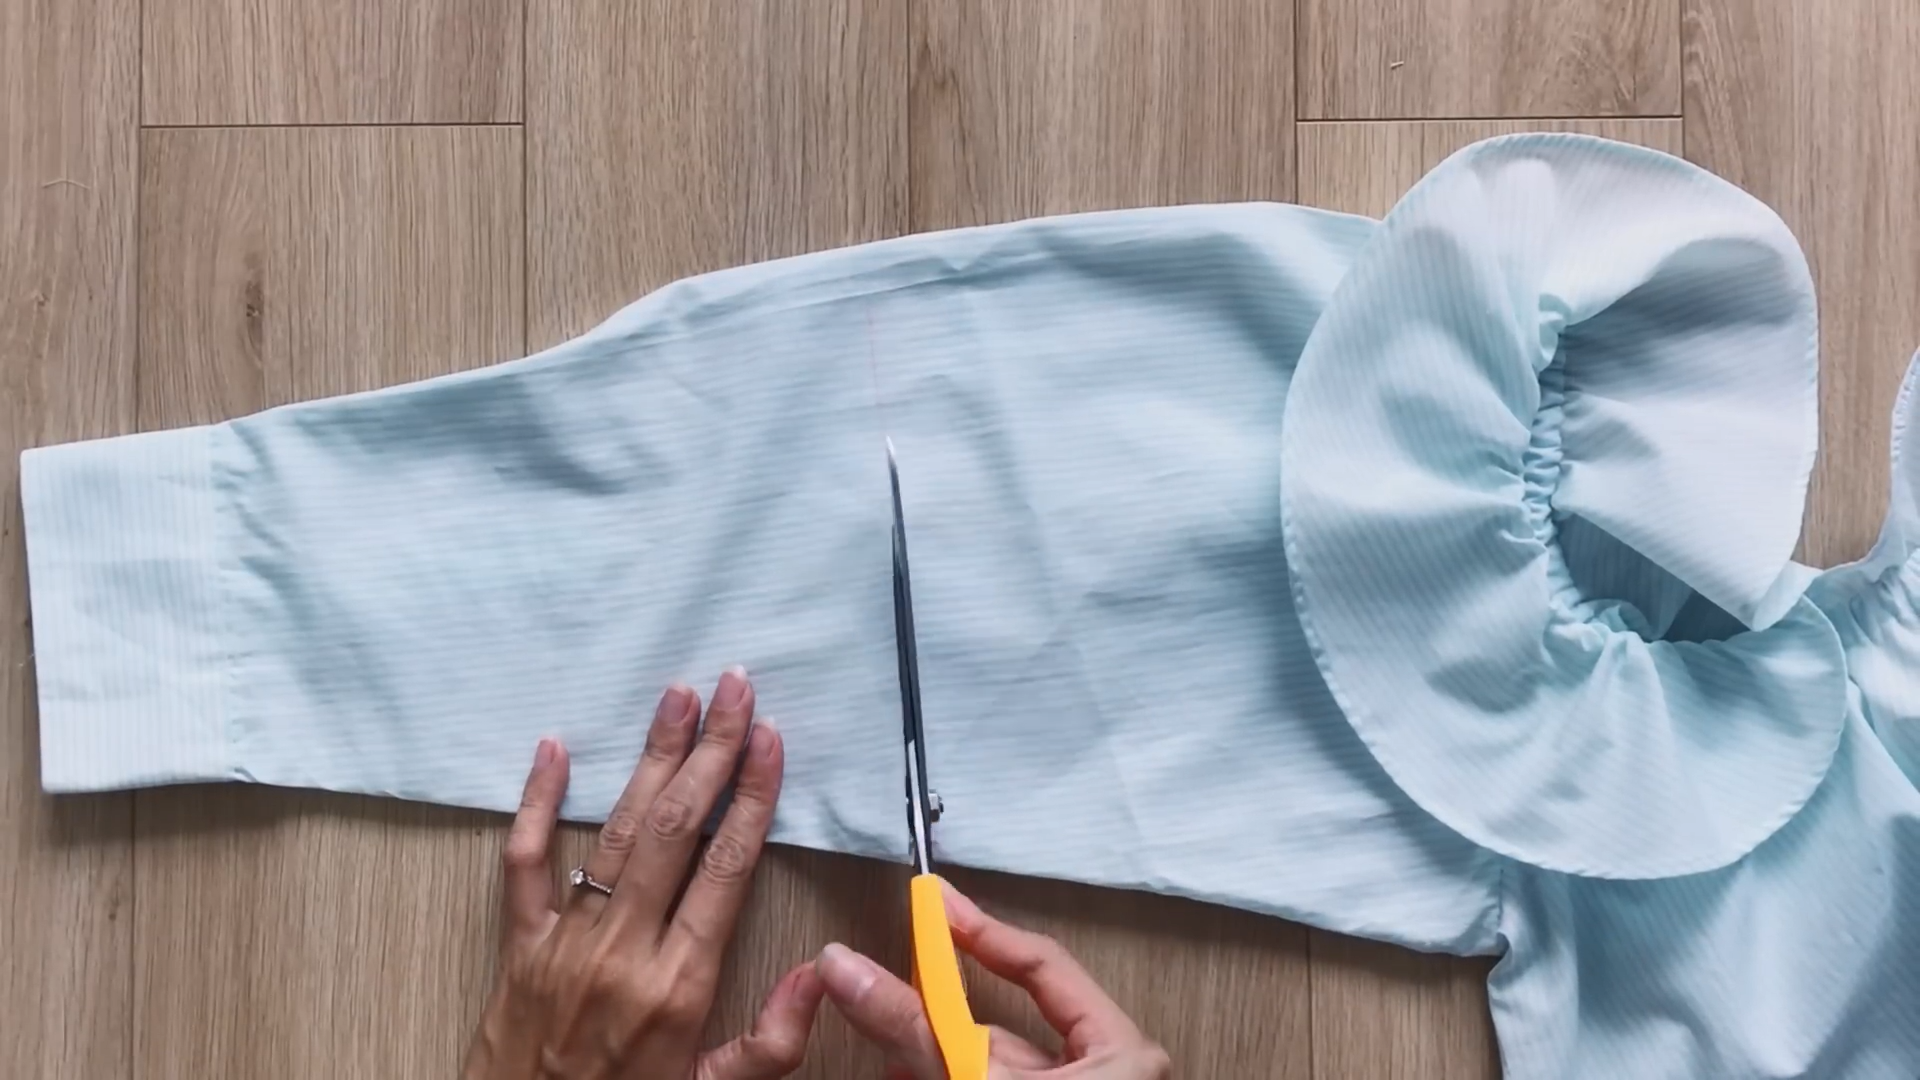
Moving to the sleeve, cut it shorter.
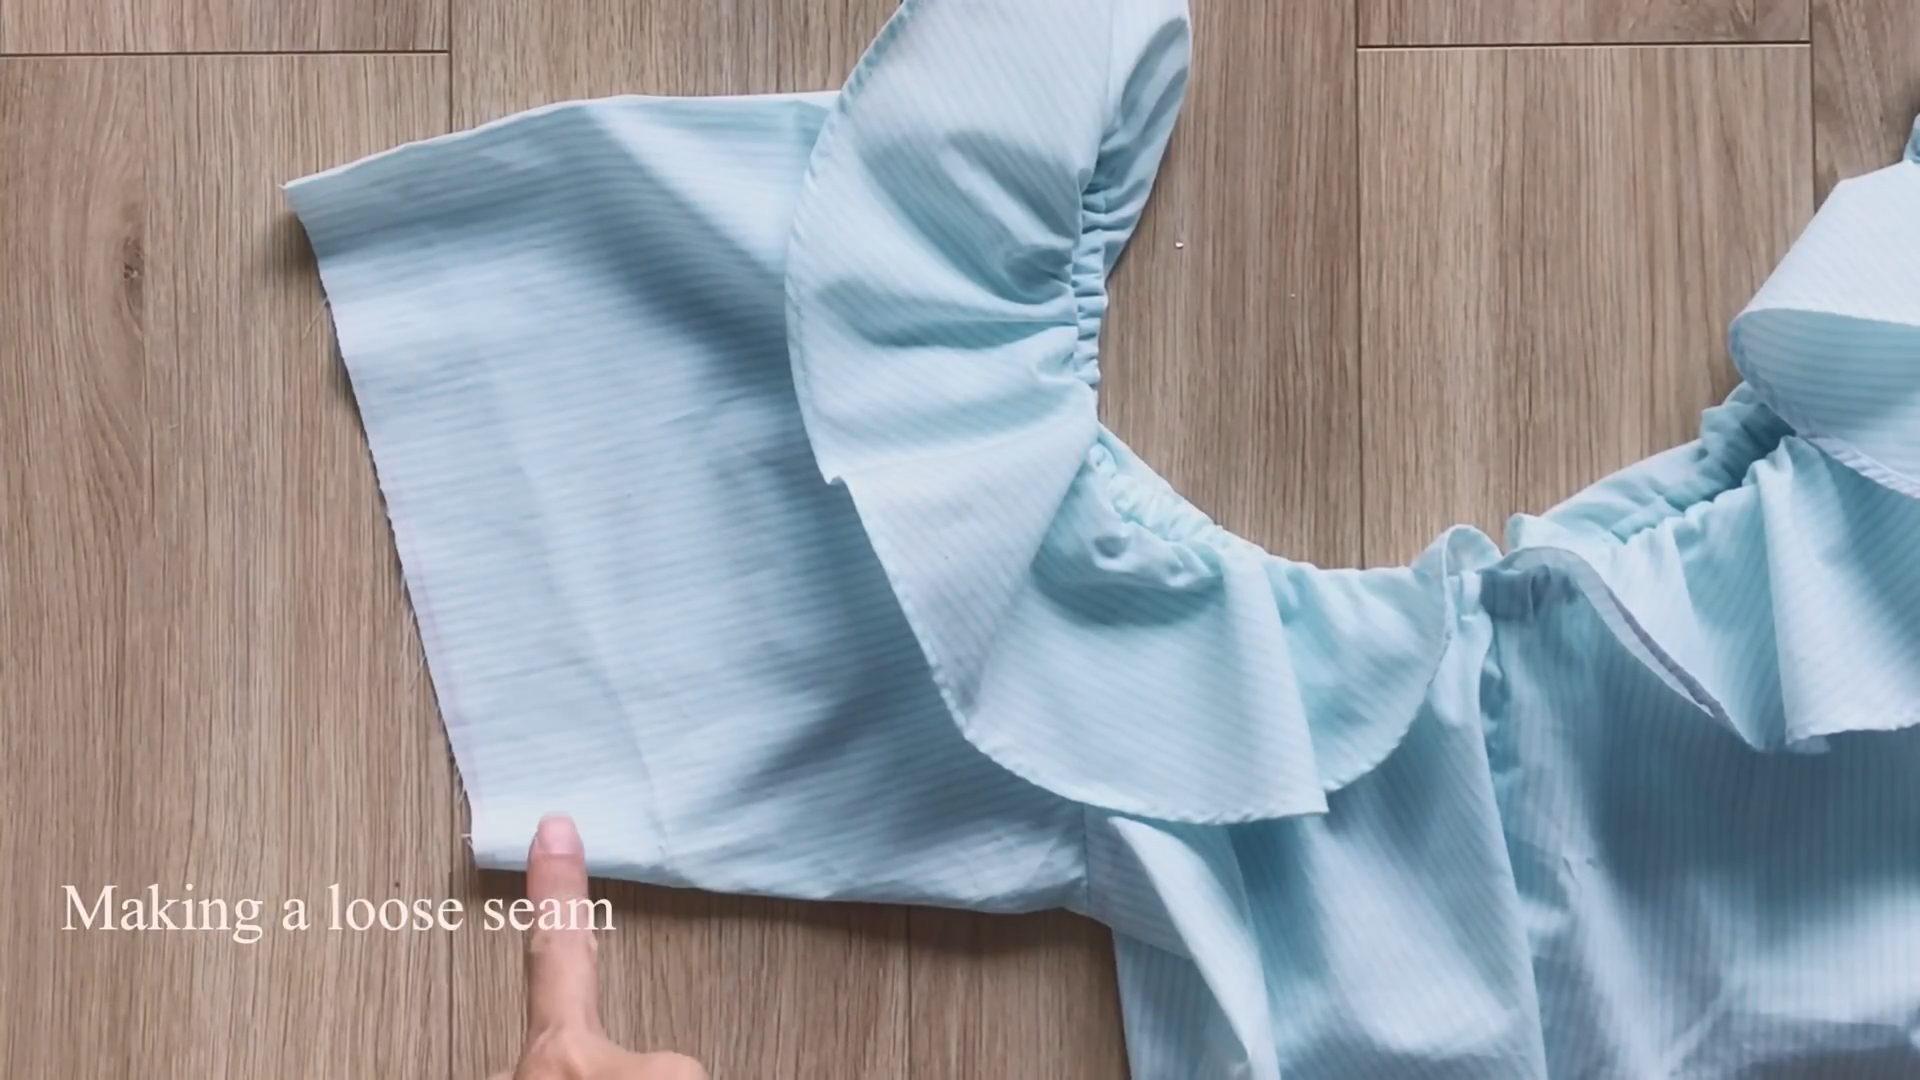
Then, make a loose seam at the end of it to create the gathering fabric there later.
Make sure the final width of the gathering fabric will be a bit bigger than the width of the arm.
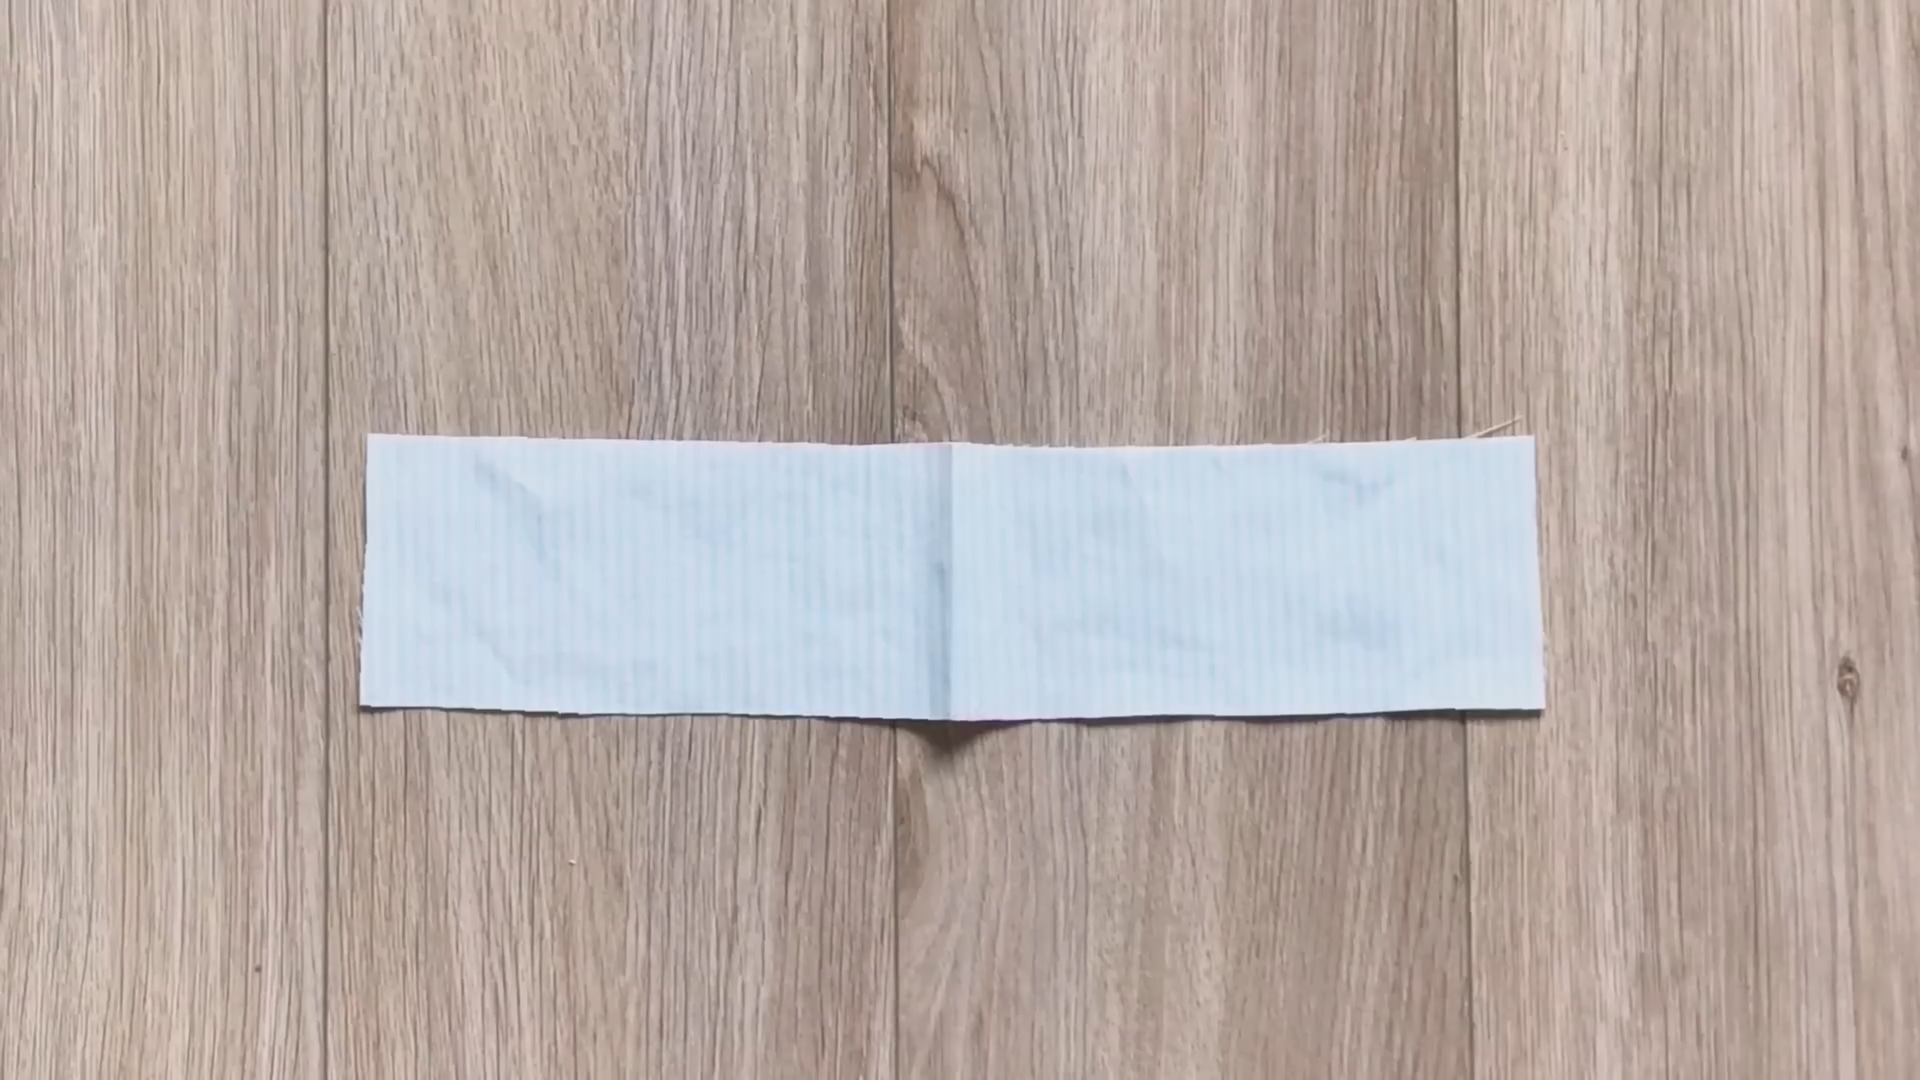
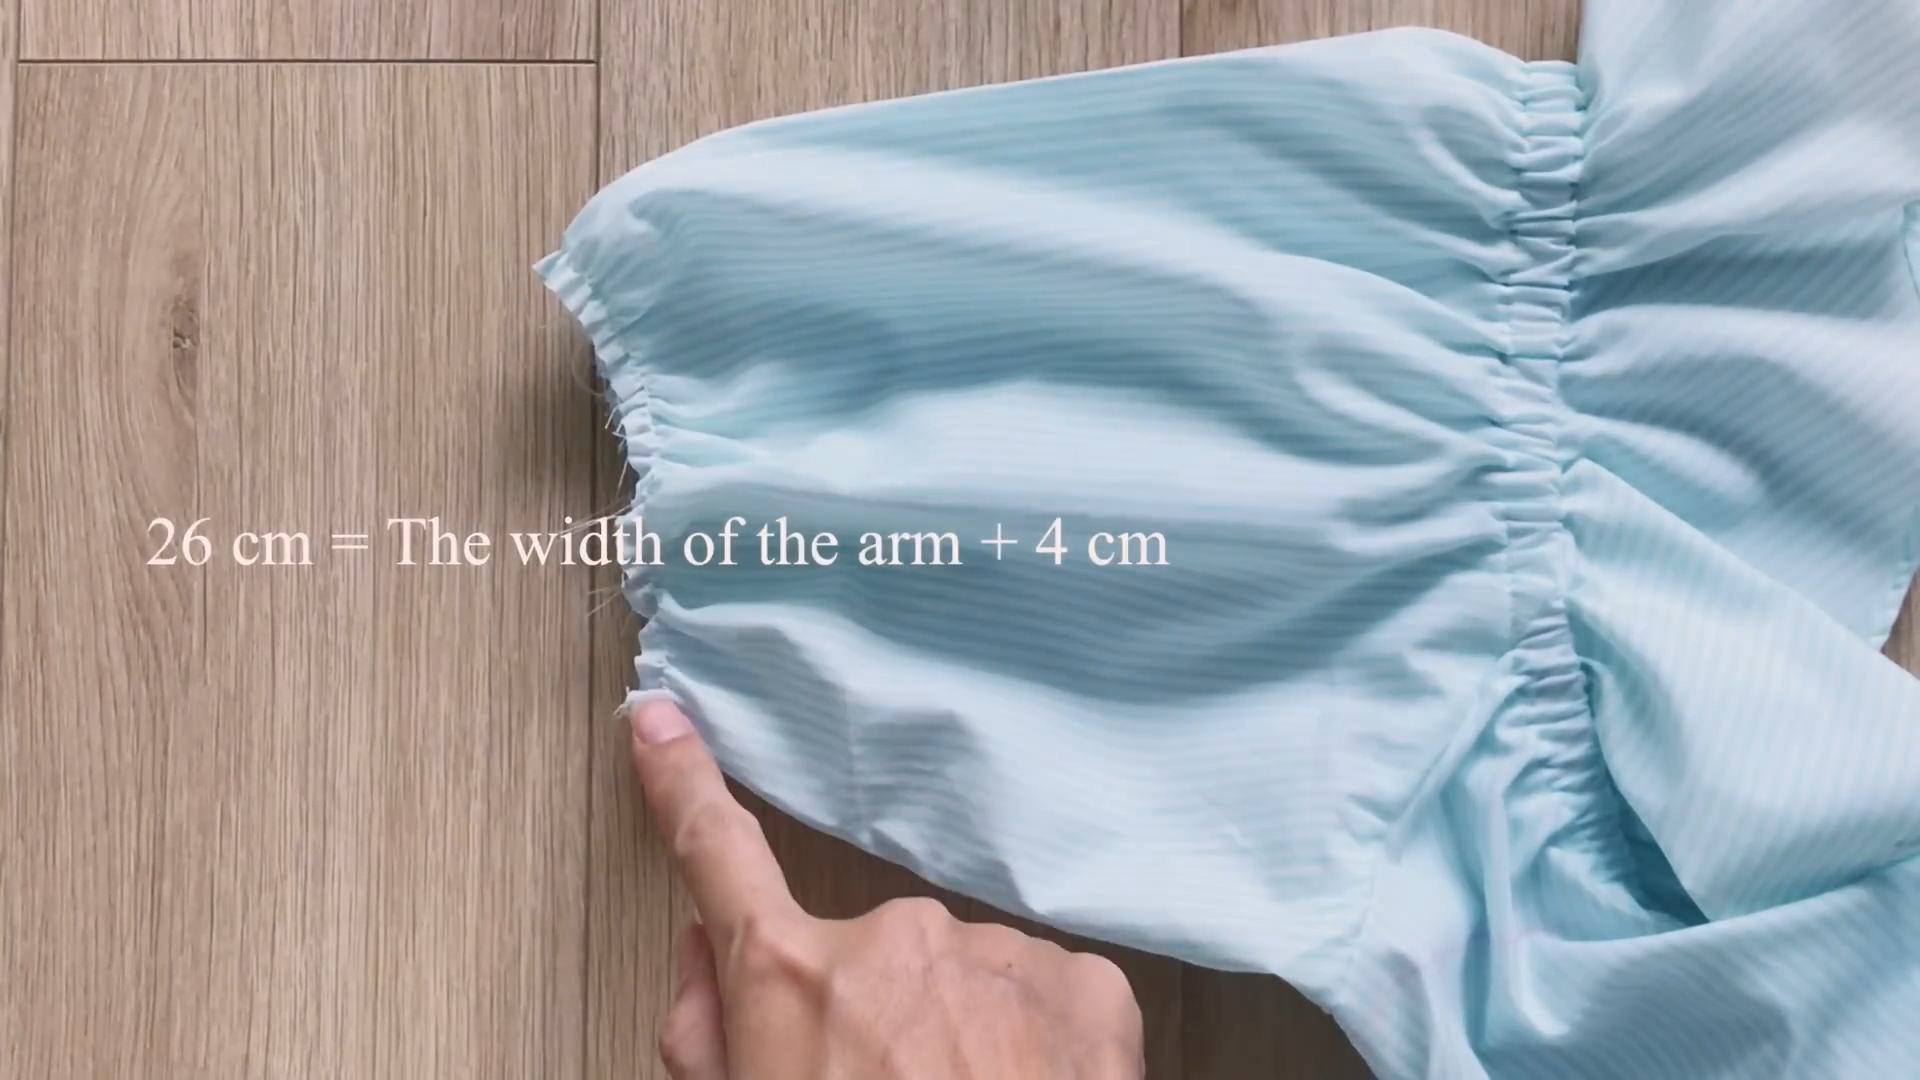
Cut a rectangle with 6 cm width and 26 cm length which is the width of the arm plus 4 cm.
Connect two ends of the width lines together to have a circle fabric first.
Then, connect it to the end of the sleeve and sew together.
After the first seam, fold the other end of the circle fabric inside 1 cm first.
Then, keep folding it over the first seam to hide the end fabric inside and make the second seam to finish the sleeve.
THE BOTTOM
At the front of the crop top, un-sew the connecting part in the middle a bit.
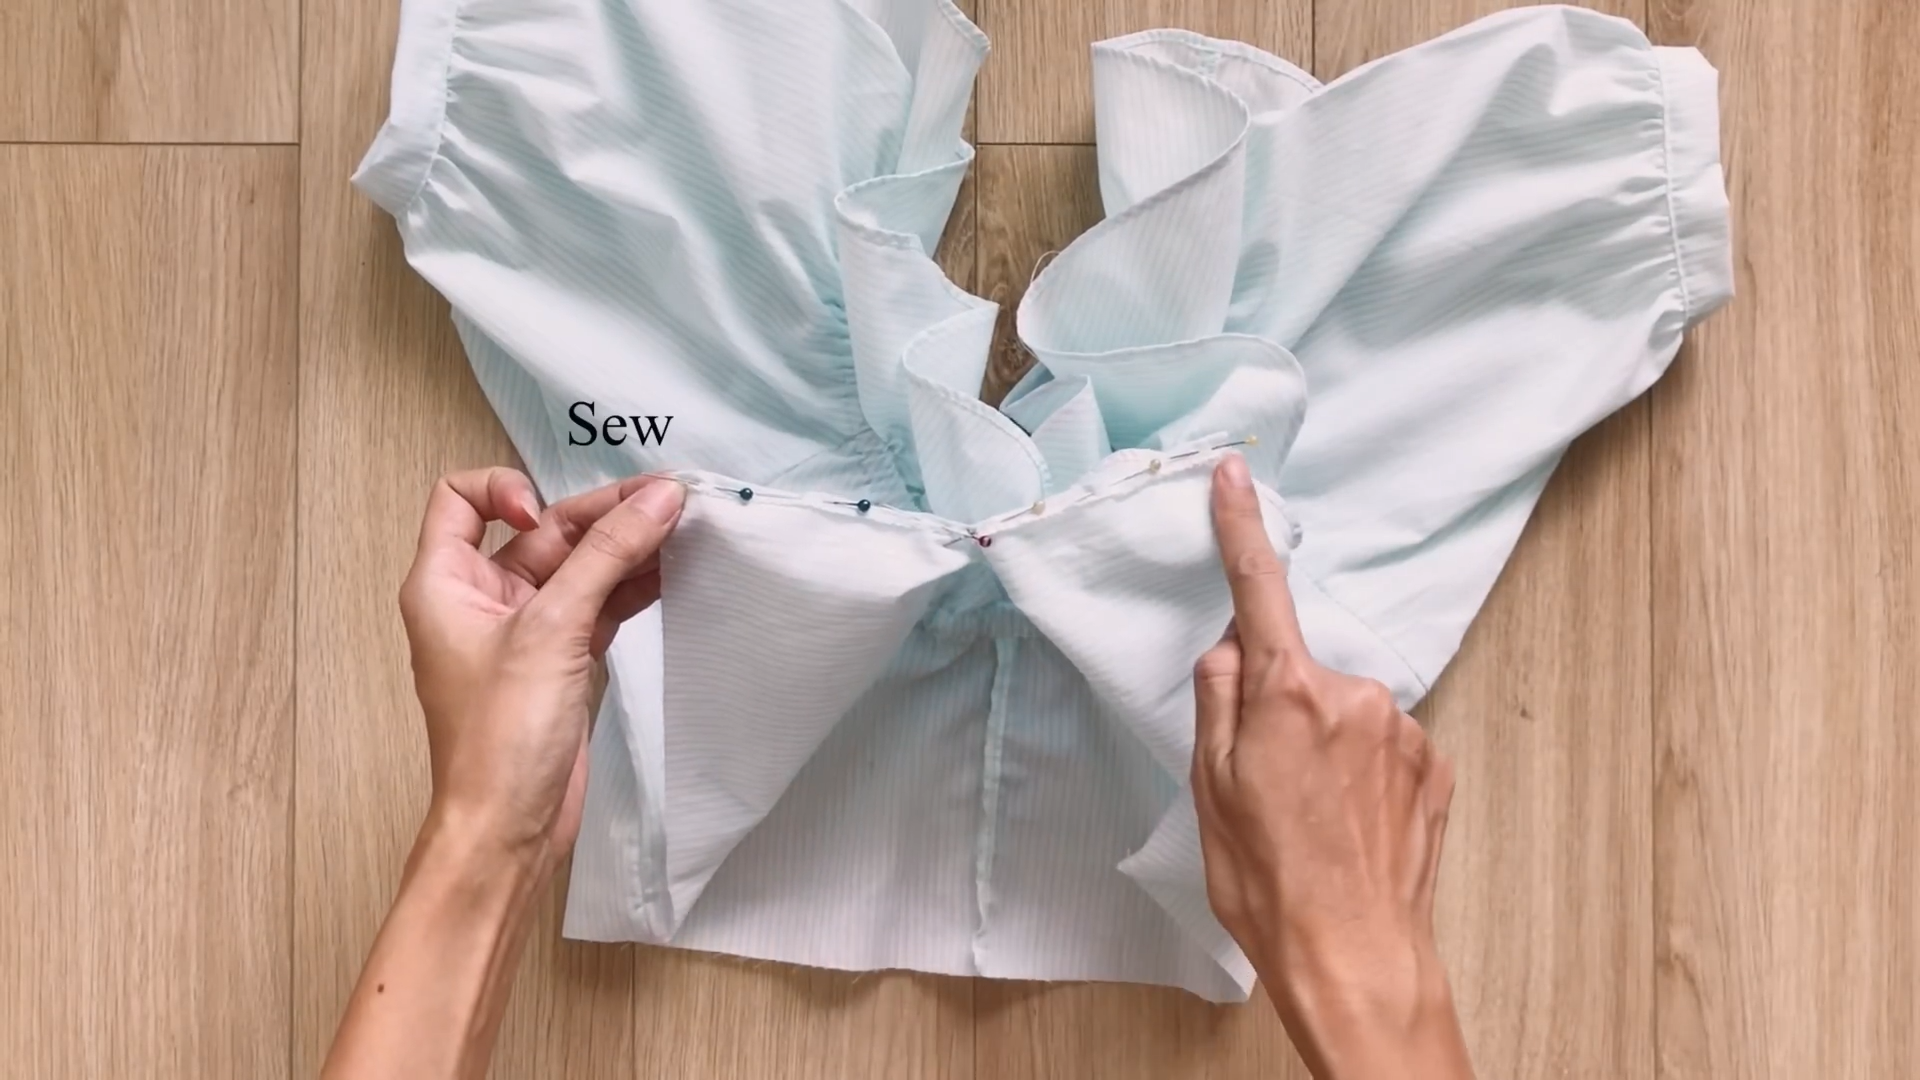
Then, fold the fabric there inside and sew to create a splitted part there.
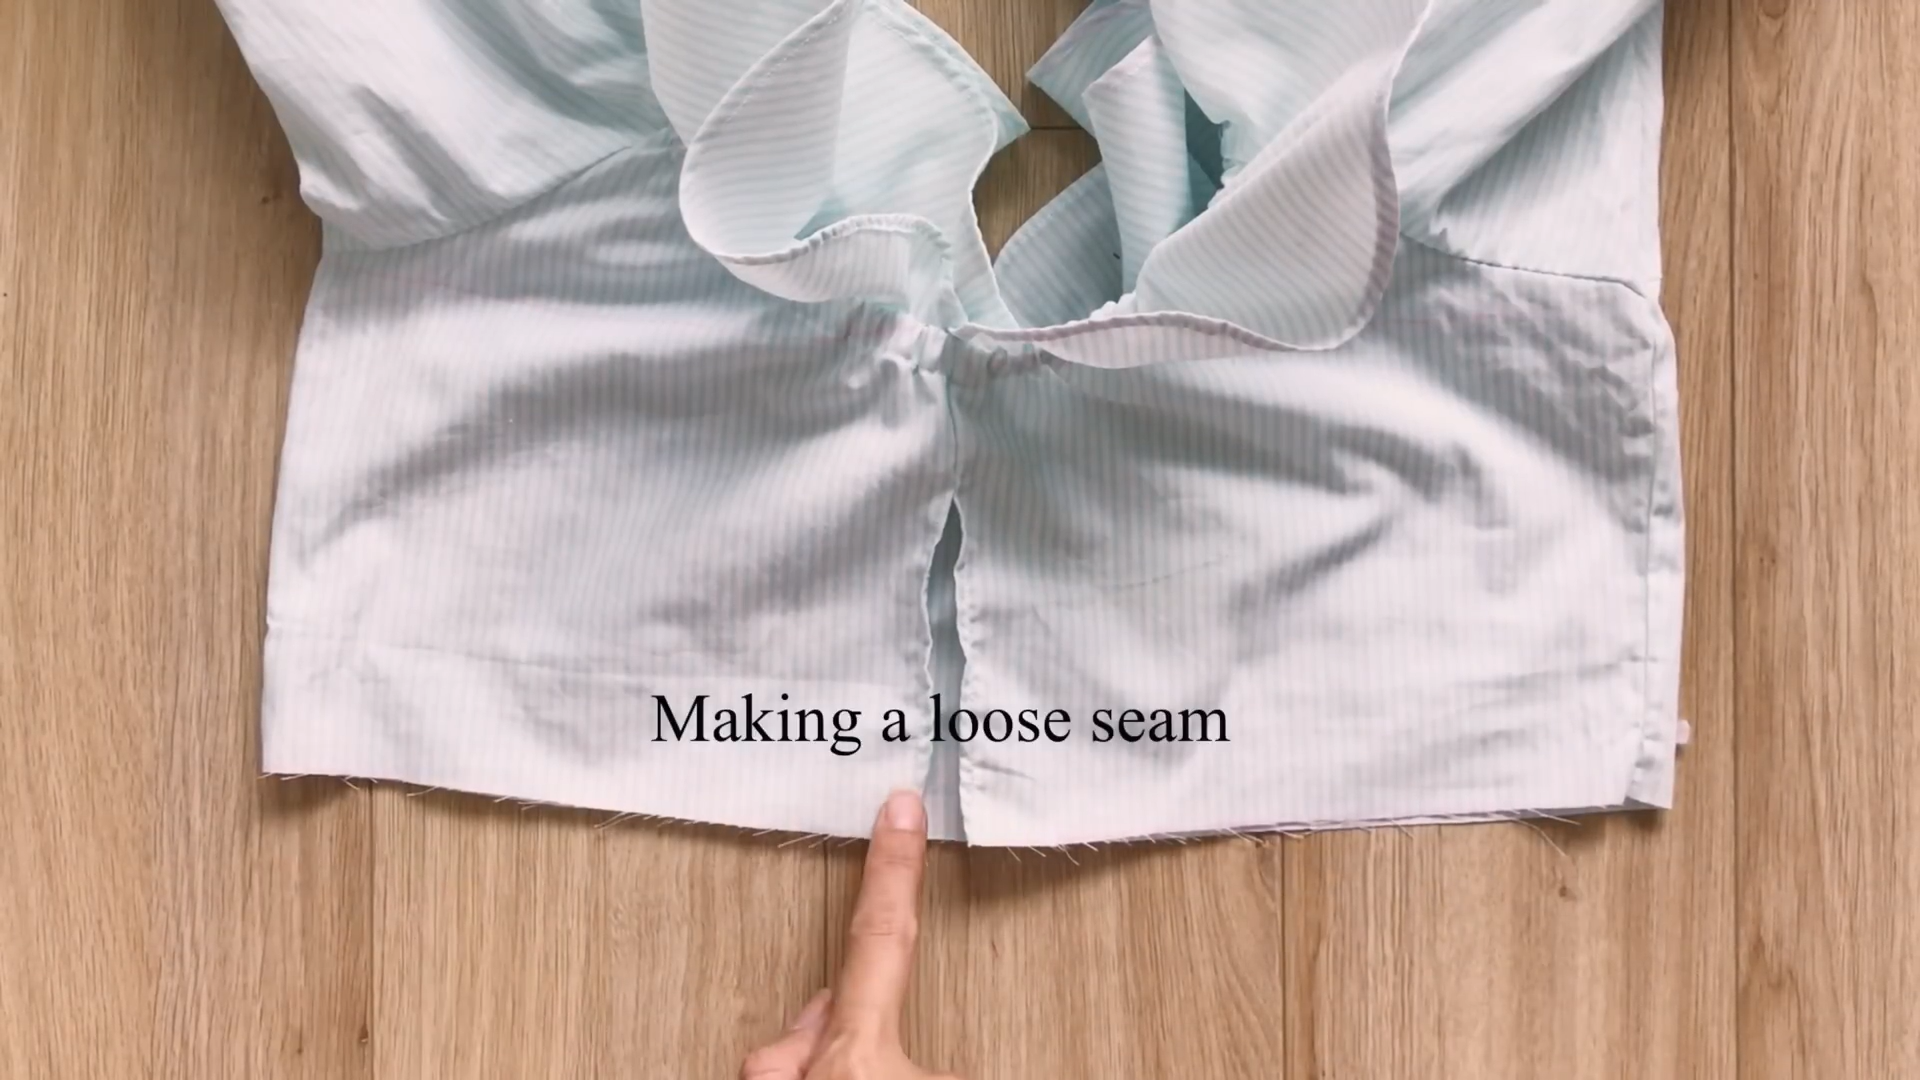
After that, make a loose seam at the end of the crop top.
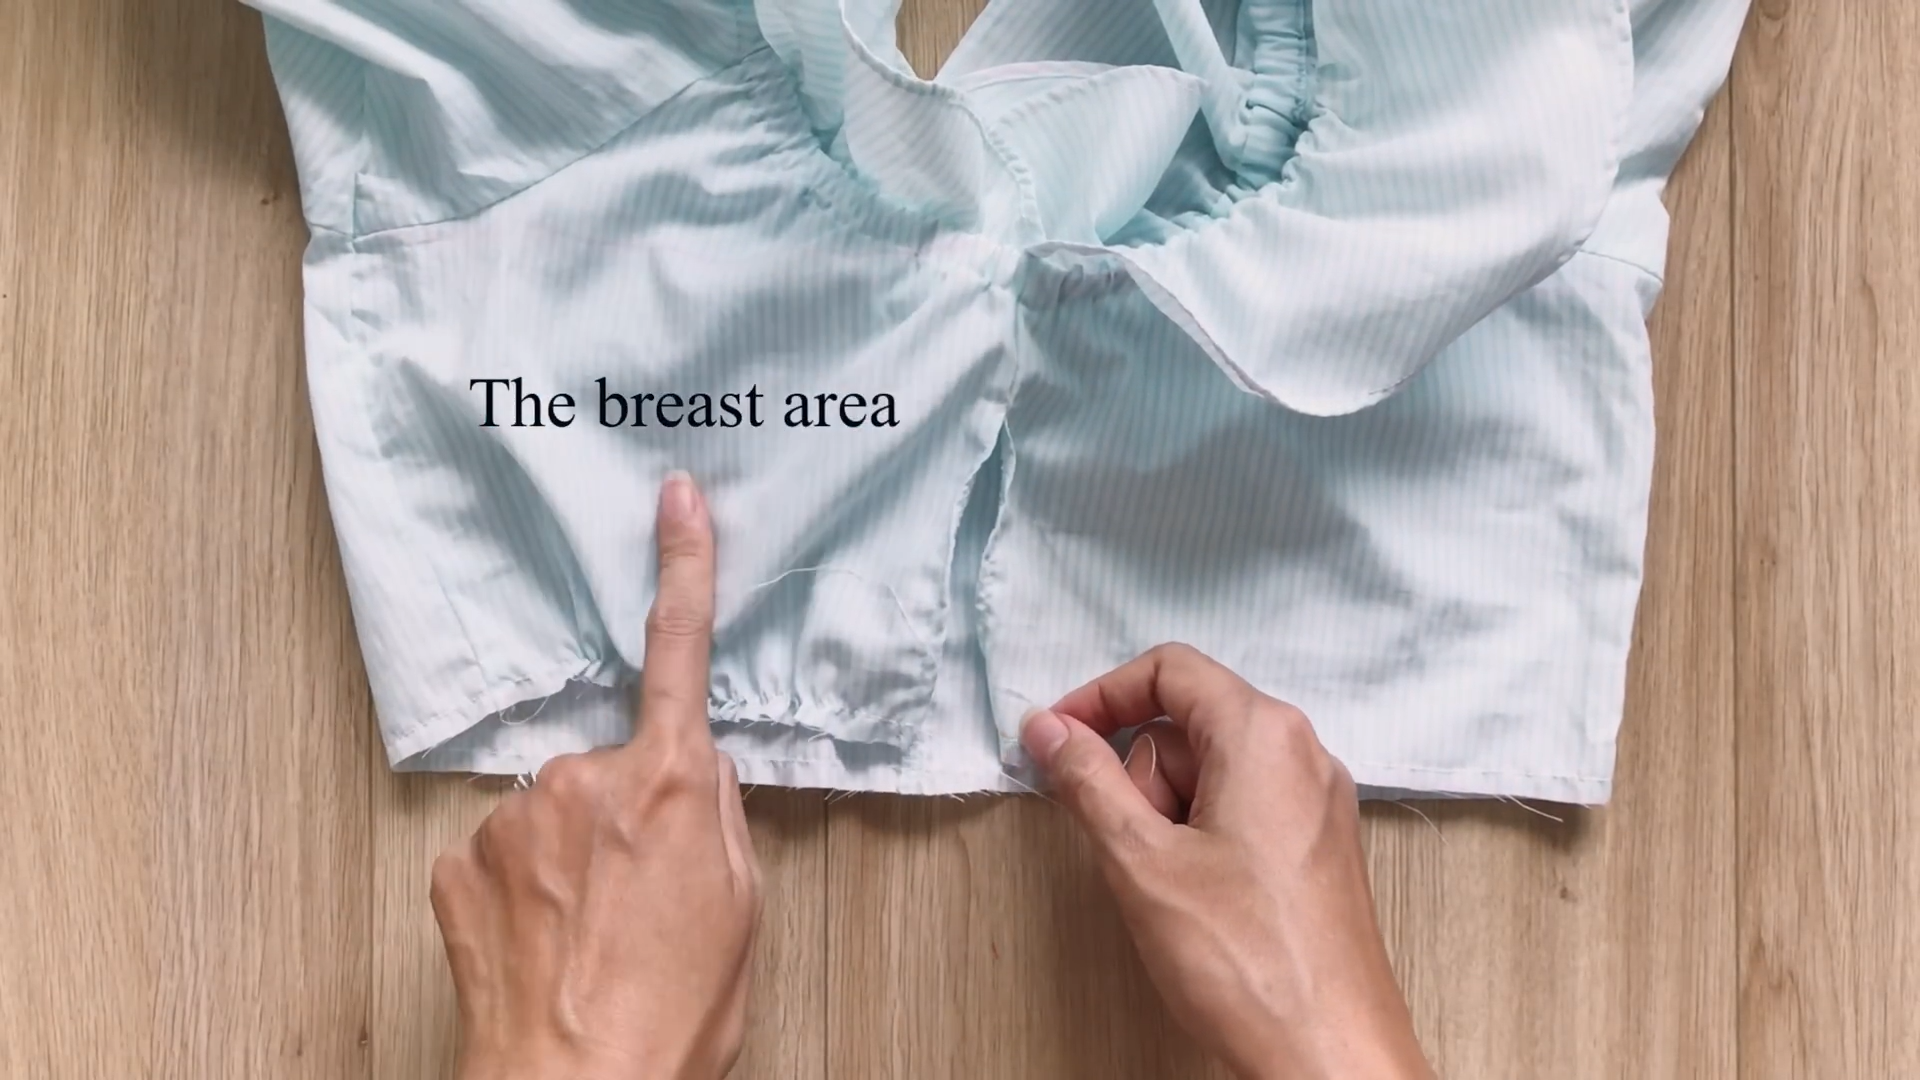
Then, make the gathering fabric at two sides of the front at the breast area.
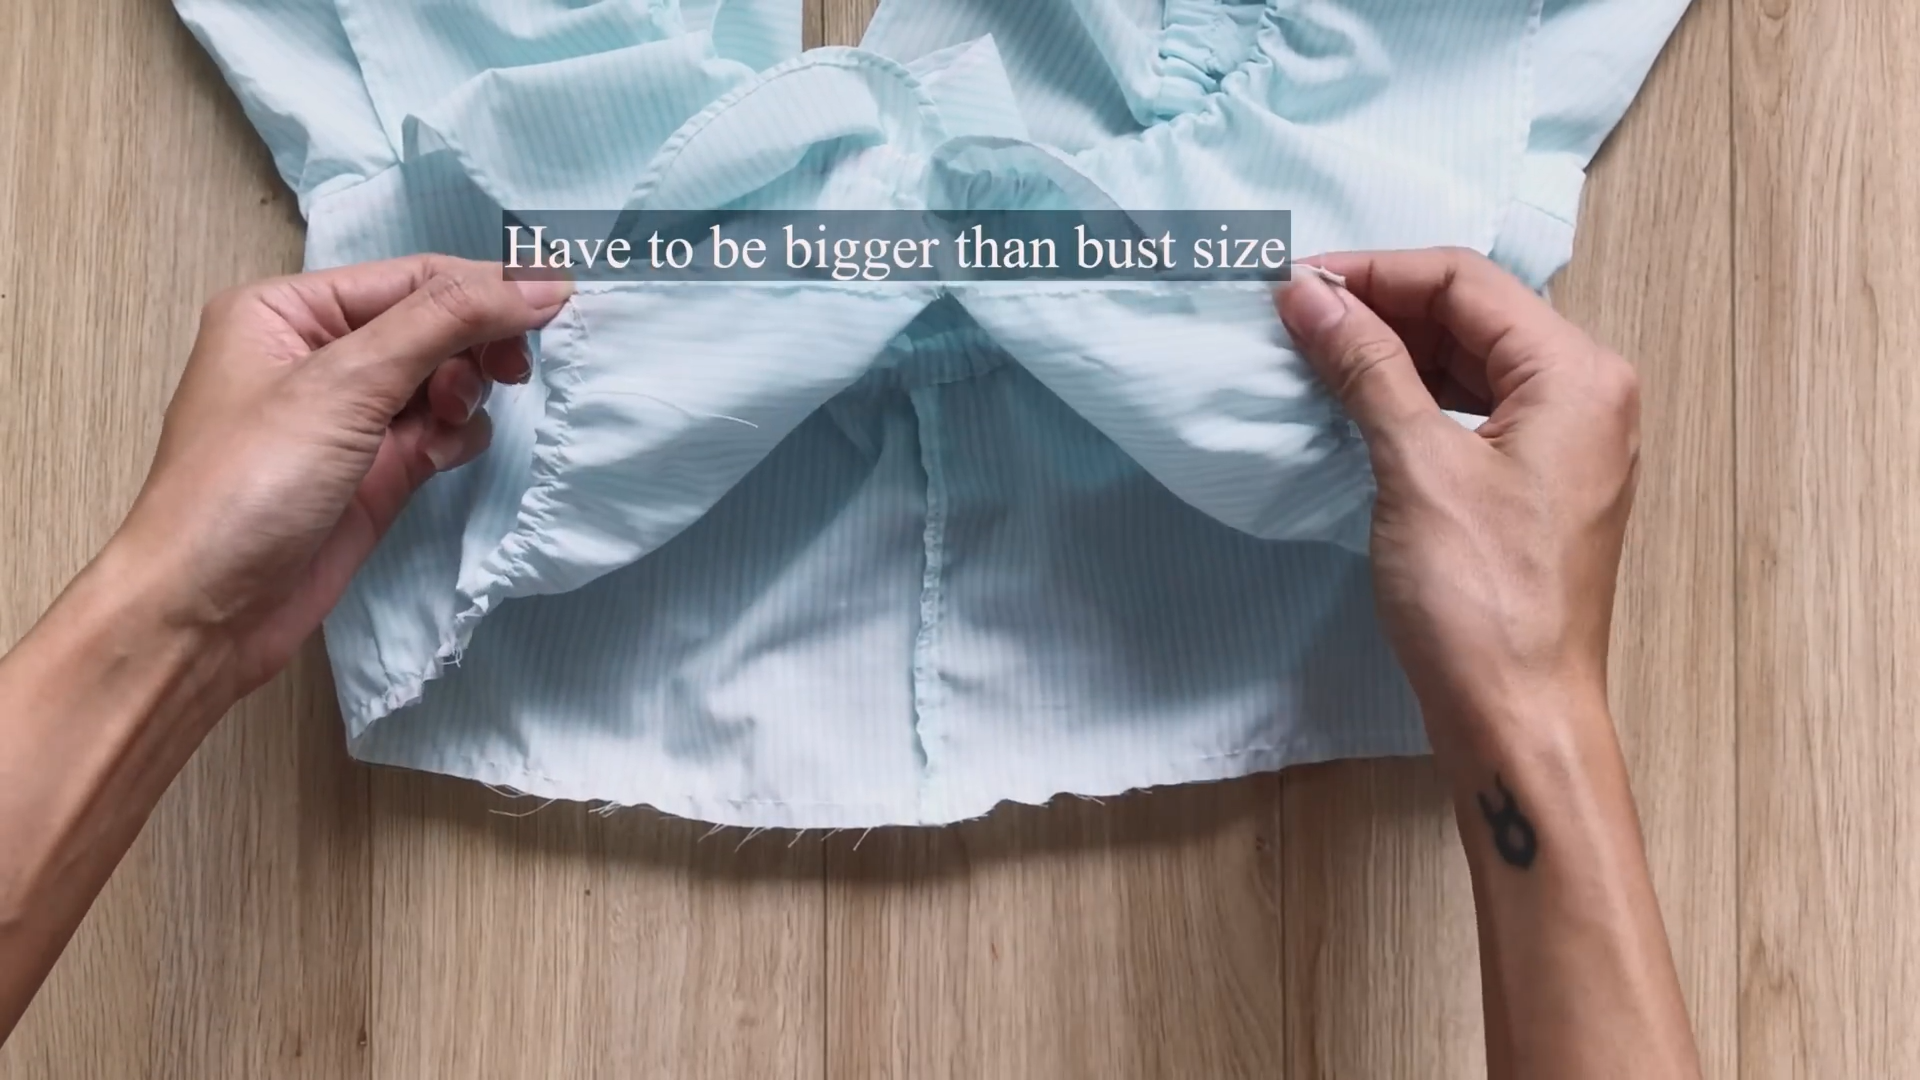
Make sure the total width at the end of the crop top has to be bigger than the bust size. So, it will be possible to wear the crop top in the end.
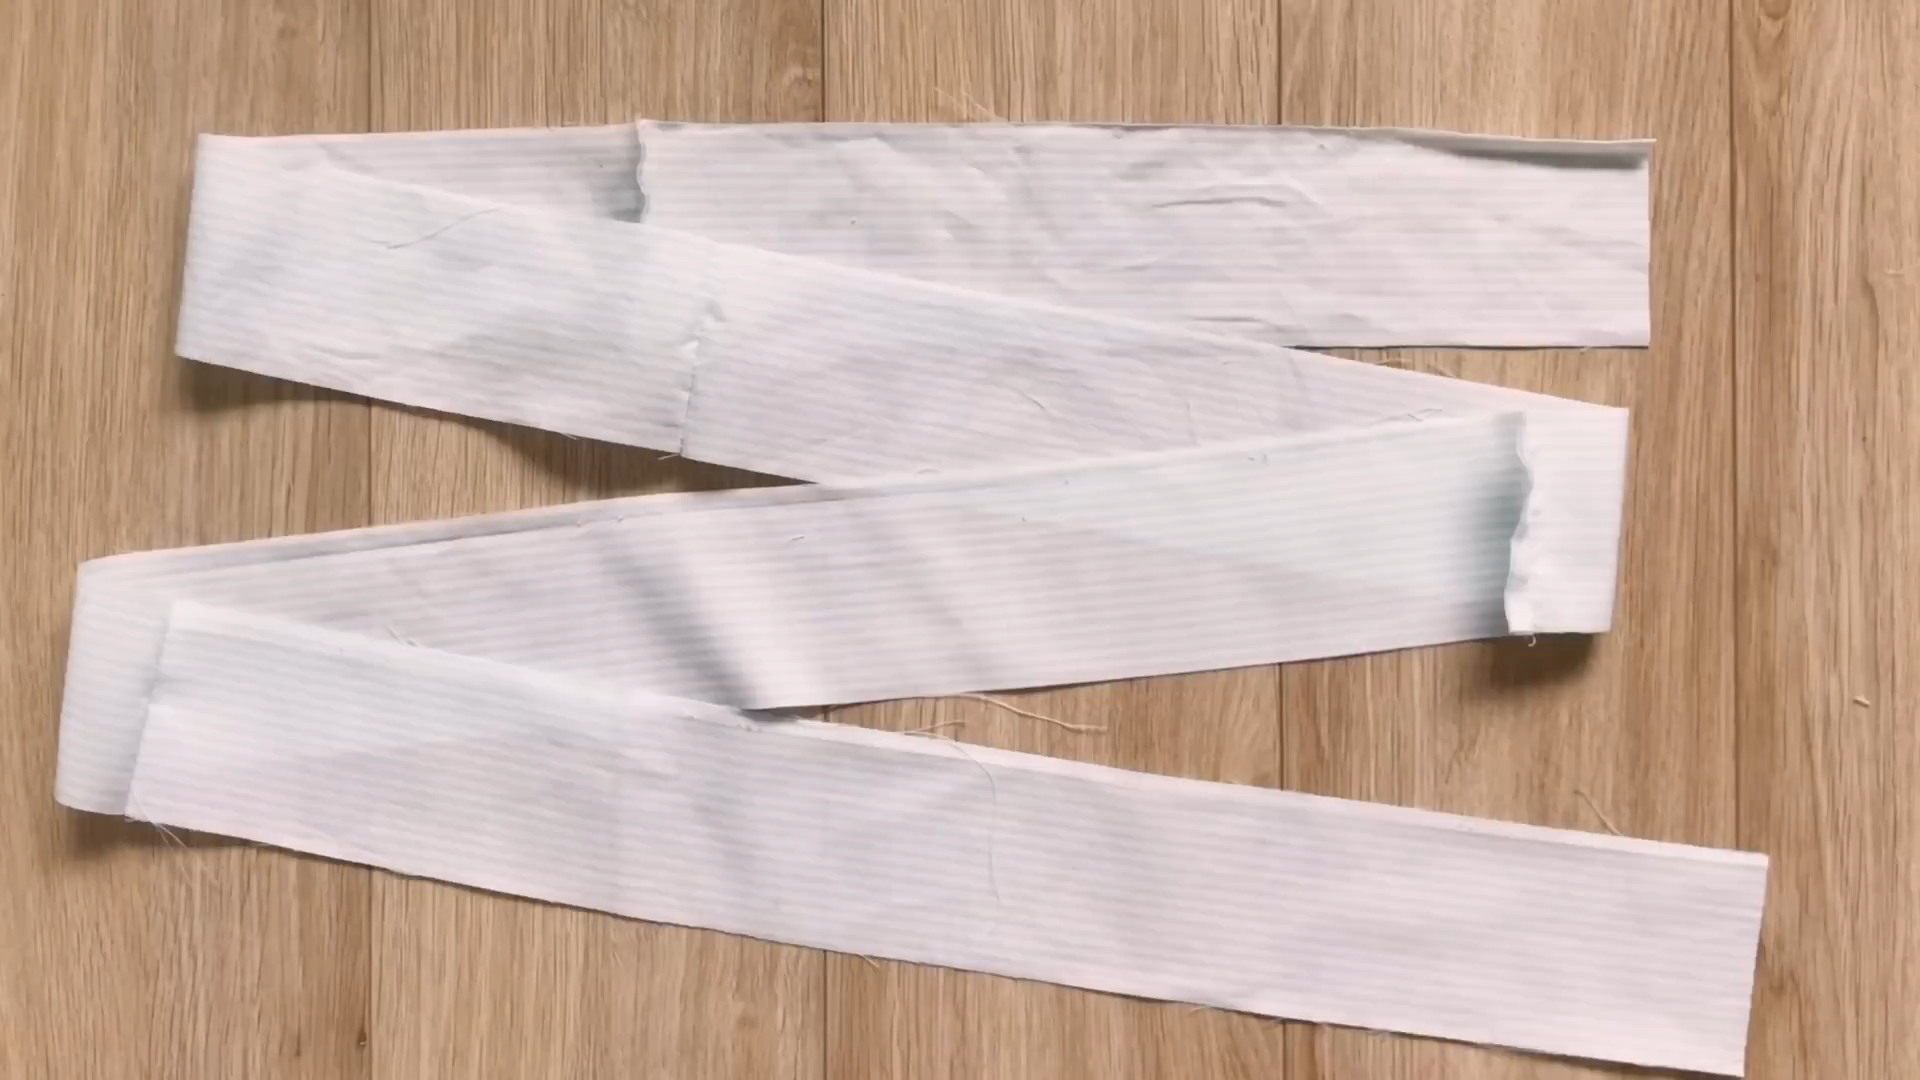
Use the leftover fabric of the man shirt to make a long fabric line with 6 cm width and the maximum length that can be obtained.
But it should be more than three times the bust size.
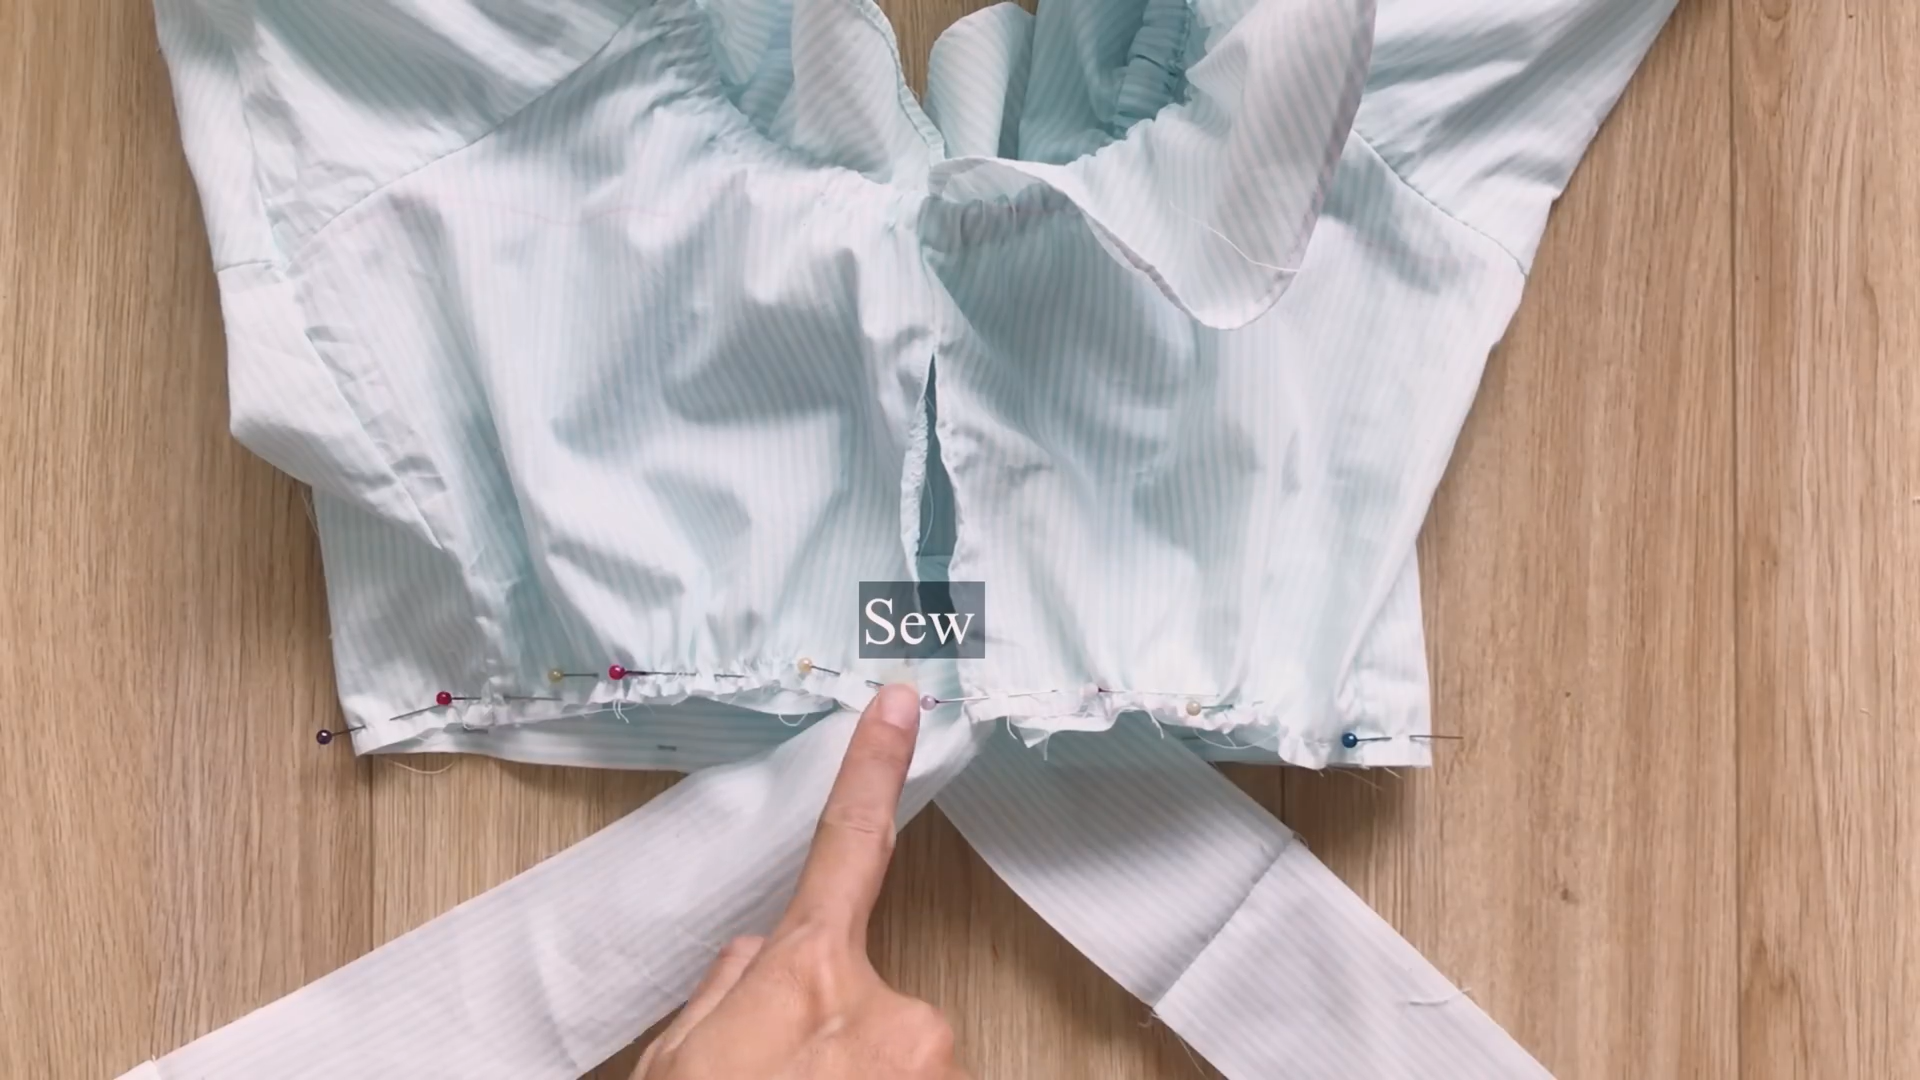
Connect the fabric line to the ends of the crop top and make the first seam.
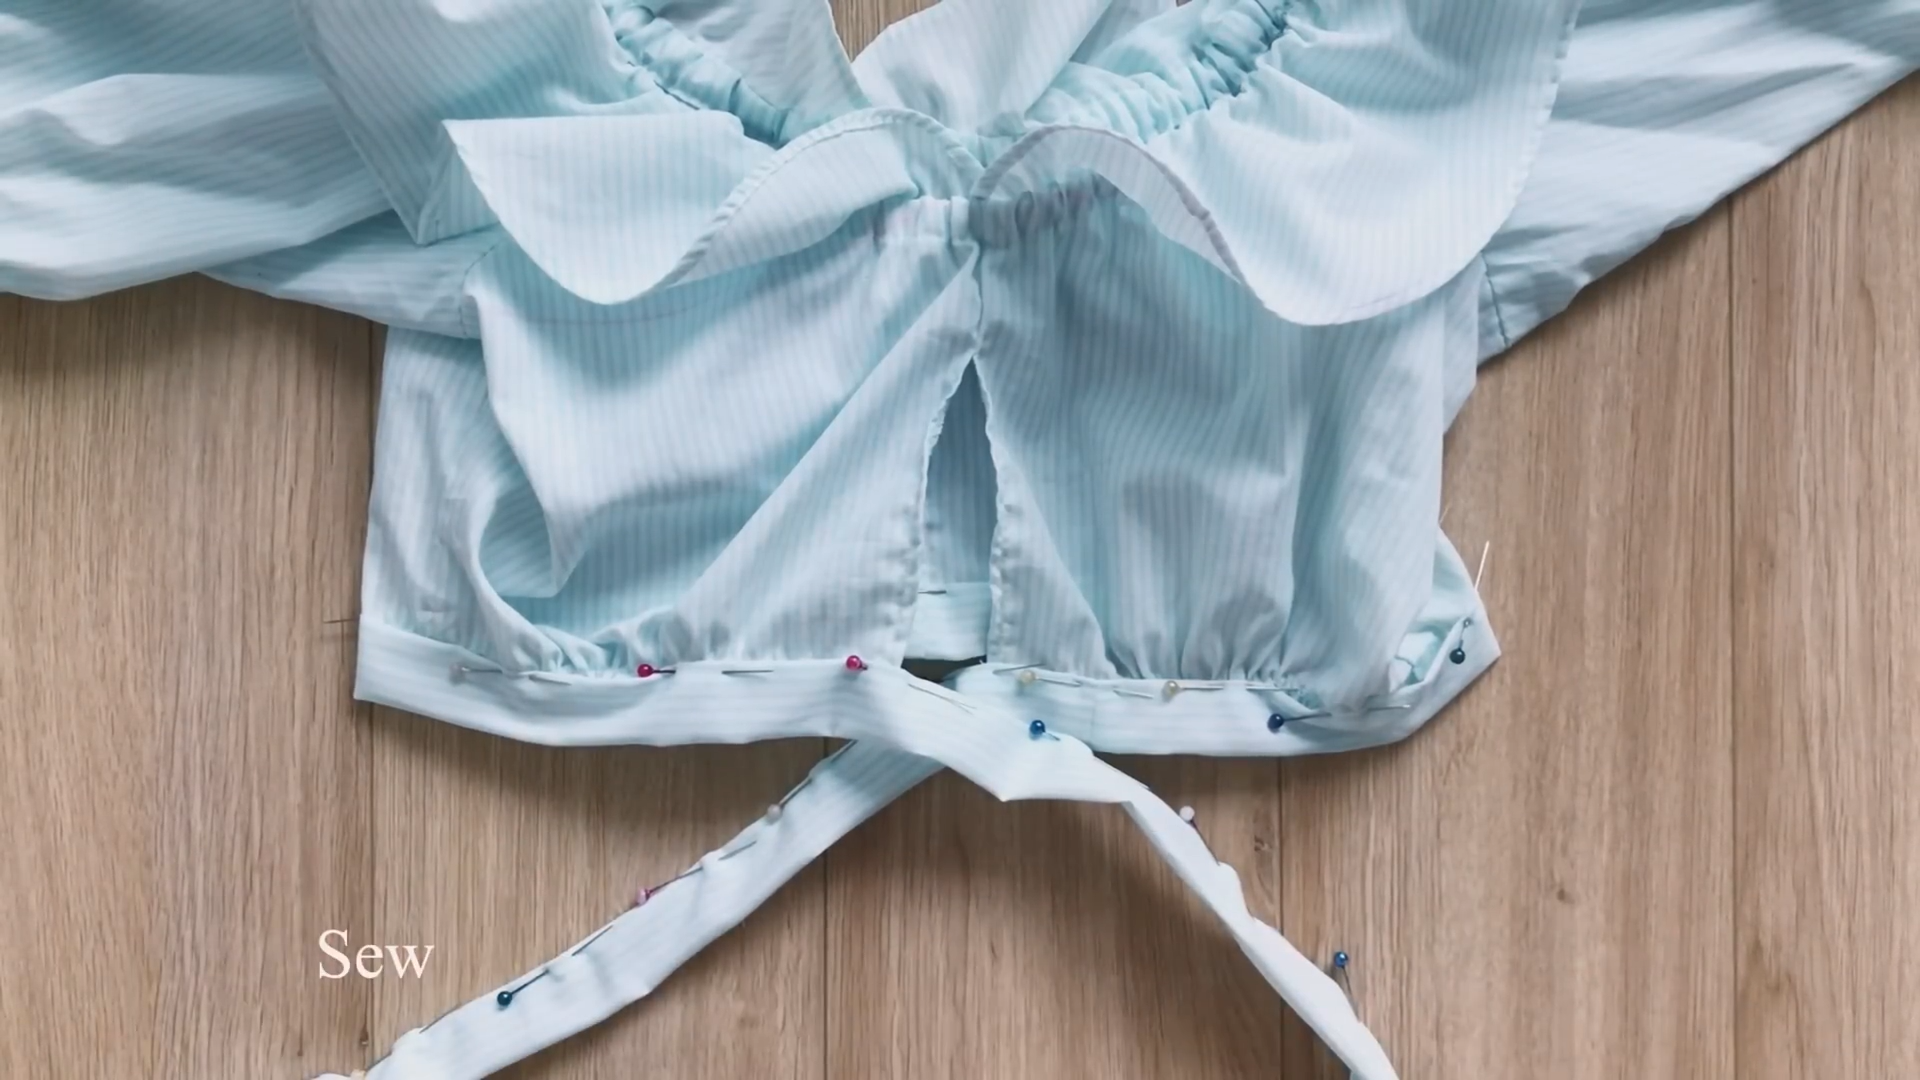
After that, fold the other end of the fabric line inside 1 cm first. Then, keep folding it again over this first seam and make the second seam.

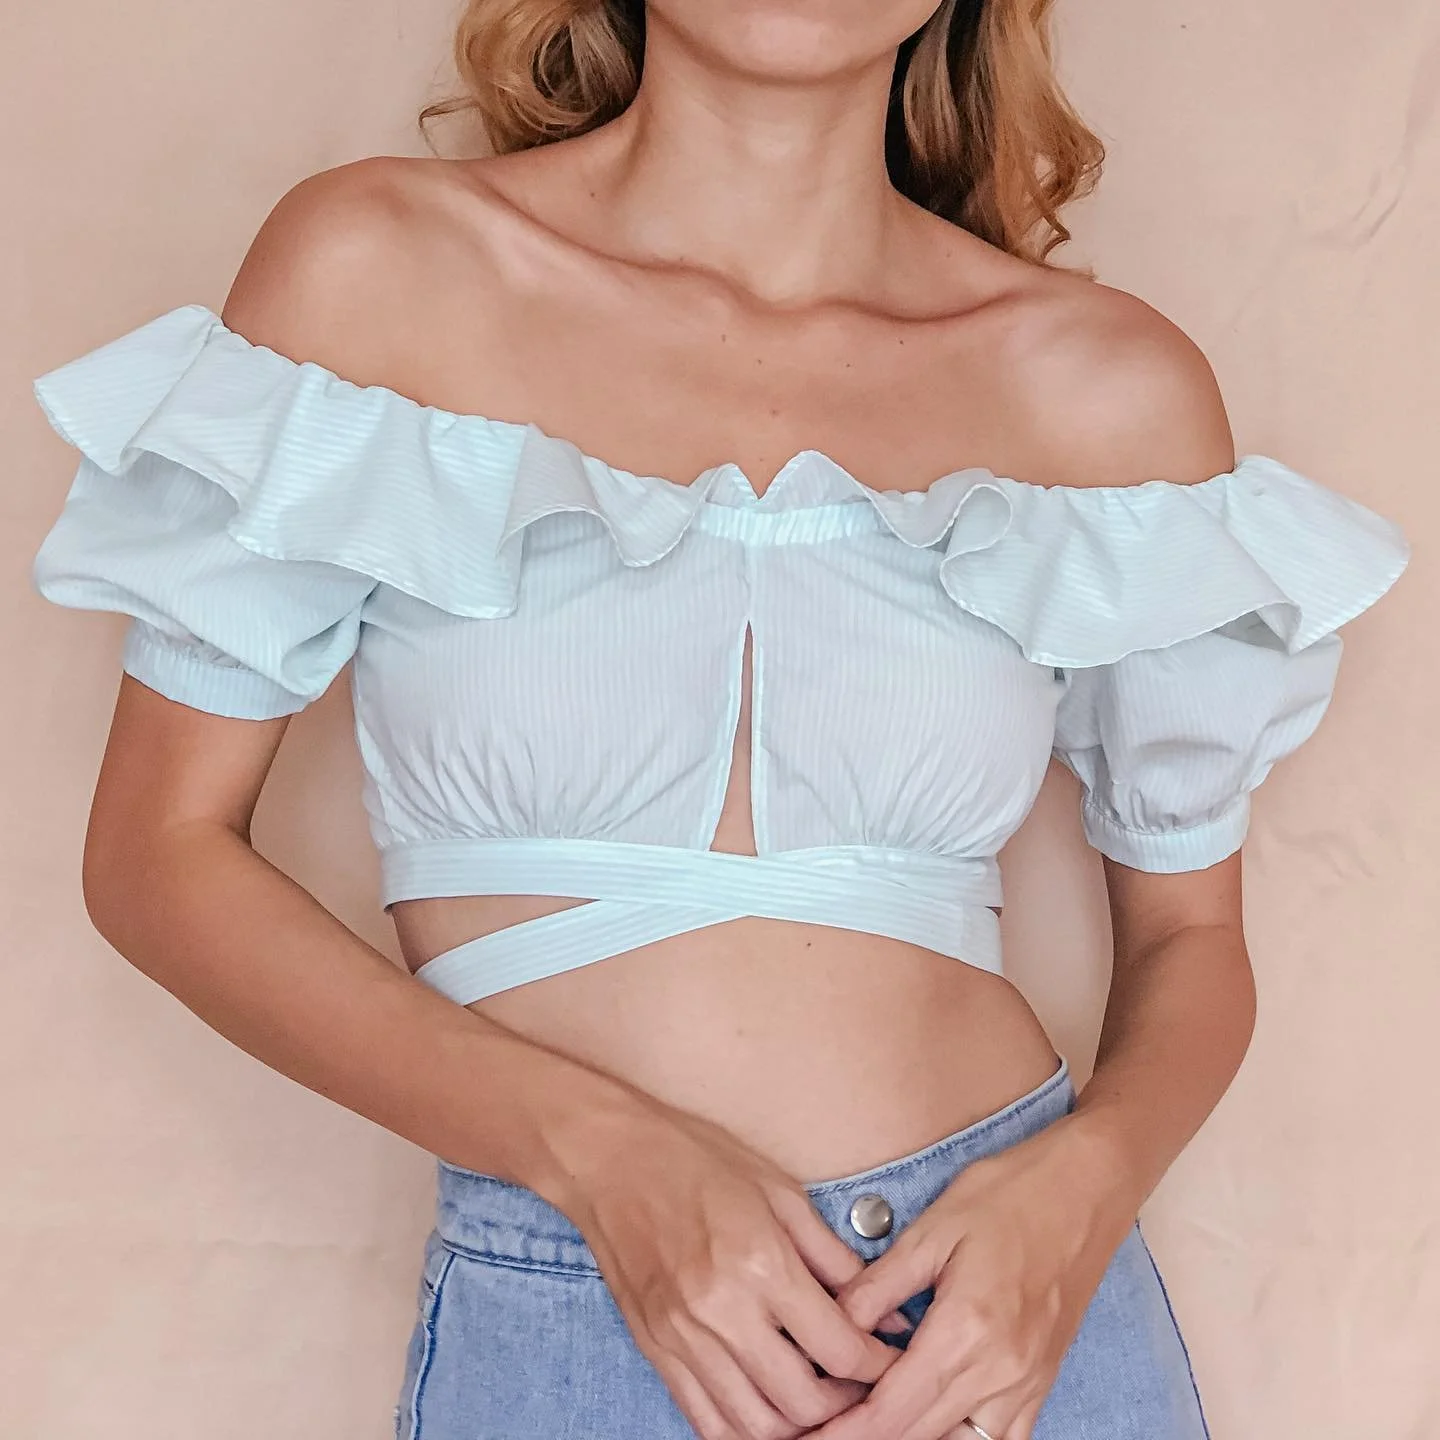
DIY Ruffle neck crop top from Men's shirt
And I finish this DIY. Here's my final transformation!
This is an adorable crop top. It'll be suitable for your vacation or weekend outfit.

And it won't be too difficult to make. So I hope you will give it a try.
If you liked this project, please share it and subscribe to my channel so you won’t miss any of my upcoming DIYs.
Until next week, happy sewing!