DIY Sleeveless milkmaid mini dress | Dating wardrobe | Ep 3 - Lunch date | Sewing tutorial

DIY Sleeveless milkmaid mini dress
Welcome or welcome back to my sewing blog!
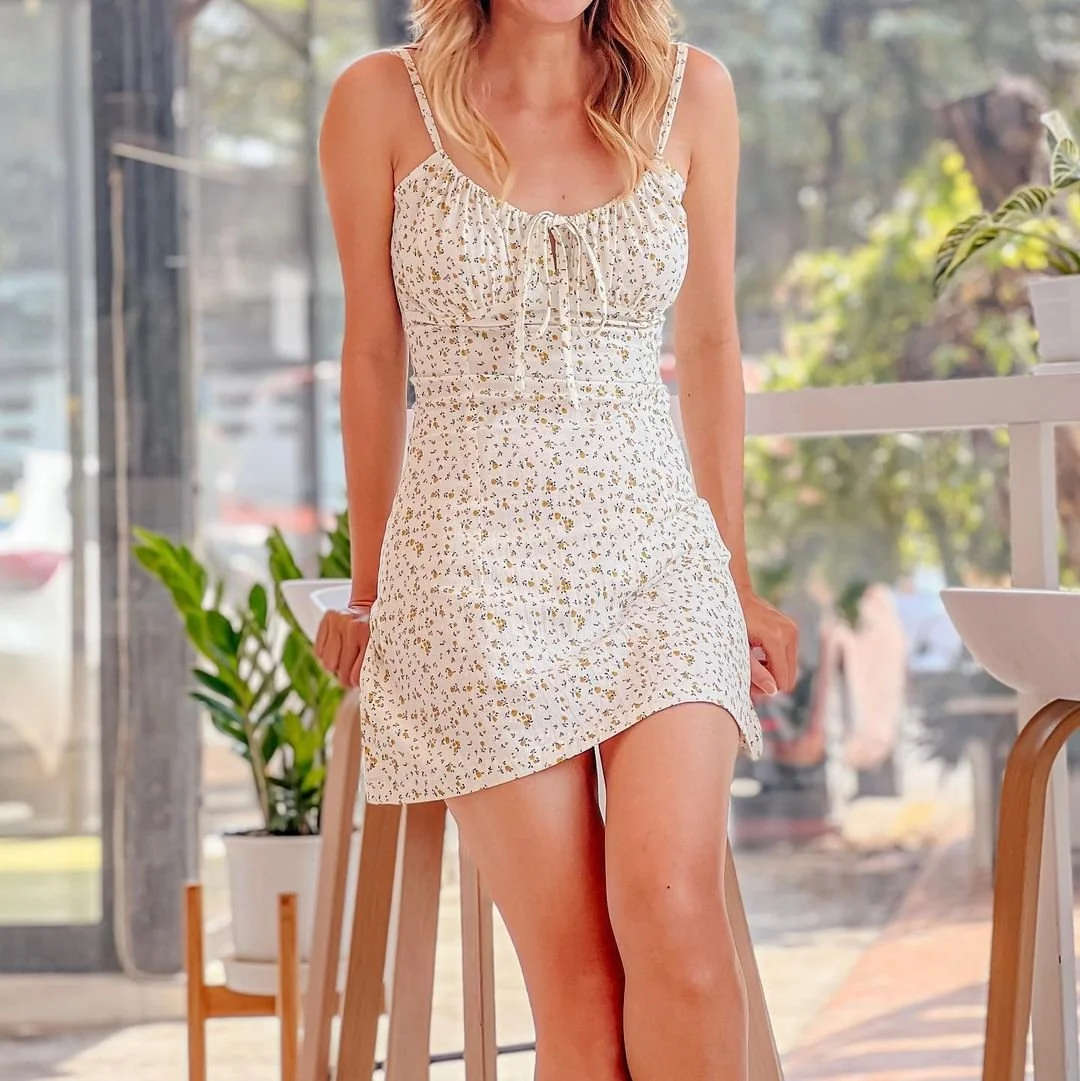
Join me in today’s video as I share my third pick for the Dating Wardrobe series. For that quick lunch date, I’ve chosen the sleeveless milkmaid mini dress. It strikes the perfect balance between pretty and sexy, with a fitted silhouette and playful mini length. Whether it’s a first date or a hundredth, feeling good in what you wear is key.
In the tutorial, I’ll guide you step by step, from selecting the fabric to sewing the wrap-style closure. Whether you’re a seasoned seamstress or a beginner, this project is both fun and rewarding.
So I hope you will like this tutorial.
Let’s get started!
WHAT YOU’LL NEED
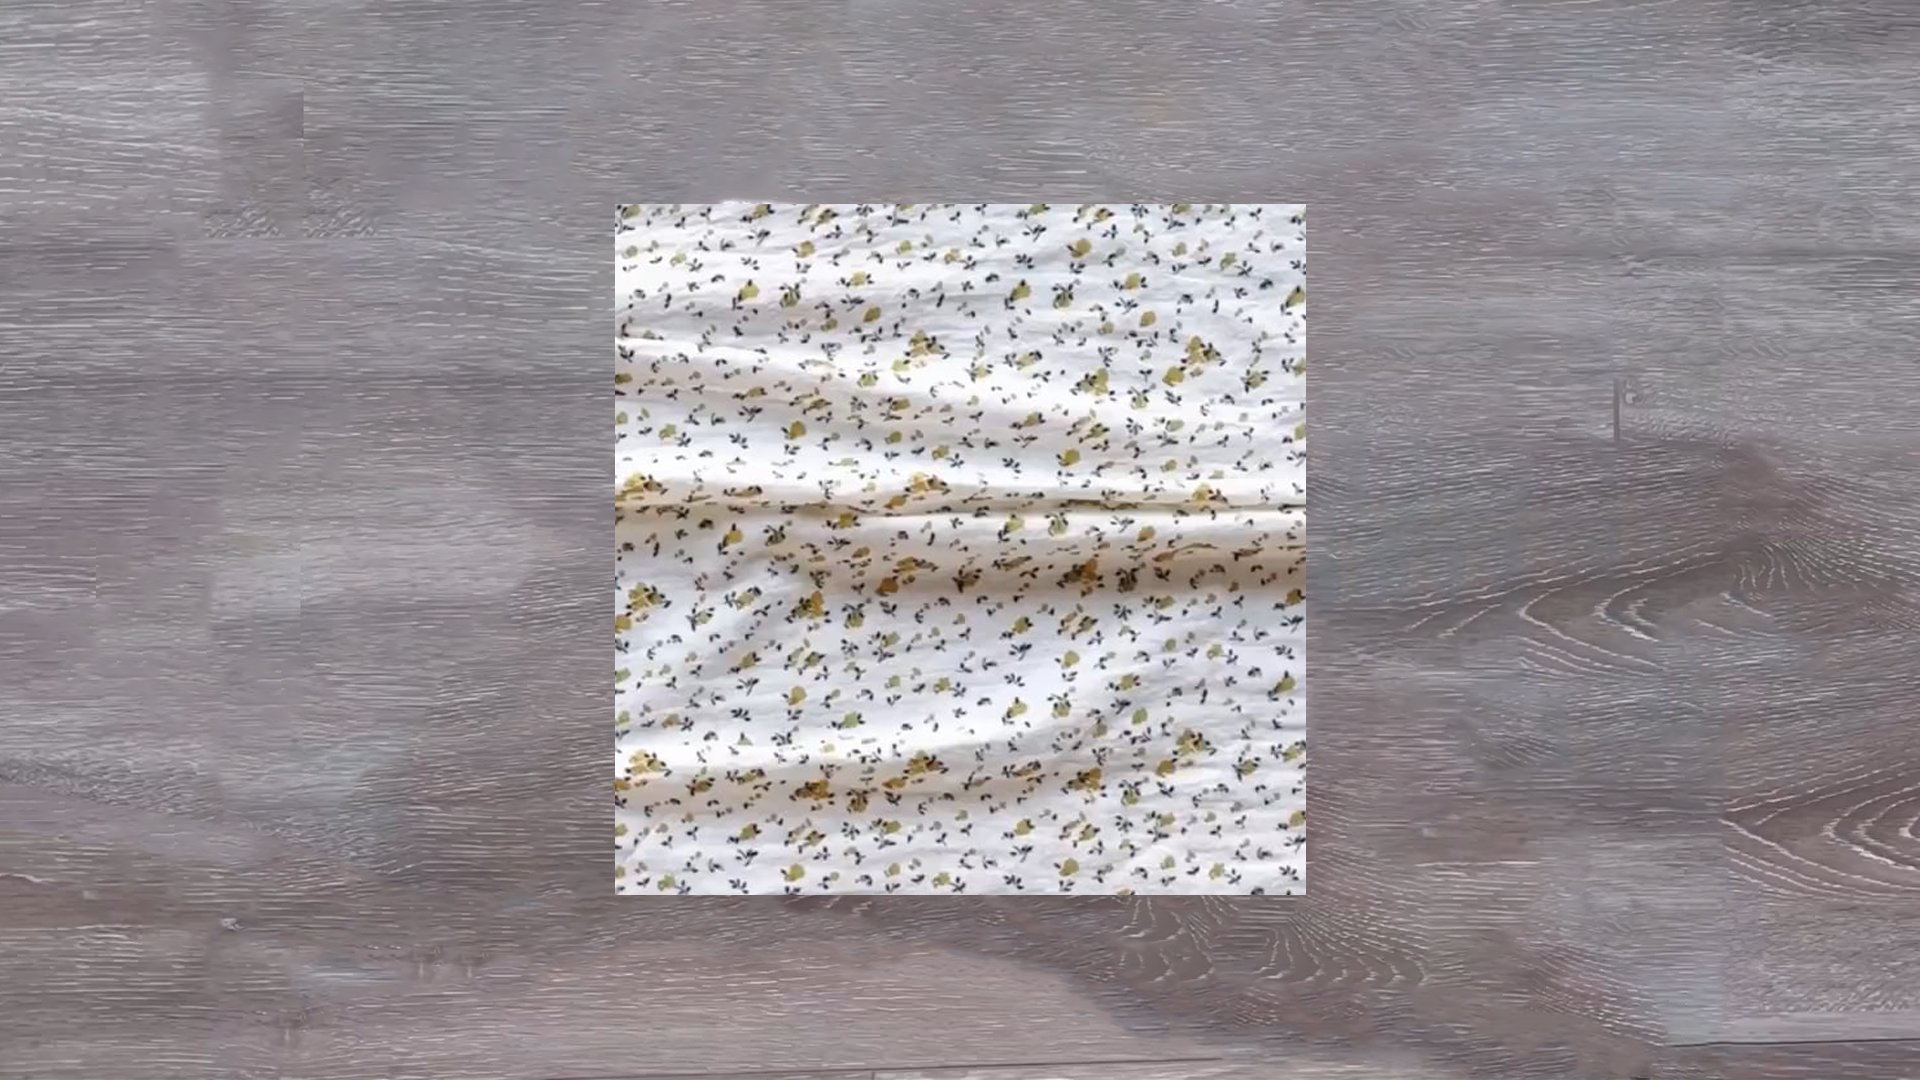
1m of soft cotton fabric
Pattern paper
Sewing machine
Pins
Scissors
Ruler
Long stick
MAKING THE PATTERNS
Here’s the pattern for the project. To get a clear understanding of all the measurements needed for the pattern, watch the video from 0:49 to 7:28.
Remember, you can adjust these measurements to fit your own dimensions!

THE BUSTIER PATTERN
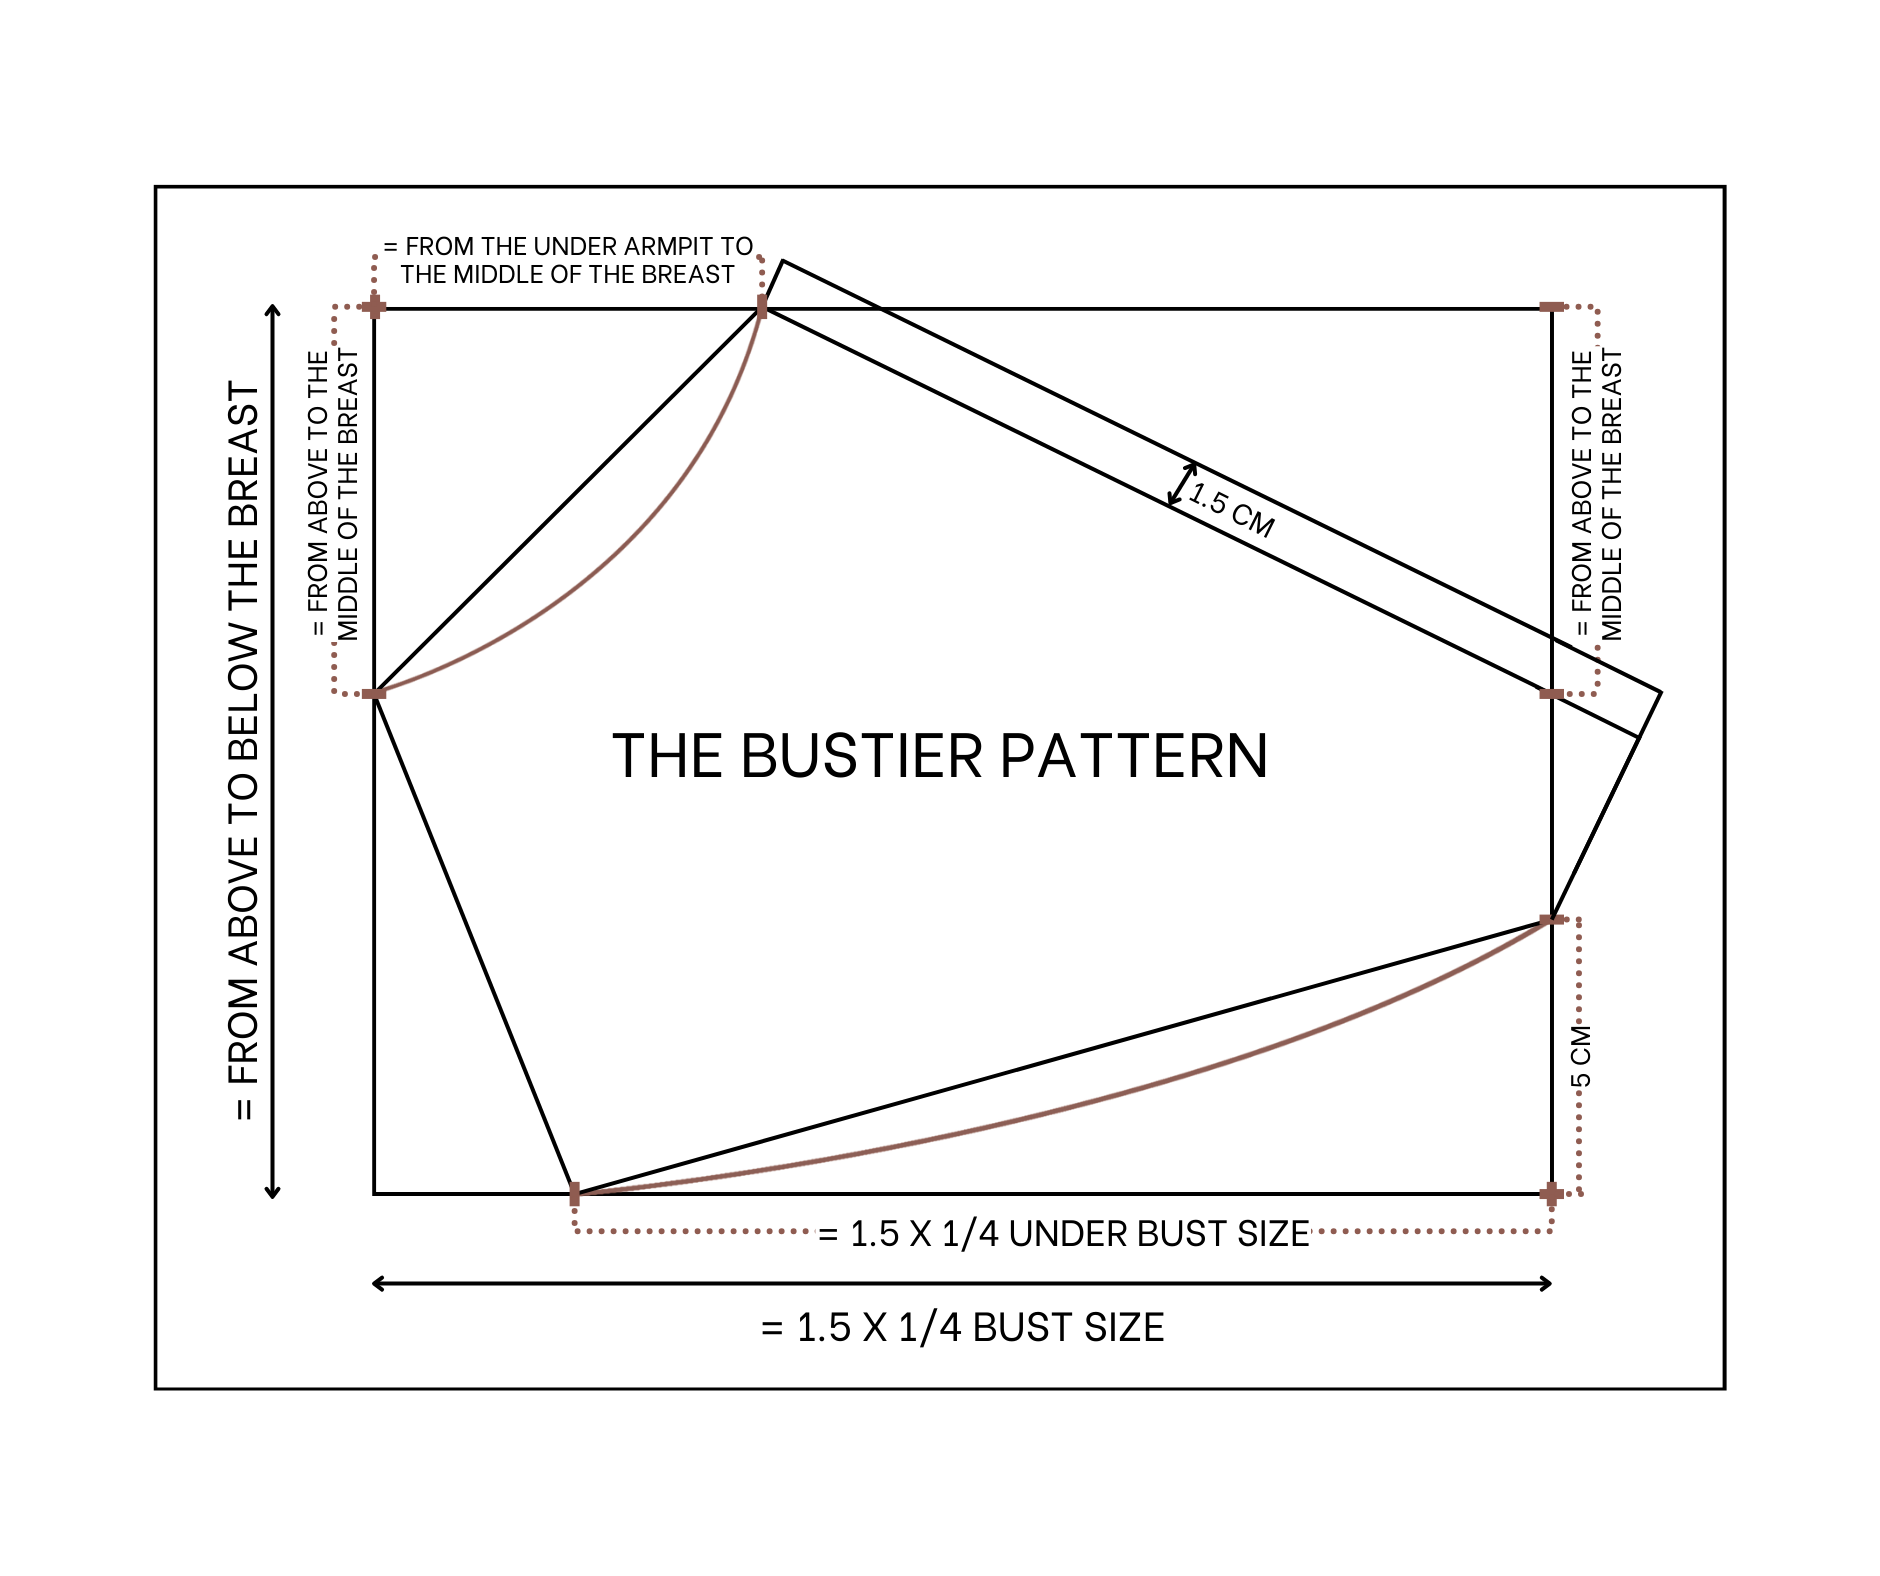
The bustier pattern
Draw a rectangle with 18 cm length, which is the length from above to below your breast, and 30 cm width which is 1.5 times a quarter of your bust size.
From one end of the rectangle, mark on the width line 8 cm, which is the width from the under armpit to the middle of the breast. It's the position of the shoulder strap of the dress.
After that, mark on the length line 8 cm which is the length from above to the middle of the breast then connect 2 marks together. Based on this line, make a slightly curved line to finish the sleeve line at the front dress.
From the other edge of the rectangle, mark down a centimeter on the length line which is the length from the above to the middle of the breast then connect this mark to the mark on the width line you’ve made before to create the neckline for the dress.
From the end of the length line, mark on the width line 27 centimeters which is 1.5 times a quarter of my under bust size. Then connect this mark to the one on the length line which is the end of the sleeve line to create a sideline of the bustier pattern.
From the end of the length line, mark up 5 cm which is the height of the bustier line that you want then connect this mark to the end of the sideline to create the under bust line of the bustier pattern.
After that, redraw the line between the neckline and the under bust line to make its perpendicular look with the neckline and also make the under bust line a bit curved as well.
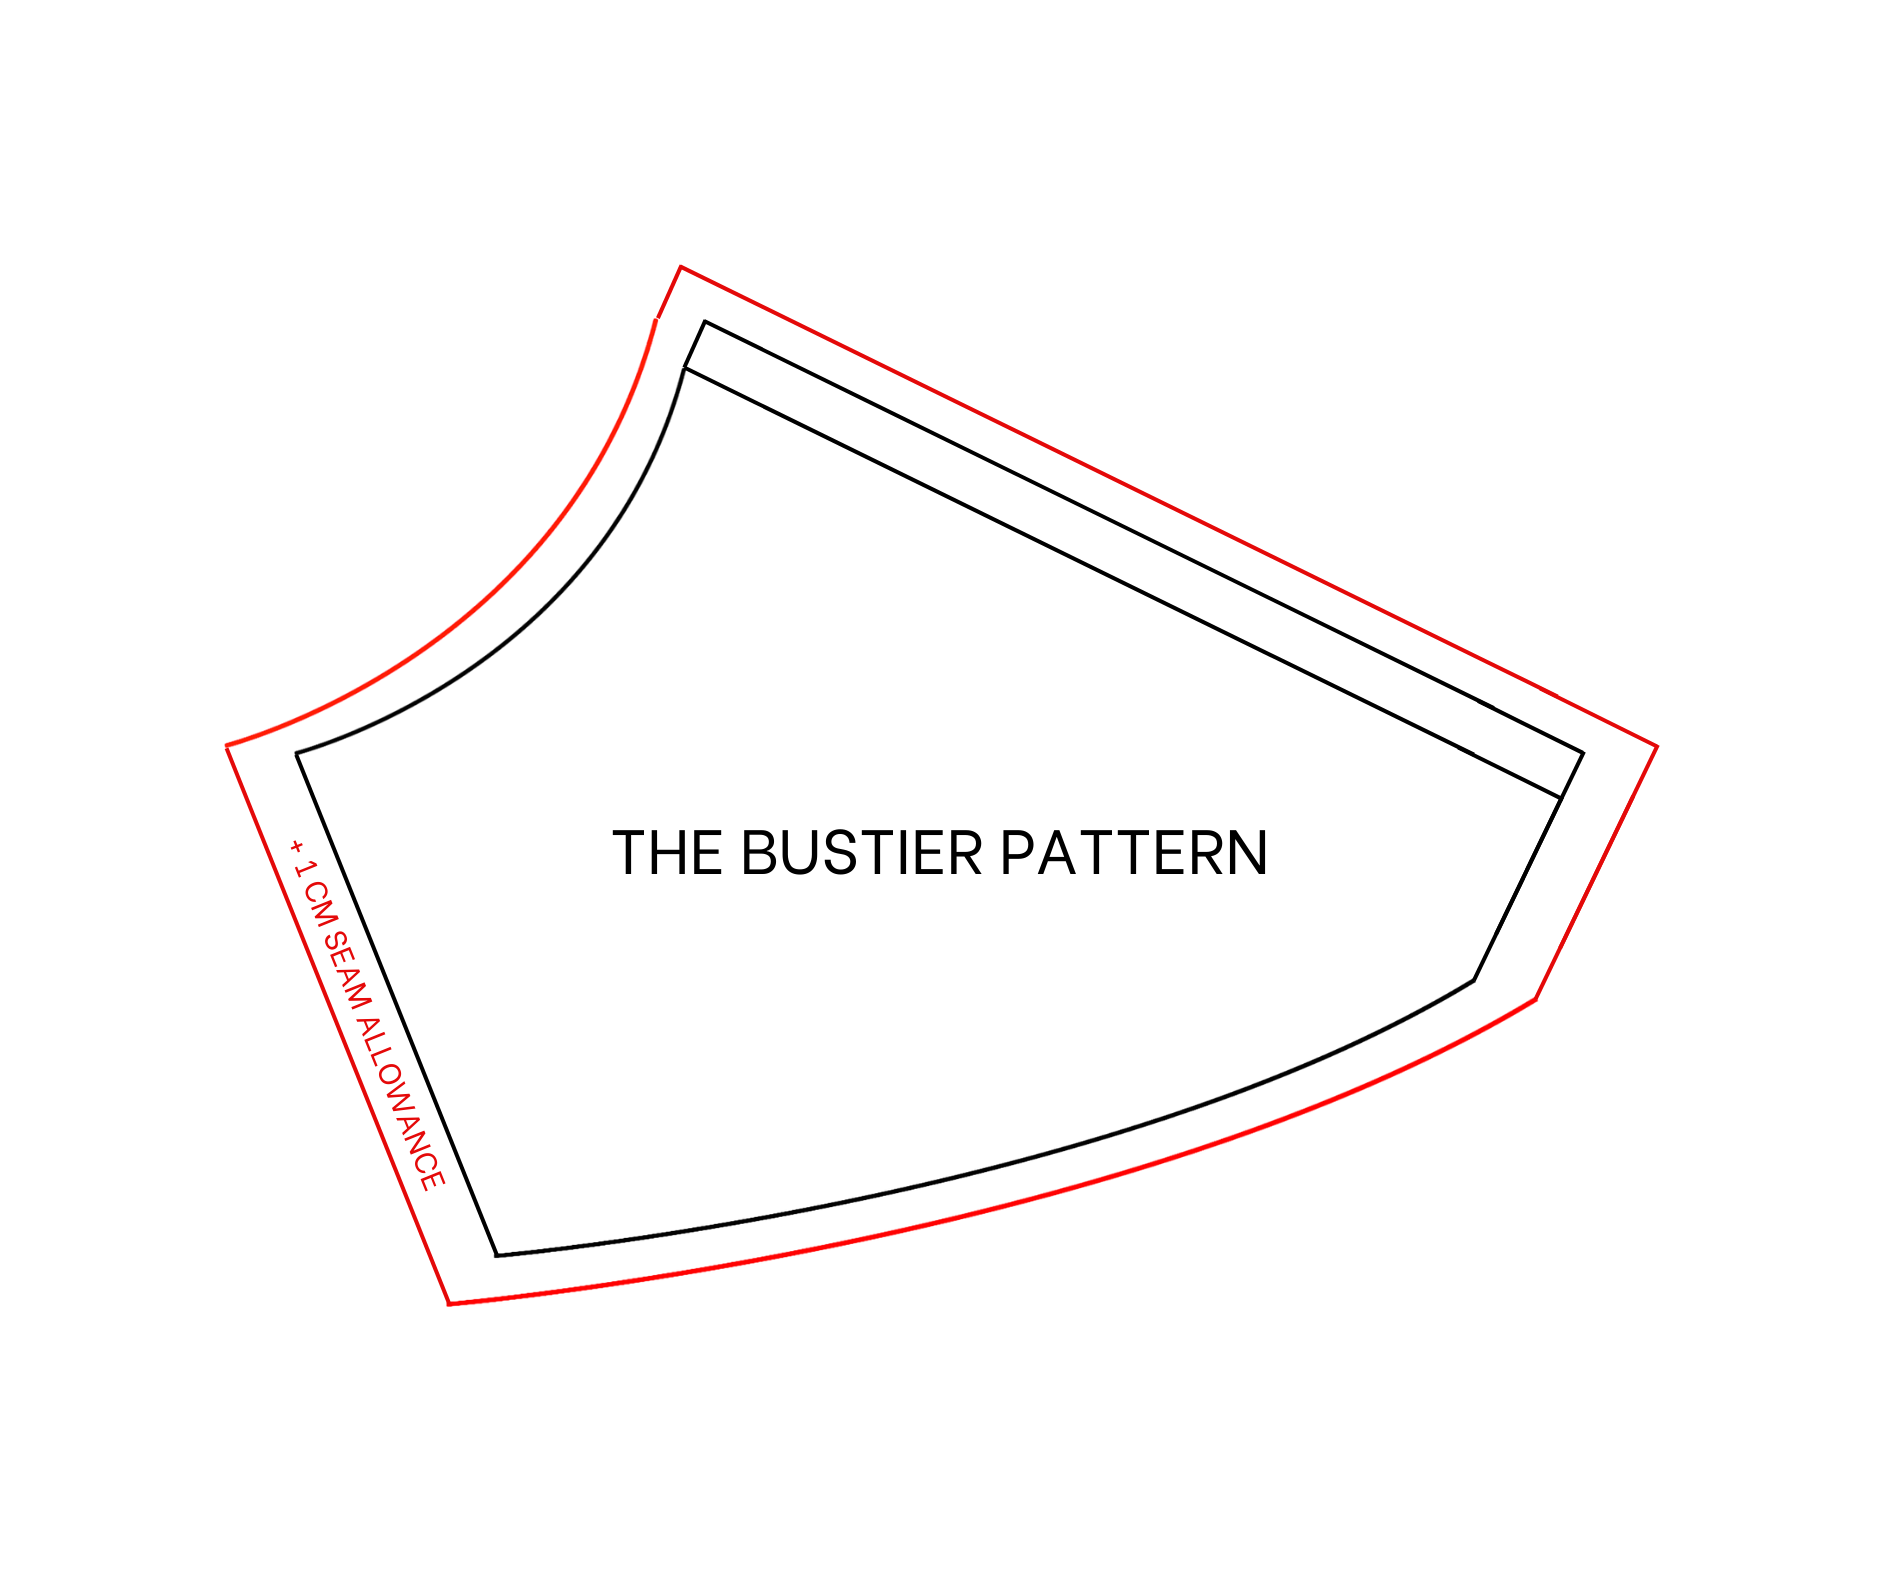
As the neck of the dress will have a drawstring look so increase 1.5 cm for the neckline to create a fabric hold there when sewing. Add 1 cm for seam allowance after that and we will have the bustier pattern of the front dress after cutting.
THE FRONT PATTERN
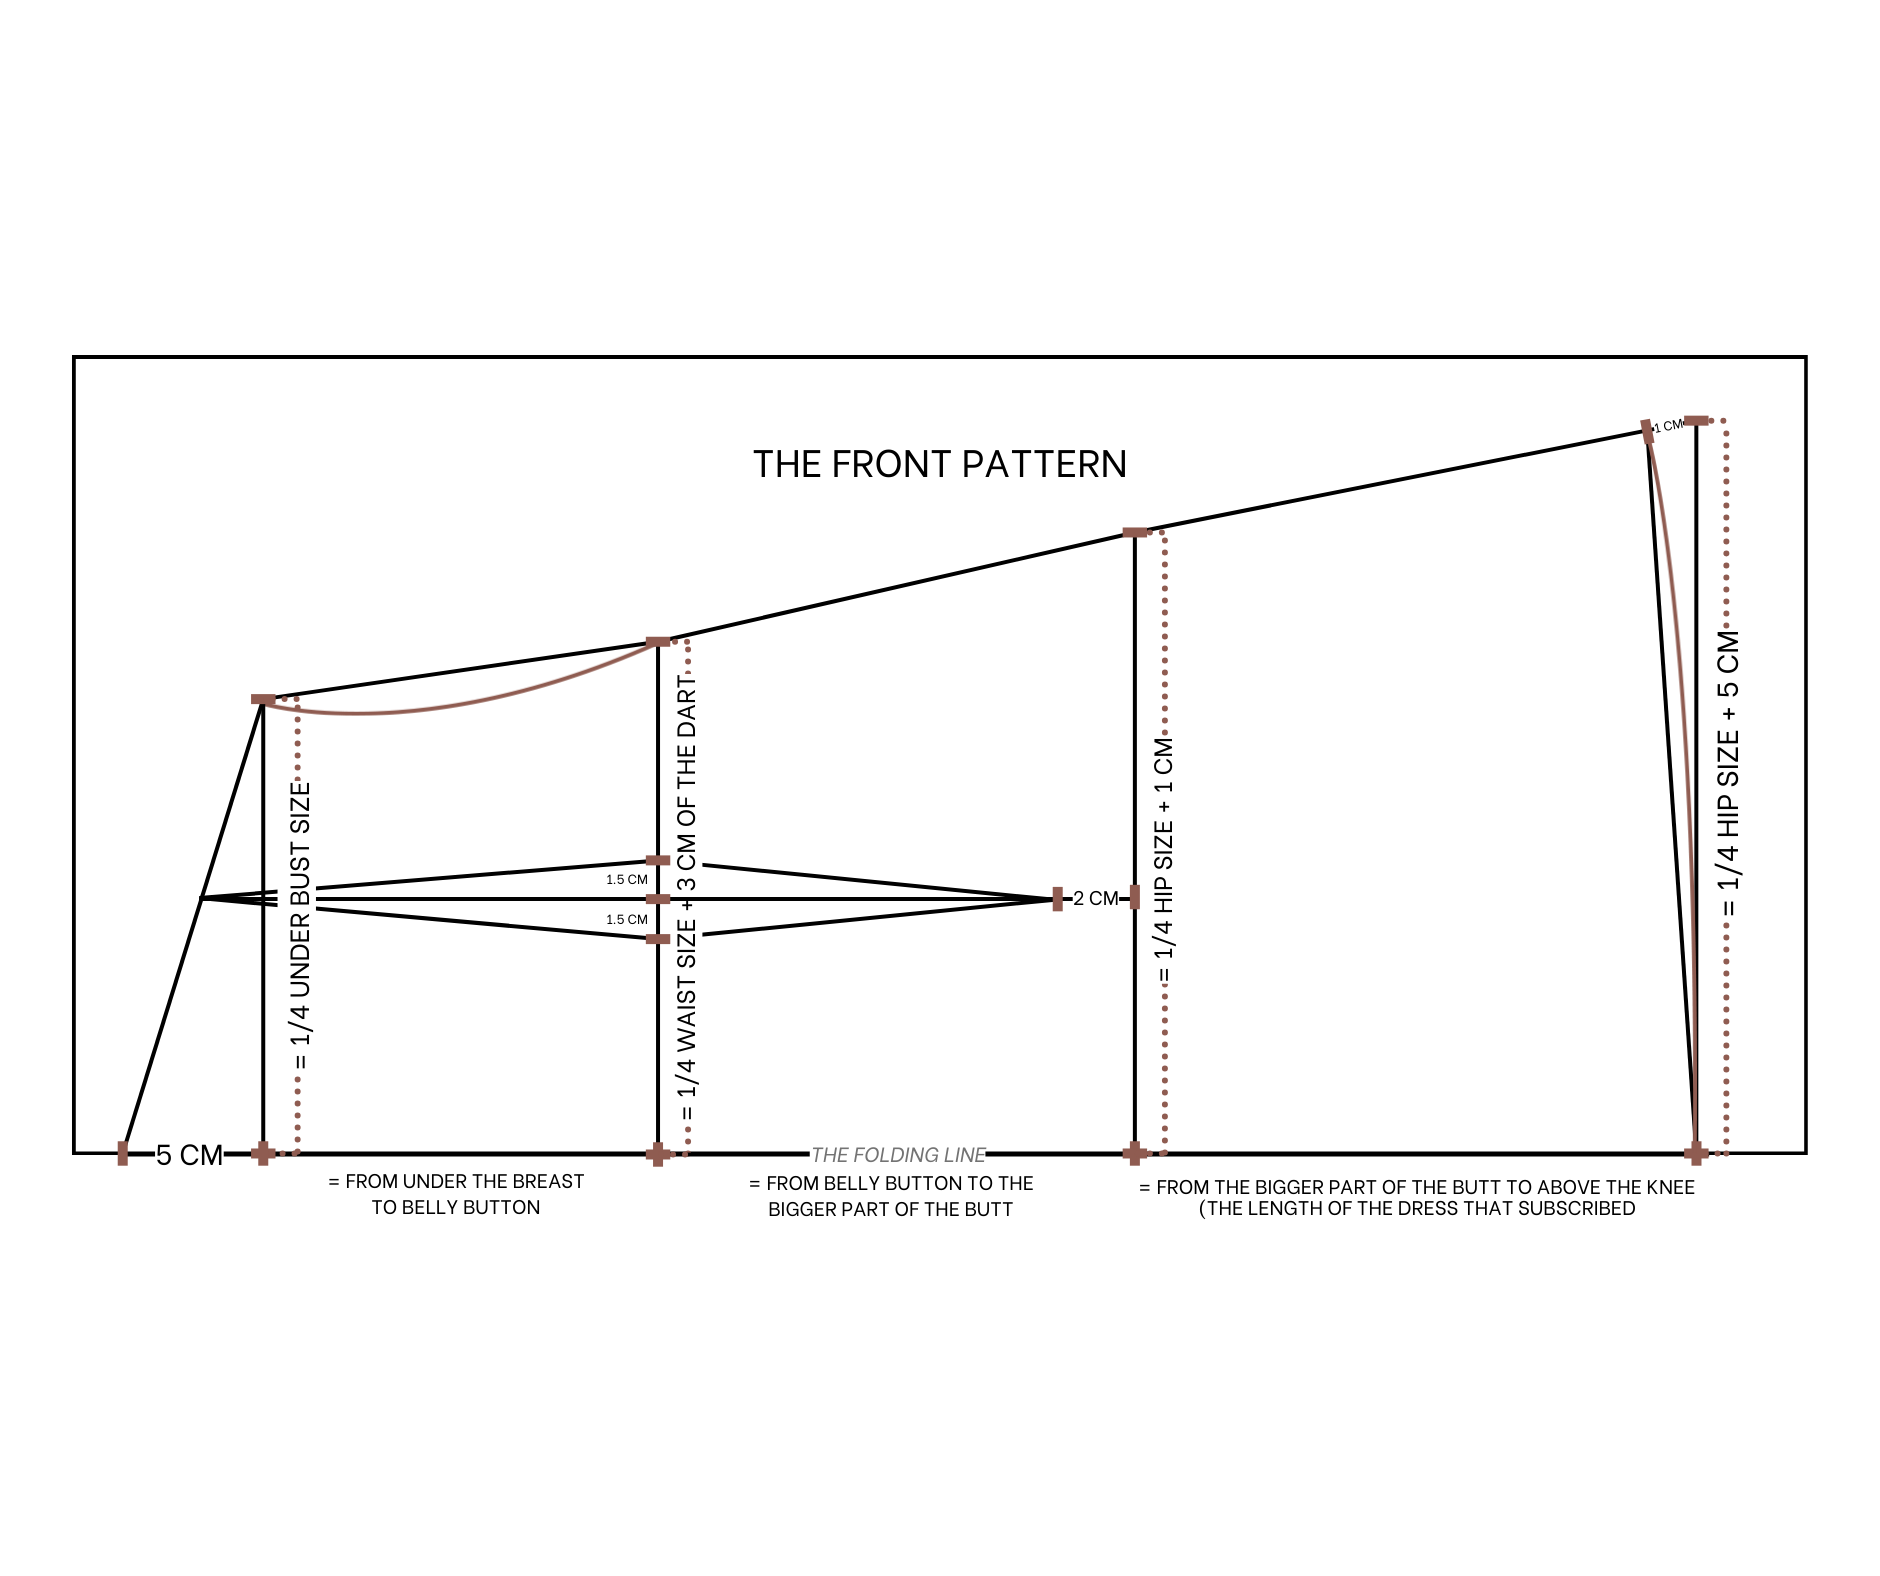
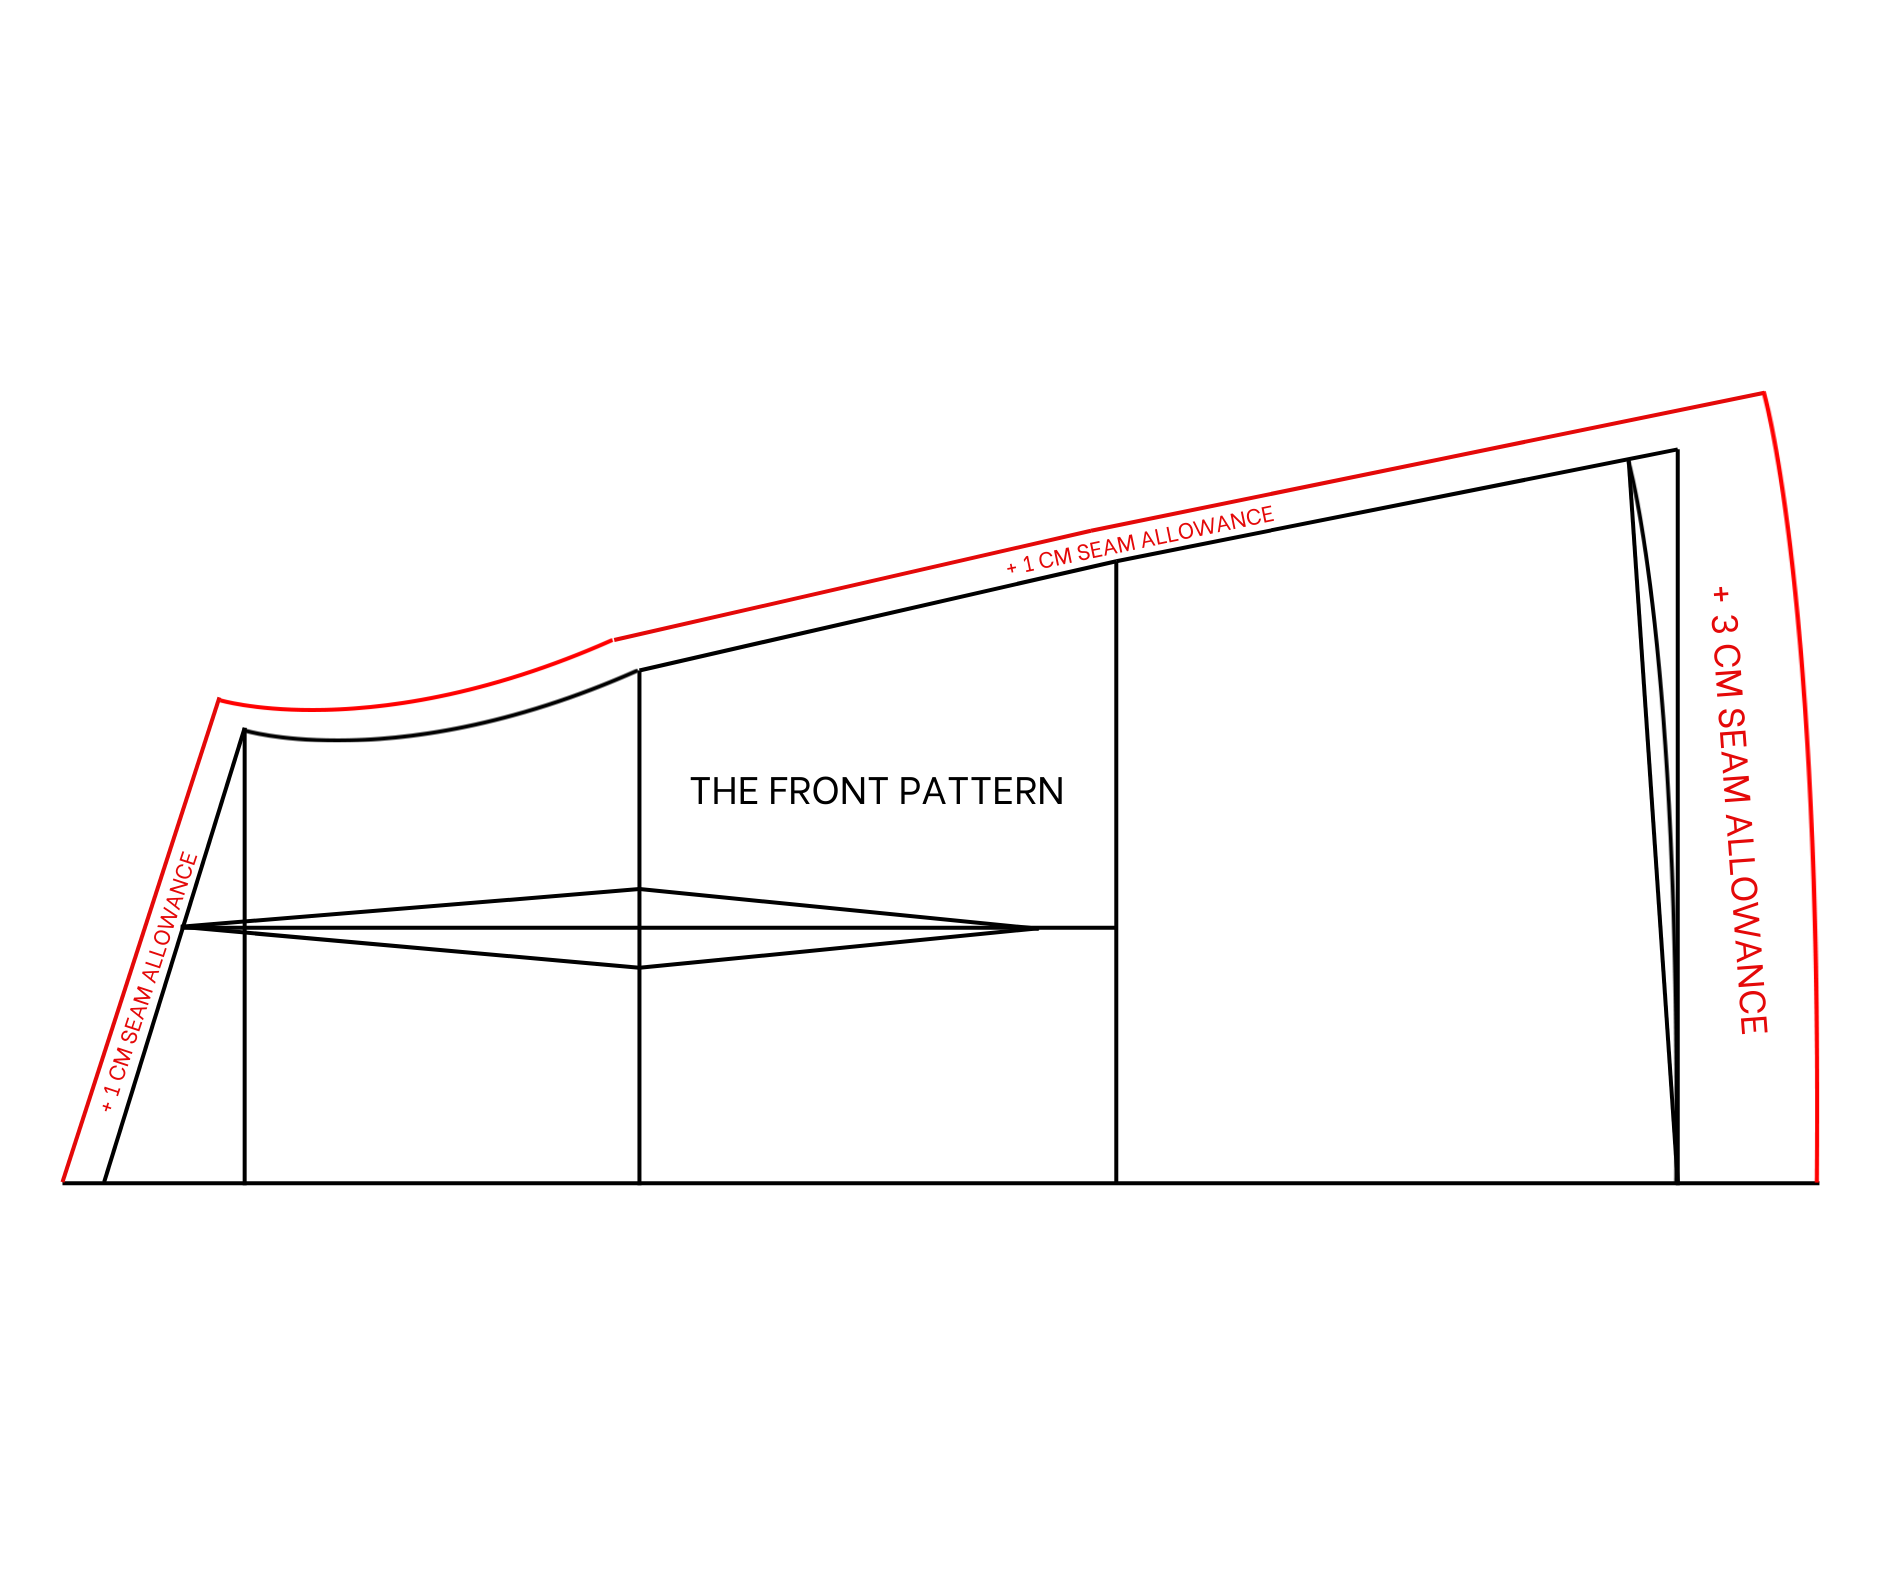
The front pattern
Draw a straight line that cut the horizontal line which is also the edge line of the paper.
Mark at 17.5 cm on the straight line, it's a quarter of your under bust size. From this line, mark out 5 cm on the horizontal line which is the height of the bustier part then connect this mark to the one you’ve made on the straight line before to create the under bust line of the front pattern.
From the first straight line draw another one 15 cm away from it, it's the length from the under bust to your belly button. The width of this straight line is 19 cm which is a quarter of your waist size plus 3 cm of the dart you want to make there later.
Then connect the end of the under bust line to the end of the waist line to create a sideline for the front dress.
From the second straight line, keep making another one 20 cm away from it, it's the length from your belly button to the biggest part of your butt. The width of this line will be 24 cm which is a quarter of your hip size plus 1 cm.
Then connect the end of this line to the end of the second straight line to continue the sideline of the dress.
From the third straight line, make another one 20 cm away from, it is the length from the biggest part of your butt to above your knee, it's also the length of the dress that you want. The width of this new line is 28 cm which is a quarter of your hip size plus 5 cm.
Then connect the end of this line to the end of the hip line to finish the sideline of the dress. After that, redraw this sideline a bit to create a smooth connecting from the top to the end of the sideline.
On the waistline, mark in the middle first then draw a horizontal line to this mark and parallel with the edge line of the paper. It's the dart line of the front dress. From the cutting point with the hip line, mark up 2 cm on the horizontal line, it's the end of the dart you will make later.
From the middle of the waistline, mark 1.5 cm two sides of it so the width between two marks will be 3 cm which is the width of the dart that you want. Then connect two marks to two ends of the dart line.
At the end of the sideline, mark up 1 cm first then connect this mark to the other end of the ending line. Based on this new line, draw a slightly curved line to finish the ending line of the dress.
Add 1 cm for seam allowance except 3 cm at the ending line and we will have the front pattern of the dress after cutting.
THE BACK PATTERN
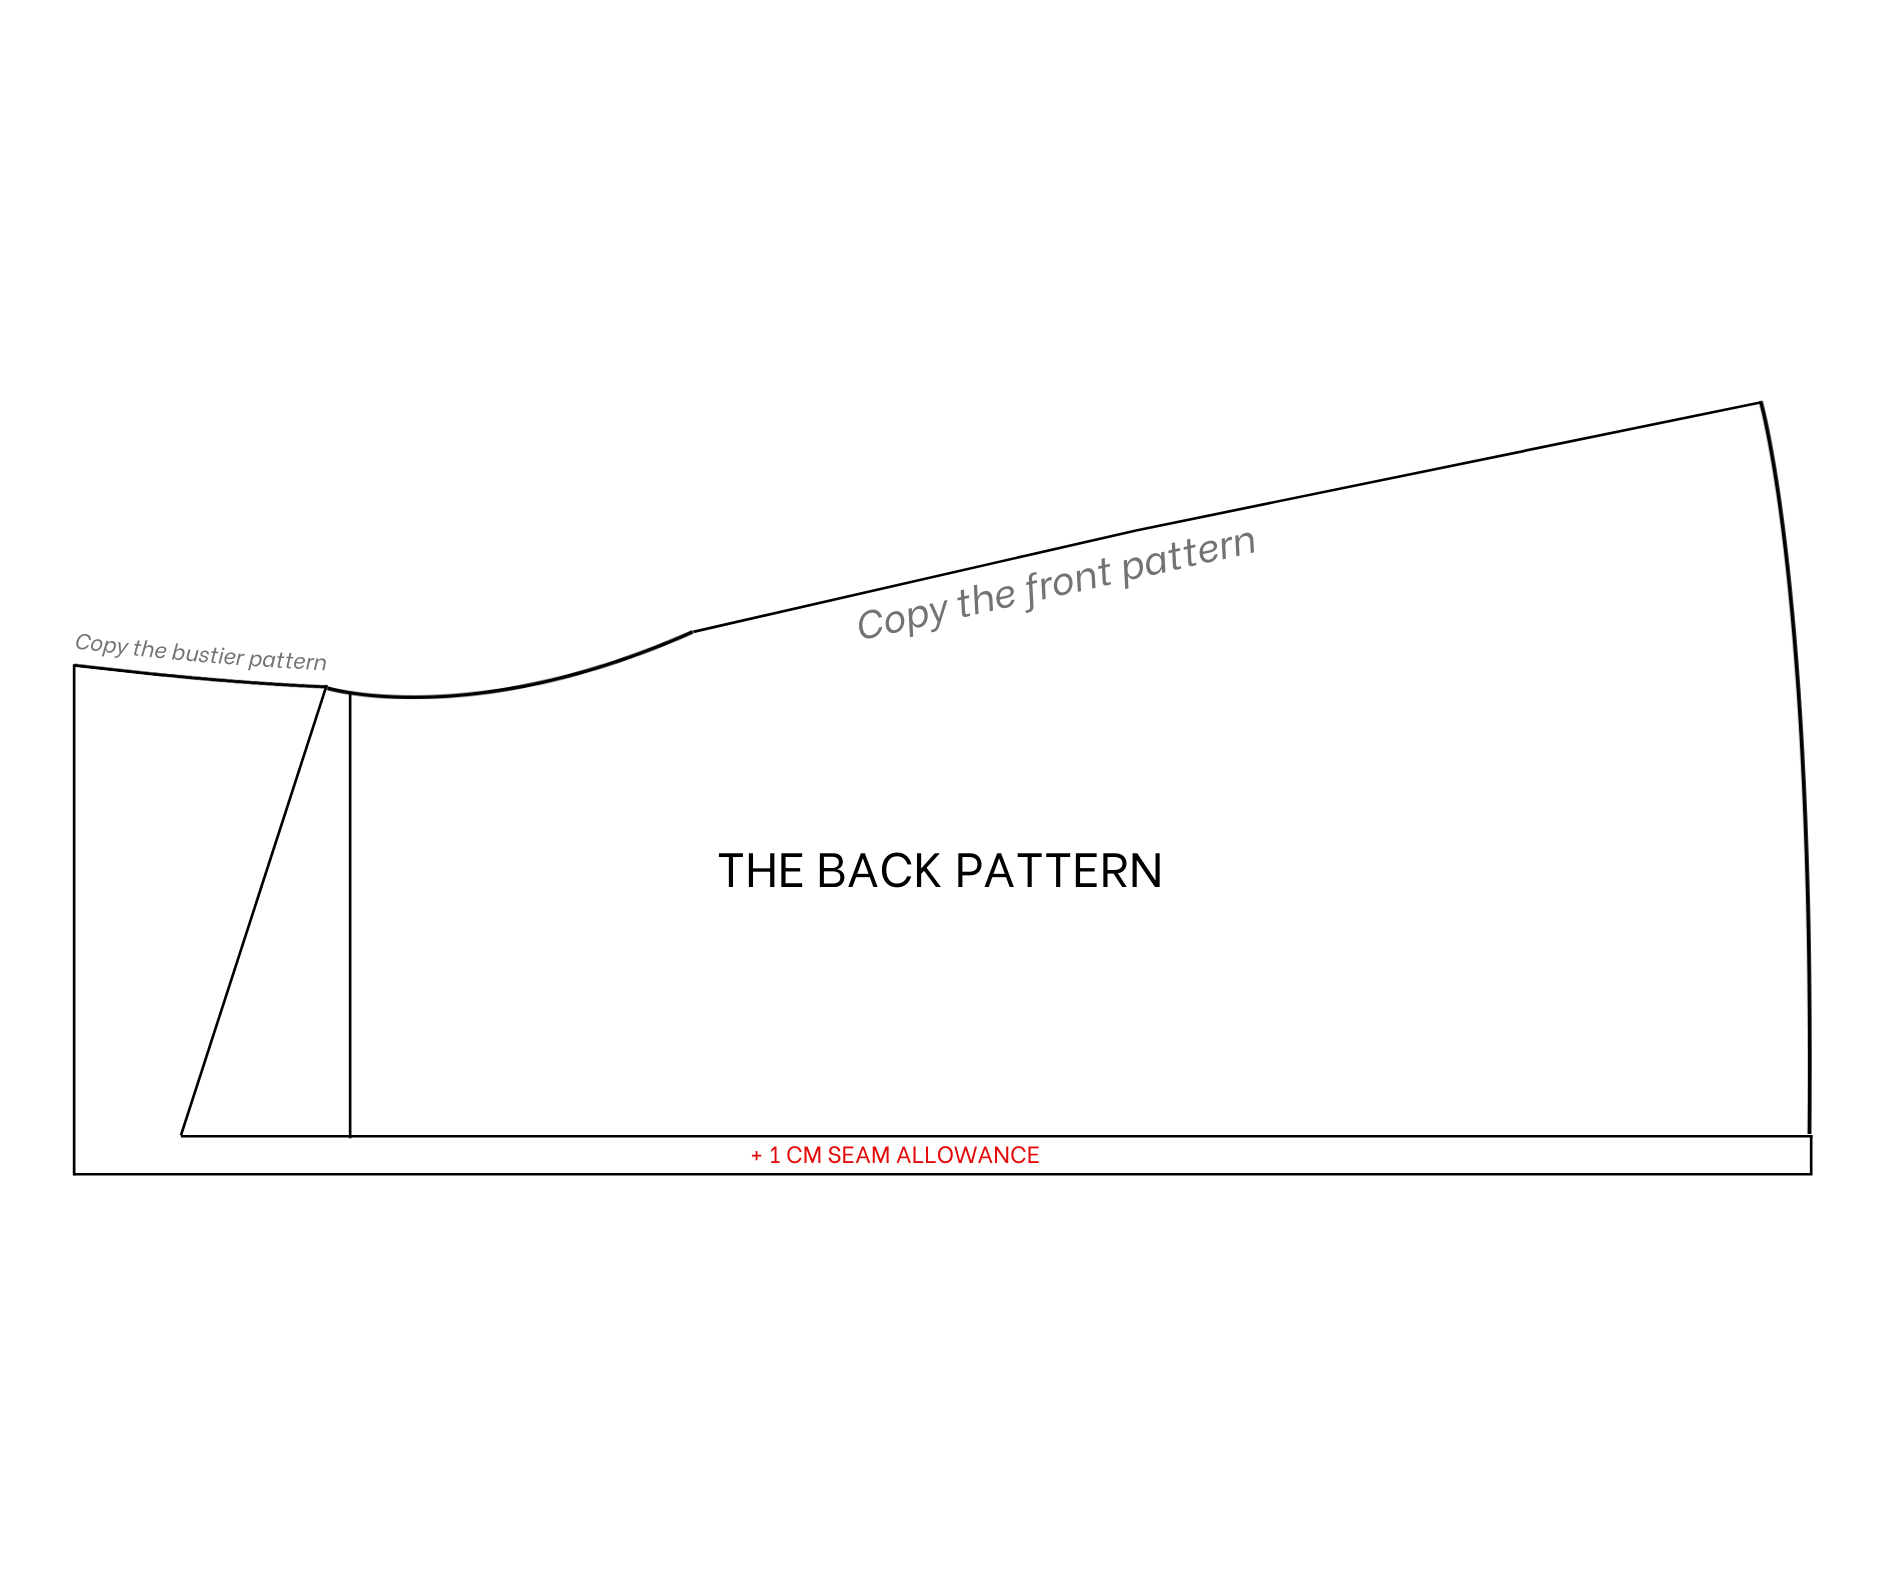

The back pattern
Draw a horizontal line at 1 cm above the edge line of the paper. It's for seam allowance at the middle of the back of the dress, then apply the front pattern to this line and copy it. Also copy the under bust line, too.
Use the bustier pattern to copy the sideline to the back pattern. After that, make a straight line from the top of the sideline to the edge line of the paper to finish the top line of the back pattern.
We will have the back pattern after cutting.
To make the dart for the back pattern, copy the waistline and the hip line from the front pattern first. Then draw the dart line by using the same way you did at the front. However, the end of the dart line will be 14 cm from the waistline now.
SEWING THE DRESS
THE FRONT PART
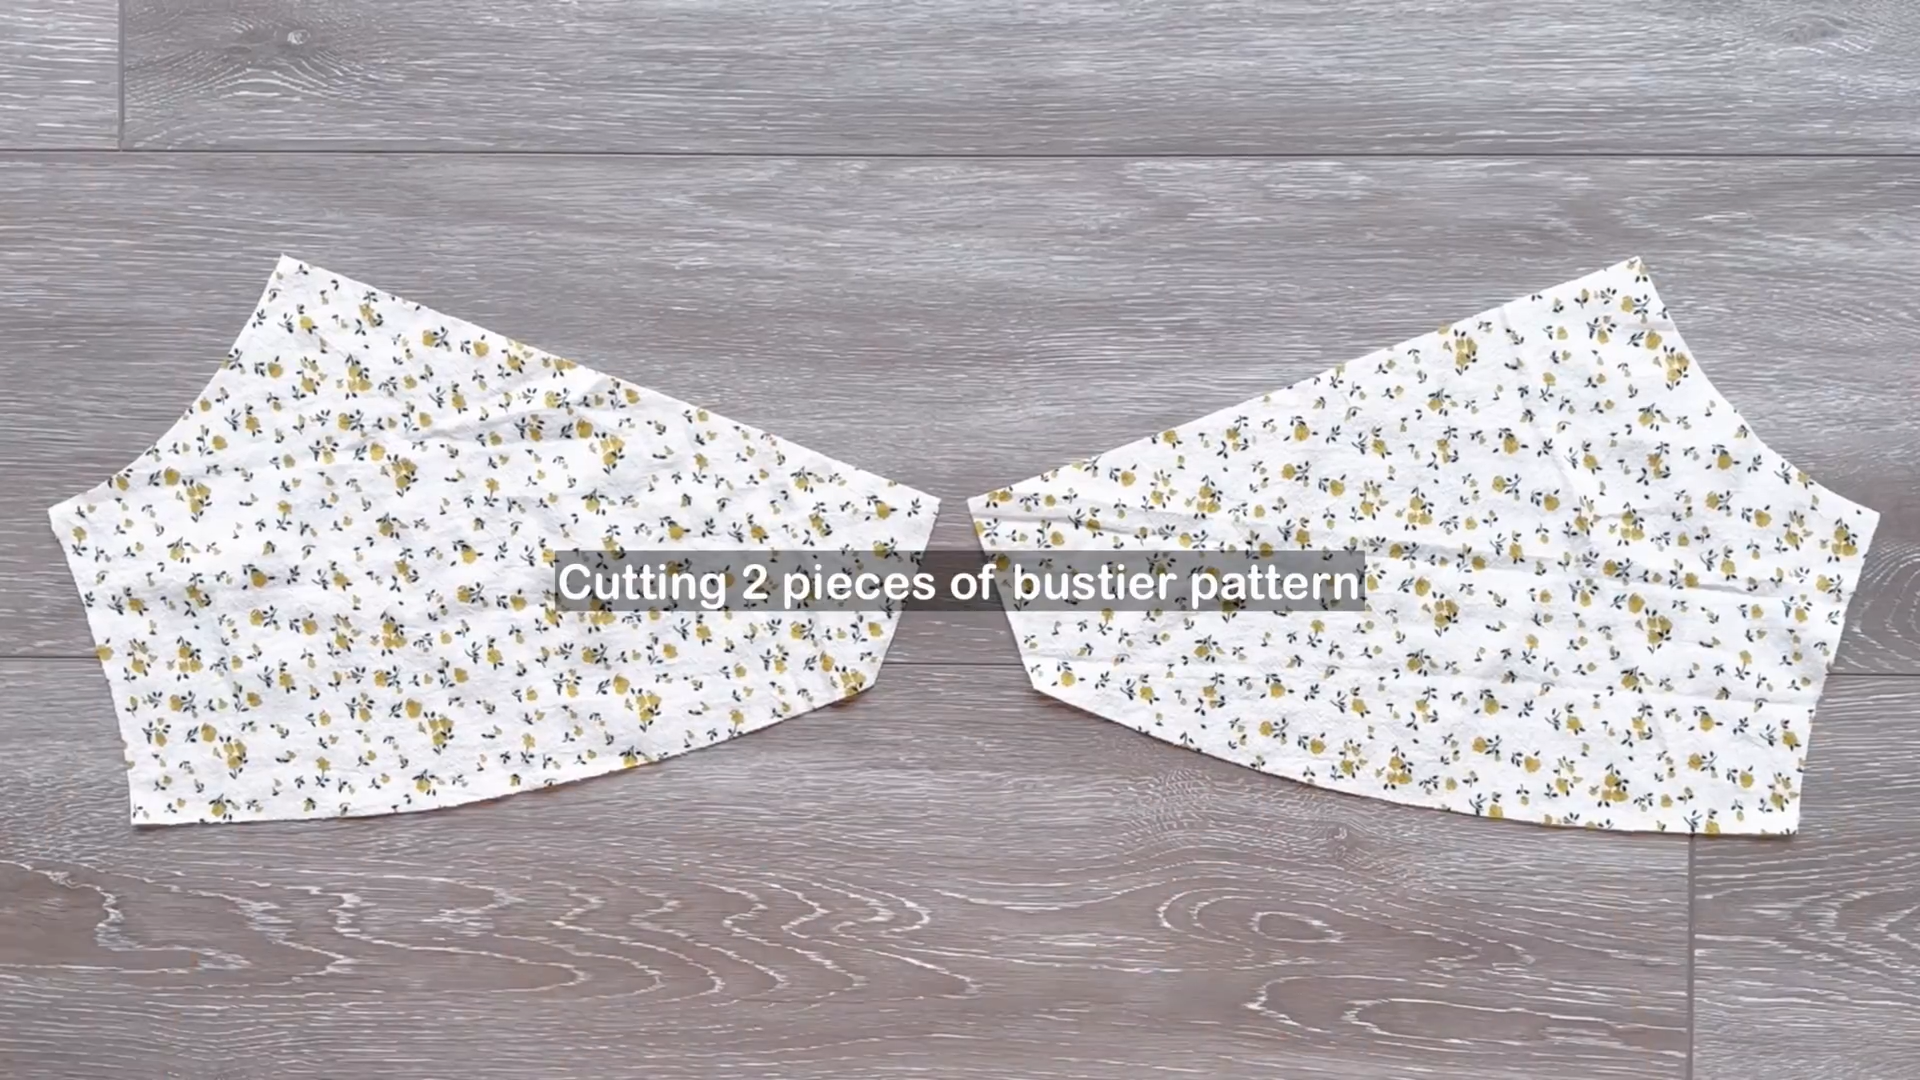
Cut out two pieces of the bustier pattern.
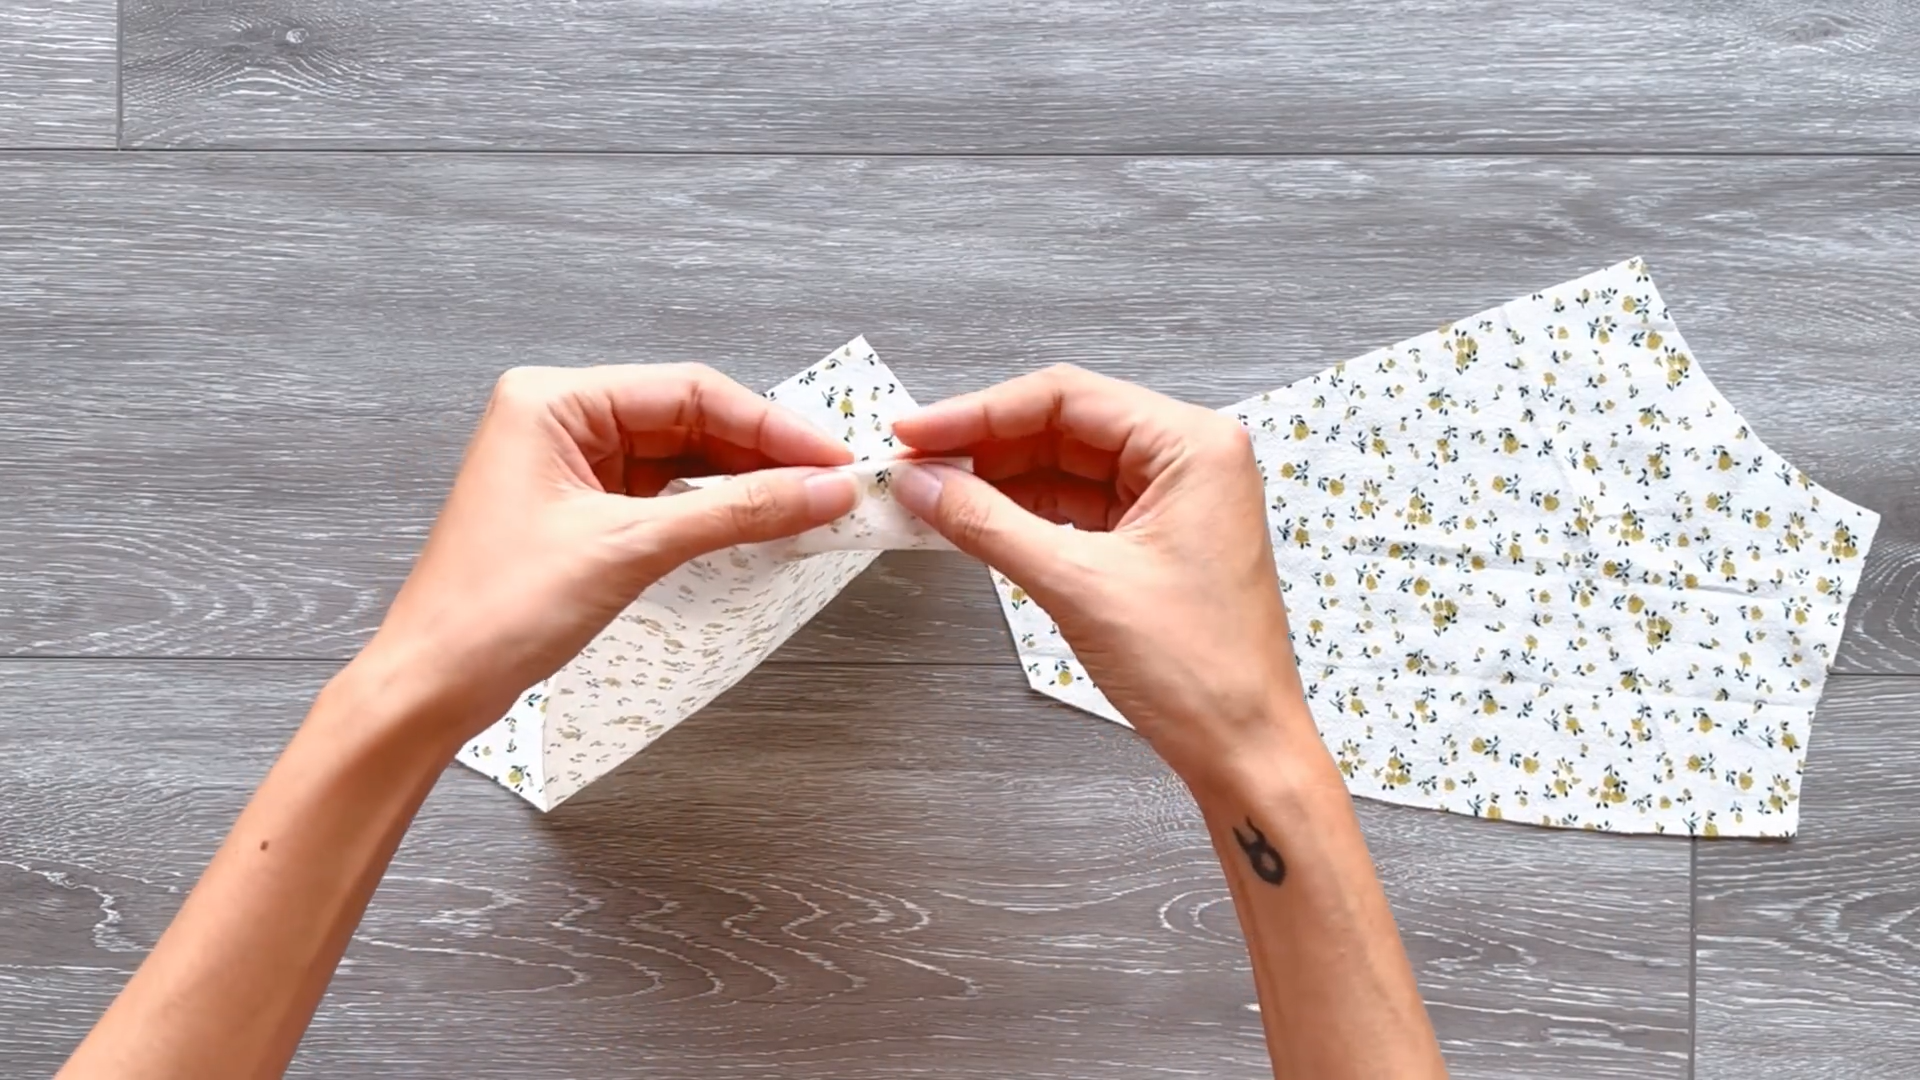
Fold the middle chest line inside twice, each time by approximately 0.5 cm.

Sew along this folded edge to secure it. This neat finish ensures a polished look.
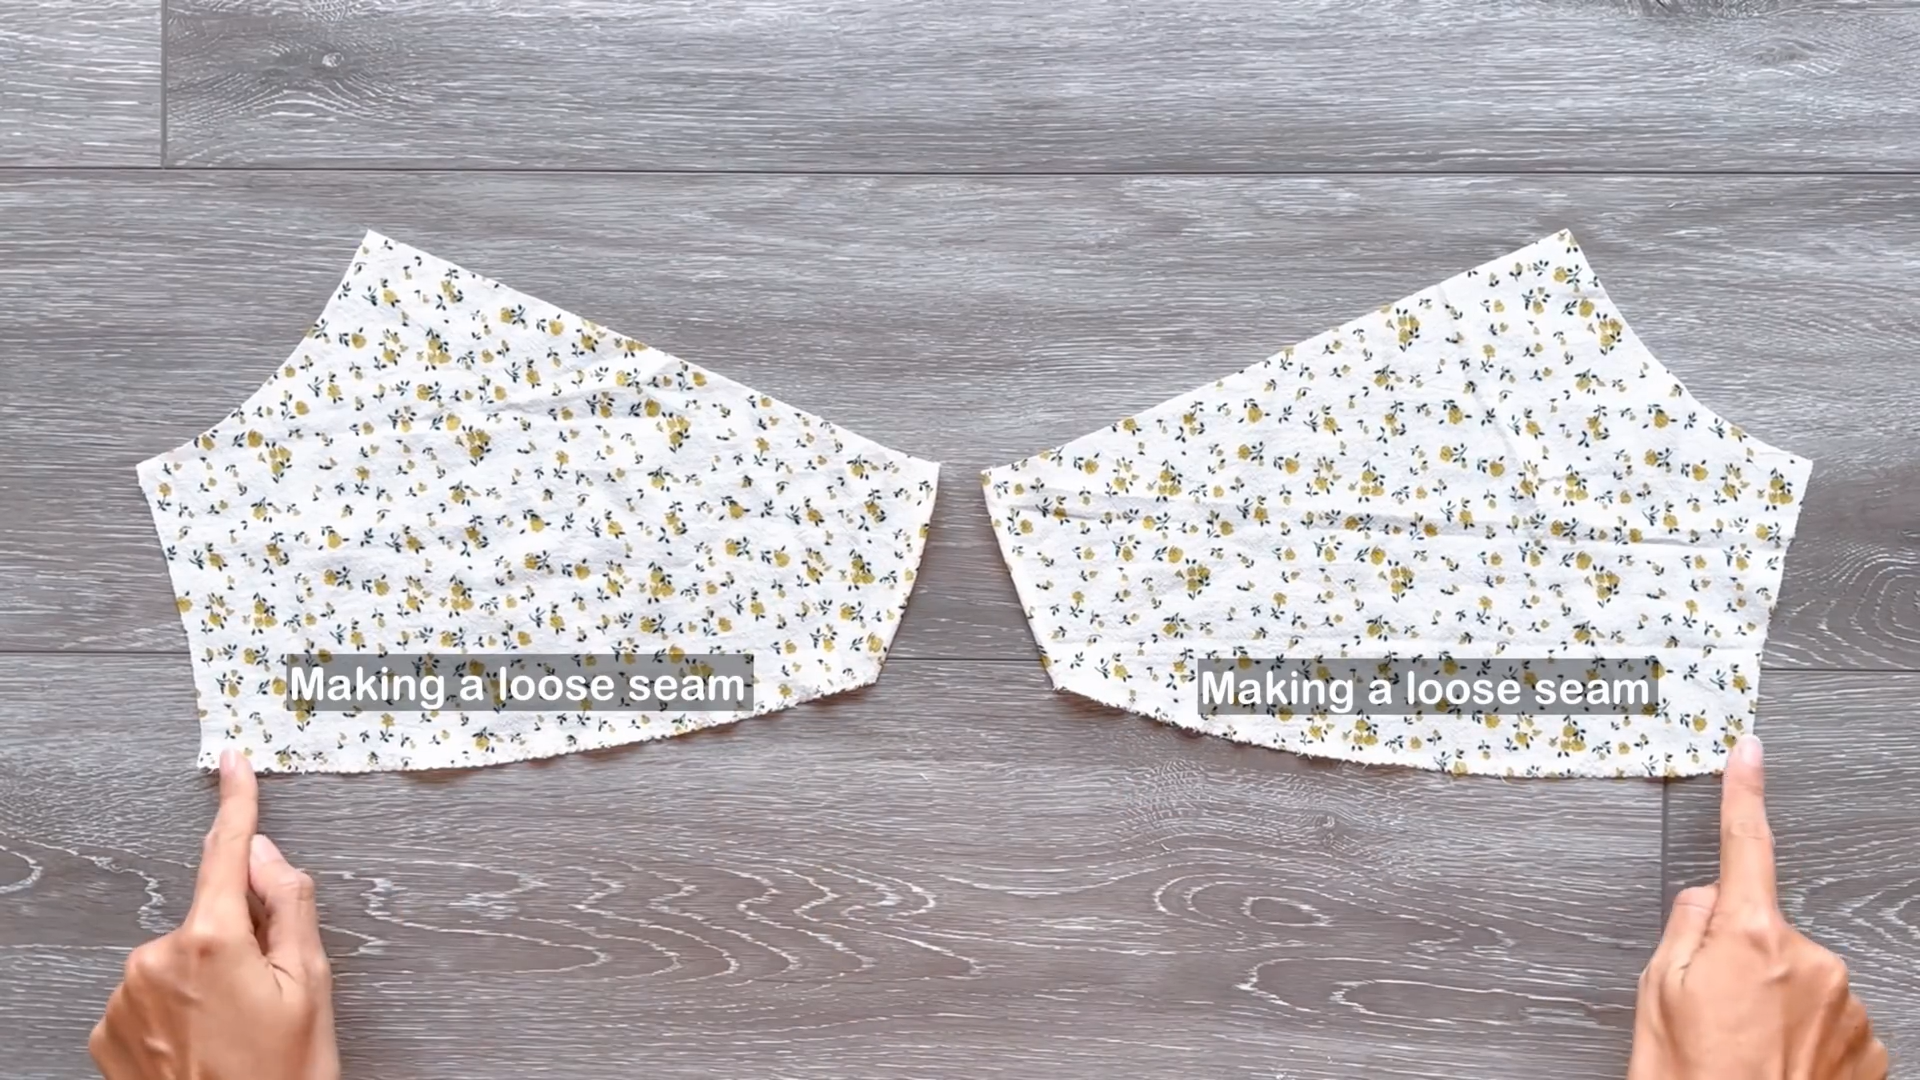
At the underbust line, create a loose seam.
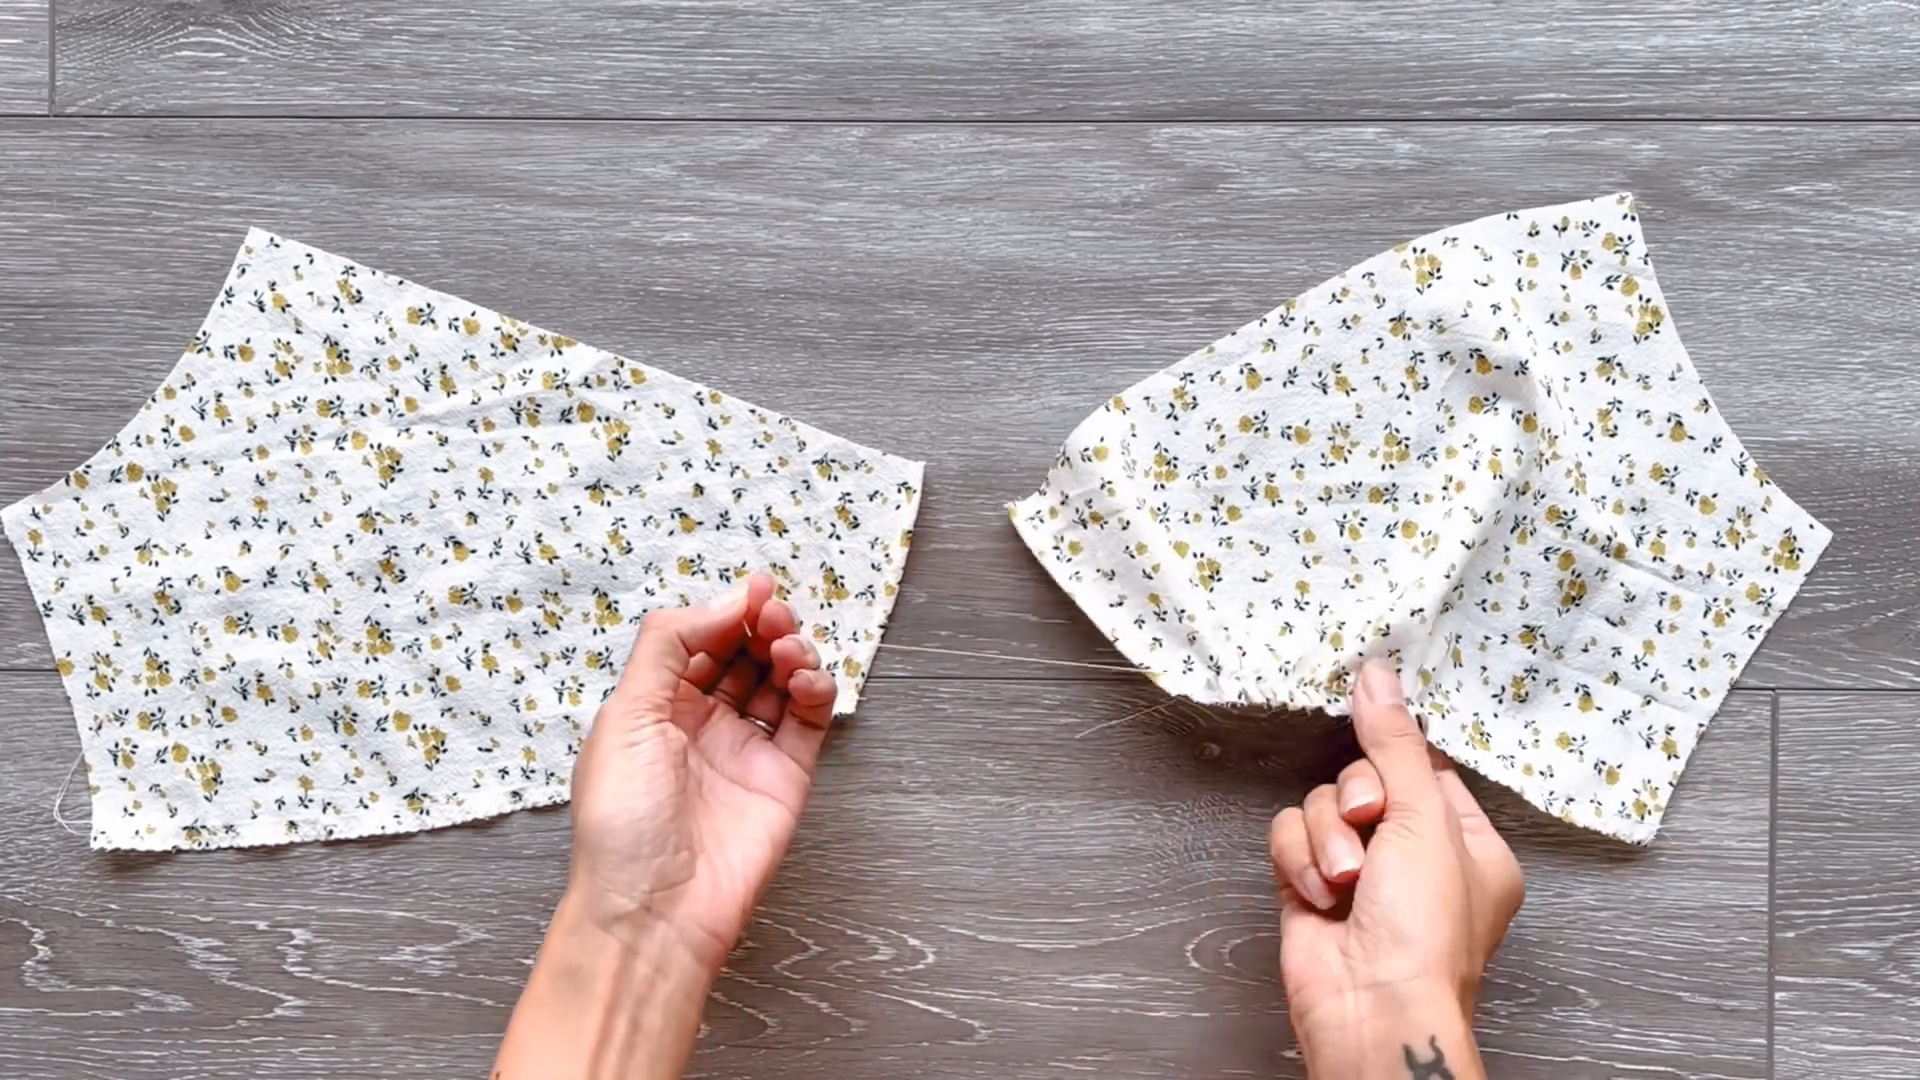
Create a gathering fabric along the loose seam.
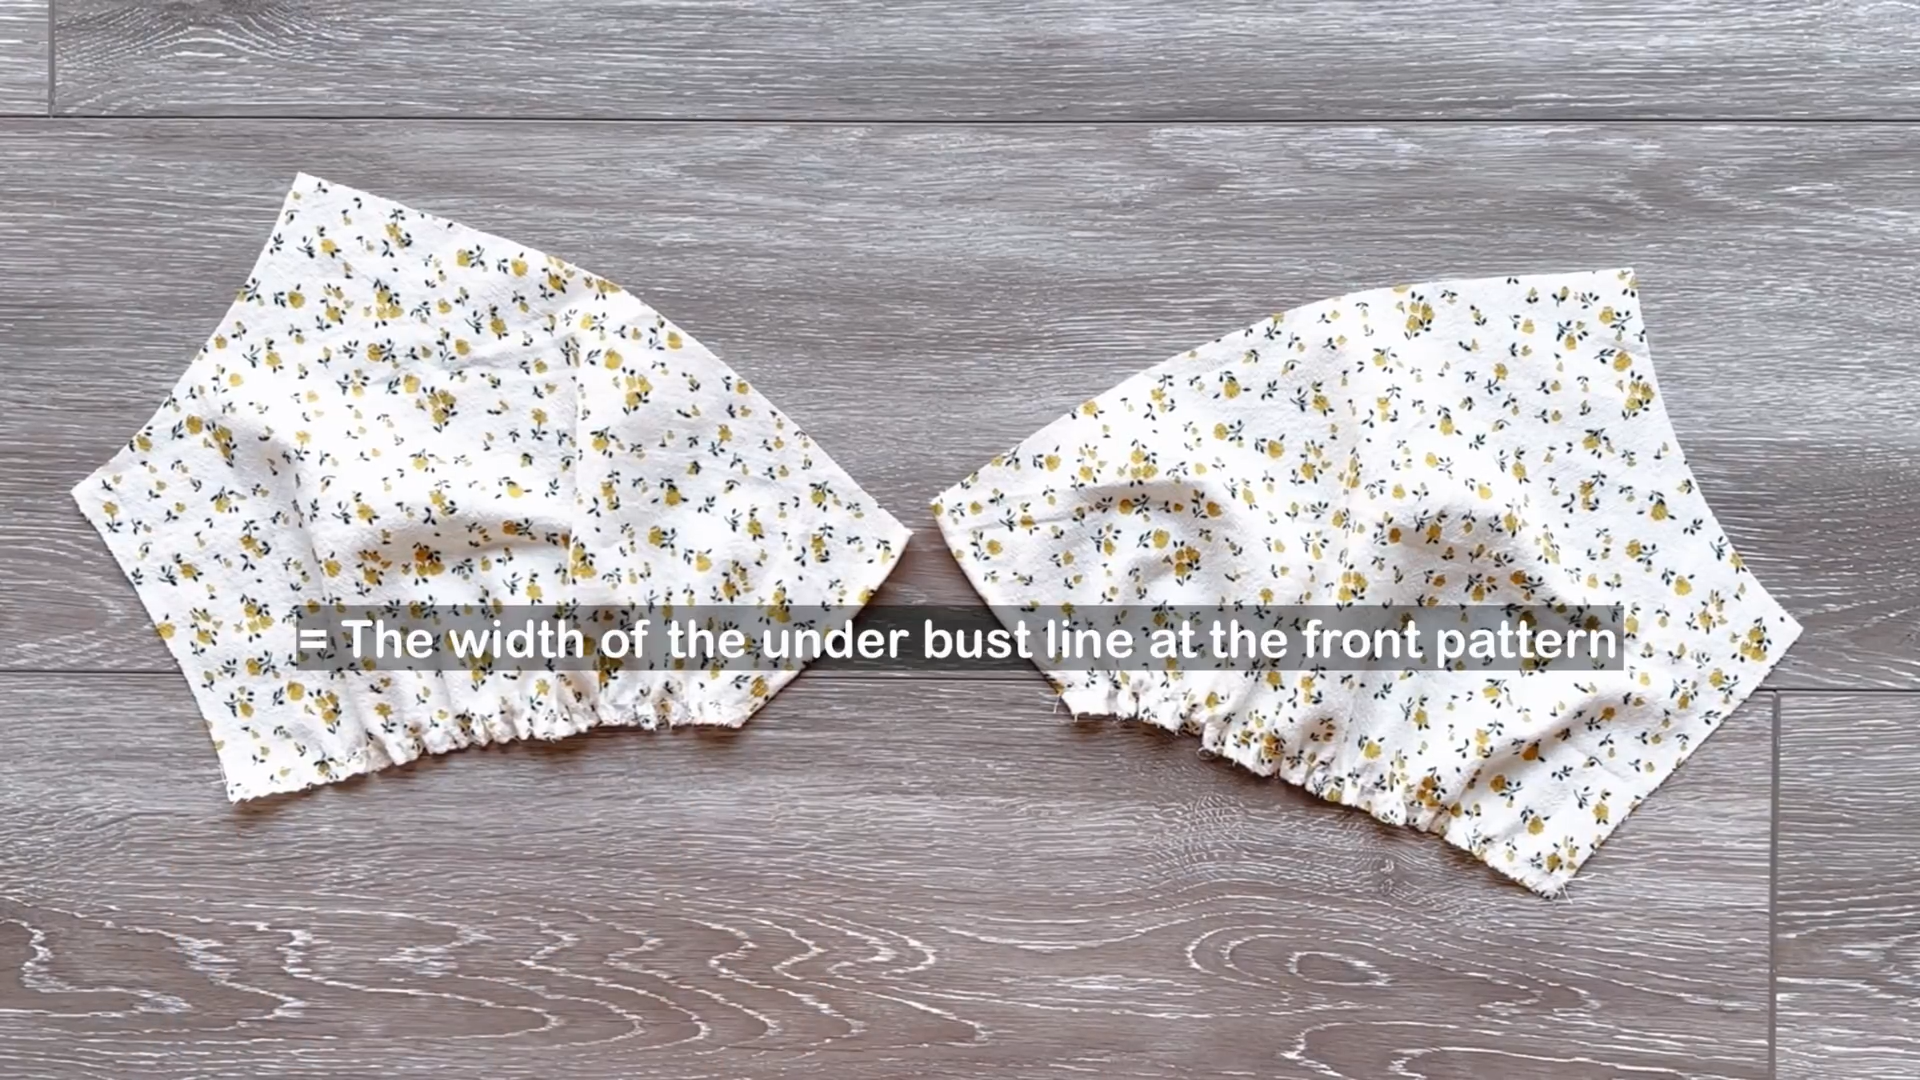
The width of this gathered section should match the underbust line on the front part of the dress.
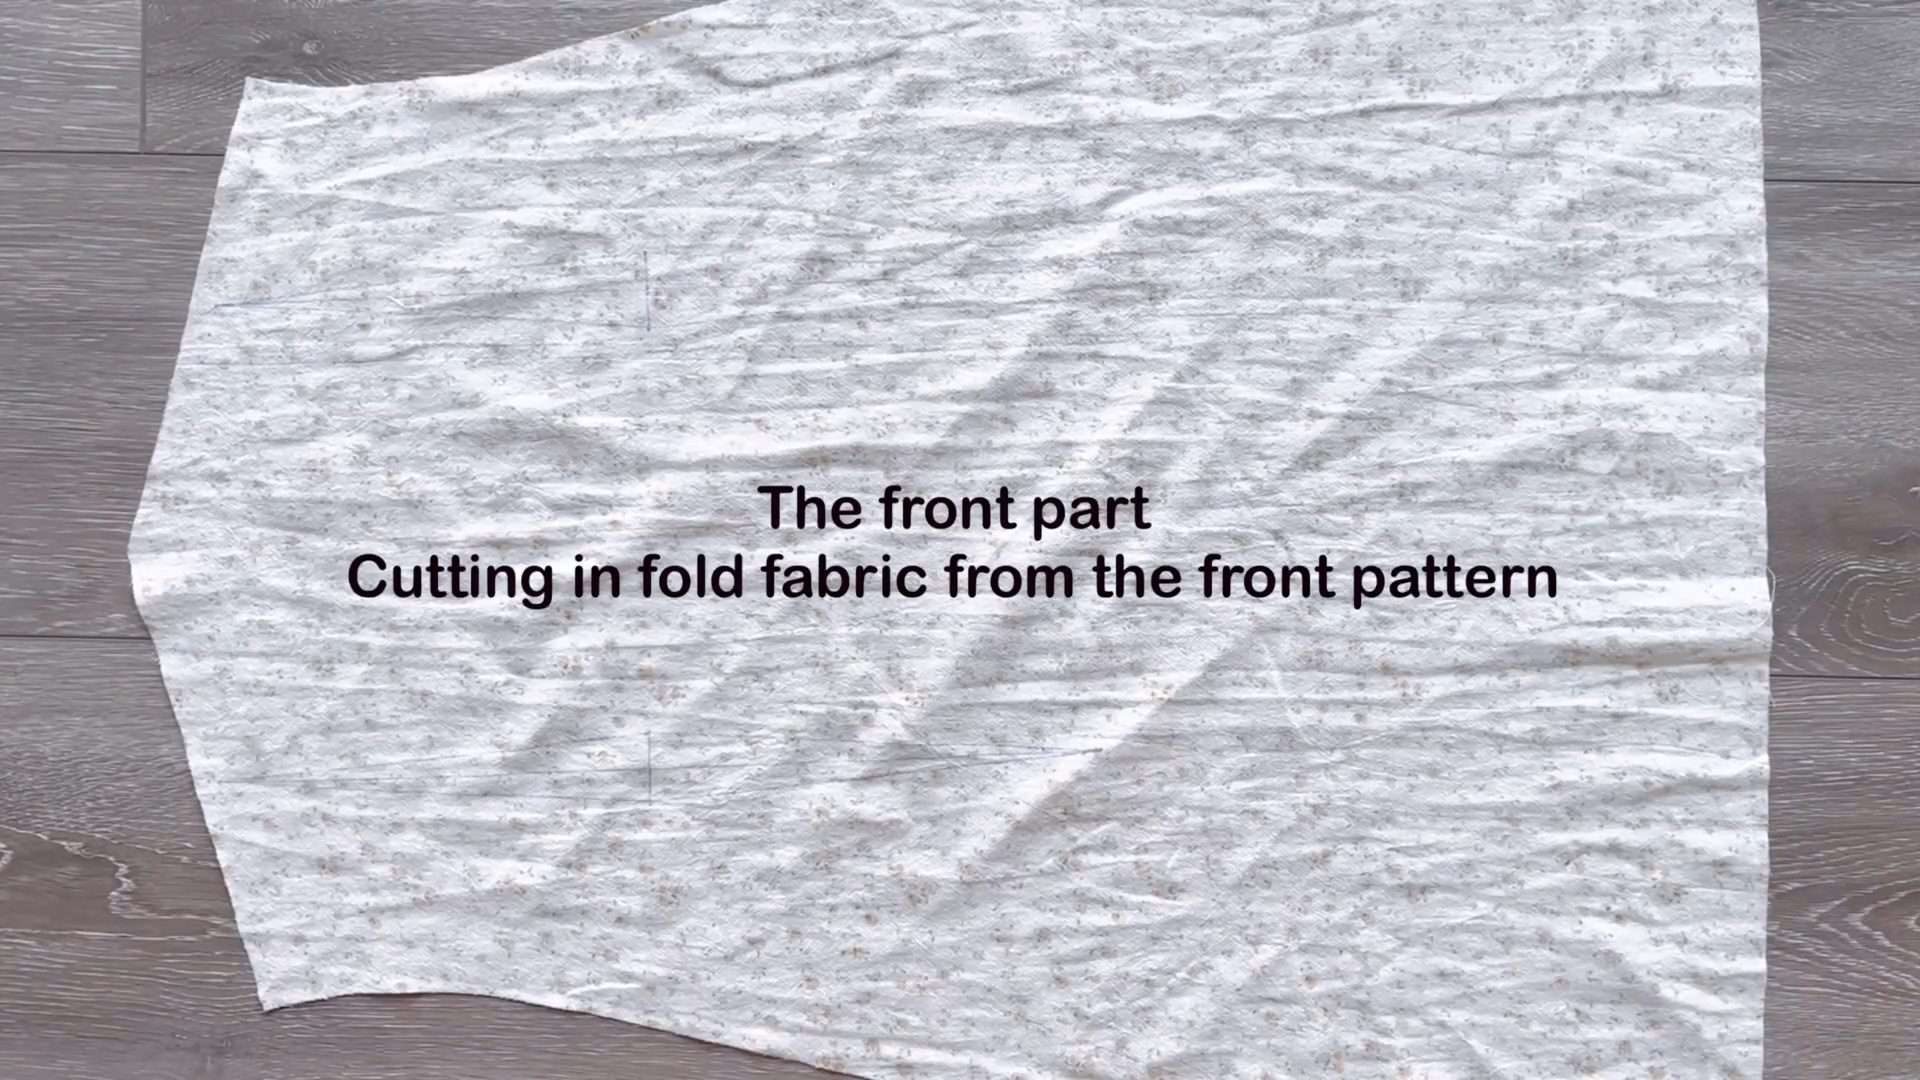
Cut out the front part of your dress from folded fabric.
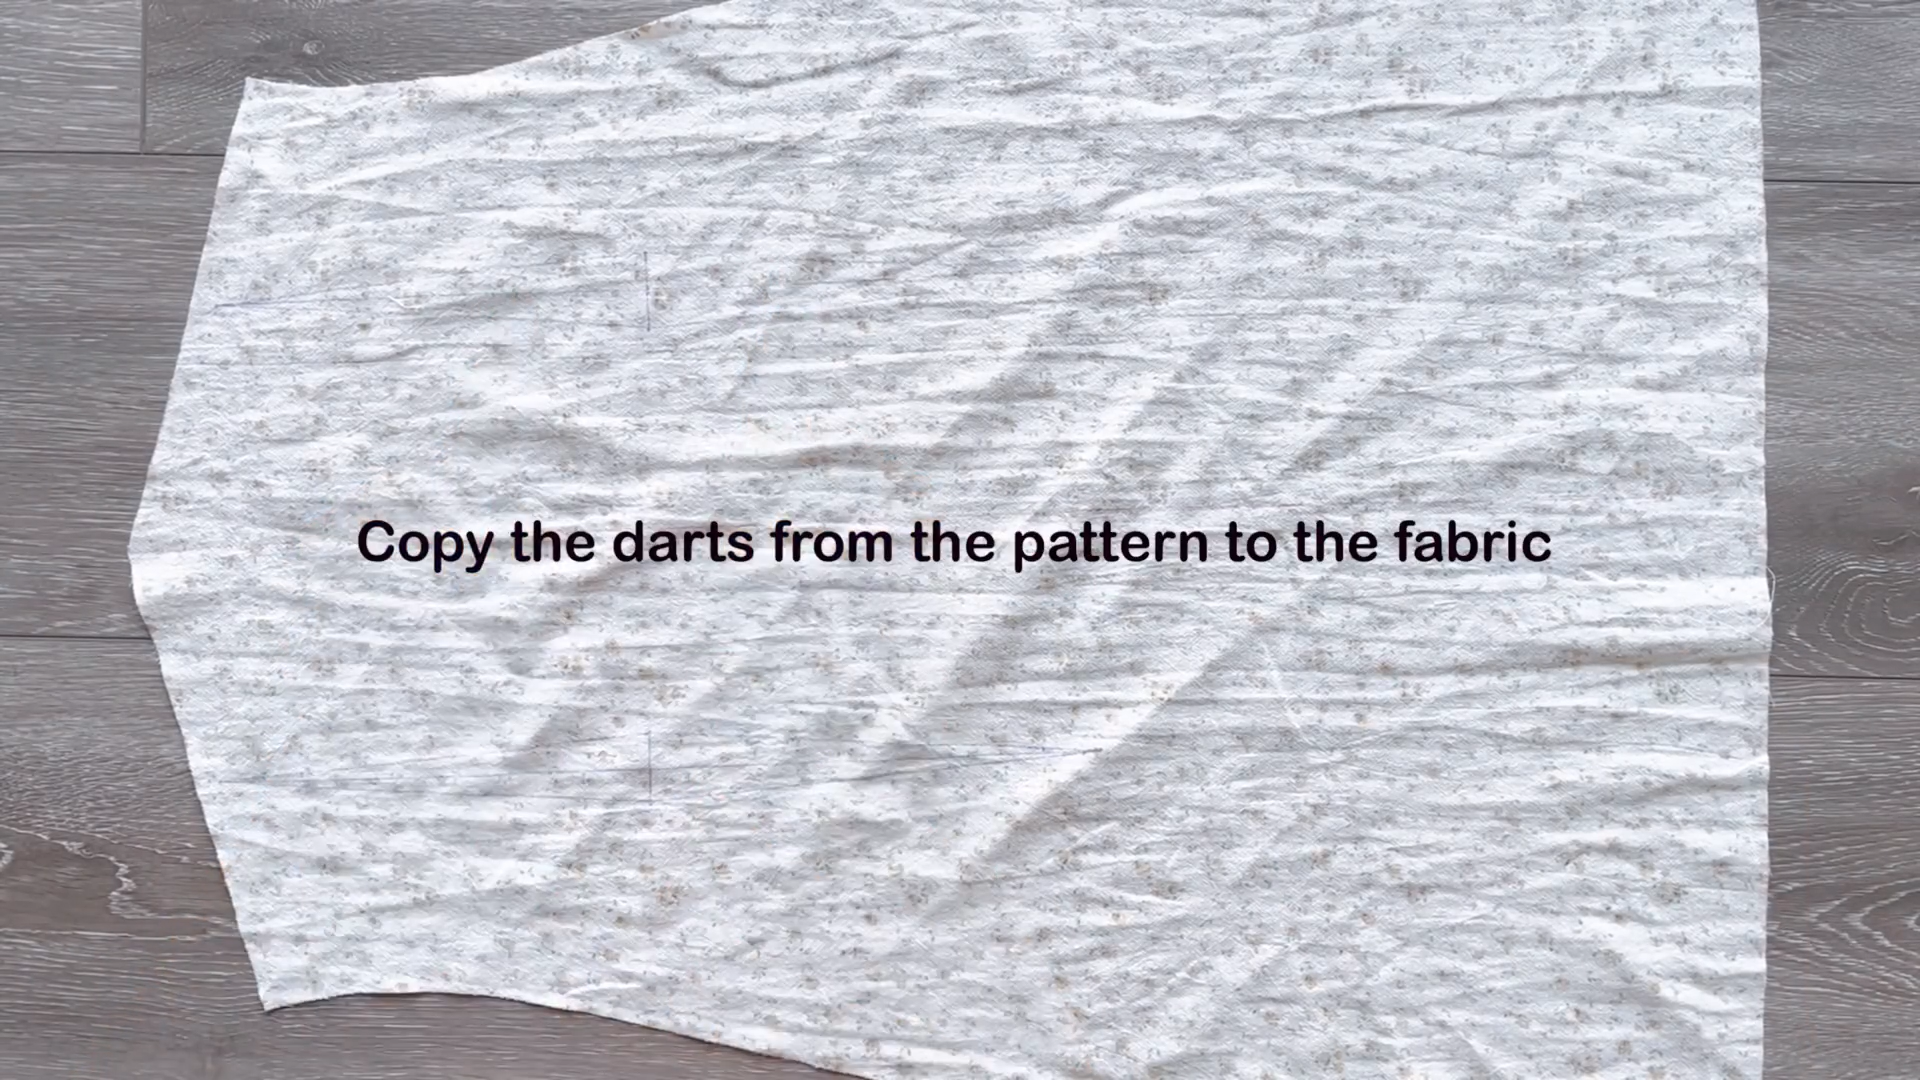
Transfer the dart shape from your pattern onto the fabric.

You’ll want to create two darts based on the drawing lines.
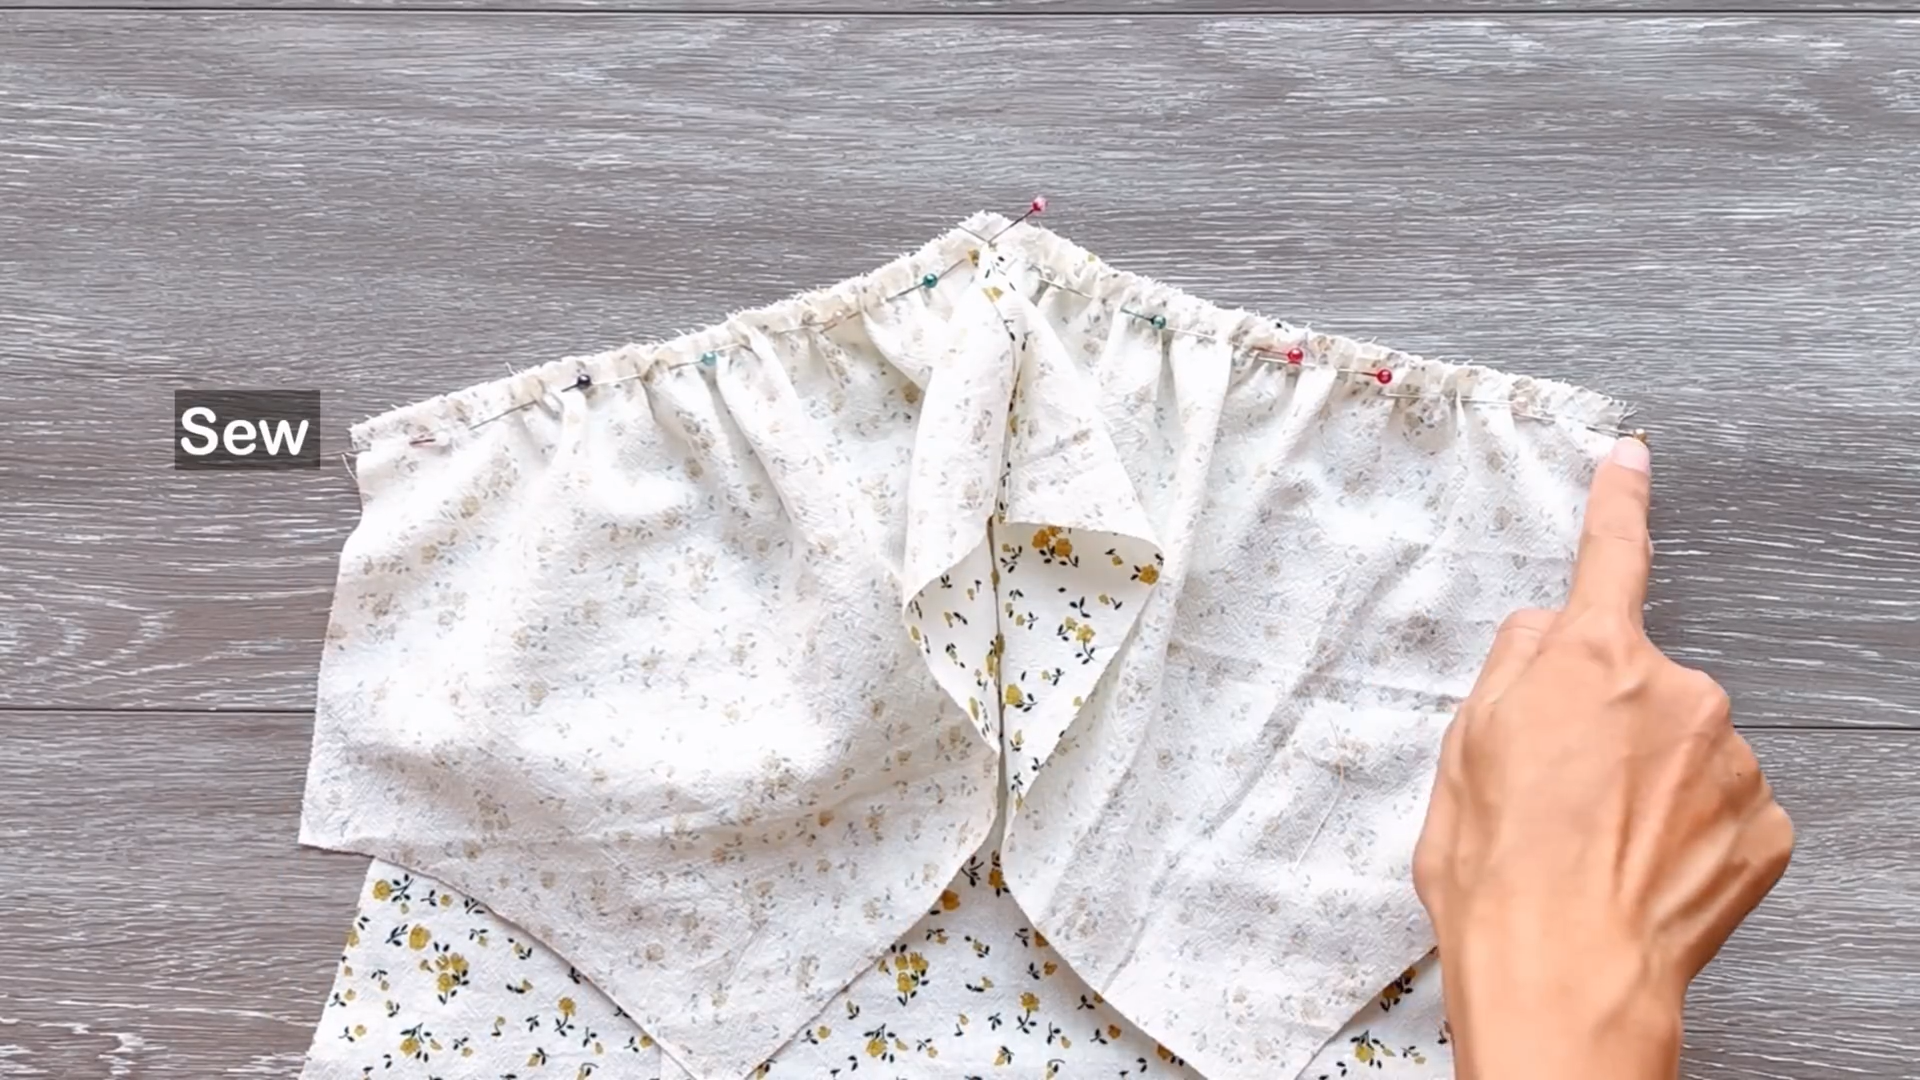
Align the front part with the bustier section at the underbust line. Seam them together carefully.
THE BACK PART
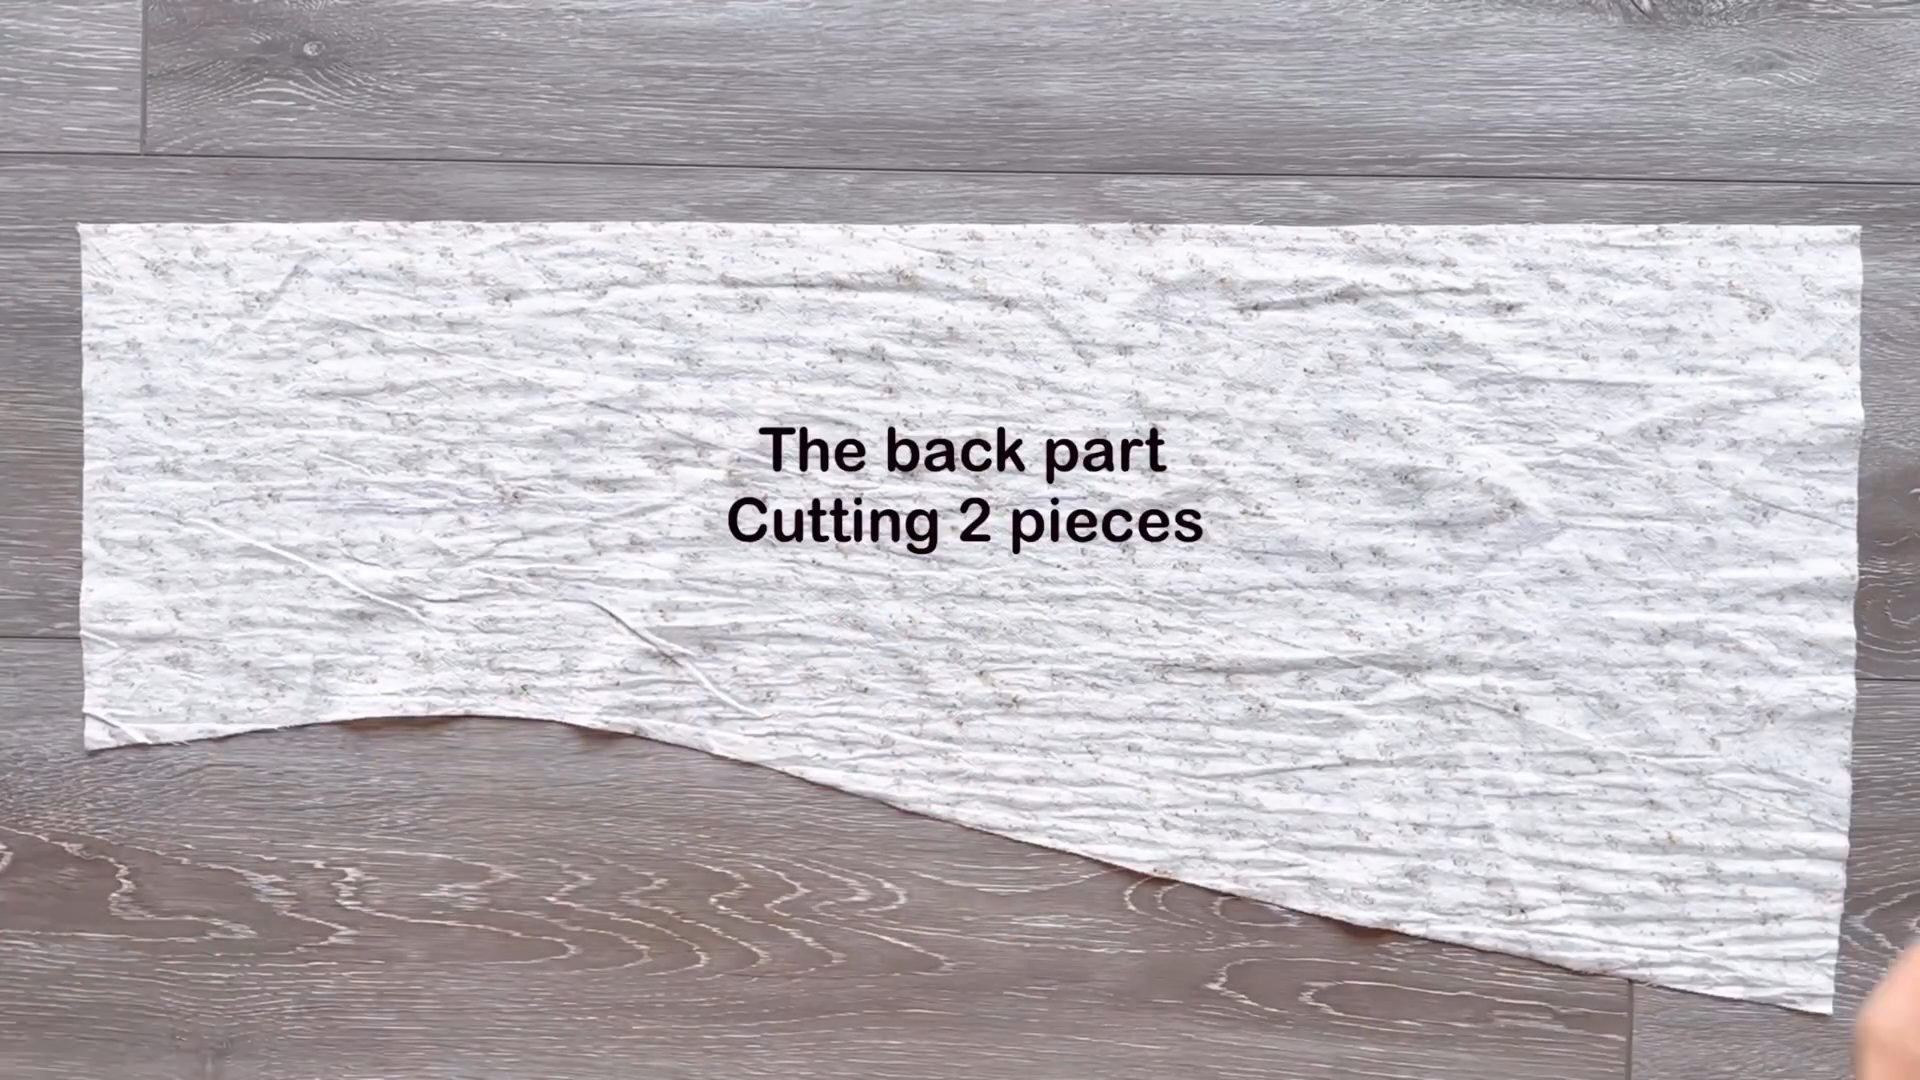
Cut out 2 pieces of the back part based on the pattern.
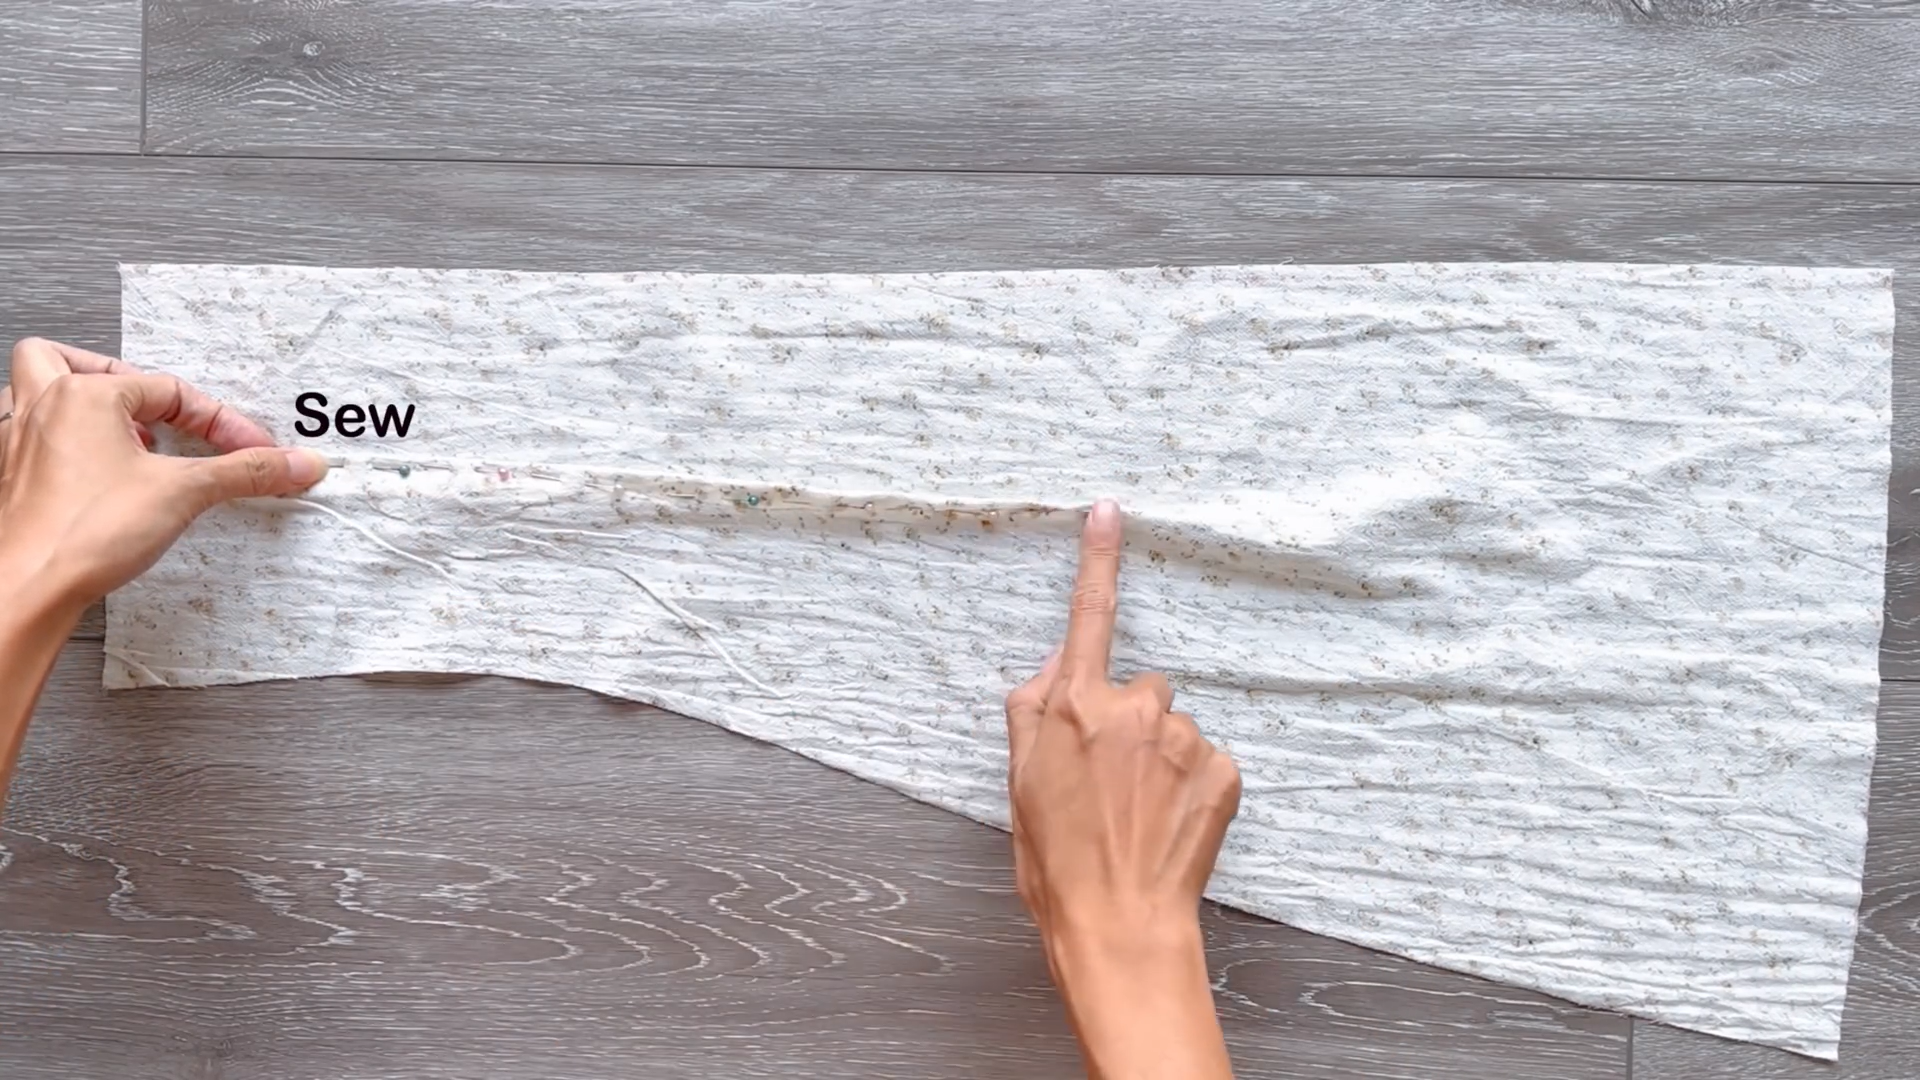
Use a similar technique used at the front to create darts for the back part.
Do this on both pieces of the back.
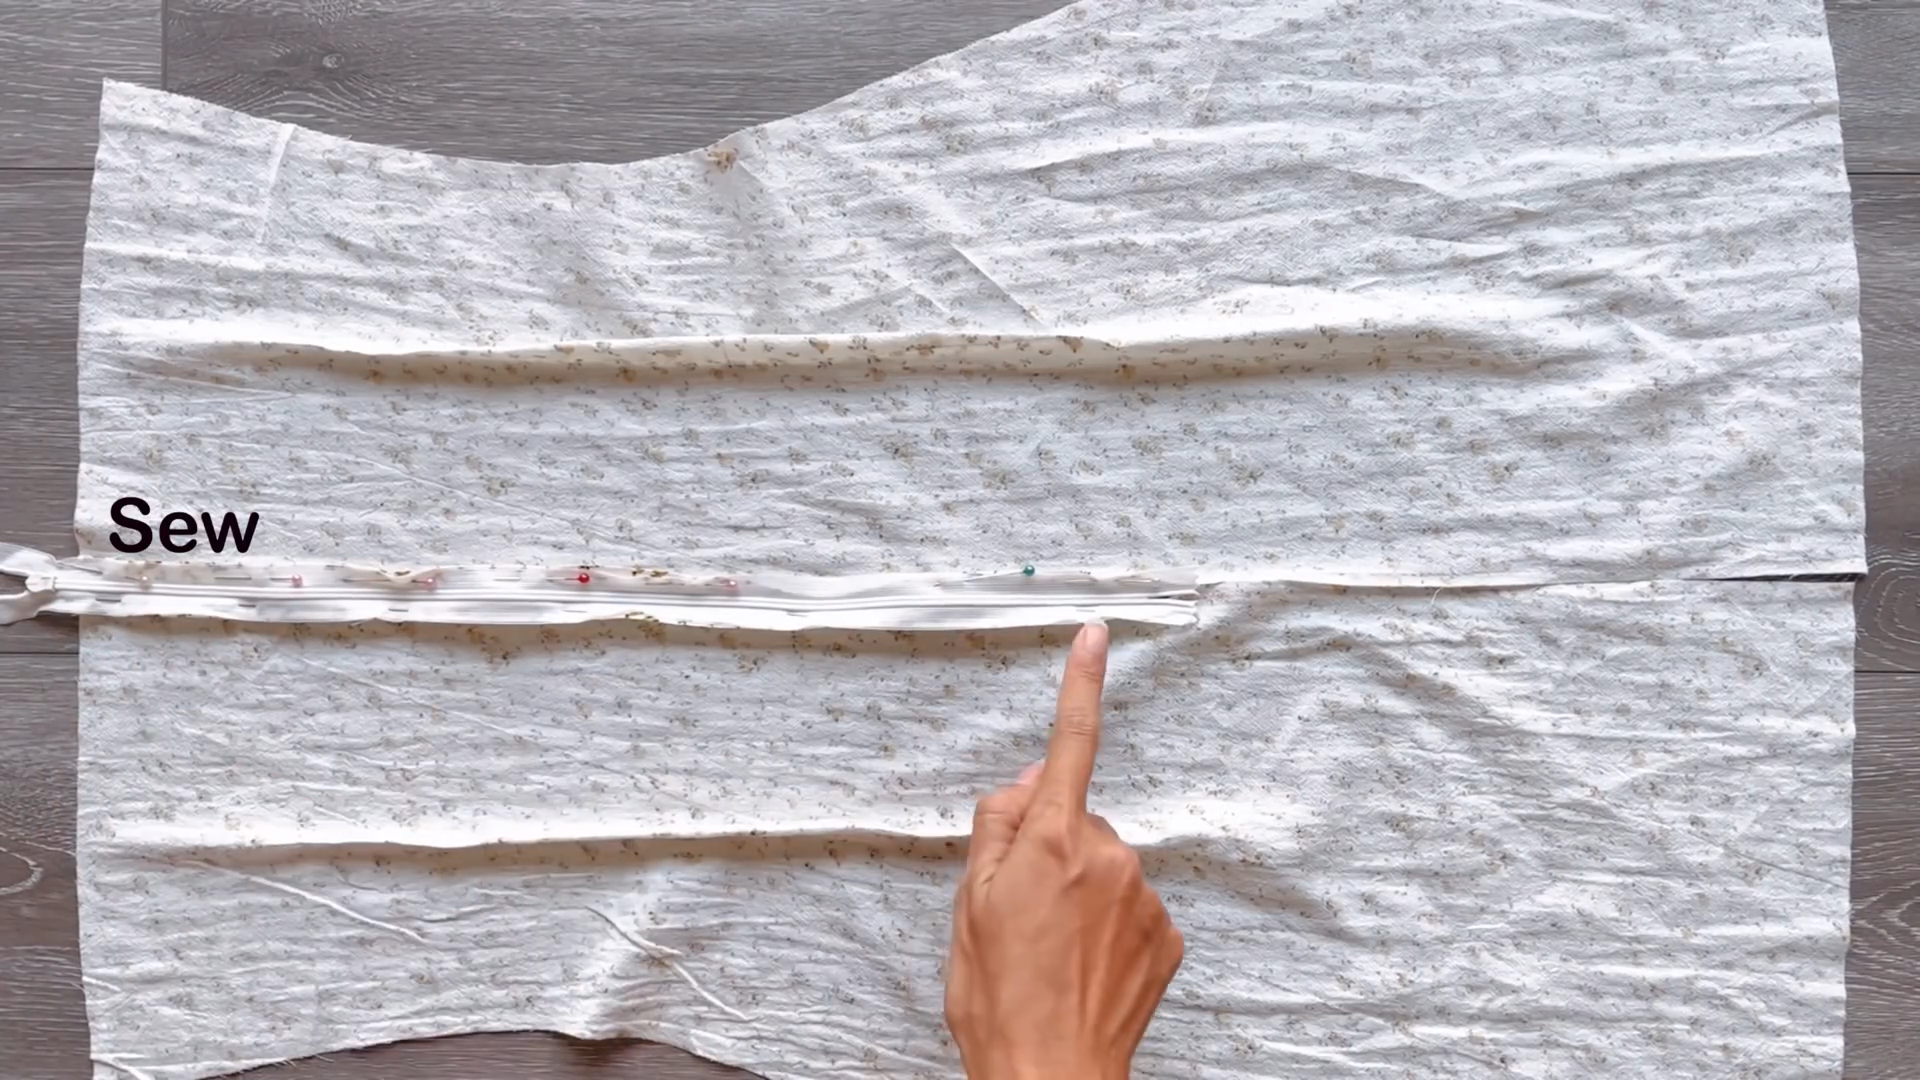
Connect the two back pieces using an invisible zipper. Use the zipper foot to sew more easily.
Sew the two pieces together just below the zipper. This ensures a secure closure.
CONNECT THE PARTS TOGETHER
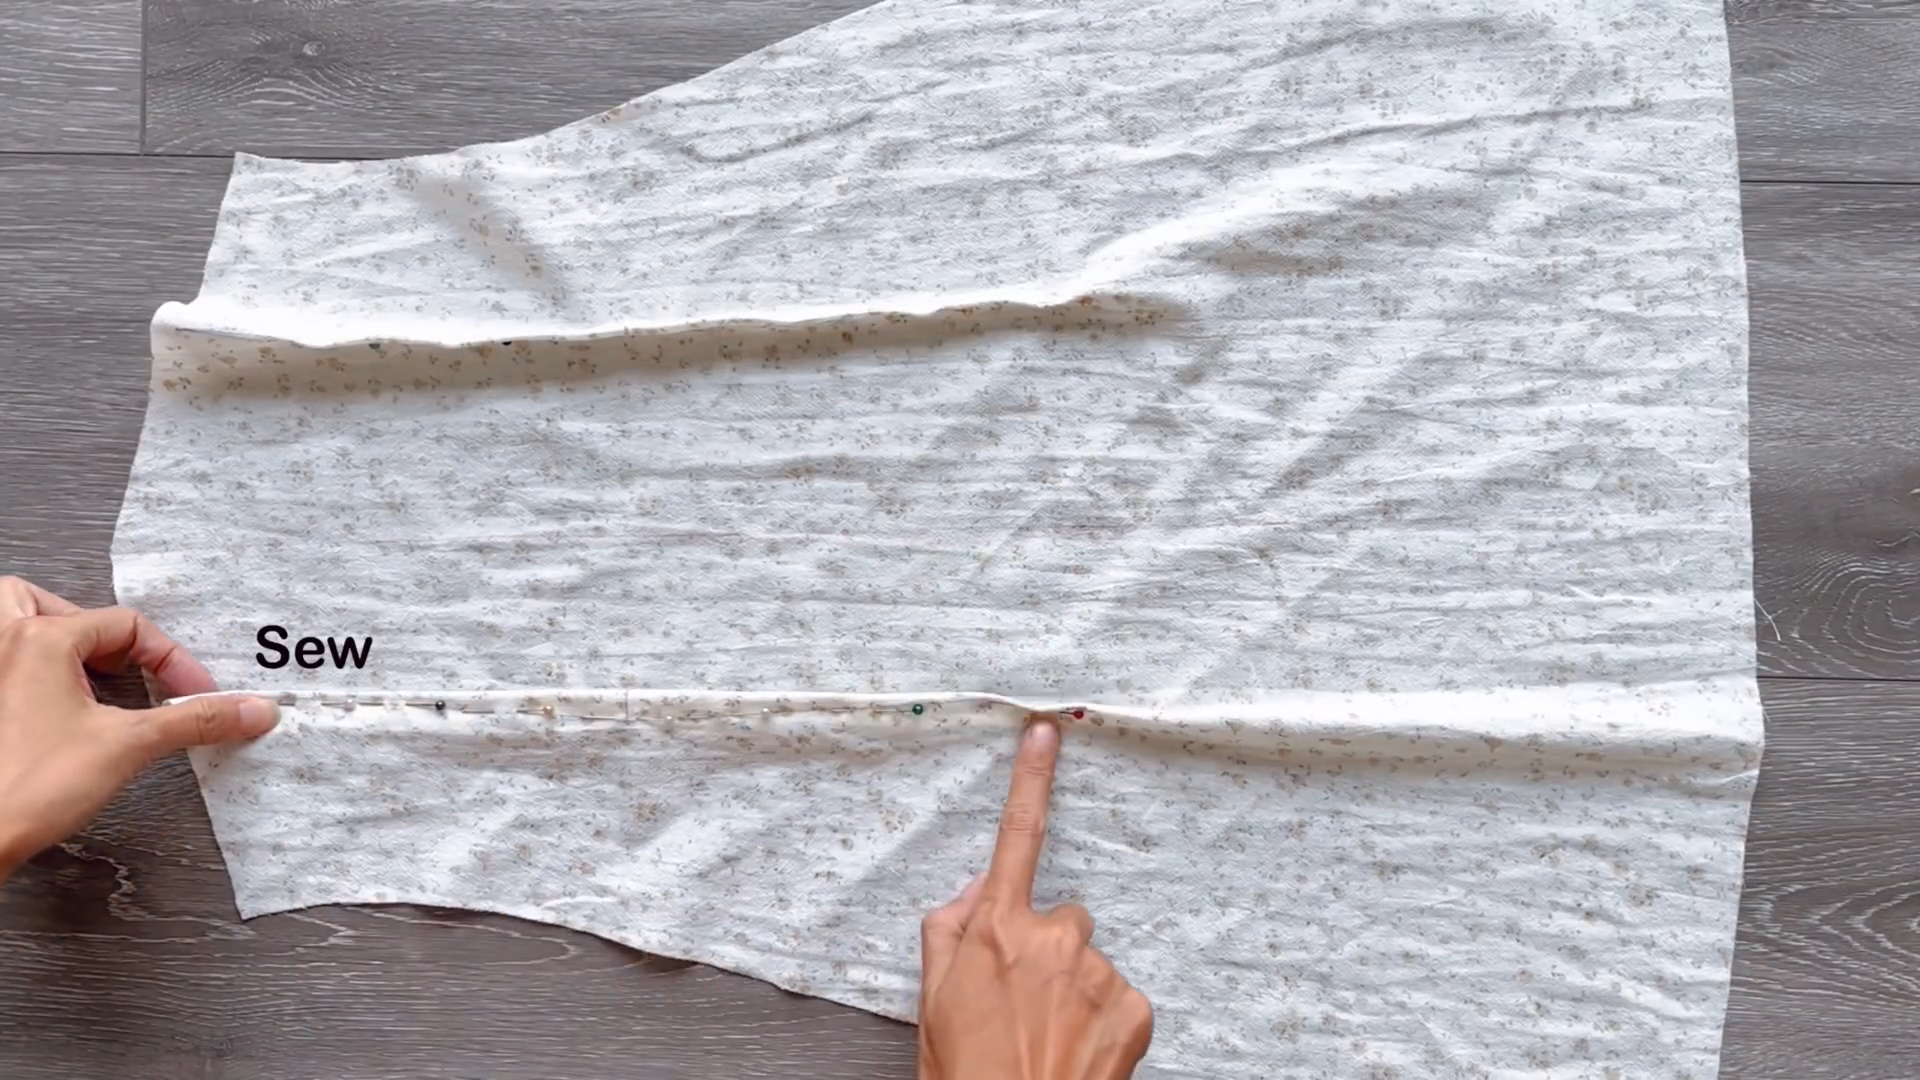
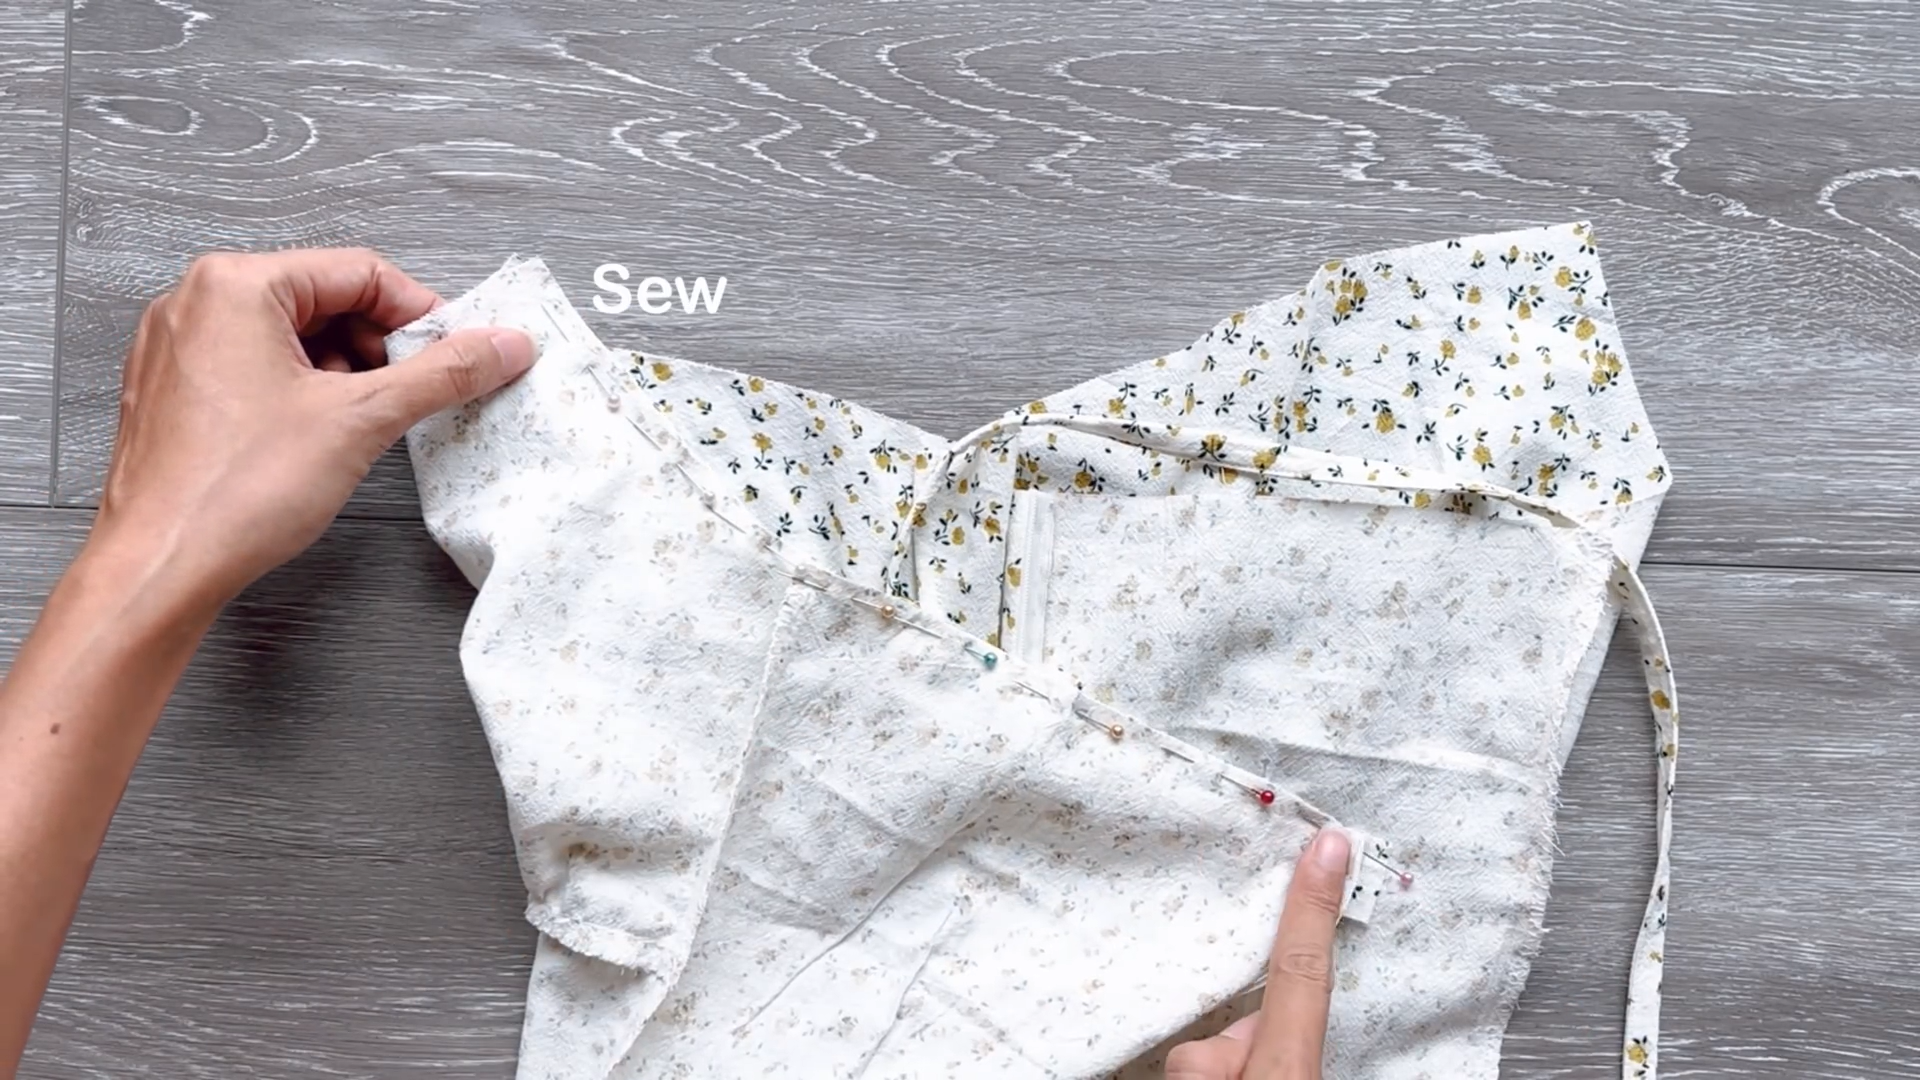
Align the front and back pieces of your dress at the sides.
Then sew them together.
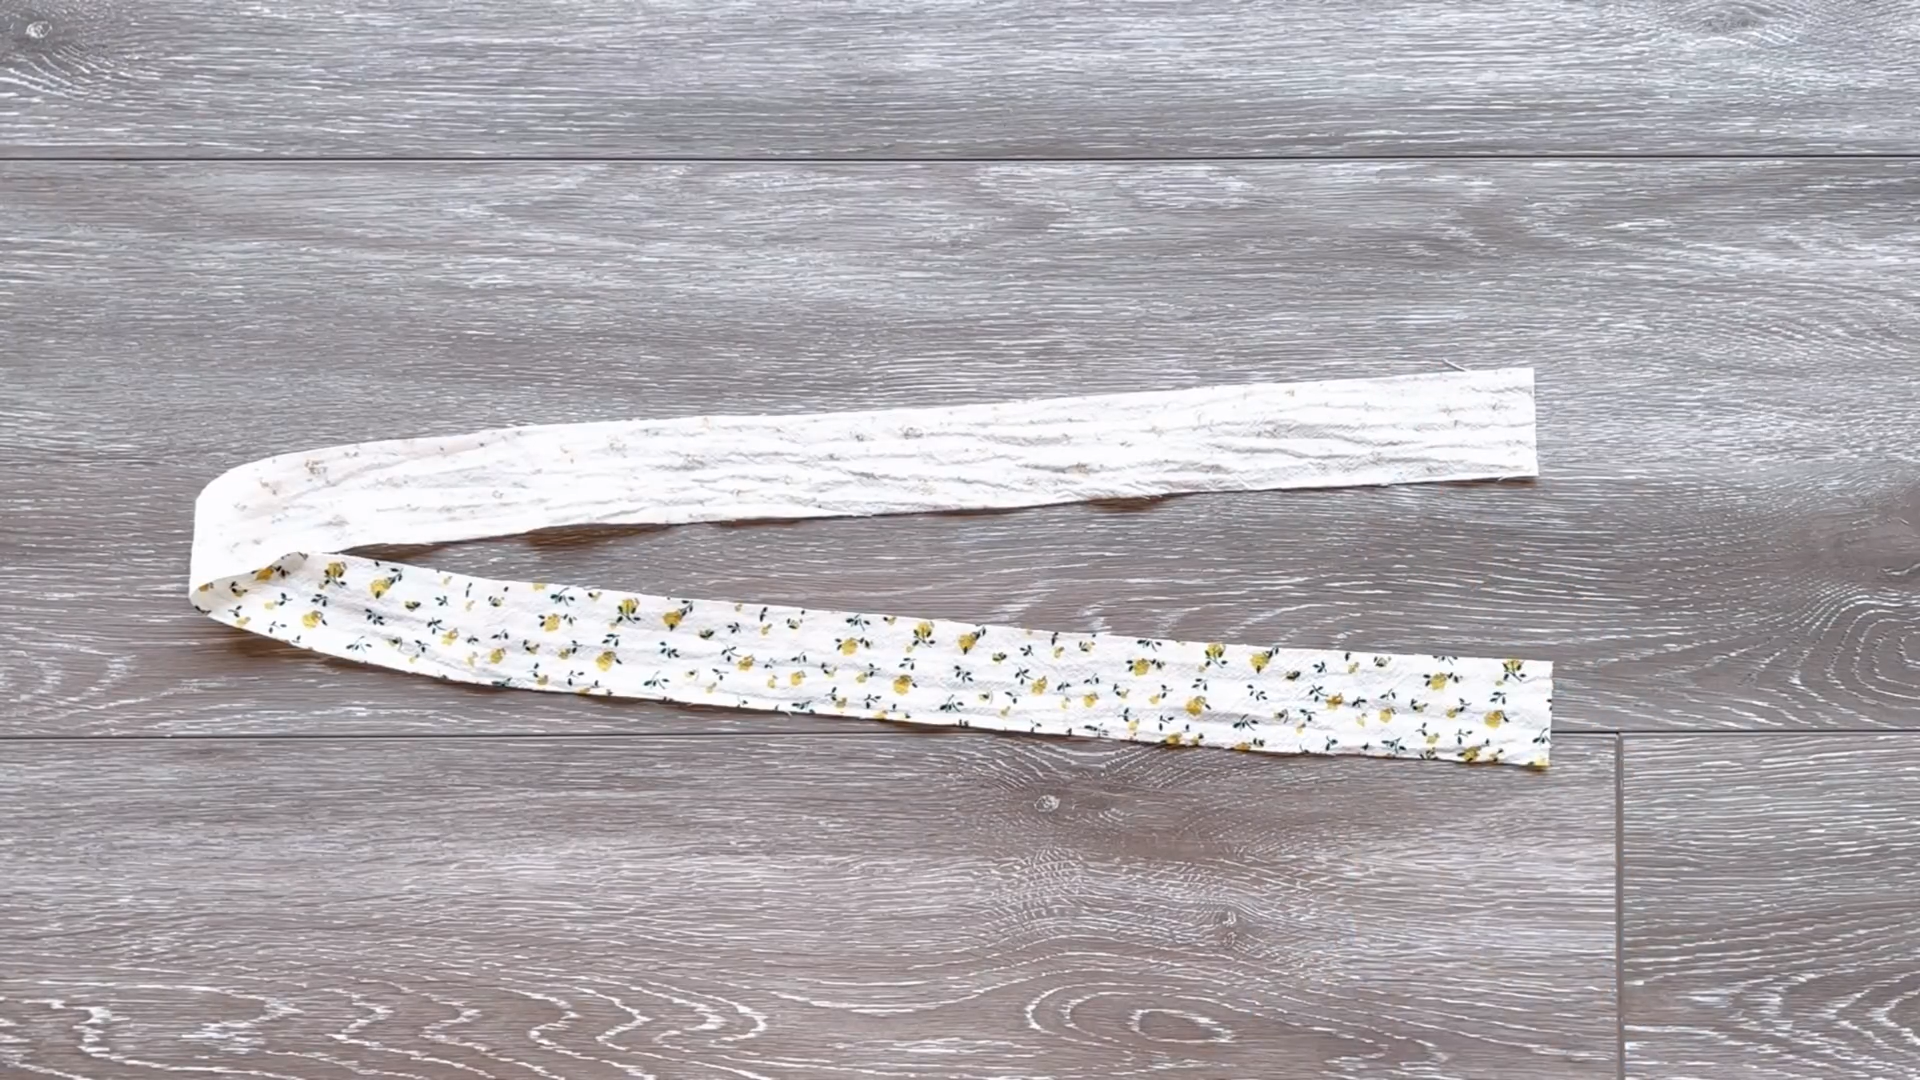
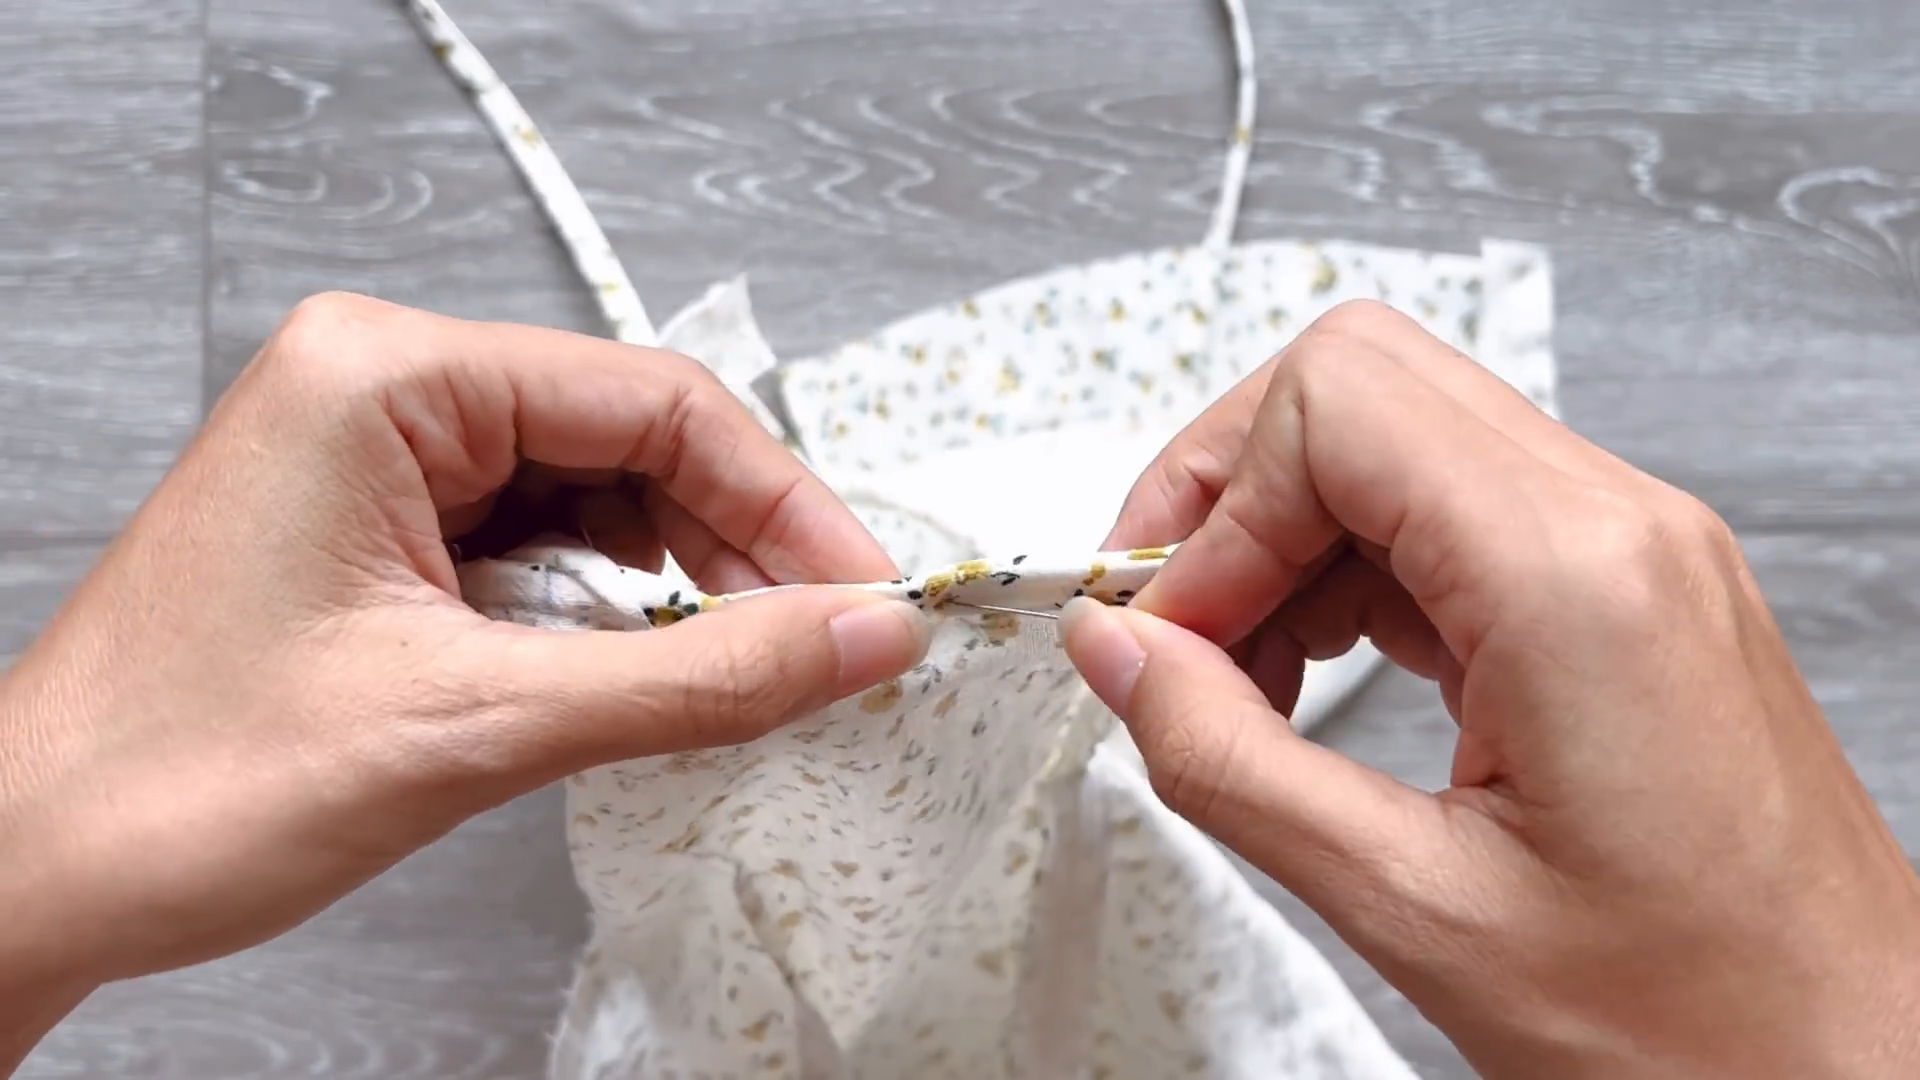
For those shoulder straps, cut a long fabric strip. It should be 3.5 cm wide and around 60 cm in length.
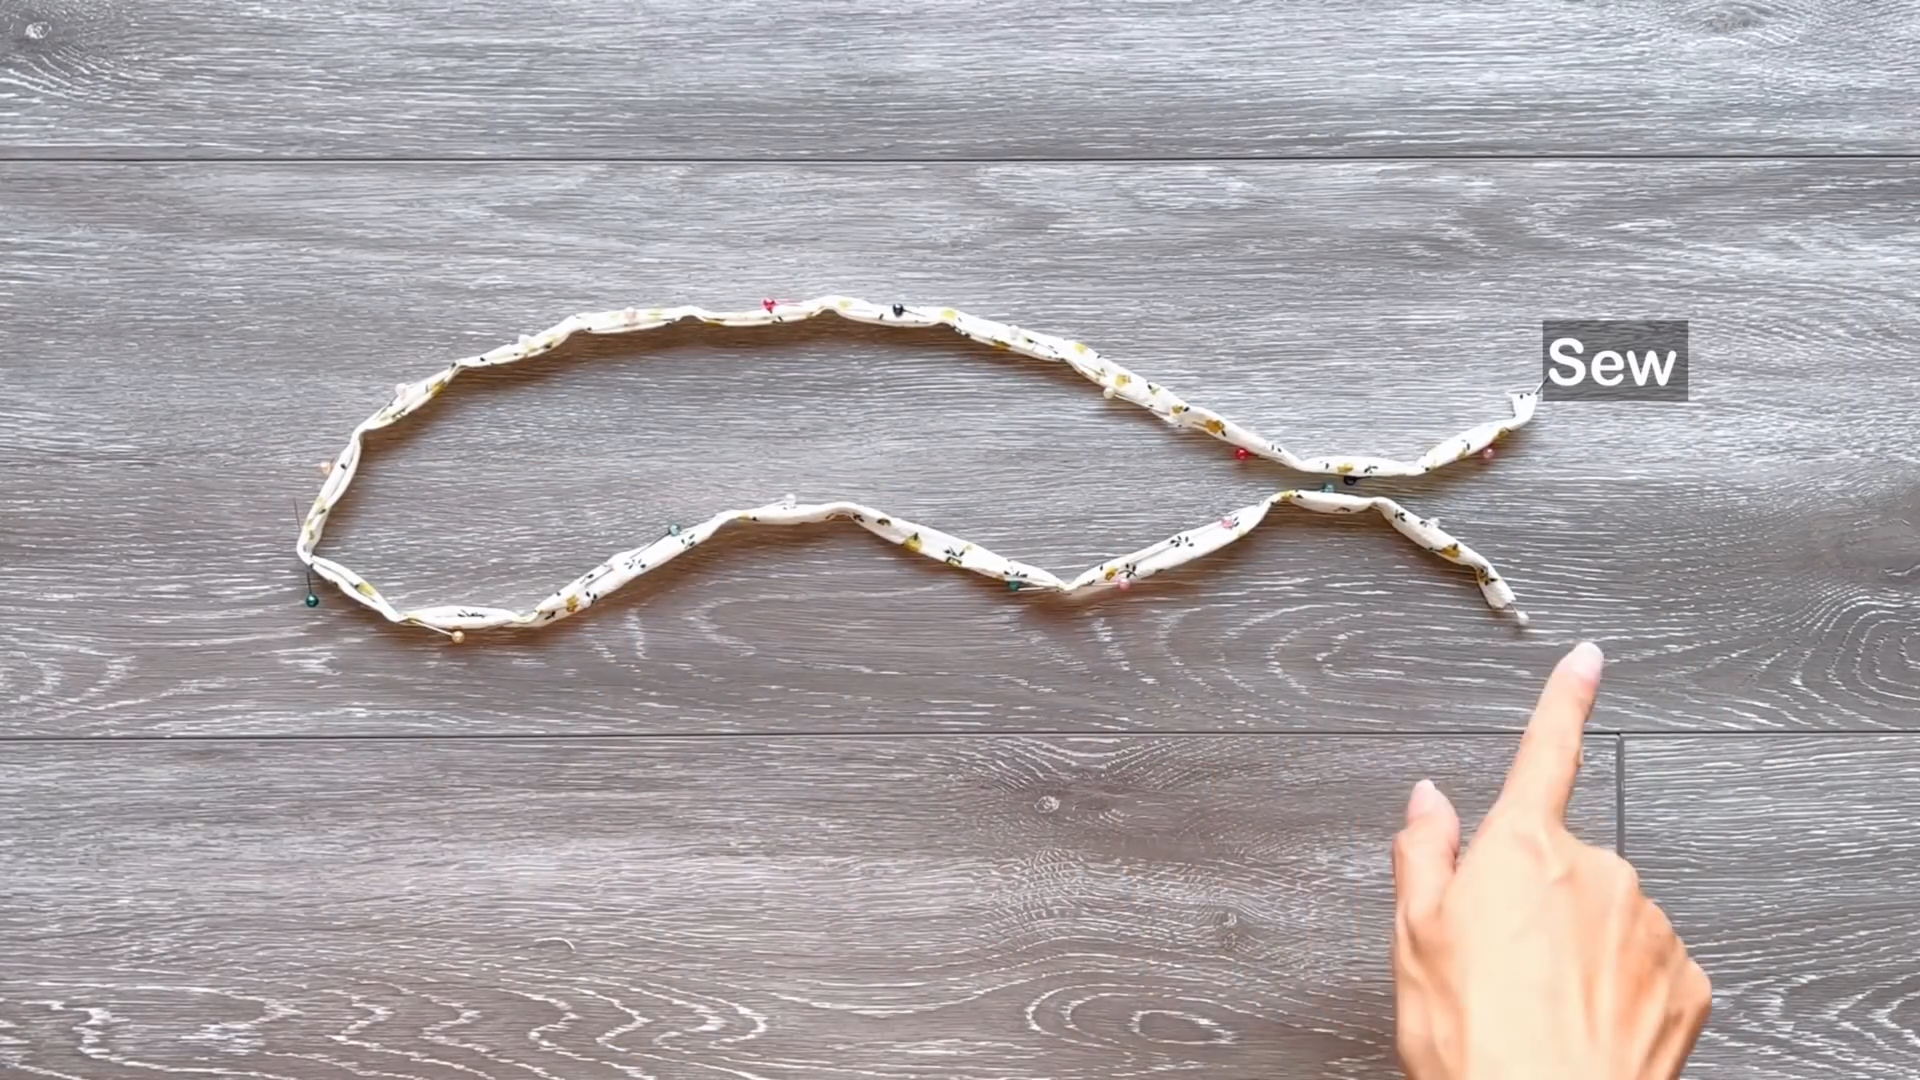
Fold the strip lengthwise, bringing the edges to the middle. Sew along this fold to create your shoulder ties.
You’ll need two of these straps
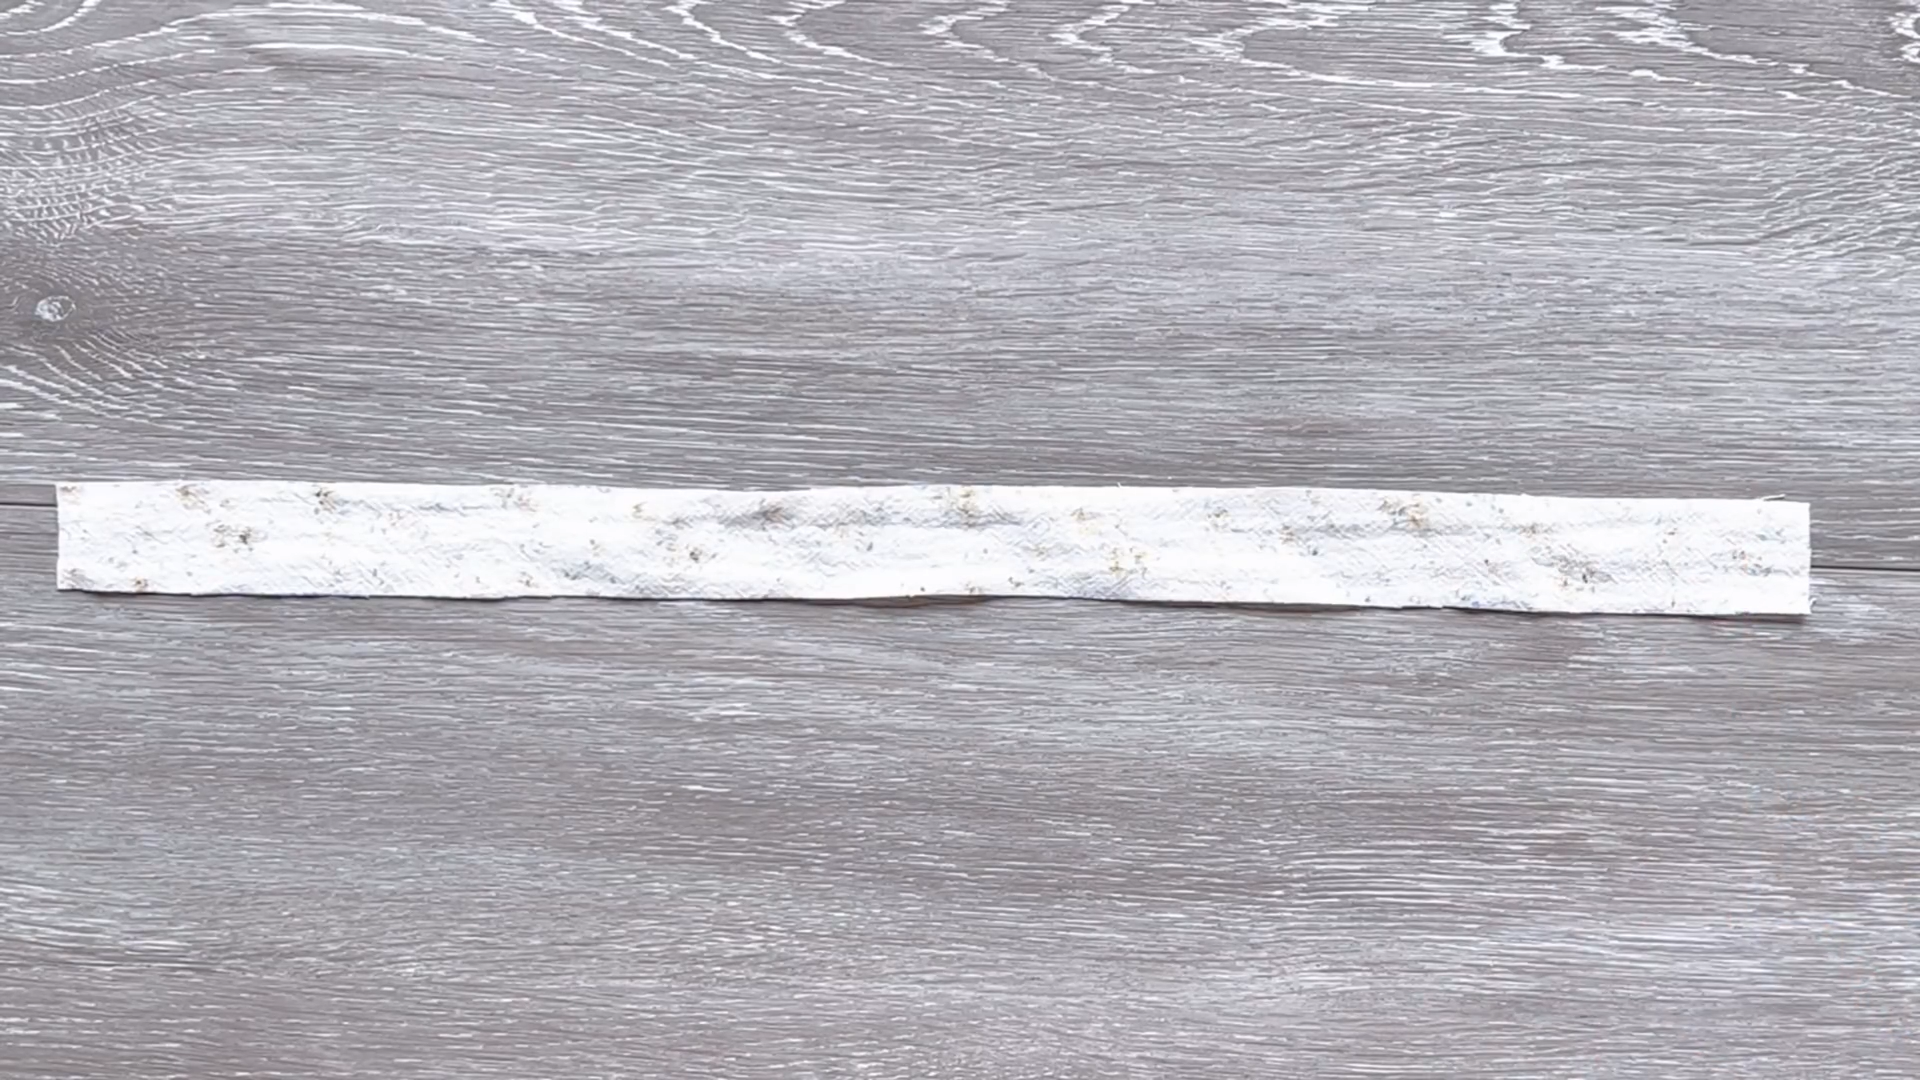
Cut another fabric strip, about 2.5 cm wide and 40 cm long.
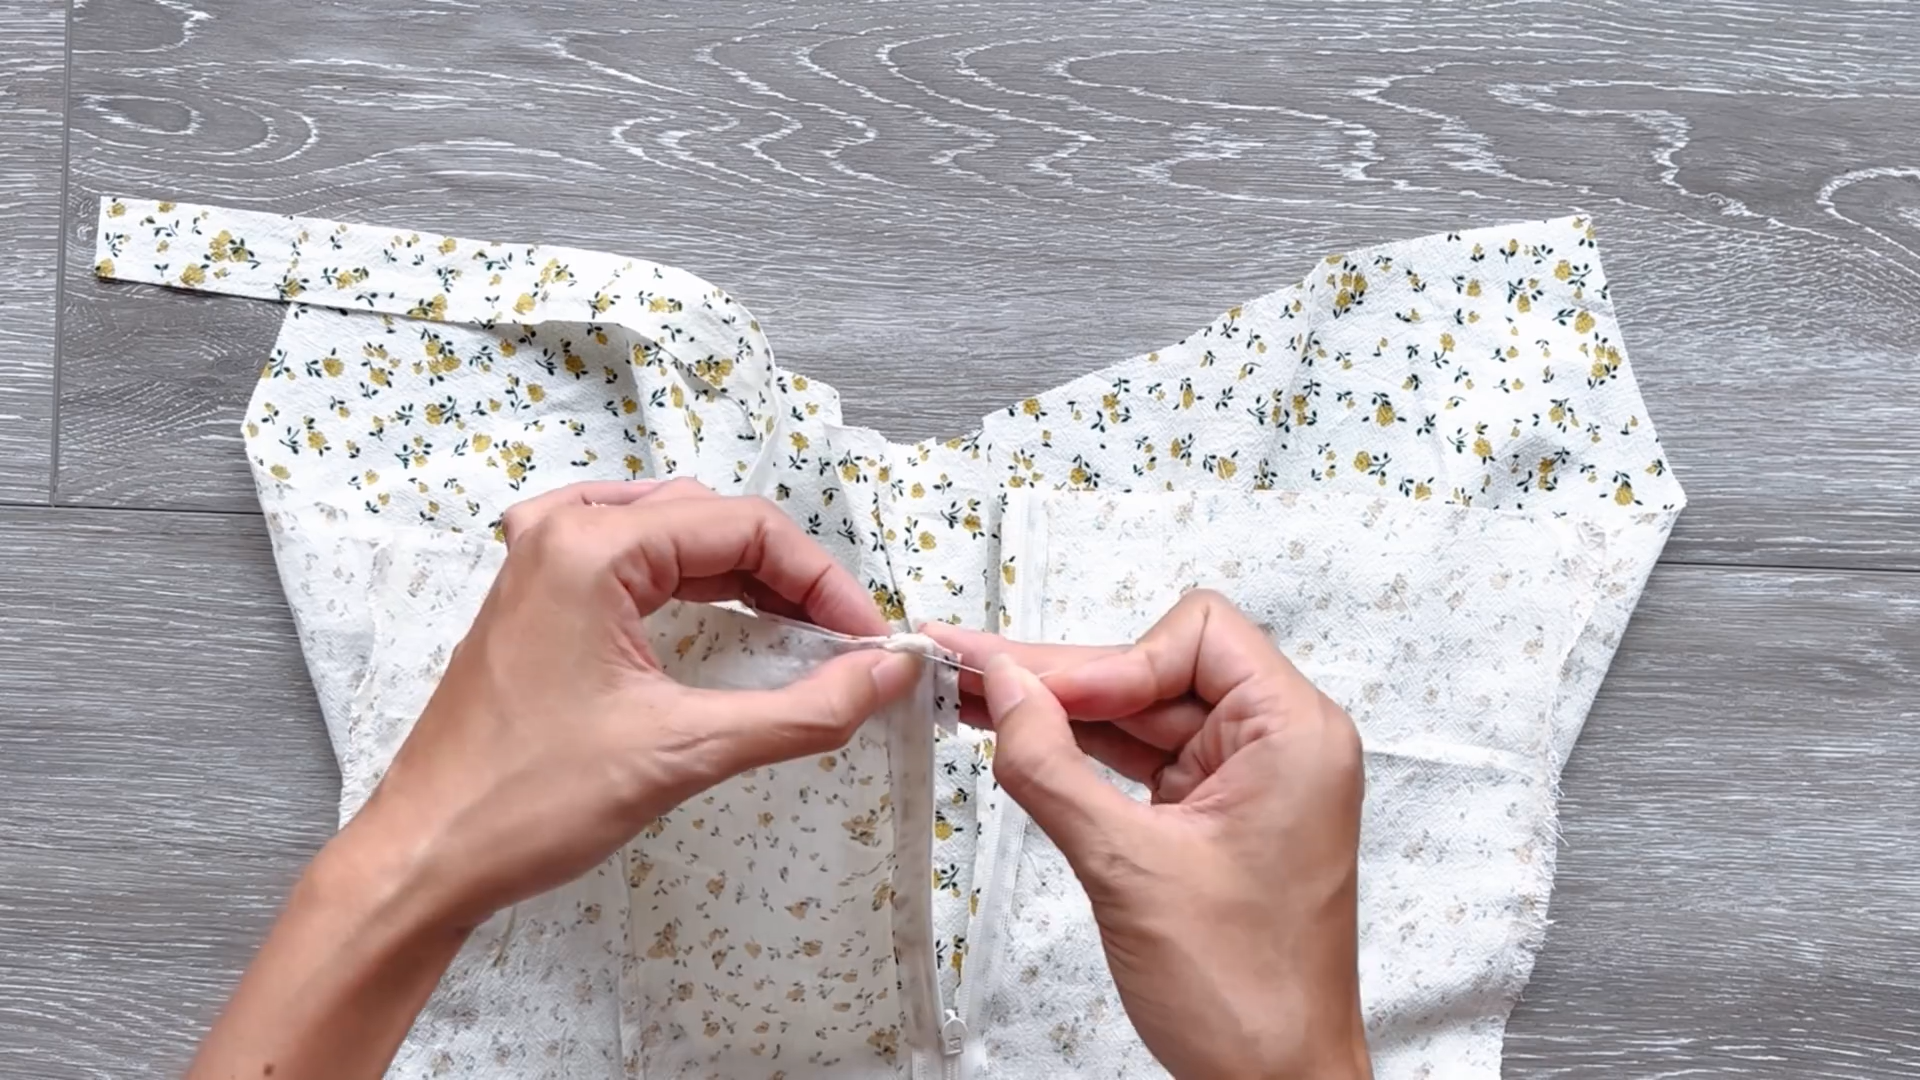
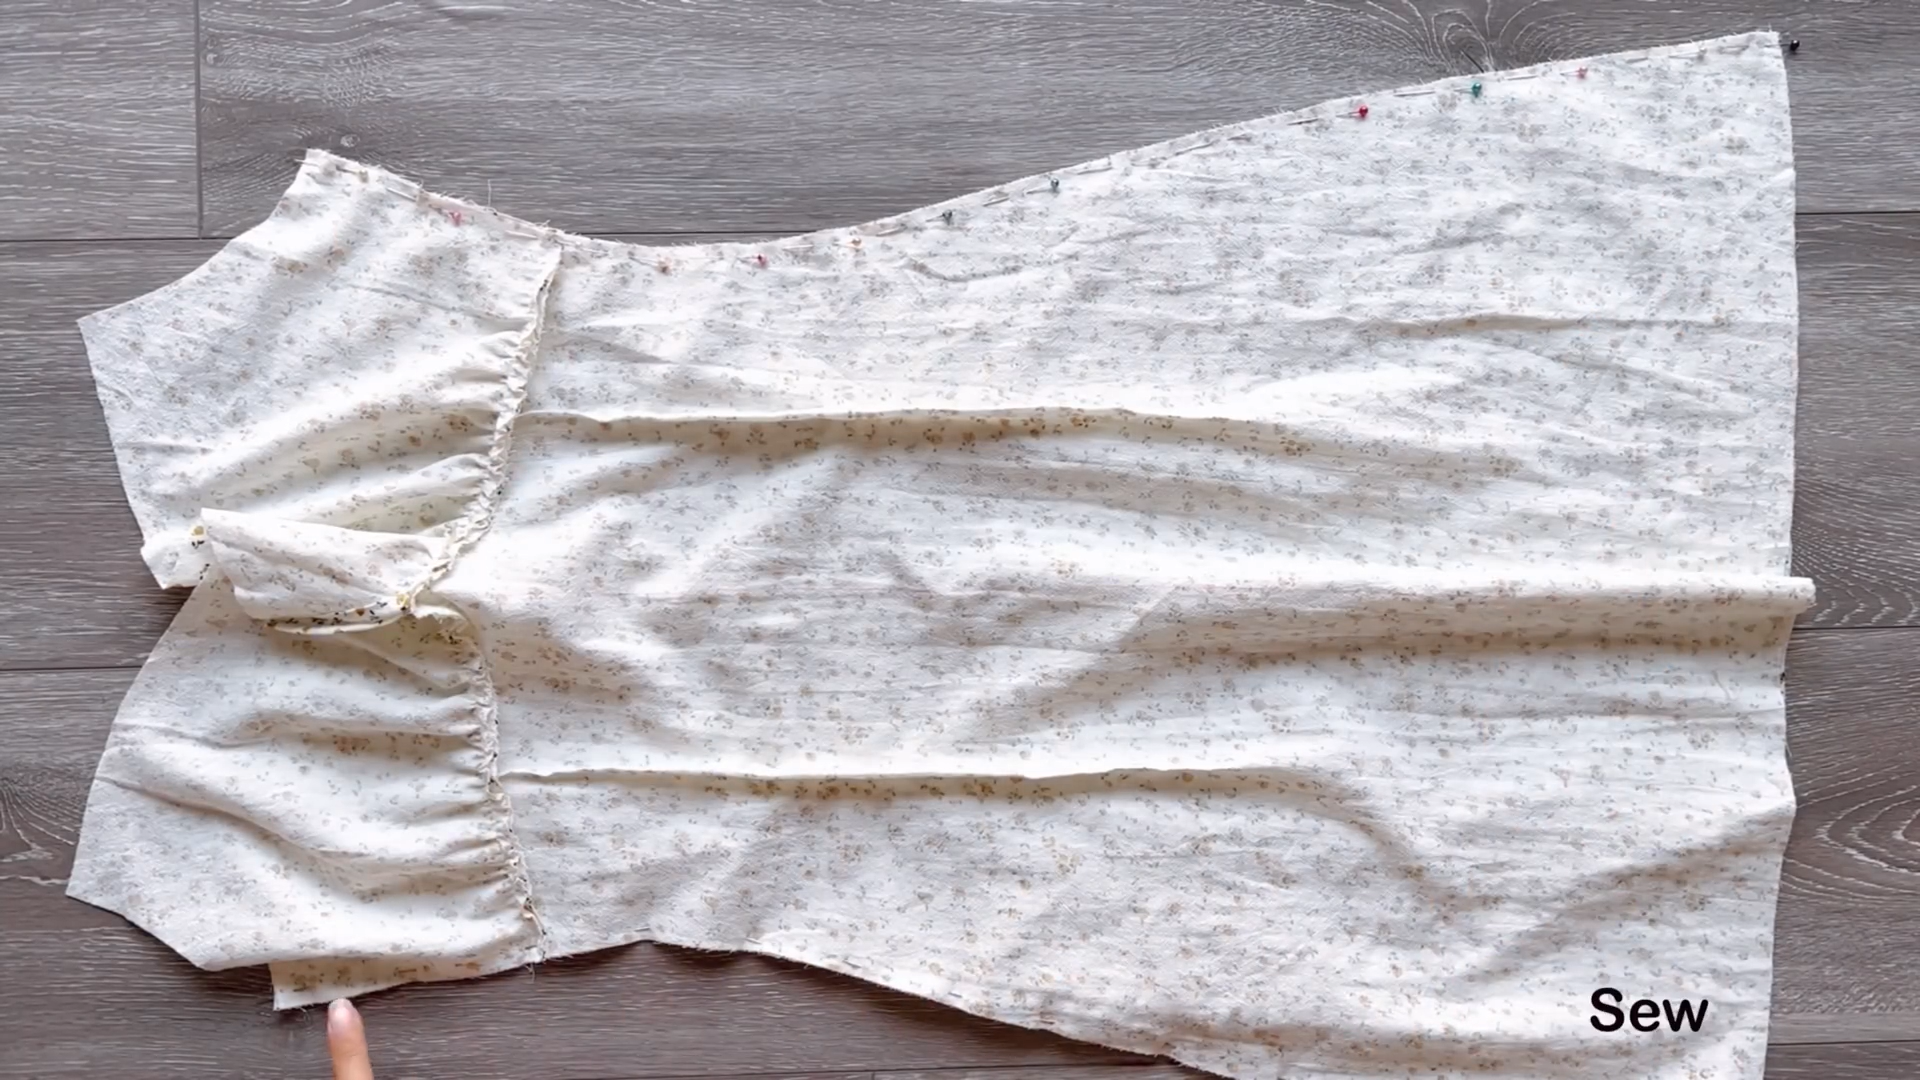
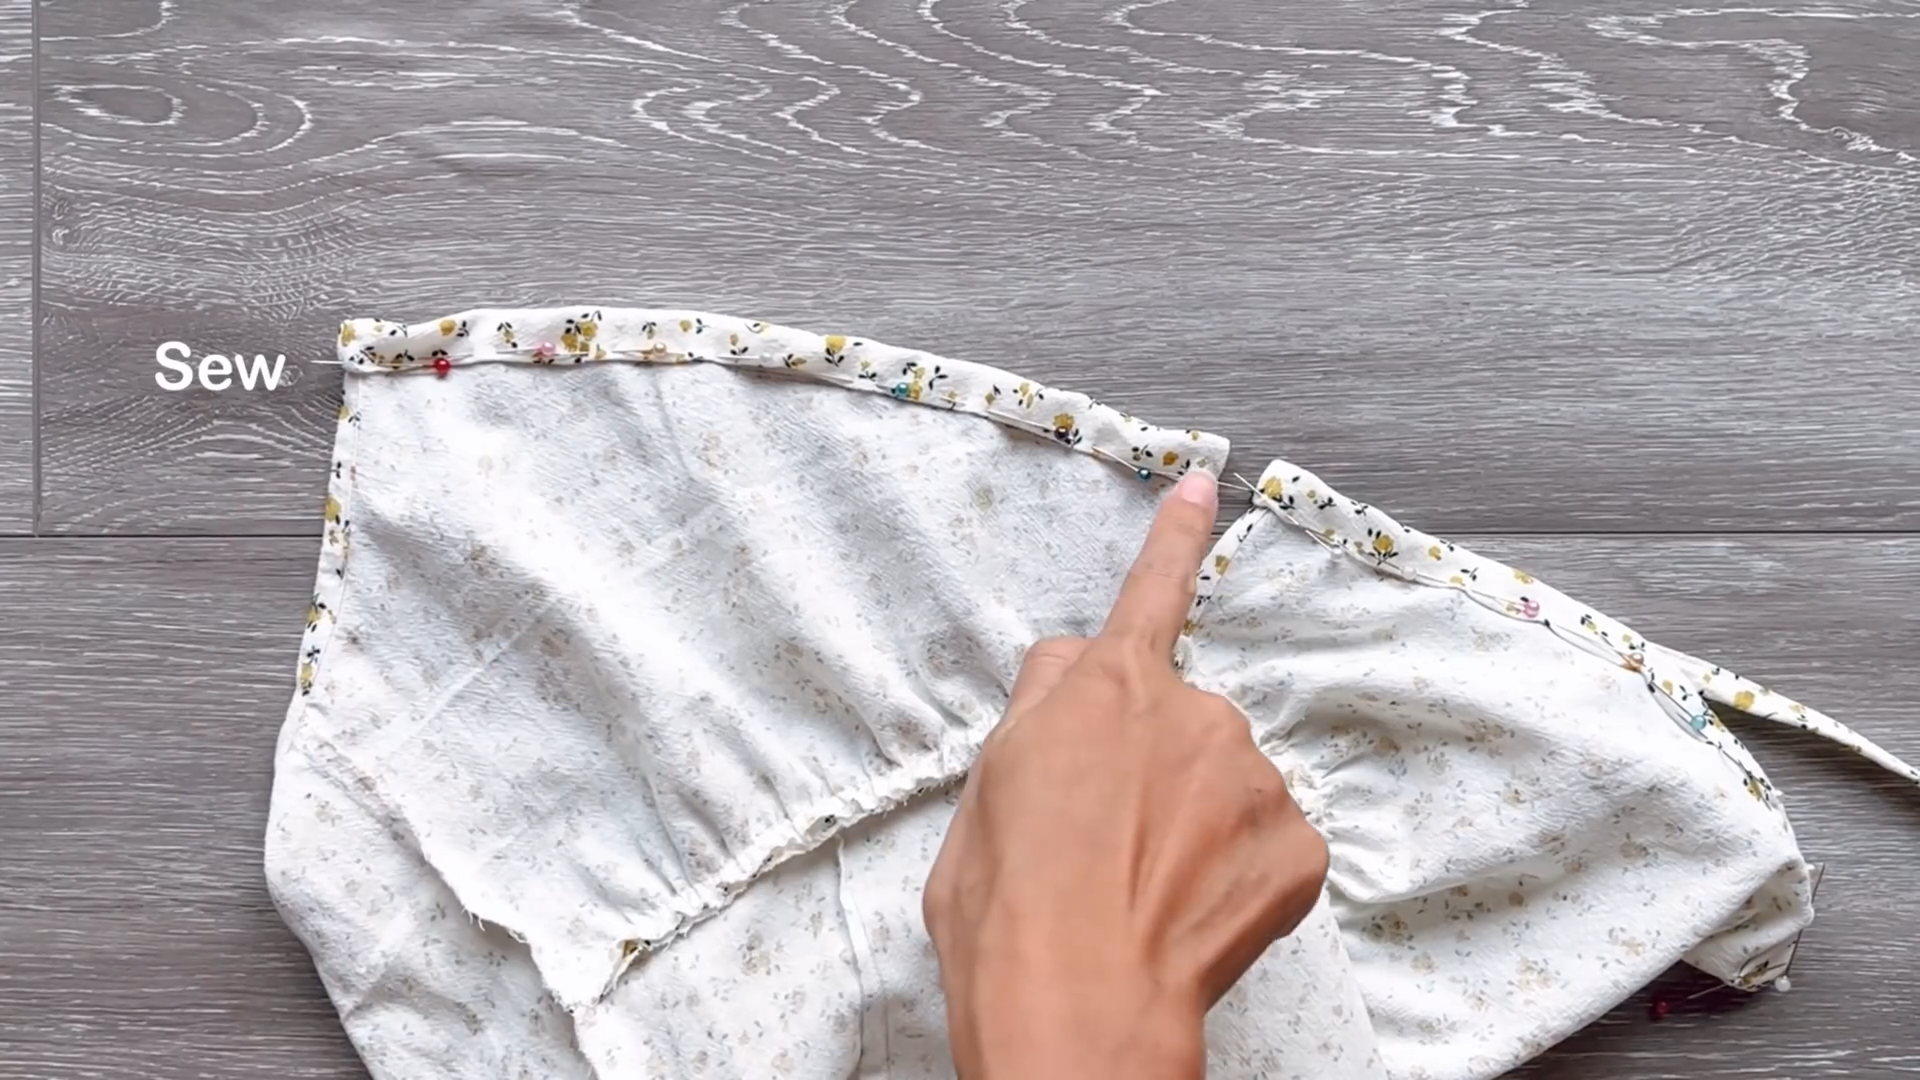
Connect the fabric strip to the top of the dress from the sideline to the top back line.
Mark at the middle of the top back line. This is where your shoulder strap will be.
Place strap at the mark between the dress and the fabric strip and sew them all together.
After the initial seam, fold the other side of the long fabric inward, concealing all those edges. Sew it shut neatly.

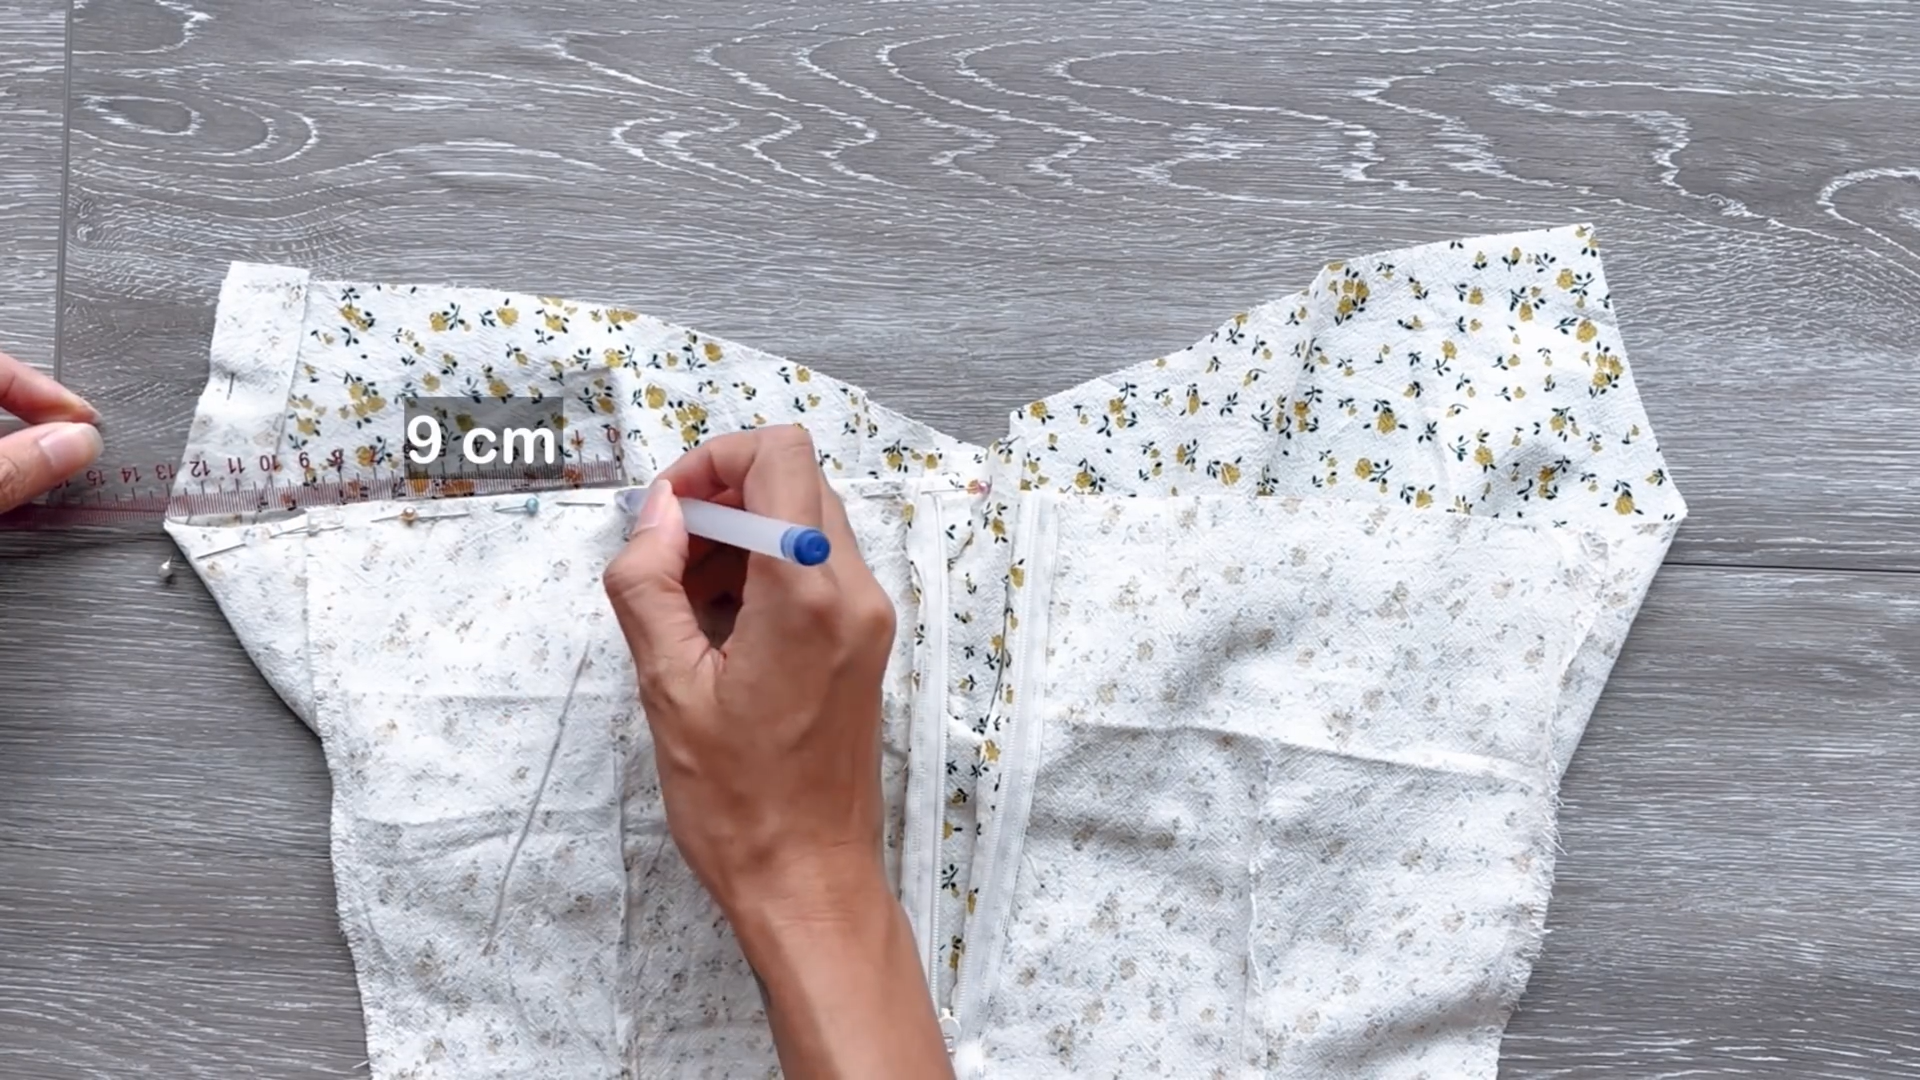
At the neckline of the bustier, draw a line approximately 3.5 cm below it. This will be our fabric hold.
Fold the fabric inside along this line and secure it with stitches.
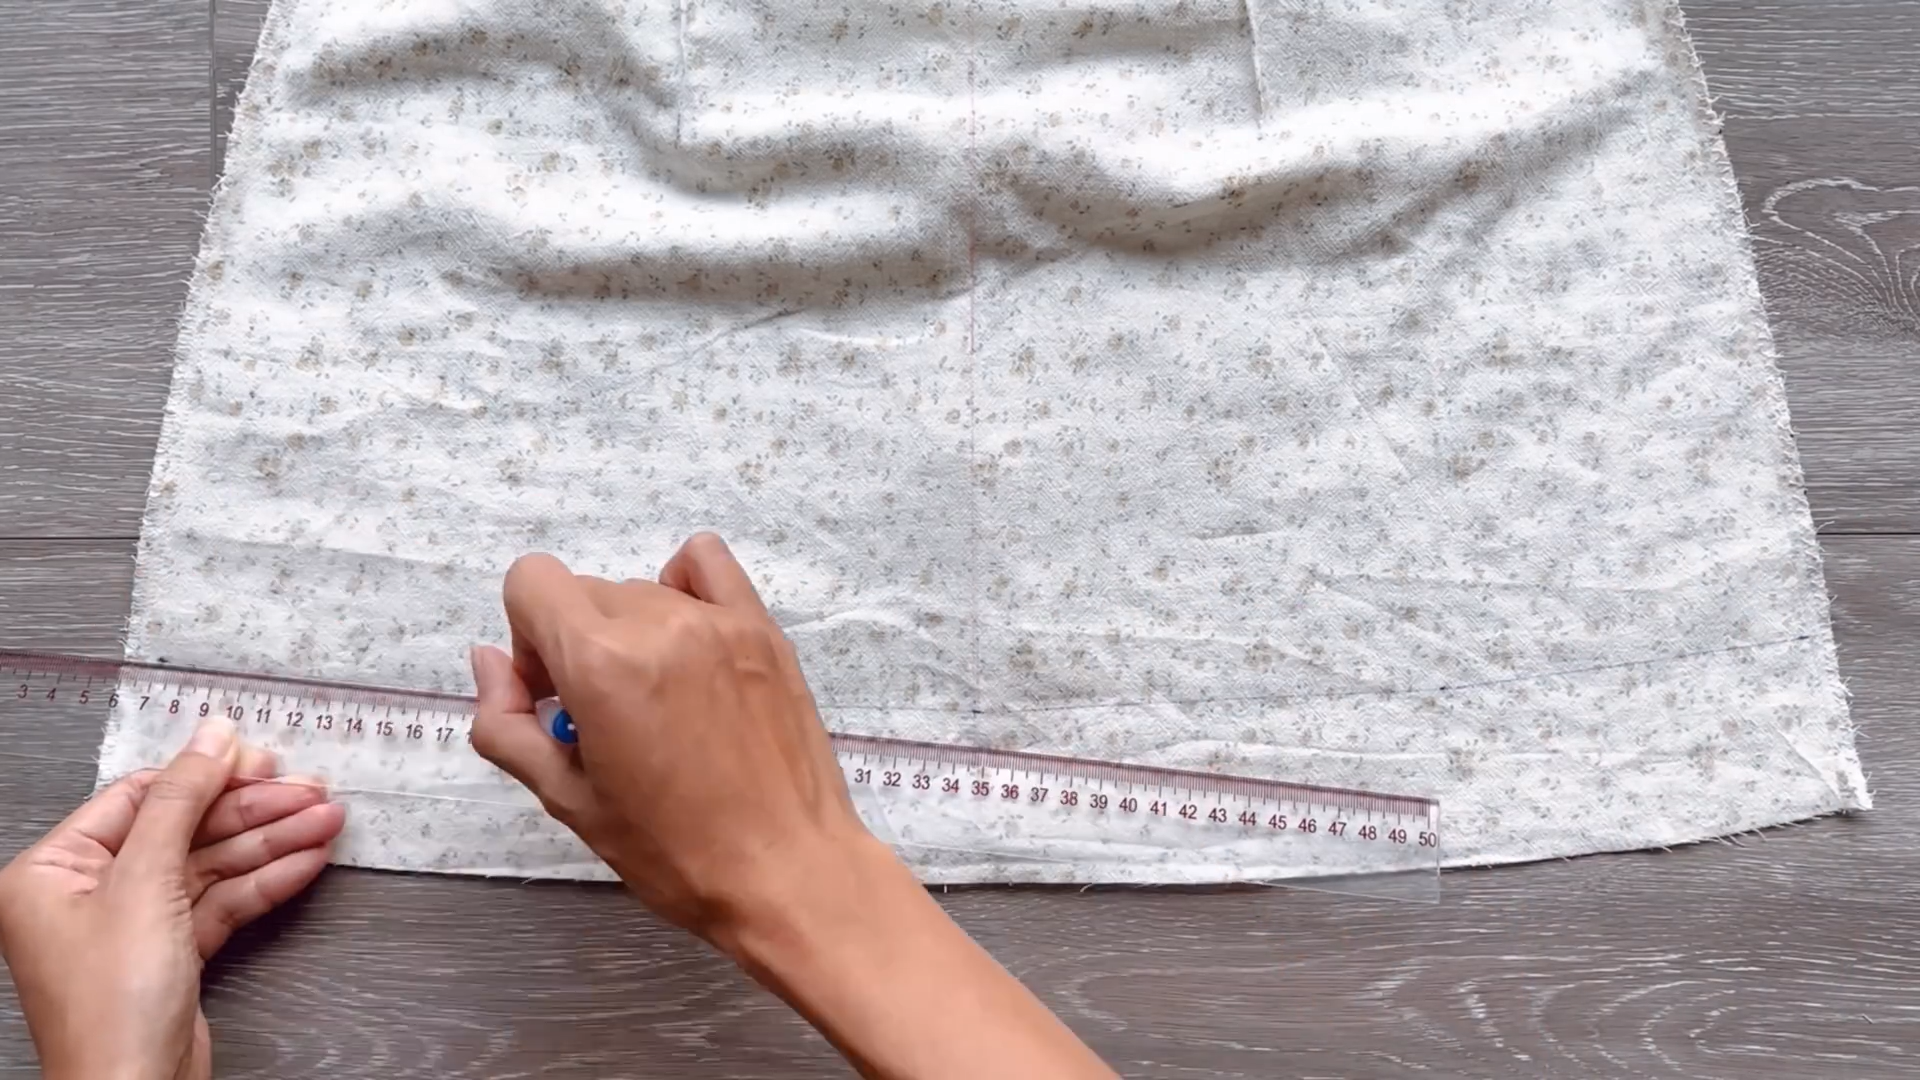
To finish the end of the dress, draw a line about 6 cm above the ending line of your dress.
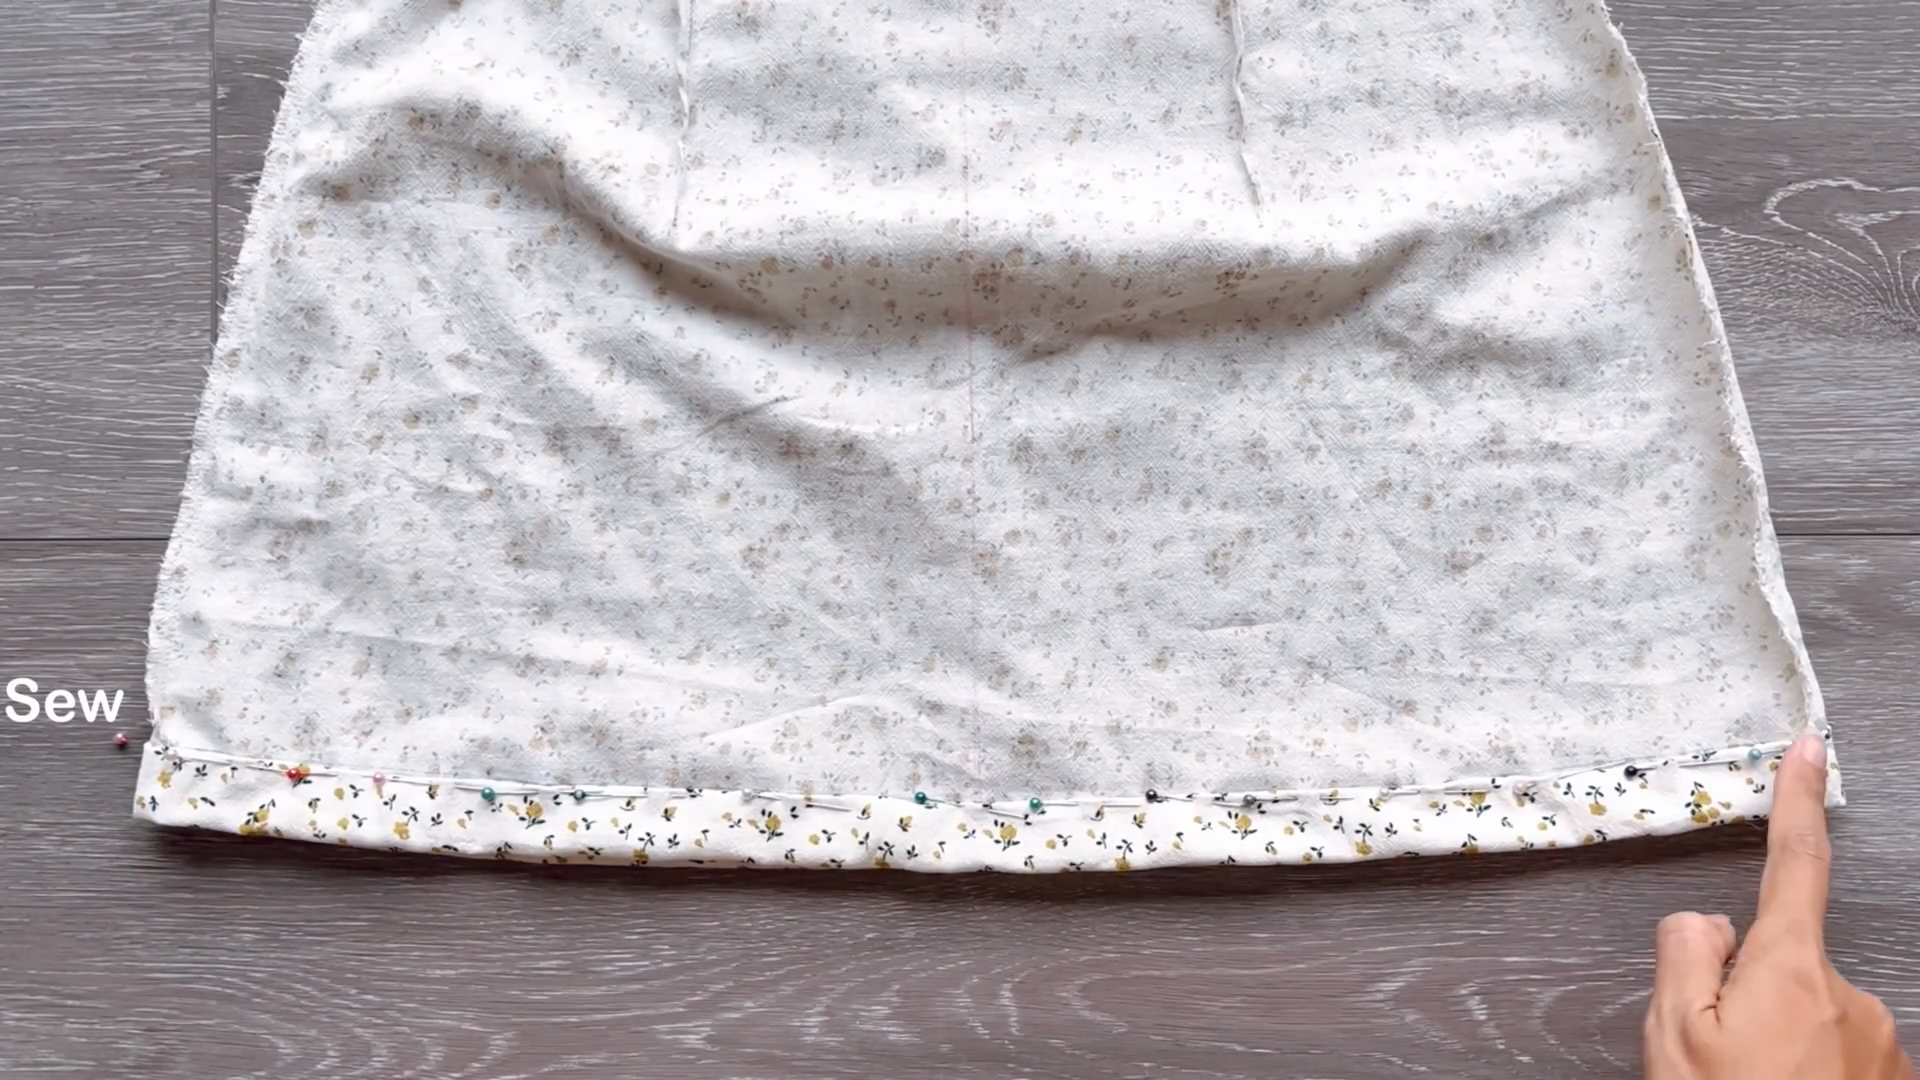
Fold the fabric to meet this line and stitch it together. The hem is complete.
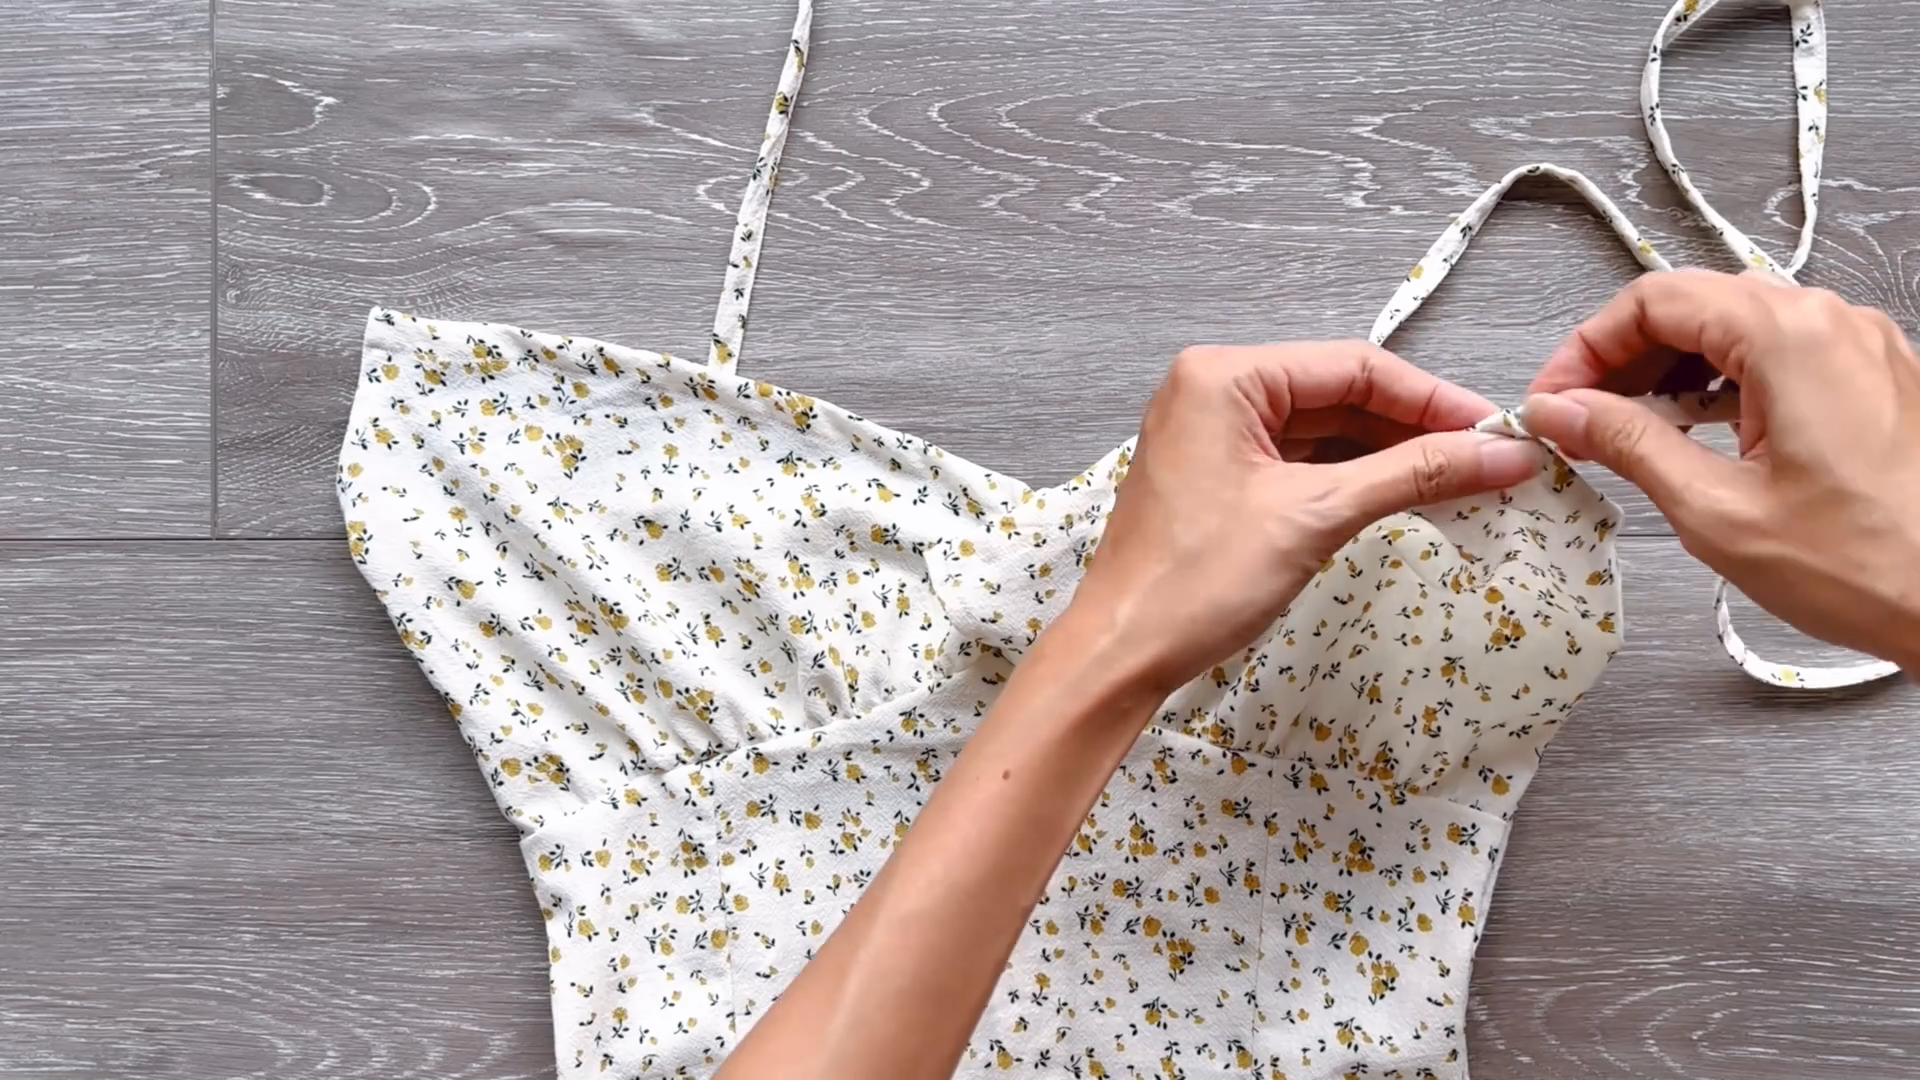
Thread your shoulder straps through the fabric hold at the bustier part. Let them meet in the middle of your chest.
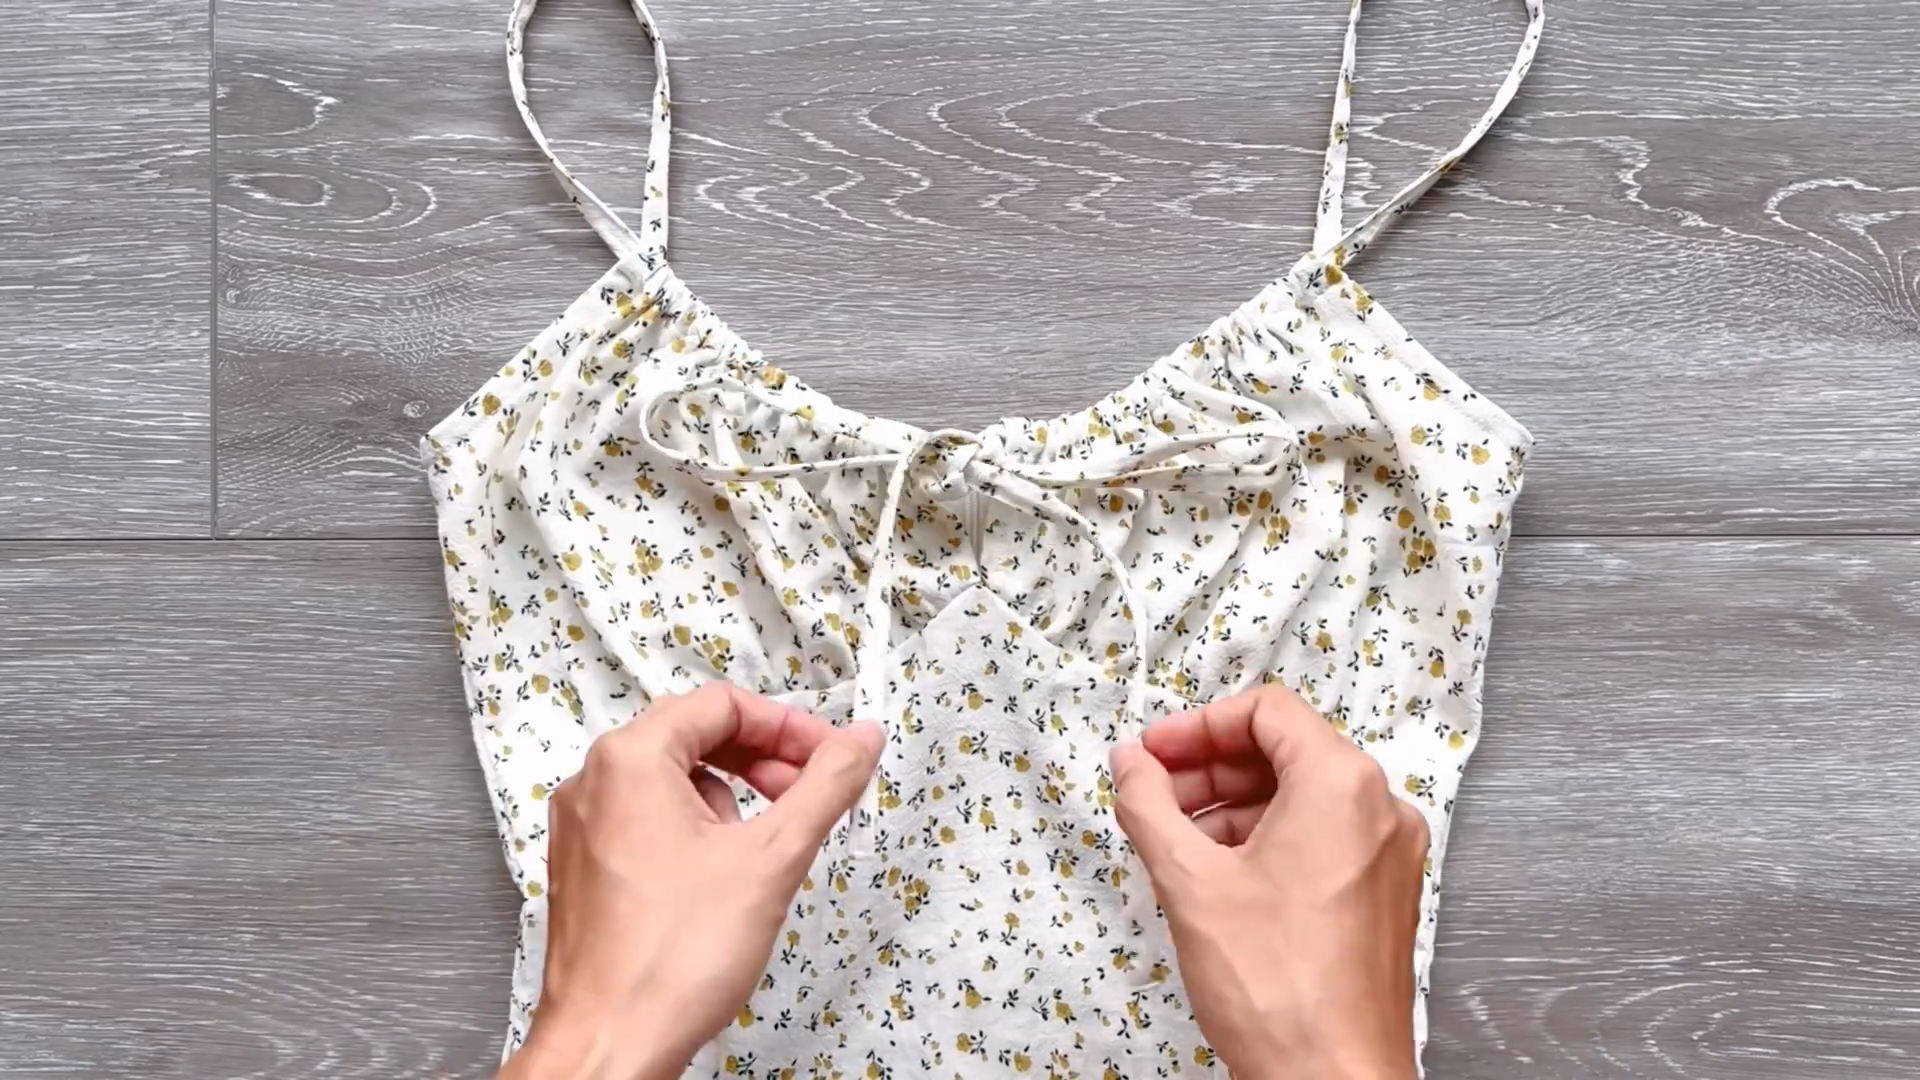
Adjust the straps to your liking.

DIY Sleeveless milkmaid mini dress
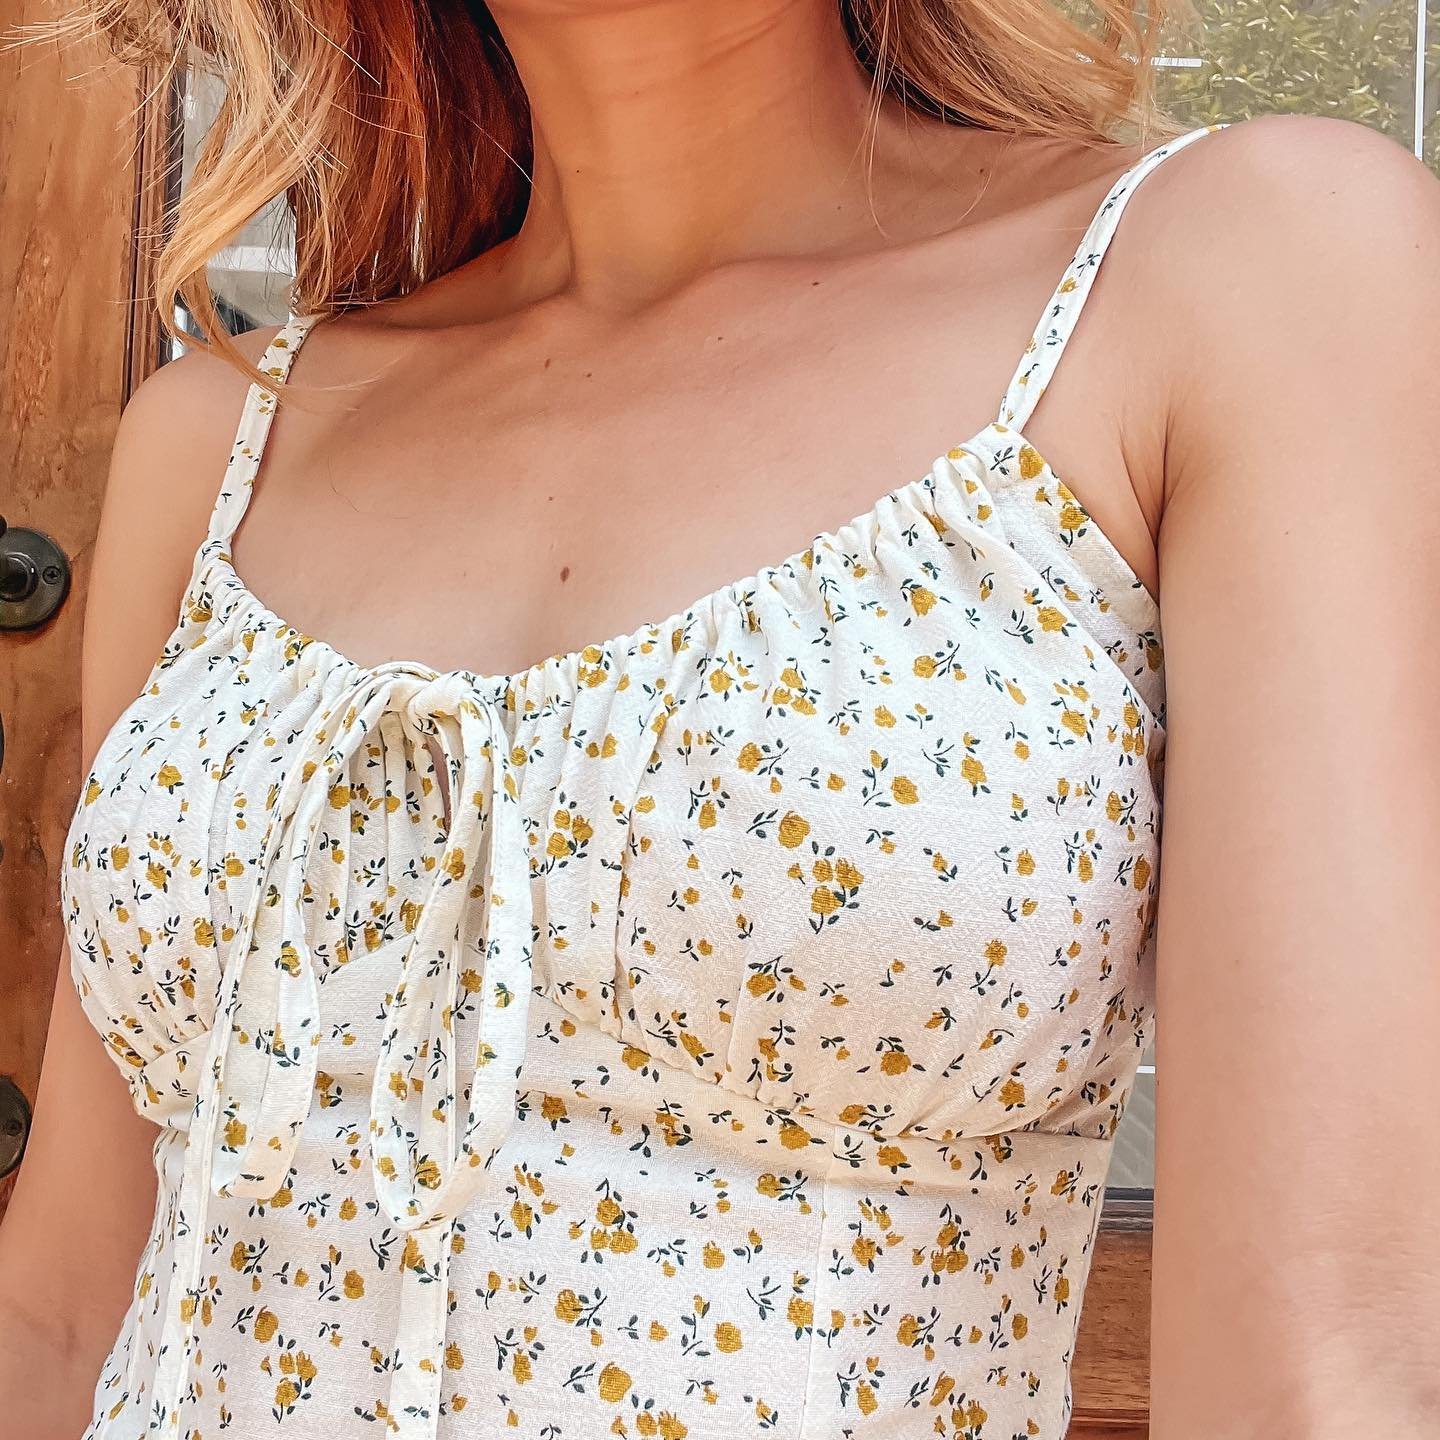
There you have it!
This dress is very cute and it also has a touch of flirty allure. The mini length adds an active vibe for the dress which makes it perfect for a lunch date.
I hope you found my step-by-step guide helpful and inspiring. If you’re interested in making your own waistcoat, give it a try and let me know how it goes!
Until then, happy sewing!