DIY Slip dress - Refashion old dress into slip dress - How to make slip dress

DIY Slip dress

Welcome and welcome back to my sewing blog!
The vibe of summer is still here. So I decided to make the slip dress. And I'm so happy to share with you how I made it. In fact, I transformed it from my old dress. It turns out so good and I love it a lot.
So let’s get started!
WHAT YOU’LL NEED
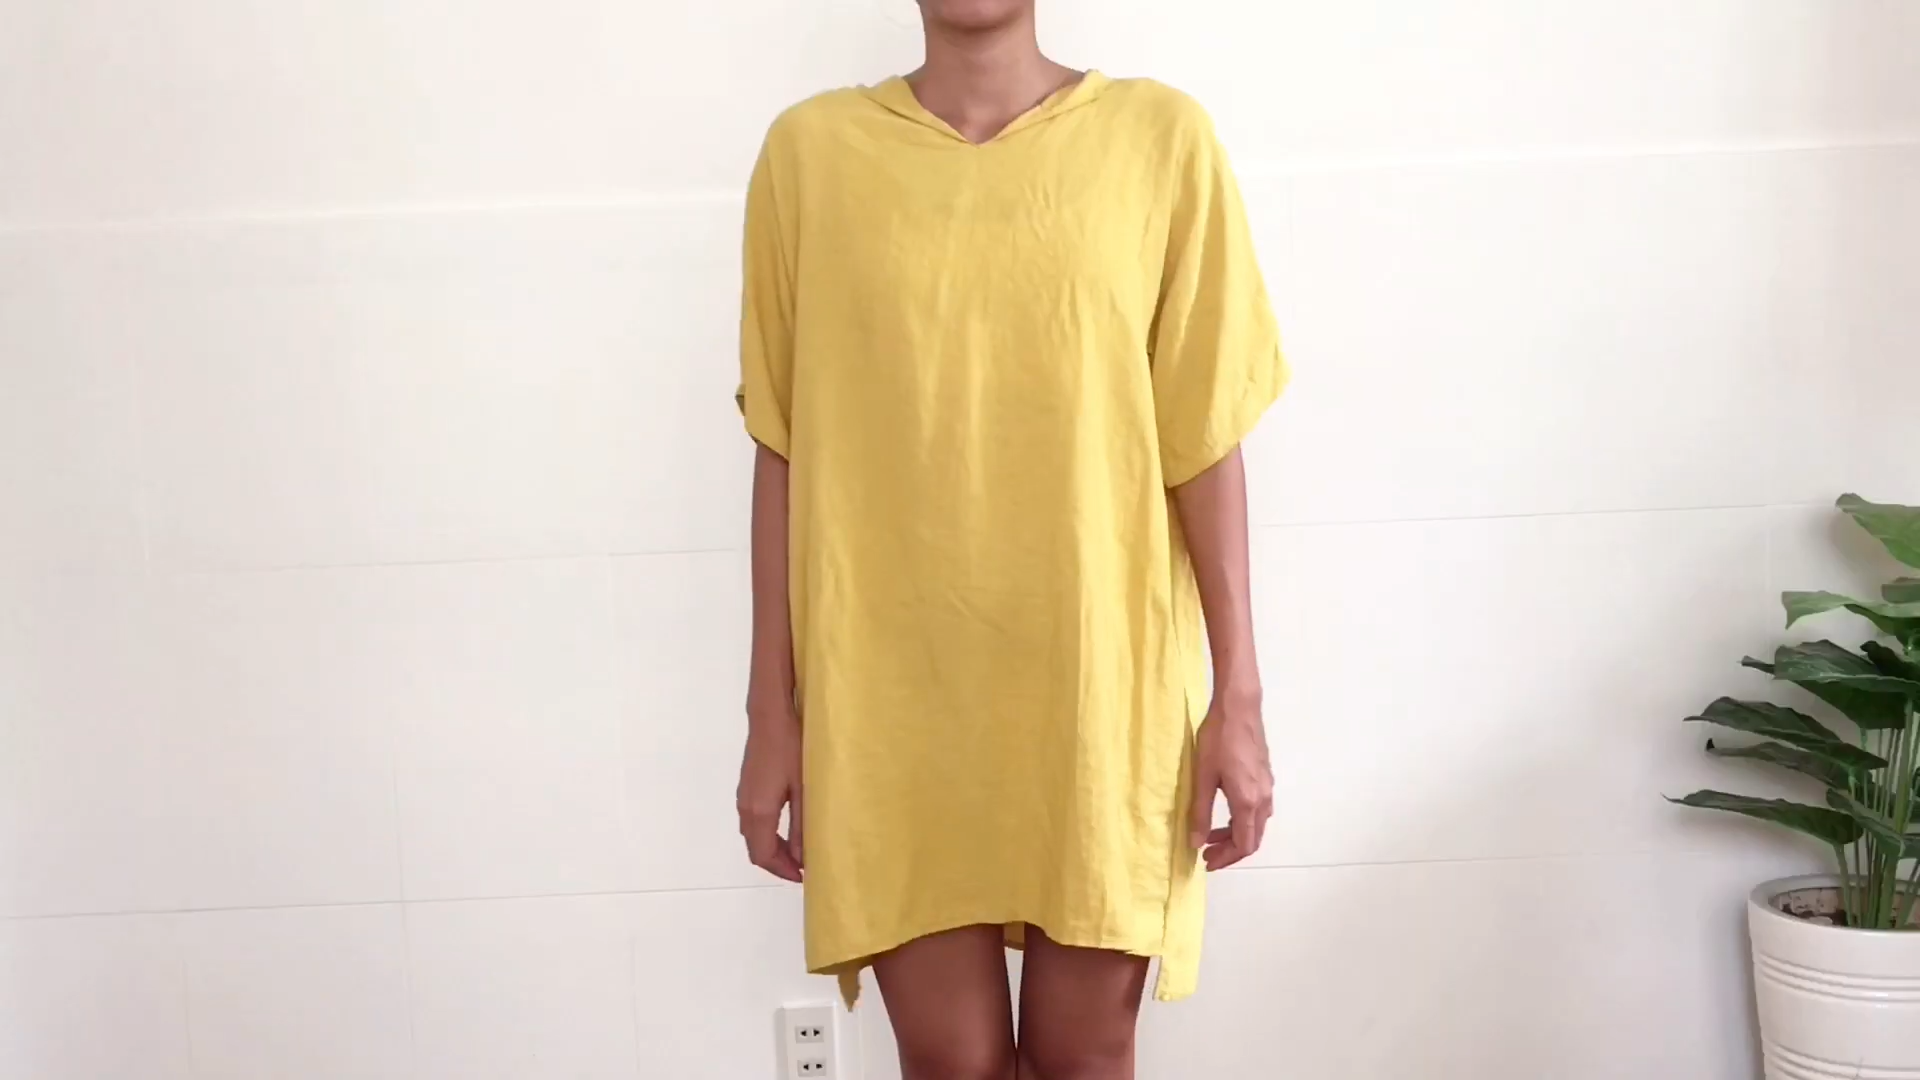
An oversized dress
Scissors
Measuring tape
Pins
Sewing machine
Fabric marker
Iron
Plastic band
SEWING THE DRESS
THE BACK
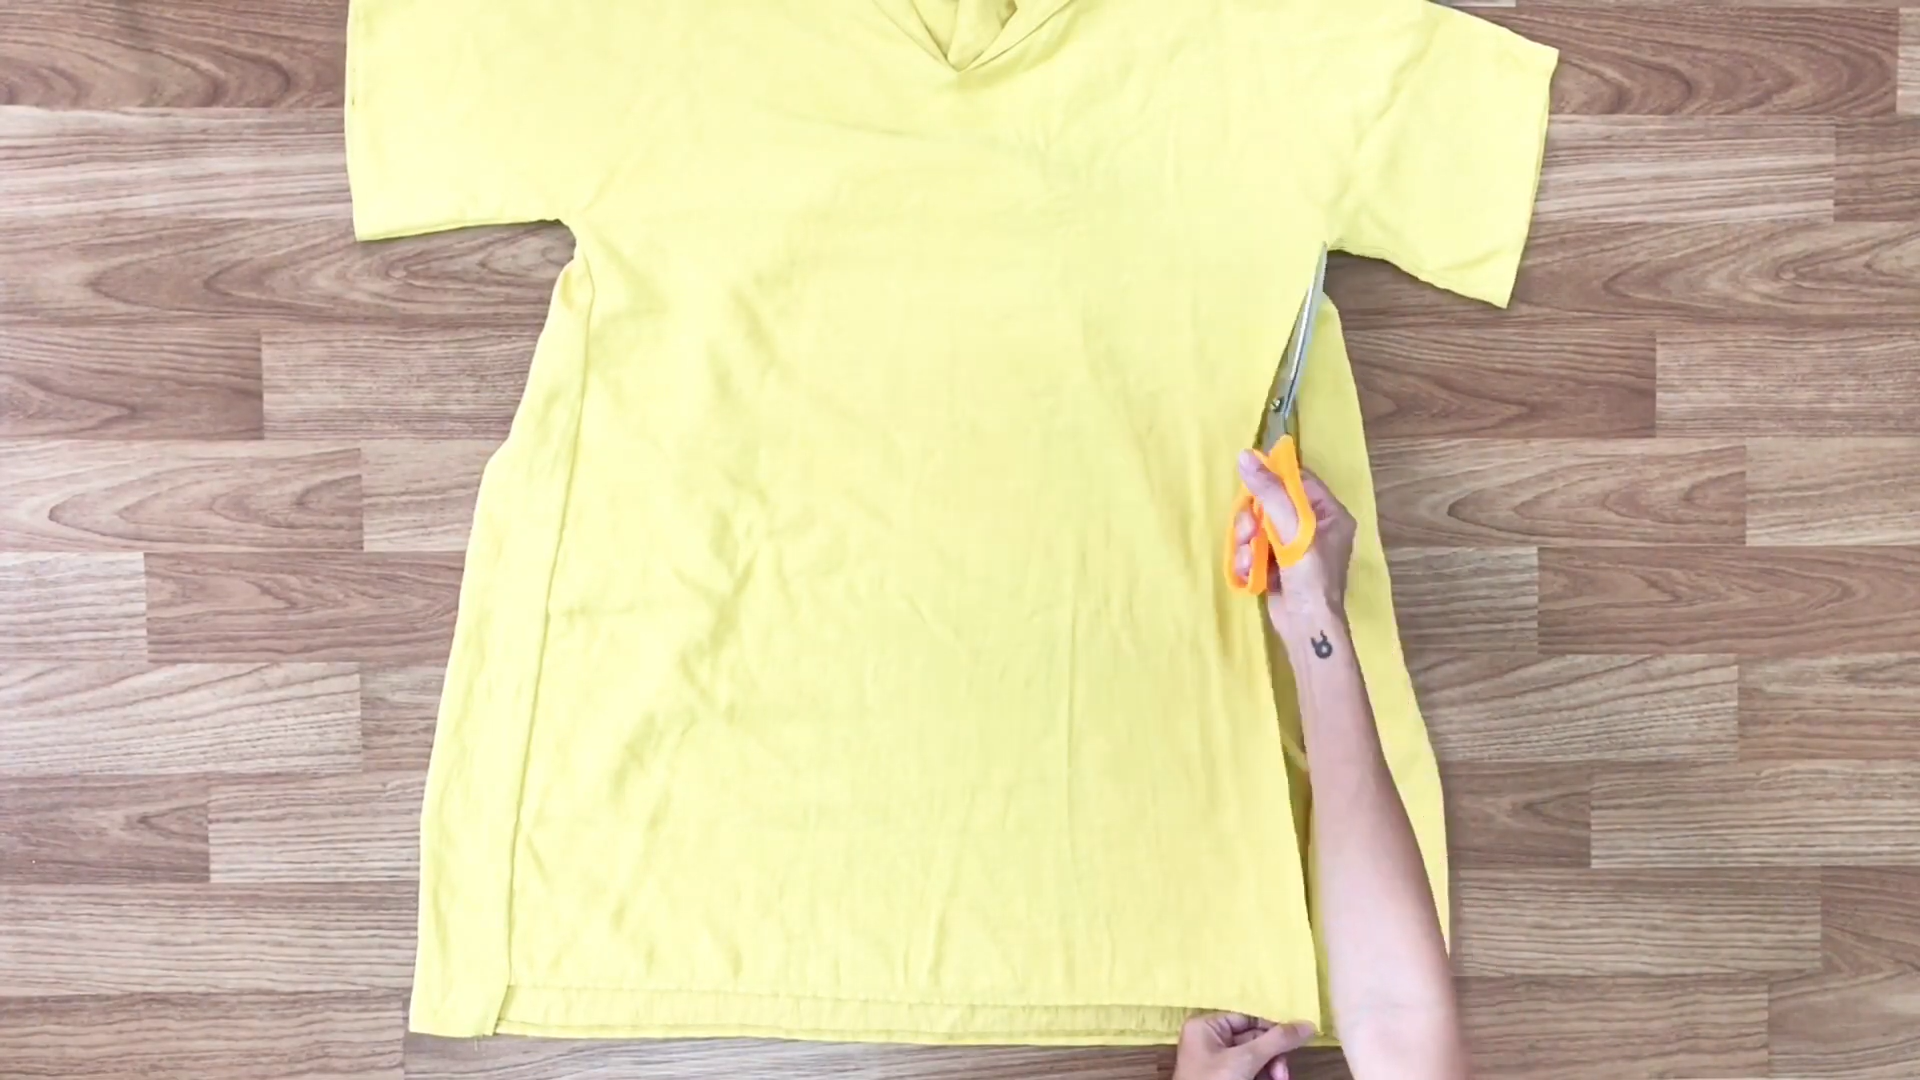
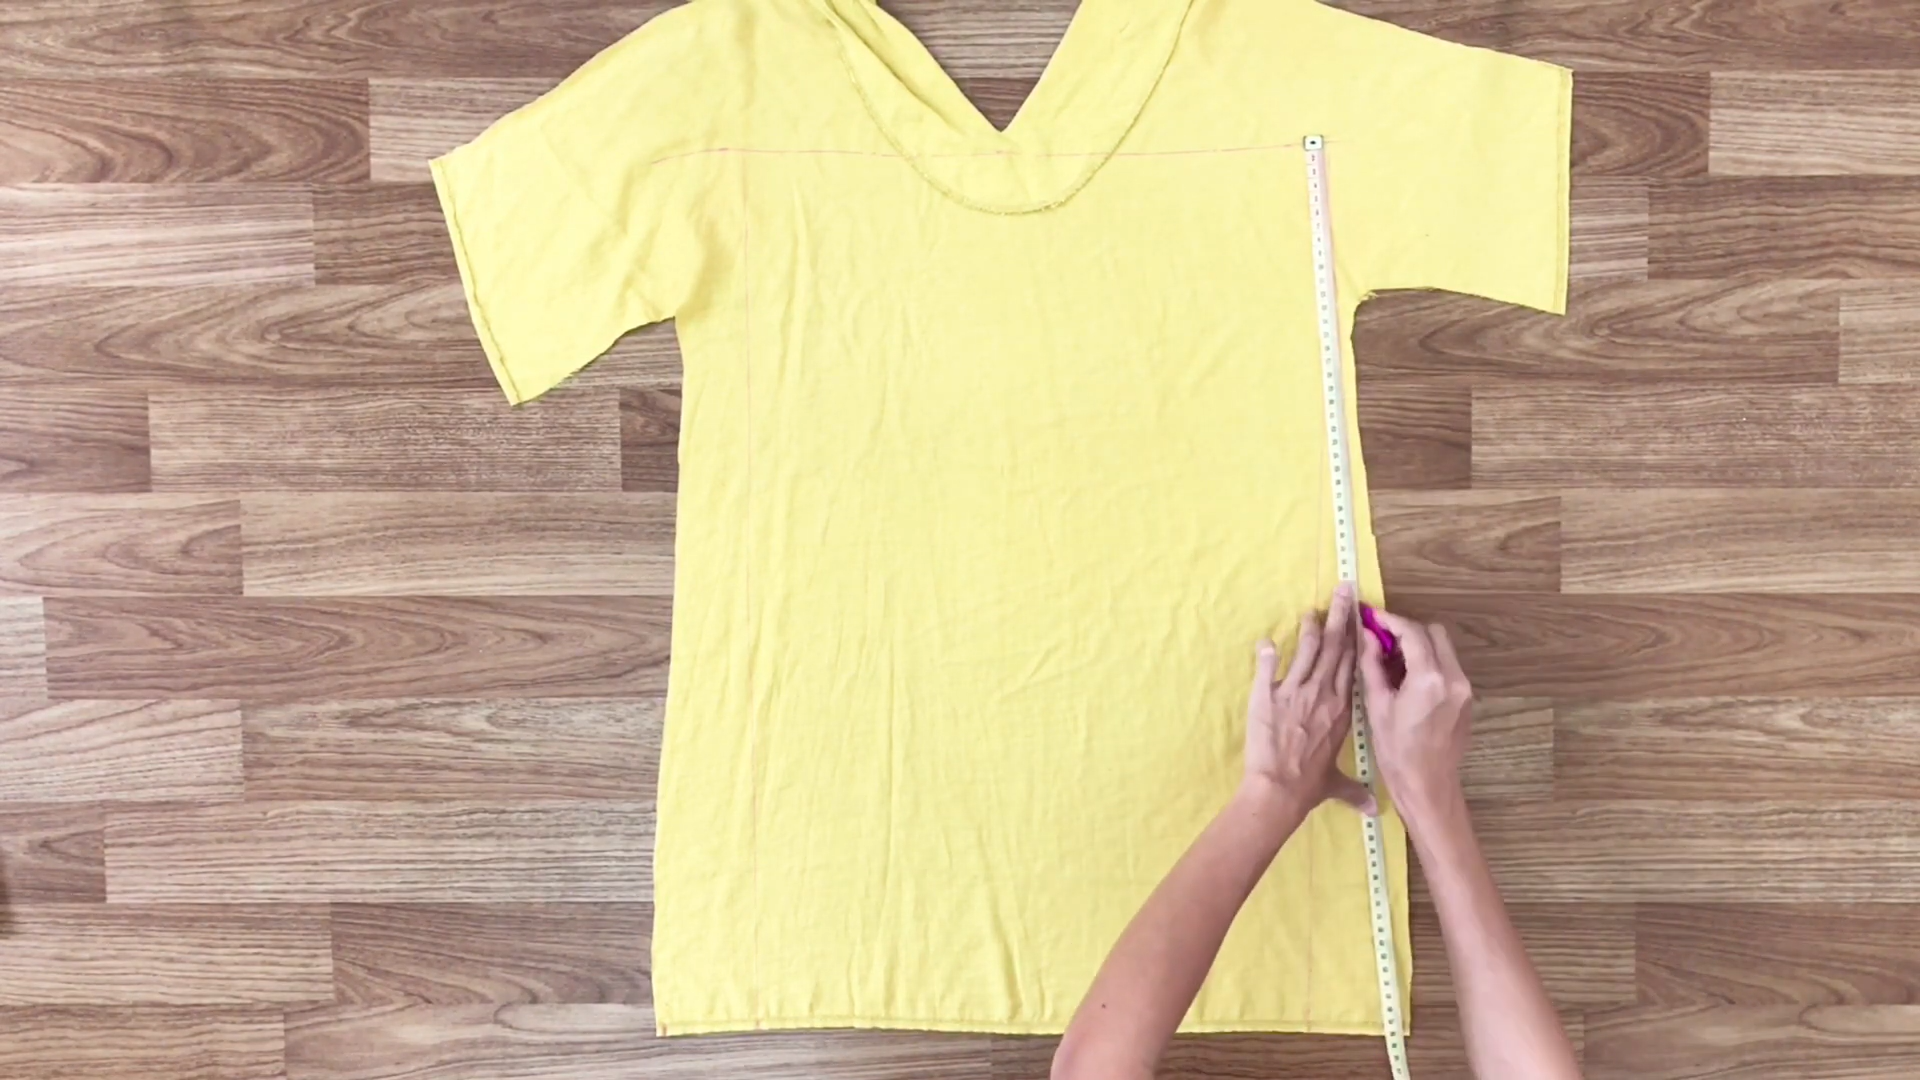
The first step is to divide the dress into two main pieces for the slip dress by cutting along the sides of the dress.
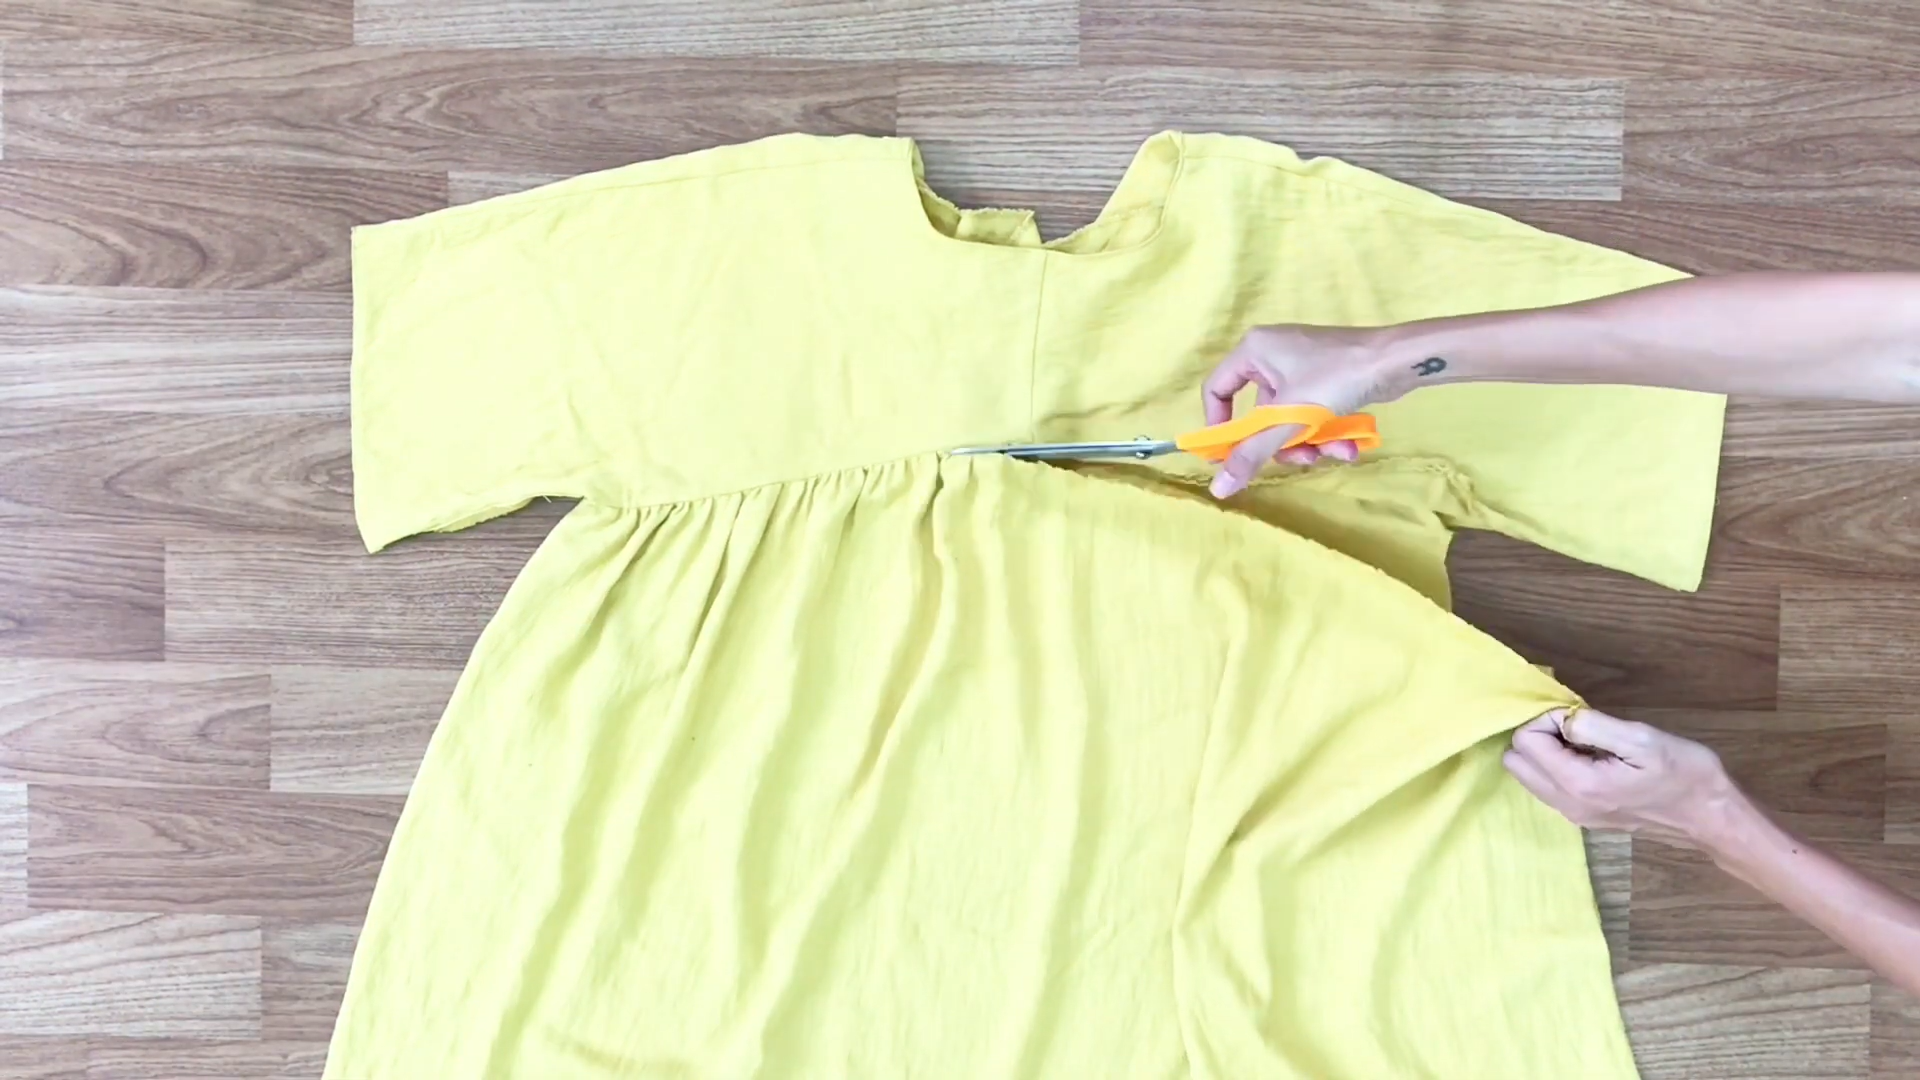
Then, cut along the stitching line on the back and the two shoulder lines.
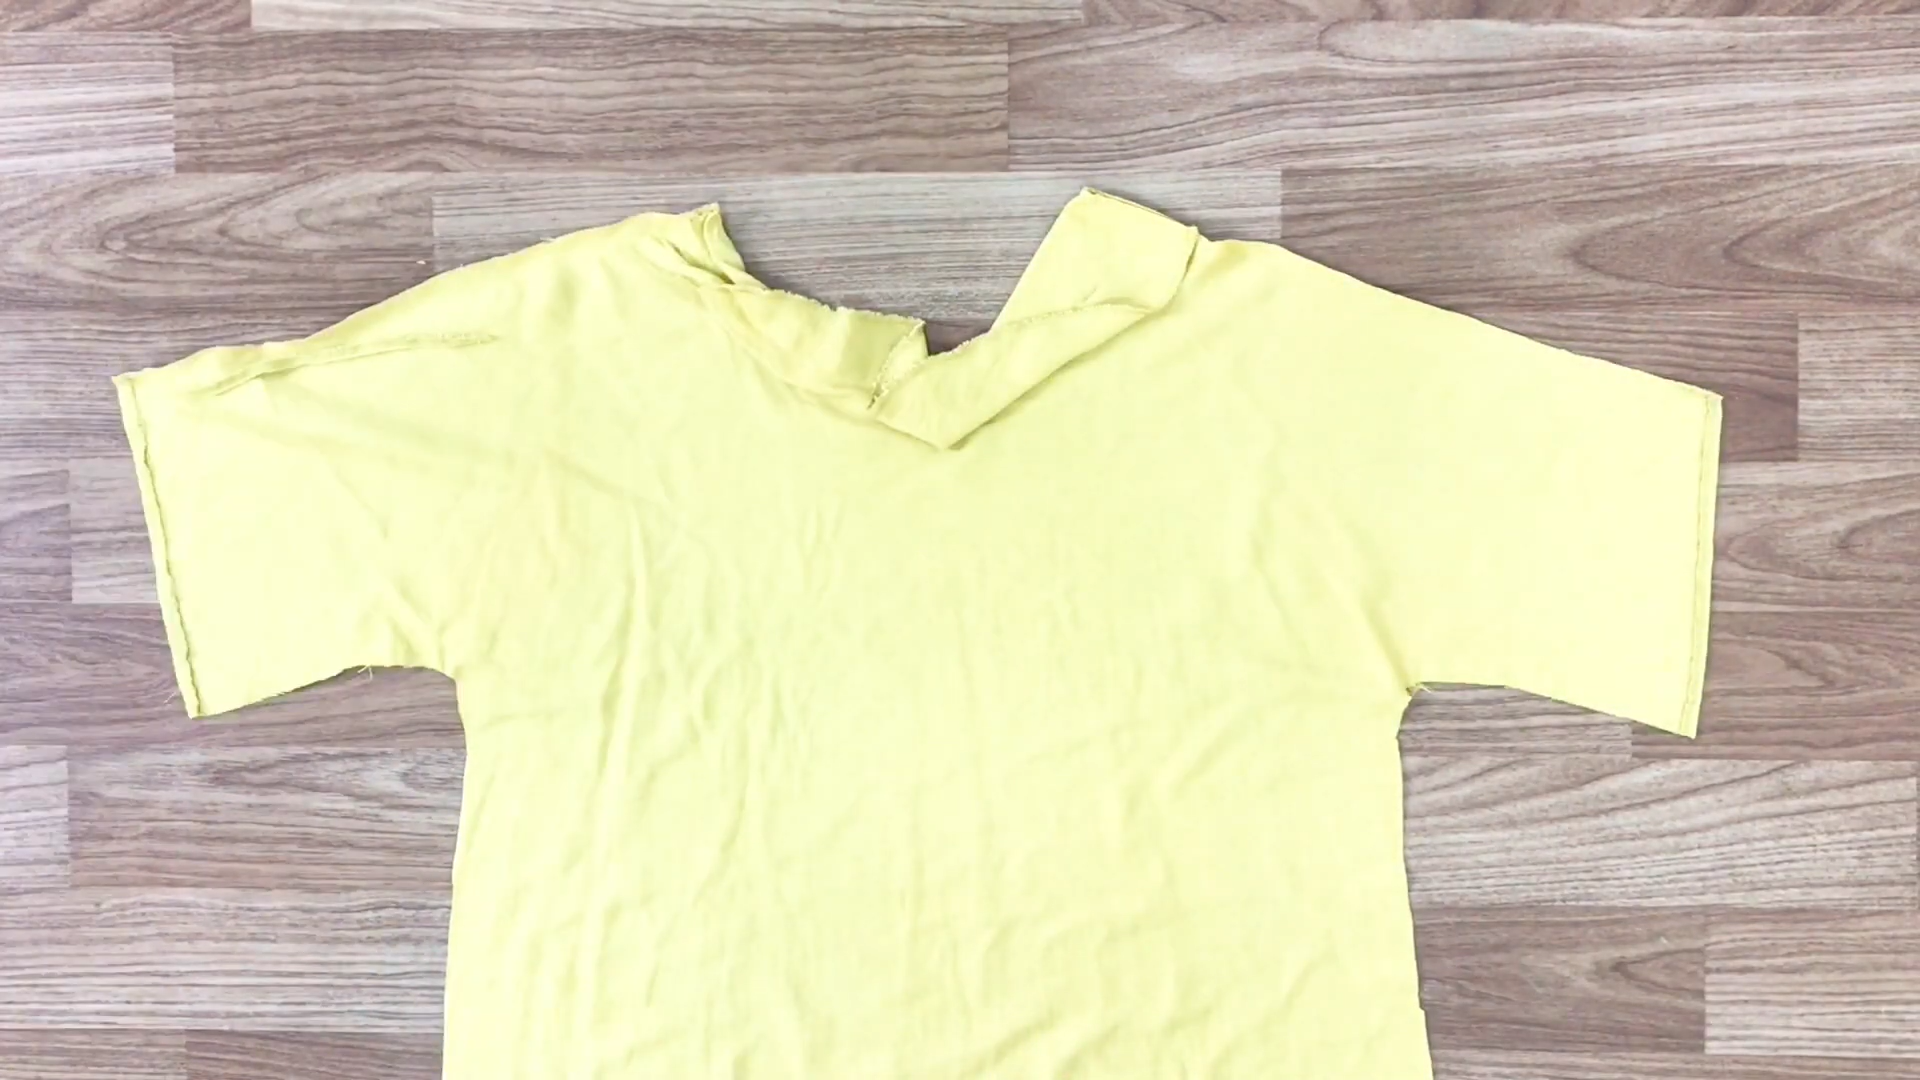
The front of the old dress will become the back of the slip dress.
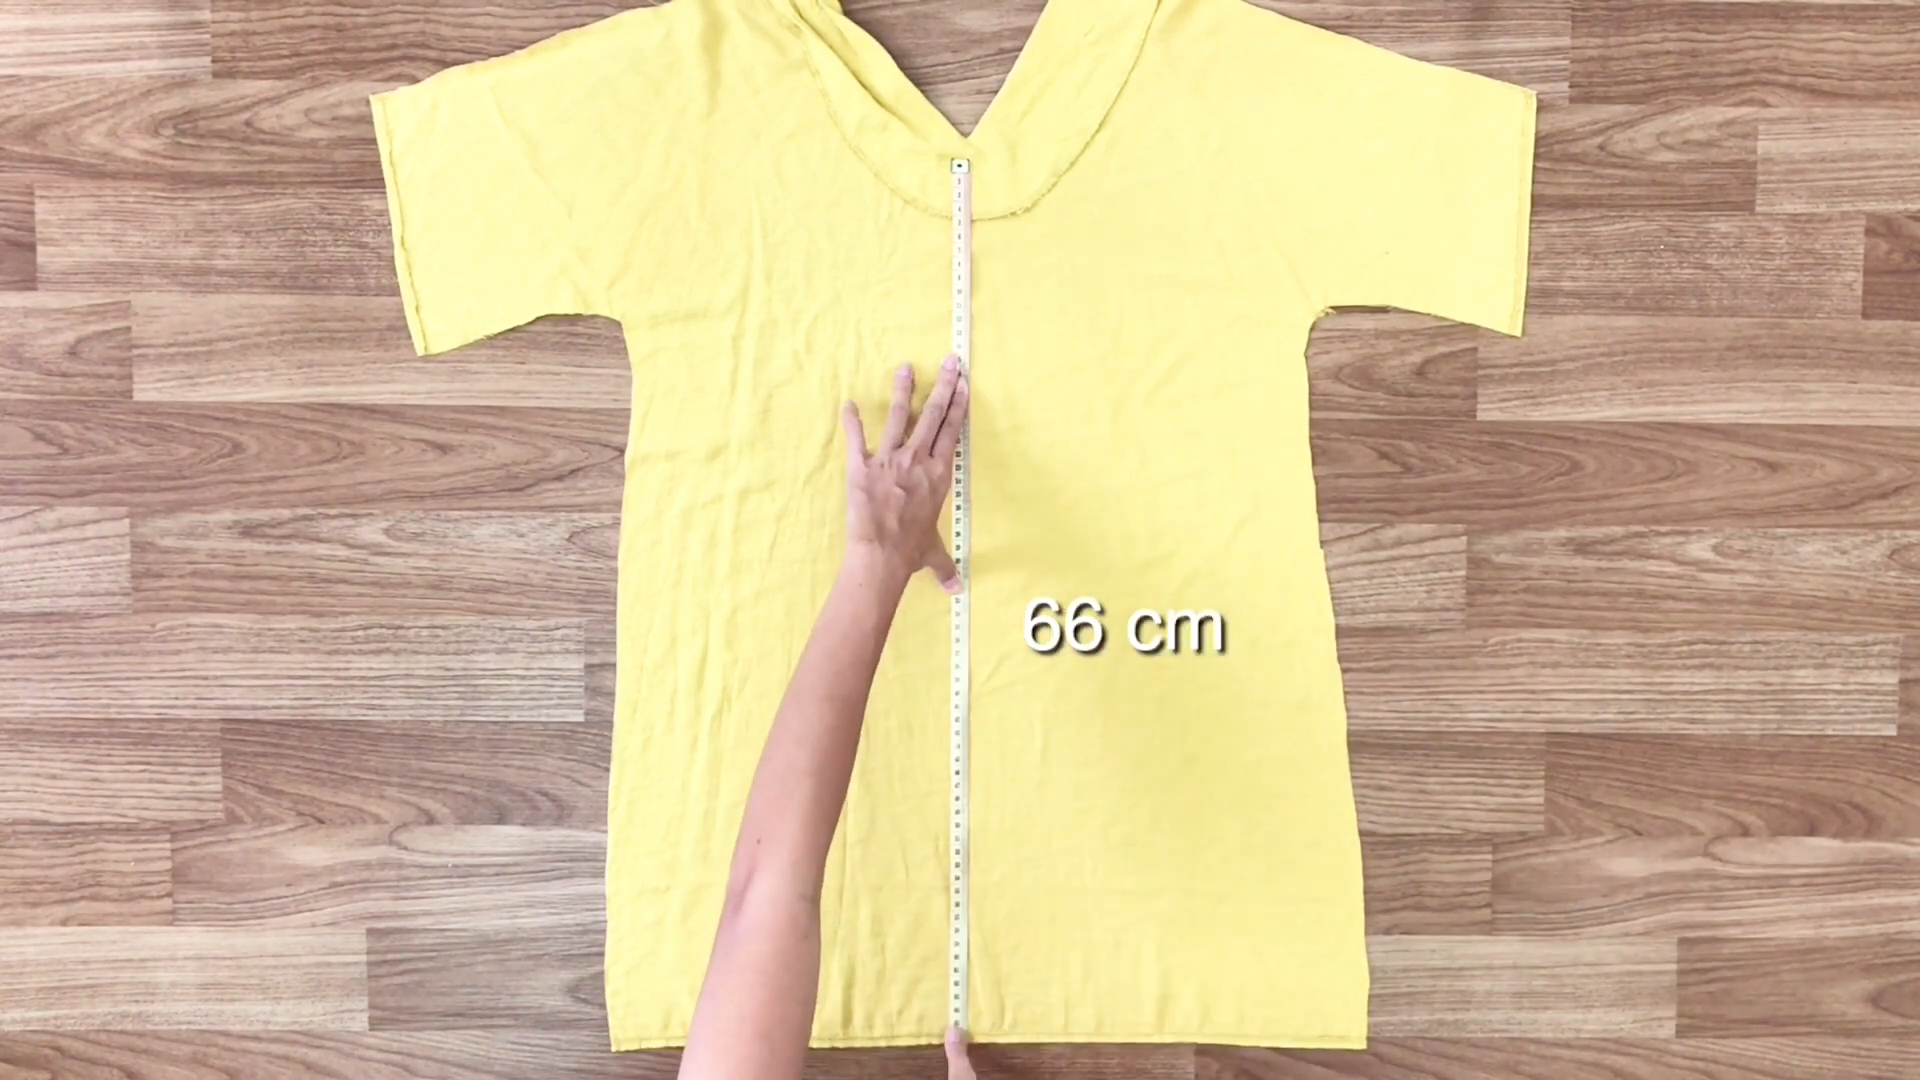
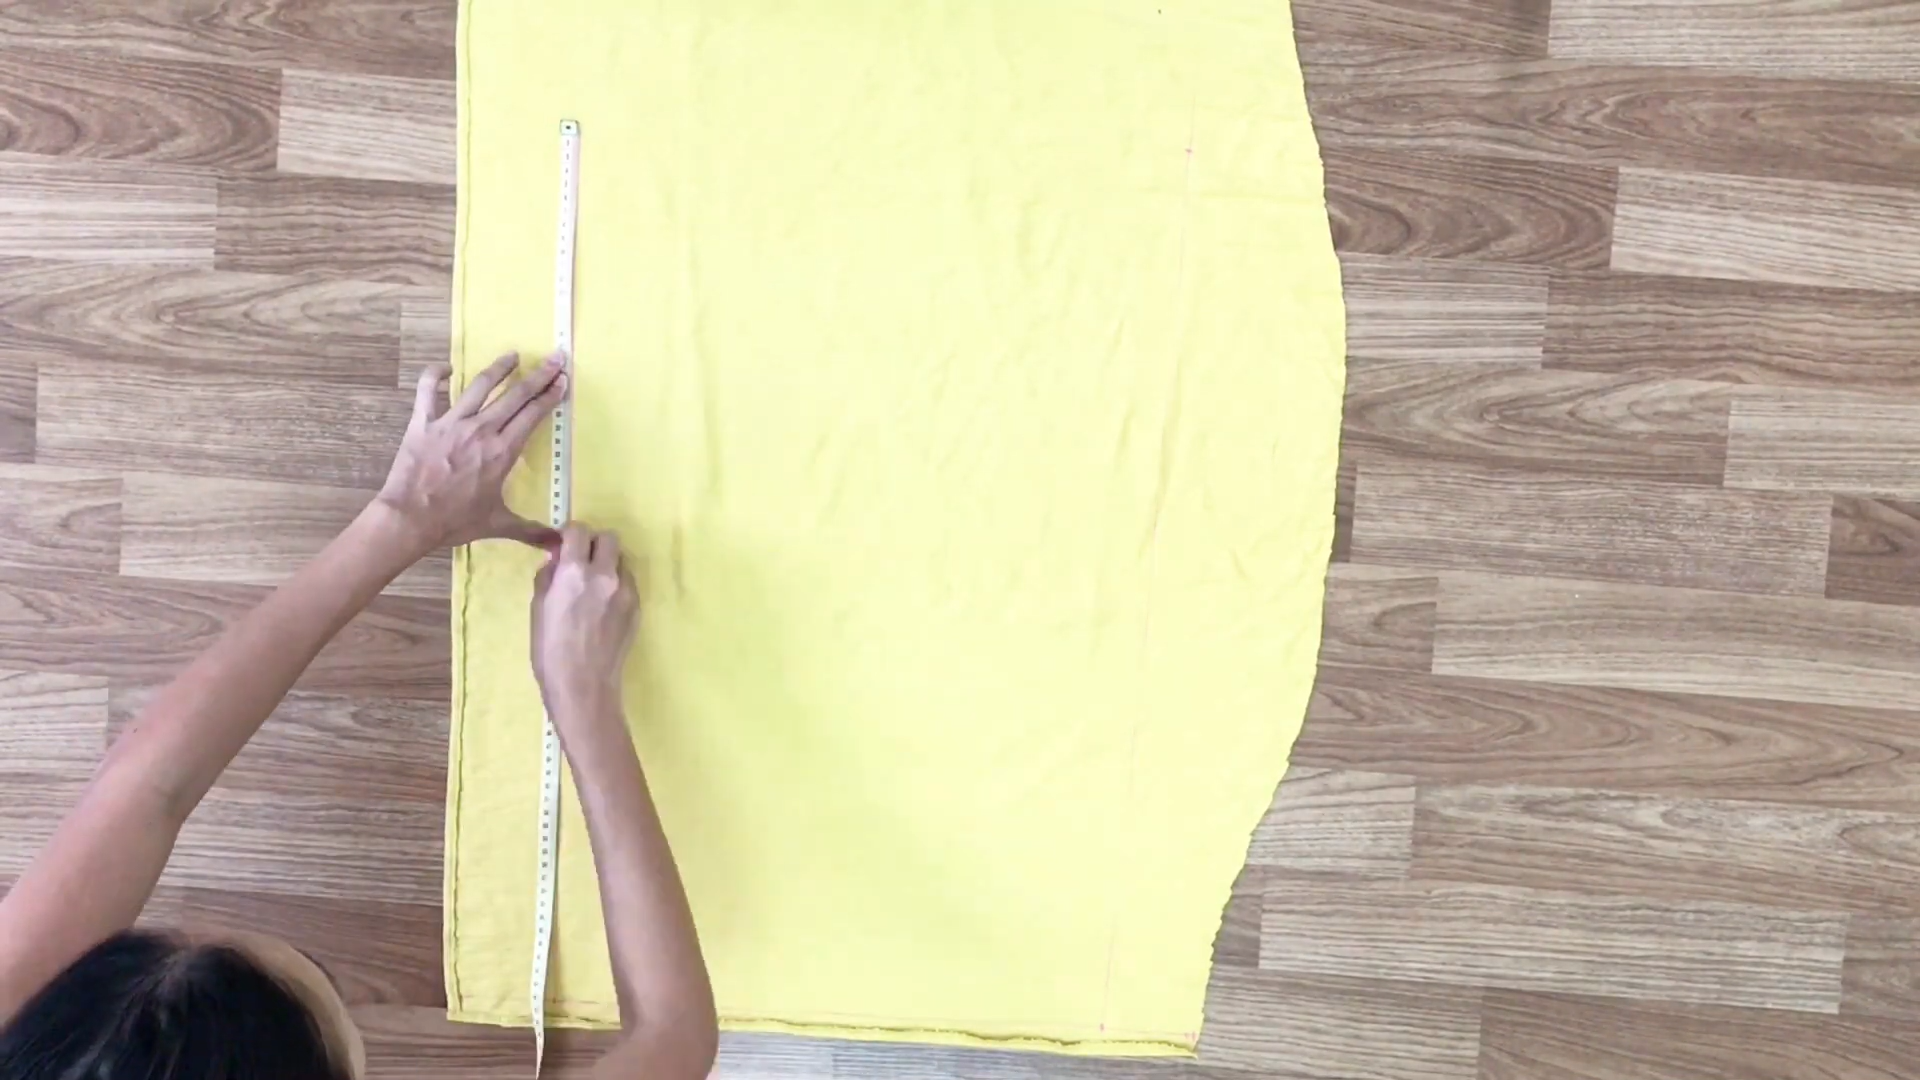
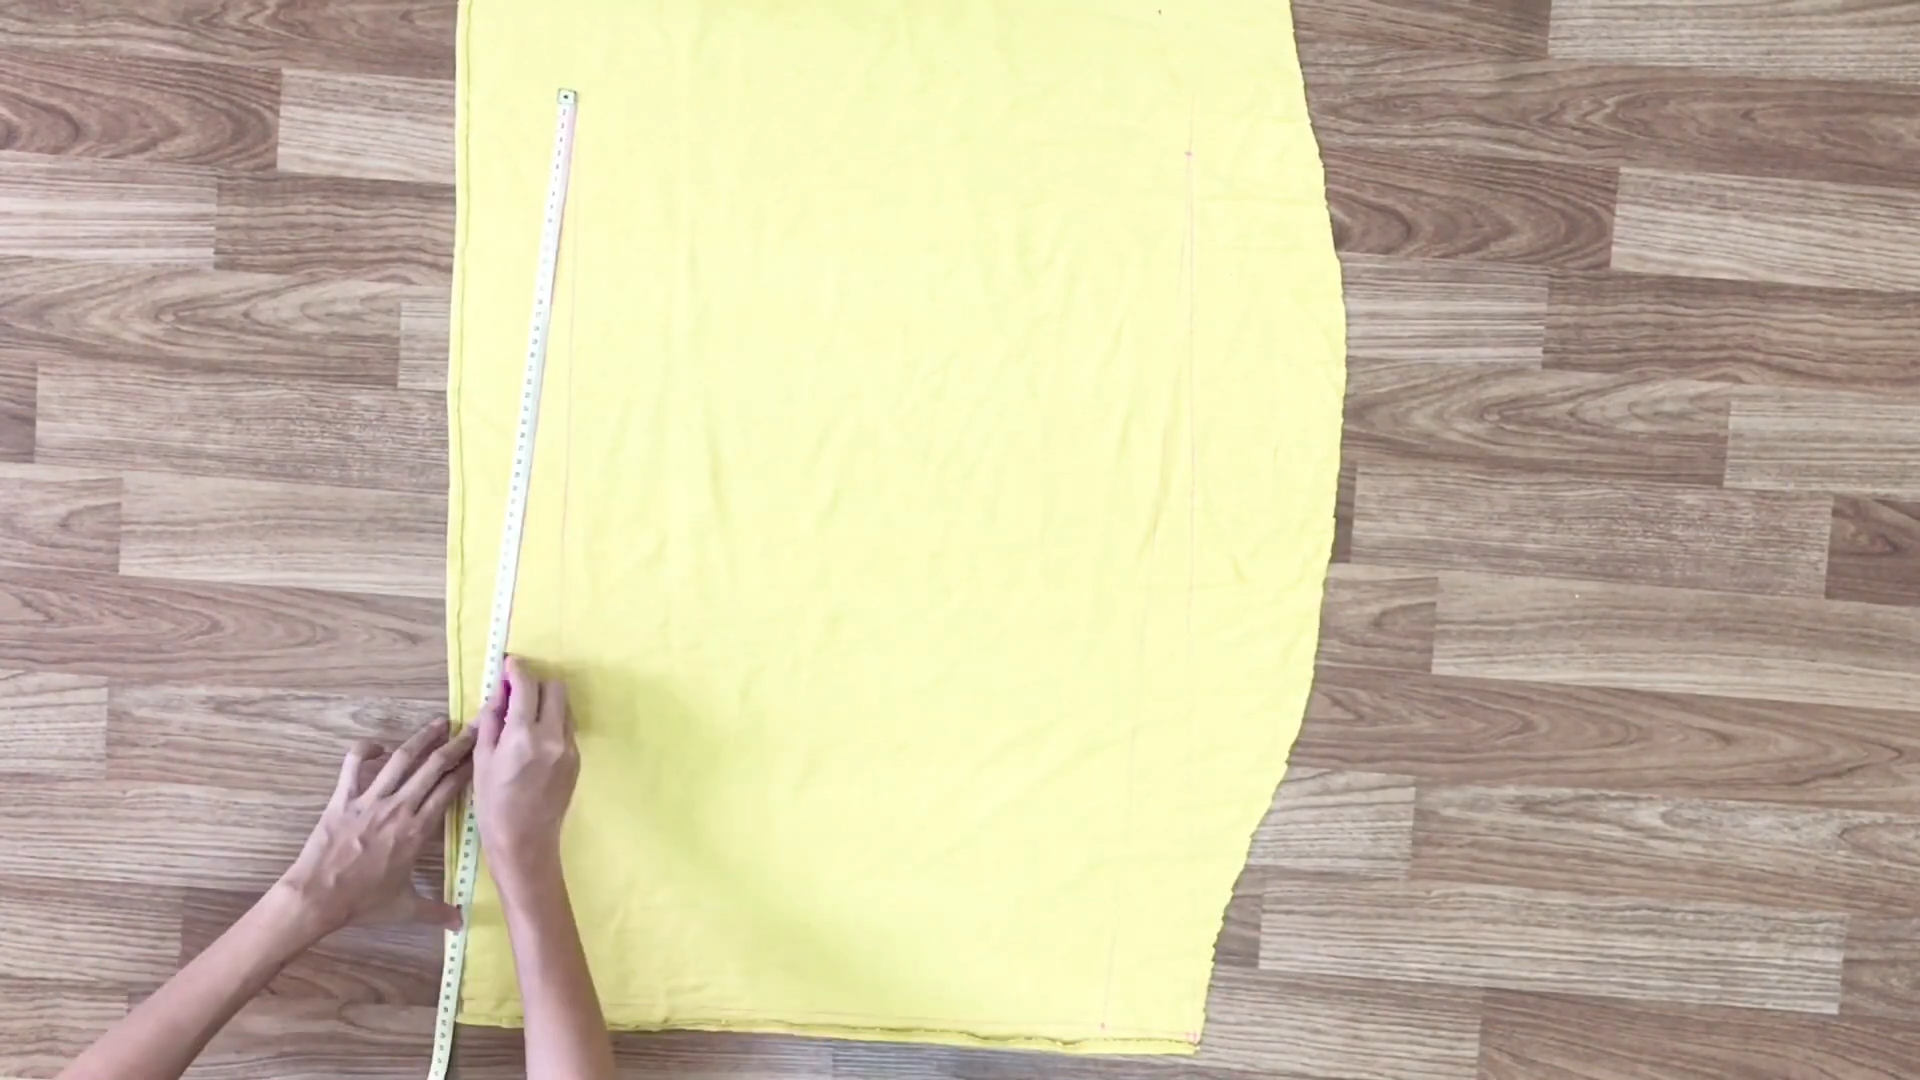
From the bottom line, measure up 66 cm and draw a line. This will be the length of the back of the slip dress.
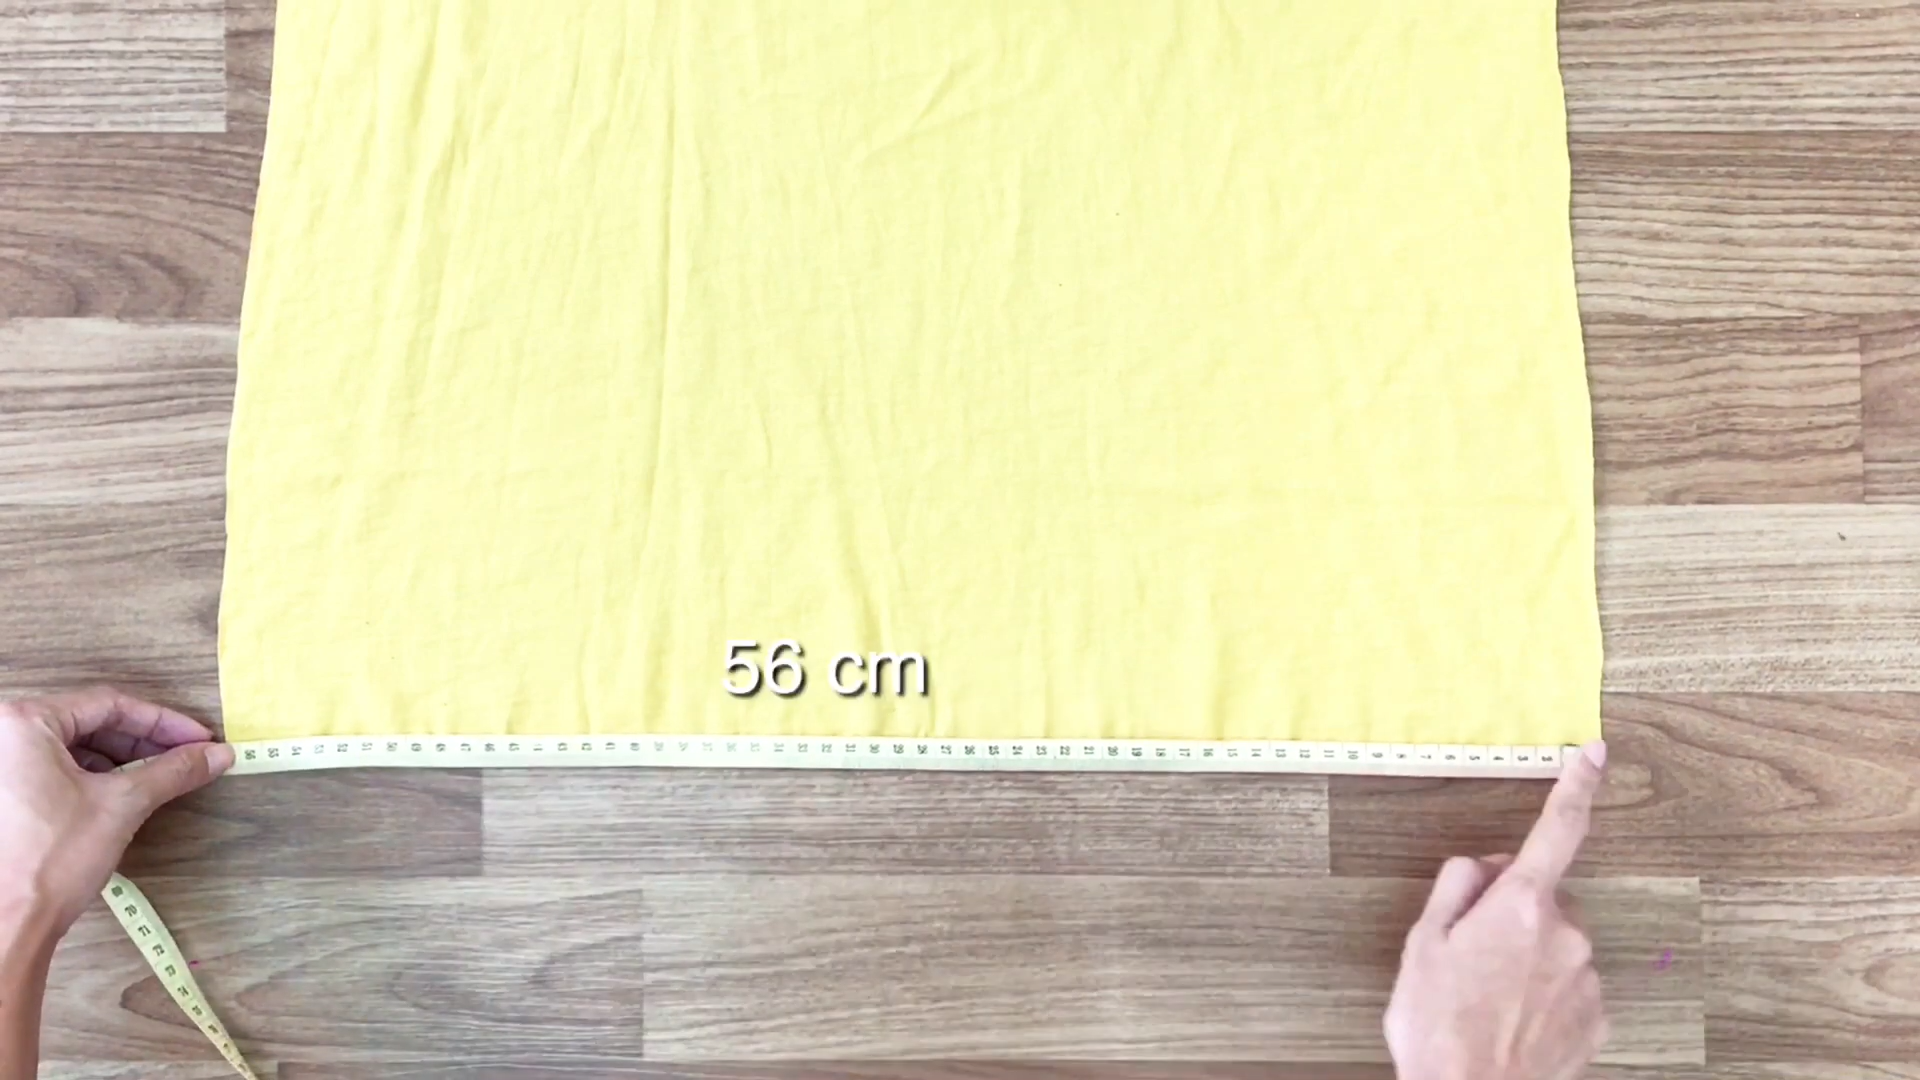
At the bottom, measure the maximum width of the fabric, which is 56 cm. This will be the width of the slip dress.
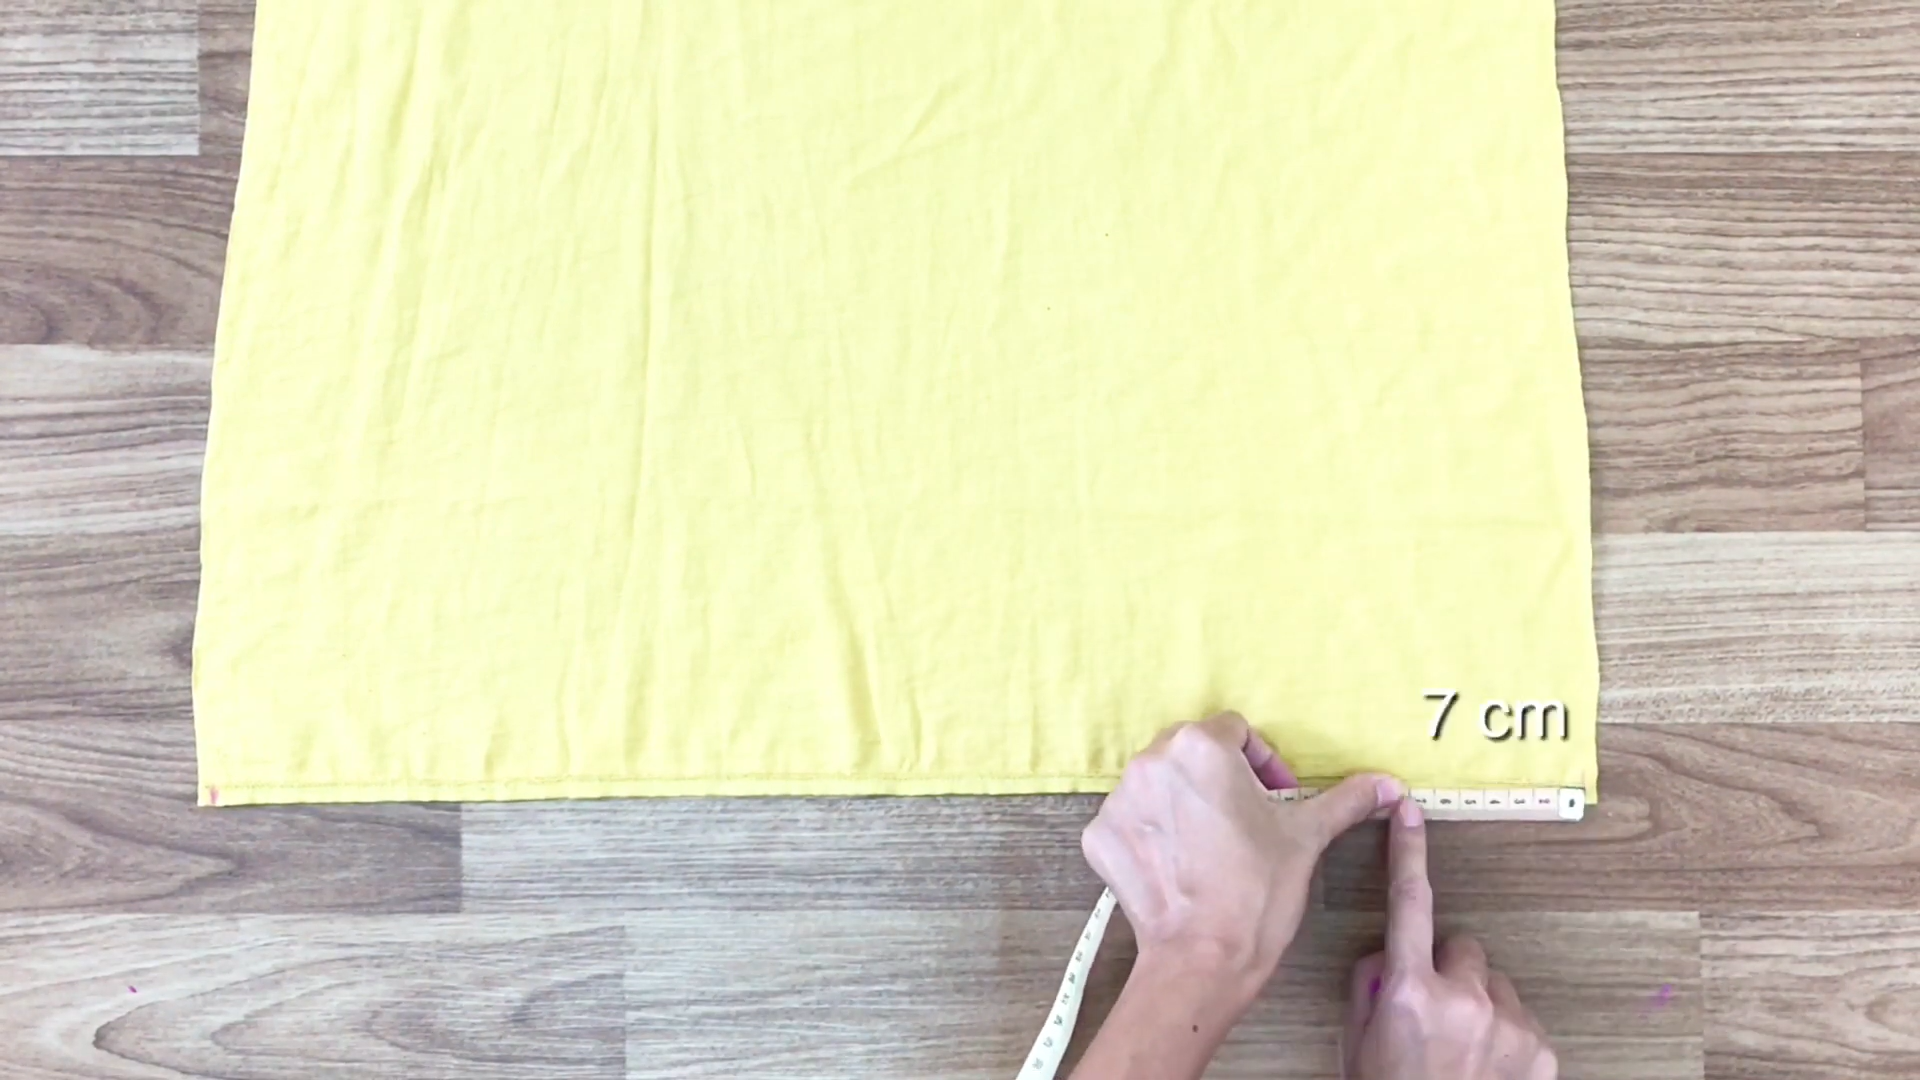
On the right edge, measure 7 cm to the left and make a mark. Repeat on the left edge.
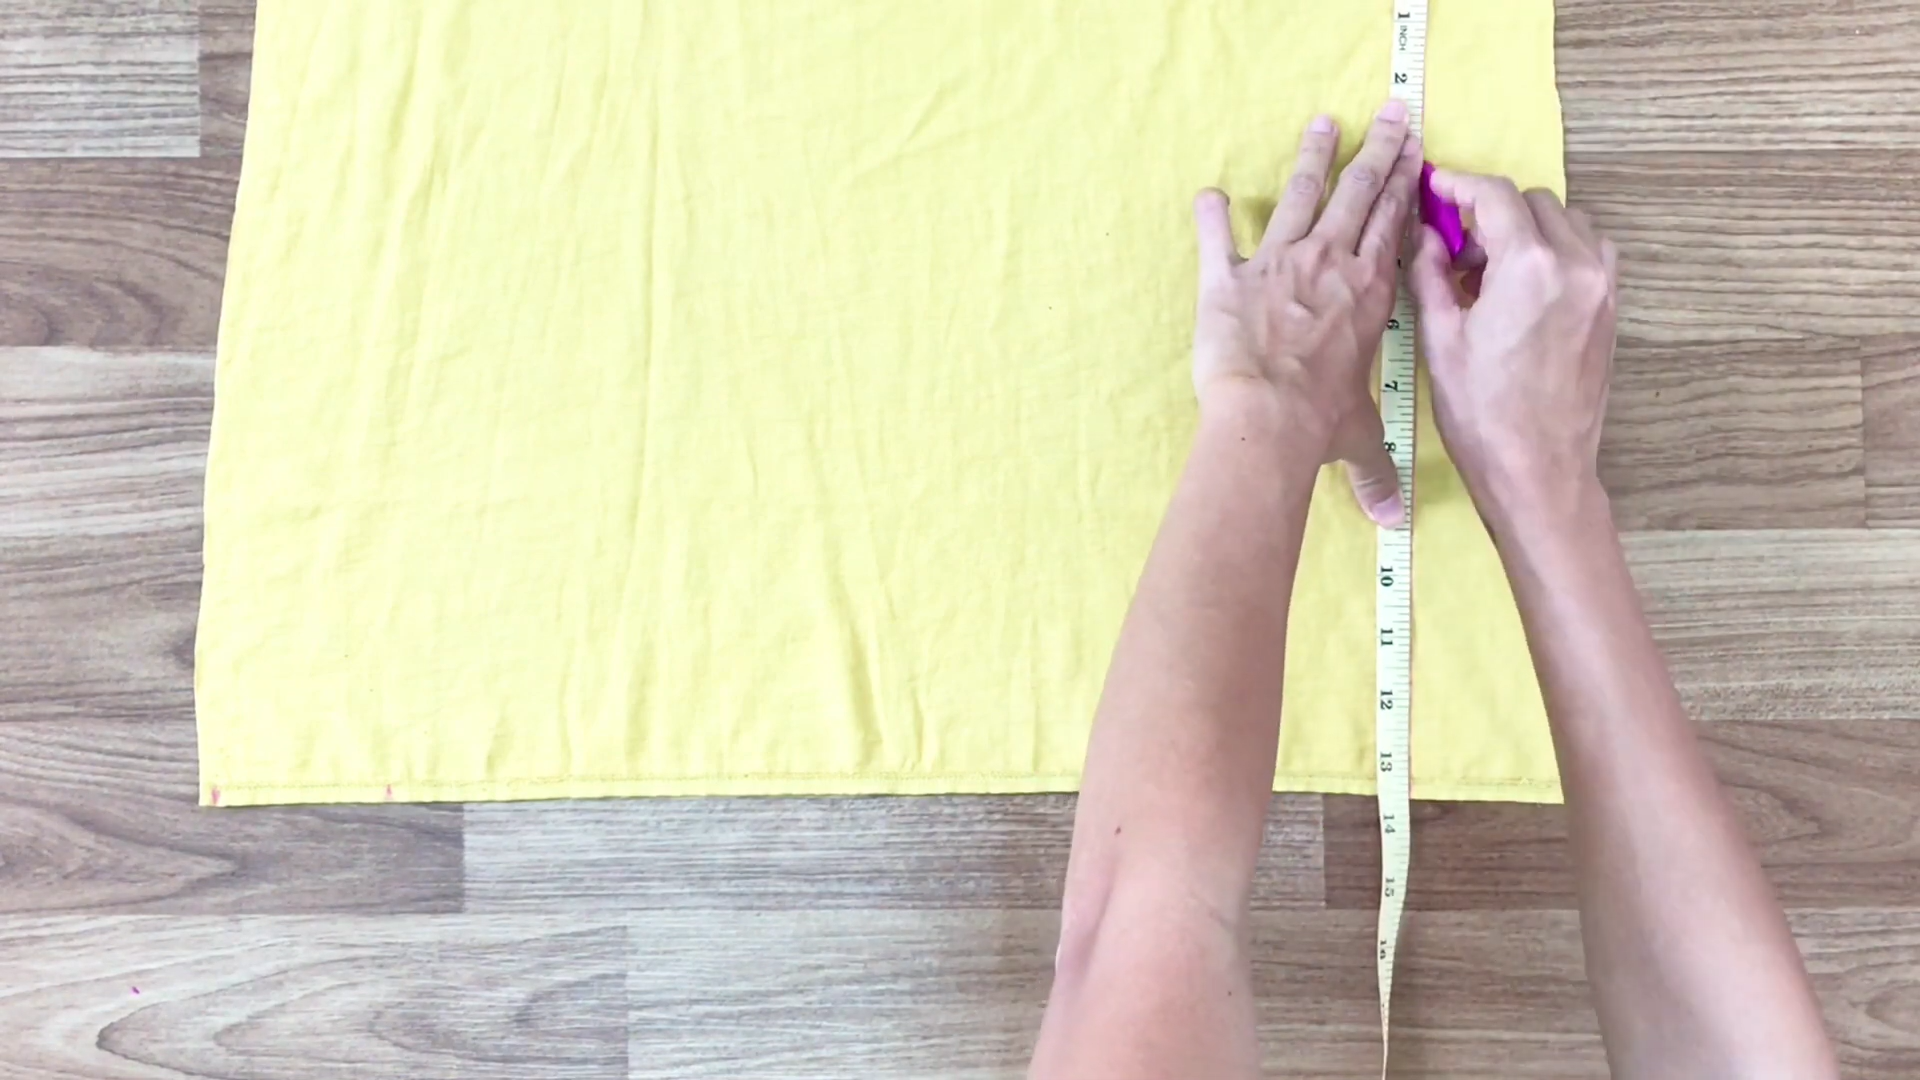
From these marks, draw straight lines up to meet the top line drawn before, forming a rectangle that is 42 cm wide and 66 cm high.
At the right of the top, go down to the right of the bottom and connect them together by the drawing line.
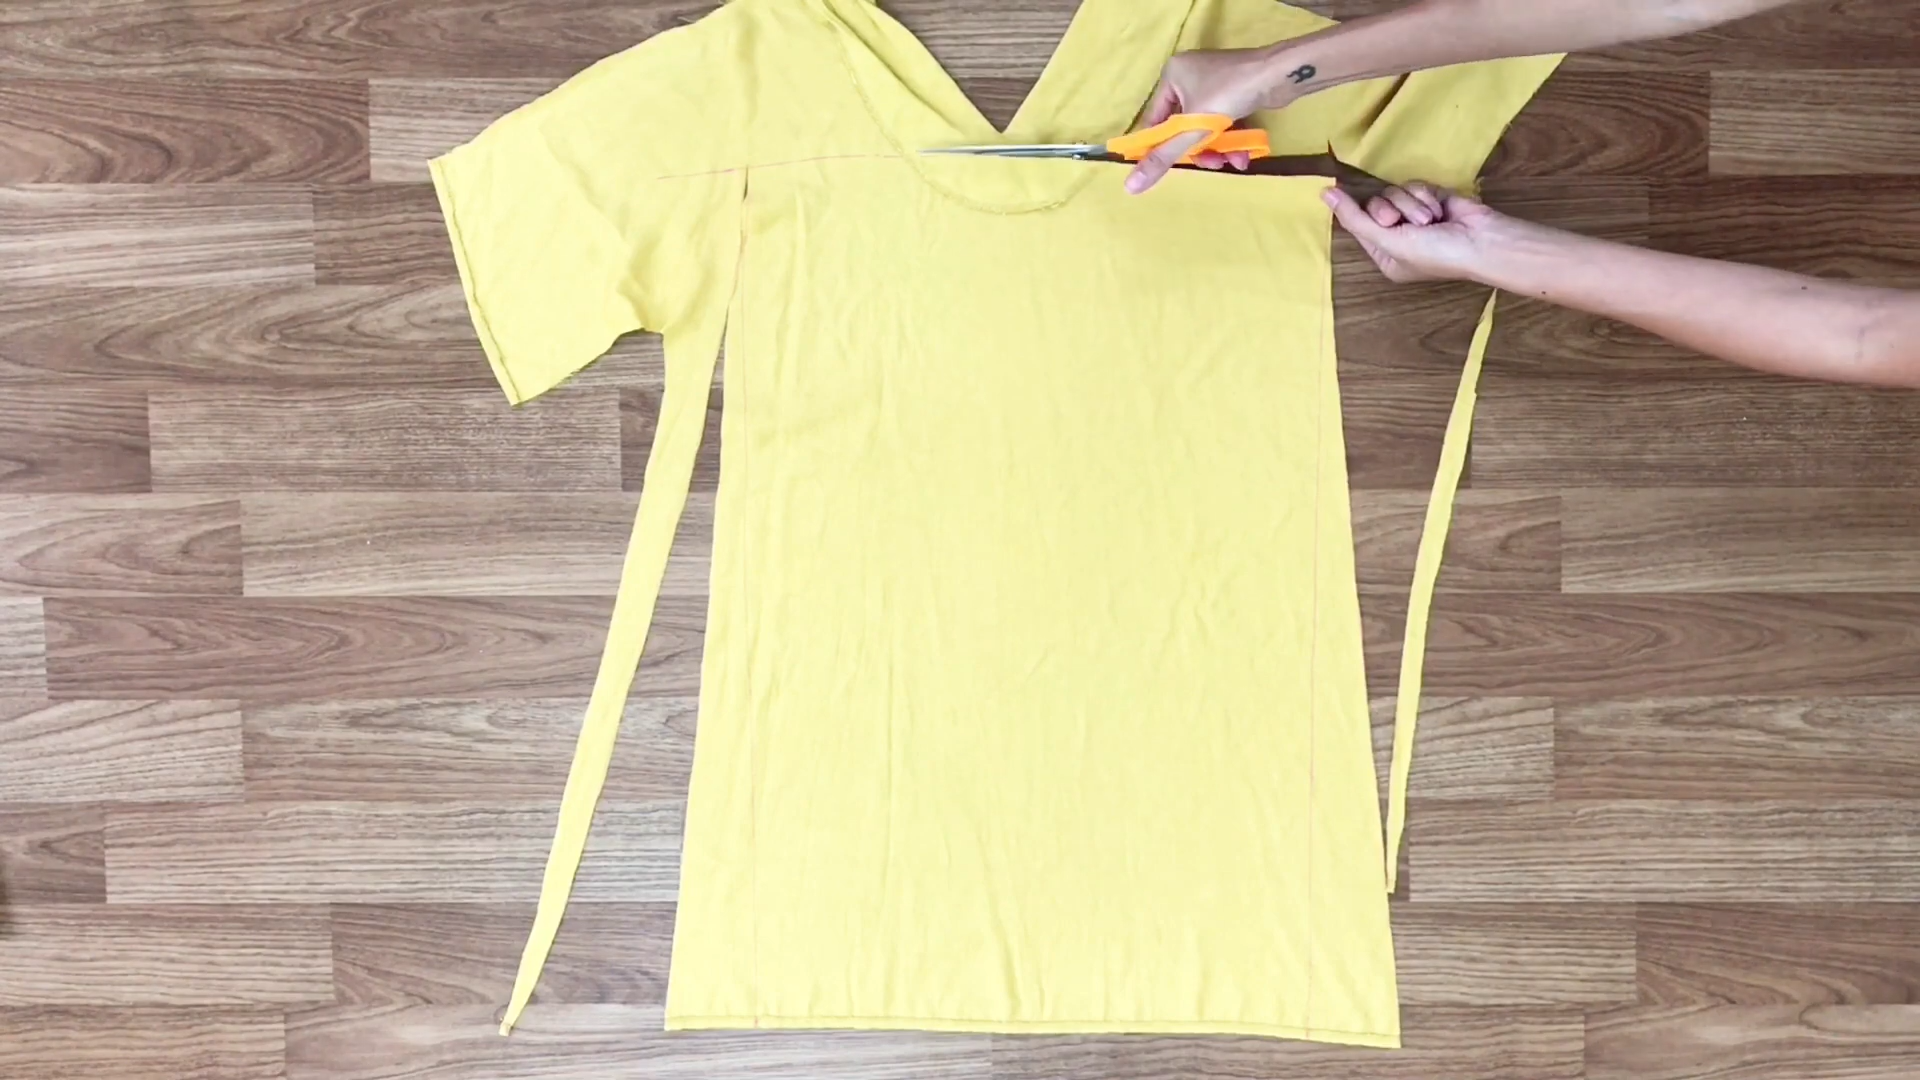
After cutting along these lines, you will have the back piece of the slip dress.
THE FRONT
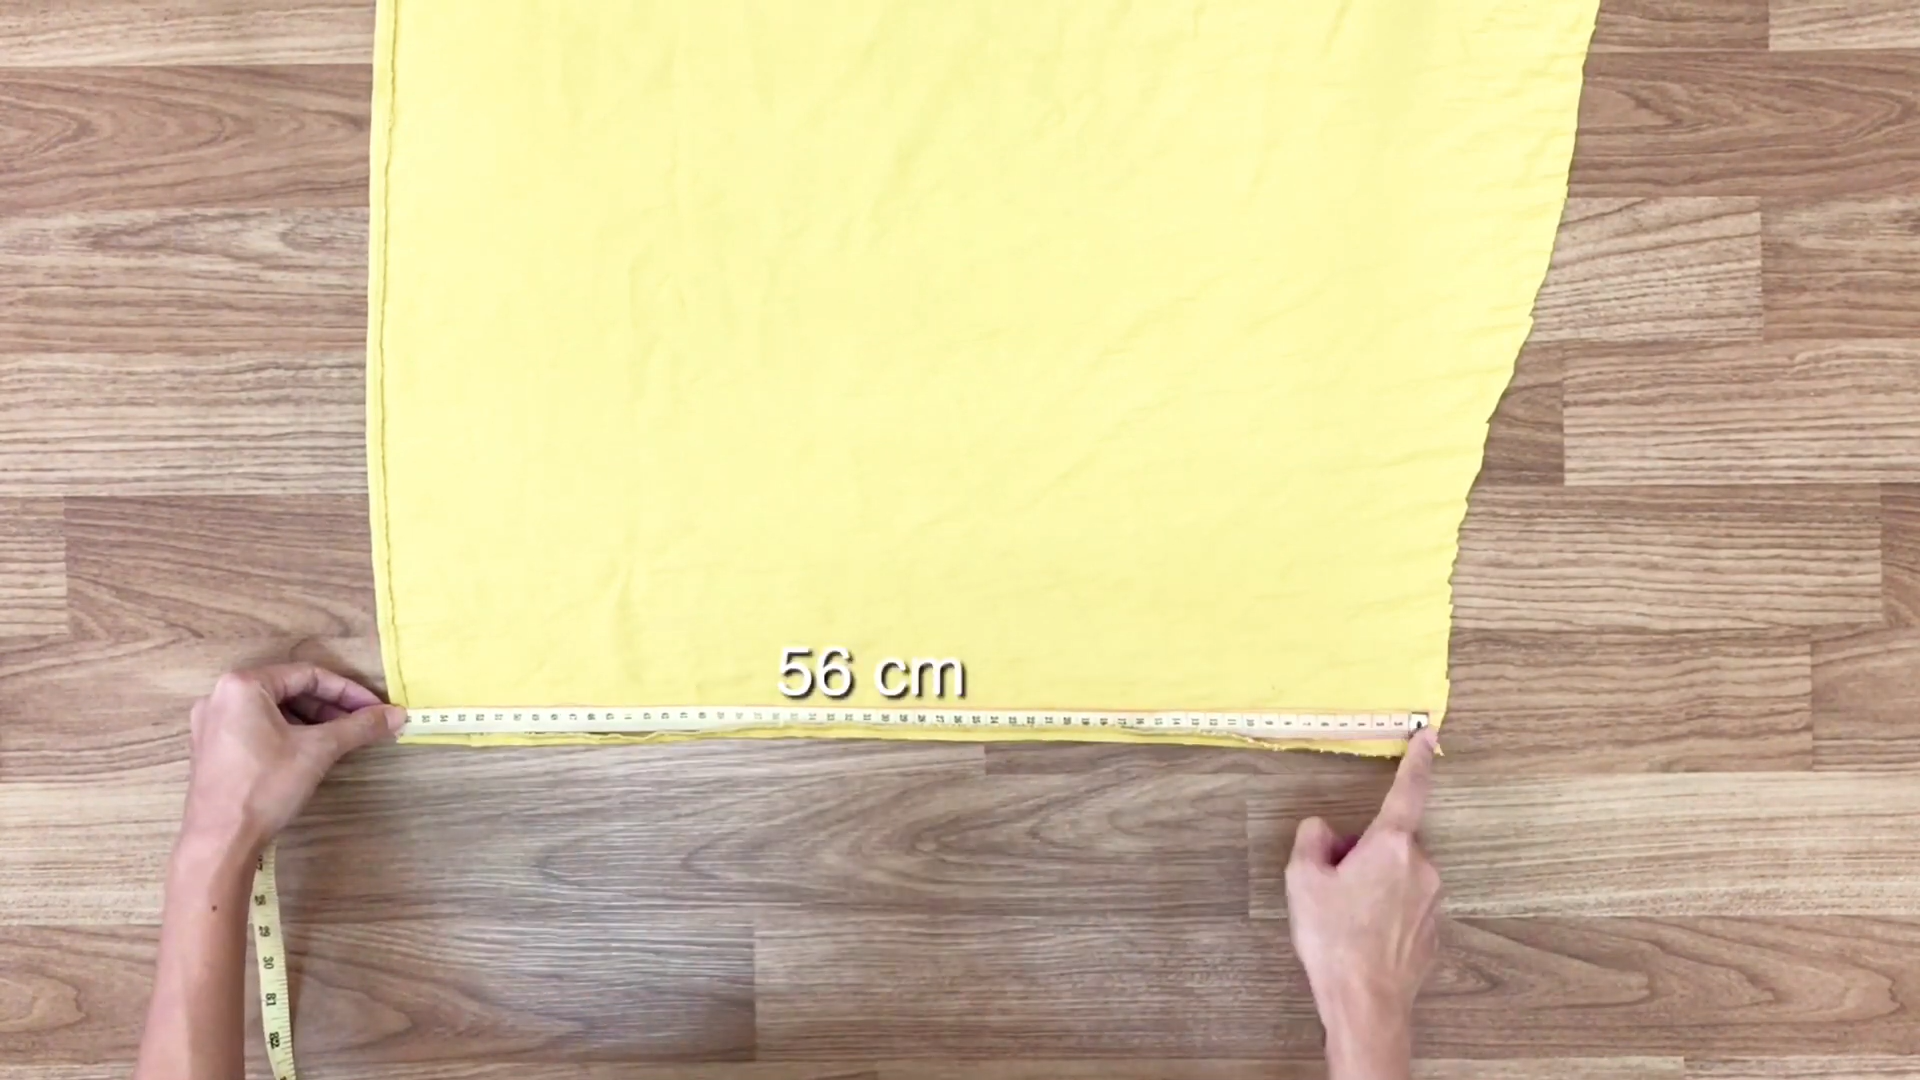
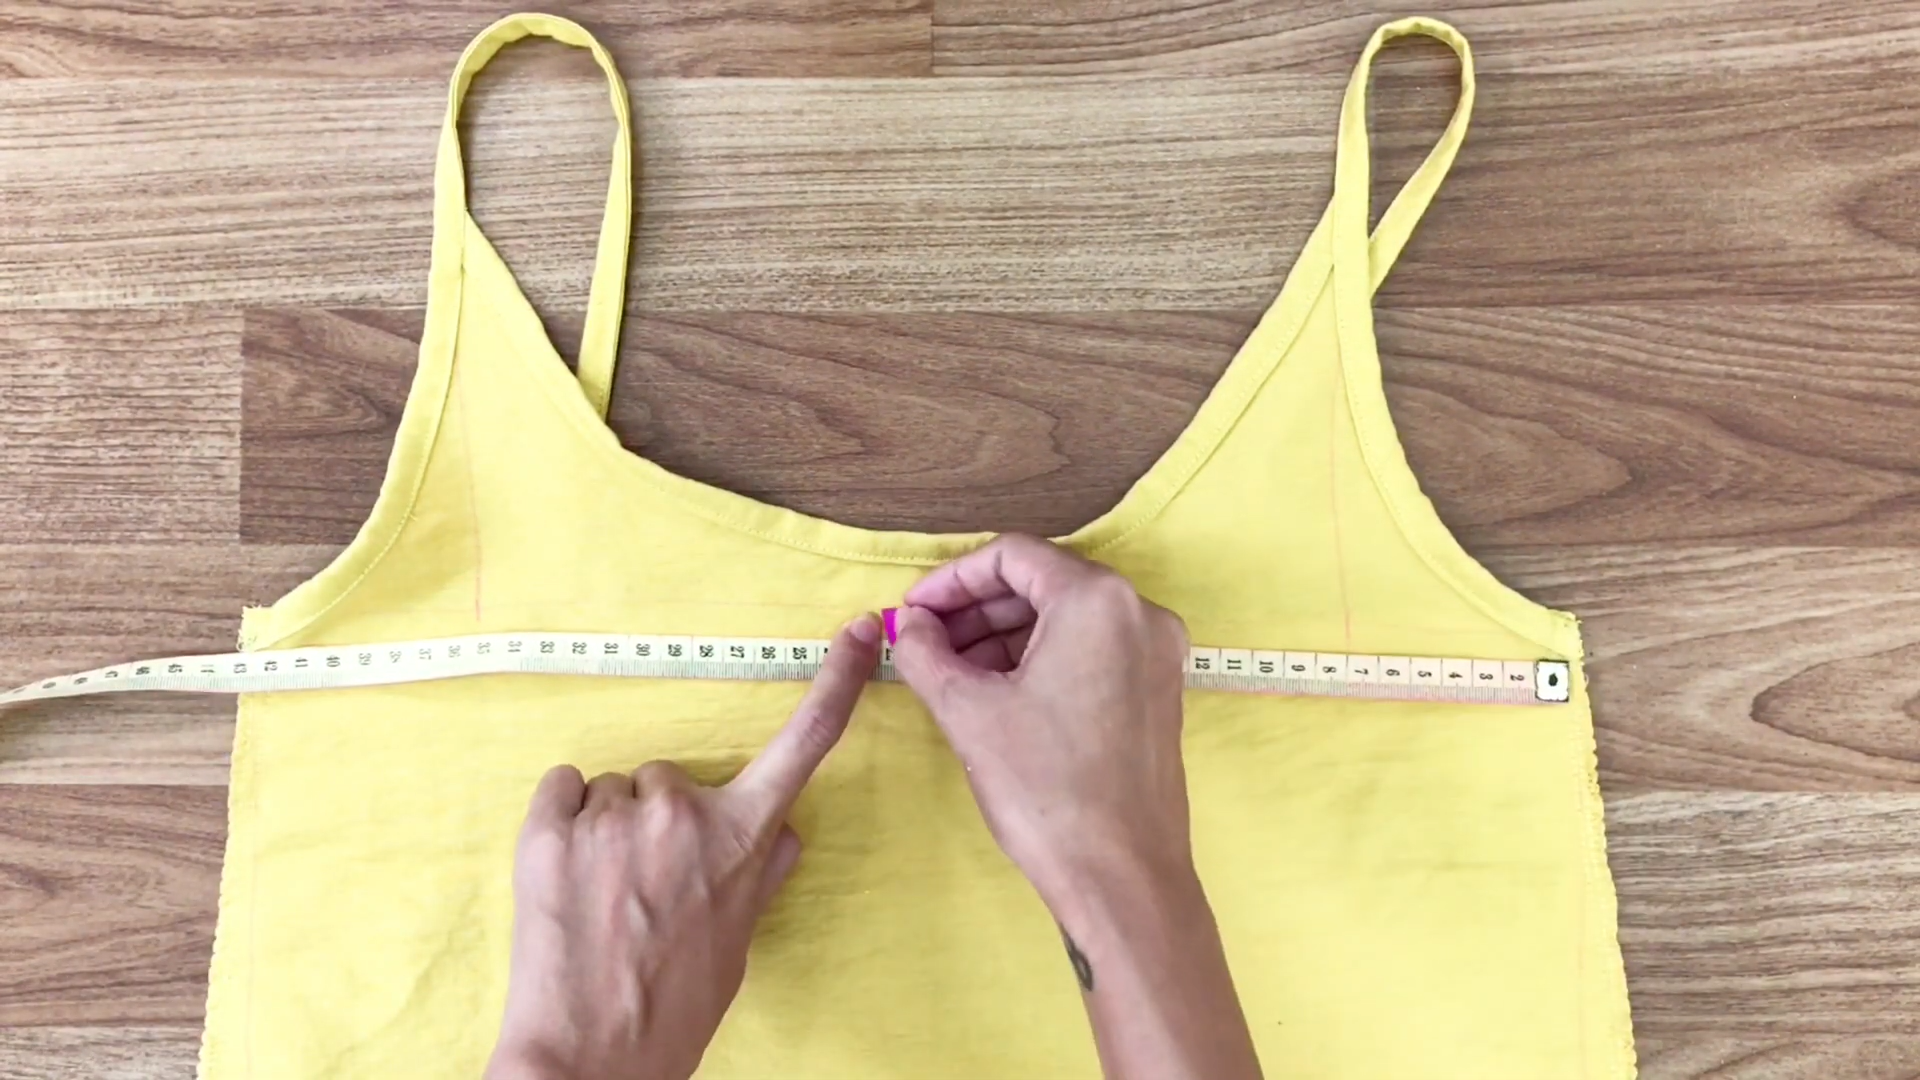
Moving to the front of the slip dress, divide the width of the front of the dress, ensuring it is 56 cm wide.
Create a rectangle that is 42 cm wide and 66 cm high, similar to the back piece.
Draw lines to connect the top right to the bottom right and the top left to the bottom left.
This will give you the front piece of the slip dress.
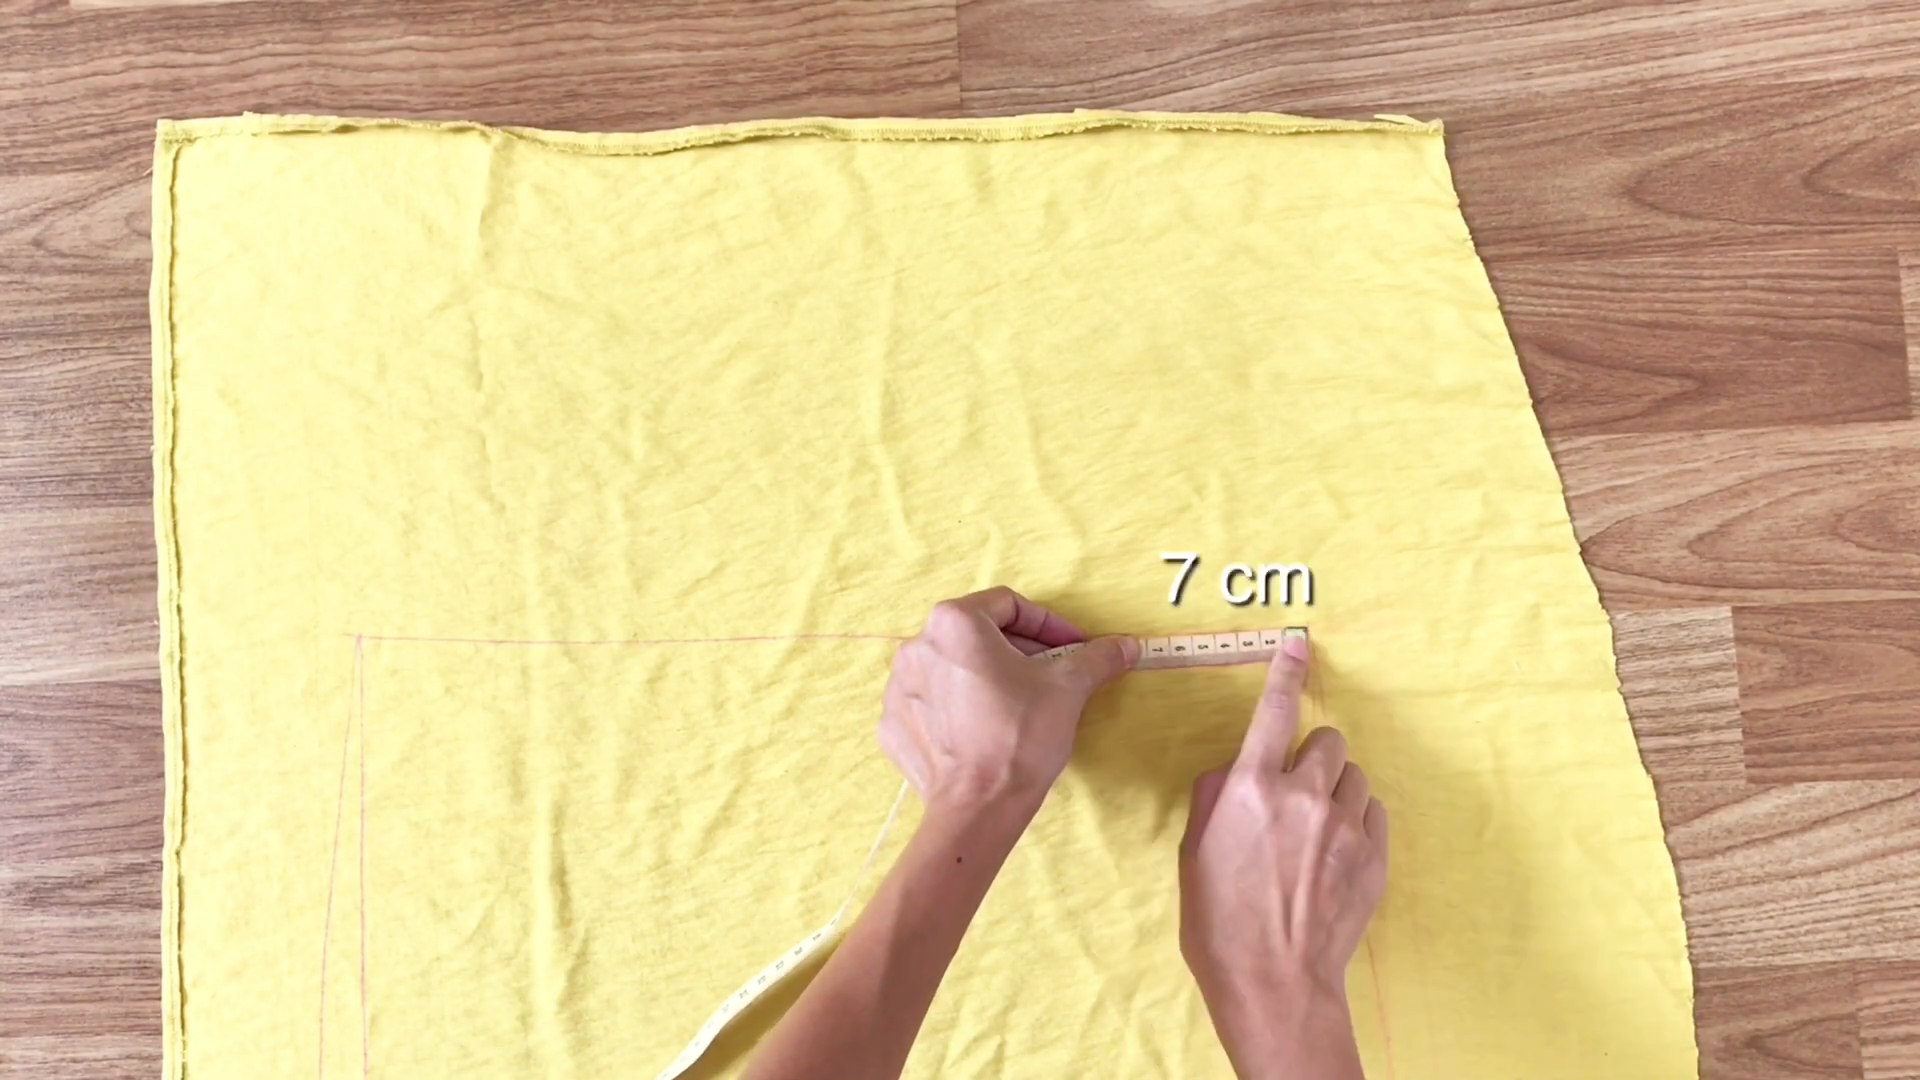
From the top right, measure 7 cm inward and make a mark. Do the same on the left.
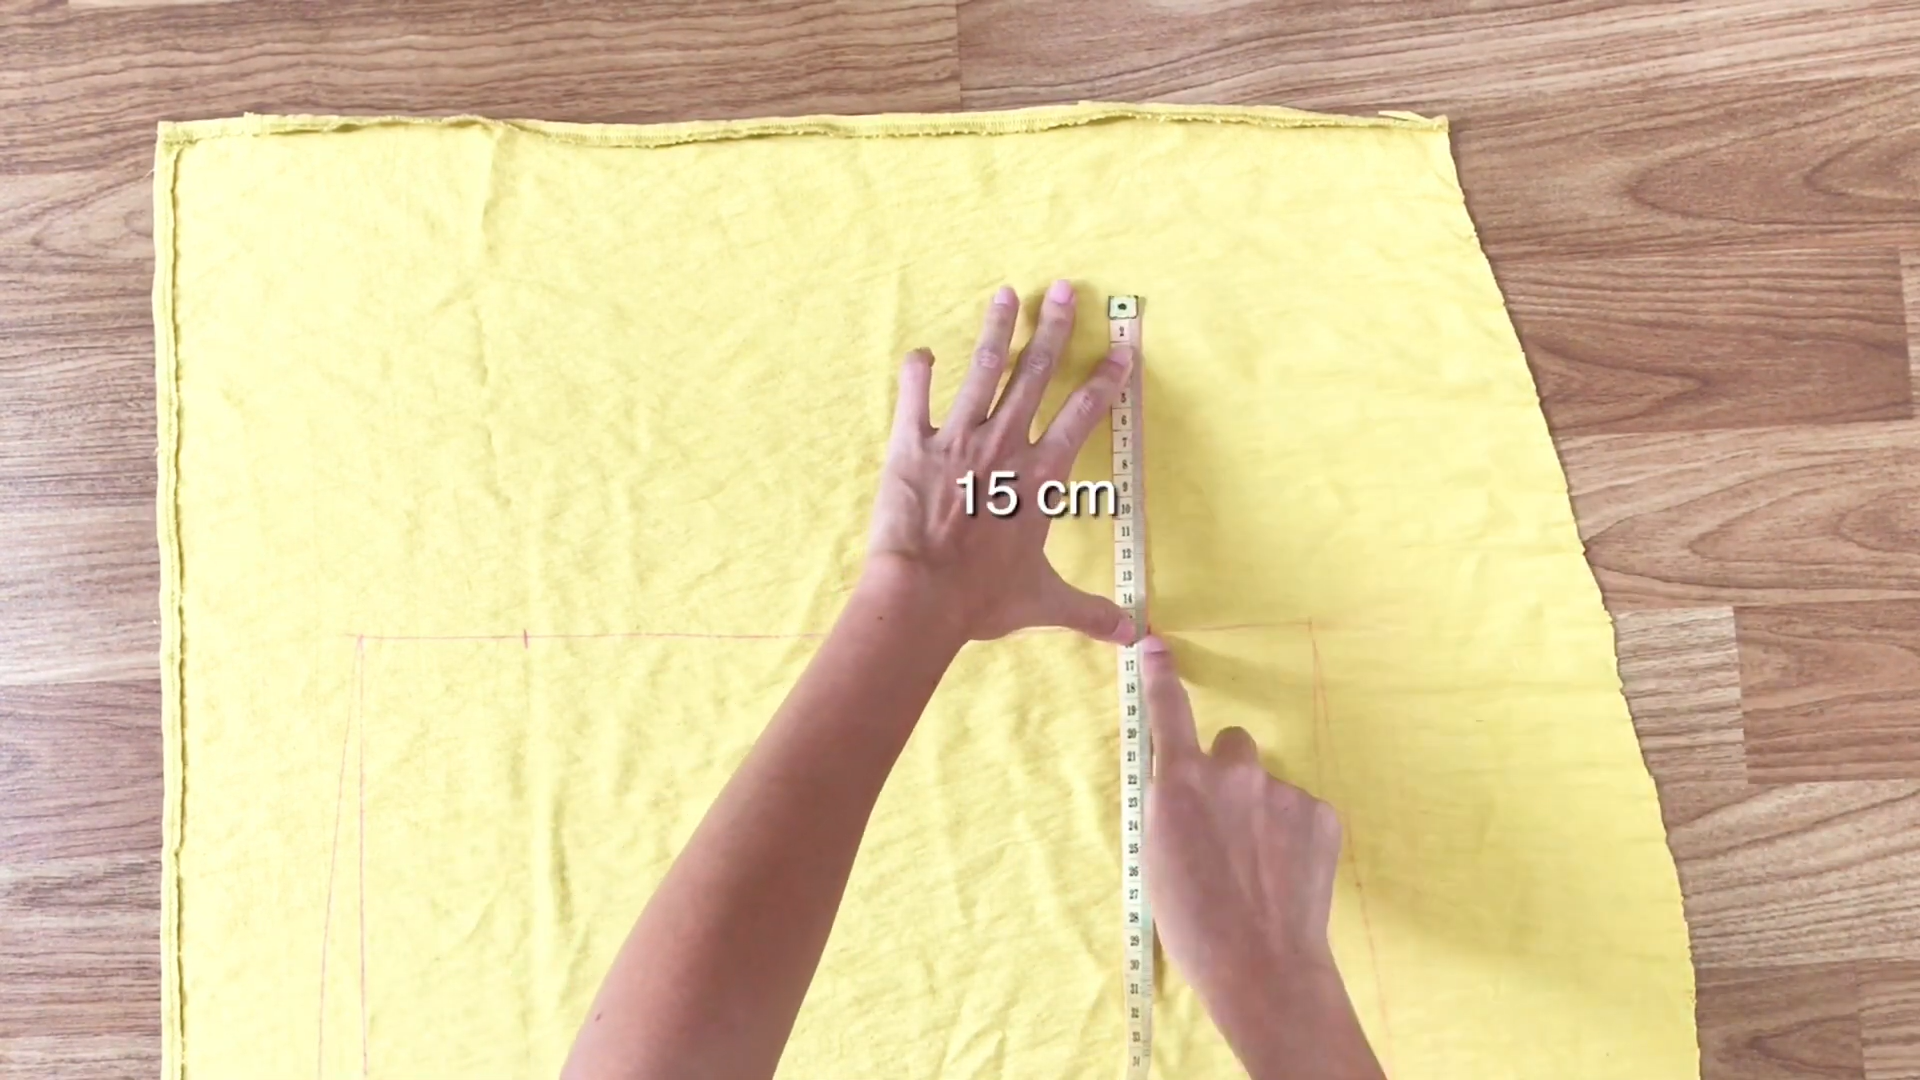
From these marks, draw a straight line 15 cm up.

From the top of this line, draw an arc to the right and left to create the armholes for the slip dress.
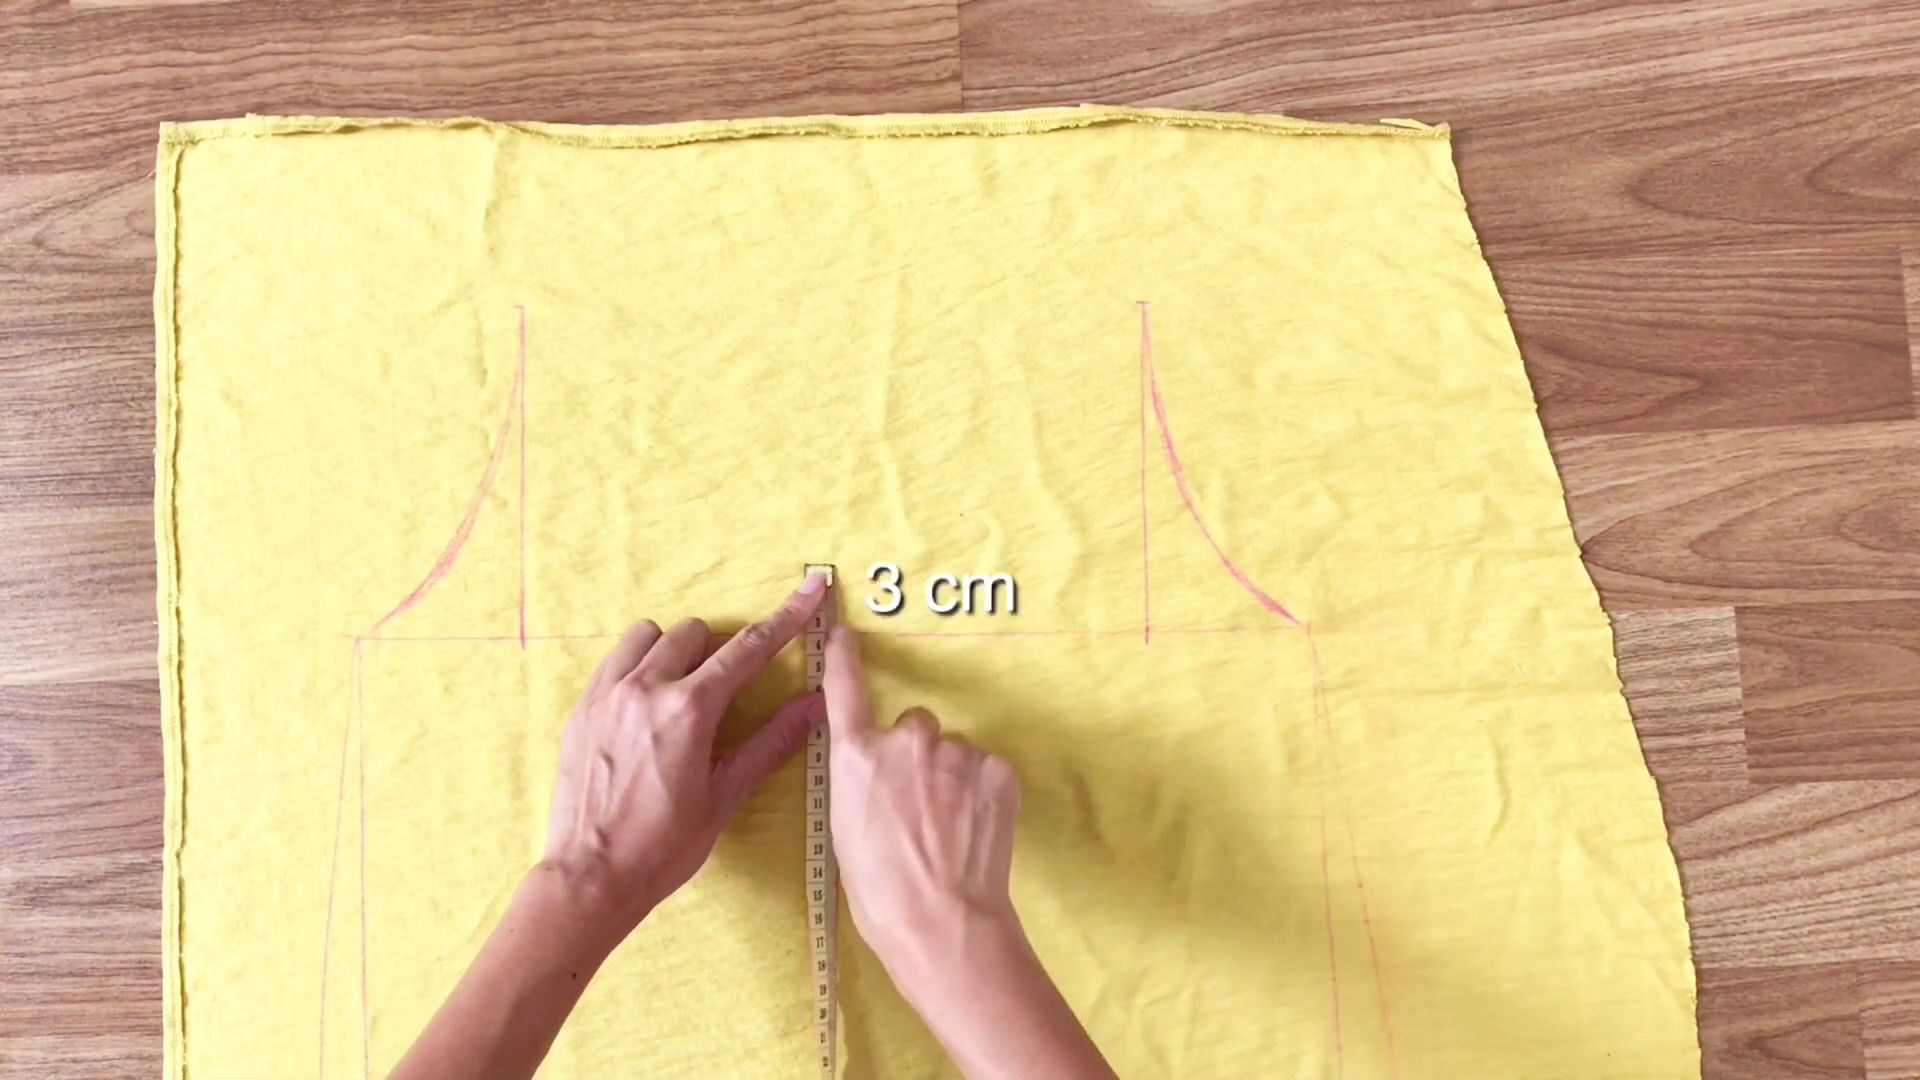
For the neckline, find the middle point between the two straight lines, mark 3 cm up from there.
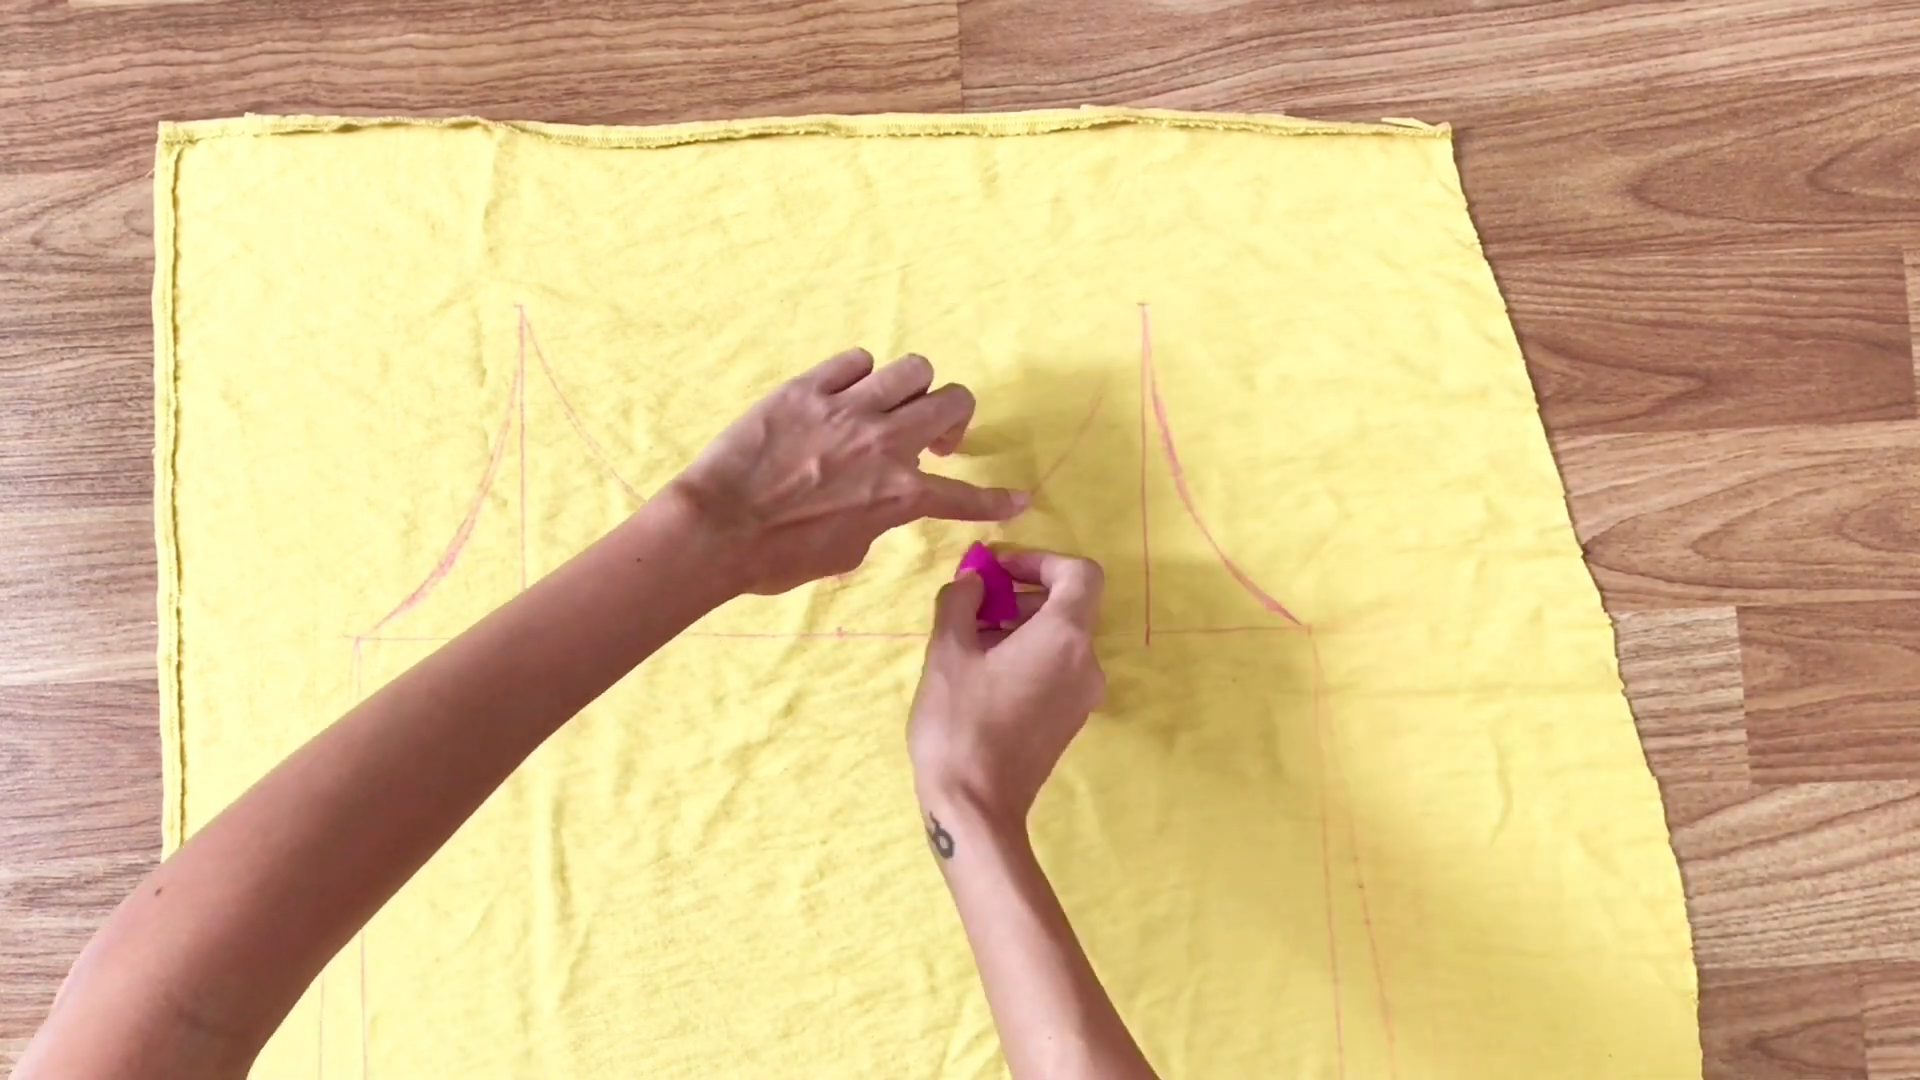
Then, draw an arc to form the neckline.
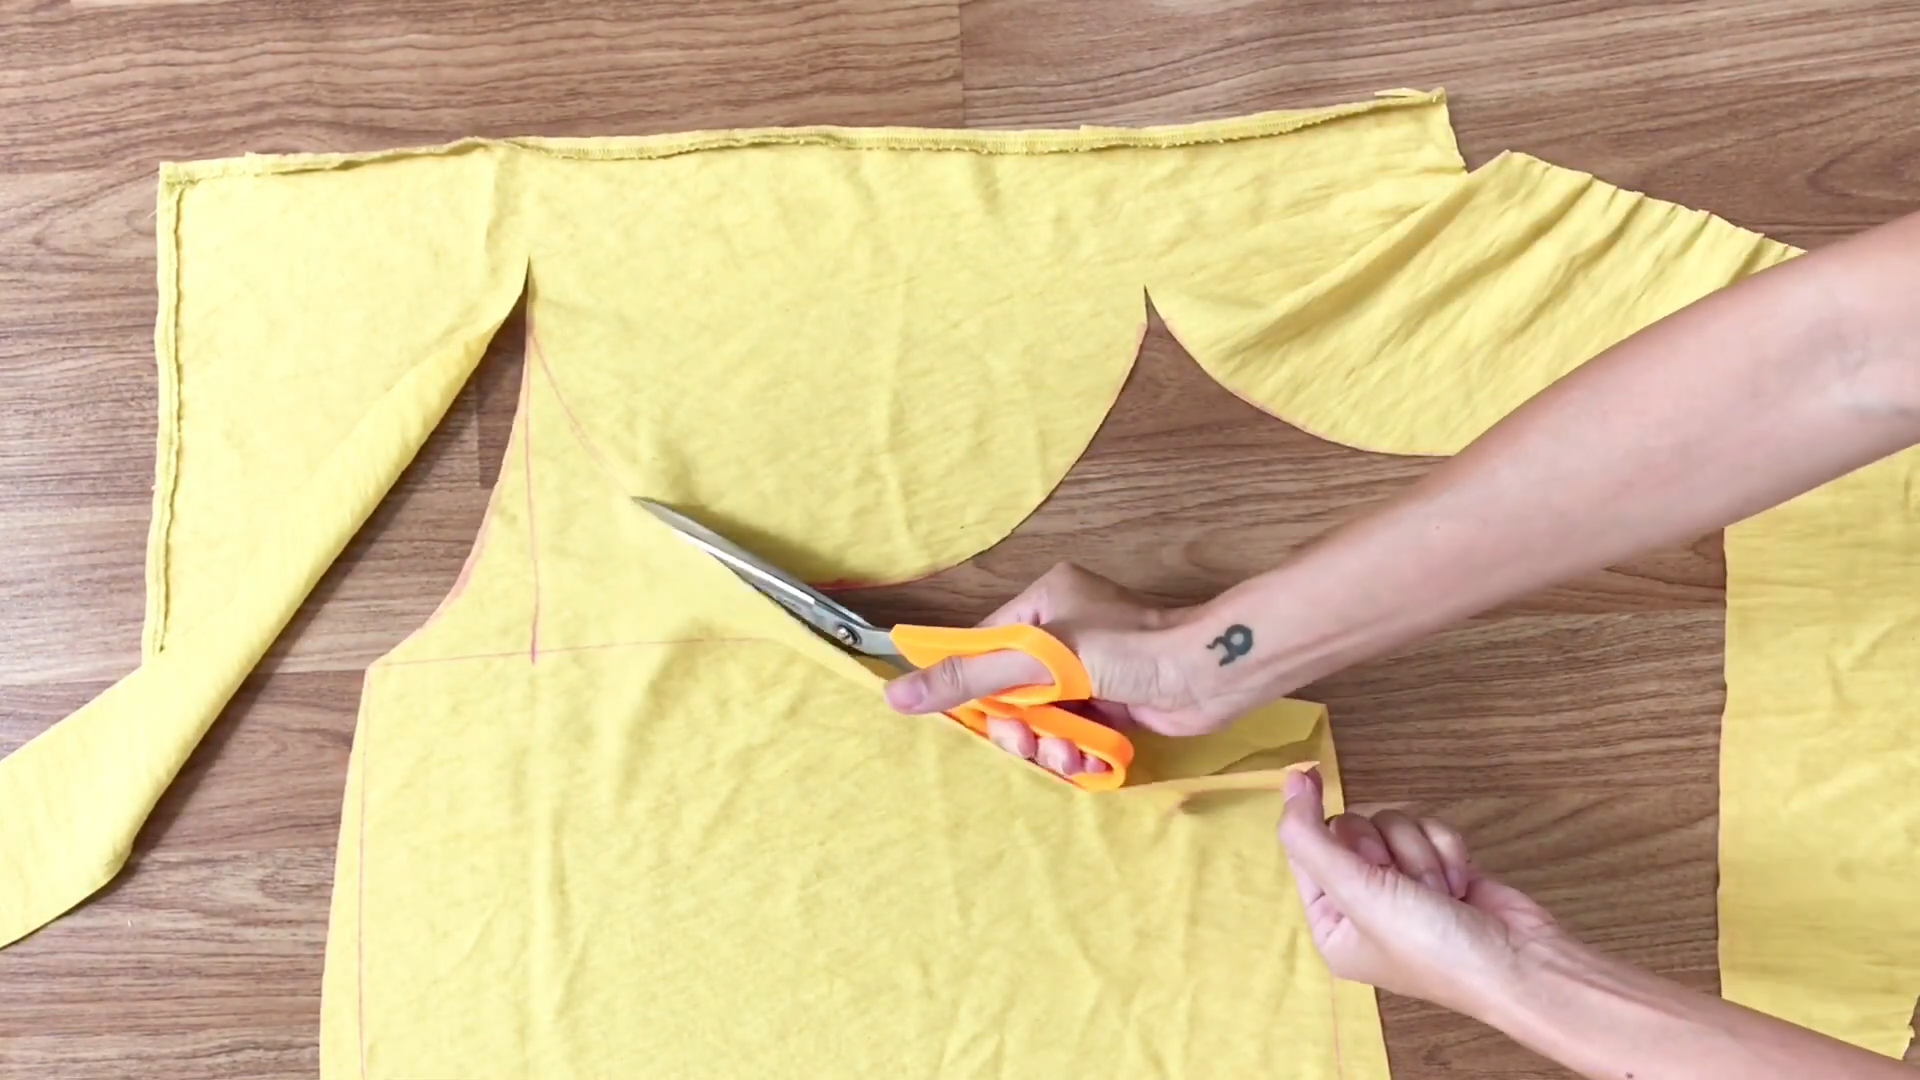
After cutting, you will have the front part of the dress.
THE STRAP
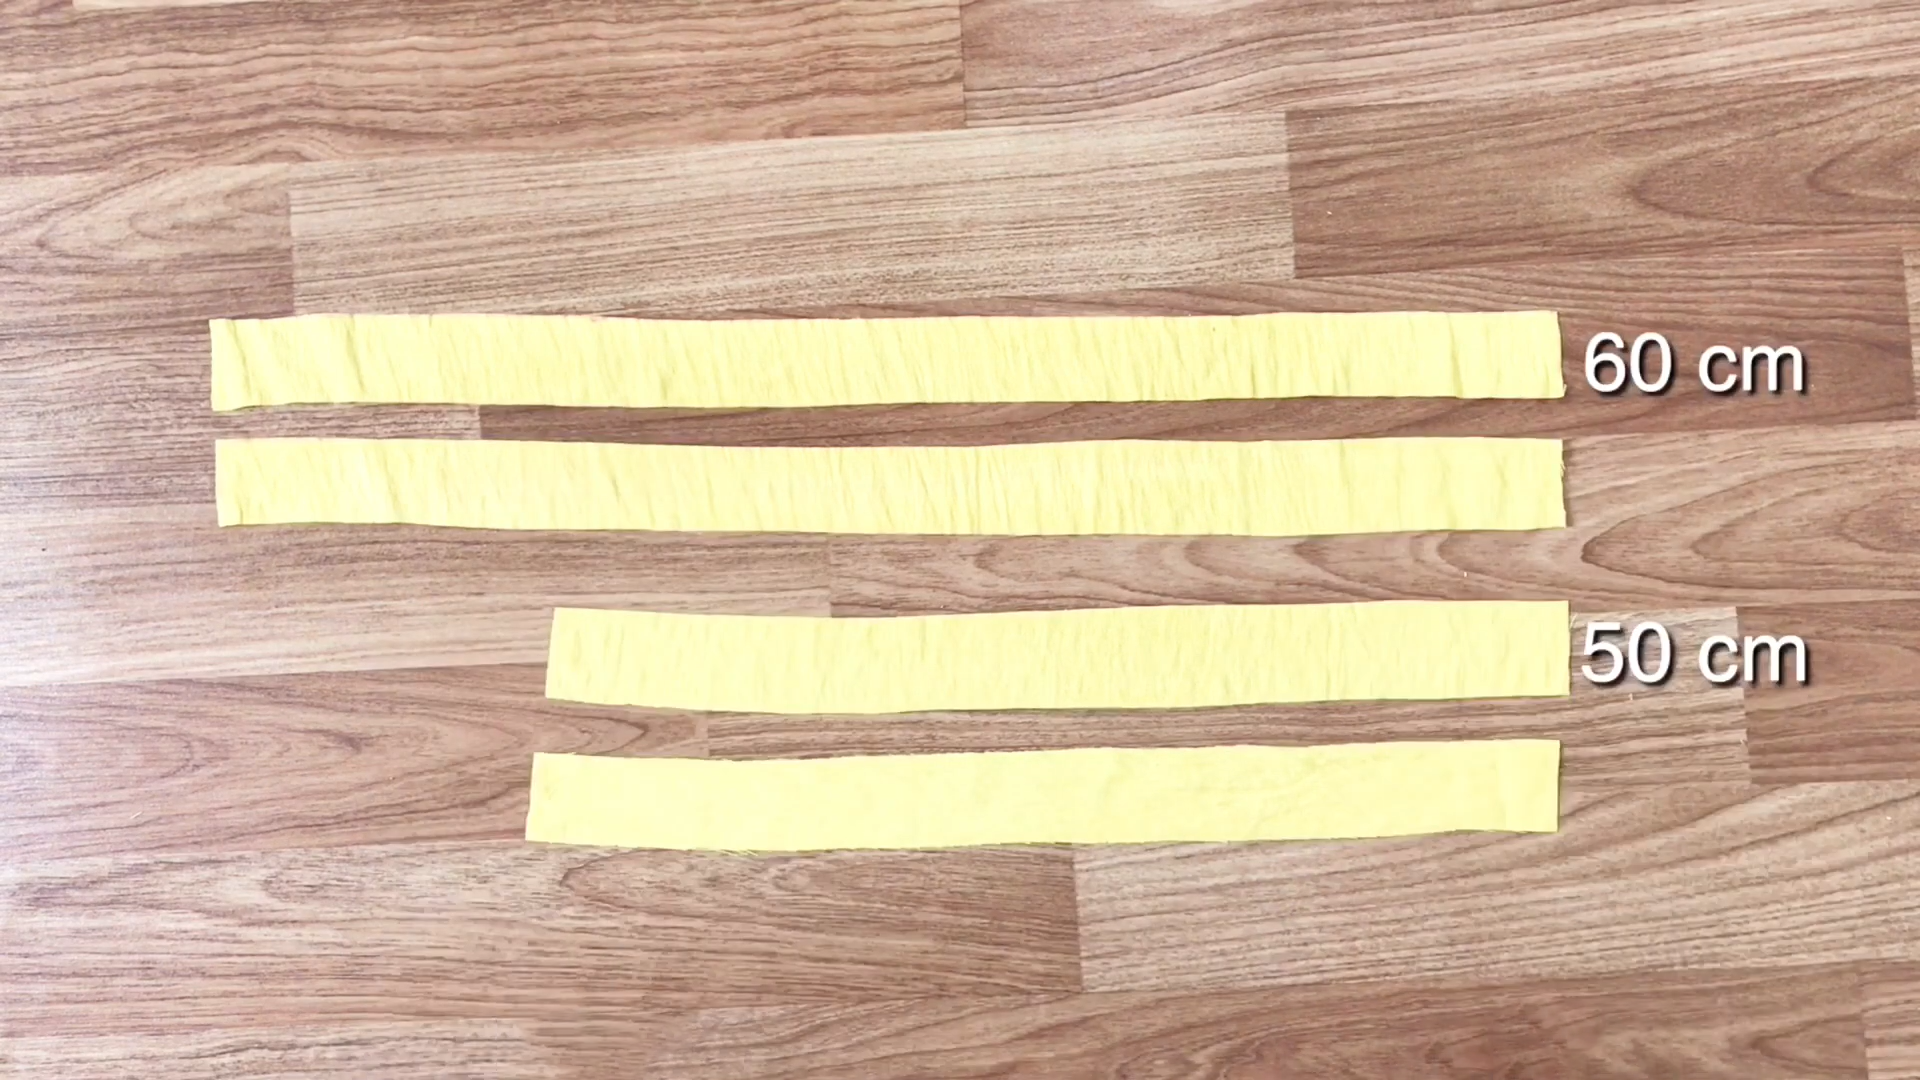
Next, use the leftover fabric to create the straps, which should be 4 cm wide.
You will need four straps: two that are 60 cm long and two that are 50 cm long.
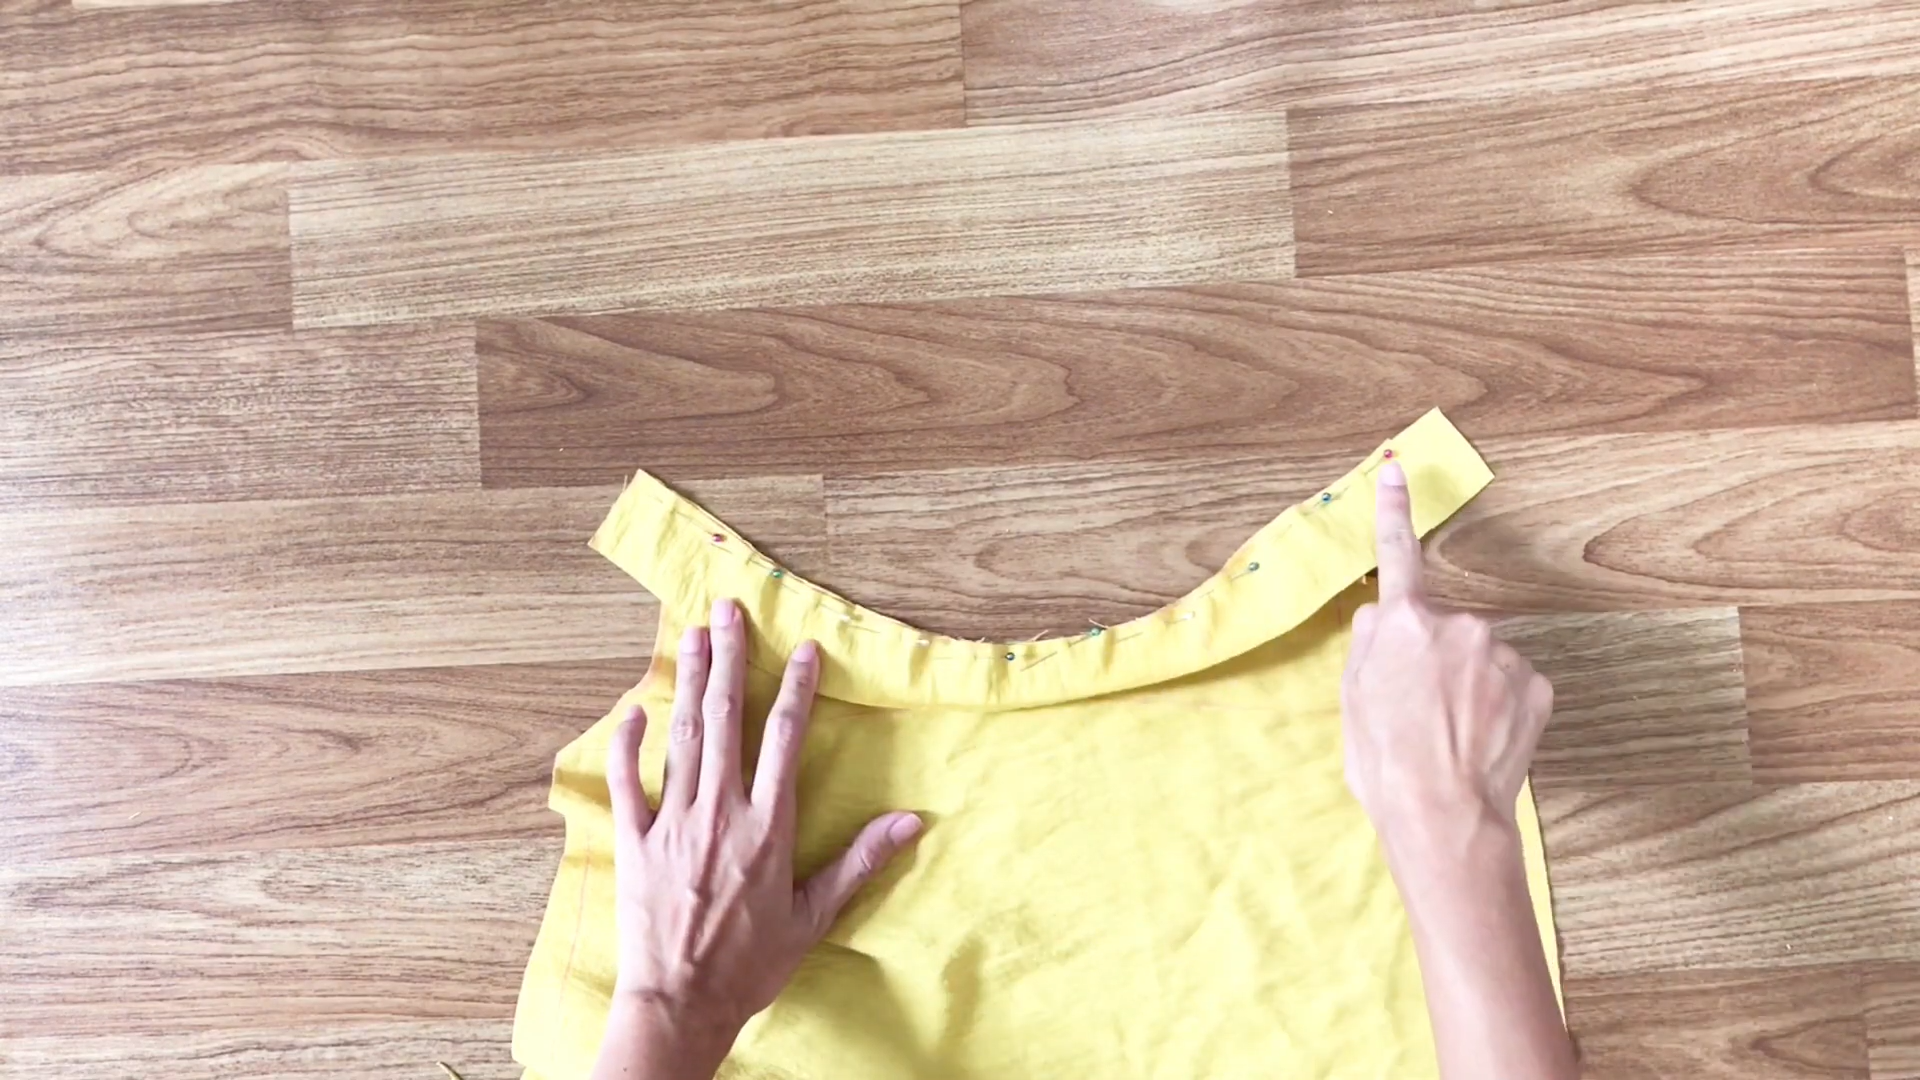
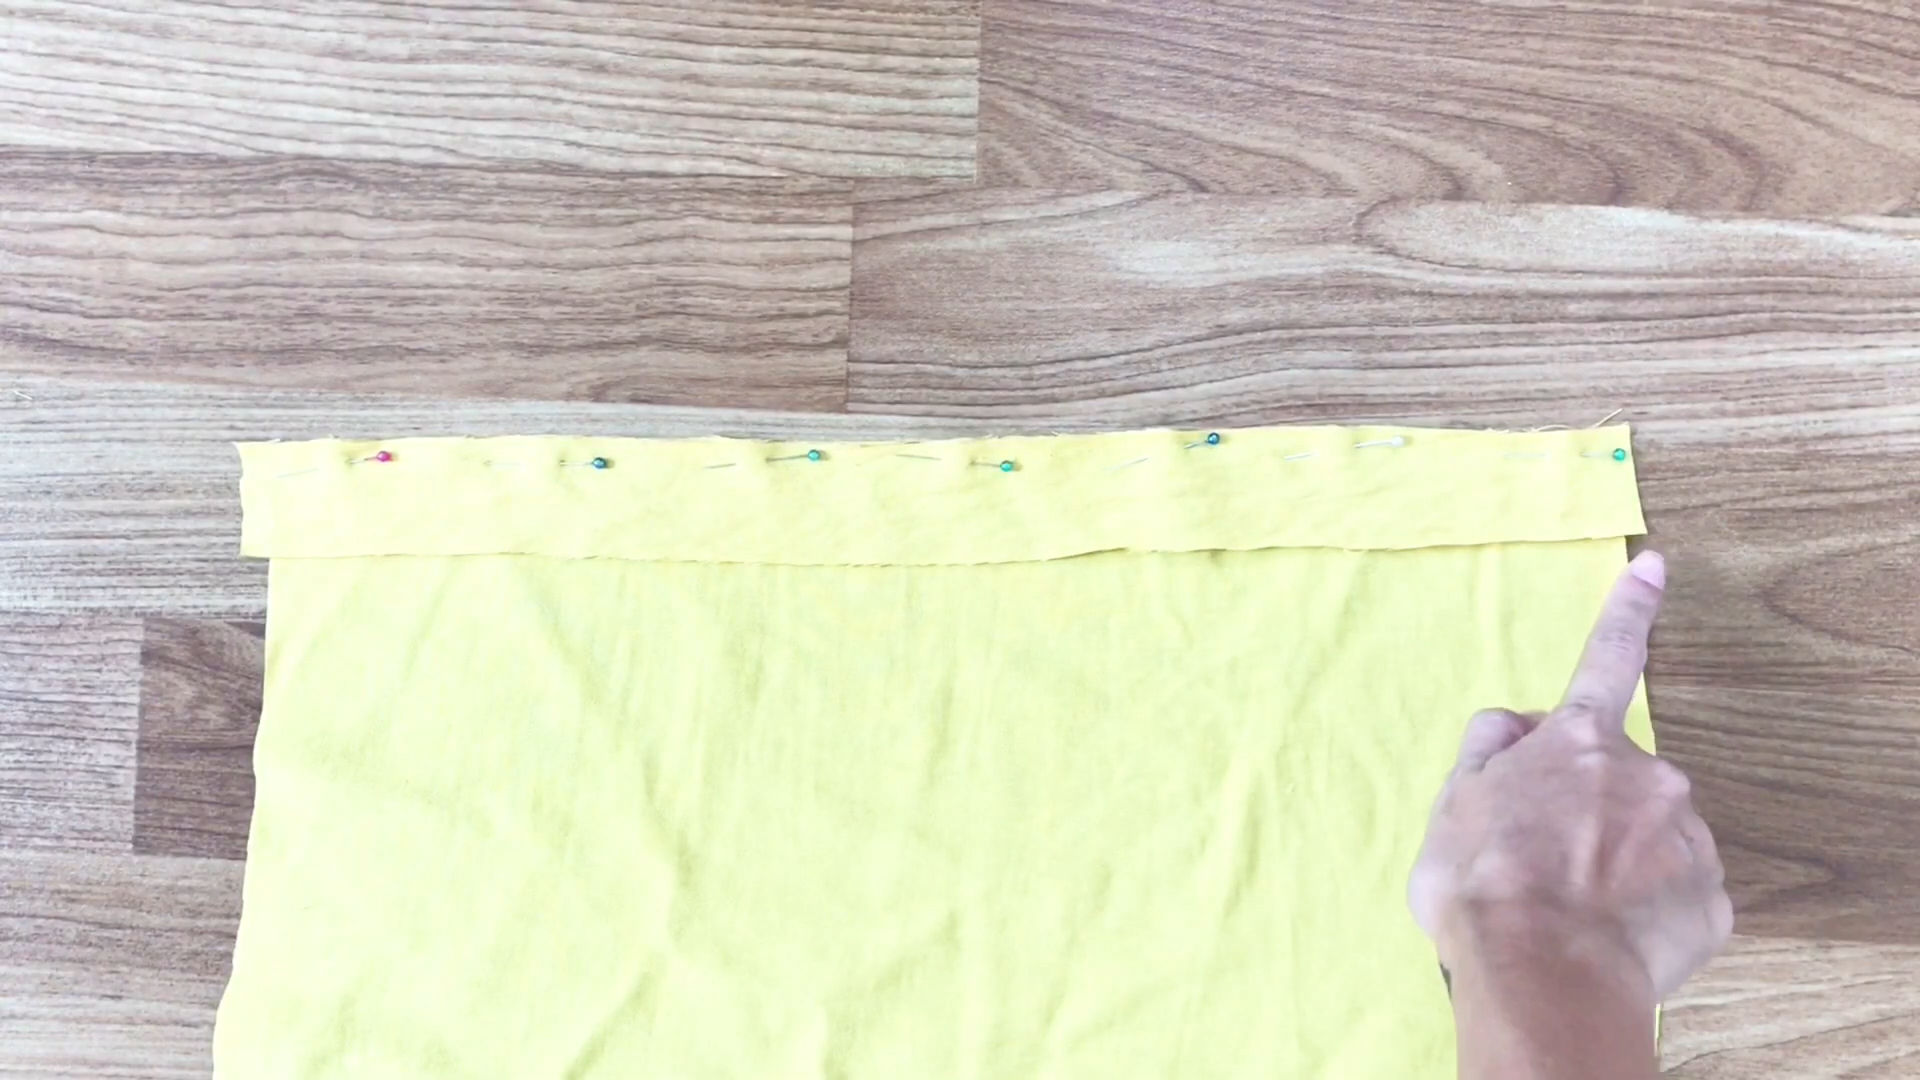
Attach the shorter straps to the neckline first, using pins to hold them in place before sewing.
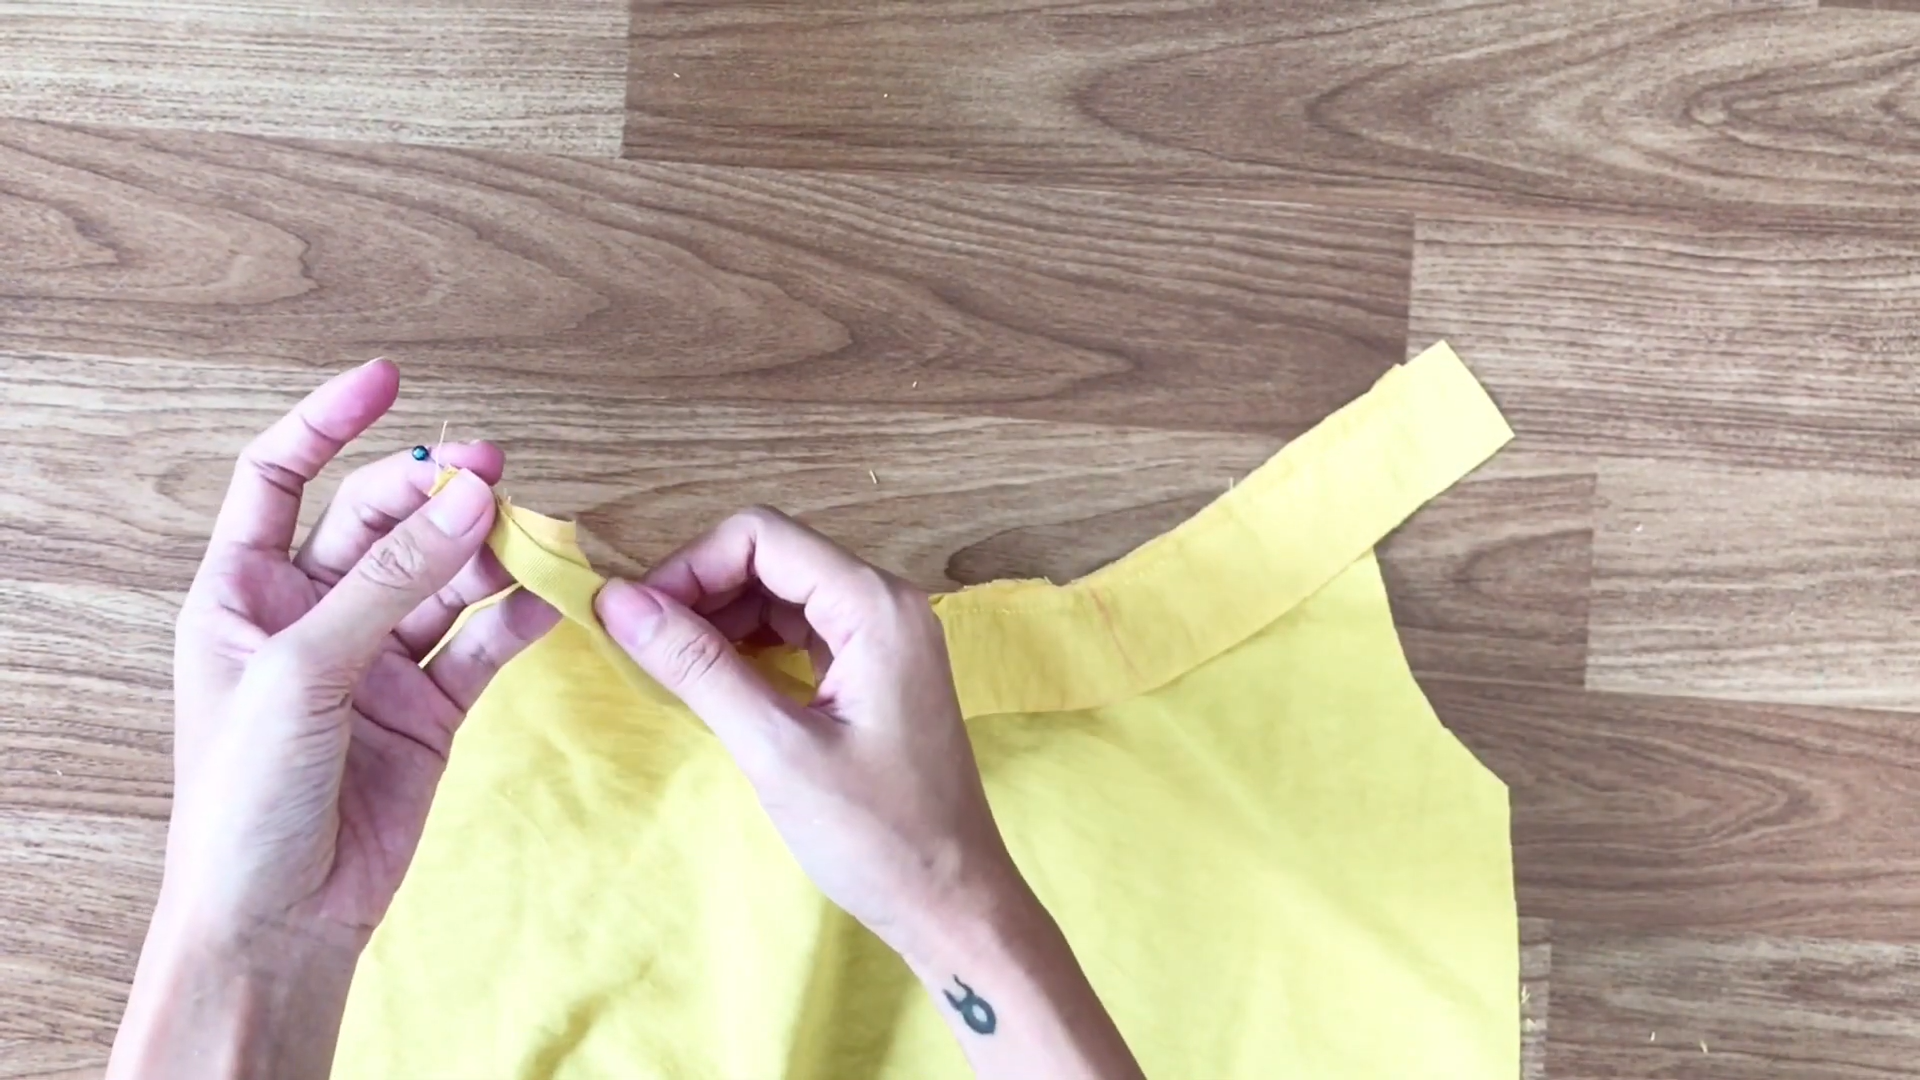
Fold the strap over the sewing line, then fold again to hide the stitching.
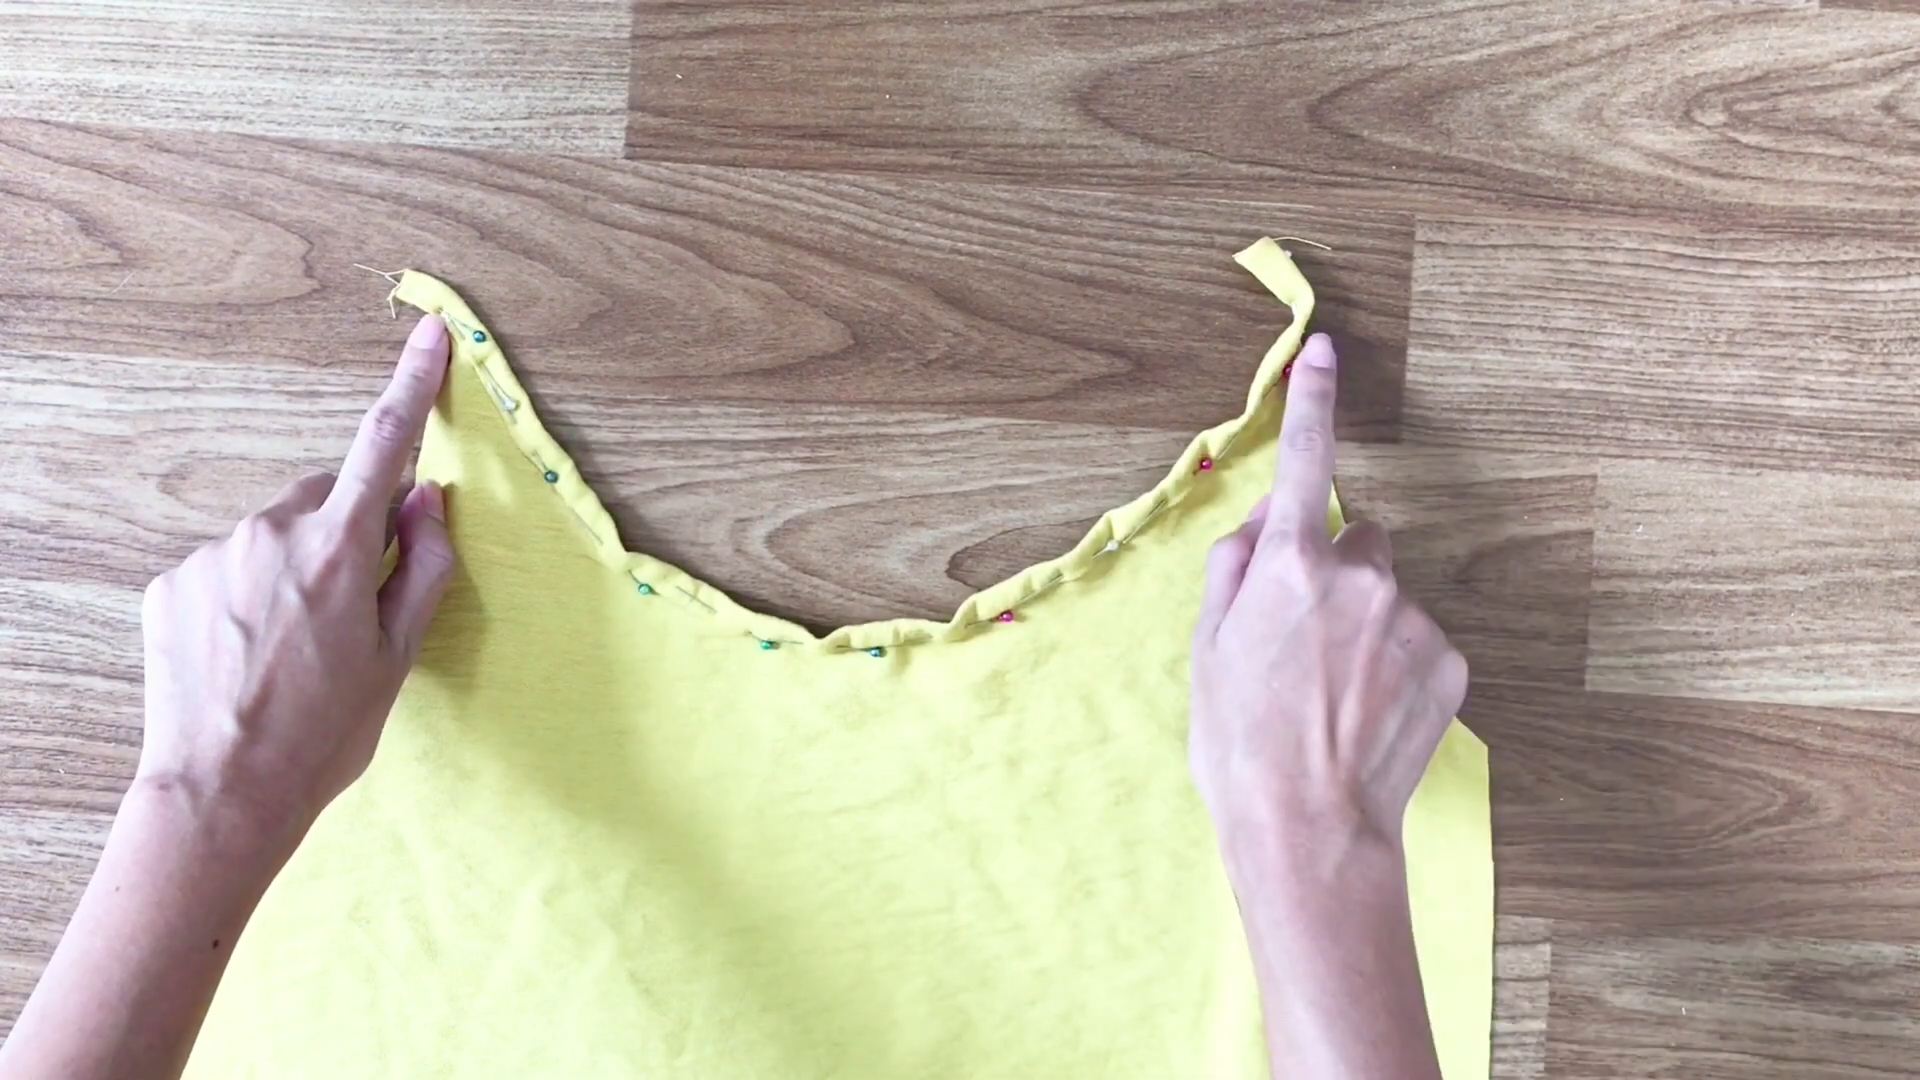
Use pins to hold the folds in place before sewing them down.

Attach the longer straps to the hand.
Then, pin and sew the straps.
Fold them over the sewing line, and sew again to hide the stitching.
The extra fabric from the straps will be folded into each other instead of the sewing line.
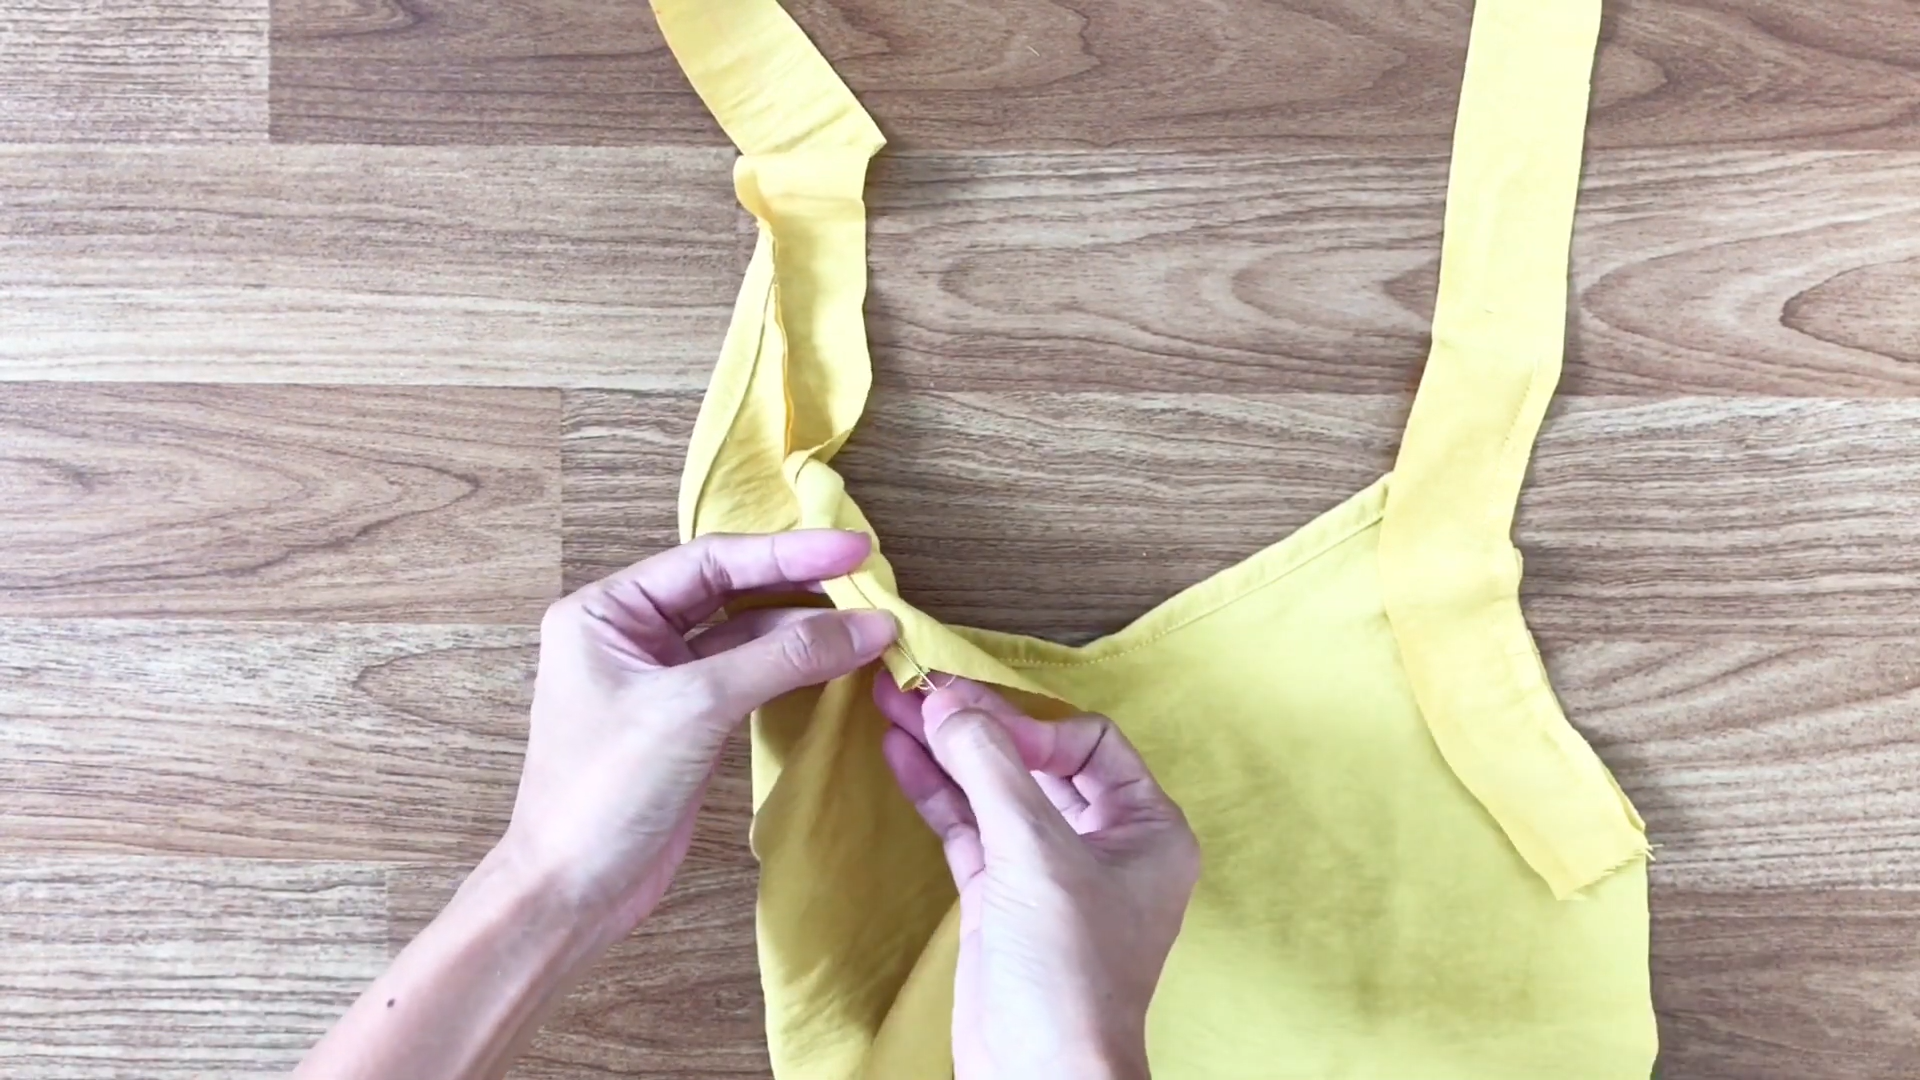
Next, attach the remaining short strap to the back of the slip dress. Pin and sew it.
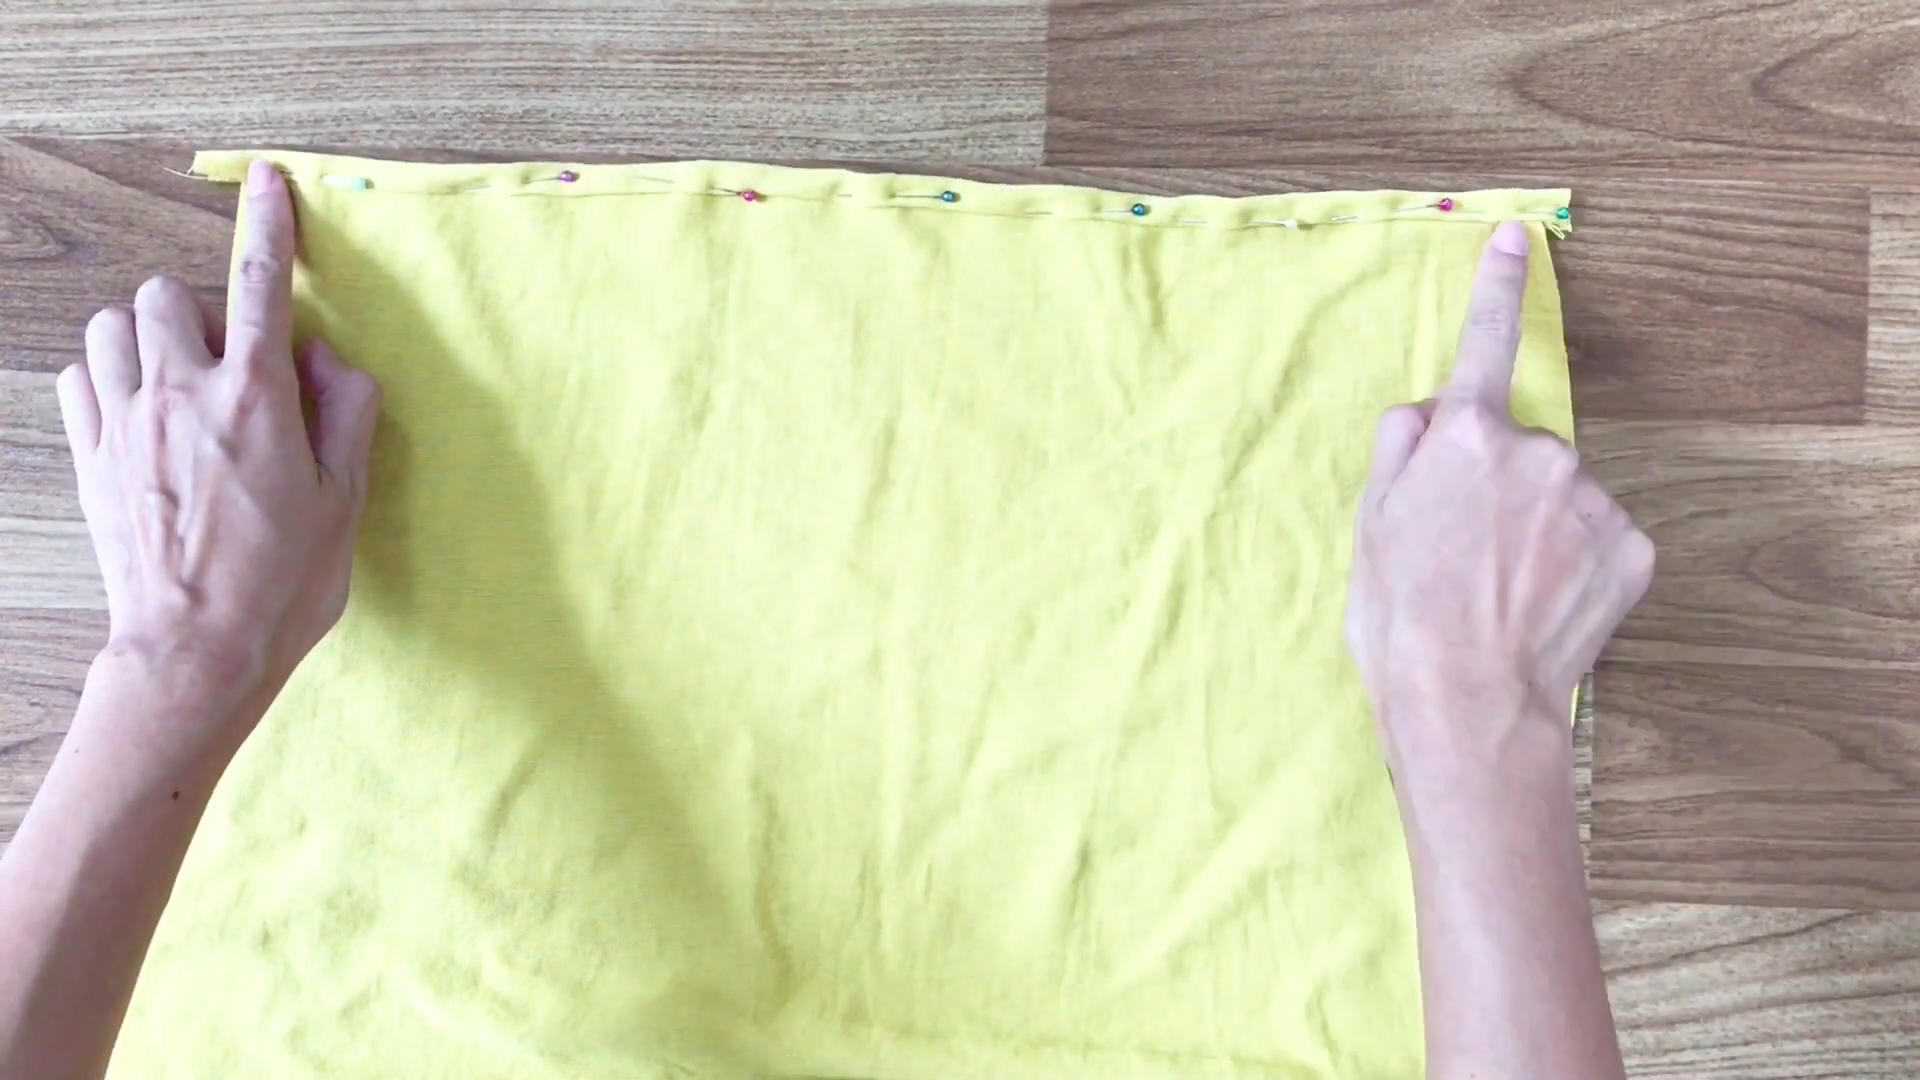
Then, double fold the fabric over the sewing line and sew again to hide the stitching.
CONNECTING THE BACK AND THE FRONT
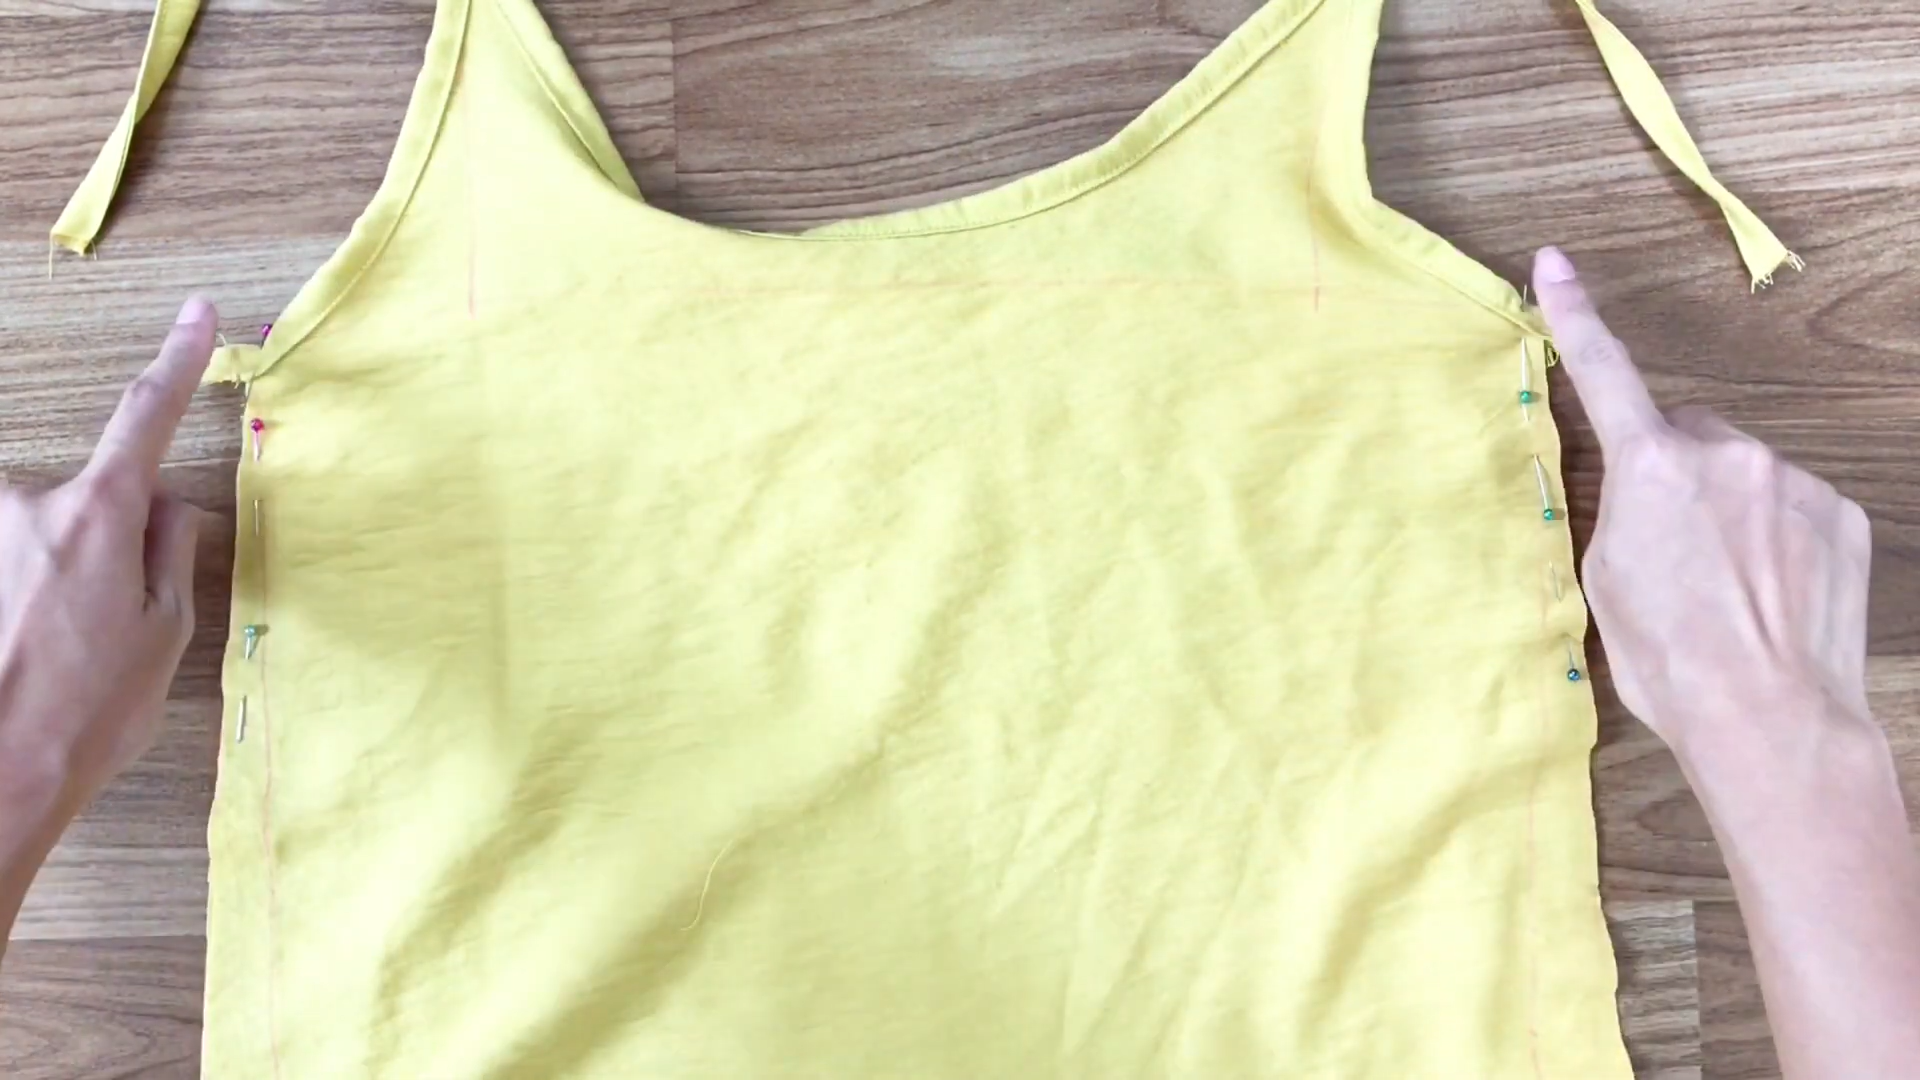
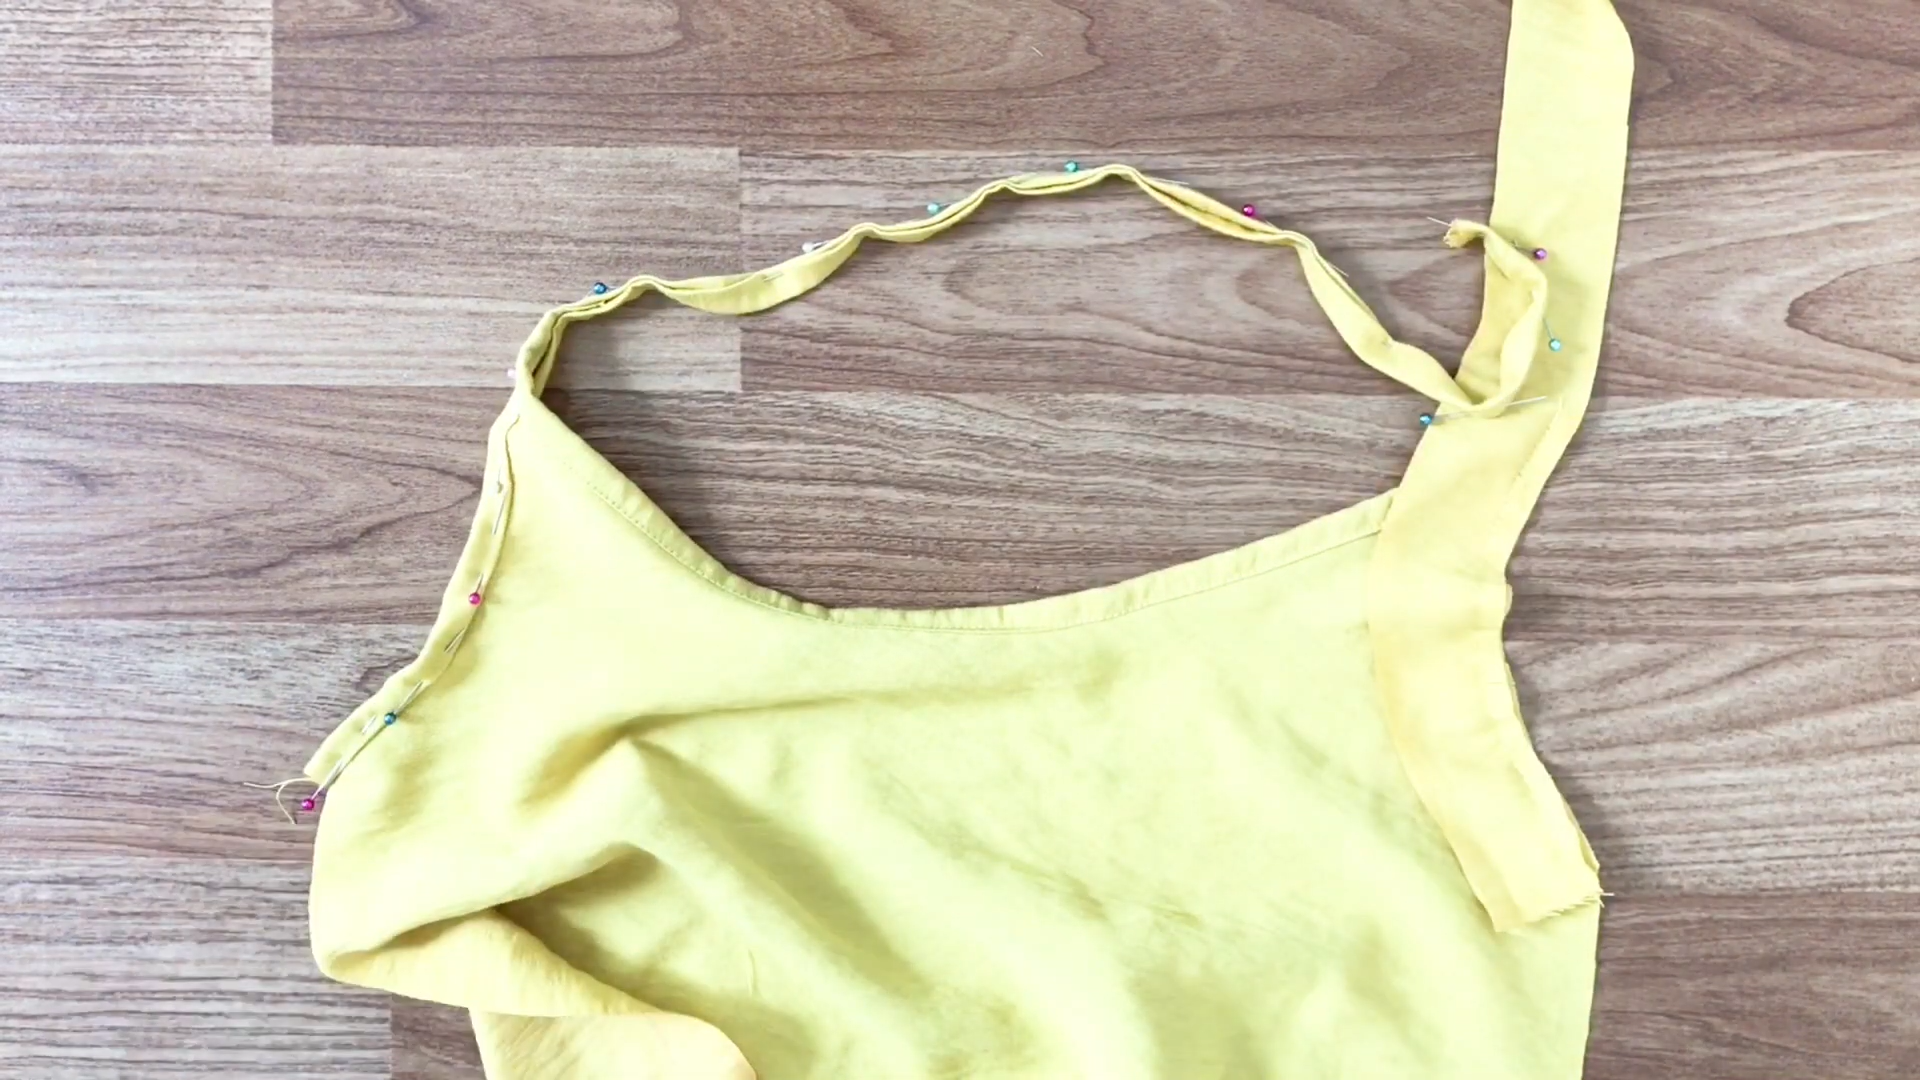
Connect the front and back pieces of the slip dress by pinning and sewing along the sides and armholes.
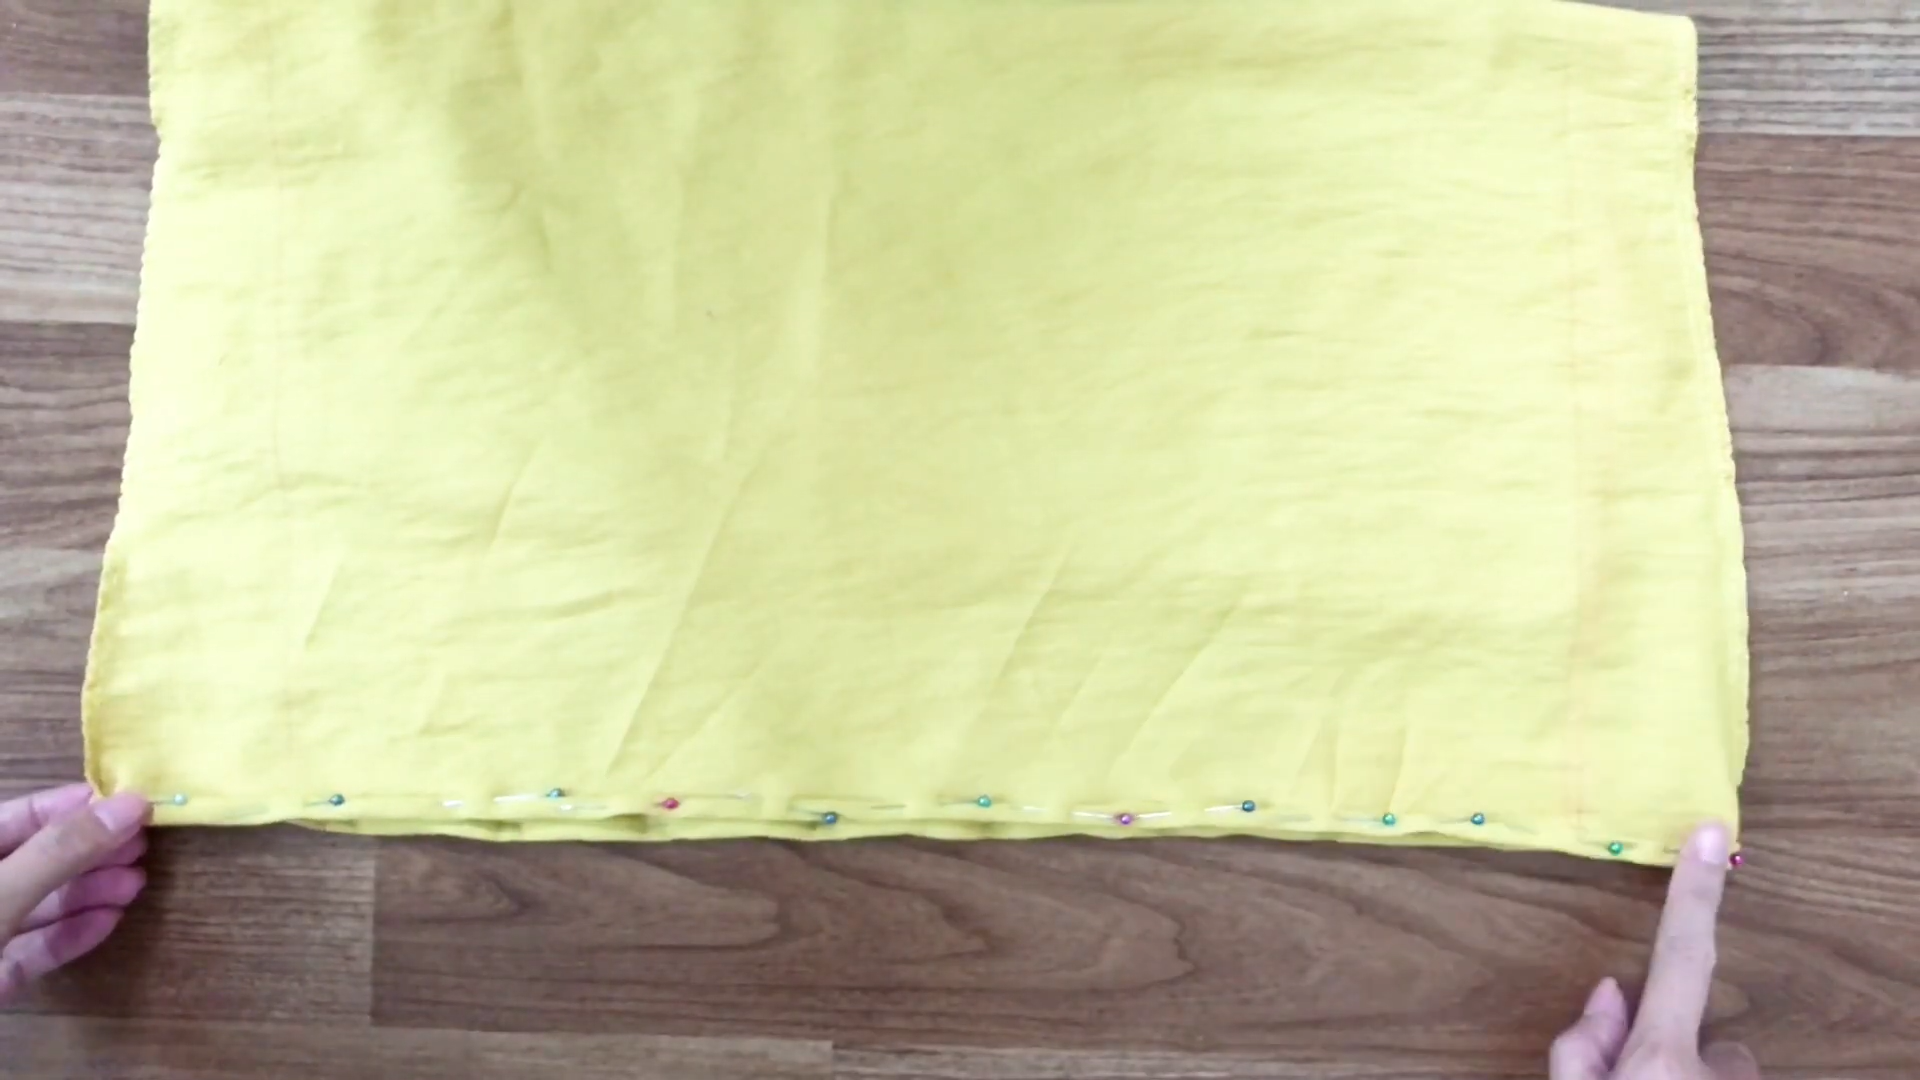
Double fold the fabric at the hem to hide the raw edge and sew to finish the bottom of the dress.
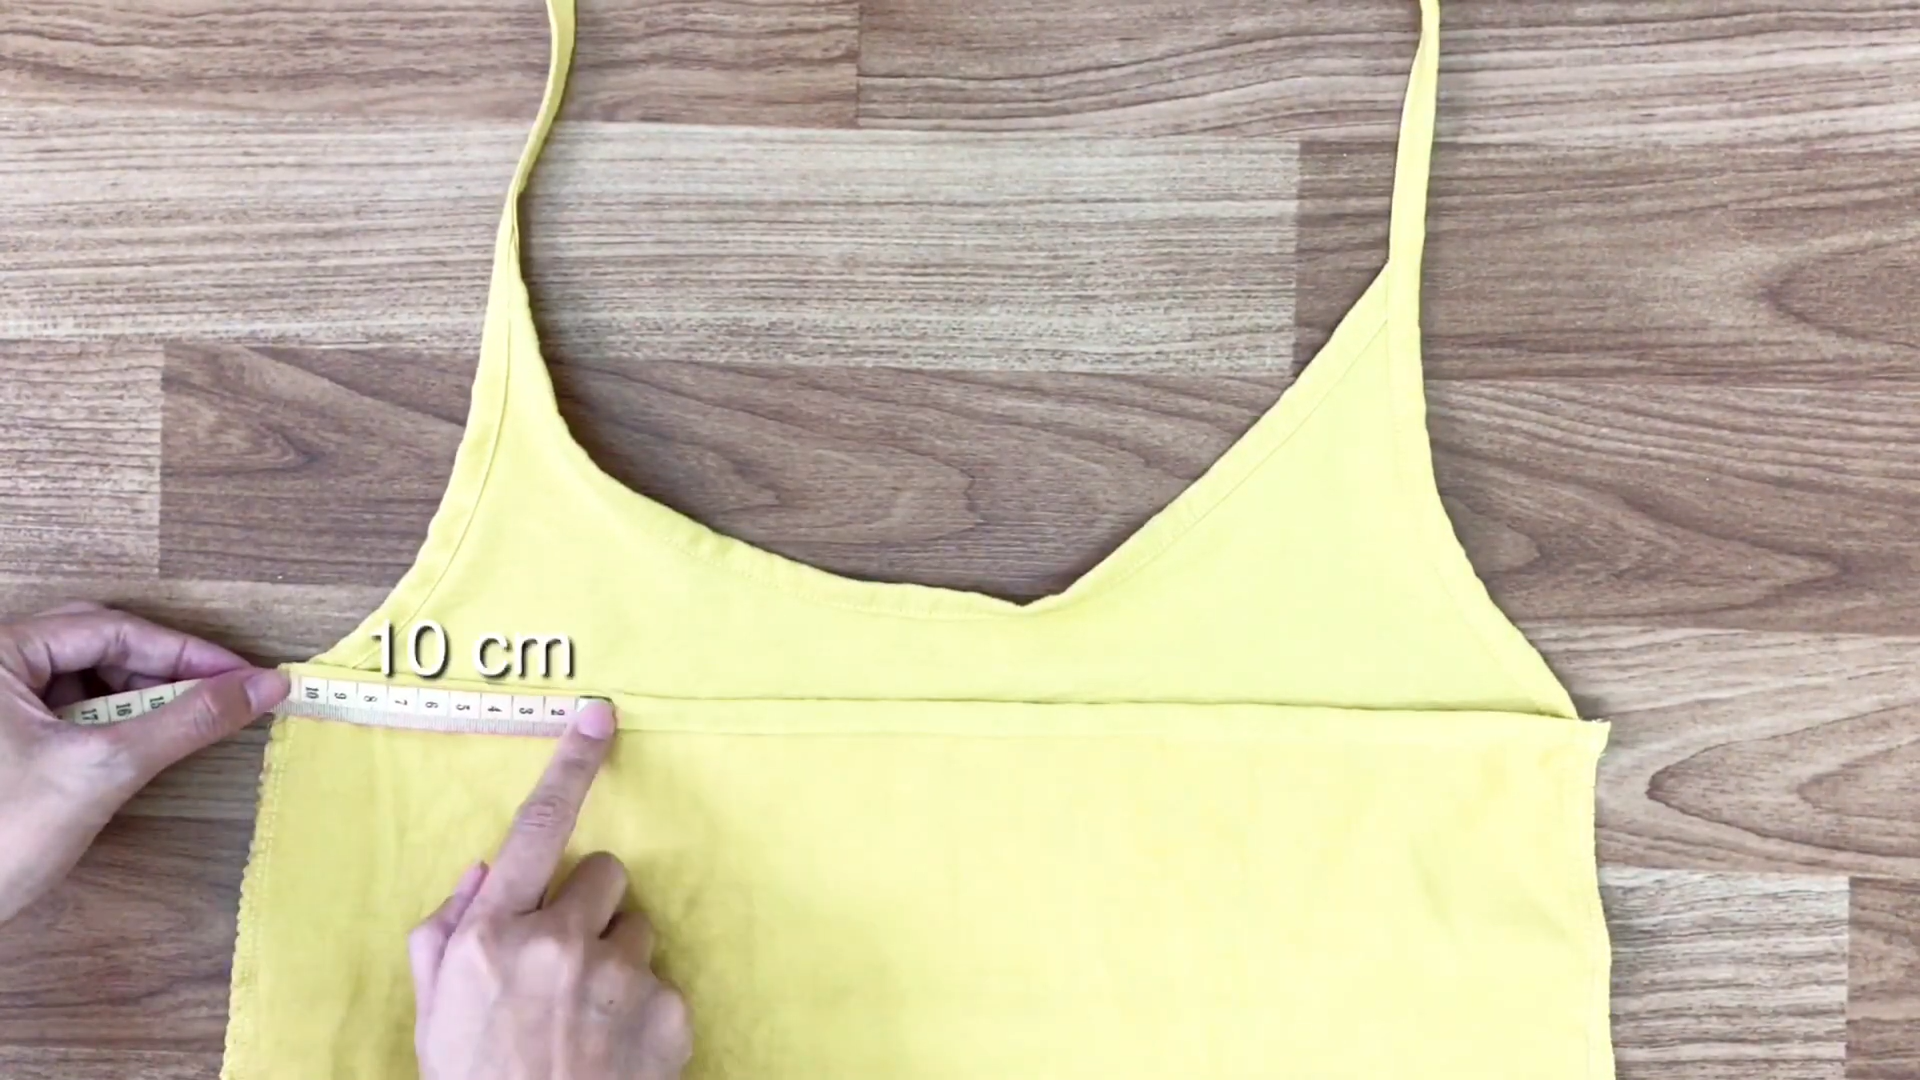
Moving back to the top of the slip dress, mark 10 cm in from both sides under the arm at the back.
These will be the points where the ties from the front will connect to the back. You can try on the dress to determine the appropriate length for the ties.
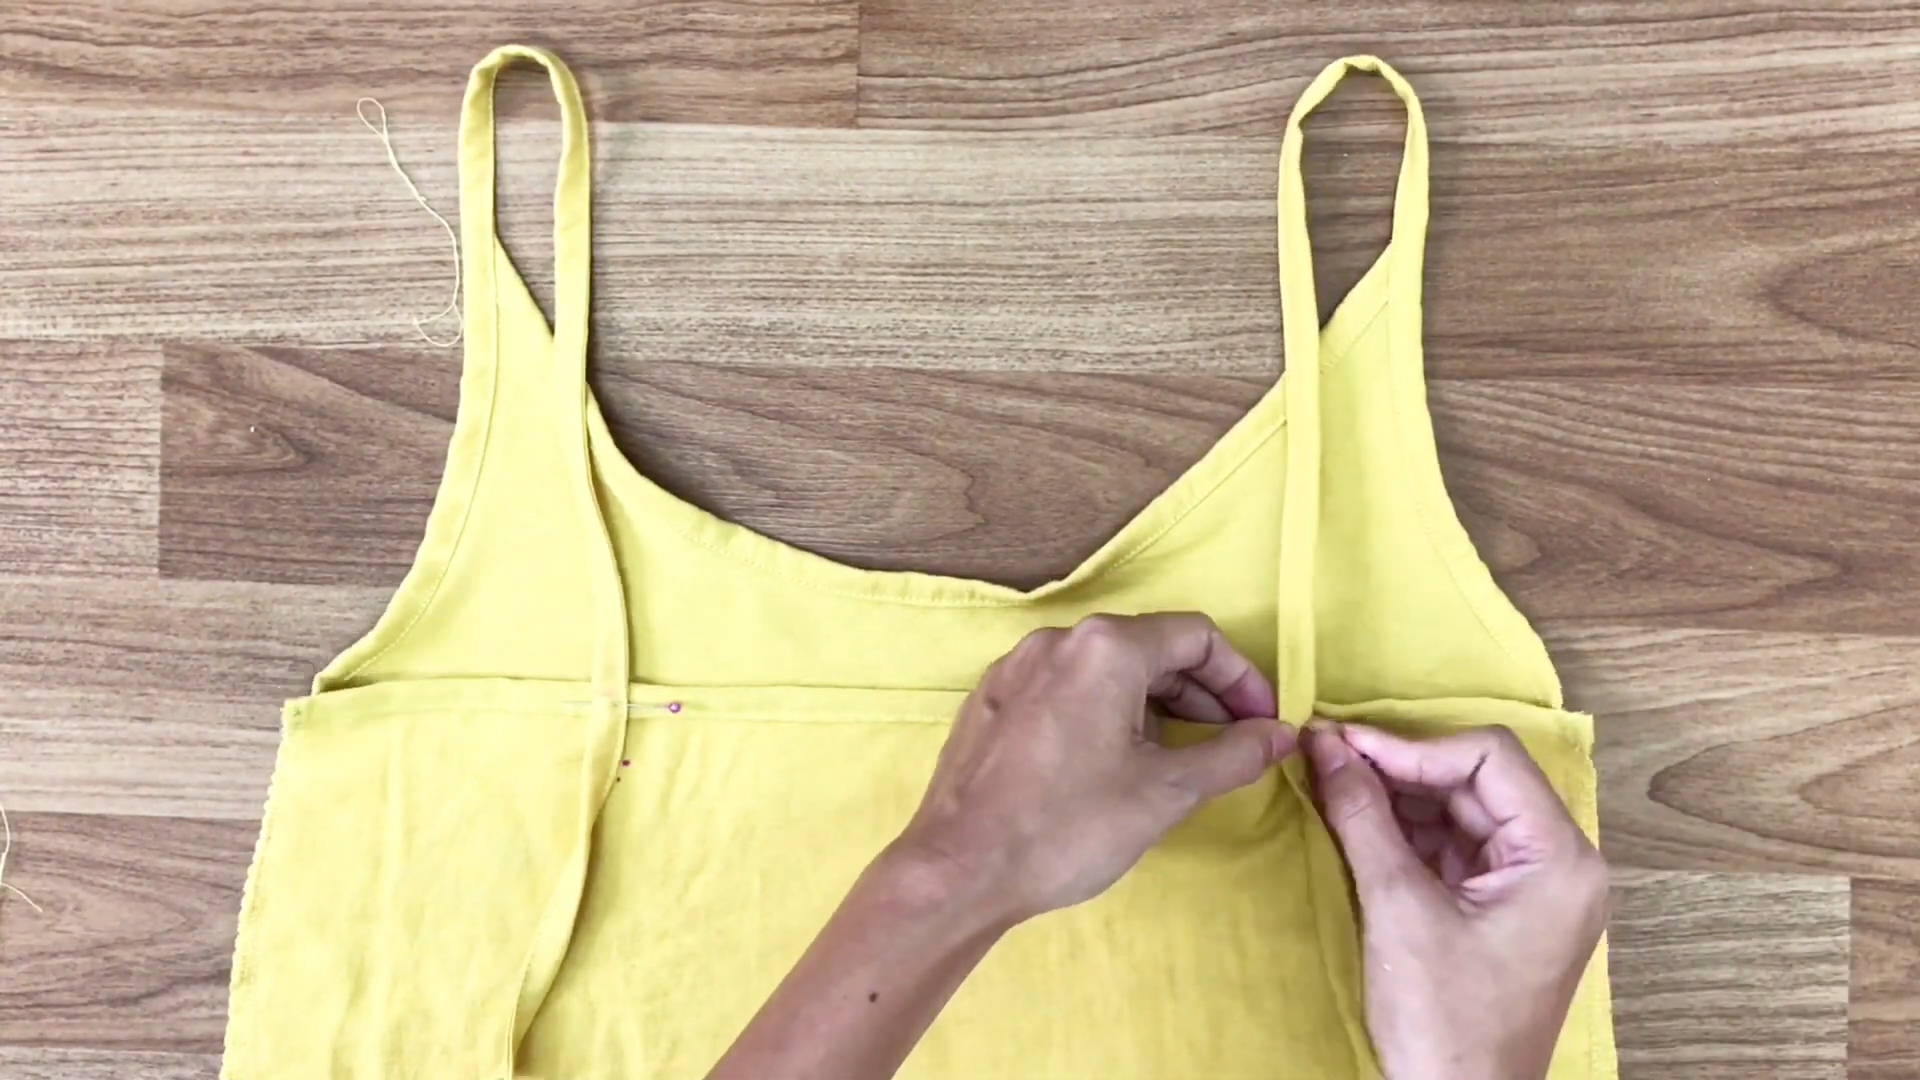
Then, pin them in place, and sew them to the back of the dress.
Finally, mark the middle of the neckline at the front.

And, use a plastic band to create a shirring effect there.

DIY Slip dress
And that's it for this DIY! Obsessed with how this turned out!
It's already become my favorite - comfy enough for those sweltering summer days on its own, and perfect for layering with a white tee when the weather gets cooler.


And it won't be too difficult to make. So I hope you will give it a try.
If you liked this project, please share it and subscribe to my channel so you won’t miss any of my upcoming DIYs.
Until next week, happy sewing!