DIY Square neck dress with ruffle hem and side pocket | Step by step sewing tutorial

DIY Square neck dress with ruffle hem and side pocket

Welcome or welcome back to my channel!
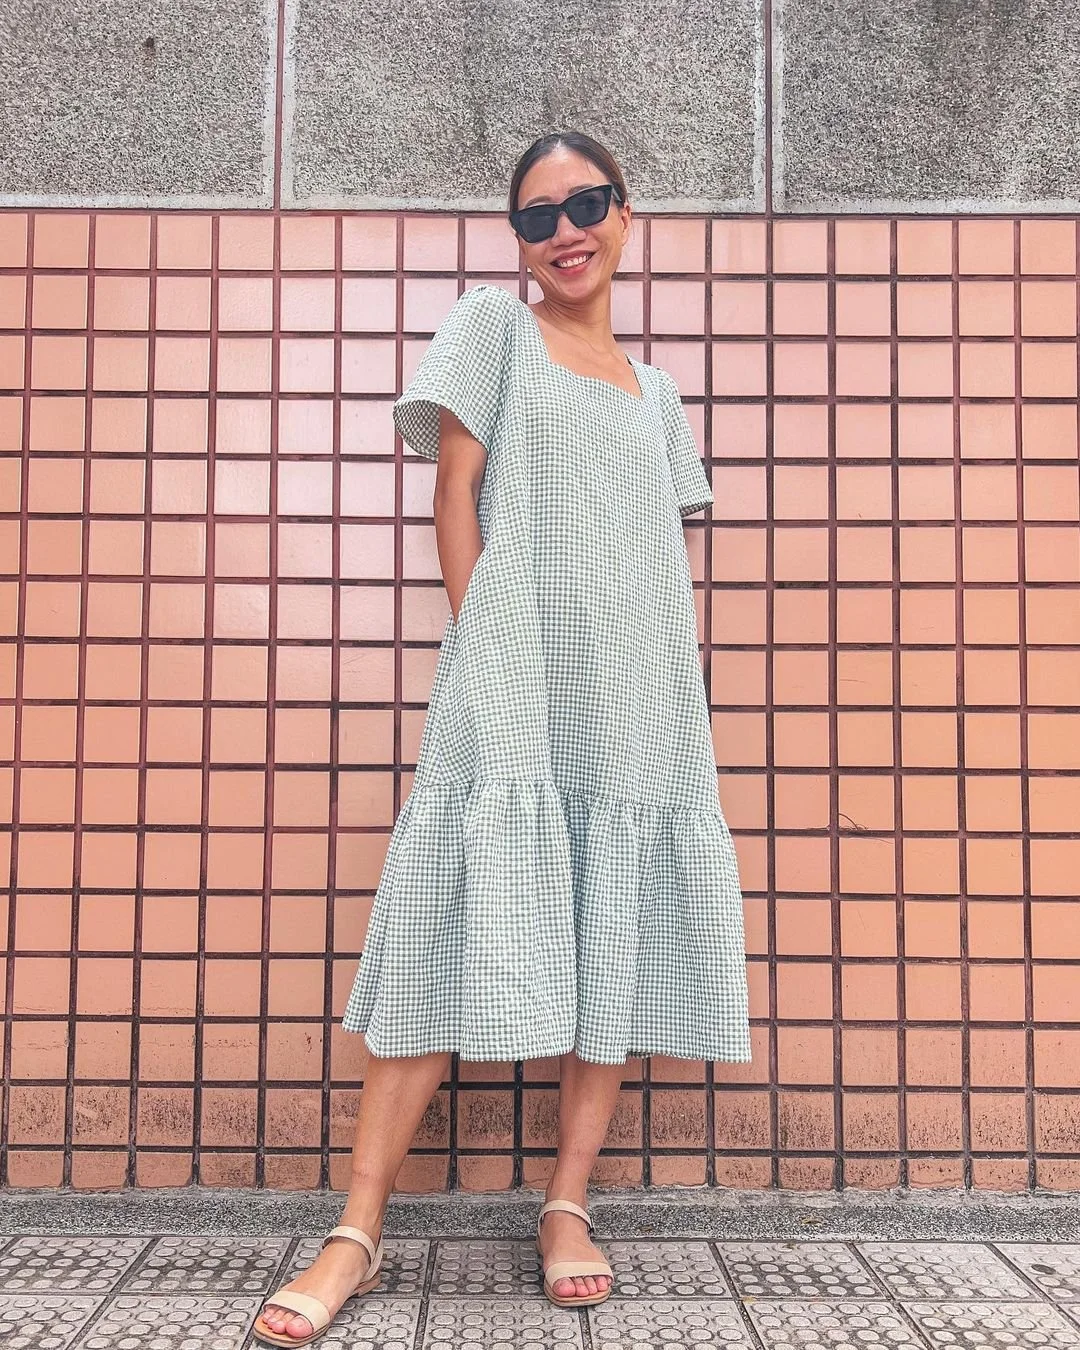
In today's video, I'm going to share with you how I made a square neck ruffle hem dress. I made this dress from a gingham fabric with 2 side pockets and in midi length. So it will be a perfect throw on outfit for your upcoming summer.
So, let’s get started!
WHAT YOU’LL NEED
3m of gingham fabric
Pattern paper
Sewing machine
Pins
Scissors
Ruler
Long stick
MAKING THE PATTERNS
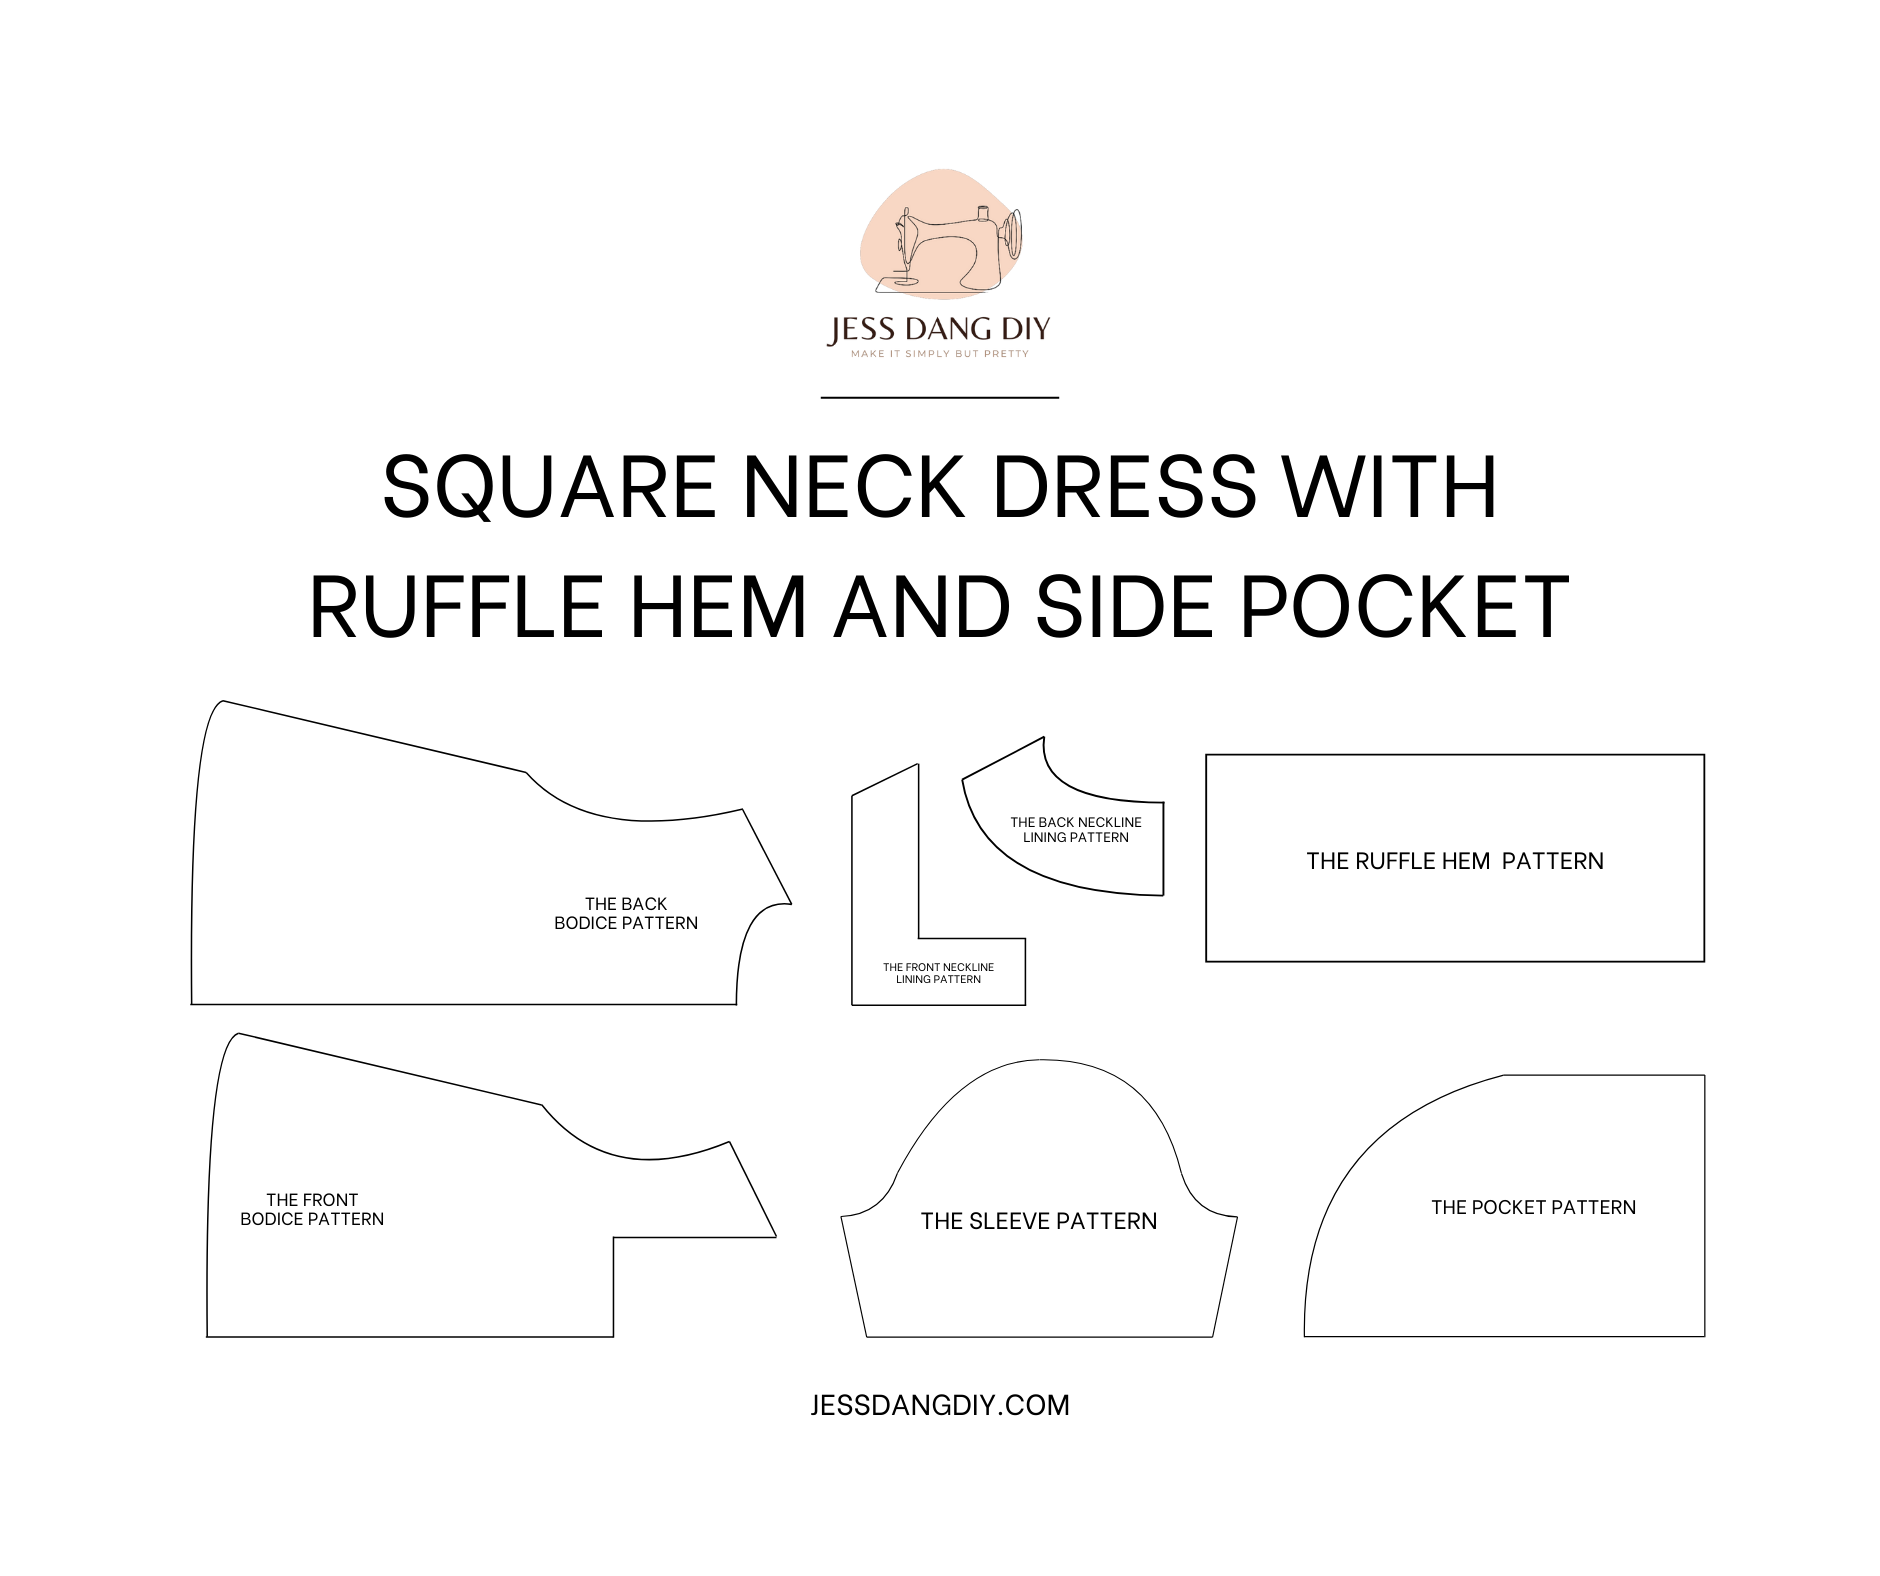
Here’s the pattern for the project. To get a clear understanding of all the measurements needed for the pattern, watch the video from 0:28 to 10:26.
Remember, you can adjust these measurements to fit your own dimensions!
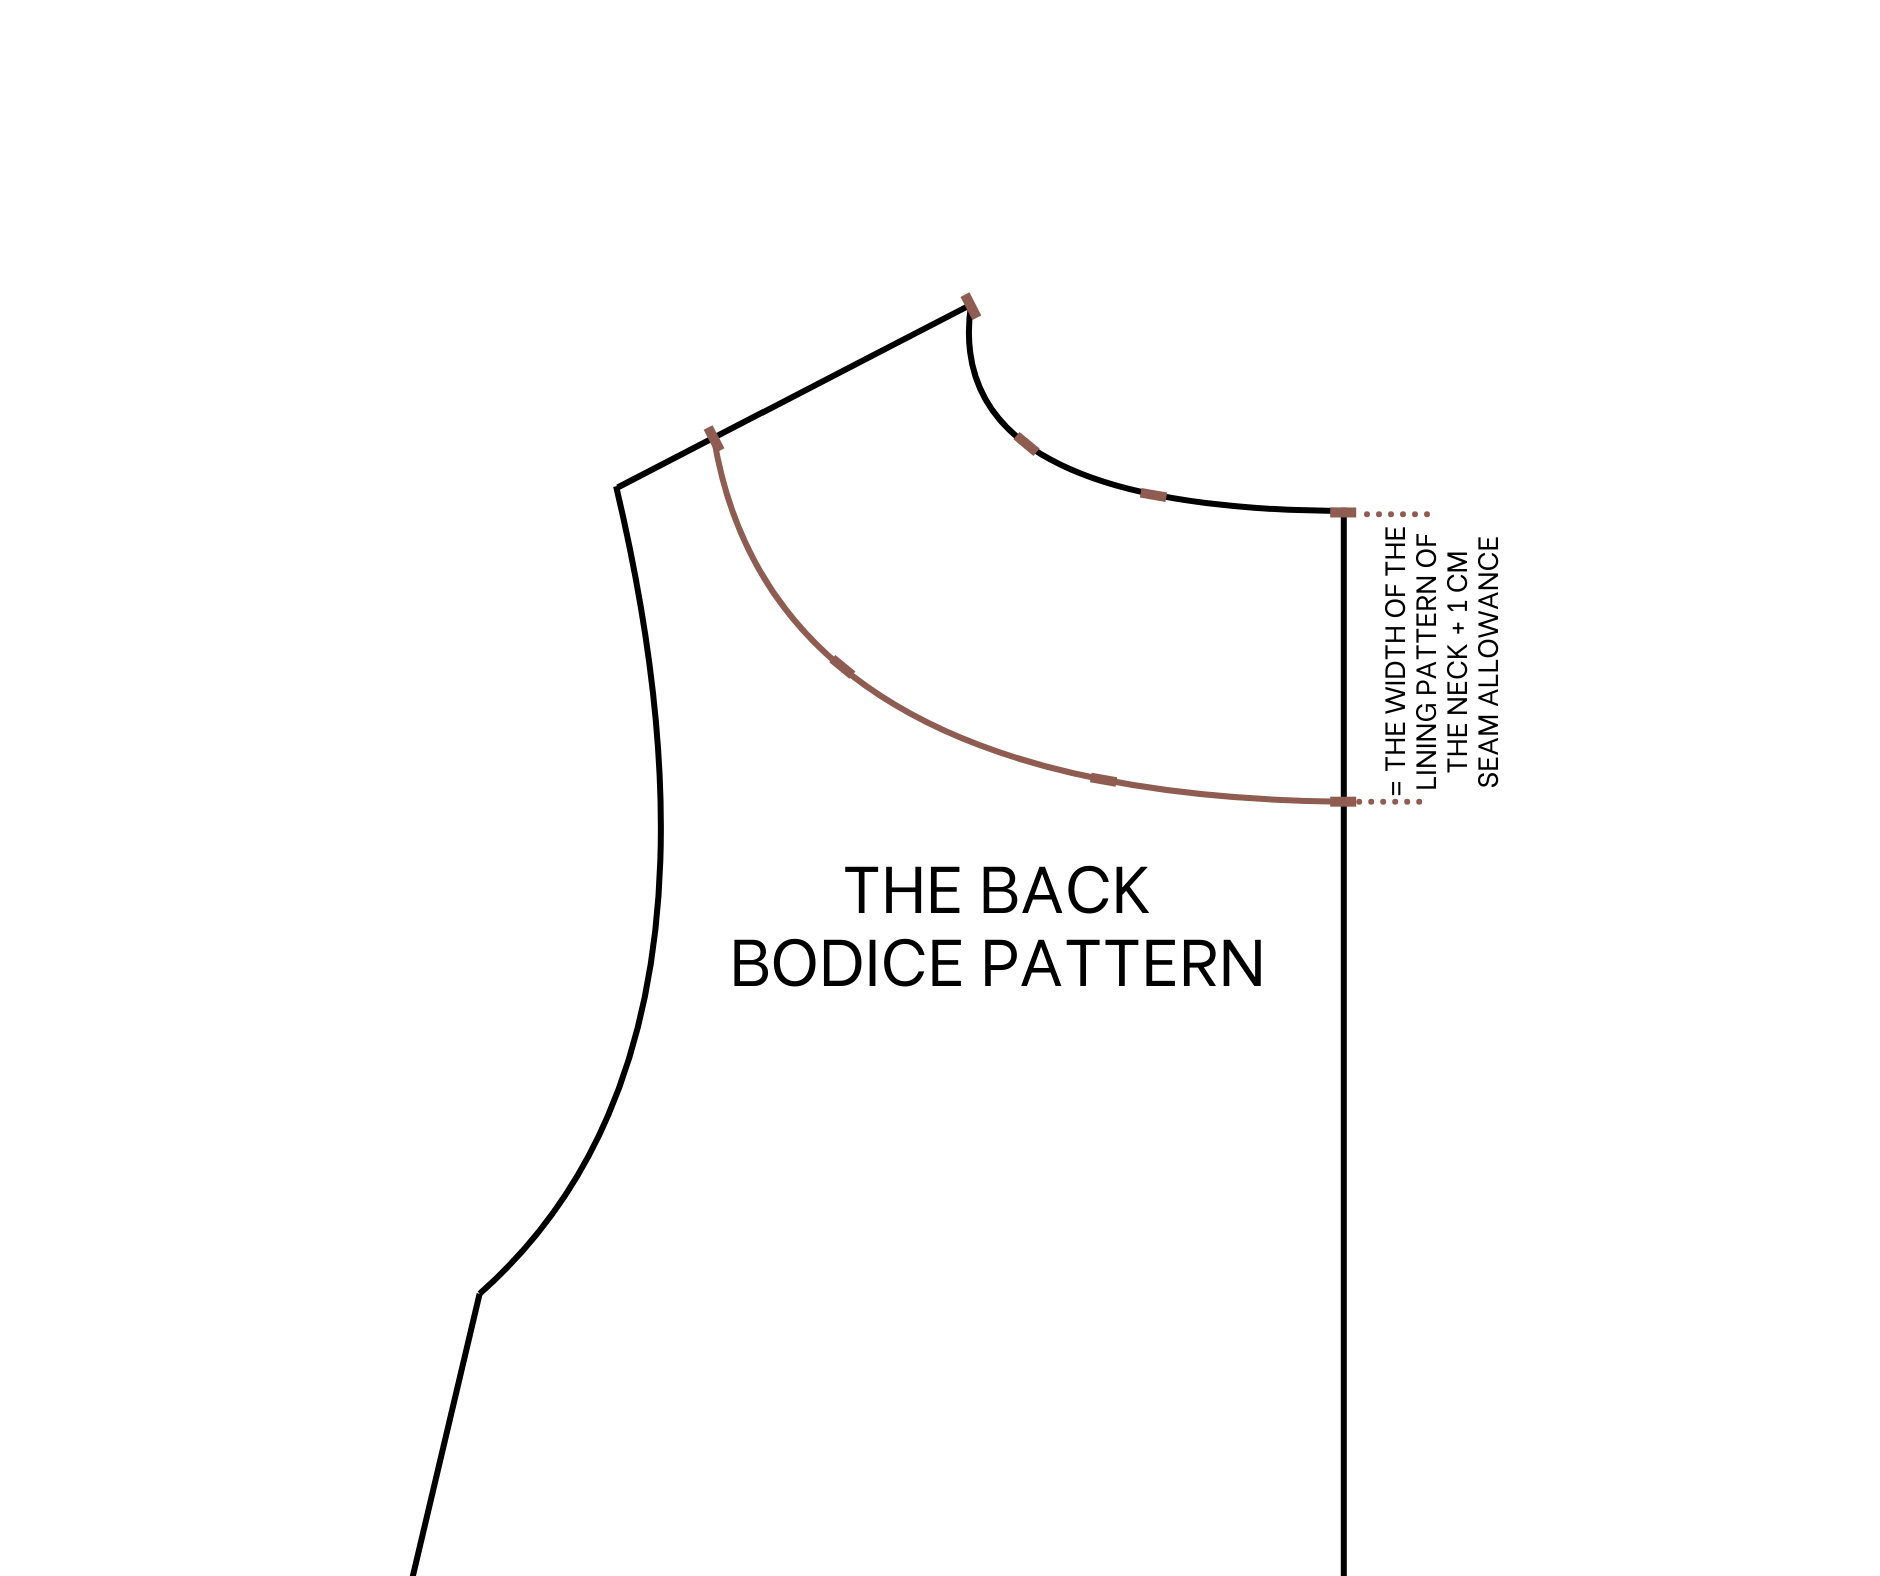
THE BACK BODICE PATTERN

The back bodice pattern
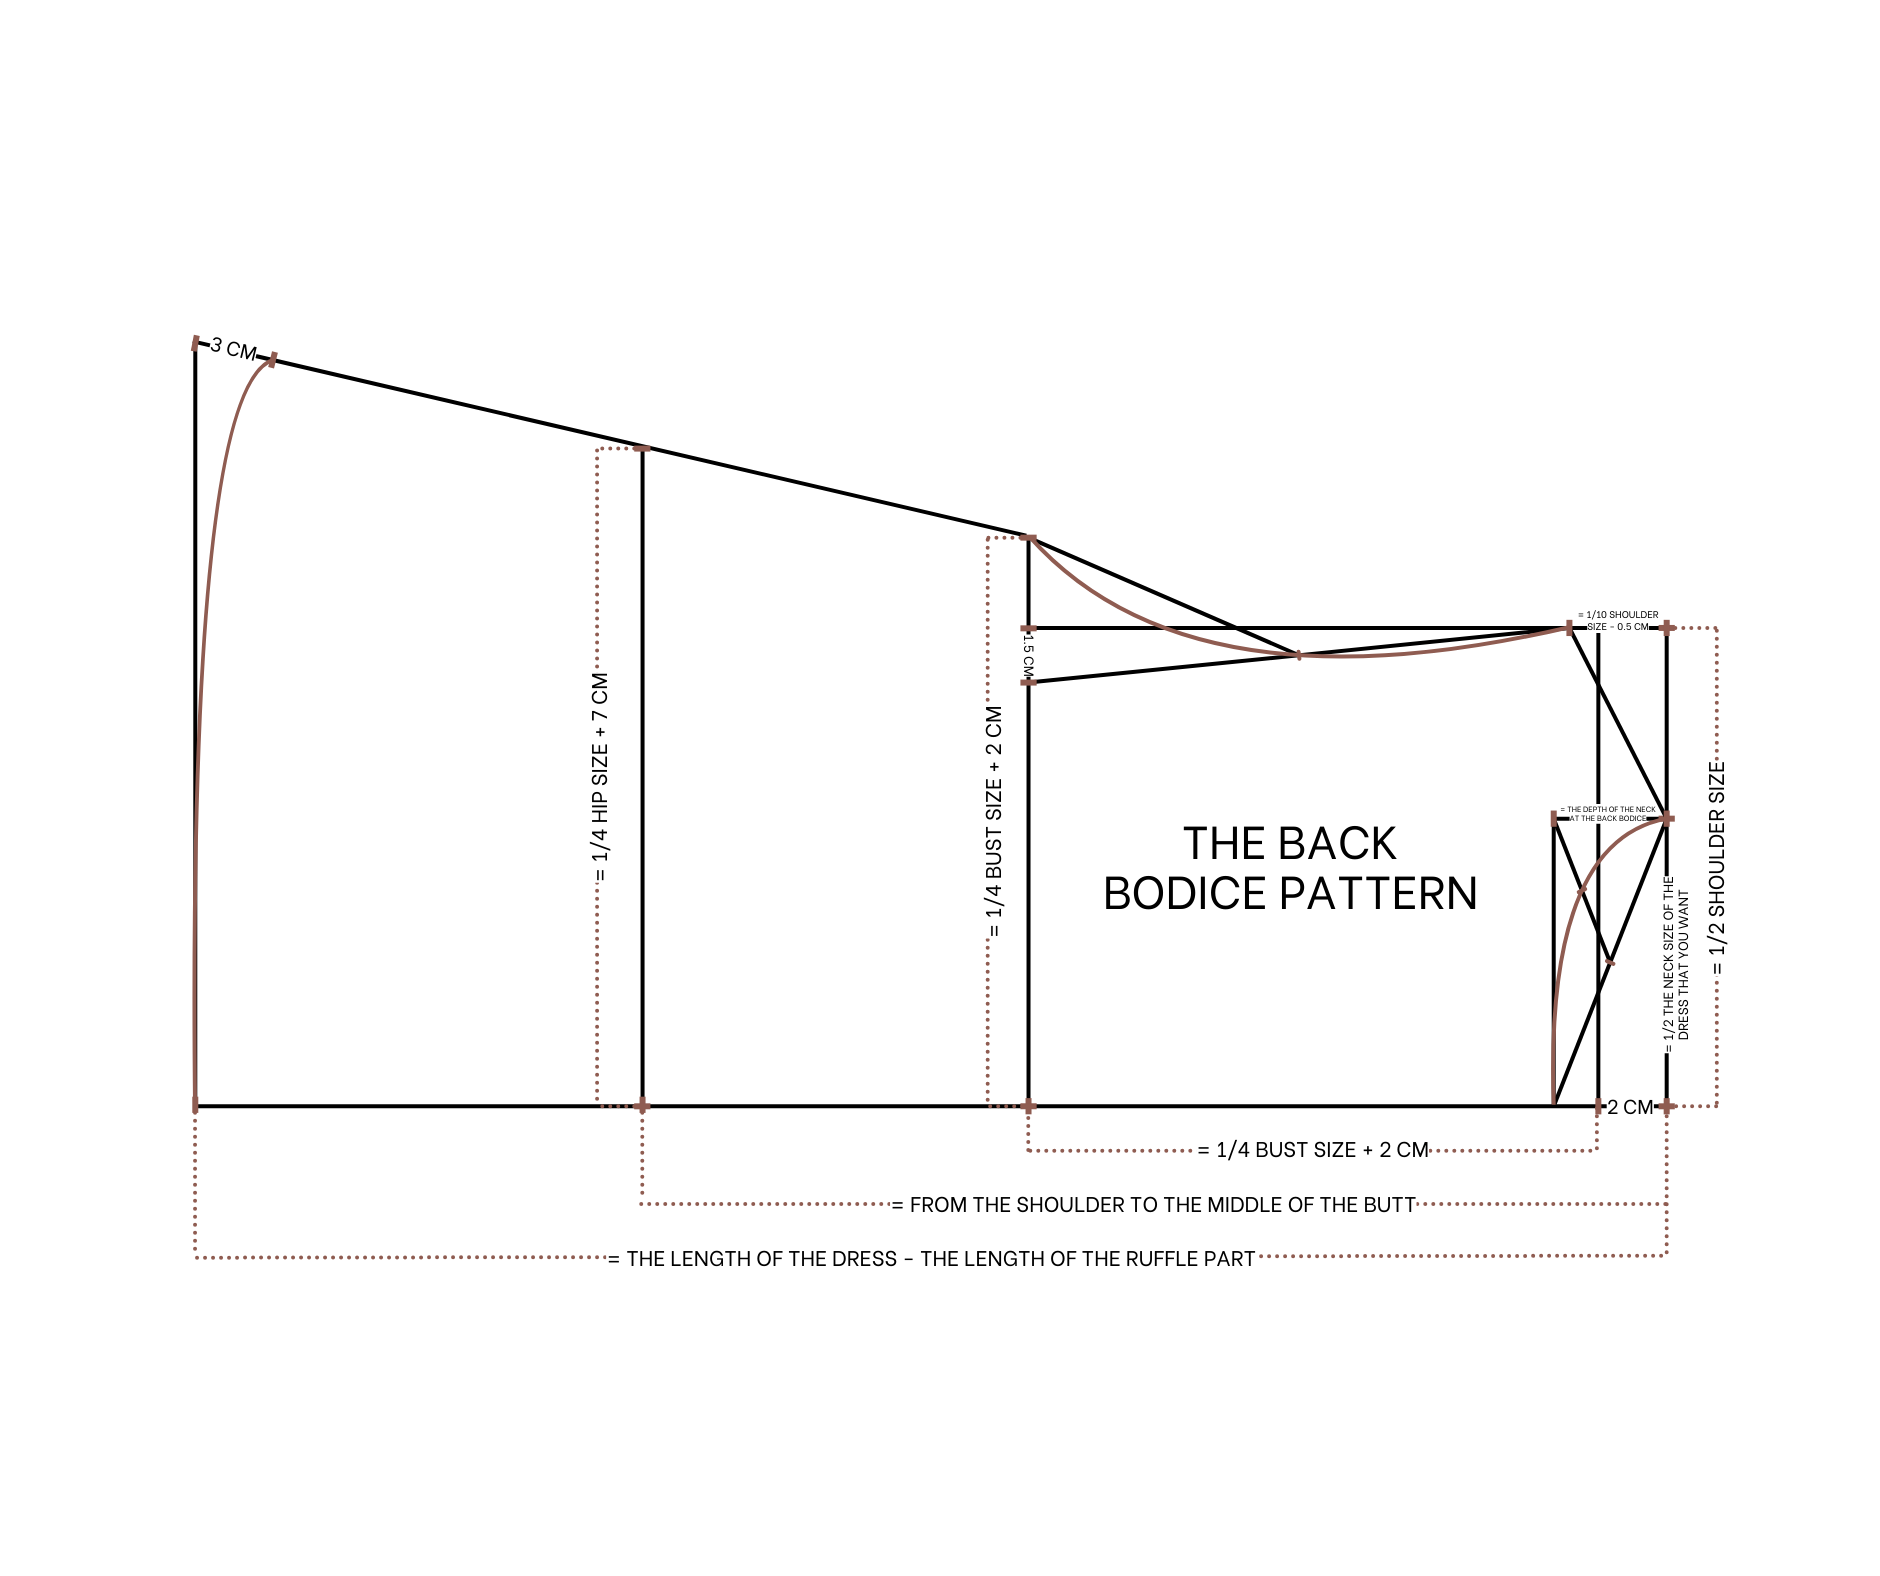
Draw a straight line and a horizontal line intersecting at one point.
From the first straight line, draw another one 2 cm next to it.
From the intersection between the second straight line and the horizontal line, mark up 9 cm, which is half the width of the desired neckline.
Then, draw a perpendicular line from that mark, making it 14 cm long for the back bodice neckline depth.
Extend a straight line from the end of the perpendicular line to intersect with the horizontal line.
Next, connect the intersection point to the other end of the perpendicular line, which is also the mark on the second straight line.
Mark the midpoint of the new slanted line first, then connect that mark to the end of the perpendicular line to create another slanted line.
Keep marking the midpoint of this line, then connect it to the mark on the second straight line at the first intersection with the horizontal line.
Based on this, draw a curved line to create the neckline for the back bodice.
From the end of the second straight line, mark up 17 cm, which is half the shoulder width.
Draw a perpendicular line from that mark, making it 2.9 cm wide (one-tenth of the shoulder width minus 0.5 cm).
Connect the end of this perpendicular line to the top of the neckline to create the shoulder line for the back bodice.
From the first straight line, draw another one 22 cm away. This is a quarter of the bust size plus 2 cm and represents the sleeve area and the bust line of the back bodice.
From the end of this line, mark up 22 cm, which is a quarter of the bust size plus 2 cm. This marks the half-width of the bust area on the back bodice.
Continue the perpendicular line from the shoulder to intersect with the bust line at one point. From this point, mark 1.5 cm inward, then connect it to the end of the shoulder line.
Mark the midpoint of this slanted line, then draw a curved line from the mark on the bust line to this midpoint, finishing at the end of the shoulder line. This creates the sleeve line for the back bodice.
From the second straight line, draw another one 55 cm away, representing the distance from the sh
oulder to the middle of the buttocks. This is also the hip line of the back bodice.
Continue by drawing another line 70 cm away from the second straight line, marking the length from the shoulder to just above the knee. This is the total dress length minus the ruffle hem, and it forms the ending line for the back bodice.
From the end of the hip line, mark out the hip side measurement plus 7 cm. The total width of the back bodice at the hip area should be 60 cm.
Draw a line from the end of the sleeve line through this mark, extending to the ending line. This forms the side seam of the back bodice.
From the end of the side seam, mark up 3 cm and draw a slightly curved line to create a new hemline for the back bodice.
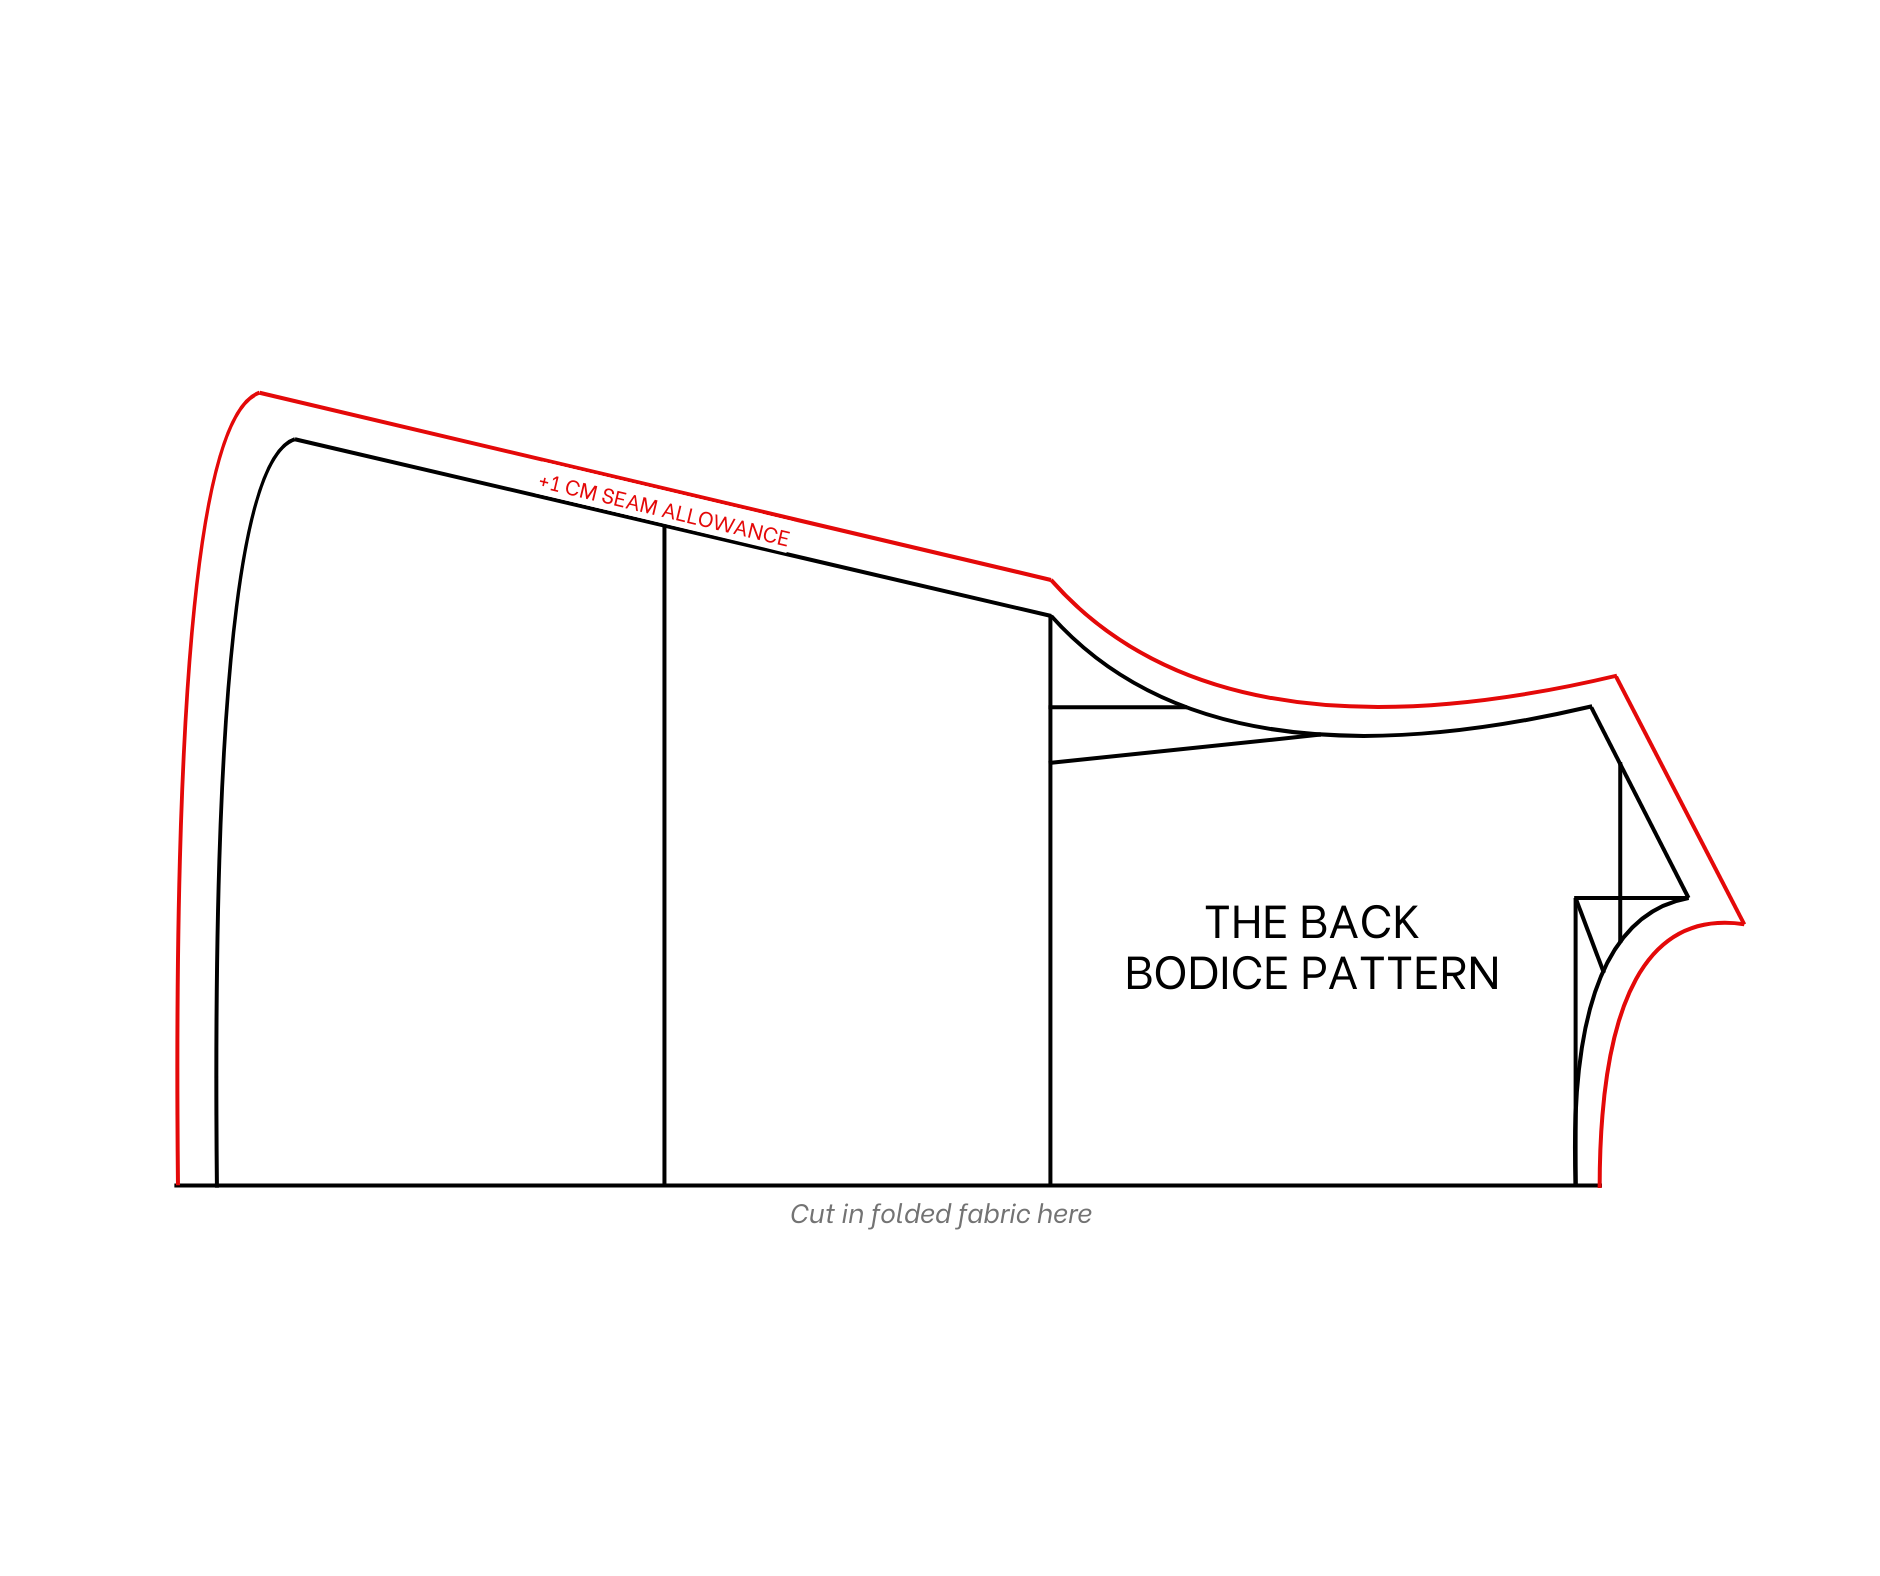
Add a 1 cm seam allowance, except on the horizontal line, and cut the pattern.
The back bodice pattern should be cut on folded fabric along the horizontal line.
THE FRONT BODICE PATTERN
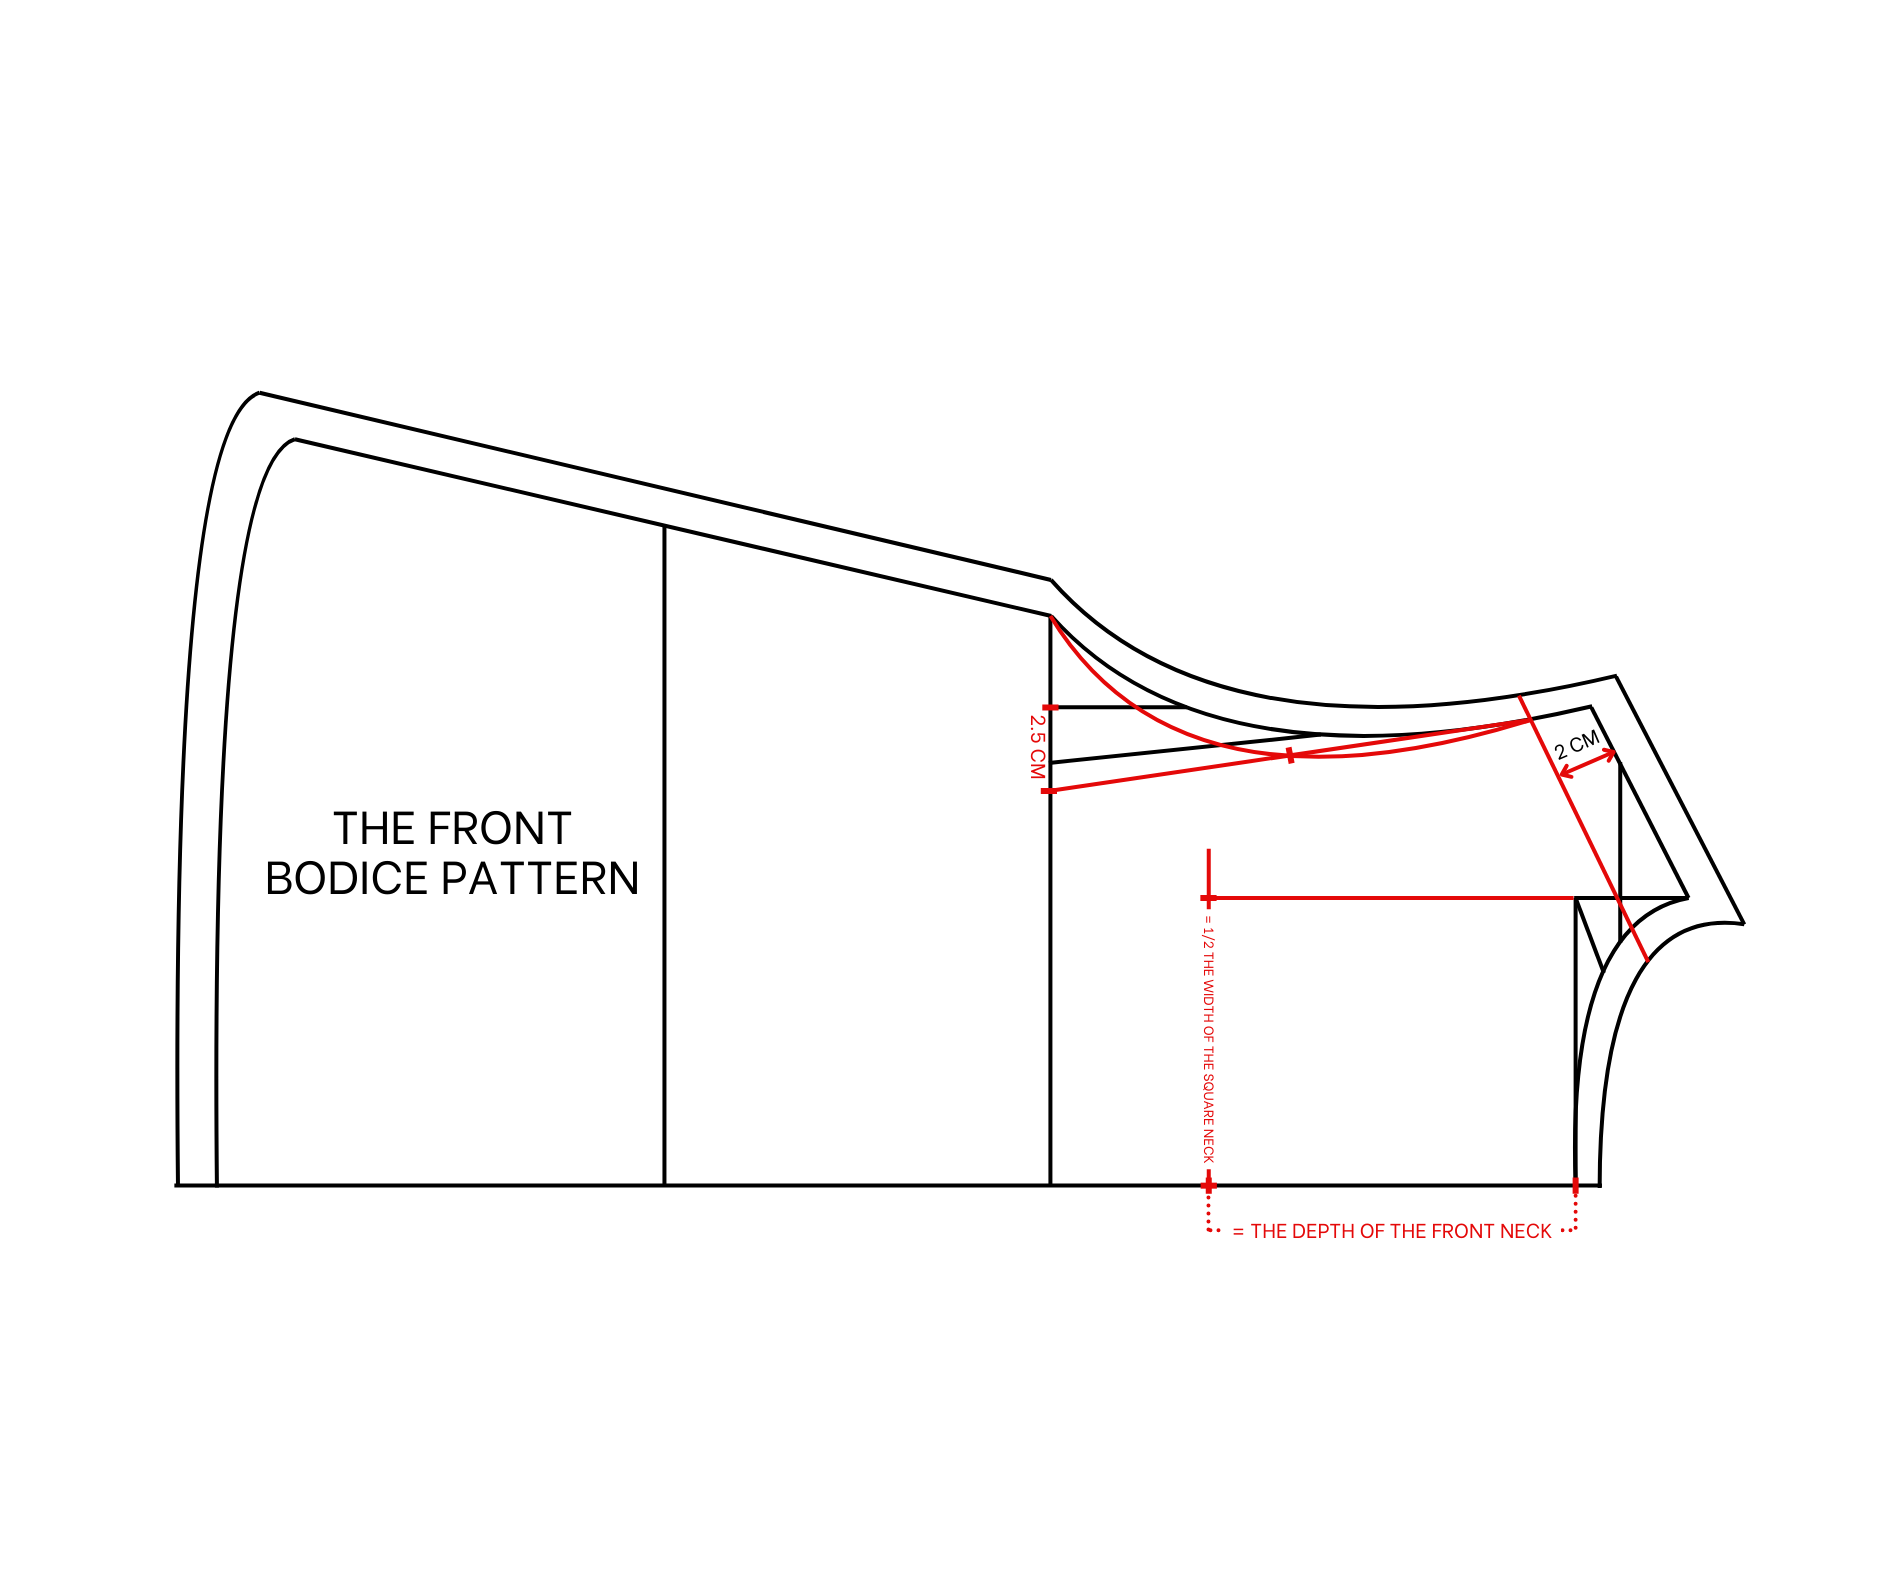

The front bodice pattern
To create the front bodice pattern, use the back bodice pattern as a base. Lower the shoulder line by 2 cm from the original. On the bust line, mark 2.5 cm inward instead of the 1.5 cm used on the back bodice. Connect this mark to the end of the new shoulder line. Mark the midpoint of the new slanted line, then draw a curved line from the mark on the bust line through the midpoint, finishing at the end of the new shoulder line to create a new sleeve line for the front bodice.
From the neckline on the back bodice, mark 15 cm on the horizontal line for the front neckline depth. Ensure it is above the bust area. Draw a straight line through this mark, then mark up 9 cm from the end of the straight line, representing half the width of the square neckline for the front bodice. Connect this to the top of the new shoulder line to create the new neckline for the front bodice. Add a 1 cm seam allowance and cut the front bodice pattern. This pattern should also be cut on folded fabric along the horizontal line.
THE NECK LINING PATTERN
To create the lining pattern for the neckline, use the front and back bodice patterns.
From the back neckline, draw a curved line 6 cm away. Cut along this line to create the lining pattern for the back neckline.
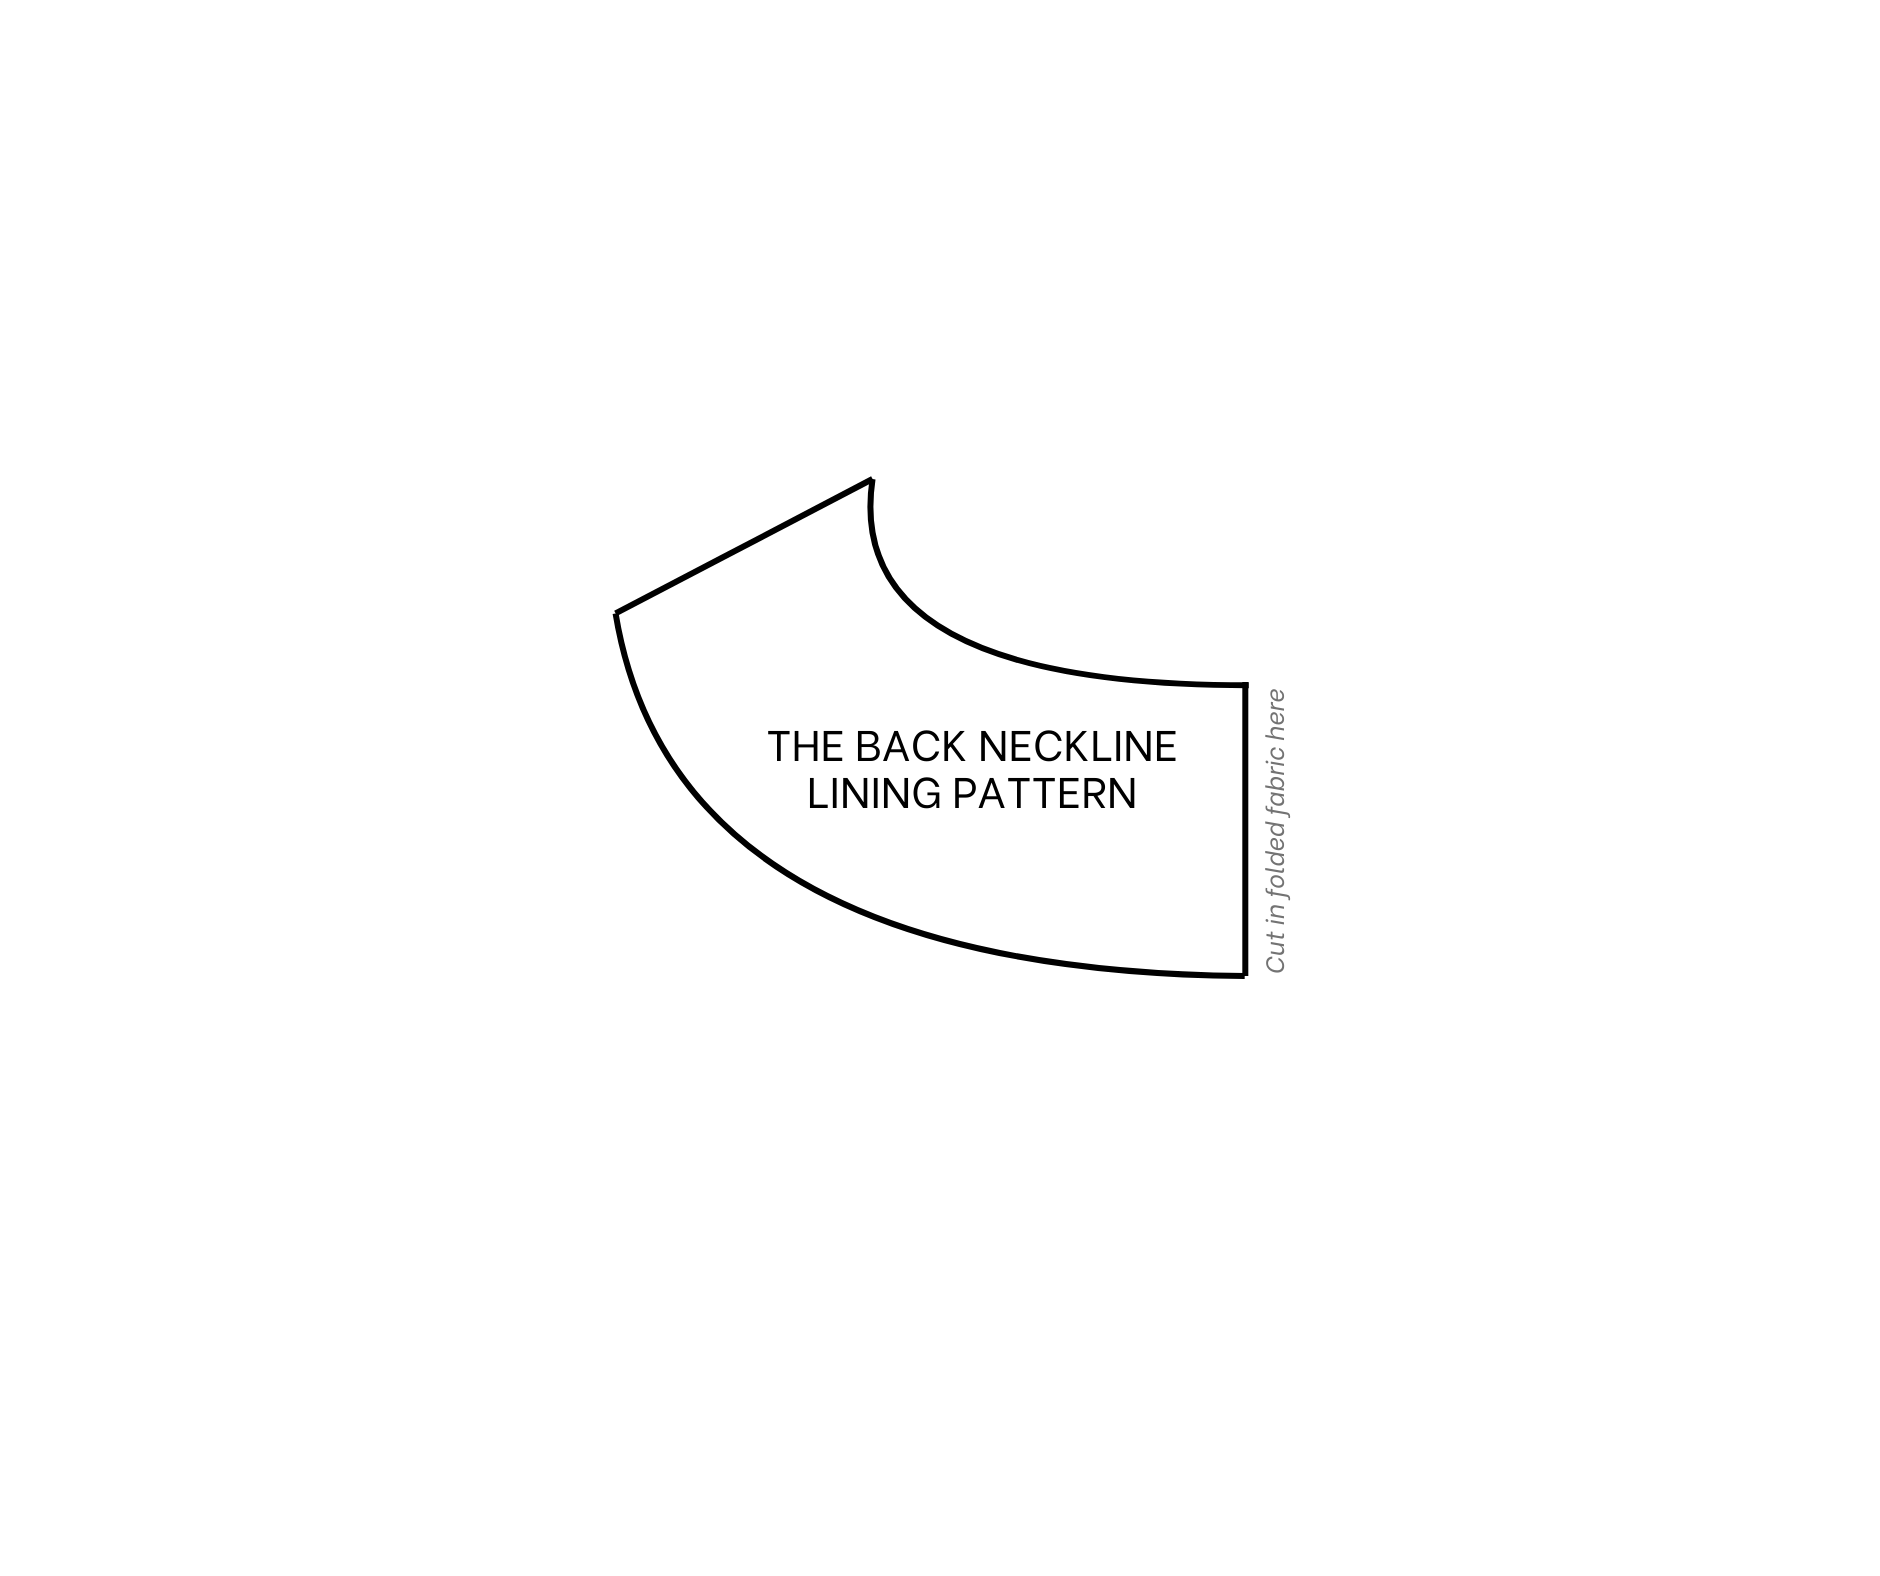
The back neckline lining pattern
From the front neckline, draw a parallel line 6 cm away, then cut along this line to create the lining pattern for the front neckline.
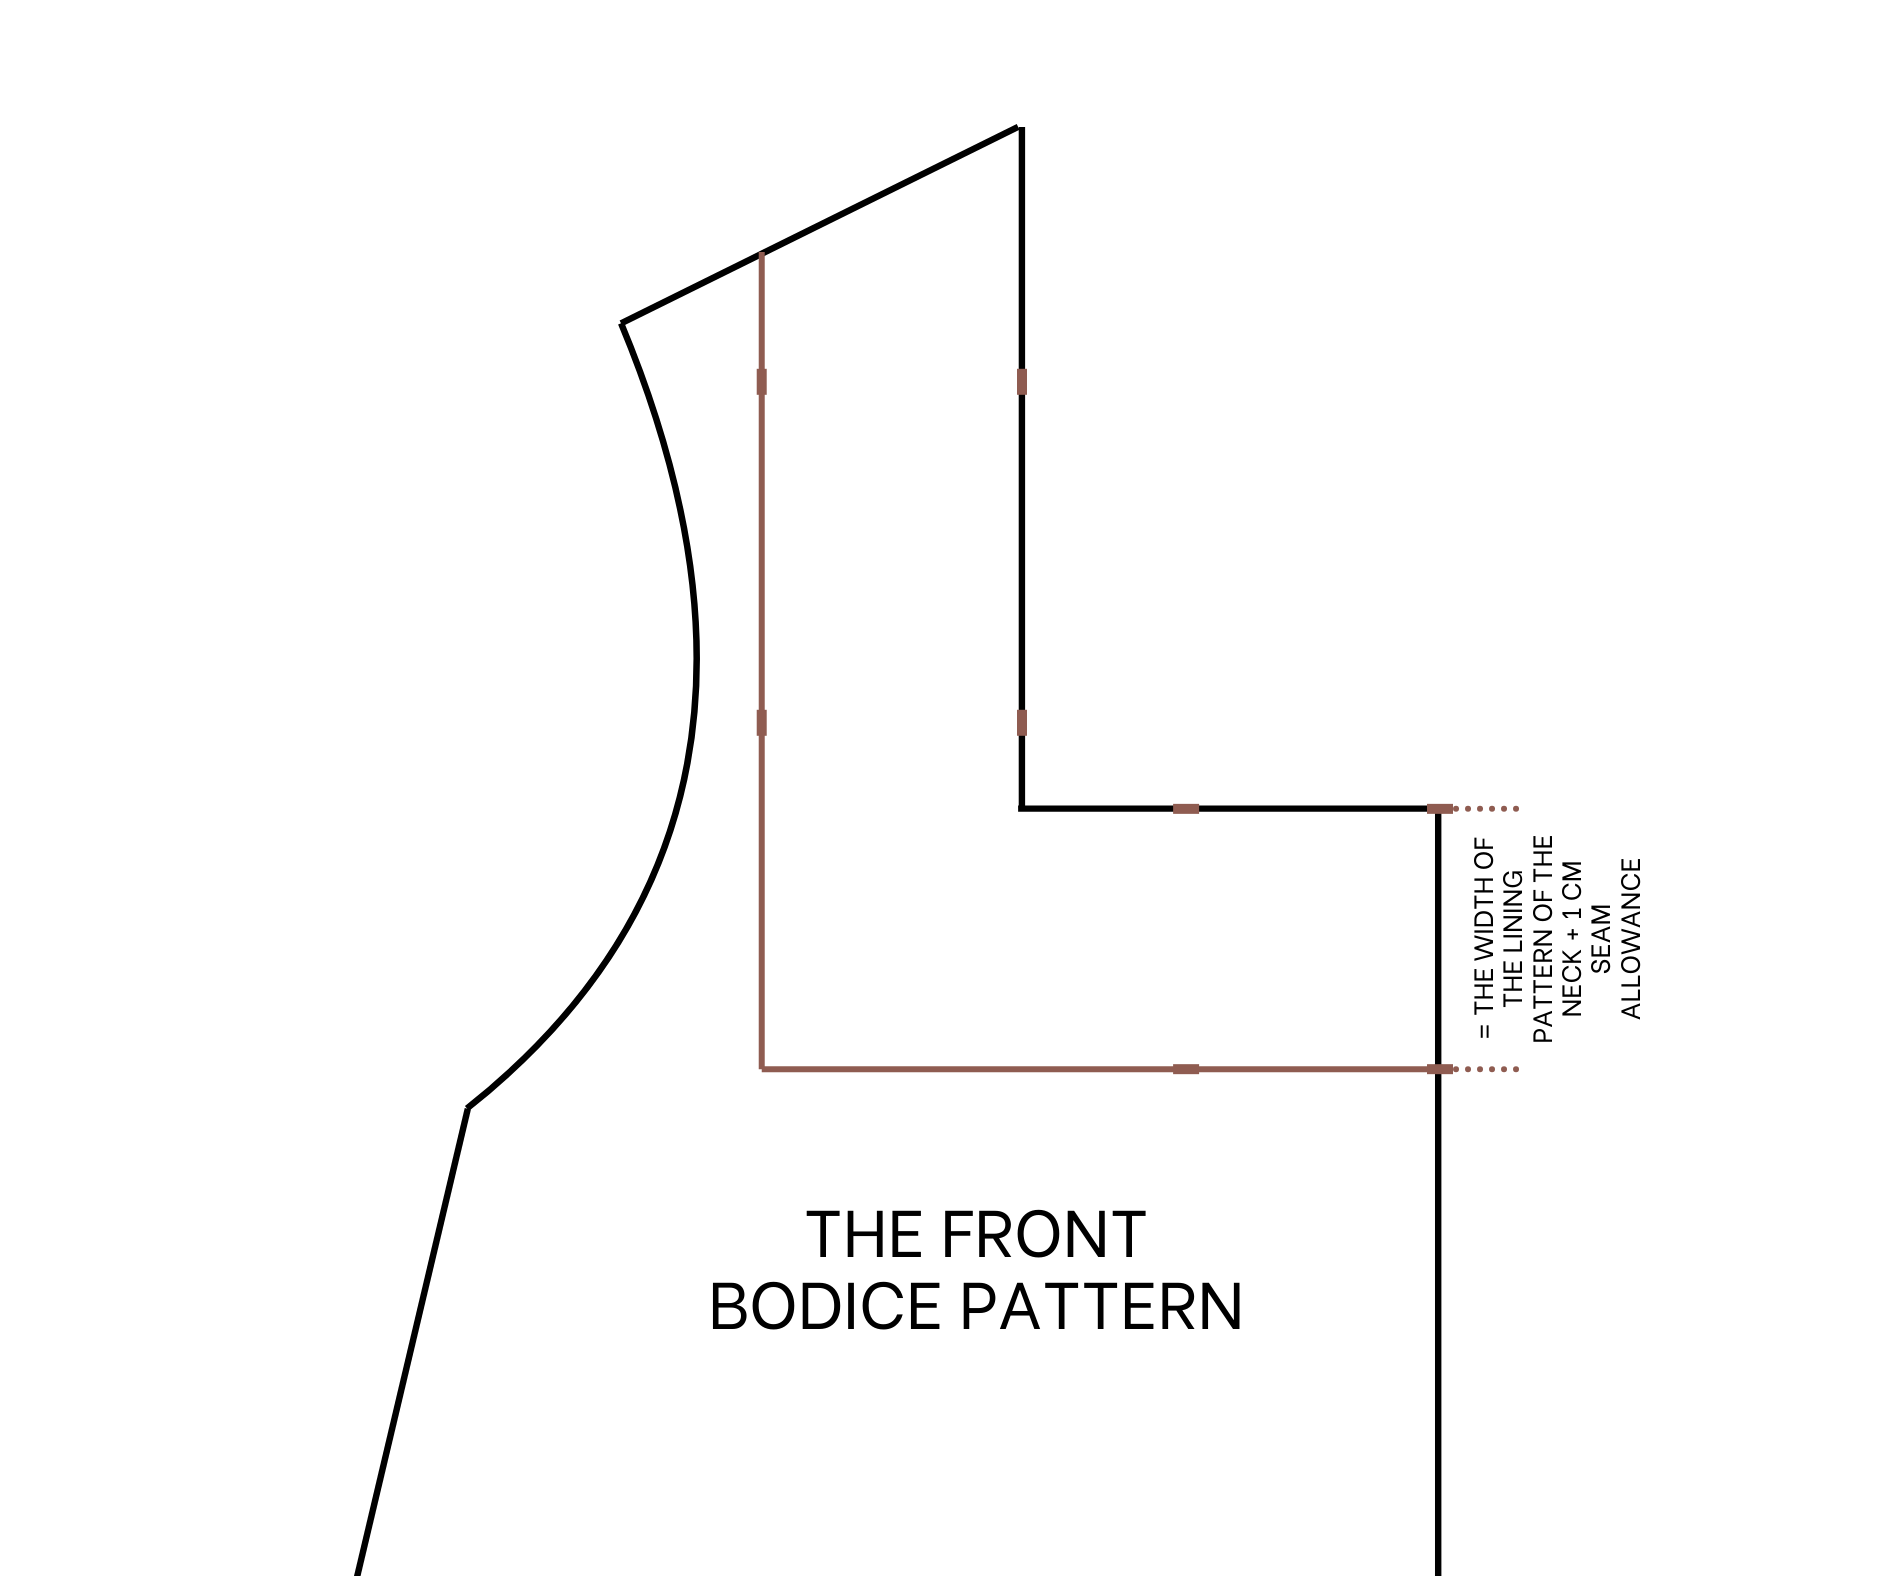
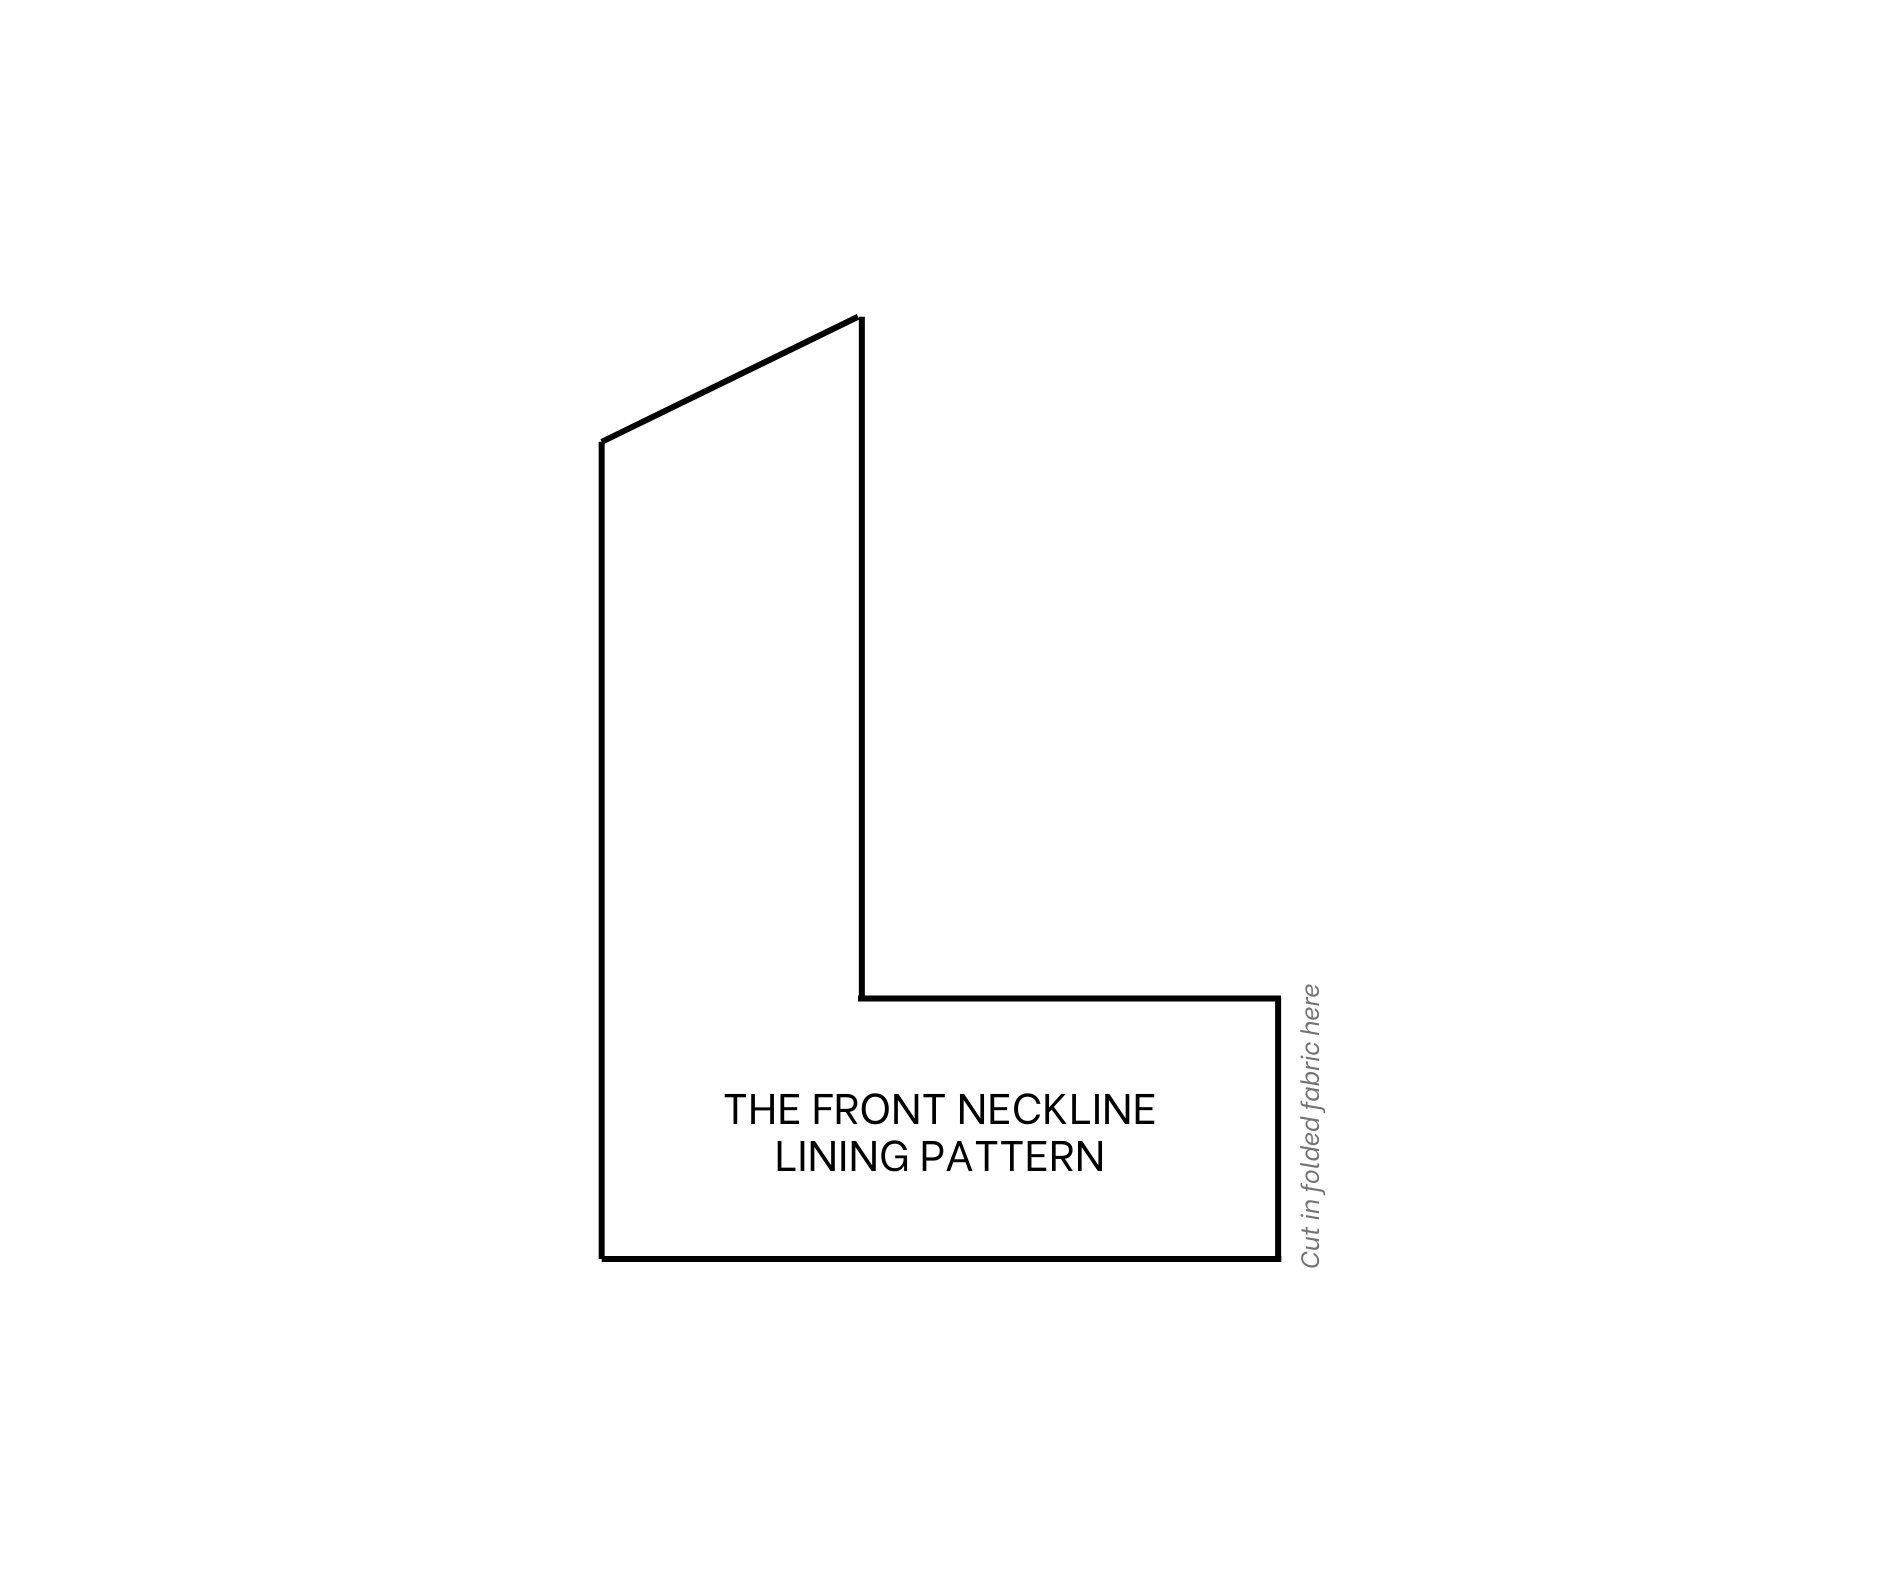
The front neckline lining pattern
THE RUFFLE HEM PATTERN

The ruffle hem pattern
The ruffle hem pattern consists of two rectangles.
Each should be 30 cm long (including a 2 cm seam allowance) and twice the width of the bodice hem.
THE POCKET PATTERN

The pocket pattern
For the pocket pattern, cut a rectangle 30 cm long and 20 cm wide.
Mark the middle of one long side, then connect that mark to one end of the opposite long side with a curved line.
Cut along the curved line to create the pocket pattern.
THE SLEEVE PATTERN
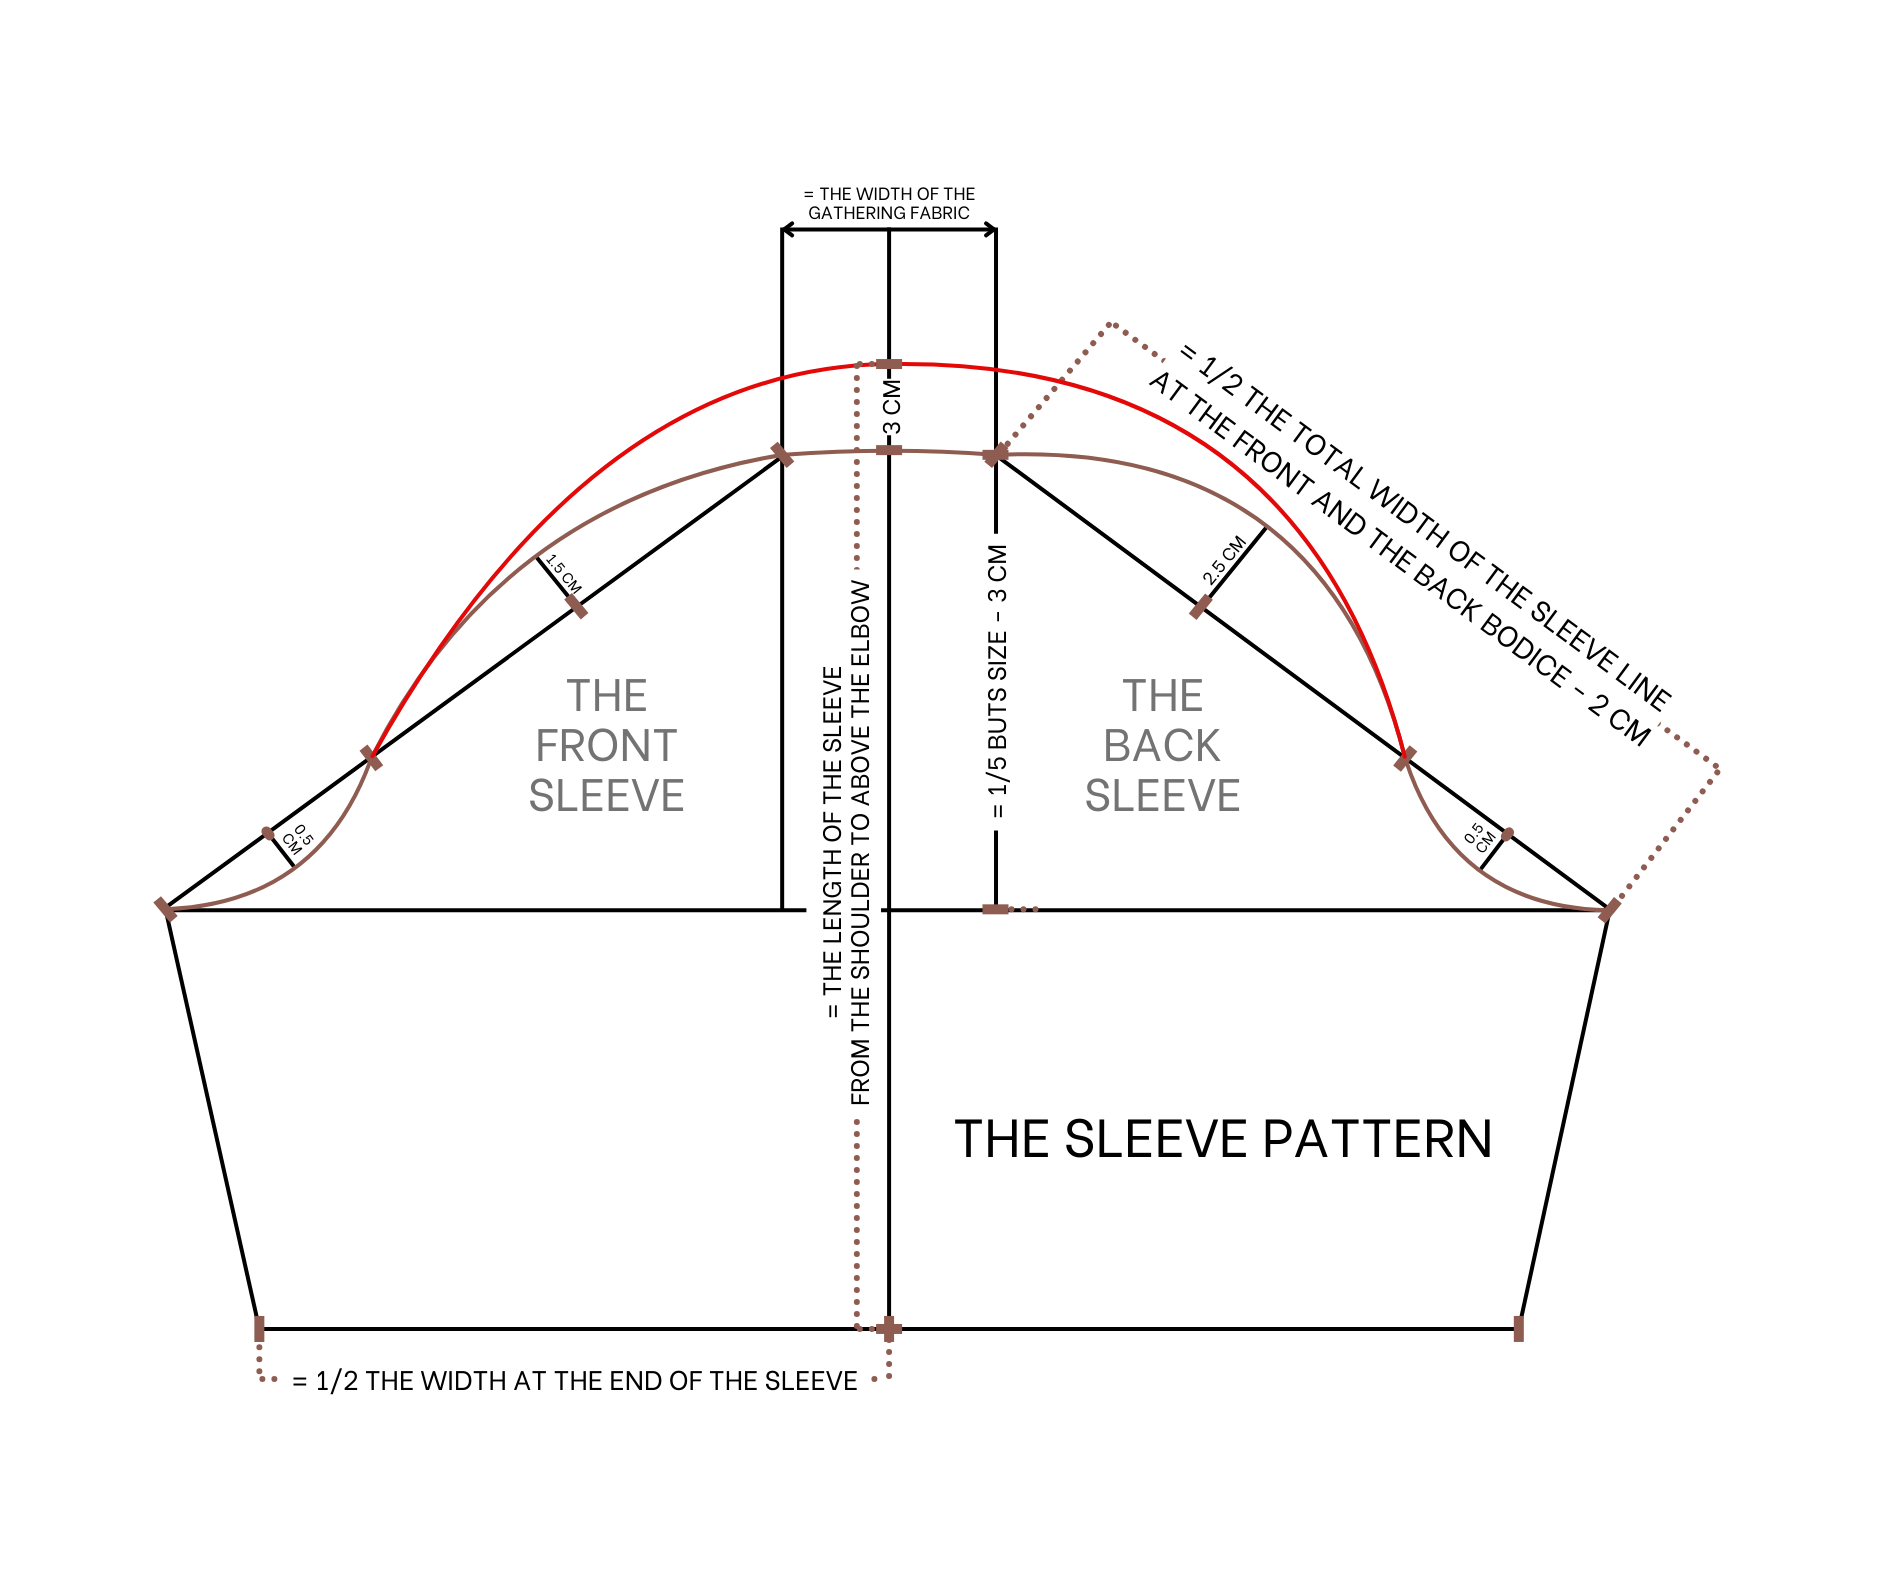
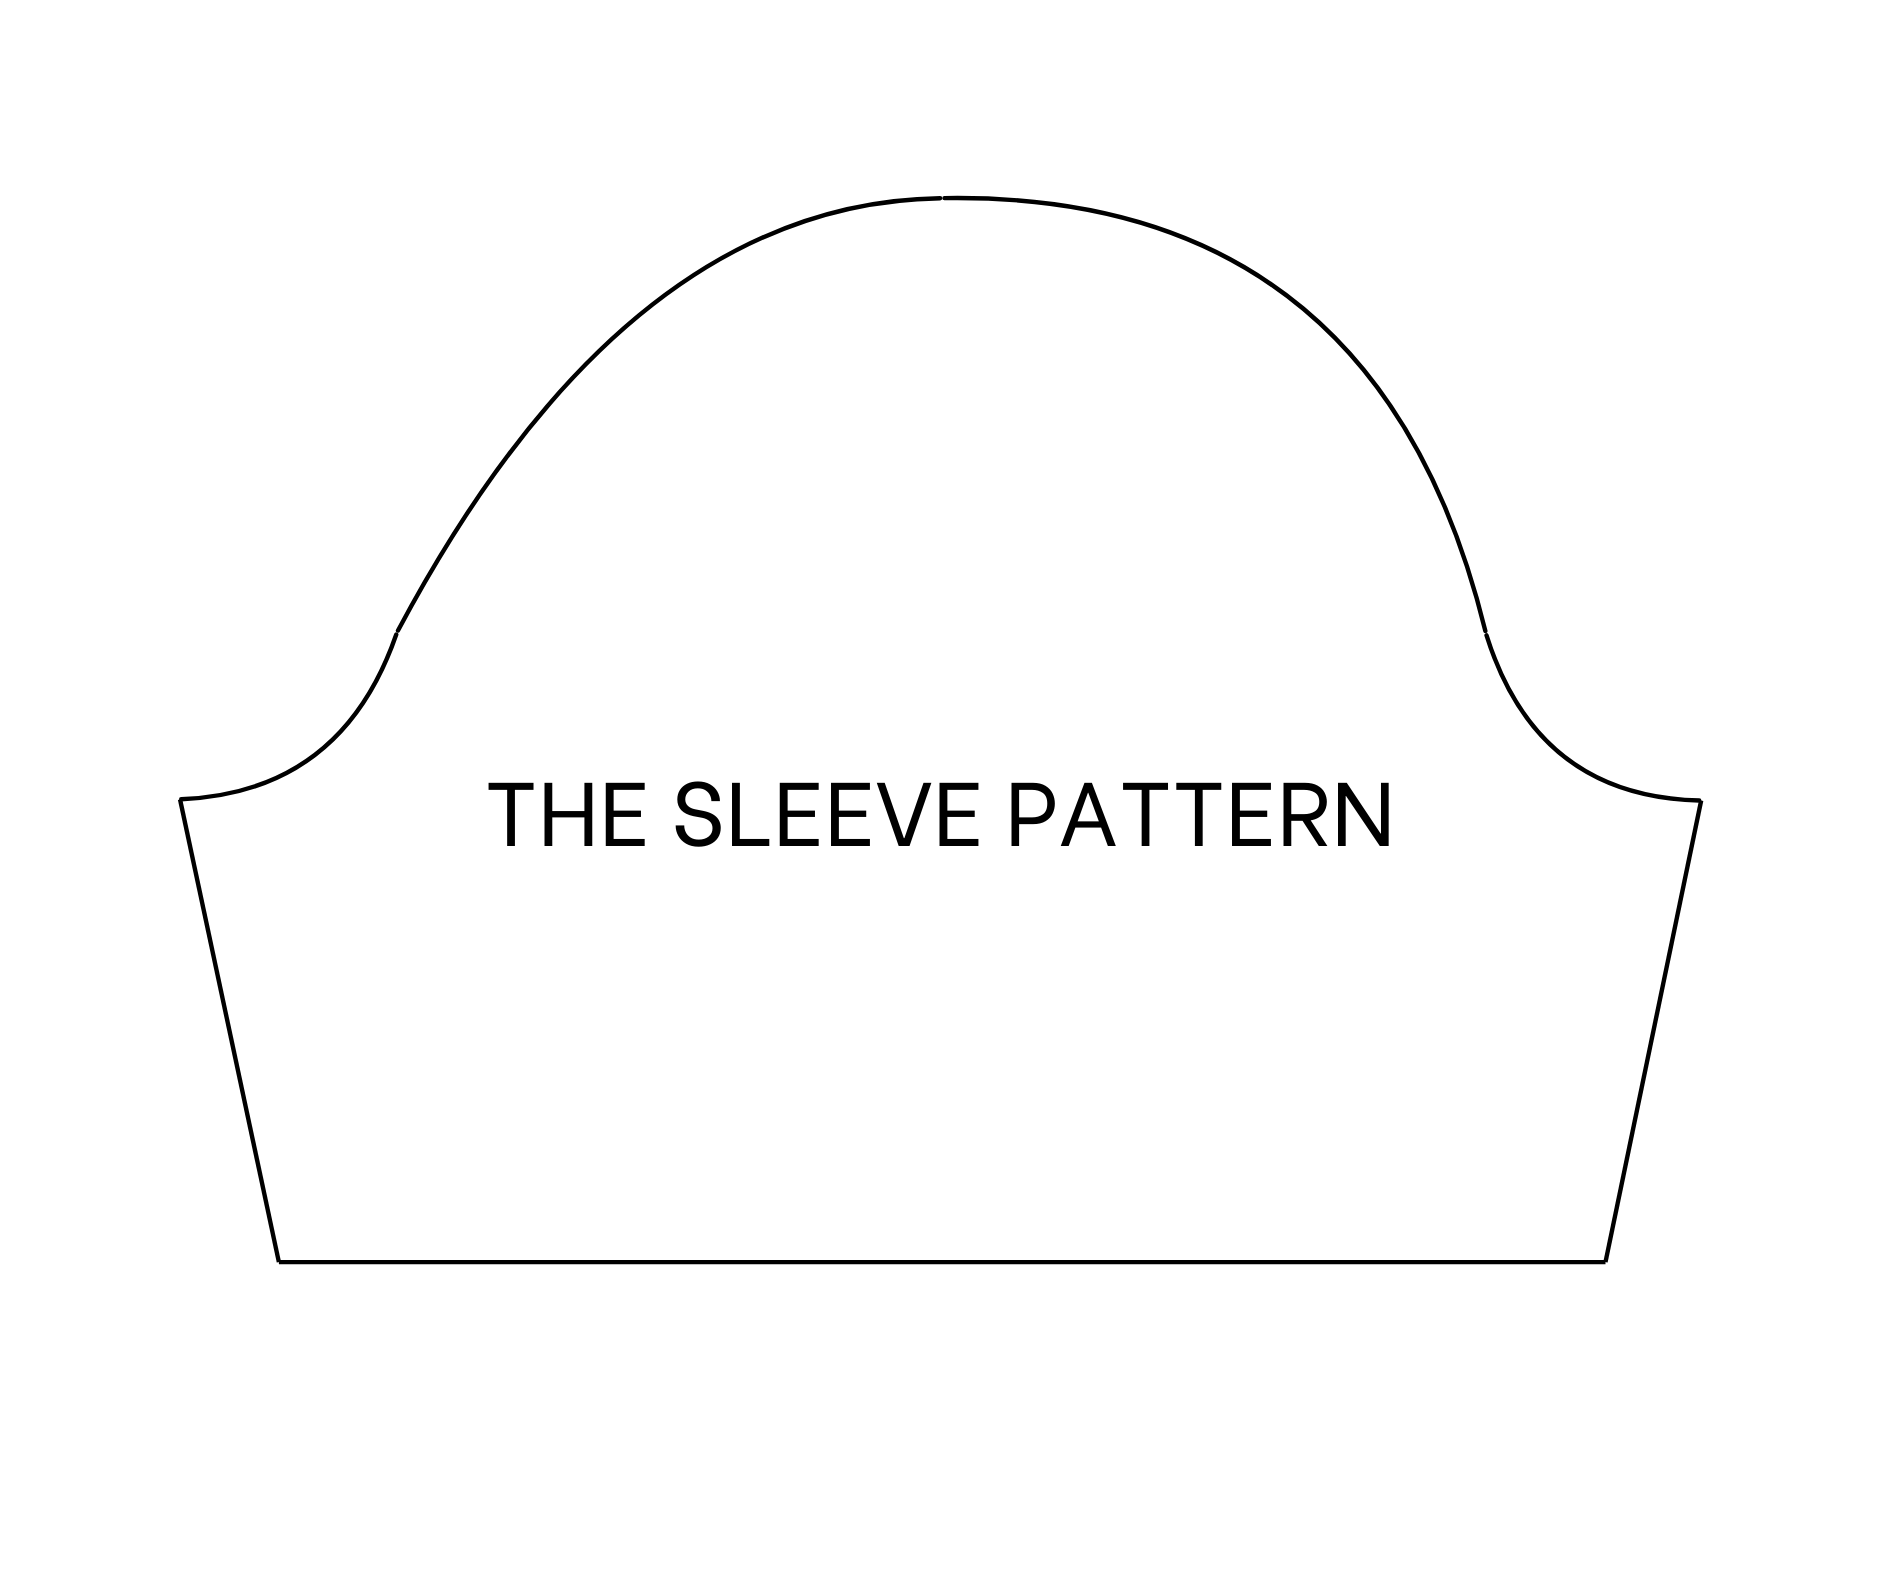
The sleeve pattern
Draw a straight line intersected by a horizontal line.
From the straight line, draw two additional lines 5 cm on either side.
The width between these new lines should be 10 cm, representing the gathered fabric at the top of the sleeve.
From the intersection of the new lines and the horizontal line, mark up 13 cm (one-fifth of the bust size minus 3 cm).
Draw a slanted line from this mark, intersecting with the horizontal line.
Ensure the width of the slanted lines equals half the total sleeve width at the front and back bodice, minus 2 cm.
Next, divide the slanted lines into three equal parts.
From the midpoint of the top two parts, draw perpendicular lines outward measuring 1.5 cm and 2.5 cm.
At the third equal part, mark the midpoint and draw a perpendicular line inward measuring 0.5 cm.
Draw a curved line from the end of this perpendicular line to create the sleeve line for the pattern.
From the intersection of the sleeve line and the straight line, mark up 3 cm, then redraw the sleeve line.
From the top of the sleeve line, mark 27 cm outward, representing the sleeve length from the shoulder to just above the elbow.
Draw a horizontal line through this mark, then place two additional marks 20 cm on either side.
The total width between these marks should be 40 cm, representing the desired sleeve width at the hem.
Connect these marks to the ends of the sleeve line to create the underarm seam line.
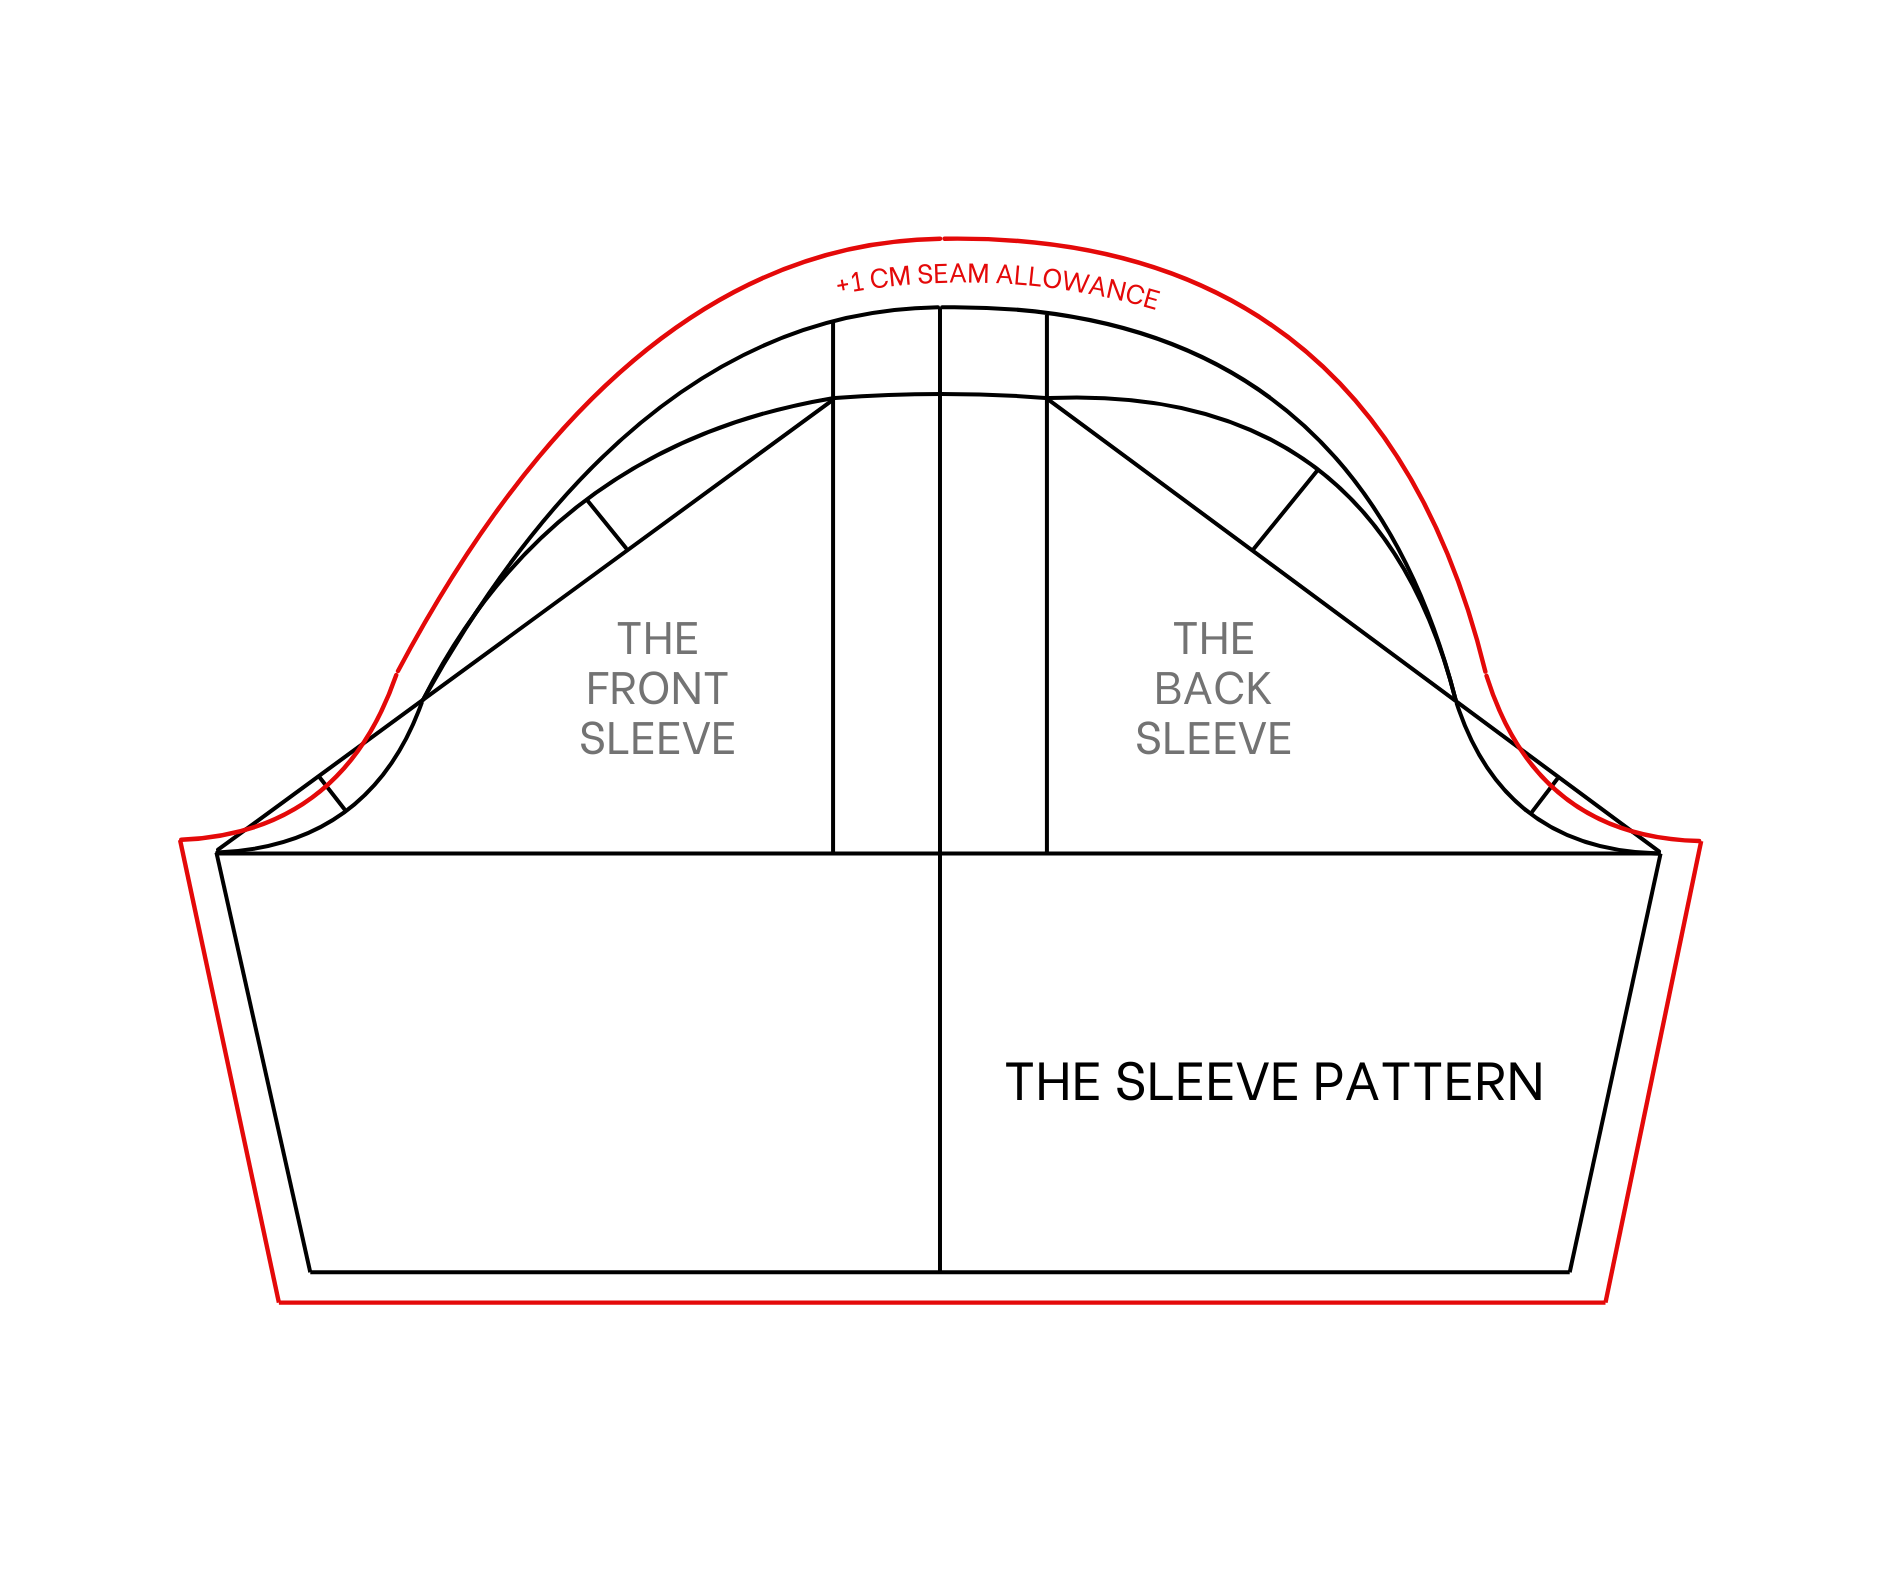
Add a 1 cm seam allowance, and the sleeve pattern is complete after cutting.
SEWING THE DRESS
THE BODICE
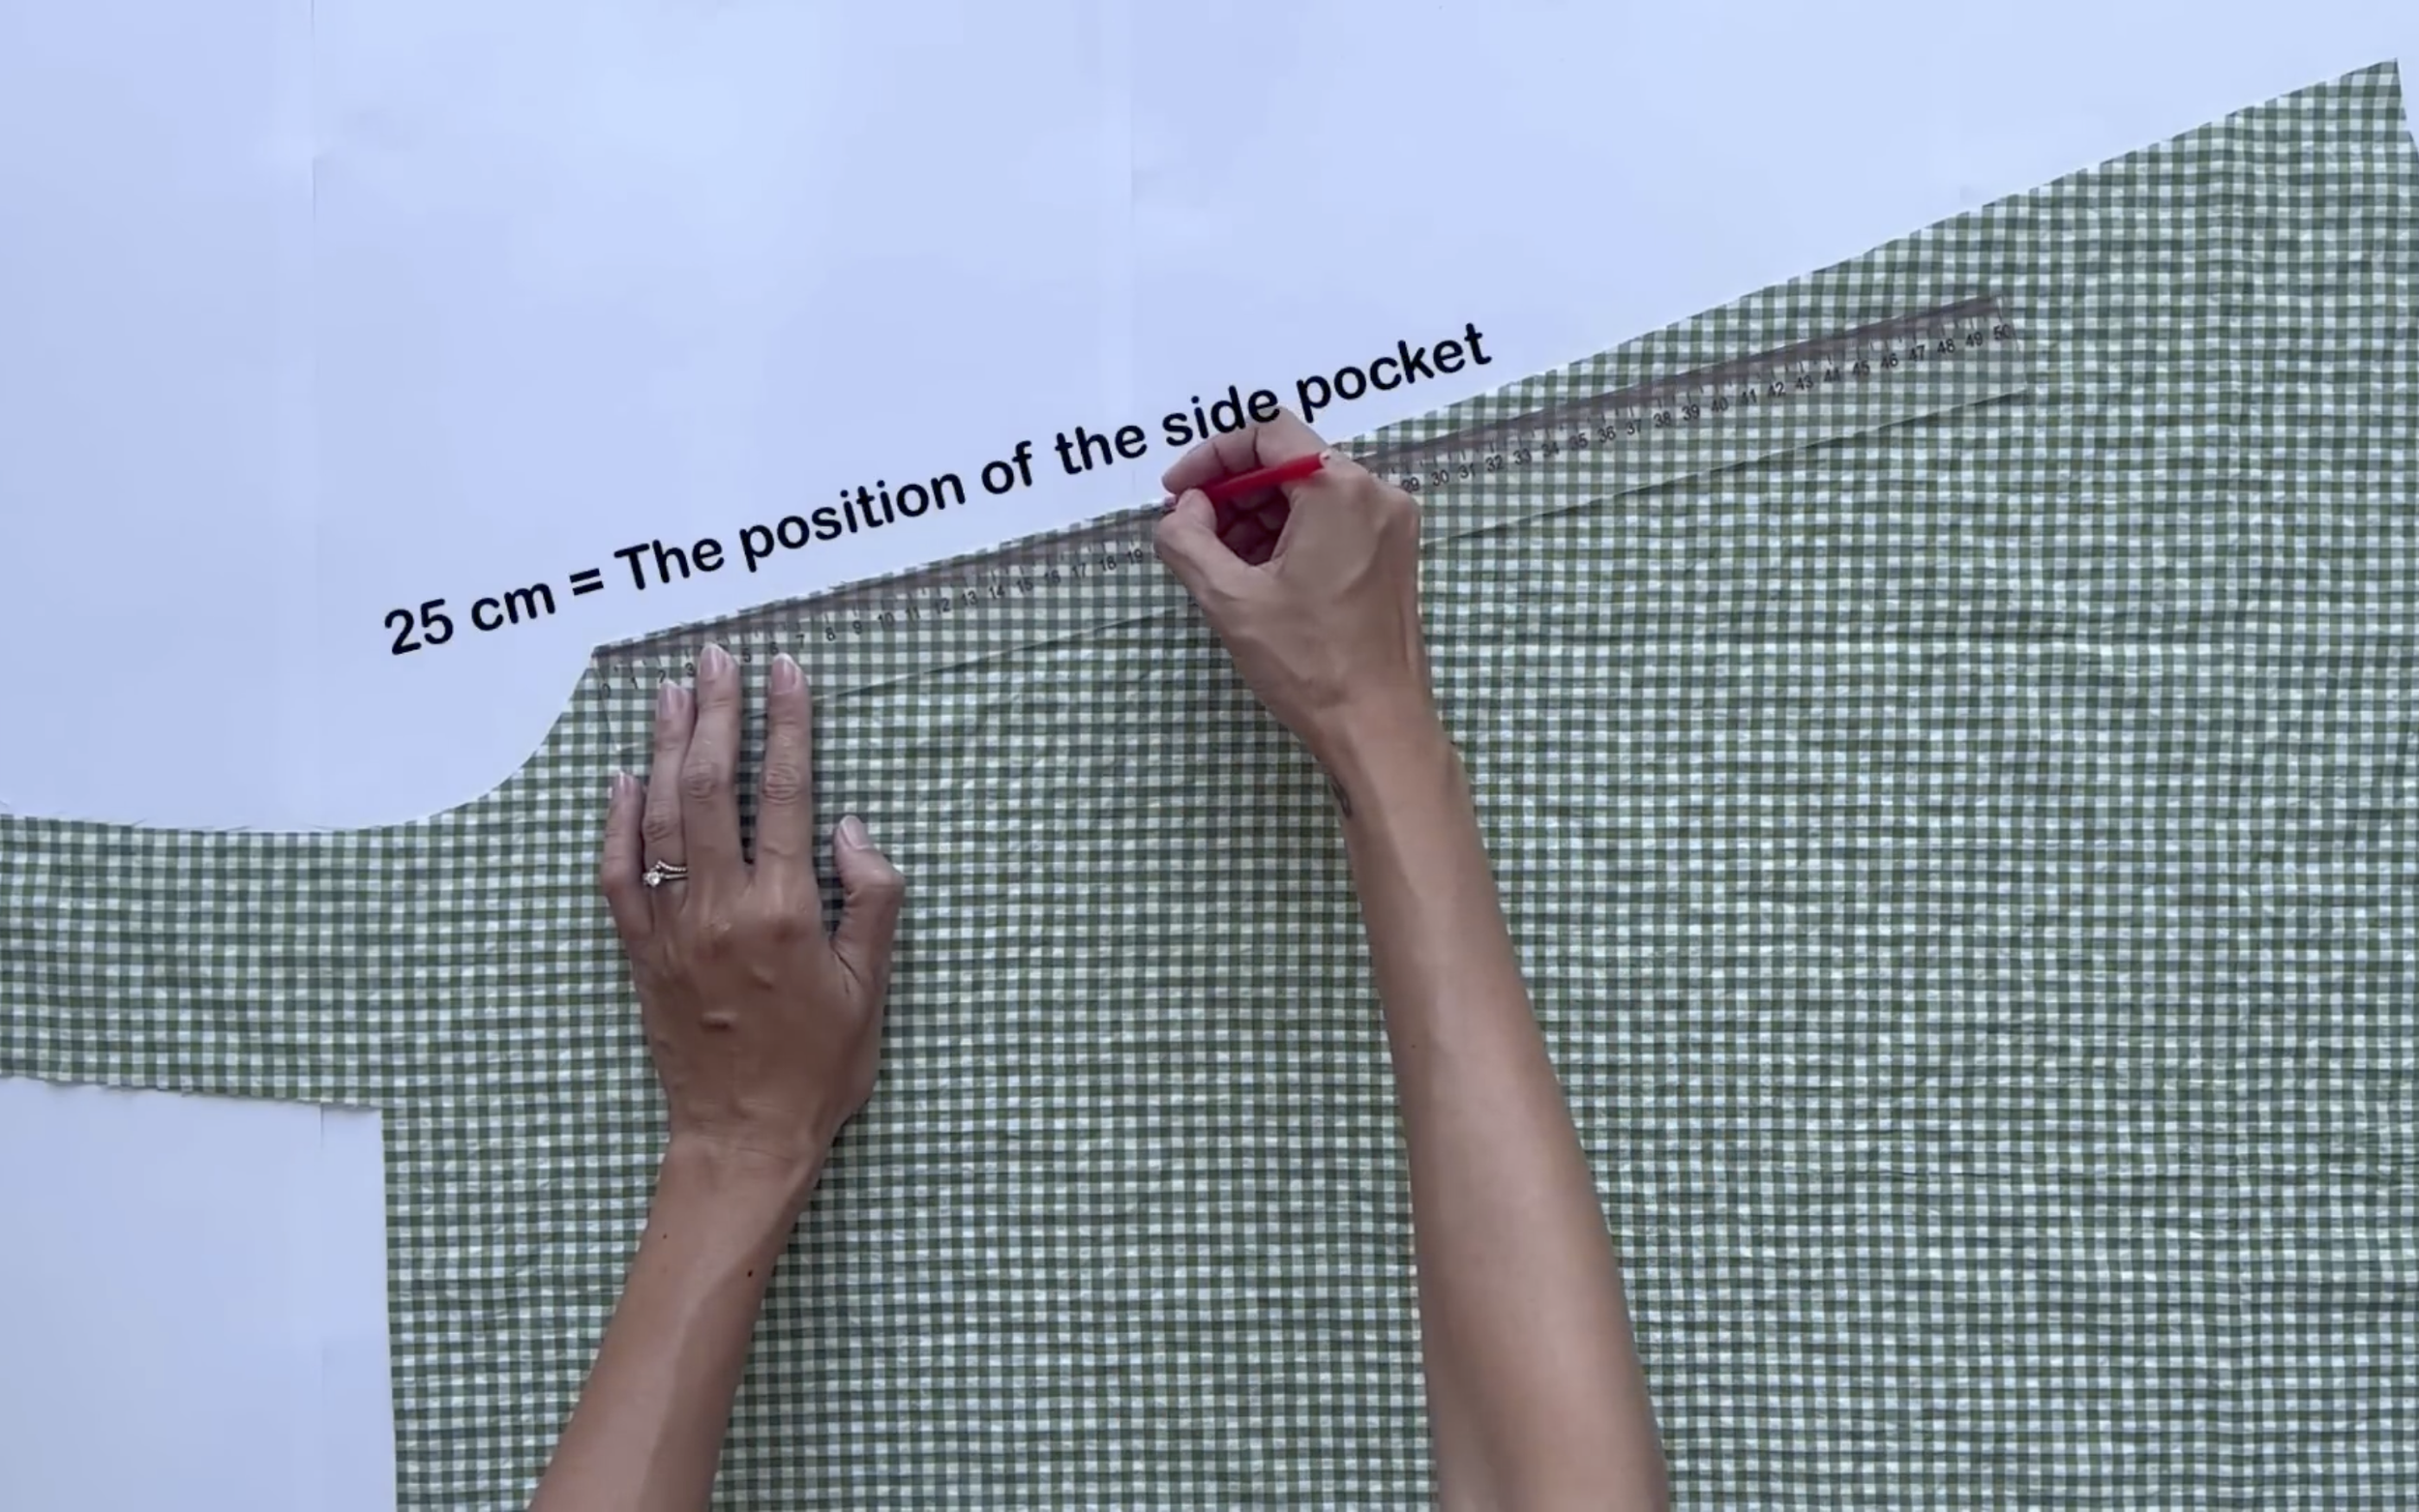
From the top of the sideline of the front bodice, mark out 25 cm. It's the position of the side pocket.
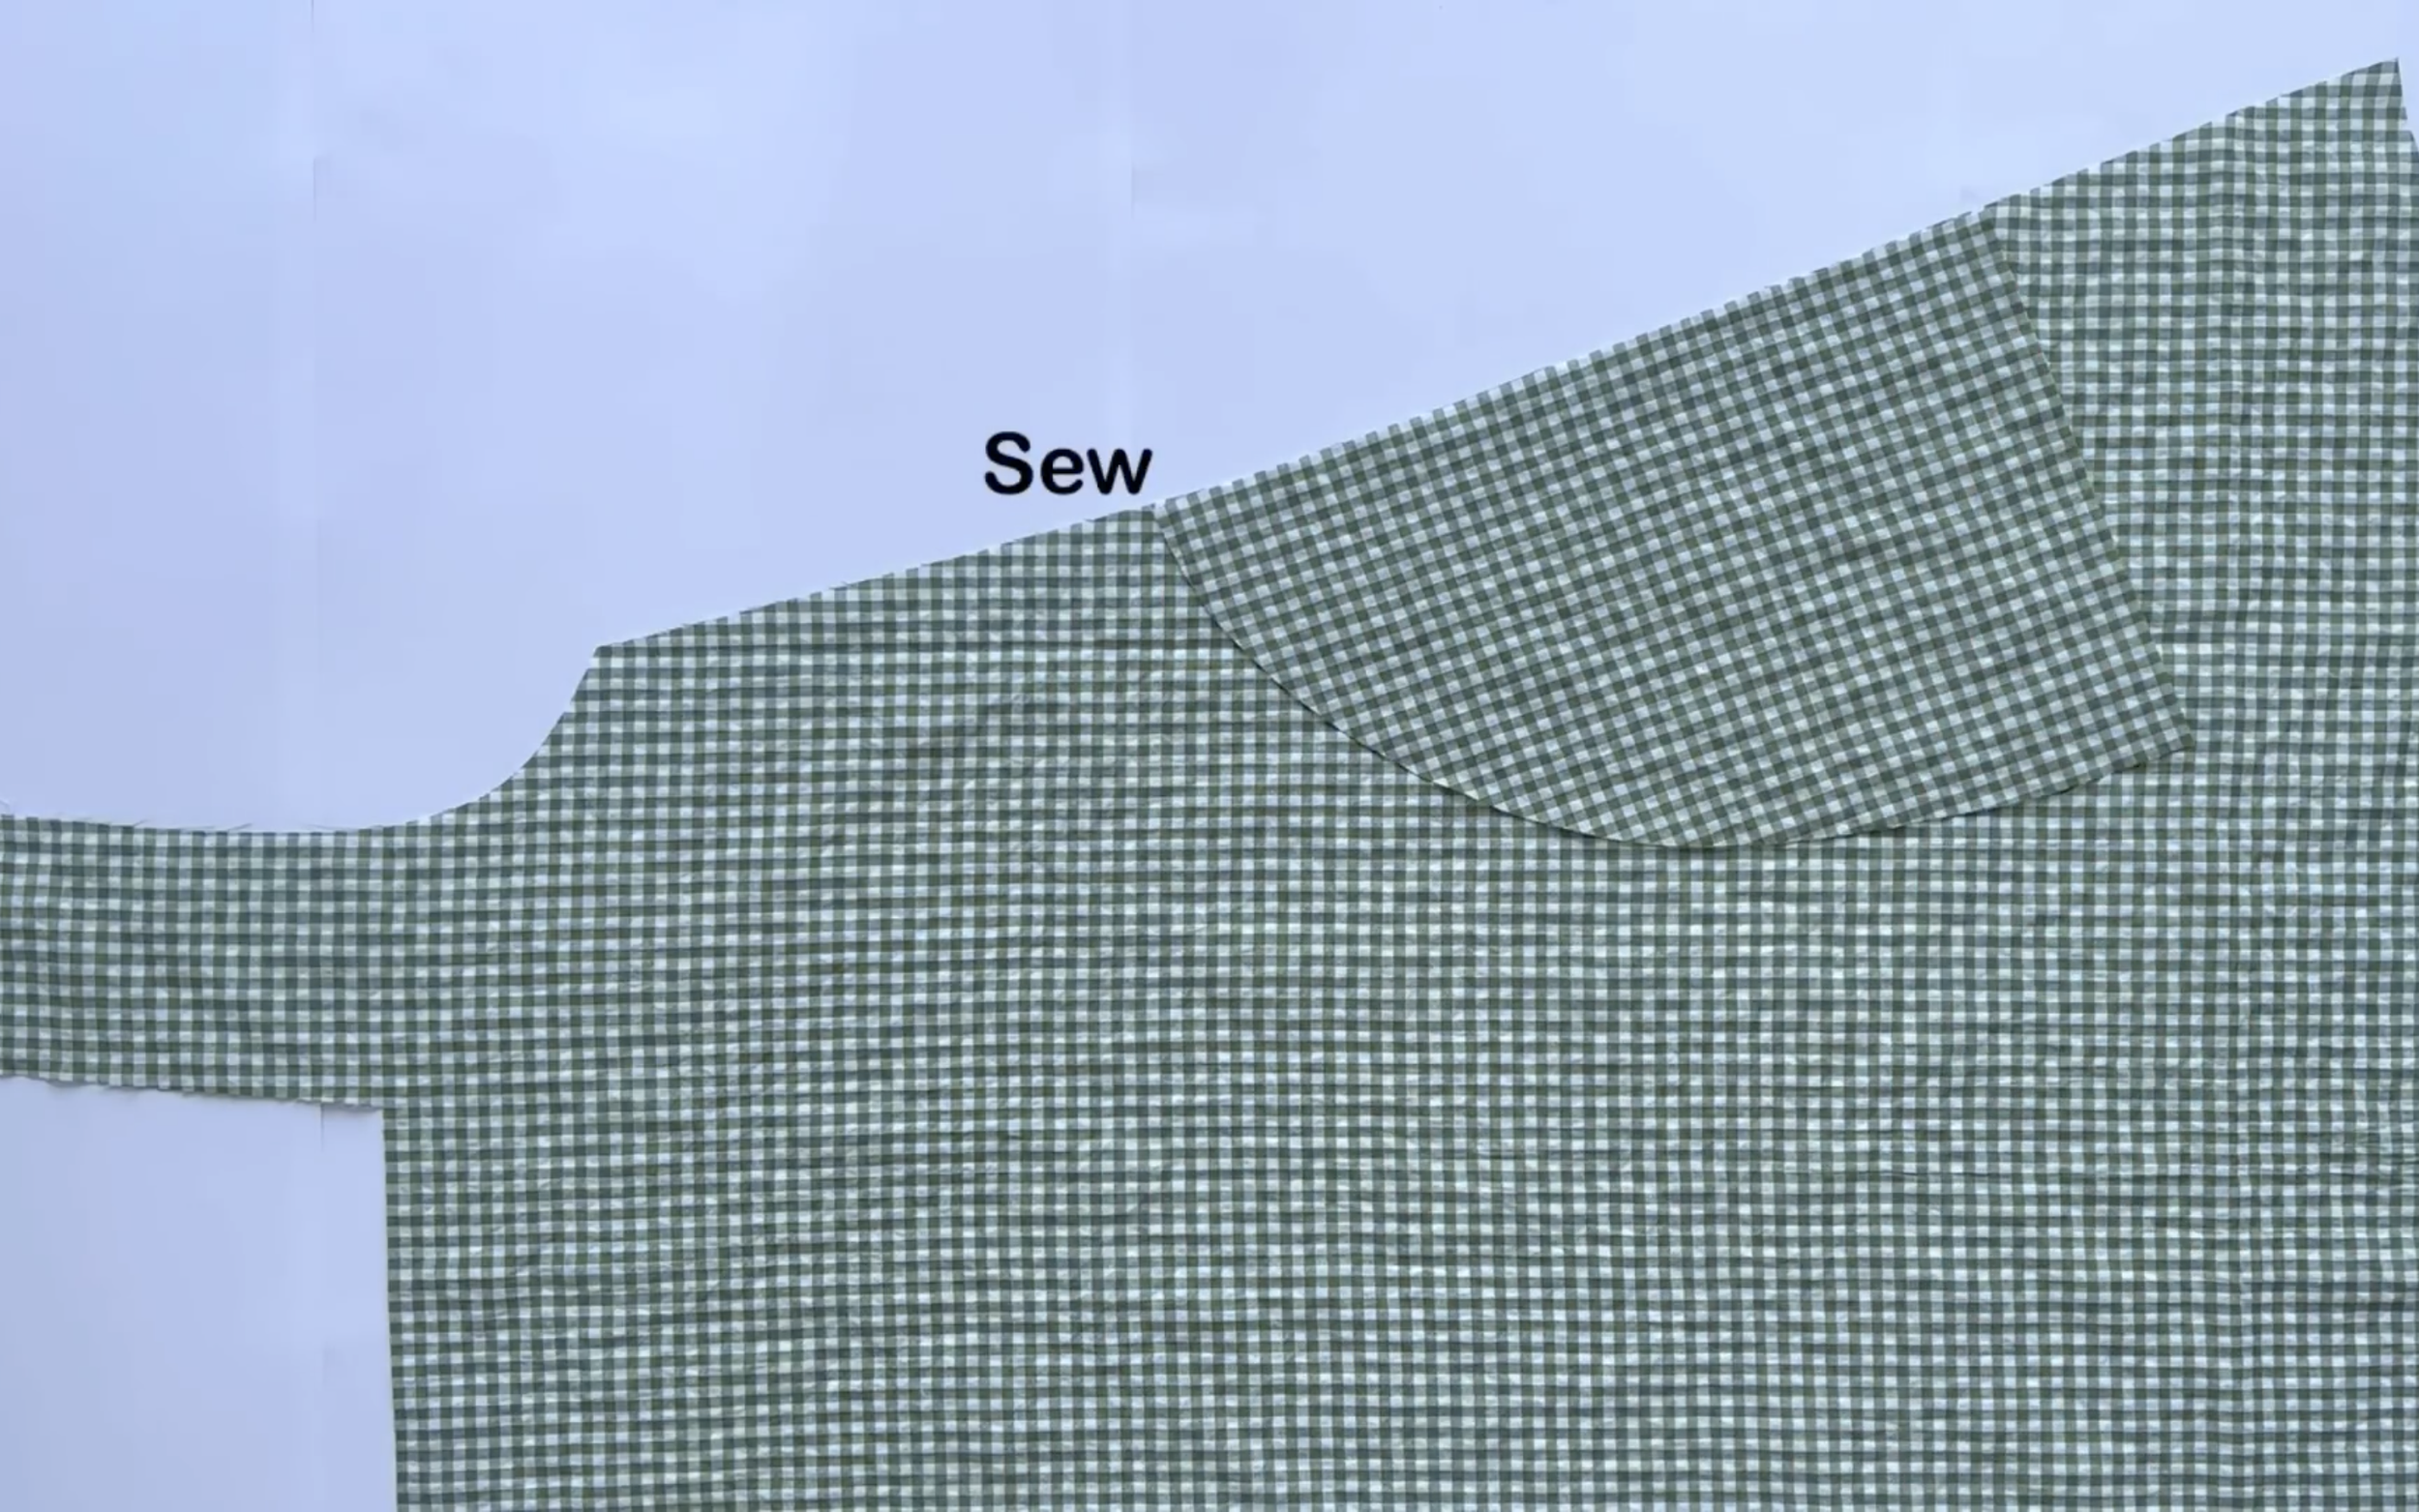
Then add the pocket there and sew it.
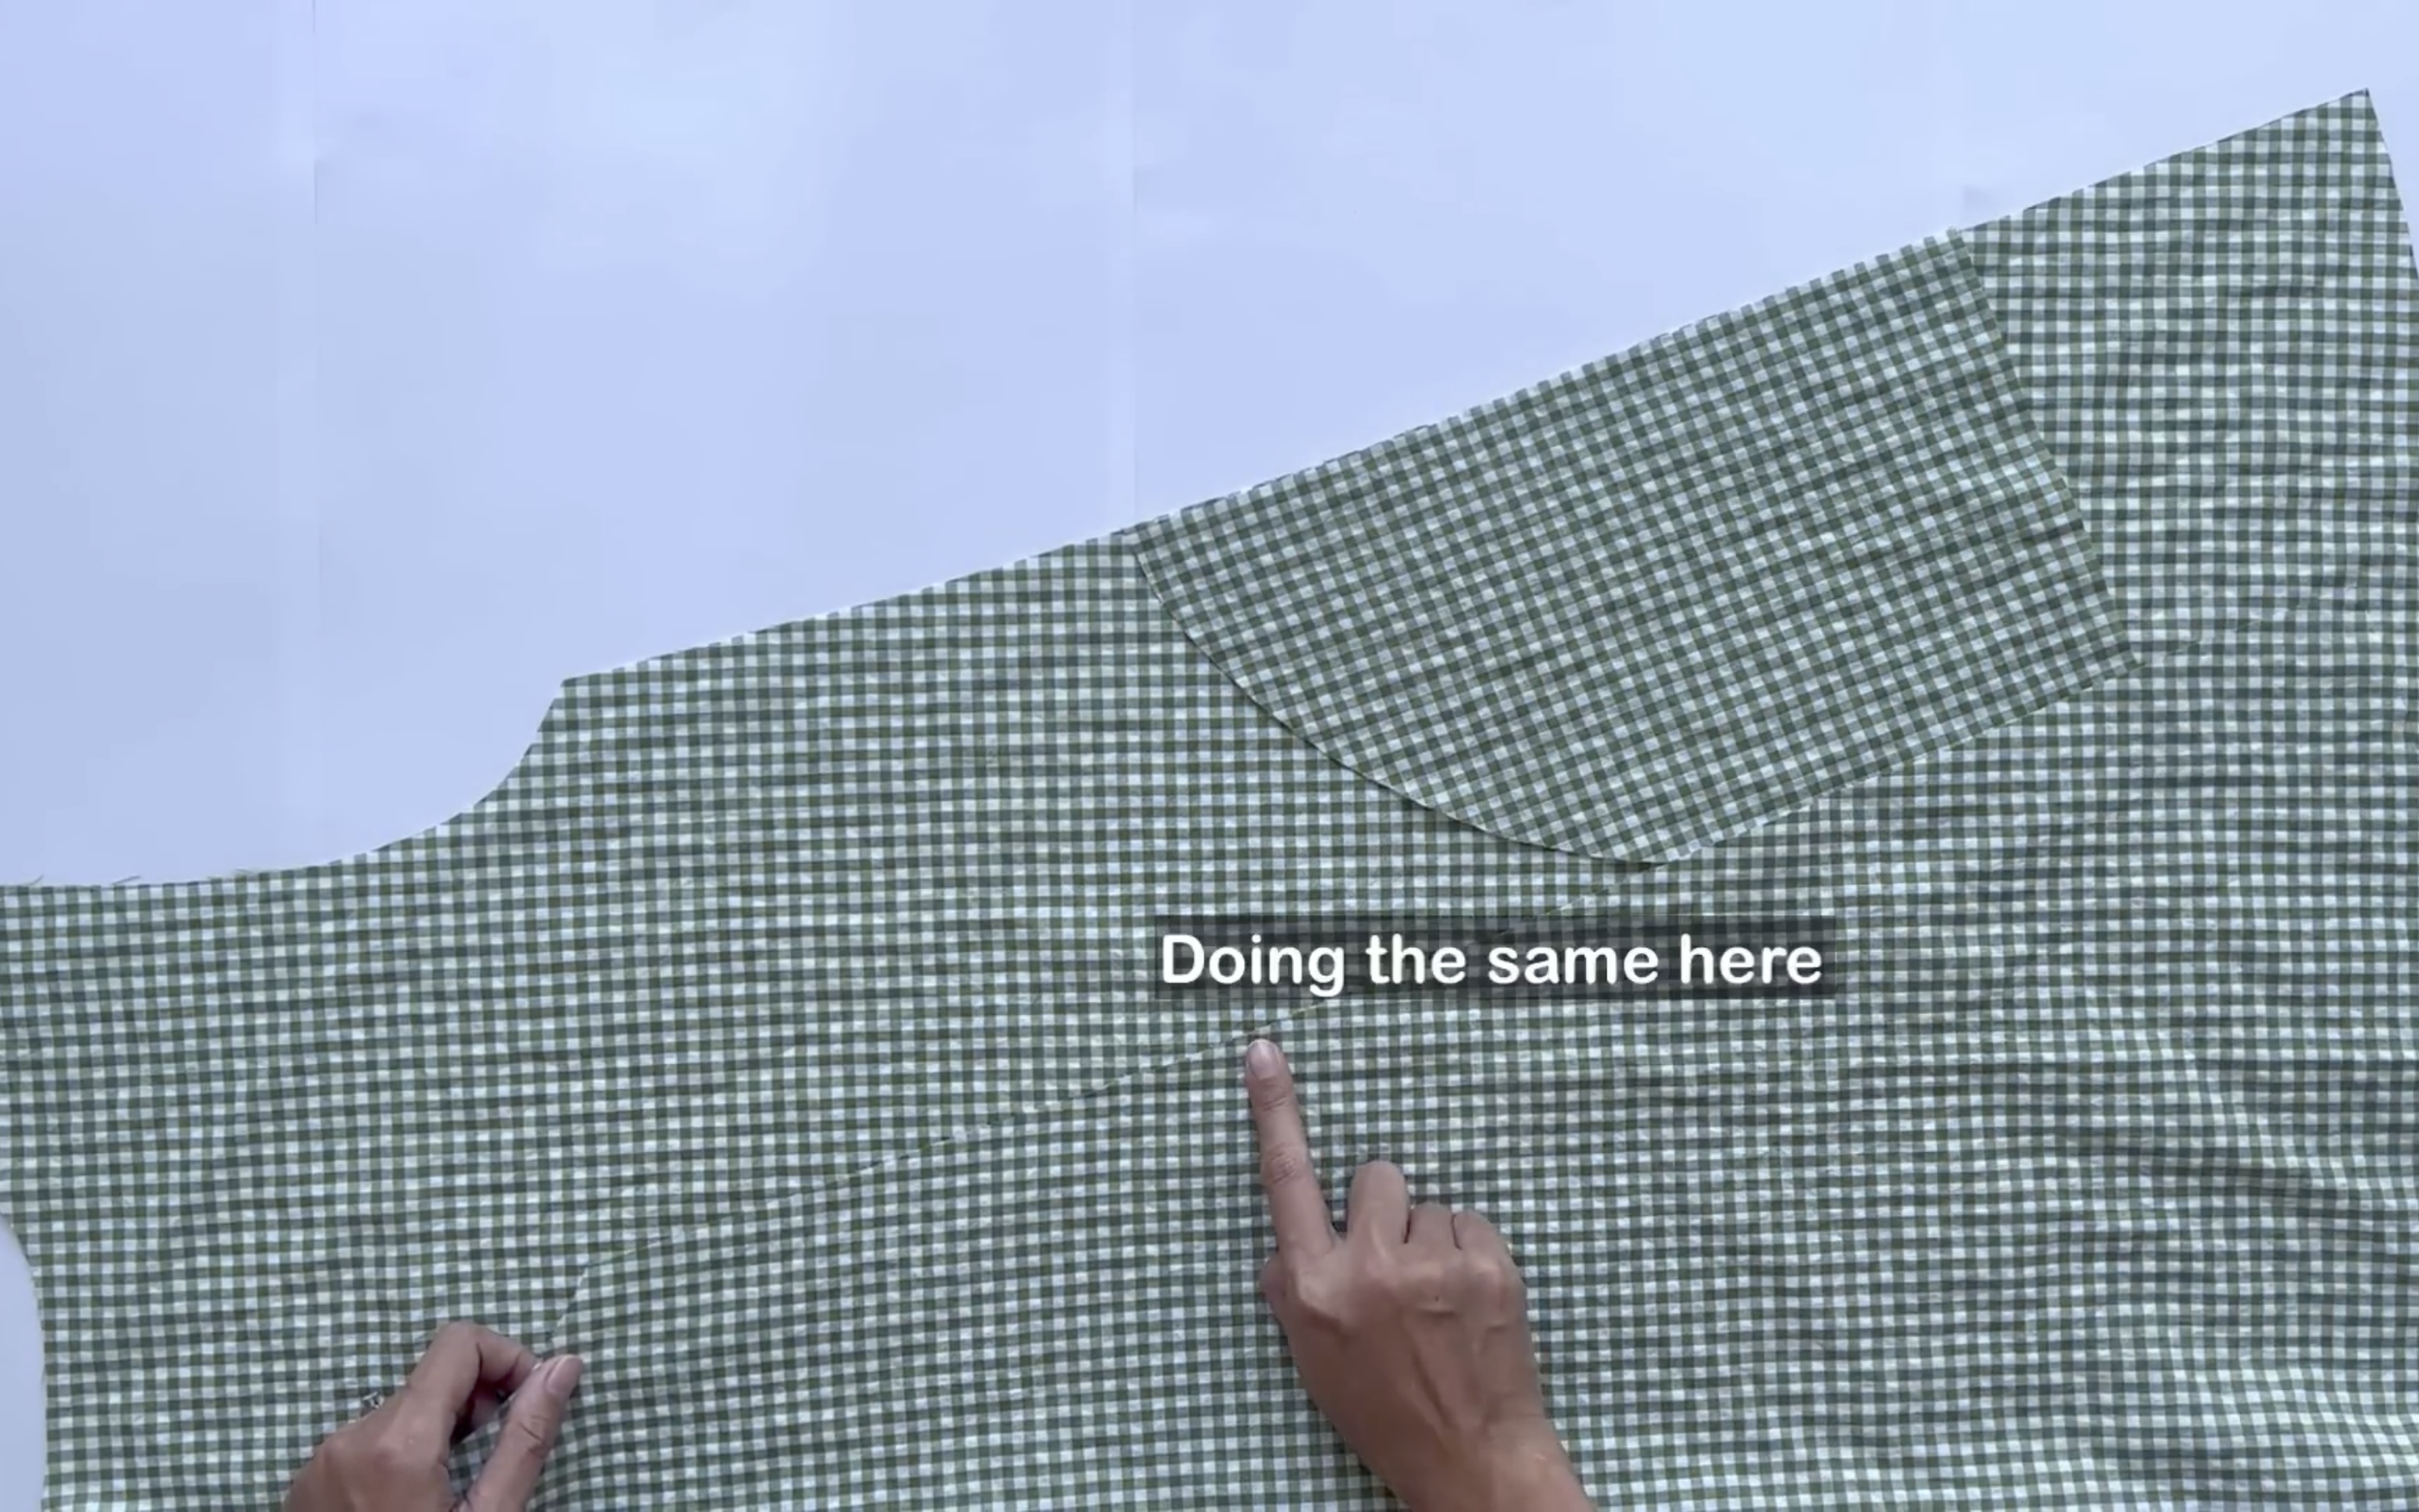
Do the same for the other sideline. Also, do the same for the back bodice.
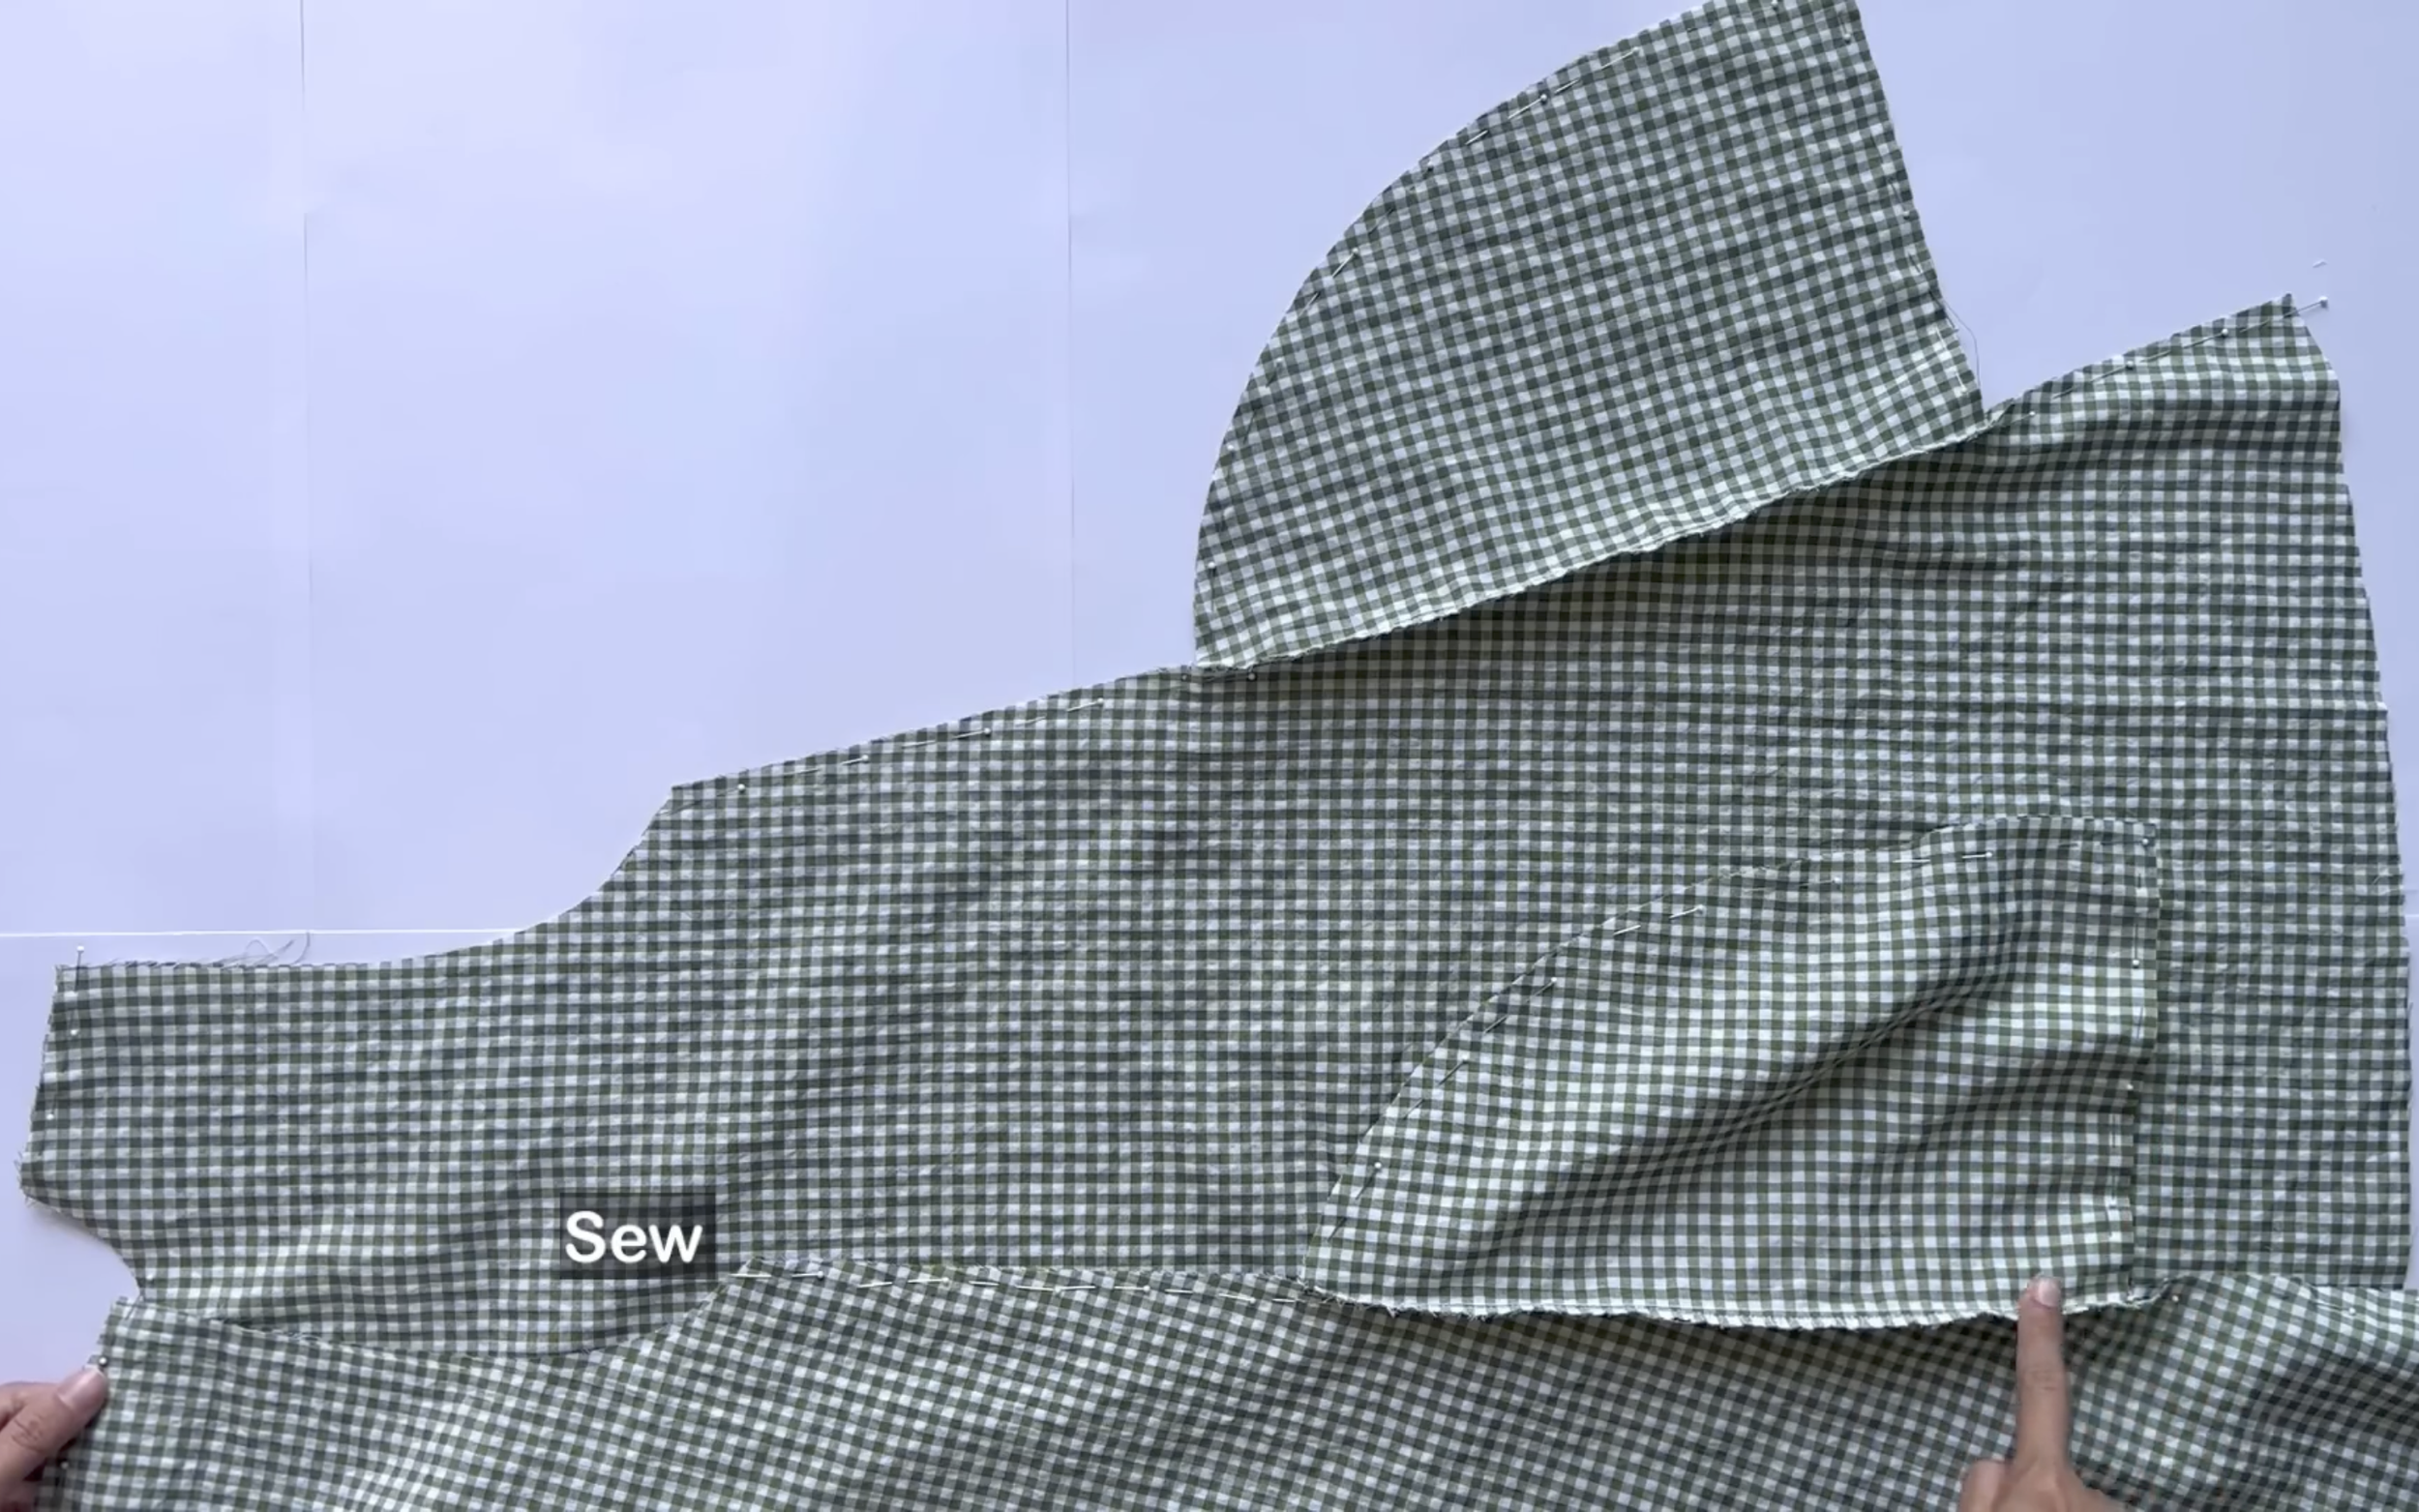
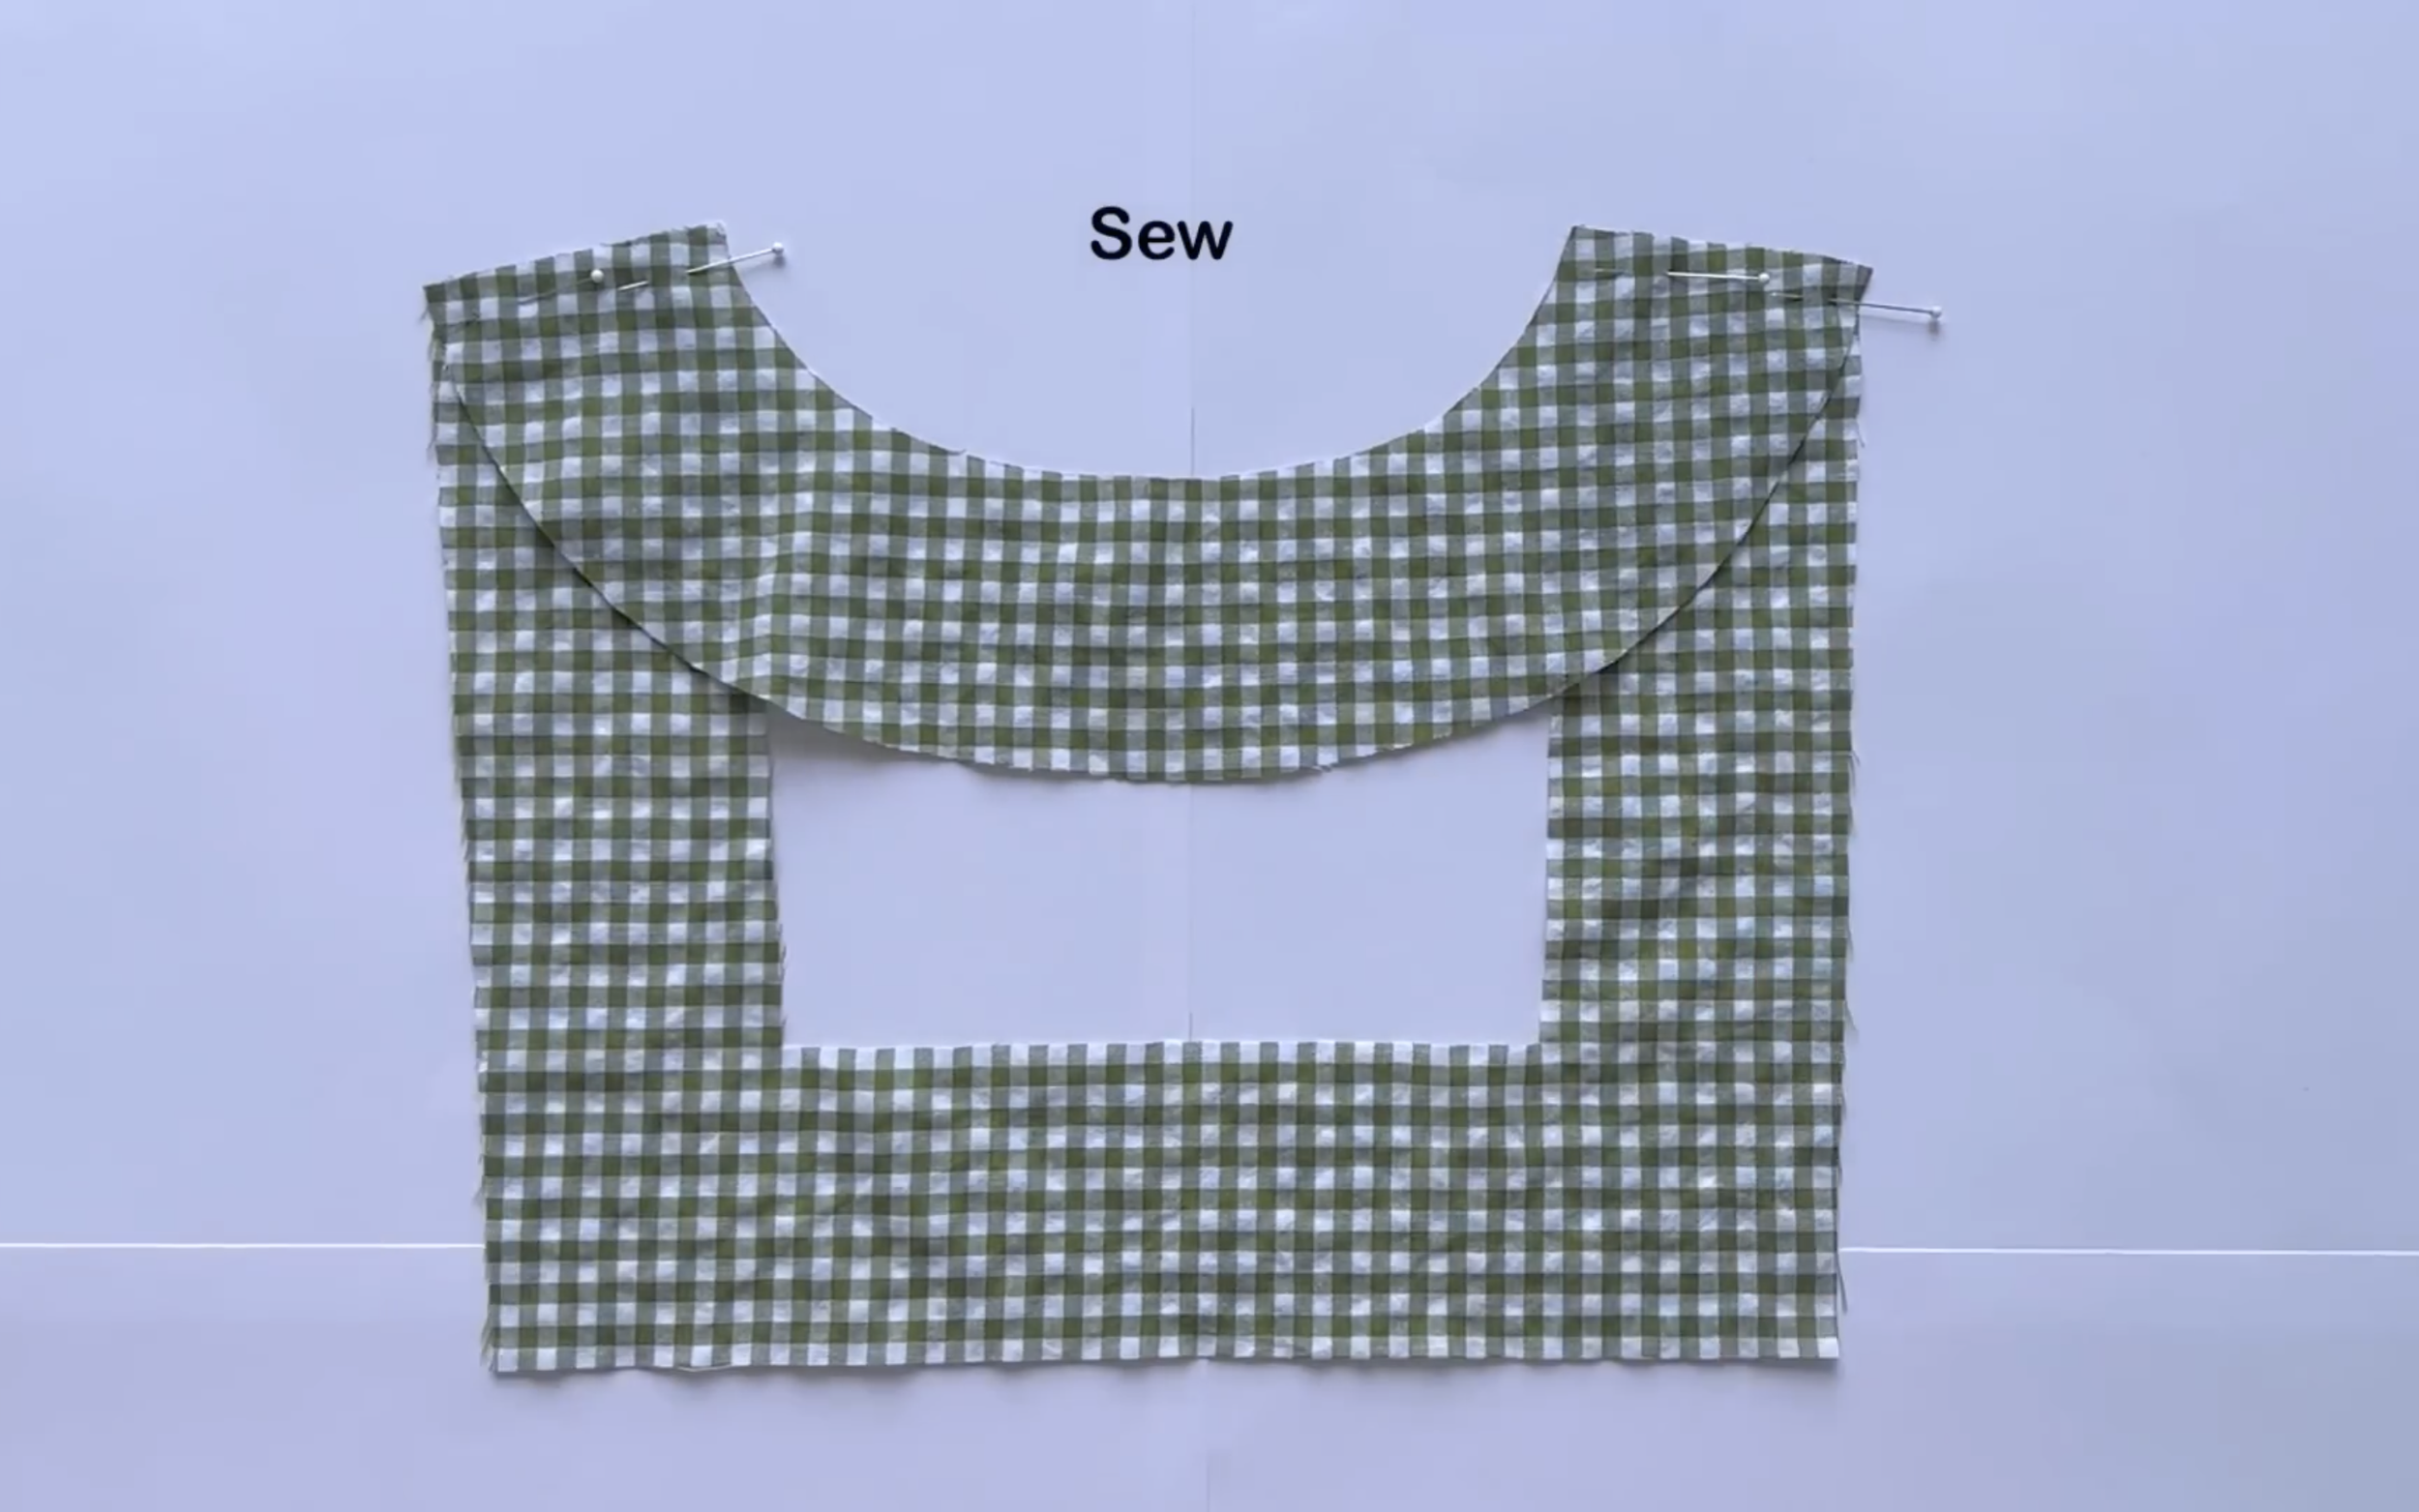
After sewing, connect the front and back bodice together at the shoulder and two sidelines.
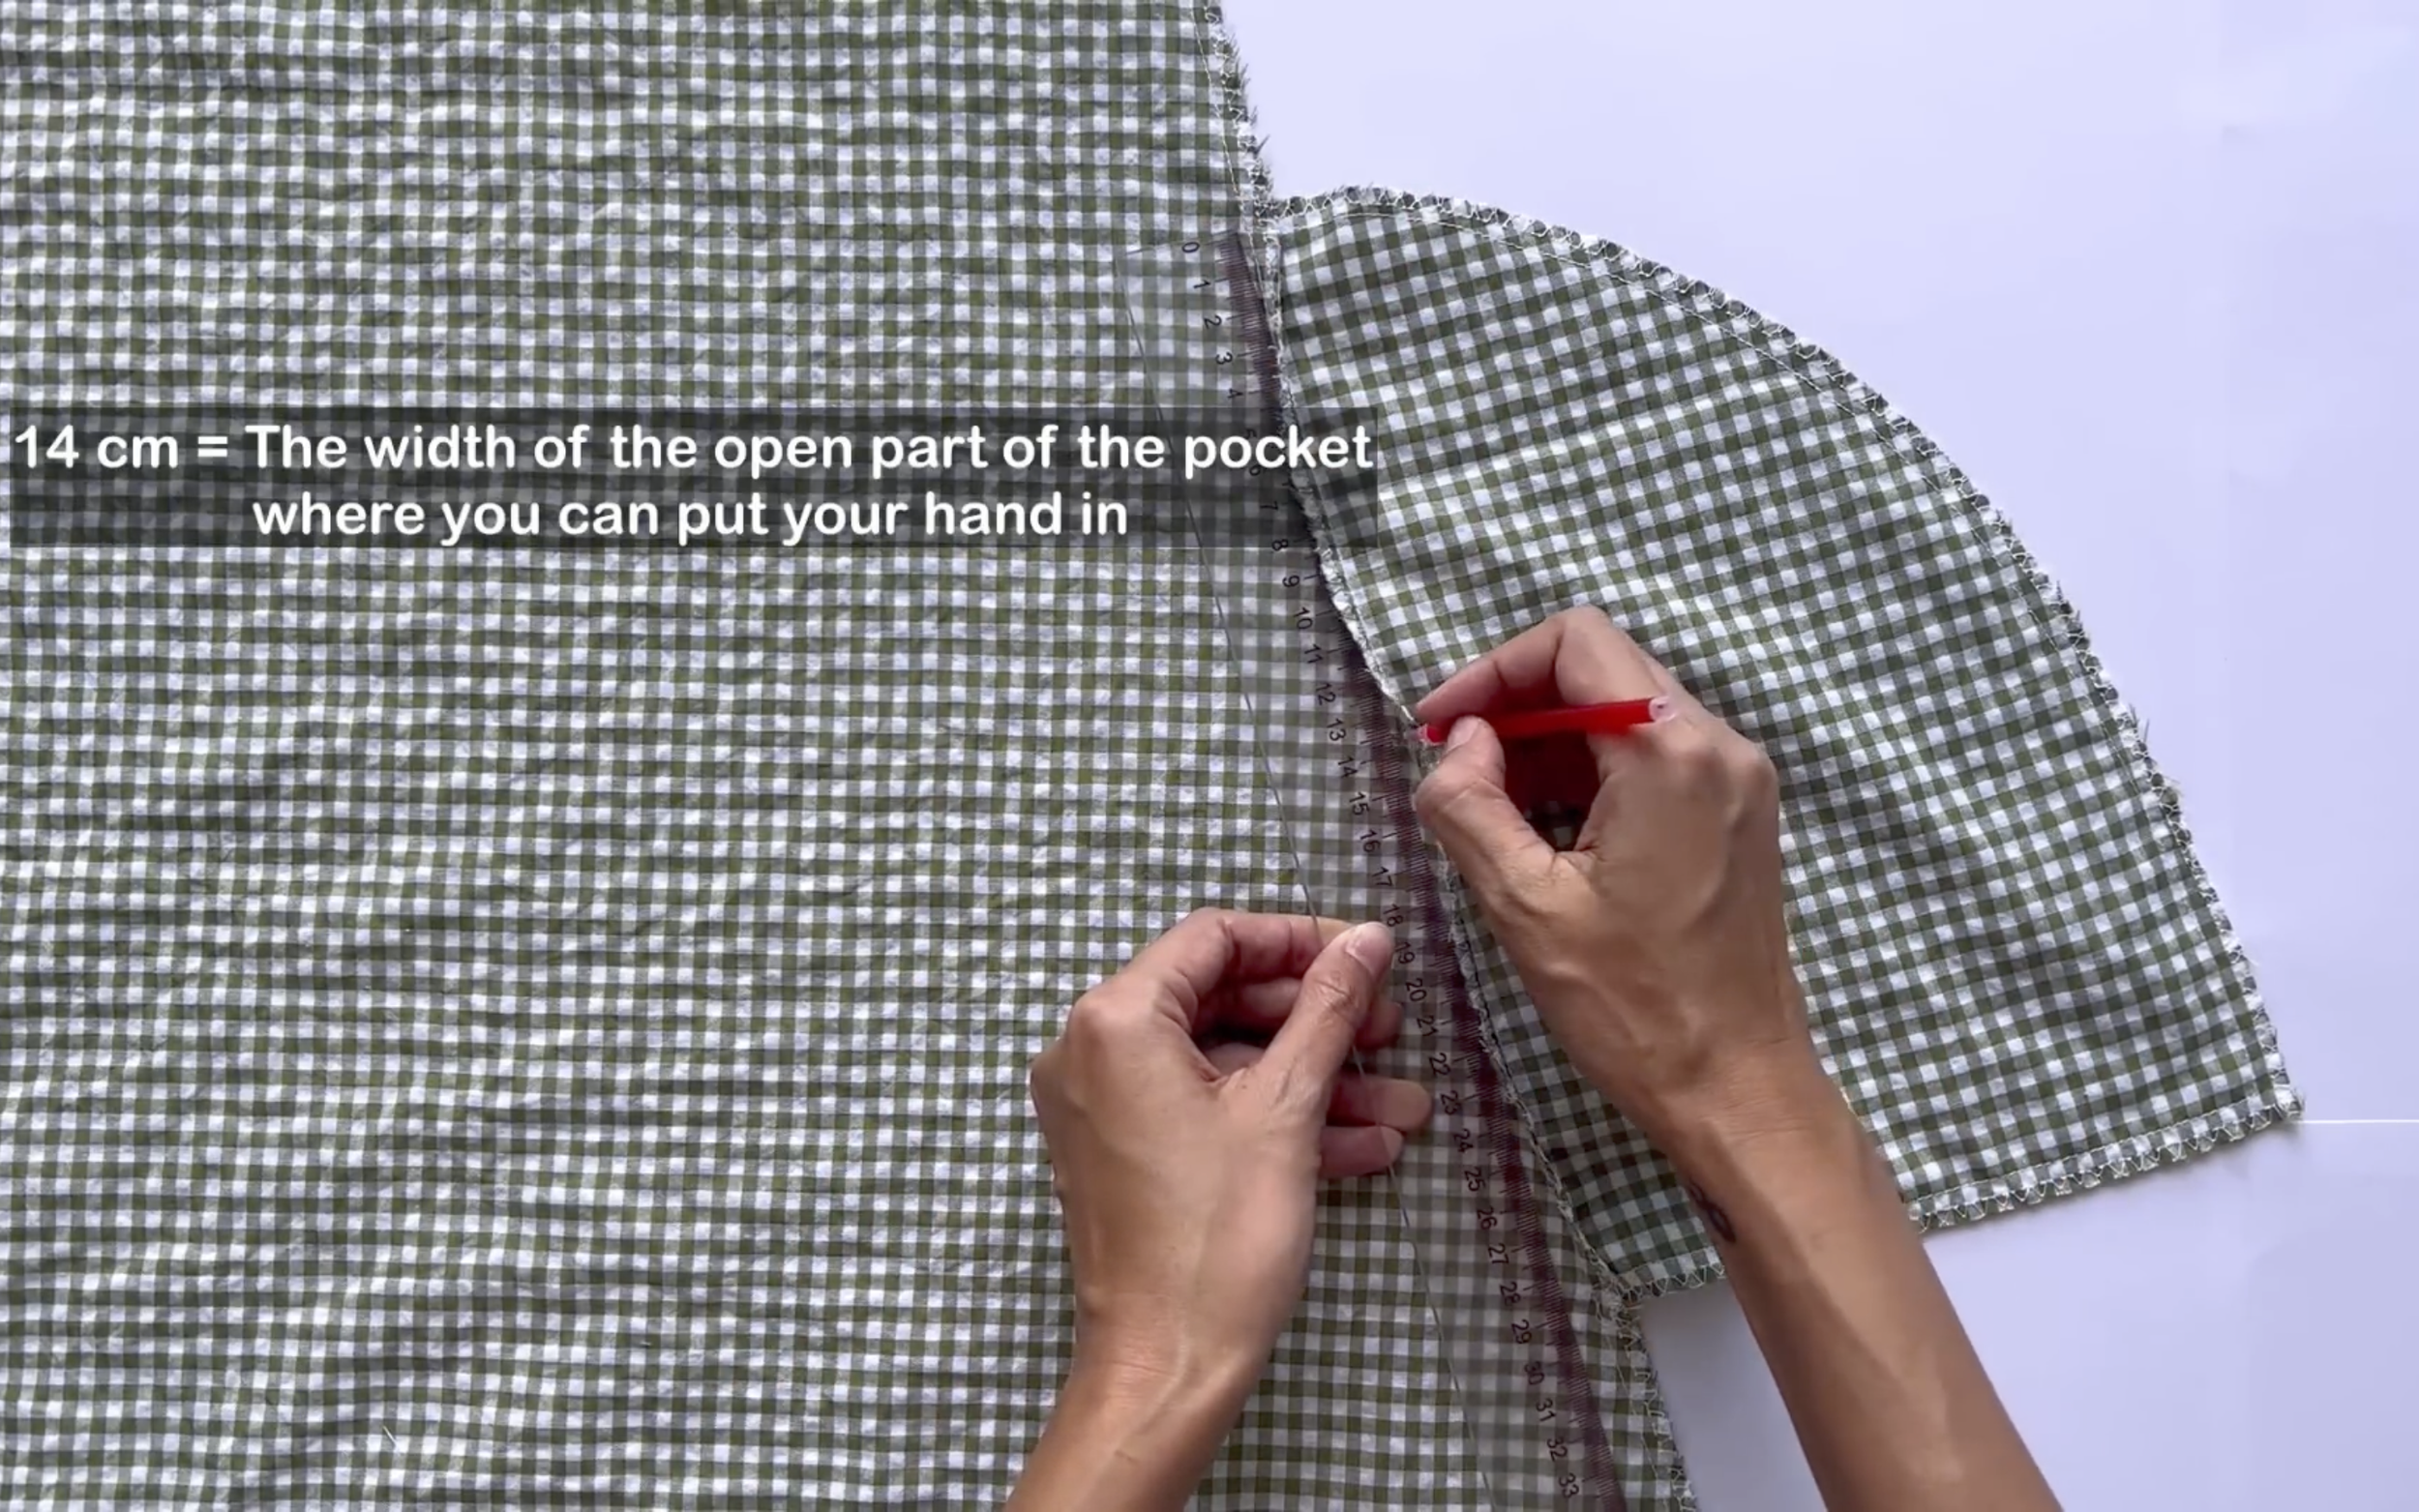
From the top of the pocket, mark down 14 cm on the sideline, which is the width of the open part of the pocket where a hand can fit.
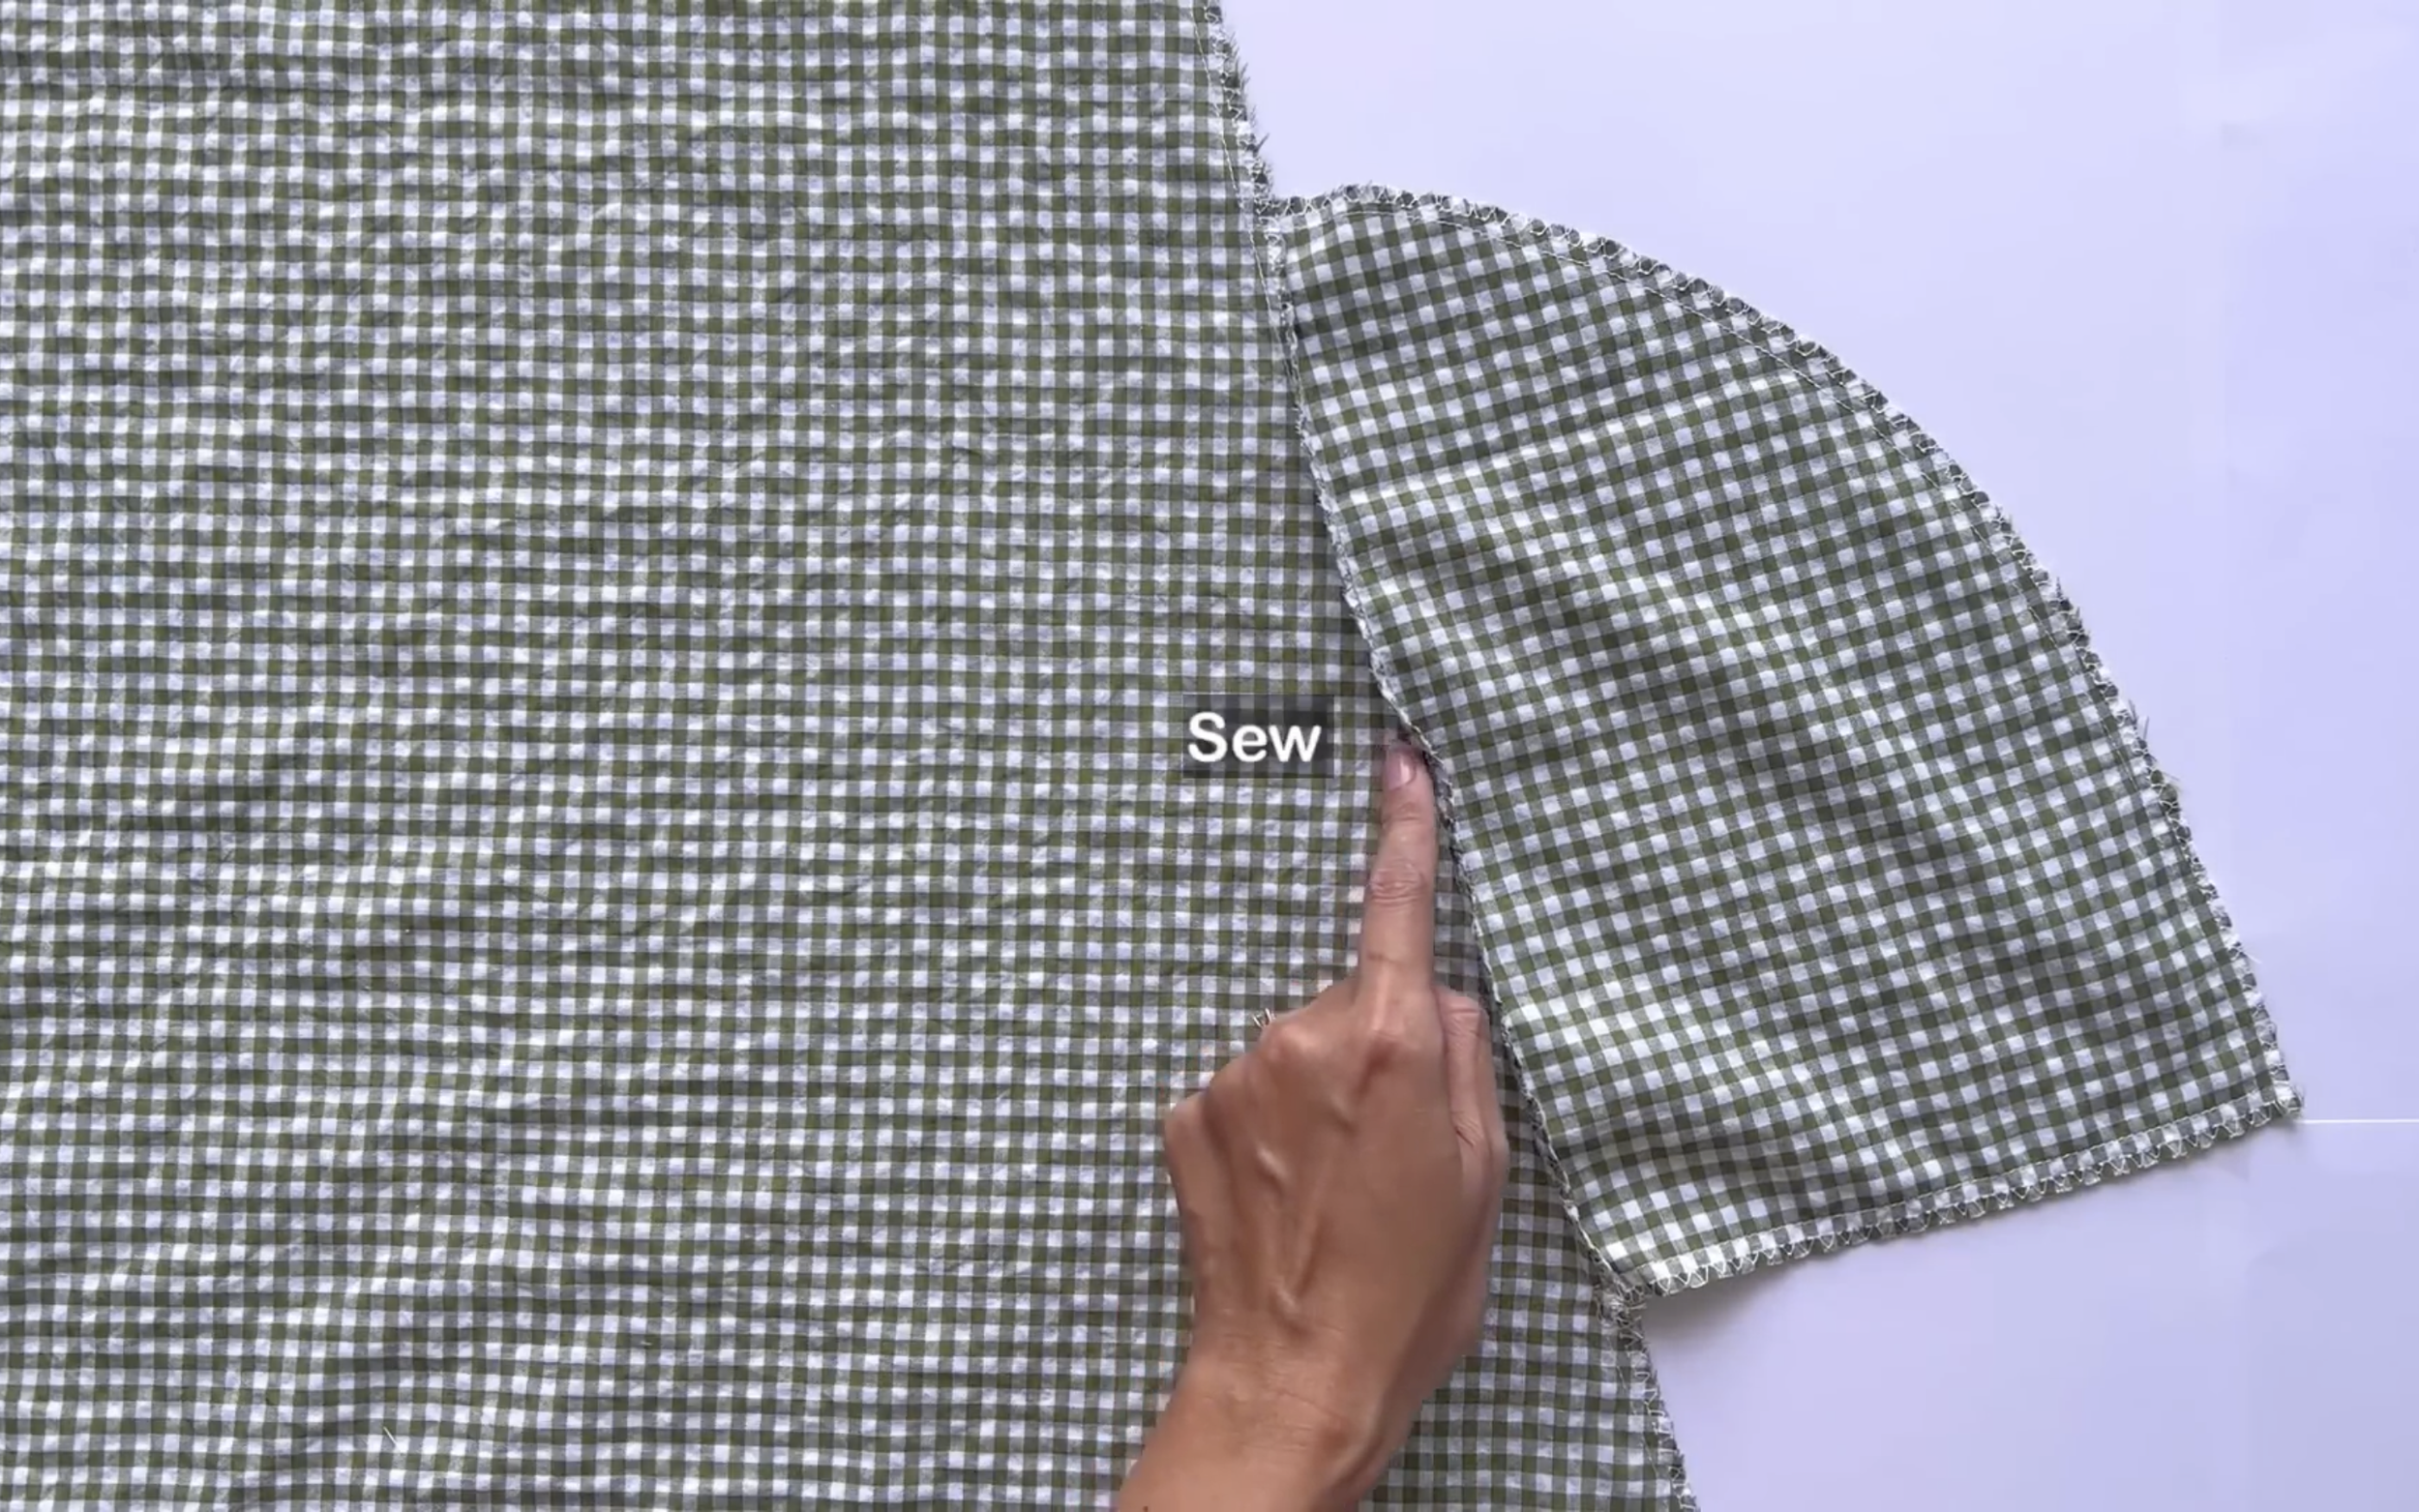
And, sew the rest together.
THE LINING
Moving to the lining part of the neck, connect the front and back together at the shoulder first.
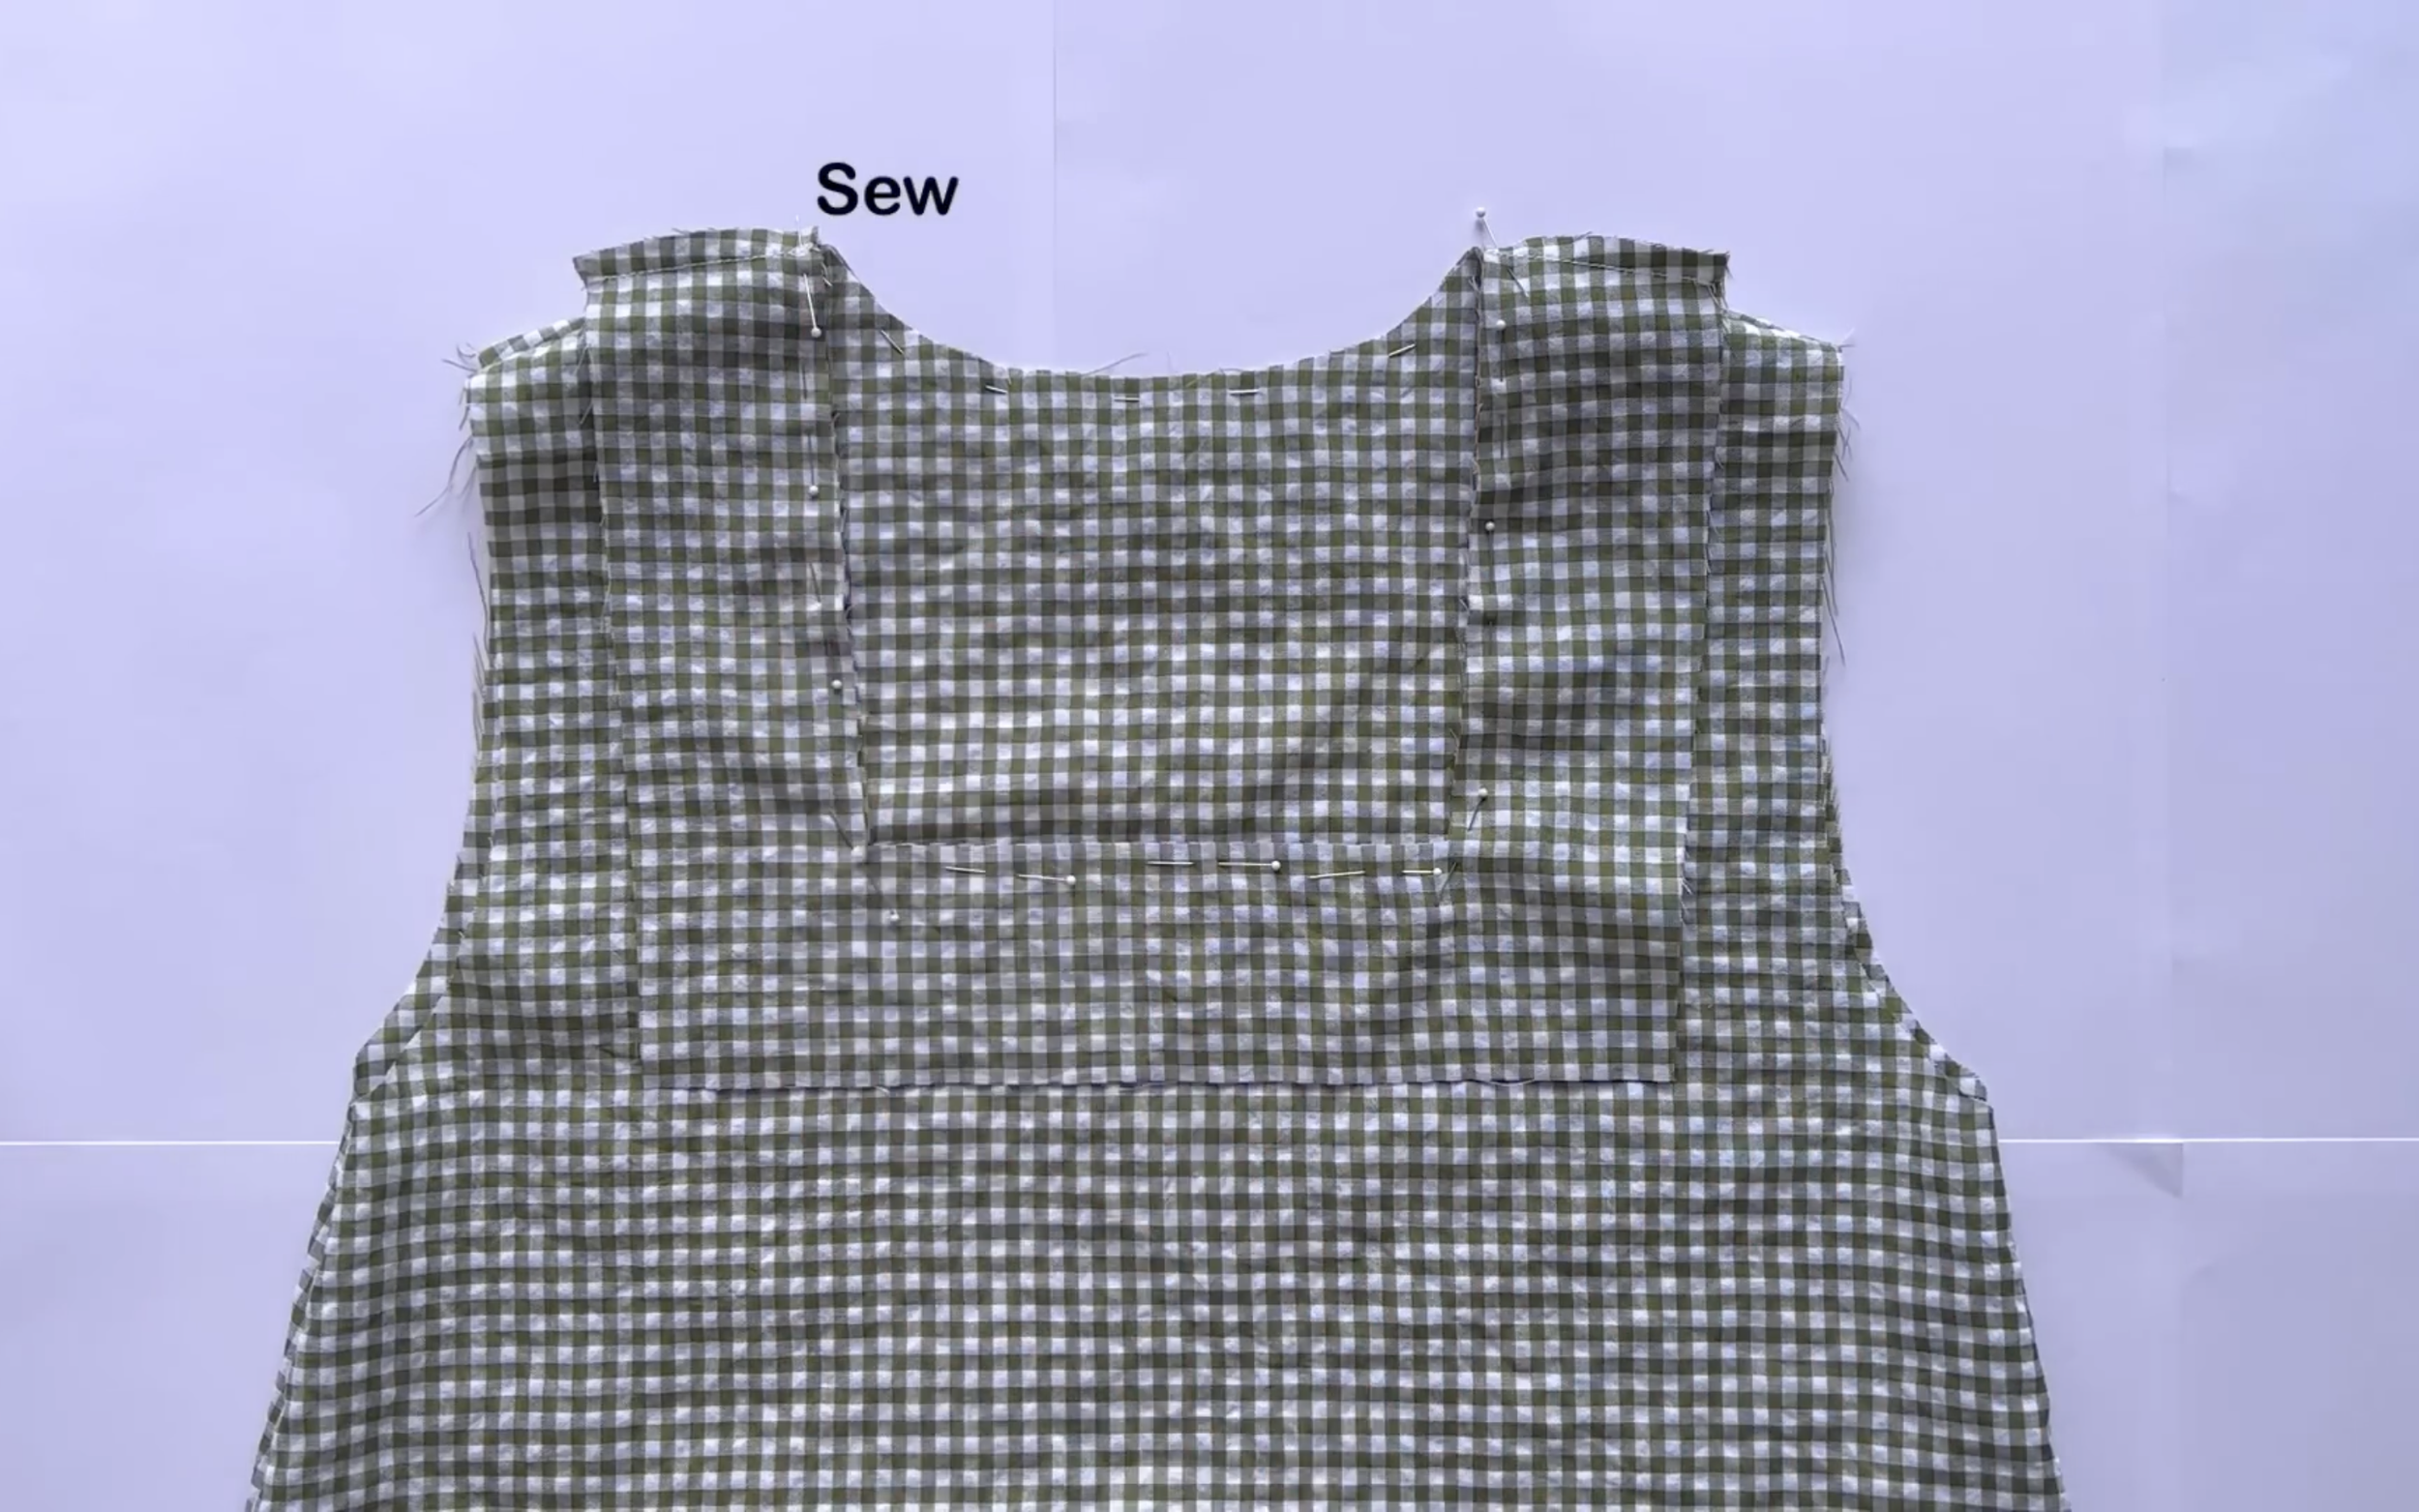
Then connect them to the bodice part at the neckline.
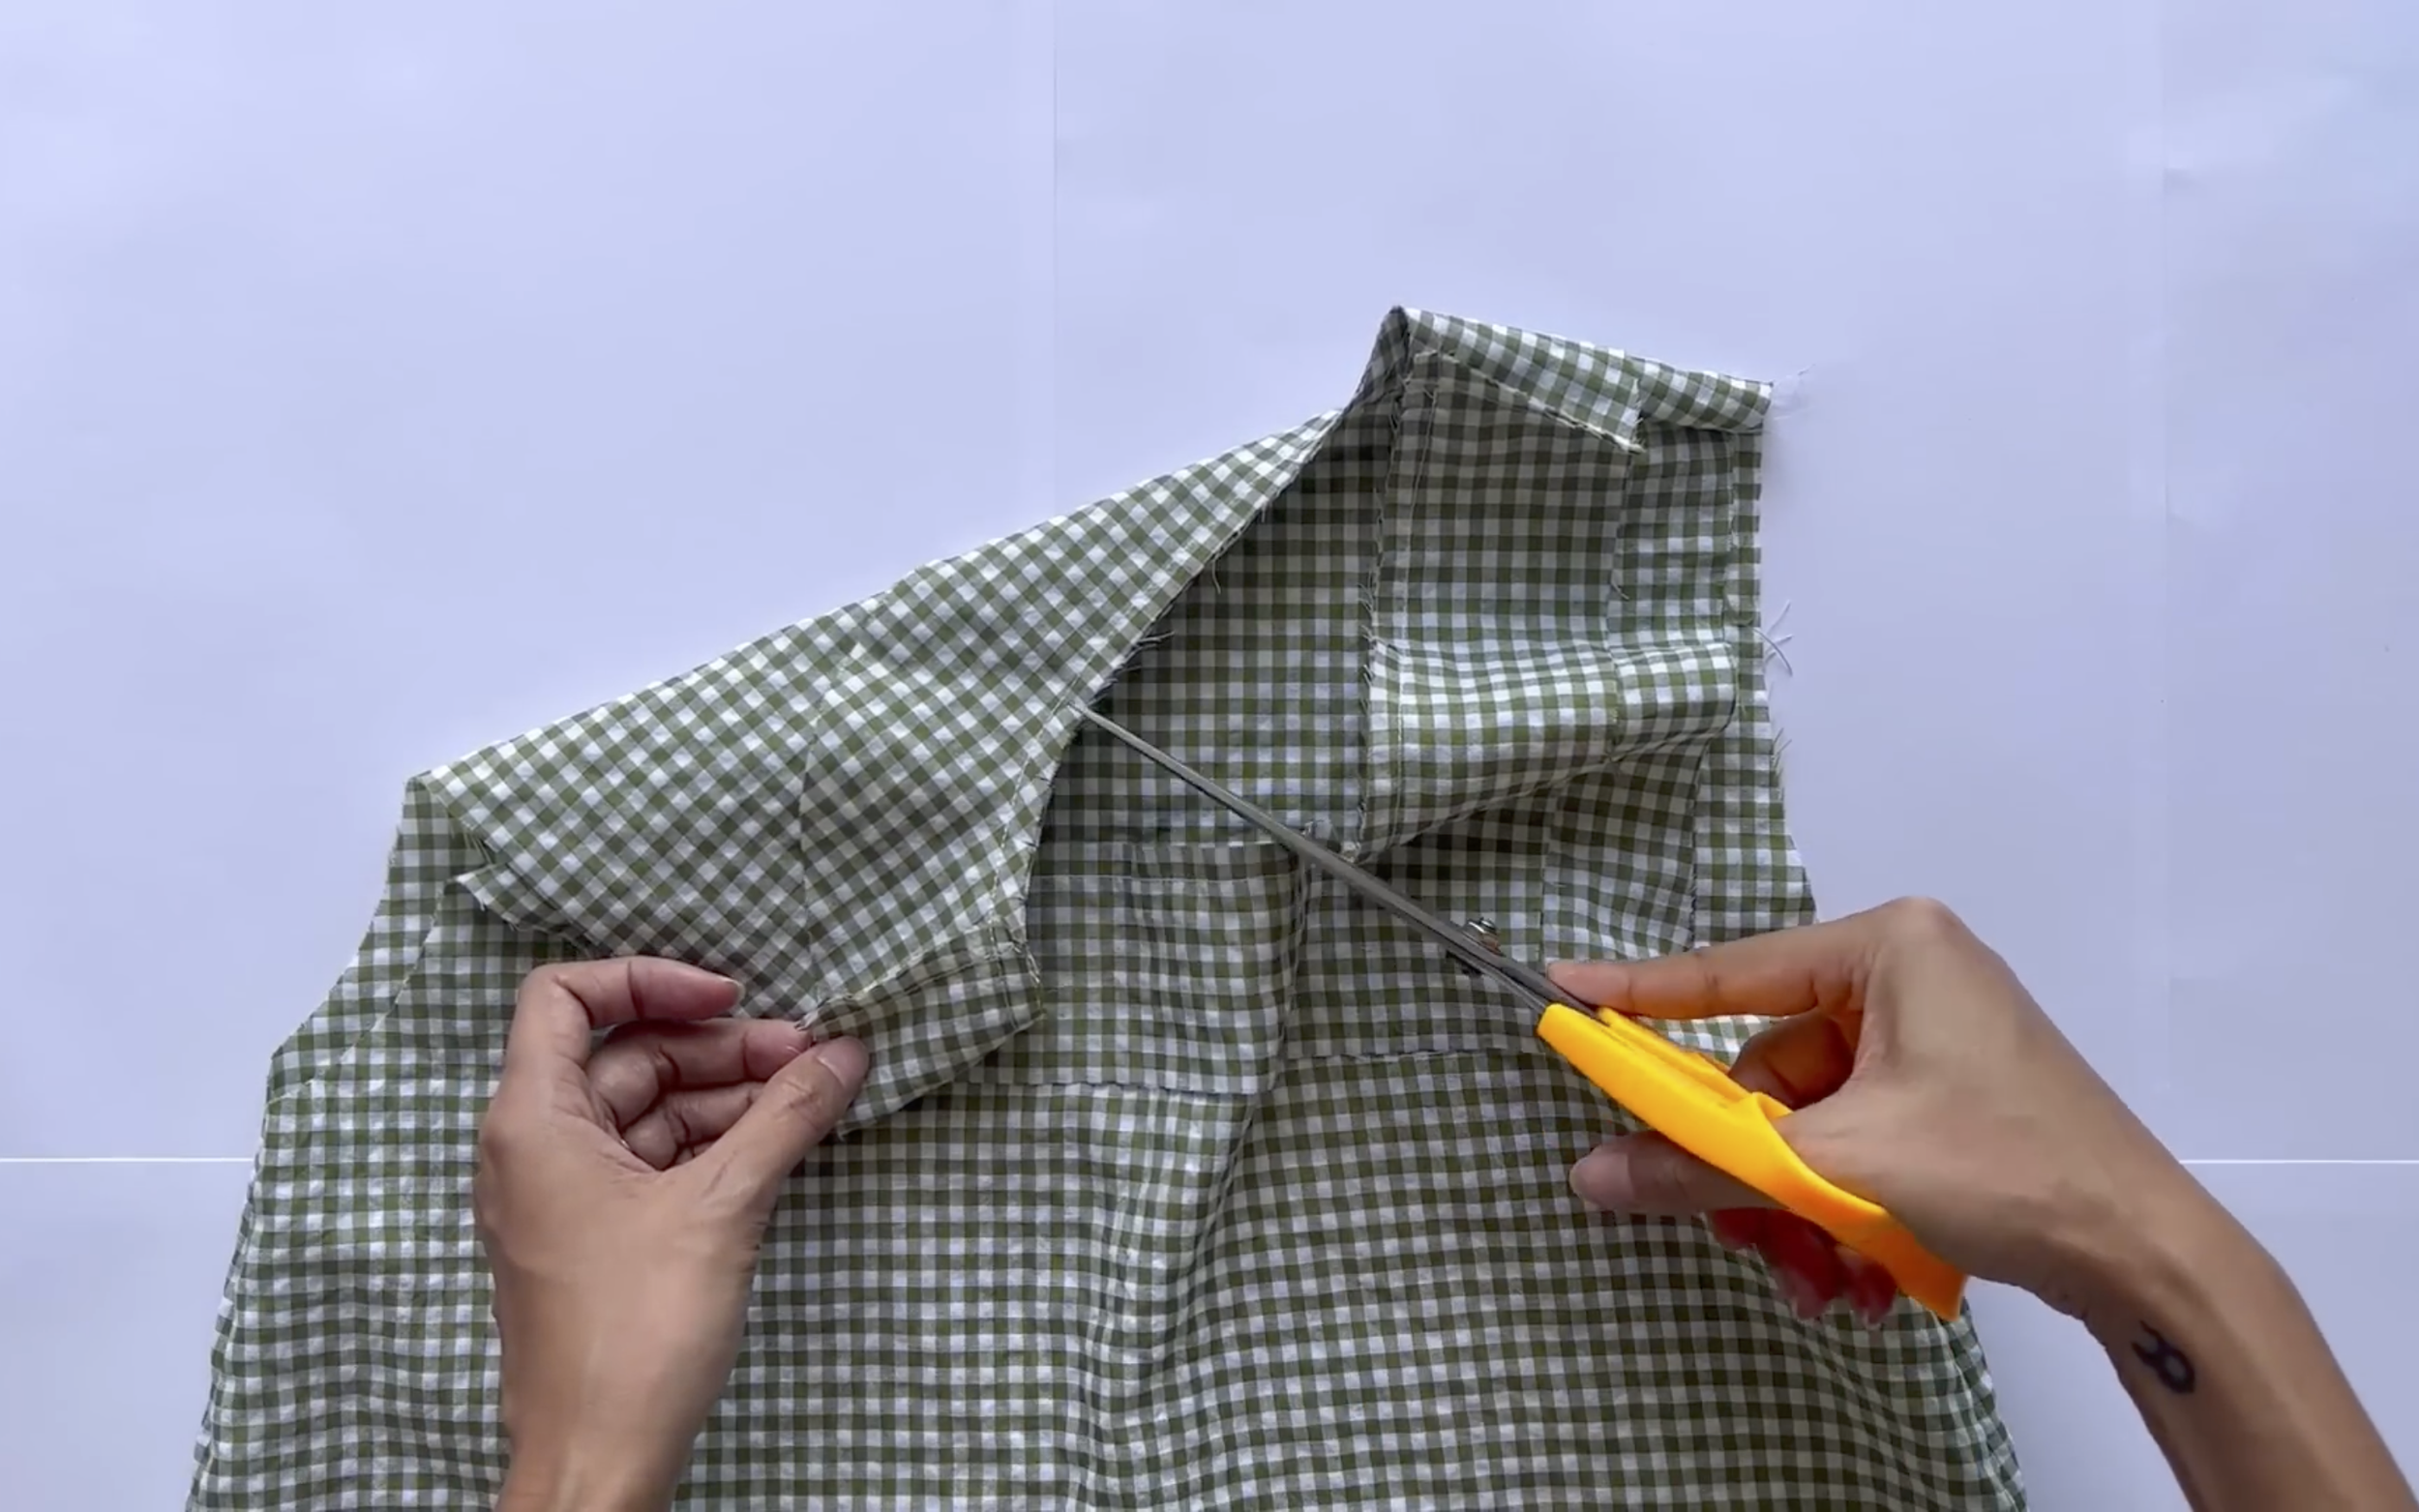
After the first seam, make a few small cuts at the curved part of the neck.
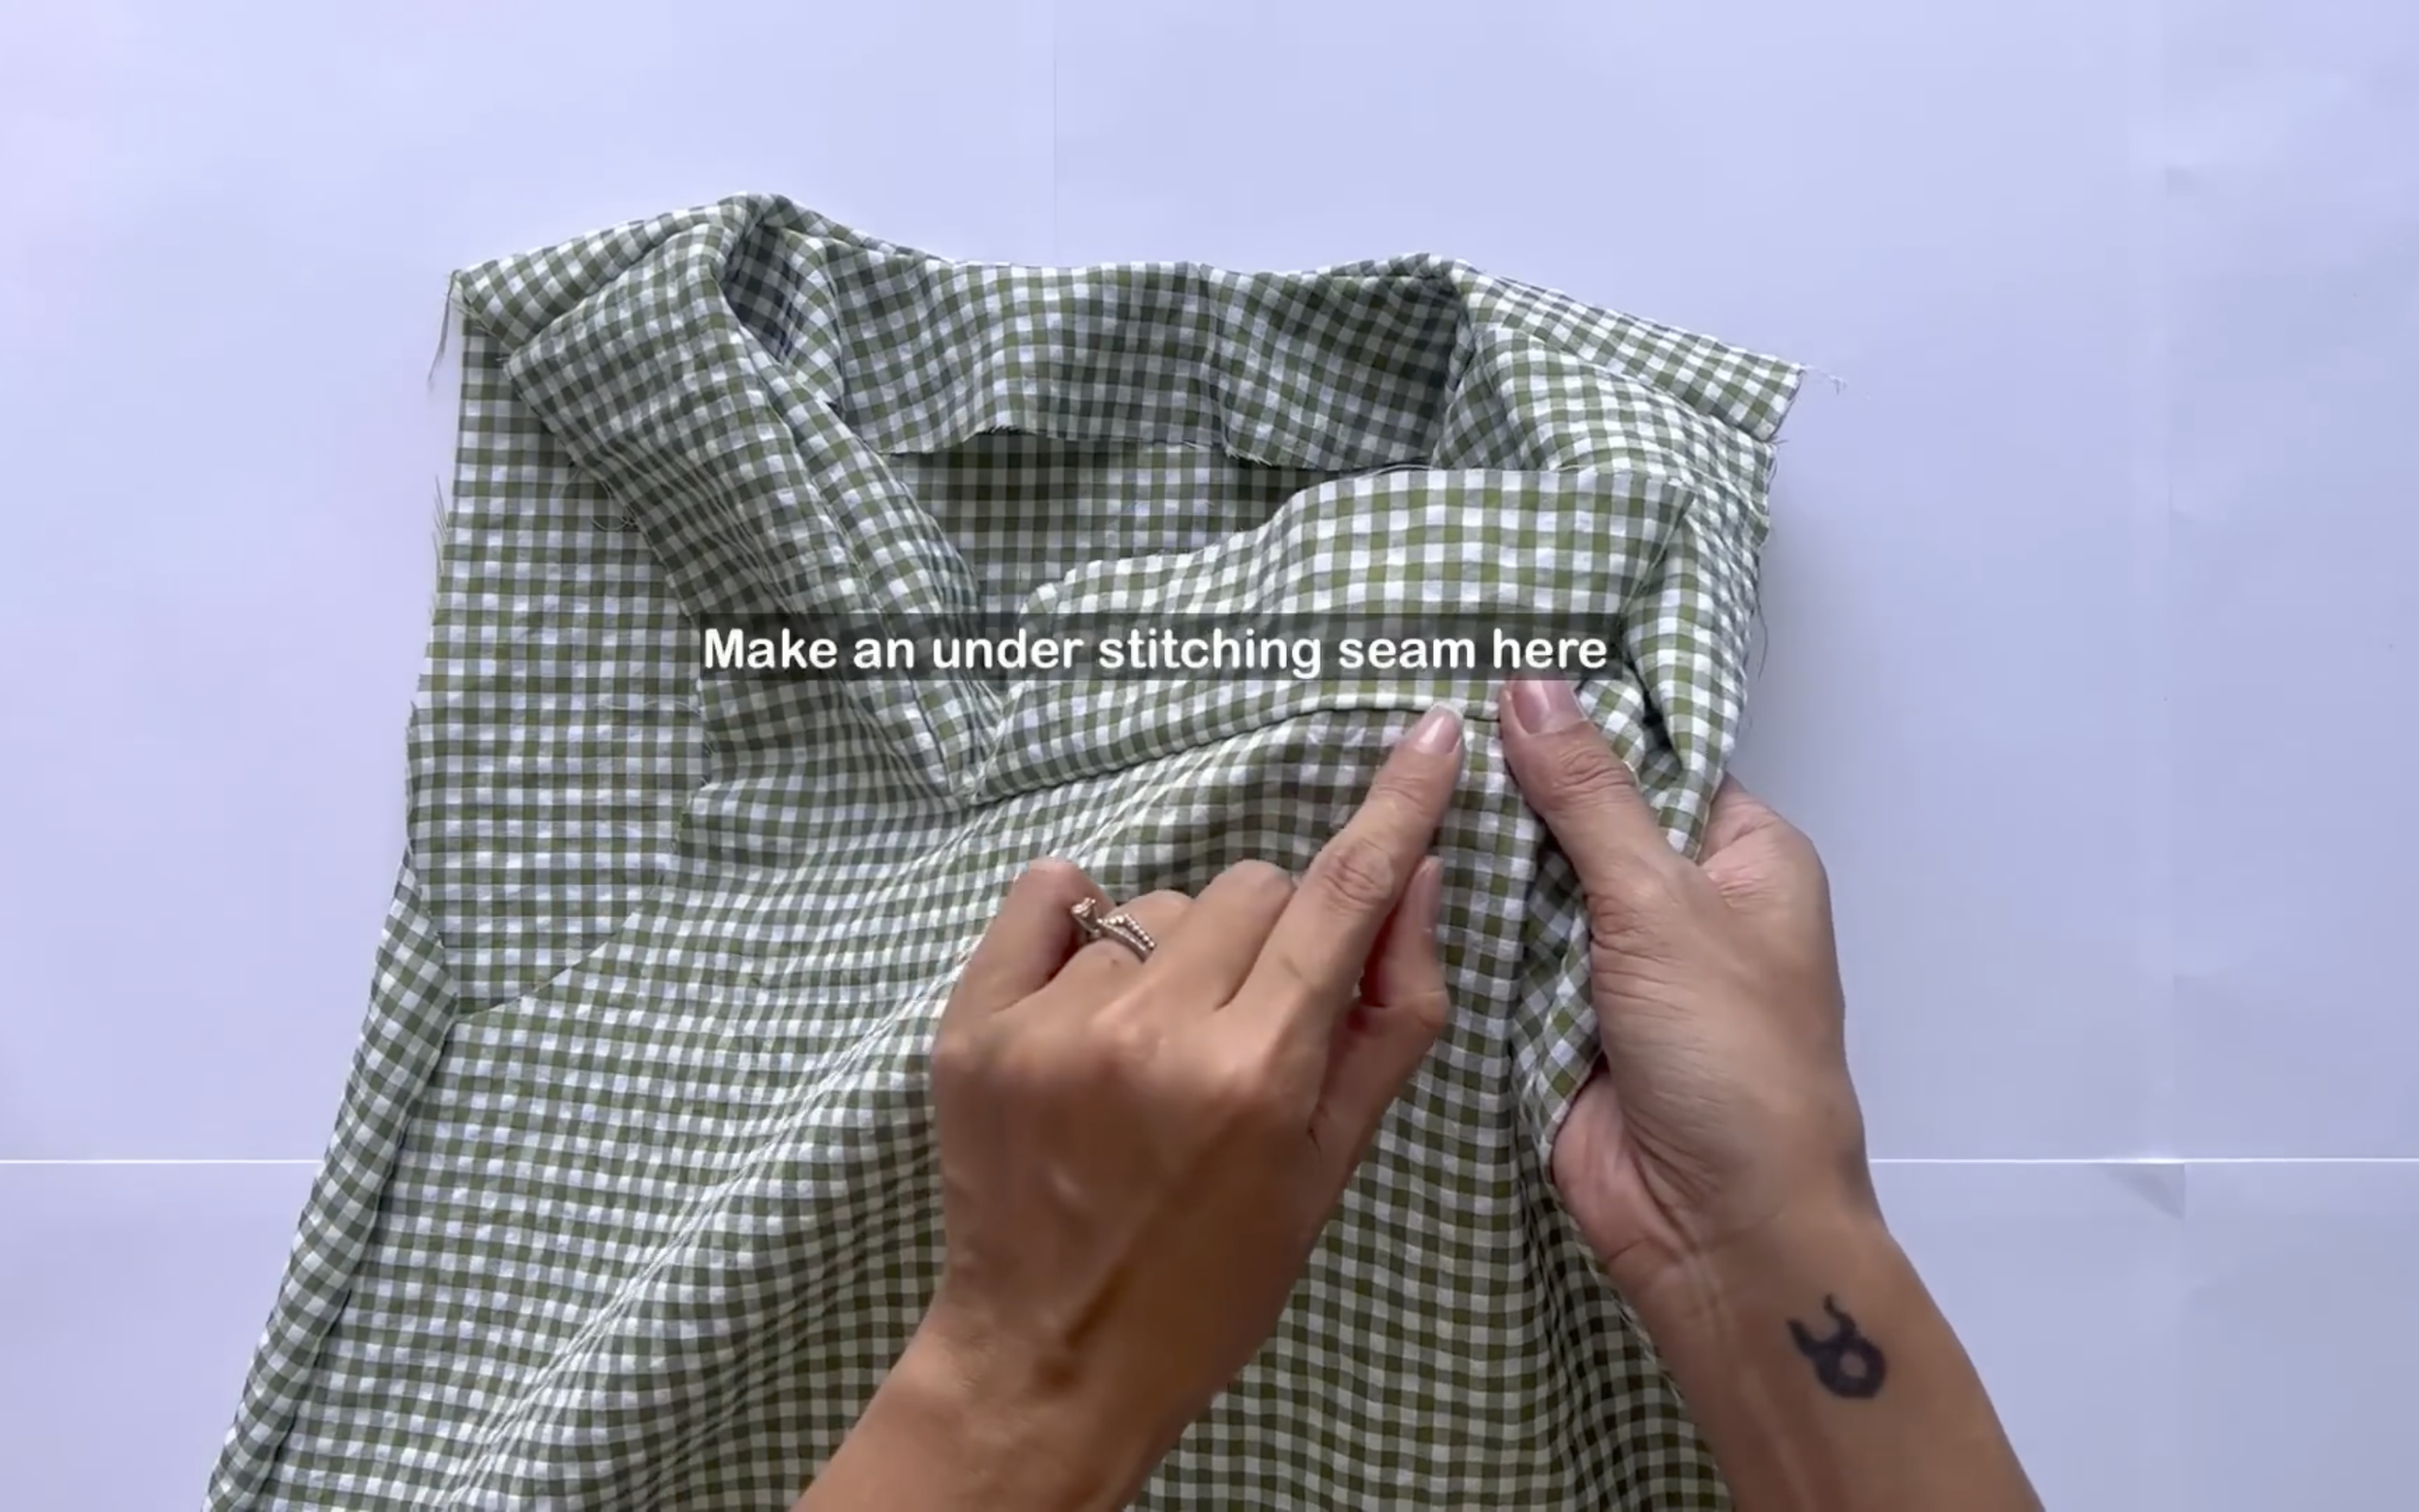
Then make the understitching seam there.
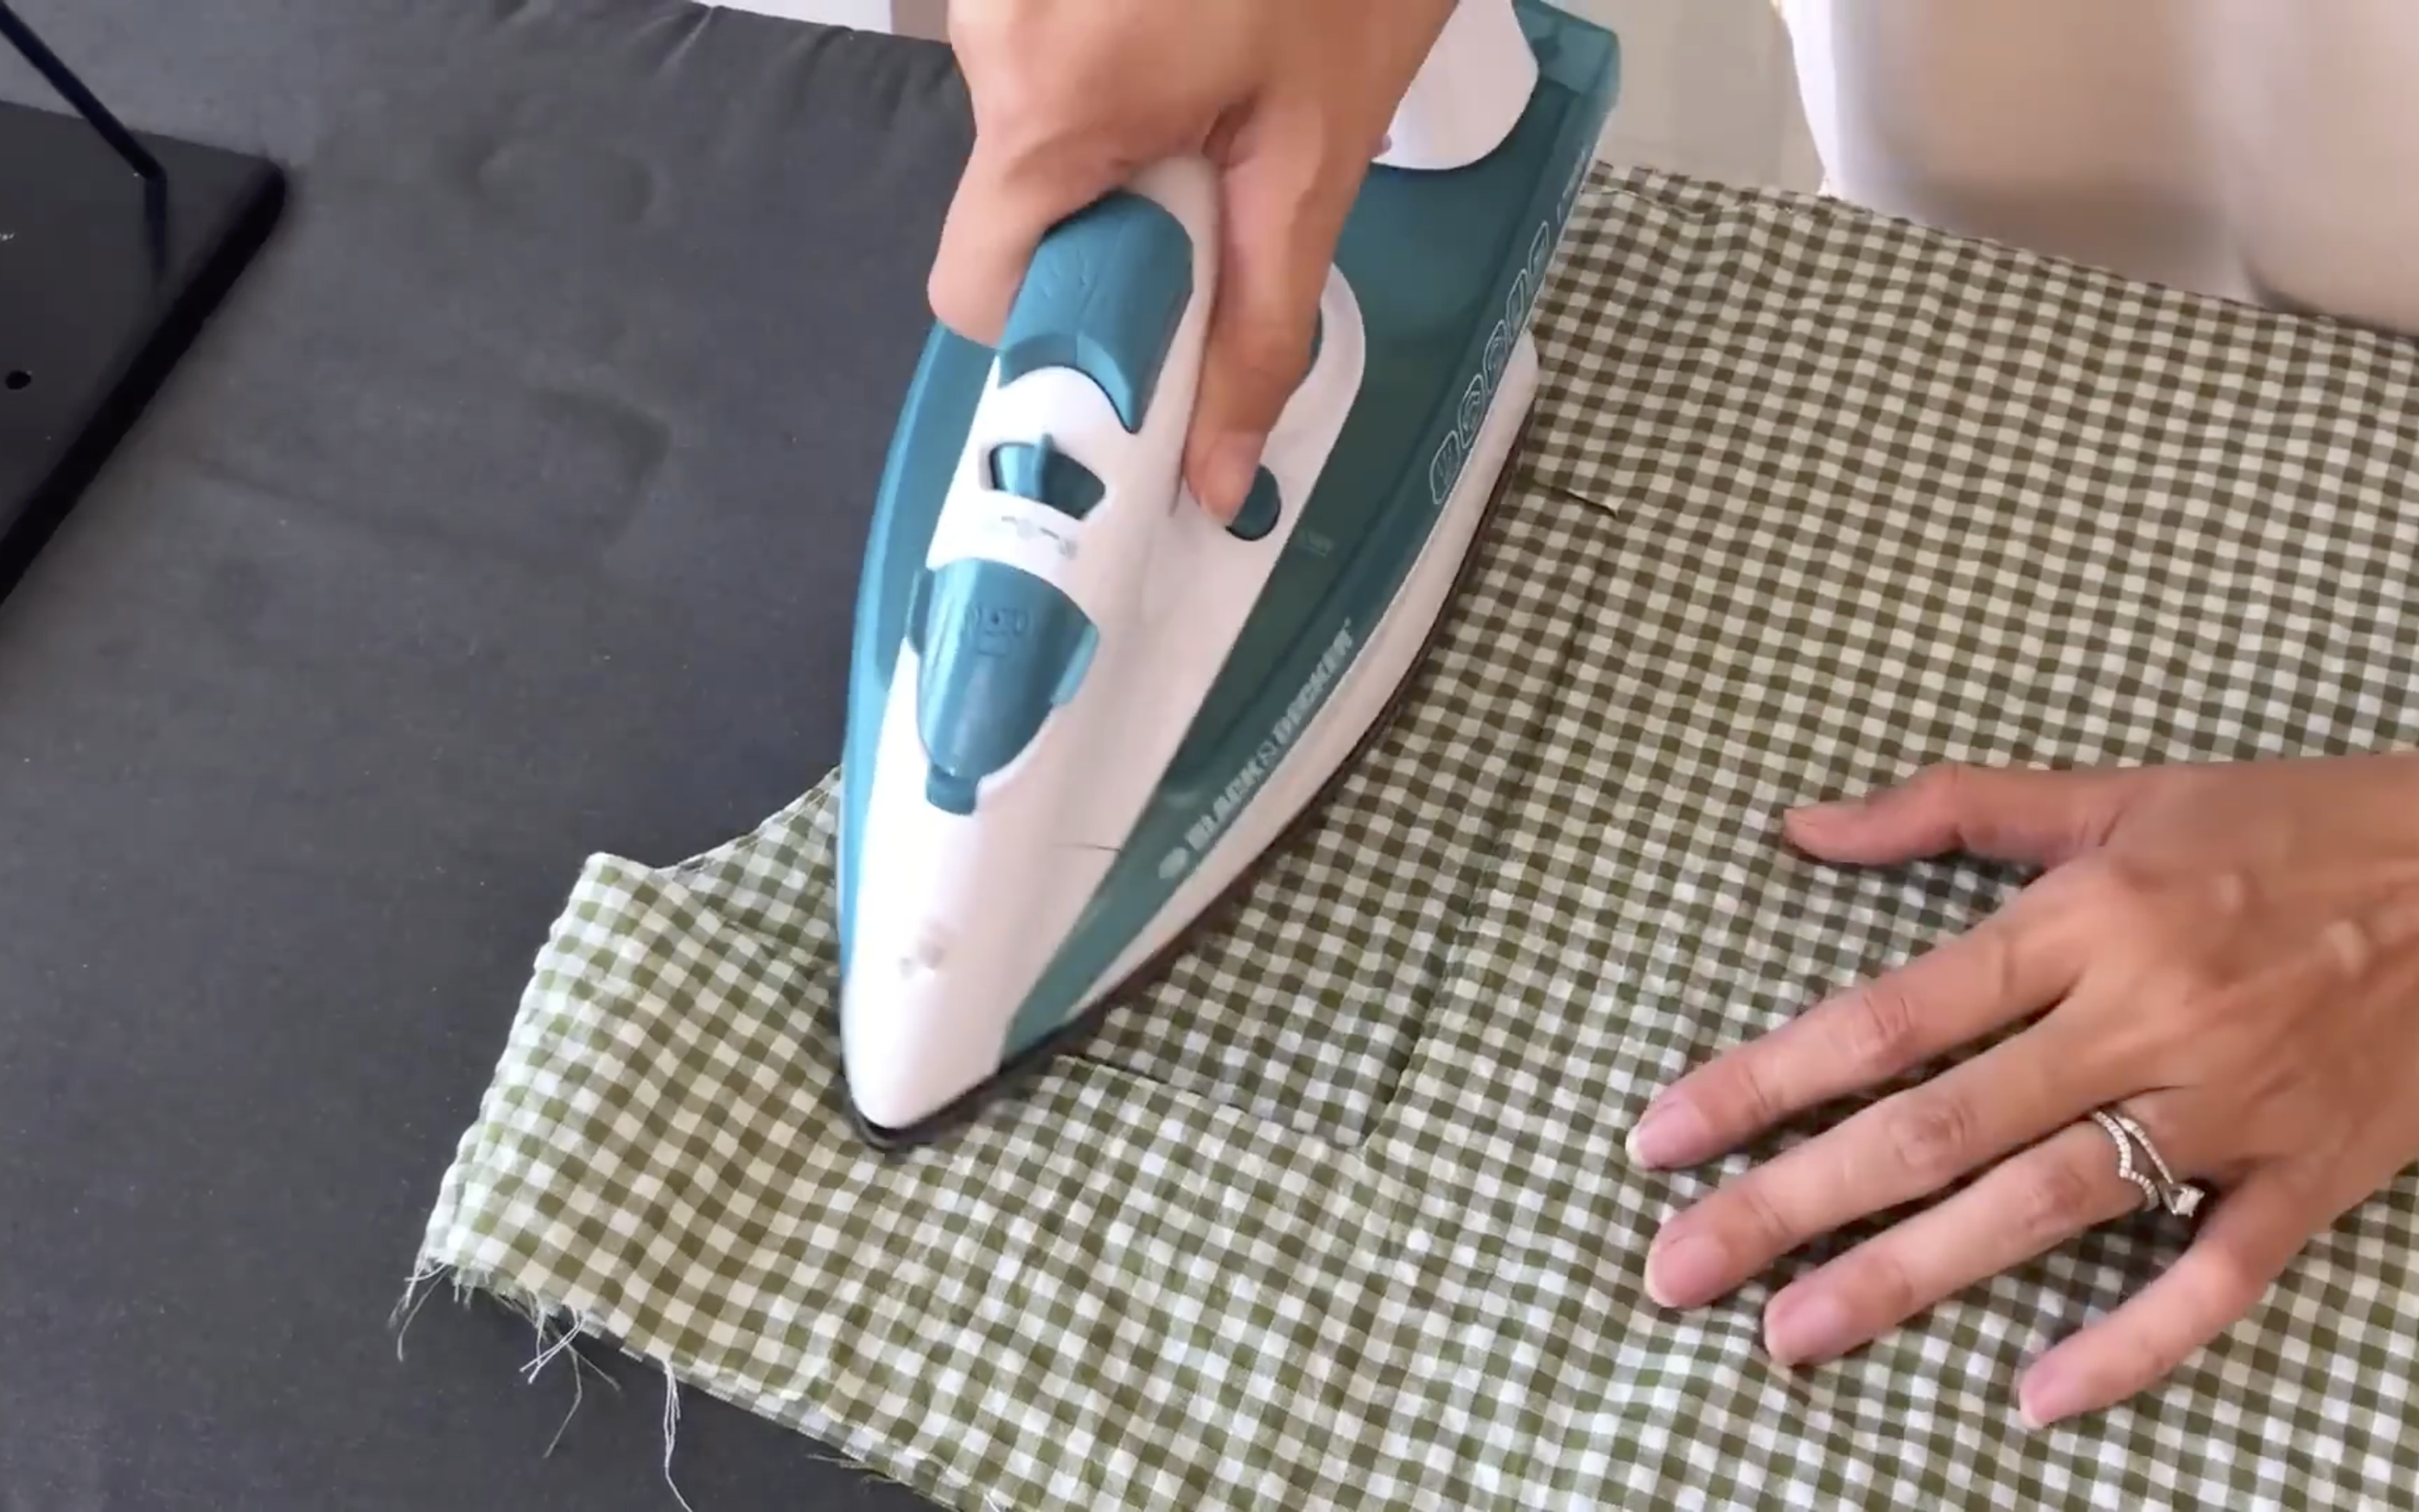
Use an iron to keep the folding of the neck after sewing.
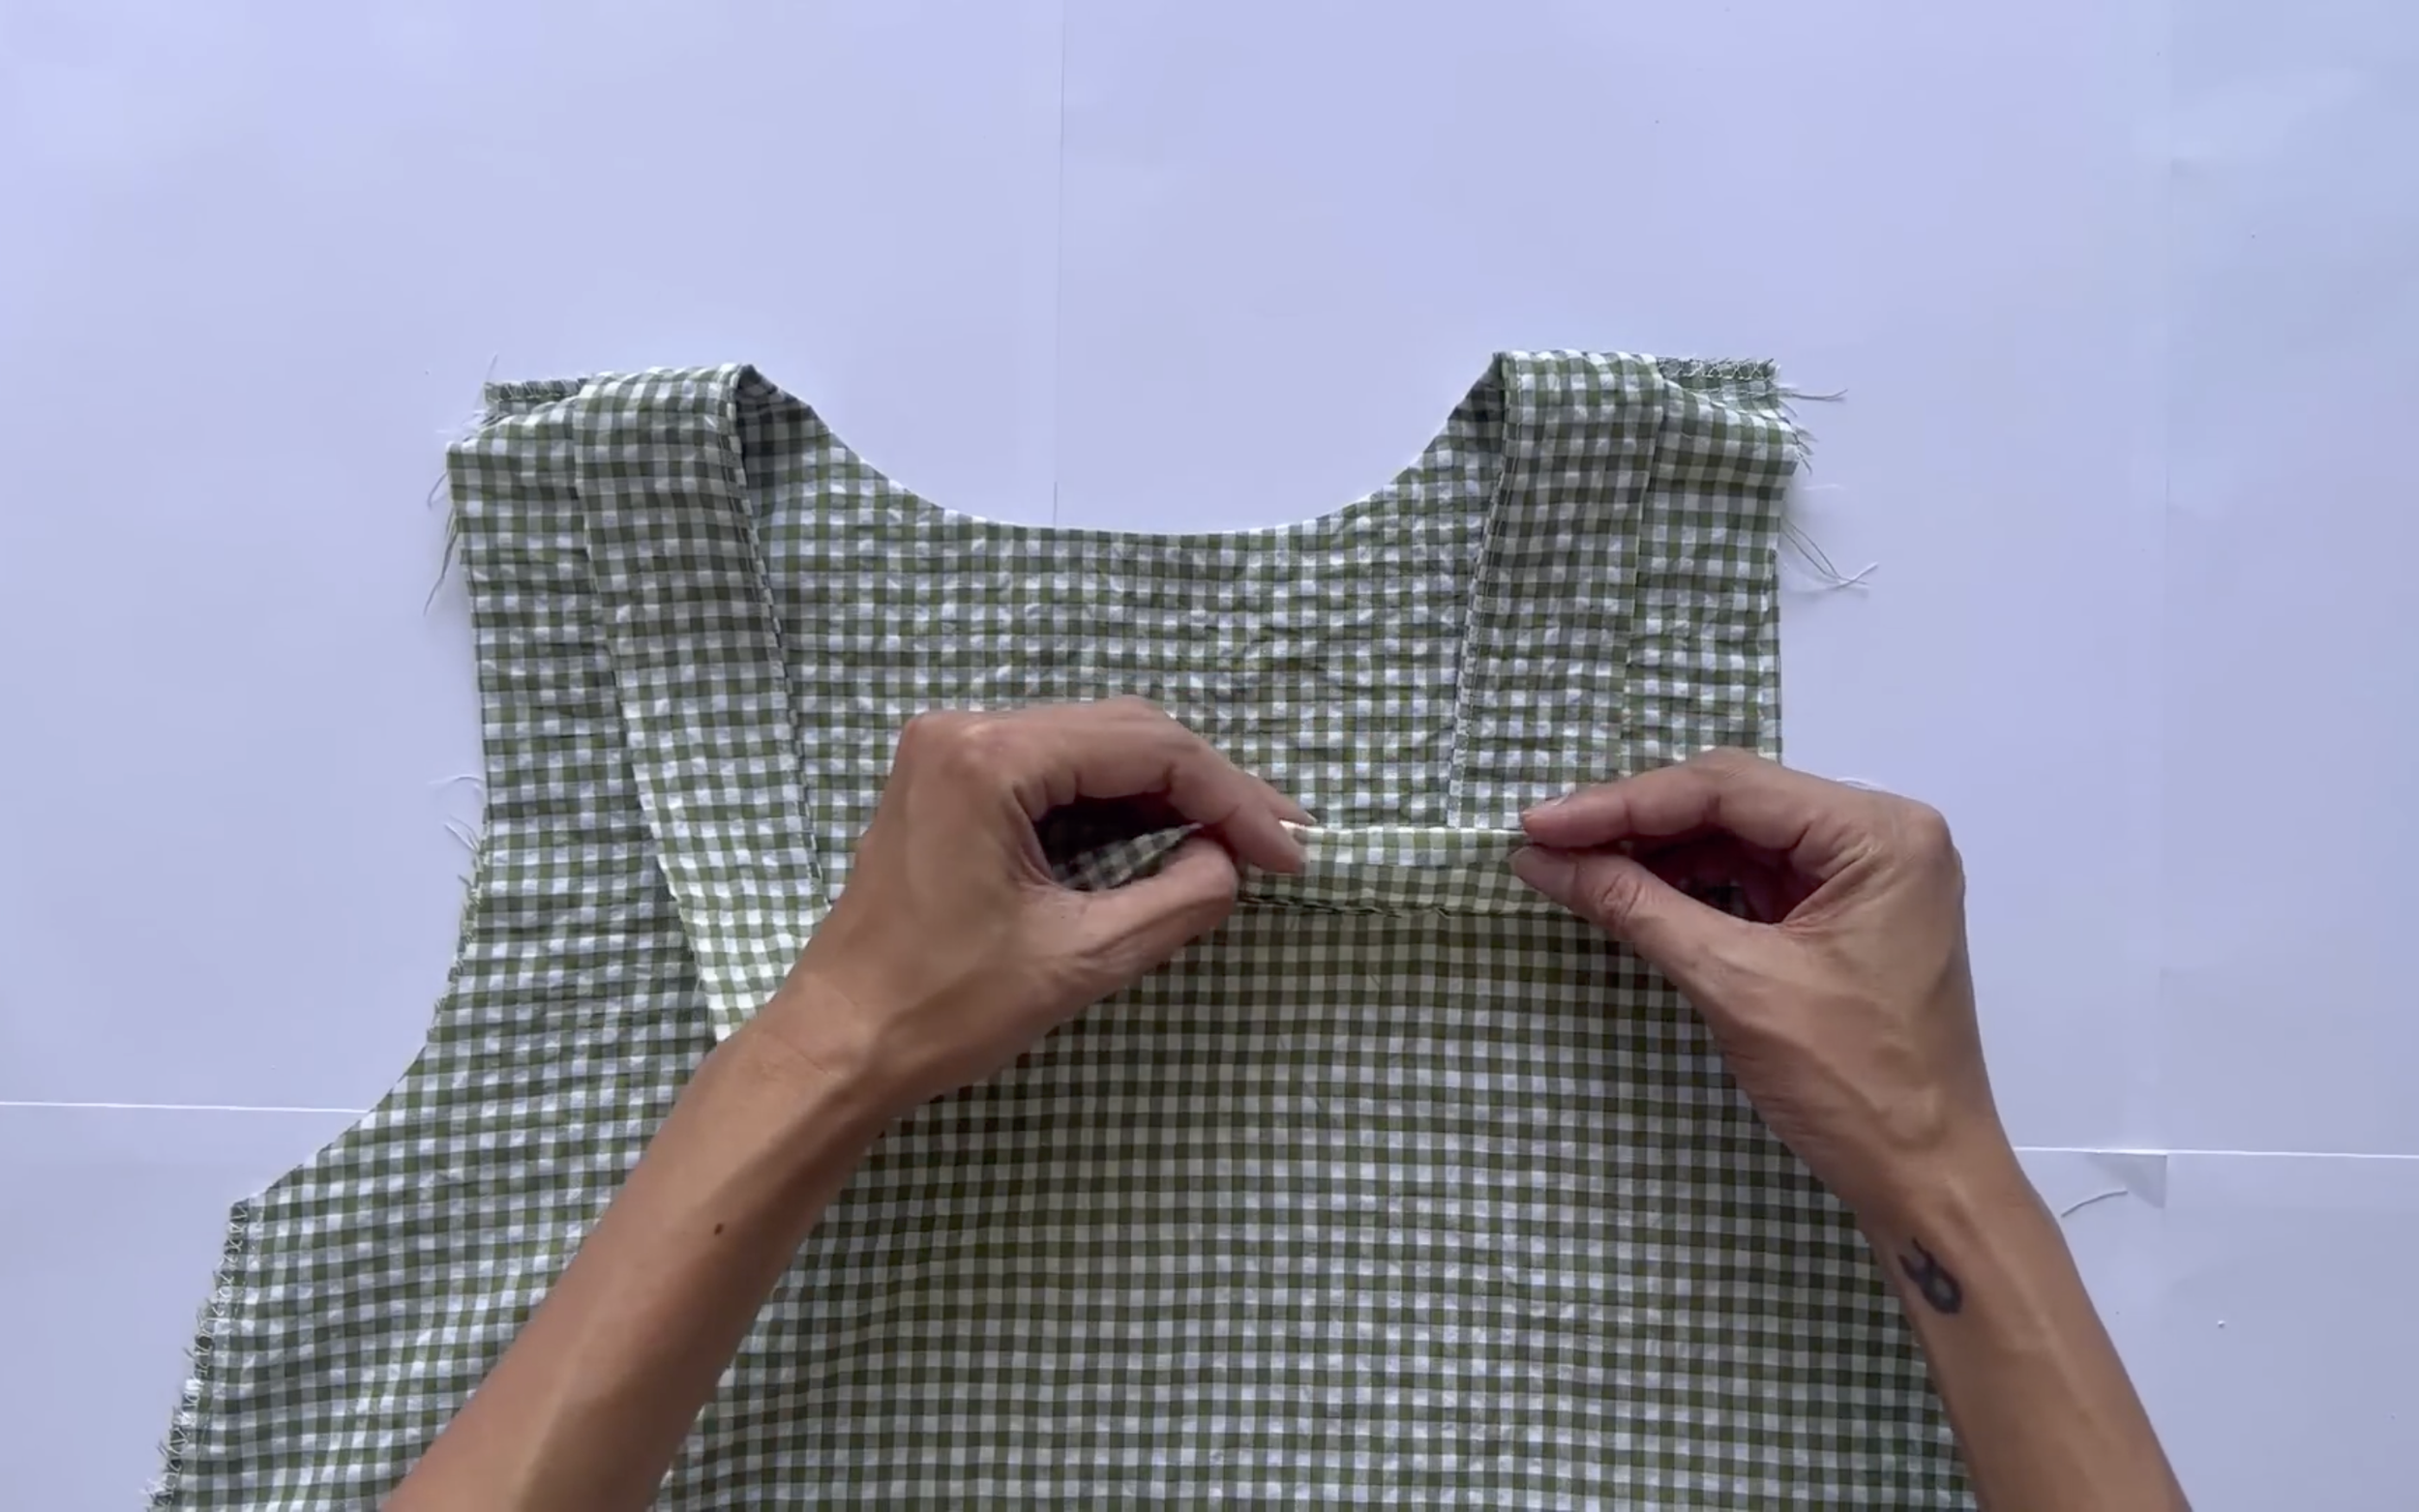
At the other side of the lining part of the neck, fold the end fabric inside around 1 cm first.

Then fold it again and sew to finish the neck.
THE RUFFLE HEM
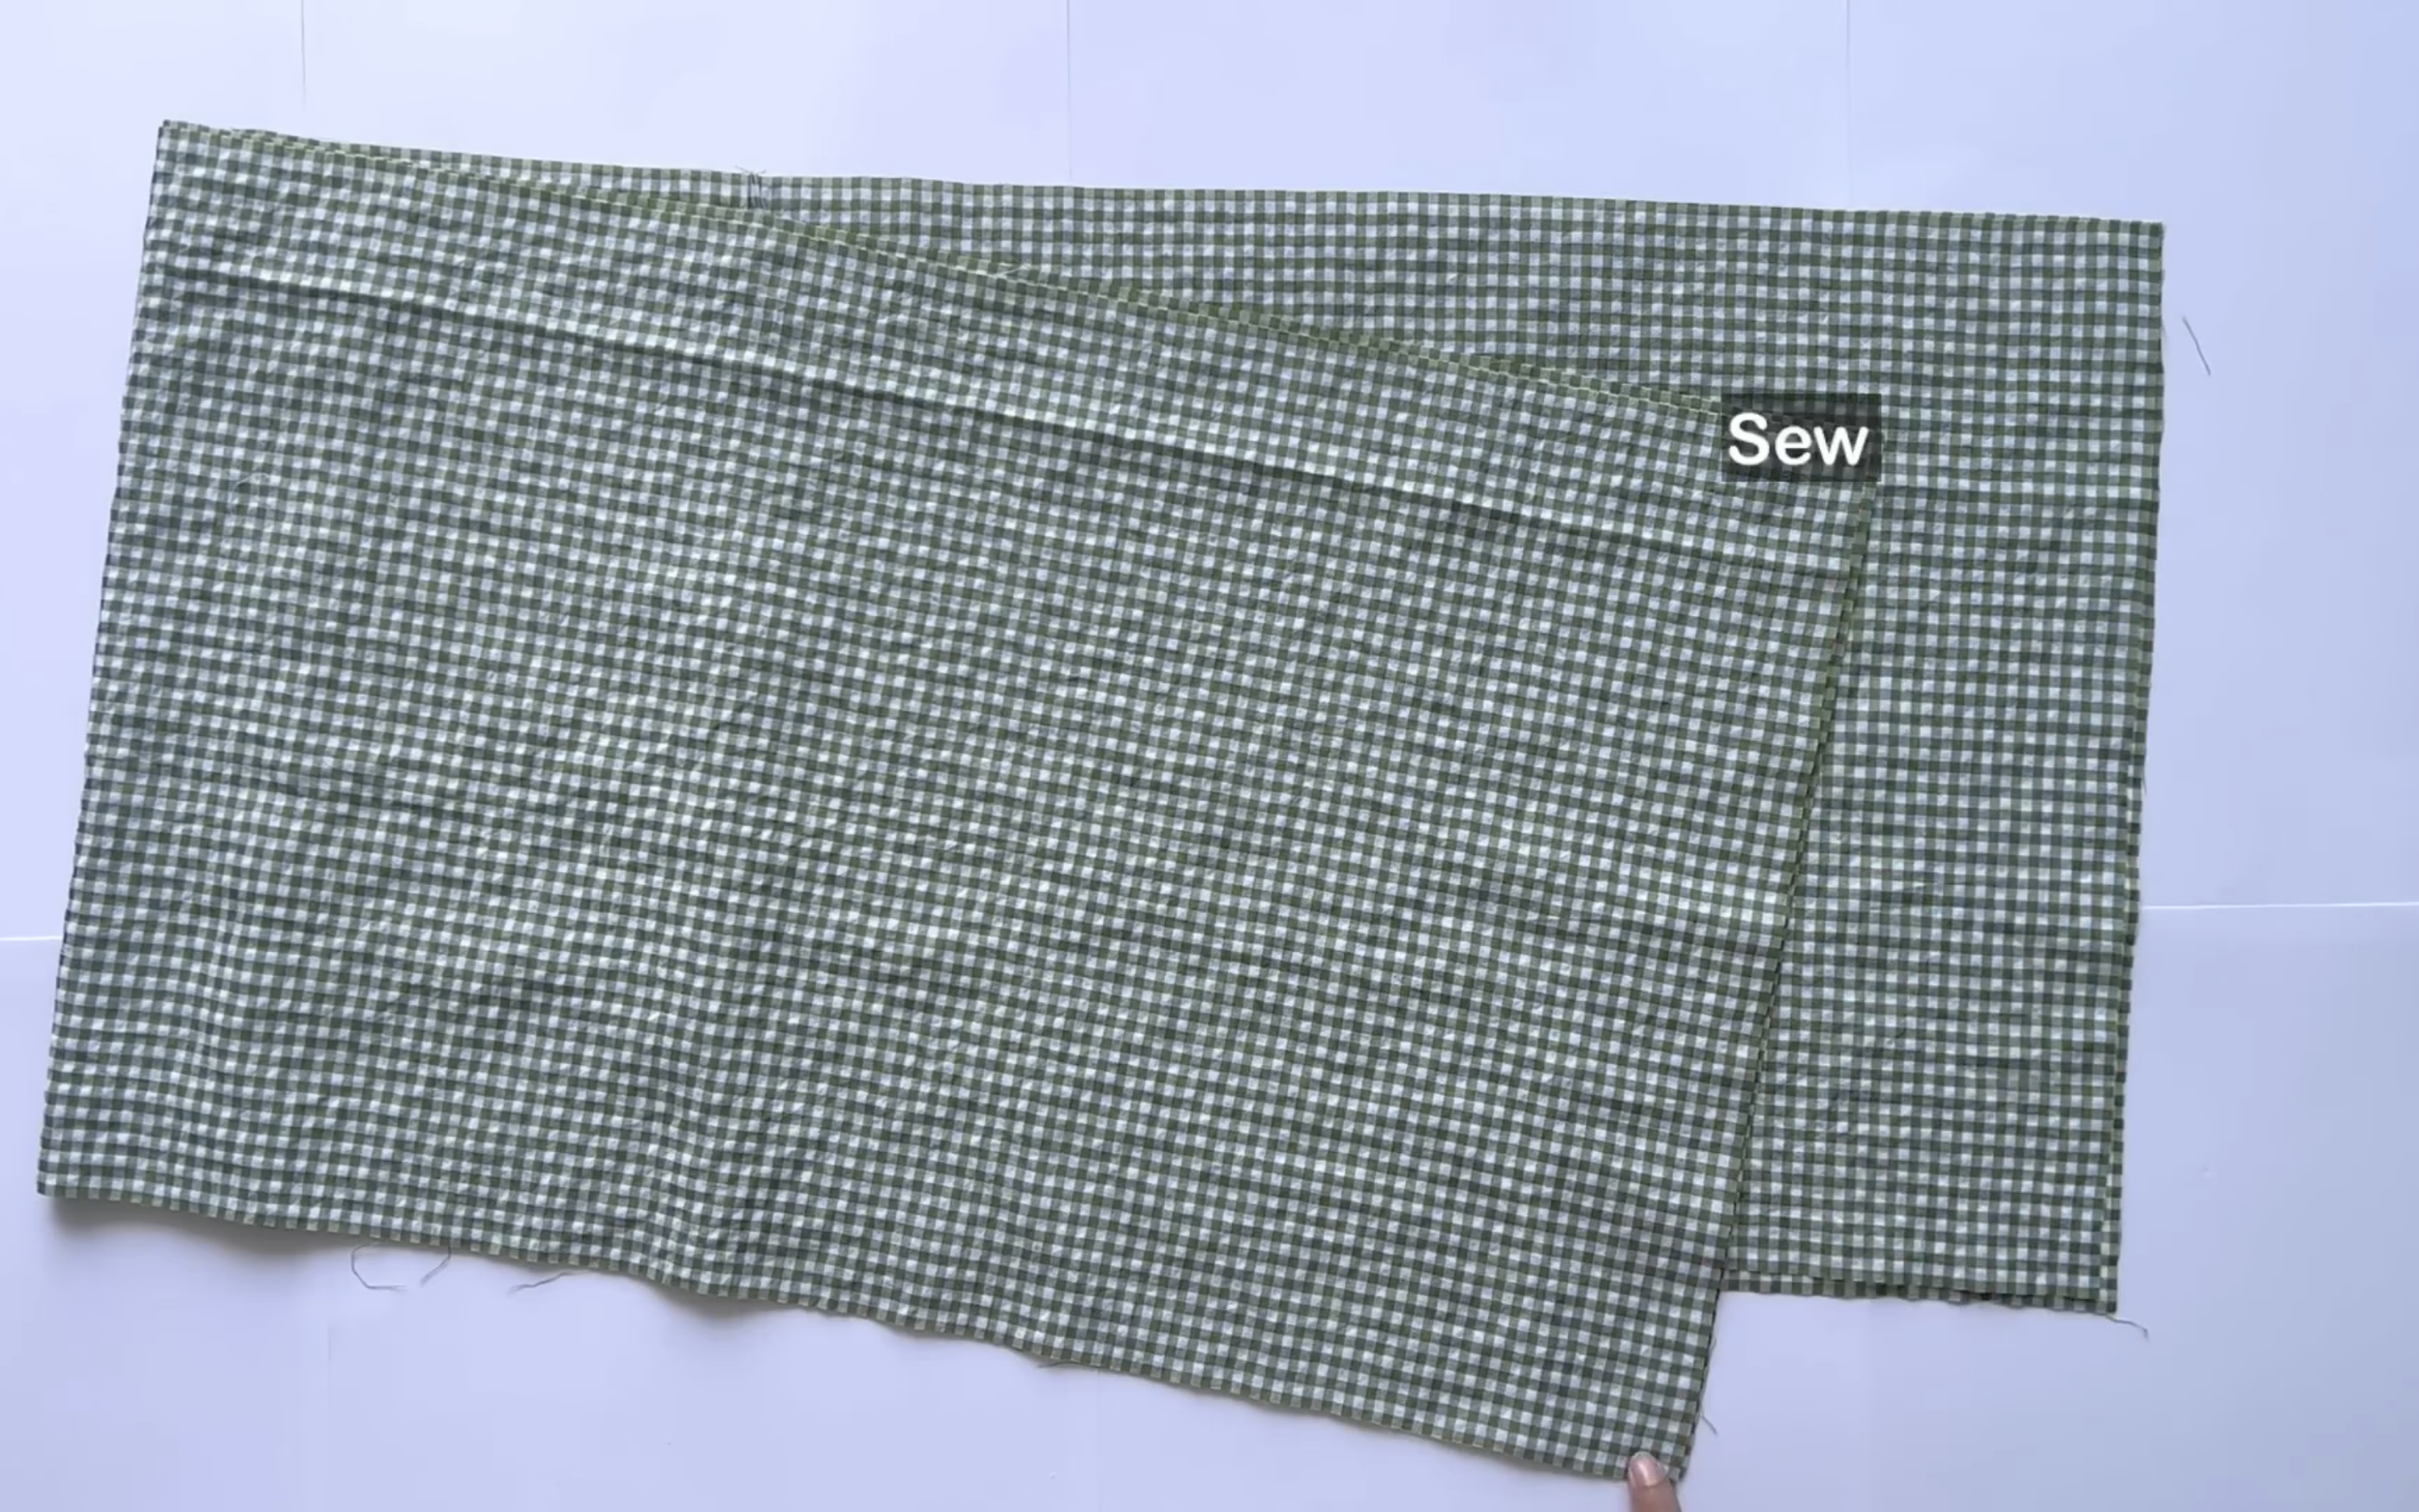
Moving to the ruffle part, connect two rectangles together at the seam line first.
Then finish one width line, which is the ending line of the dress, by folding the end fabric inside twice with 1 cm each time.
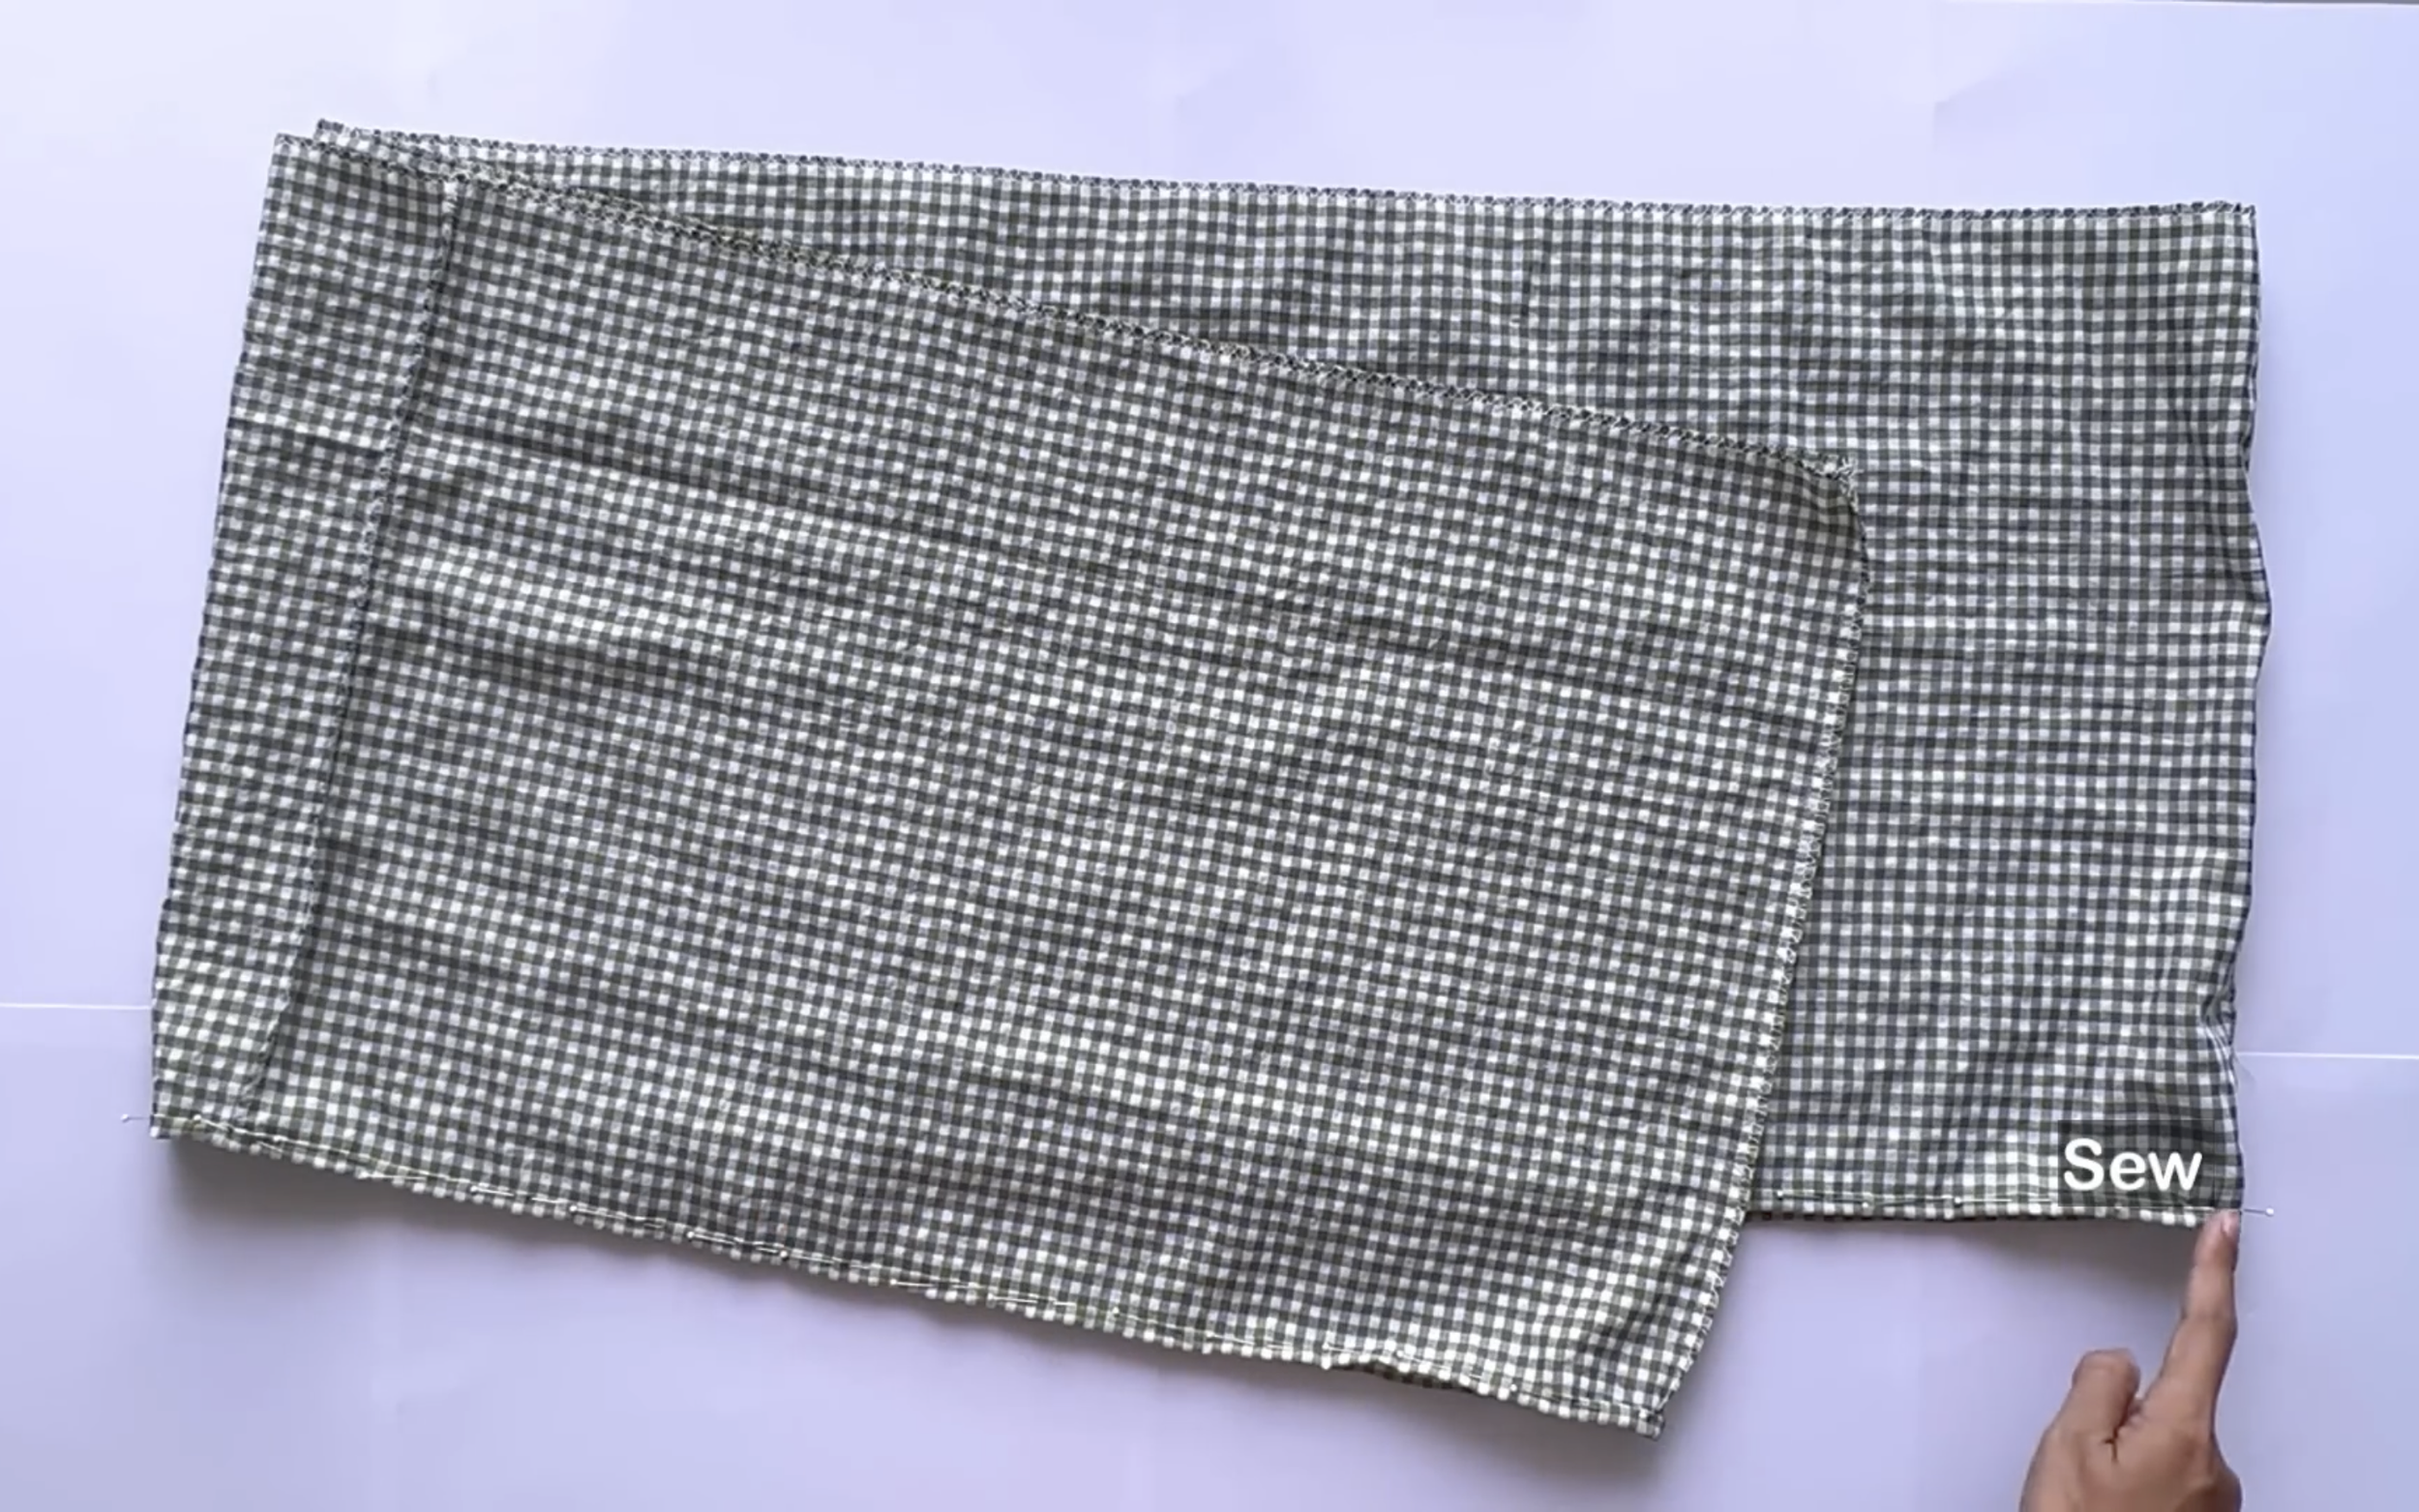
And sewing.
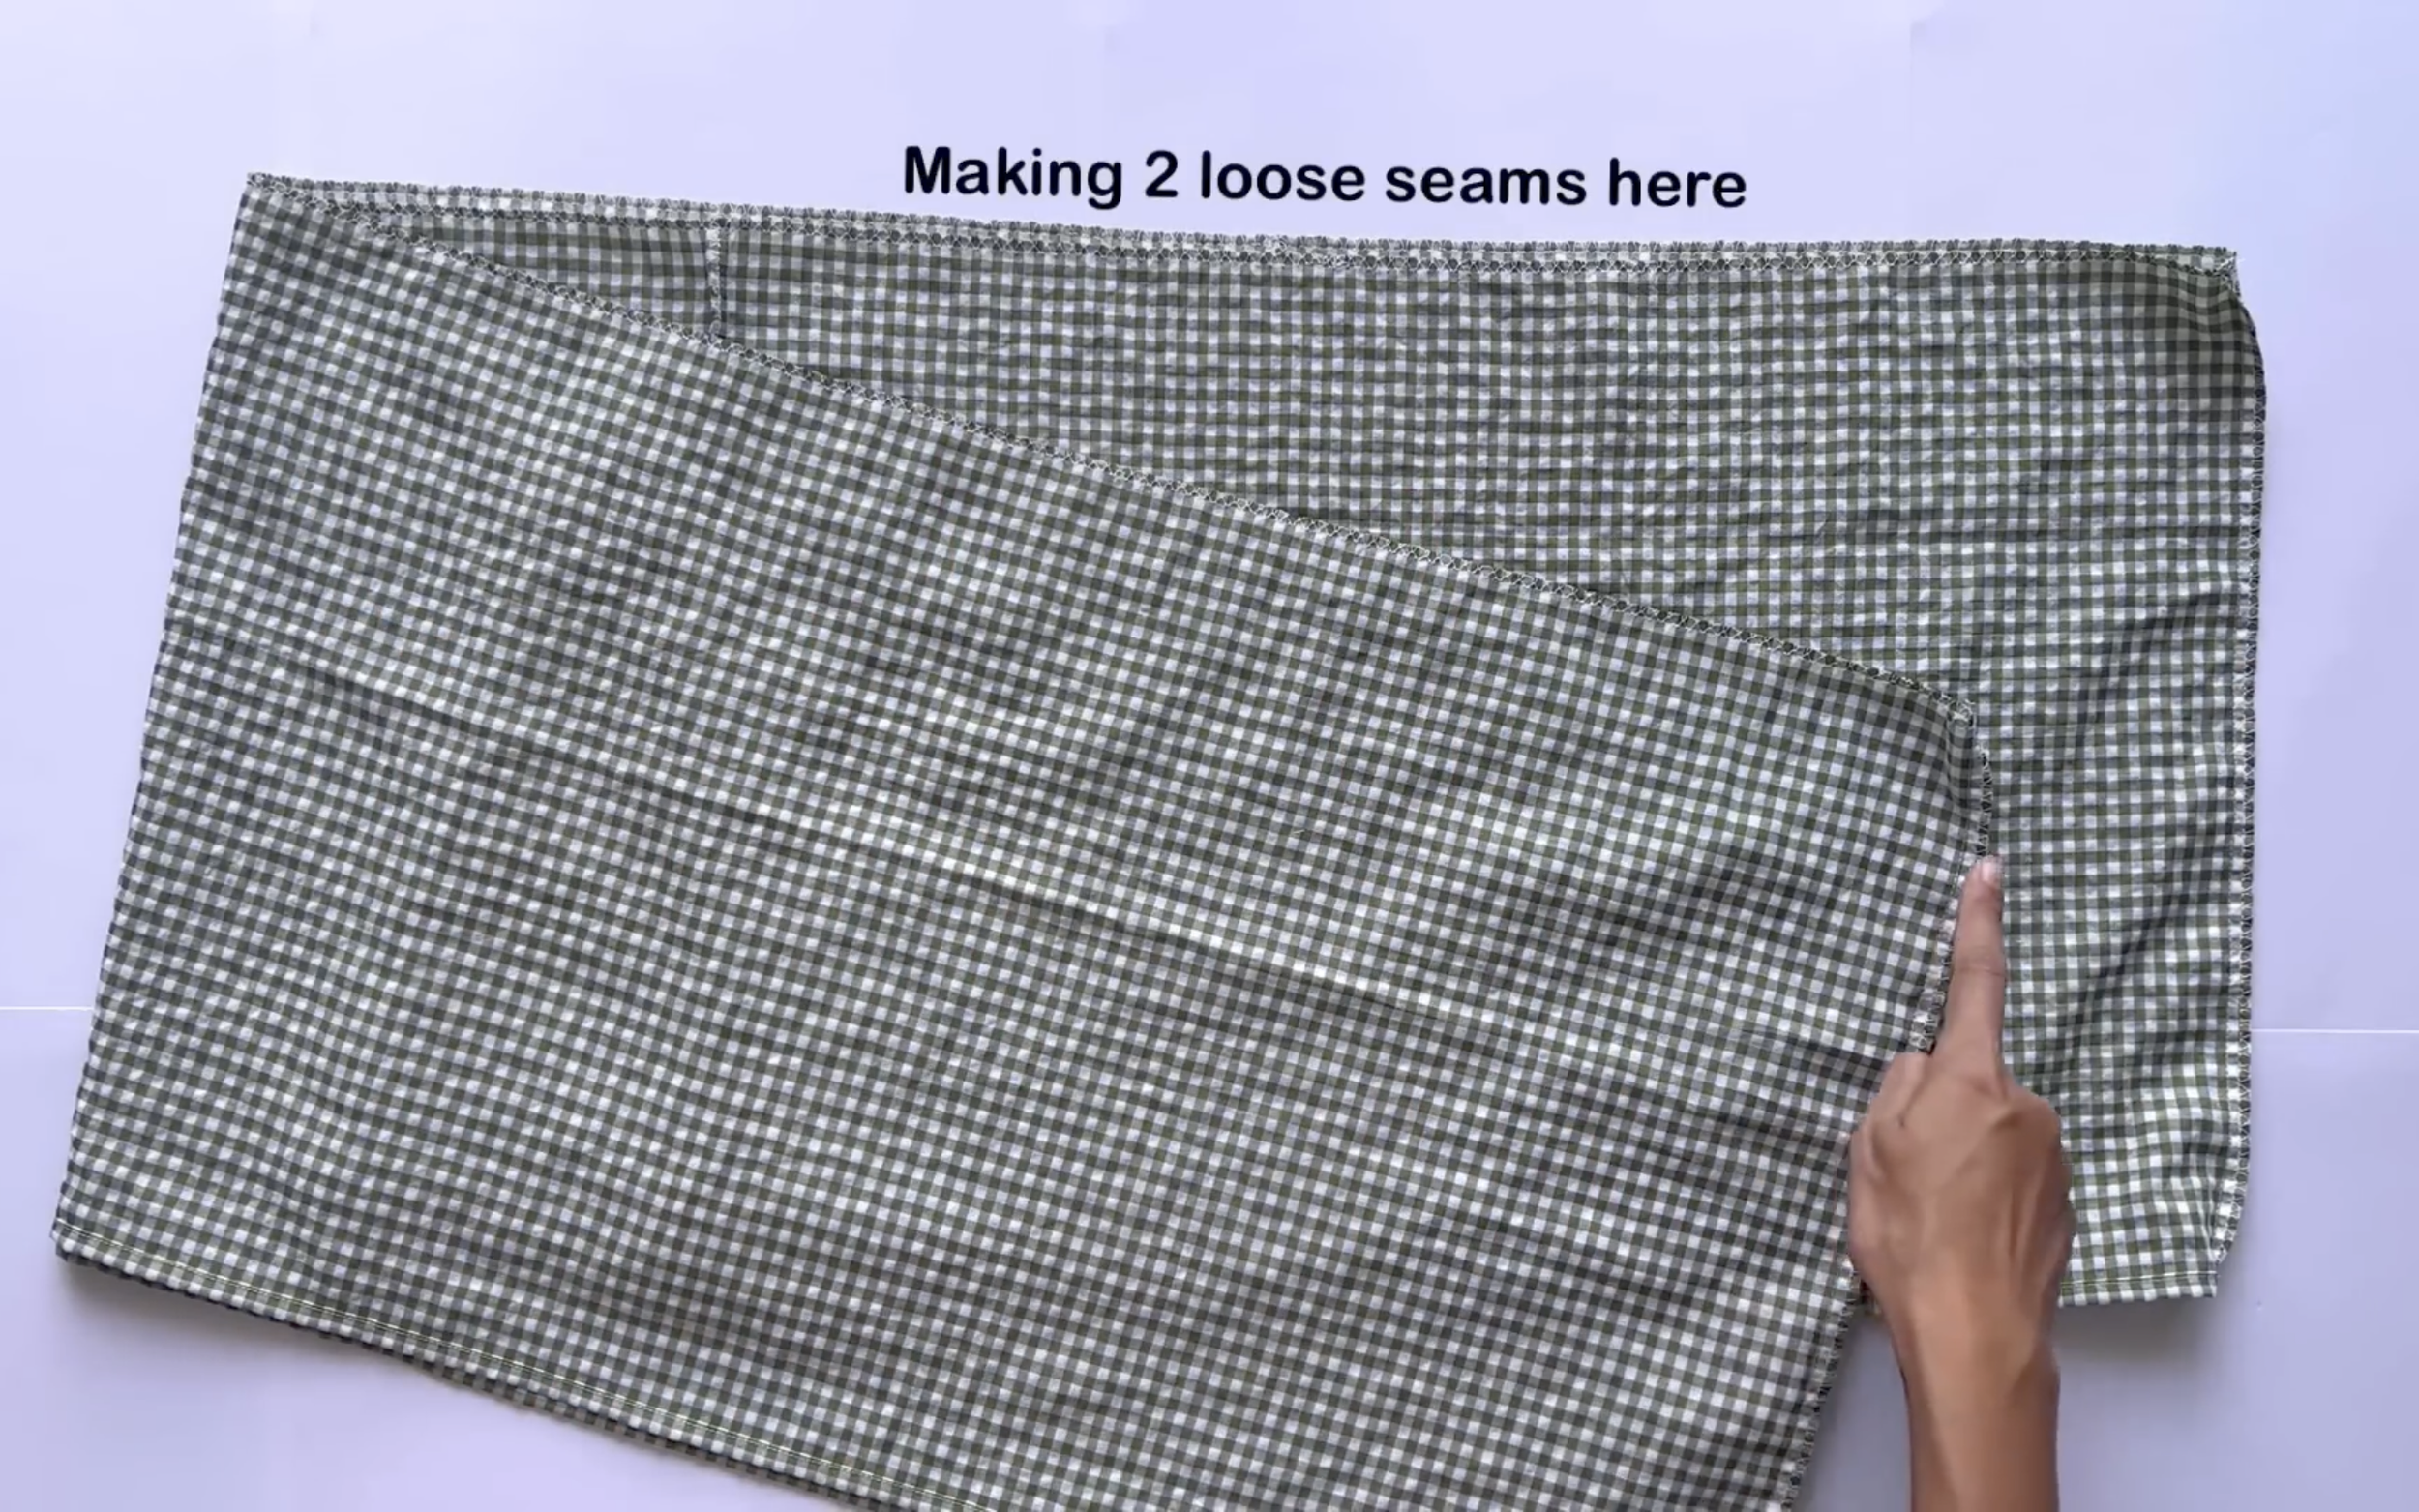
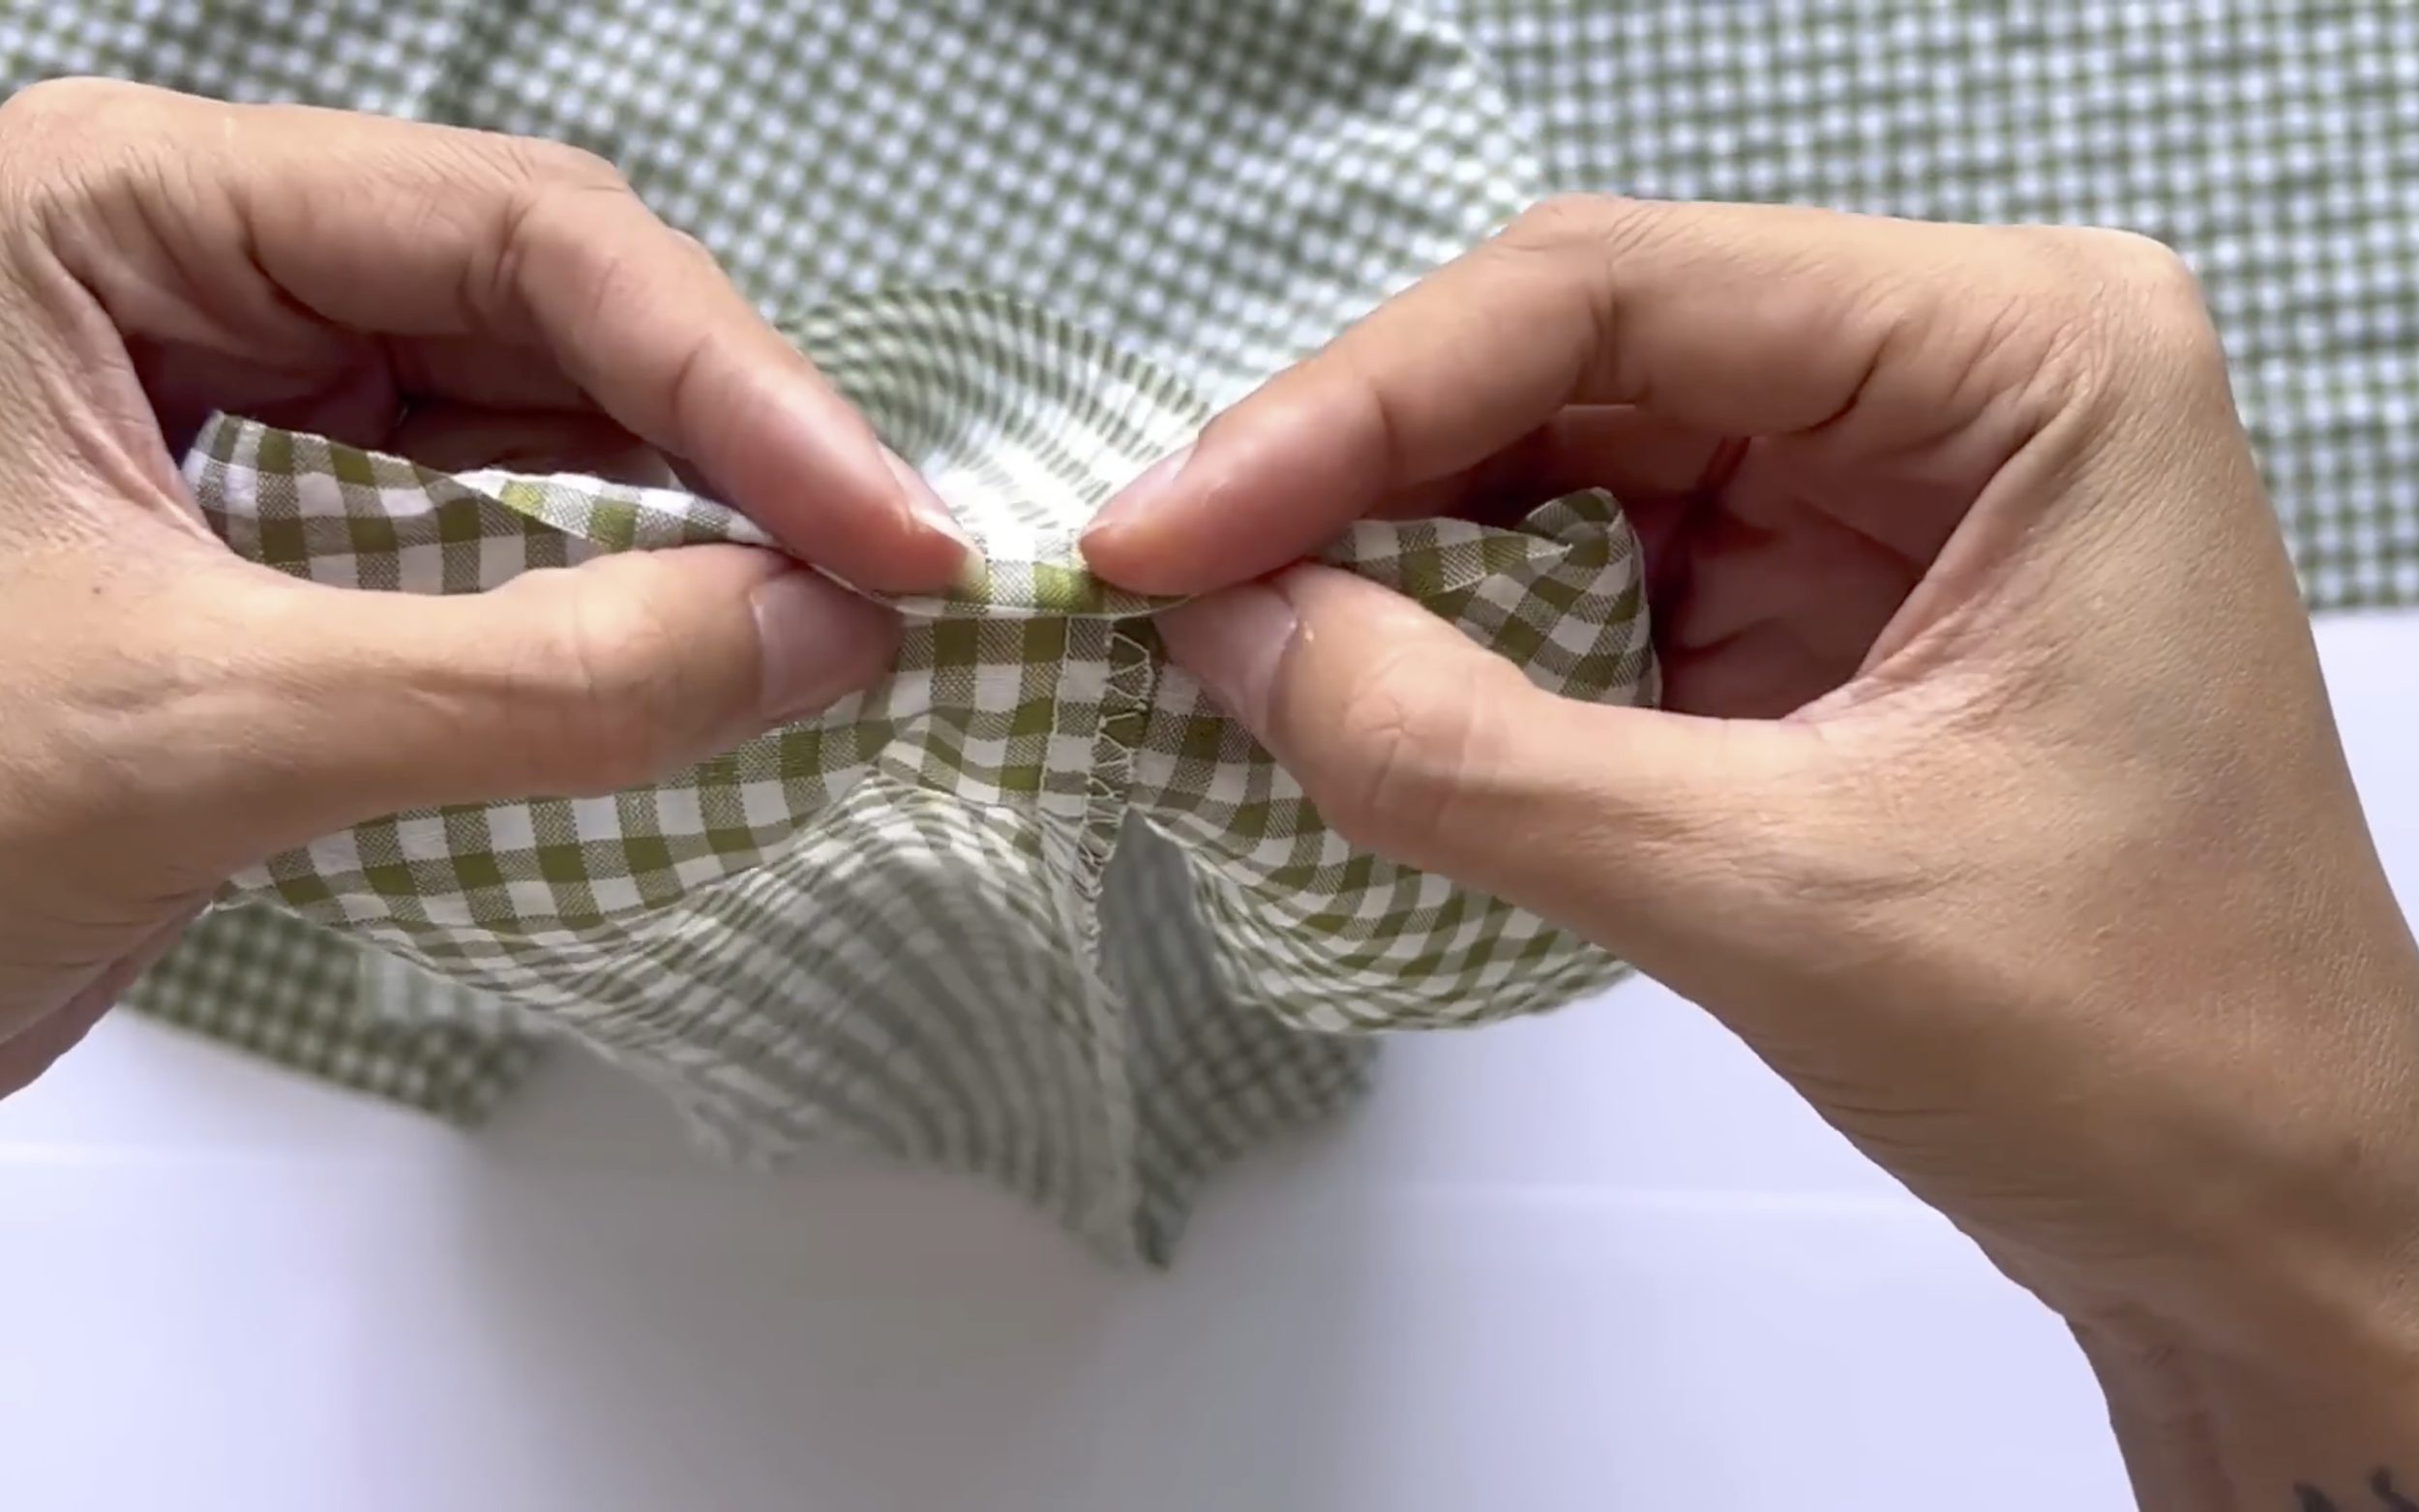
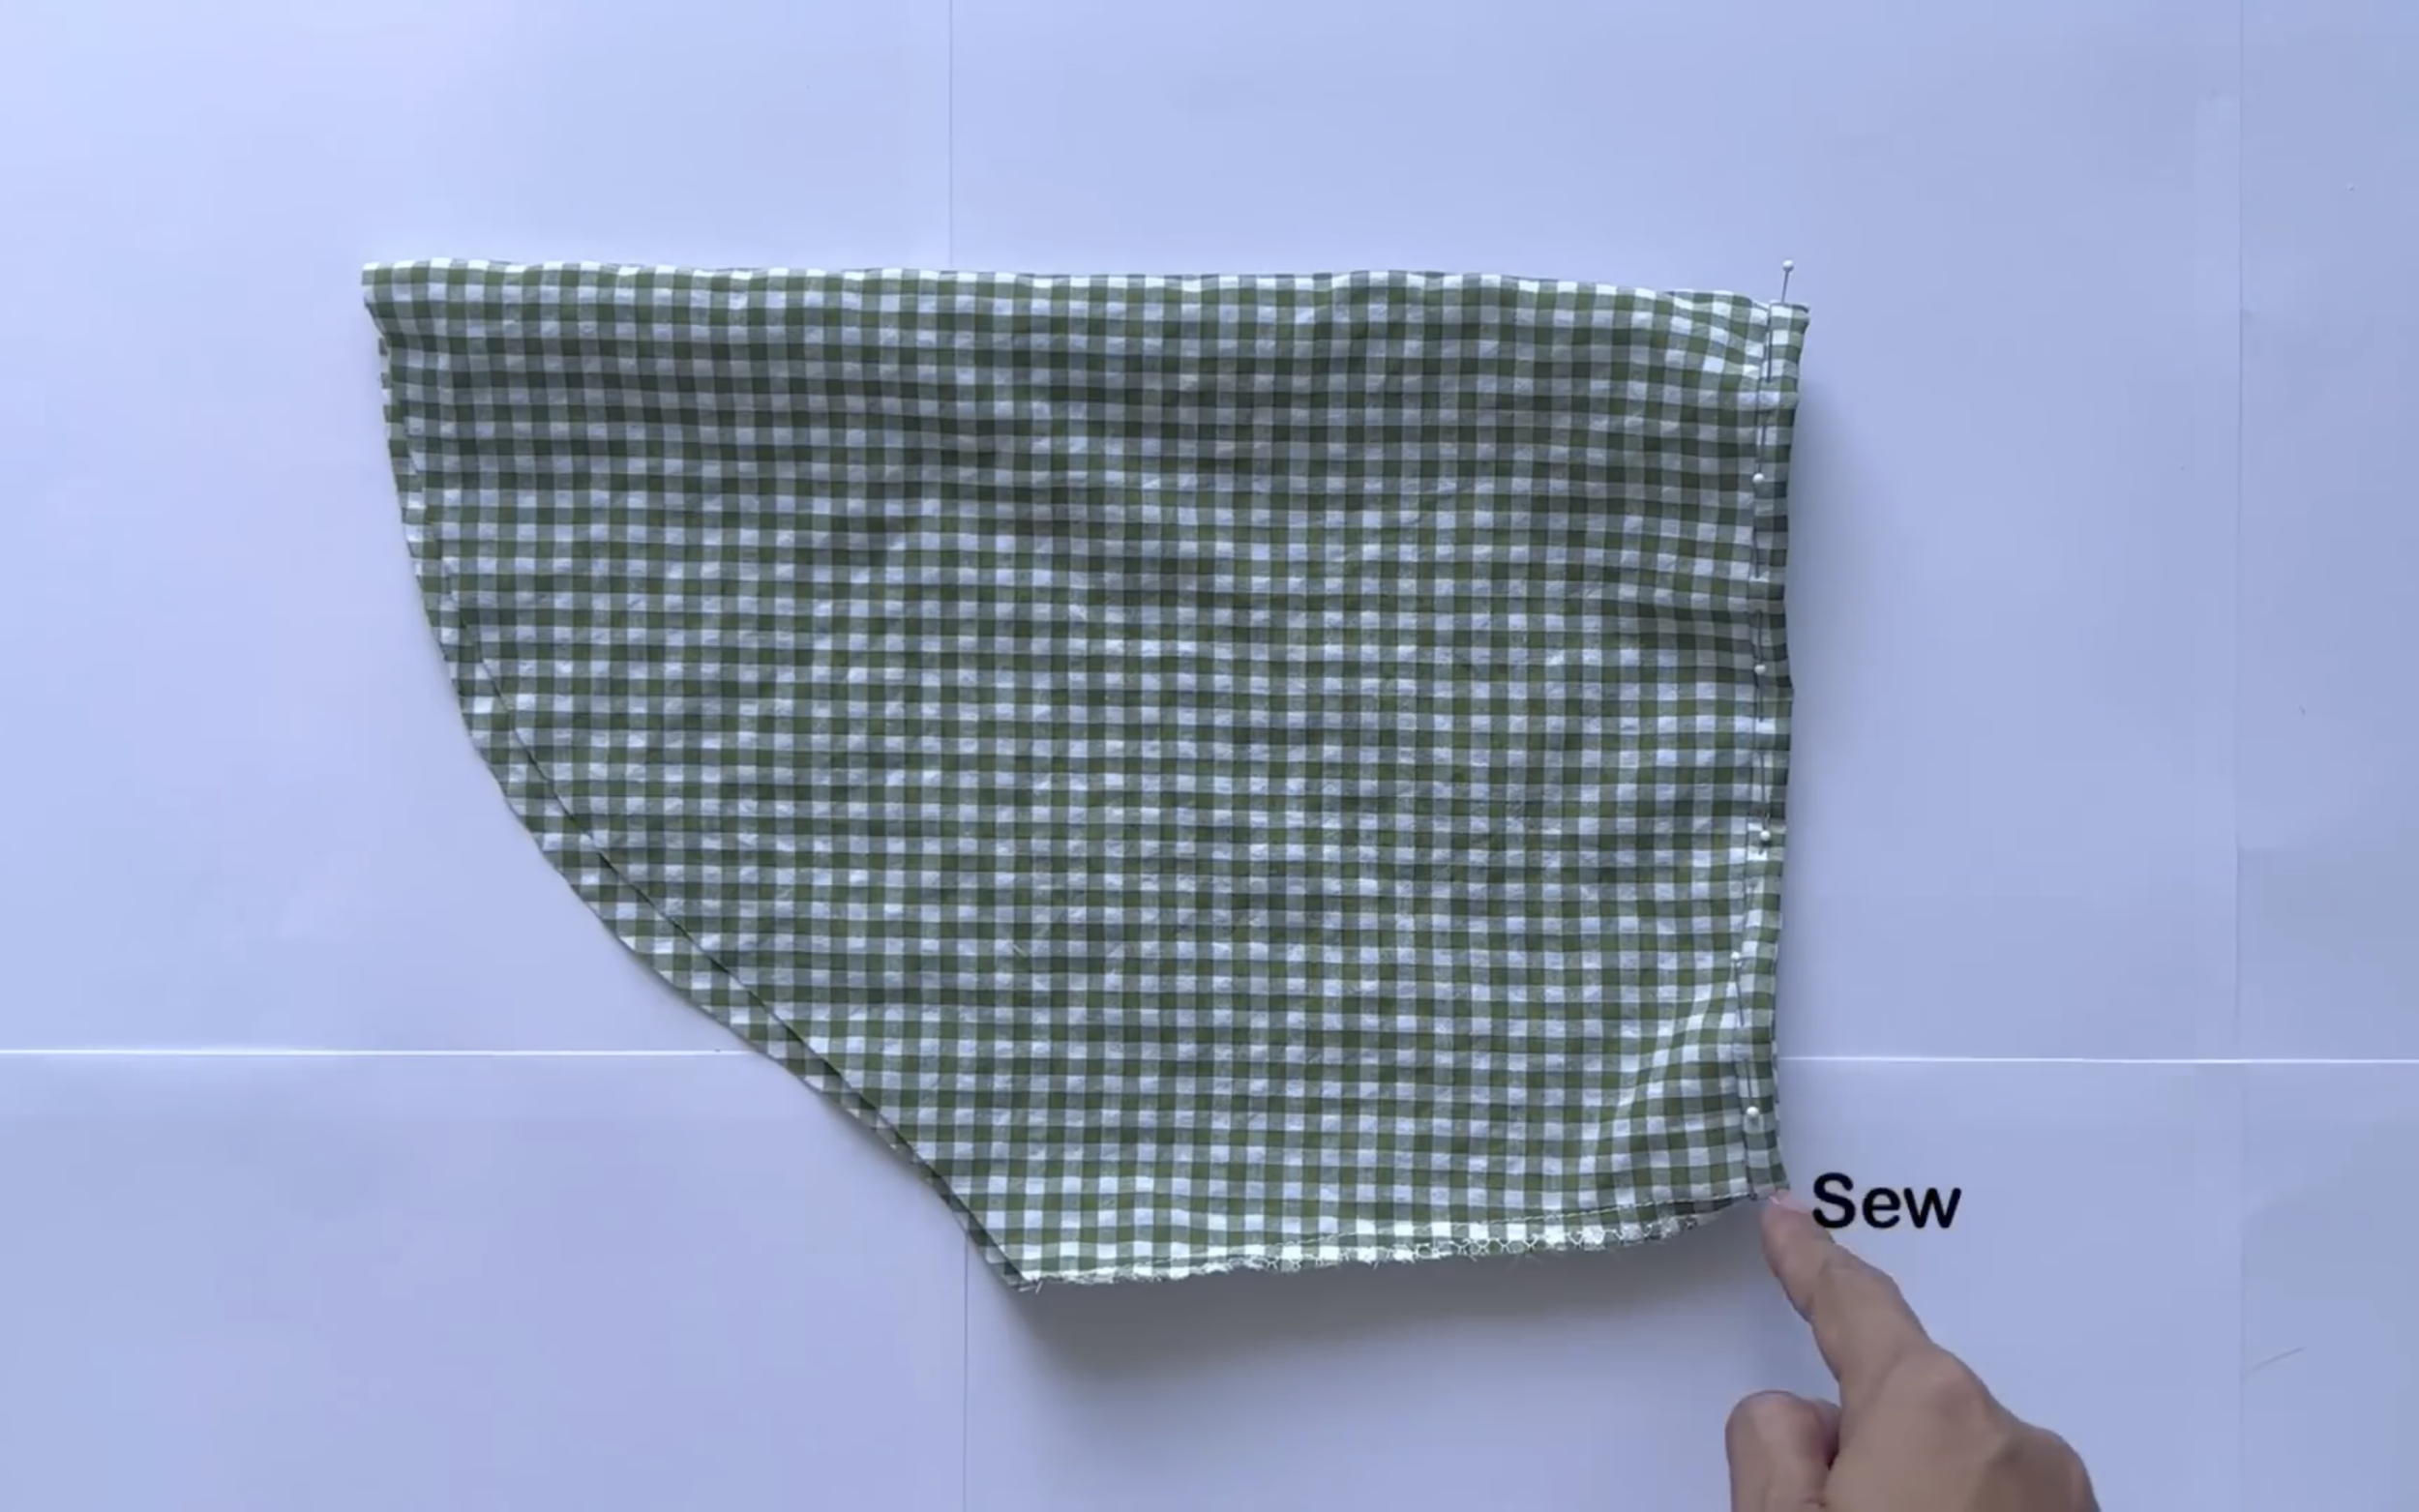
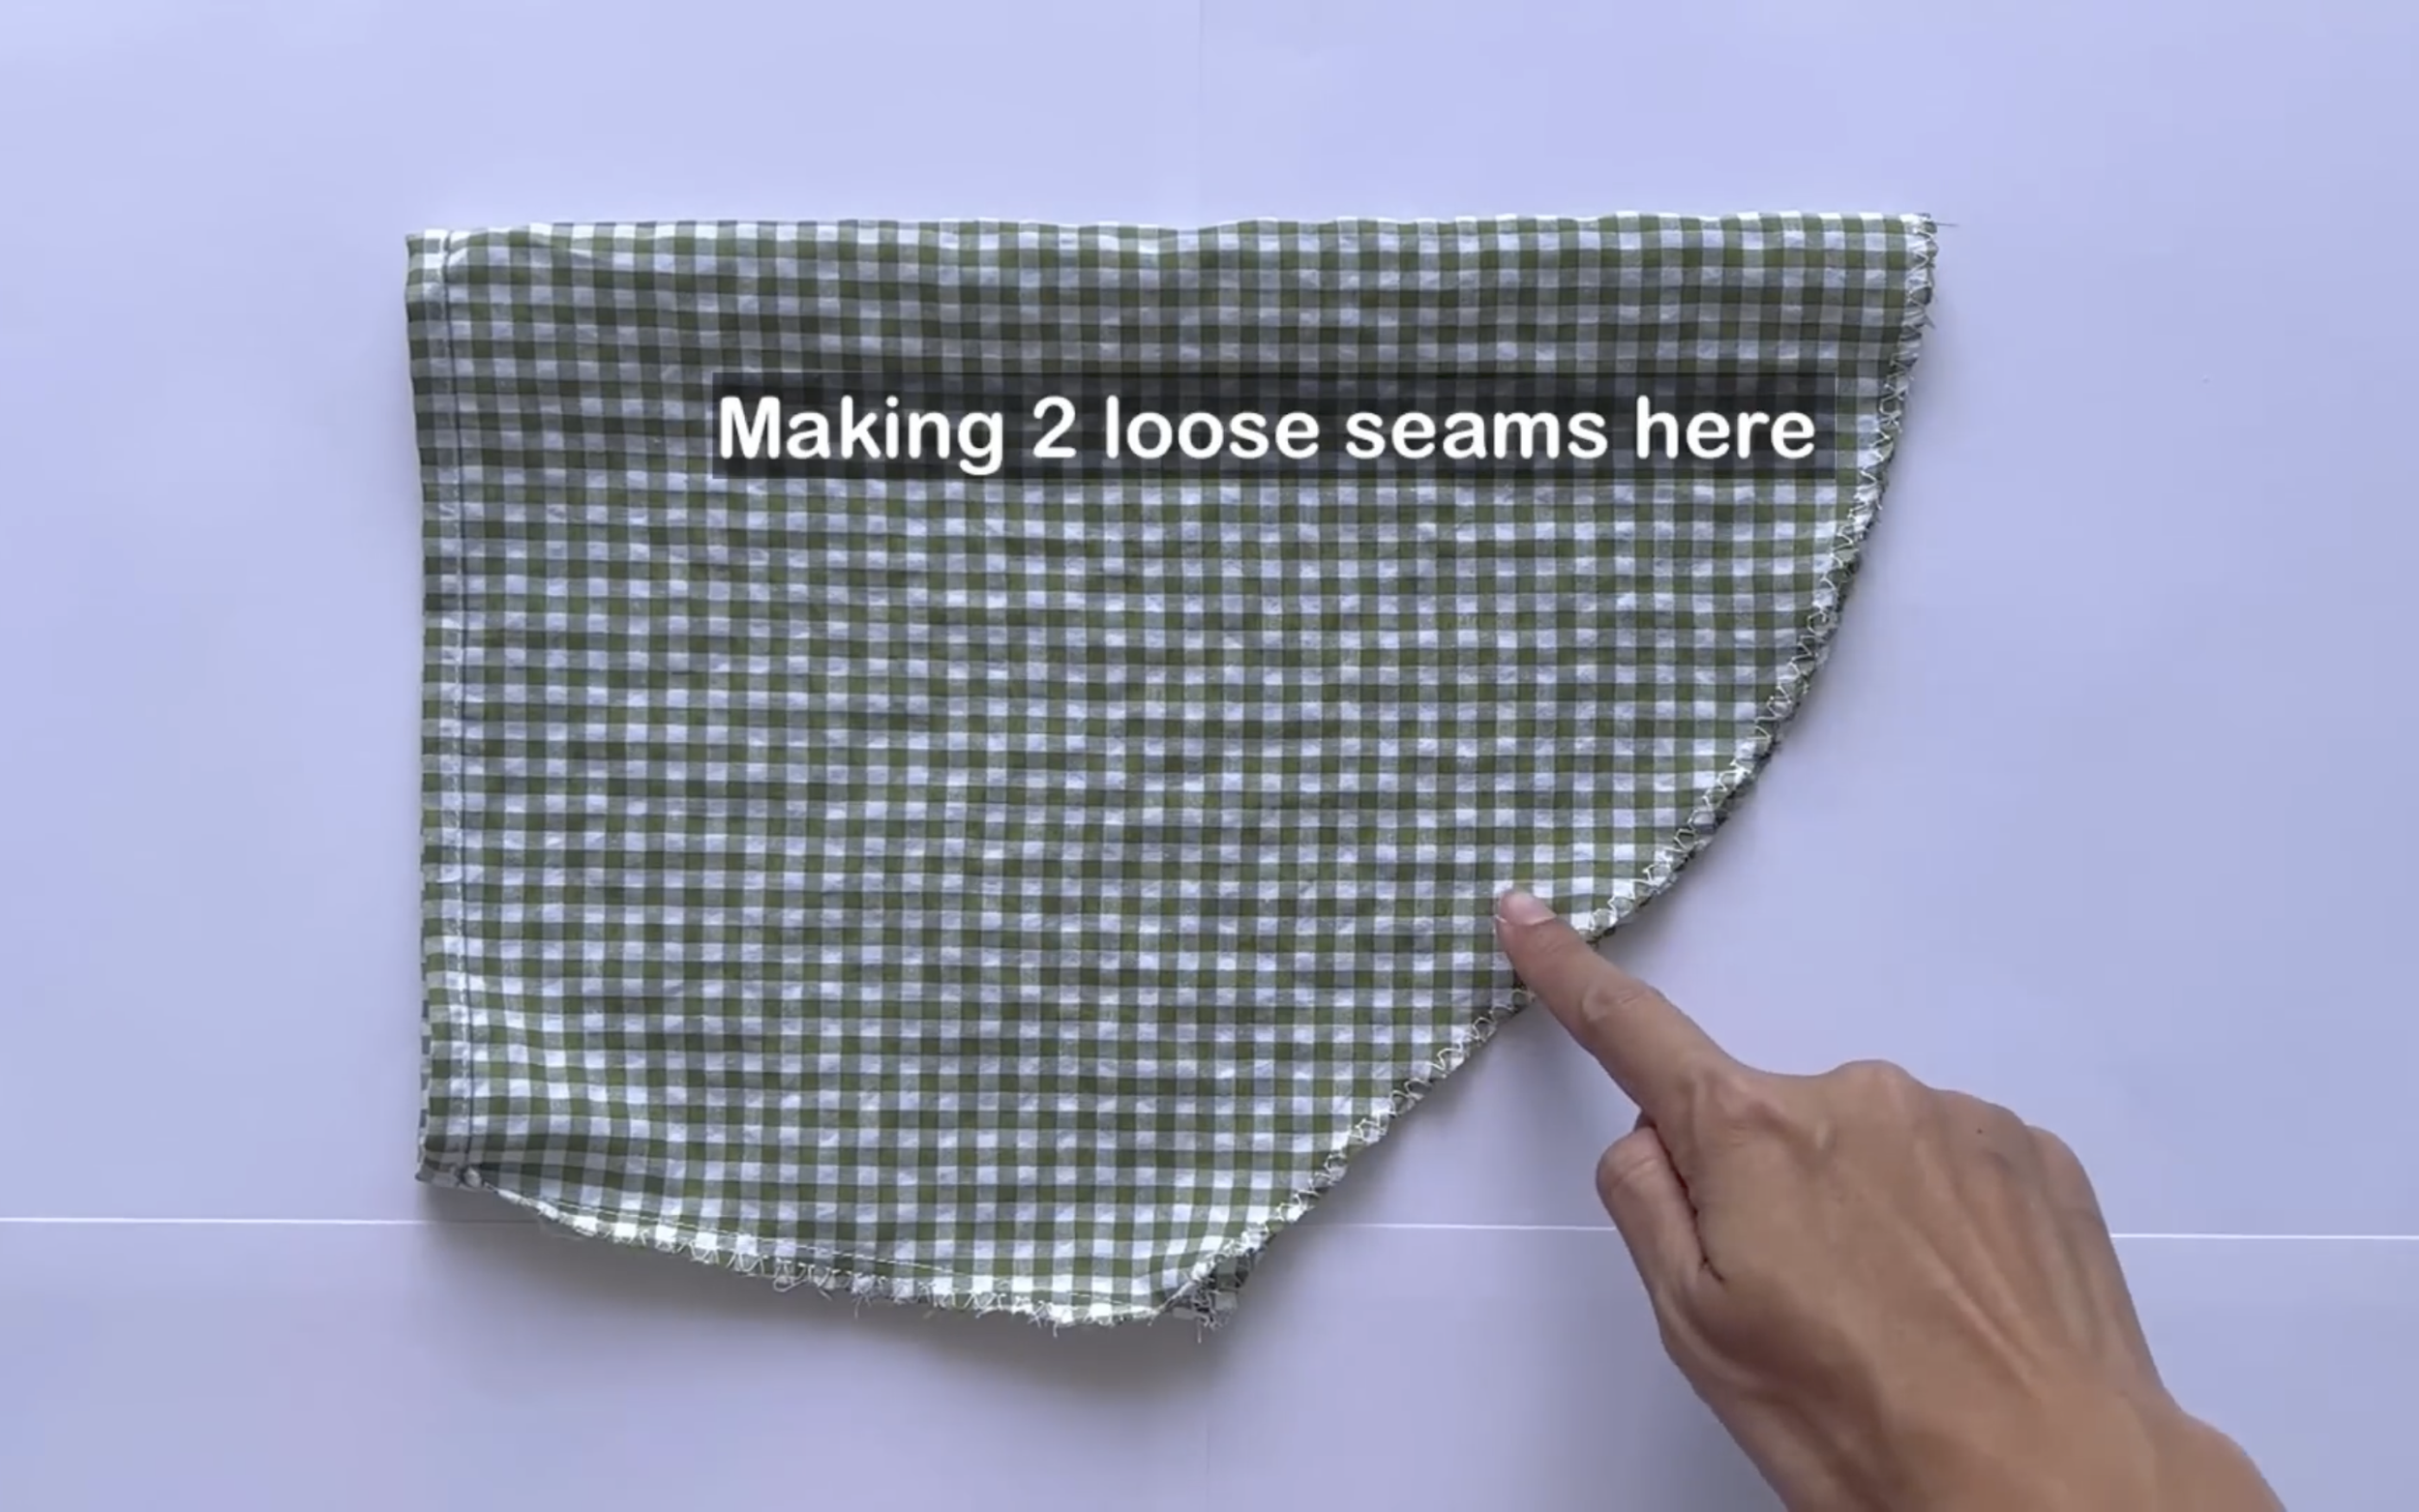
At the other width line, which is the top of the ruffle part, make two loose seams.
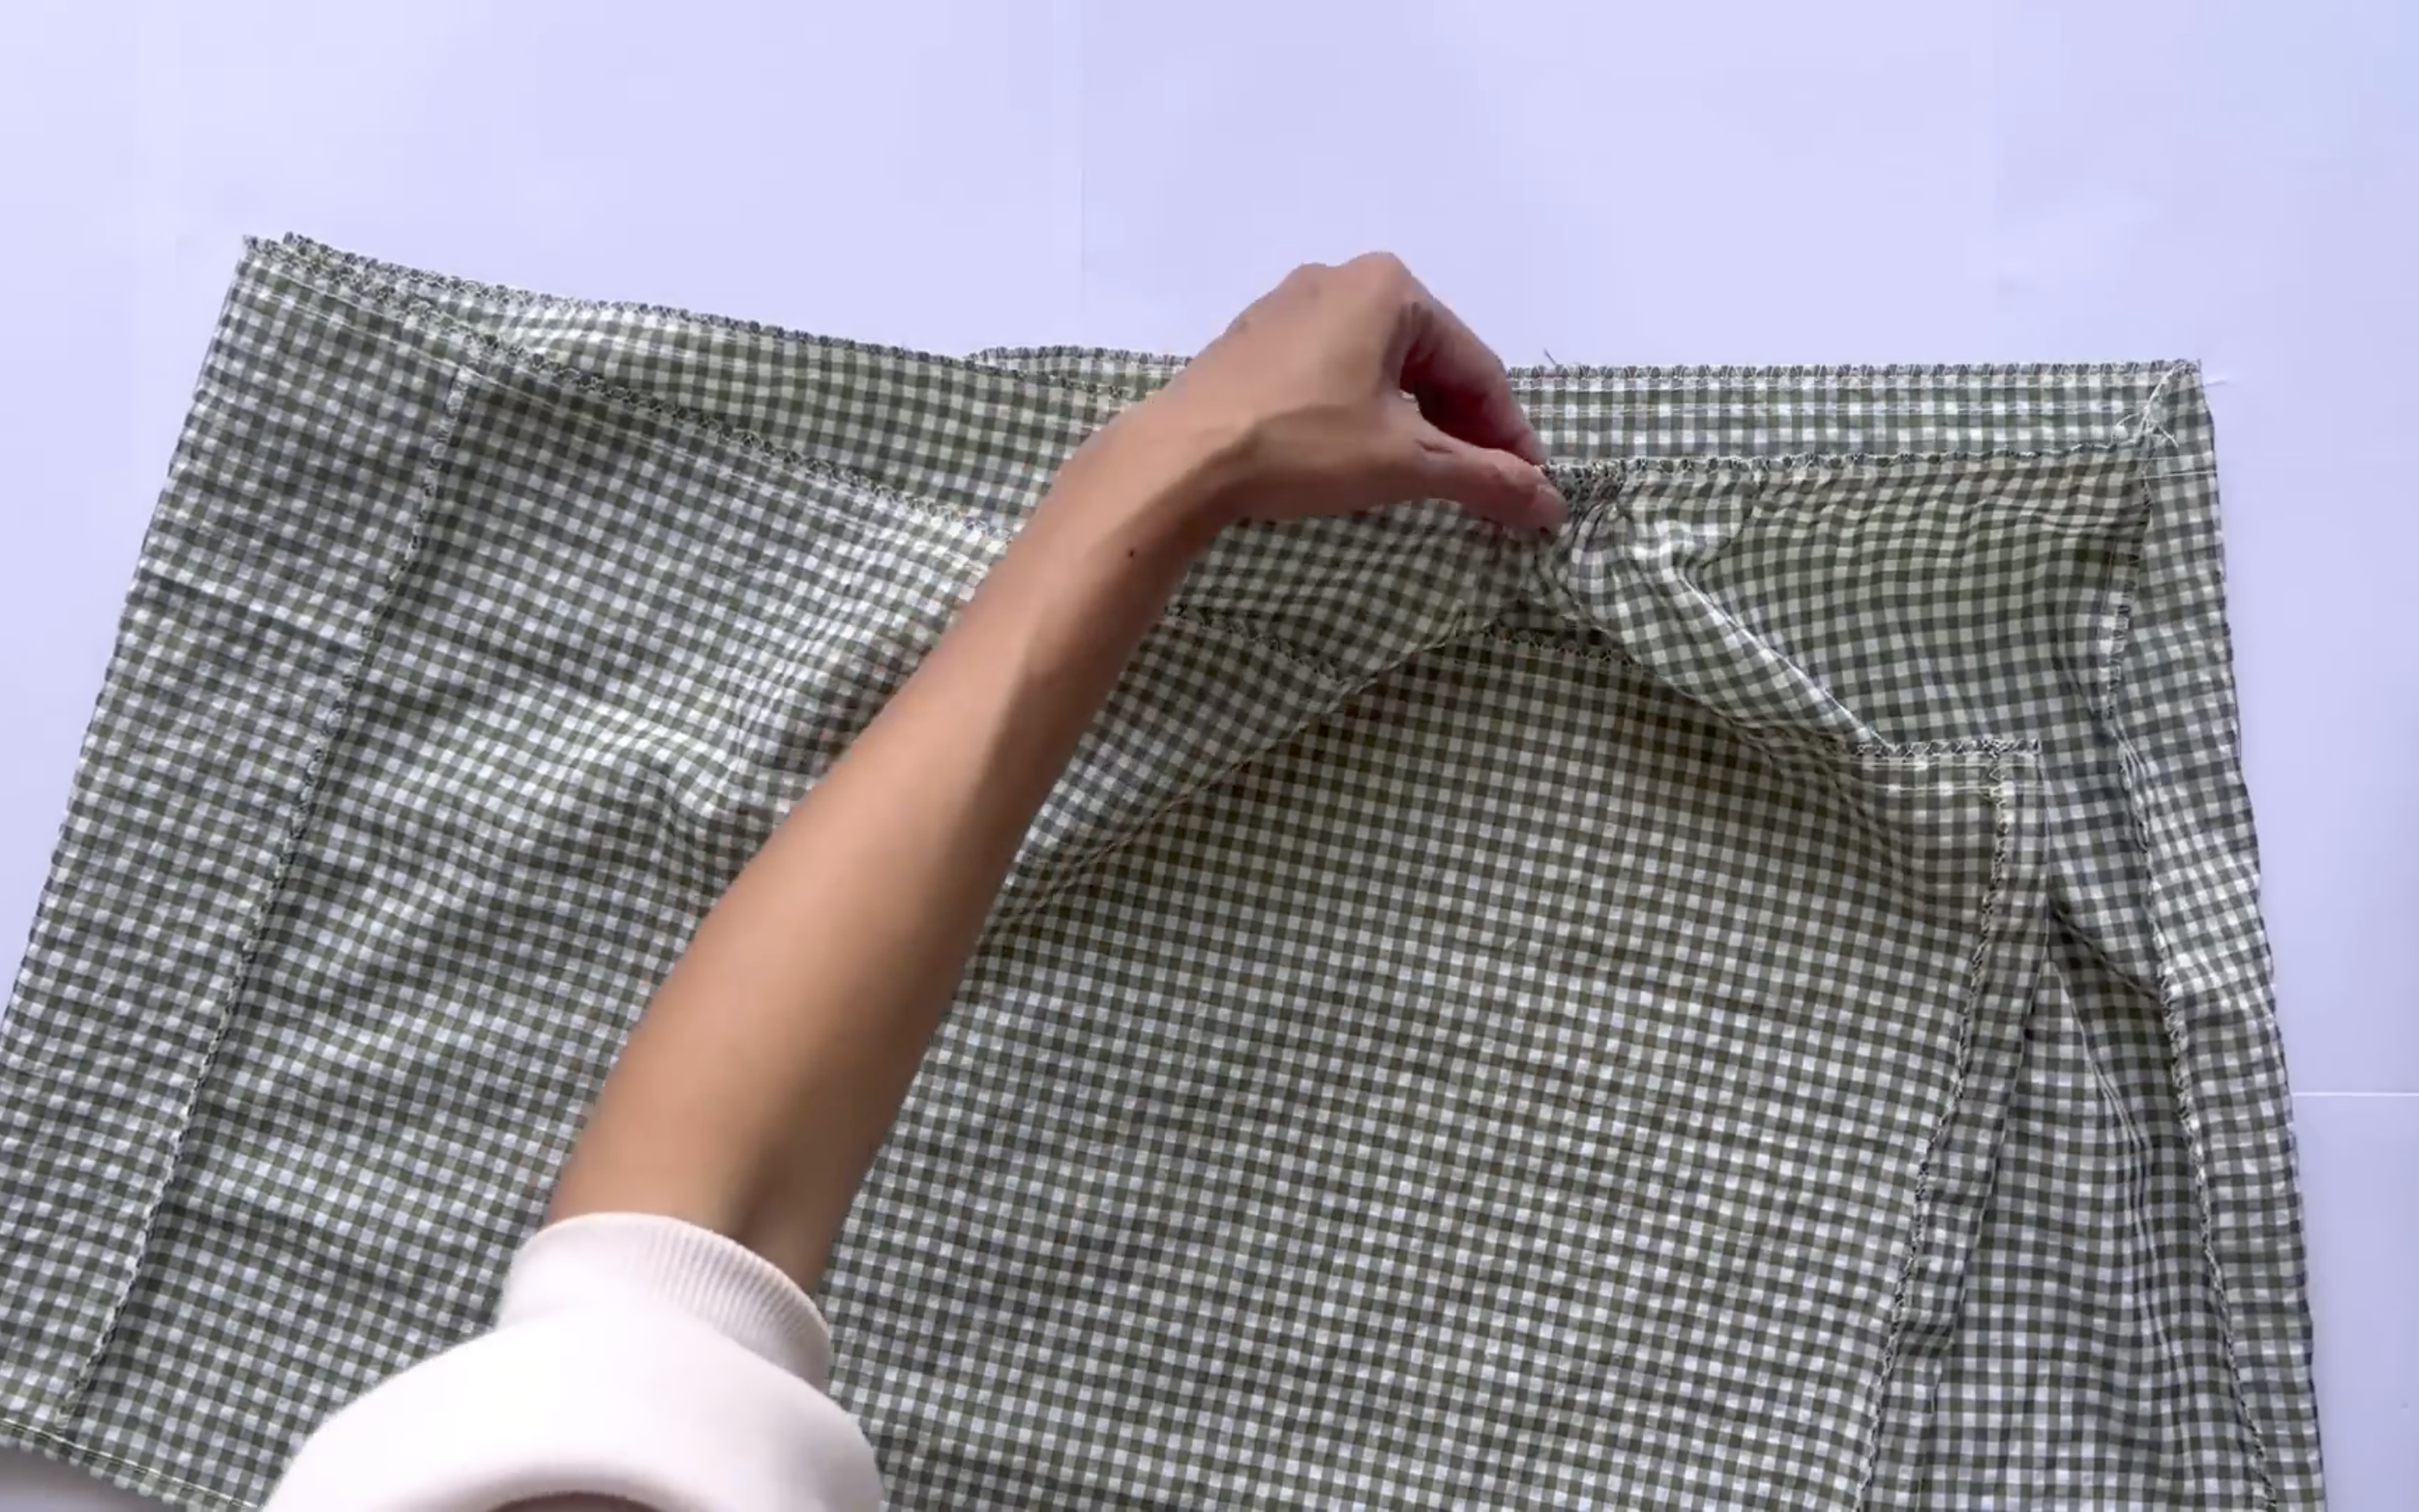
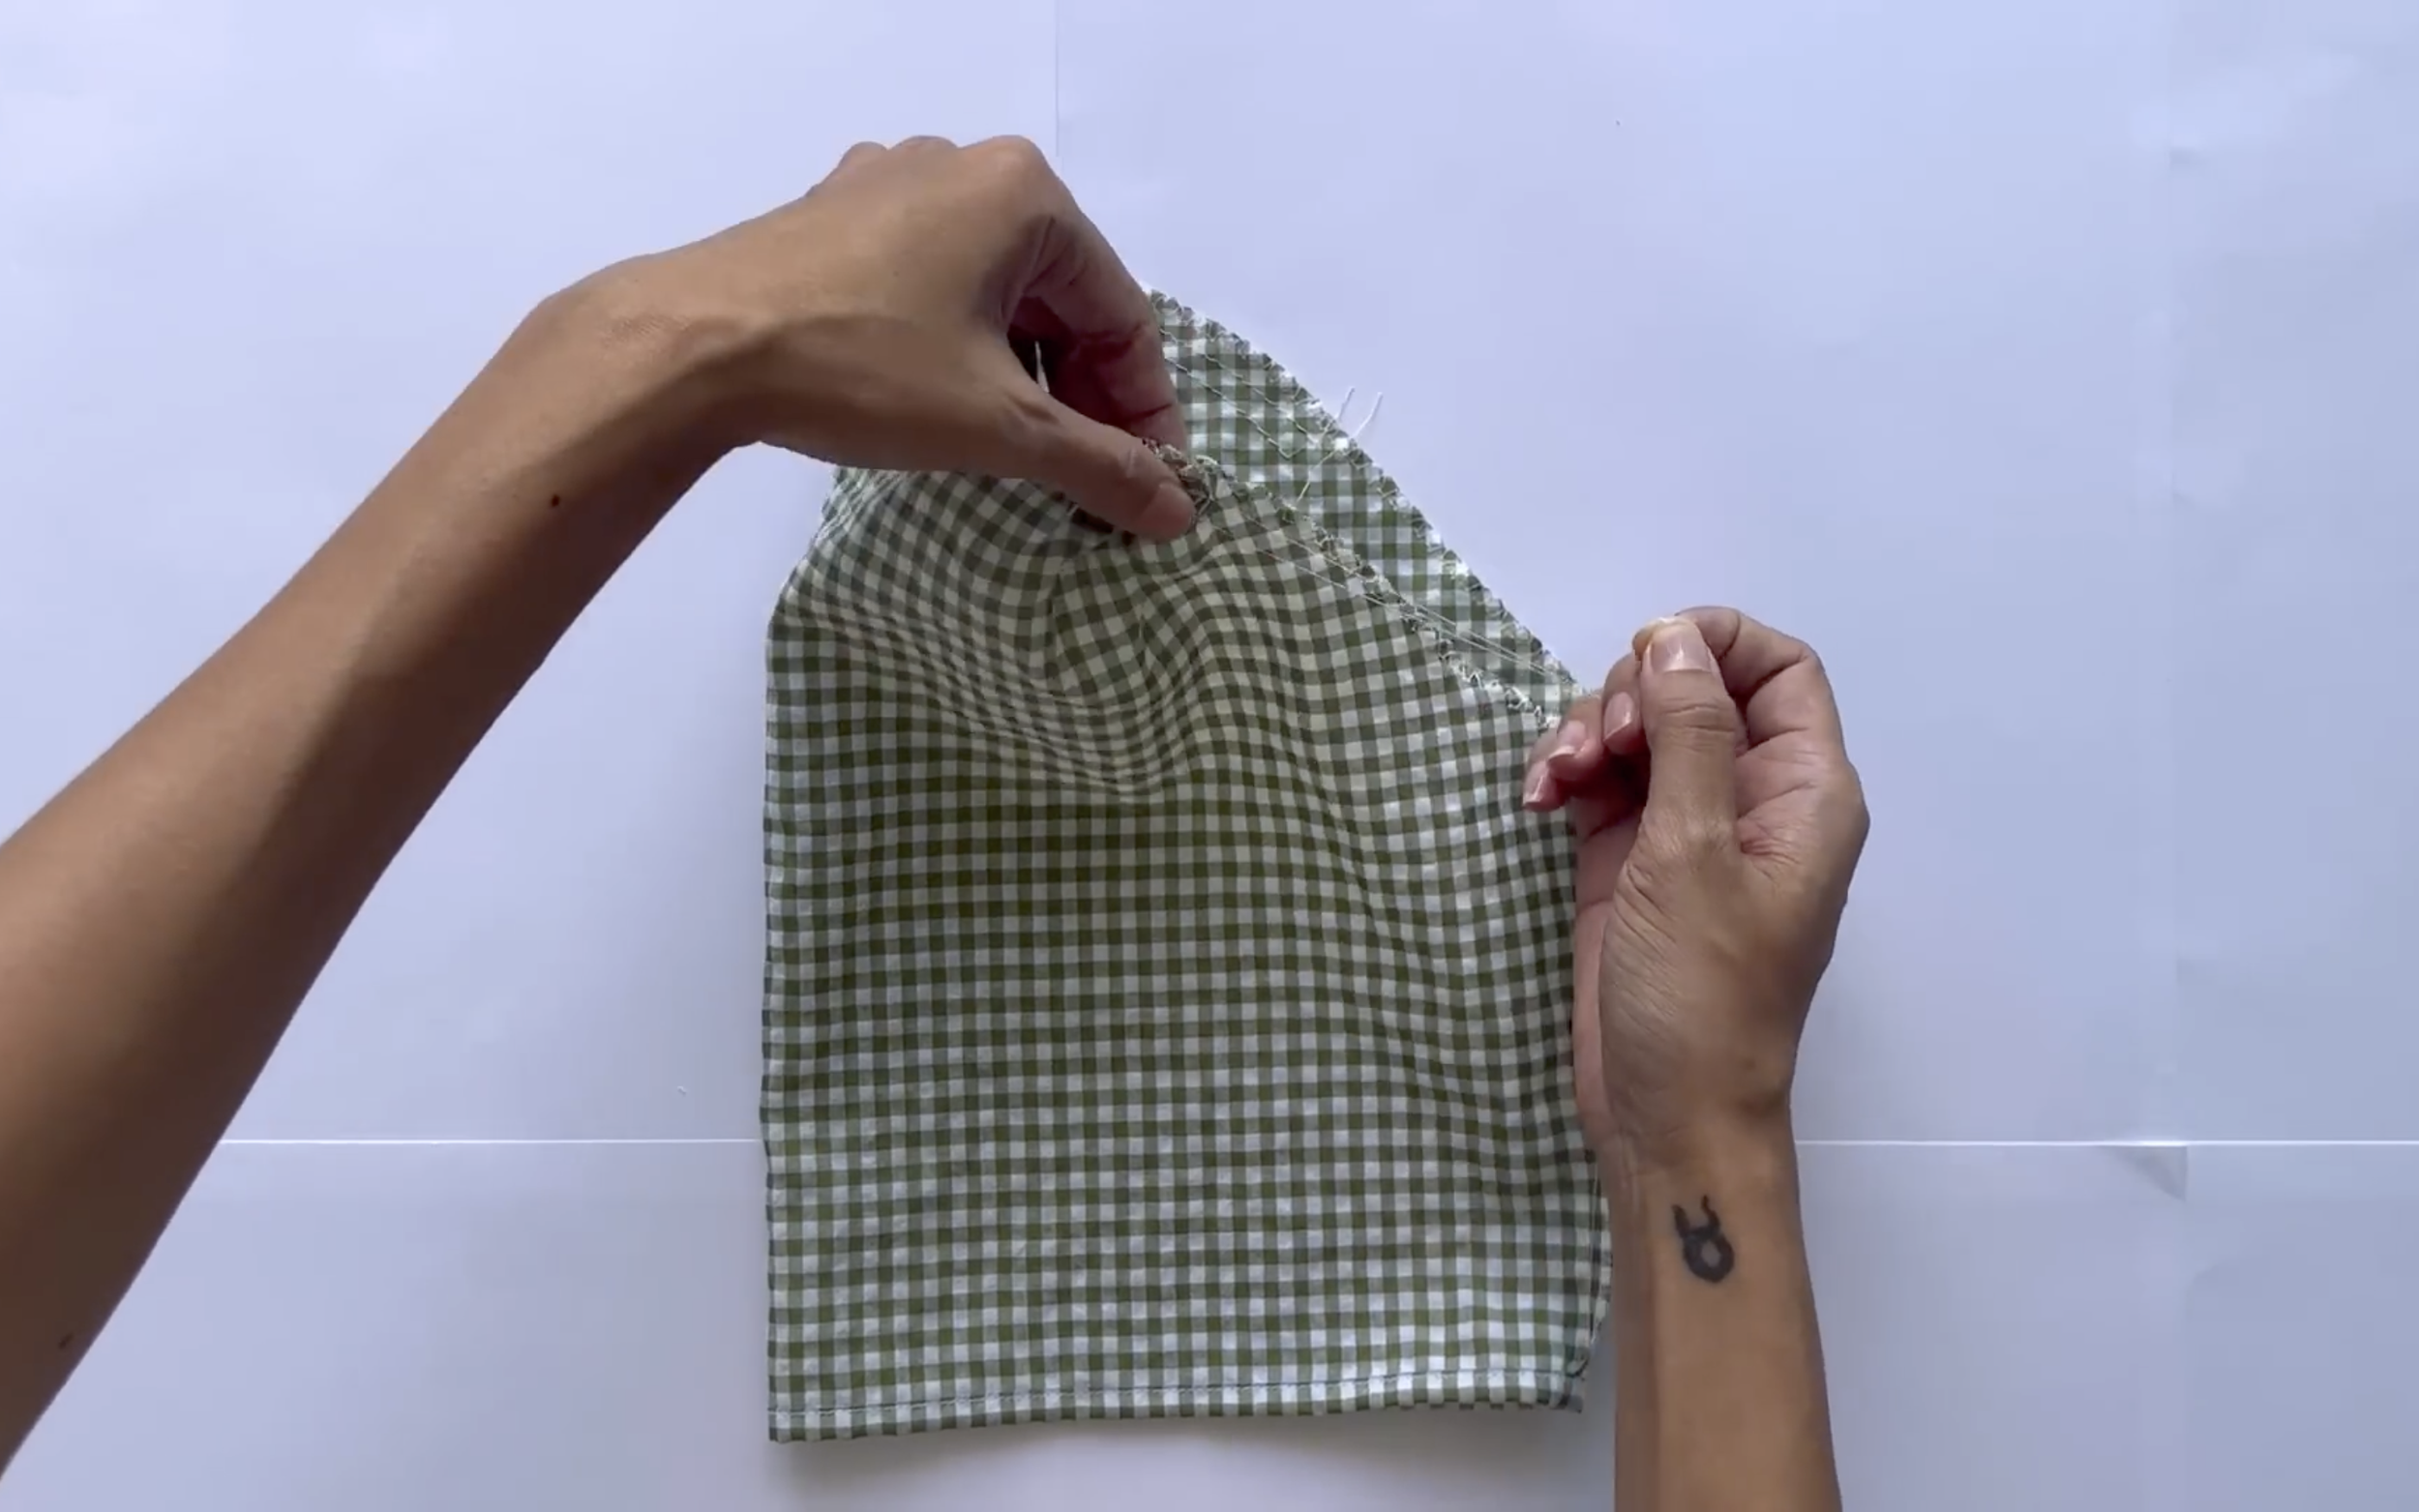
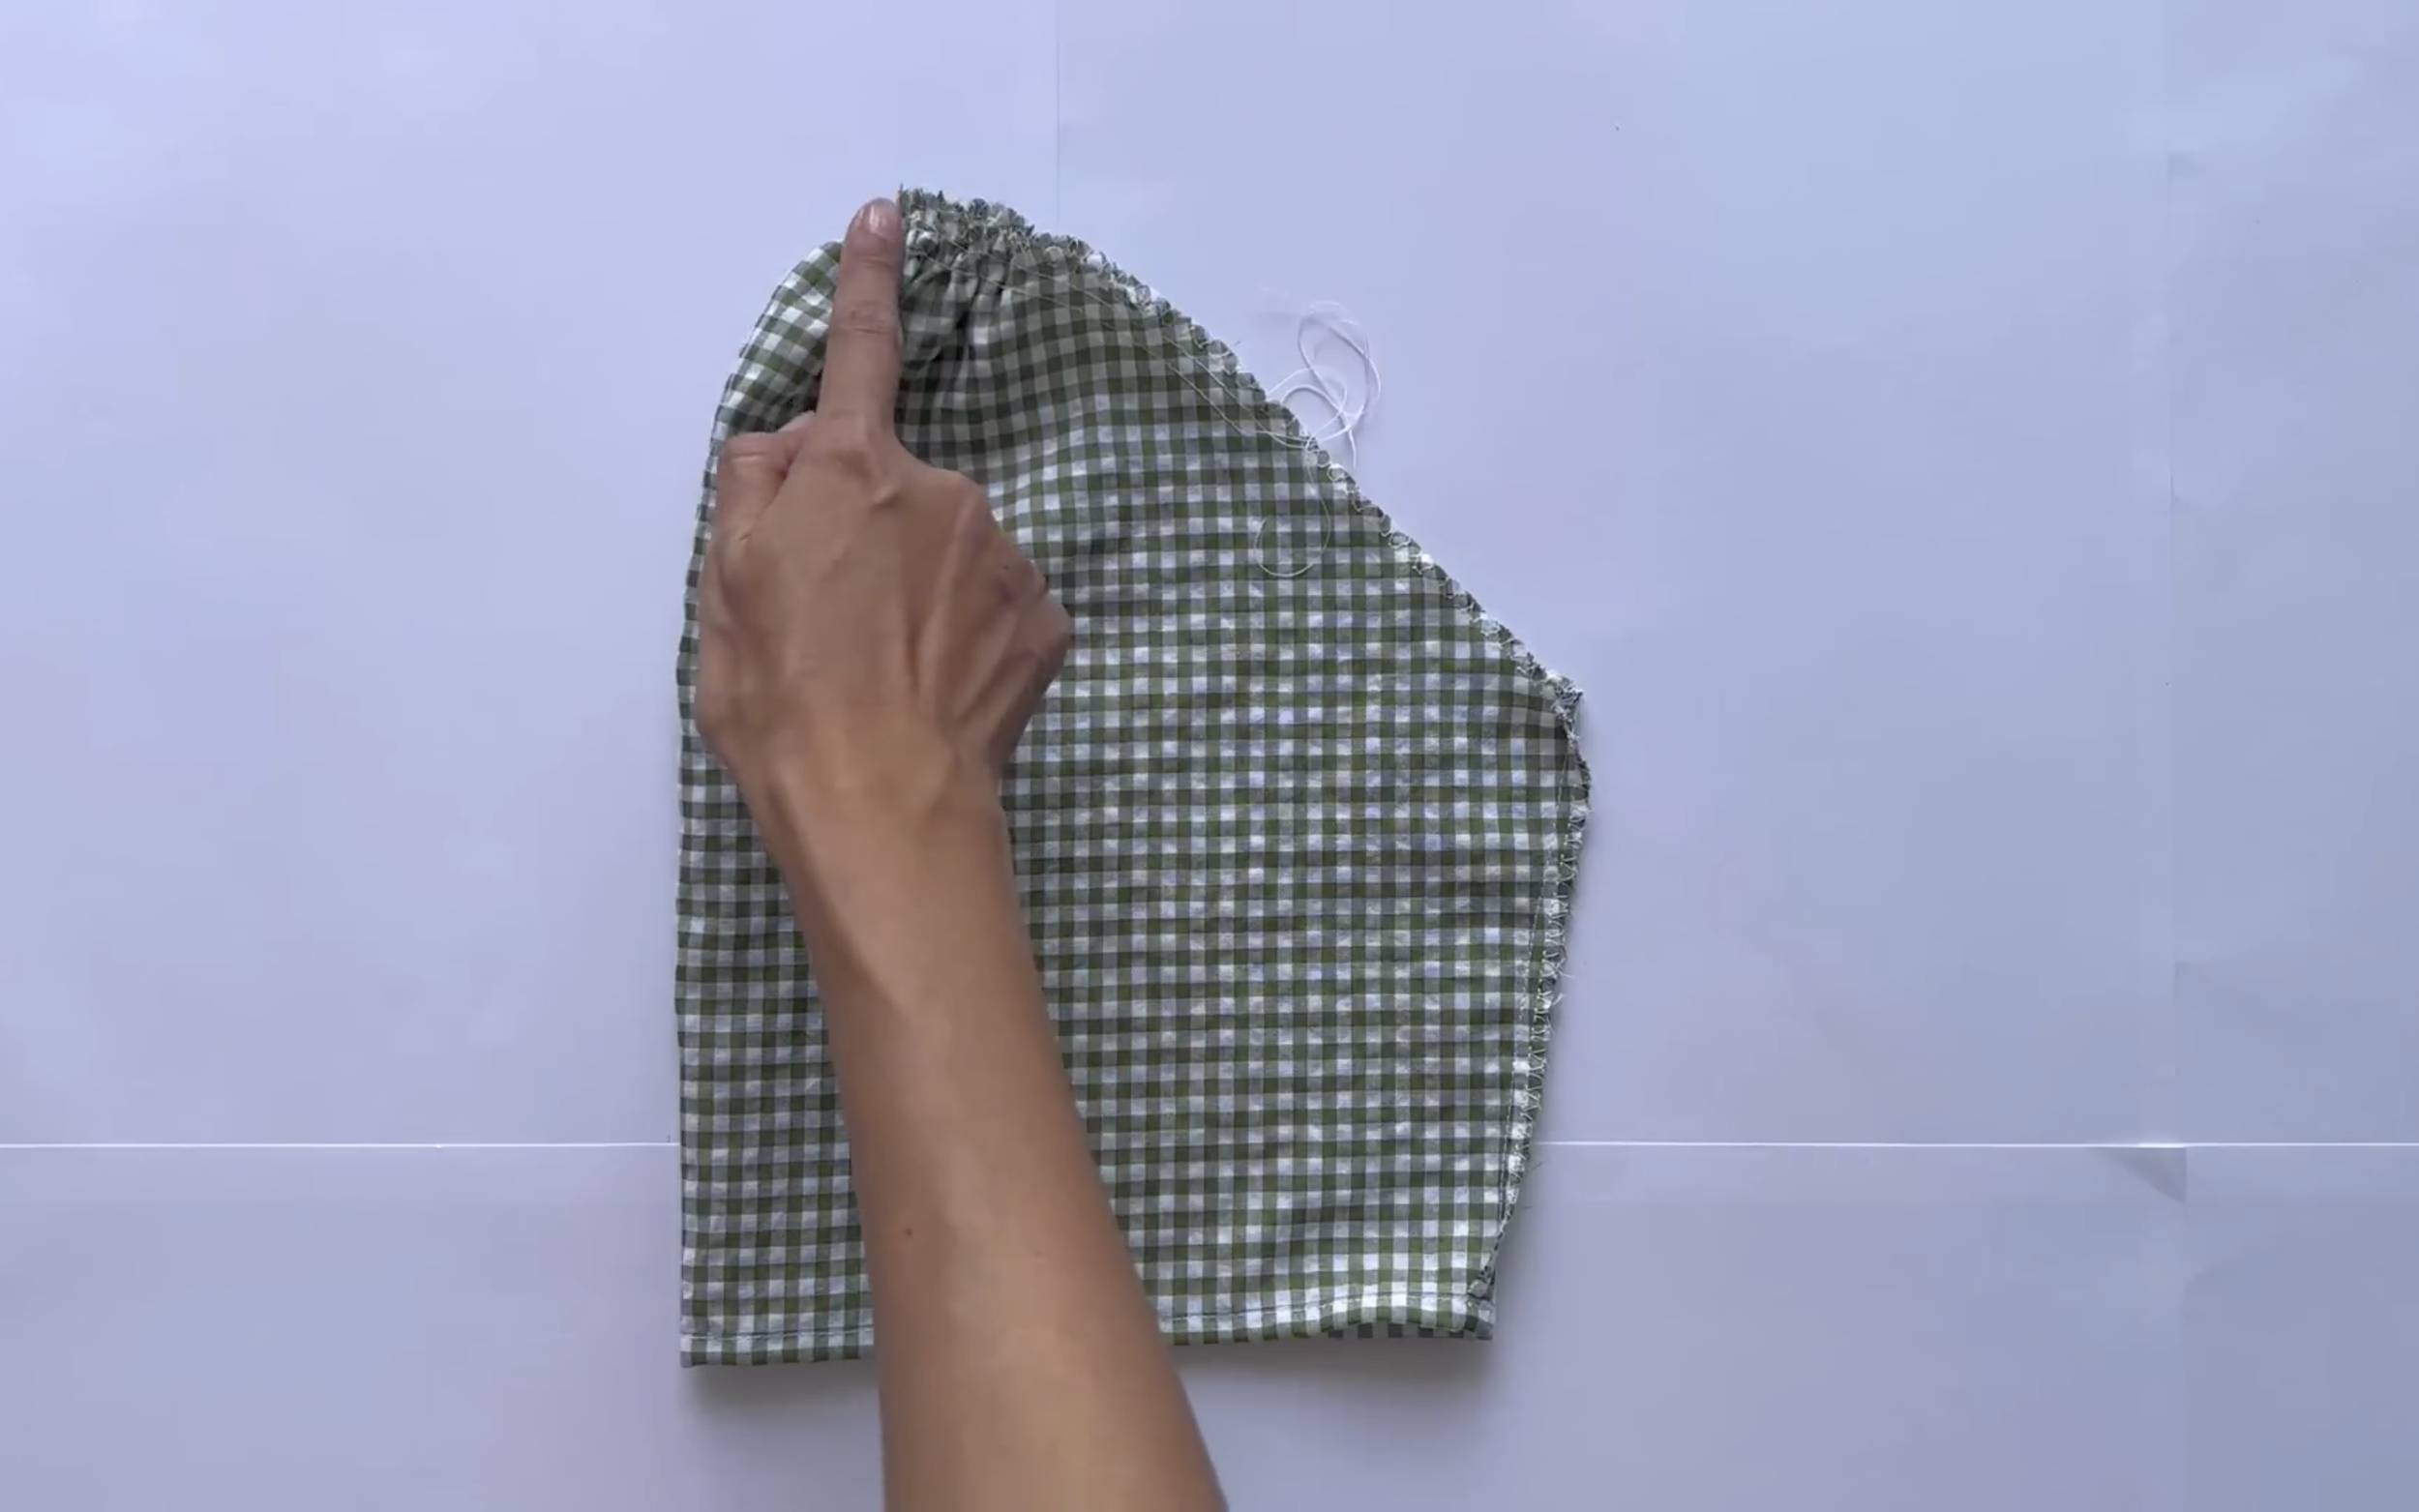
Then create the gathering fabric there.
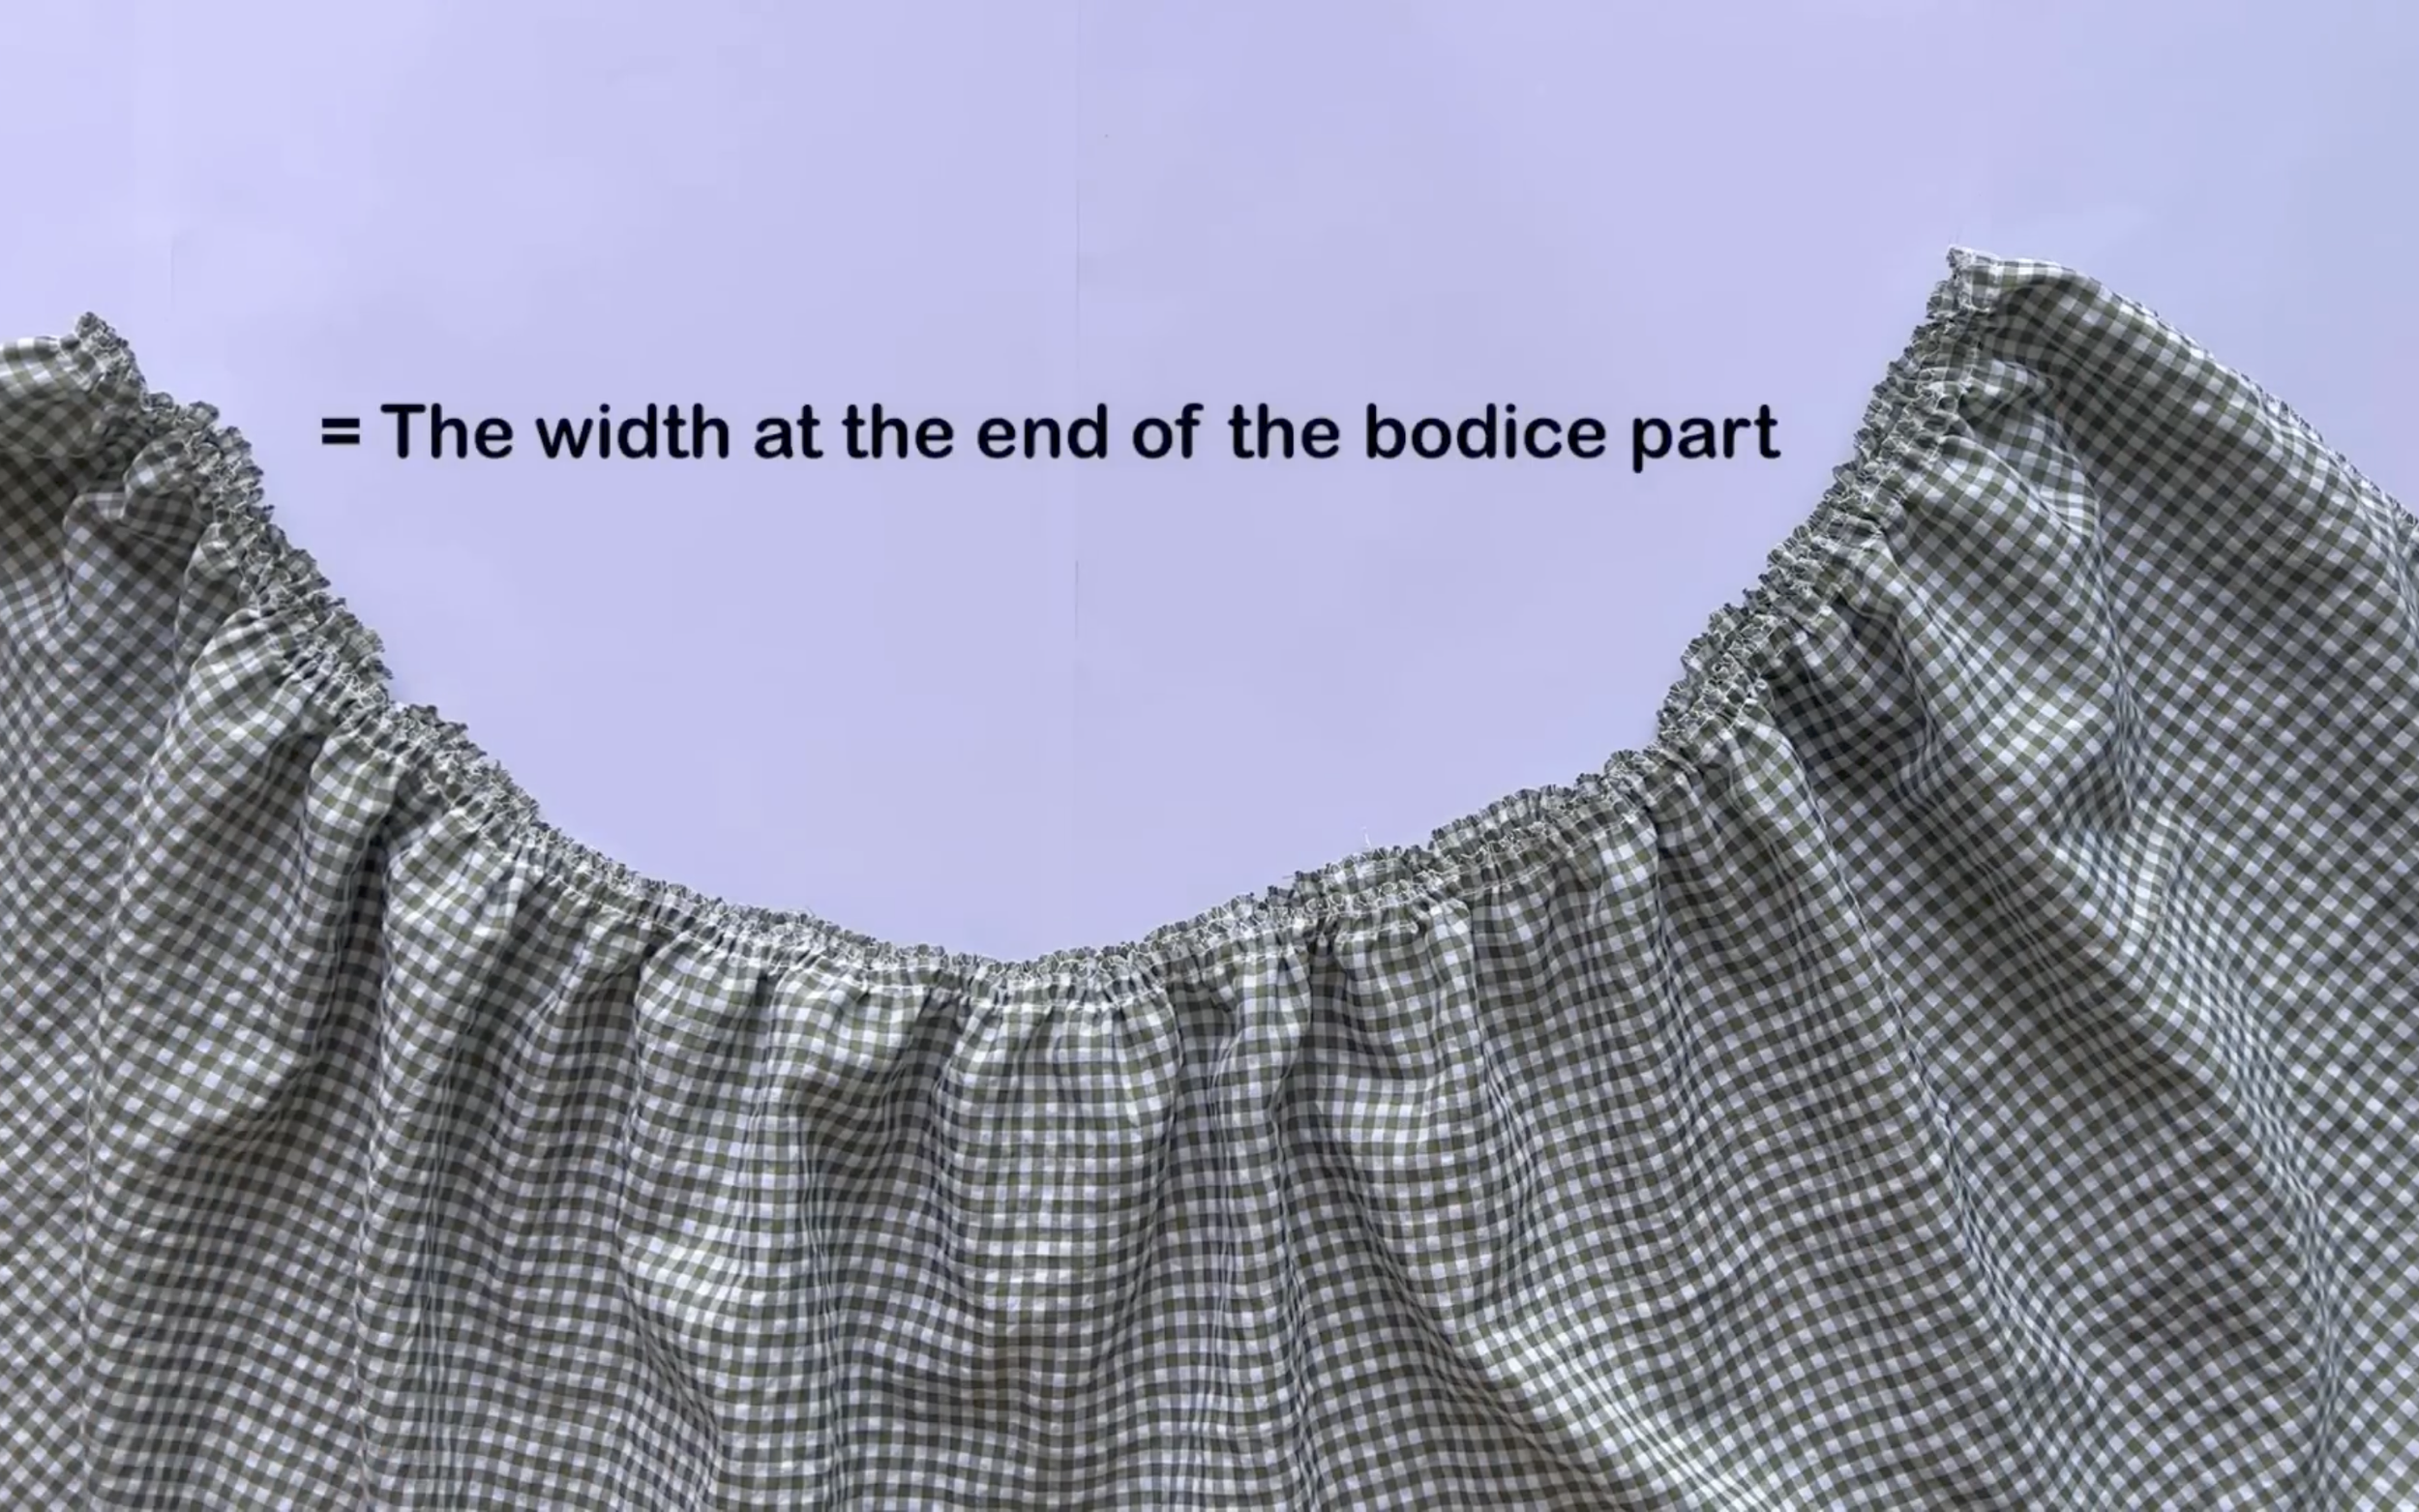
The final width of the gathering fabric will be the same as the width at the end of the bodice part.
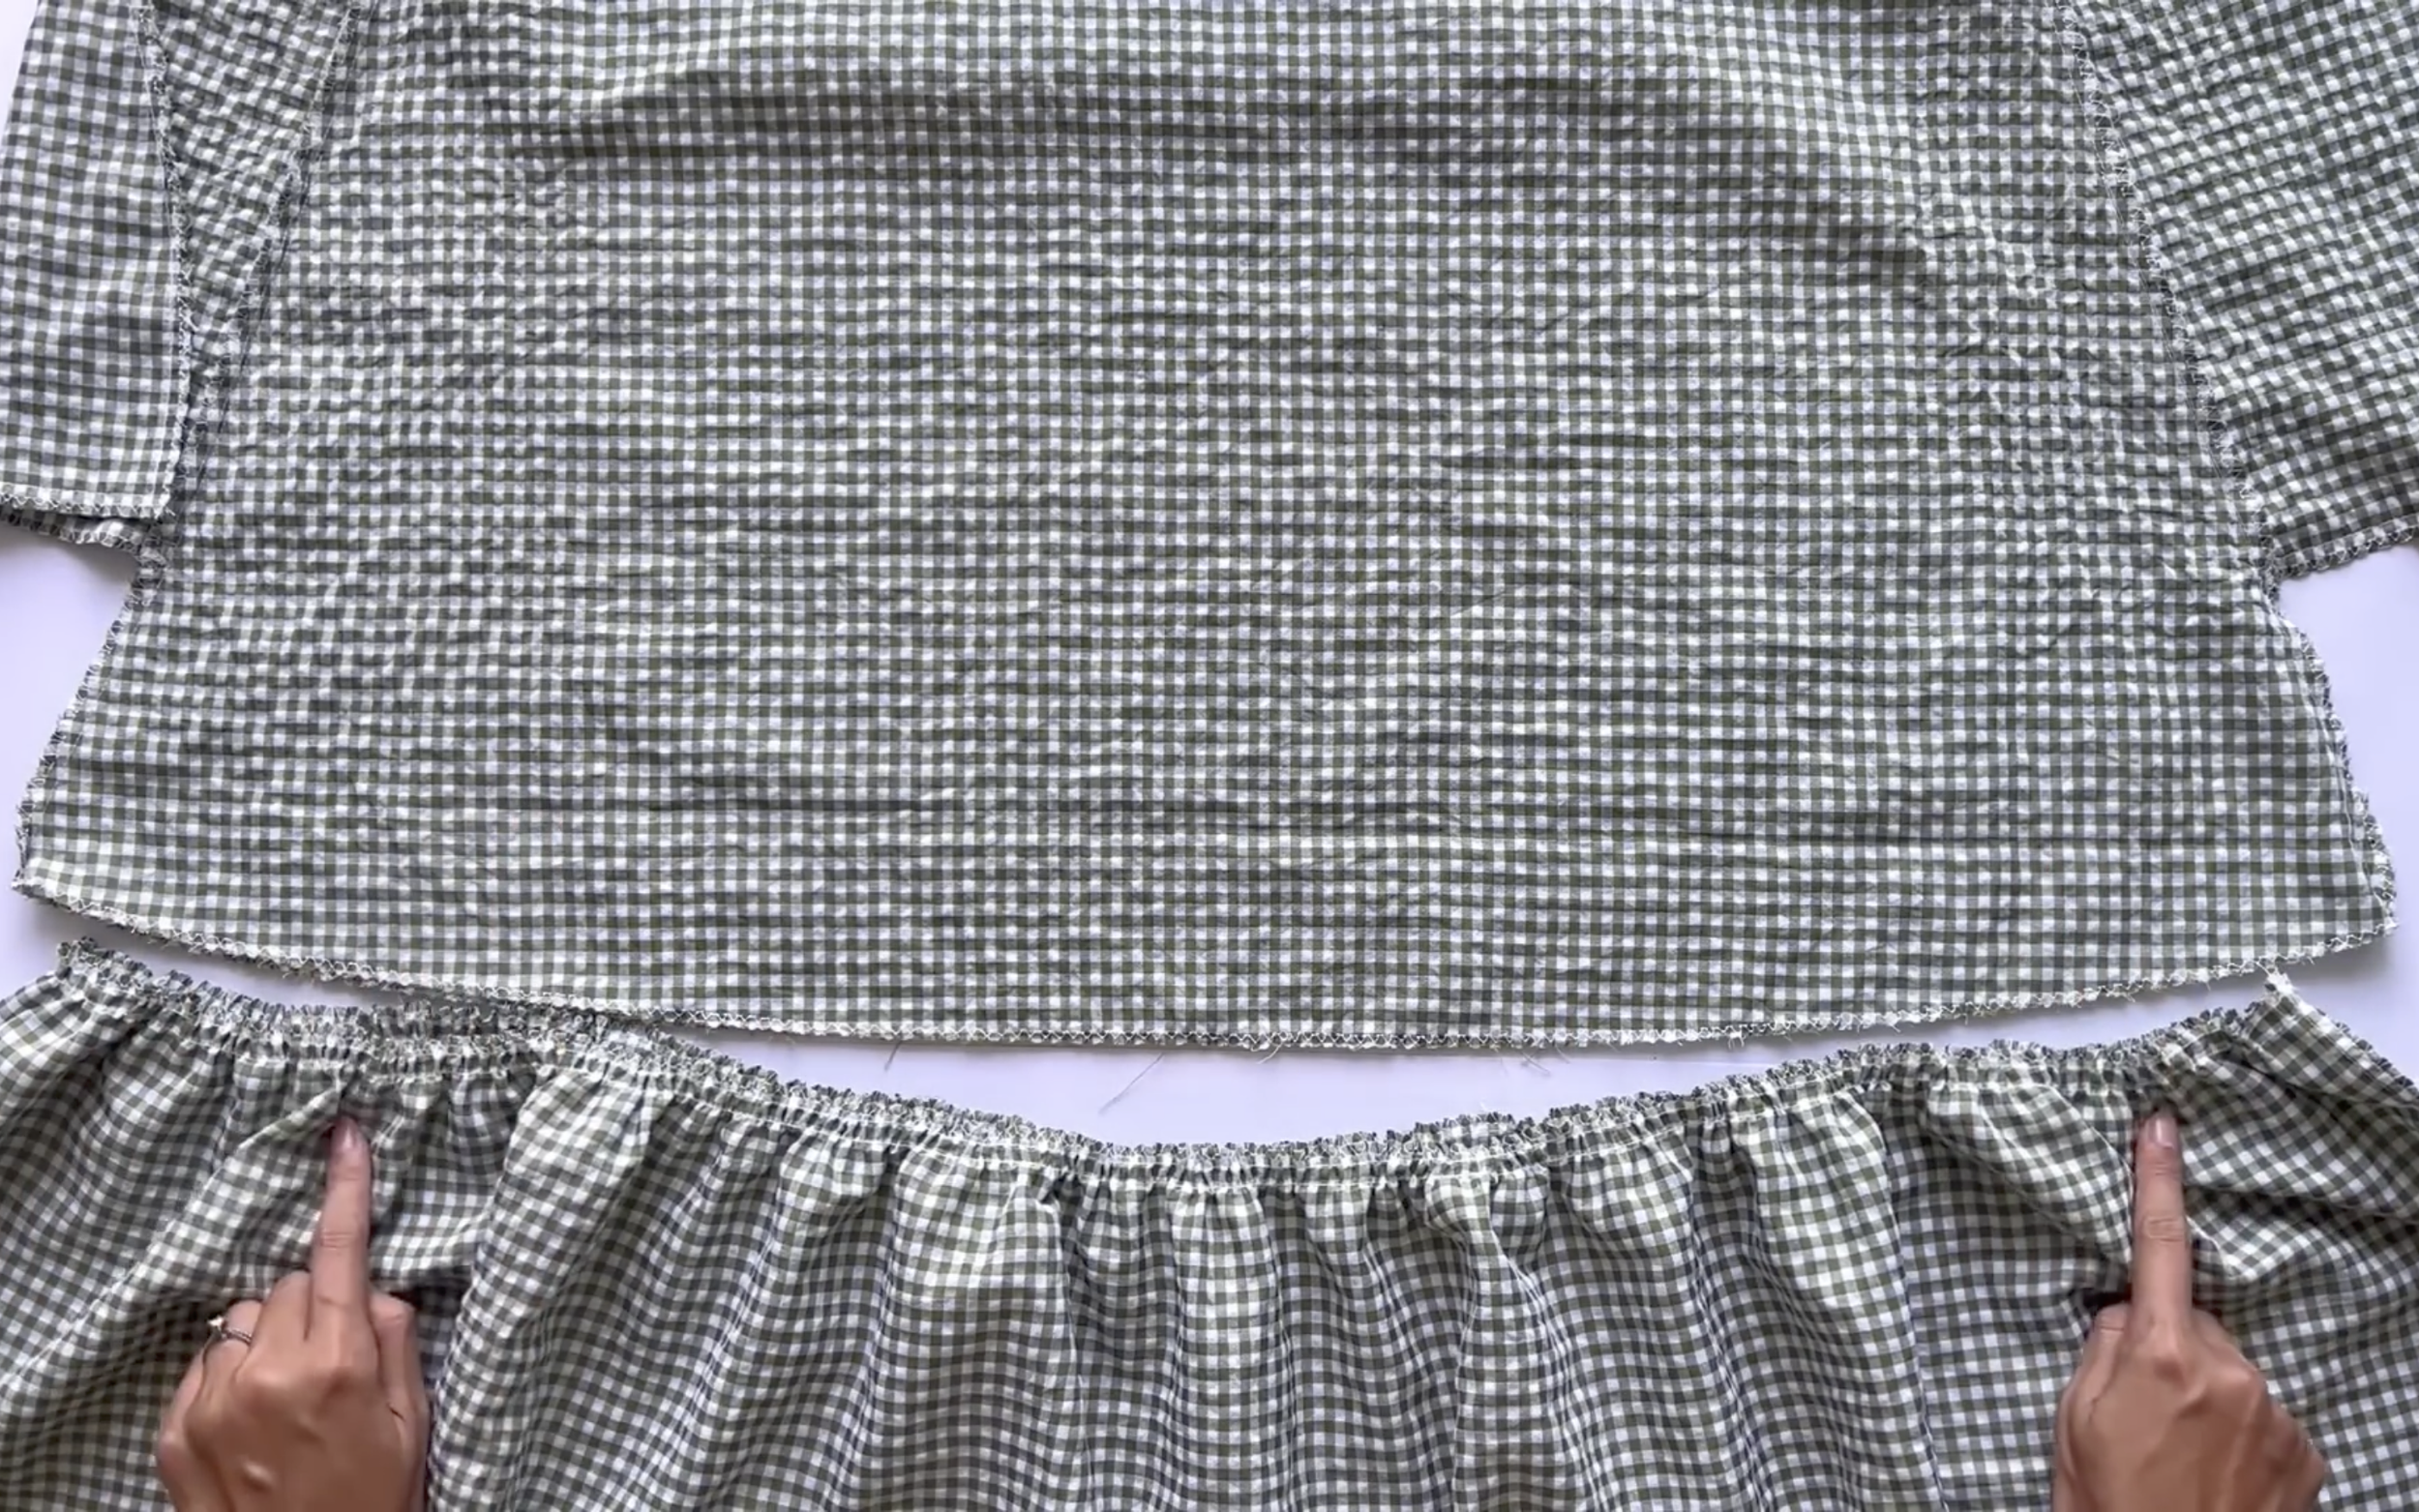
Then, connect the ruffle hem to the bodice.
THE SLEEVE
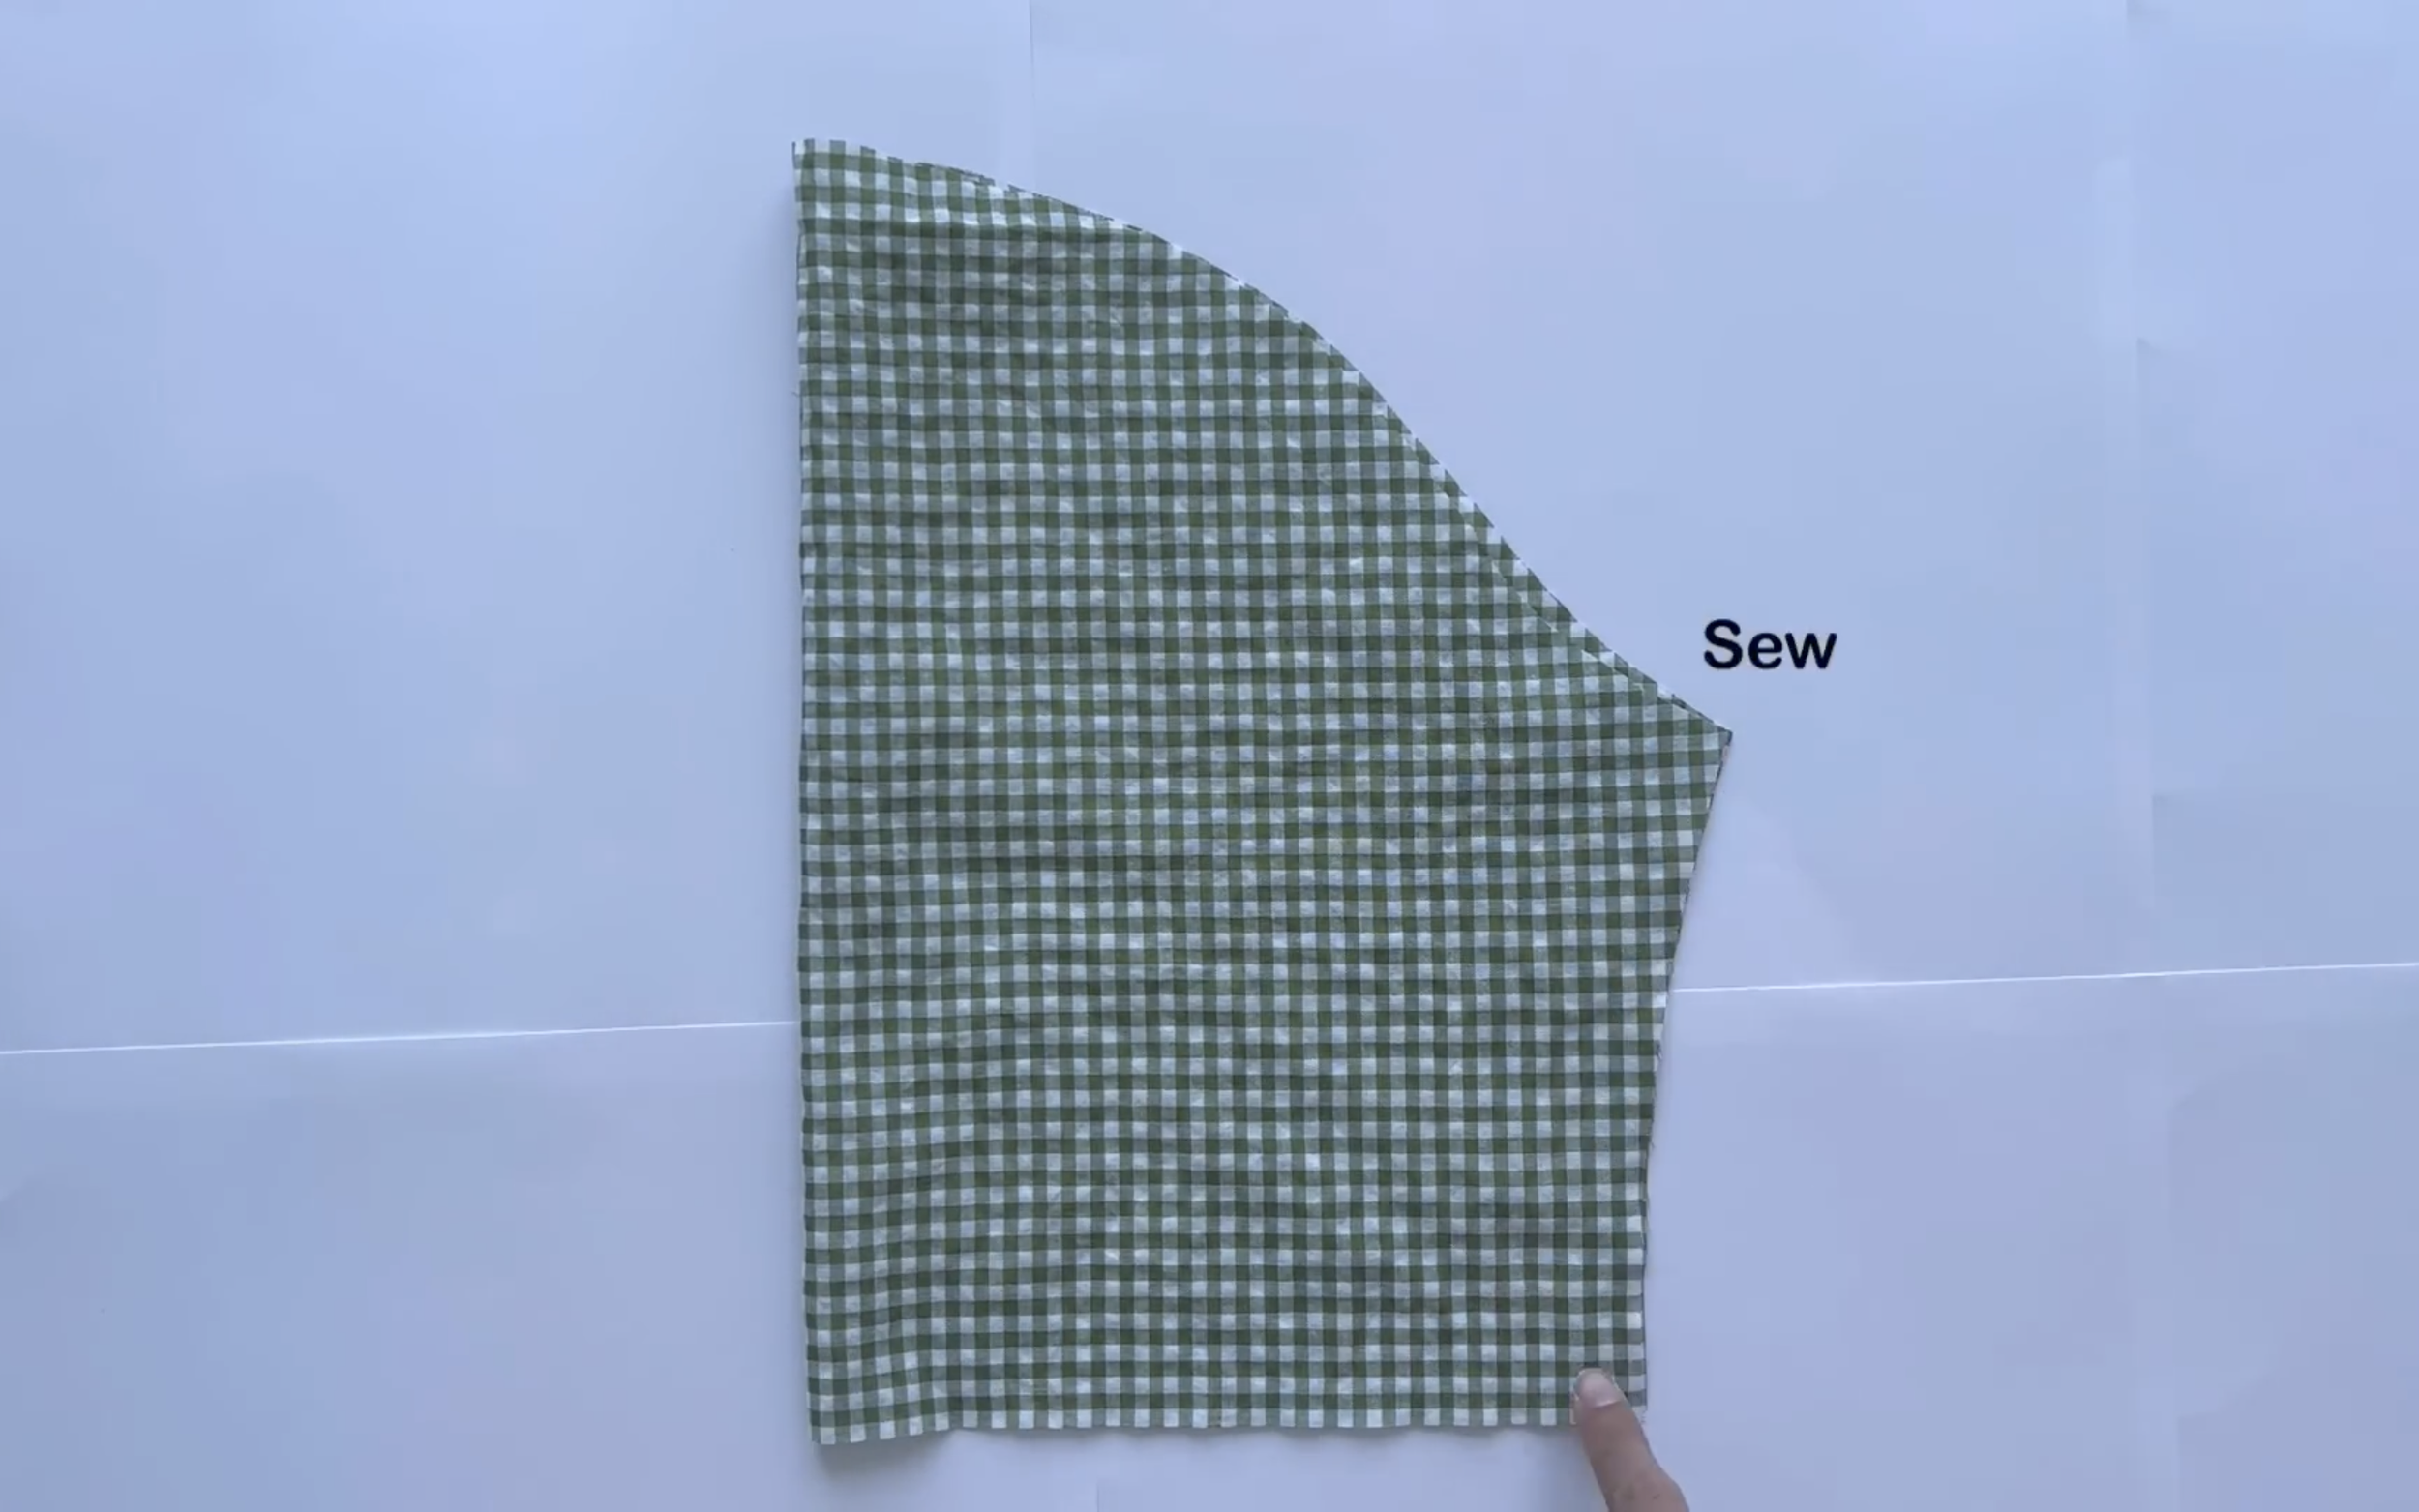
After cutting the sleeve, connect the under-armpit line together.
Then finish the end of the sleeve by folding the end fabric inside twice with 1 cm each time and sewing.
At the sleeve line of the sleeve, make loose seams.
Then create the gathering fabric there.
The gathering fabric should be around the top of the sleeve.
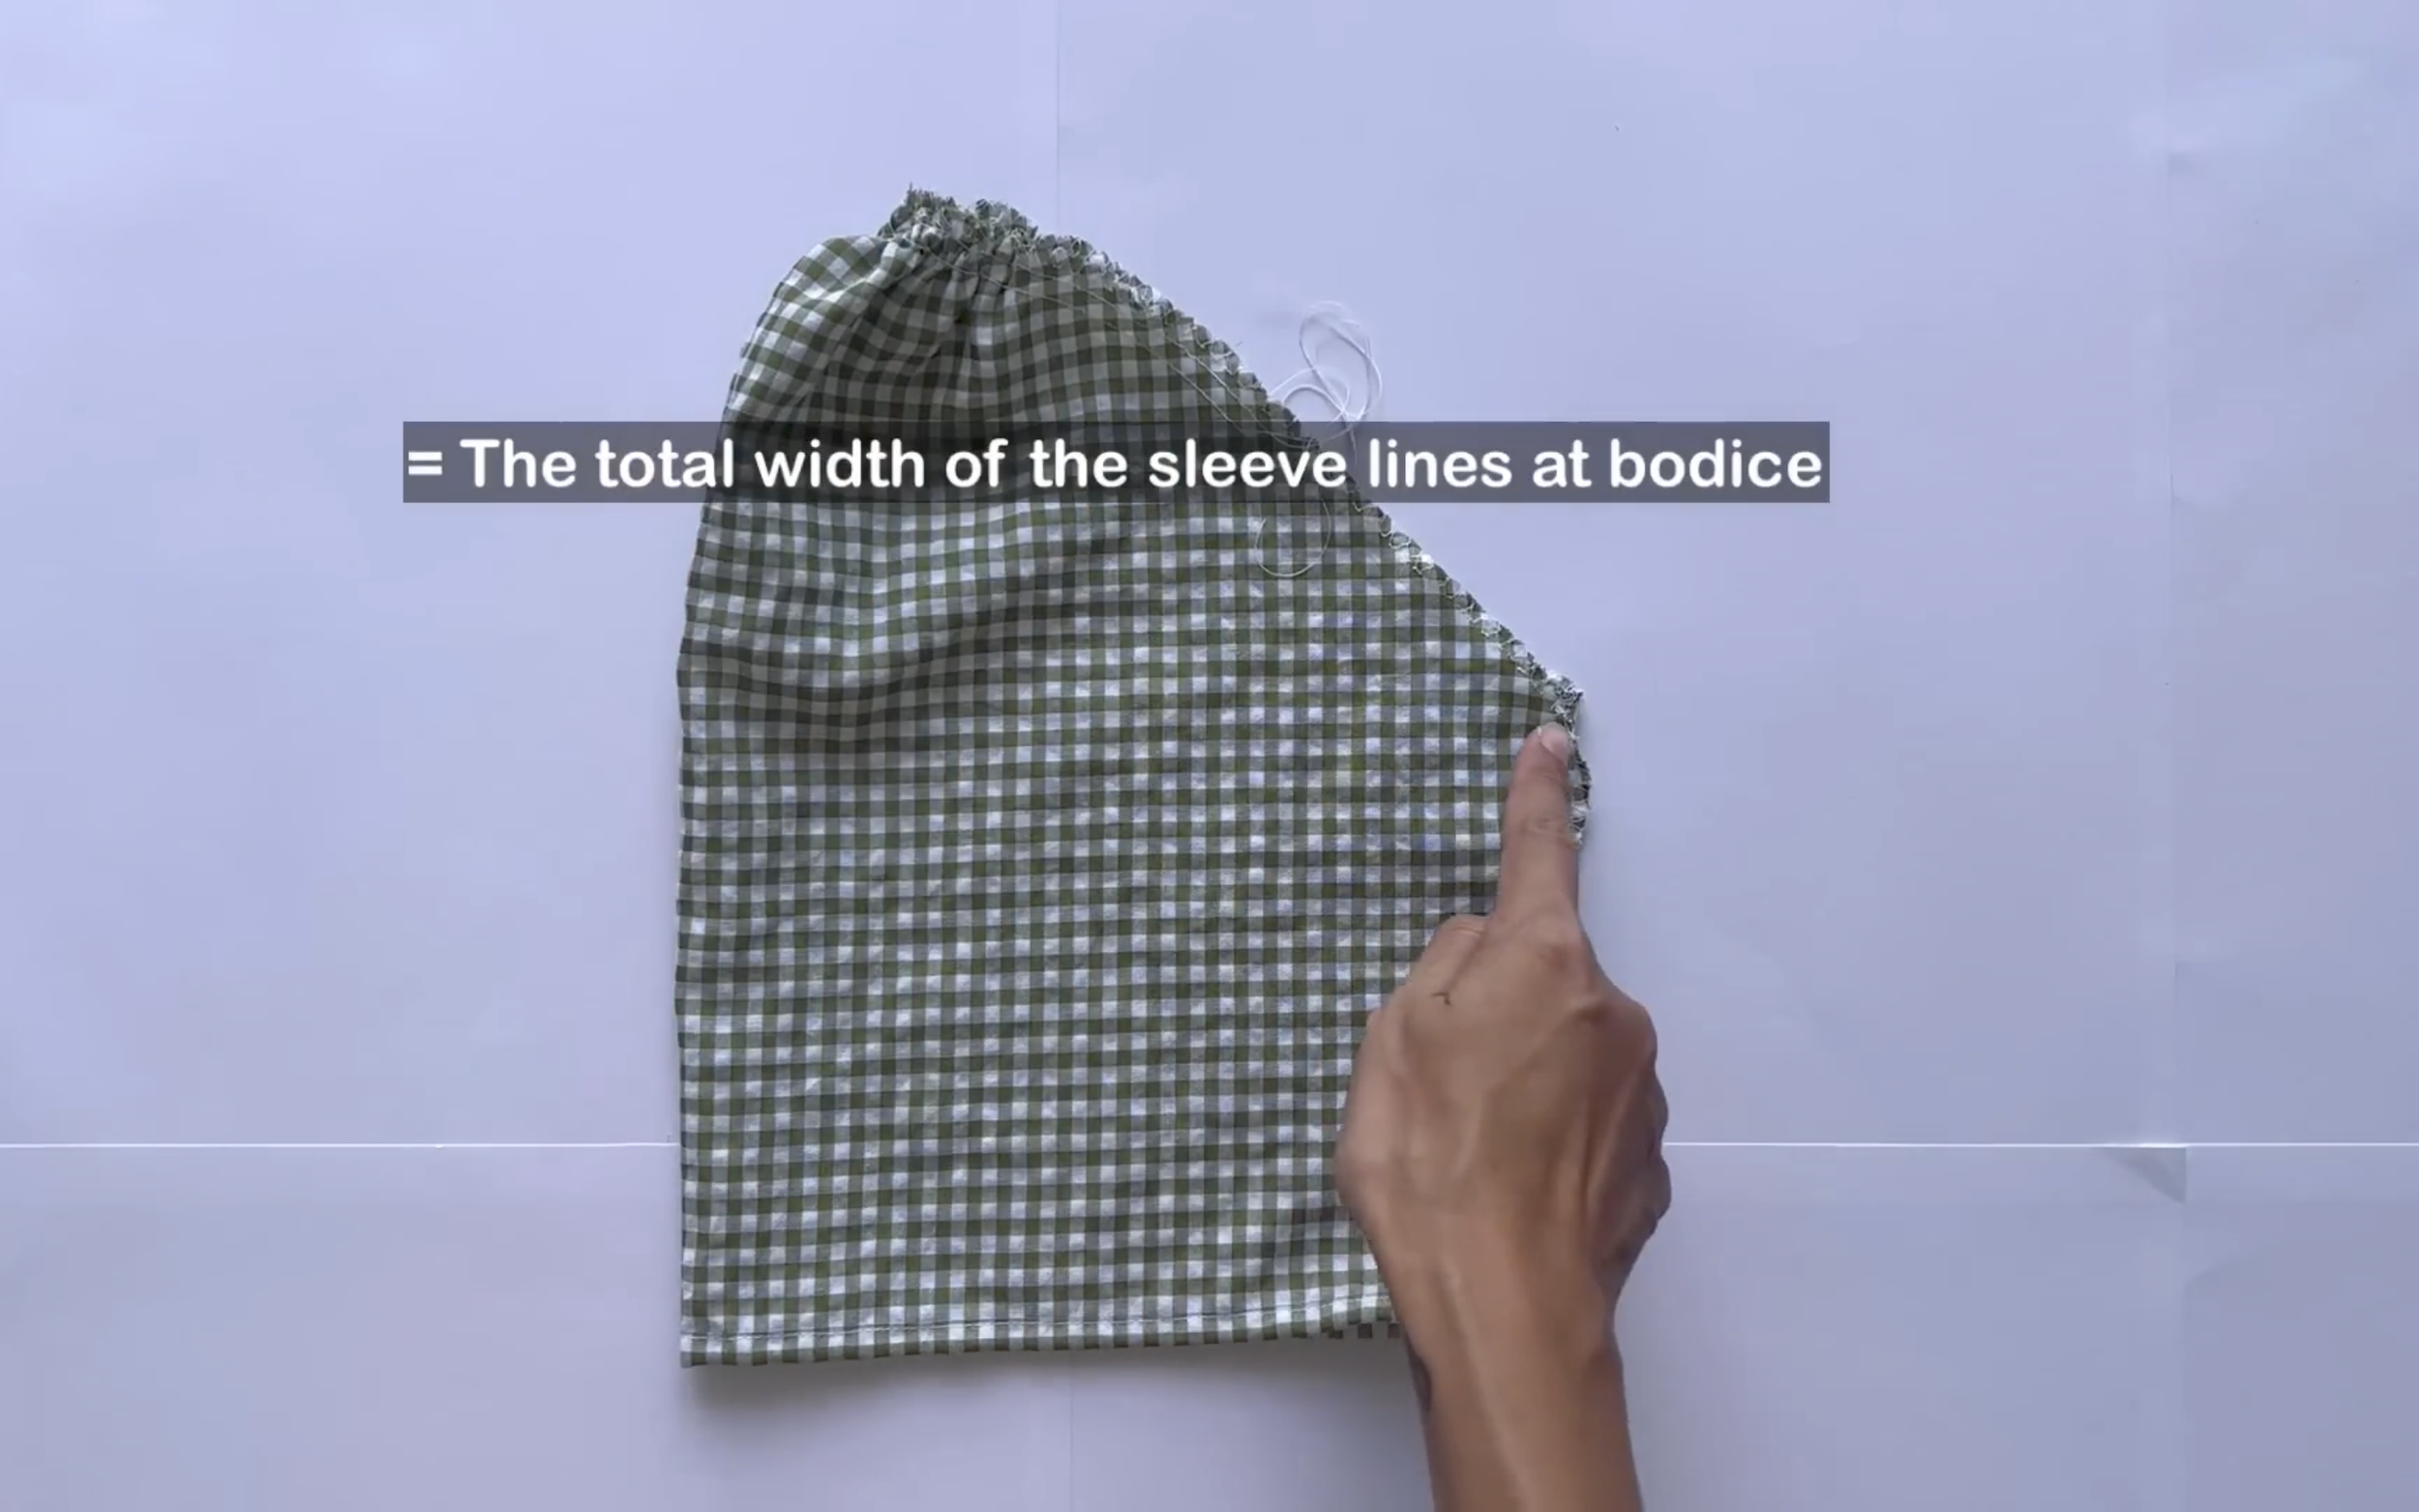
And the final width should be the same as the sleeve line at the bodice part so they can be connected together later.
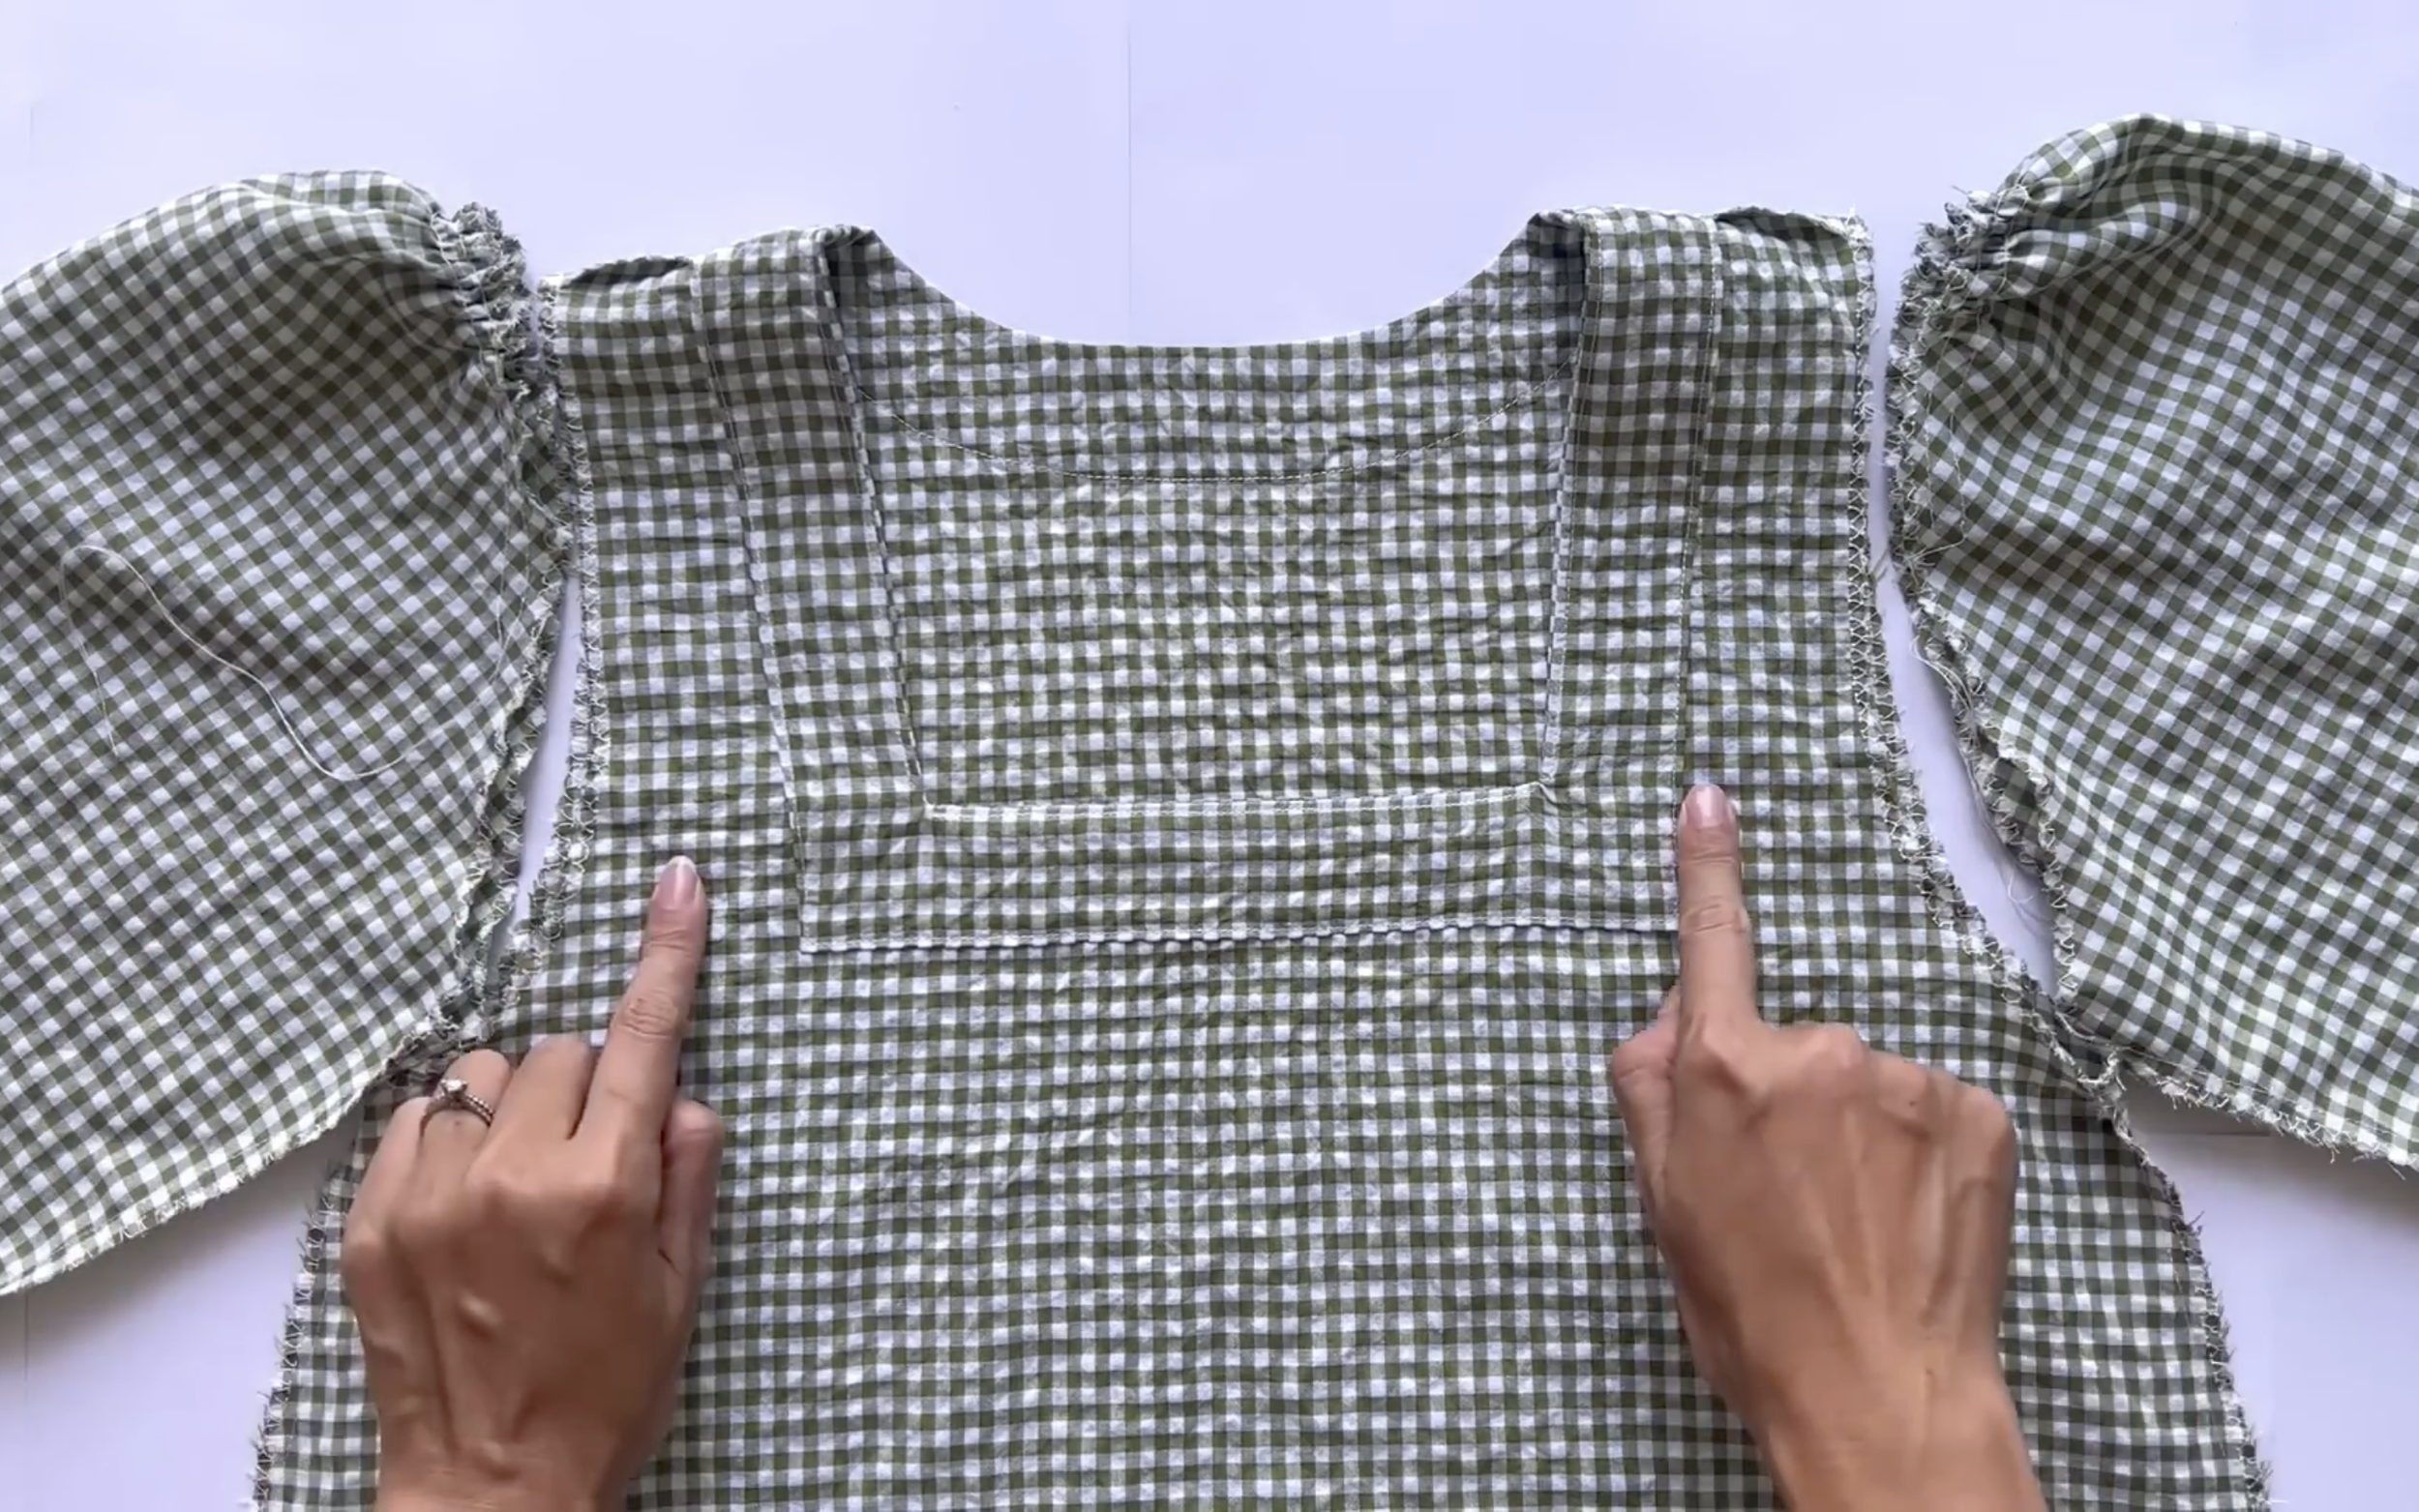
Now, connect the sleeves to the bodice.
DIY Square neck dress with ruffle hem and side pocket
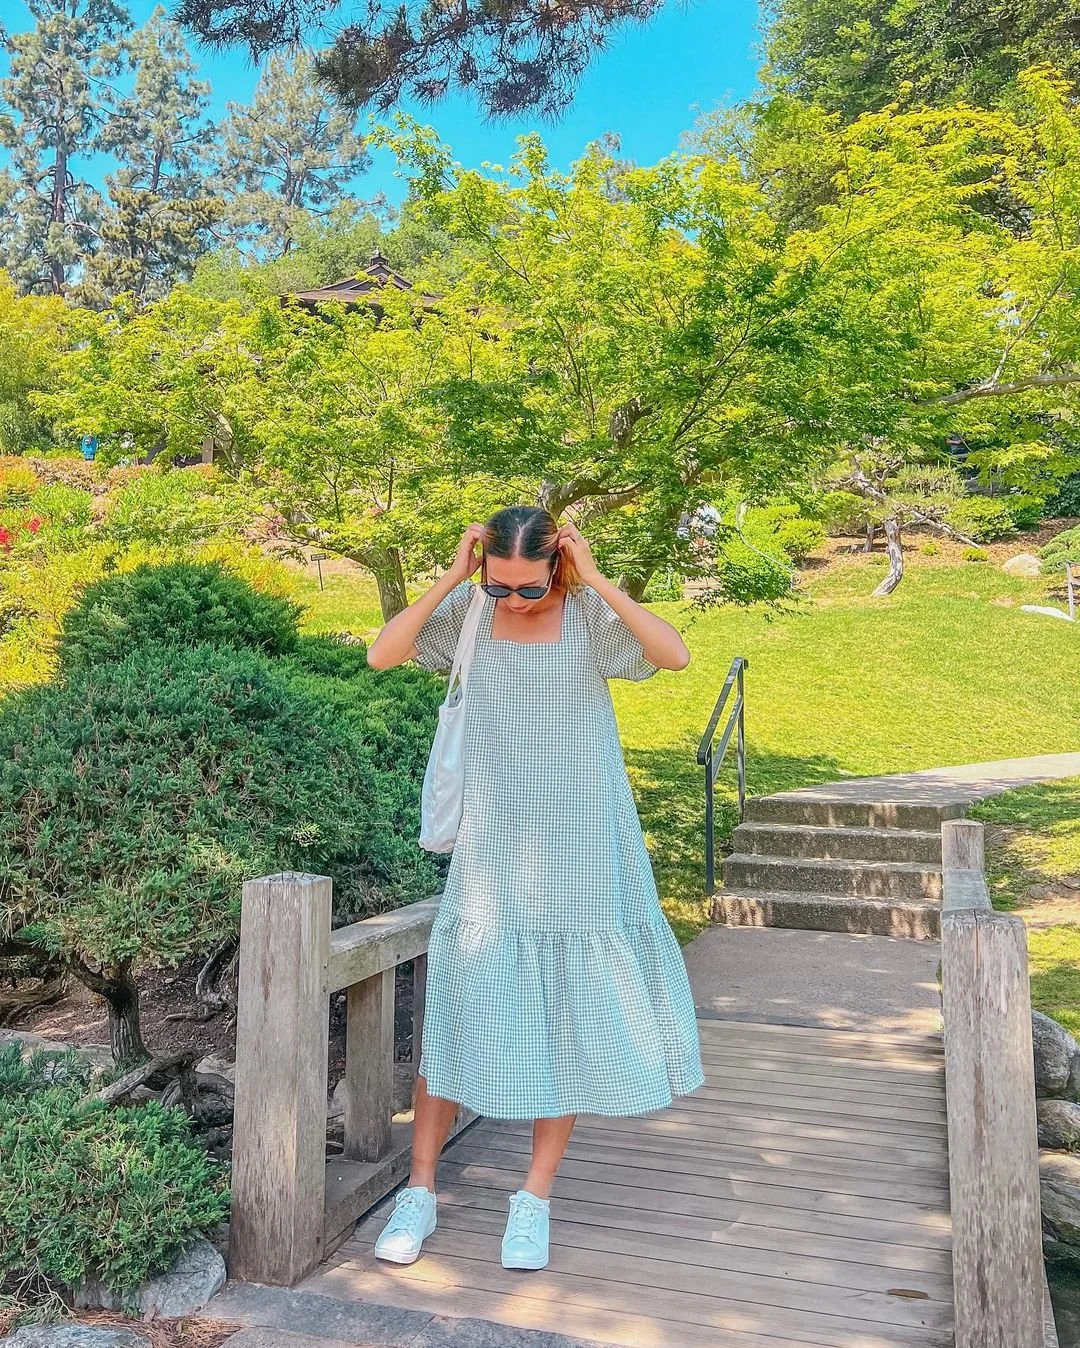
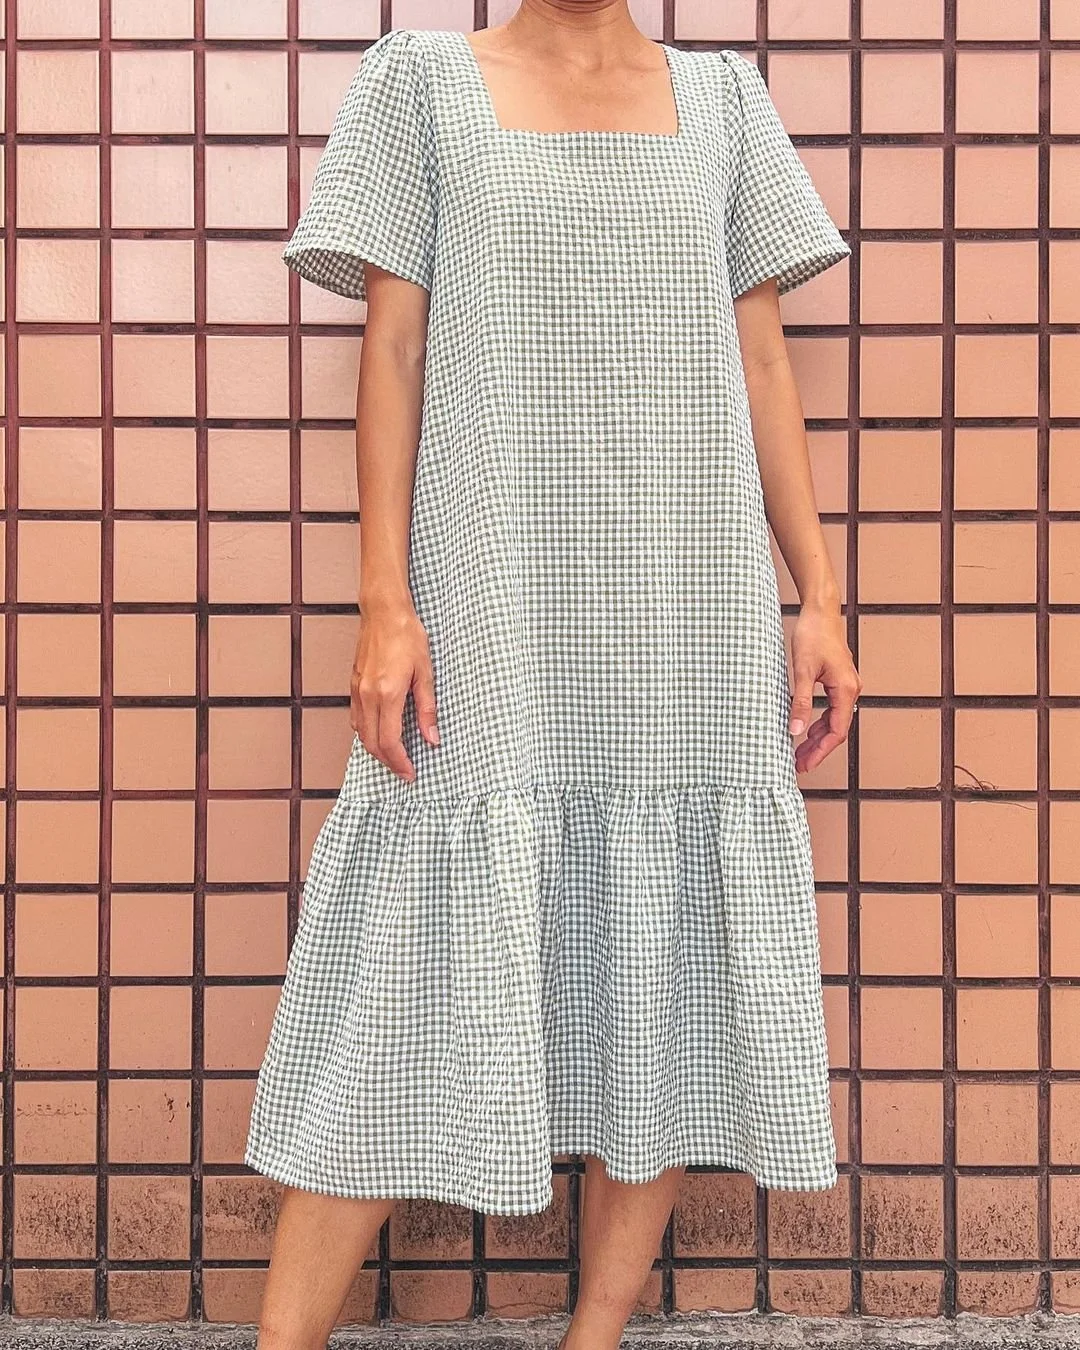
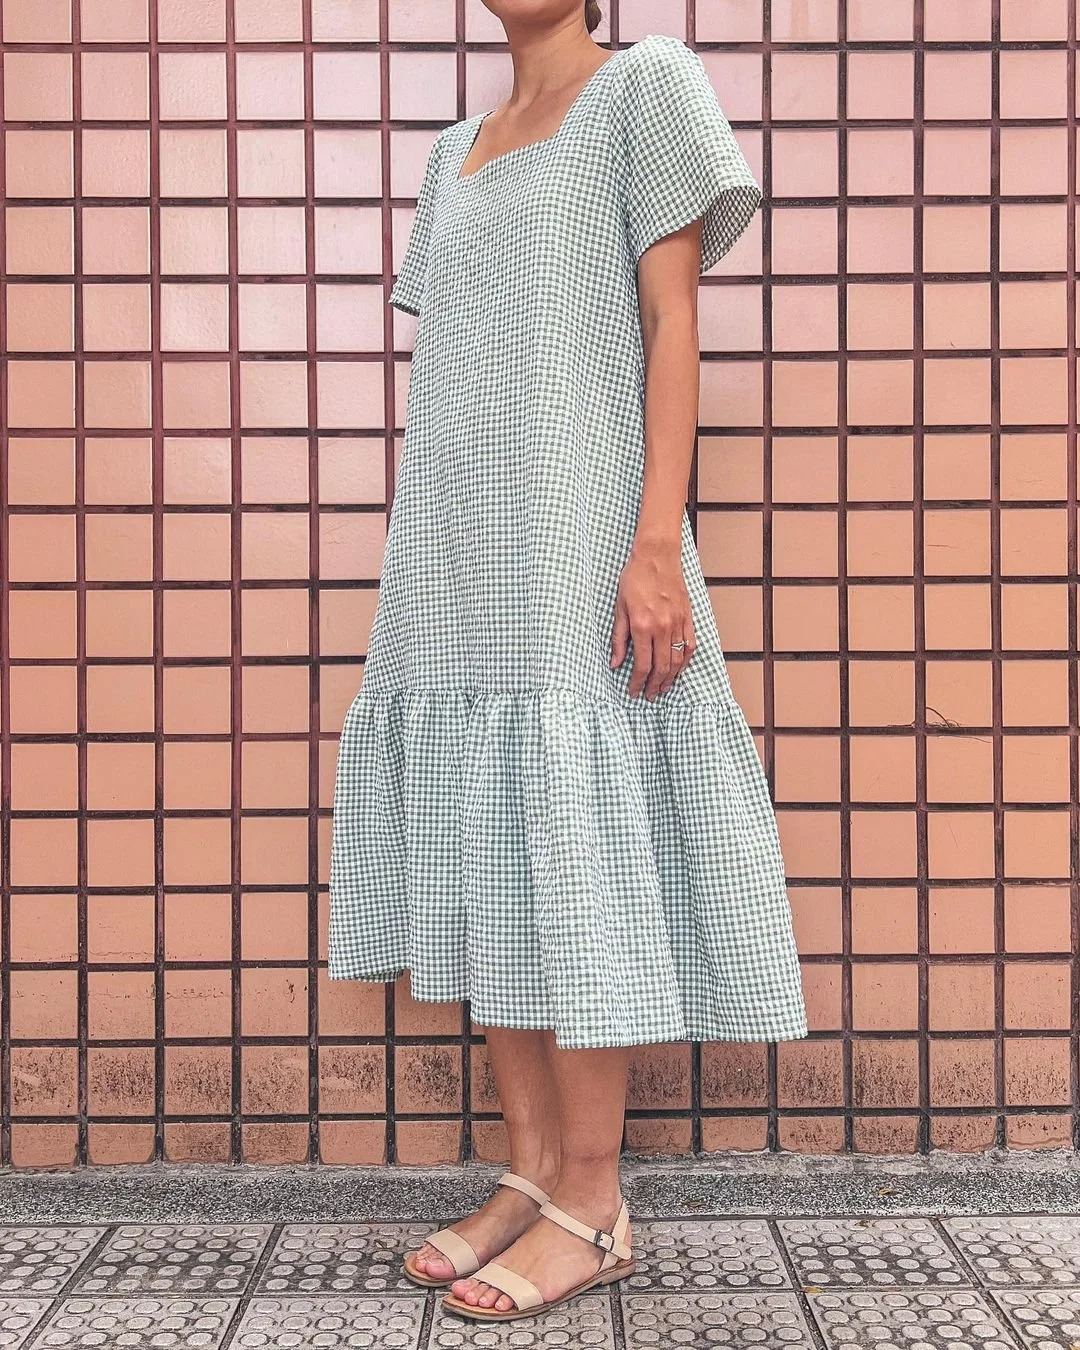
And that’s the finished dress!
The final result is so cute yet still feminine, making it perfect for the upcoming summer.
I hope you found my step-by-step guide helpful and inspiring.
If you’re interested in making your own, give it a try and let me know how it goes!
Until then, happy sewing!