DIY Tie front puff sleeve peplum blouse | Trying to make the Ganni Top | Sewing tutorial

DIY Tie front puff sleeve peplum blouse
Welcome or welcome back to my sewing blog!
In today’s sewing tutorial, I’ll guide you through creating your very own tie-front puff sleeve peplum blouse, which was inspired by the popular Ganni top that has been gracing social media feeds.
Whether you’re an experienced seamstress or a beginner, you’ll find this project approachable and rewarding. Follow along step by step, and soon you’ll have your own version of this charming blouse.
Let’s get started!
WHAT YOU’LL NEED
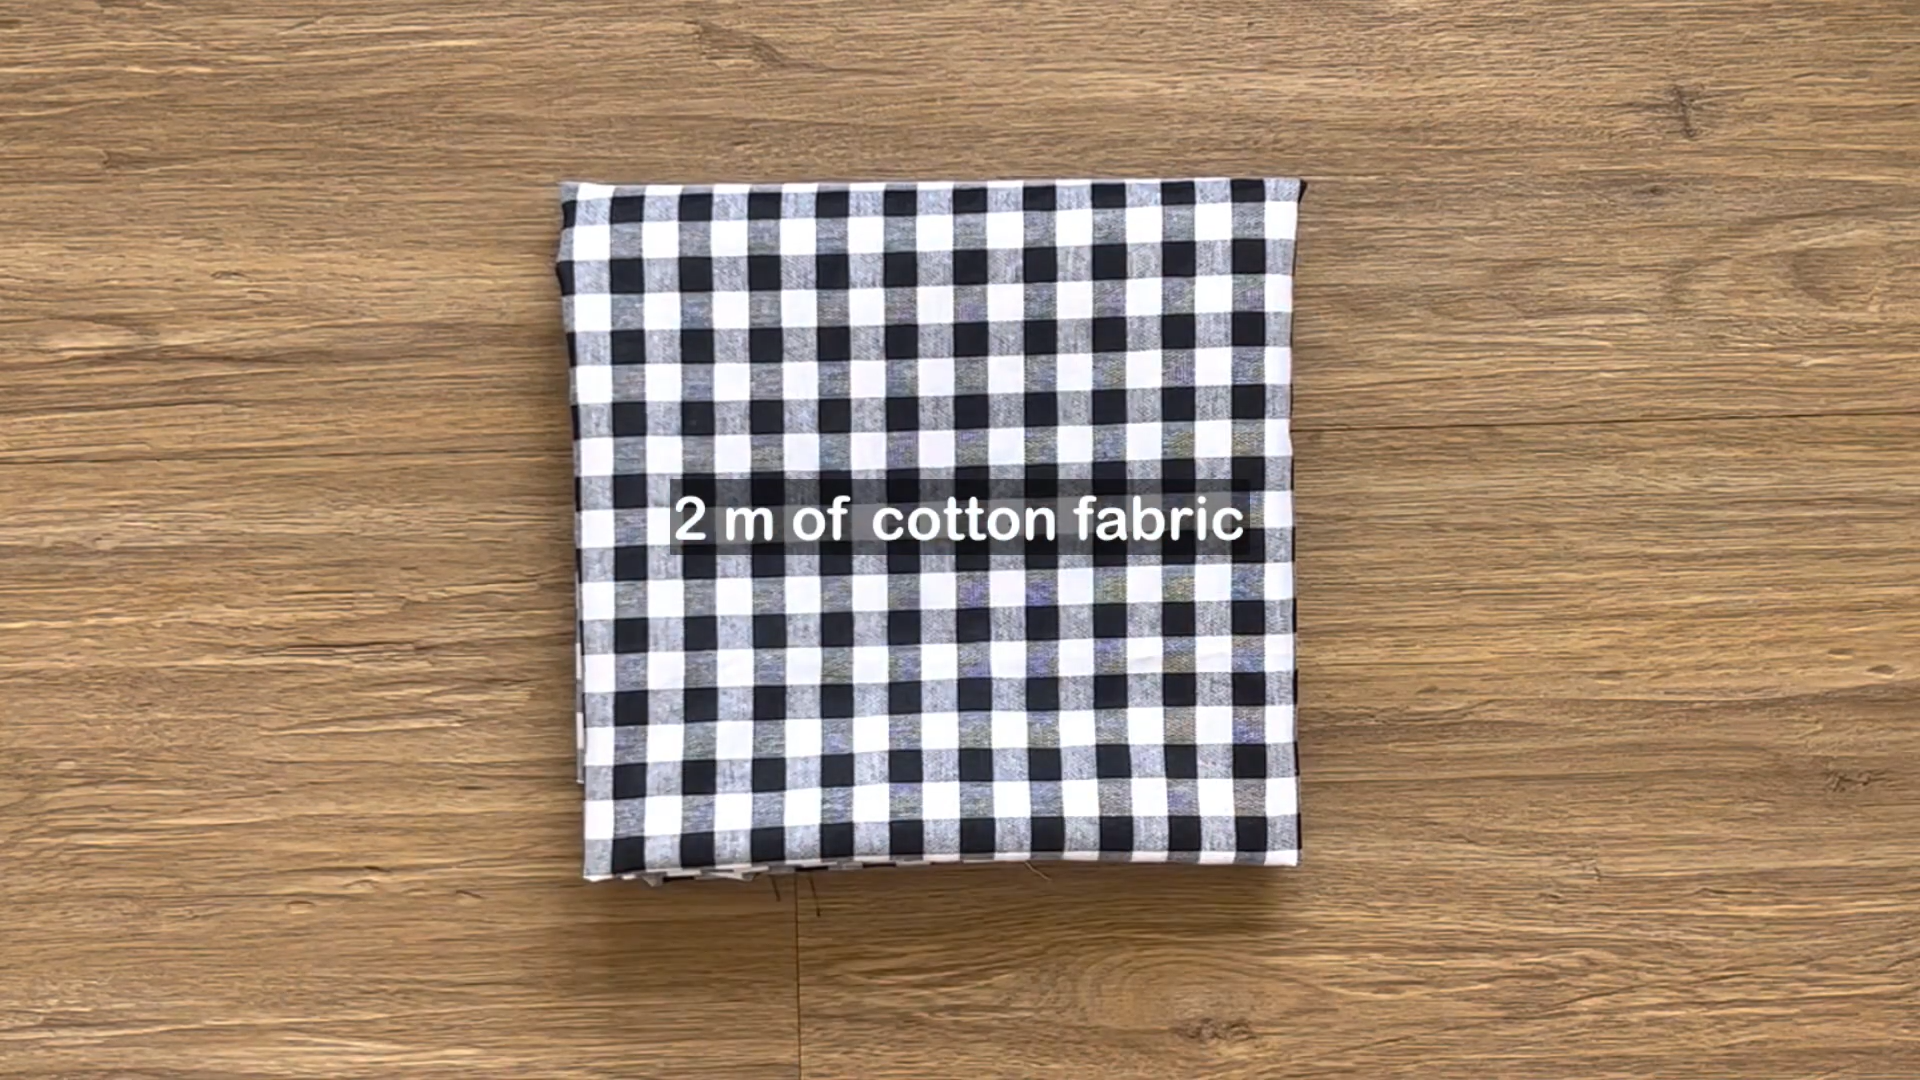
2m of cotton fabric
Pattern paper
Sewing machine
Pins
Scissors
Ruler
Long stick
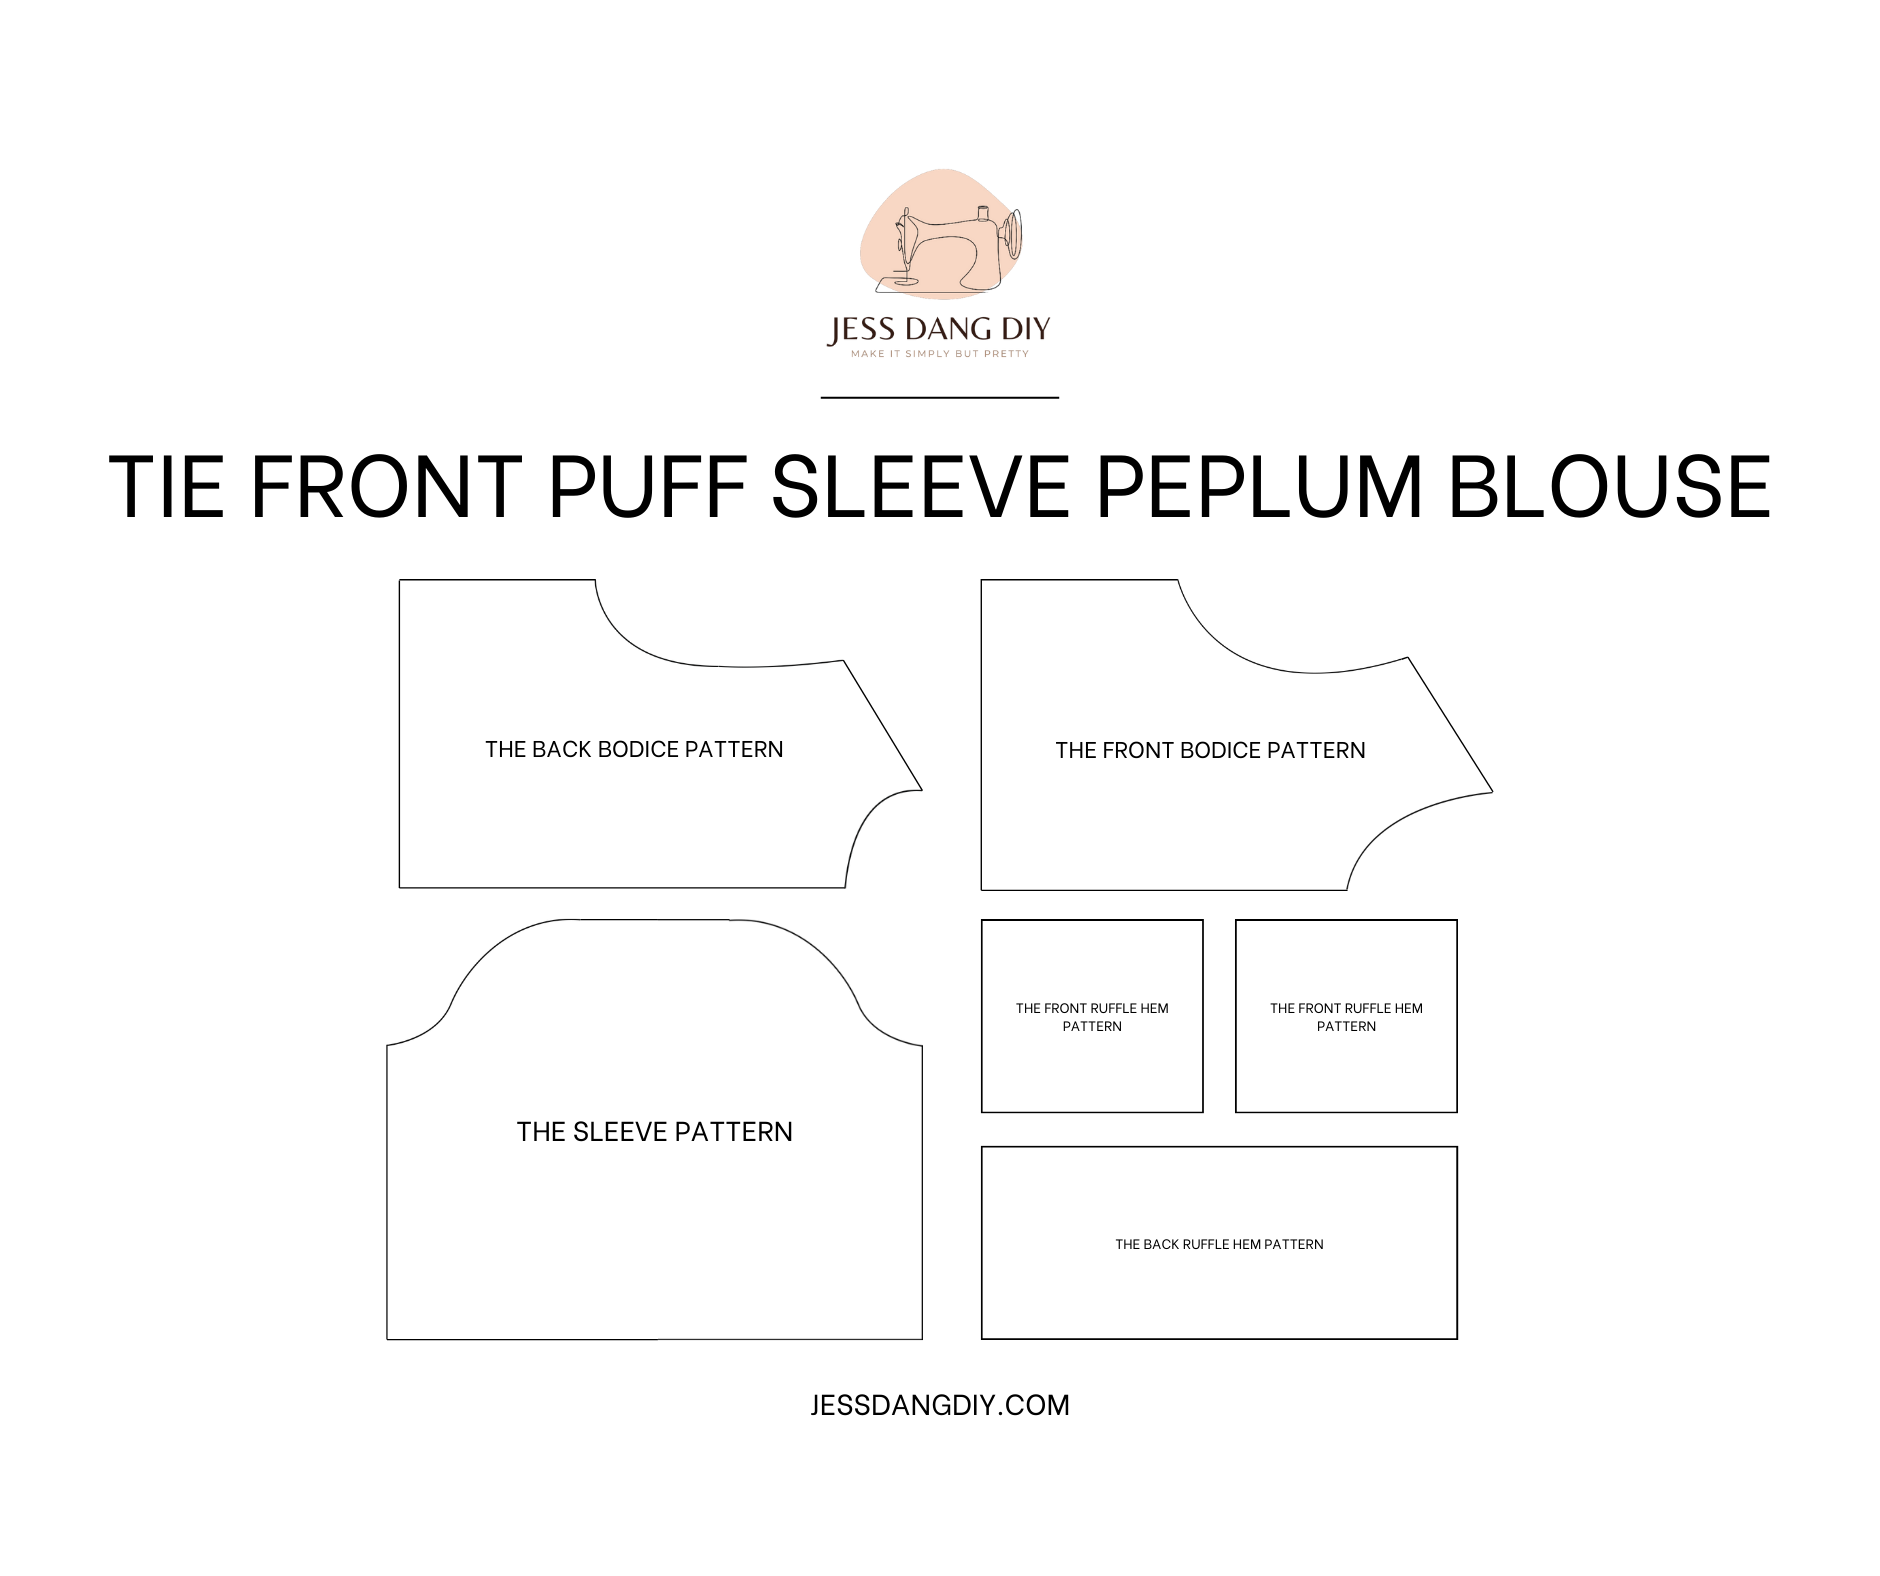
MAKING THE PATTERNS
Here’s the pattern for the project. To get a clear understanding of all the measurements needed for the pattern, watch the video from 0:27 to 7:57.
Remember, you can adjust these measurements to fit your own dimensions!
THE BACK BODICE PATTERN
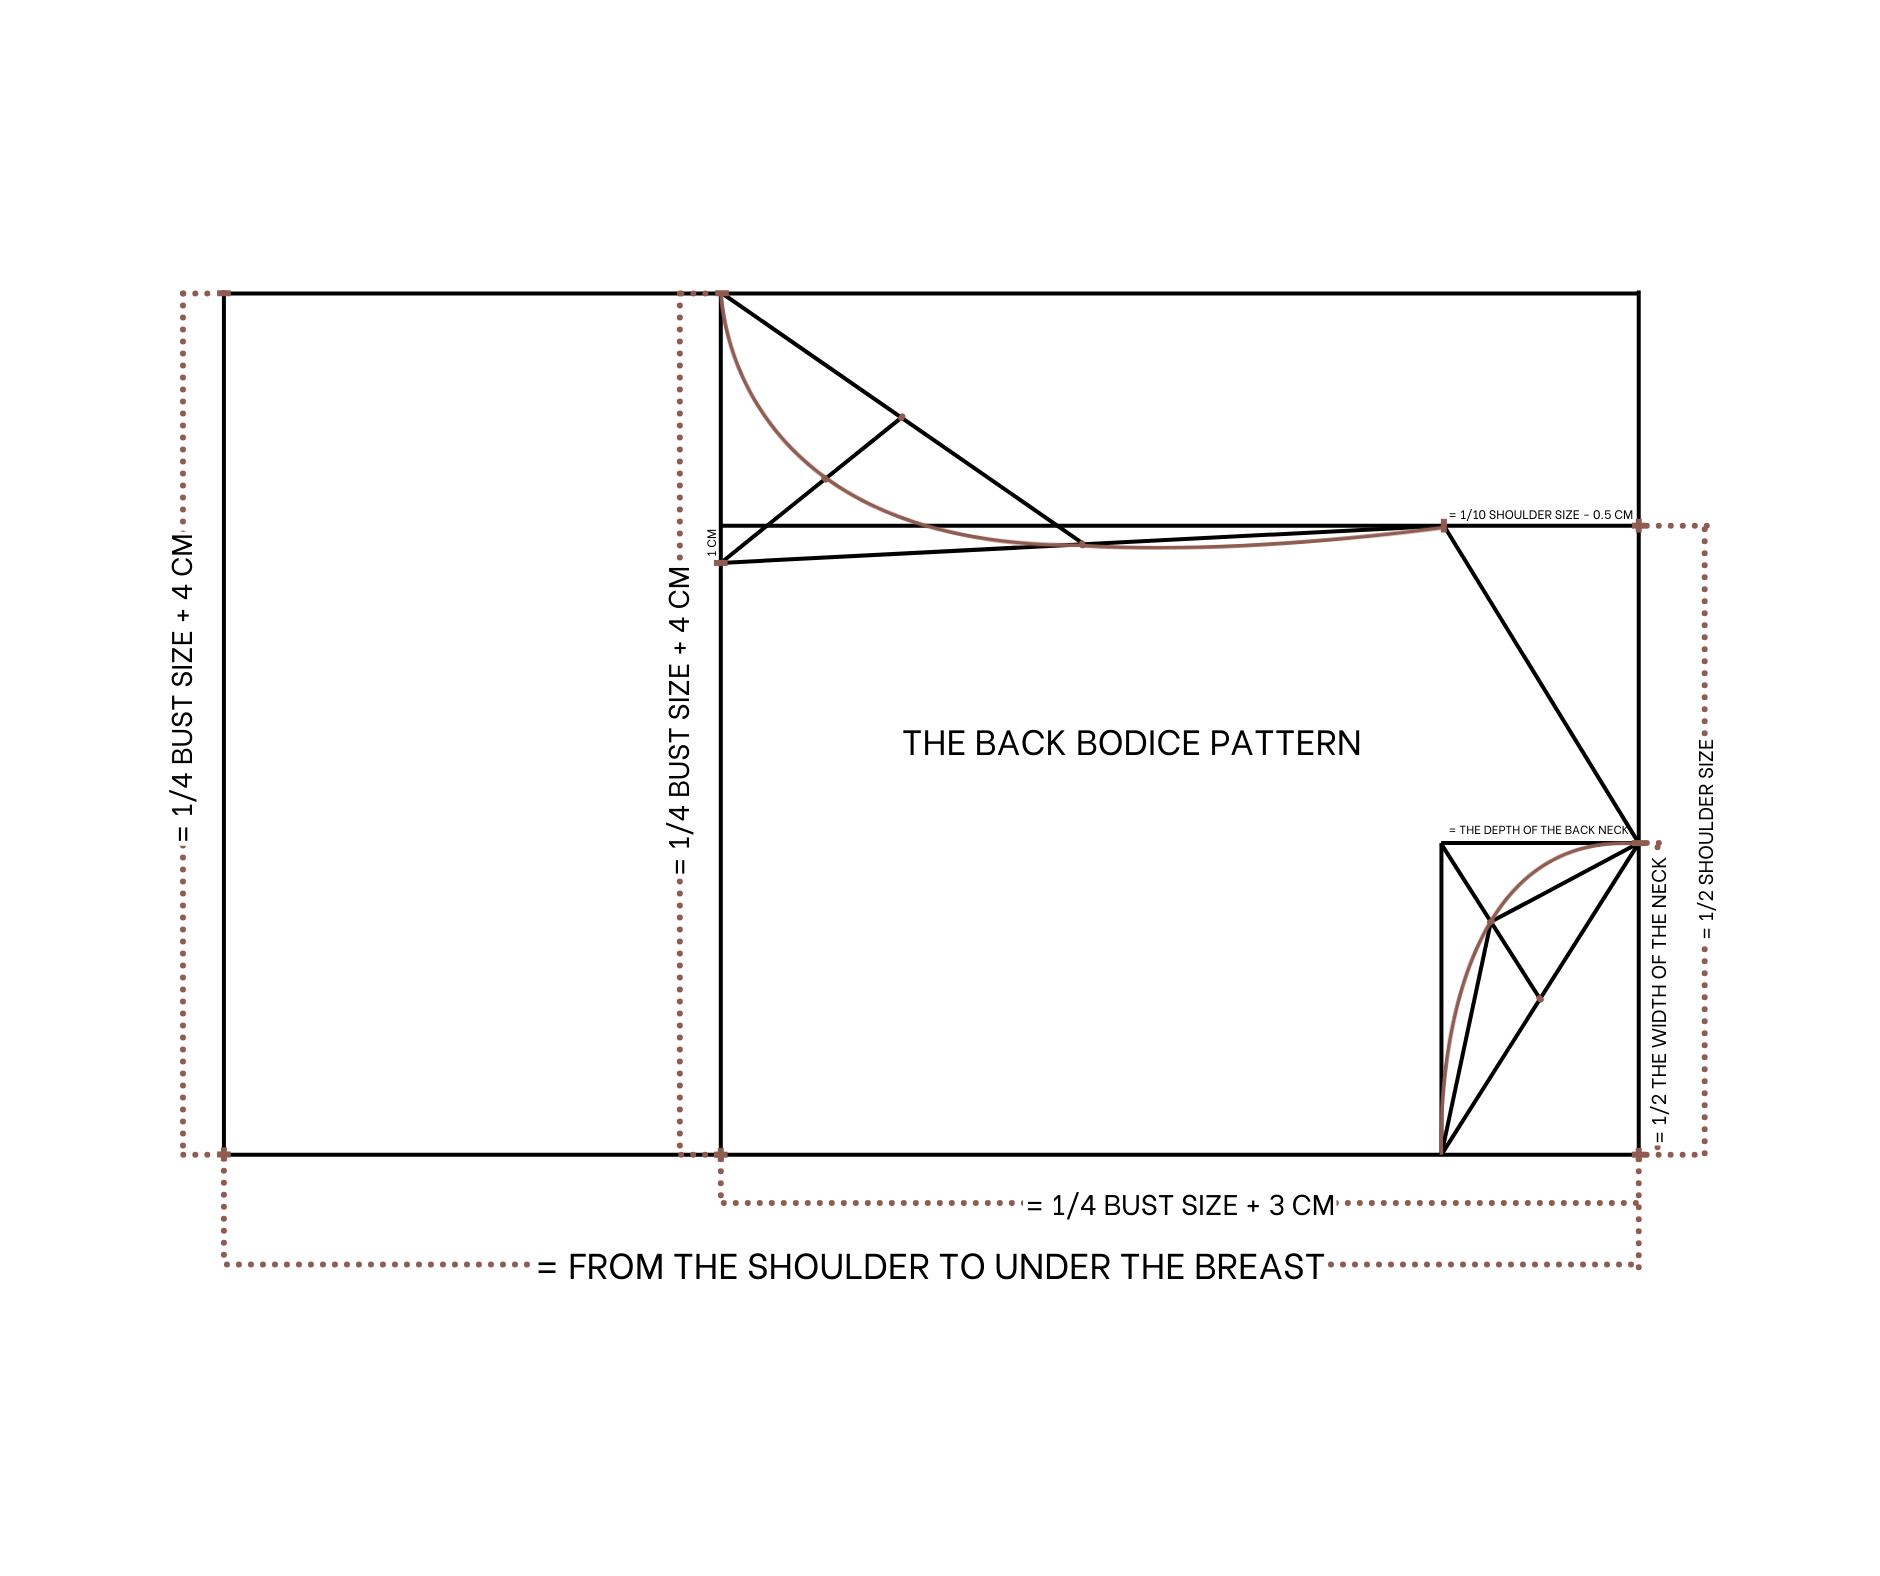
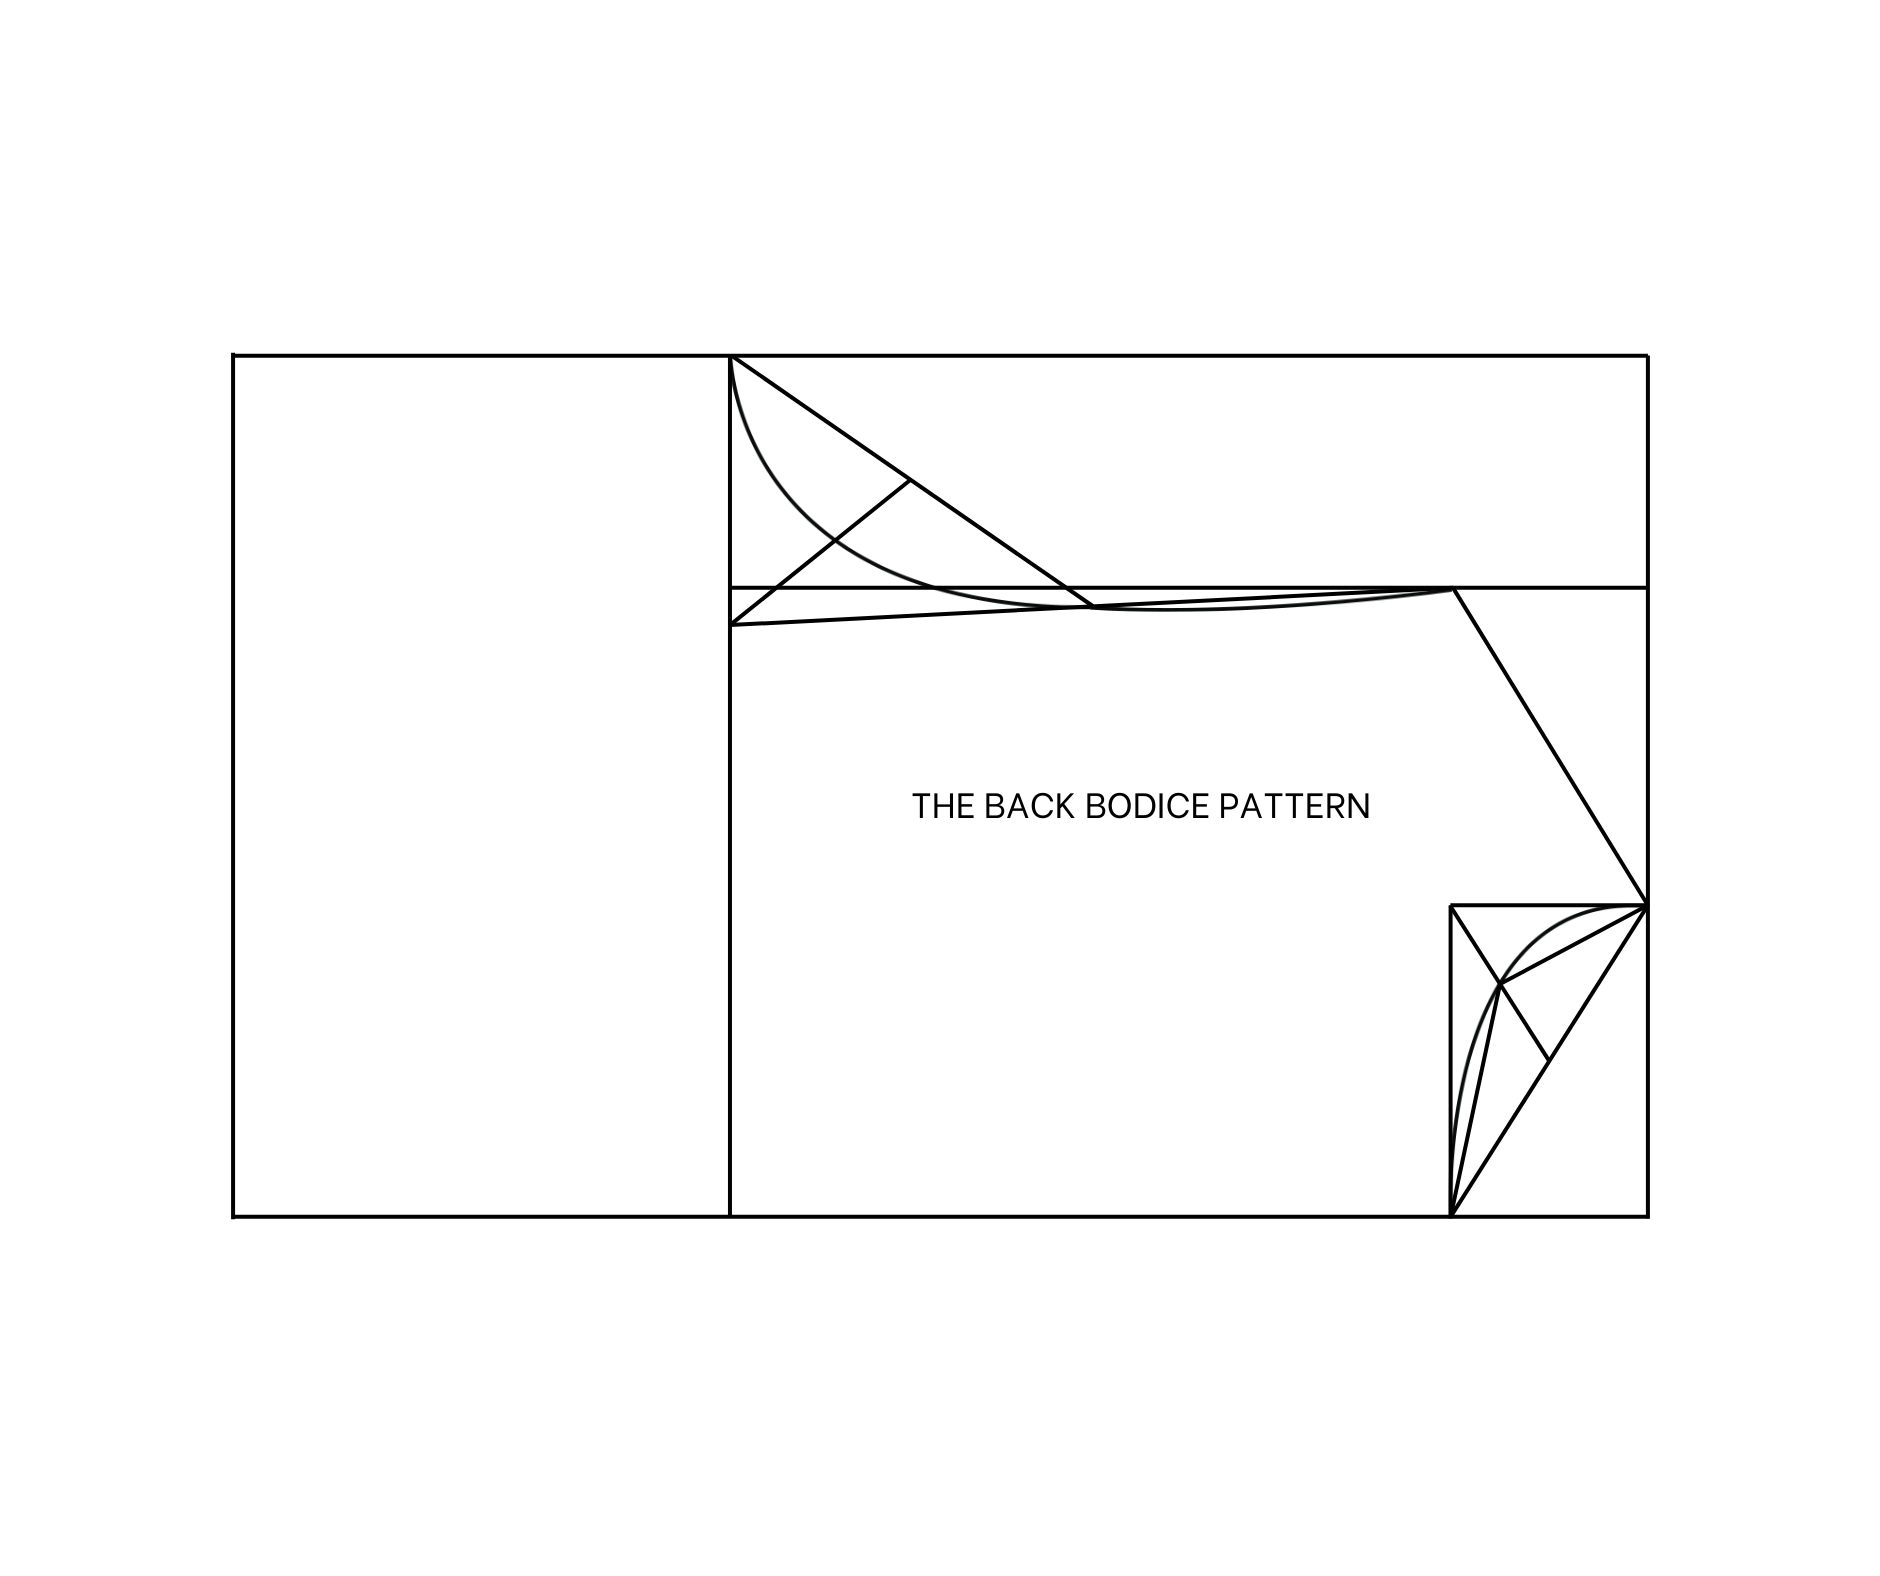
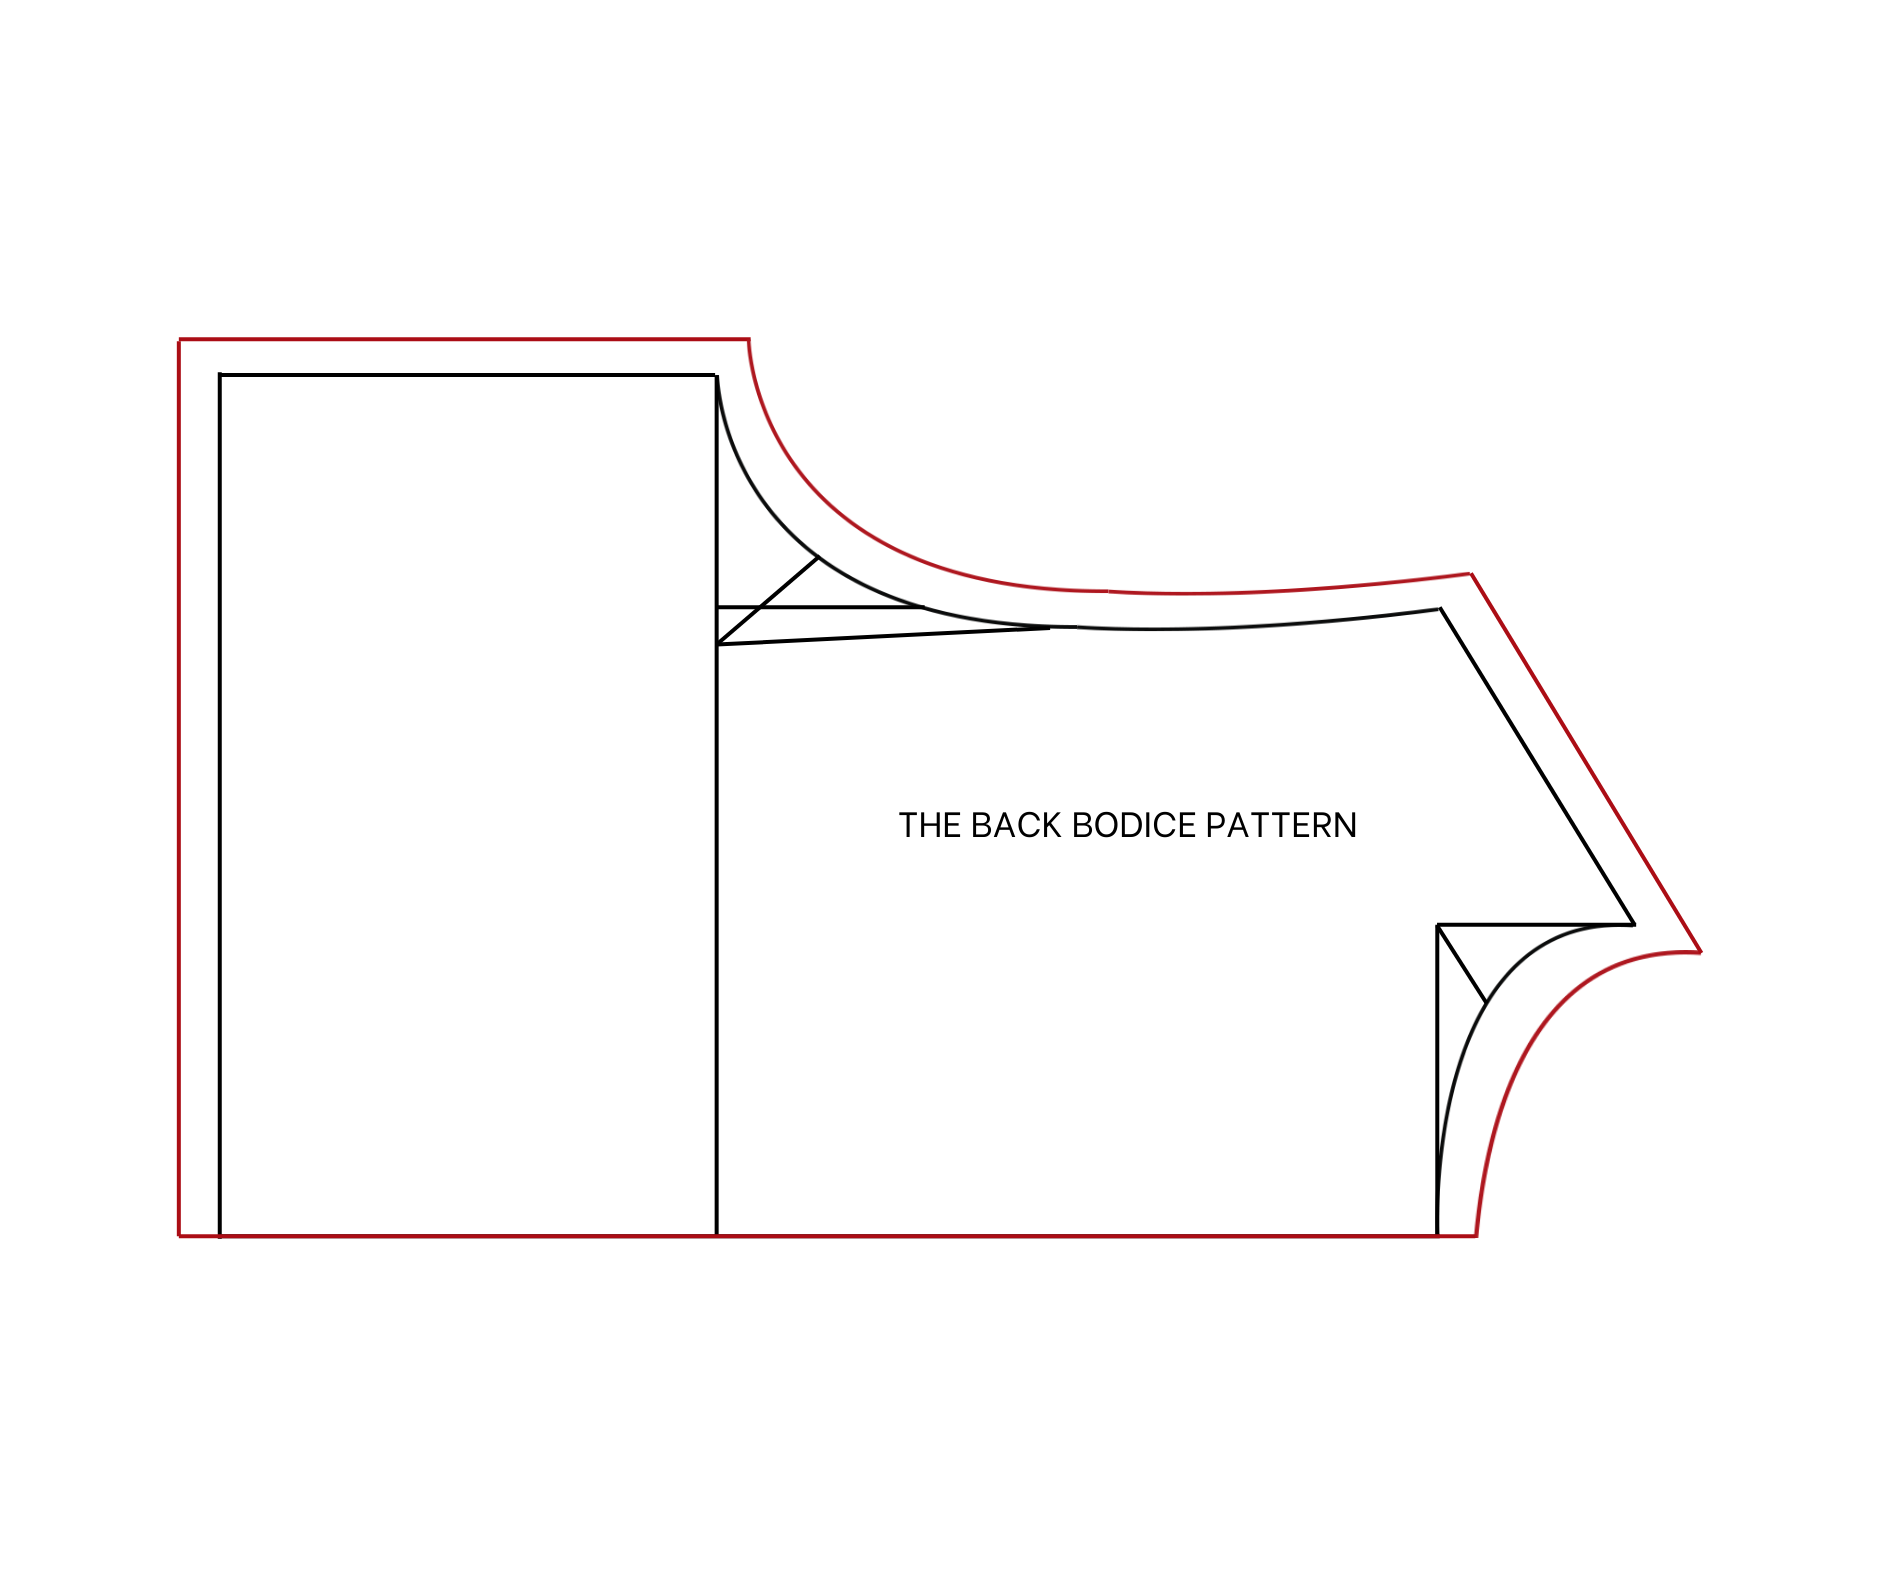
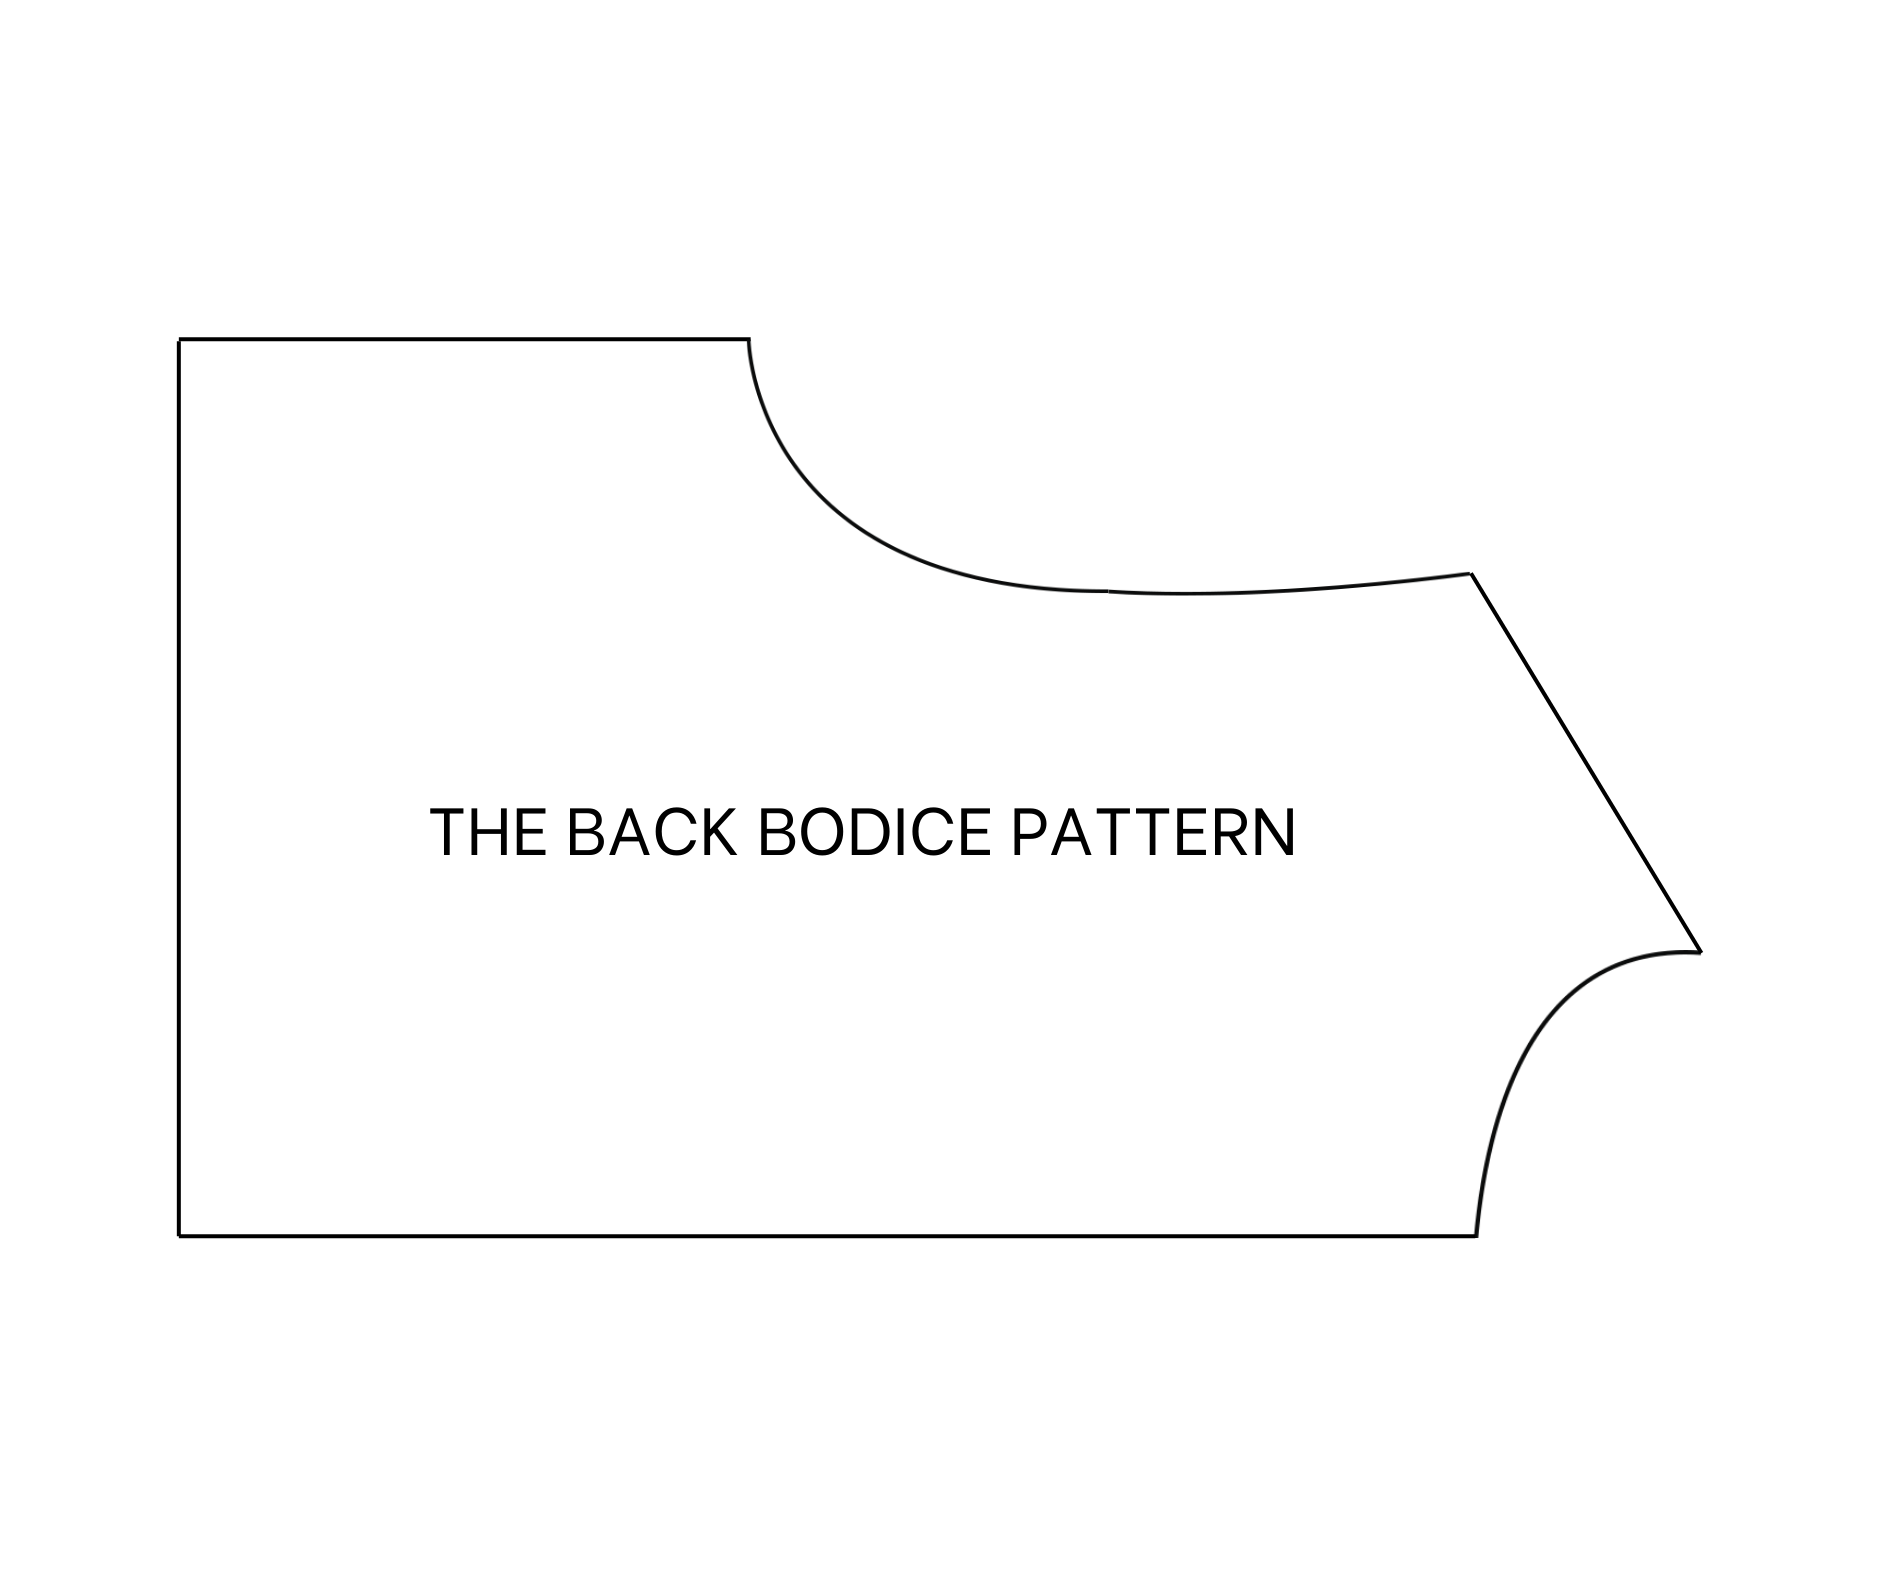
The back bodice pattern
To make the back bodice pattern, draw a straight line and a horizontal line cutting each other first.
From the cutting point, mark up 8 cm on the straight line which is a half width of the neck of the top that you want then draw a perpendicular line from that mark. The length of this line will be 3 cm which is the depth of the neck at the back bodice.
Then keep drawing a straight line from the end of the perpendicular line to cut the horizontal line. After that, connect this cutting point to the first mark on the straight line then drawing a curve line from this mark to meet the first mark on the first straight line to create the neck line for the back bodice.
From the end of the first straight line, keep marking up 17 cm which is a half width of the shoulder size. Then draw a perpendicular line from that mark the length of this line will be 2.9 cm which is 1 per 10 the shoulder size minus 0.5 cm. Connect the end of this line to the top of the neck line to create a shoulder line for the back bodice.
From the first straight line, draw another one 23 cm away from it, it's a quarter of my bust size plus 3 cm. From the cutting point between the new line and the horizontal line, mark up 24 cm which is a quarter of my bust size plus 4 cm. After that, continue the perpendicular line from the shoulder to cut this bust line at one point.
From the cutting point, mark inside 1 cm then connect this mark to the end of the shoulder line. Mark in the middle of this slanted line after that, then draw a curve line from the mark on the bust line to this mark and finish it at the end of the shoulder line to create a sleeve line for the back bodice.
From the first straight line, keep drawing another one 40 cm away from it, it's the length from the shoulder to under the breast. From the end of this line, mark up 24 cm which is the same width of the bust line then connect this mark to the end of the sleeve line to create the sideline of the back bodice.
Add 1 cm for seam allowance after that except at the horizontal line and we will have the back bodice pattern after cutting. You will need to cut this pattern in full fabric at the horizontal line.
THE FRONT BODICE PATTERN
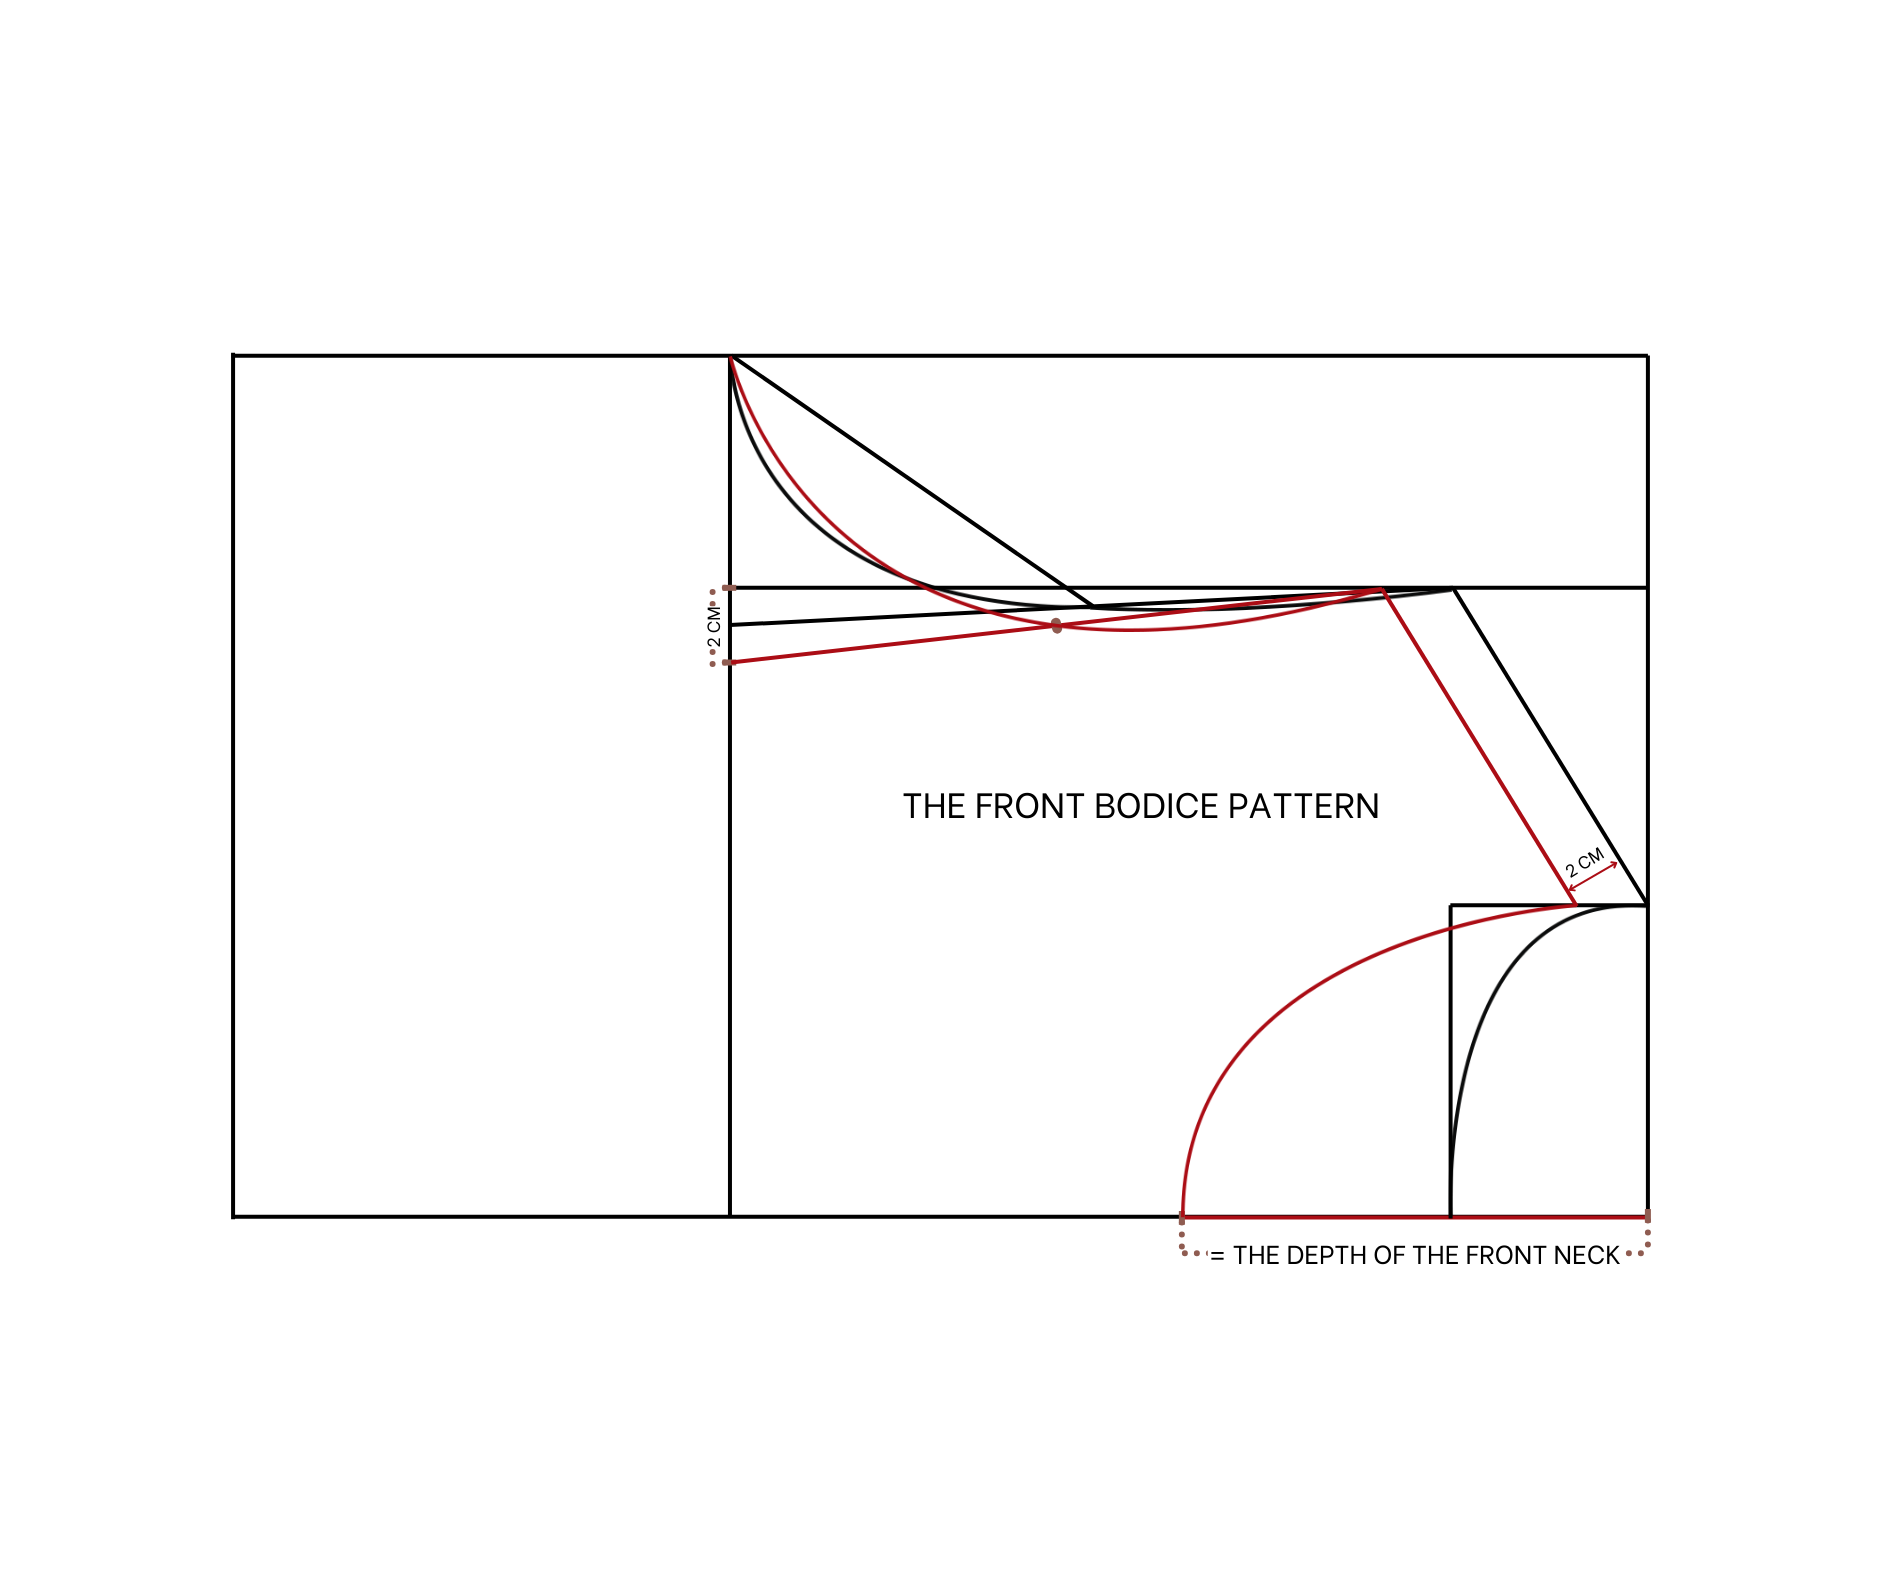
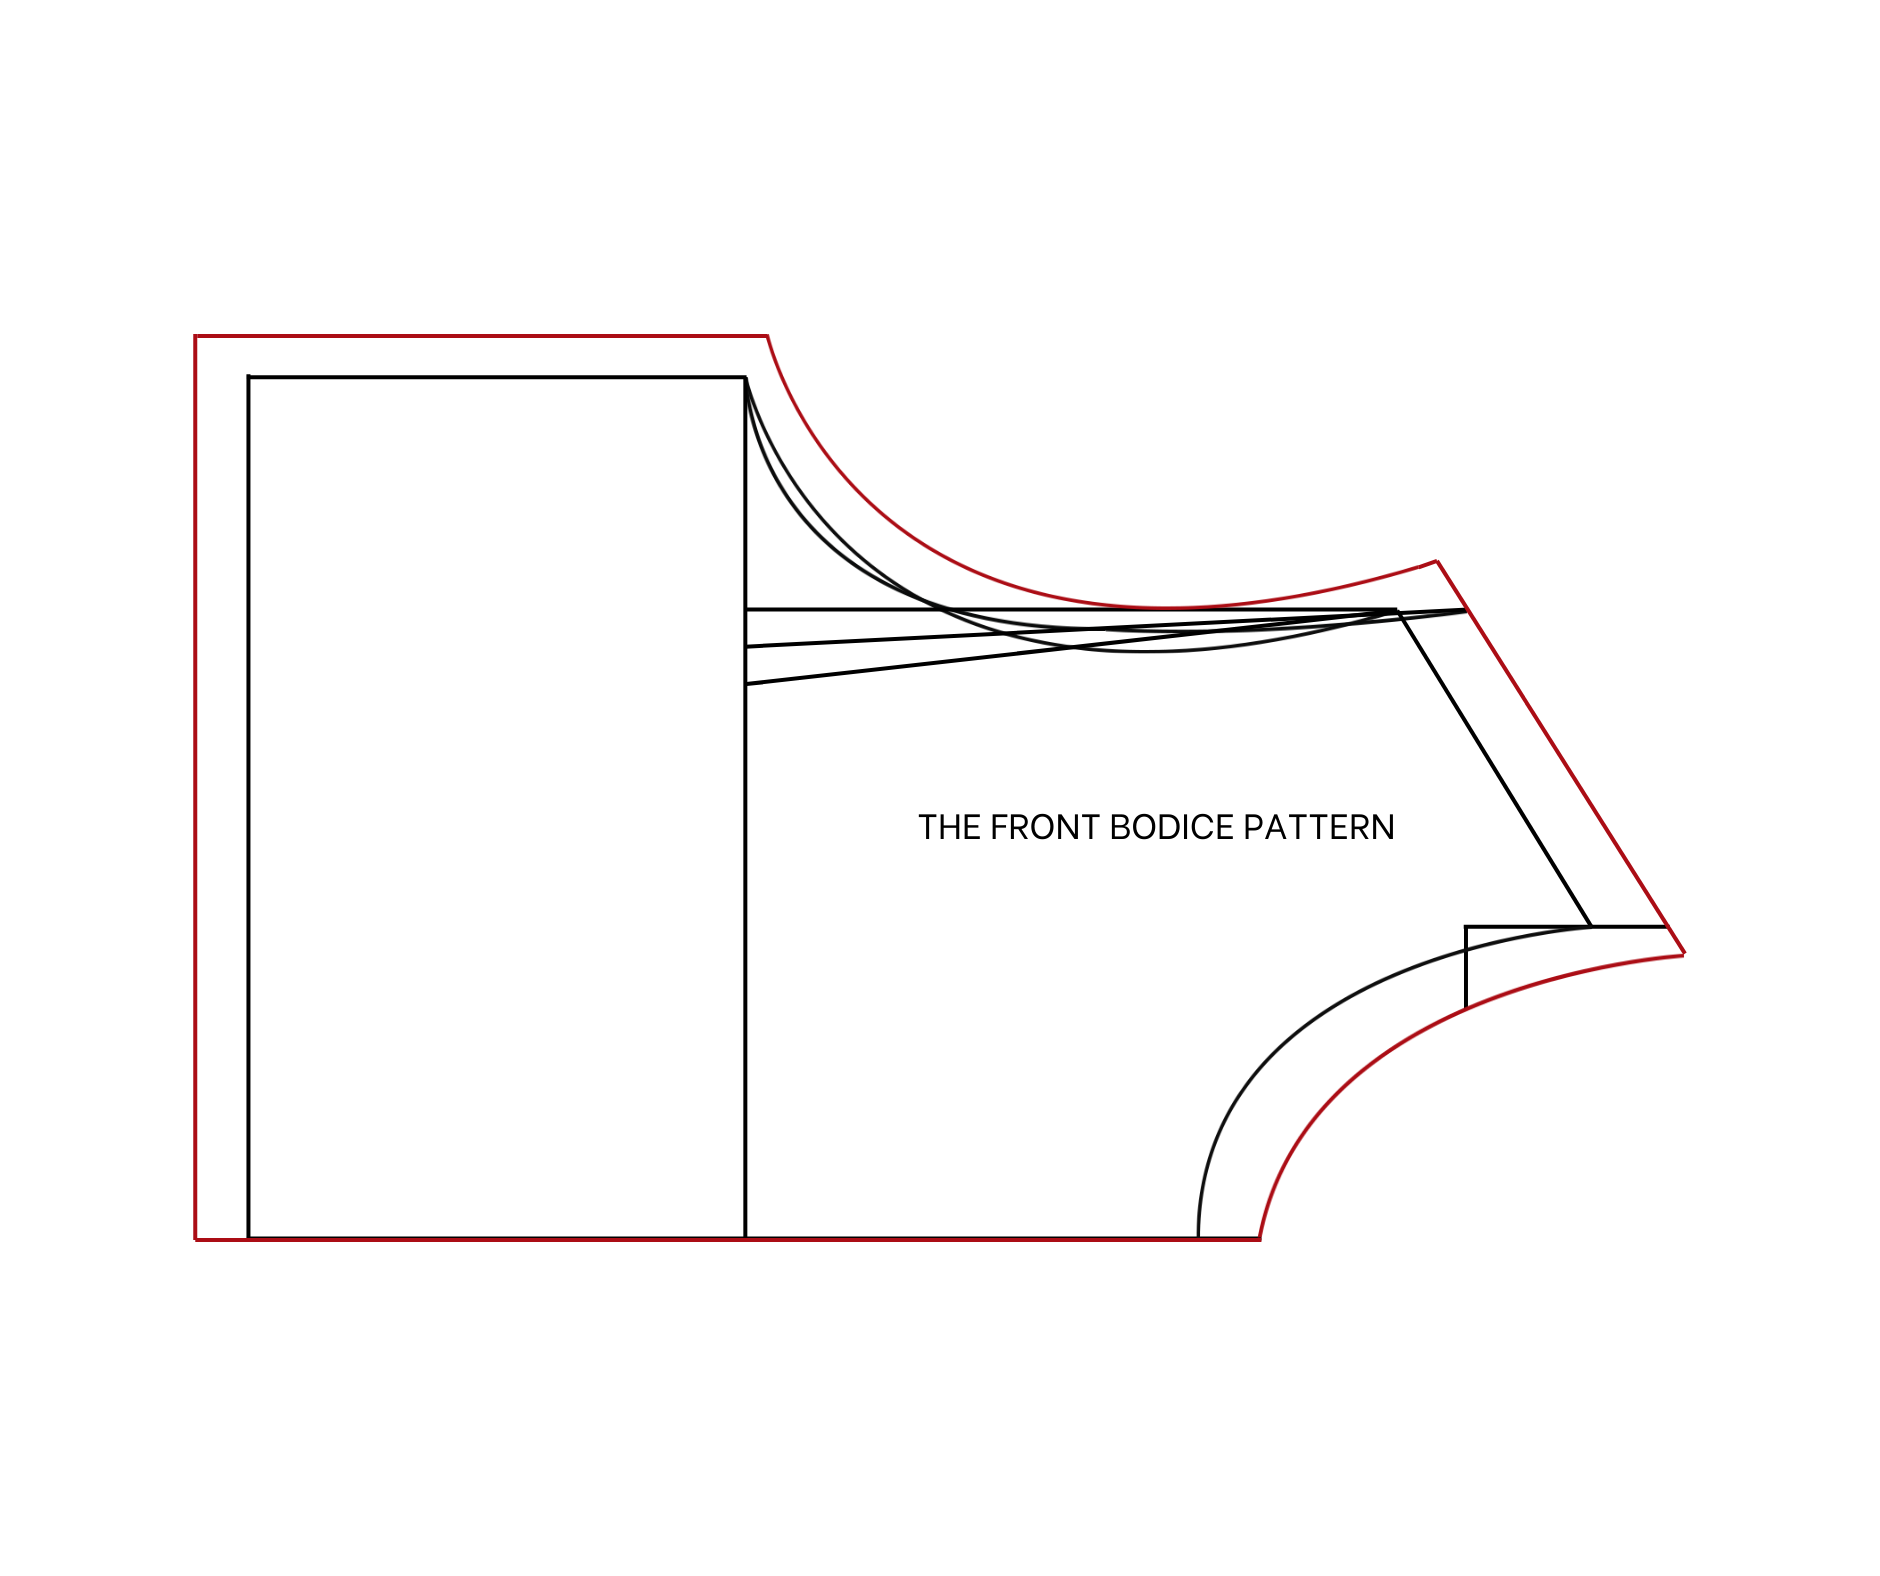
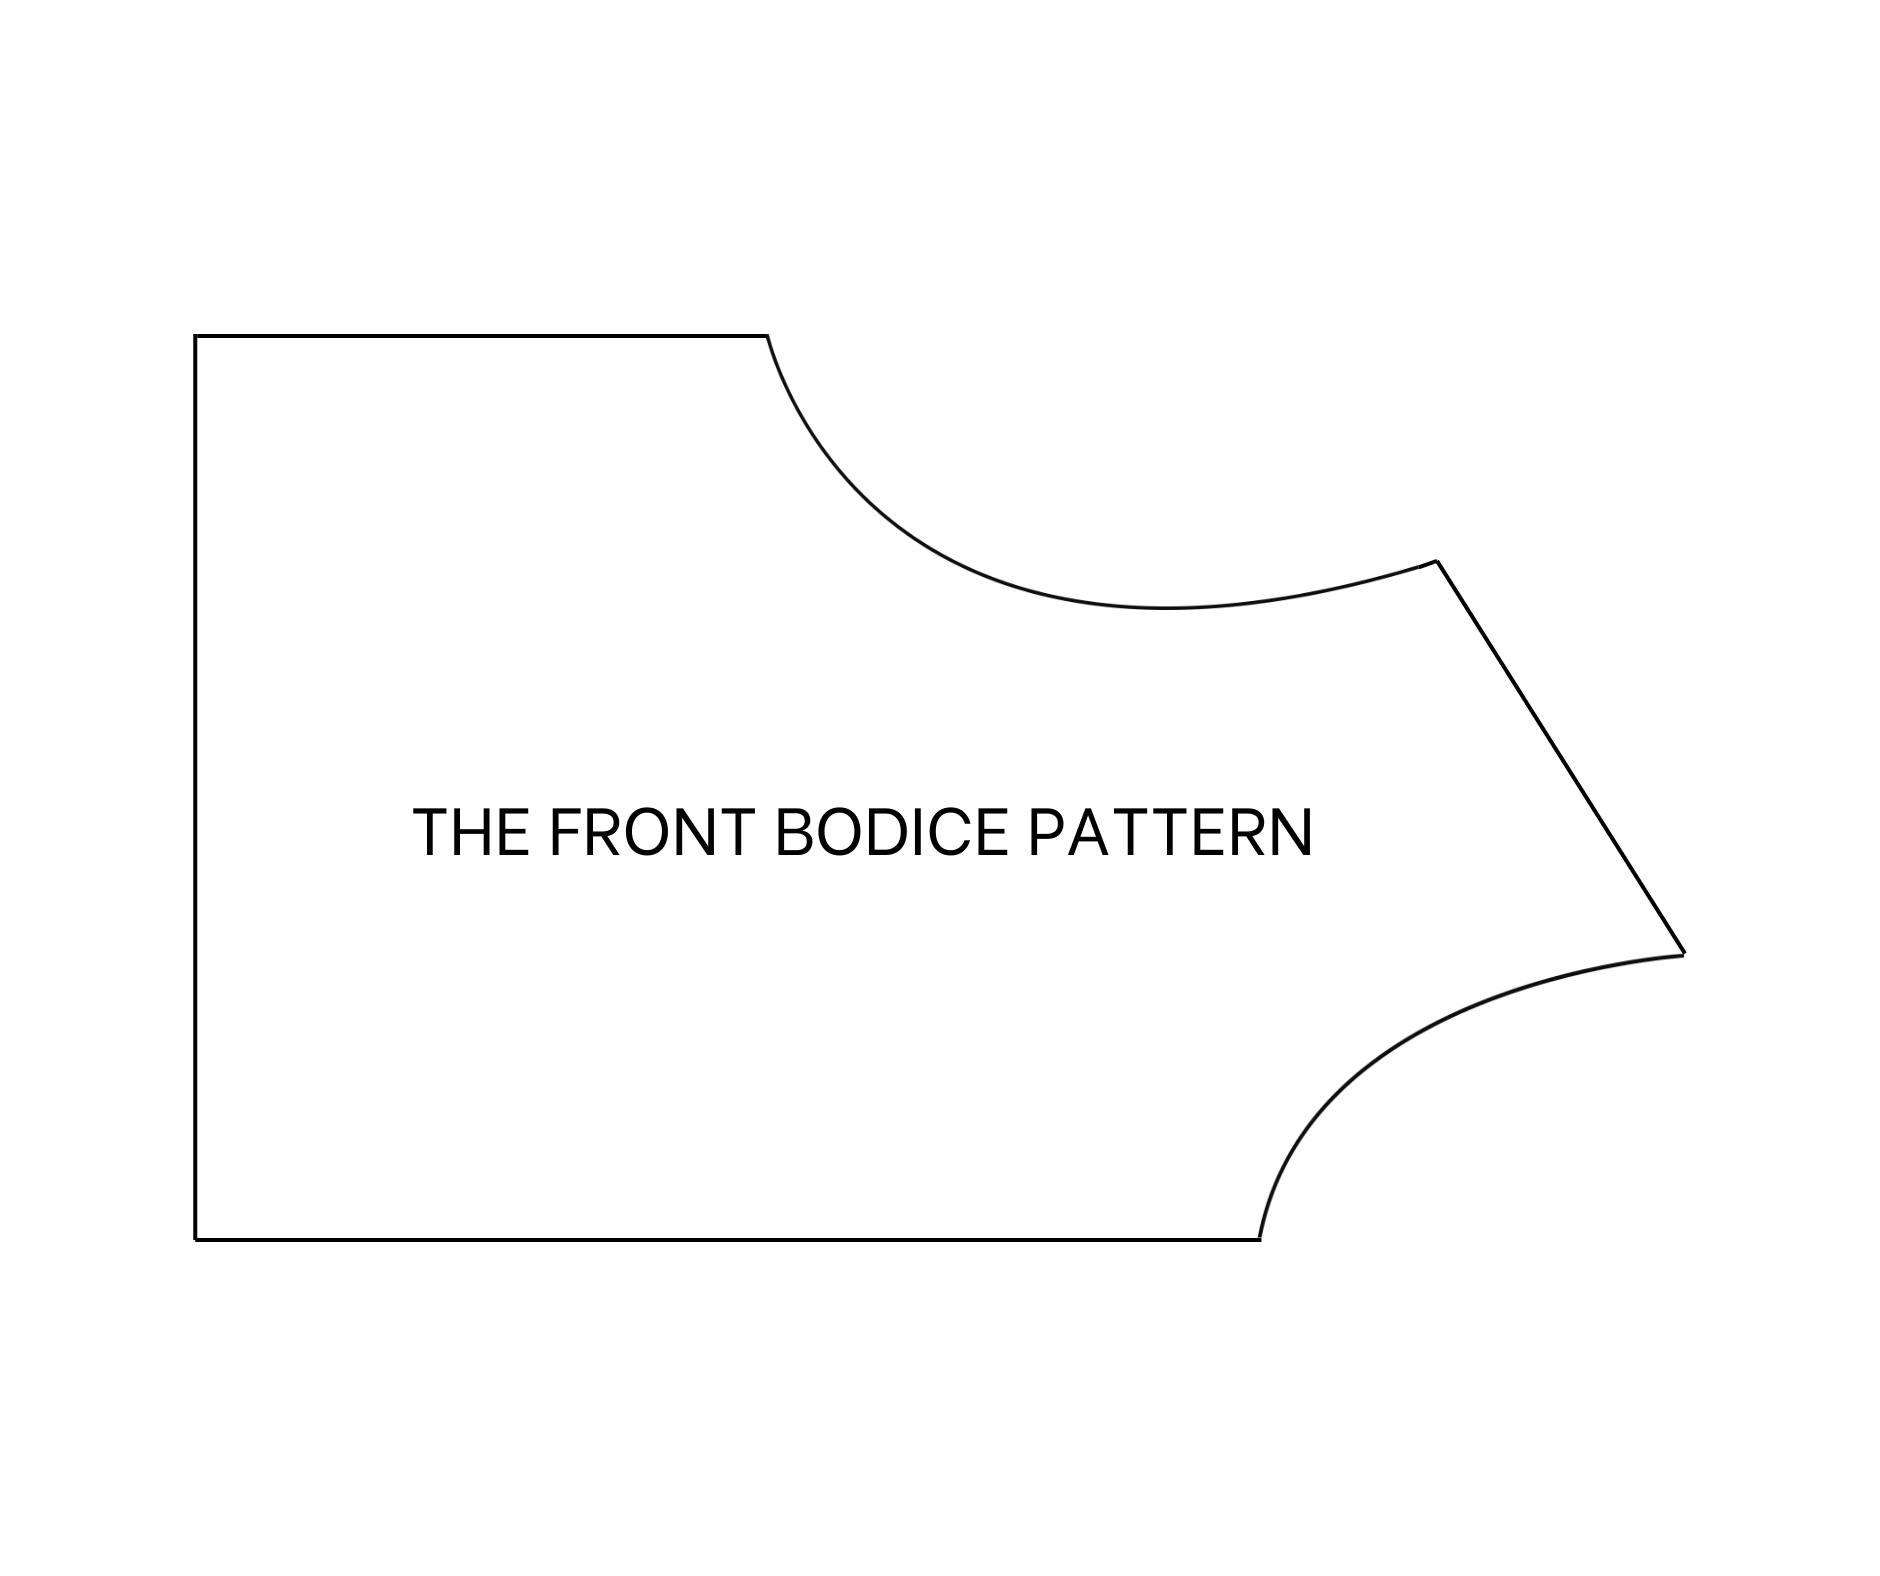
The front bodice pattern
You will base on the back bodice pattern without the seam allowance.
From the shoulder line, draw a parallel line that is 2 cm under it.
From the end of the first straight line, mark at 9 cm on the horizontal line, it's the depth of the neck at the front bodice that you want.
Then draw a curve line from that mark to the top of the new shoulder line to create a new neckline for the front bodice.
From the cutting point between the perpendicular line on the shoulder to the bust line, mark to the inside 2 cm instead of 1 cm that you did at the back then connect this mark to the end of the new shoulder line.
After that, mark in the middle of this new line before drawing a curve line from the mark on the bust line through this mark and finish at the end of the new shoulder line to create the new sleeve line for the front bodice.
Add 1 cm for seam allowance and after that except the horizontal line.
We will have the front bodice pattern after cutting.
THE SLEEVE PATTERN
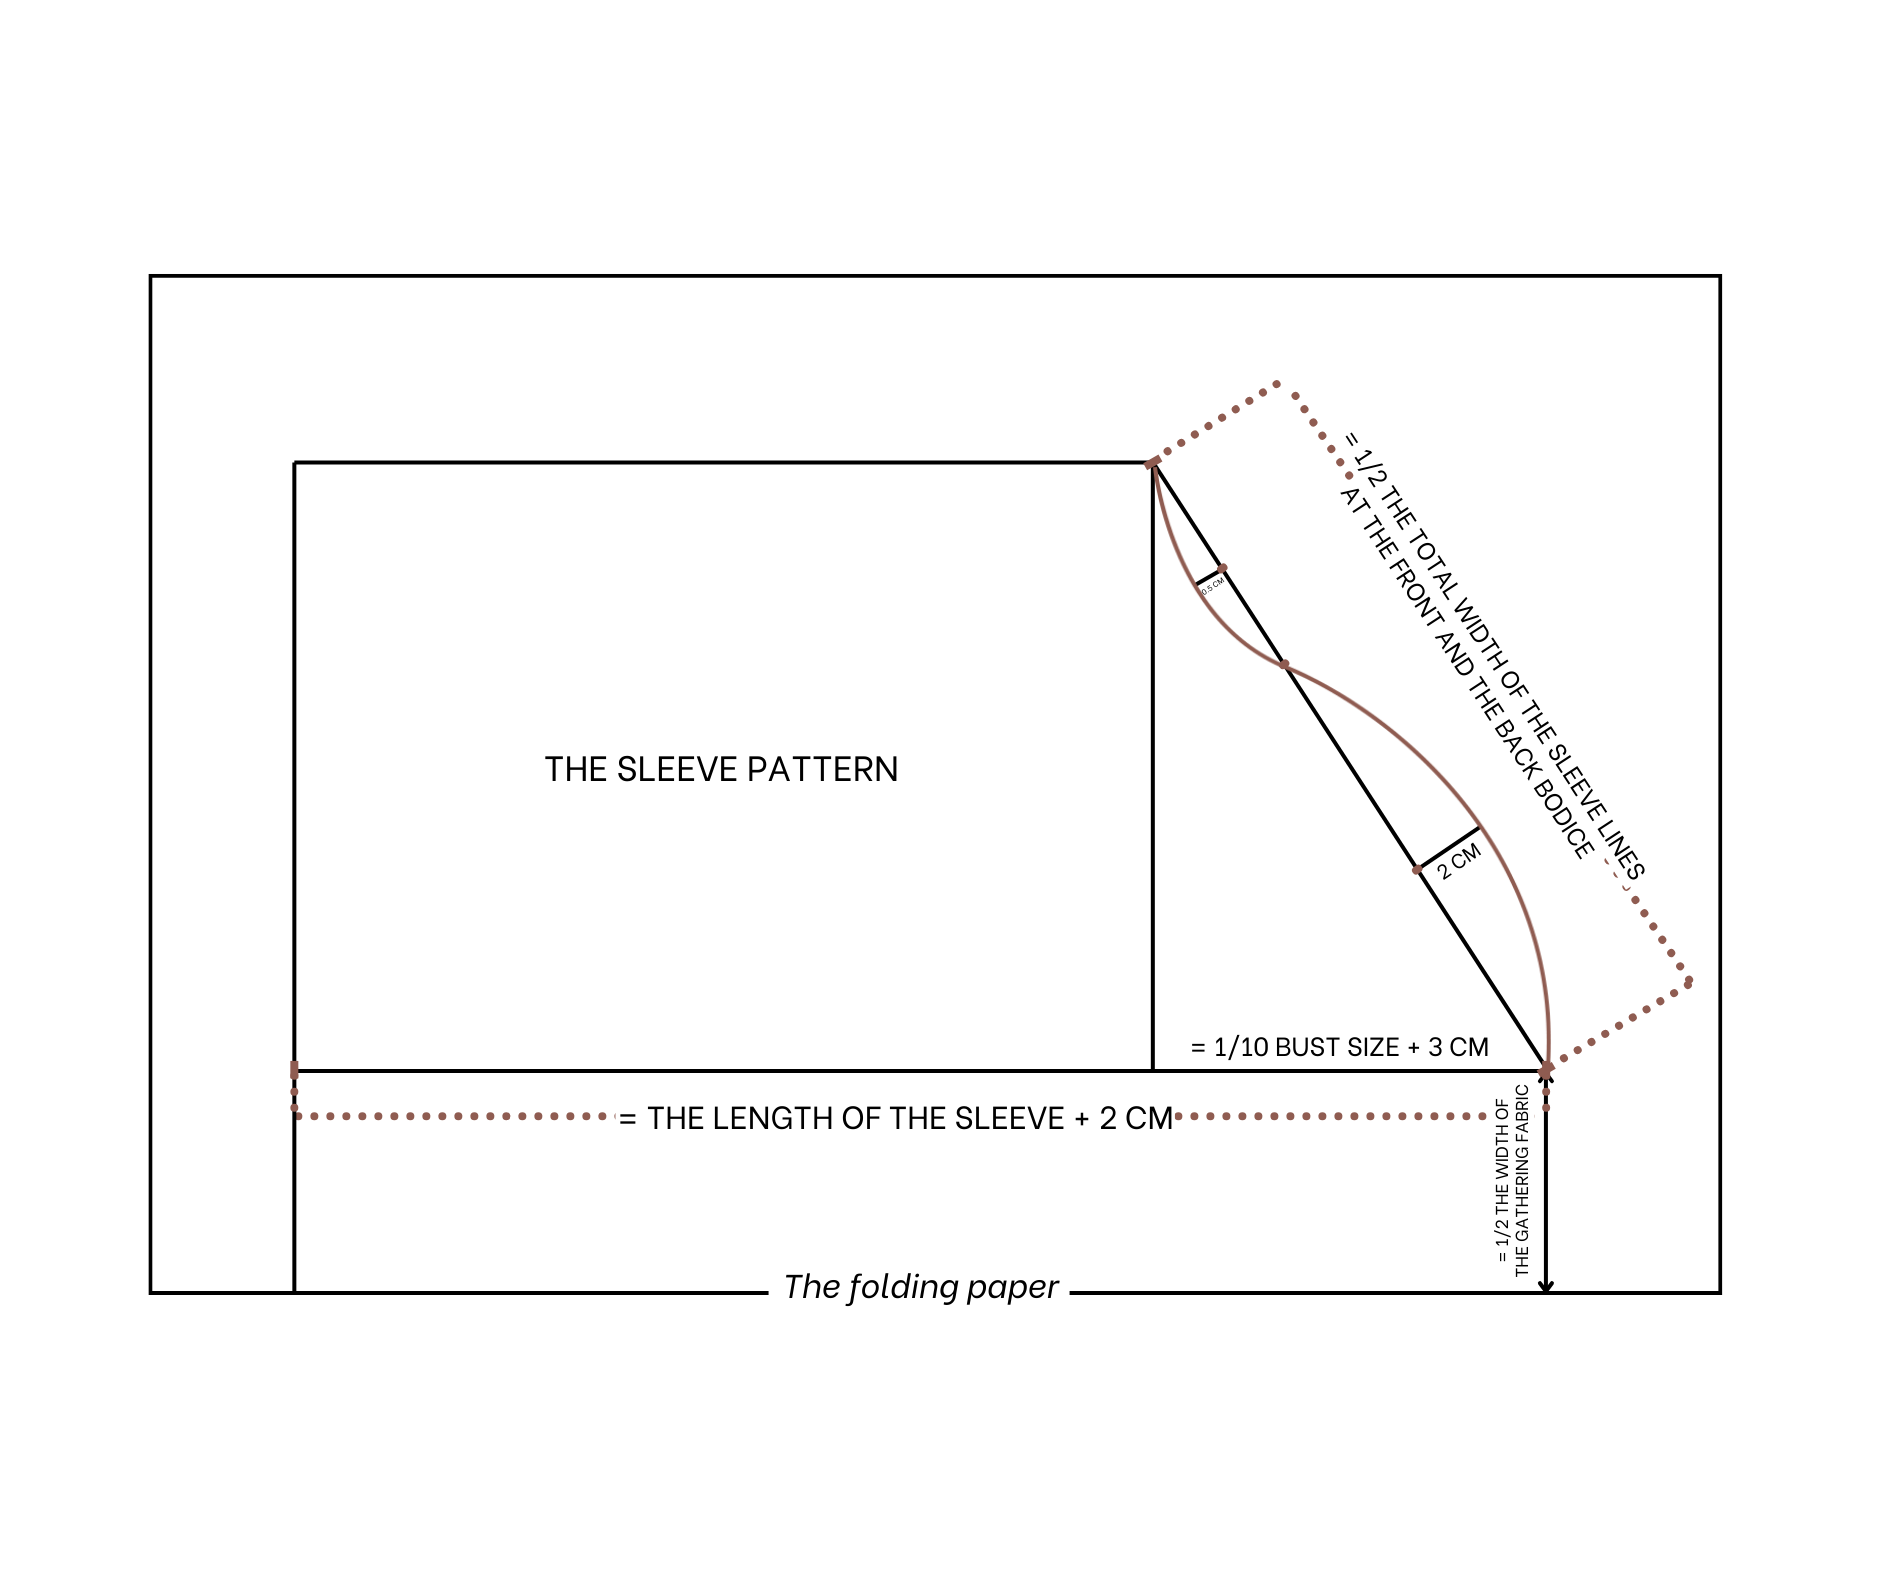
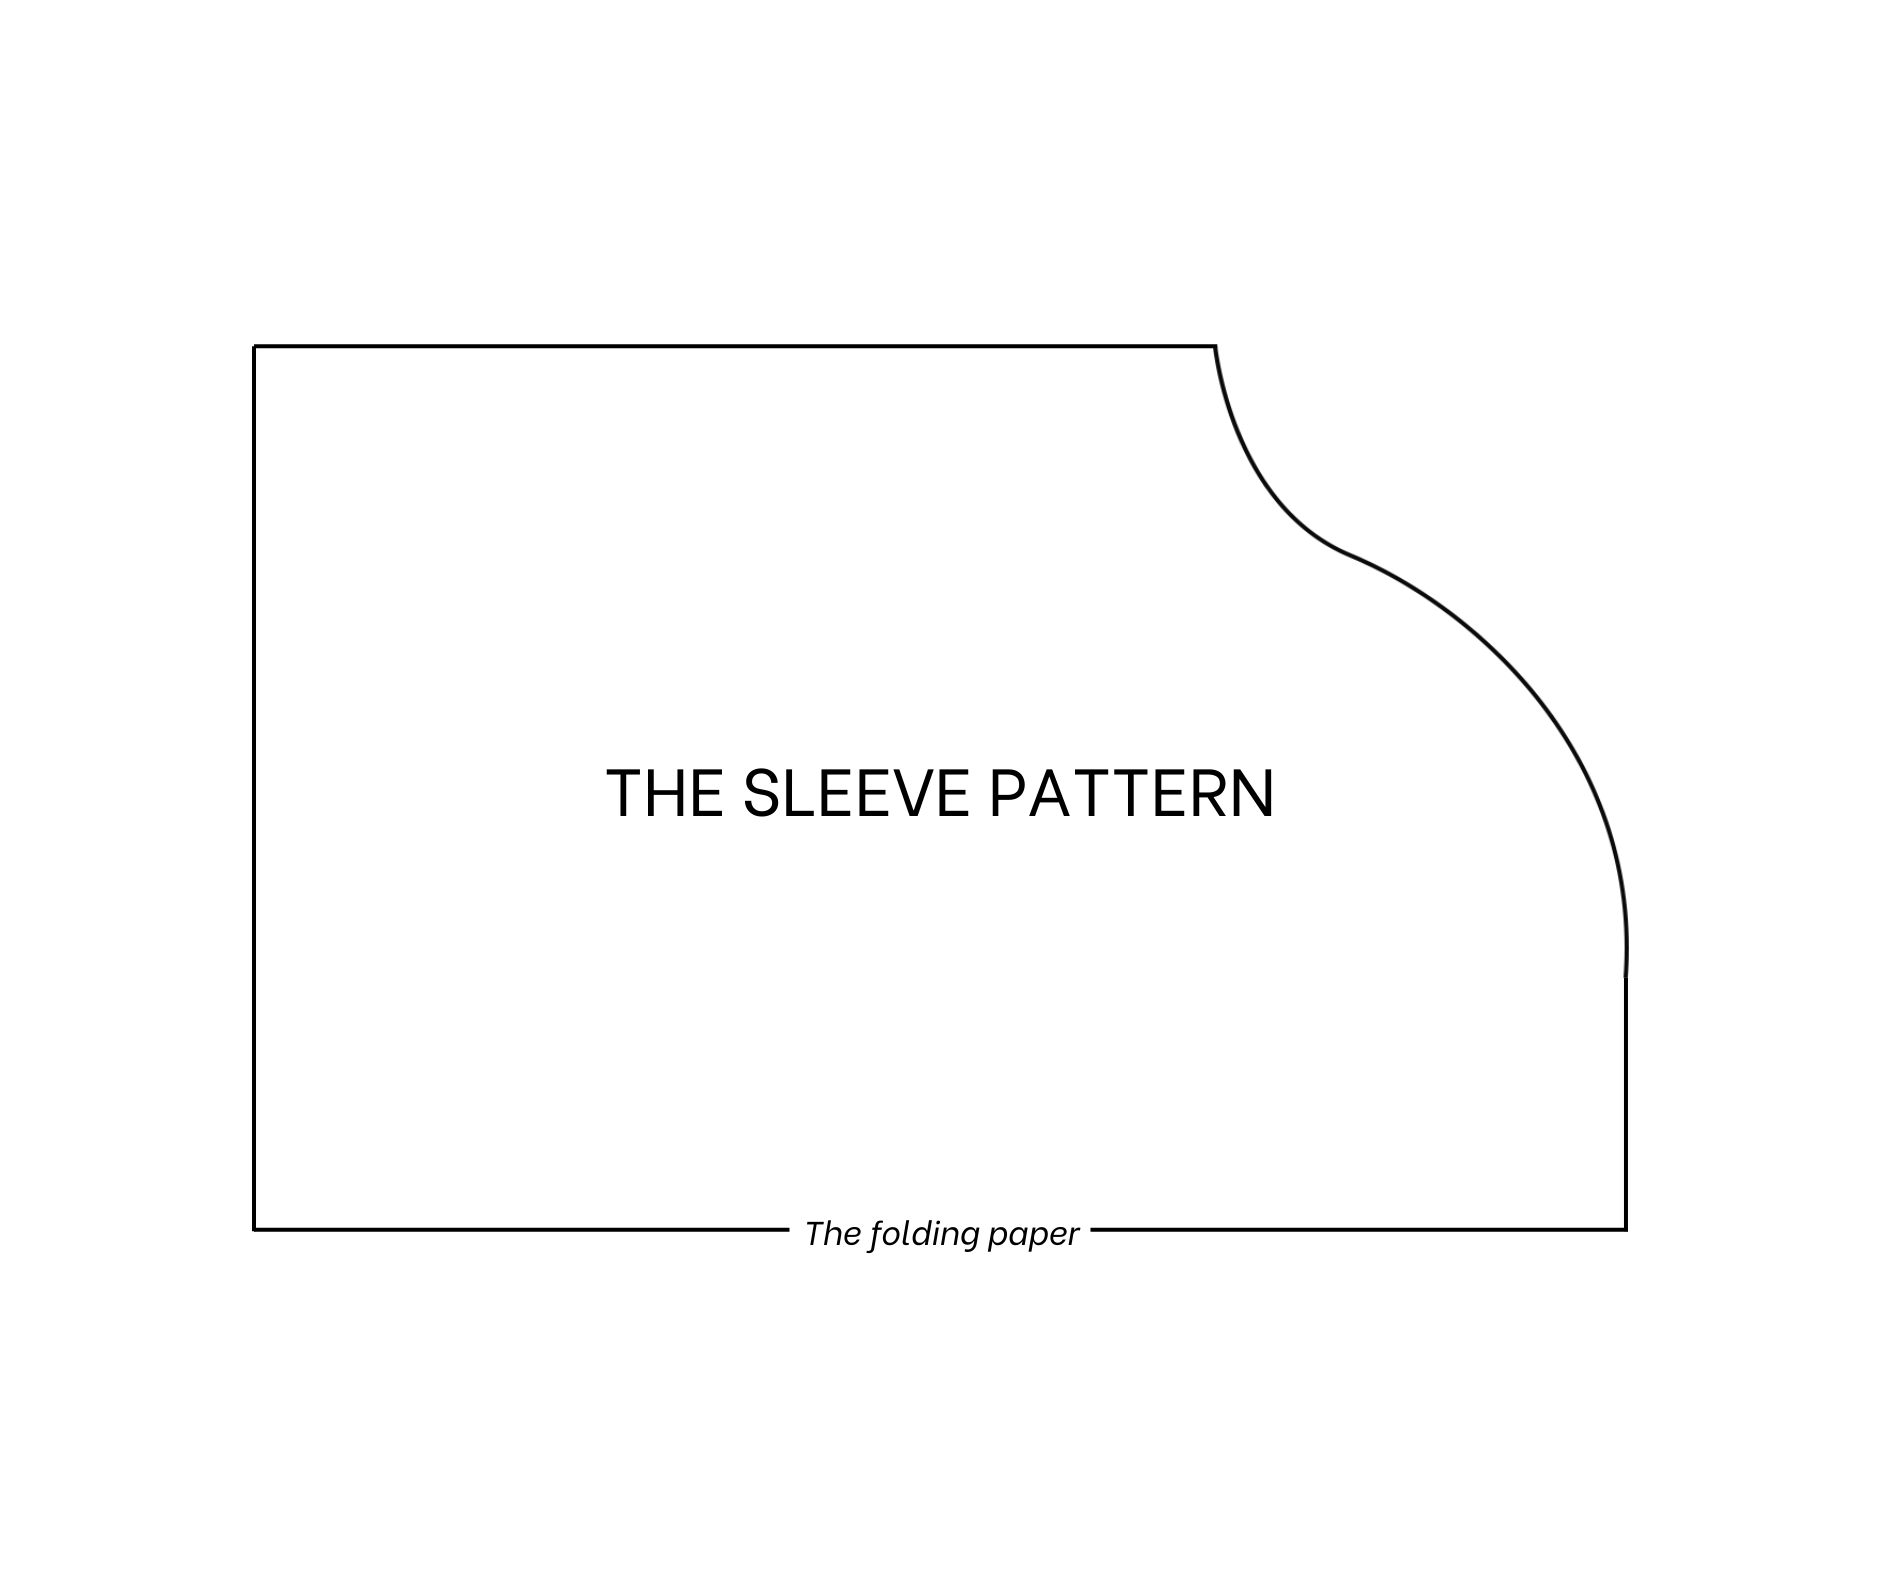
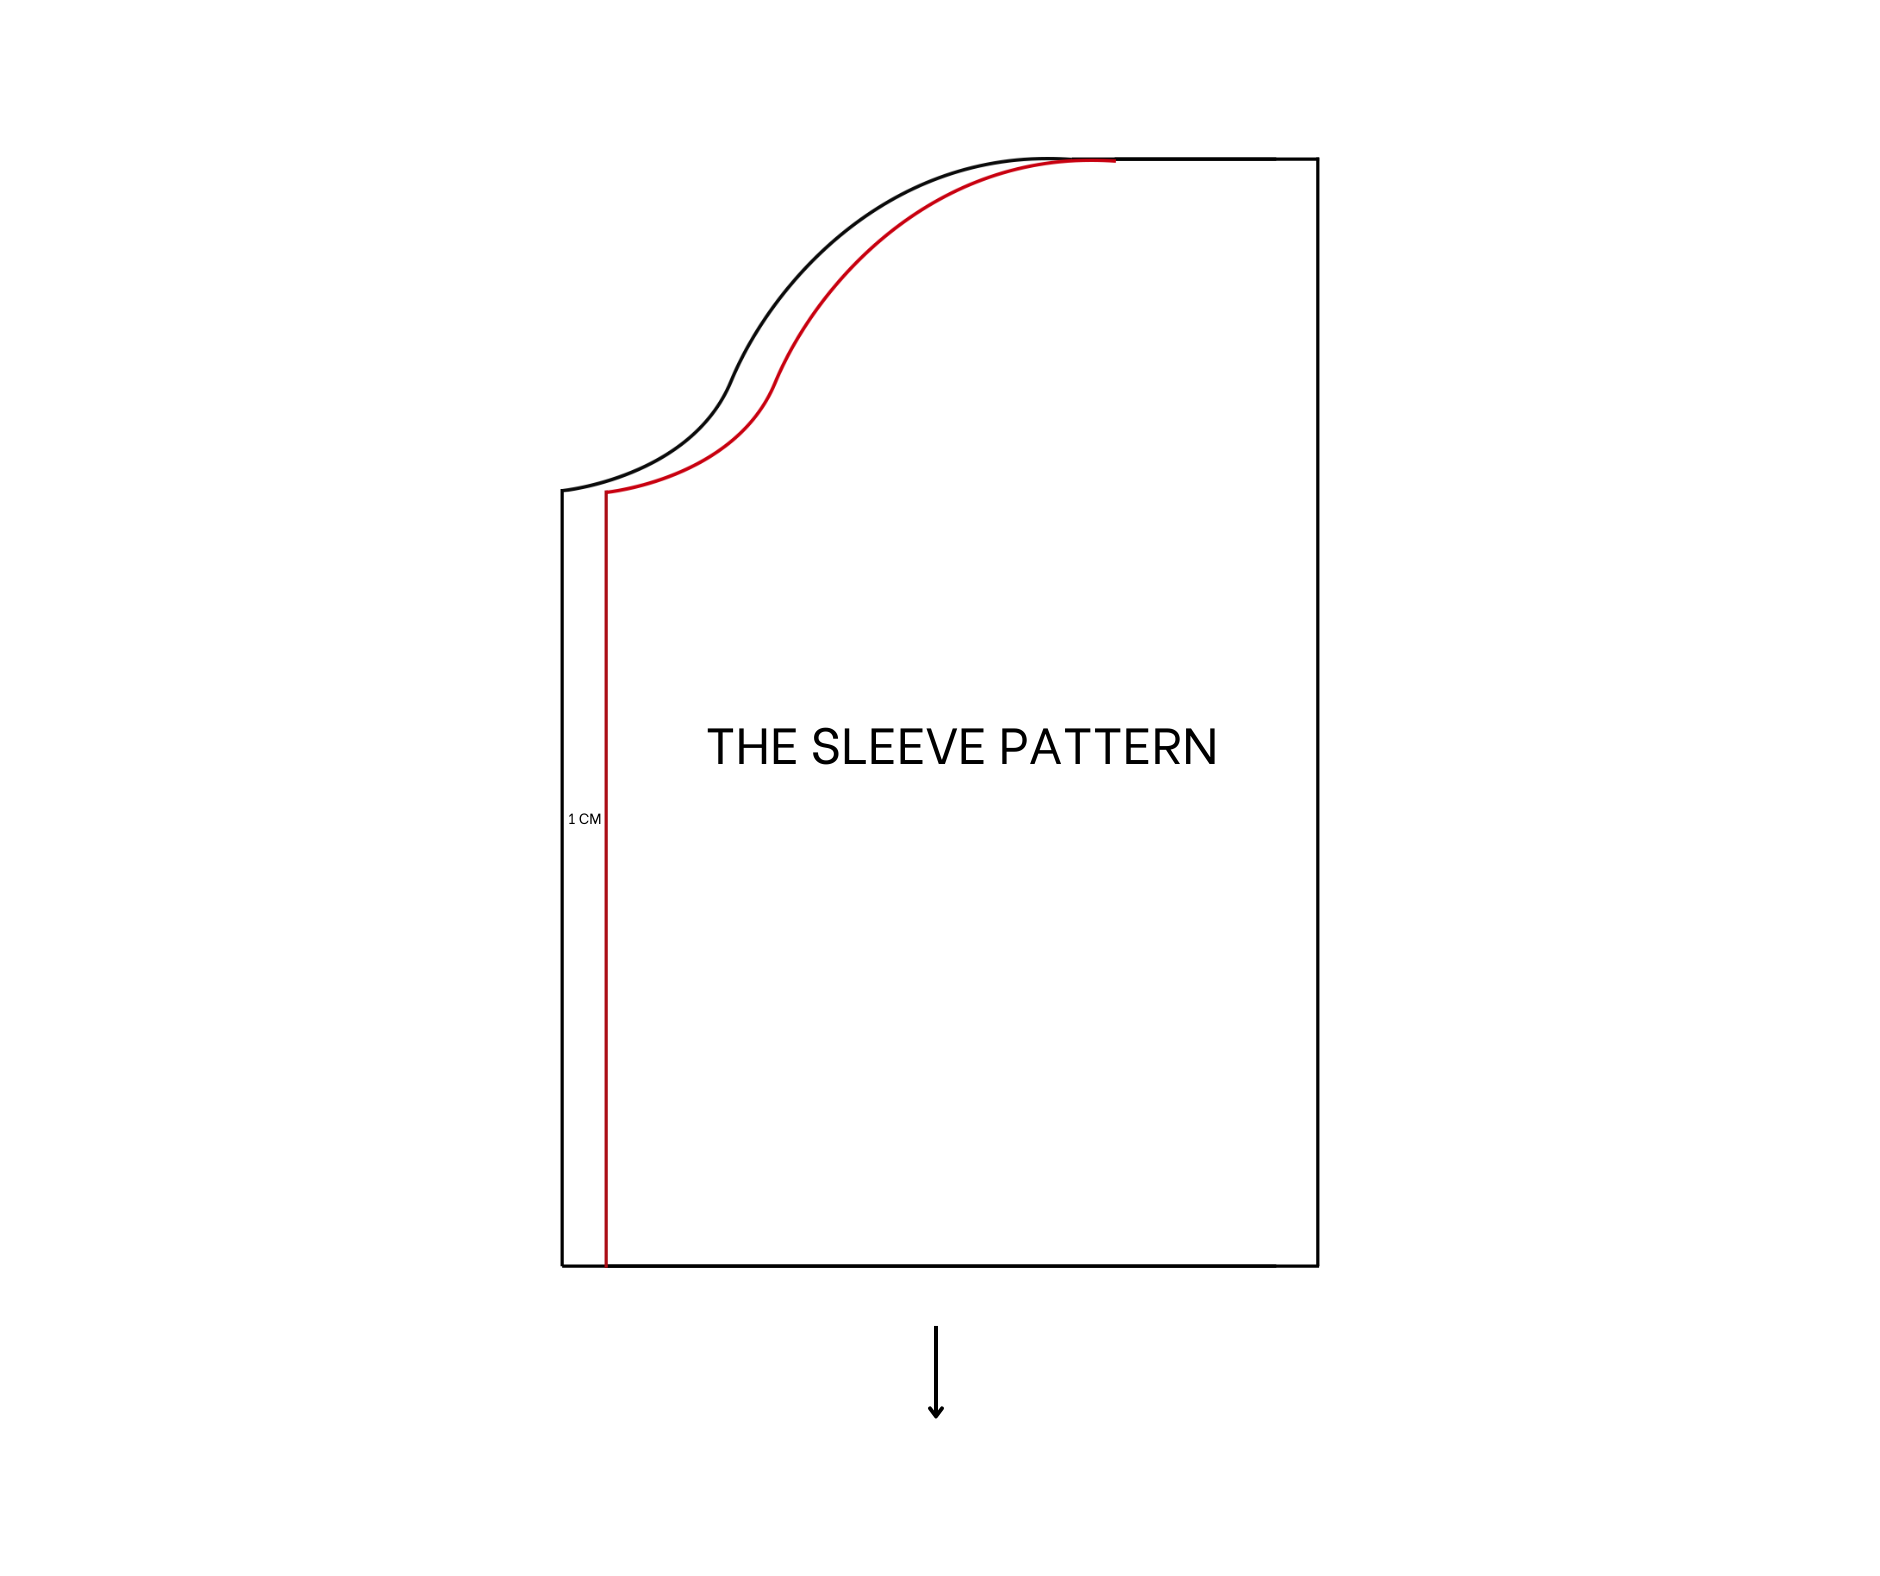
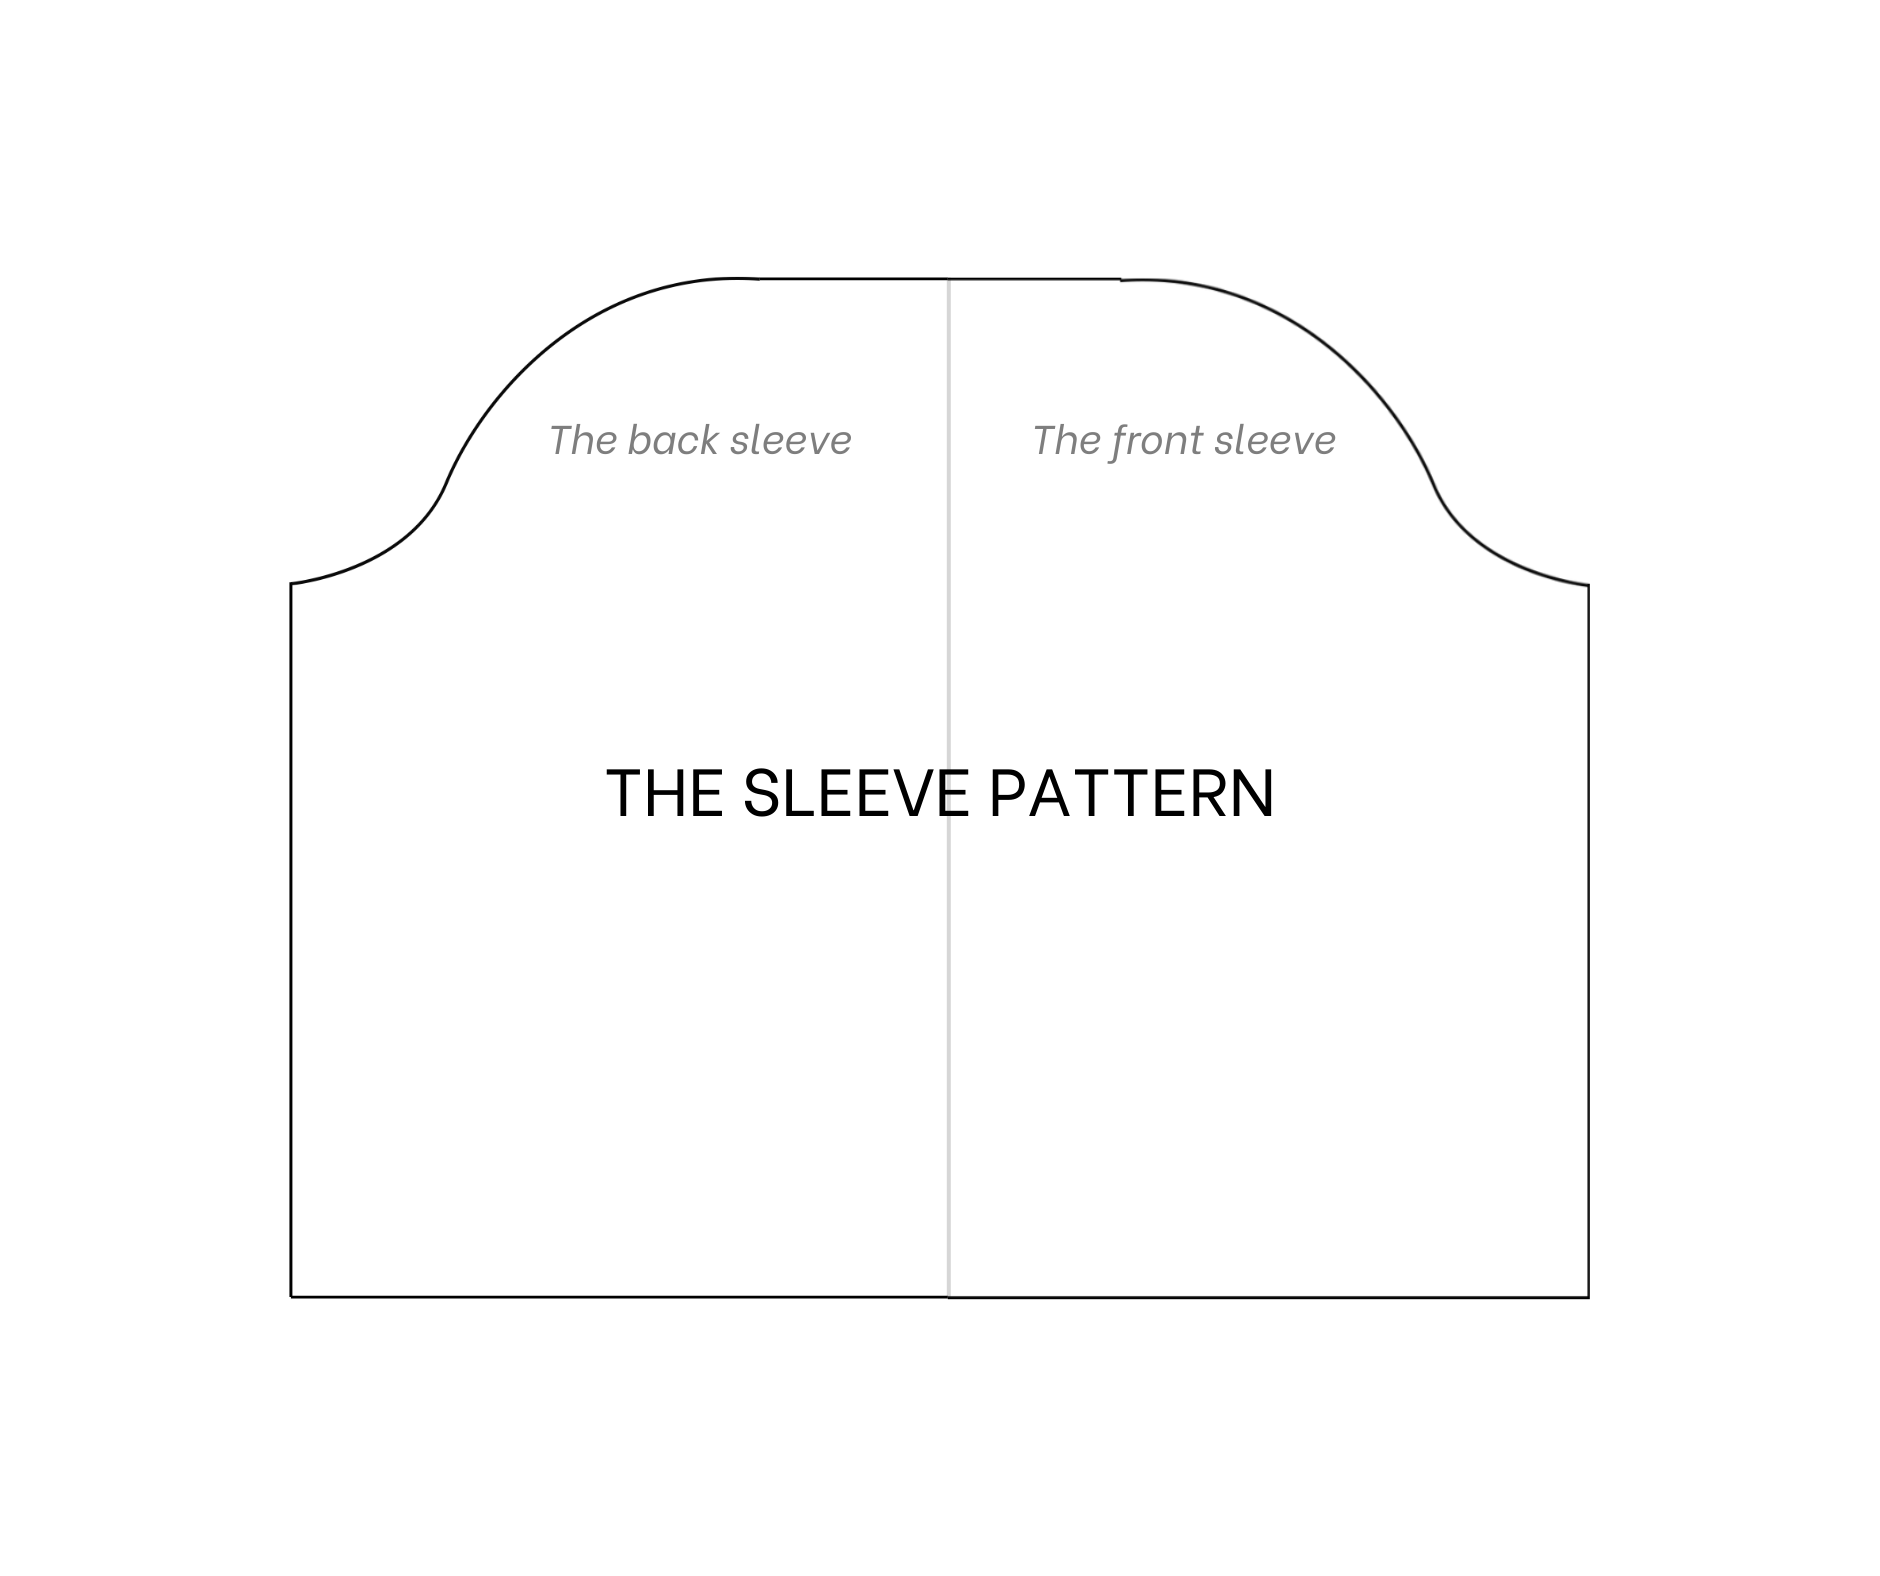
The sleeve pattern
To make the sleeve pattern, measure the total width of the sleeve lines at the front and the back bodice first.
Use the folding paper to make the sleeve pattern.
Draw a horizontal line at 8 cm from the folding line, it's a half the width of the puffing area of the sleeve that you want.
Then draw a straight line cutting that horizontal line.
From the cutting point, mark to the right of the horizontal line 11 cm which is 1 per 10 your bust size plus 3 cm then draw a slanted line from this mark to cut the straight line.
Make sure the width of this slanted line will be a half of the width of the sleeve line at the front and the back bodice that you've checked before.
Divide this slanted line into three equal parts.
From the middle of the first two parts, draw an outside perpendicular line with 2 cm width.
In the third part, mark in the middle first then draw an inside perpendicular line with 0.5 cm width later.
After that, draw a curve line through these marks to create the sleeve line for the sleeve pattern.
Continue the top of the sleeve to the folding line. From the top of the sleeve, draw another straight line 40 cm away from it, it's the length of the sleeve that you want plus 2 cm.
After that, draw a horizontal line from the end of the sleeve line to cut the new straight line and create the under arm big line for the sleeve pattern.
Add 1 cm for seam allowance before cutting.
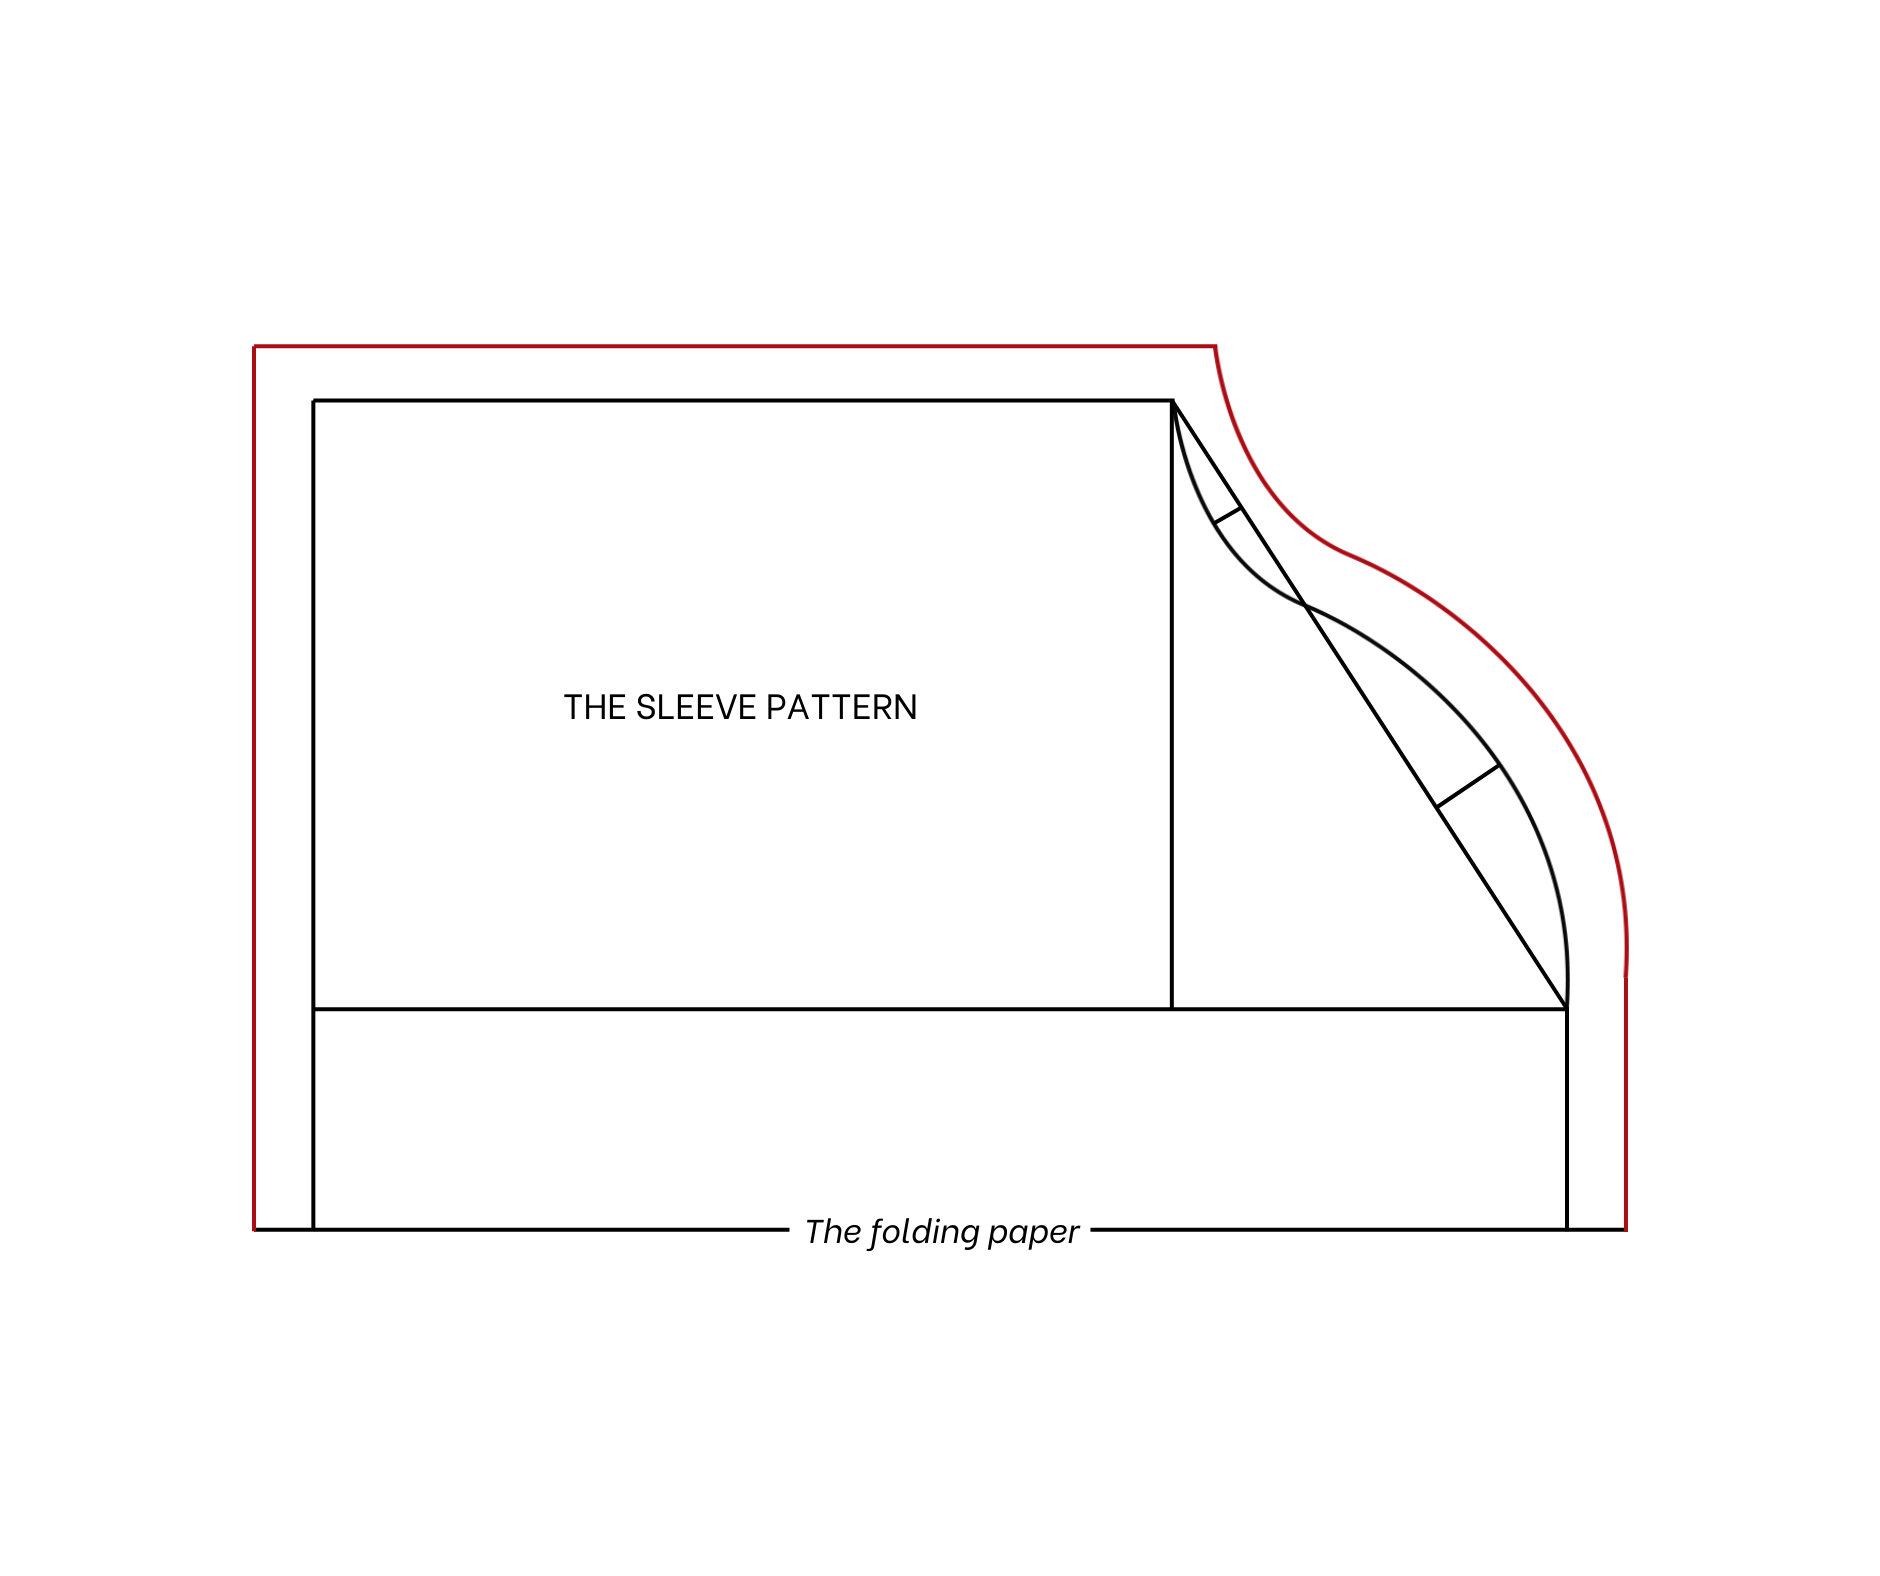
After that, move one under arm big line to the inside of the other one 1 cm then redraw the sleeve line and cut after that.
We will have the front and the back of the sleeve pattern.
THE RUFFLE HEM PATTERN
The ruffle hem part of this top is quite a simple with some basic rectangles.
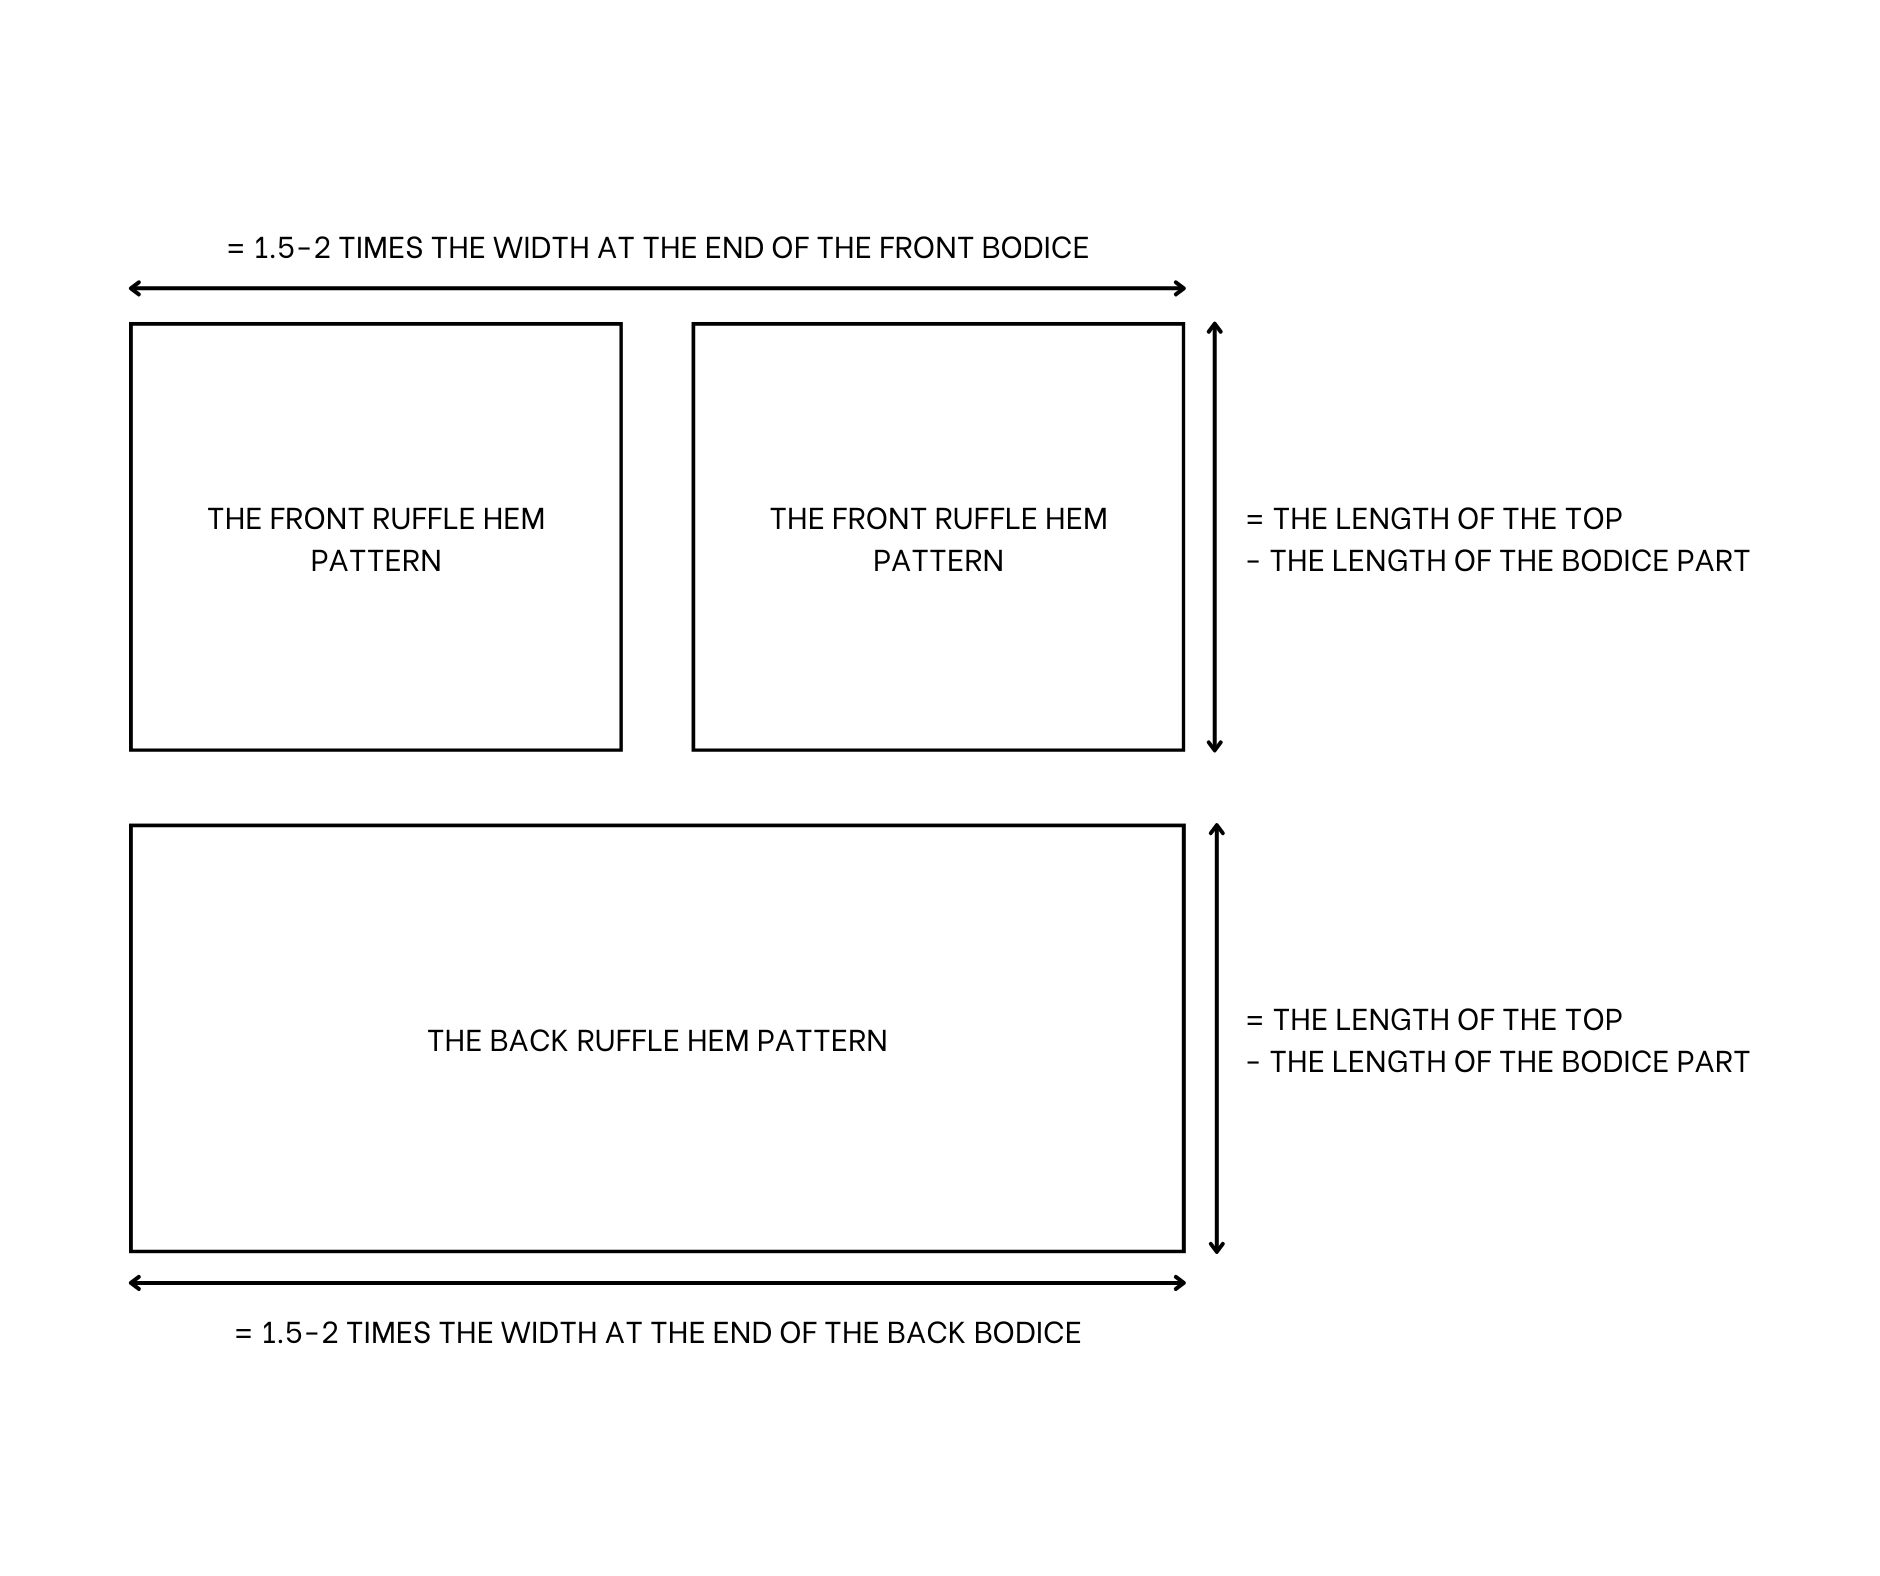
The ruffle hem pattern
SEWING THE BLOUSE
THE BODICE
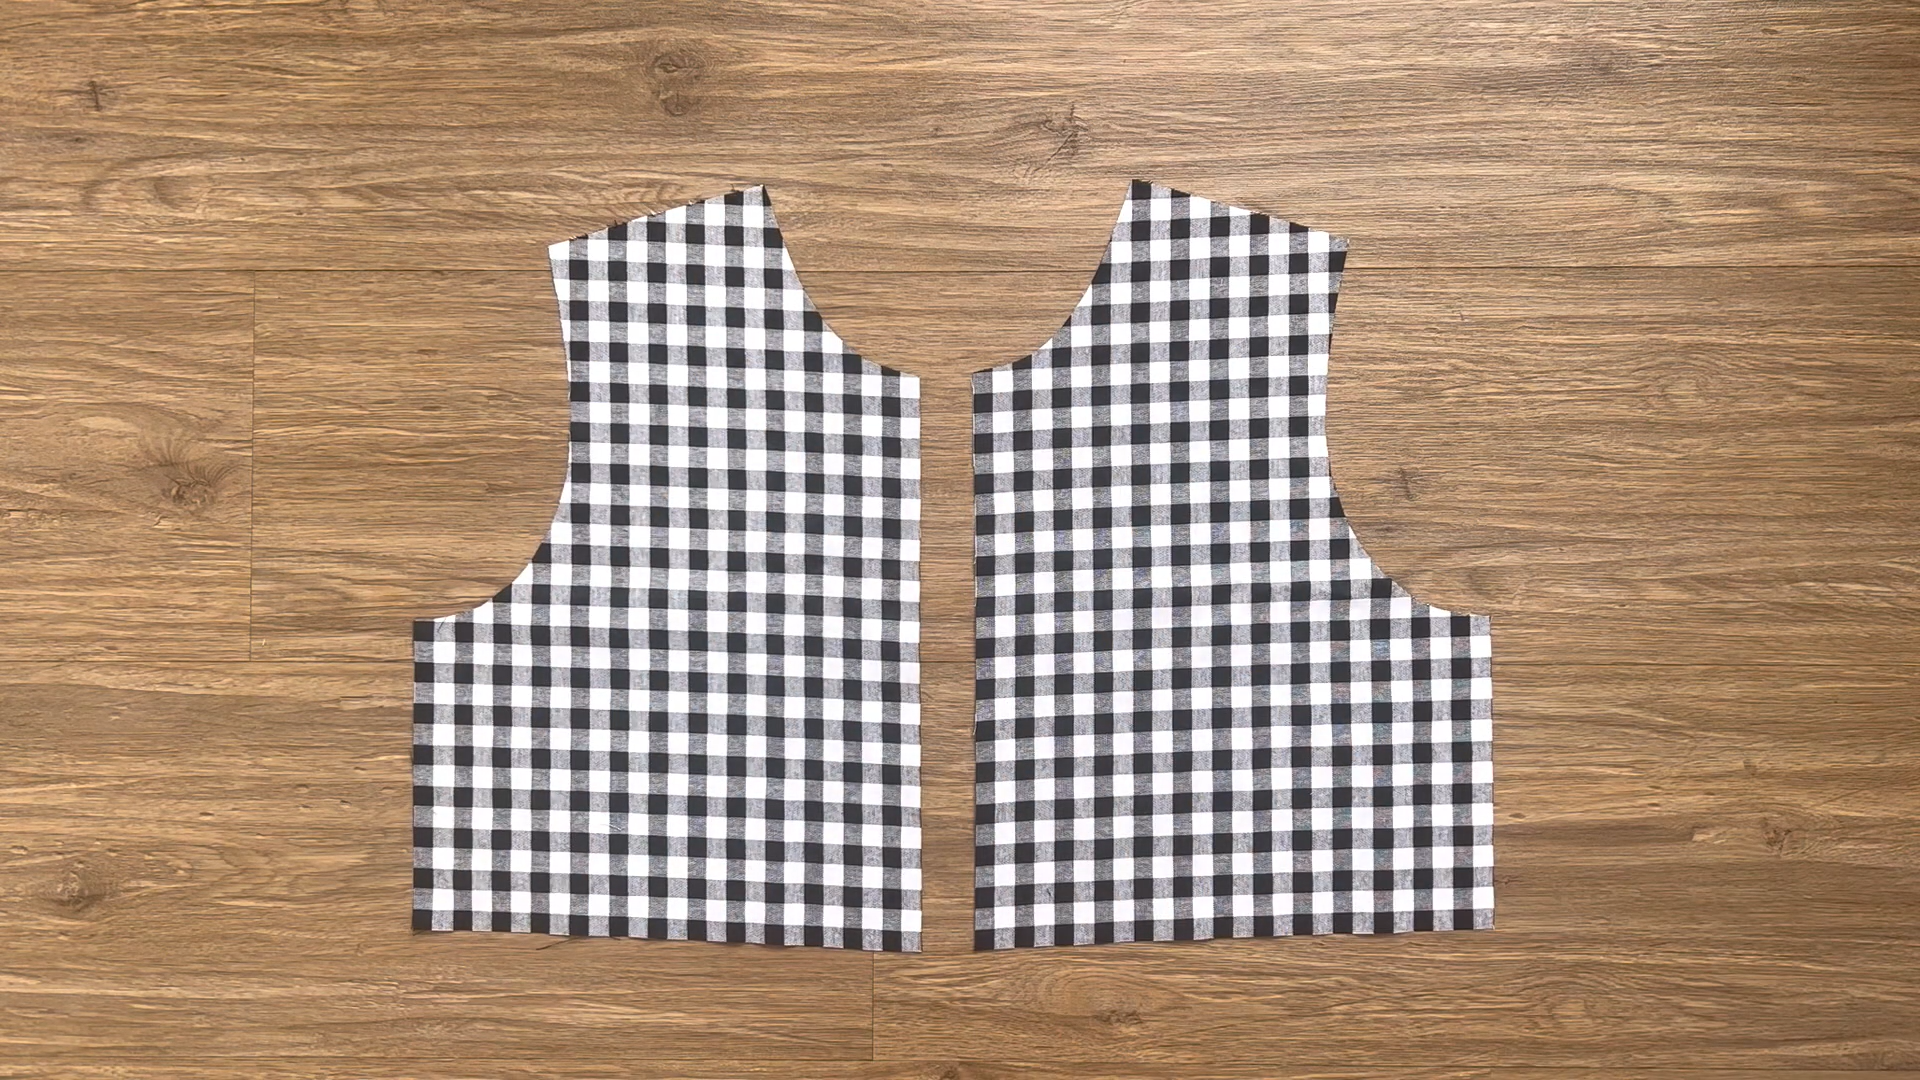
Cut out two pieces for the front bodice.
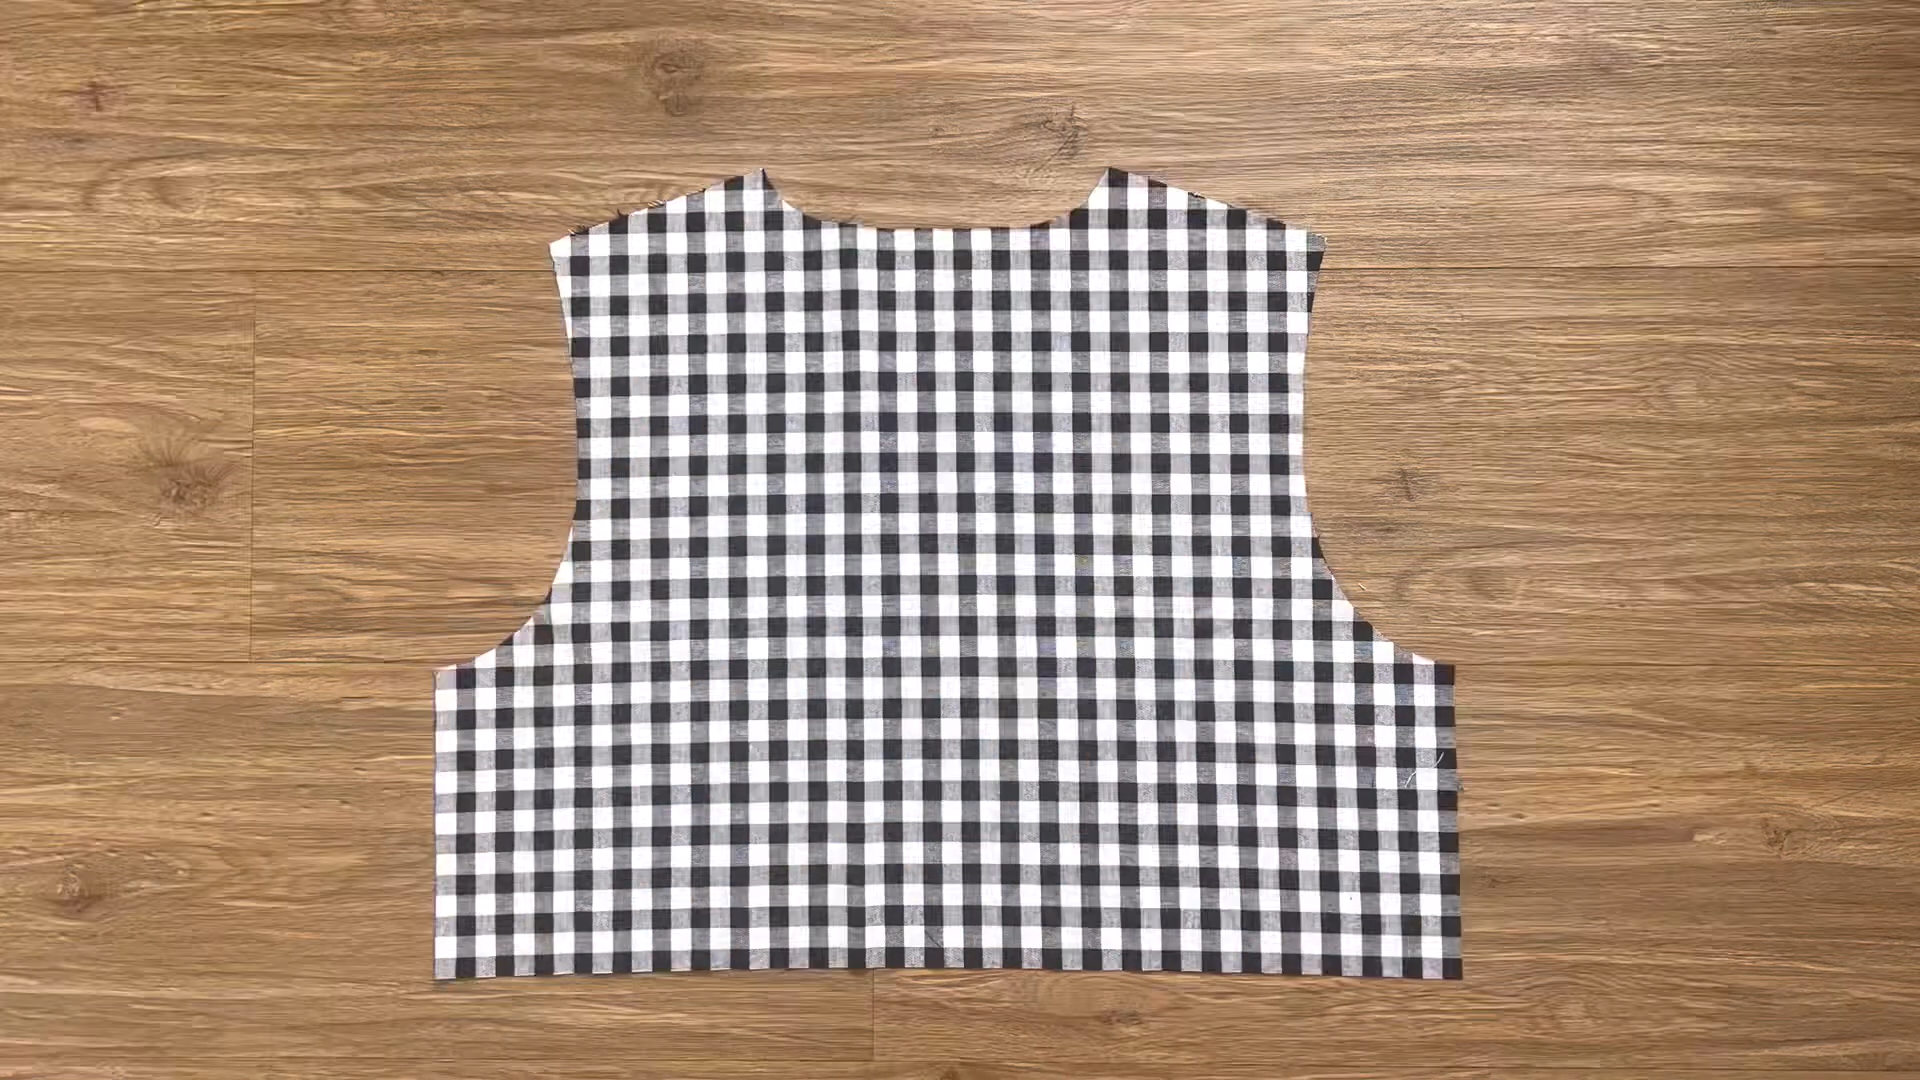
Cut out one piece for the back bodice.
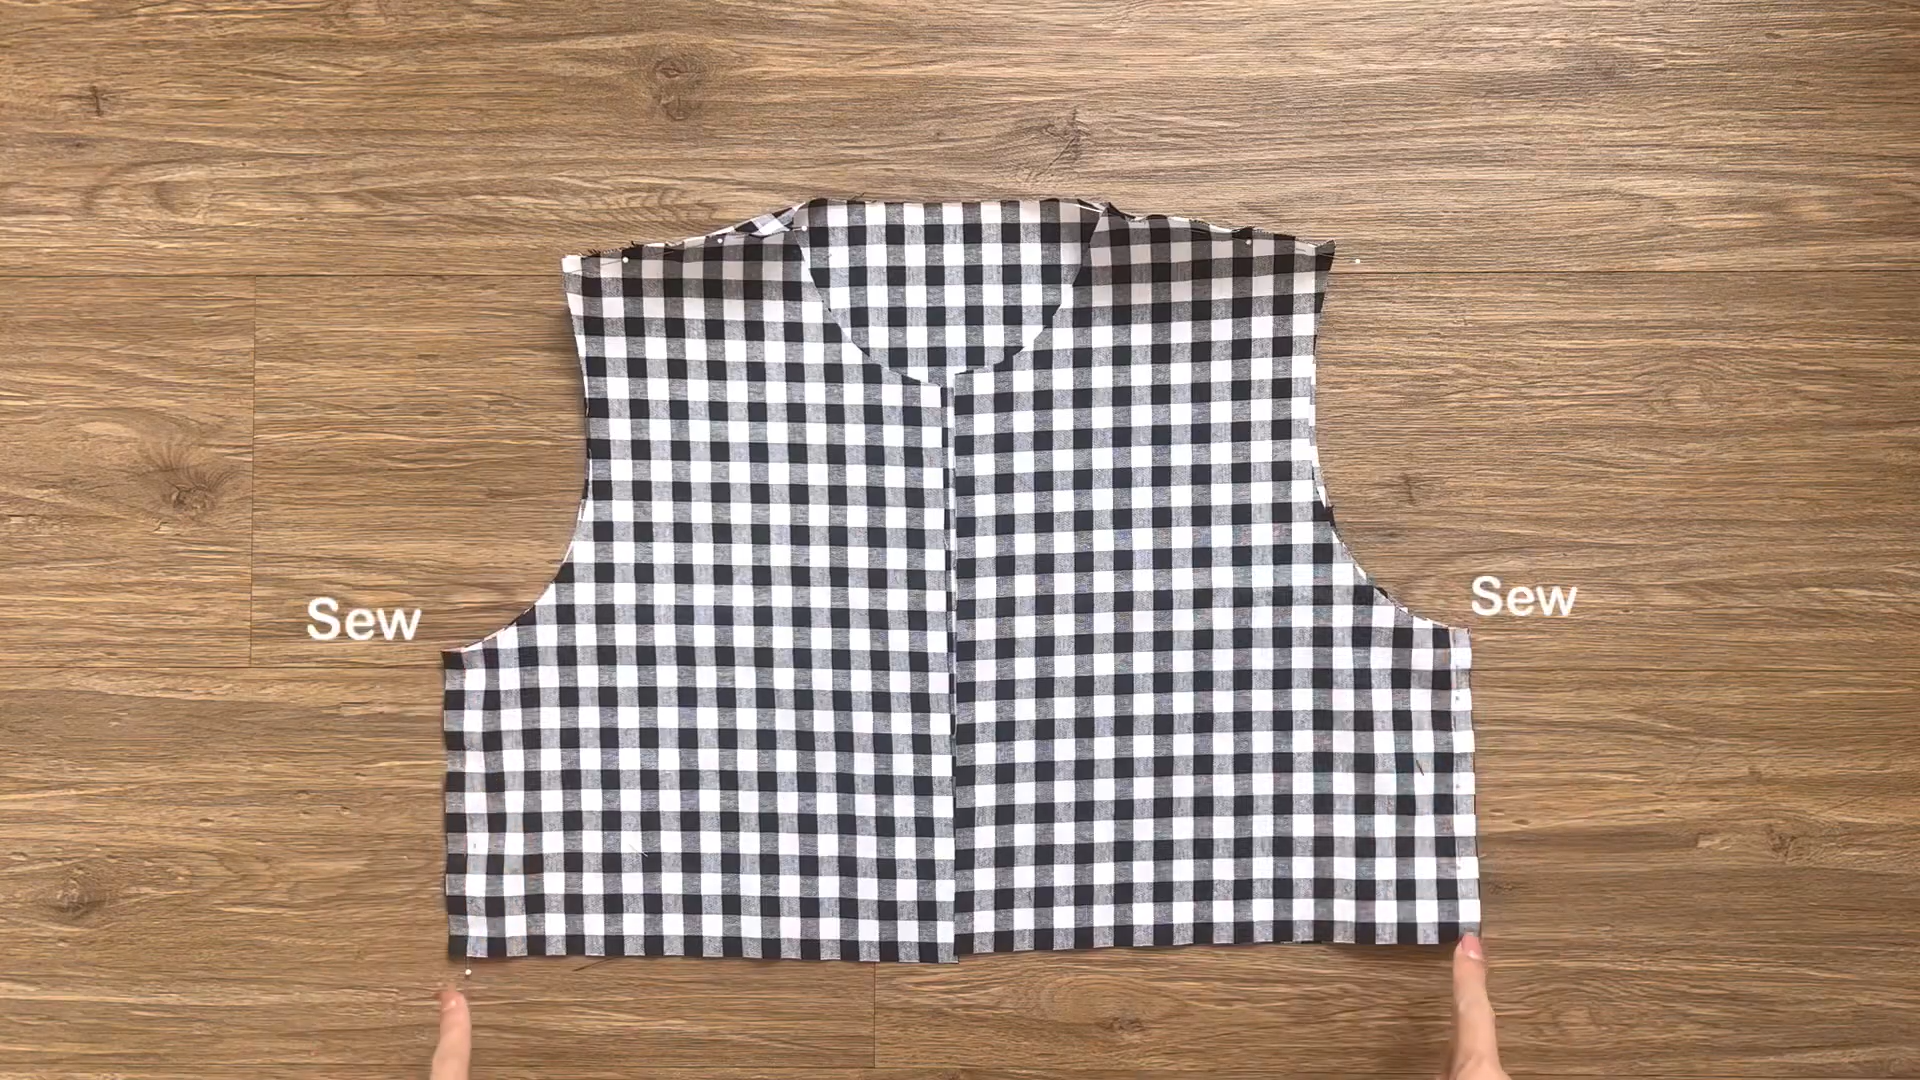
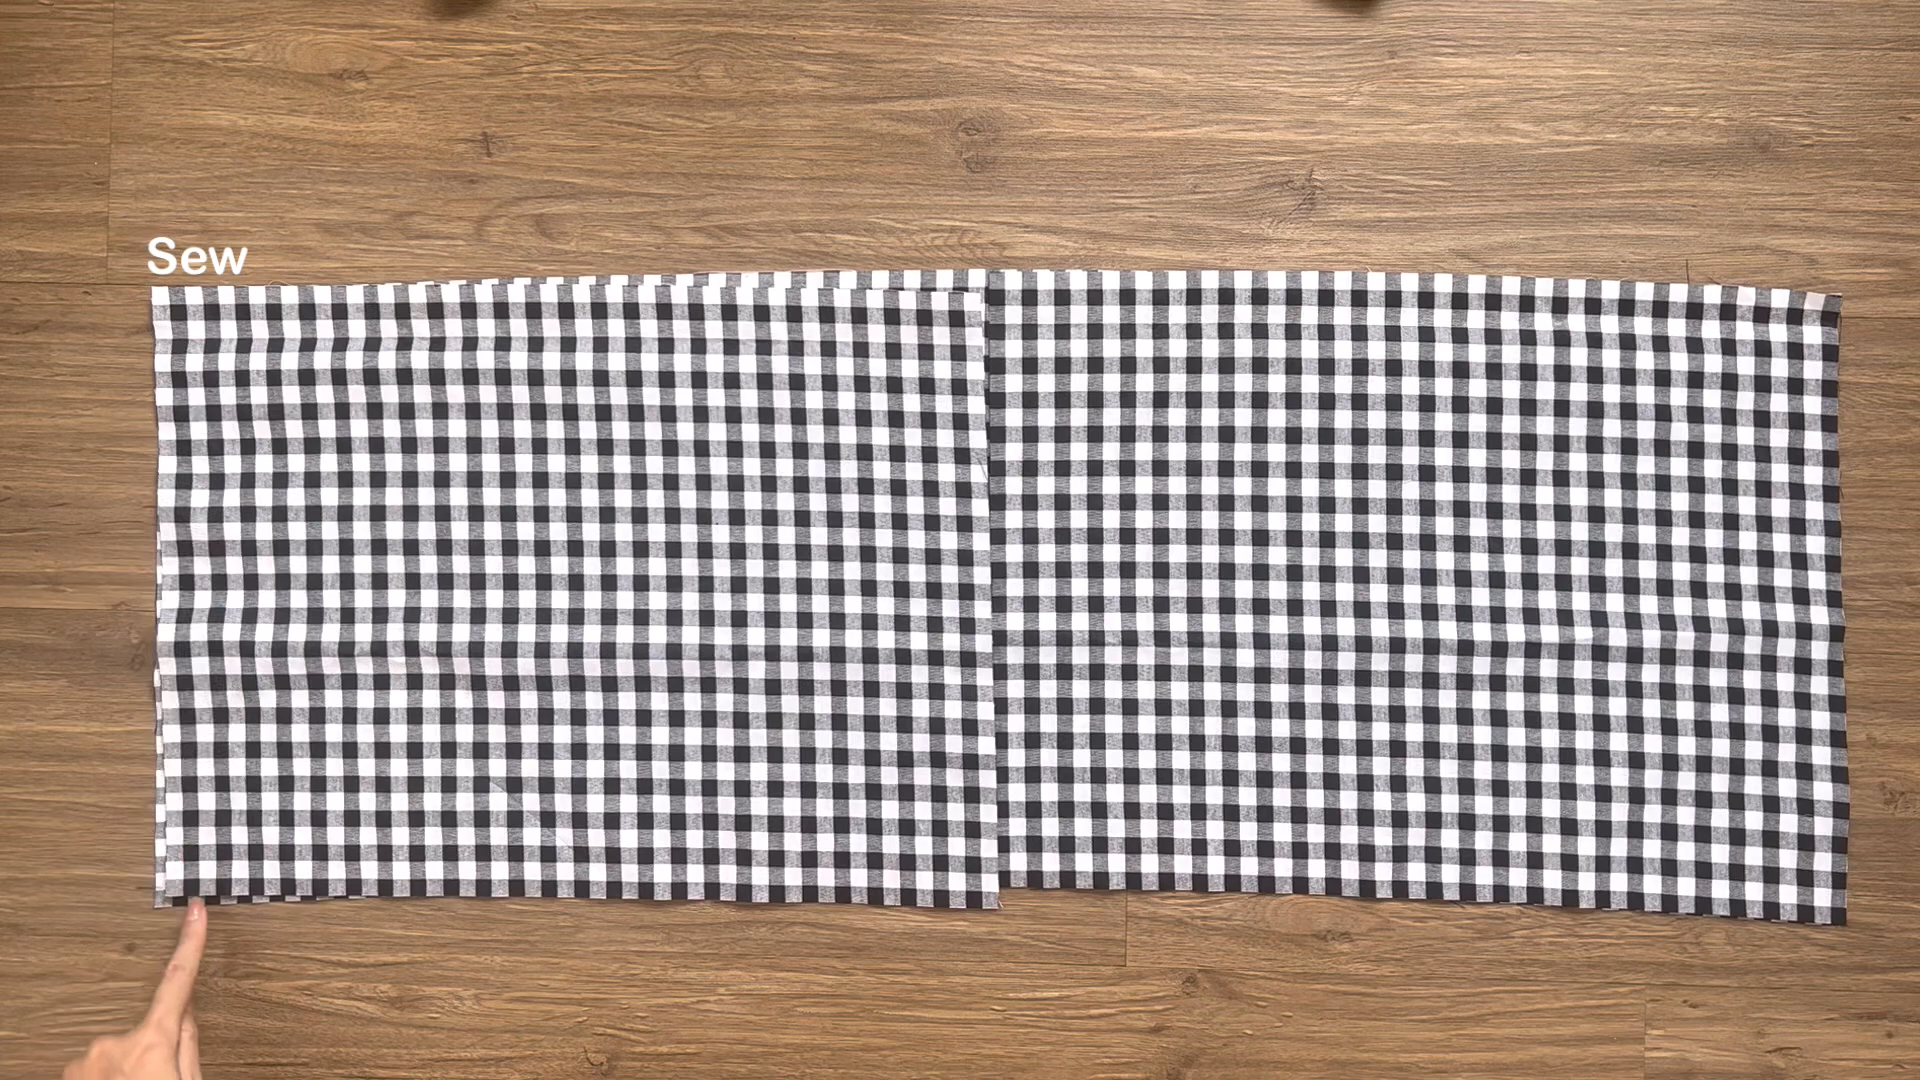
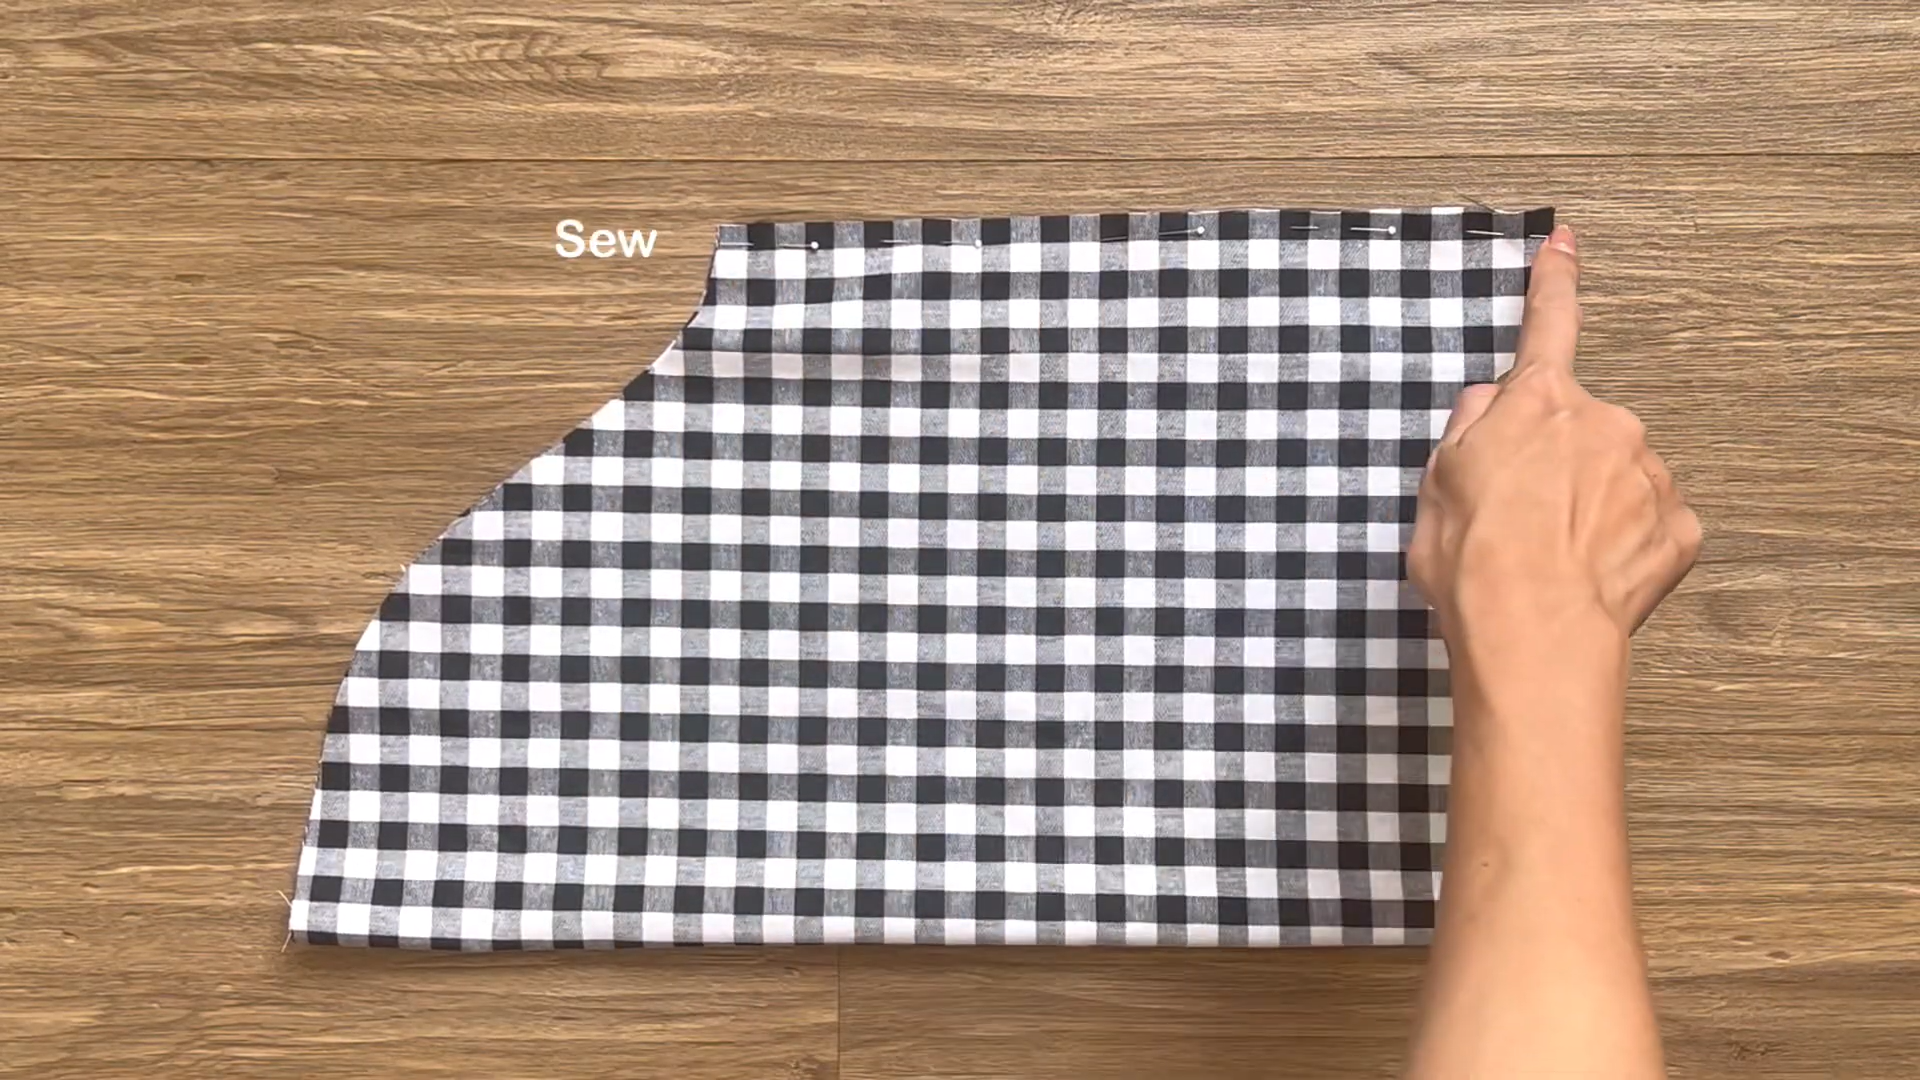
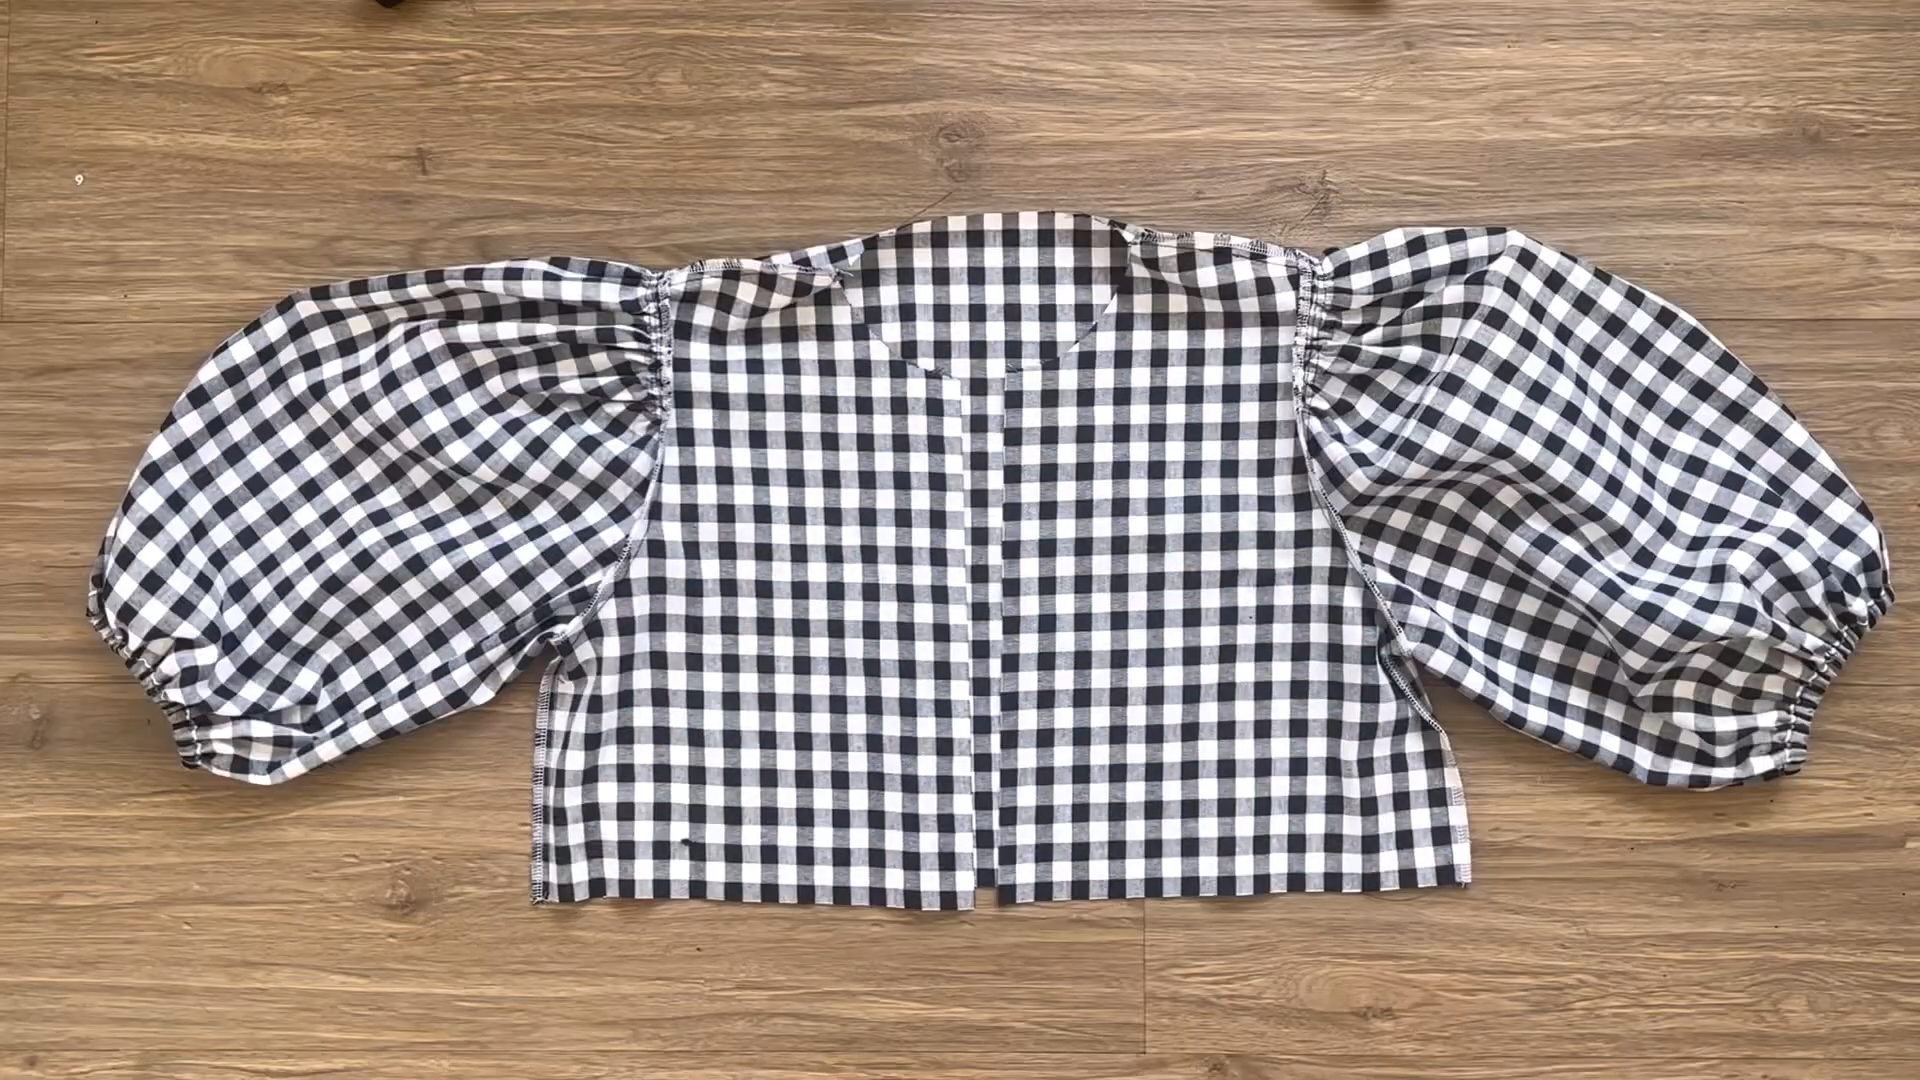
Connect the front and the back bodice pieces at the shoulder and the sidelines with pins.
Sew them together.
THE RUFFLE HEM
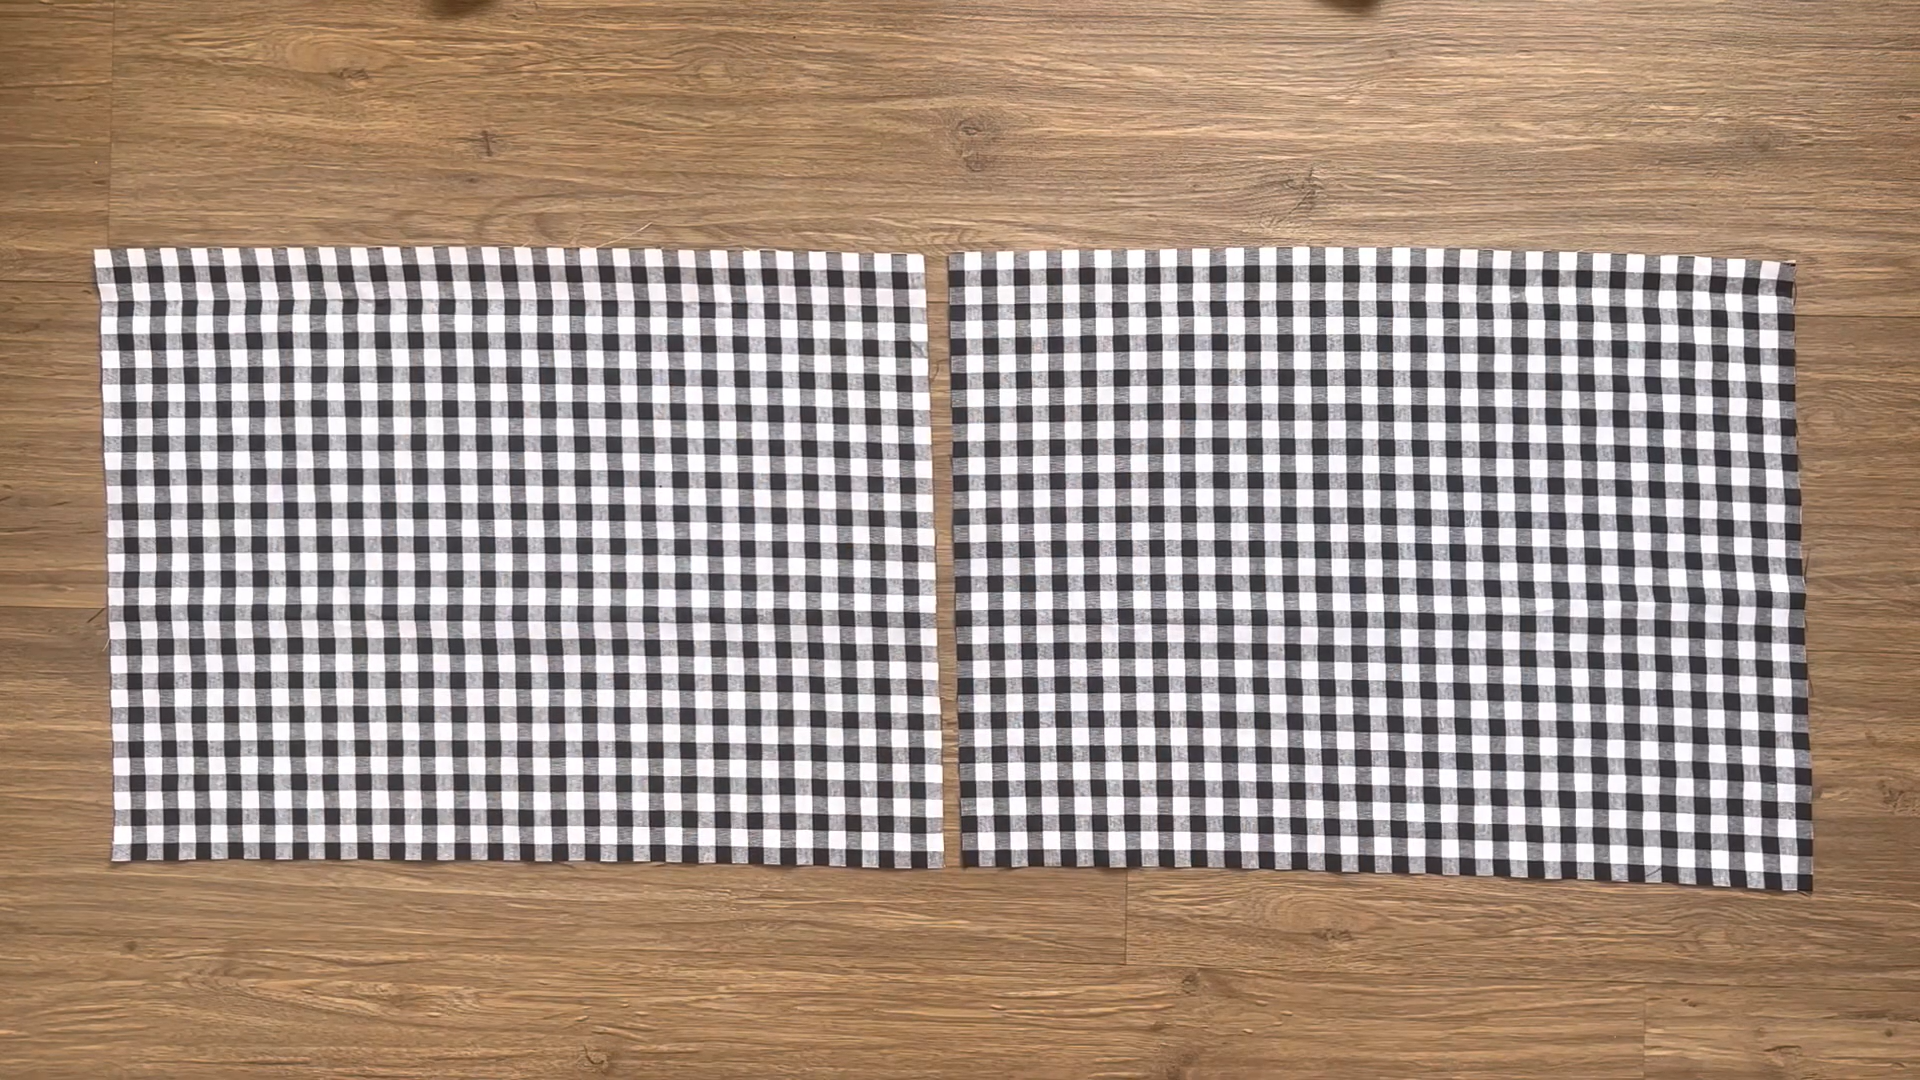
Cut out two pieces of the front ruffle hem.
Cut out one piece of the back ruffle hem.
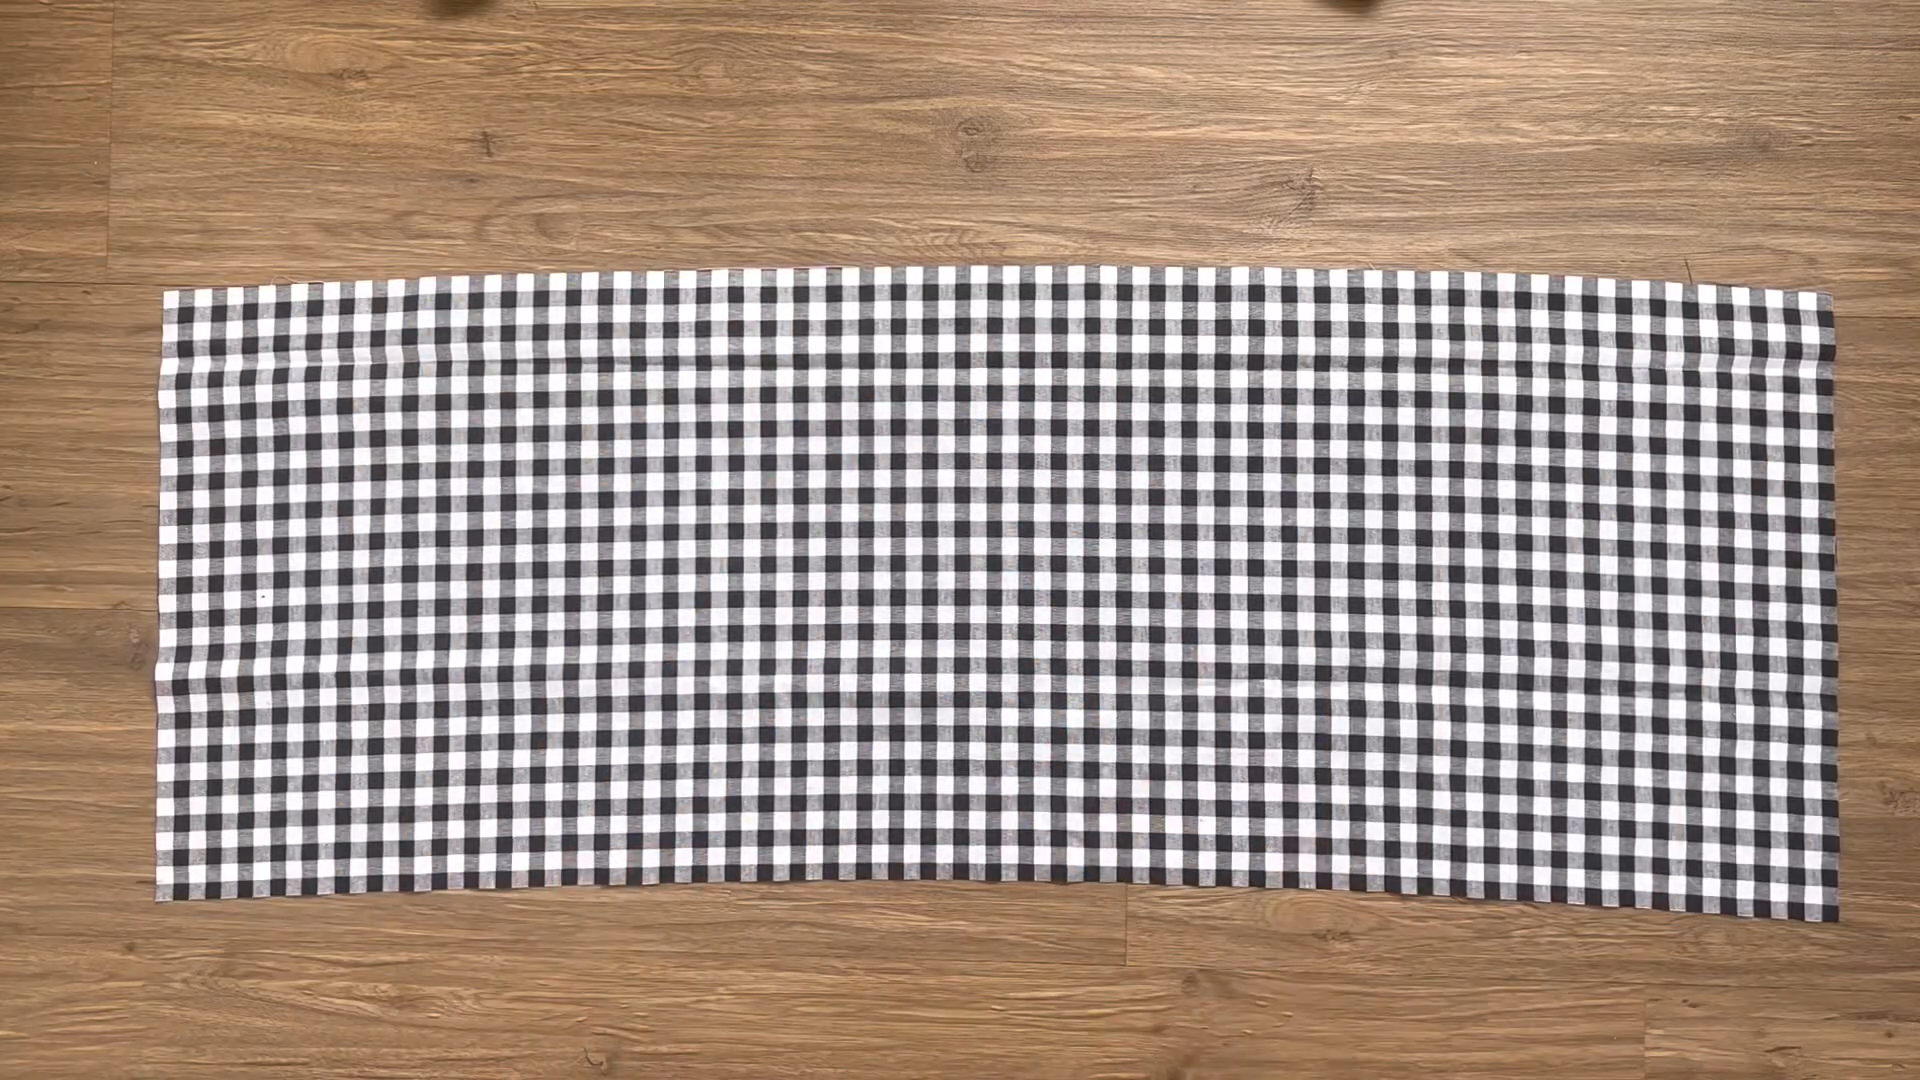
Align the front ruffle hem and back ruffle hem pieces. Stitch them together at two sides.
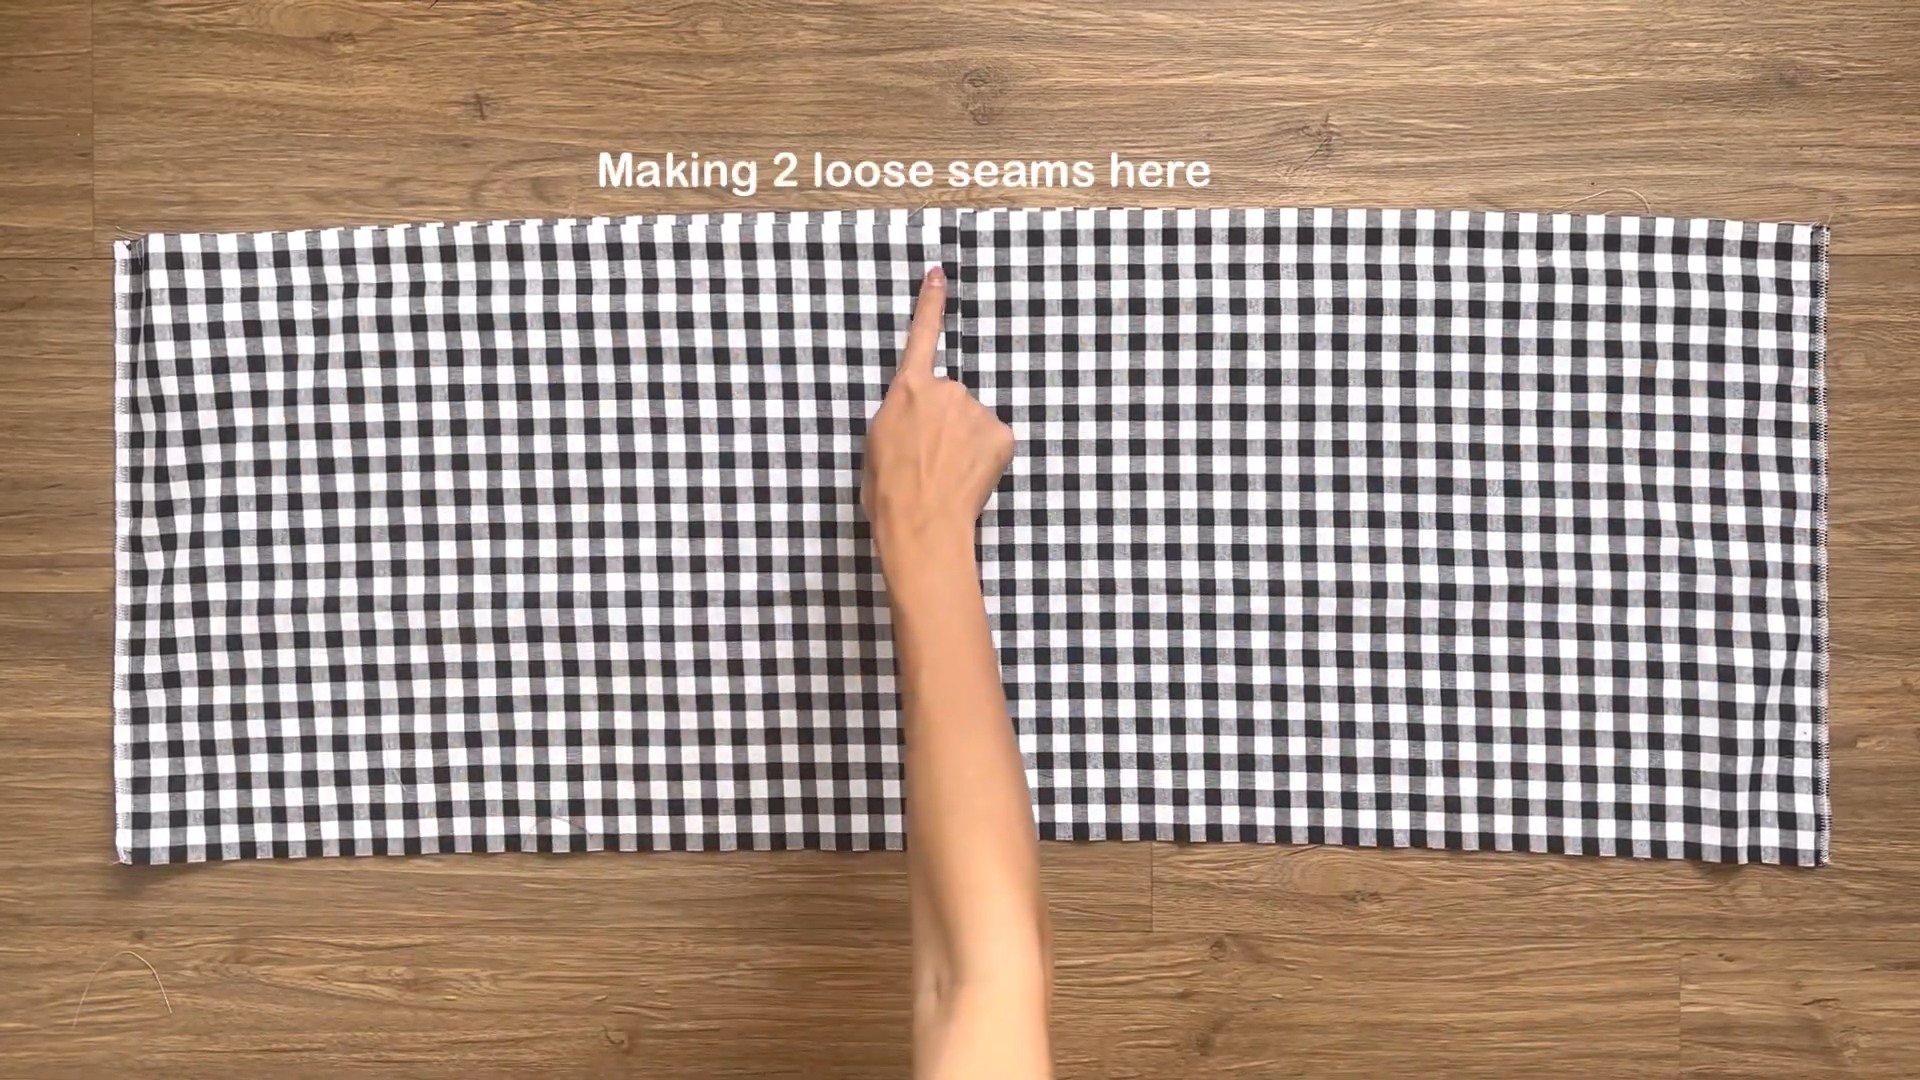
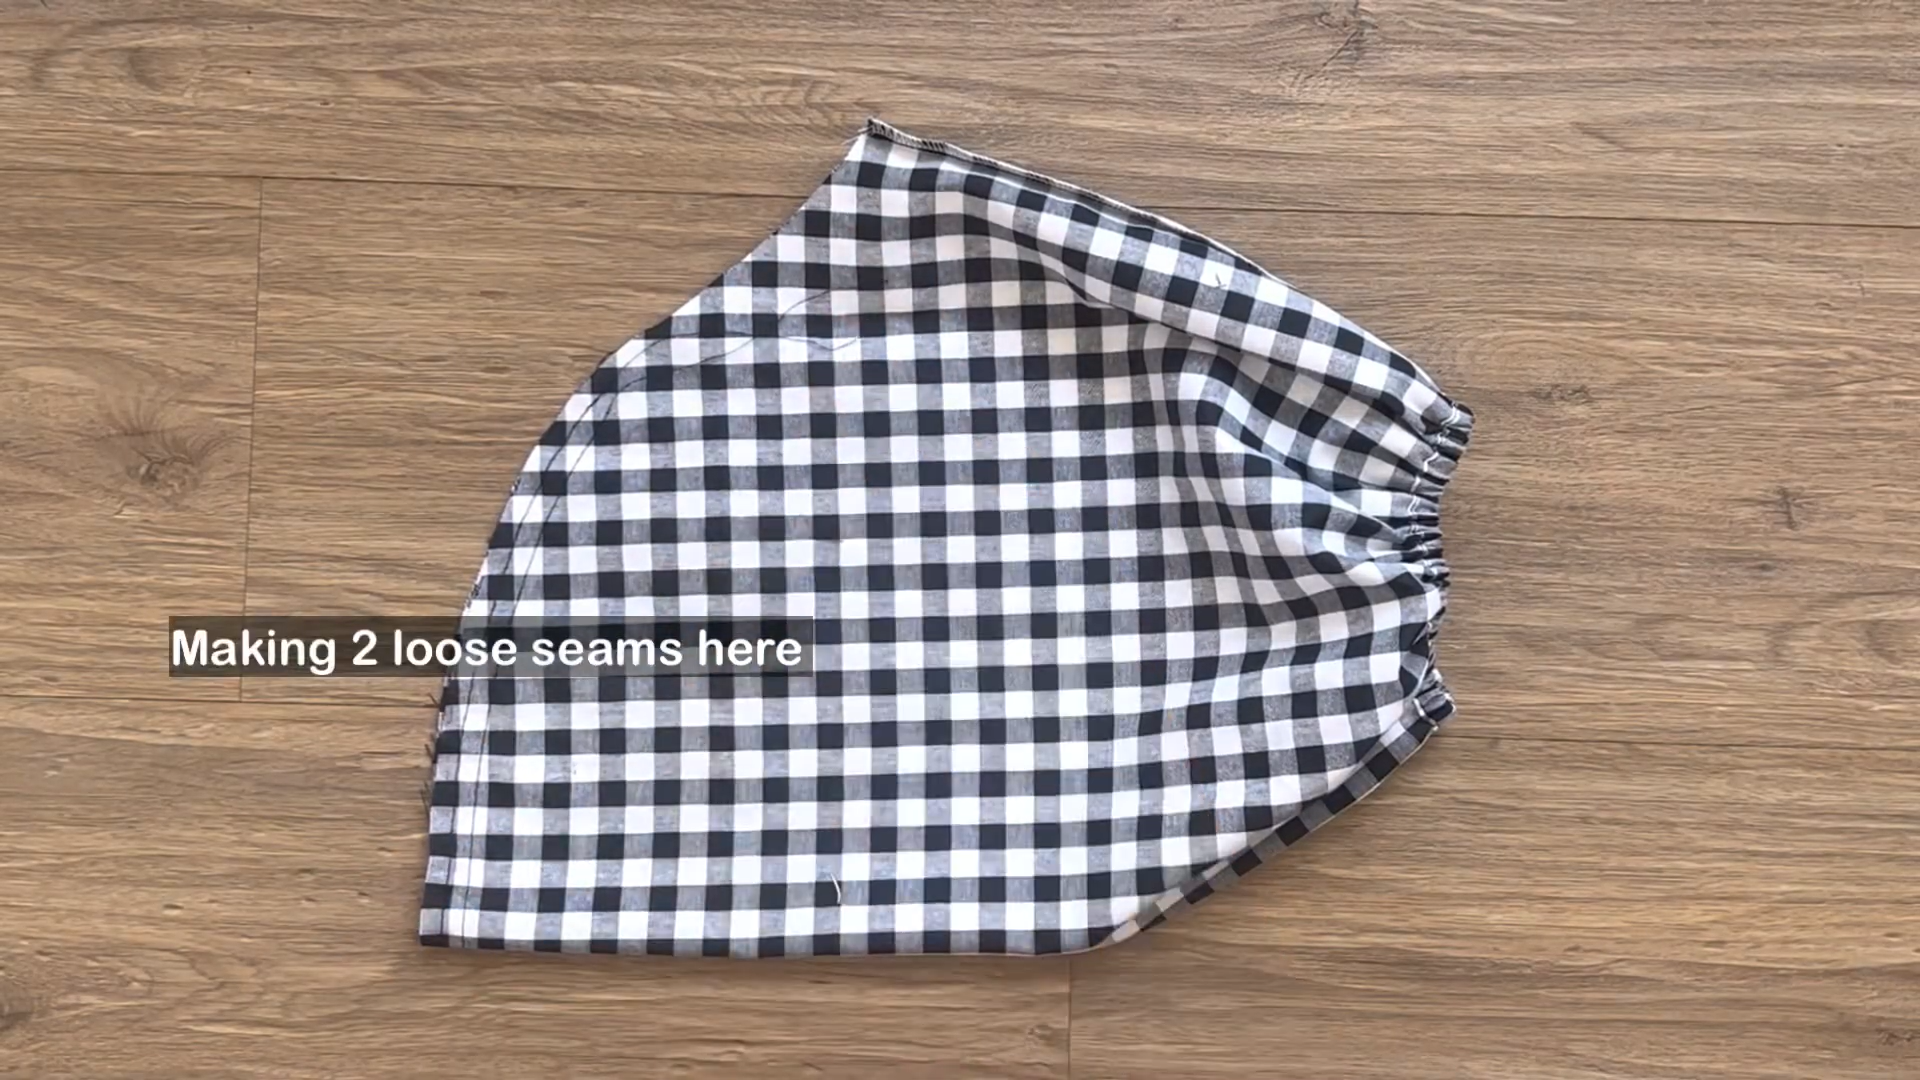
At the top of the ruffle hem part, create two loose seams.
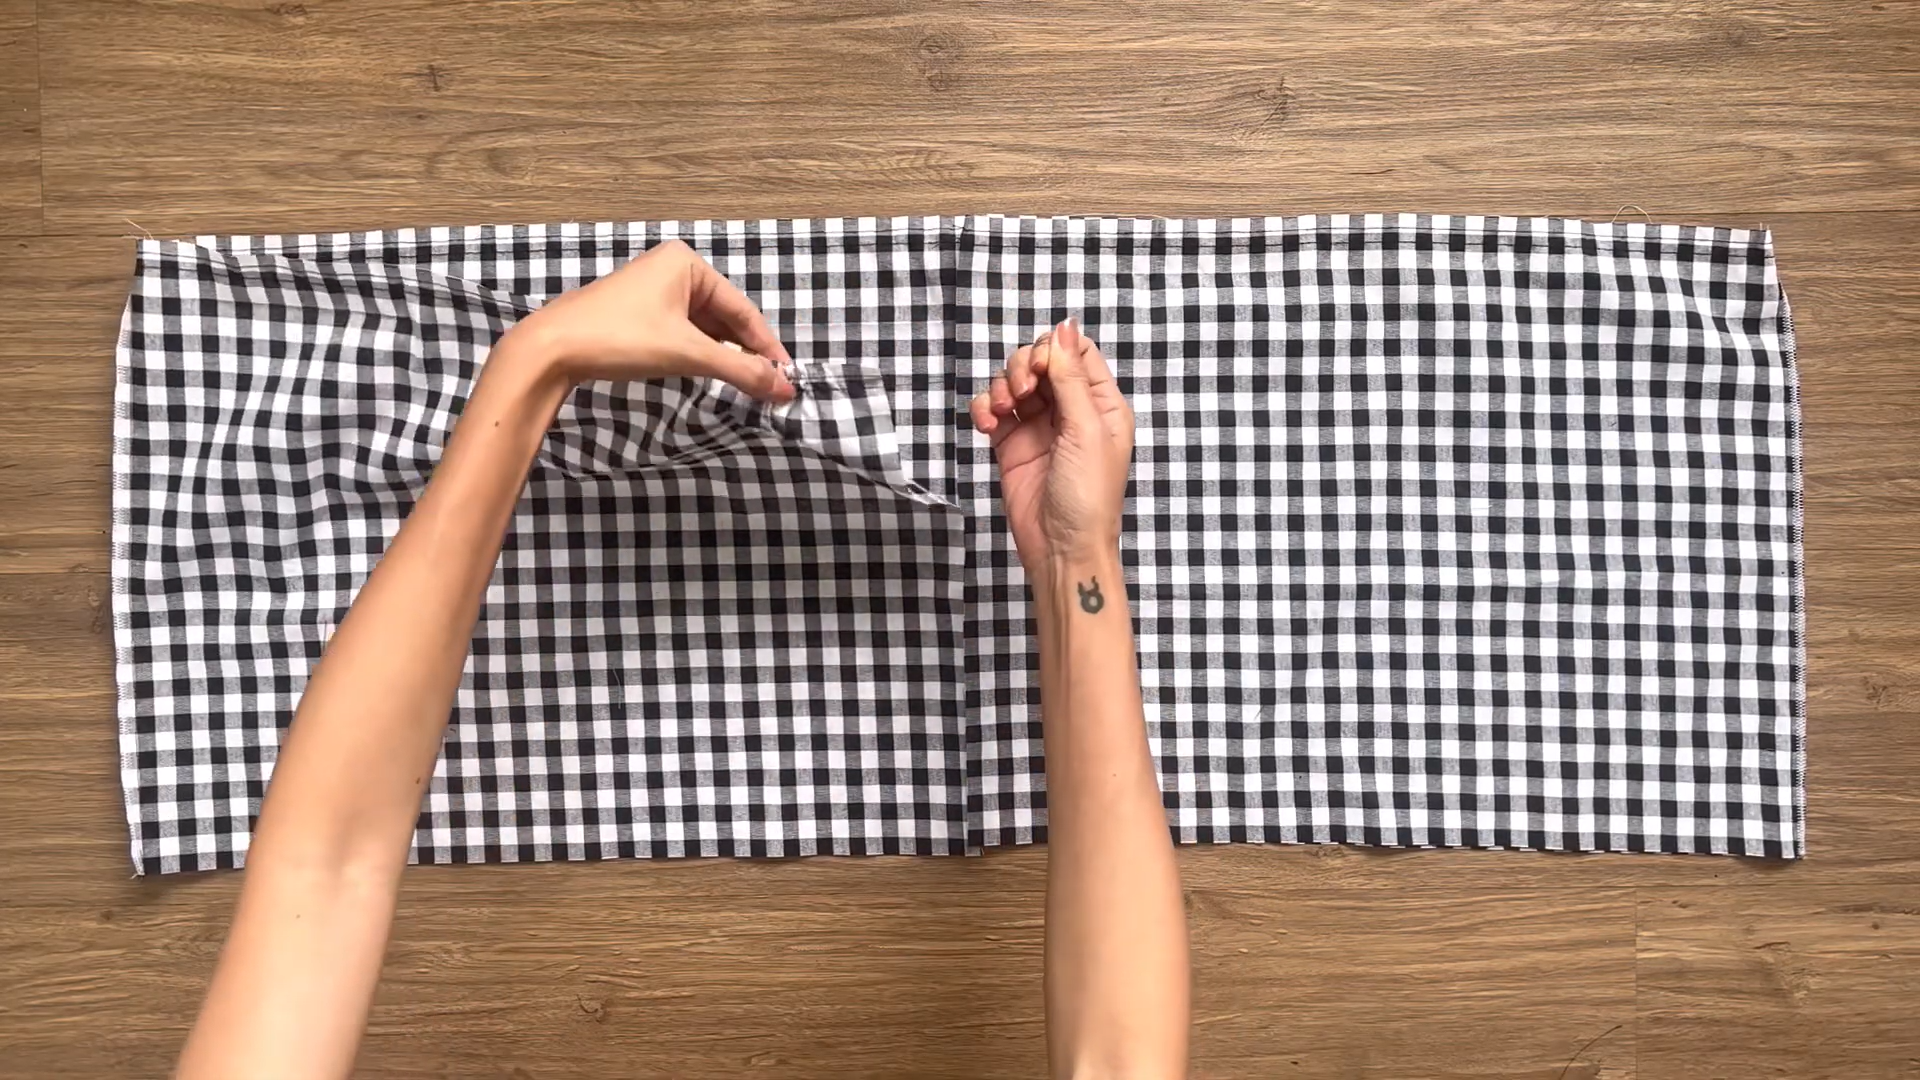
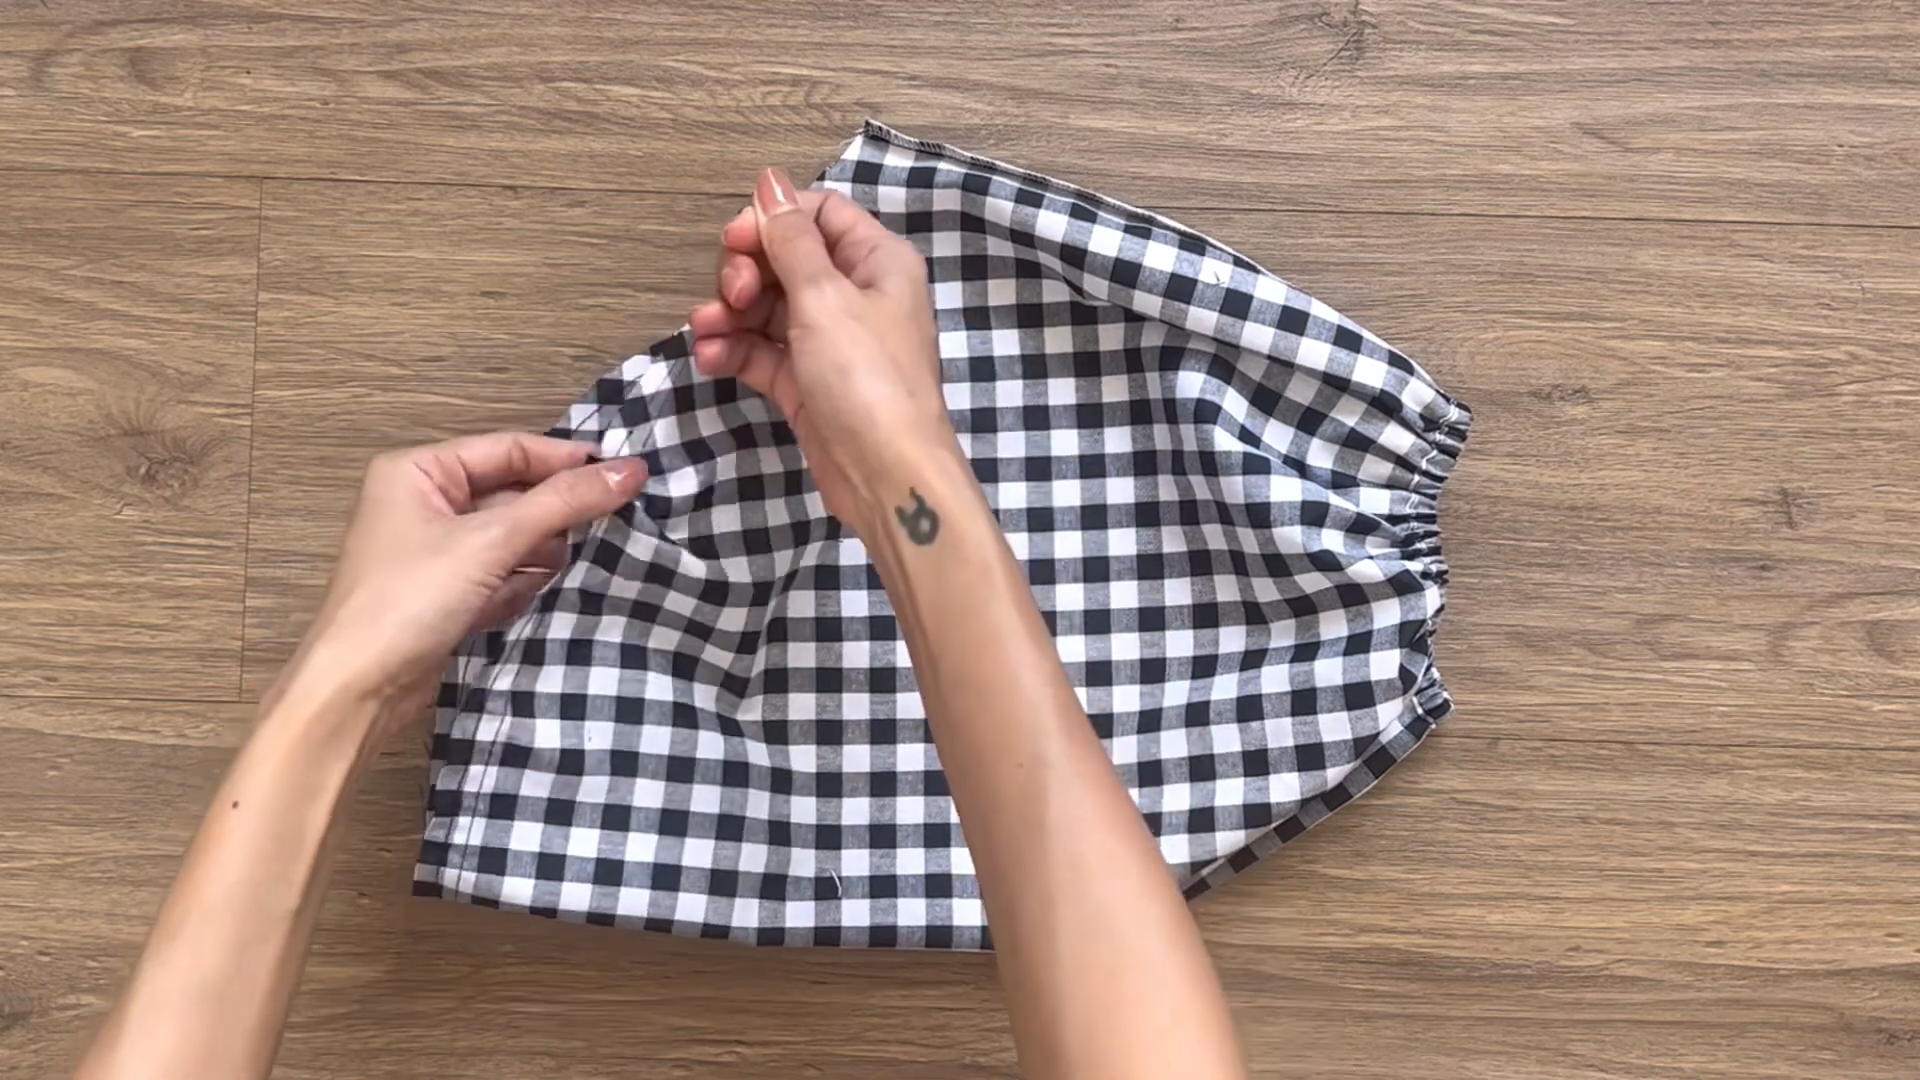
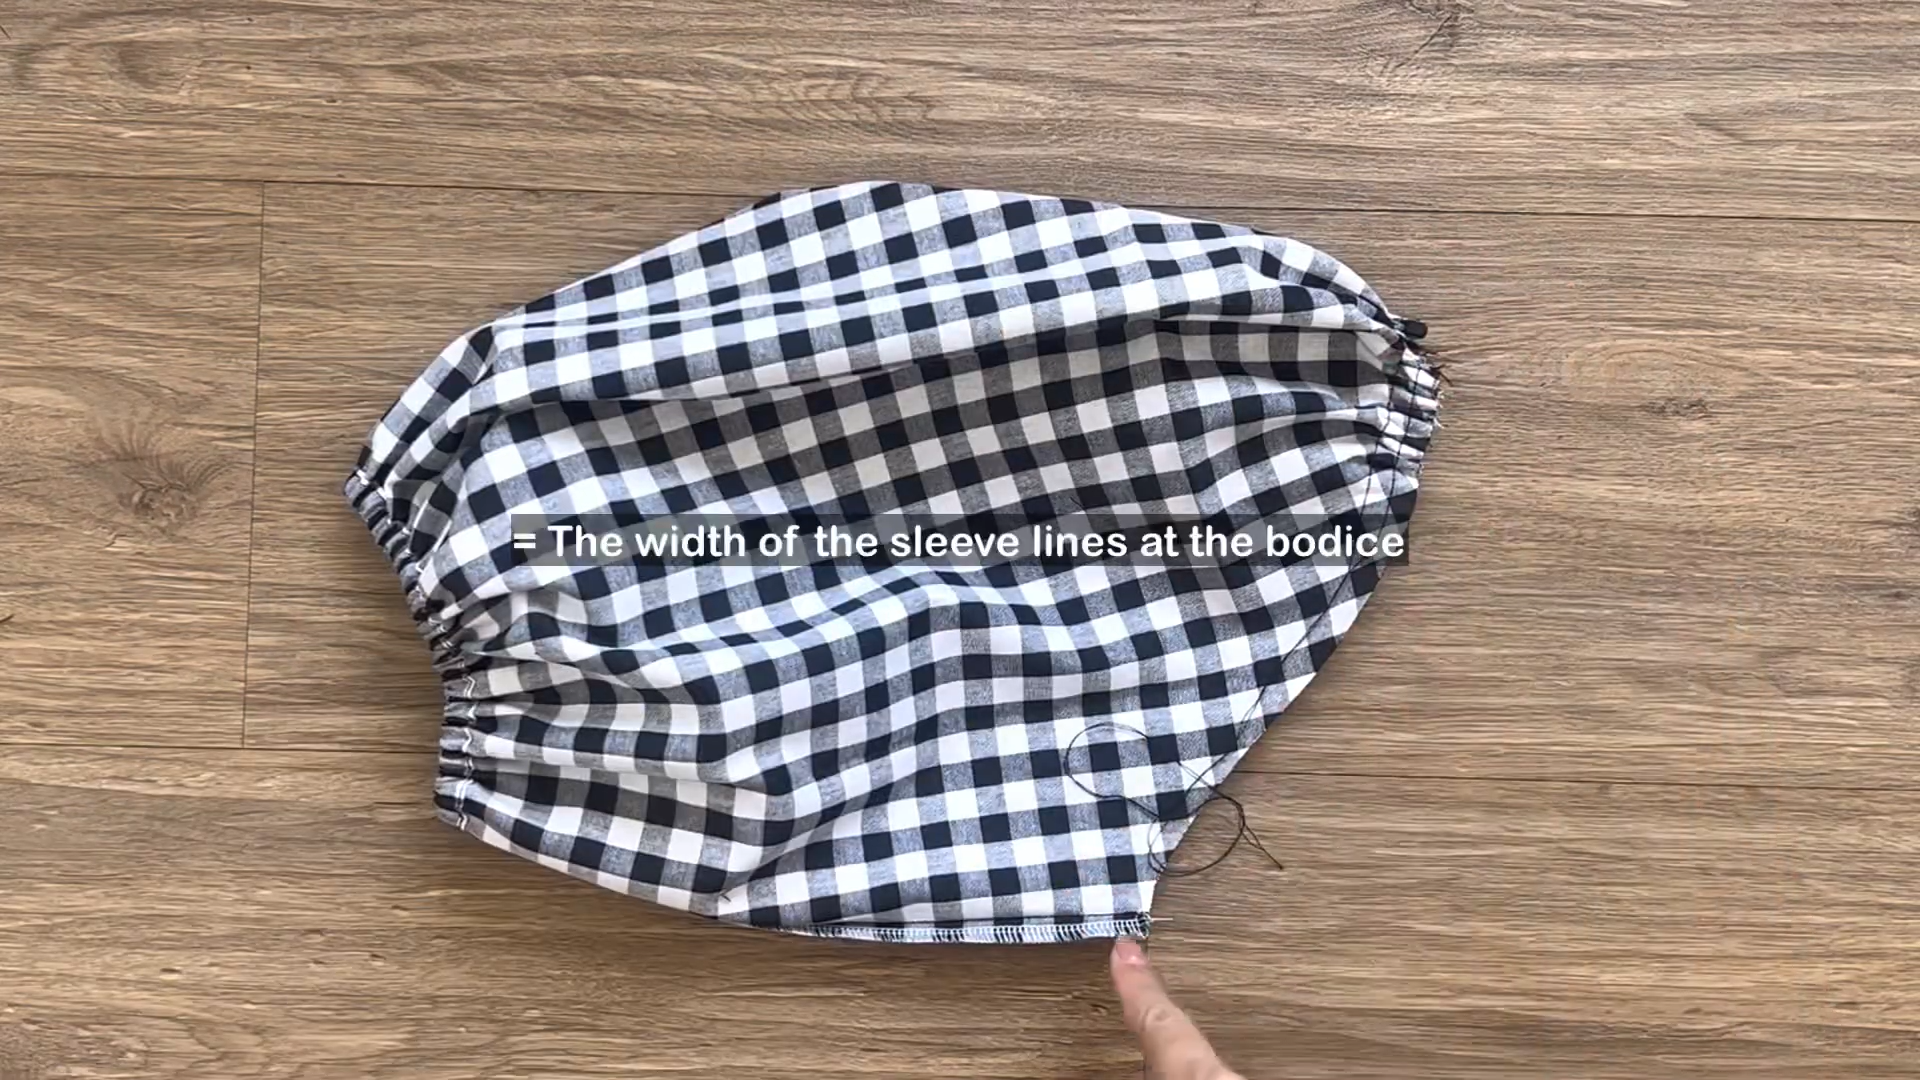
Gather the fabric along the loose seams you’ve just sewn.
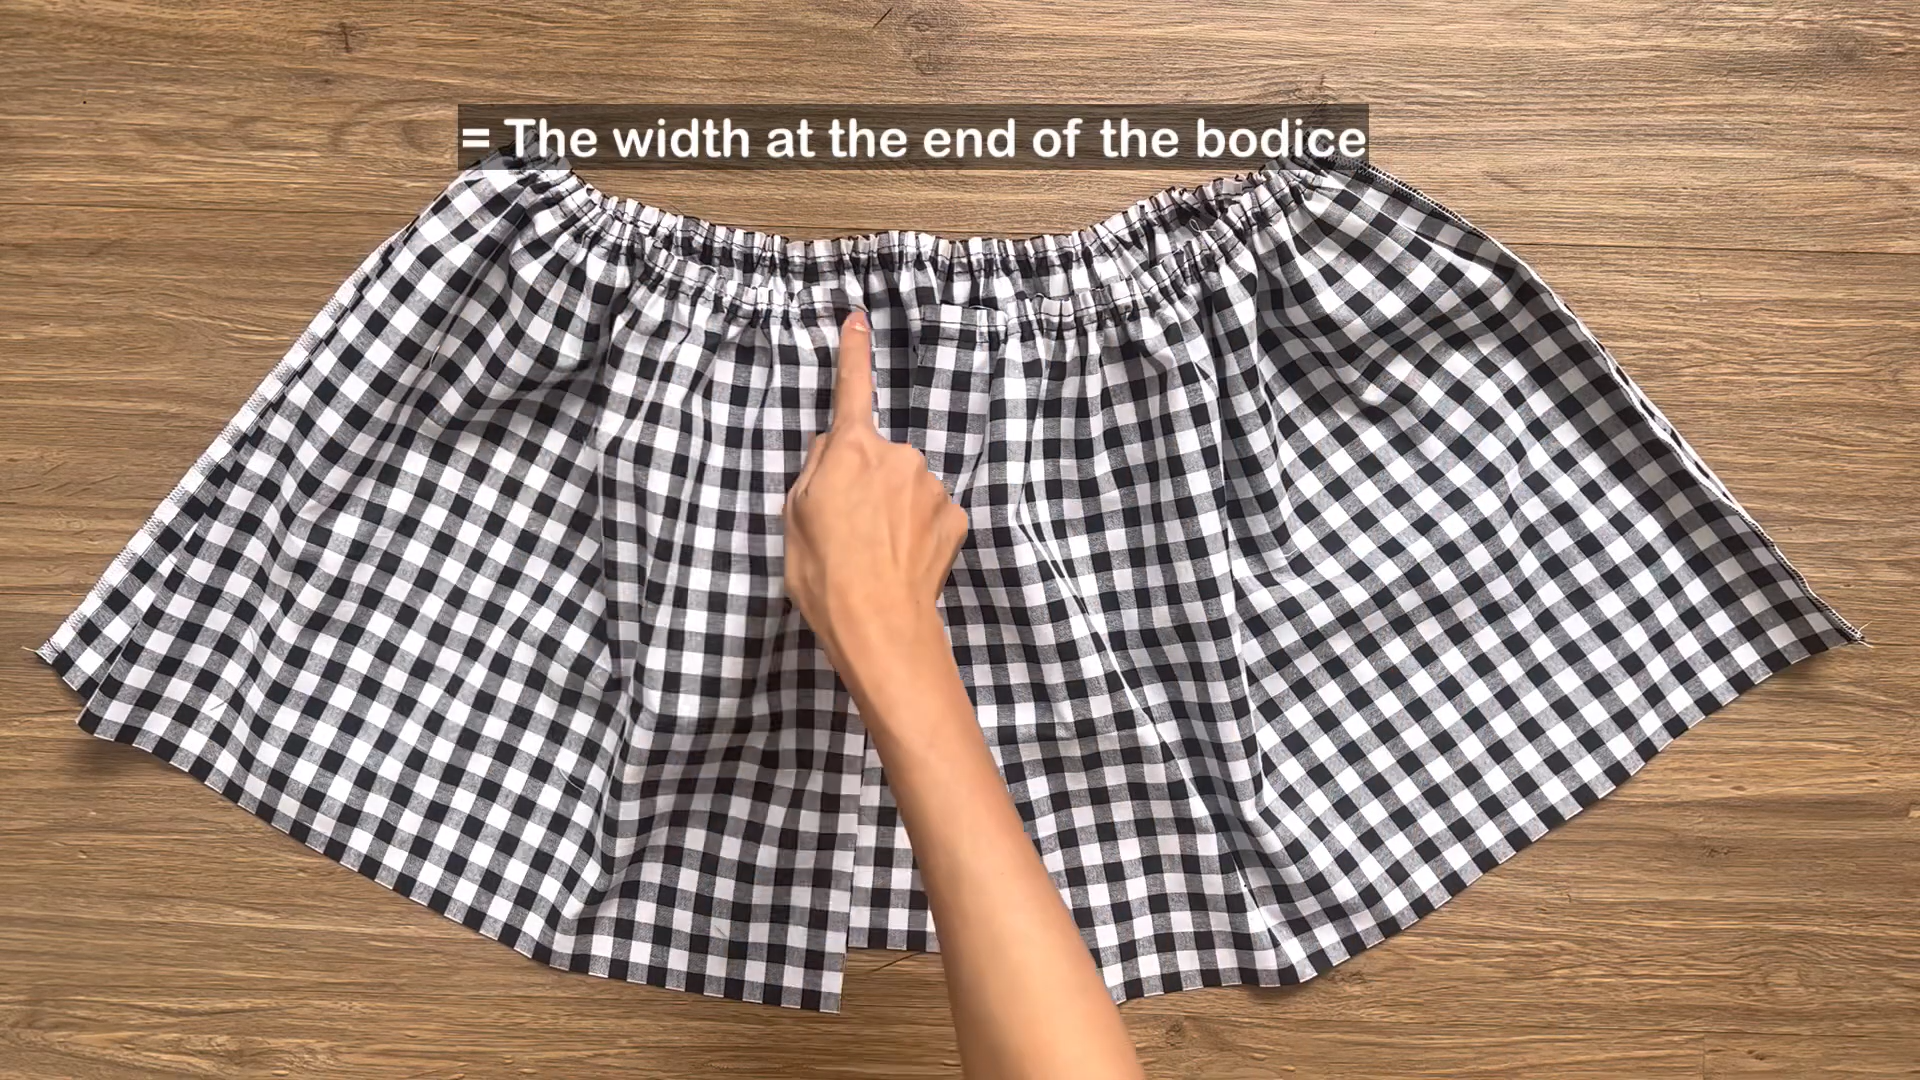
Adjust the gathering until the final width matches the width at the end of the bodice part that you previously checked.
THE SLEEVE
Connect the two underarm big lines together.
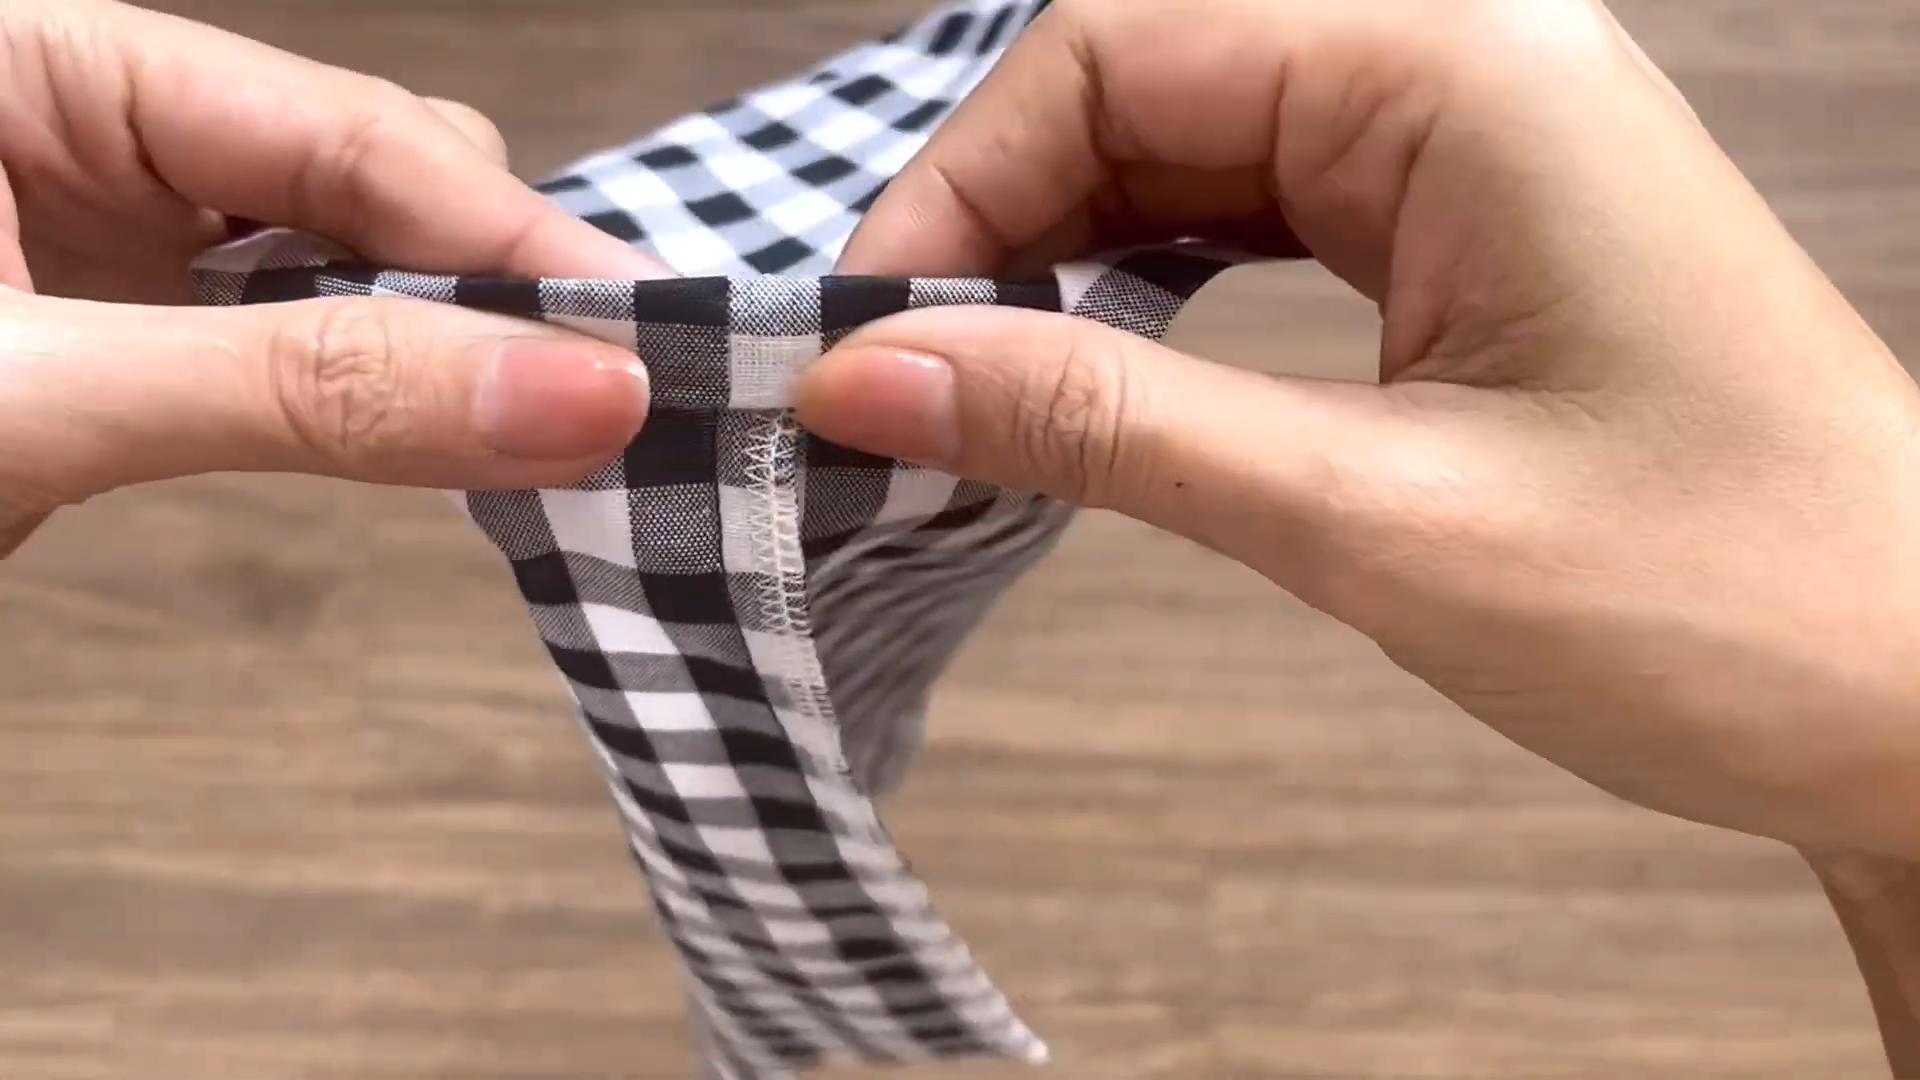
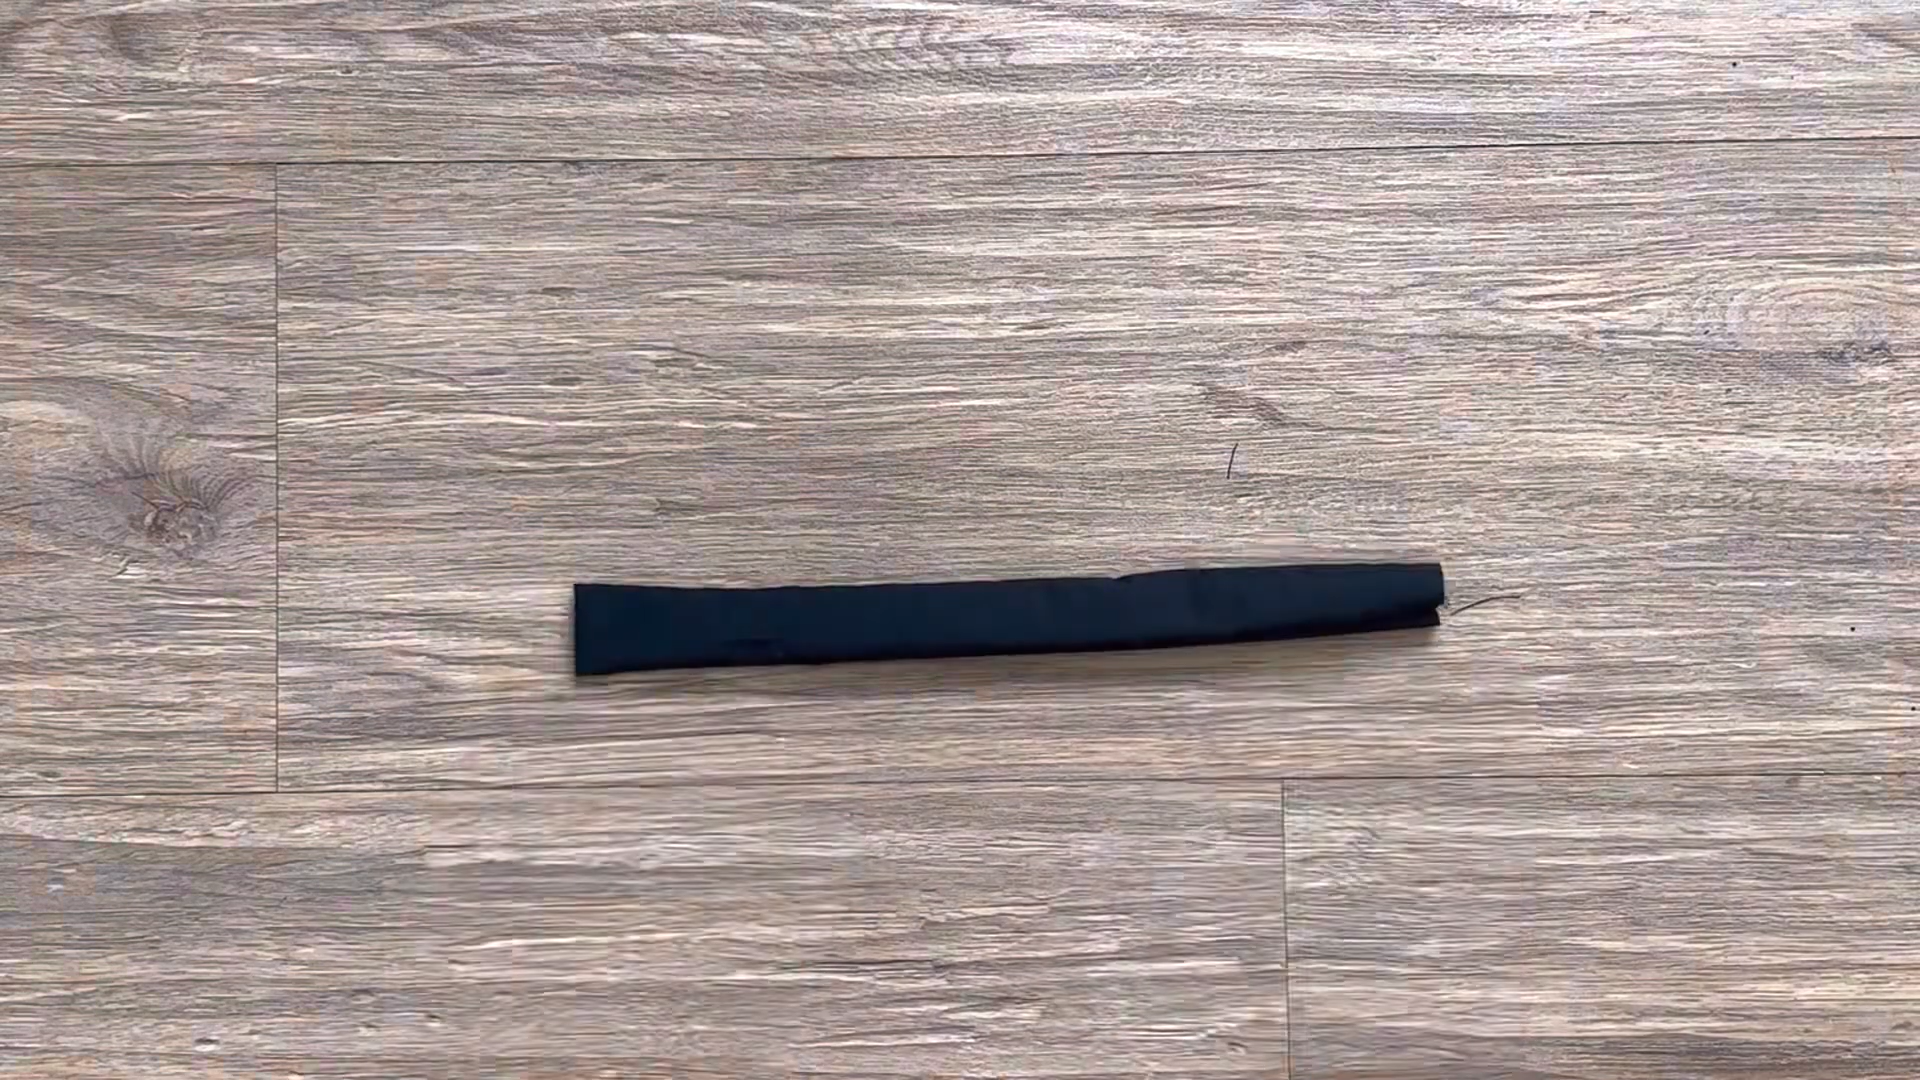
At the end of the sleeve, fold the fabric inside. First, fold it by 0.5 cm then fold it again by 1 cm.
Sew along the folded edge to secure it.
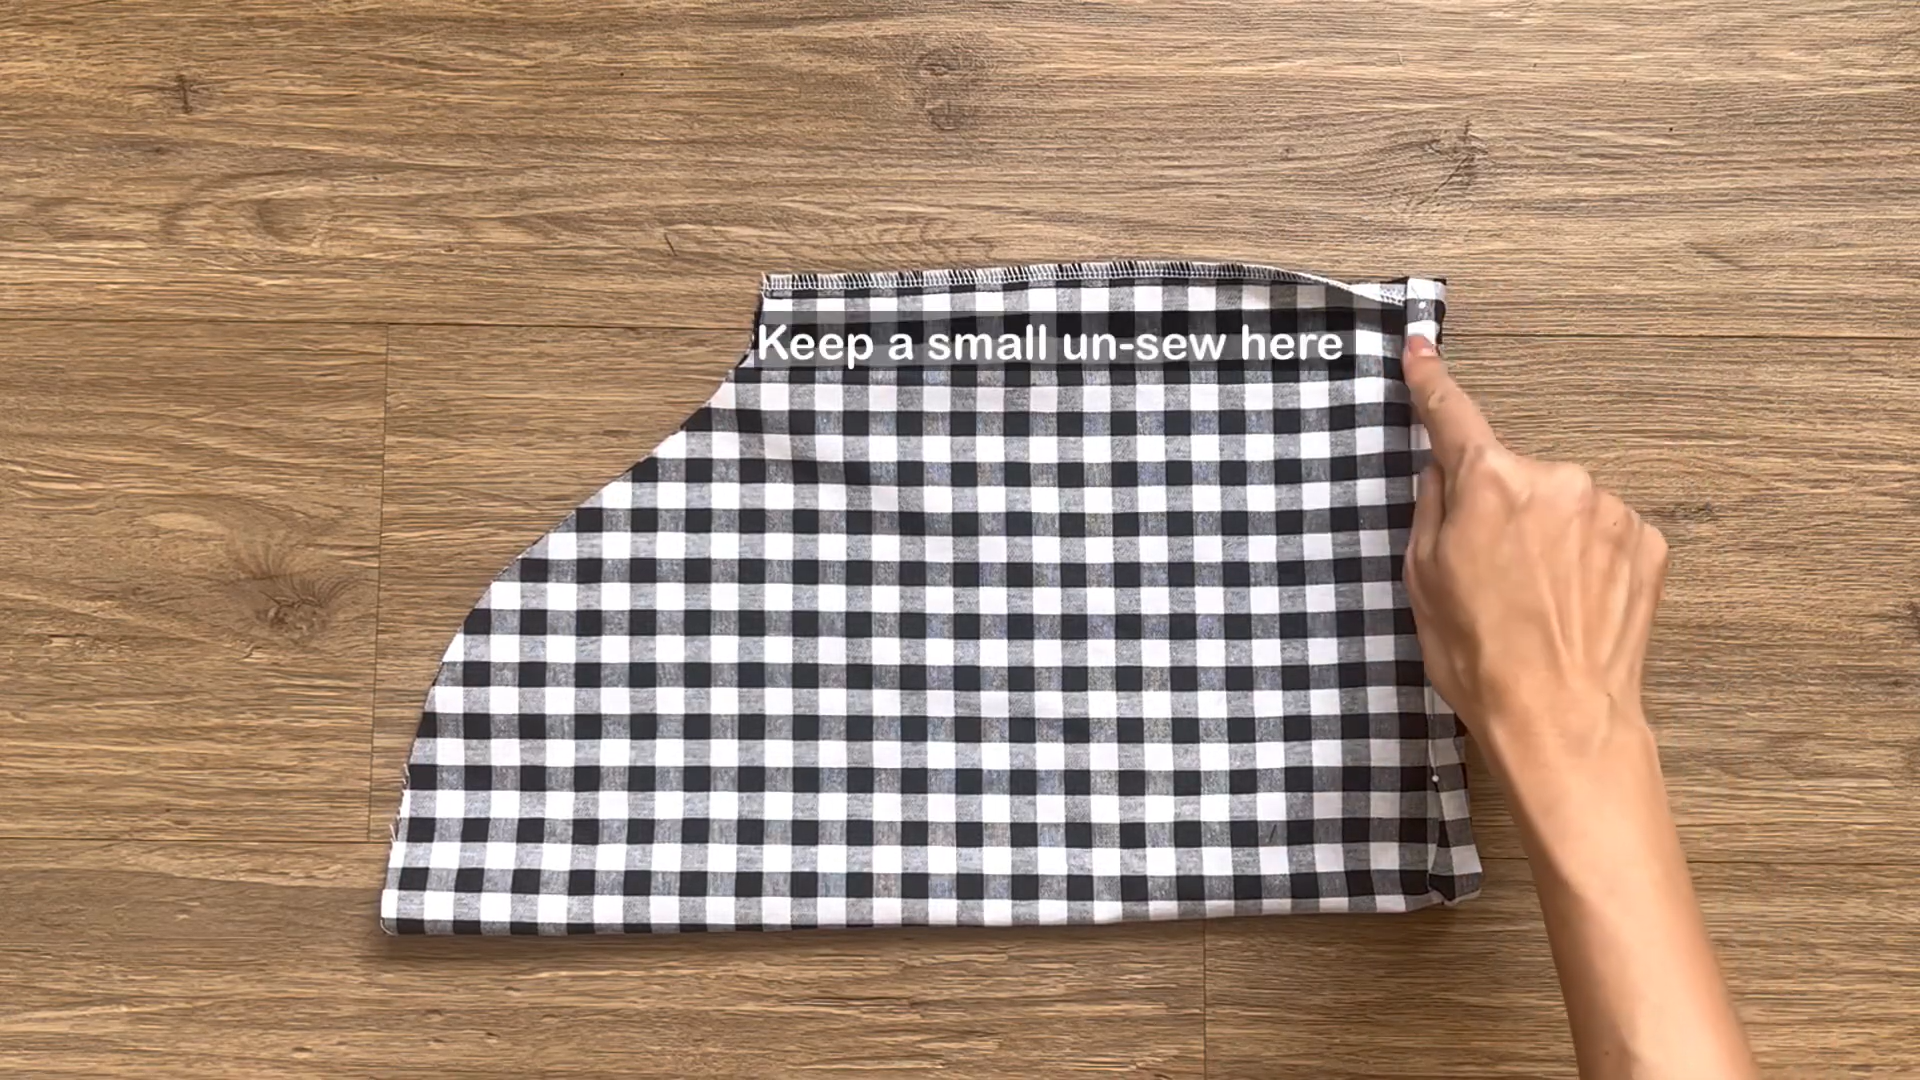
Remember to leave a small unsewn space before the elastic band insertion point.

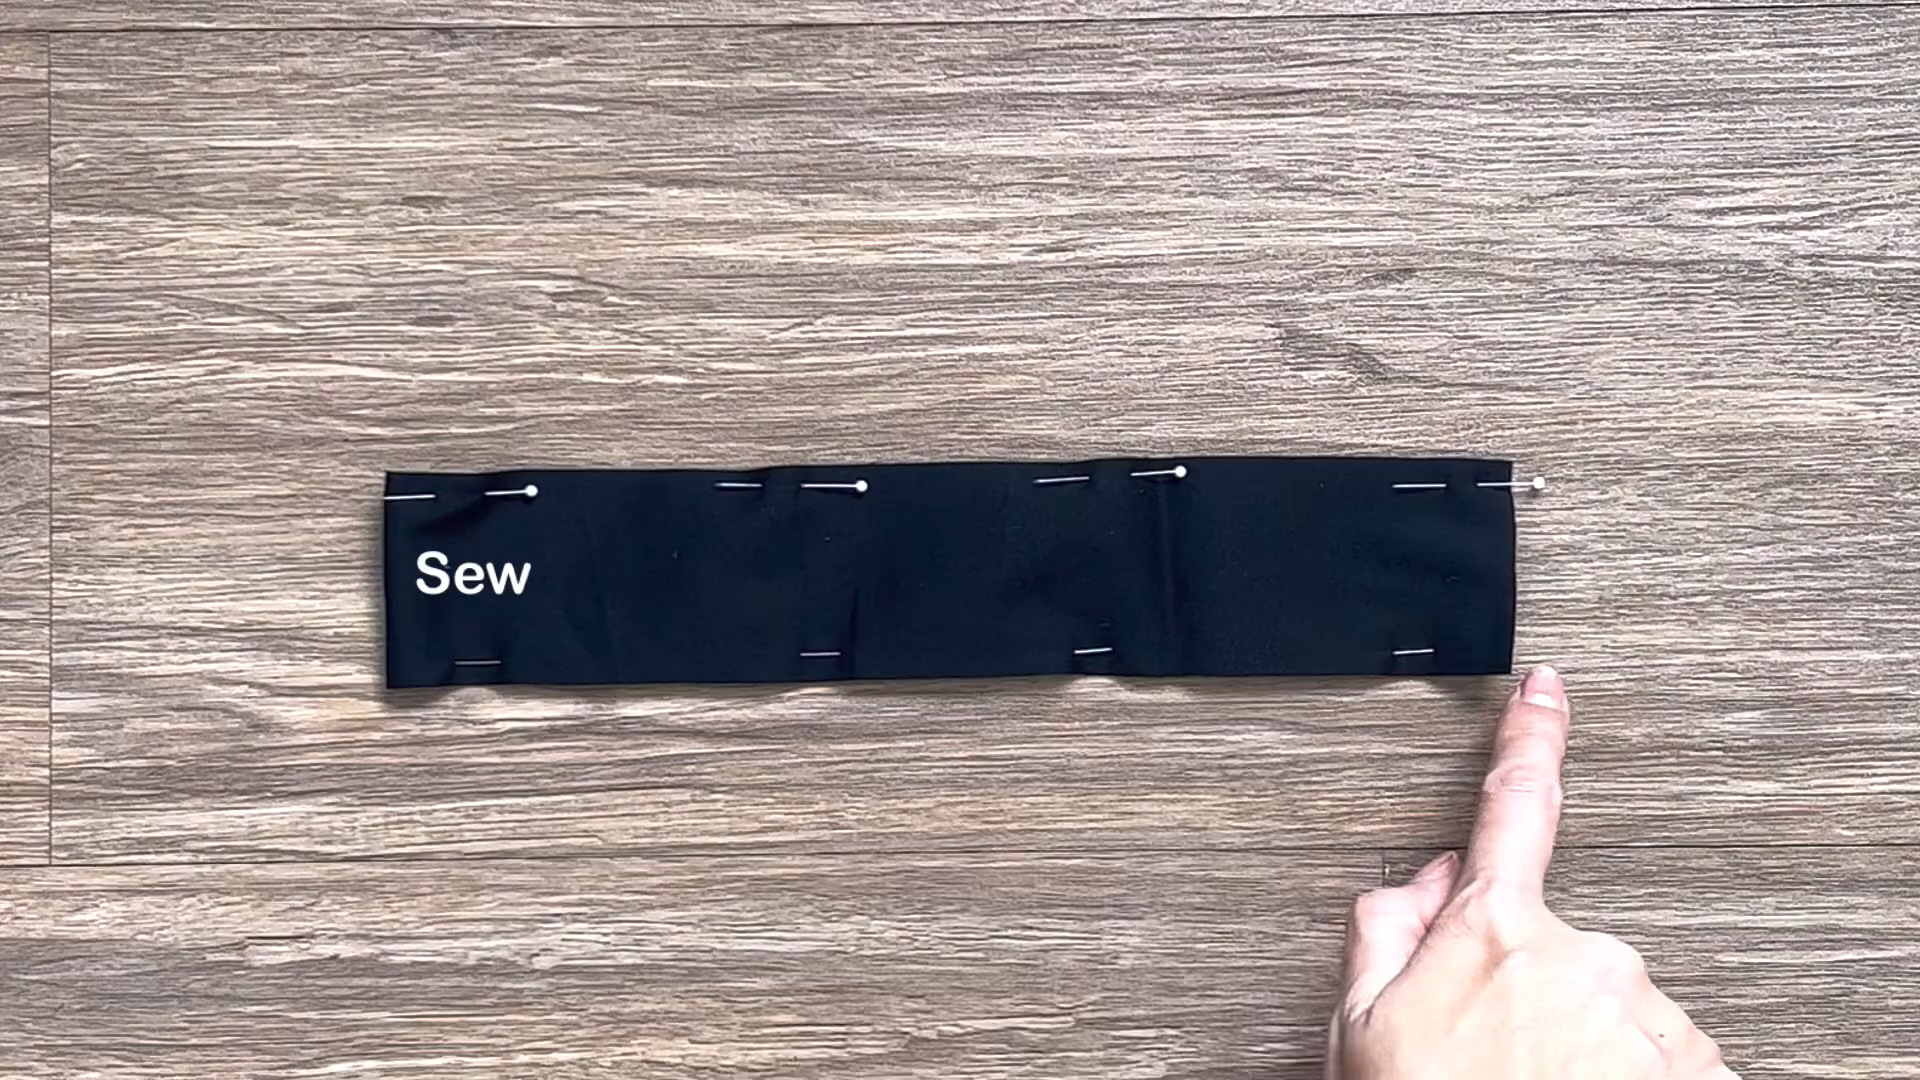
Cut an elastic band with a length of 28 cm matching the circumference of your arm plus 4 cm. The width is 0.8 cm.
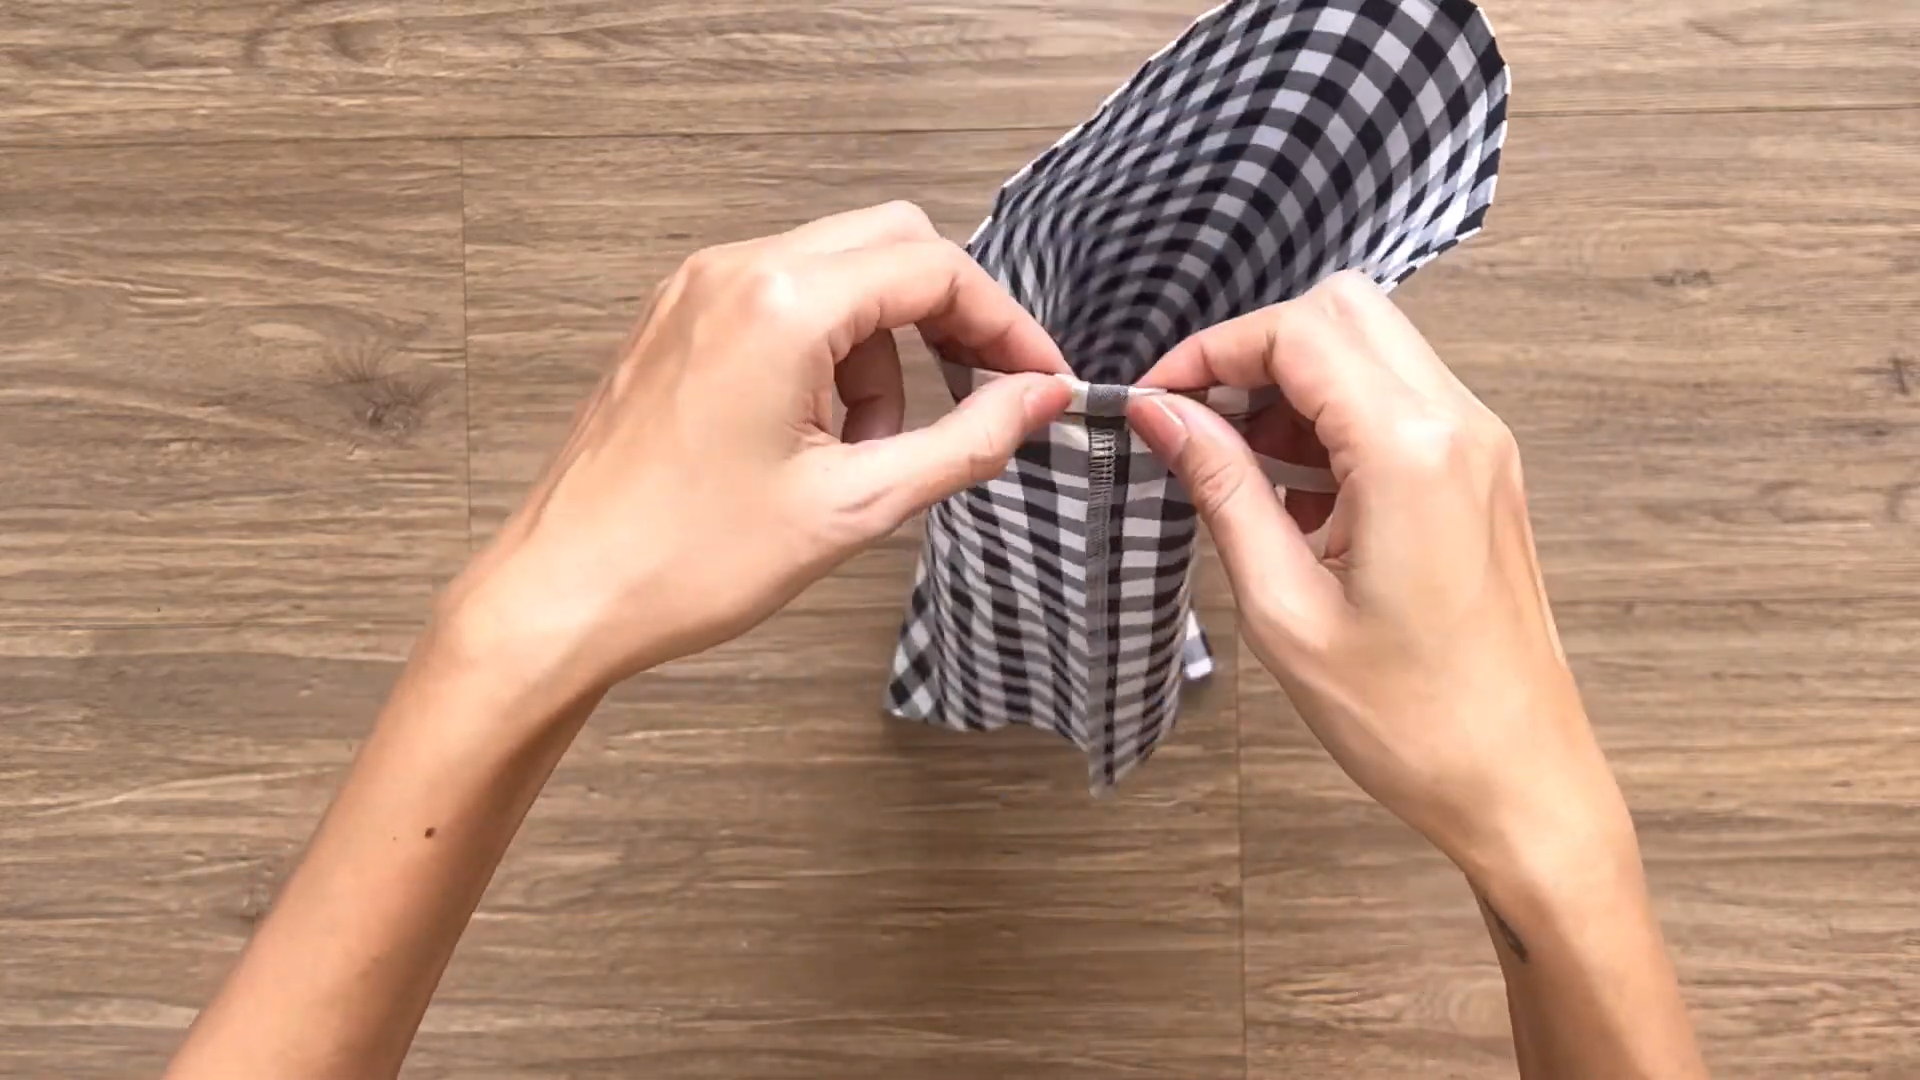
Use a small safety pin to thread the elastic band through the fabric hole.
Sew the two ends of the elastic band together and close the unsewn space that you kept earlier.
Create two loose seams along the sleeve line.
Gather the fabric along the loose seams you’ve just sewn.
Adjust the gathering until the final sleeve width matches the width at the sleeve line of the bodice part.
Connect the sleeves to the bodice at the sleeve lines.
Sew them together.
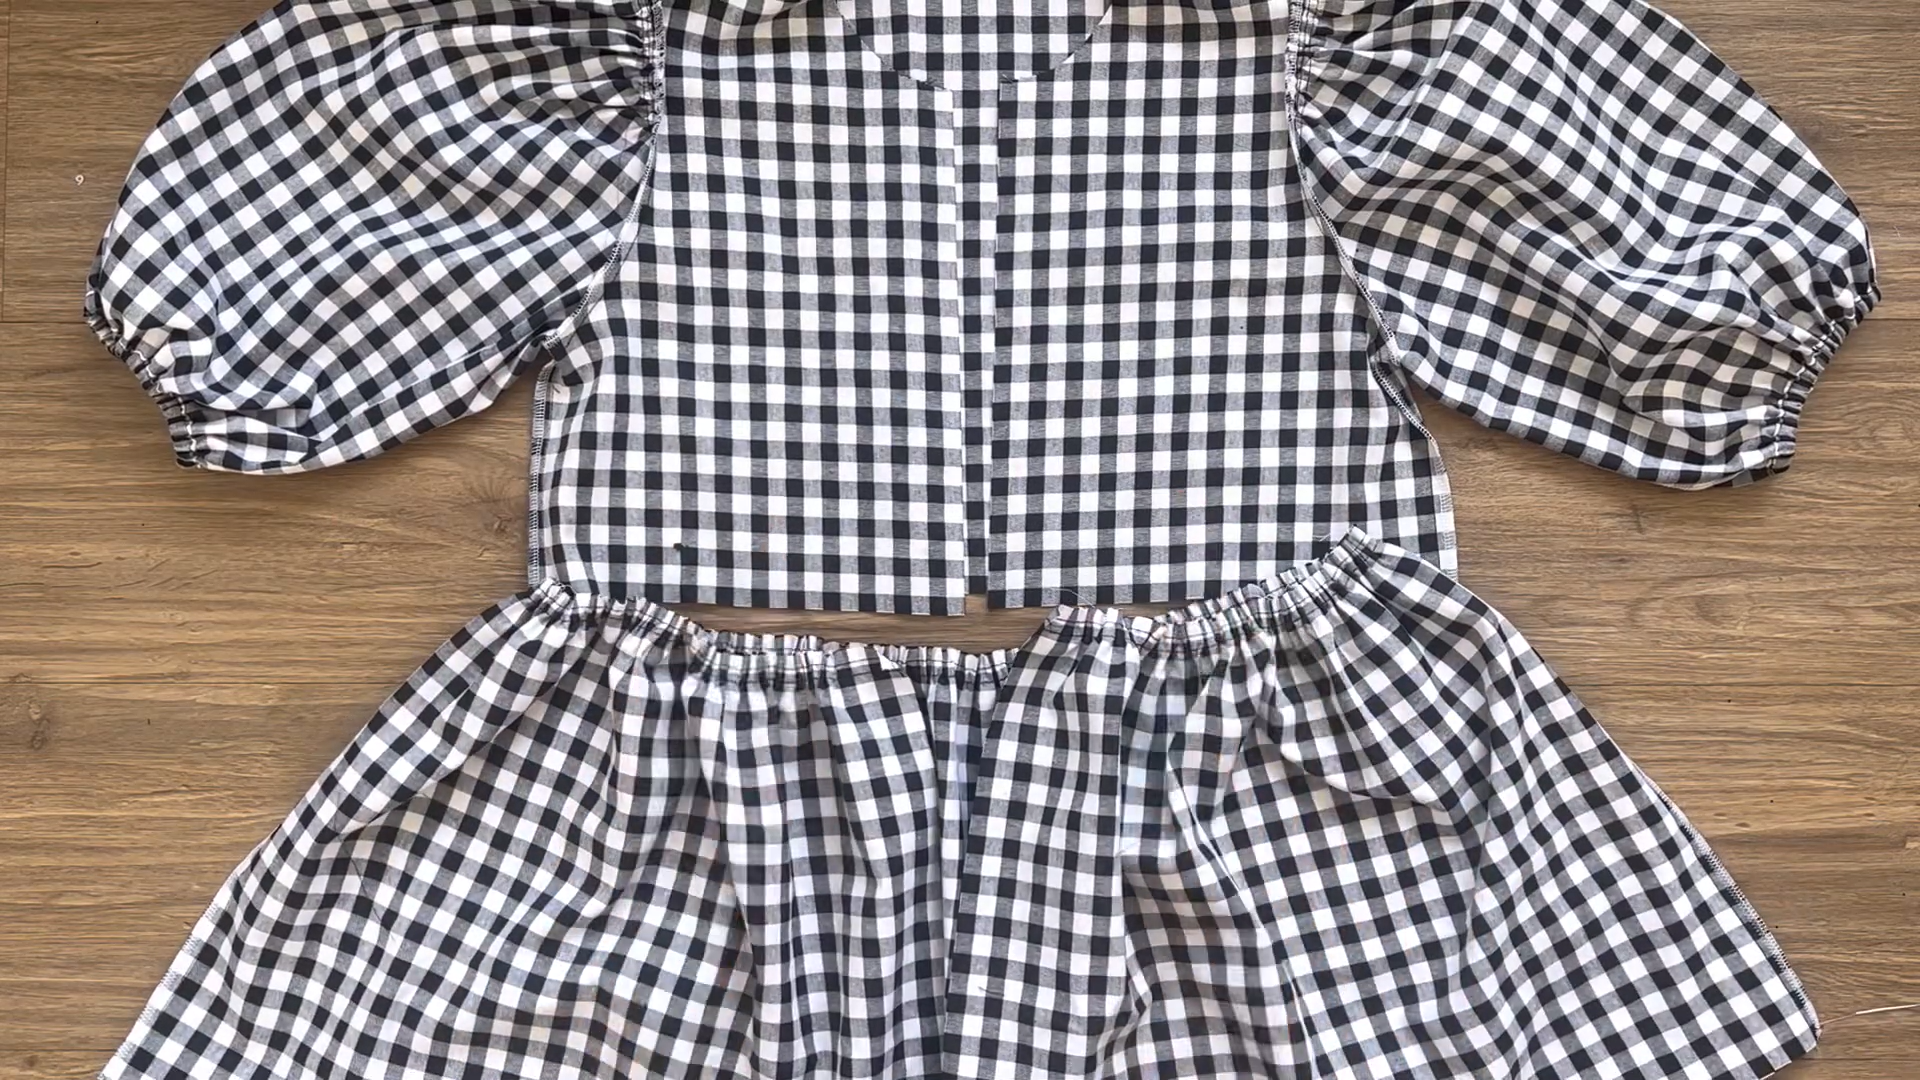
Attach the ruffle hem part to the bodice also.
THE BINDINGS AND TIES
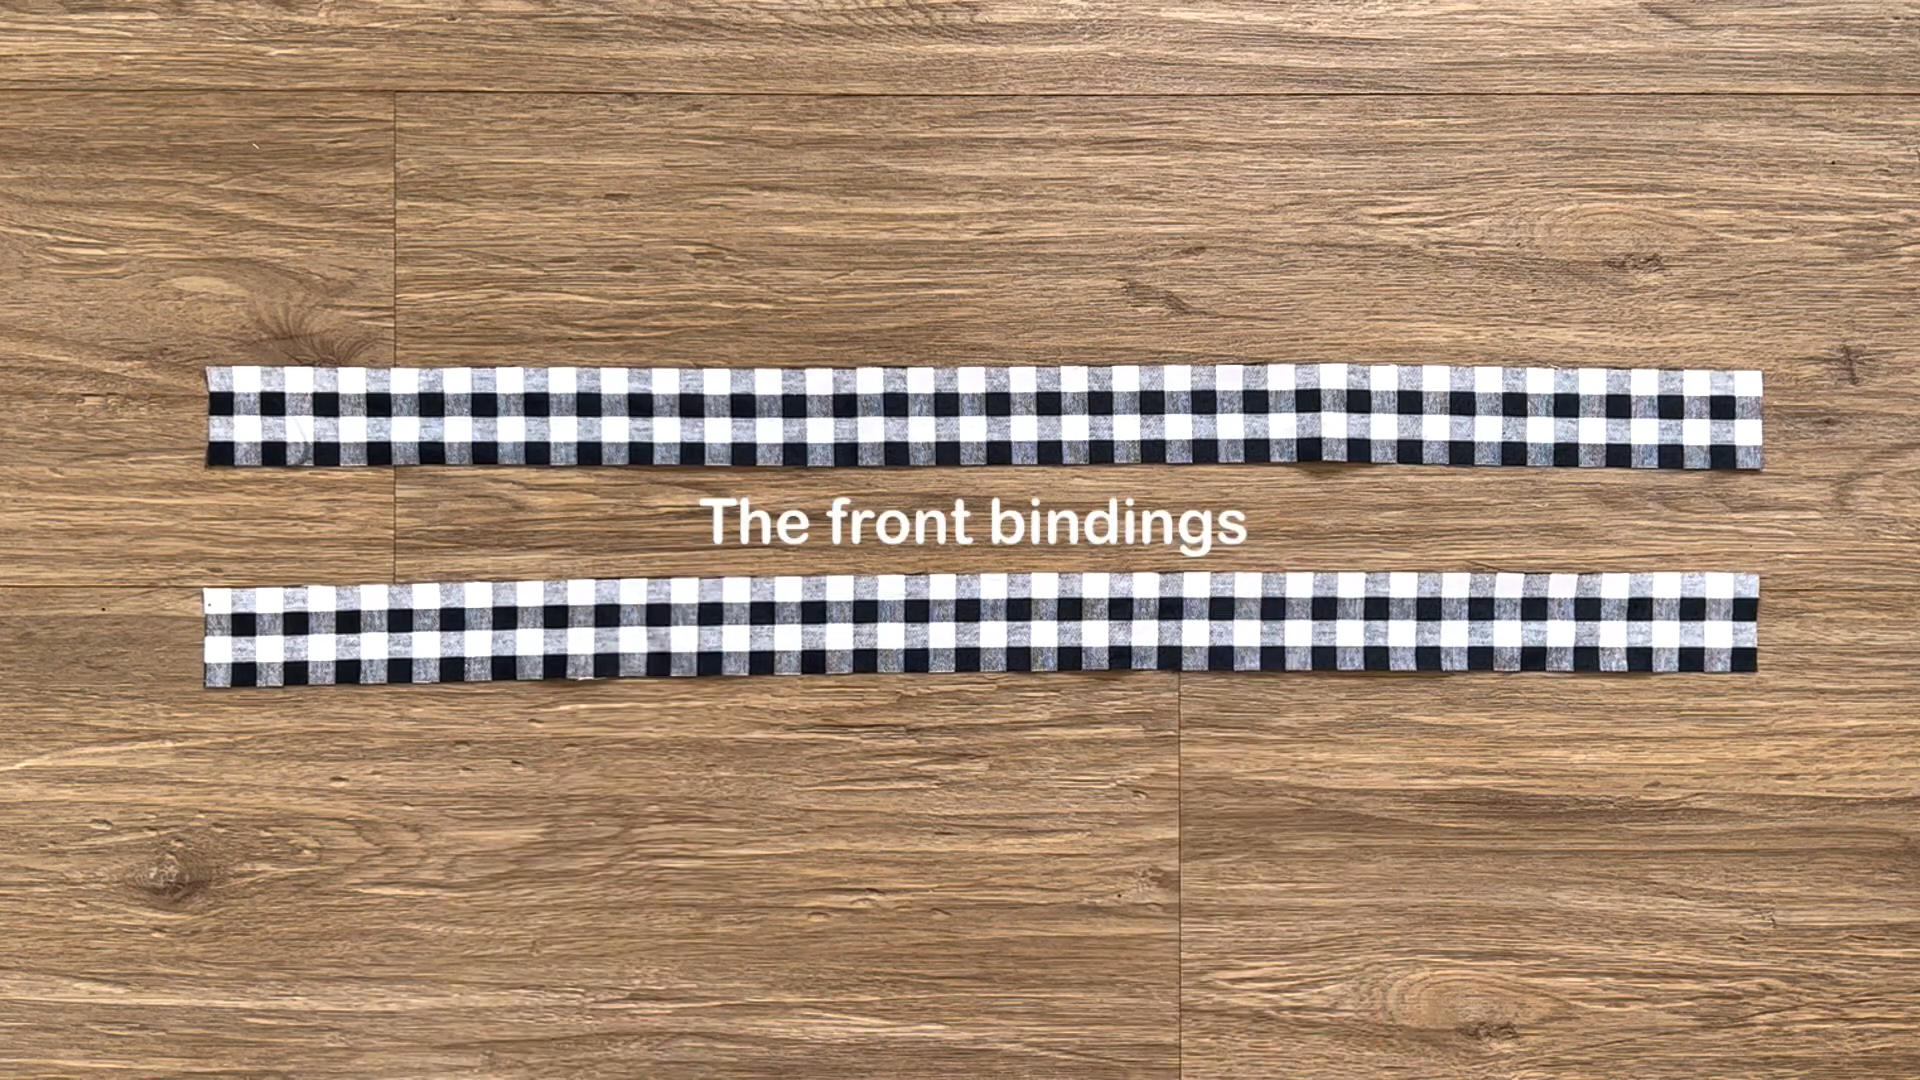
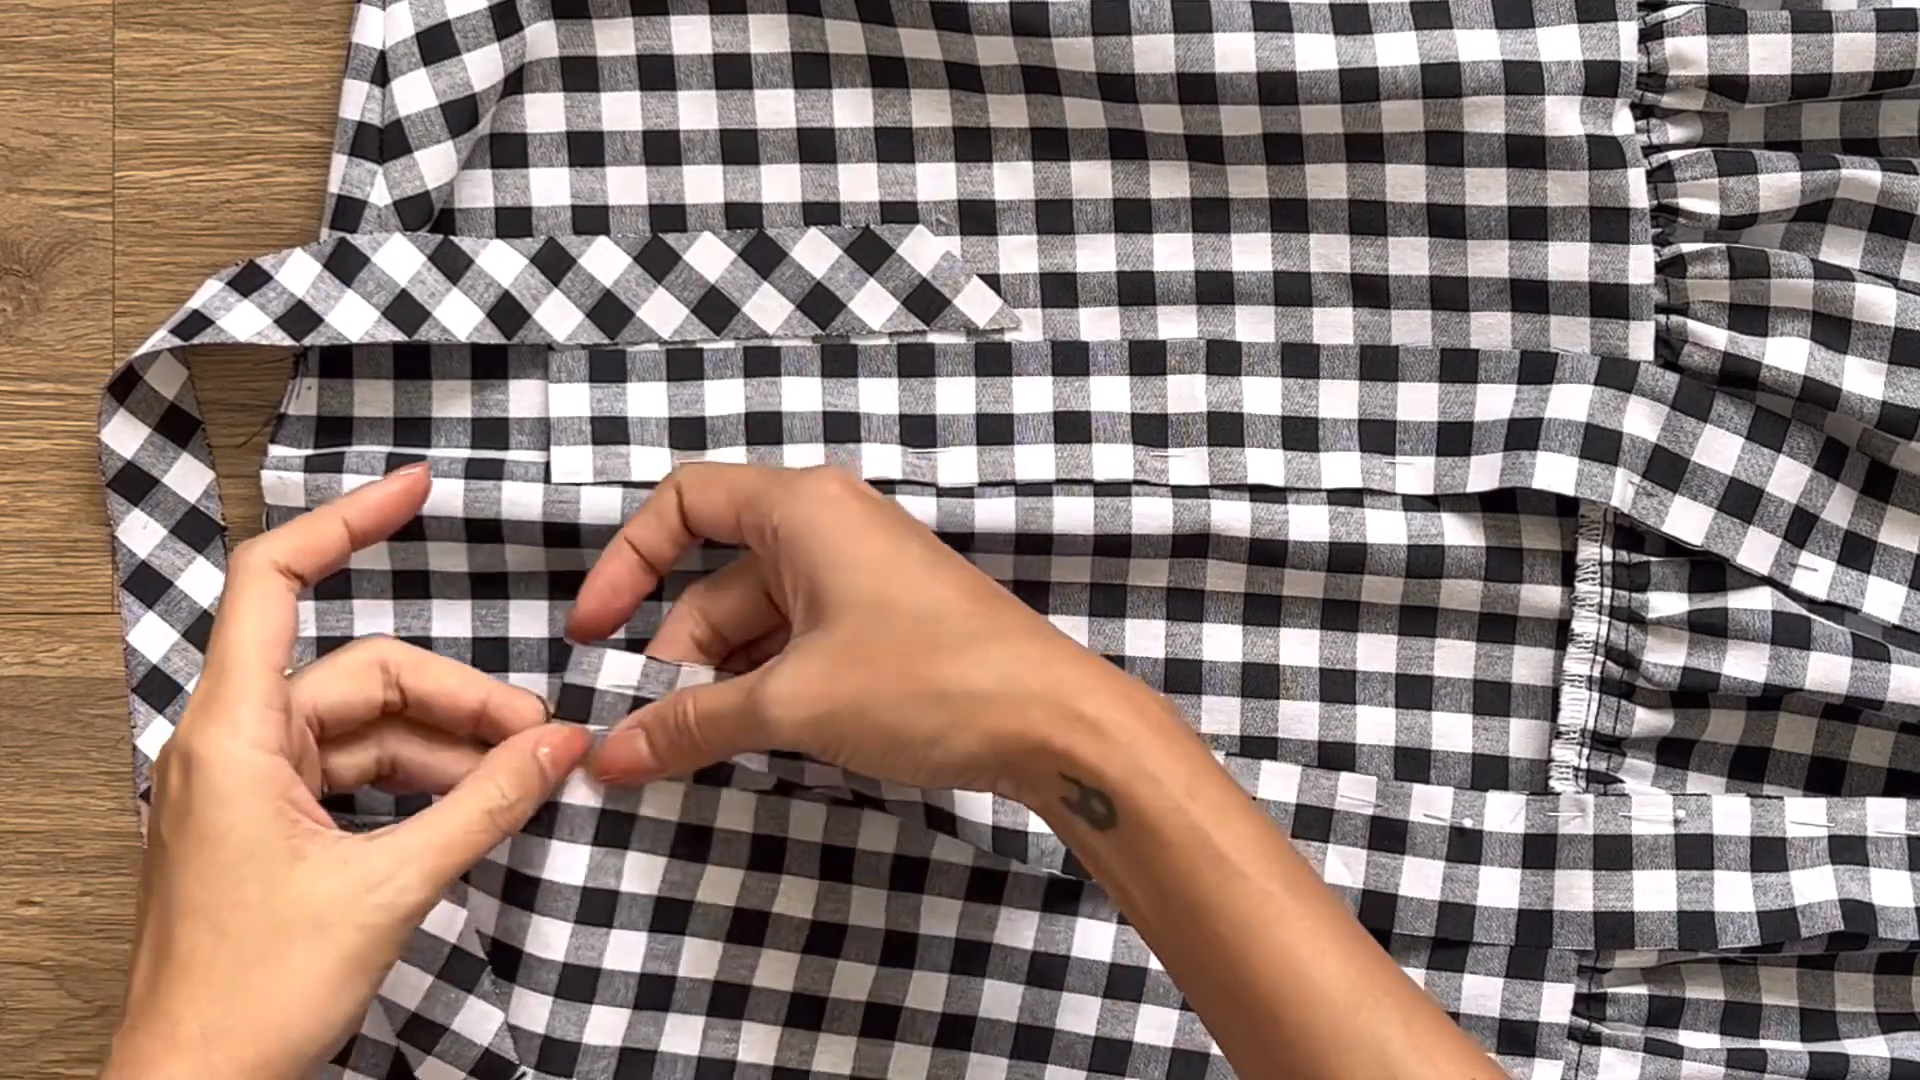
Cut two long rectangles with a width of 4 cm each. These rectangles have the same length as the front part of the top.
Connect one side of each rectangle to the corresponding front part of the blouse using pins.

At the end of the top, fold the rough fabric inside by 1 cm first then fold in the opposite direction by 3 cm.
Place the binding over this folded area.
For the neck binding, cut a bias rectangle with a width of 3 cm. This rectangle should have the same length as the neckline.
Attach one side of the bias rectangle to the neck line.
At the beginning of the neck, fold the other side of the front binding outside by 1 cm, then place the bias binding over it.

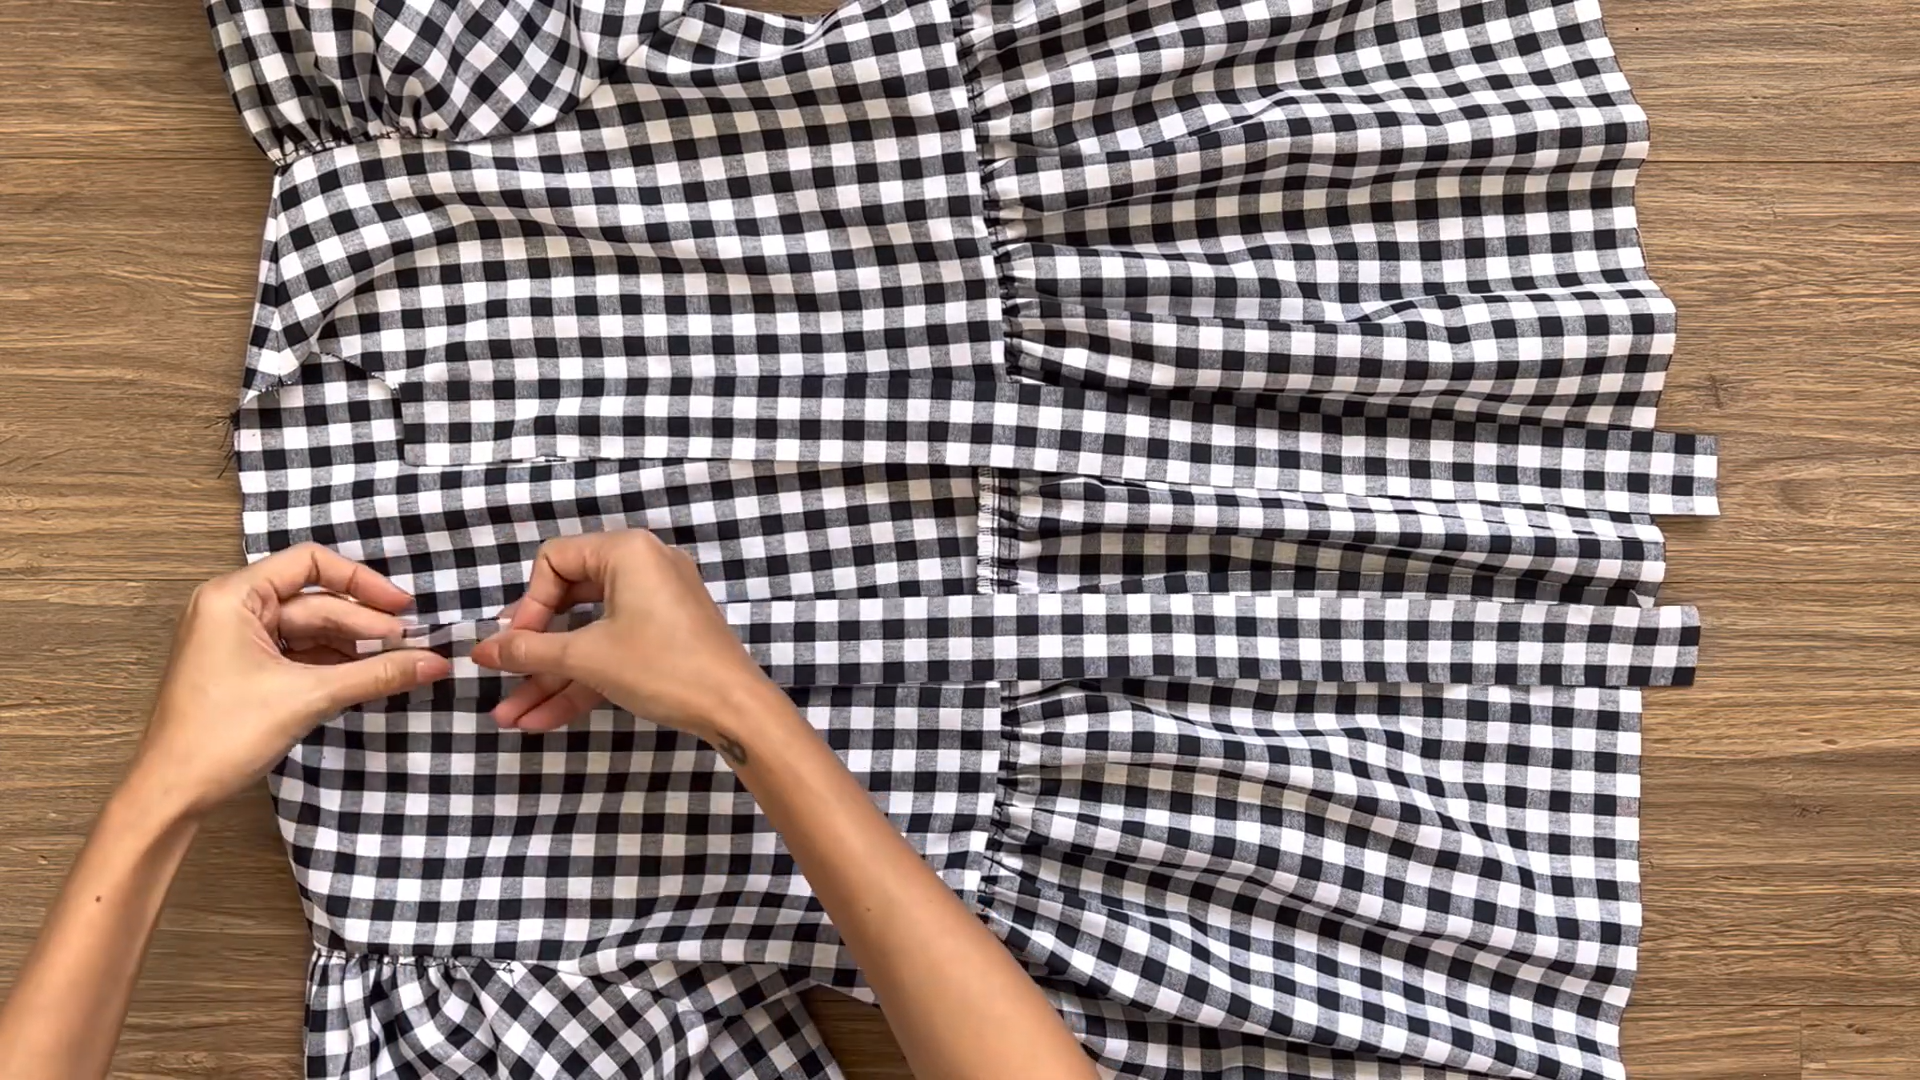
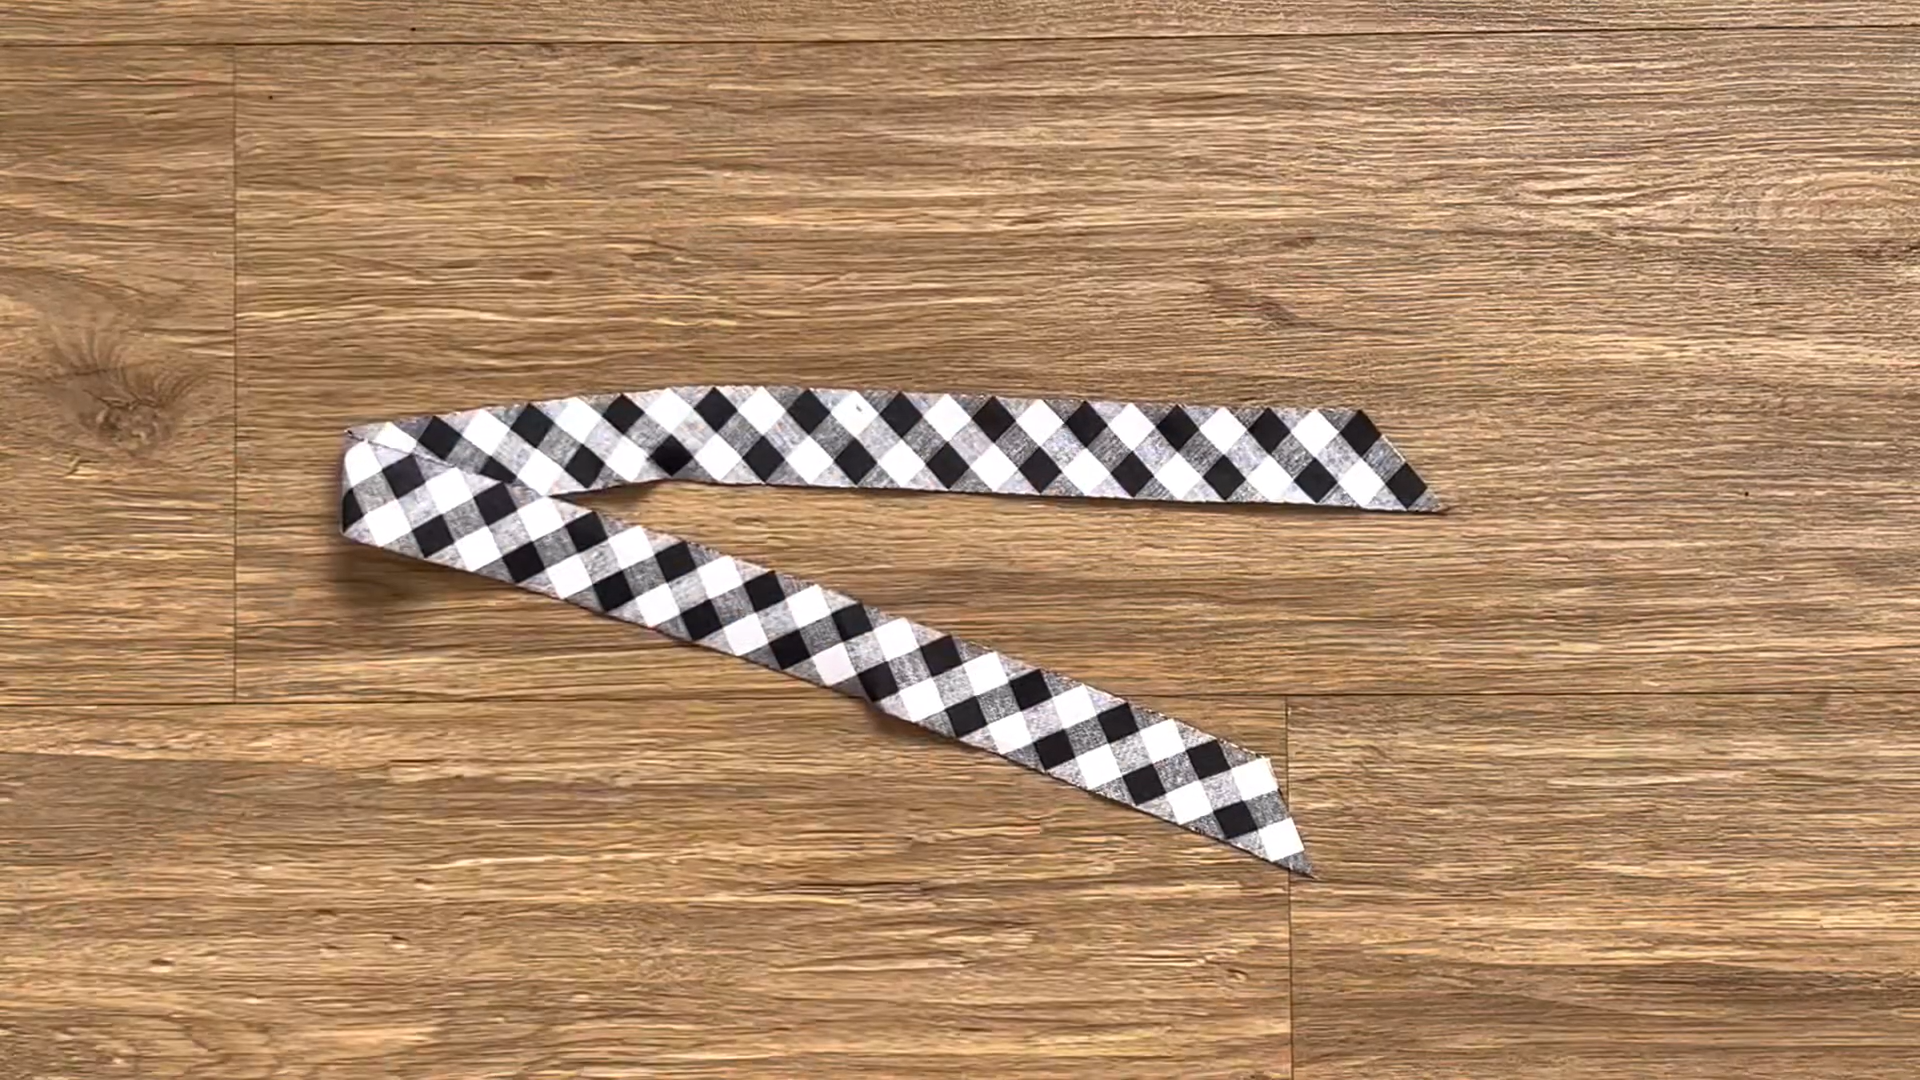
Cut a rectangle with a length of 60 cm and a width of 4 cm.
Fold the rectangle in half along the length line.
Sew along both sides of the folded rectangle with a 0.5 cm seam allowance.
Turn the tie inside out and iron it to make it look neat.
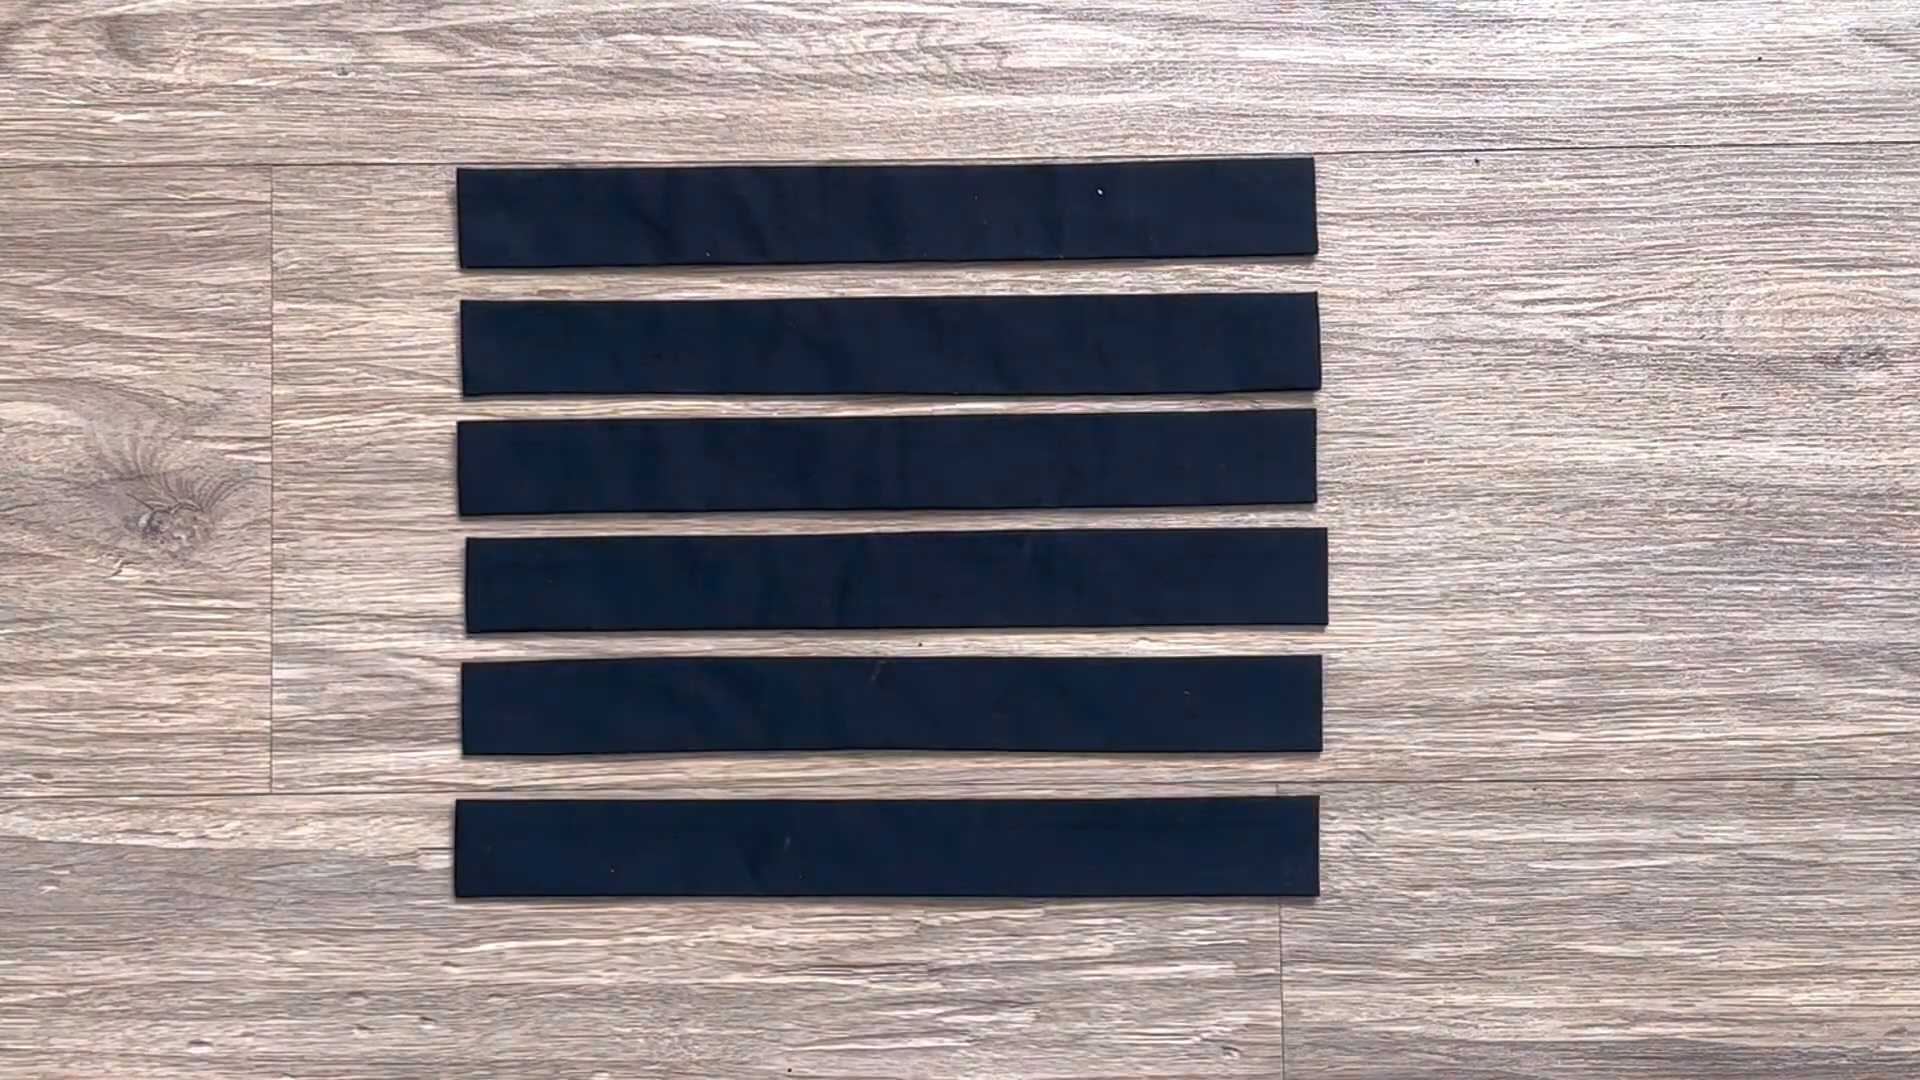
Repeat this process to create a total of 6 ties.
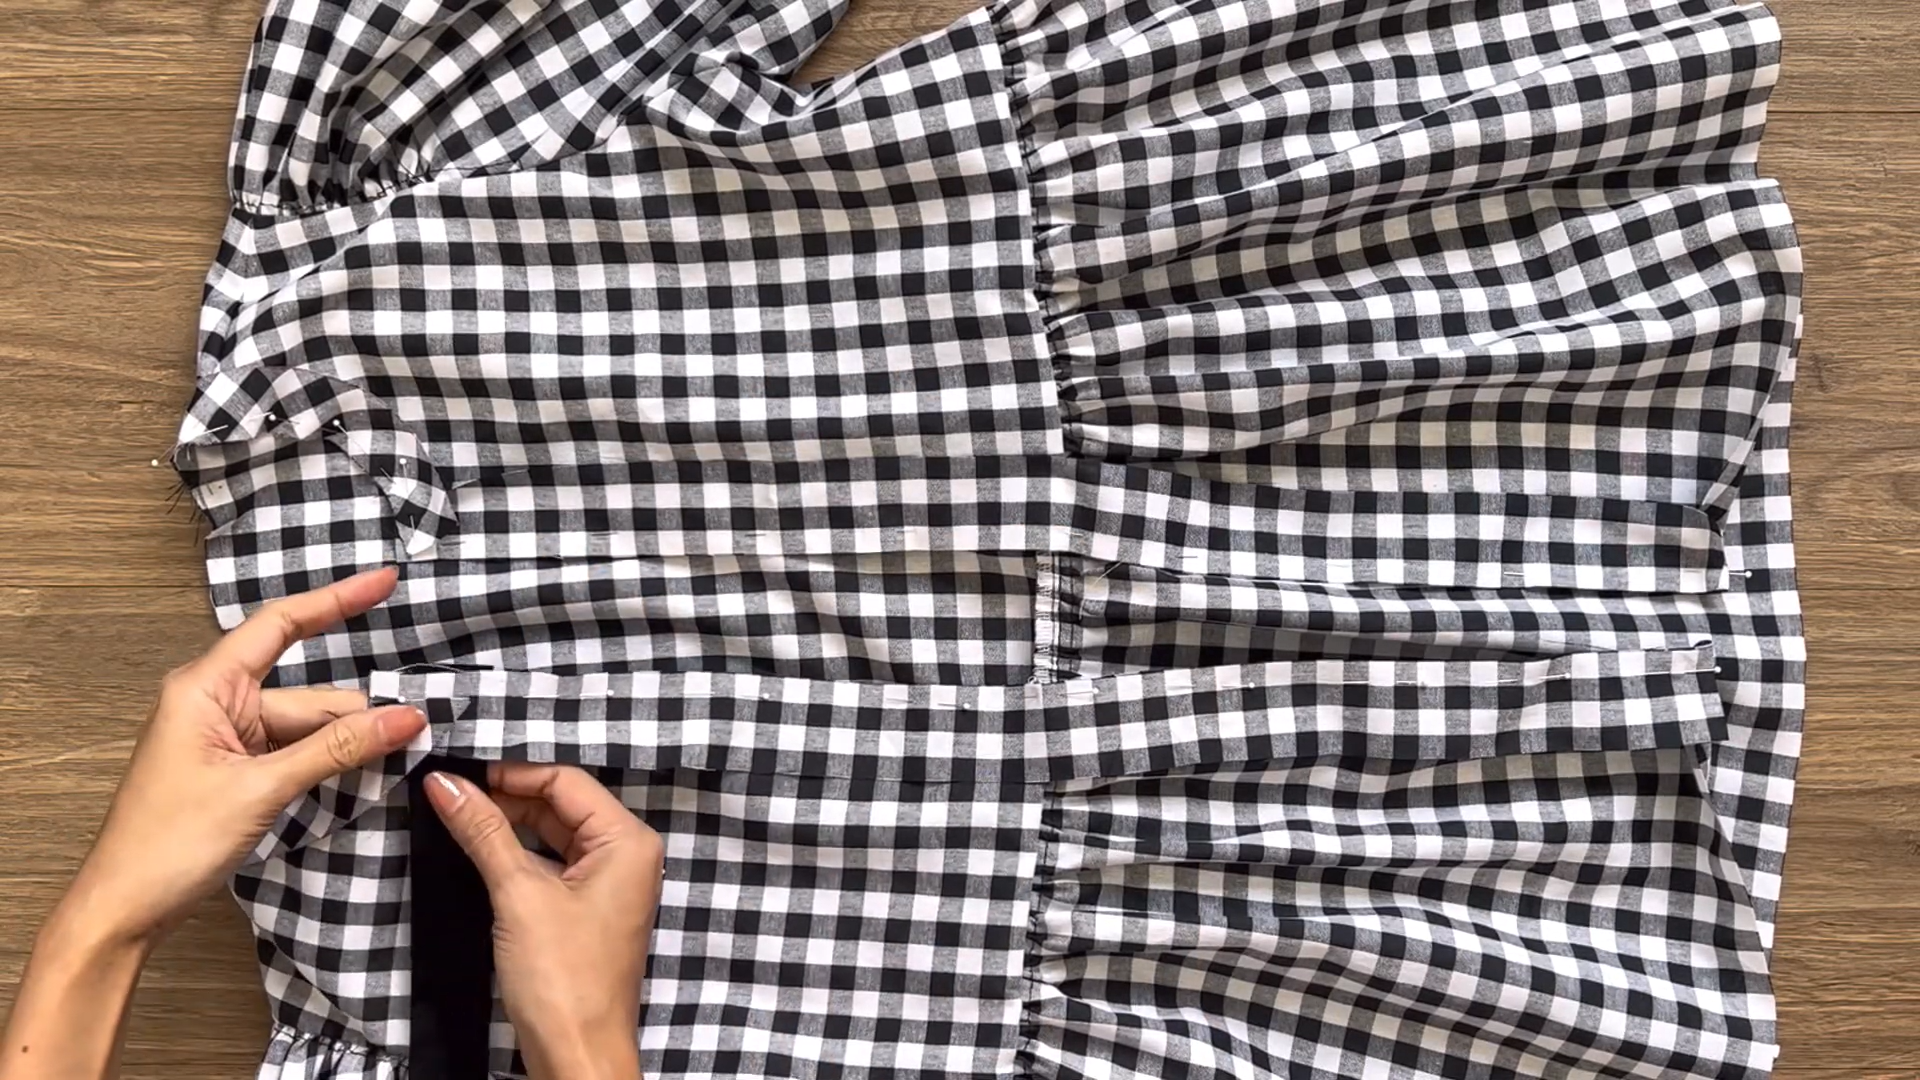
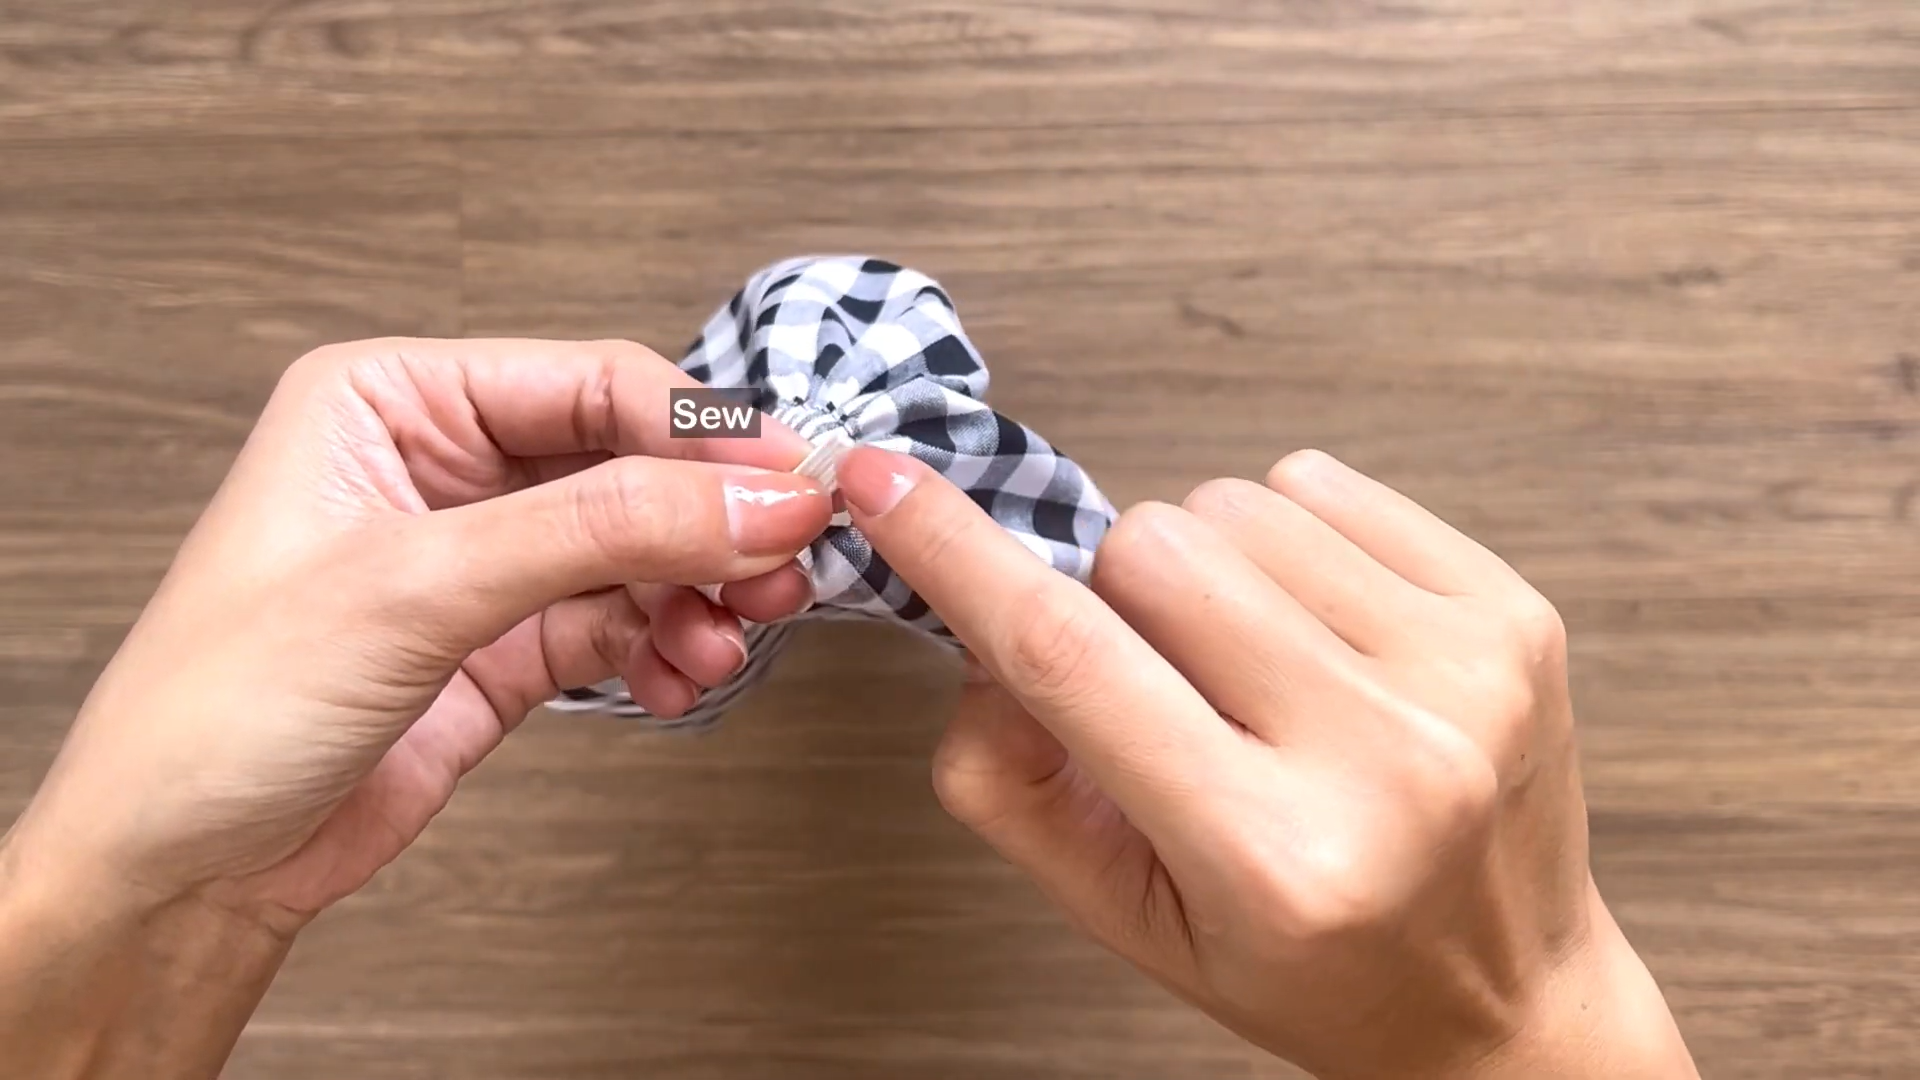
Connect one end of each tie to both sides of the front part of the top.
Make sure the tie is positioned in the middle between the binding and the front part of the blouse.
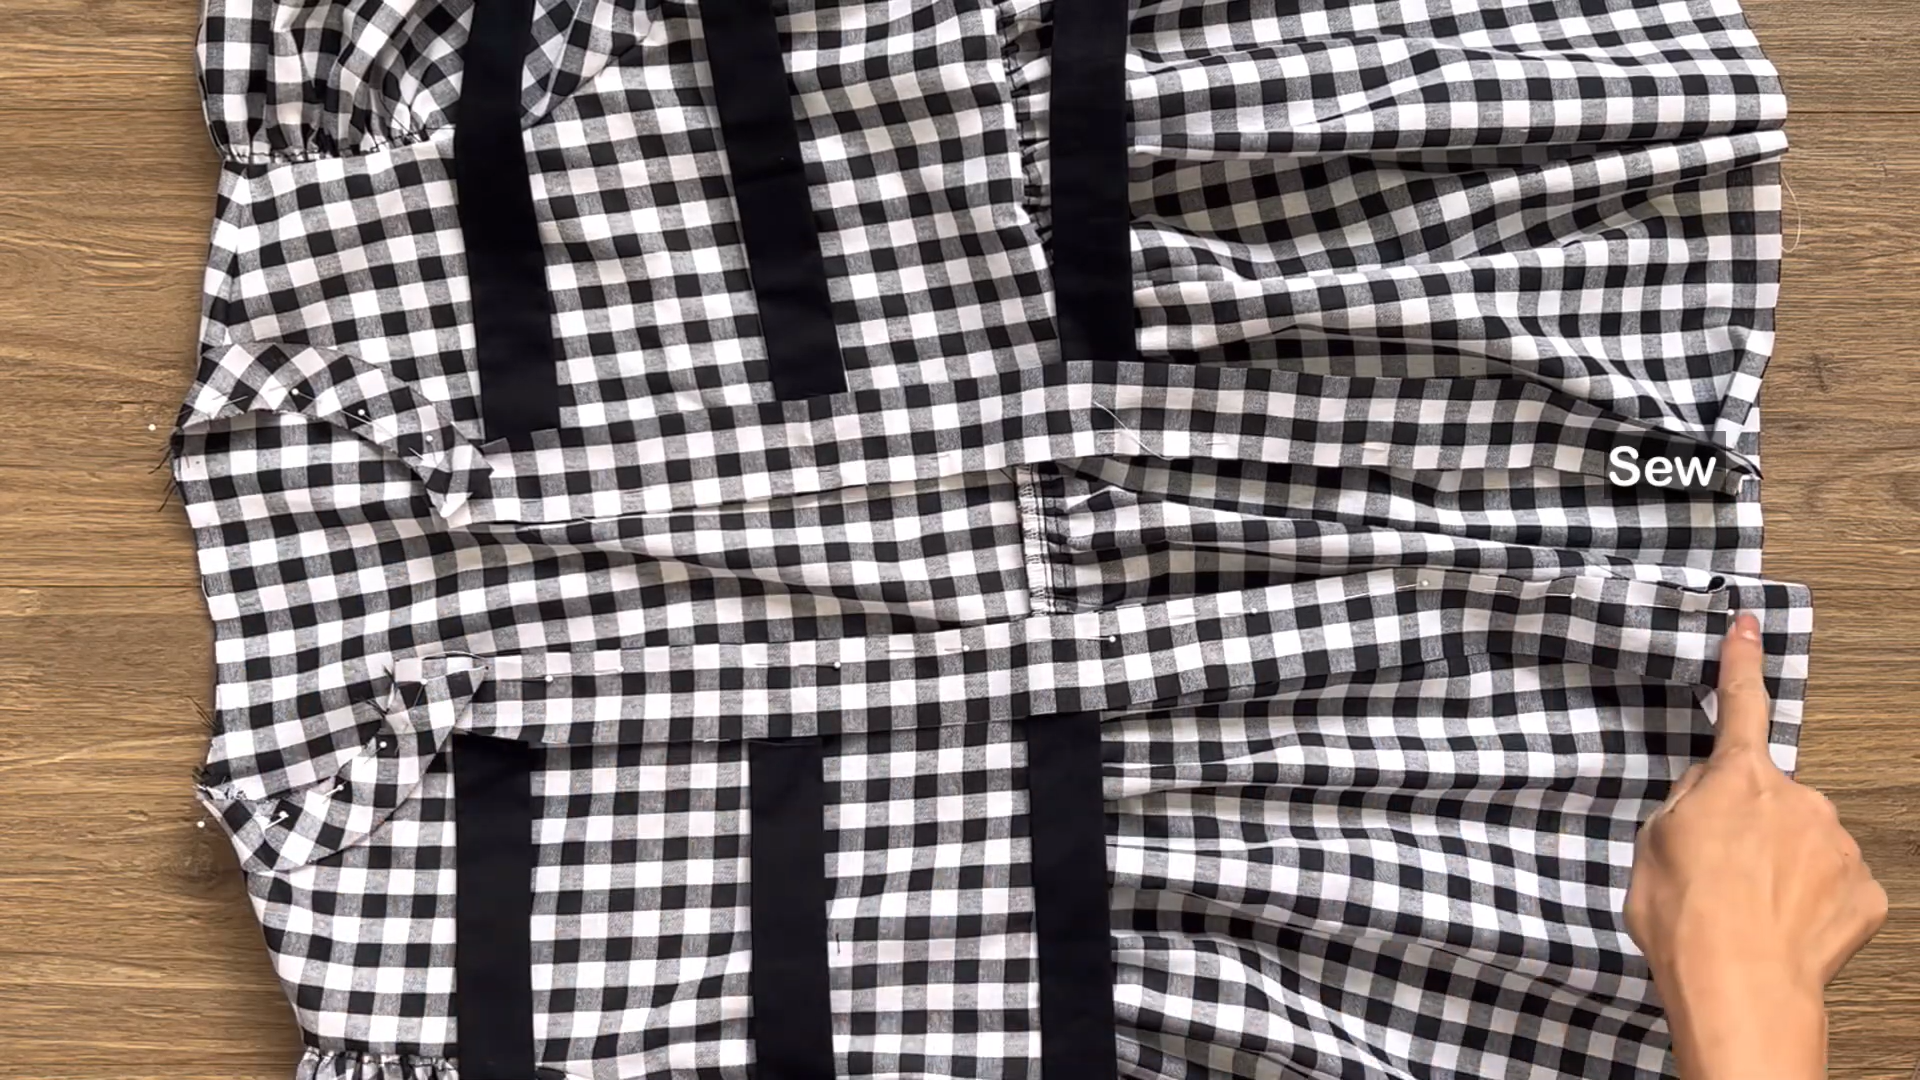
Securely sew the ties in place.

Fold the binding inside and sew it to finish.
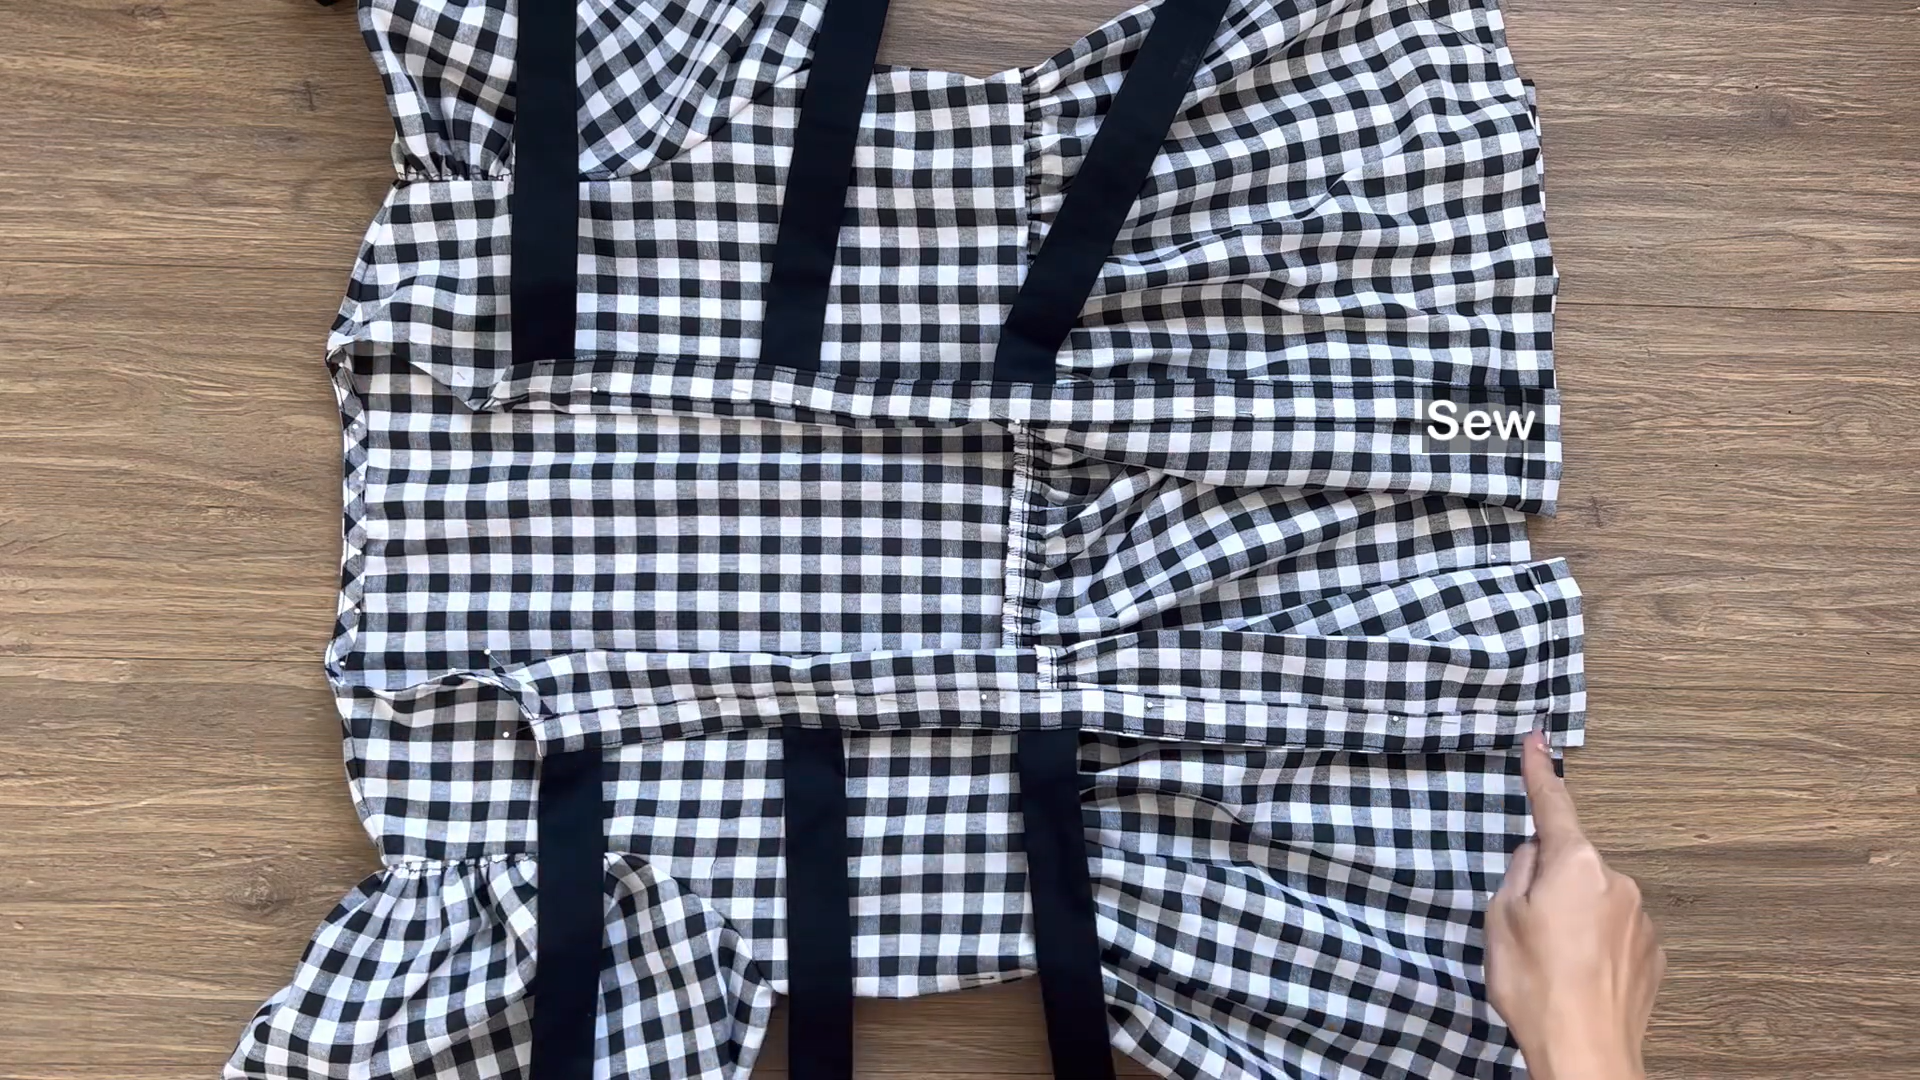
Repeat the same process to finish the end of the ruffle part as well.

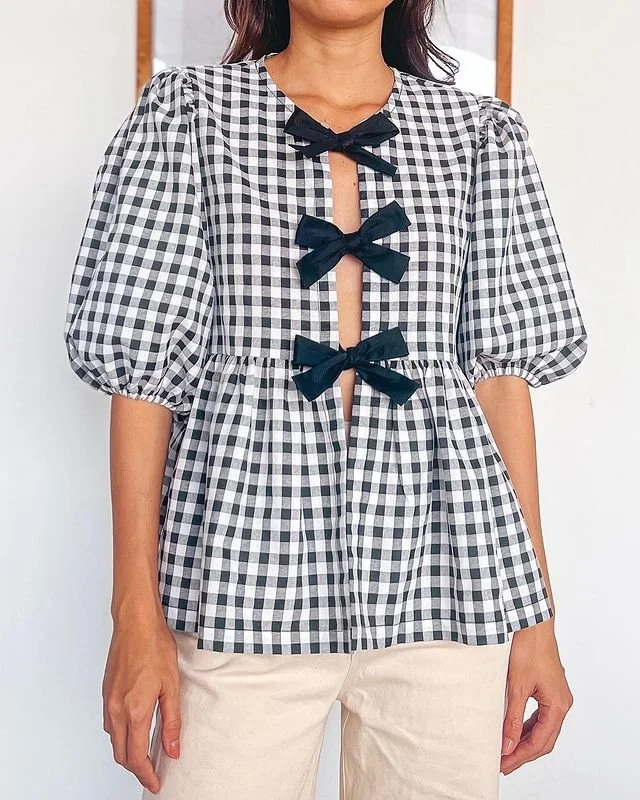
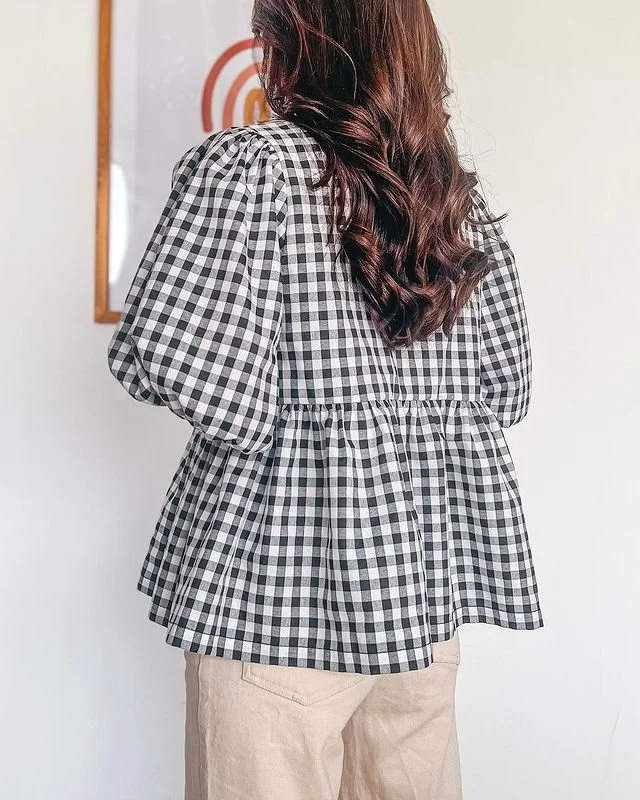
DIY Tie front puff sleeve peplum blouse
There you have it!
After all the stitches, fabric choices, and meticulous details, I present to you the final result of this delightful DIY project. Behold the tie-front puff sleeve peplum blouse! It’s not only cute but also incredibly comfortable. The ruffle hem and the puff sleeves add a touch of whimsy for the top.

I hope you found my step-by-step guide helpful and inspiring. If you’re interested in making your own waistcoat, give it a try and let me know how it goes!
Until then, happy sewing!