DIY Velvet Jumpsuit - Reformation inspired - Party outfit idea 2020

DIY Velvet Jumpsuit - Reformation inspired - Party outfit idea 2020
Welcome or welcome back to my channel. My name is Jess and I love doing DIY, making clothes in a "simply but pretty" way.
It's getting closer to Christmas and New Year. Did you know the outfit you want to wear to the parties this holiday? As I love jumpsuit so much, so I'm going to wear one to my upcoming party. And it's the inspiration from Holland Velvet jumpsuit from Reformation. I knew right away that I gonna make this jumpsuit when I saw it. Because it's so me, haha
I hope you like it and try it out. So let’s get started!
WHAT YOU’LL NEED
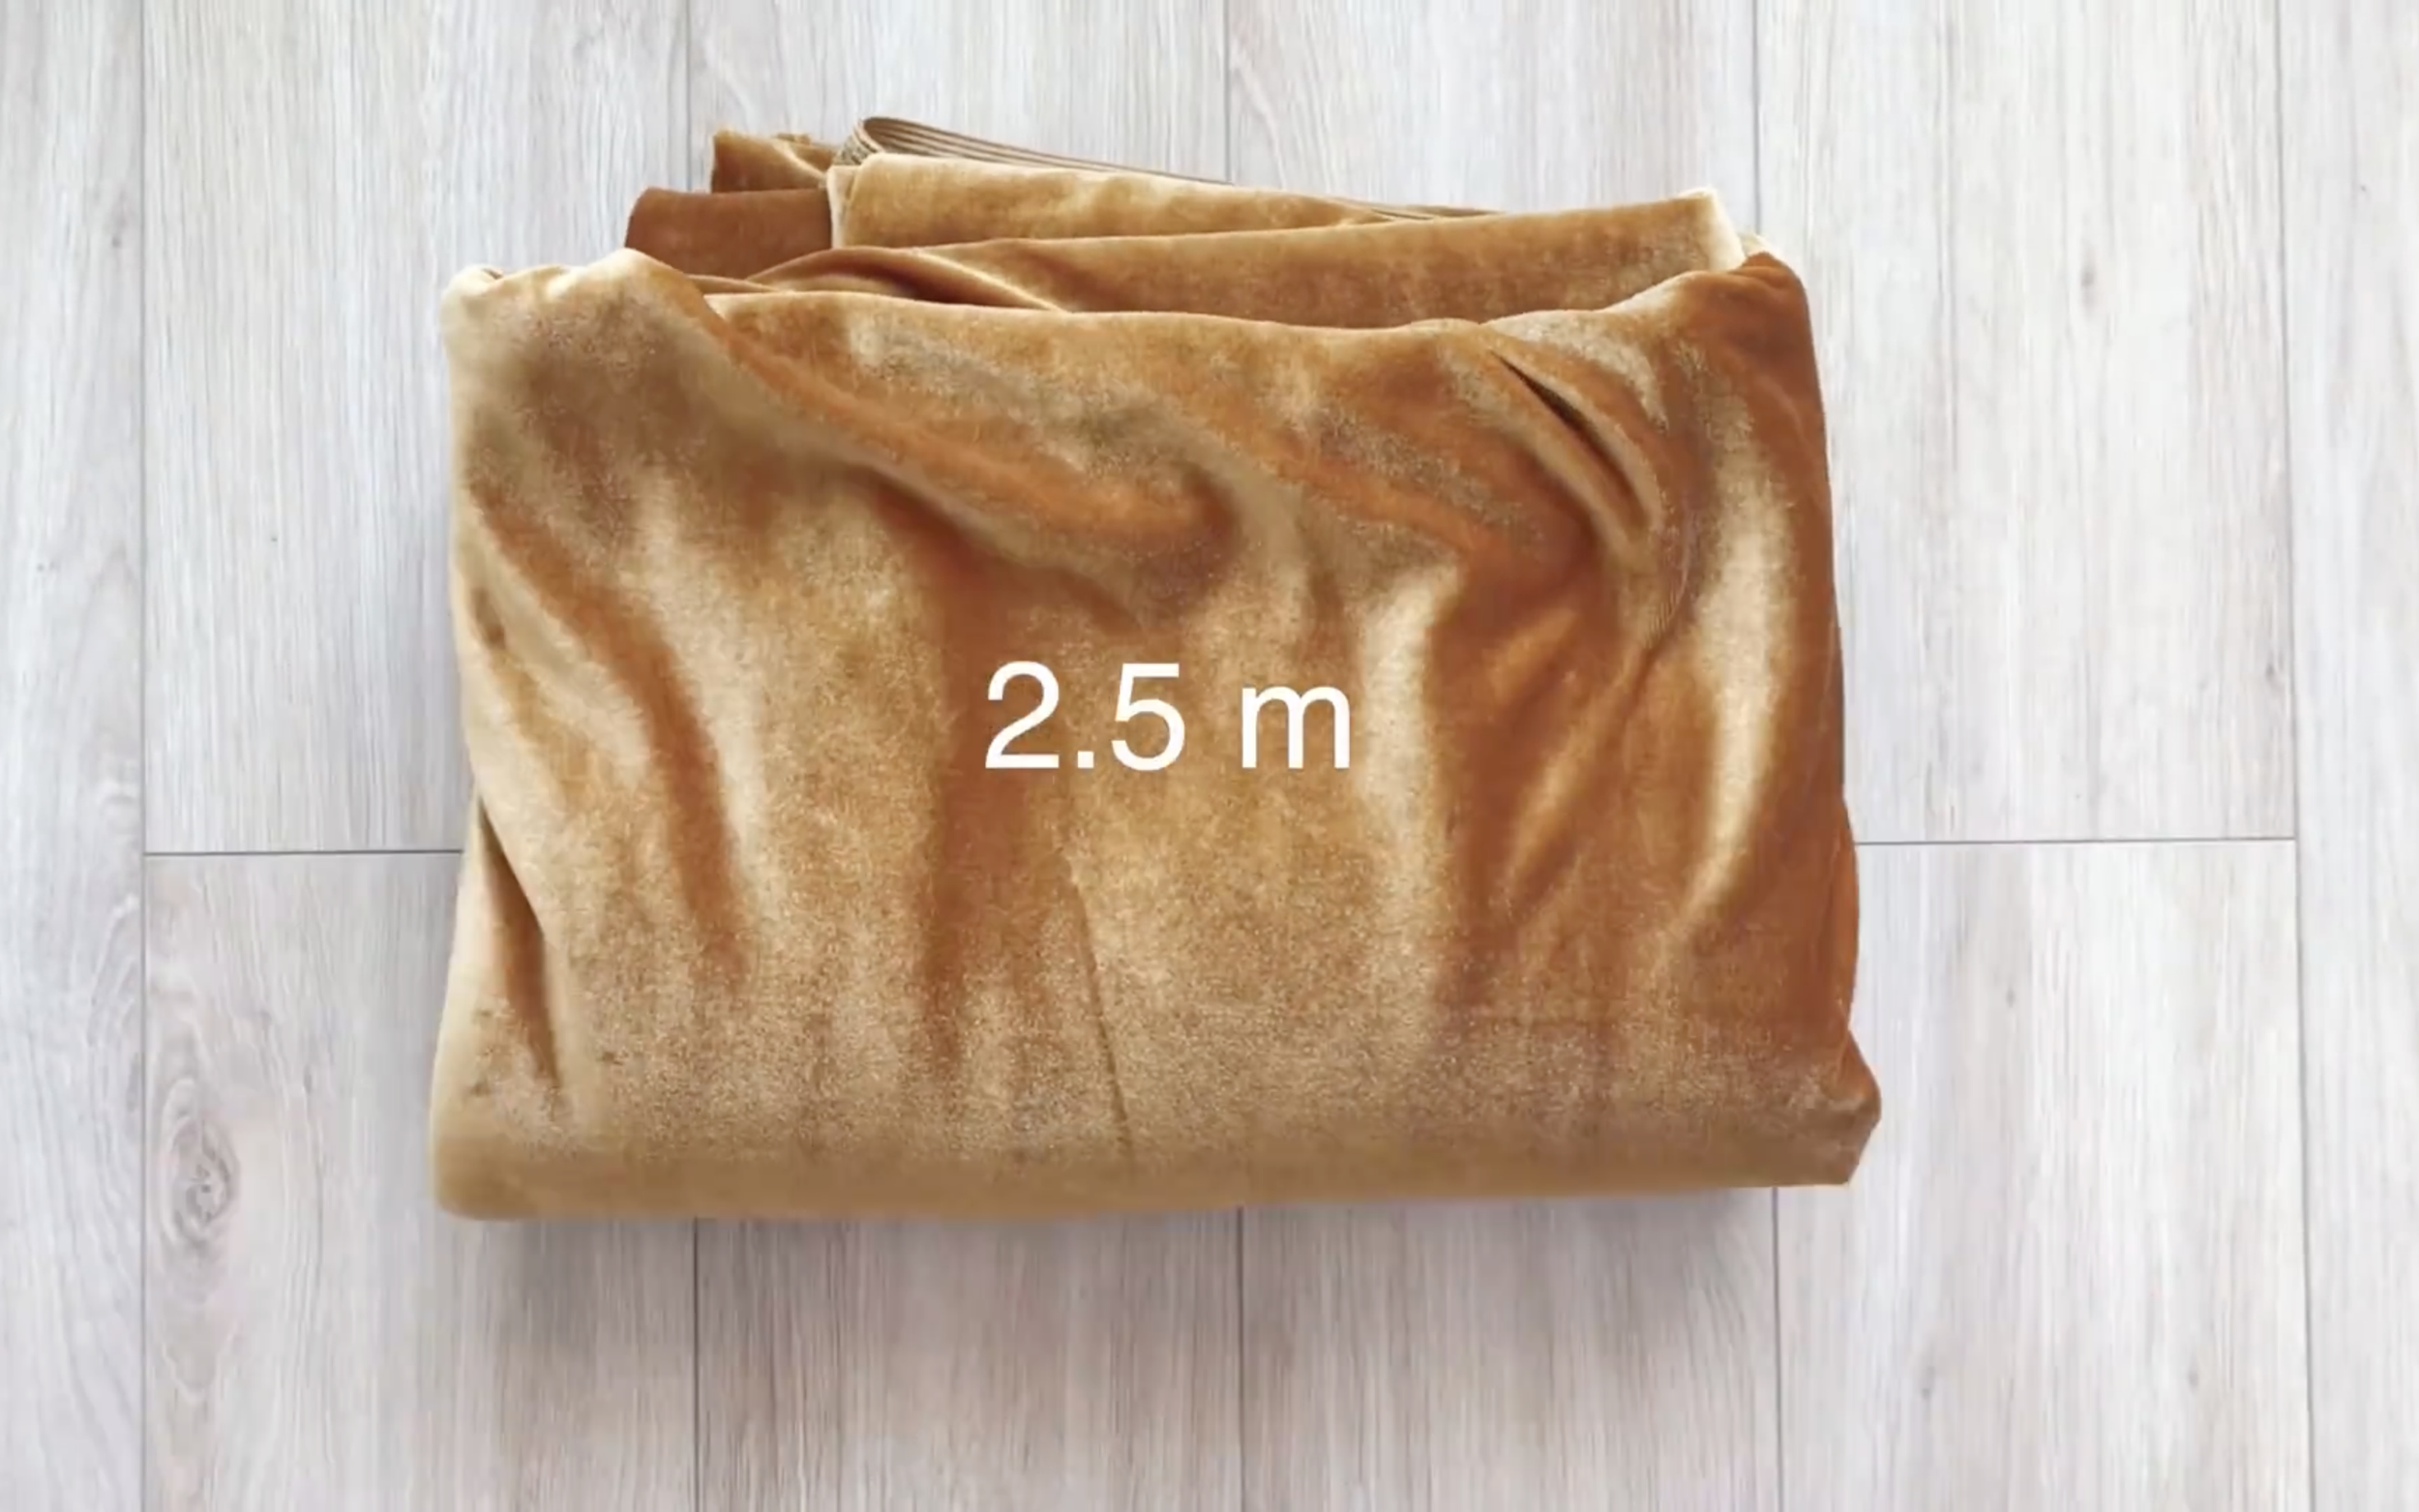
Velvet fabric in gold color (2.5m)
Pattern paper
Sewing machine
Pins
Scissors
Ruler
Elastic band
SEWING THE JUMPSUIT
THE TOP PART

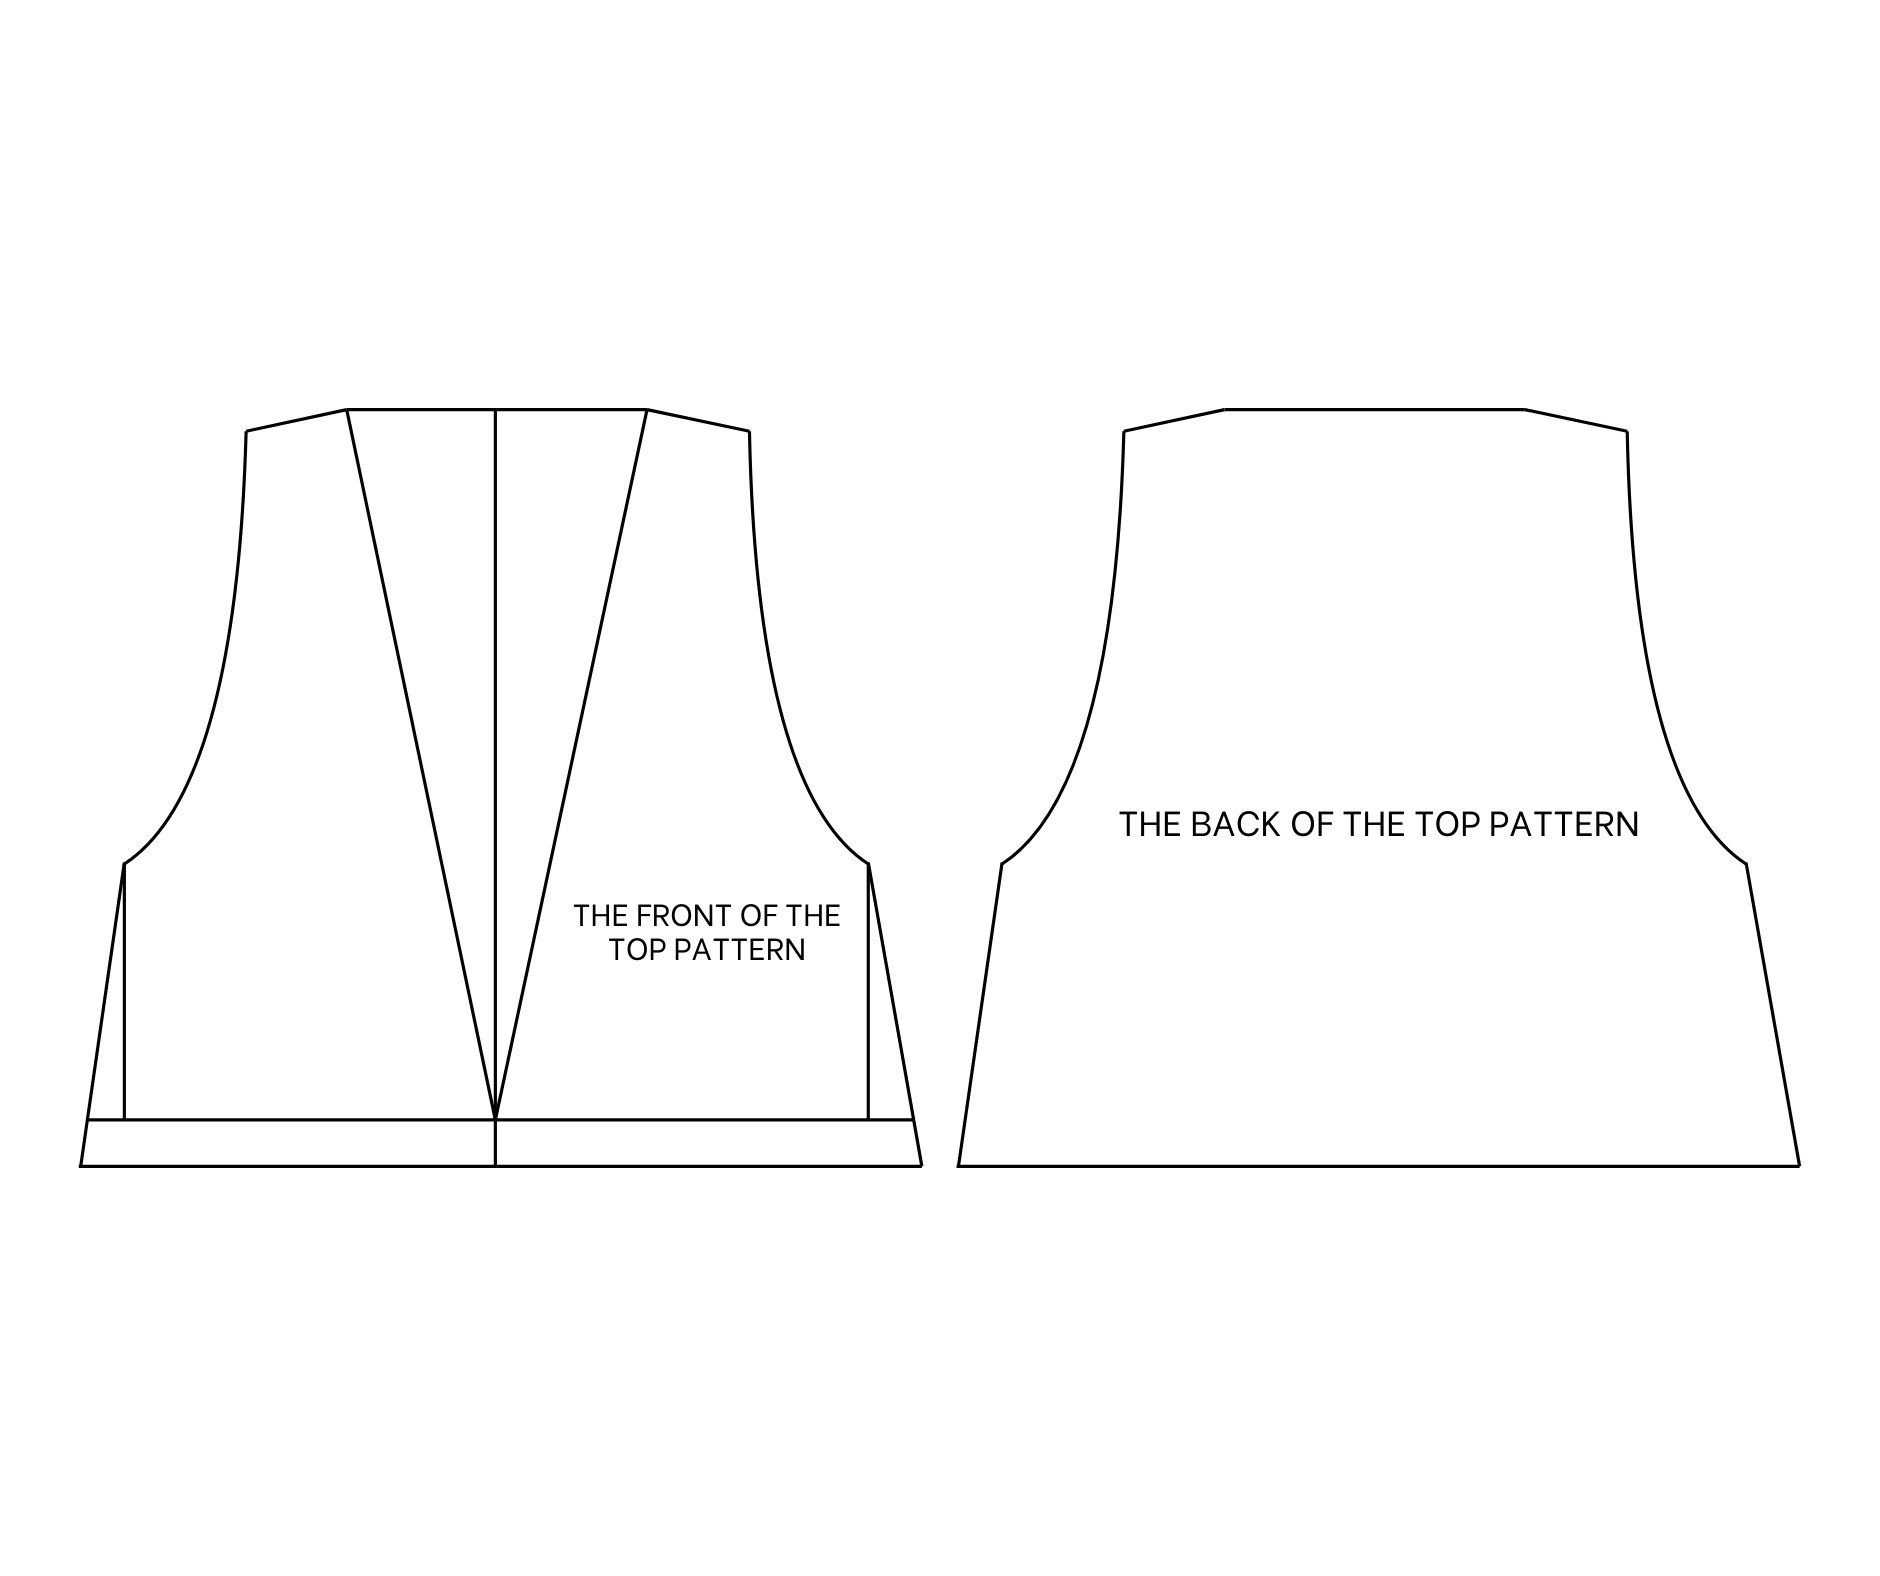
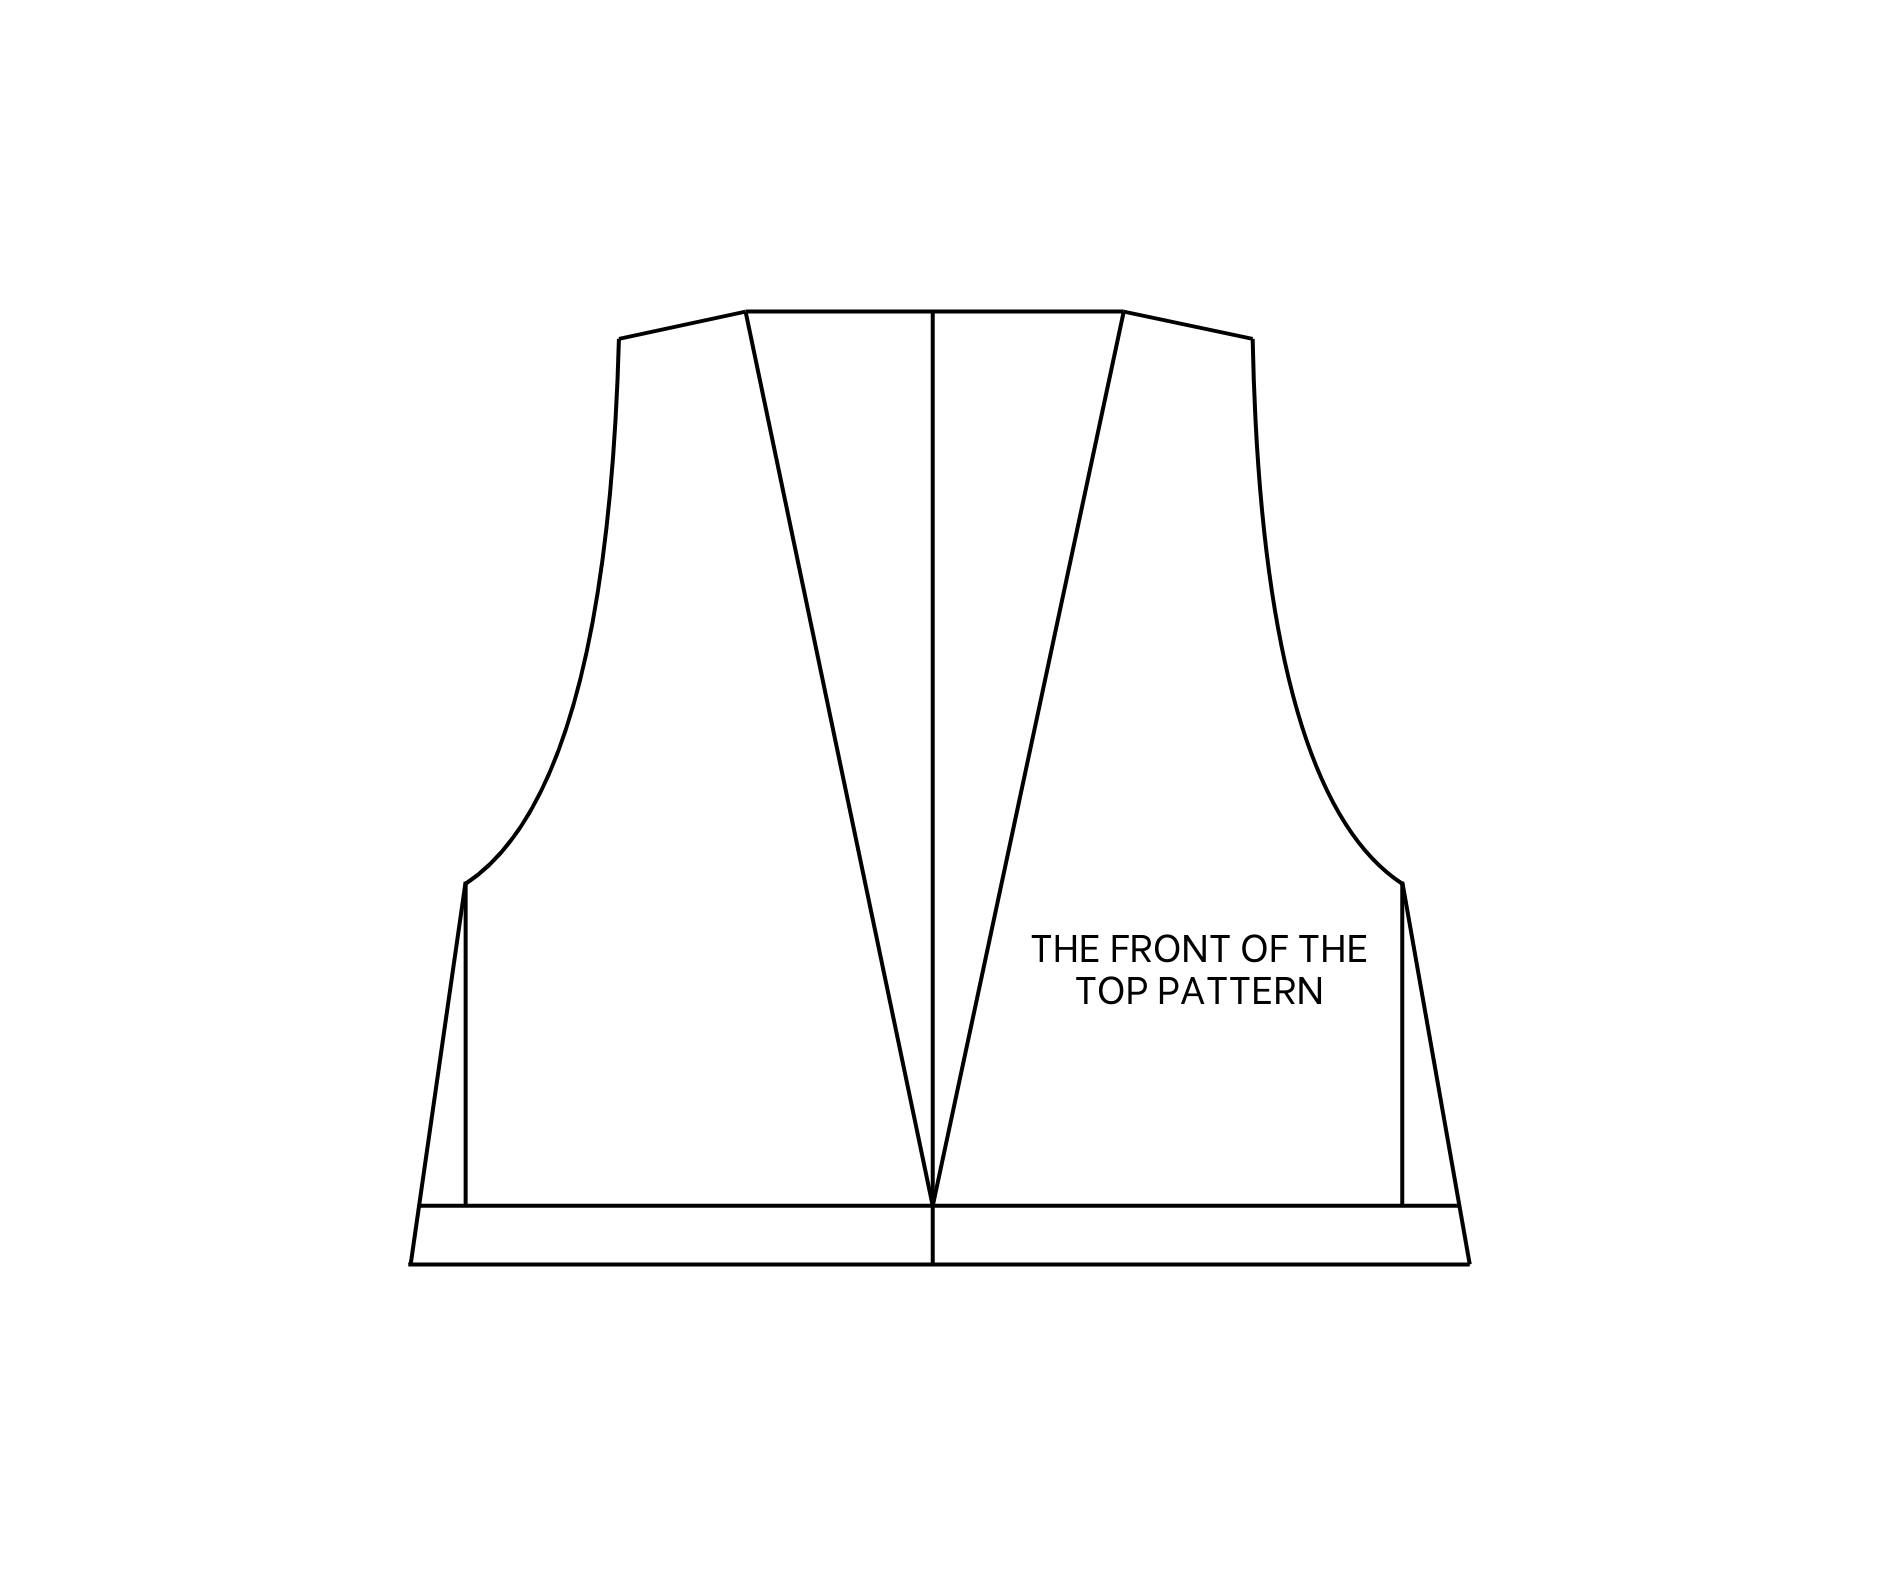
Draw a rectangle with 50 cm width (which is a half of your hip size plus 4 cm for seam allowance) and 42 cm length (which is the length from the shoulder to the belly button). Then, divide the rectangle into two smaller rectangles by drawing a straight line at the middle of the width line.
At the top of the straight line, mark at 9 cm at two sides so the width between two marks will be 18 cm, which is the width of your neck. It's usually around 18 to 20 cm, so don't make it bigger because it will make your deep V-neck wider and might show your breast too much.
Connect two marks to the end of the straight line to have the deep V-neck of the top.
From two marks of the neck, move to the outside around 6 cm. It is the width of the top at the shoulder. After that, mark at 28 cm down at the length line. It is the width from the shoulder to under the armpit plus around 6 cm, and this will be the width of the hand. Connect two marks together, then draw a curved line based on it. It is the curved line from the shoulder to the armpit.
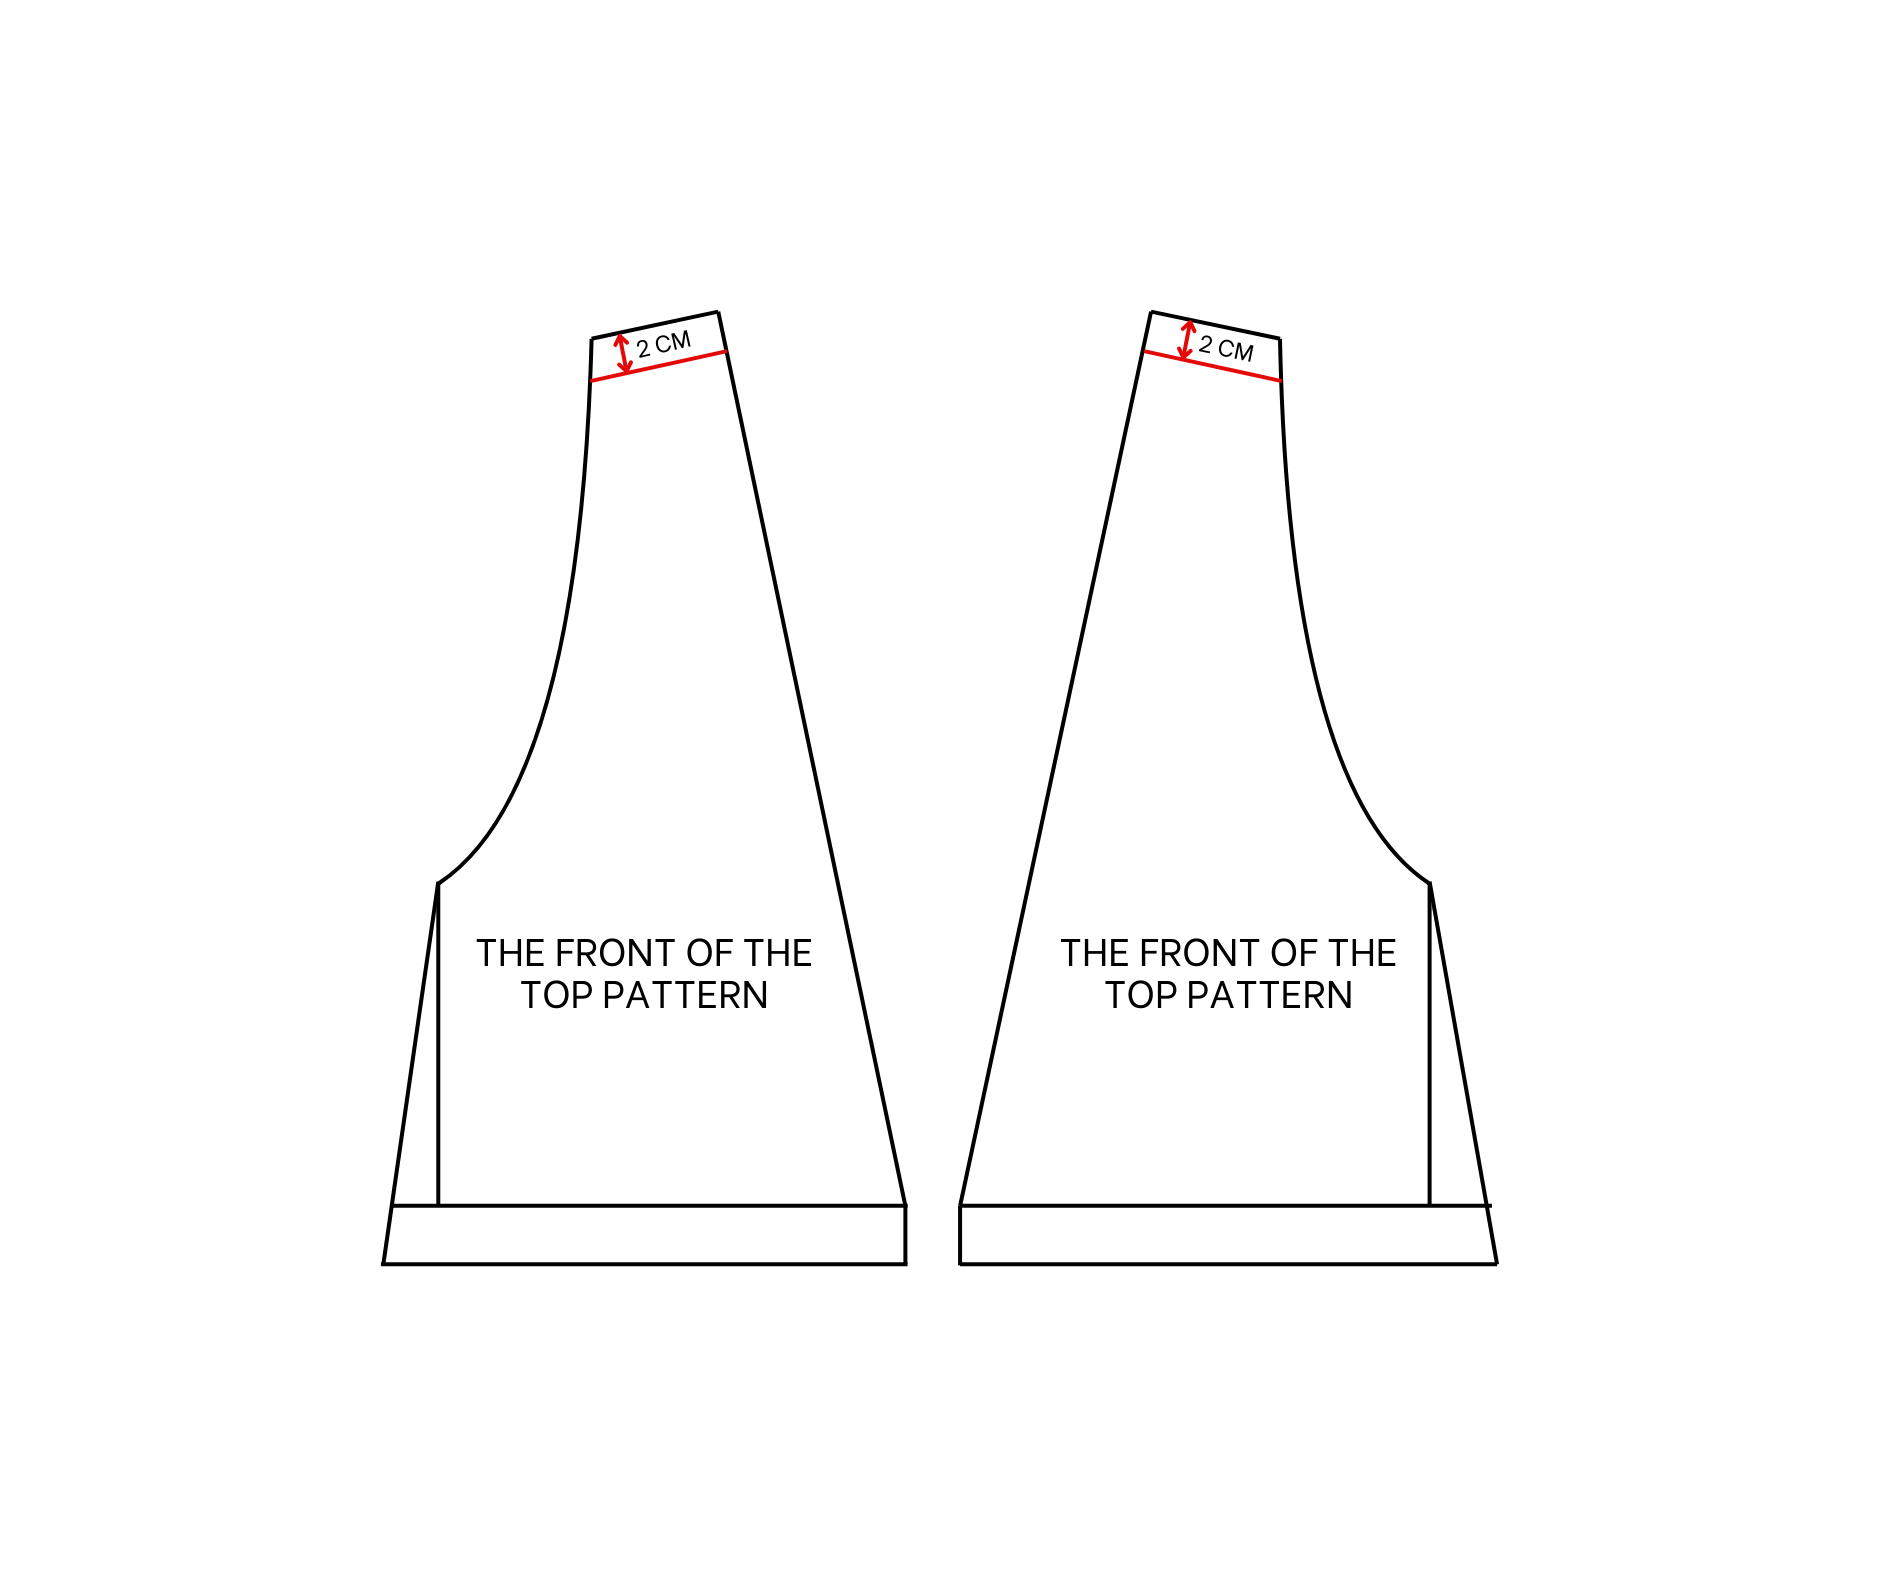
At the top of the curved line, move down and mark at 2 cm. Then, connect this mark to the mark at the neck. It is for the slightly down of the shoulder.
At two sides of the top, draw other straight lines at 3 cm inside the length lines. Just make sure the width between two lines has to be a half of your bust size plus 3 cm. Then, connect the top of this line to the end of the length line. However, the top will be connected to the bottom which is the band of the jumpsuit, so make the top a little longer at the end with around 3 cm.
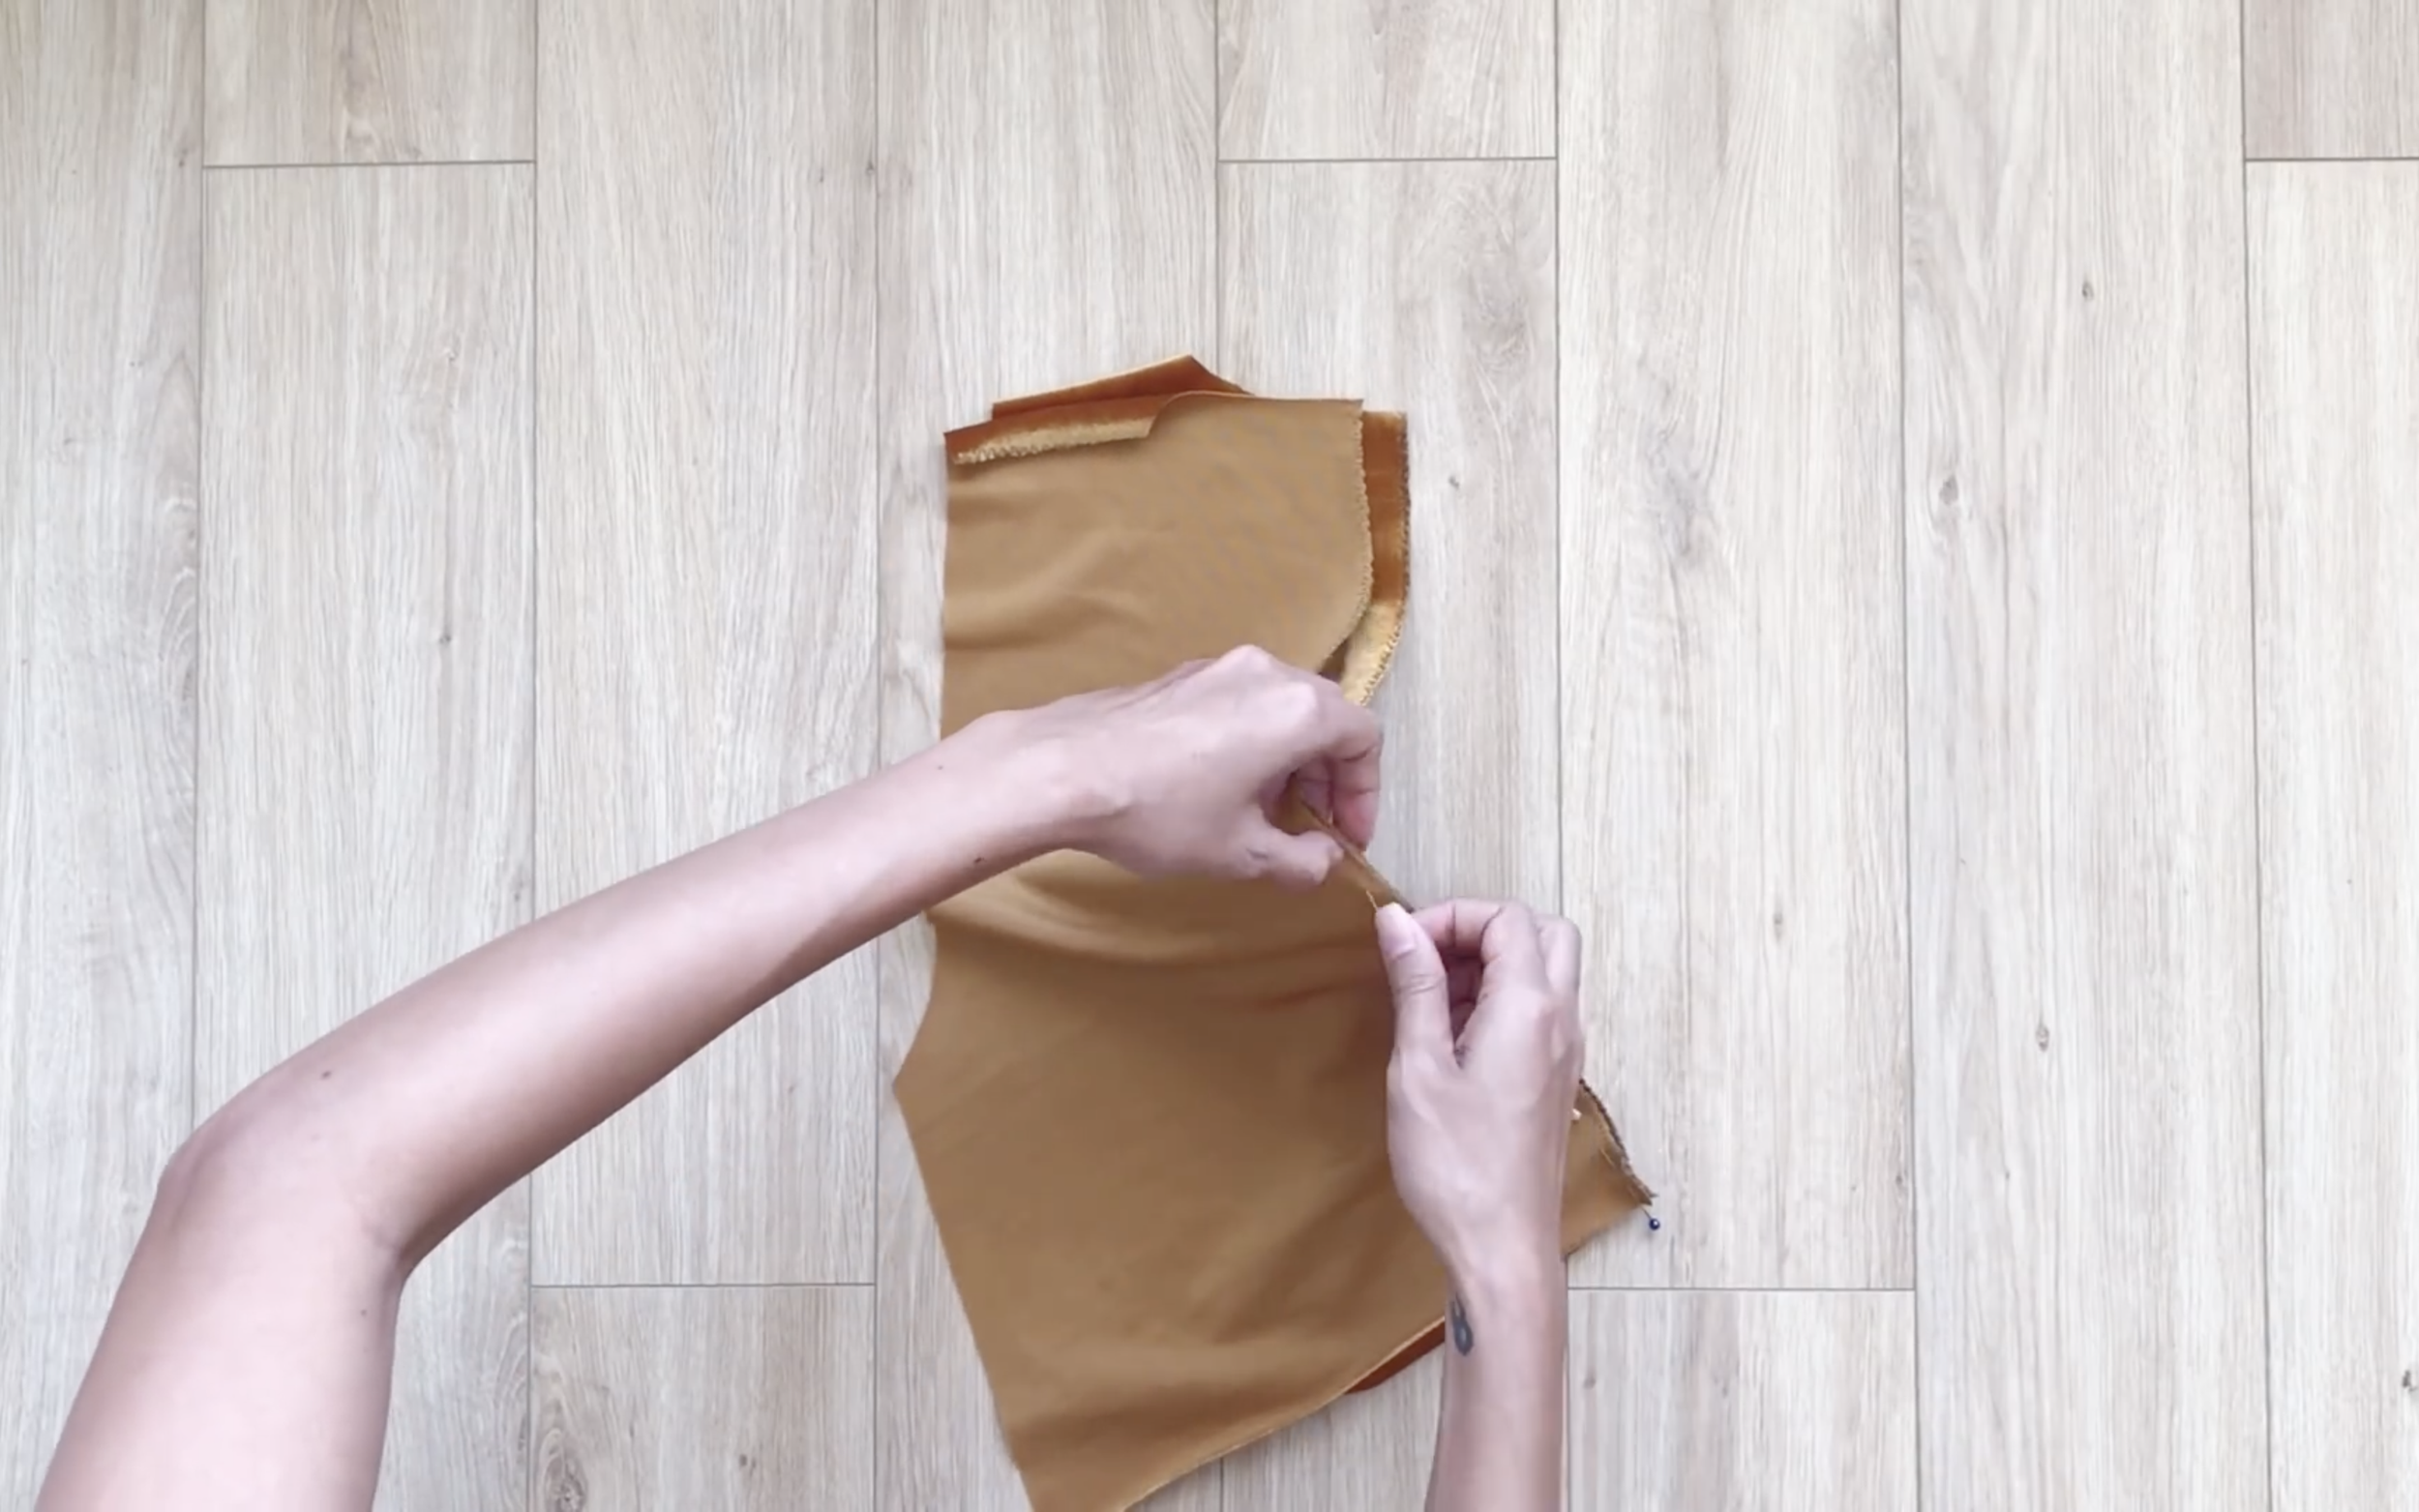
After cutting by the drawing lines, the front and the back of the top will be ready. Remember, don't cut at the neck area.
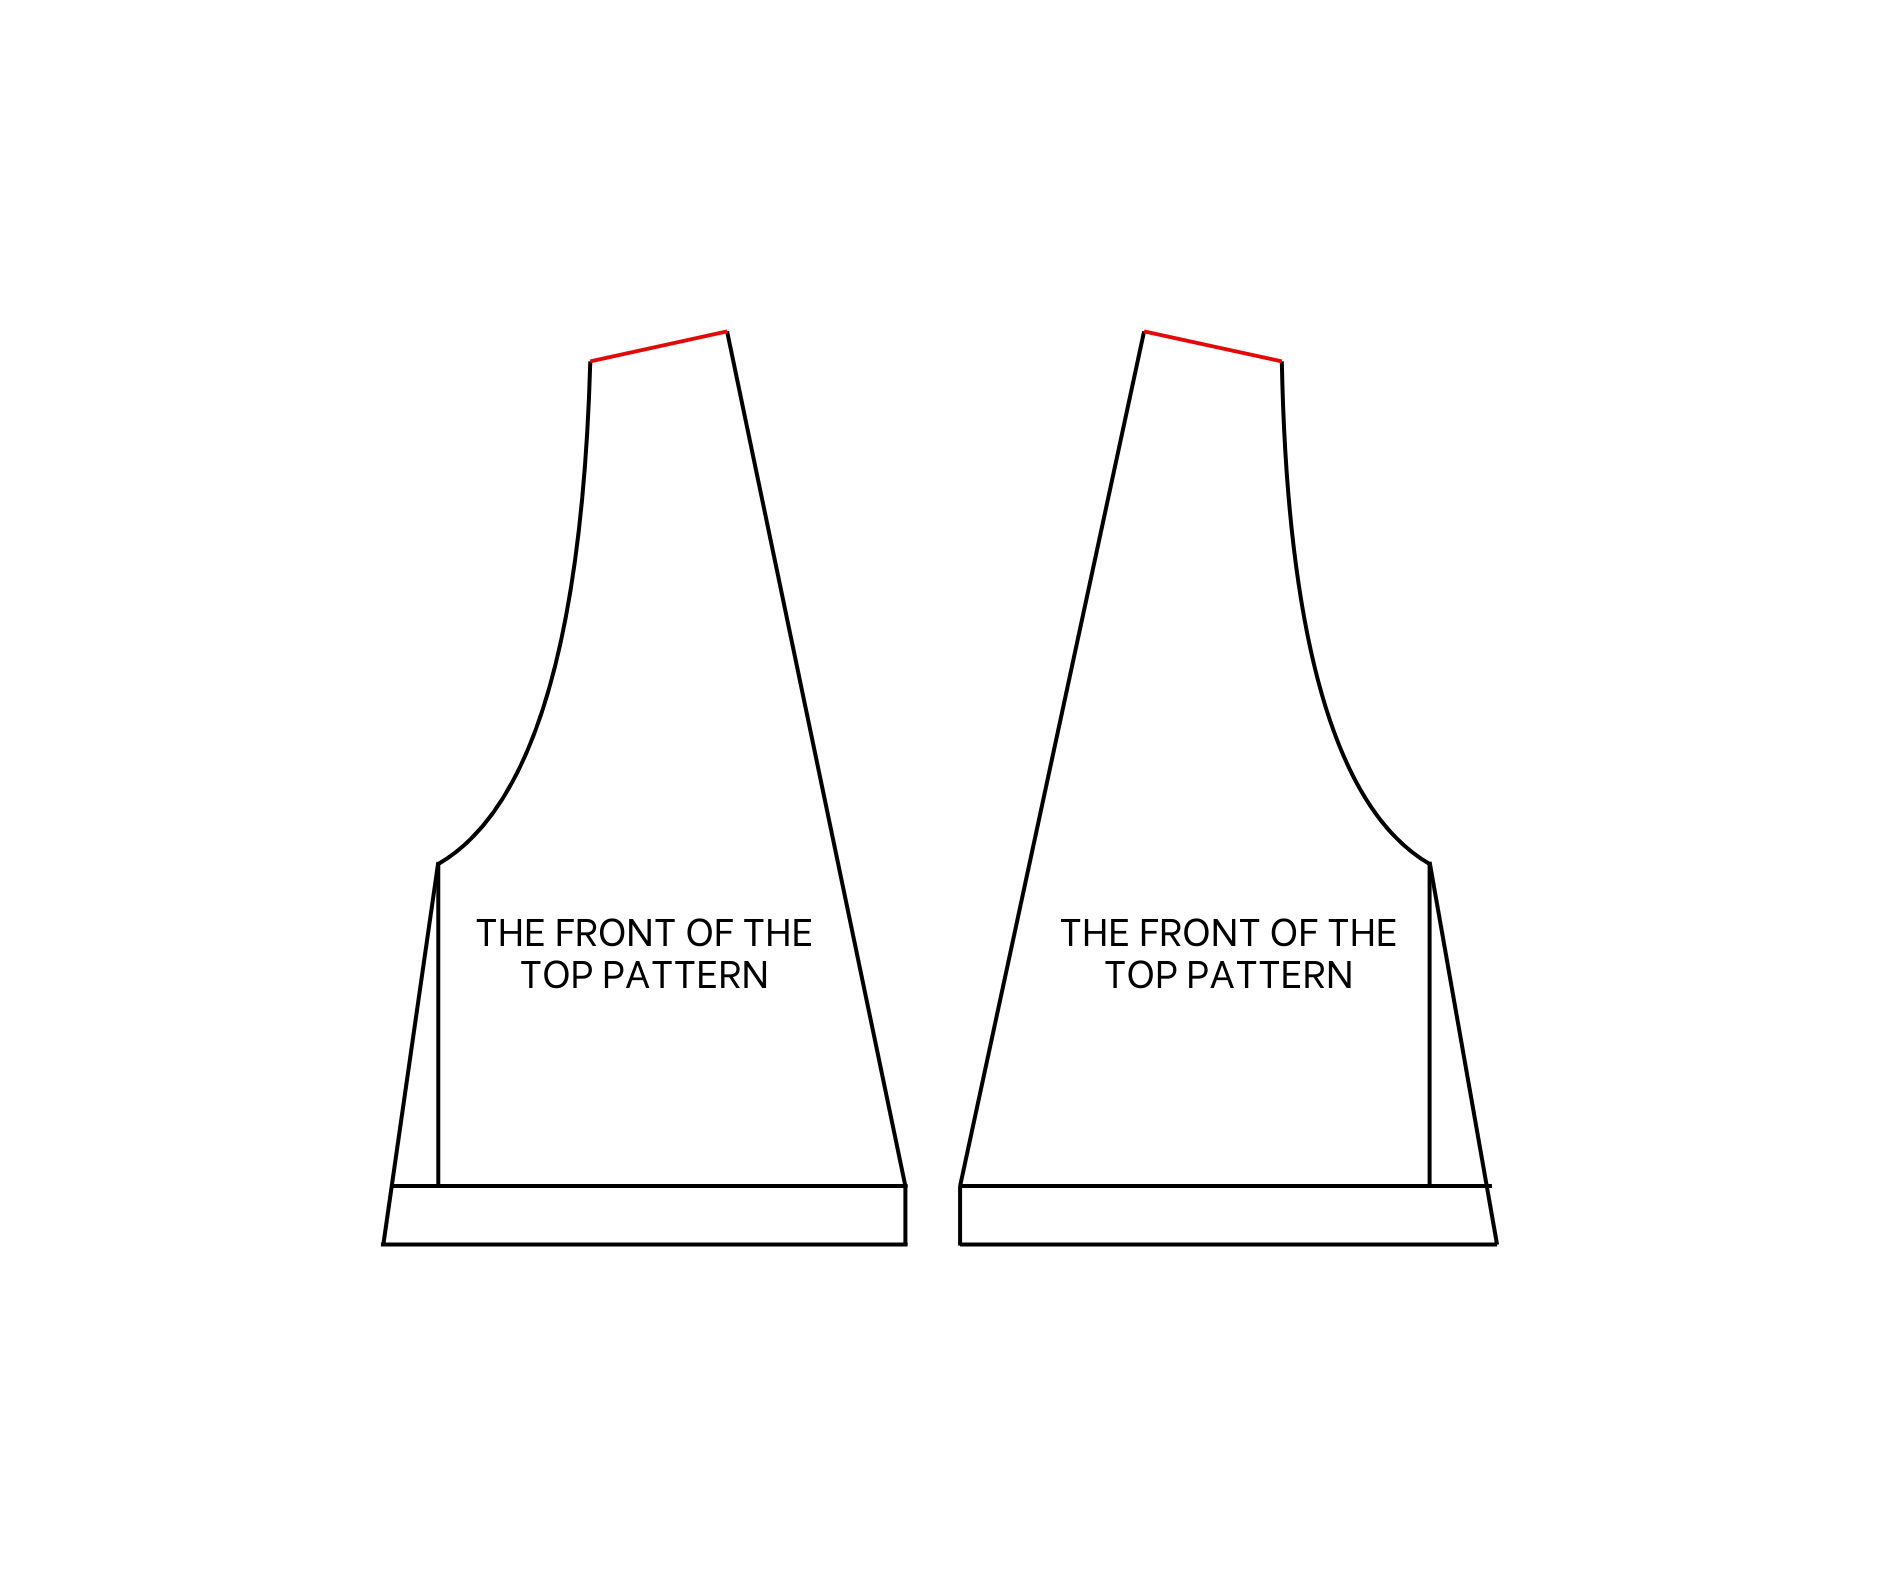
THE FRONT OF THE TOP PATTERN
At the front part, cut at the neck area first.
Then, cut 2 cm at the shoulder to make it shorter than the back.
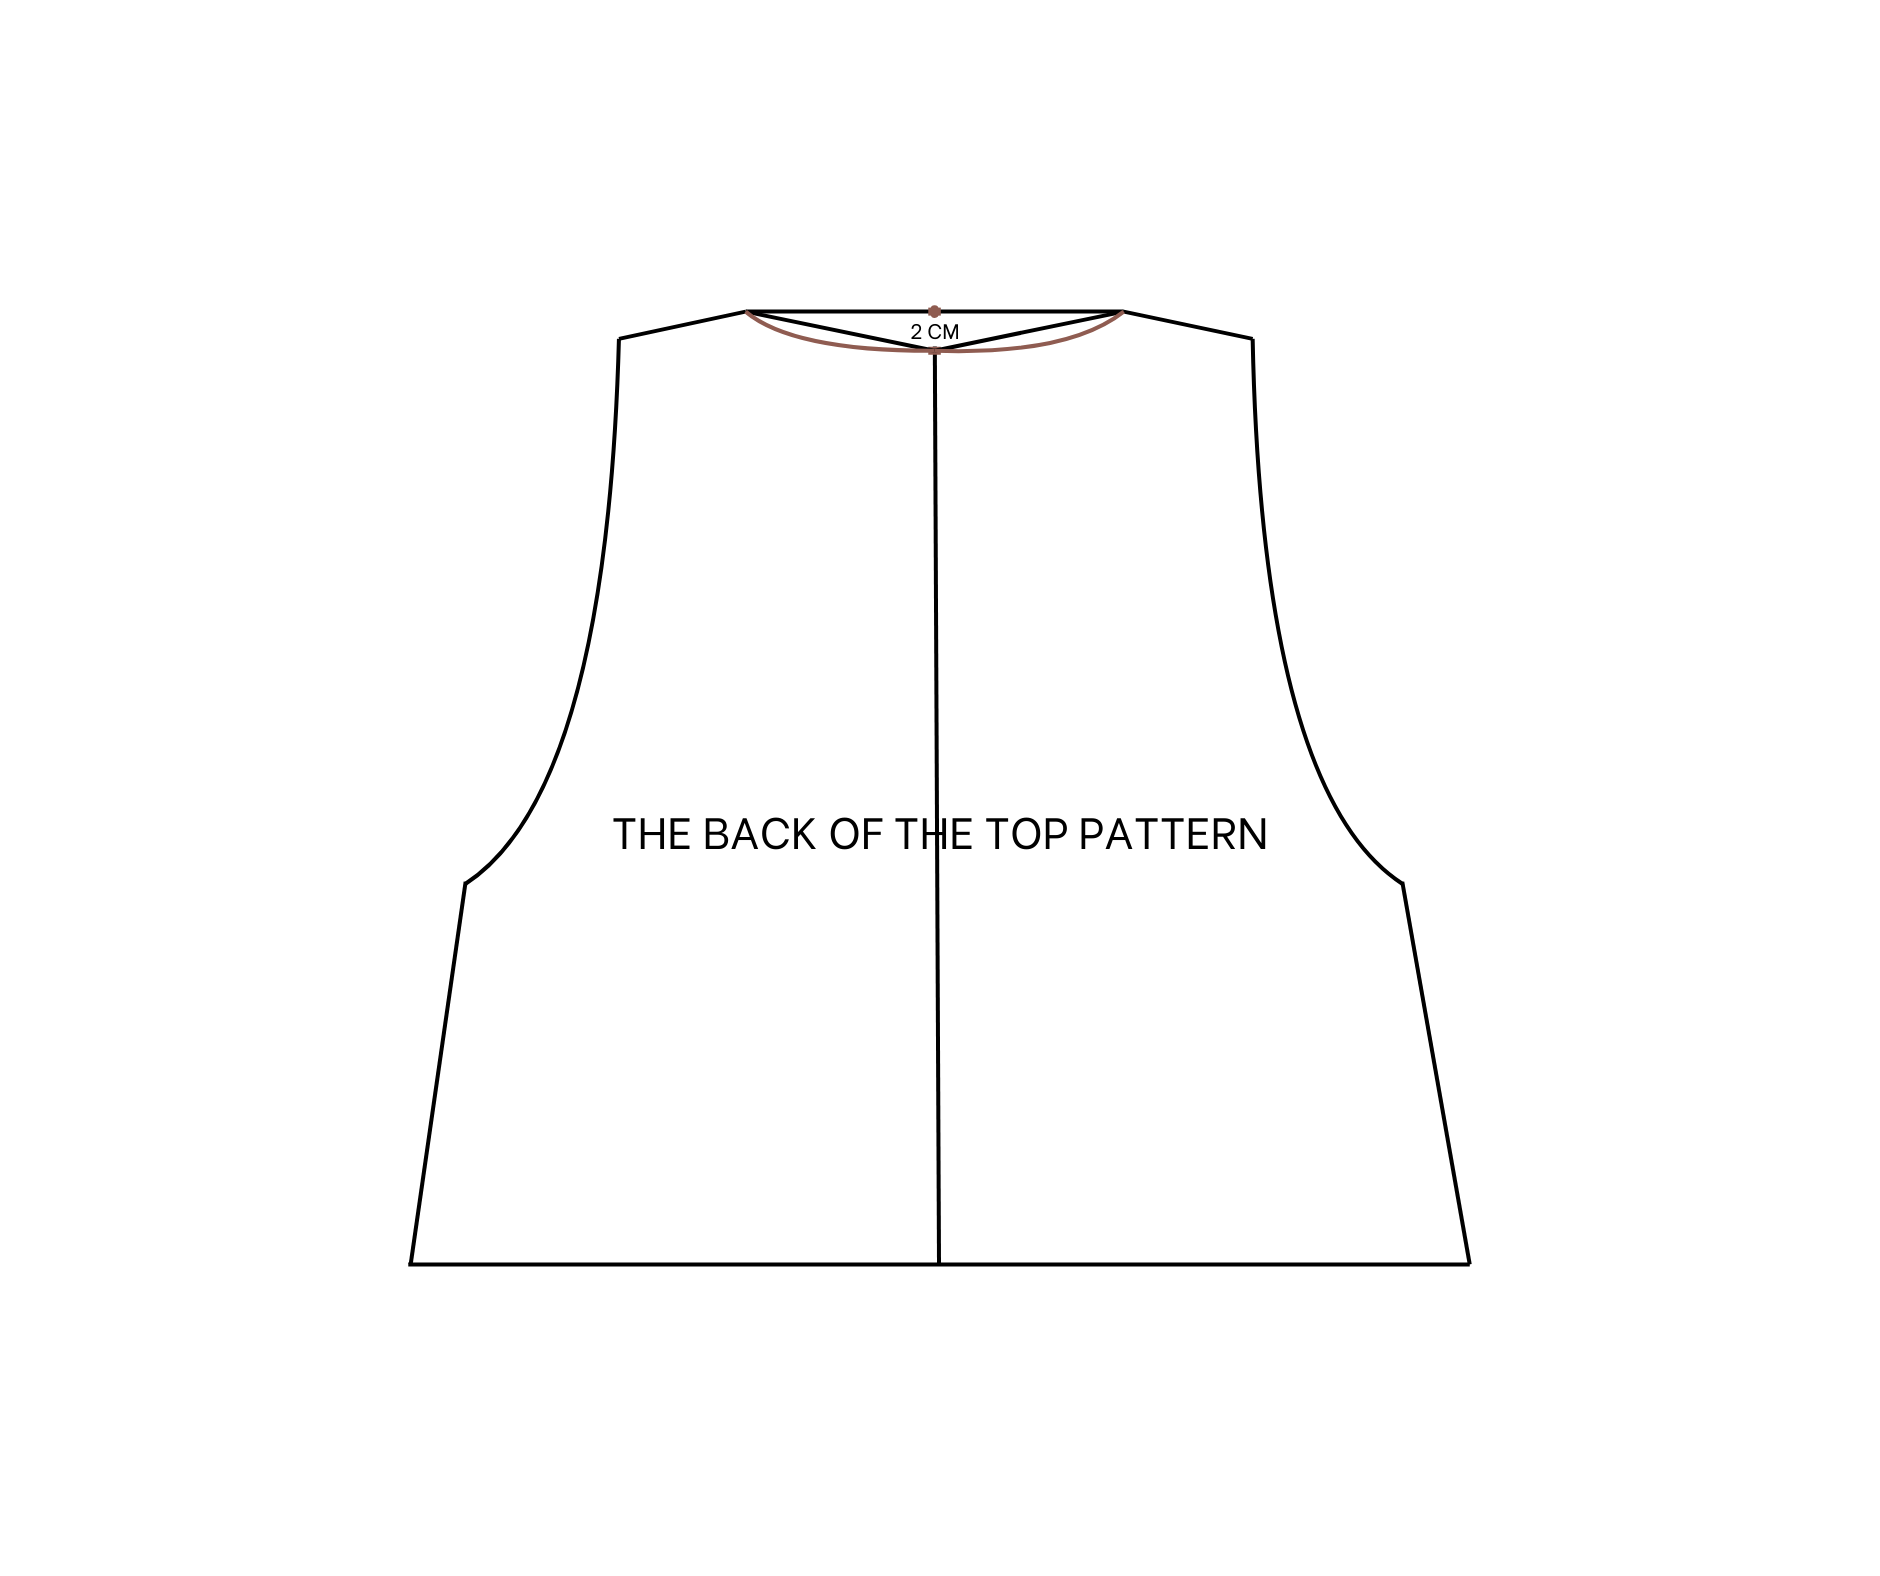
THE BACK OF THE TOP PATTERN
At the back part, draw a straight line at the middle of the back.
At the top of the straight line, mark it 2 cm first.
Then, draw a curved line from there to two sides of the neck, and this will be the neck area of the back part. Then, cut.
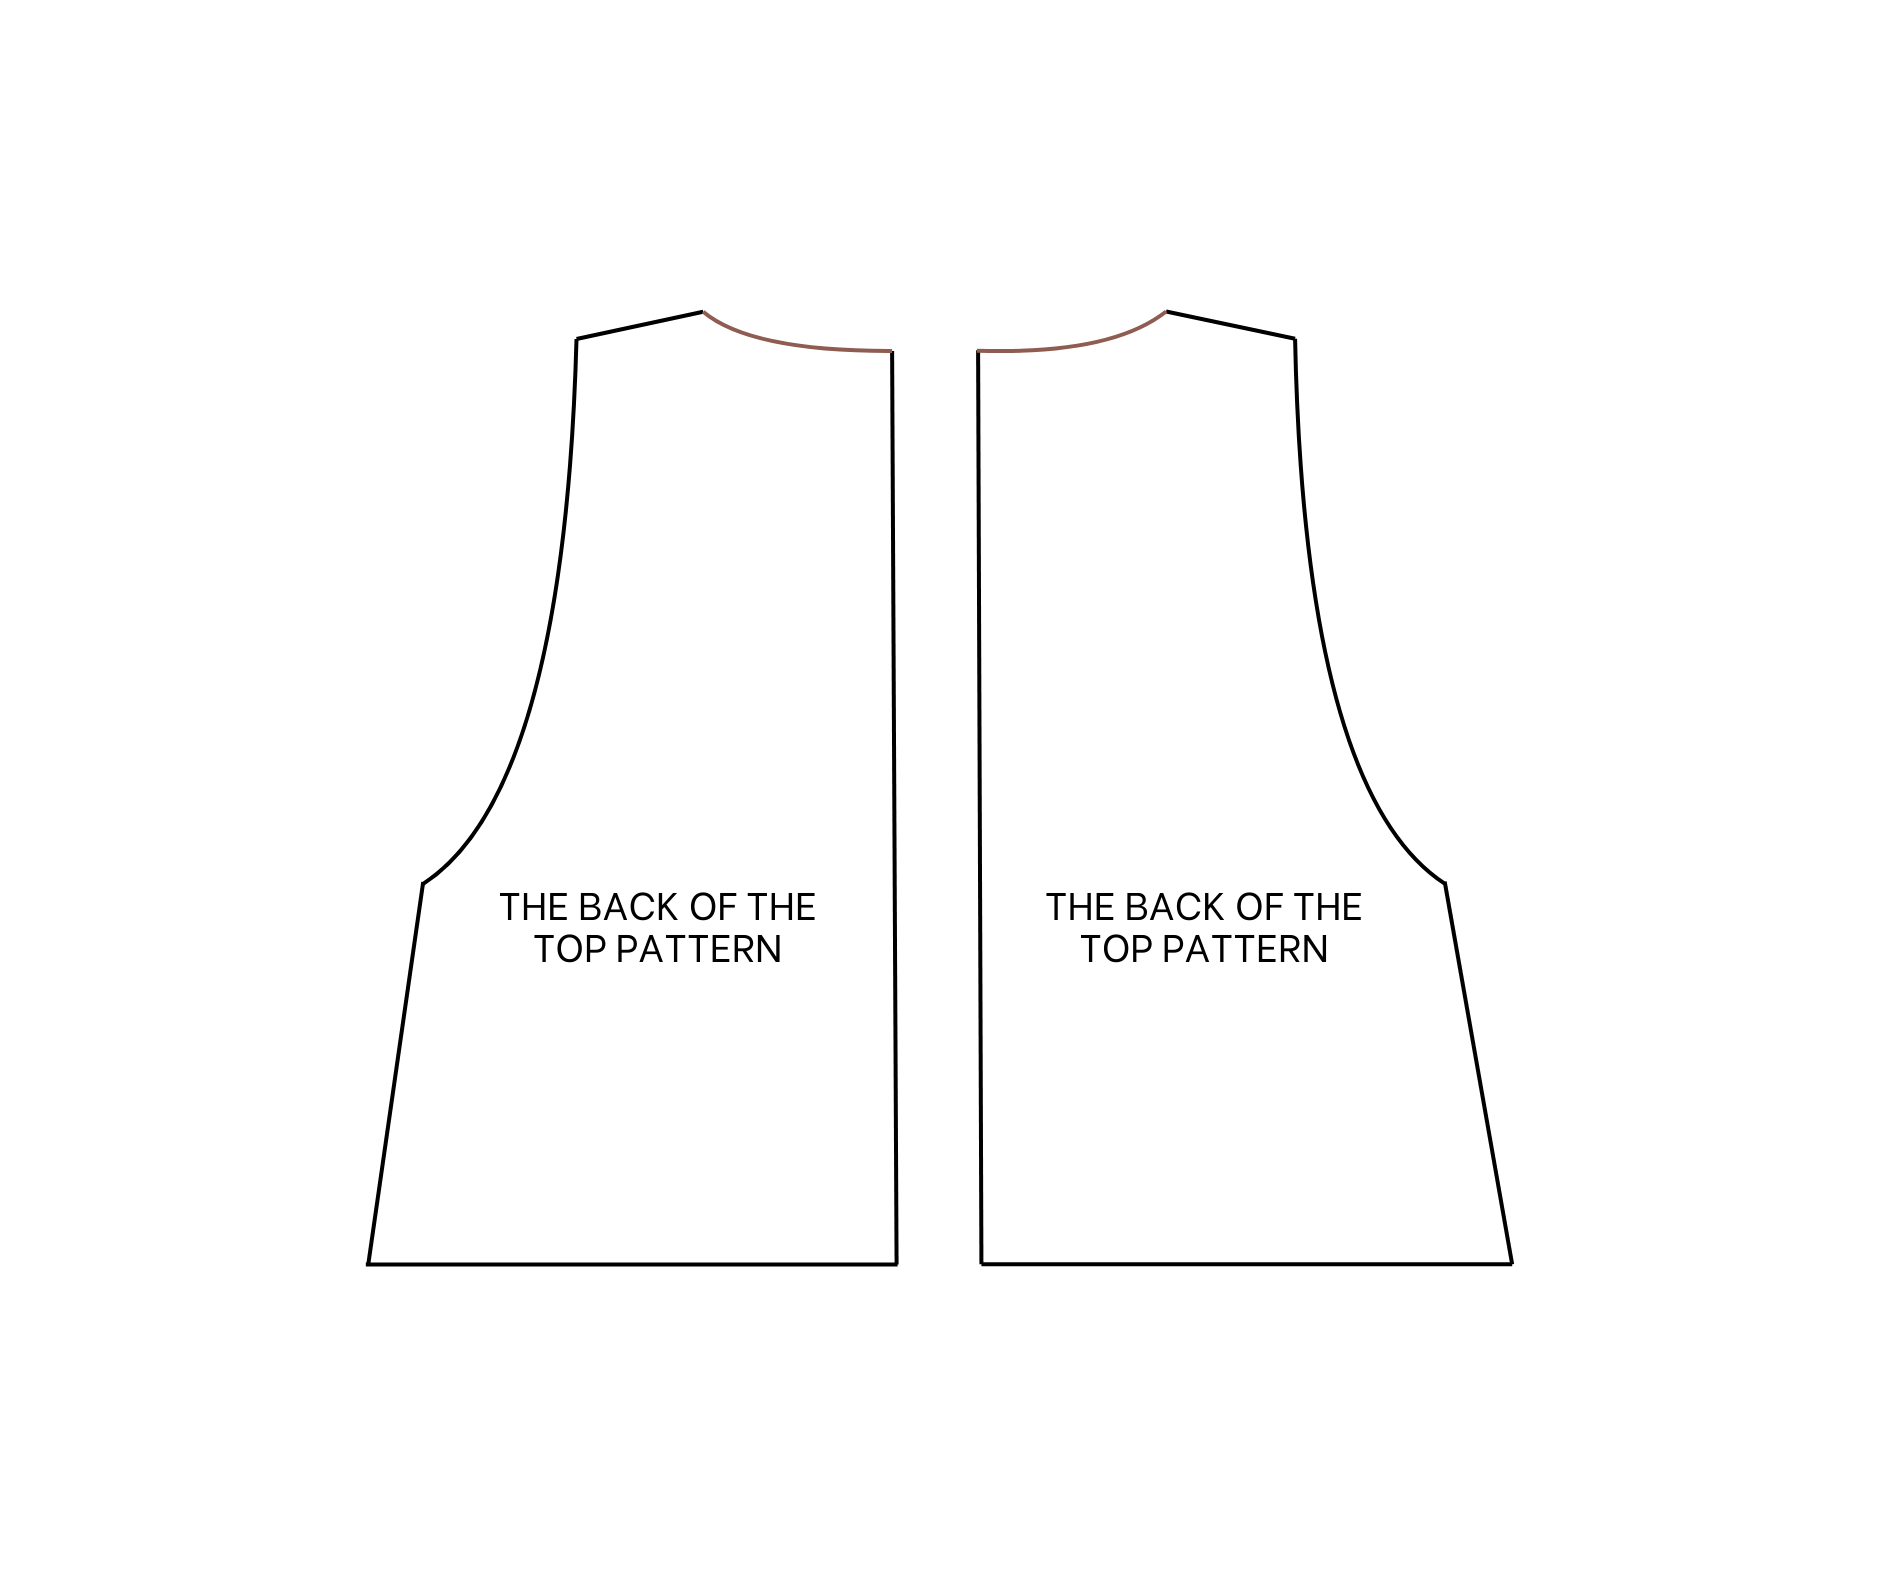
Folding two pieces of the back part together first.
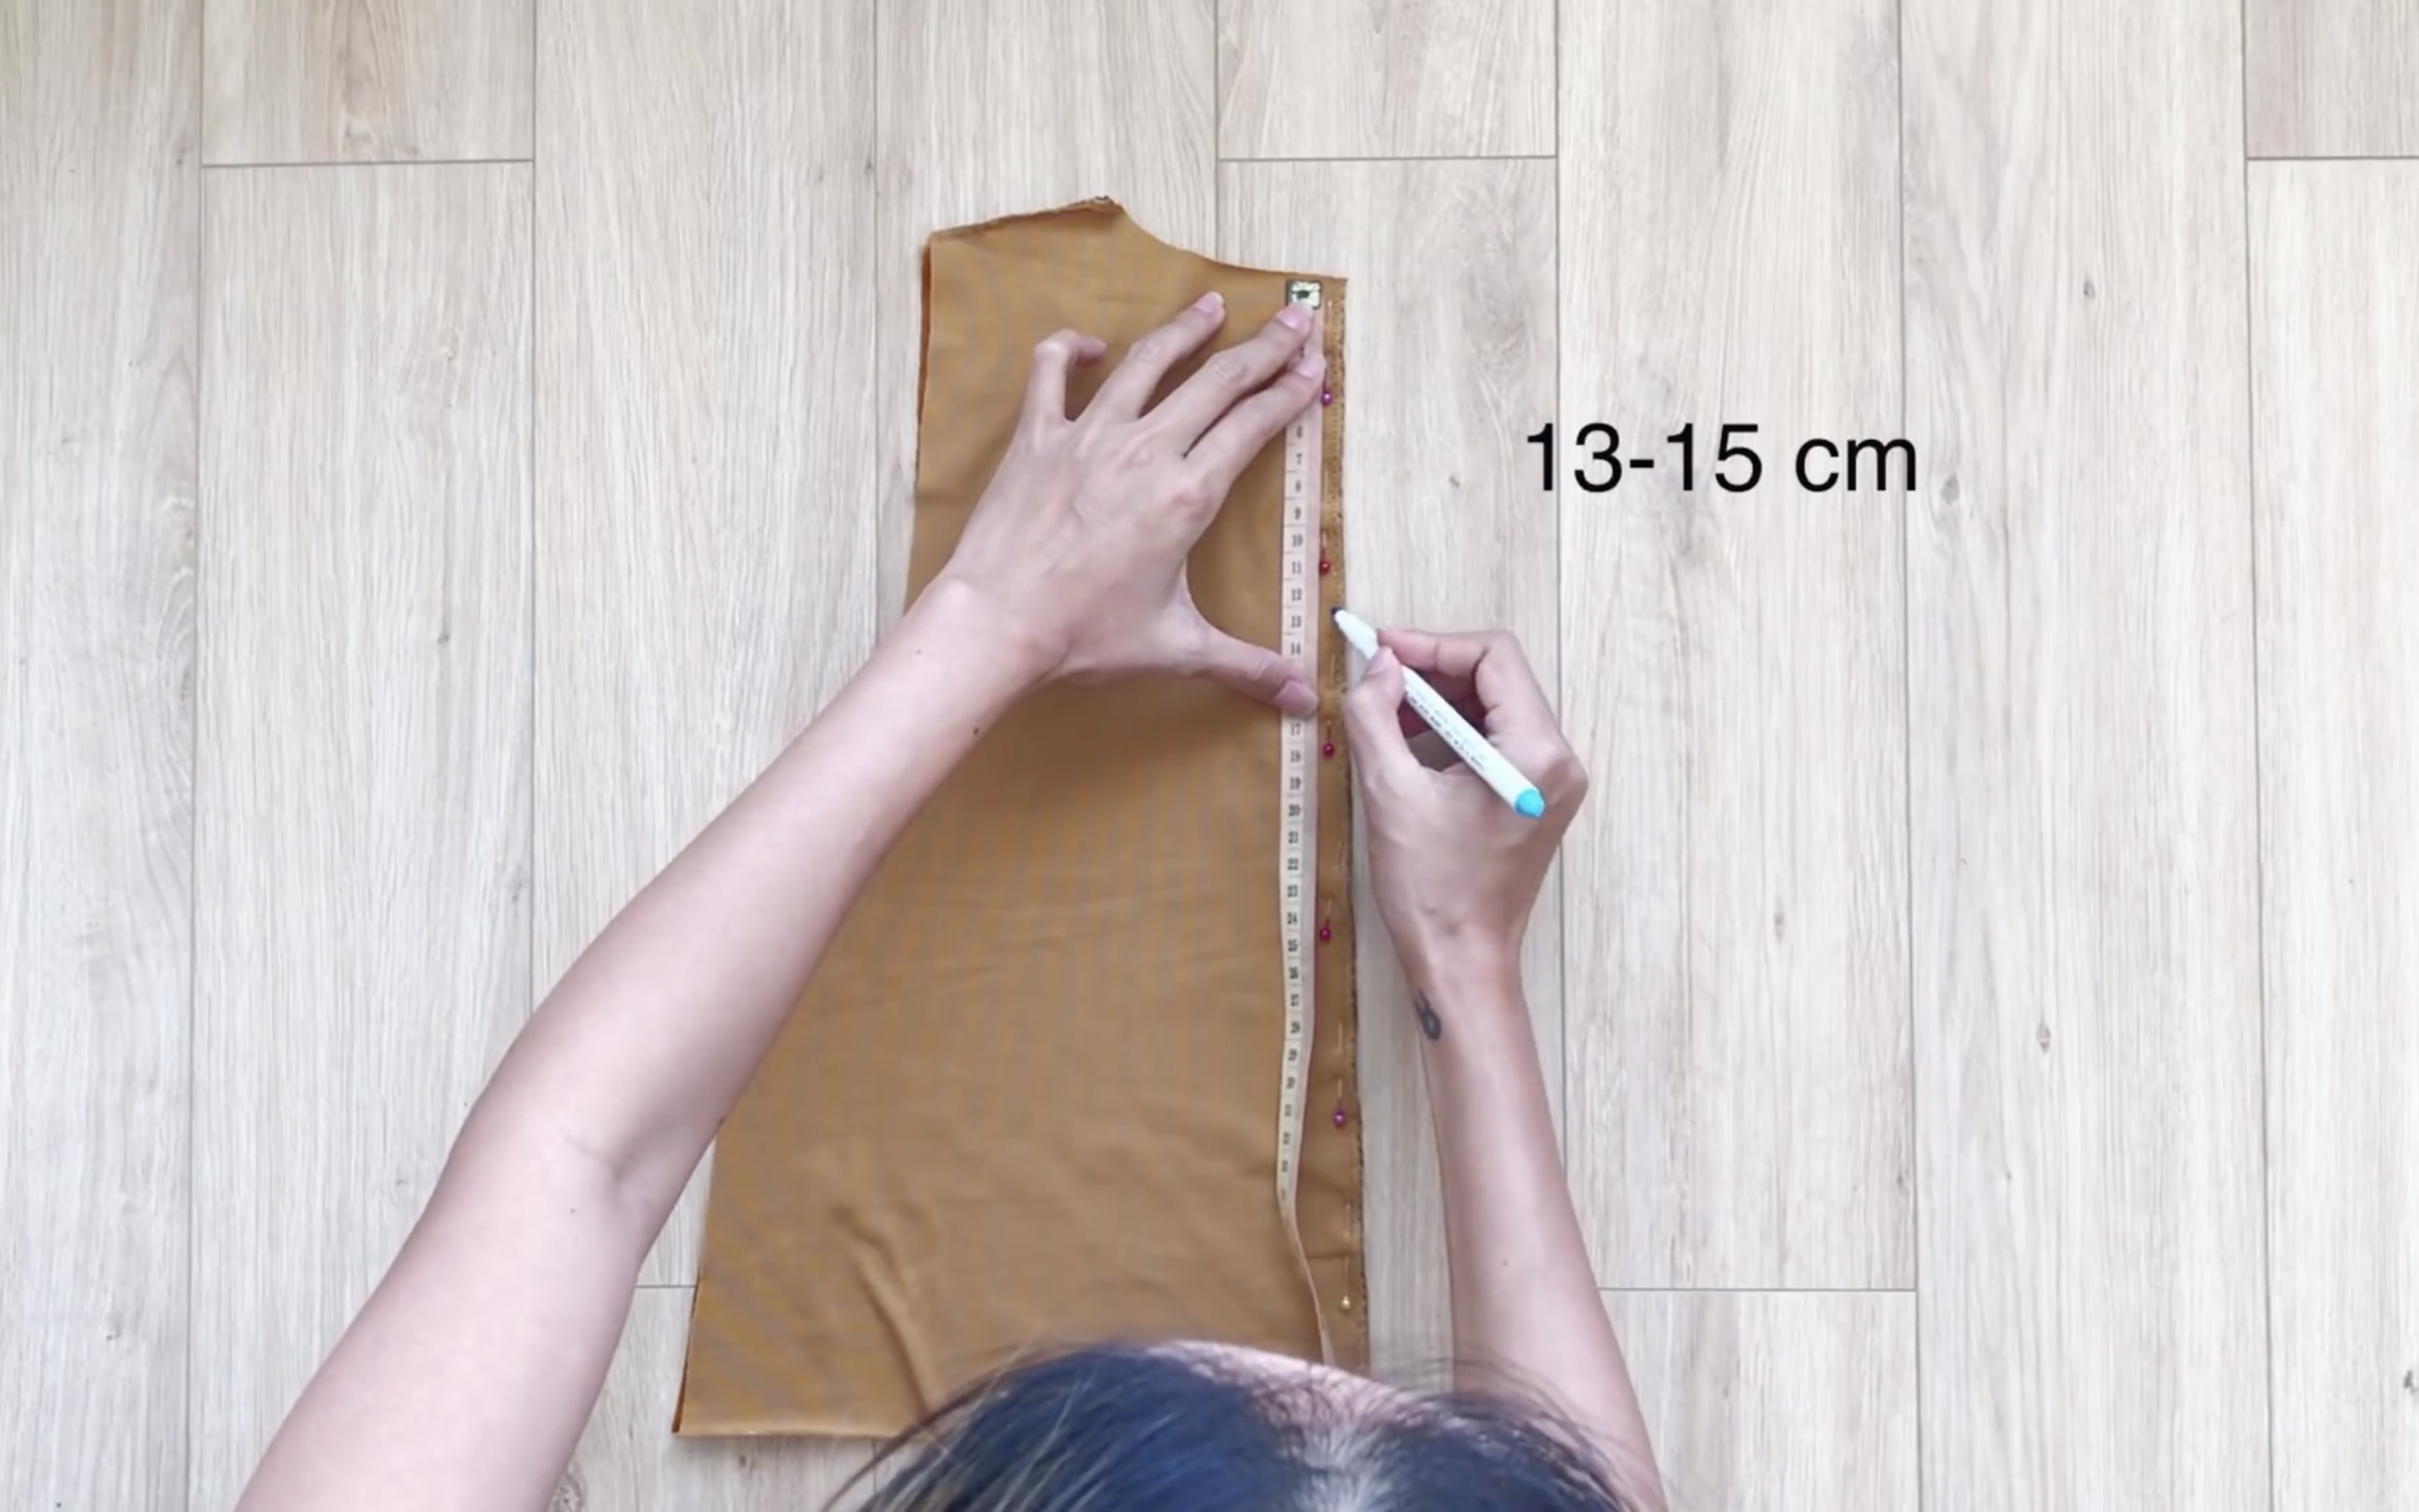
Then, from the top, move down and mark at 13 or 15 cm.
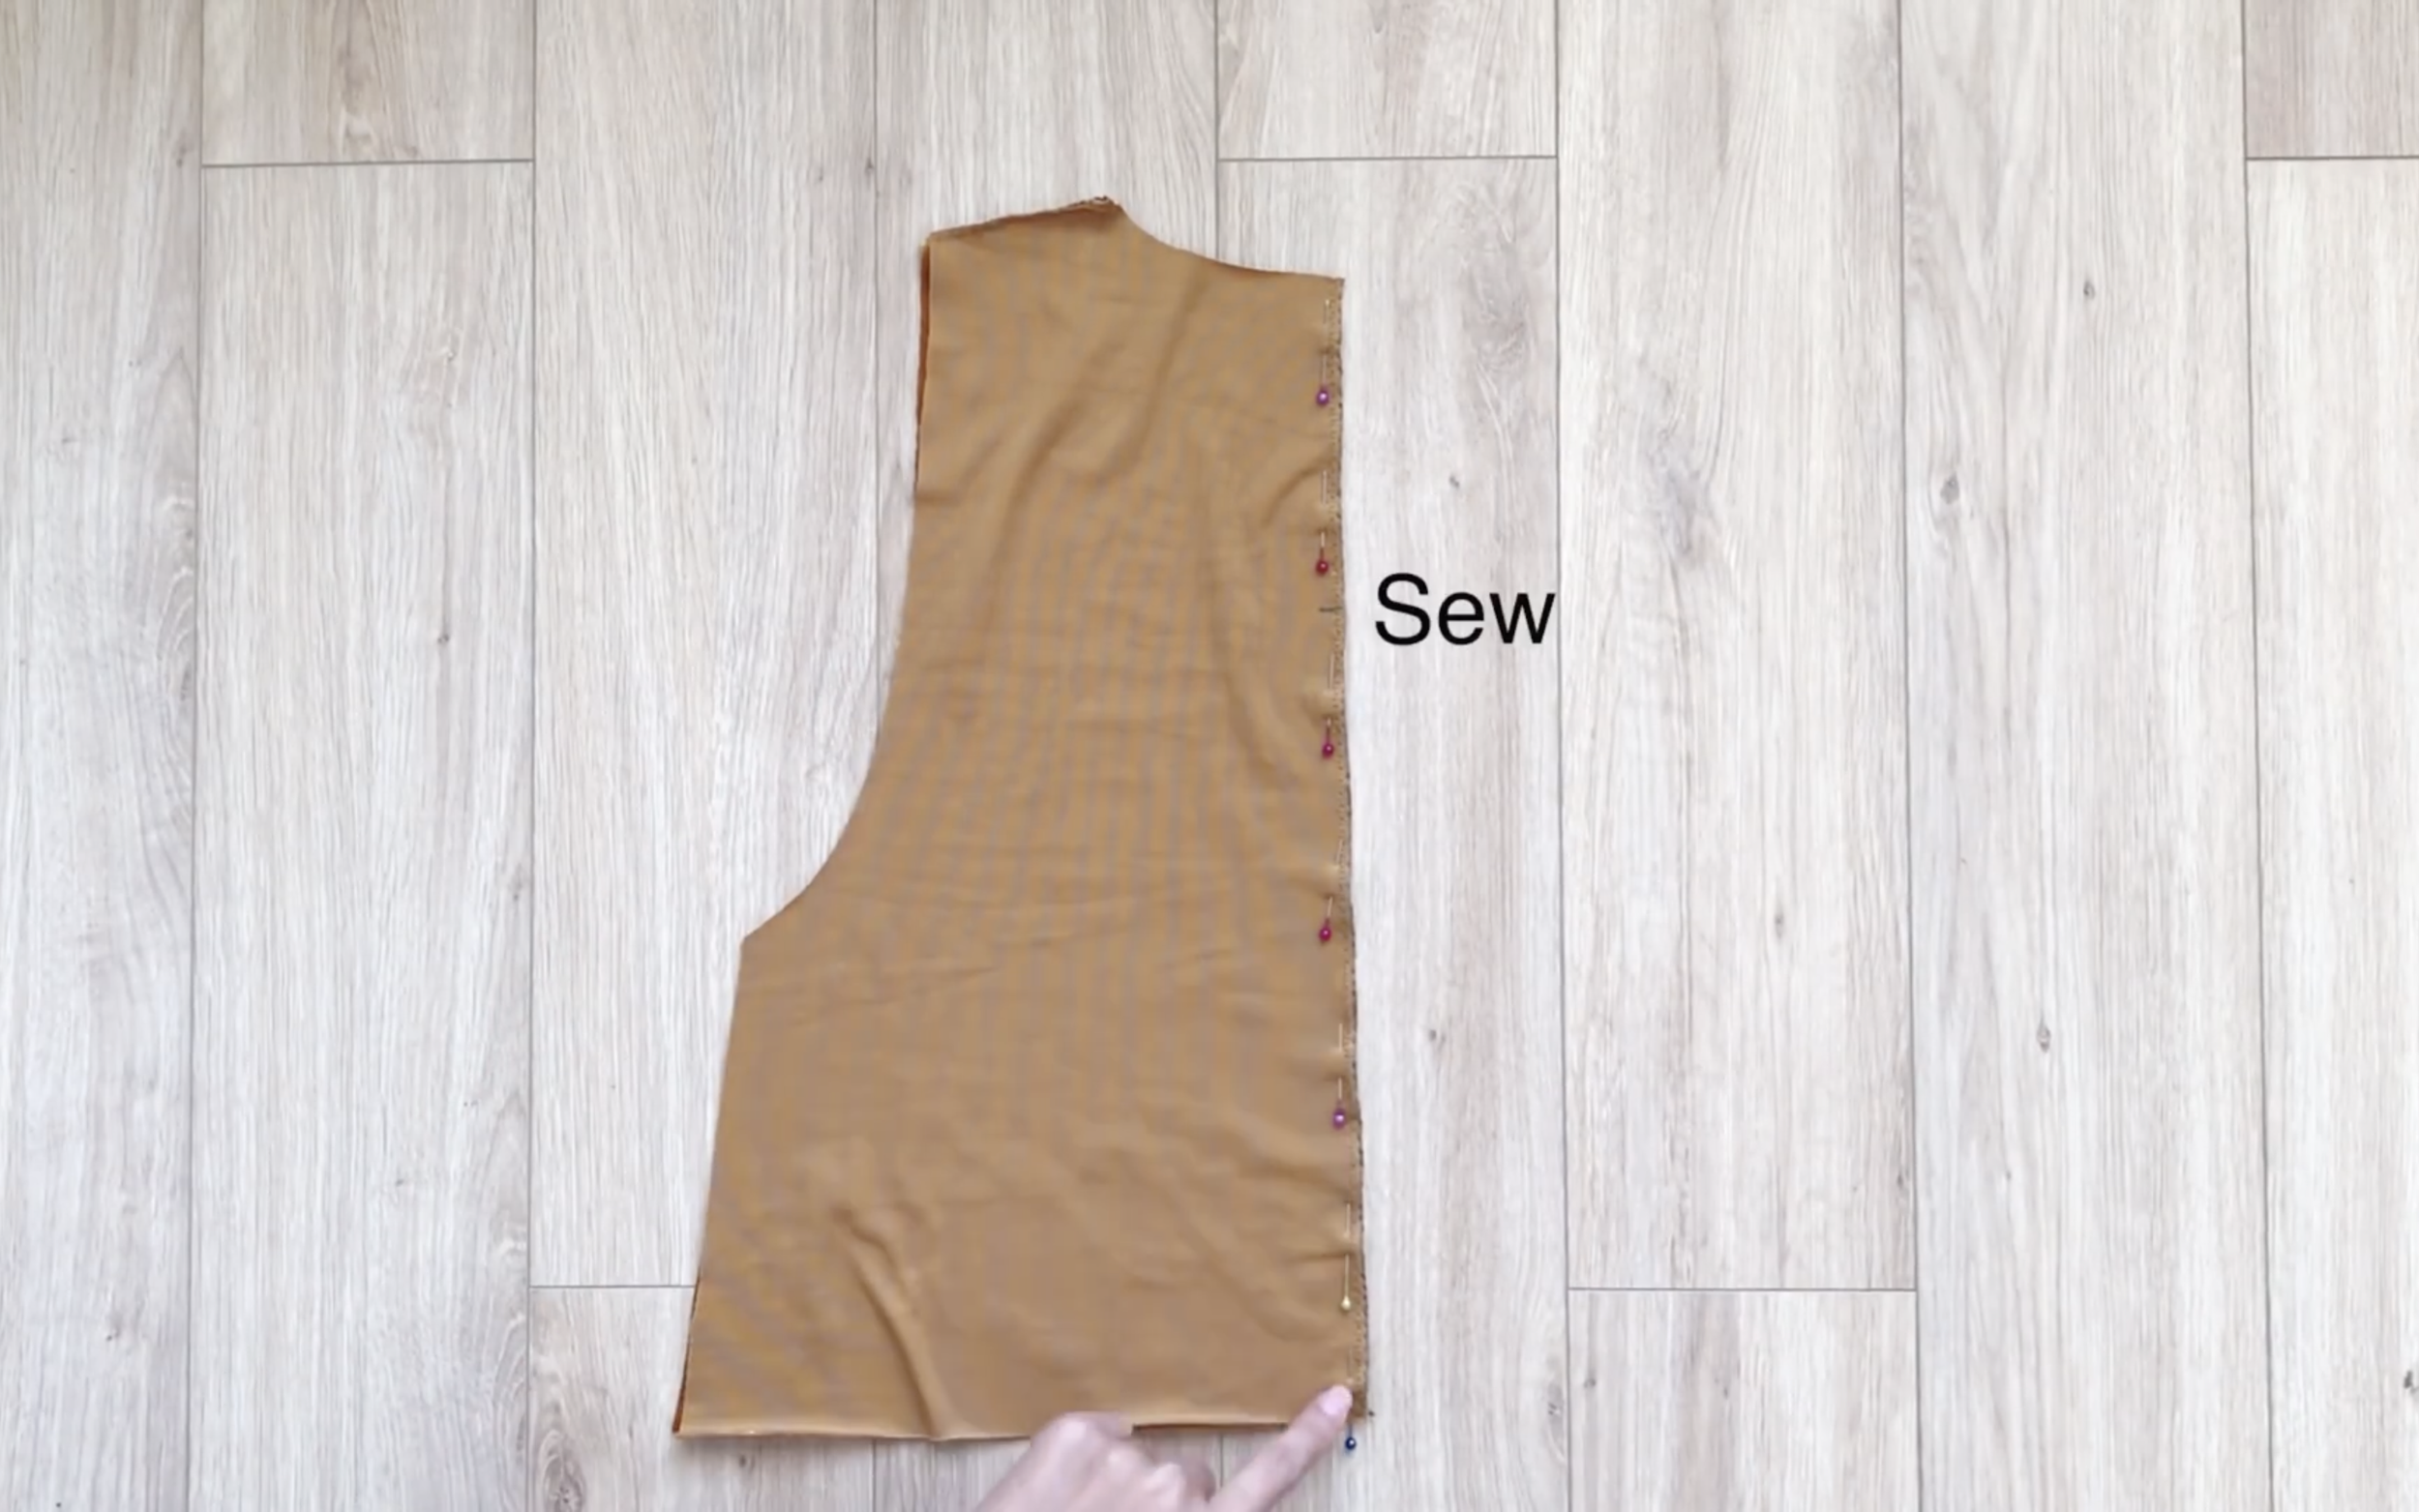
And sew from it to the end.
After that, fold the unsewn part at the top of the back inside, then sew. By doing it, the neck of the jumpsuit will be made bigger to be able to wear the jumpsuit after.
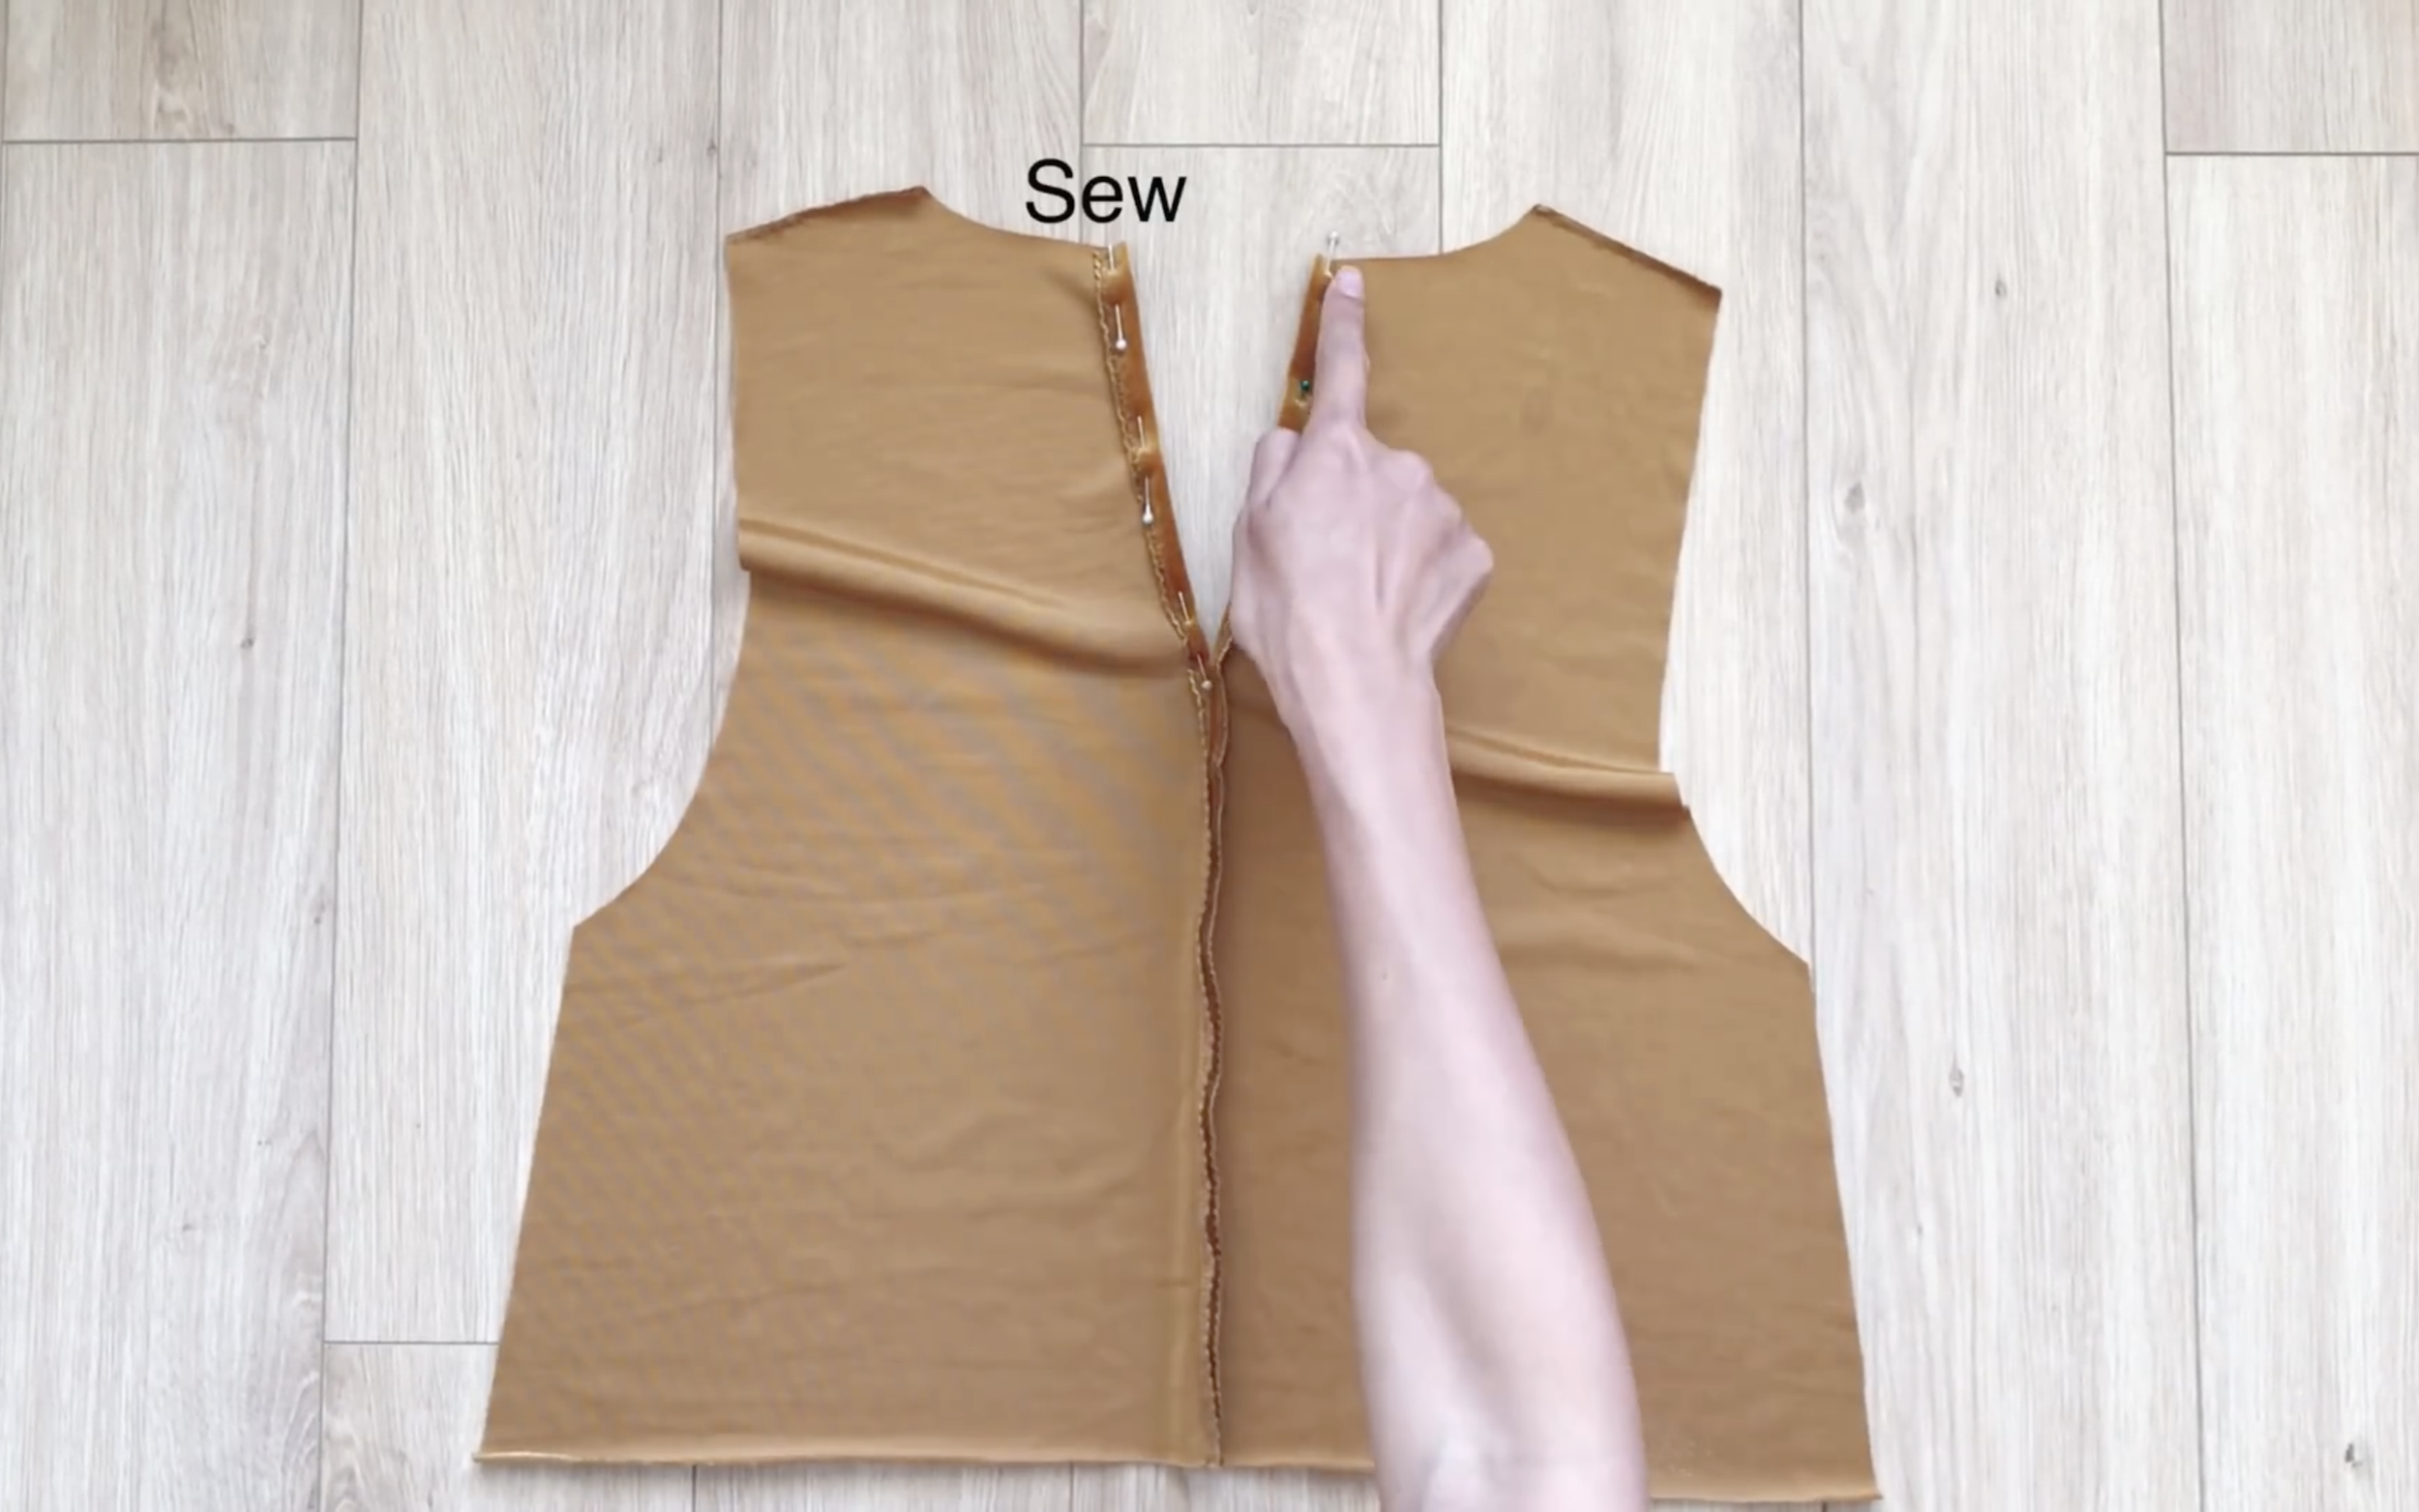
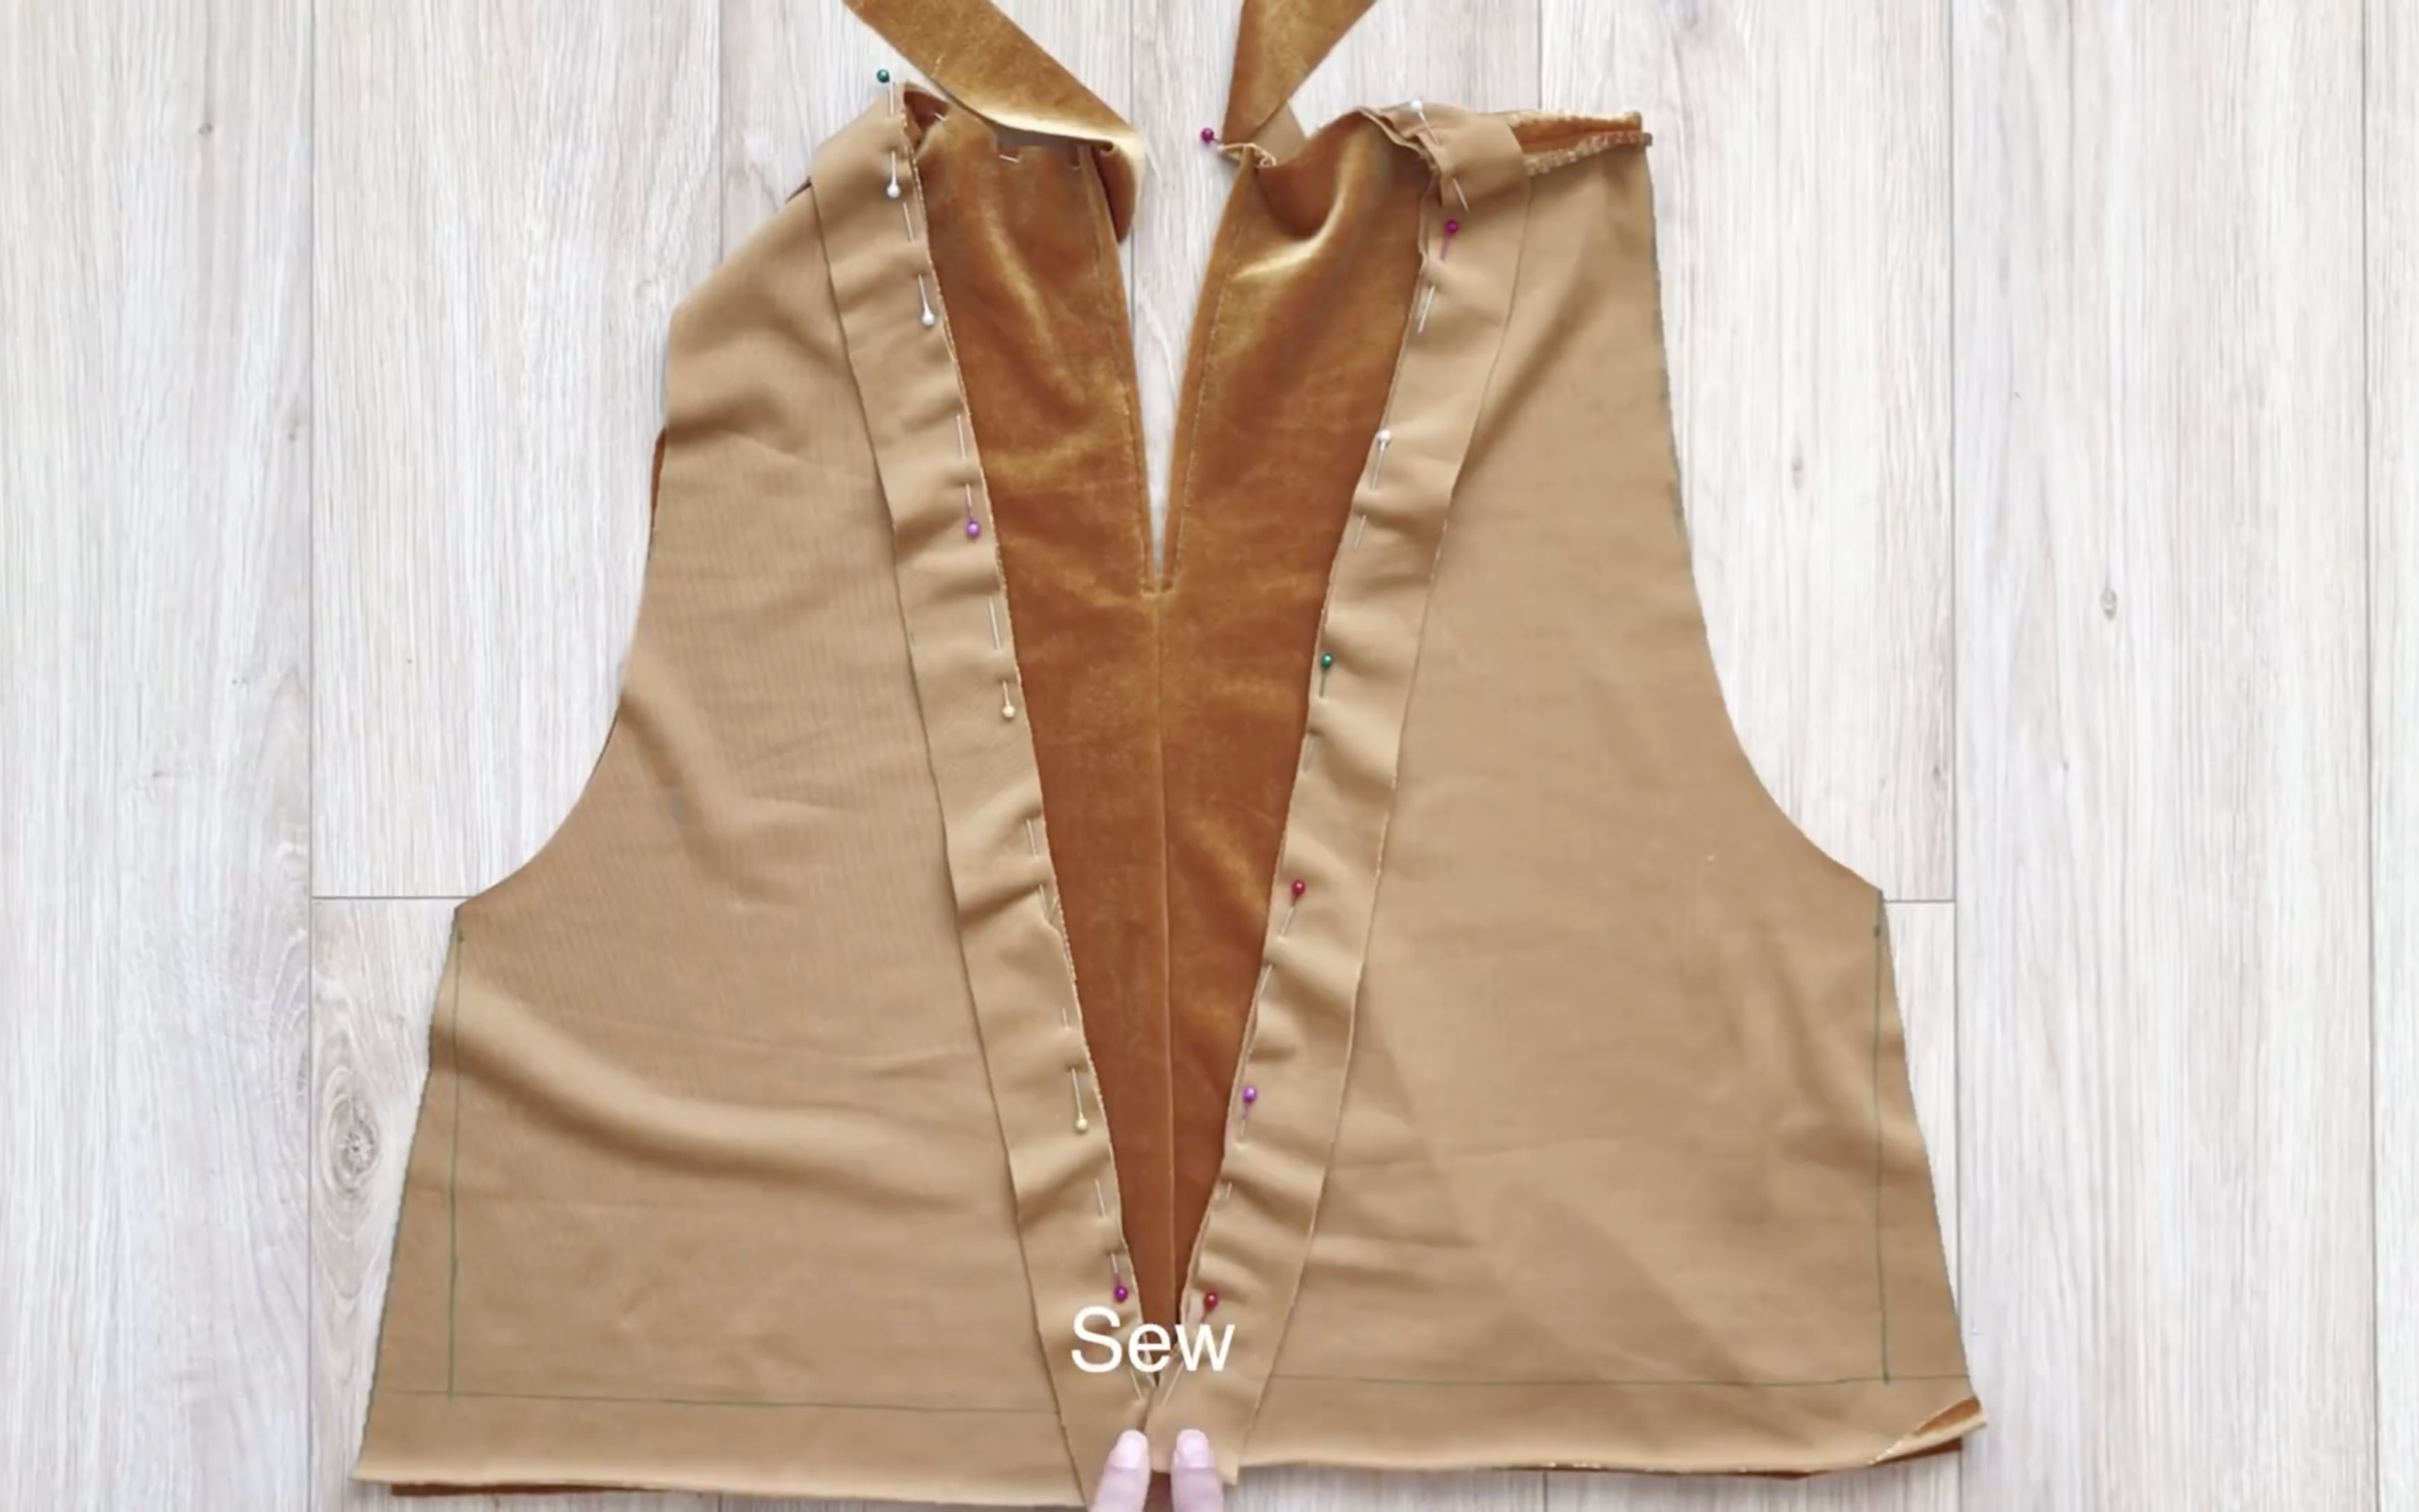
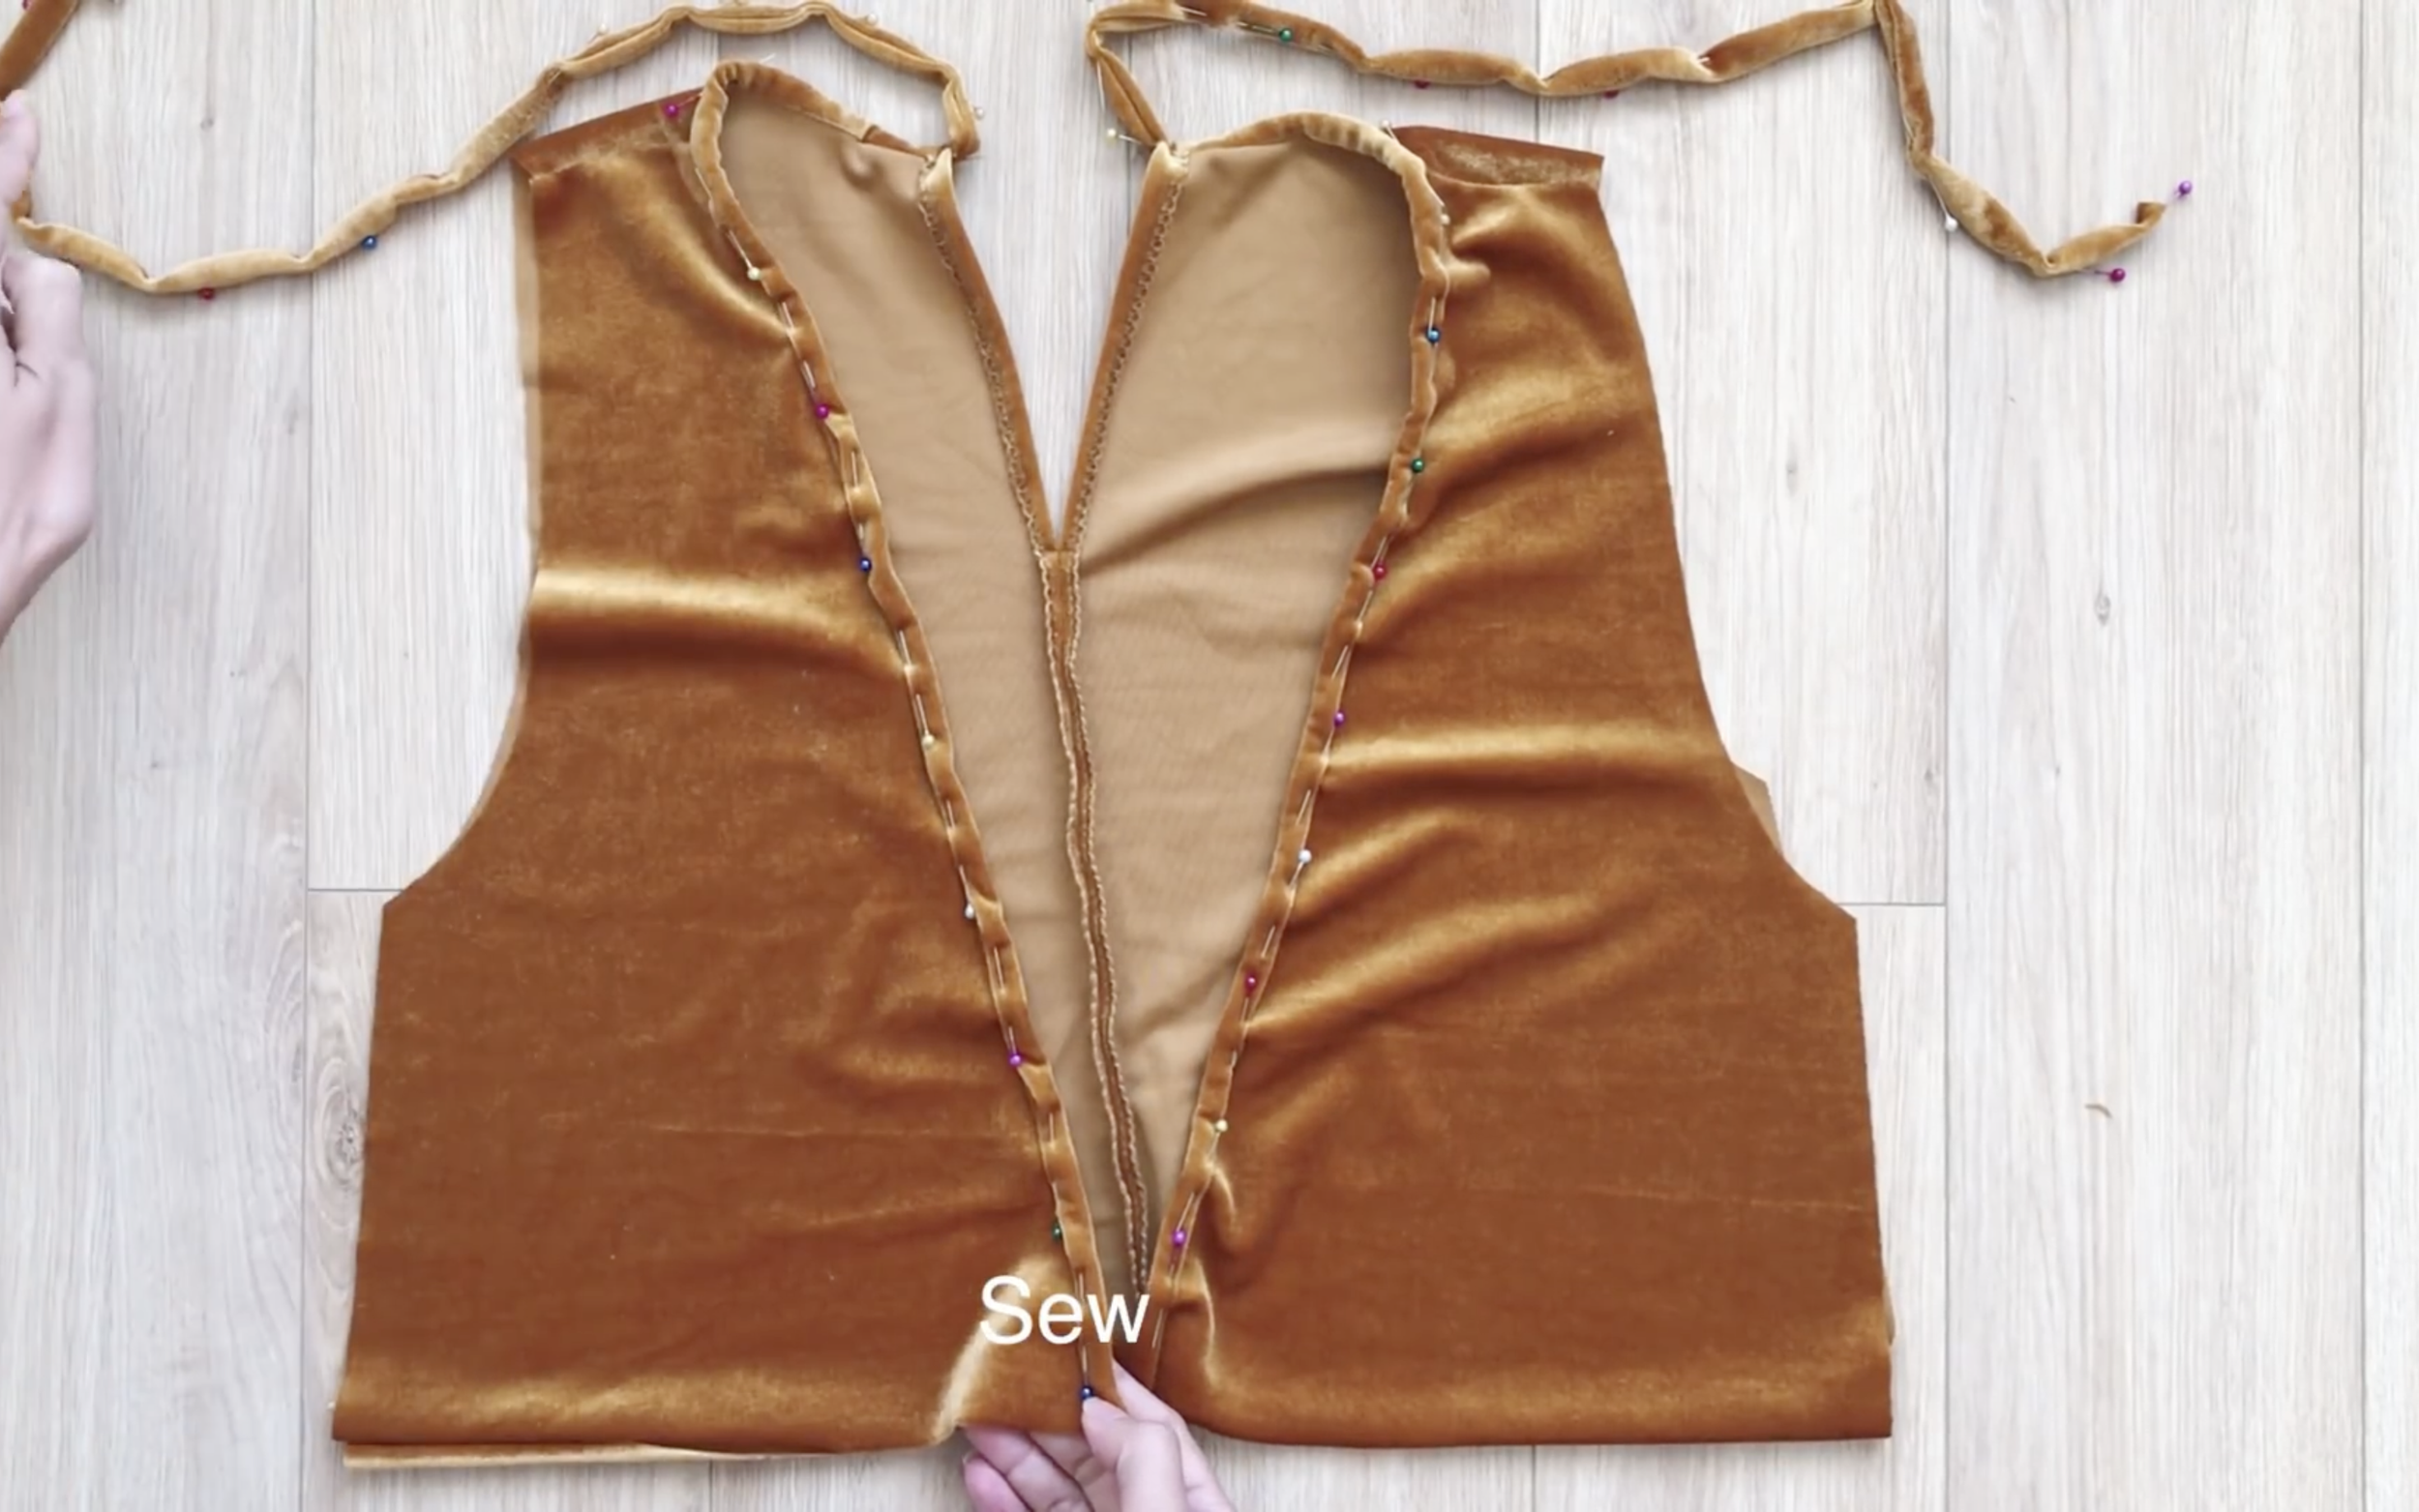
Now, connect the front and the back part together at the shoulder.
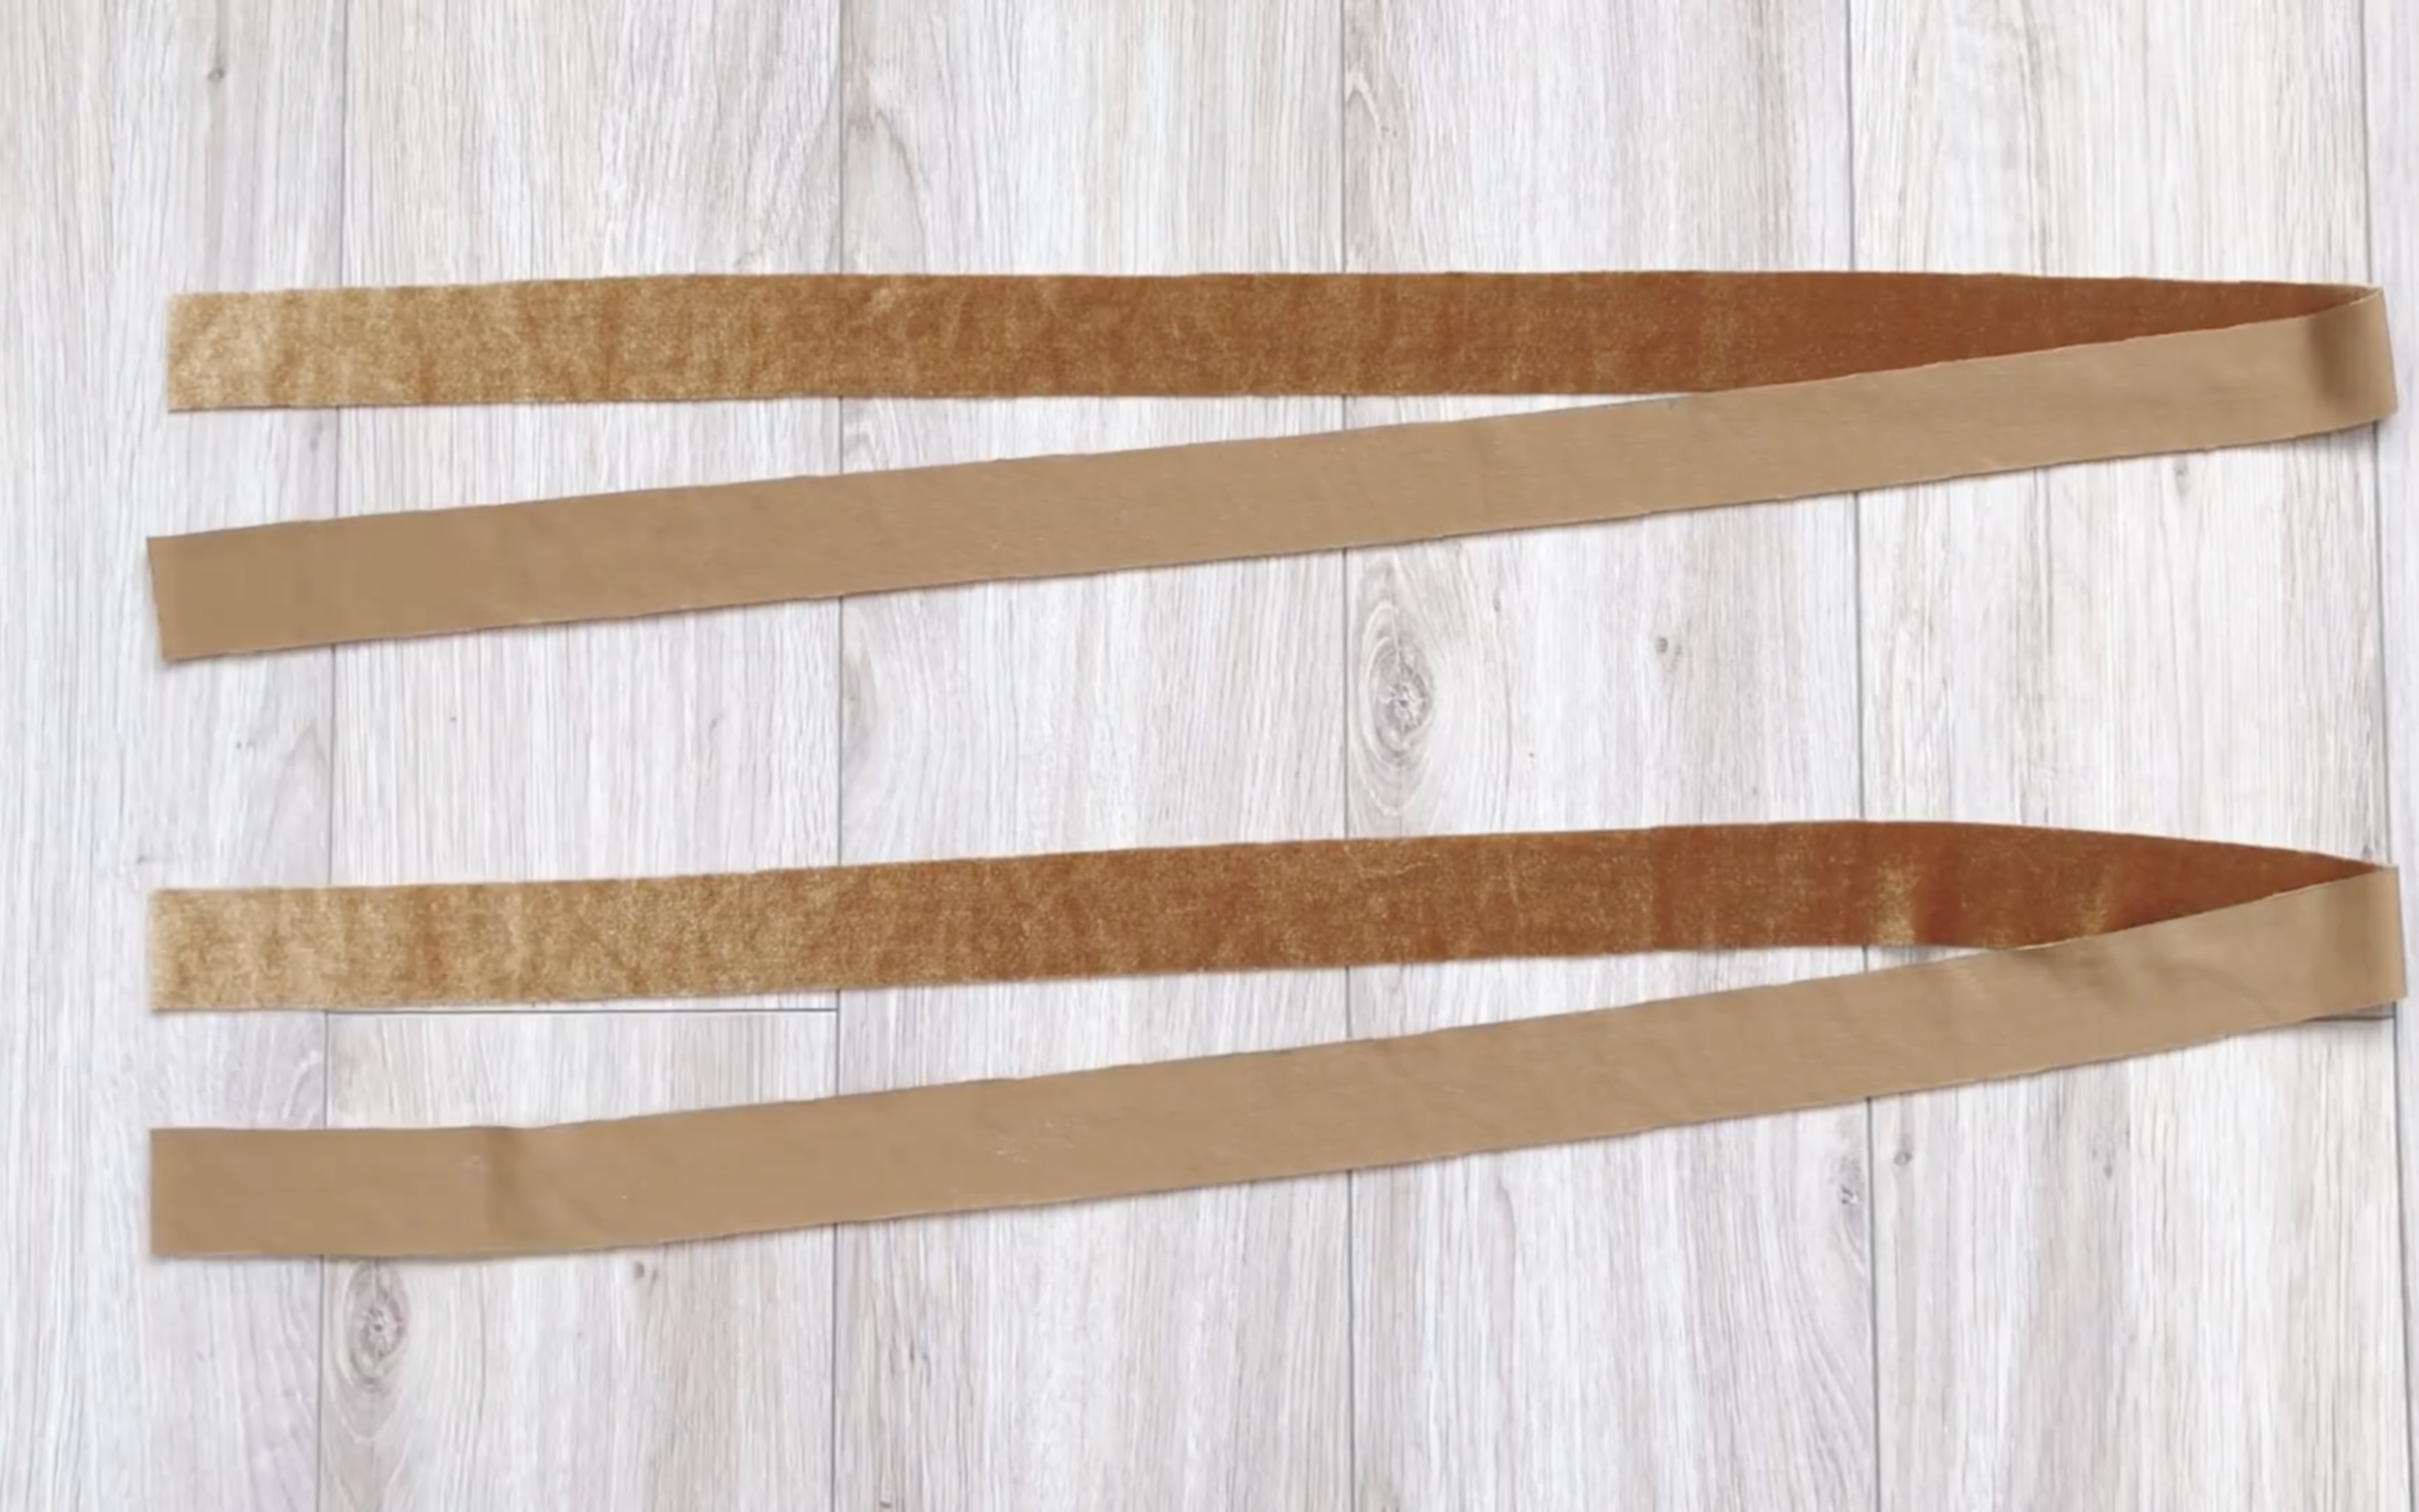
After that, cut two long rectangles with 3 cm width and around 60 cm length to make the bias tape for the neck.
Connect the long fabrics to two sides of the neck first, then sew.
After the first seam, fold the rest of the long fabric two times to create a bias tape, then make the second seam.
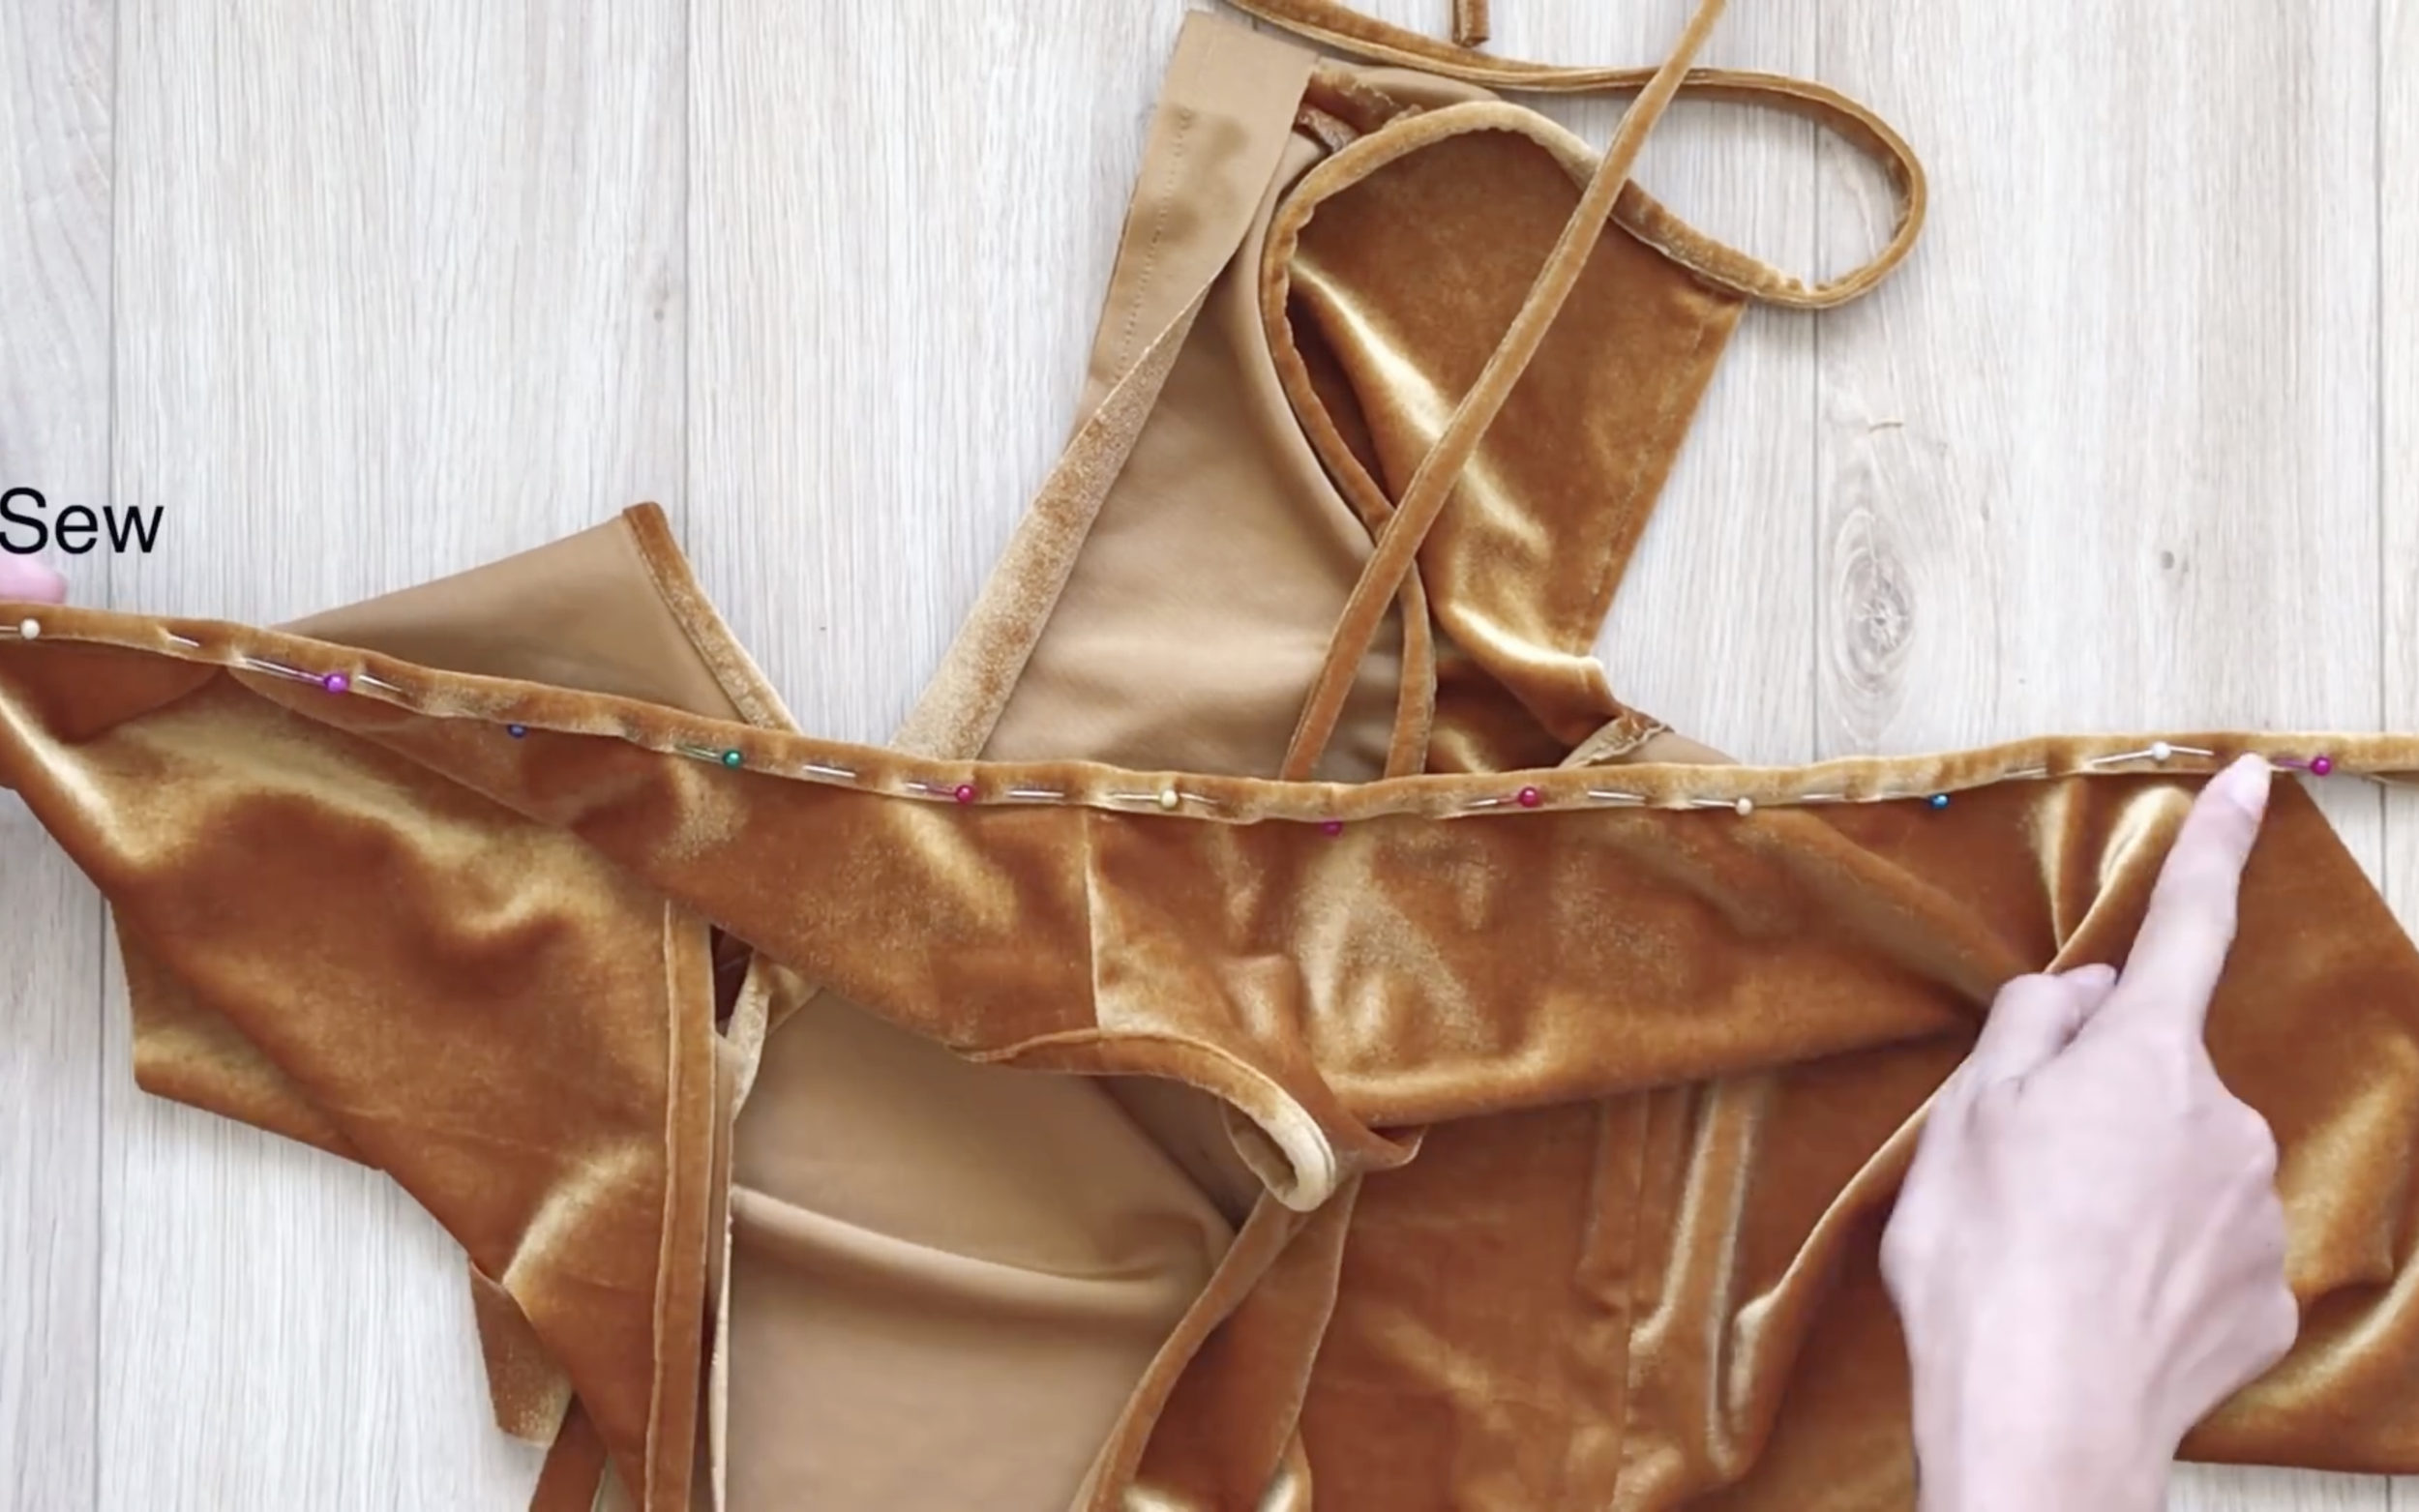
Use the same way to finish the hand part of the top.
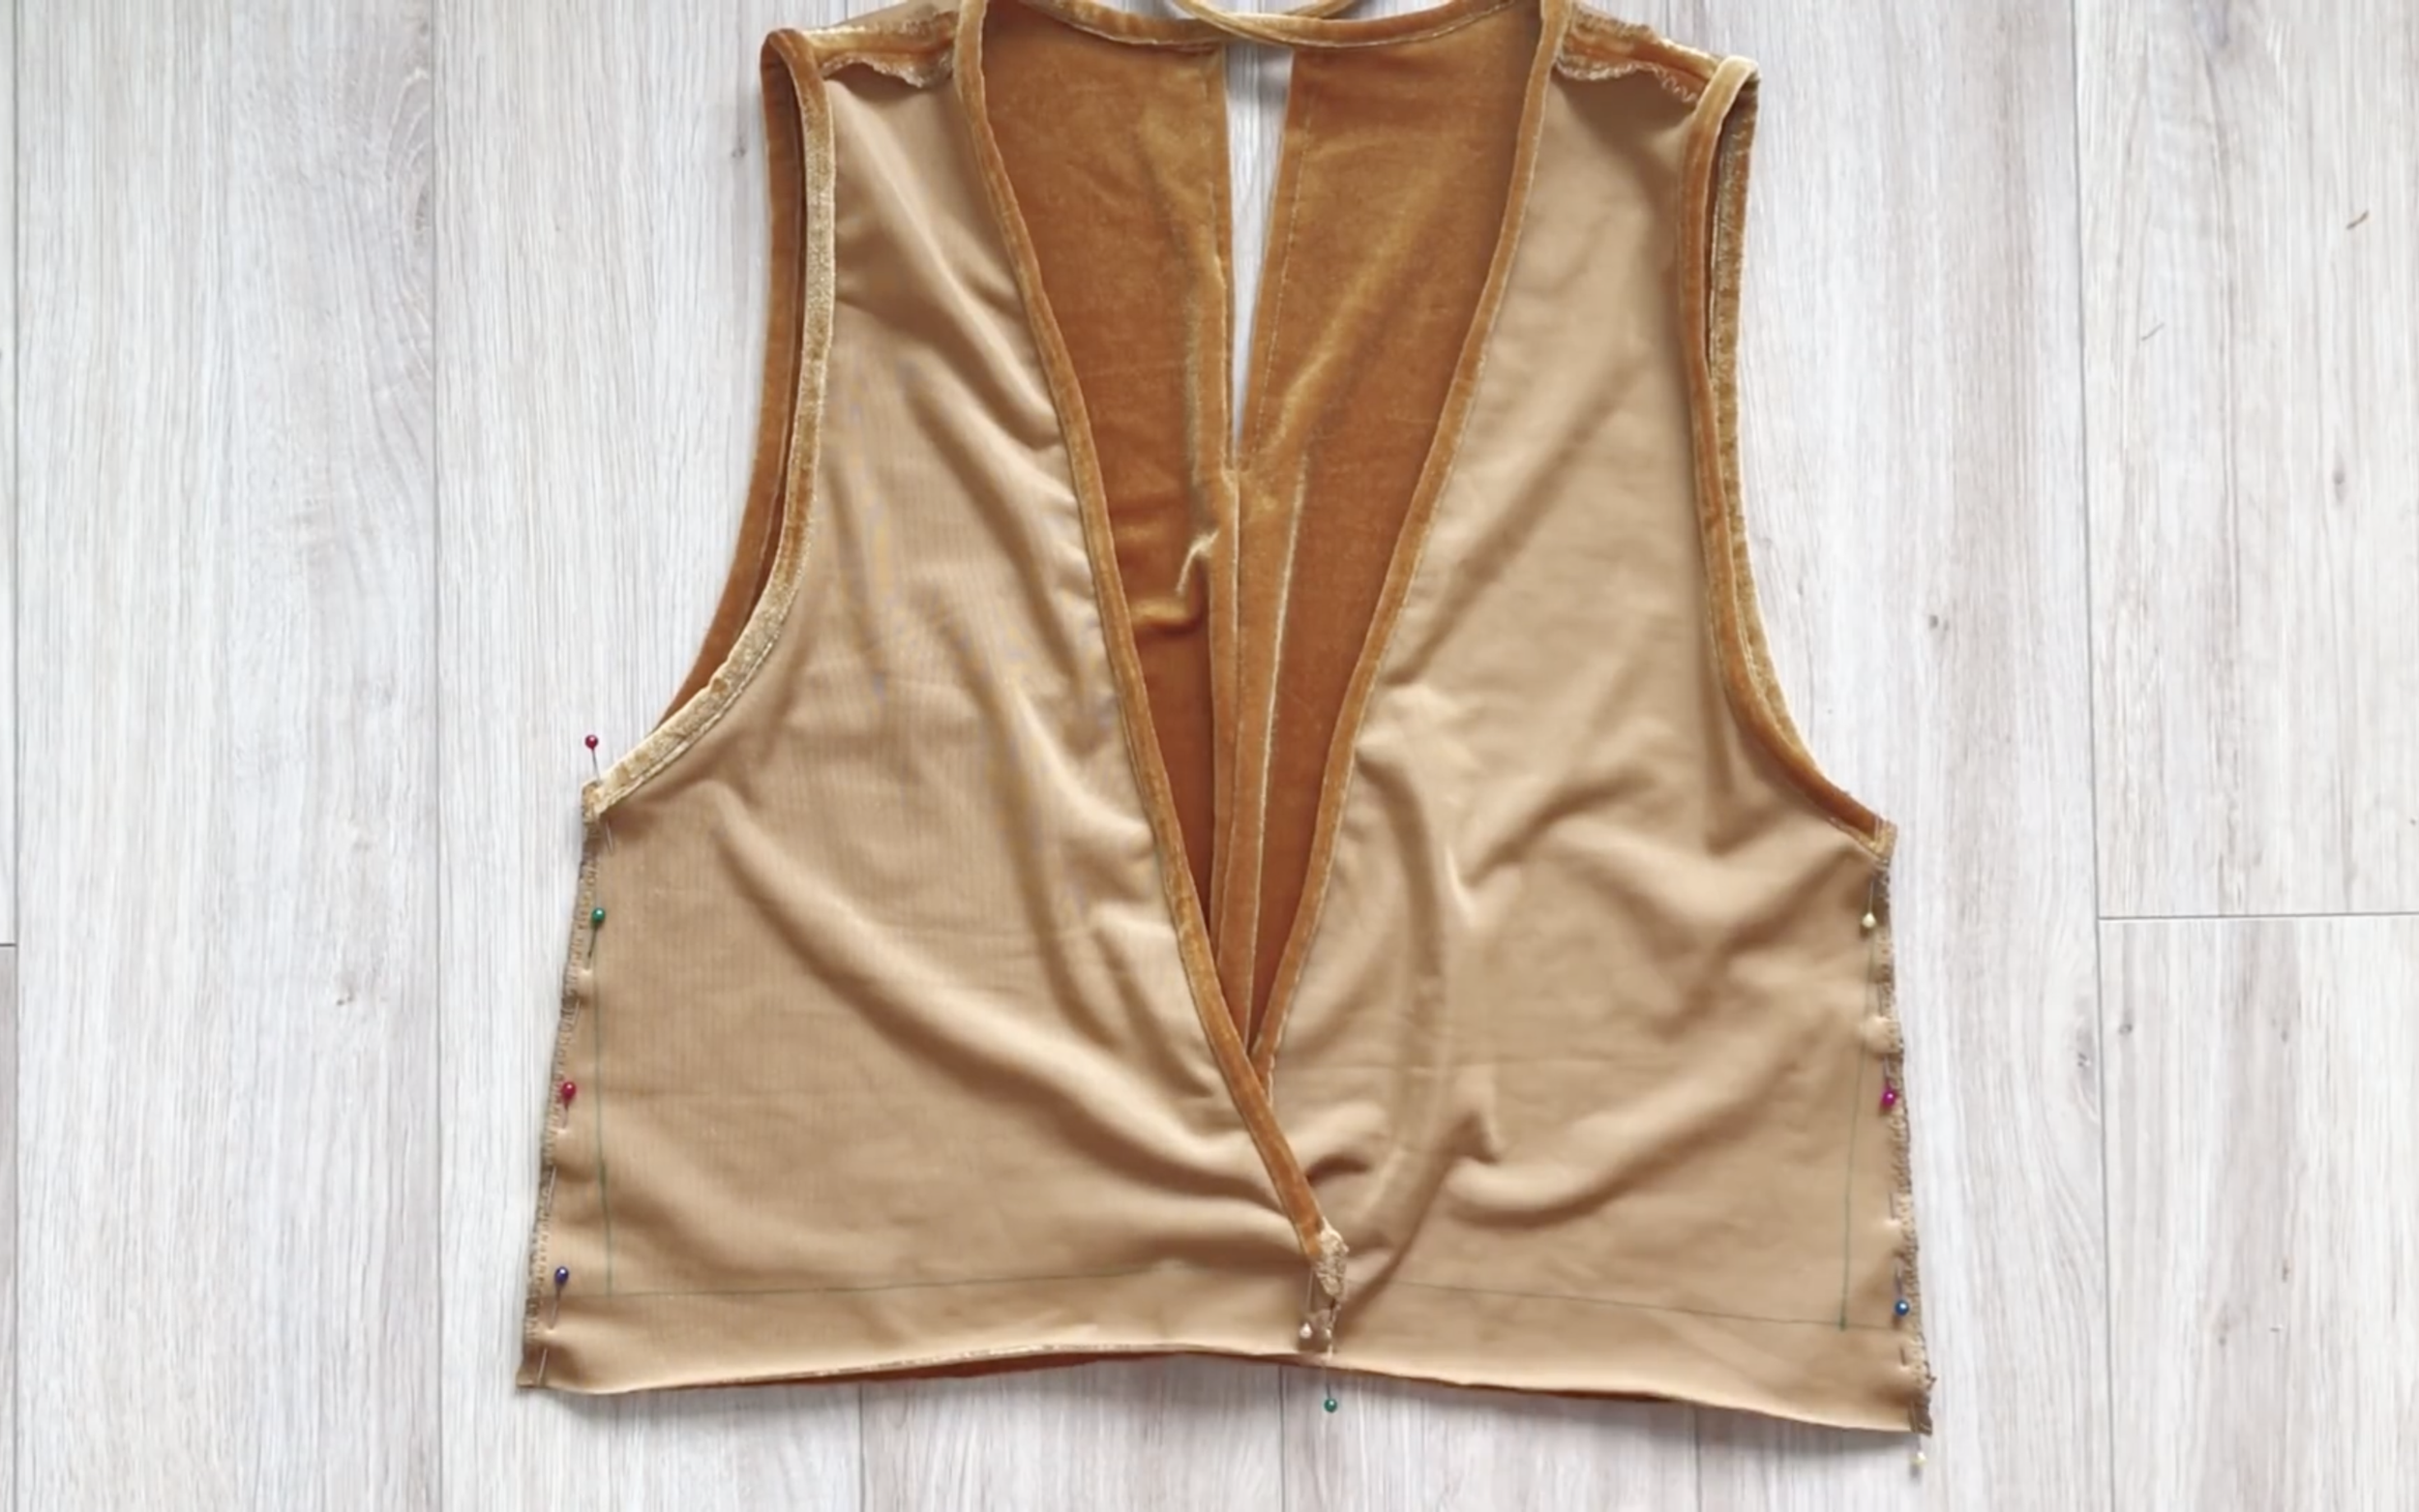
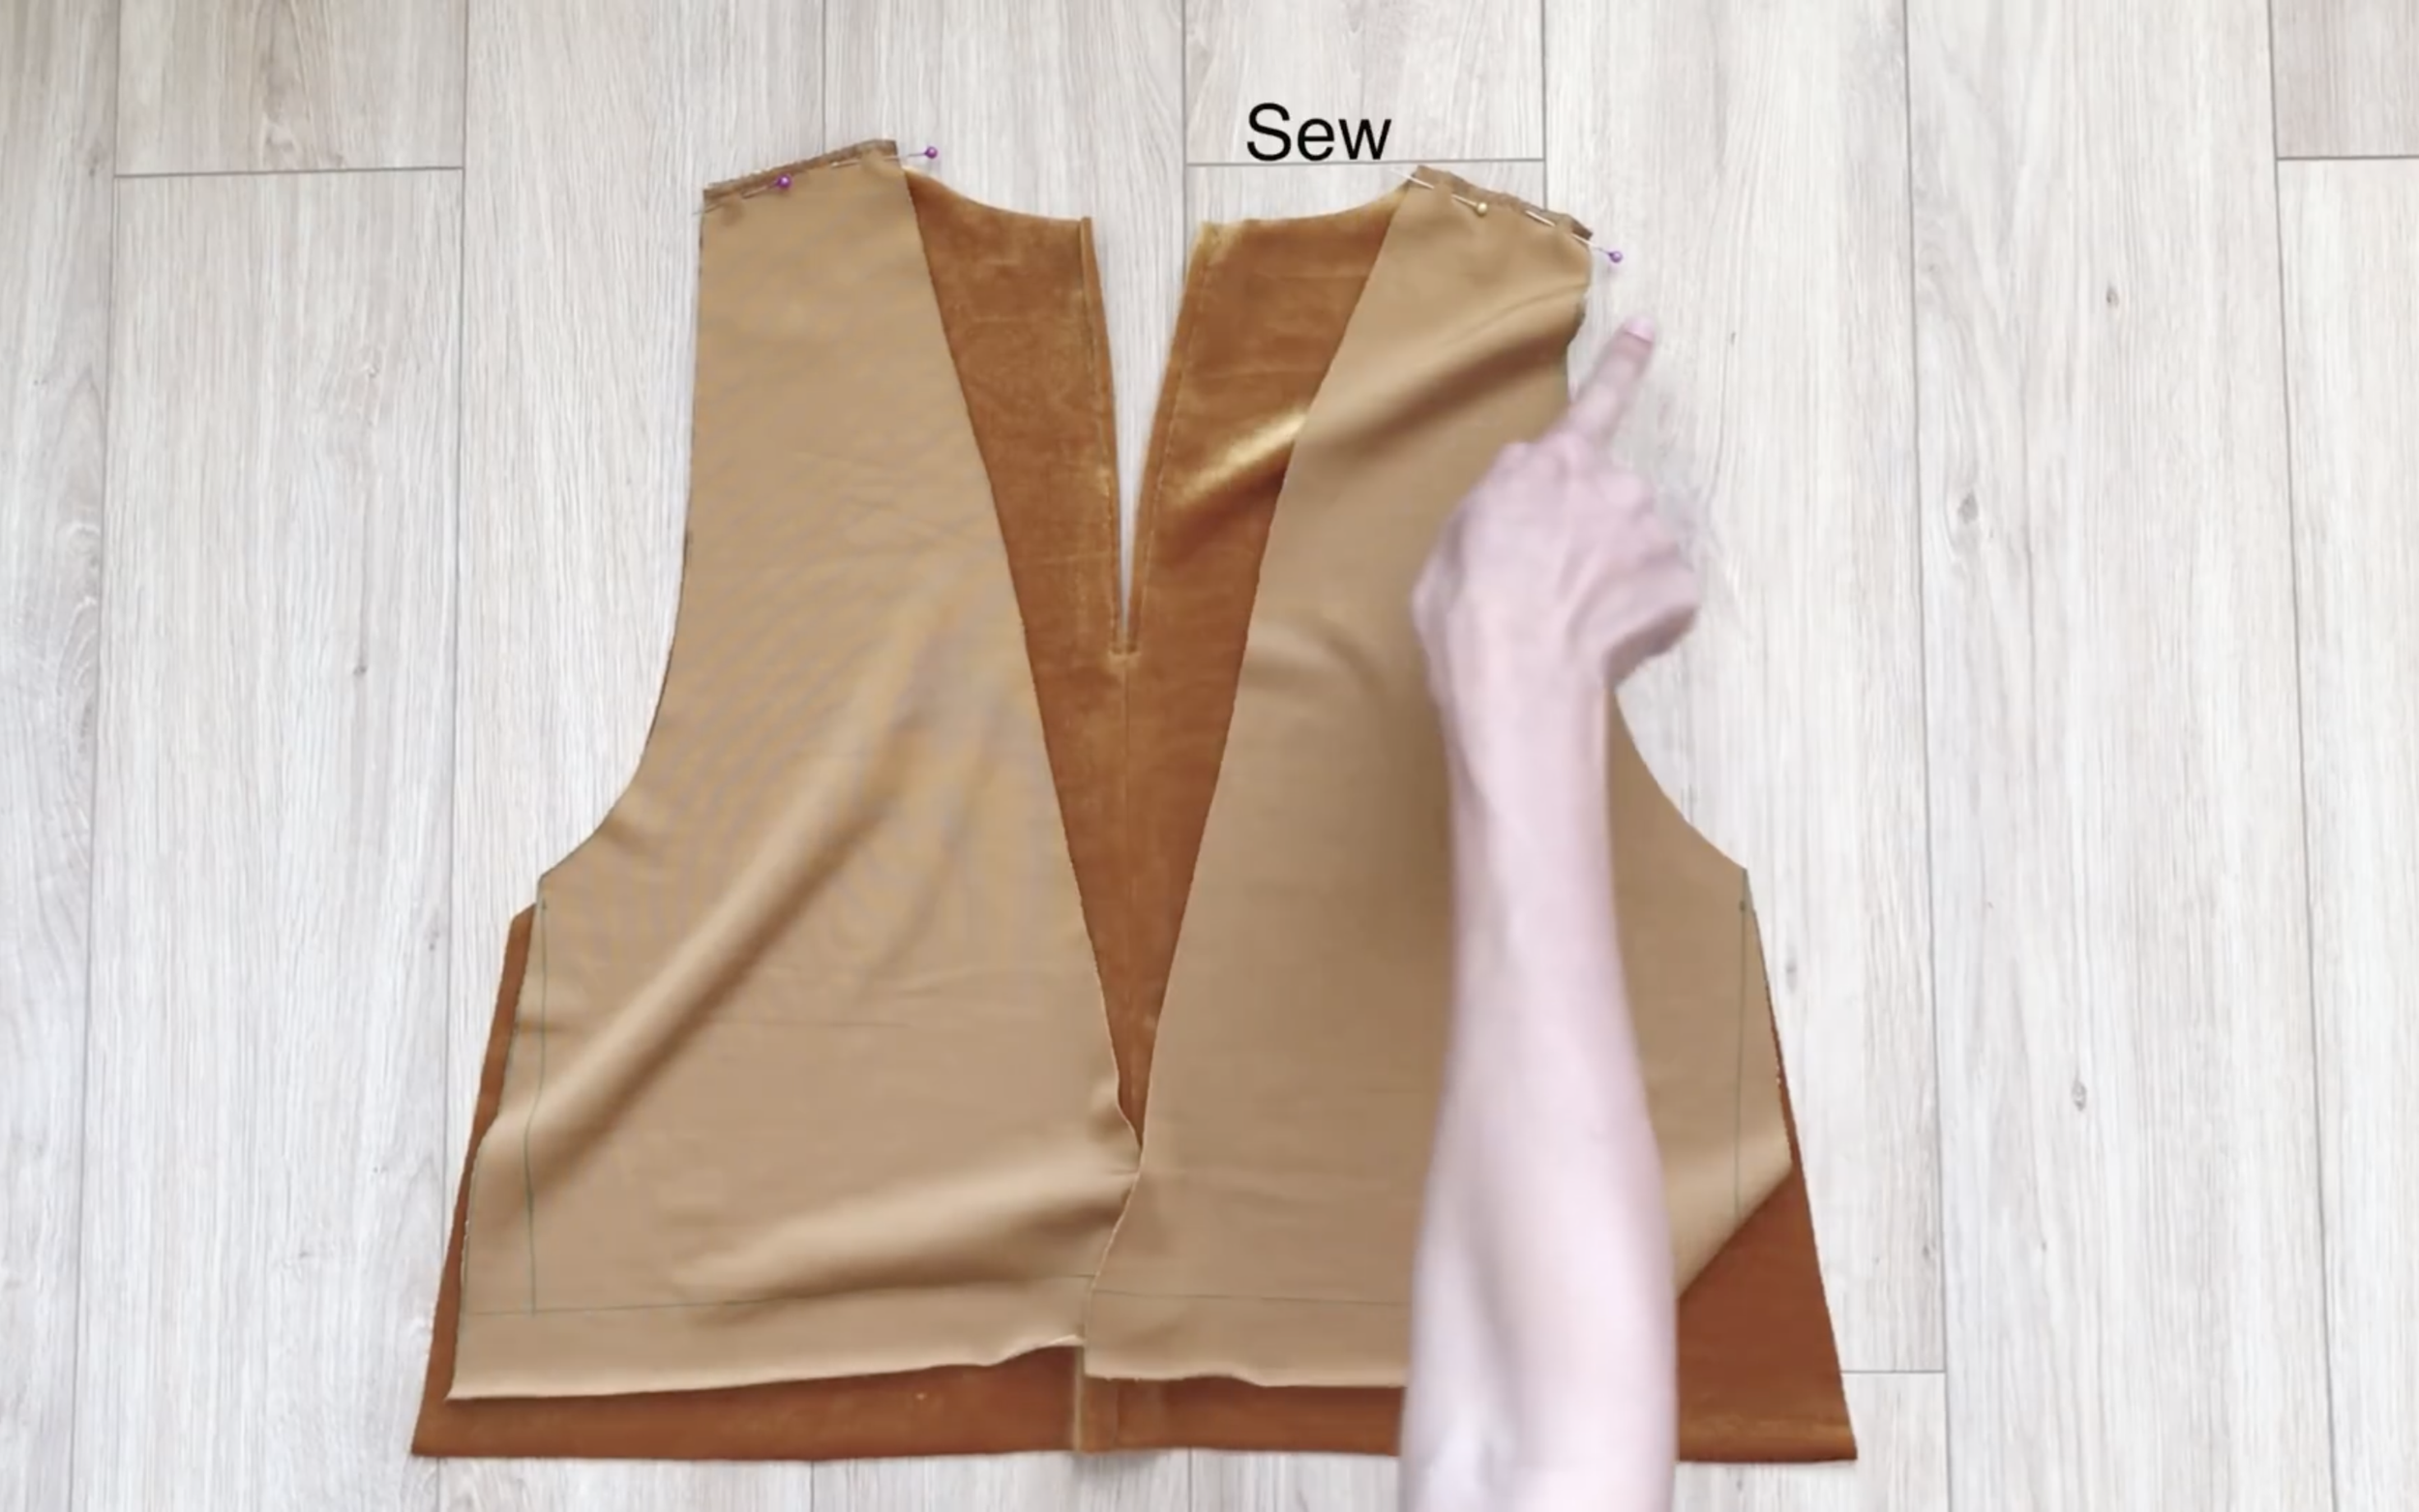
Now, connect two sides of the top and two sides of the end of the neck together to finish the top of the jumpsuit.
THE BOTTOM PART

Moving to the bottom which is the pants of the jumpsuit. Fold the fabric together before drawing.
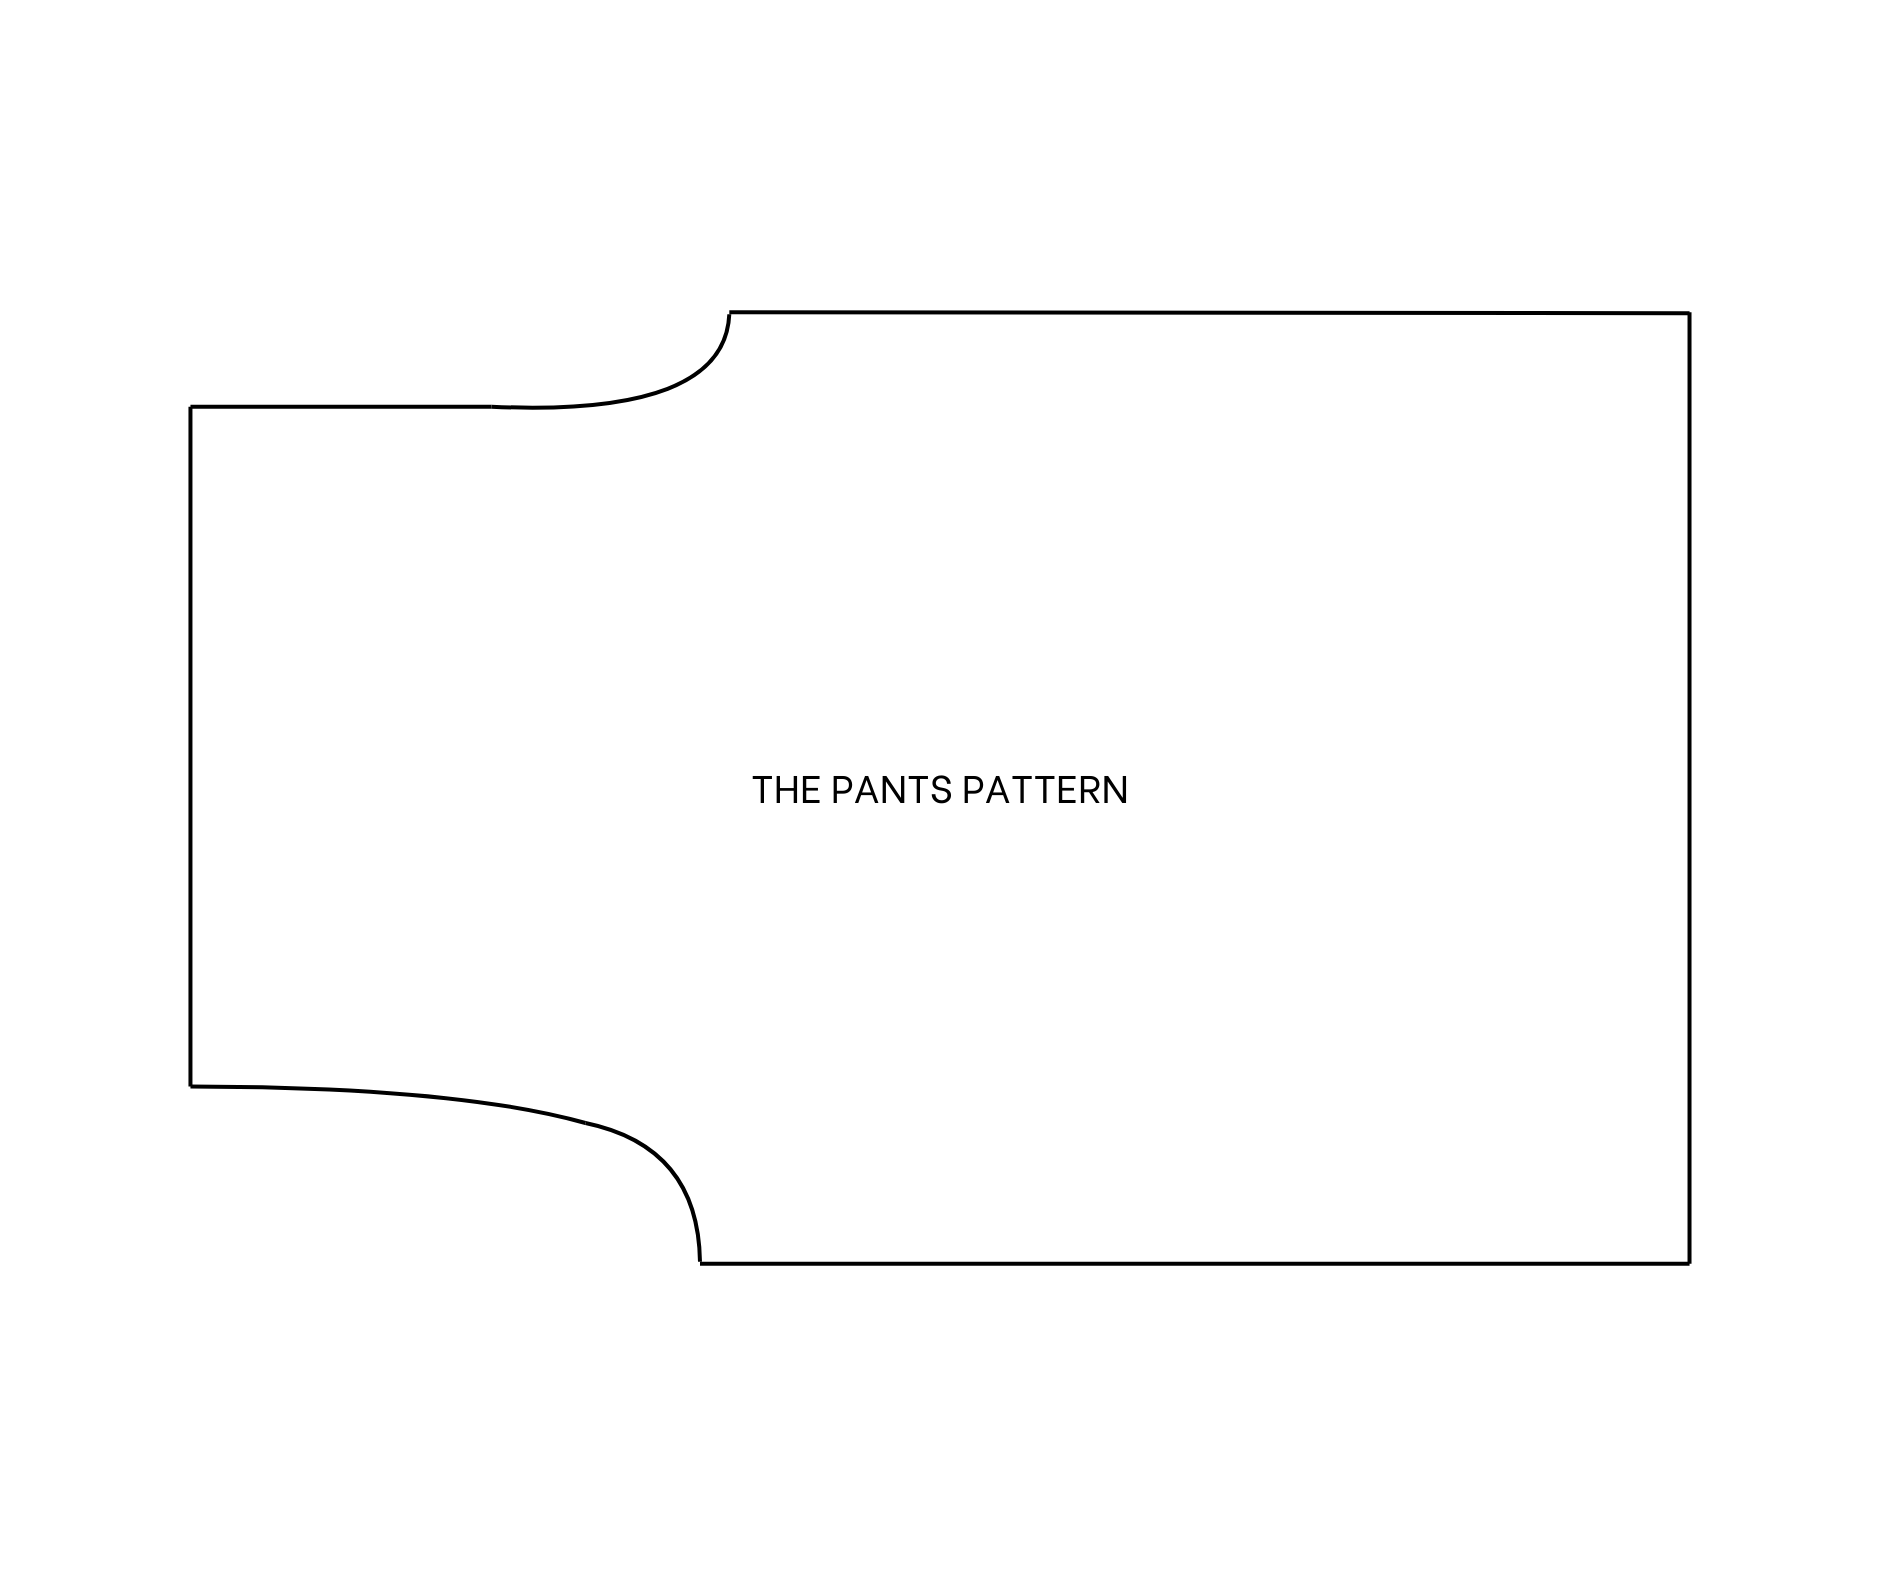
Then, draw a rectangle with 70 cm width (which is 1.5 times a half of the hip size) and 110 cm length (which is the length from your belly button to over your ankle).
At the waist line, mark at 12 cm inside, then draw a straight line.
At the length line next to it, mark at 30 cm, which is the width from your belly button to over the crotch.
Then, connect this mark to the mark at the width line by a curved line. This will be the crotch area of the back pants.
At the other side, do quite similar to create the front of the pants, but instead of marking at 12 cm, just mark at 8 cm only.
Make sure to check the width between two crotch lines will be a half of your hip size plus 4 cm, which is the same with the end of the top so they can be connected together later.
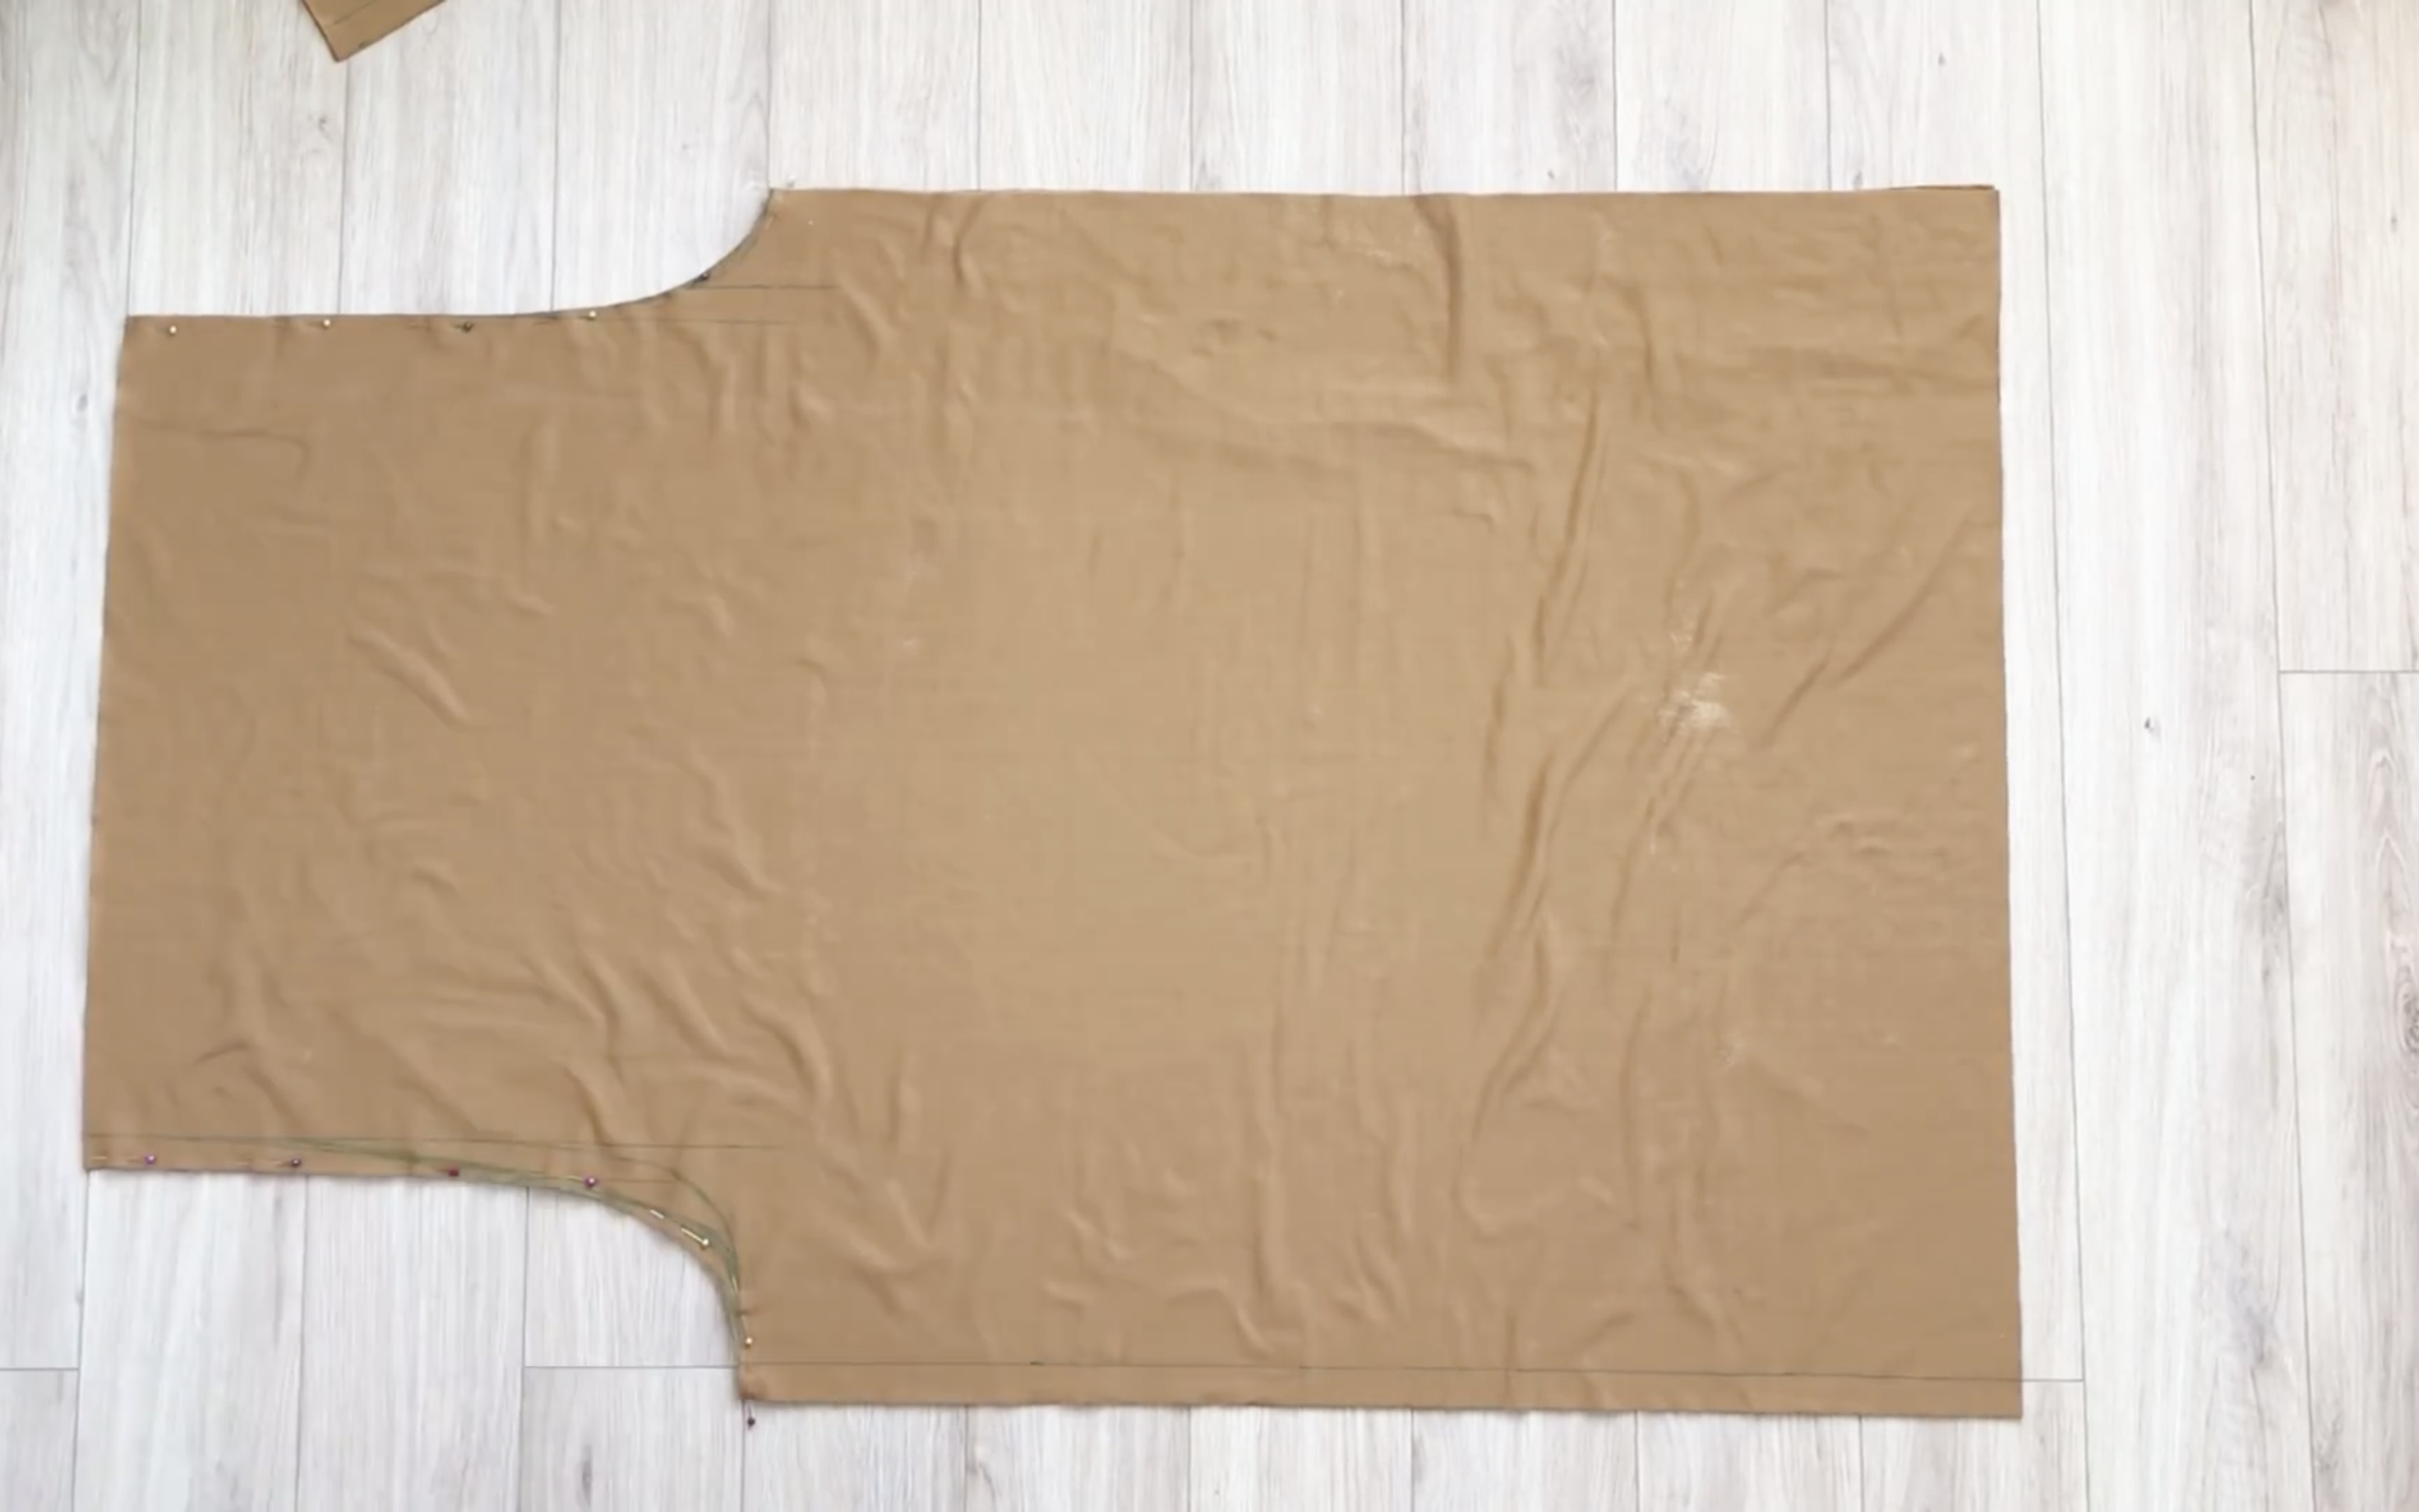
After cutting, connect two pieces of the pants and the crotch line together.
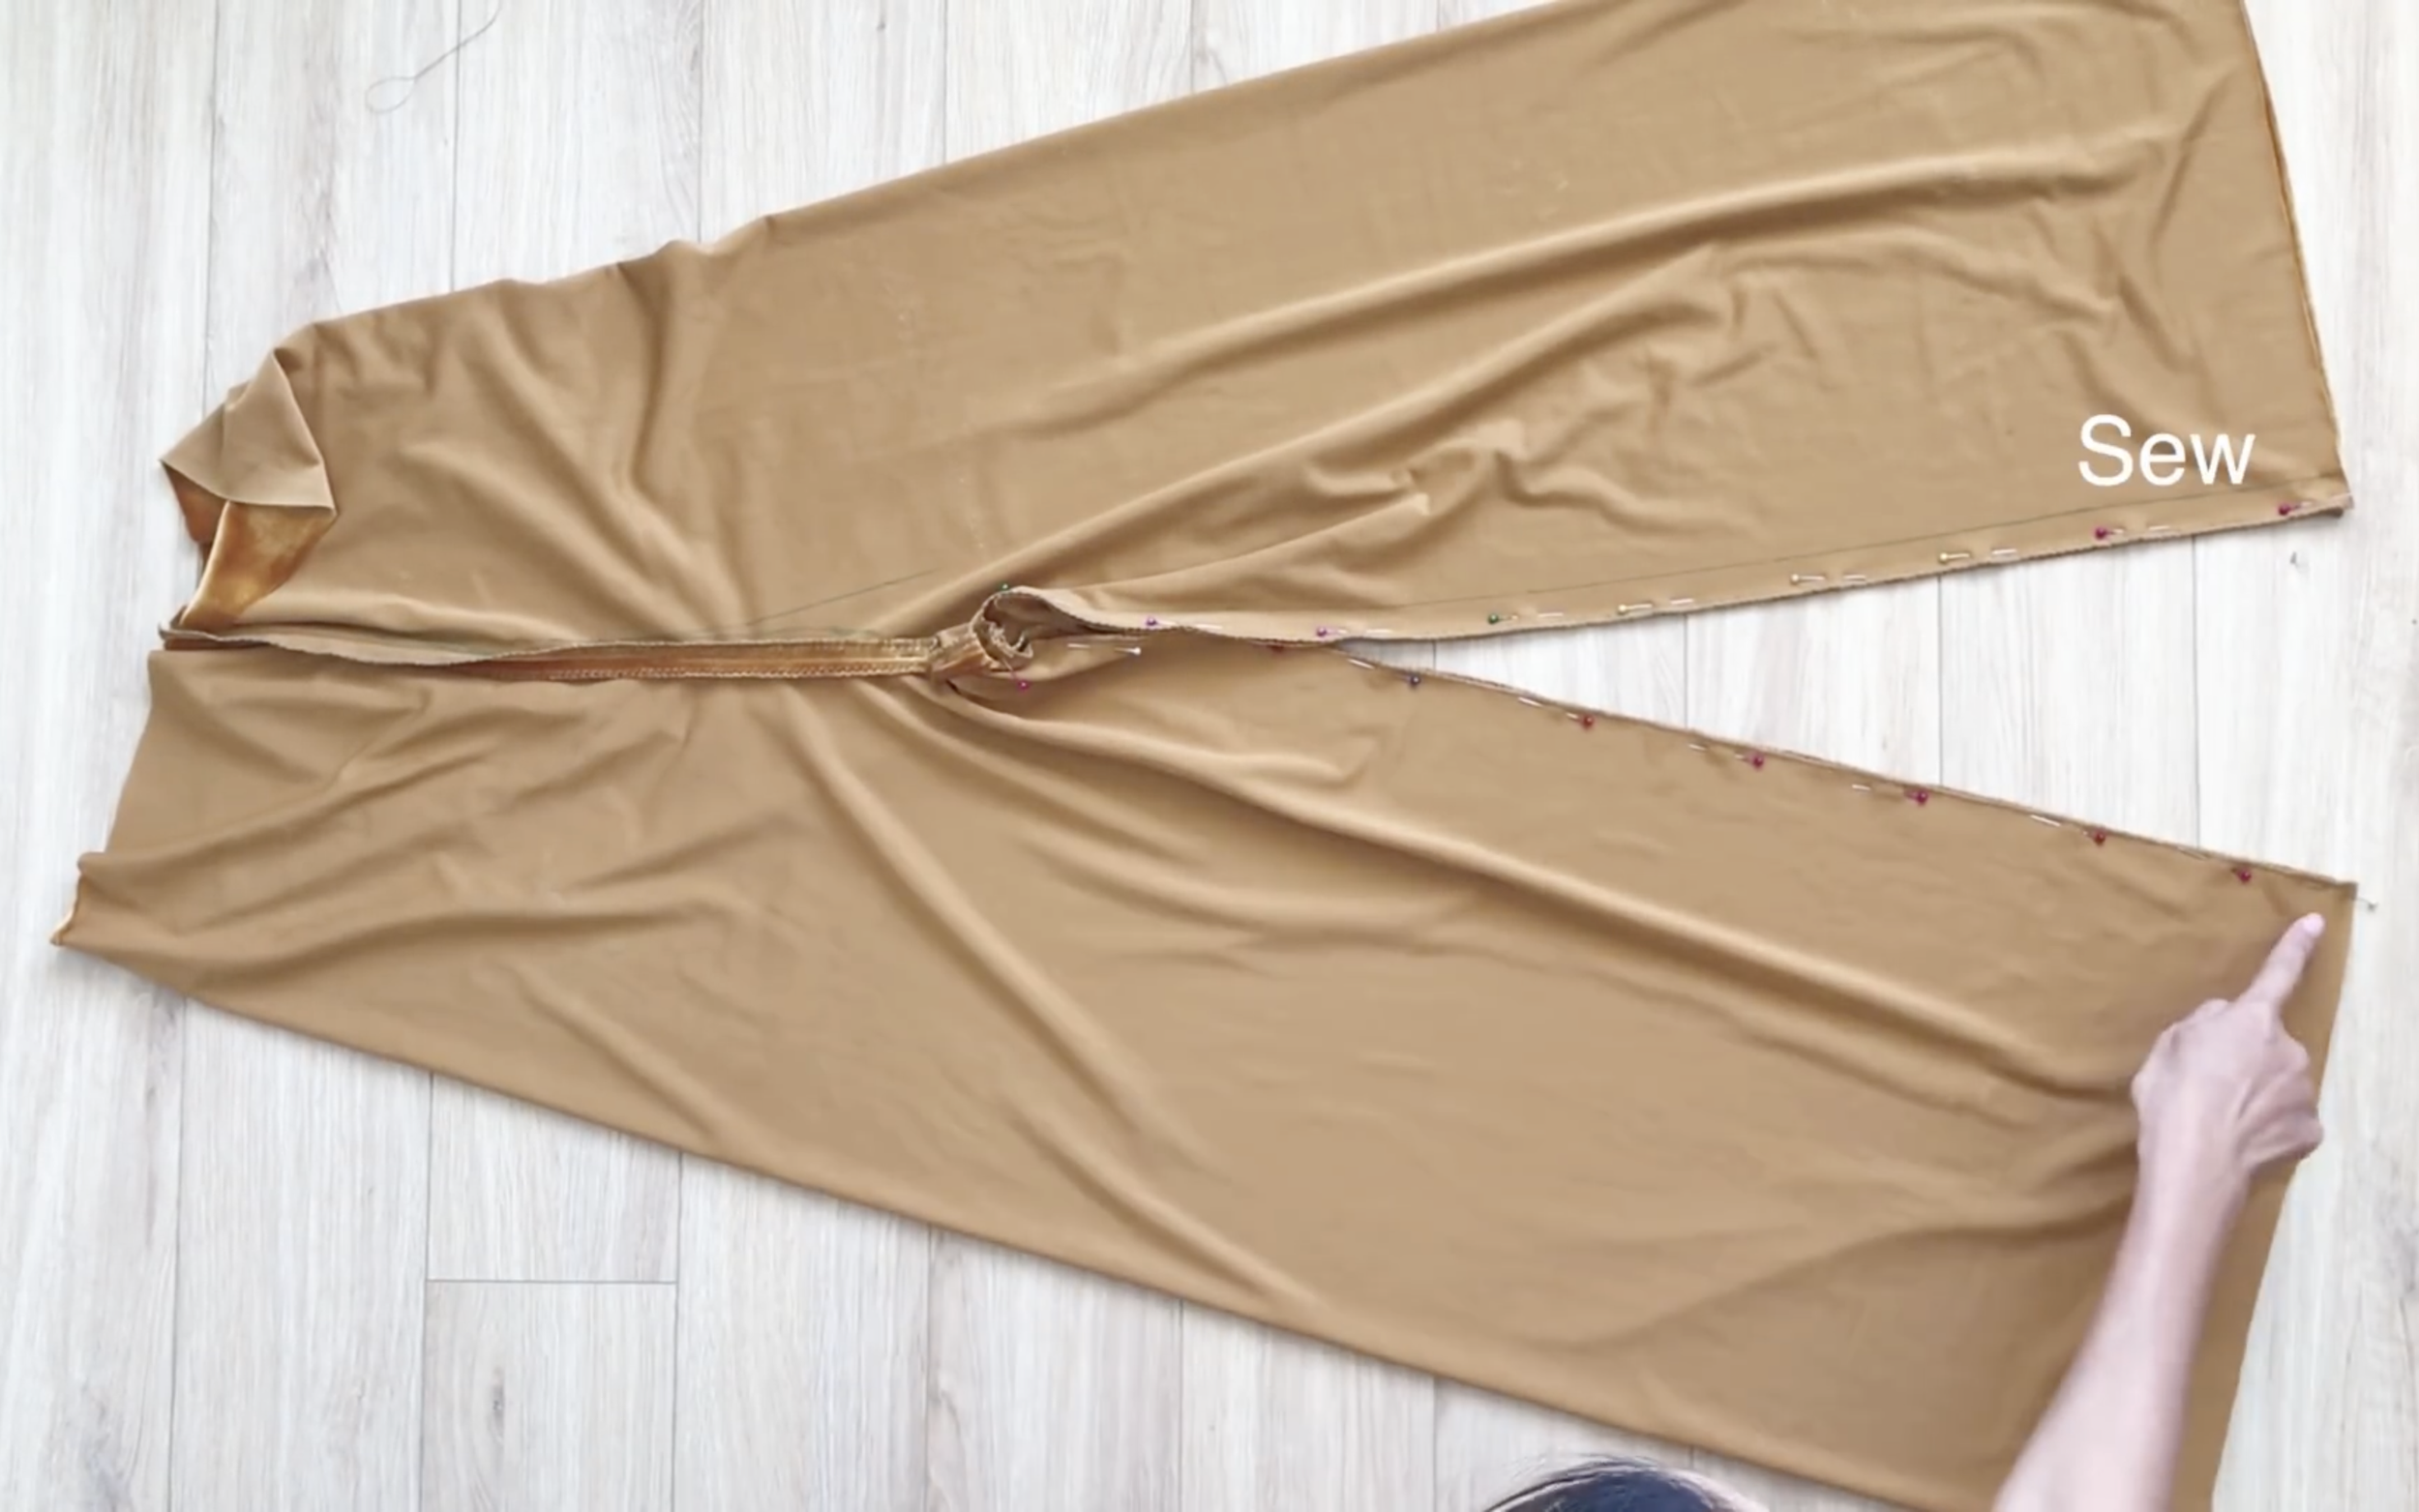
Then connect the inside lines of the legs after that. And the pants of the jumpsuit will be ready.
CONNECTING THE TOP AND THE BOTTOM PART TOGETHER
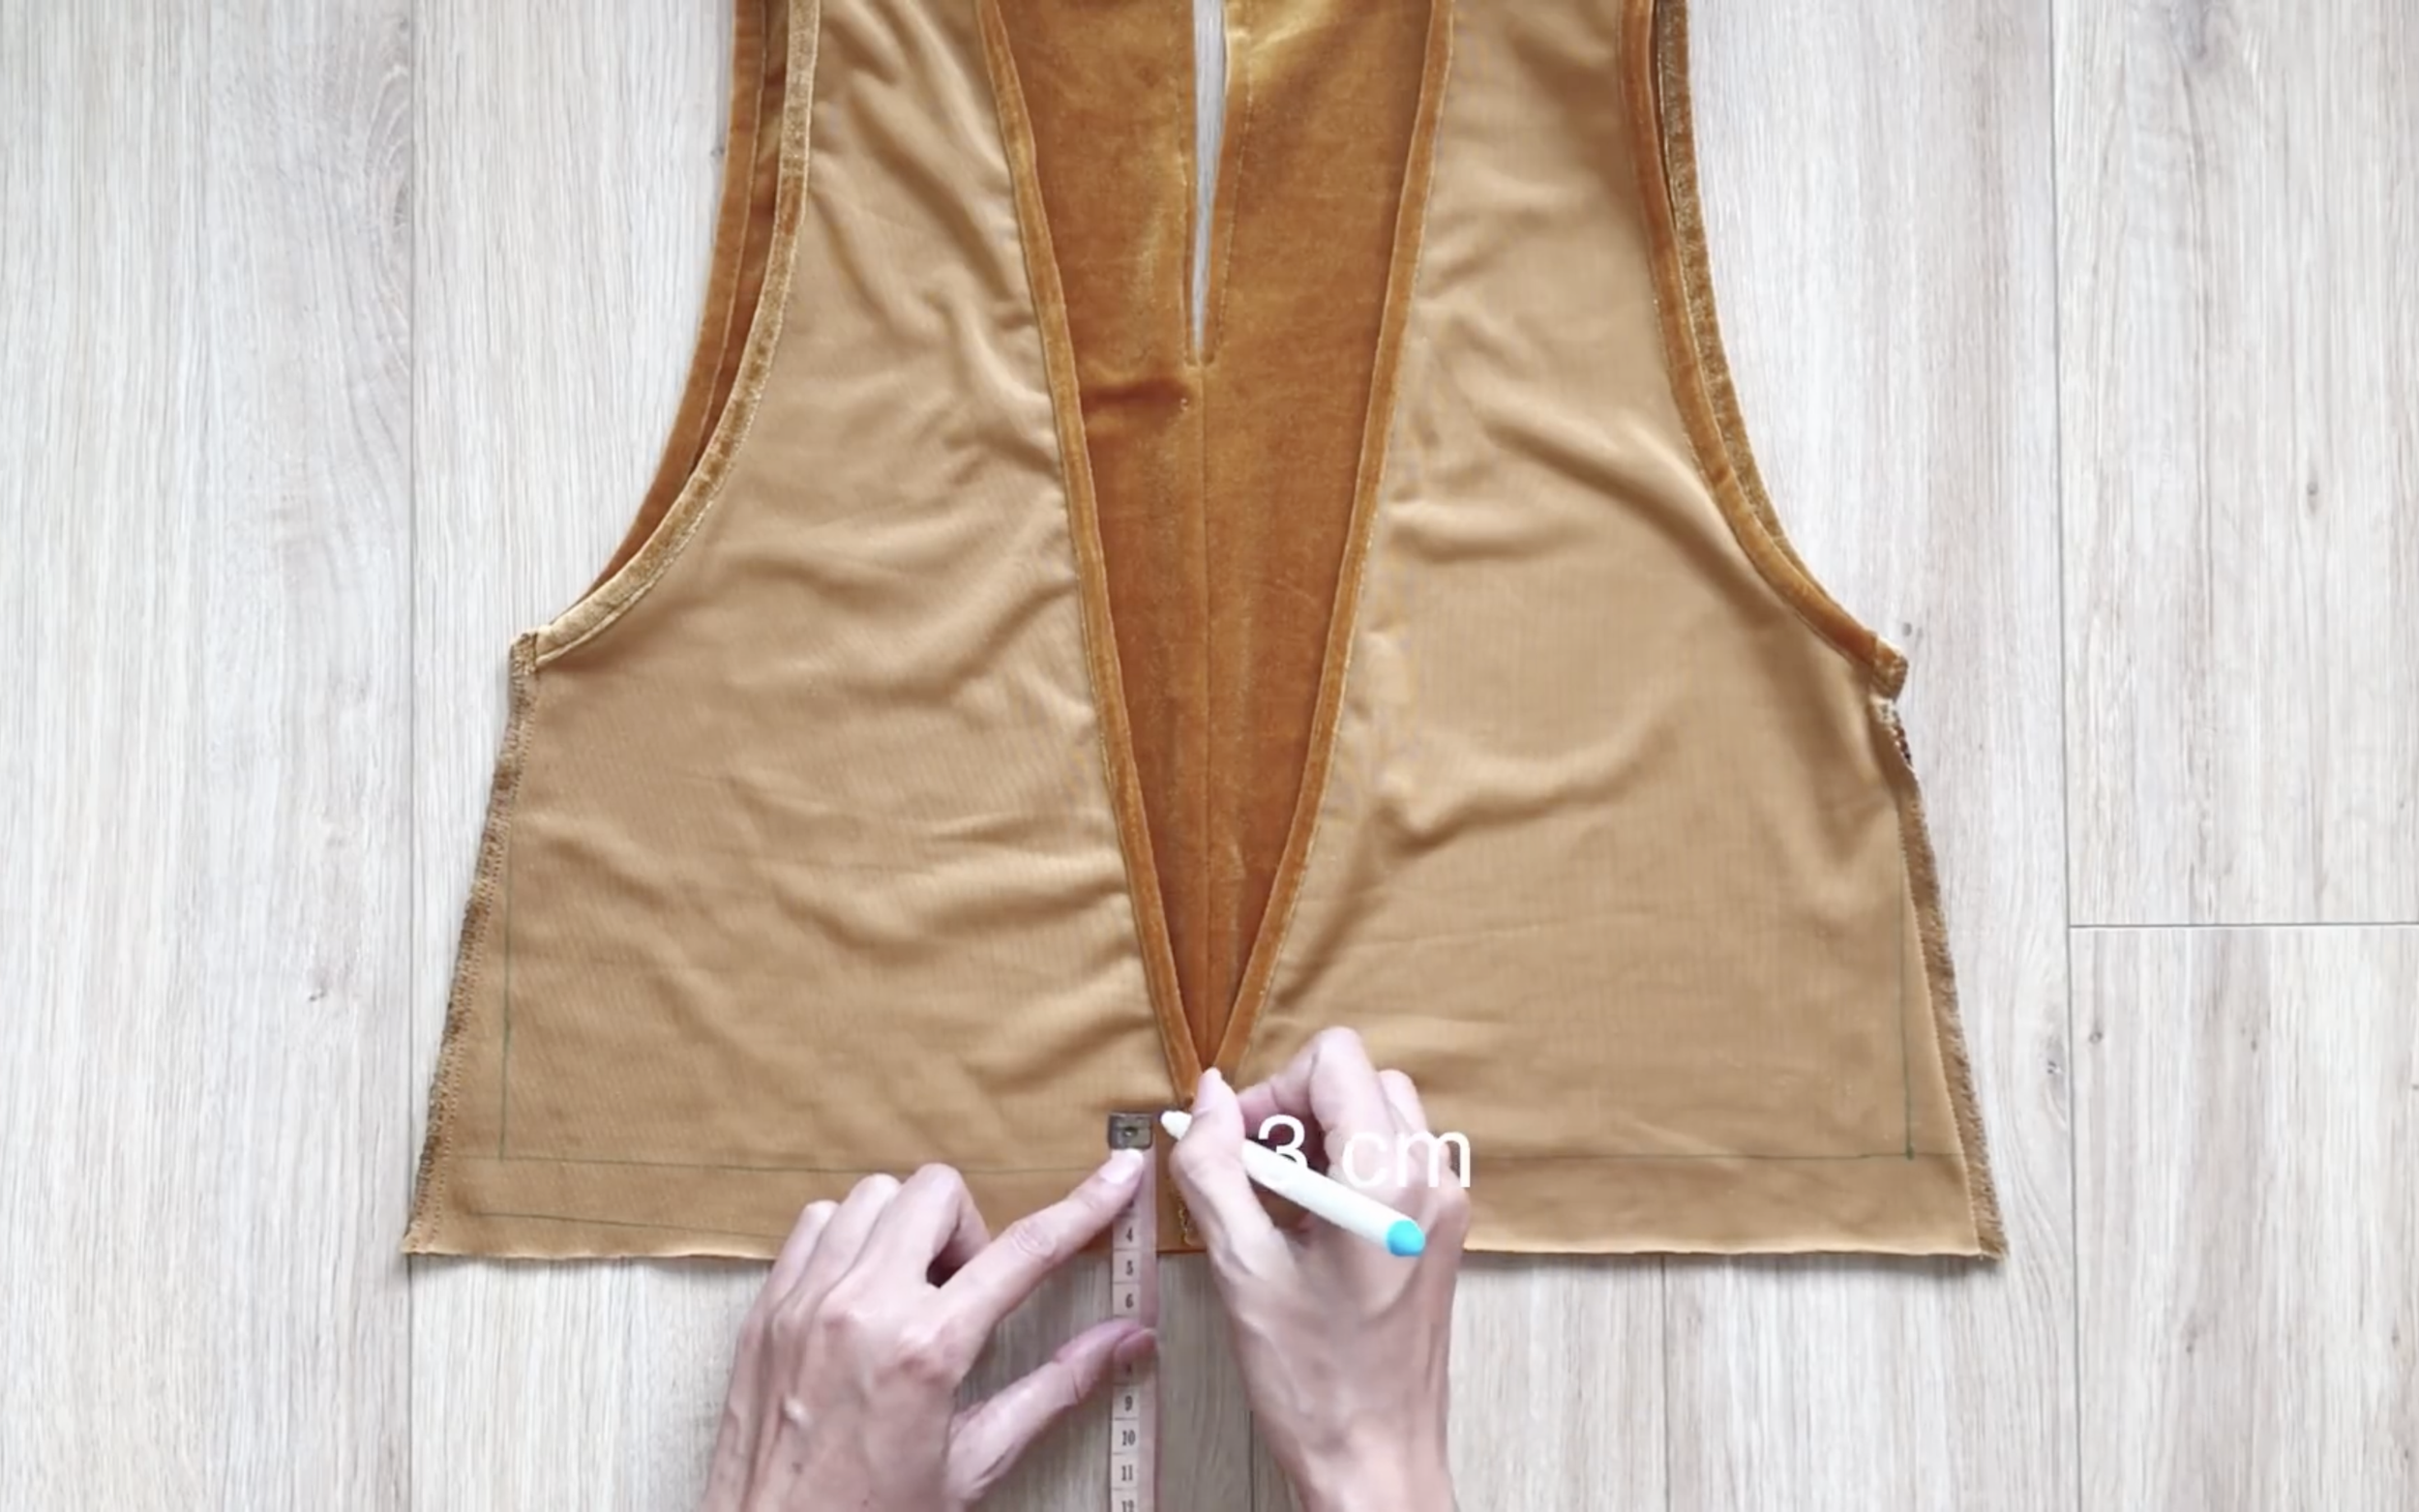
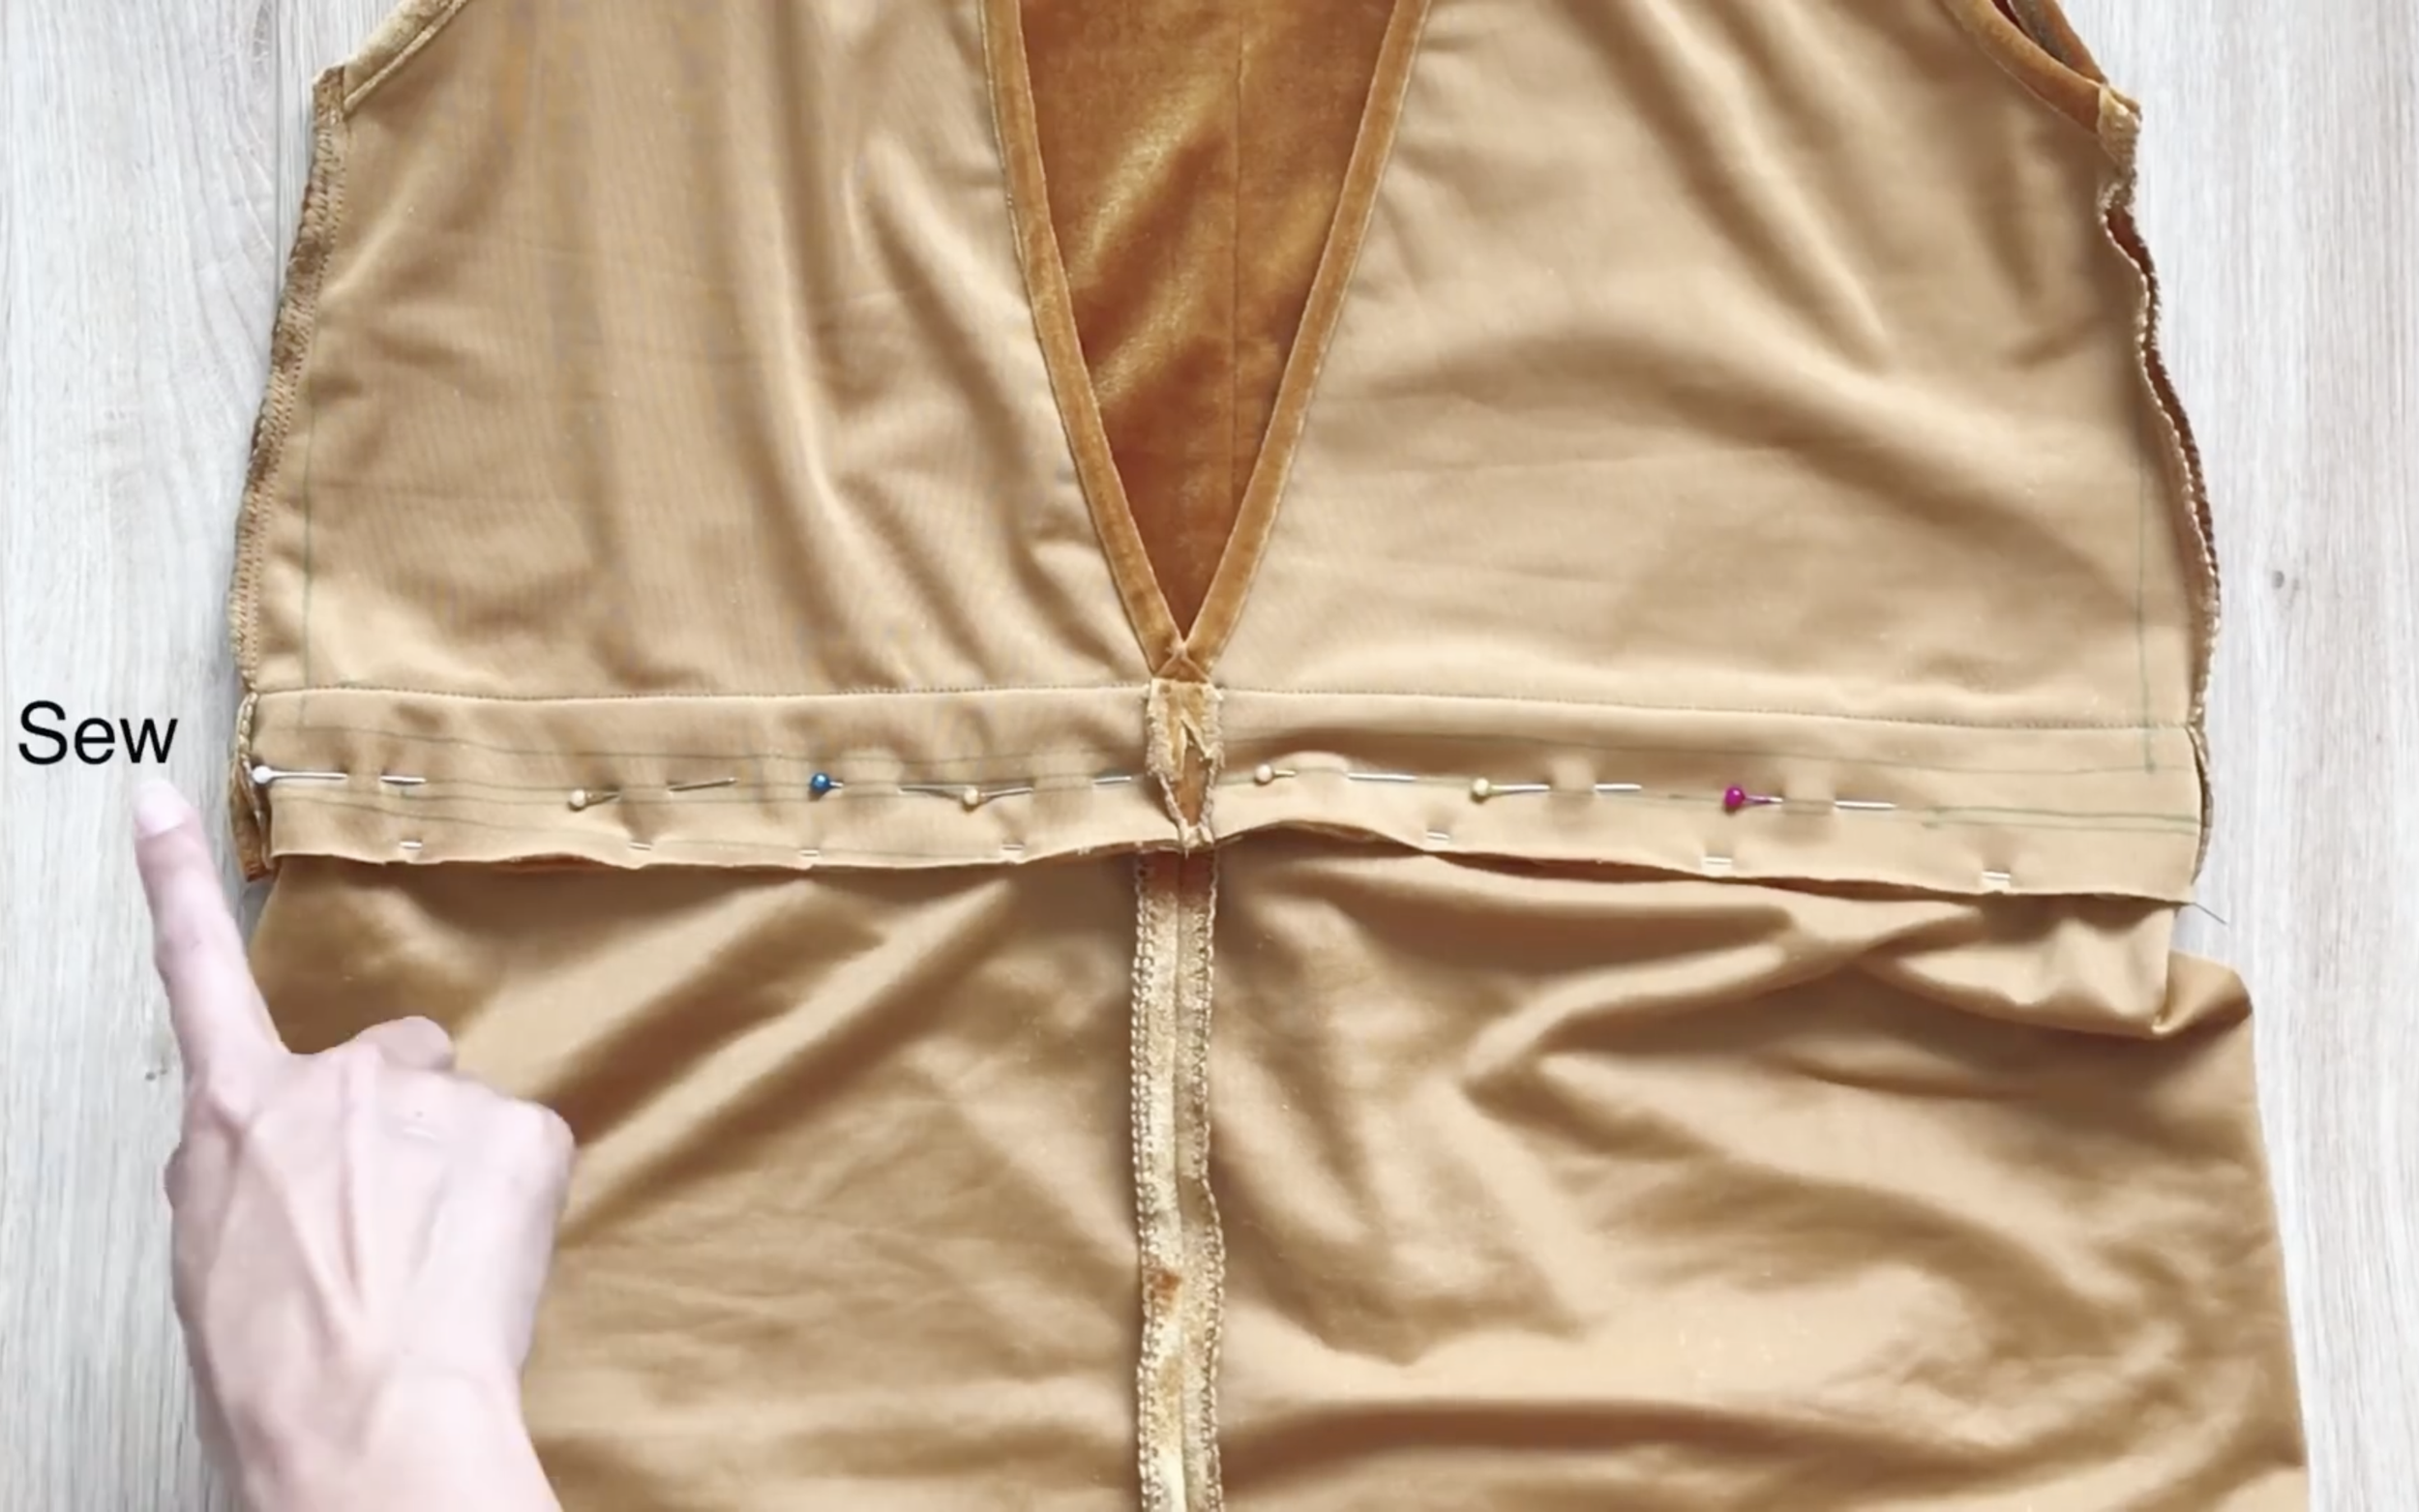
Before sewing the top and bottom sections together, mark 3 cm up from the top edge.
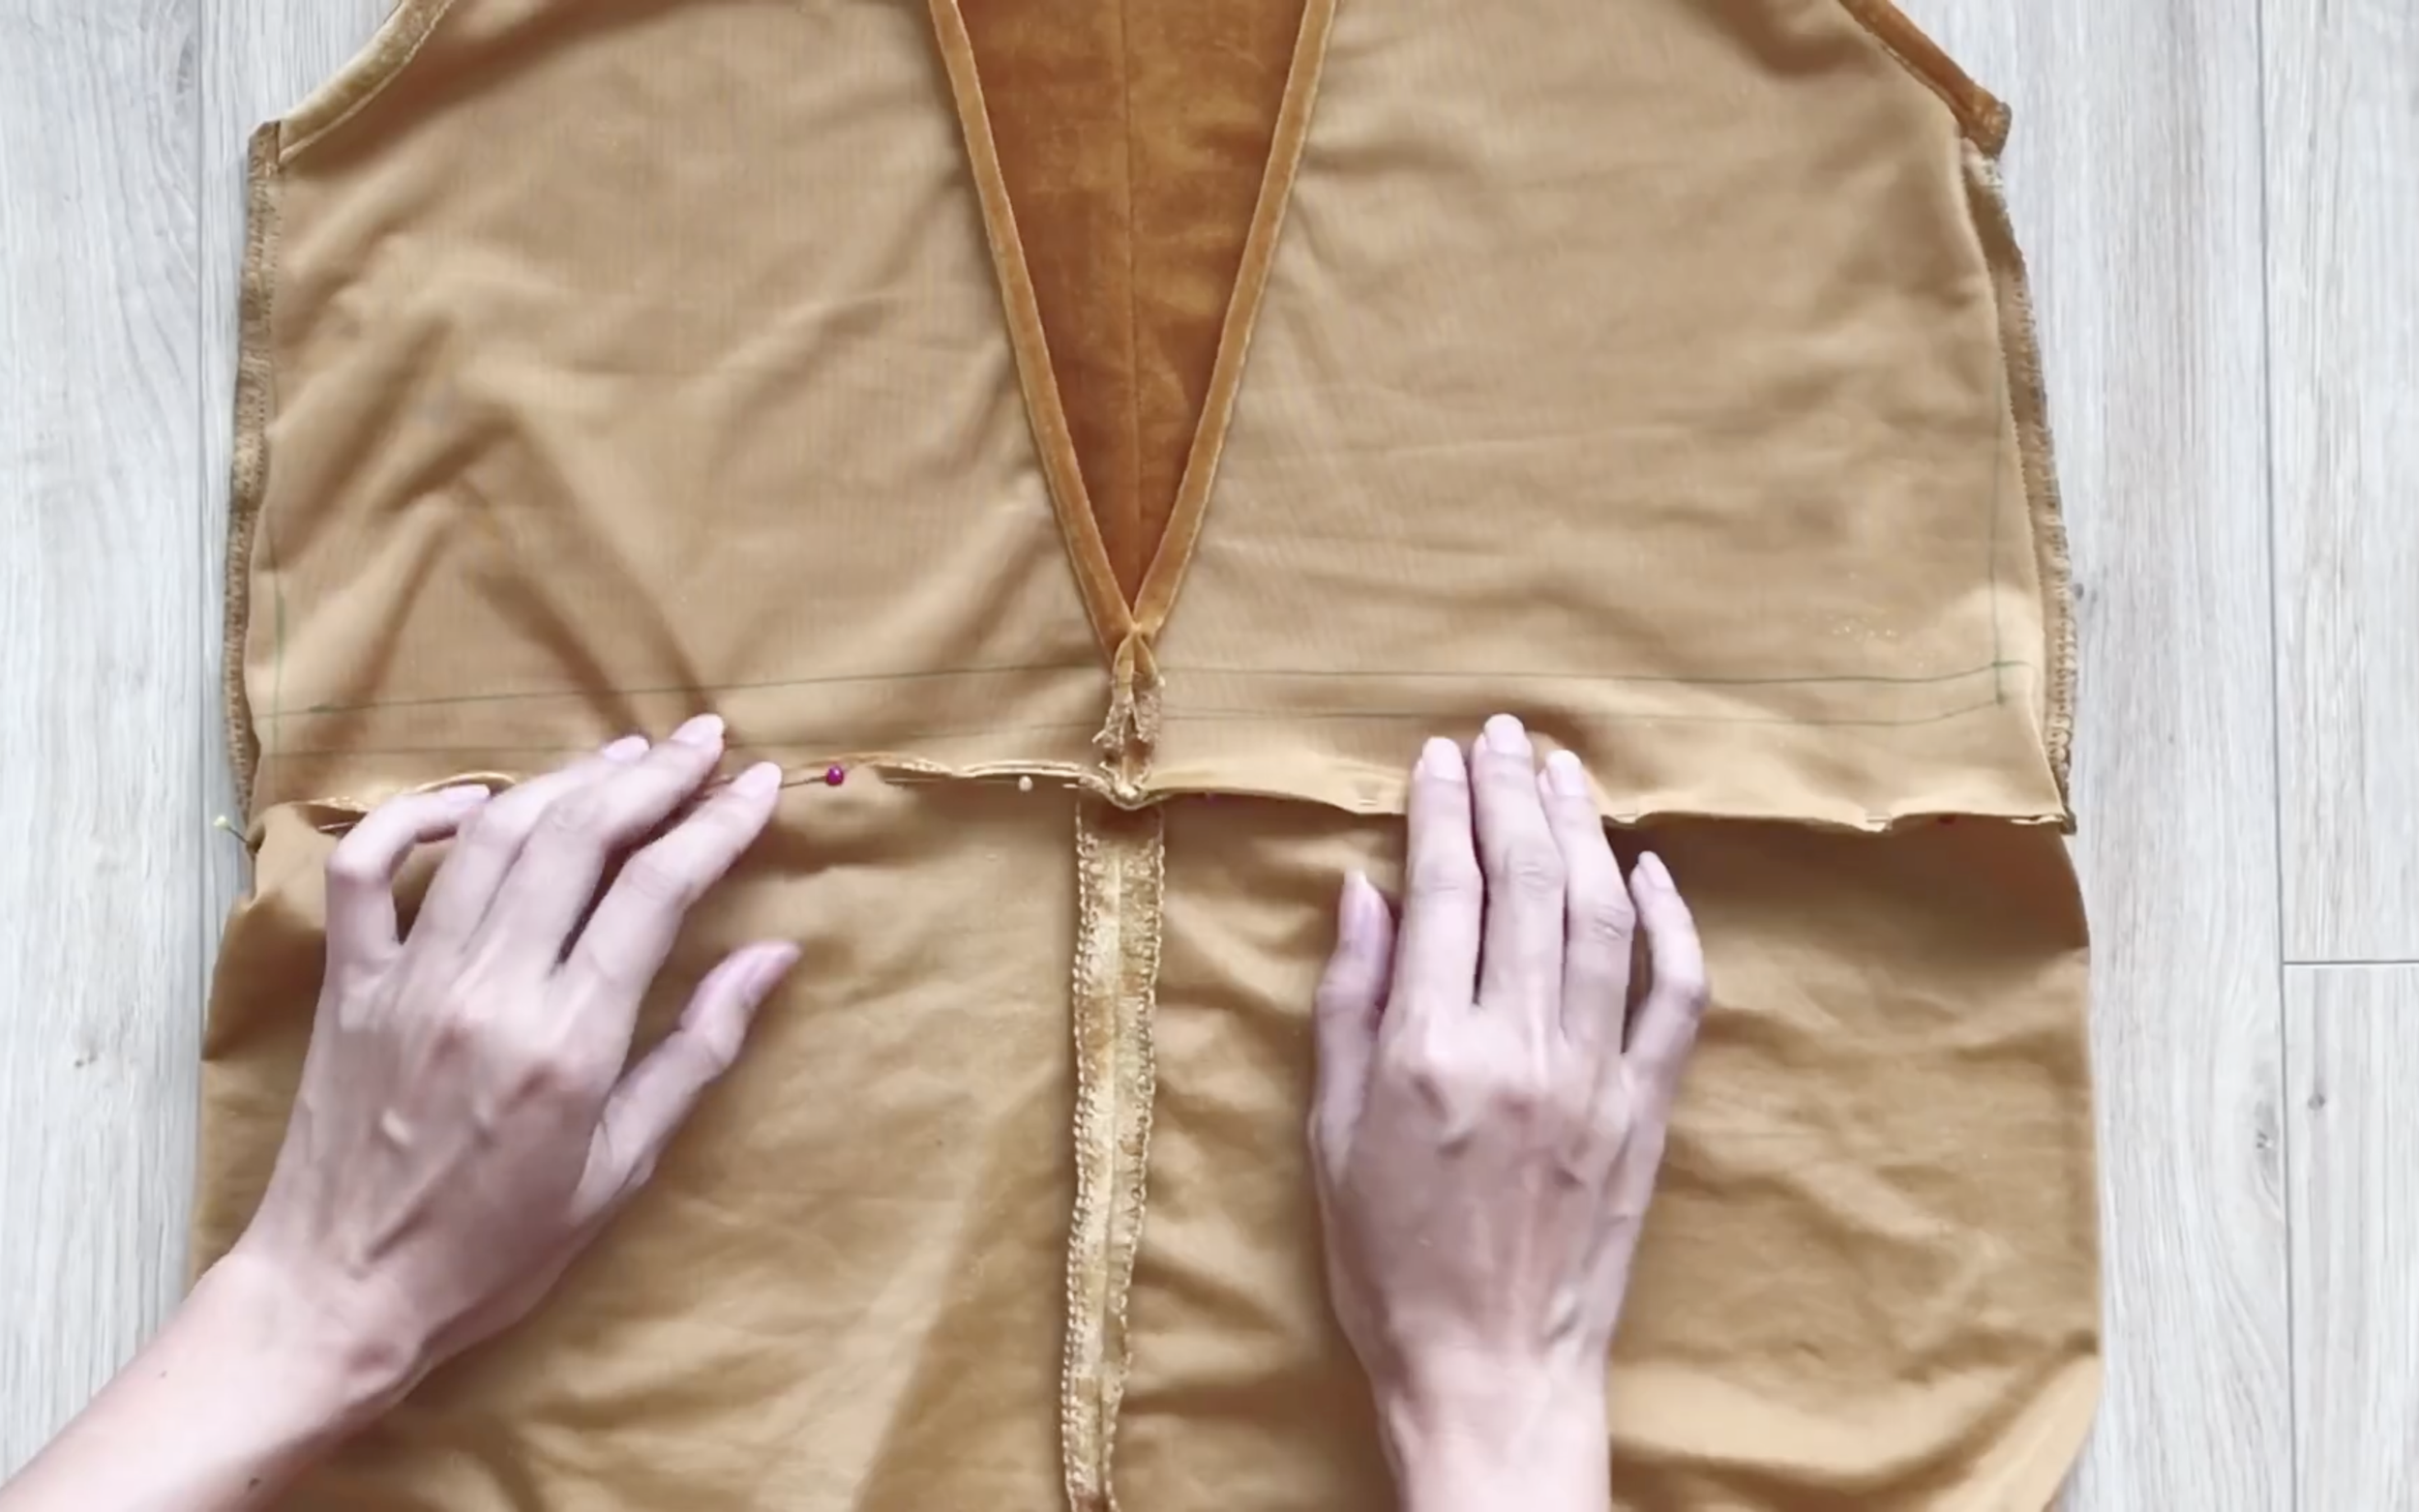
Now, connect the top and the bottom of the jumpsuit together.
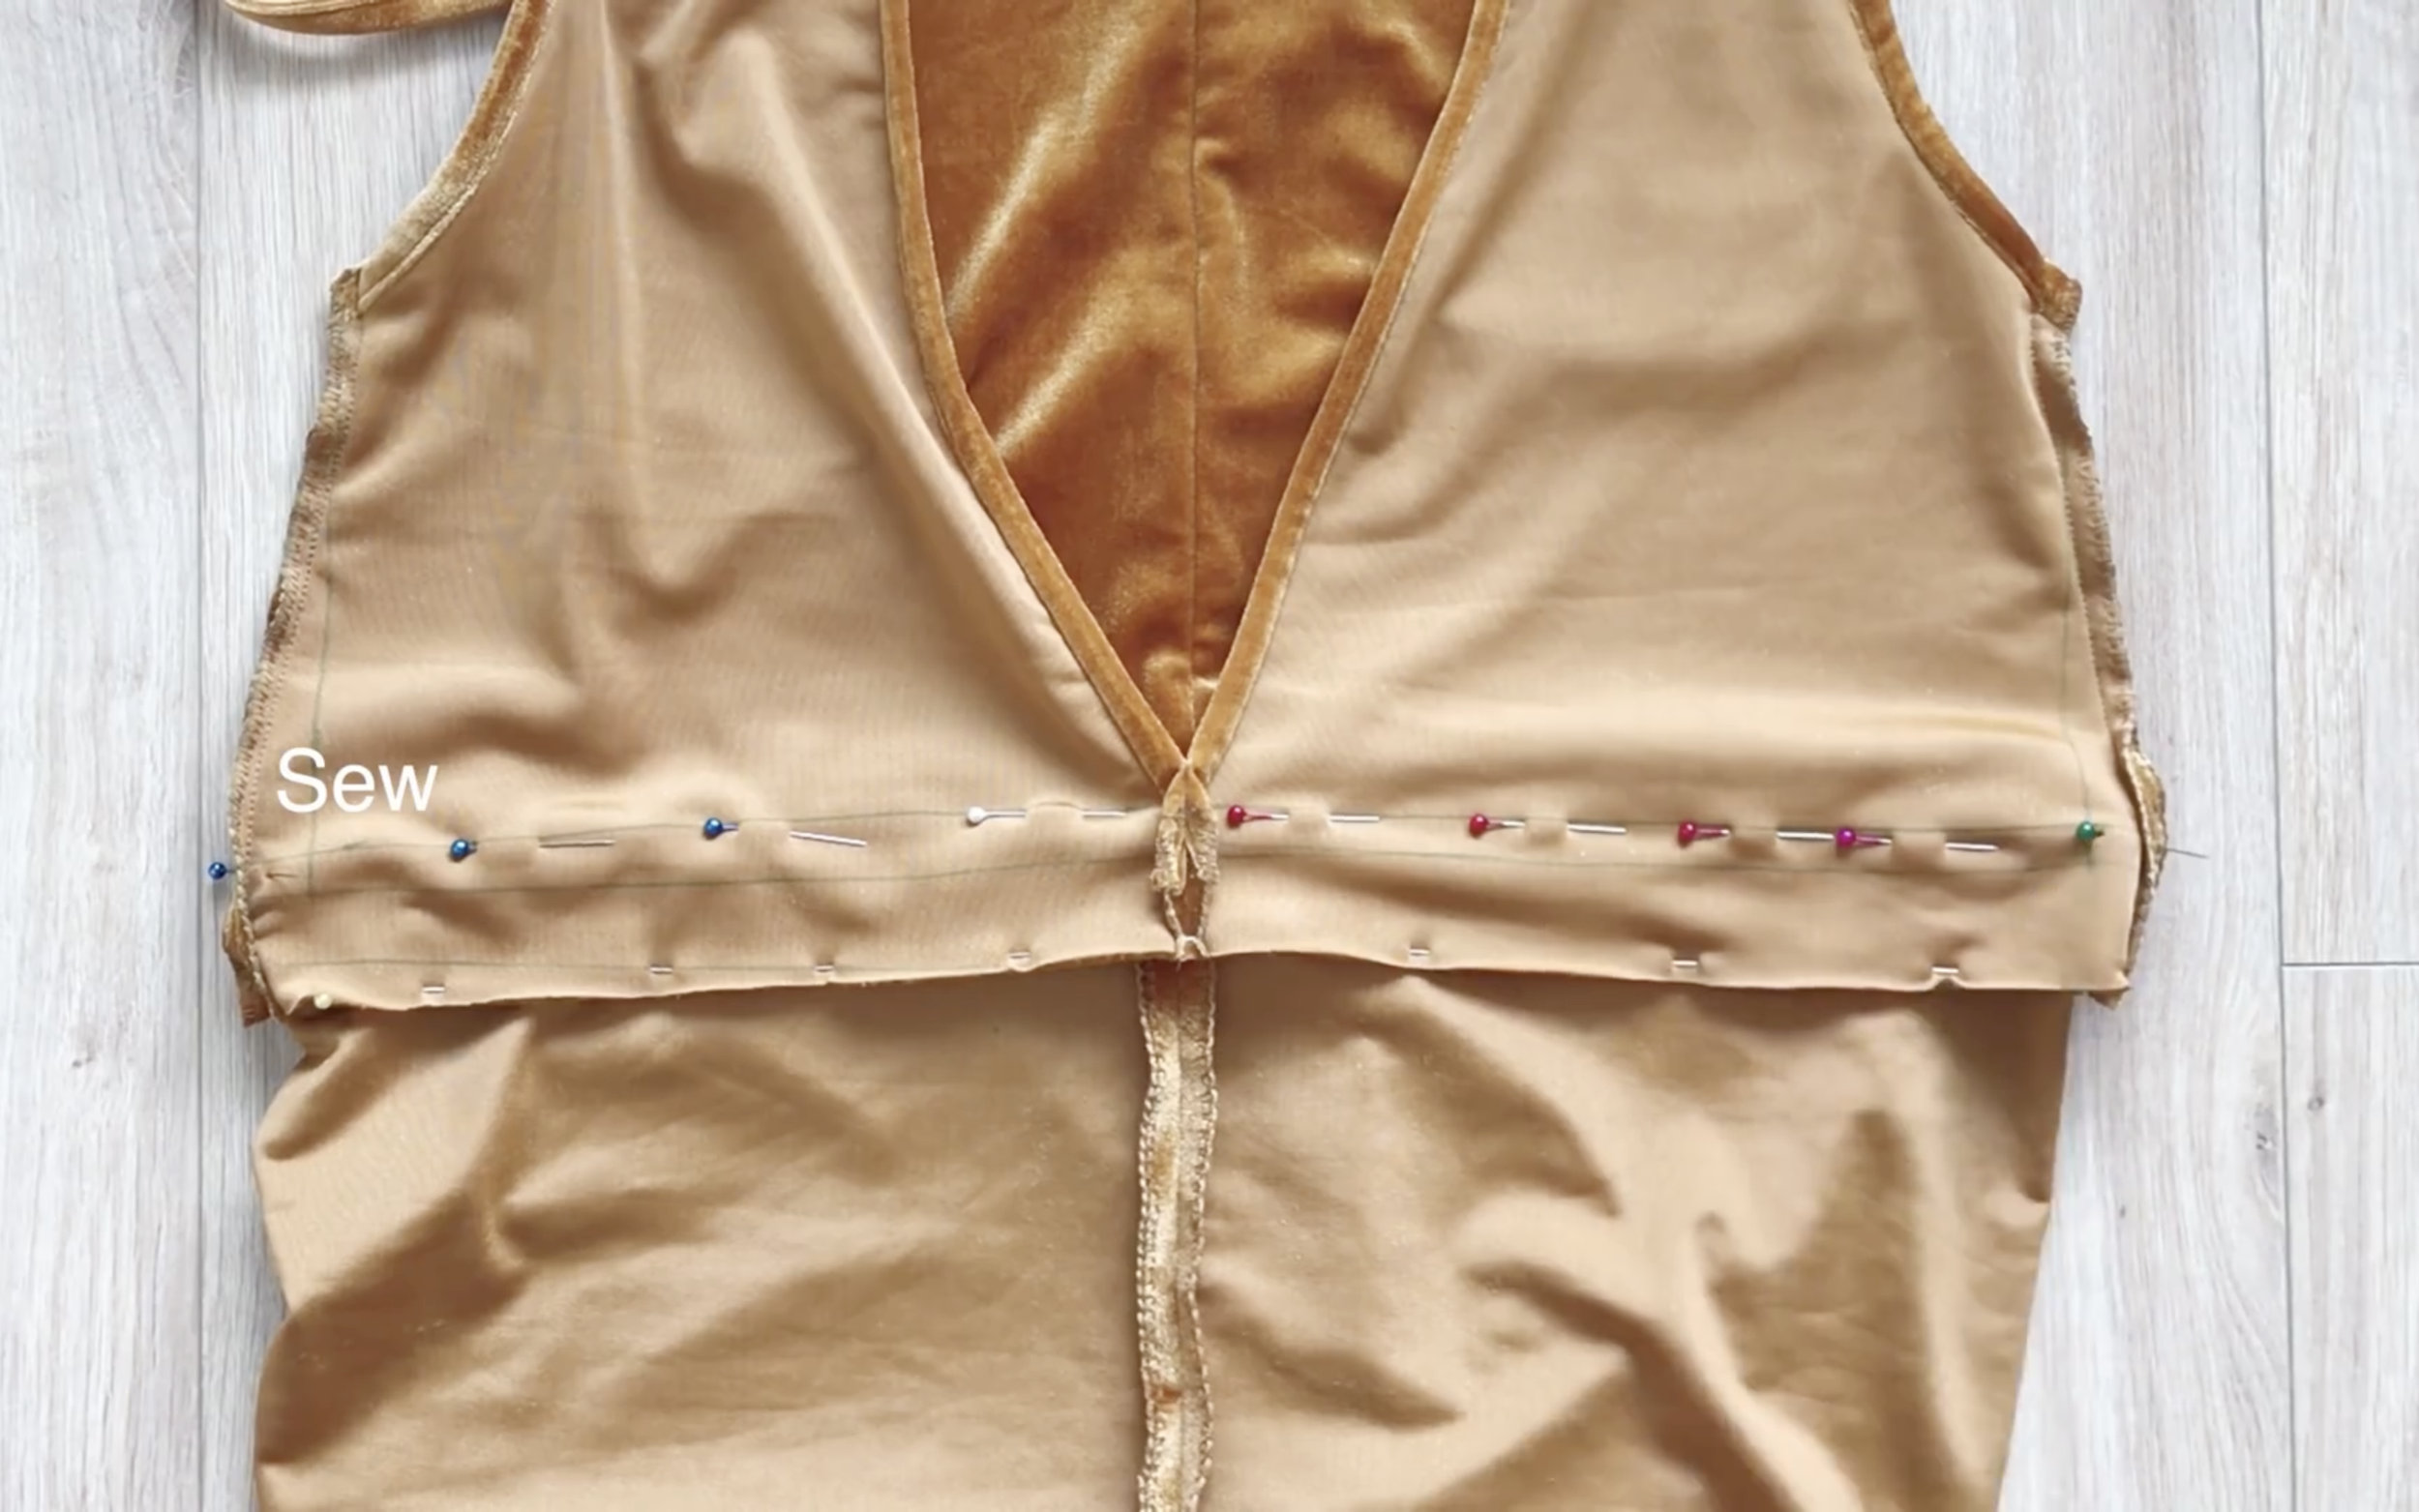
Then sew the first seam at the line that was drawn before that.
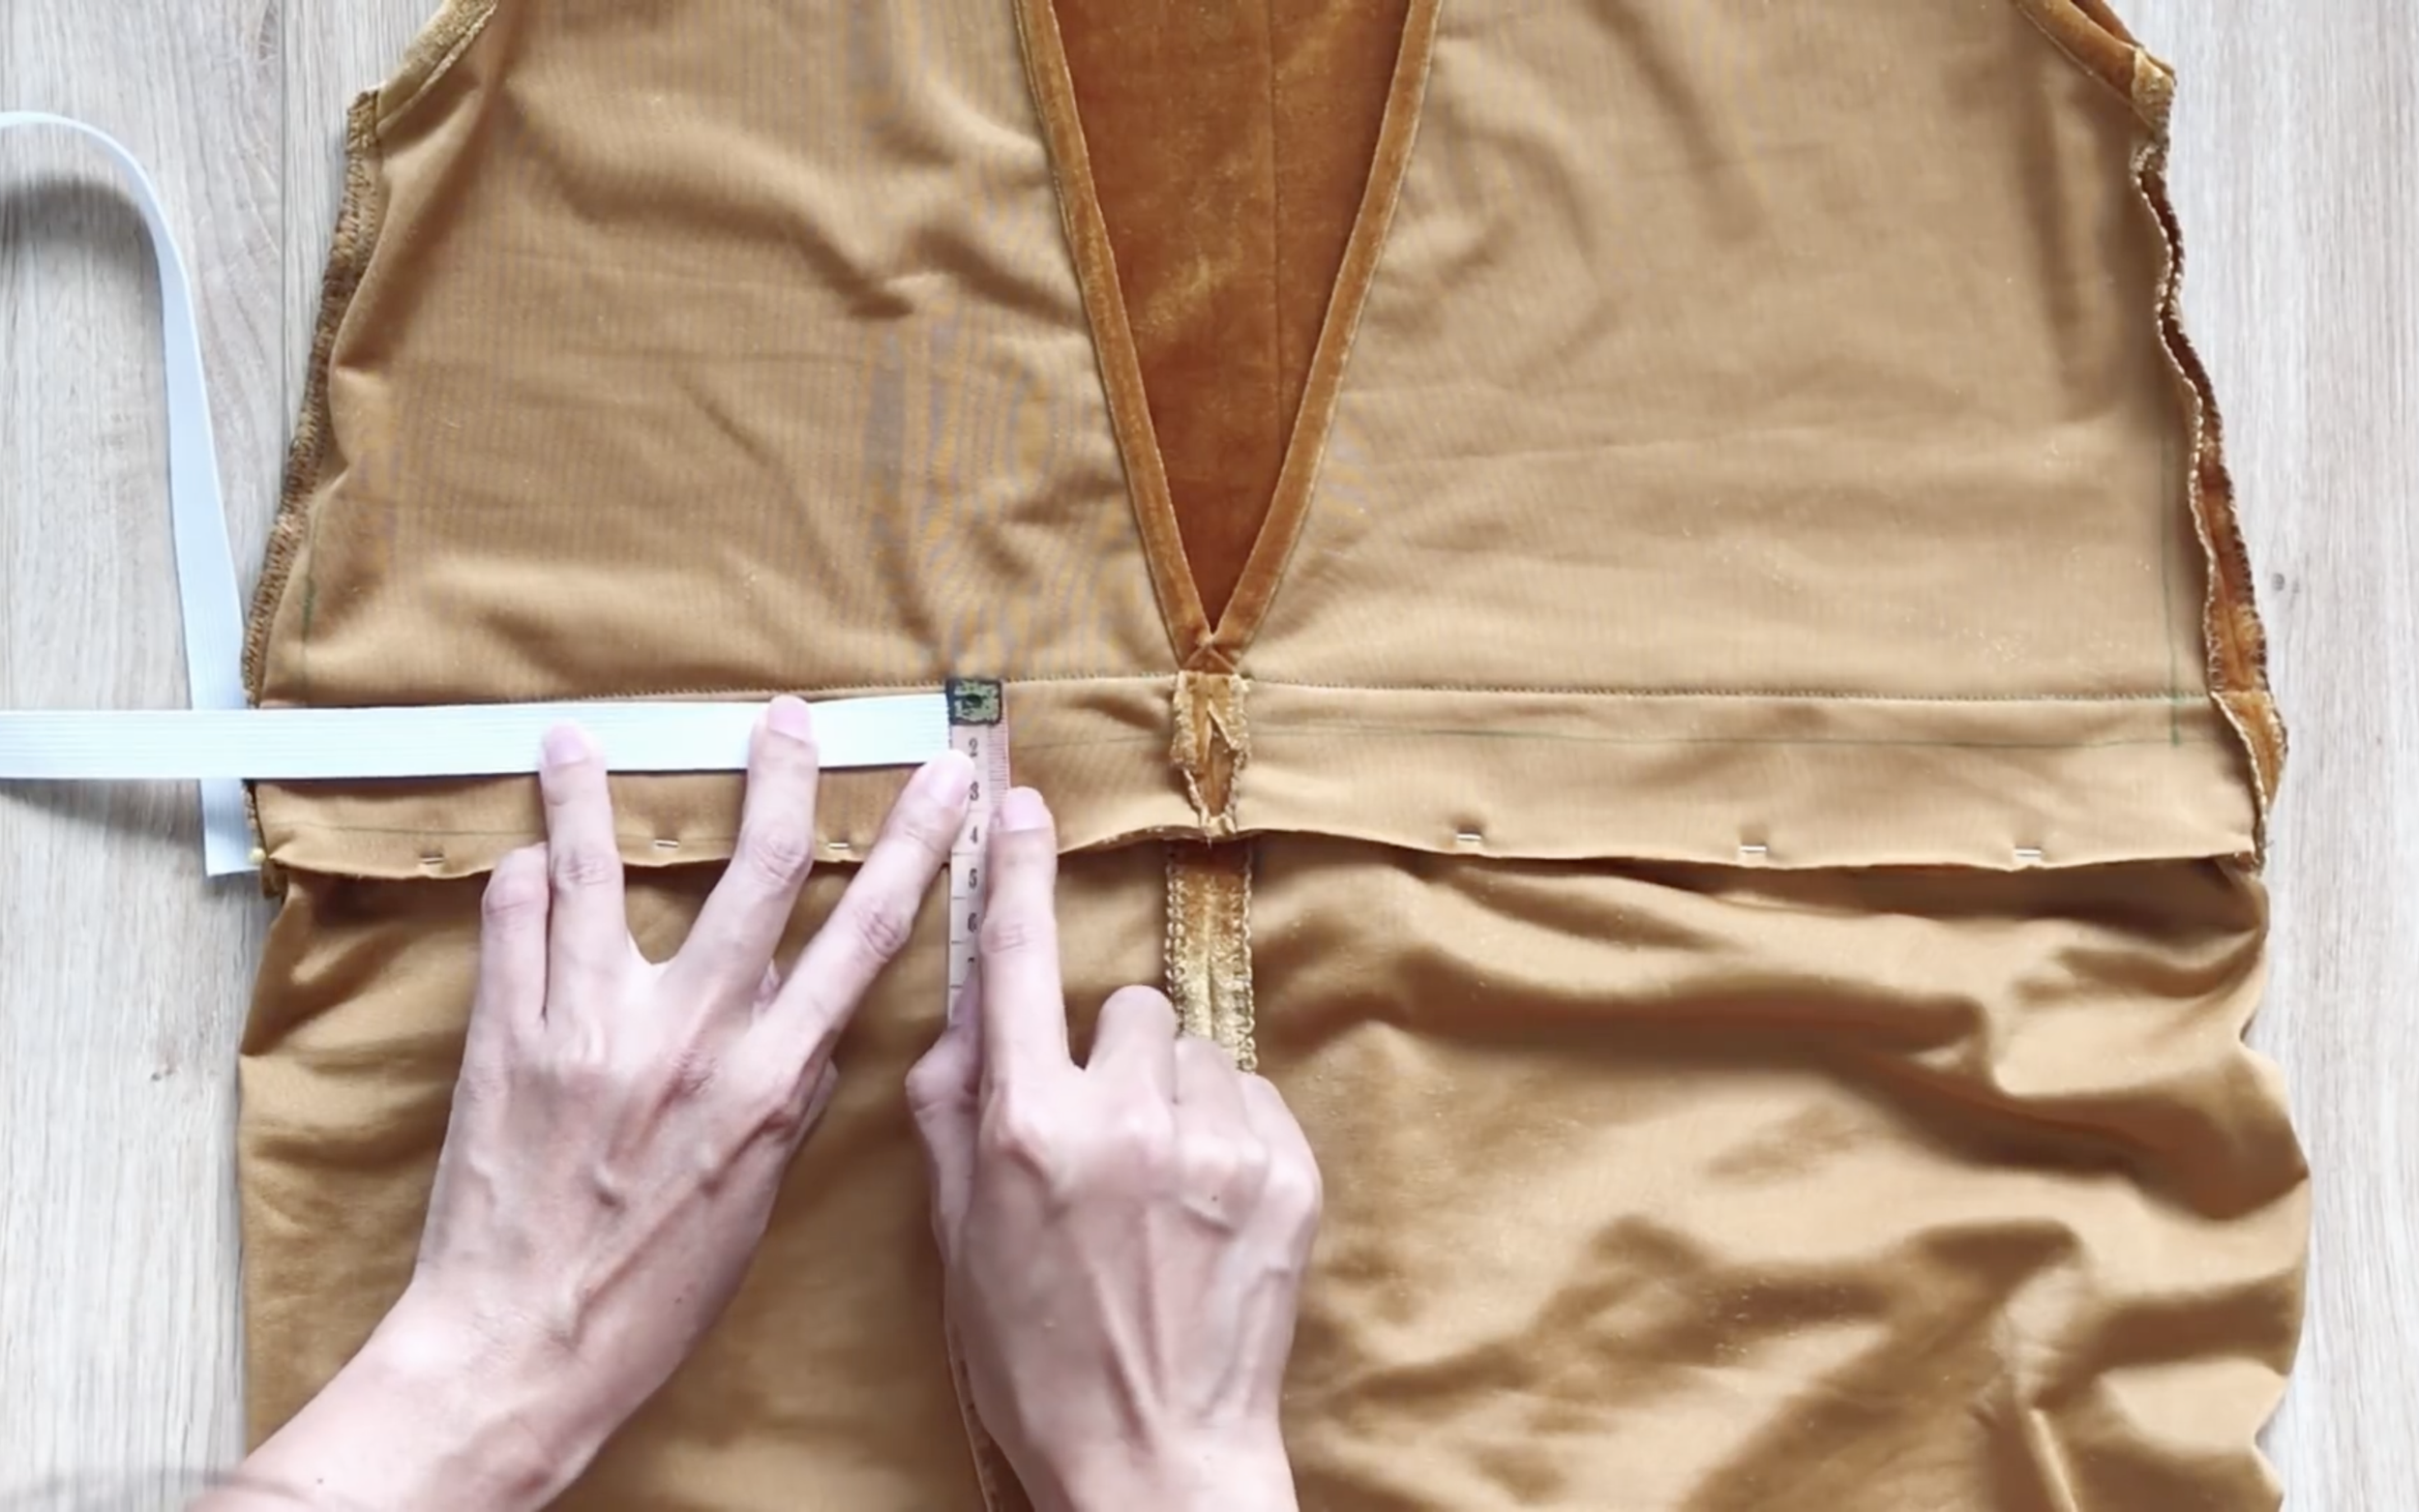
After that, check the width of the elastic band that will be used to know the width of the fabric hole that needs to be created.
Then, make the second seam.
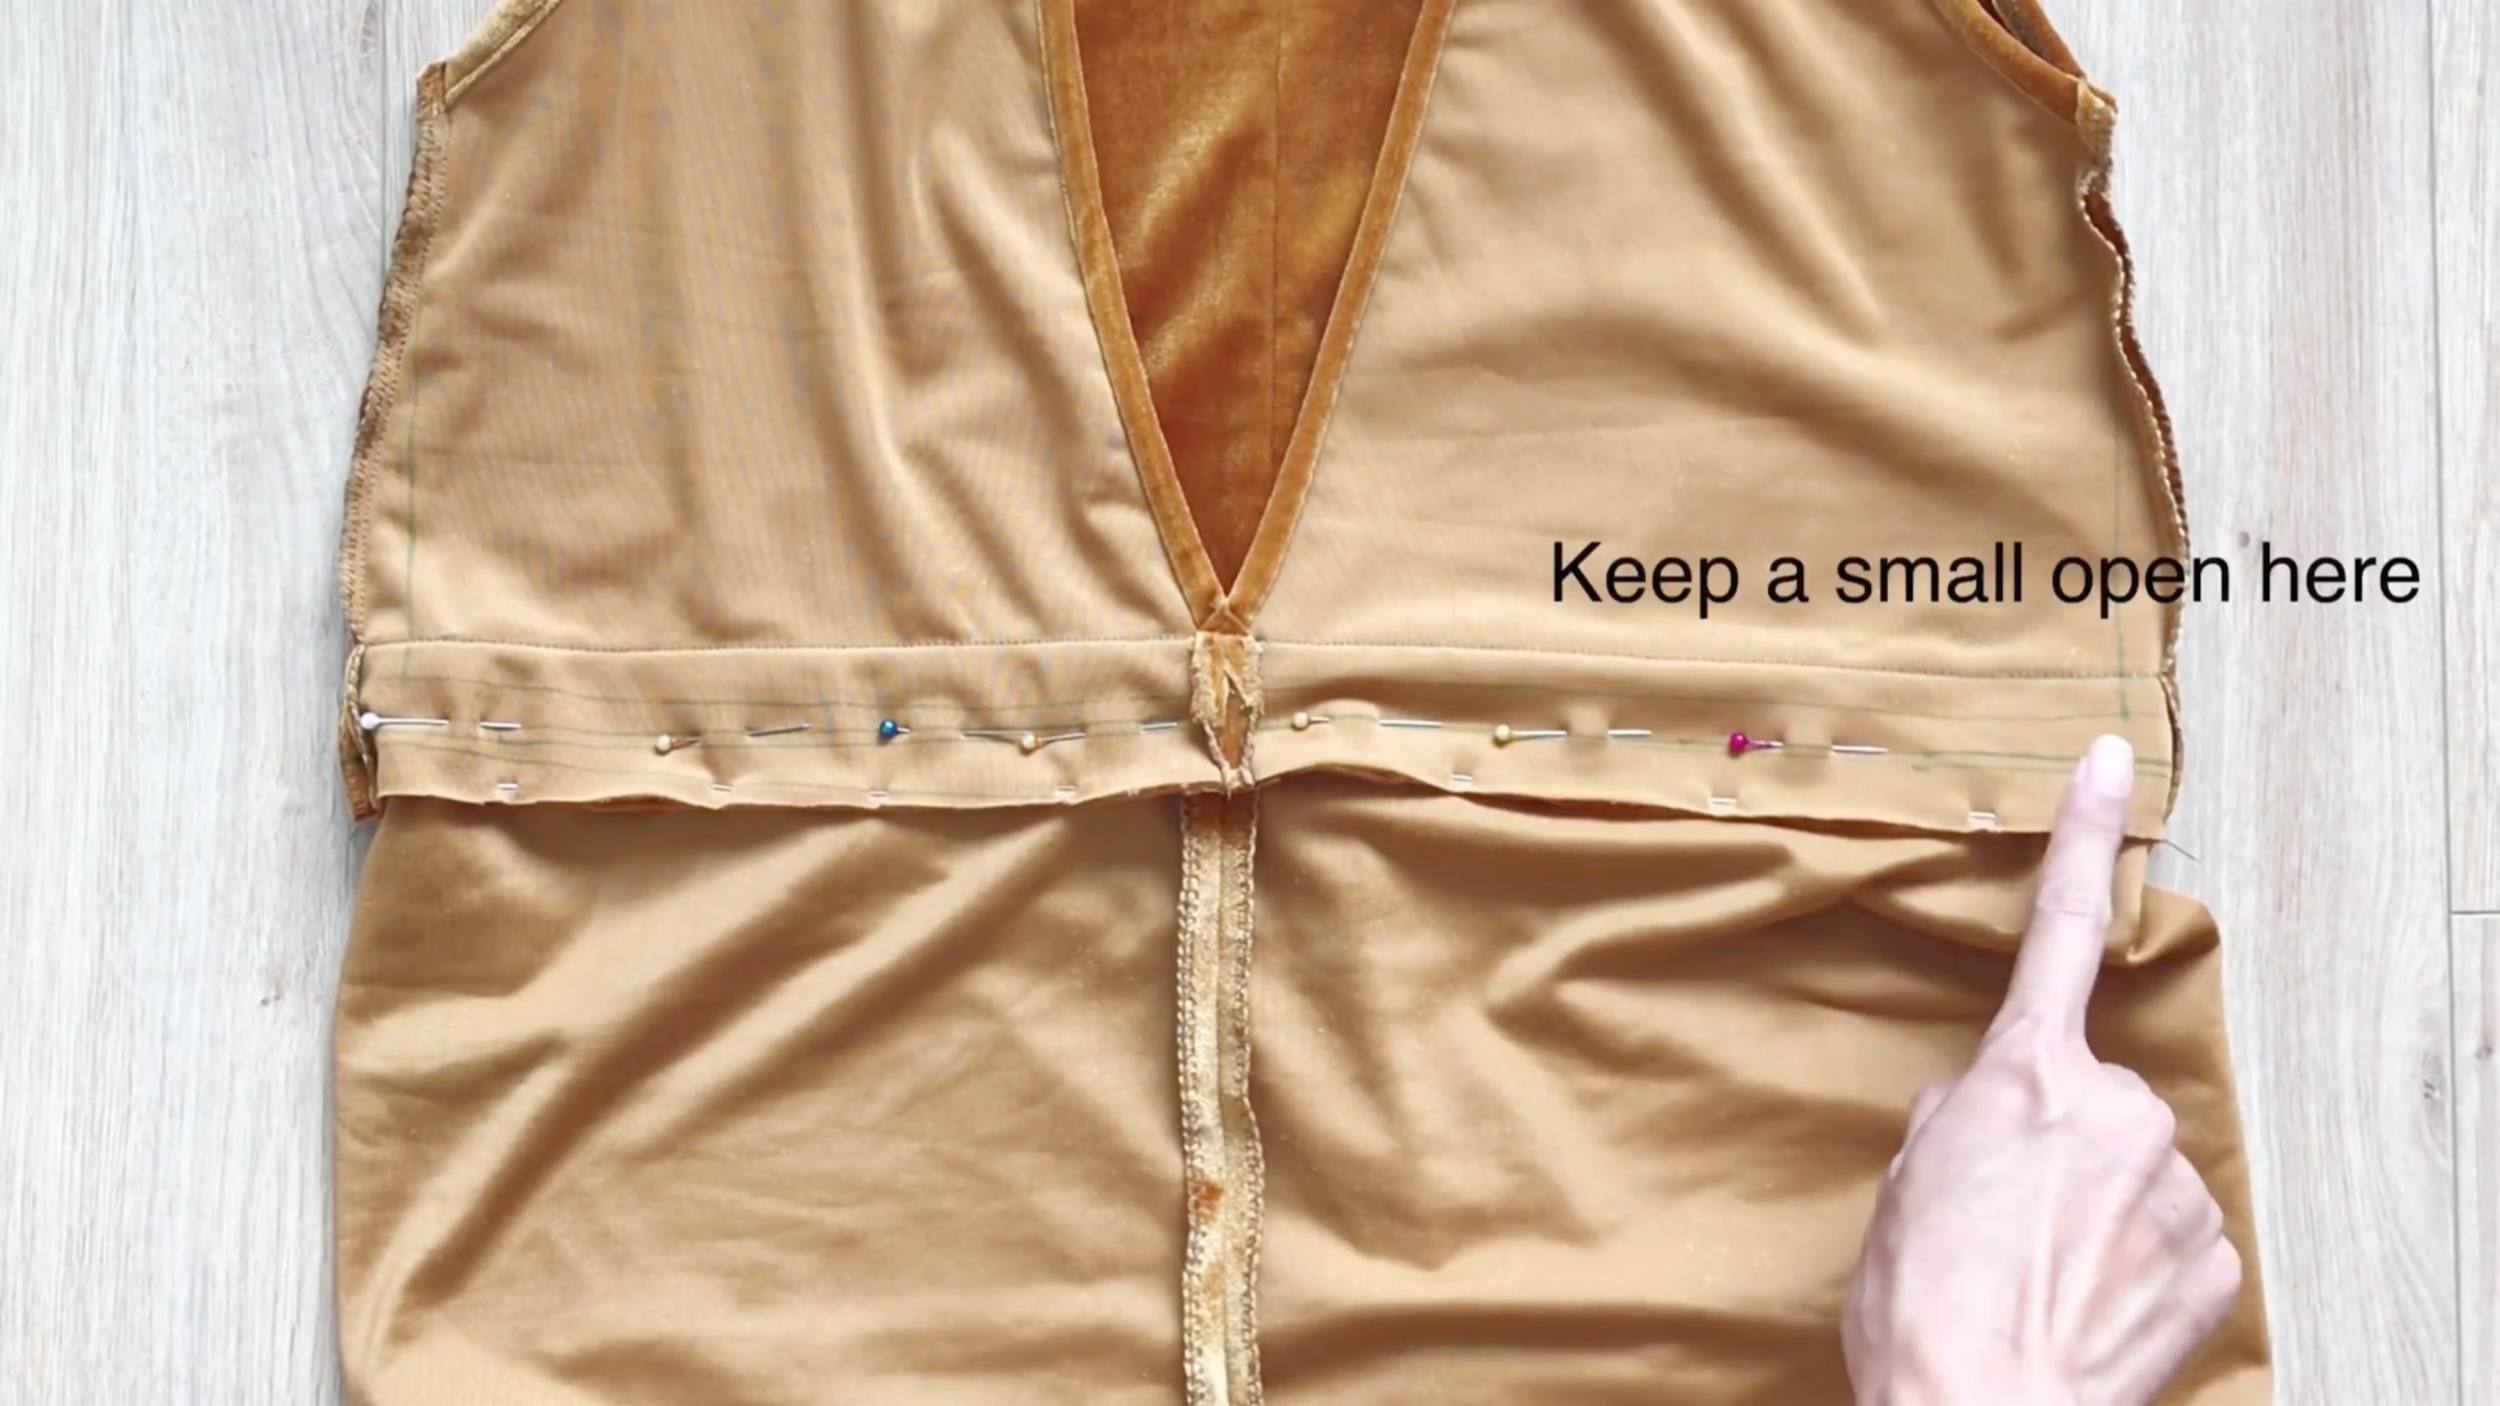
Remember to keep a small unsewn space to put the elastic band later.
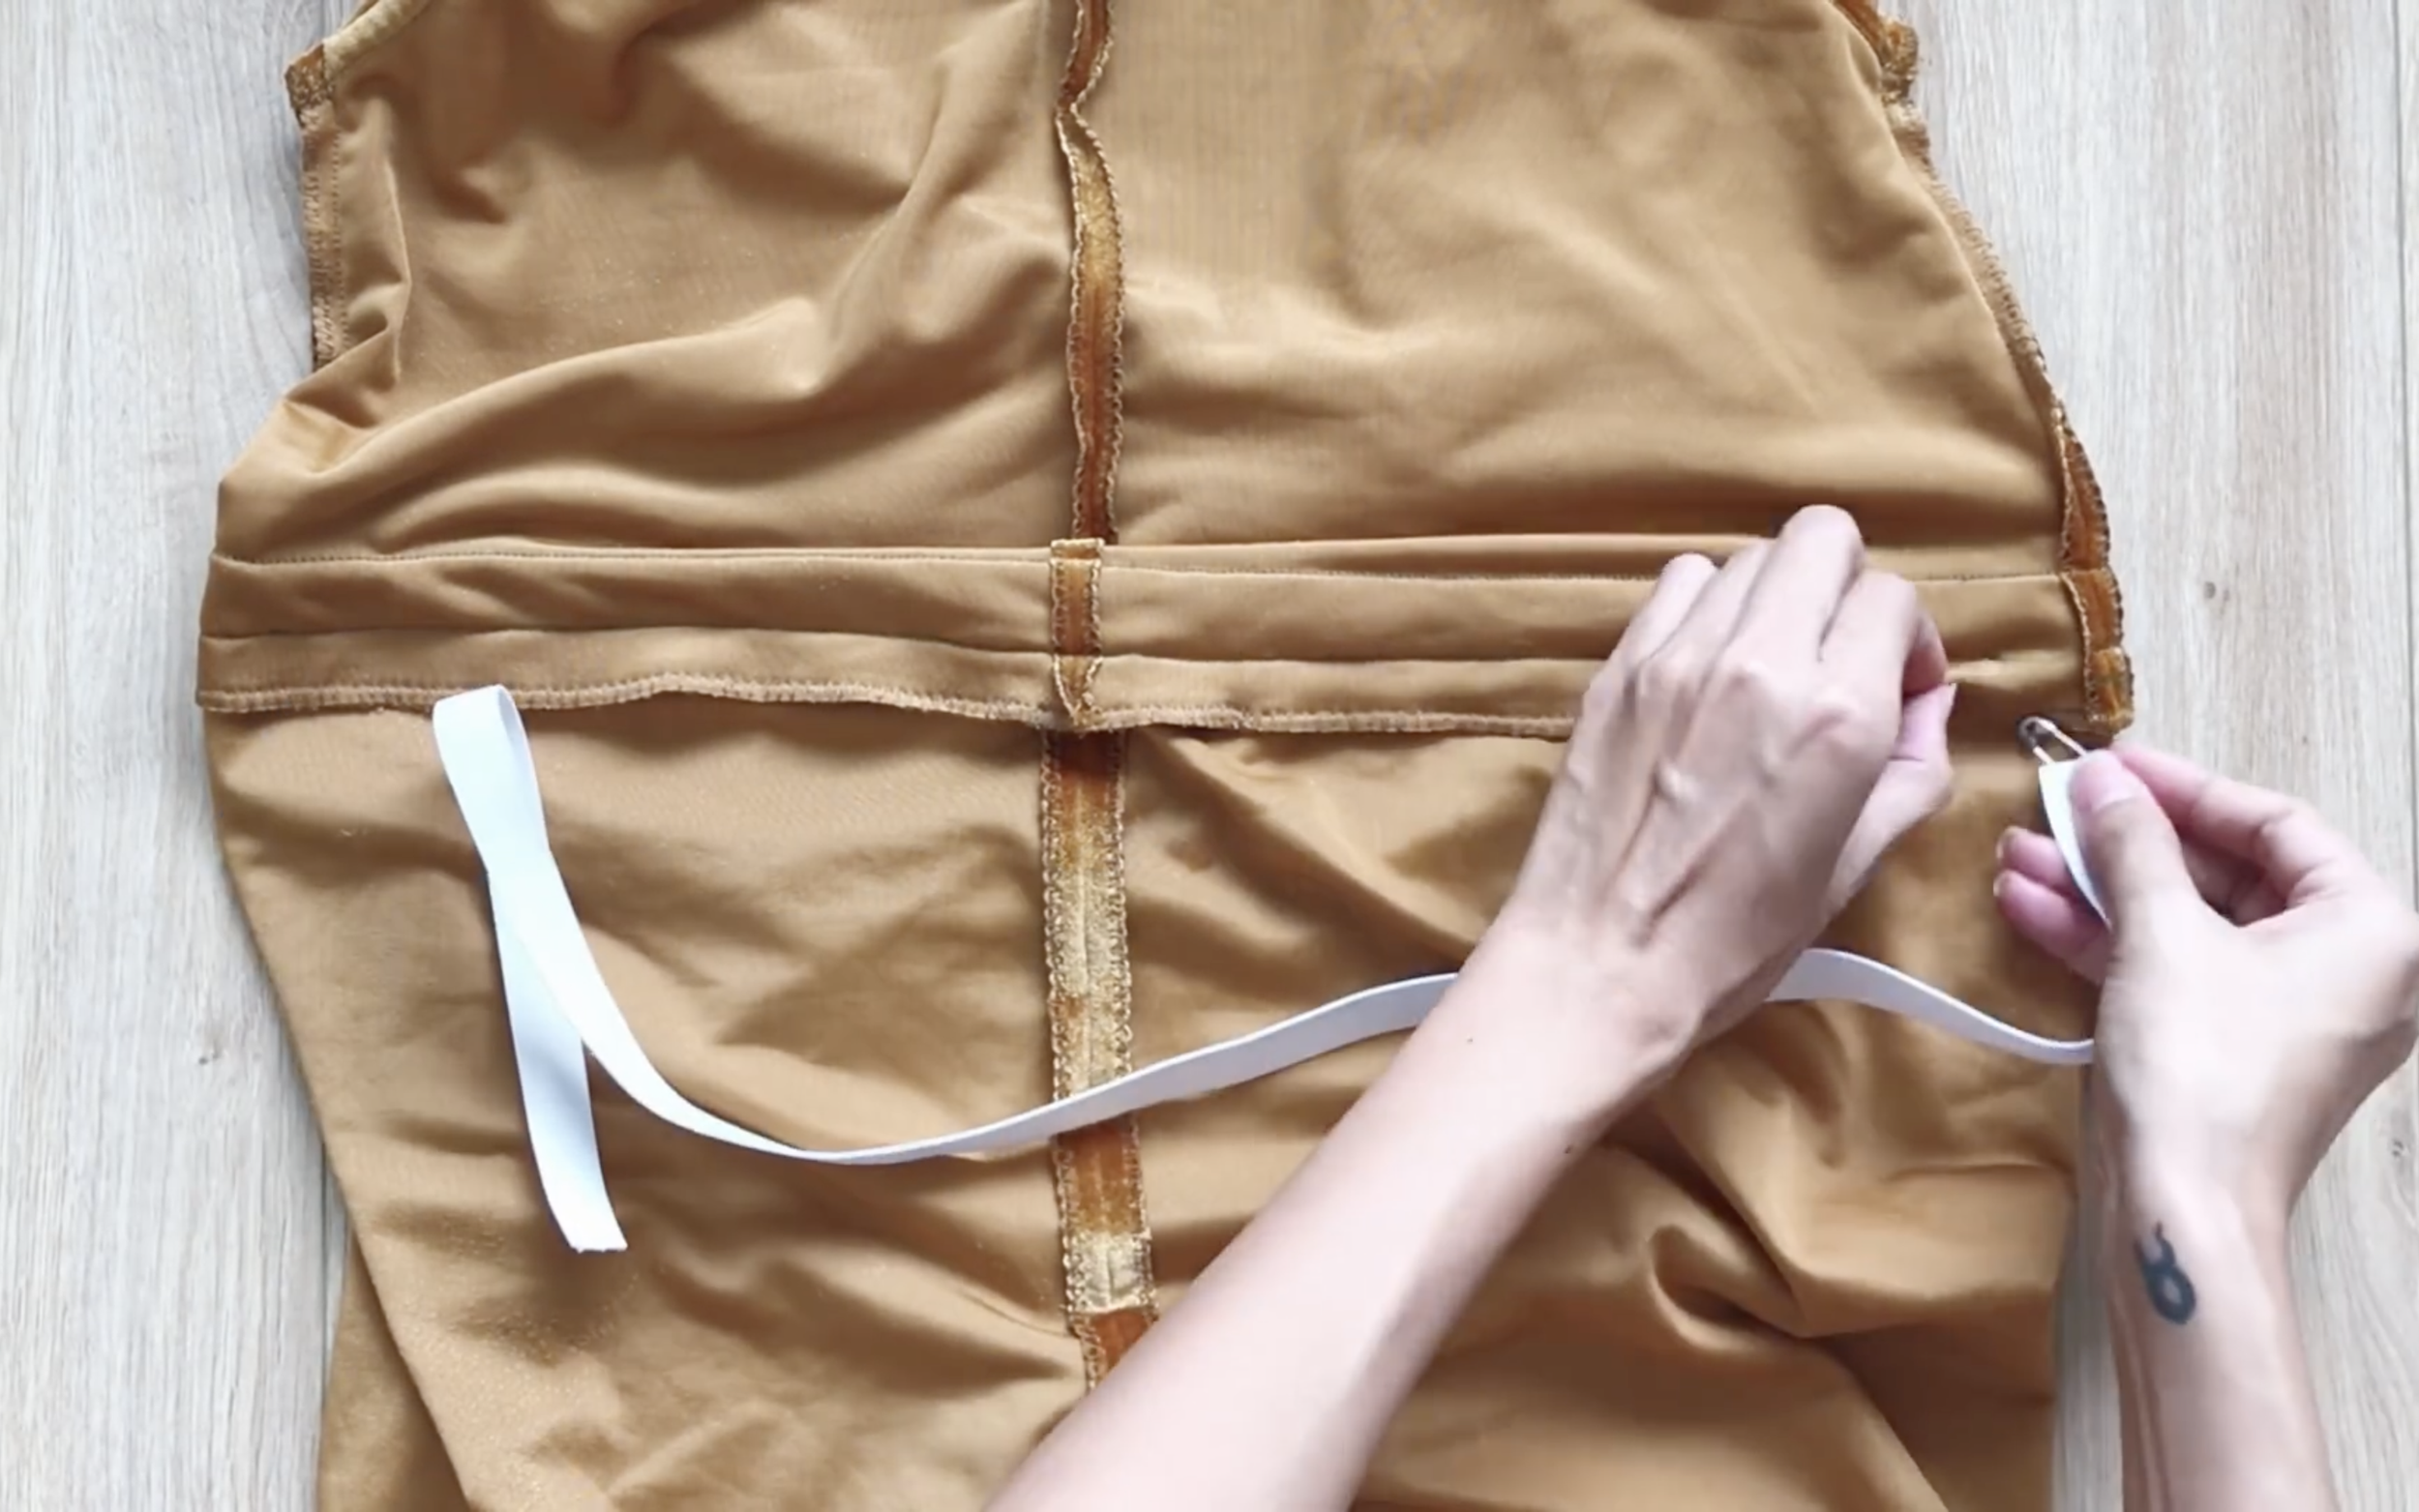
Then put the elastic band through the fabric hole first.
Then, sew two ends of the elastic band.
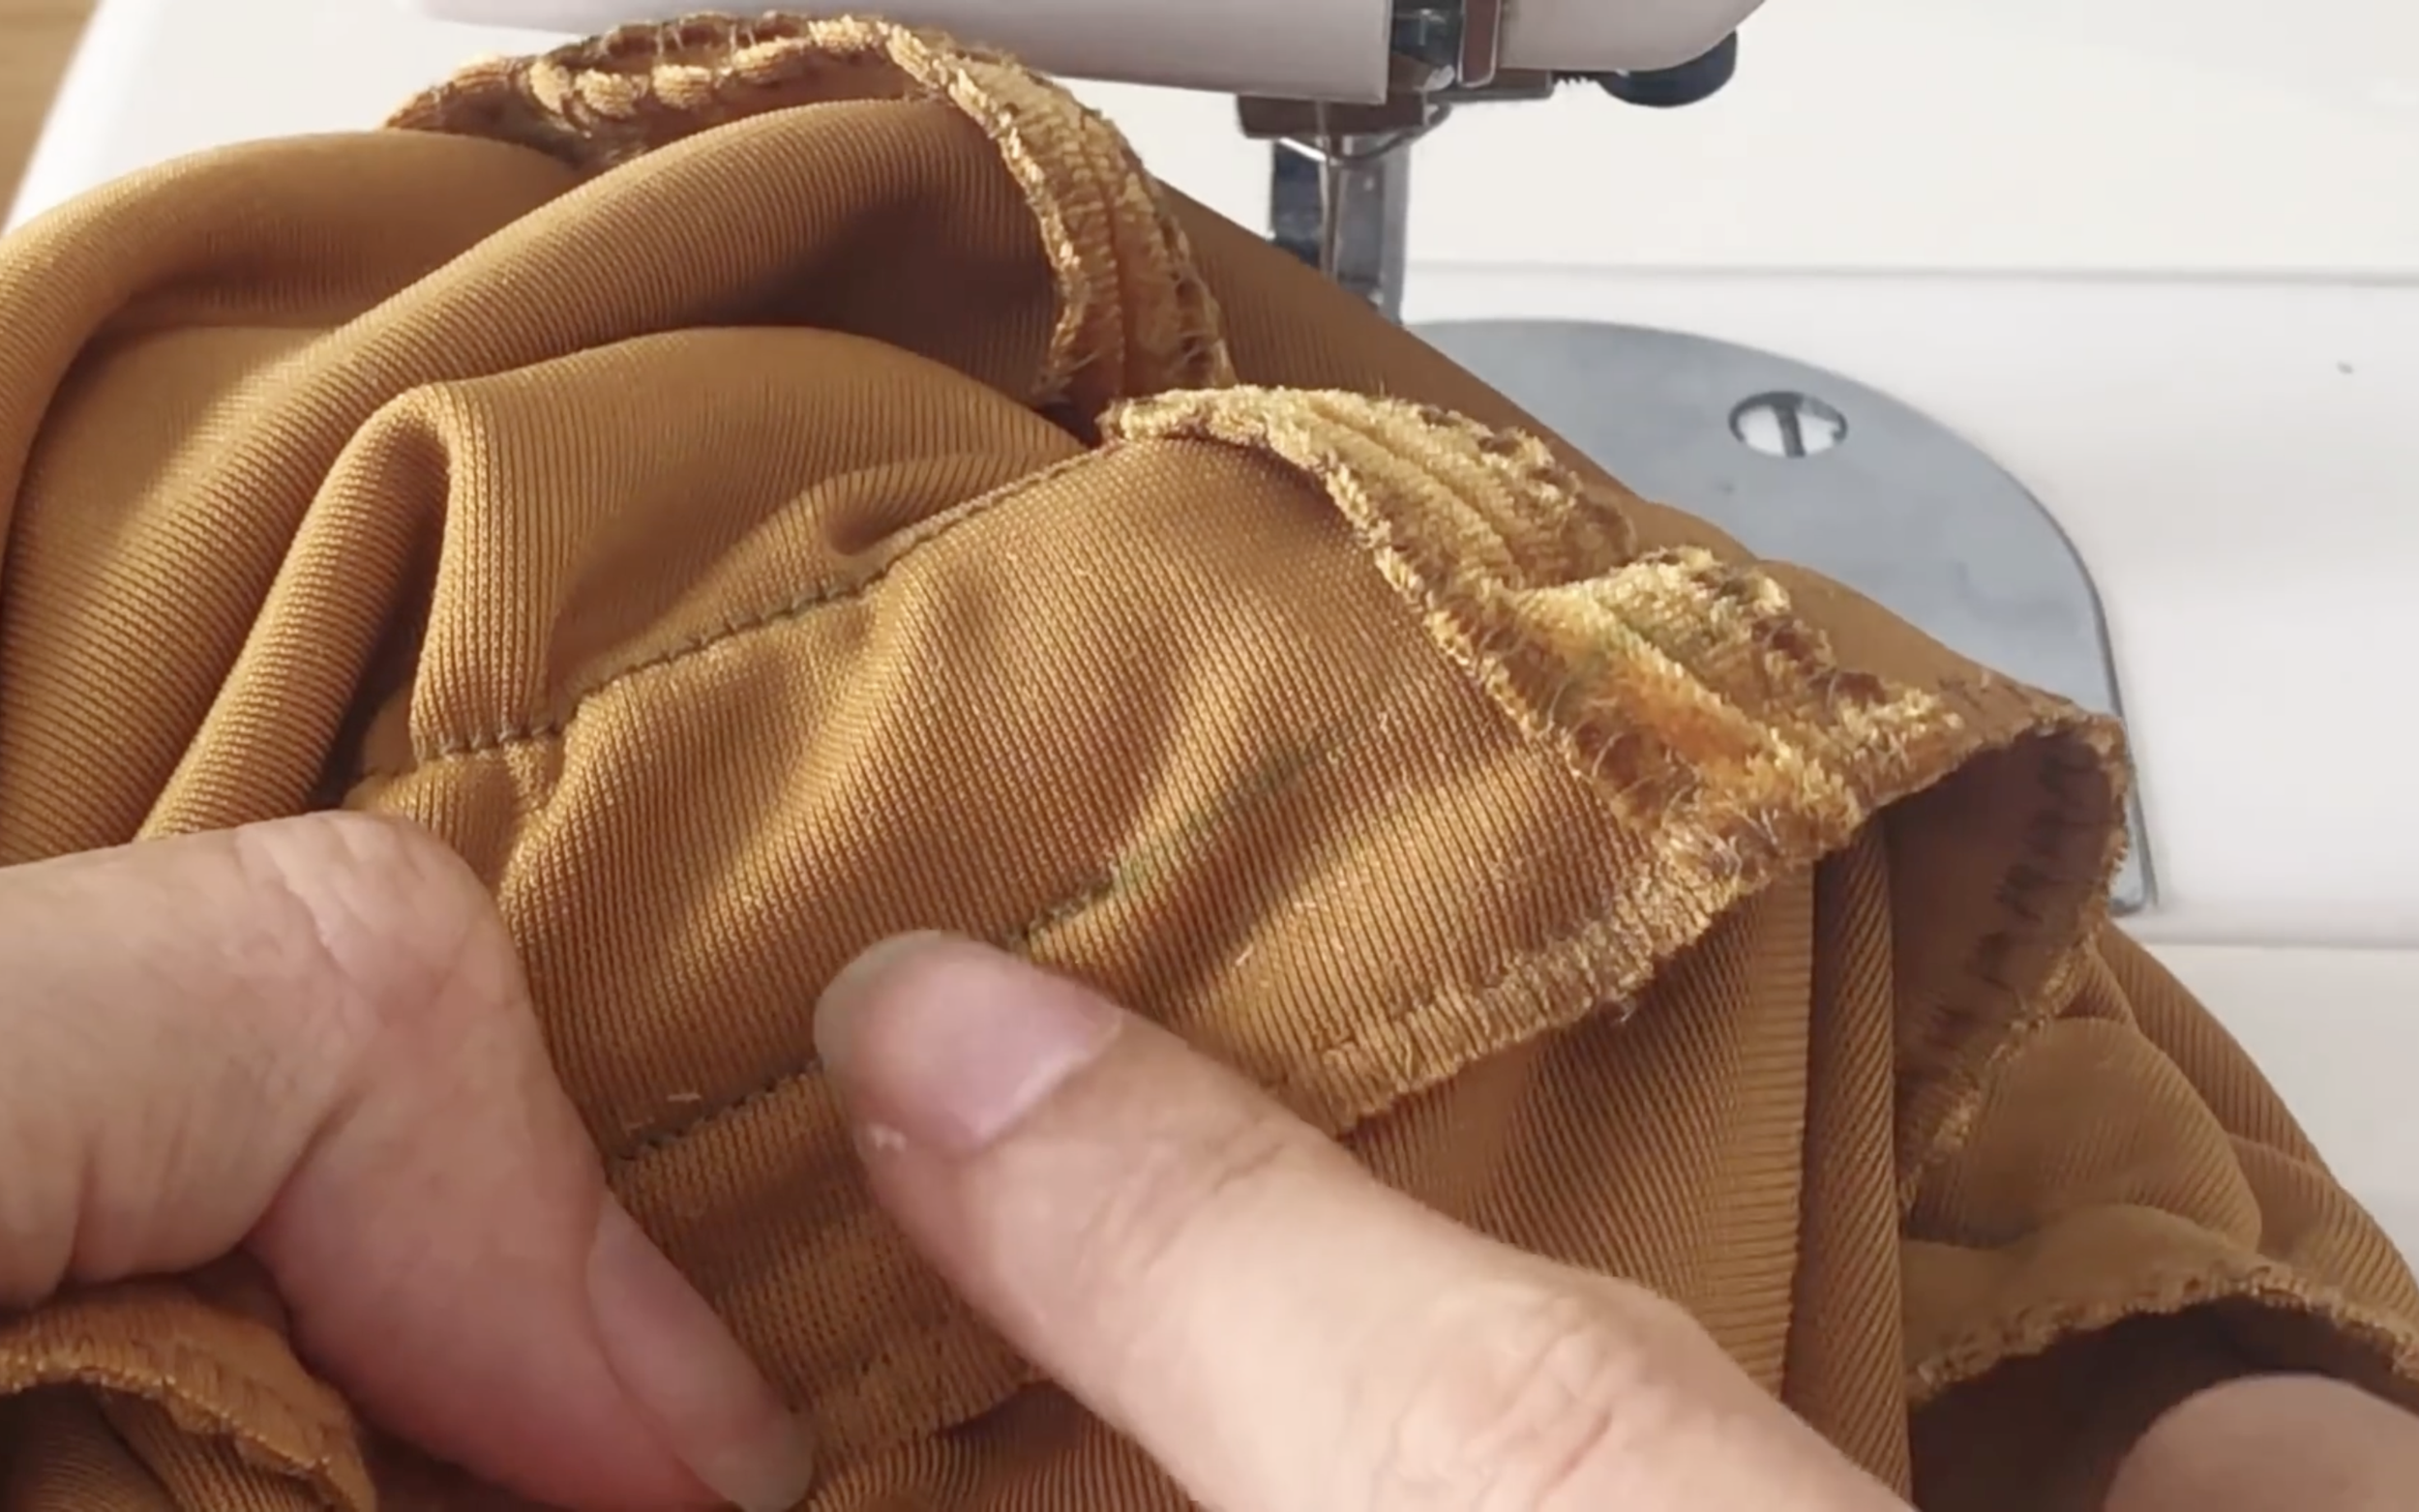
And close the unsewn space that was kept before.
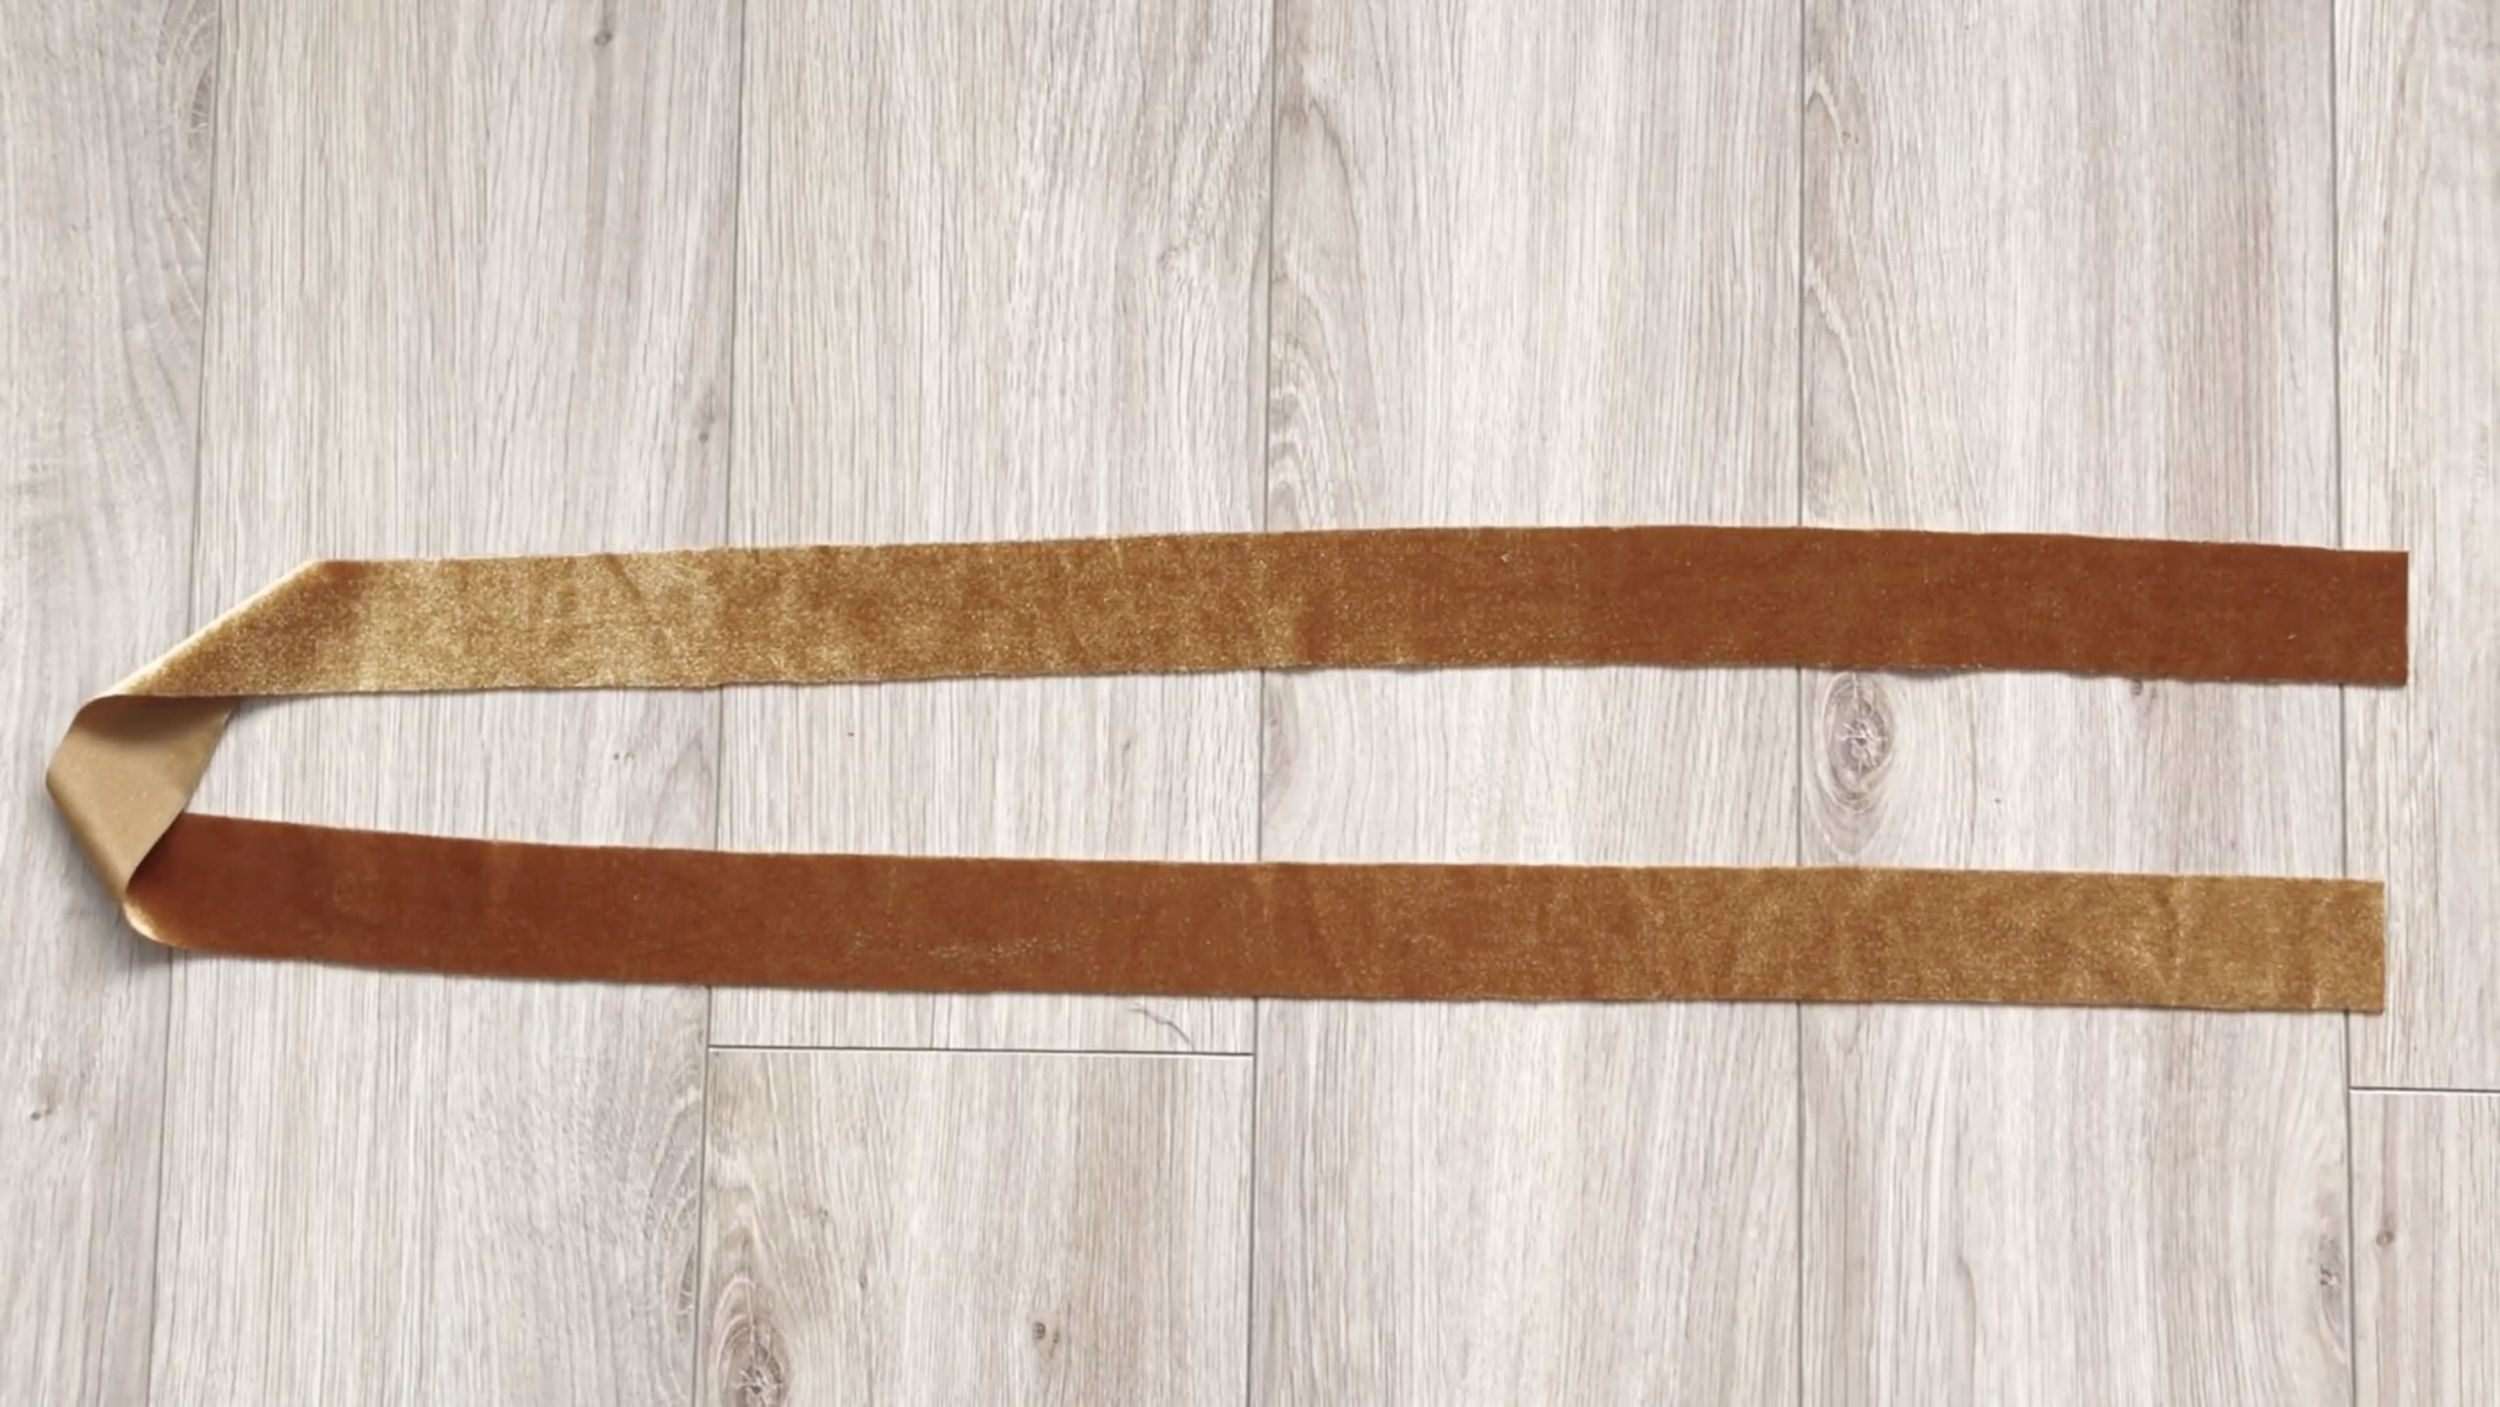
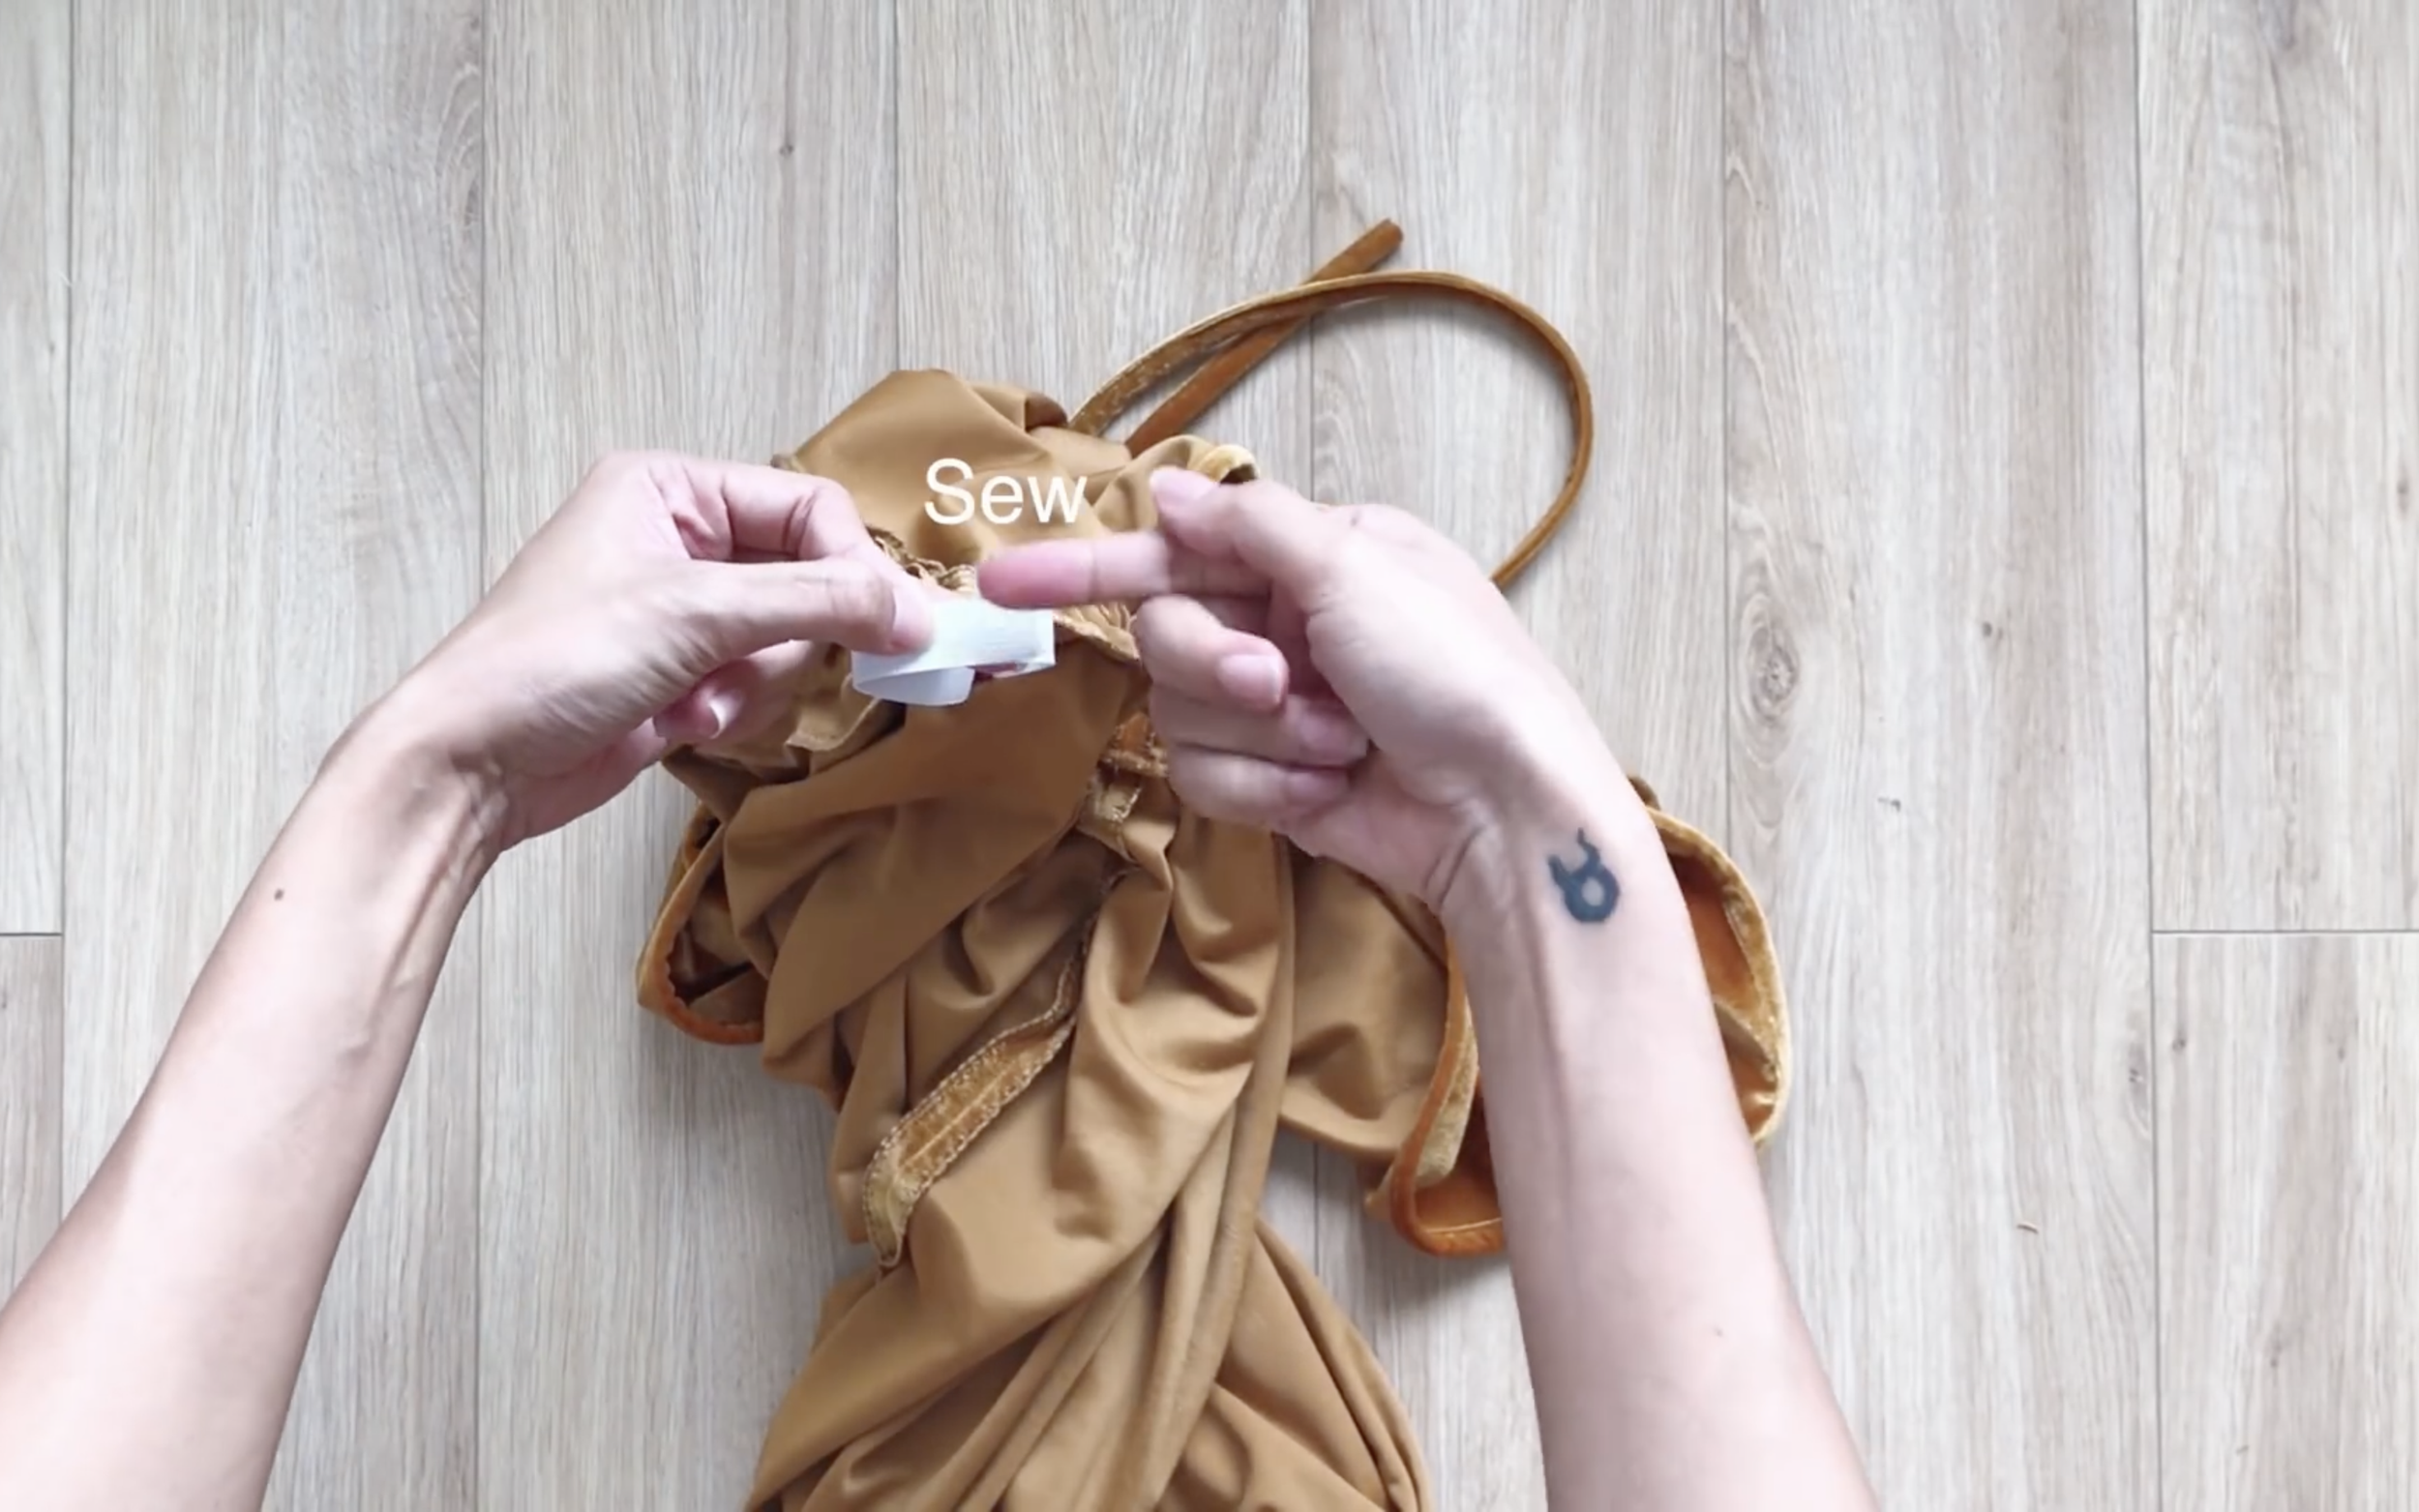
The jumpsuit has the tie at the waist, so cut a long rectangle at 3 cm width and 160 cm length or longer.
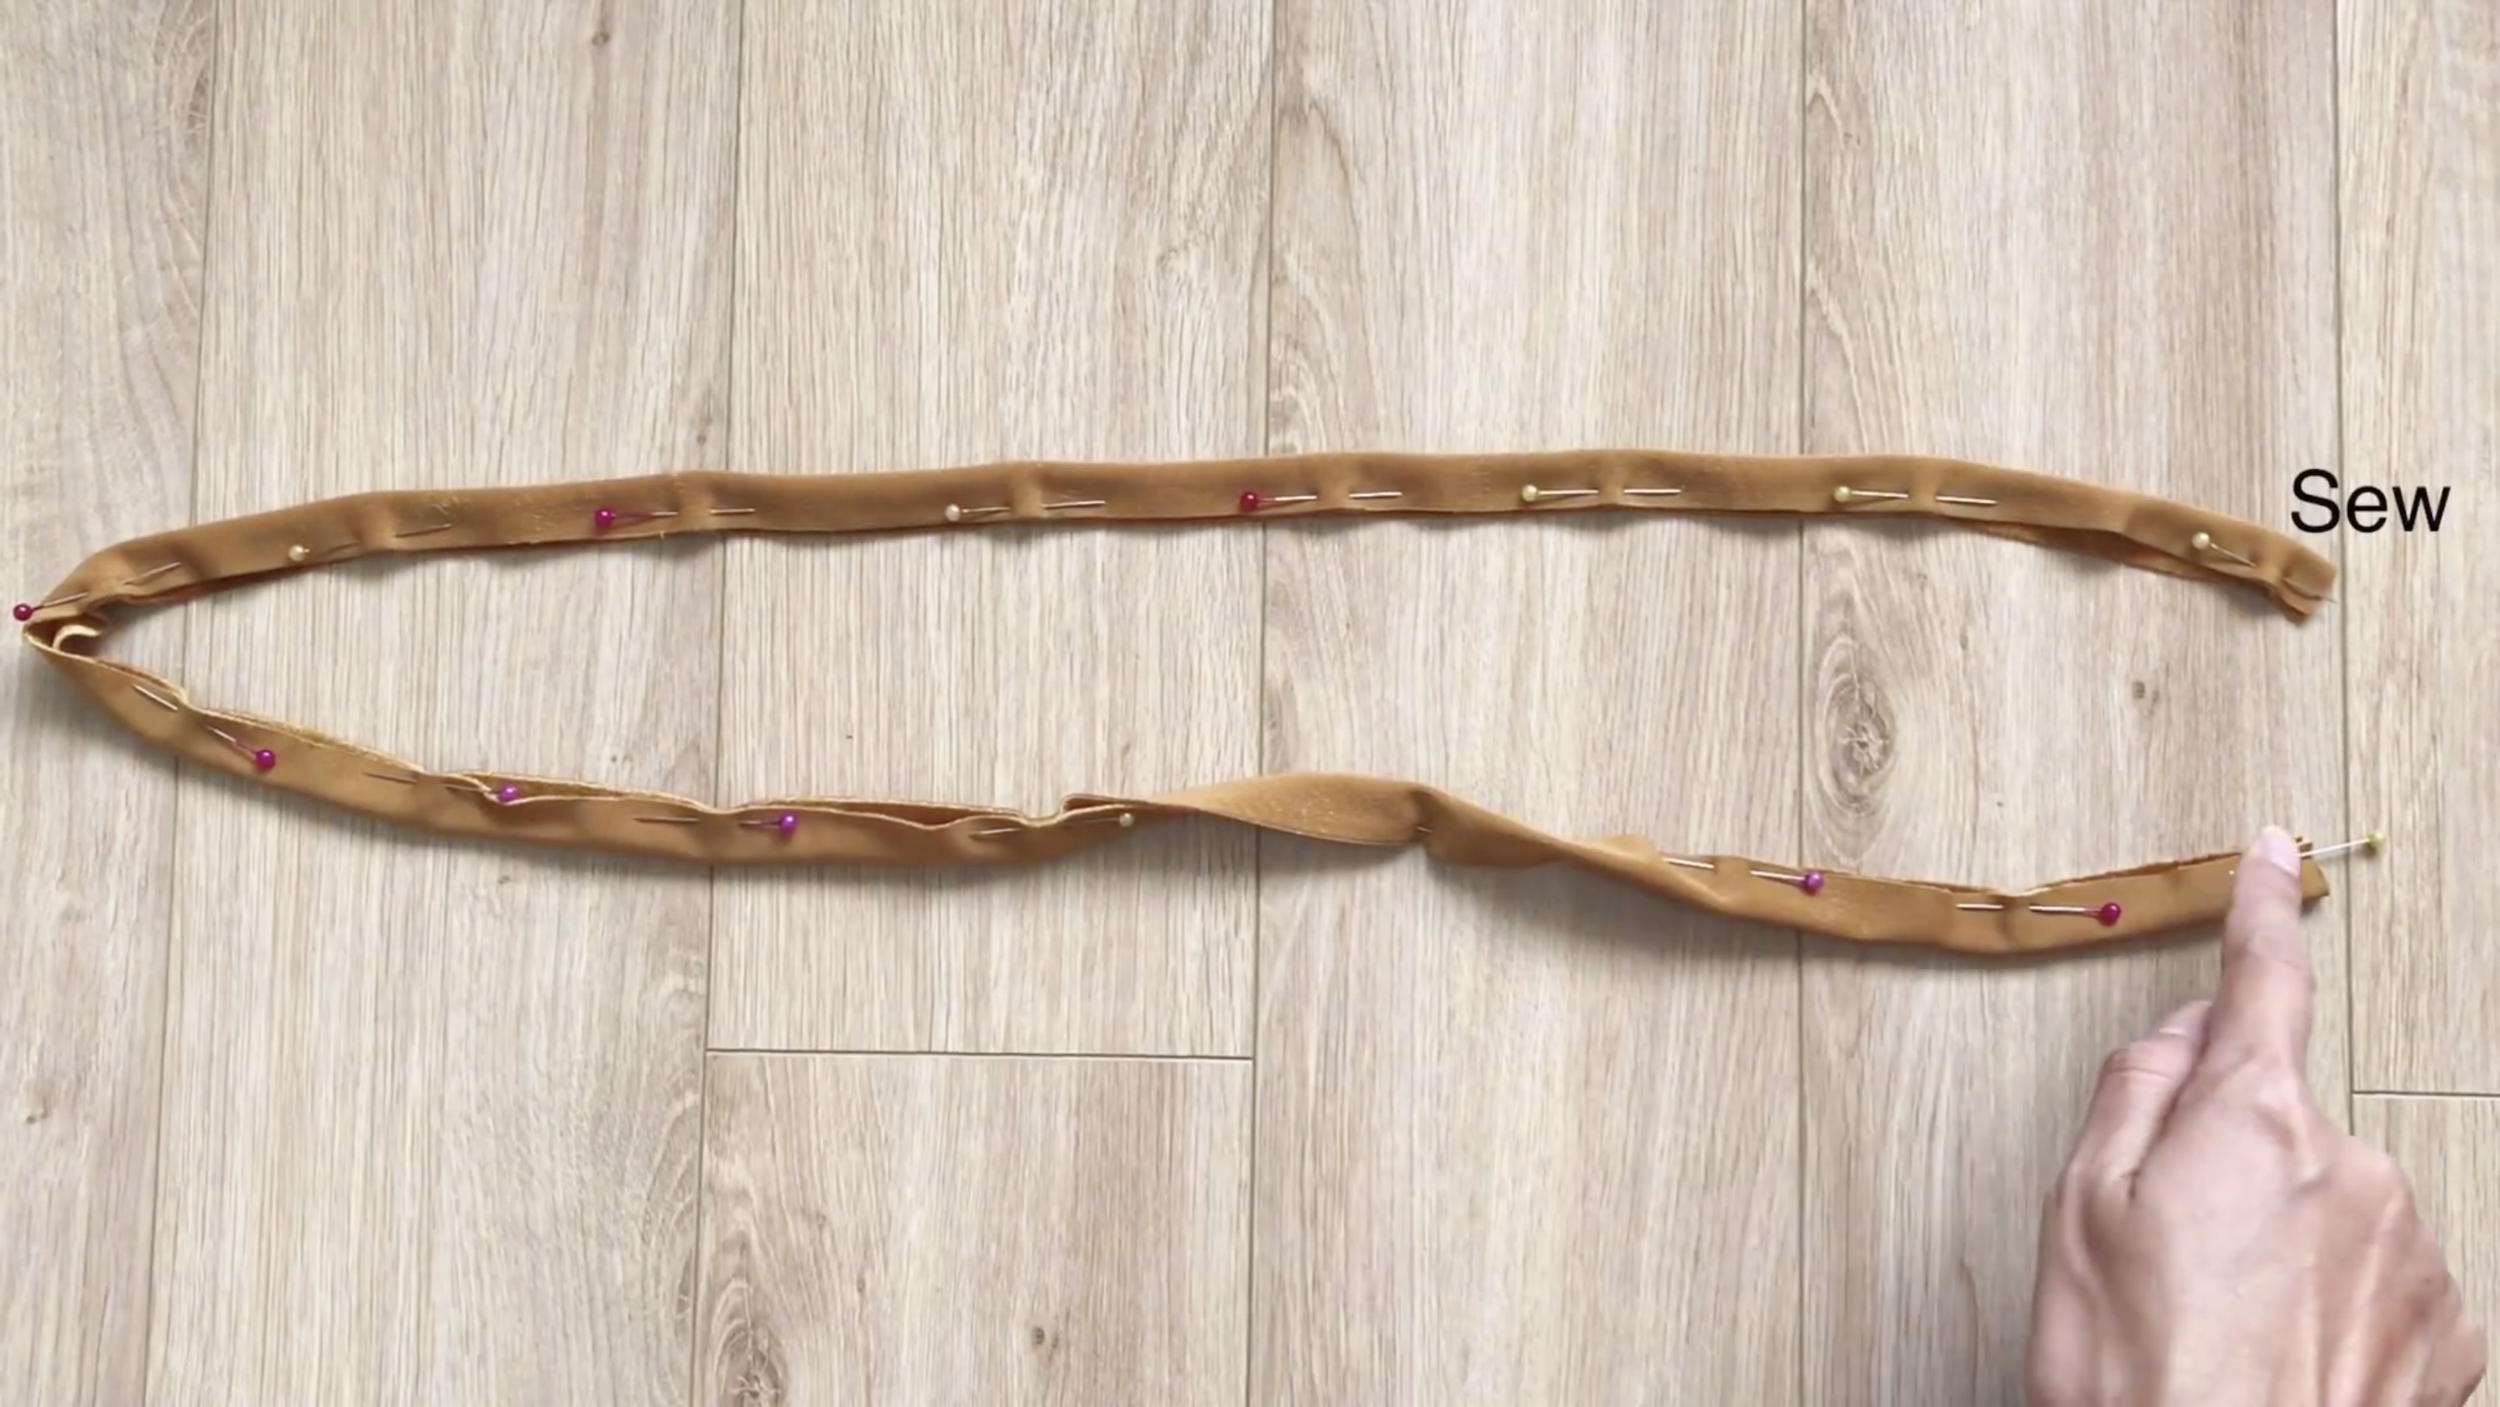
Fold the rectangle in half at the width, then sew.

Turn it right-side out after that by a small safety pin or hair clip like was done, and the tie for the jumpsuit will be ready.
To put this tie inside the waist, open a small hole at the middle of the waist under the V-neck.
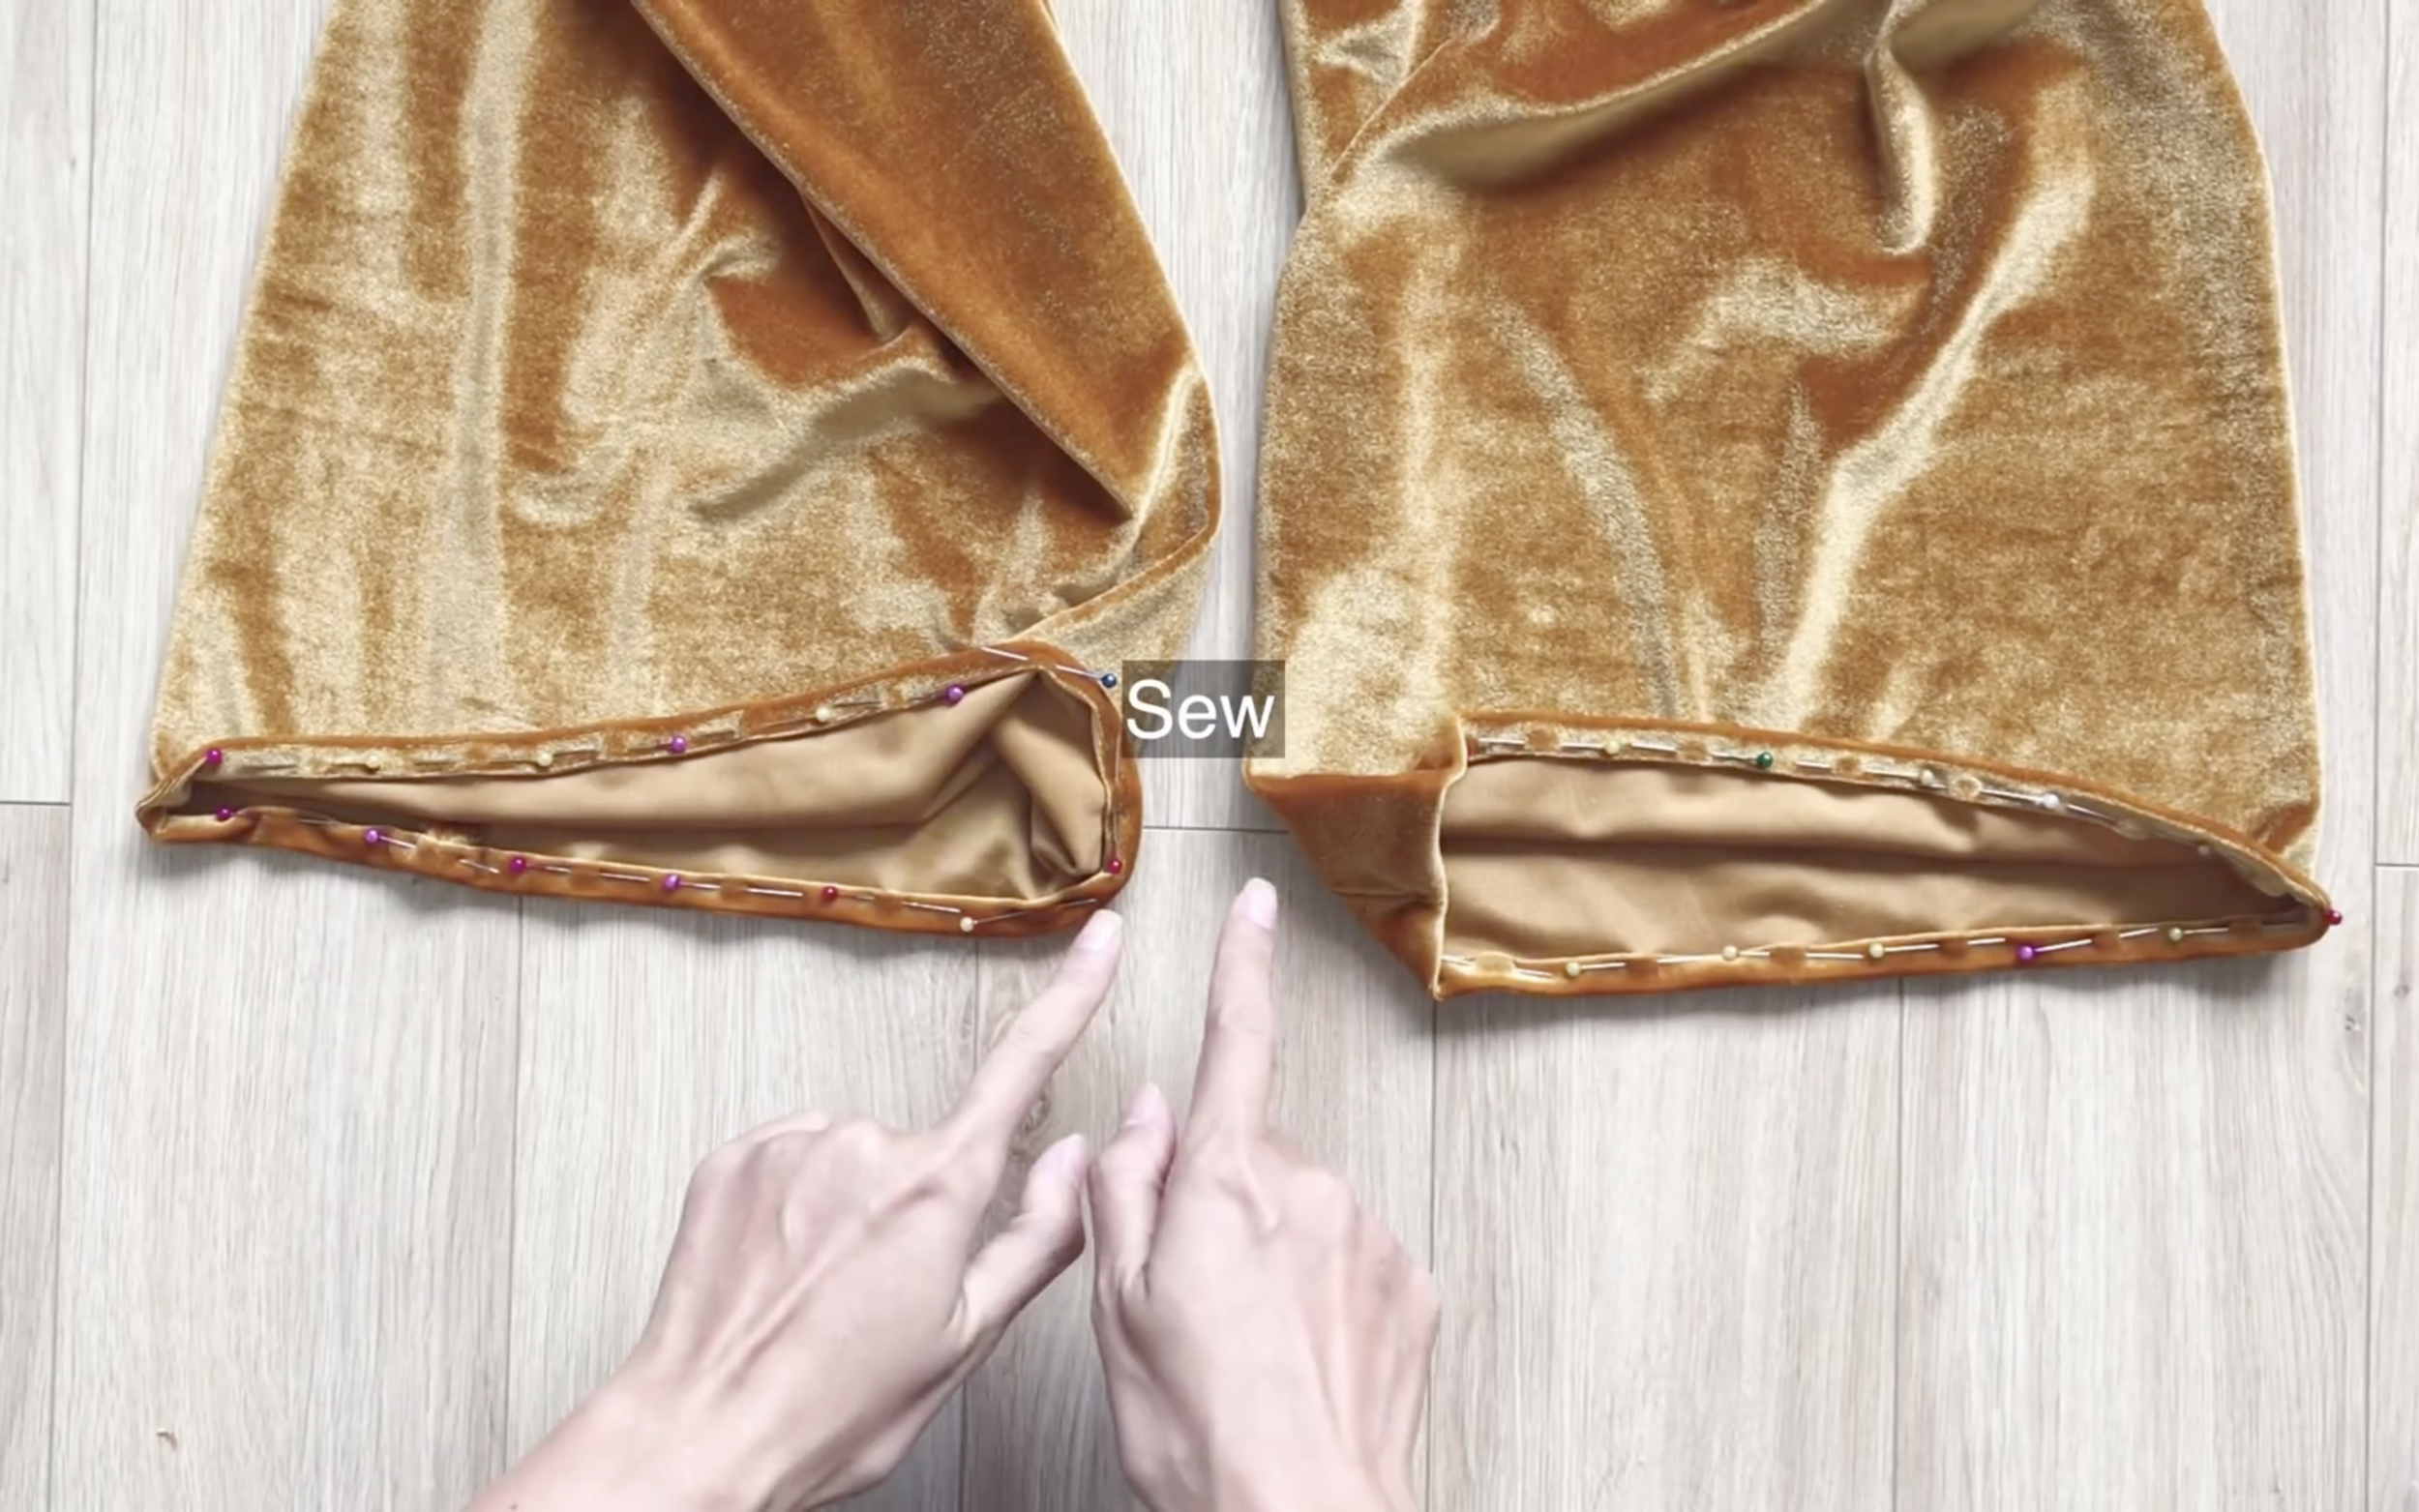
The last step is finishing the end of the jumpsuit.
At the leg, fold the end of the fabric two times inside, then sew.

DIY Velvet Jumpsuit - Reformation inspired - Party outfit idea 2020
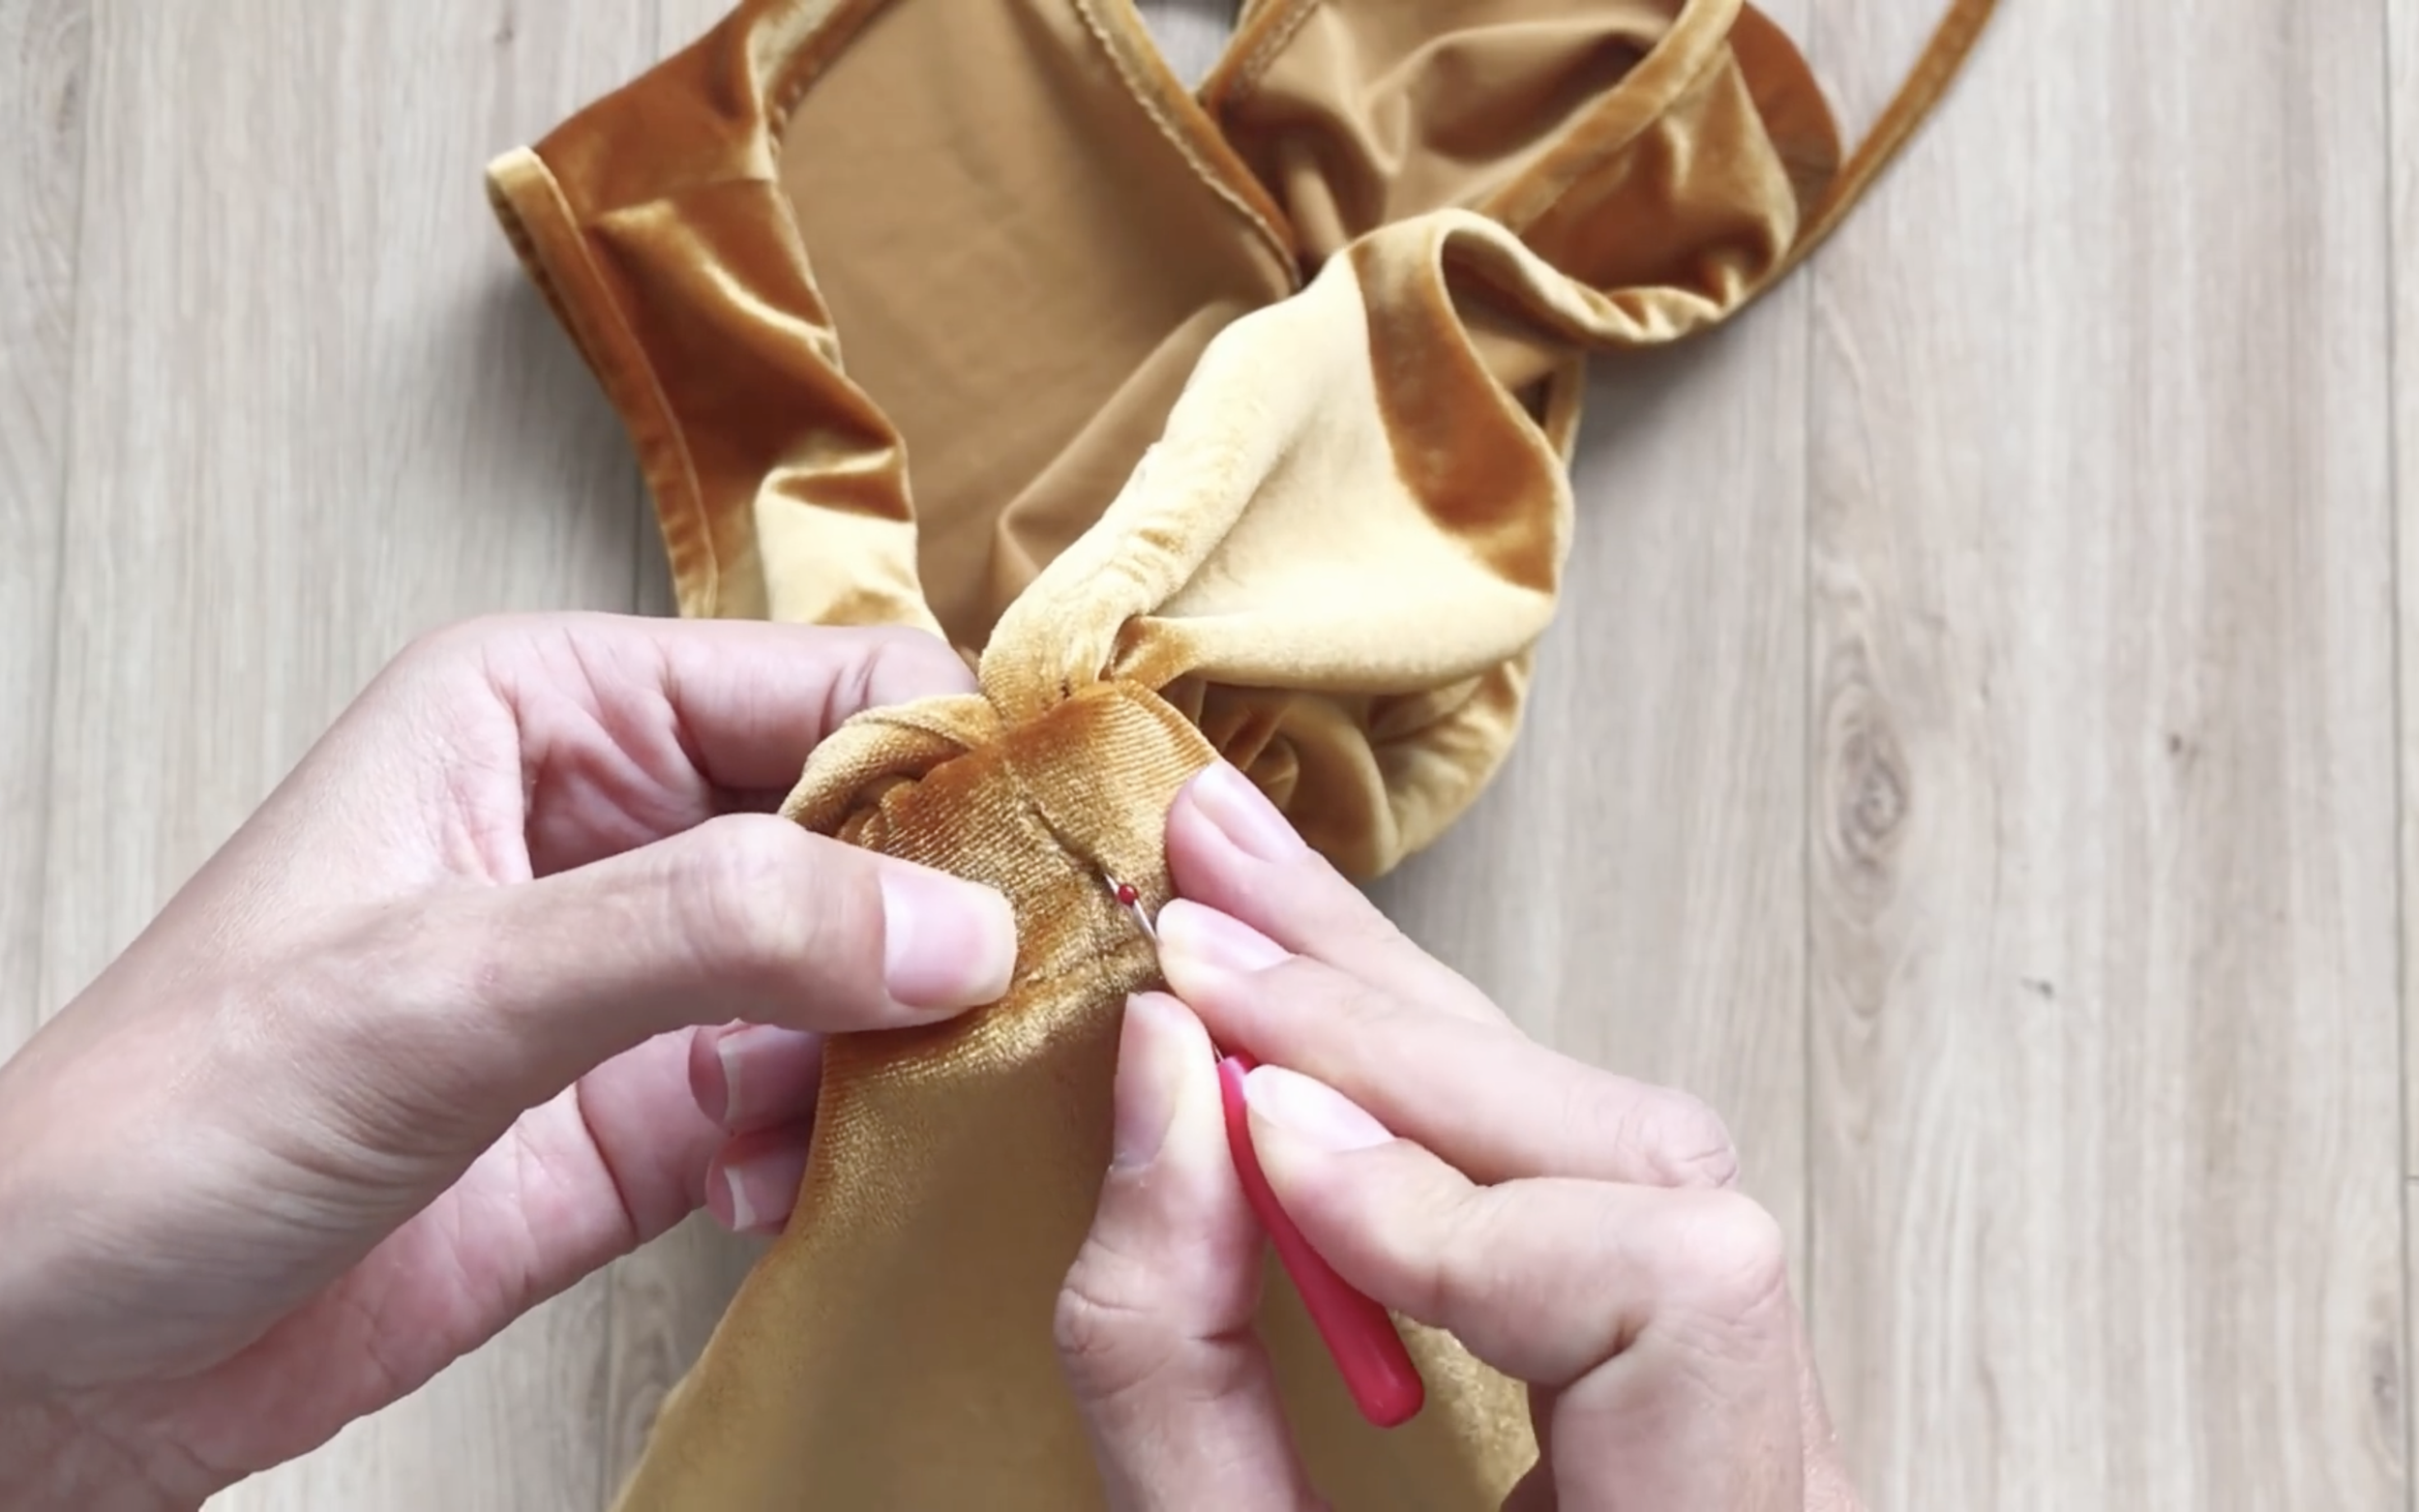
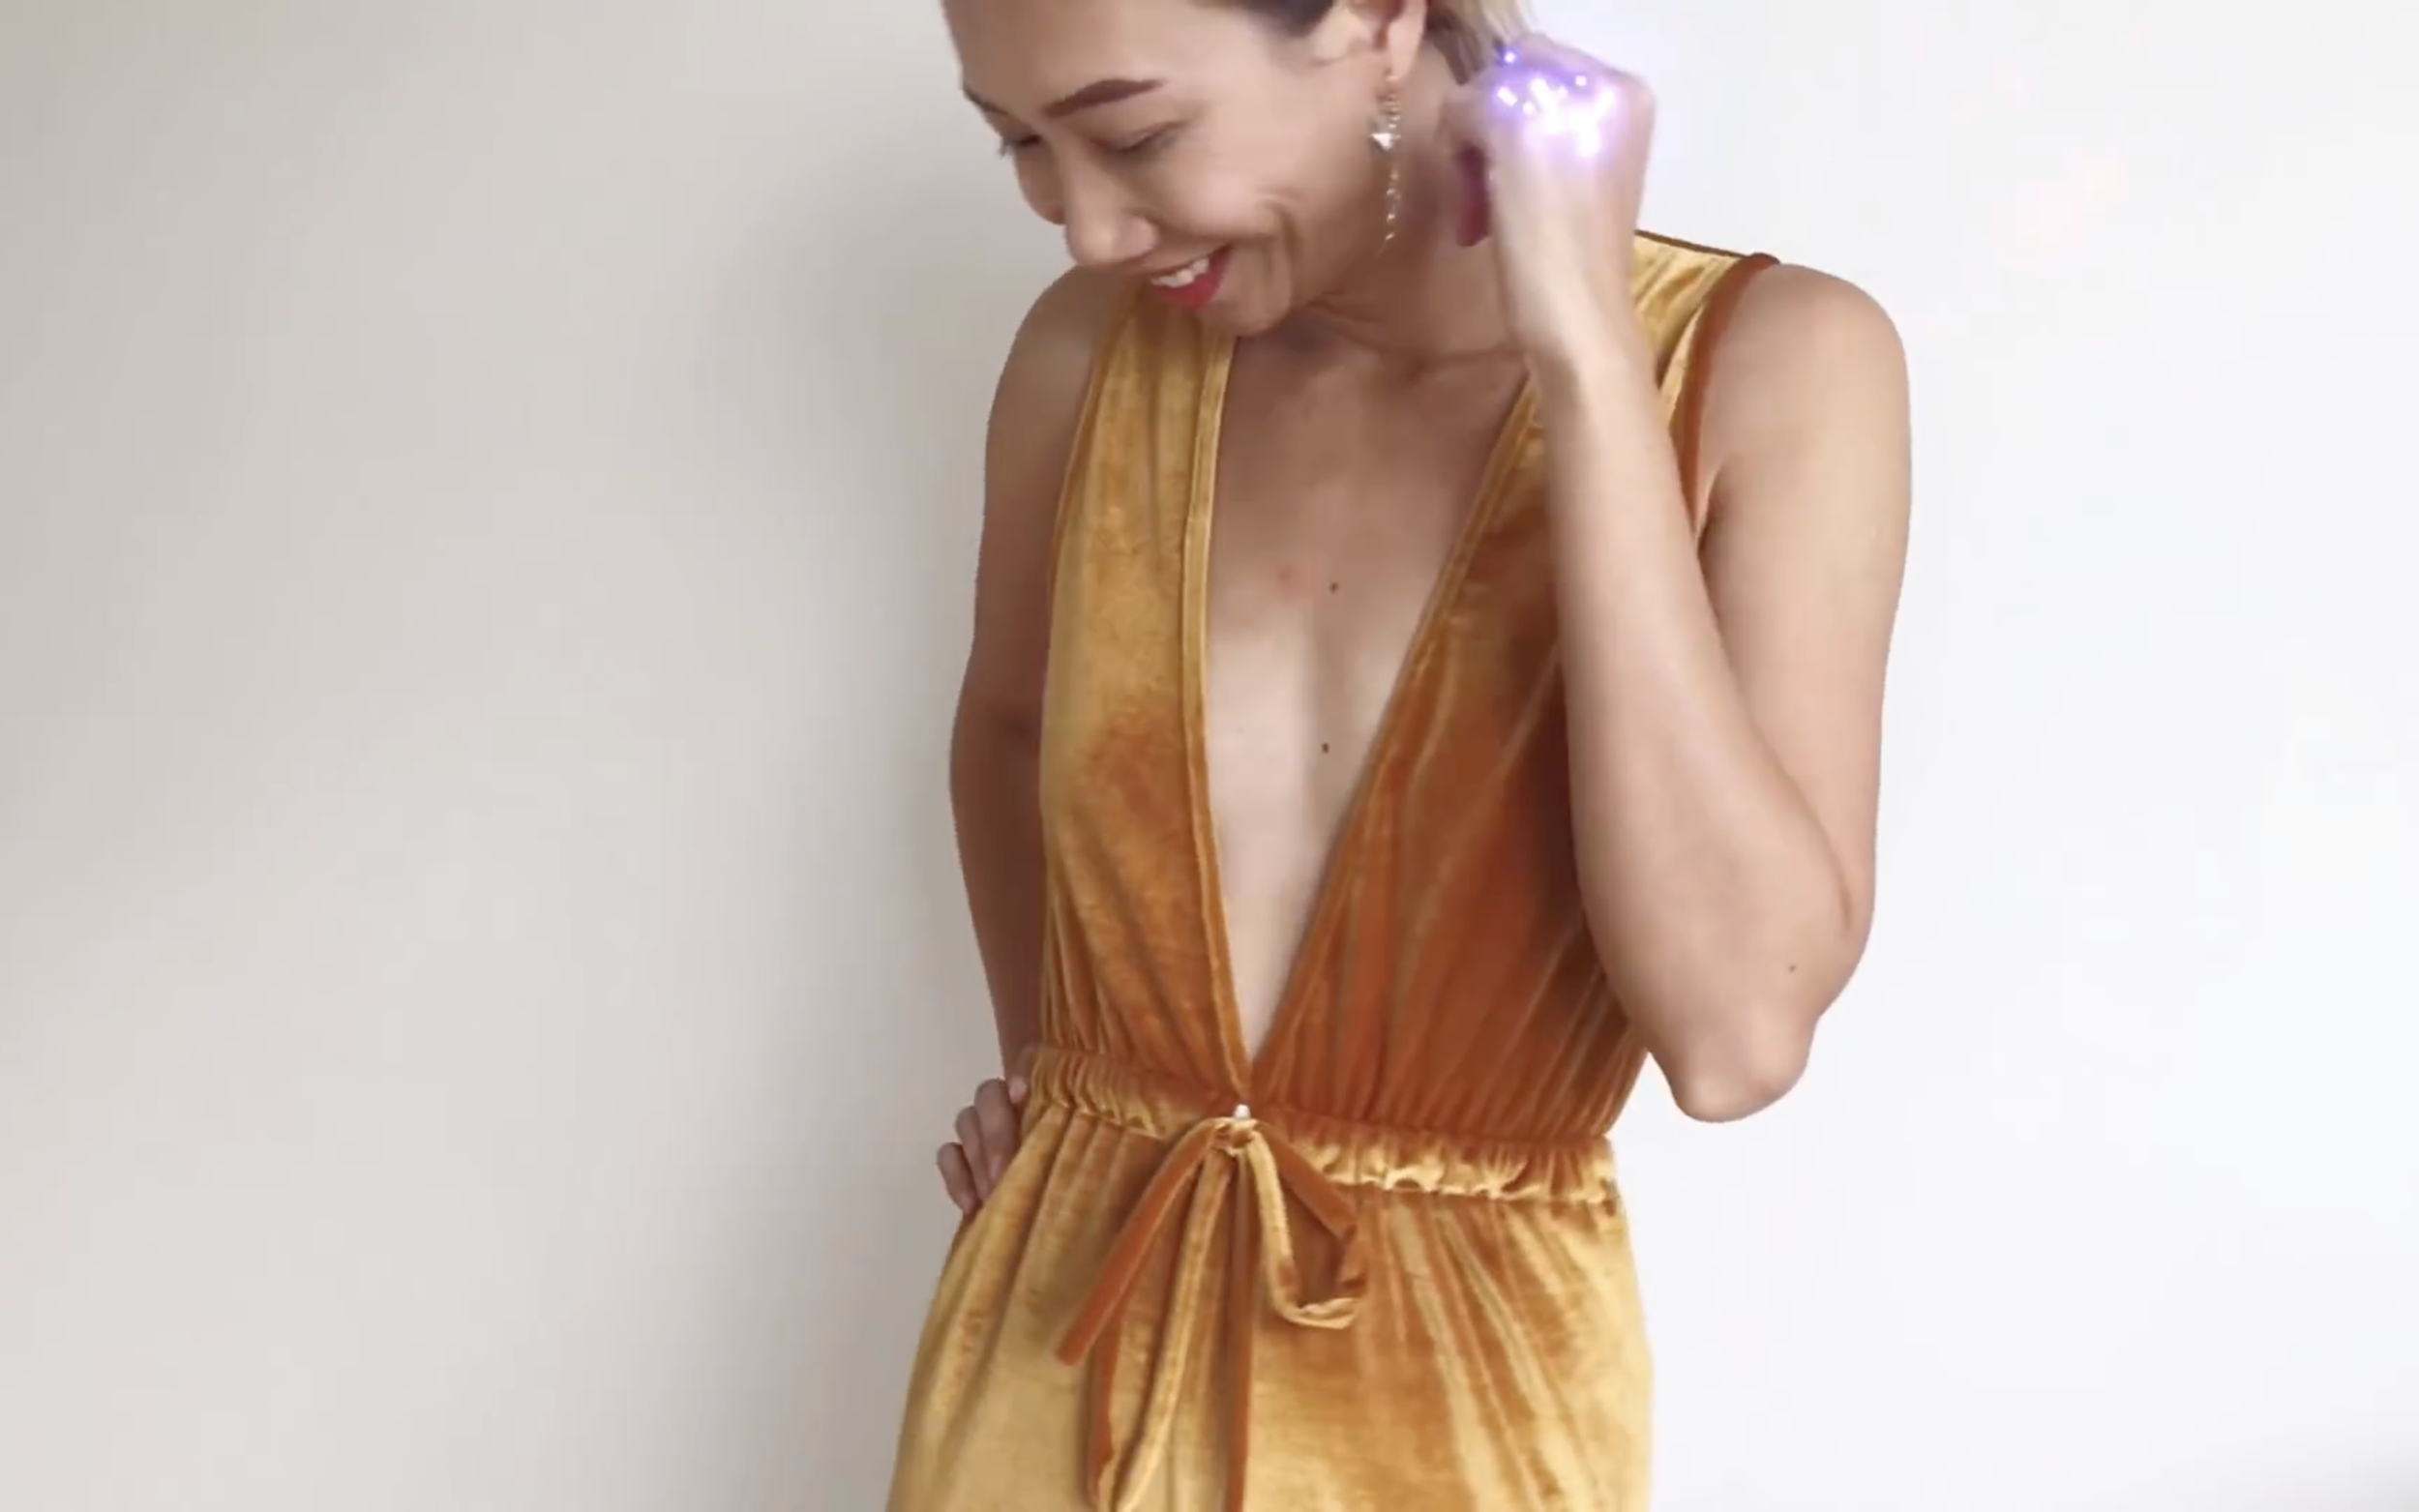
And I'm done with this DIY! Here is the final result.
What do you think? Does it give you those same vibes as the Holland Jumpsuit from Reformation?

I hope you found my step-by-step guide helpful and inspiring.
If you’re interested in making your own, give it a try and let me know how it goes!
Until then, happy sewing!