I tried to make the "De Una Vez" pink floral dress that got inspired from Selena and Kendall

I tried to make the "De Una Vez" pink floral dress that got inspired from Selena and Kendall

Welcome or welcome back to my channel. My name is Jess and I love doing DIY, making clothes in a "simply but pretty" way.
In today's tutorial, I'm going to share with you how I made this dreamy dress. This dress is the most dreamy, cottage and beautiful dress that I've ever made so far. It' was also a challenge for myself when making this dress. Because I had to learn about the designs and techniques at each part of this dress. They're all new to me and I've never done anything like it before.
But it's a worthy challenge. I earned myself some new techniques and experiences in sewing. The dress came out just perfect and I love it so much. So I was trying to make as many detail as I can in this tutorial to help you guy can be able to follow and make one for yourself.
So let’s get started!
WHAT YOU’LL NEED
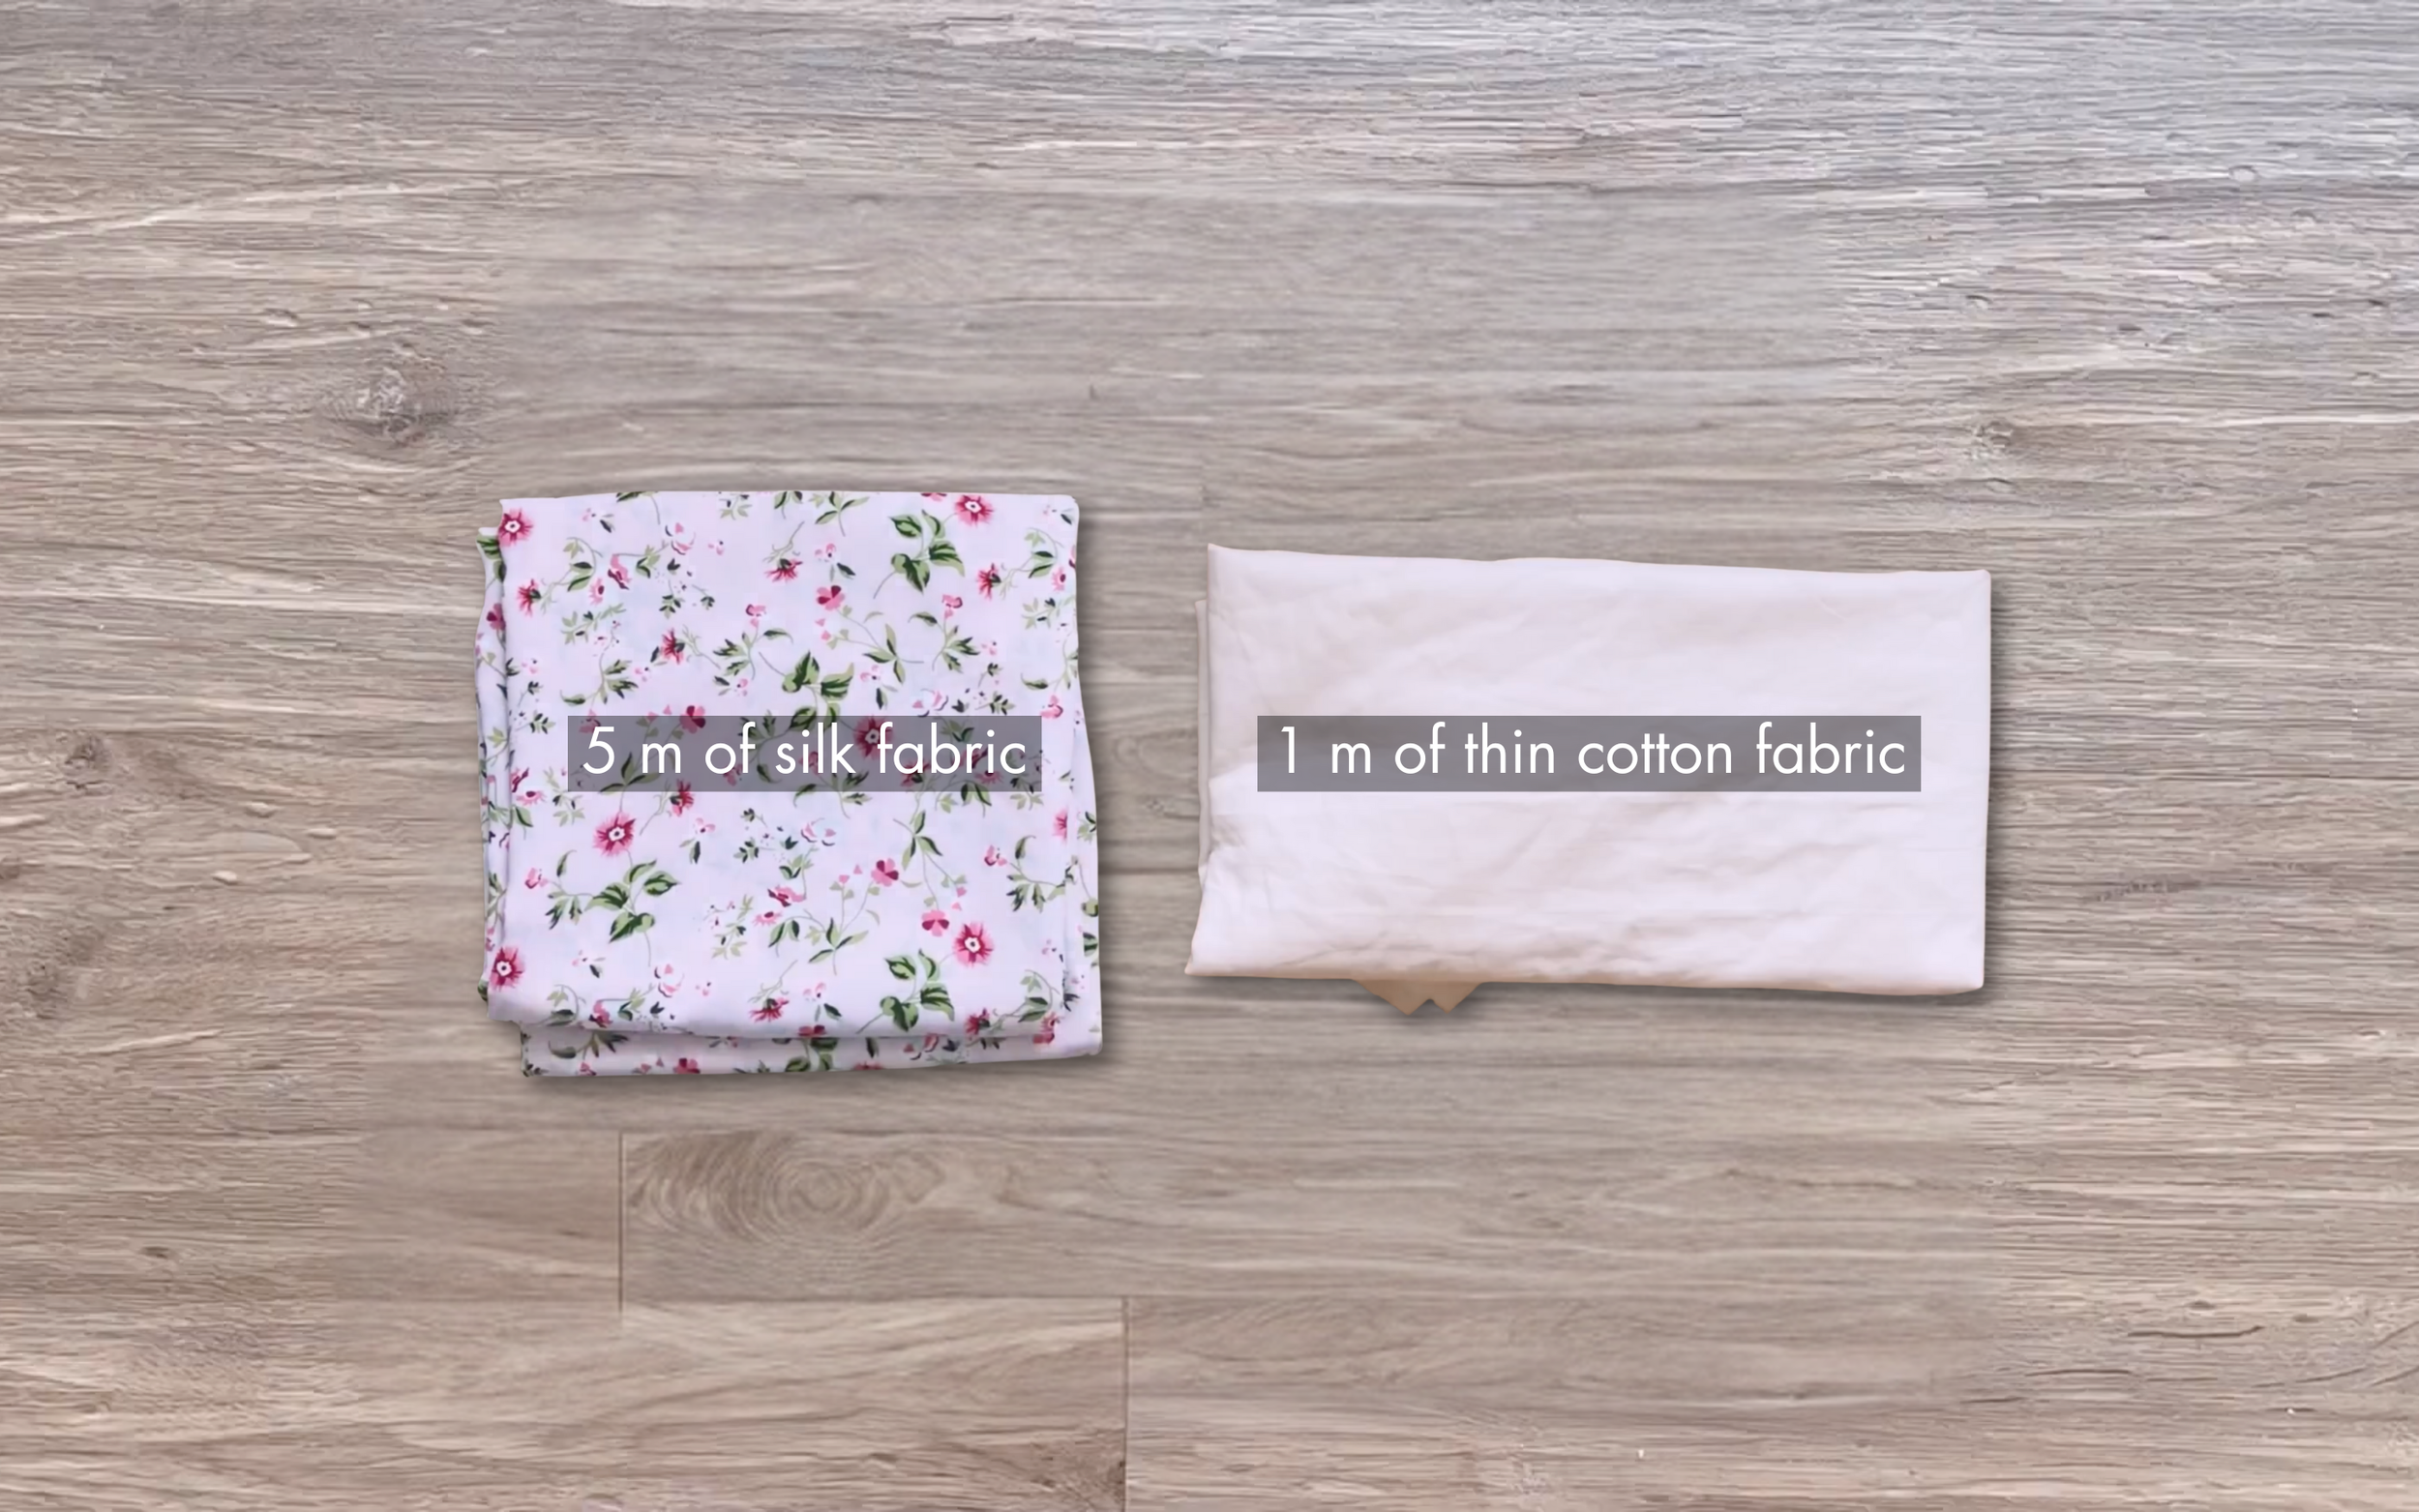
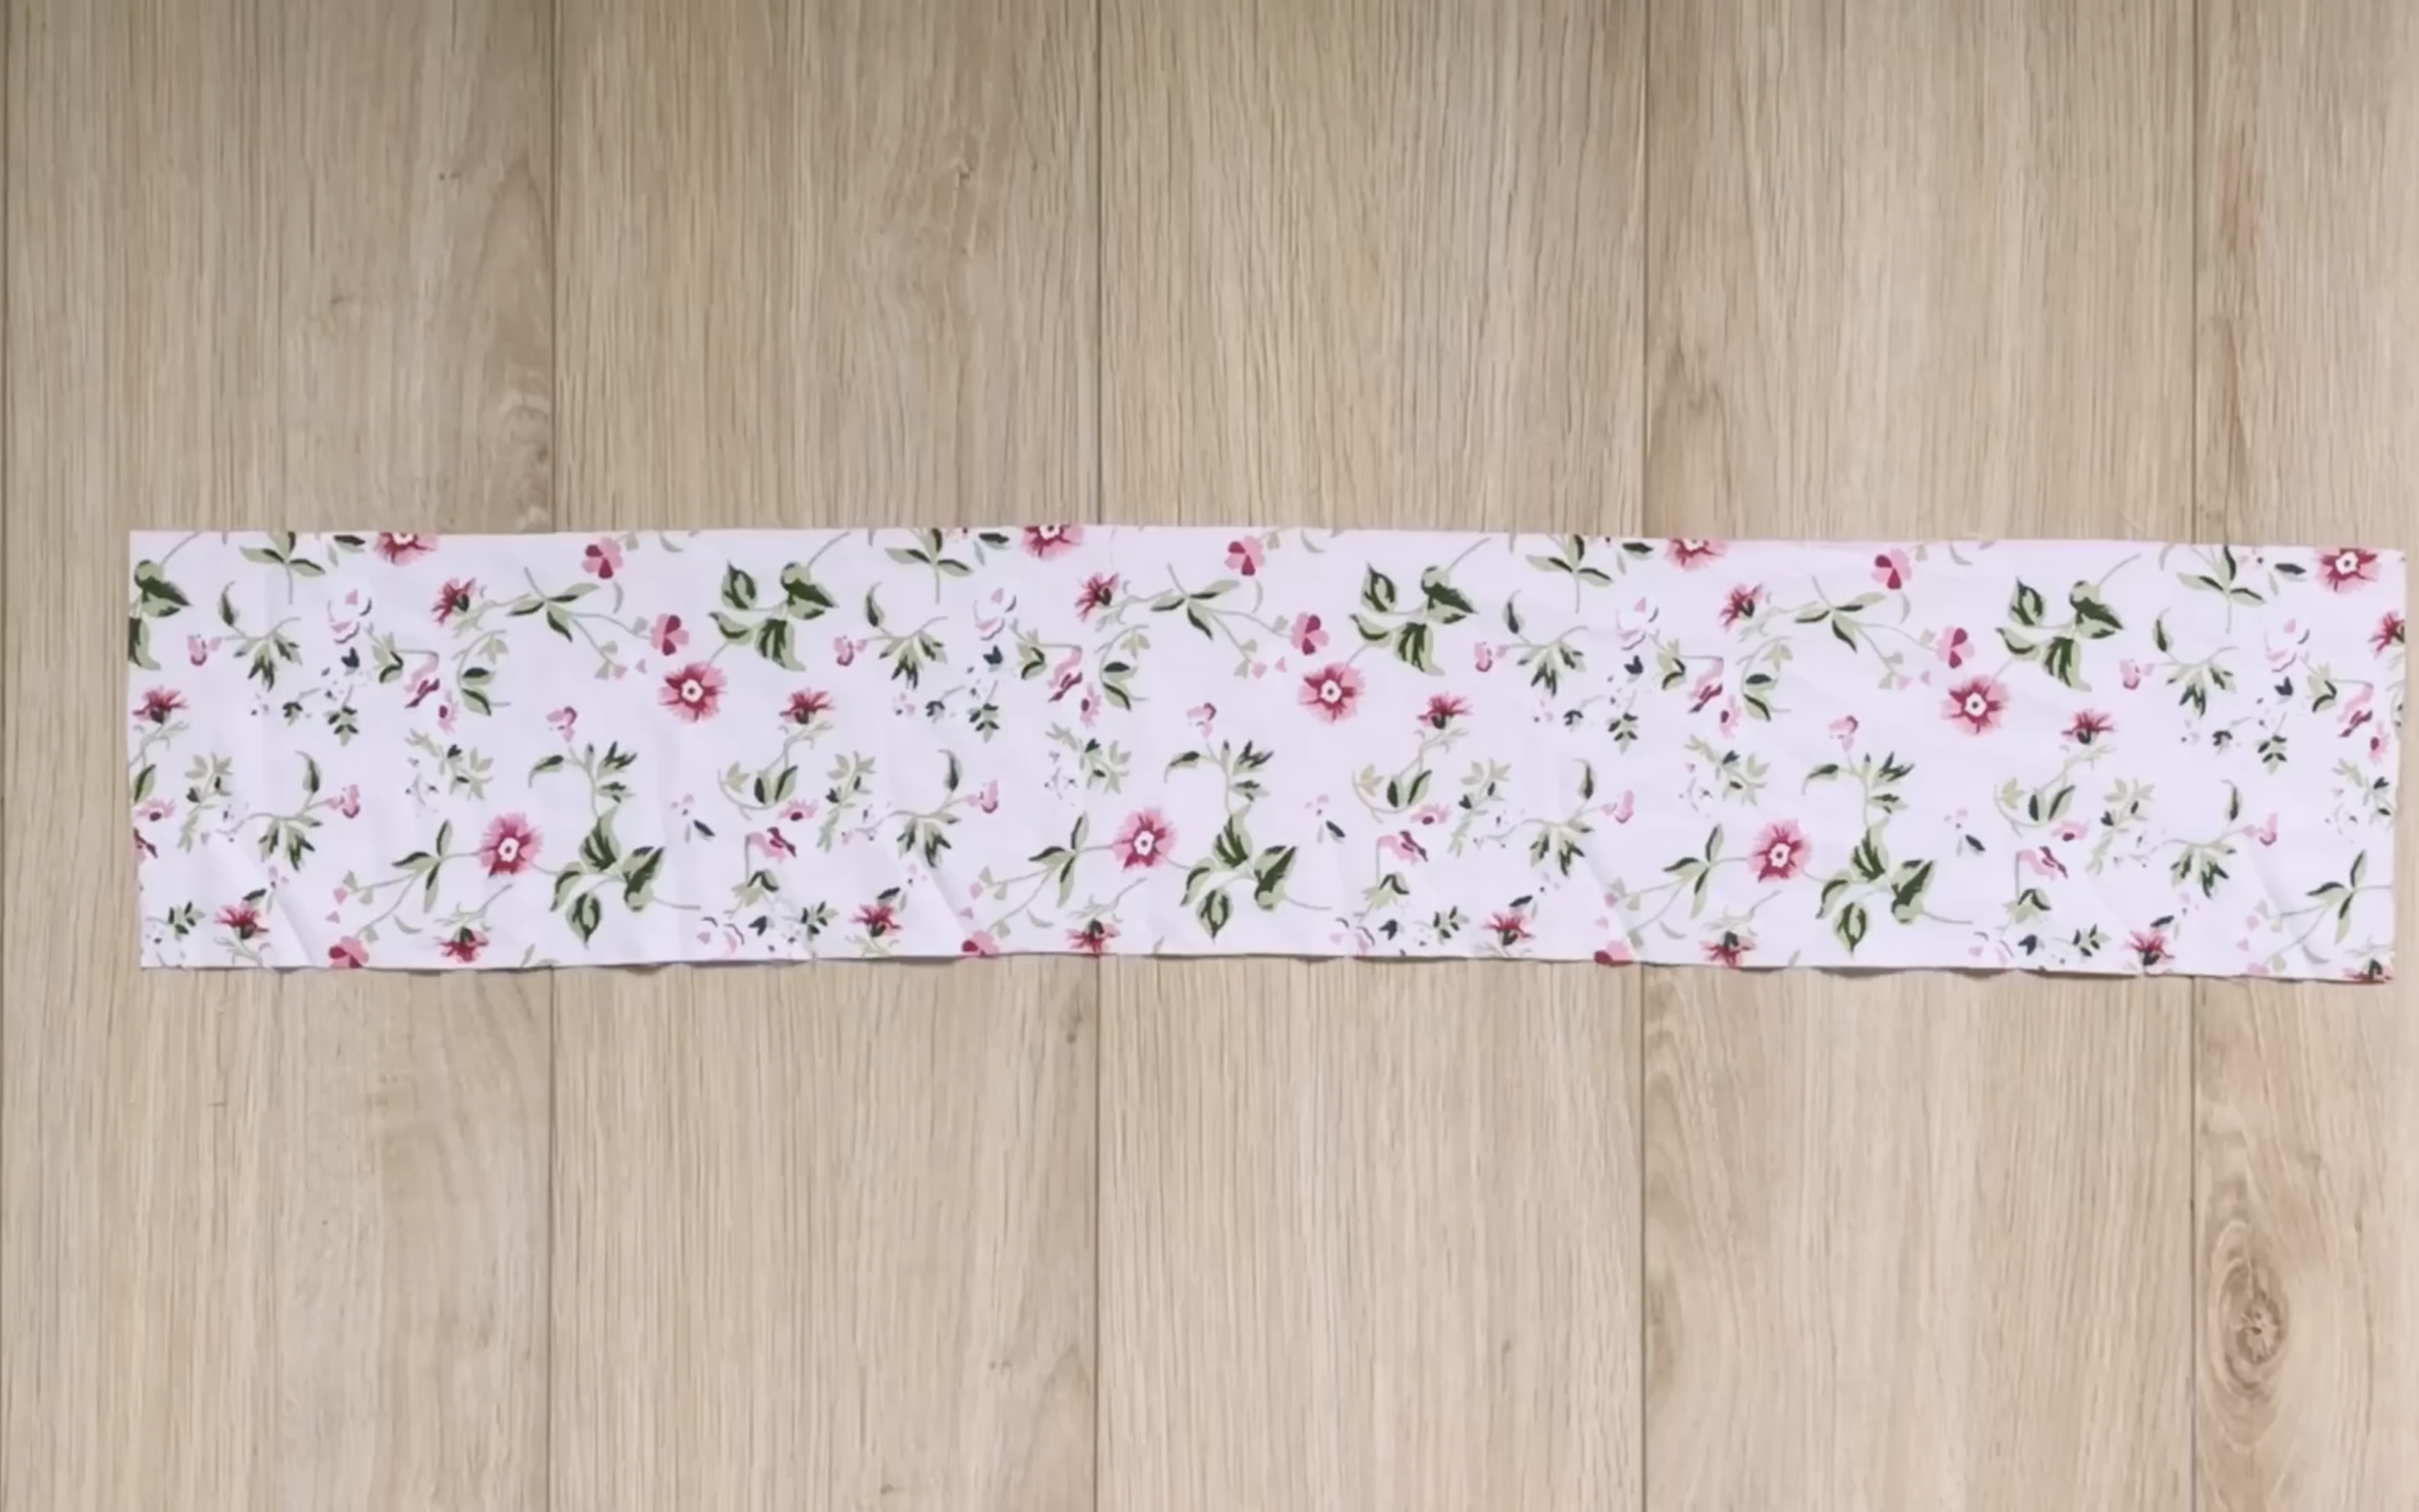
Main fabric: 5m of silk fabric in floral printing
Lining fabric: 1m of thin cotton fabric in white
Pattern paper
Sewing machine
Pins
Scissors
Ruler
Long stick
Zipper
MAKING THE PATTERNS
Here’s the pattern for the project. To get a clear understanding of all the measurements needed for the pattern, watch the video from 2:03 to 09:53 for the top of the dress and from 19:41 to 26:24 for the bottom of the dress.
Remember, you can adjust these measurements to fit your own dimensions!

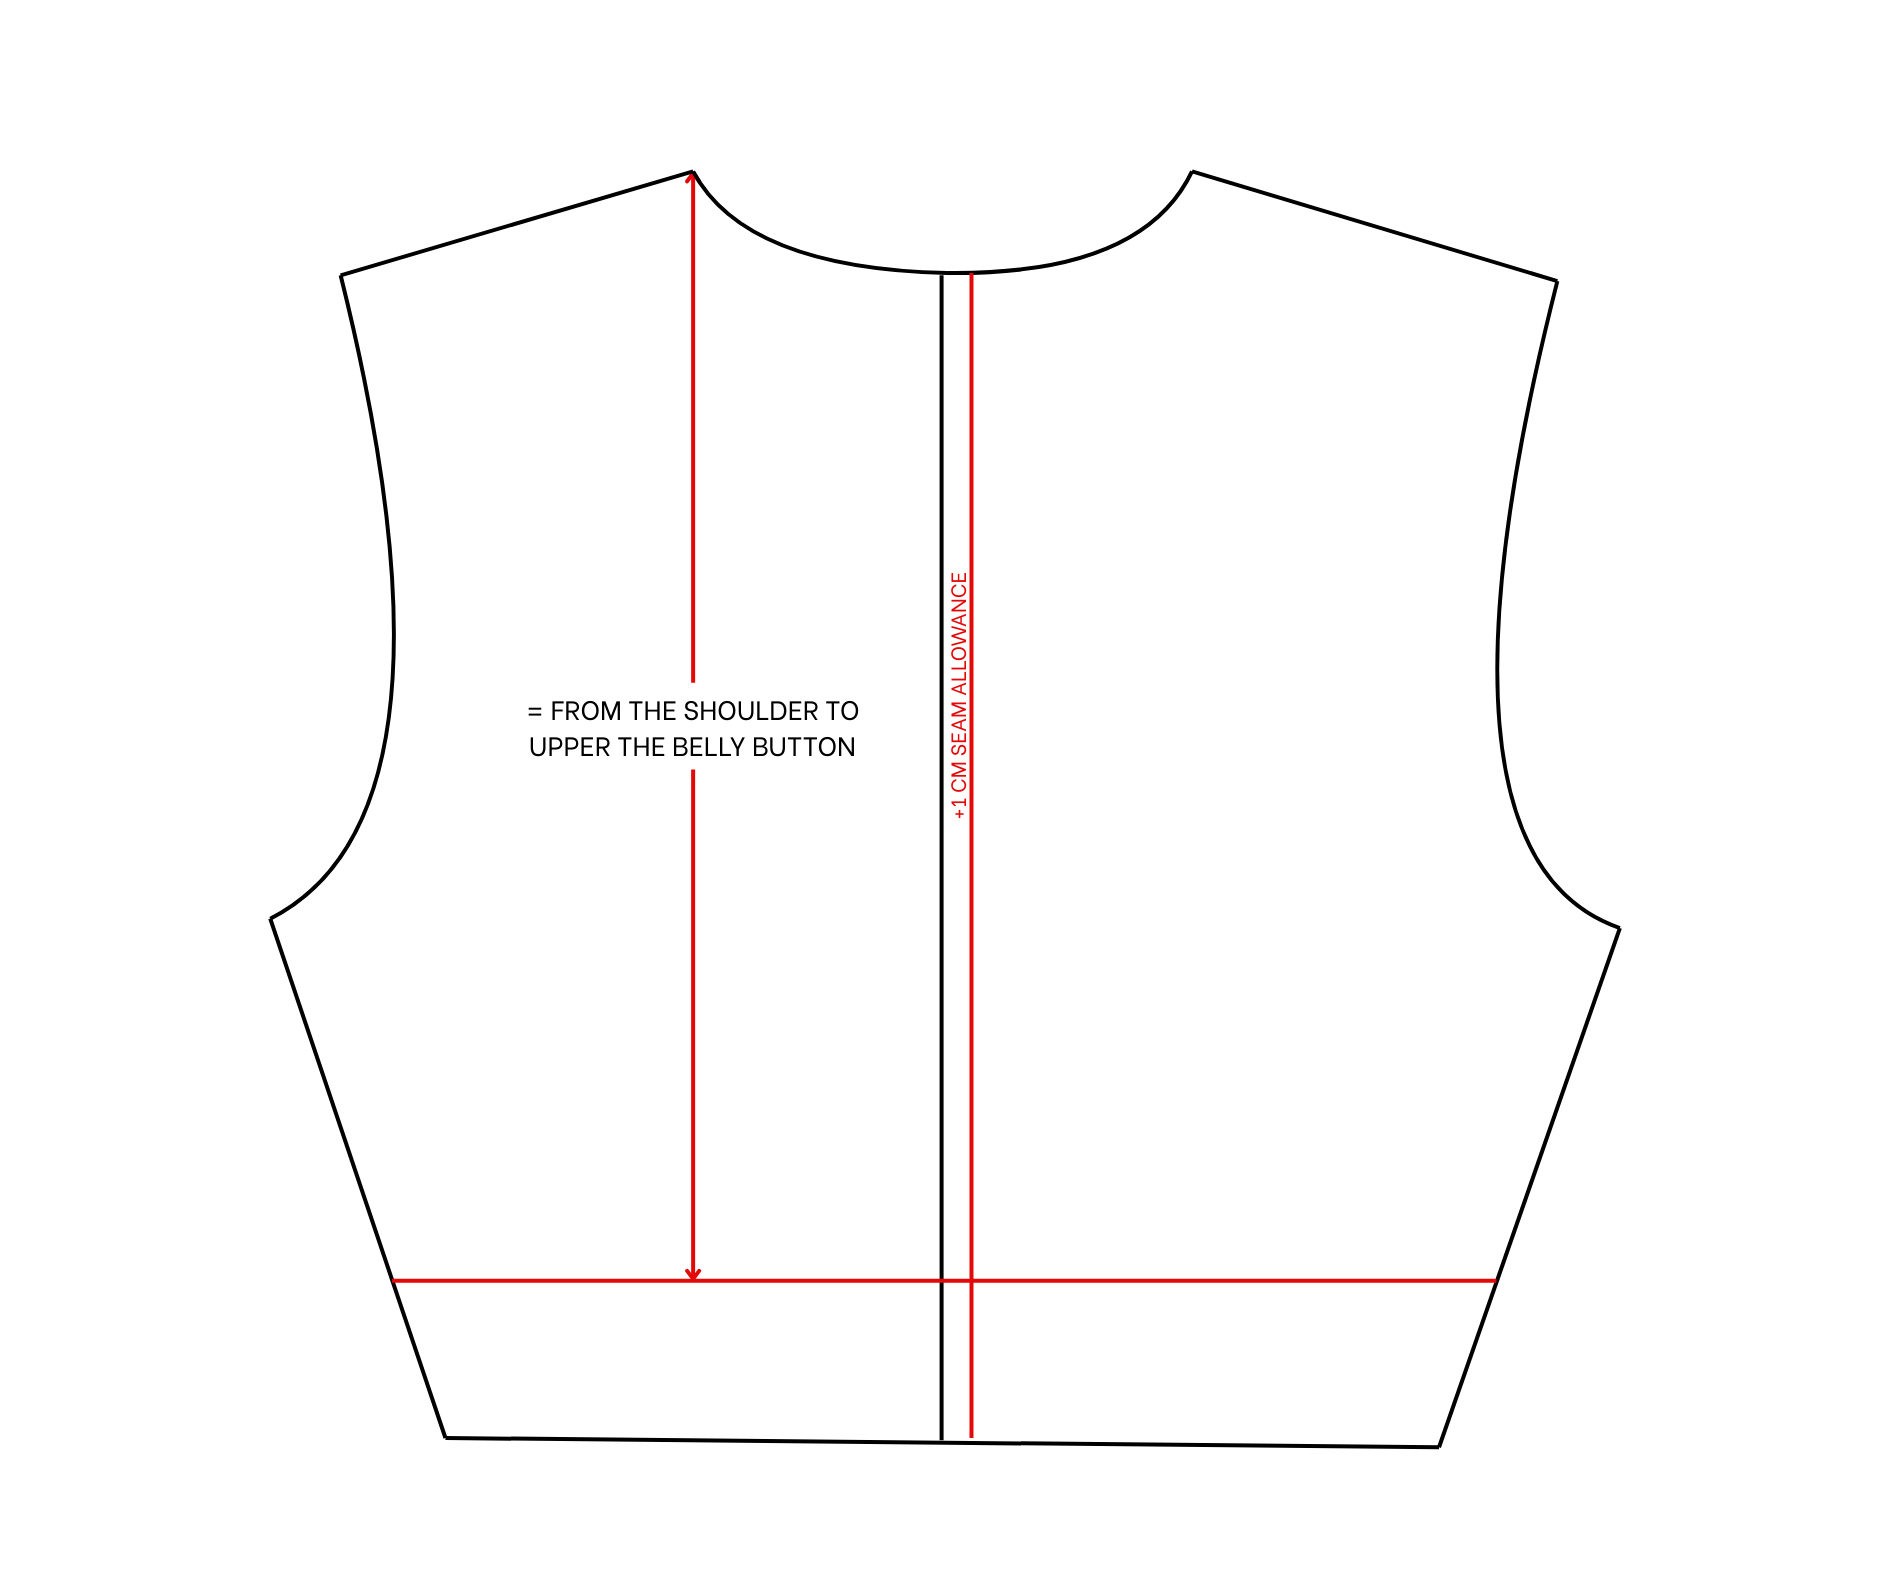
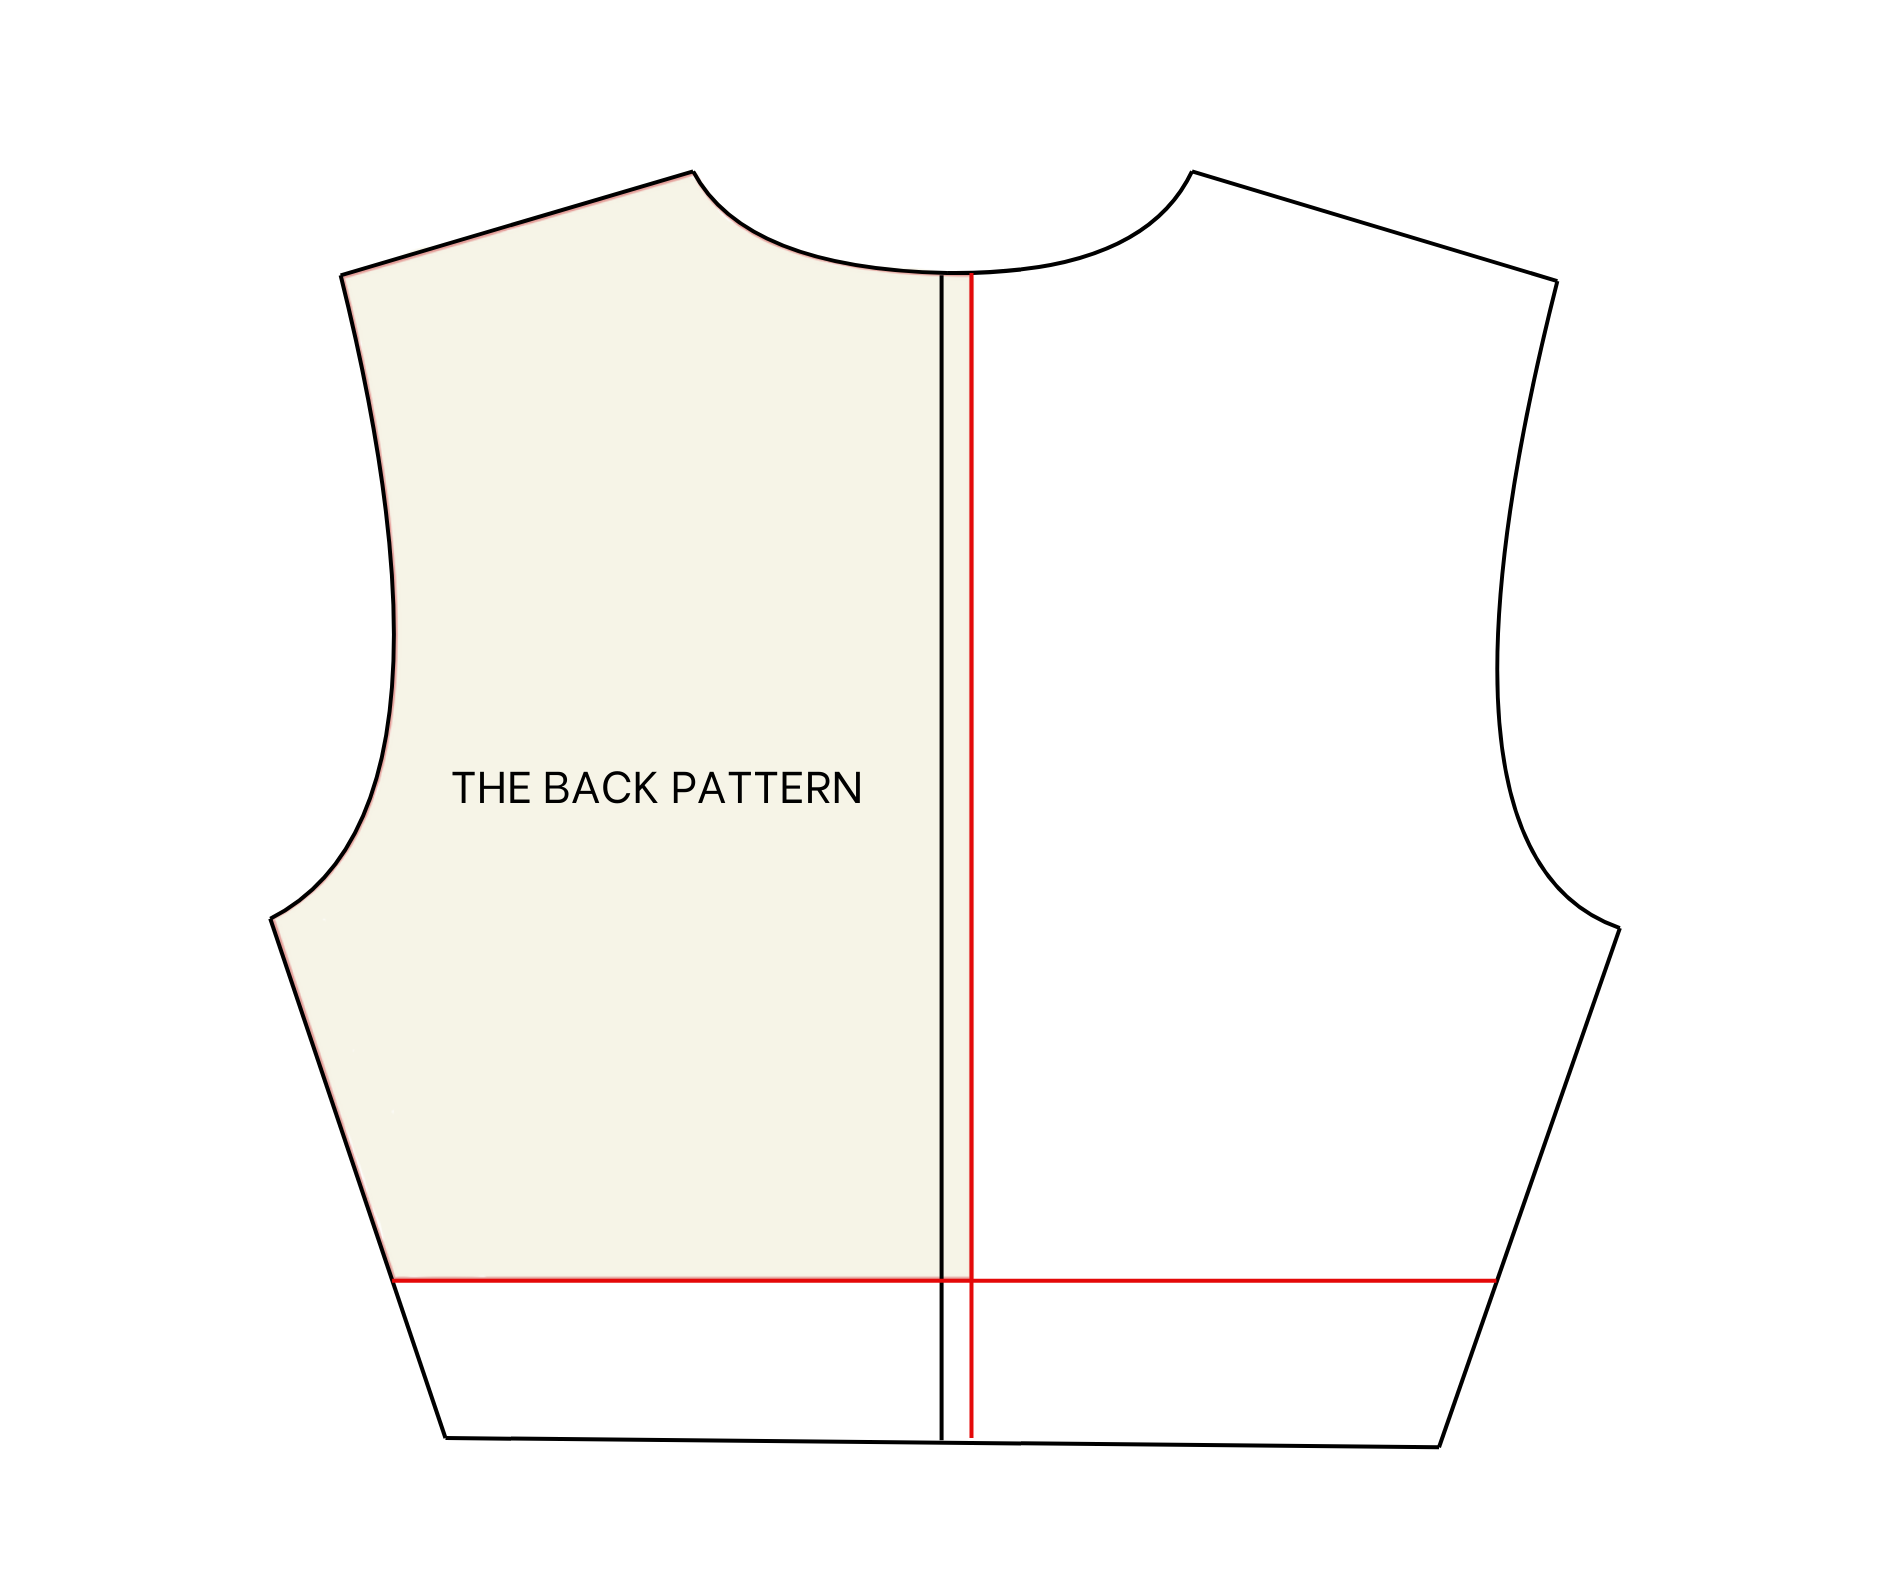
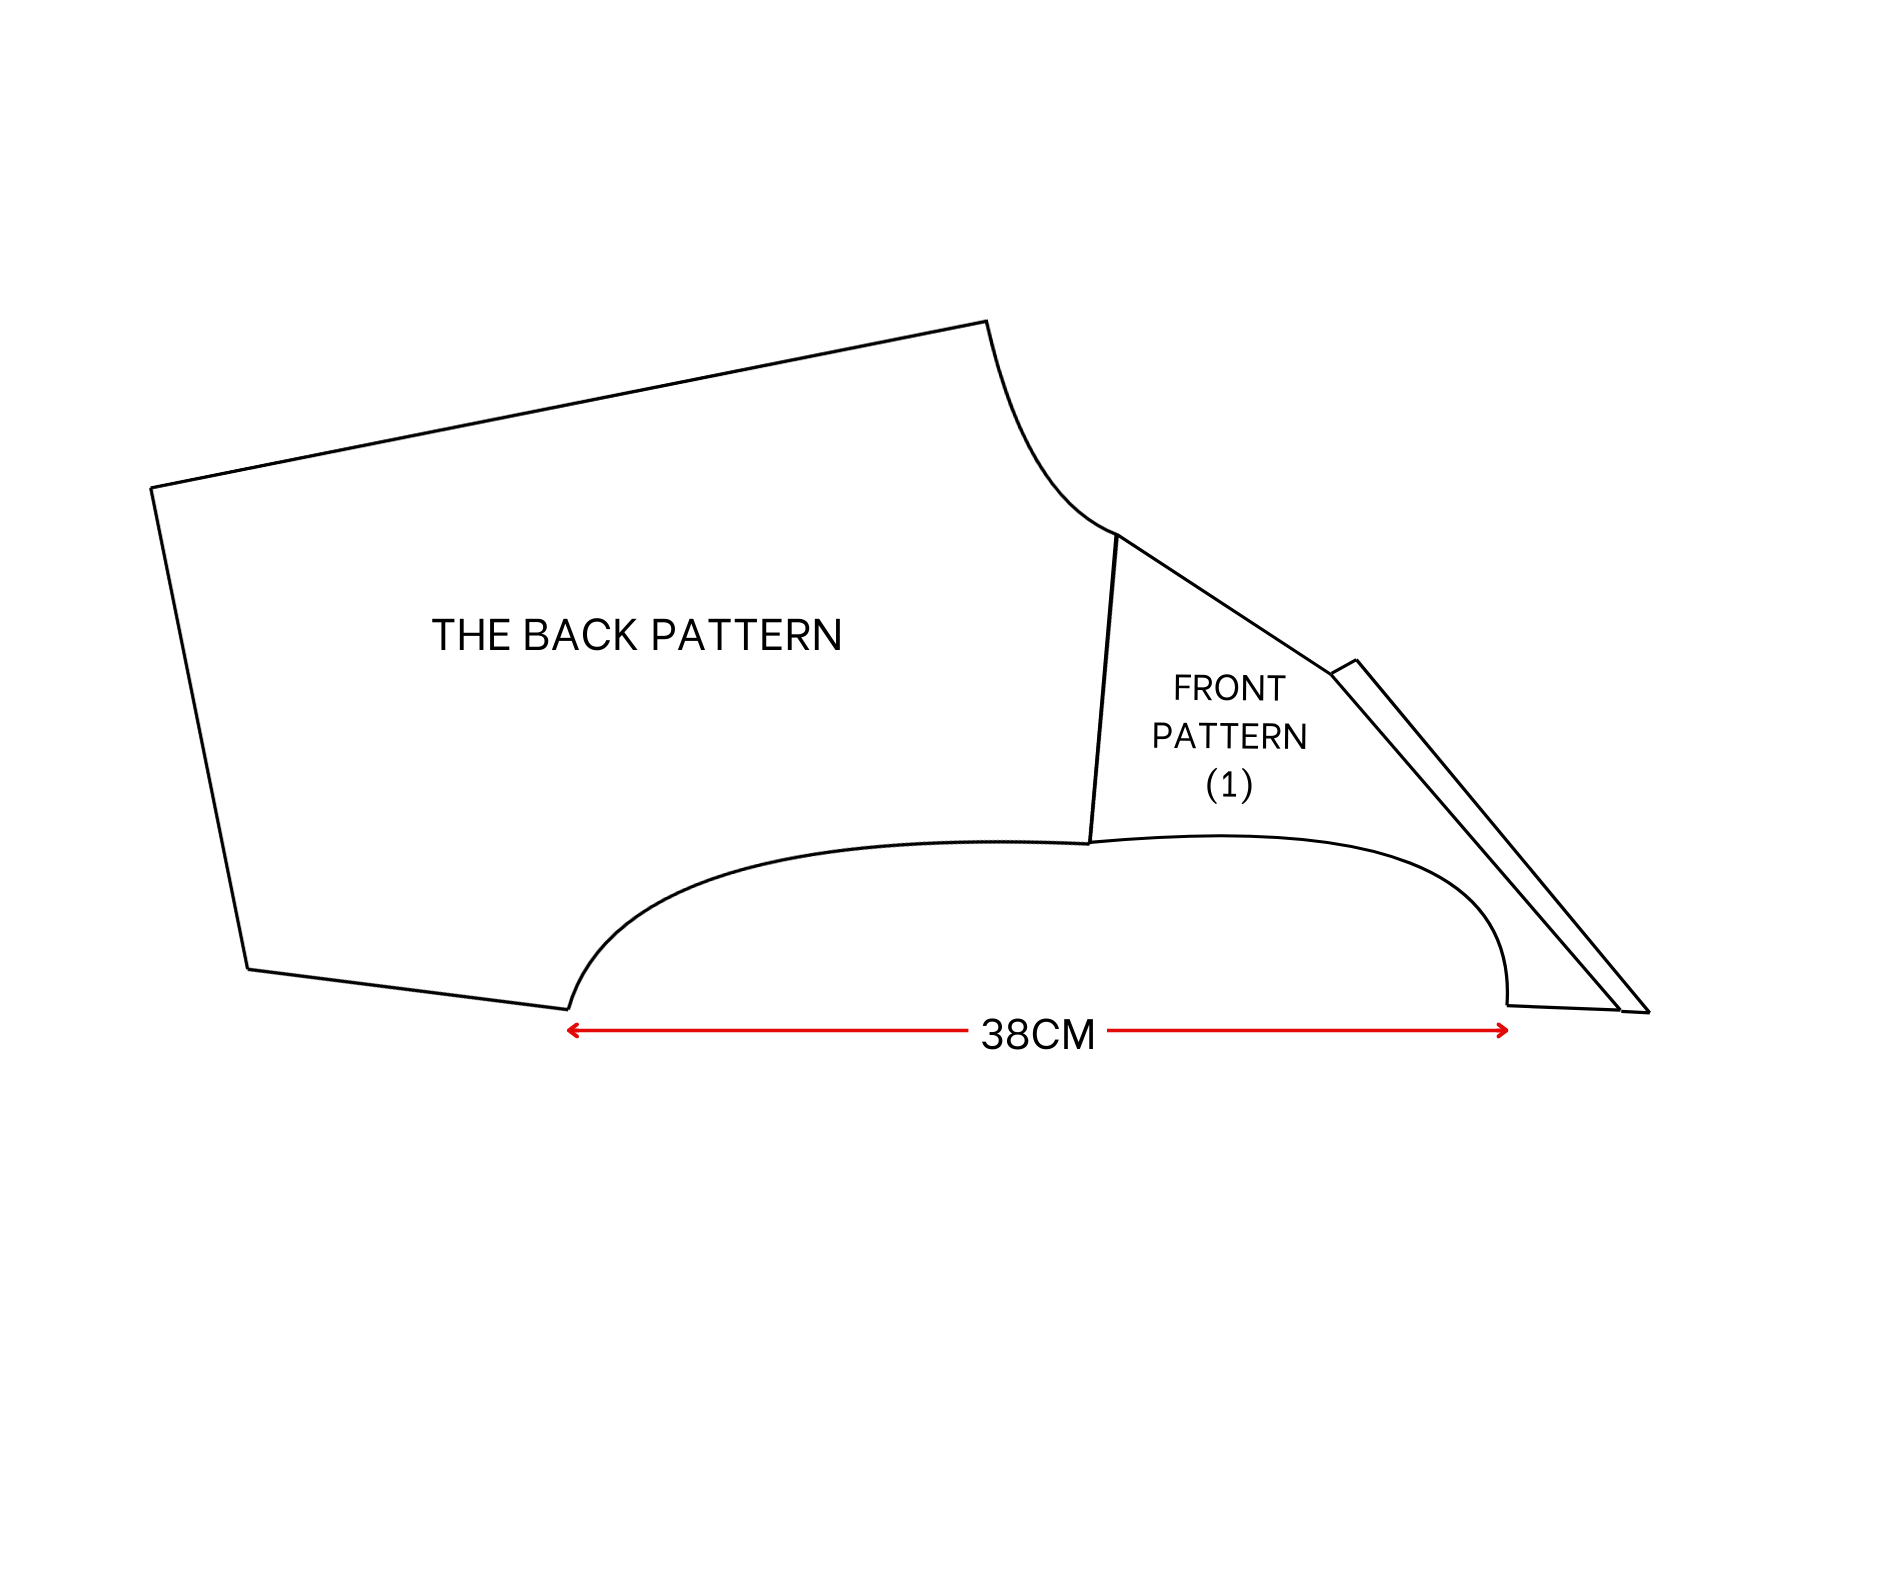
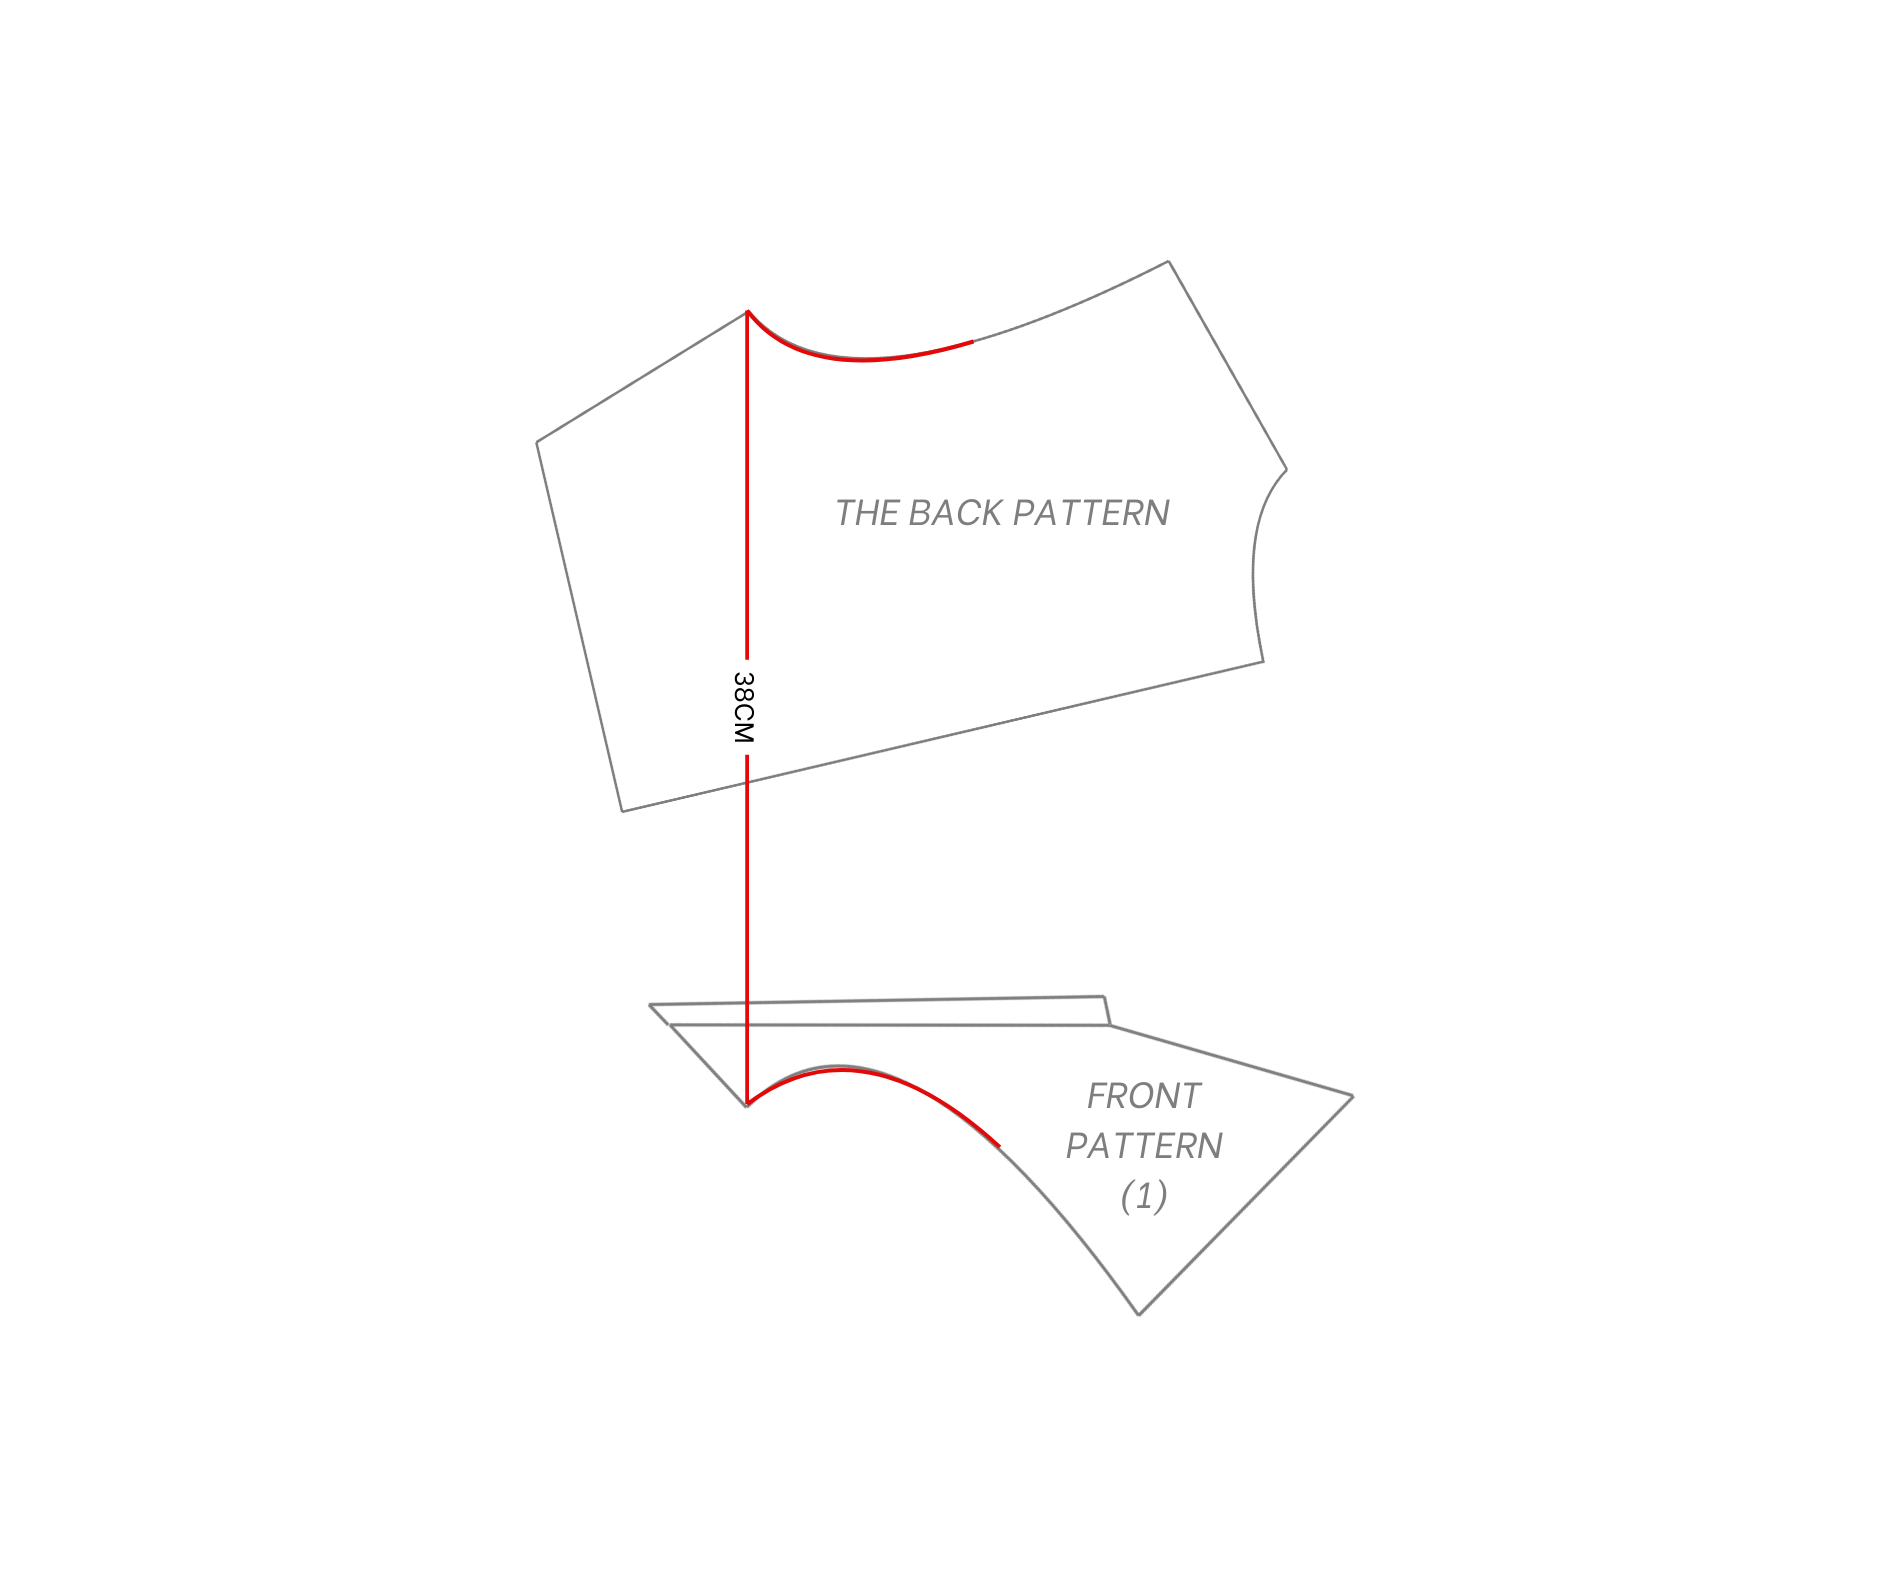
THE BACK PATTERN OF THE TOP
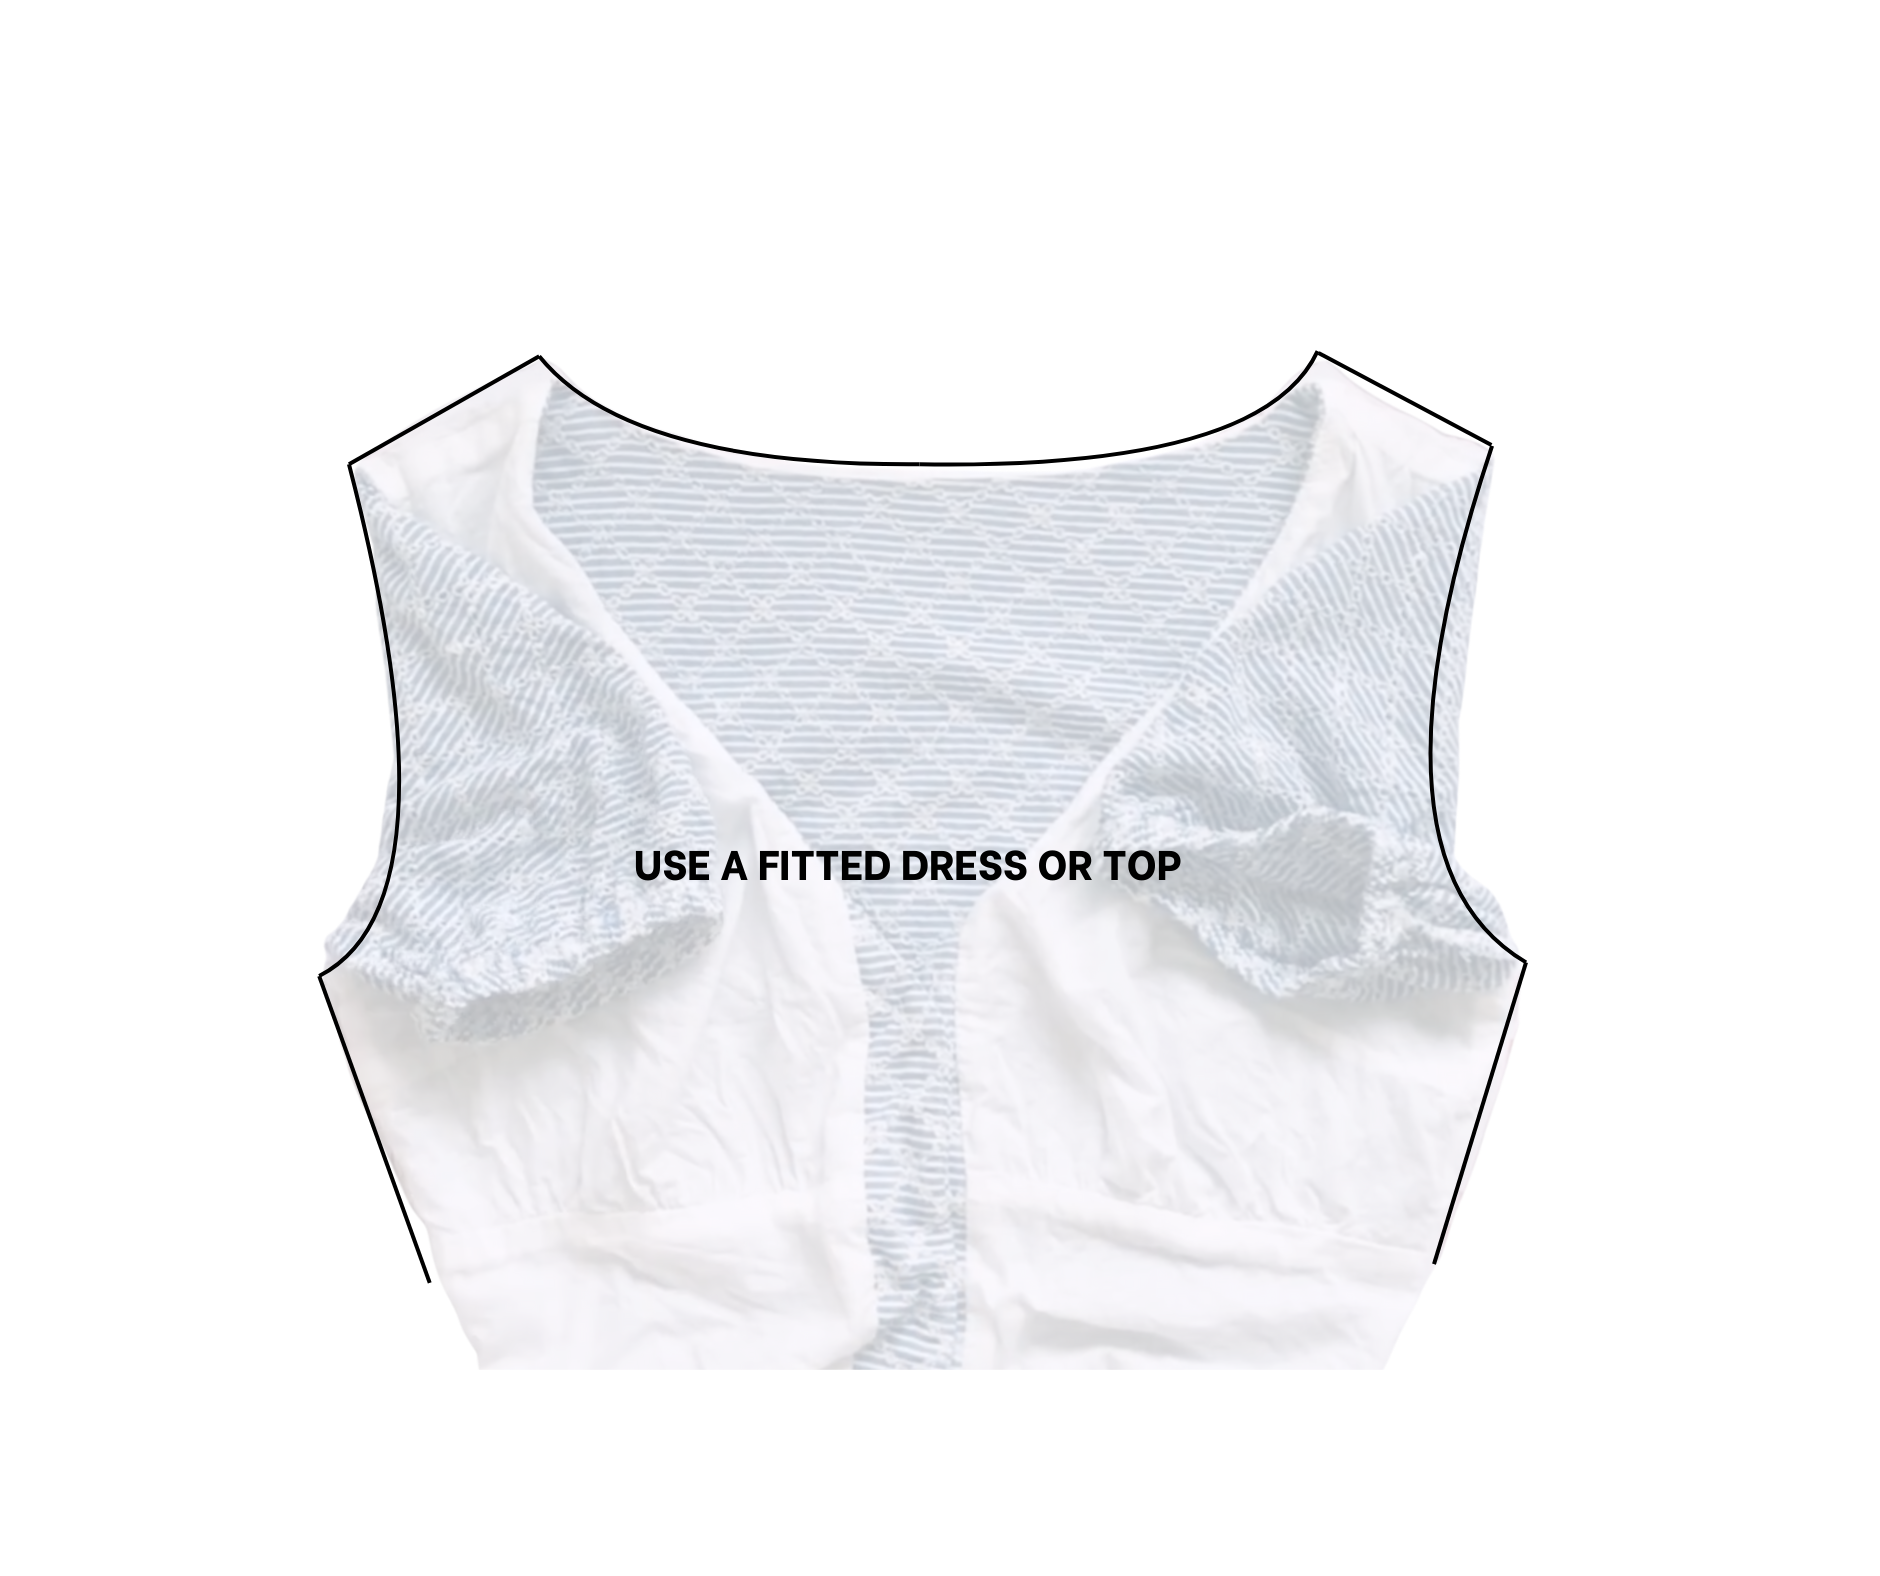
Used one of your favorite dresses with the fitted top to copy the pattern. Should use a cotton or not stretching fabric of the dress or top to copy the right pattern.
Draw along the edge lines of the back of the dress to create the back pattern for the top of the dress.
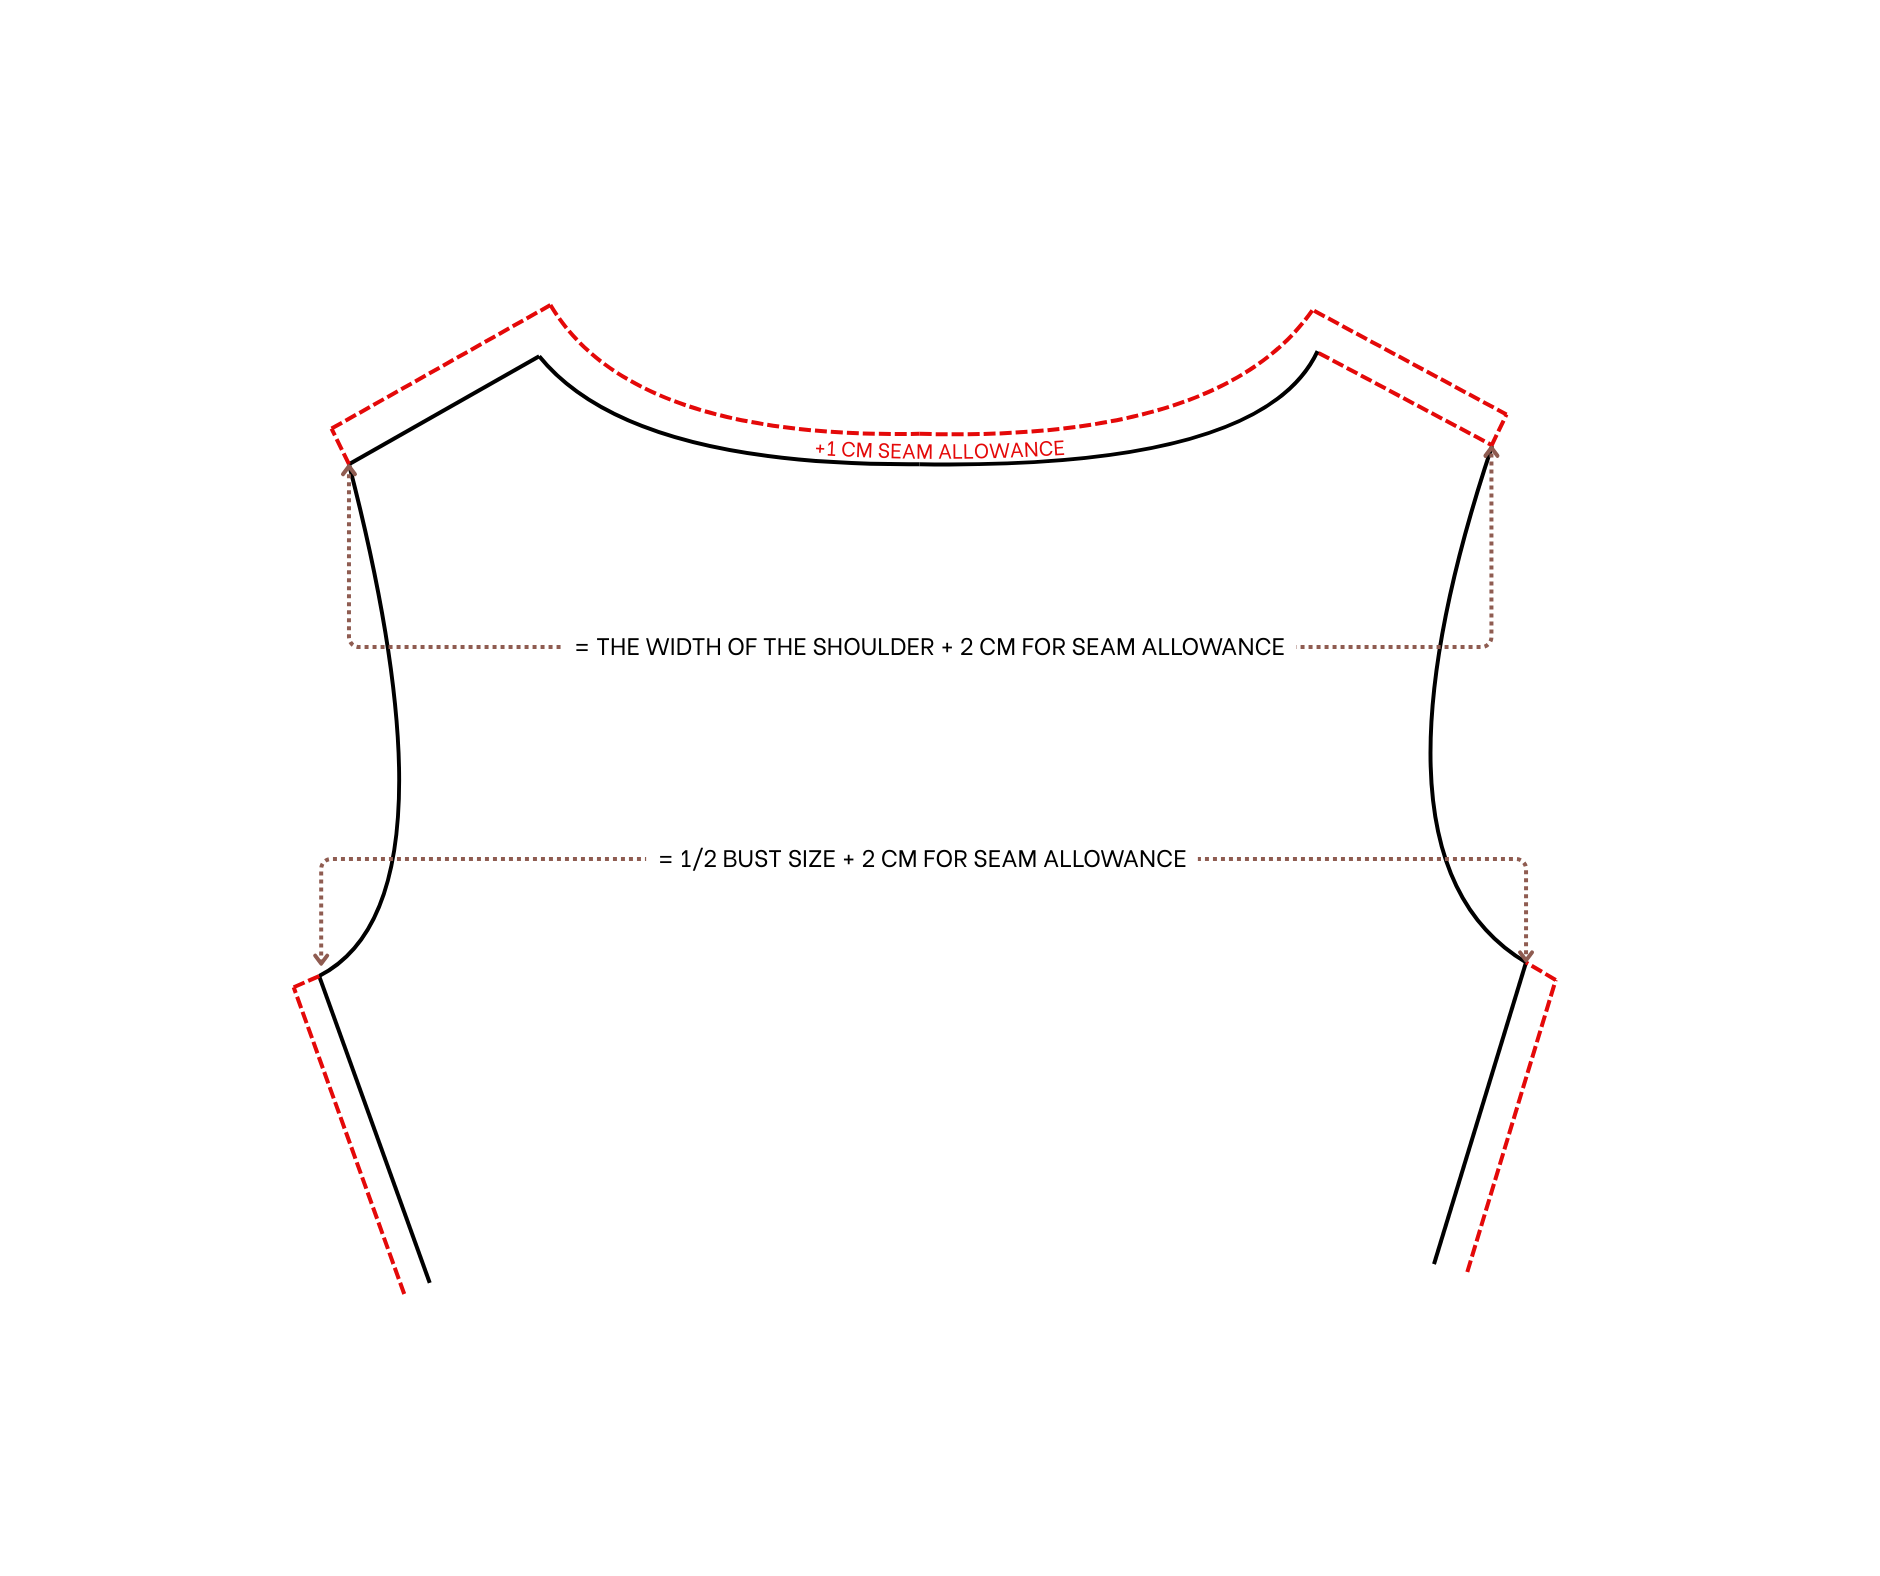
After that, add the seam allowance at the shoulders, neck, and underarm line.
Don't forget to check the measurement of your pattern at the shoulder and the underarm line to make sure it fits your body.
The width of your shoulder is 36 cm. The width of your underarm size will be a half of your bust size plus 2 cm for seam allowance.
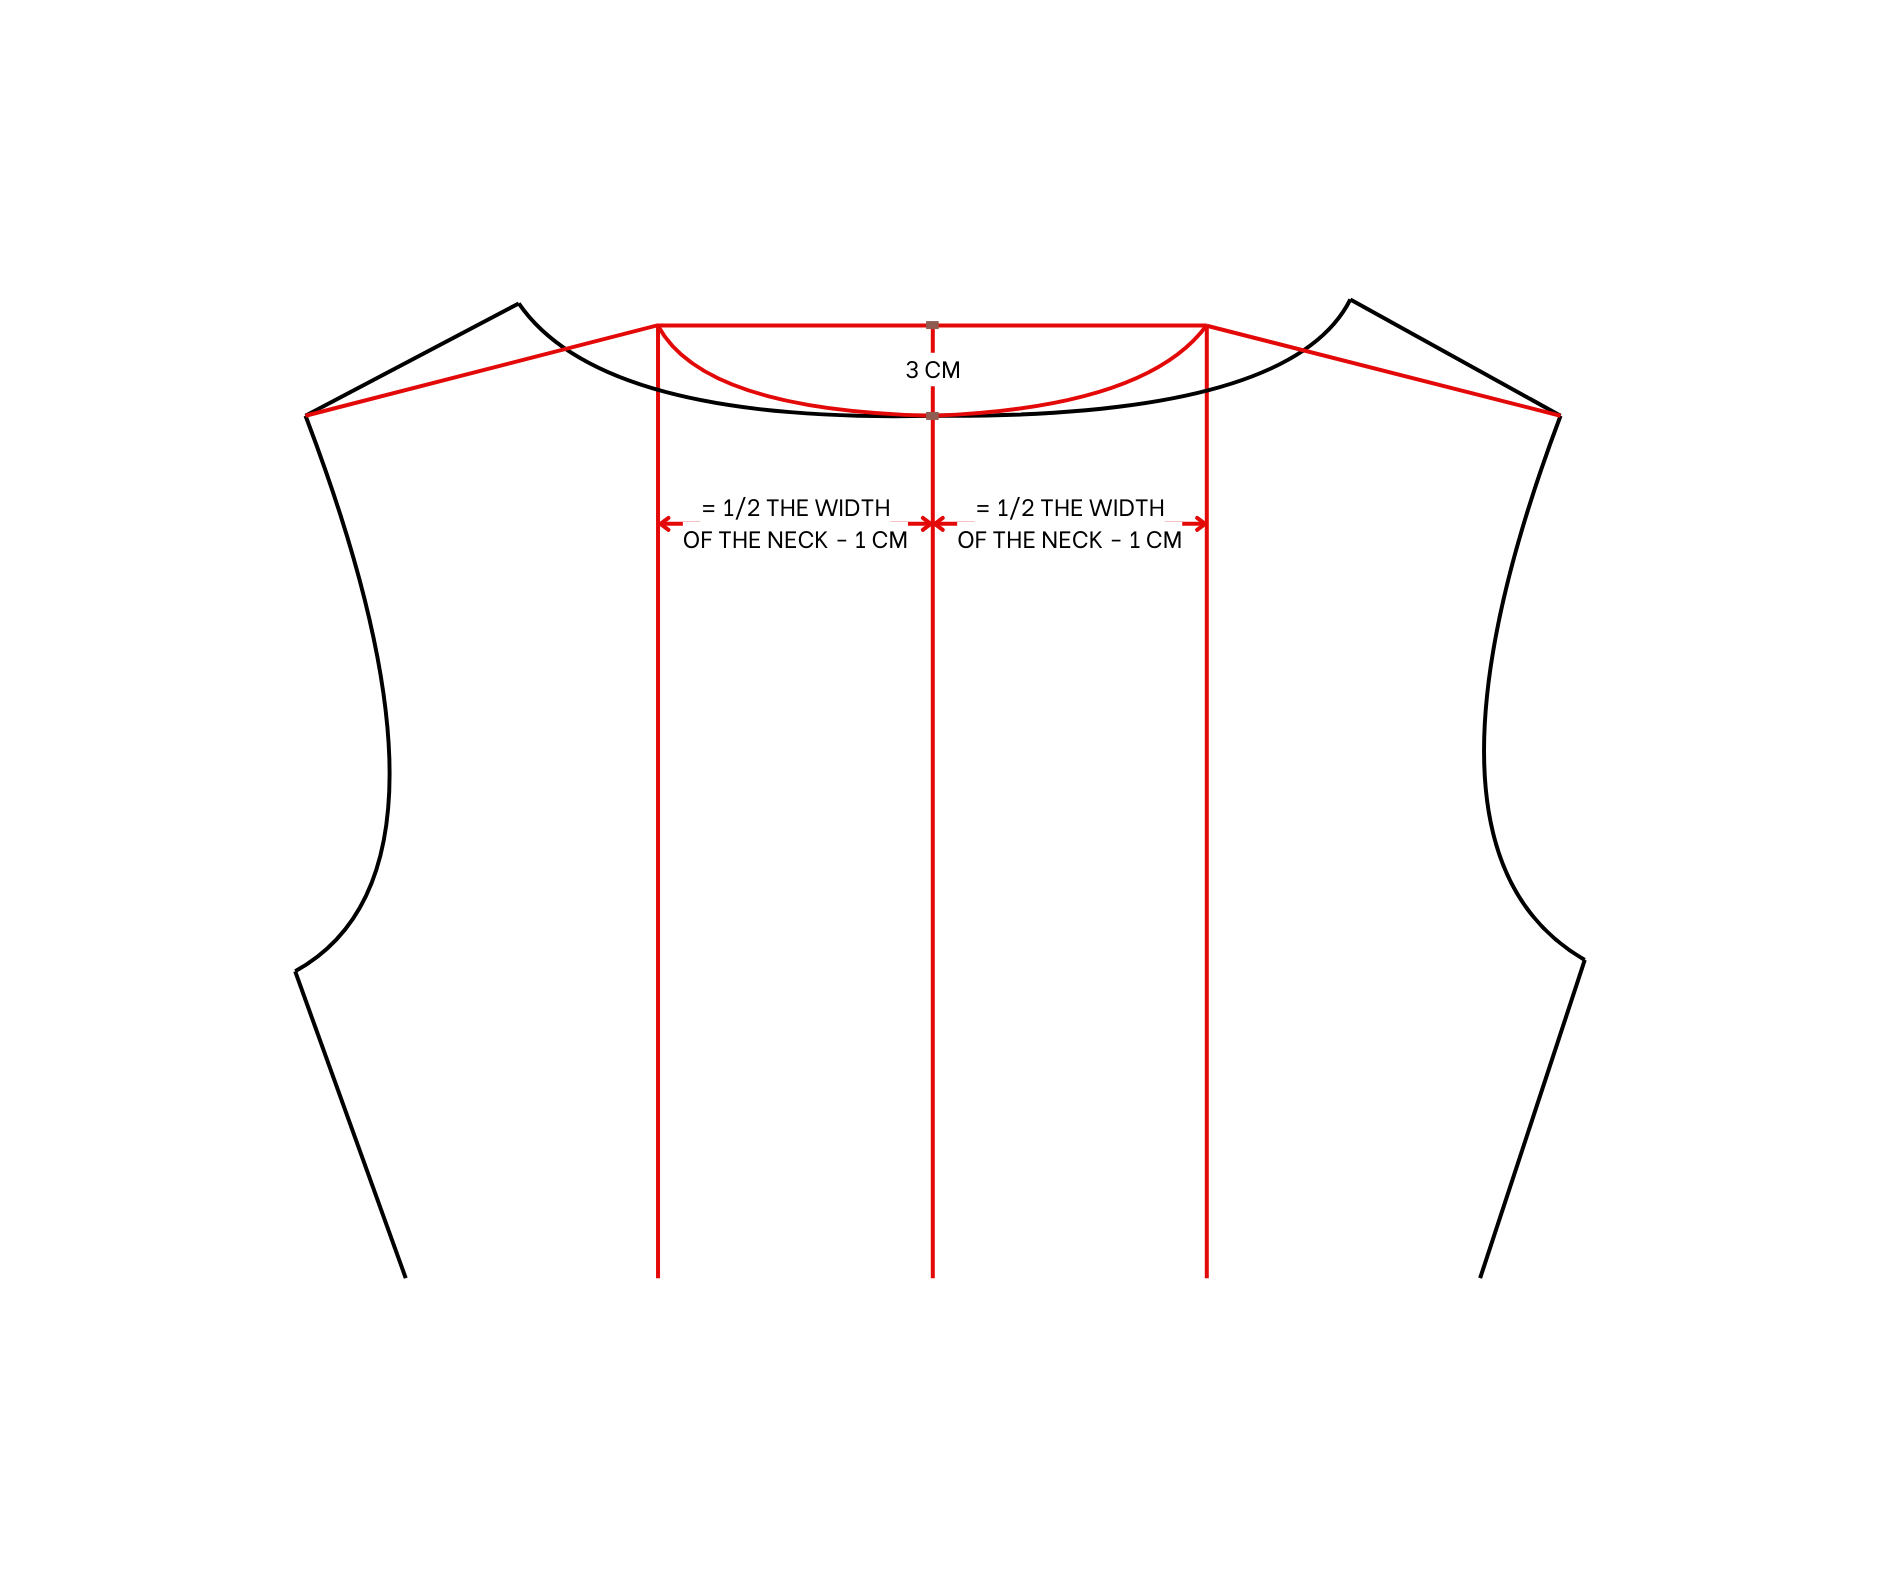
Because the neck of the dress used is quite big but the original dress want to make is quite small at the neck, make the neck of the back pattern smaller.
The width of the neck wanted is 20 cm. So, draw two lines at two sides of the middle line of the neck with 9 cm width.
After that, draw the new neck lines and also the new shoulder lines.
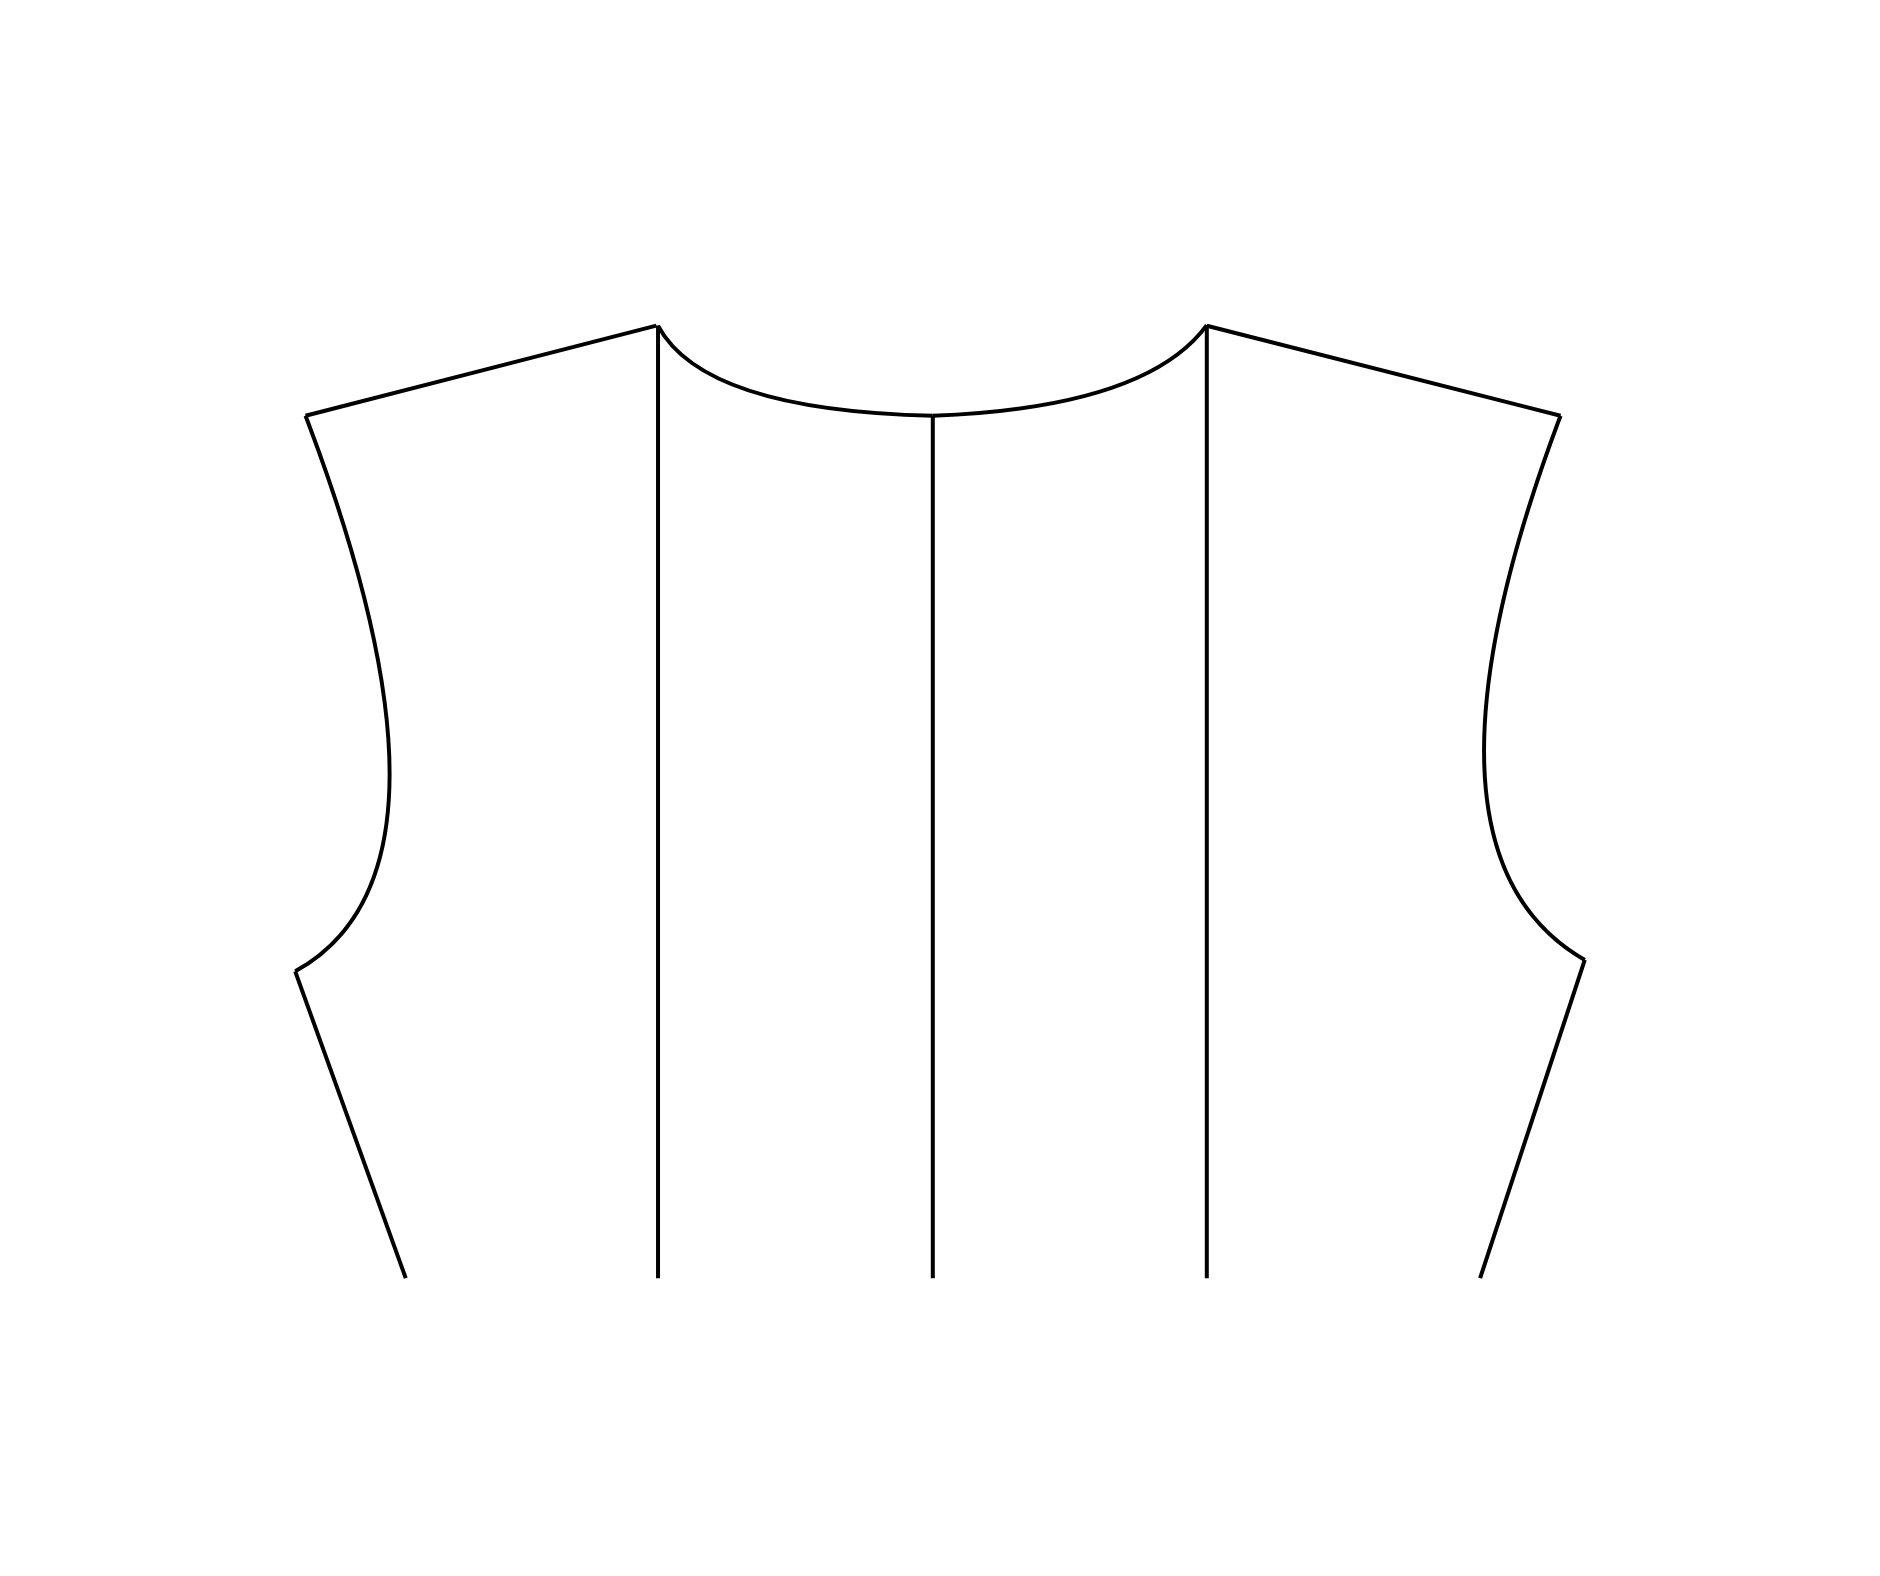
Because the zipper will be put at the back of the dress, so add a 1 cm seam allowance at the middle of the back pattern.
The length of the back pattern is 38 cm, which is the length from your shoulder to a bit upper of your belly button.
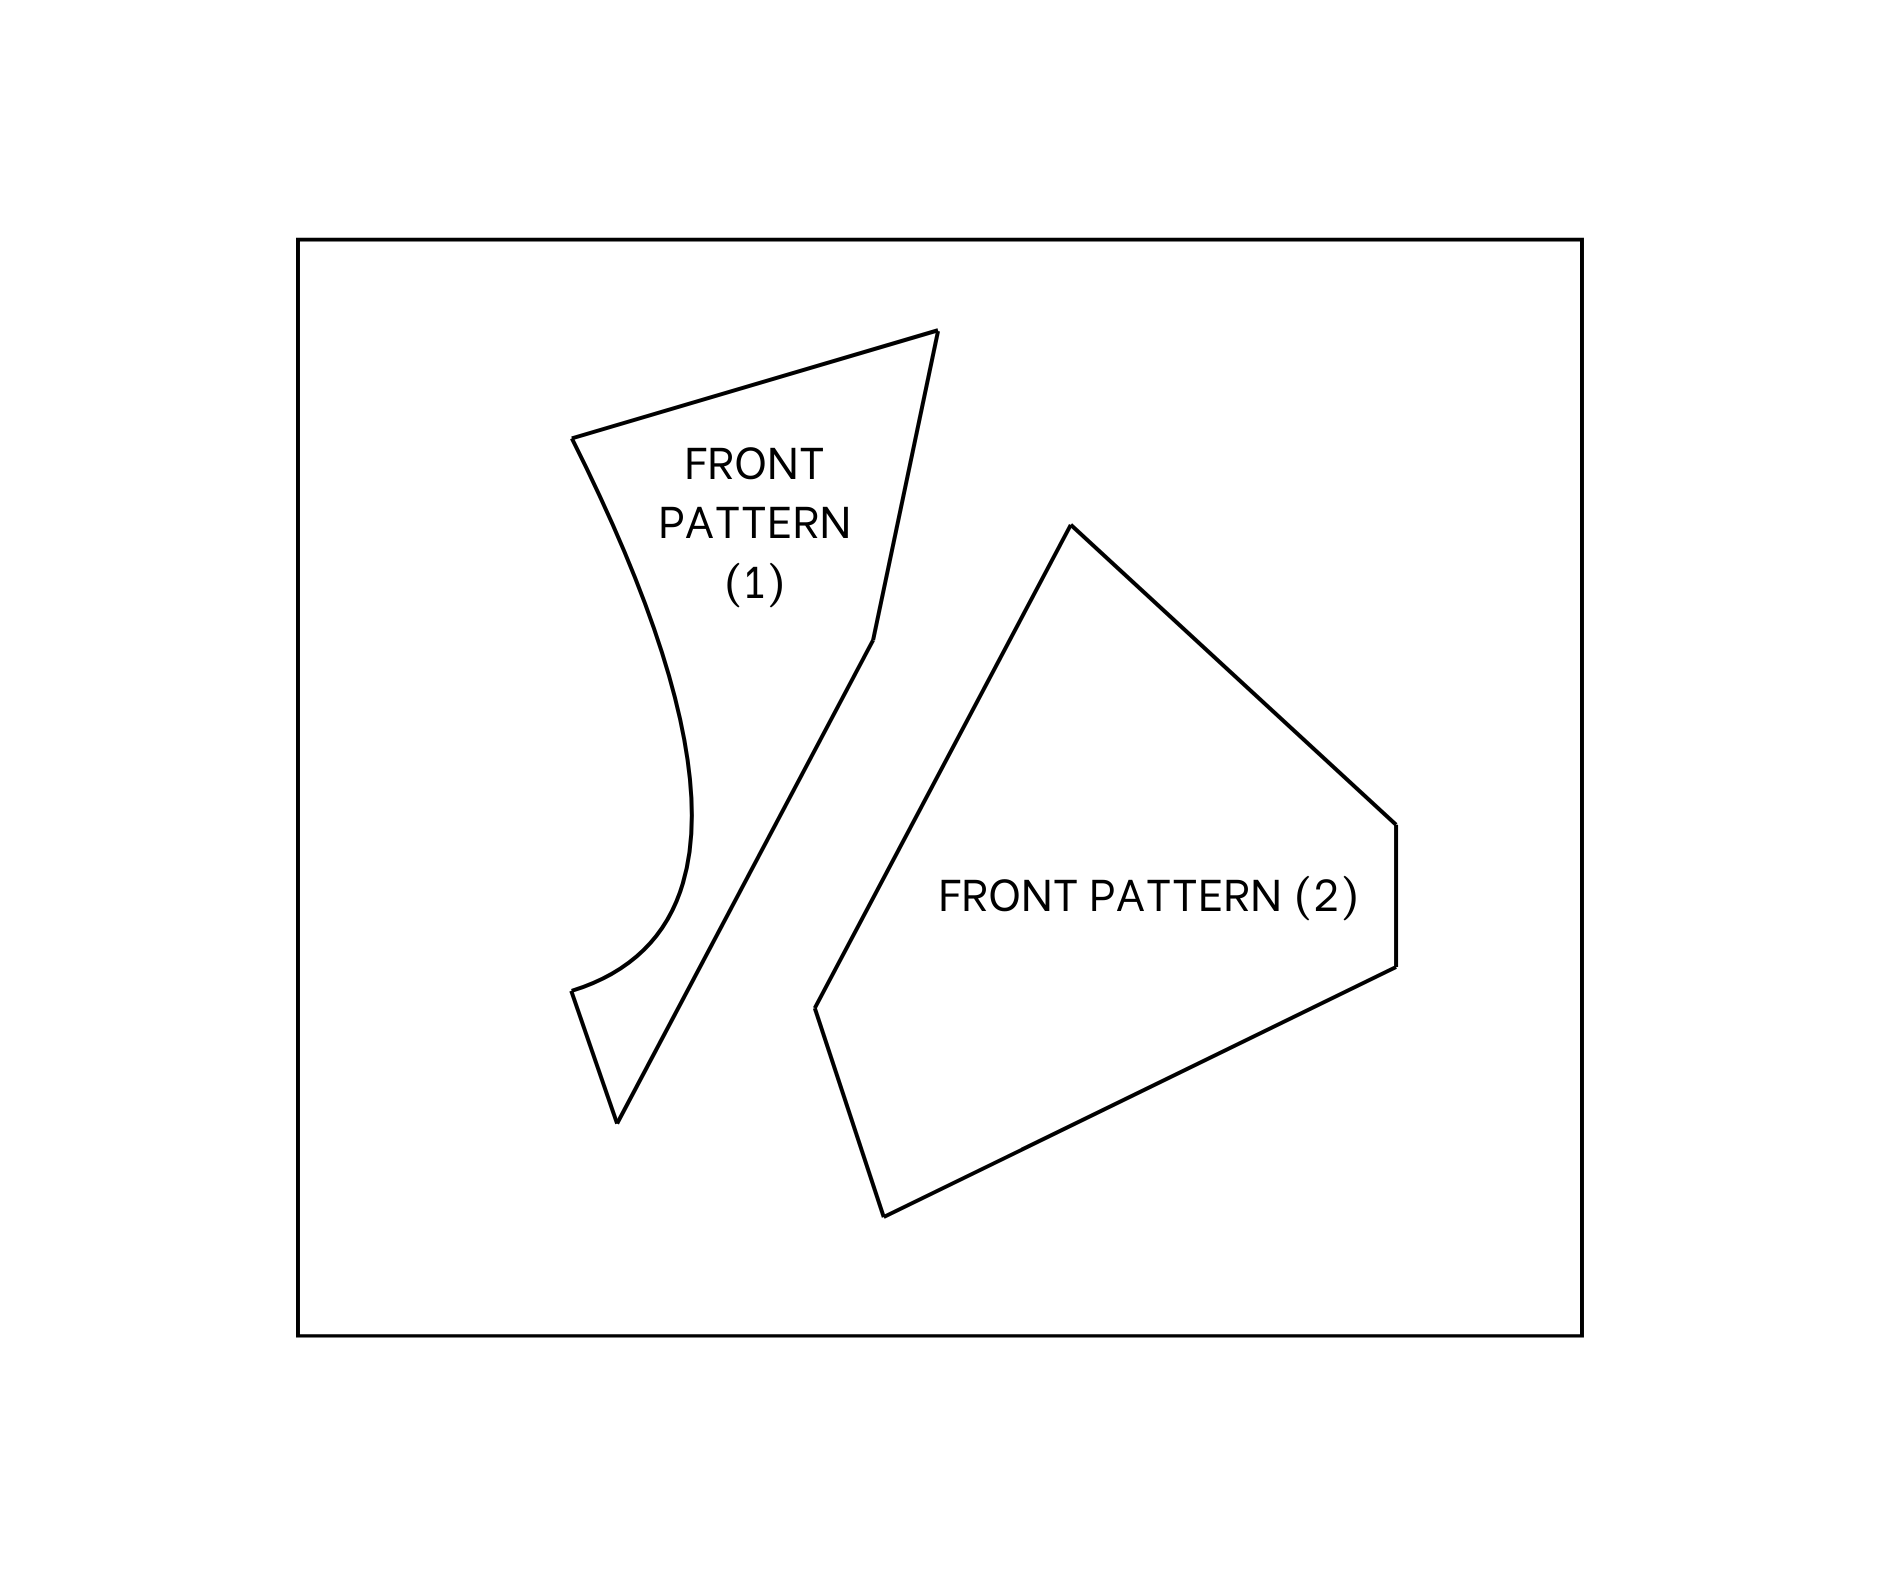
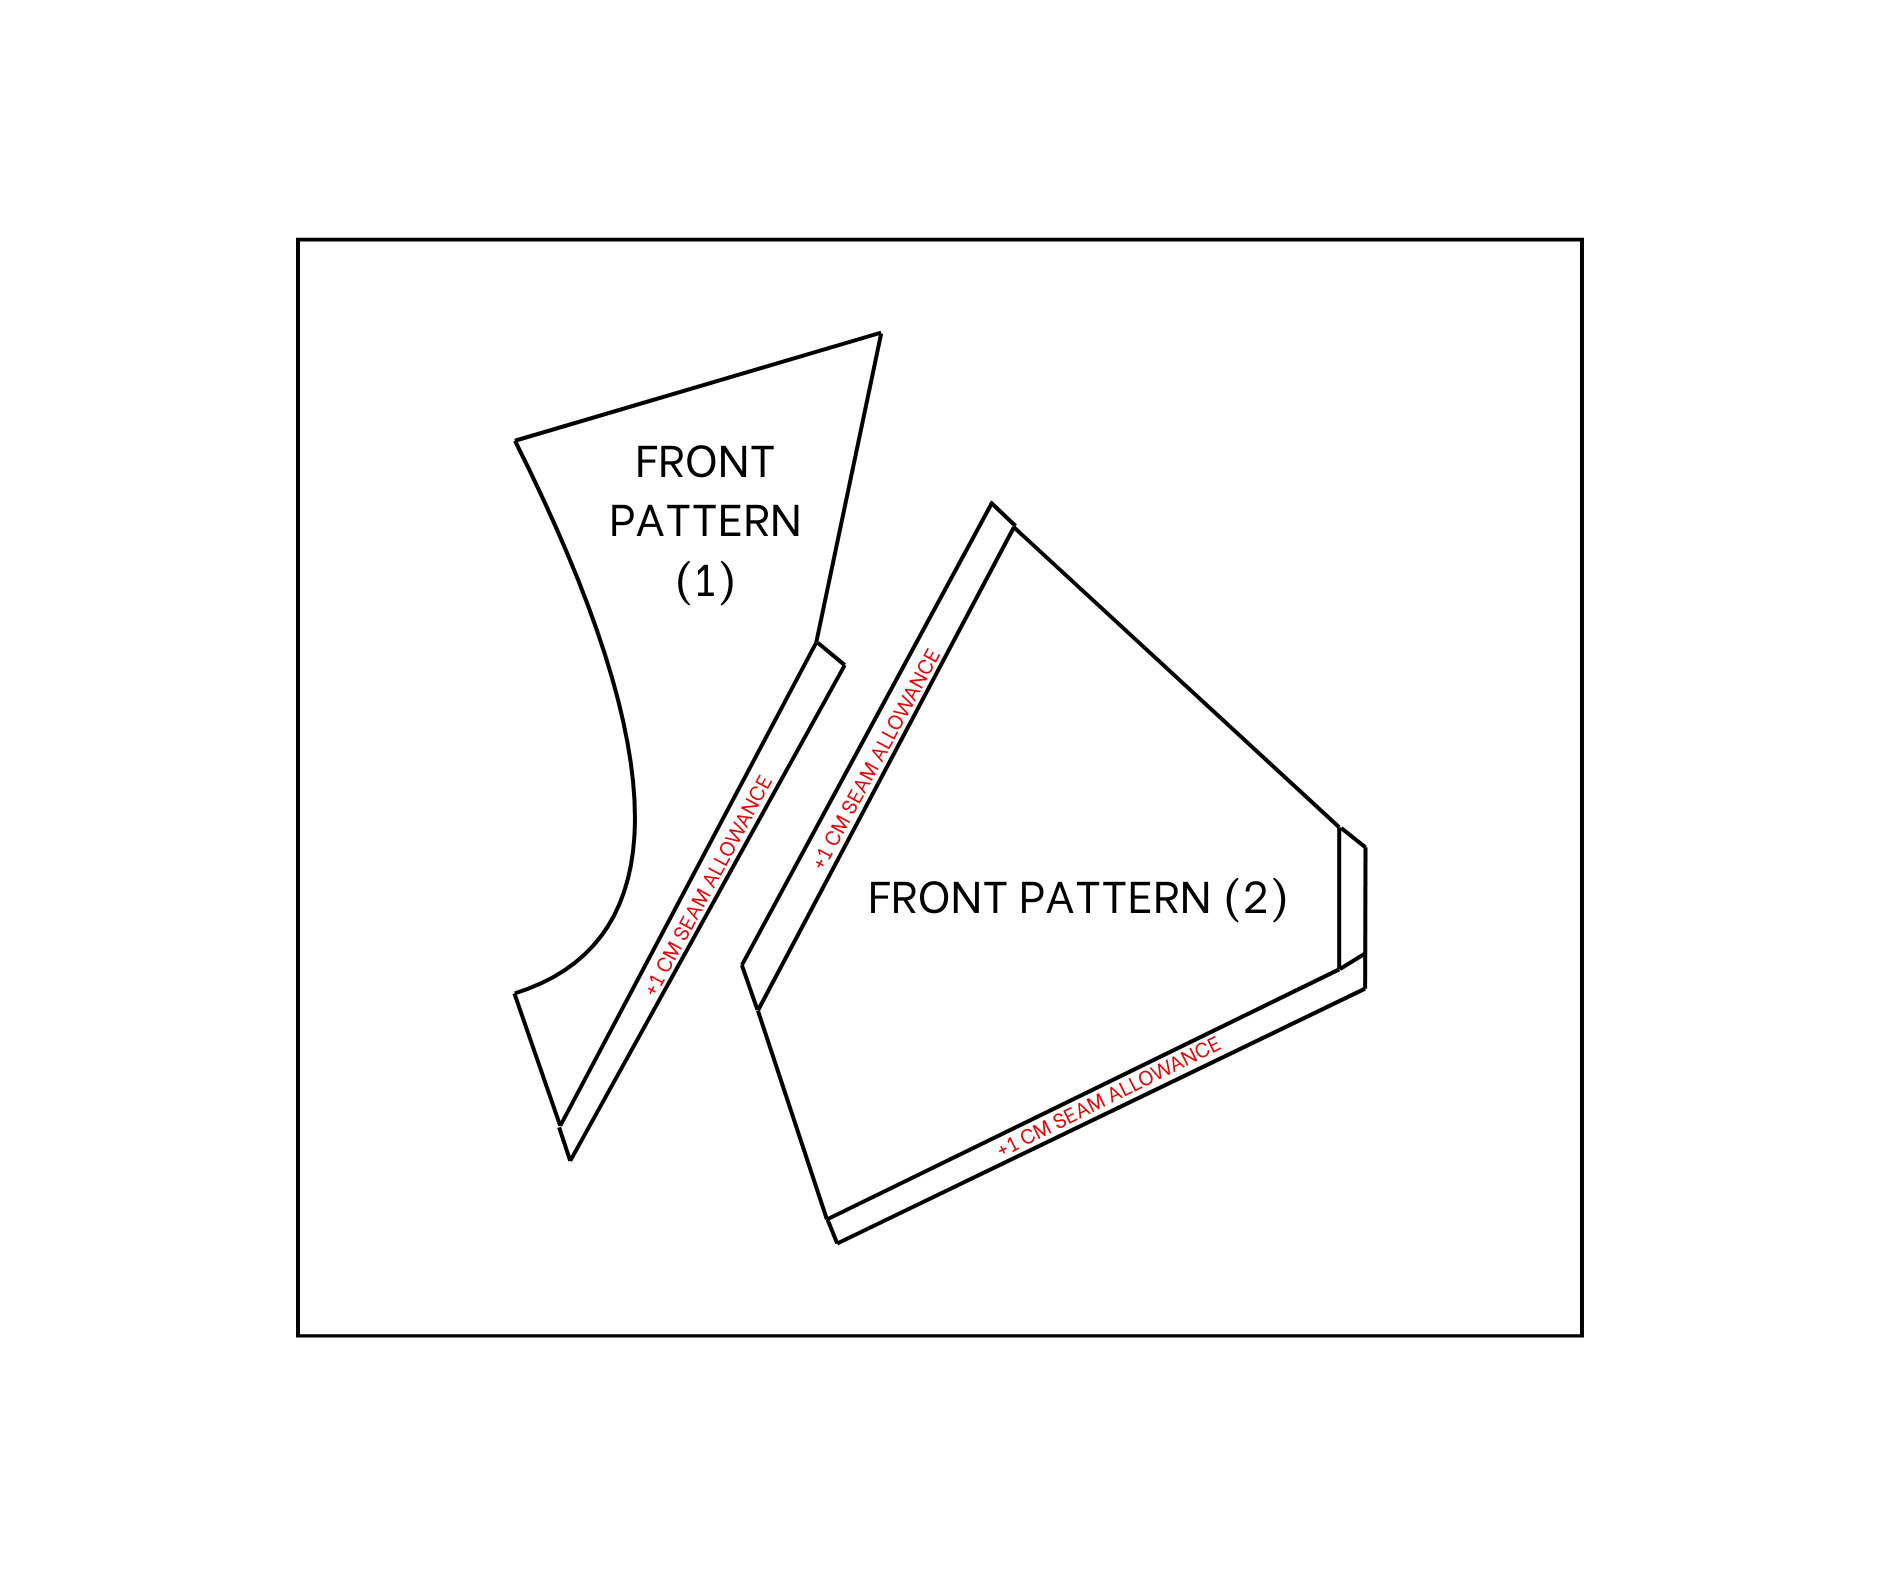
THE FRONT PATTERN OF THE TOP
Use the back pattern to create the front pattern for the top of the dress, but the front will be lower than the back a bit at the shoulder. So, move down the shoulder line 2 cm.
After that, draw a bit more curve for the sleeve line.
From the middle of the neck, mark down 8 cm.
Then, mark at 11 cm outside from this mark for the first shape of the neck. Then, connect these marks to two ends of the neckline.
Then, move down again 11 cm to create the depth of the neck of the dress. Make sure the depth of the dress won't be lower than the underarm line.
Then, connect it to two marks at two sides made before that to finish the shape of the neck of the dress.
As you can see the original dress has the line from the first shape of the neck going down to the side line. So, mark at 5 cm on the side line to connect to two marks on the neck. So the bust area will be separate with the rest of the top.
After that, draw a horizontal line at the end of the front pattern. The length of the front pattern is 36 cm, which is 2 cm shorter than the back pattern.

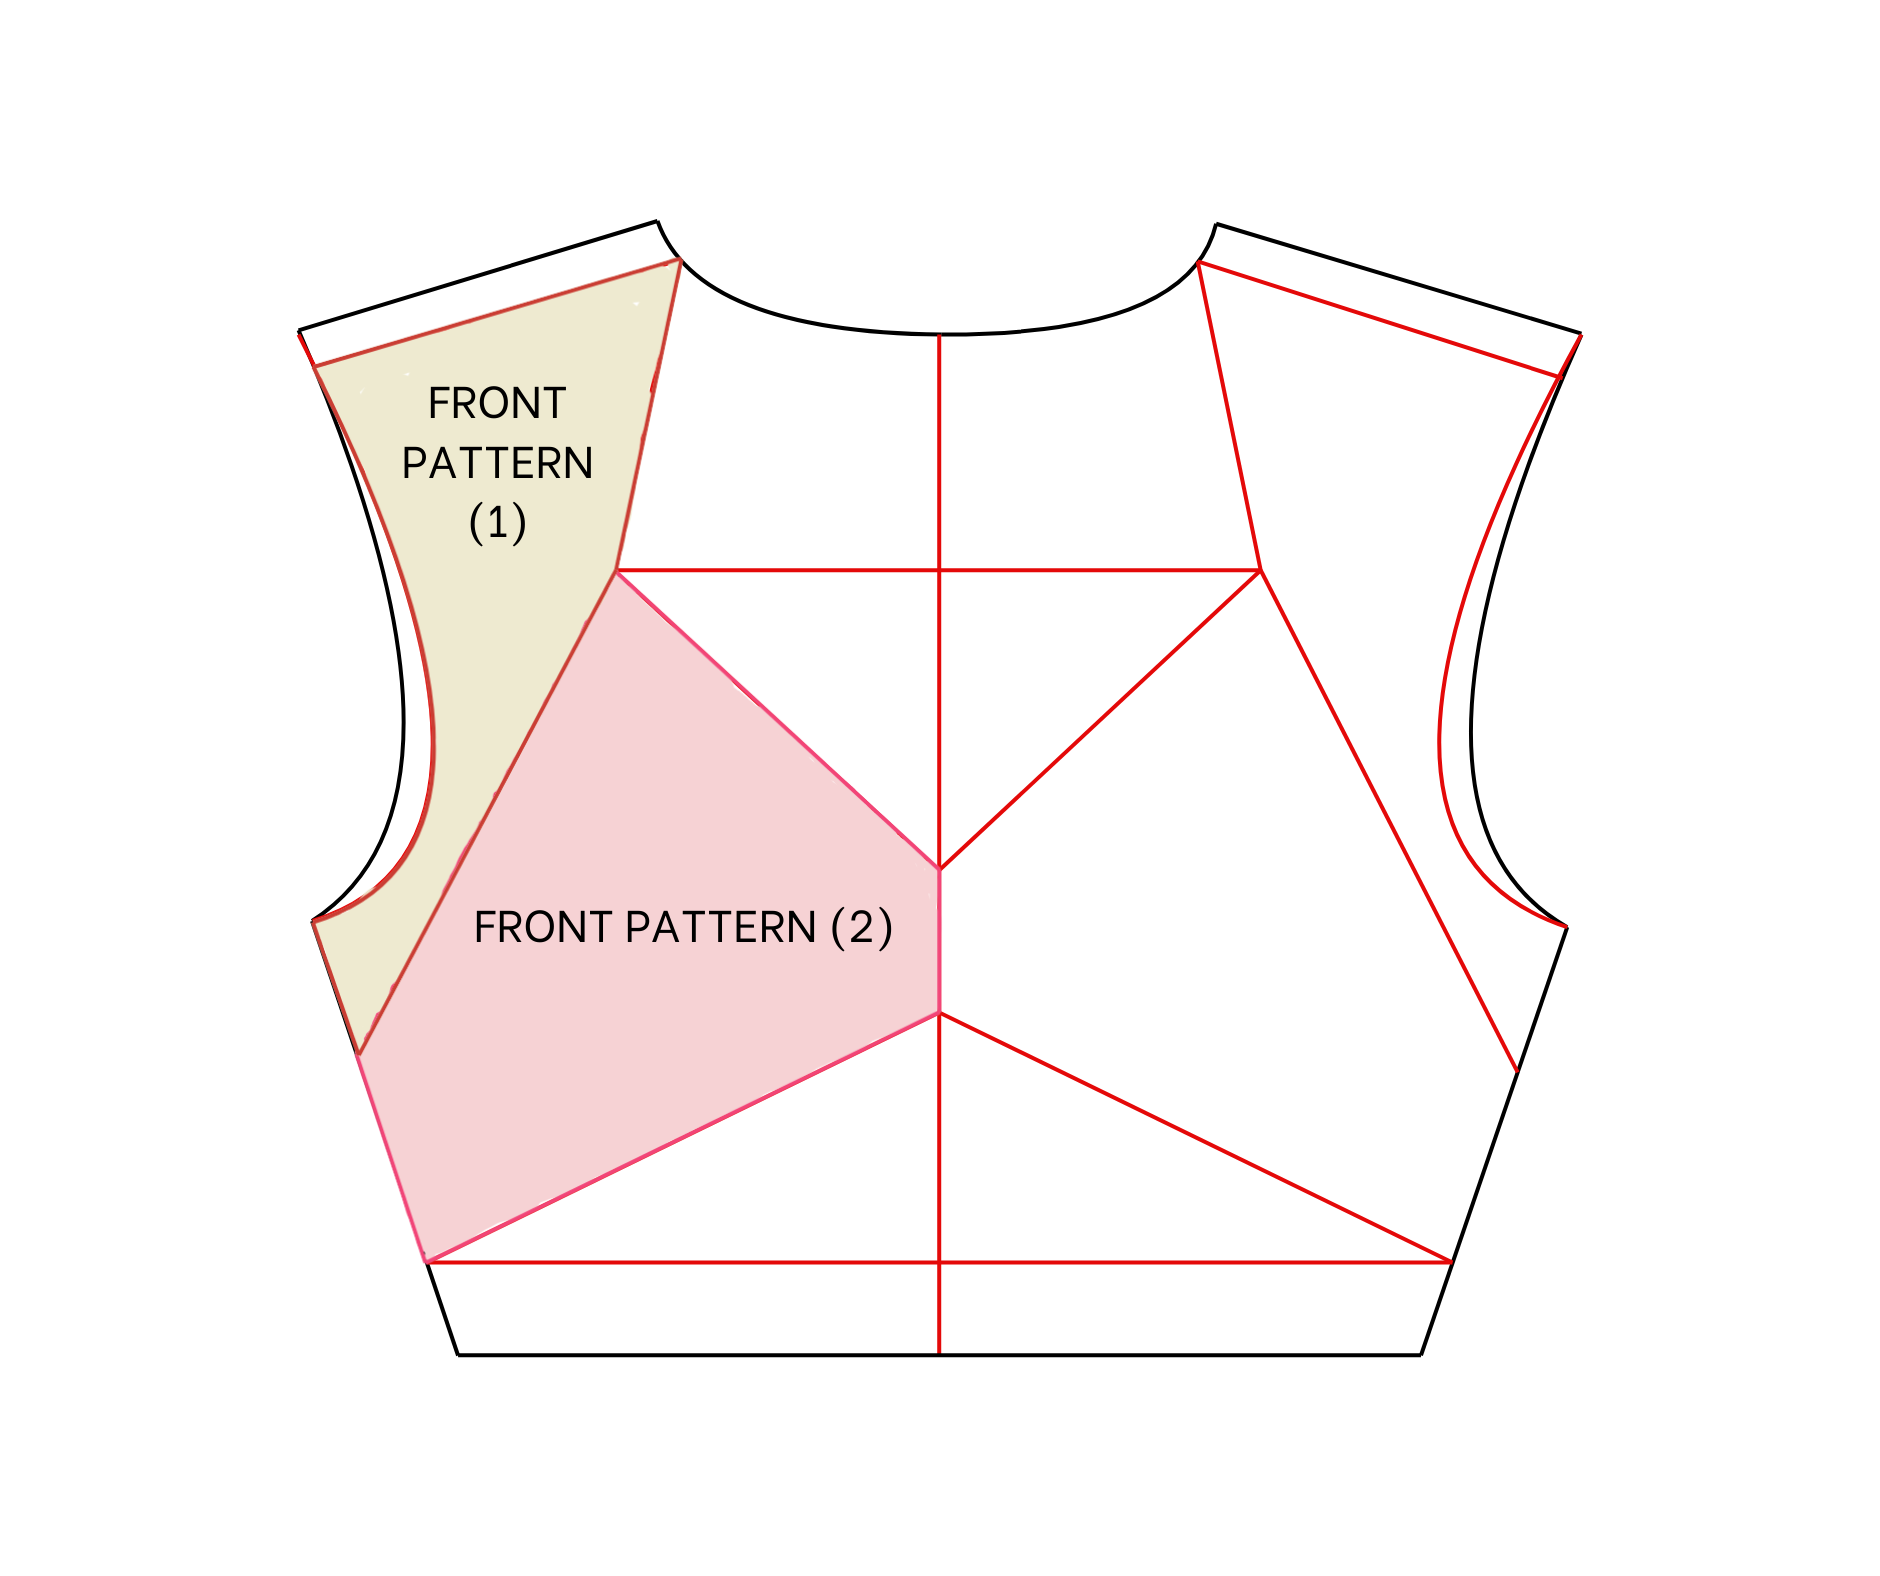
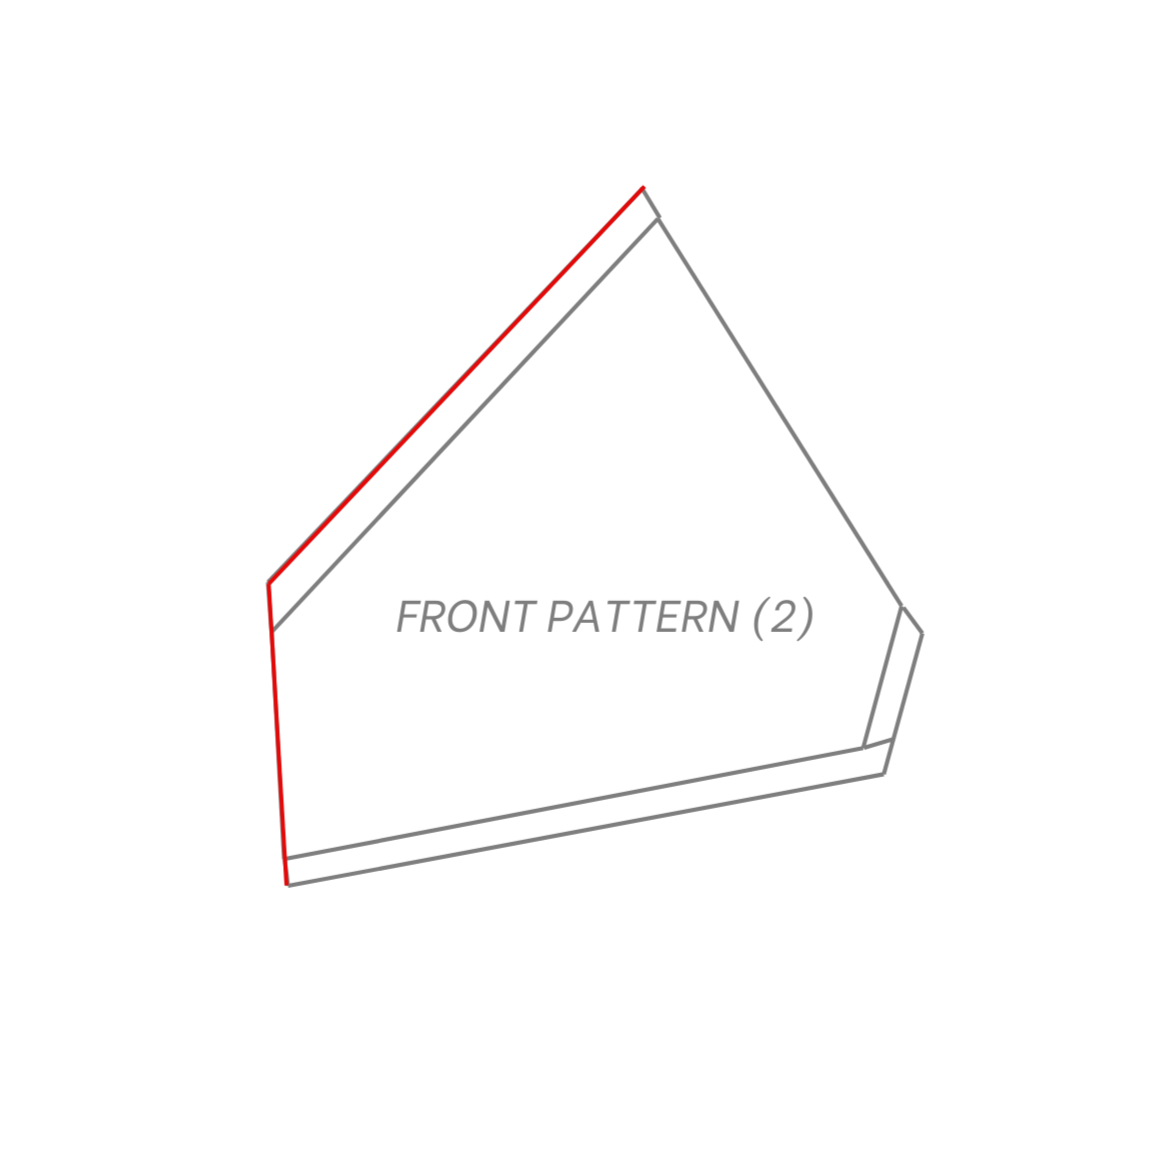
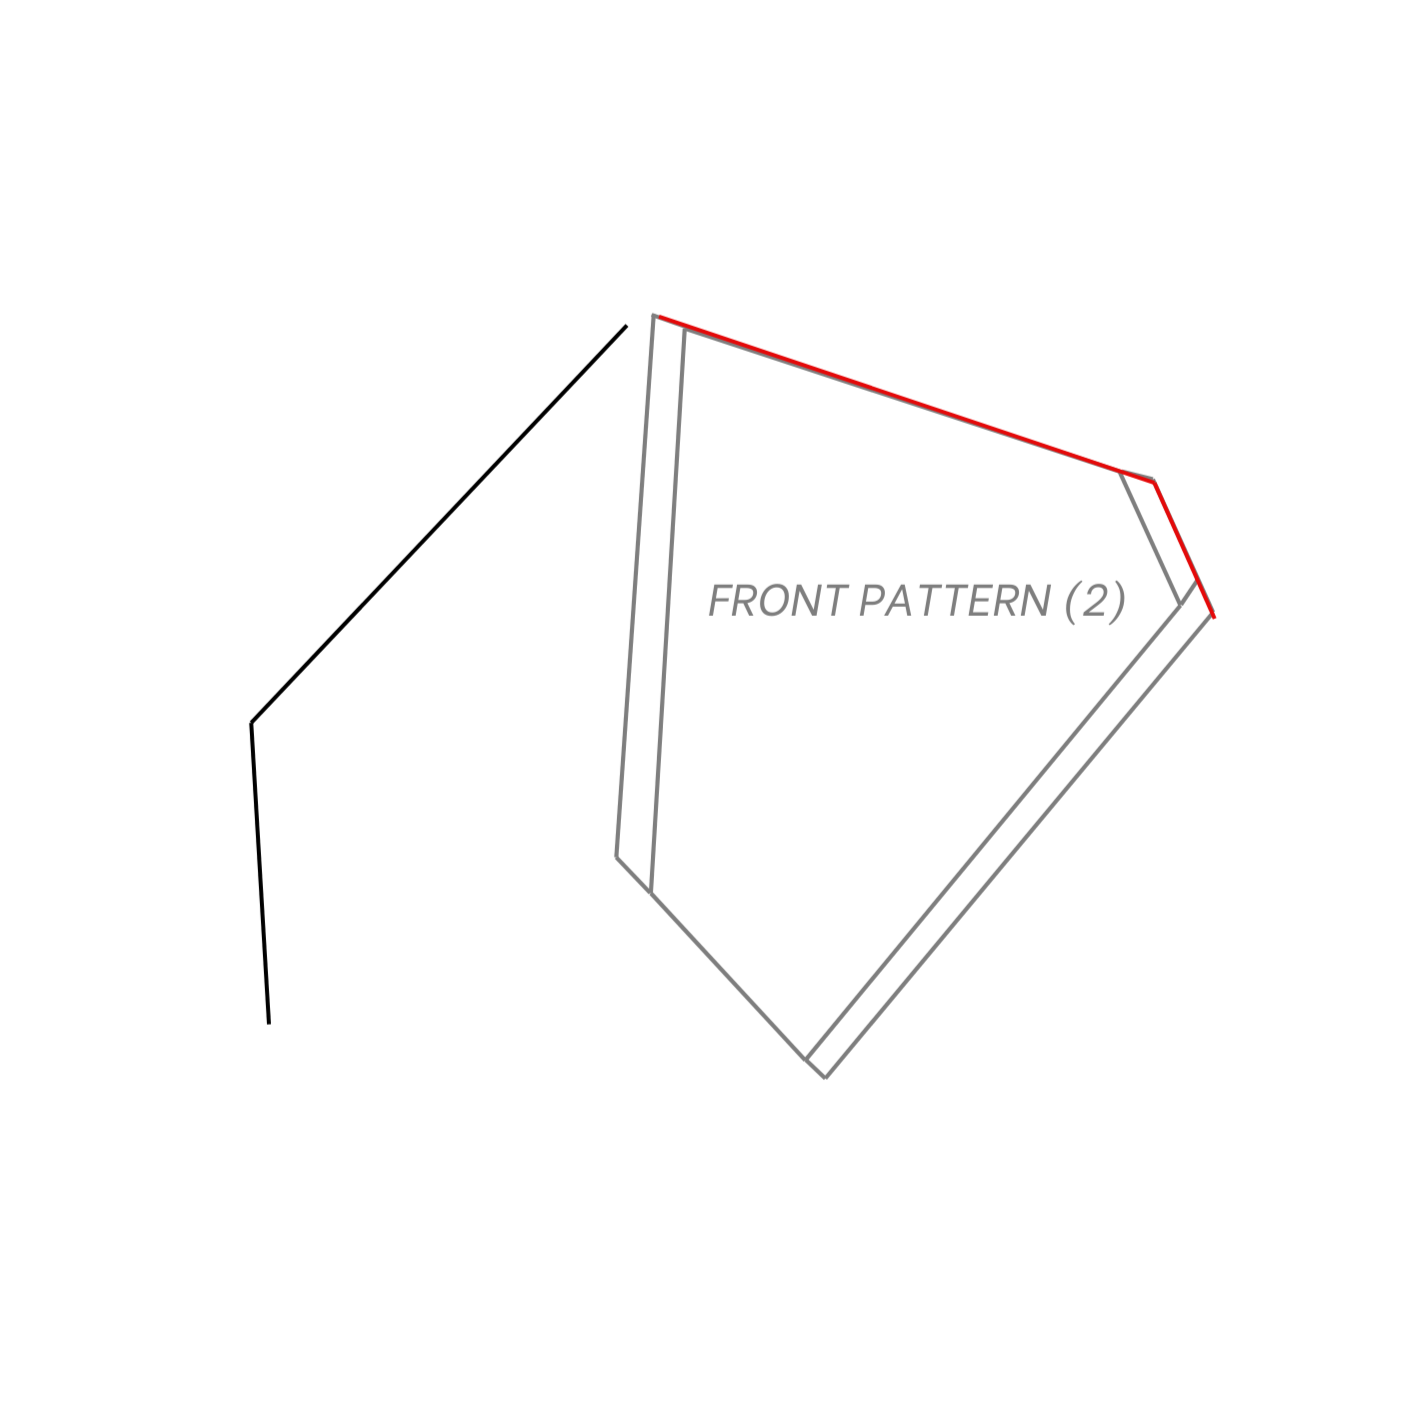
Because the front pattern is from four pieces, so need to add the seam allowance at the connected part of each piece.
However, the bustier part had a ruffle. So, increase the width of this part to create a ruffle there later.
THE SLEEVE PATTERN
Use the pattern of the back and one pattern of the front and the sleeve to make the sleeve pattern for the dress.
Check the width of two sleeves by connecting two patterns together first.
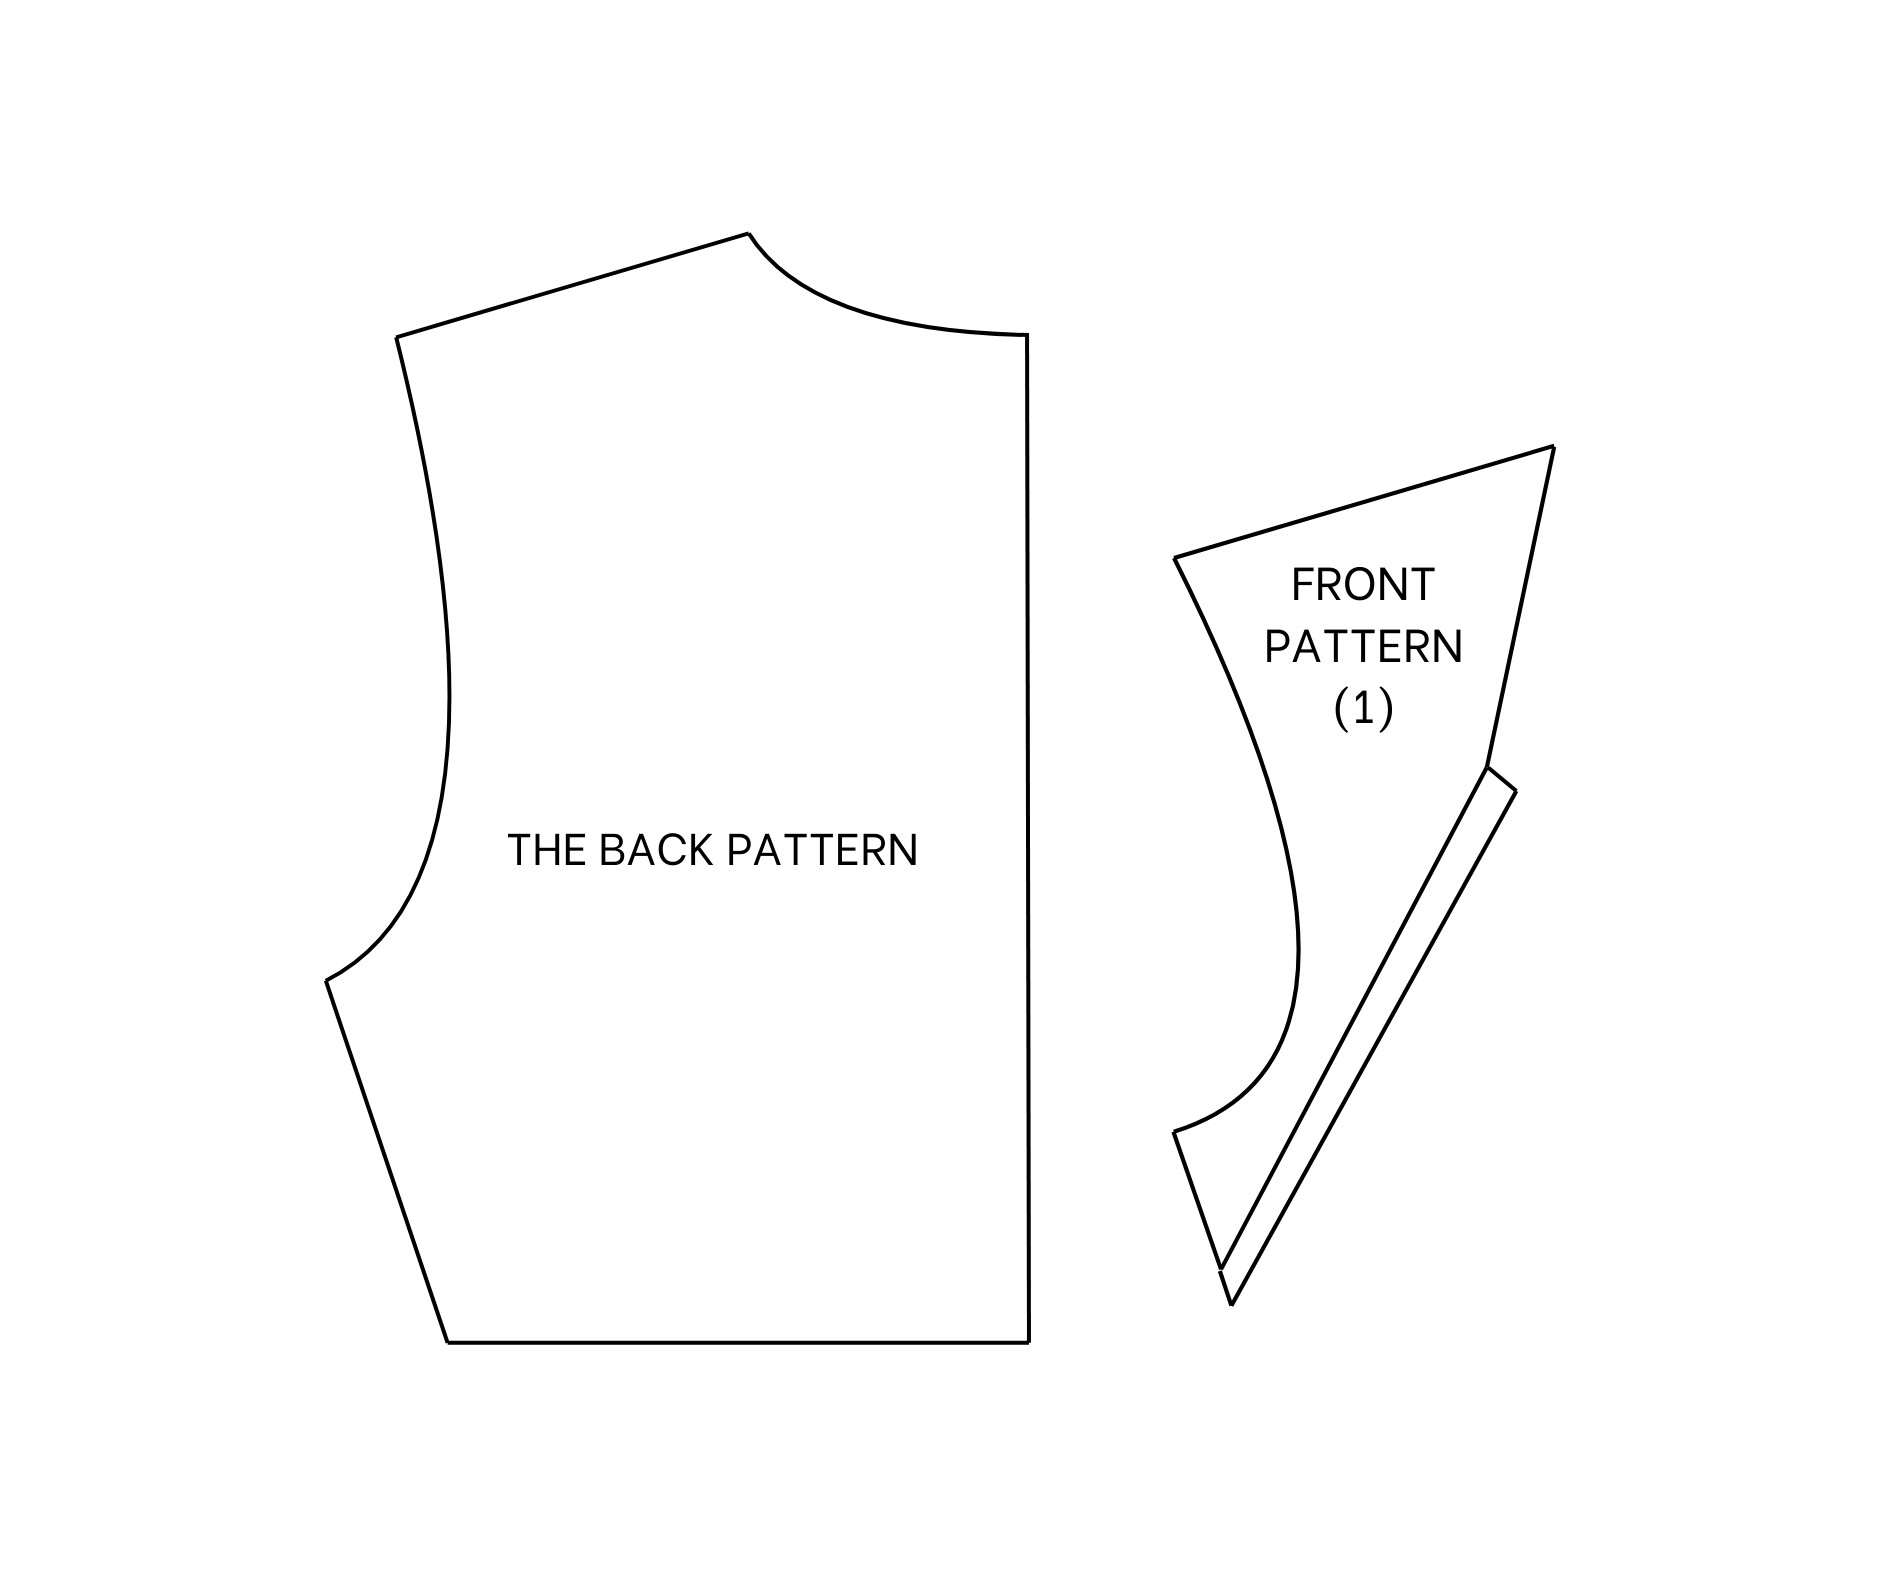
Then, draw a line with the same width to start making the sleeve pattern.
After that, apply the sleeve part of the back and the front pattern to two ends of the line just drew. But just draw a short part of the sleeve from the end of it and keep the rest open so can create a puffy for the sleeve there later.
Remember to mark the back and the front of the sleeve to connect it to the main bodice later.
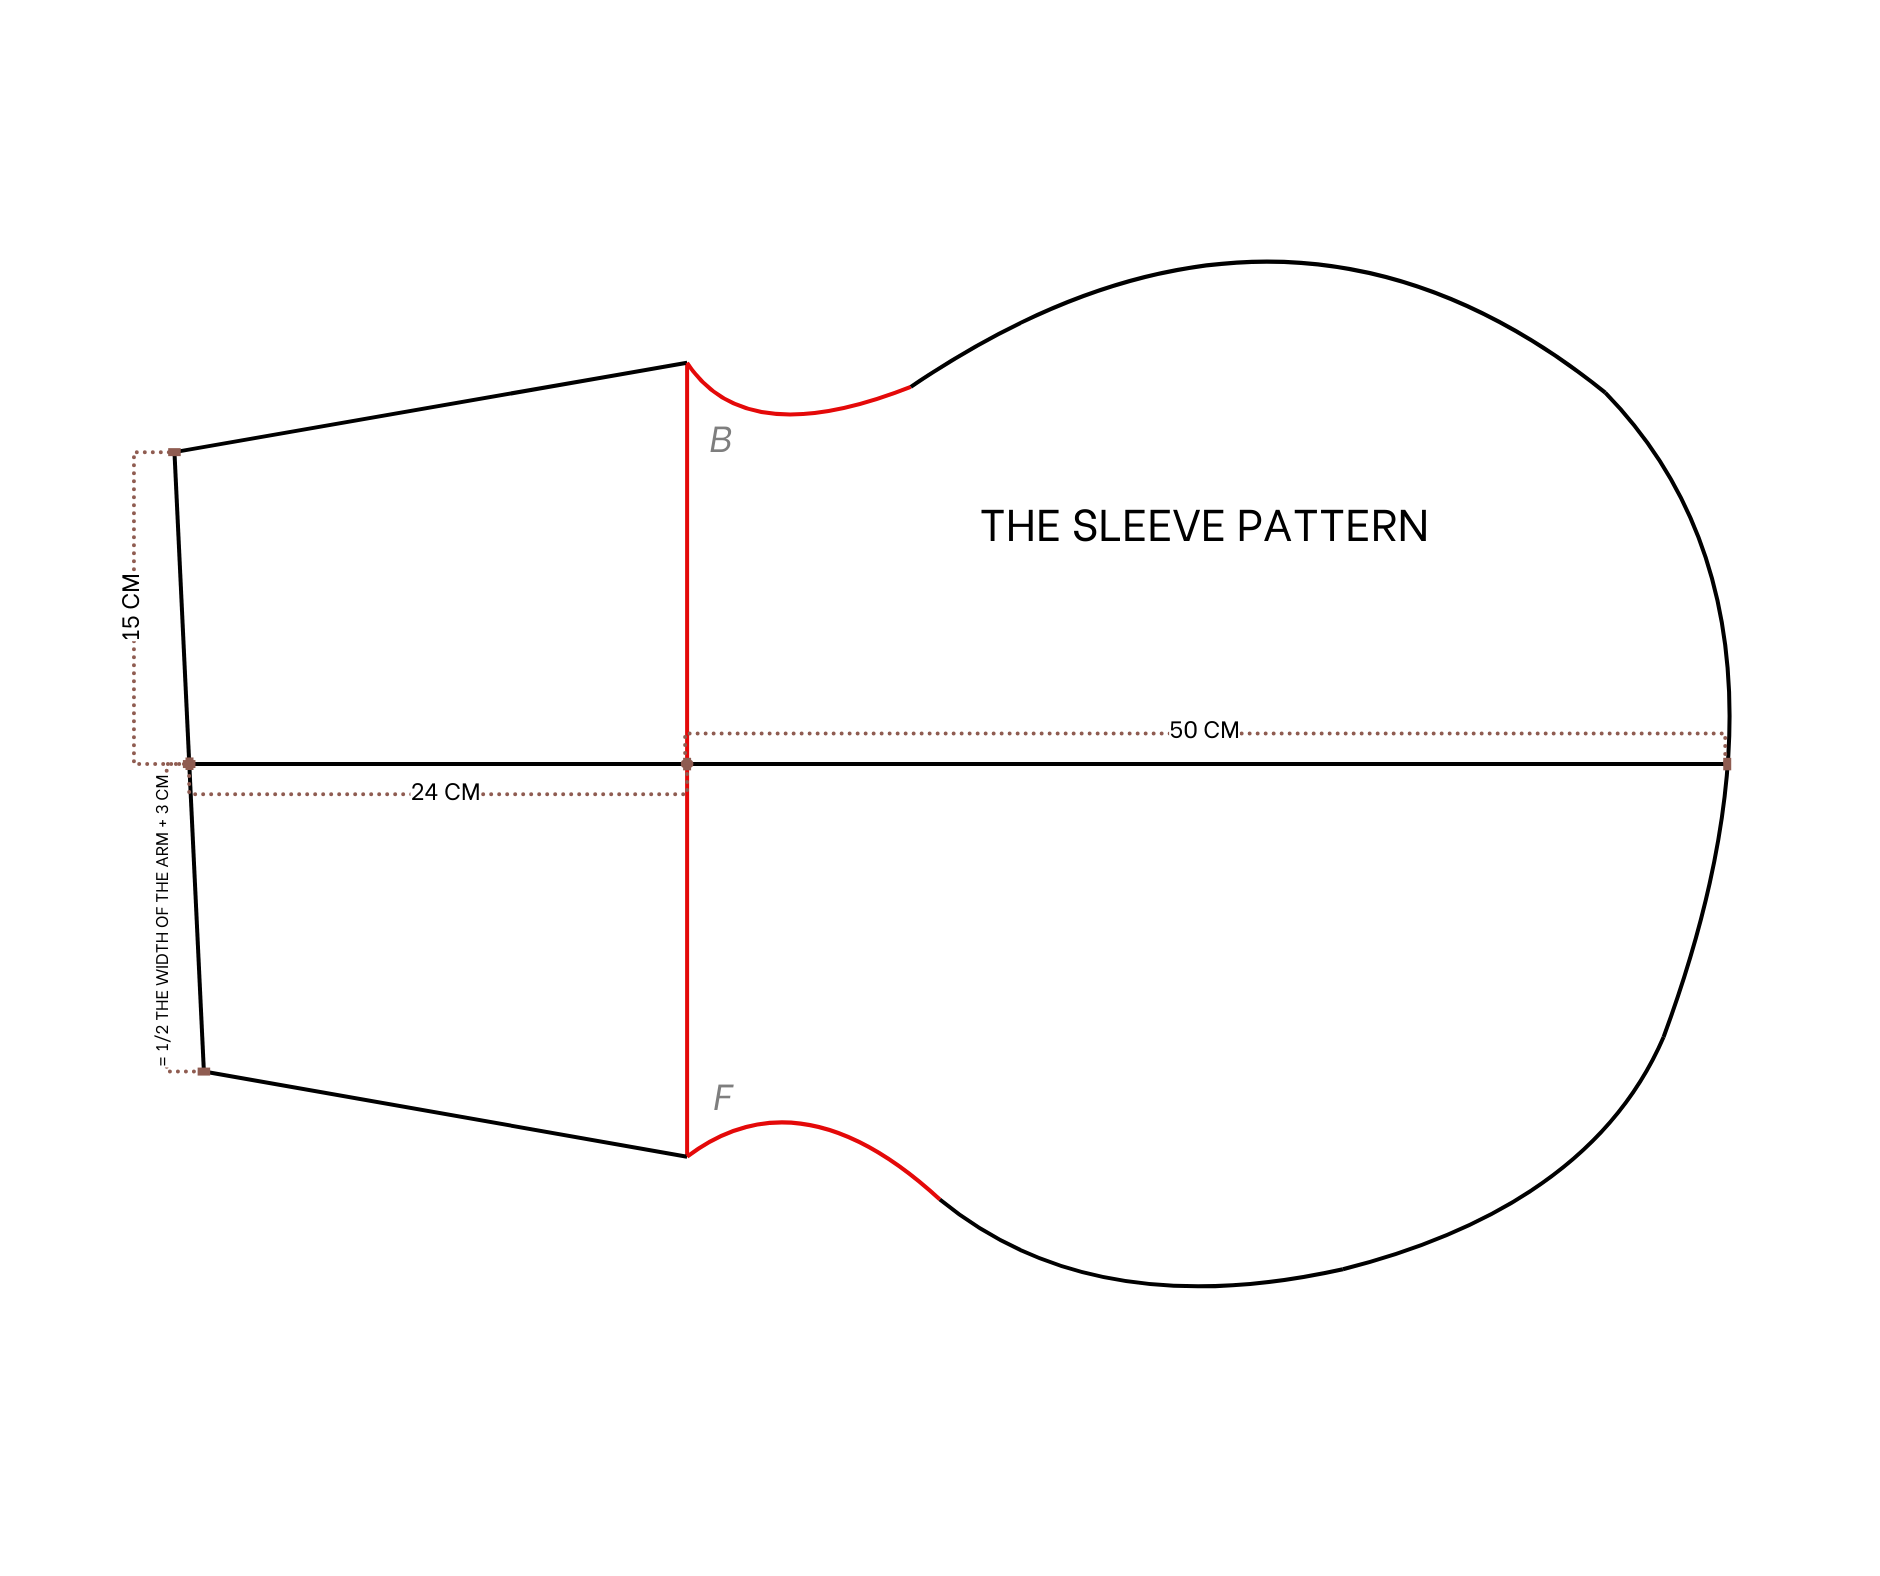
From the middle of the straight line, draw a horizontal line to divide the sleeve into two parts.
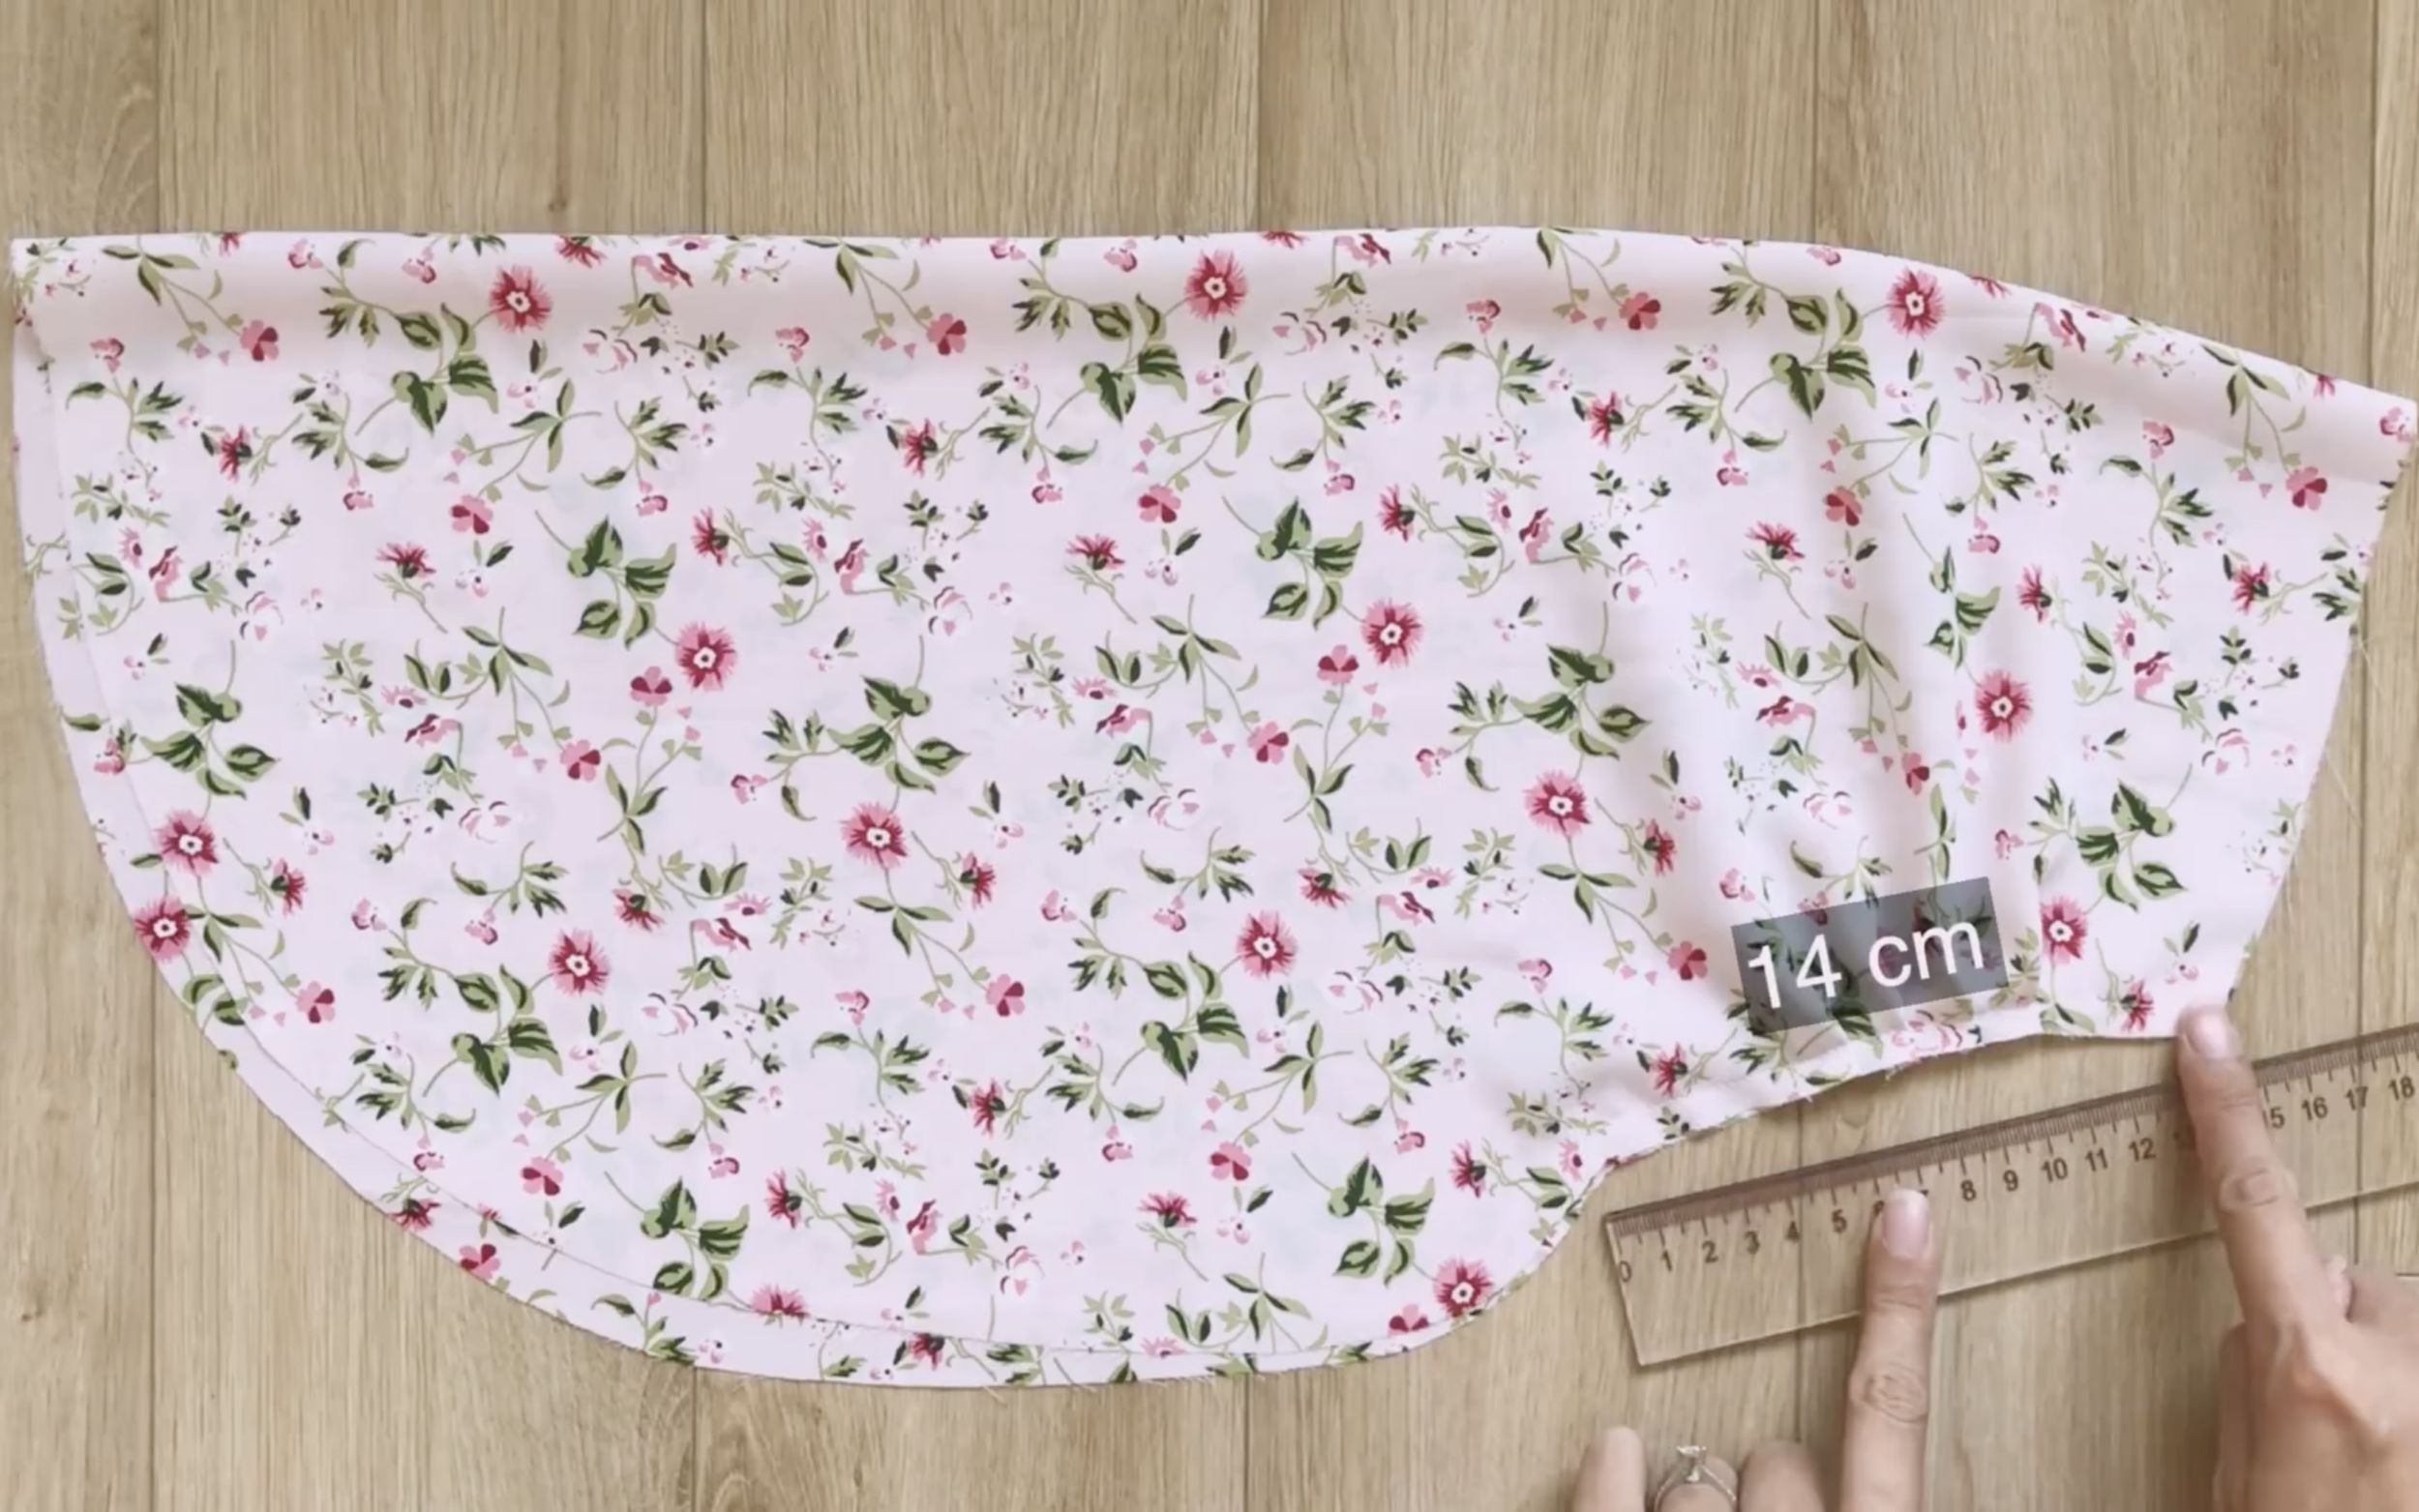
From the middle mark on the straight line, mark at the right side 50 cm, which is the length of the puffy area of the sleeve that is wanted.
Then, draw a circle from two curved lines to connect to this mark. And it’s the puffy area of the sleeve.
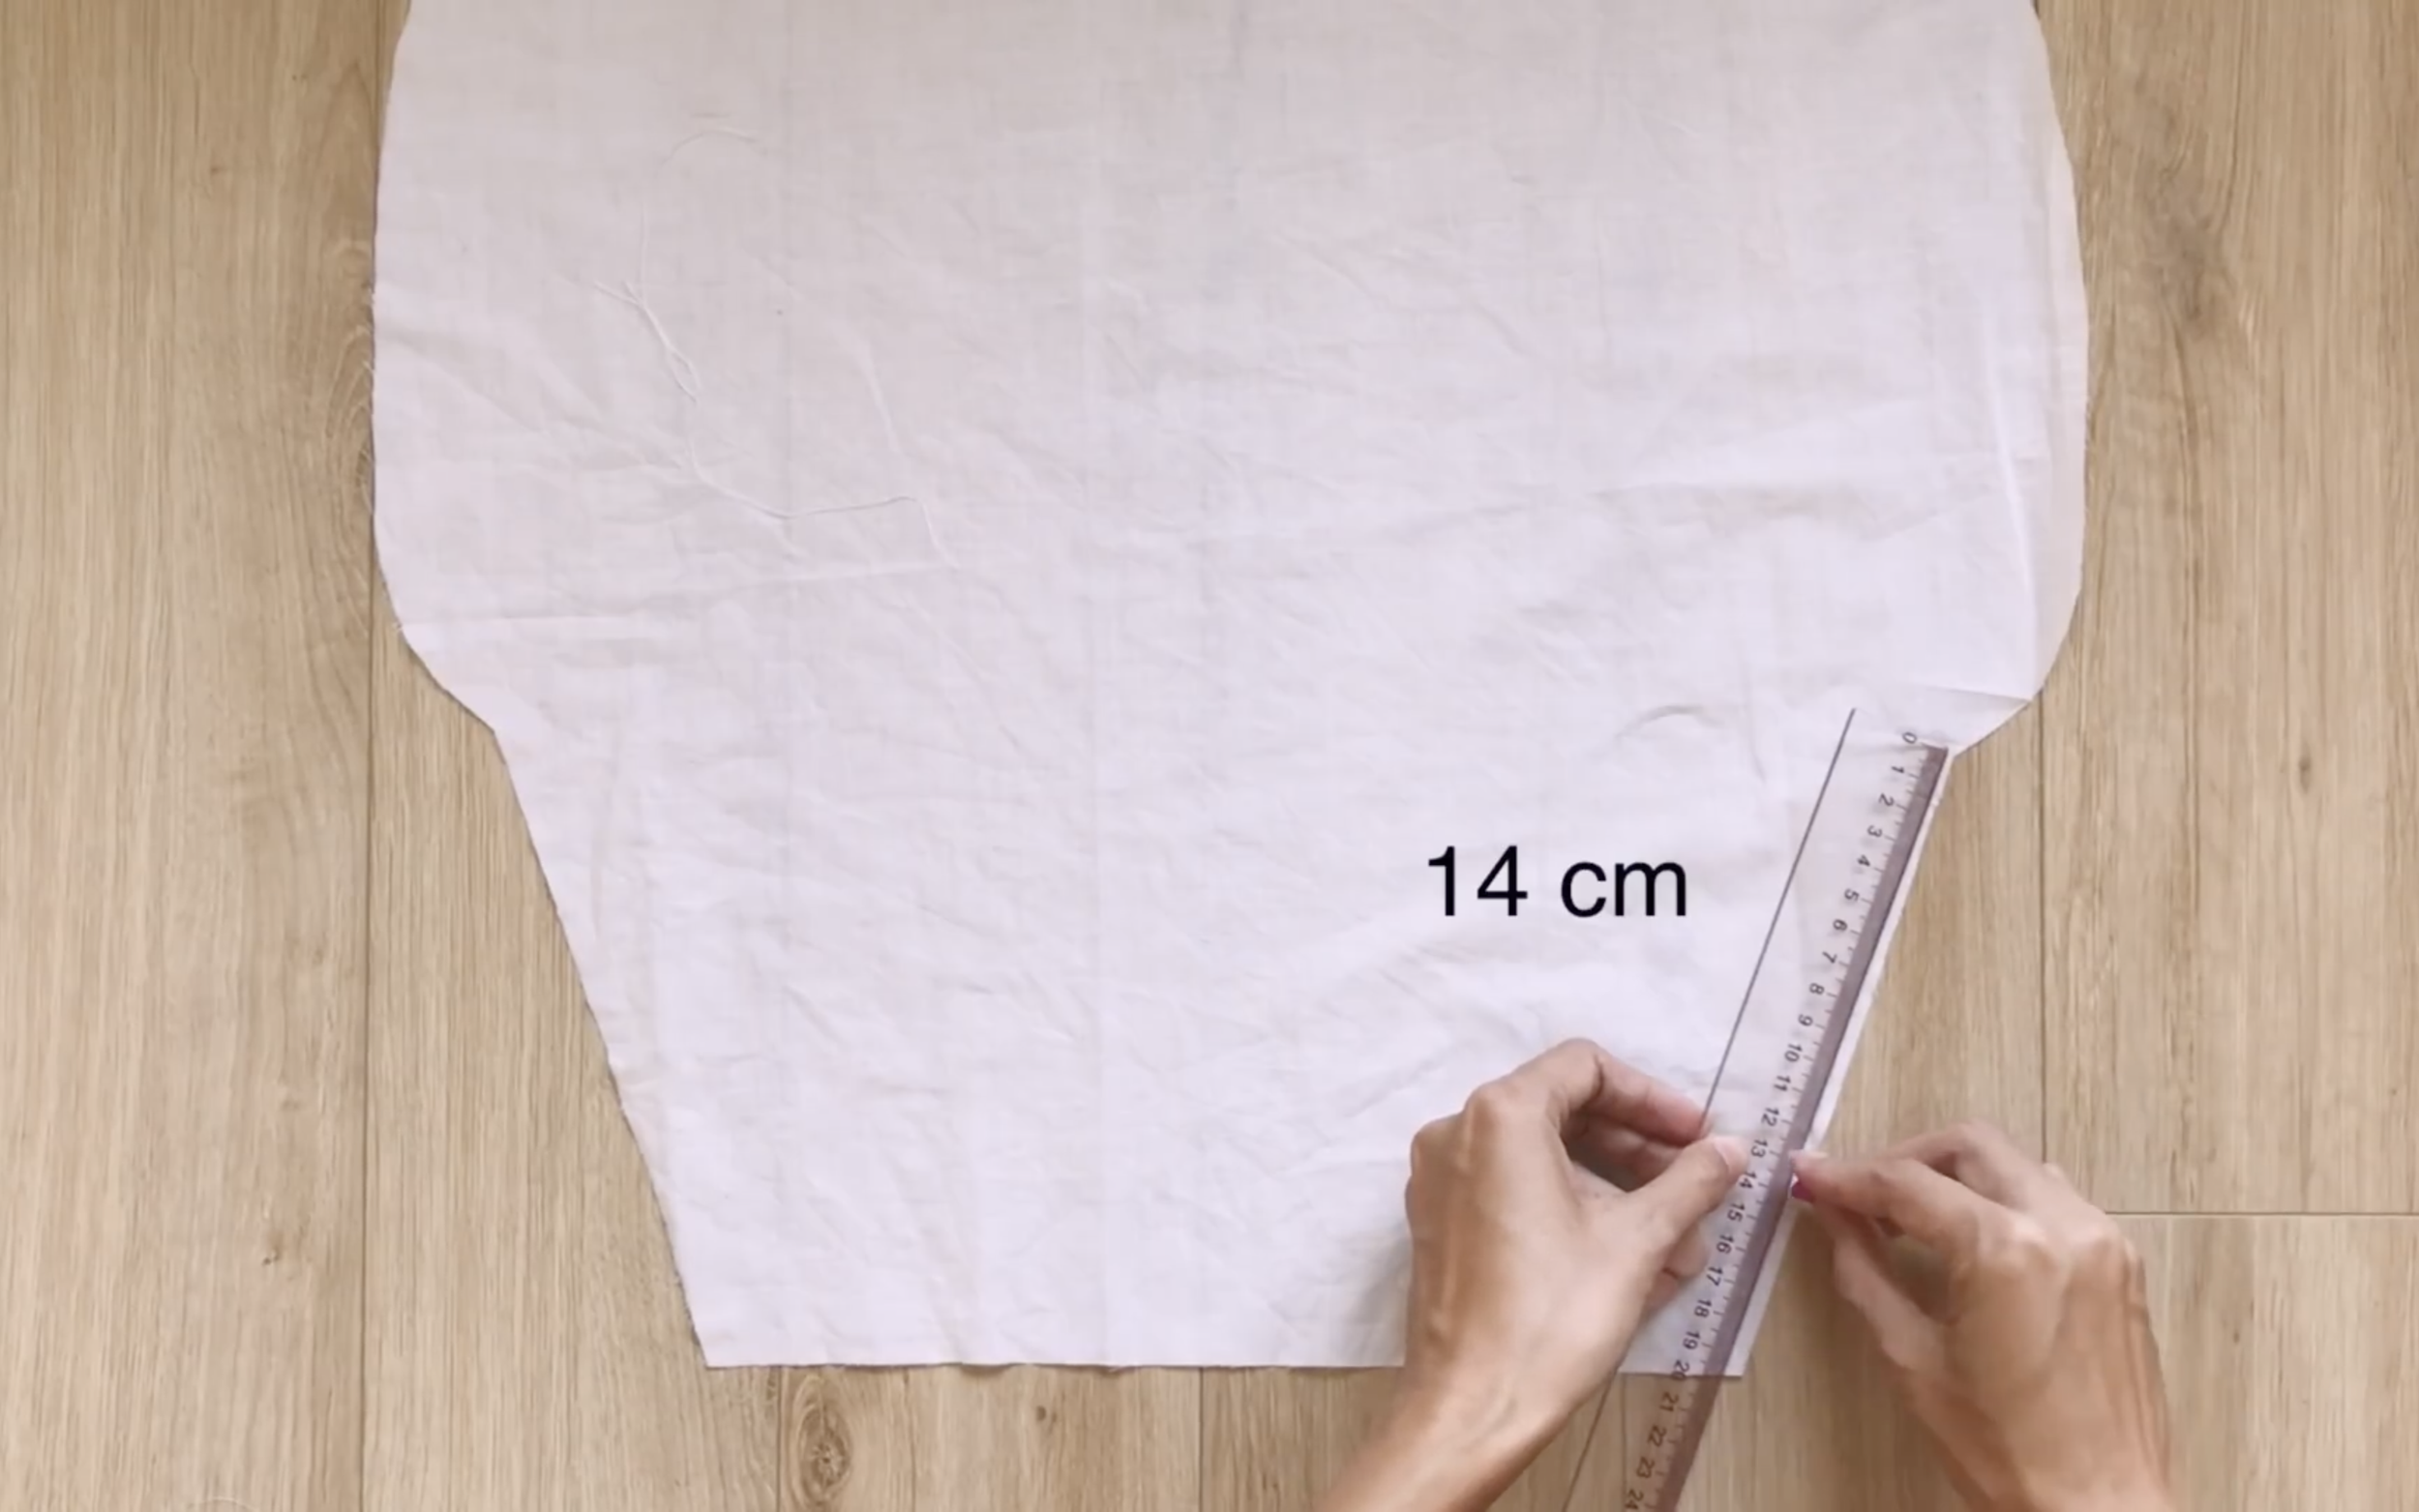
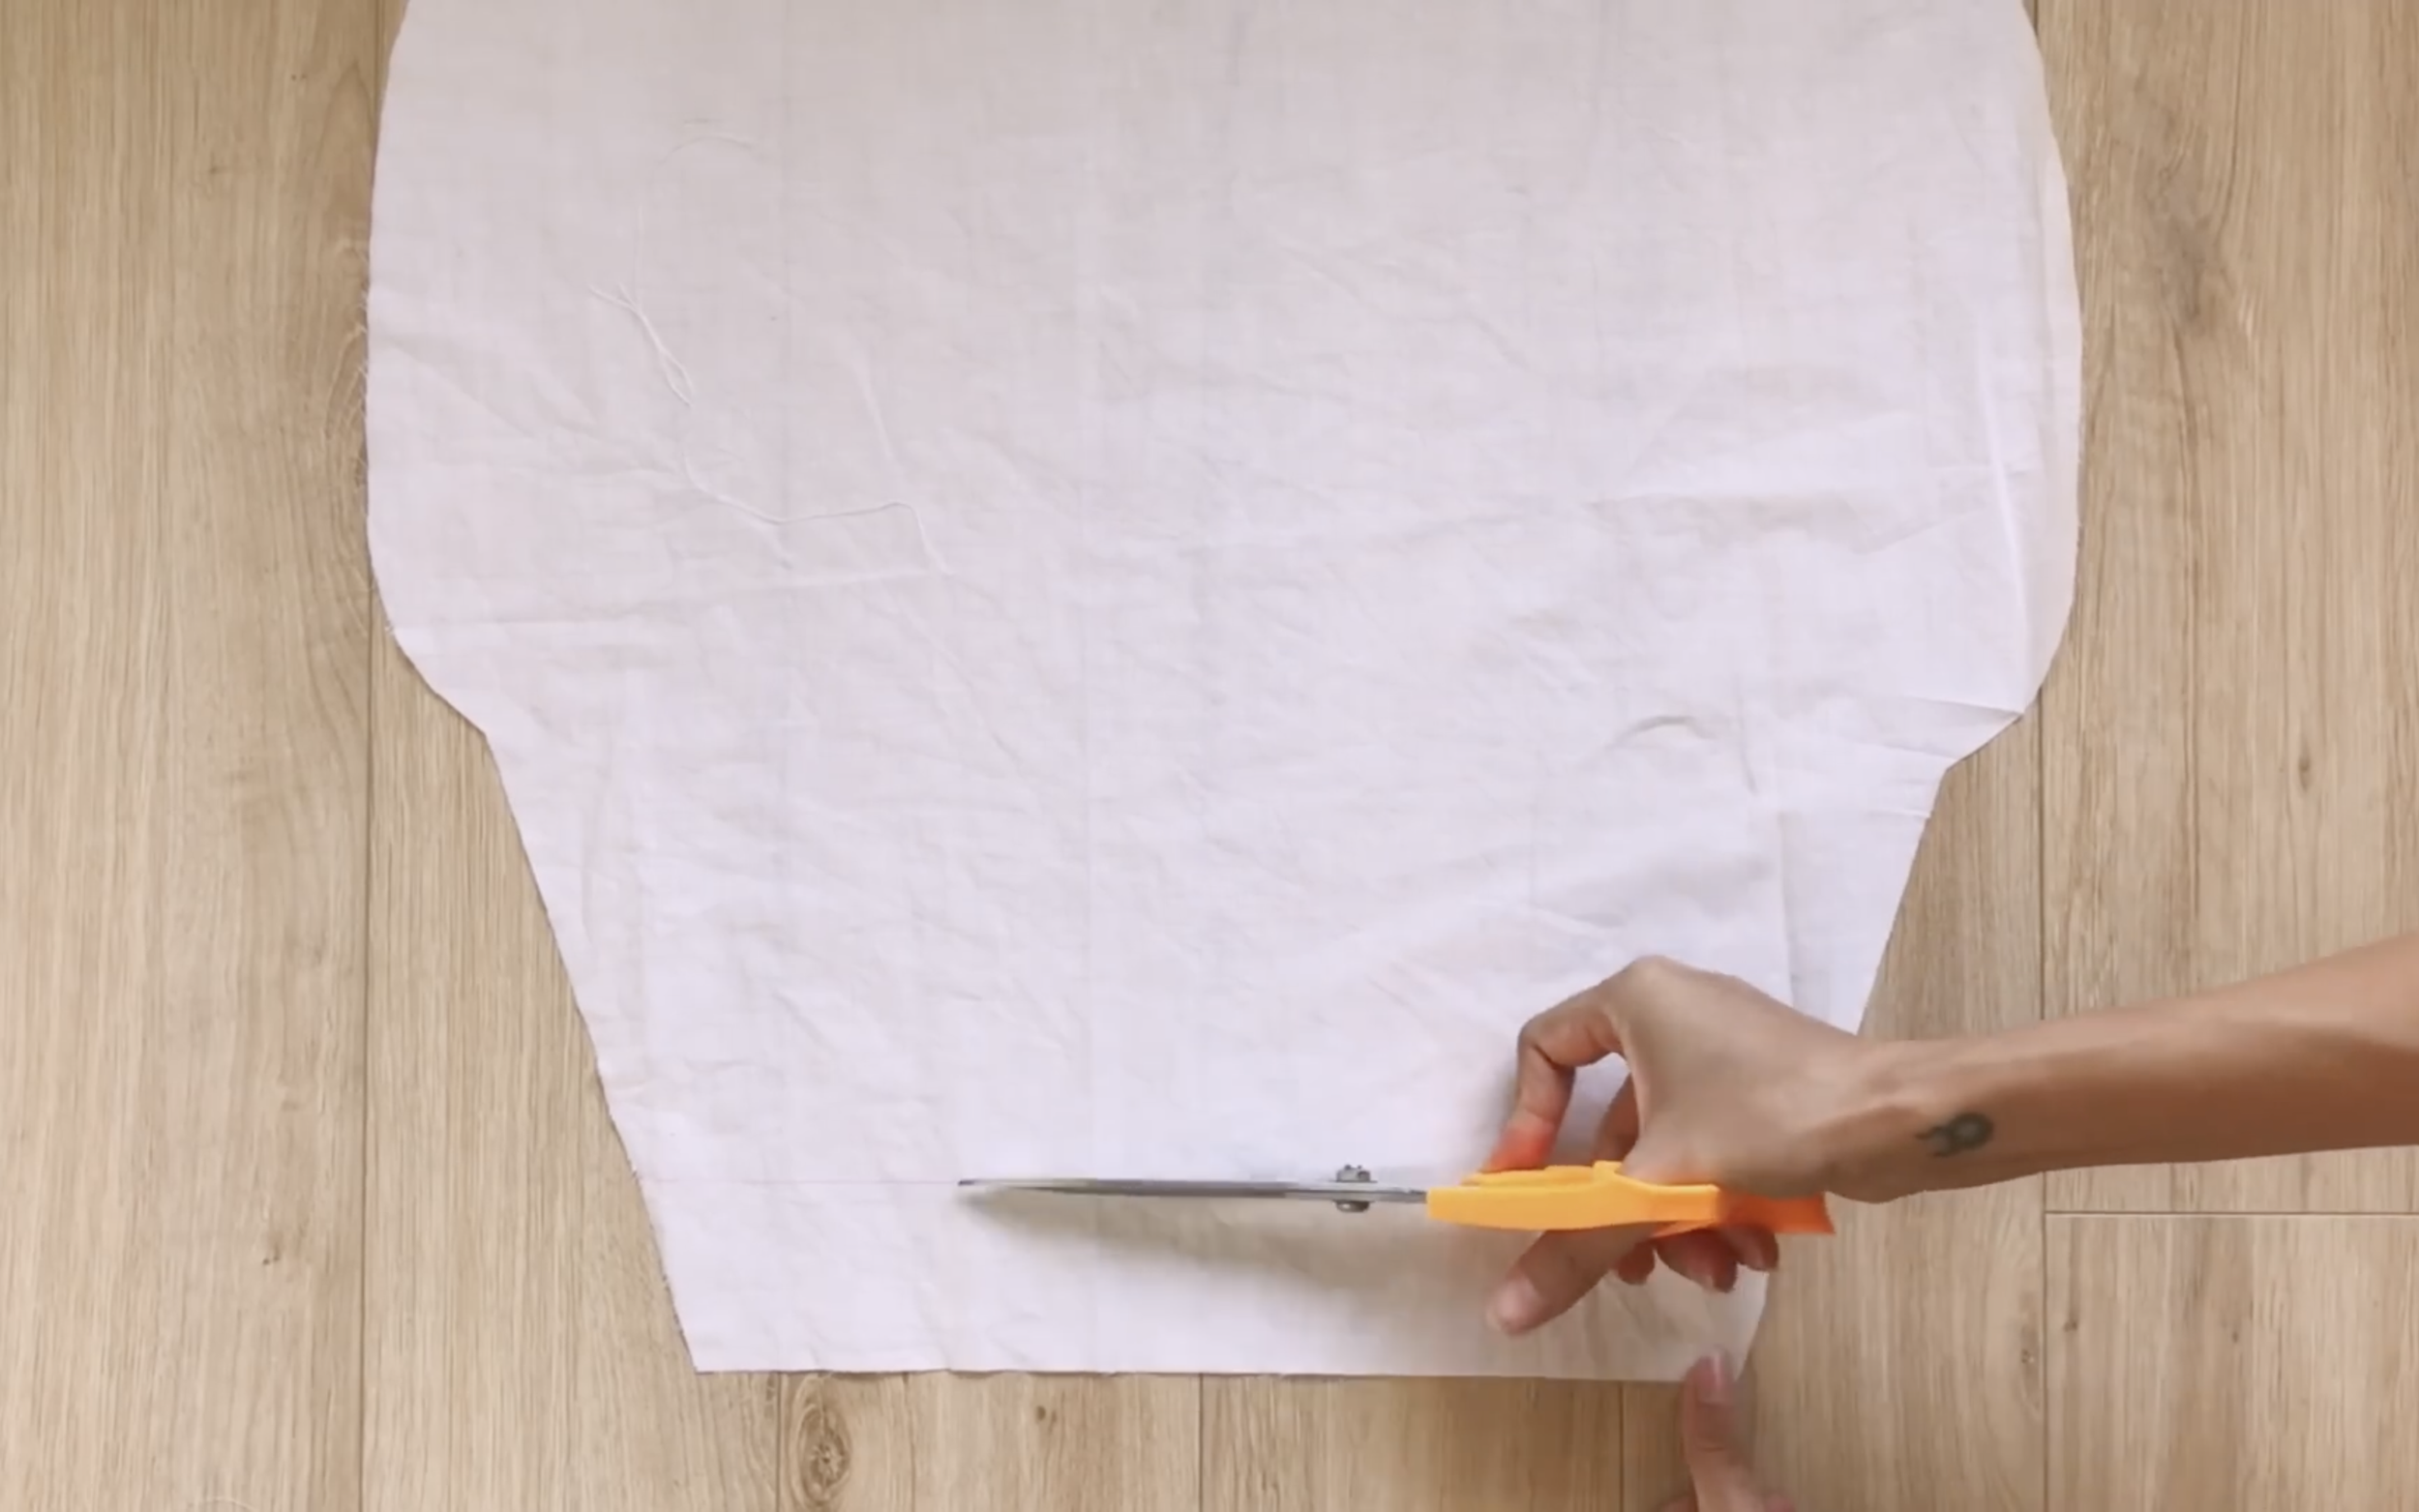
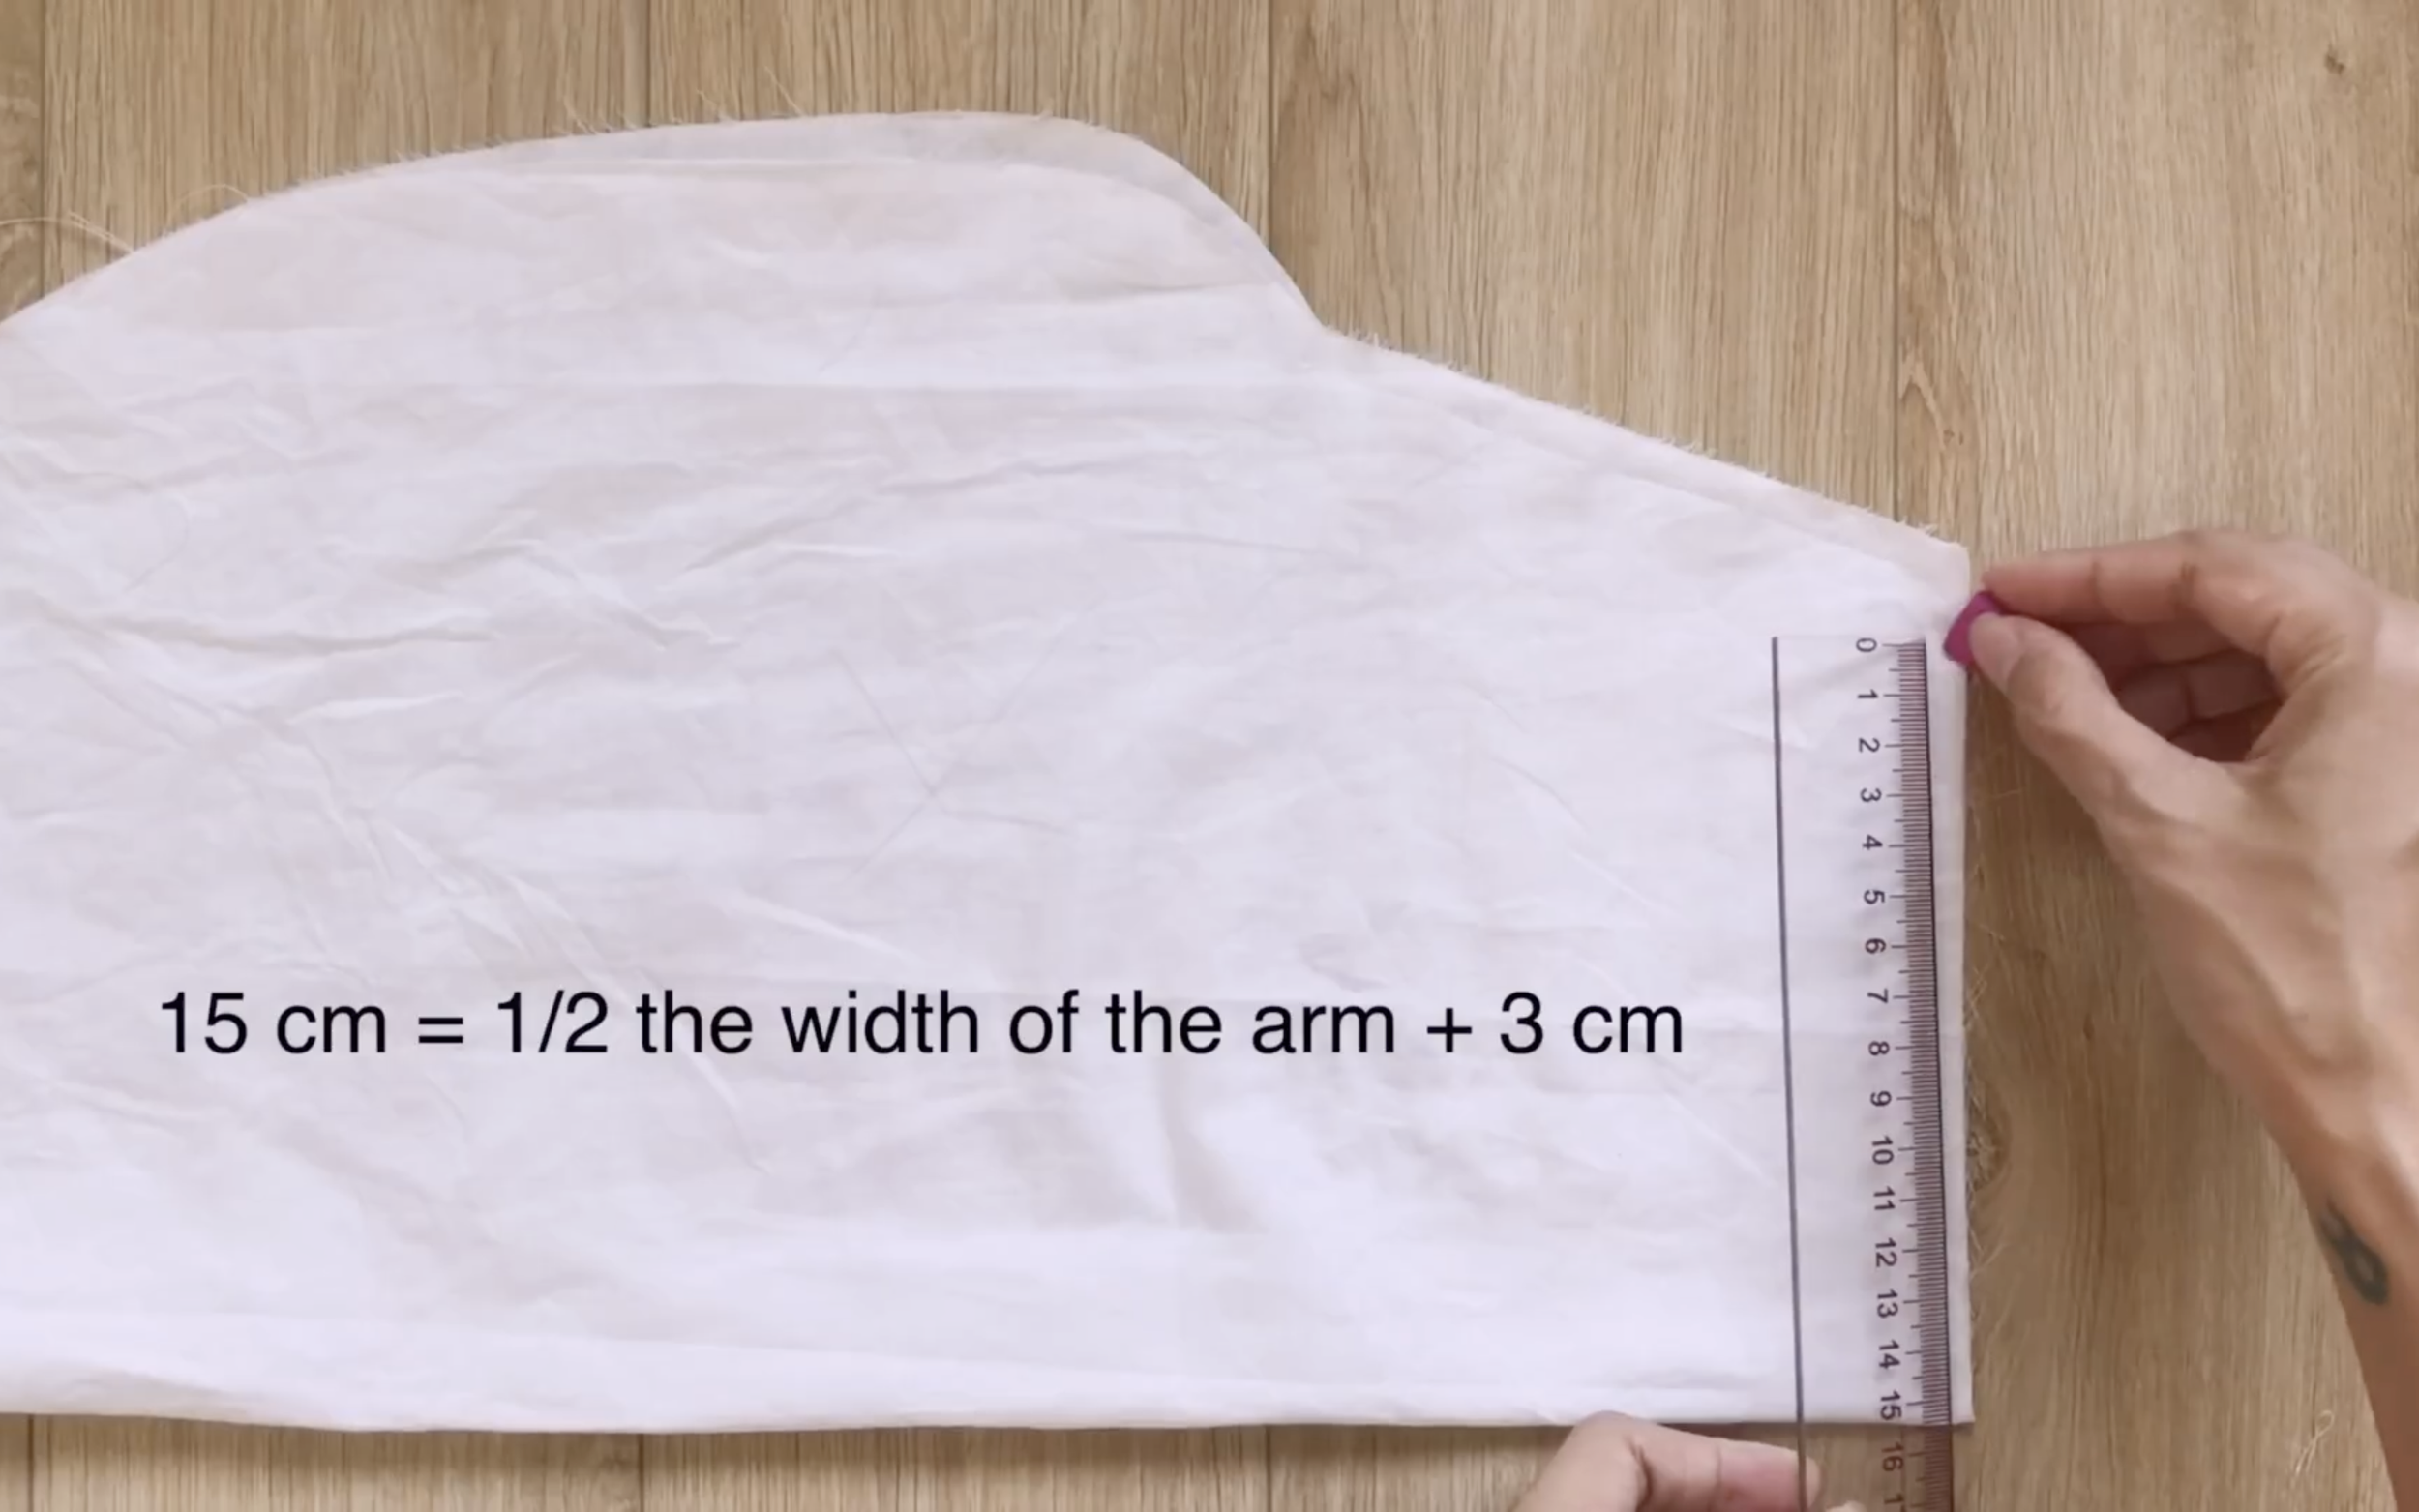
The left side of the straight line will be the length of the sleeve from the underarm. So, mark at 24 cm from the middle mark on the straight line to the left side of the horizontal line.
Draw another straight line from that mark after that.
Then, mark at 15 cm each side from the middle of this line which is a half of your arm size plus 3 cm.
SEWING THE DRESS
THE TOP
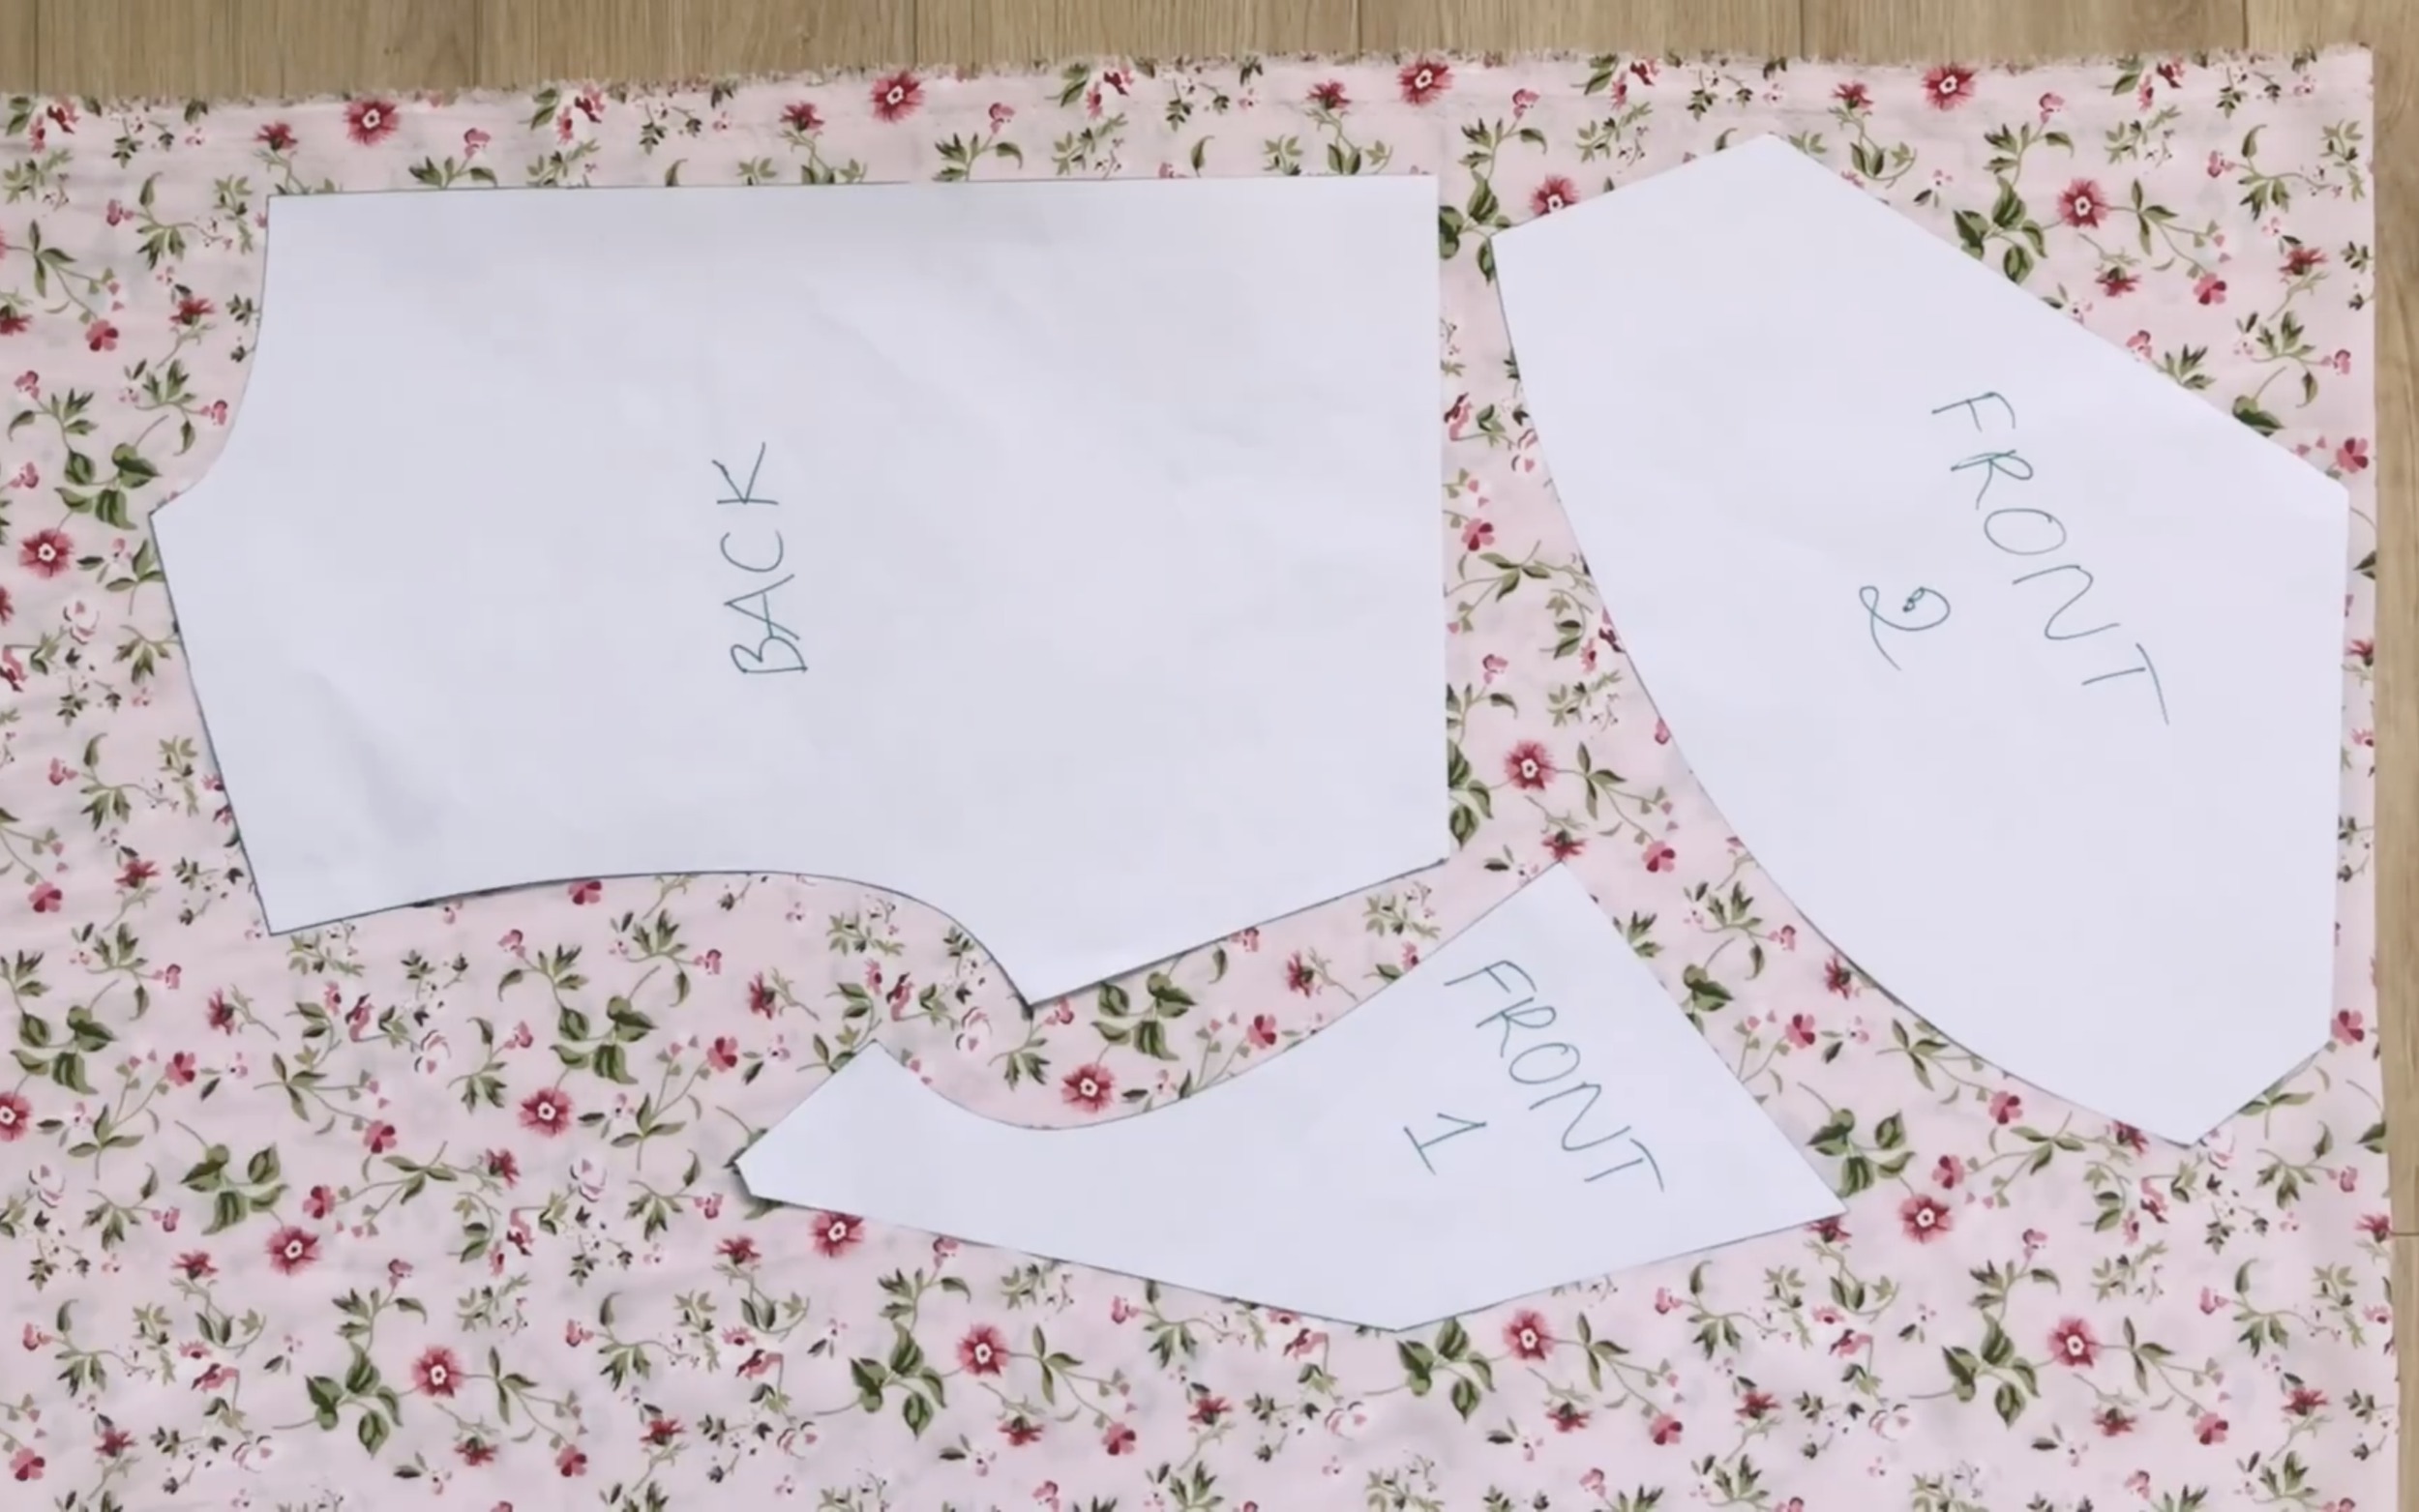
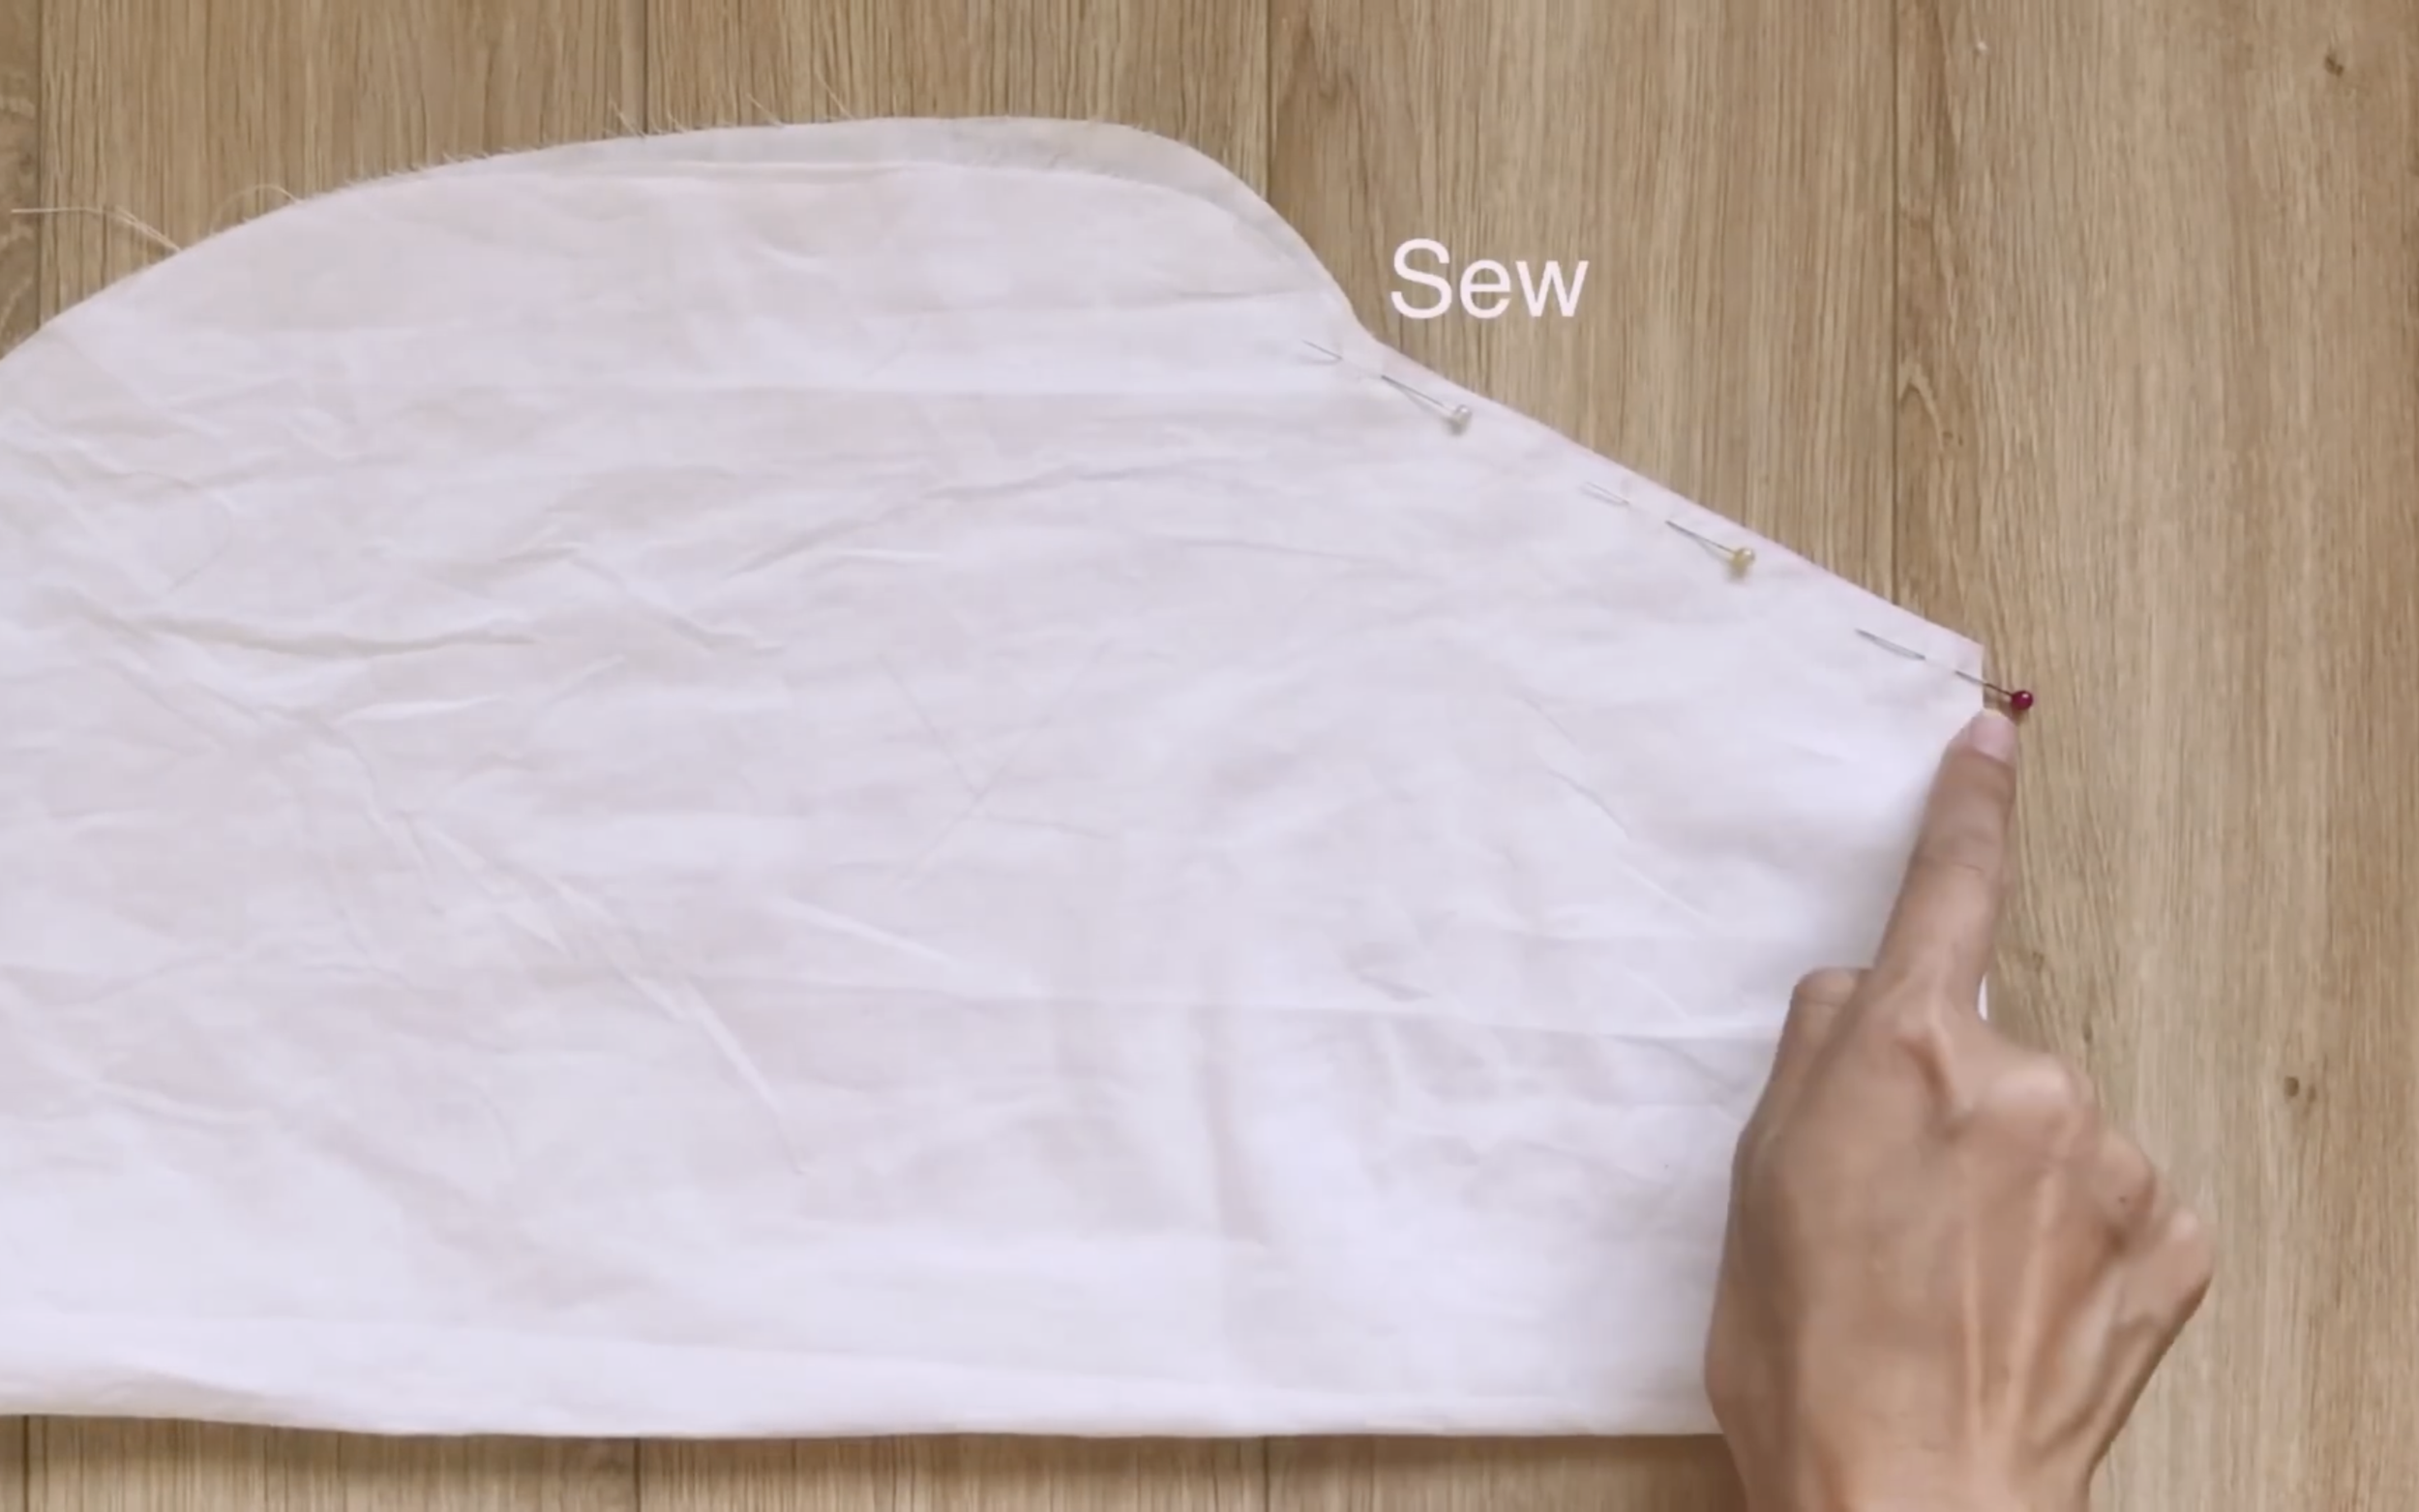
Now, apply the pattern to the fabric and draw.
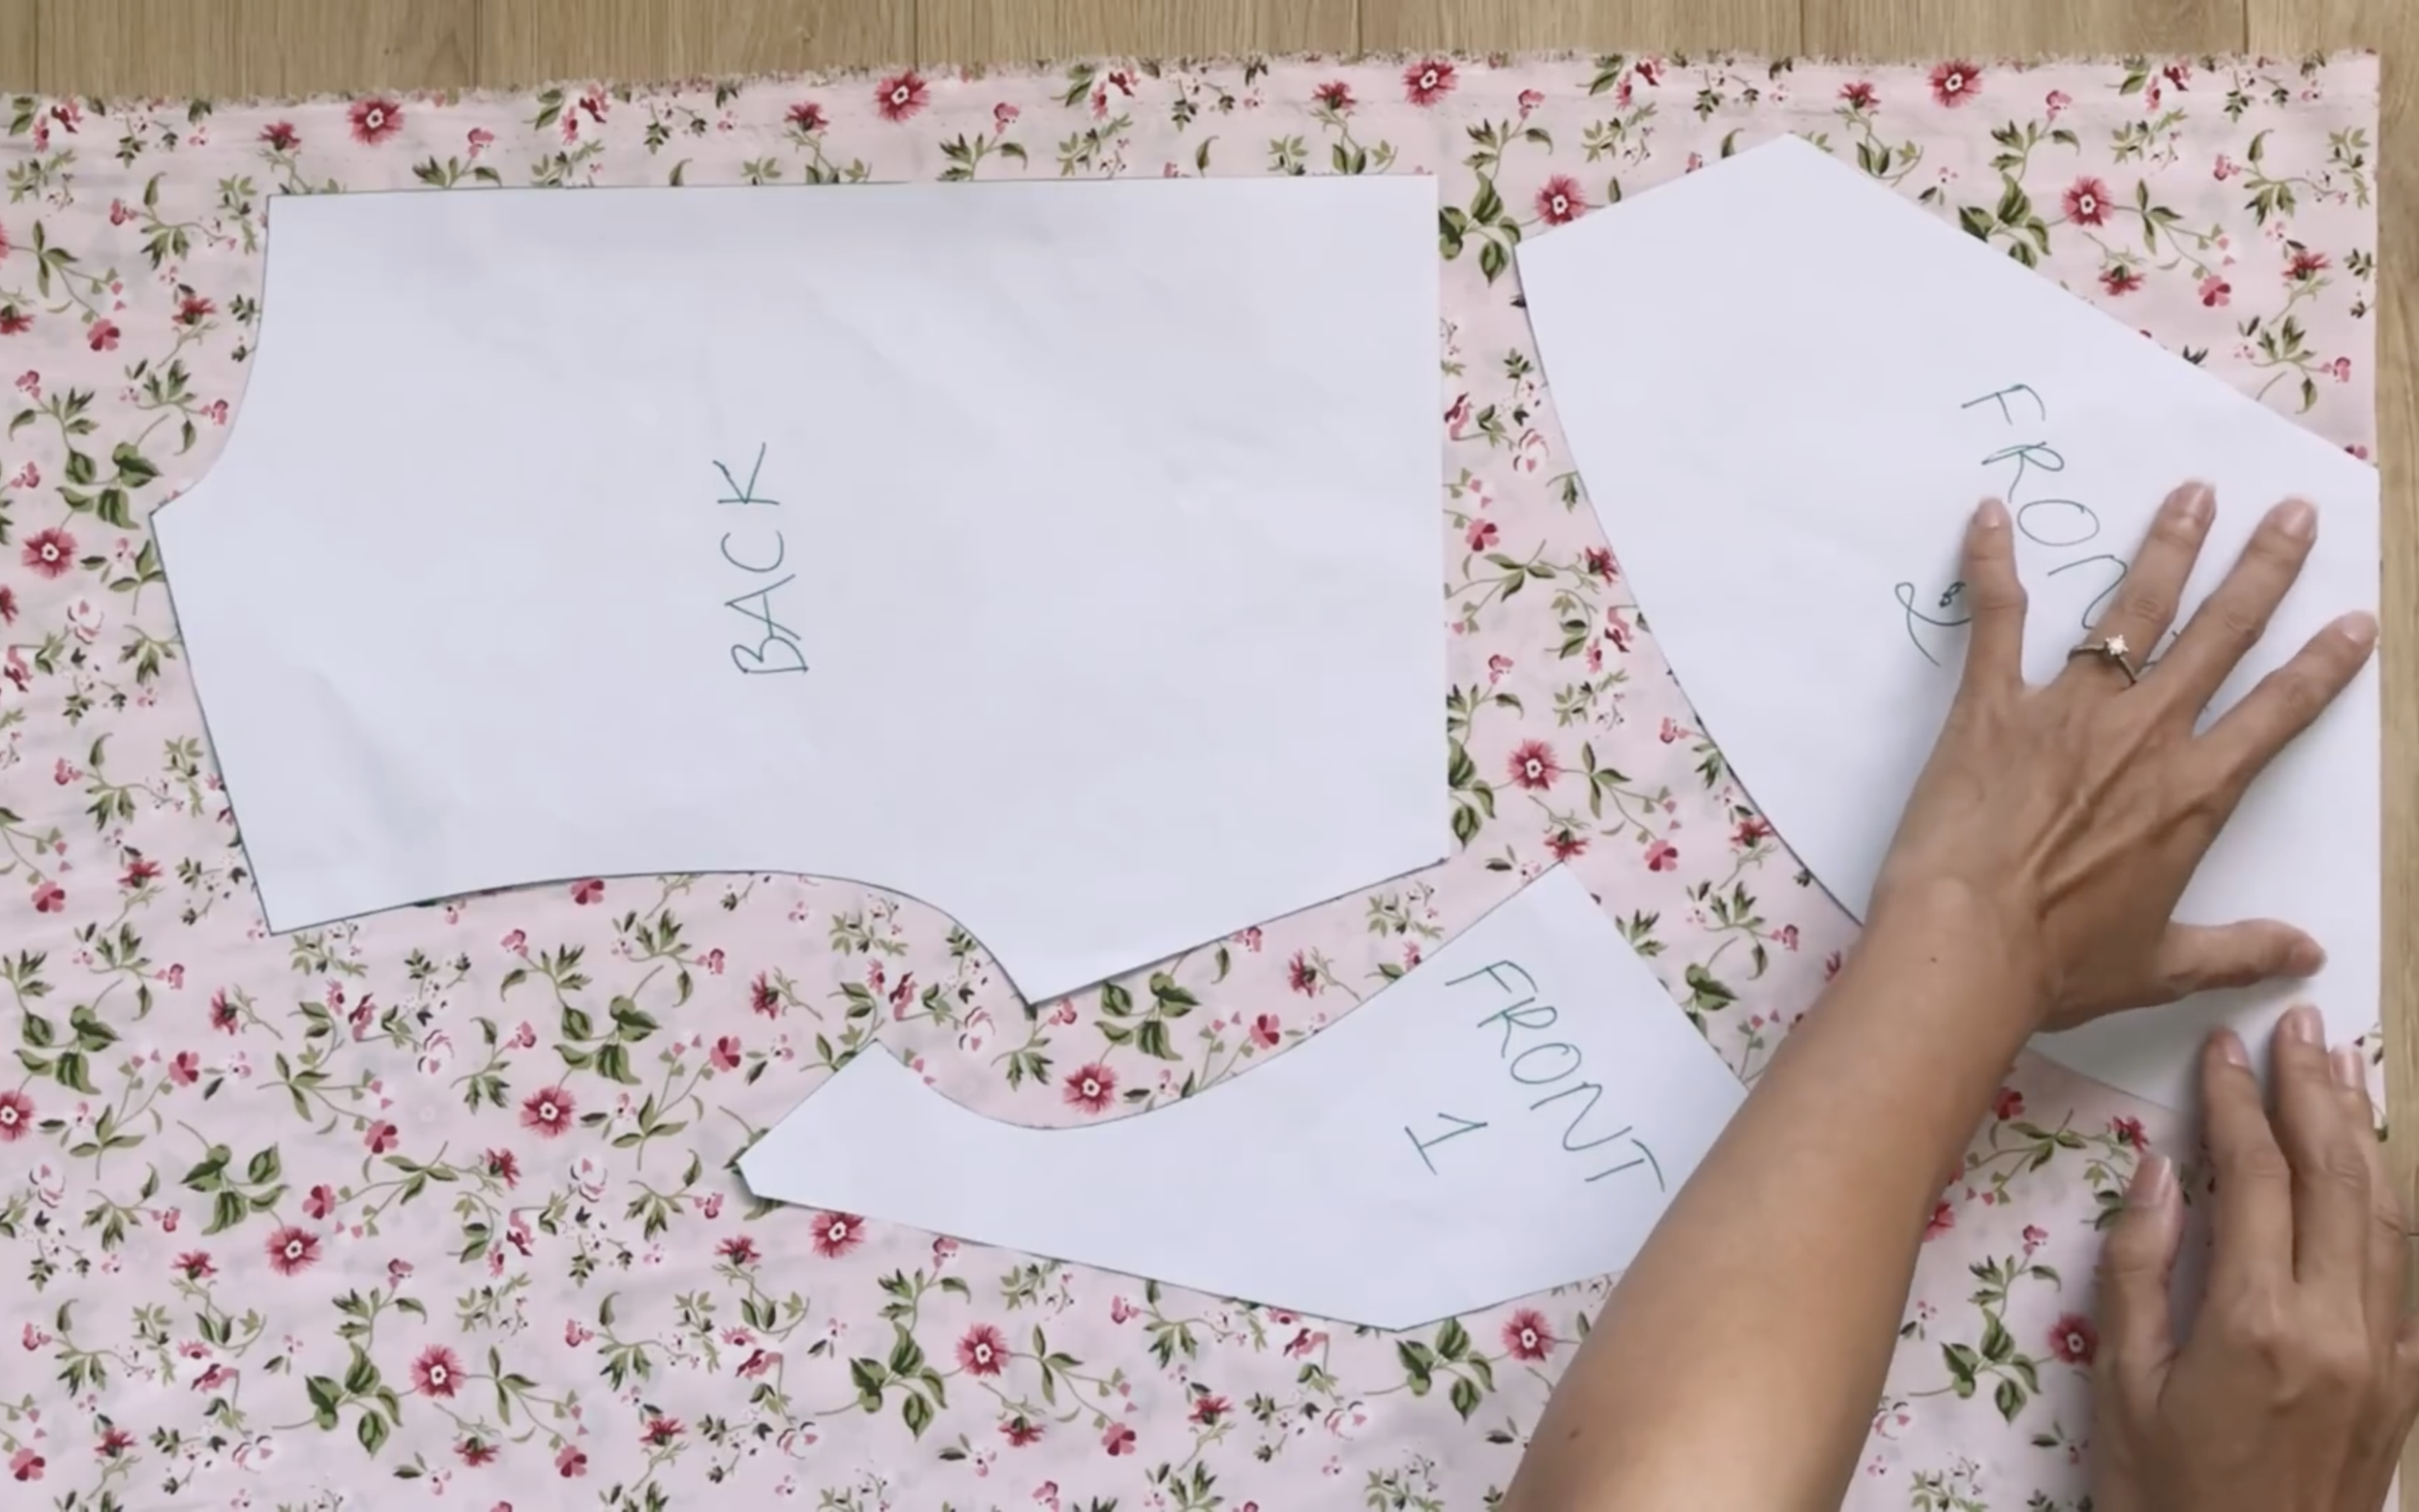
However, at the second front pattern, apply the neckline of this pattern at the folding line fabric.
After cutting, connect two pieces of the second front pattern together at the middle line.
Then, sew.
After that, connect two pieces of its second front part to keep them not moving and stay together.
As you can see, the original dress had the fold of the fabric to create a puffy from there to the bust area.
So, make two folds at the top of the second front part and sew to keep the fold together.
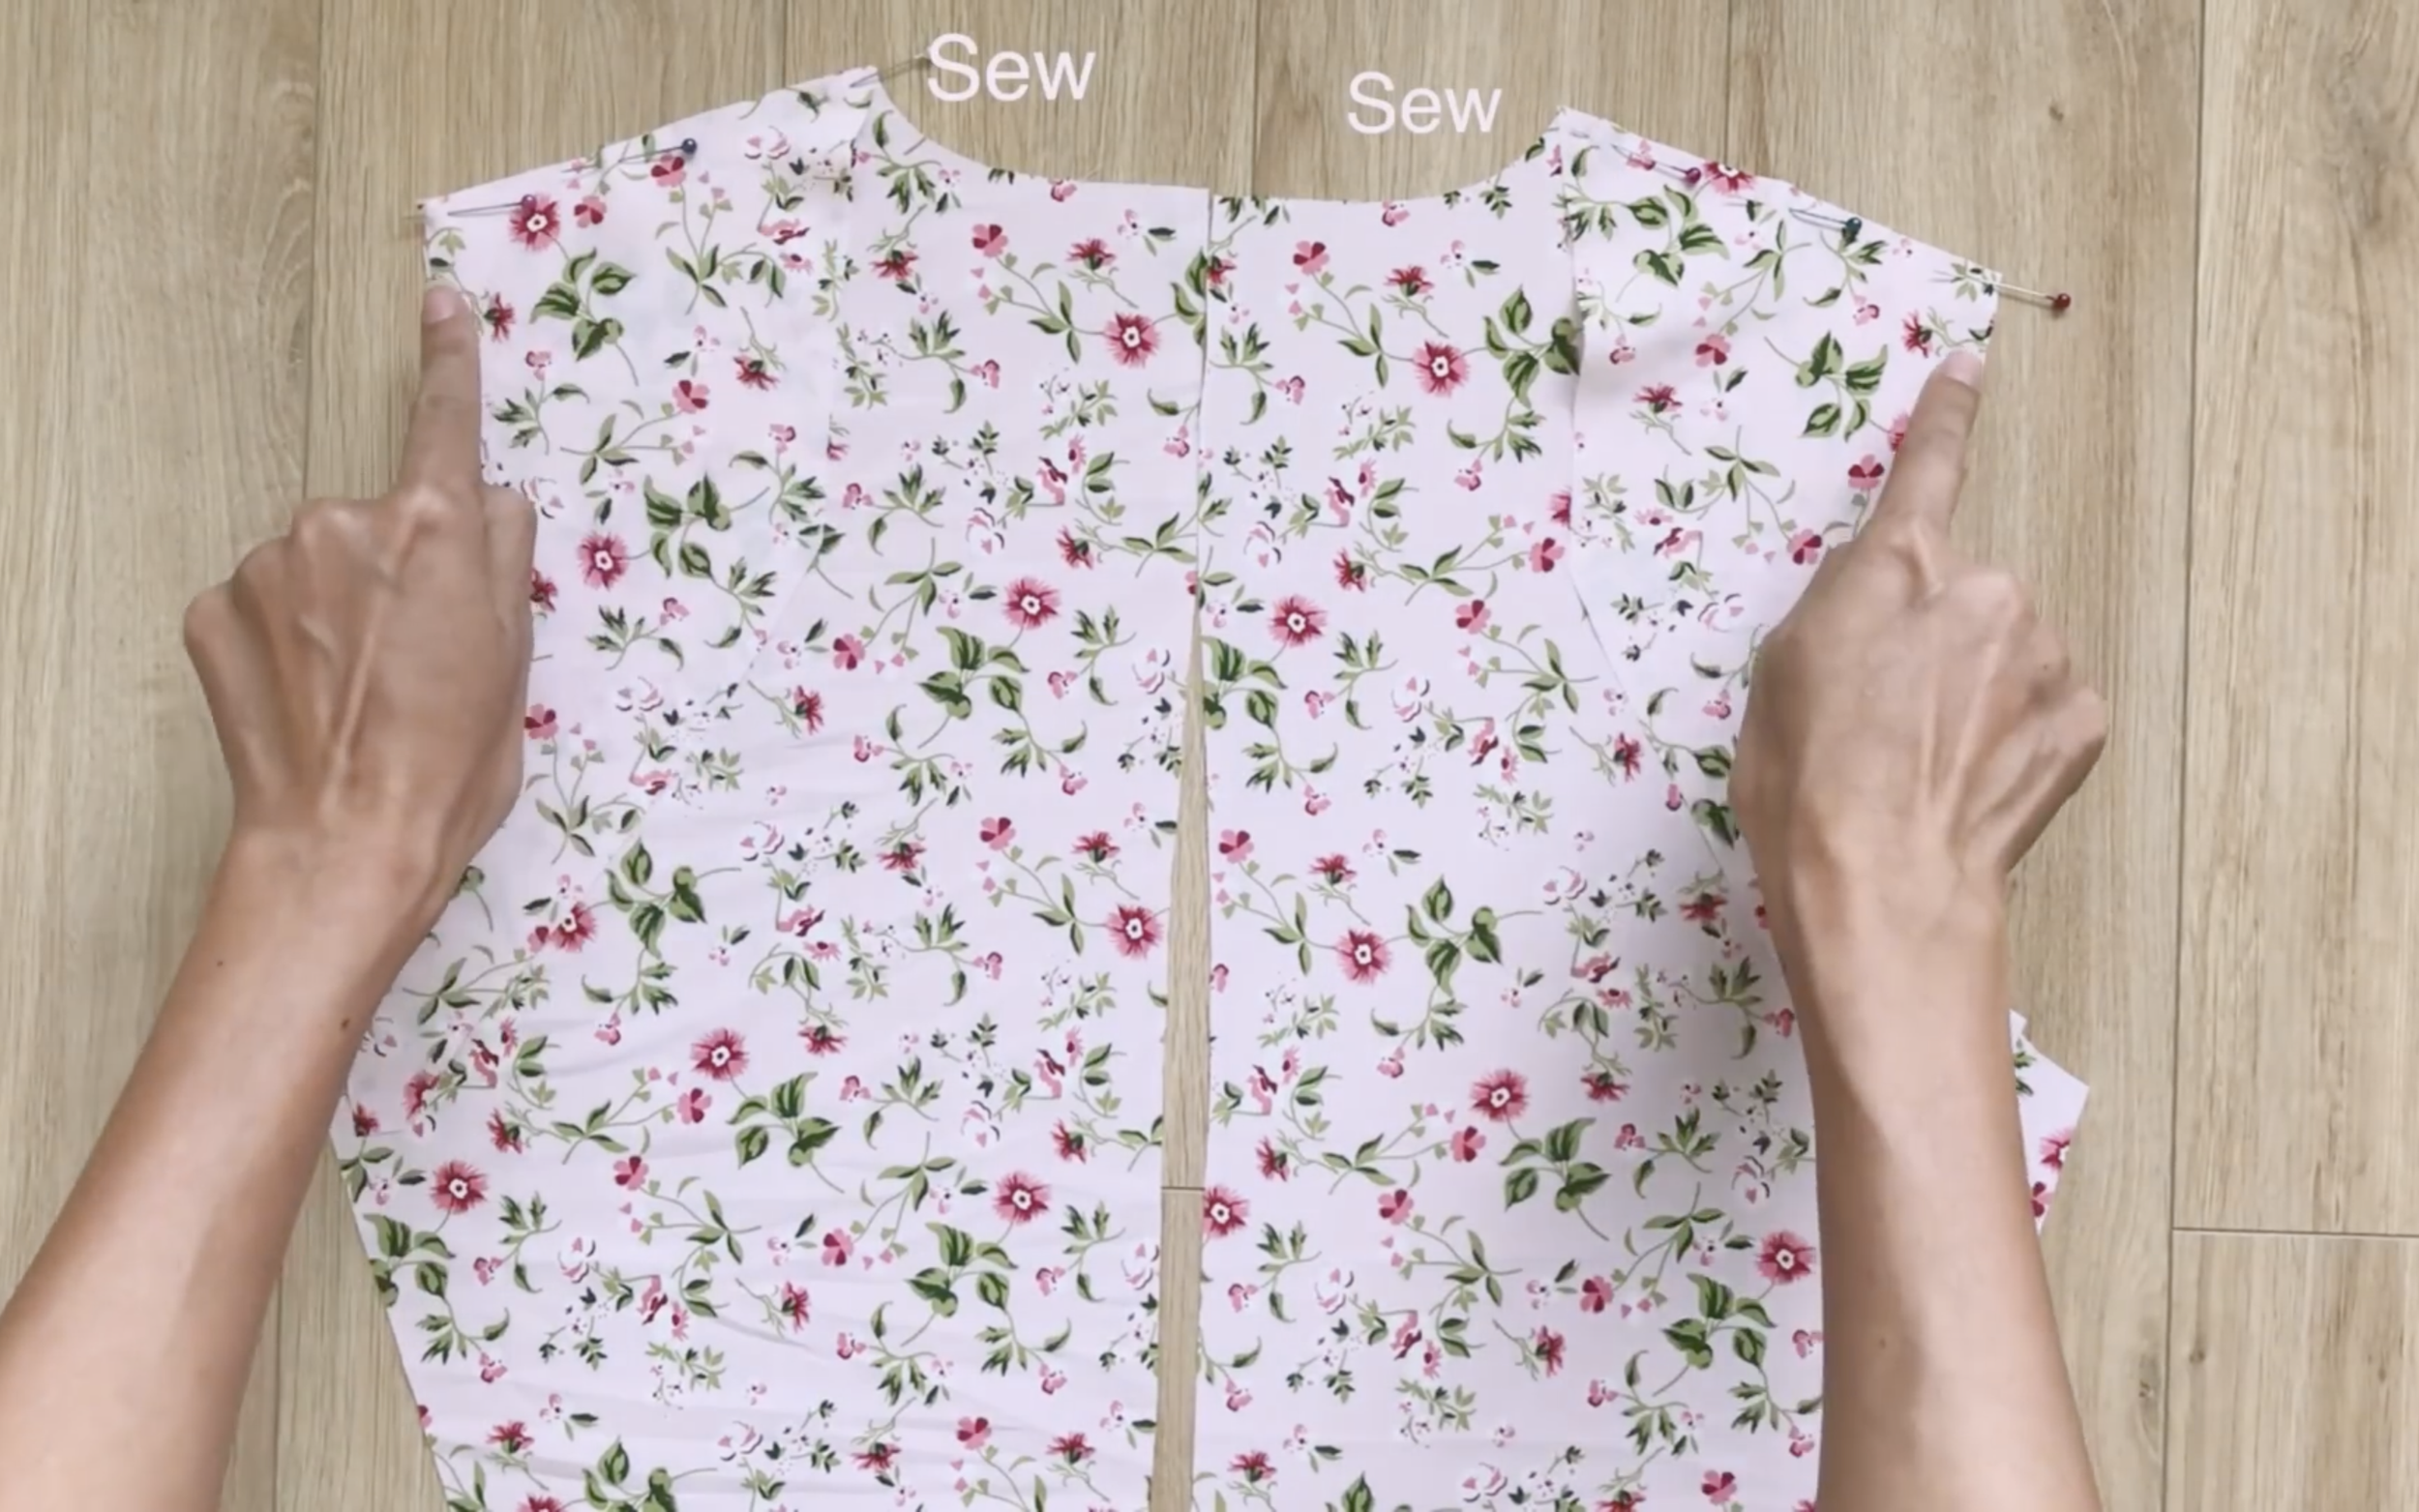
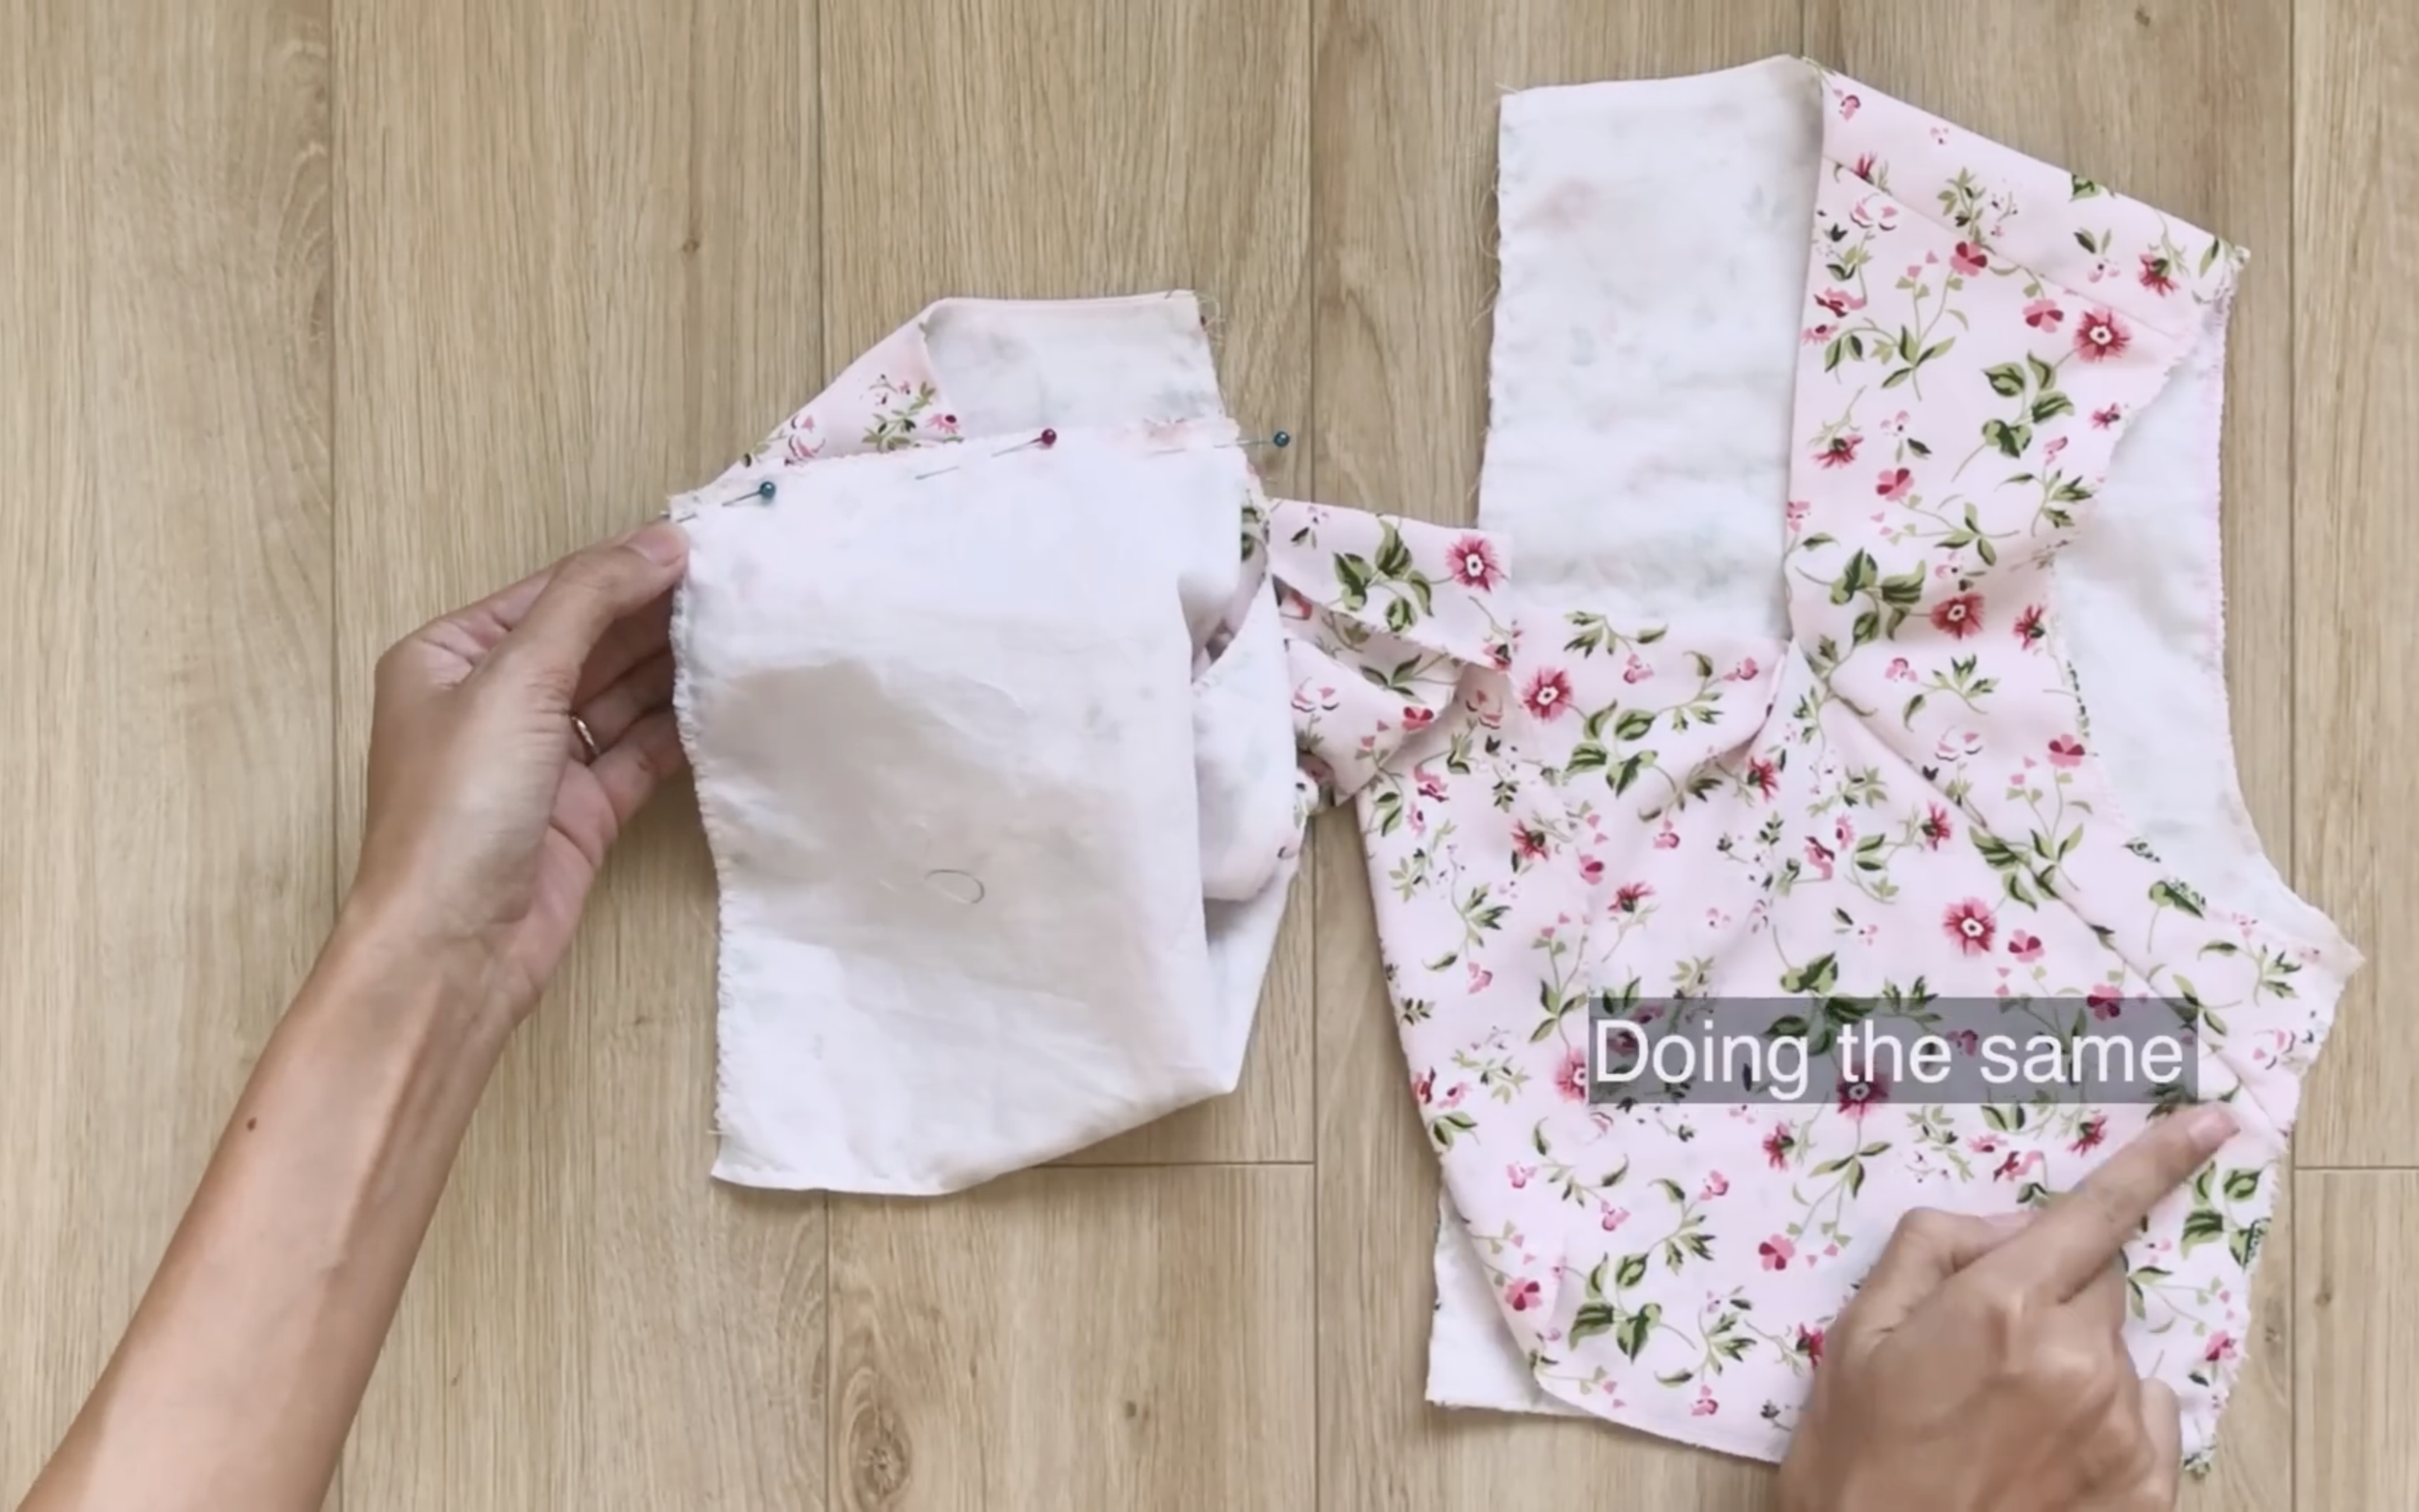
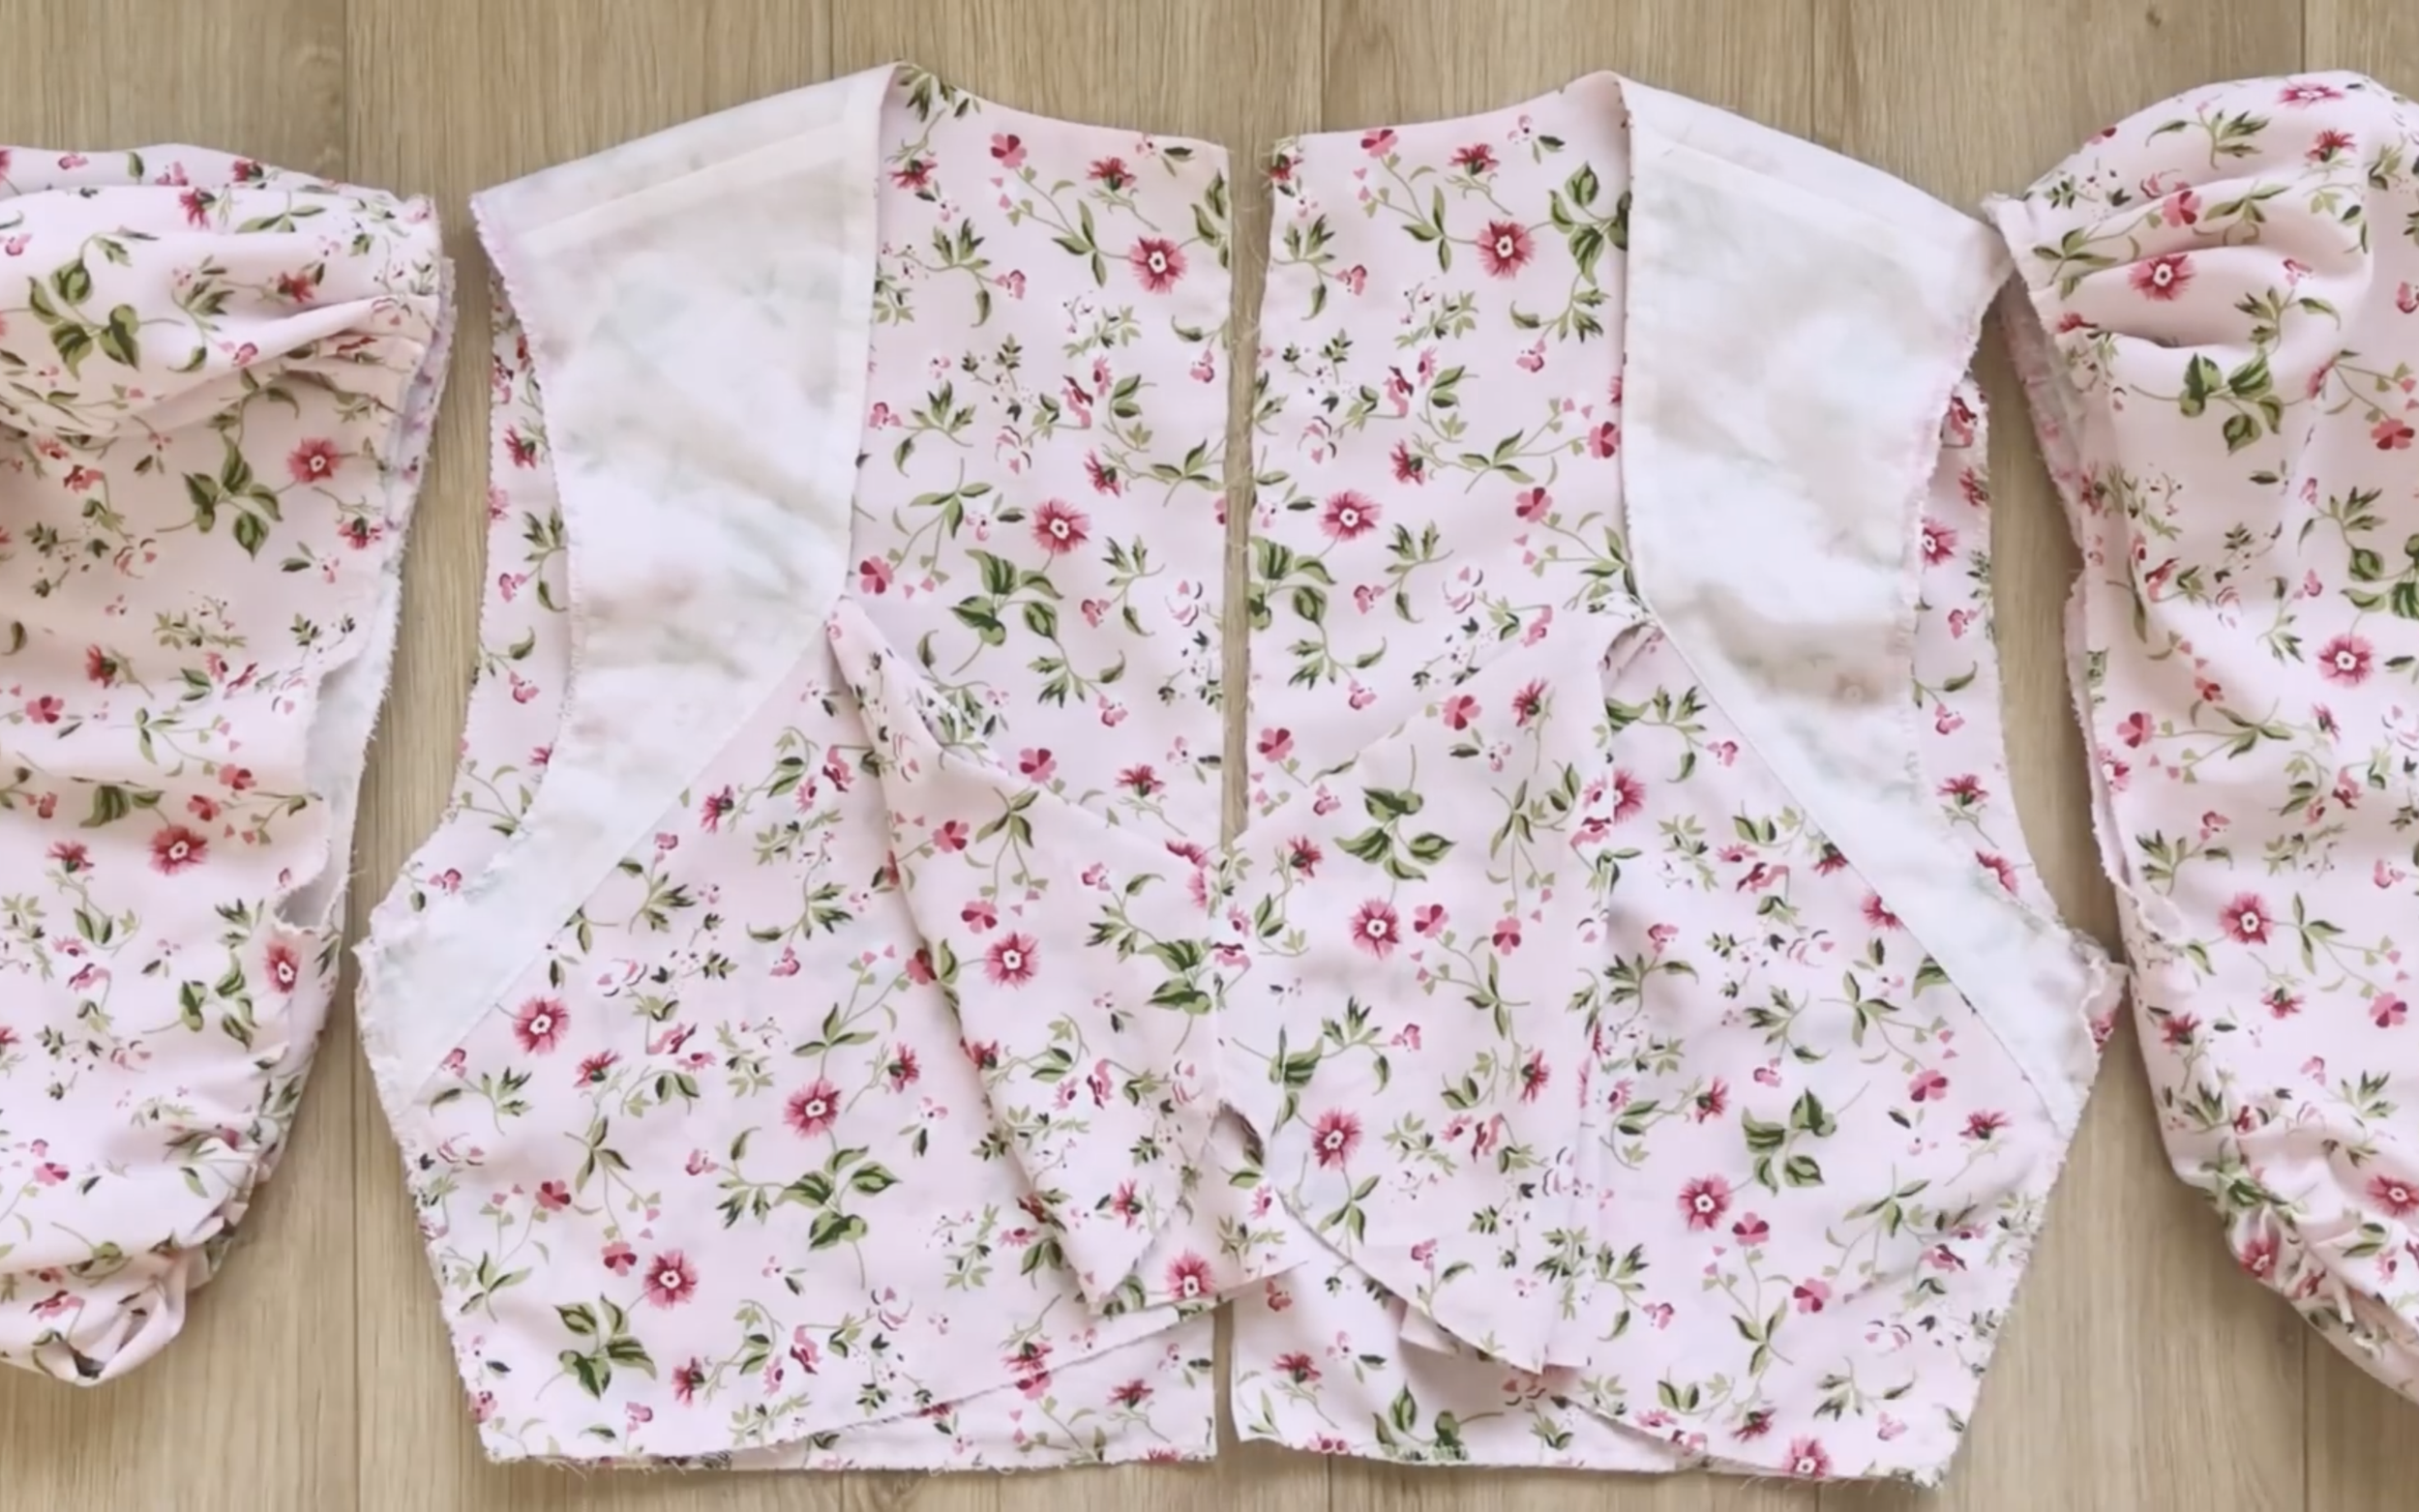
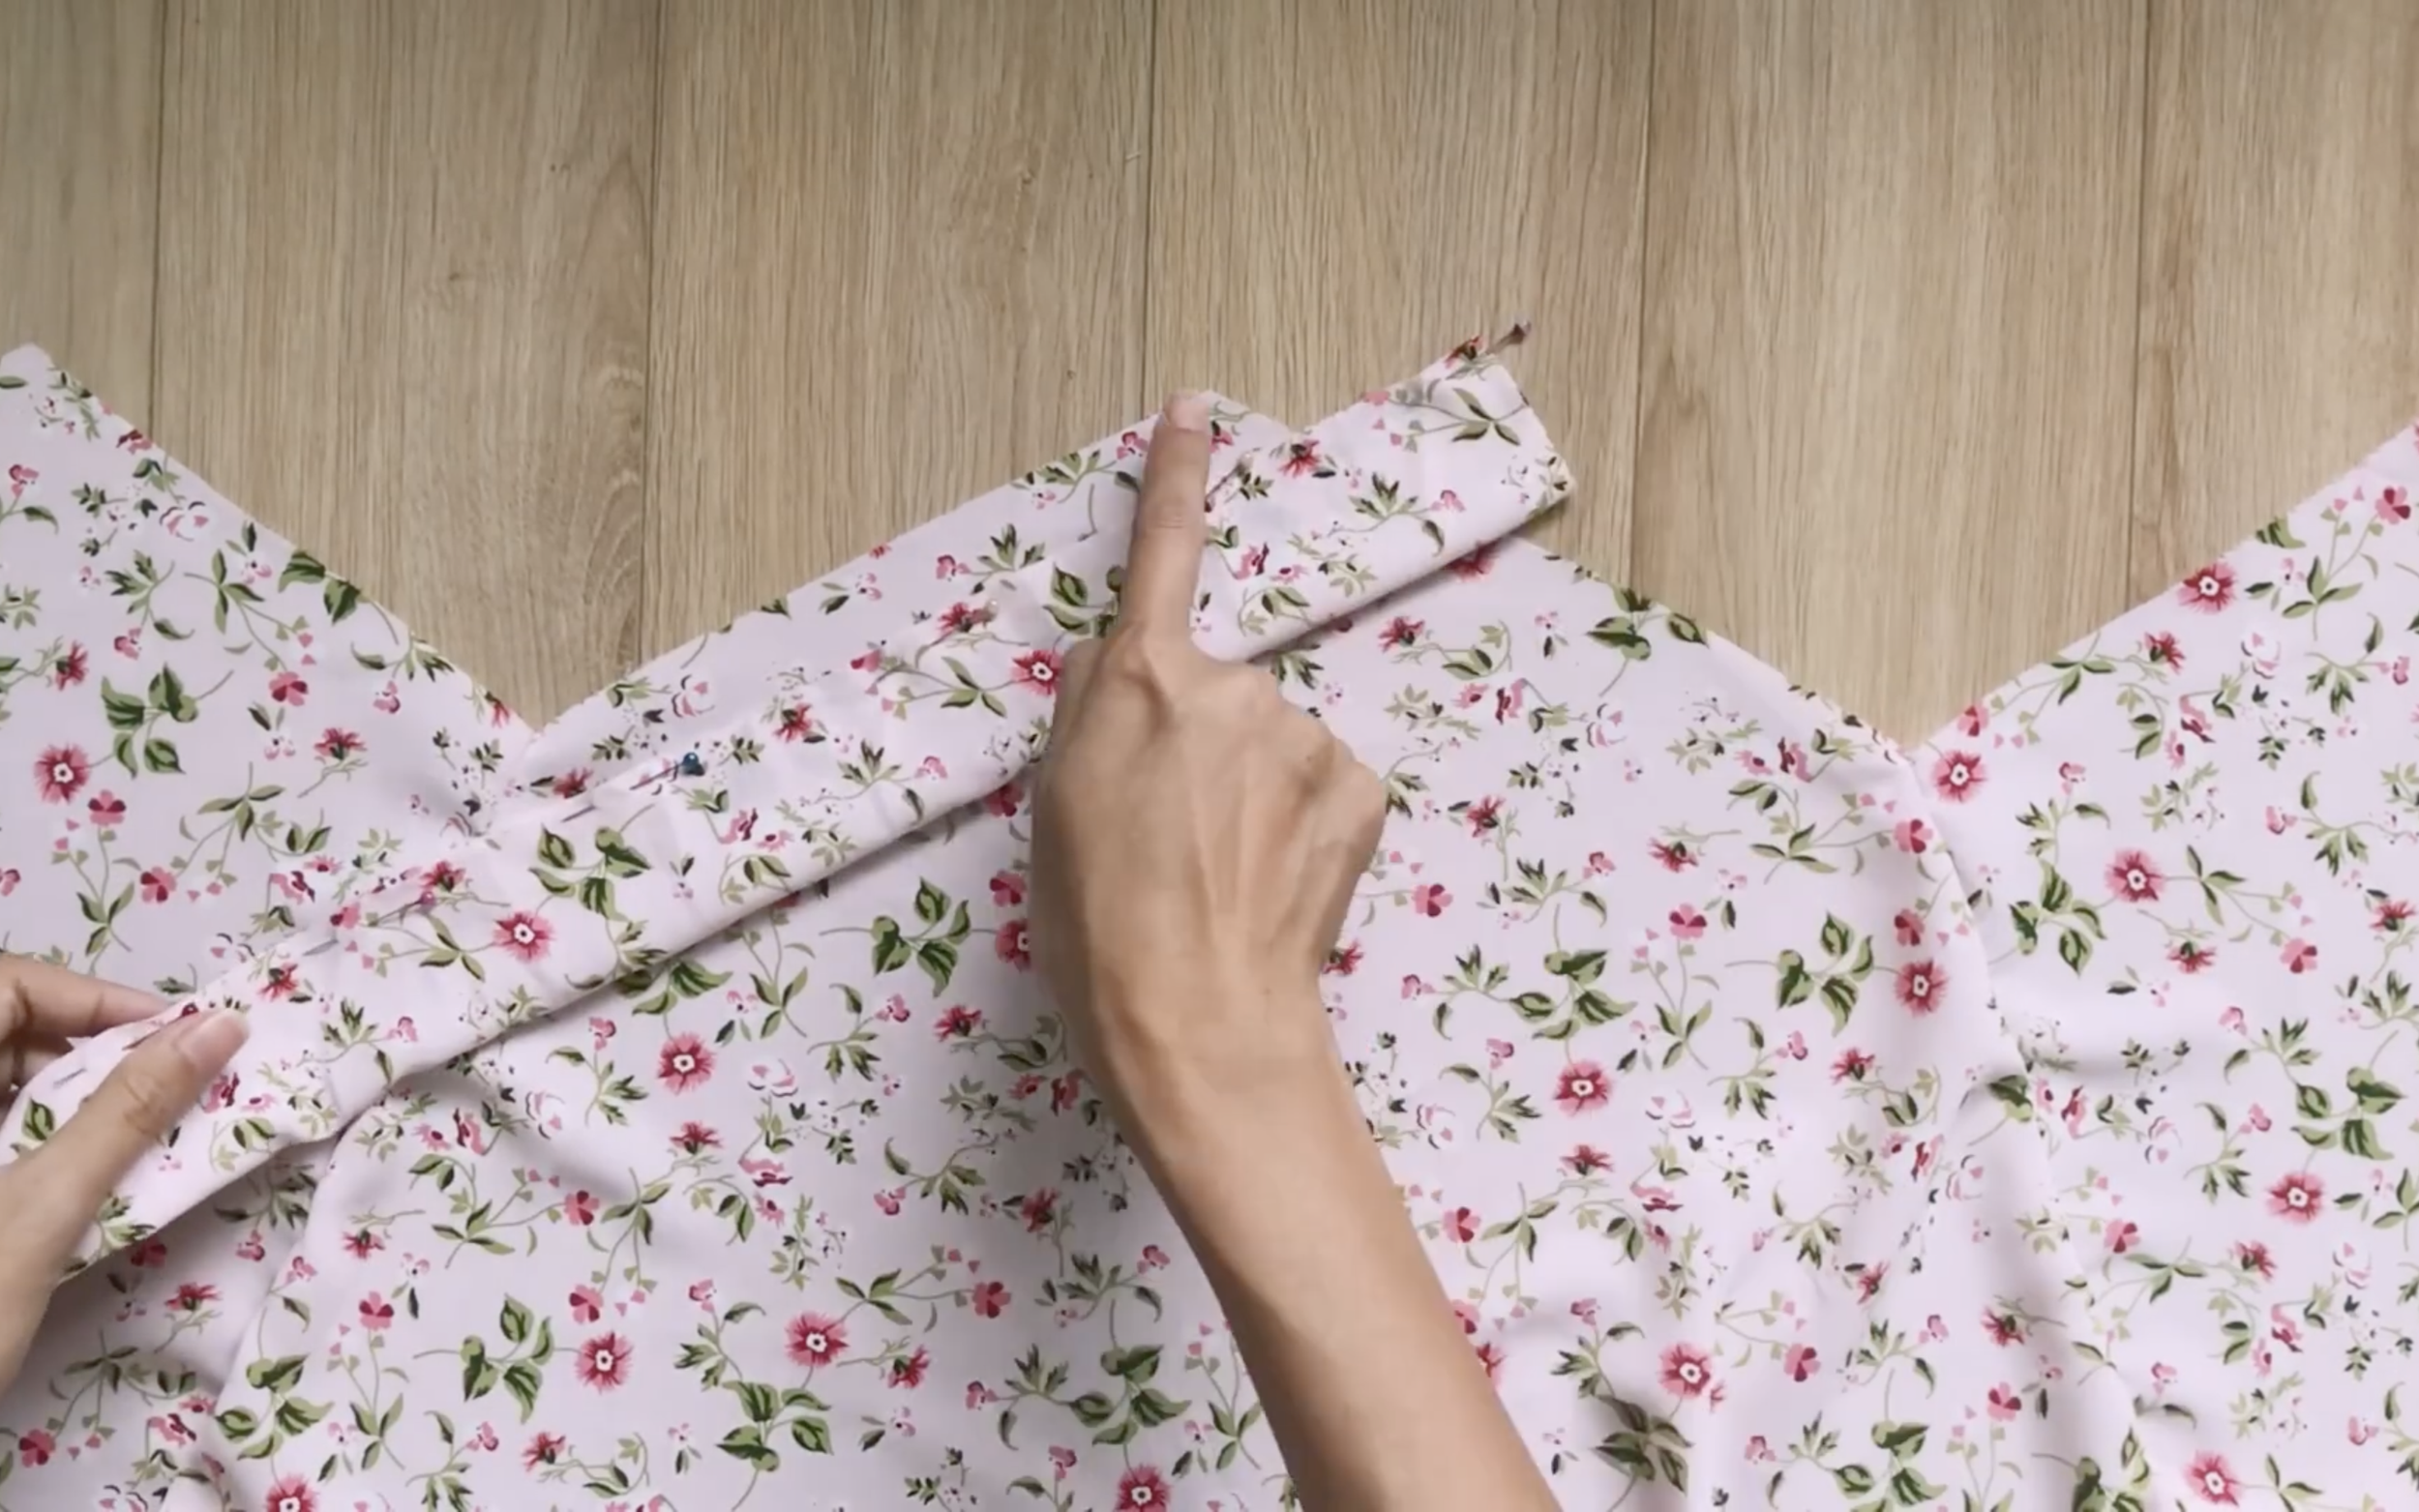
Now, connect the back and the first front pattern together at the shoulder lines.
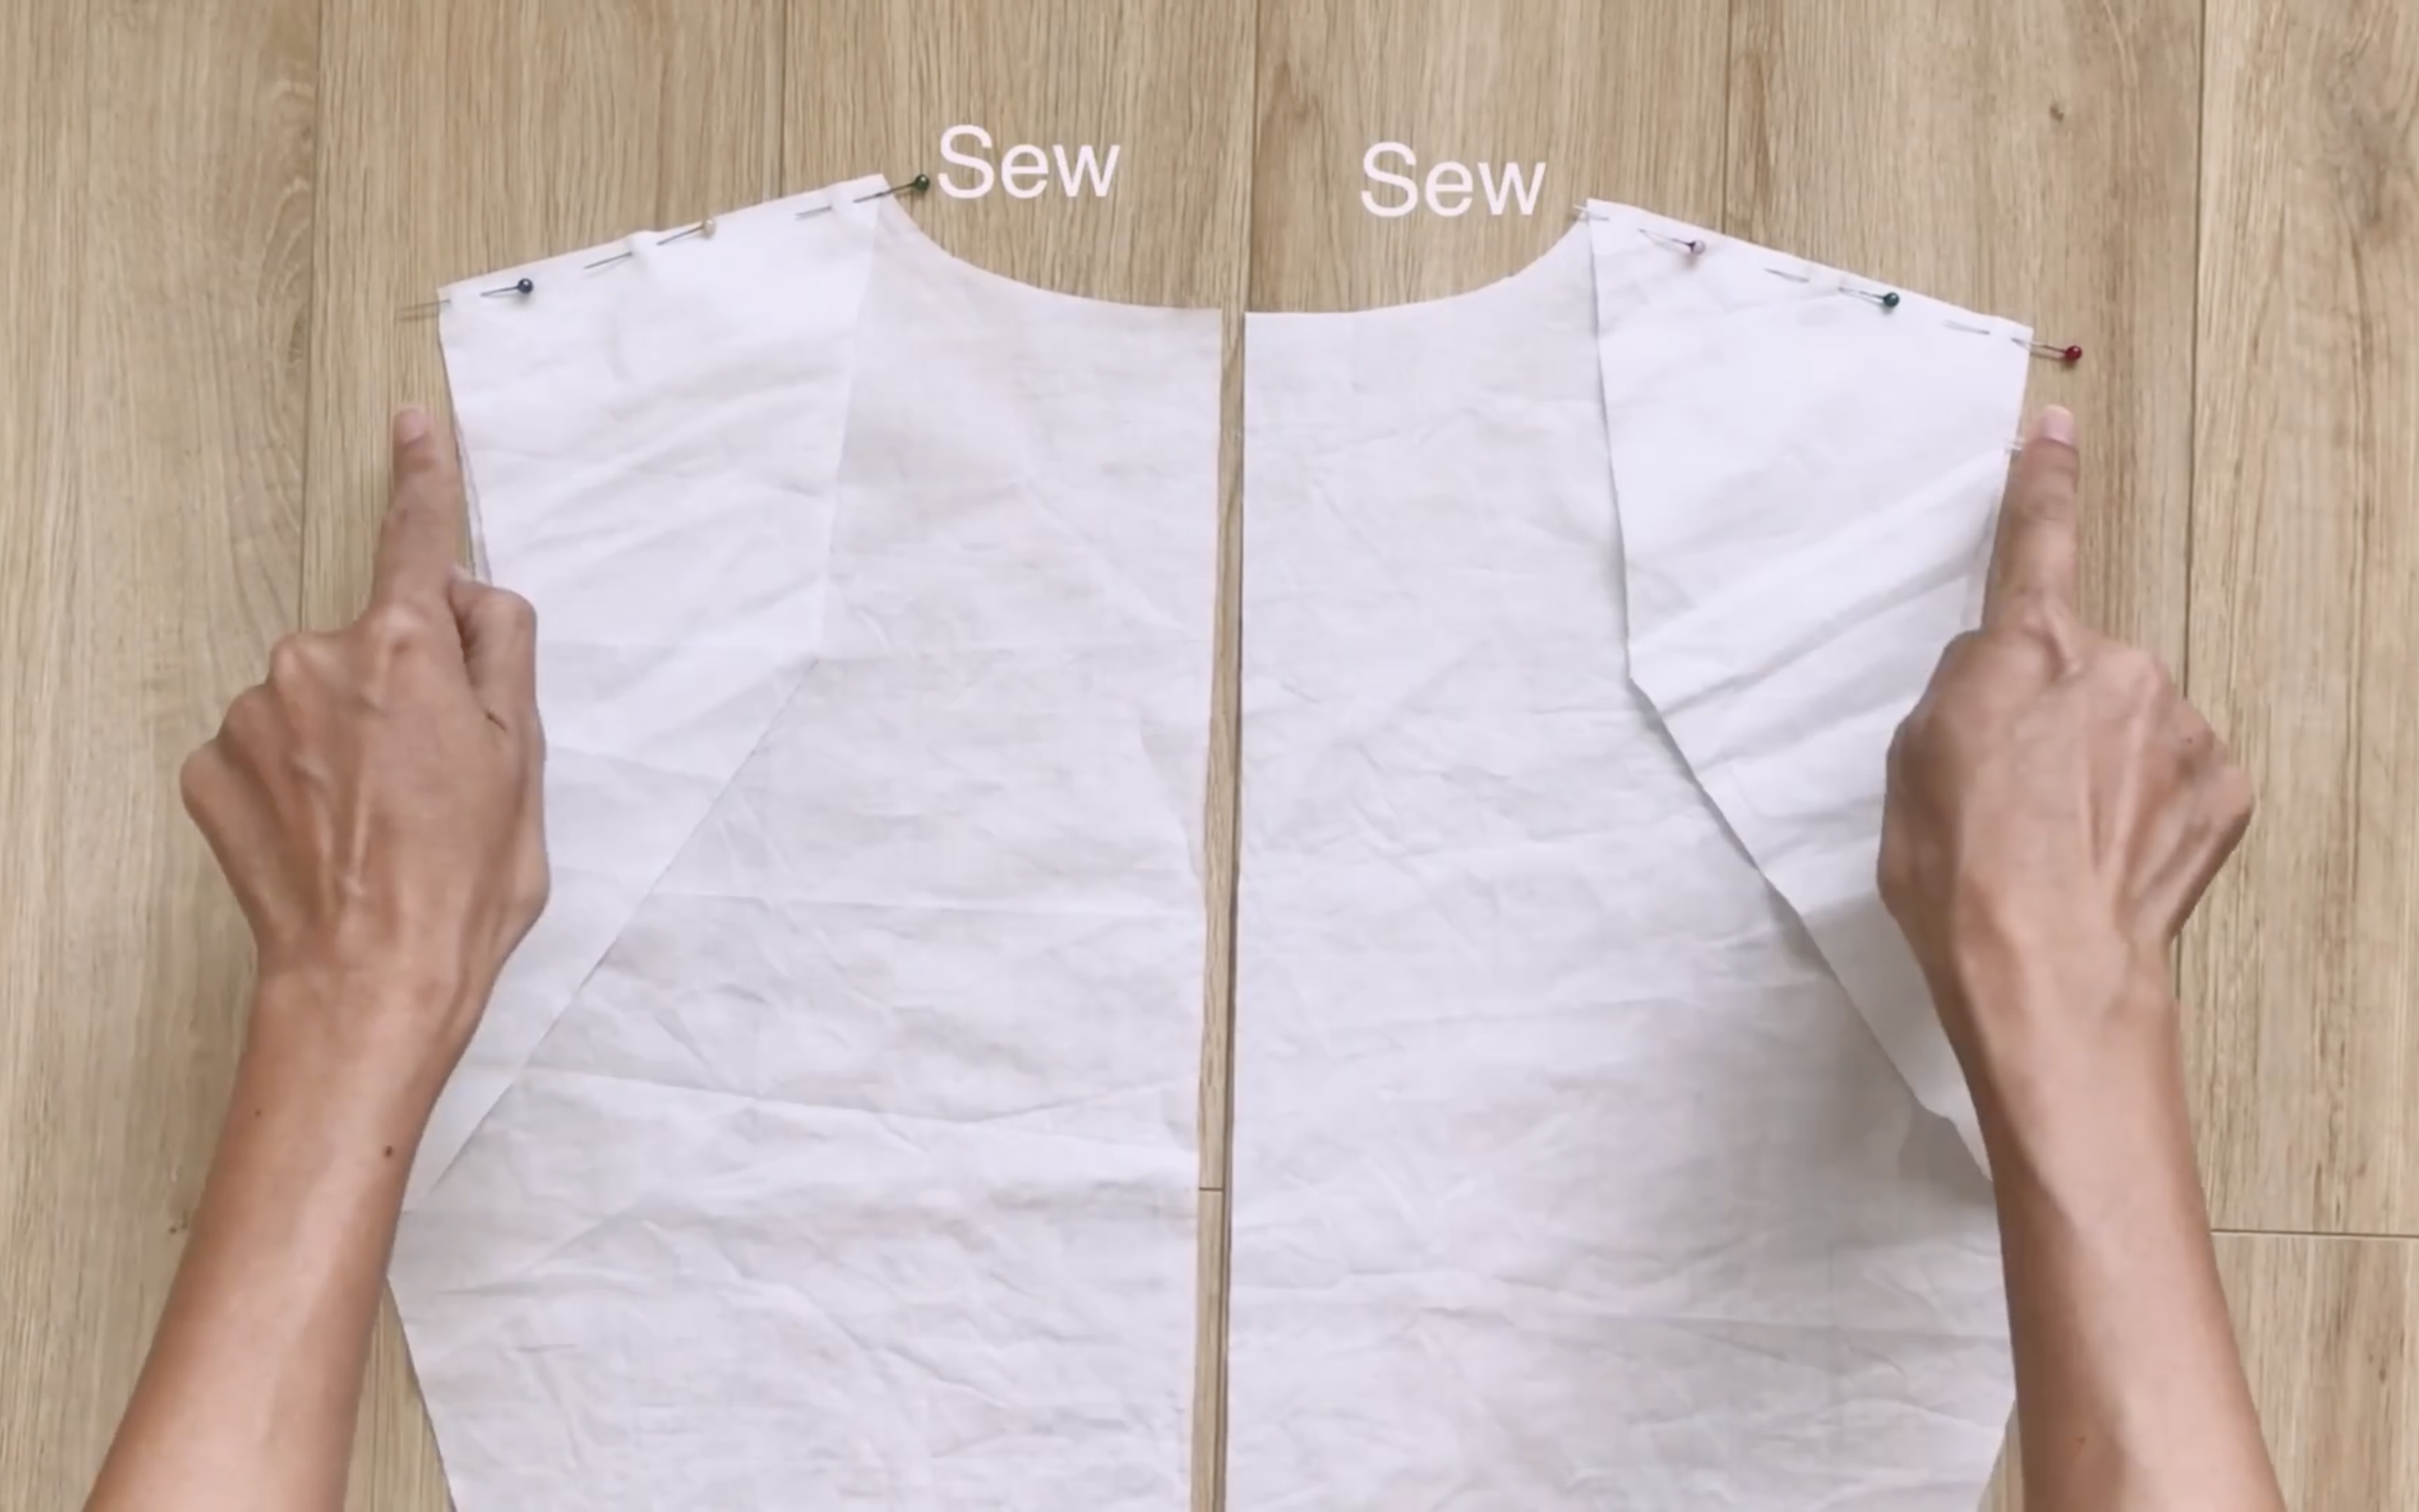
Do the same for the lining part of the back and the first front part.

Now, connect the first front part and the second front part together. Make sure the second front part will be in the middle of two first front parts.
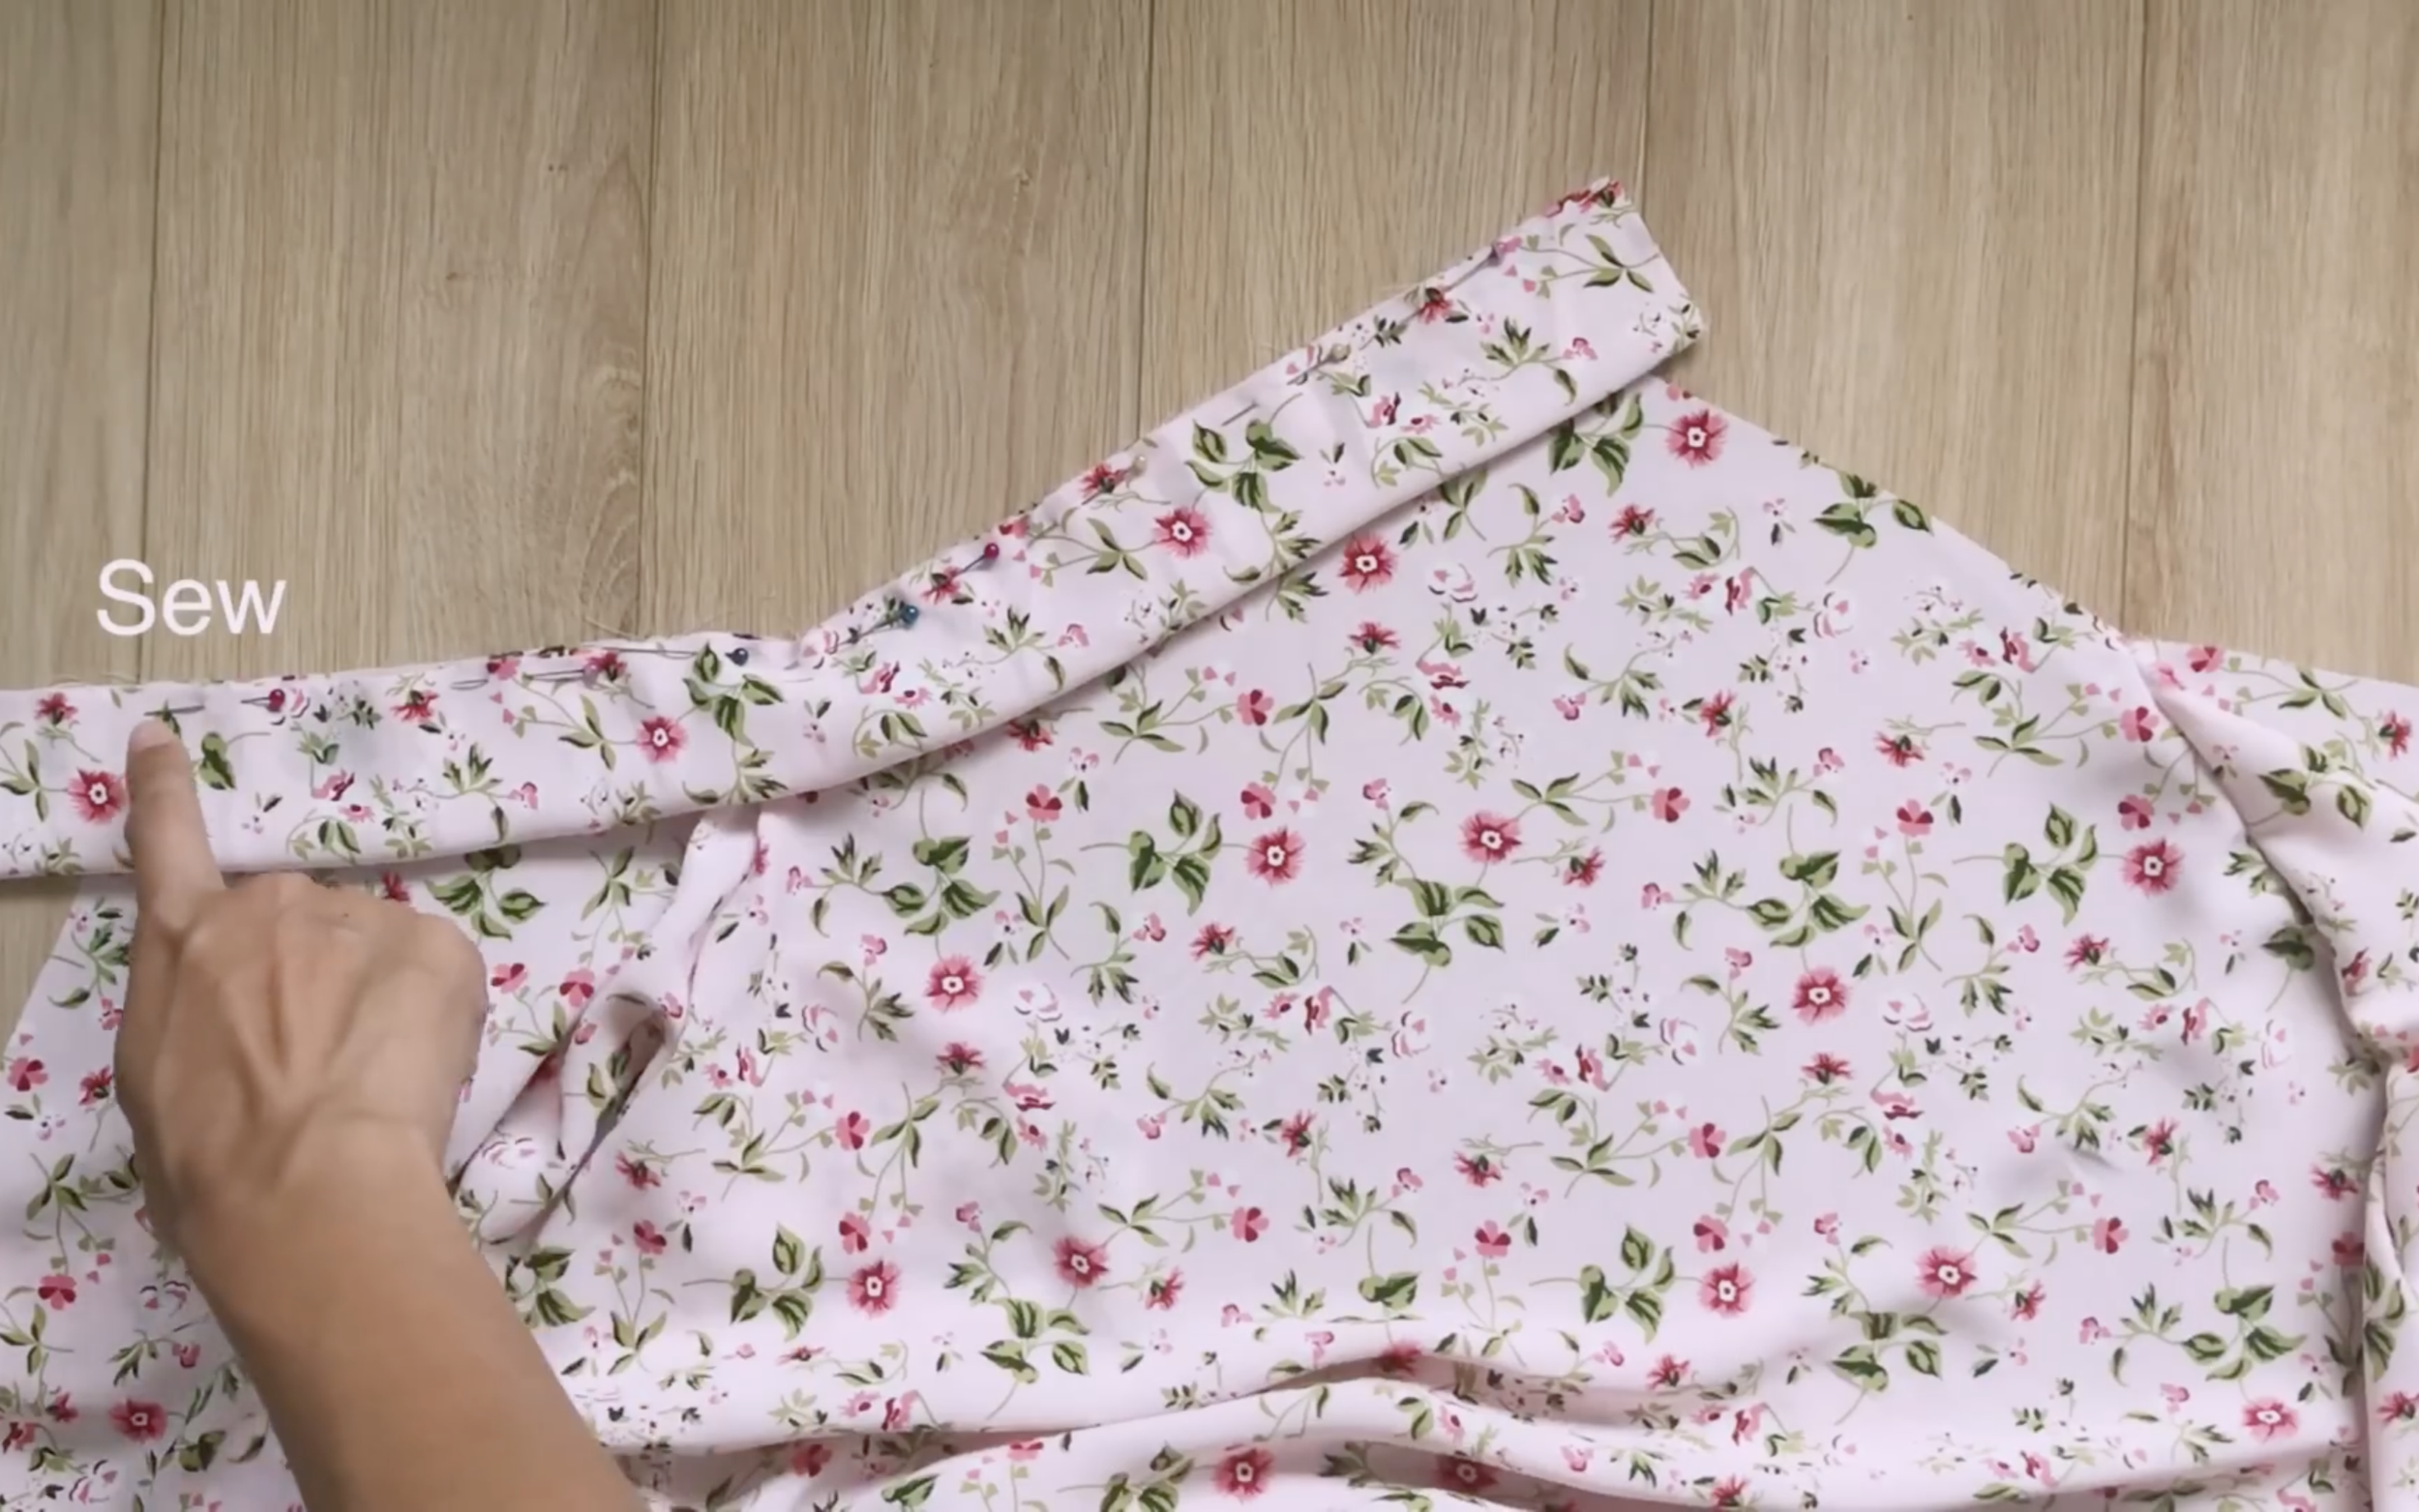
Also, connect the rest of the neckline of two front parts and the neckline of the back parts together.
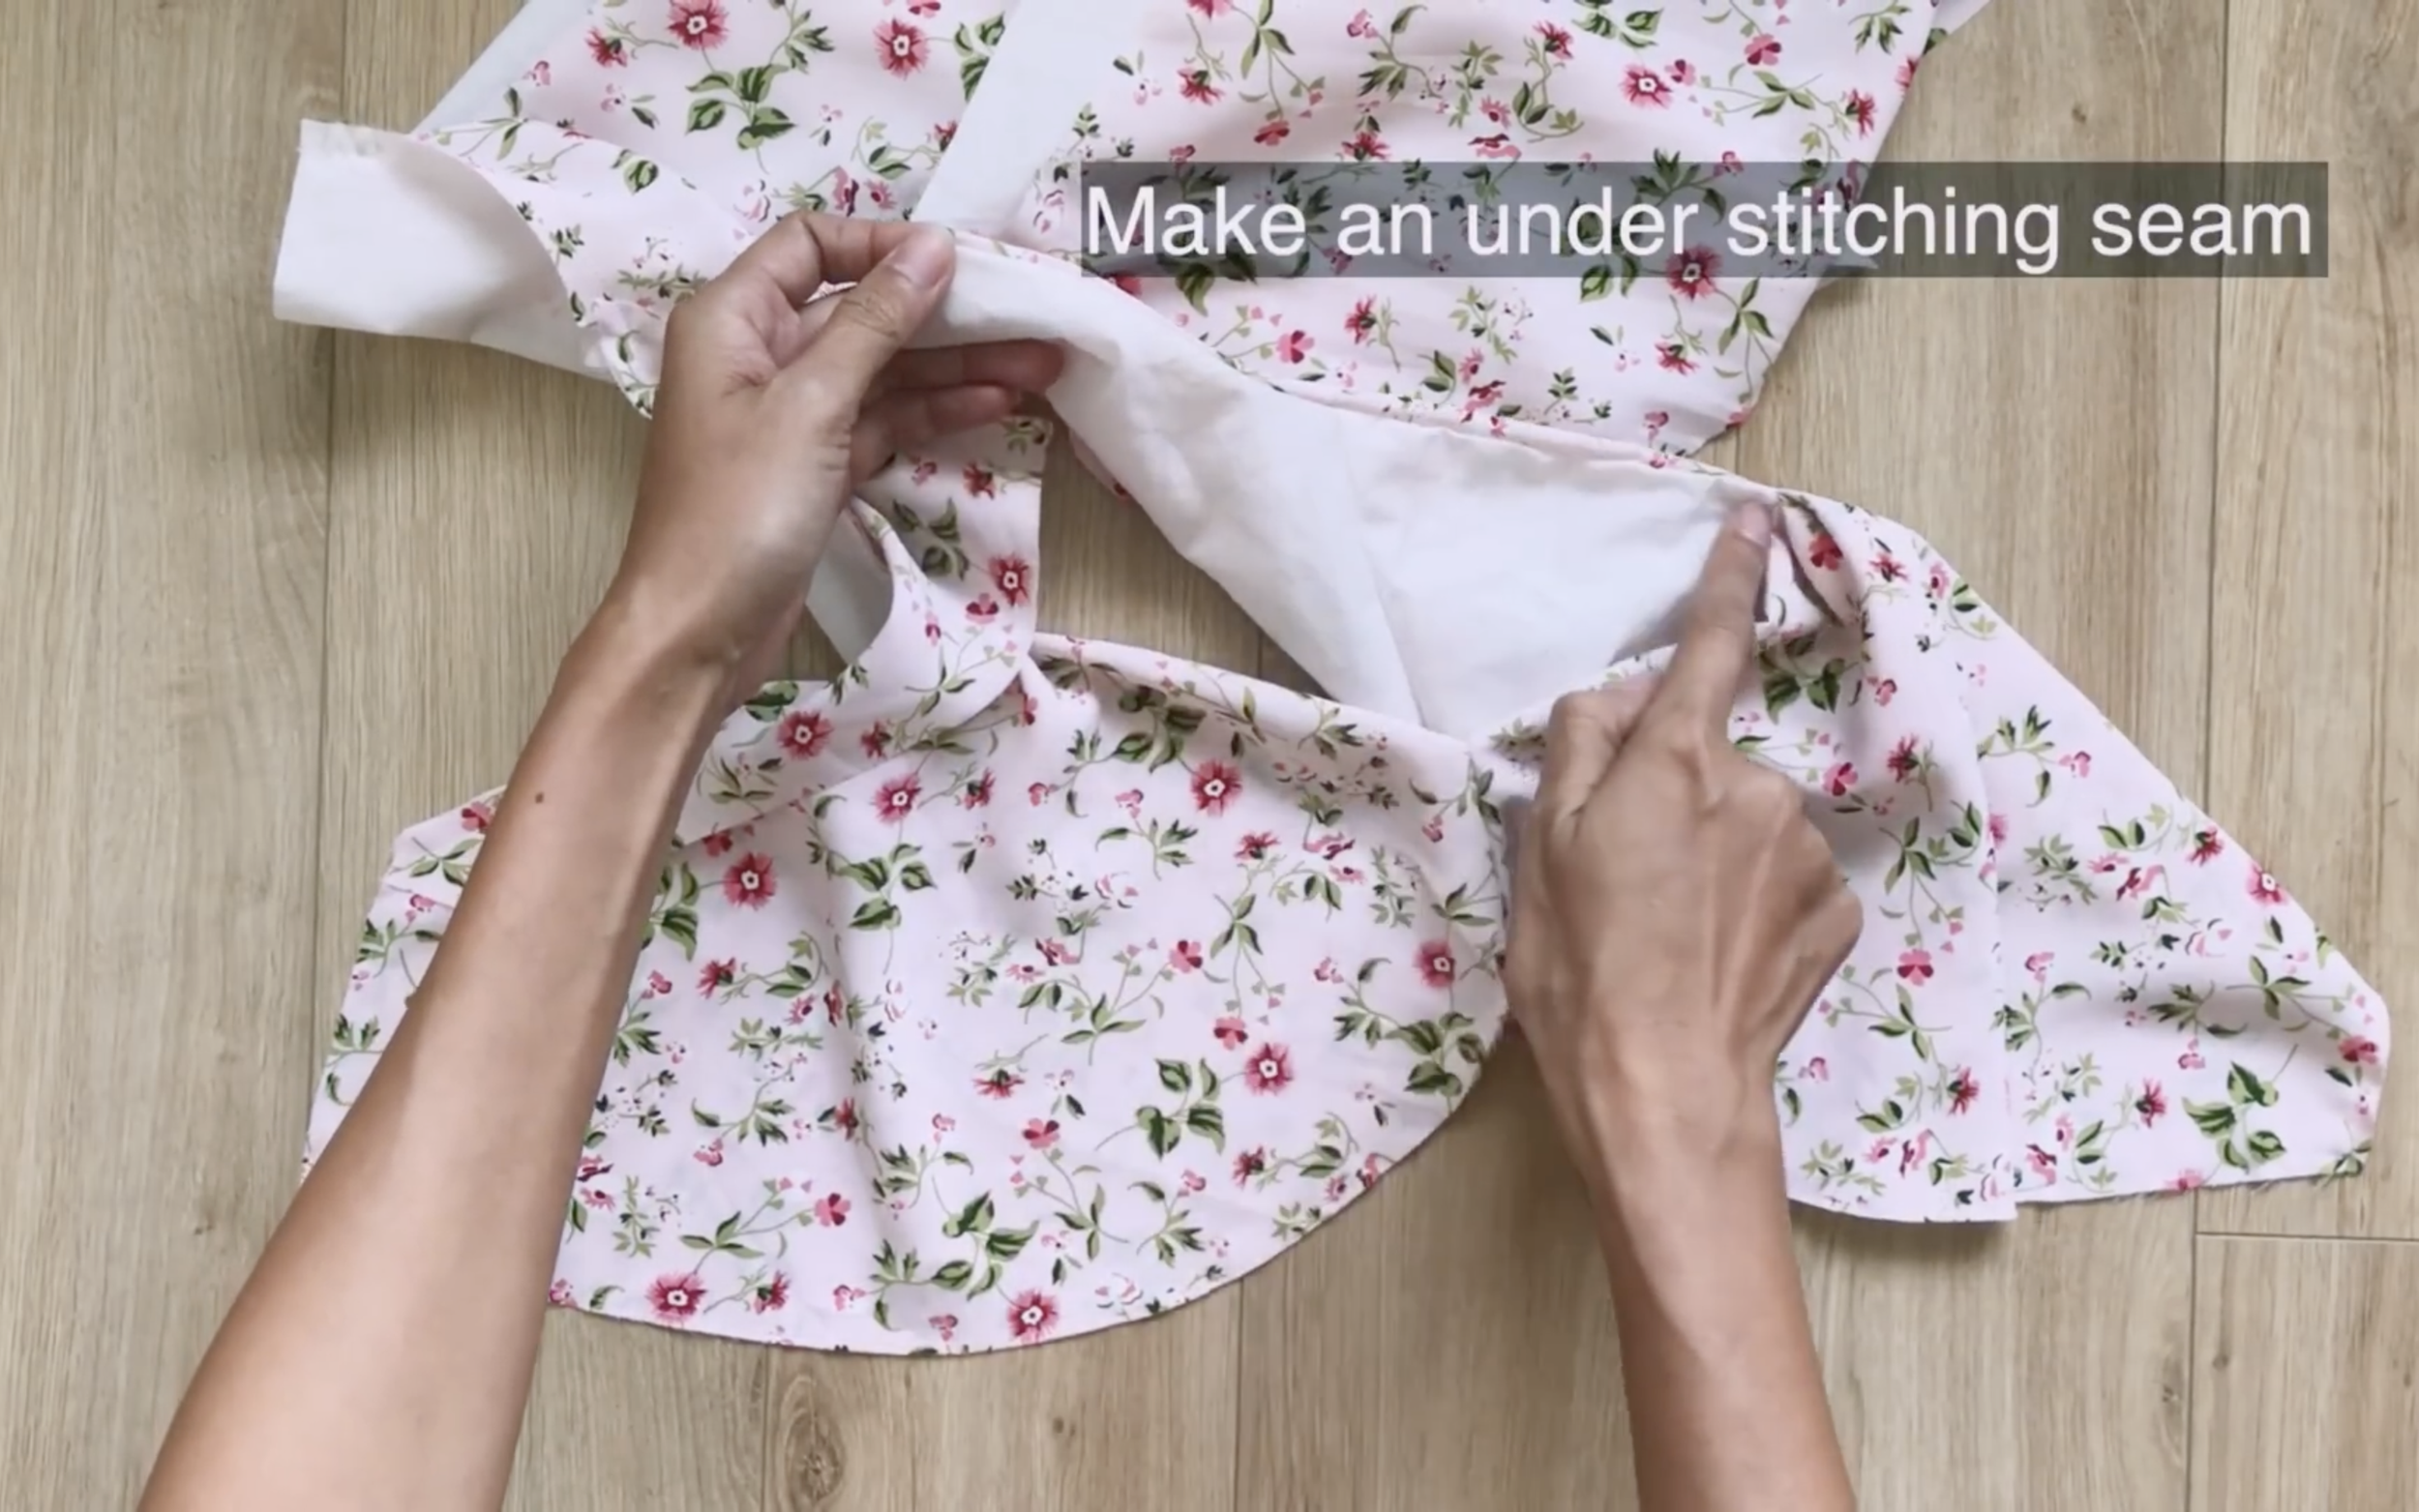
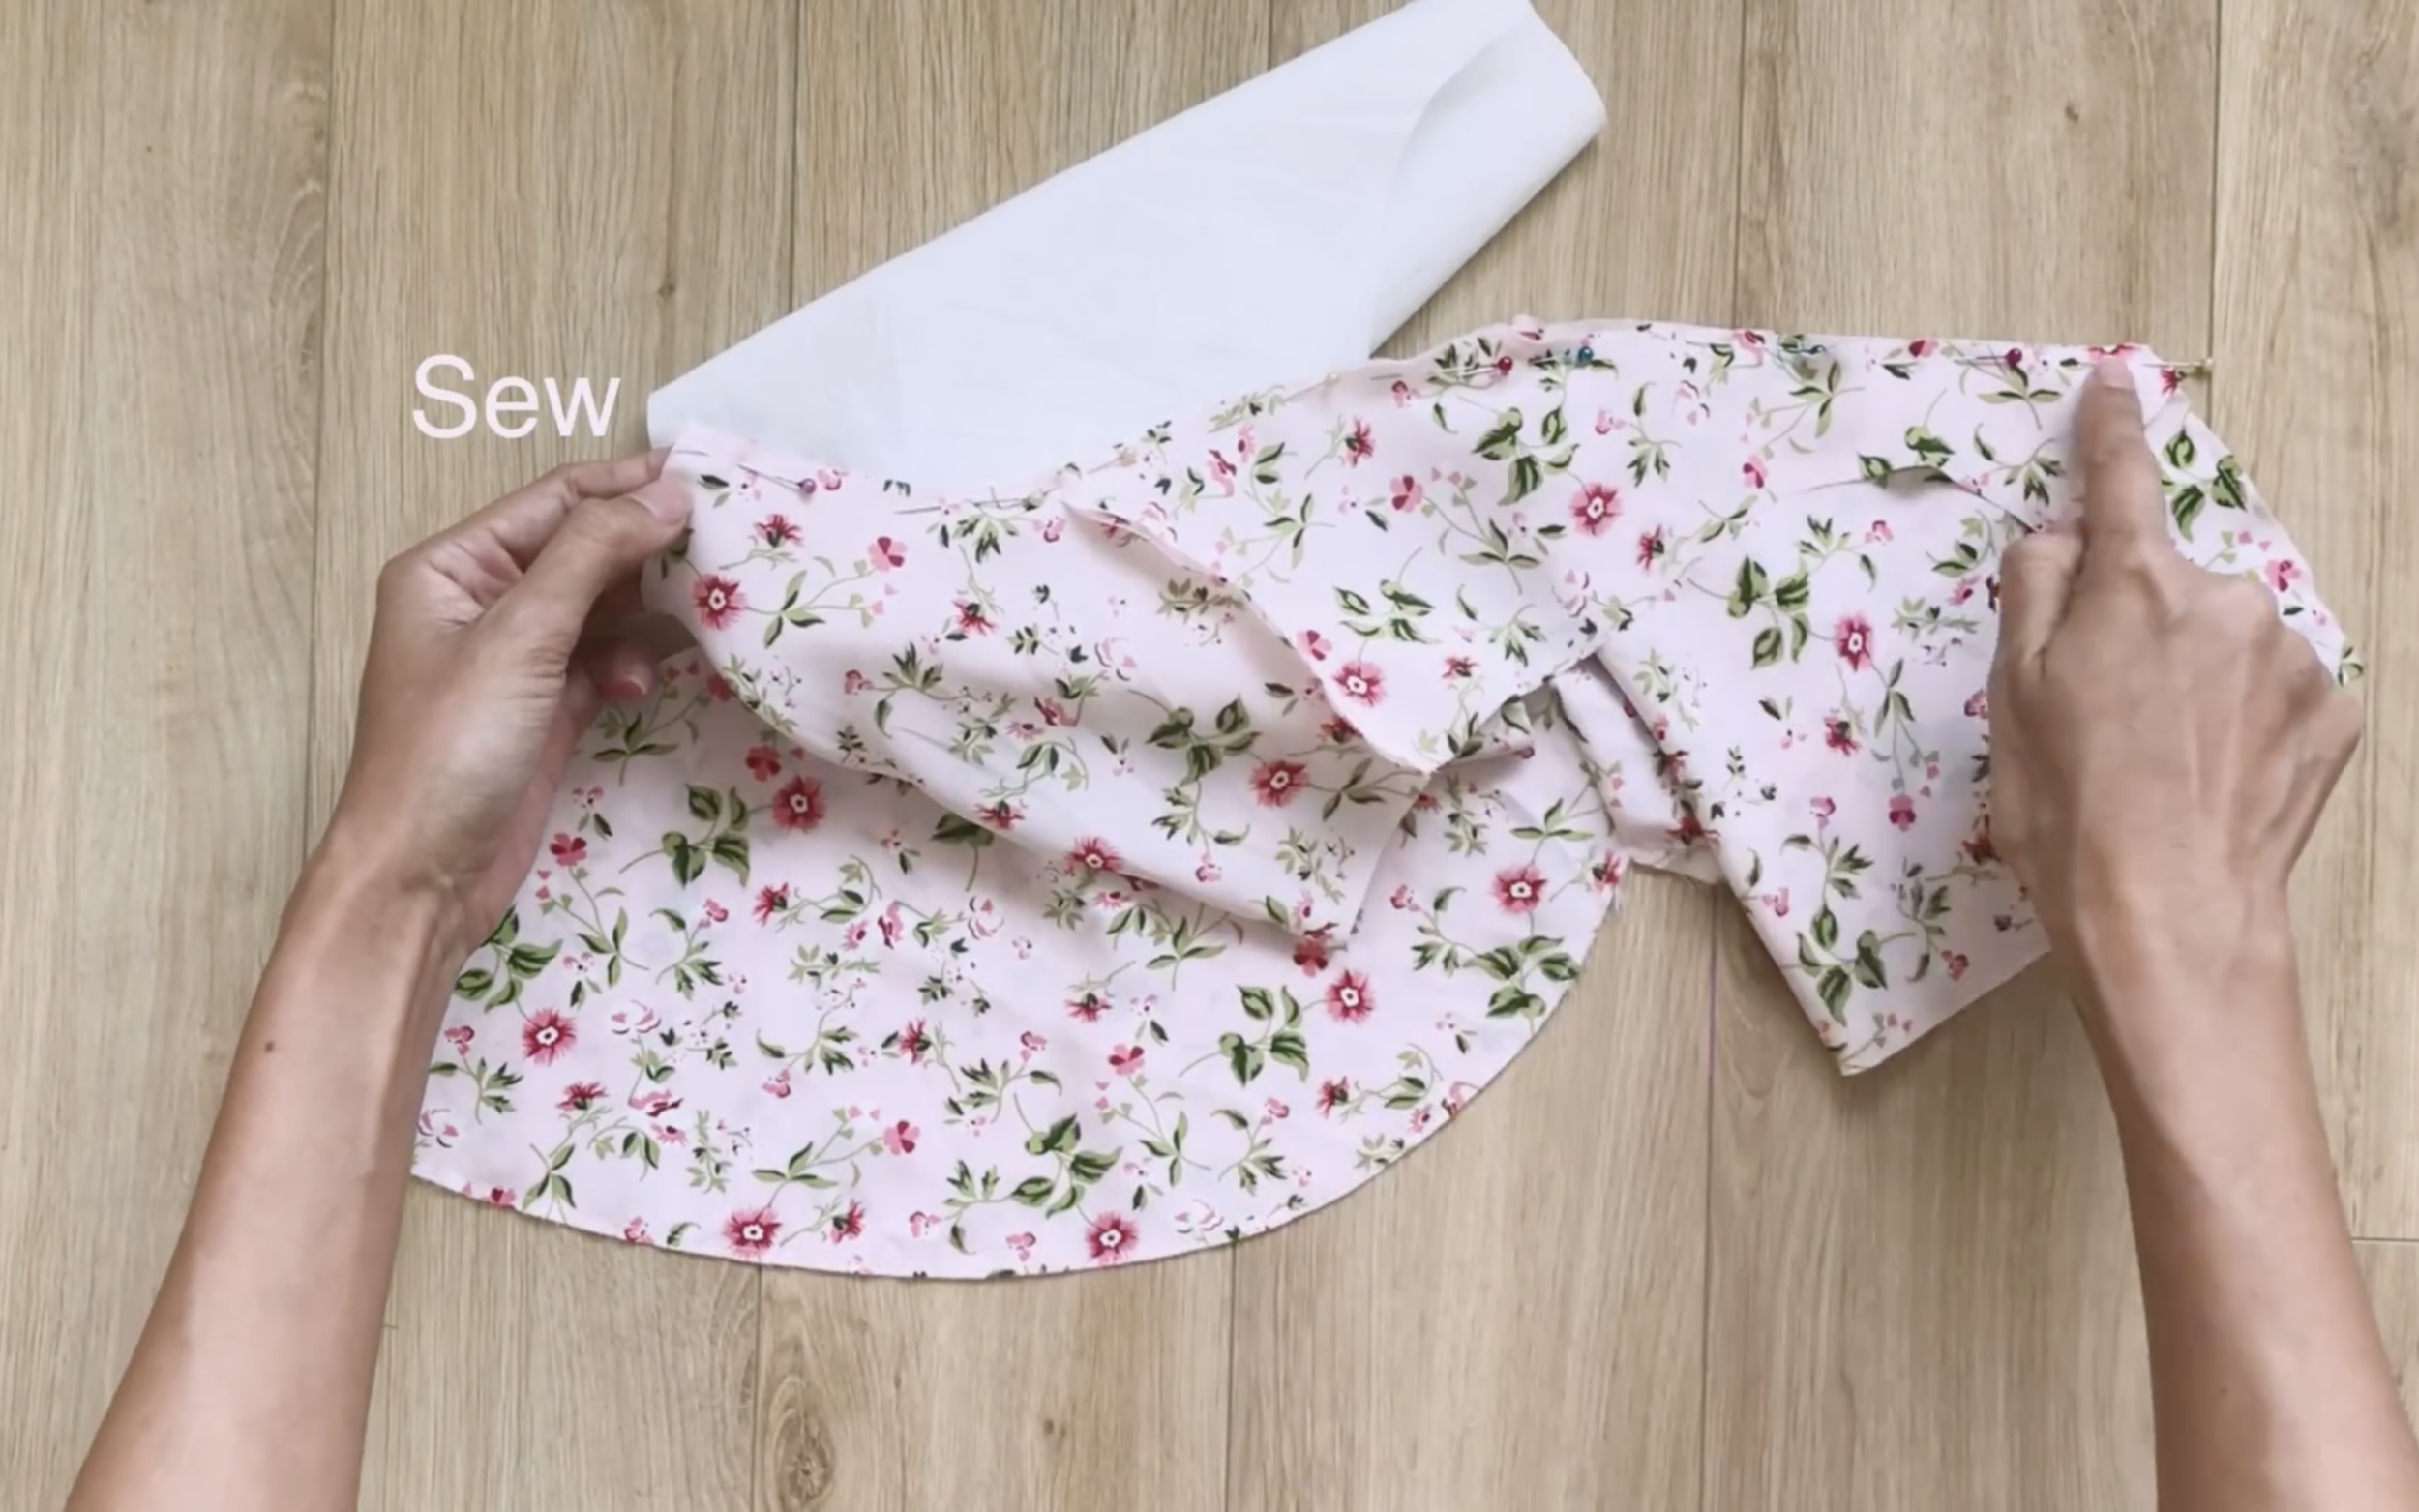
After sewing, make the understitching seam…
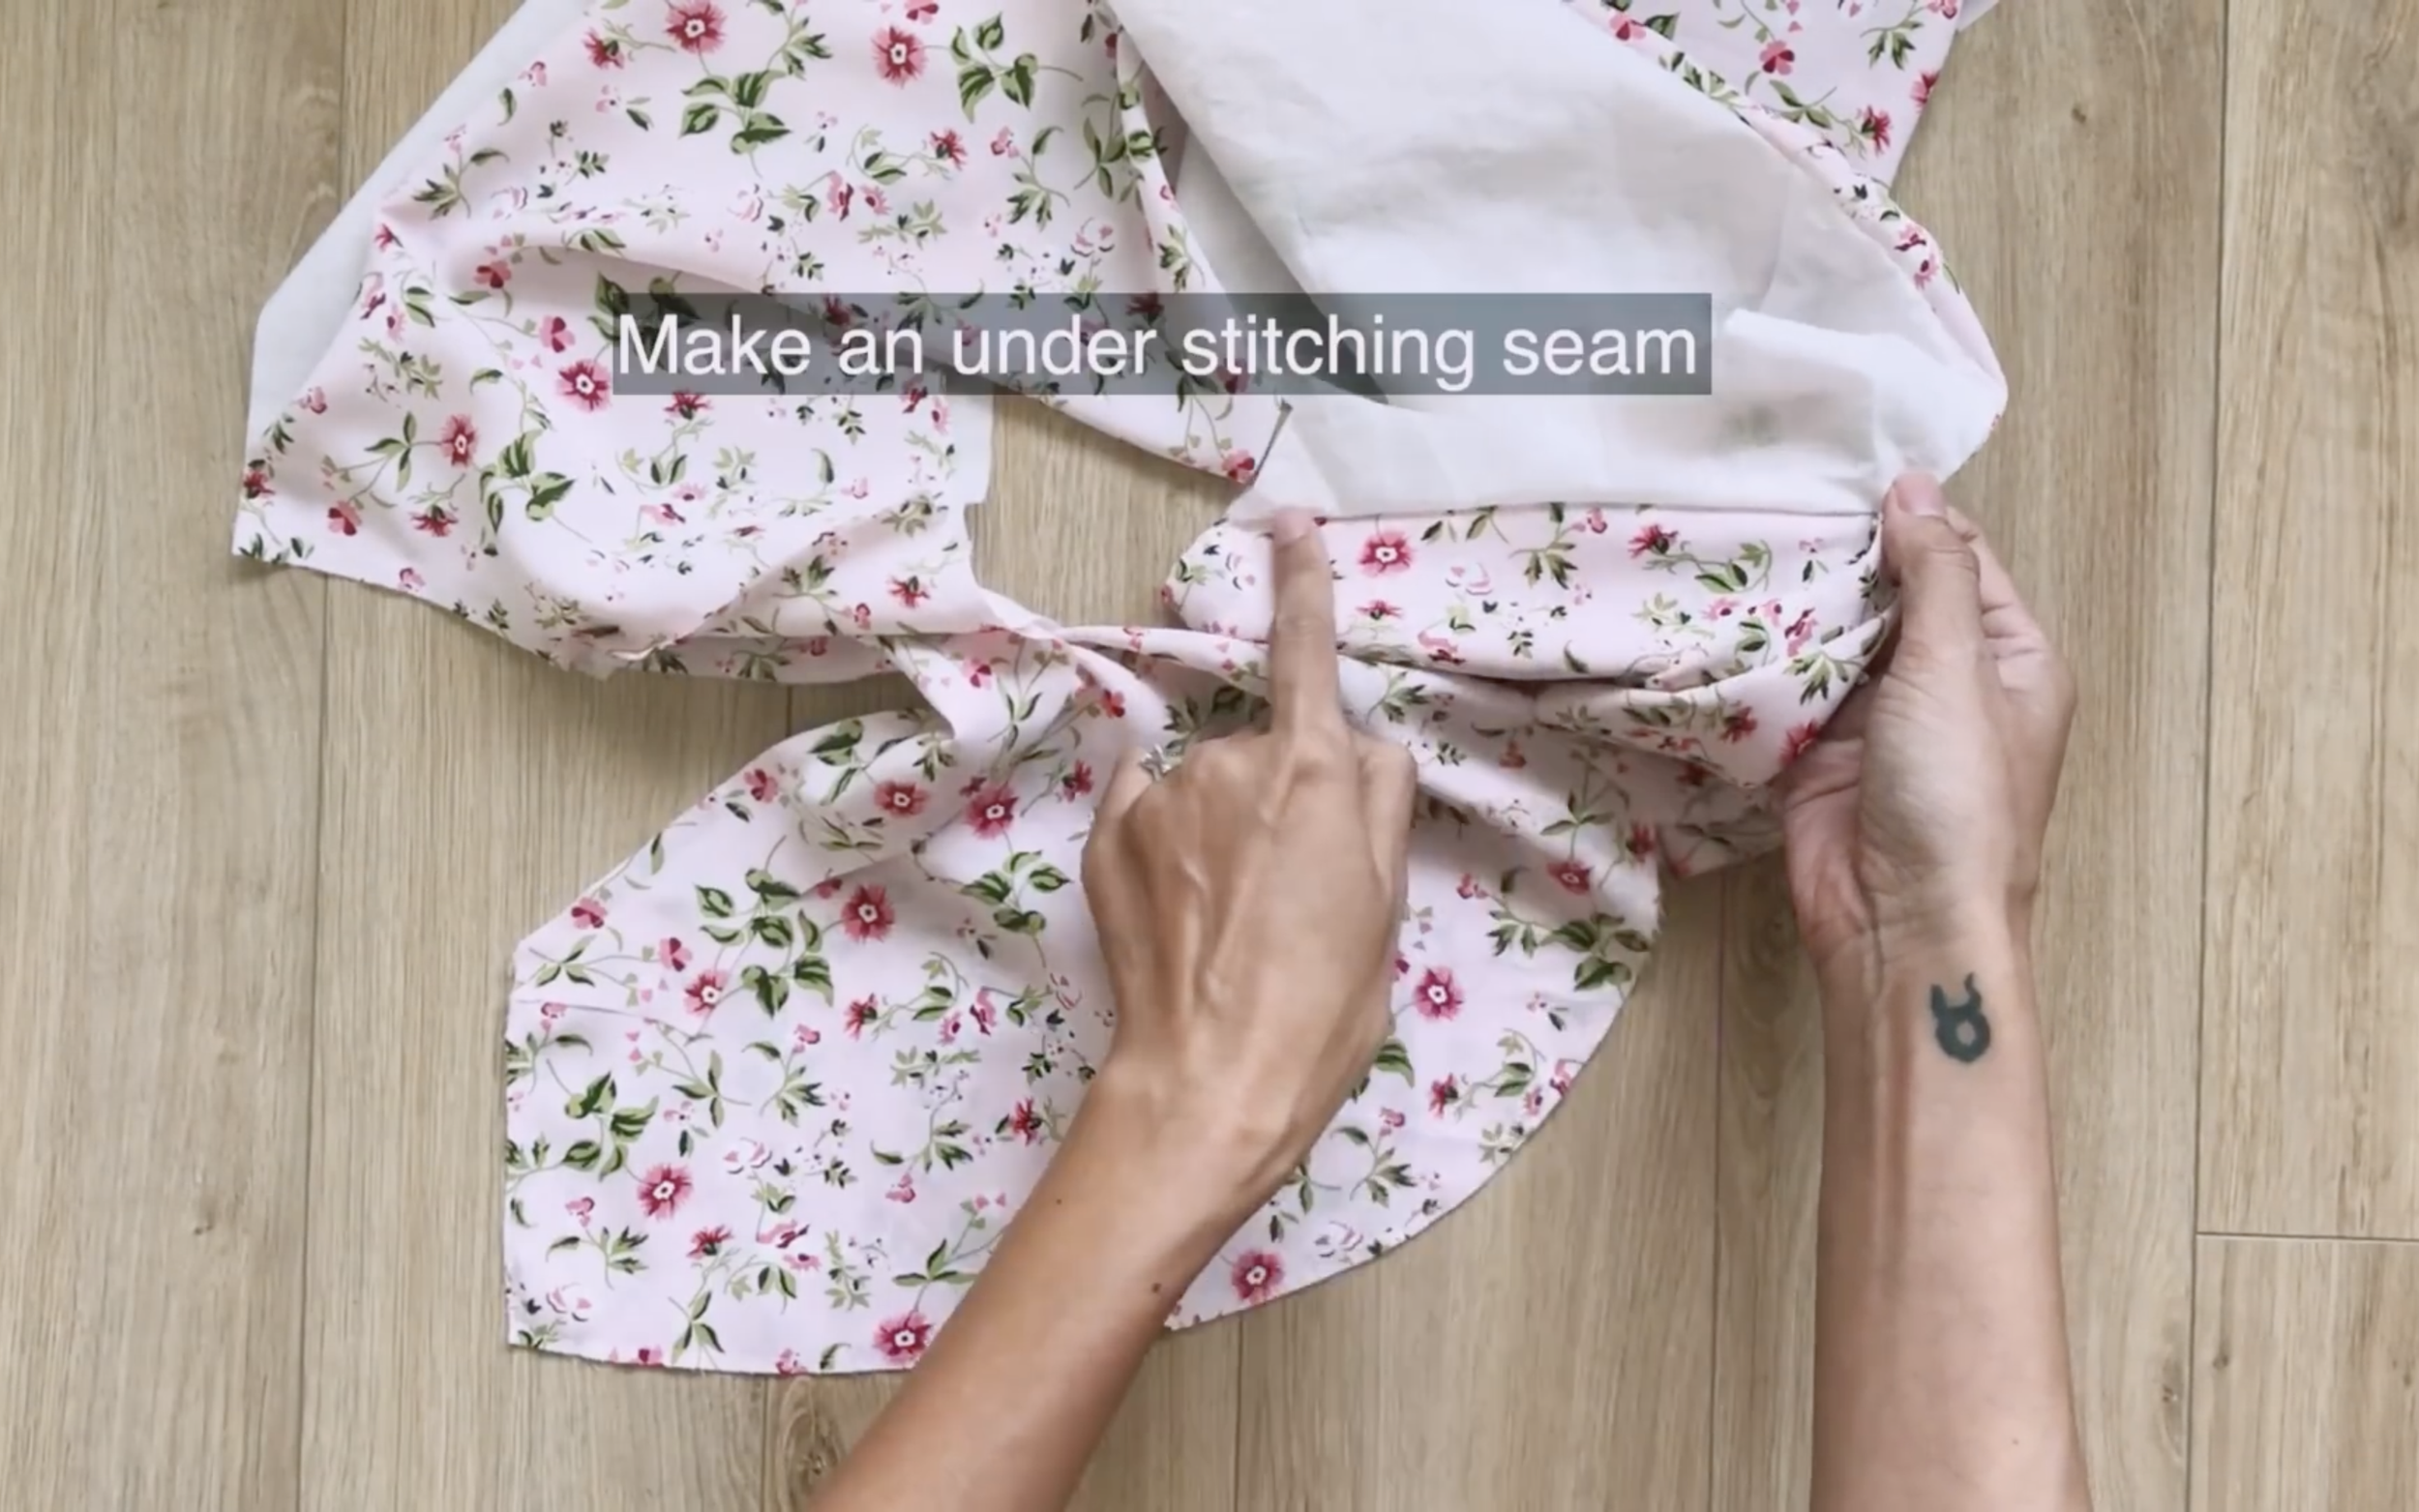
… to keep the end fabric to one side.
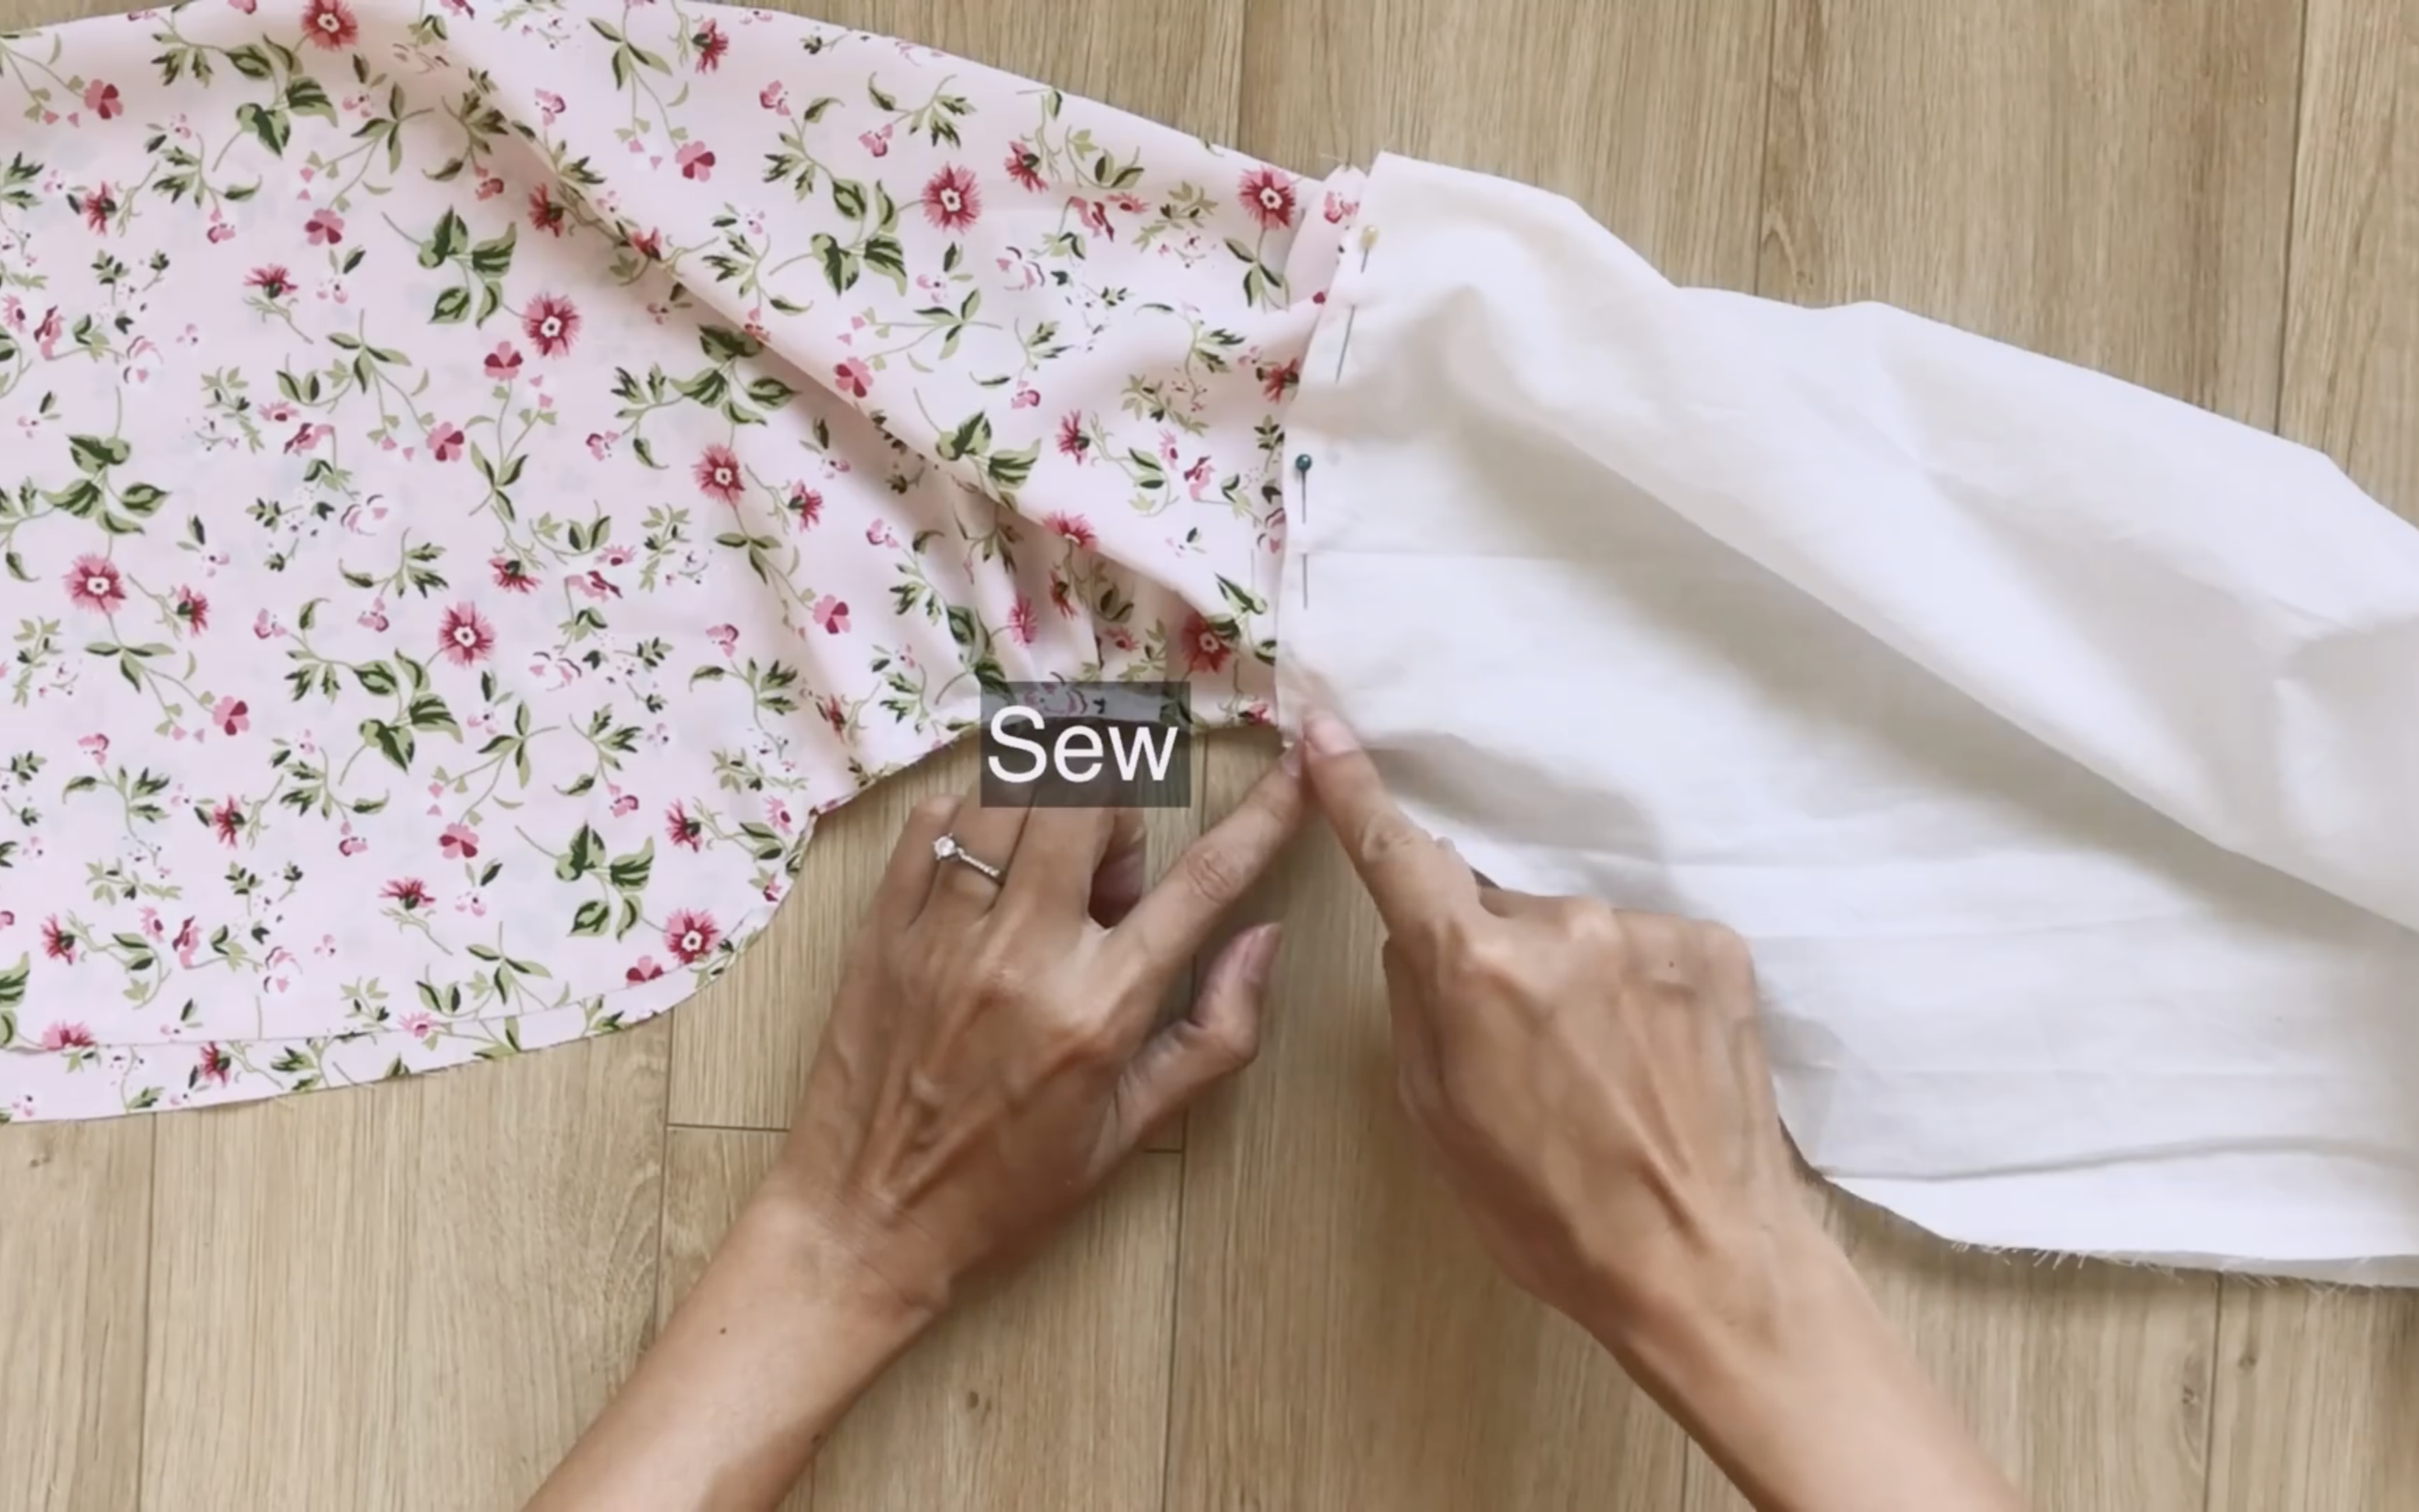
Then, connect the front and the back part together at the sideline.
THE SLEEVES
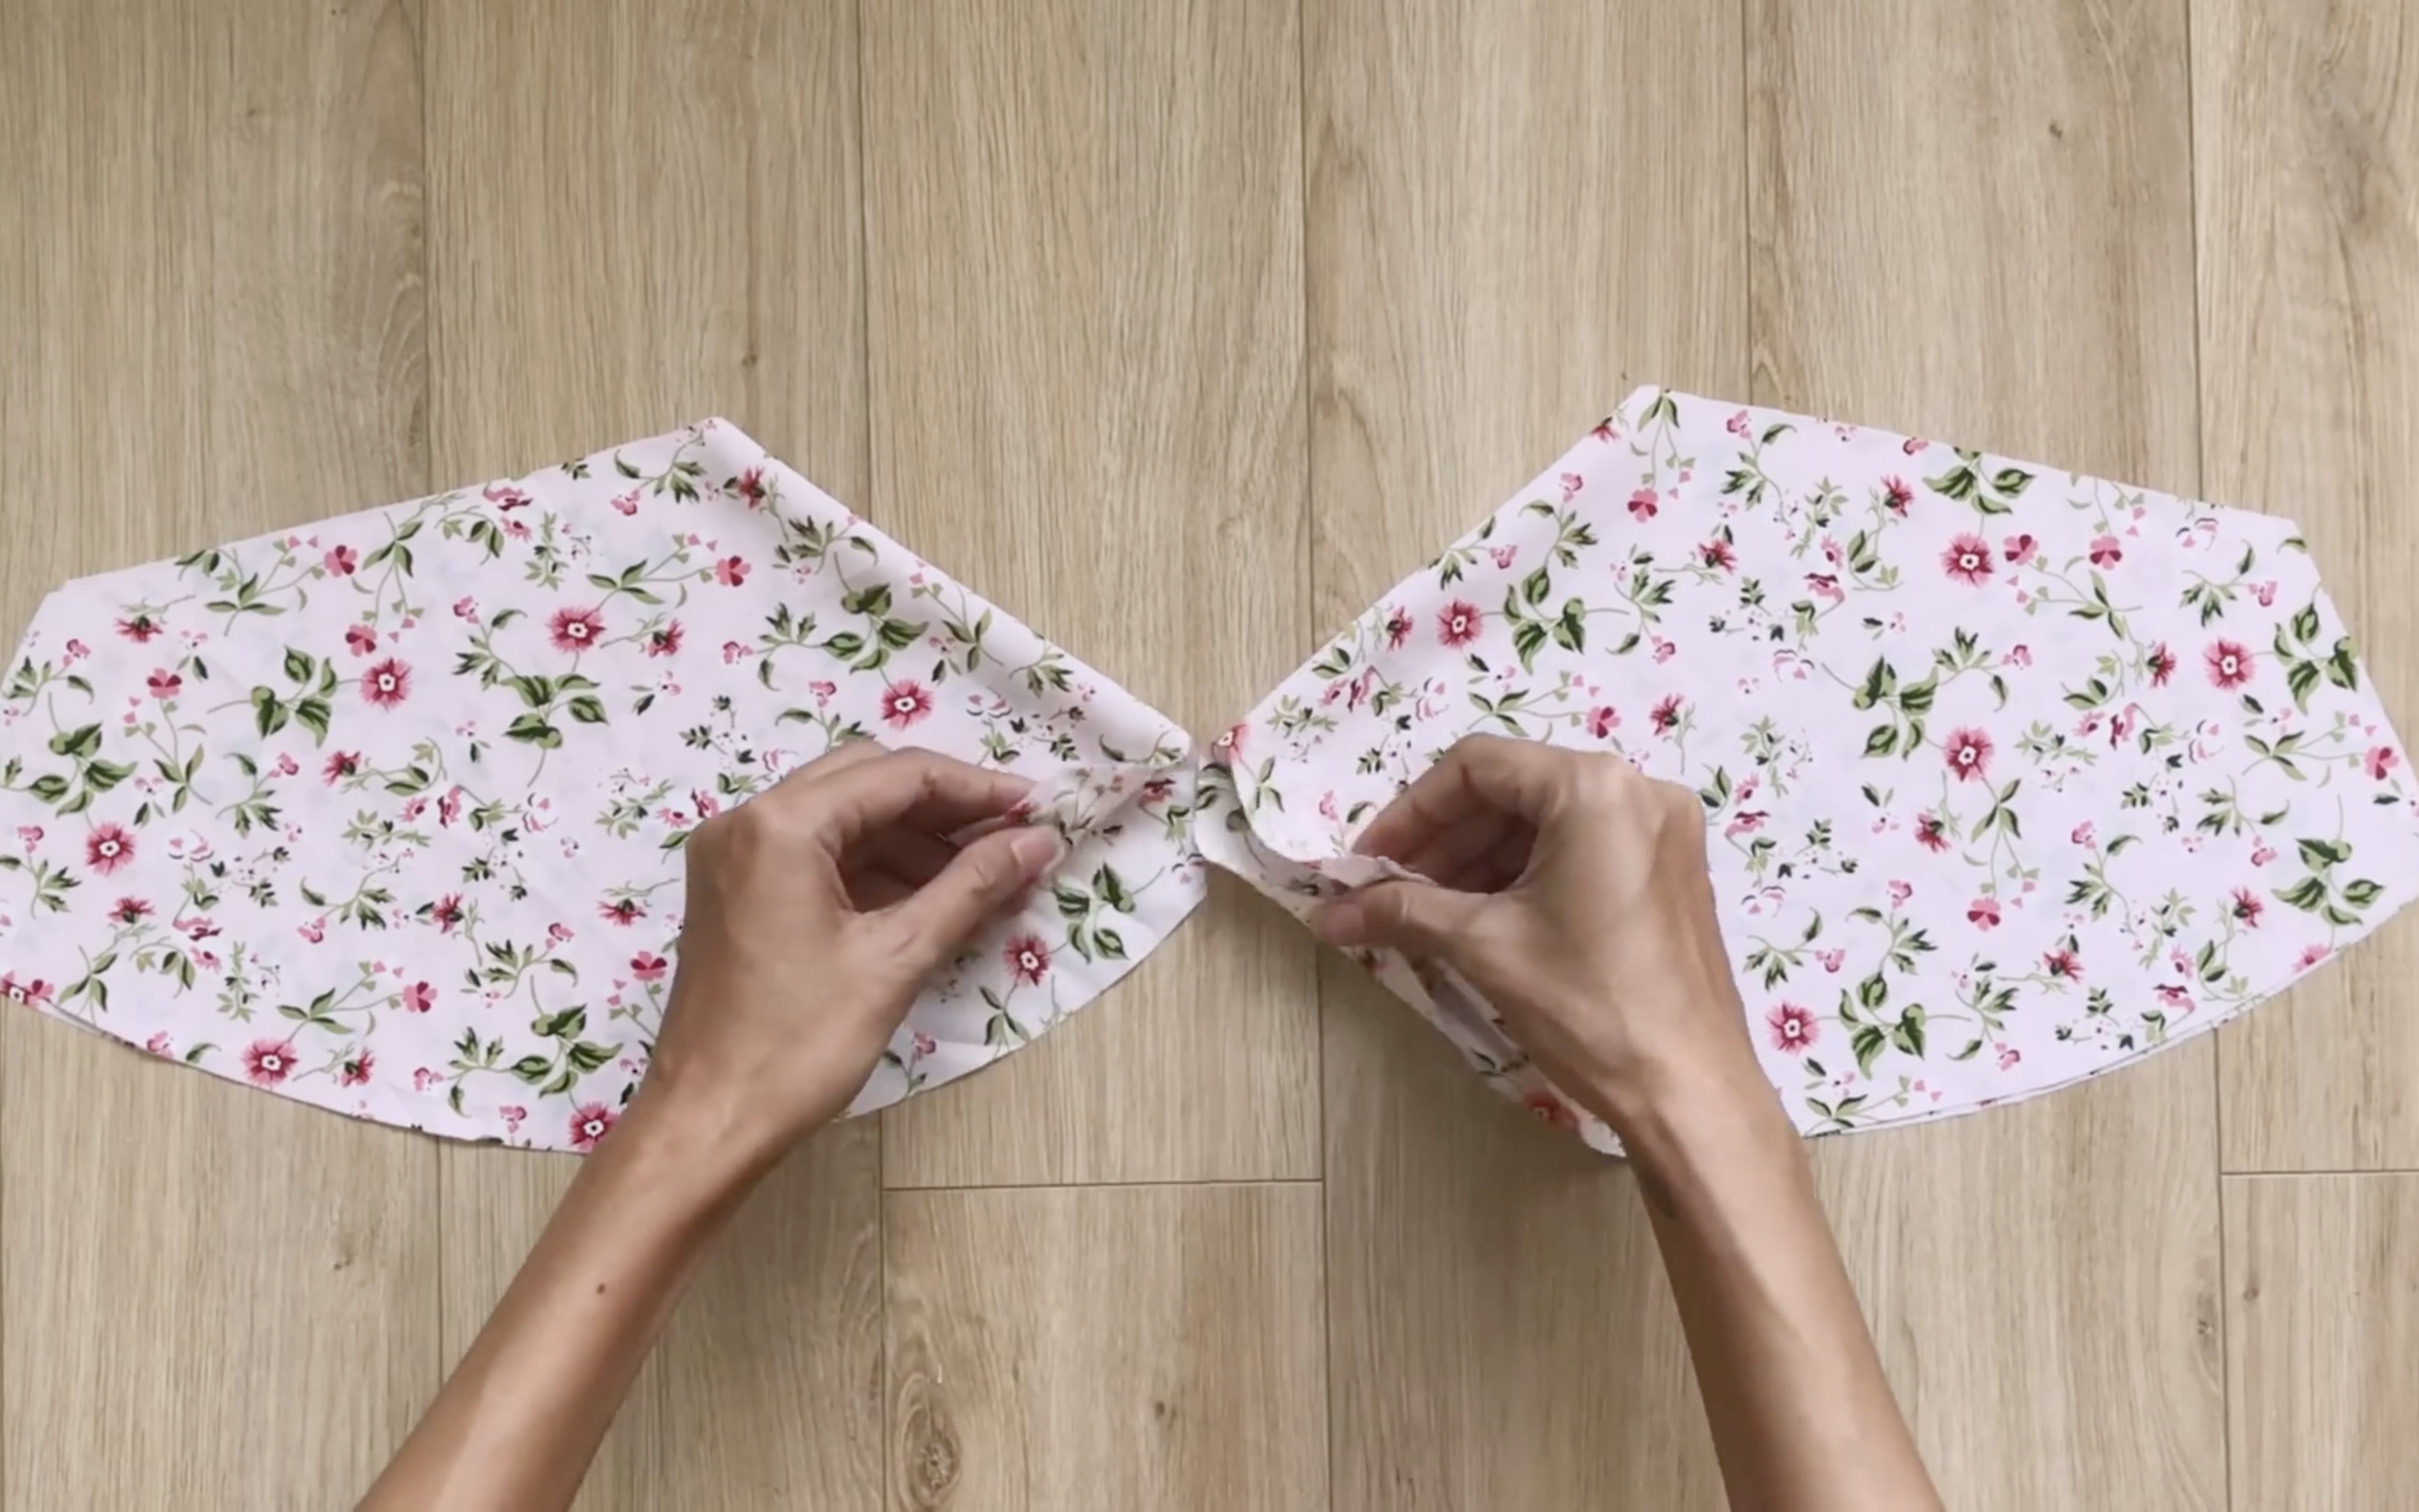
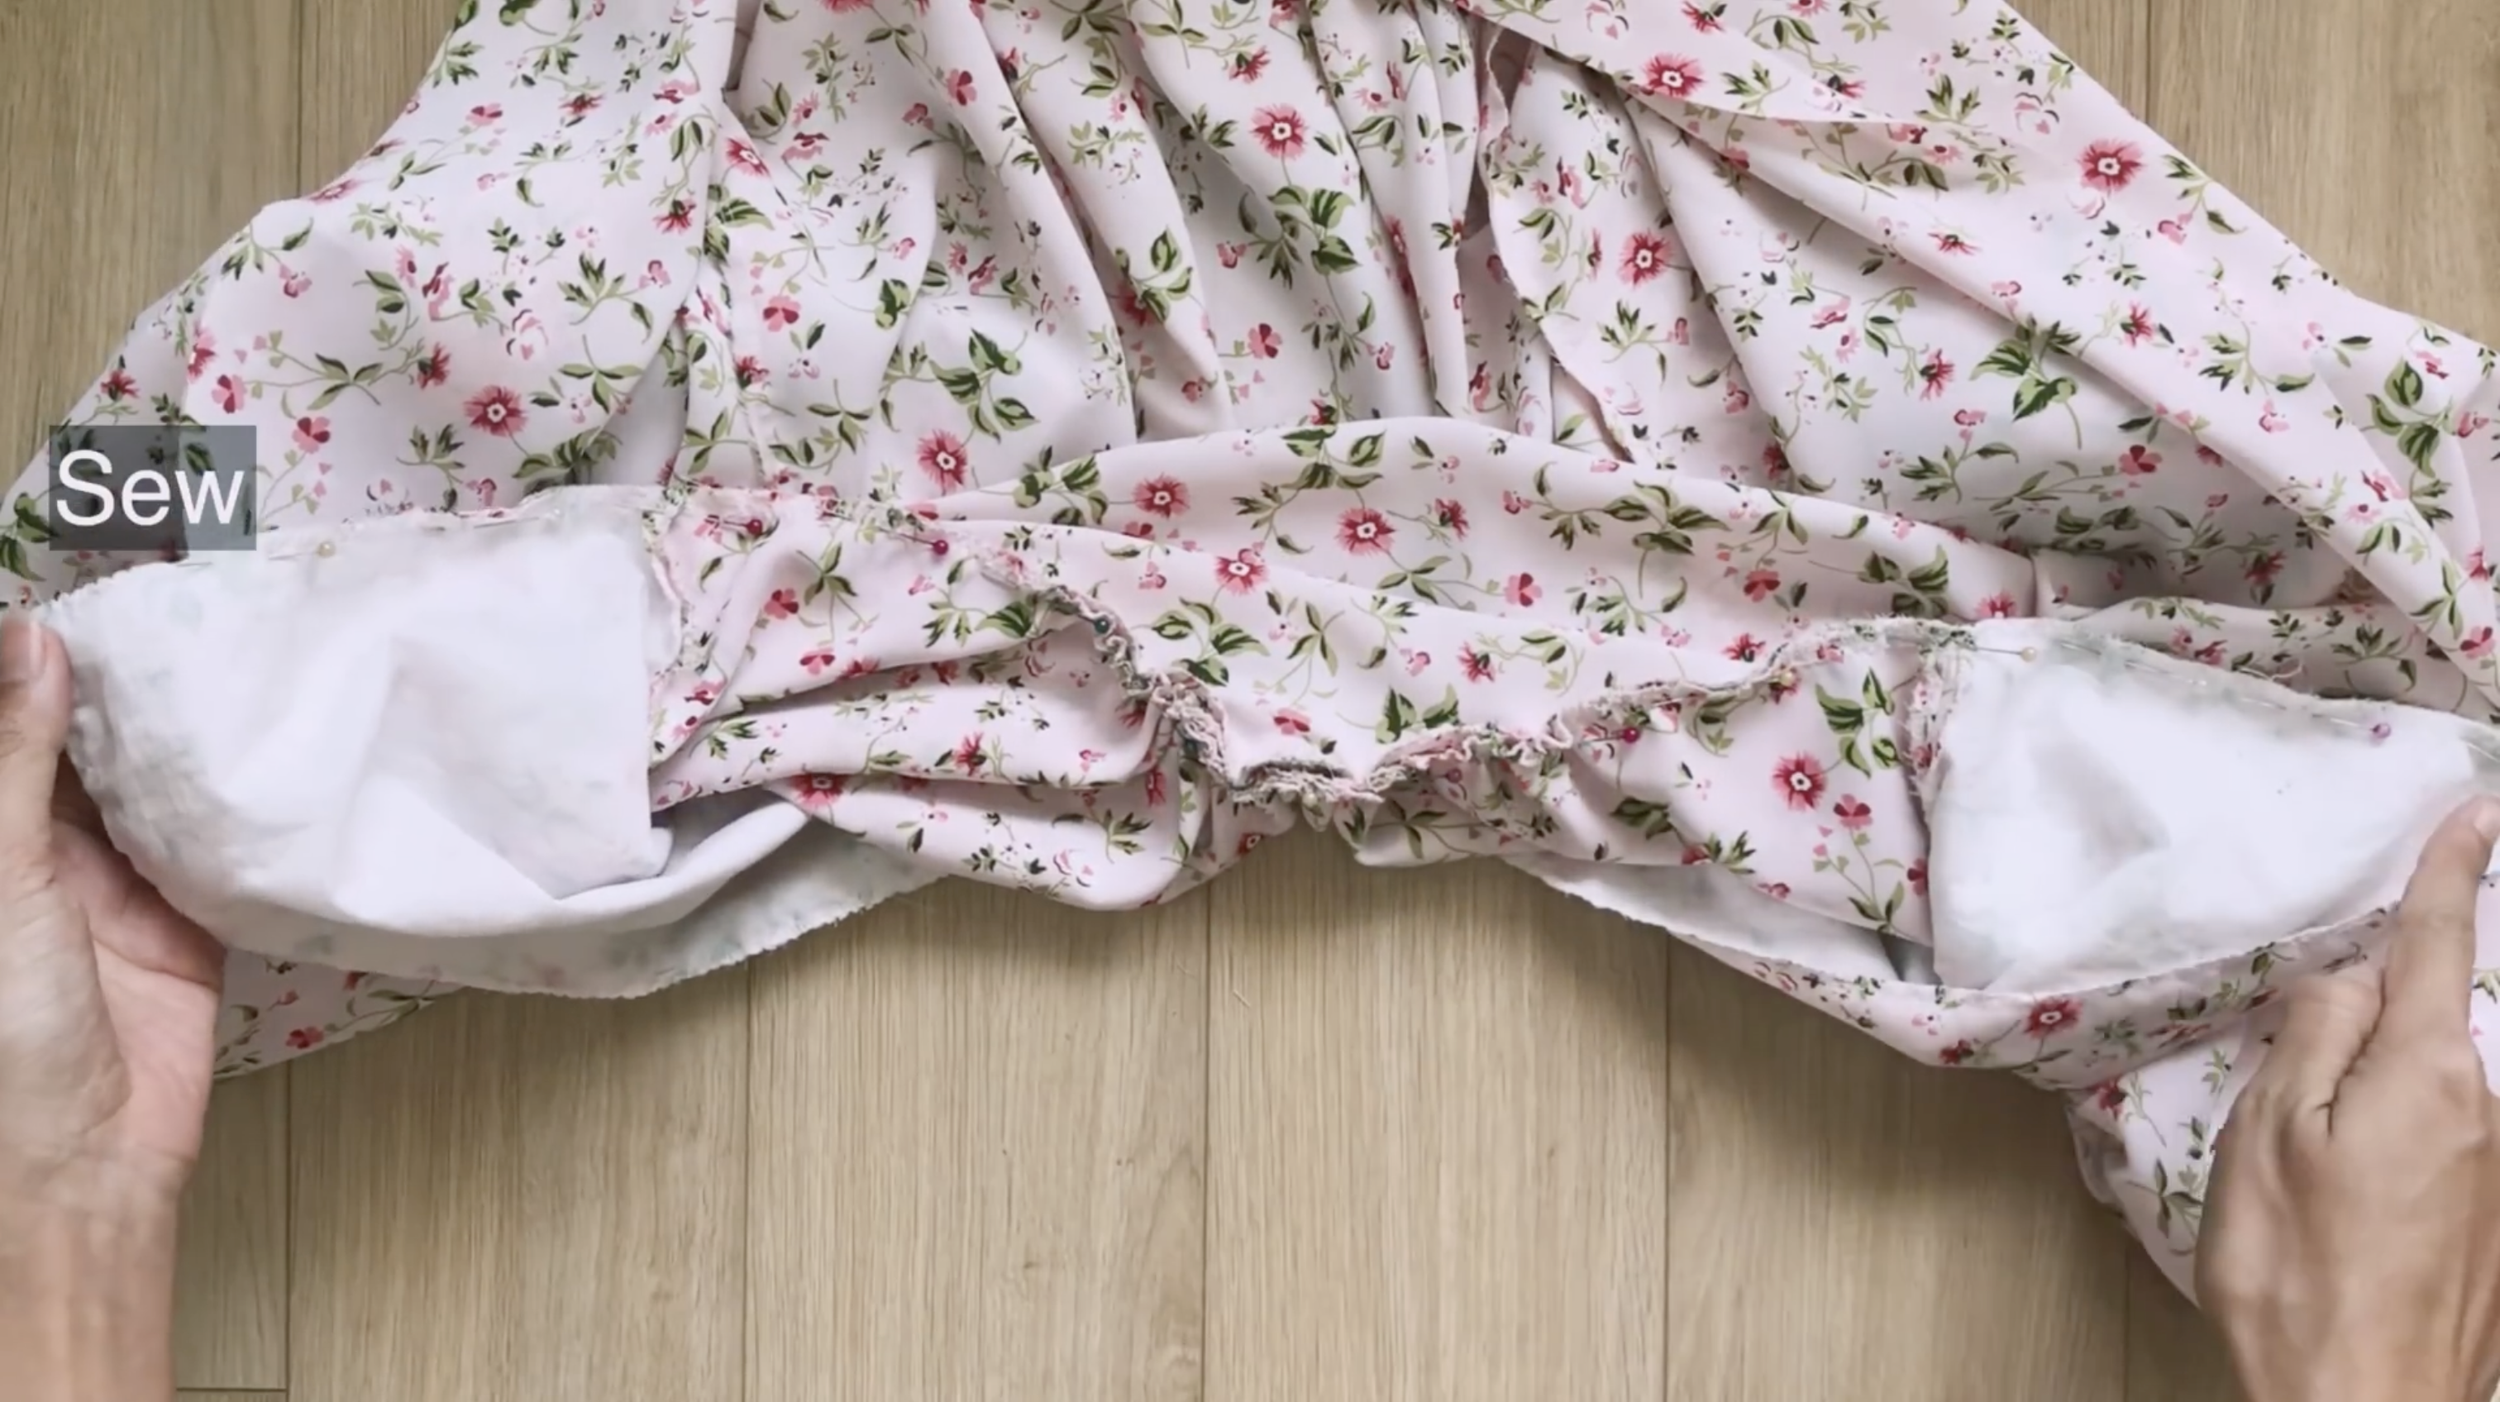
After cutting the sleeve, create some fold at under the armpit lines of the sleeve to create the ruffle feeling there.
Then, connect two underarm lines together after that.
After sewing, check the final width of under the armpit line first to keep working on the lining part of the sleeve later.
Because the fold make the underarm line of the sleeve shorter than the pattern and won't create a fold for the lining of the sleeve.
So, re-cut the length of the lining sleeve part to be the same at the new underarm line of the sleeve that was checked before that.
Don't forget to check the width of the end sleeve of the lining to be the same with the end of the sleeve.
Then, re-cut the lining again to make sure it aligns with the sleeve edge.
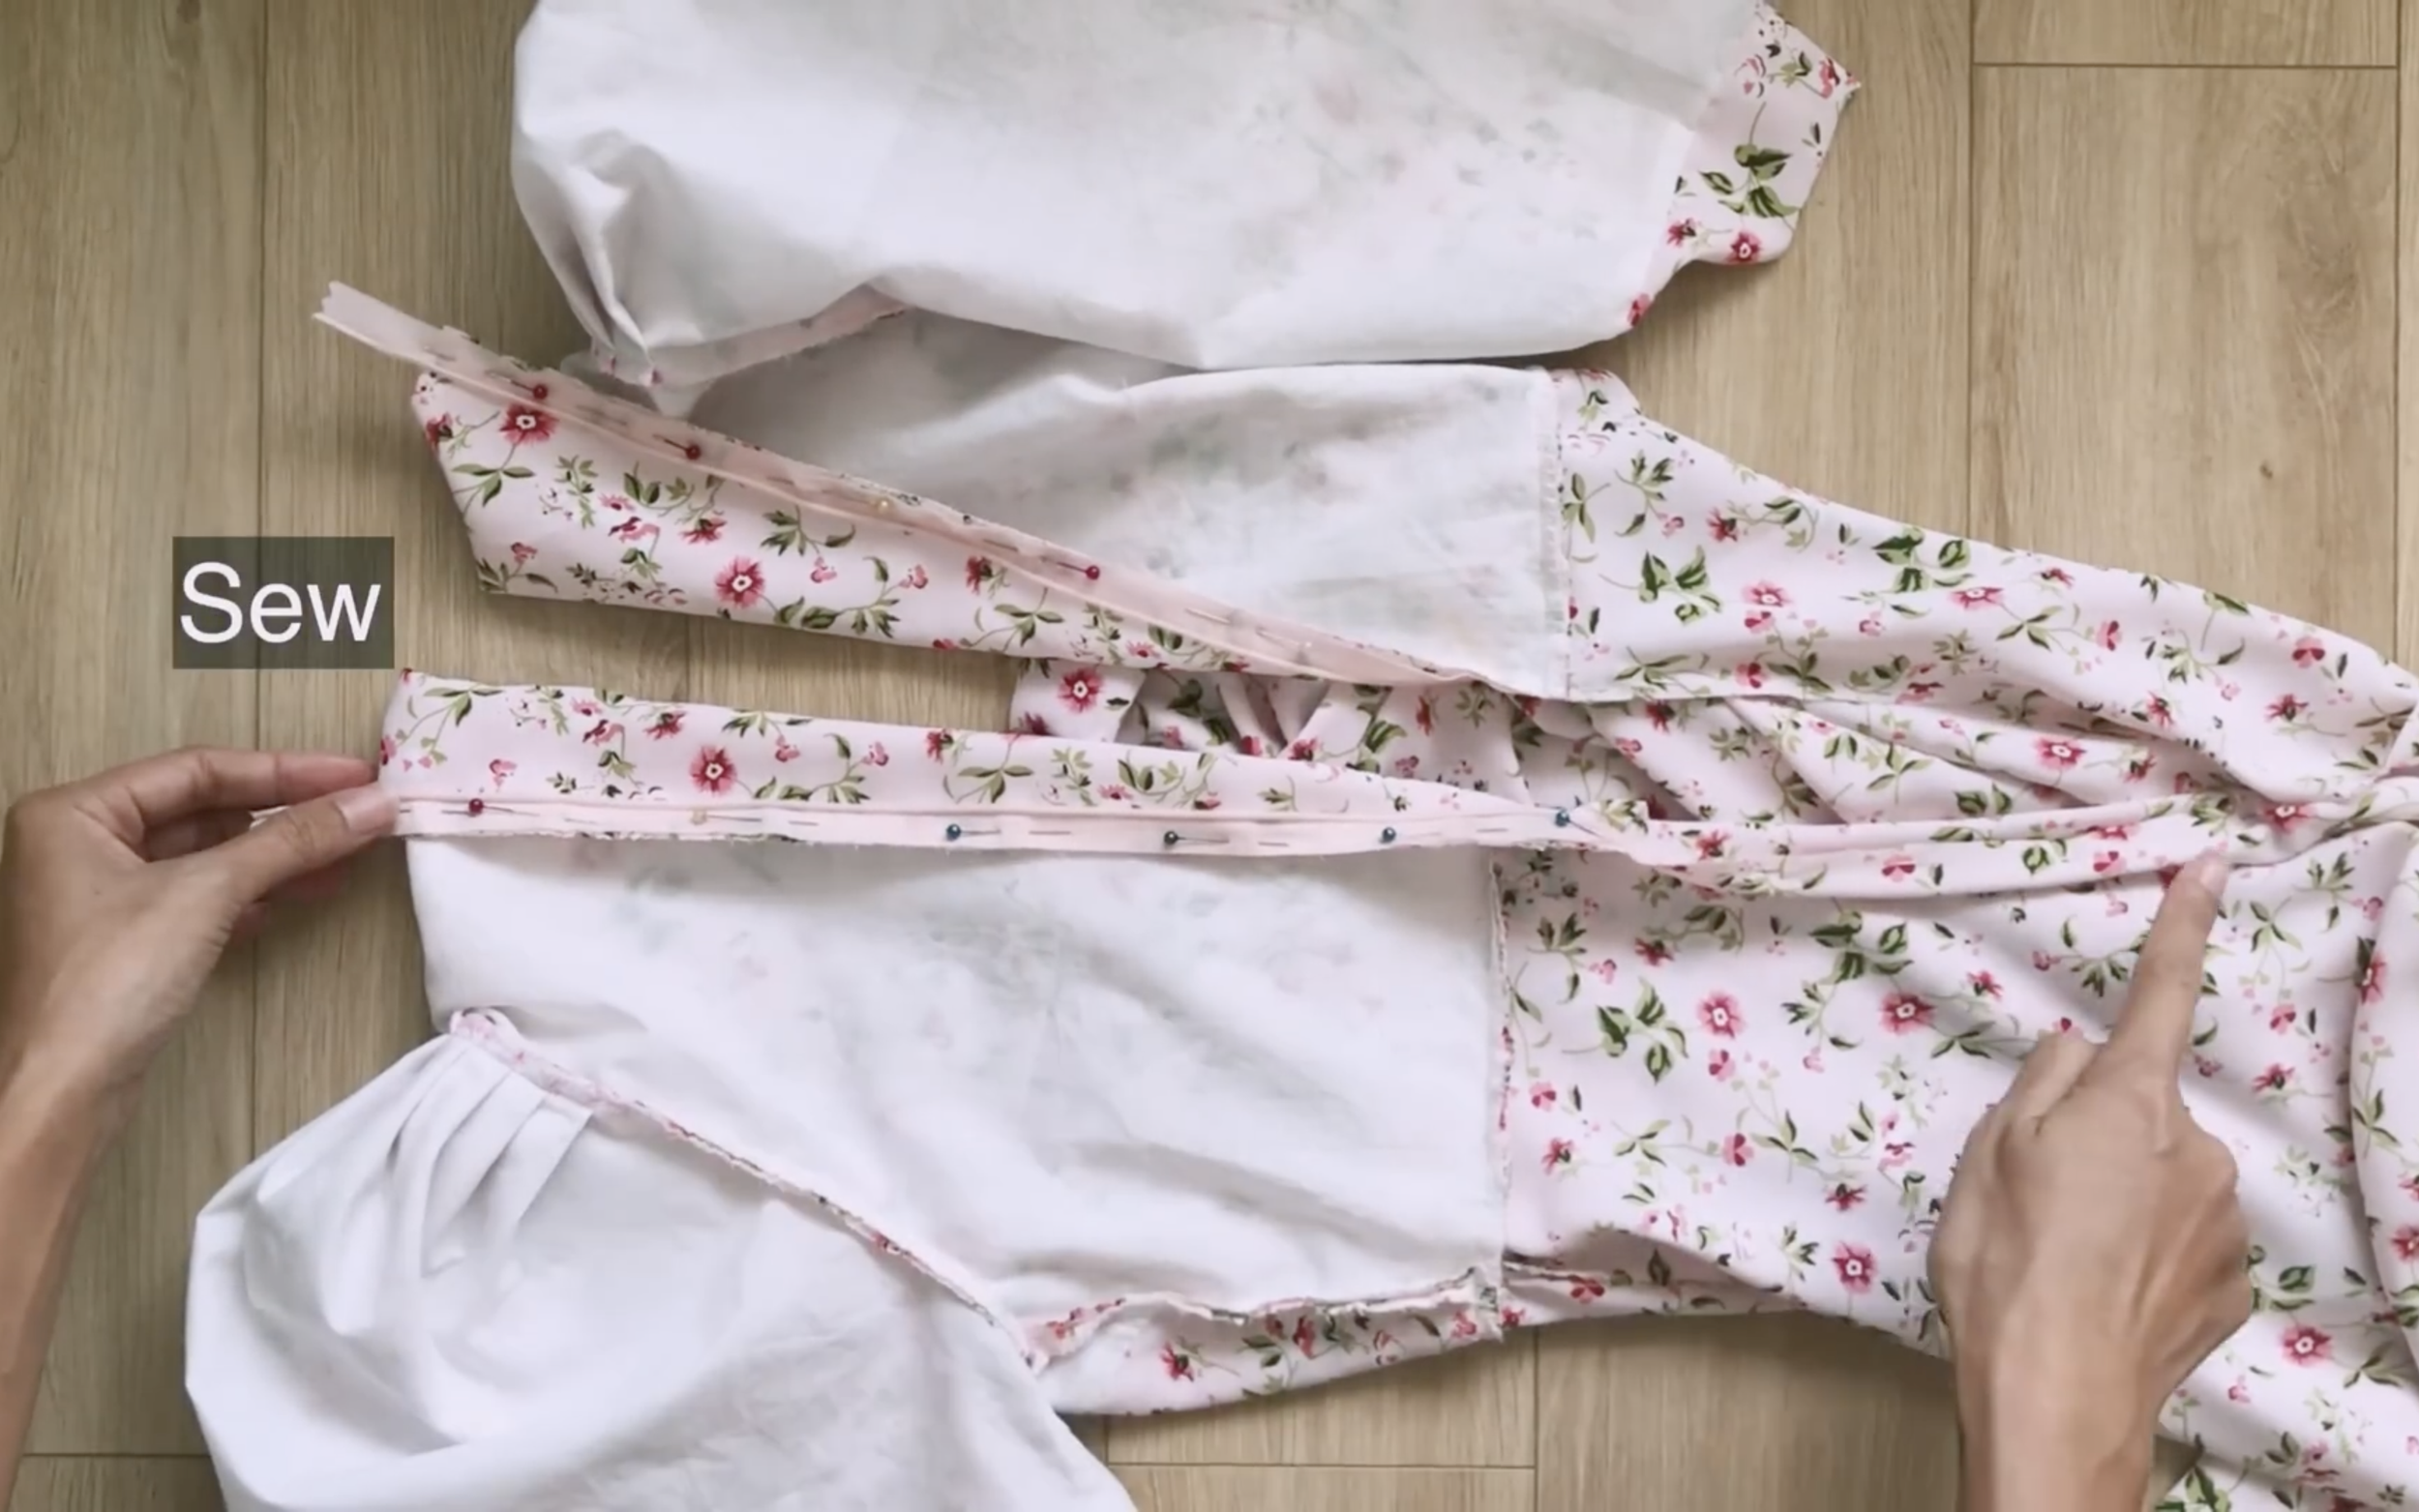
After that connect the sleeve and the lining of the sleeve together.
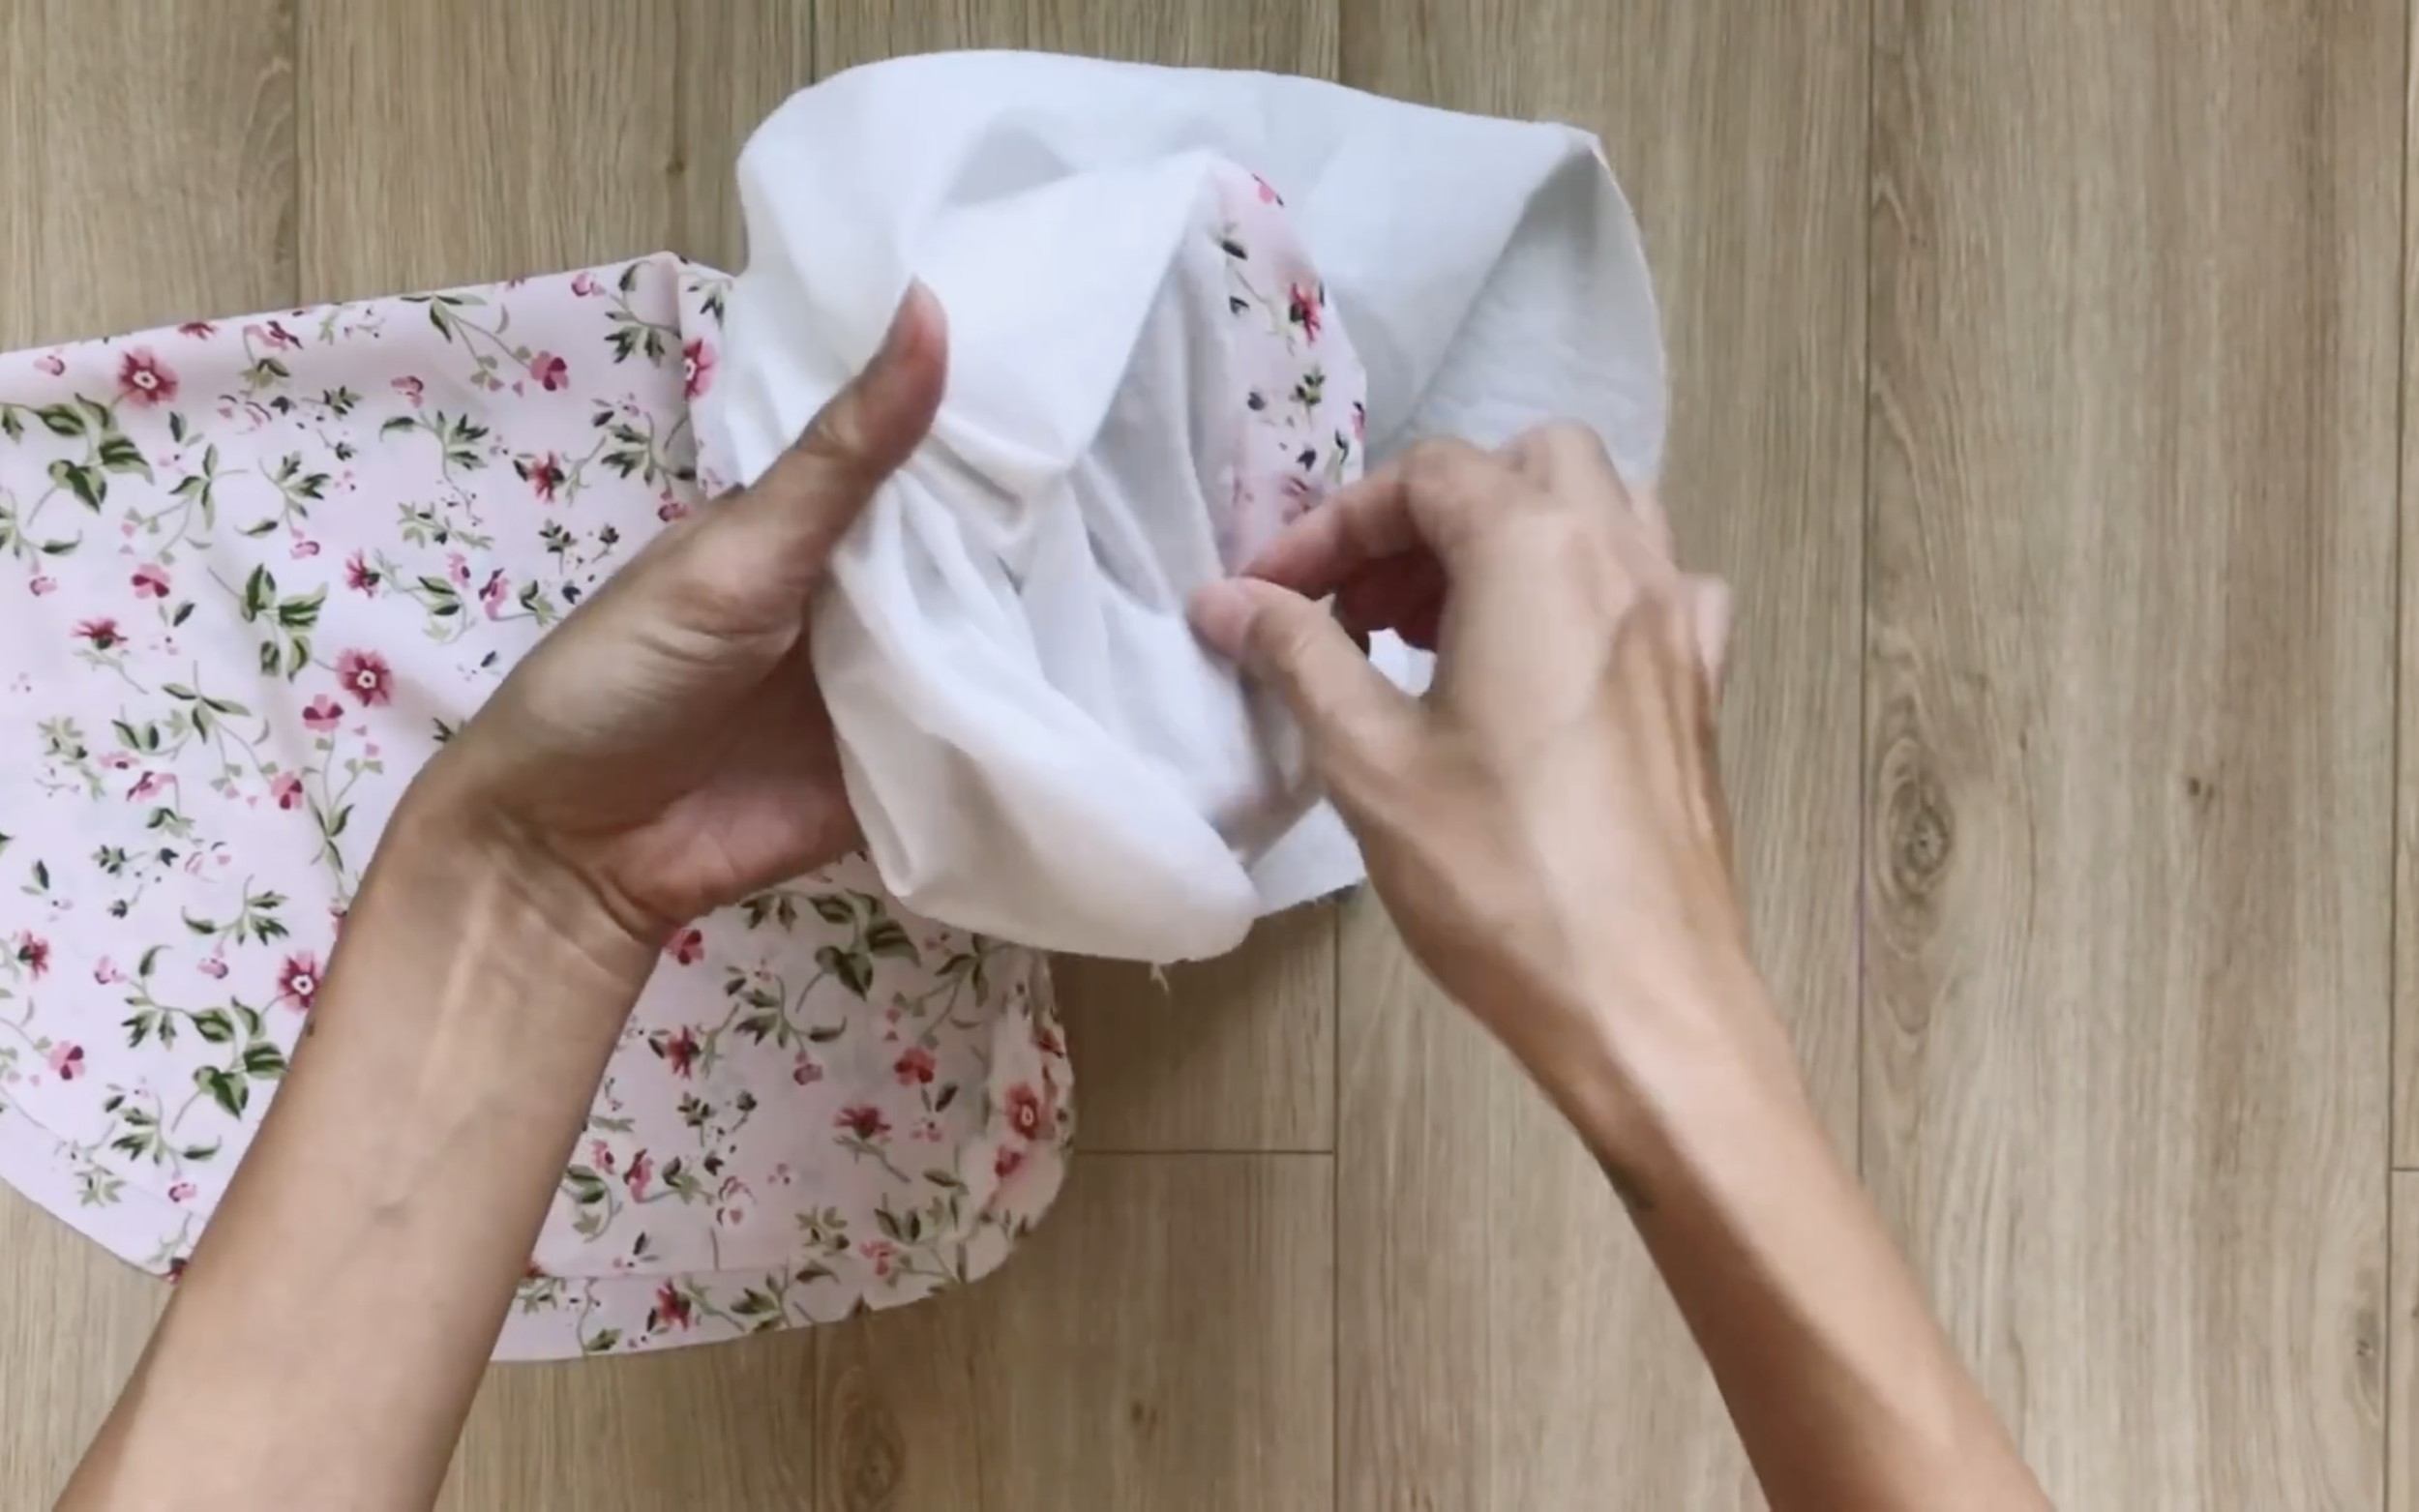
After sewing, turn the lining sleeve right-side out to hide the seam inside.
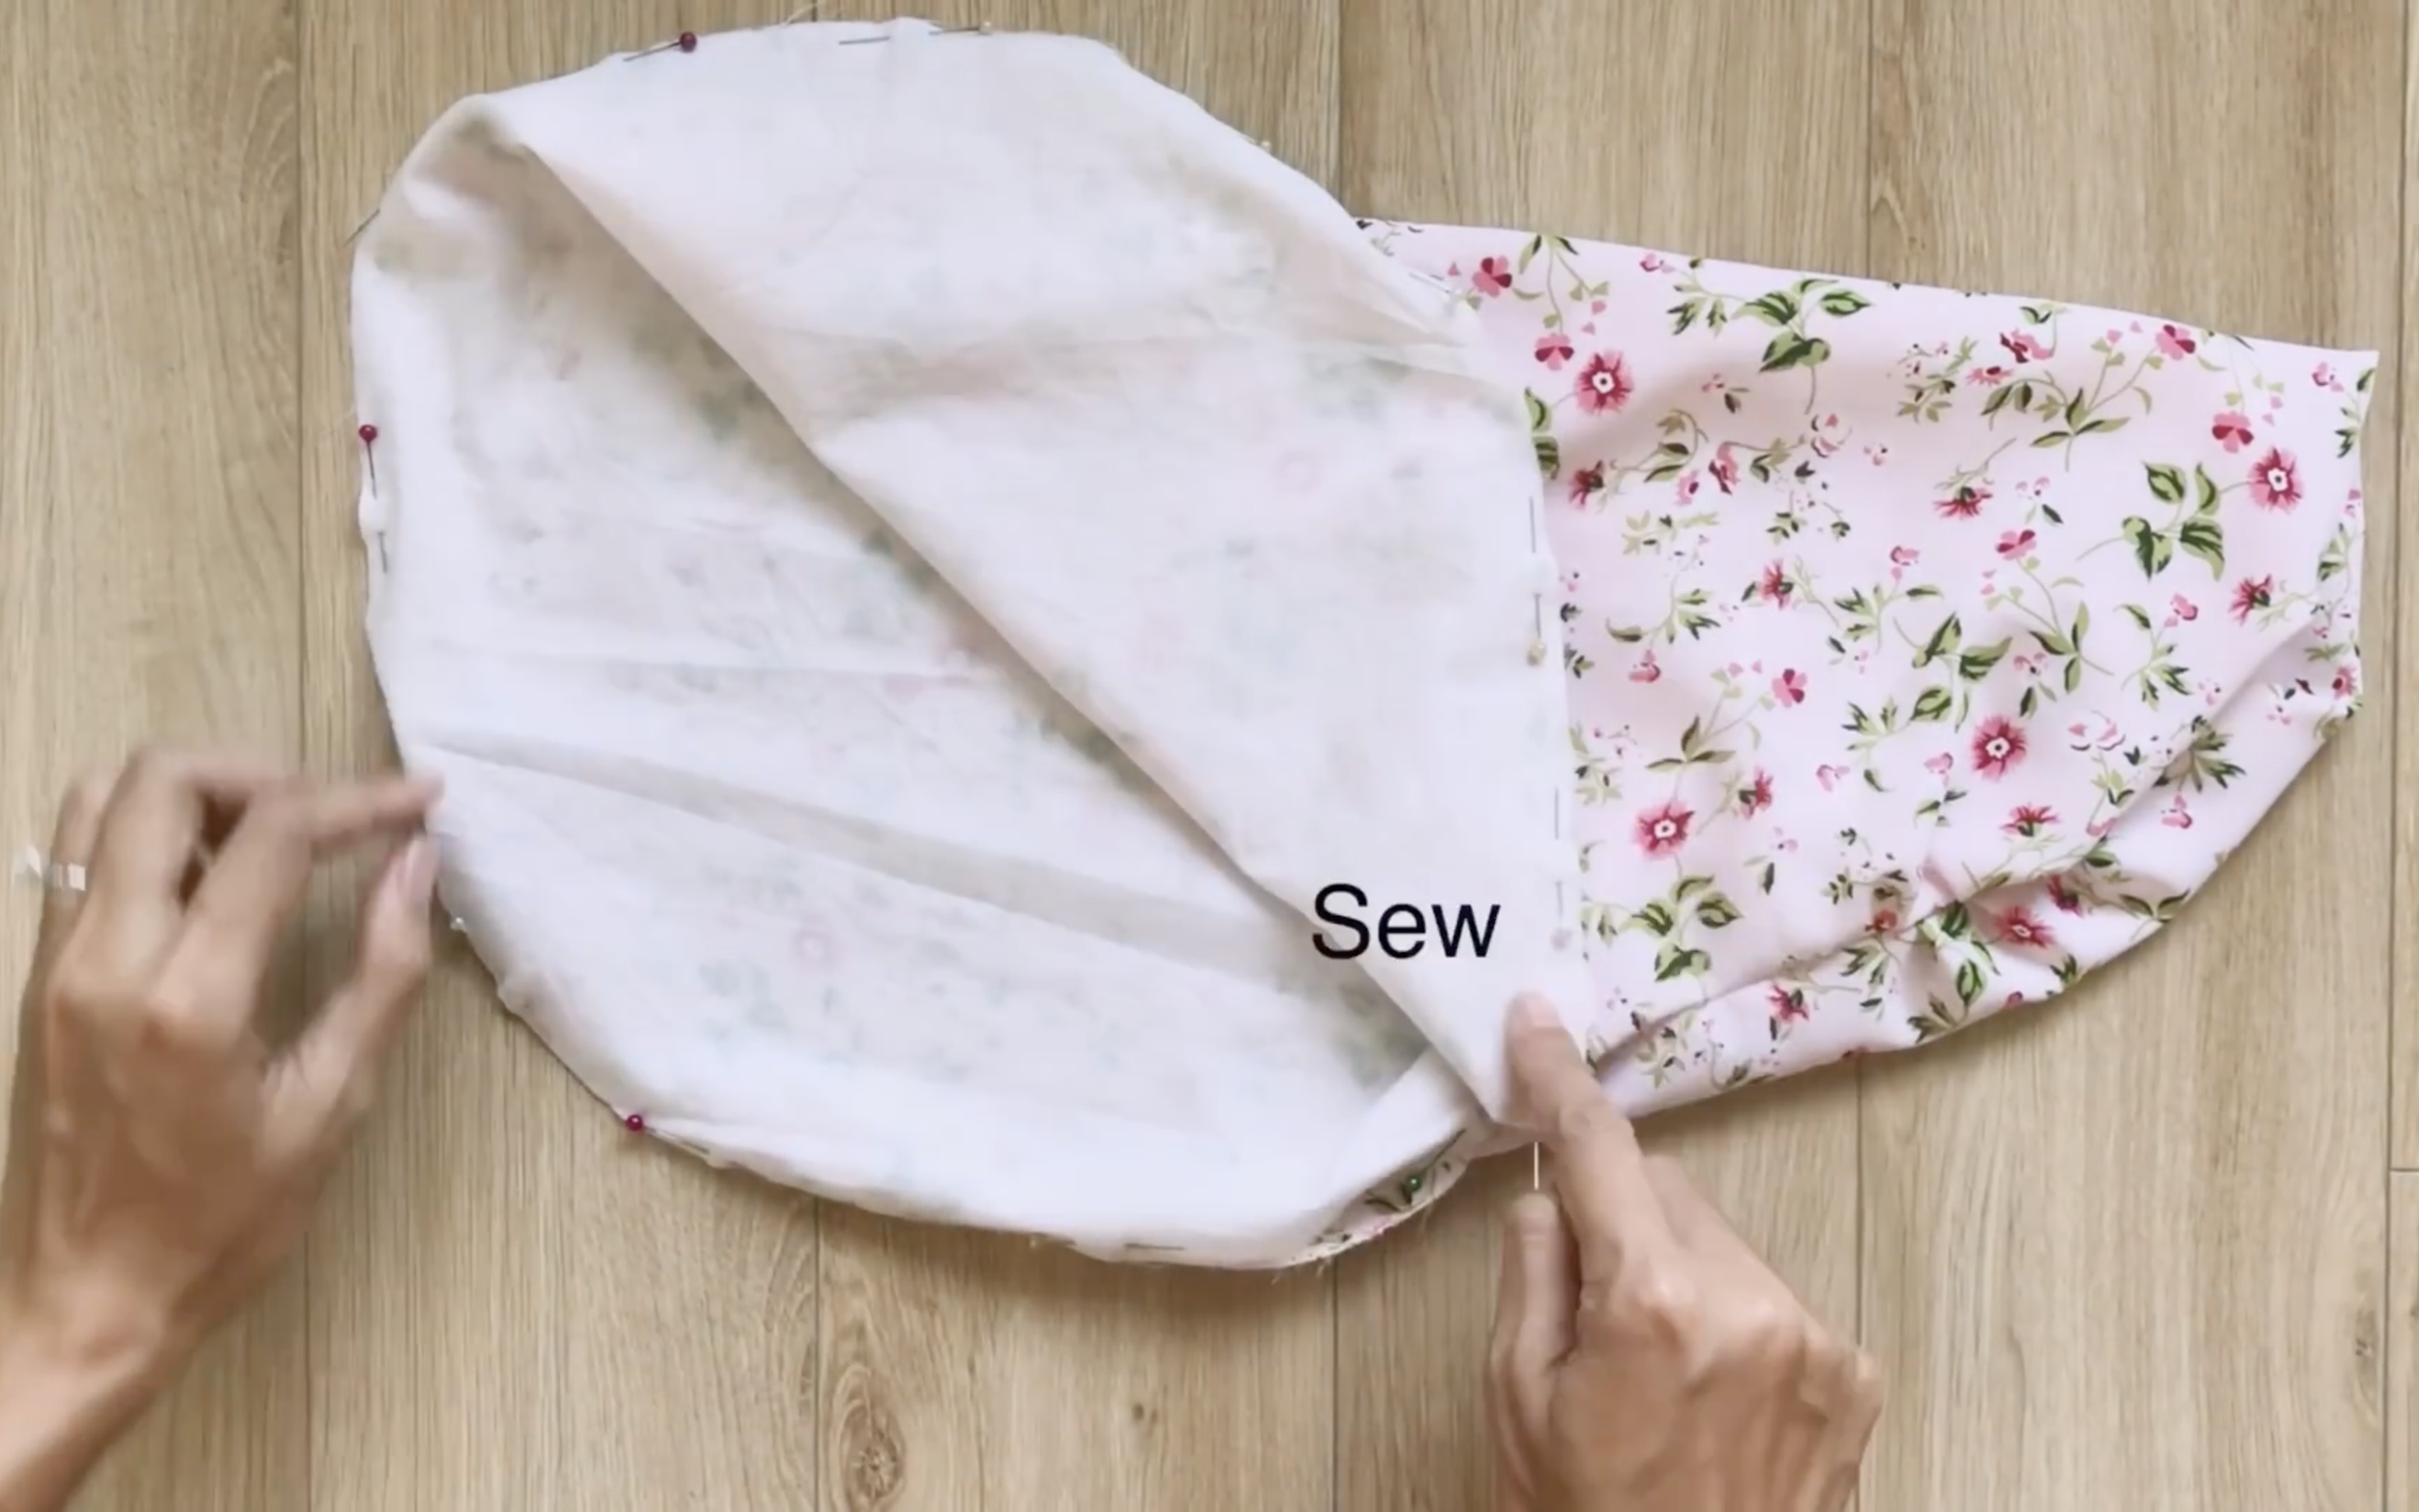
Then, connect the sleeve and the lining together at the rest of the sleeve.
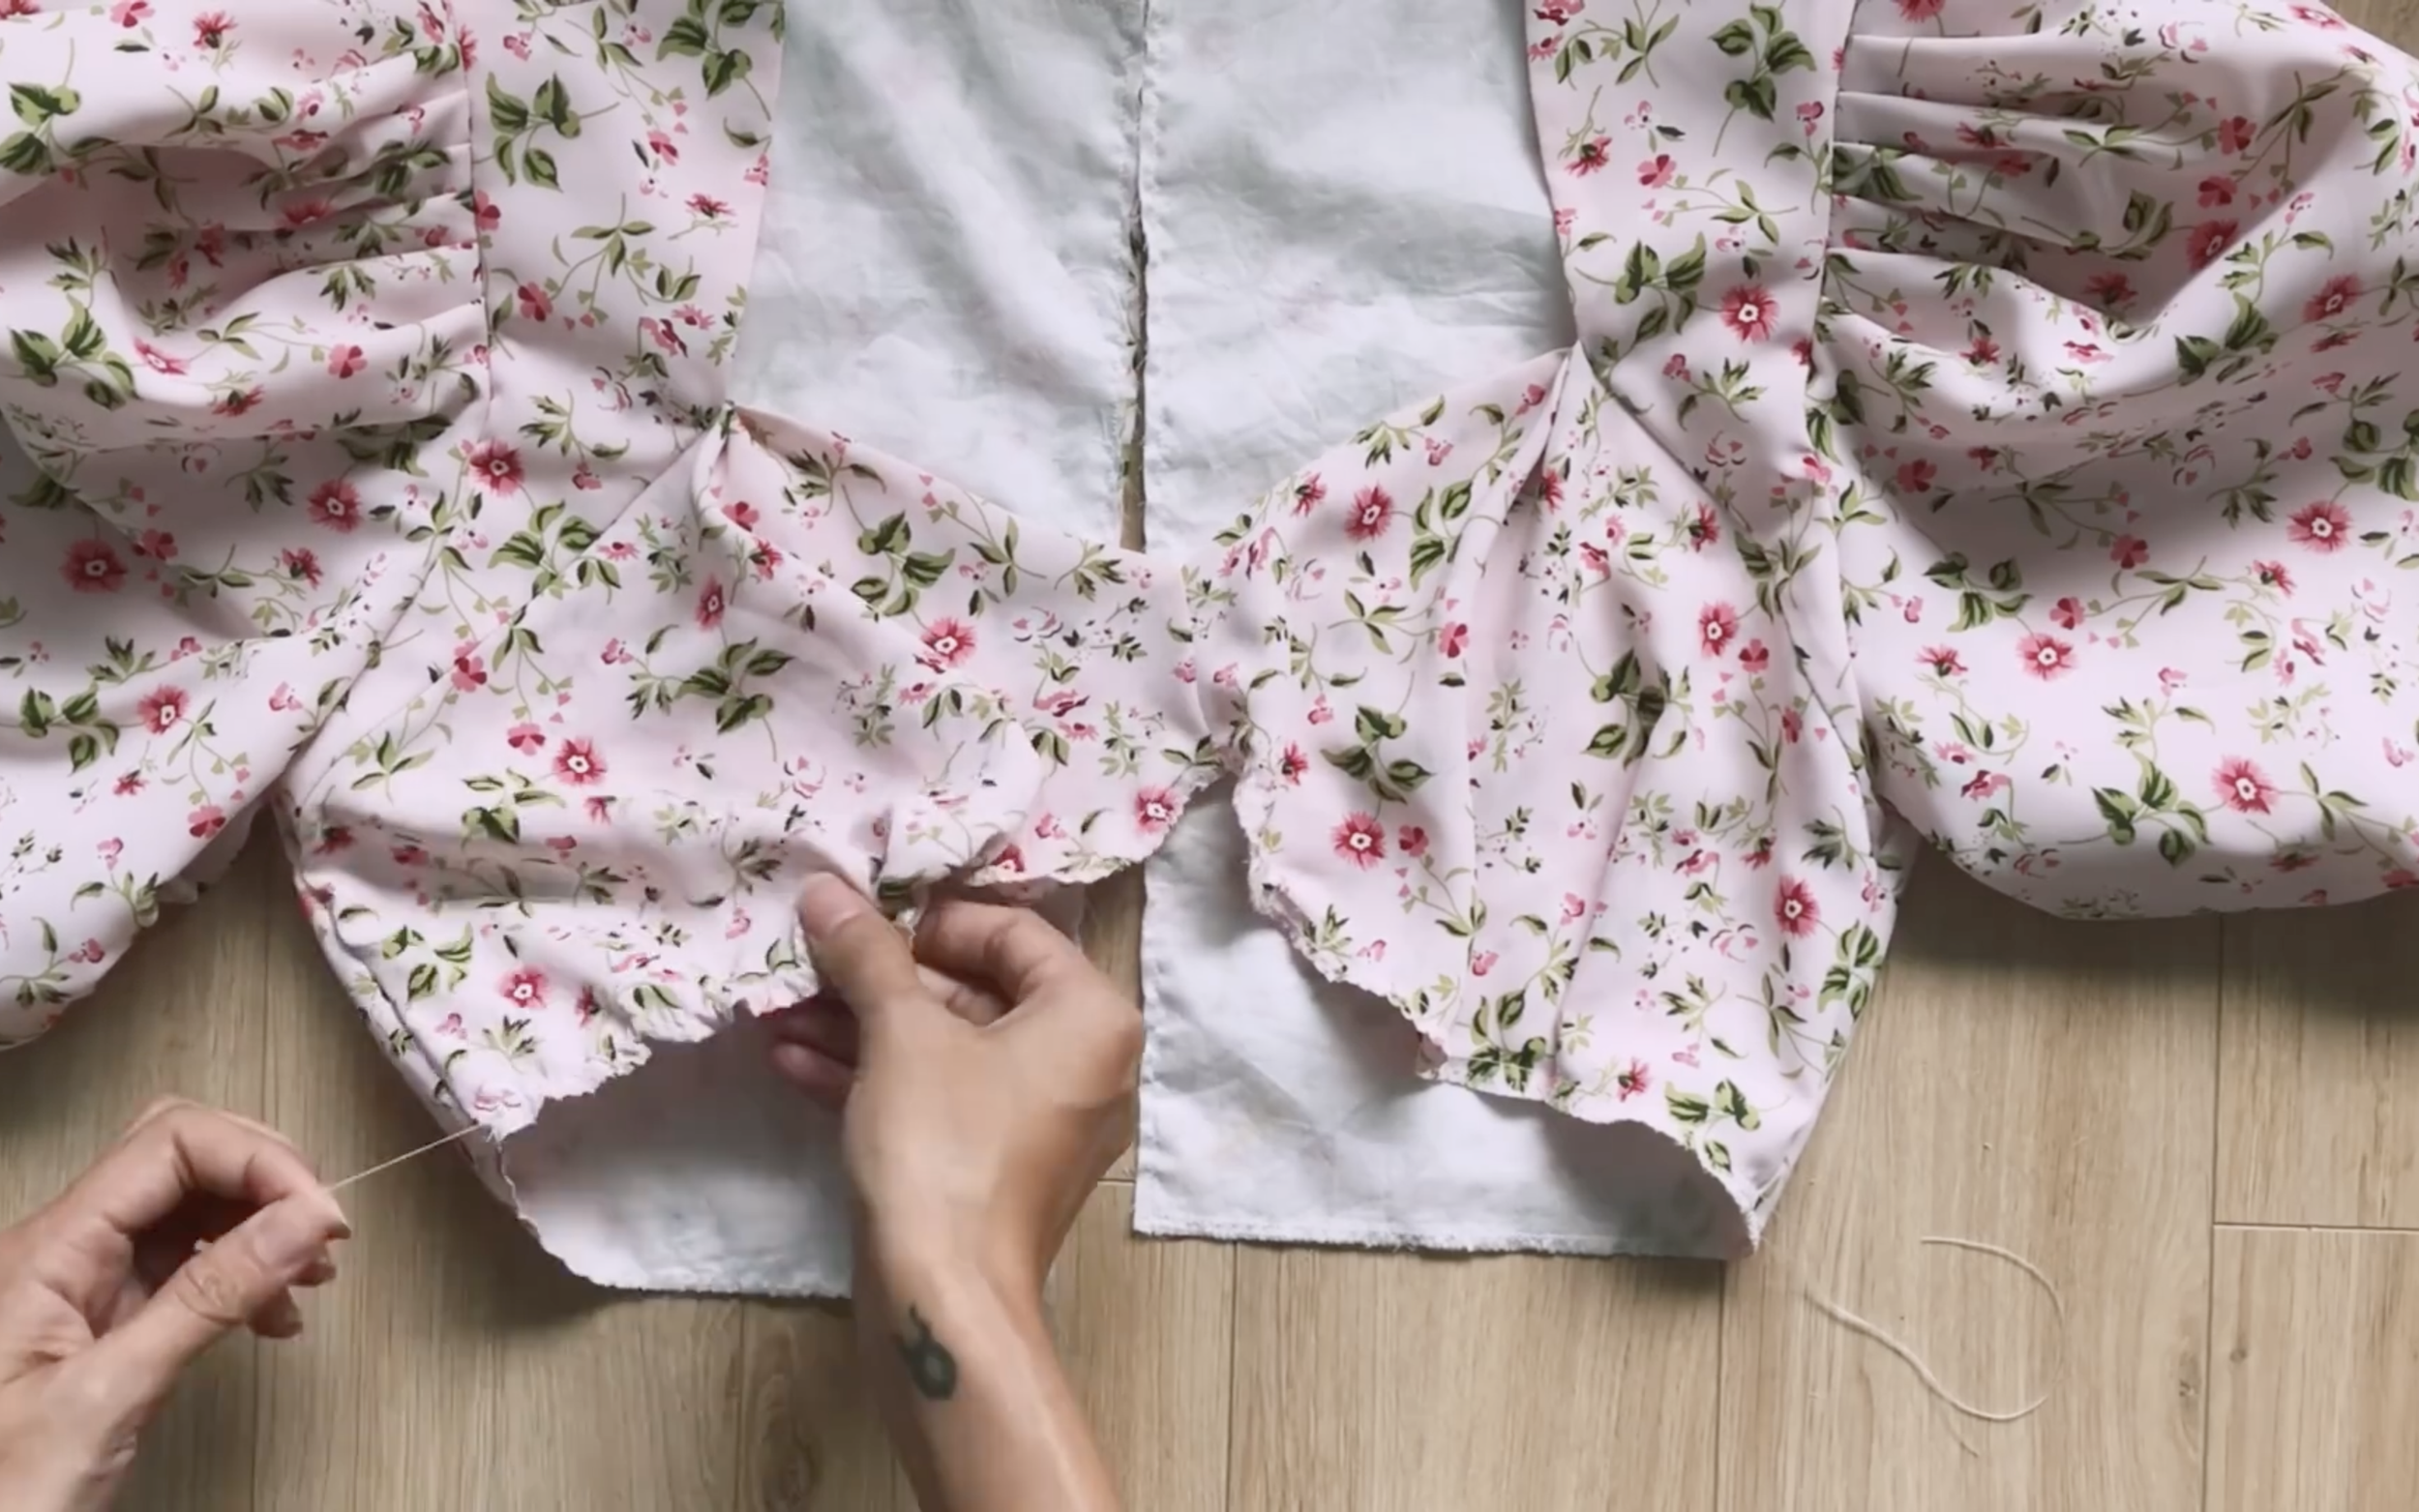
At the middle of the circle on the sleeve, start making the mark with 1 cm from the middle, then 4 cm after that.
Doing the same for the left and the right from the middle of the circle.
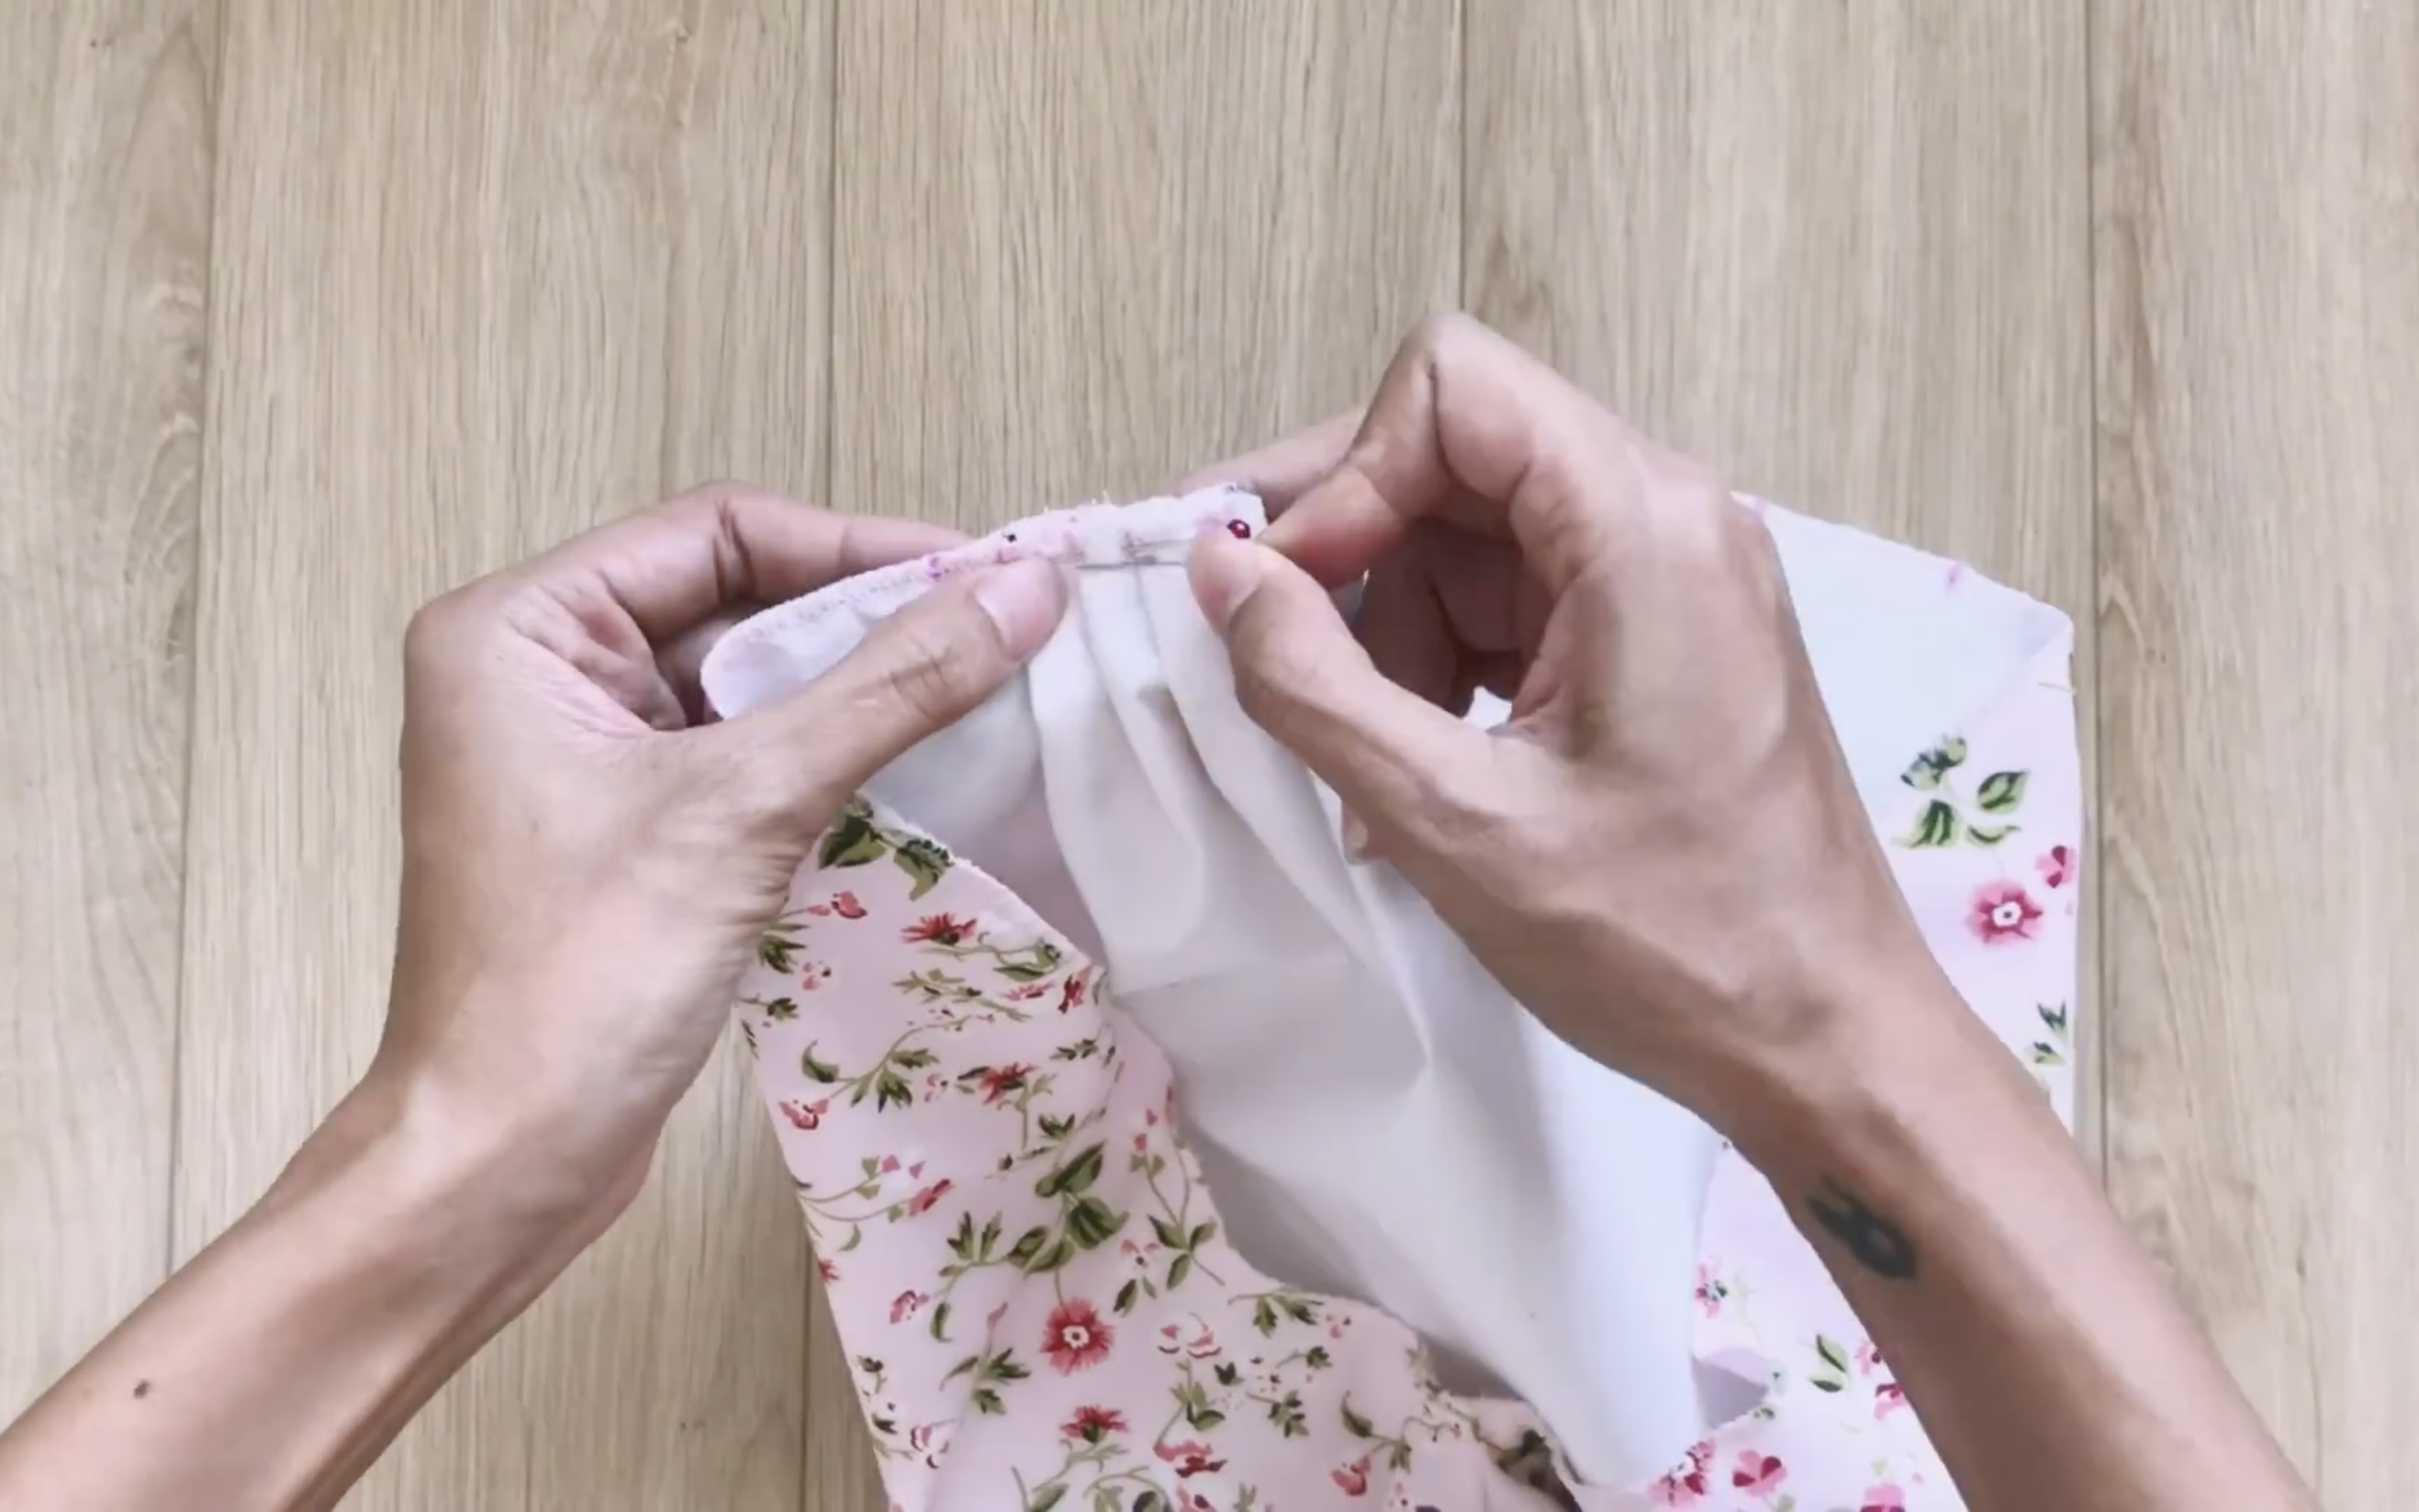
Then, create the fold.
The number of the folds will depend on the length of the sleeve at the front and the back part. So, remember to check the total length of the sleeve after folding to make sure it will be the same with the total length of the sleeve at the front and the back part. So, you can connect them together later.
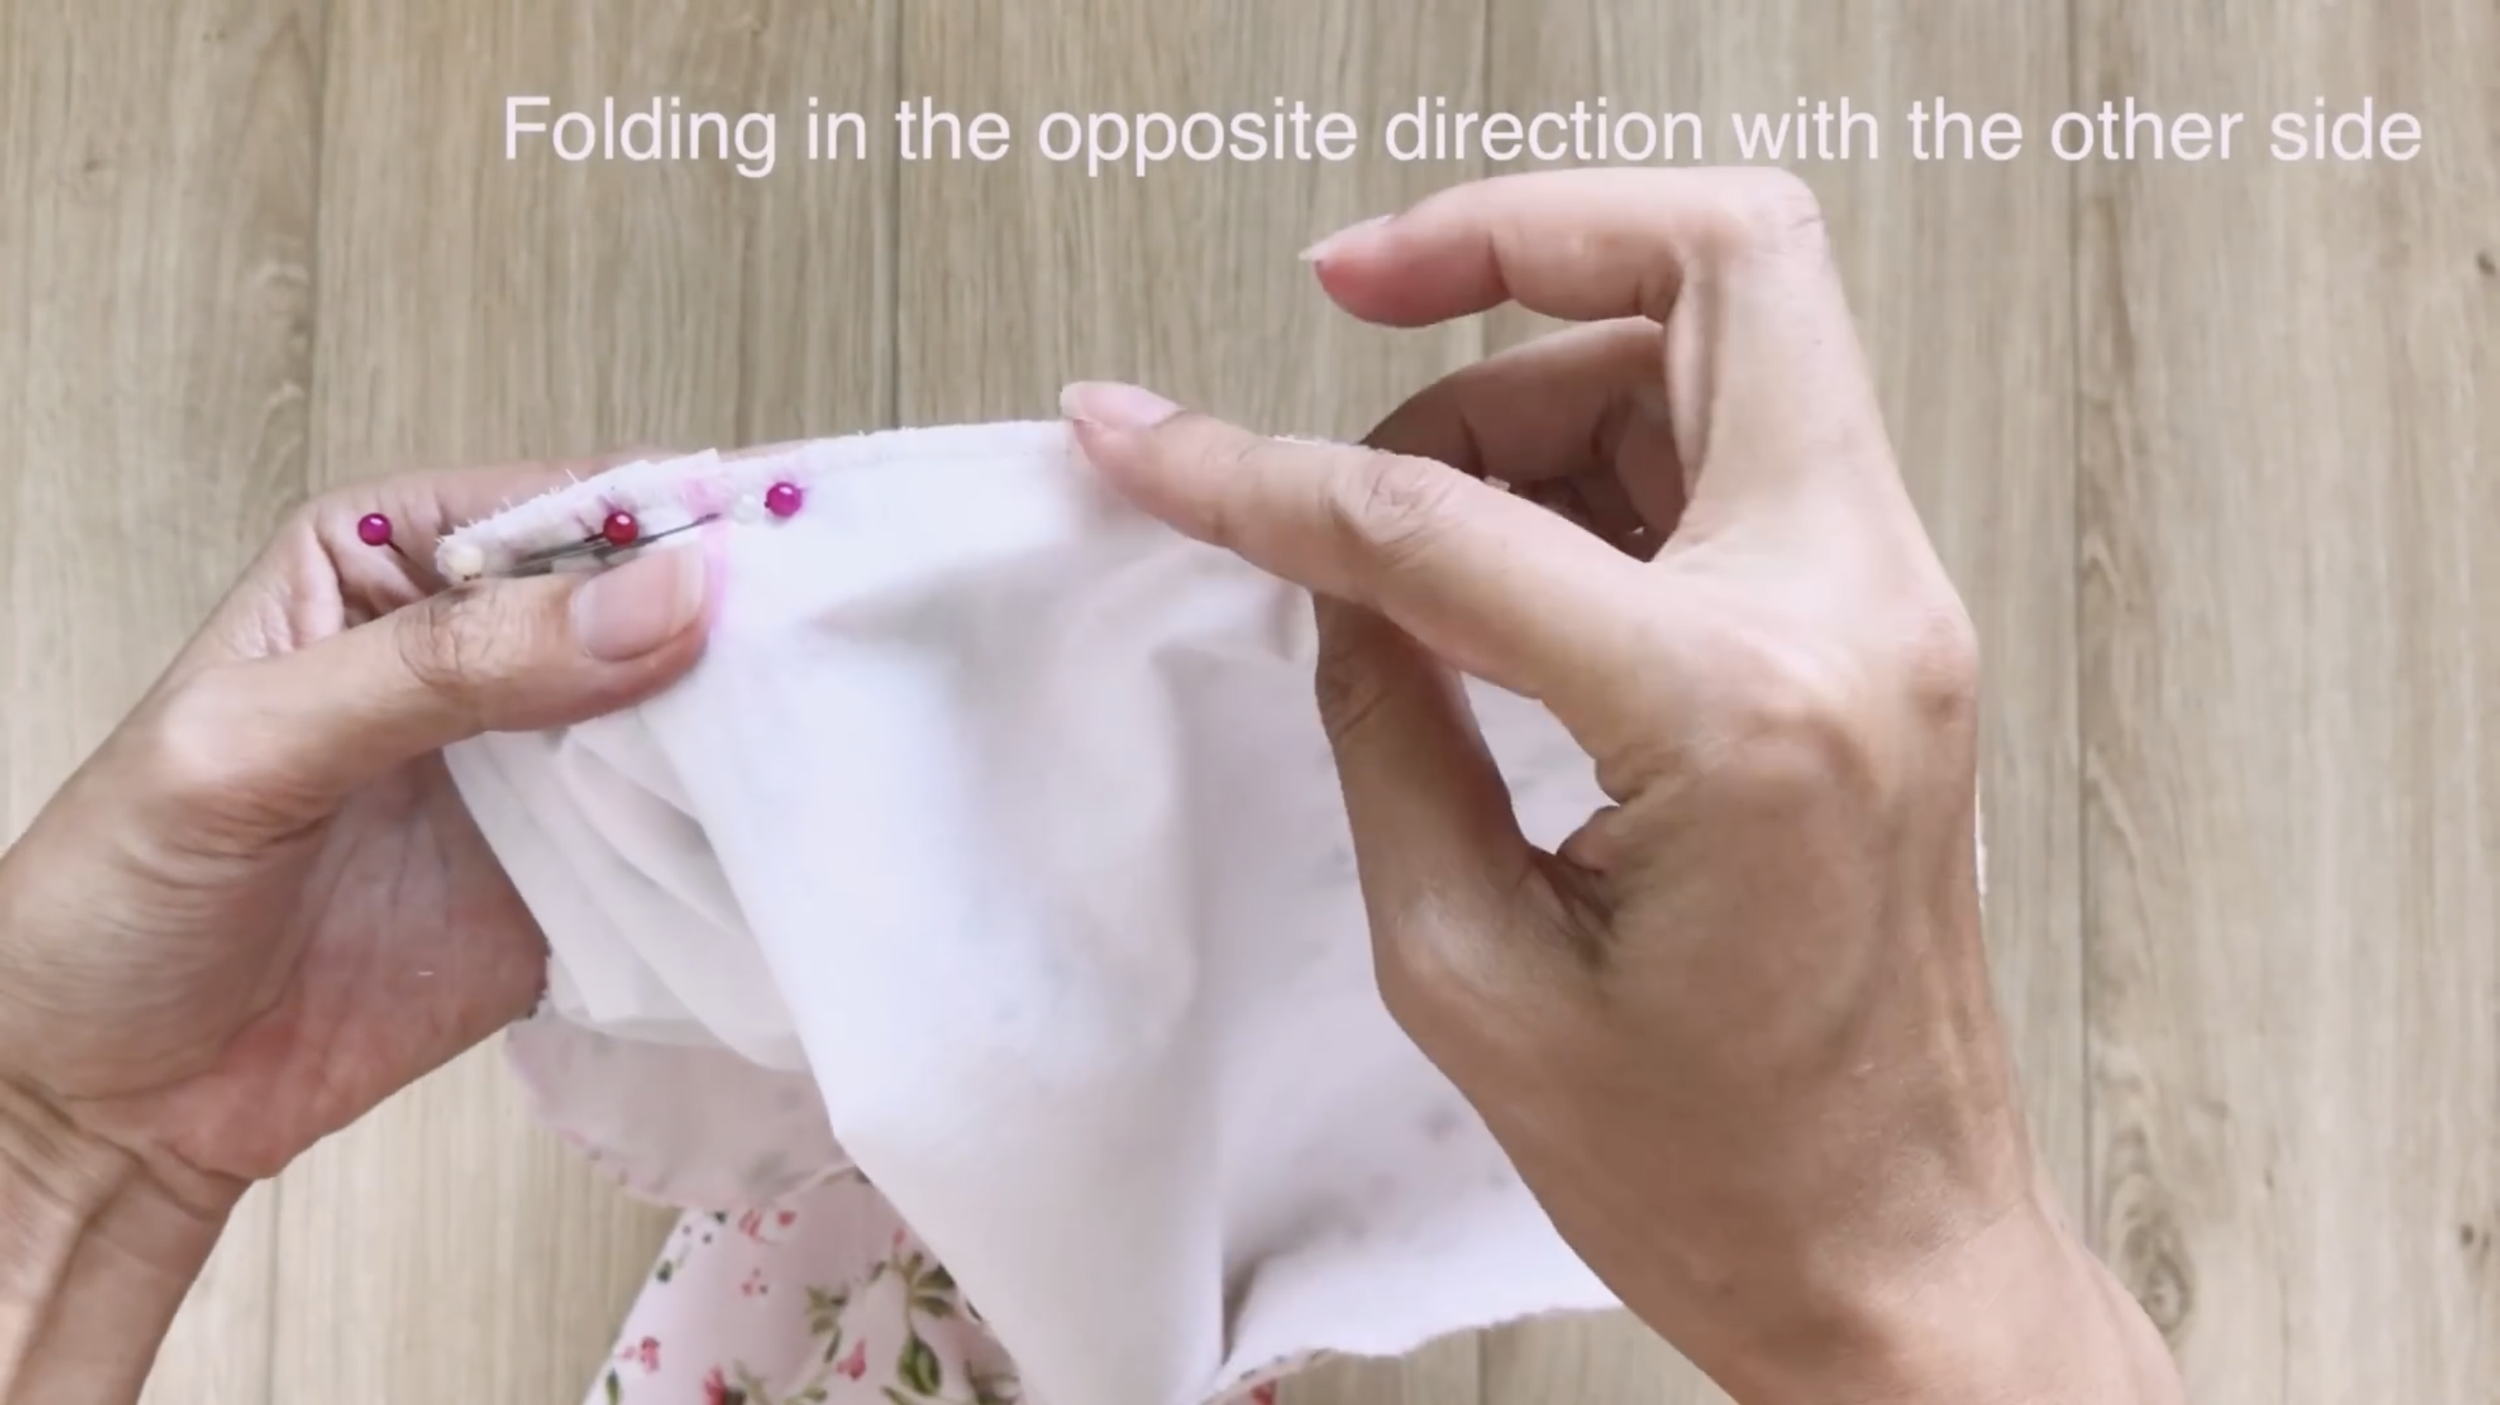
But remember the fold at two sides from the middle of the circle will be in the opposite direction to each other.
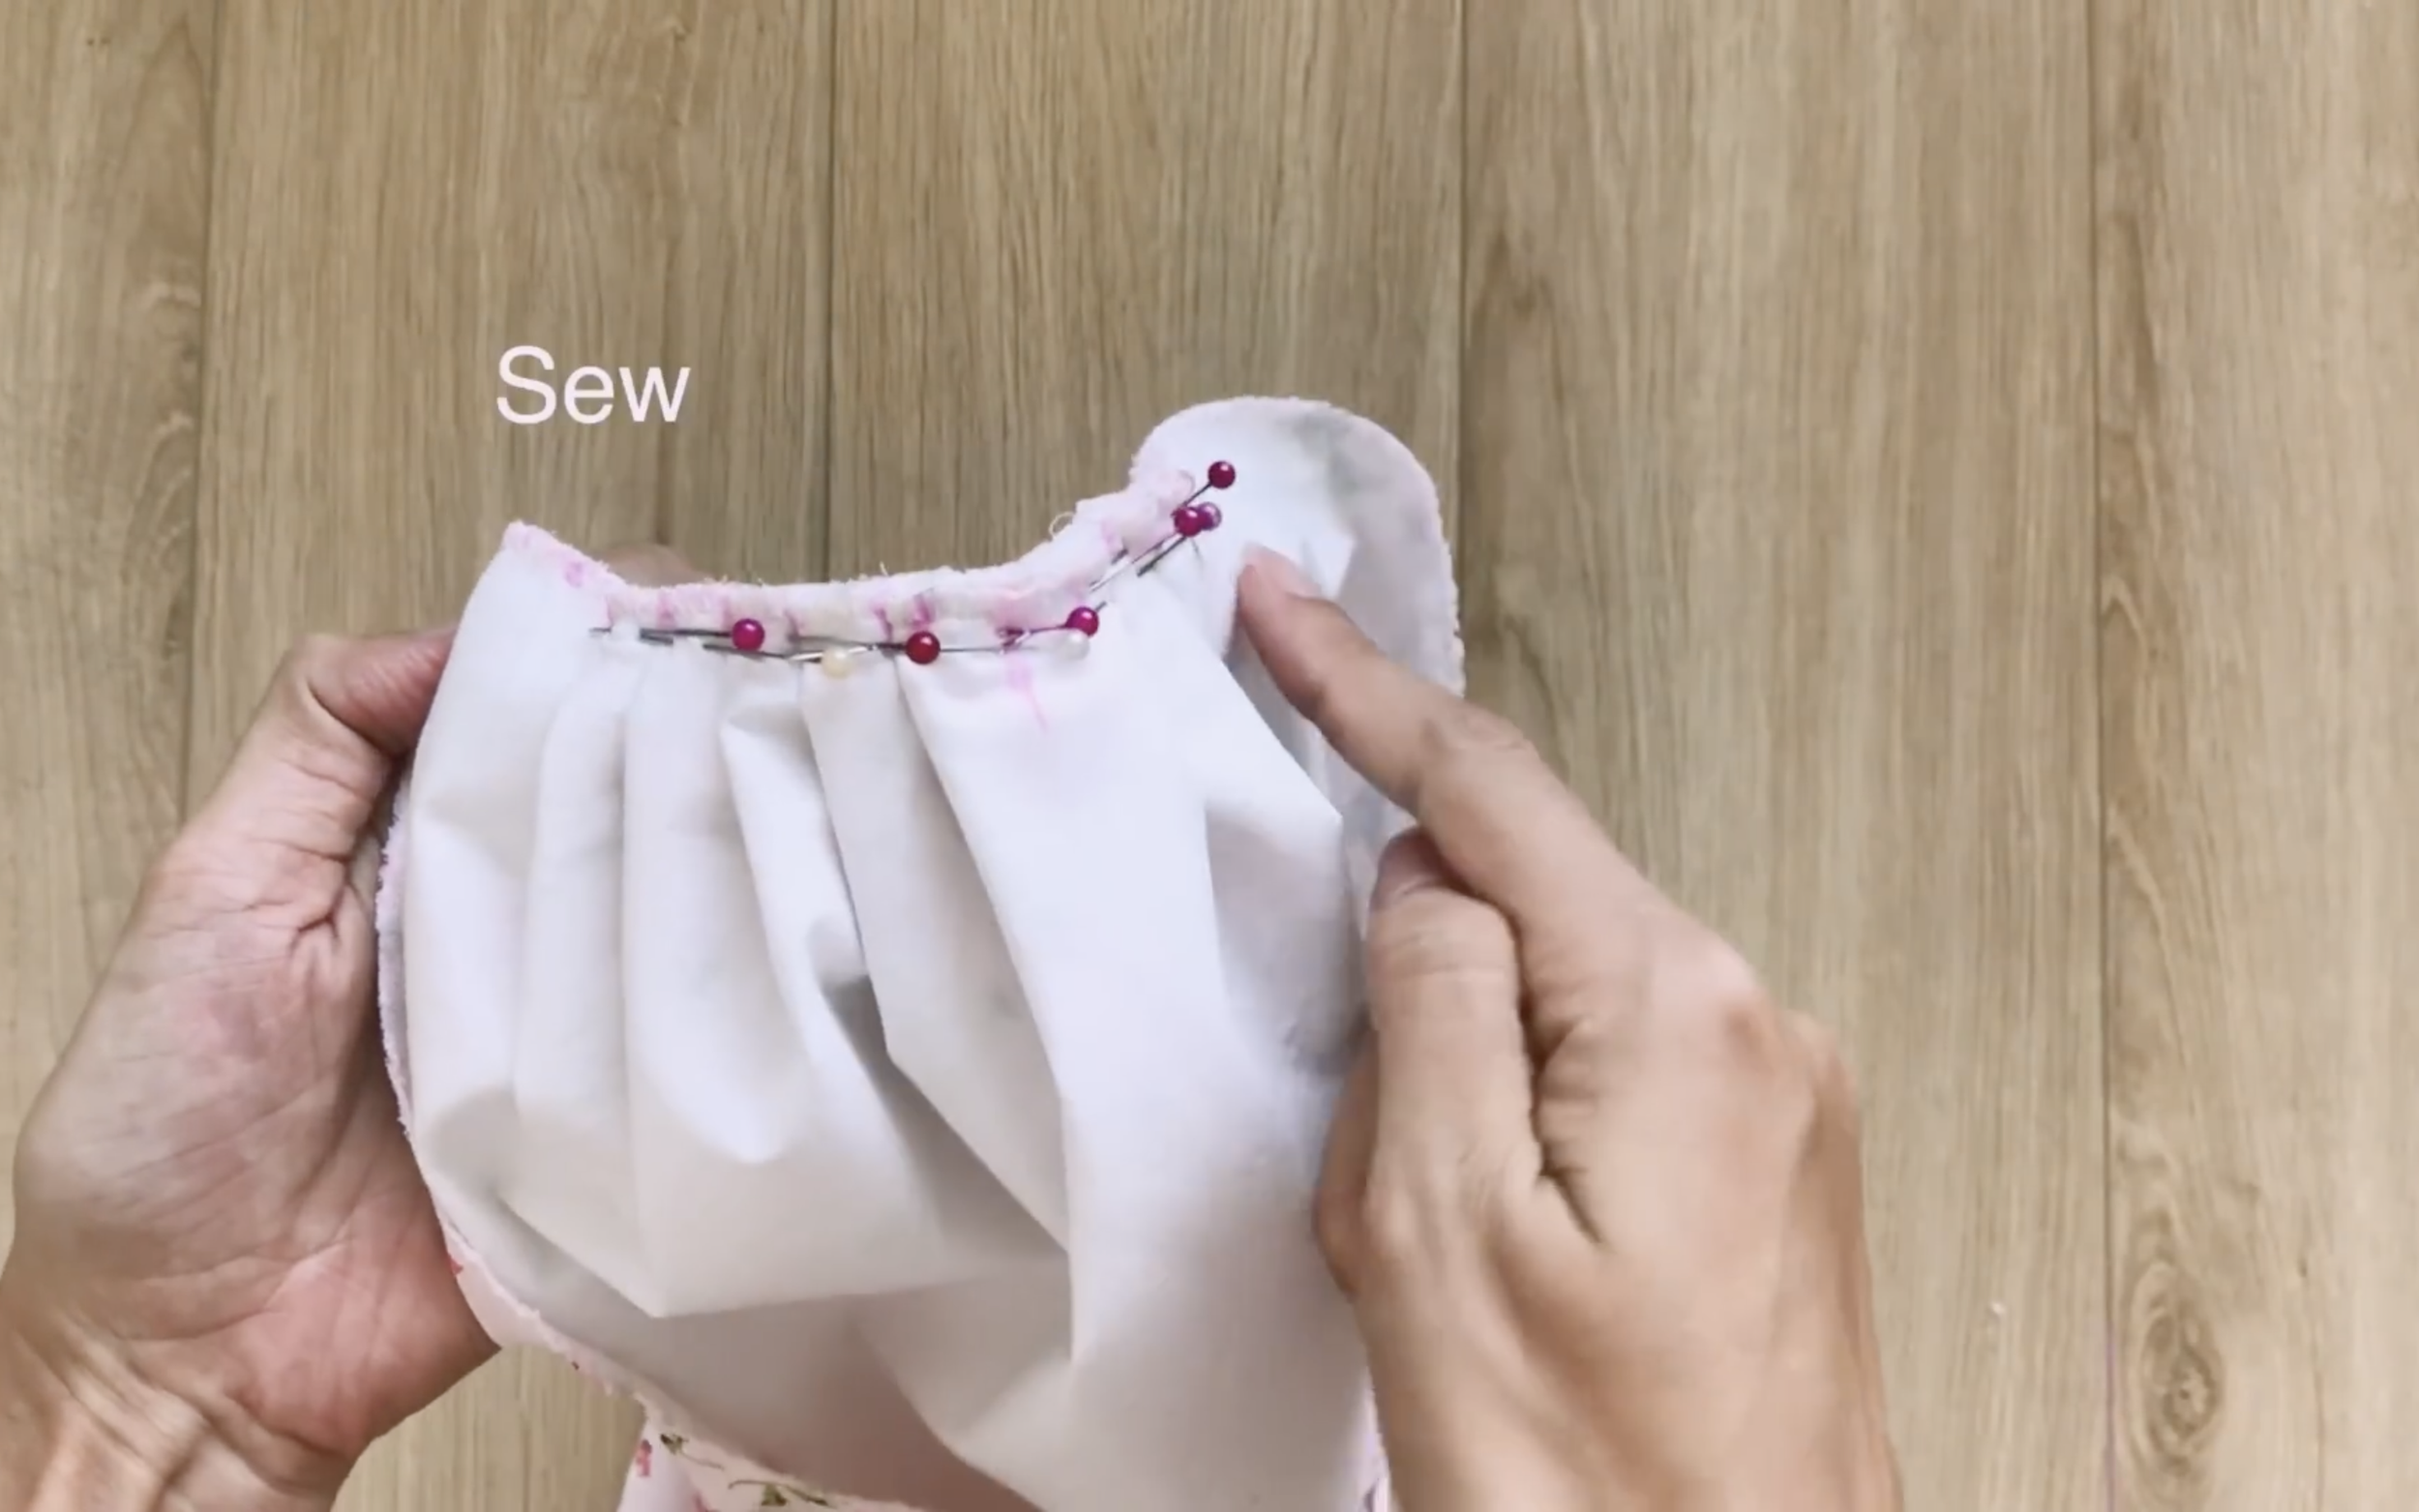
Then, sew.
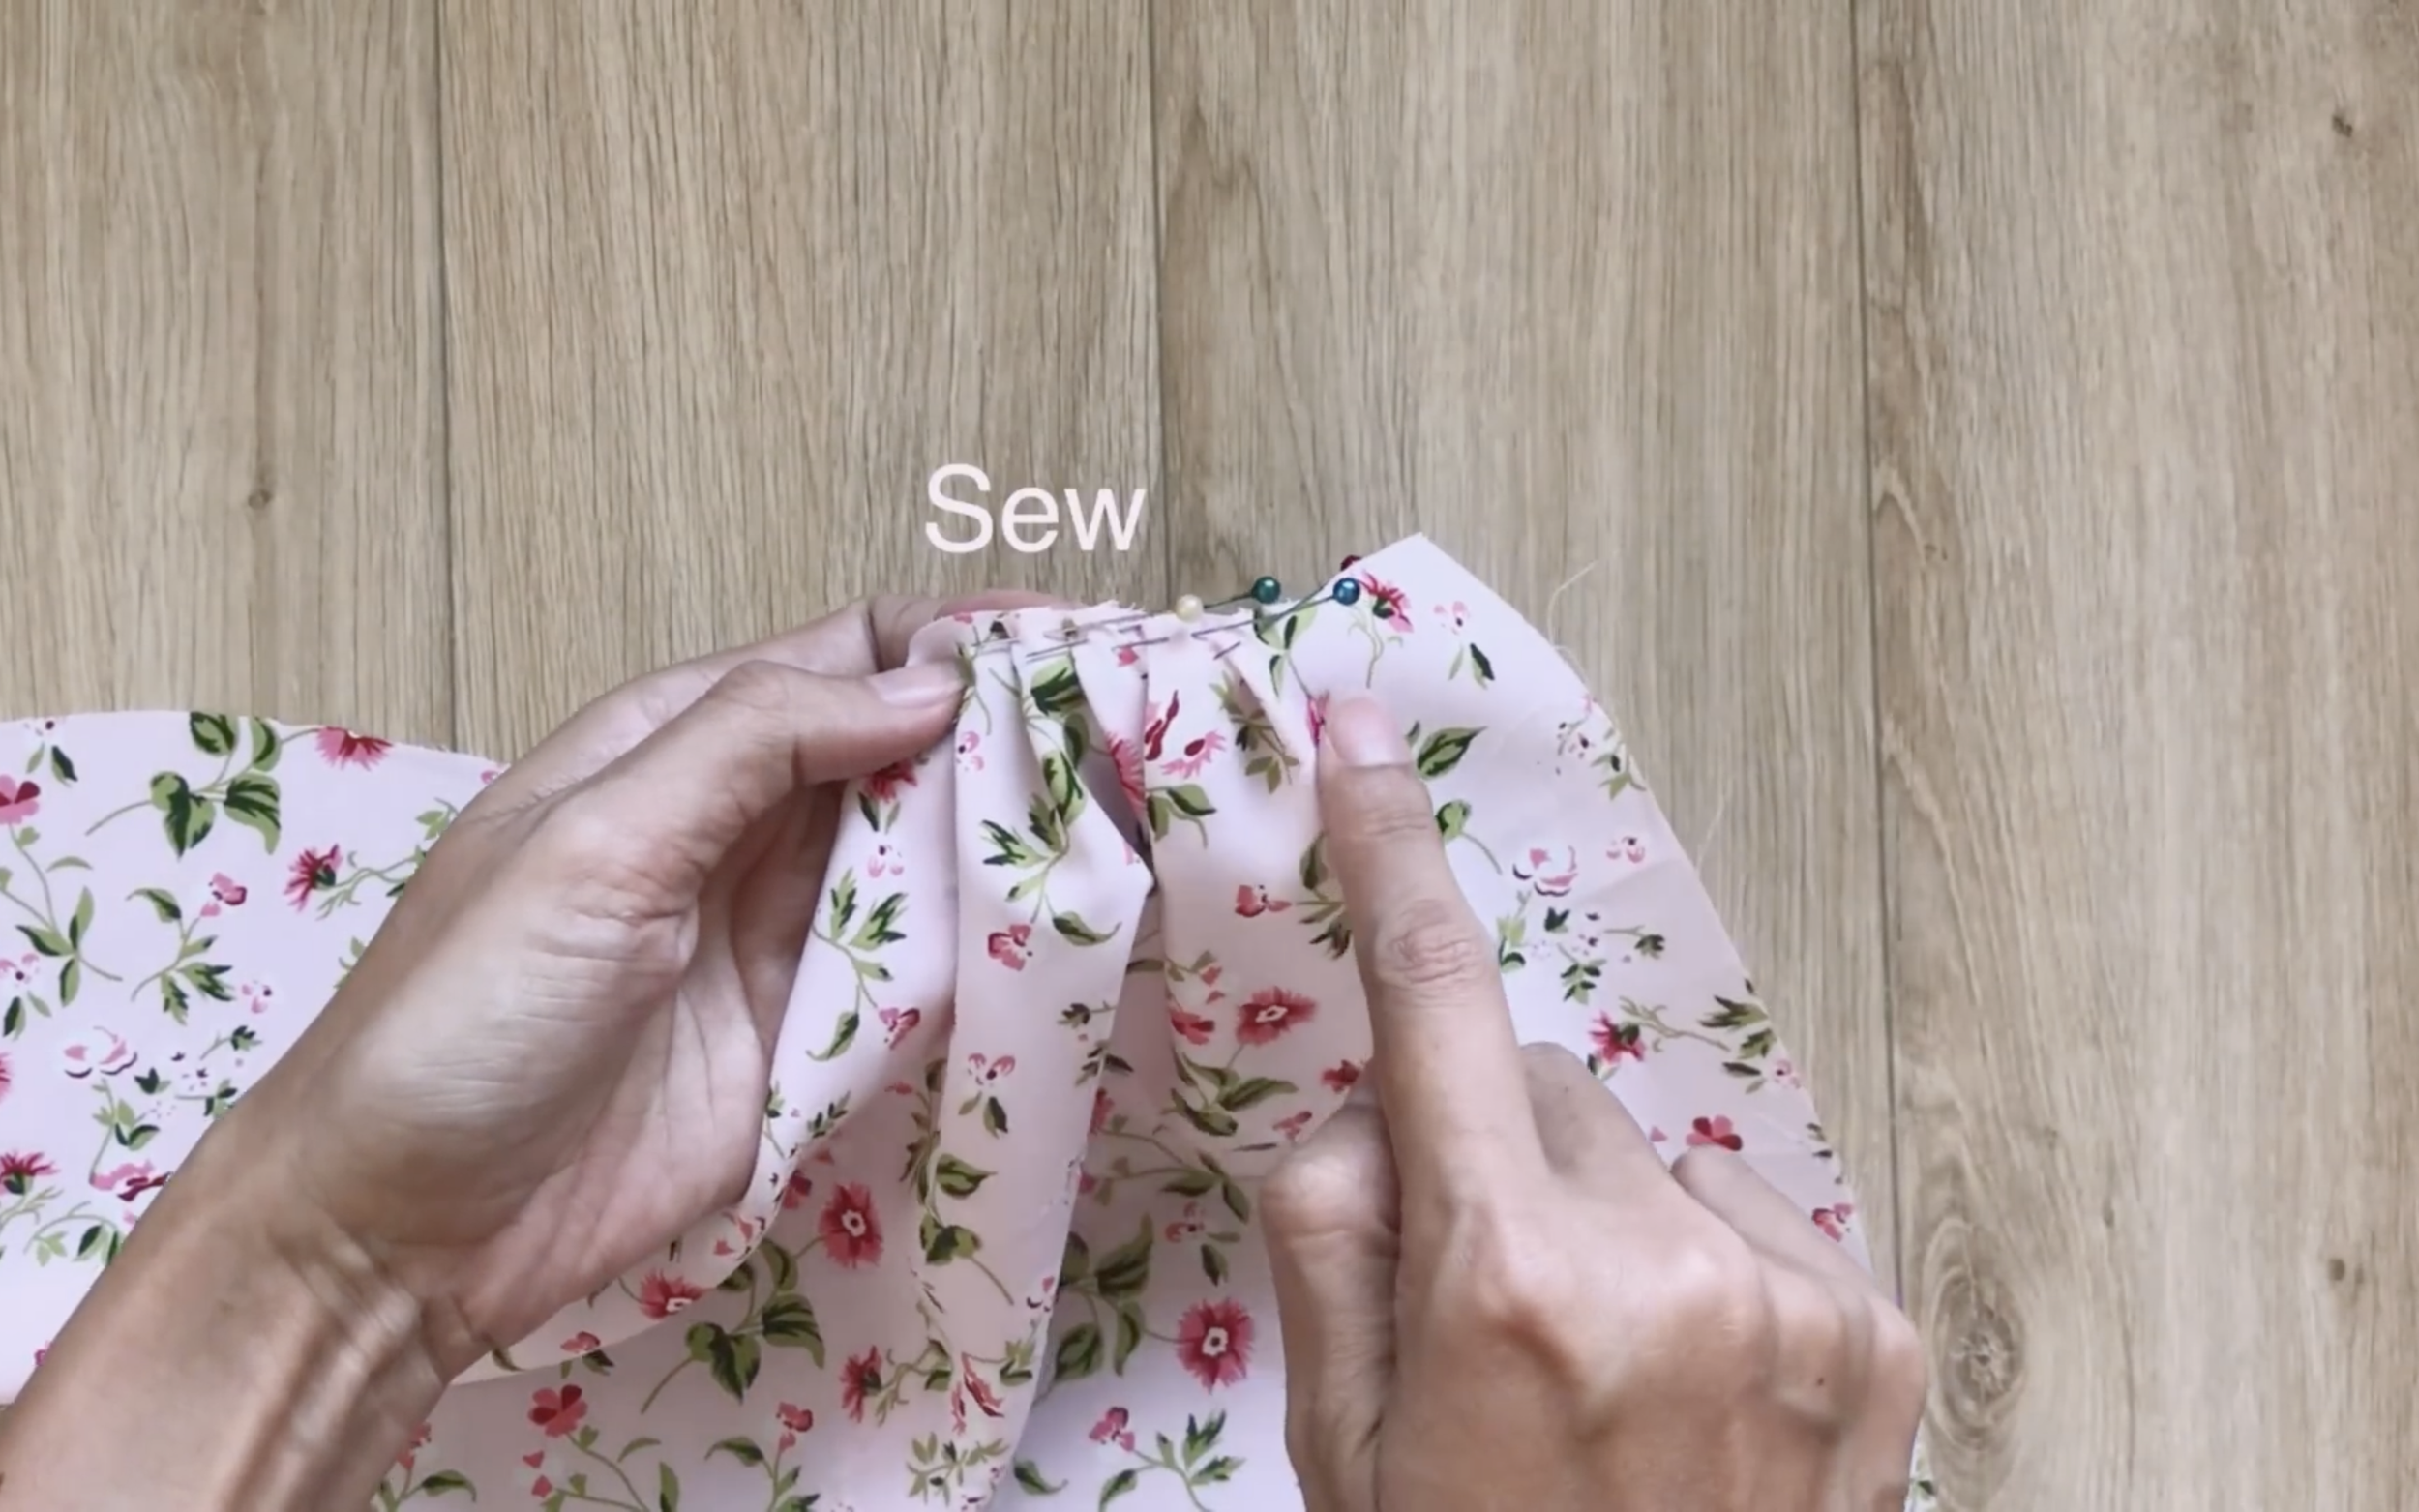
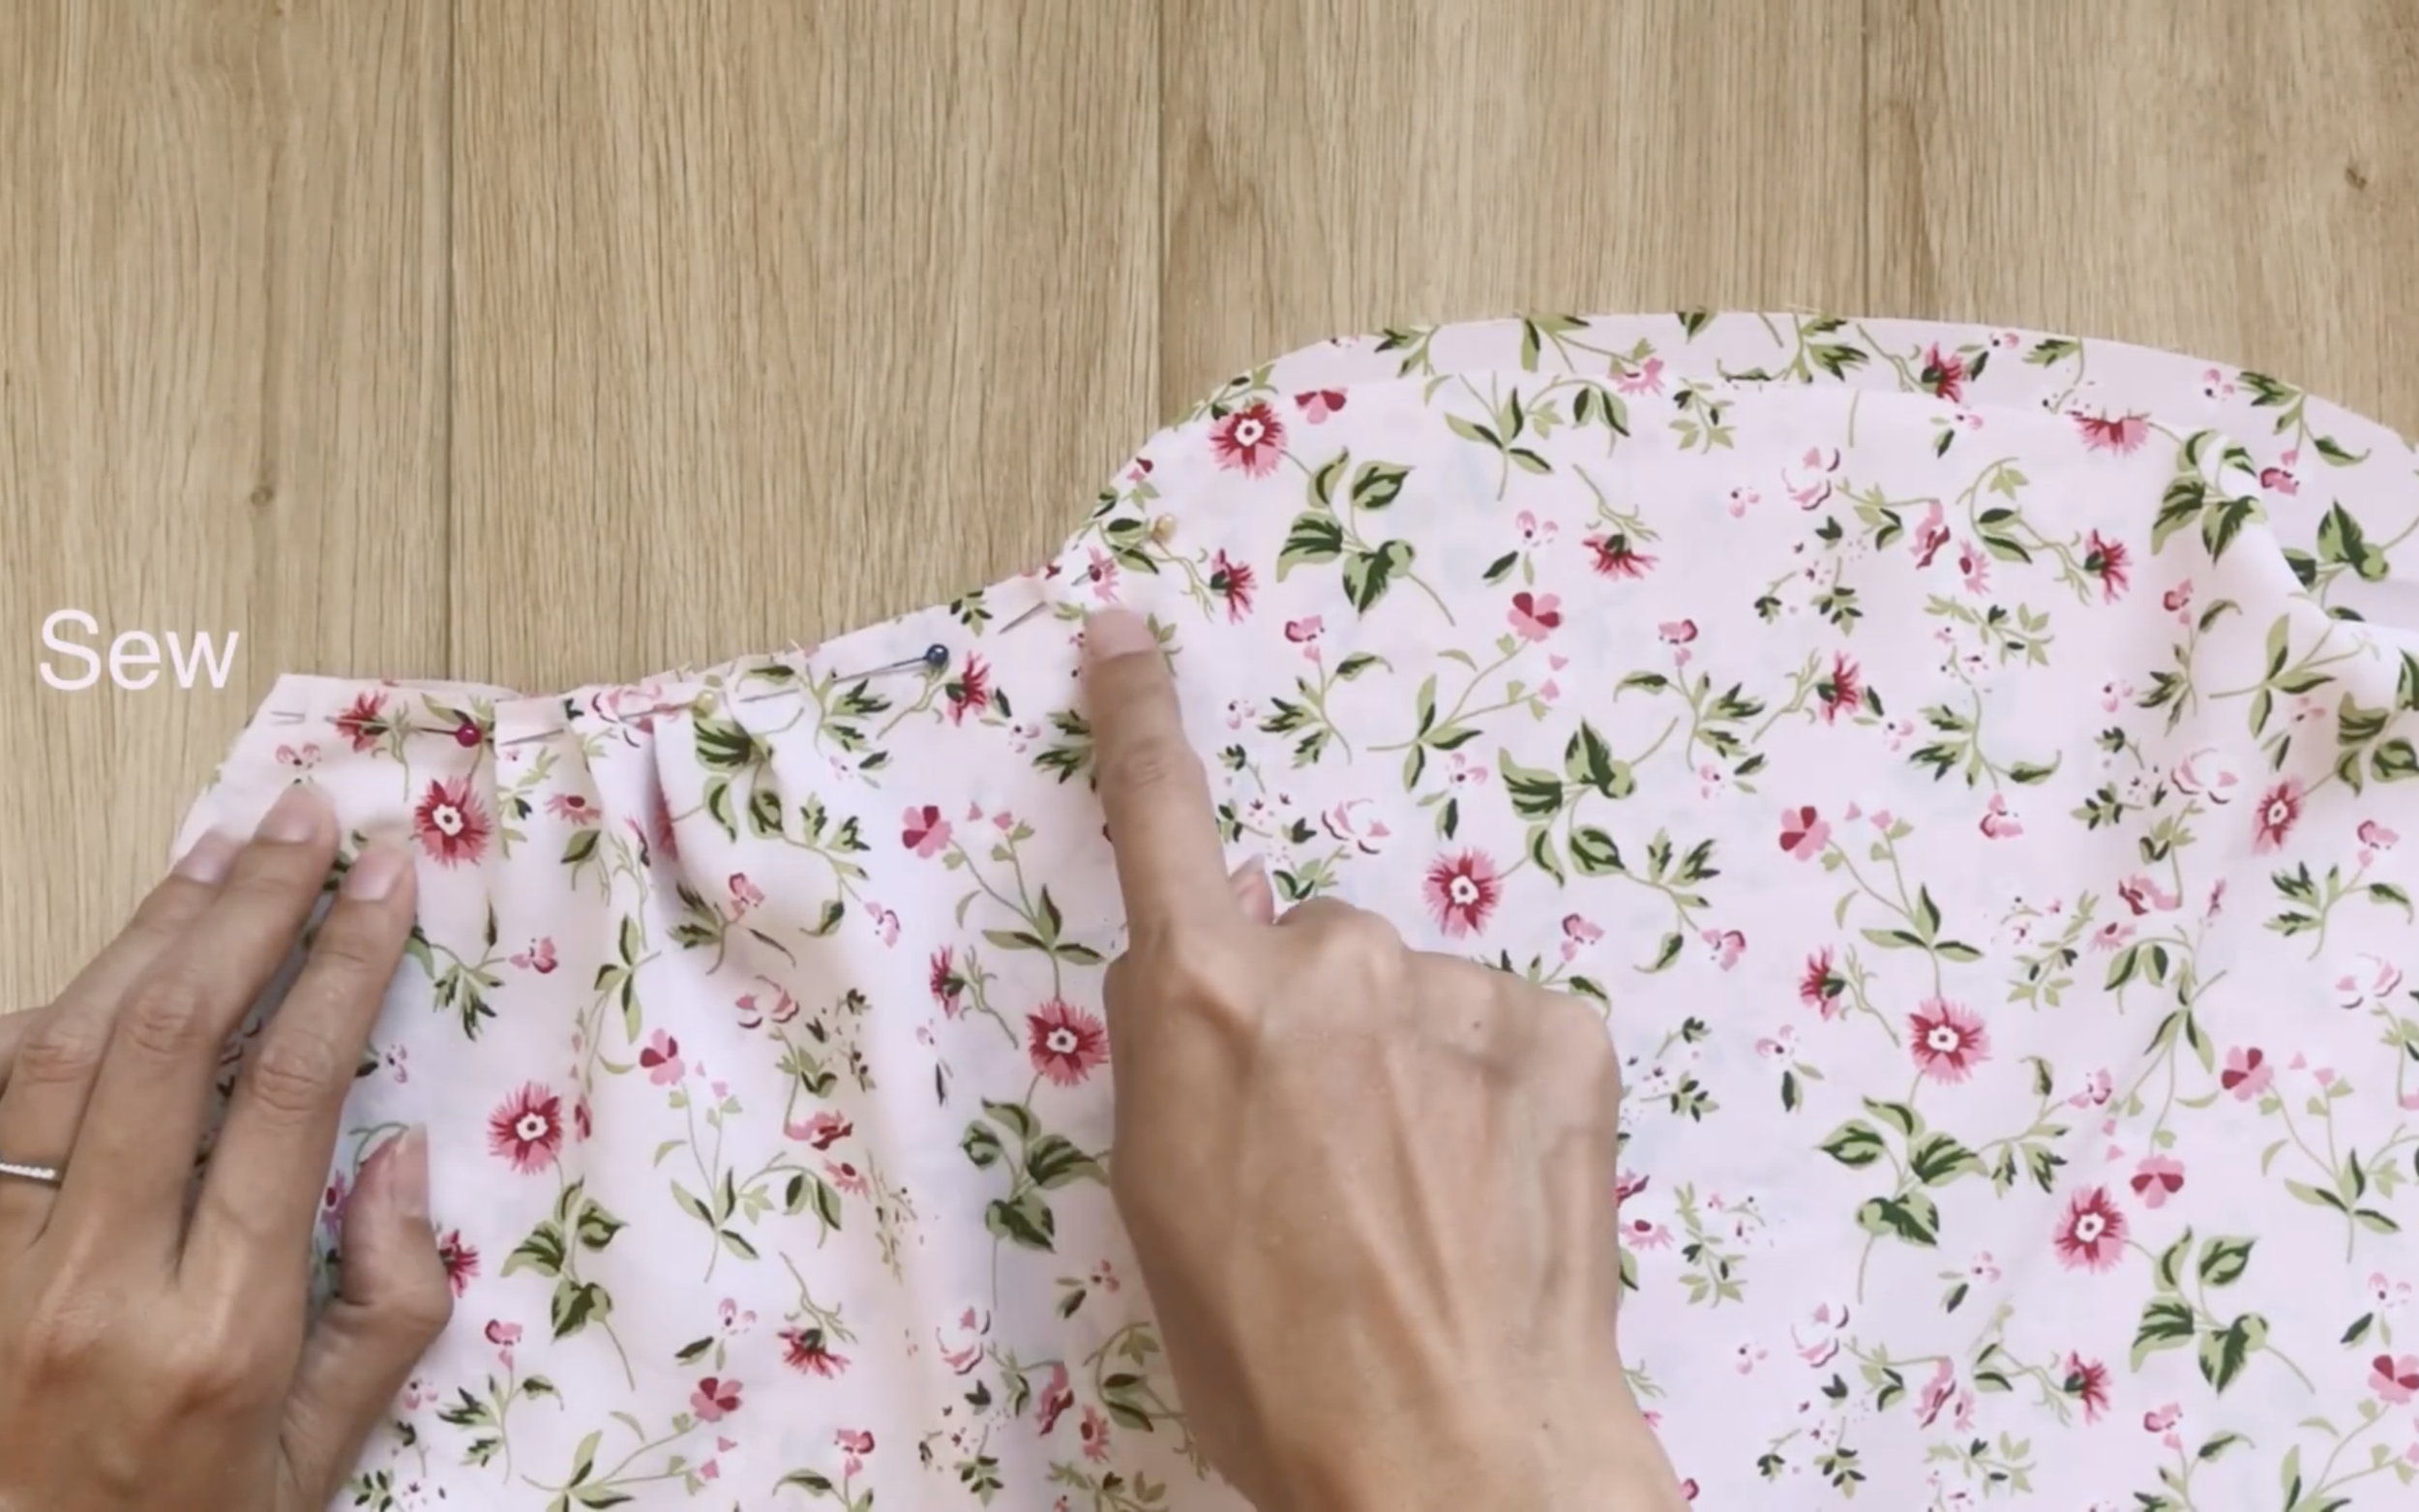
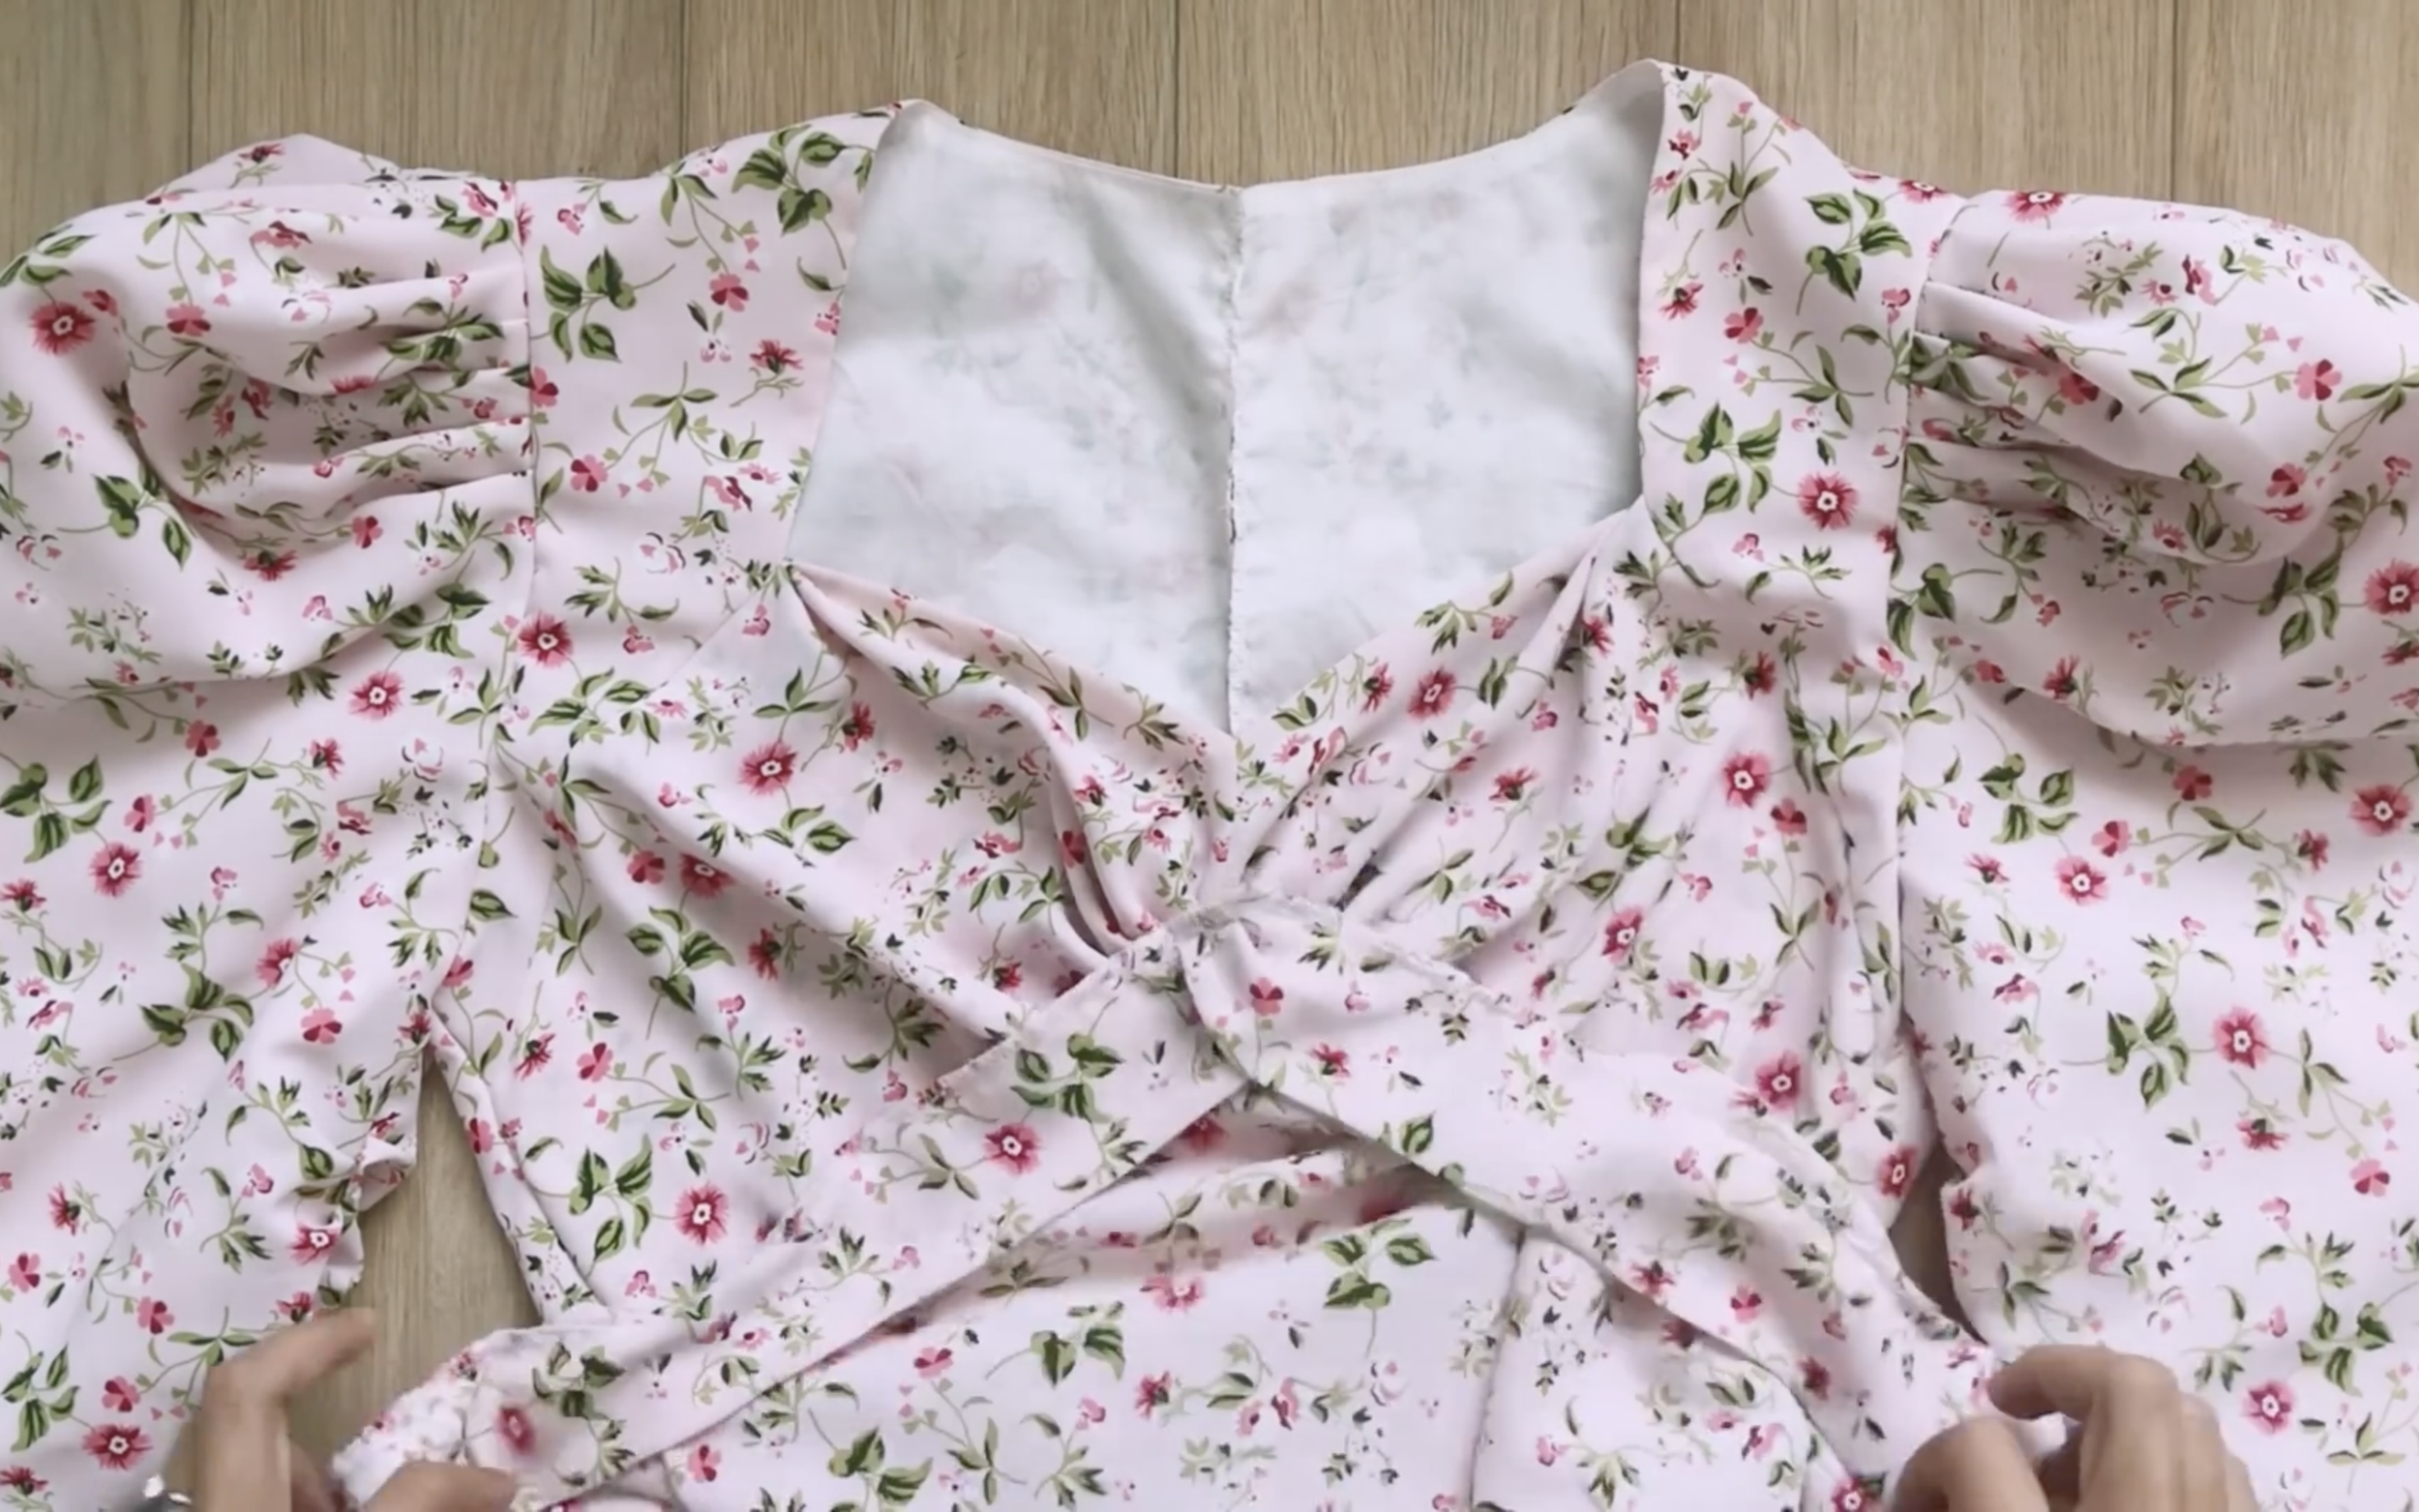
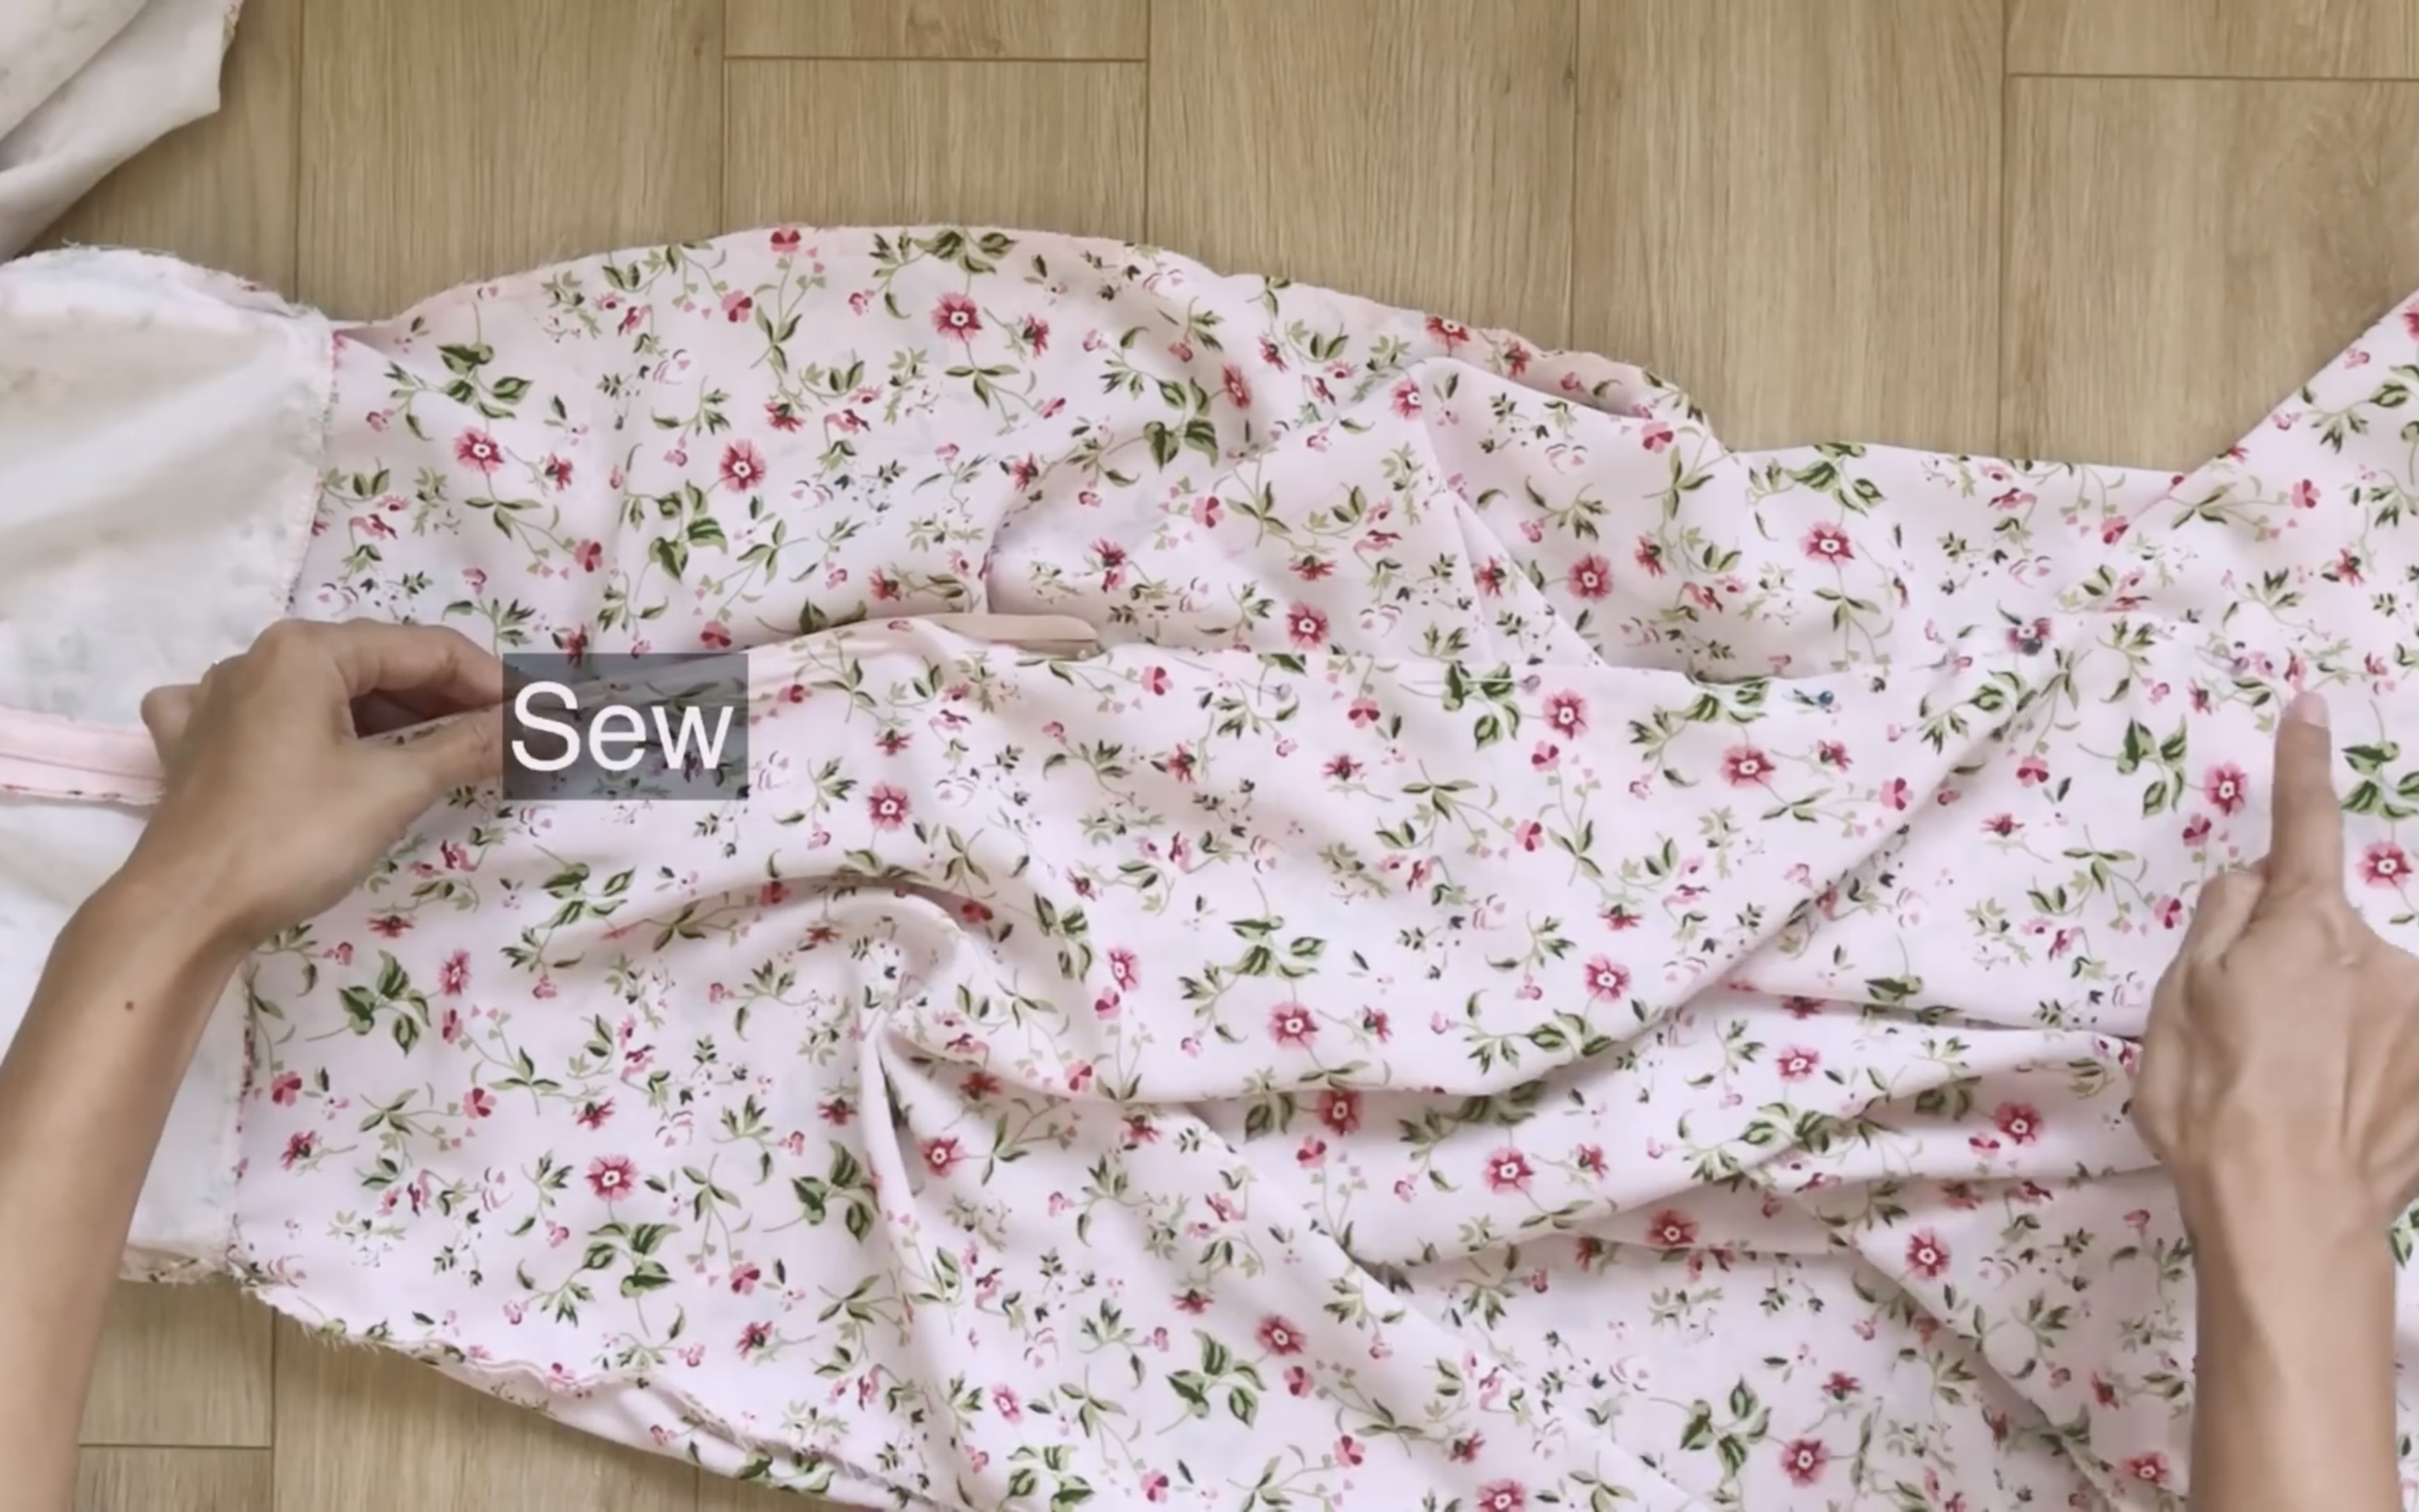
Now connect the bodice and the sleeve together.
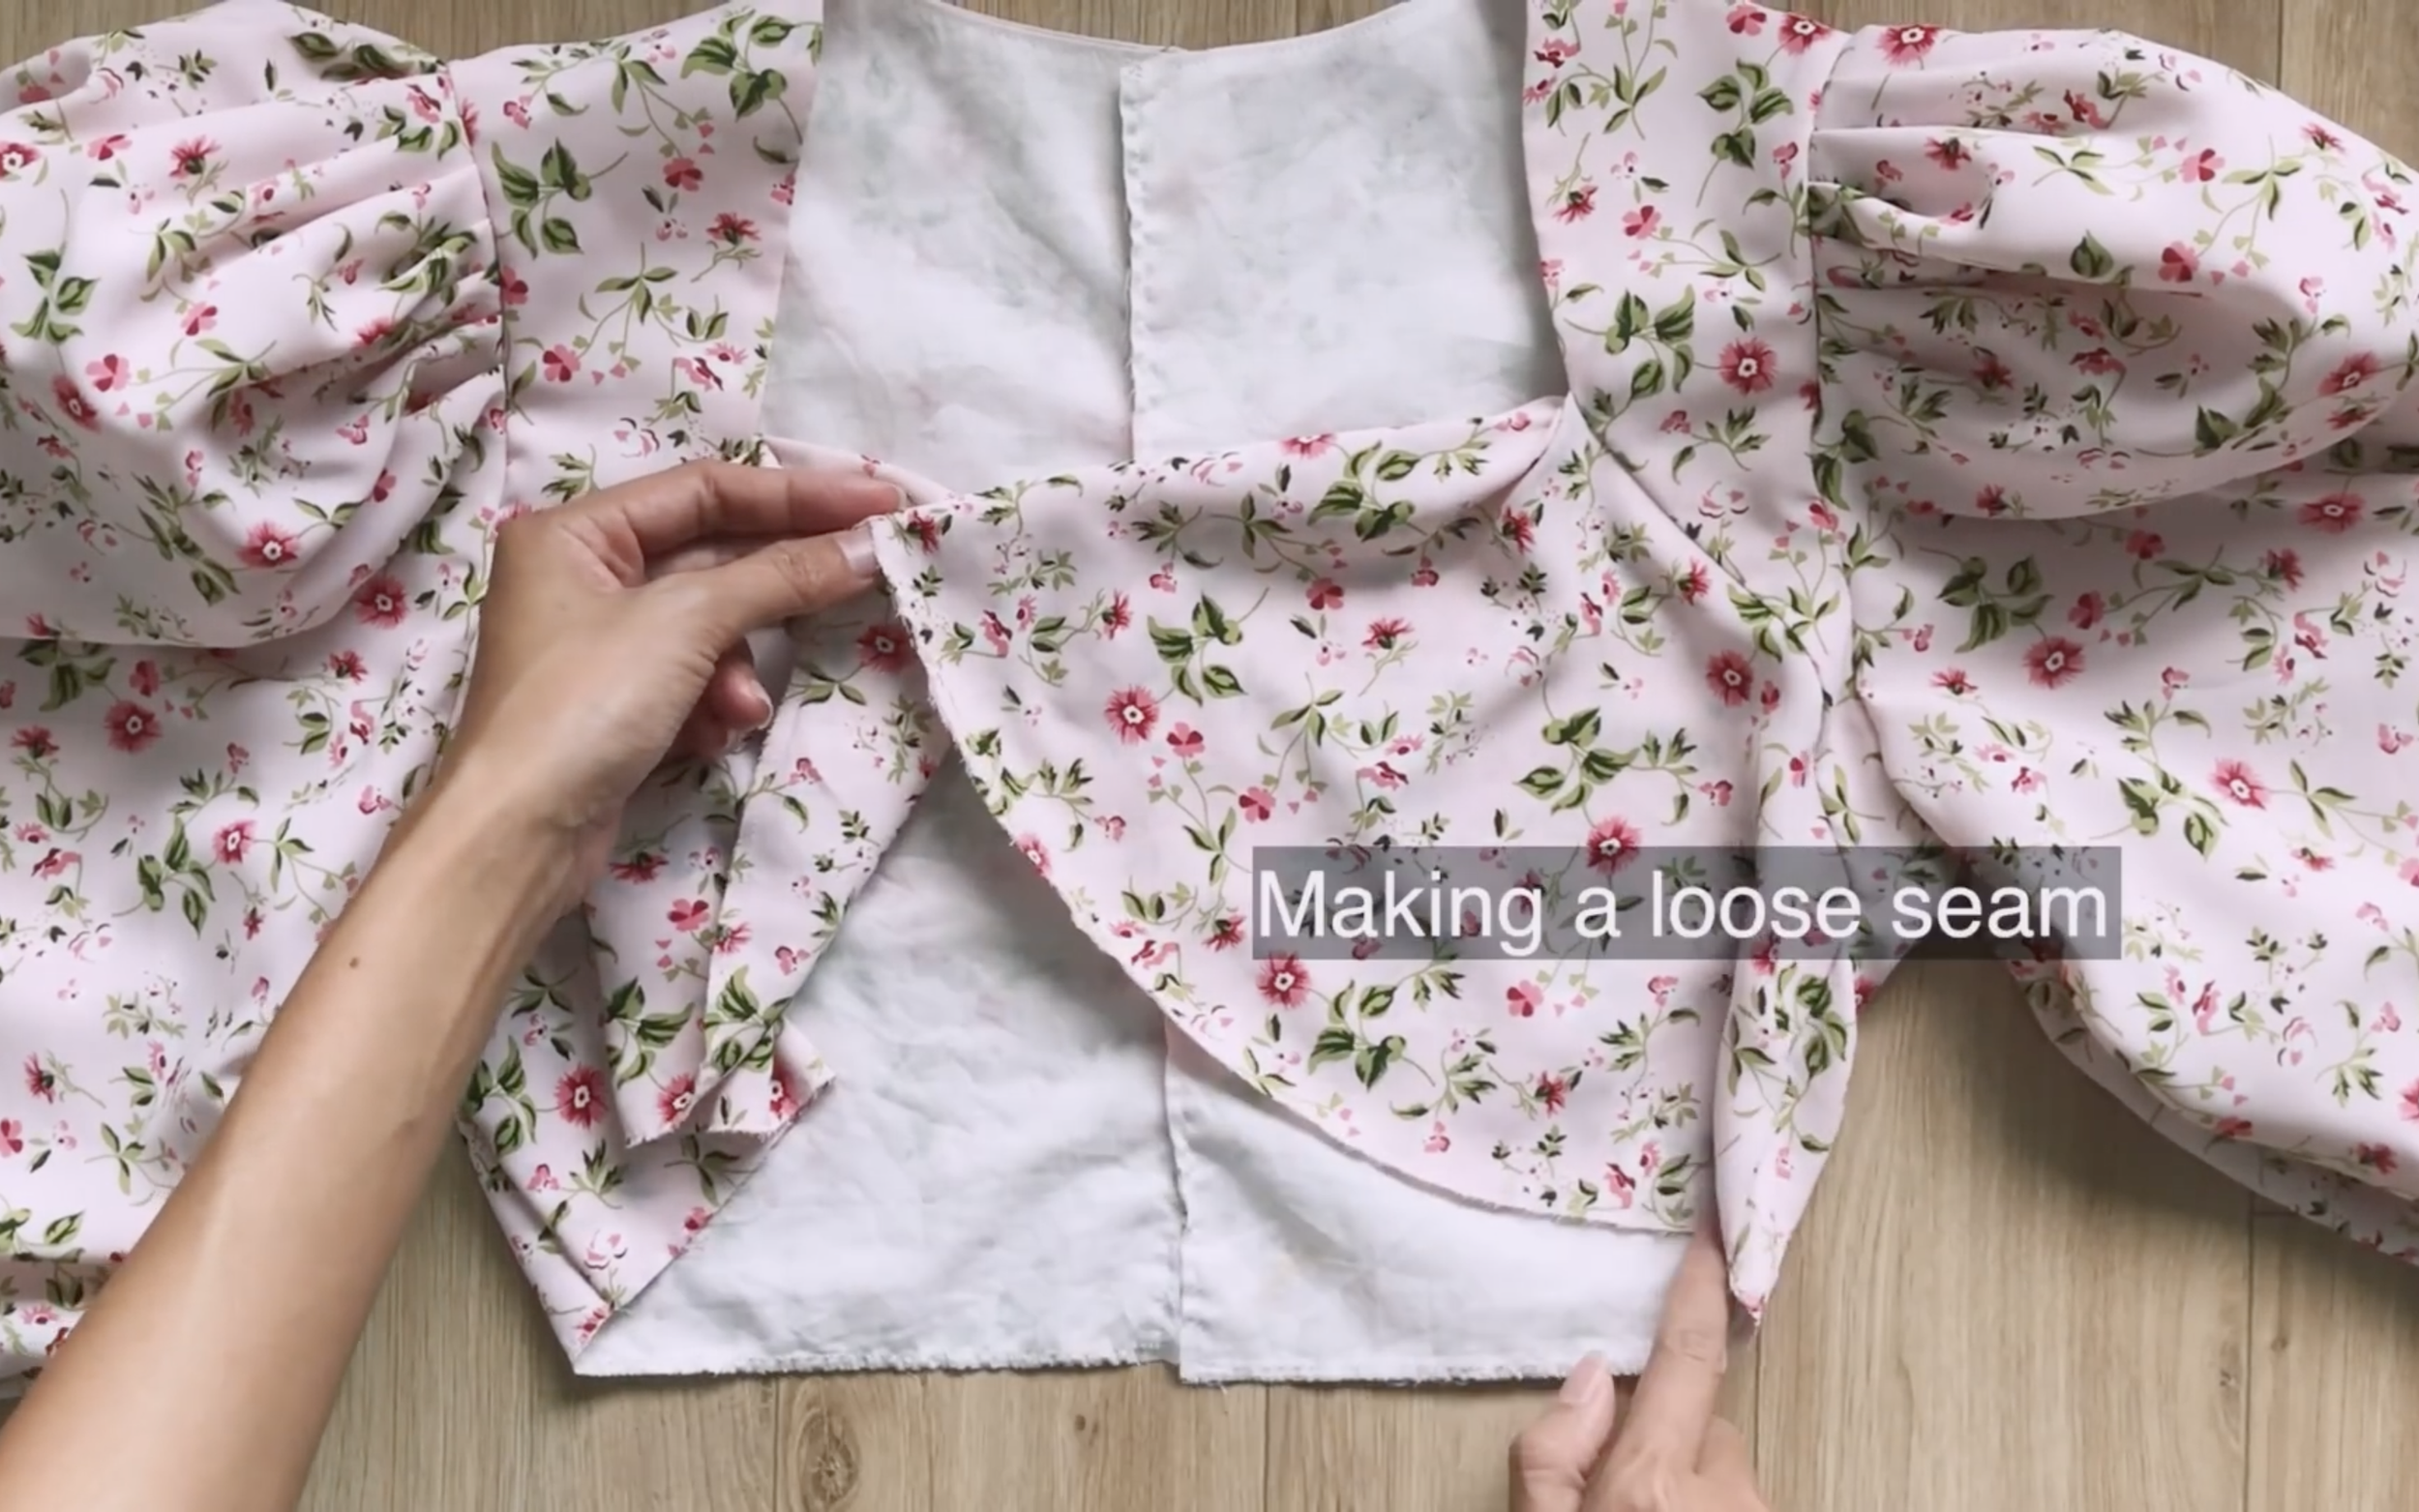
At the end of the bust area, make a loose seam first.
Then, create a puffy.

However, at the middle of the bust line, make a few folds to make the puffy there bigger than the rest. Just to make it similar to the original dress, make sure the final width of the bust line there will be right at the middle of the main bodice which is a quarter of the bust size.
THE BOTTOM DRESS
Moving to the bottom of the dress, drawing straight on the fabric. As you can see, the bottom of the dress had the folding feeling at the end. That means the width at the end of the bottom have to be bigger than the top of the bottom. And you only can create this feeling by cutting the fabric in fold.
You will need one piece for the front and two pieces for the back of the bottom dress.
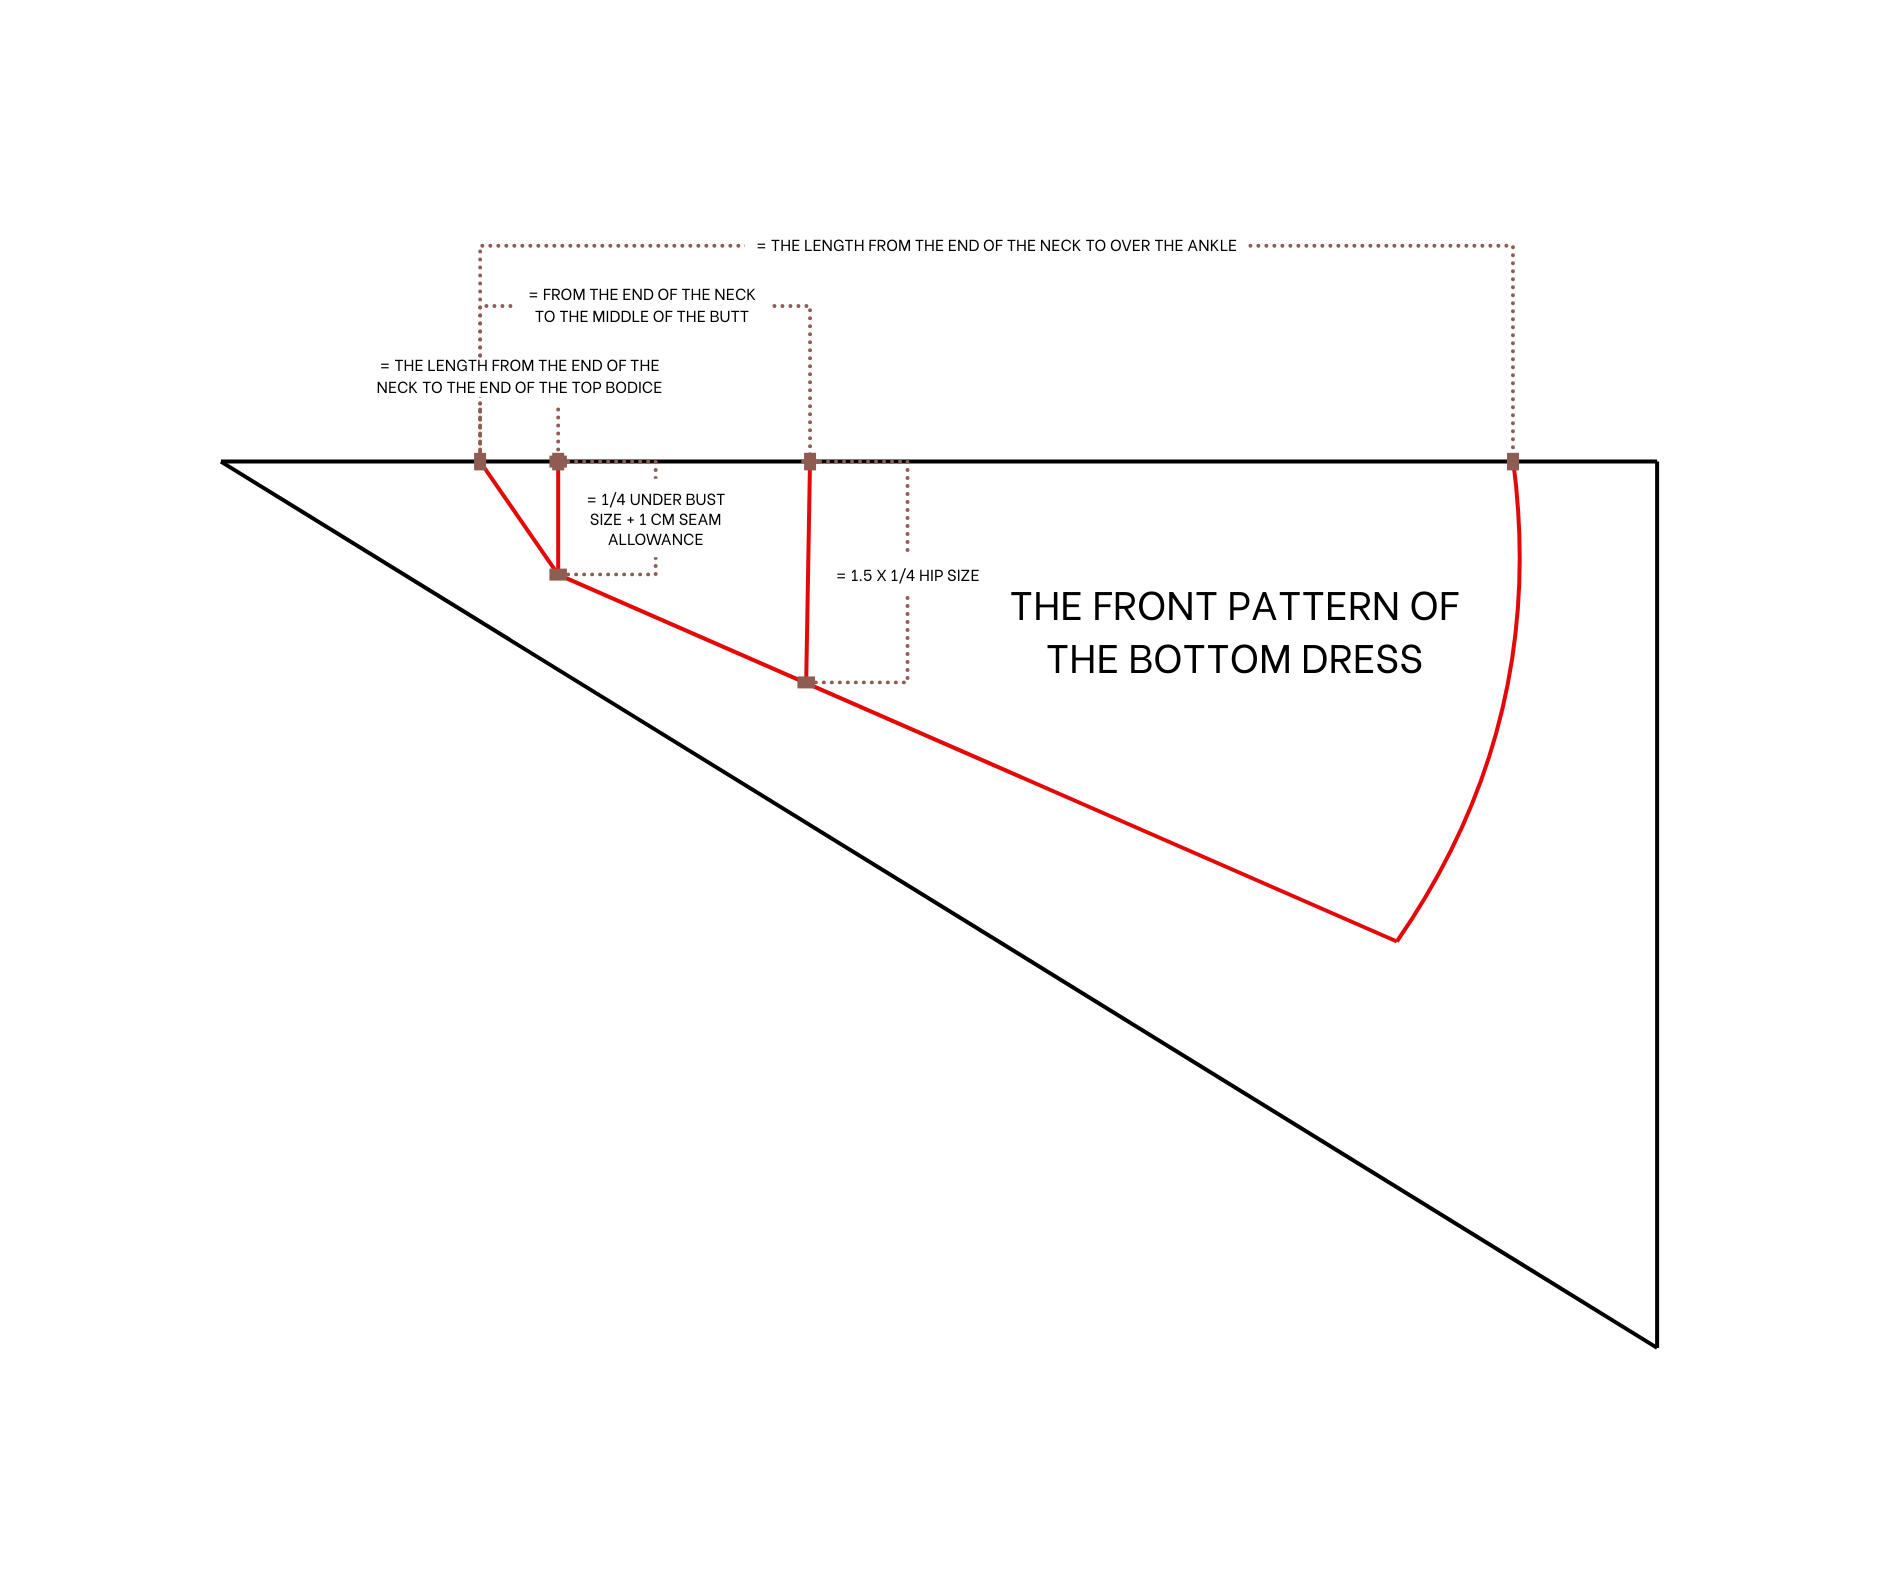
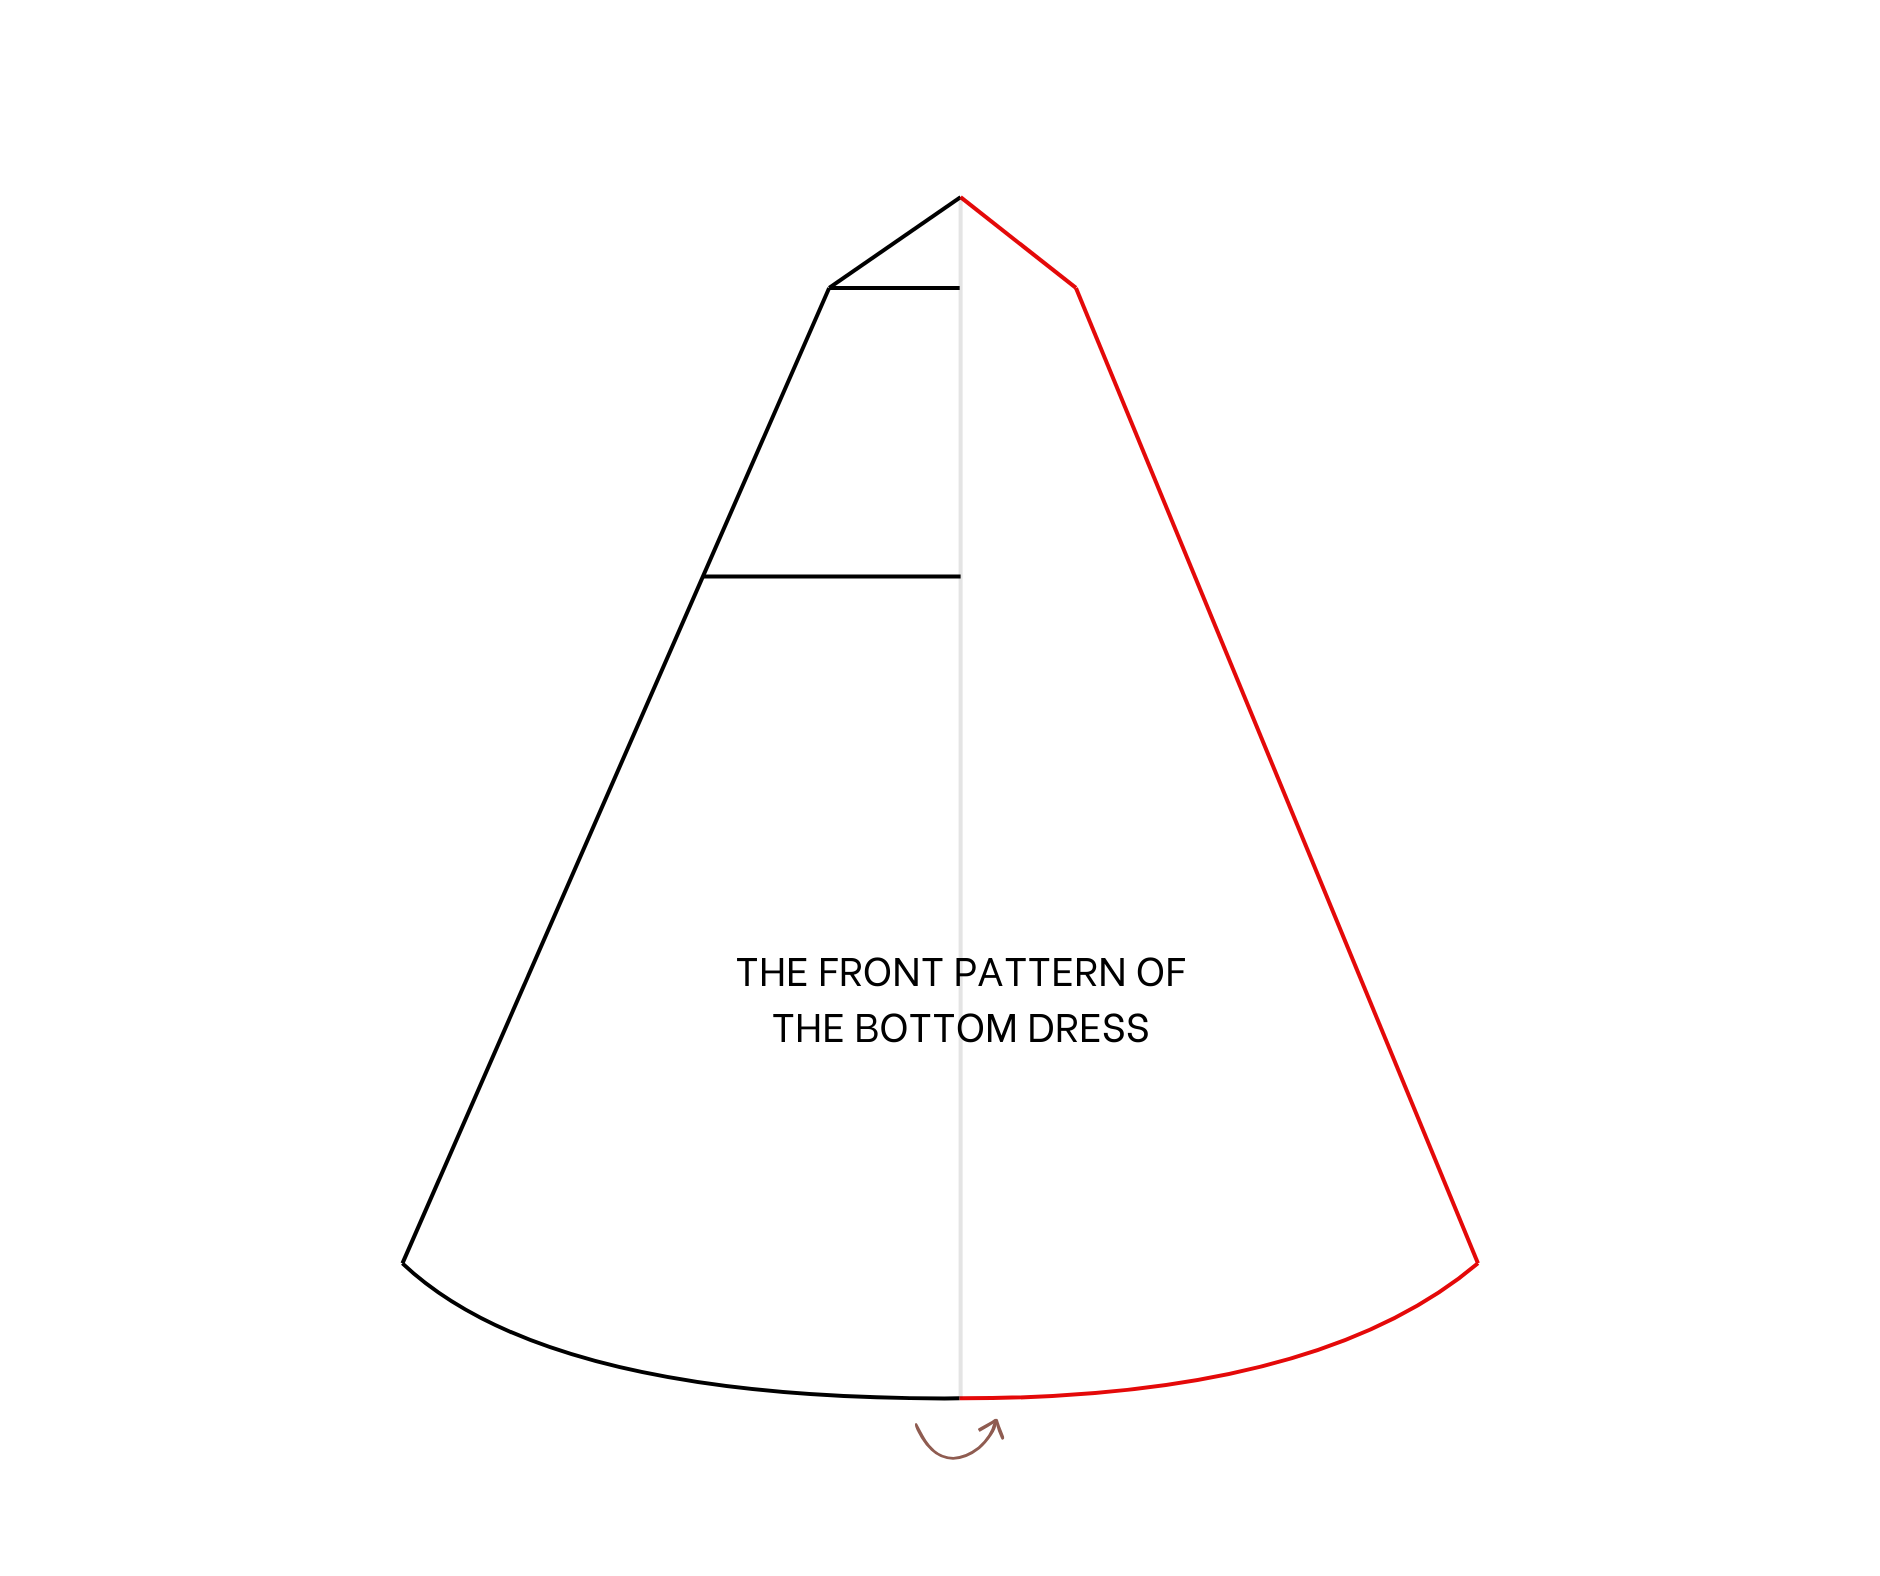
THE FRONT PATTERN OF THE BOTTOM DRESS
To make the front piece, fold the width of the fabric to the length of it first.
Then from the folding line, draw a 18 cm line, which is a quarter of your underbust size plus 1 cm for seam allowance.
From the cutting between this line and the folding line, mark at 10 cm on the folding line. This is the length from the end of the neck to the end of the main bodice.
After that, connect this mark to the other end of the 18 cm line and it's the underbust line that will connect to the underbust line of the top. Also, make another mark on the folding line with 40 cm from this mark. This is the length from the end of your neck on the top to the middle of your hip.
Then, draw another line with 35 cm, which is 1.5 times a quarter of your hip size. The bigger you make at this line will create a bigger folding at the end of the dress.
After that, draw a line connecting two ends of the inside line to create a side line for the end of the front bottom part.
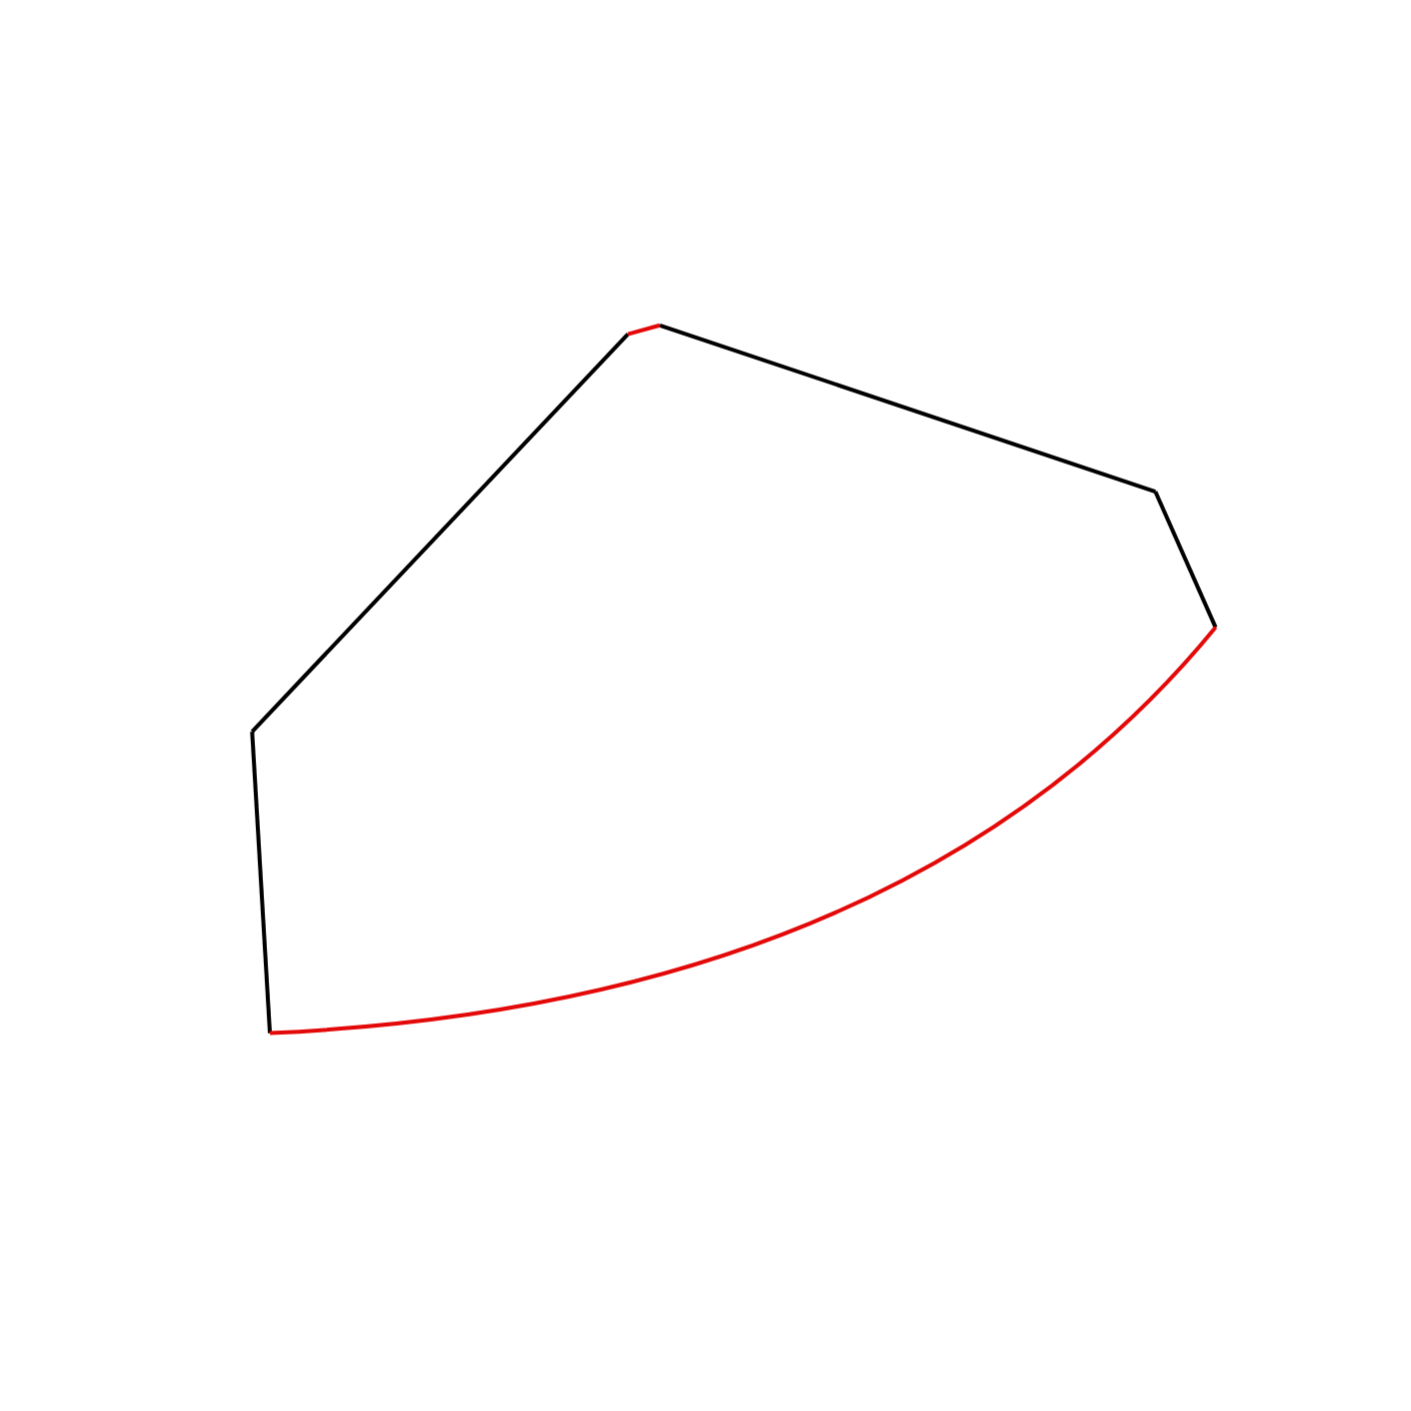
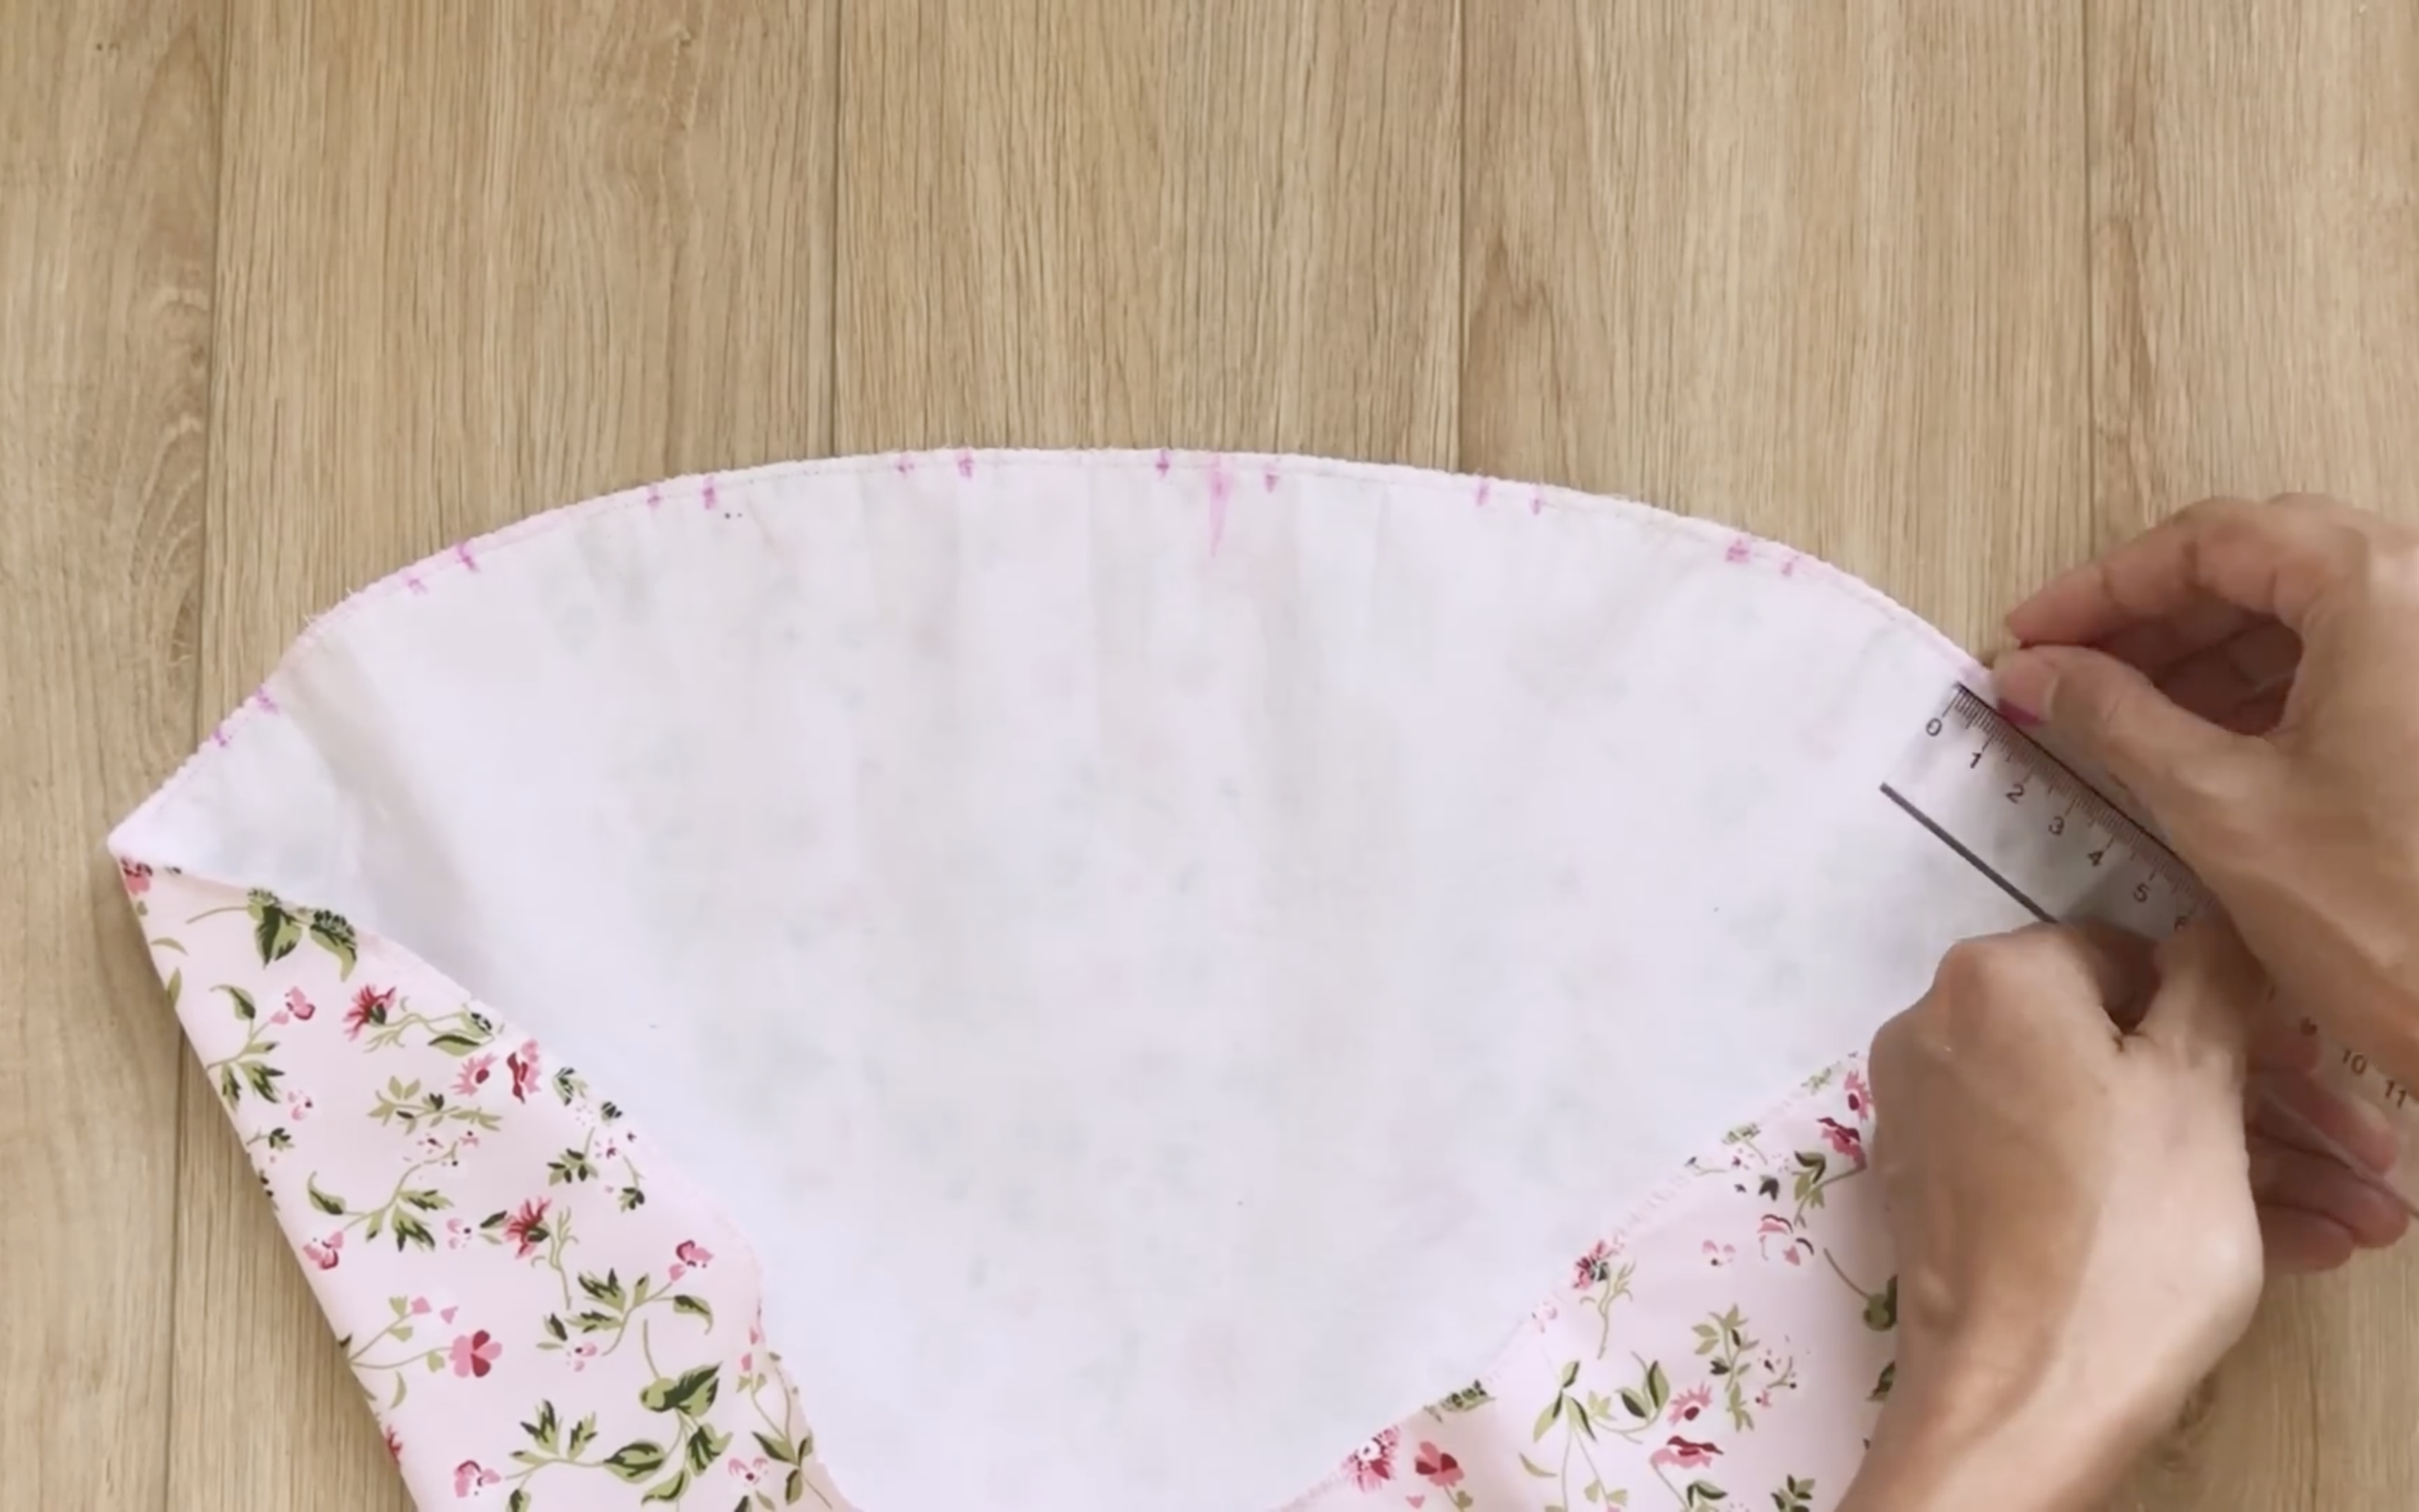
Now, making the ending line of the front bottom part by drawing a curved line from the top to 100 cm, which is the length from the end of the neck to over your ankle.
Here is the front bottom part of the dress after cutting.
THE FRONT PATTERN OF THE BOTTOM DRESS
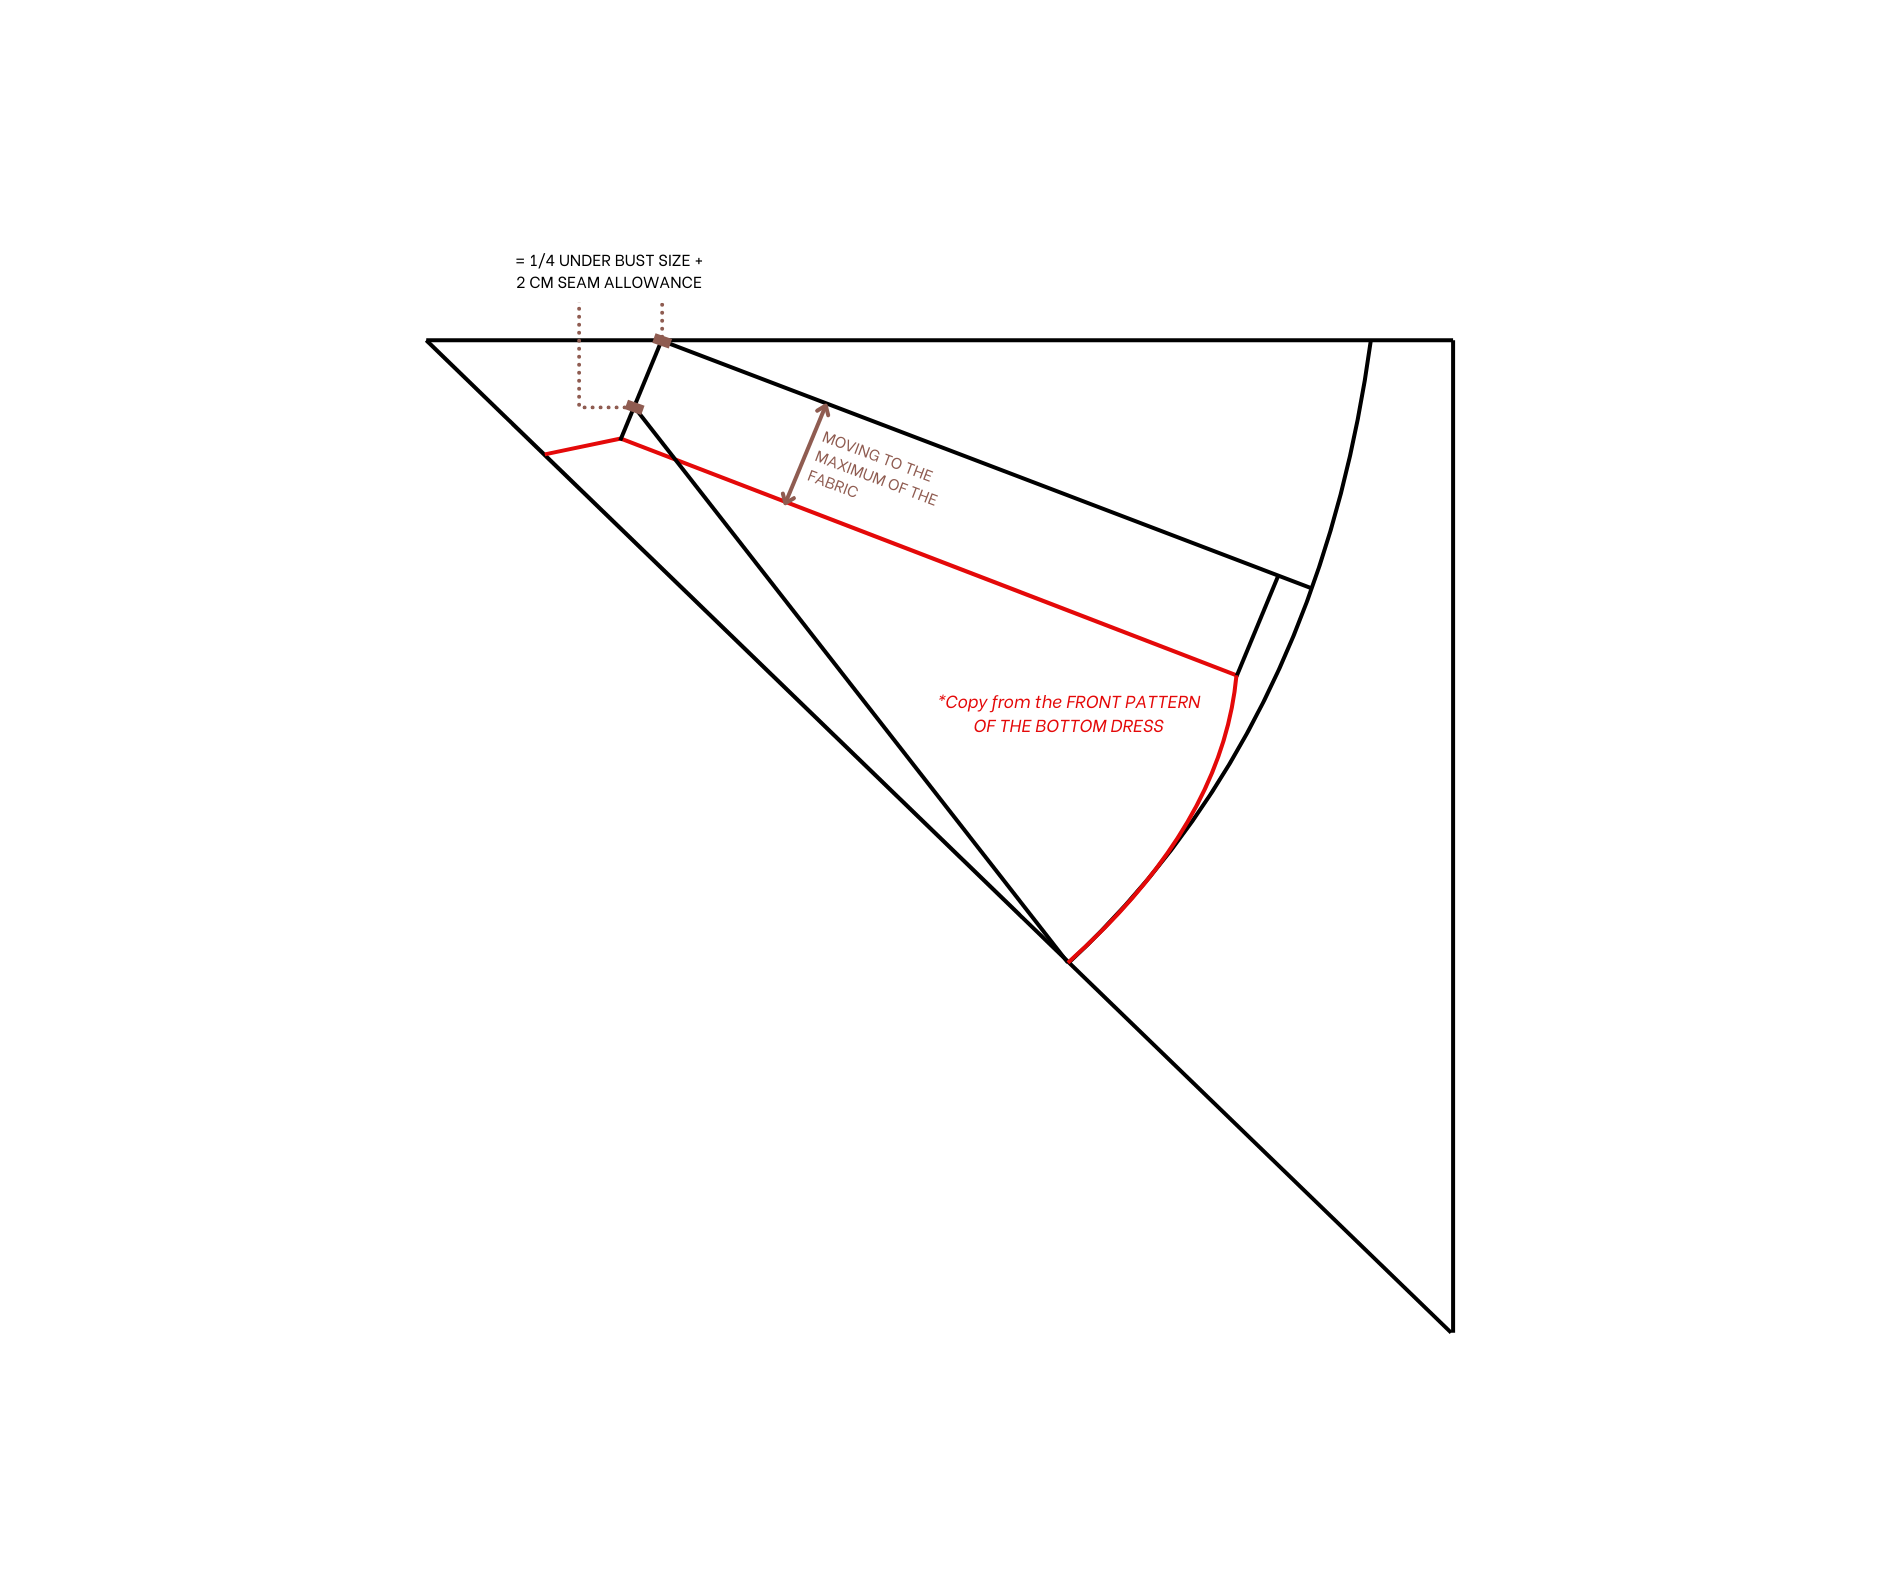
To make the back bottom part of the dress, also use the folded fabric. But will make the folding line of the fabric to be the middle of the back bottom part.
Draw a curved line from the top of the folding line to the end of each first.
Then from the cutting point of the curved line and the folding line, mark up at 100 cm, which is the length of the front bottom part.
From this mark, move down and mark at 10 cm, which is the length from the end of the neck to the end of the top.
Then, draw a 18 cm line from this mark to inside.
From the top mark on the folding line, mark down at 40 cm, which is the length from the end of the neck to the middle of your hip.
Then, draw a 35 cm line from that mark to inside and connecting two ends of the inside line together.
In fact, it's just like you make another front bottom part. But as you can see at the original dress, the end of the back bottom parts have more folding feeling than the front. It means the end of the back bottom part is bigger than the end of the front. That's why move the side line of the back bottom part outside as much as can by drawing a line parallel with it.
From the end of the new side line, mark up at 90 cm, which is the length of the front side line. So can connect them together later.
Then, make the new line for the top of the back bottom part from this mark. The width of the top bottom part will be 19 cm, which is a quarter of your underbust size plus 2 cm for seam allowance.
Draw a line from one end of the 19 cm line to the end of the folding line to create the middle line for the back bottom part.
Here are two pieces of the back bottom part of the dress after cutting.
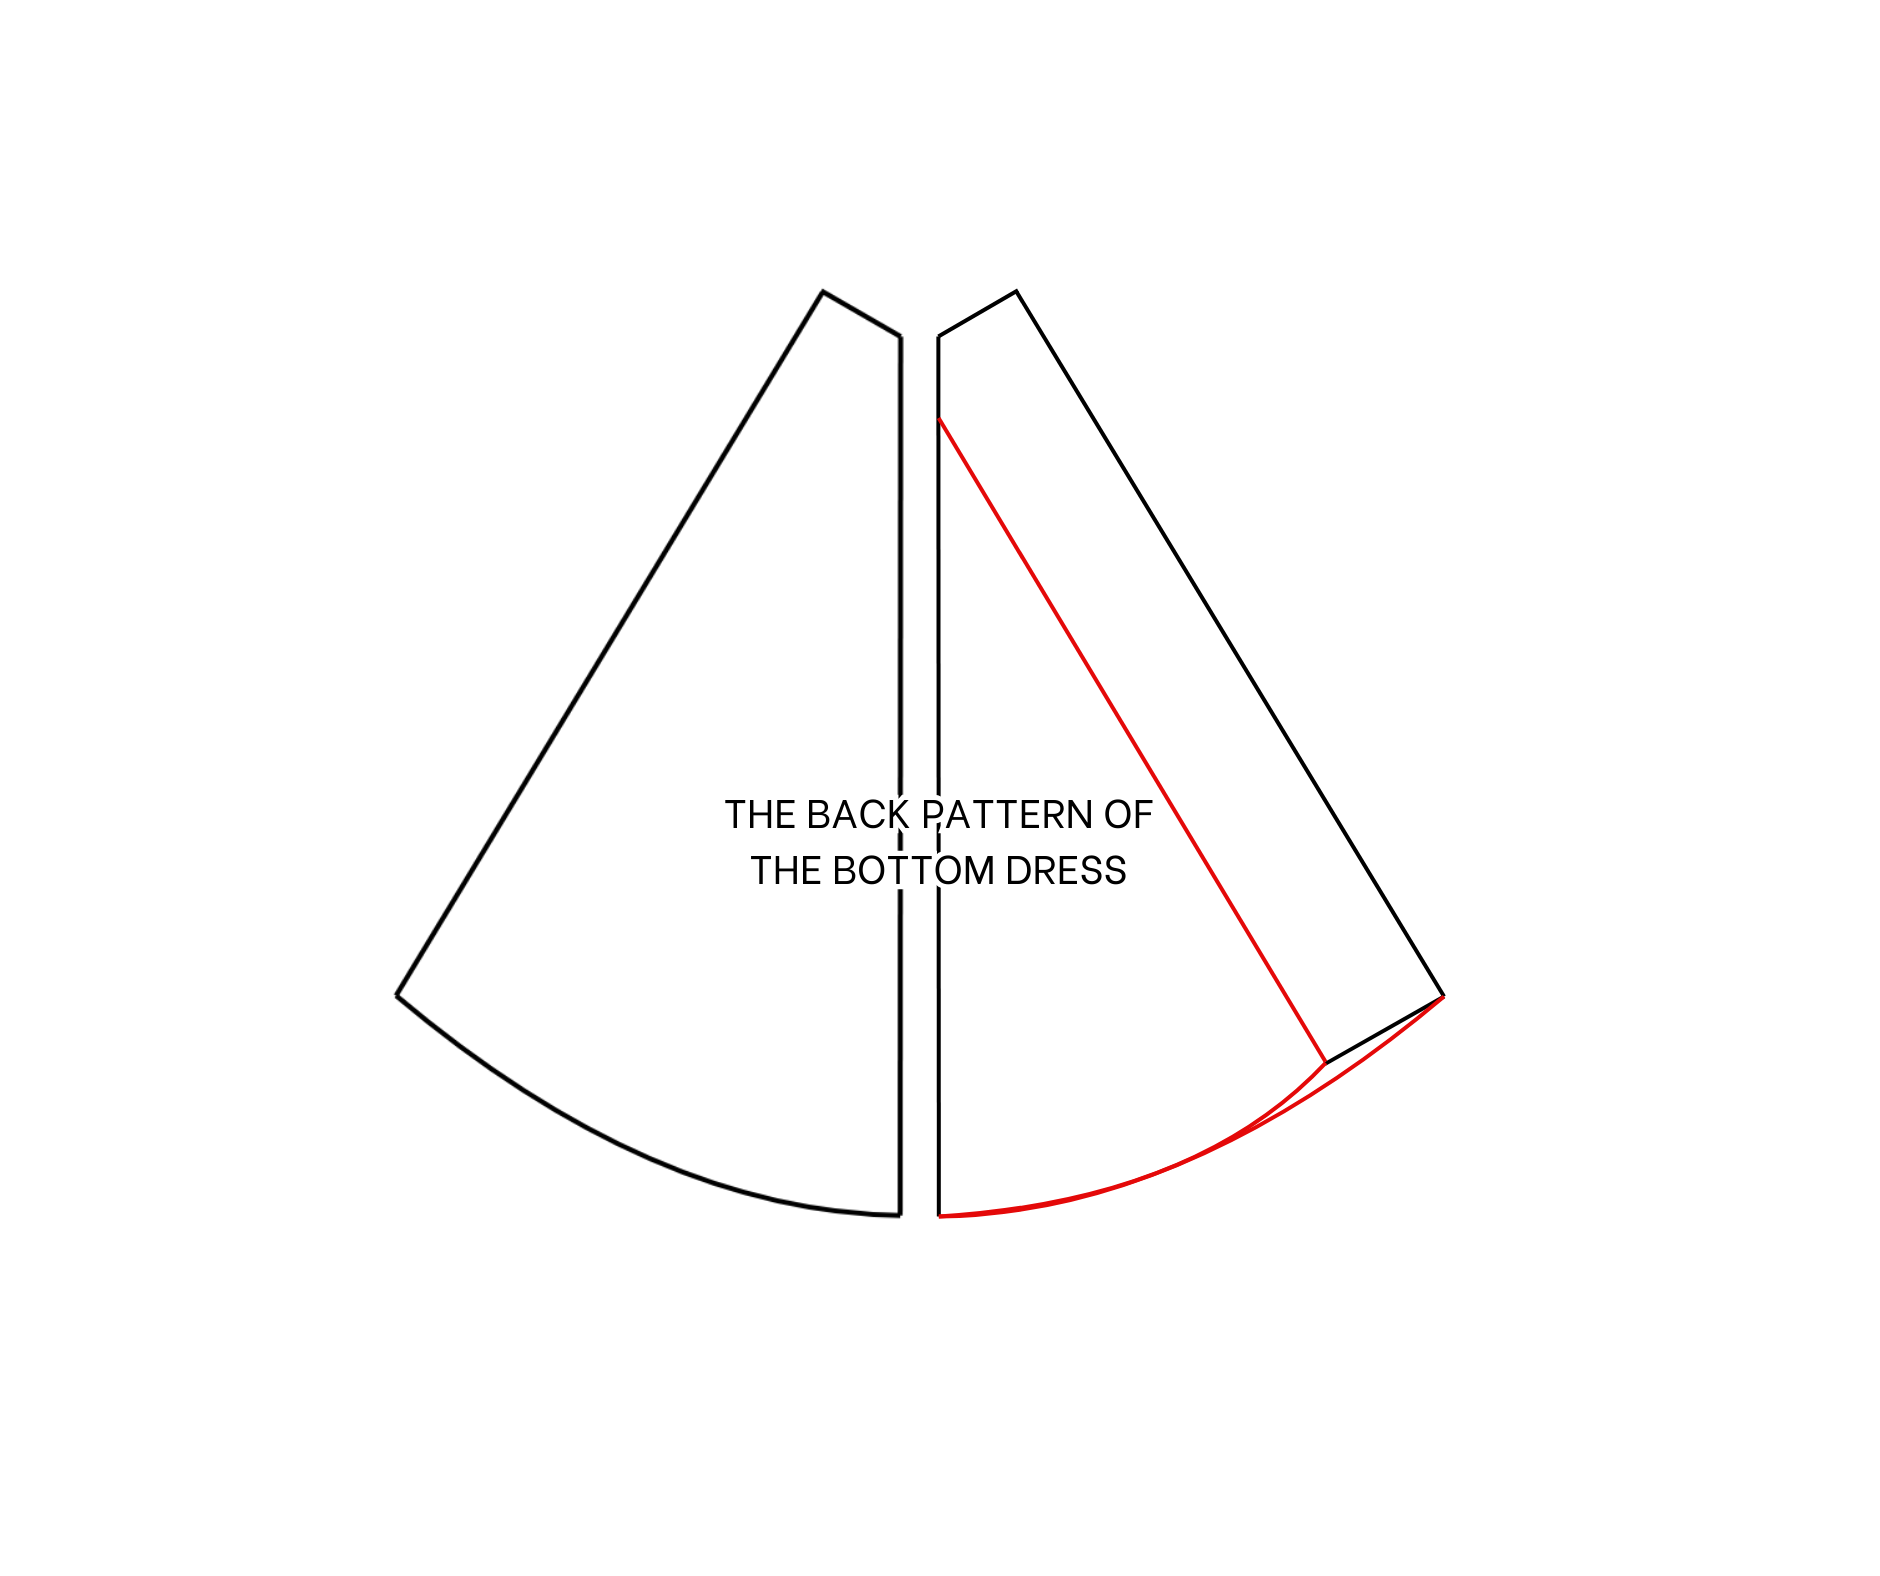
Now, connect the front and the back of the bottom part together at the sidelines. Then, sew.
Cut two long rectangles with 12 cm width and around 45 cm length, which is longer than a half of your underbust size.
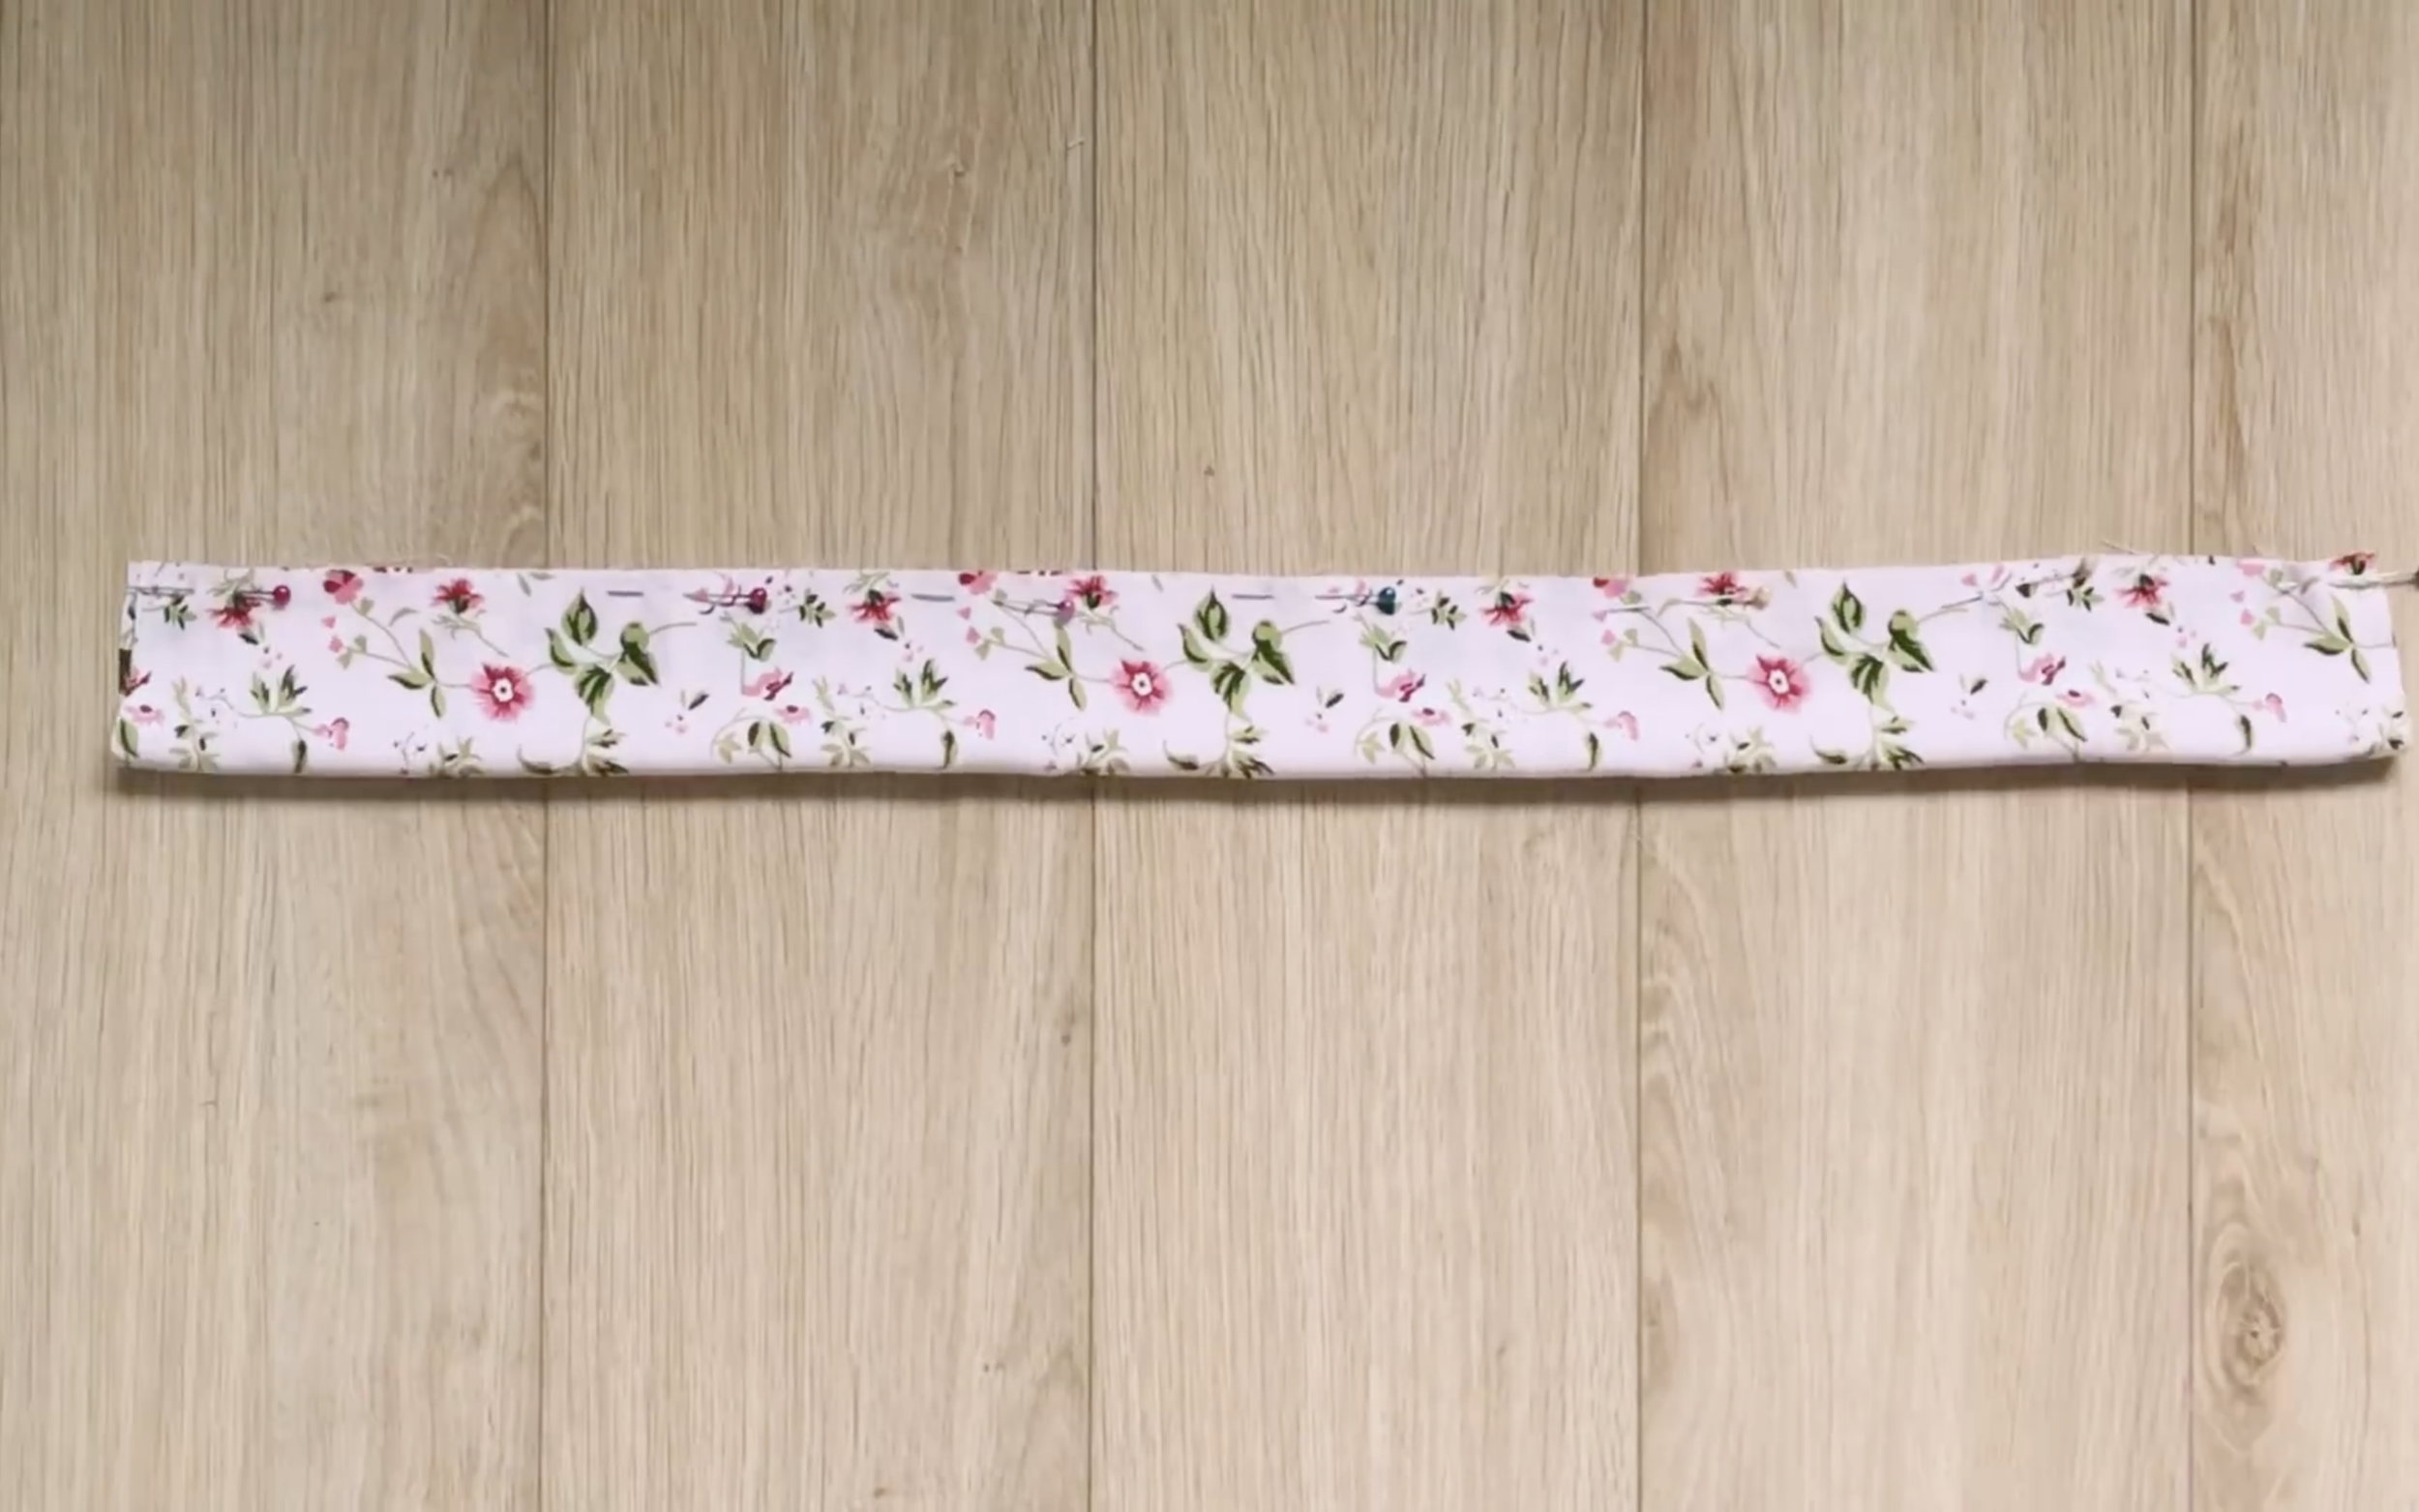
Connect two ends of the length line together first.
Then, connect it to the top of the bottom part.
Then, sew.
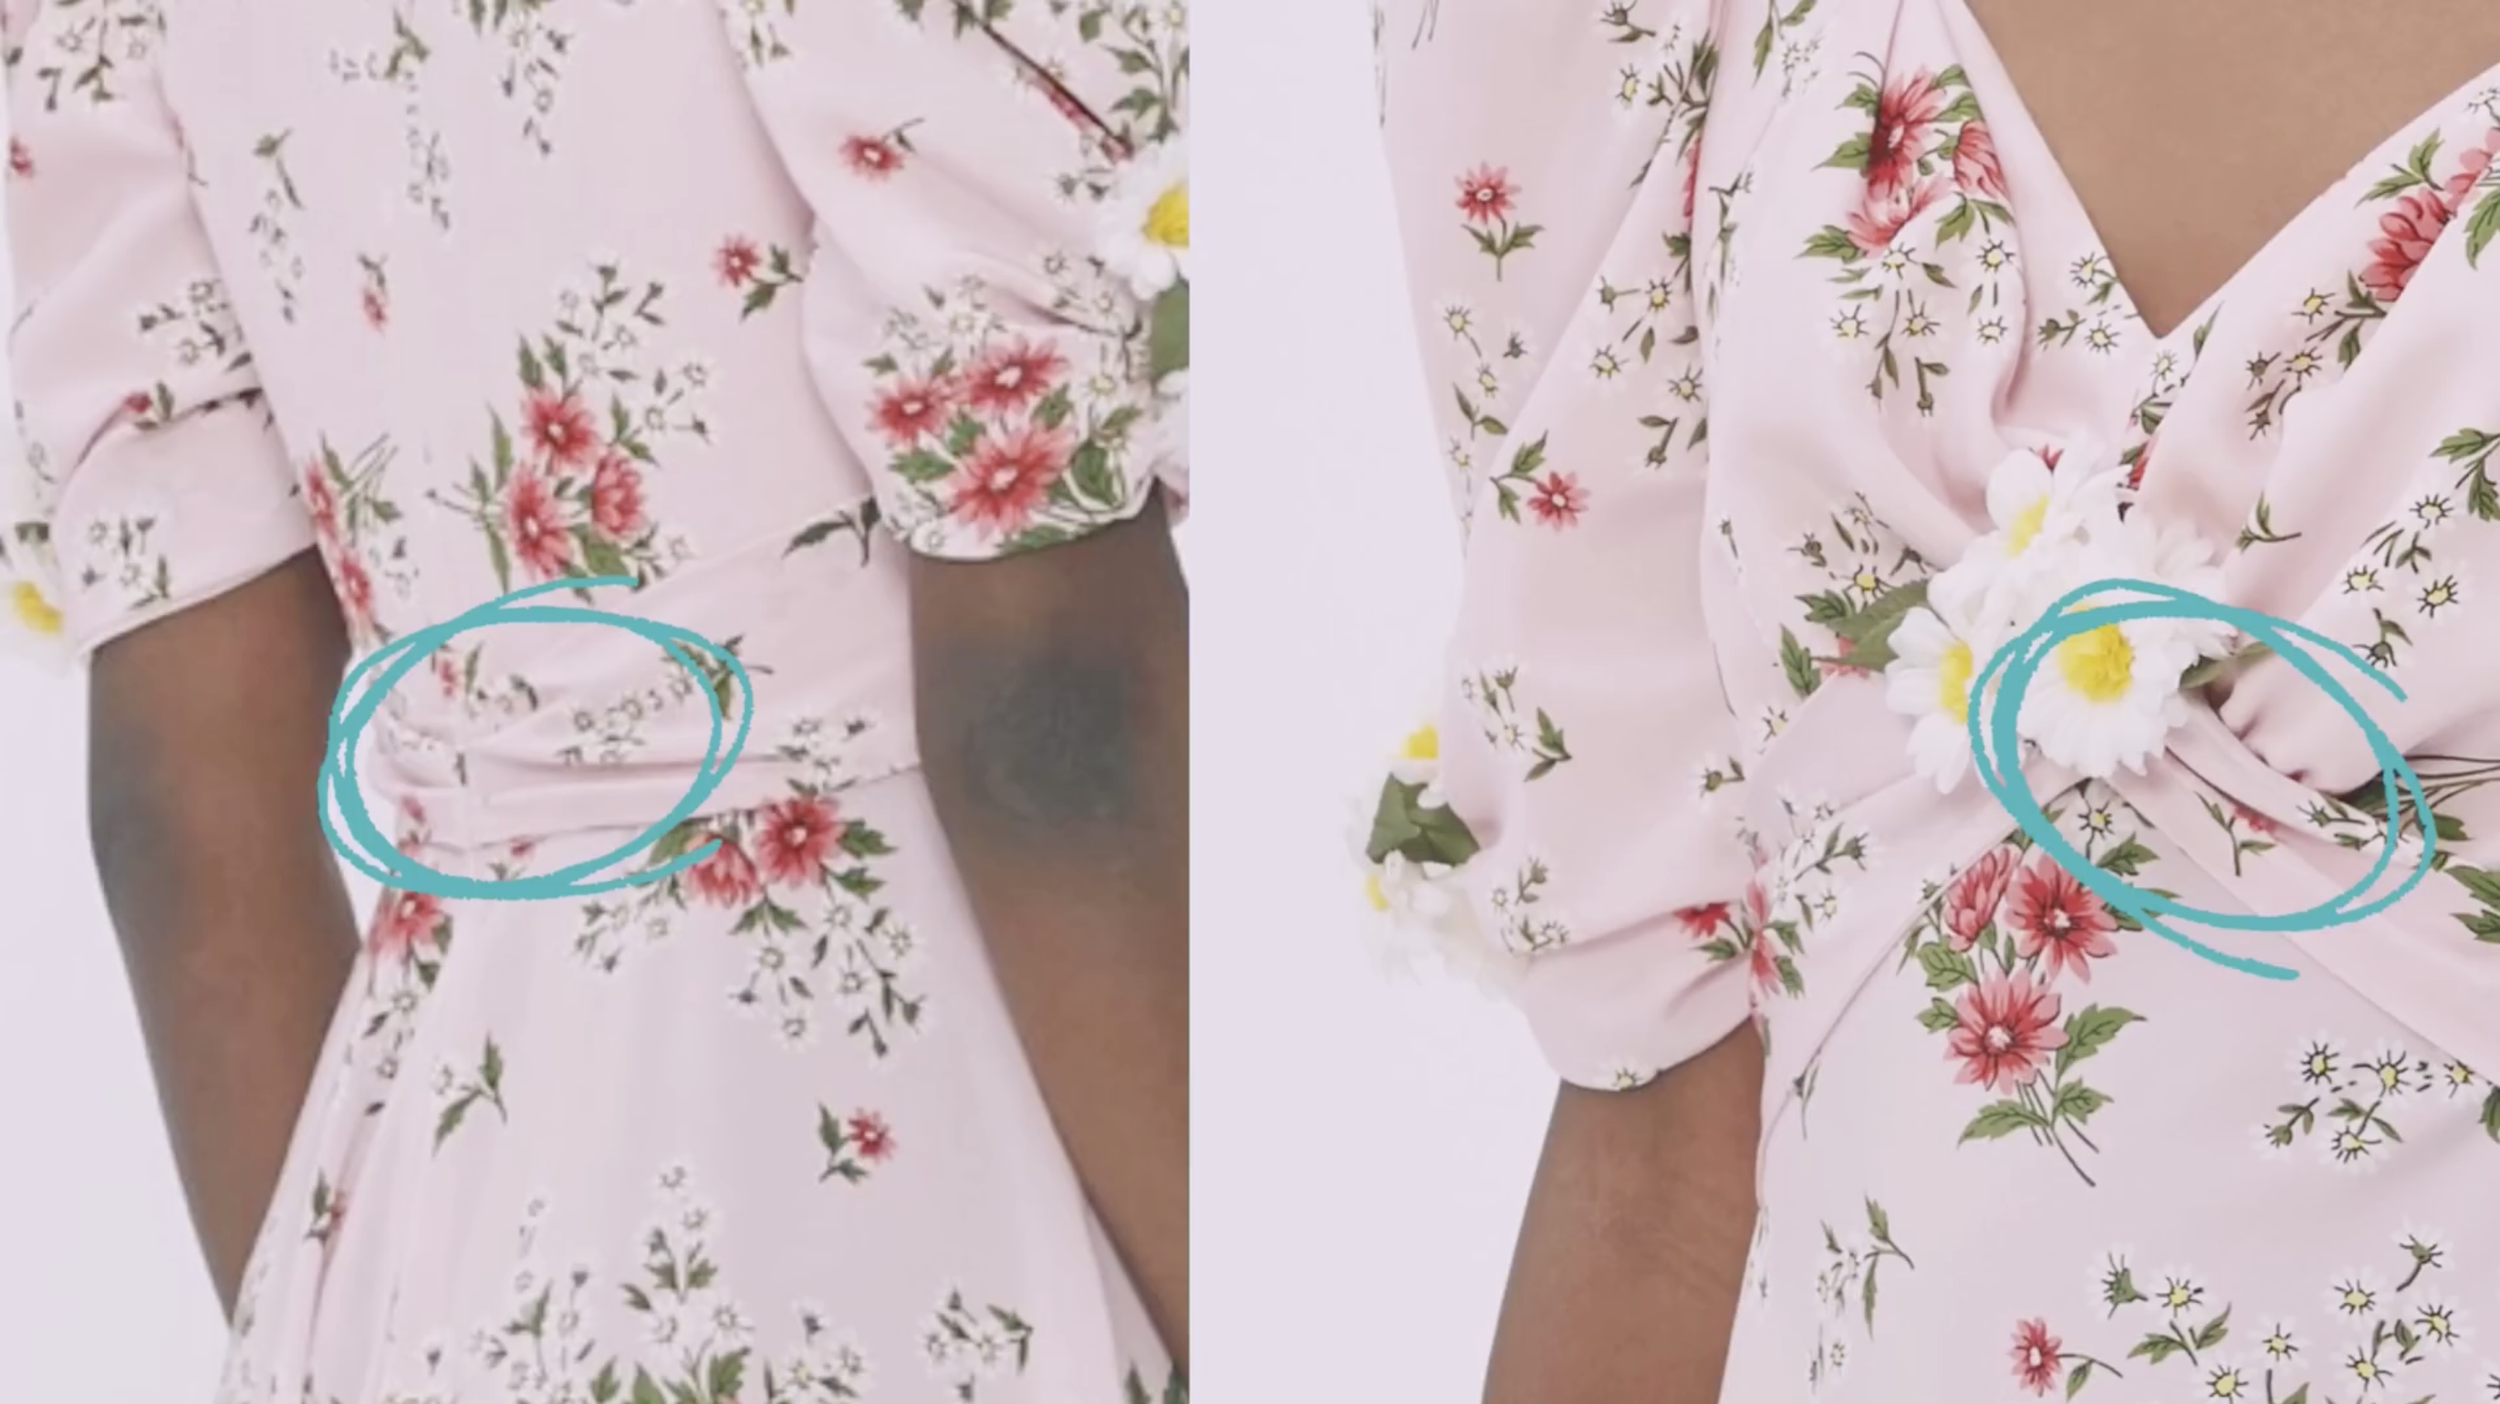
As you see here, on the original dress, it has the folding at two ends of the rectangle.
So, create two folds at two ends of the rectangles.
Then, sew to fix.
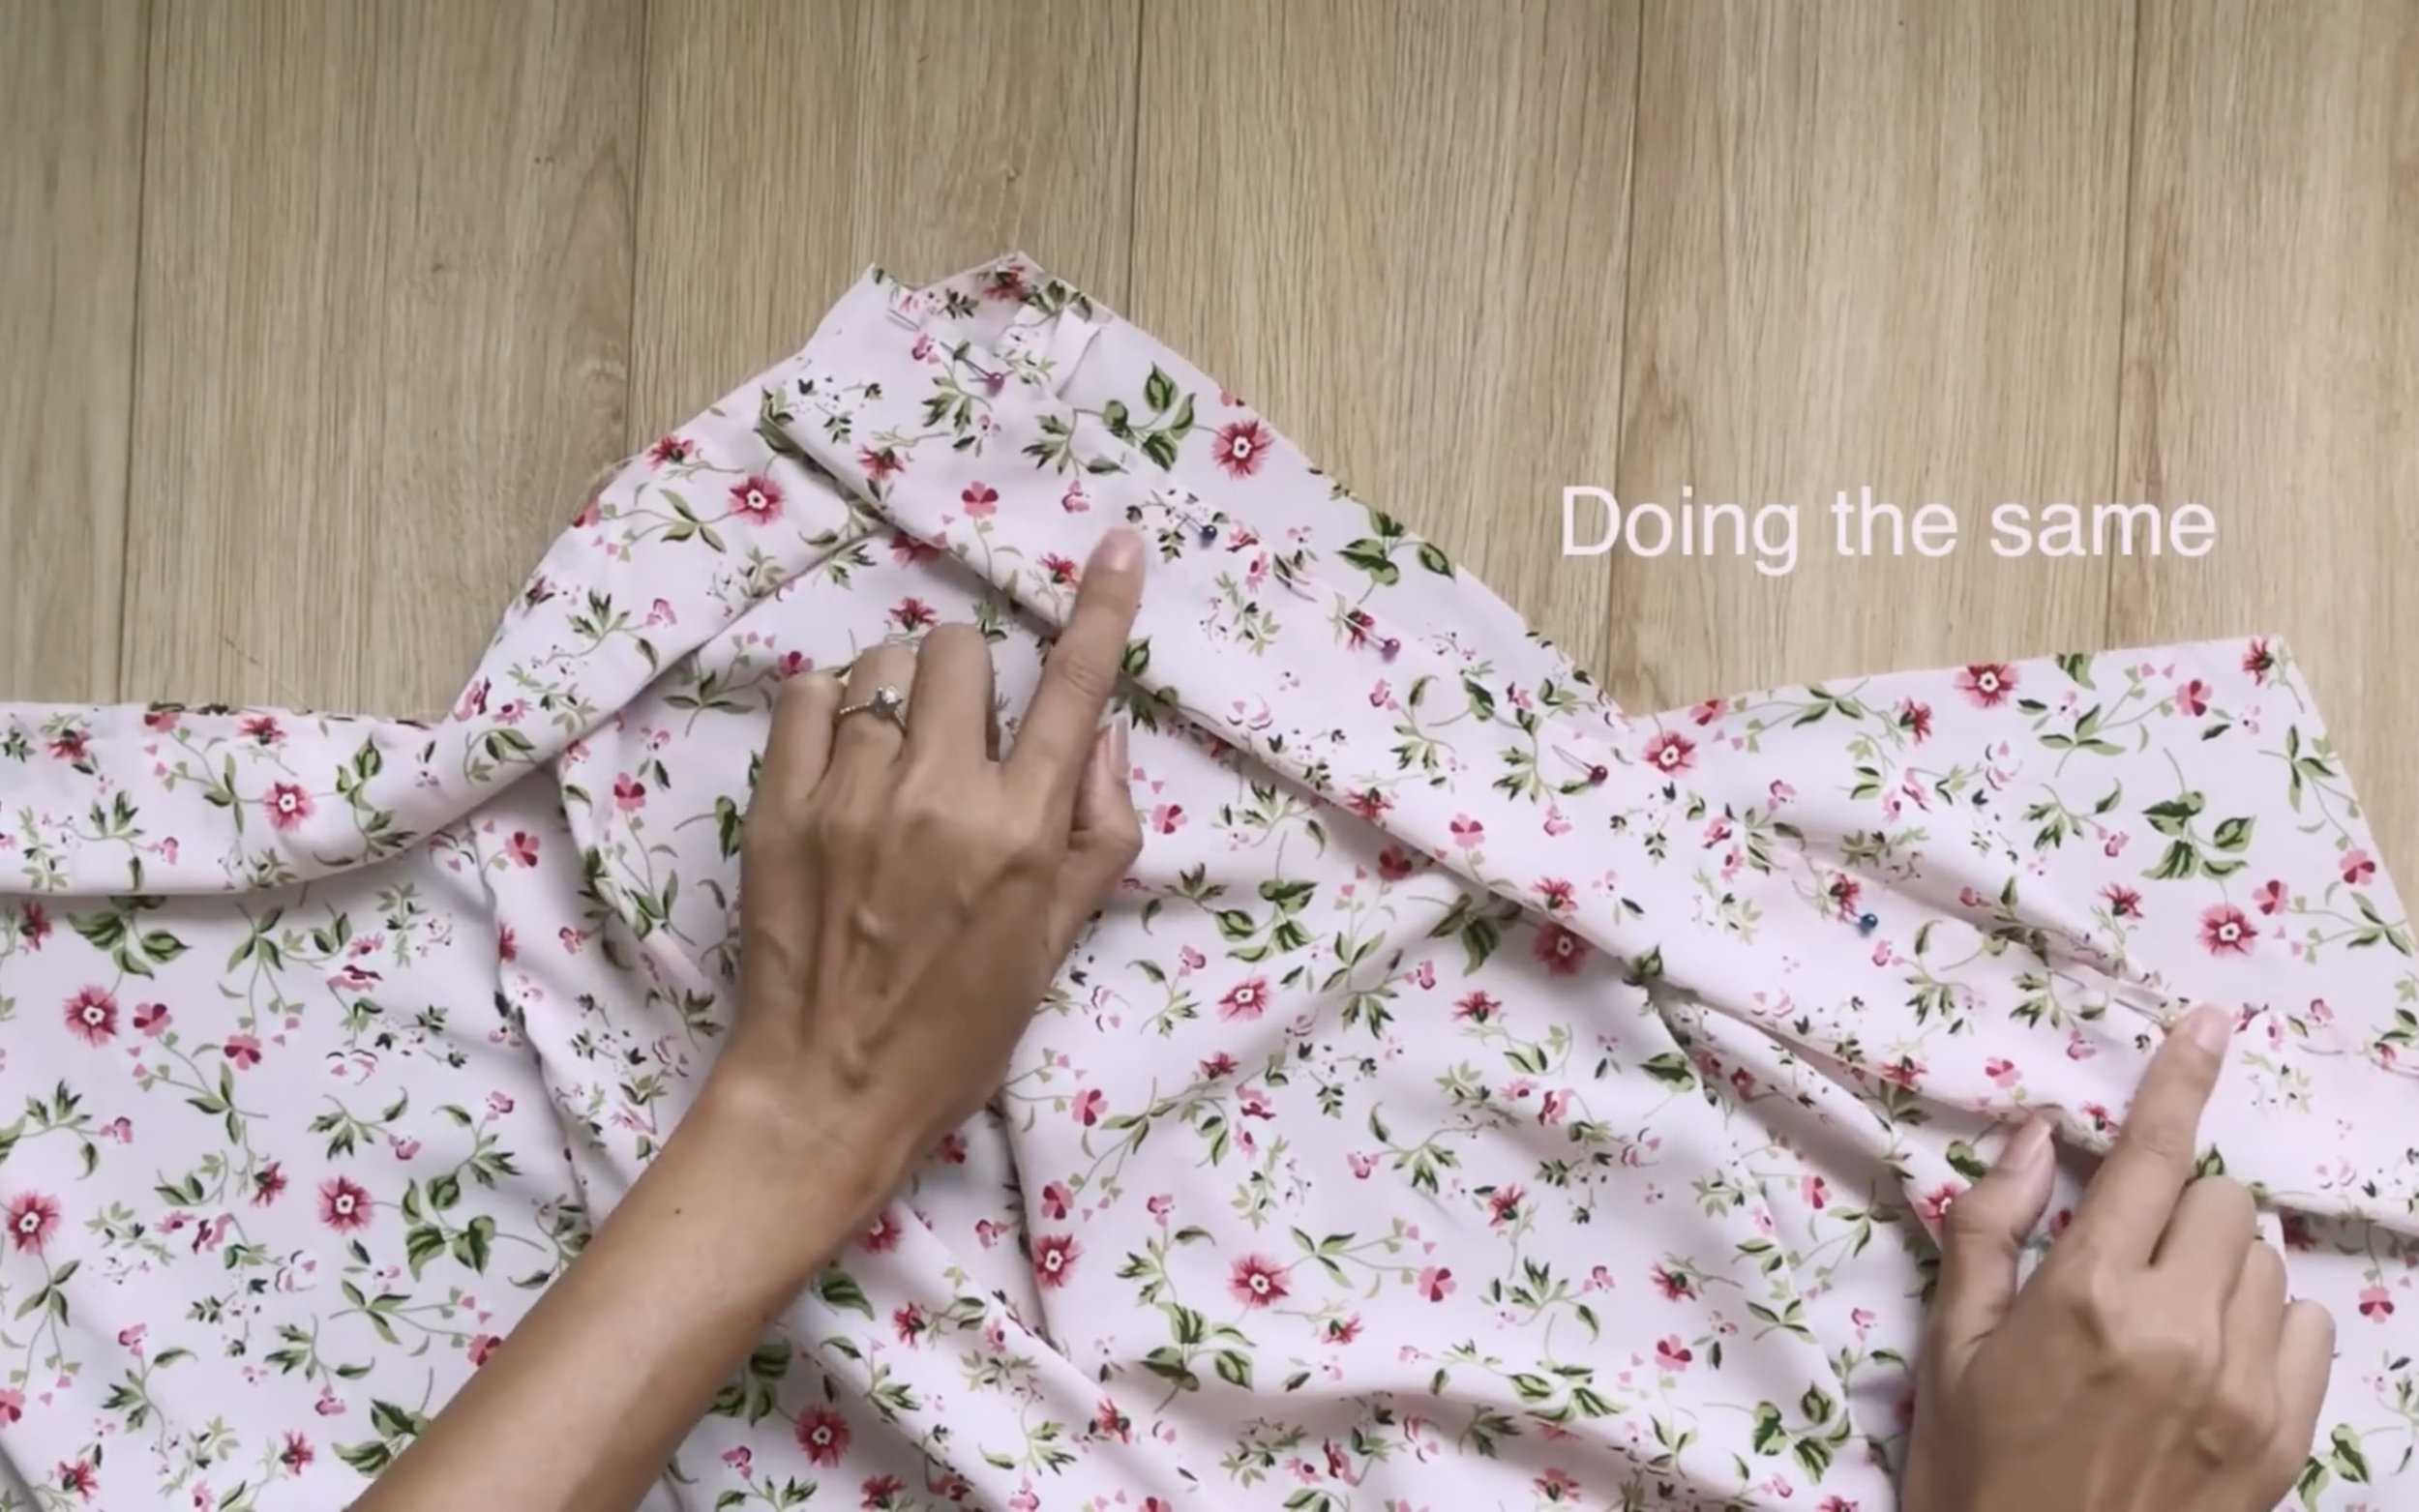
Doing the same for the other side.
CONNECTING THE TOP AND THE BOTTOM
Now, connecting the top and the bottom together at the waist.
Then, sew.
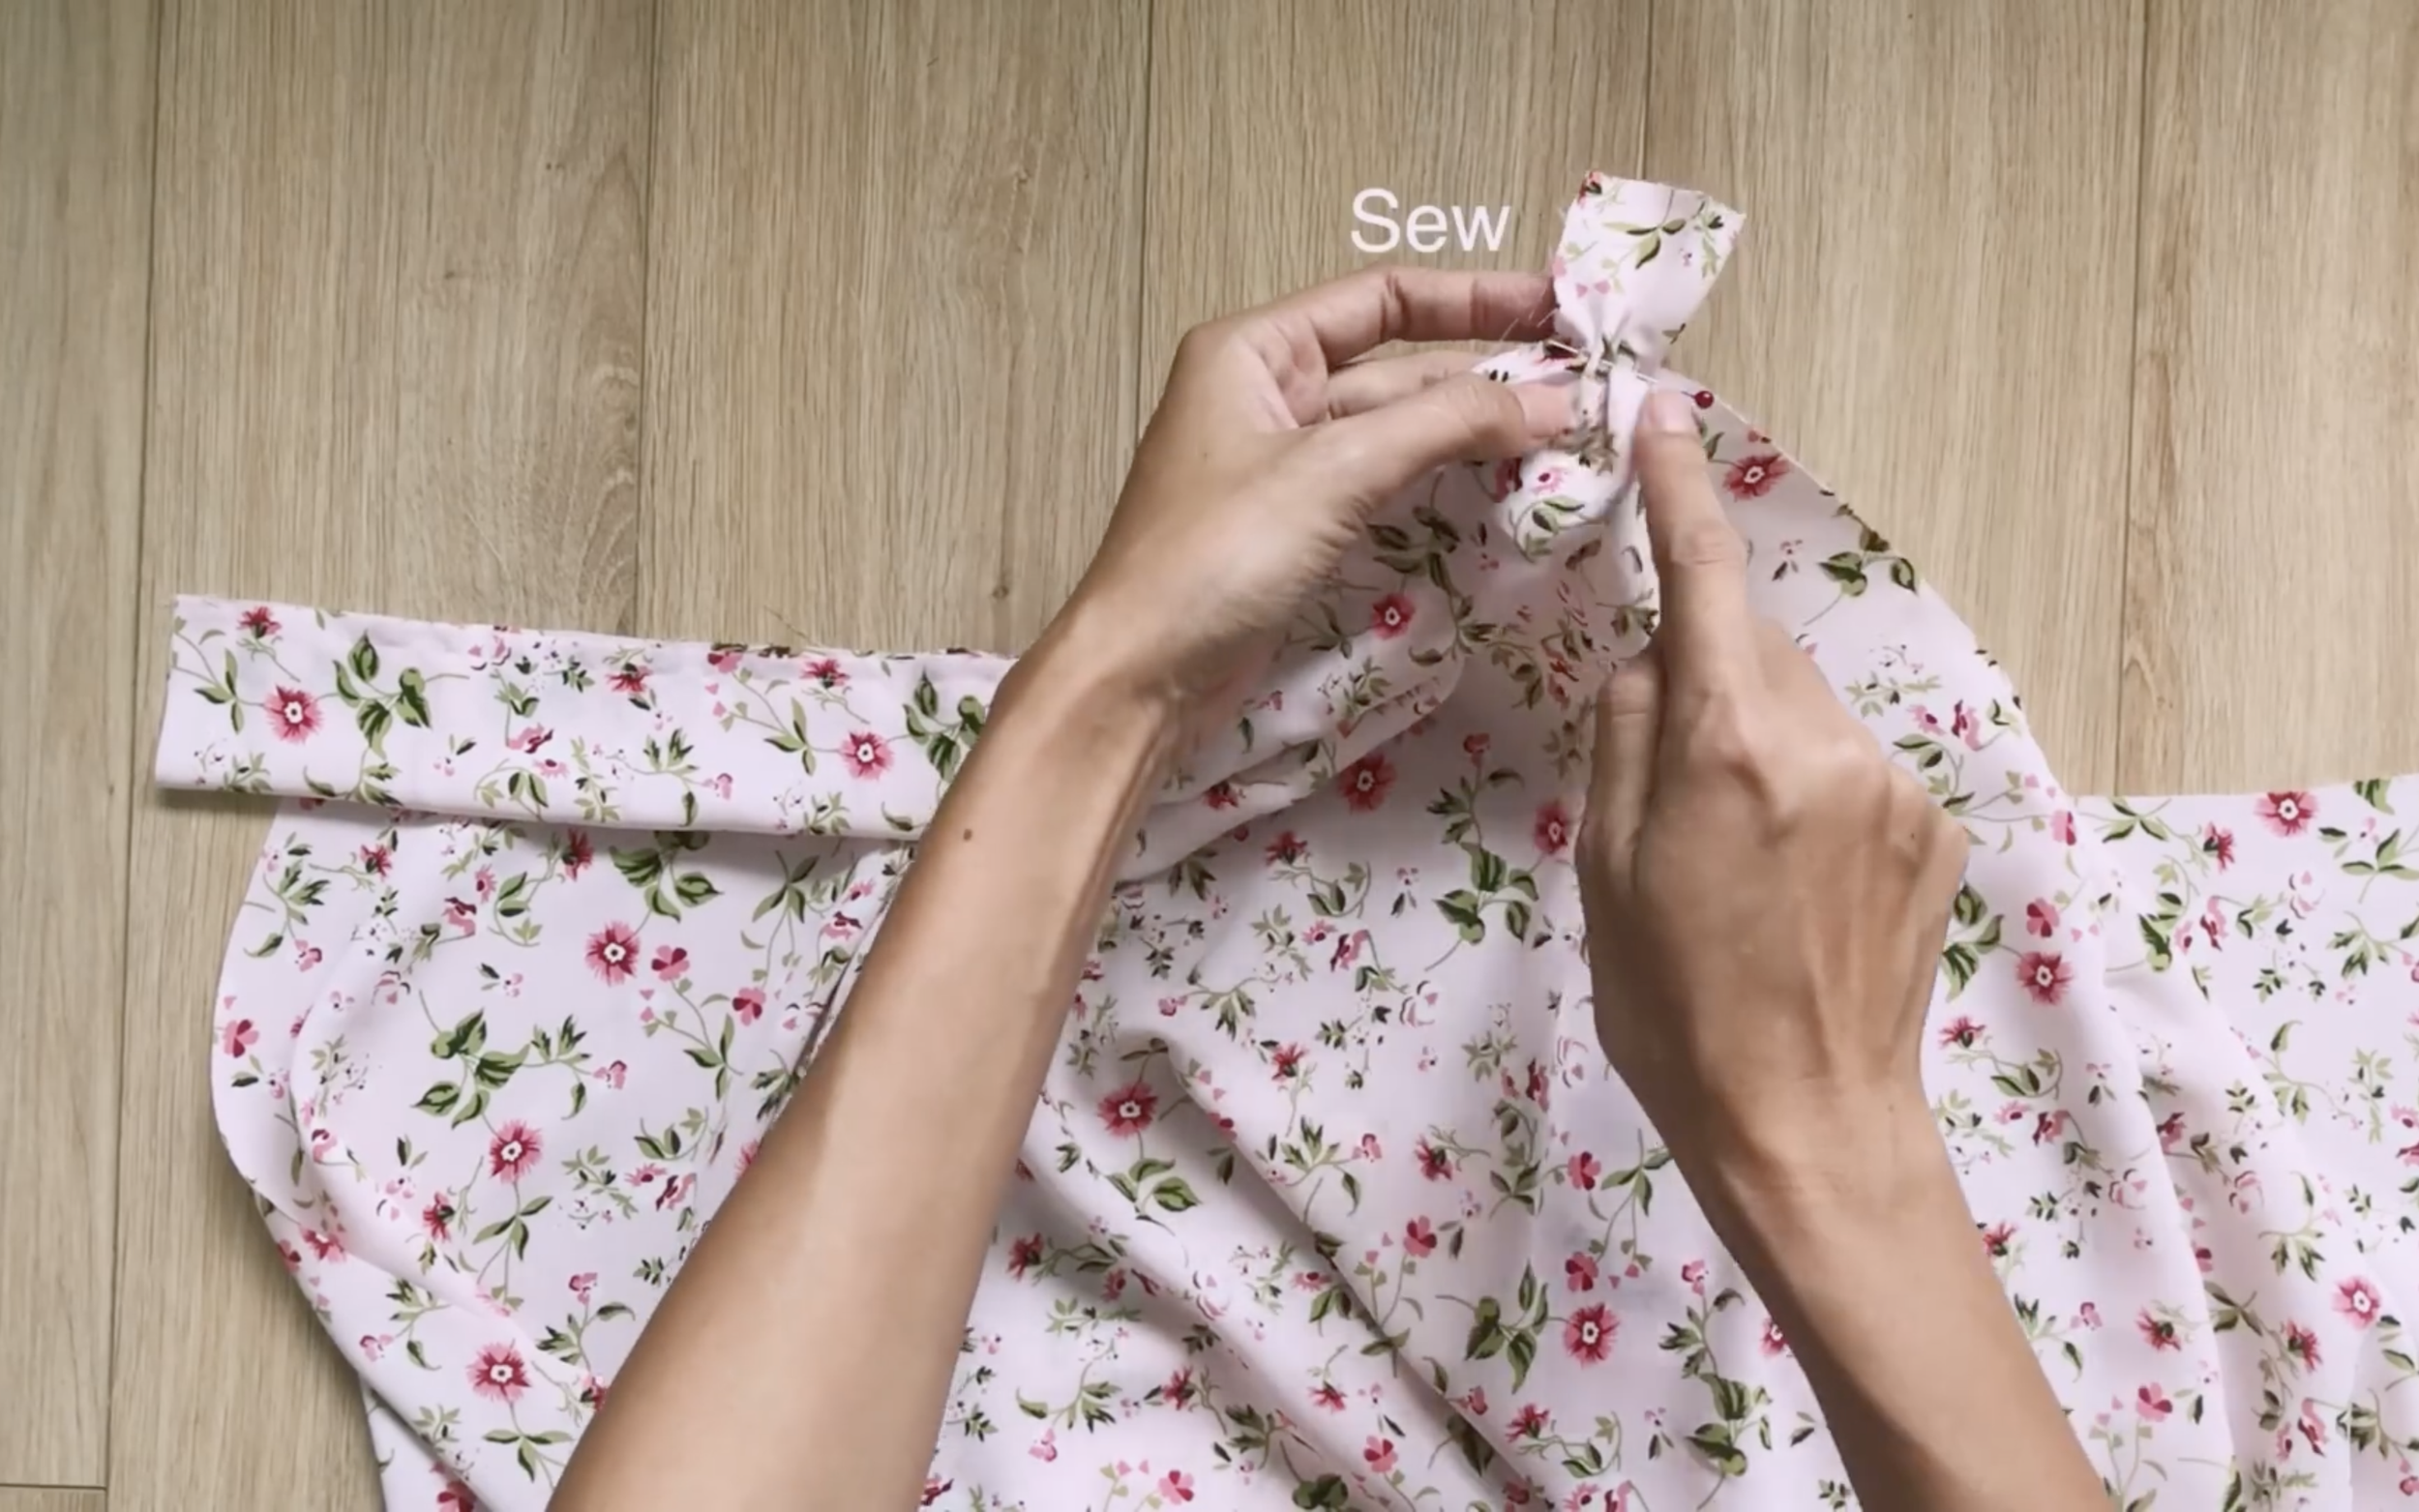
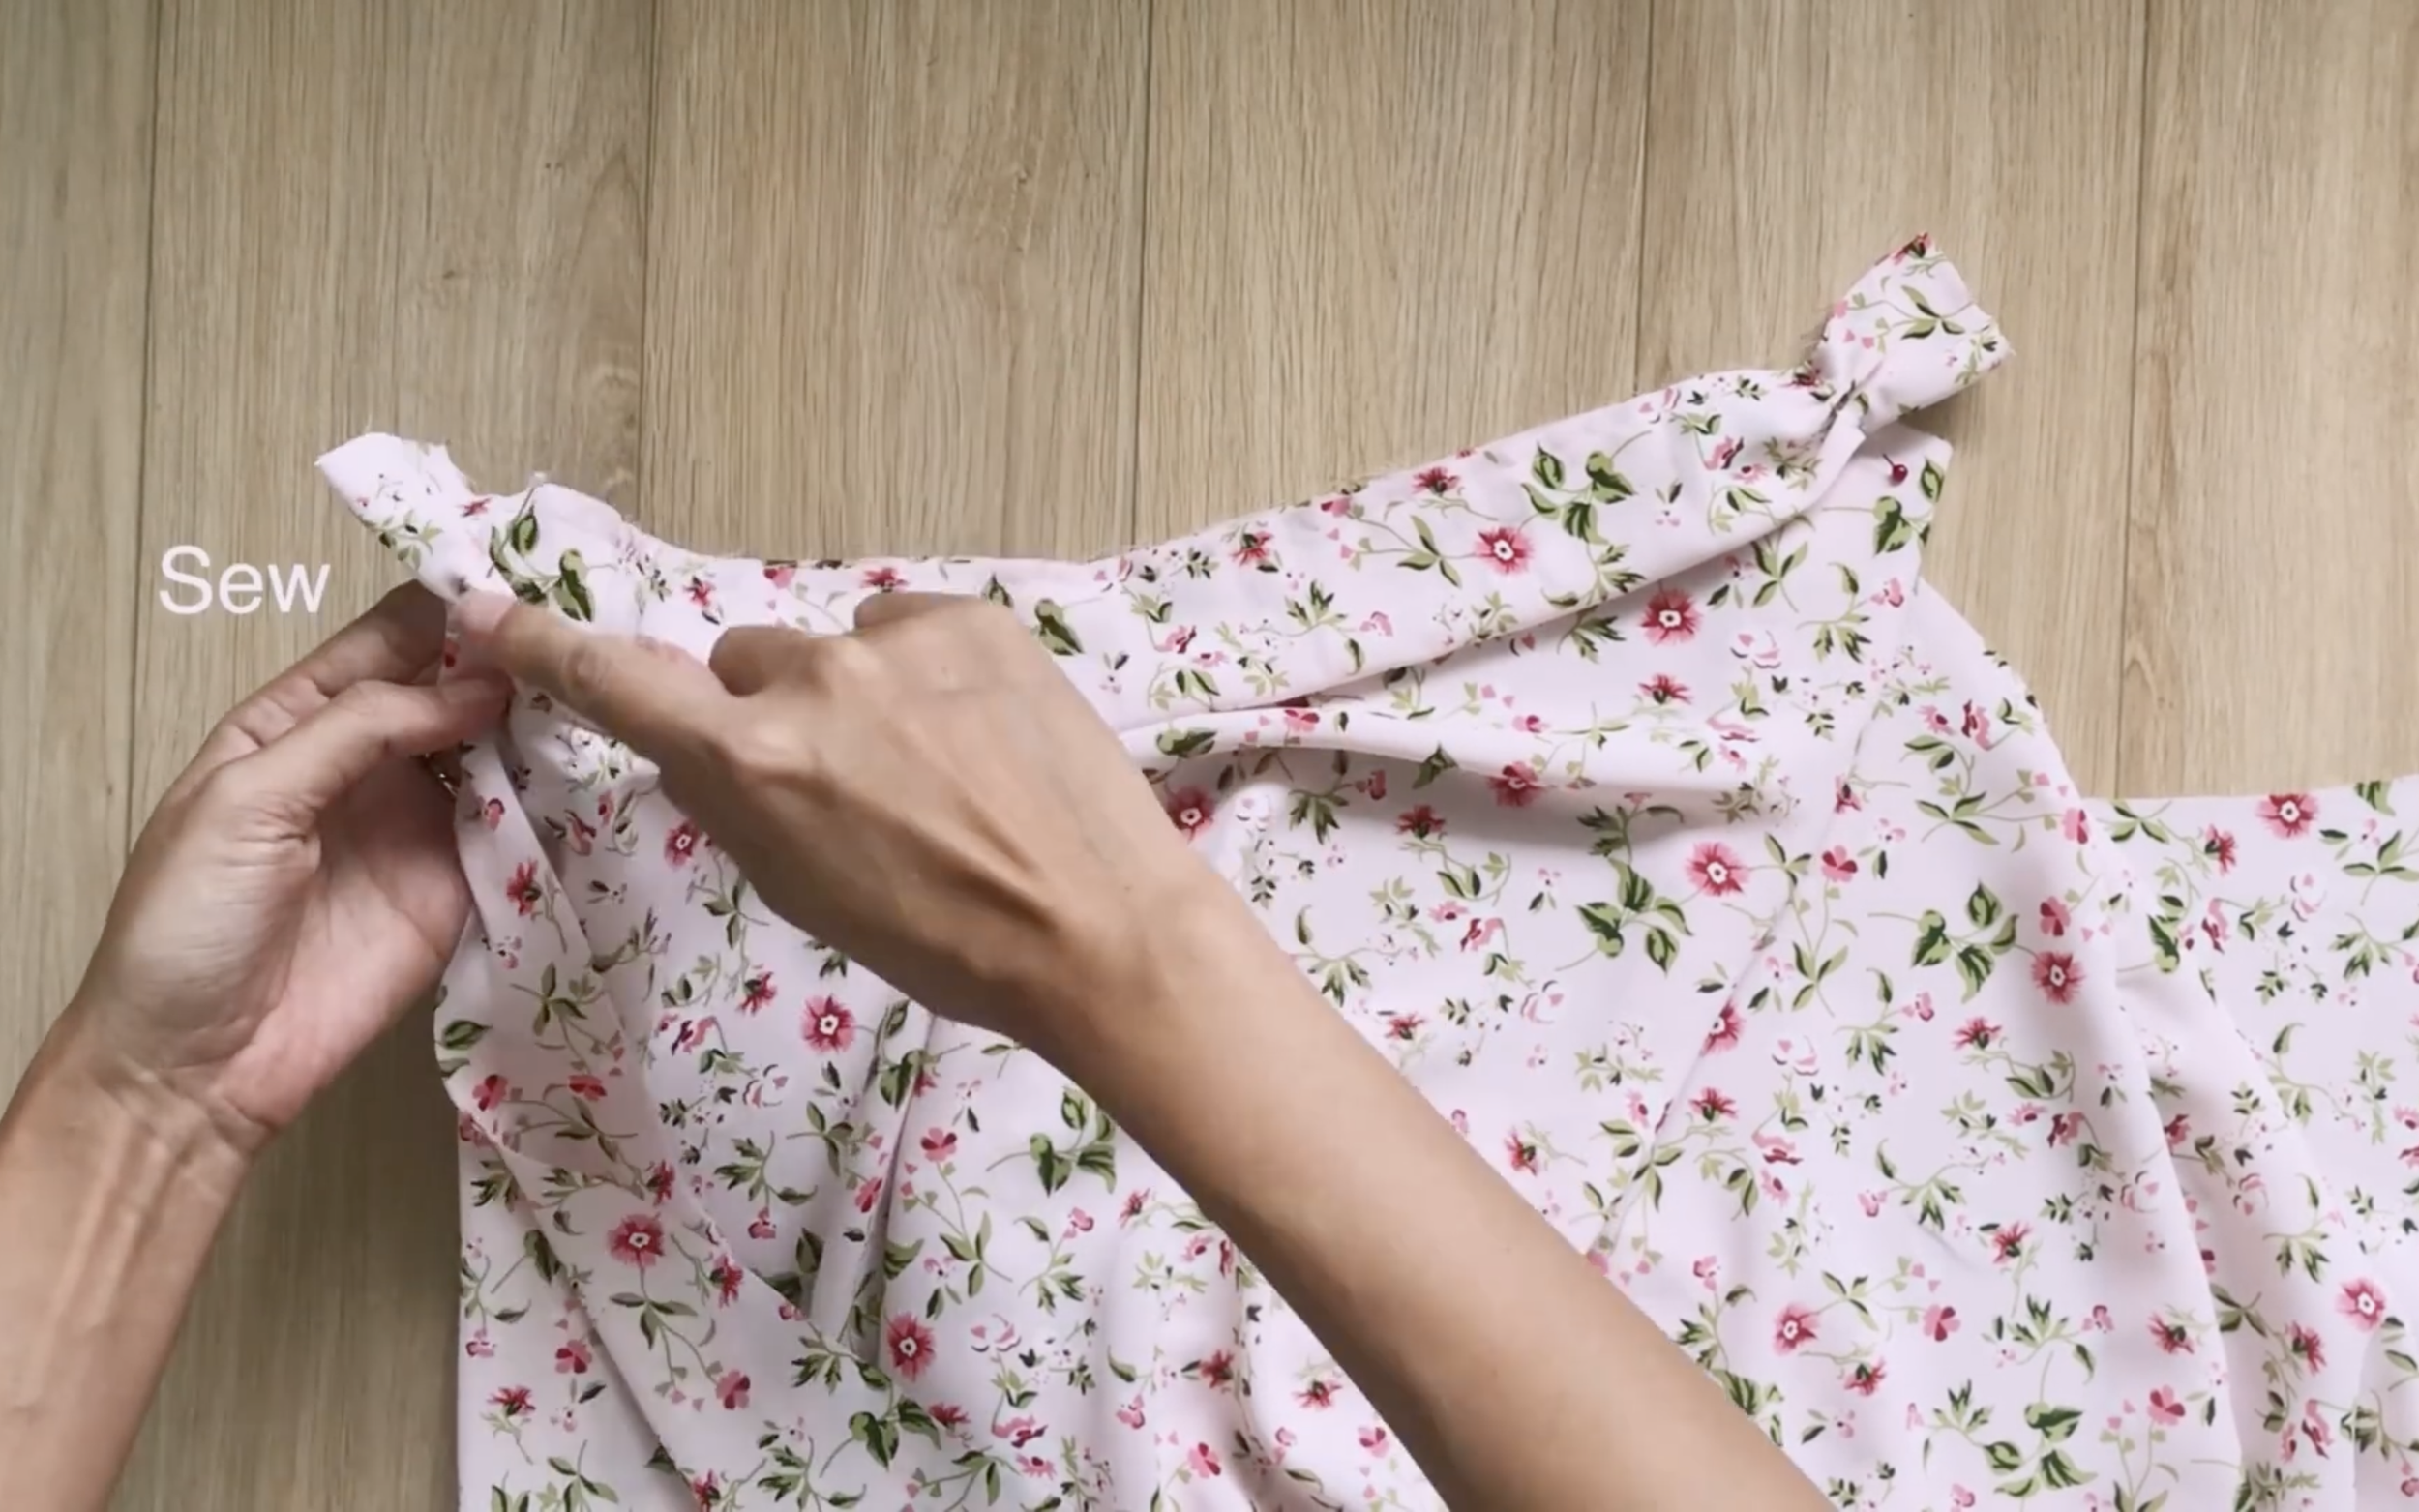
Use an invisible zipper to connect the back pieces.
After that, connect the rest of the bottom dress under the zipper together.
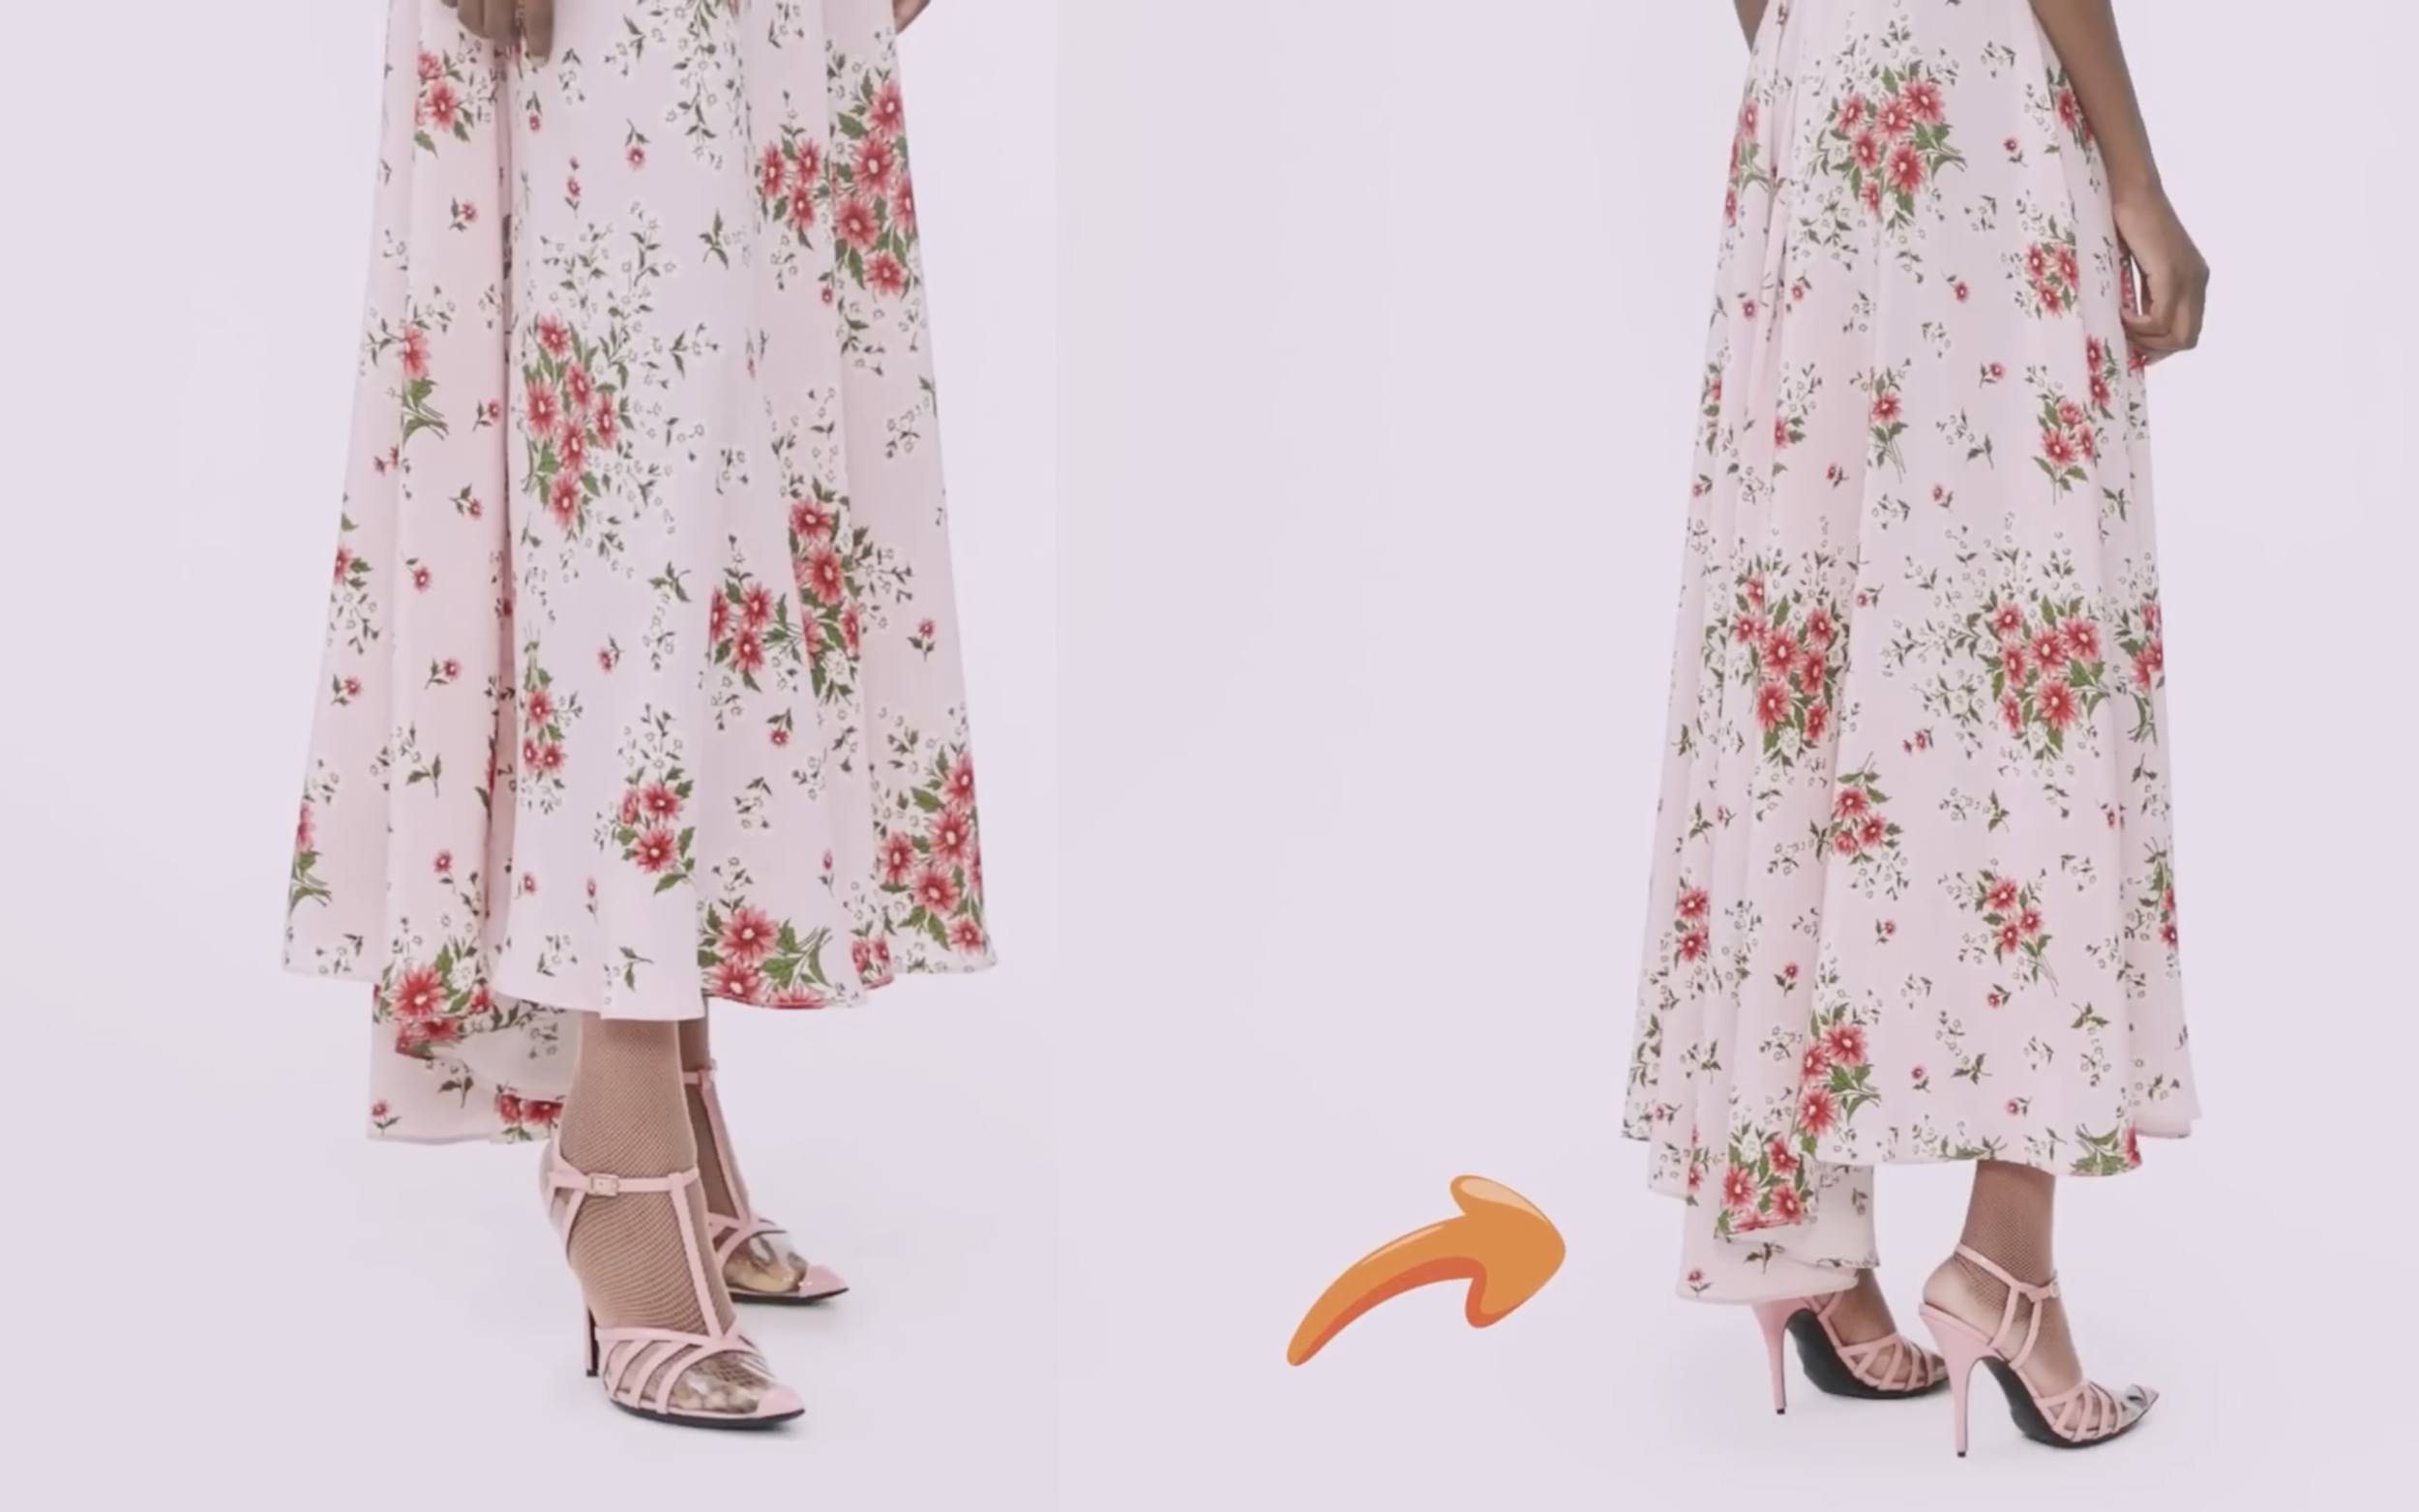
Next step is finishing the end of the dress. As you can see at the original dress, the end of the front is a little shorter than the end of the back.
So, don't forget to cut it a bit before finishing the end of the dress.
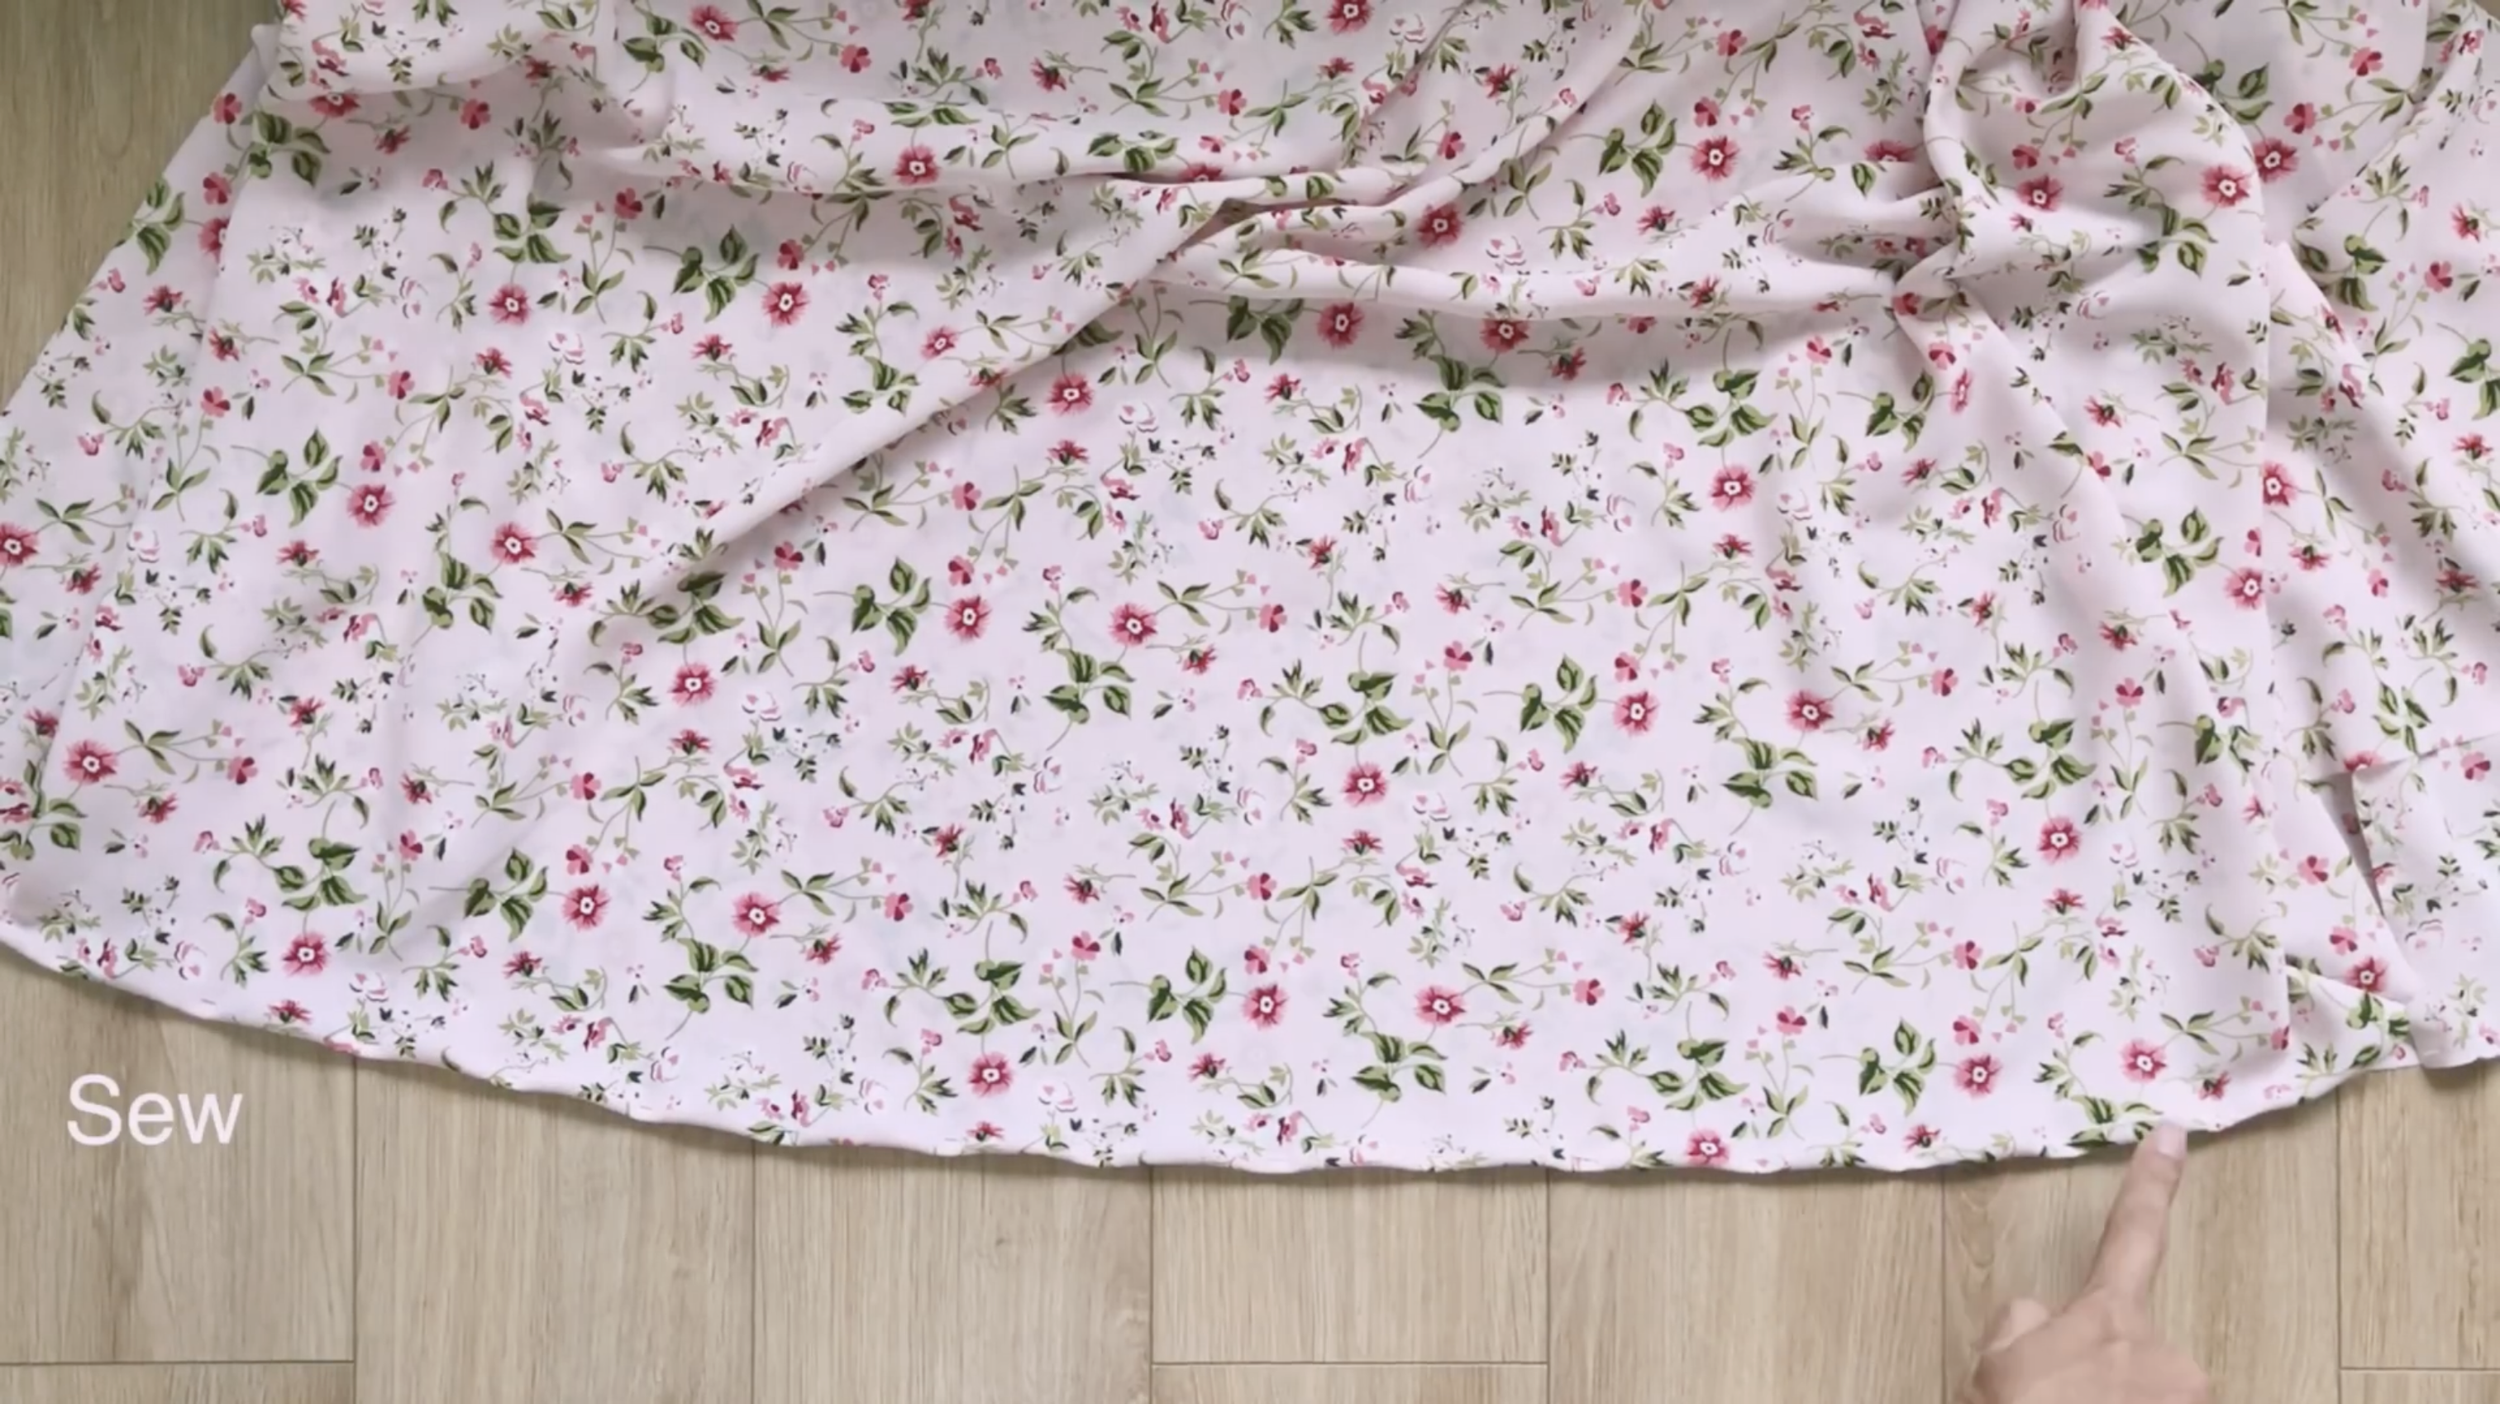
At the end of the dress, fold the edge fabric two times to finish the end, then sew
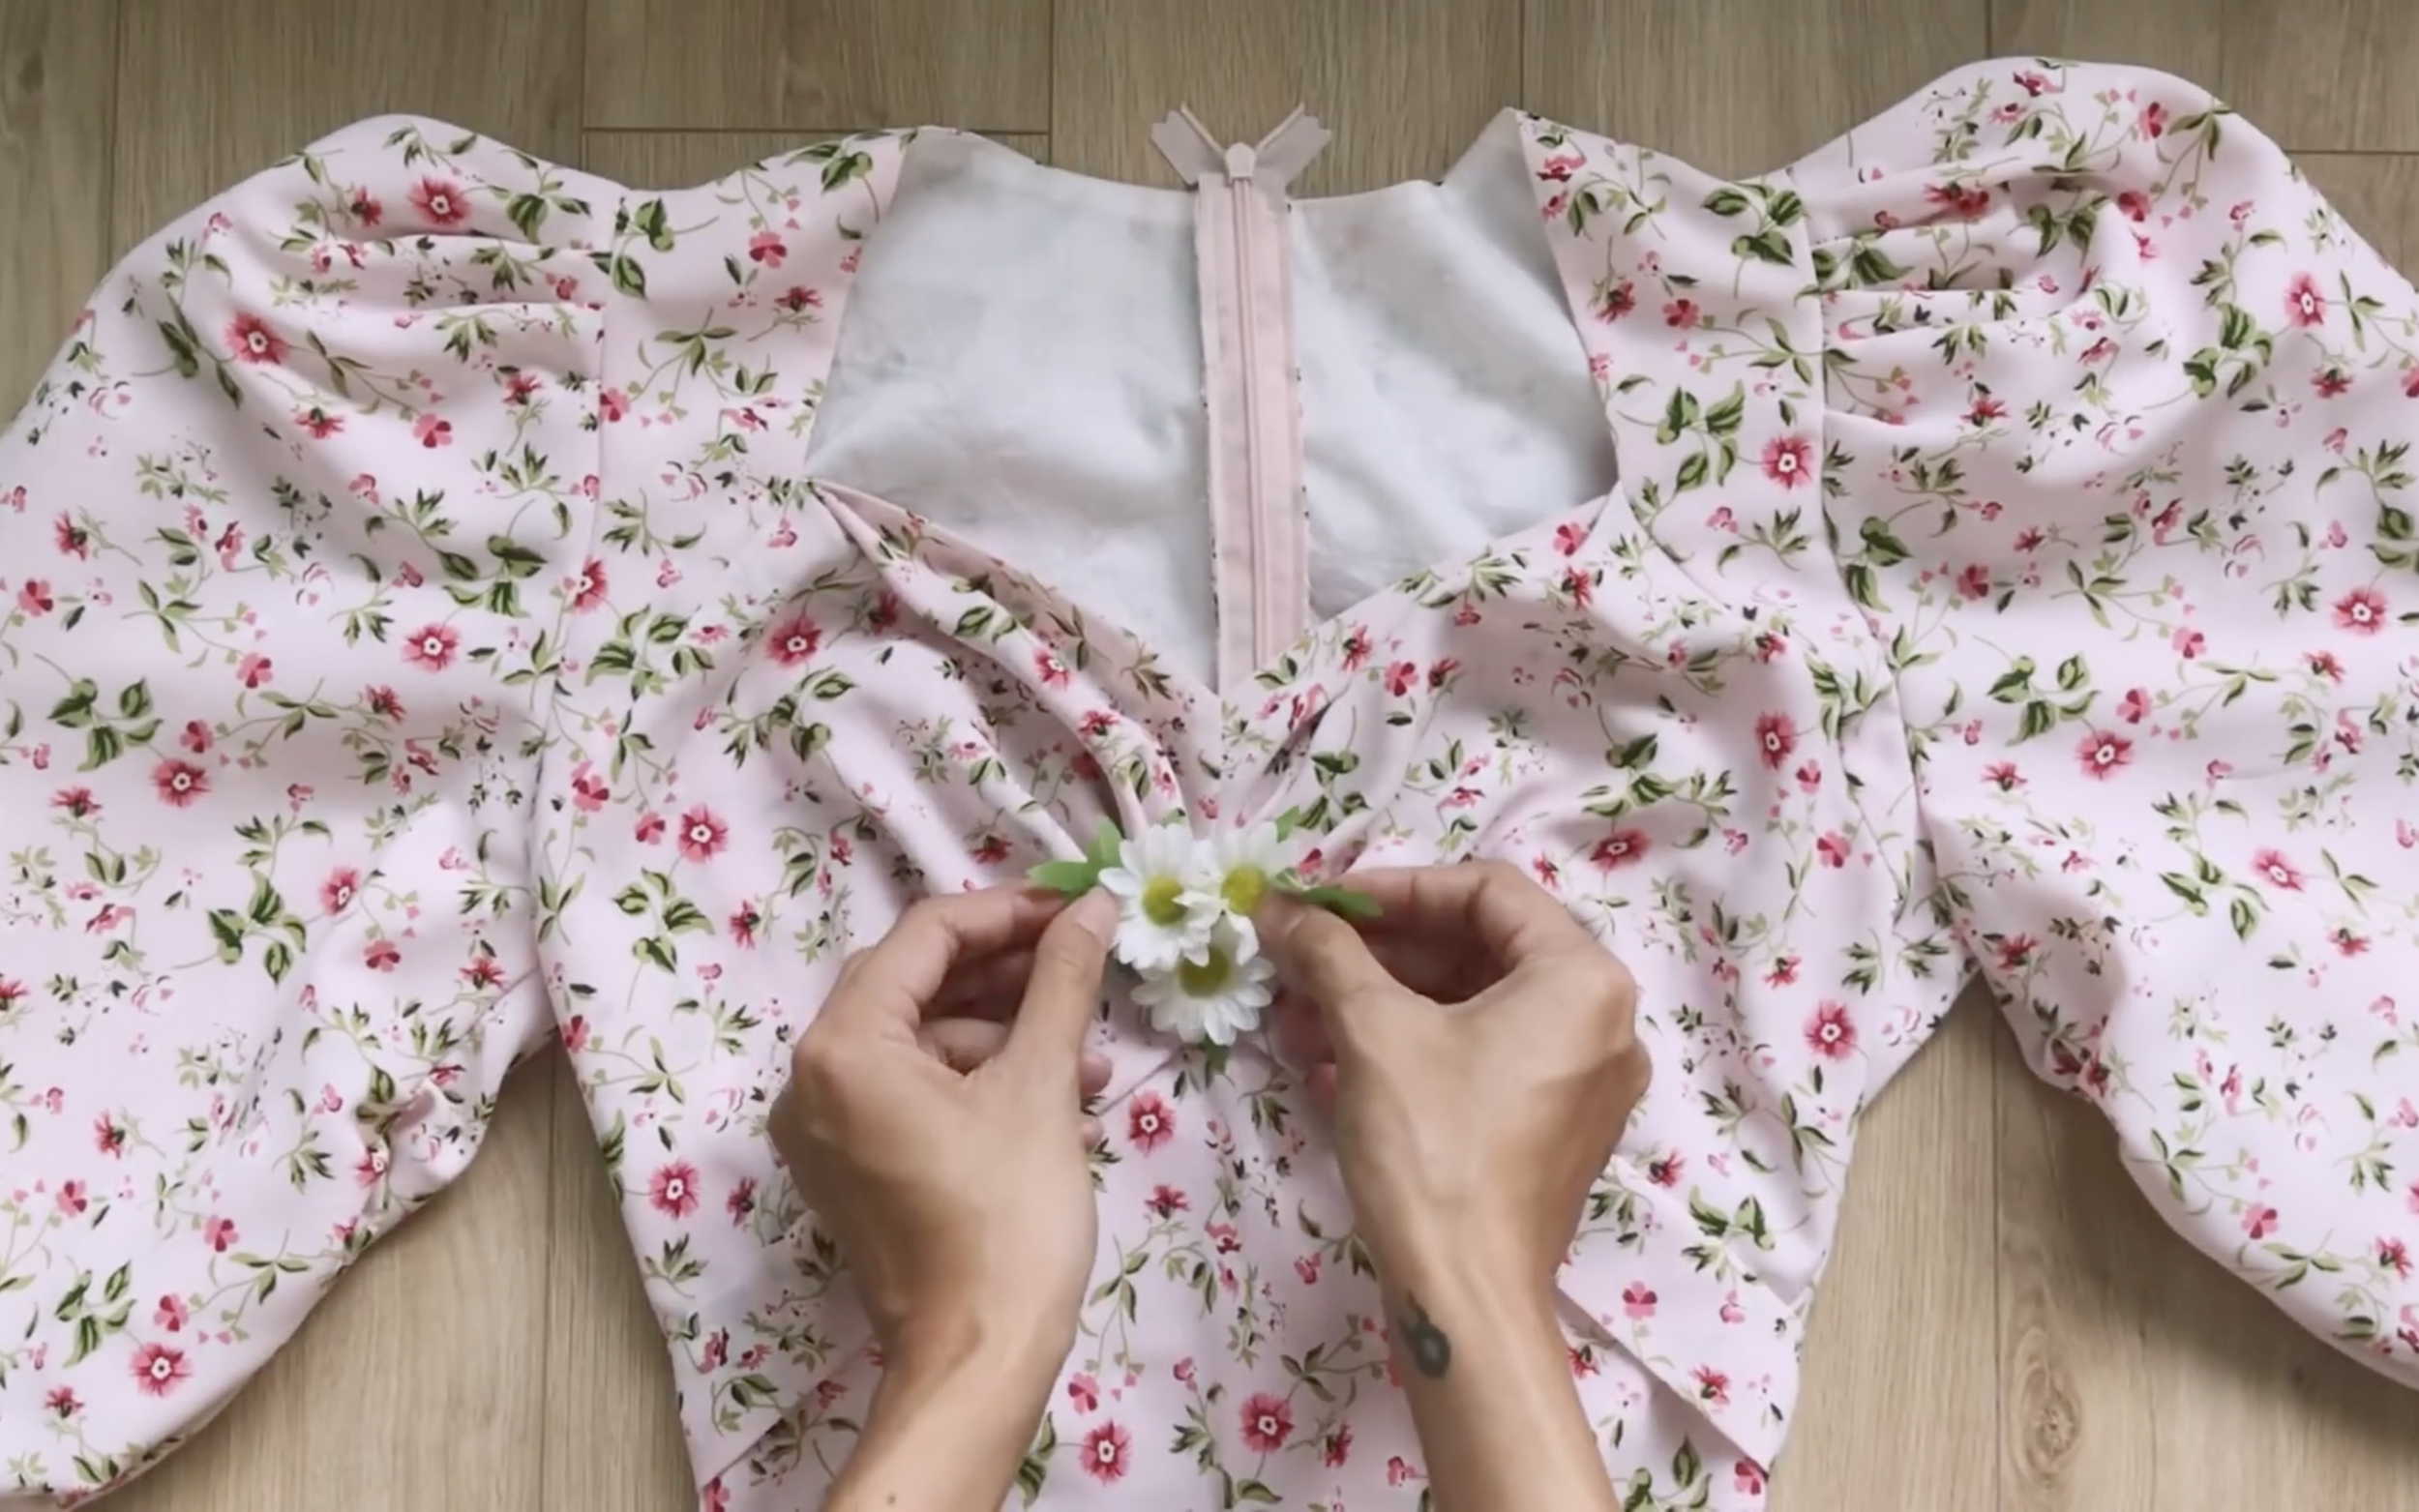
And the last step is putting the flower to the middle of two breasts and at two ends of the sleeve.

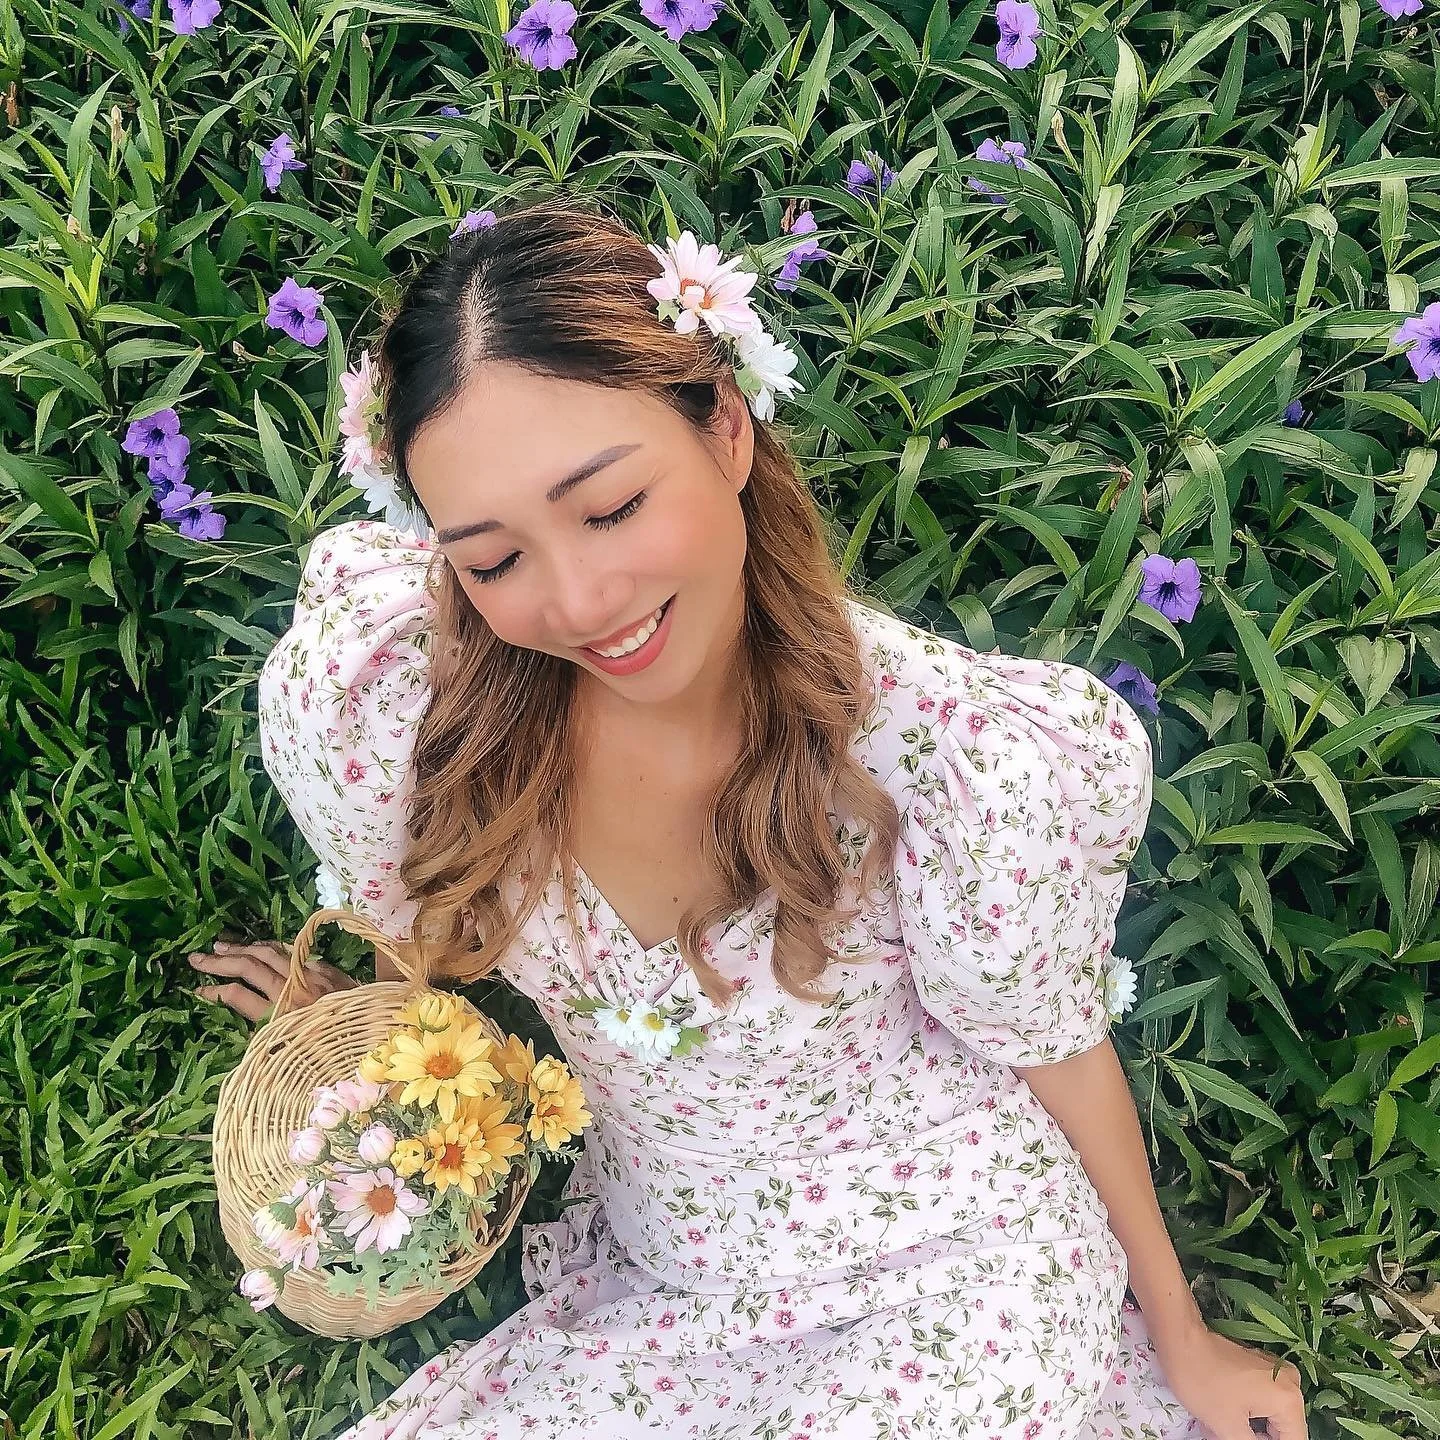
I tried to make the "De Una Vez" pink floral dress that got inspired from Selena and Kendall
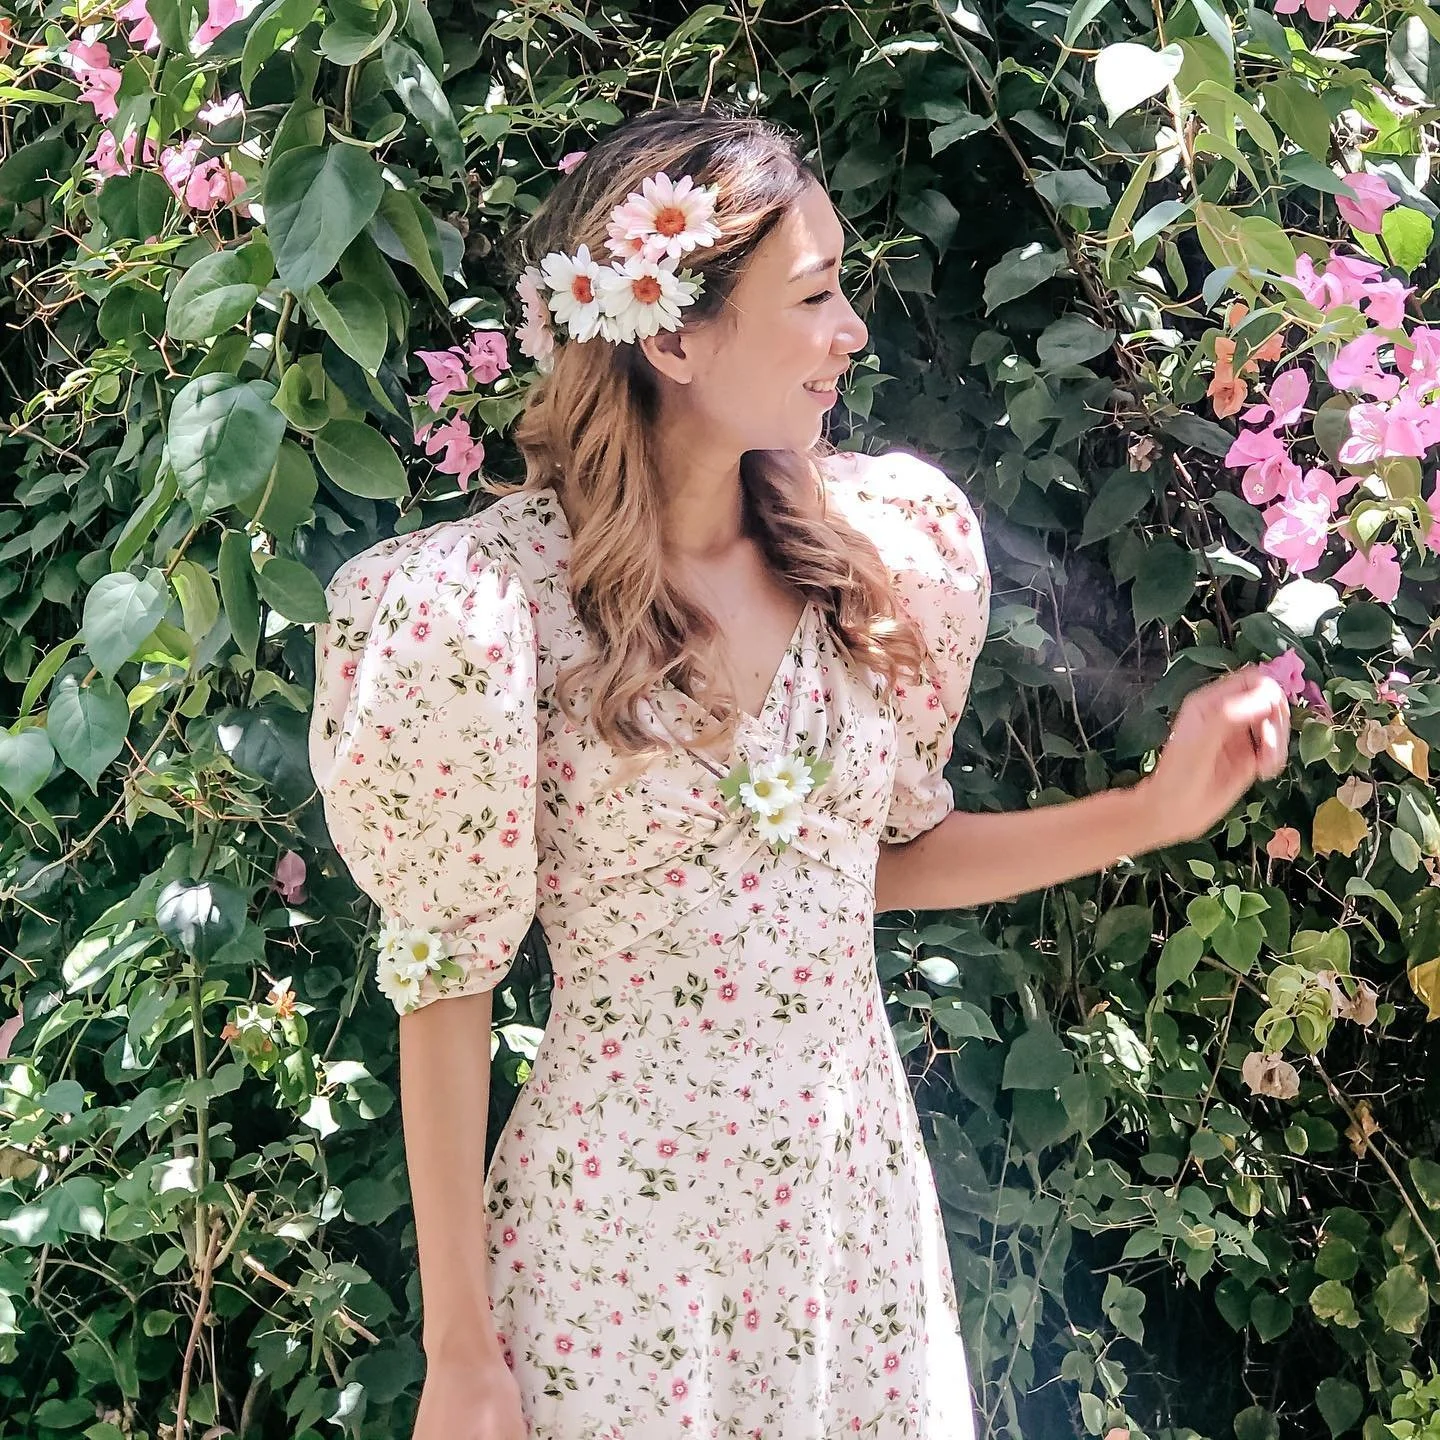
And I'm finished with this DIY! Here is the final result.
I truly feel like a princess in this dress—it is just so pretty and dreamy. I tried my very best to explain the steps so you can make one for yourself, too!
I hope you found my step-by-step guide helpful and inspiring.
If you’re interested in making your own, give it a try and let me know how it goes!
Until then, happy sewing!