How to make a perfect Puff sleeve wrap dress | Clara dress - My first sewing pattern

How to make a perfect Puff sleeve wrap dress | Clara dress - My first sewing pattern
Hi guys, if you want to create your beautiful website and build your brand, head to https://www.squarespace.com/jessdang to save 10% off your first purchase of a website or domain using code: JESSDANG

Welcome or welcome back to my channel!
Today’s video is a special one because I’m sharing my very first sewing pattern with you: the Clara dress, a puff sleeve wrap dress that's perfect for any occasion.
Since I started sharing my DIYs on YouTube, many of you have asked about my designs, so last year, I decided to take a course on creating sewing patterns. After lots of learning, testing, and refining, I’m excited to finally share it with you today.
Don’t worry, I’ll still be sharing tutorials for those who want to make their own patterns—because that’s what this channel is all about: making sewing simple and fun. Using a pattern not only makes your sewing faster and easier, but it also helps you create beautiful clothes made by you! Plus, I’ll show you how to hack this pattern into different designs, so you can learn to make your own patterns too.
I hope you love it and give it a try!
Let’s get started!
WHAT YOU’LL NEED

2.2 m of soft cotton fabric
Pattern paper
Sewing machine
Pins
Scissors
Ruler
Long stick
Zipper
Buttons
MAKING THE PATTERNS
Here’s the pattern for the project. To get a clear understanding of all the measurements needed for the pattern, watch the video from 1:45 to 10:15.
Remember, you can adjust these measurements to fit your own dimensions!

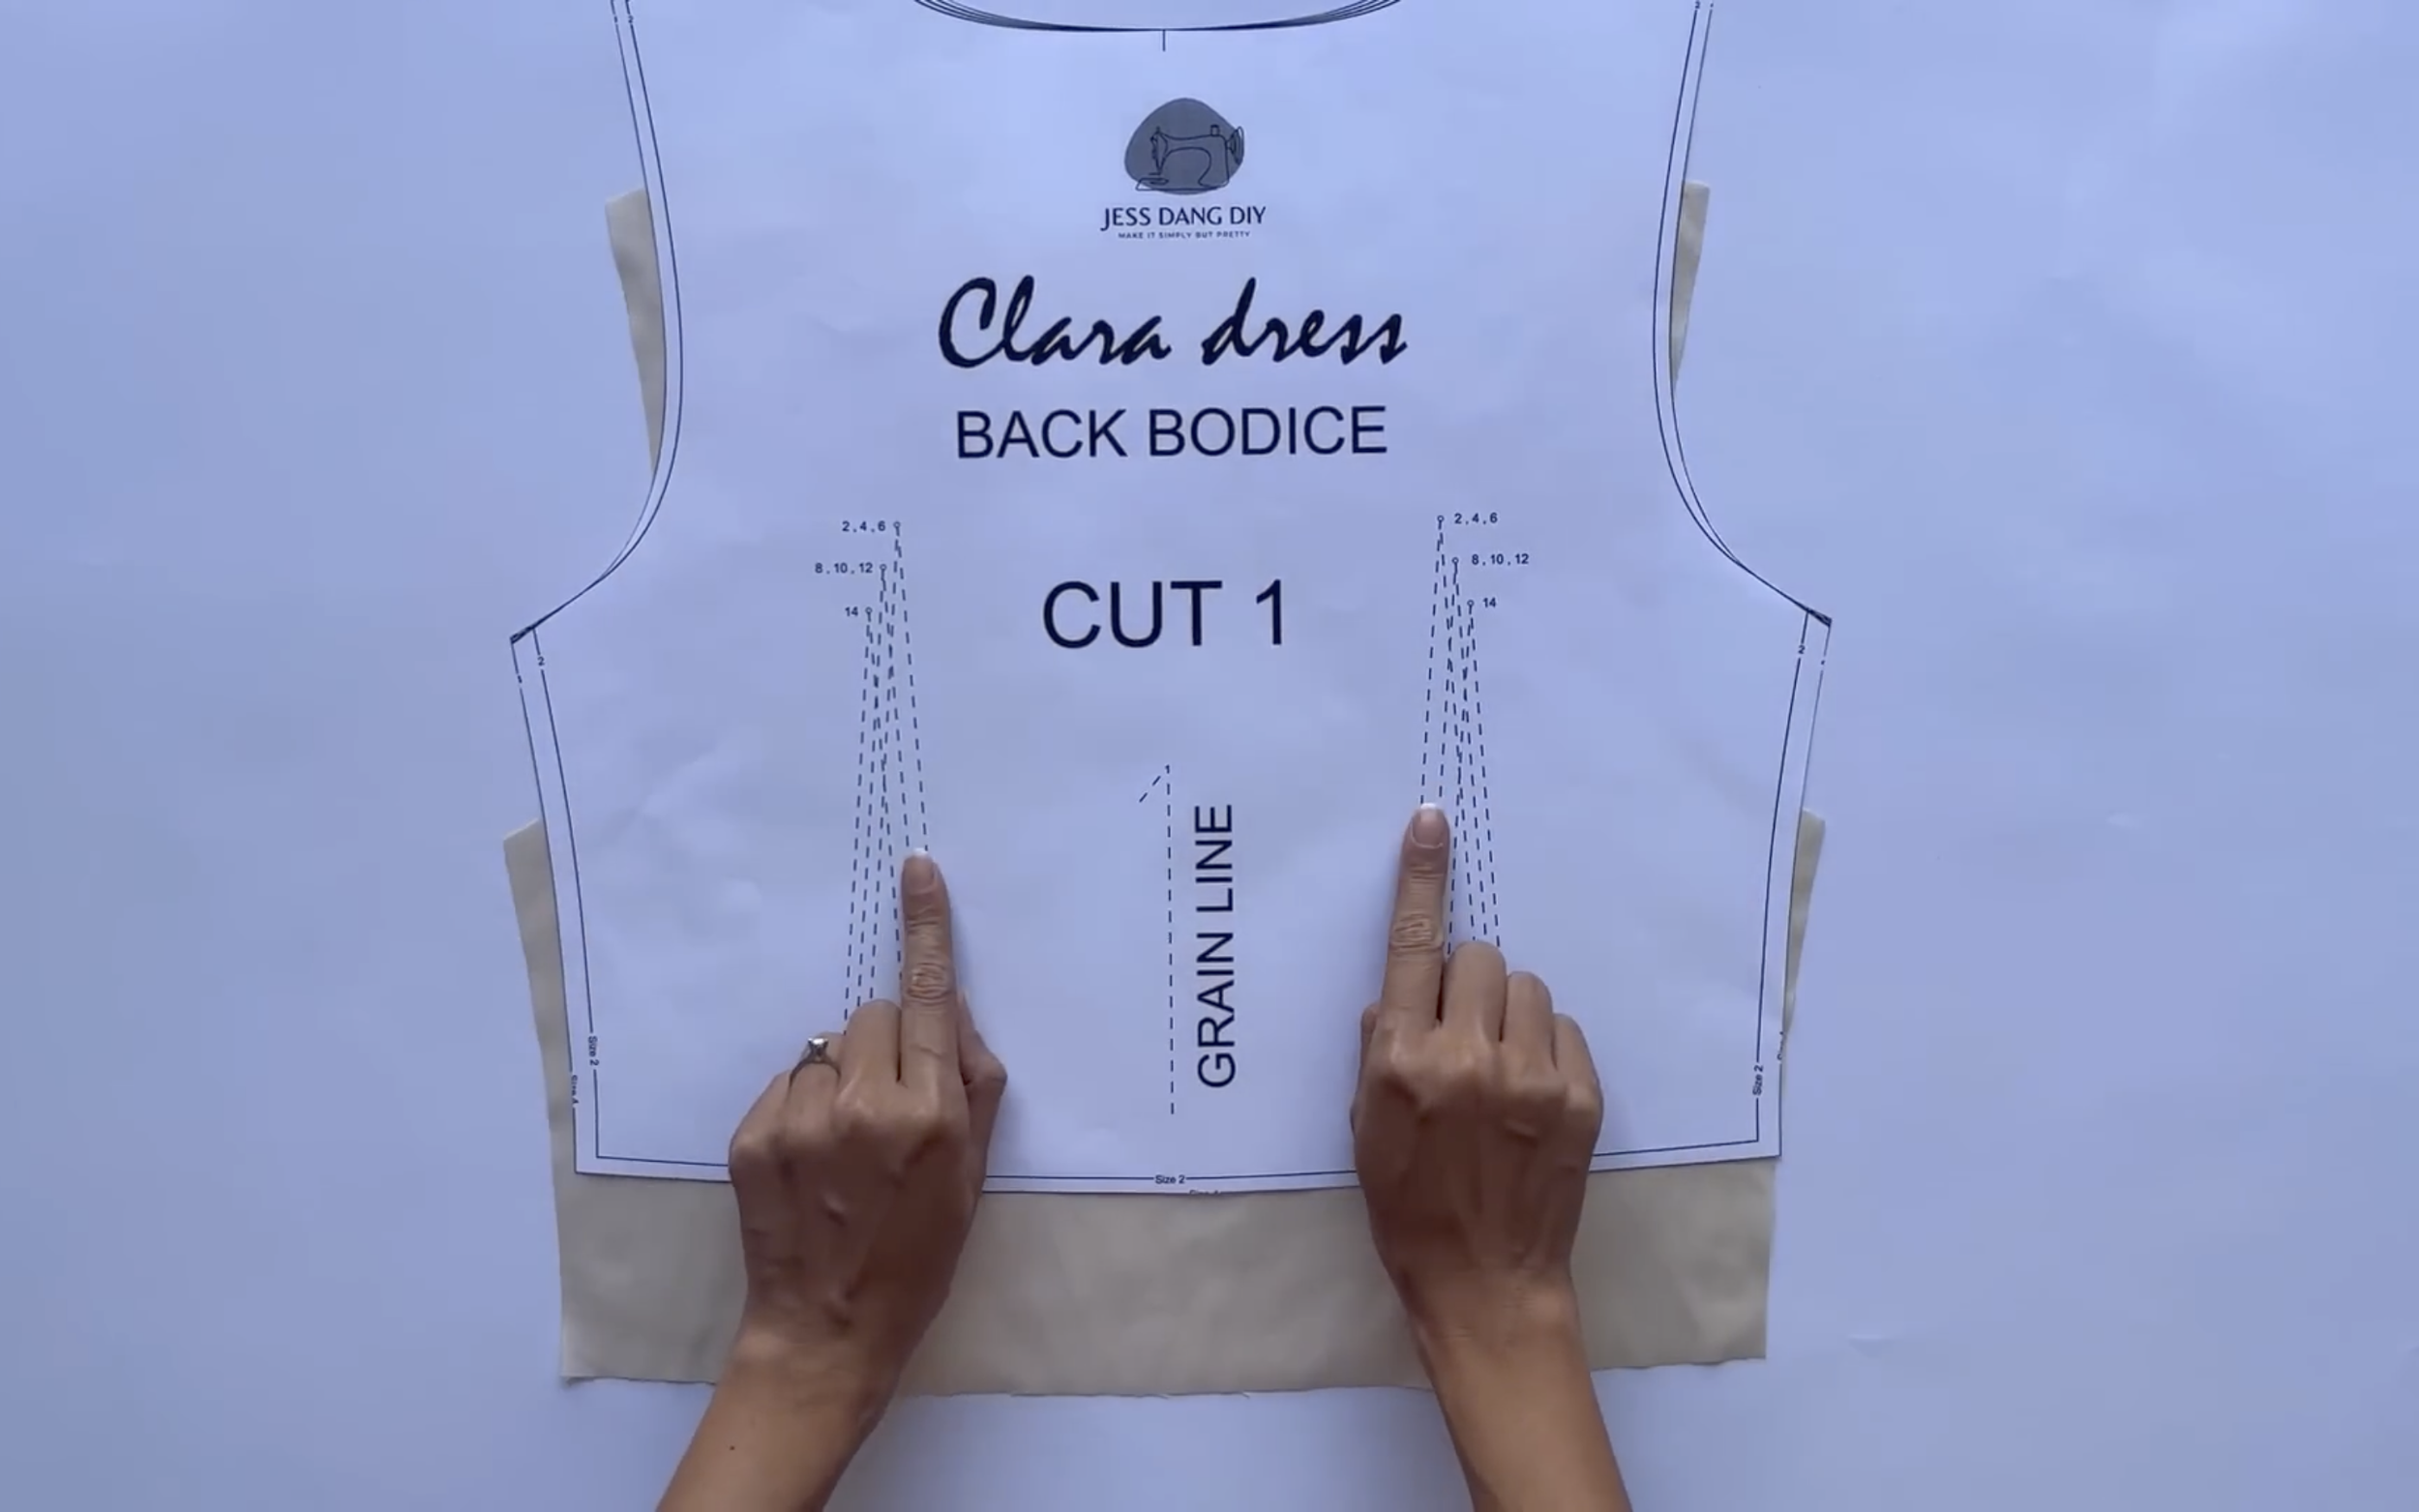
THE BACK BODICE PATTERN
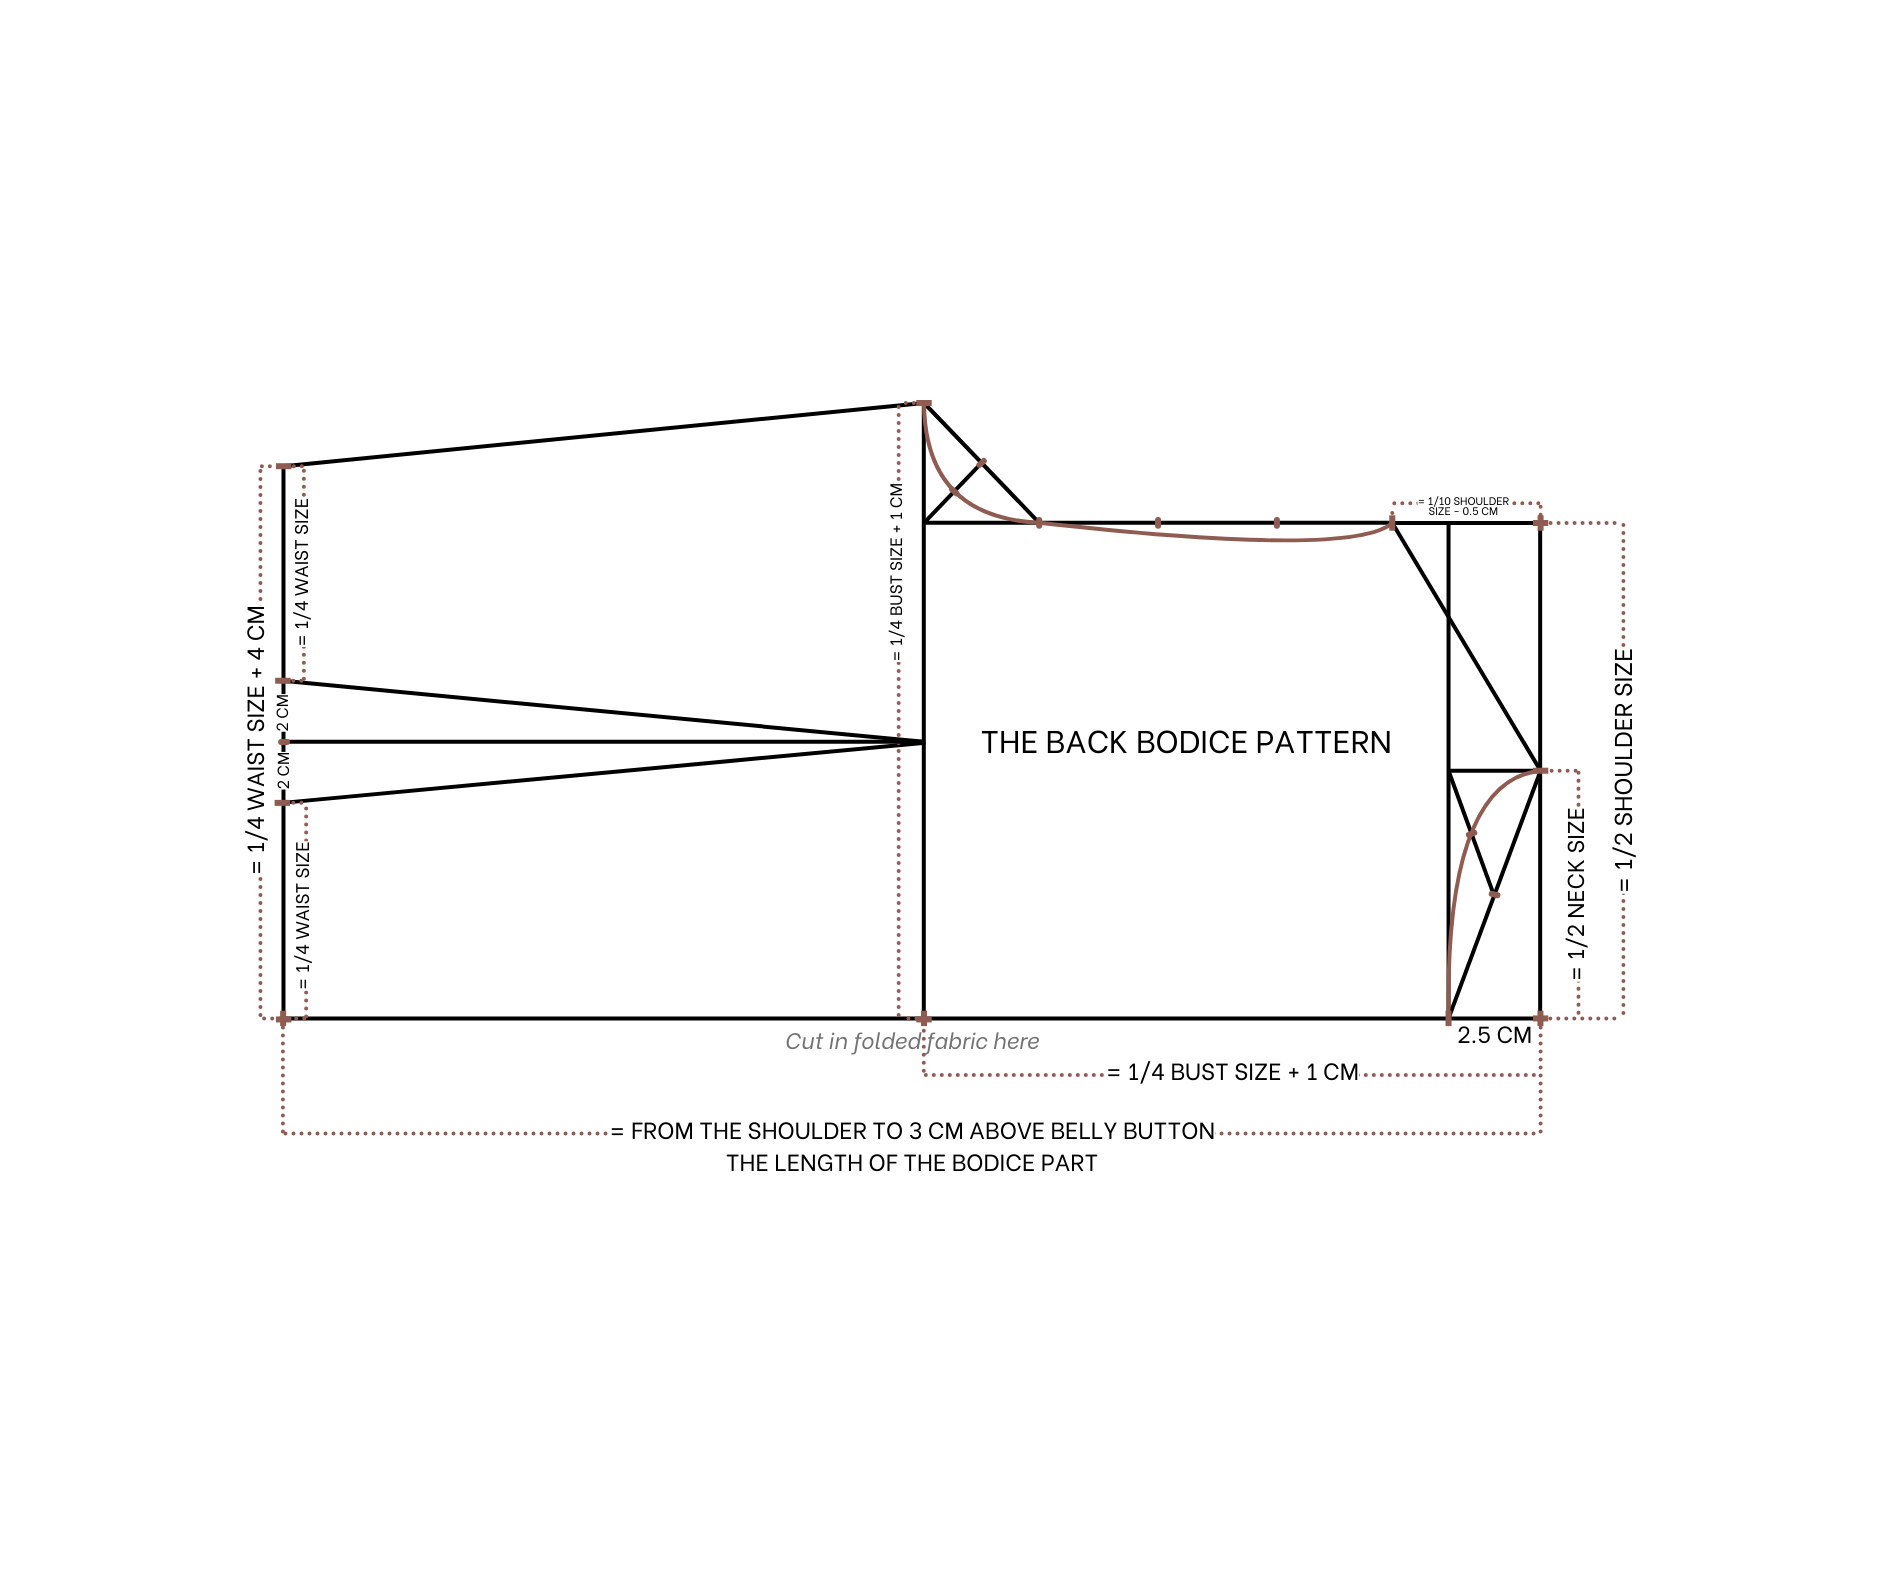
The back bodice pattern
Draw a straight line intersecting a horizontal line first.
Next, draw another straight line 2.5 cm outside the first one. This new straight line will intersect the horizontal line at one point.
From this intersection point, mark up 8 cm on the second straight line, which is half of the desired neck size.
Then connect this mark to the intersection of the horizontal line and the first straight line.
From this mark, draw a perpendicular line that intersects the first straight line at one point.
From this intersection point, connect it to the middle of the slanted line made earlier.
Then draw a curved line from that mark to the middle of the slanted line to the first intersection point to finish the neckline of the back pattern.From the end of the second straight line, mark up 16 cm, which is half of the shoulder size.
From this mark, draw a perpendicular line measuring 2.8 cm, which is one-tenth of the shoulder size minus 0.5 cm.
Then connect the end of this line to the end of the neckline to finish the shoulder line of the pattern.From the second straight line, draw another straight line 21 cm away. It’s a quarter of the bust size plus 1 cm, marking the position of the end of the armpit line.
From the intersection of this line and the horizontal line, mark up 21 cm, which is a quarter of the bust size plus 1 cm. Continue the perpendicular line from the shoulder to this line.
On the perpendicular line, mark at one-third of the line first, then connect it to the mark on the bust line.
After that, draw a curved line similar to the neckline to create the sleeve line of the pattern.
From the second straight line, draw another one 40 cm away. This is the length from the shoulder to 3 cm above the belly button. From the intersection of this line and the horizontal line, mark up 20 cm, which is a quarter of the waist size plus 4 cm.
Then connect this mark to the end of the sleeve line to create the side line of the pattern.
At the waistline, mark the middle first, then draw a horizontal line parallel to the middle line of the pattern. This line will intersect the bust line at one point.
From the mark on the waistline, make two additional marks 2 cm outside of it, so the width between the two marks will be 4 cm, representing the extra 4 cm on the waistline. This means the remaining width of the waistline is 16 cm, which is a quarter of the waist size.
Connect these two marks to the intersection on the horizontal line and the bust line to create the dart for the back pattern.
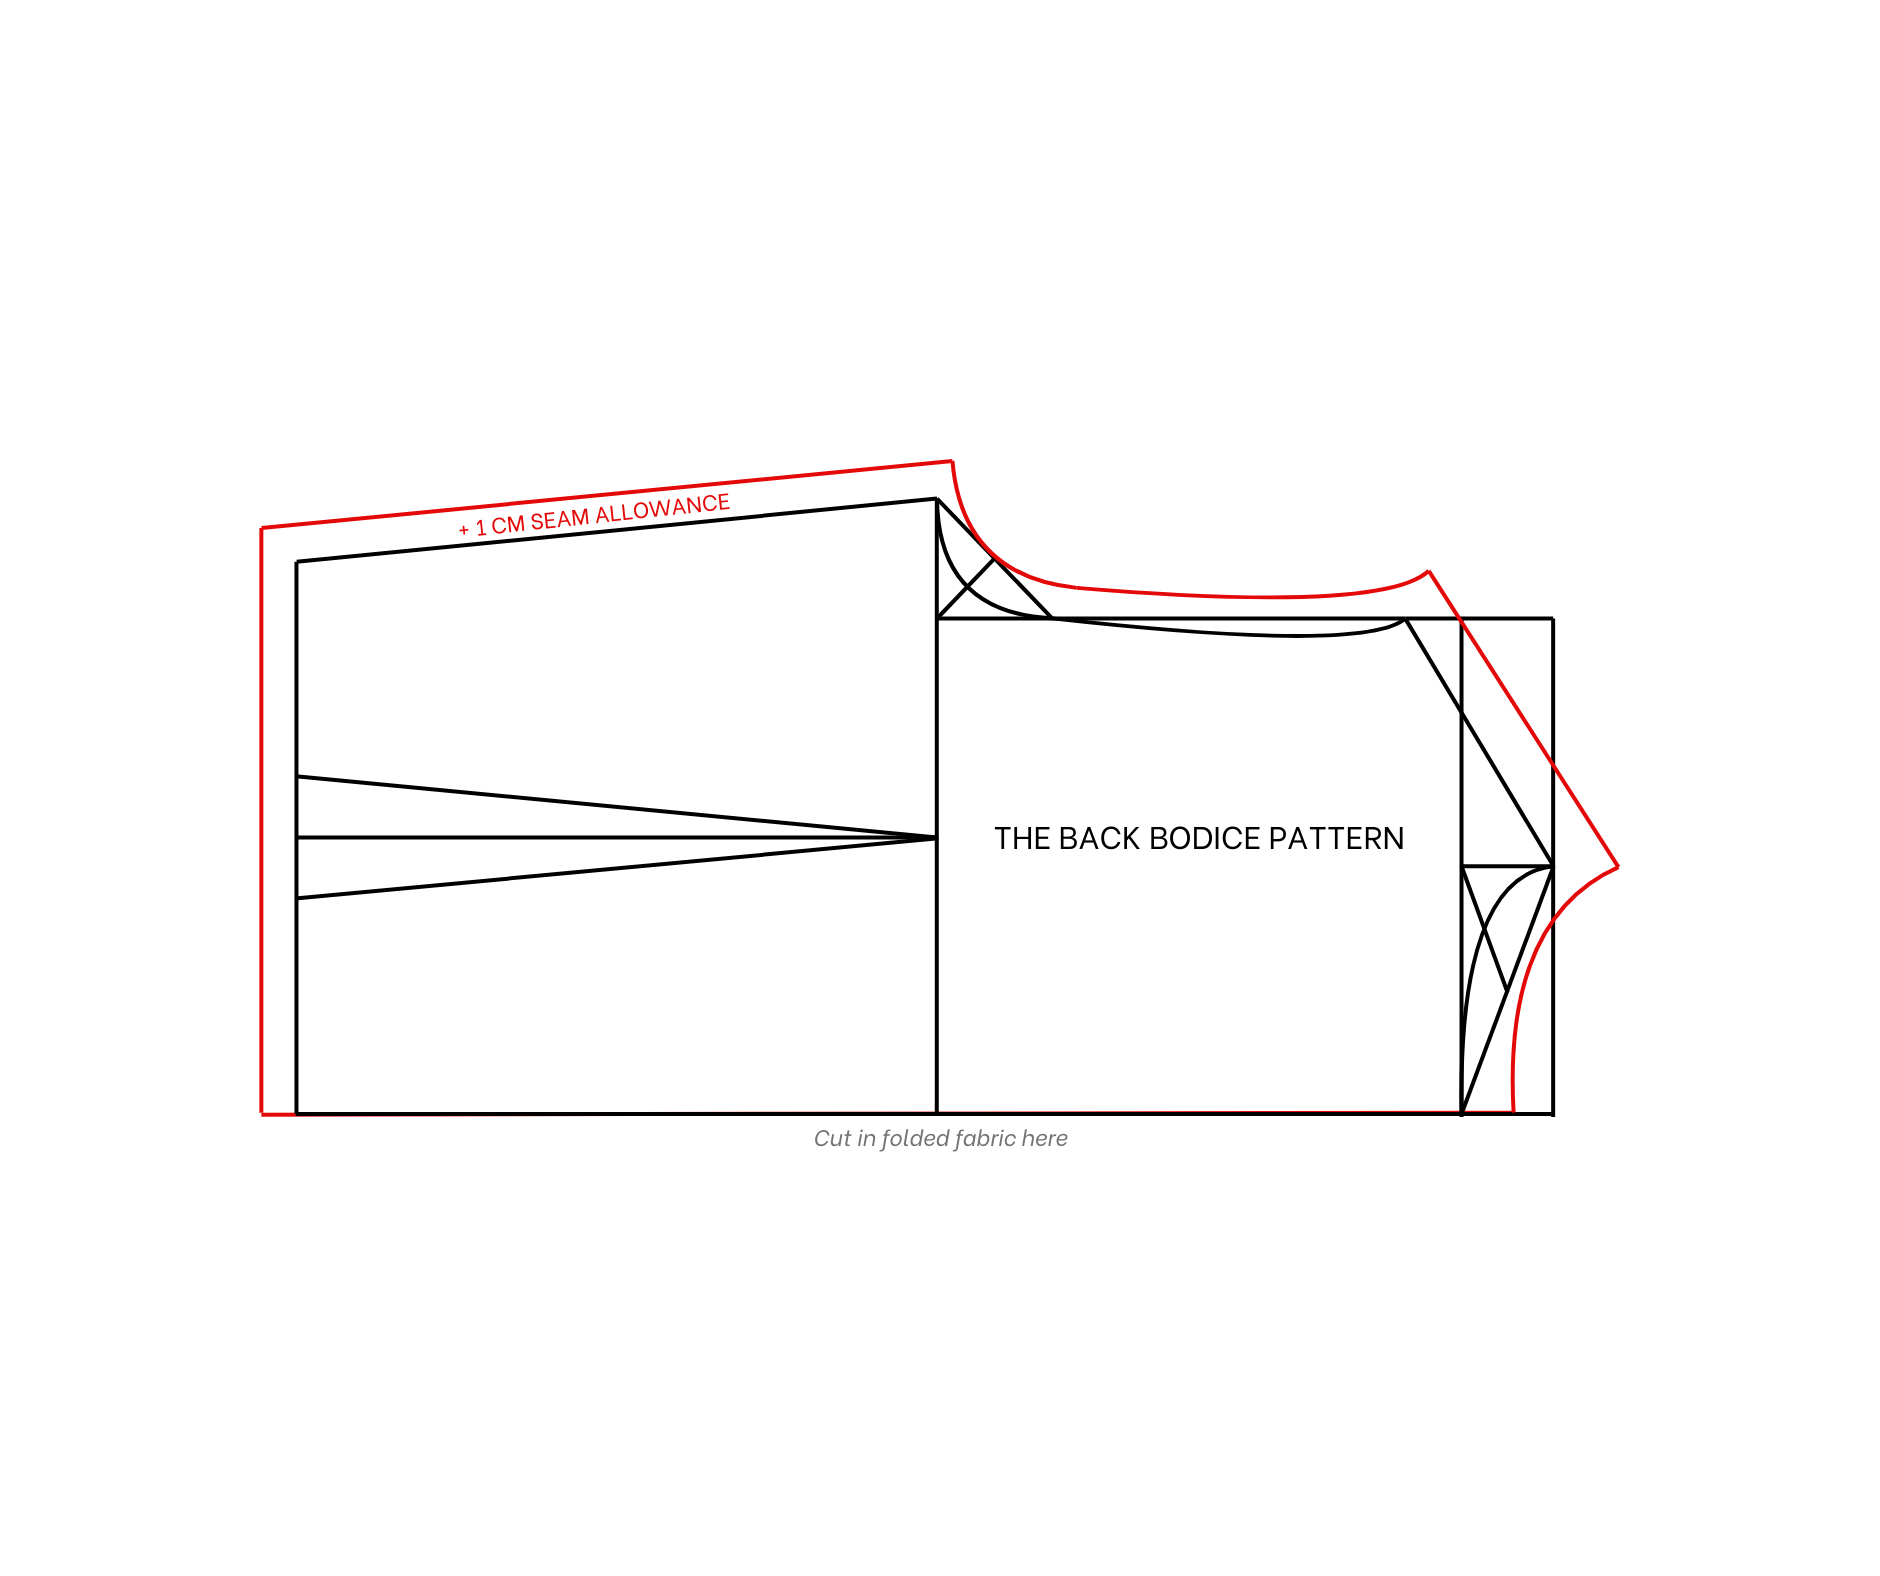
Add 1 cm for seam allowance before cutting, except along the middle line.
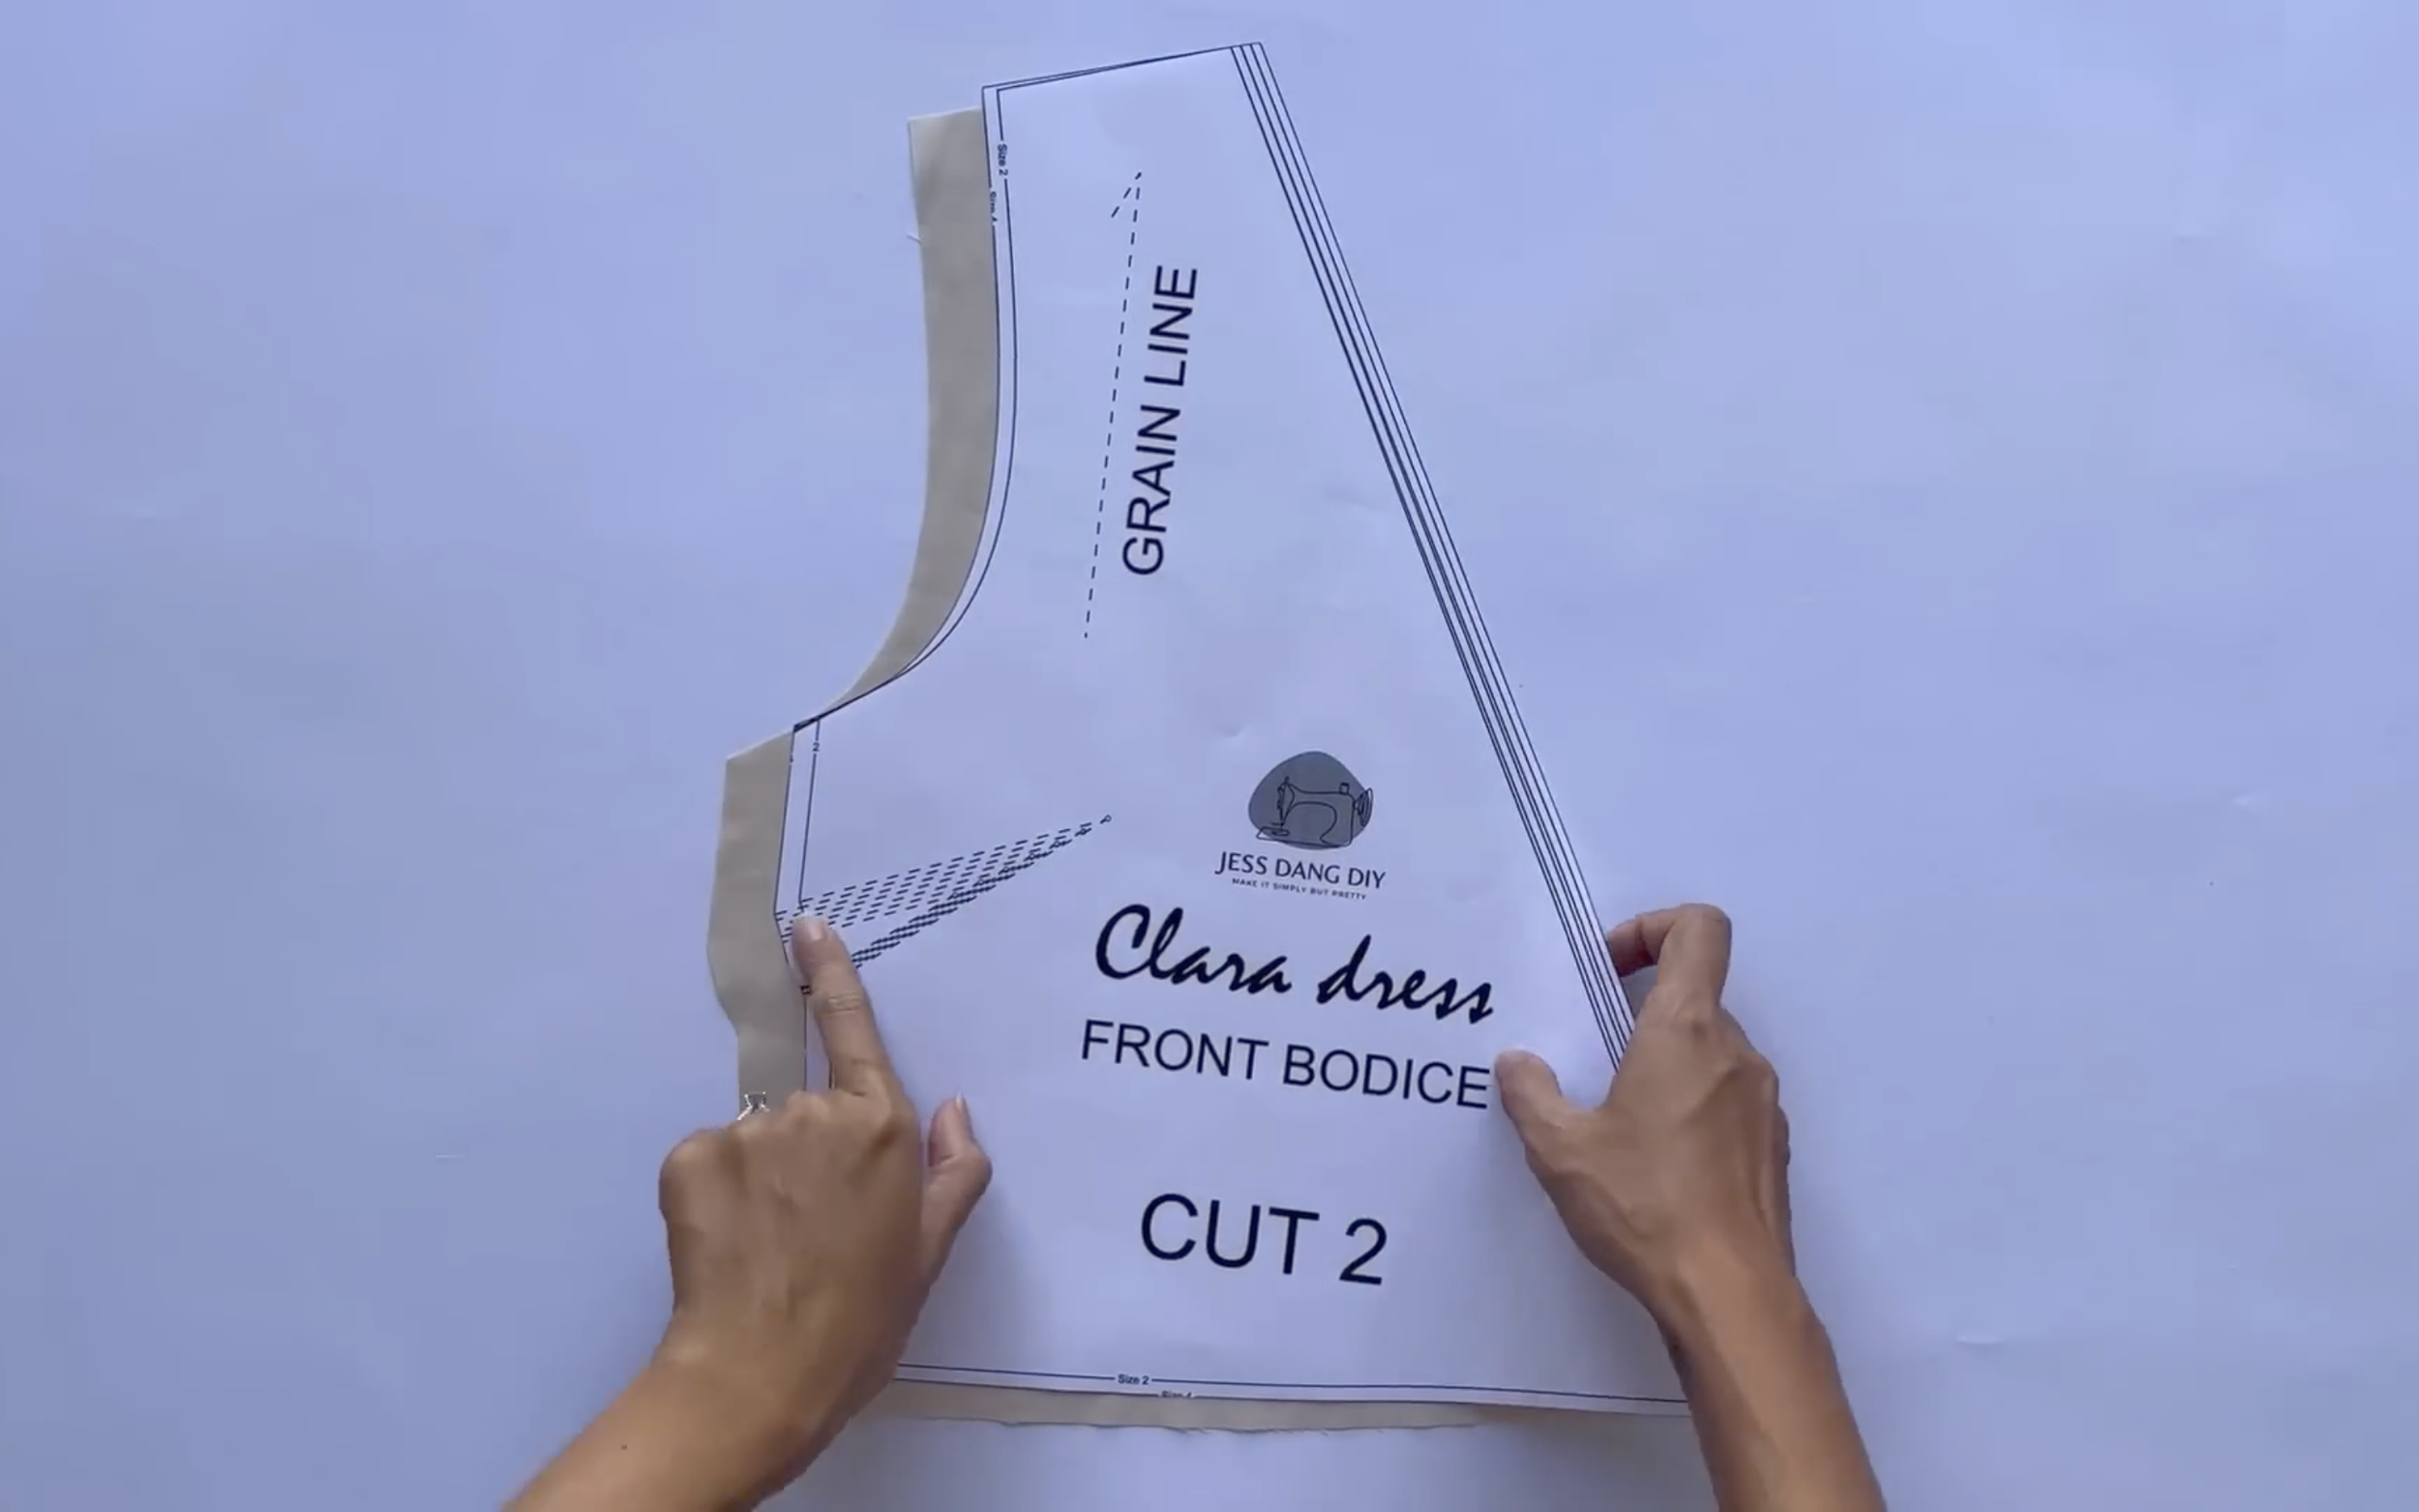
THE FRONT BODICE PATTERN
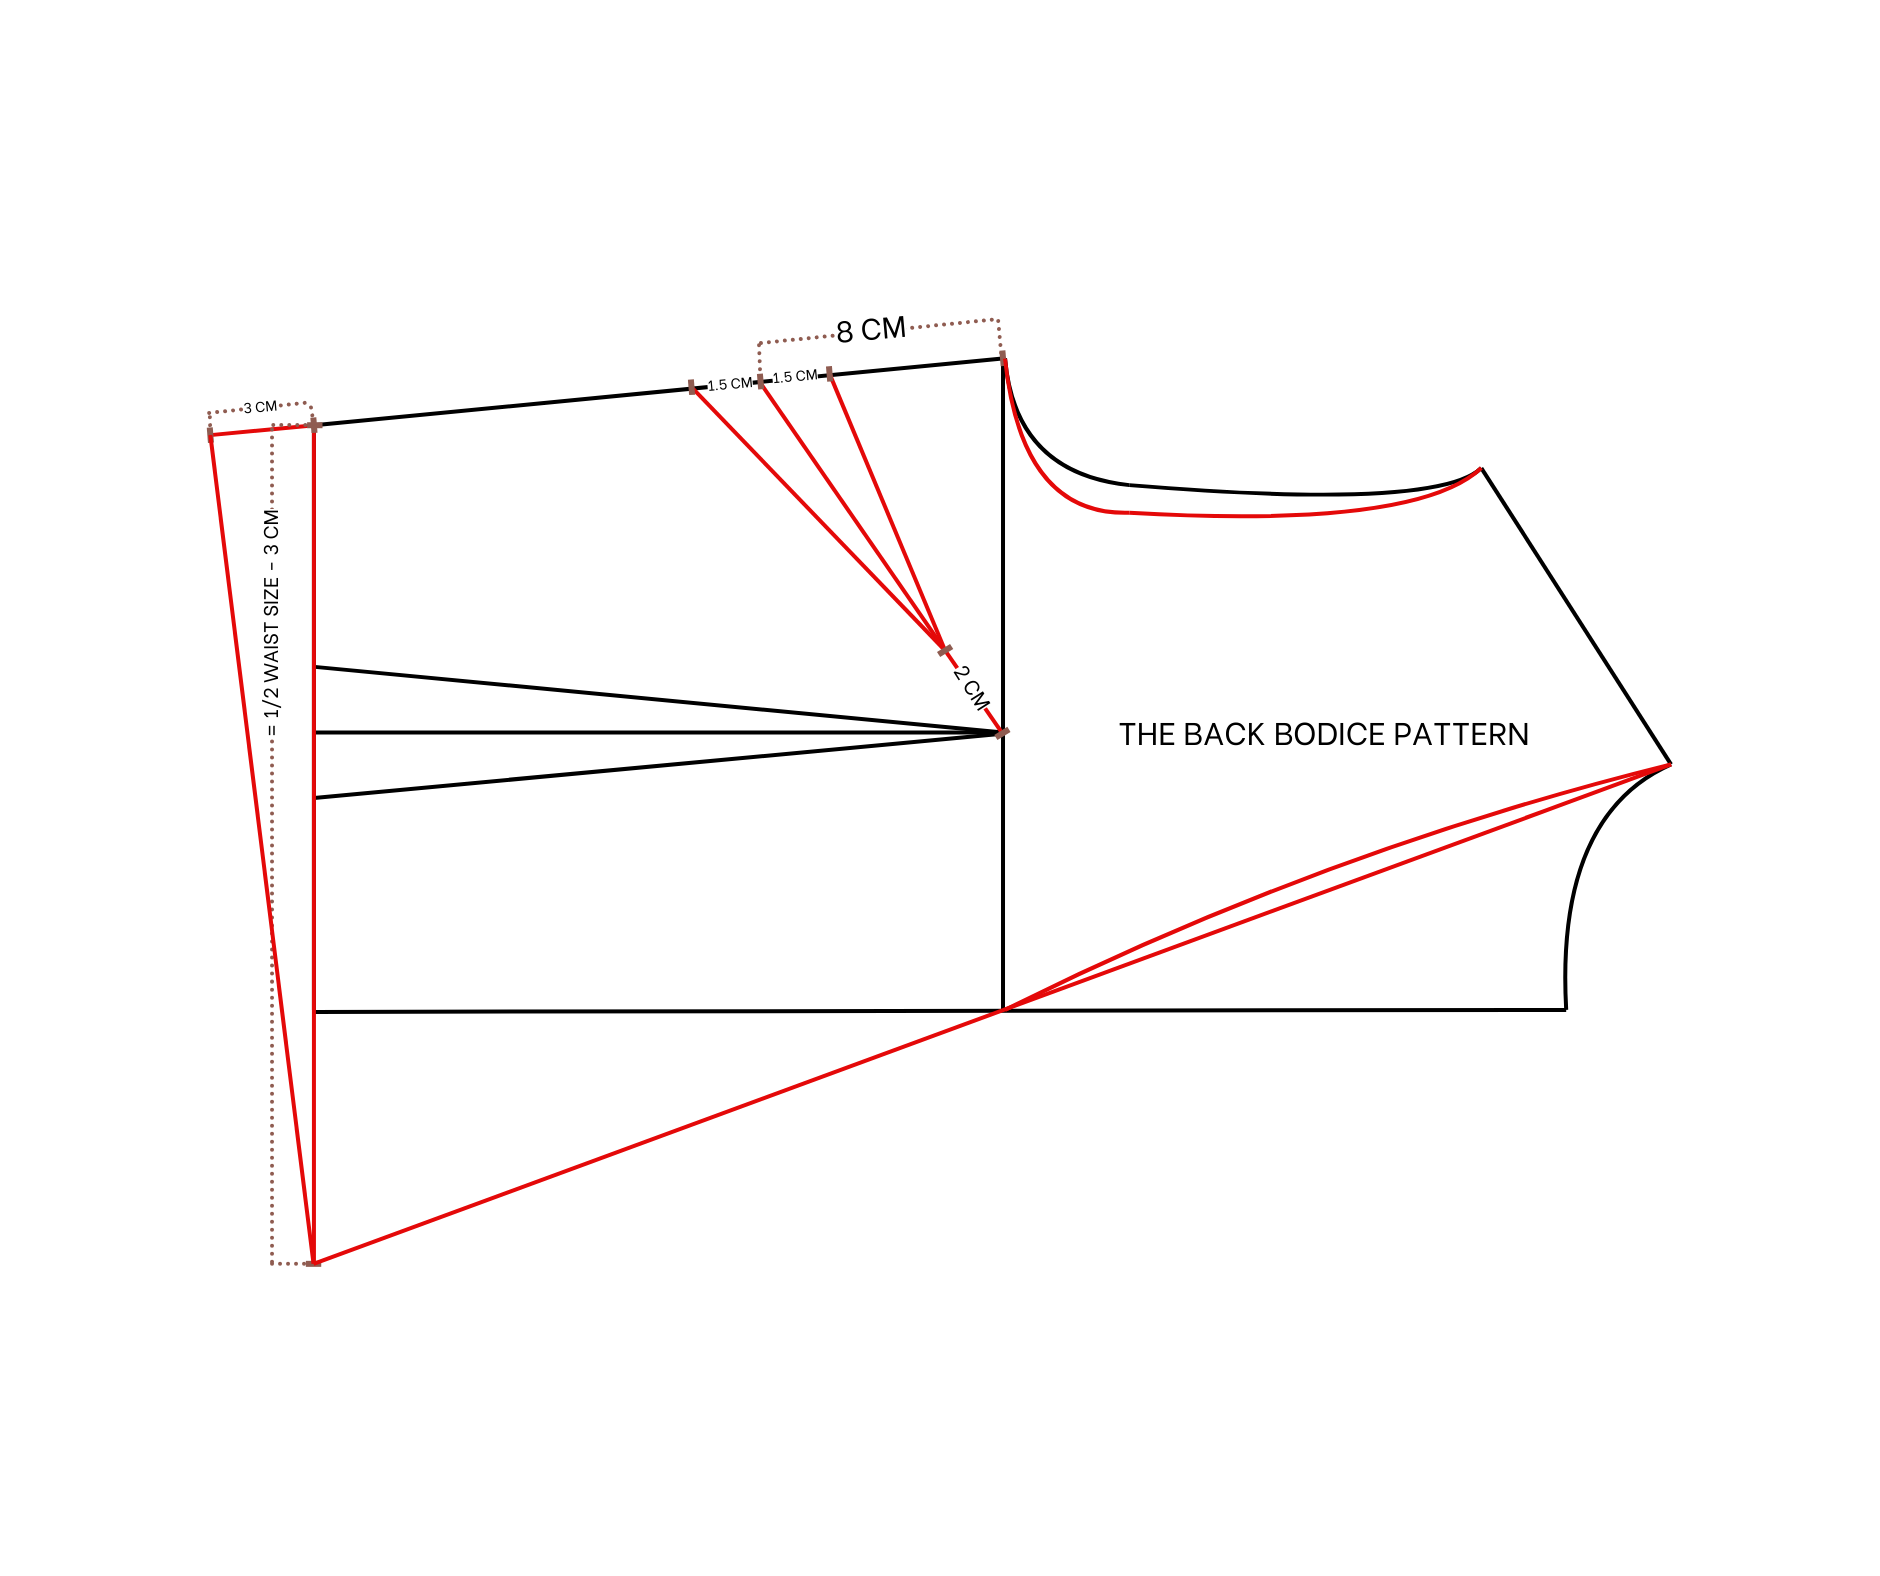
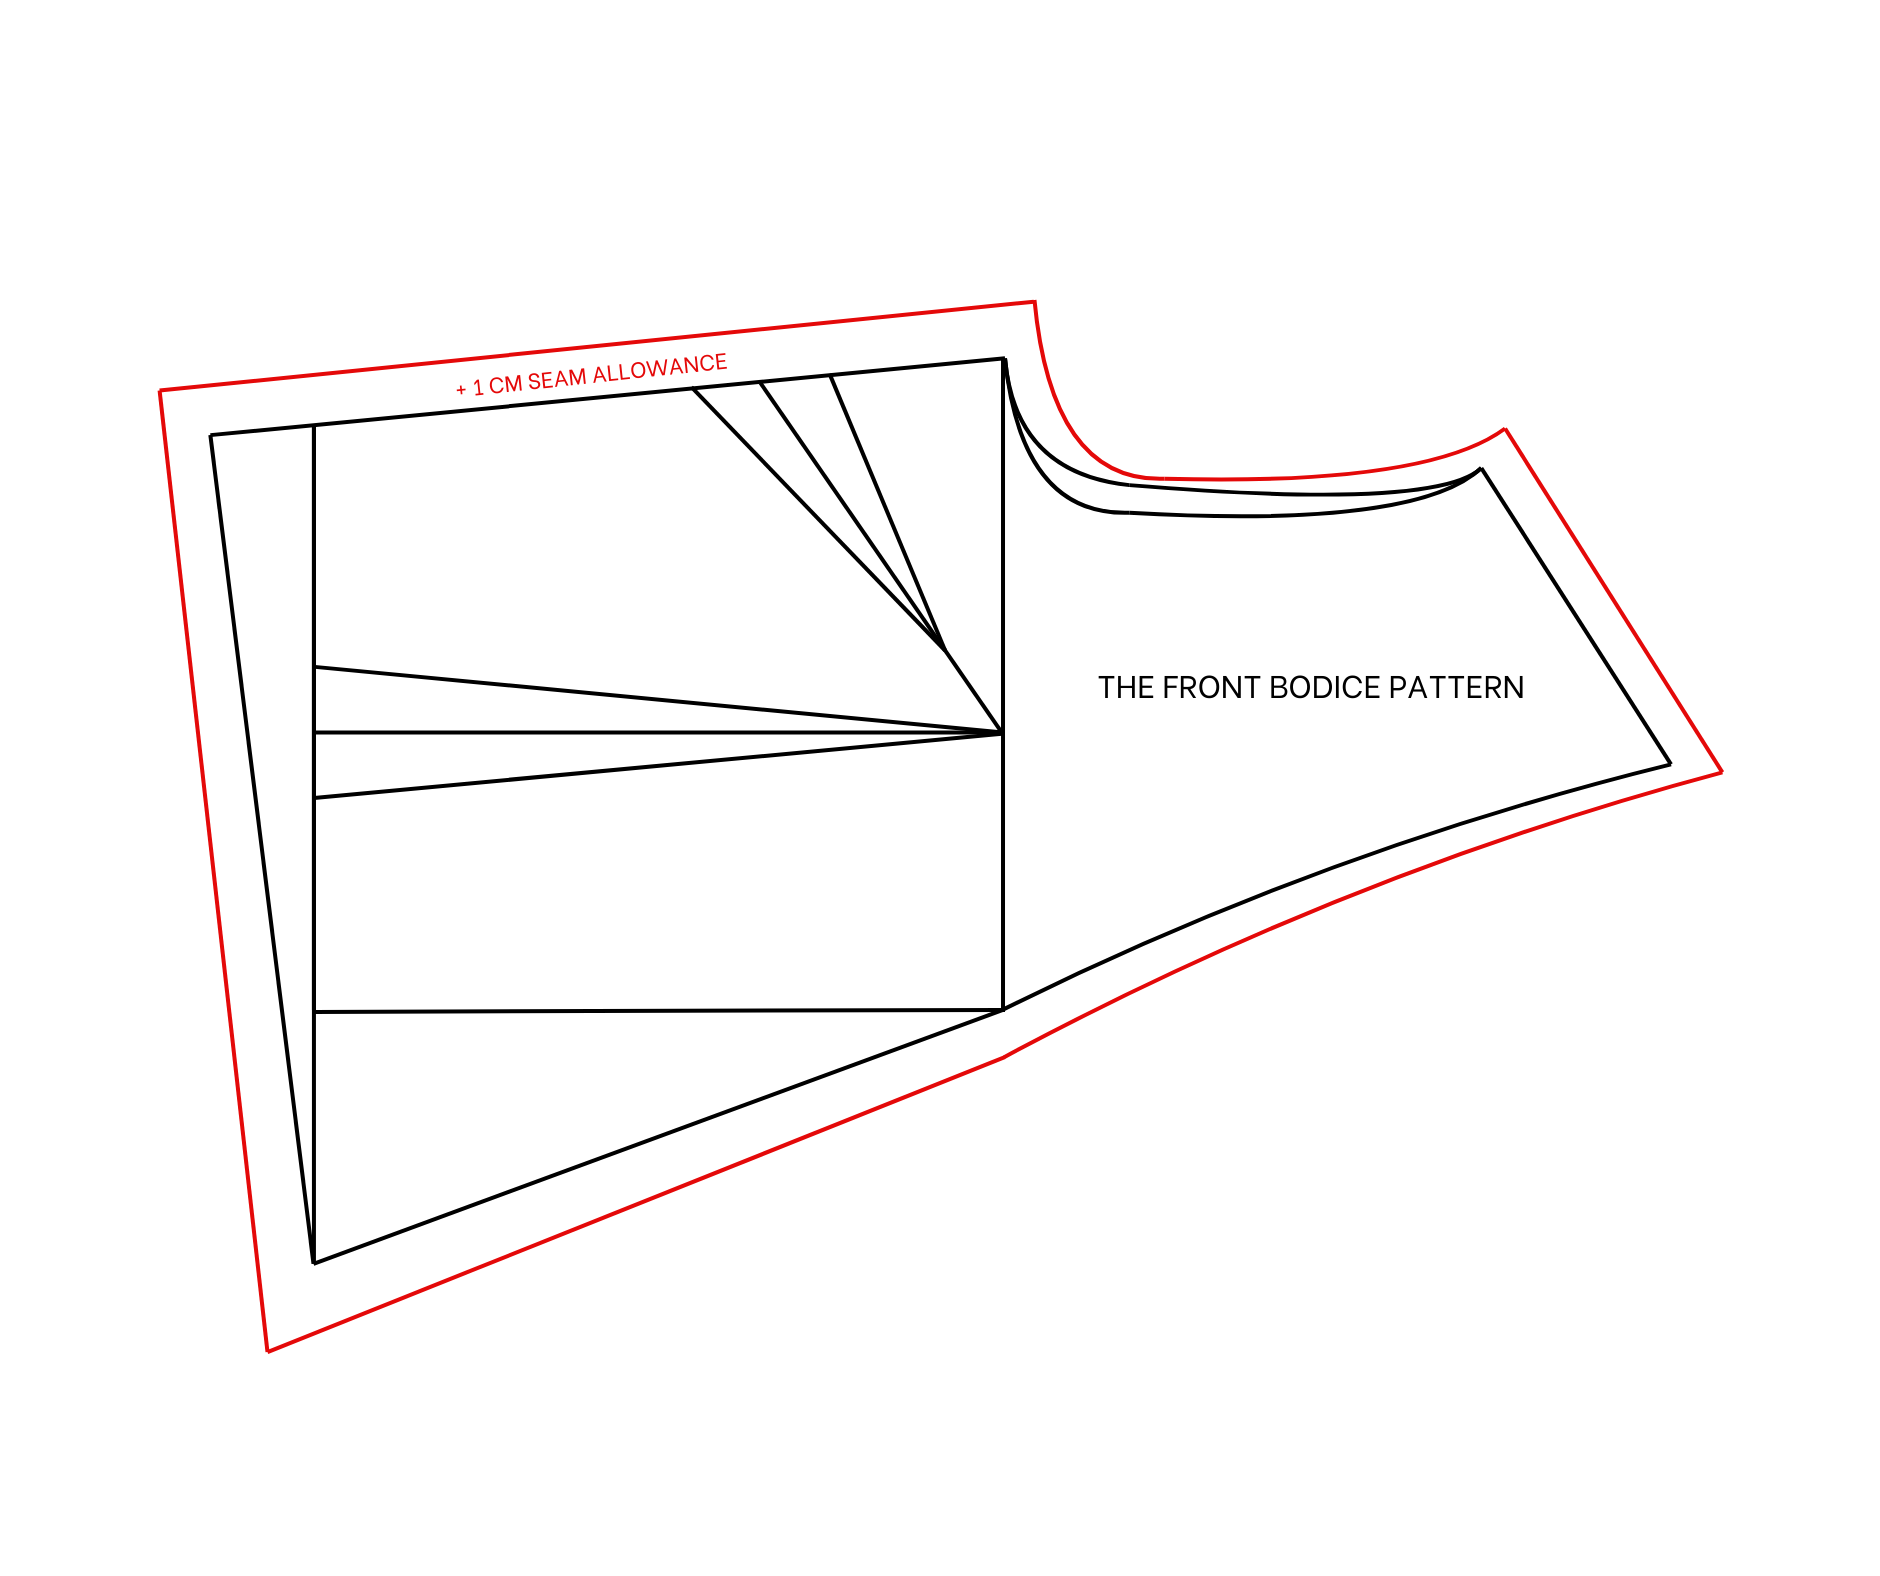
The front bodice pattern
Use the back pattern to create the front pattern for the top dress.
Extend the waistline outward from the middle line.
The width of the new waistline will be 29 cm, which is half of the waist size minus 3 cm. Then connect one end of the waistline to the top of the neckline to create a new neckline for the front dress.
To create the dart at the bust area of the front pattern, mark 8 cm below the armpit line, then connect it to the middle of the bust line.
From this mark, make two additional marks 1.5 cm outside of it, then connect these two marks to a mark 2 cm below the other end of the dart line.
Since there is 3 cm extra for the dart on the side line, increase the sideline by 3 cm at the end to match the sideline of the back pattern.
As a result, redraw the ending line of the front pattern.
Add 1 cm for seam allowance afterward.
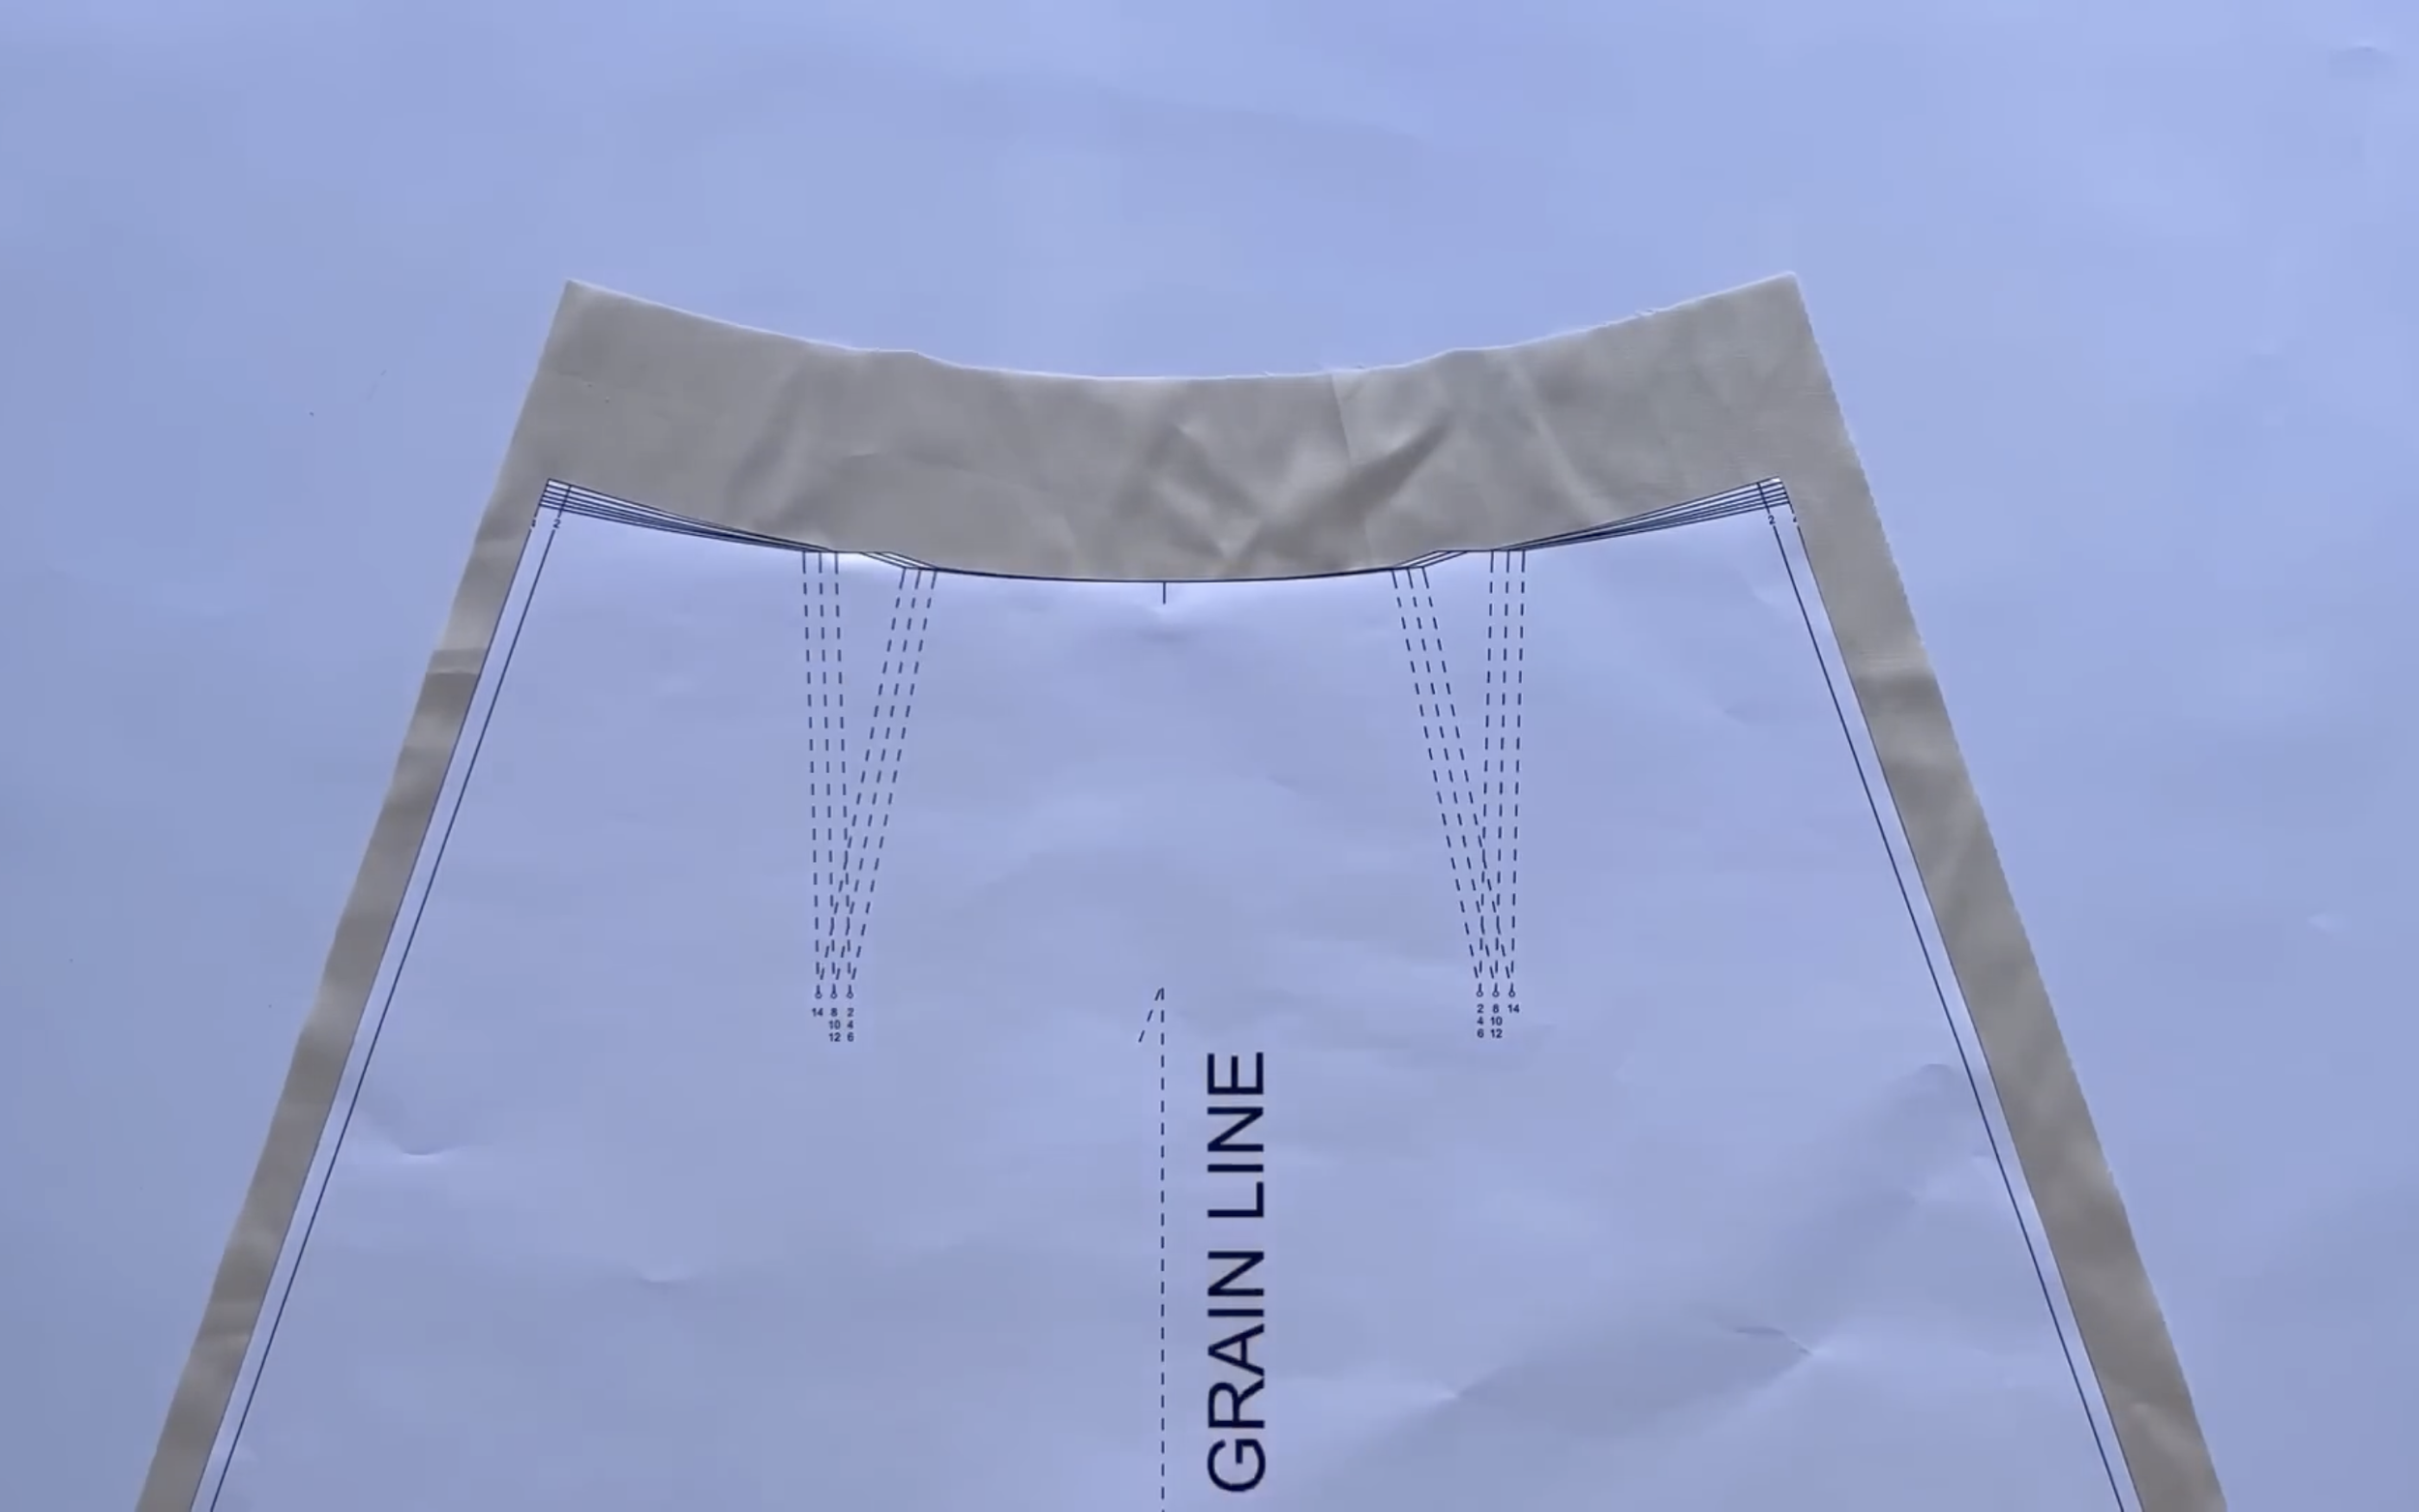
THE SLEEVE PATTERN
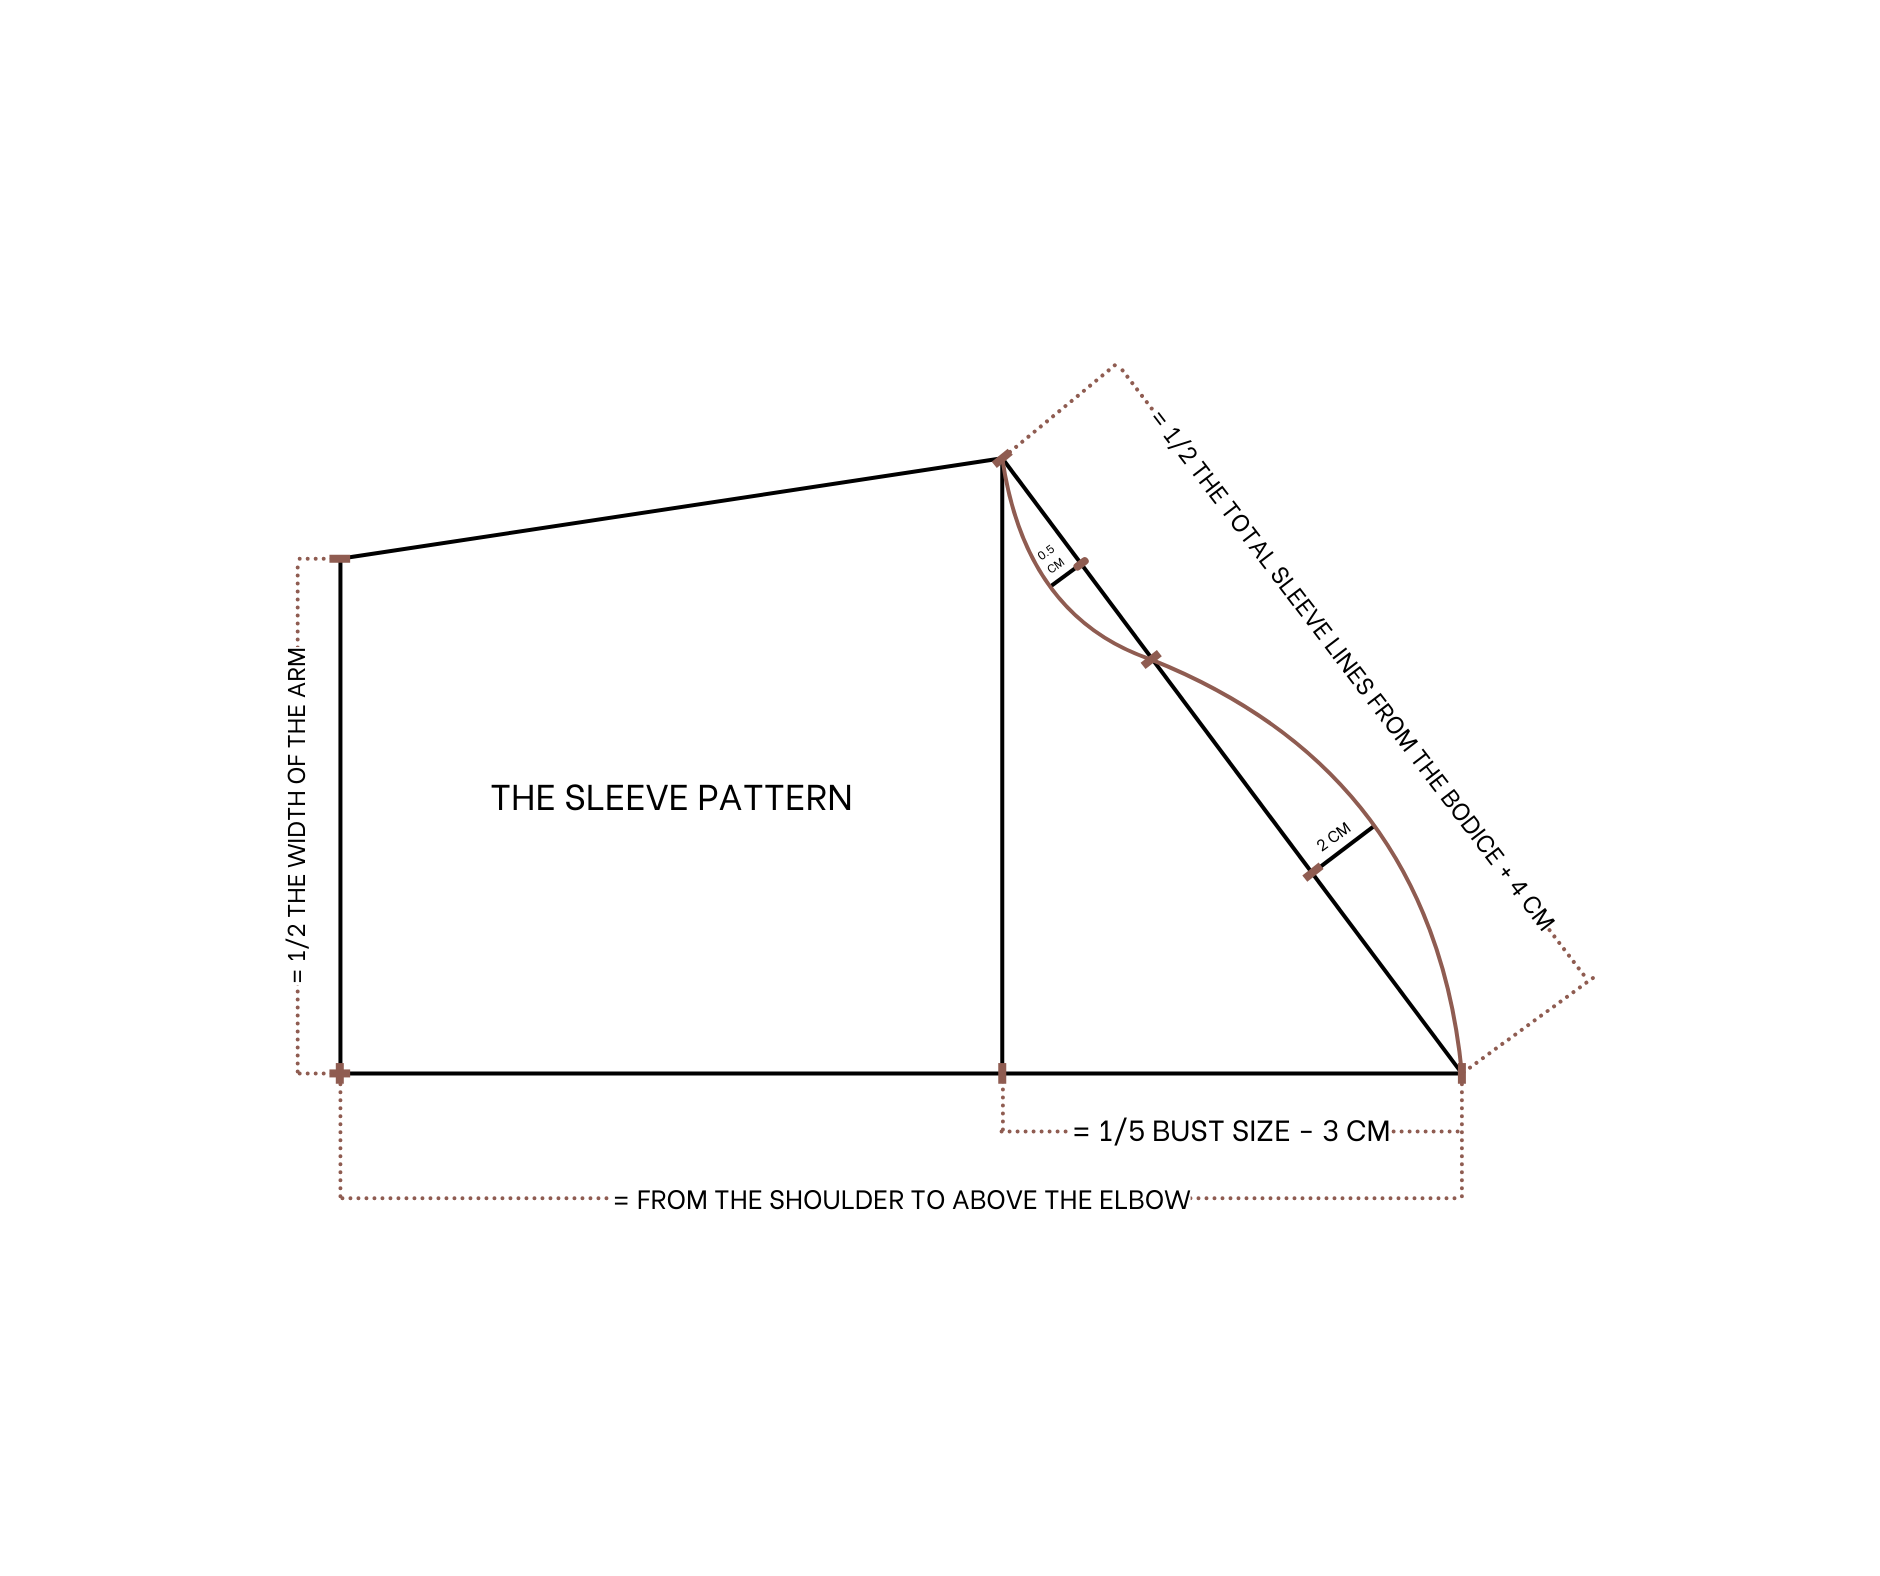
The sleeve pattern
Measure the total width of the sleeve line on both the front and back patterns first.
Draw a straight line and a horizontal line intersecting each other.
From the intersection point, mark 13 cm to the right on the horizontal line, which is one-fifth of the bust size minus 3 cm, and represents the top of the sleeve.
Then draw a slanted line from this mark that intersects the straight line.
The width of this slanted line will be 24 cm, which is half the total width of the sleeve line from the front and back bodice, plus 4 cm for the gathering fabric to create the puff at the top of the sleeve.
Divide the slanted line into three equal parts.
From the middle of the first two parts, draw an outward perpendicular line 2 cm long.
From the middle of the third part, draw an inward perpendicular line 0.5 cm wide.
Then draw a curved line through these marks to create the sleeve line for the sleeve pattern.
From the top of the sleeve, mark 30 cm along the horizontal line, which is the length from the shoulder to above the elbow.
It’s also the desired sleeve length. Then draw a straight line through that mark.Mark up 16 cm on this new straight line, representing half the desired sleeve width. Ensure this width is larger than the arm’s width.
Then connect that mark to the end of the sleeve line to create the underarm line of the sleeve pattern.
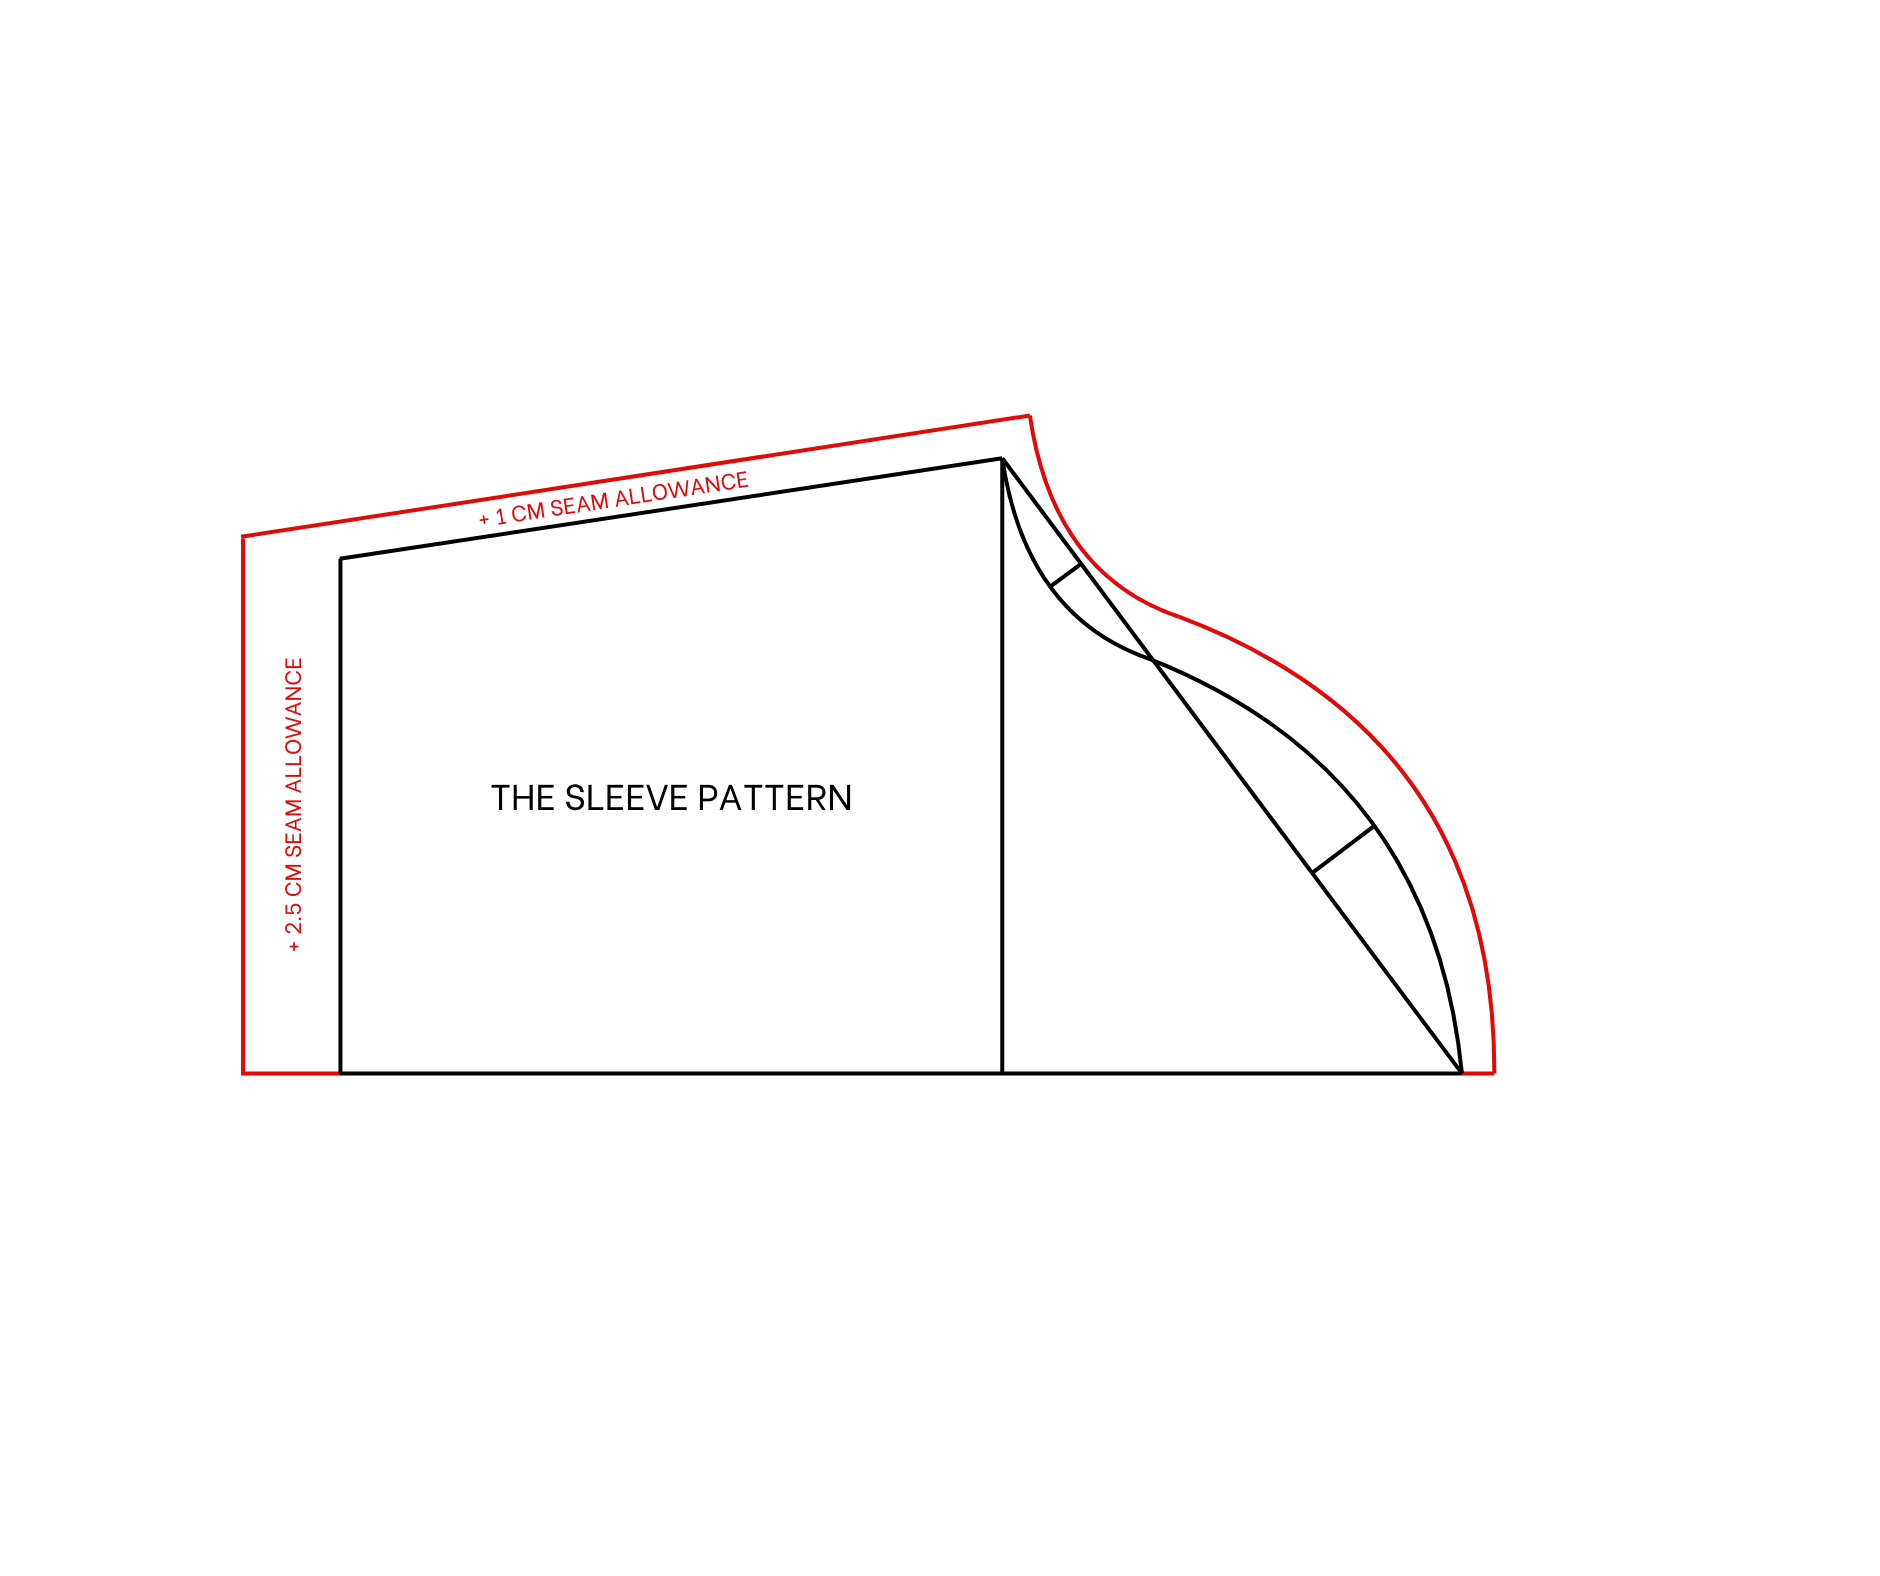
Add 1 cm for seam allowance afterward, except along the horizontal line, as this pattern will be cut on folded fabric.
THE BACK SKIRT PATTERN
The back skirt pattern
Draw a straight line and a horizontal line intersecting each other. The straight line will be the waistline of the skirt.
From the first straight line, draw another one 23 cm away, which is a quarter of the hip size, marking the hip line of the skirt.
Next, draw another line 80 cm away from the first one, representing the length of the skirt from the belly button to just over the knee, also the desired dress length.
From one end of the first line, mark 19 cm up, which is a quarter of the waist size plus 3 cm for the dart.
From one end of the second straight line, mark 24 cm up, which is a quarter of the hip size plus 1 cm.
Connect these two marks together. This line will intersect the ending line at one point, creating the sideline of the skirt pattern.
From one end of the waistline, mark 1 cm along the horizontal line.
Draw a curved line connecting this mark to the other end of the first straight line to create the waistline of the skirt pattern.
Mark the middle of the new waistline first, then draw a perpendicular line from that mark. The width of this line will be 15 cm.
From the mark on the waistline, make two additional marks 1.5 cm on either side of it, creating a width of 3 cm.
Connect these two marks to the end of the perpendicular line to finish the dart for the back of the skirt.
Measure the length of the horizontal line to ensure the same length for the side line.
Then connect the end of the side line to the other end of the horizontal line with a curved line to finish the ending line of the skirt pattern.
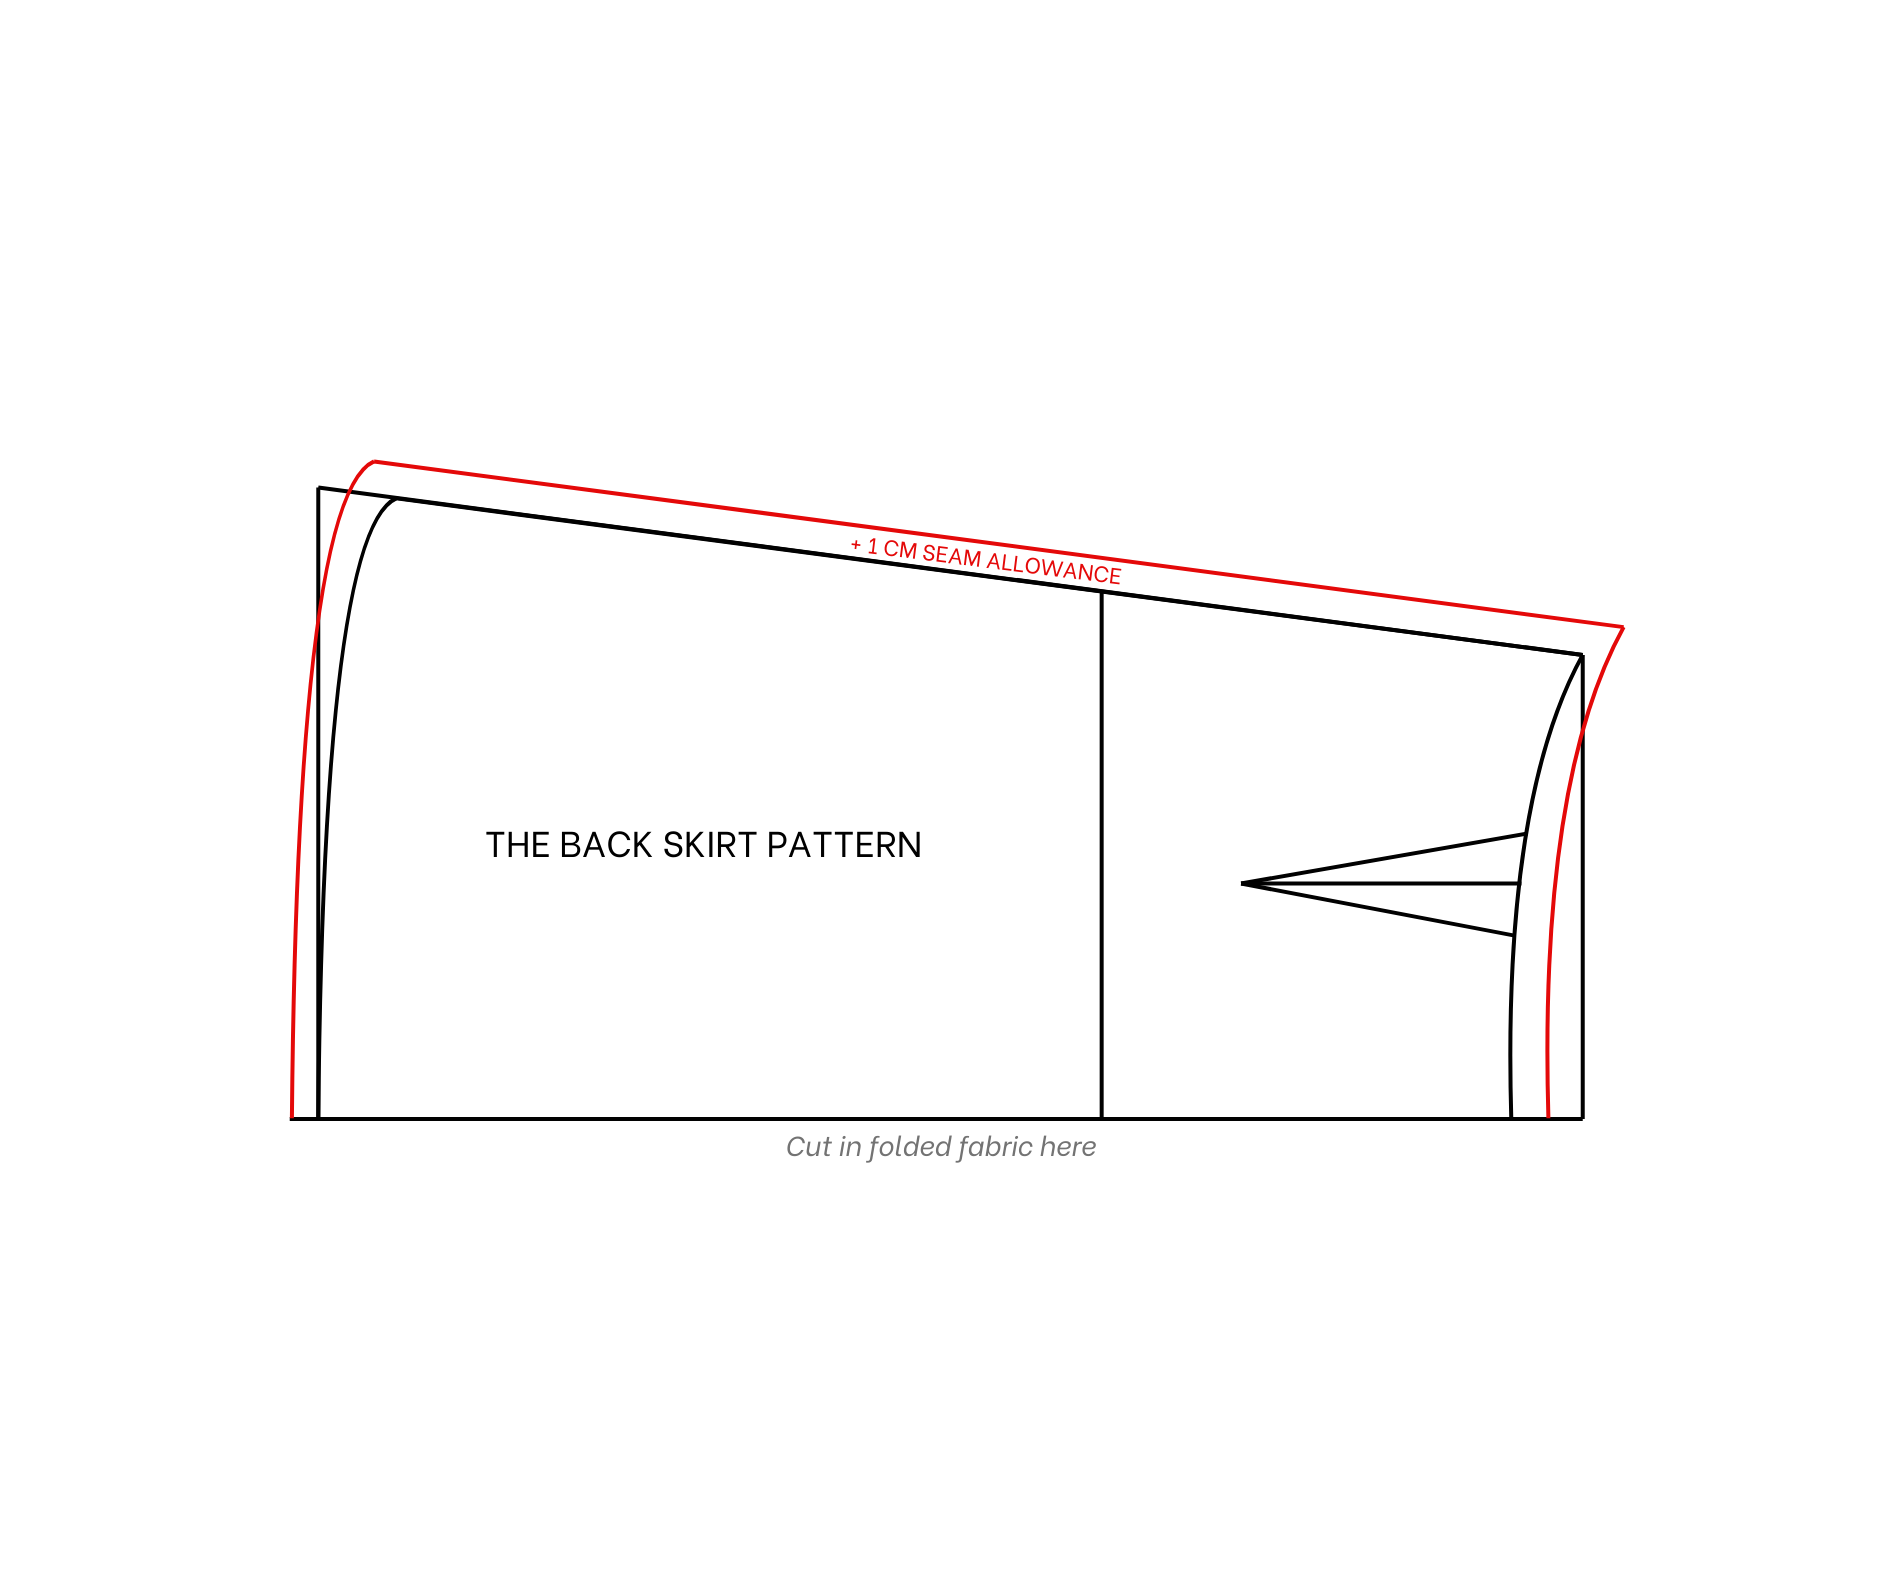
Add 1 cm for seam allowance afterward, except along the horizontal line, as this pattern will be cut on folded fabric.
THE FRONT SKIRT PATTERN
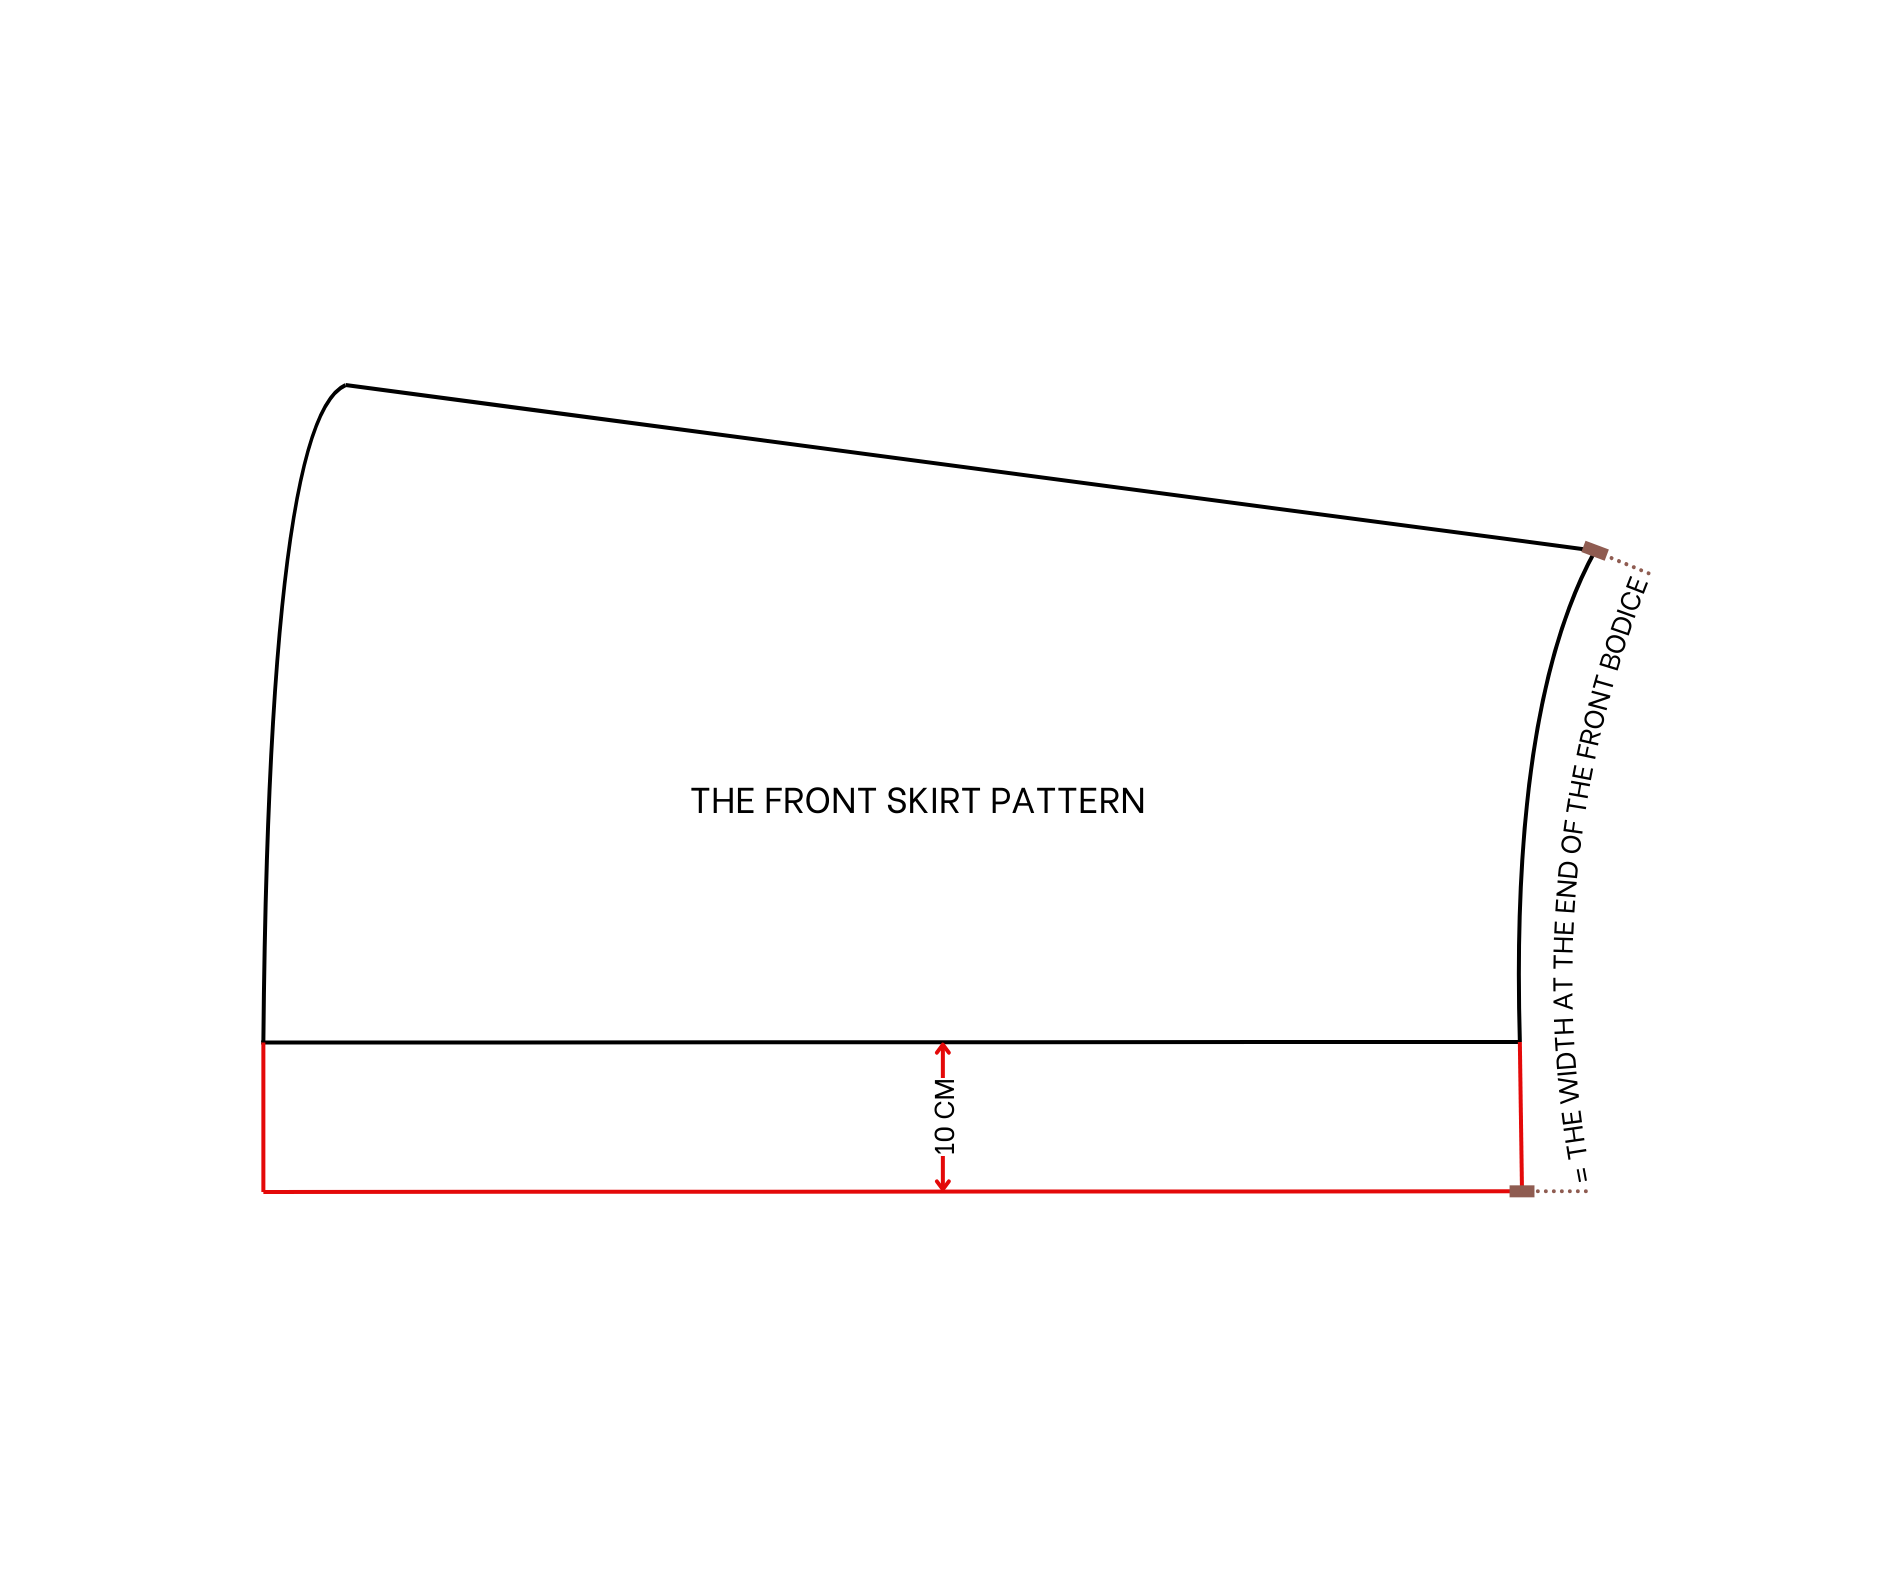
The front skirt pattern
To make the front skirt pattern, start by copying the back pattern.
Next, draw a new horizontal line 10 cm outside the current one. This will enlarge the waistline, making it the same as the waistline on the front part of the bodice.
This adjustment allows the two pieces to be connected later, and the front skirt pattern will be complete after cutting.
SEWING THE DRESS
THE BODICE
After cutting the bodice pieces, copy the dart from the pattern to the fabric.
Then sew to finish the dart.
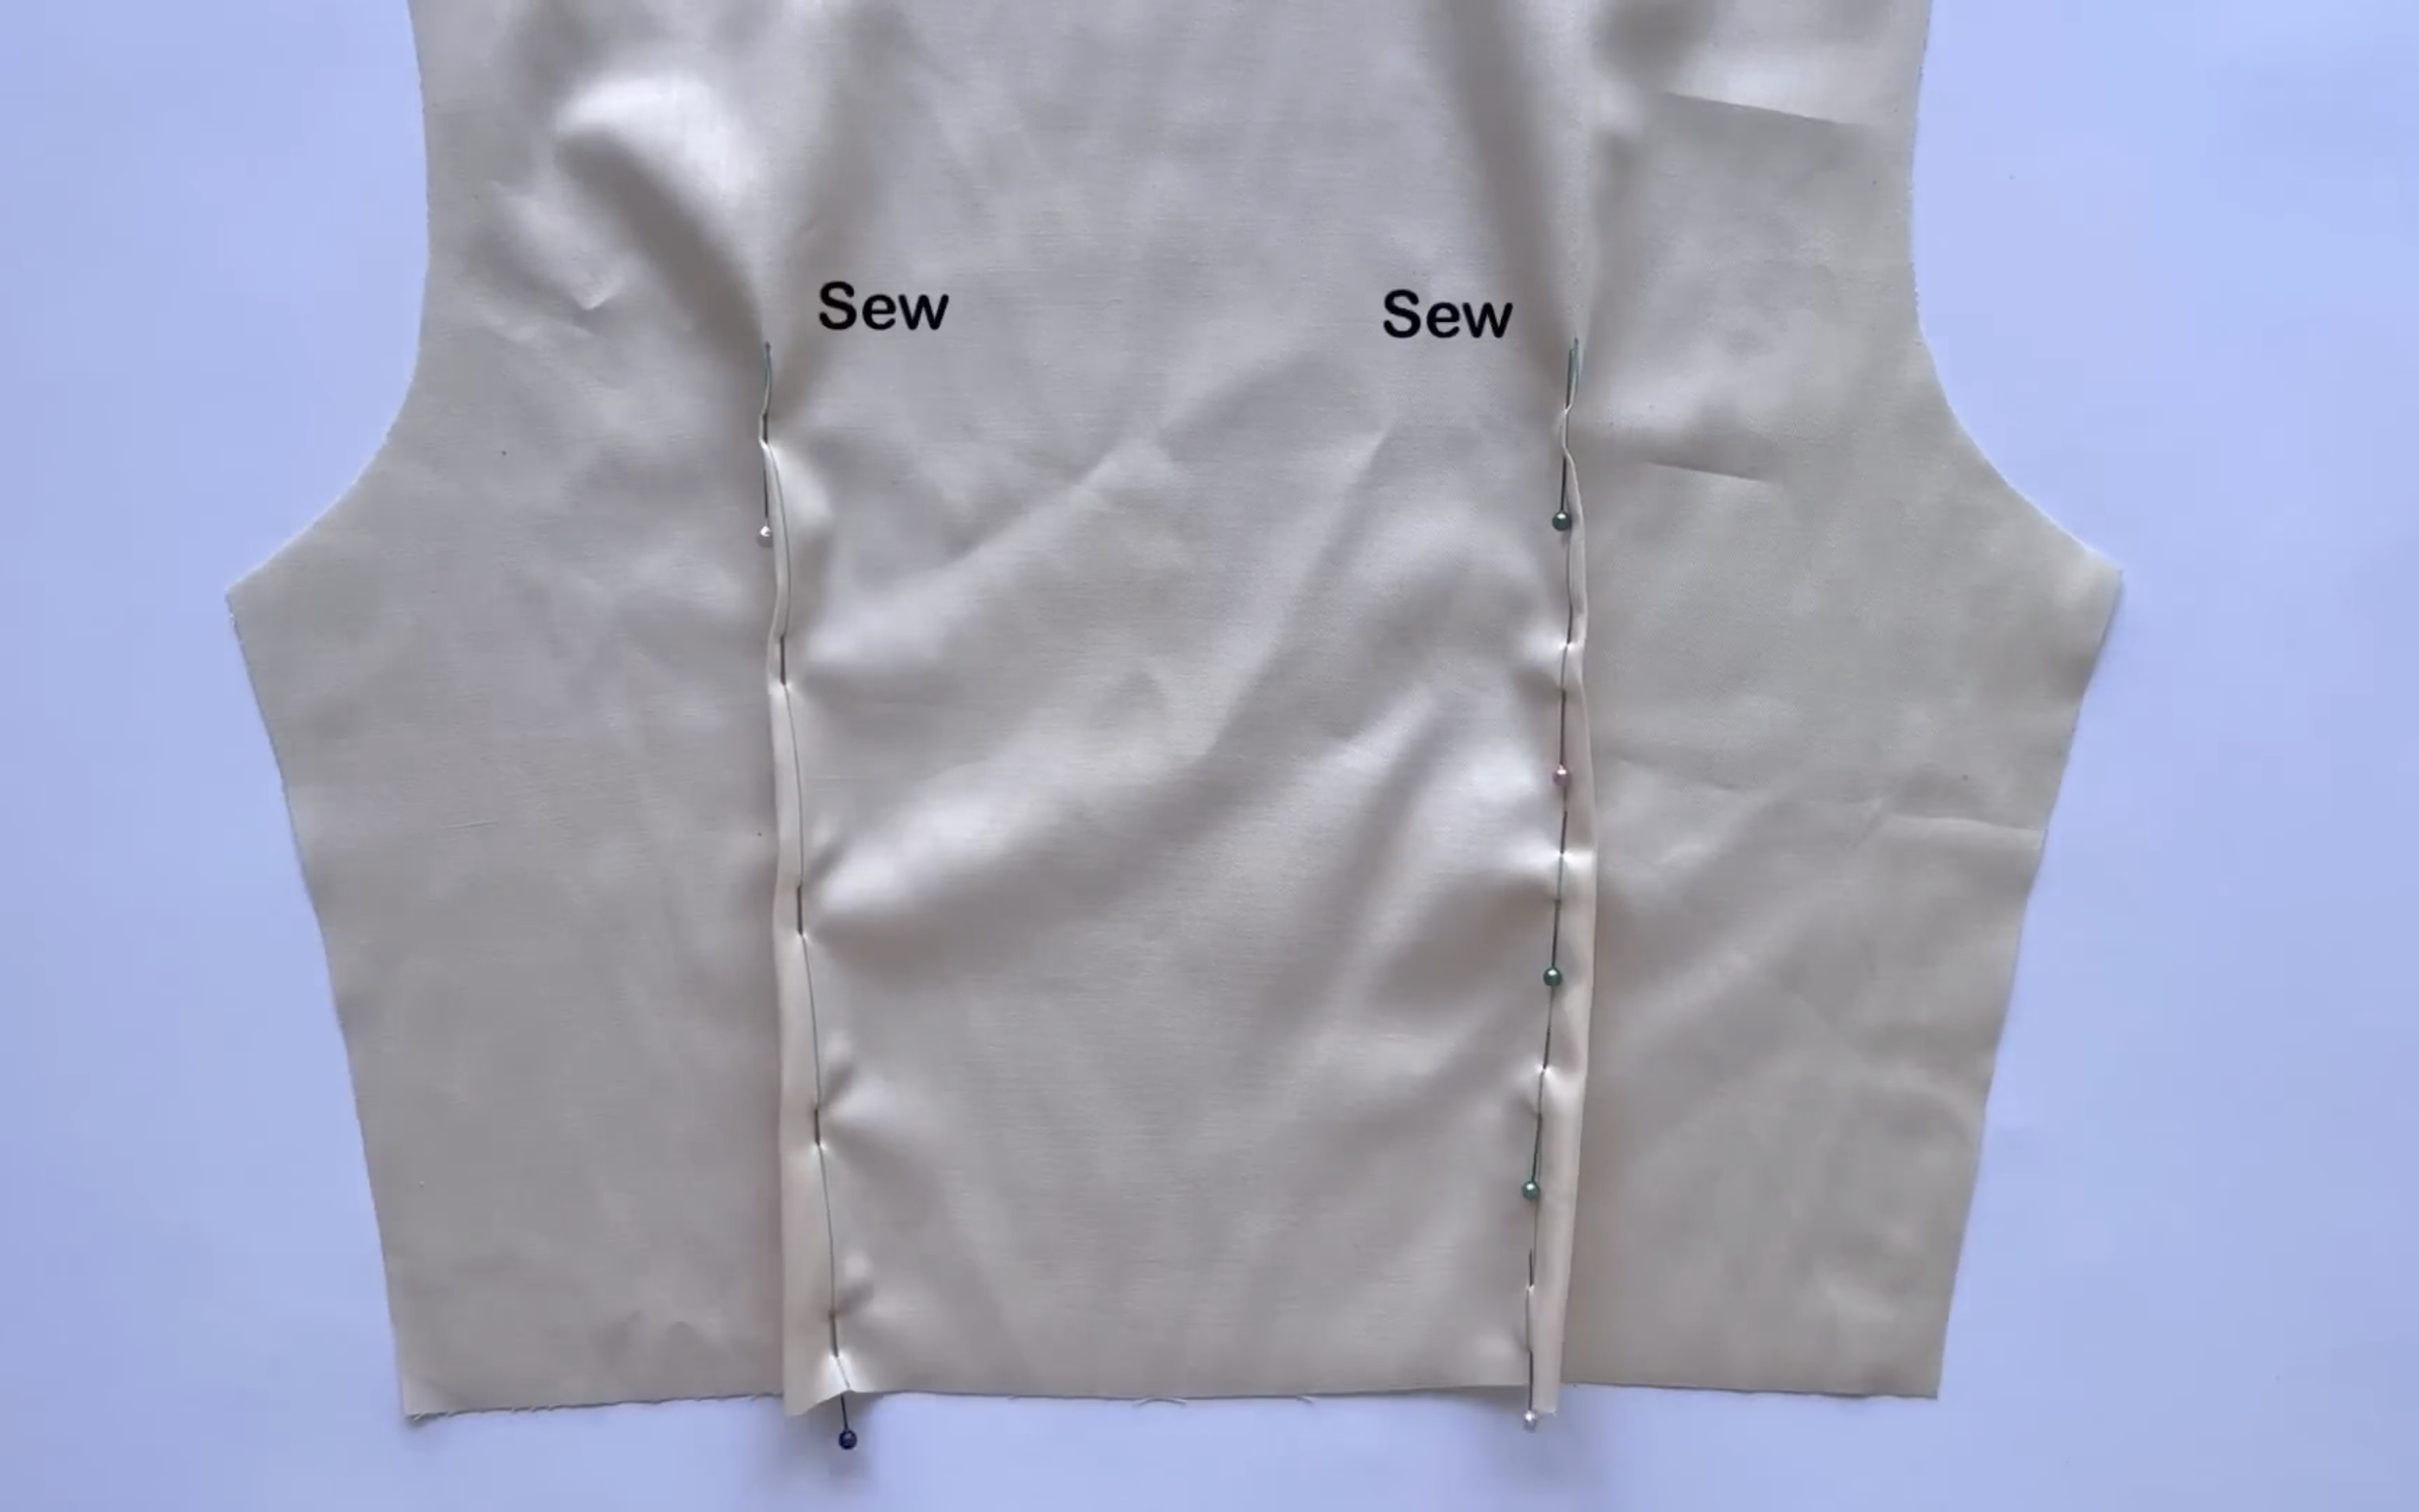
Do the same for the two front pieces and one back bodice piece.
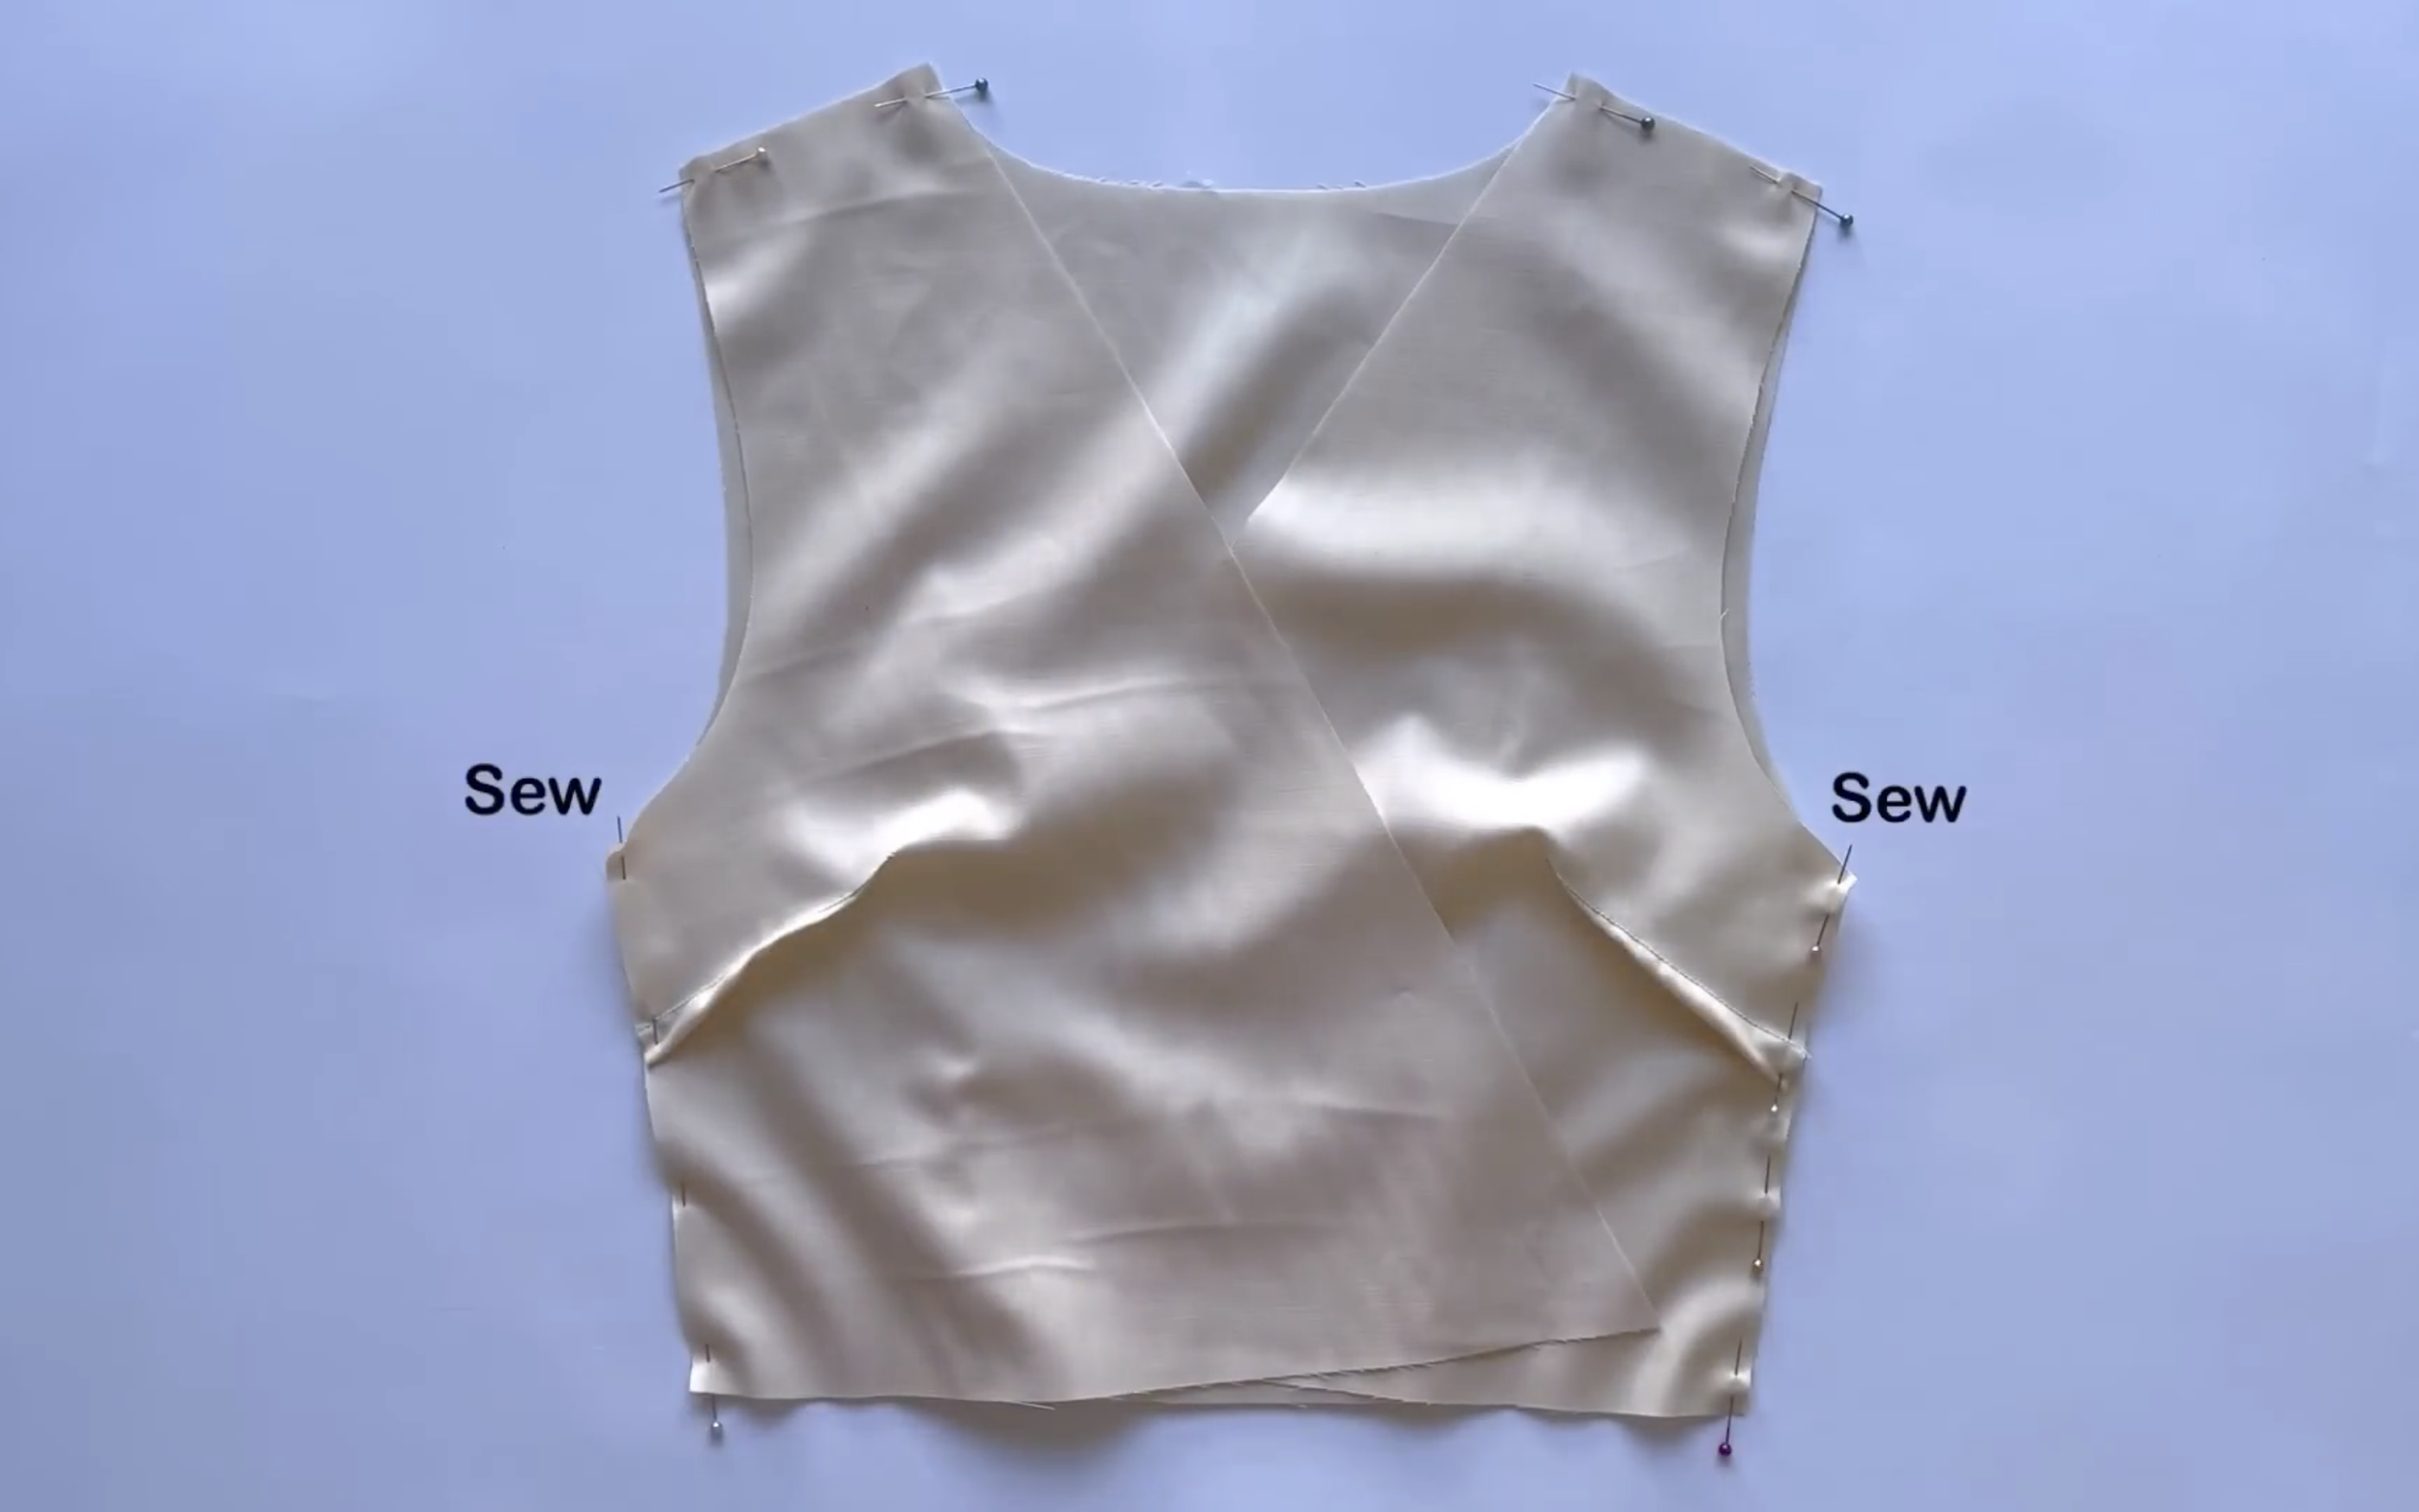
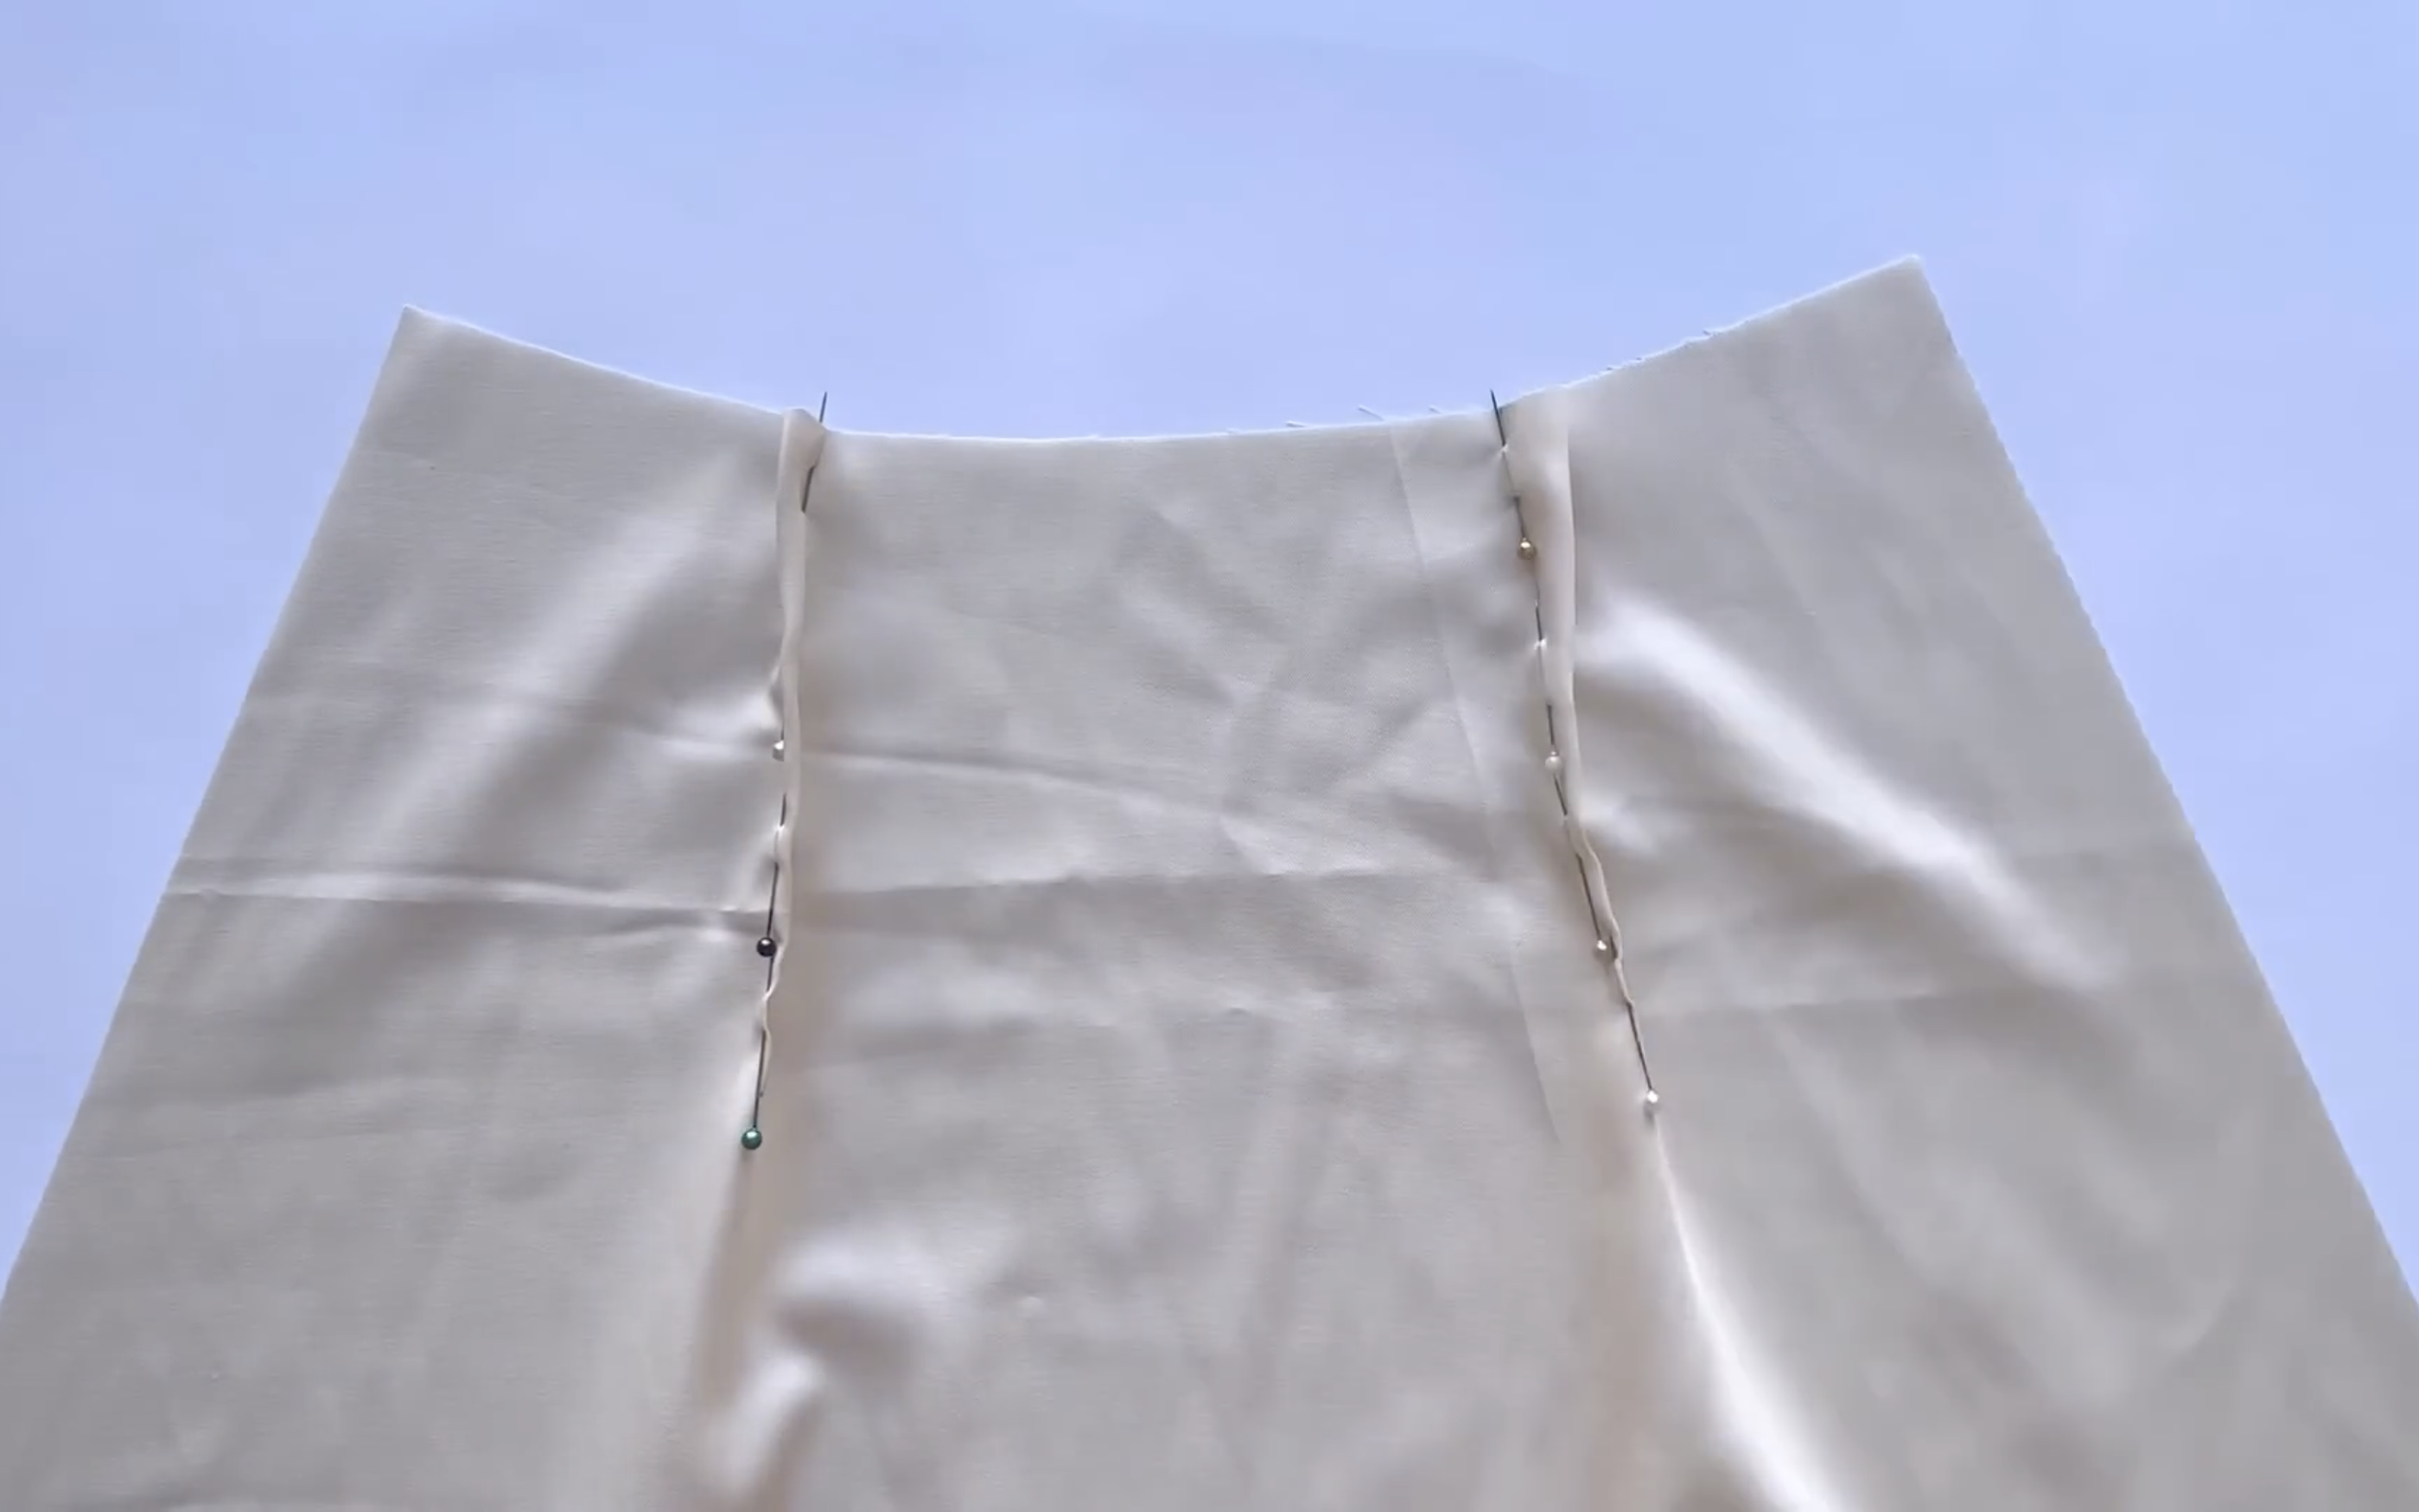
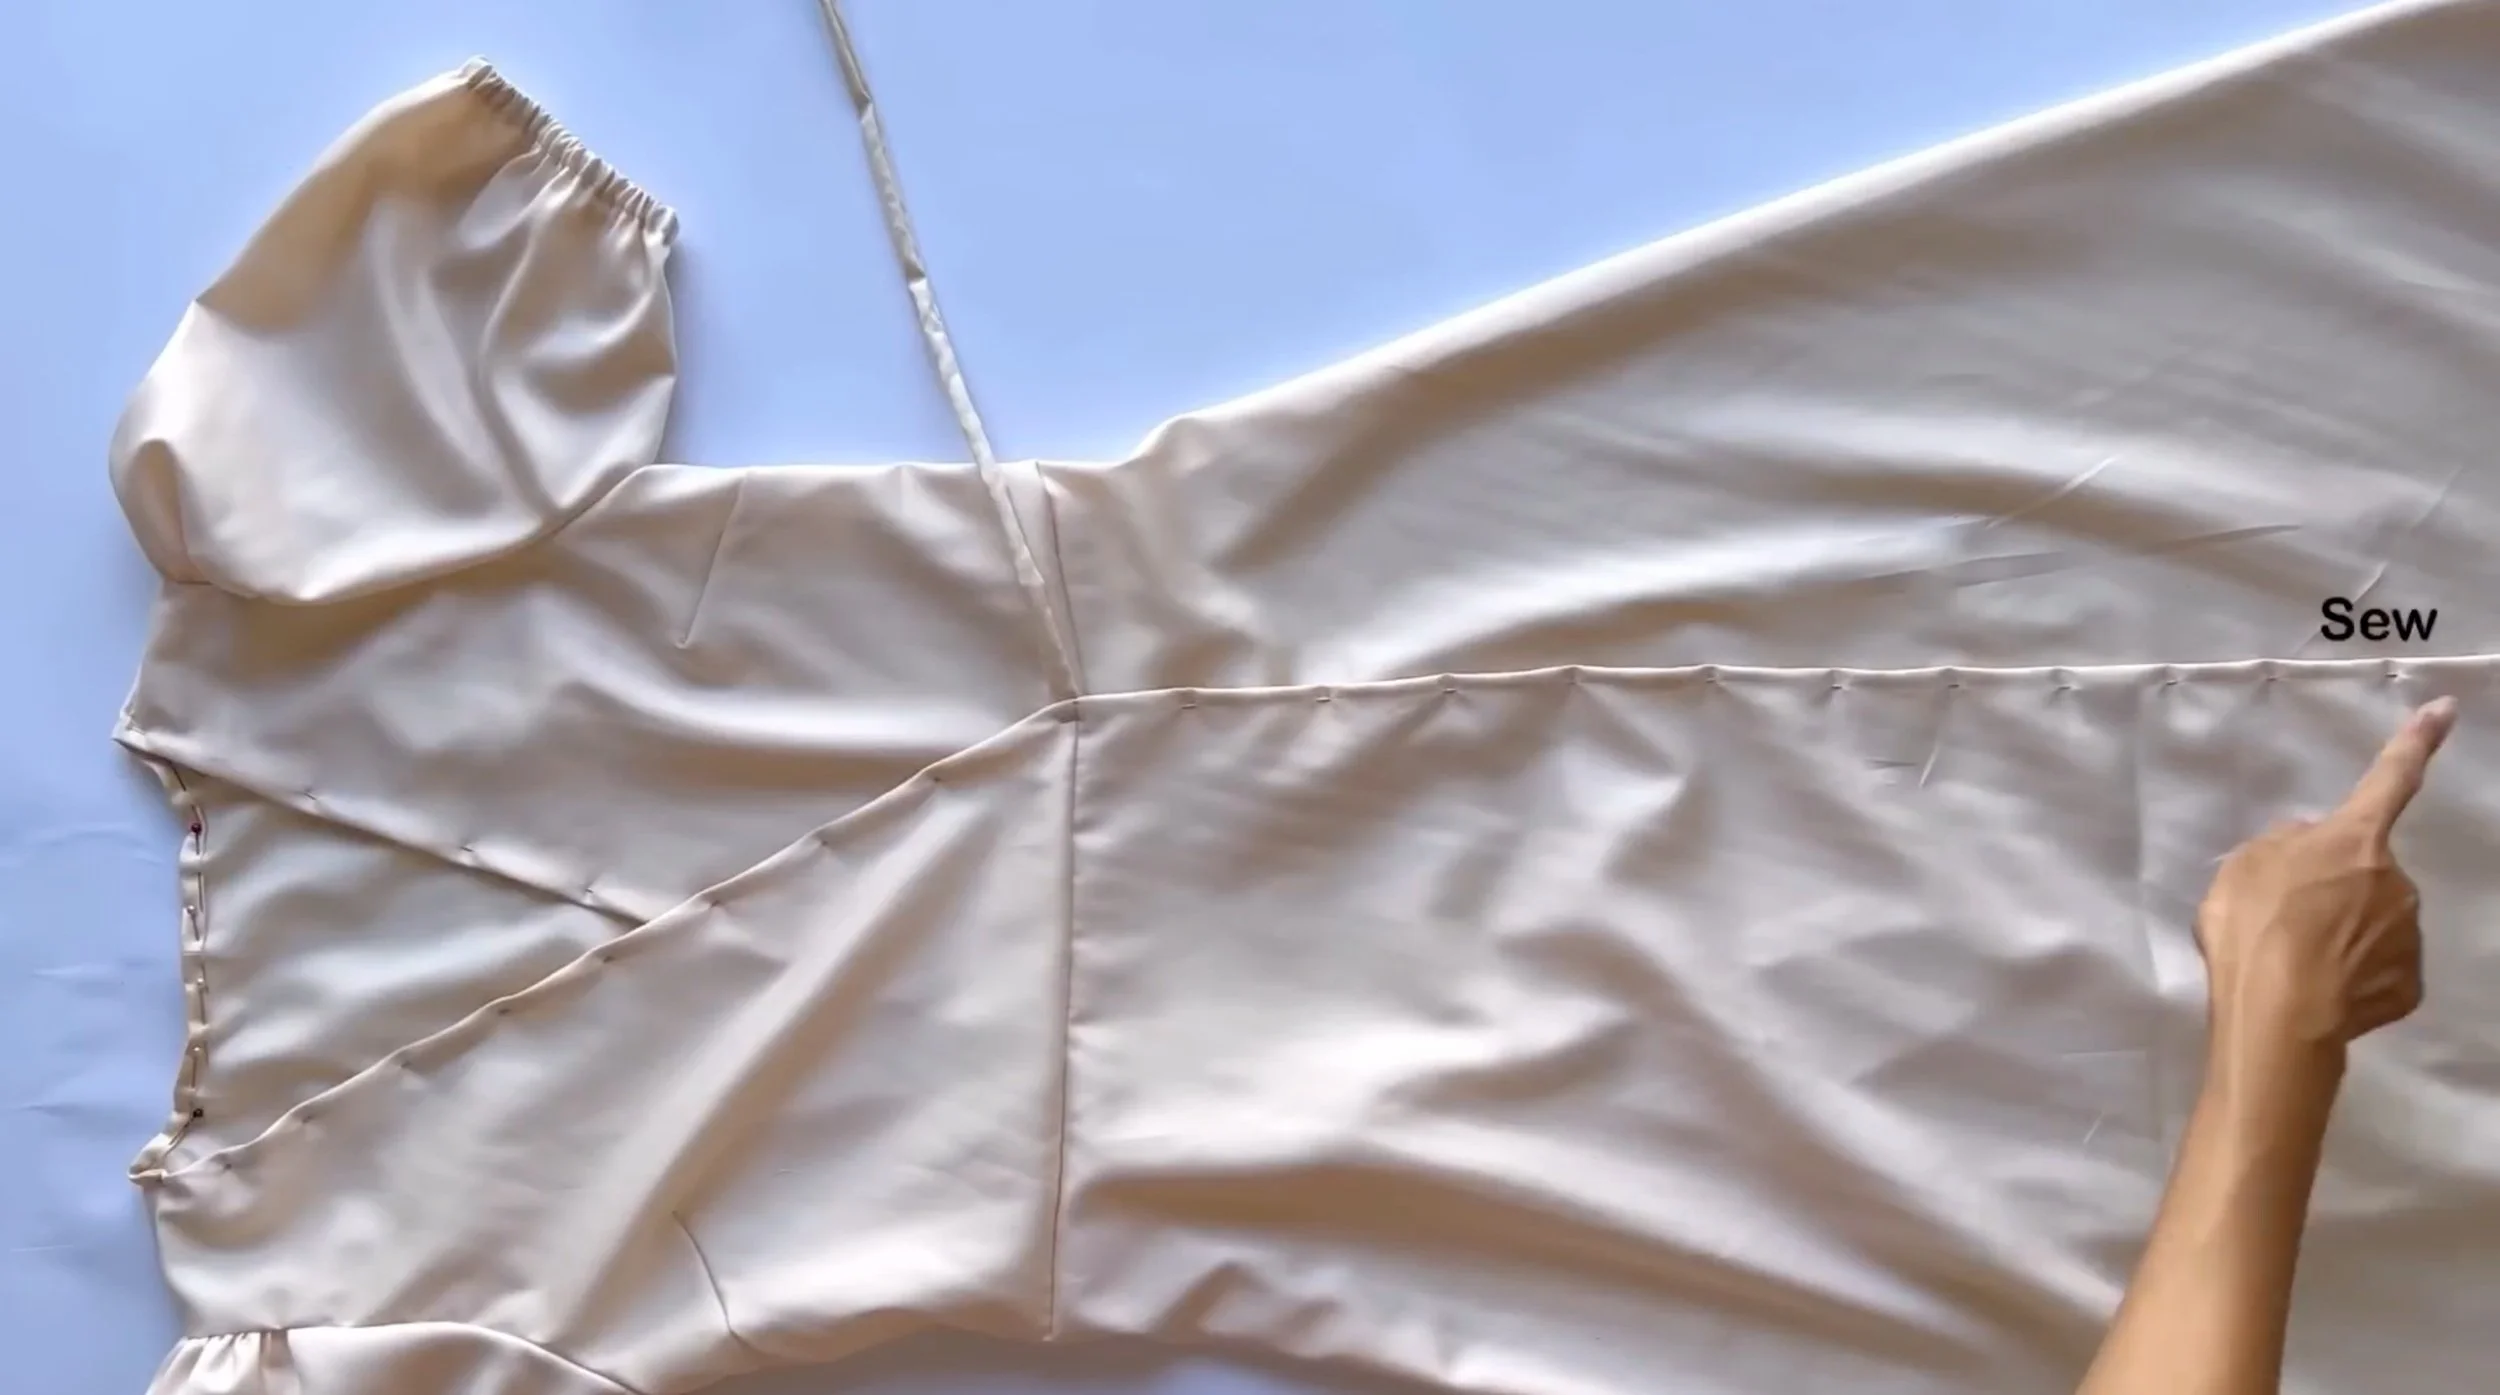
Next, connect the front and back bodice together at the shoulder and along the sides.
THE SLEEVE
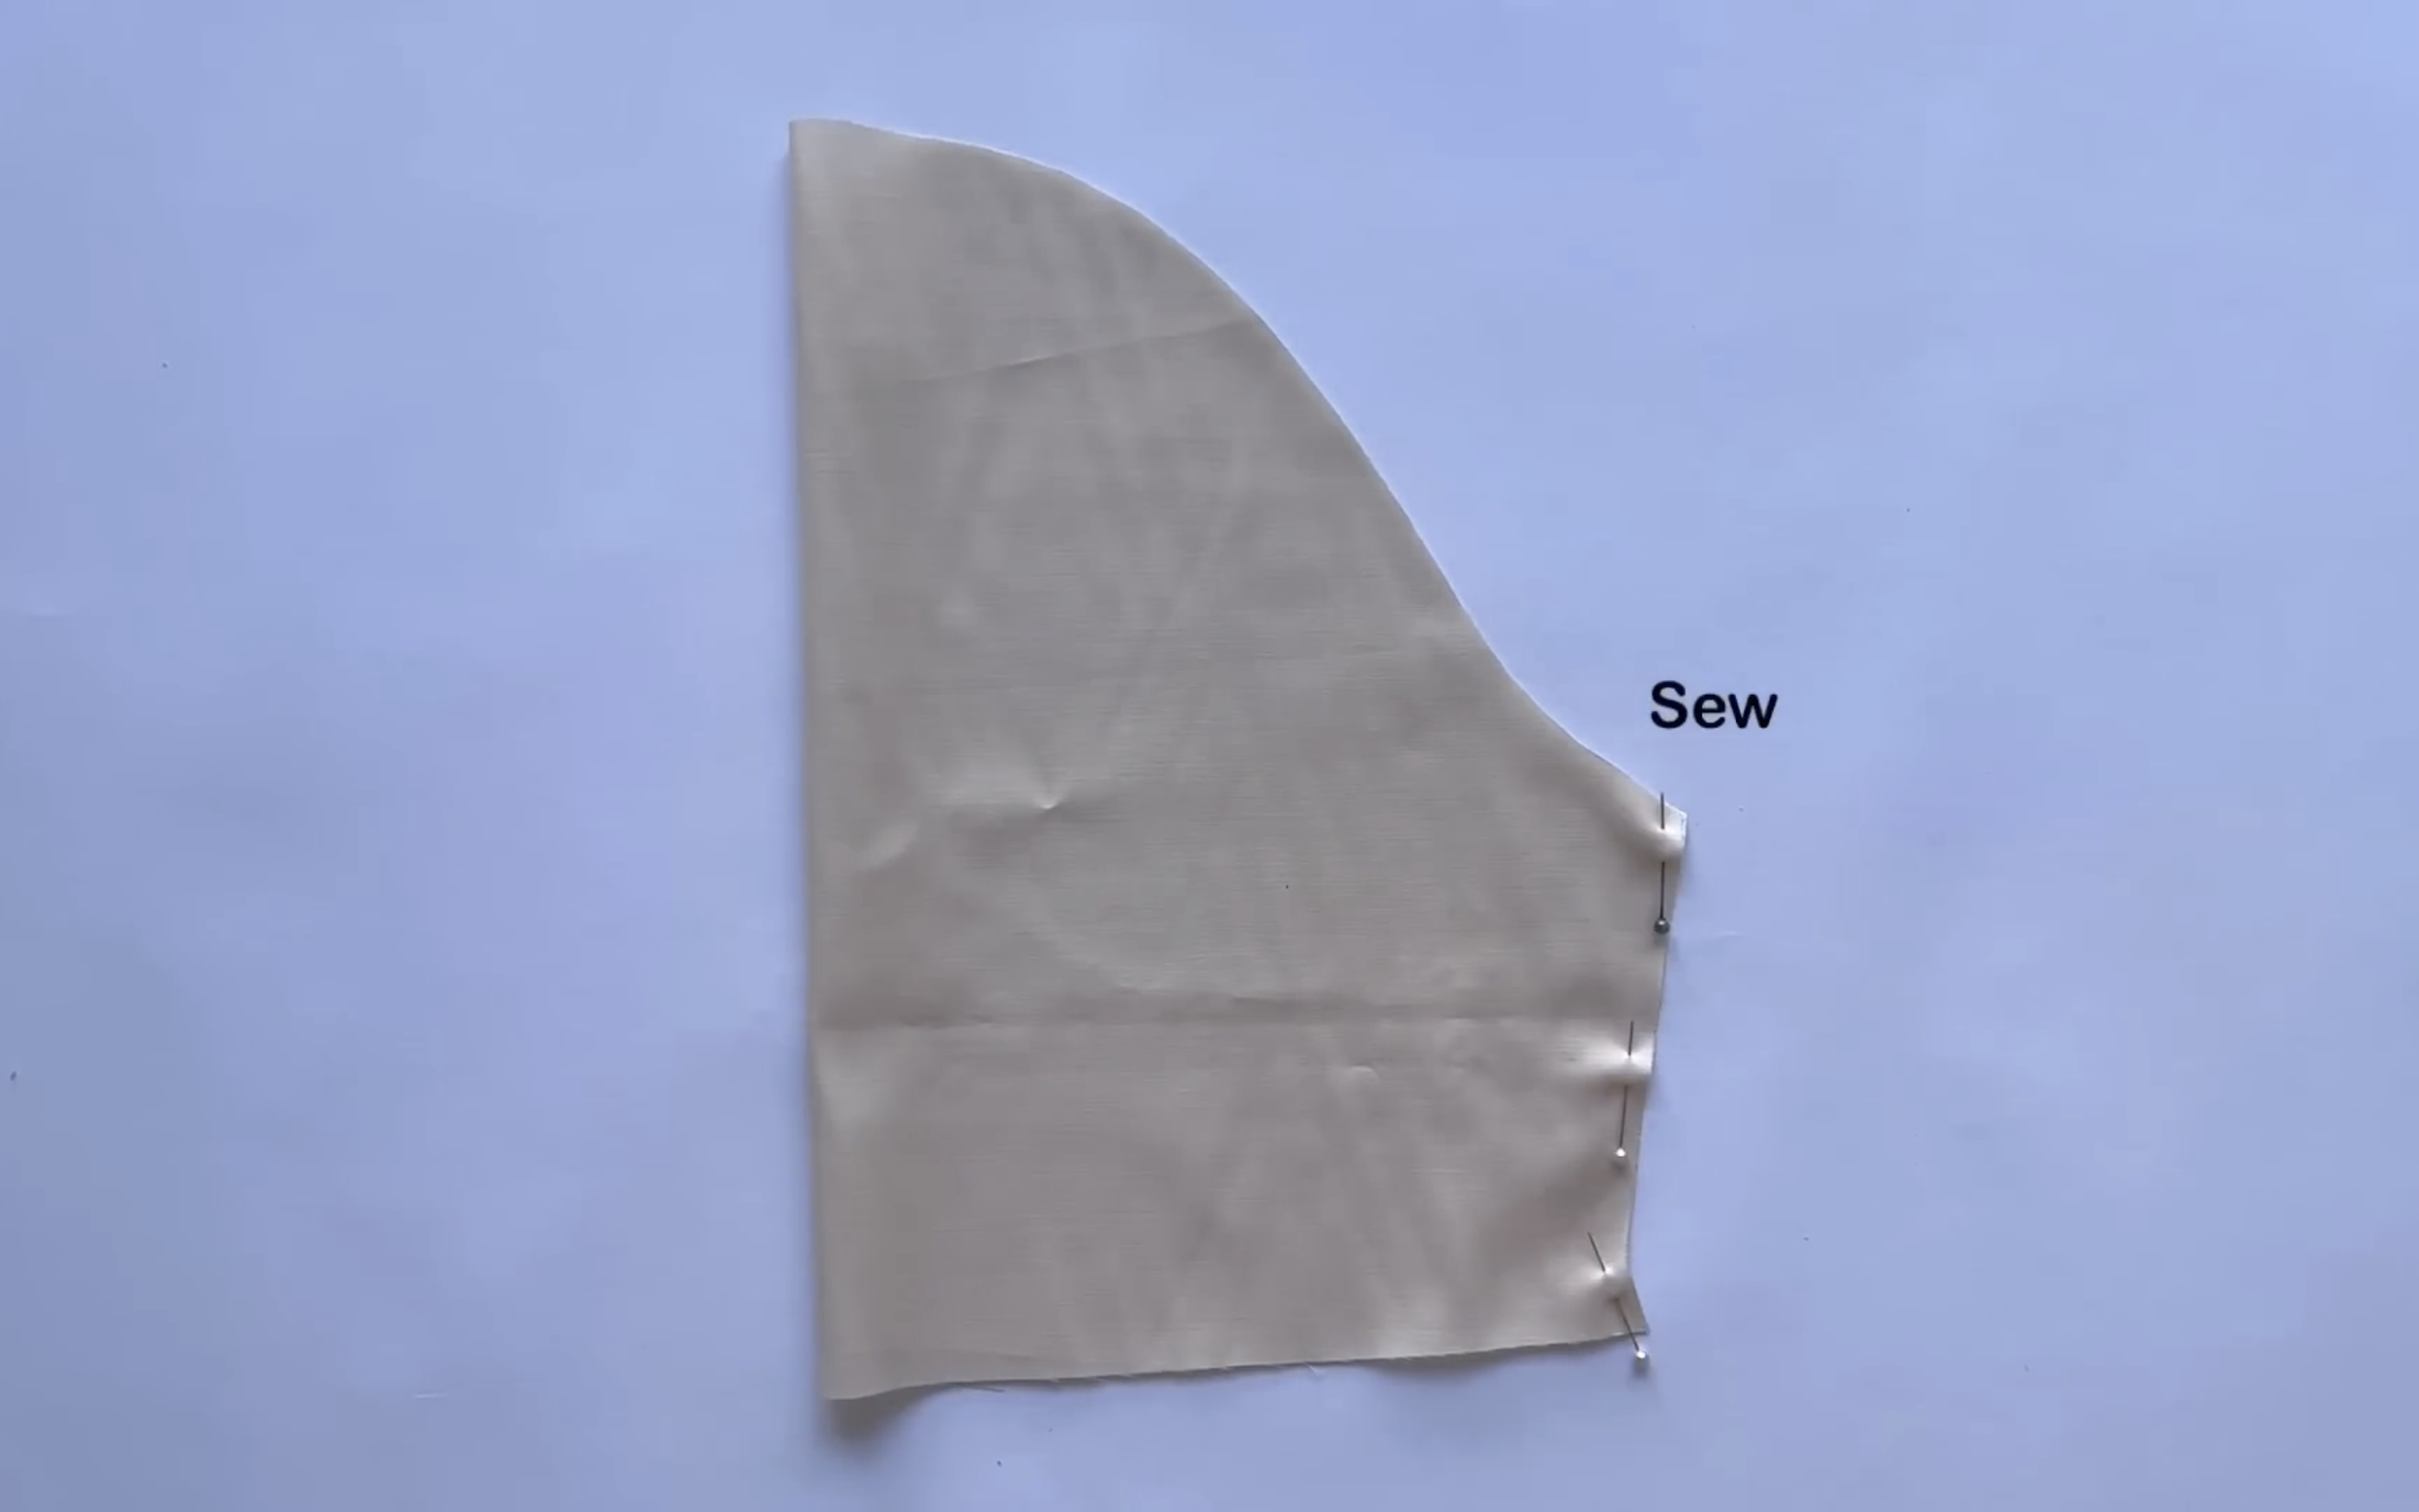
Moving to the sleeve, connect the two underarm lines first.
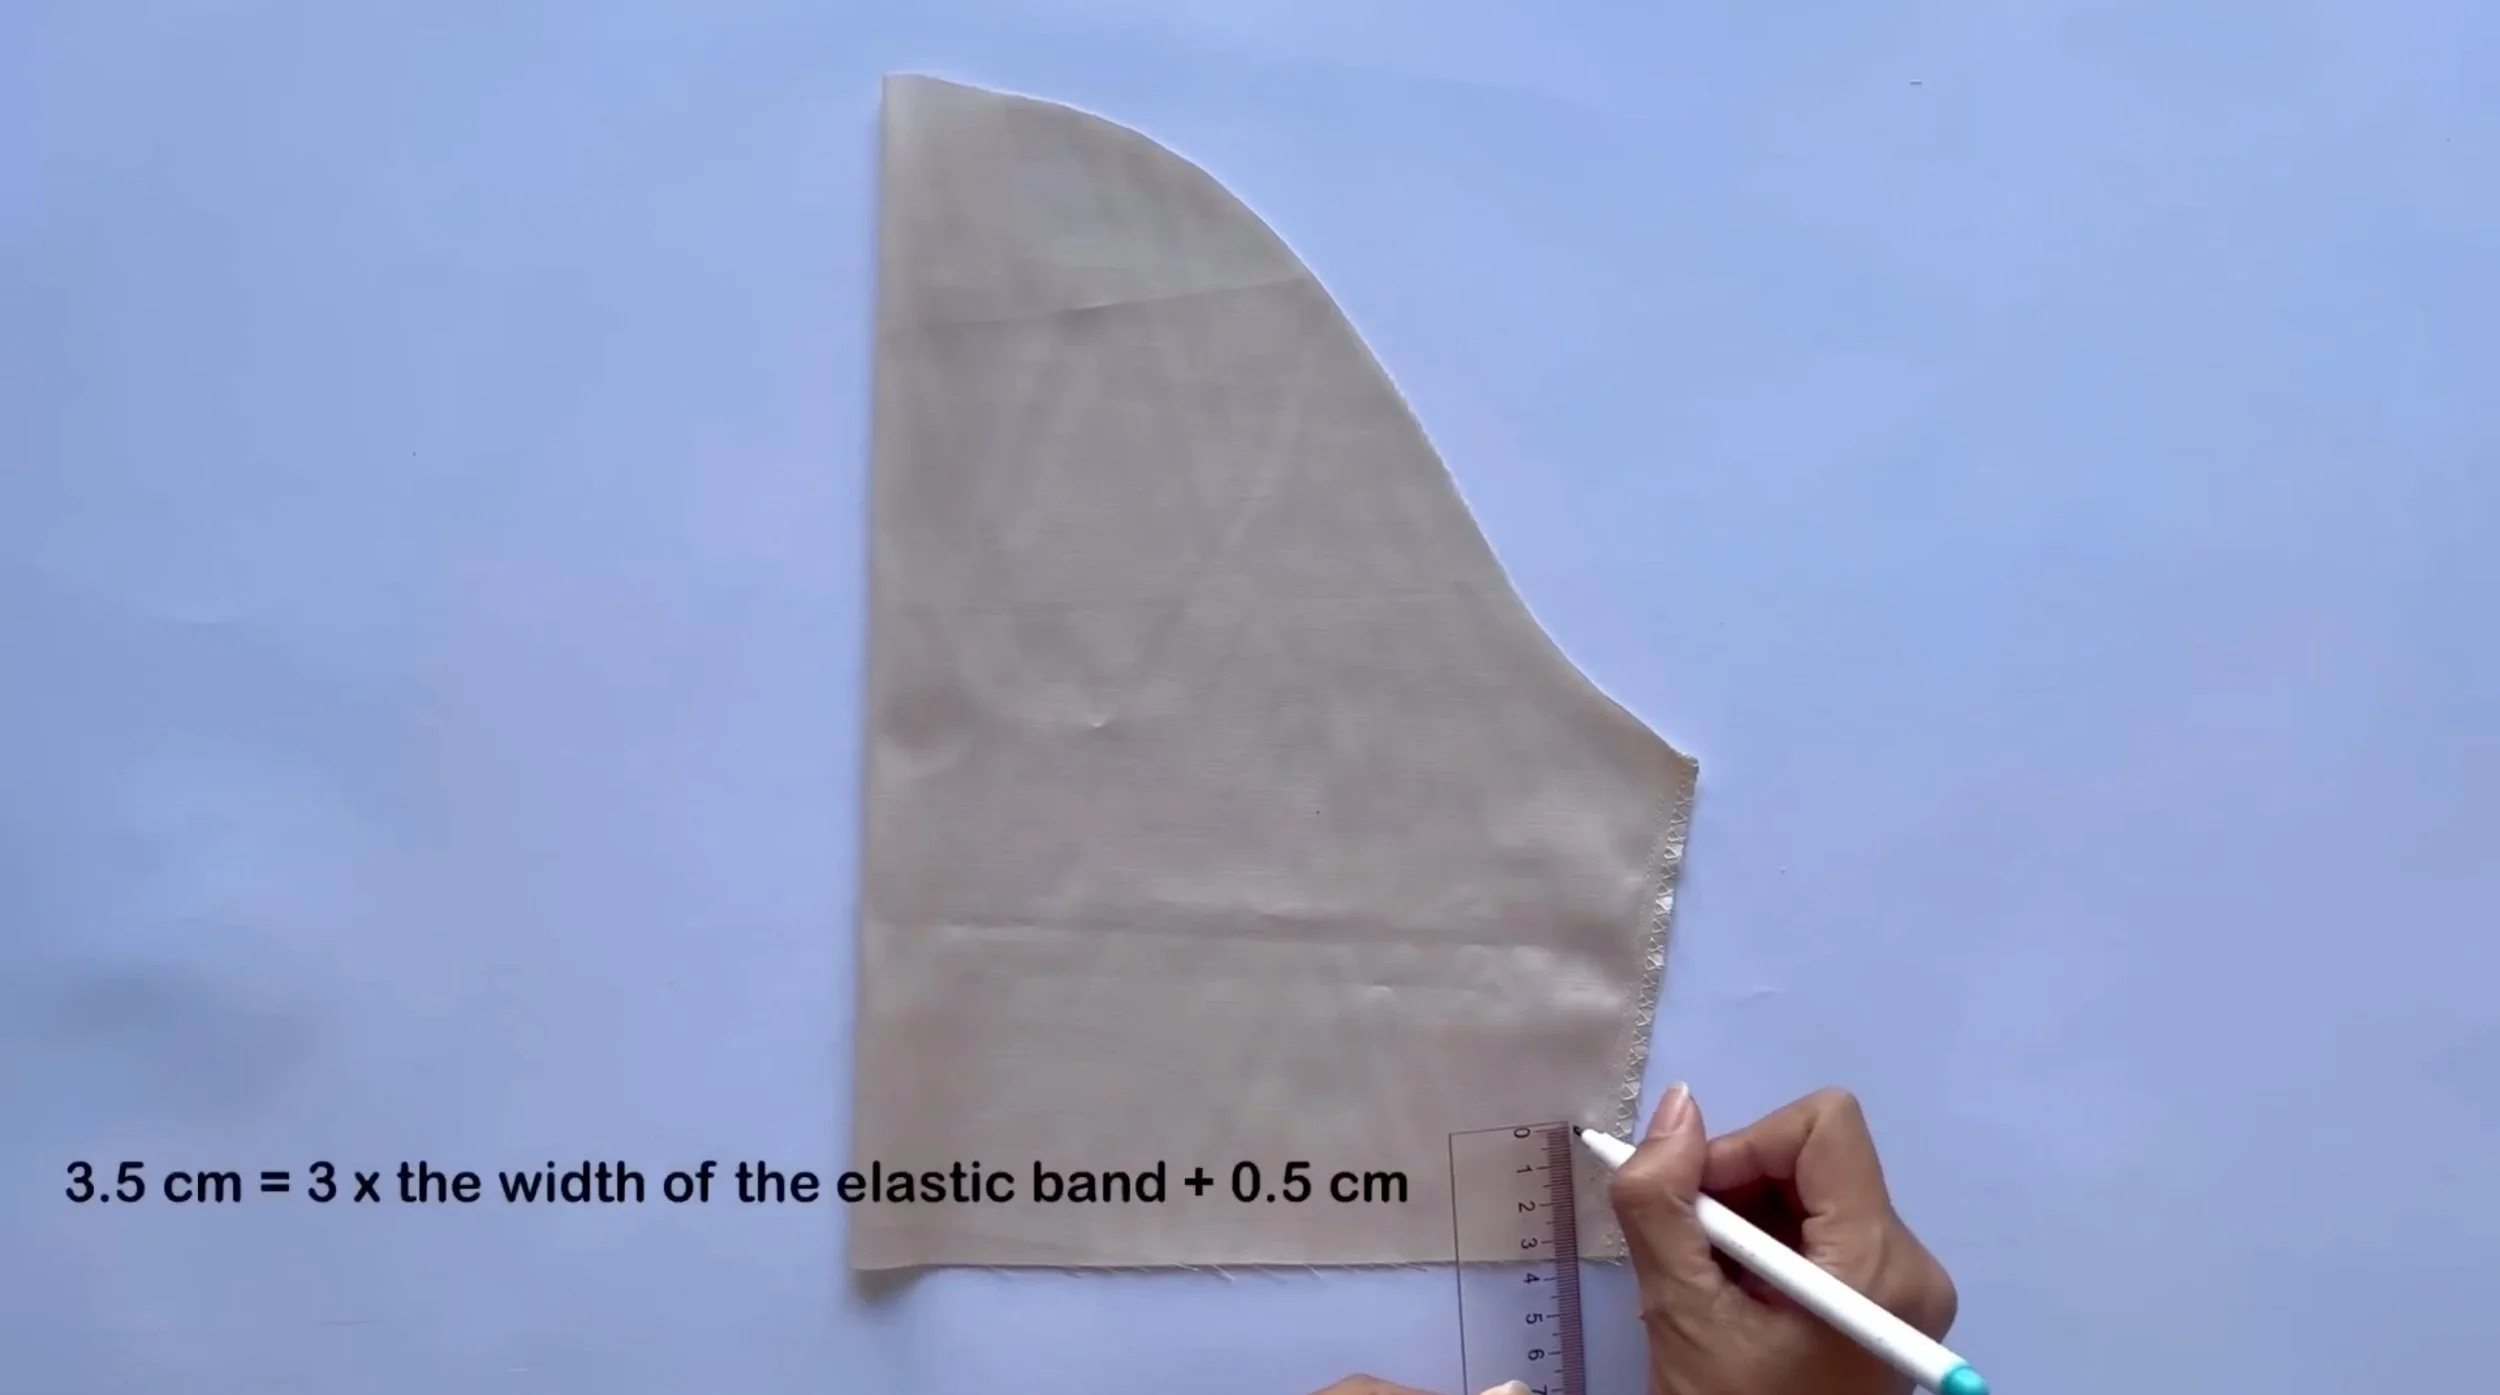
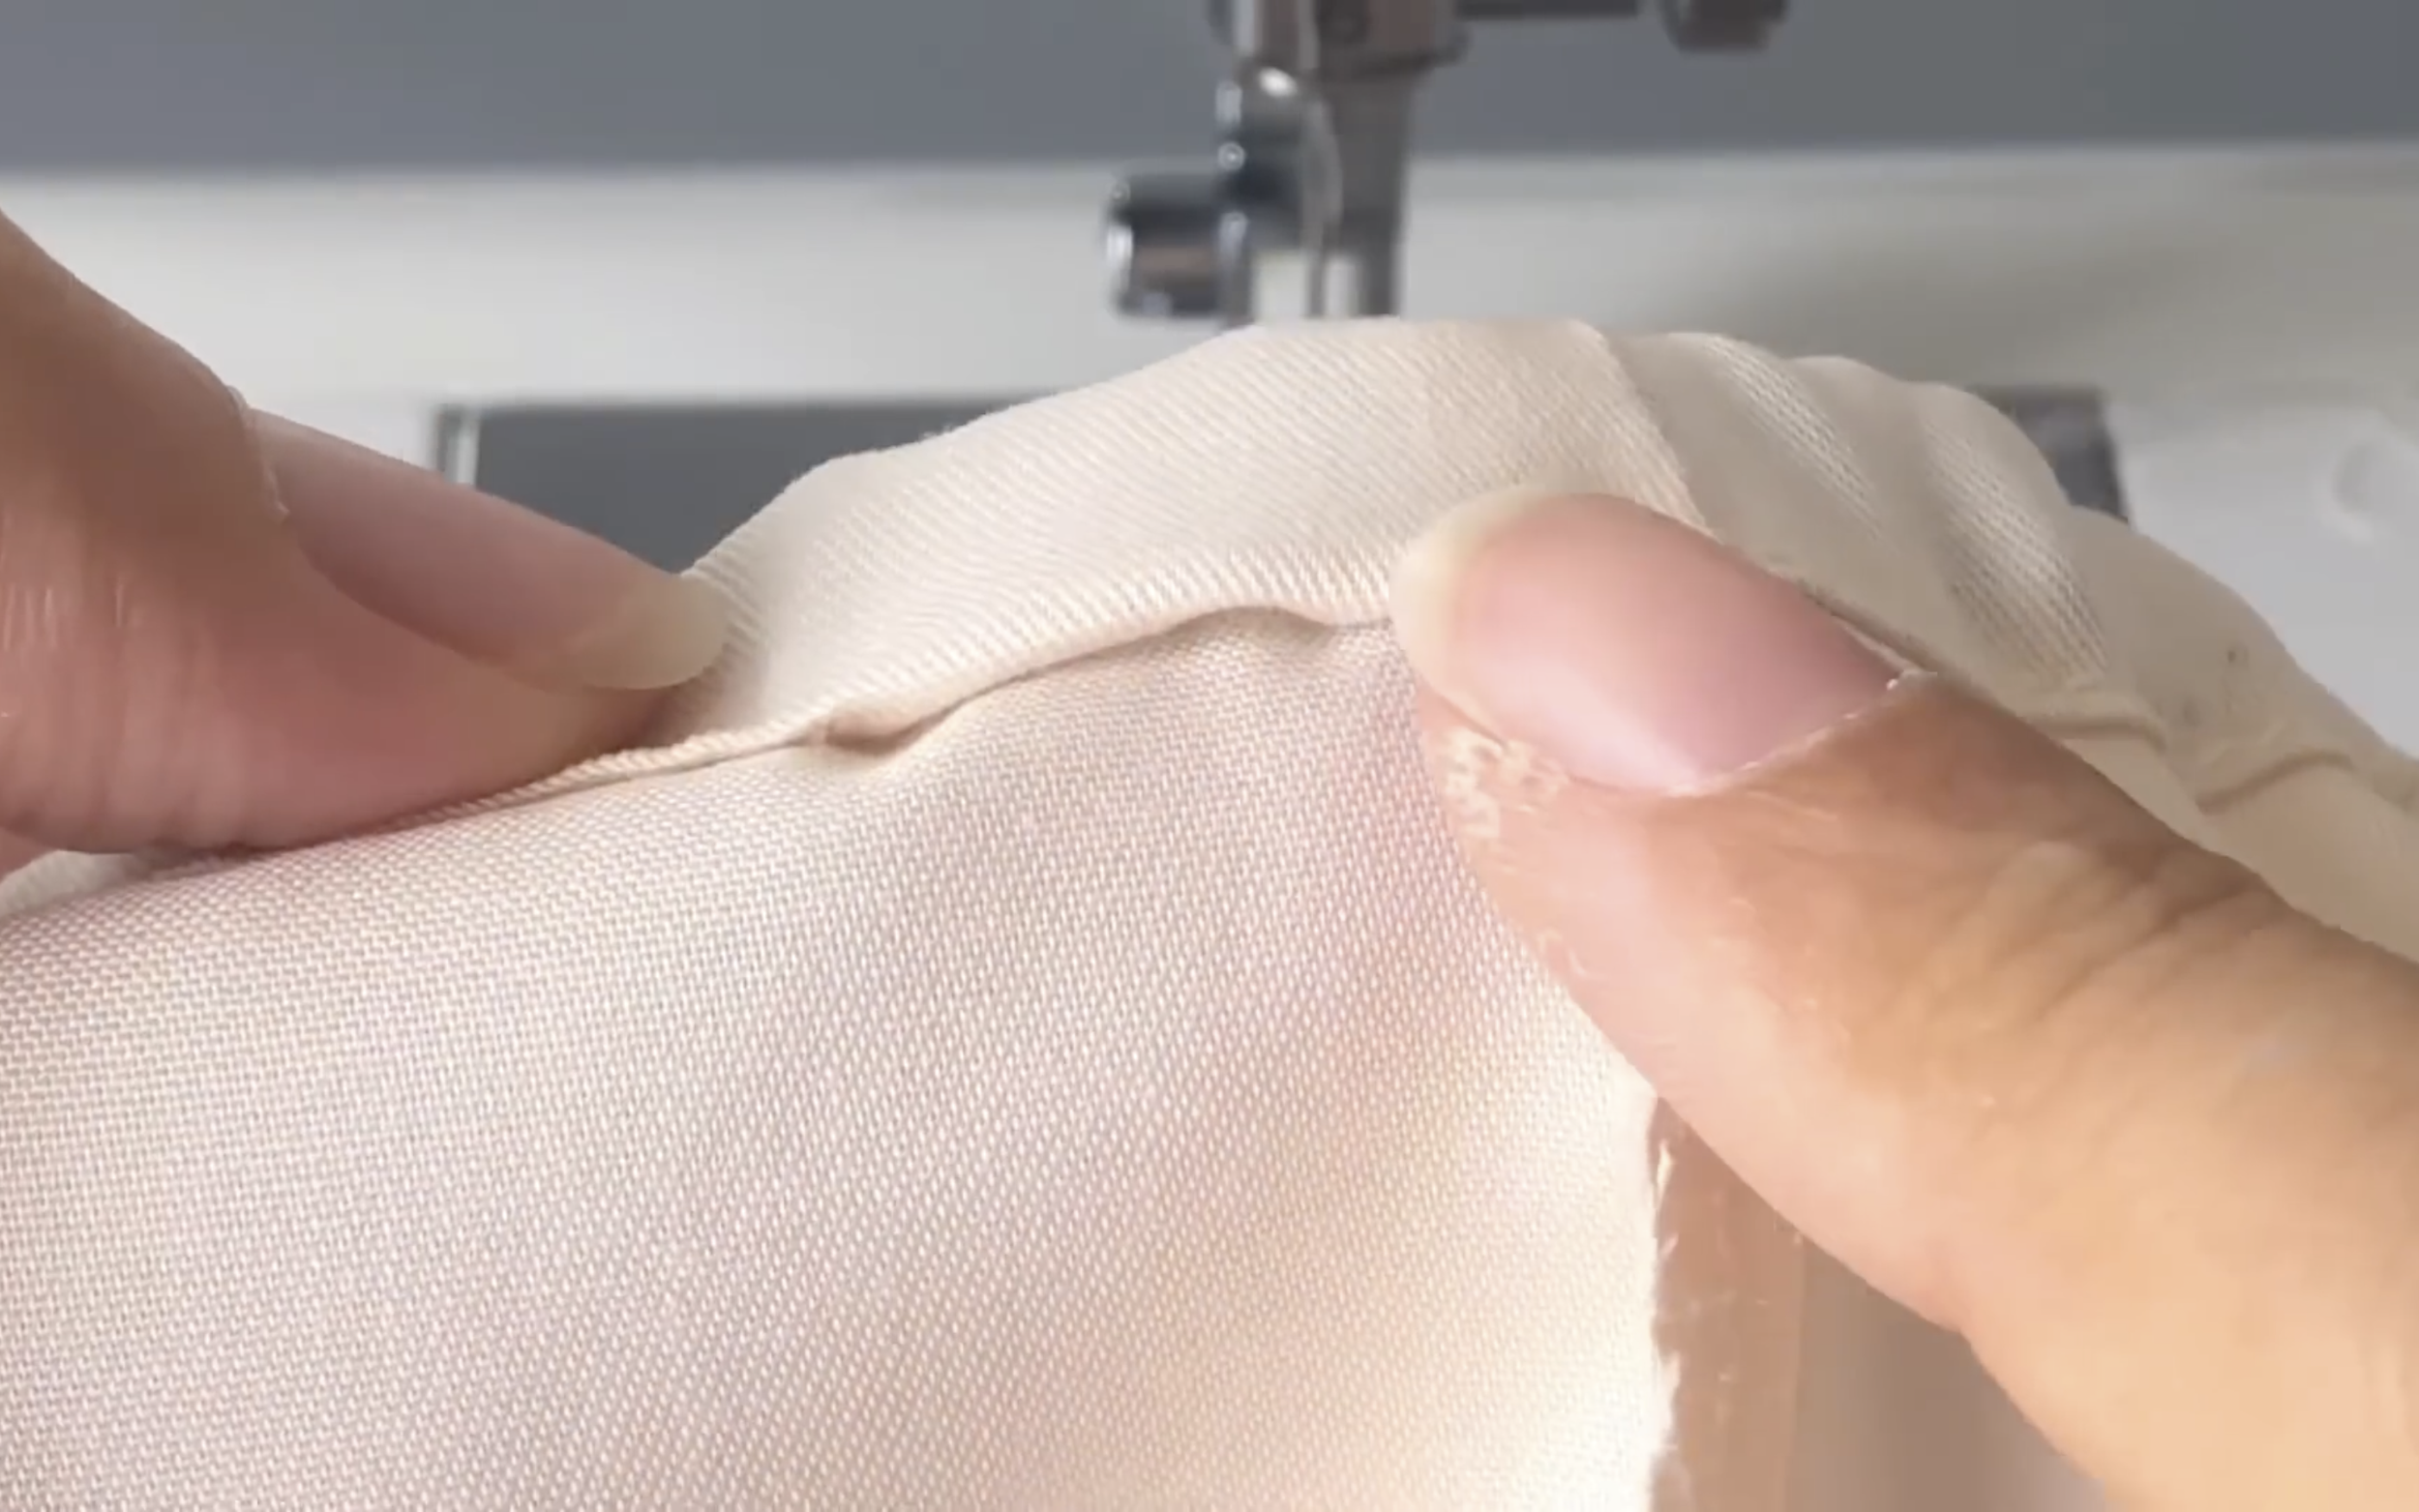
Then, draw a line 3.5 cm above the ending line.
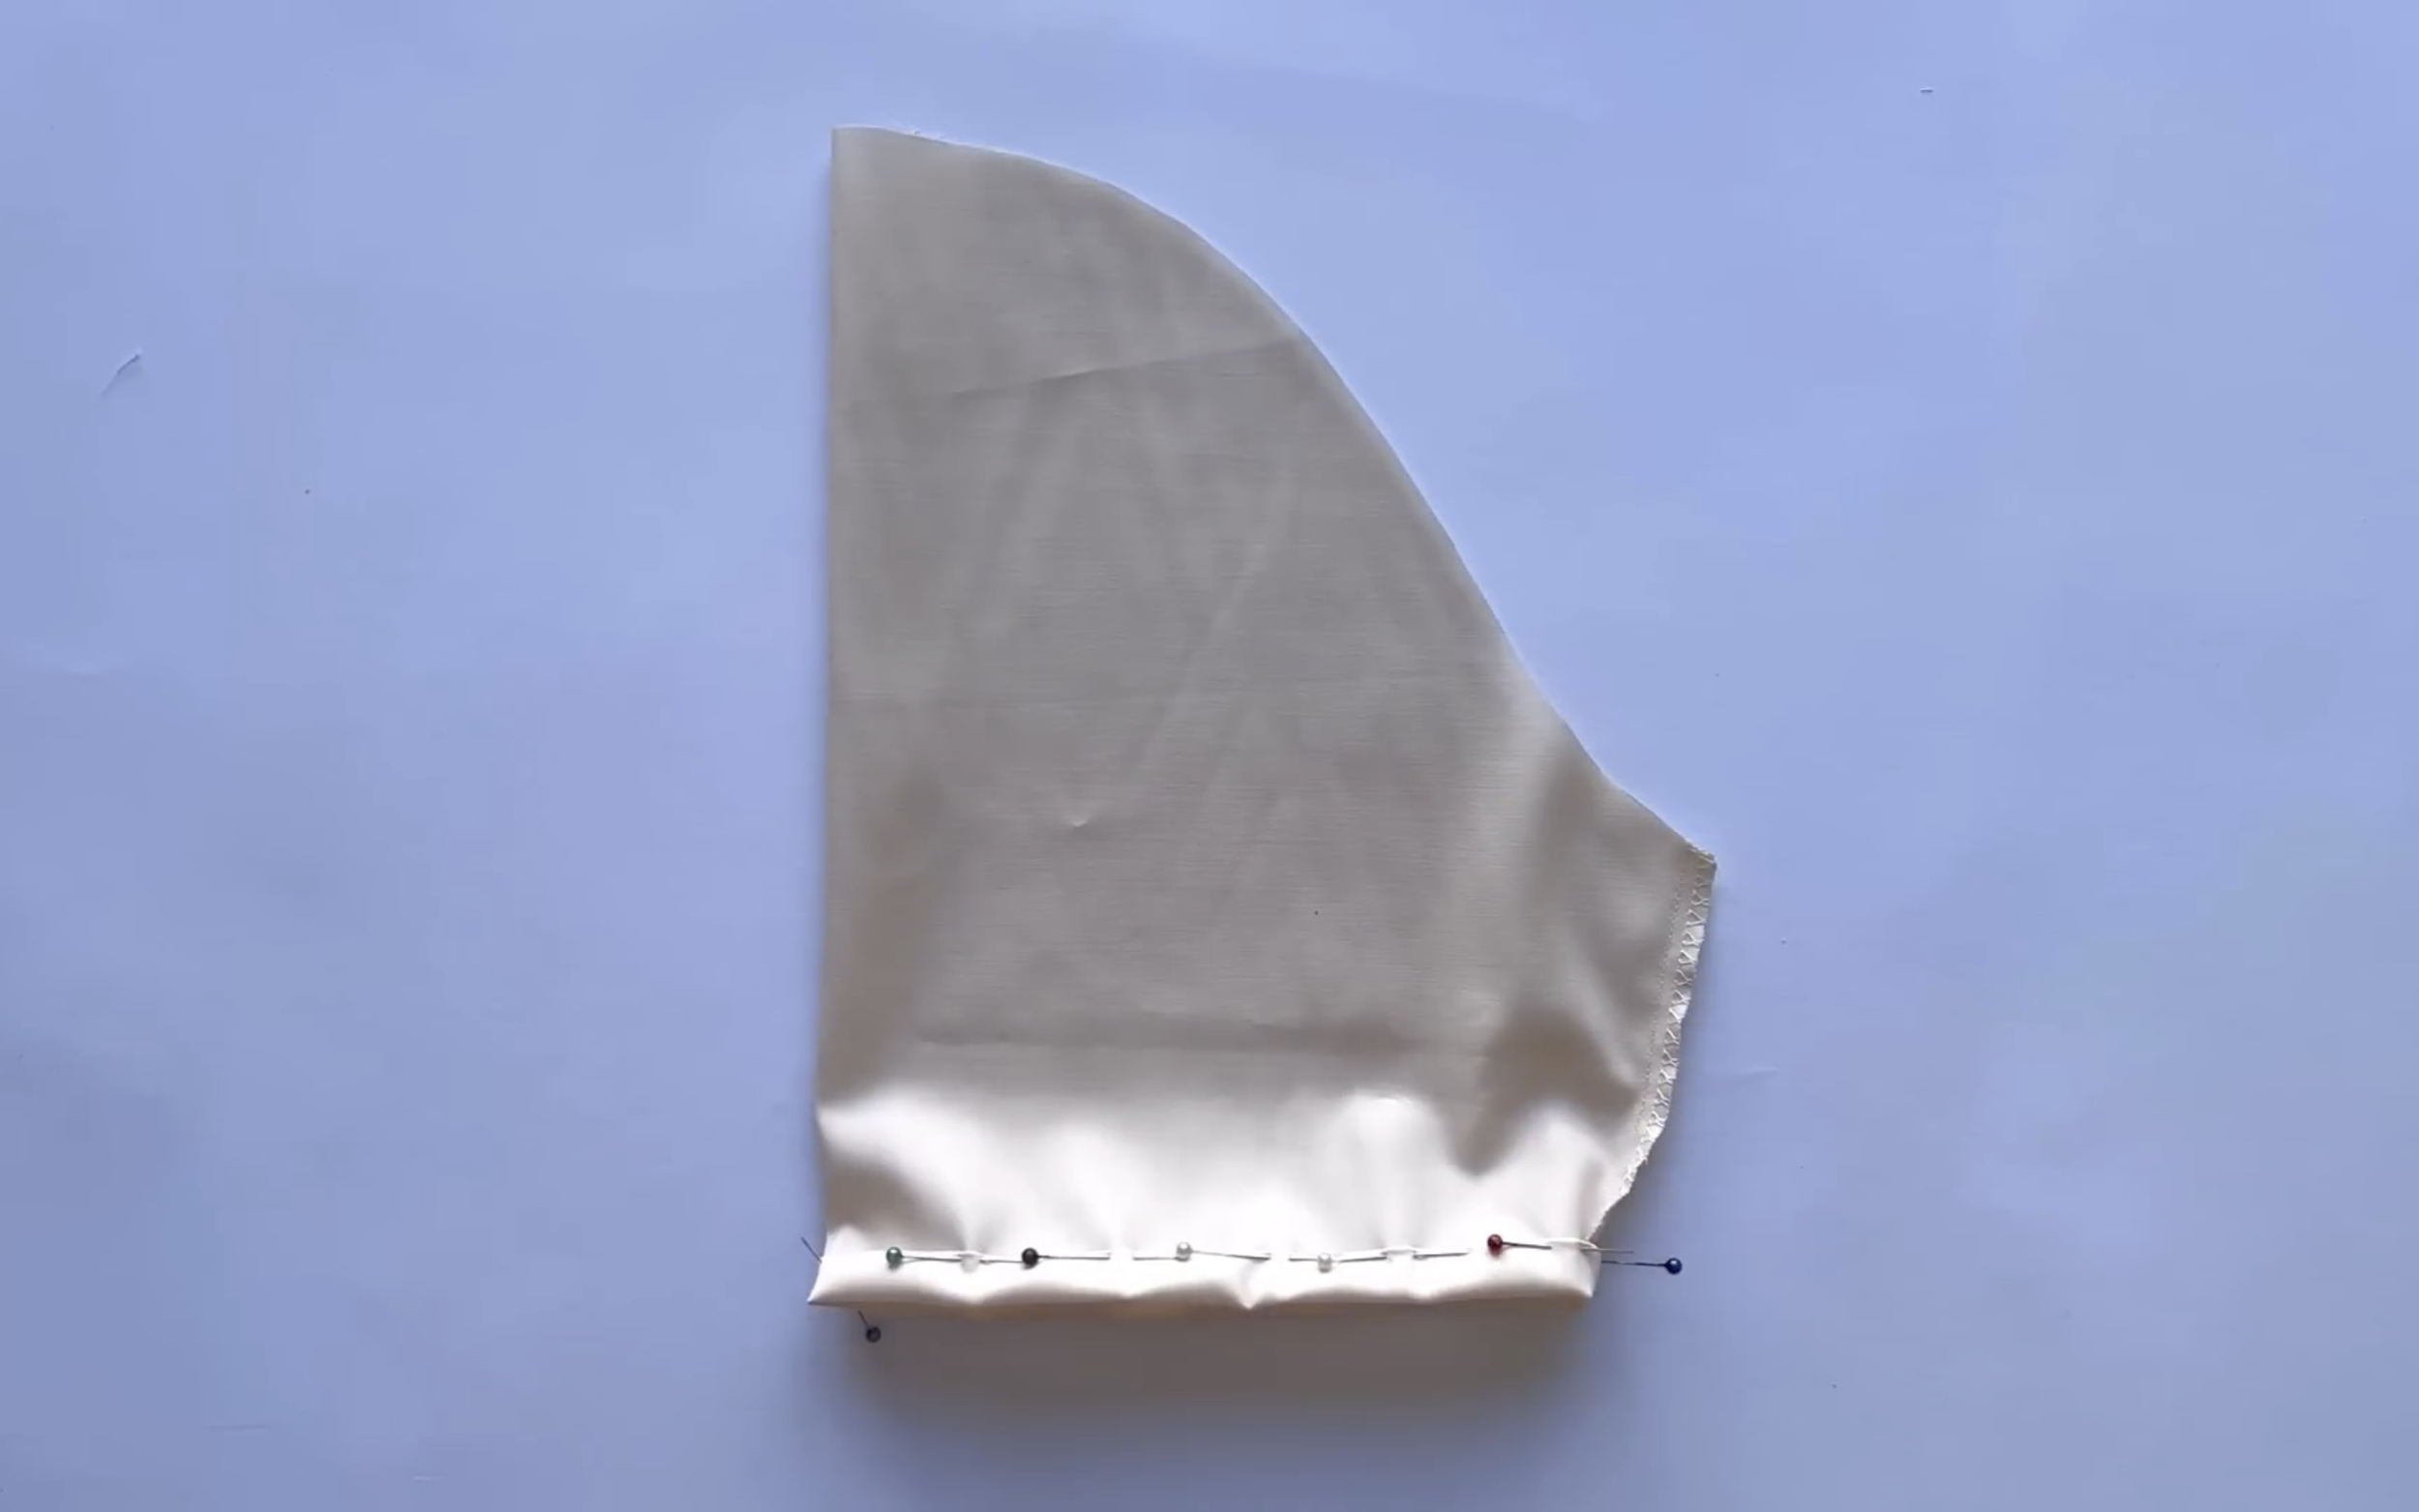
Fold the edge of the fabric inside around 0.5 cm, then fold it again to the previously drawn line and sew to create a fabric hole there.

Leave a small unsewn space for the elastic band to pass through later.
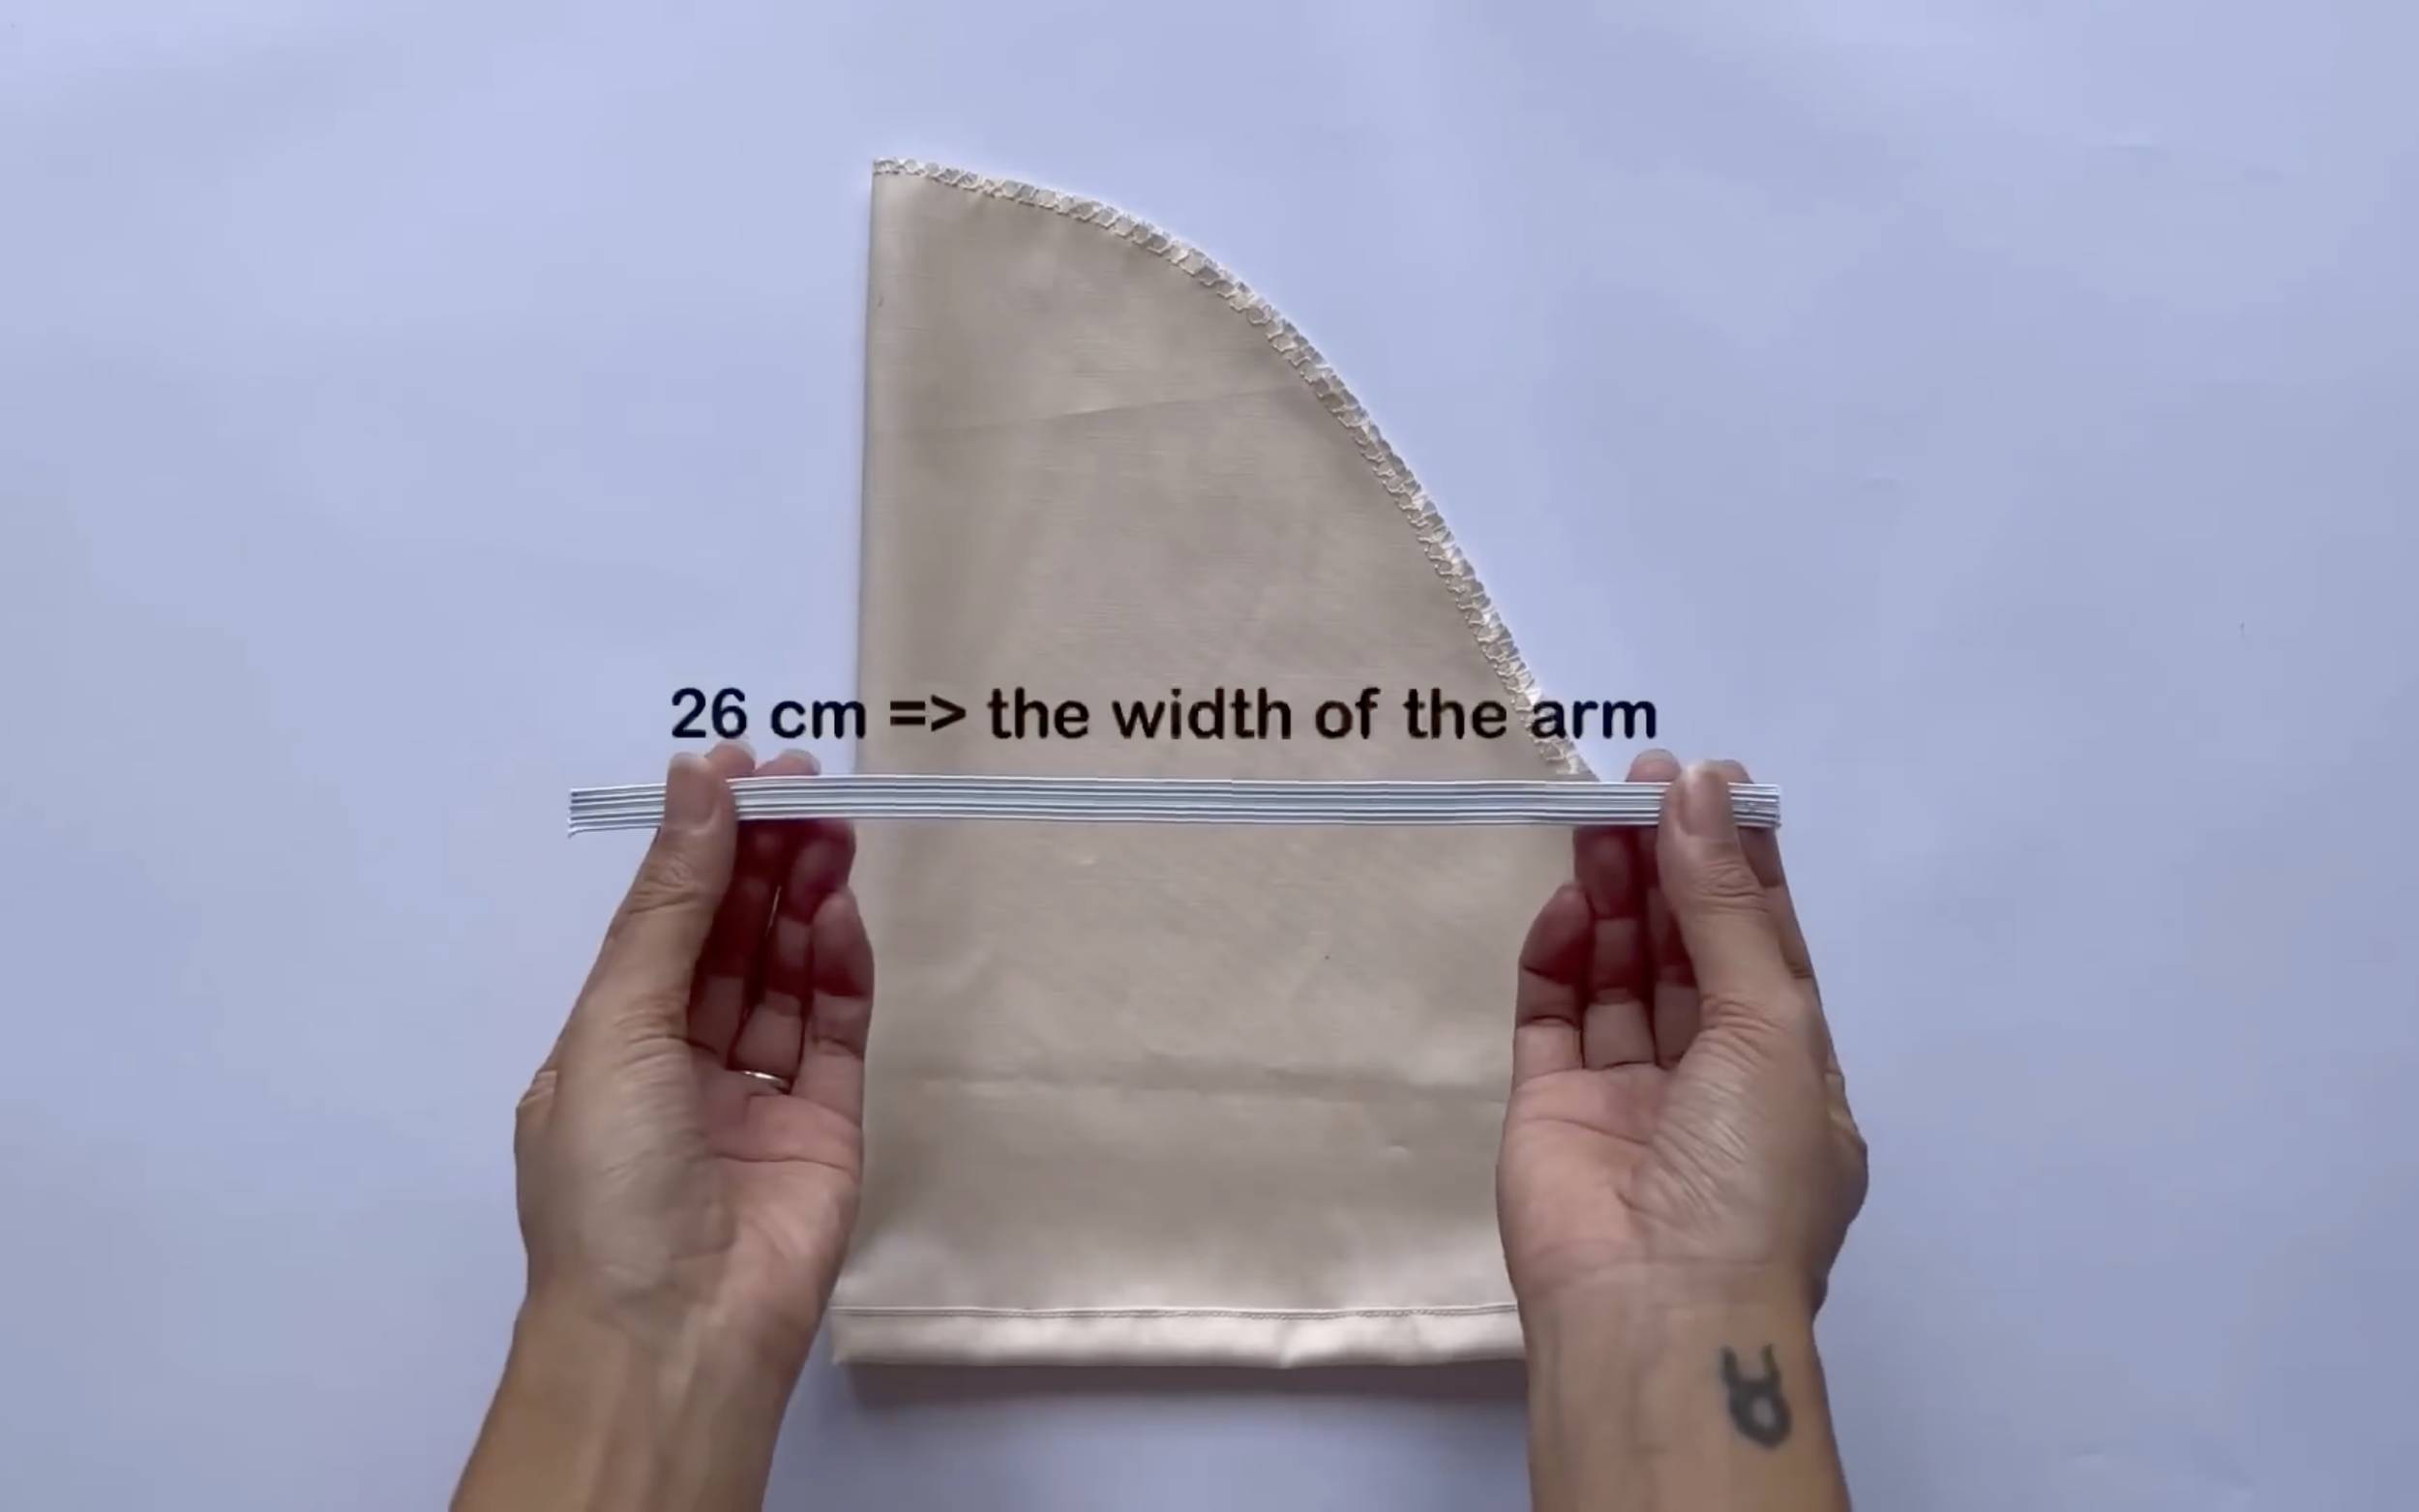
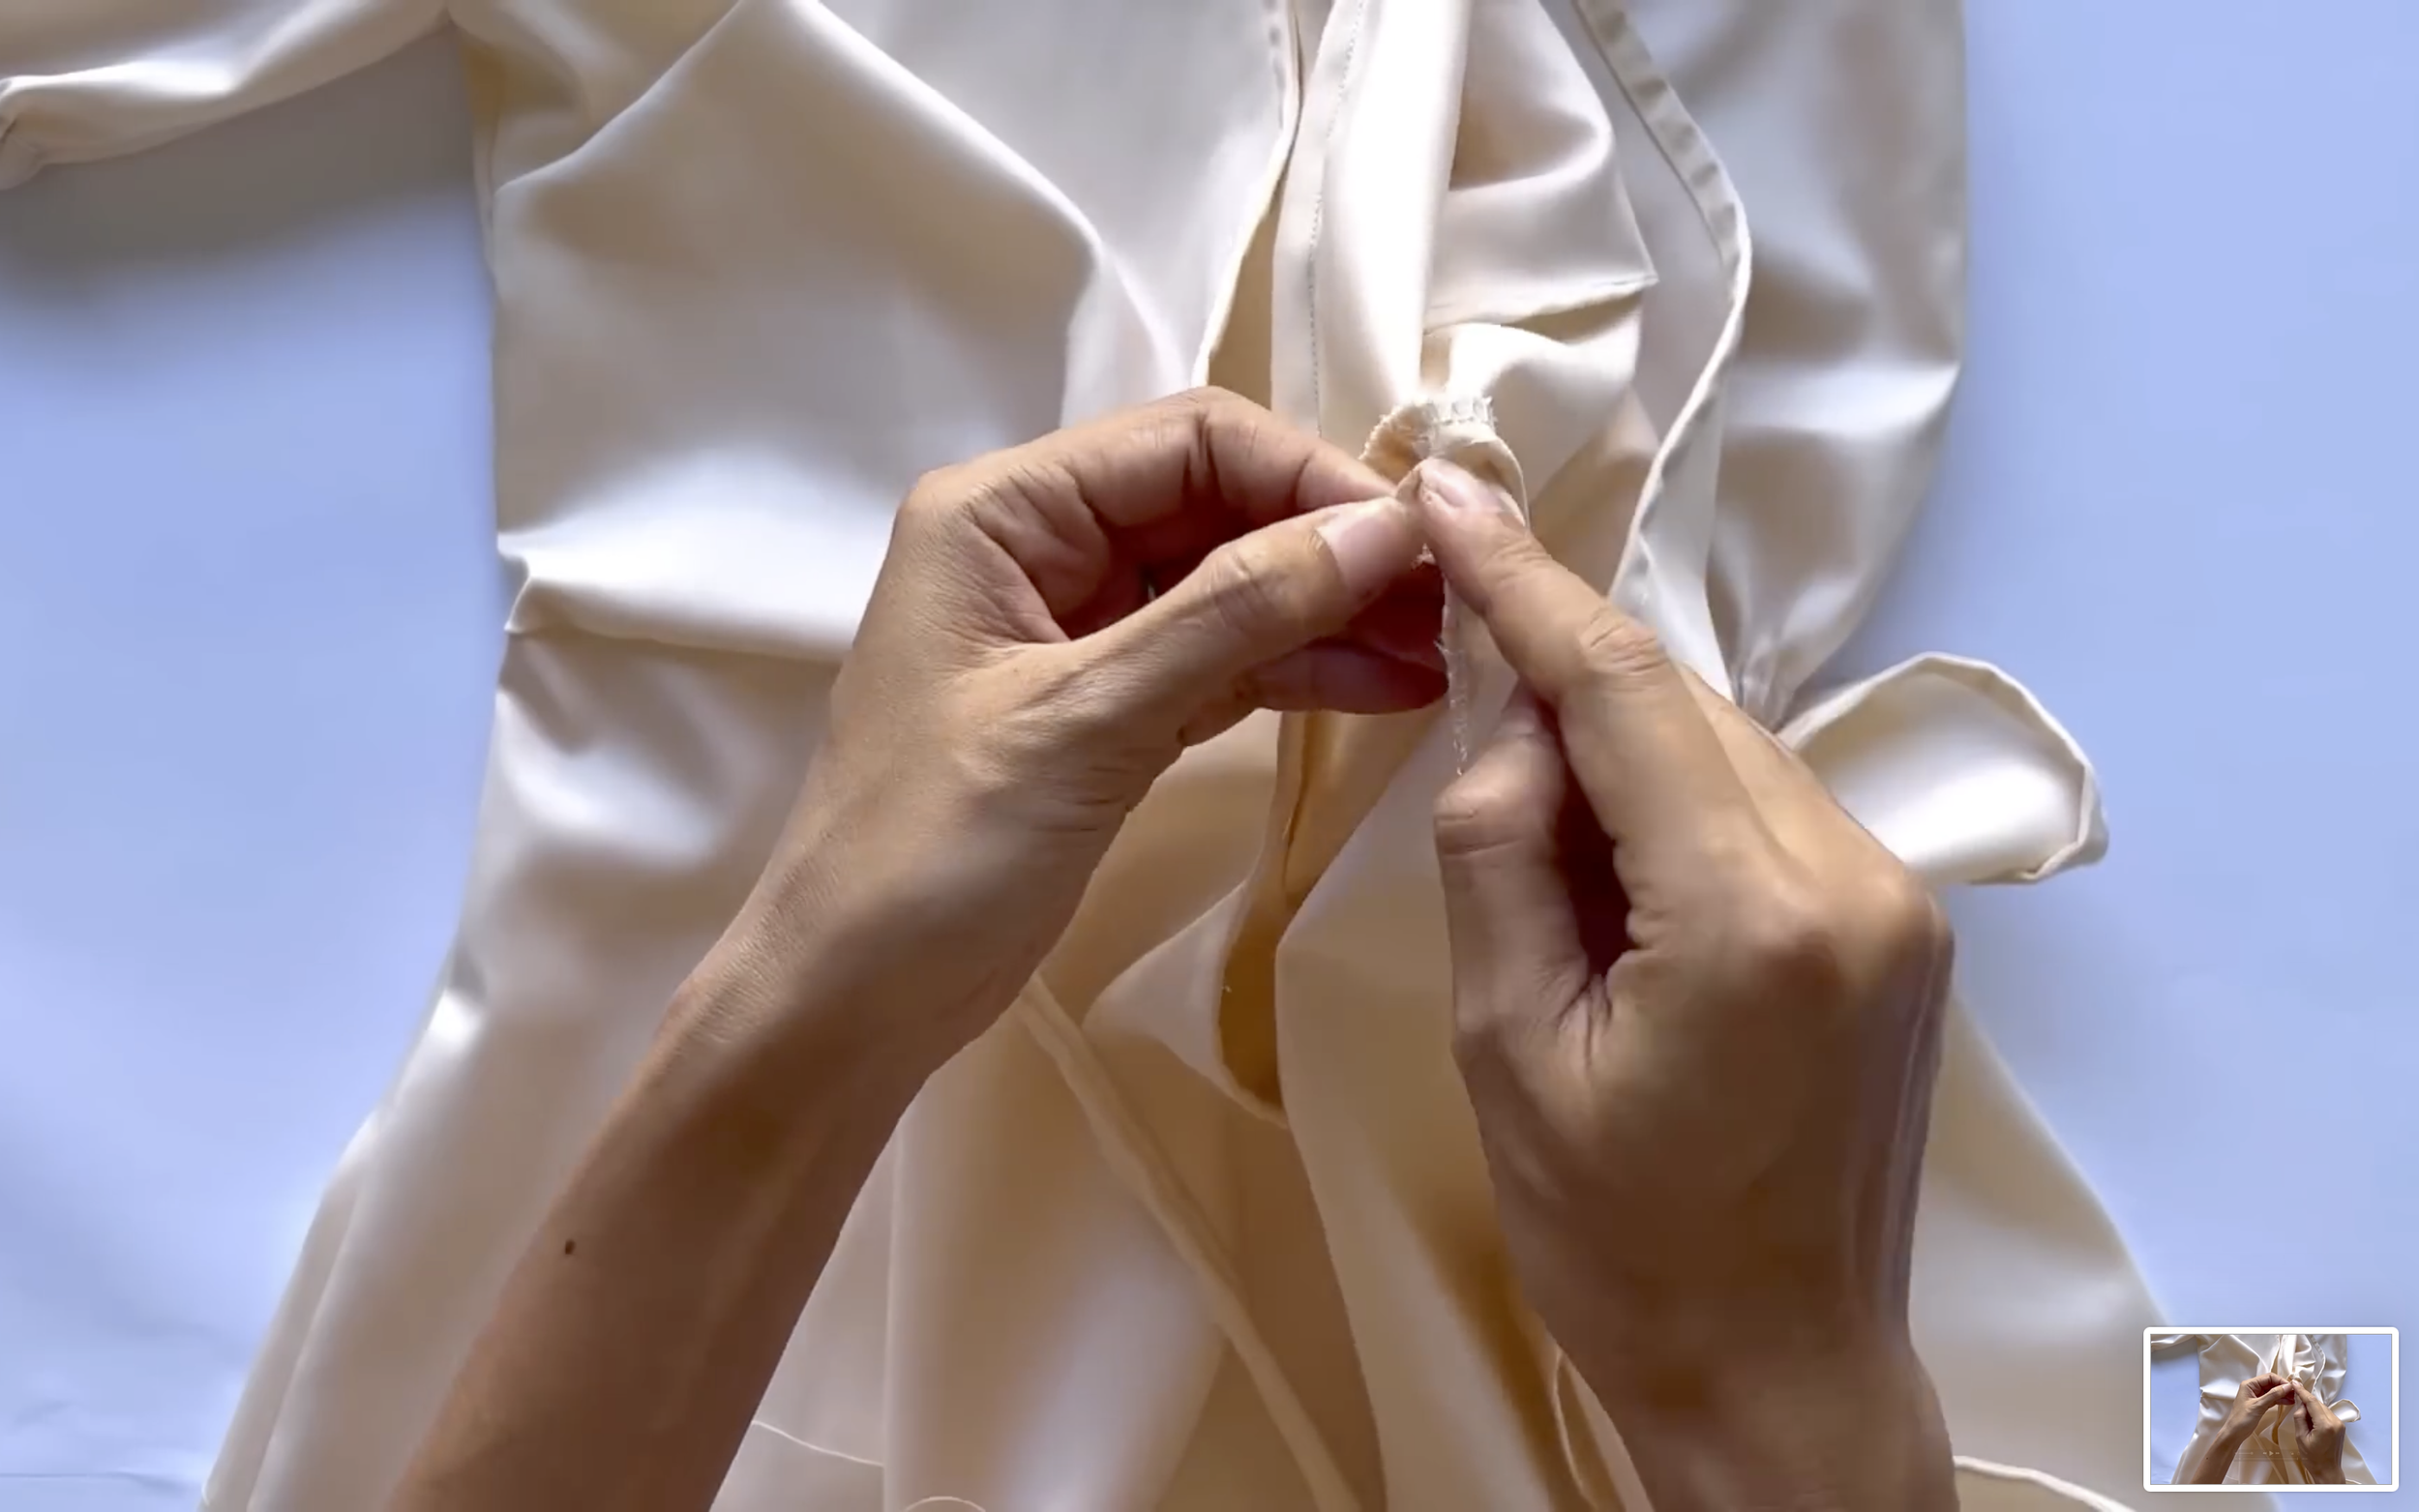
Cut an elastic band 1 cm wide and 26 cm long, slightly larger than the arm size.

Use a small hair clip to thread the elastic through the fabric hole.
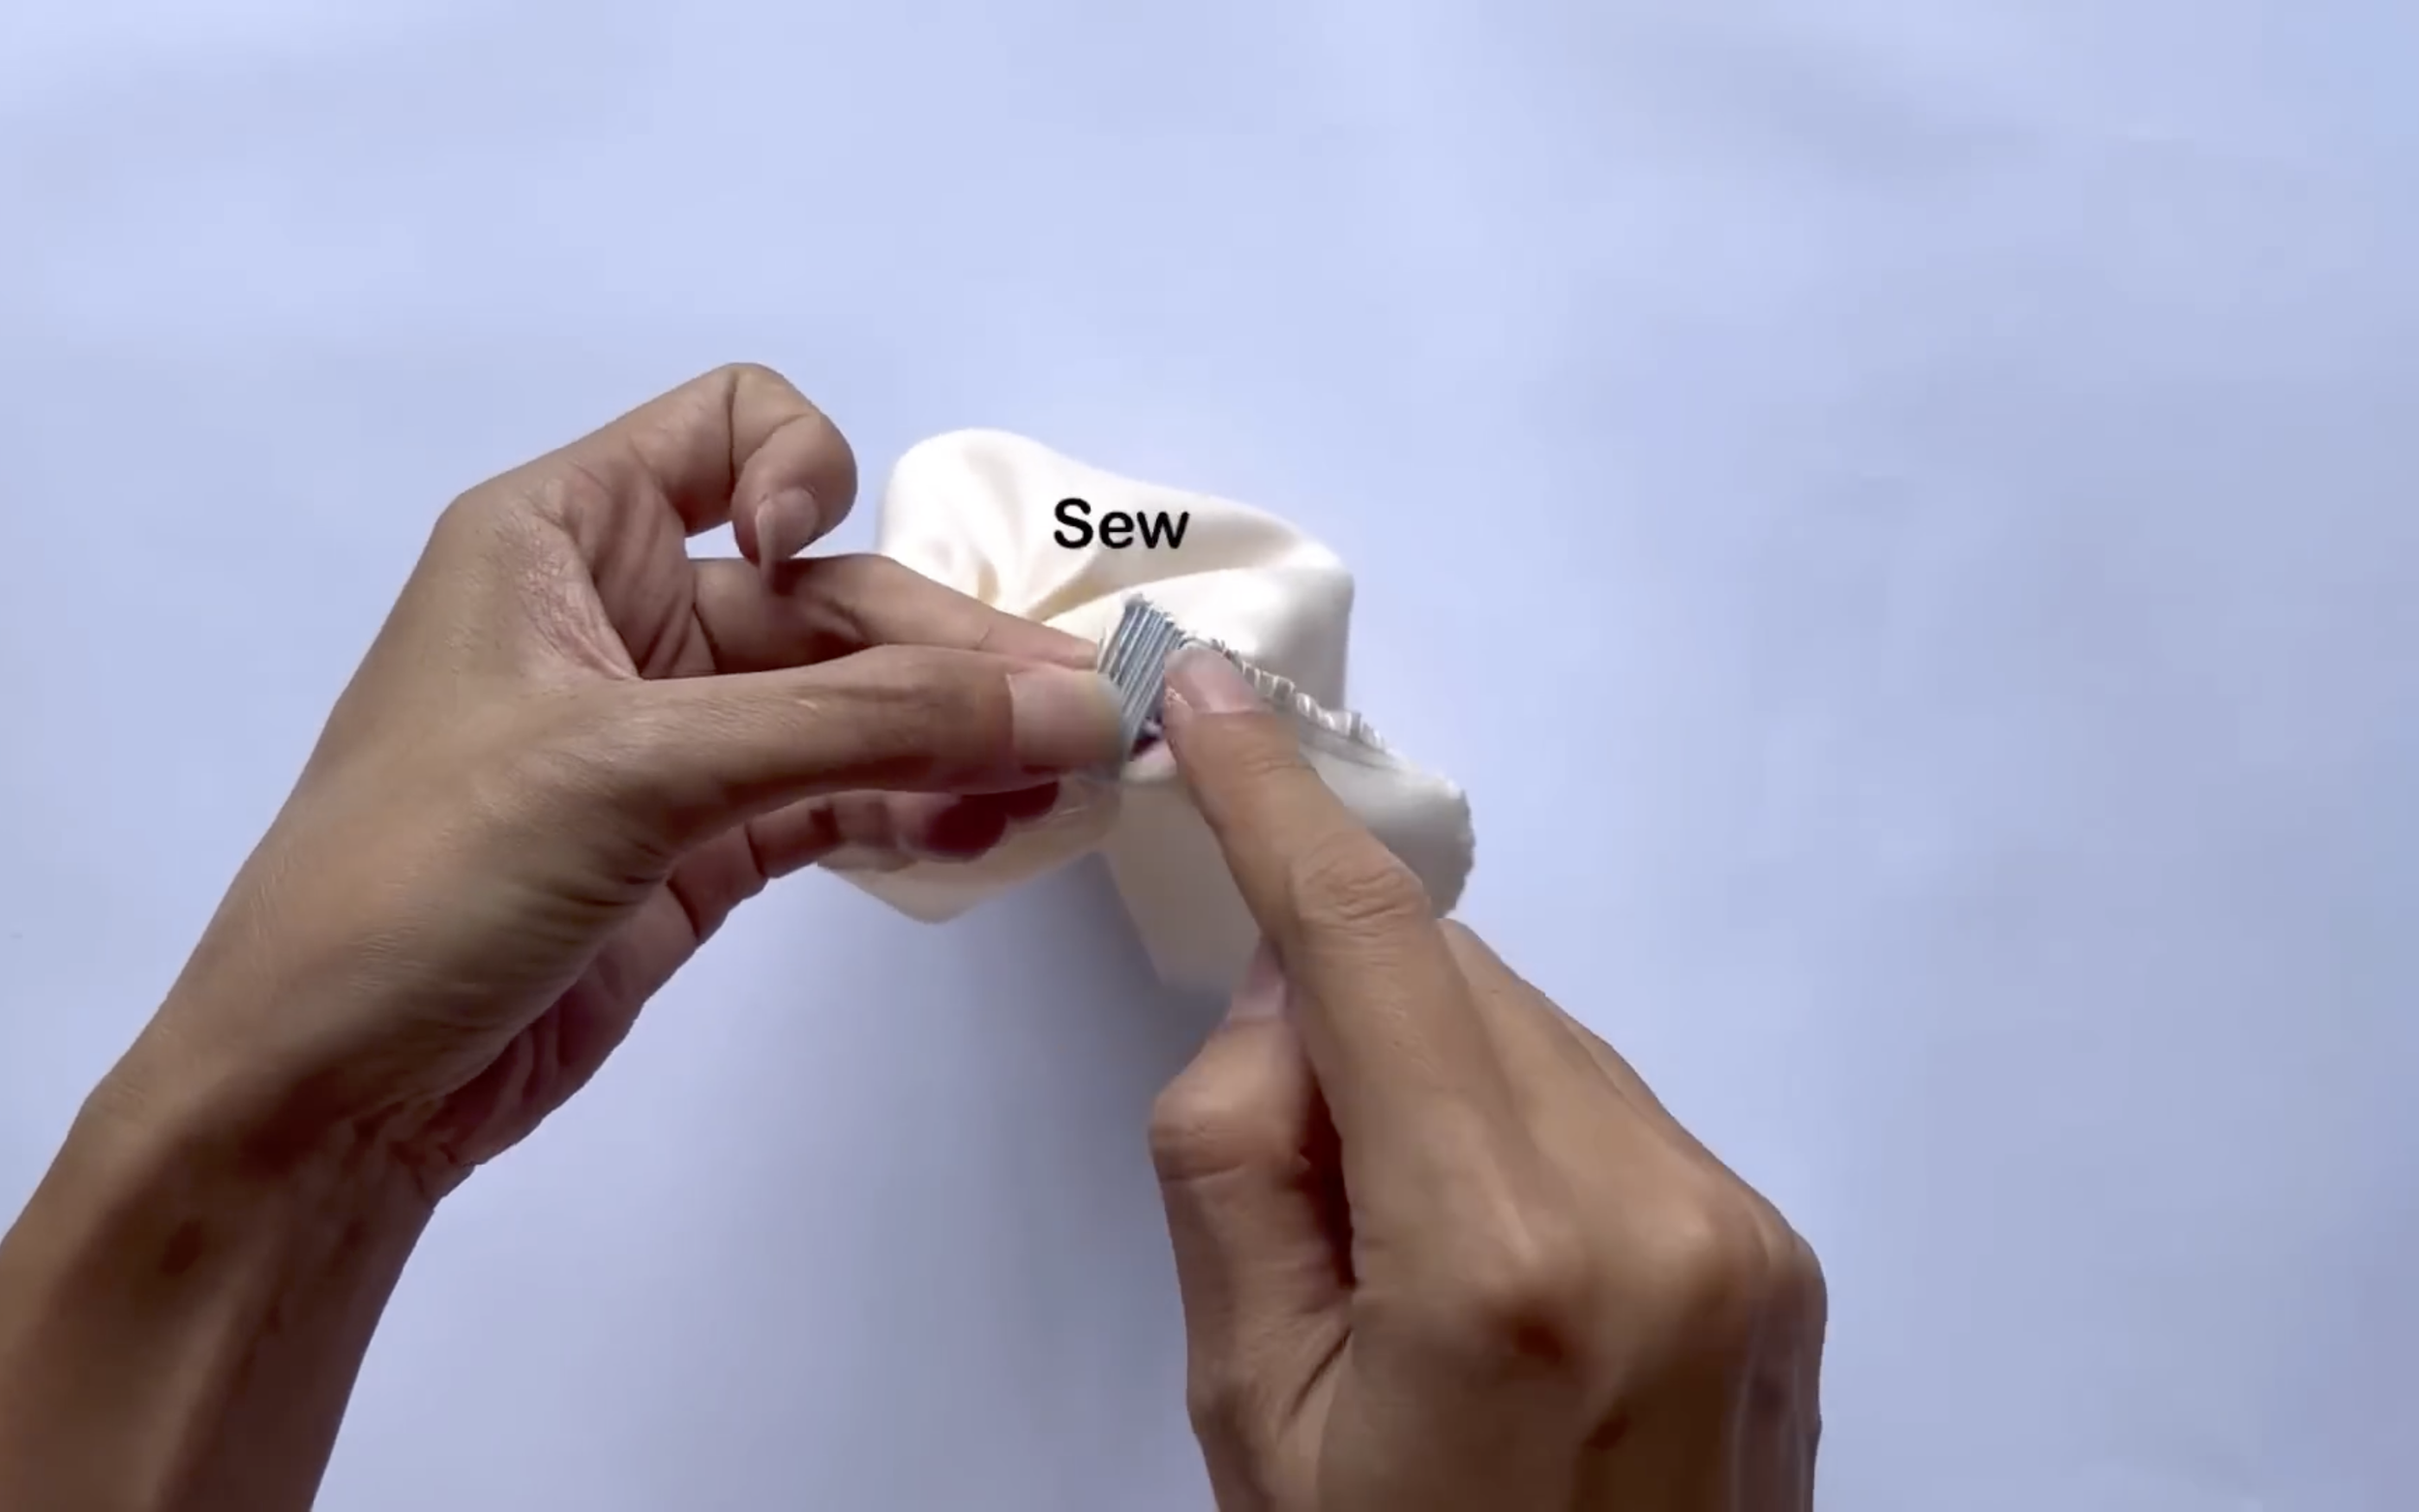
Sew the ends of the elastic band together.
And close the remaining unsewn space.
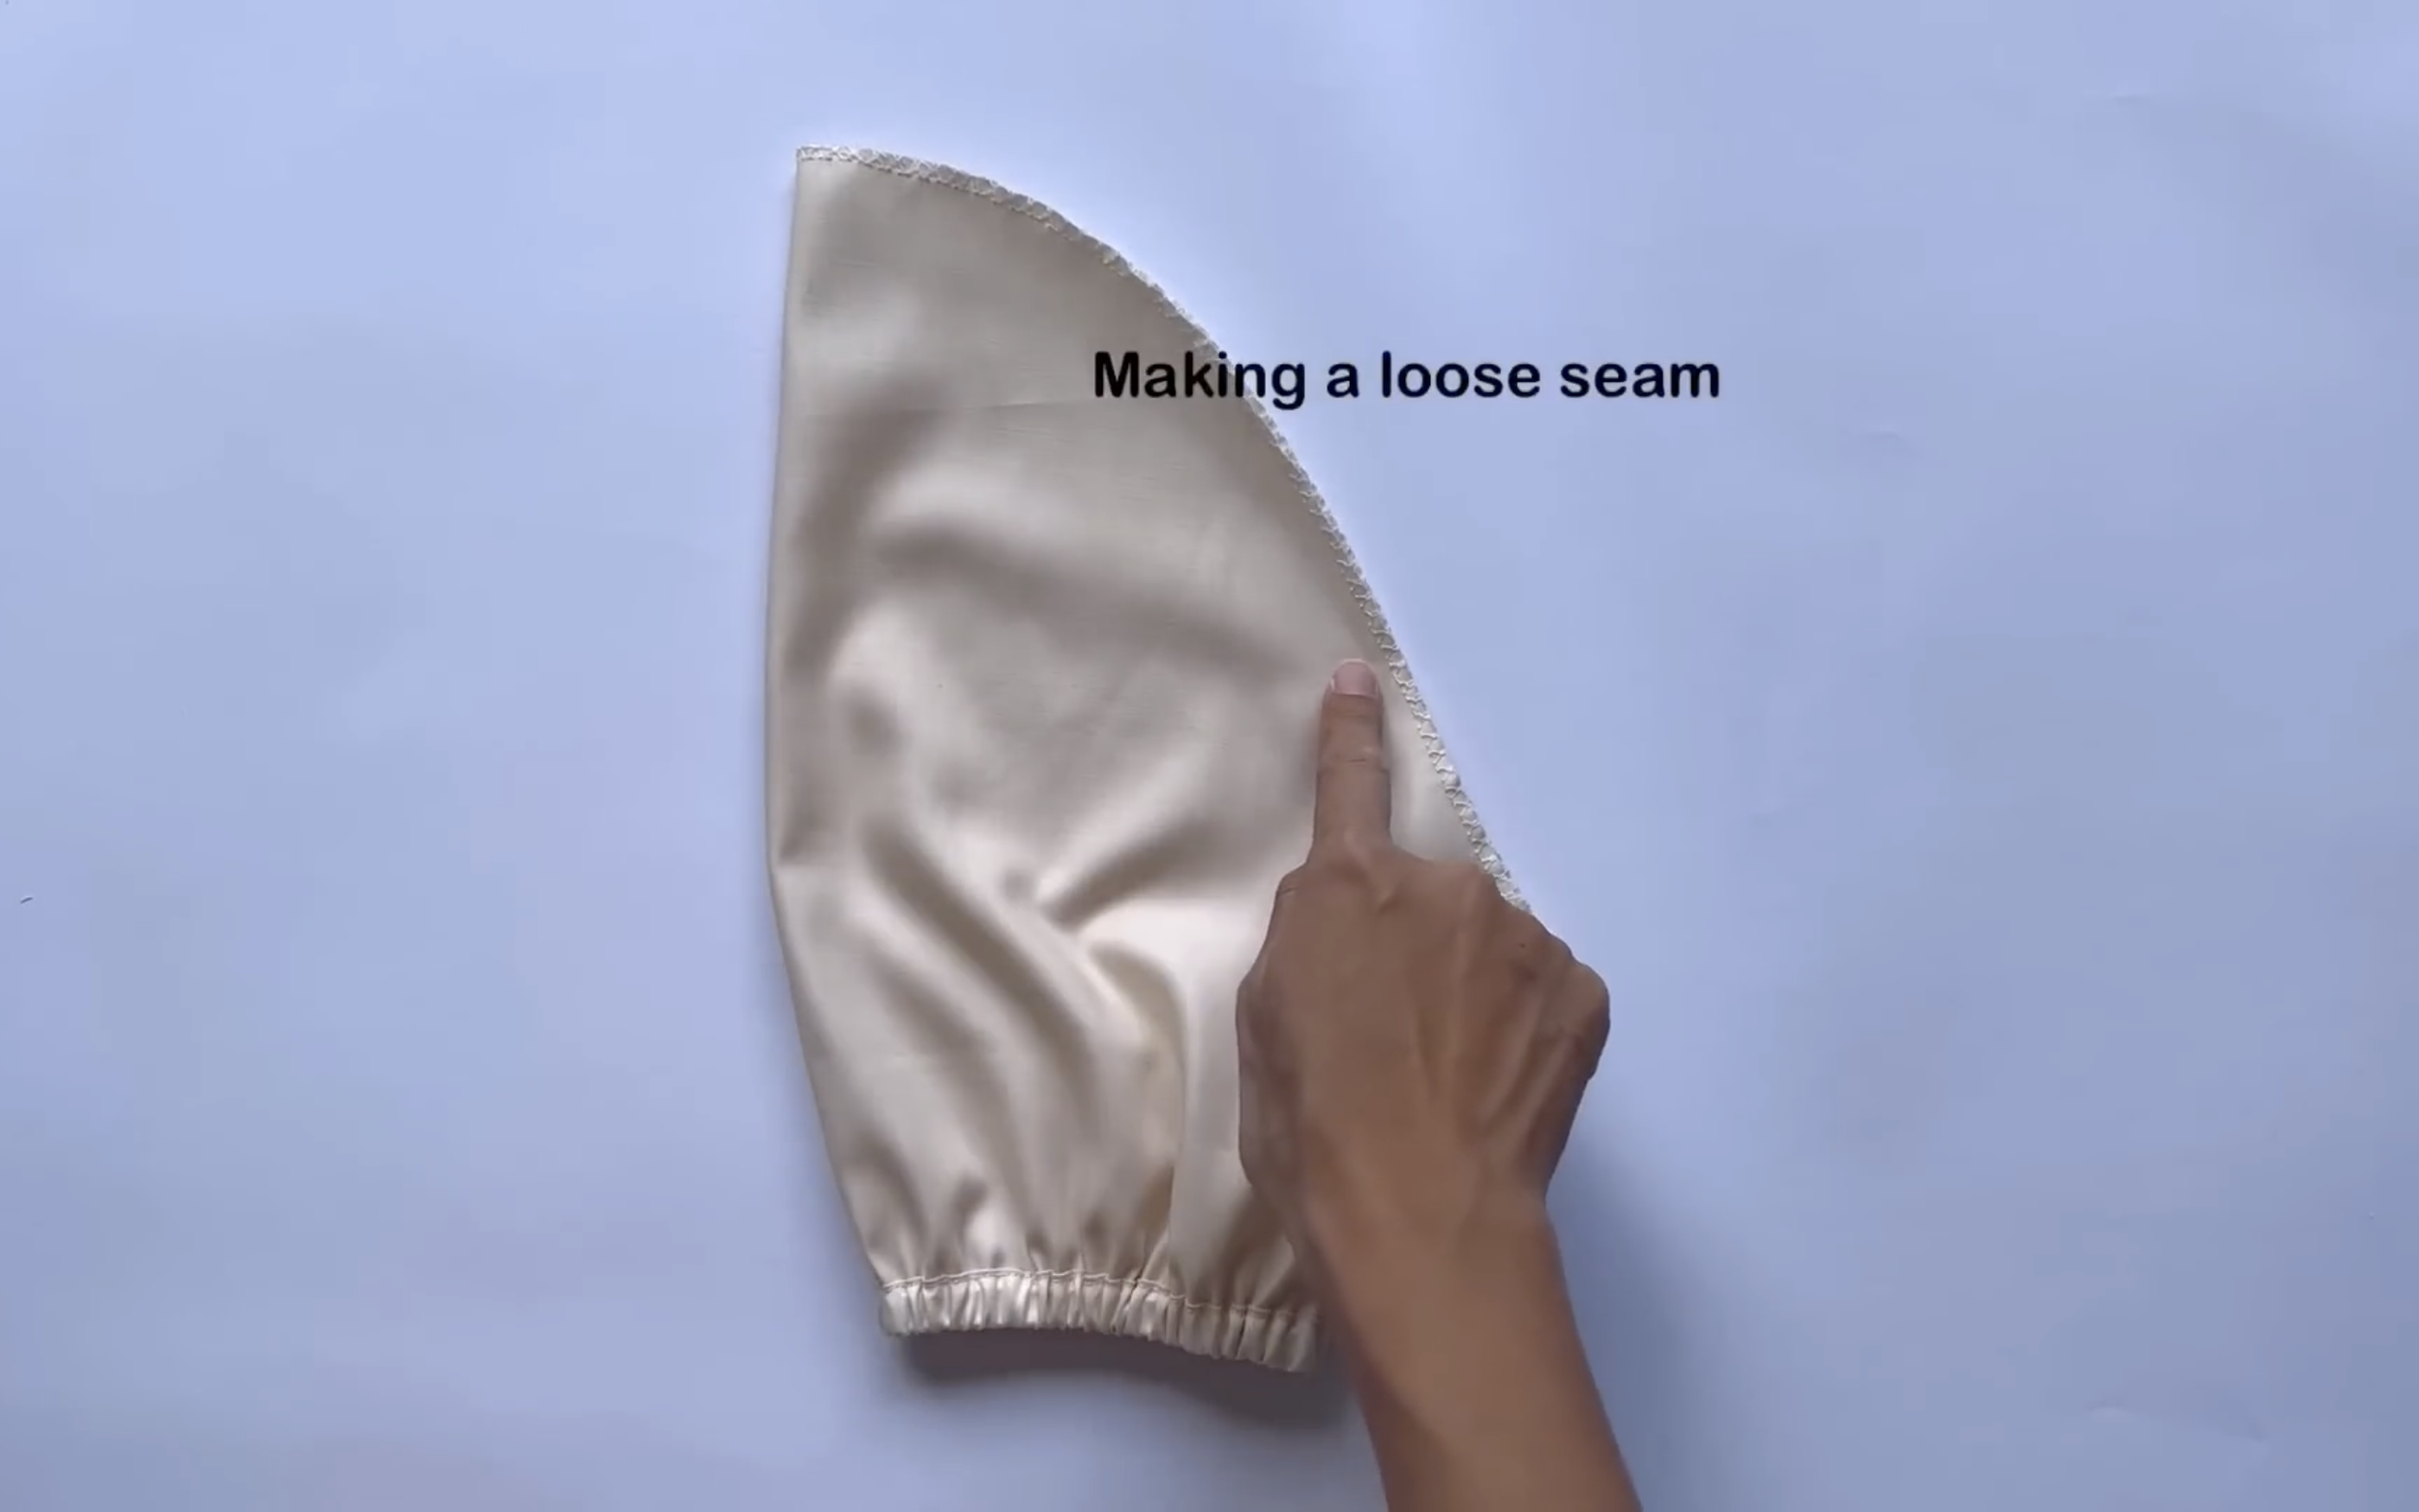
At the top of the sleeve, make a loose seam and gather the fabric.
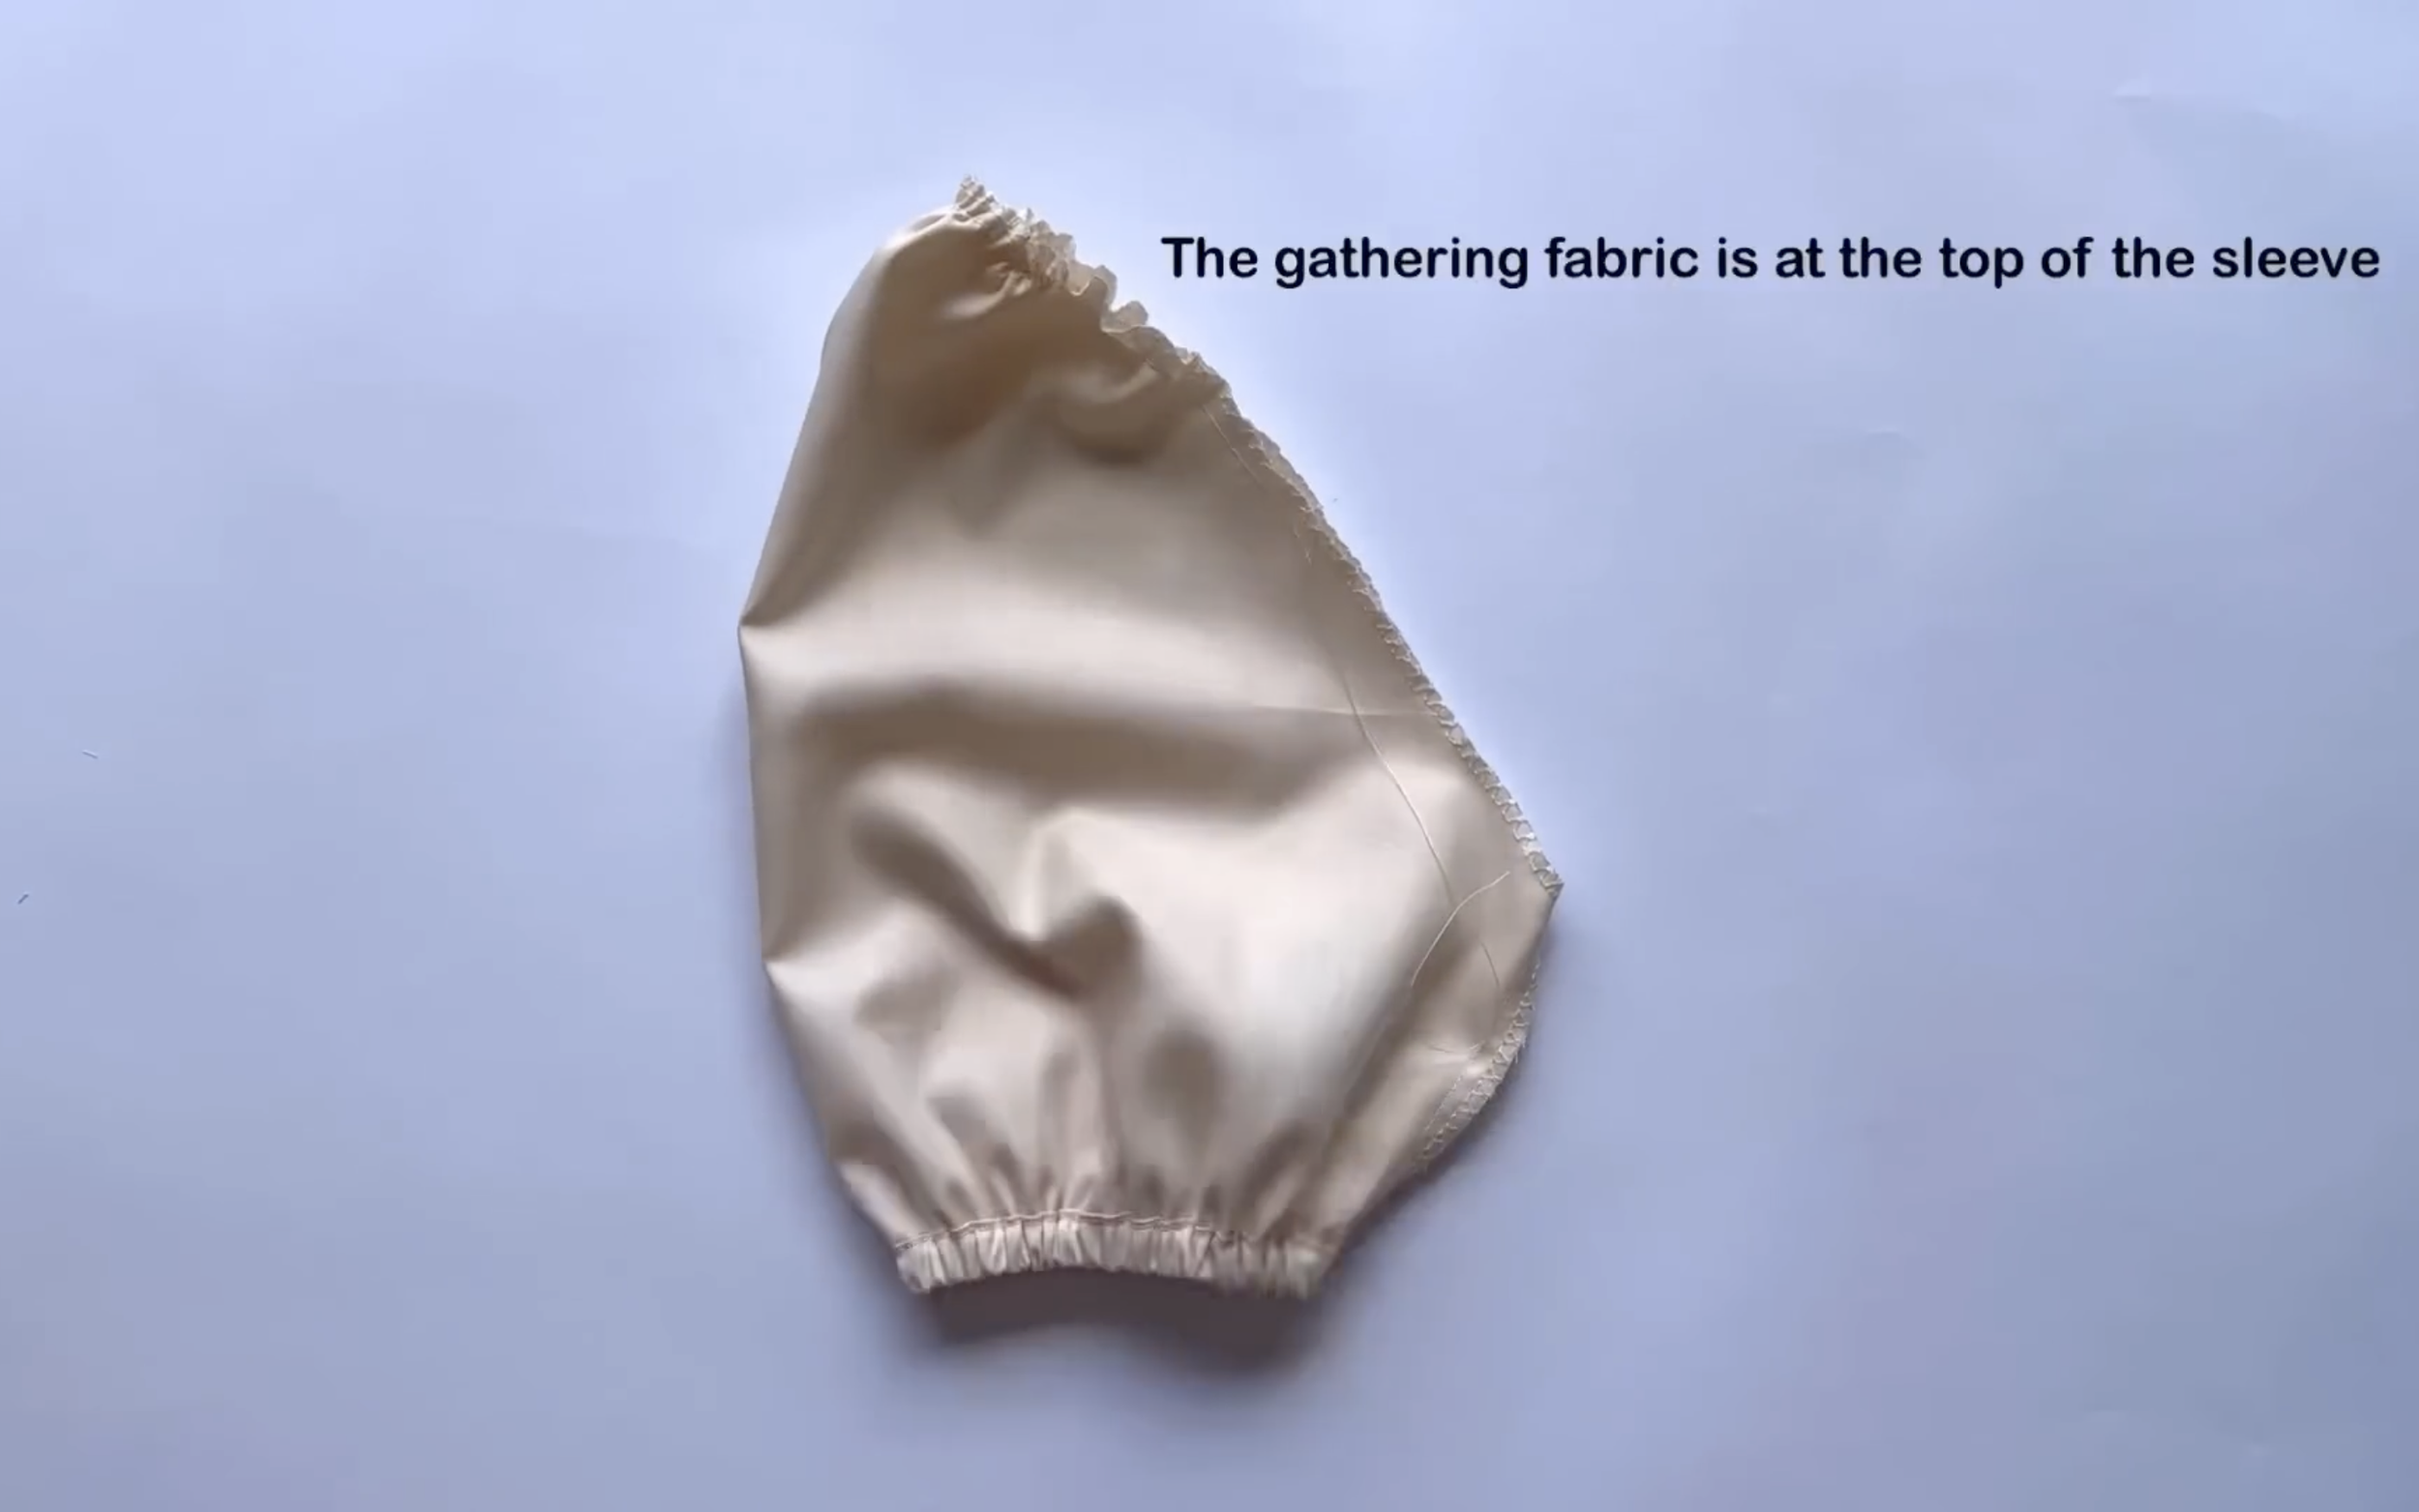
Make sure the gathered fabric fits the top of the sleeve.
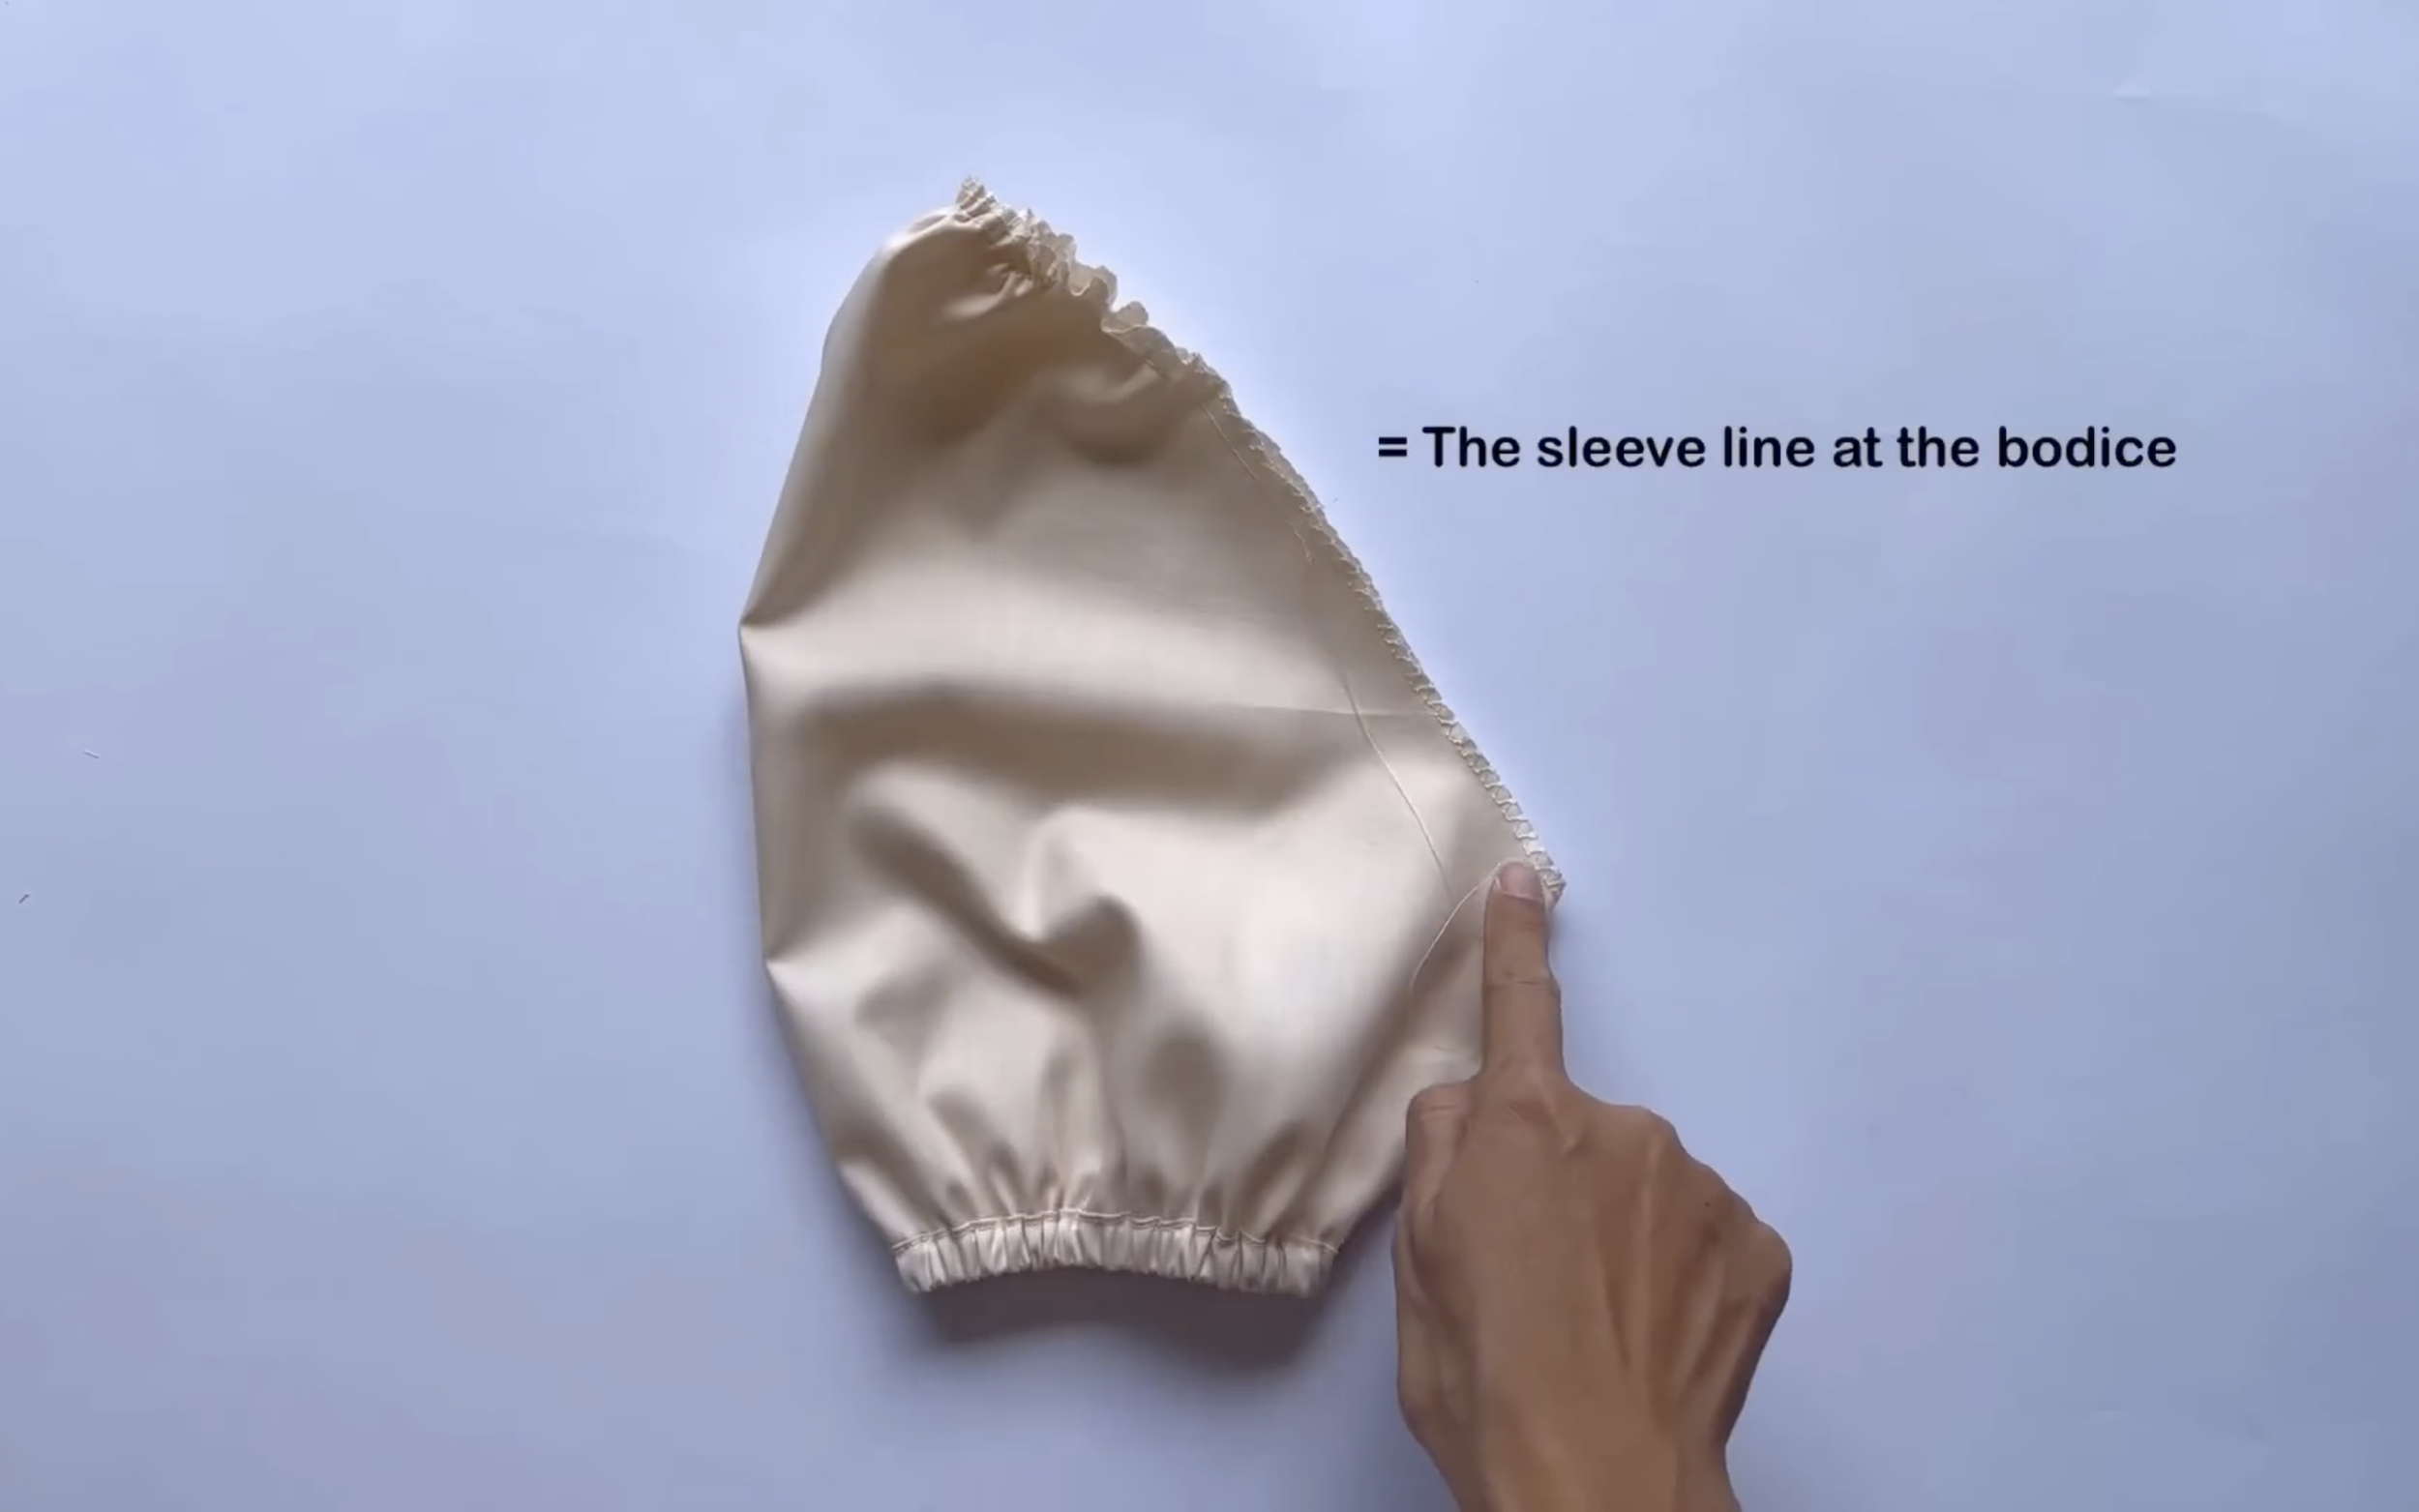
And that the sleeve’s final width matches the sleeve lines on the front and back bodice, so they can be connected later.
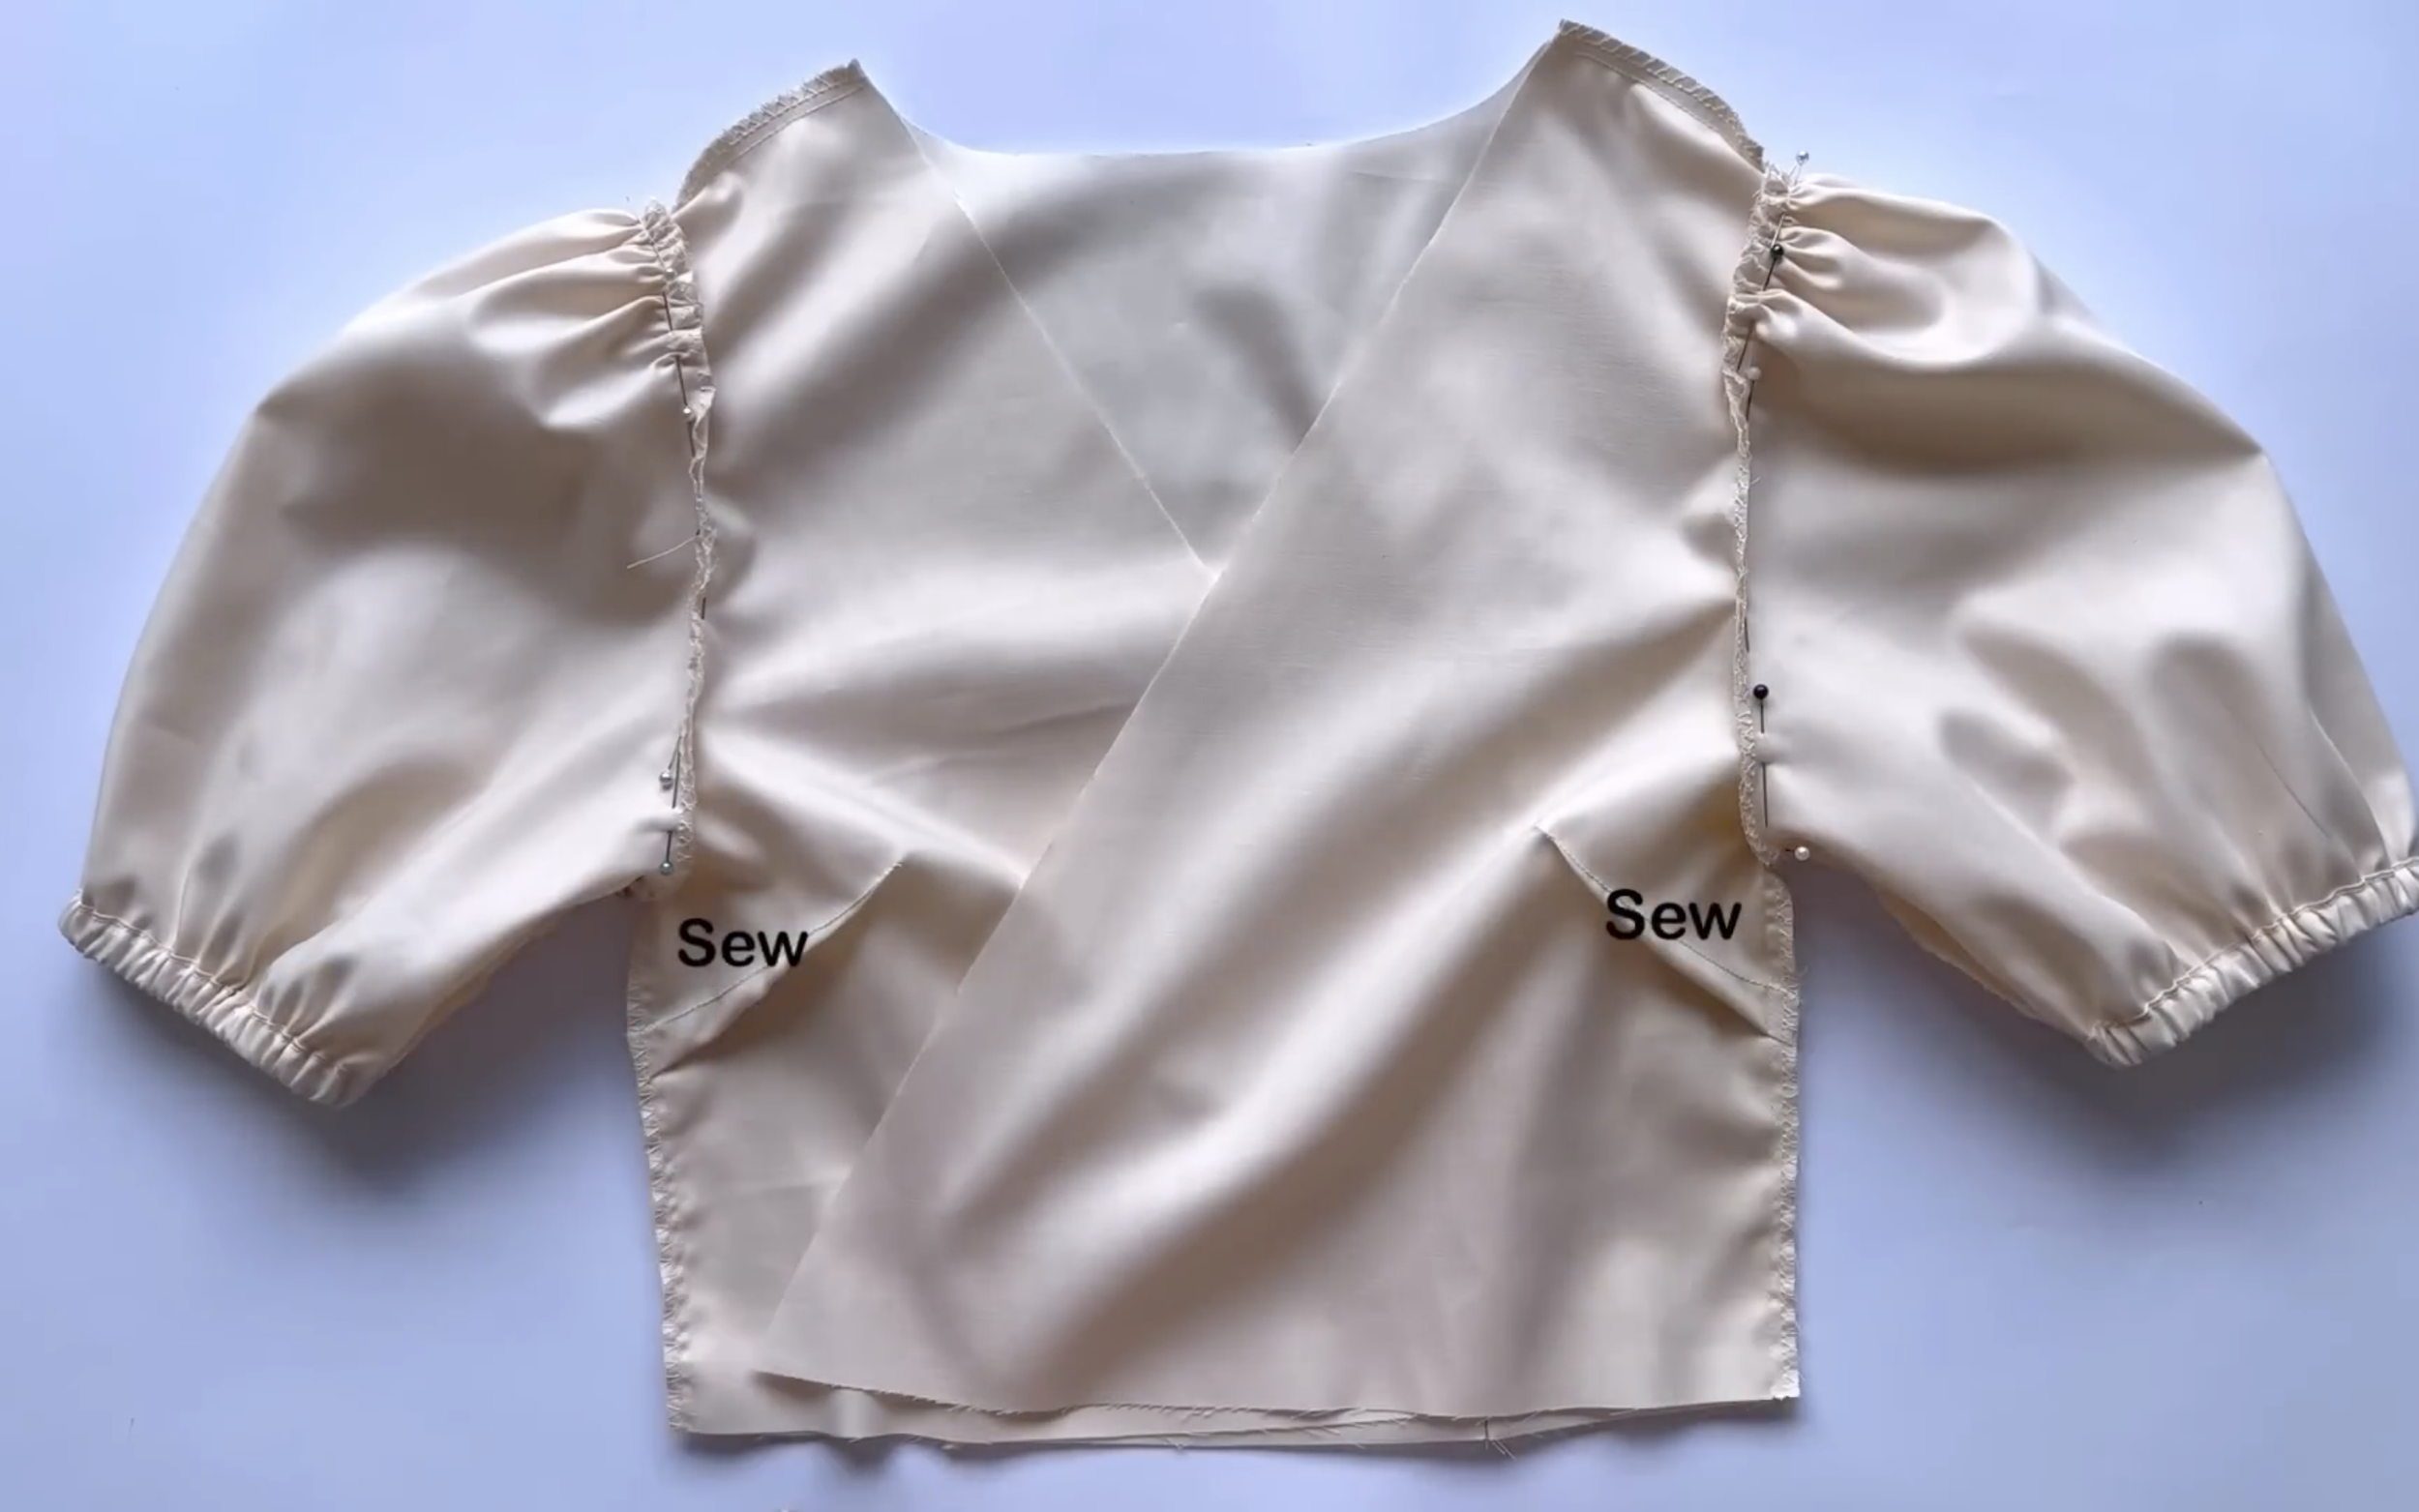
Finish the bodice part of the dress after sewing.
THE SKIRT
Moving to the skirt, copy the dart from the pattern to the fabric.
Then sew to complete it.

Connect the two front skirt pieces to the back skirt at the sides and sew them together.
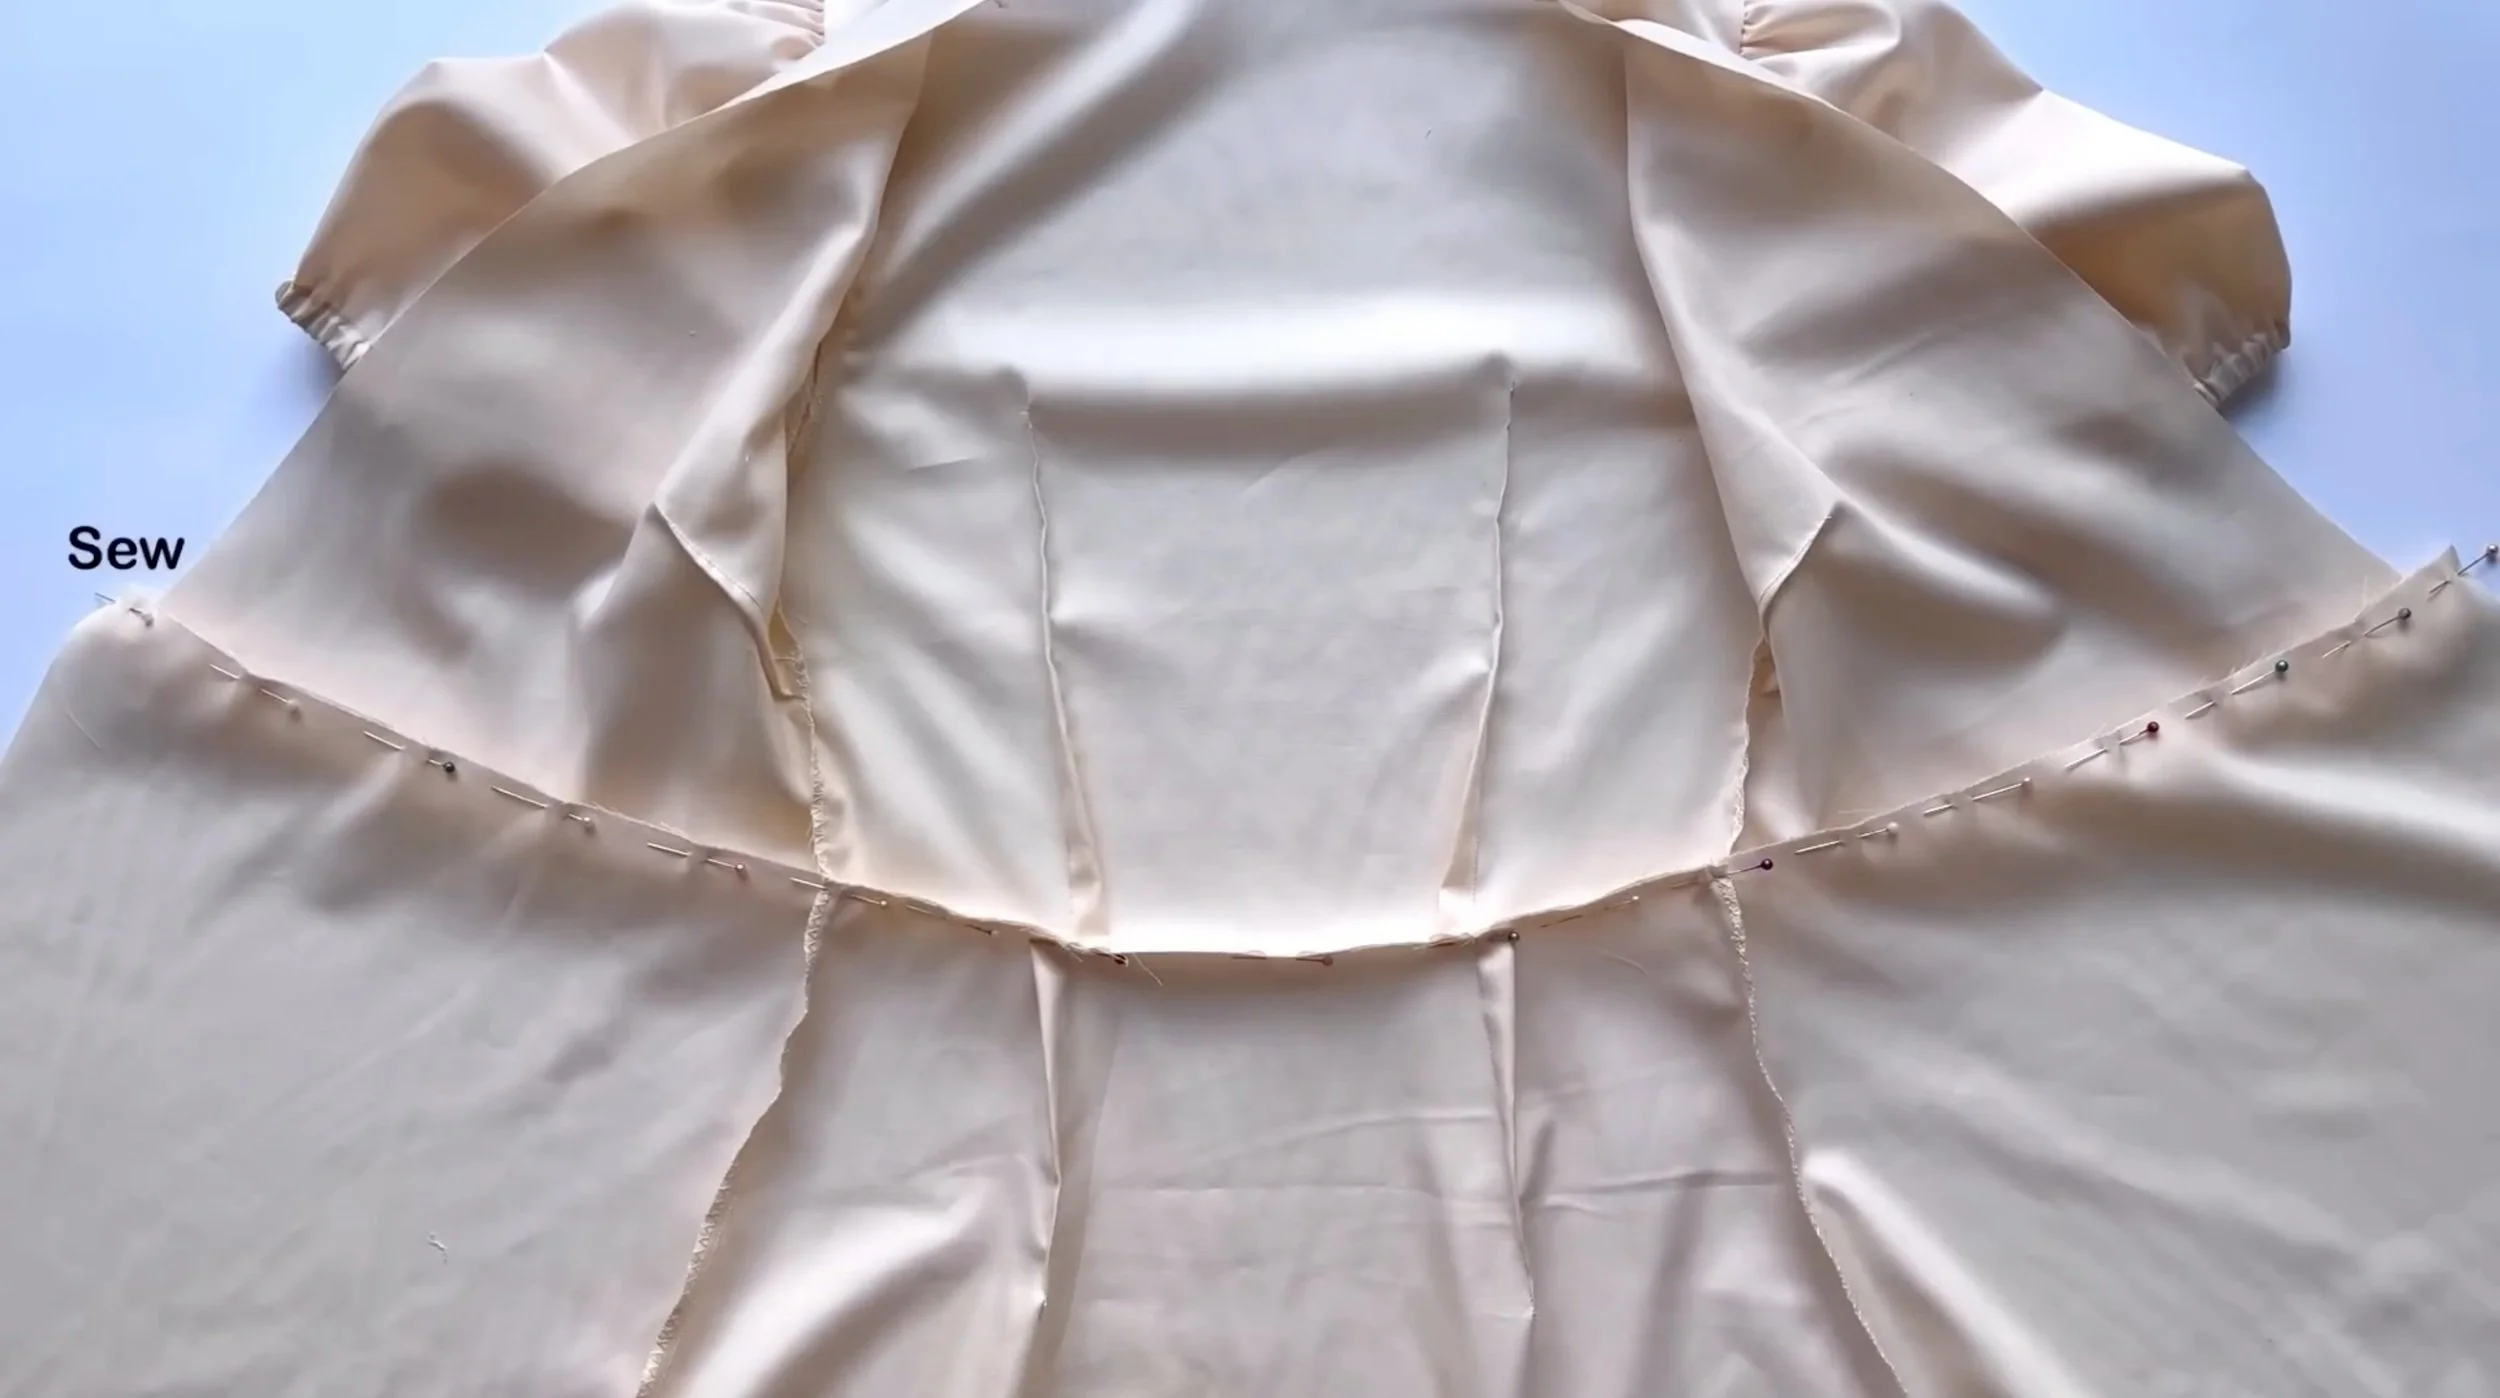
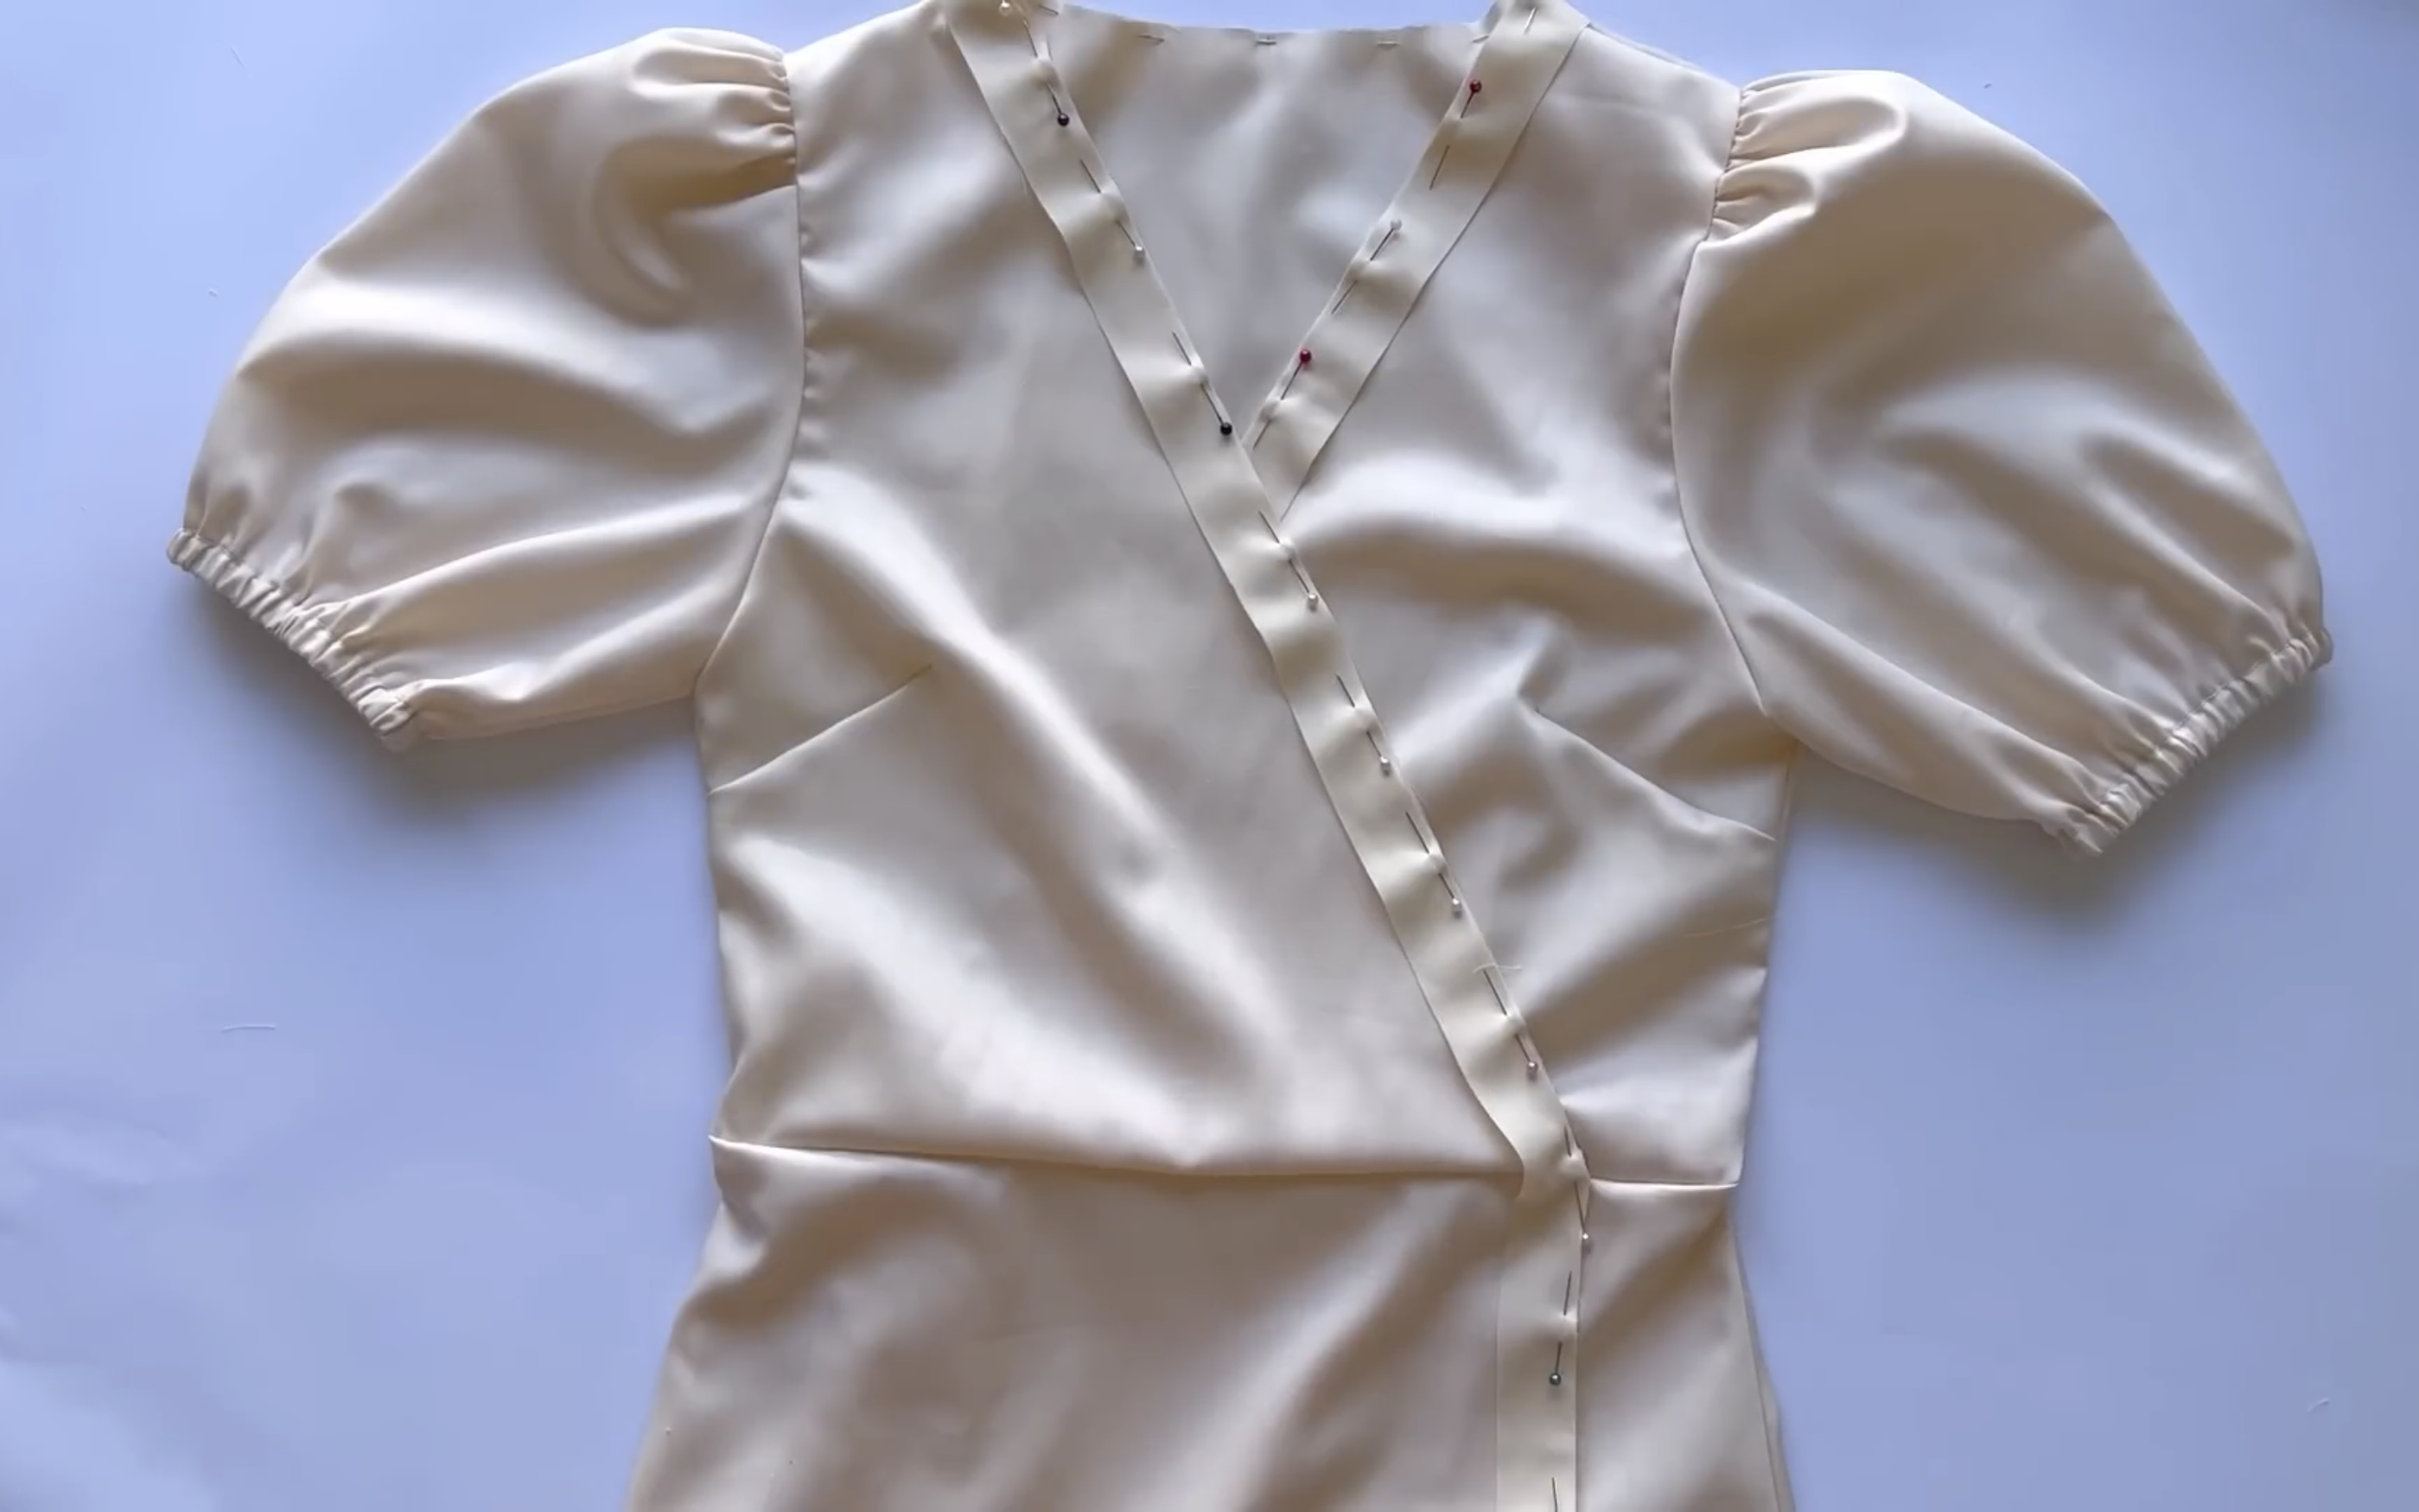
Now, connect the bodice and skirt parts at the waistline.
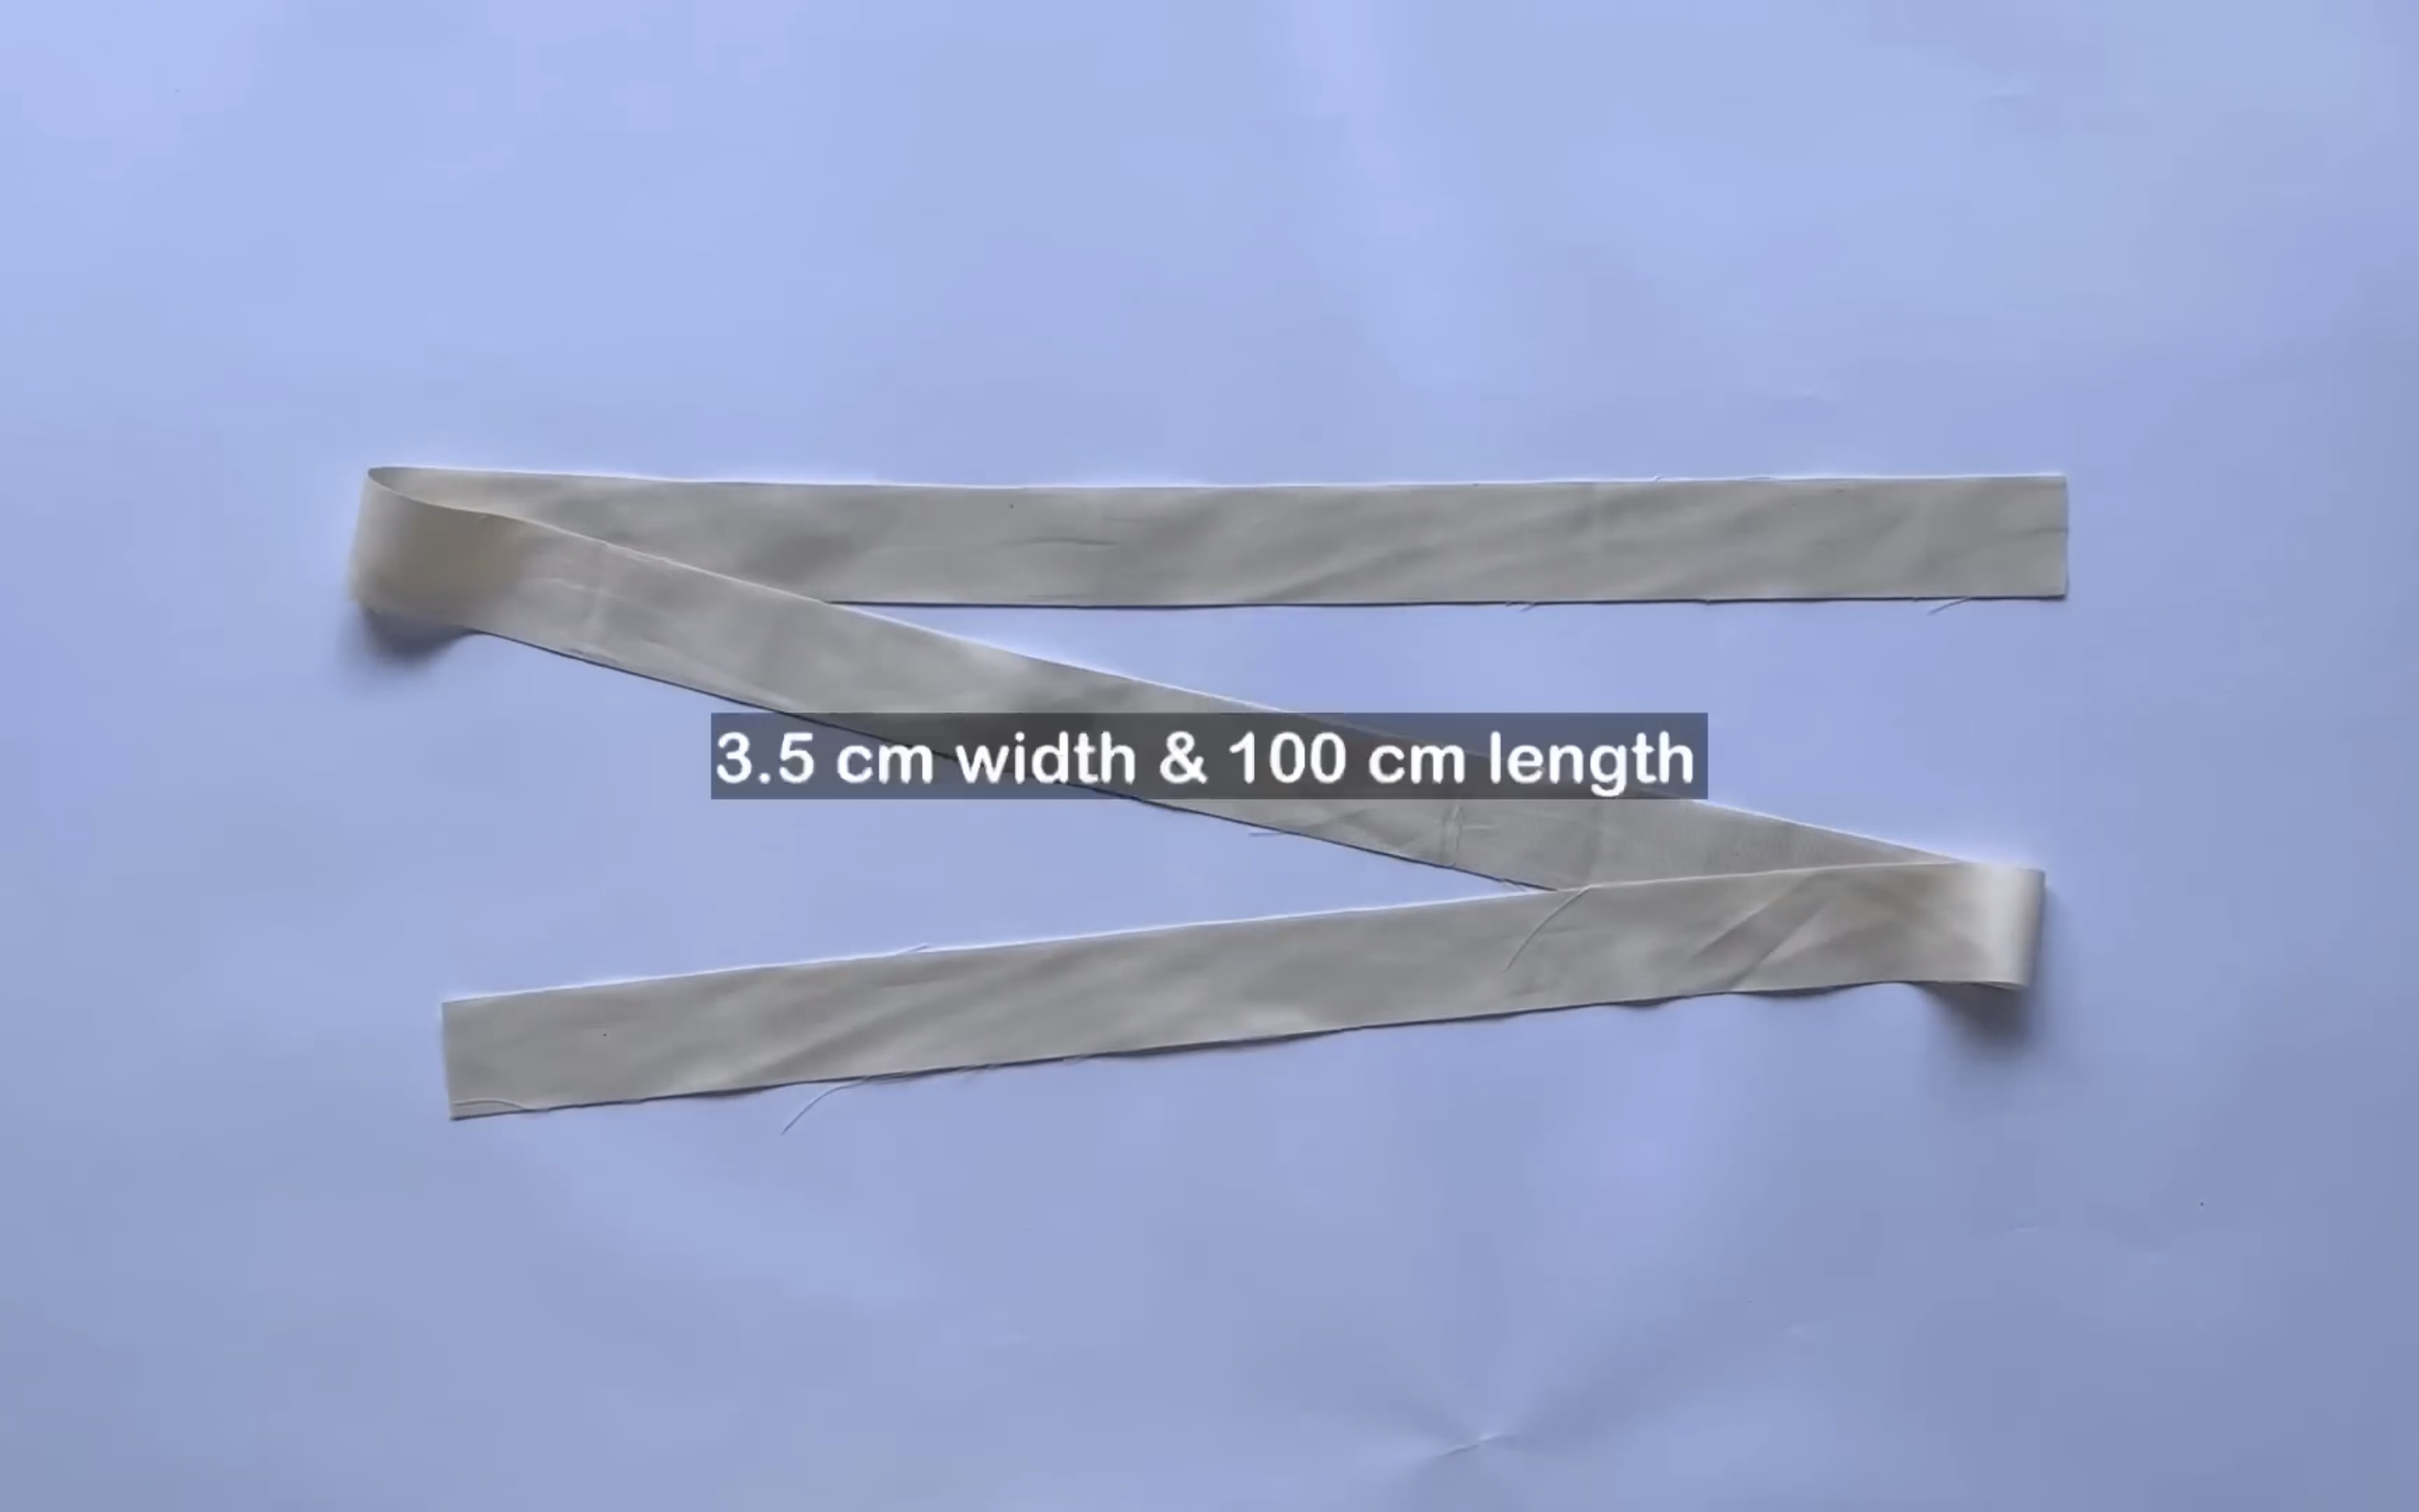
For the ties, cut a long fabric strip 3.5 cm width and about 100 cm length.
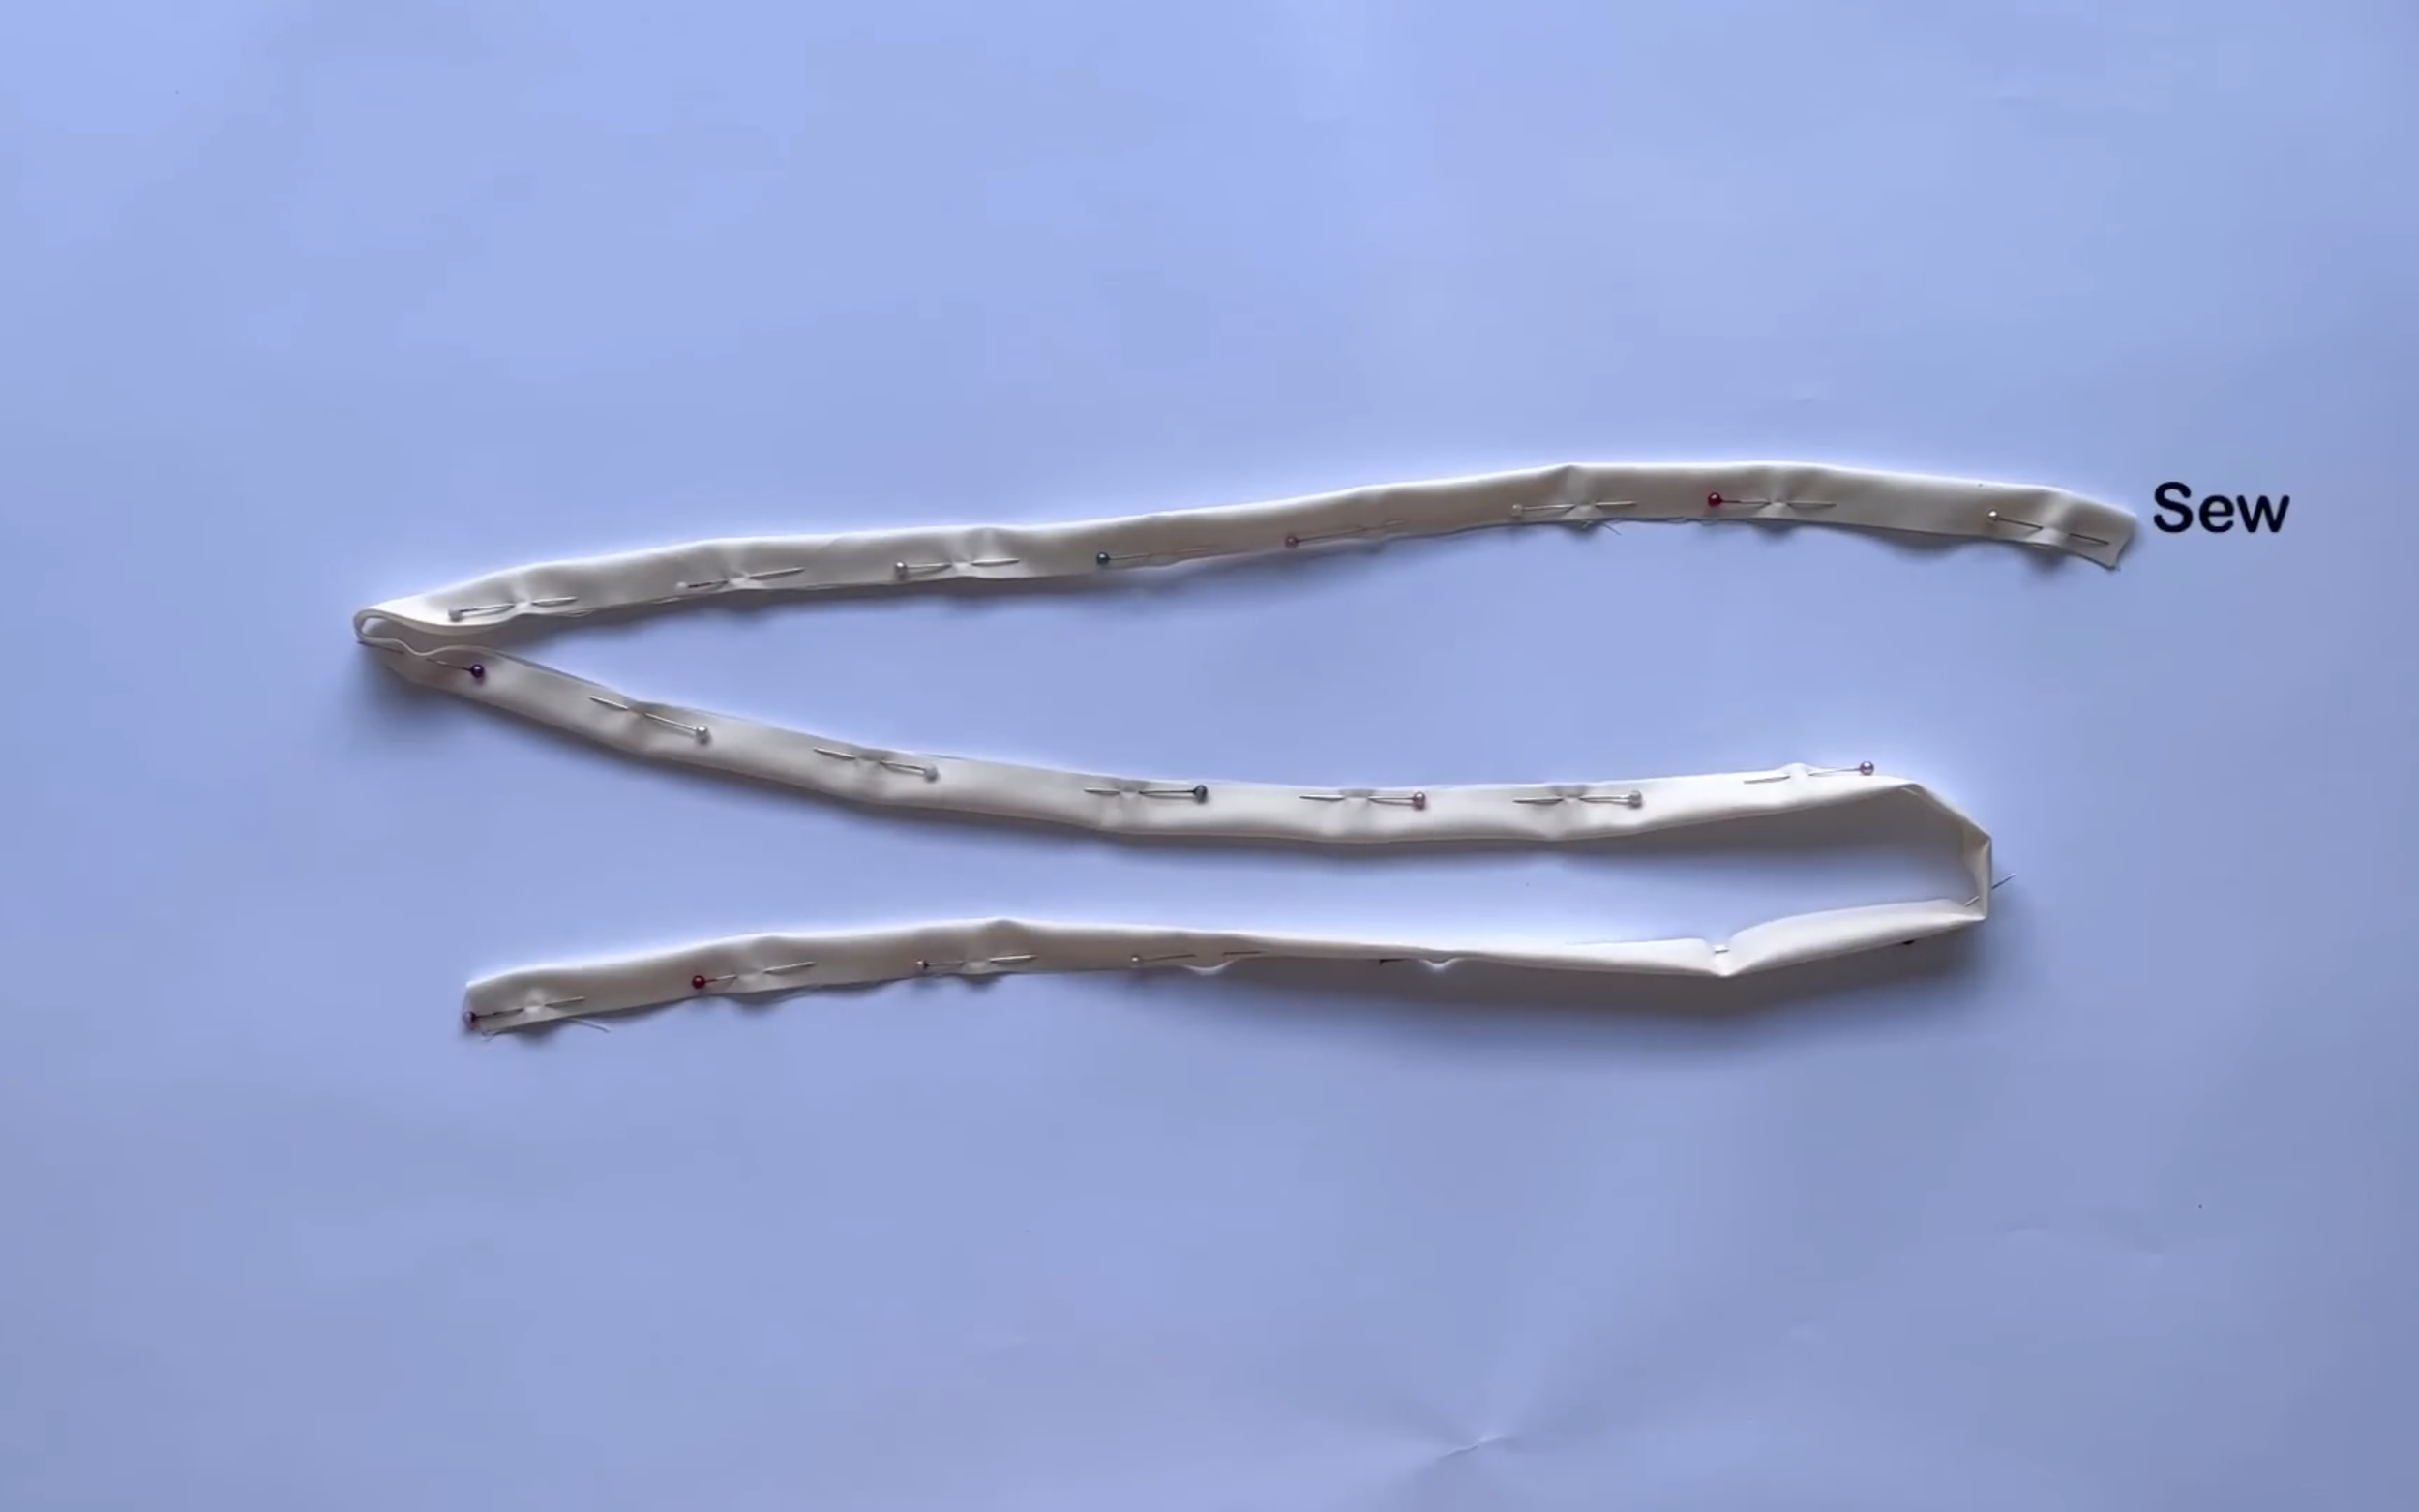
Connect the connect two landlines of the long fabric together first.
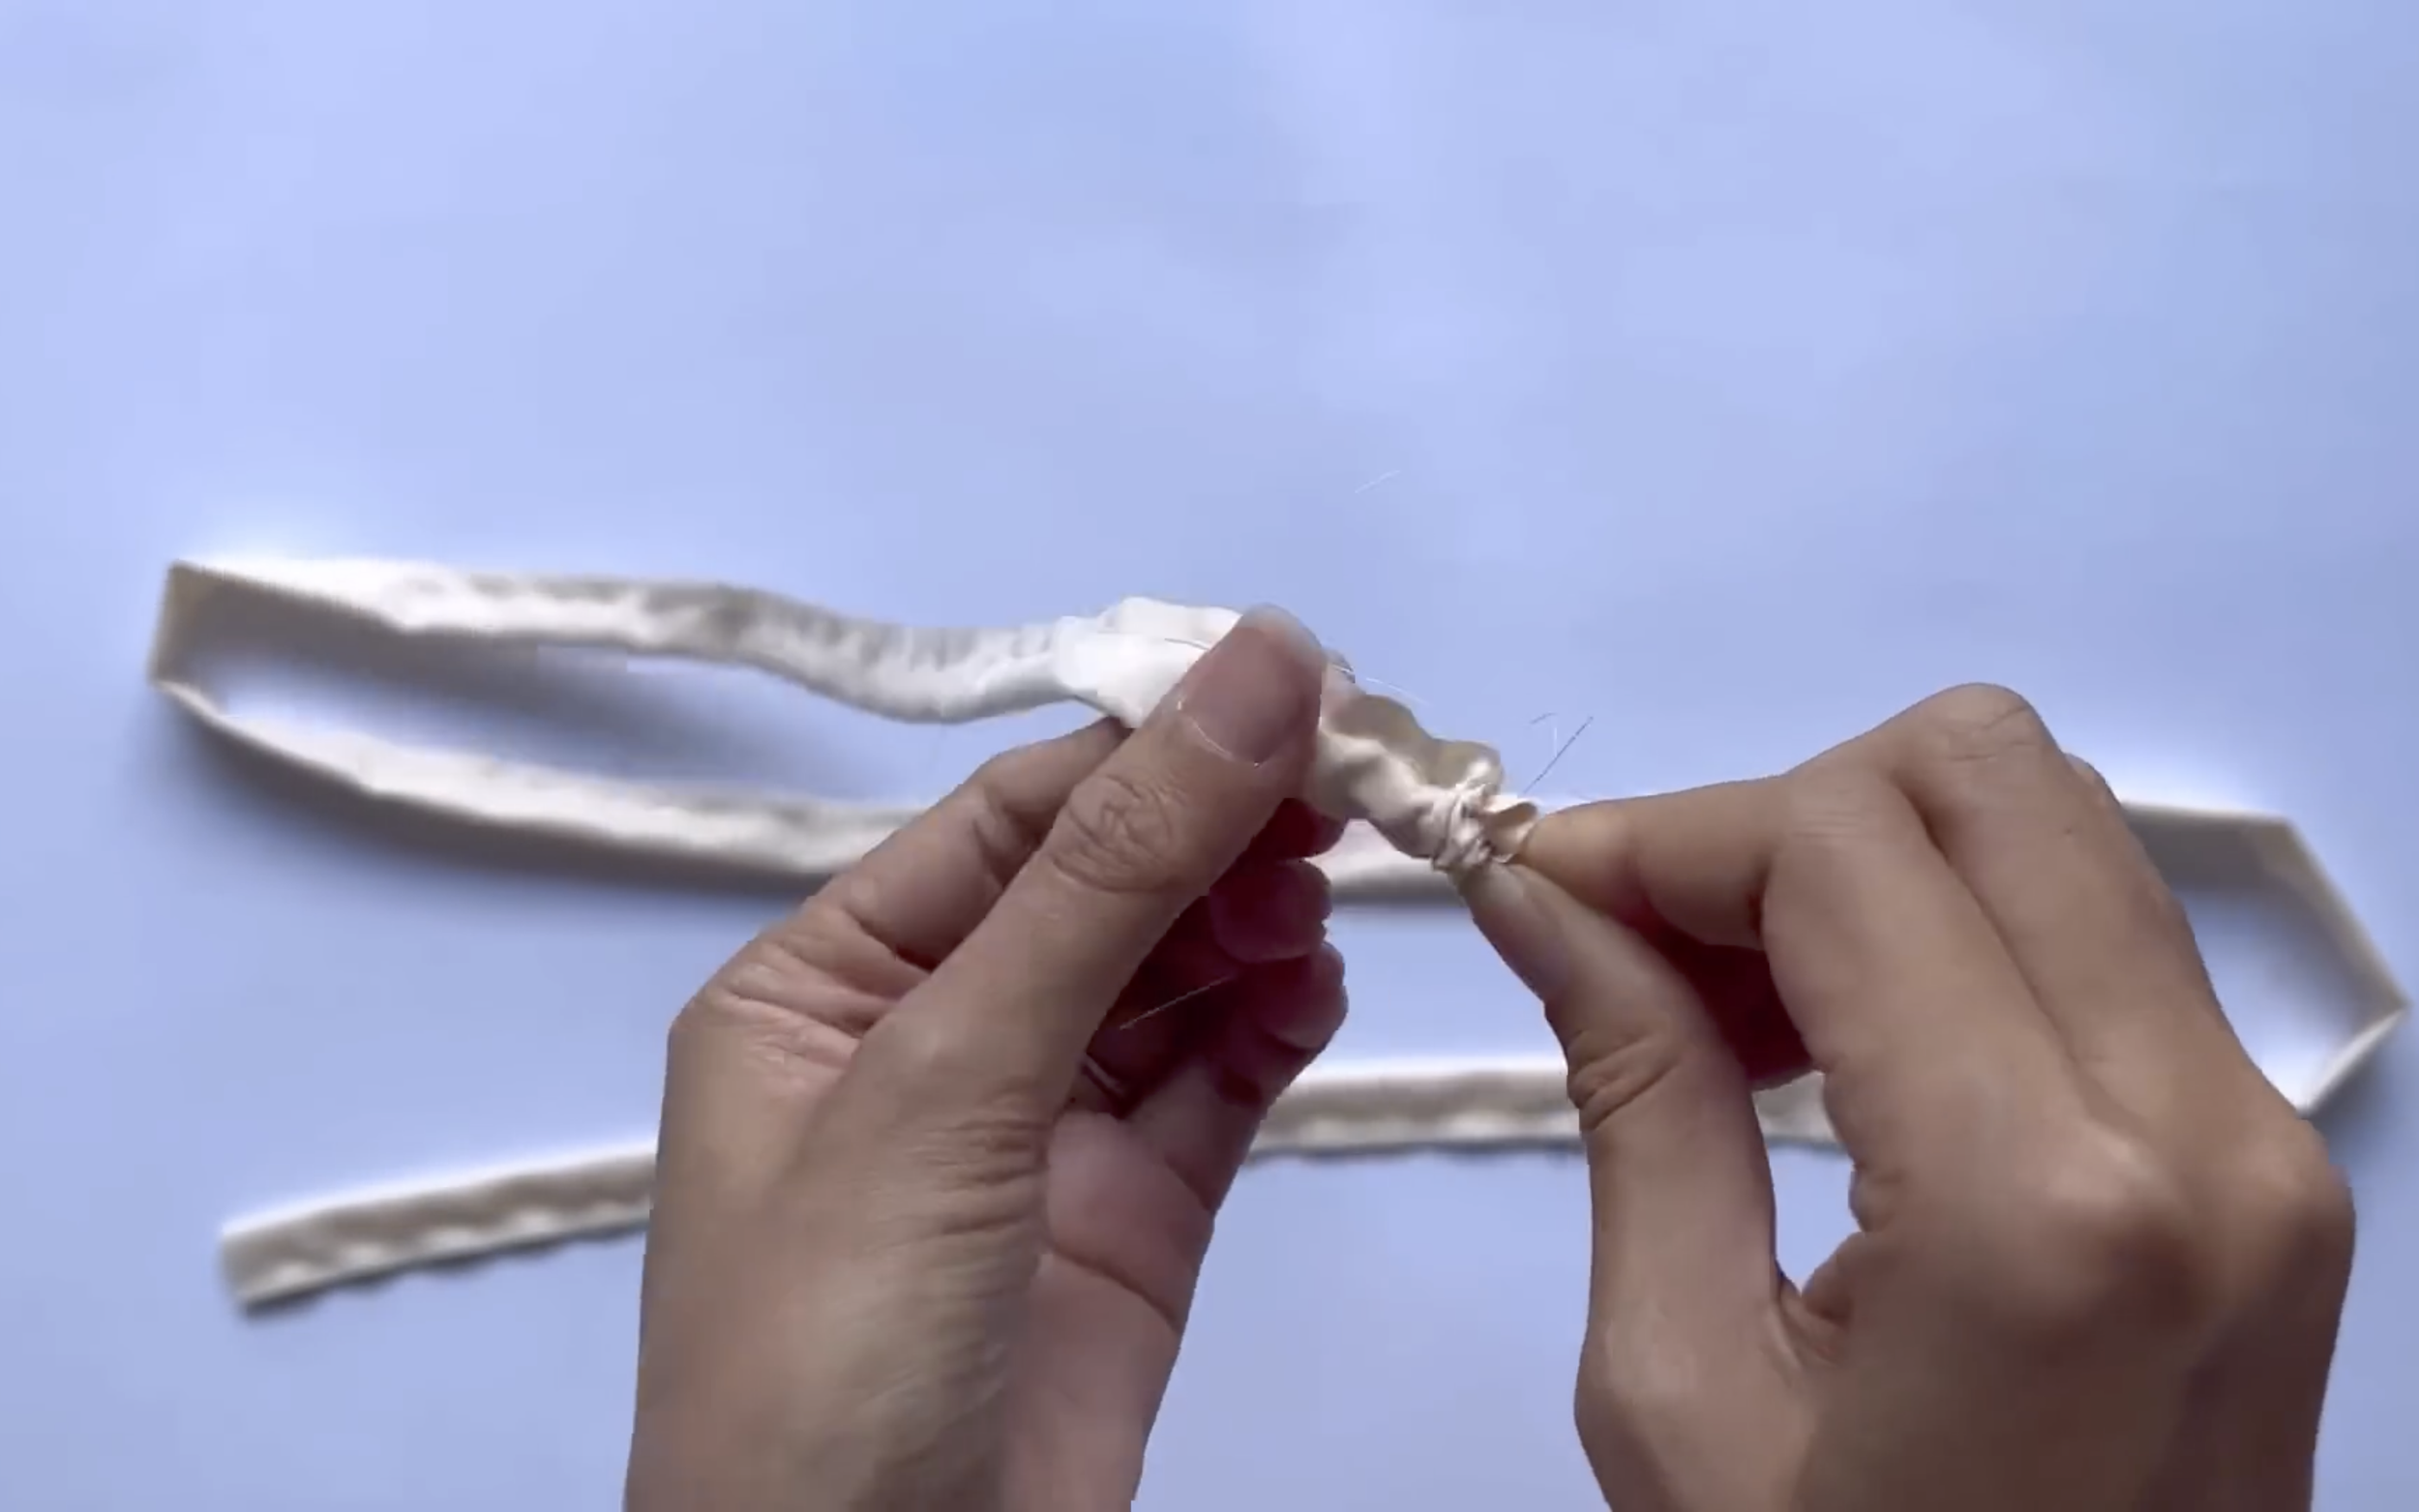
Then turn it inside out to form the tie.
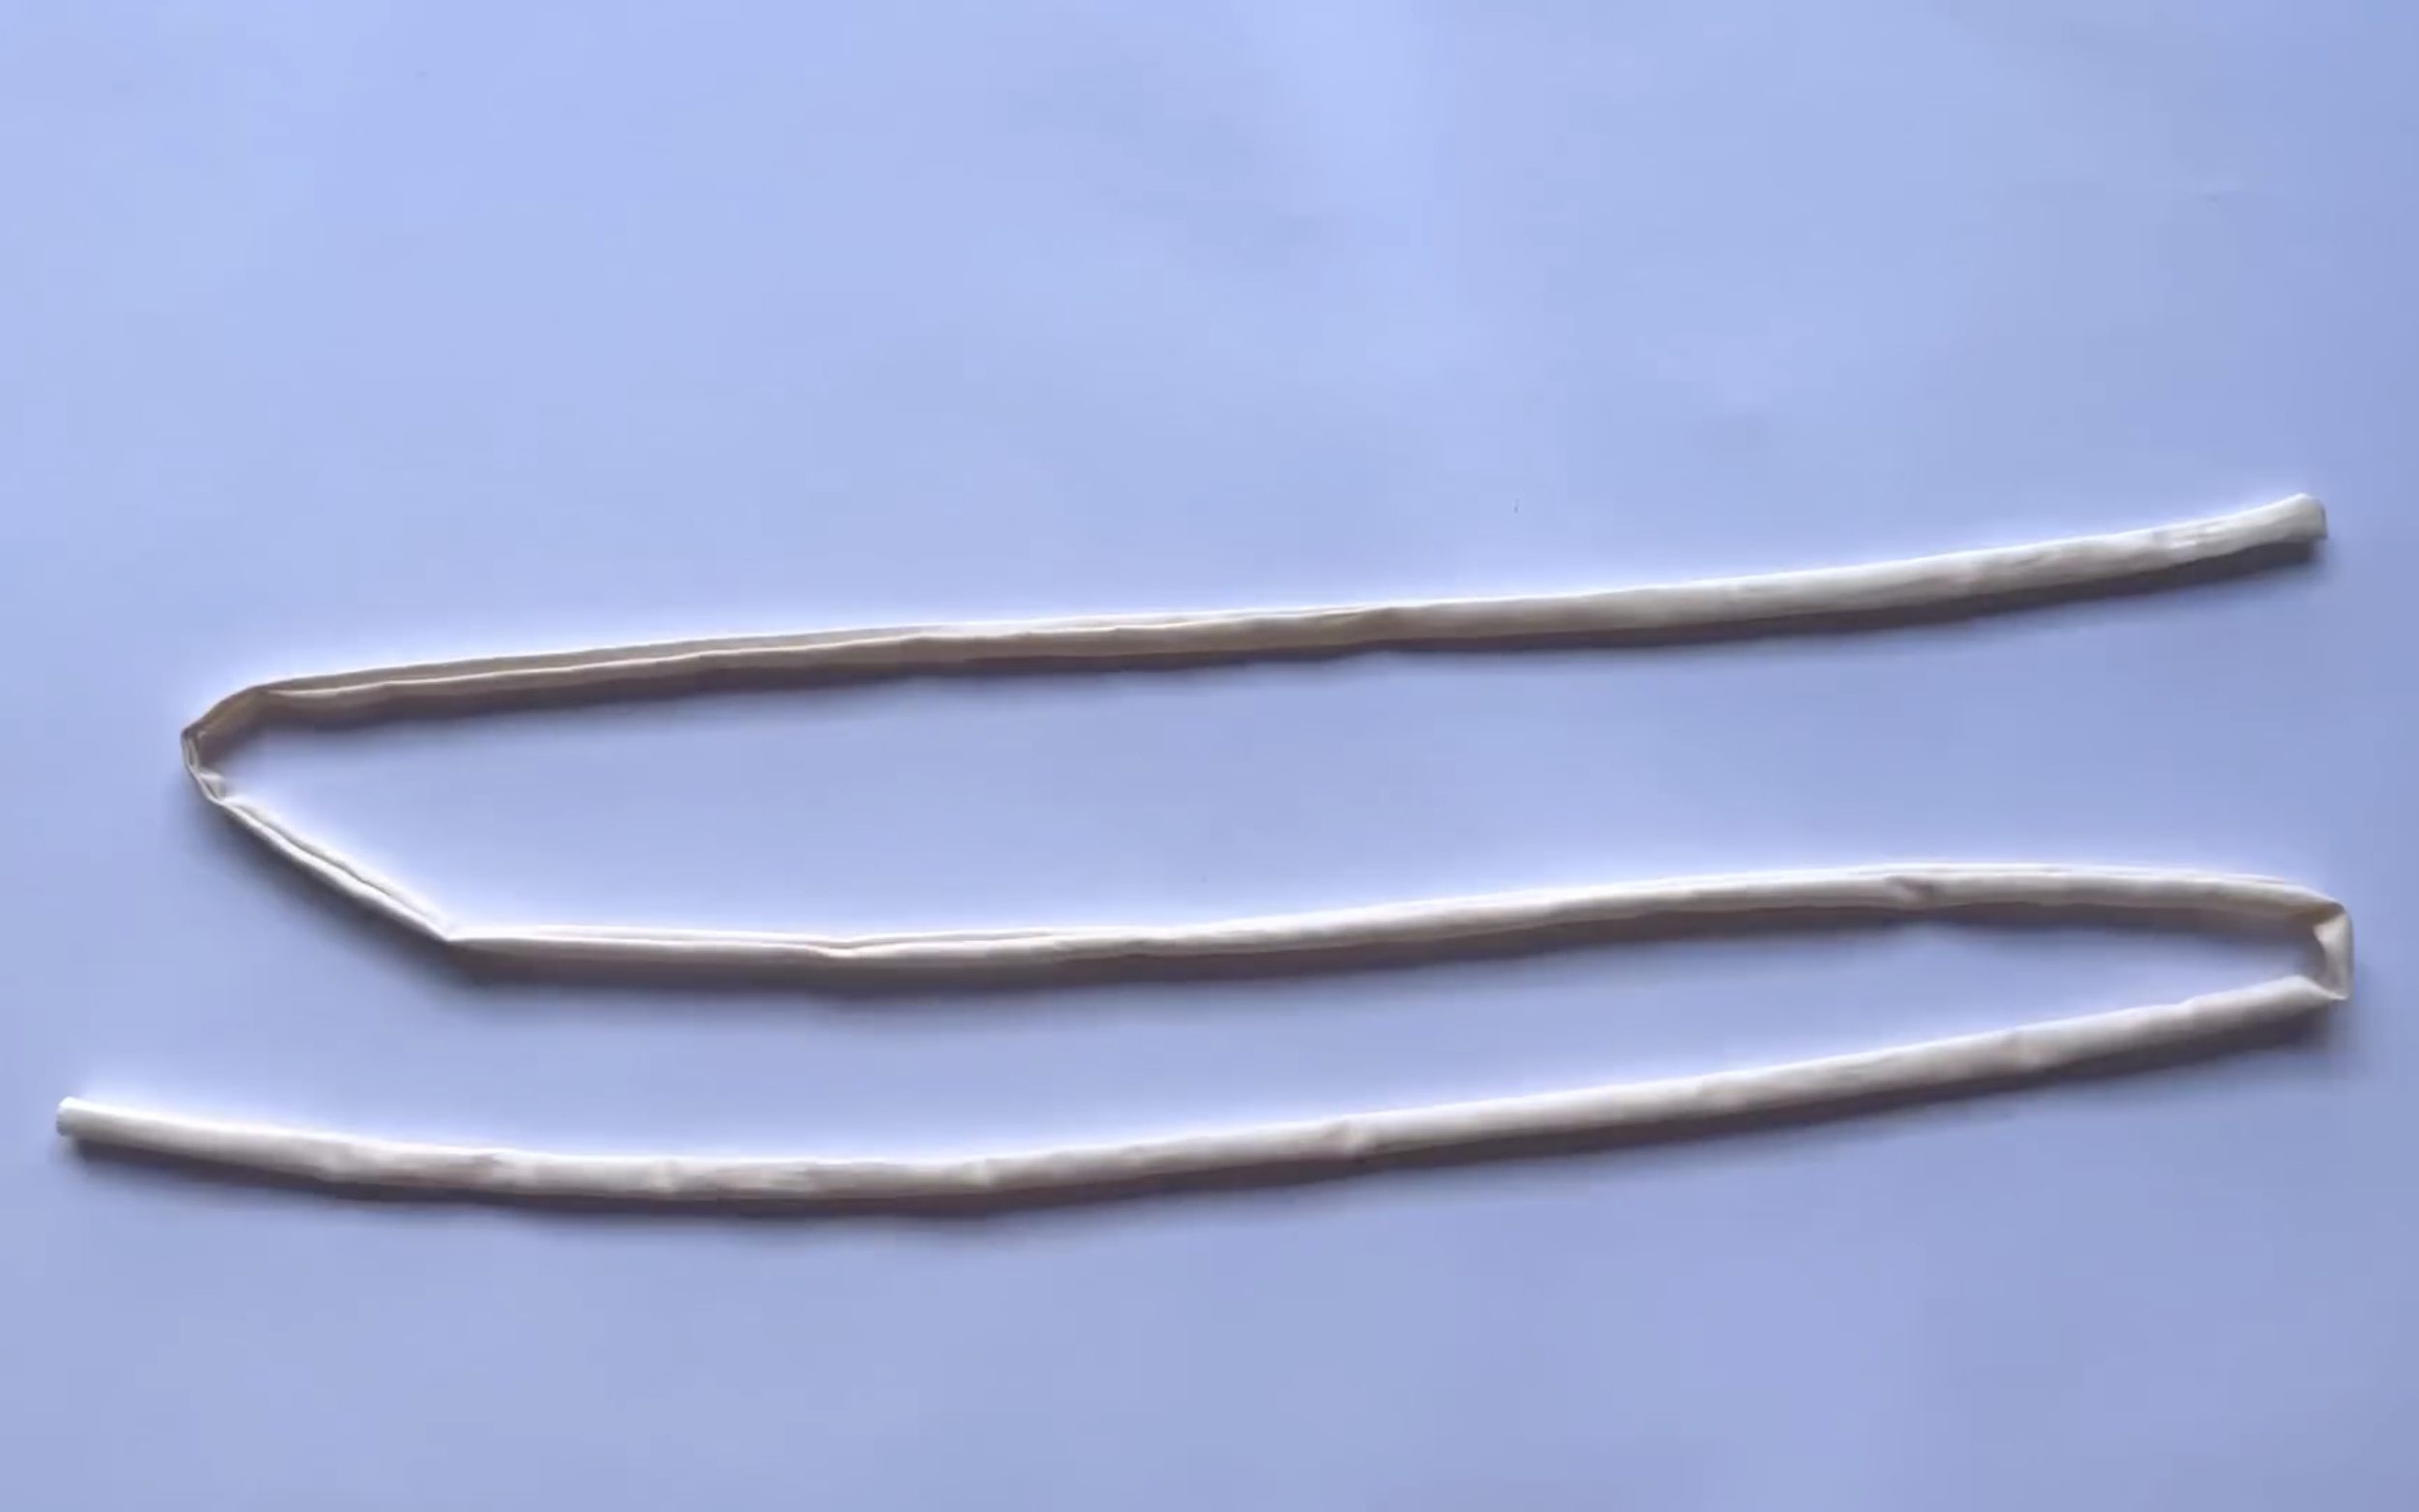
Use an iron to make the folds neat.
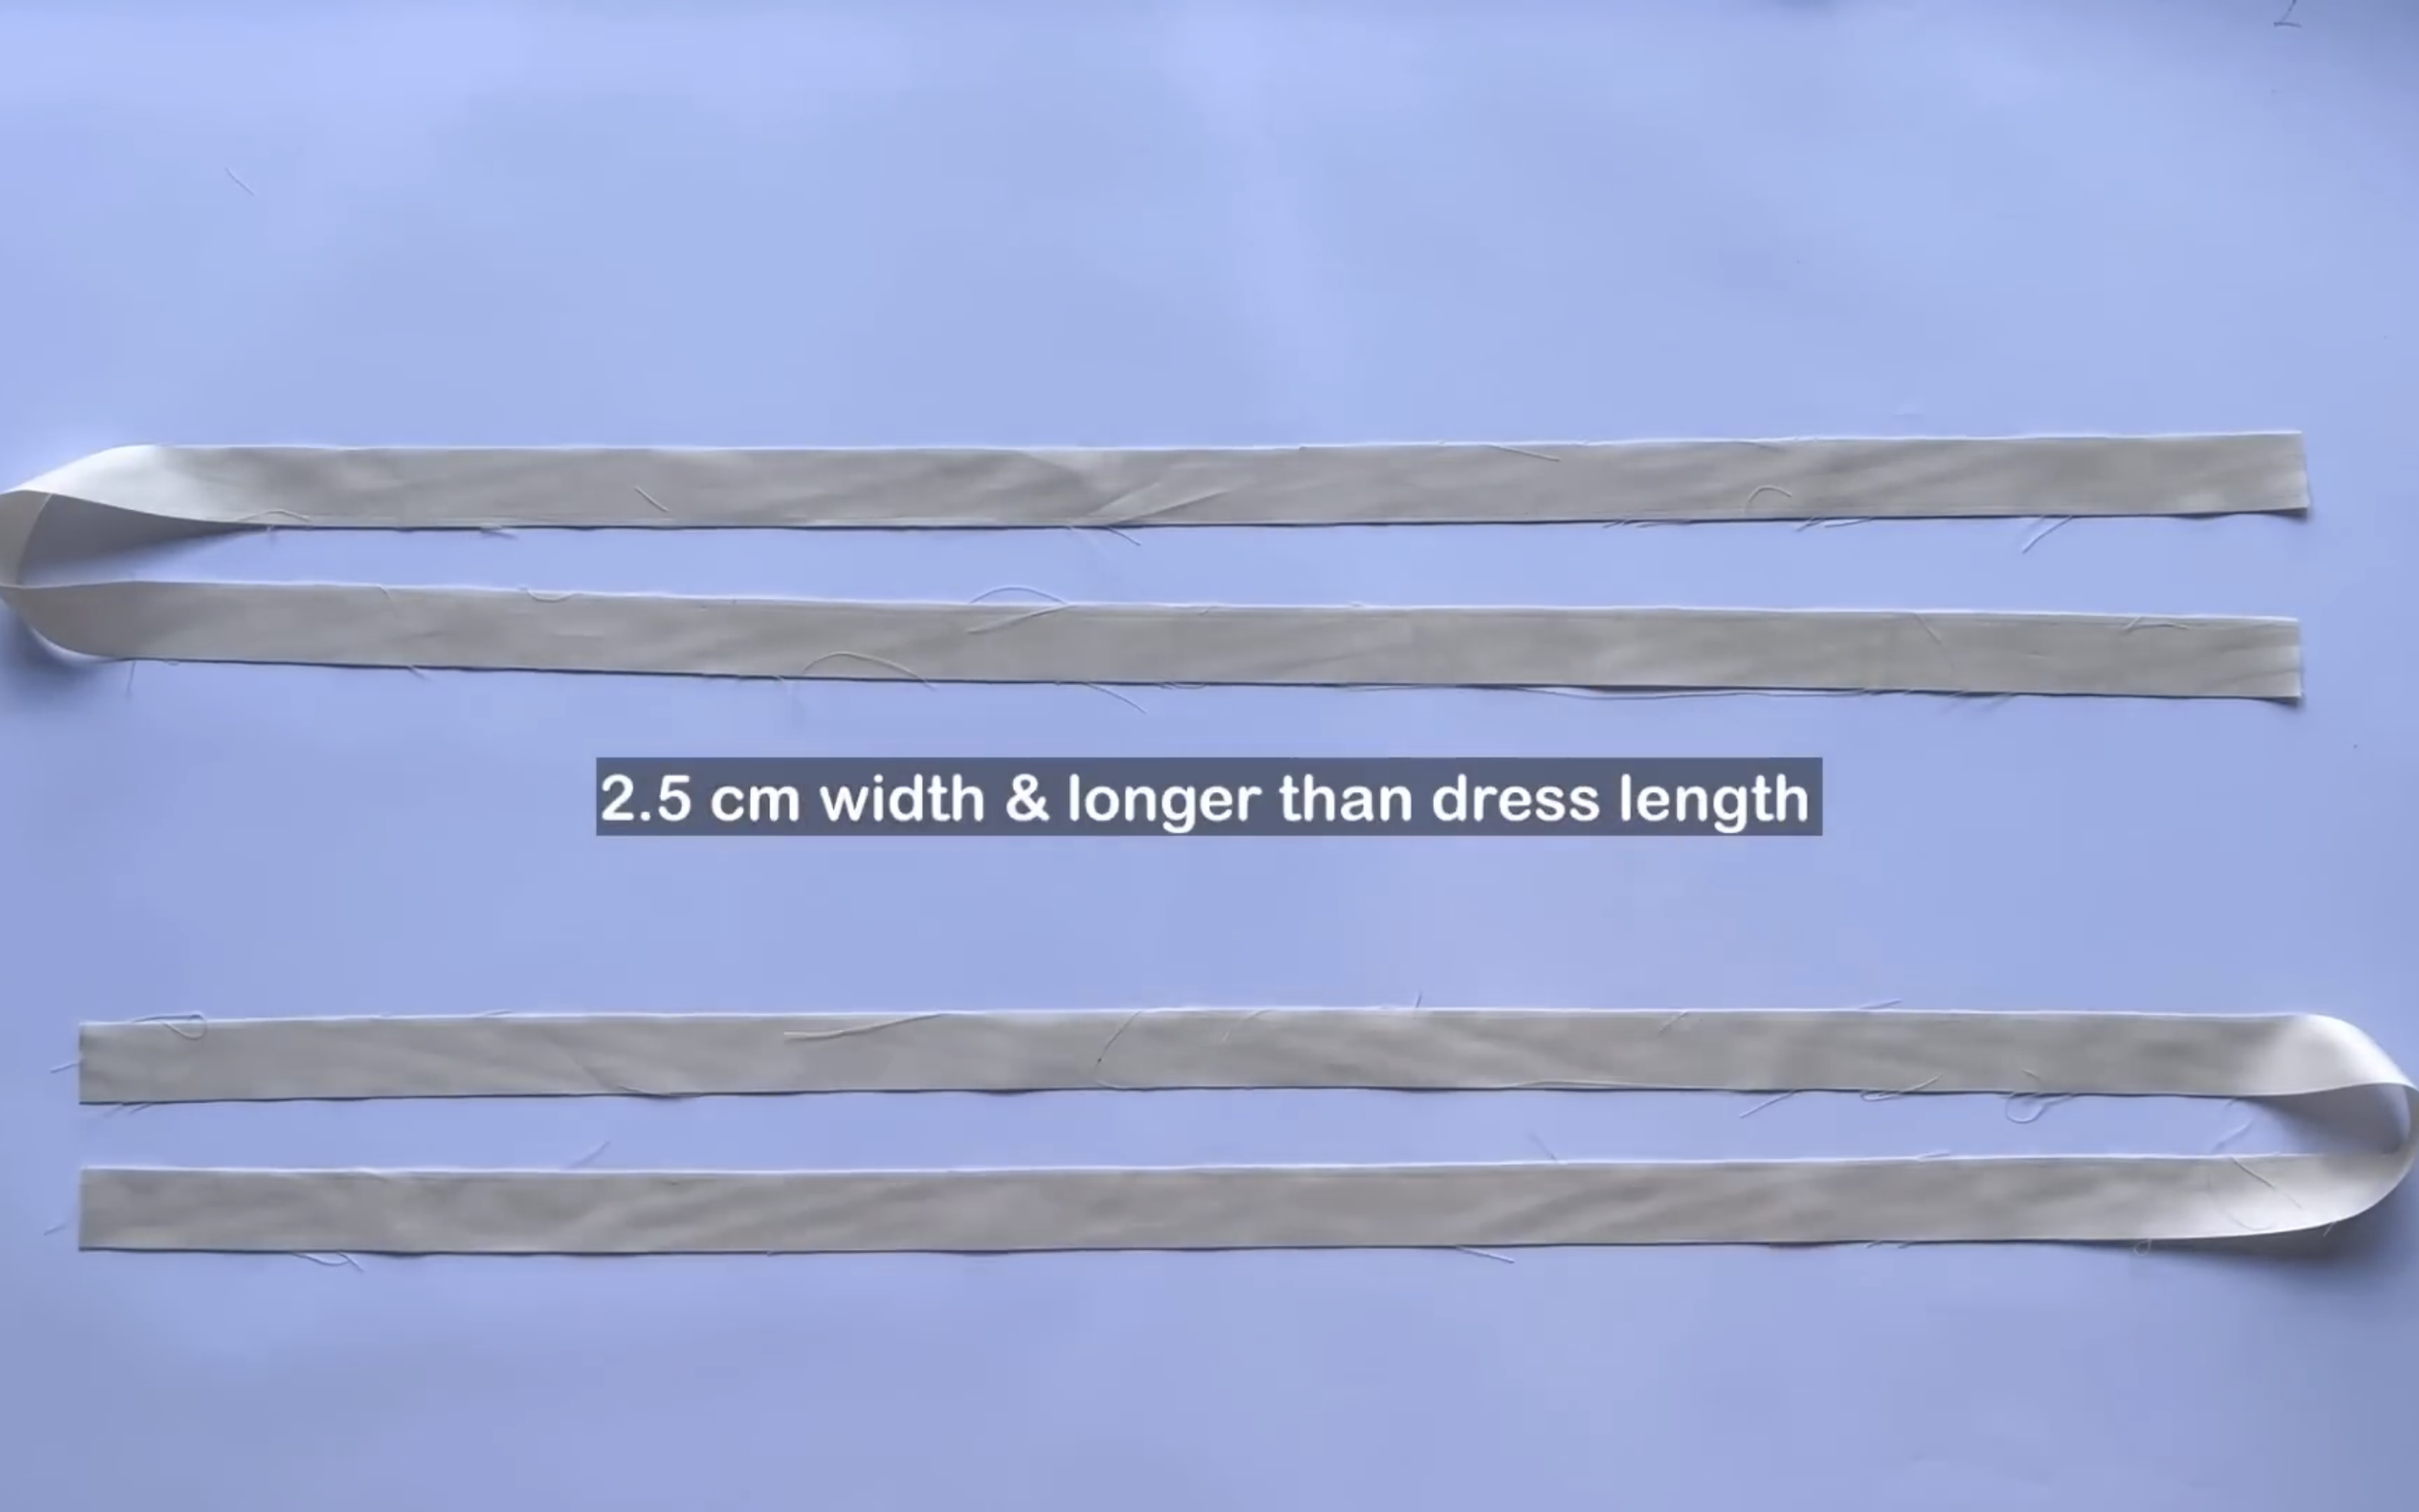
Cut two more long fabric strips, 2.5 cm wide and longer than the length of the dress.
Connect them to form the binding.
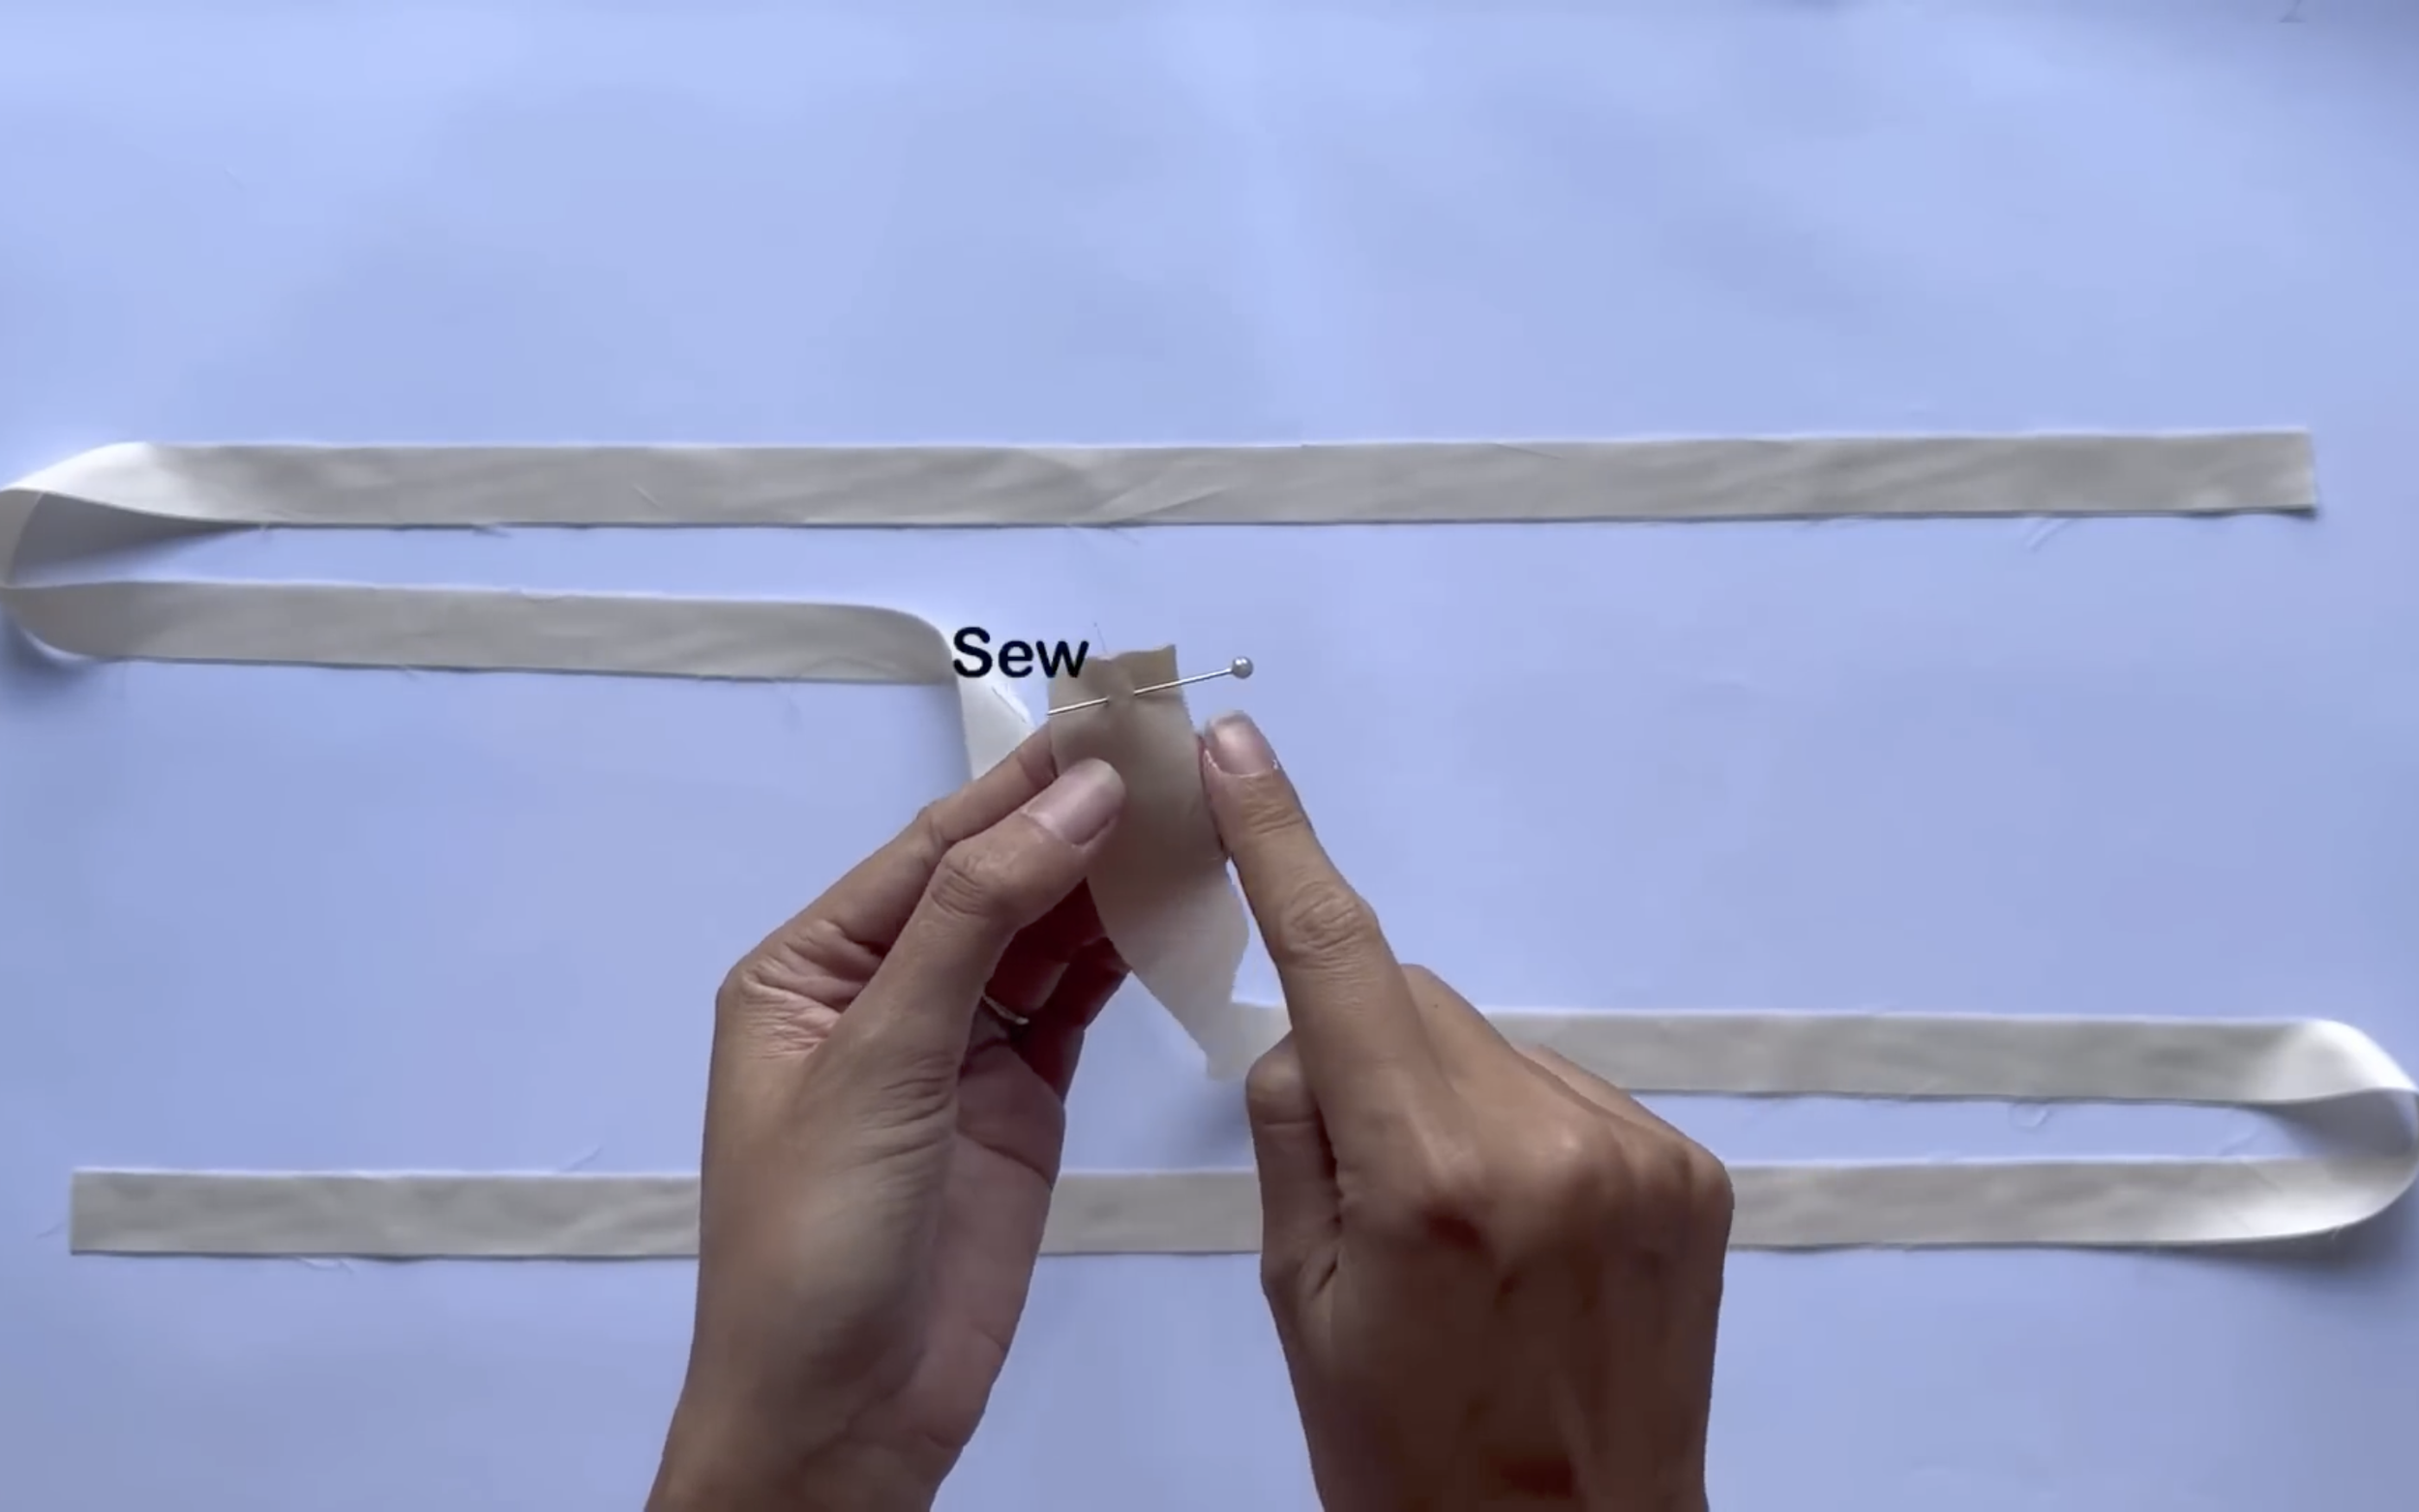
Connect the center of the binding to the center of the neckline at the back of the dress.
Then extend the binding to the front neckline and down to the end of the front skirt.
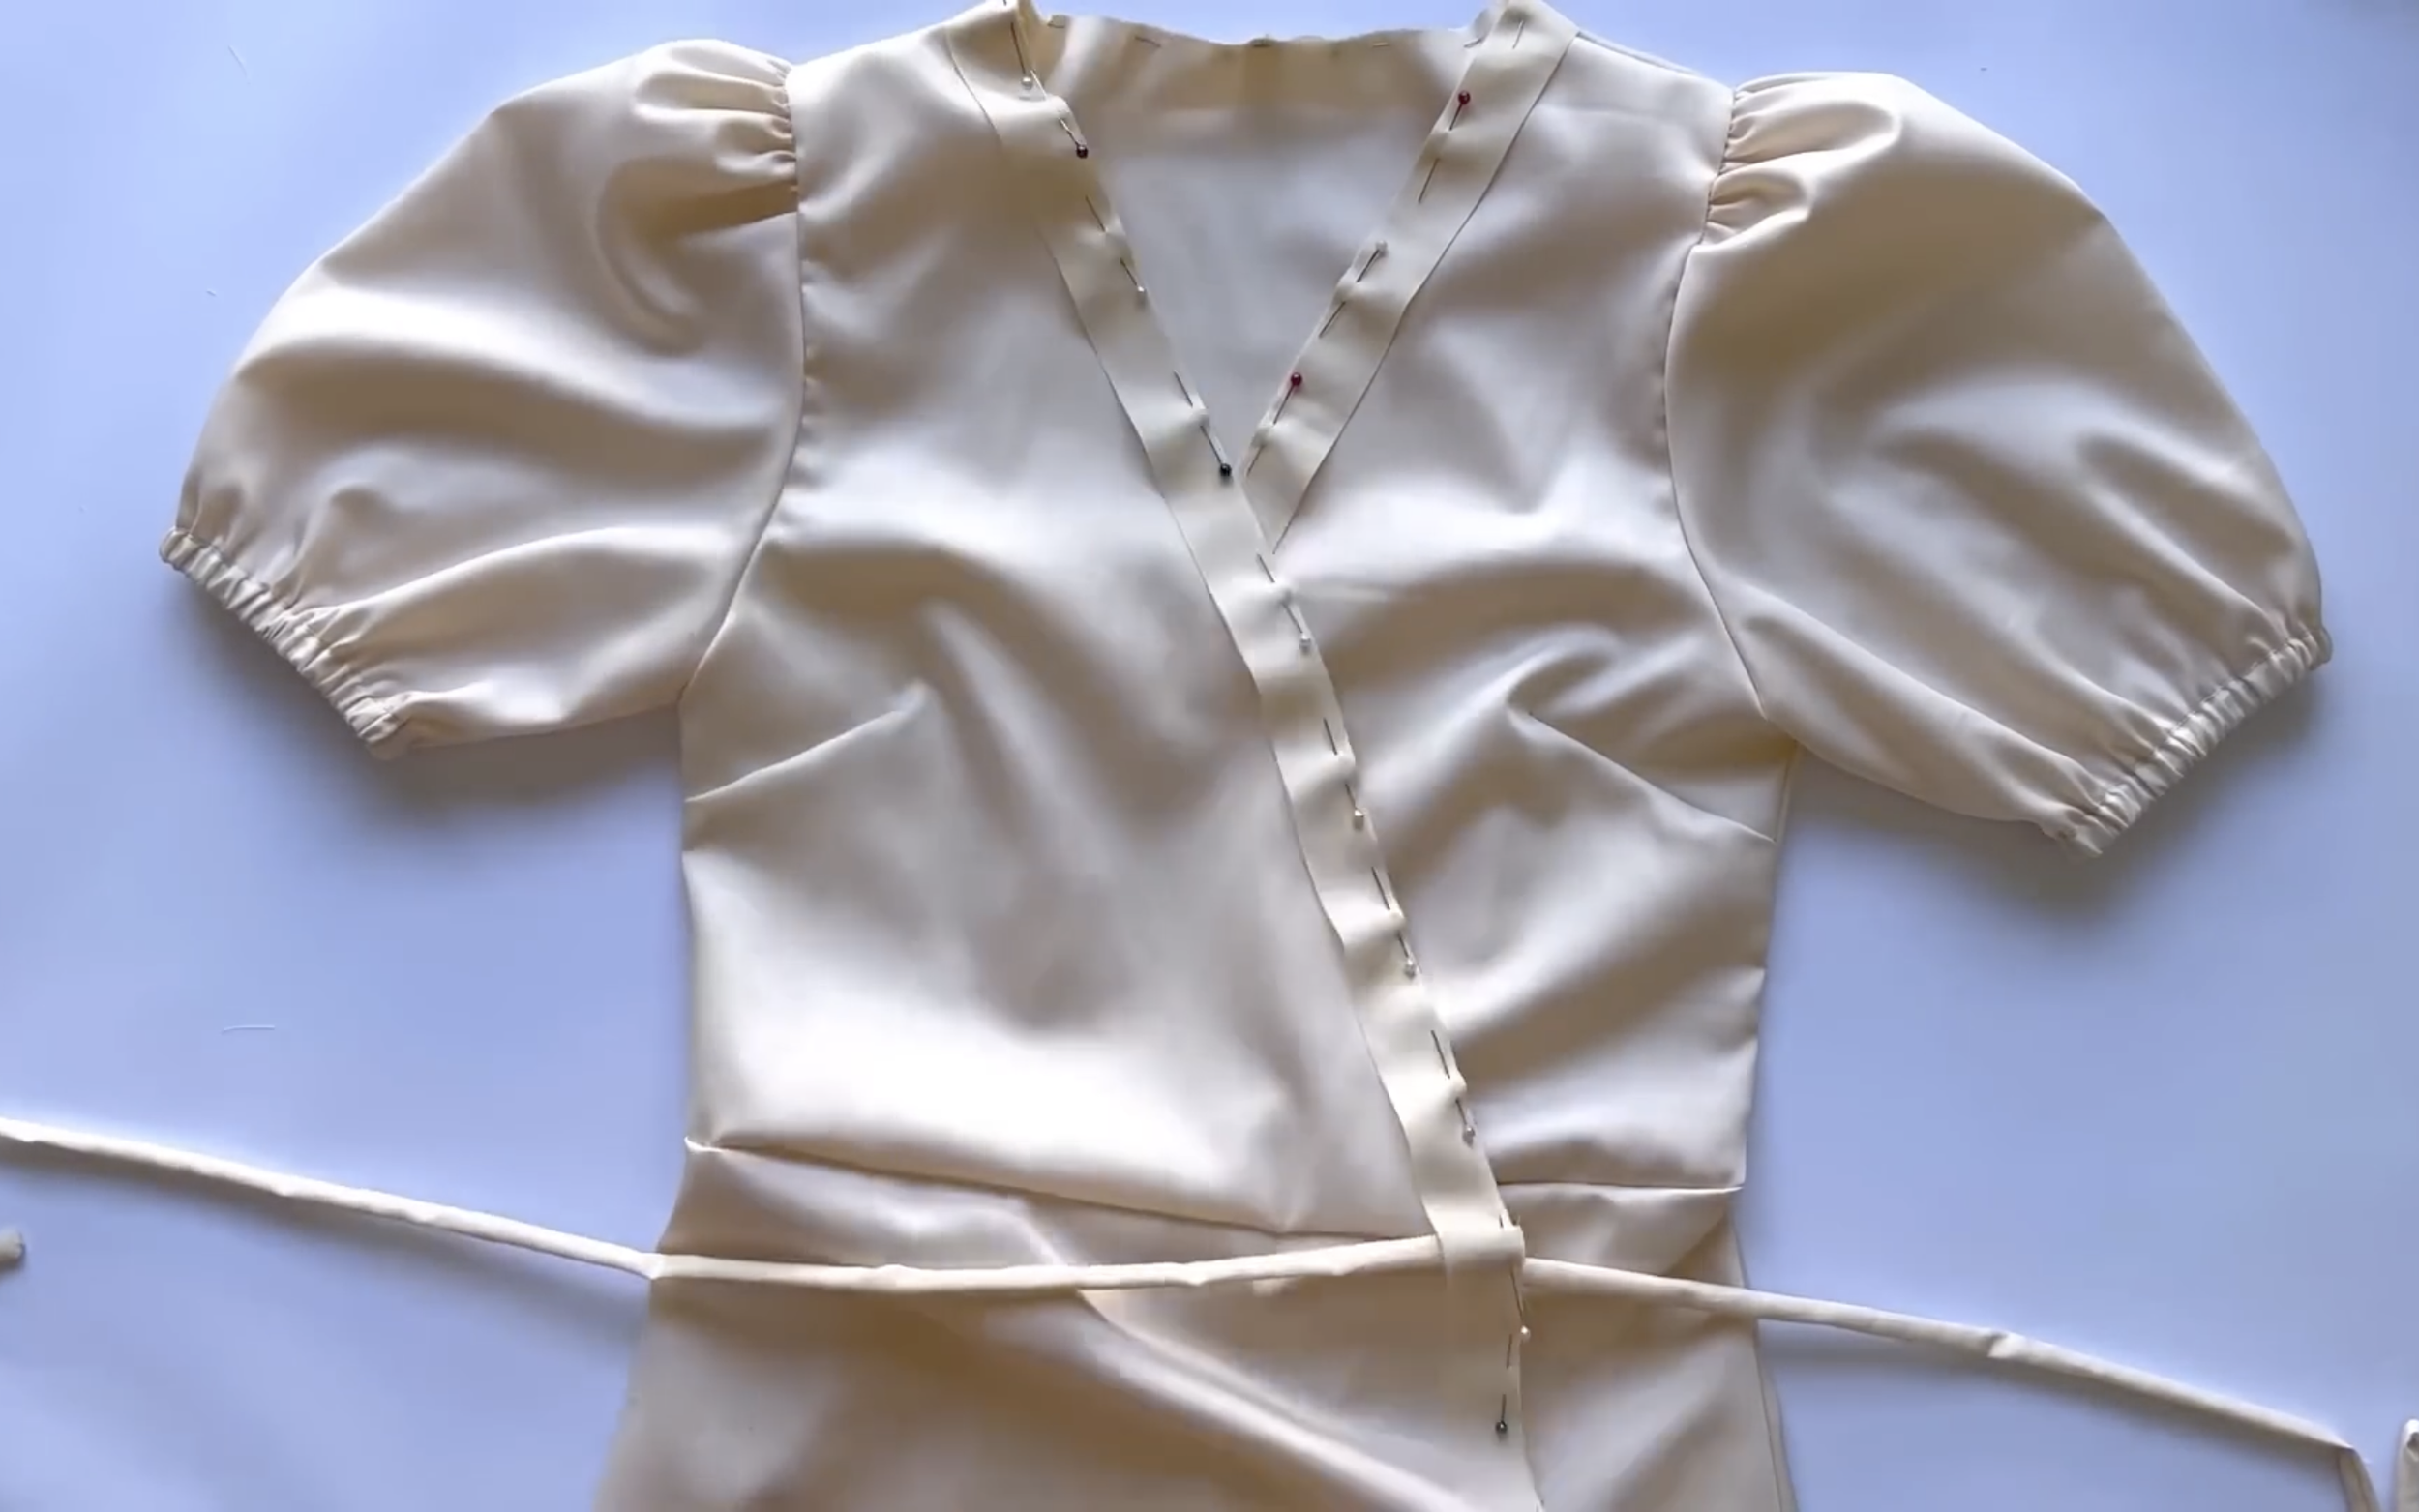
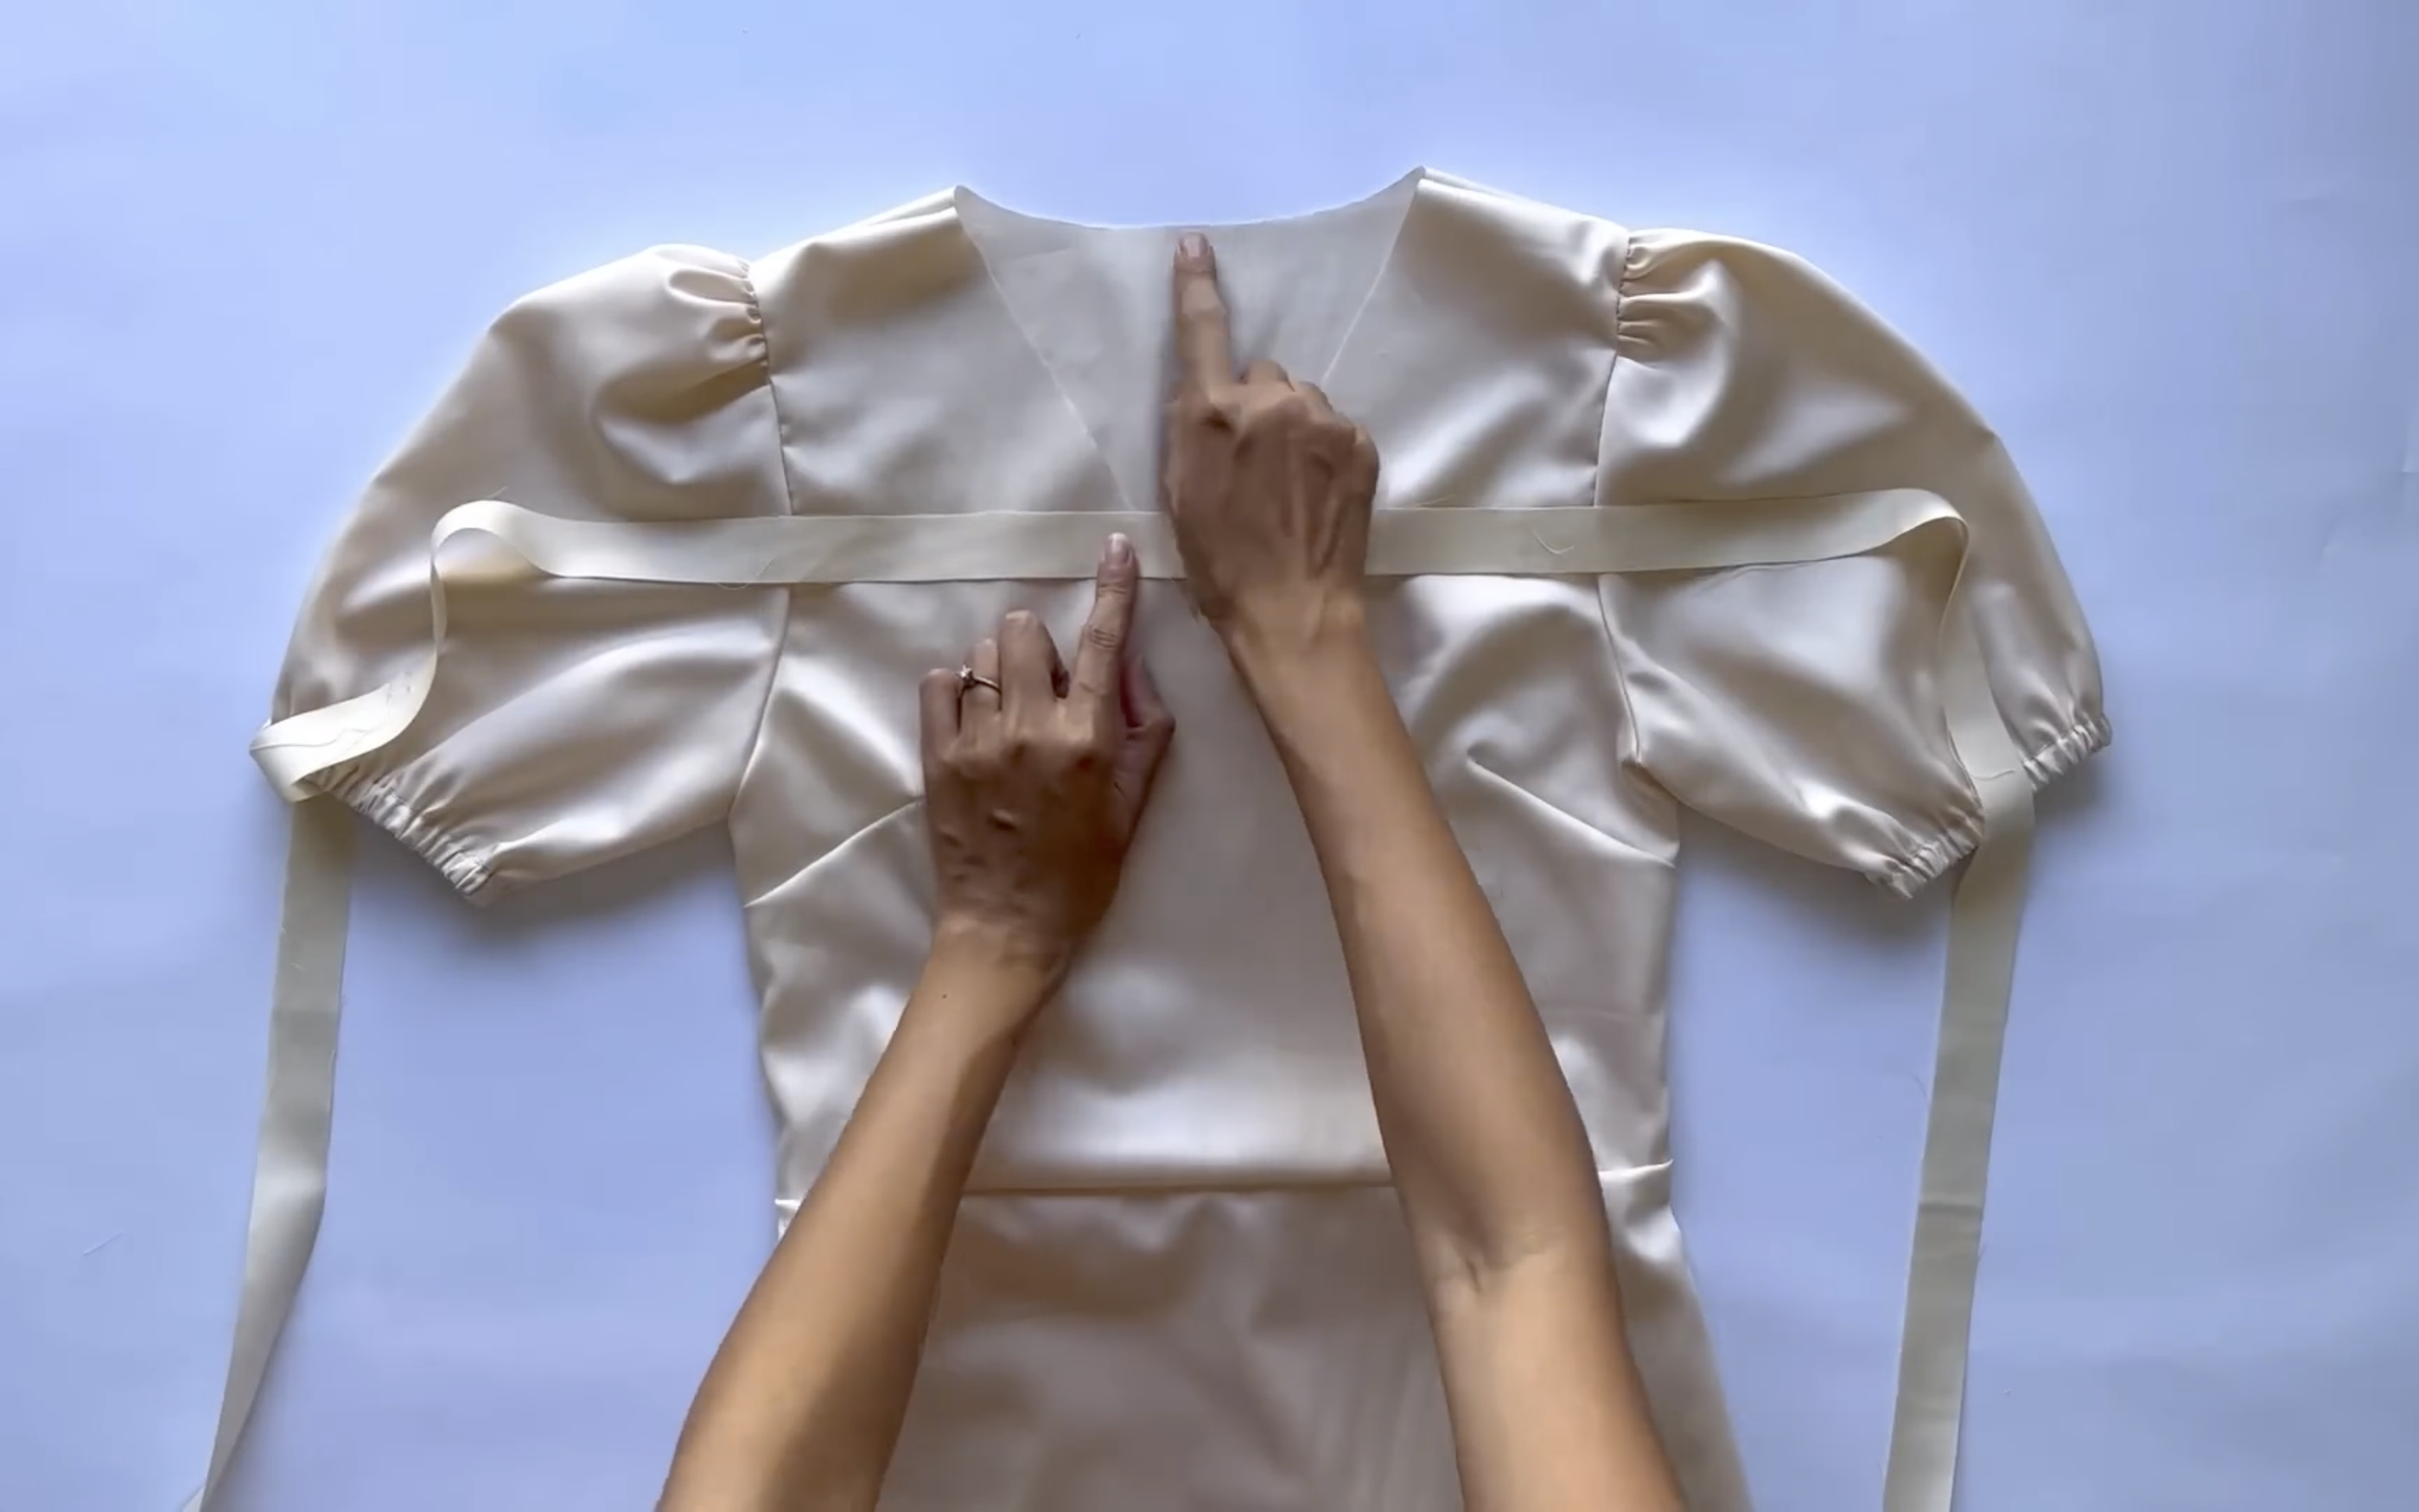
Before sewing, add the ties to each end of the waistline.
Make sure the ties are placed between the dress and binding before sewing them all together.
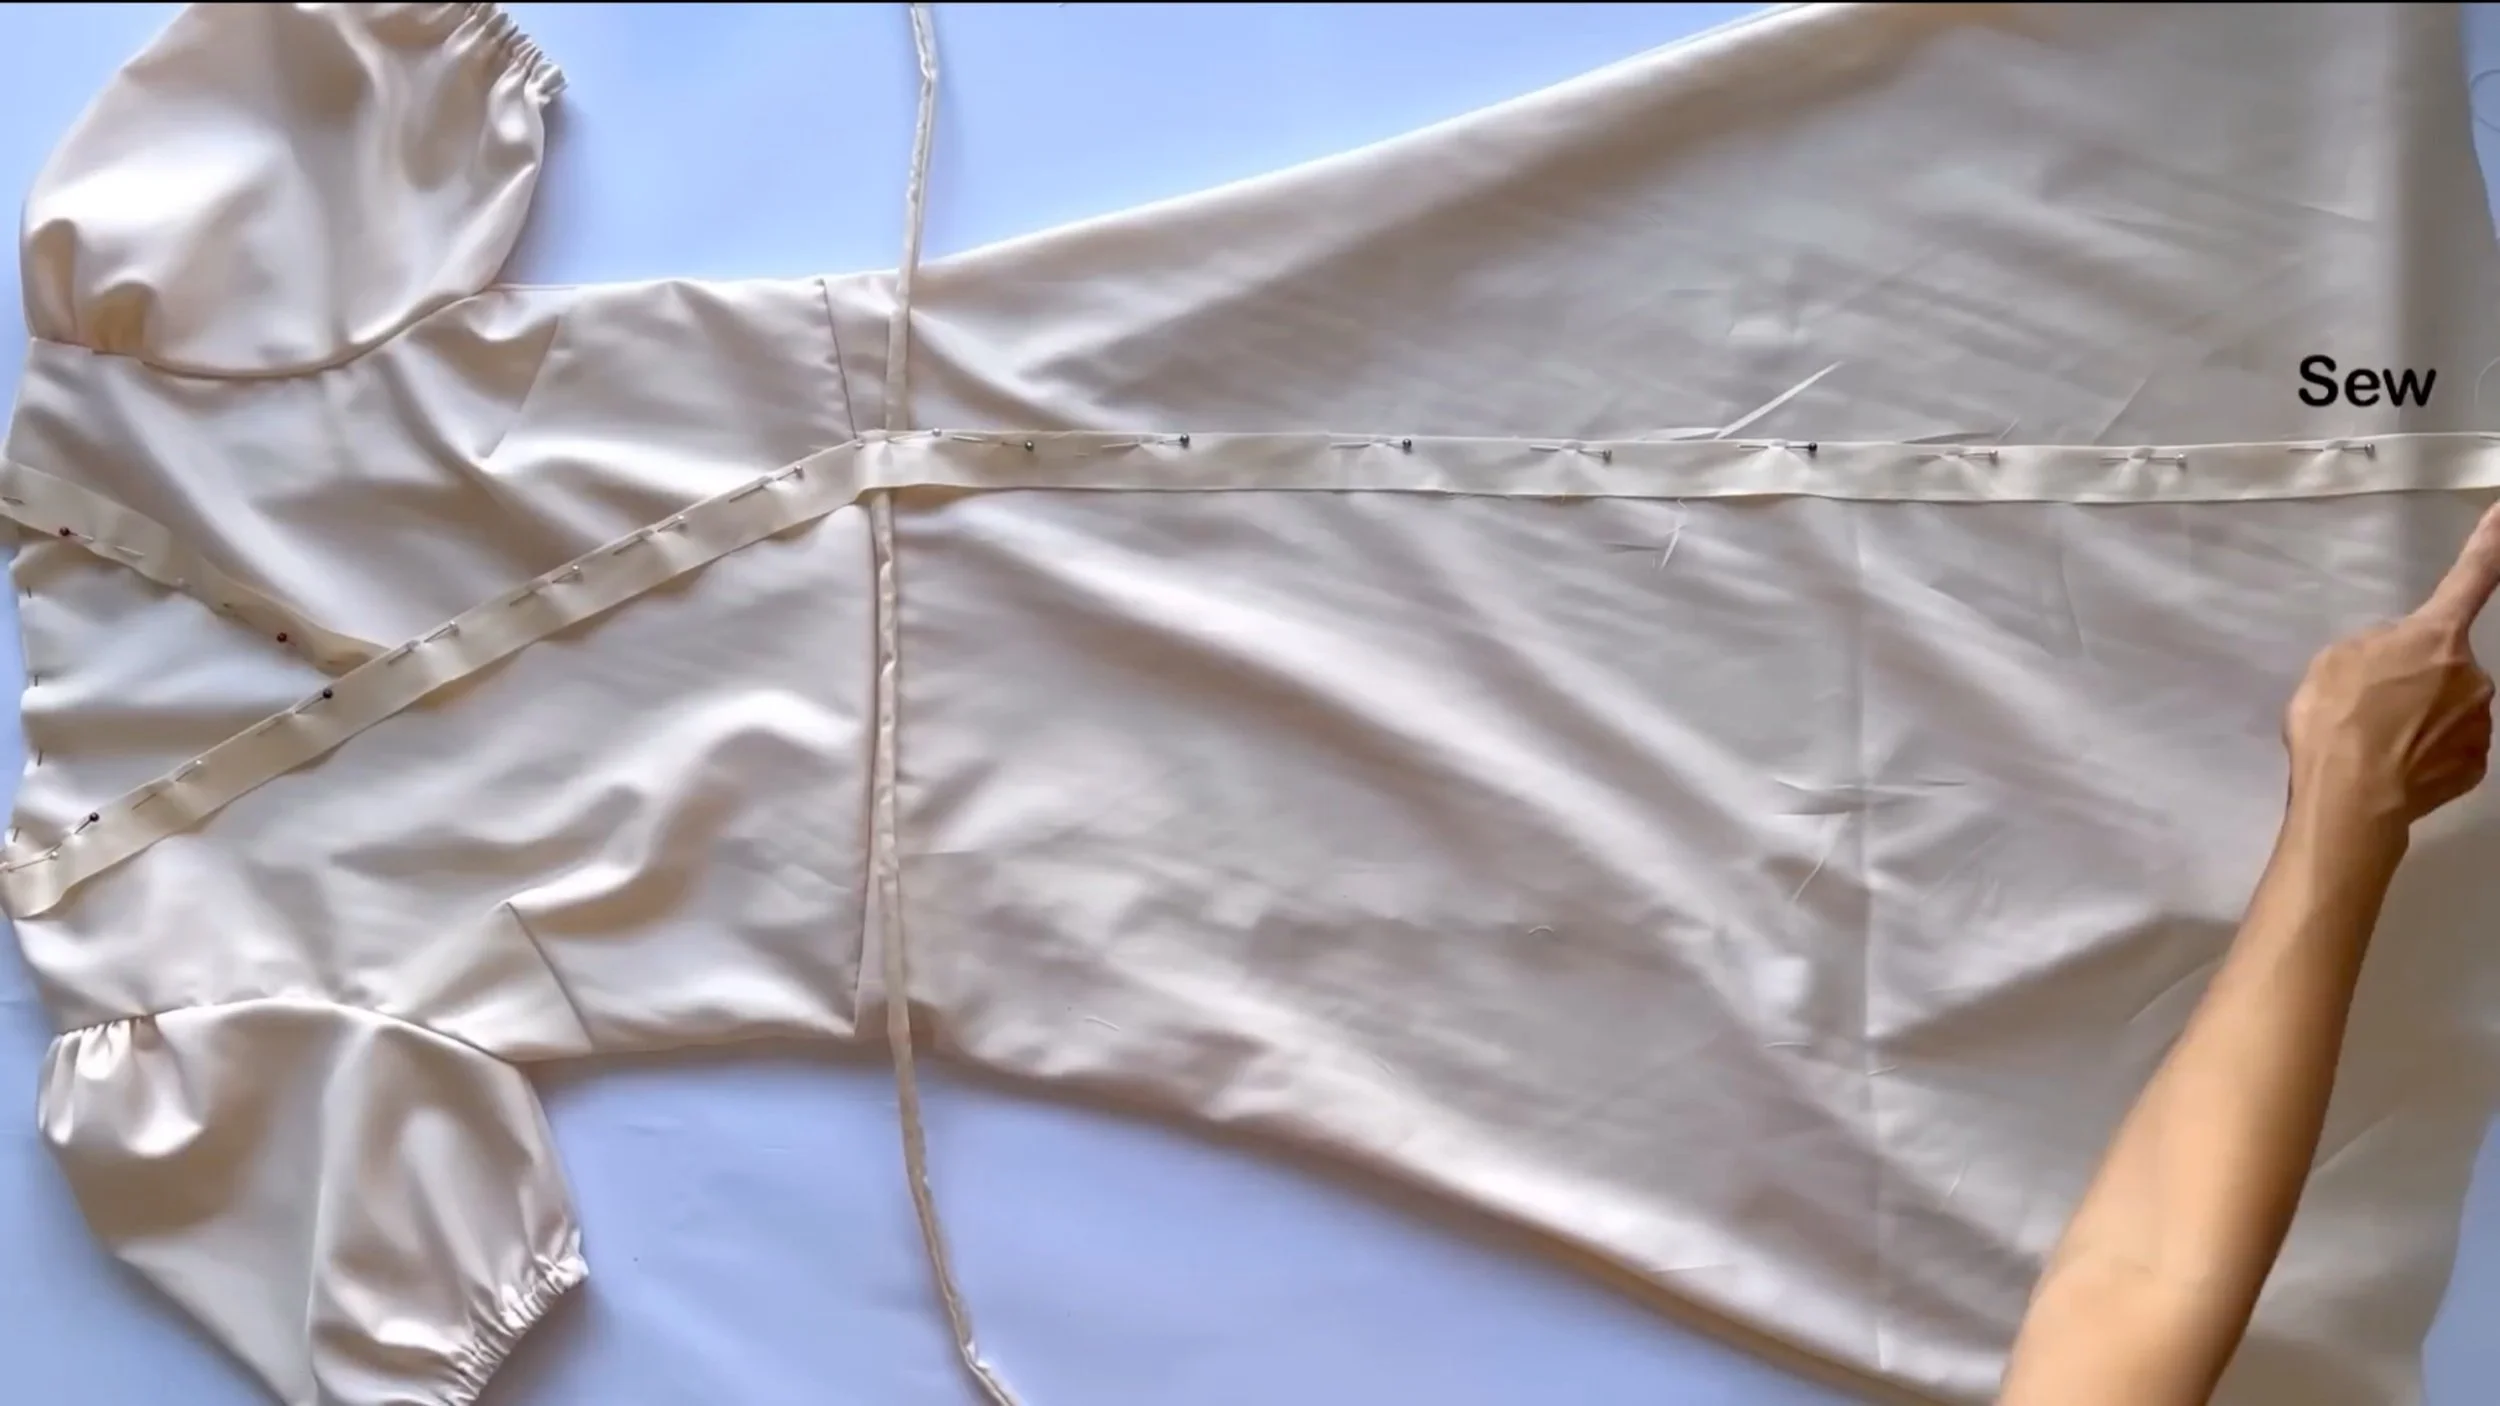
THE WAISTBAND
After the first seam, fold the other side of the binding inside in half, then fold it again over the first seam and sew a second seam.
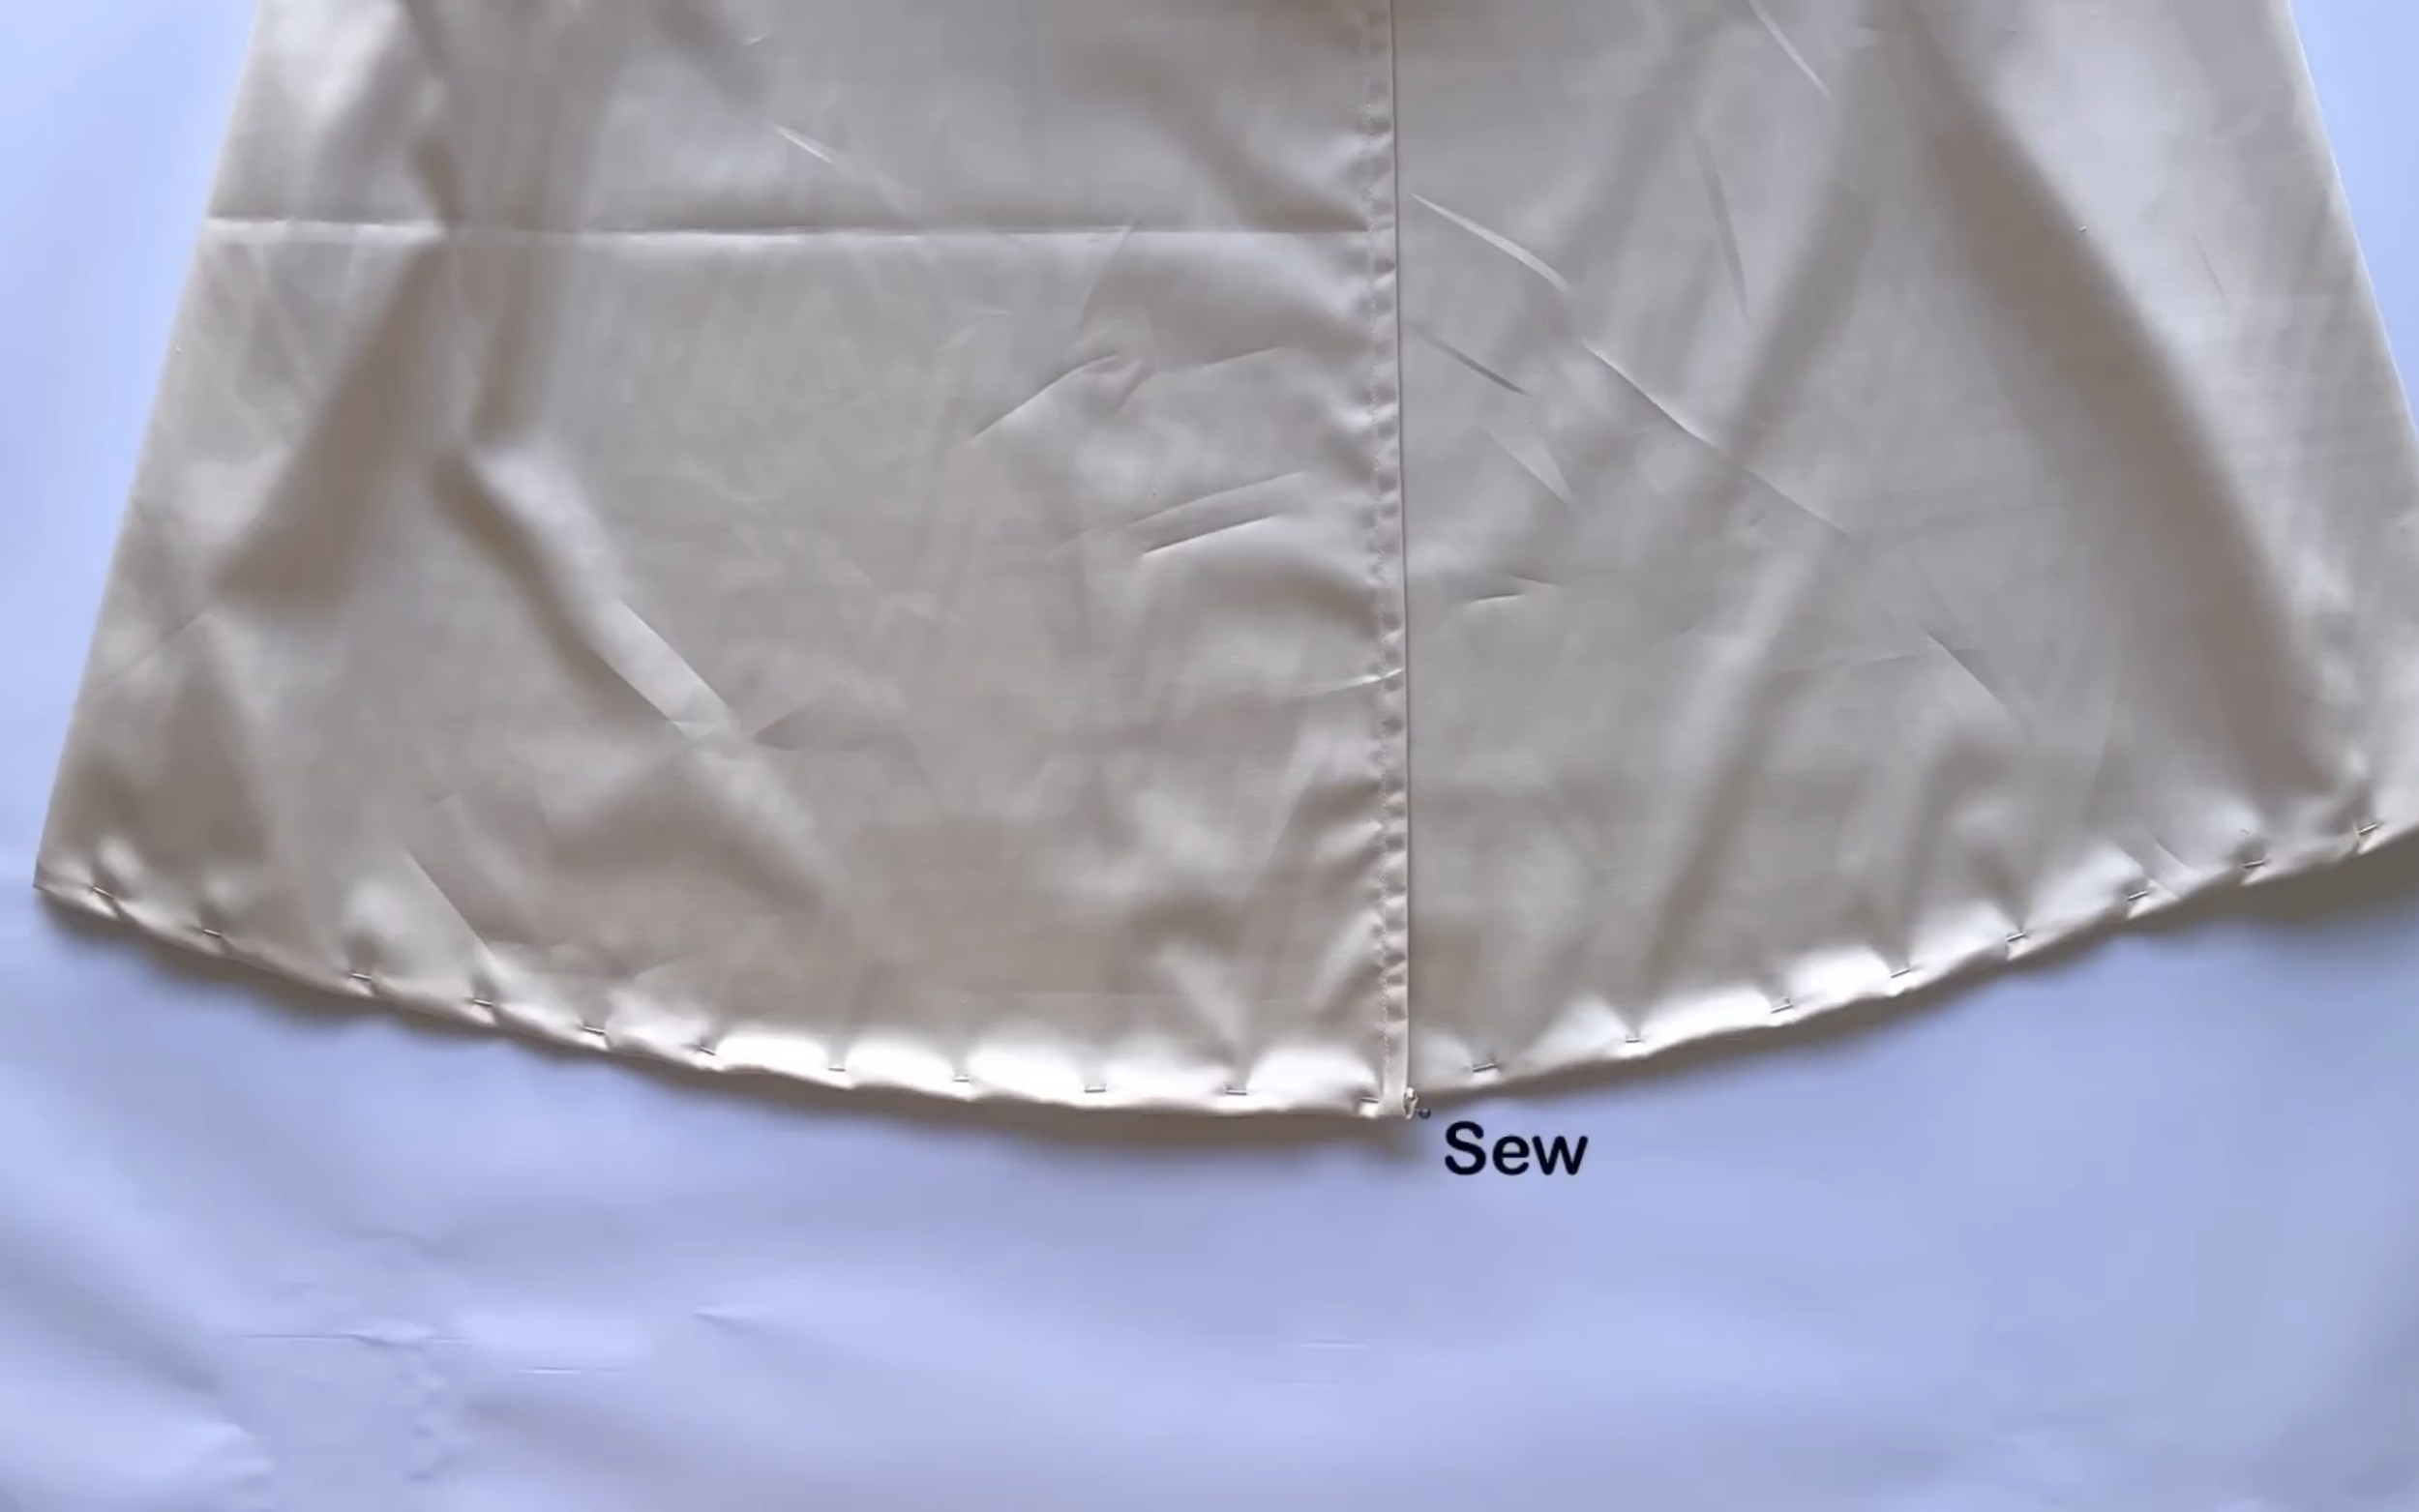
At the bottom of the dress, finish by folding the fabric edge inward twice, 1 cm each time, and sew.
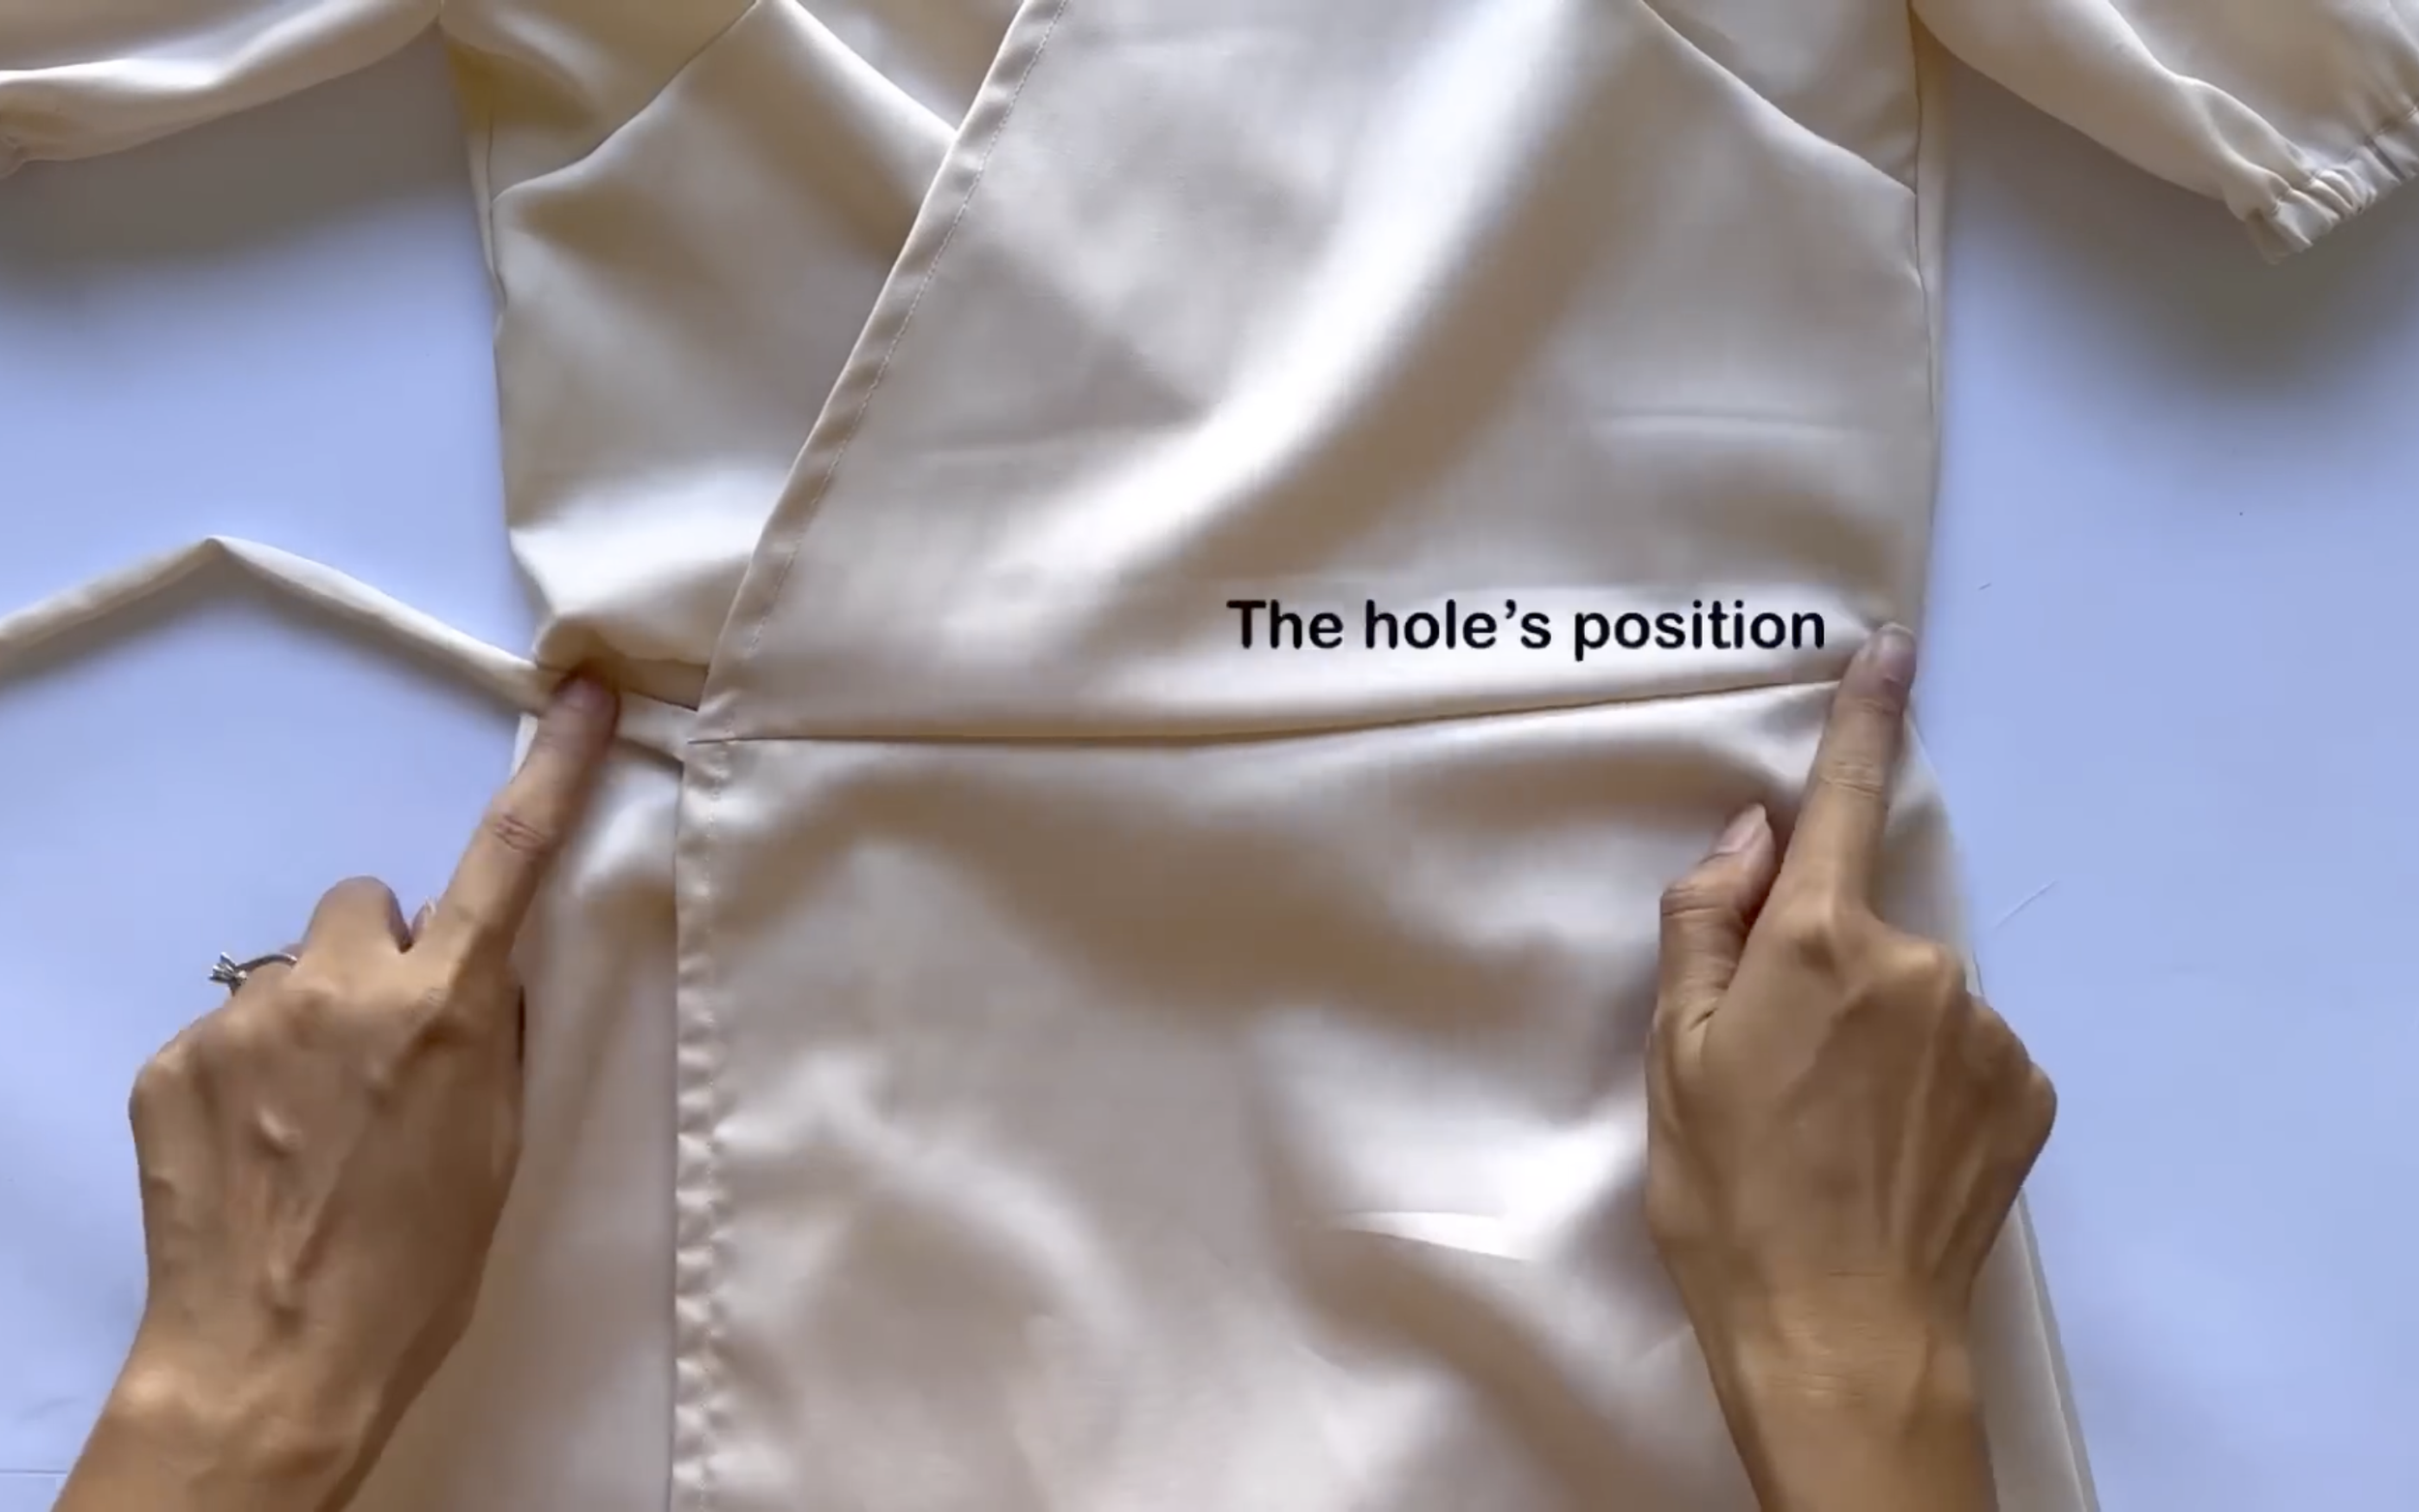
The final step is to make a small hole on one side of the dress for the tie to pass through.
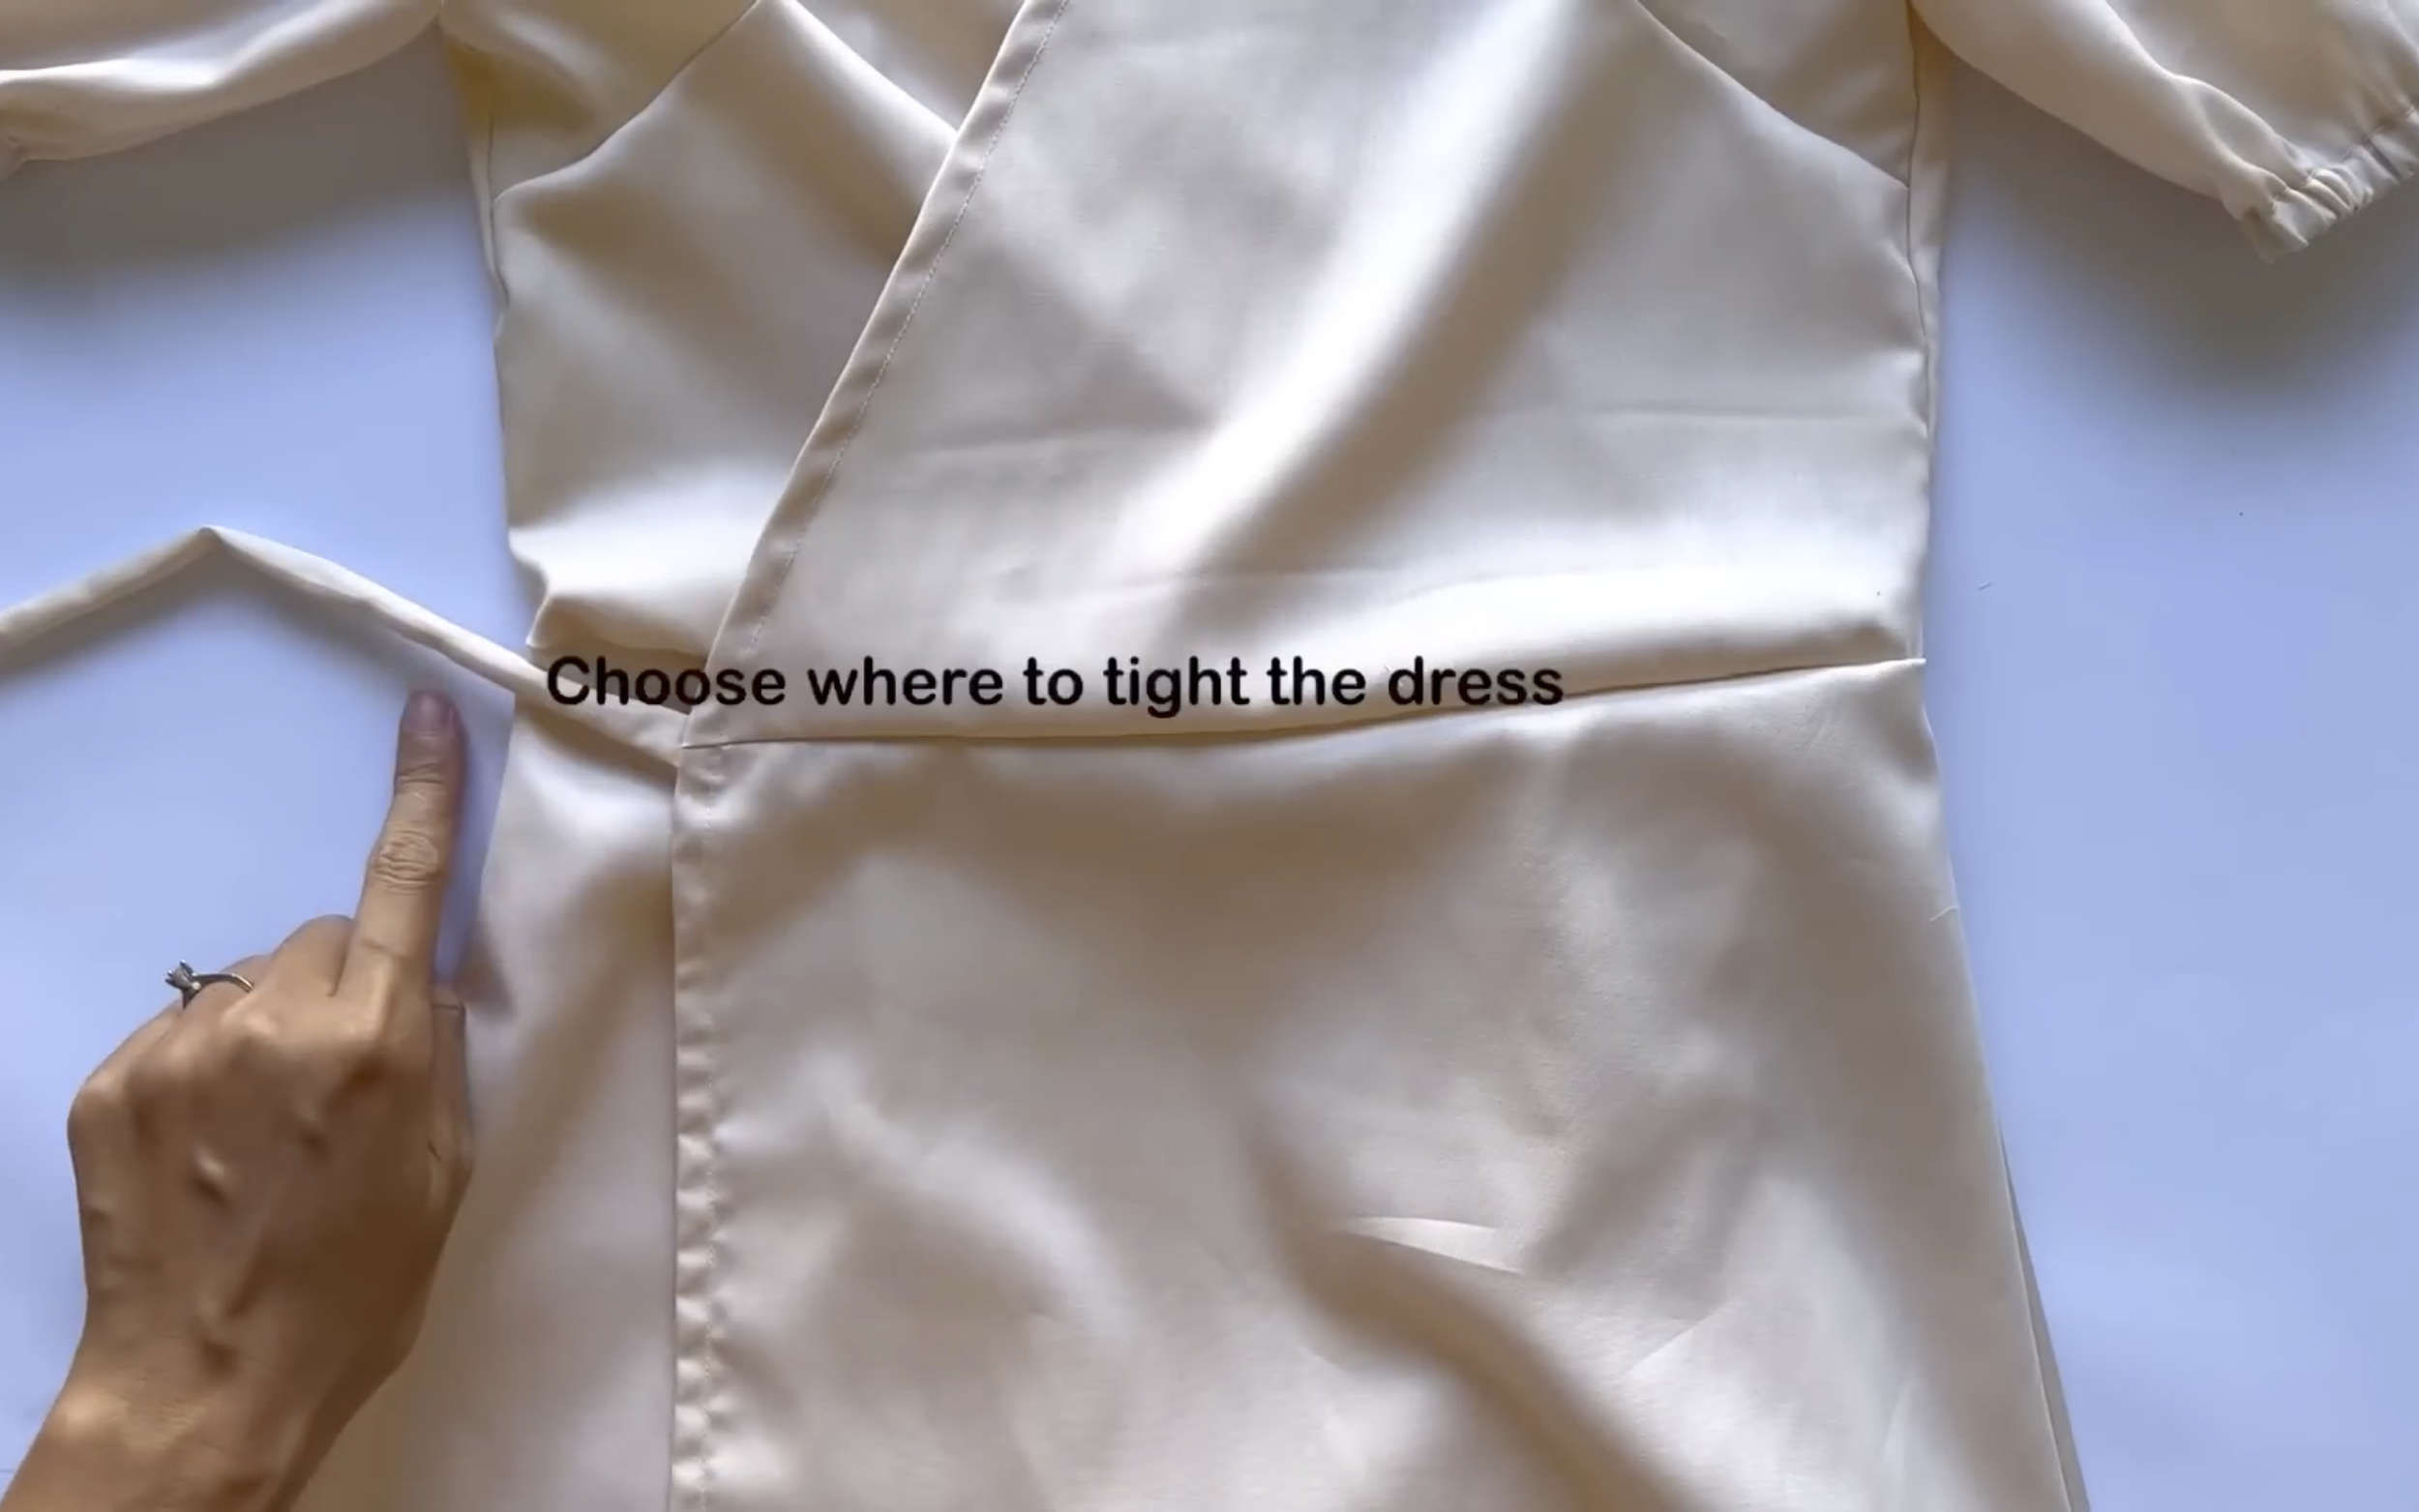
The hole can be located near the top of one side of the skirt or near the side of the bodice.
Make sure to re-sew the seam there after making the hole

How to make a perfect Puff sleeve wrap dress | Clara dress - My first sewing pattern
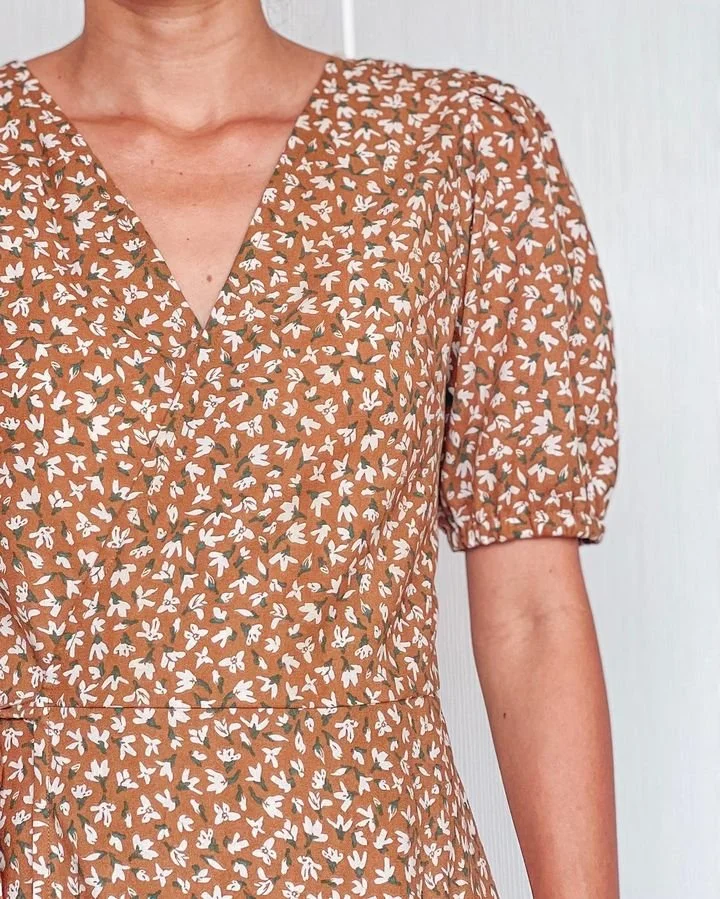
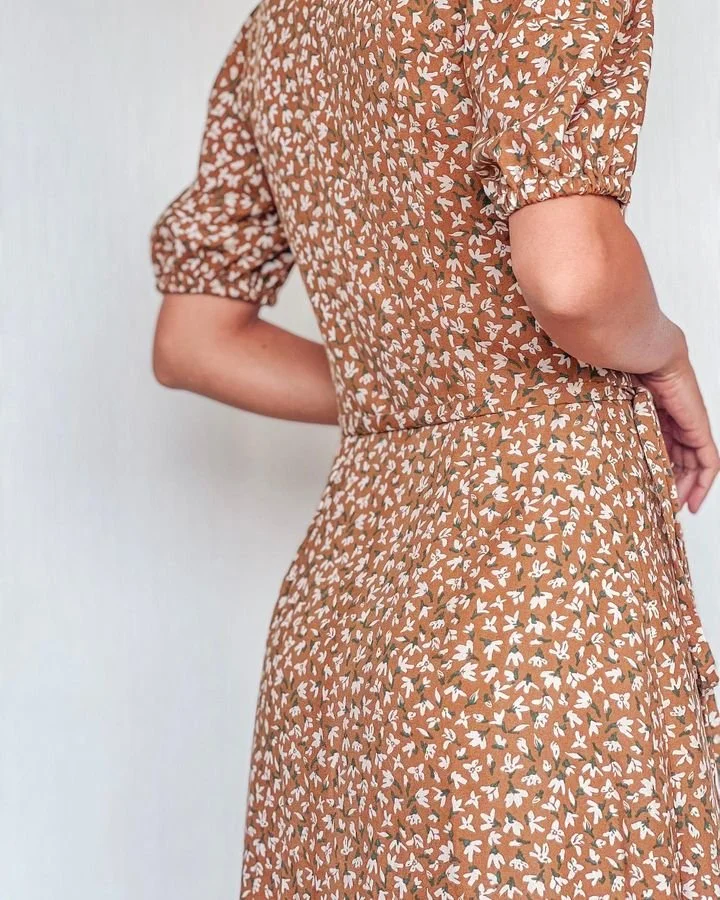
And that’s the finished DIY! Here’s the final result—this dress is perfect for any occasion.
With this pattern, you can easily create many different styles, and I’ll be sharing how to do that very soon.
I hope you found my step-by-step guide helpful and inspiring.
If you’re interested in making your own, give it a try and let me know how it goes!
Until then, happy sewing!