I made 3 different DIYs from 1 simple design | The abilities of sewing are from your own creativity

I made 3 different DIYs from 1 simple design | The abilities of sewing are from your own creativity
Welcome or welcome back to my channel. My name is Jess and I love doing DIY, making clothes in a "simply but pretty" way.
In today's tutorial, I'm going to share with you how I made a cute puff sleeve blouse with the yoke neck design. And how I base on this yoke design to make 2 different dresses. They show the ability of making so many different clothes just from a simple design. And they're all from your own creativities.
So I hope you will try it out and let's get started!
WHAT YOU’LL NEED

Blouse: 2m cotton fabric
Babydoll dress: 2.5m of cotton fabric
Maxi dress: 3m of cotton fabric
Pattern paper
Sewing machine
Pins
Scissors
Ruler
Long stick
Elastic band
PUFF SLEEVE BLOUSE WITH YOKE NECK DESIGN
THE BACK PATTERN OF THE YOKE NECK

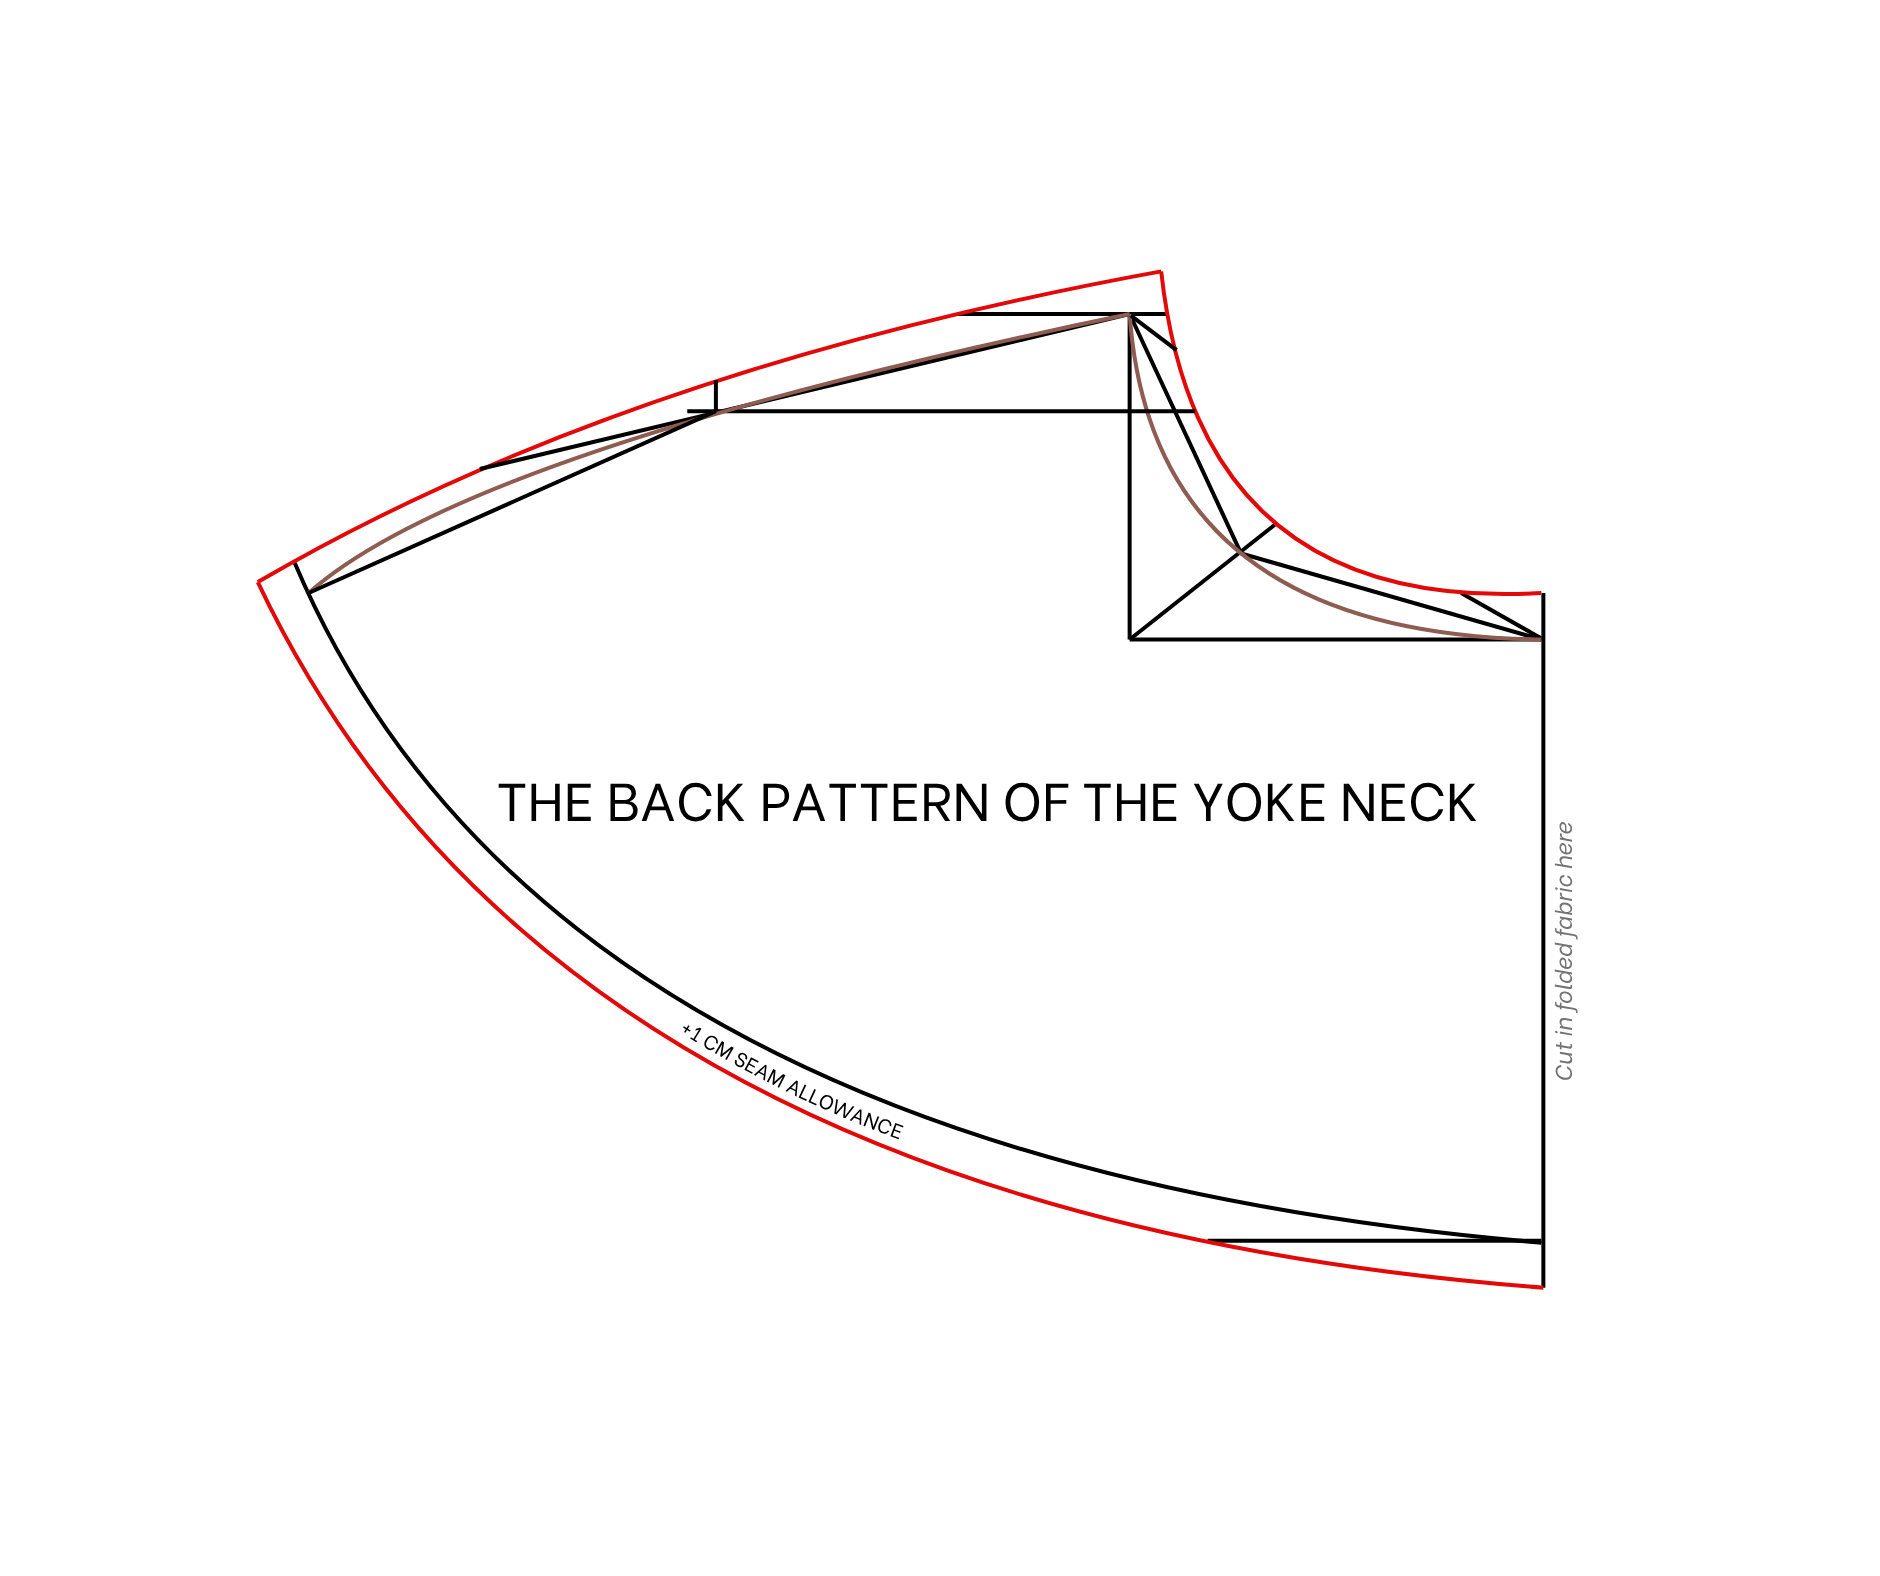
Draw a horizontal line cutting a straight line first.
From the first horizontal line, keep making another one 2 cm next to it.
From the cutting point between the second horizontal line and the straight line, mark at 9 cm, which is the half of the neck size of the blouse that is wanted.
Then, draw a perpendicular line to that mark. The length of this line will be 7 cm, which is the depth of the front neck that is wanted.
Then, draw another horizontal line at the end of the perpendicular line and cut the first straight line at one point.
After that, draw a curved line to connect this cutting point and the mark on the second horizontal line to create a neckline of the pattern.
From the cutting point between the second horizontal line and the first straight line, keep making another mark at 18 cm on the horizontal line. It is the half of your shoulder size.
Then, draw a perpendicular line through that mark and cut the first horizontal line at one point.
After that, connect this cutting point to the top of the neckline to create a shoulder line of the pattern. The width of the shoulder line will be 19 cm, which is the width from the neck to over the shoulder.
From the top of the straight line, mark down 20 cm, which is the length of the yoke neck that is wanted. It is the length from the shoulder to above your breast.
Then, draw a perpendicular line to that mark.
After that, draw a curved line to connect the end of the shoulder line to this perpendicular line to create the ending line of the yoke neck.
From the top of this curved line at the end of the shoulder line, mark to the inside 2 cm.
Then, redraw the shoulder line through that mark.
Adding 1 cm for seam allowance after that, except the first straight line.
The back pattern of the yoke neck will be ready after cutting. You will need to cut this pattern in folded fabric on the straight line.
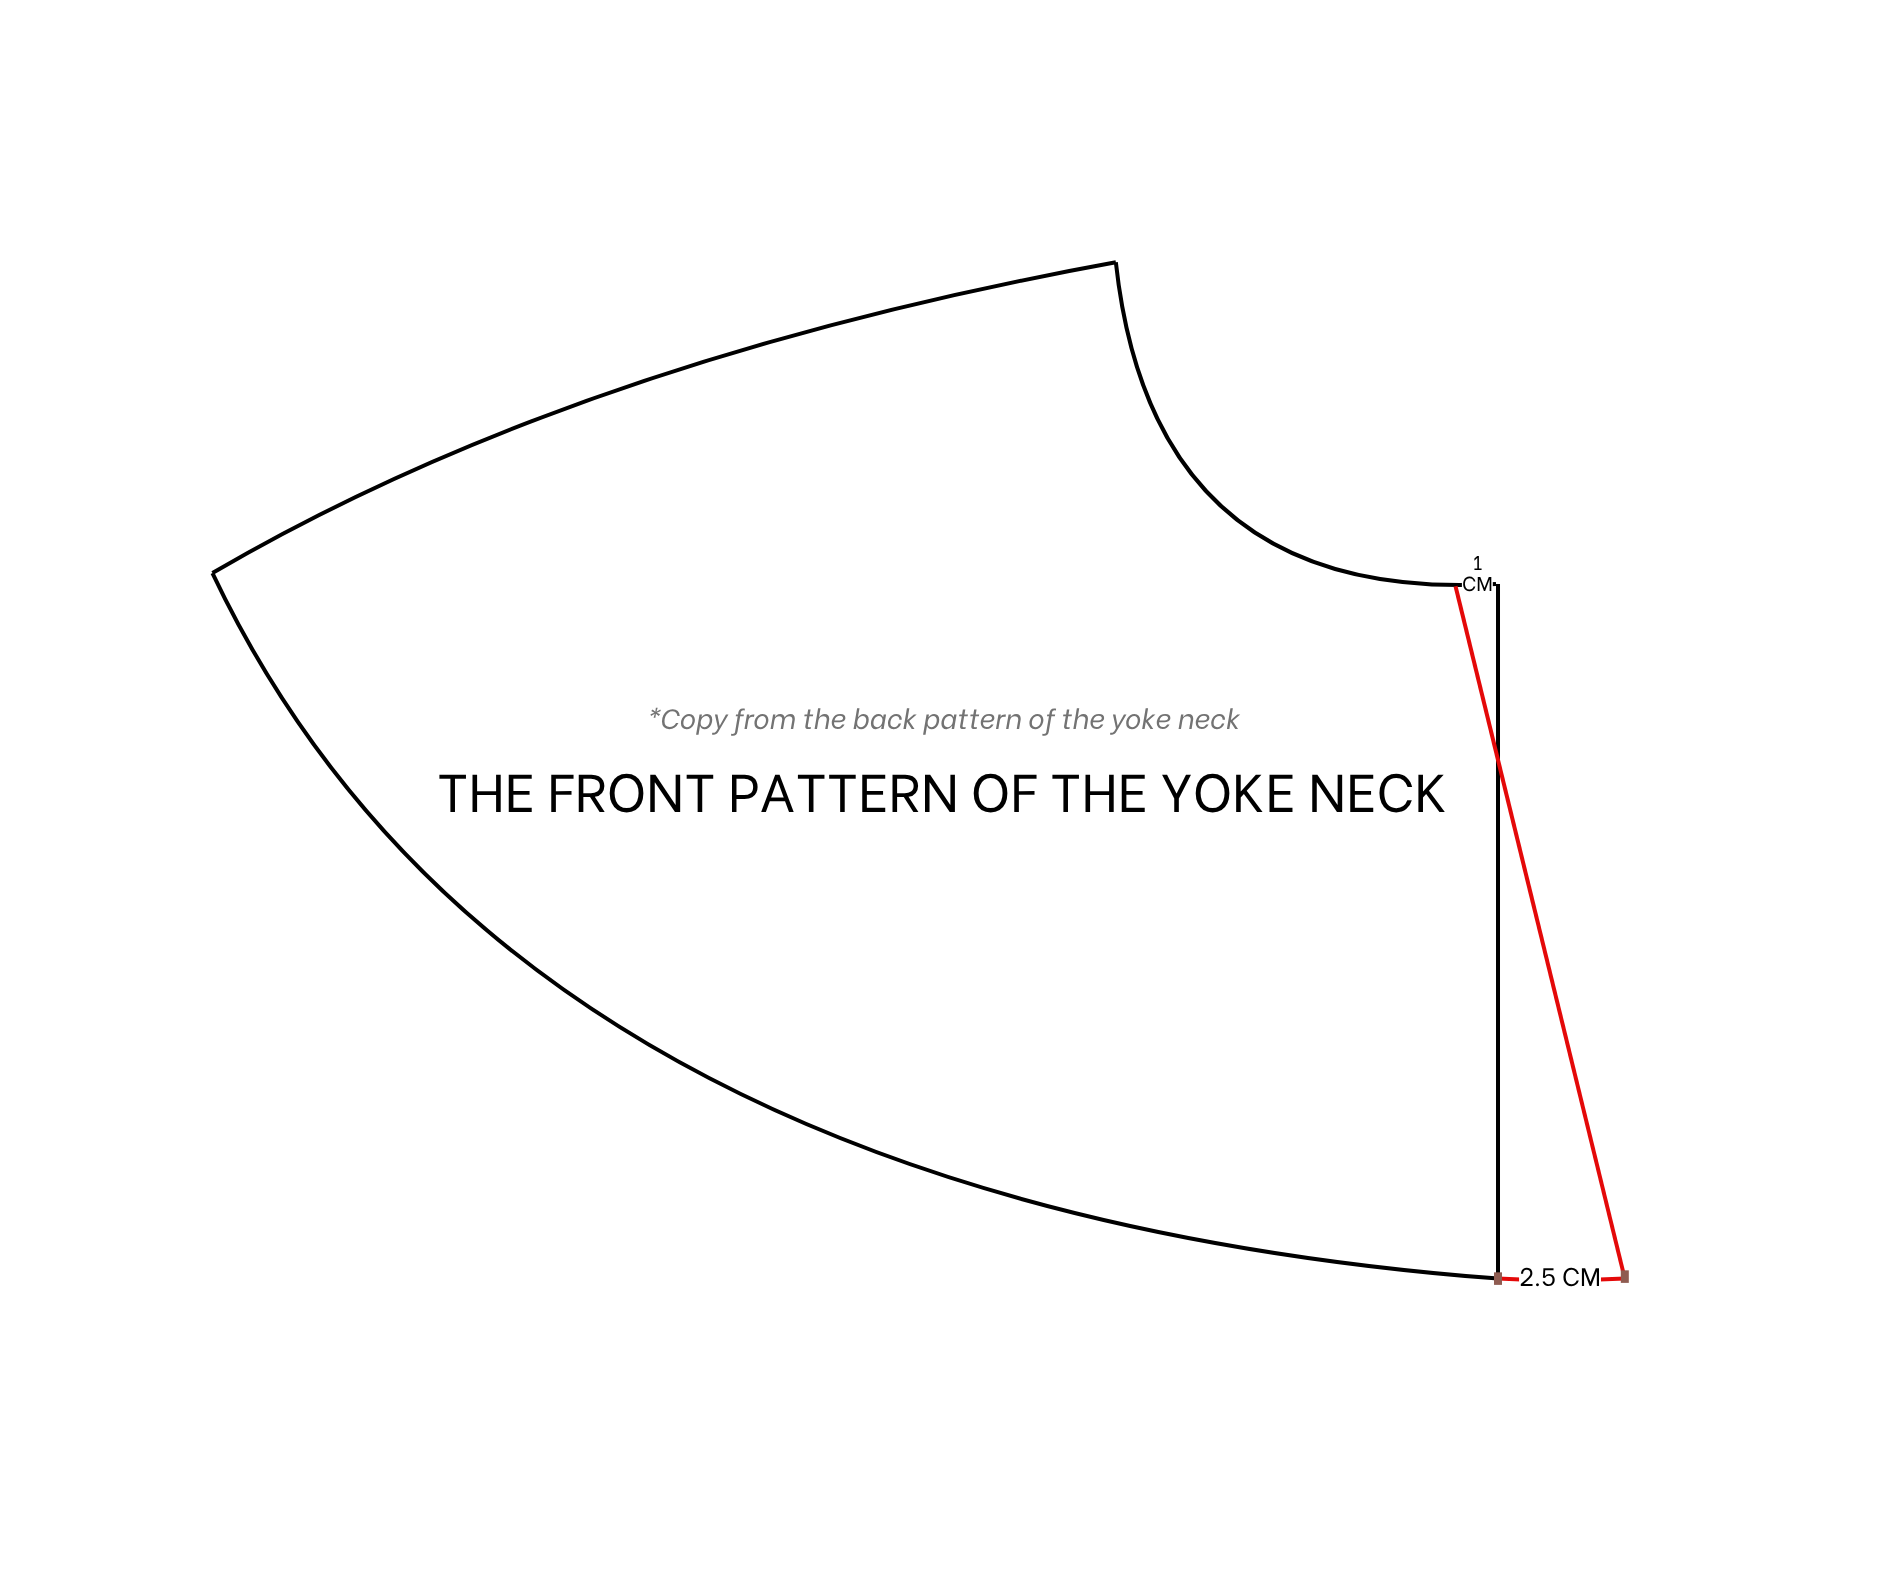
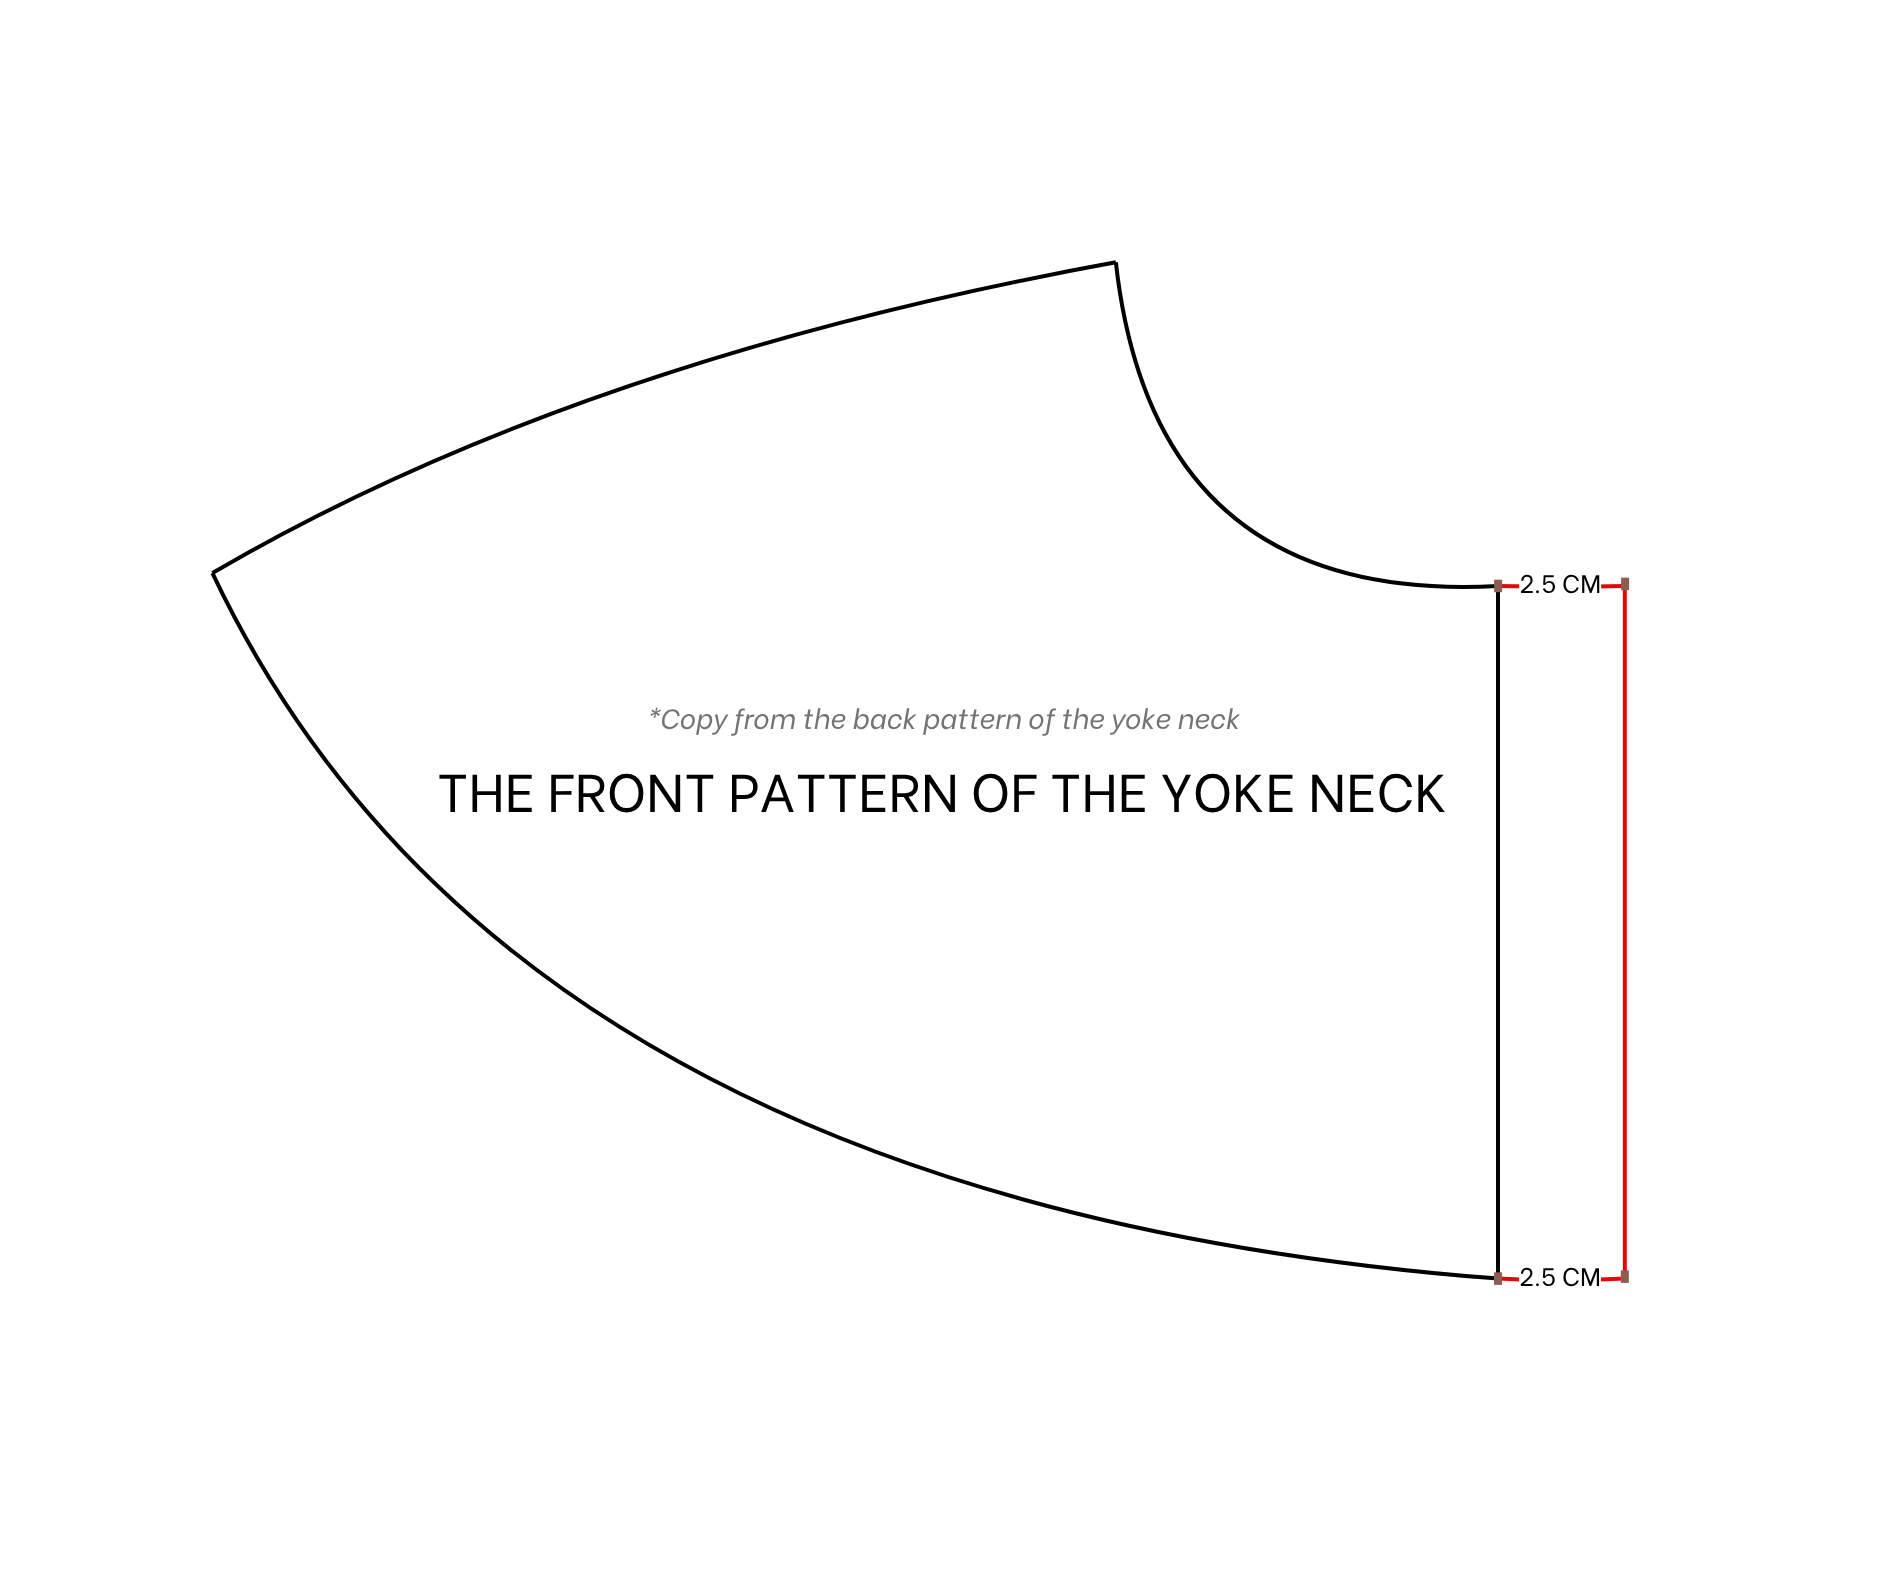
THE FRONT PATTERN OF THE YOKE NECK
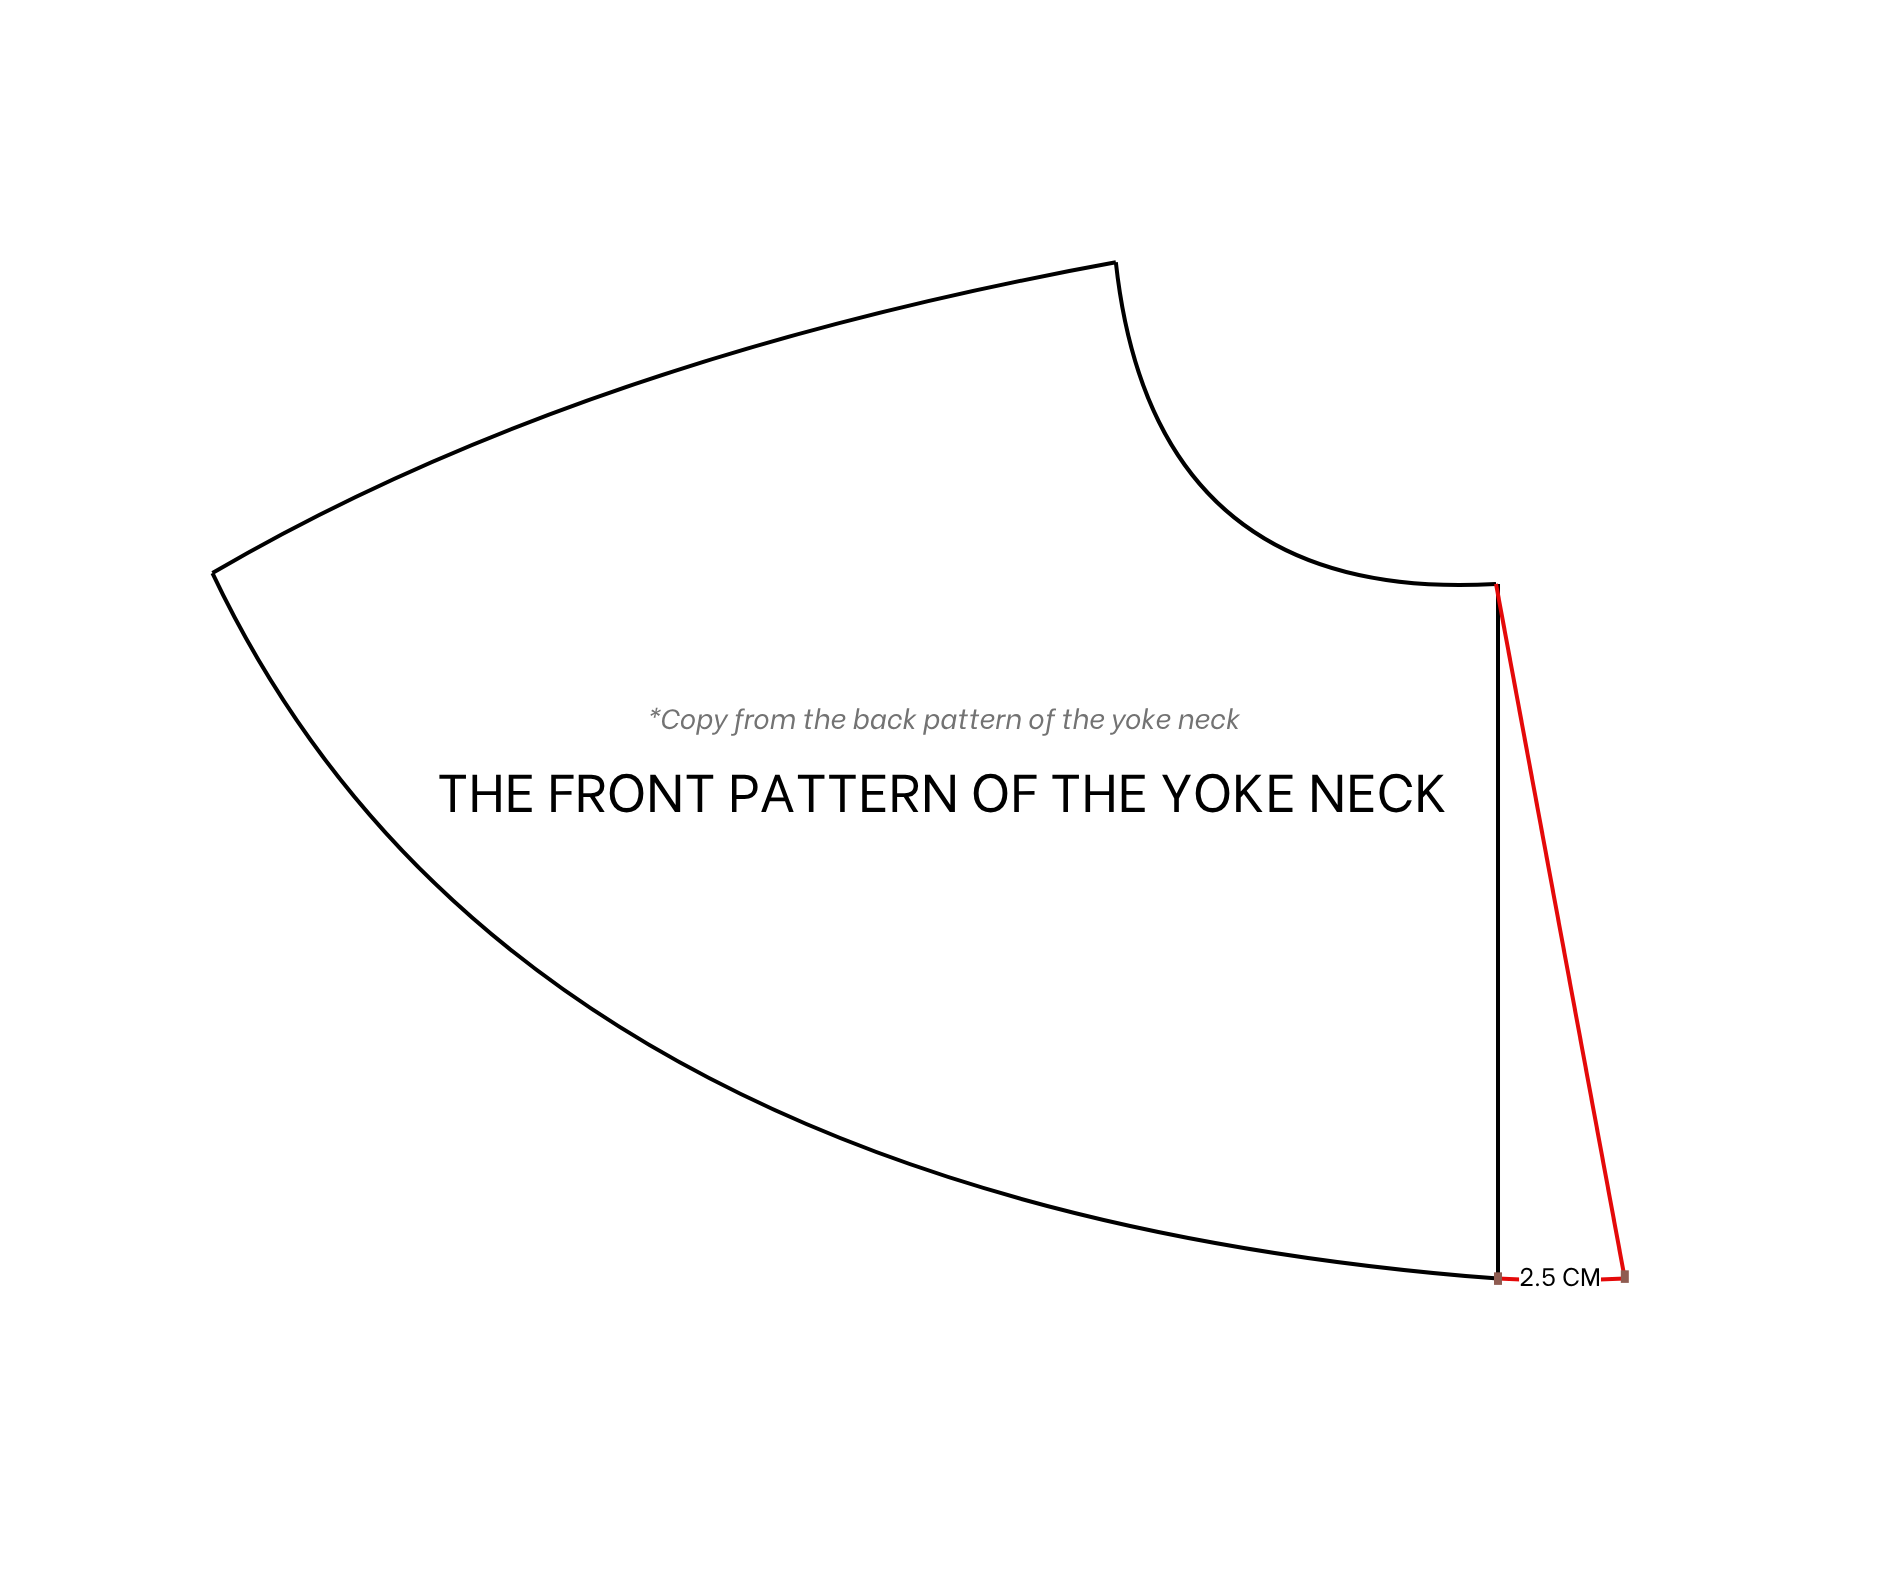
Copy the back pattern first.
From the end of the straight line, extend the ending line 2.5 cm to create the gap for two front necks.
Then, connect it to the top of the straight line to create the open area of the front neckline.
The front pattern of the yoke neck will be ready after cutting. You will need to cut two pieces of this pattern in the opposite way.
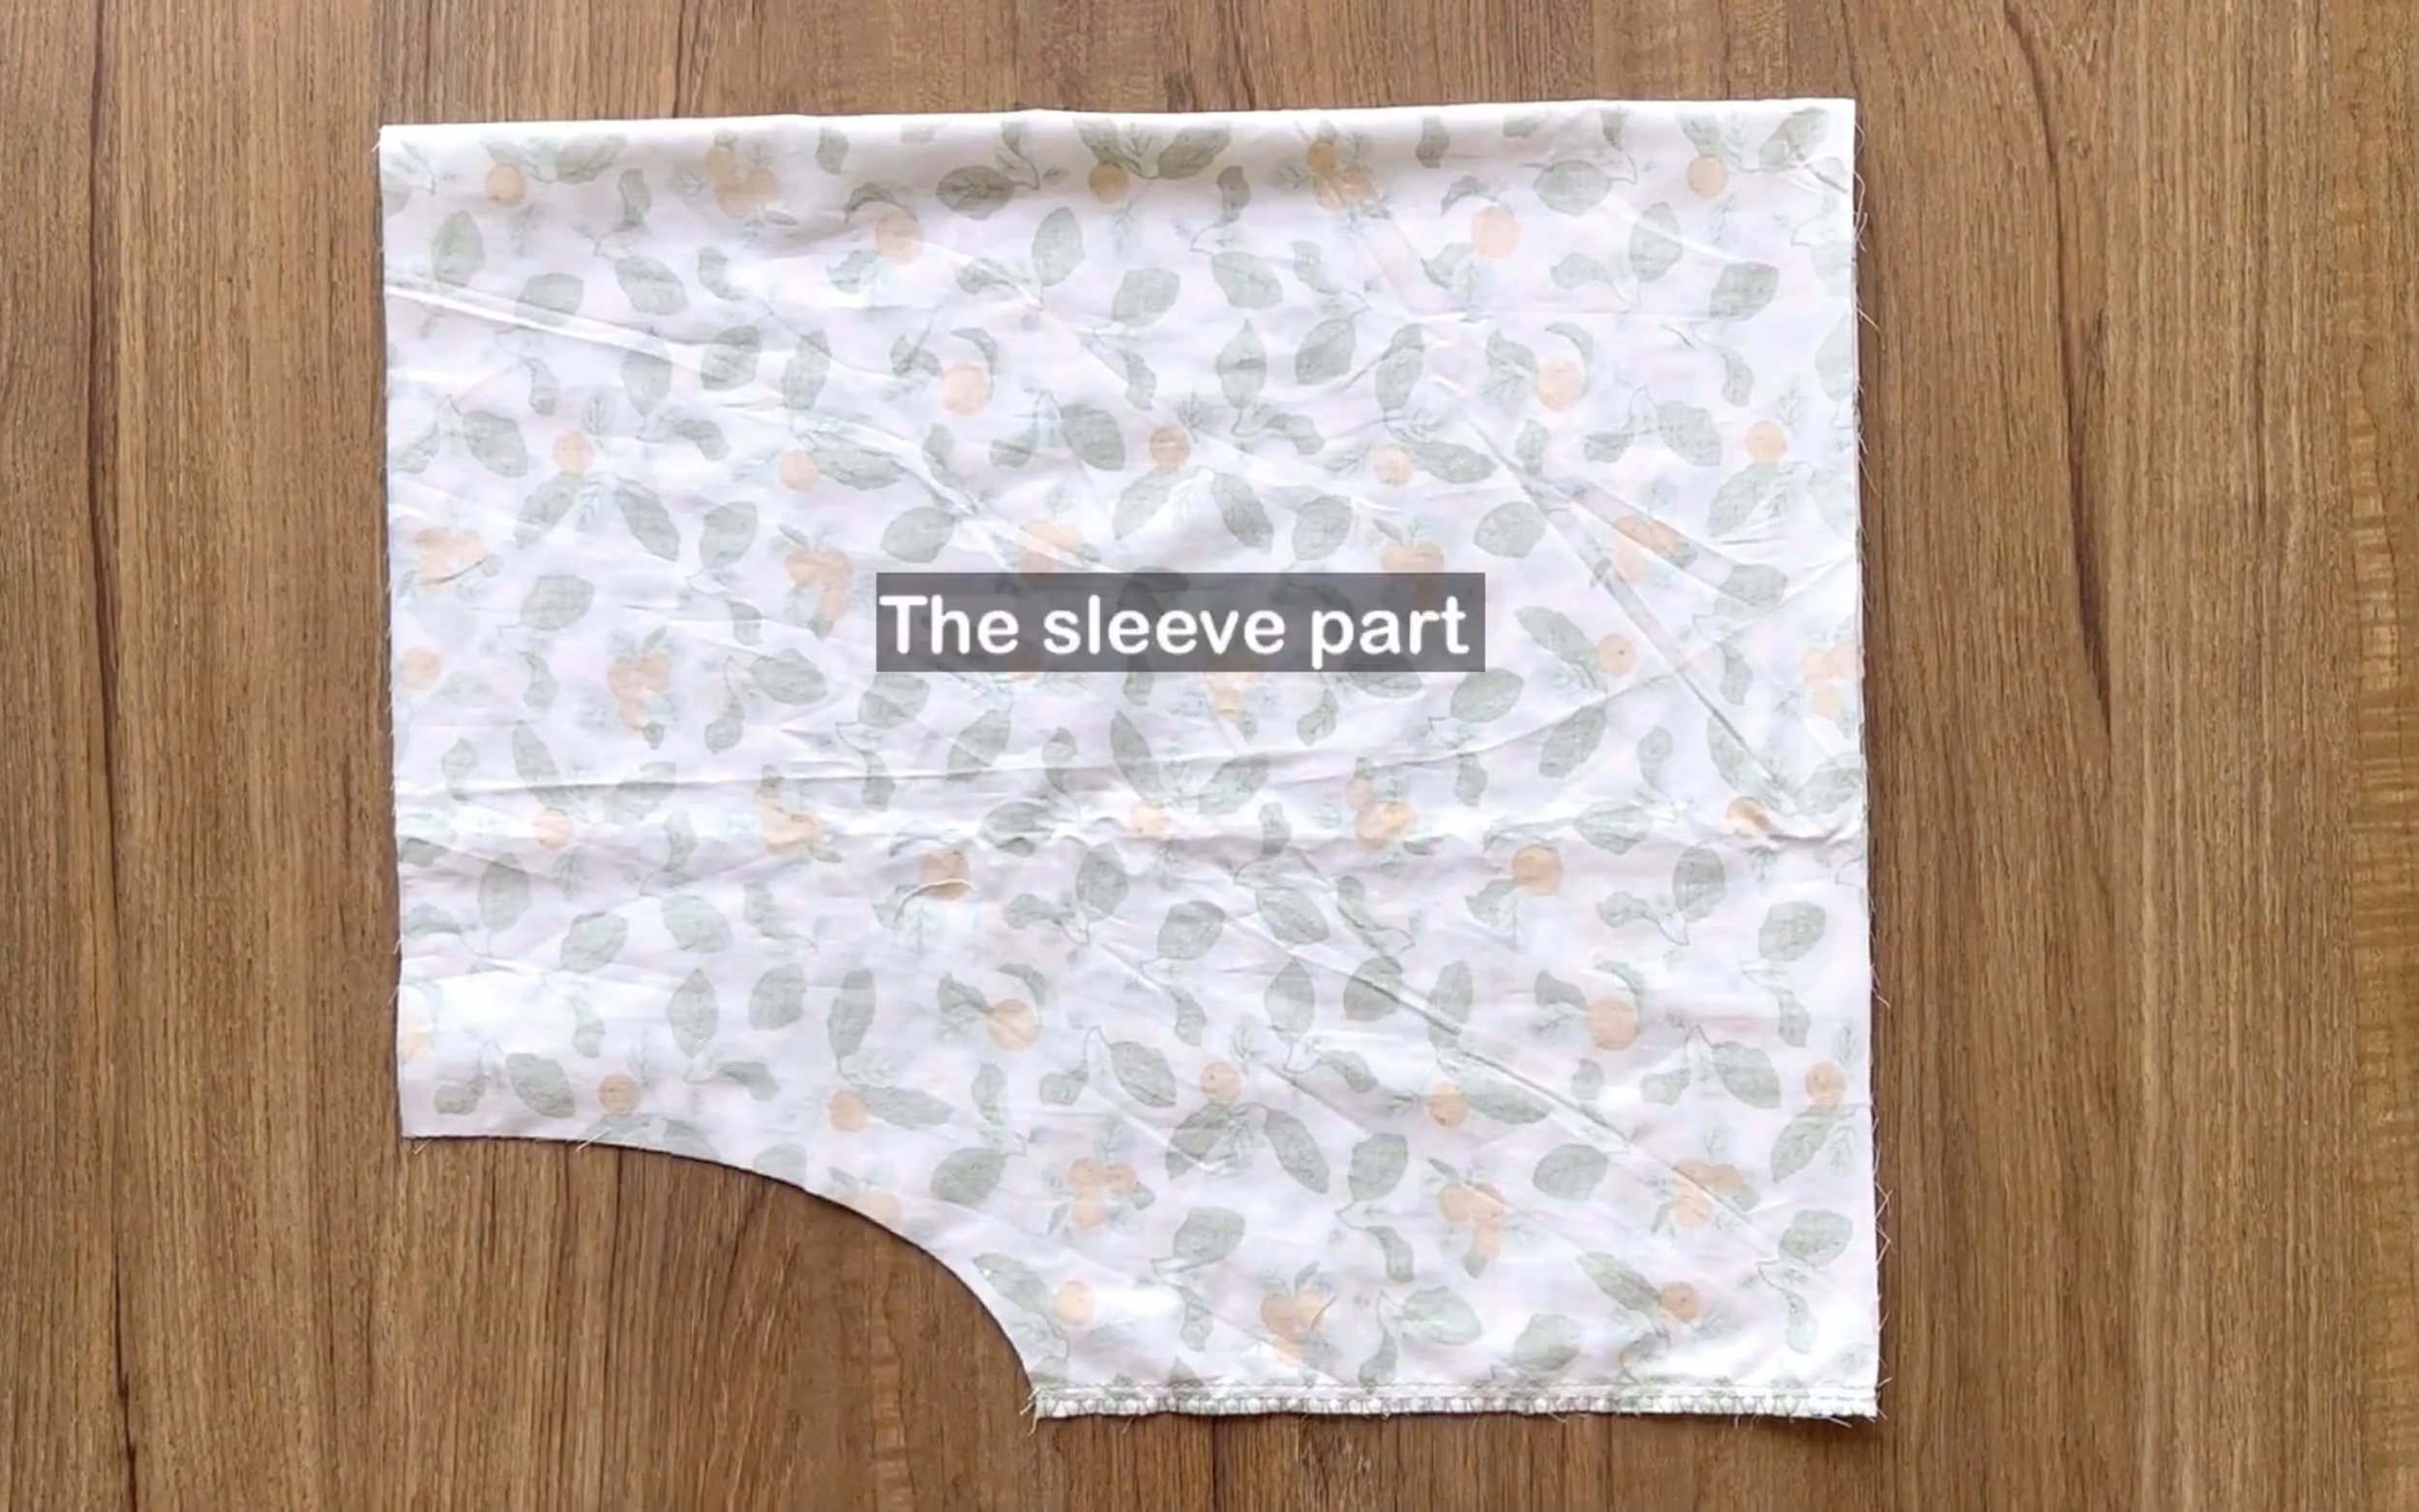
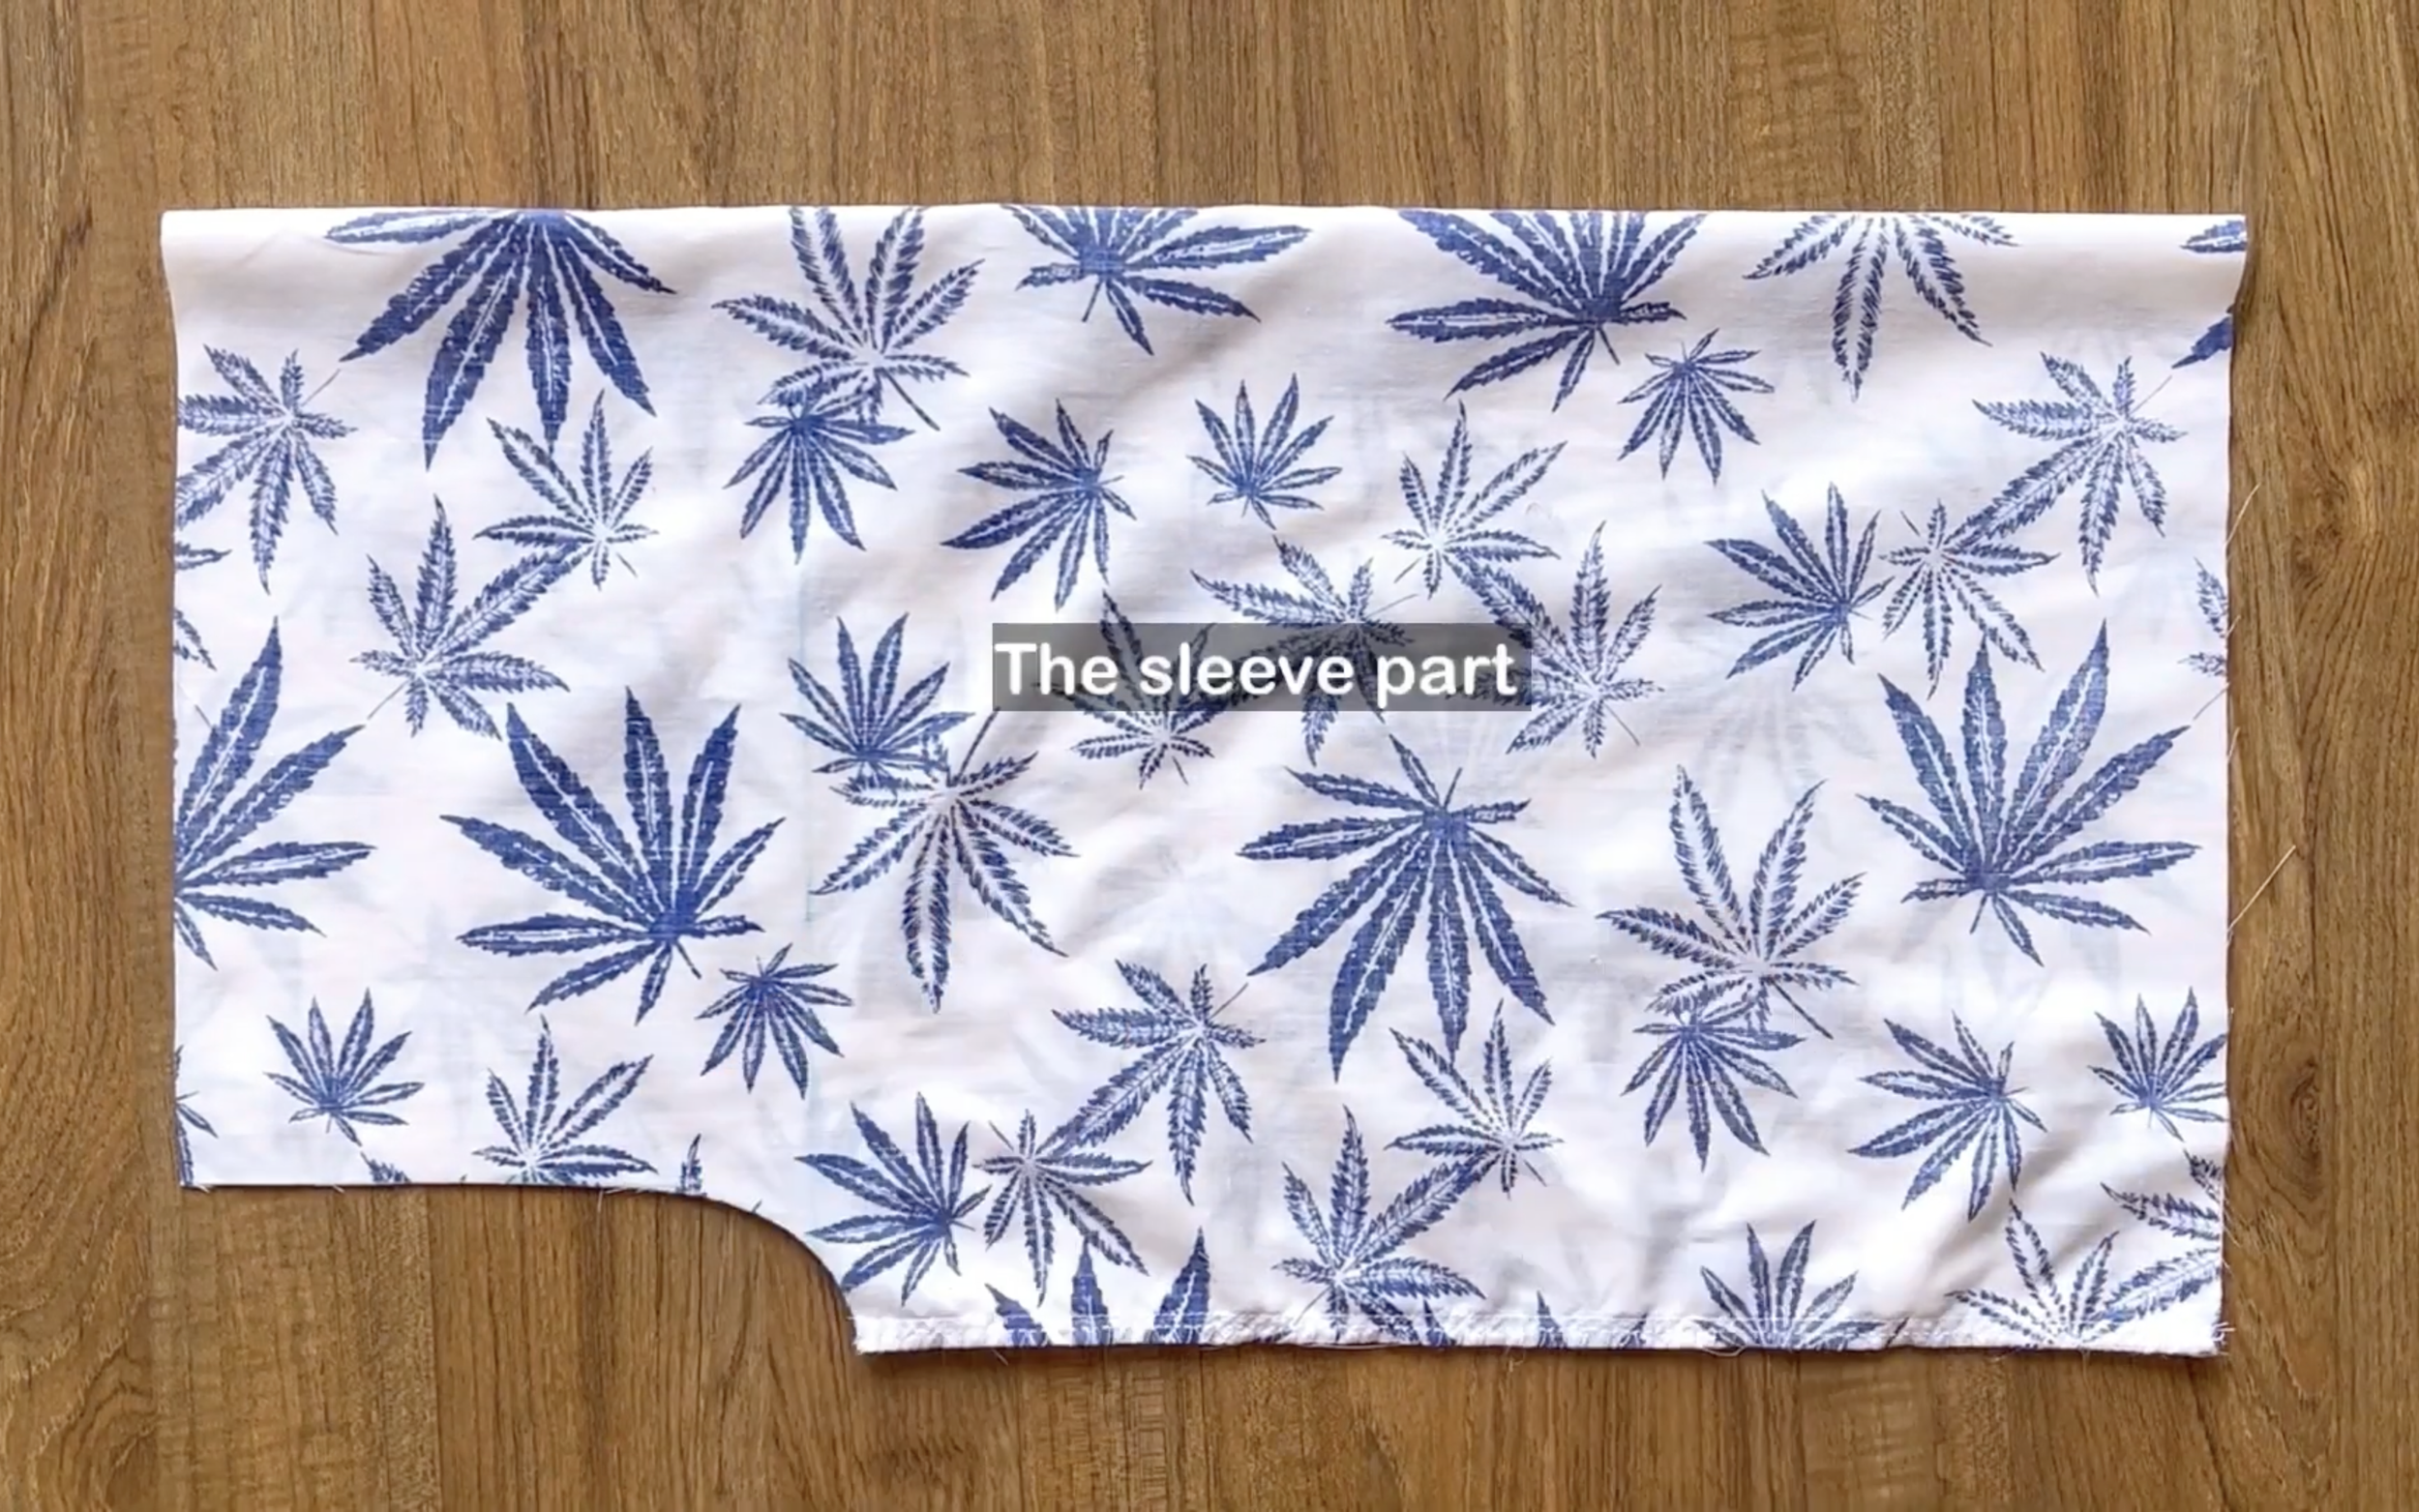
THE SLEEVE PATTERN
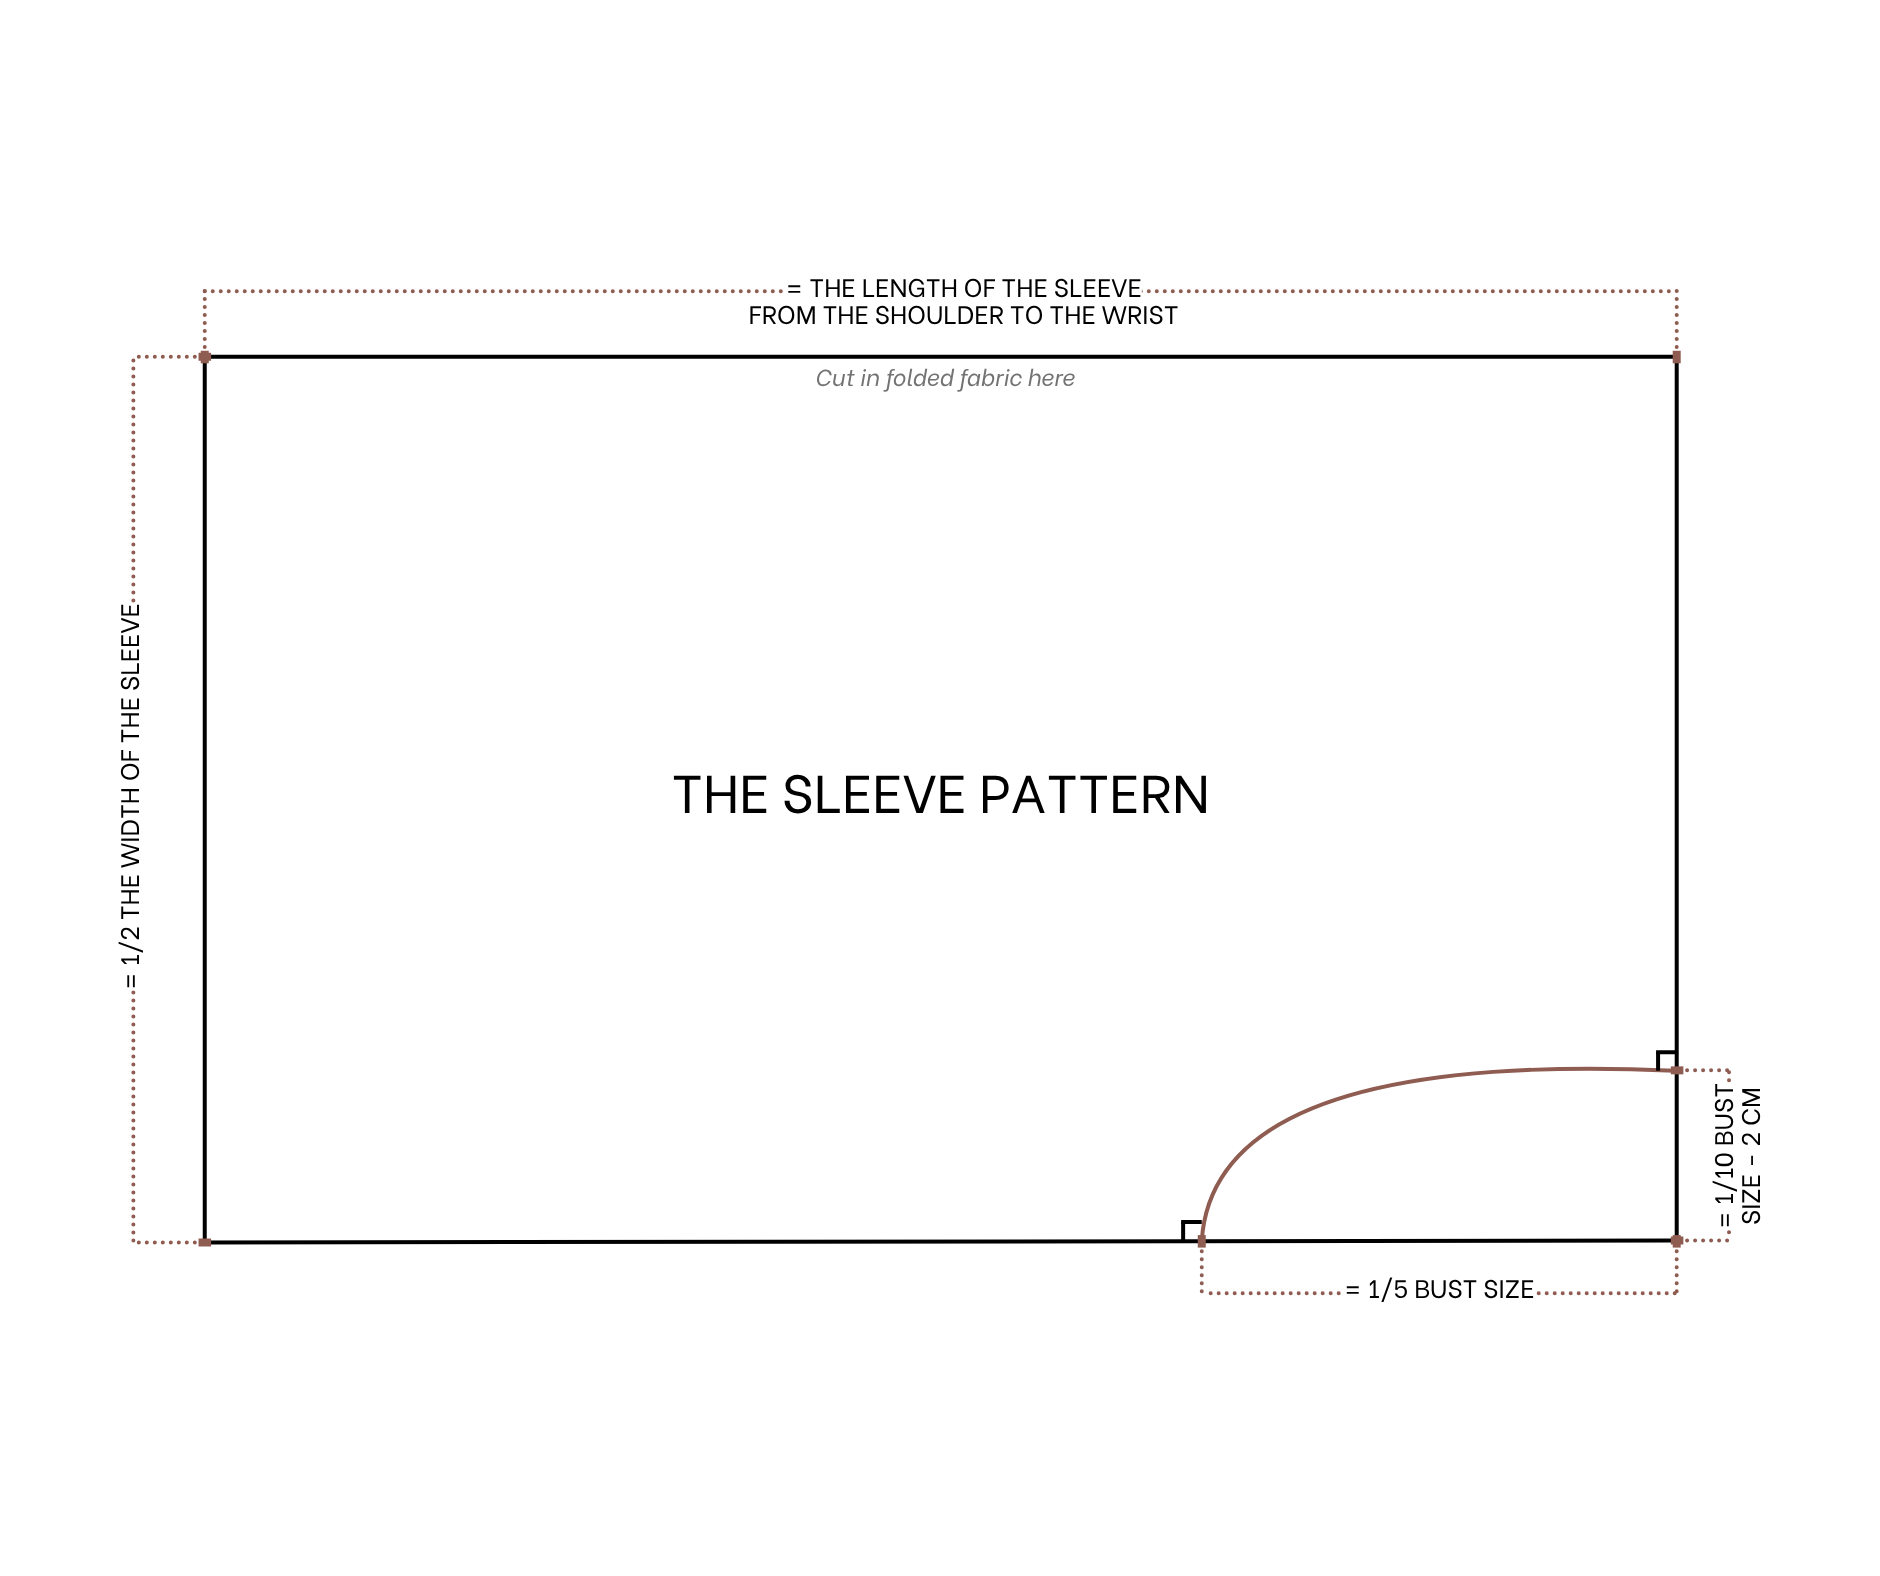
Cut a rectangle with 30 cm width, which is the half width of the sleeve that is wanted, and 50 cm length, which is the length of the sleeve from the shoulder to the wrist.
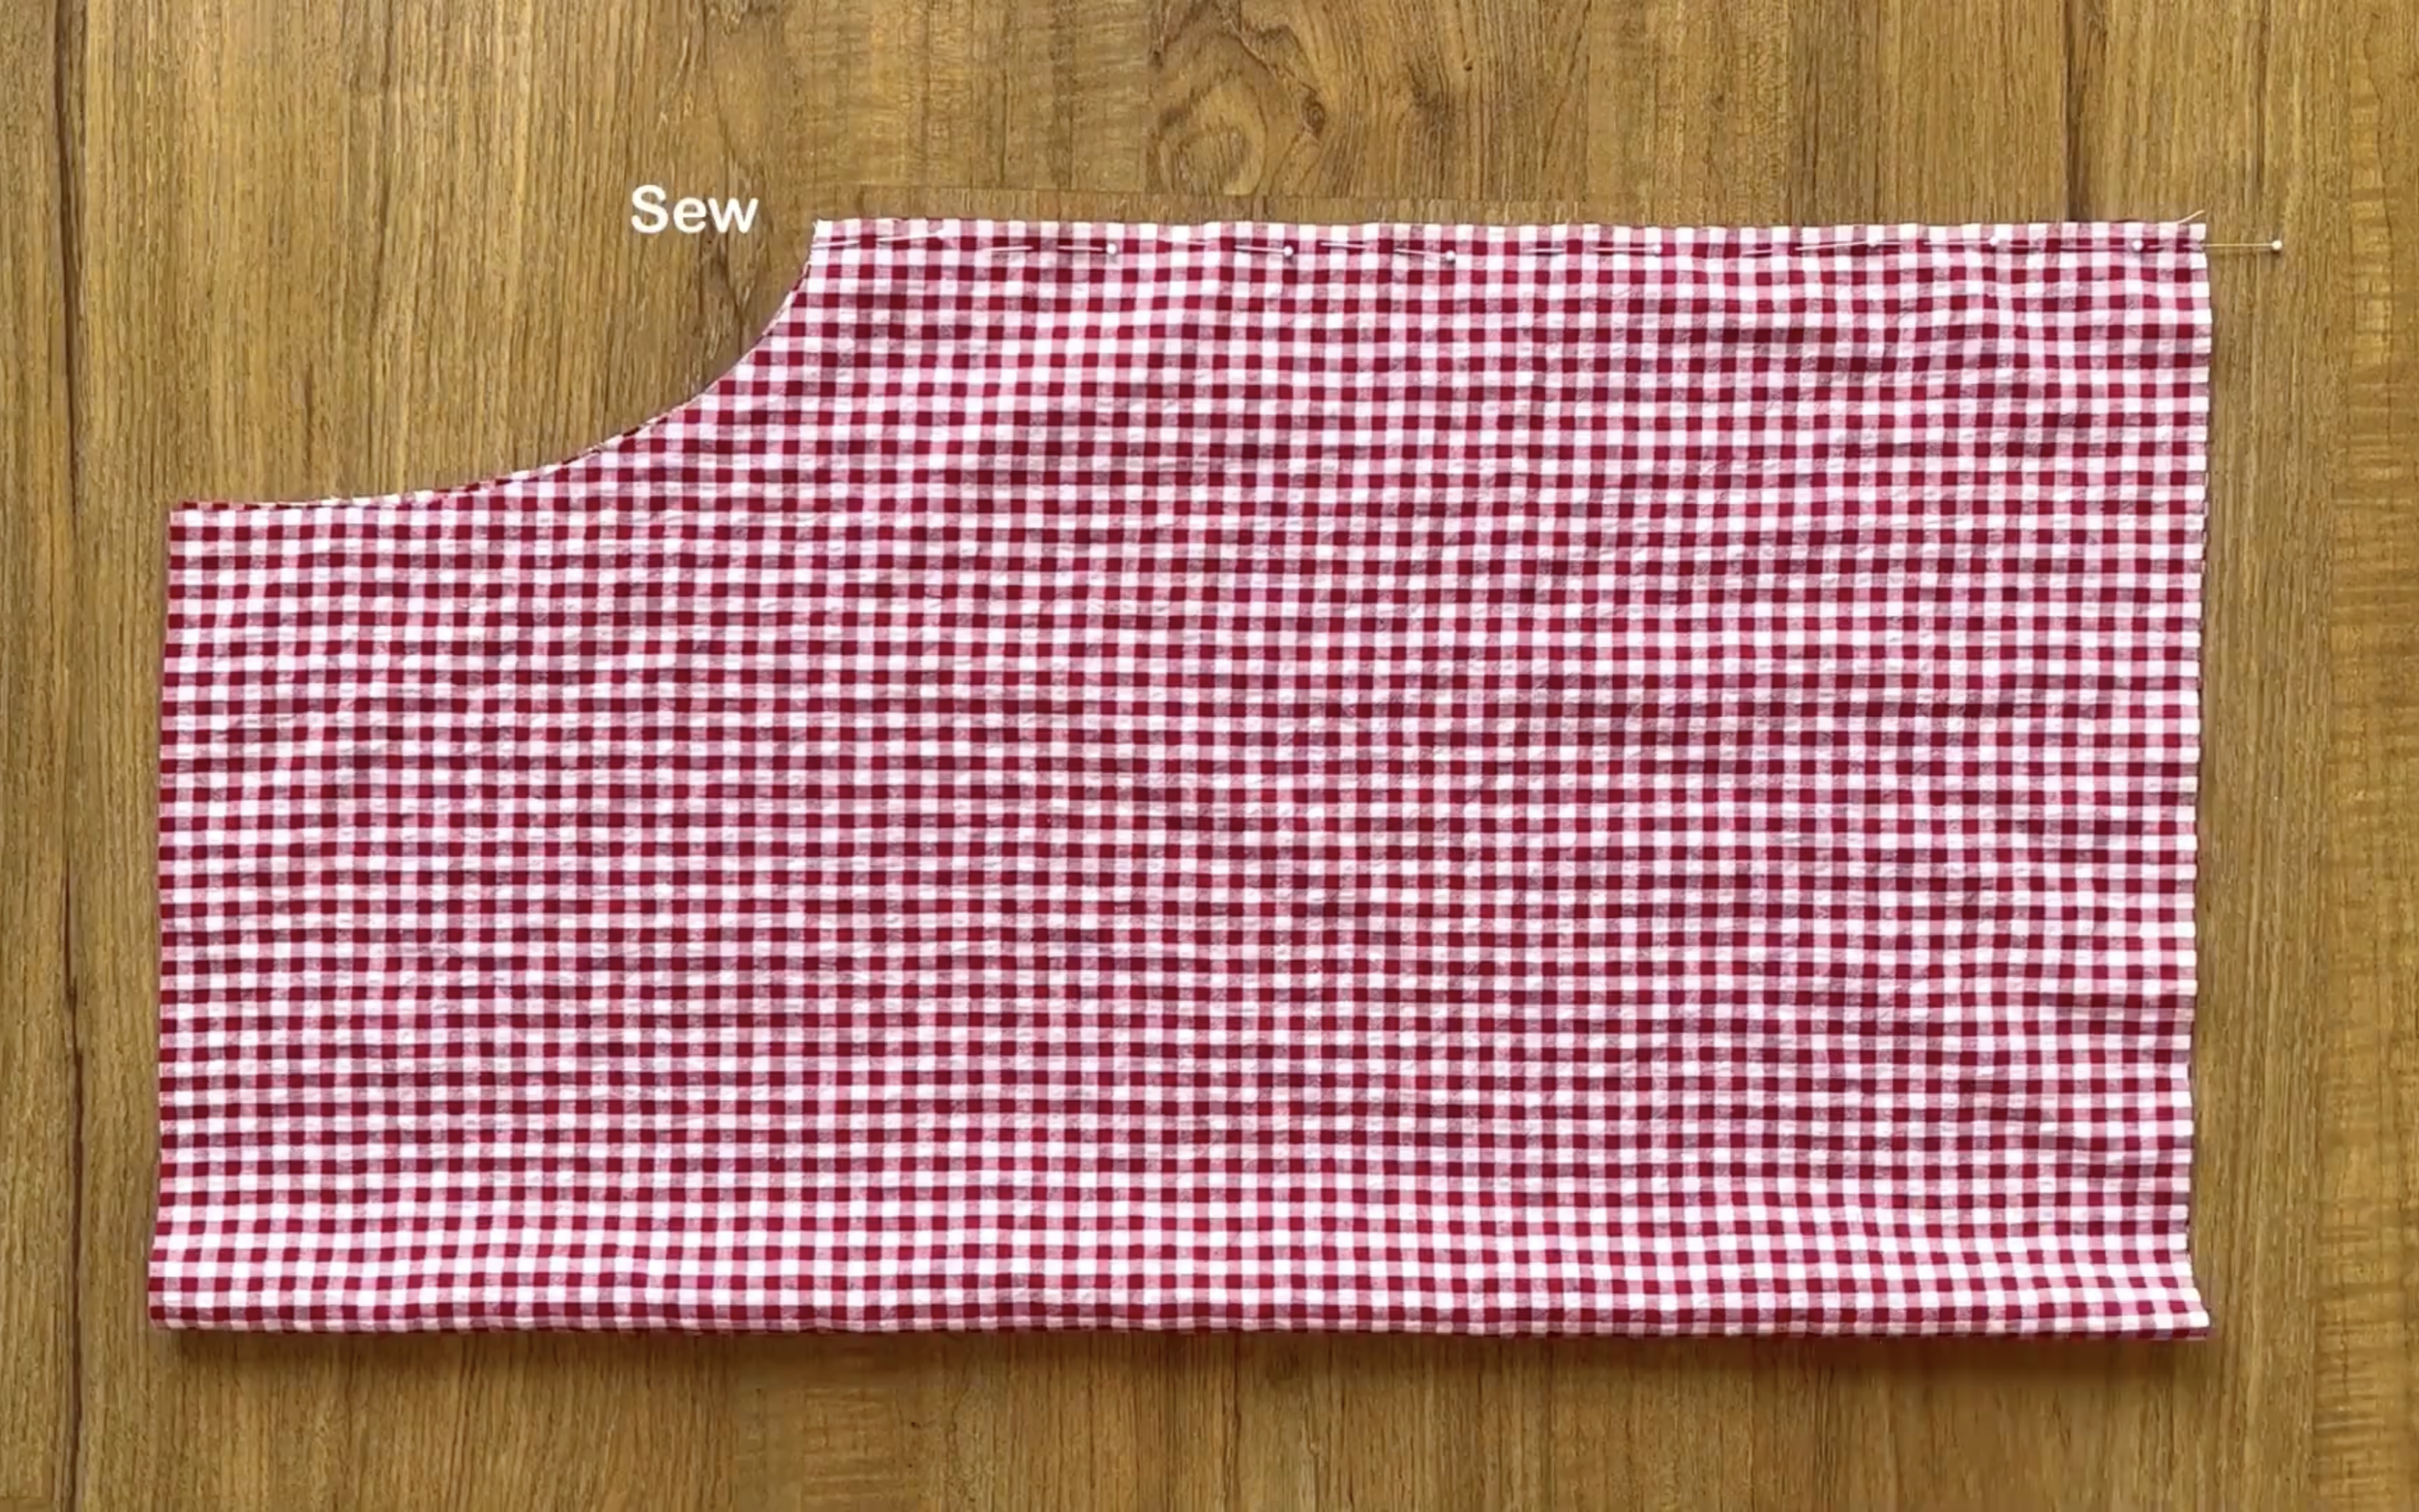
After choosing one width line, which is the top of the sleeve, start making the sleeve line for it.
From the end of the top width line, mark at 16 cm on the length line. It is 1/5 your bust size.
Also, mark at 6 cm on the top width line as well. It is 1/10 your bust size minus 2 cm.
Then, connect two marks together by a curved line. This will be the sleeve line of the sleeve.
The sleeve pattern will be ready after cutting. You will need to cut this pattern in folded fabric at the other length line.
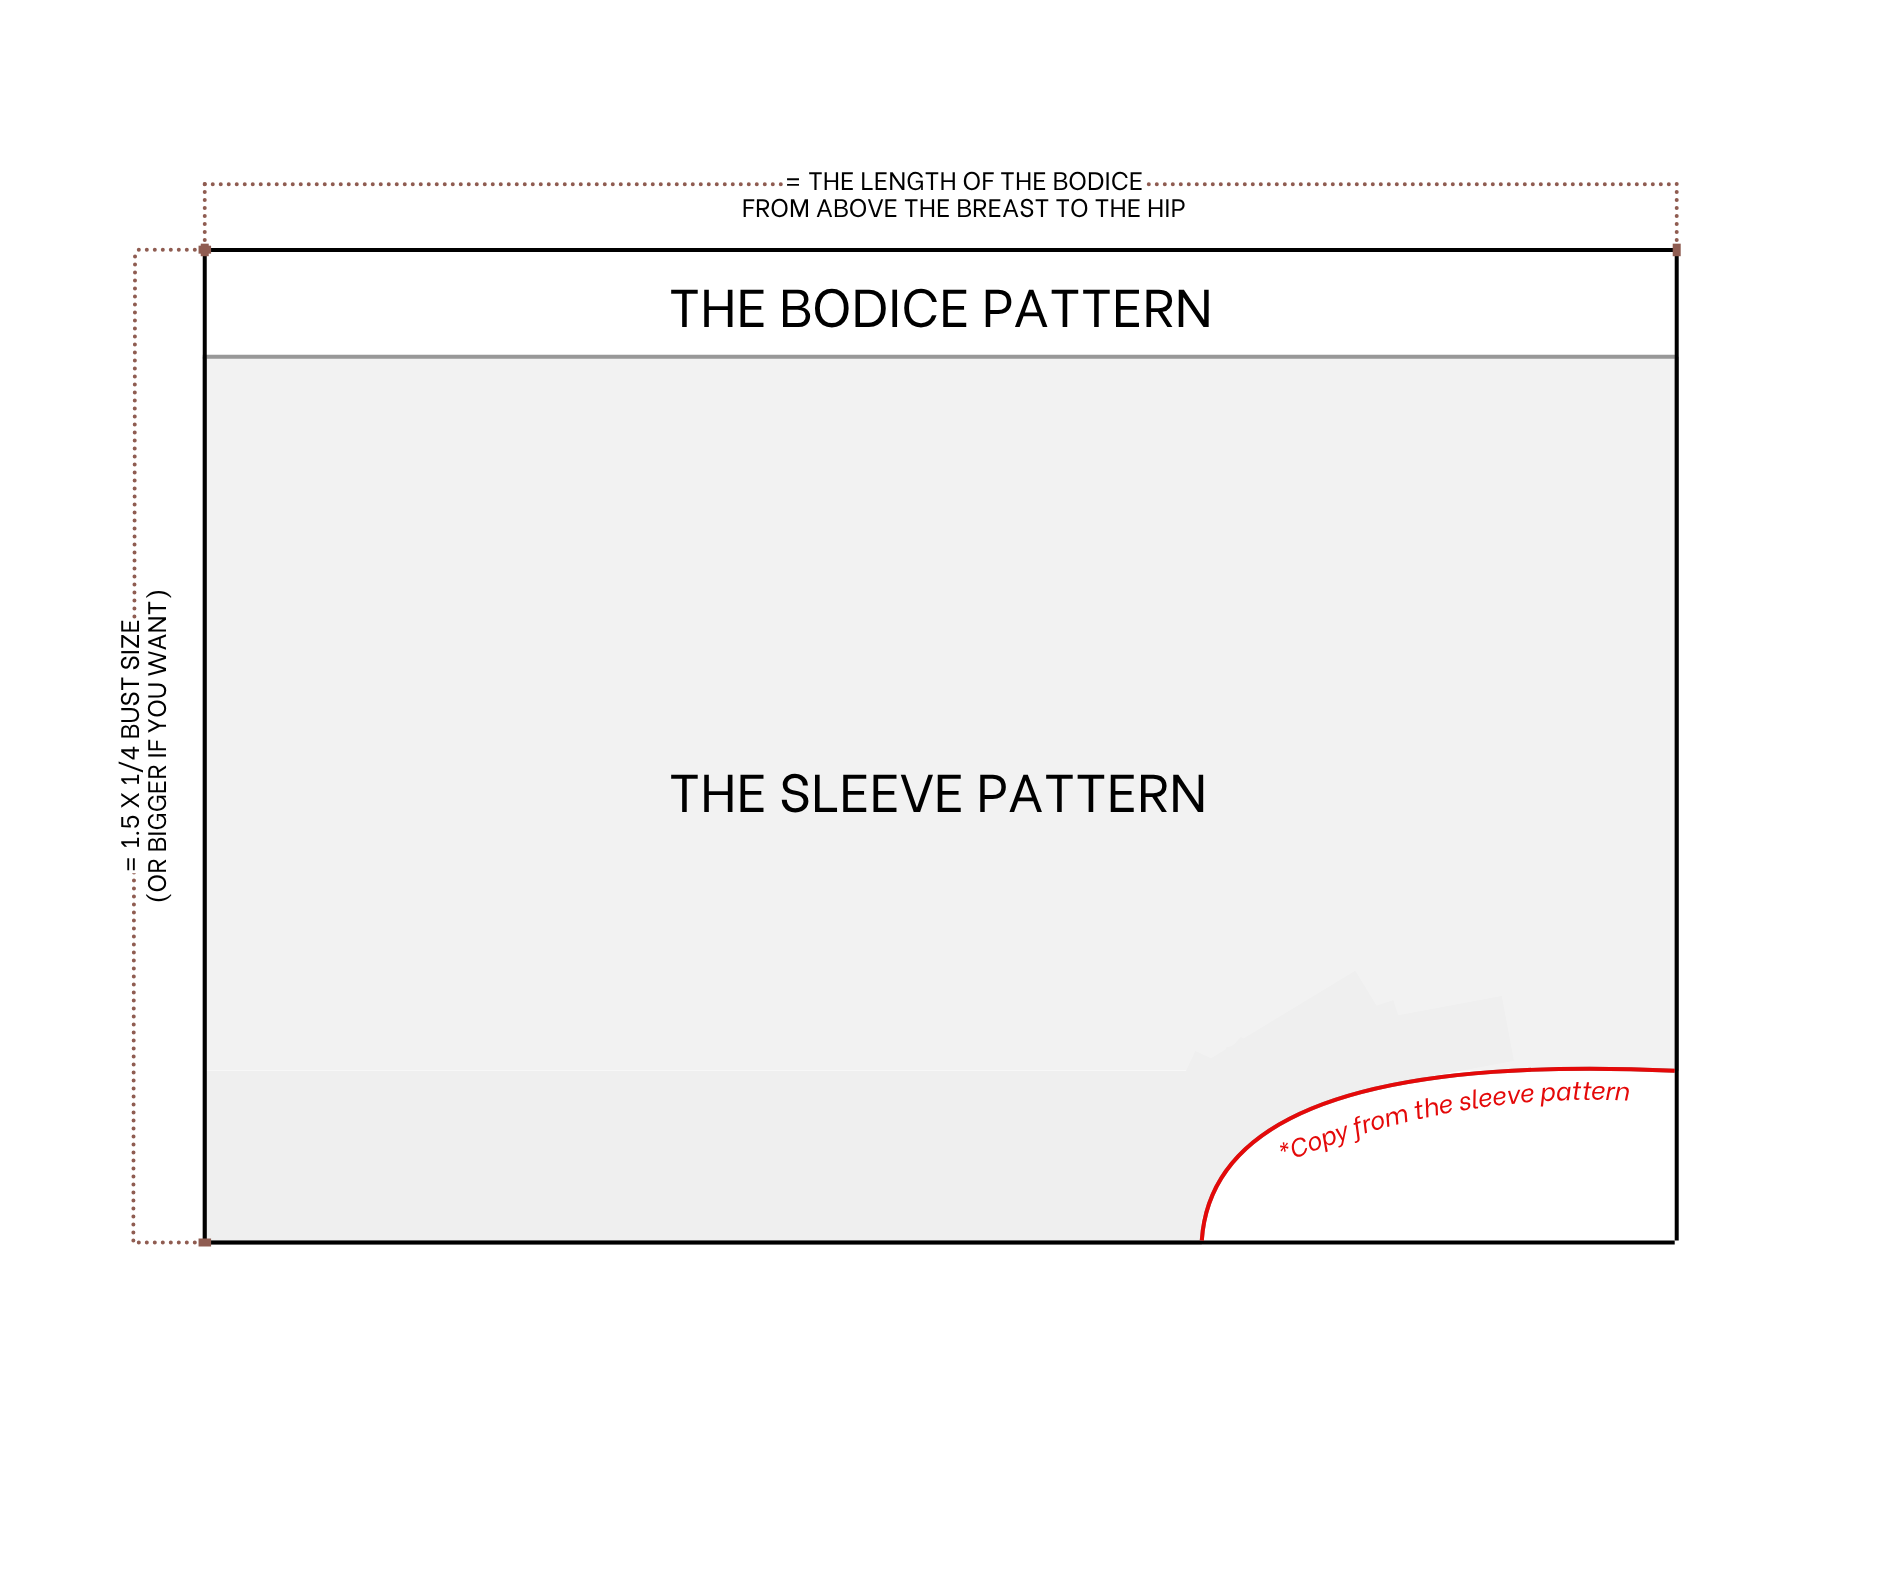
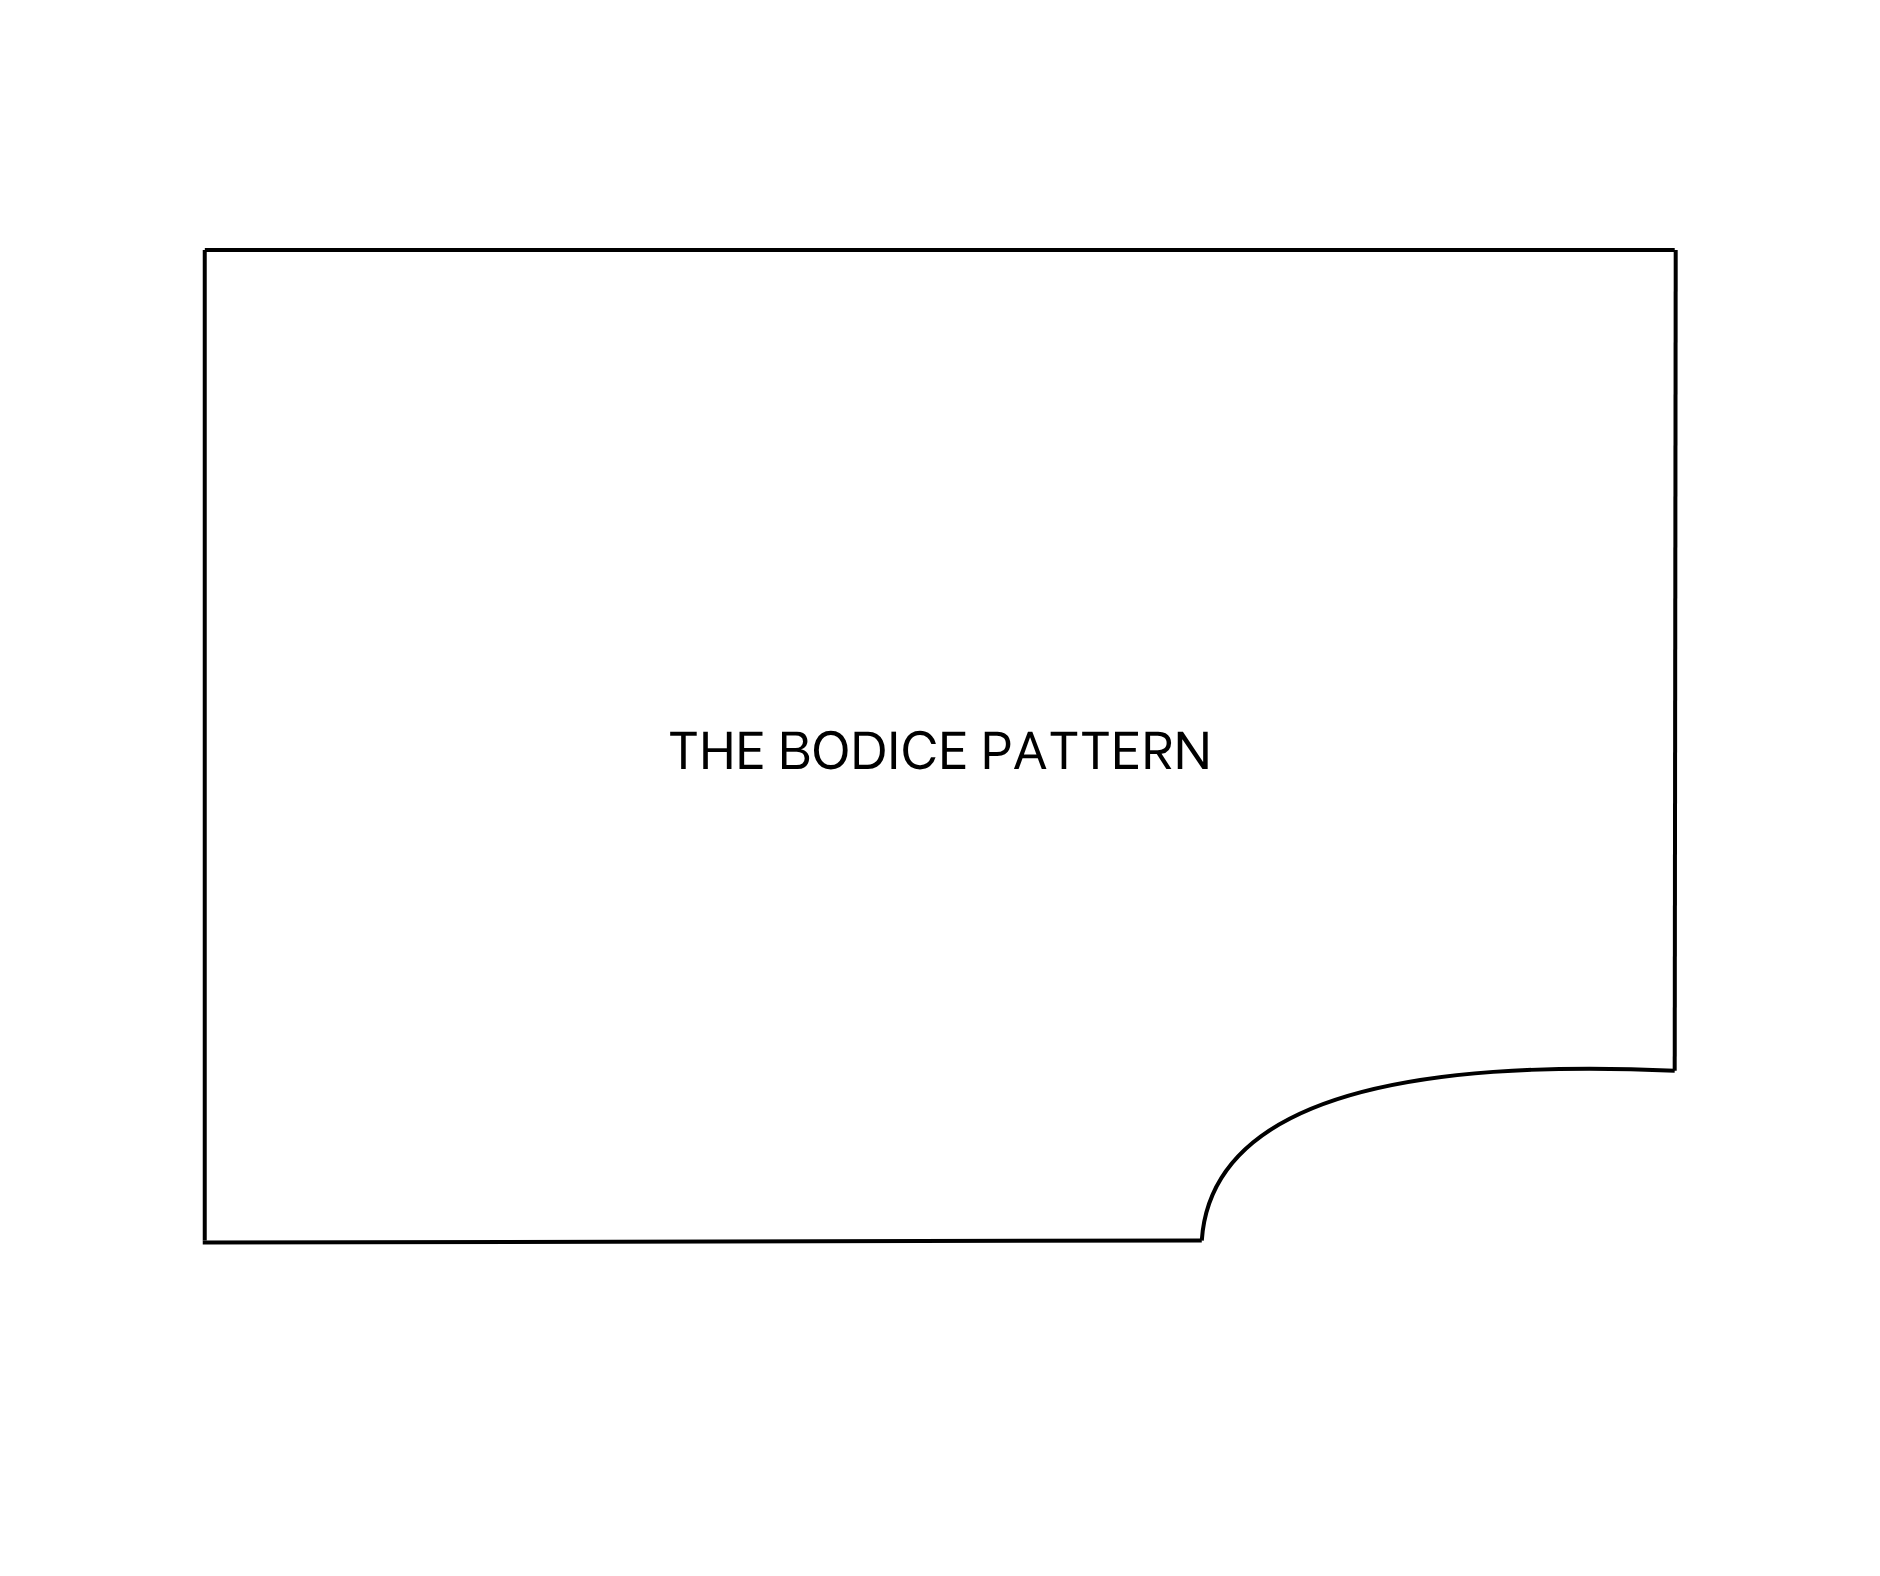
THE BODICE PATTERN
Cut a rectangle with 30 cm width (which is 1.5 times a quarter of your bust size—you can make it bigger if you want a bigger blouse) and 50 cm length (which is the length of the blouse from above the breast to the hip).
After choosing the top of the bodice, use the sleeve pattern to copy the sleeve line to the bodice pattern.
The bodice pattern will be ready after cutting. You will need to cut this pattern in folded fabric at the other length line.
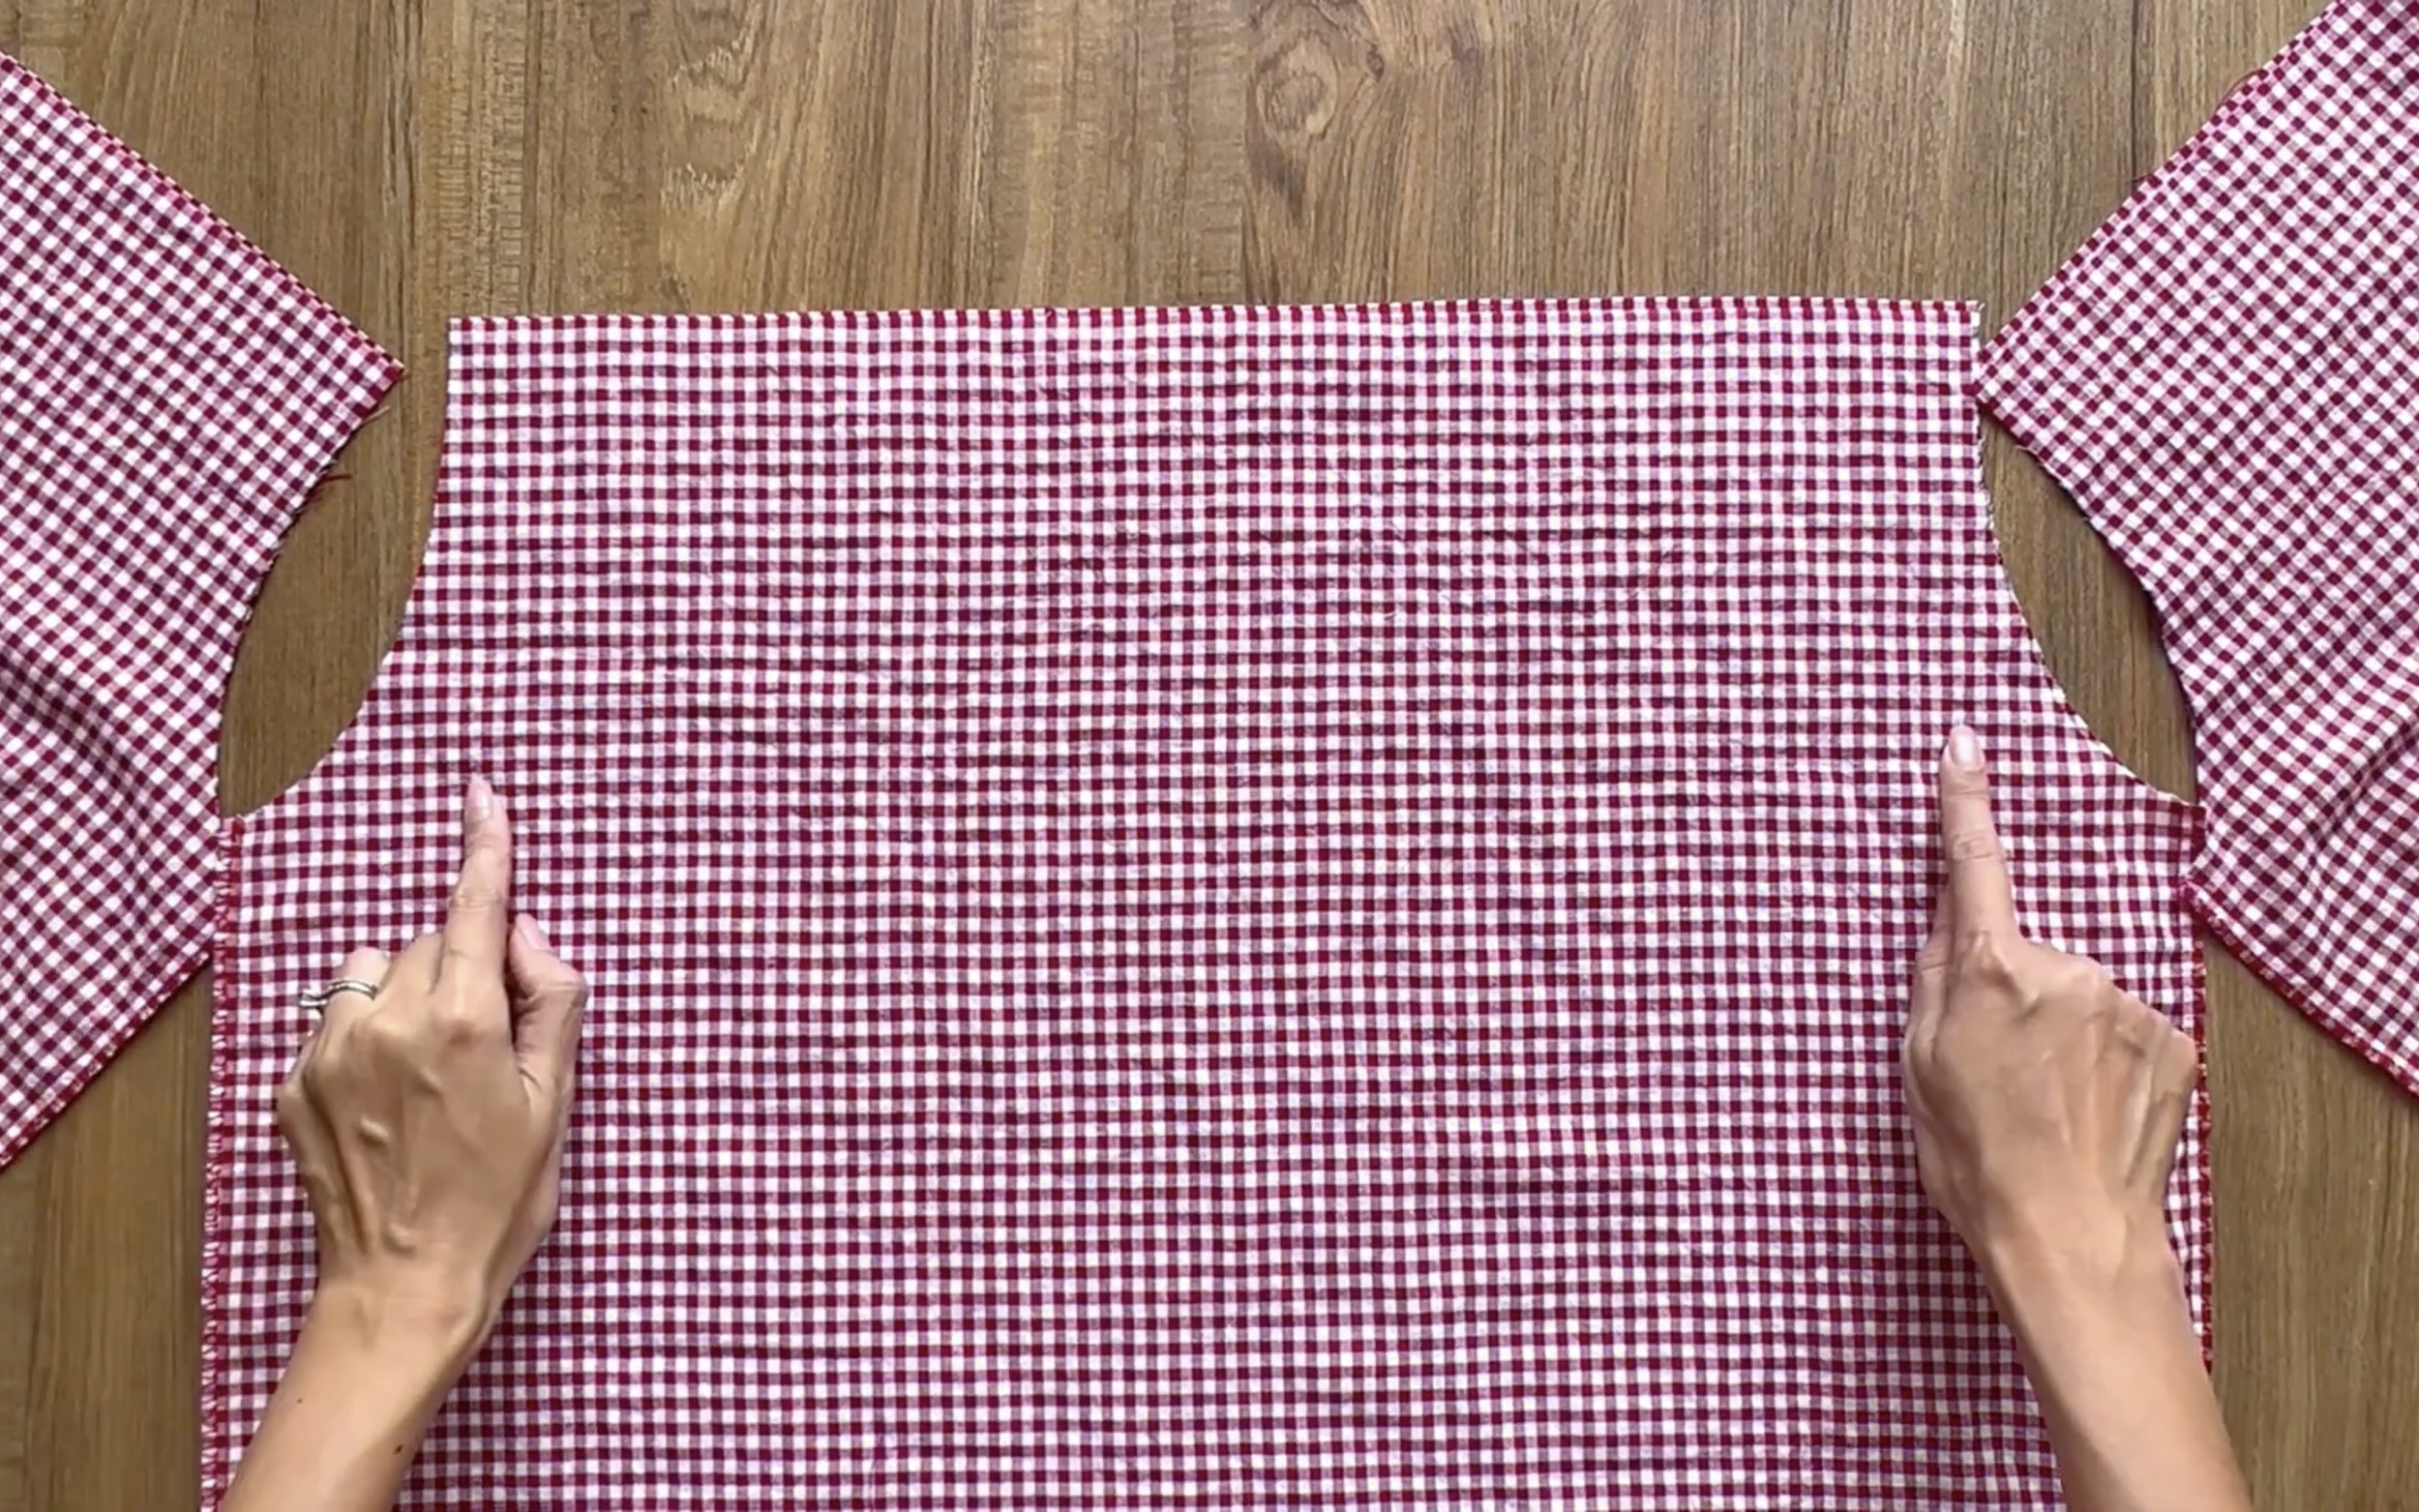
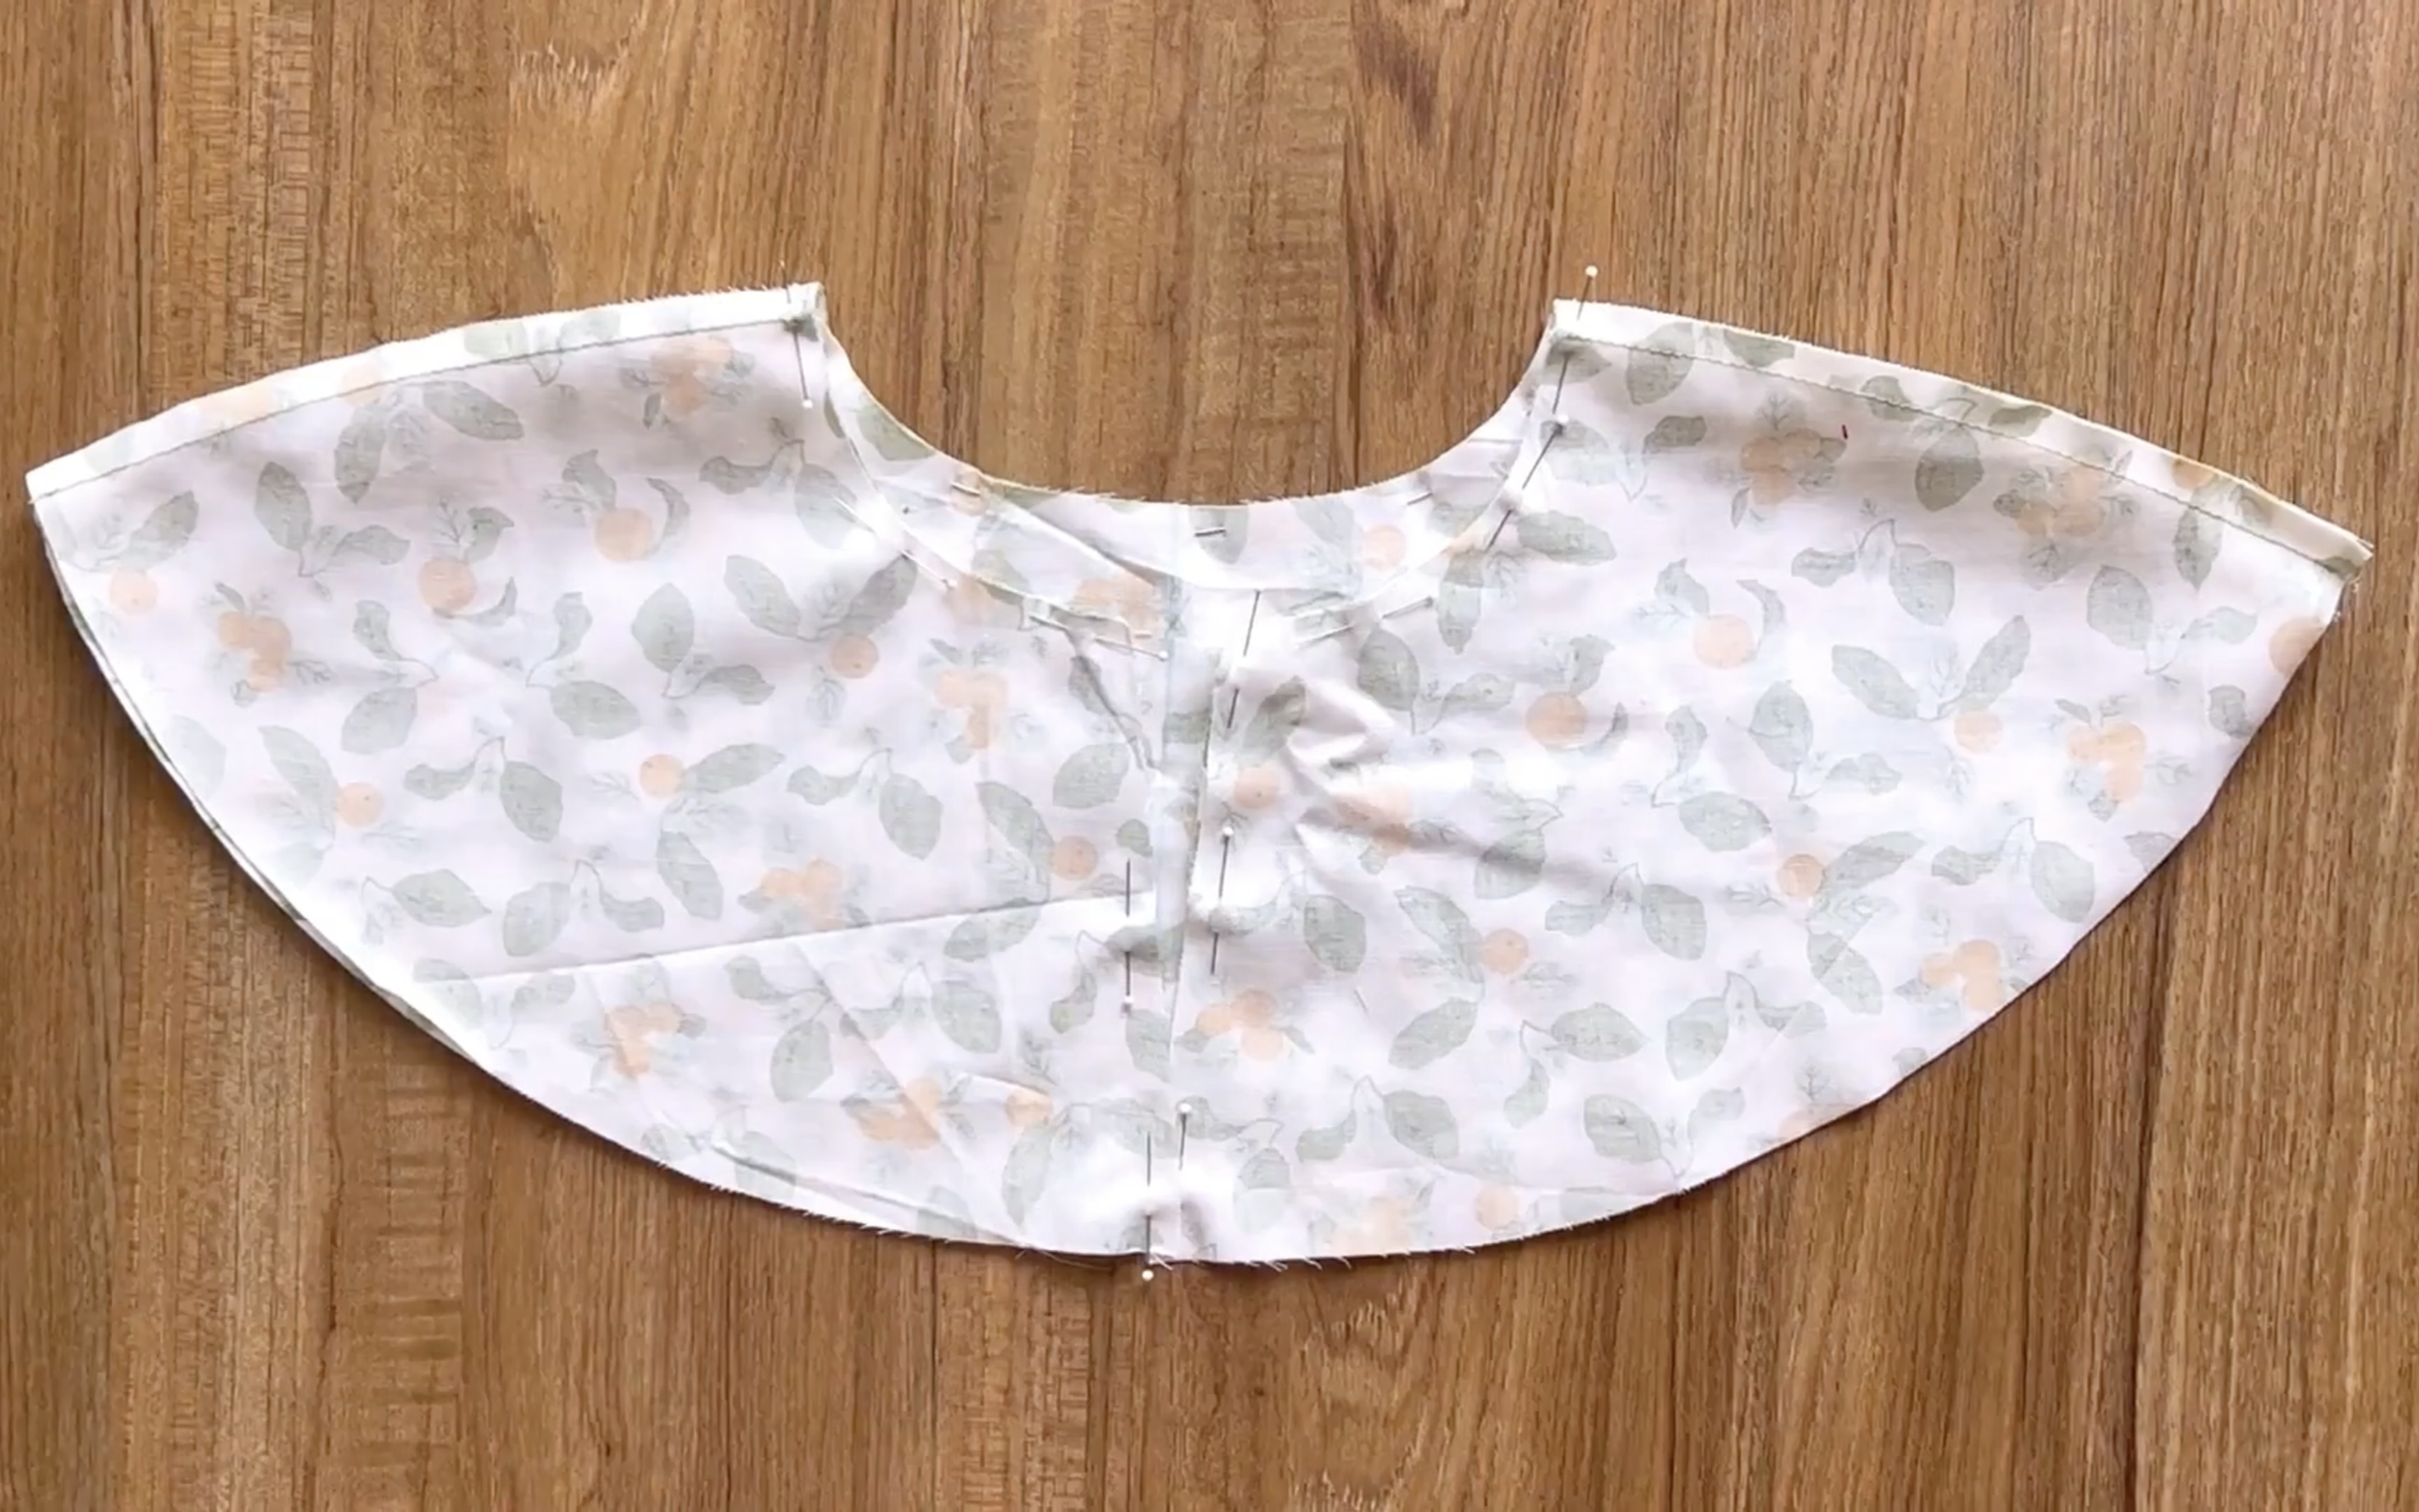
THE YOKE NECK PART
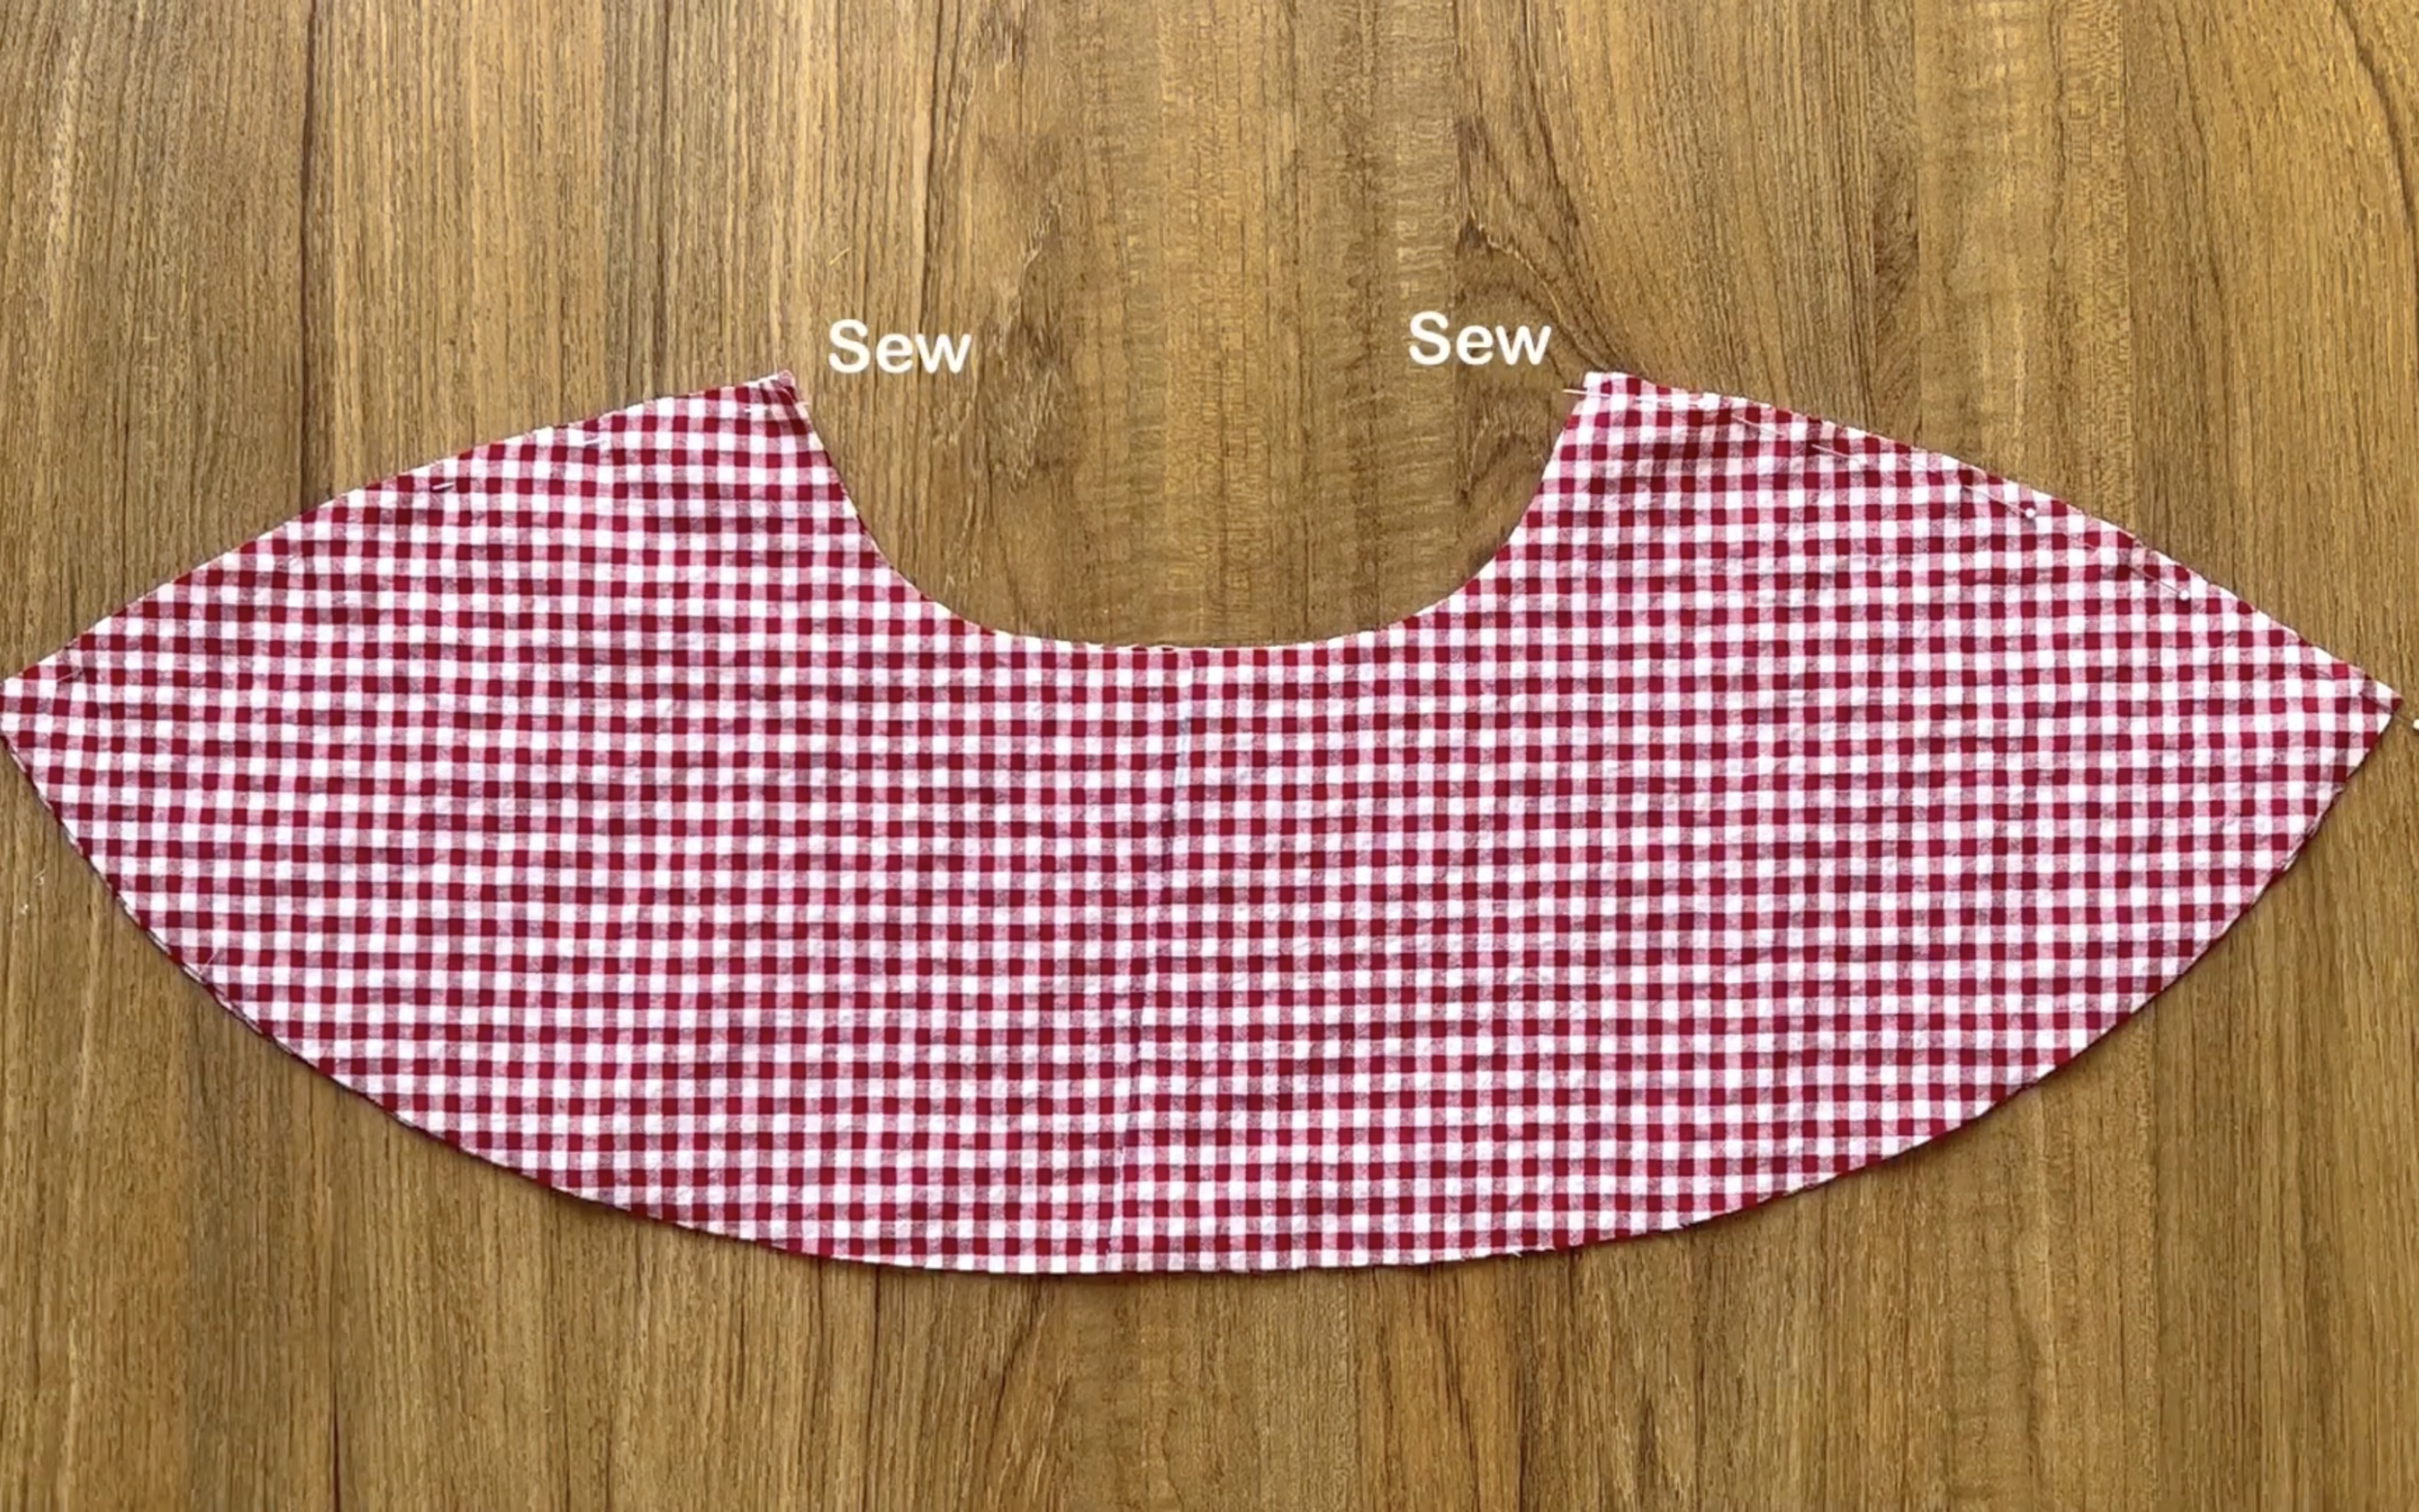
Connect the back of the yoke neck to two pieces of the front at the shoulder line and sew.

After that, you can try on this yoke neck to see if you need to alter your pattern or not.
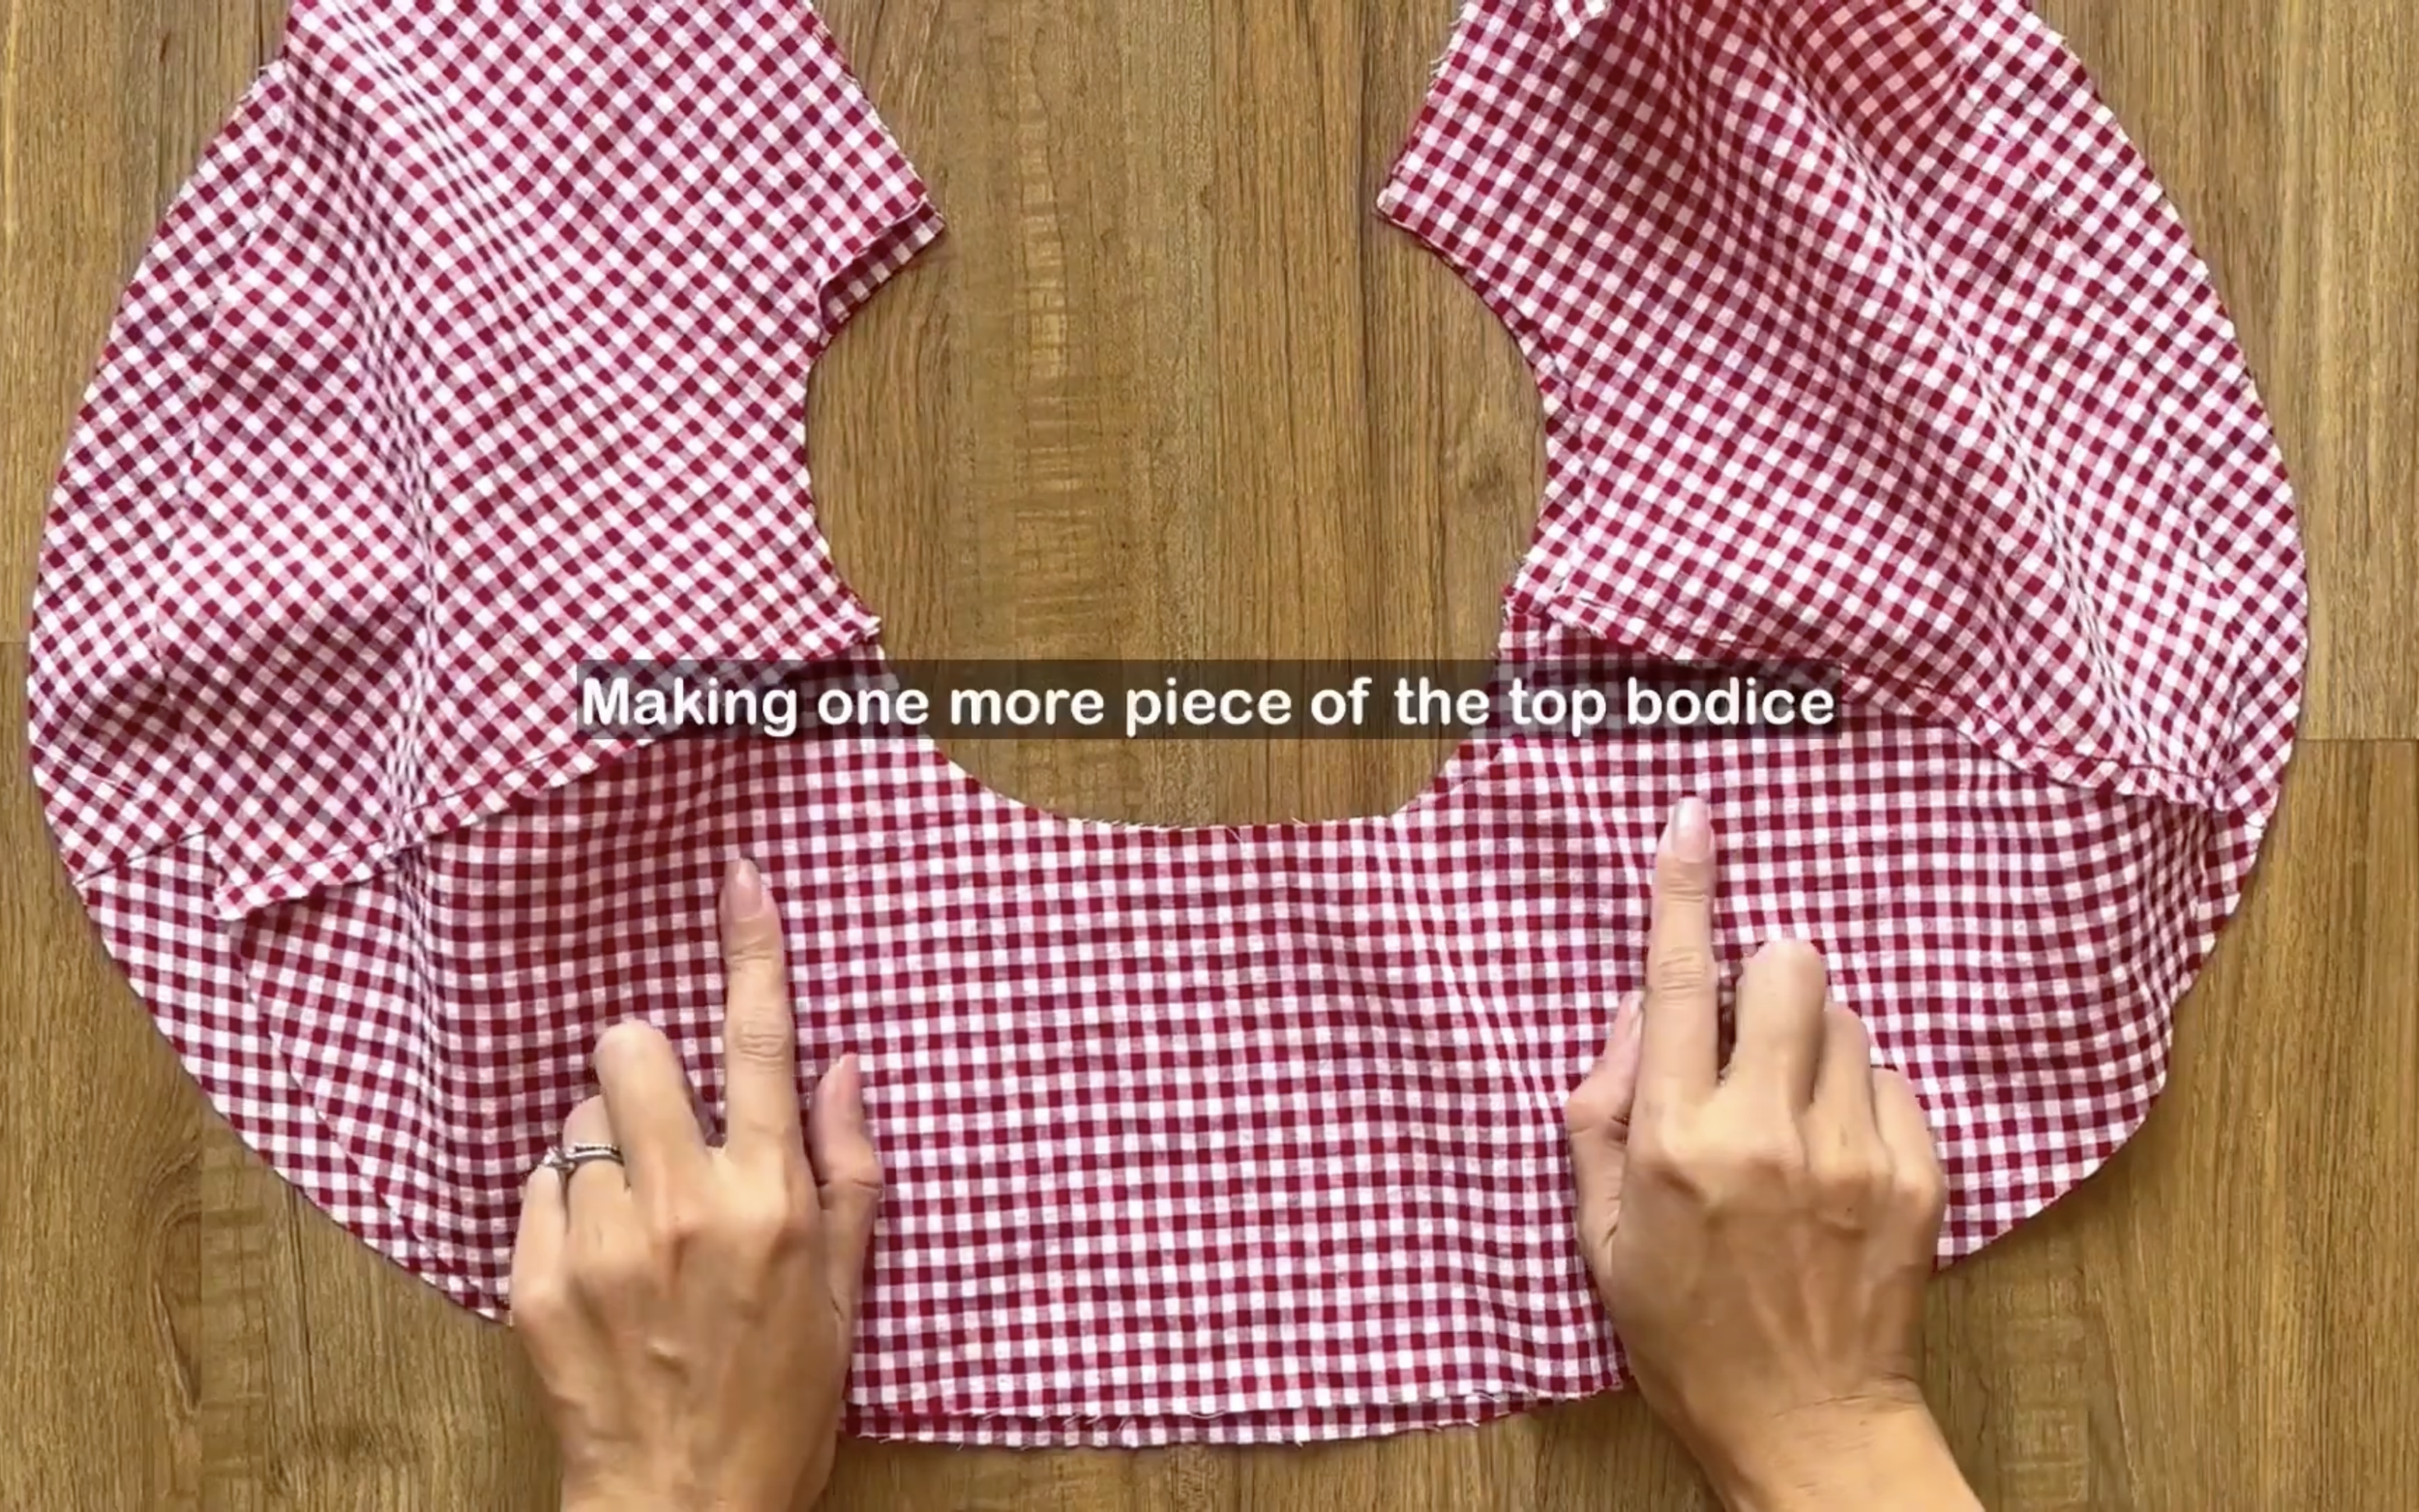
Then, make another piece like this.
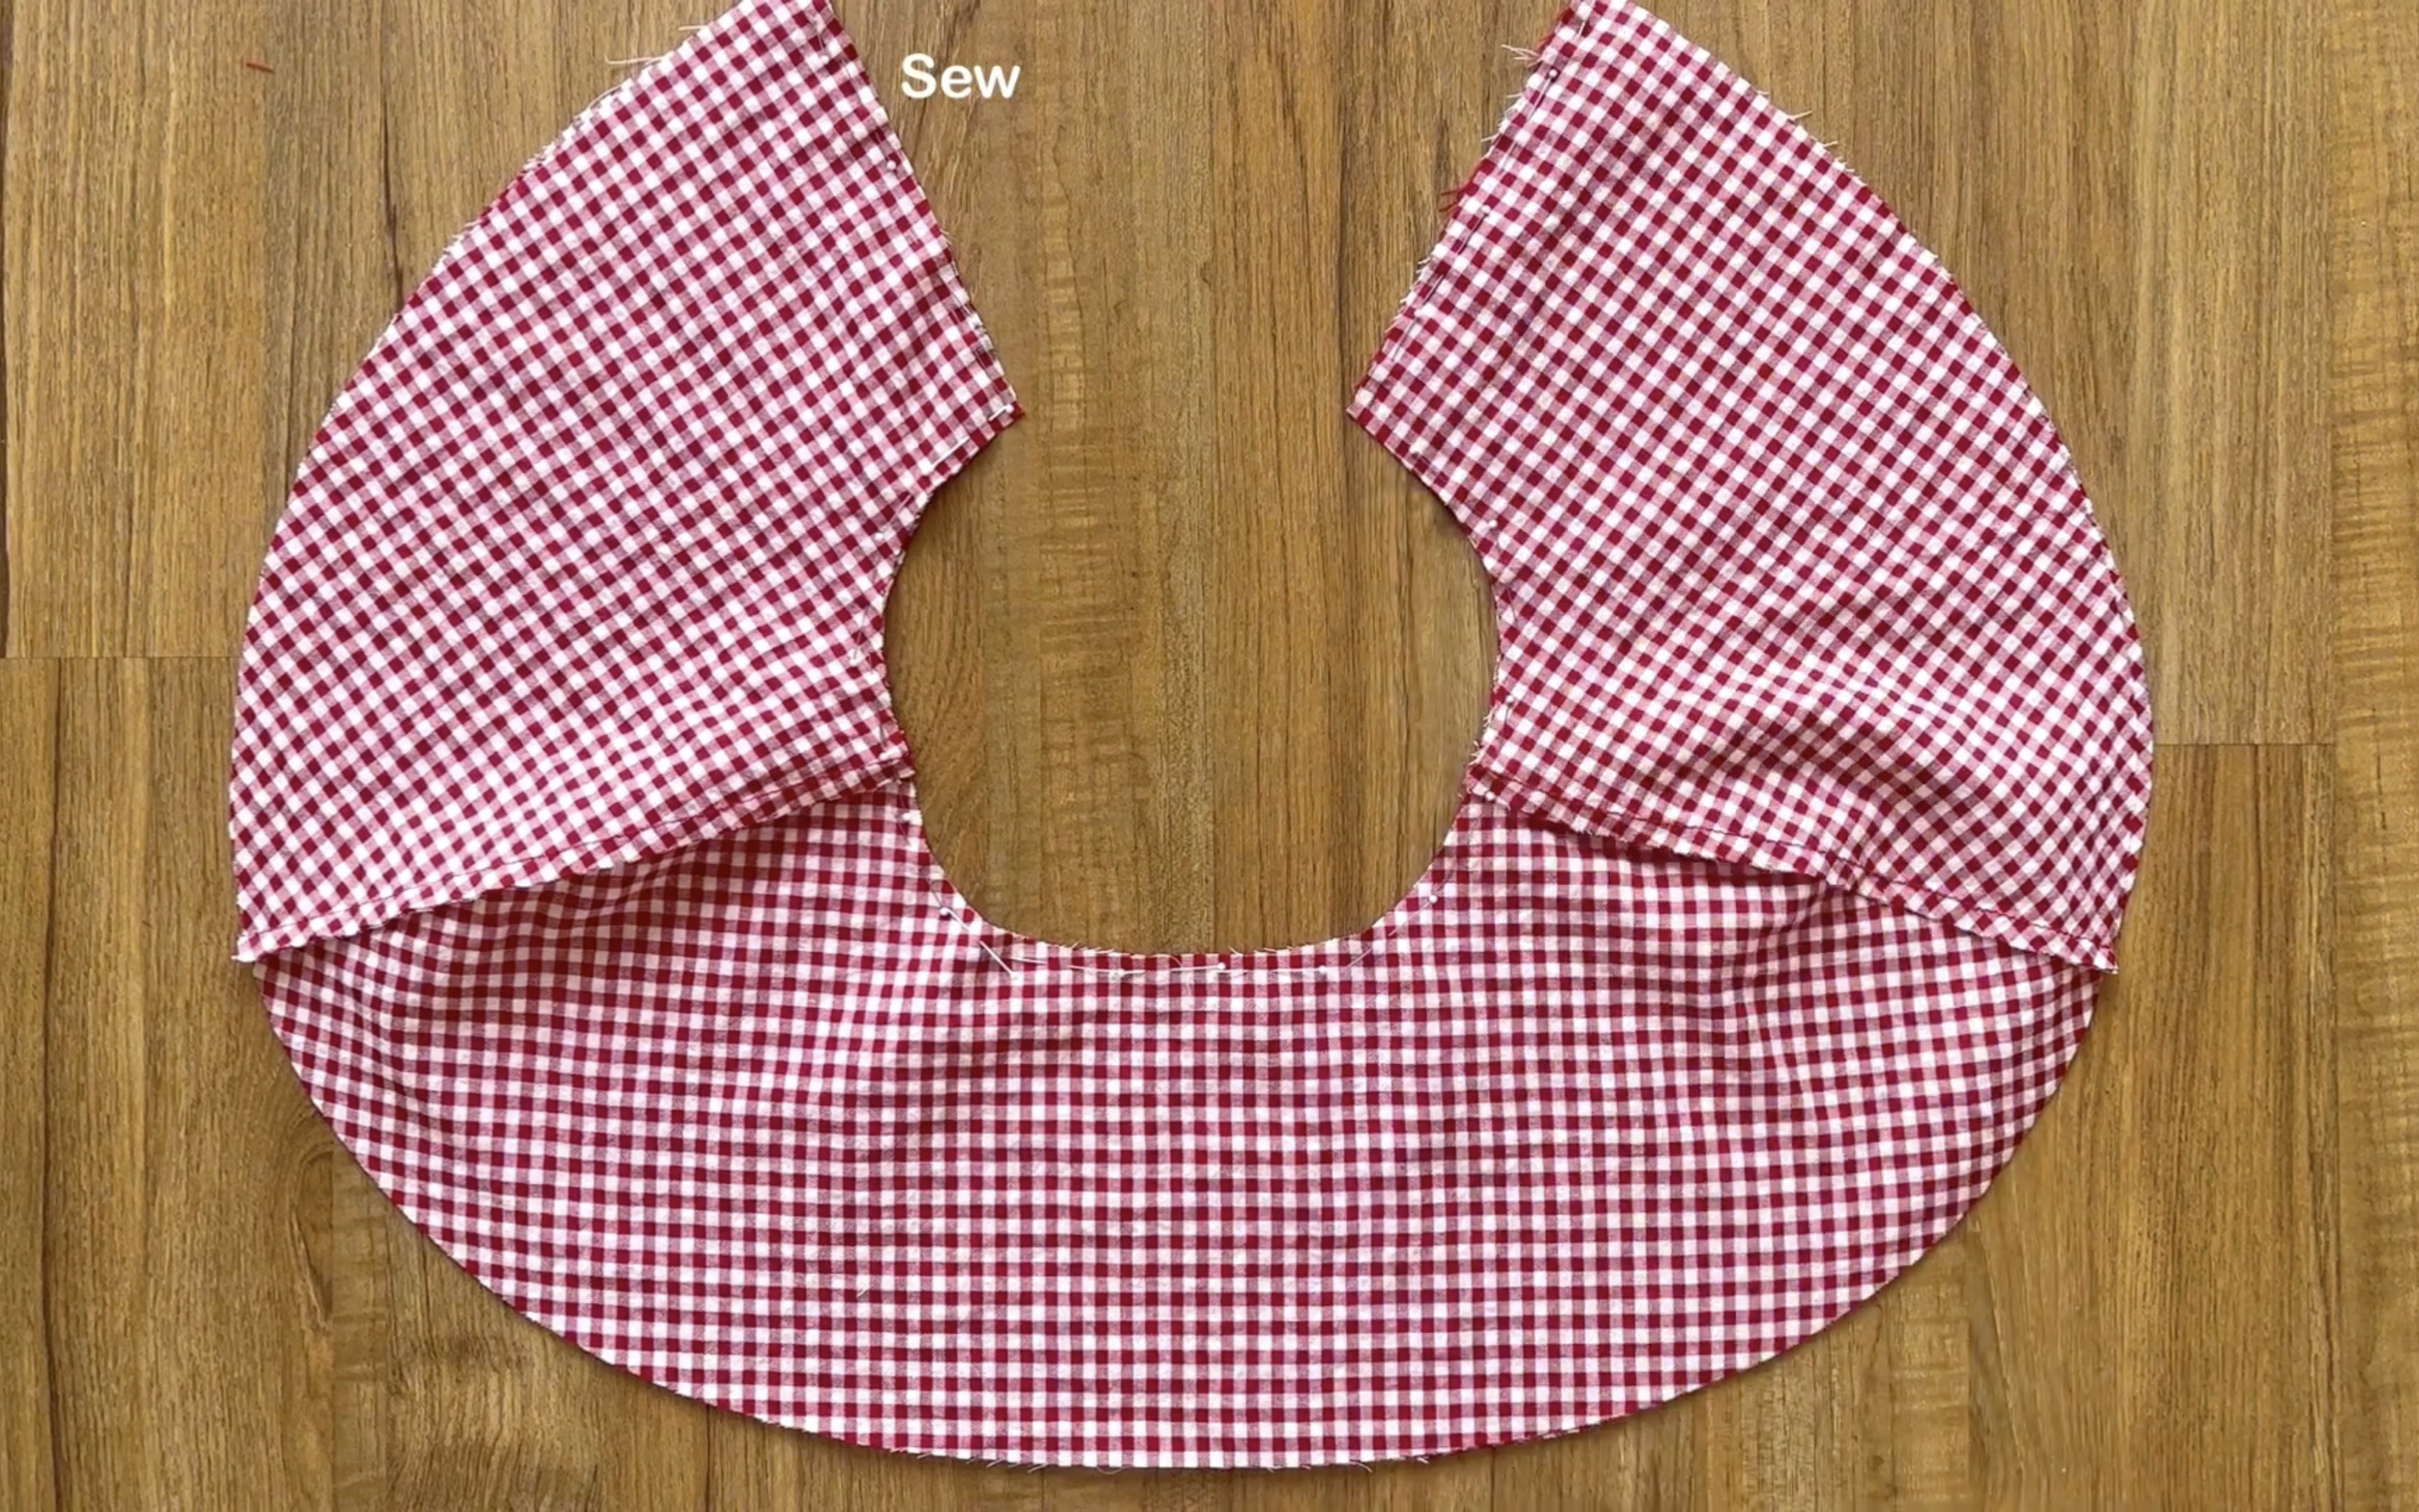
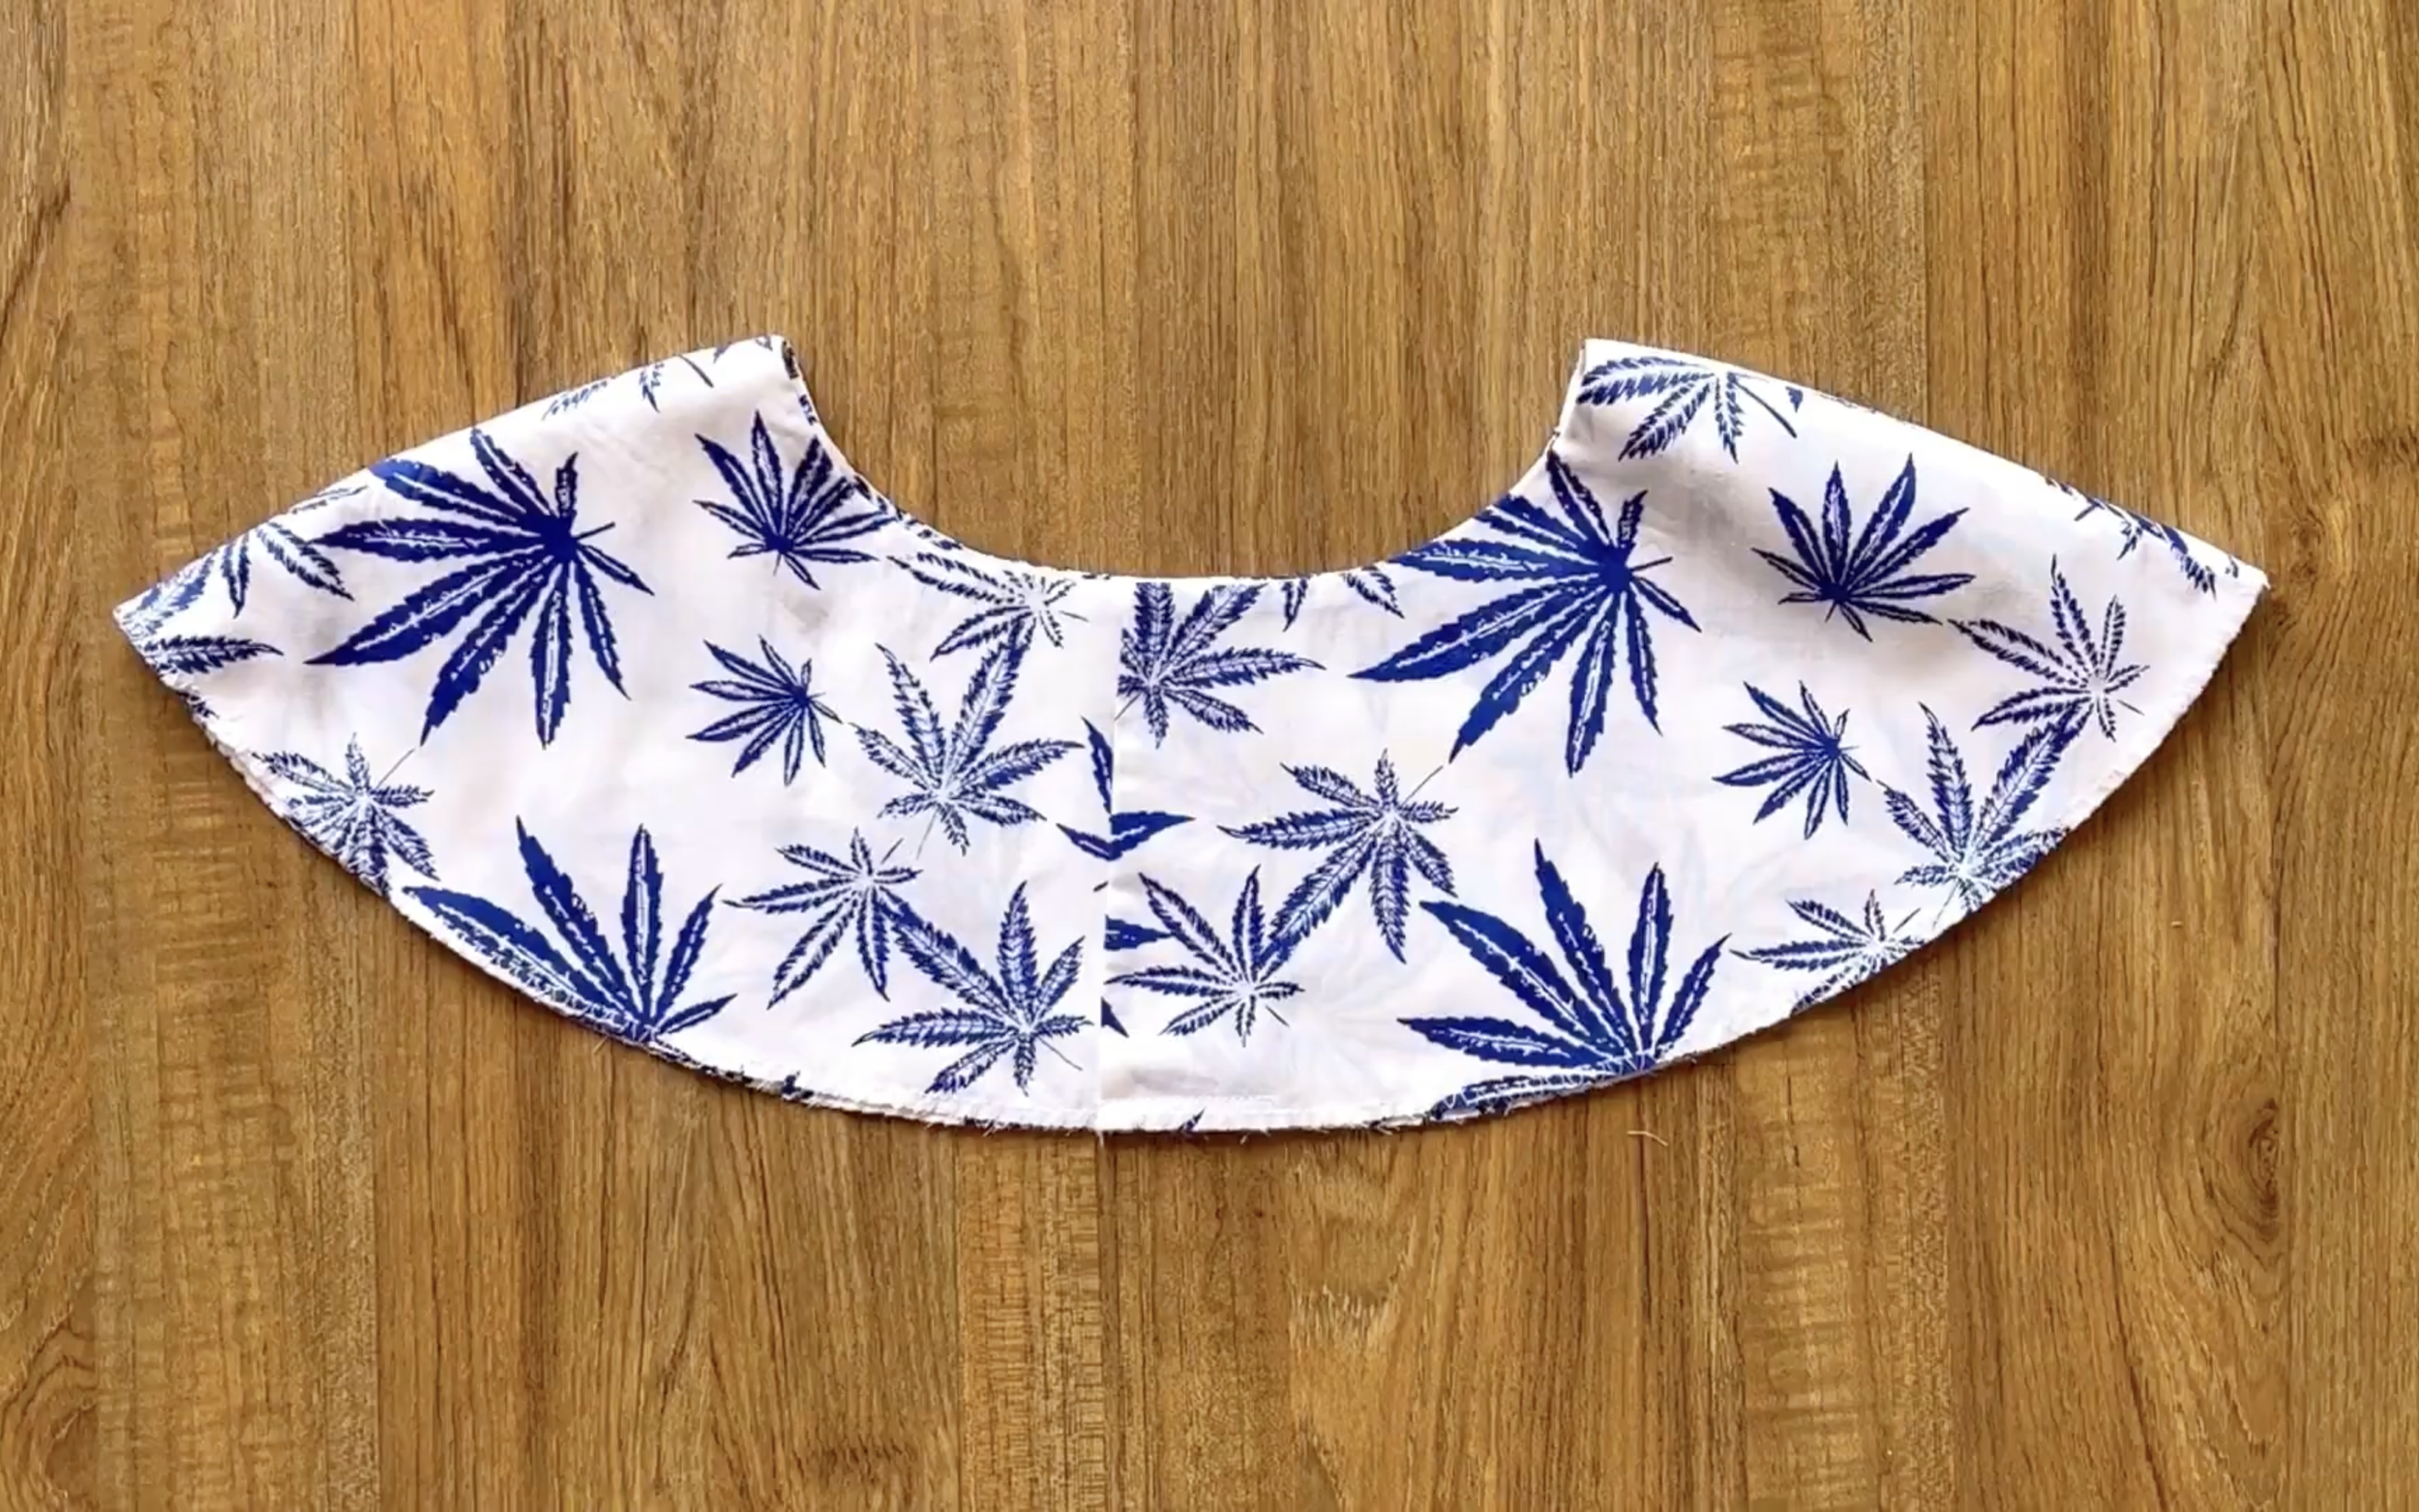
After that, connect them together at the neckline from the front to the back.
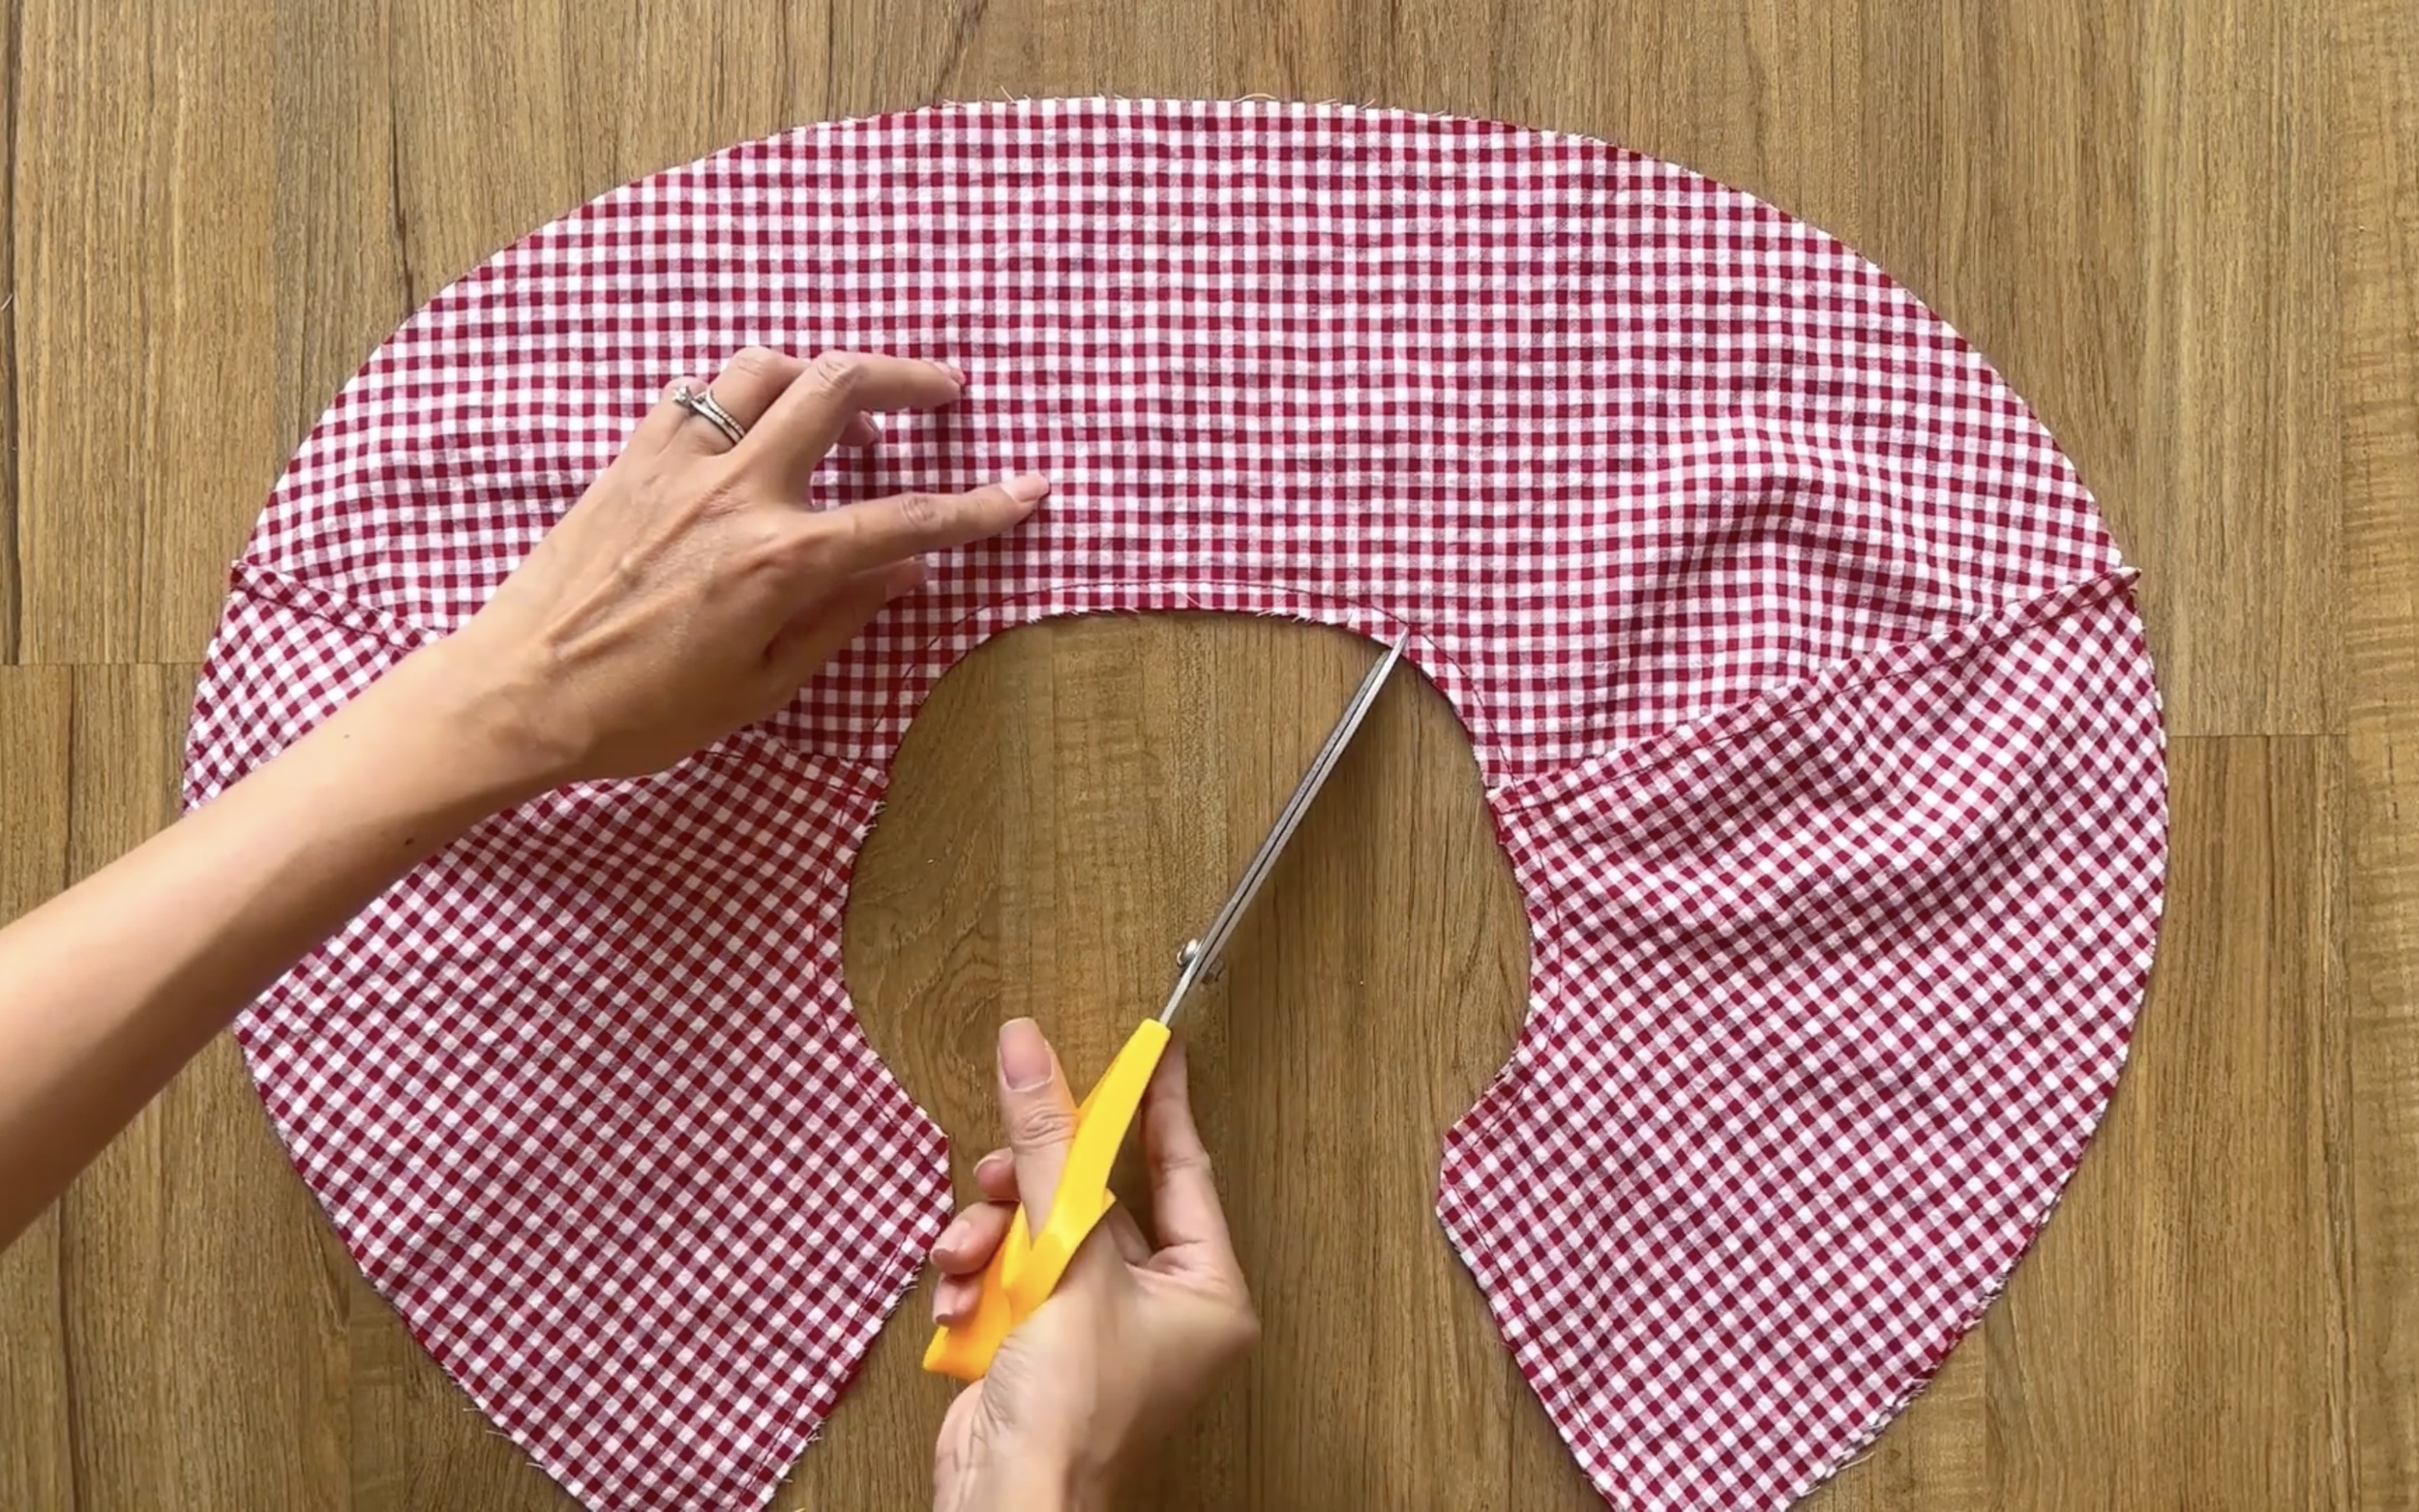
After sewing, make a few small cuts at the curve line before turning it to have a nice neckline.
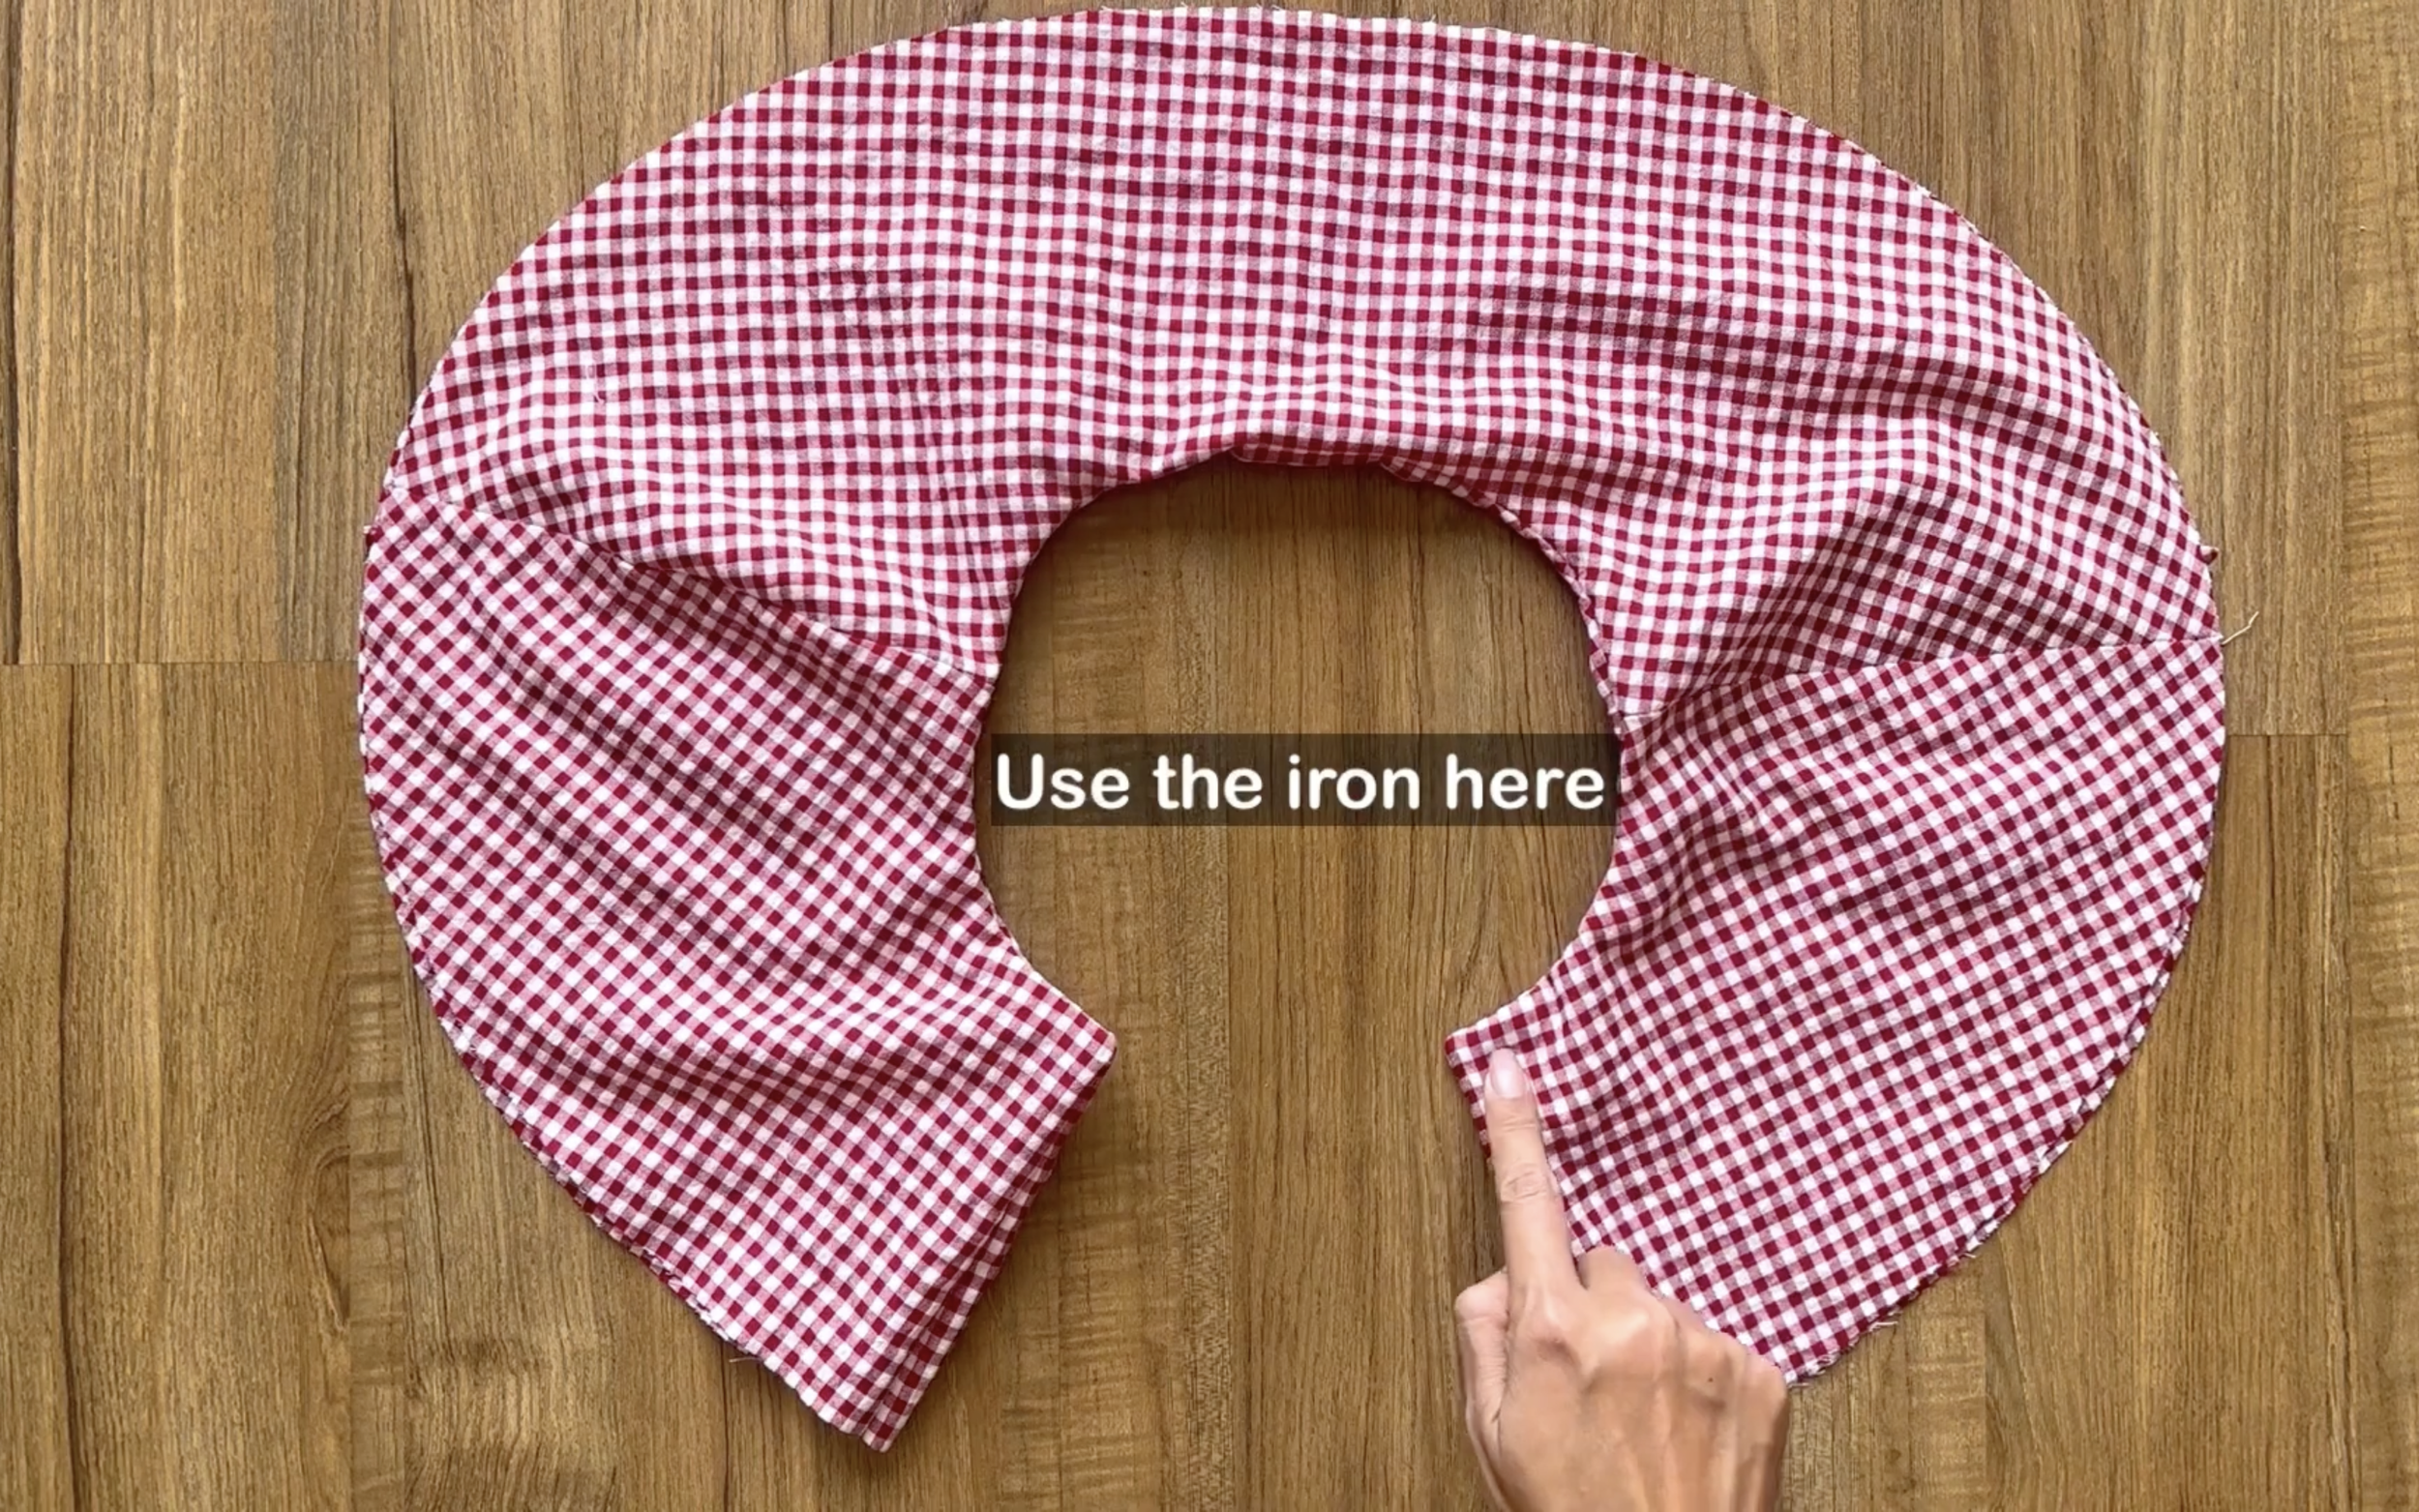
Use the iron after that as well.
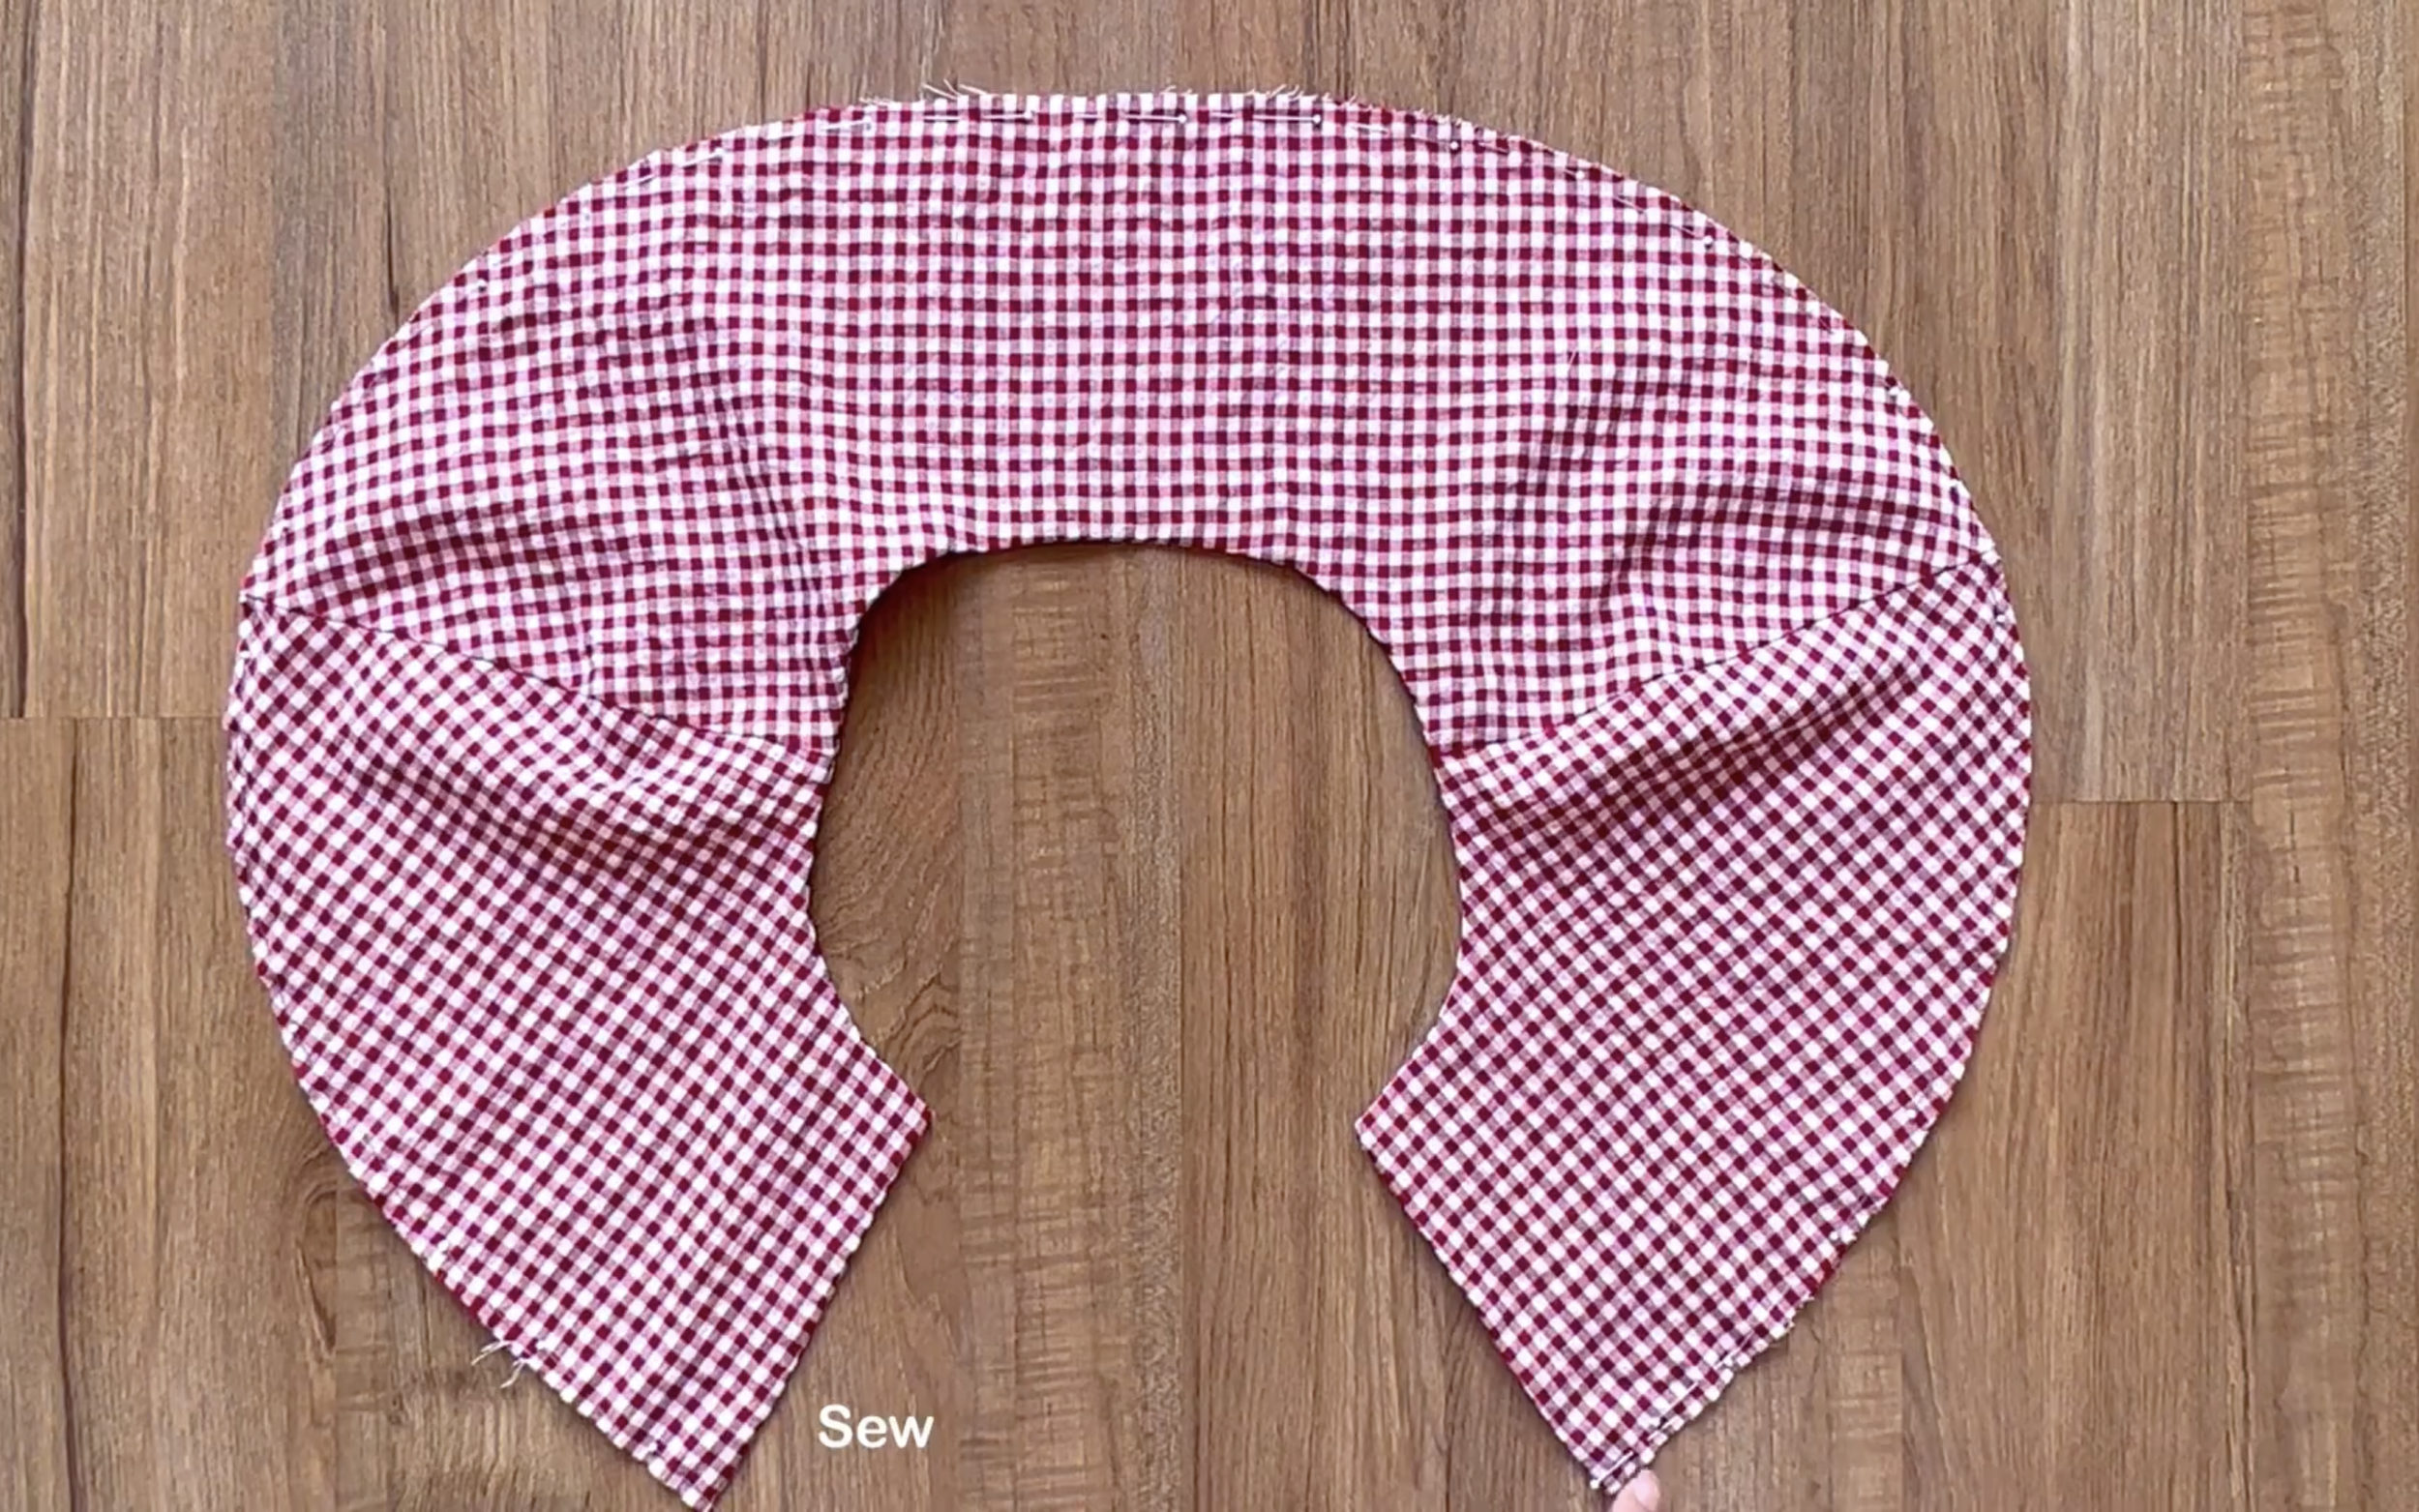
Then, connect the ending lines of two pieces together.
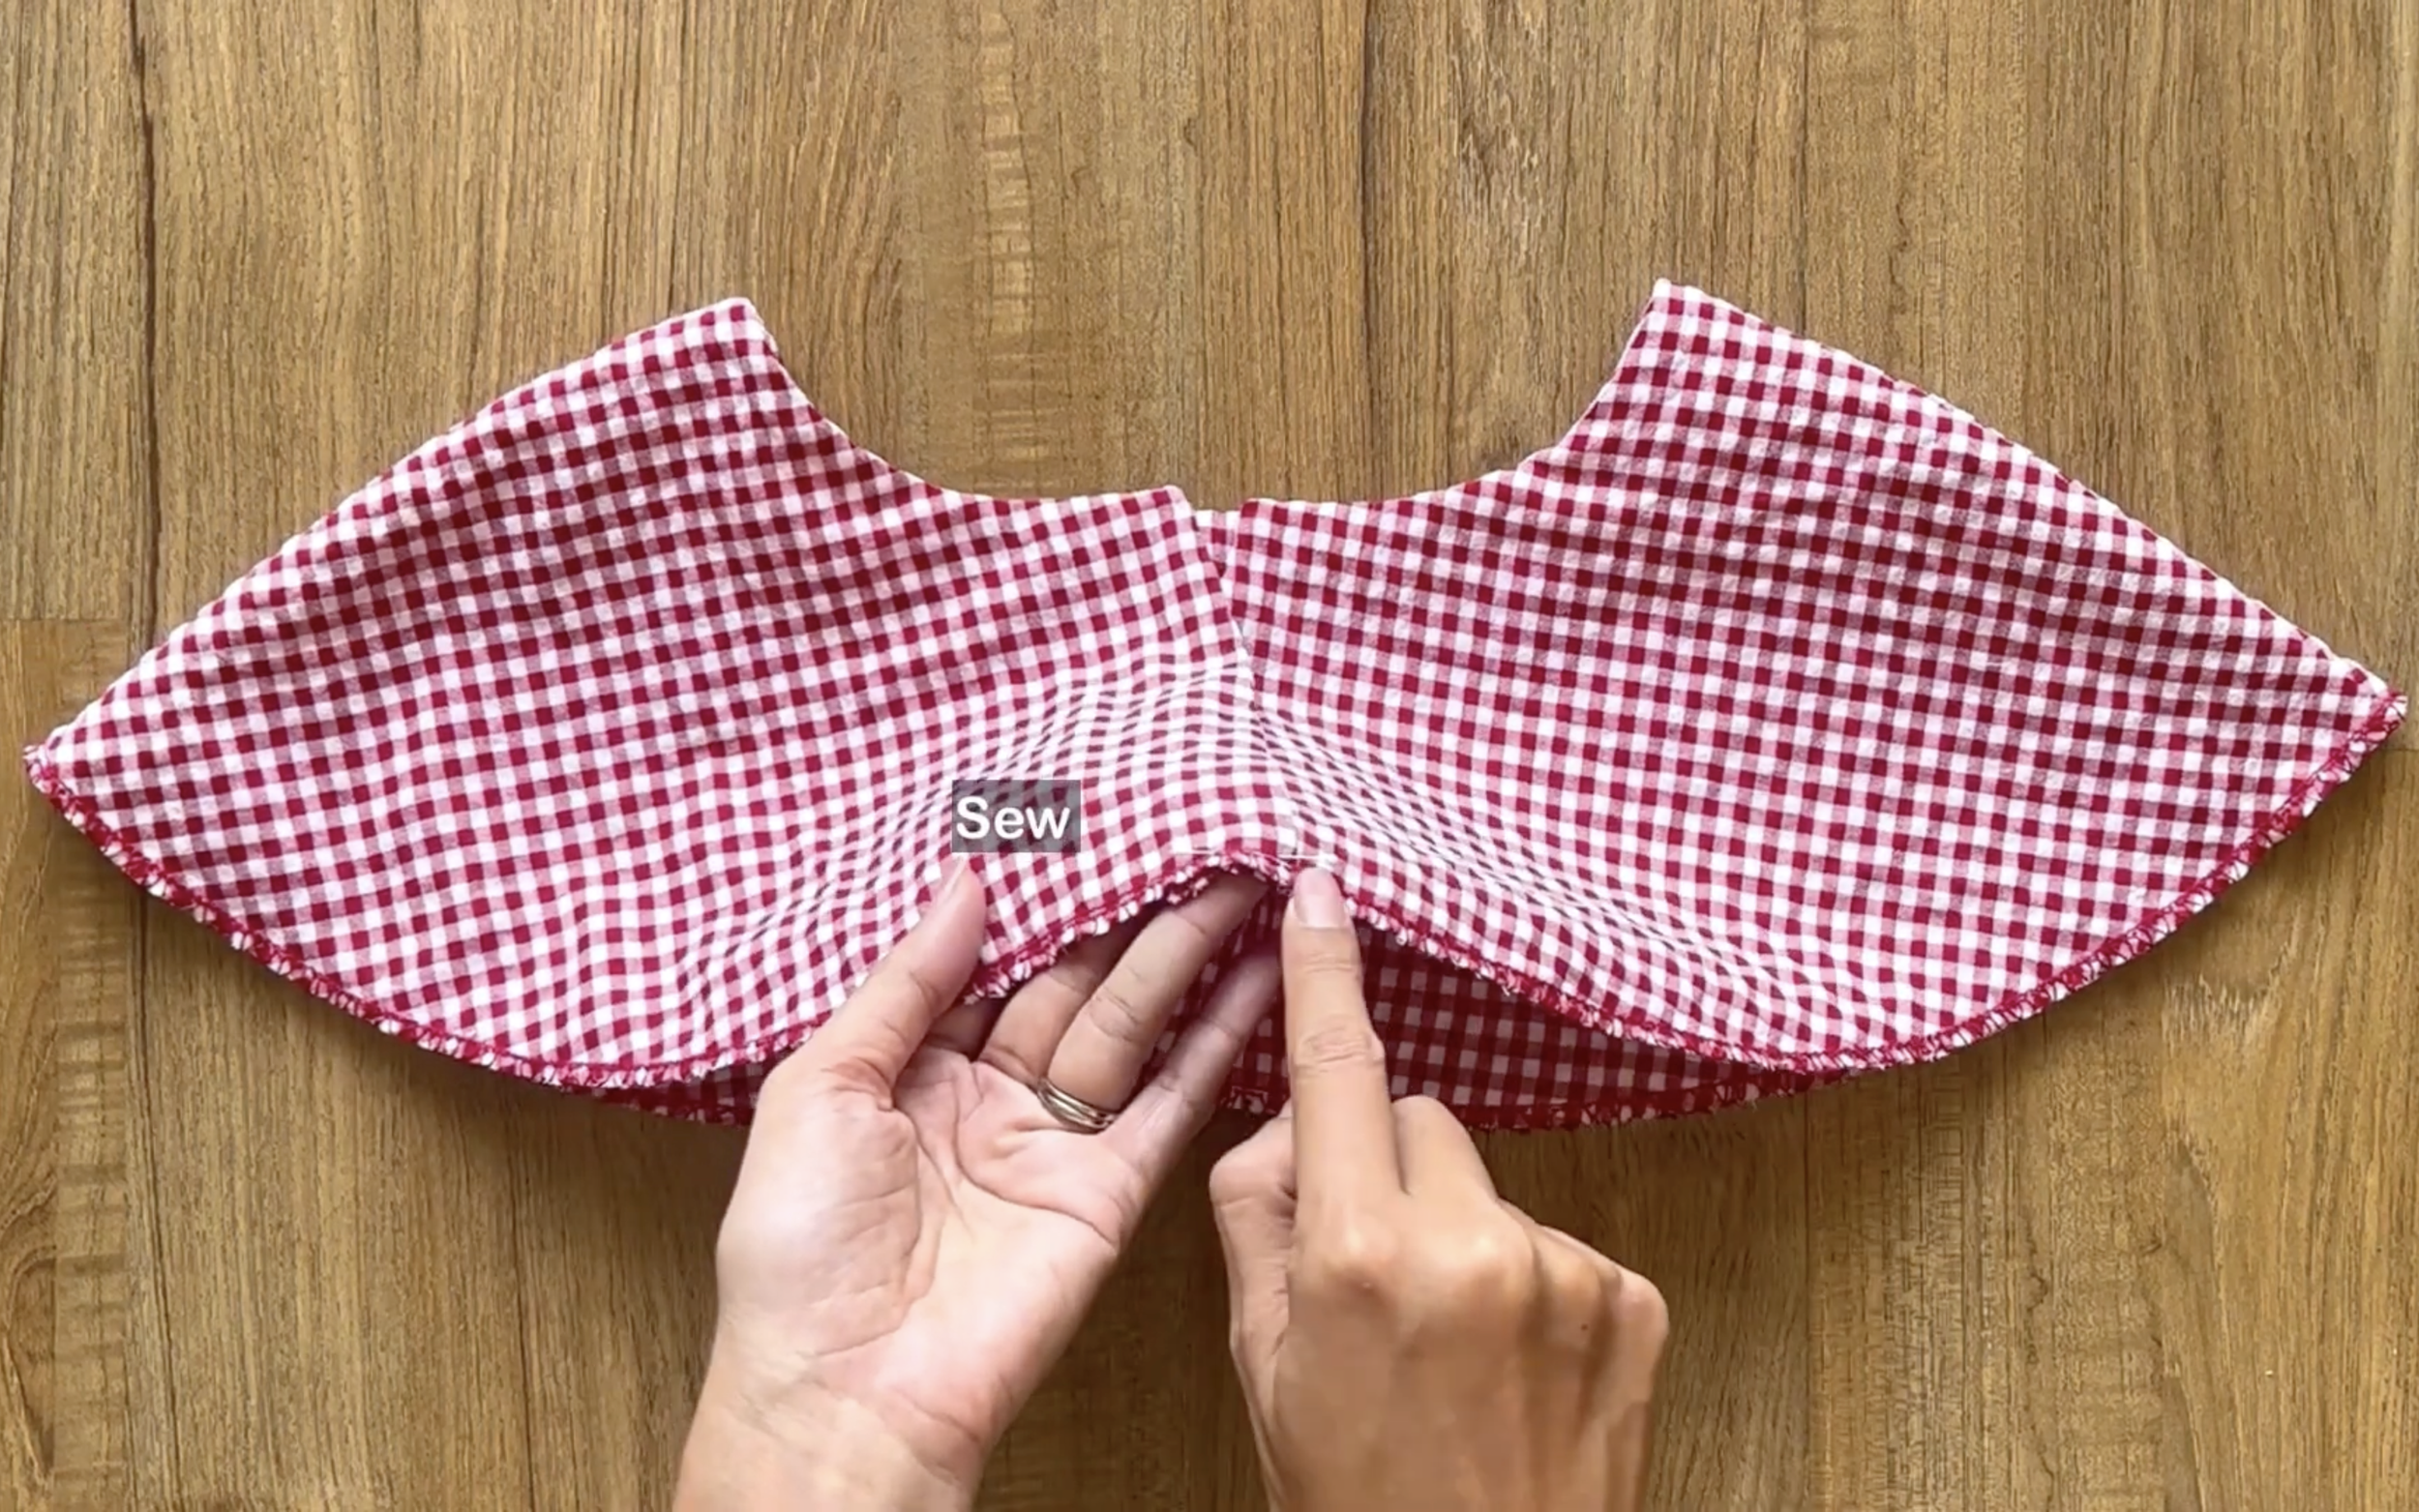
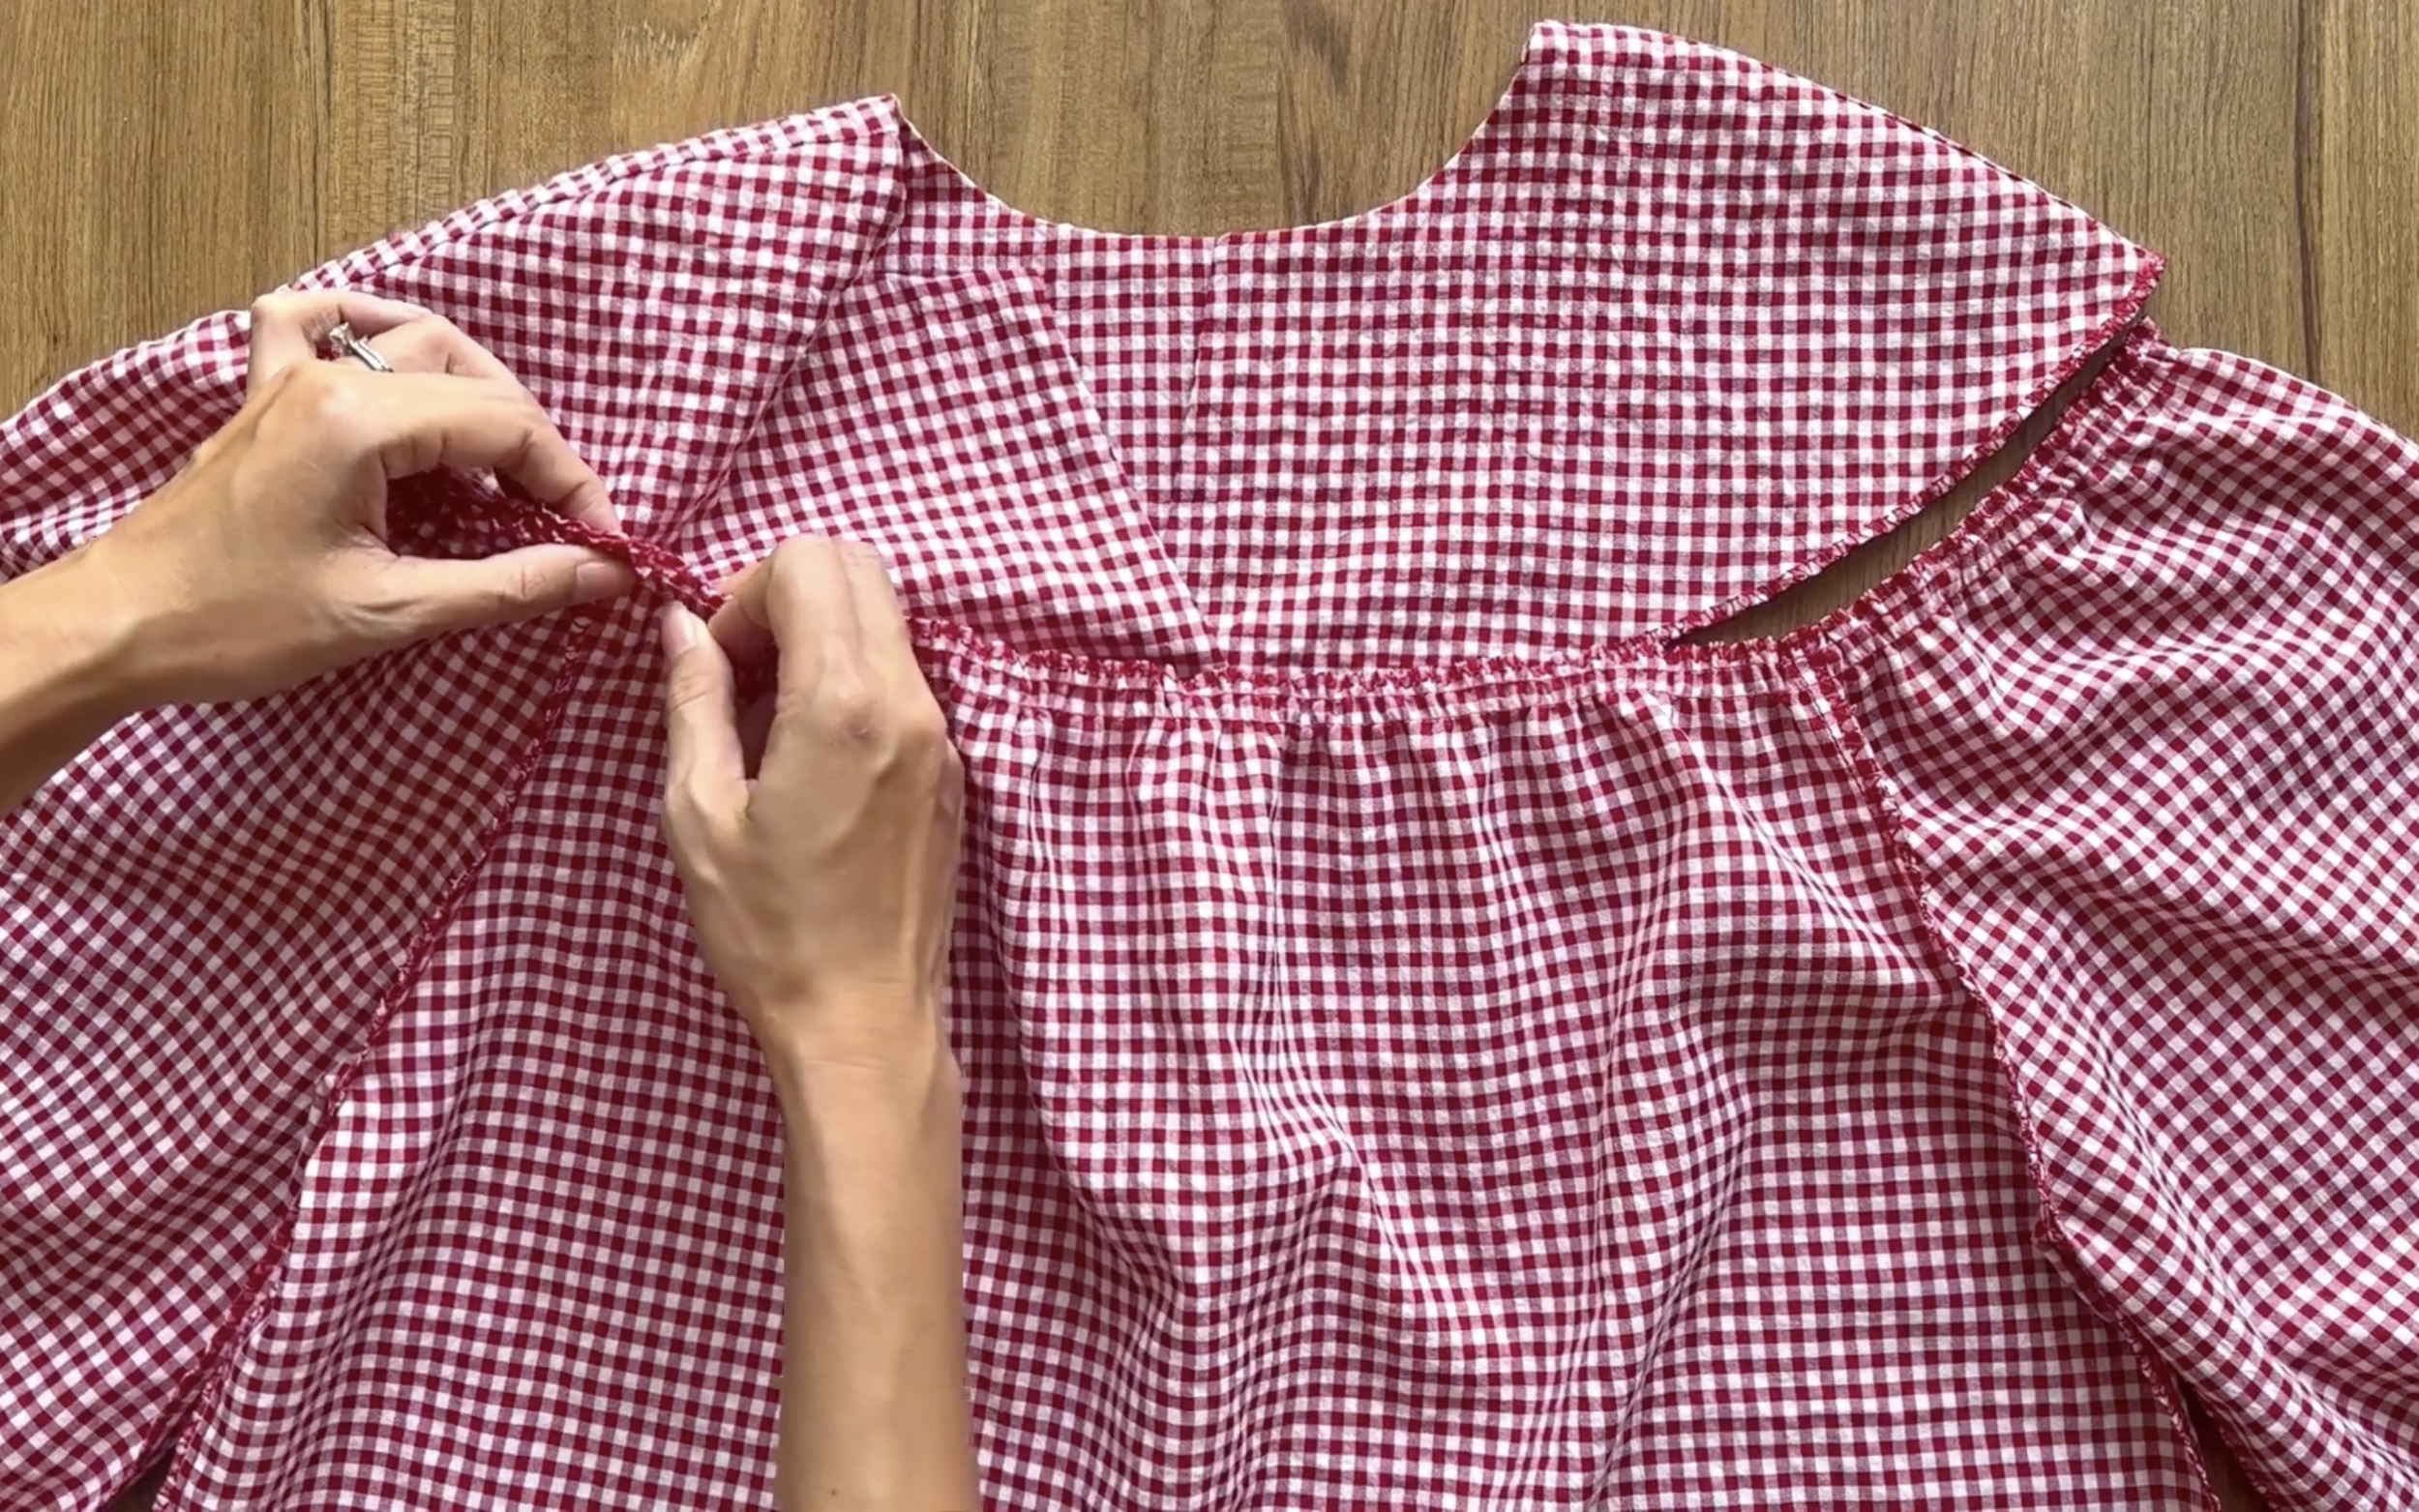
At the front neck, connect two pieces of the front at the gap at the end of the neckline as well, and the yoke neck will be finished after sewing.
THE BODICE PART

Moving to the bodice part of the blouse, connect two pieces of the bodice together at two sidelines and sew.
After that, finish the end of the blouse by folding the end fabric inside two times with 1 cm each time and sewing, and the bodice part will be finished after that.
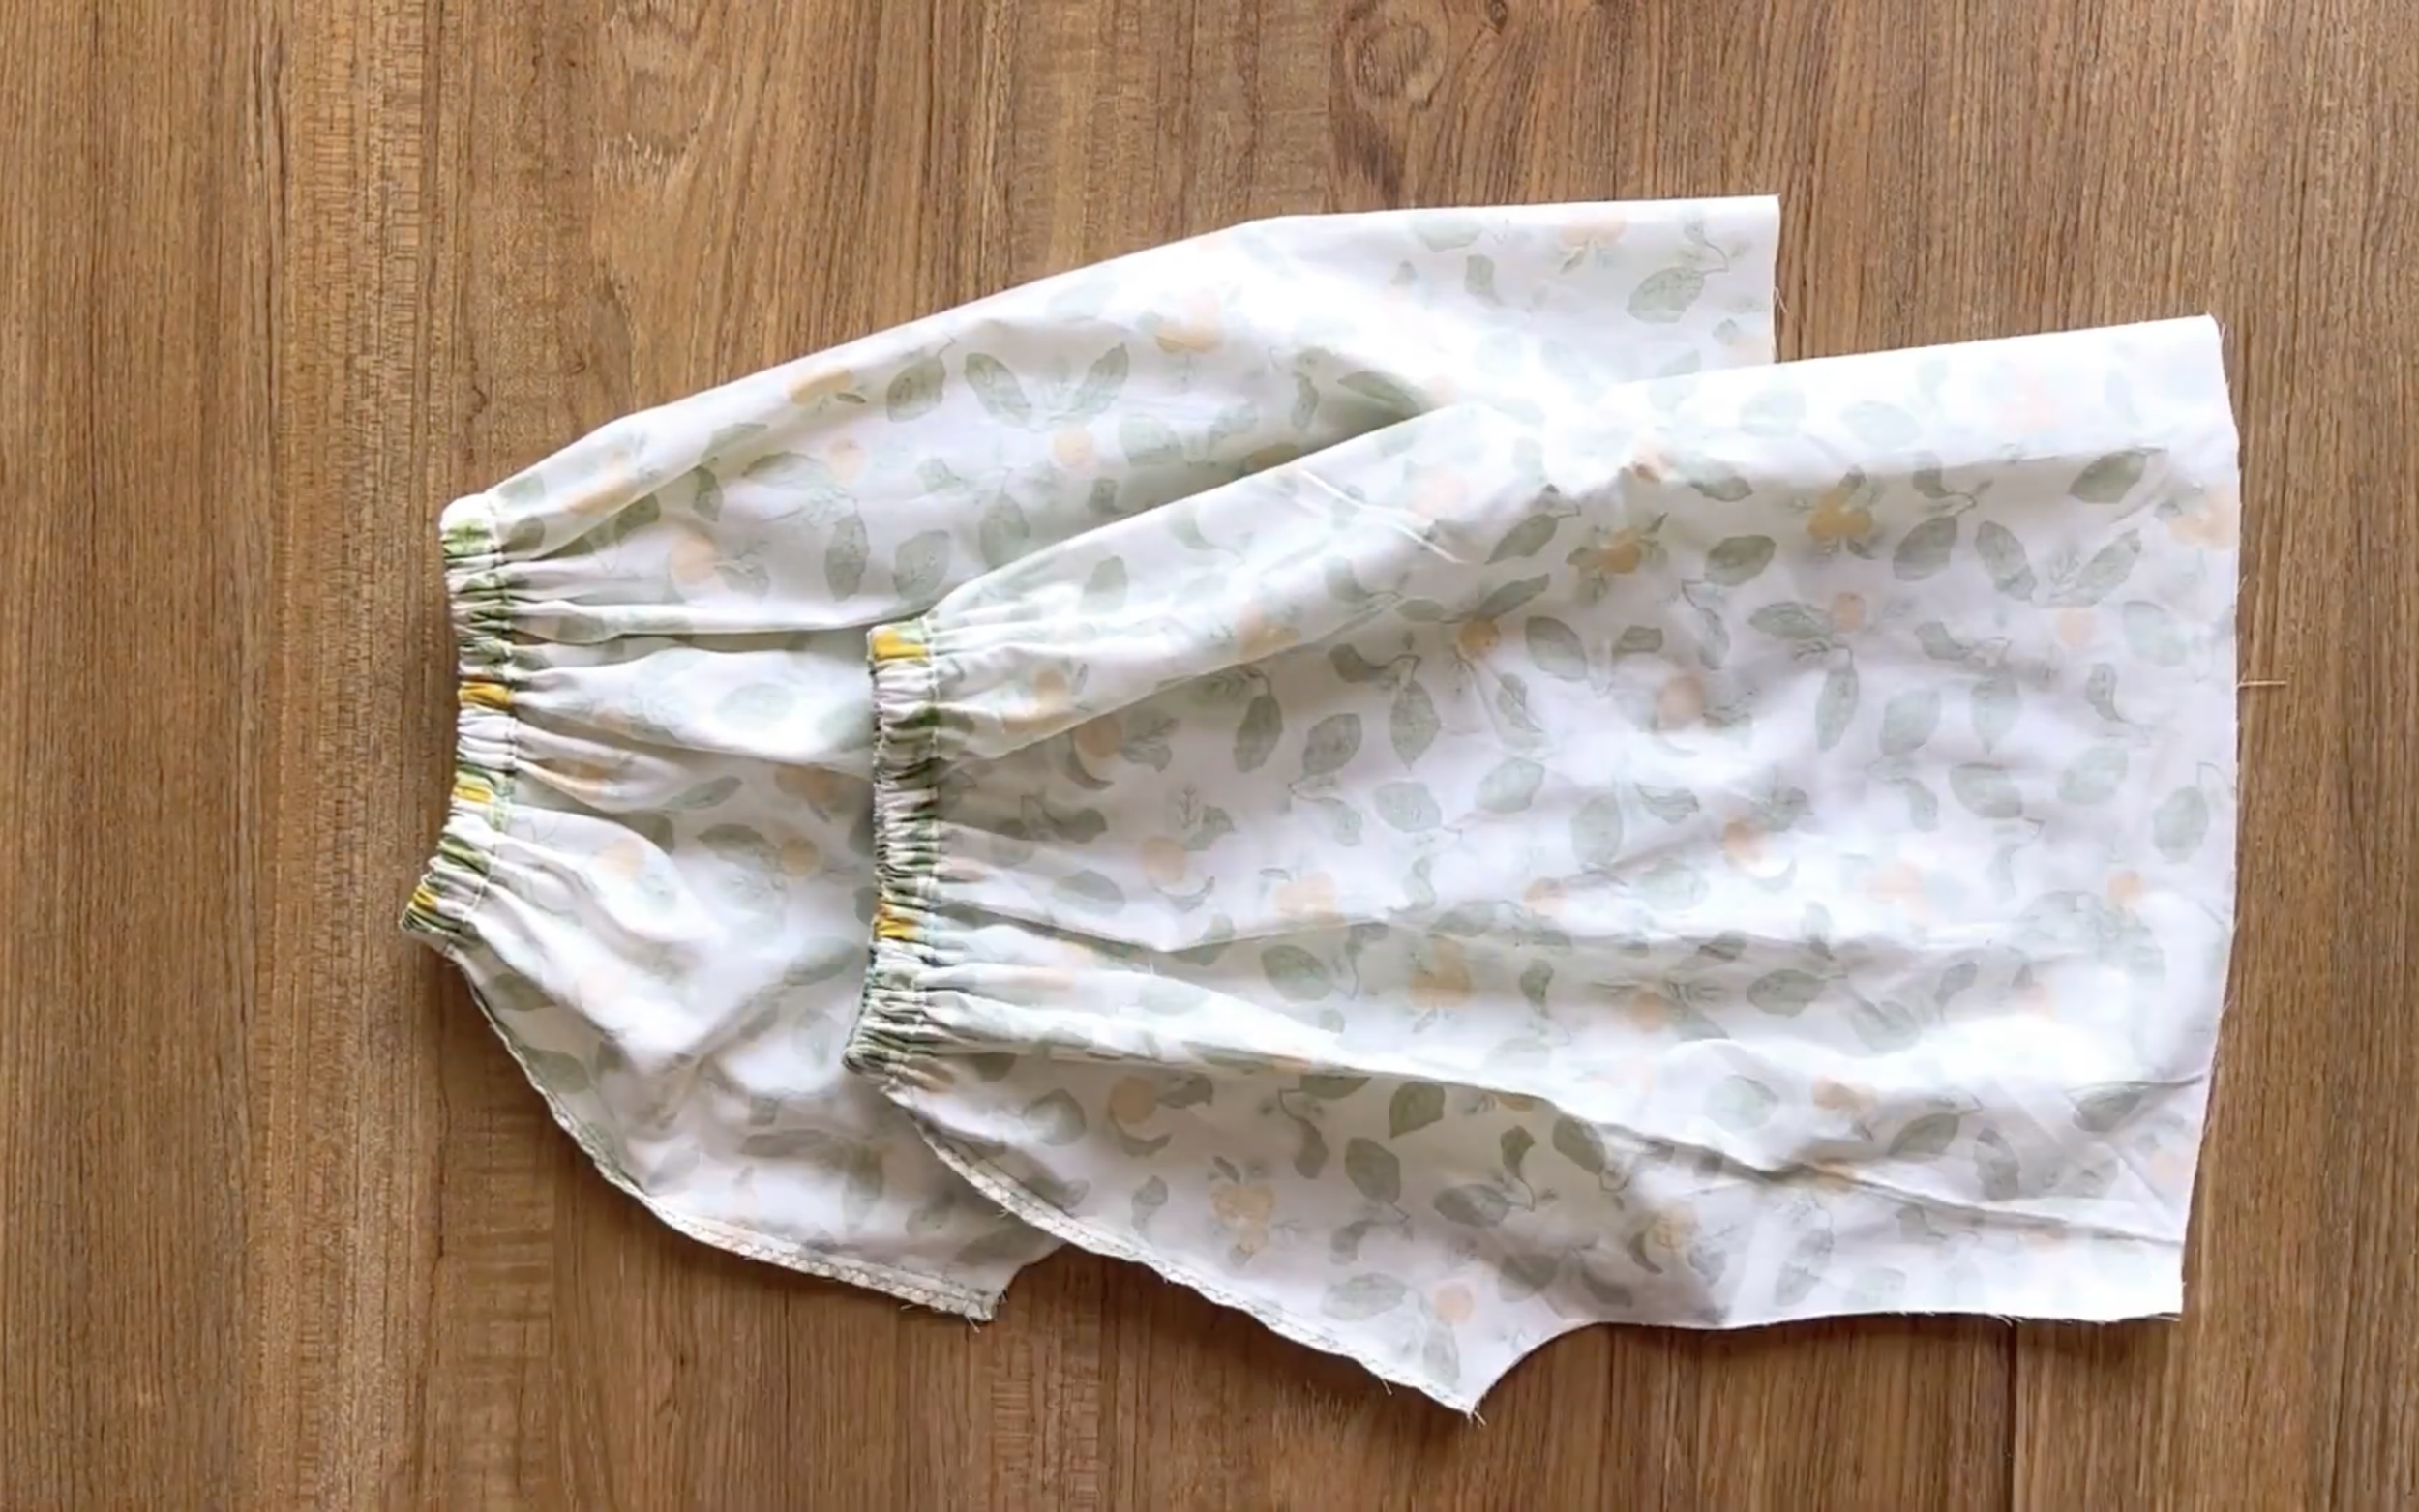
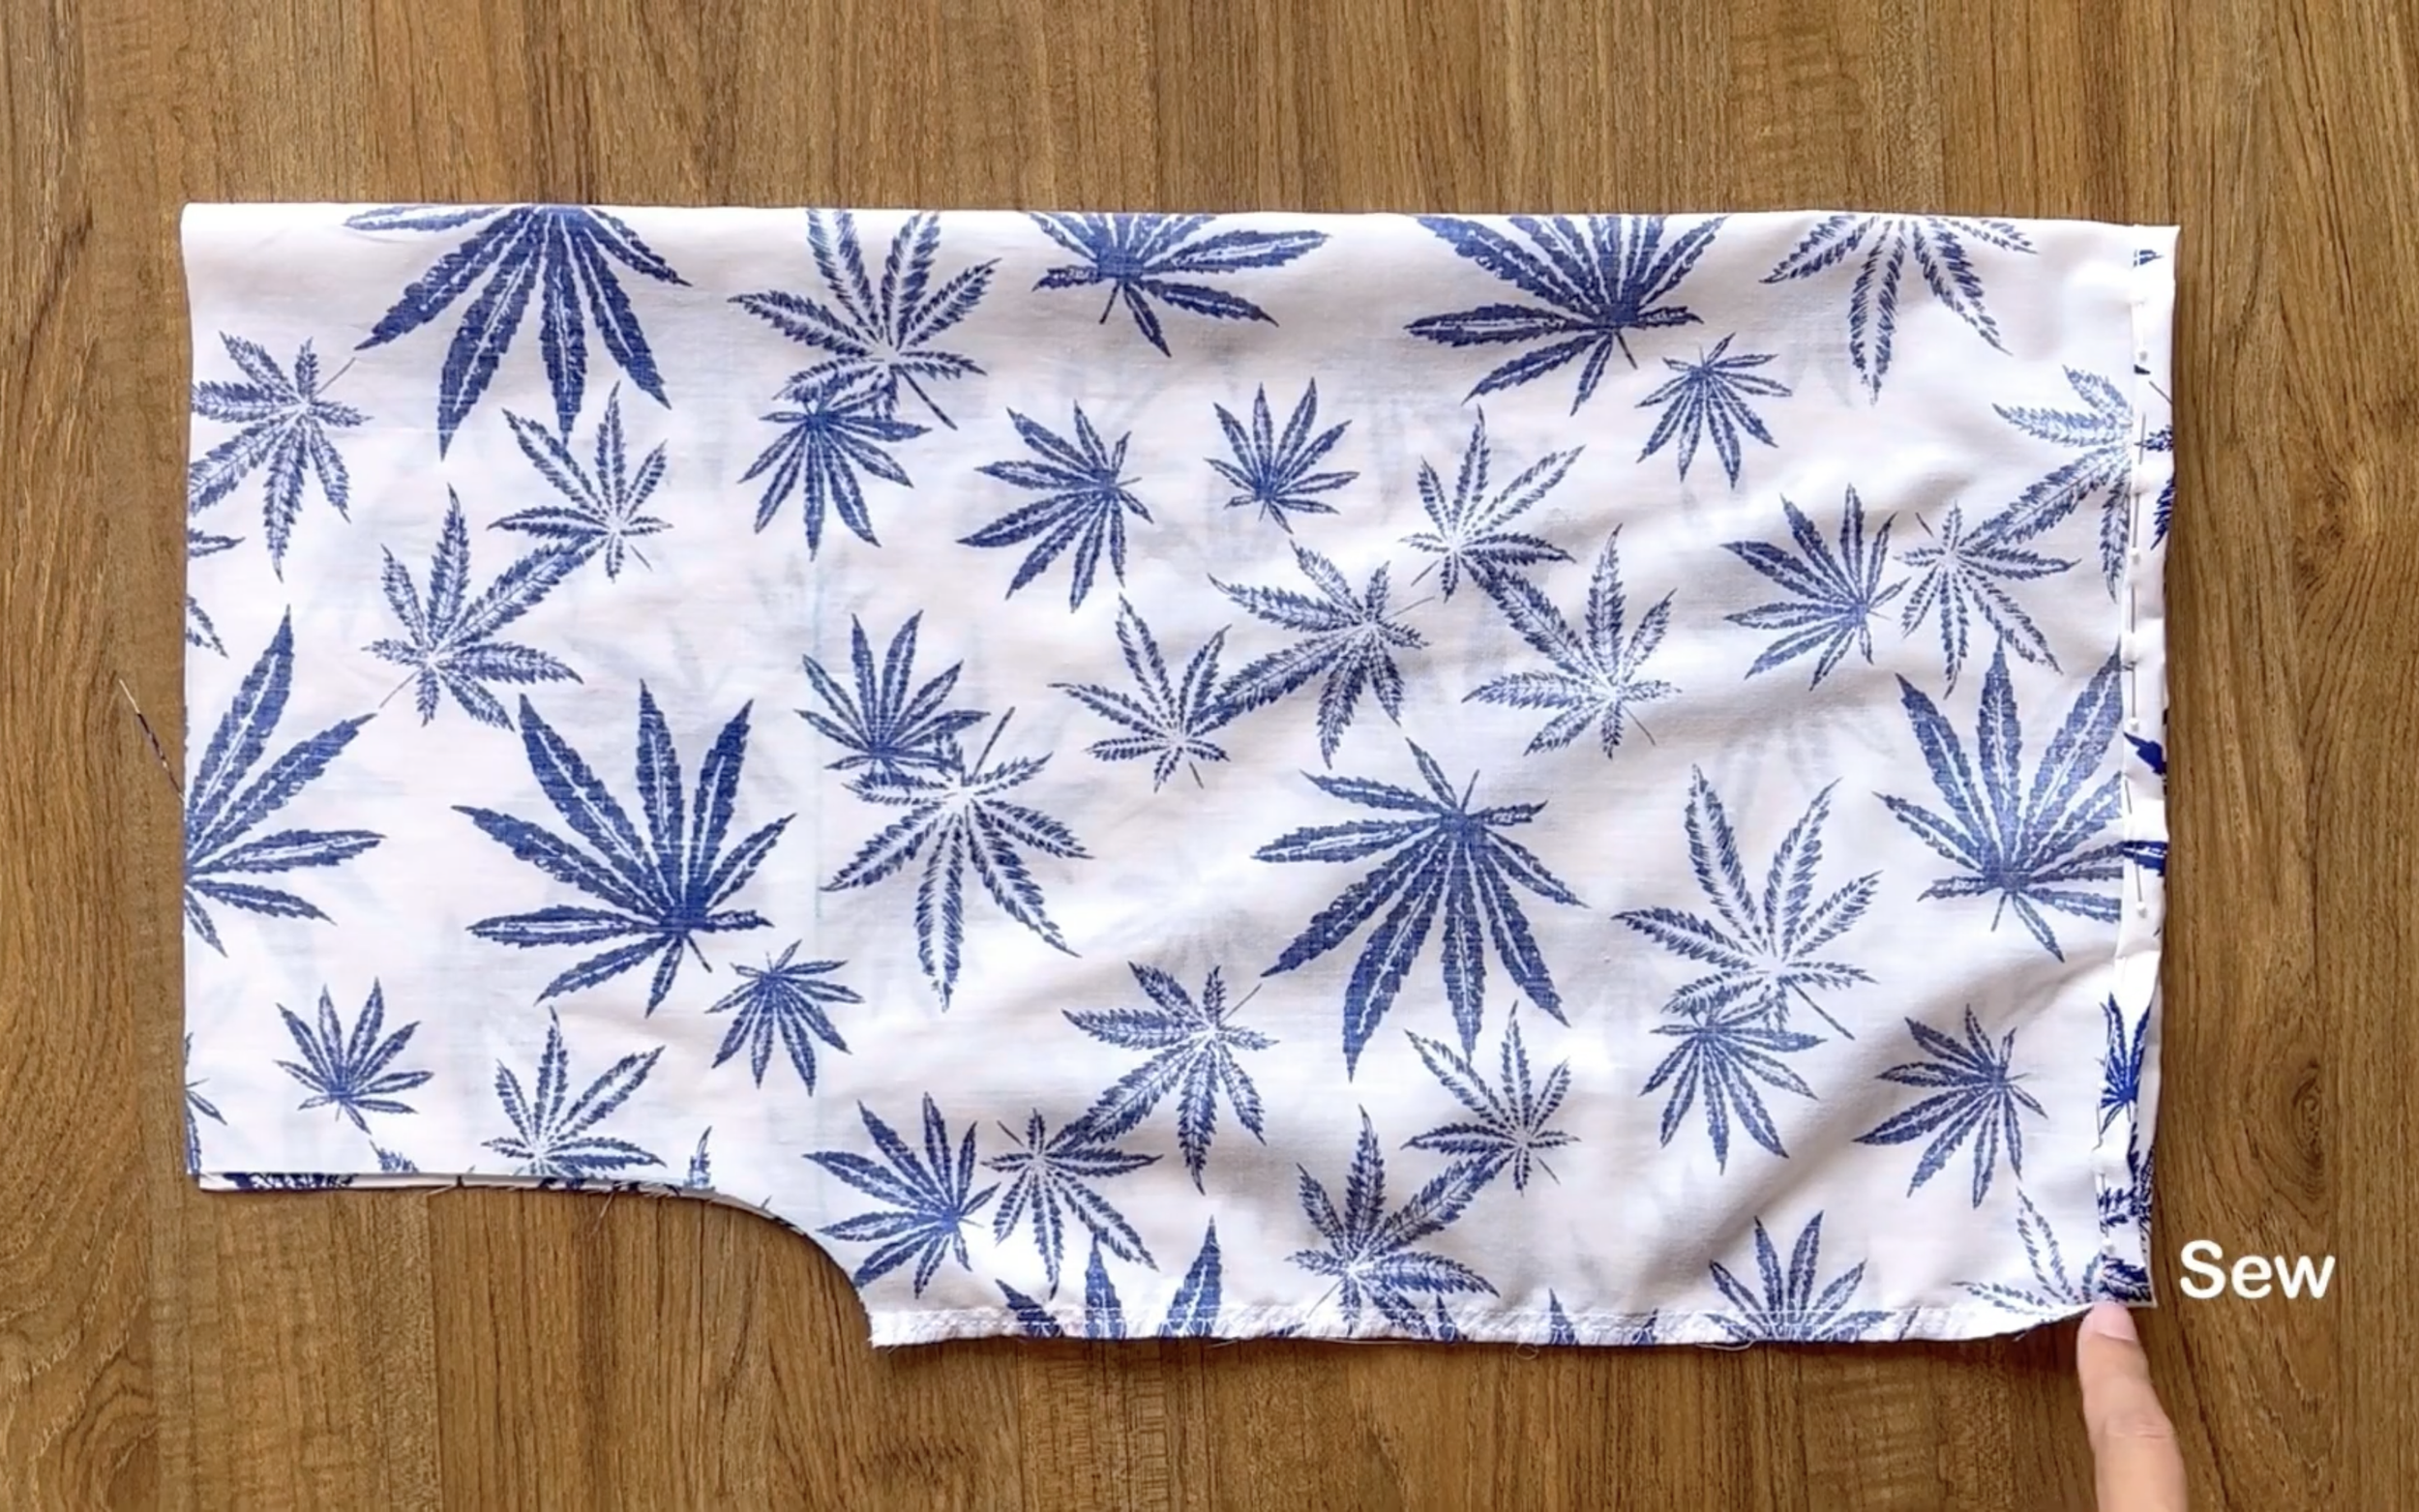
THE SLEEVE PART
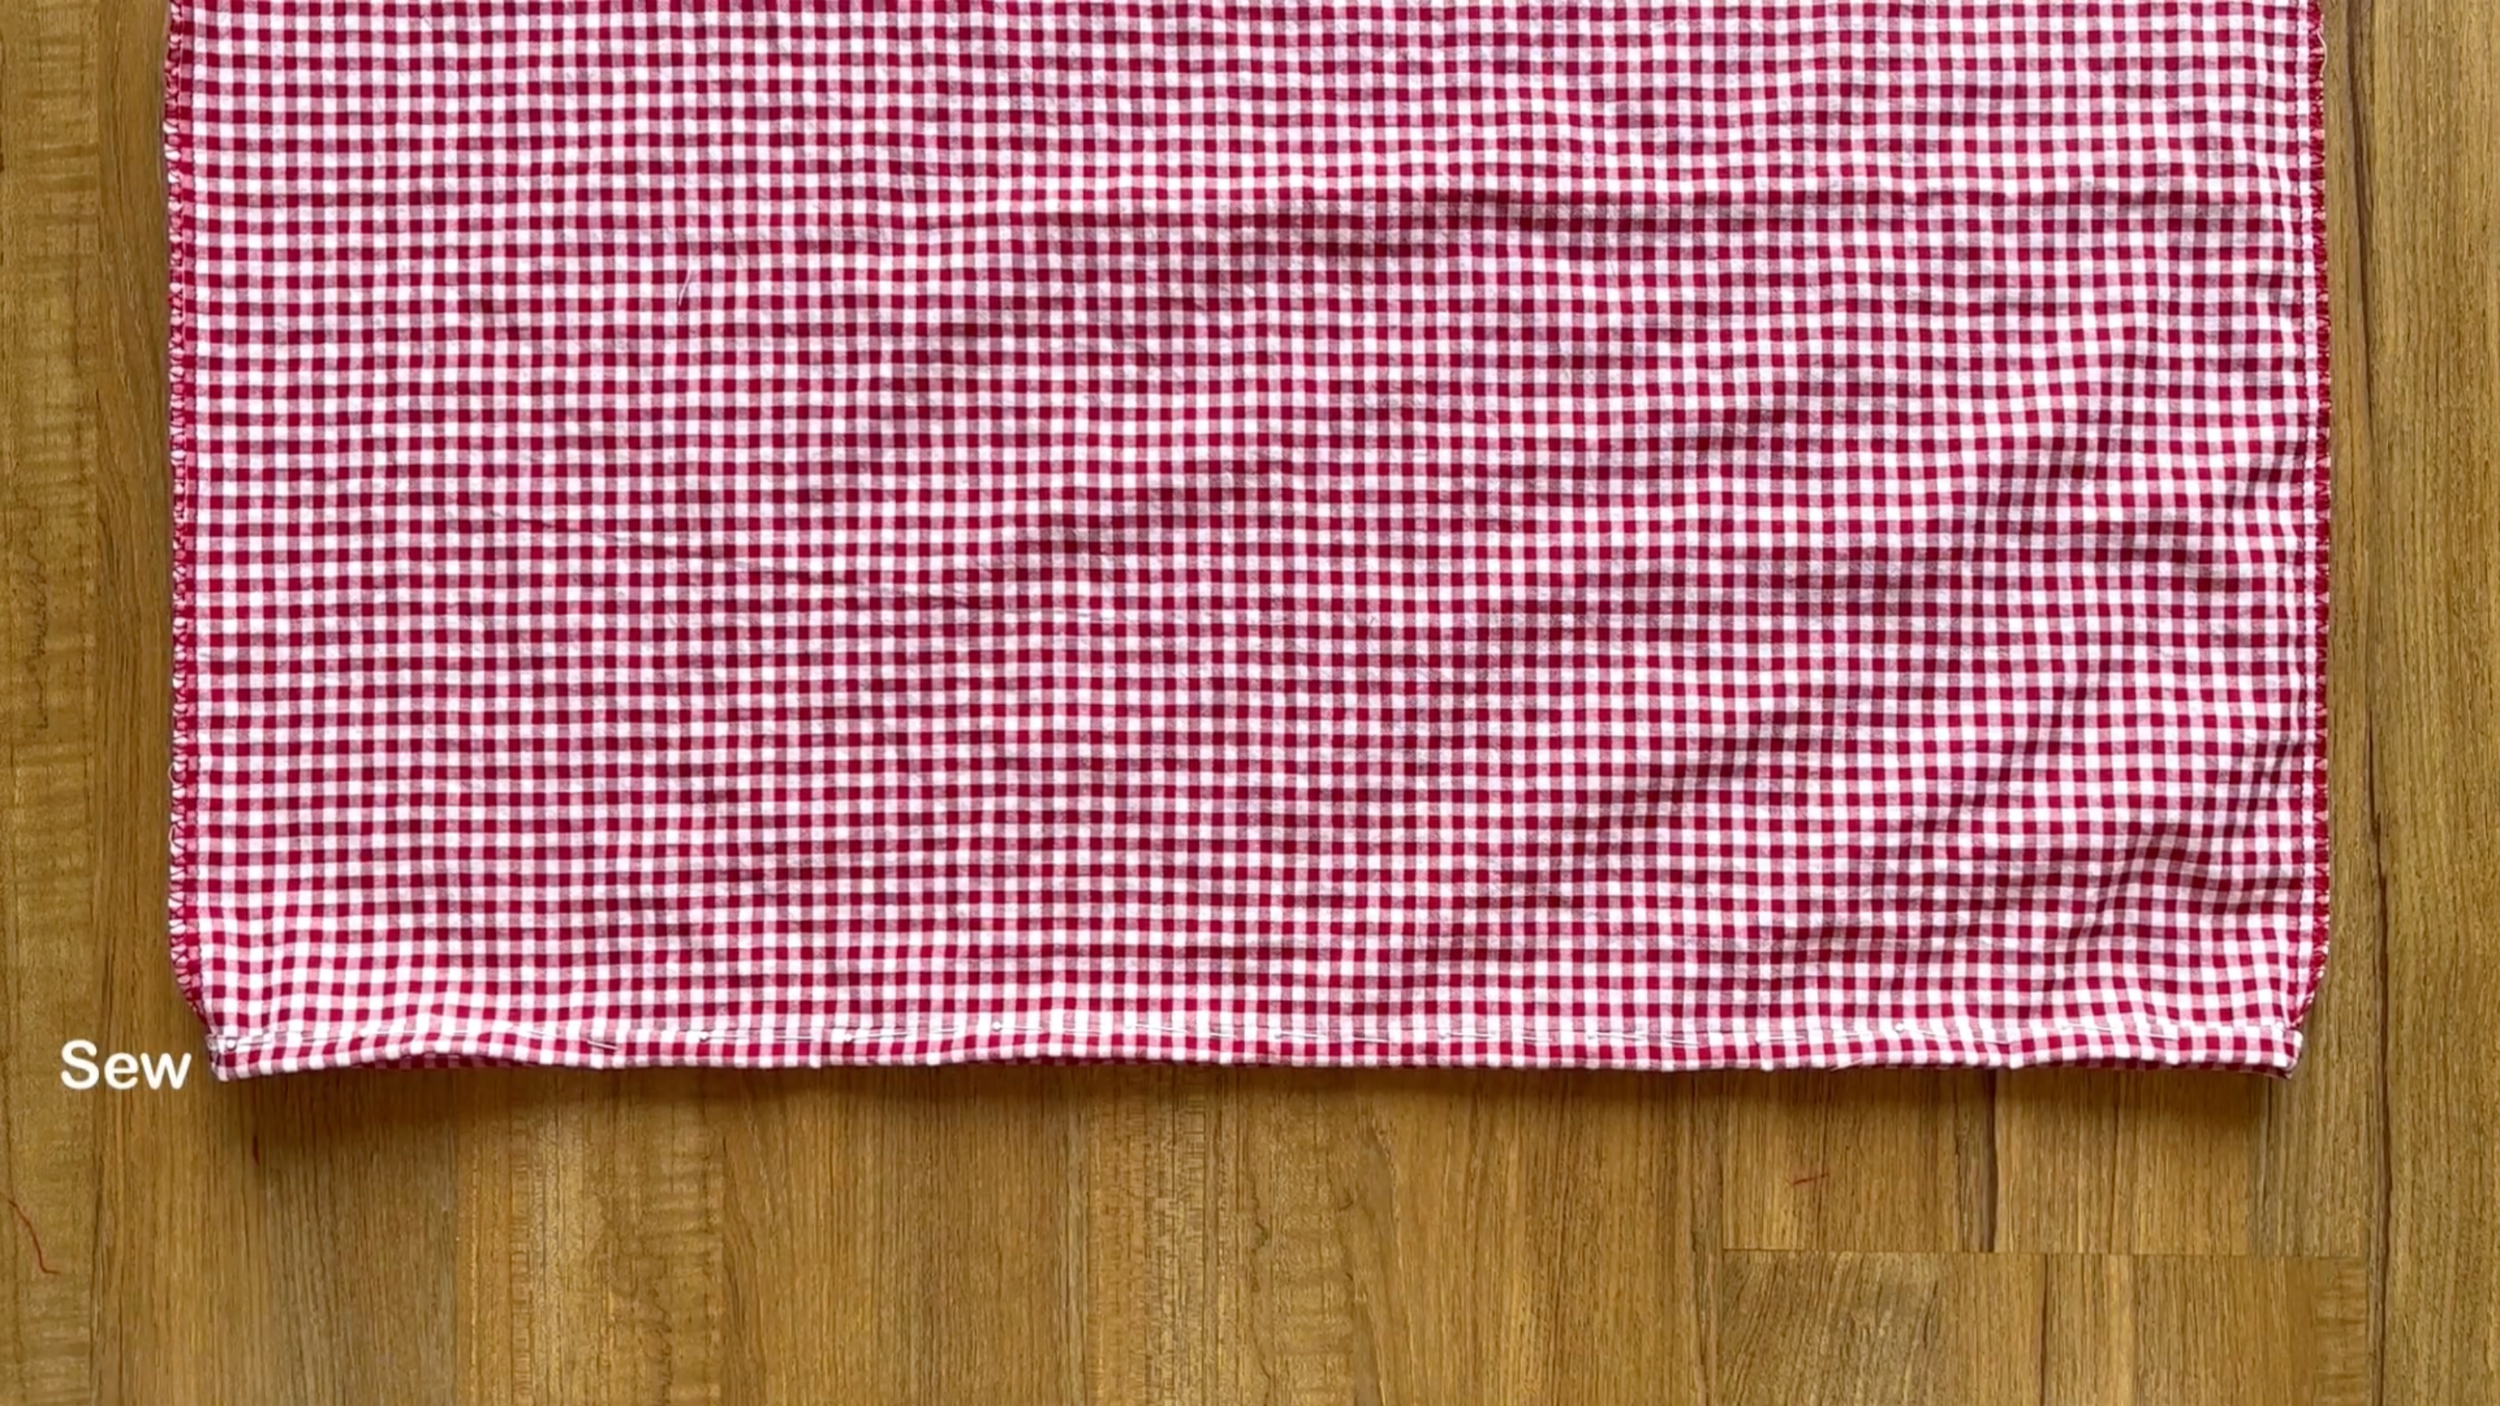
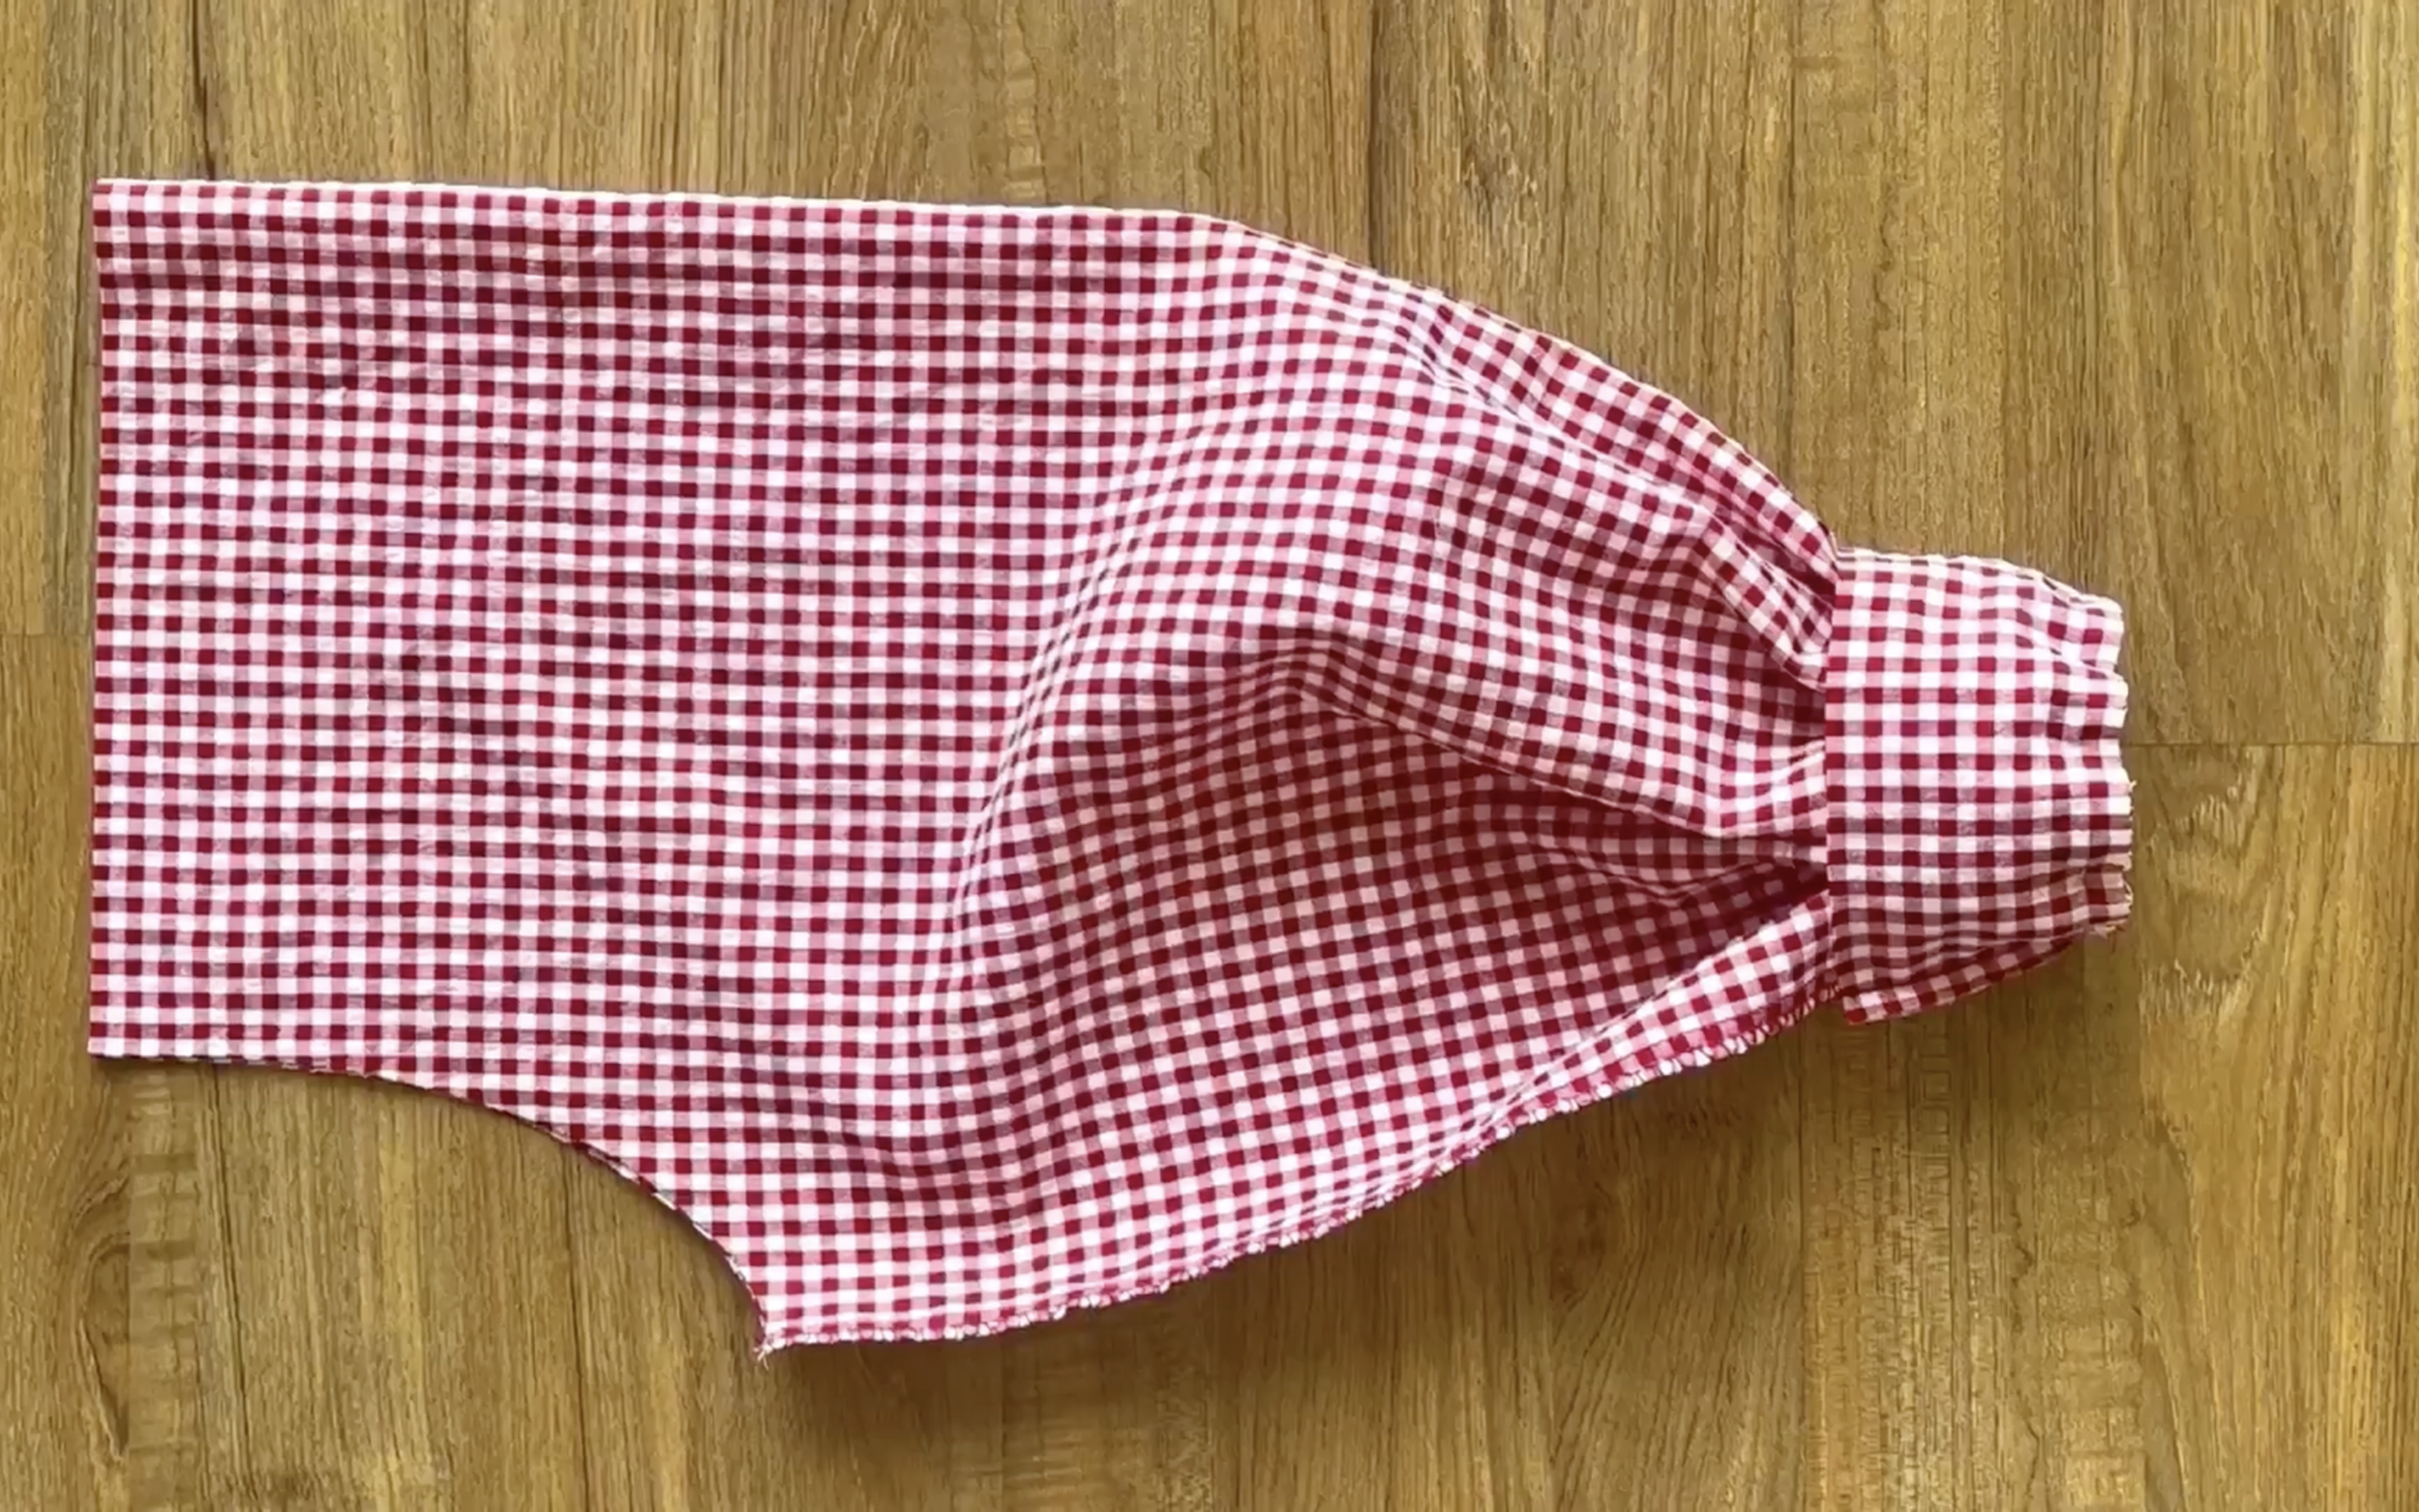
For the sleeve, connect two underarmpit lines of the sleeve together first.
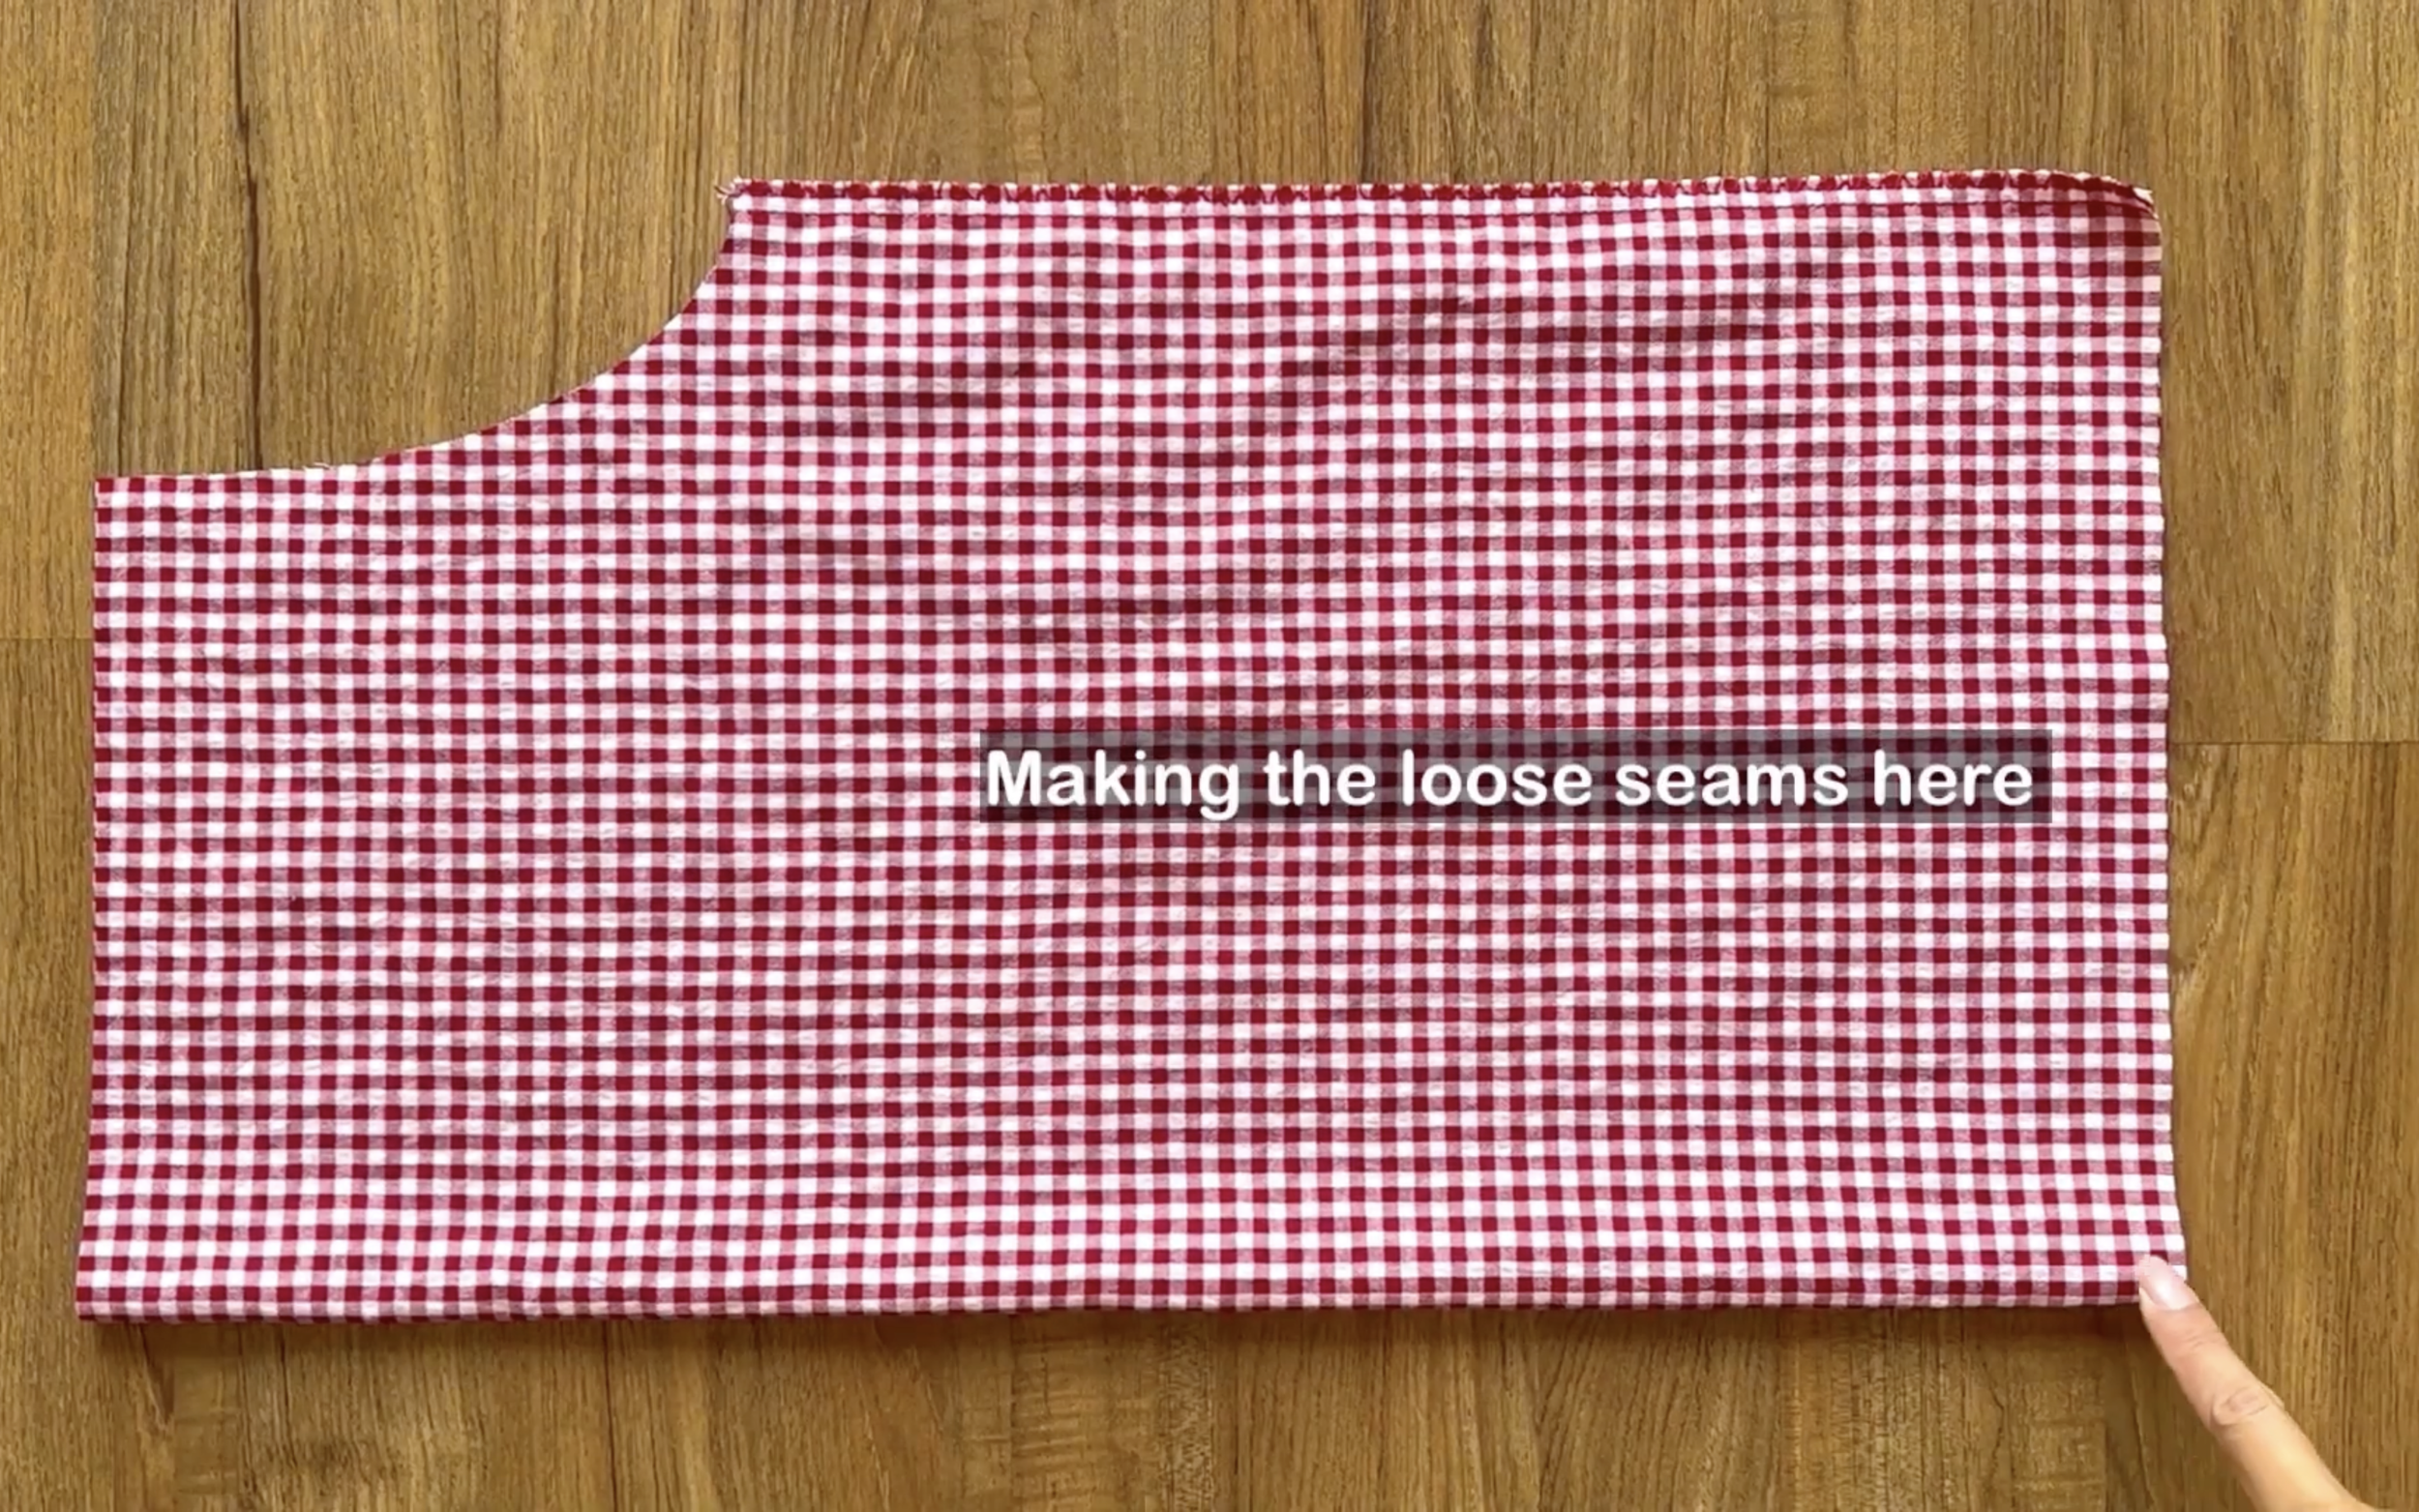
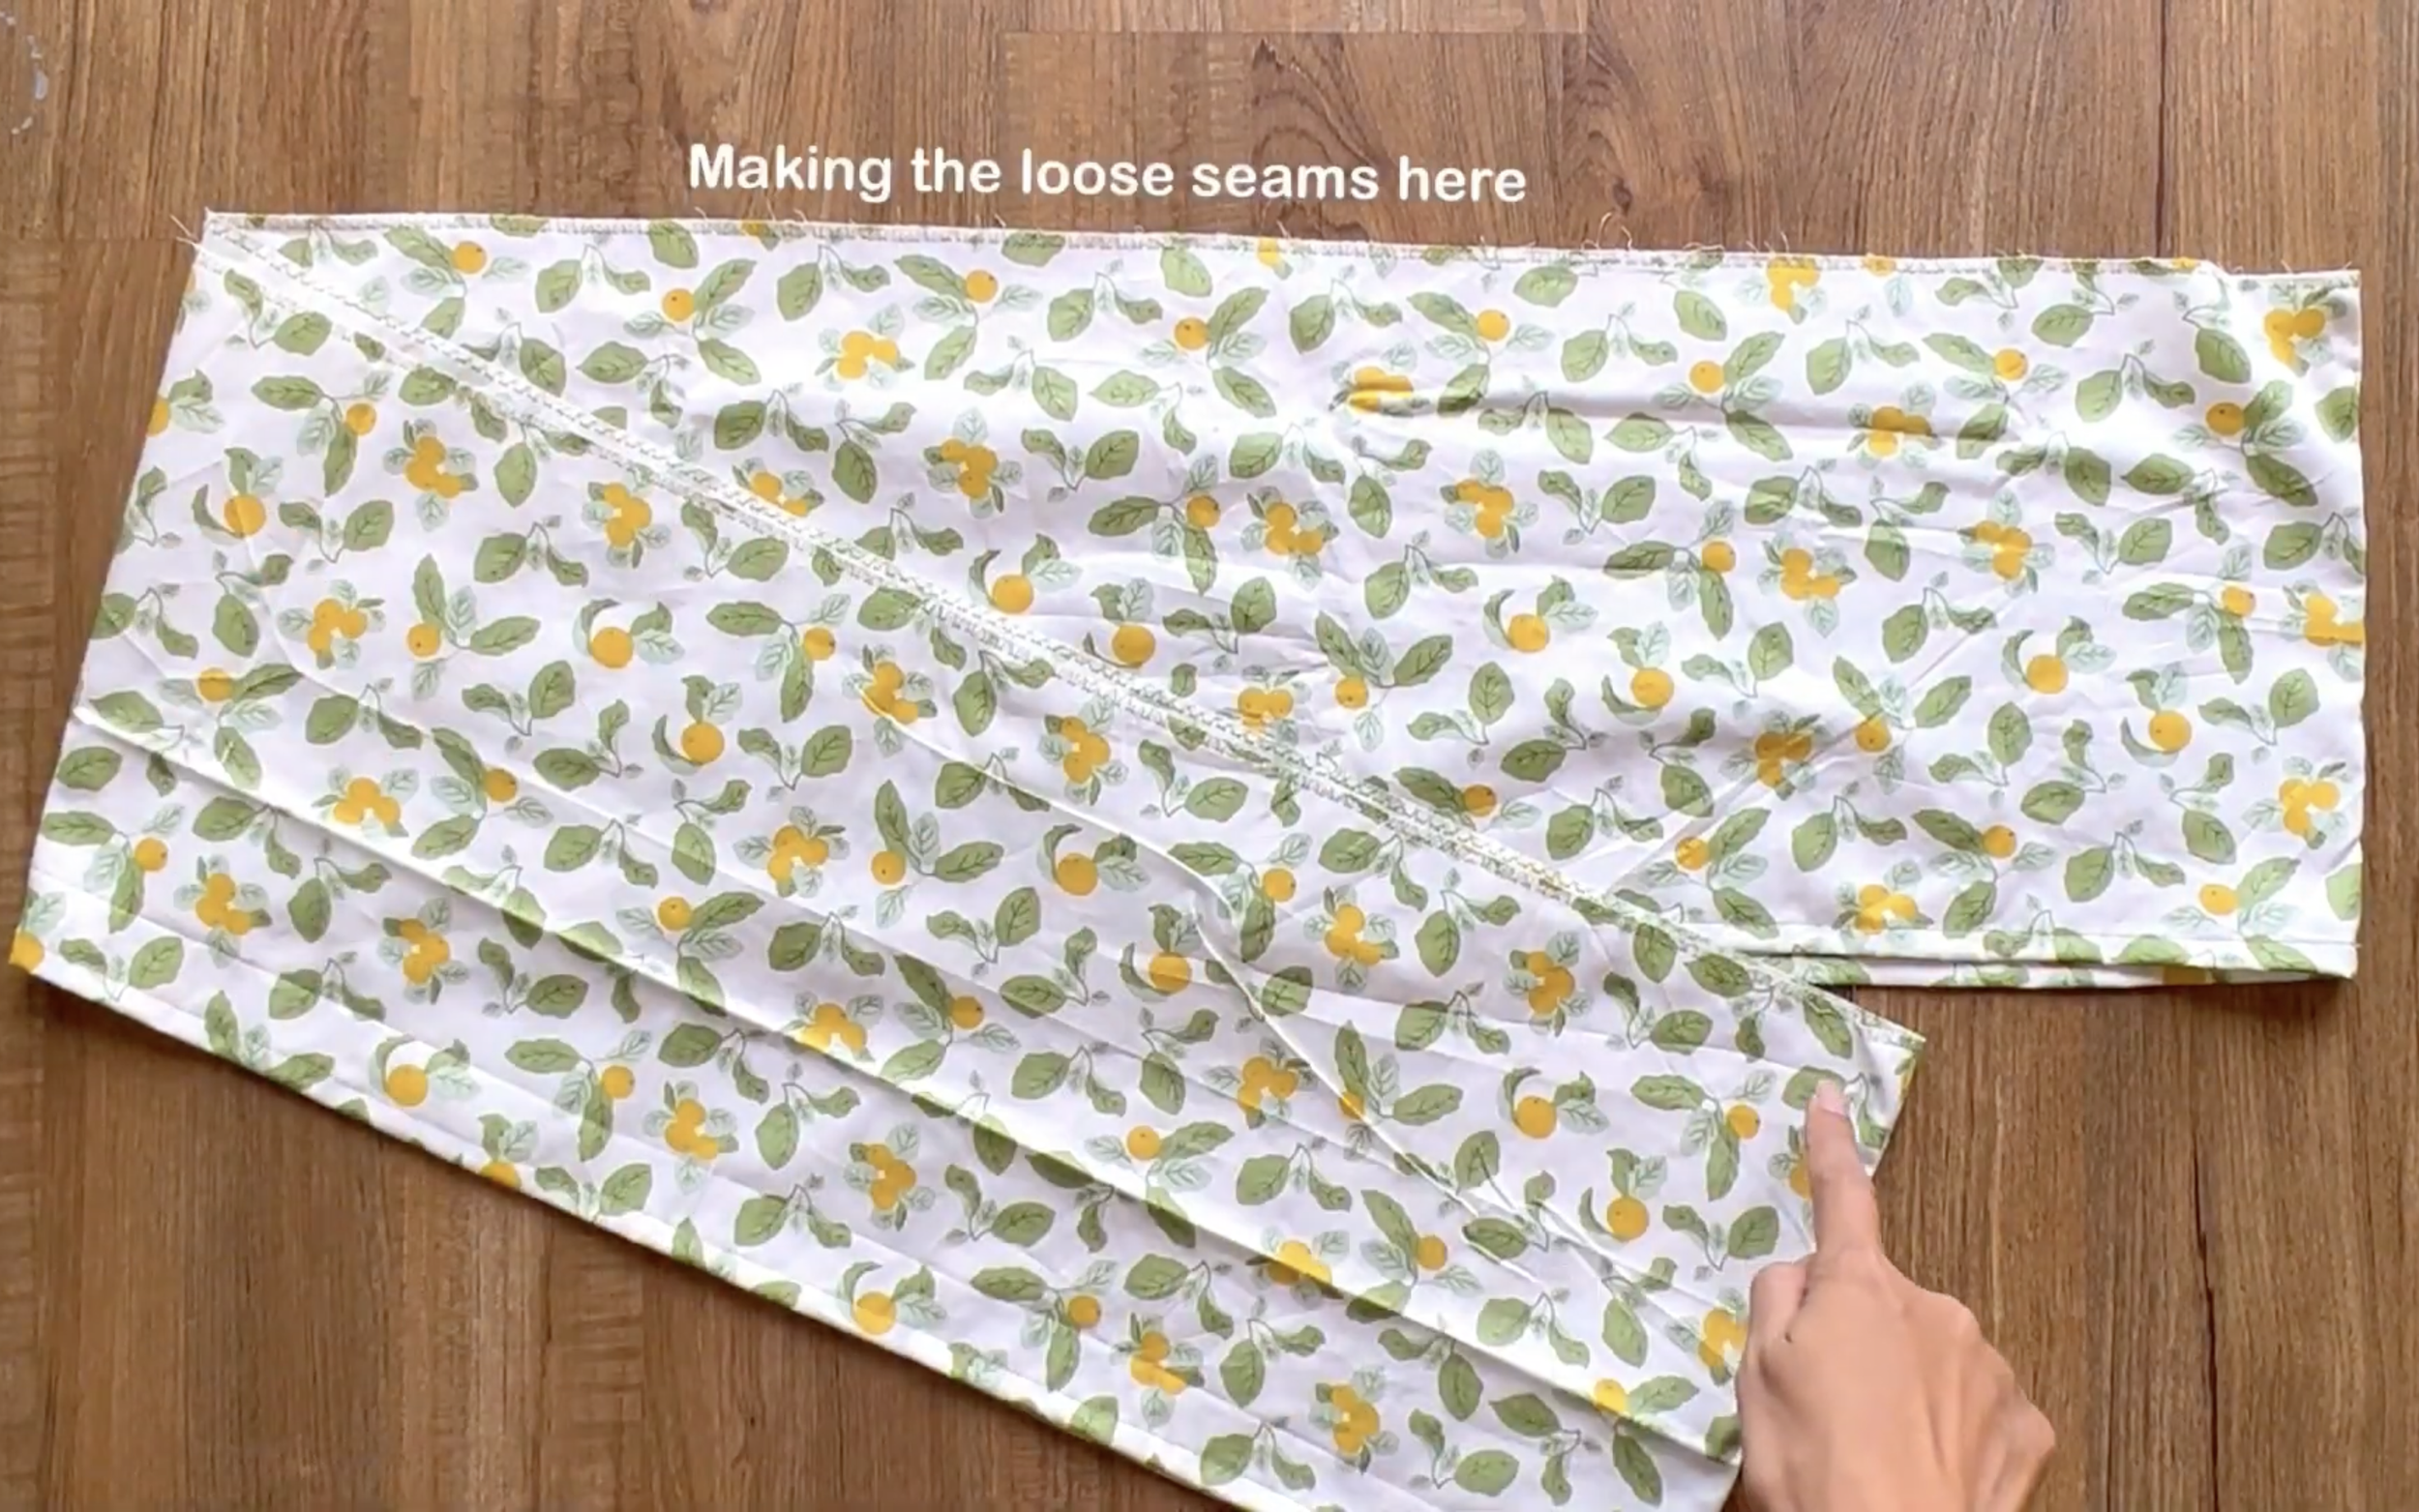
After that, make two loose seams at the end of the sleeve to create a gathering fabric there.
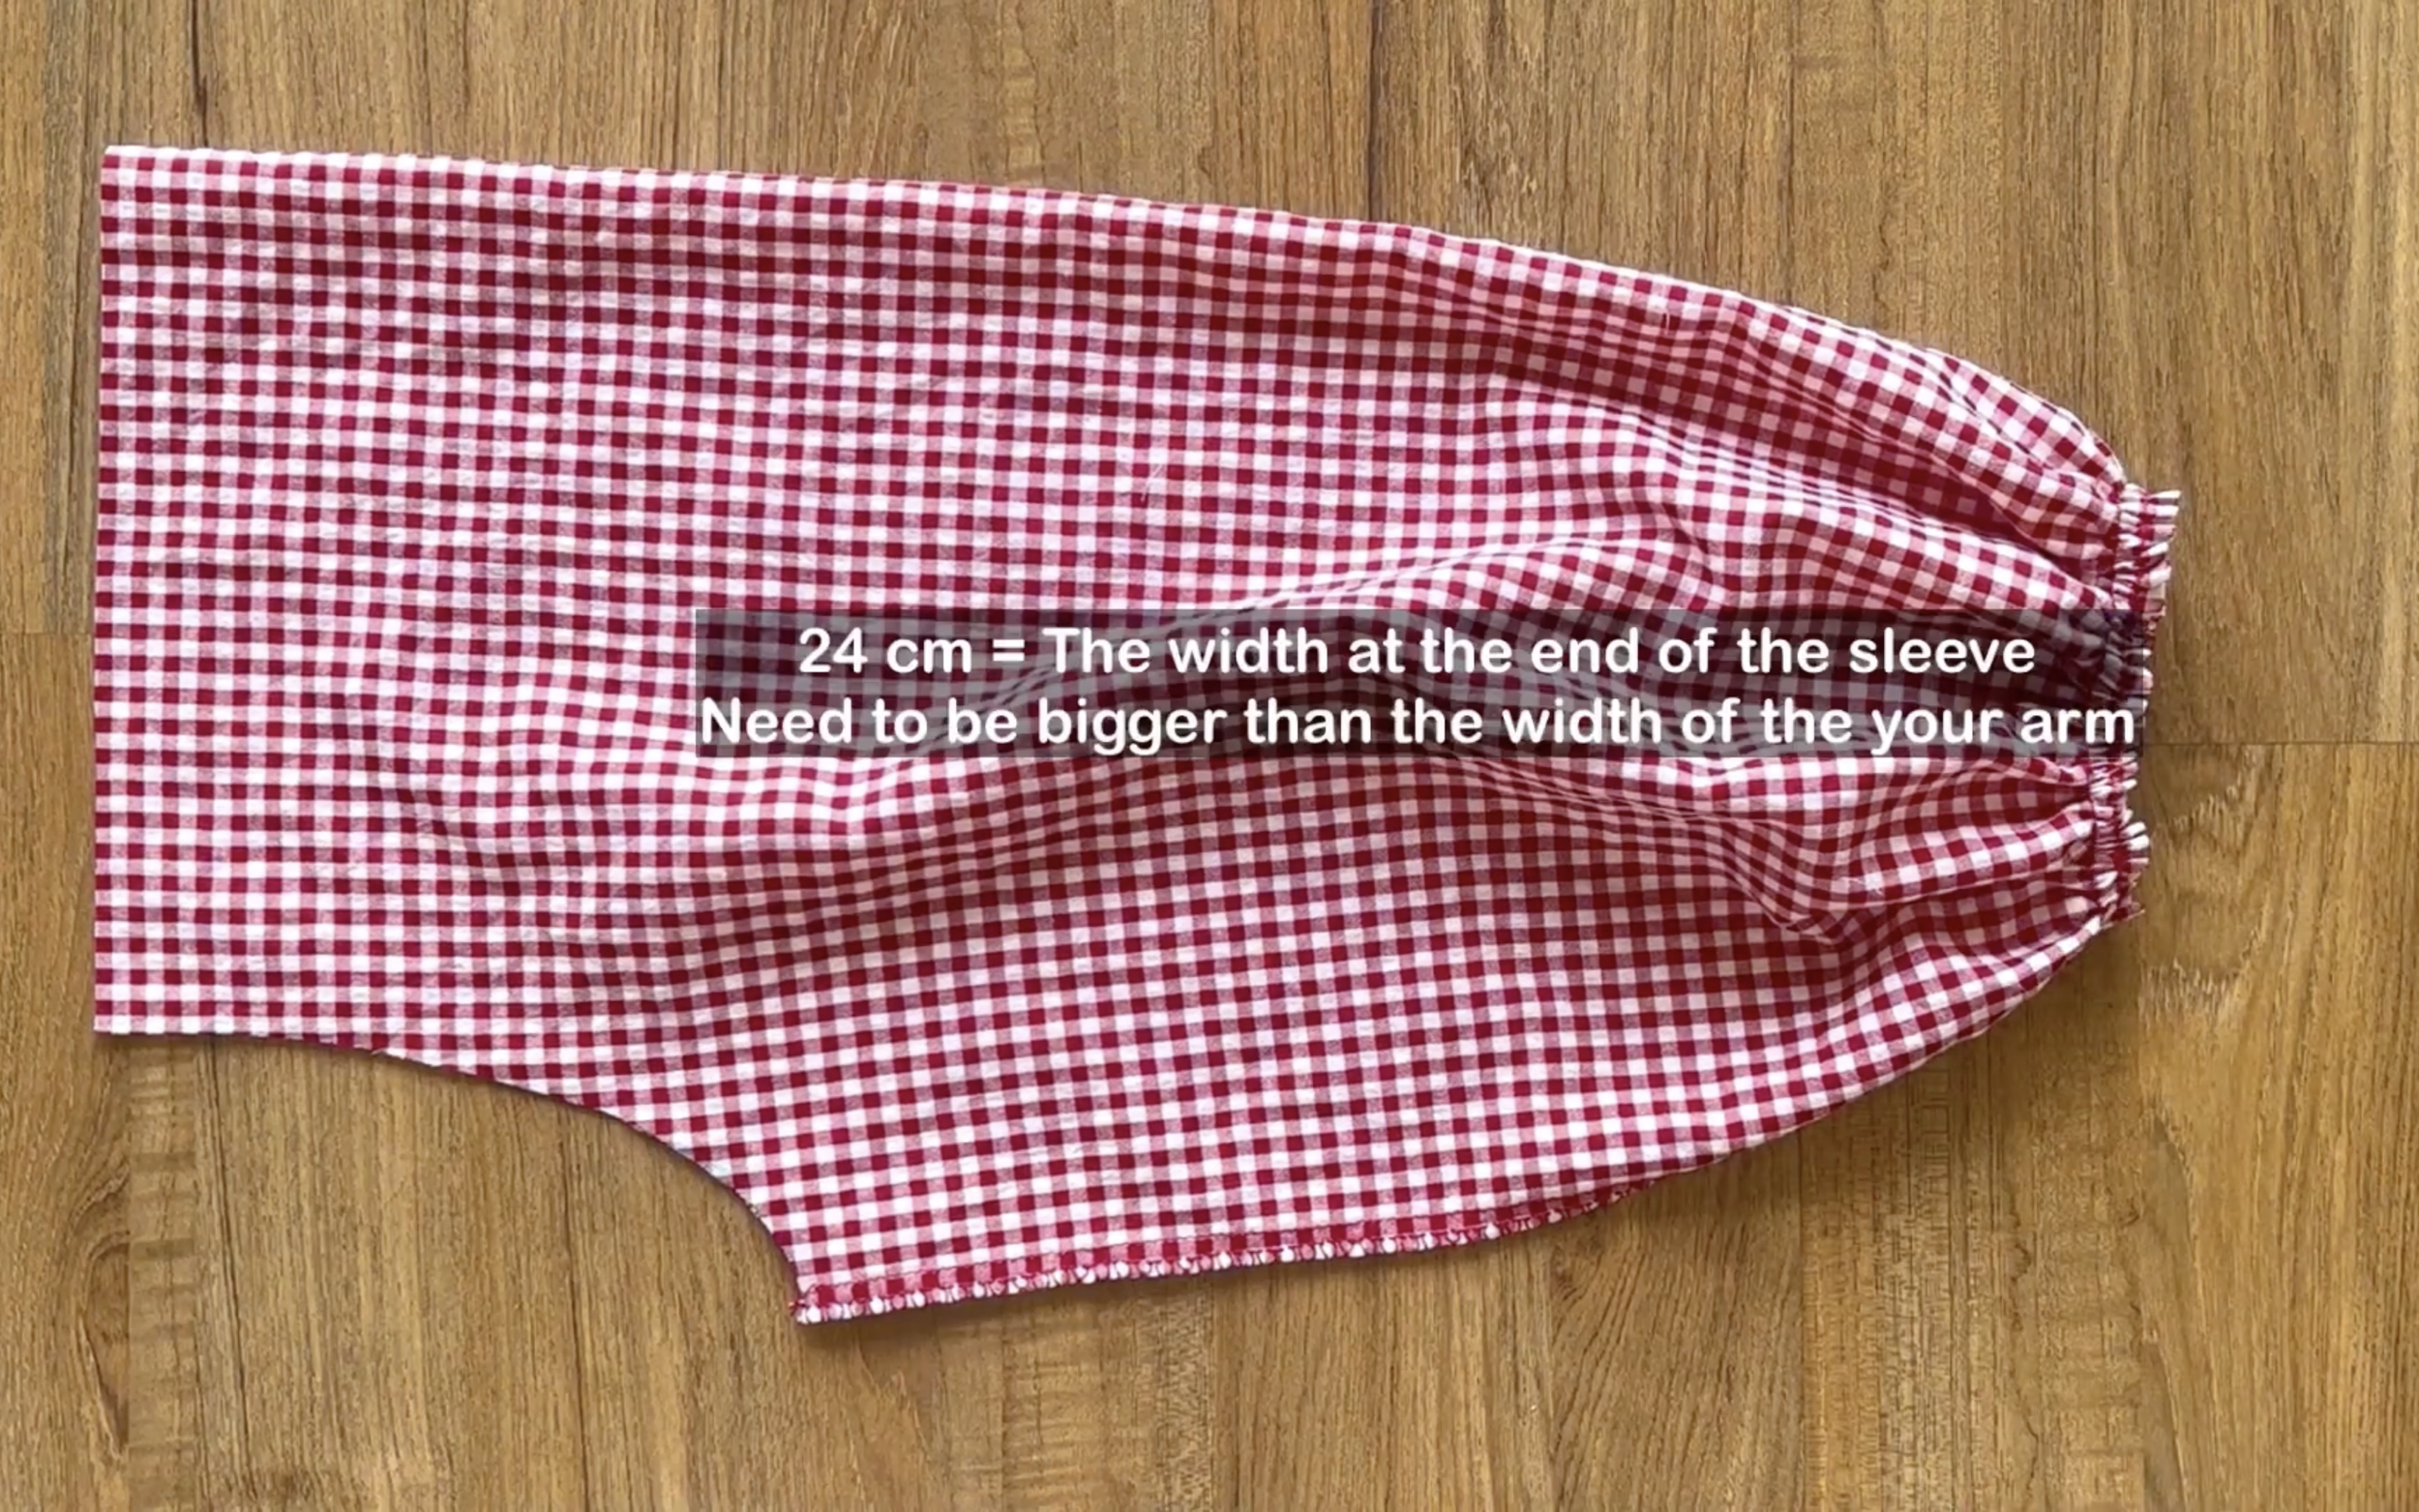
The final width of the gathering fabric will be 24 cm, which is the width at the end of the sleeve that is wanted. Make sure it's bigger than the width of your arm so you can wear the sleeve on.
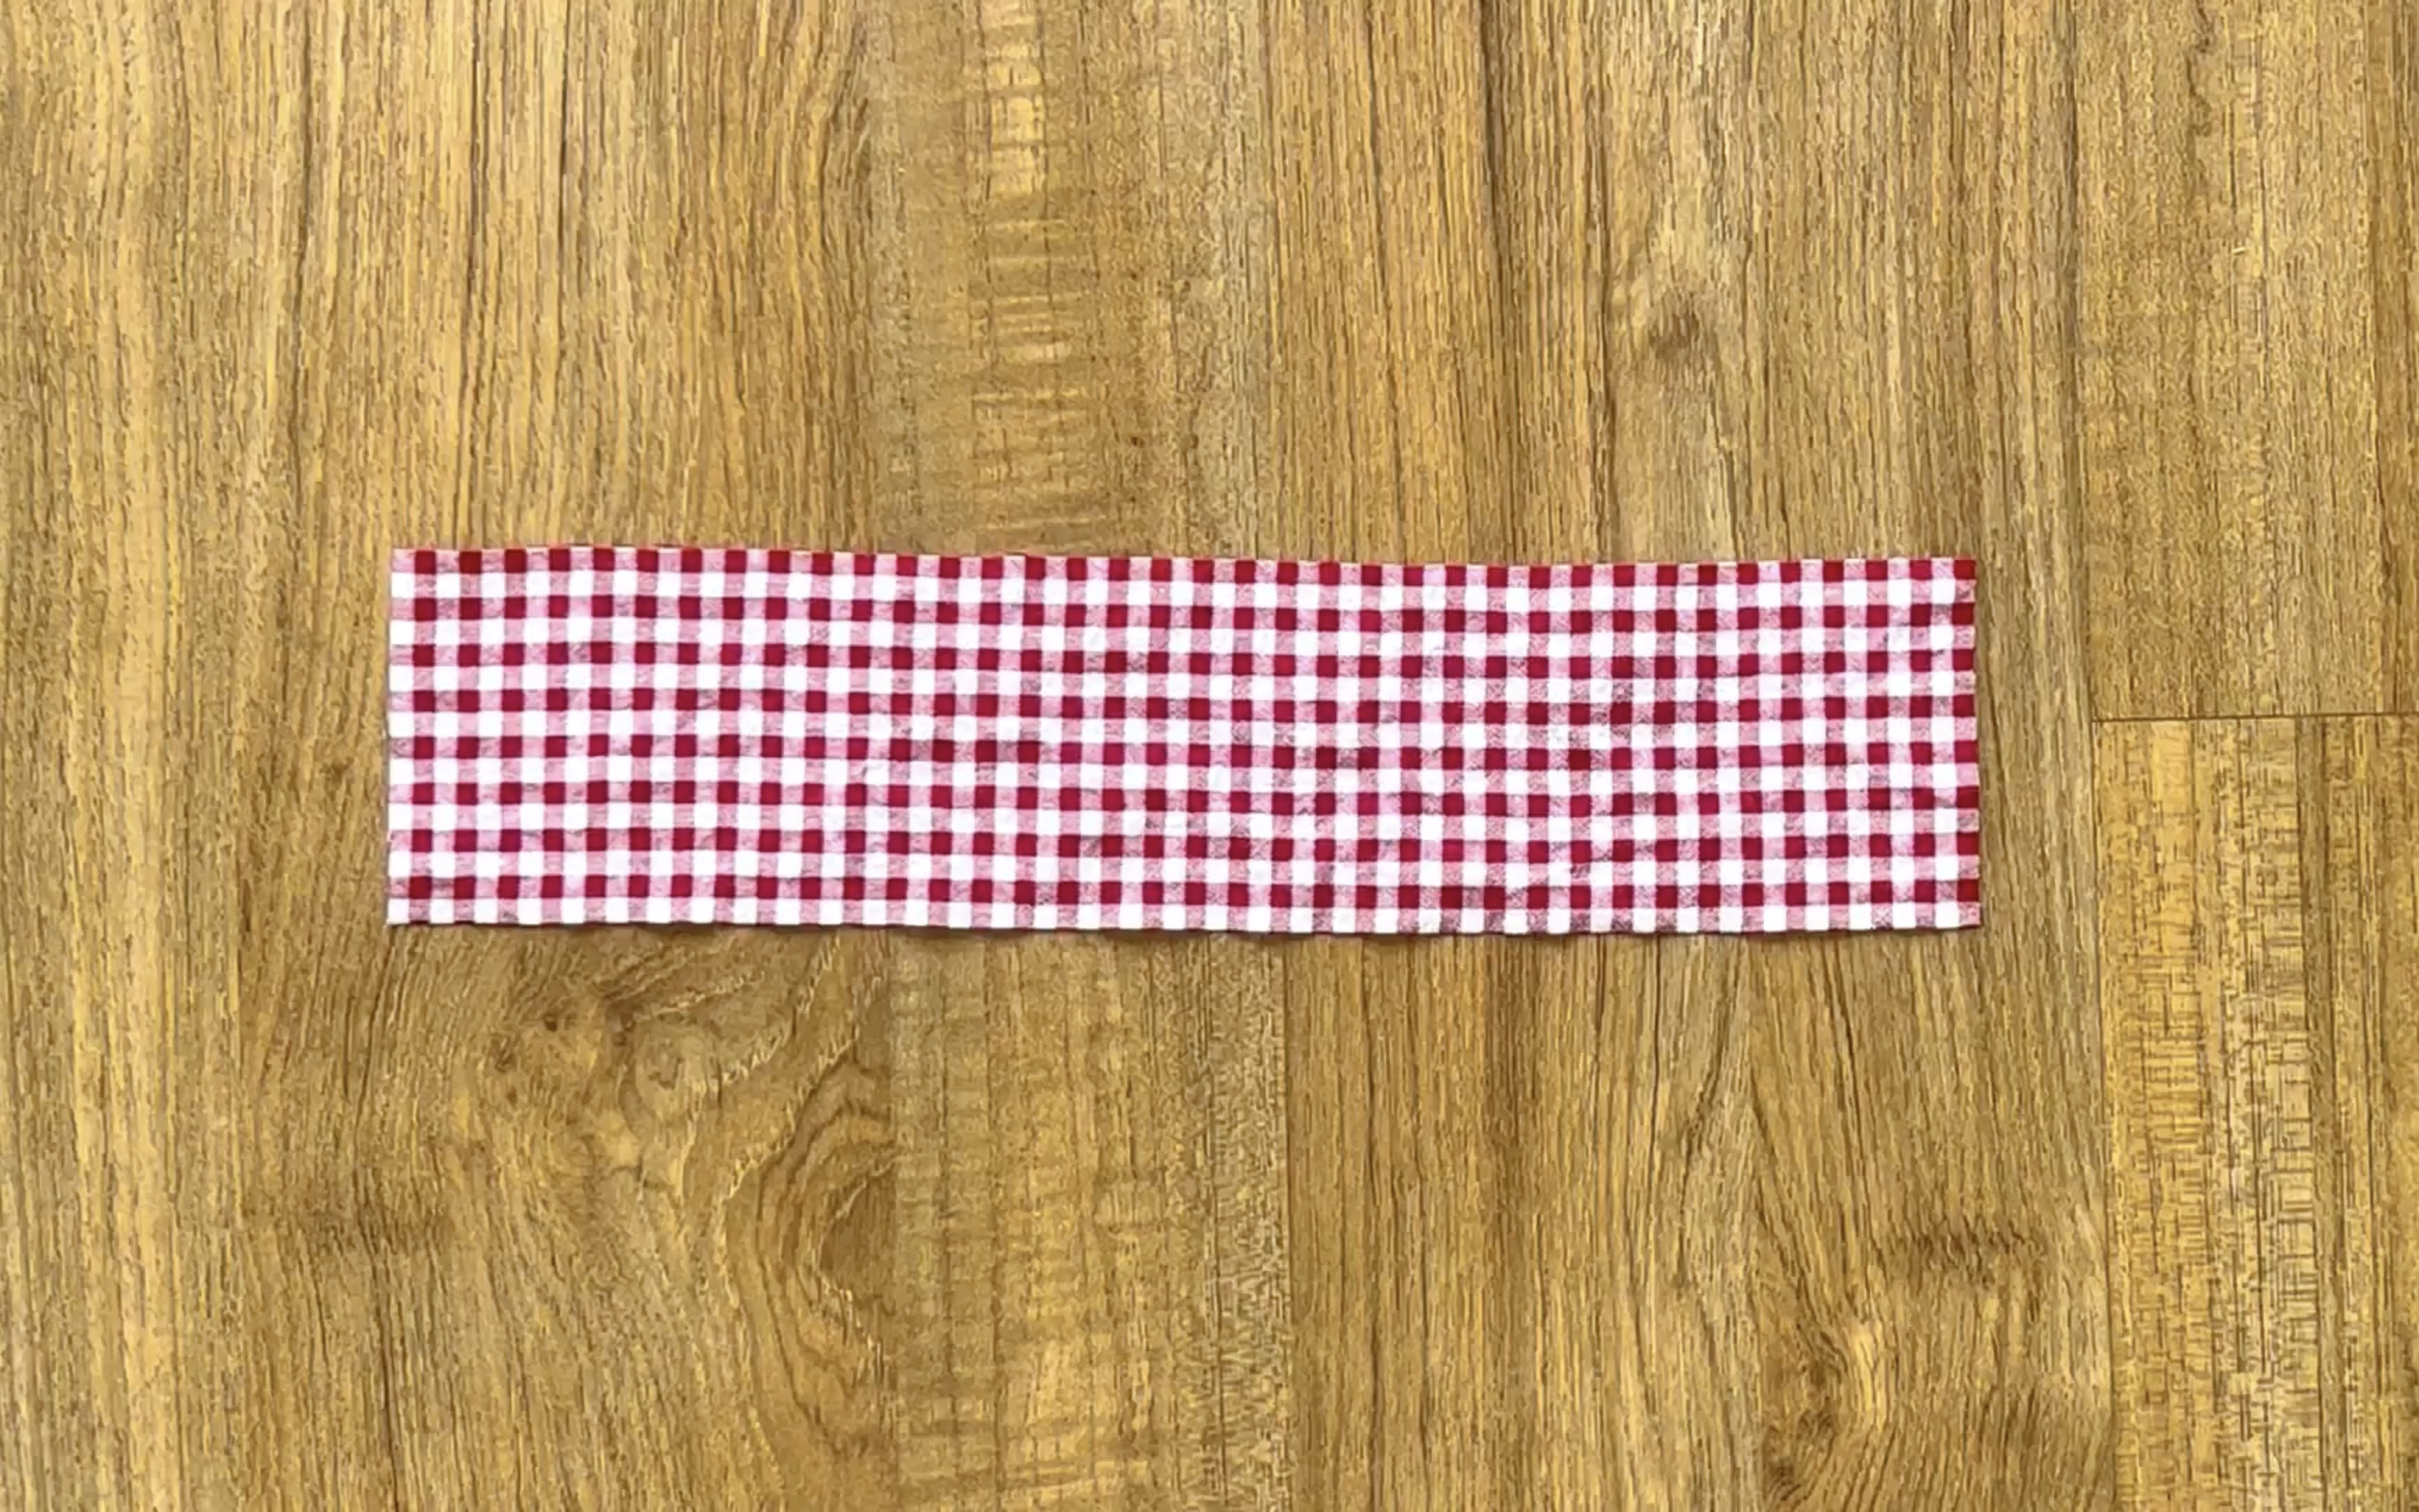
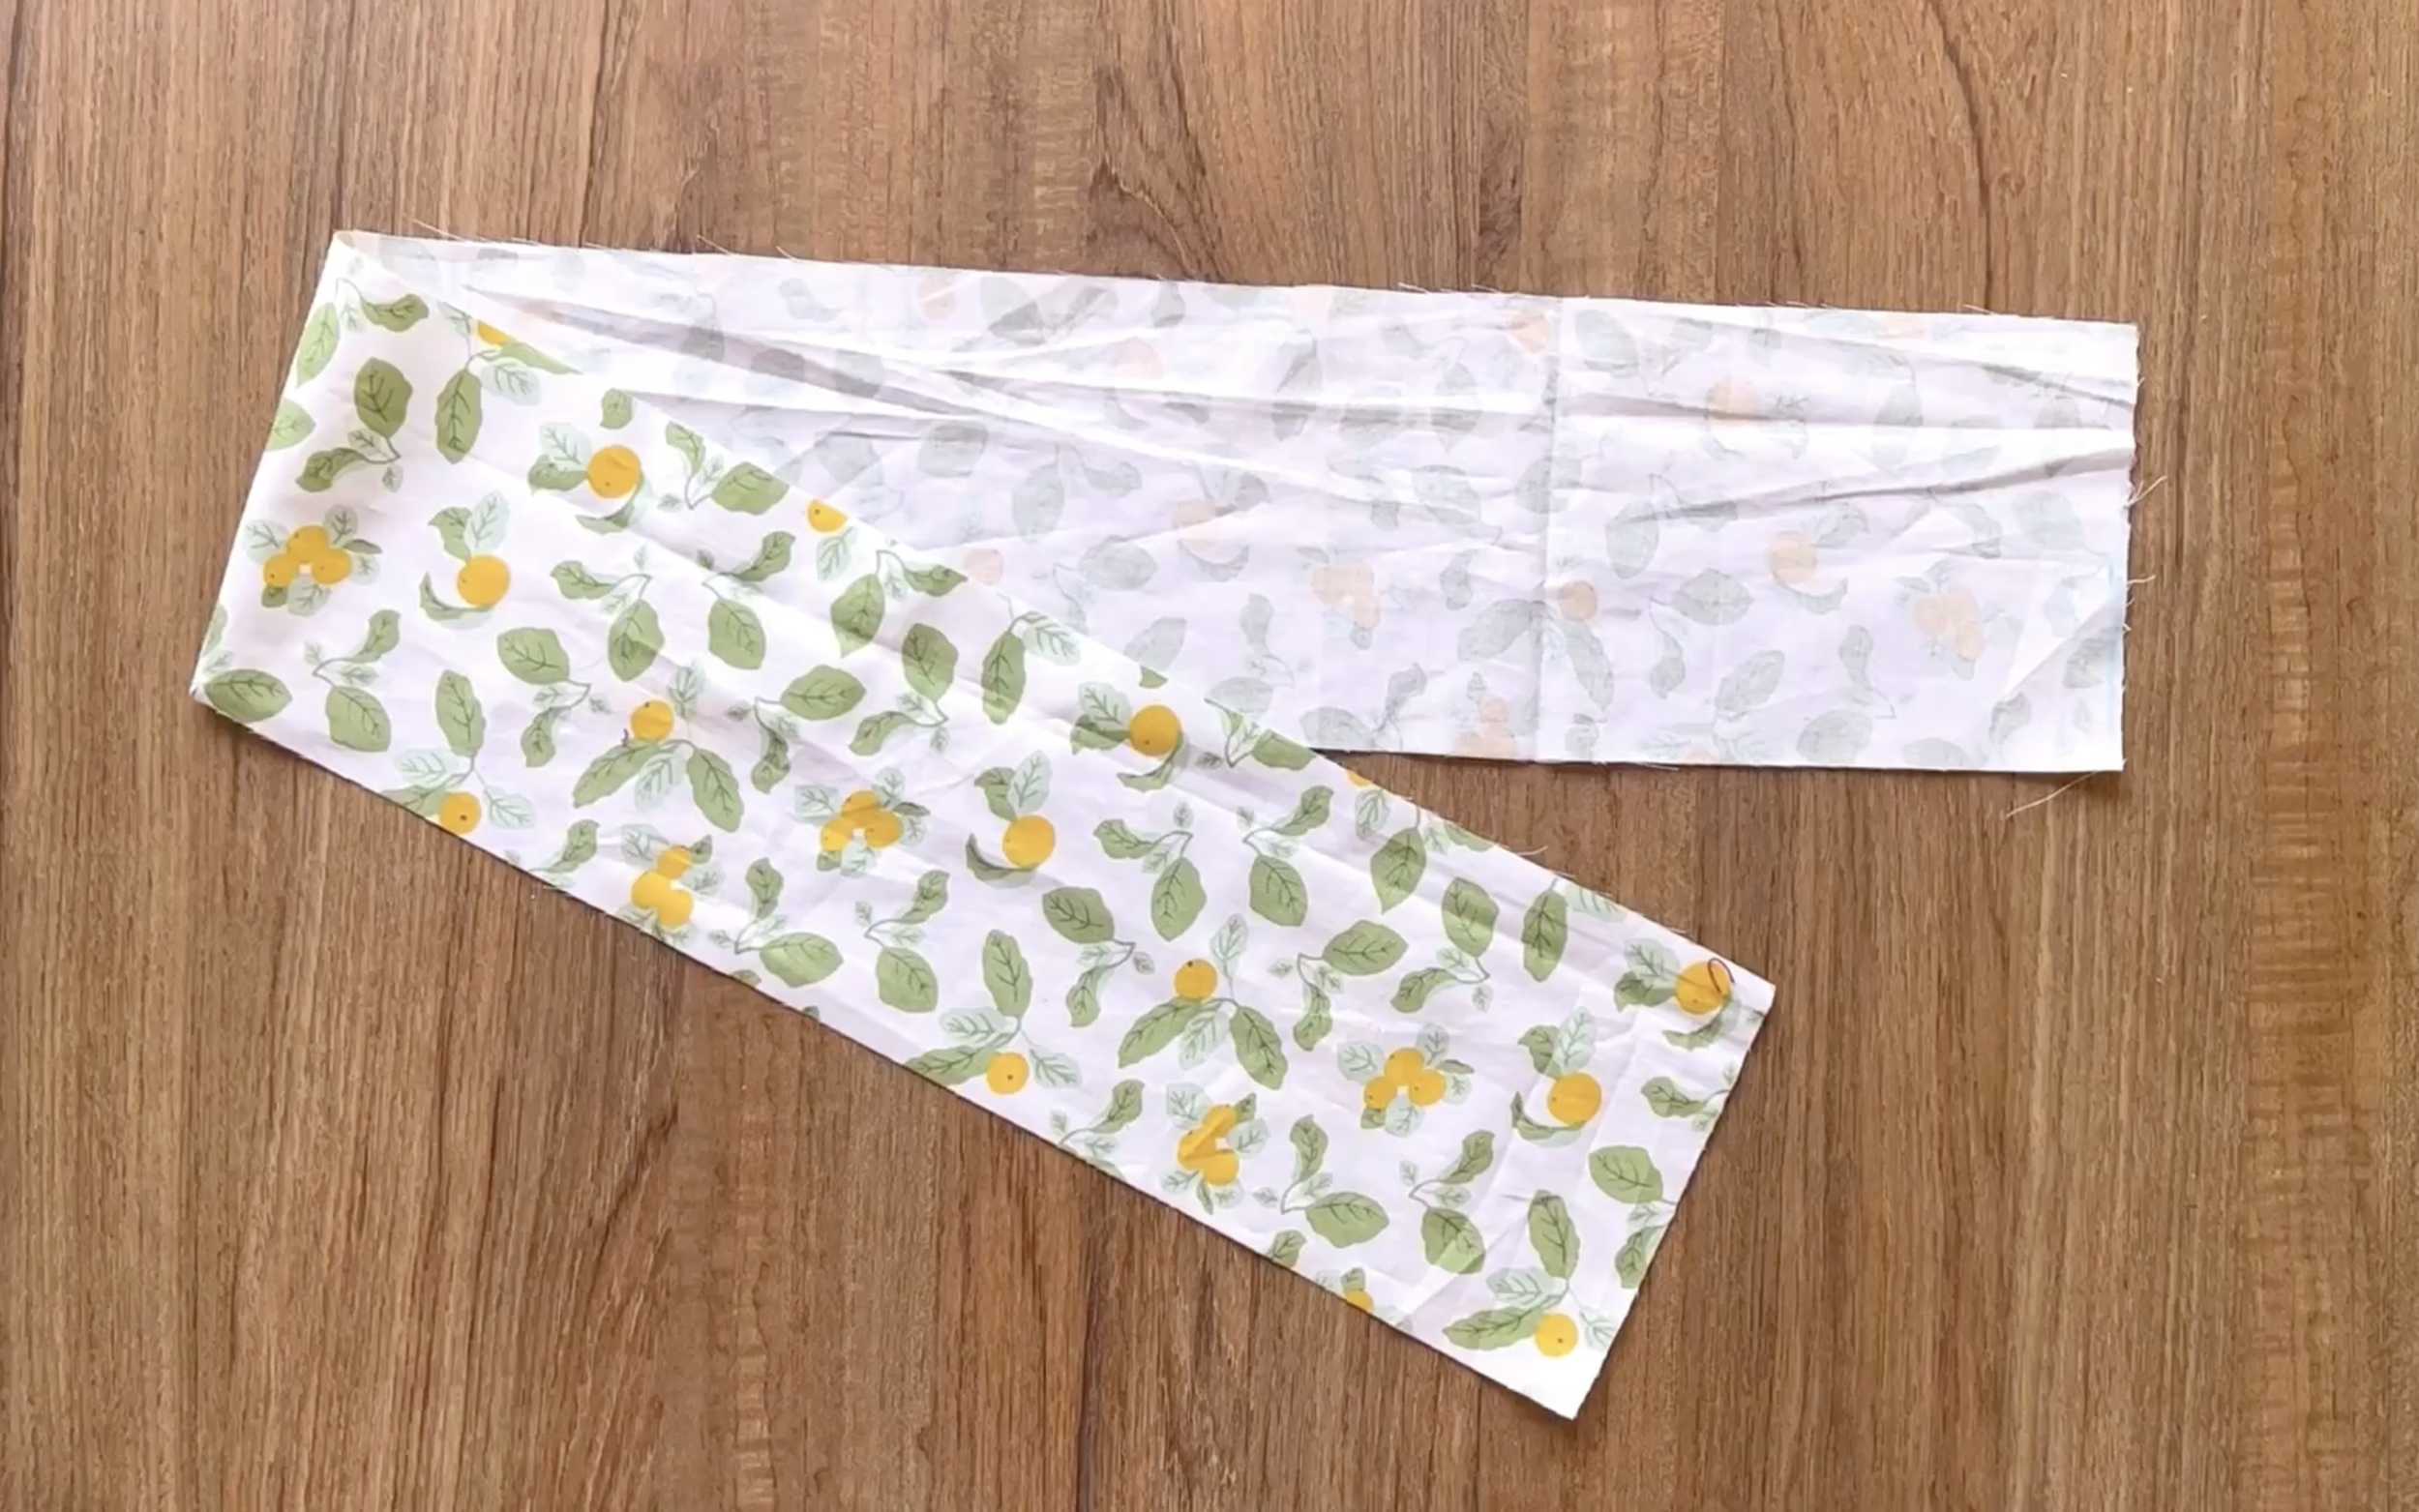
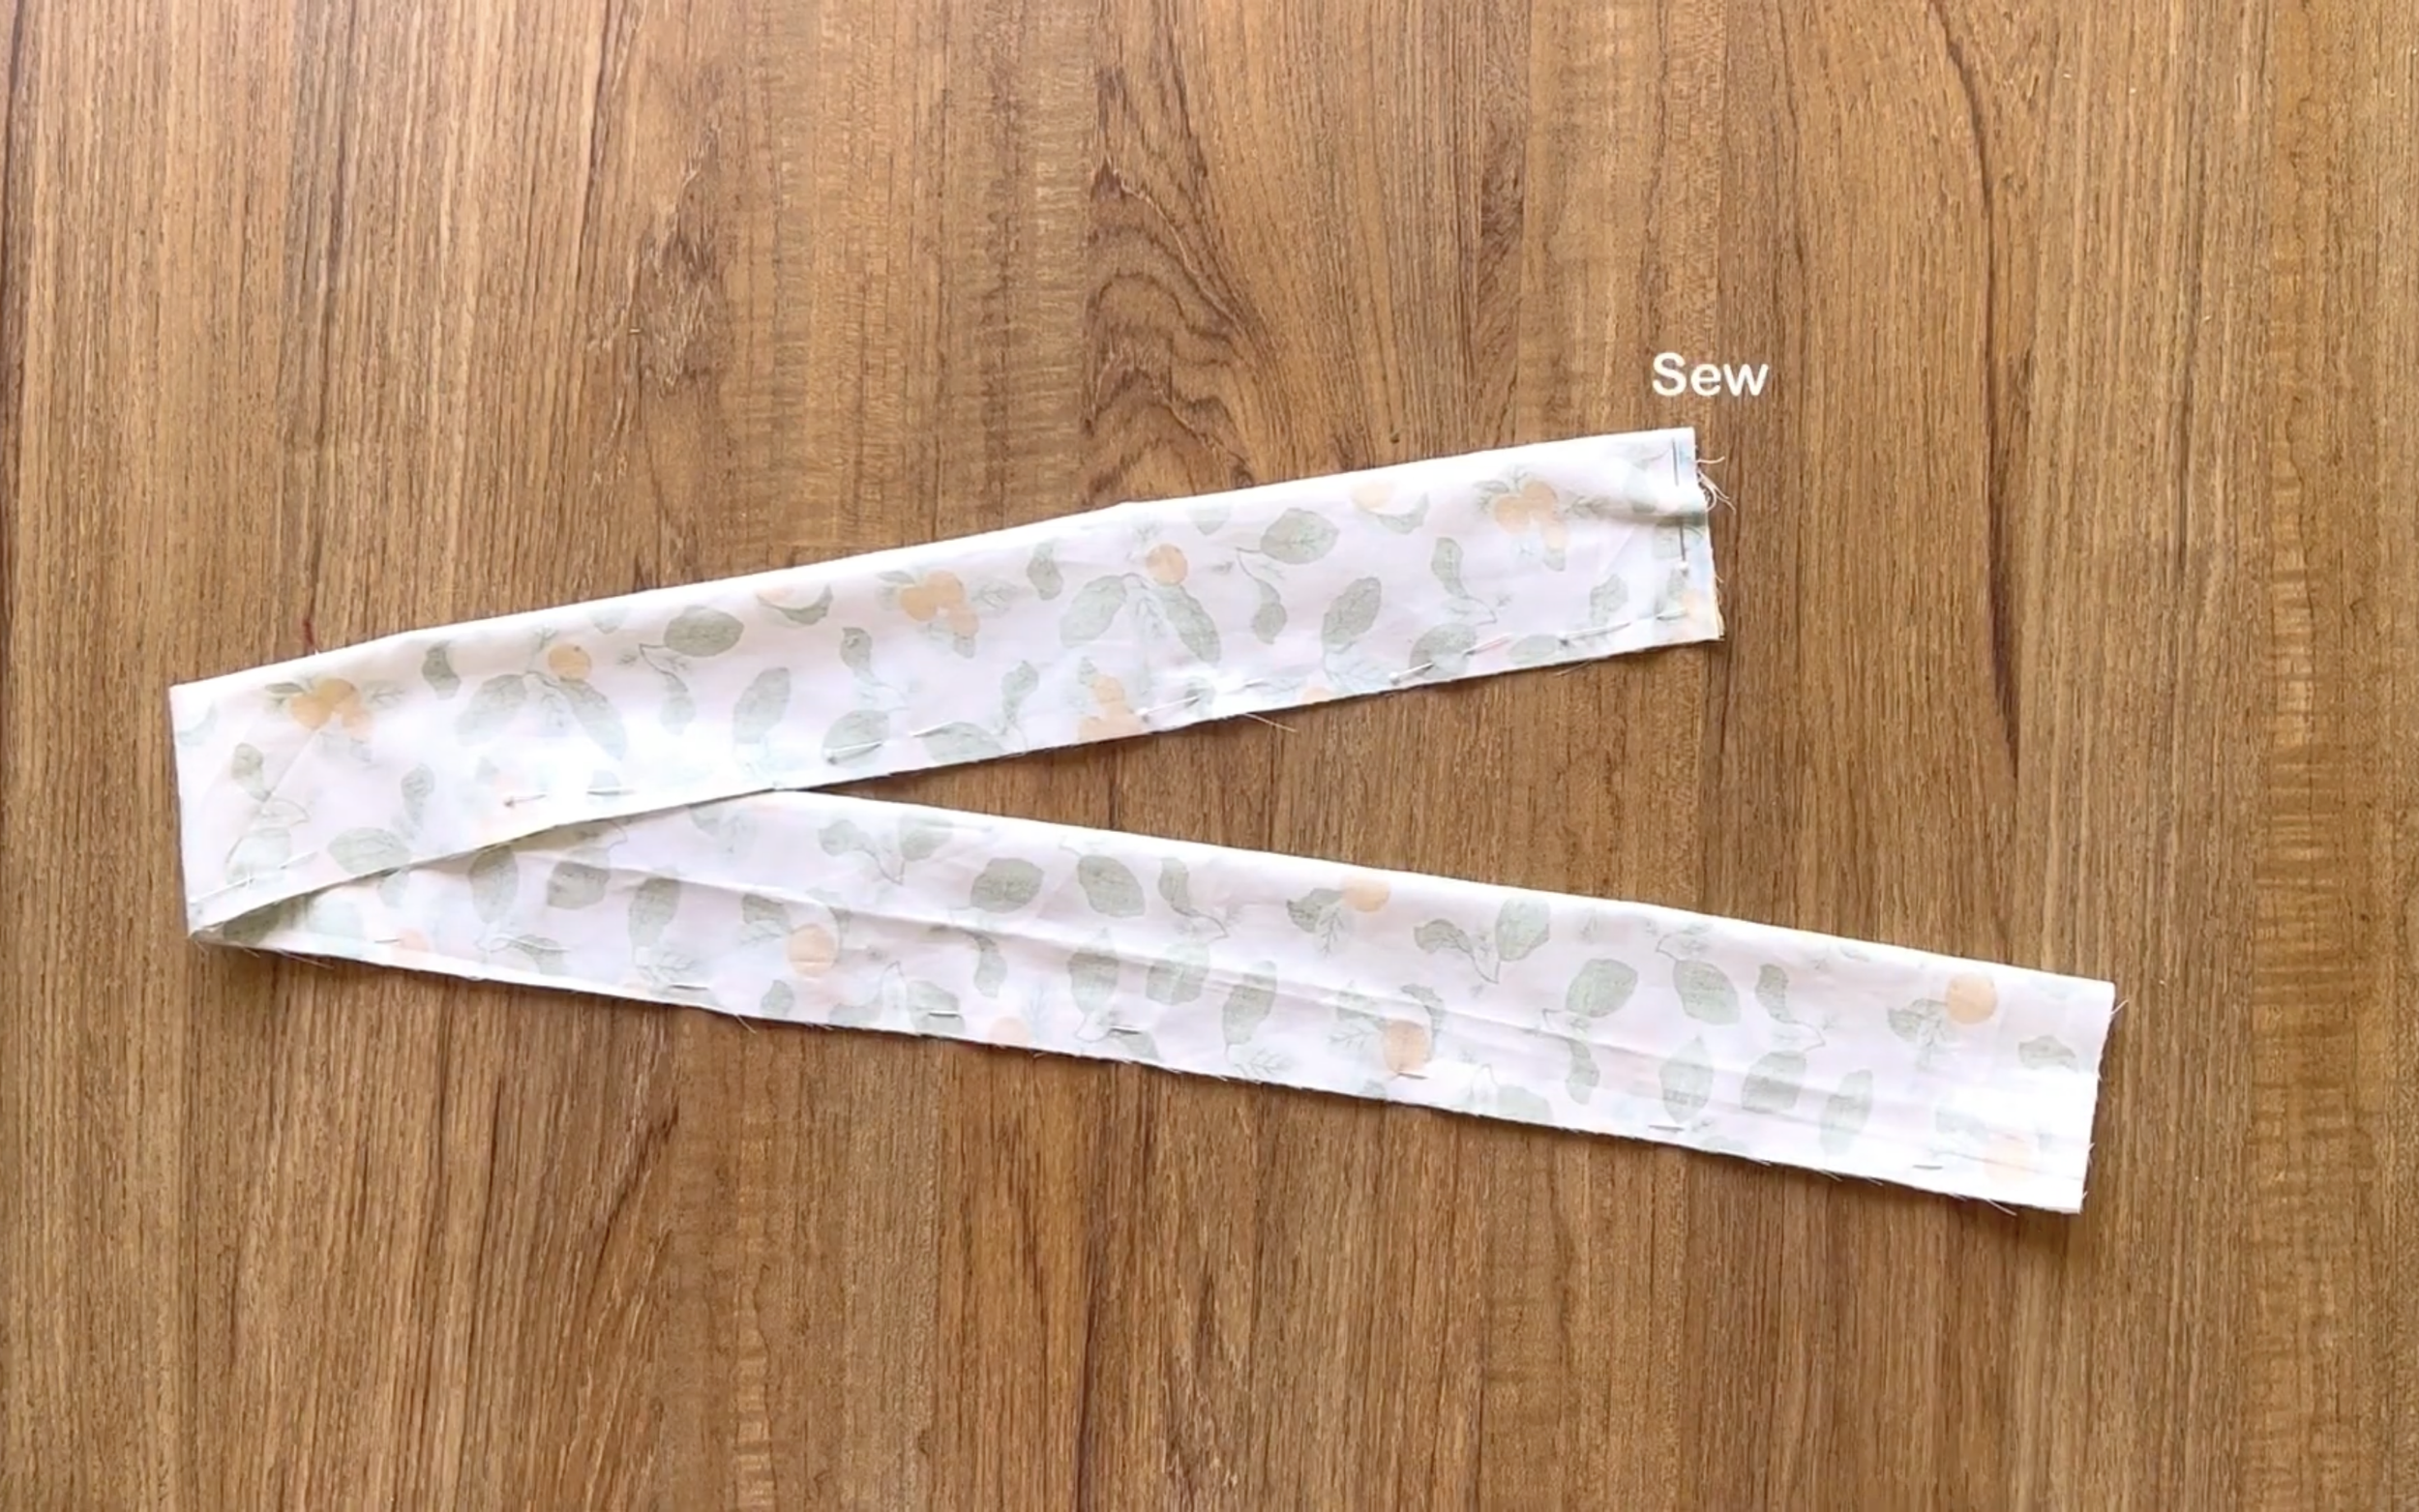
Cut a long fabric line with 5 cm width (which is two times the width of the bias at the end of the sleeve plus 2 cm for seam allowance) and 26 cm length (which is 2 cm bigger than the width at the end of the sleeve from the gathering fabric that was made before). 2 cm is also the seam allowance as well.

So, when connecting two width lines together, a circle fabric with the same width at the end of the sleeve will be created.
After that, connect one side of the circle fabric to the end of the sleeve and make the first seam.
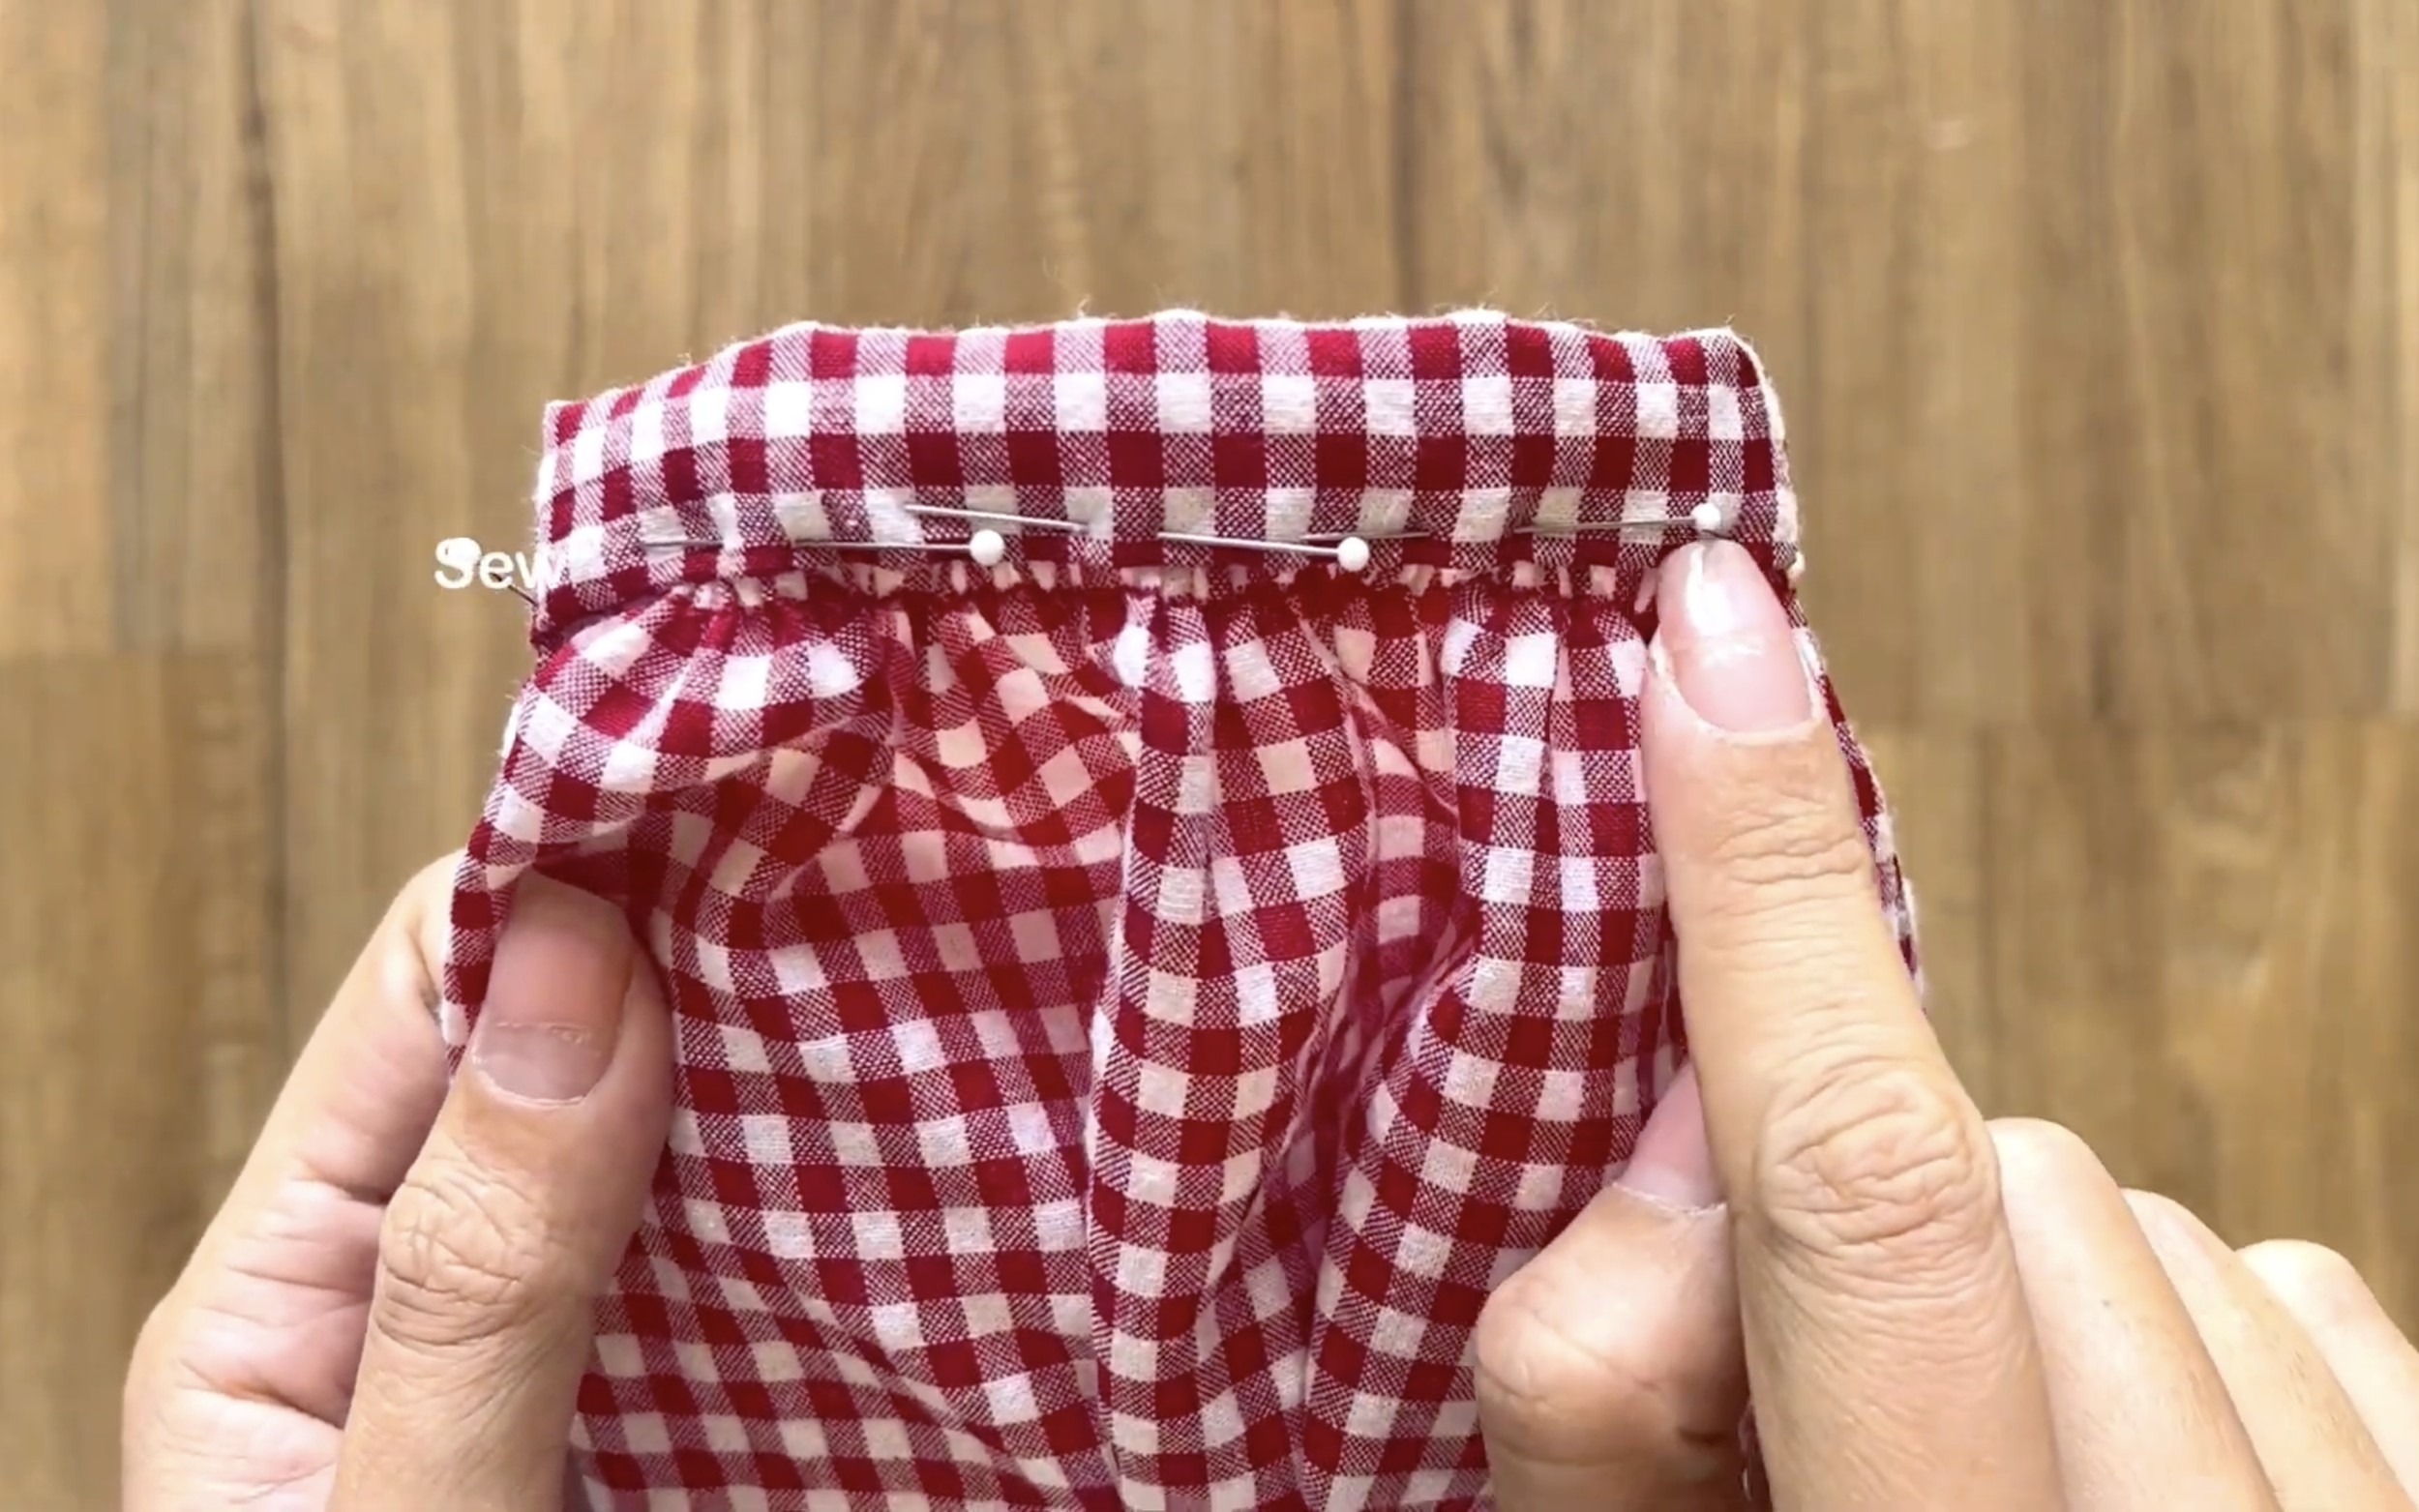
After sewing, fold the other side of the circle fabric inside around 1 cm first, then keep folding it to the first seam and make the second seam.
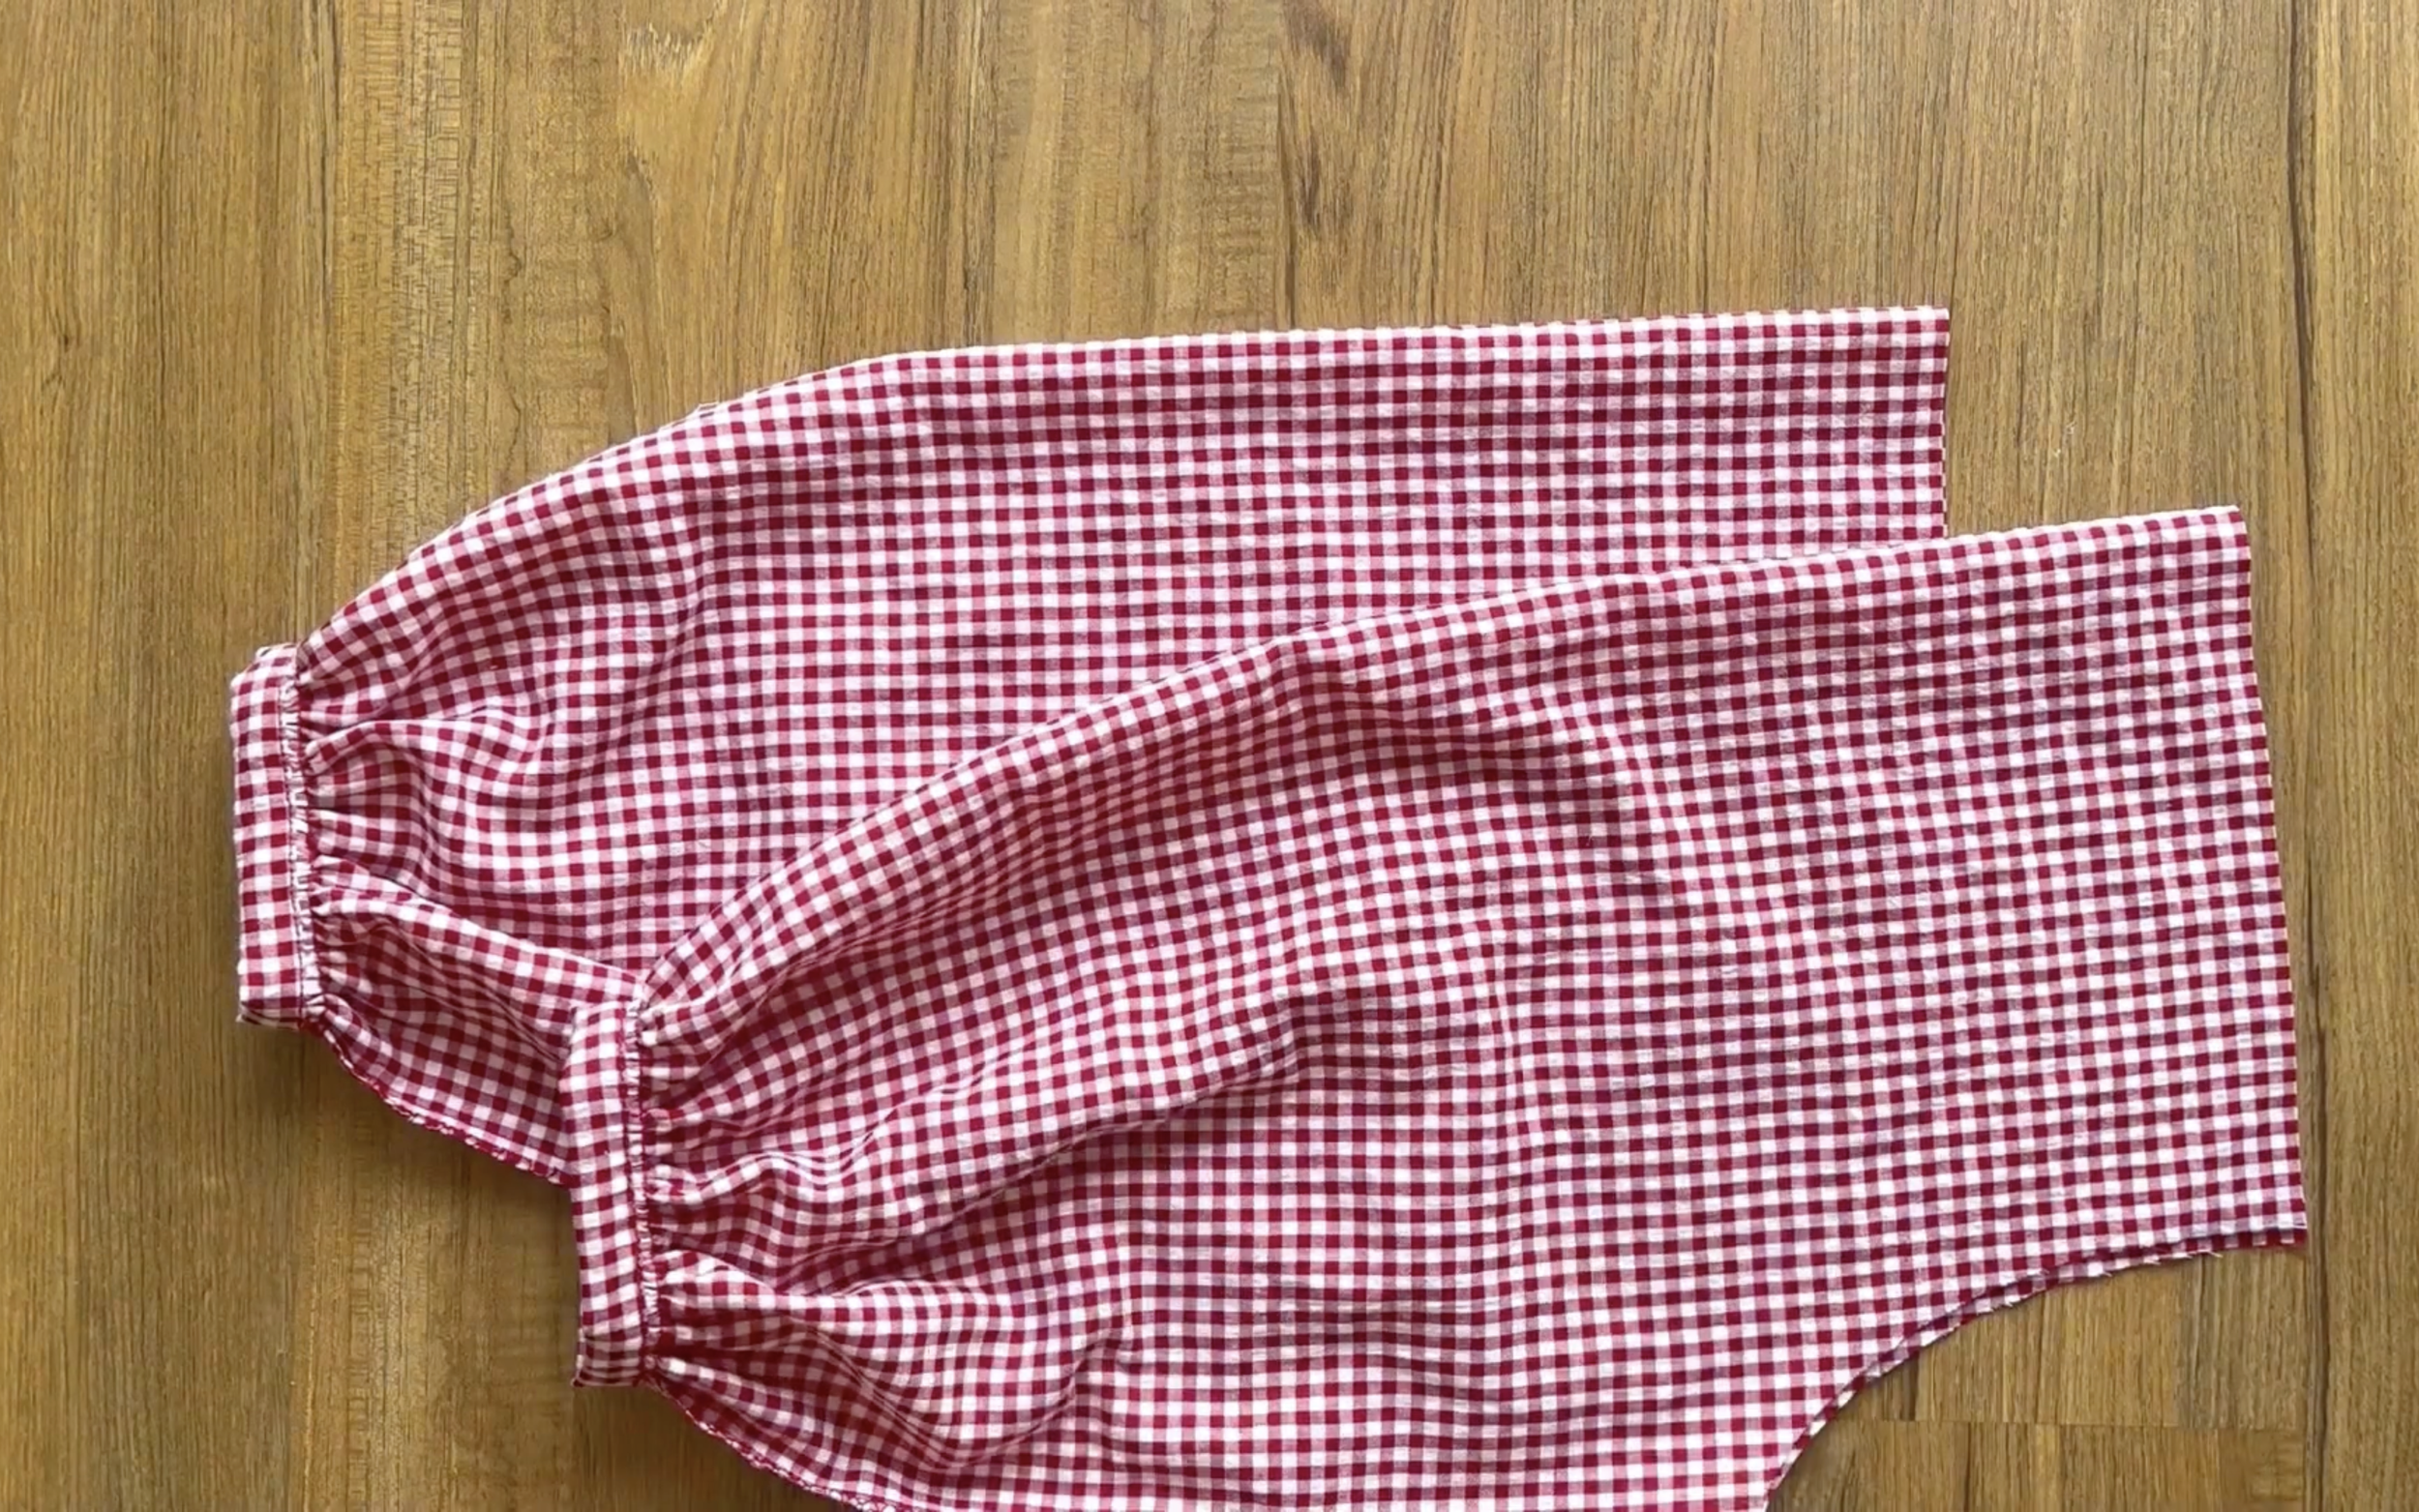
The sleeve part will be finished after sewing. You will need to make two pieces like this.
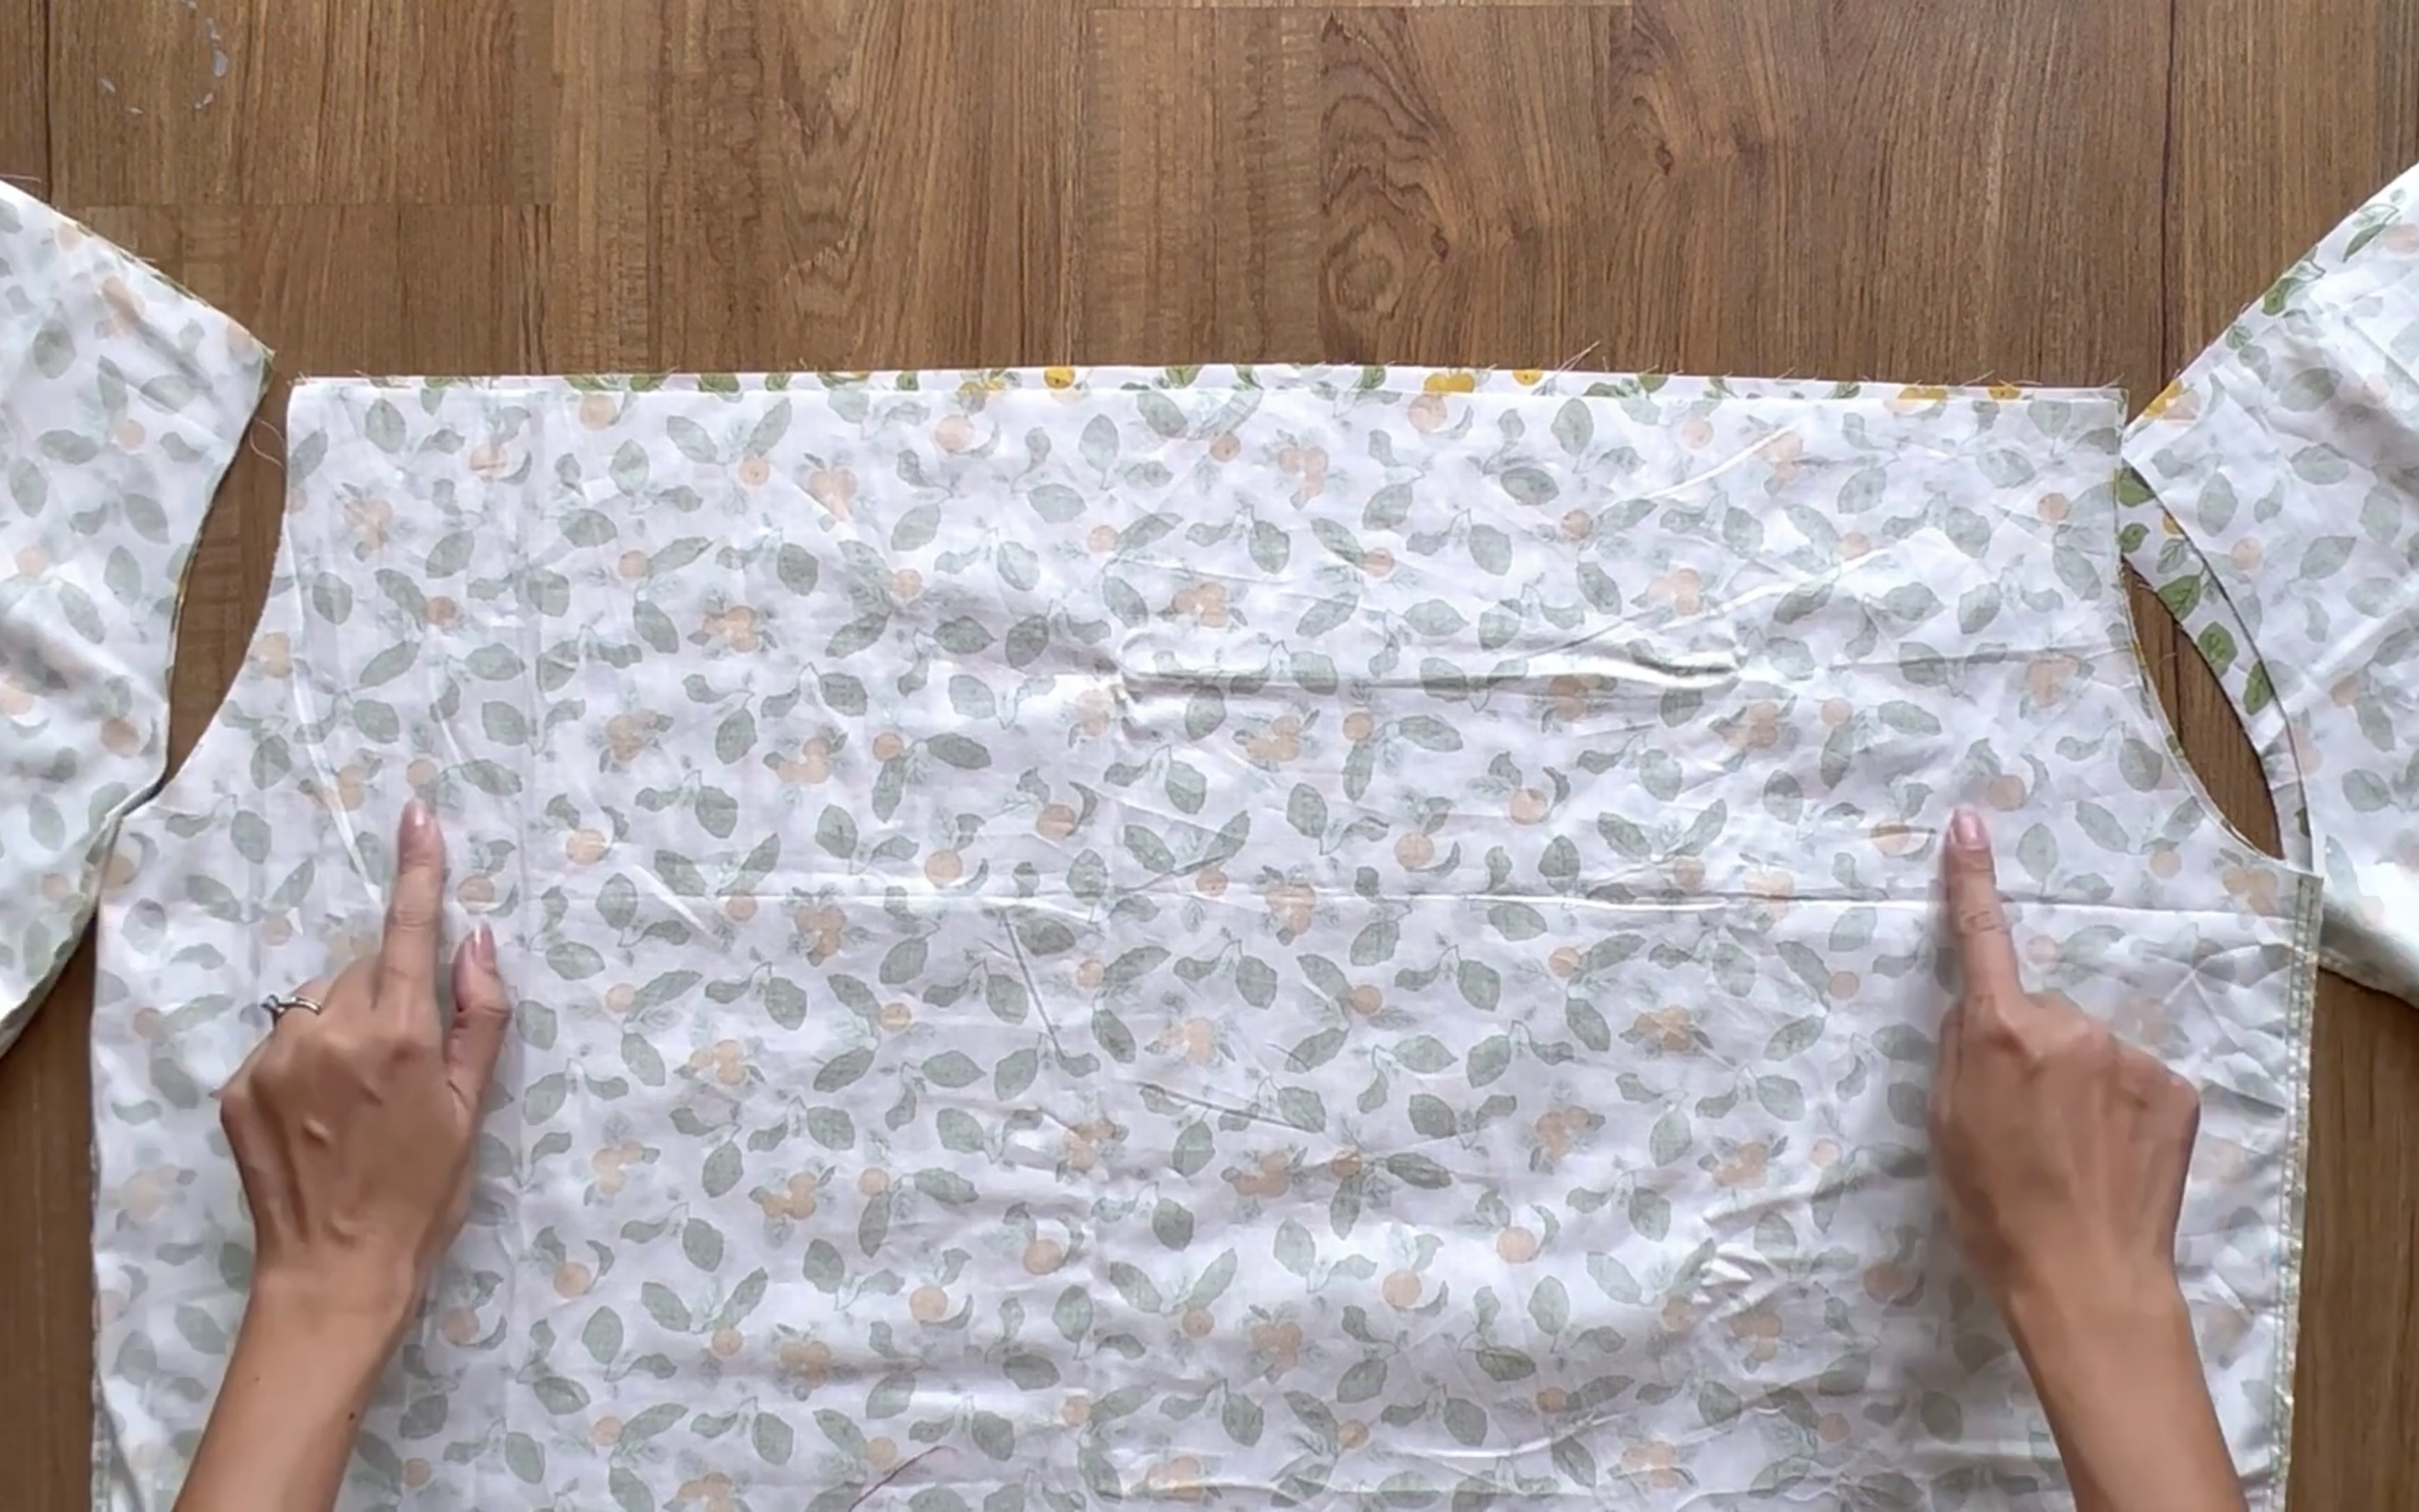
CONNECT THE SLEEVES TO THE BODICE PART
Now, connect two sleeves to the bodice part at the sleeve line and sew.

At the top of the bodice and the sleeve, make two loose seams first, then create a gathering fabric there later.
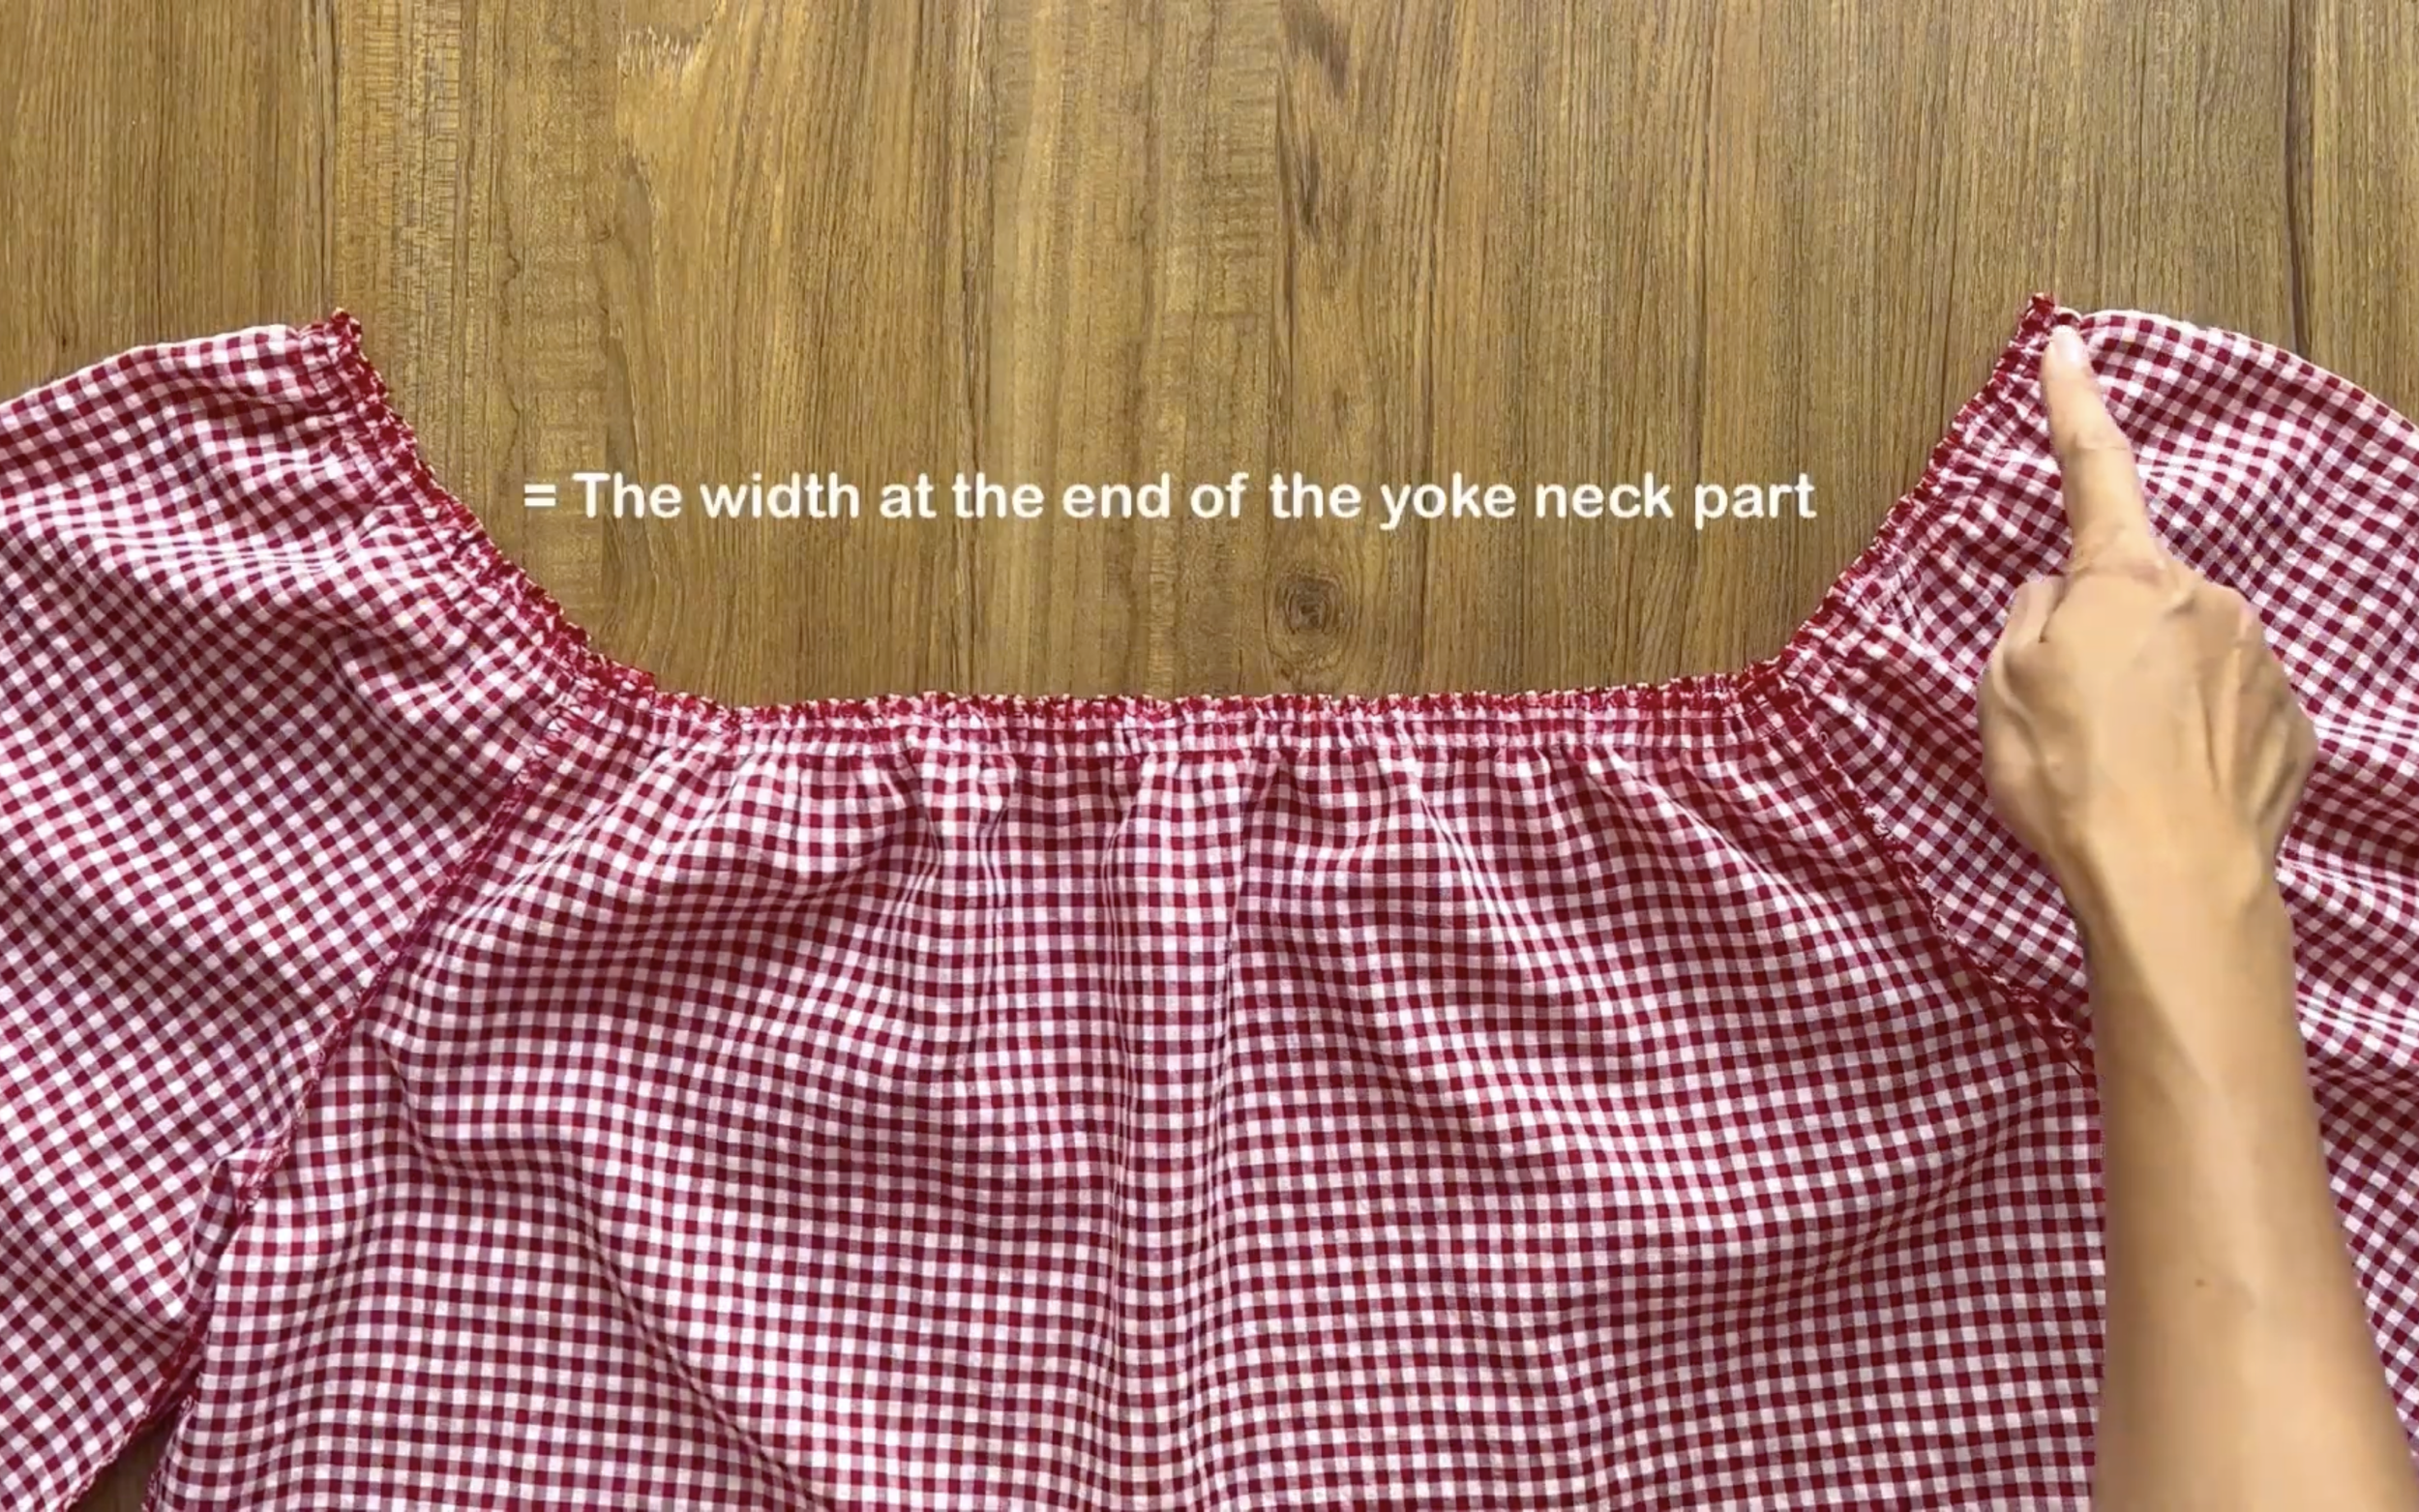
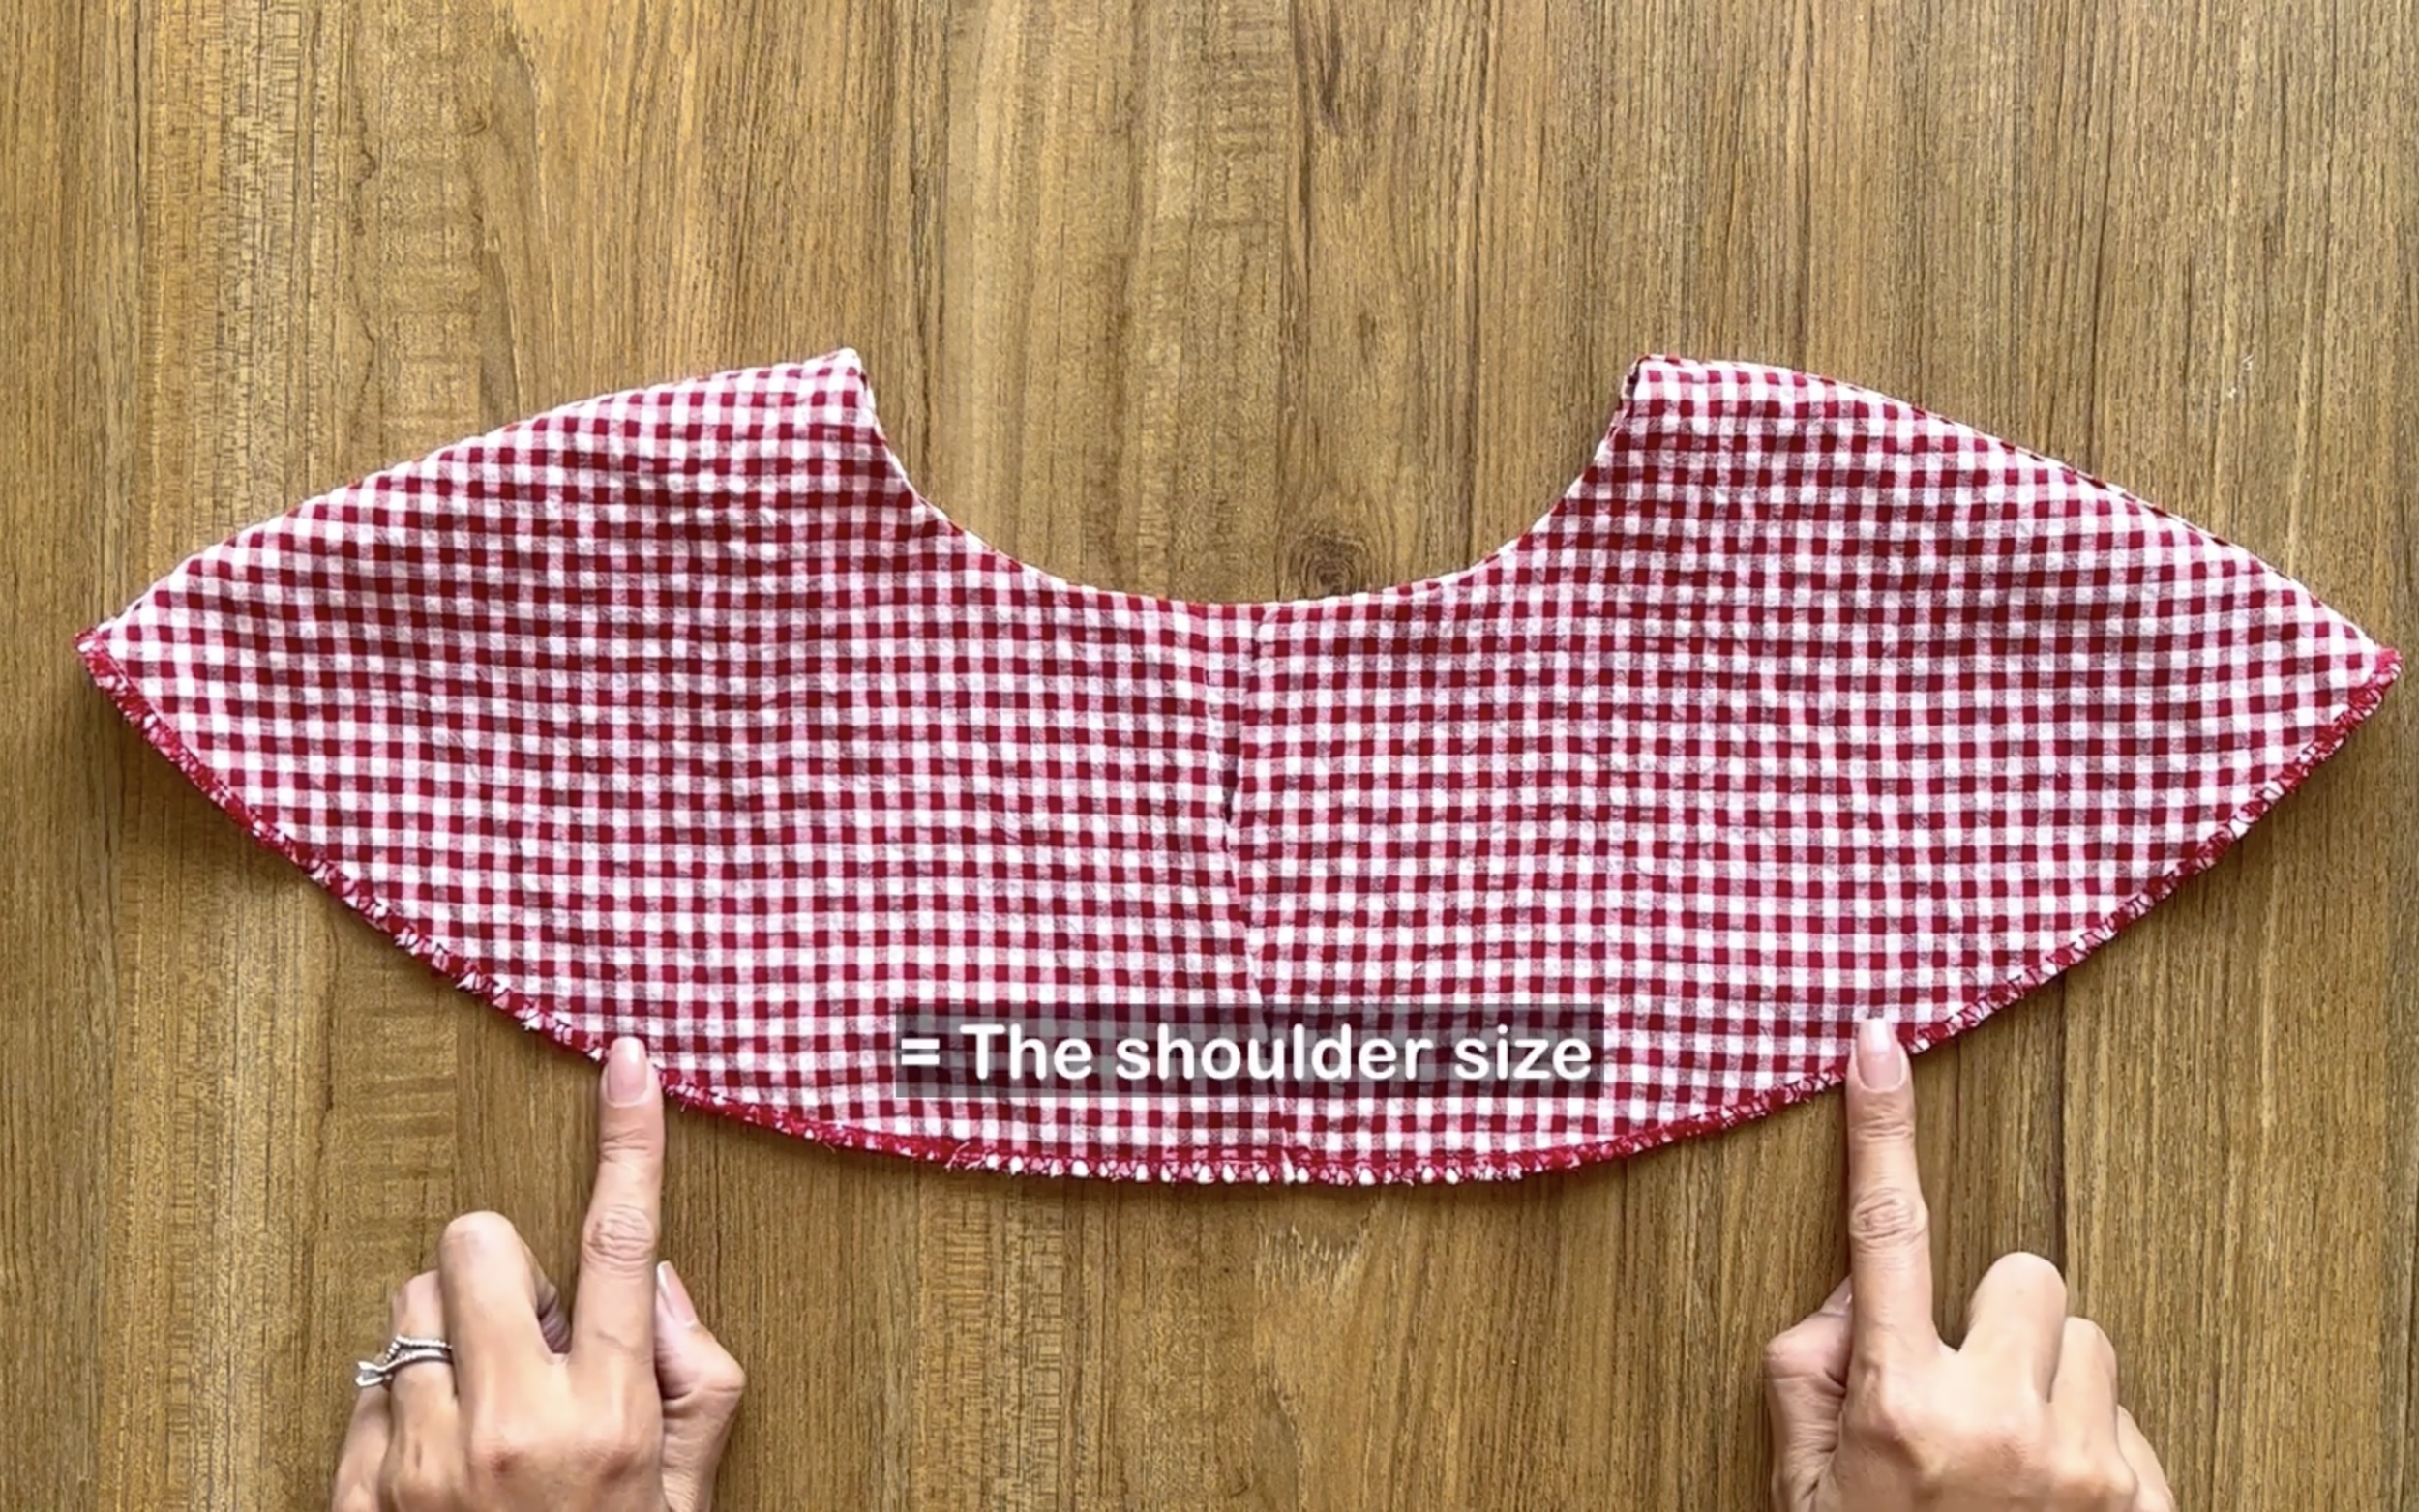
The final width of the gathering fabric will be the same as the width at the end of the yoke neck so they can be connected together later.
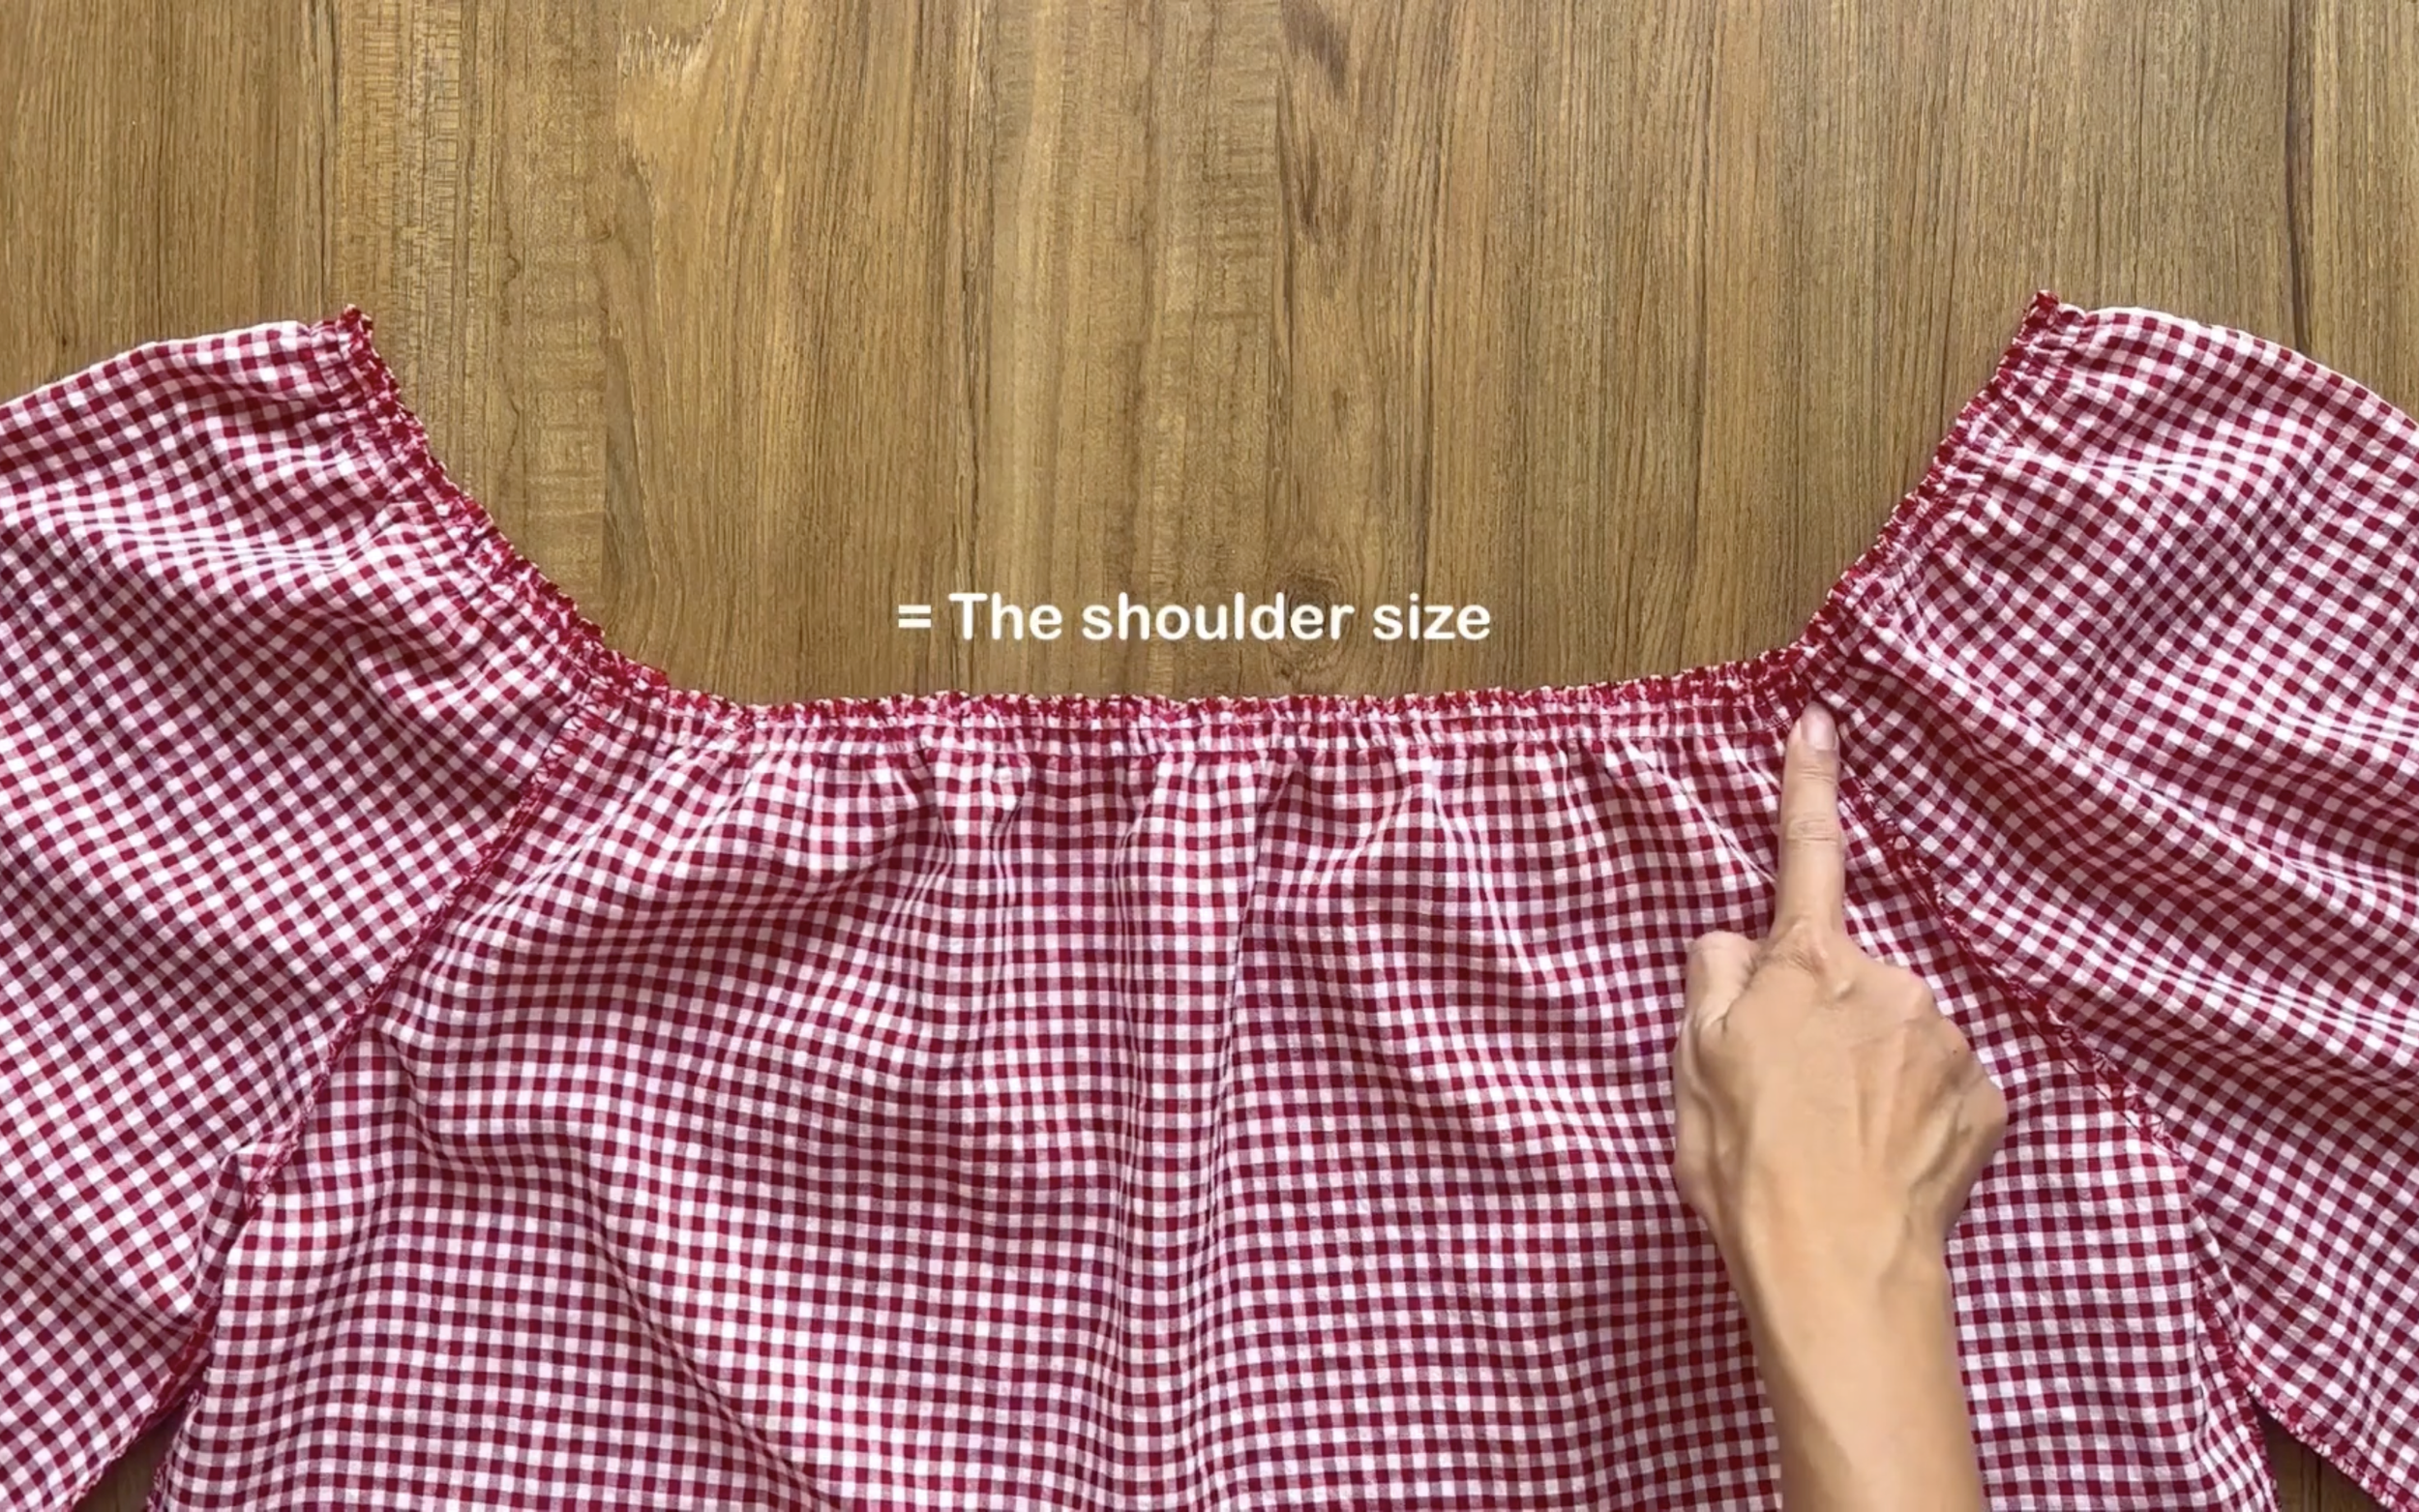
Make sure the width between two ends of the bodice part should be around your shoulder size.
CONNECT THE BOTTOM PART TO THE YOKE NECK PART
Before connecting the yoke neck to the bodice part, measure to mark the position for two ends of the top bodice first.
Then, connect them together later.
I made 3 different DIYs from 1 simple design | The abilities of sewing are from your own creativity
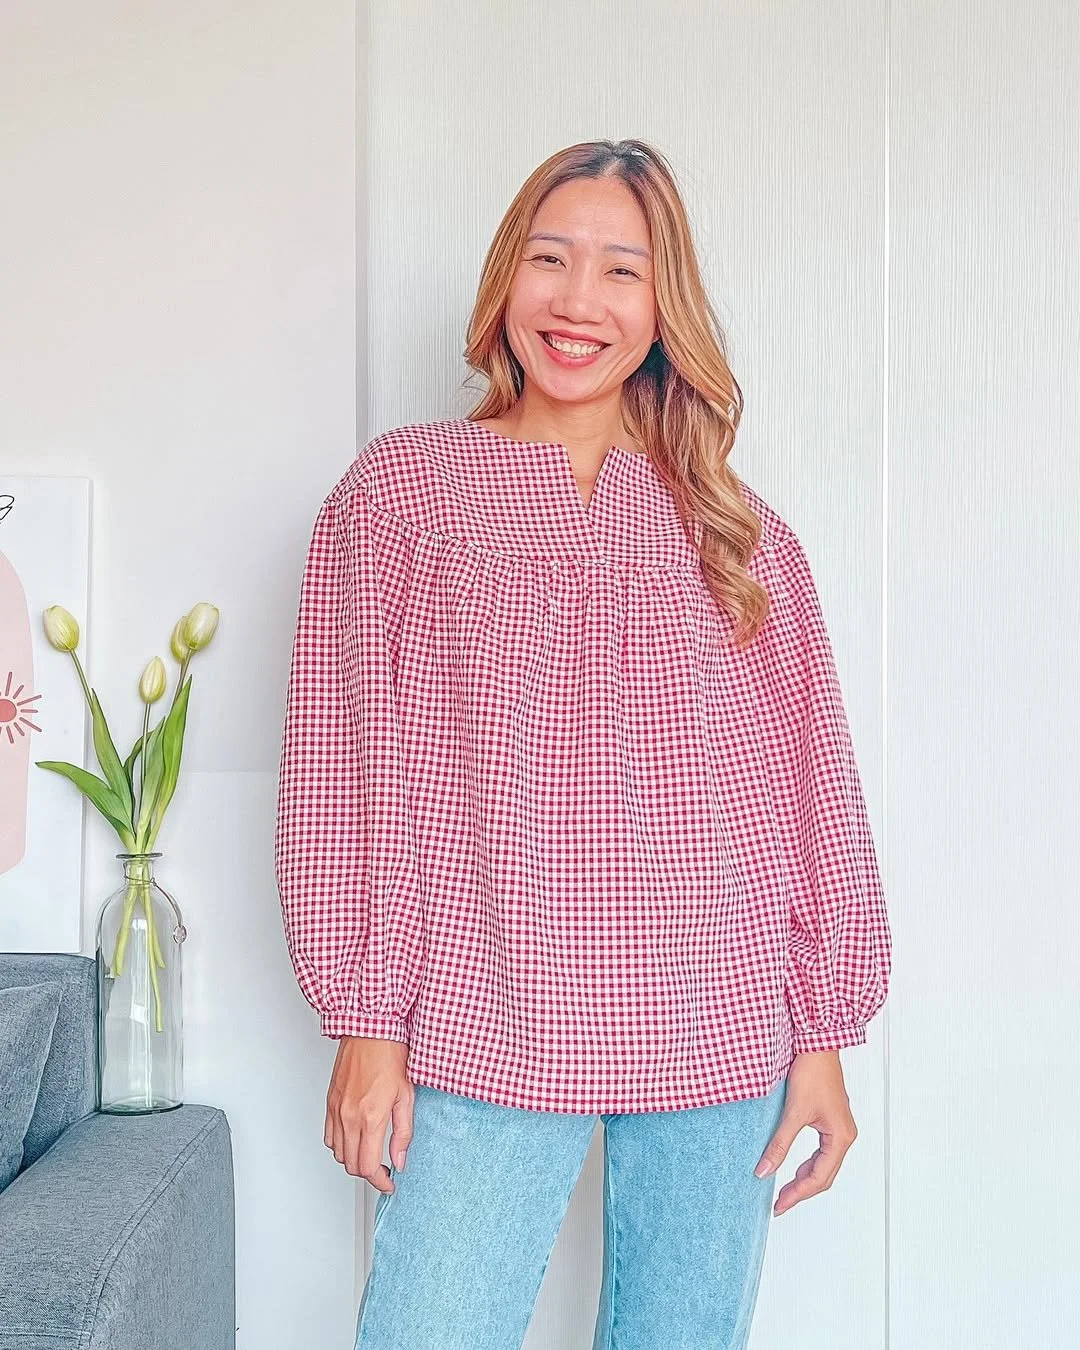
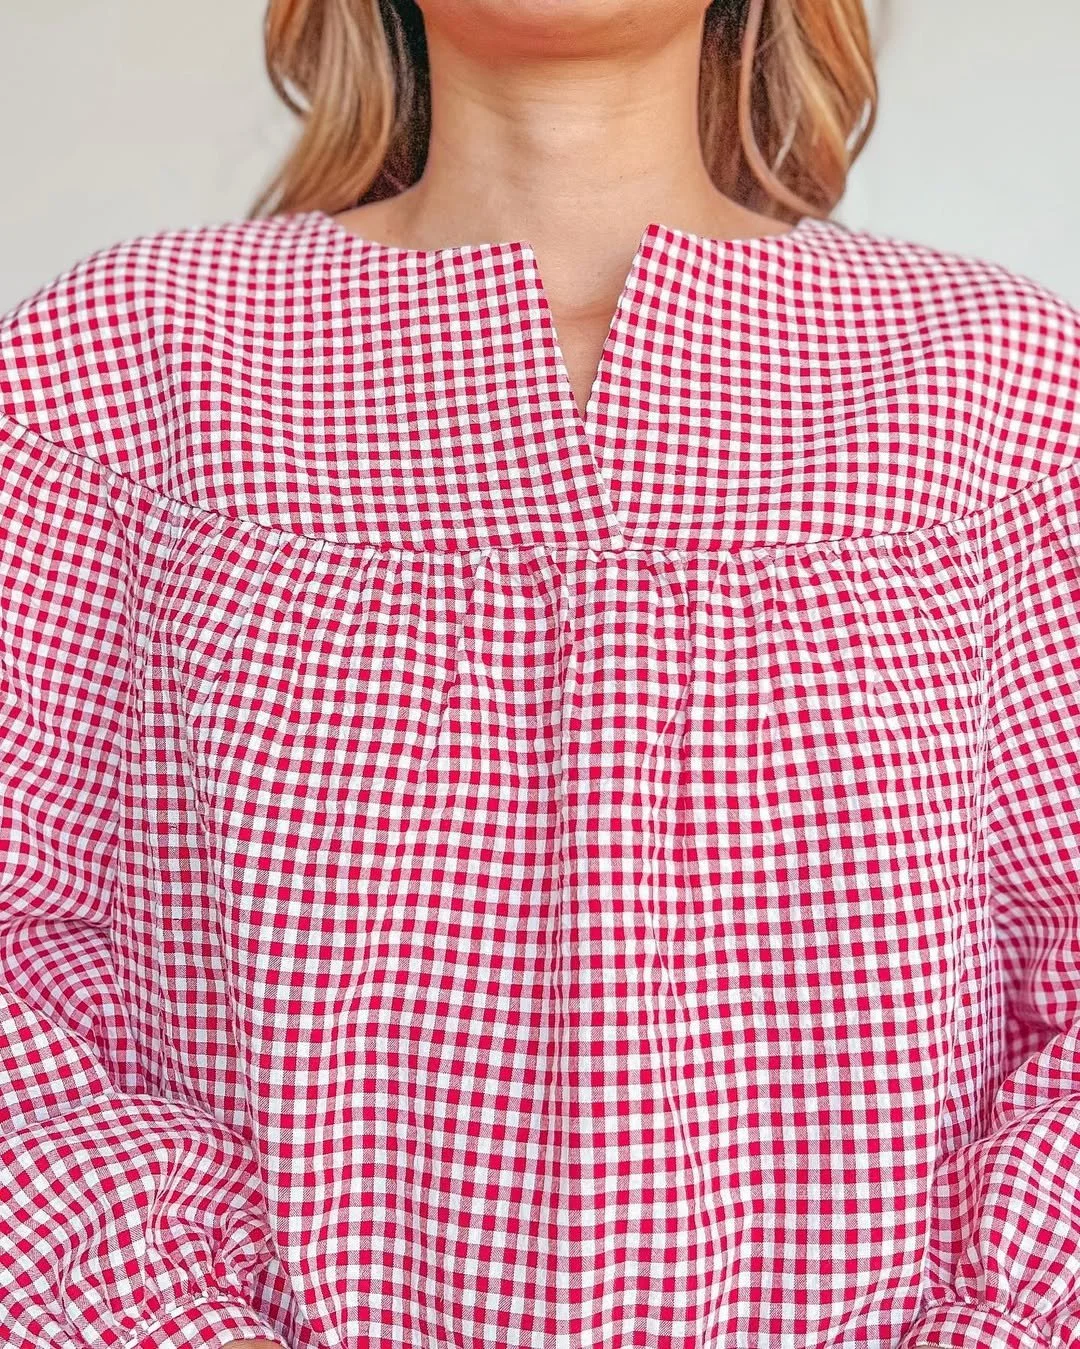
And look! The DIY blouse is all finished!
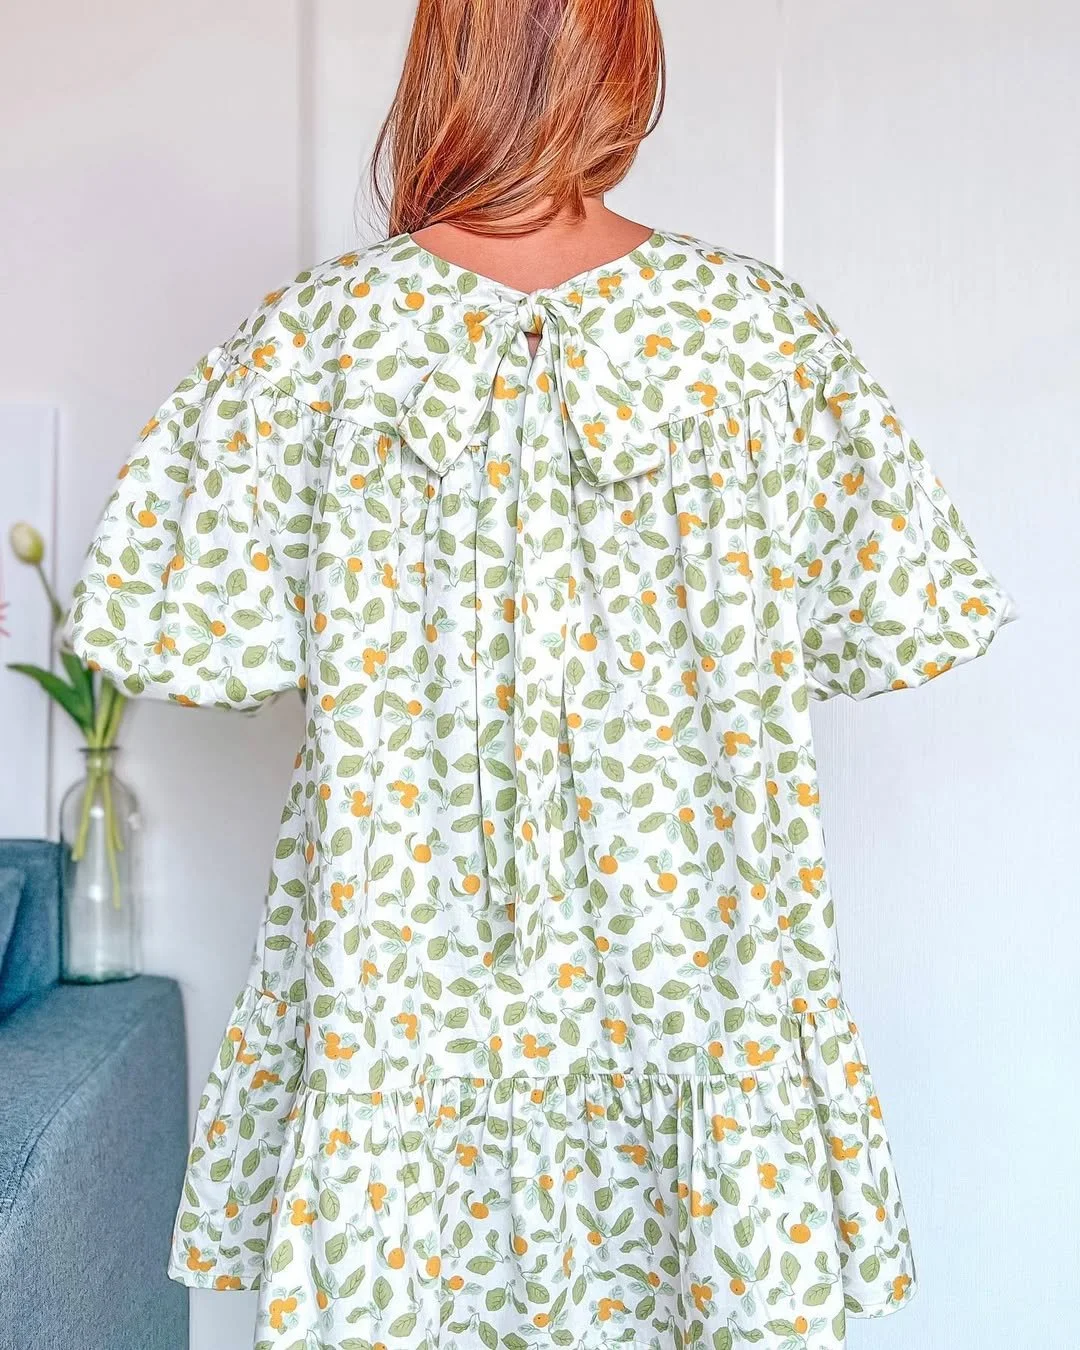
I'm so happy with how wonderfully comfy it turned out. That yoke neck shape has such a cute vintage feel, which is exactly why I love it.
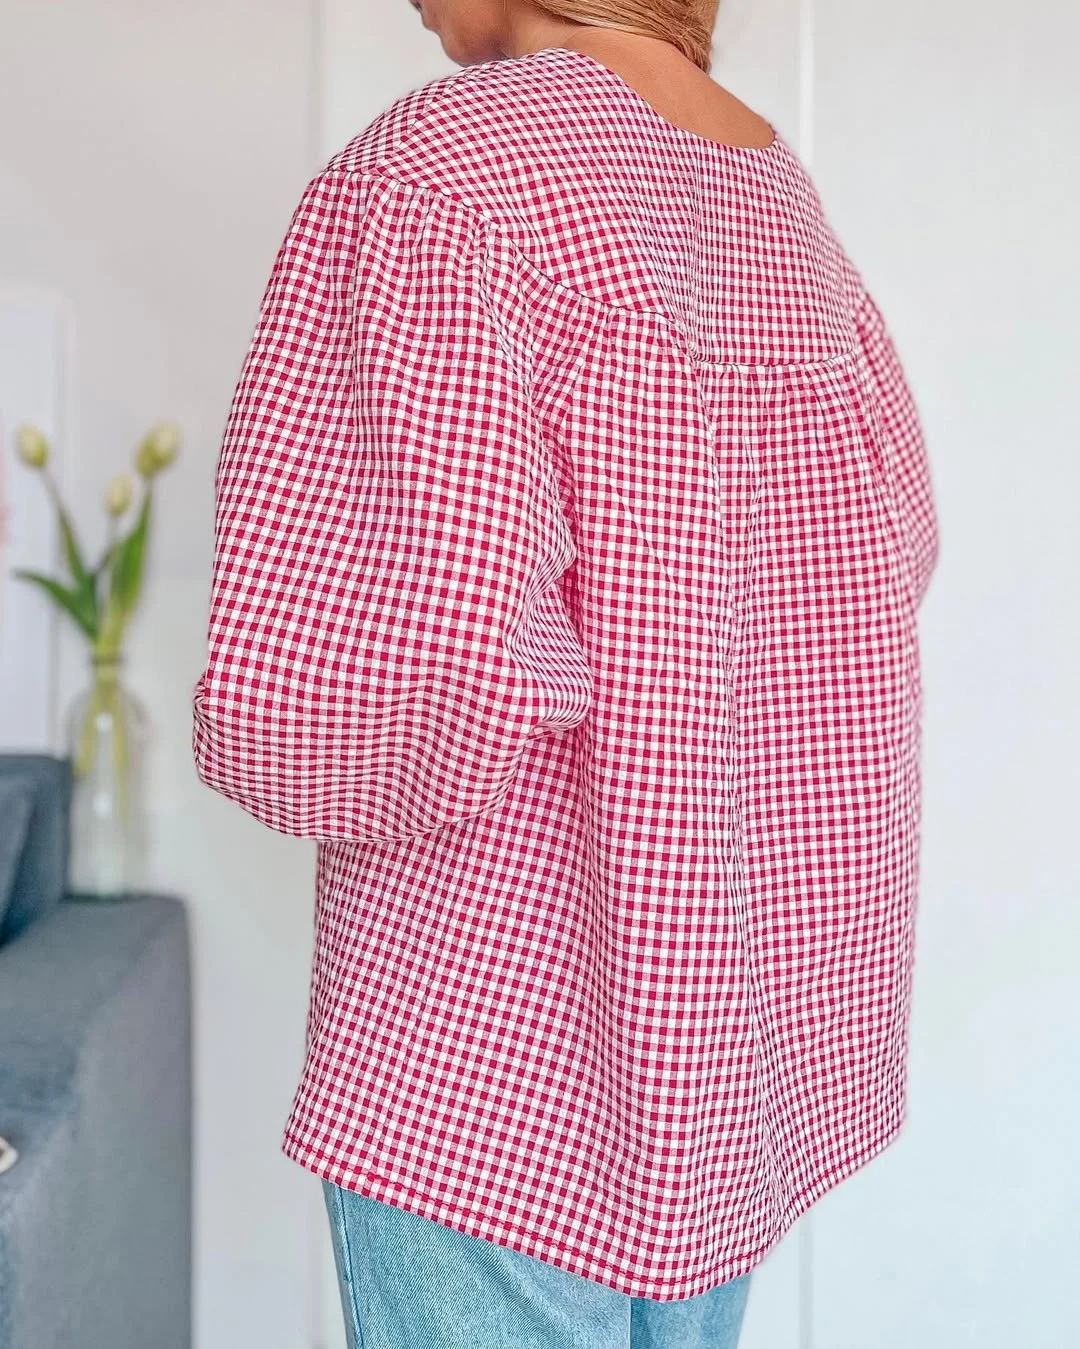
Here's a neat secret: I made the neck opening the same on the front and back, so you can wear this blouse either way! This little trick also makes it perfect for us to use later for more fun DIY projects.
Hope you love this easy-to-wear top! Happy sewing!
2. THE BABYDOLL DRESS
THE FRONT PATTERN OF THE YOKE NECK
Keep the same pattern for the back of the yoke neck.
At the front of the yoke neck, make the open area of the front neckline a bit bigger because a big bow tie will be added there later, but you can keep the same pattern if you just add a small bow tie.
Here's how the yoke neck looks like with the new front neckline
To make the bow tie, cut a long fabric line with 10 cm width (two times the width of the bow tie that is wanted plus 2 cm for seam allowance) and 50 cm length (the length of the bow tie that is wanted).
Connect two length lines and one side of the width line of the fabric together first.
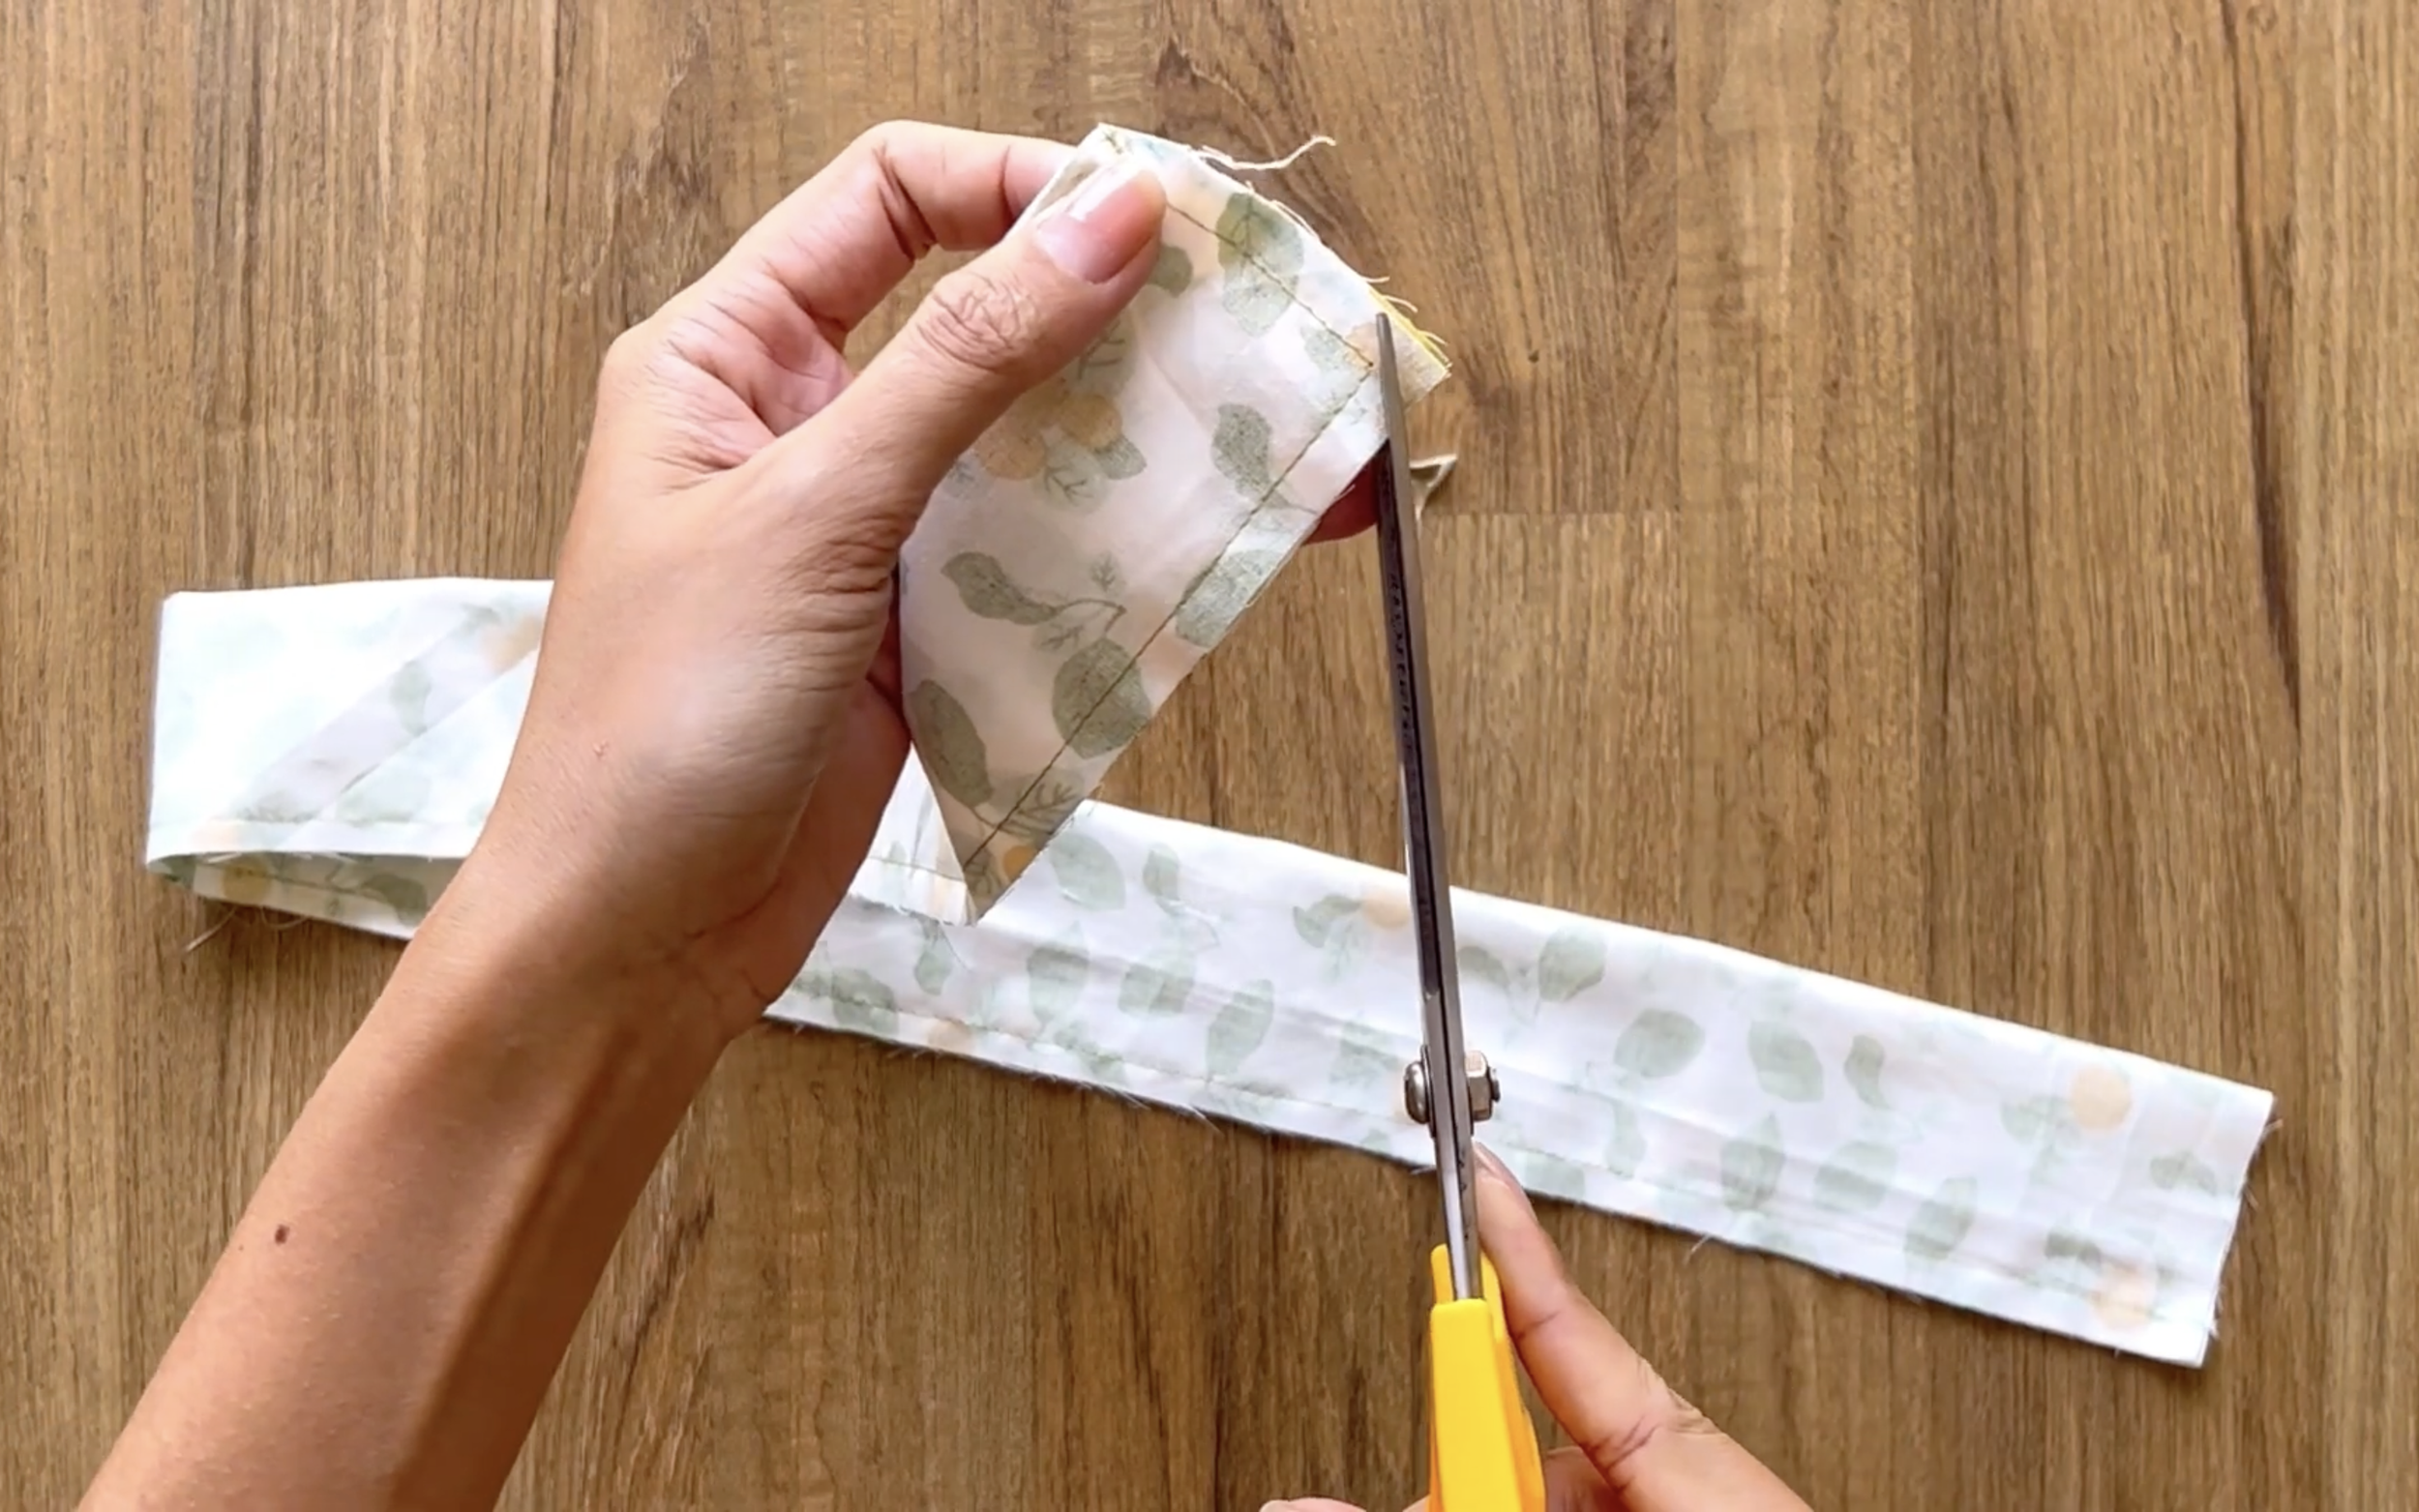
After sewing, make a small cut at two ends of the width line before turning it.
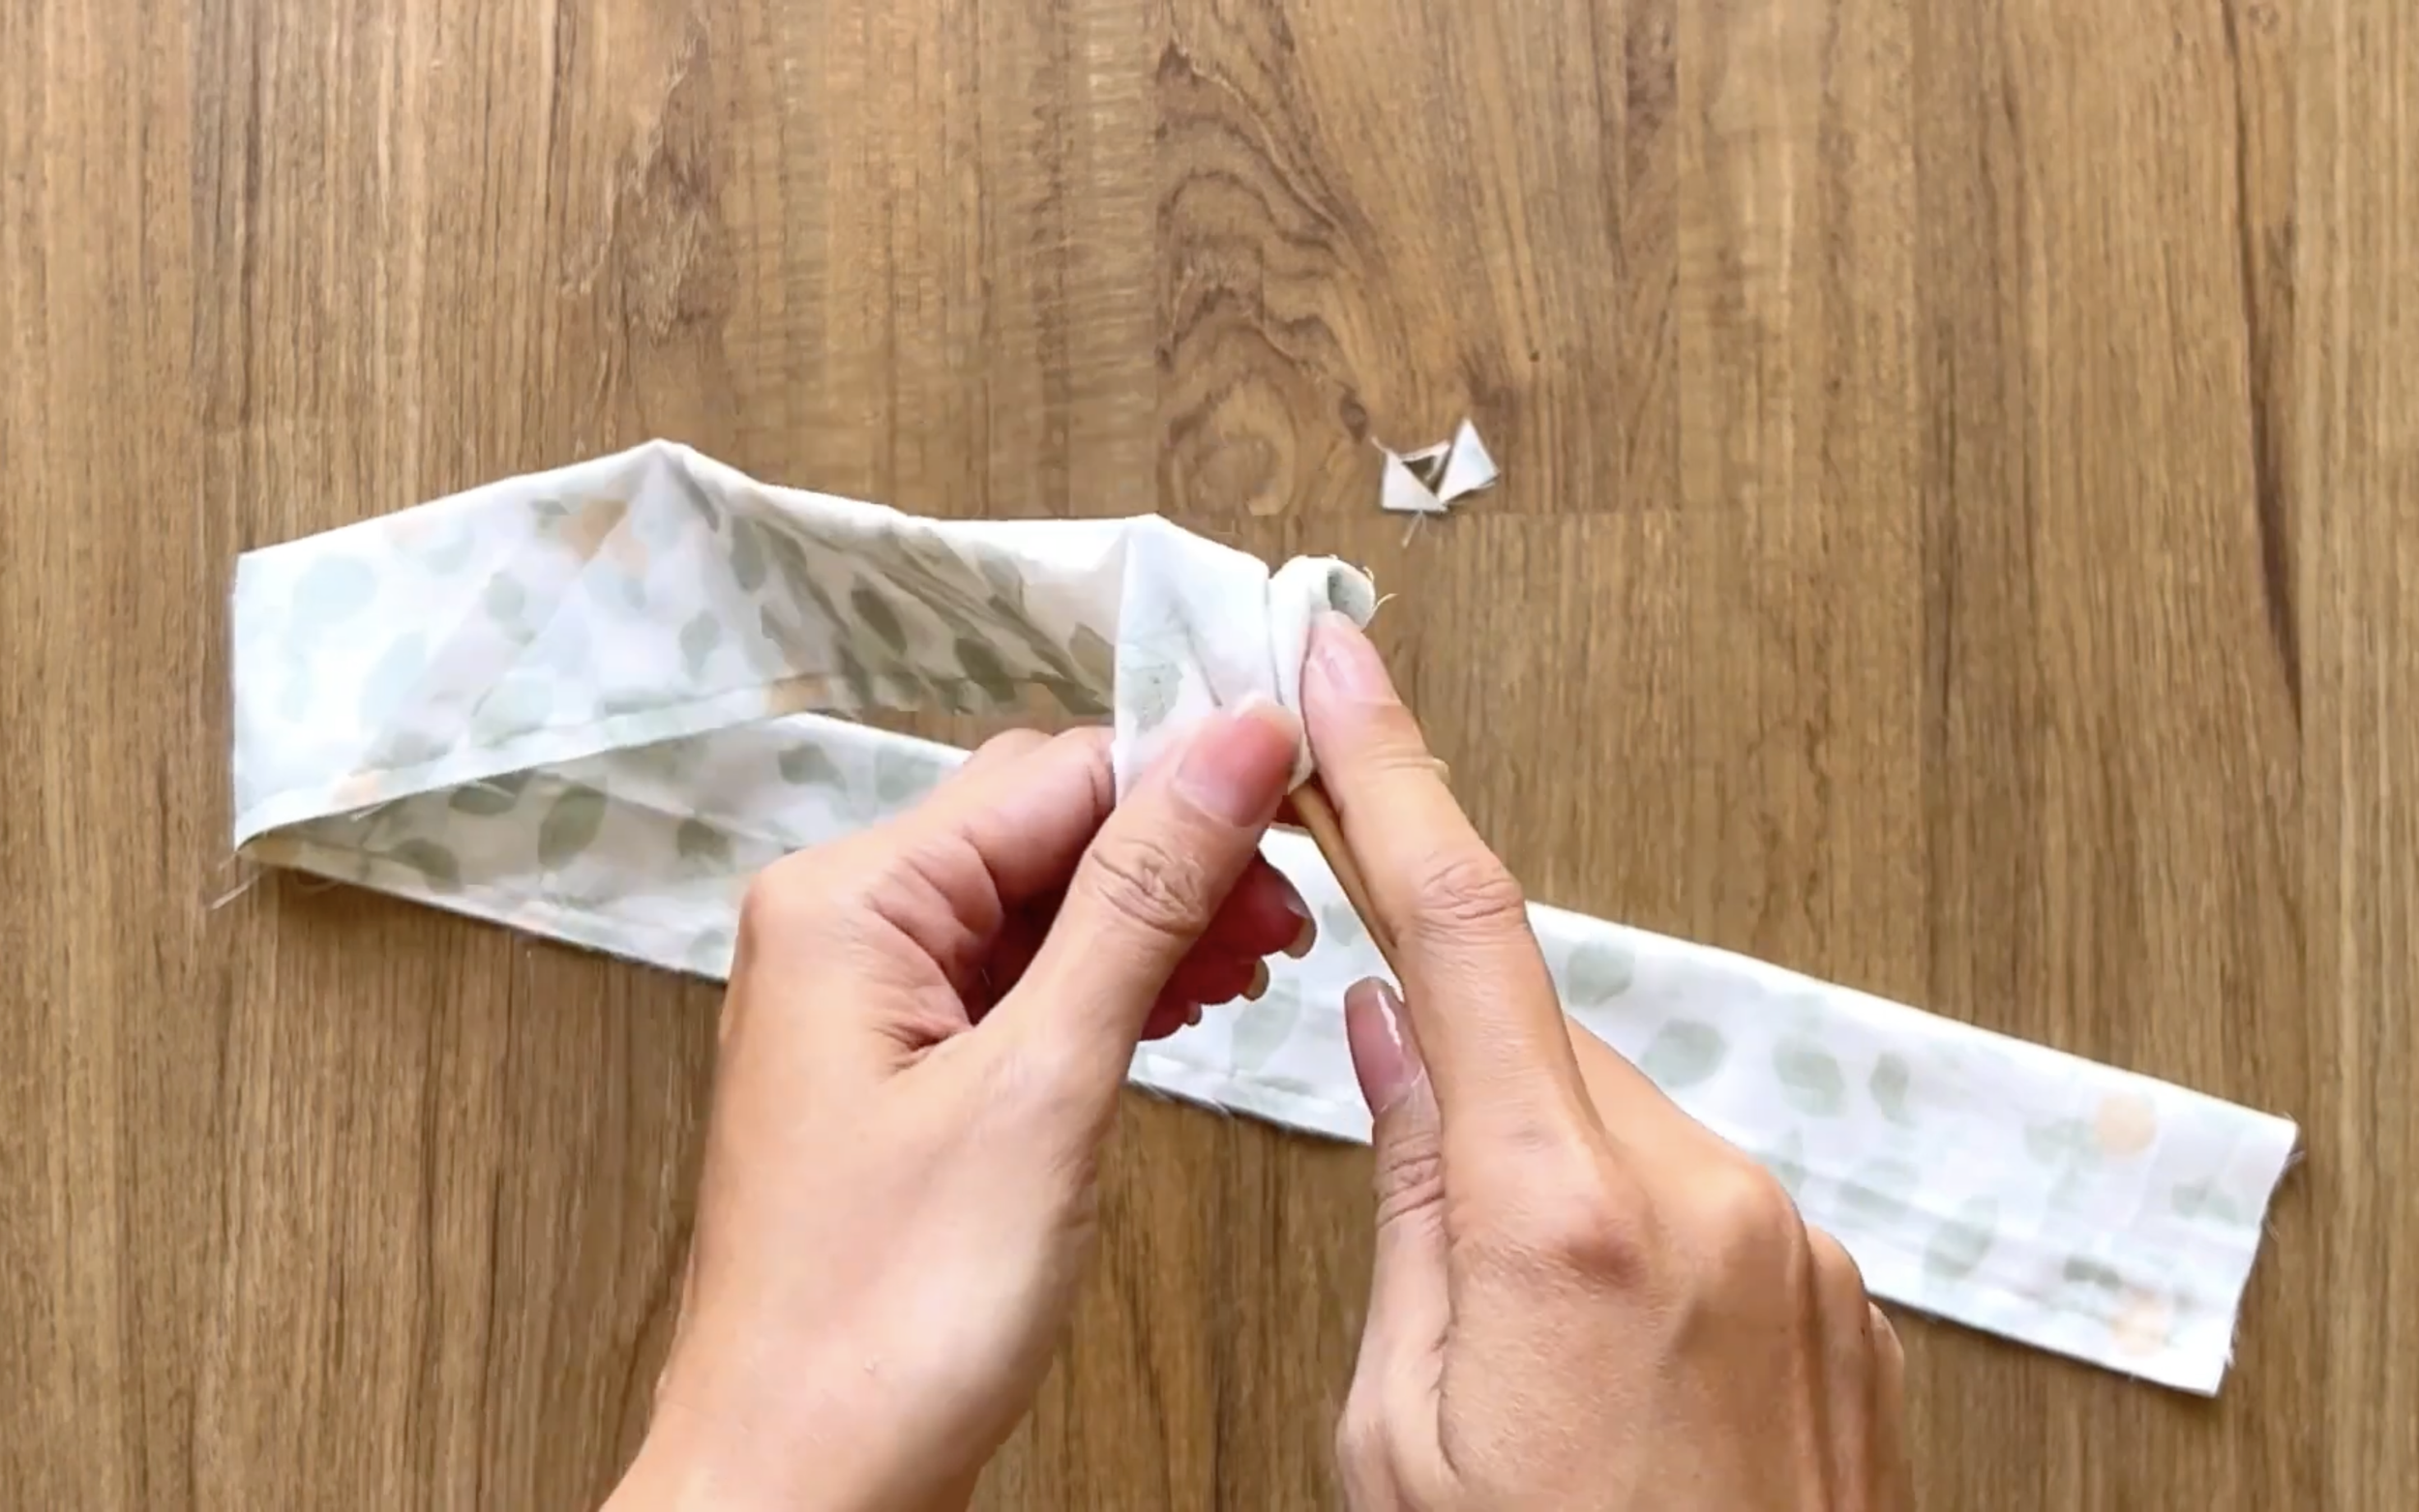
Then, use a stick to turn it inside out.
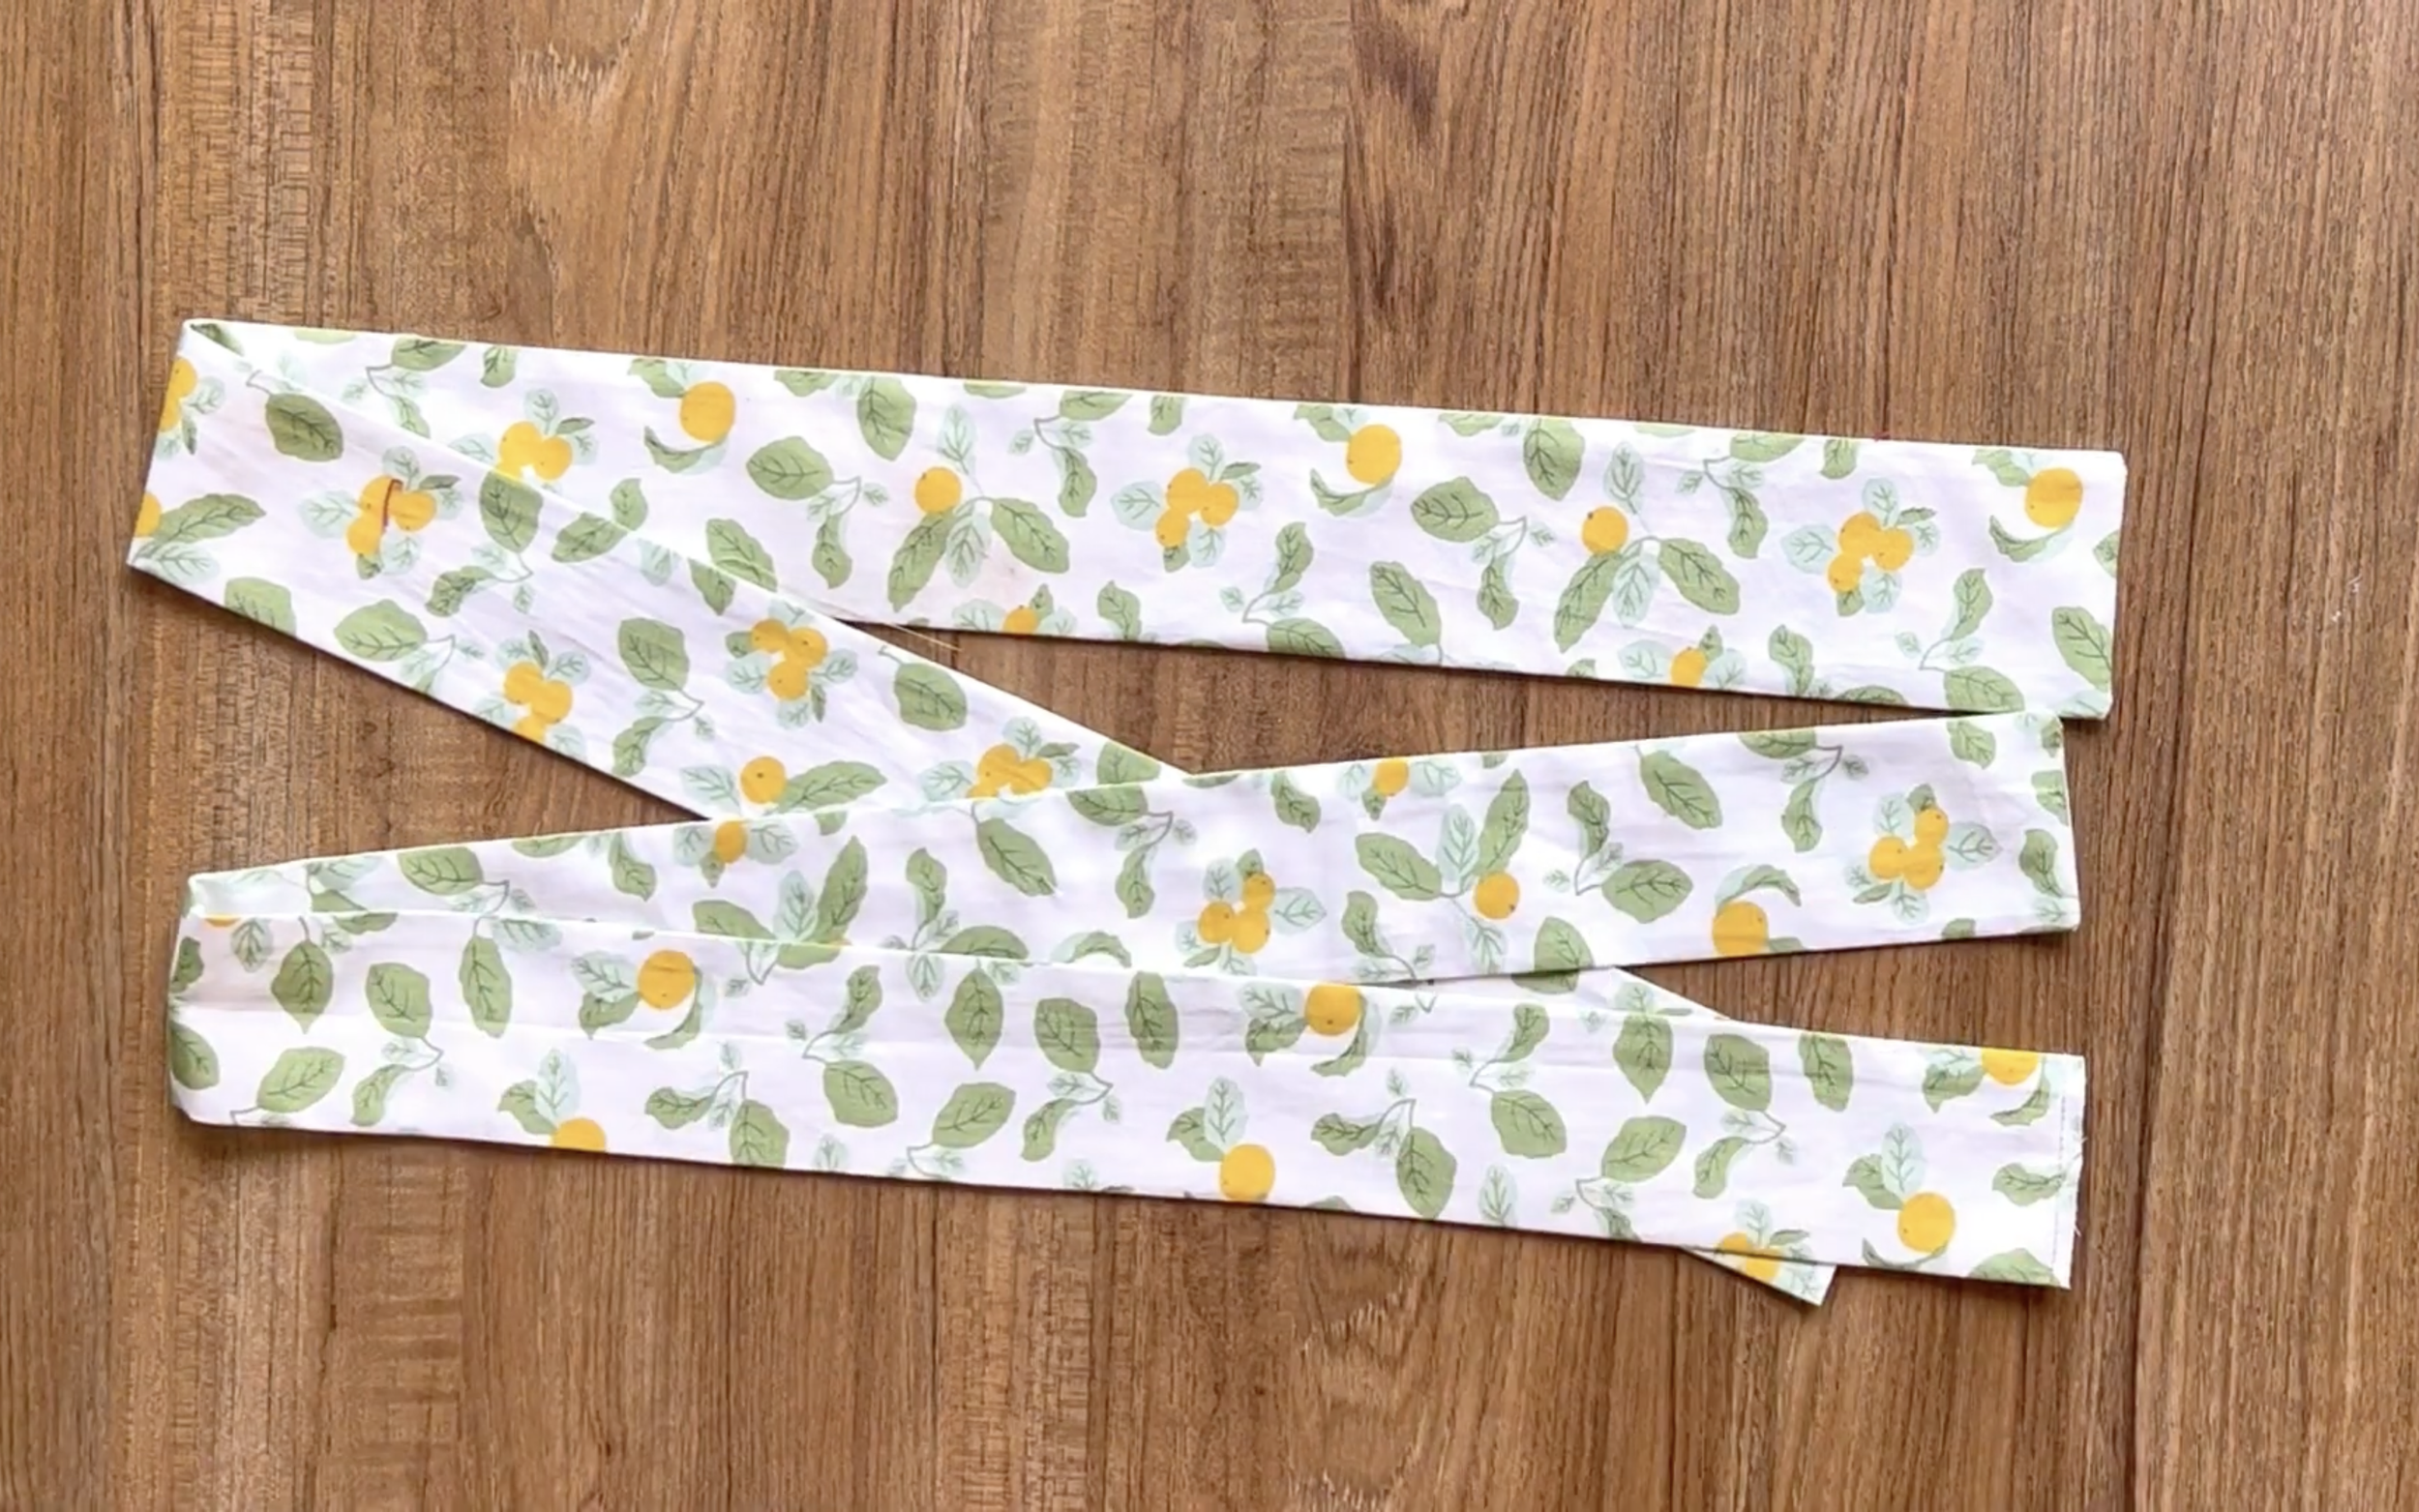
Use the iron after that to make the tie nicer. You will need to have two ties like this.

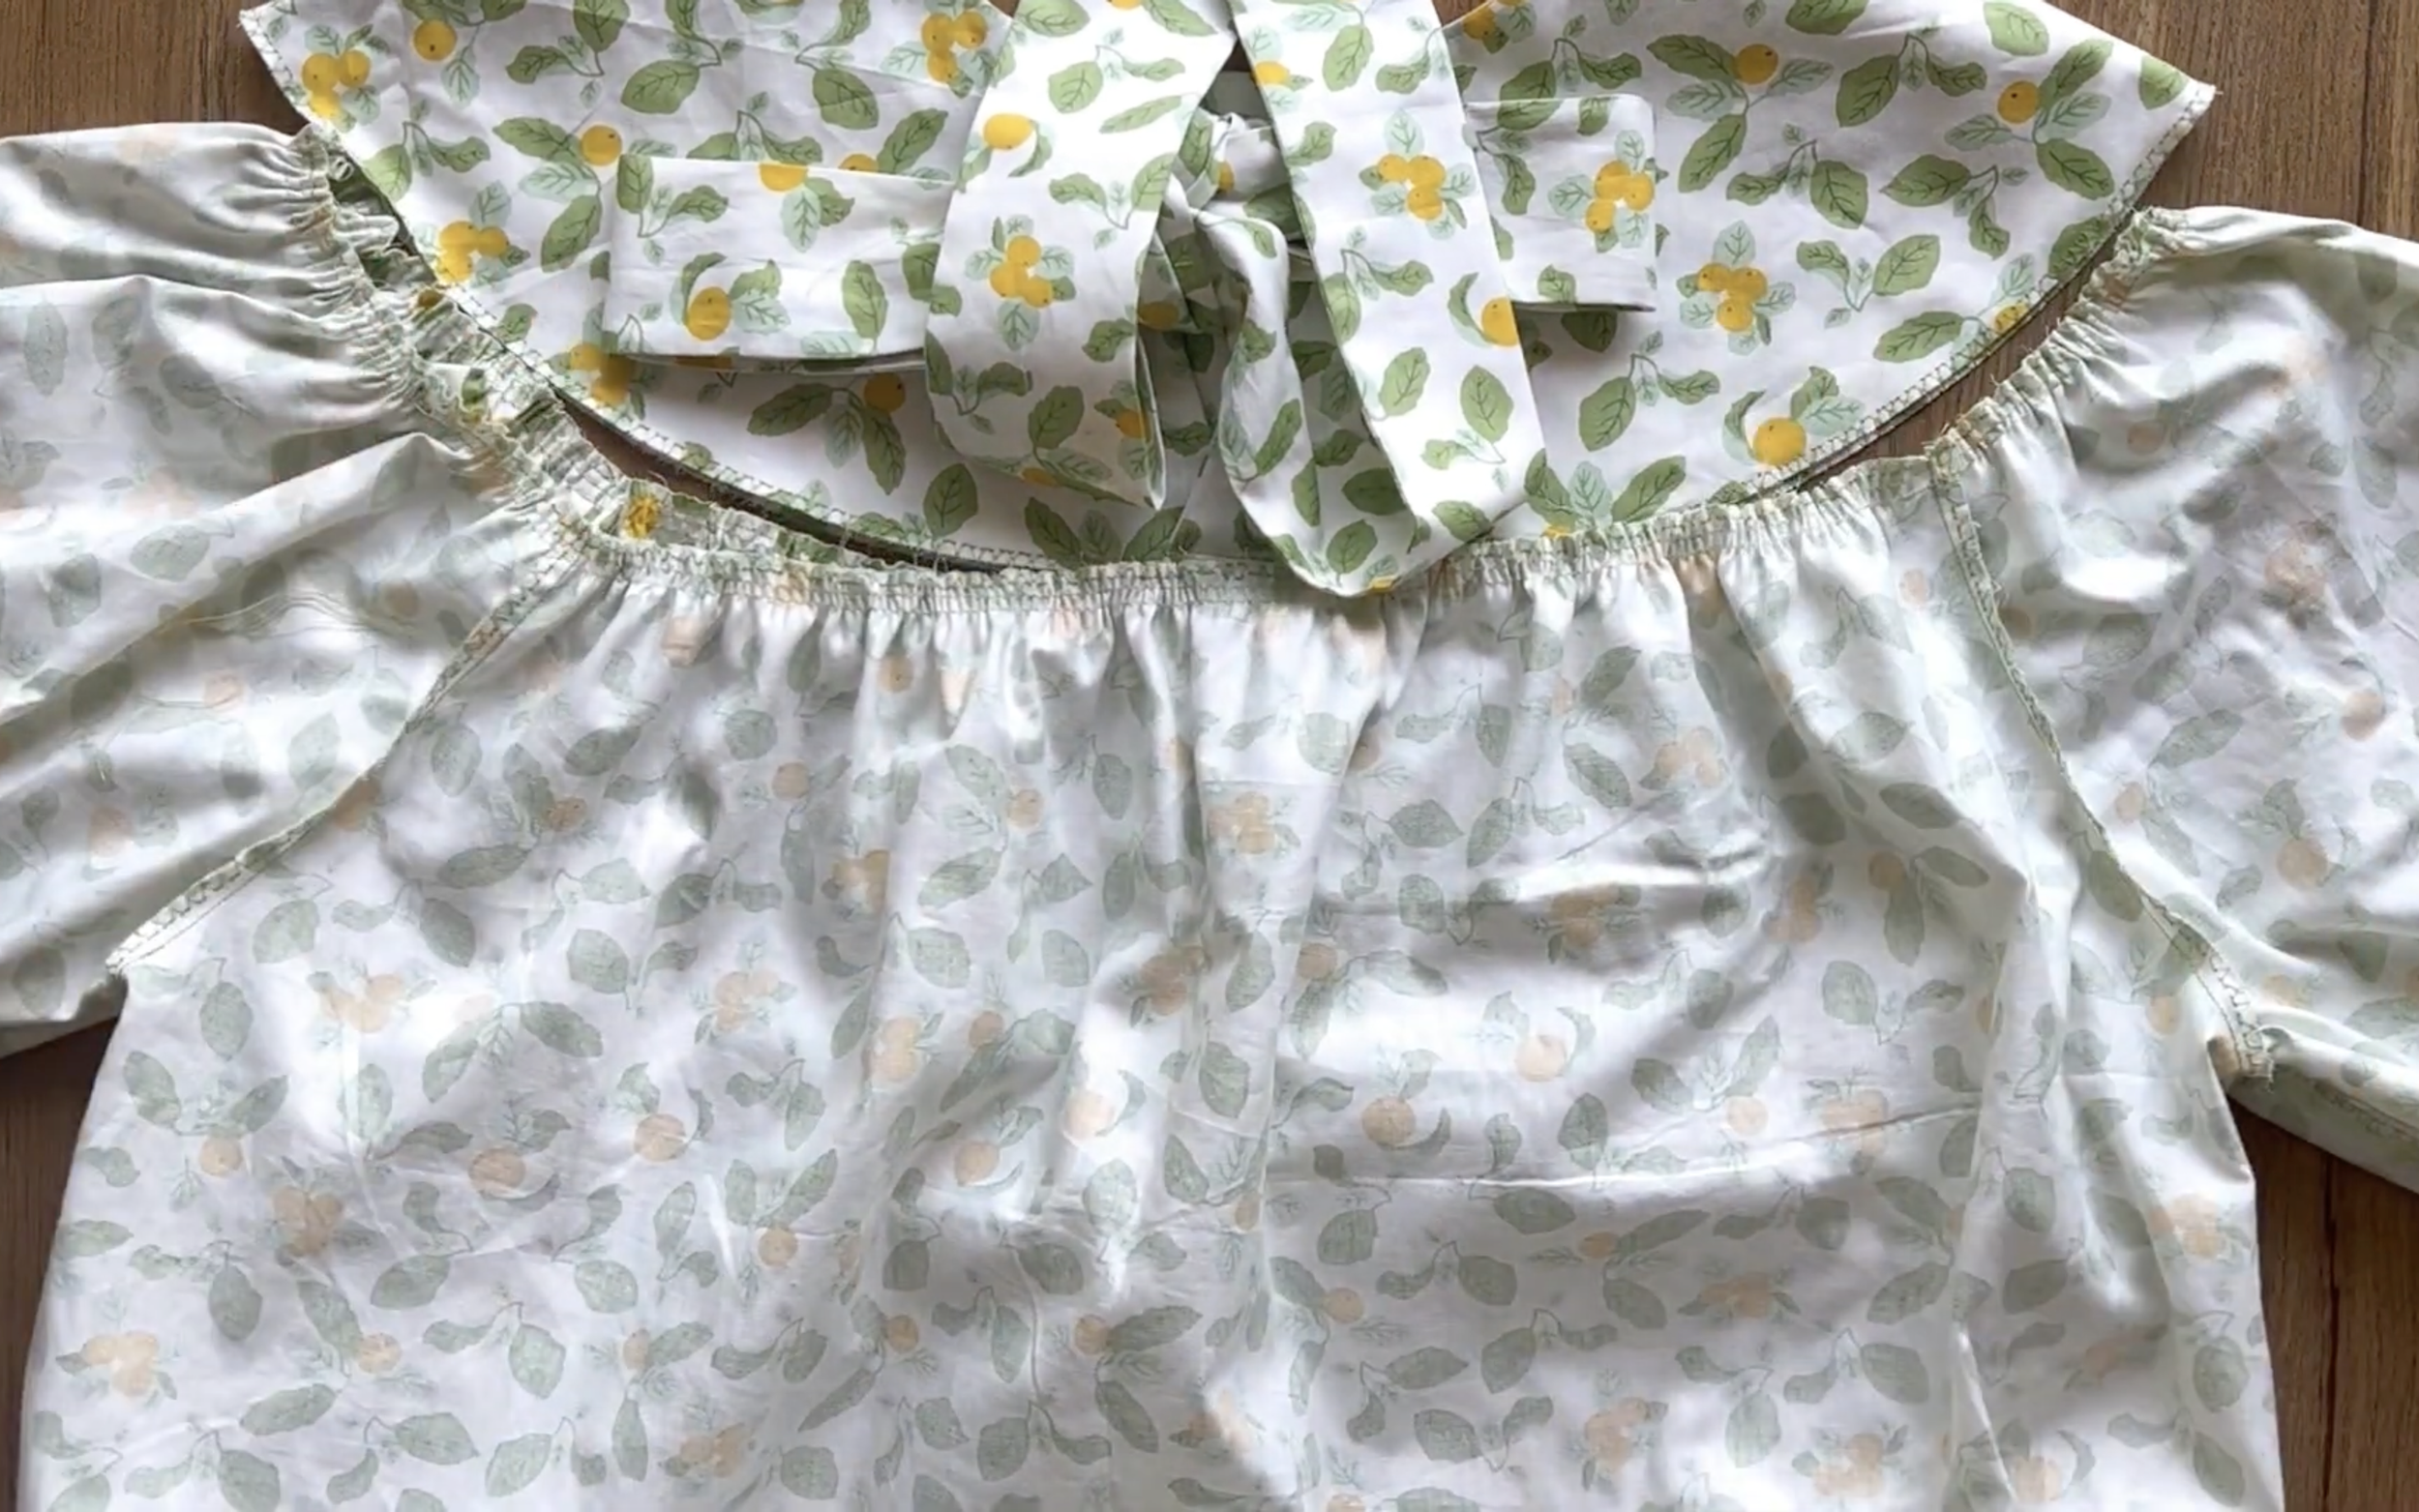
Now, add one end of each tie to the top of the open area of the front neck. Make sure the tie will be in the middle between two pieces of the yoke neck.
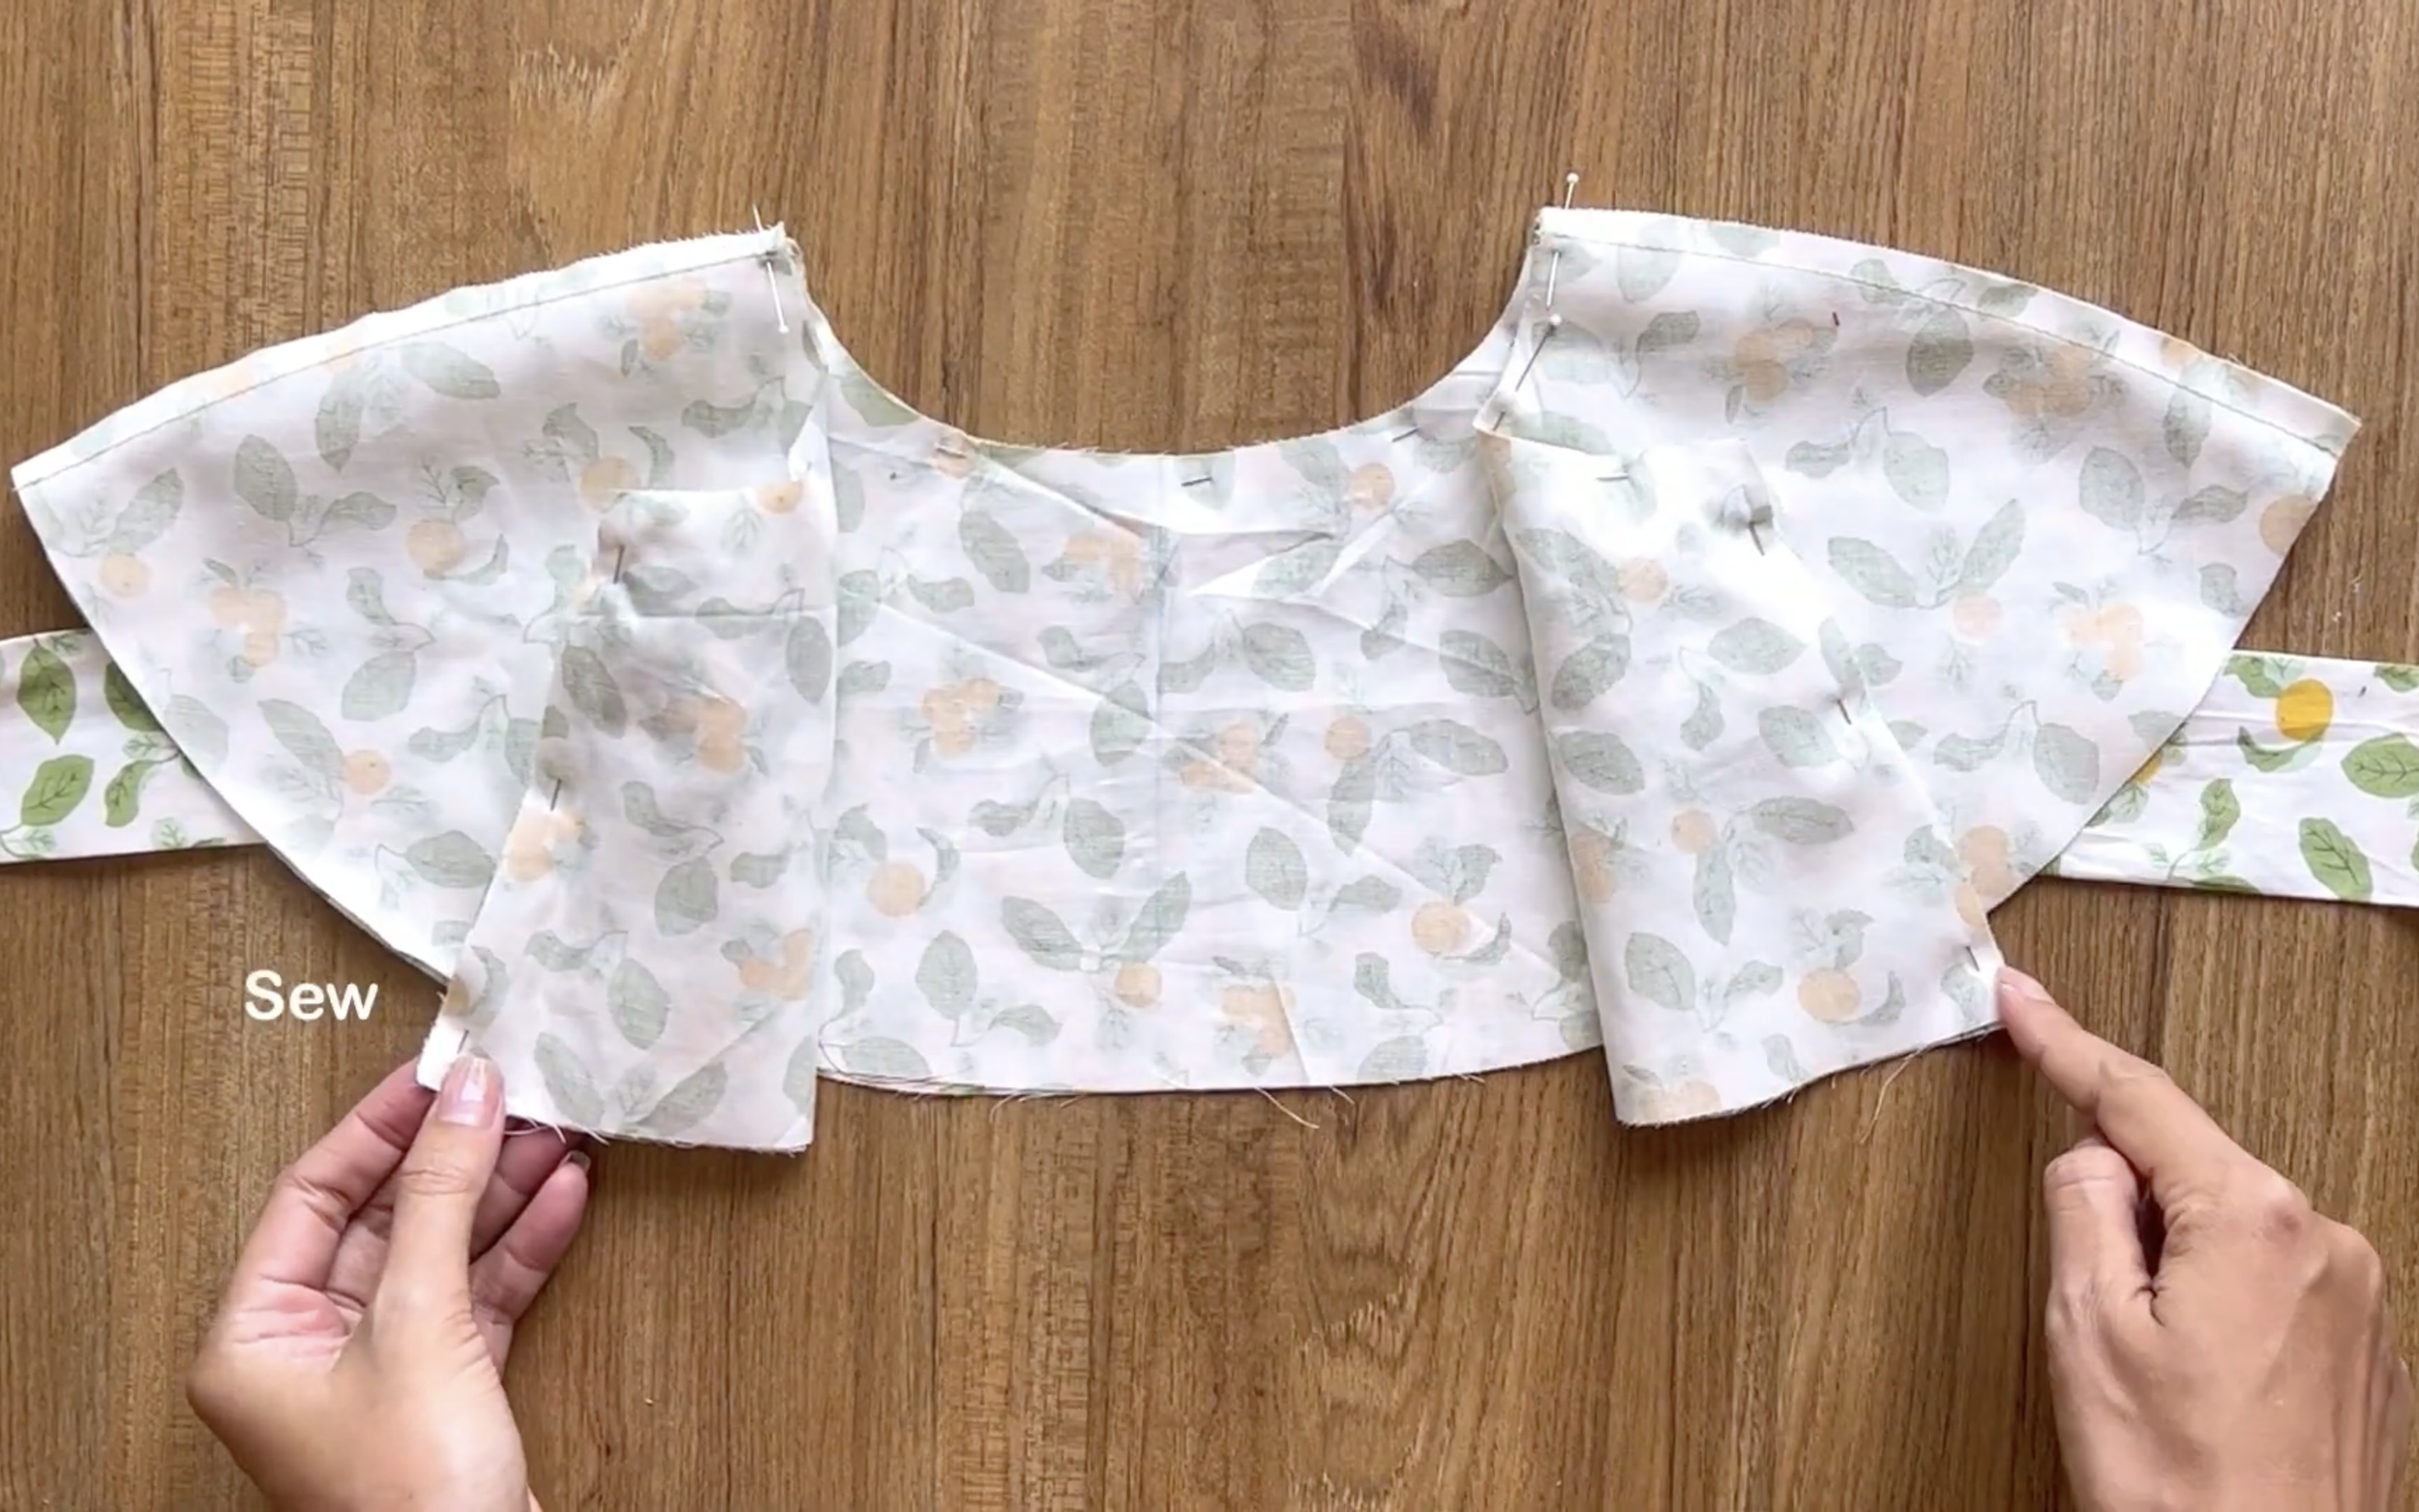
Then, sew to connect them all together.
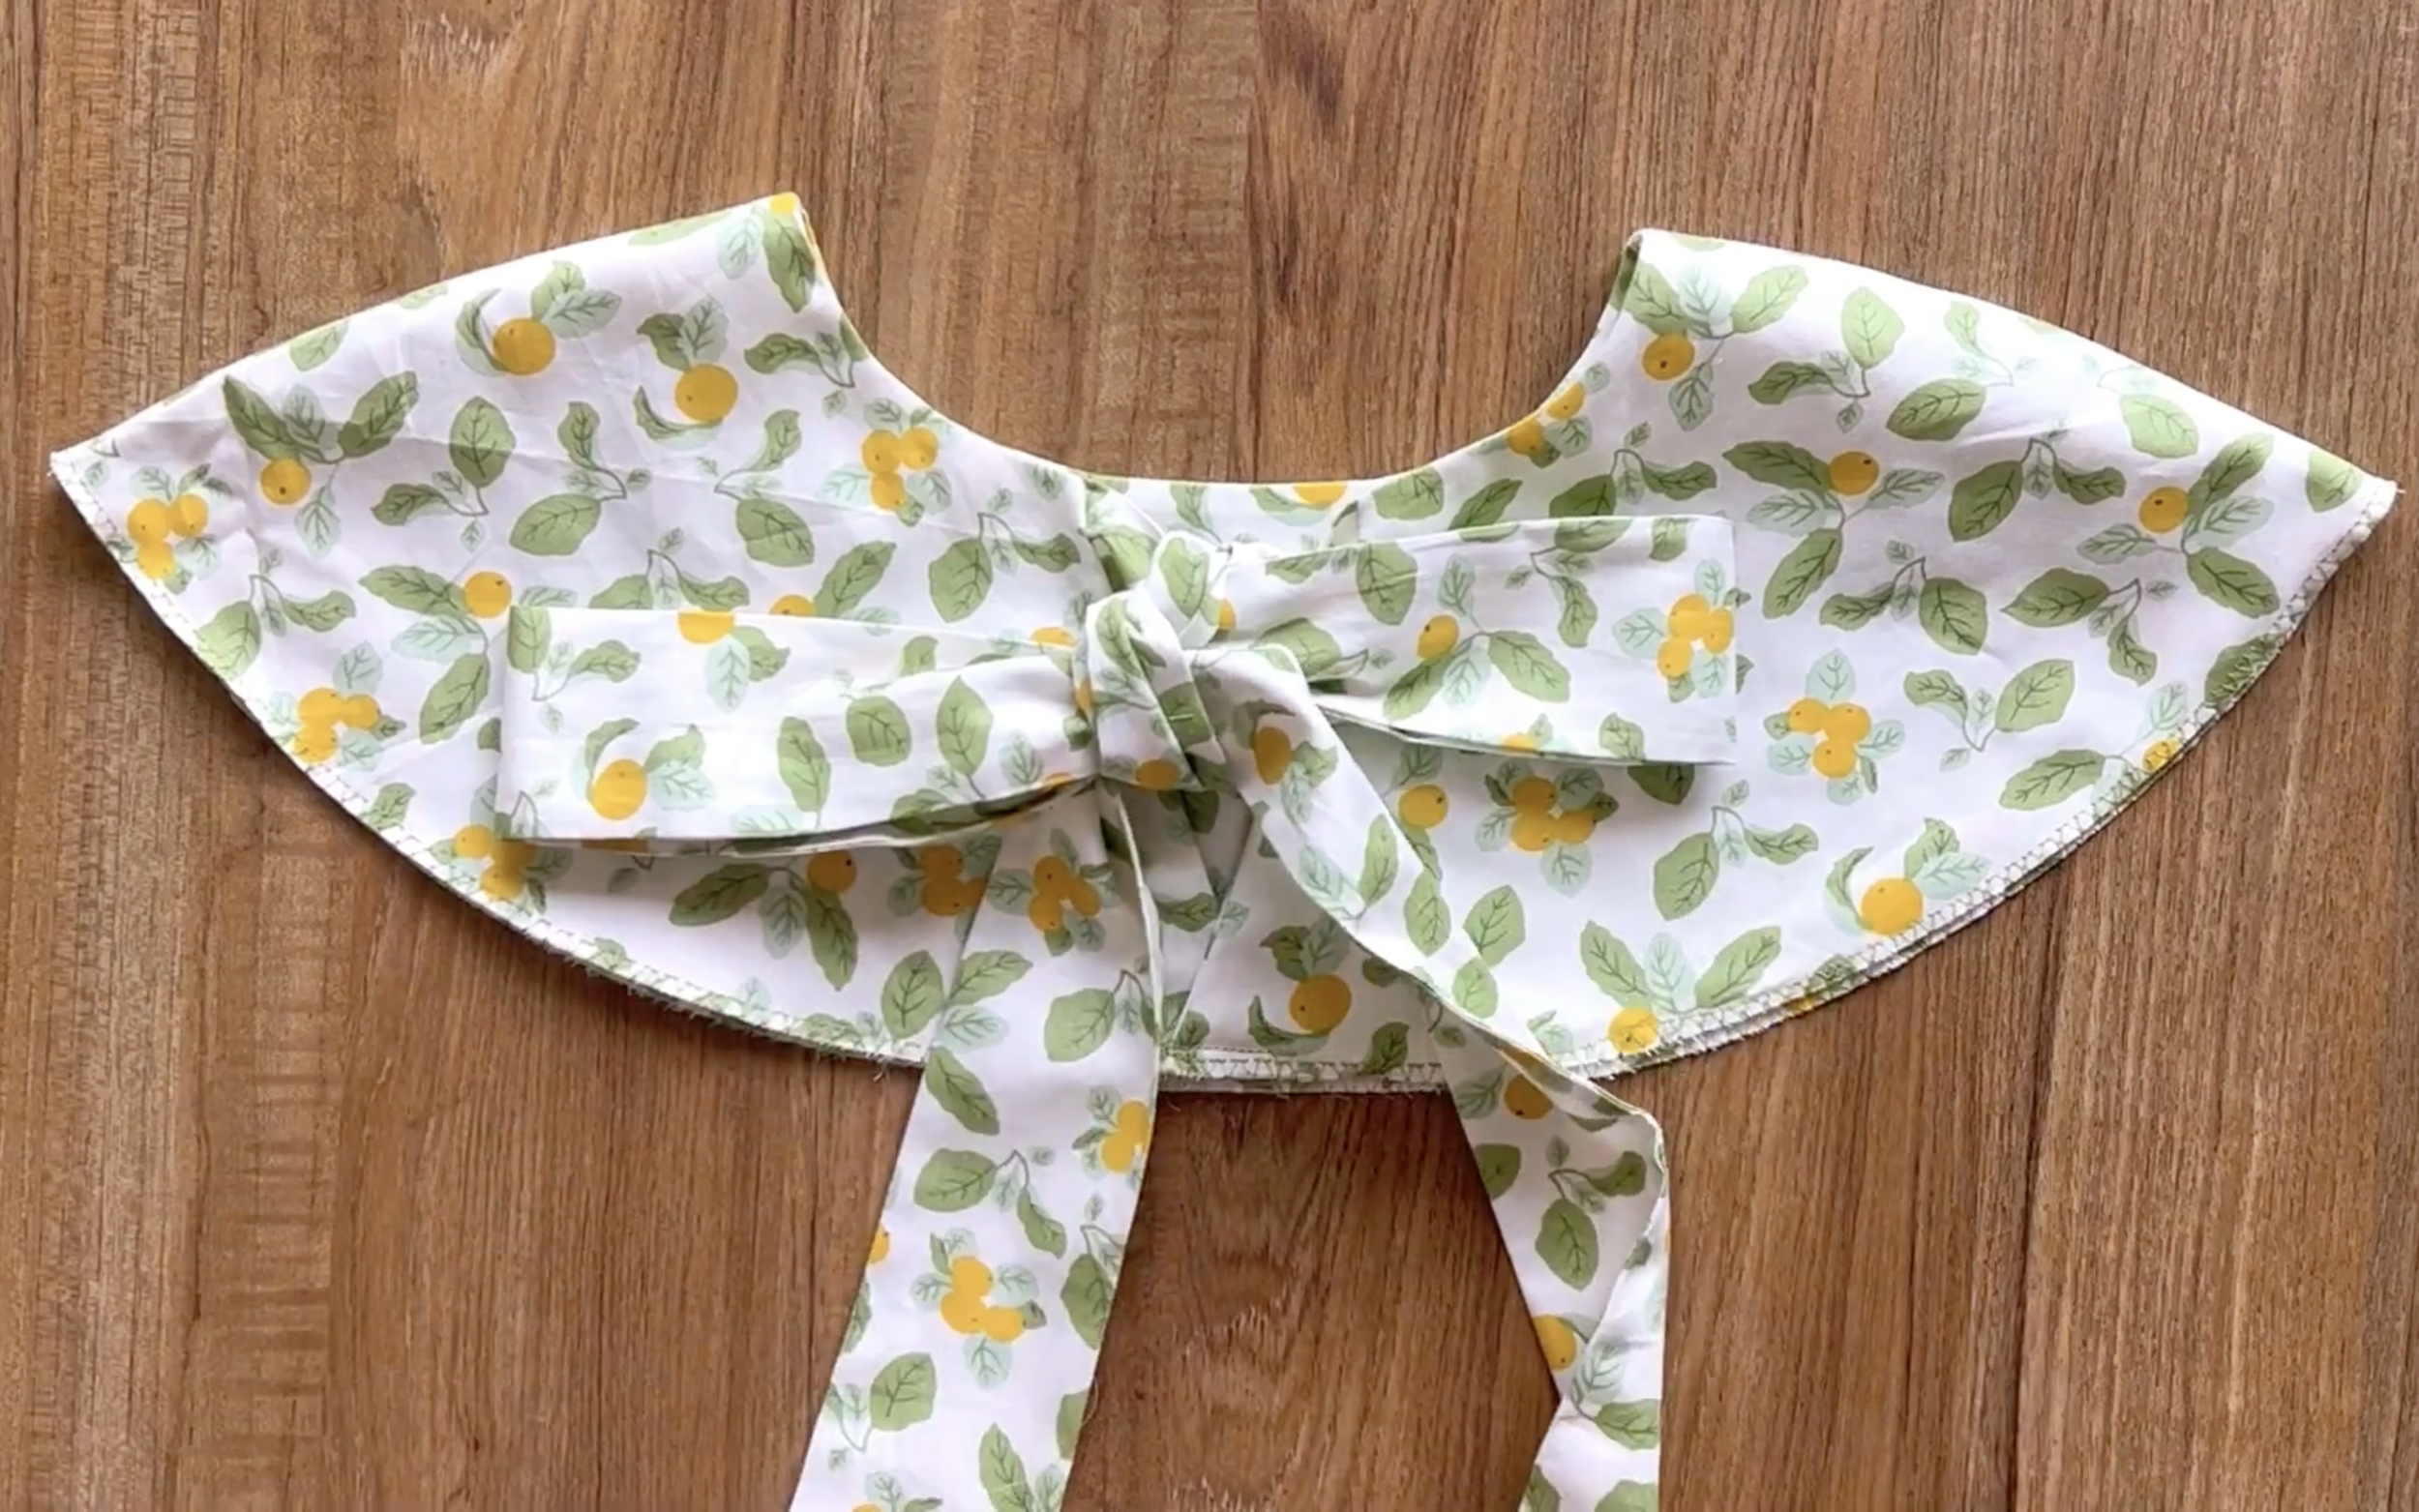
Here is how your new yoke neck looks like after all.
THE SKIRT PART
THE SKIRT PATTERN
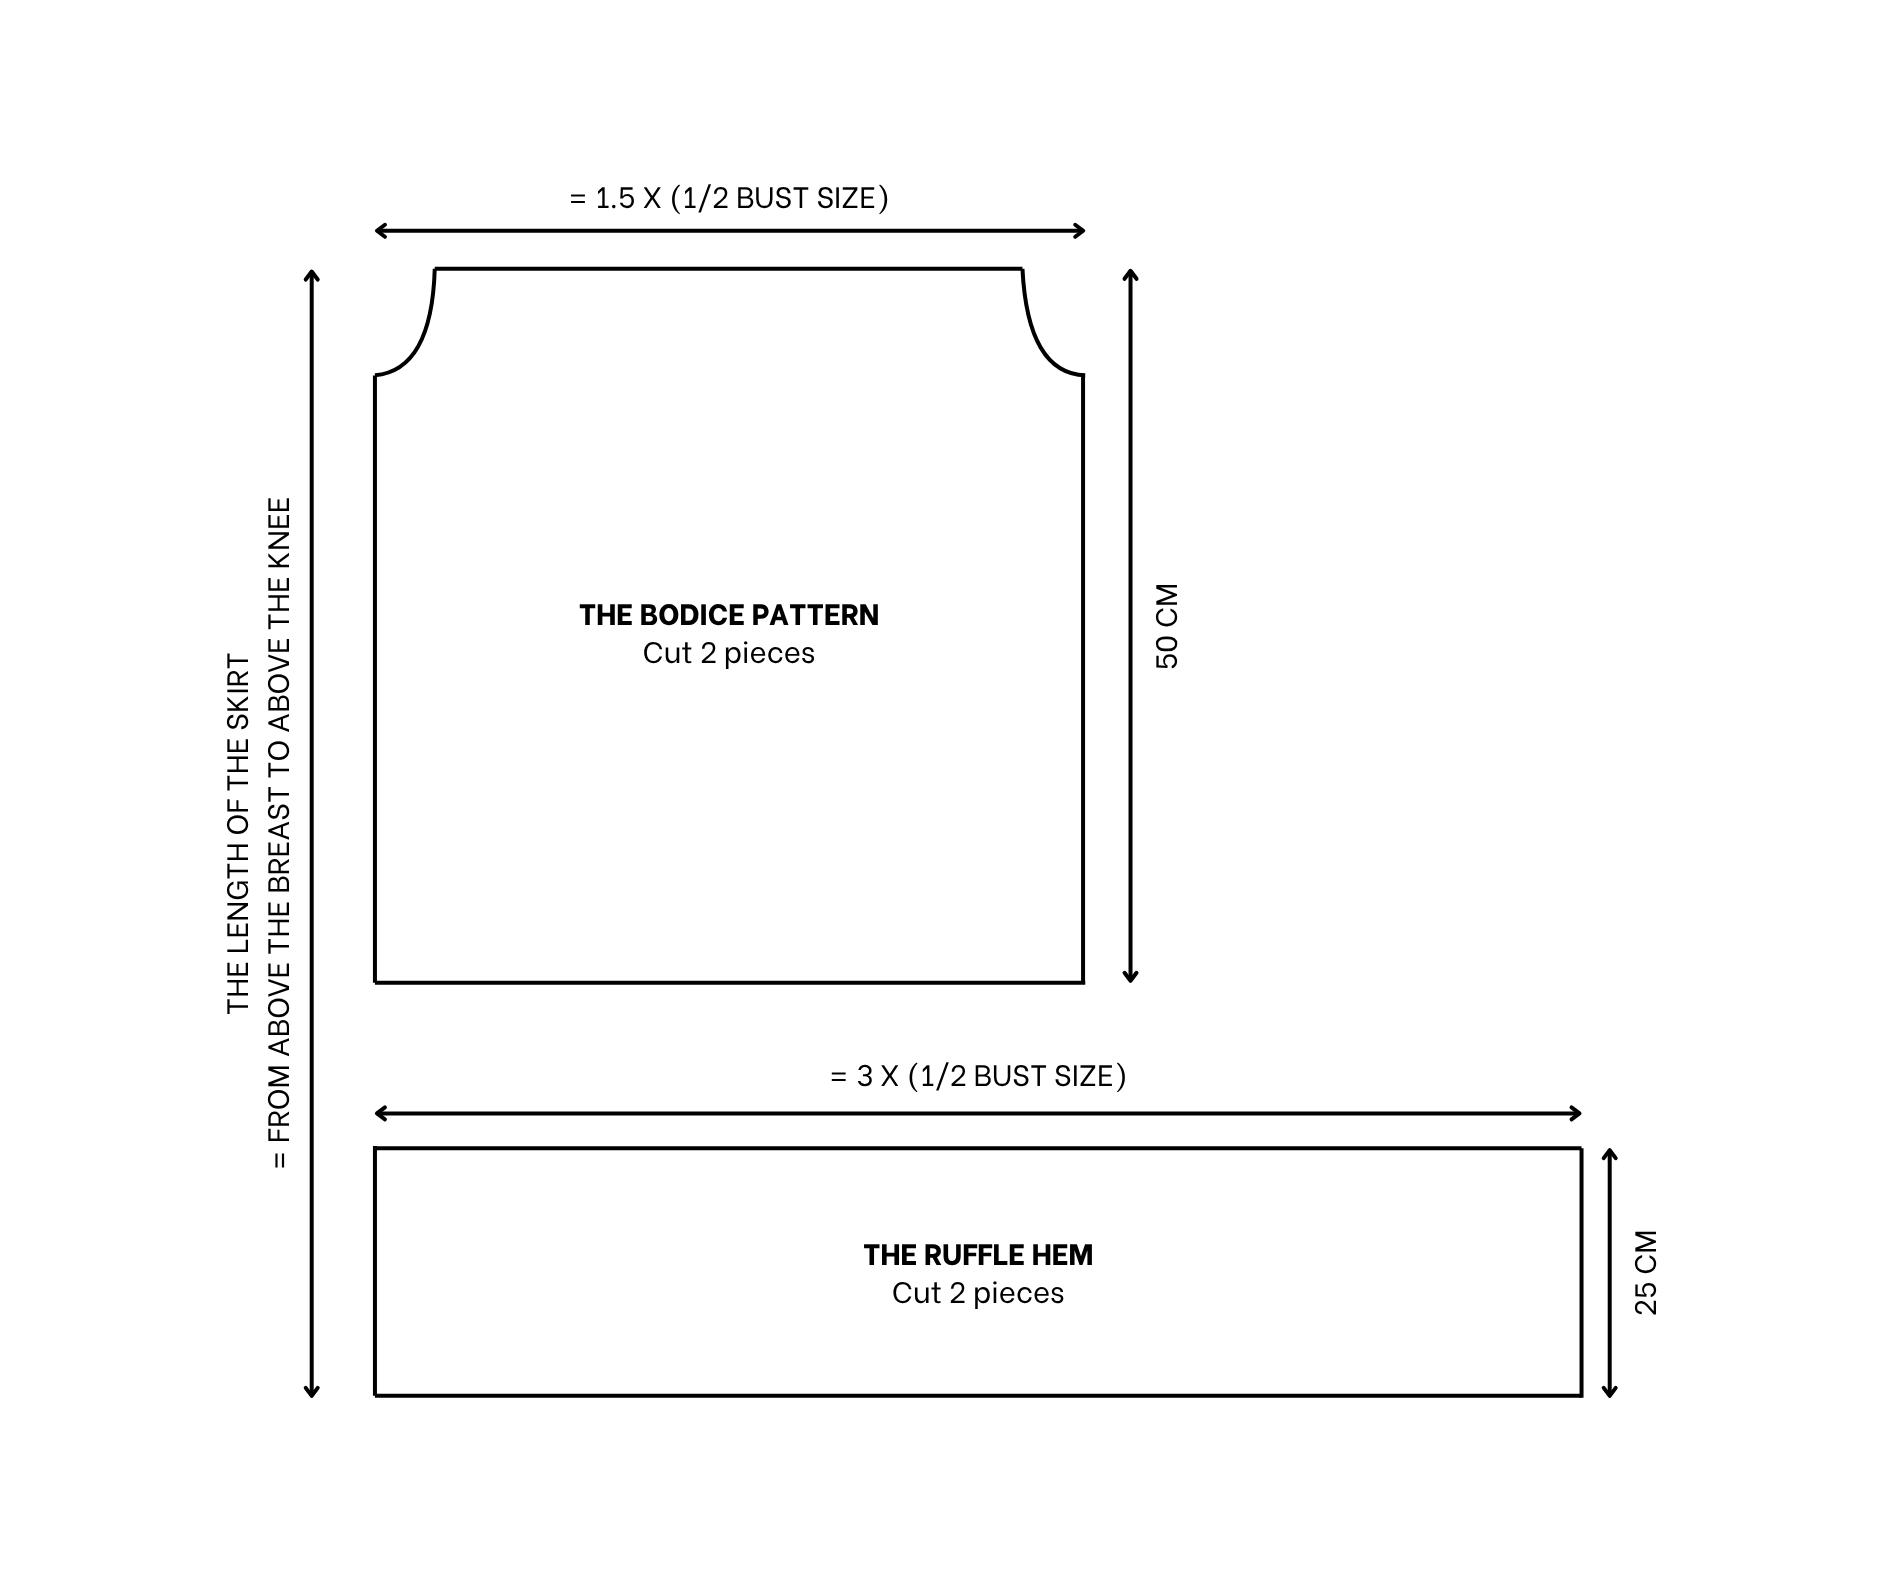
Moving to the skirt part of the dress, here is the pattern of the skirt that is wanted.
Keep the same pattern of the bodice part from the blouse and just add a ruffle hem at the end to create a skirt part.
The length of the ruffle hem depends on the length of the skirt part that is wanted.
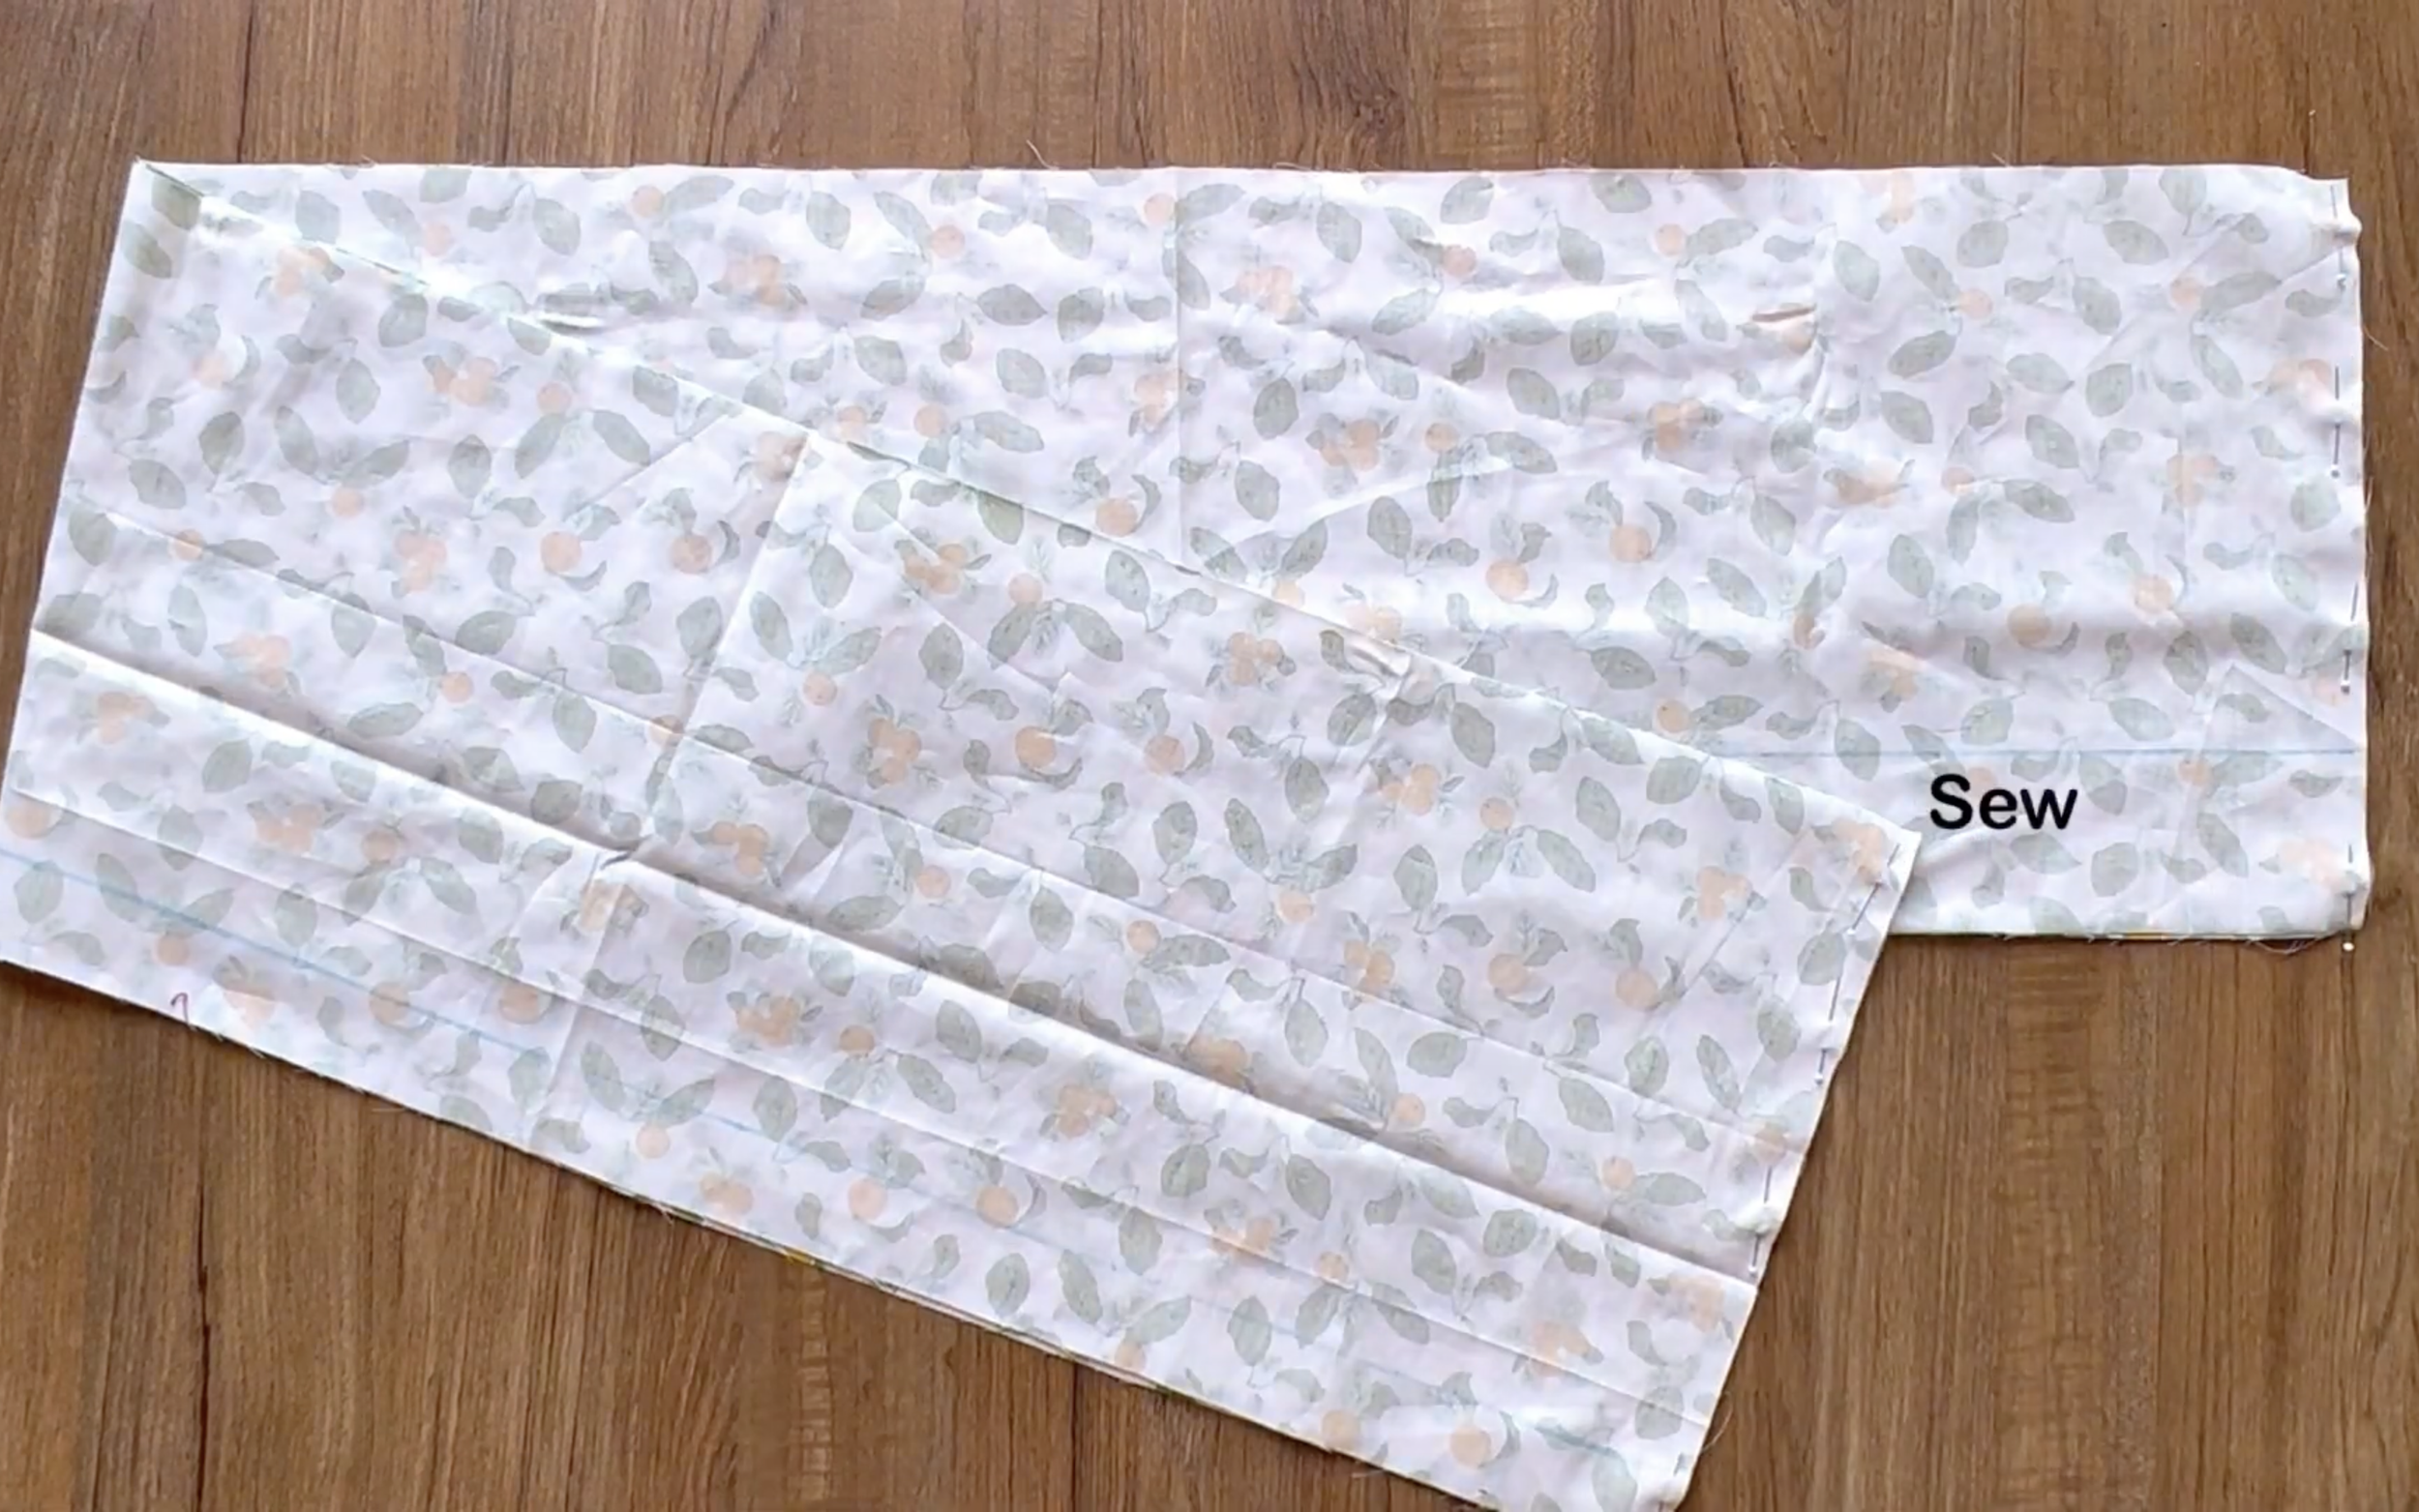
At the ruffle hem part, connect the length line of two rectangles together to create a circle fabric.
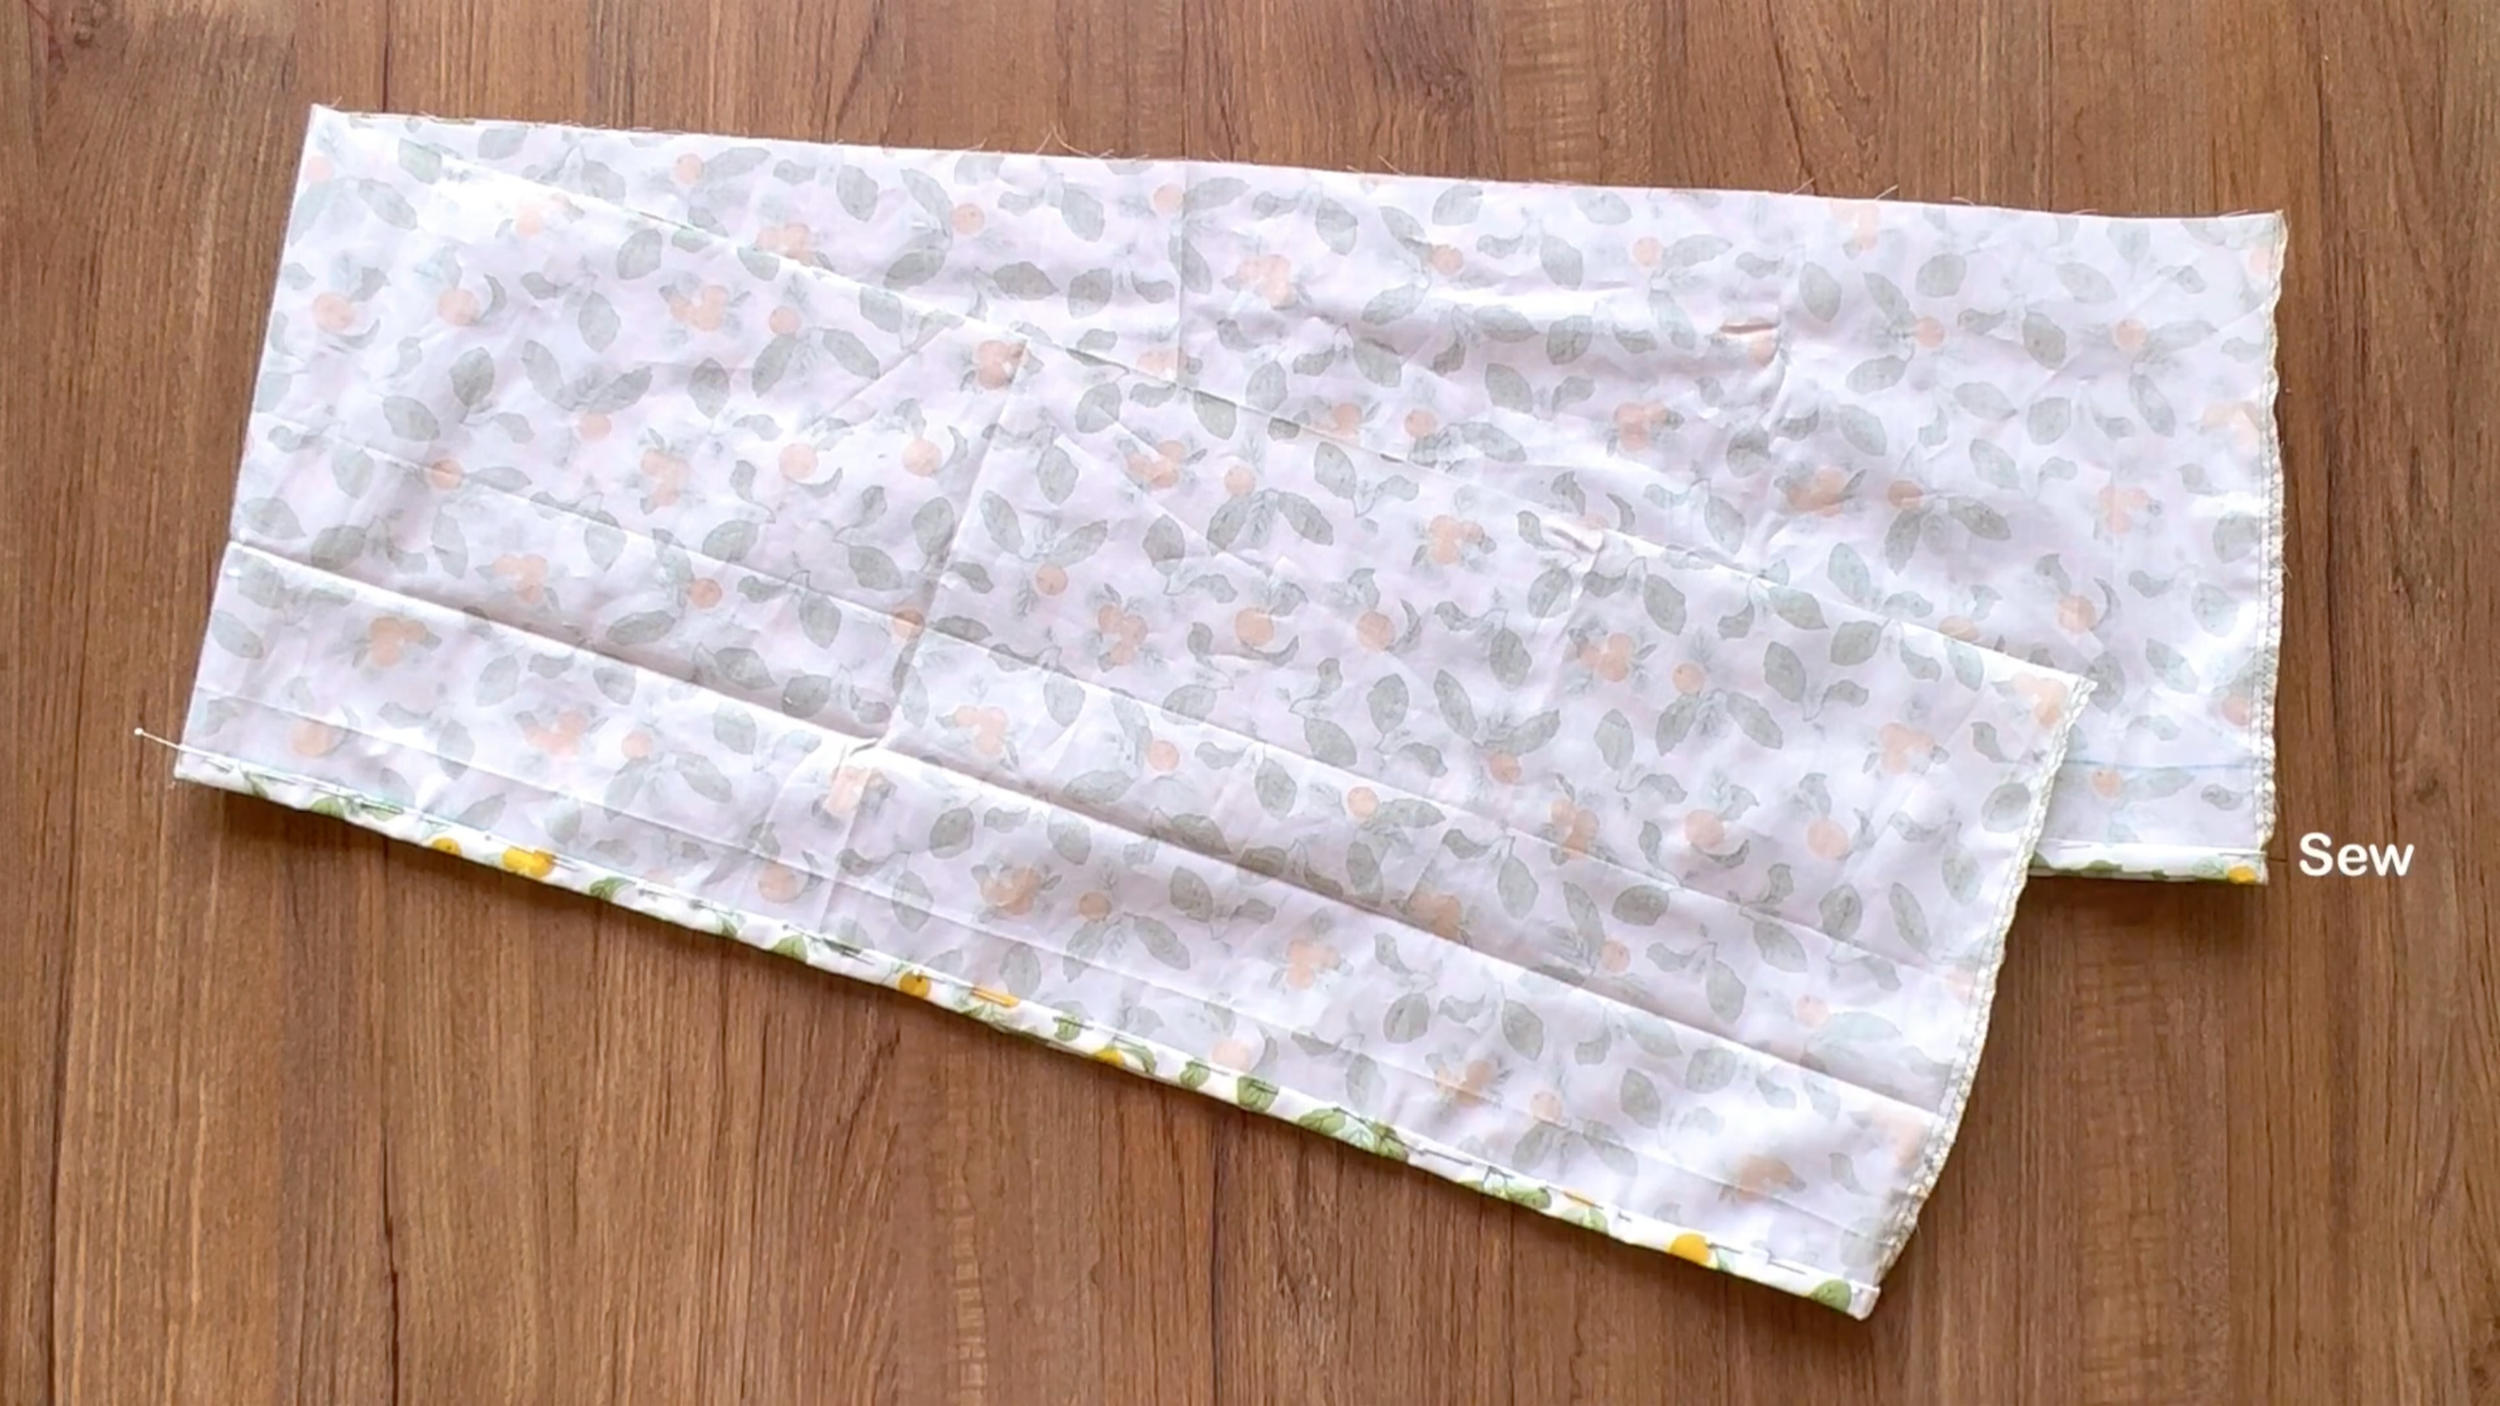
At one side of the circle fabric, which is the end of the skirt, finish it by folding the end fabric inside two times with 1 cm each time and sewing.
At the other side of the circle fabric, which is the top of the ruffle hem, make two loose seams first, then create a gathering fabric there later.
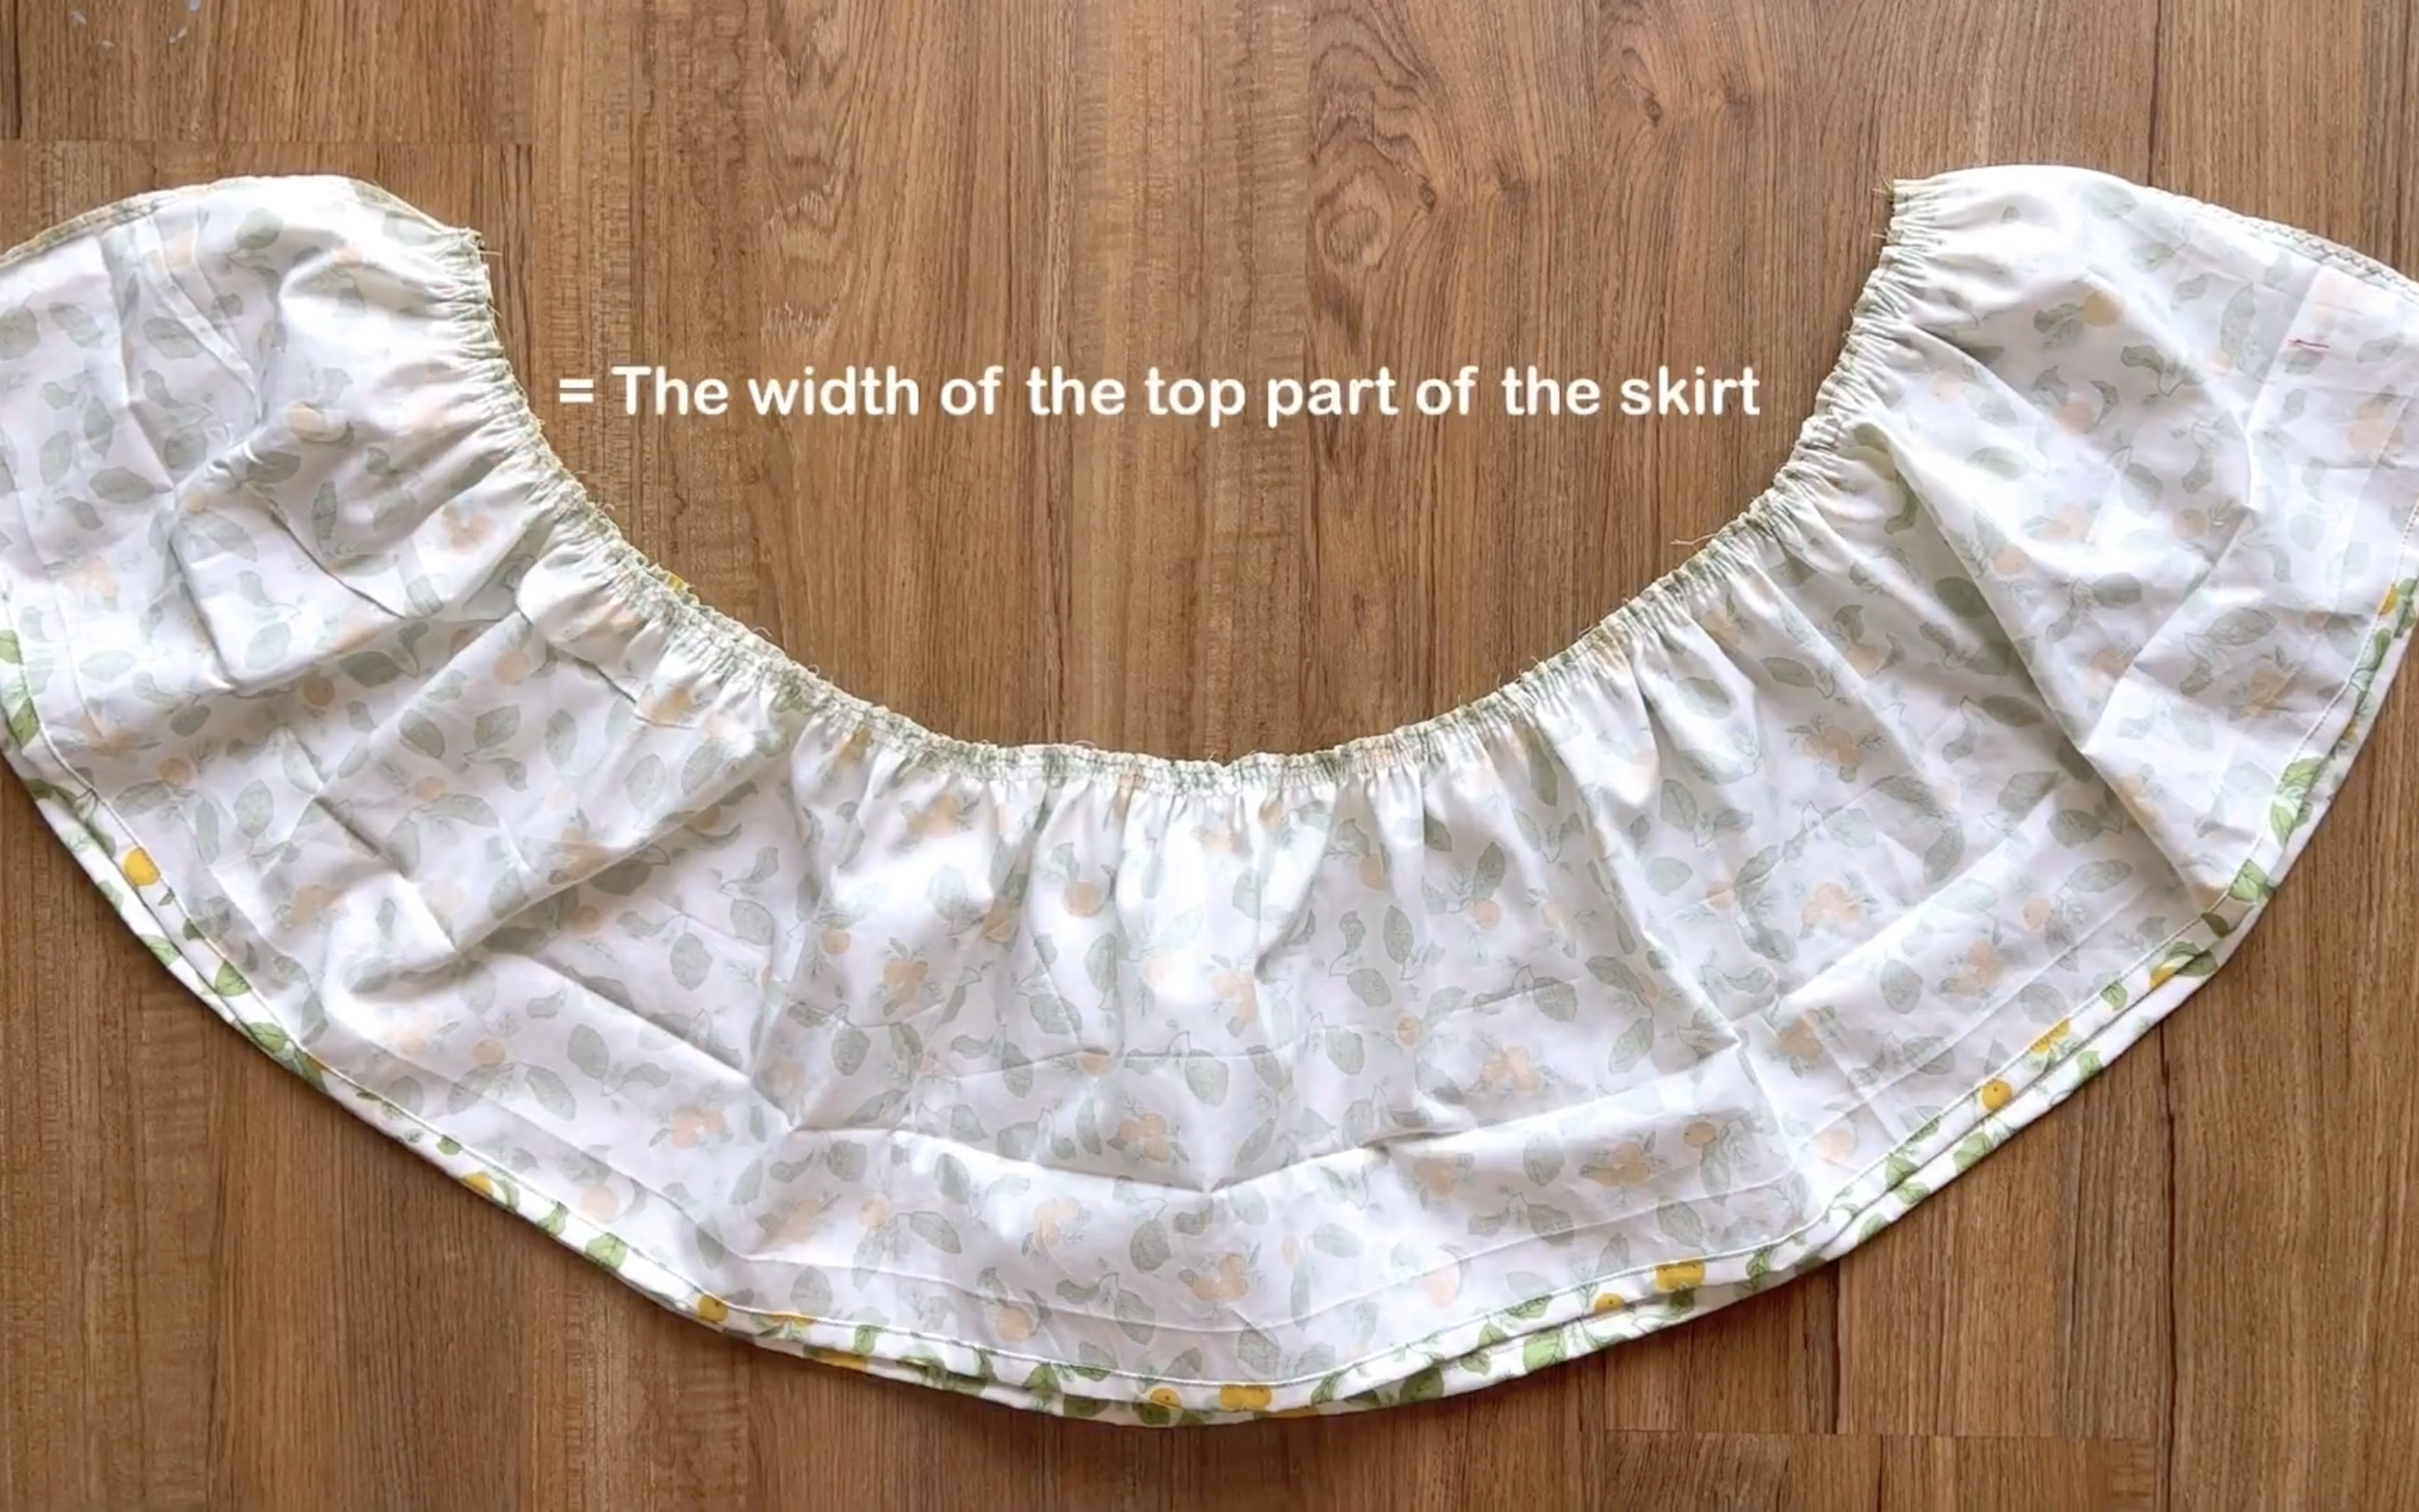
The final width of the gathering fabric will be the same as the width at the end of the top part of the skirt.
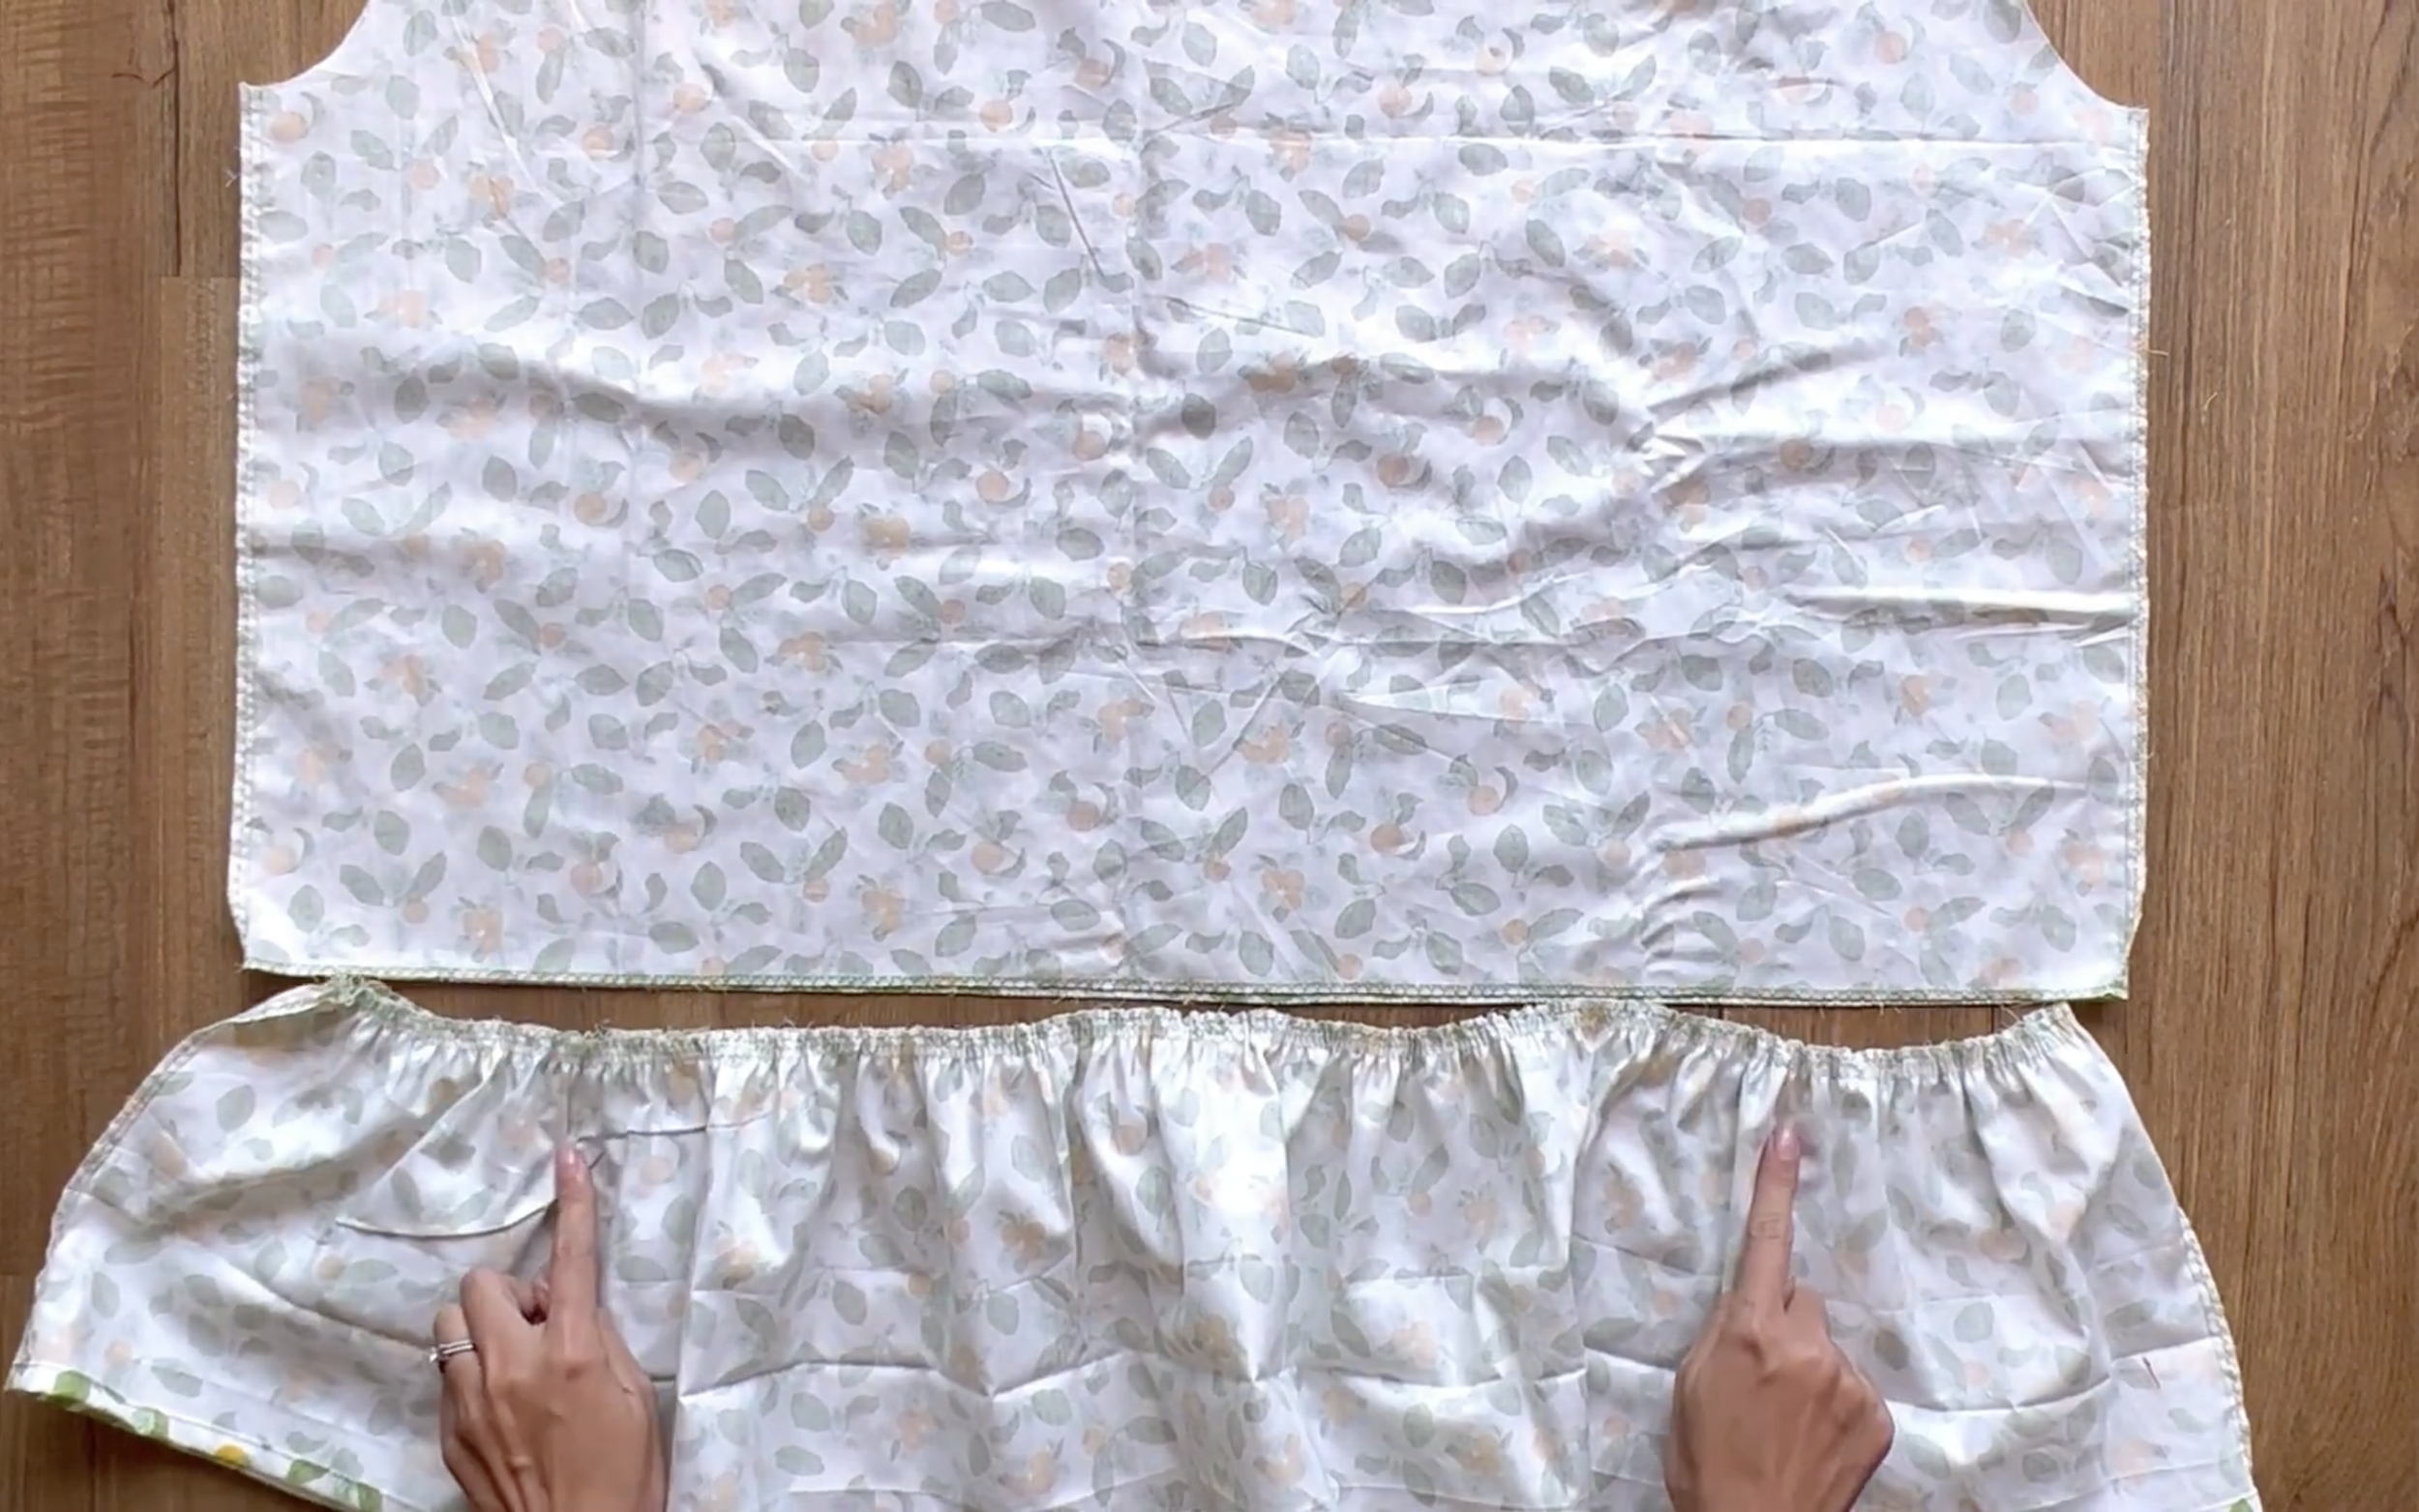
Then, connect the bodice and the ruffle hem together.
THE SLEEVE PART
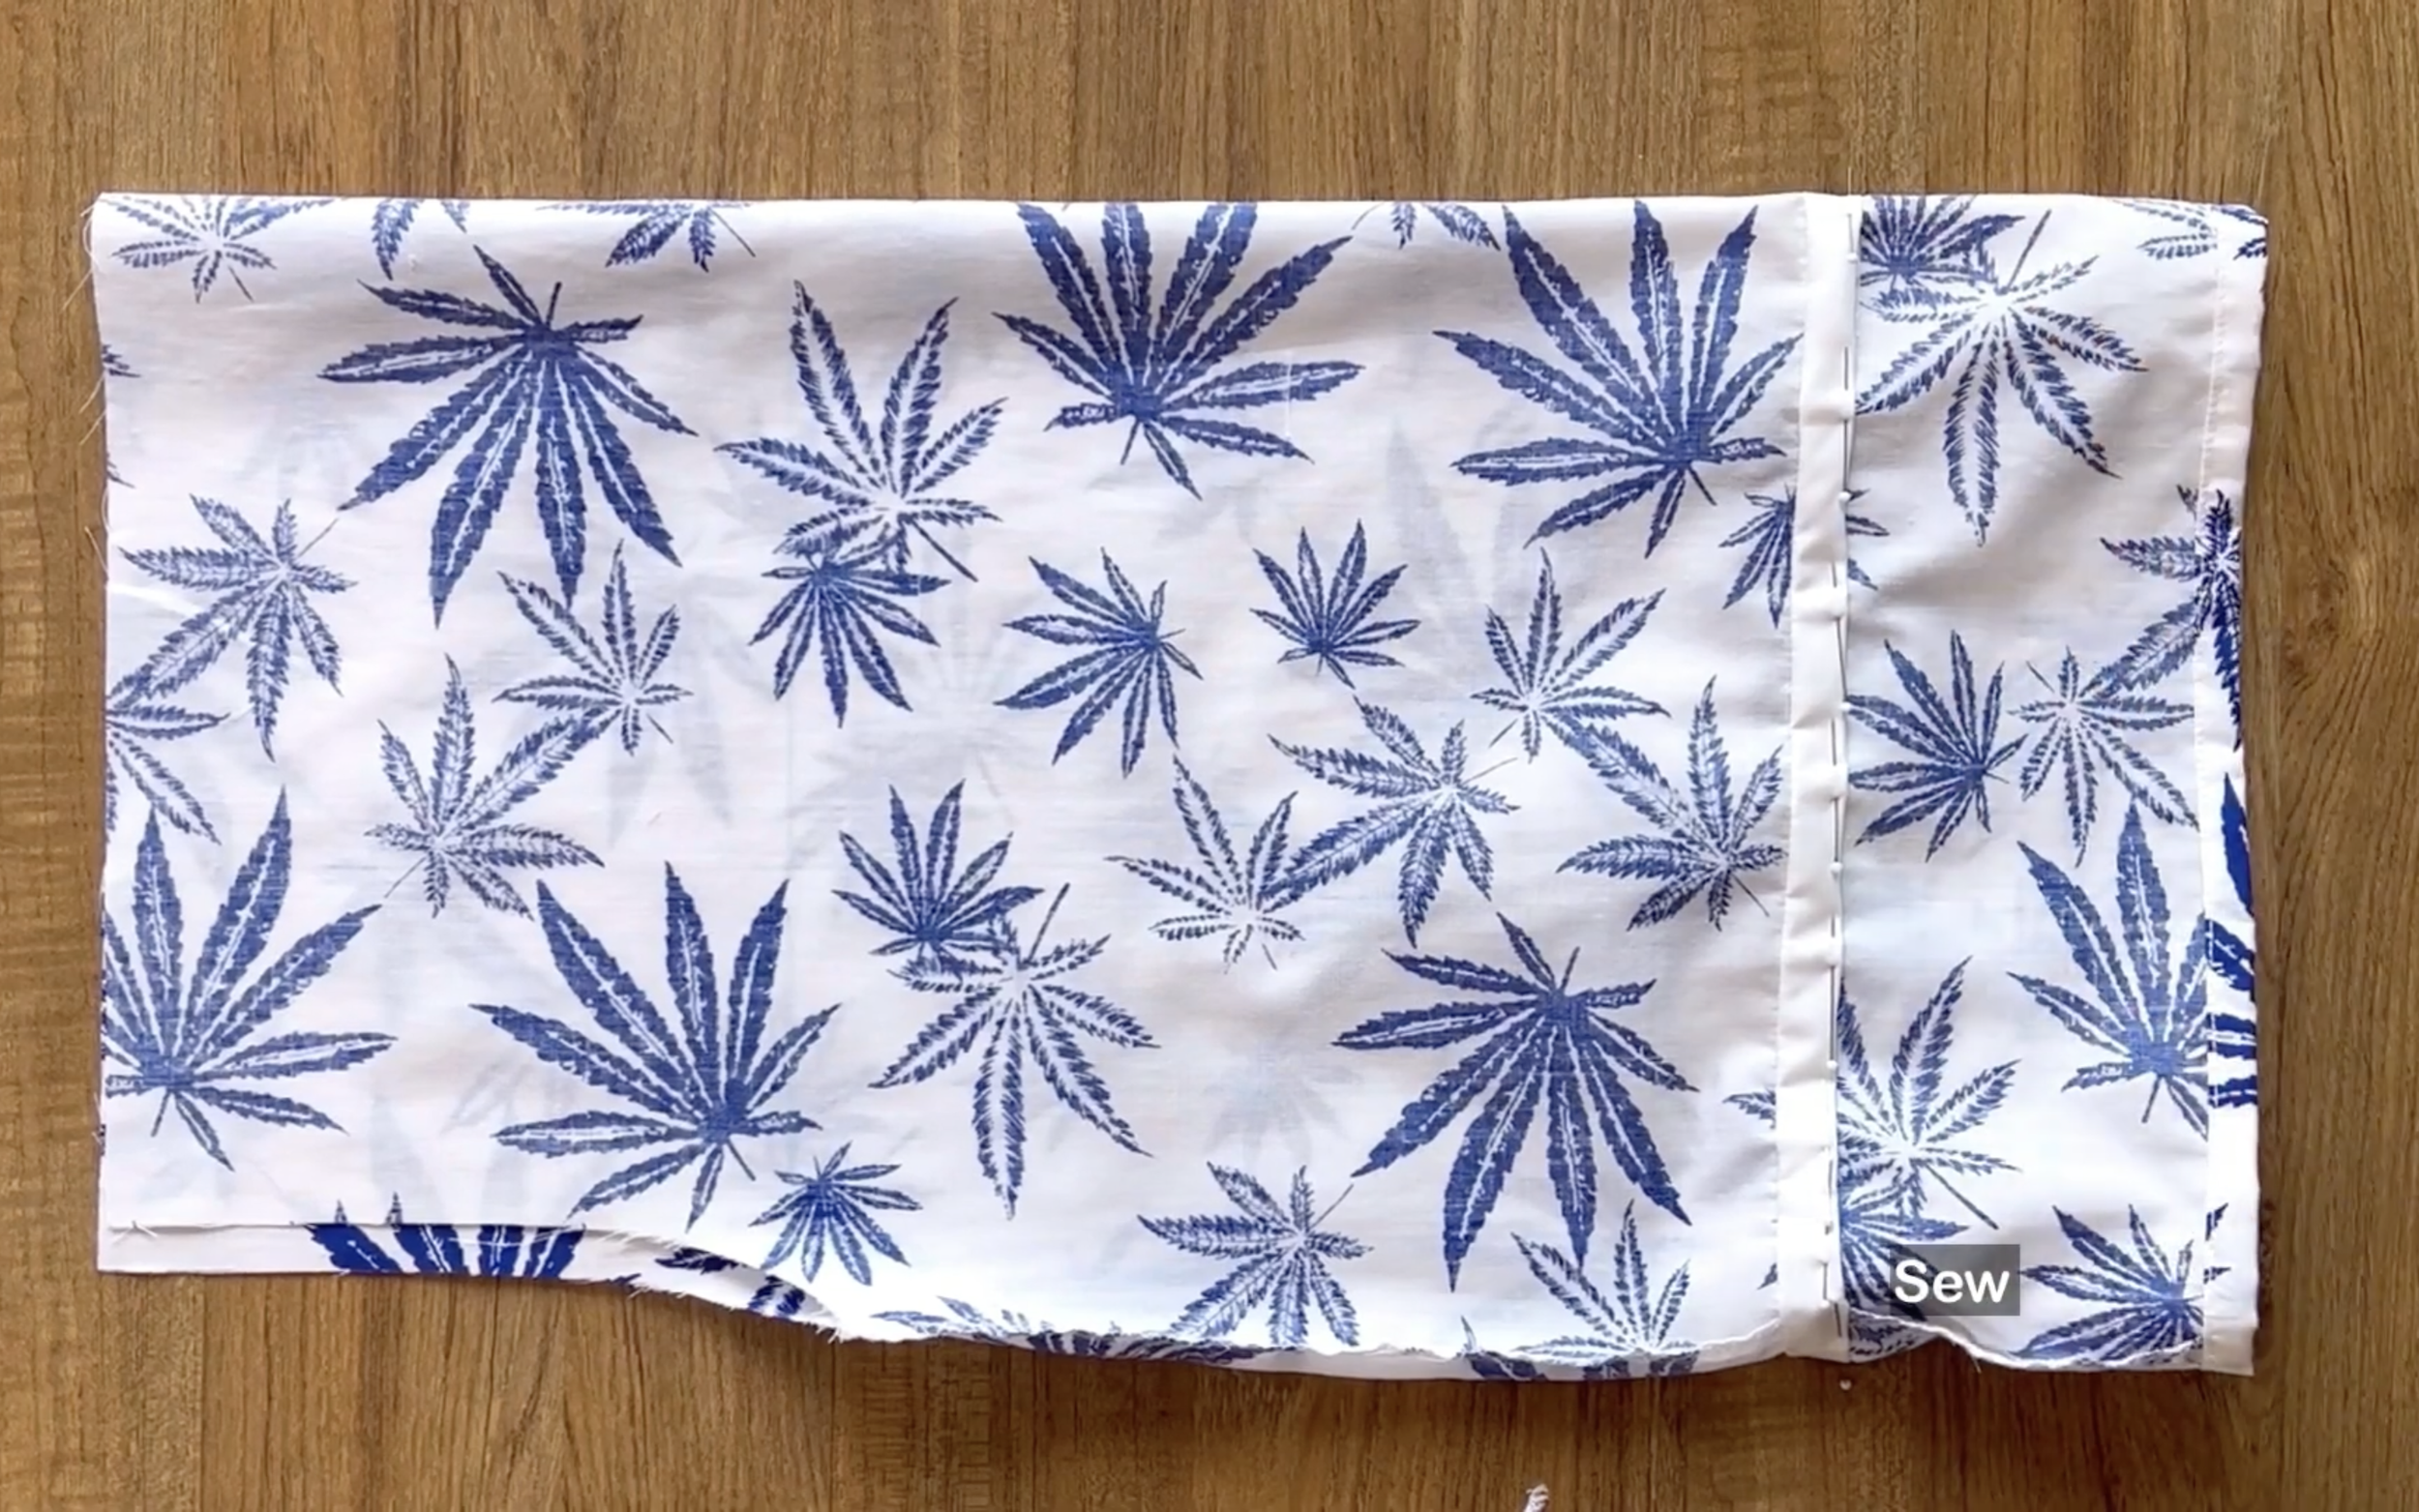
Moving to the sleeve of the dress, use the same sleeve pattern from the blouse. Just make the sleeve a bit shorter compared to the sleeve of the blouse. The length of the sleeve wanted is from the shoulder to your elbow, but instead of finishing the end of the sleeve by the bias, use the elastic band so you can have a puffy look for the sleeve.
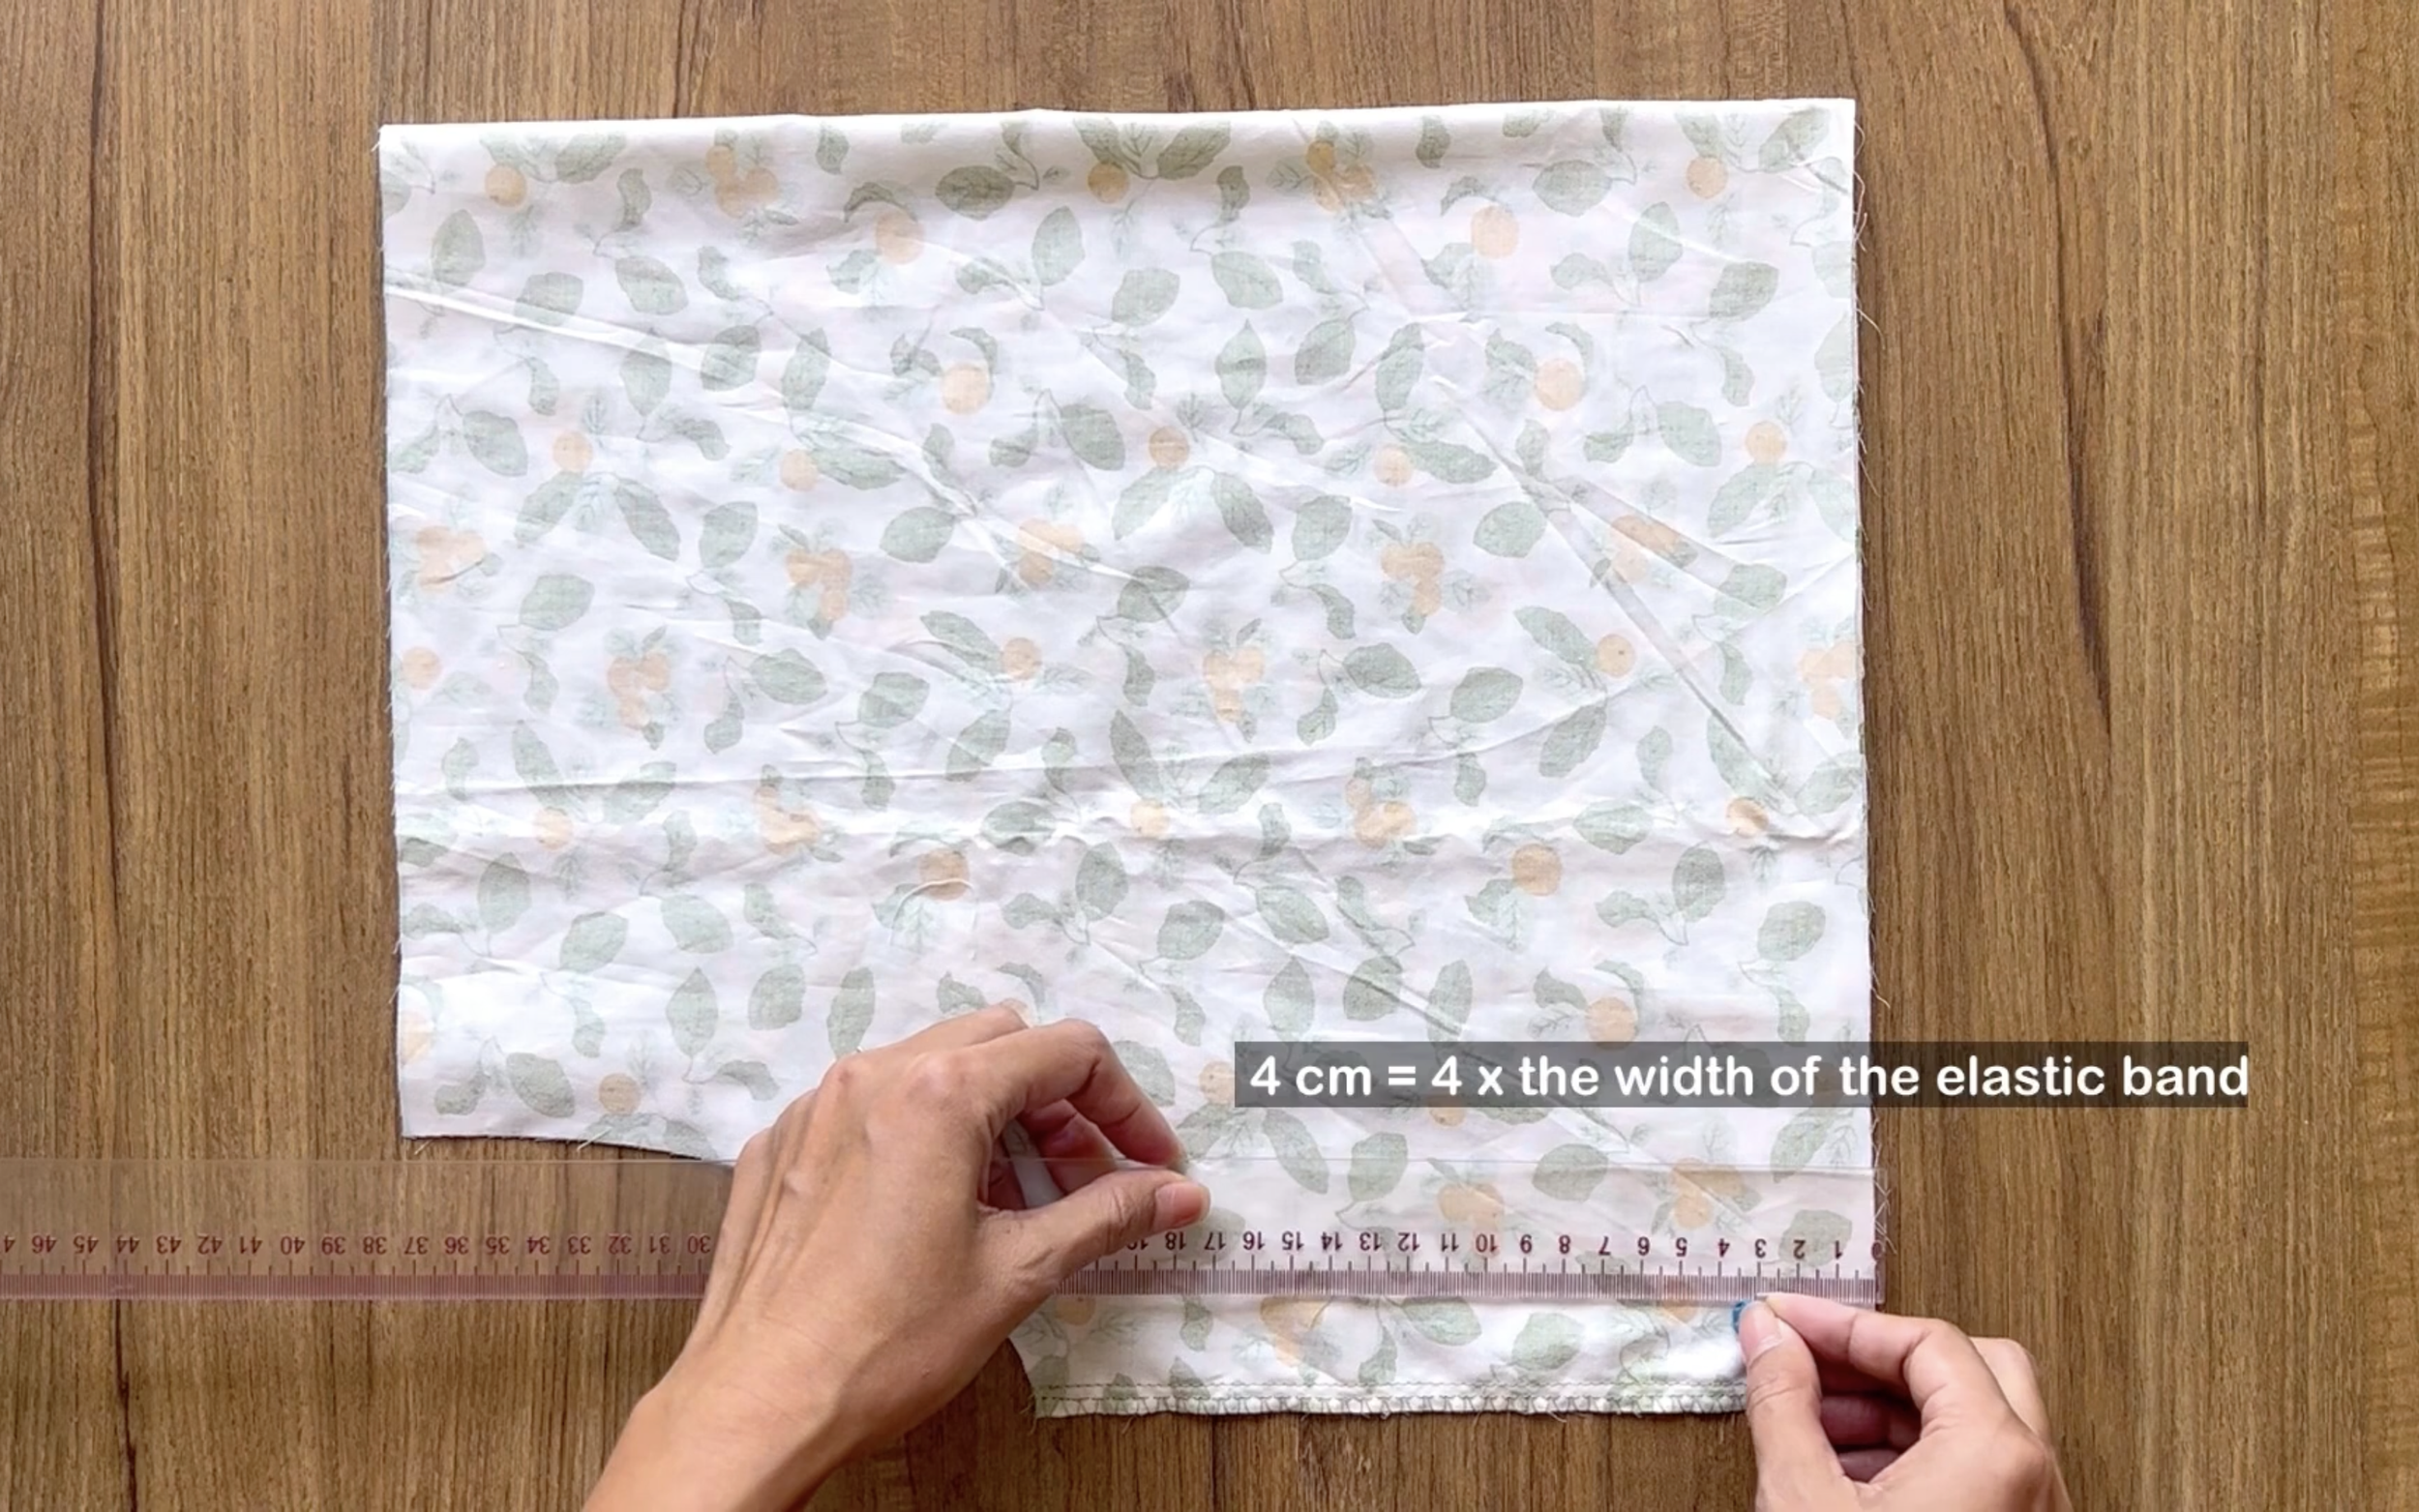
From the ending line, draw another line 4 cm above it. It's four times the width of the elastic band that will be used there later.
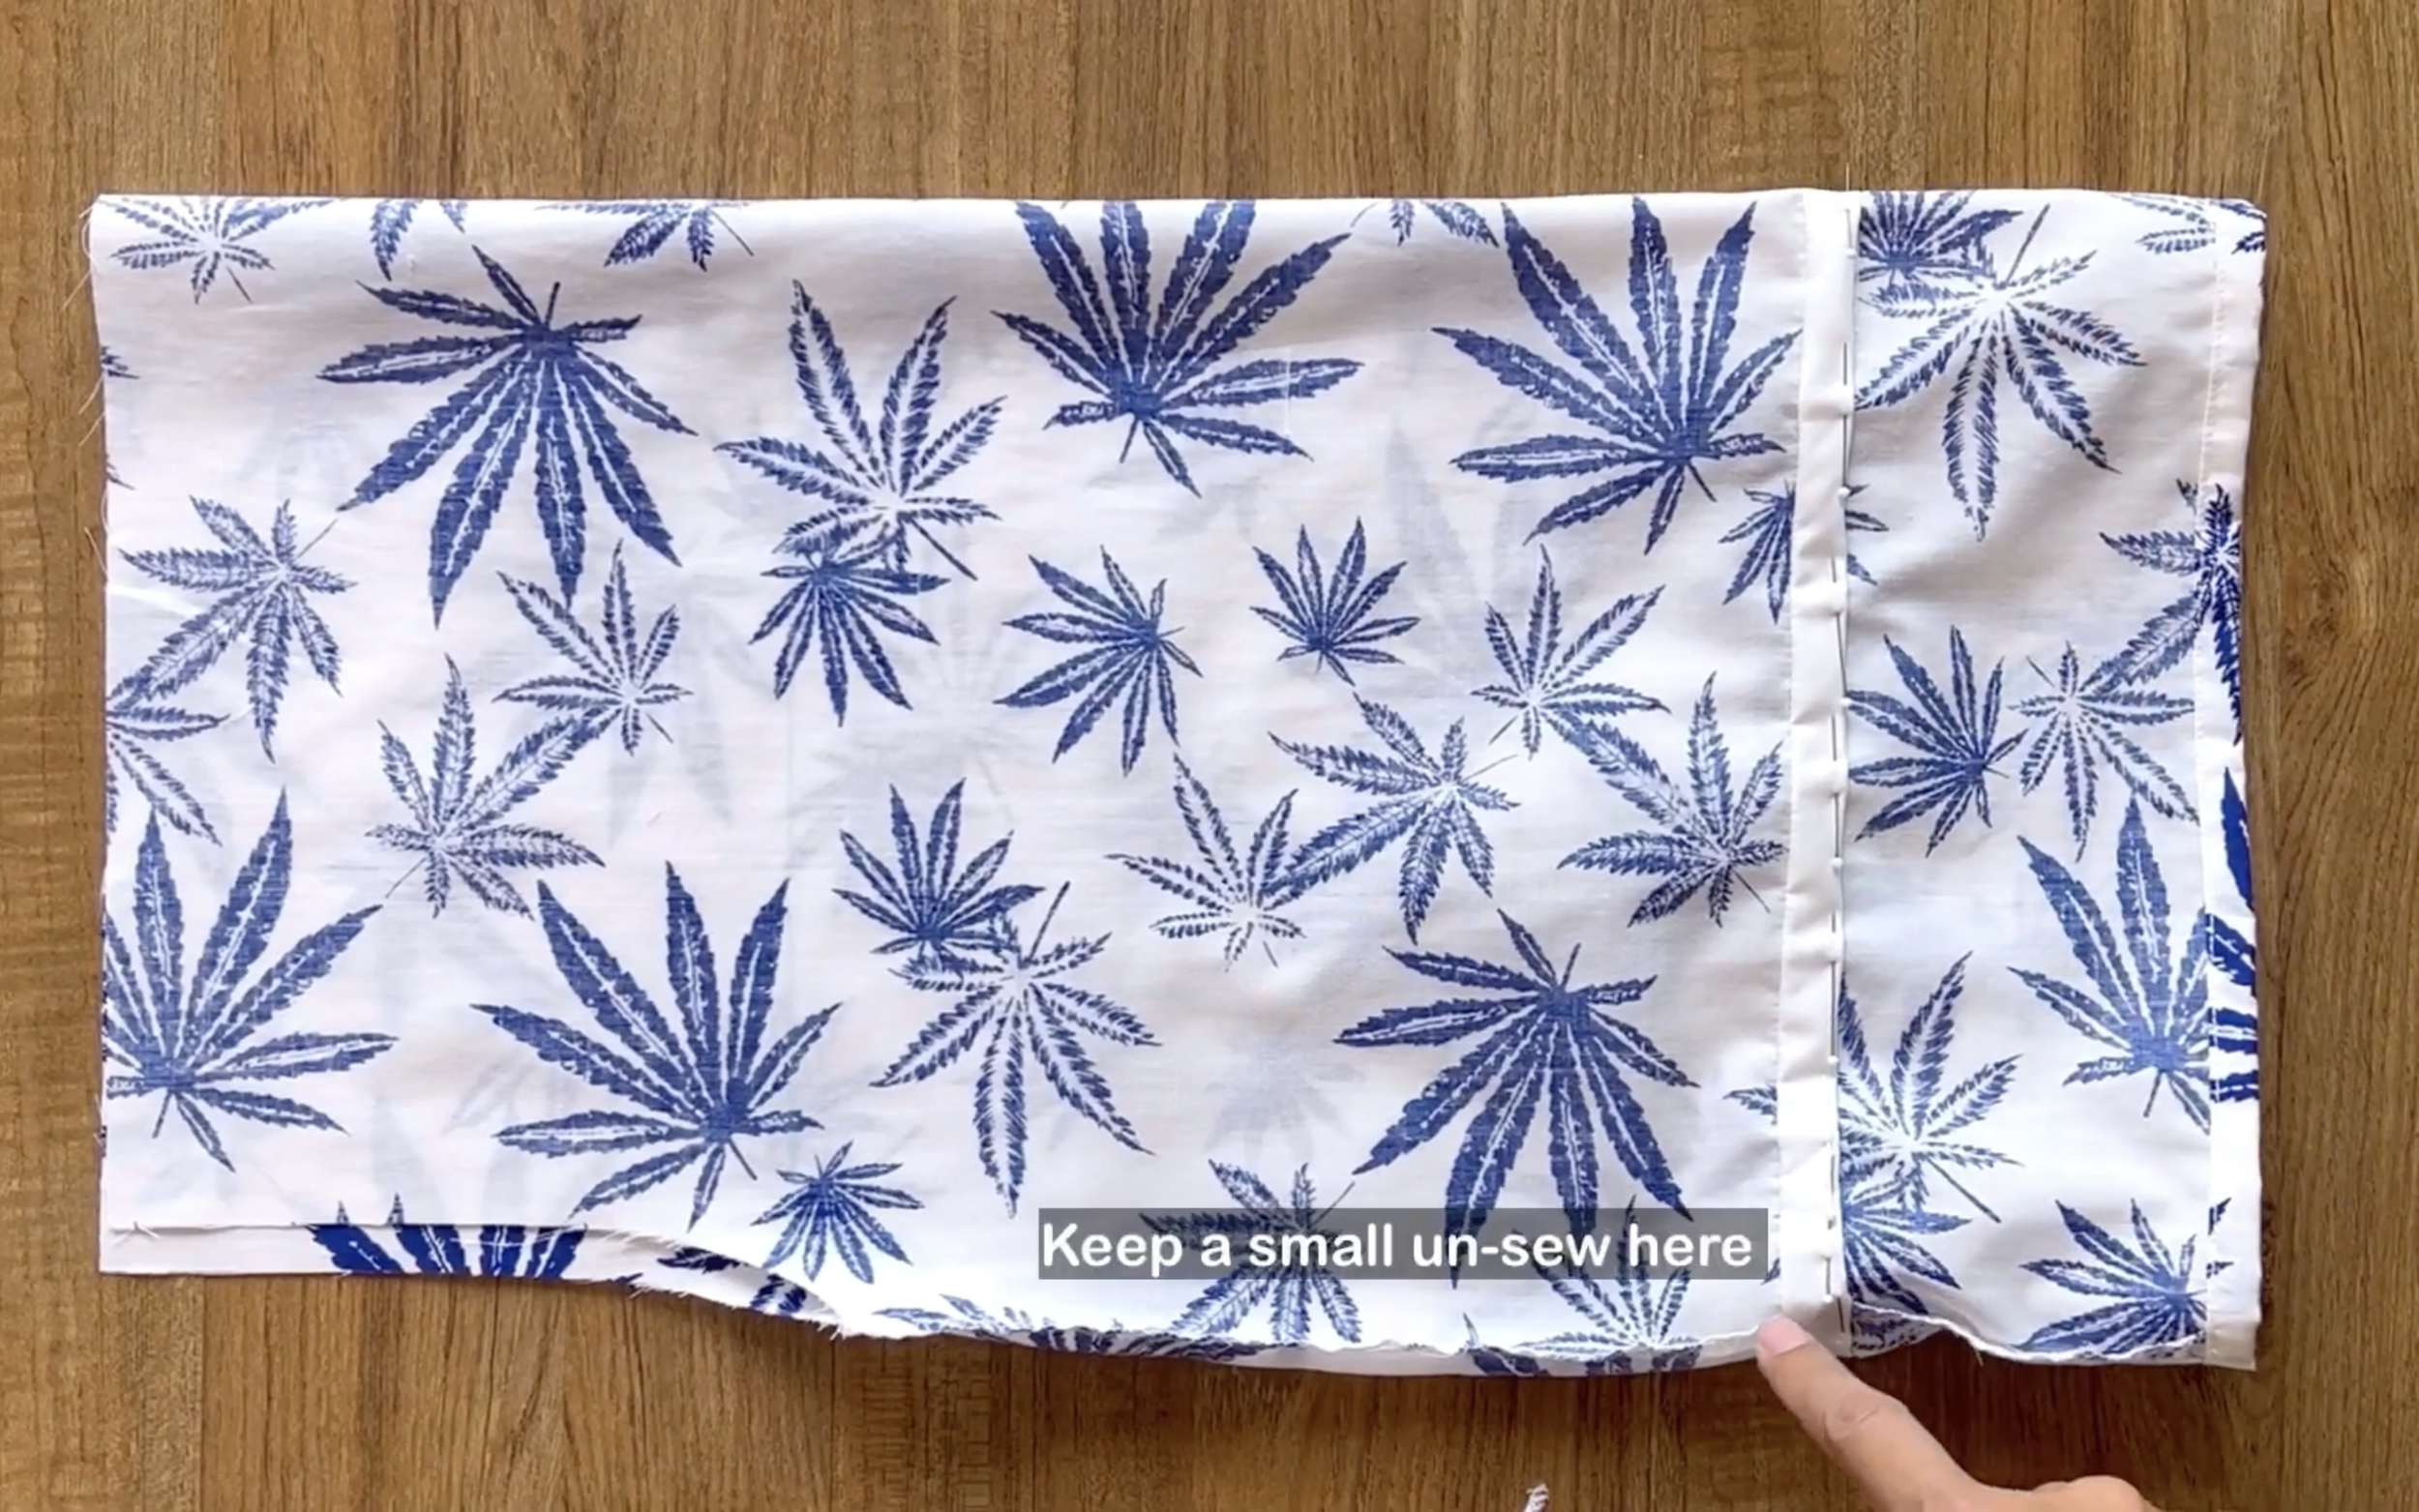
After that, fold the end fabric inside around 0.5 cm first, then keep folding it to the line drawn before and sew.
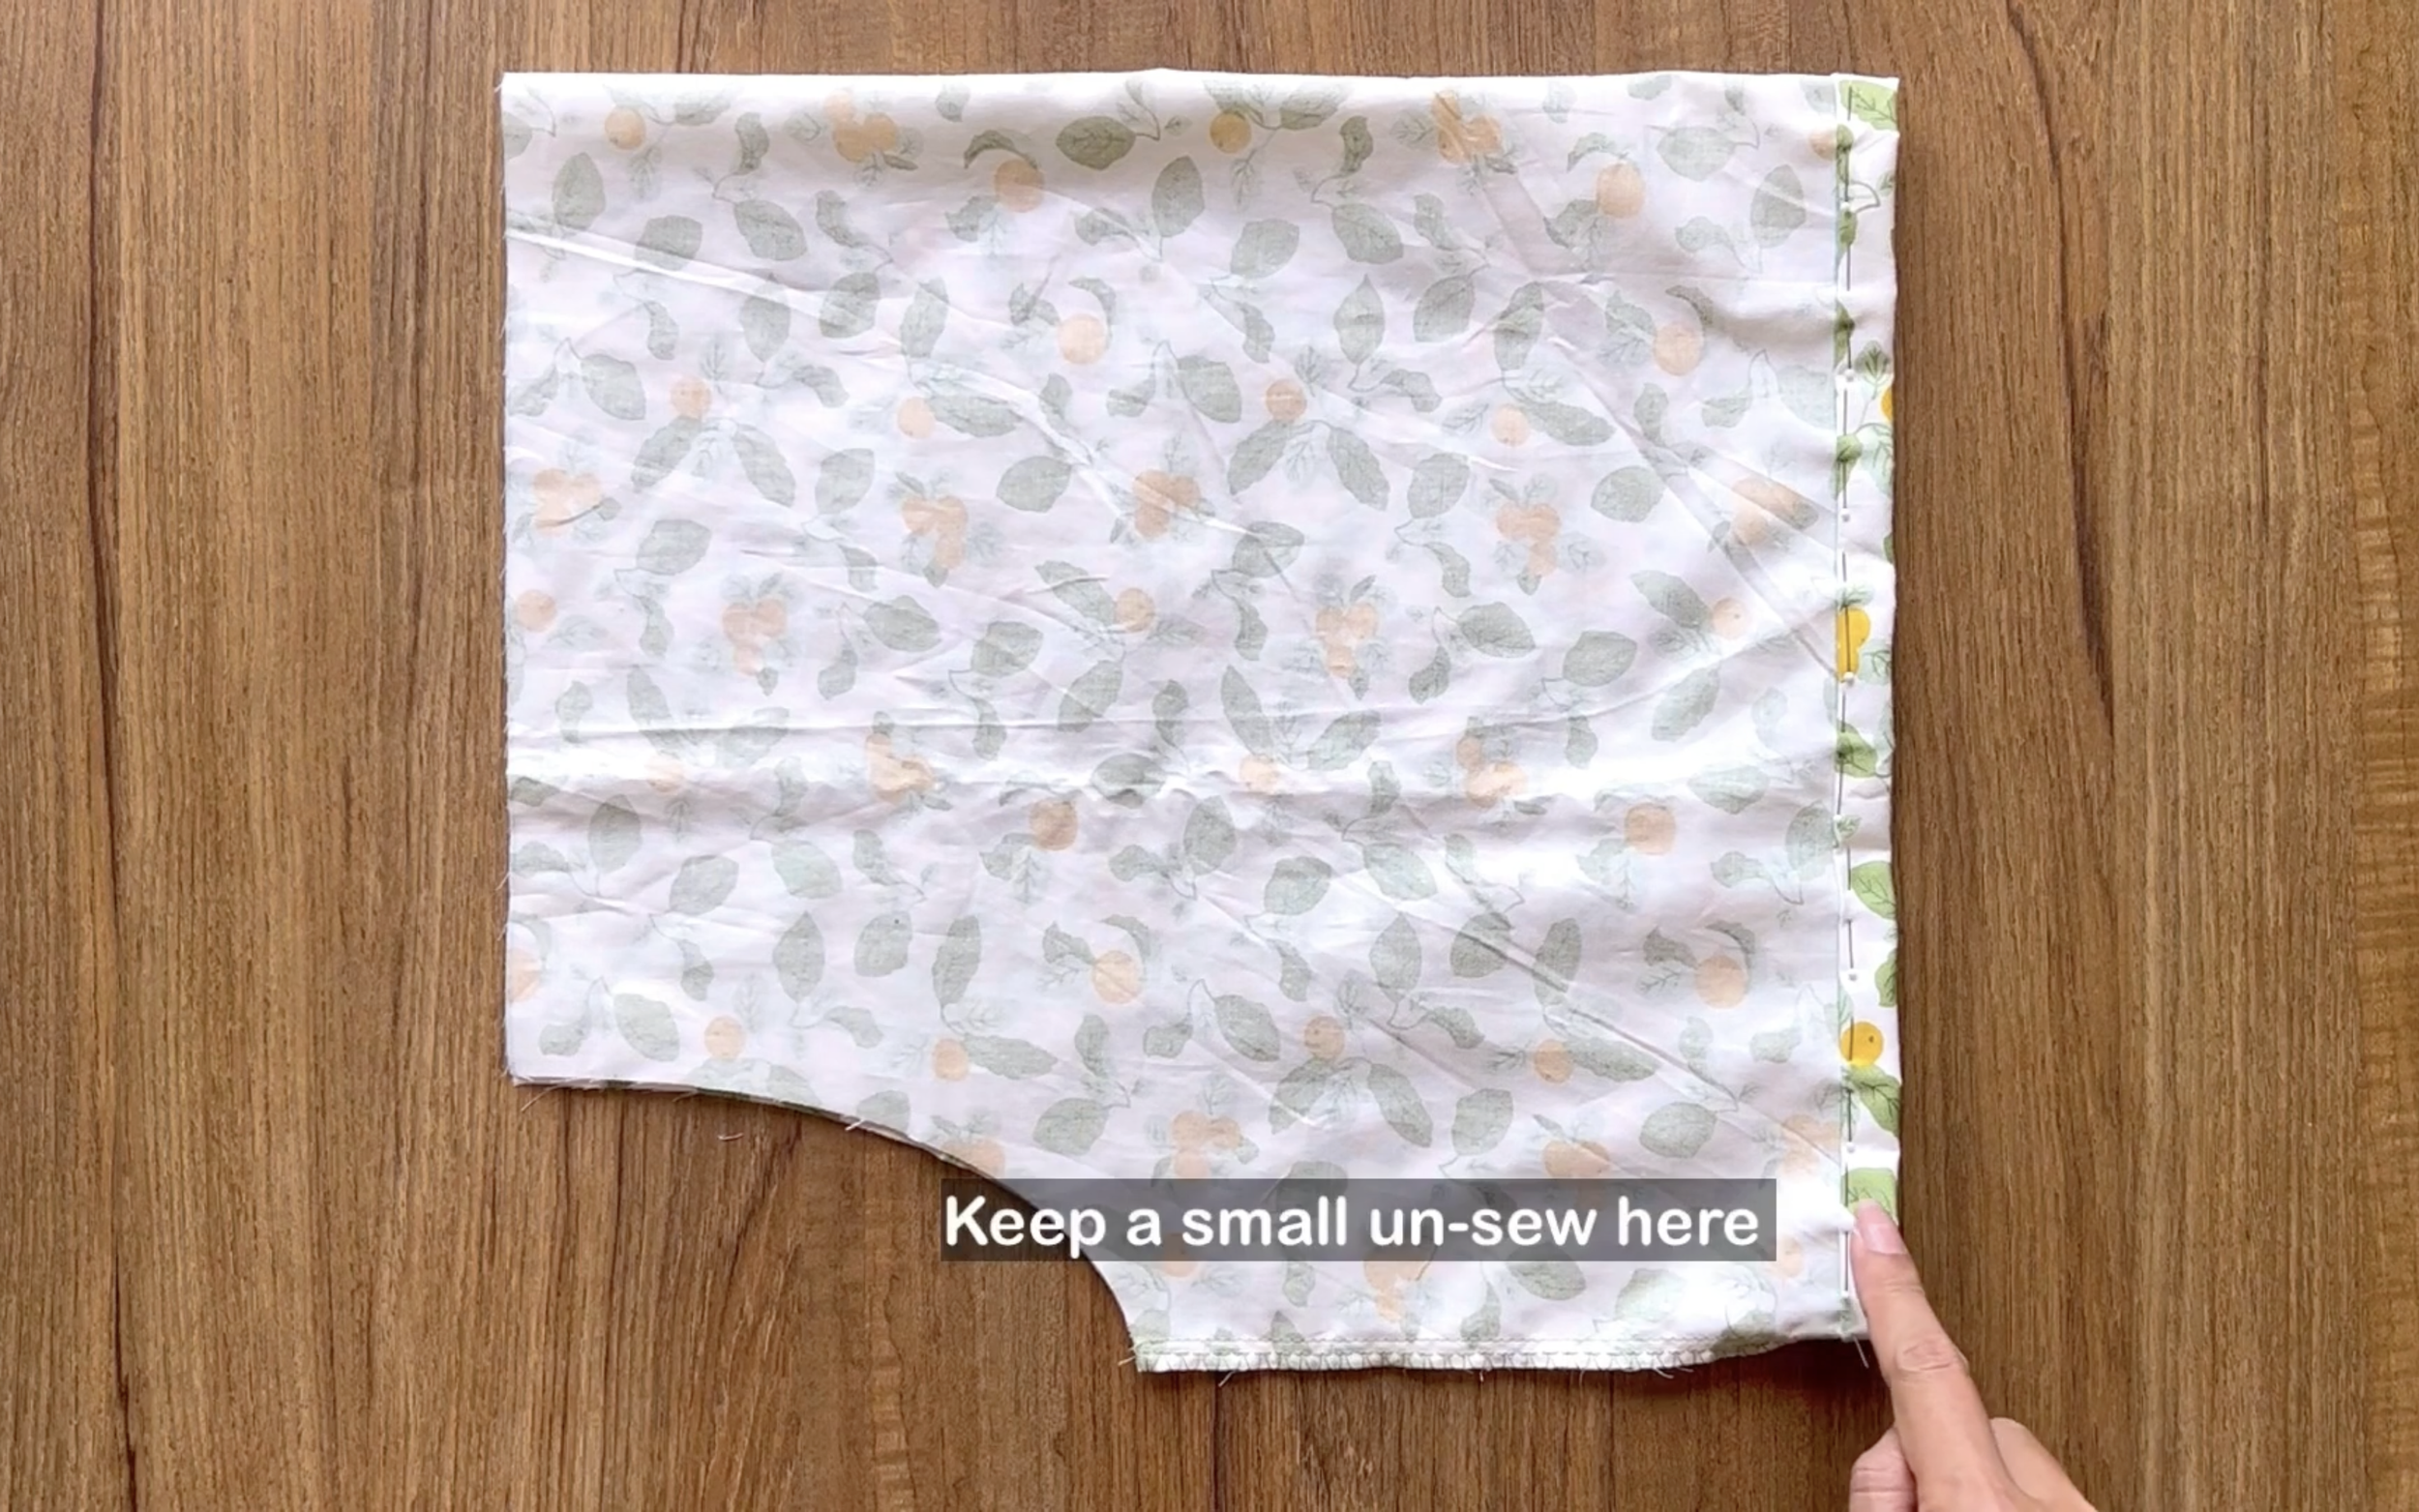
Remember to keep a small unsewn space for the elastic band to go through later.
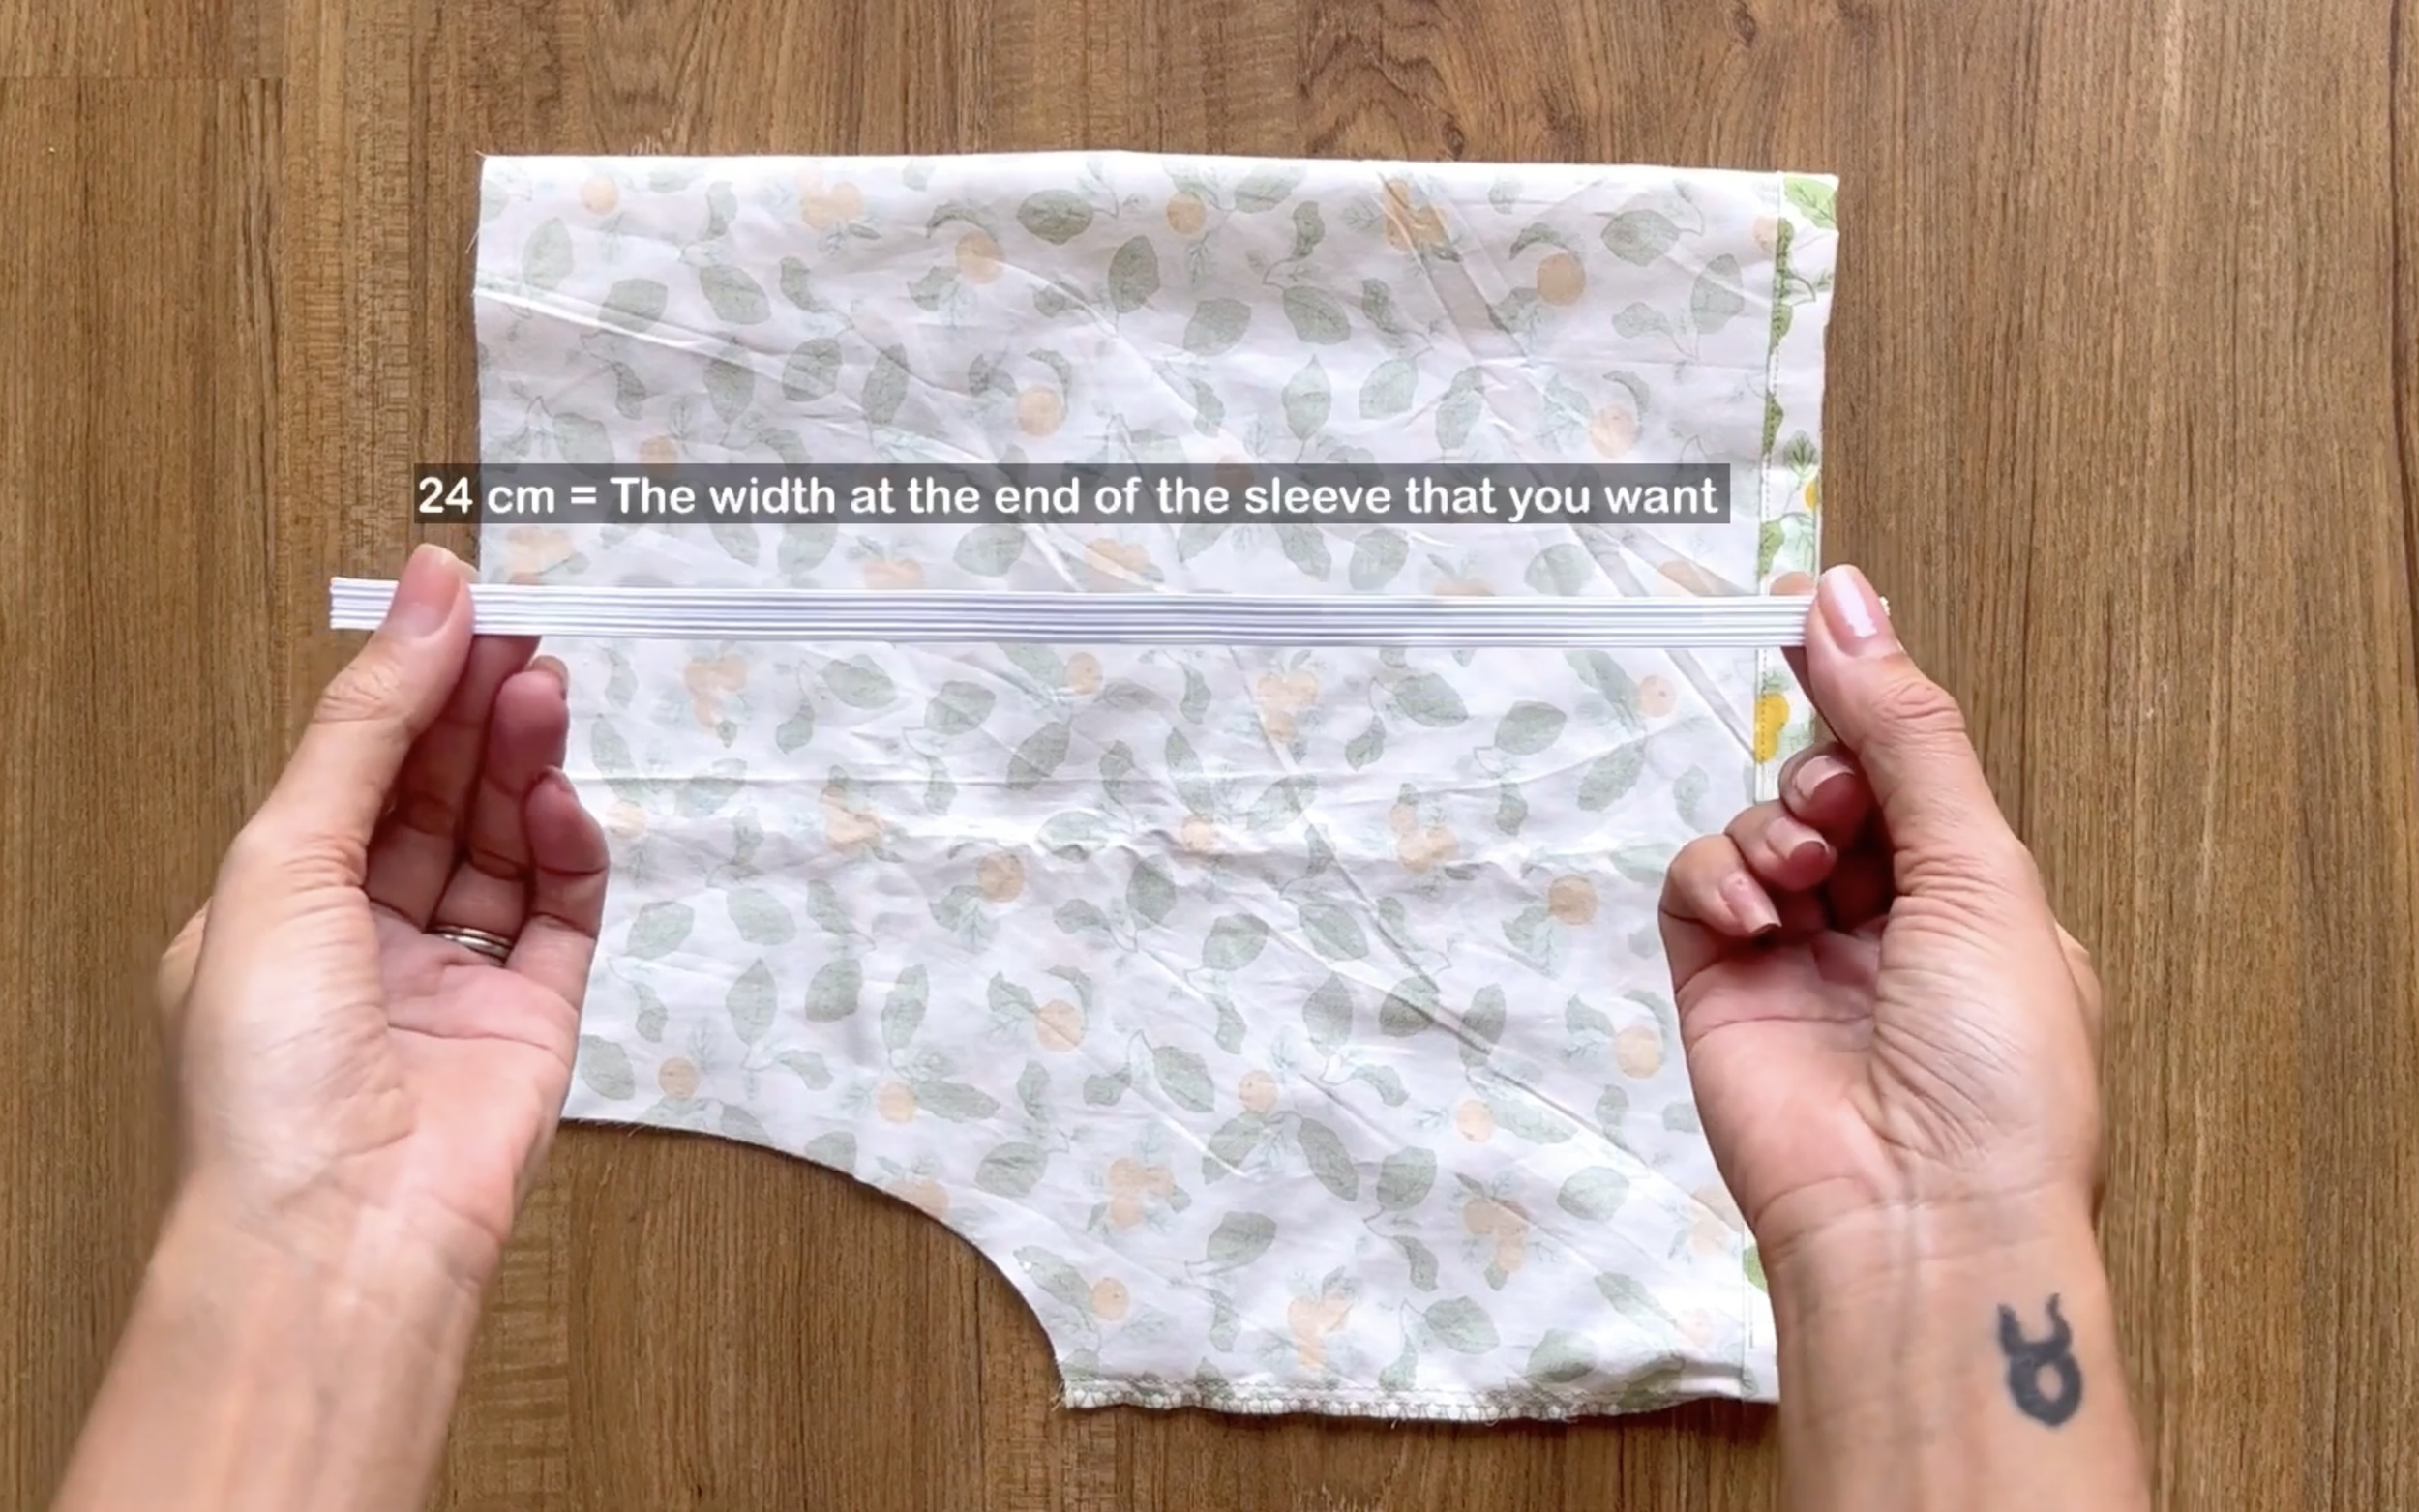
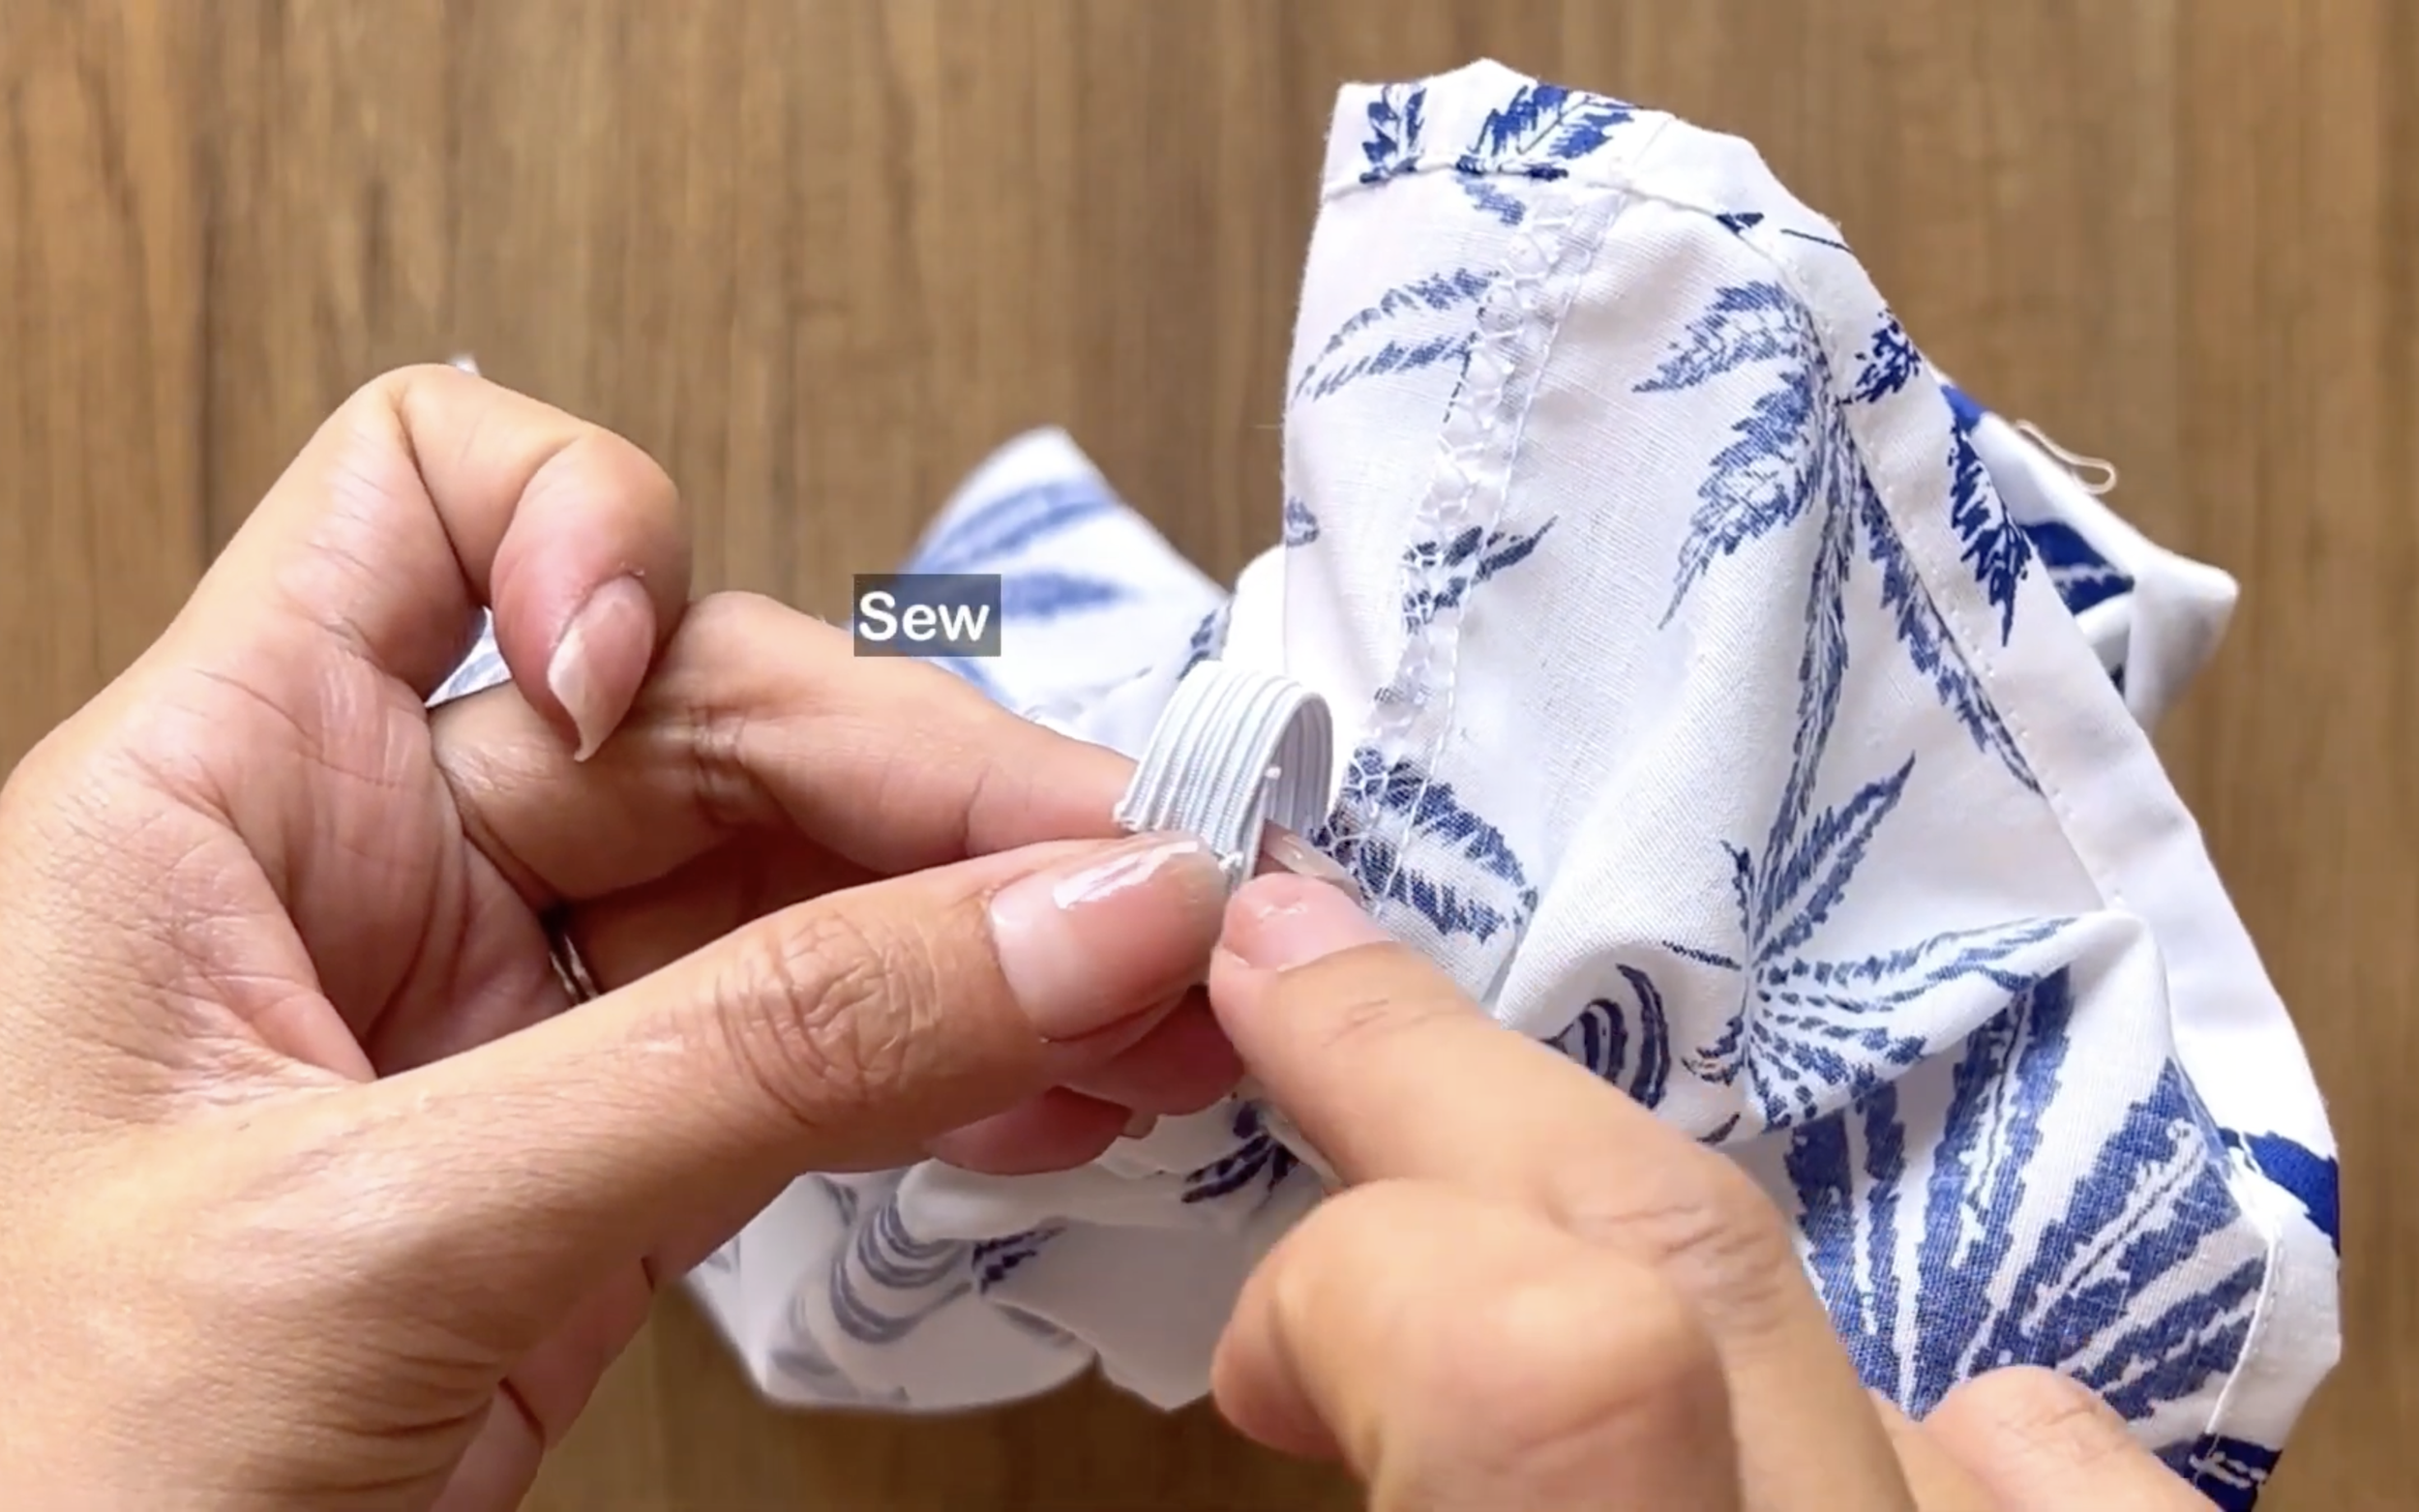
Cut an elastic band with a 24 cm length, which is the width of your arm, to go through the fabric hole.

Sew two ends of the elastic band after that and close the unsewn space you kept before.
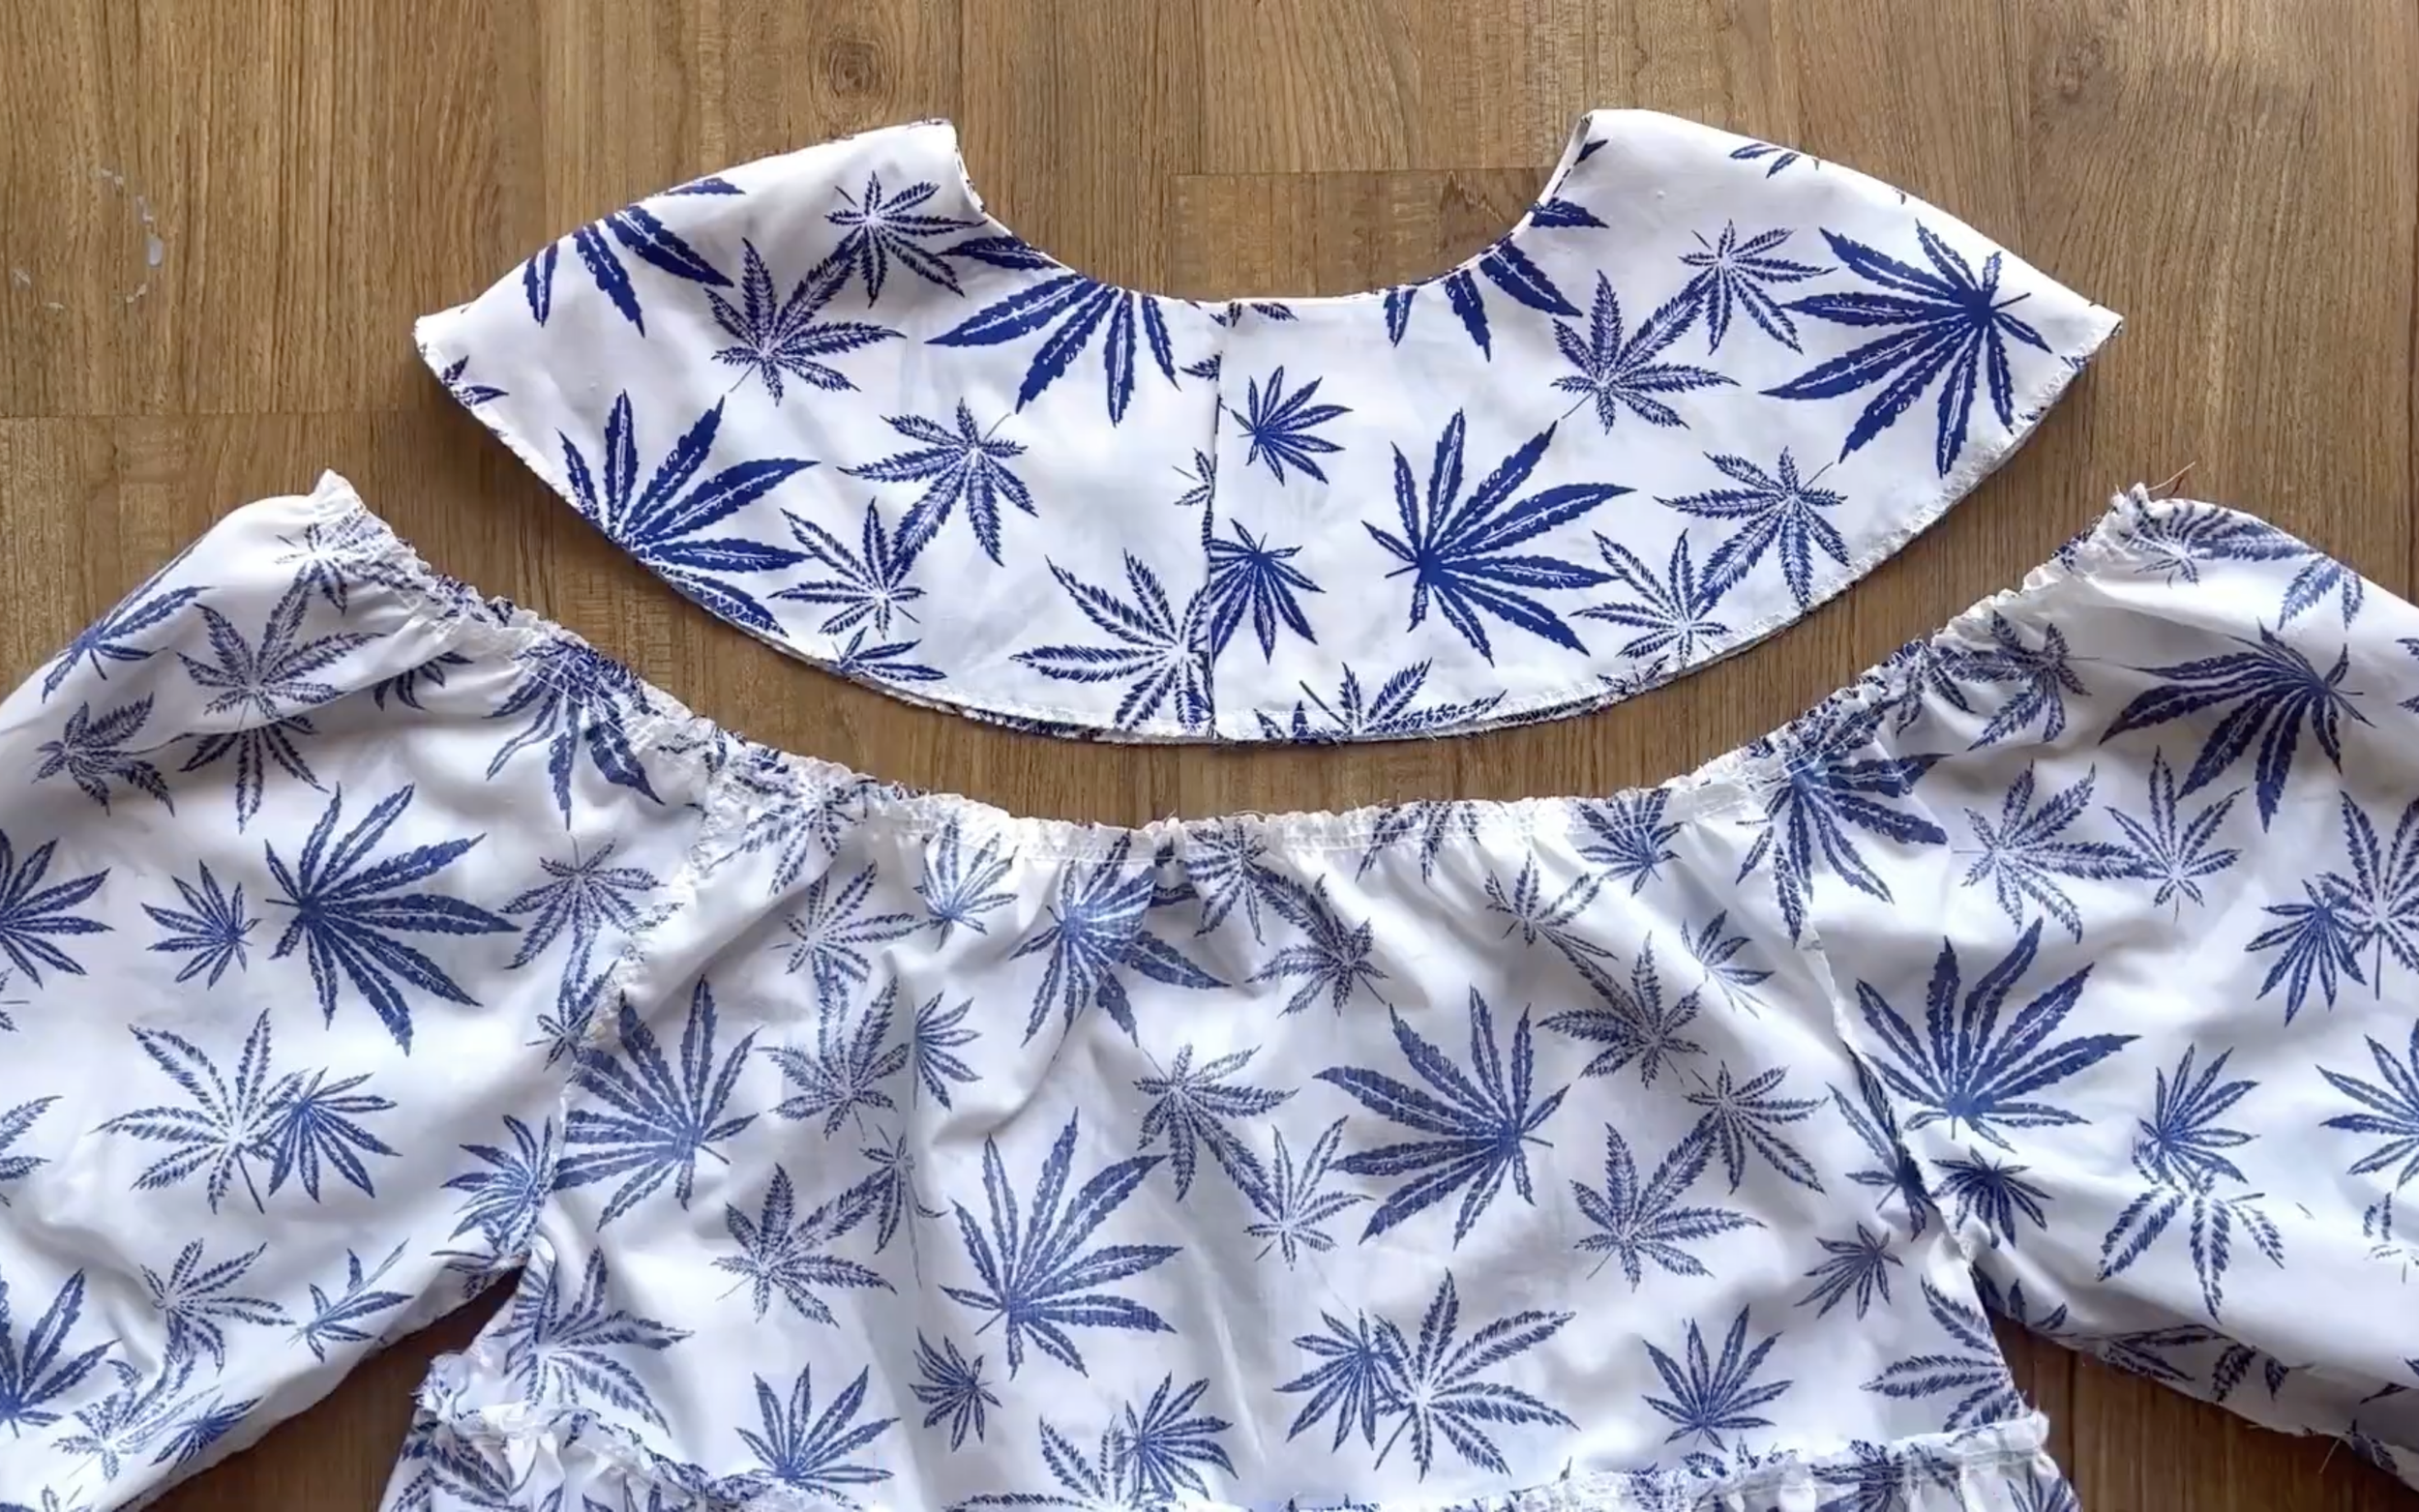
The sleeve part of the dress is finished.
CONNECT ALL PARTS TOGETHER
Now, just need to connect the sleeve to the skirt part.
Then, connect the bottom part of the dress to the yoke neck after that by using the same way as was done at the blouse.

I made 3 different DIYs from 1 simple design | The abilities of sewing are from your own creativity
And that’s a wrap — my baby doll dress is finally finished!
I’m in love with how it turned out — the puffy sleeves, ruffle hem, and big bow tie make it such an absolute cutie.
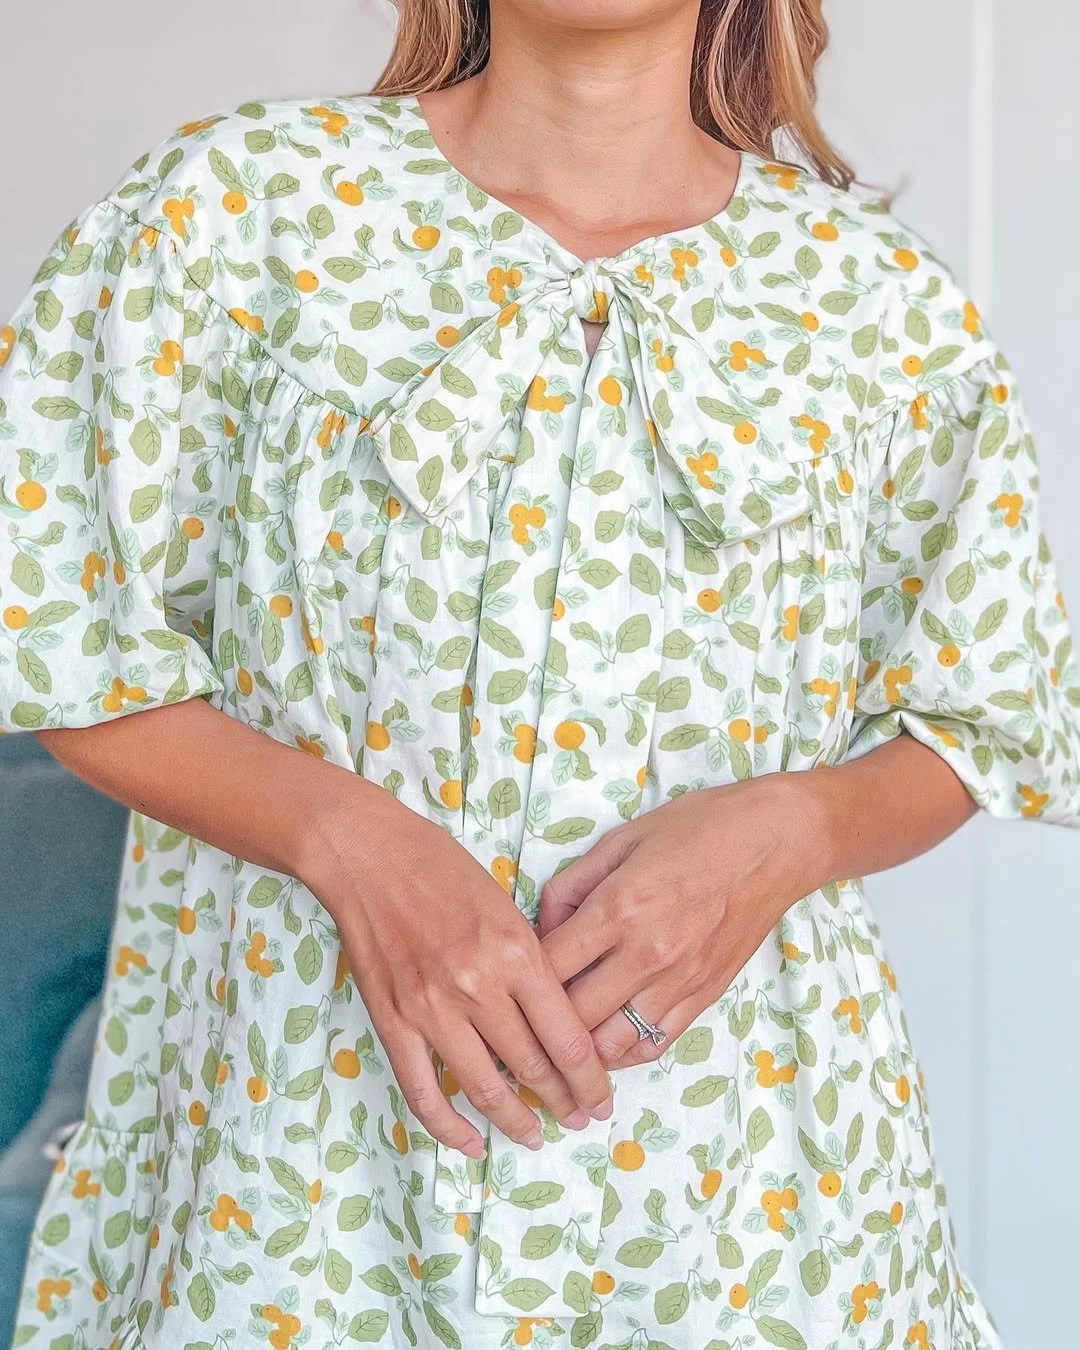
The best part? It’s reversible! You can wear it either way, with the bow at the front or the back, depending on your mood or style.
I hope this inspires you to try making your own.
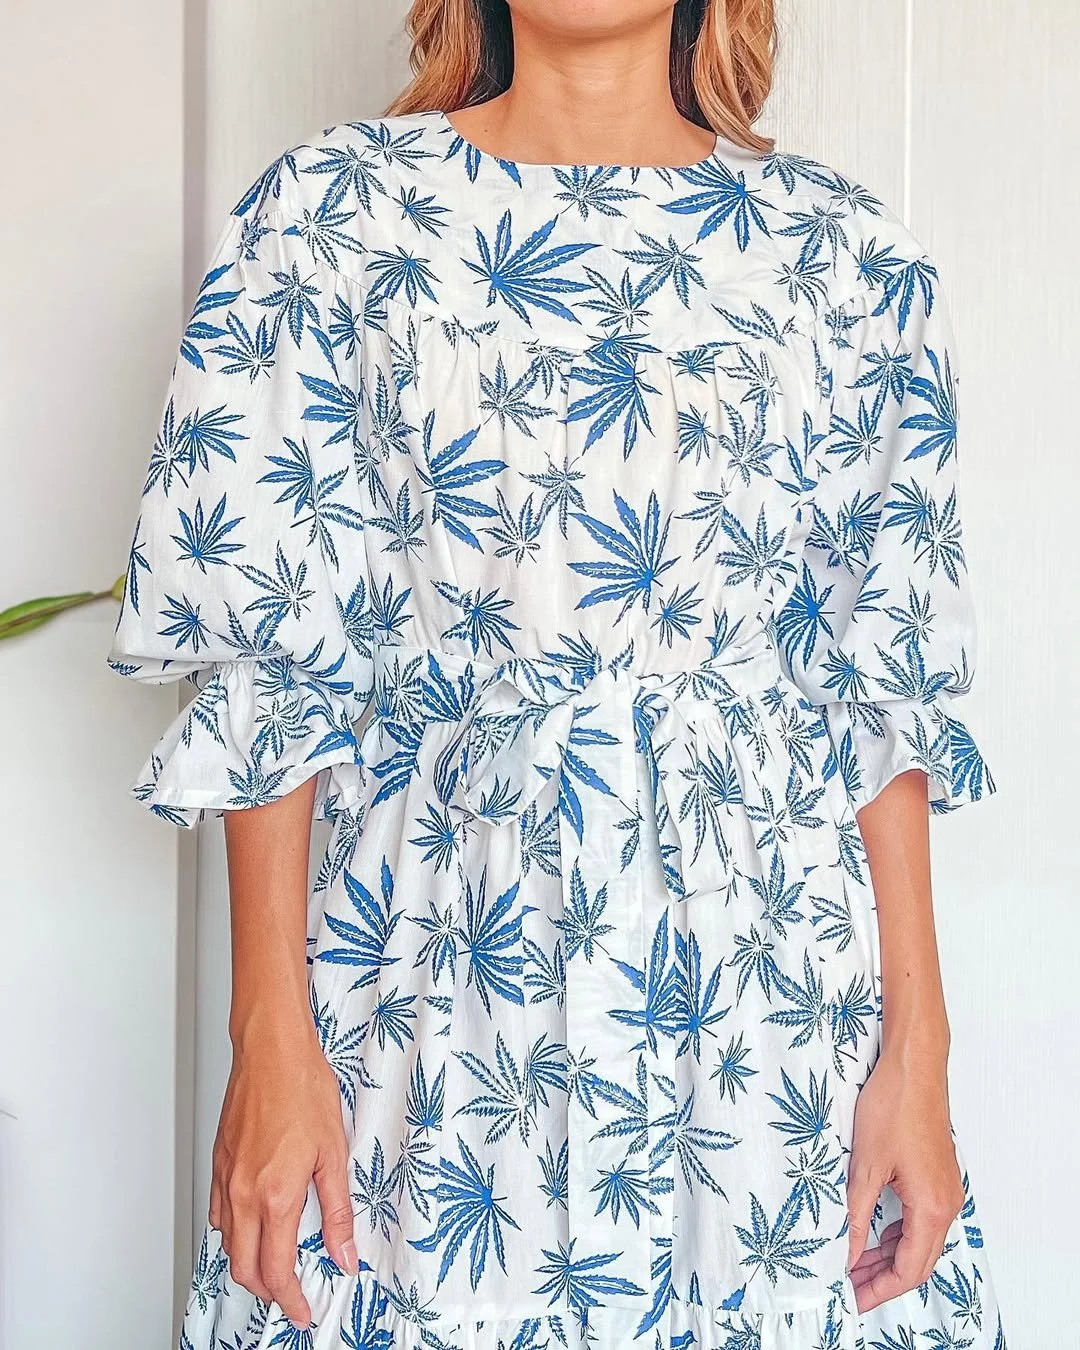
3. THE MAXI DRESS
THE YOKE NECK PART
Still keep the same pattern for the back of the yoke neck.
At the front of the neck, change the open area of the neckline a bit to close that part with a button. That's why draw a straight line at 2.5 cm outside the first one.
Here is how the yoke neck looks with the new front neck pattern.
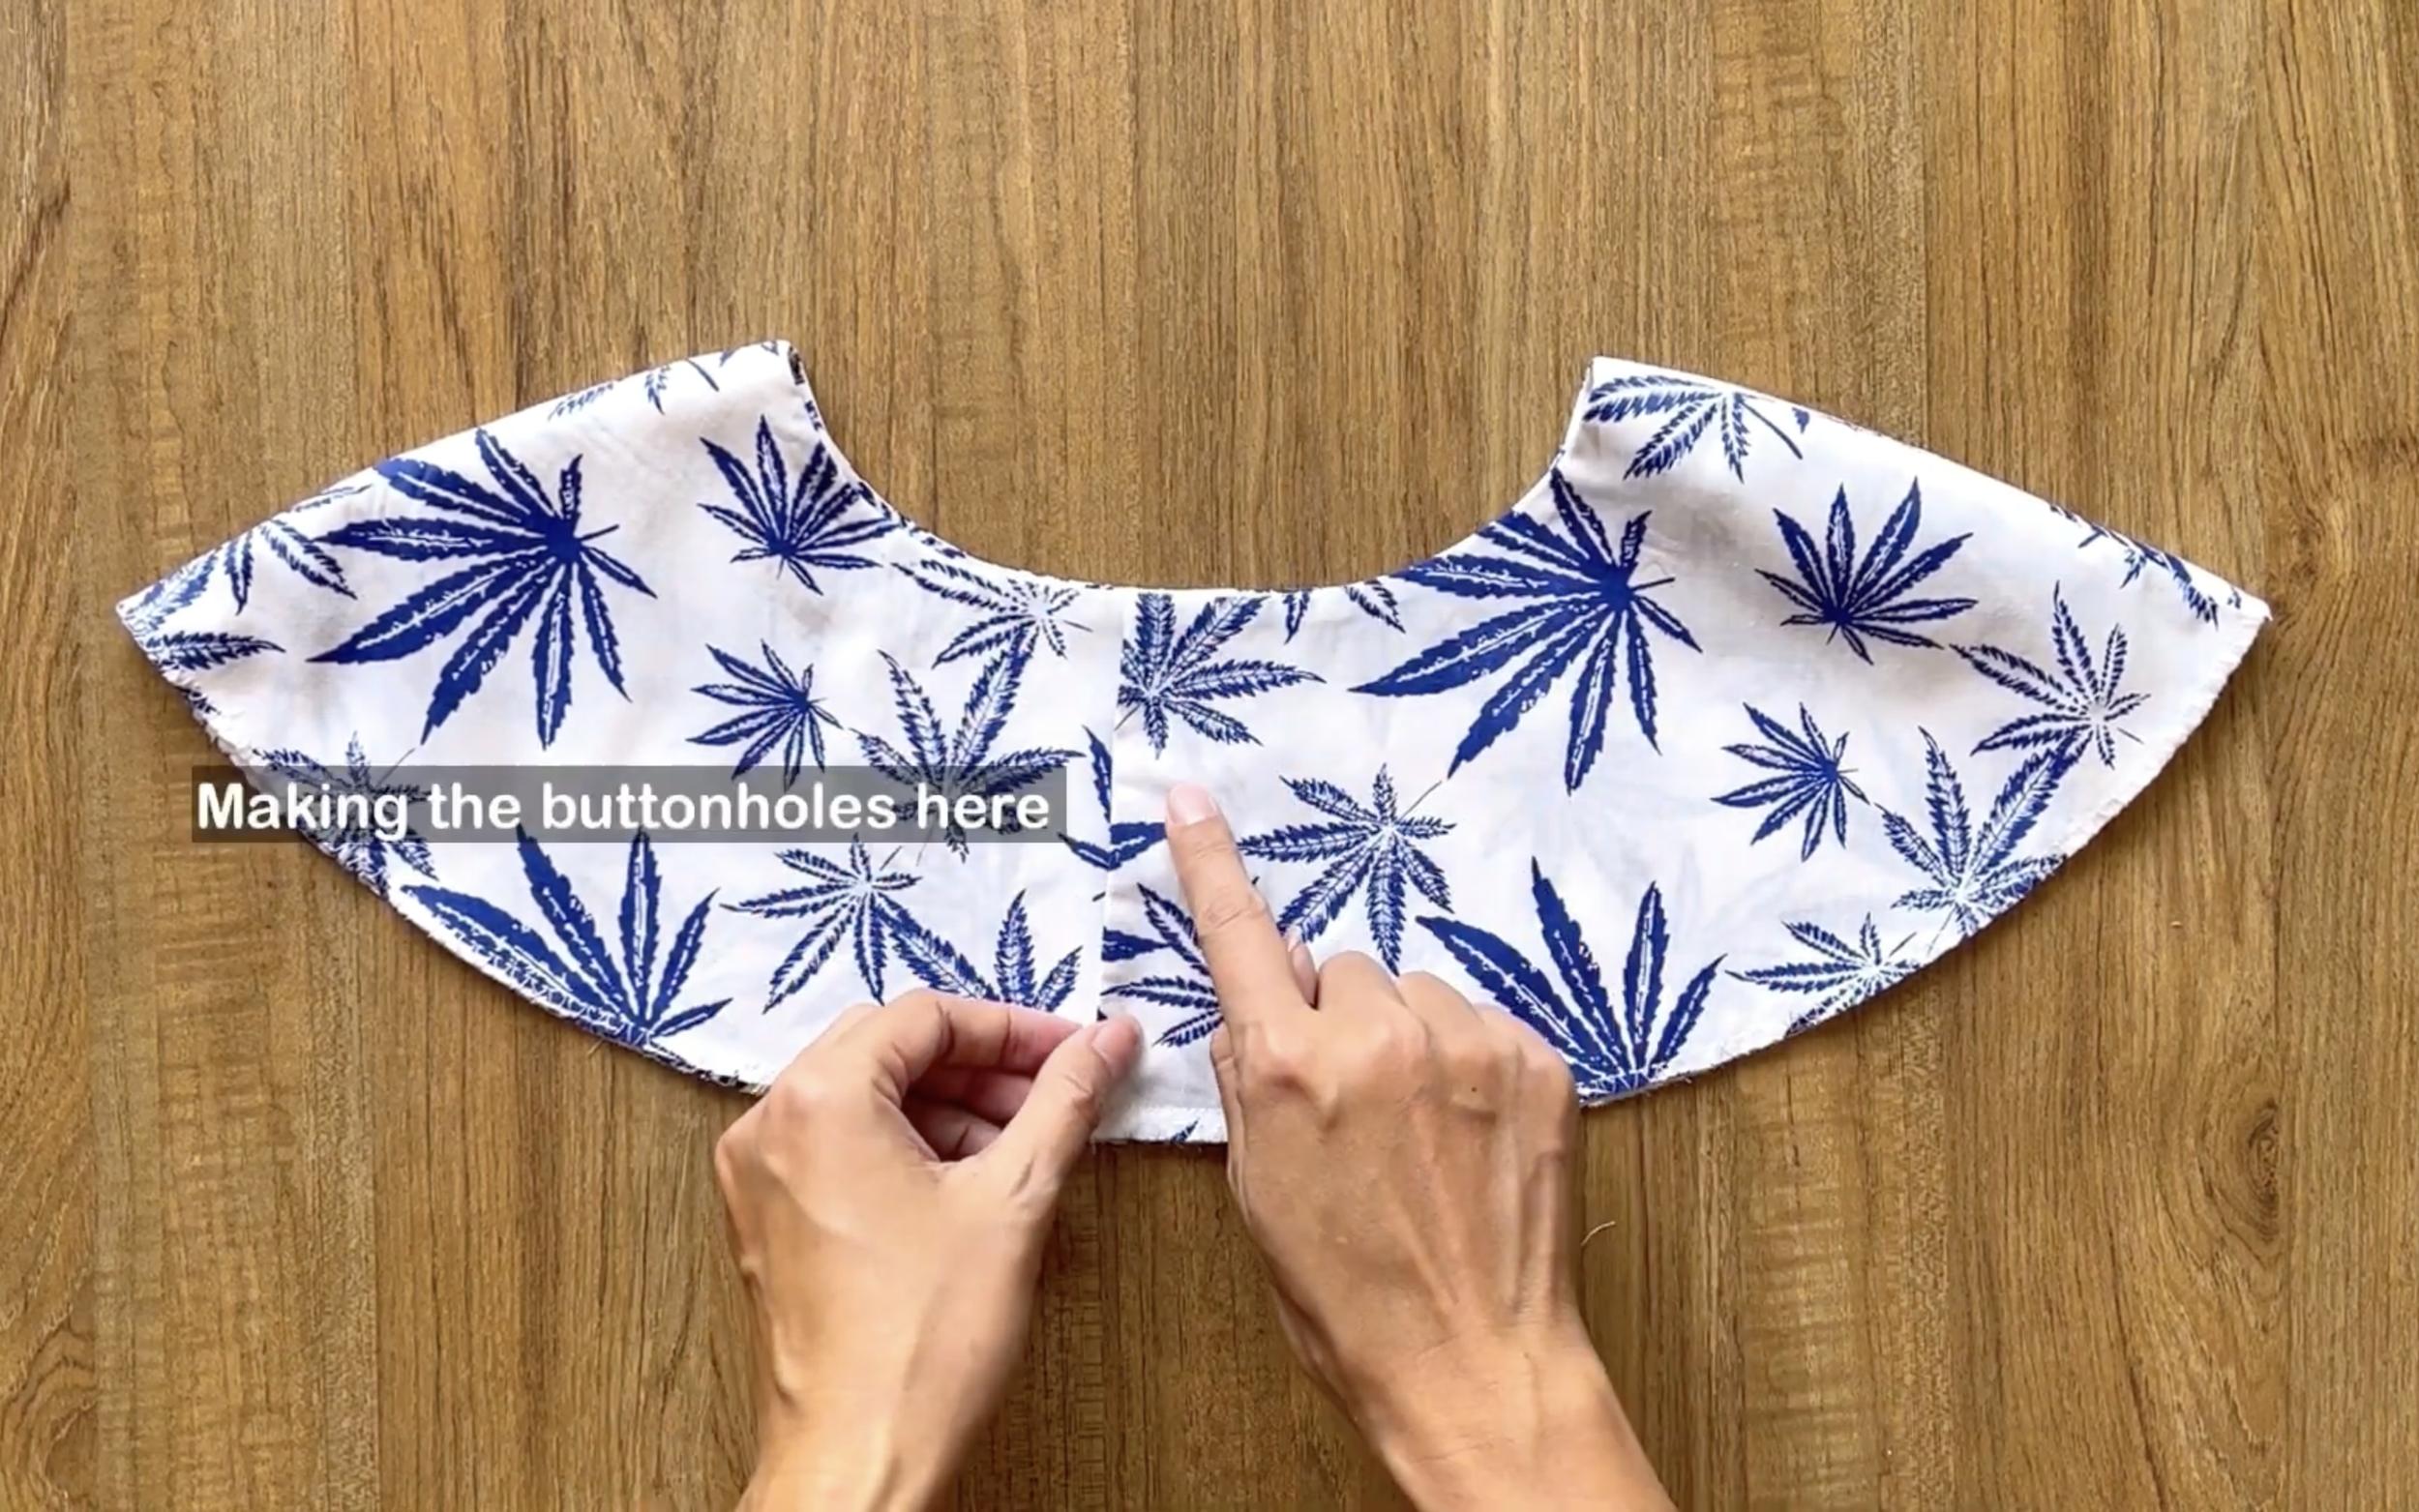
You just need to add a button and create a buttonhole there after that.
THE SKIRT PART
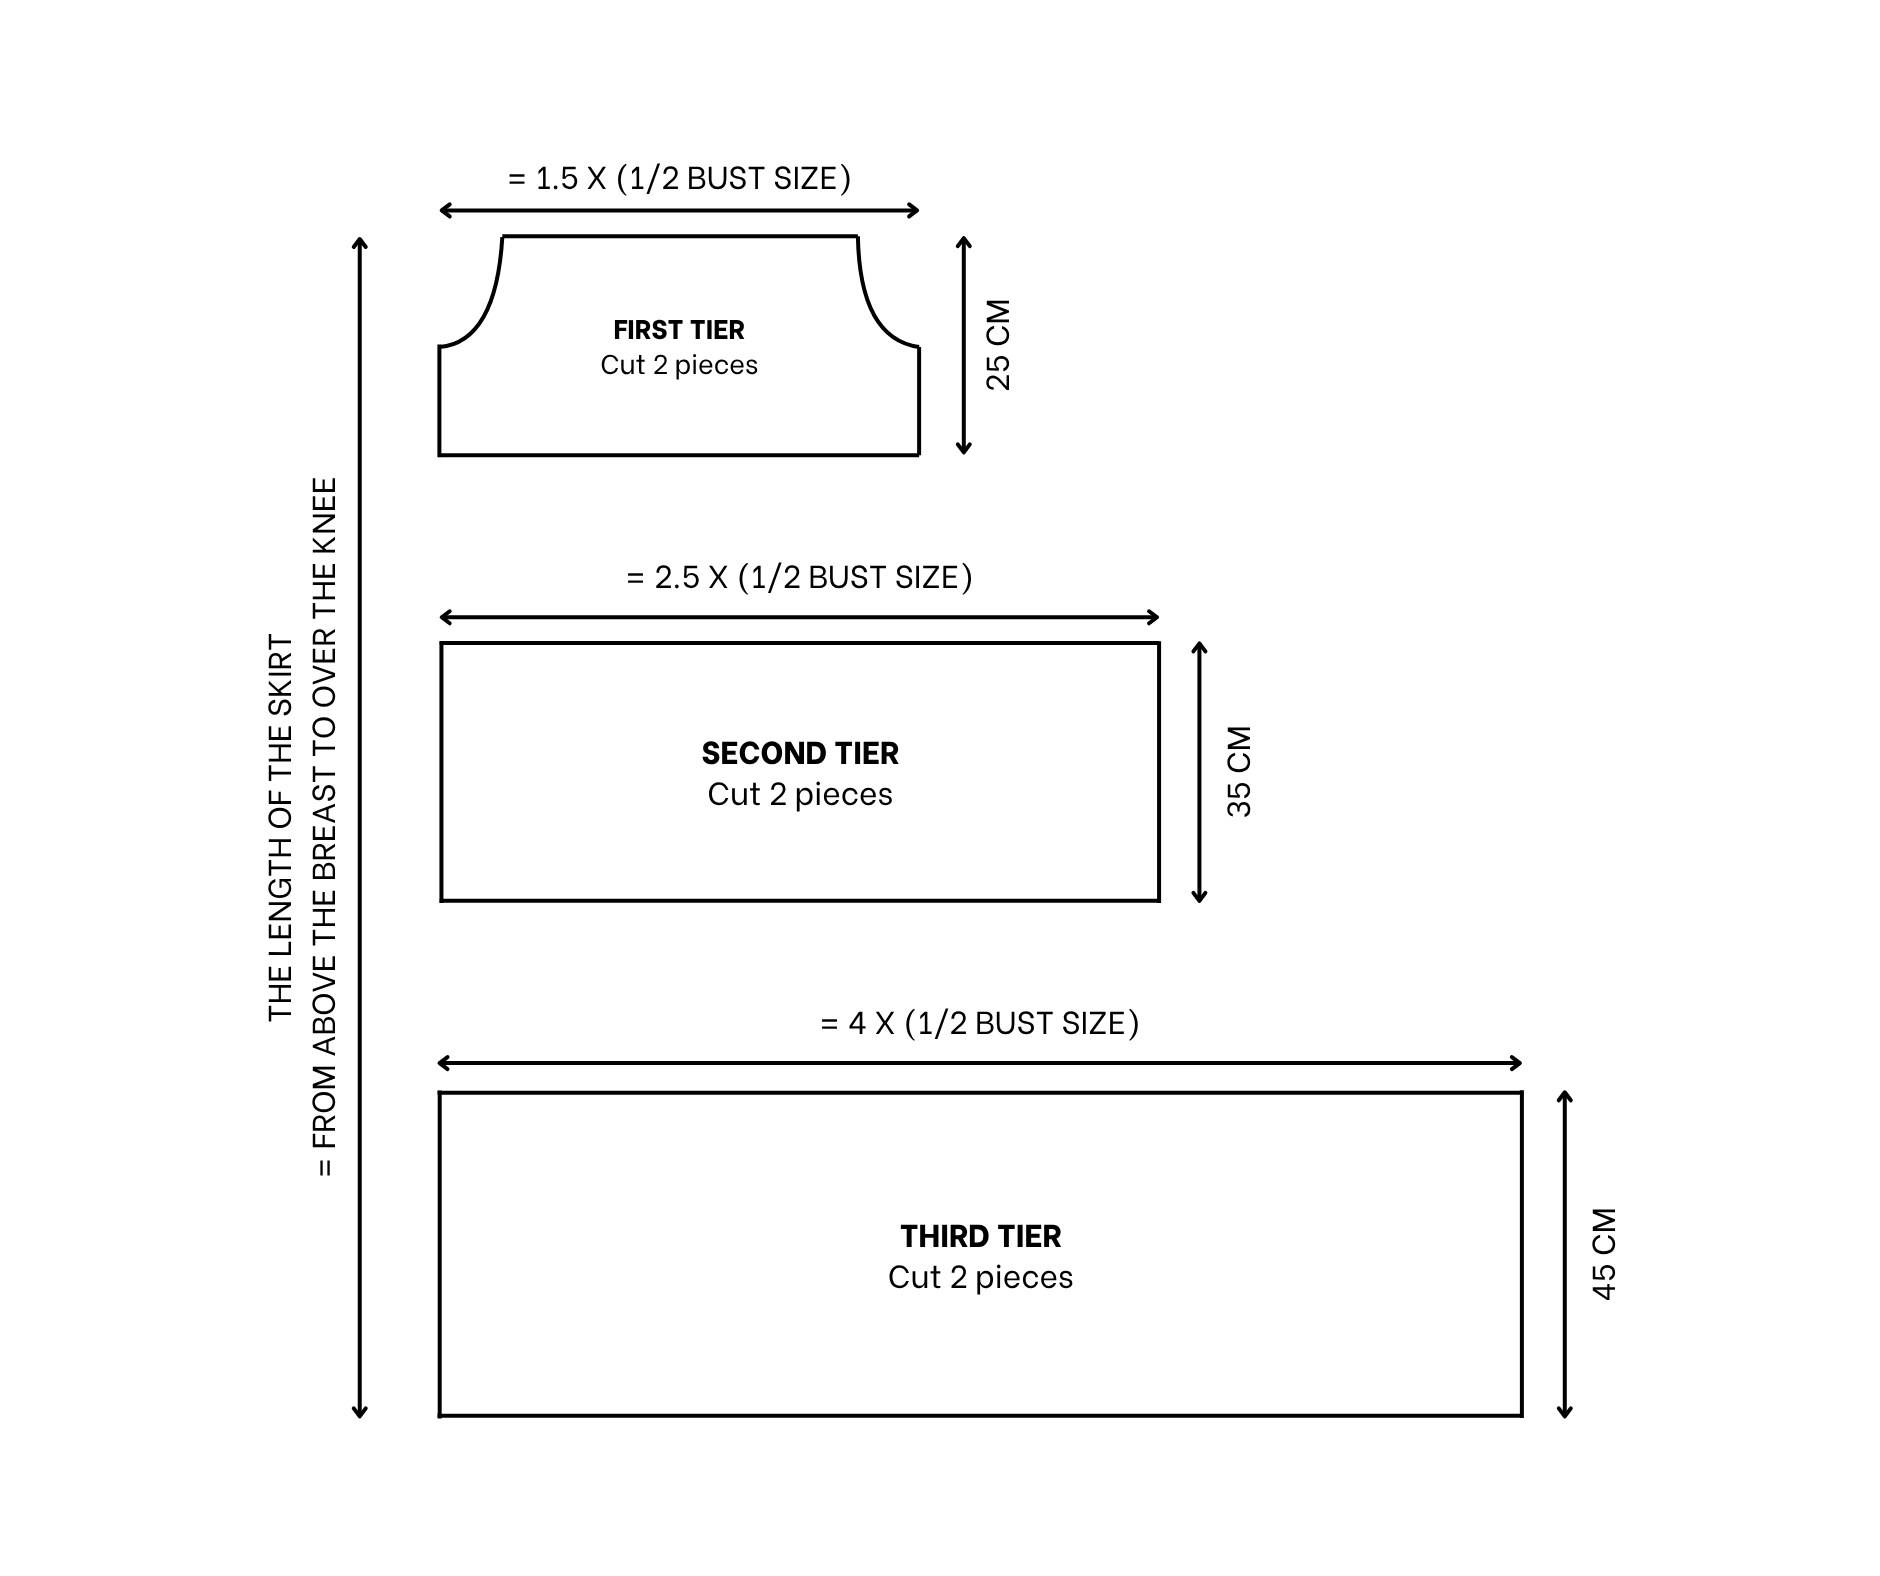
Moving to the skirt part of the dress, decide to have three tiers for it, and here is the pattern of each tier.
The first tier pattern is actually the bodice part from the blouse but shorter. The length of the skirt part is from above the breast to over the knee or wherever you want.
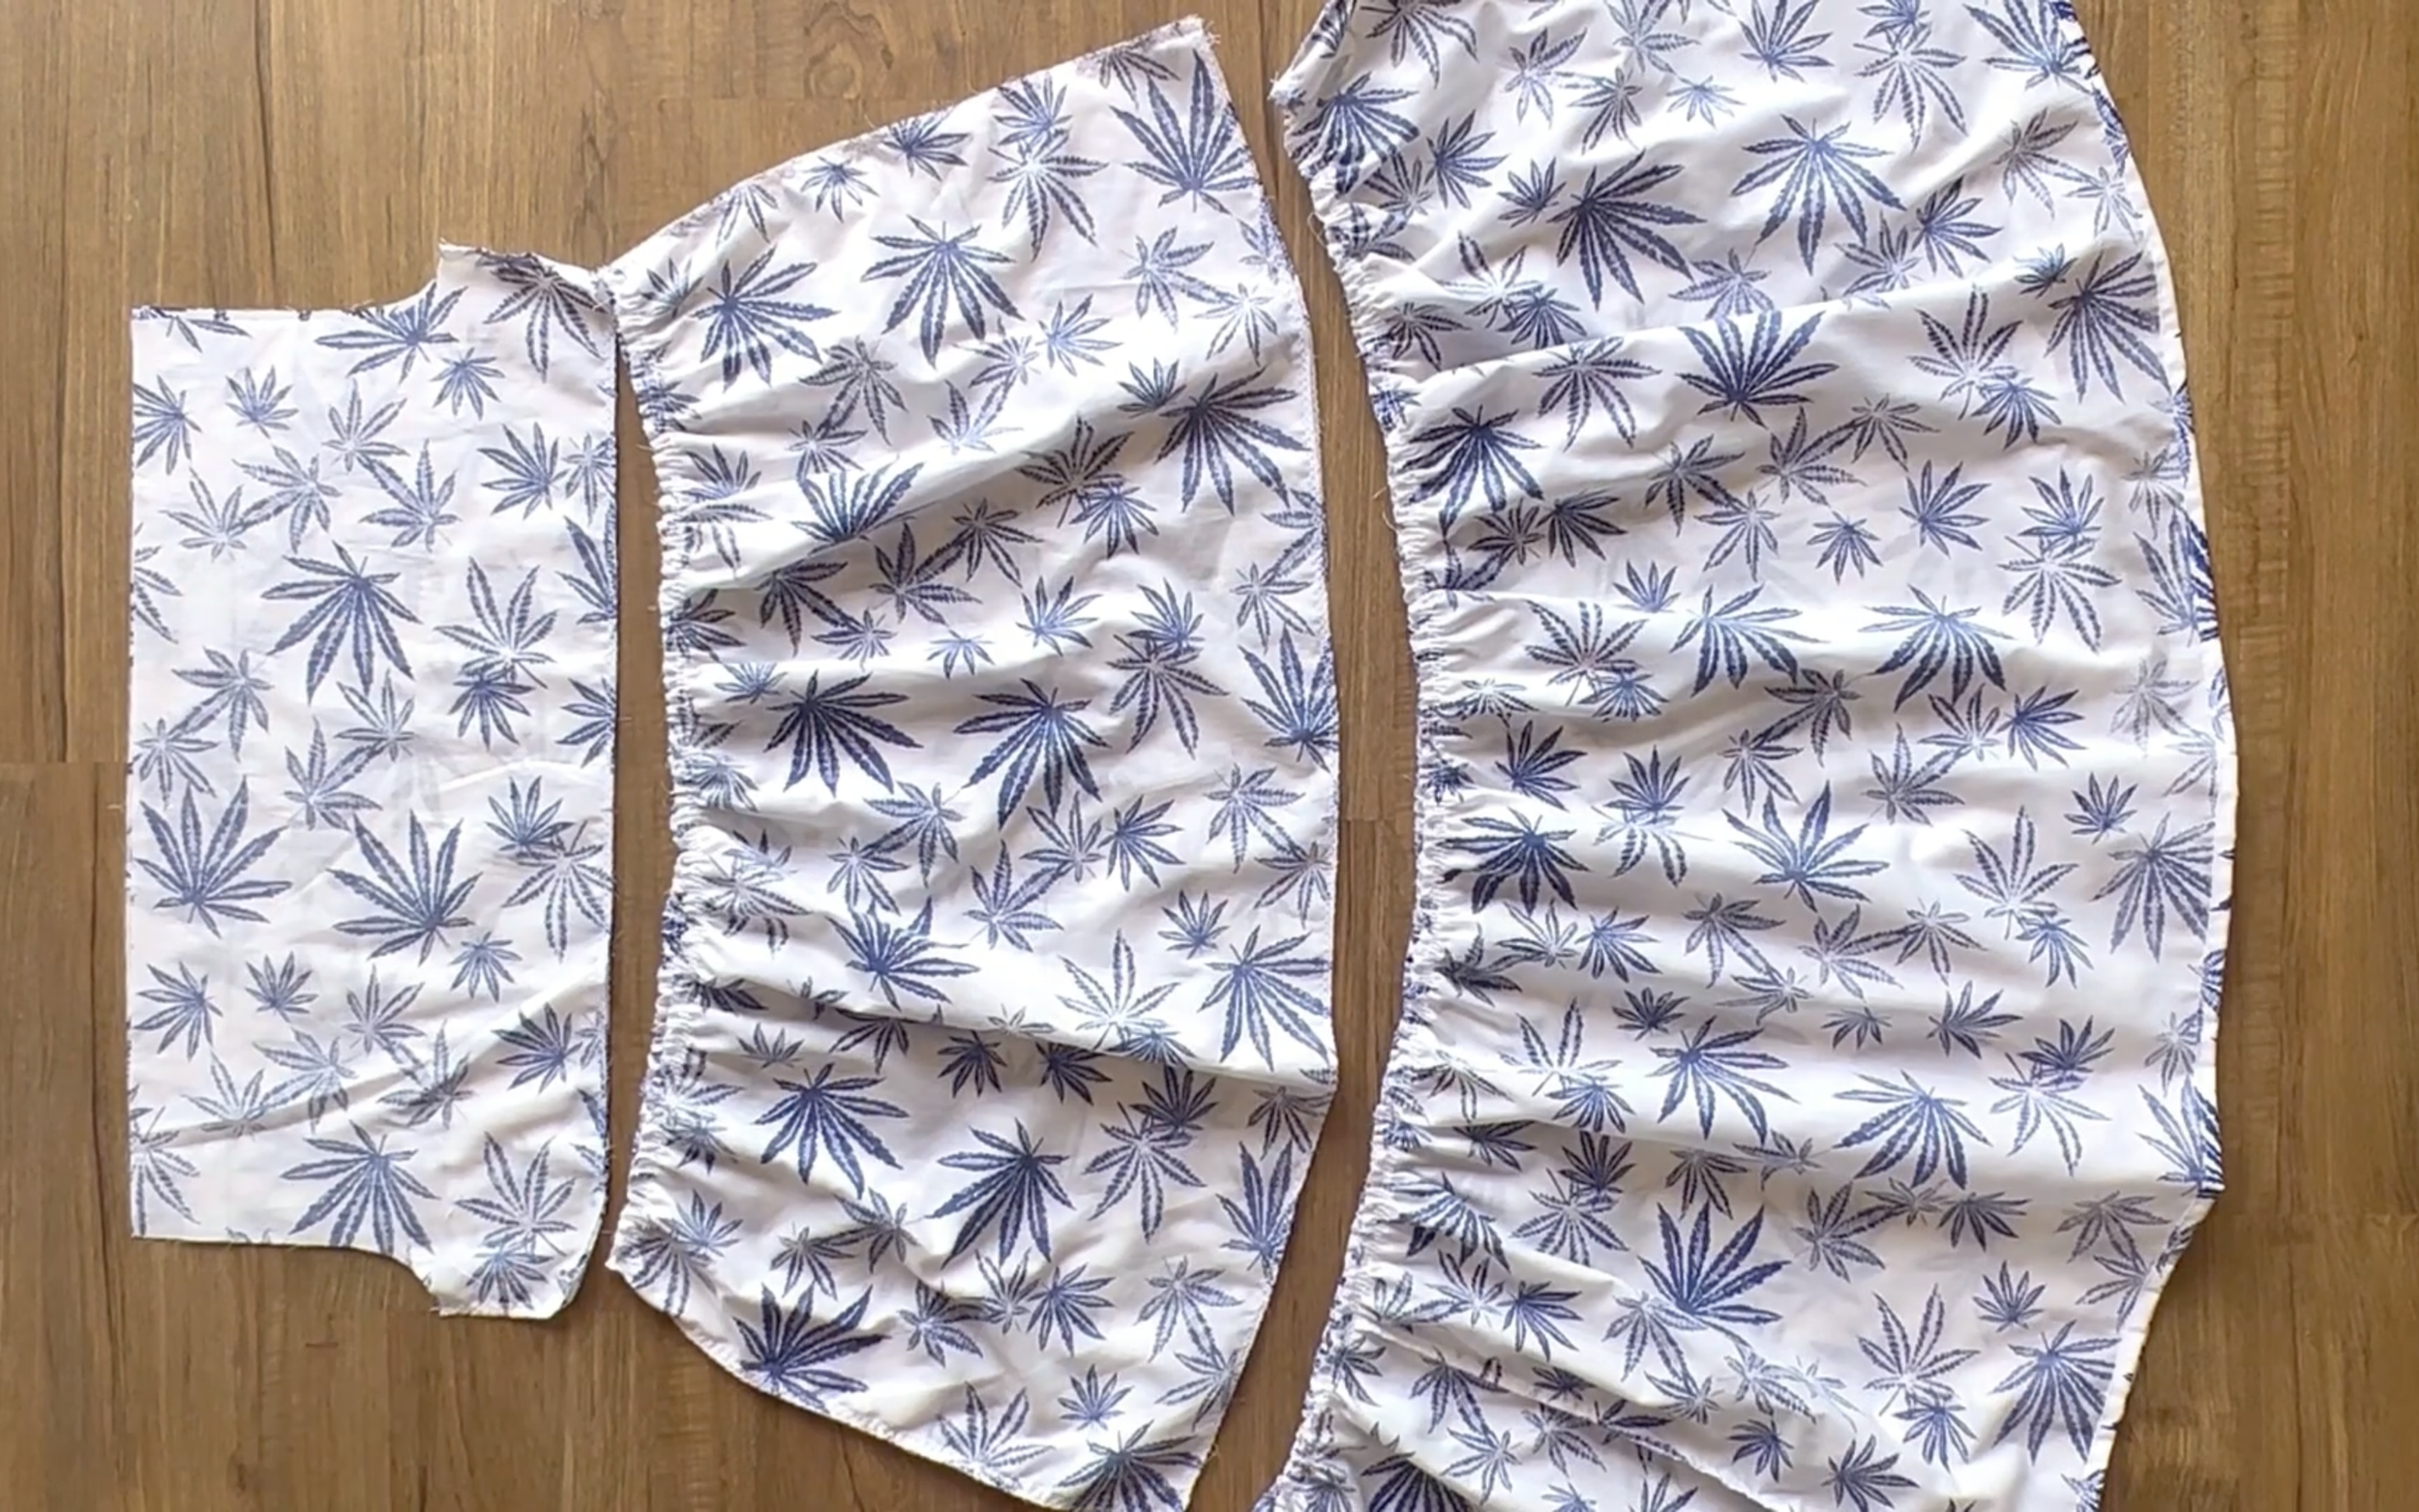
Here's what they look like after all. You just need to connect each tier together to finish the skirt part of the dress.
THE SLEEVE PART
For the sleeve of the dress, use the same sleeve pattern from the blouse, but change the finishing at the end of the sleeve to the puffy look.
Finish the end of the sleeve by folding the end fabric inside two times with 1 cm each time and sewing.
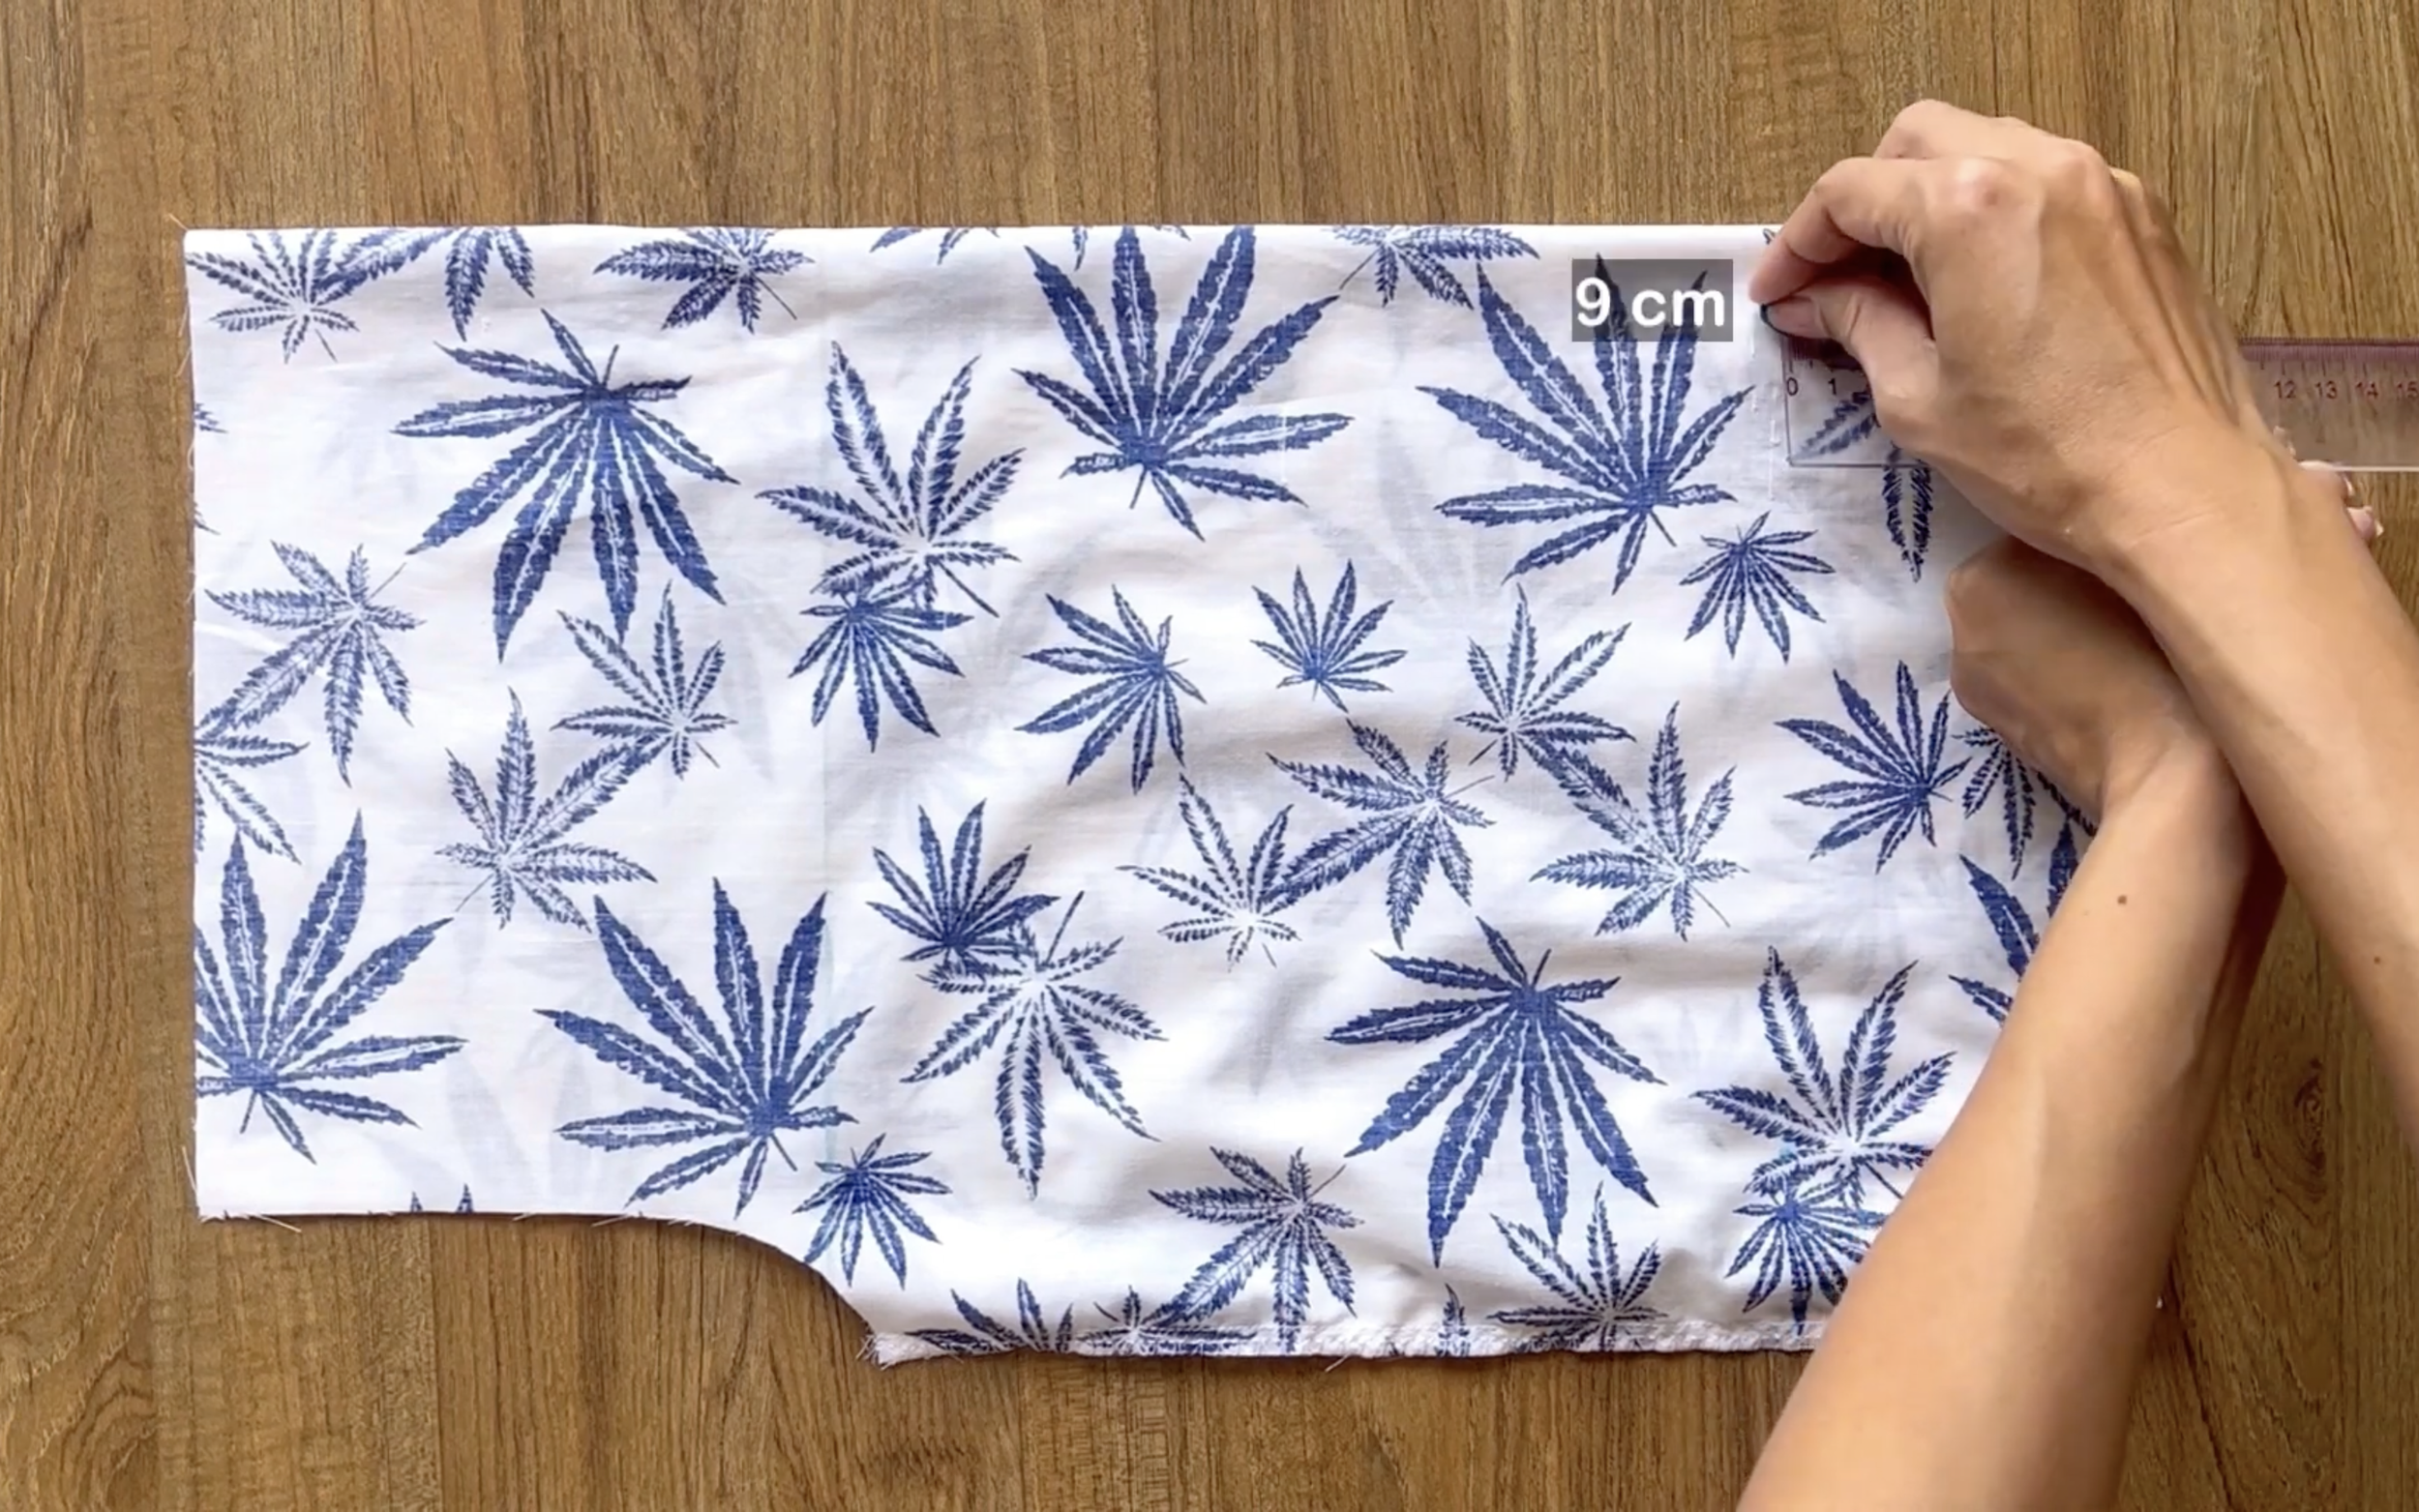
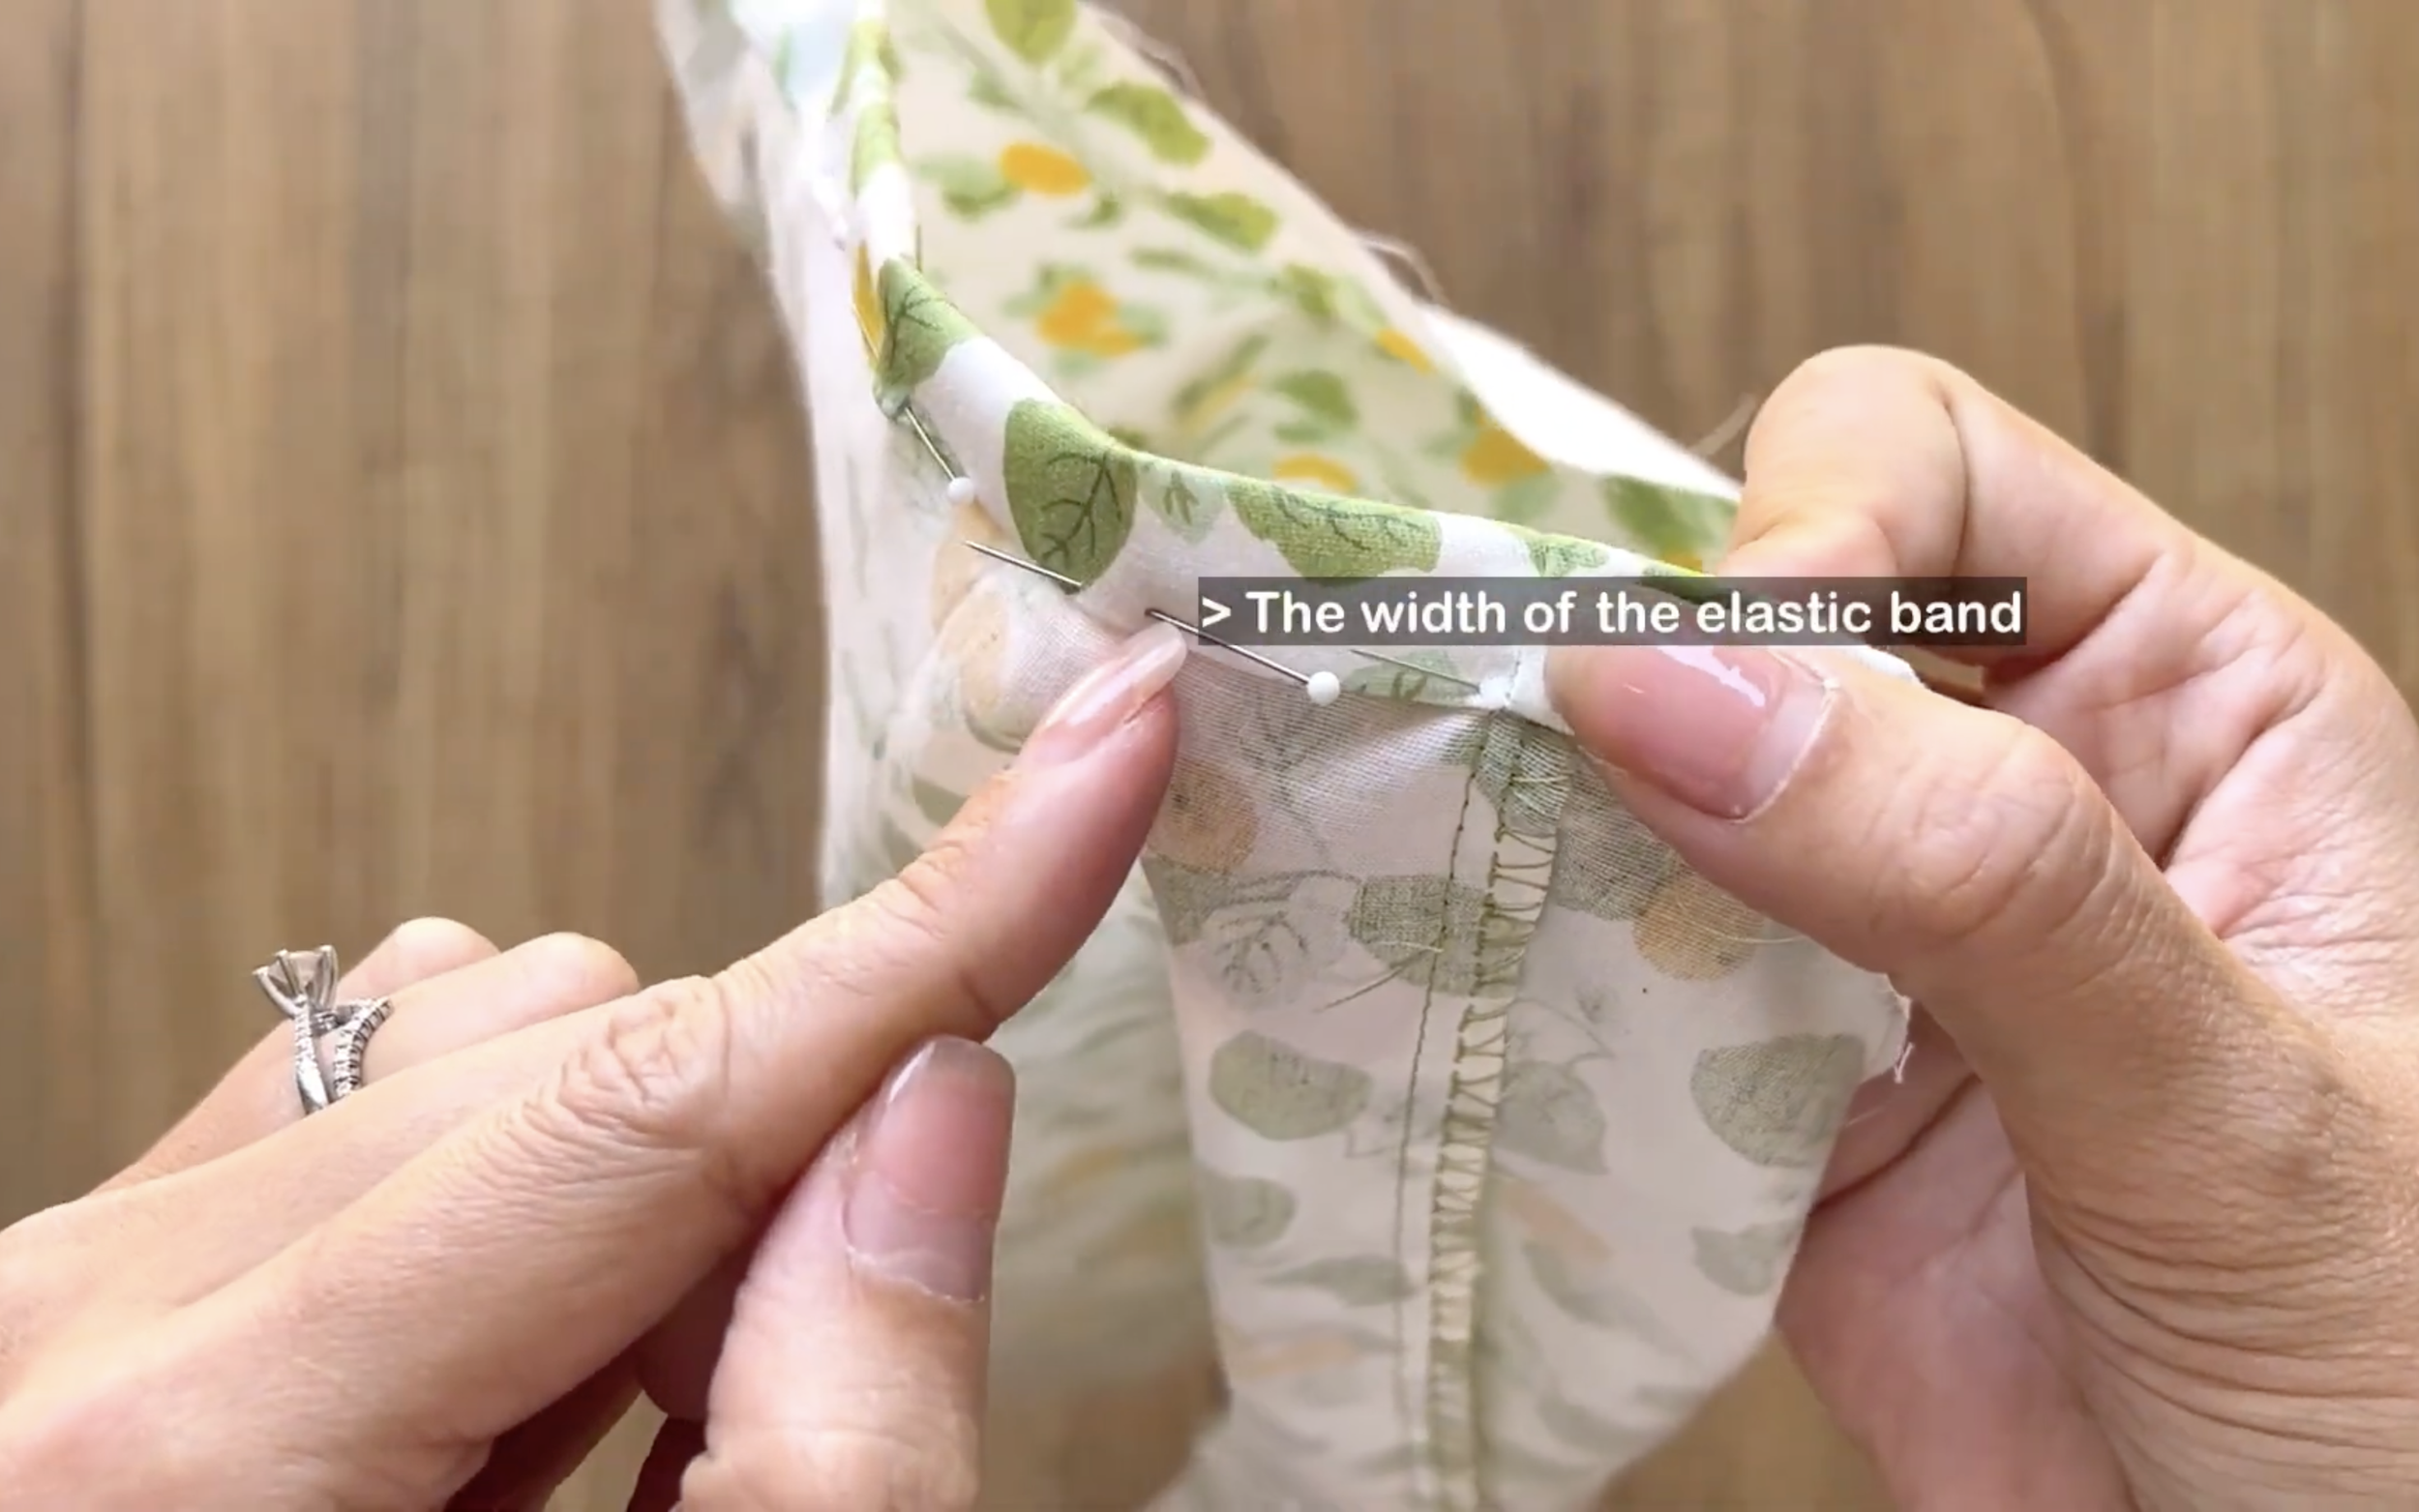
After that, draw a line at 9 cm above the ending line first. It's the width of the puffy at the end of the sleeve that is wanted.
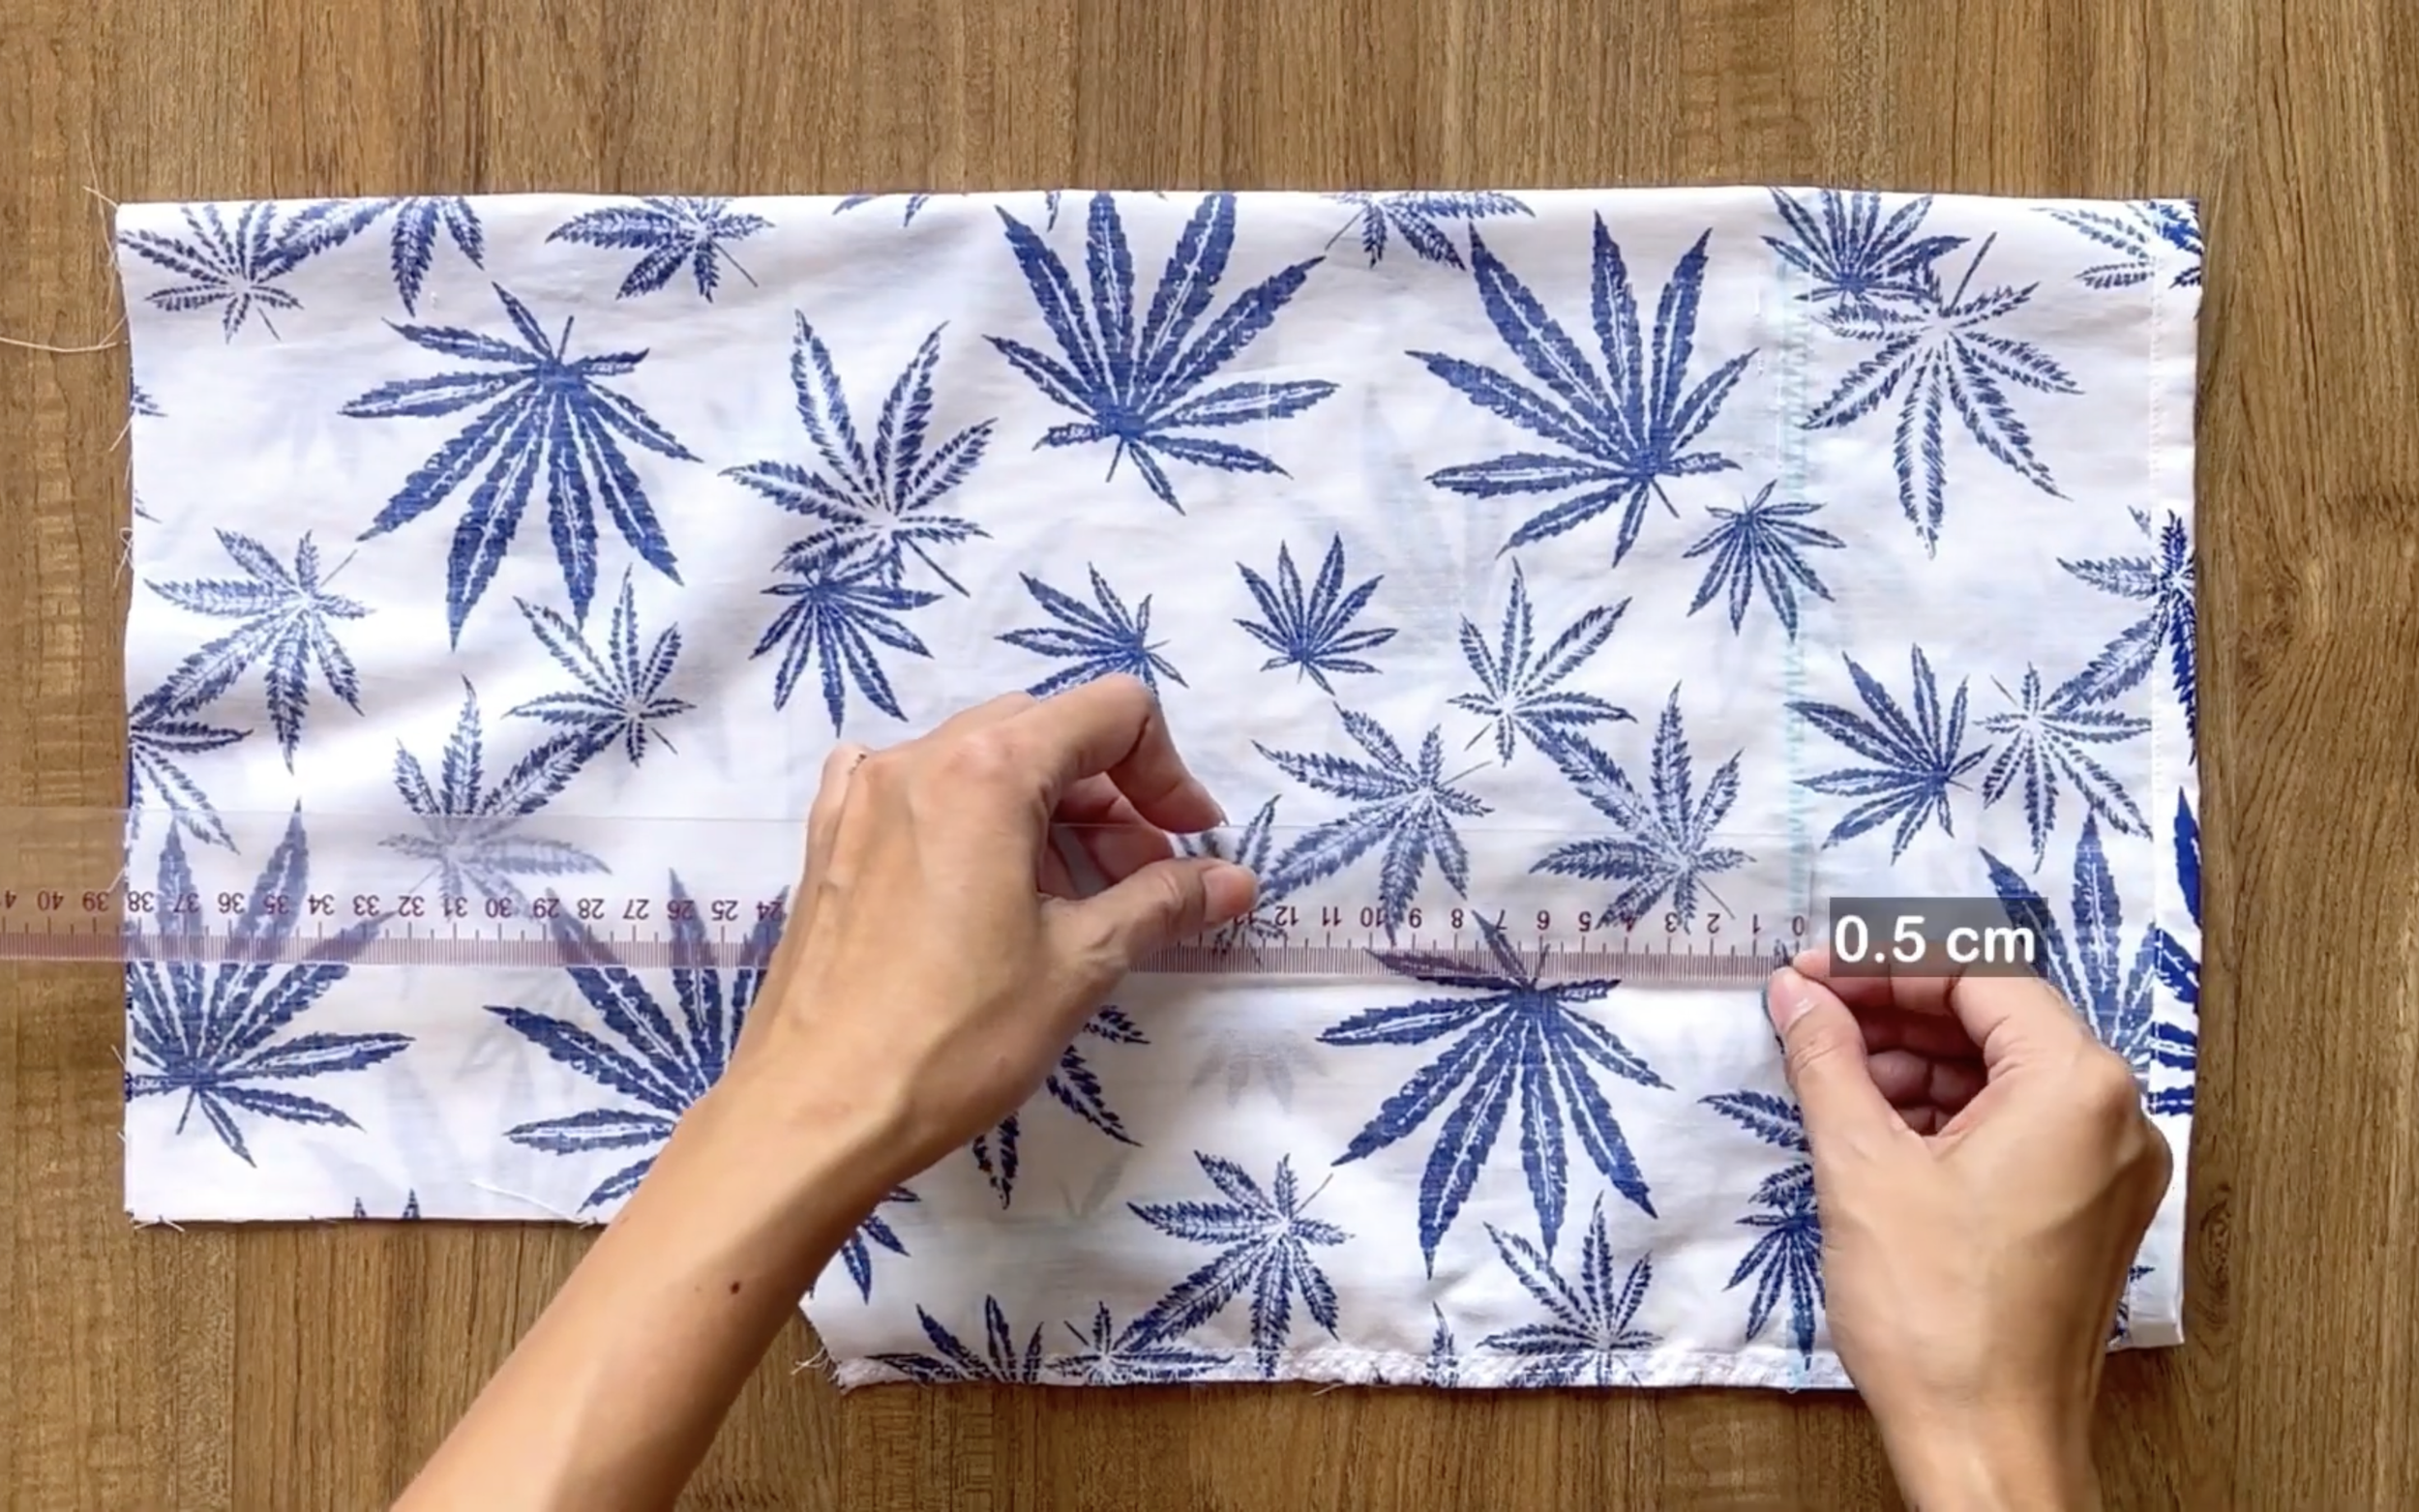
Then, keep drawing another line at 0.5 cm next to it.
Make a circle fabric line with 3 cm length (which is three times the width of the elastic band that will be used later) and the same width as the sleeve.
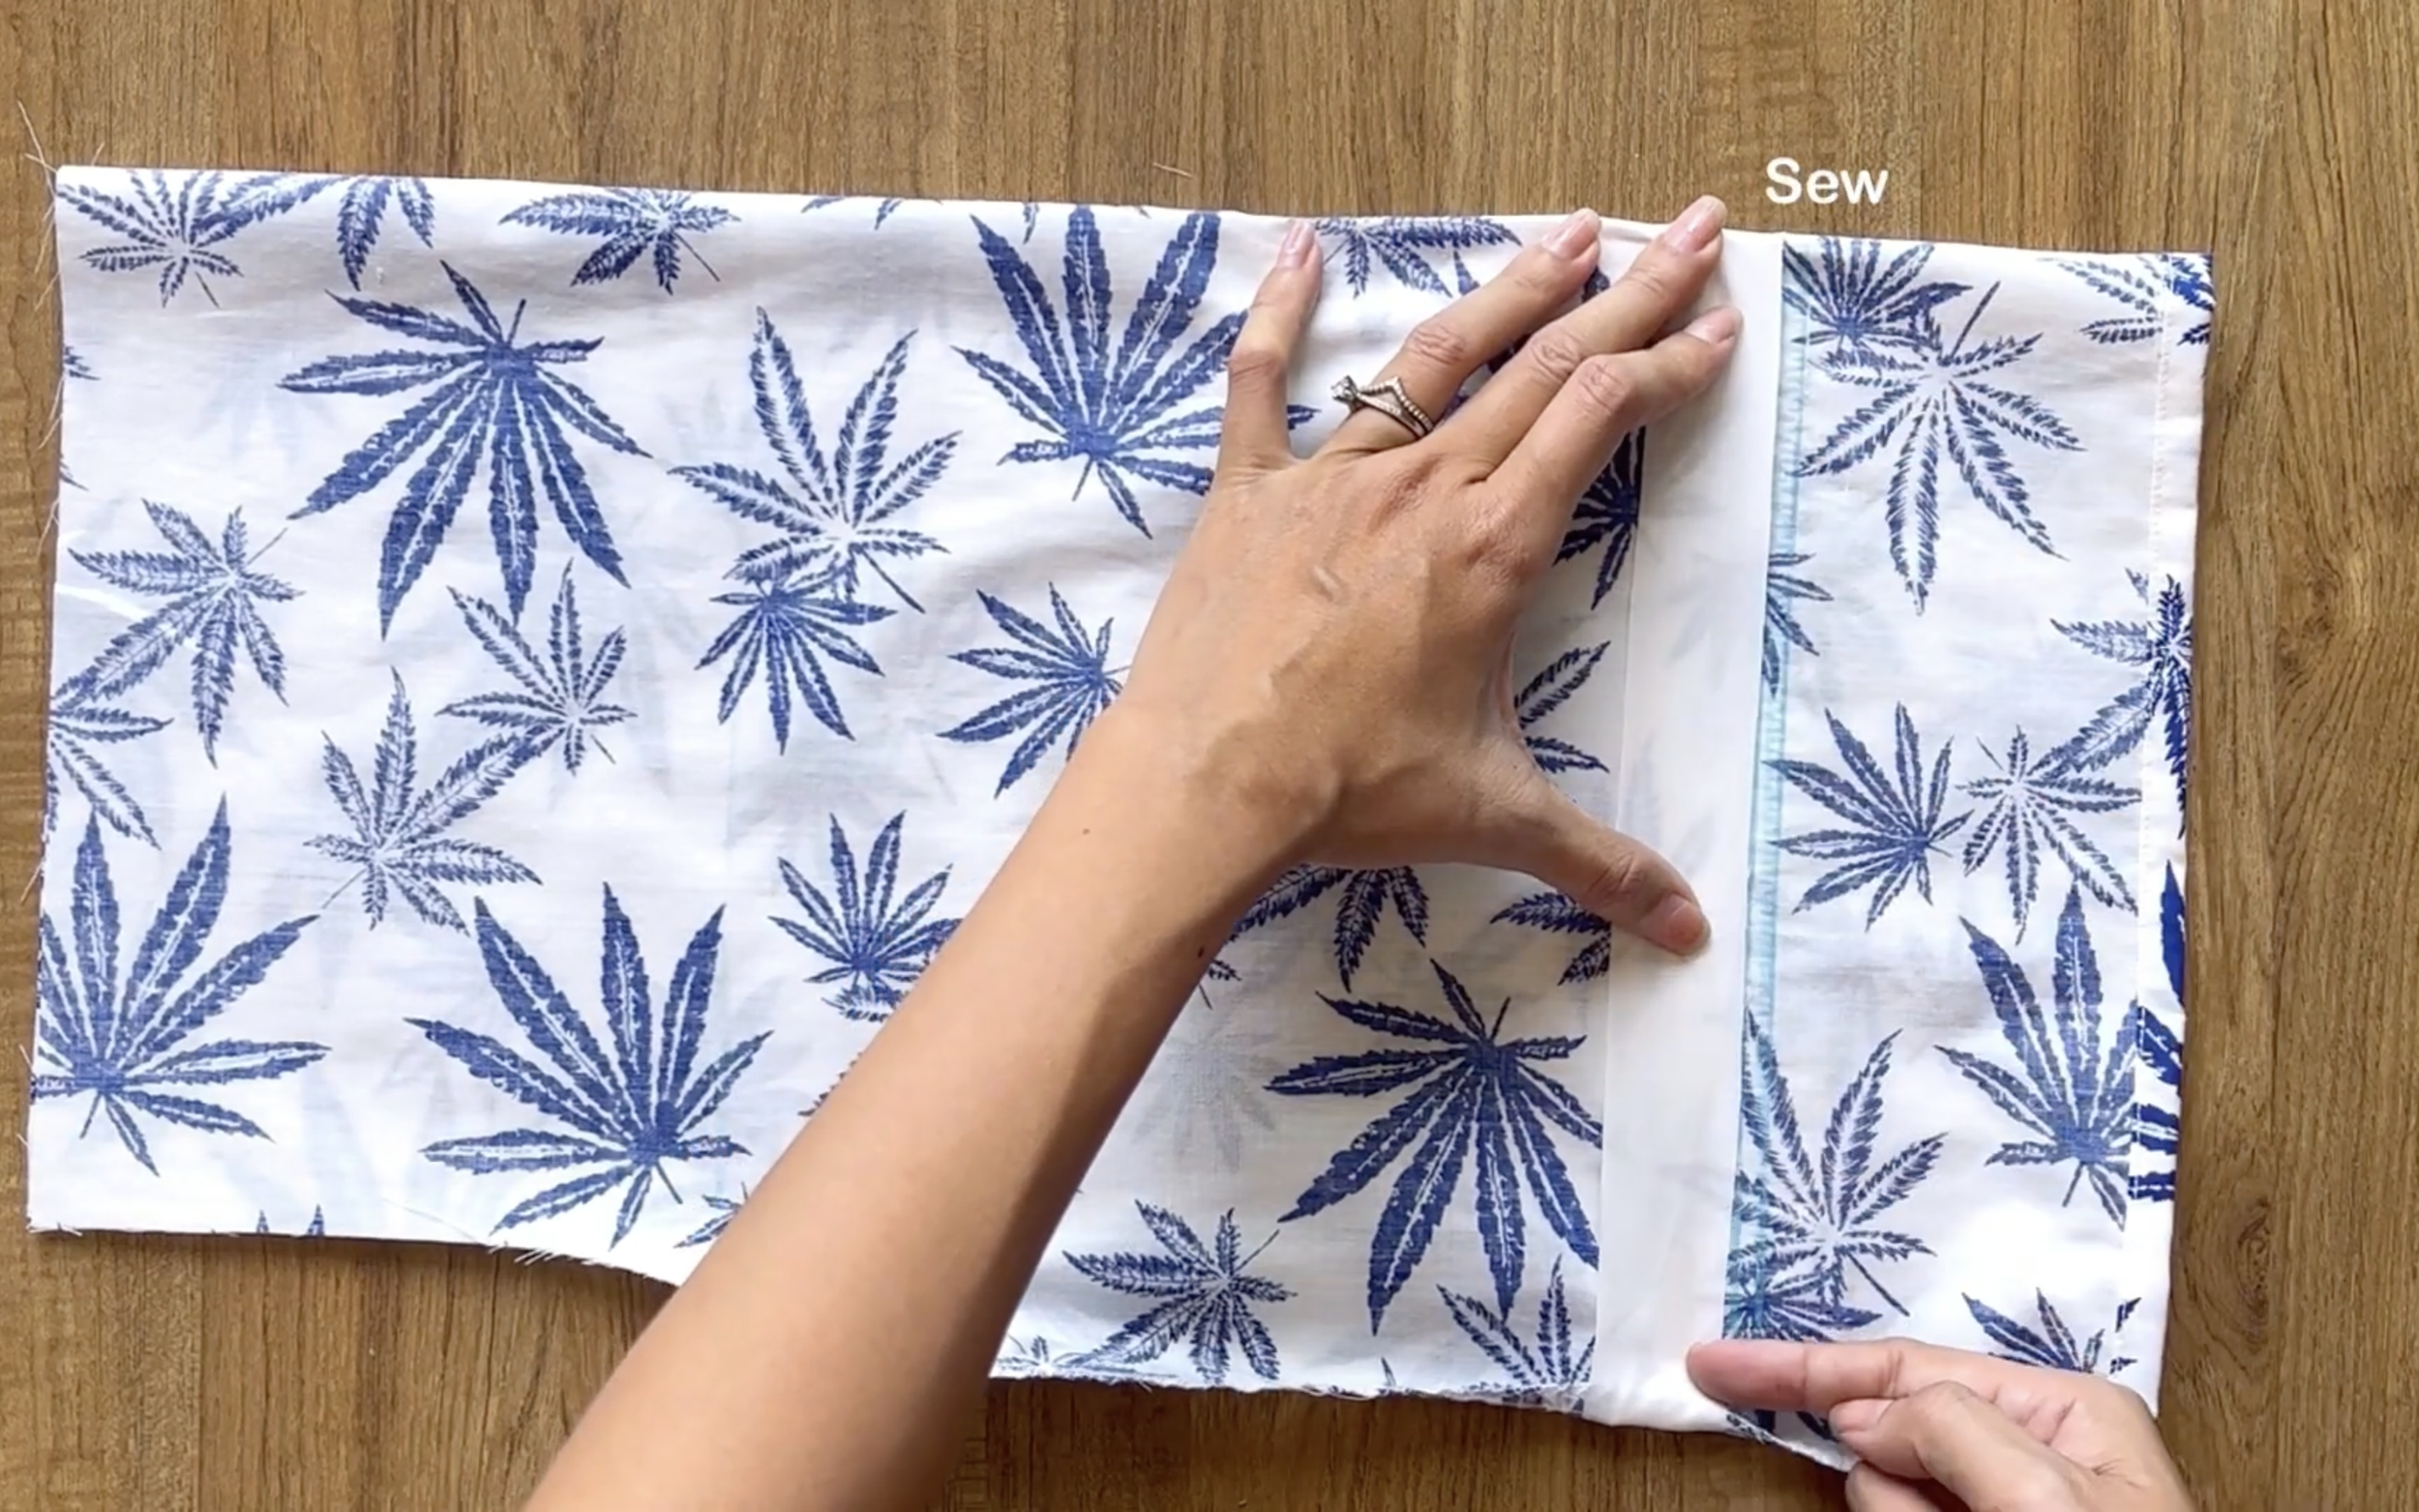
Connect one side of the circle fabric to the second line and make the first seam.
After that, fold the other side of the fabric inside 0.5 cm first, then keep folding it to the first line and make the second seam.
Remember to keep a small unsewn space for the elastic band to go through later. This is a way to make the fabric hole at the end of the sleeve.

Cut an elastic band with 20 cm width, which is the width of your arm, to go through the fabric hole.
Sew two ends of the elastic band after that and close the unsewn space that was kept before.

And the sleeve part of the dress will be finished.
CONNECT ALL PARTS TOGETHER

Now, just need to connect two sleeves to the skirt part of the dress.
Then, connect the bottom part of the dress to the yoke neck by using the same way as was done at the blouse.

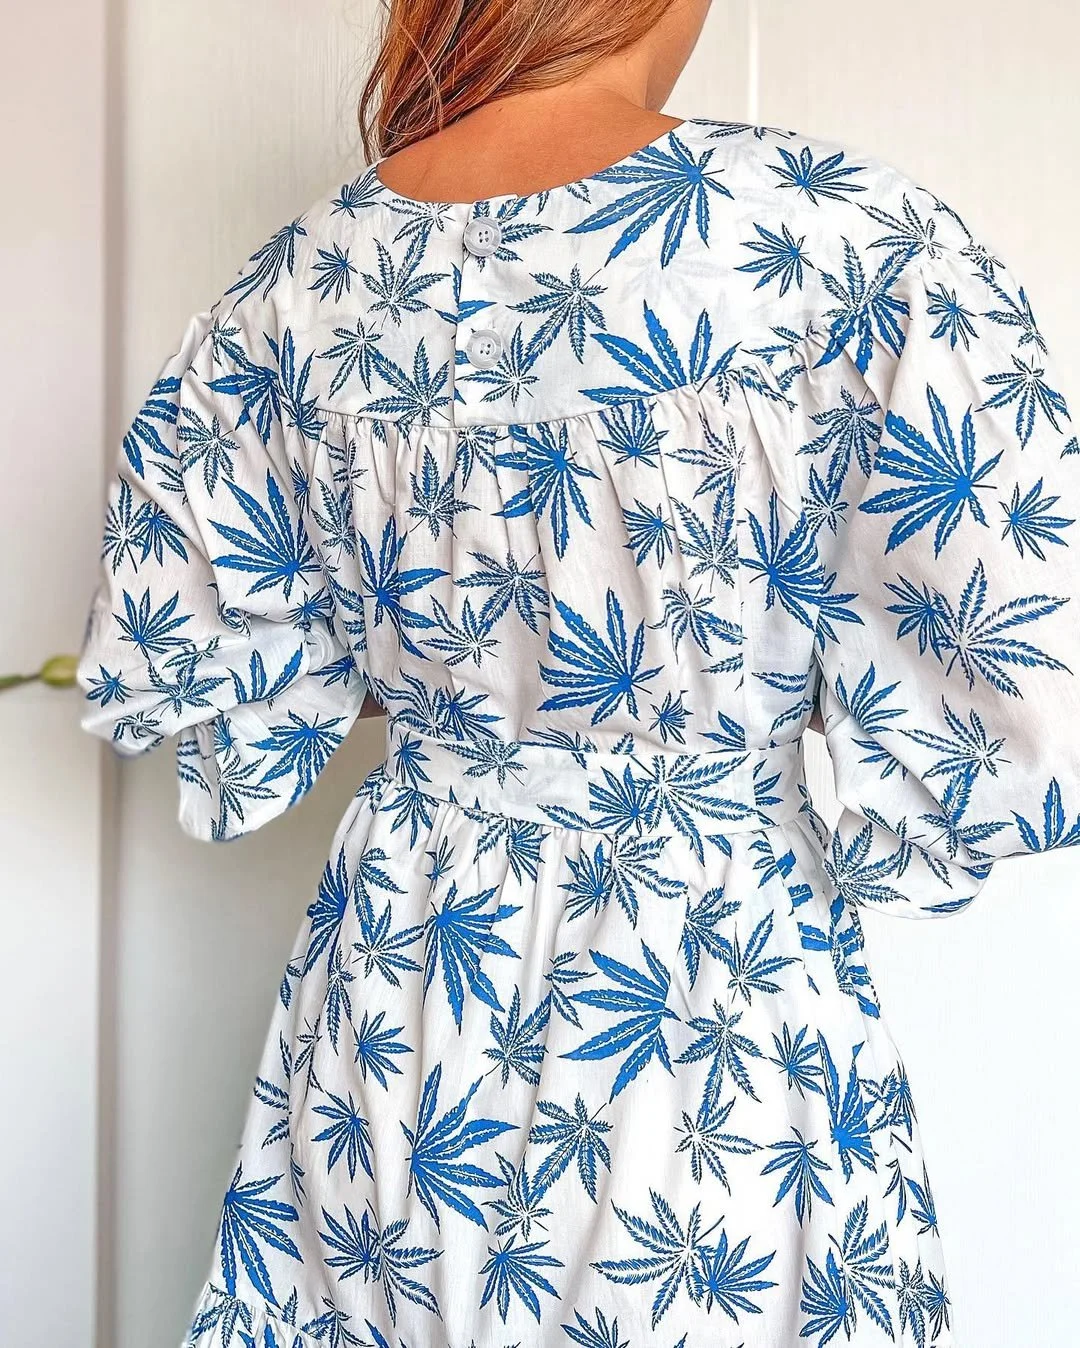
I made 3 different DIYs from 1 simple design | The abilities of sewing are from your own creativity
And I’ve just finished this maxi dress — here’s the final result!
It turned out so cute and versatile. You can wear it with or without the waist tie, but I personally love how the tie adds a touch of elegance. Plus, it’s reversible, so you can wear it on either side for a different look each time.
I hope you found my step-by-step guide helpful and inspiring.
If you’re interested in making your own, give it a try and let me know how it goes!
Until then, happy sewing!