Making a Vintage inspired dress (with lining) | Step by step sewing tutorial with pattern making

Making a Vintage inspired dress (with lining) | Step by step sewing tutorial with pattern making

Welcome or welcome back to my channel. My name is Jess and I love doing DIY, making clothes in a "simply but pretty" way.
In today's tutorial, I'm going to share with you how I made my Vintage inspired dress. This is a very simple and basic design dress with puff sleeve, gathered waist. But the lining is what makes this dress different. By using the lining technique, you can even turn it into a reversible dress to wear both sides.
That's why I hope you will try it out. Let’s get started!
WHAT YOU’LL NEED
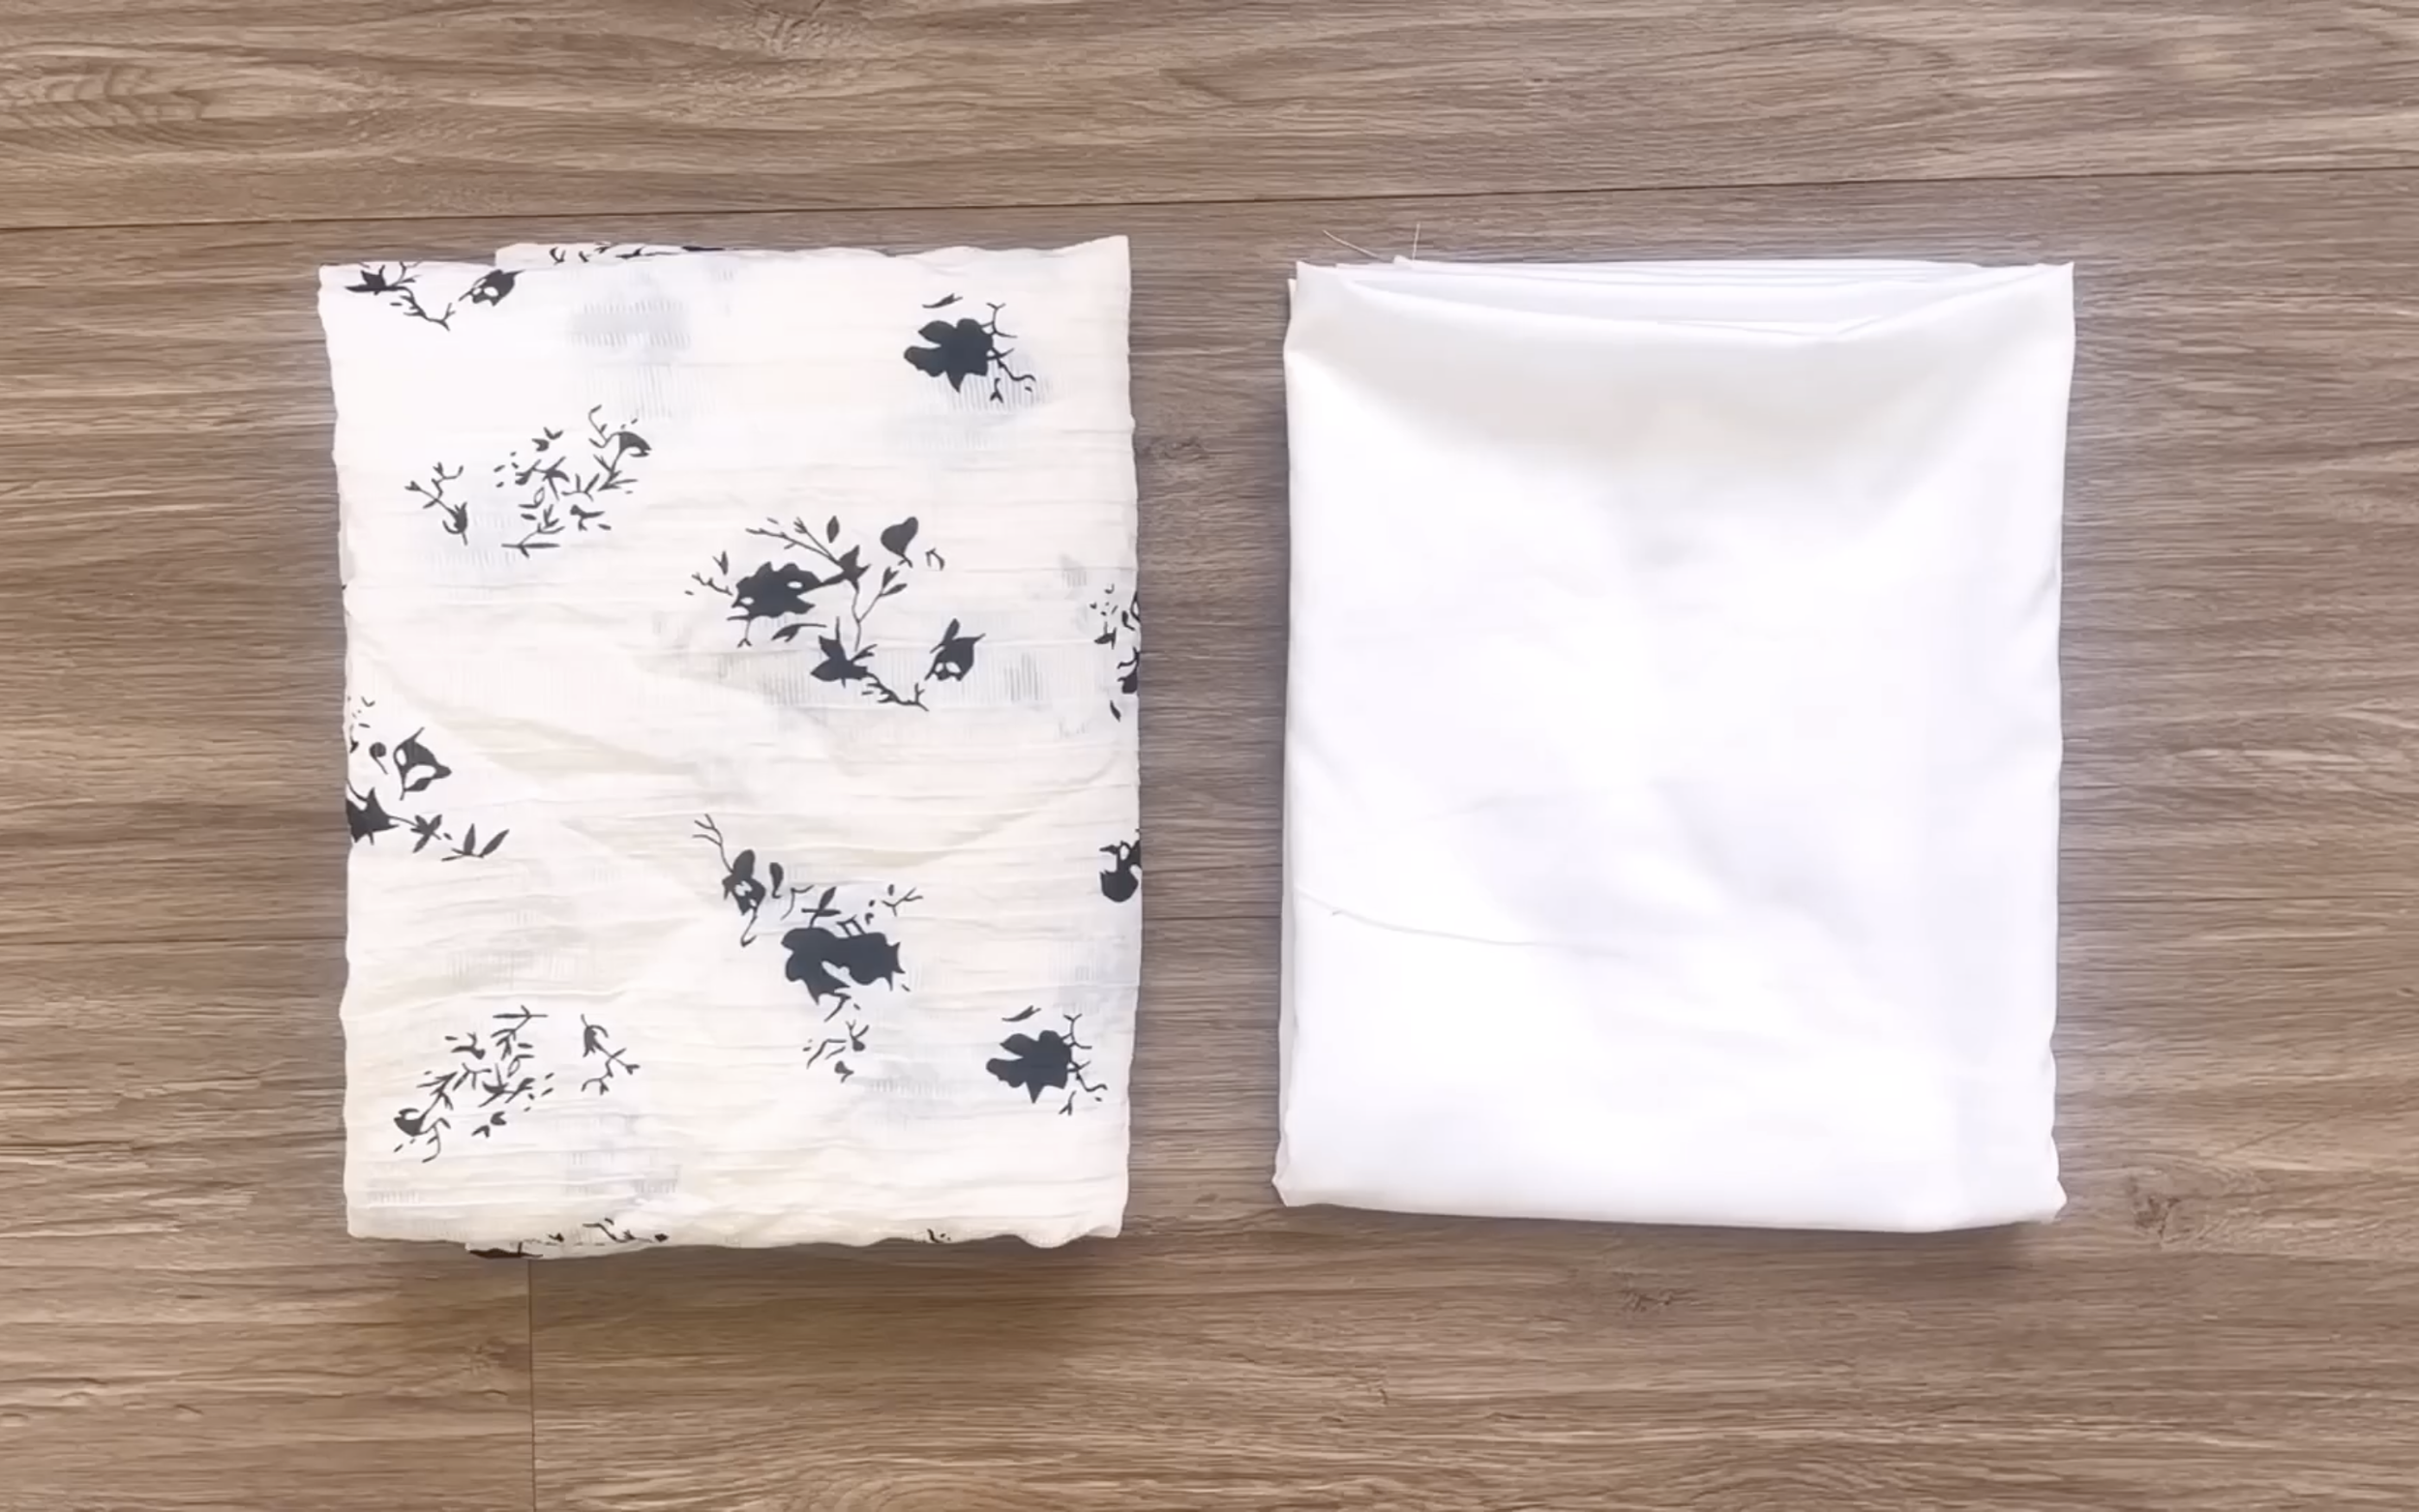
2.5m of silk organza fabric
2.5m silk cotton fabric for the lining
Pattern paper
Sewing machine
Pins
Scissors
Ruler
Long stick
Zipper
Buttons
MAKING THE PATTERNS
Here’s the pattern for the project. To get a clear understanding of all the measurements needed for the pattern, watch the video from 0:42 to 6:30.
Remember, you can adjust these measurements to fit your own dimensions!

THE BACK BODICE PATTERN


To make the back bodice pattern, draw a straight line cutting the edge horizontal line first.
From the first straight line, draw another one 2 cm next to it.
From the cutting point between the second straight line and the horizontal line, mark up 9 cm, which is half of the neck of the dress.
Then, draw a perpendicular line from that mark. The length of this line will be 3.5 cm, which is the depth of the neck at the back bodice.
Keep drawing a straight line from the end of the perpendicular line to cut the edge horizontal line at one point.
After that, connect this cutting point to the third mark on the second straight line.
Based on it, draw a curved line to create a neckline at the back bodice.
From the end of the second straight line, mark up 19 cm, which is half of the shoulder size.
Then, draw a perpendicular line from that mark. The length of this line will be 3.3 cm, which is 1/10 of the shoulder size minus 0.5 cm. Then, connect the end of this line to the top of the neckline to create a shoulder line for the back bodice.
From the first straight line, draw another 22 cm from it. It's a quarter of the bust size plus 2 cm. It's also the end of the sleeve line of the back bodice. This is called the bust line.
From the end of this line, mark up 23 cm, which is a quarter of the bust size plus 3 cm.
Then, continue to the perpendicular line from the shoulder to cut the bust line at one point.
From the cutting point, mark inside 1.5 cm. Then, connect this mark to the end of the shoulder line.
After that, mark the middle of this line before drawing a curved line from the mark on the bust line to this mark, finishing at the end of the shoulder. This will be the sleeve line of the back bodice.
From the second straight line, keep drawing another line 39 cm from it. It's the length of the back bodice from the shoulder to 2 cm above the belly button.
From the end of this line, mark up 22 cm, which is a quarter of the bust size plus 2 cm. Then, connect this mark to the end of the sleeve line to create the sideline of the back bodice.
Add 1 cm for seam allowance at the shoulder, the sleeve, and the sideline before cutting. This will be the back bodice pattern.
Cut this pattern in folded fabric at the edge horizontal line.
THE FRONT BODICE PATTERN


To make the front bodice pattern, base it on the back bodice pattern.
Move the shoulder line down 2 cm for the front bodice pattern.
From the middle of the back neckline, mark at 5 cm on the edge horizontal line. This will be the depth of the neck at the front bodice.
Then, redraw the neckline.
From the cutting point between the bust line and the perpendicular line at the shoulder, mark inside 2.5 cm. Then, connect this mark to the end of the new shoulder line.
After that, mark the middle of this line before drawing a curved line from the mark on the bust line through this mark, finishing at the end of the new shoulder line. This will be the sleeve line of the front bodice.
Add 1 cm for seam allowance at the new shoulder line and the sleeve line before cutting. This will be the front bodice pattern.
Cut this pattern in folded fabric at the edge horizontal line.
THE SLEEVE PATTERN


To make the sleeve pattern, draw a straight line cutting the edge horizontal line first.
From the cutting point, mark at 15 cm on the edge horizontal line. It's 1/5 of the bust size minus 1 cm. This will be the top of the sleeve.
Also, mark at 20 cm, which is a quarter of the bust size on the straight line. Then, connect the two marks together.
Divide this slanted line into three equal parts.
From the middle between the two top parts, draw a perpendicular line outside the slanted line with a 2 cm length.
From the middle of the third part, draw a perpendicular line inside the slanted line with a 0.5 cm length.
Then, draw a curved line from the mark on the straight line through the top of the perpendicular line, finishing at the mark on the edge horizontal line. This will be the sleeve line of the sleeve pattern. The width of this line will be bigger than half the total sleeve line at the front and the back bodice, allowing for some puffiness at the top of the sleeve.
From the top of the sleeve, mark at 33 cm on the edge horizontal line. This is the length of the sleeve from the shoulder to above the elbow.
Then, draw a straight line from that mark.
From the end of this straight line, mark up 19 cm, which is 1.5 times half the width at the end of the sleeve.
Then, connect this mark to the end of the sleeve line to create the under-armpit line of the sleeve.
Add 1 cm for seam allowance after that. This will be the sleeve pattern after cutting.
Cut this pattern in folded fabric at the edge horizontal line.
SEWING THE DRESS
THE TOP PART
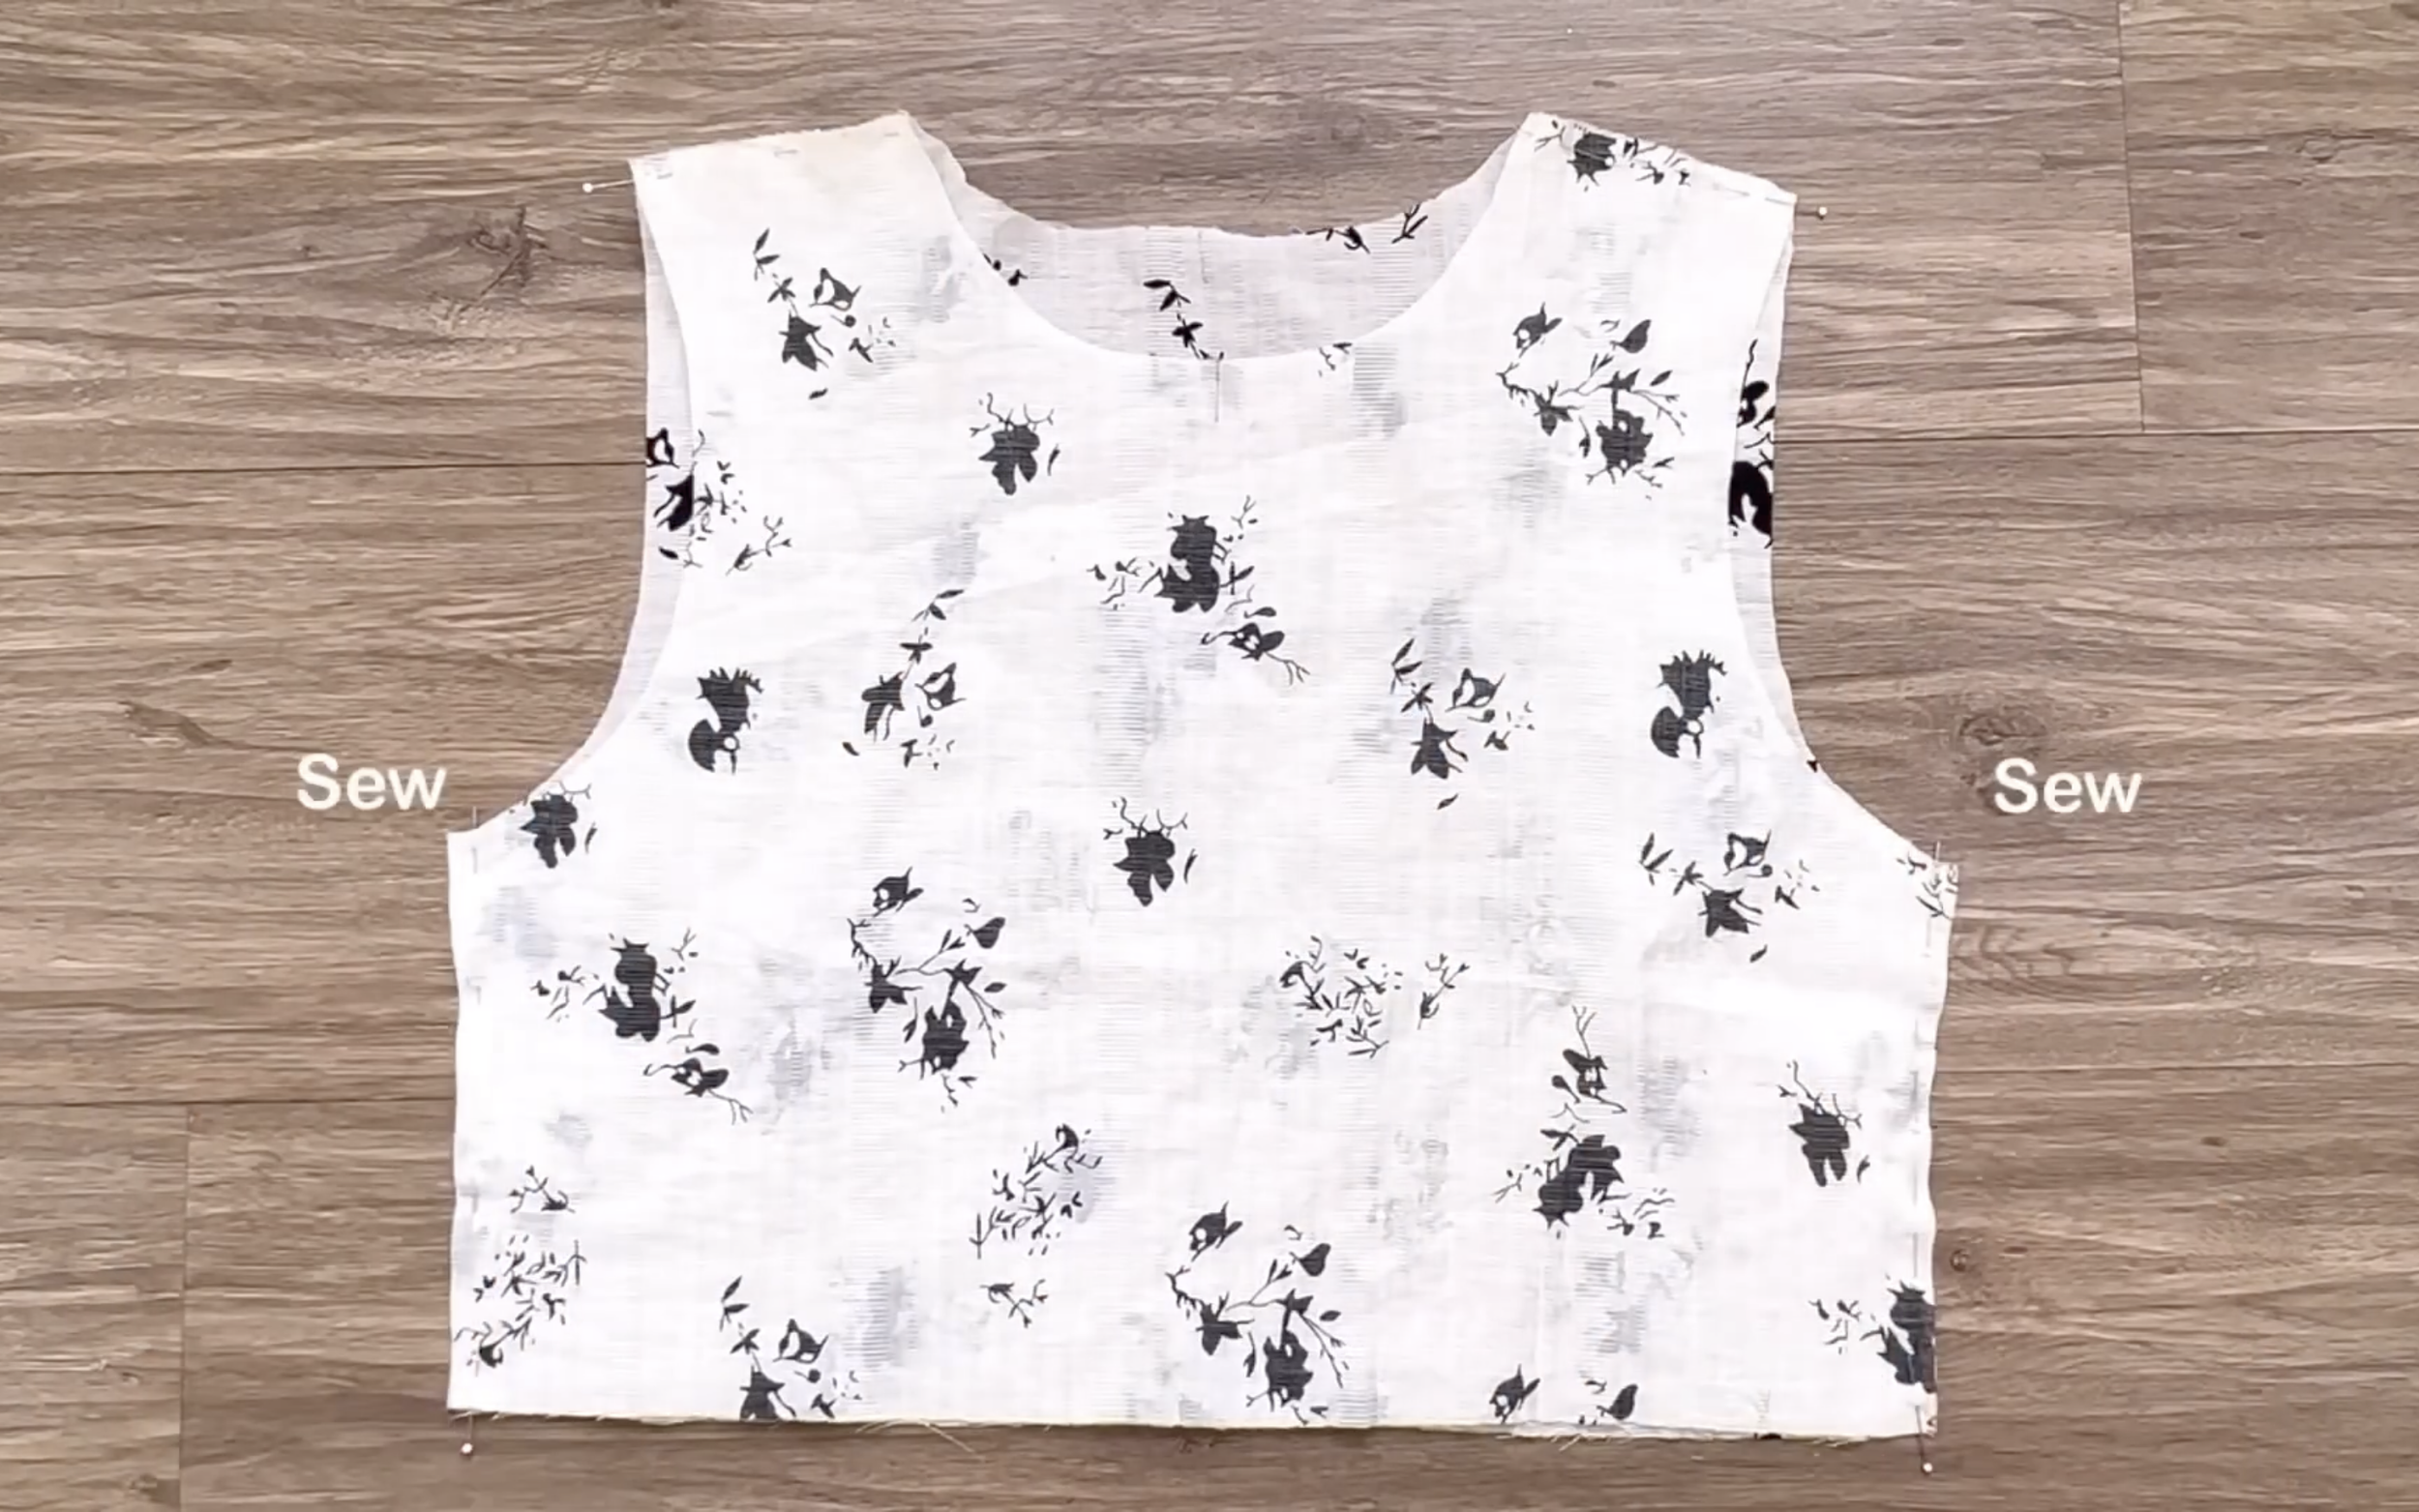
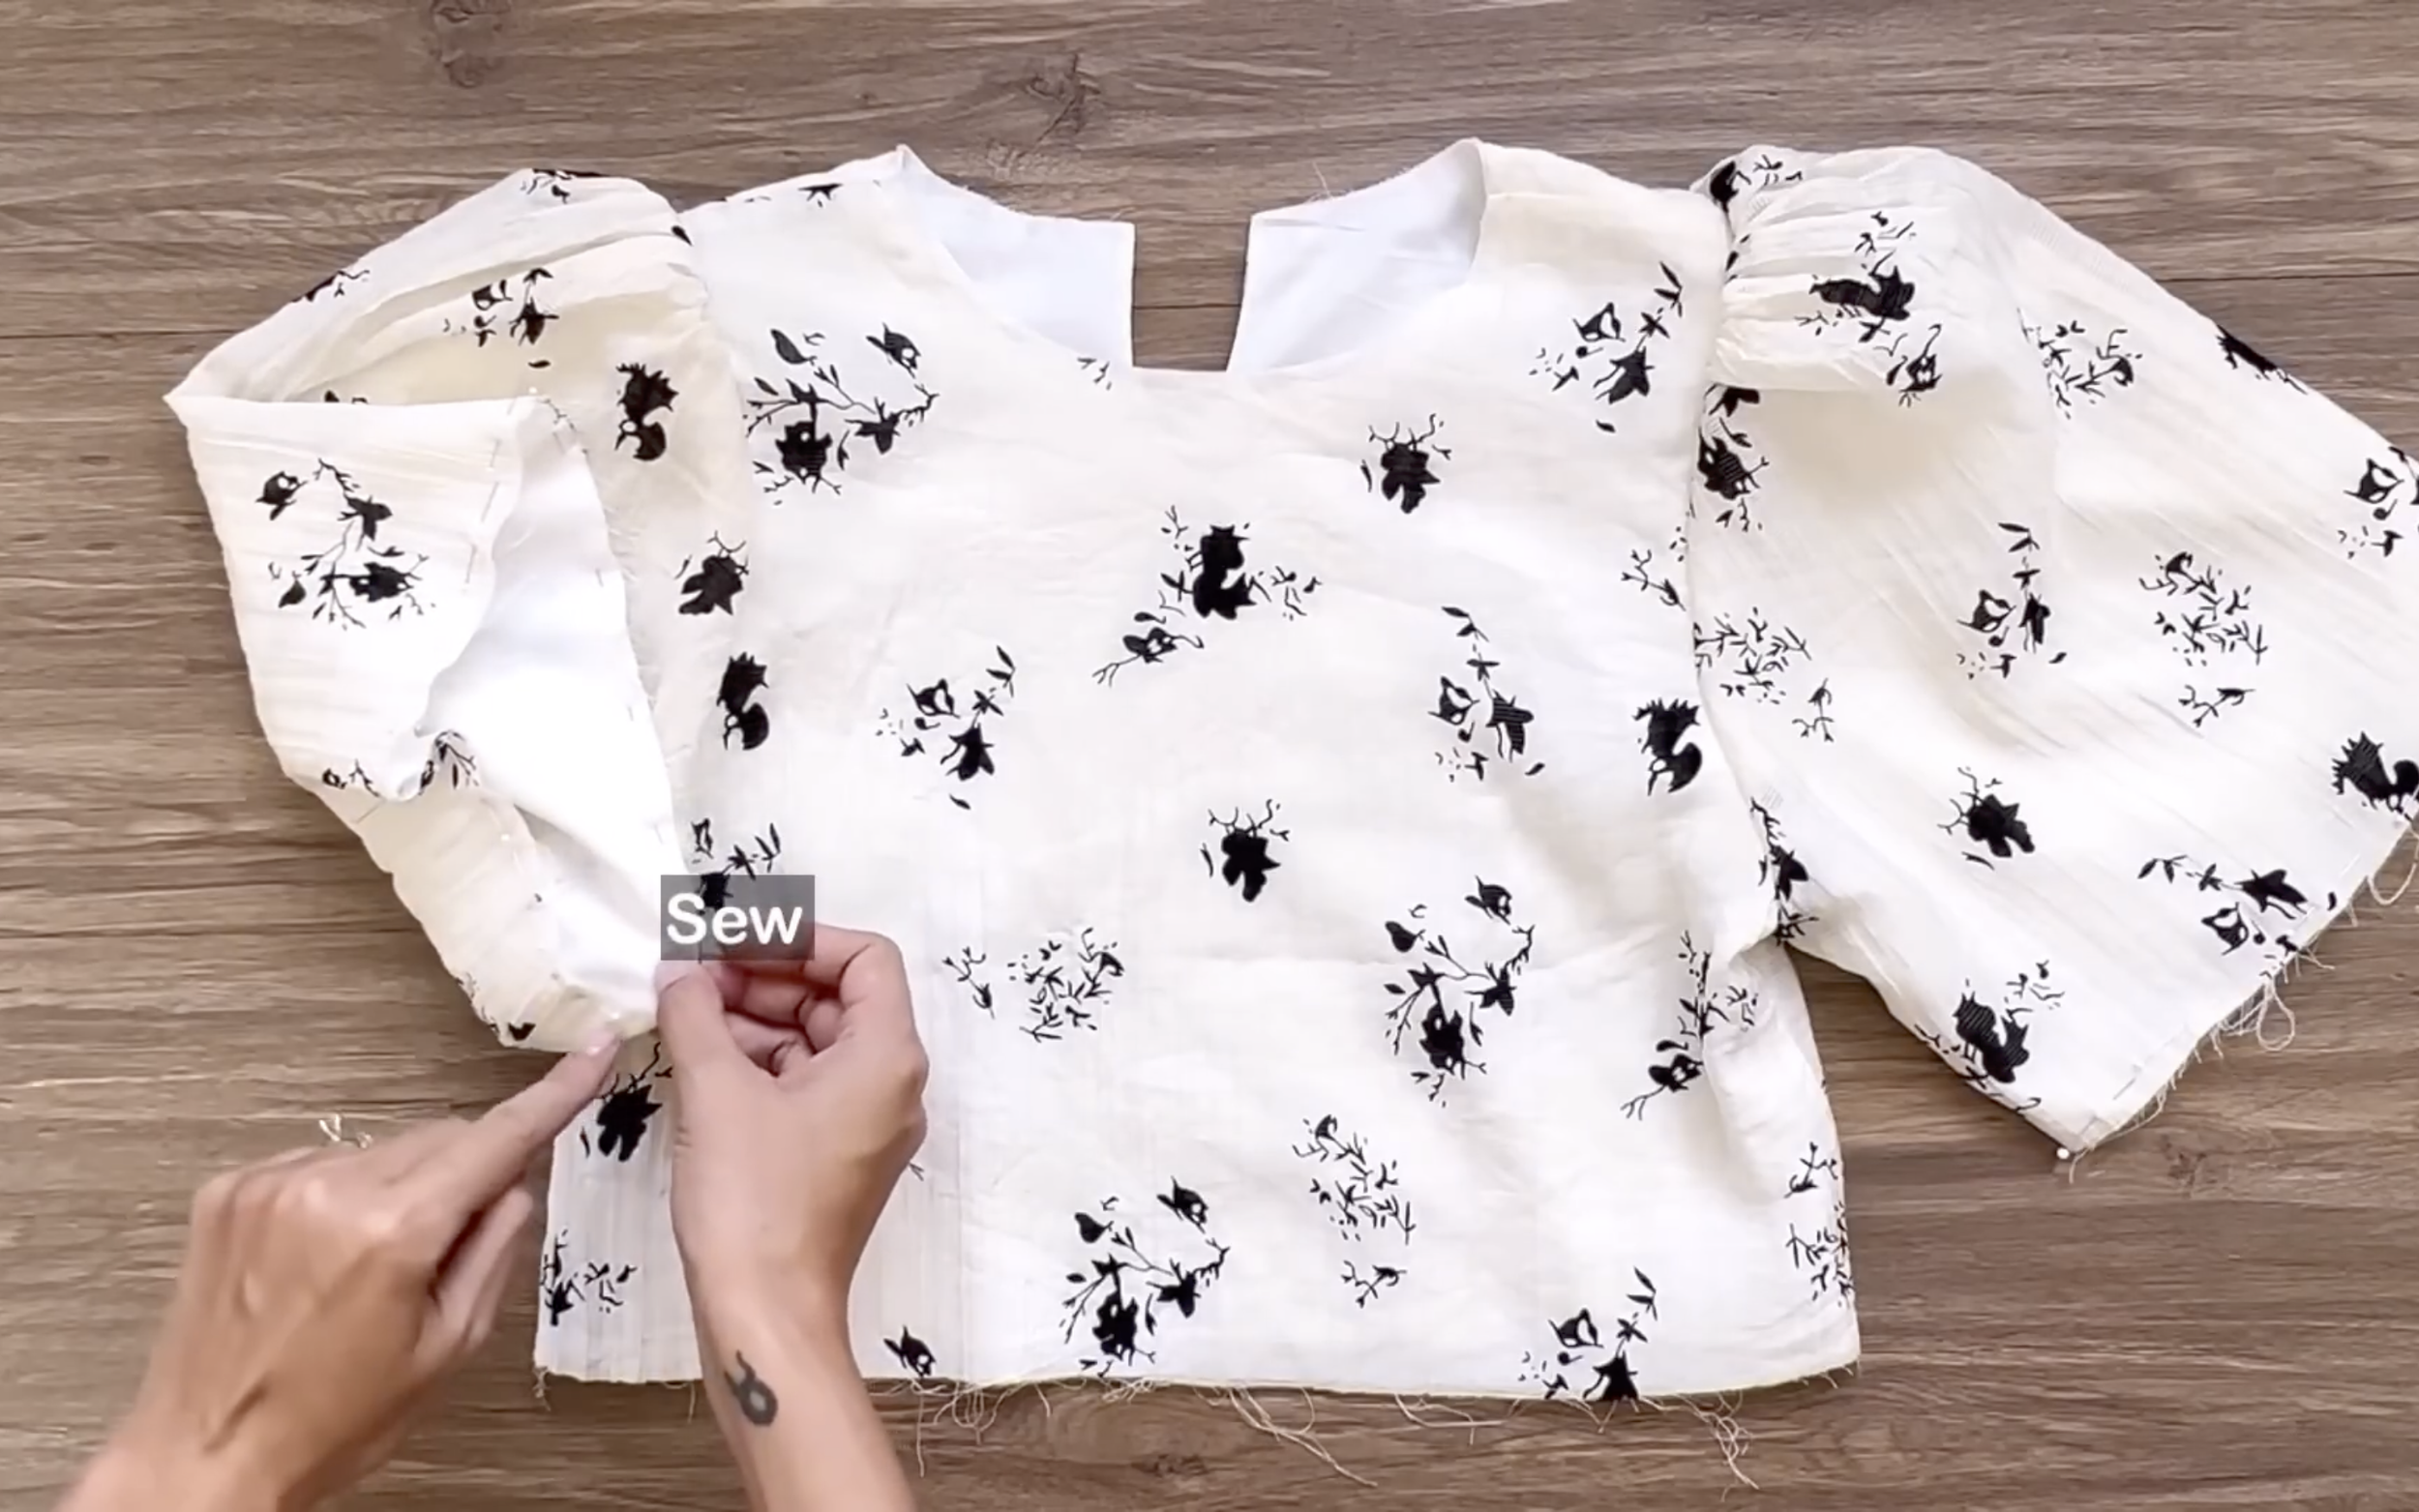
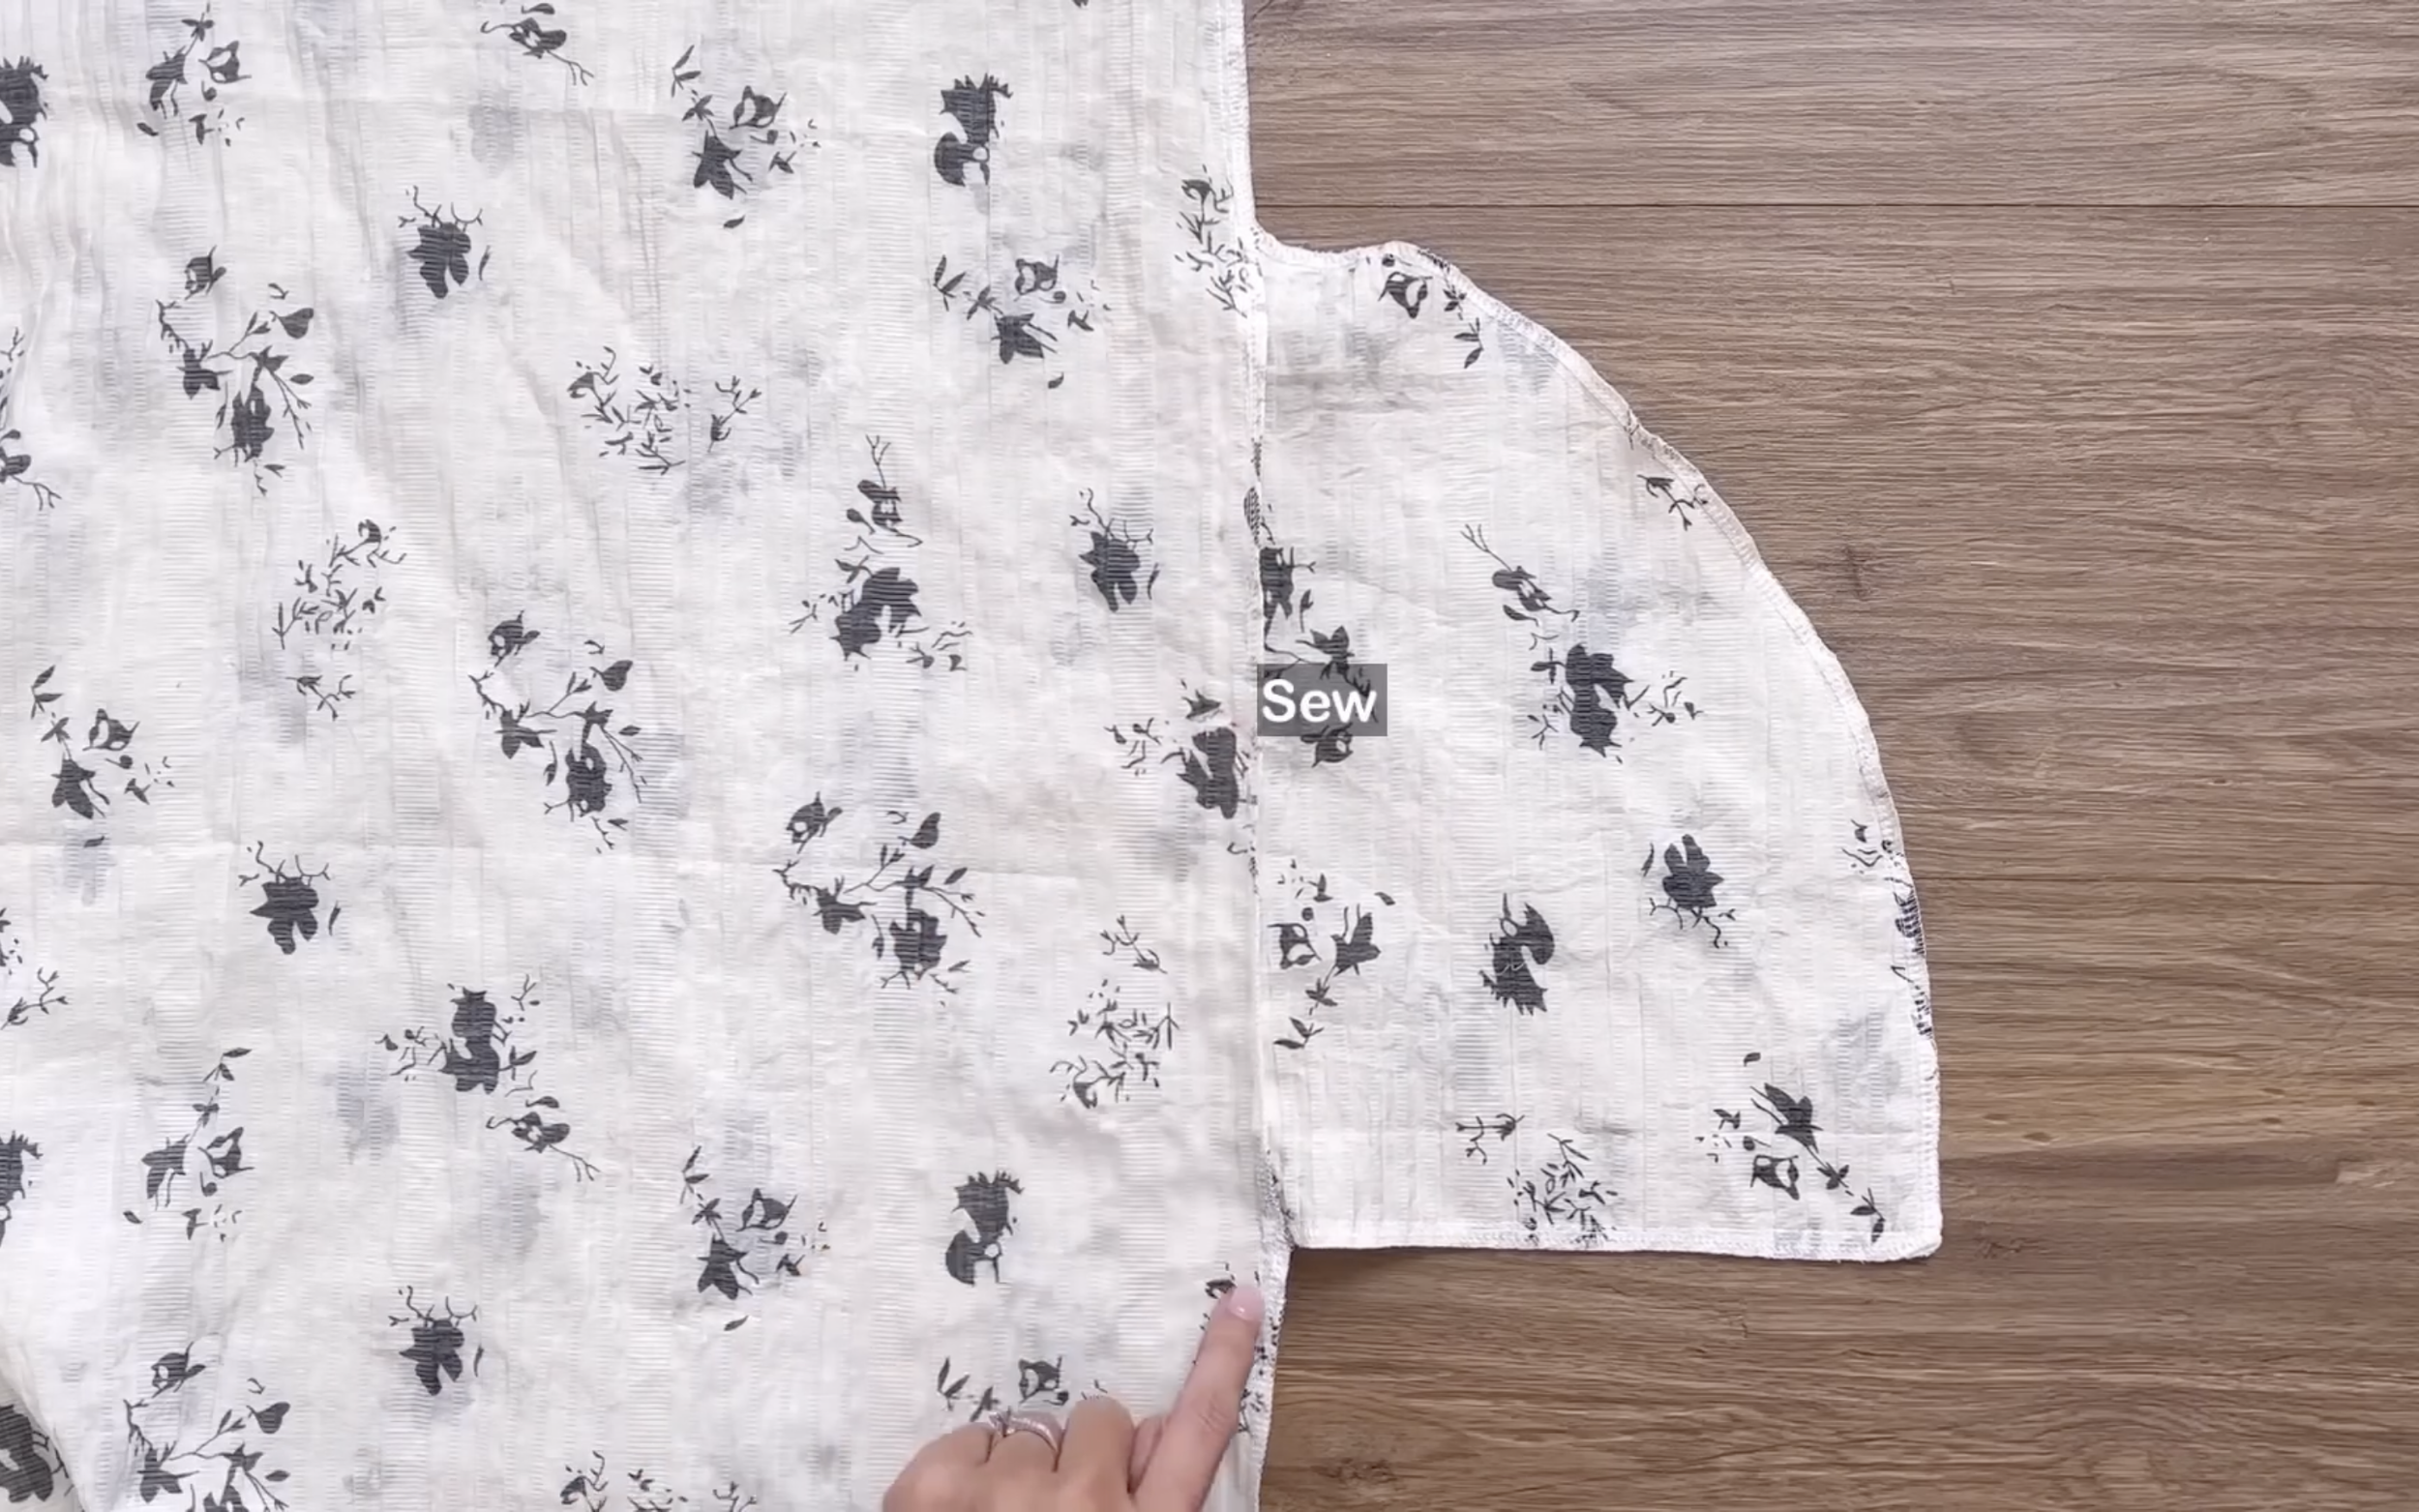
Connect the front and back bodice together at the shoulder and two sides.
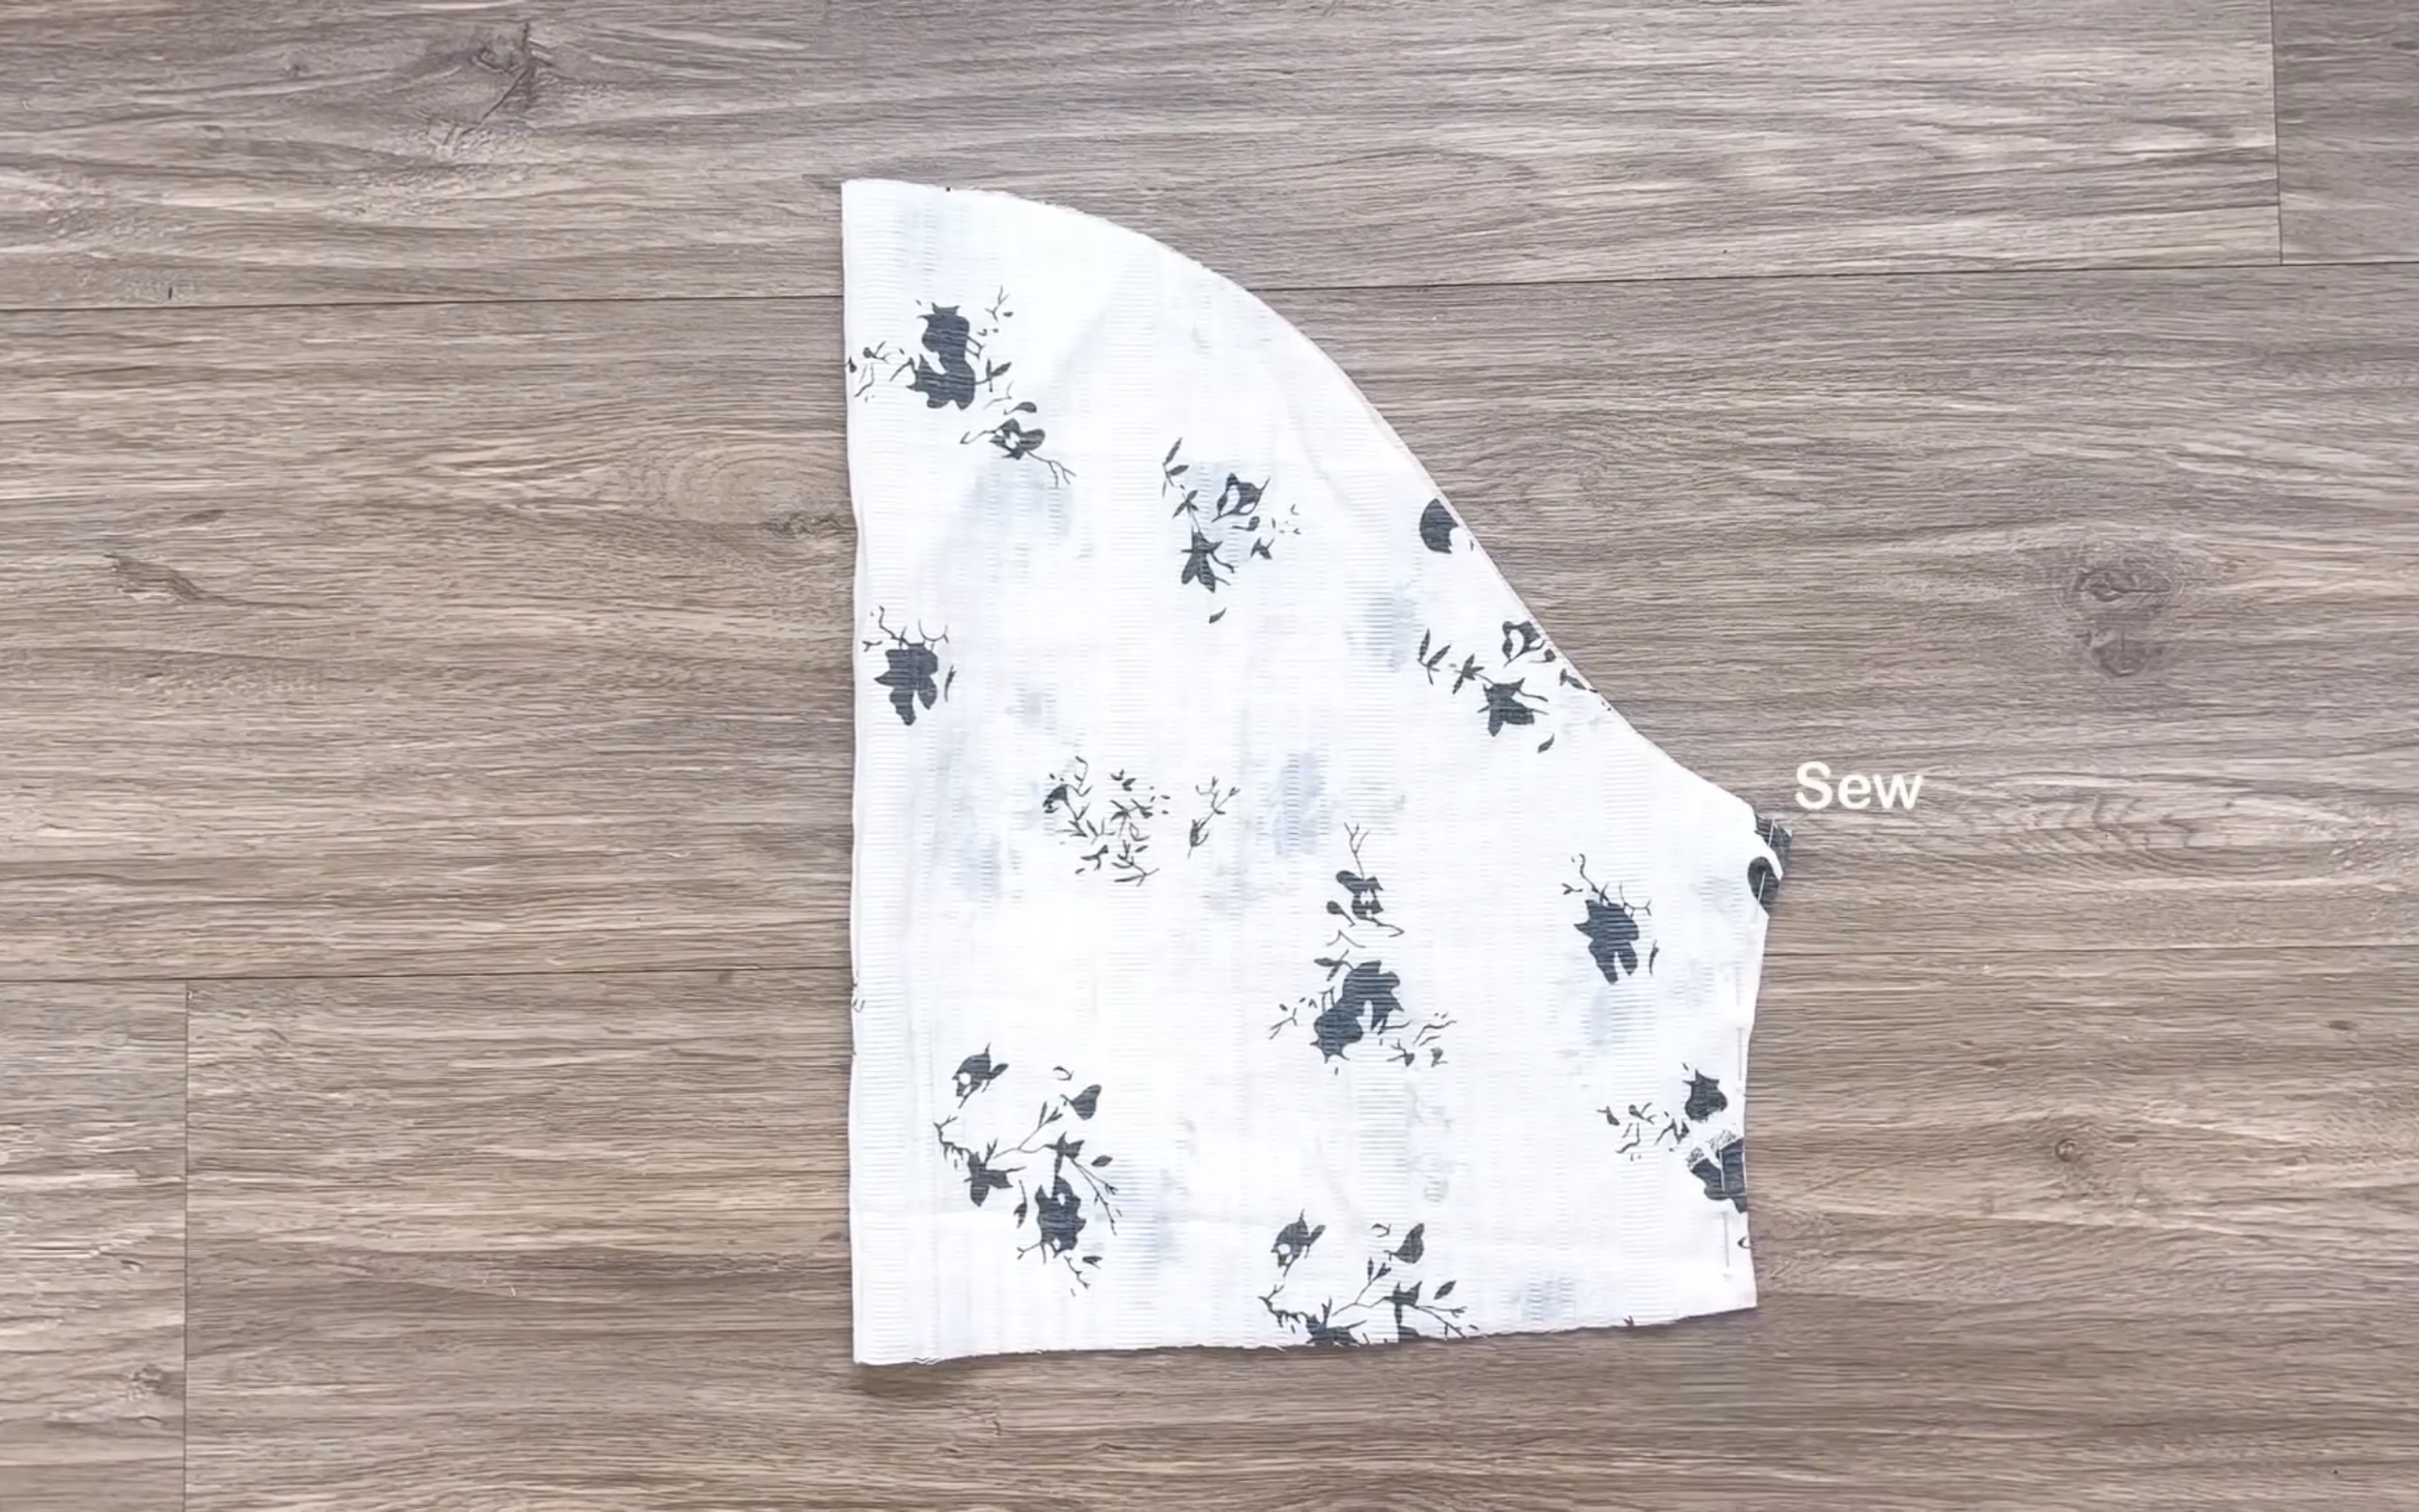
At the sleeve, connect two under-armpit lines together first.
Then, make two loose seams at the sleeve line later to create gathering fabric.
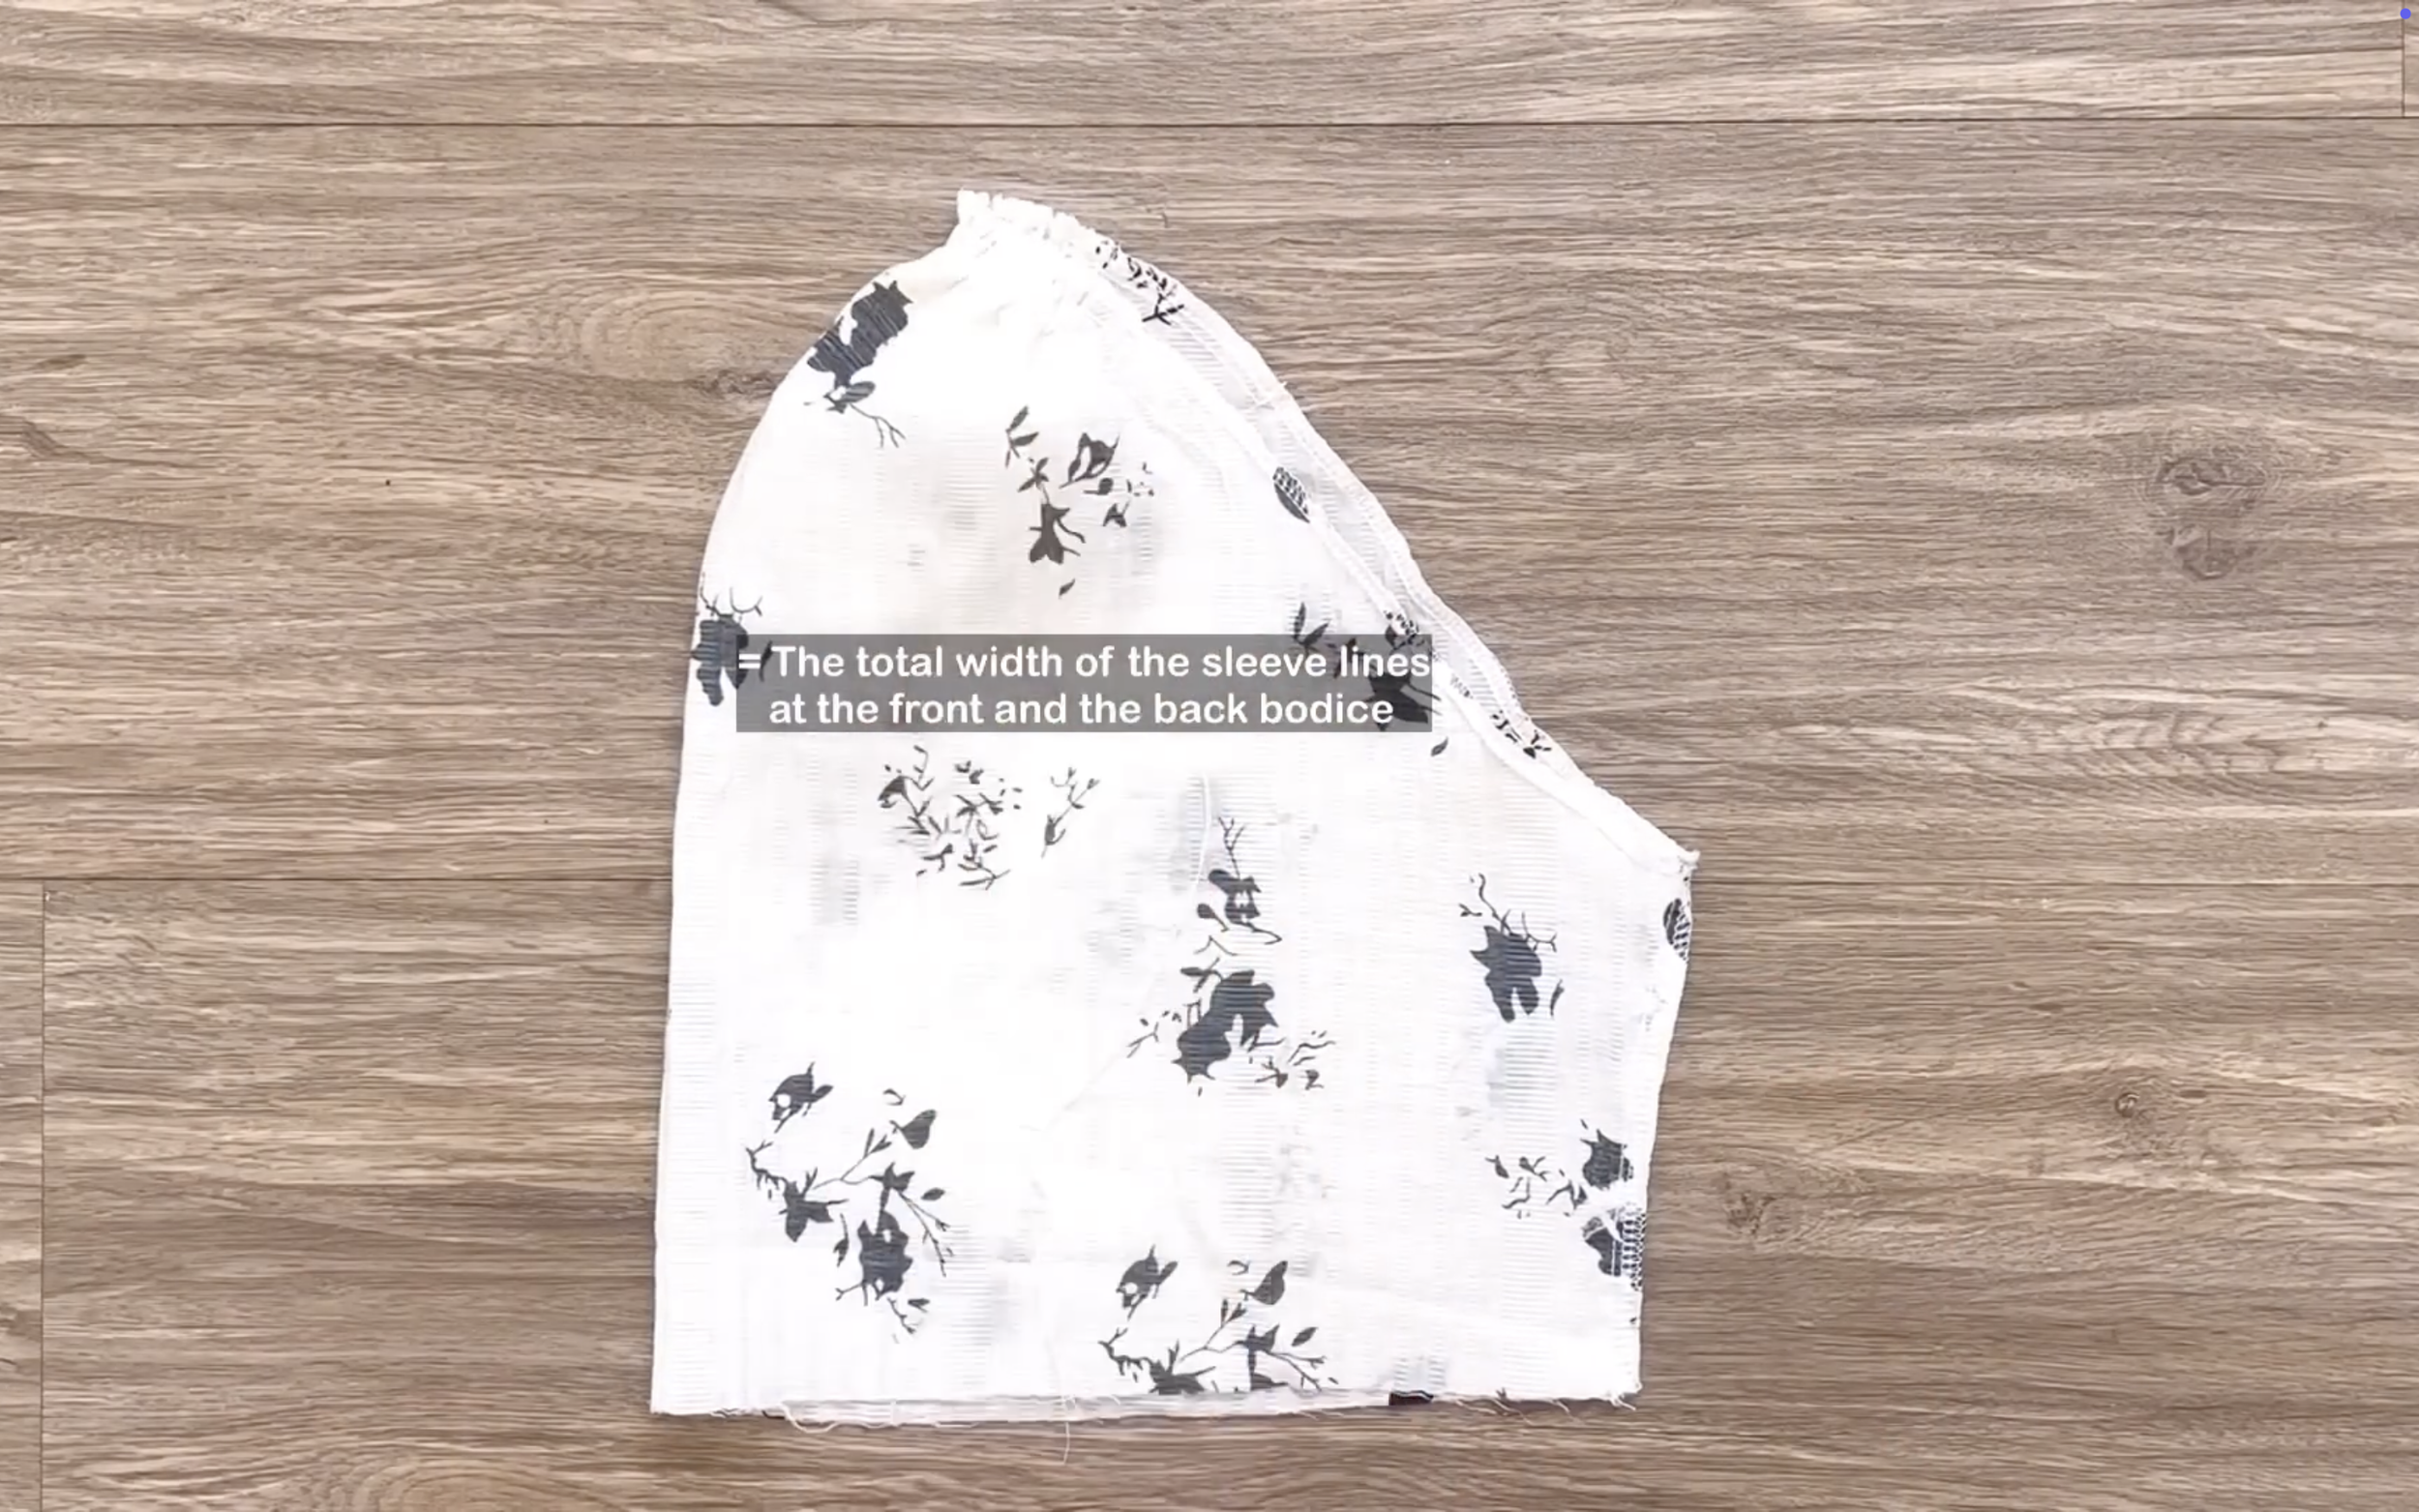
The final width of the gathering fabric will be the same as the total width of the sleeve line at the front and back bodice, so they can be connected together later.
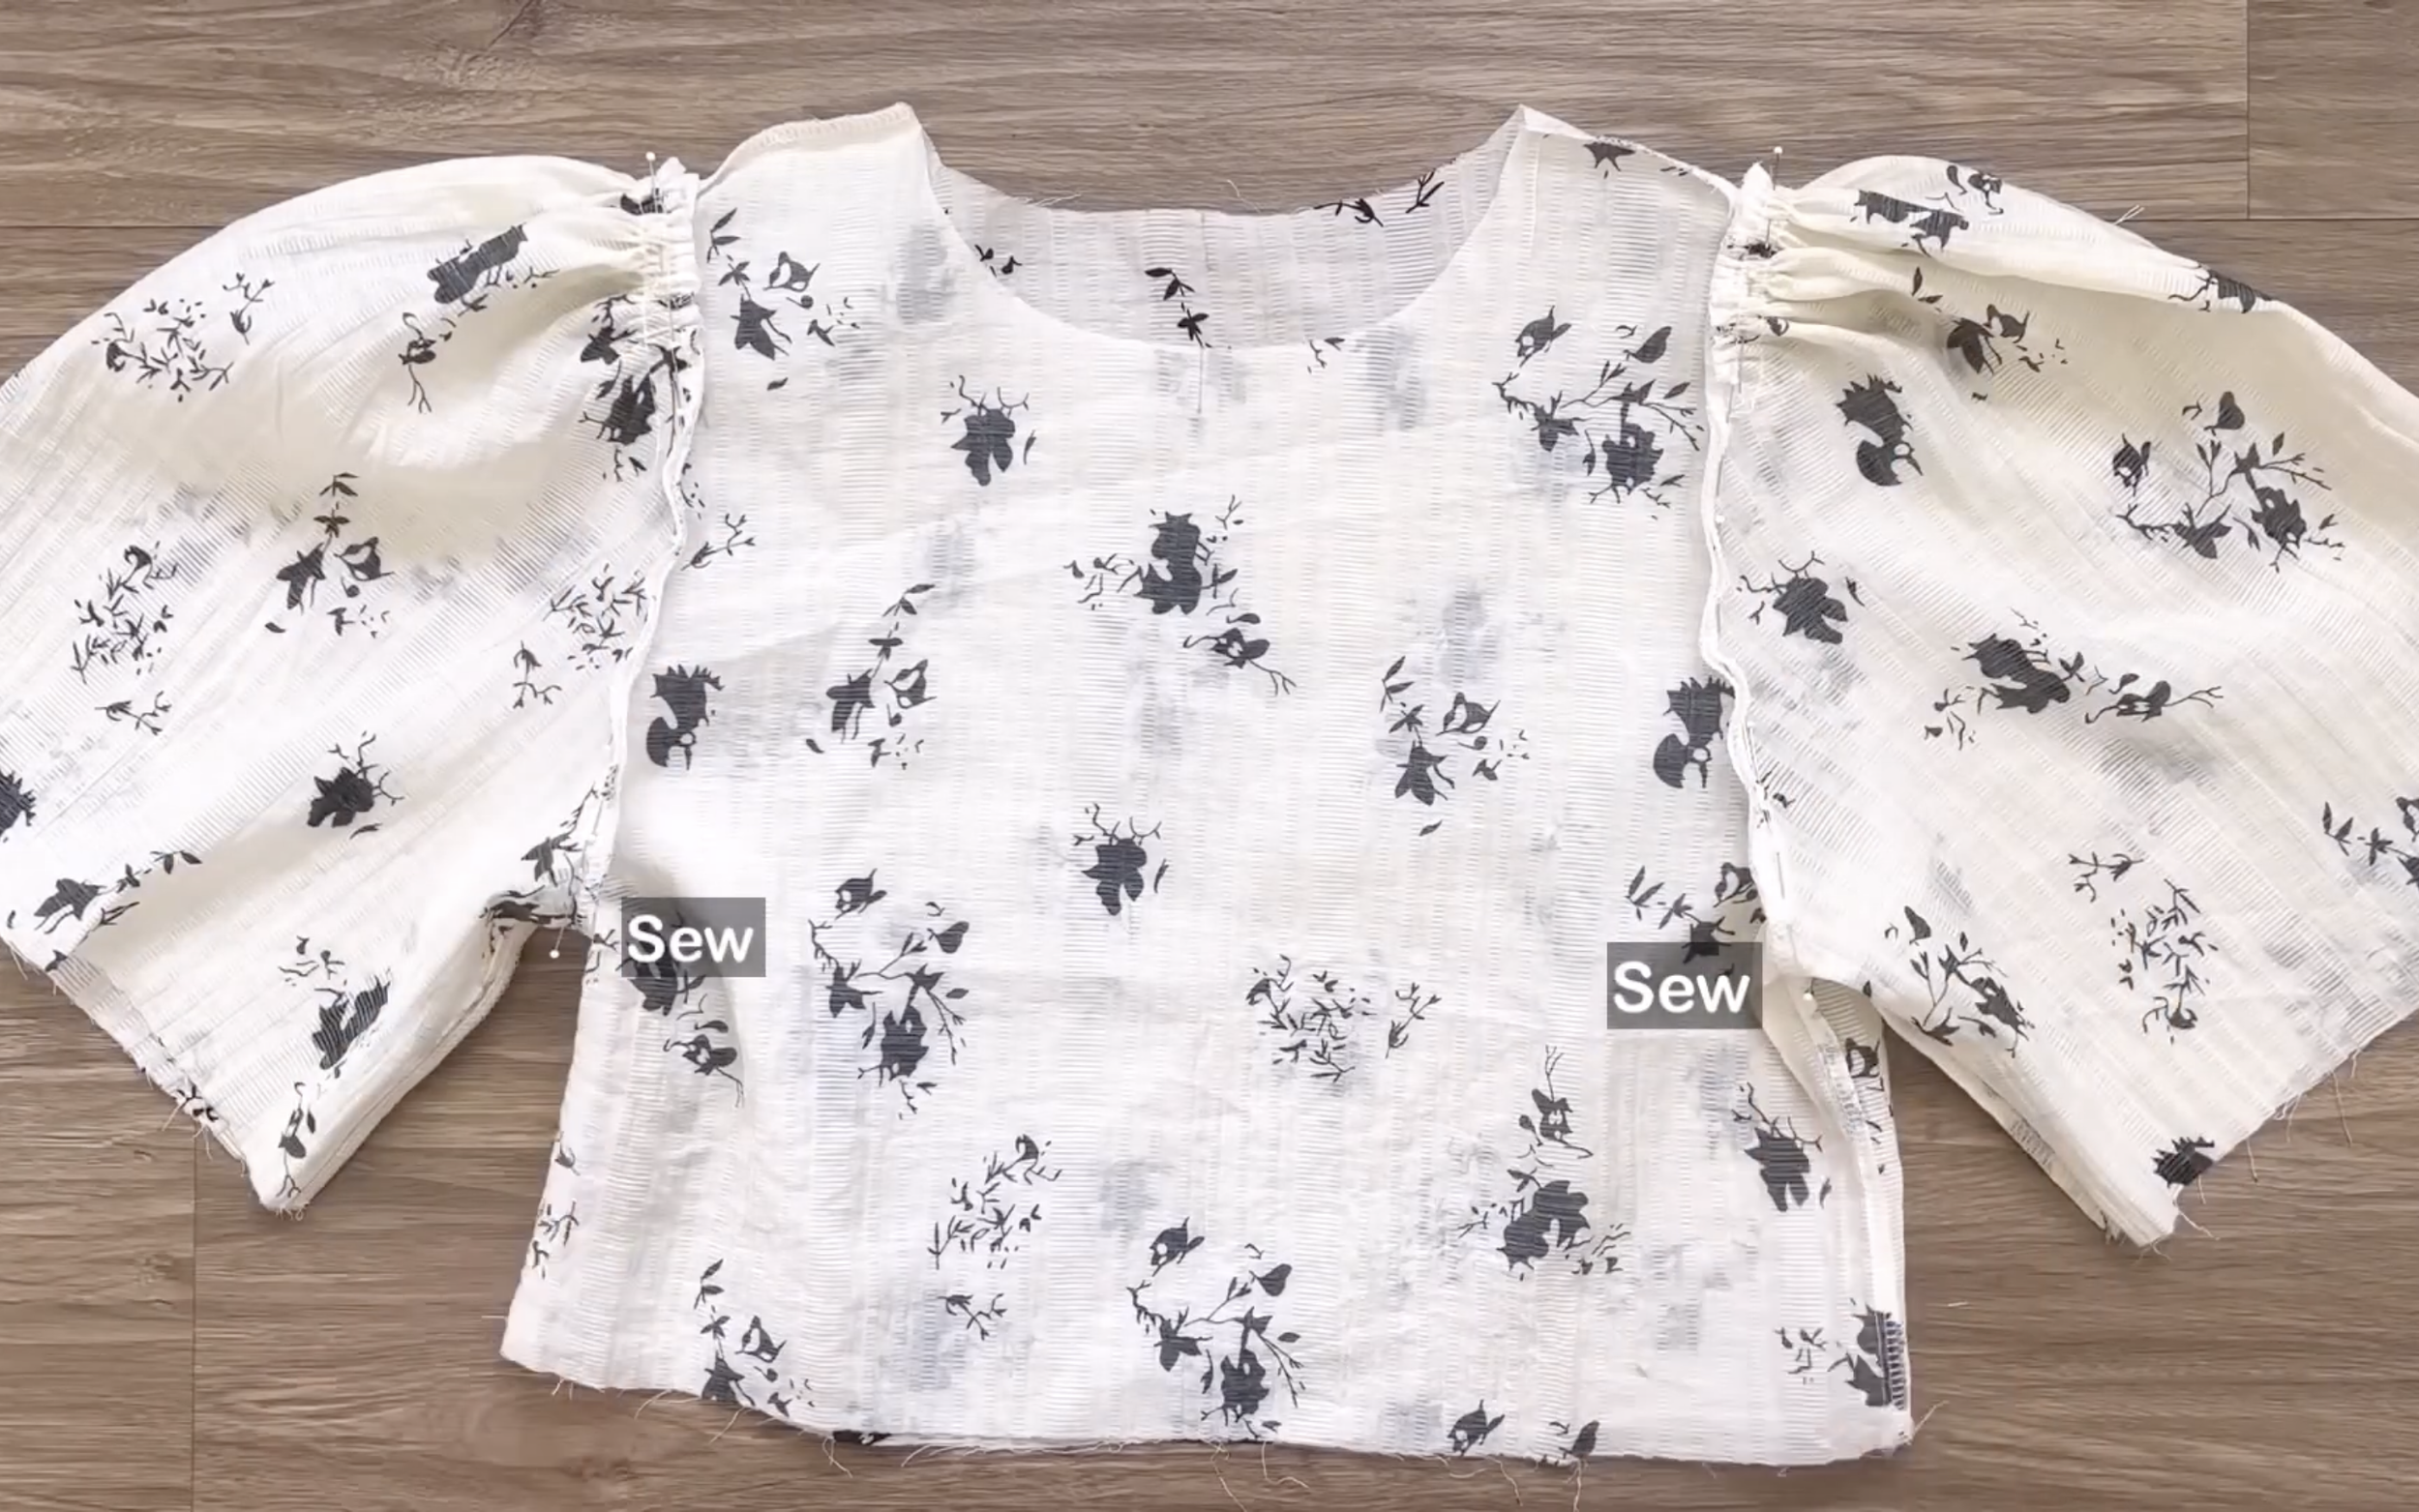
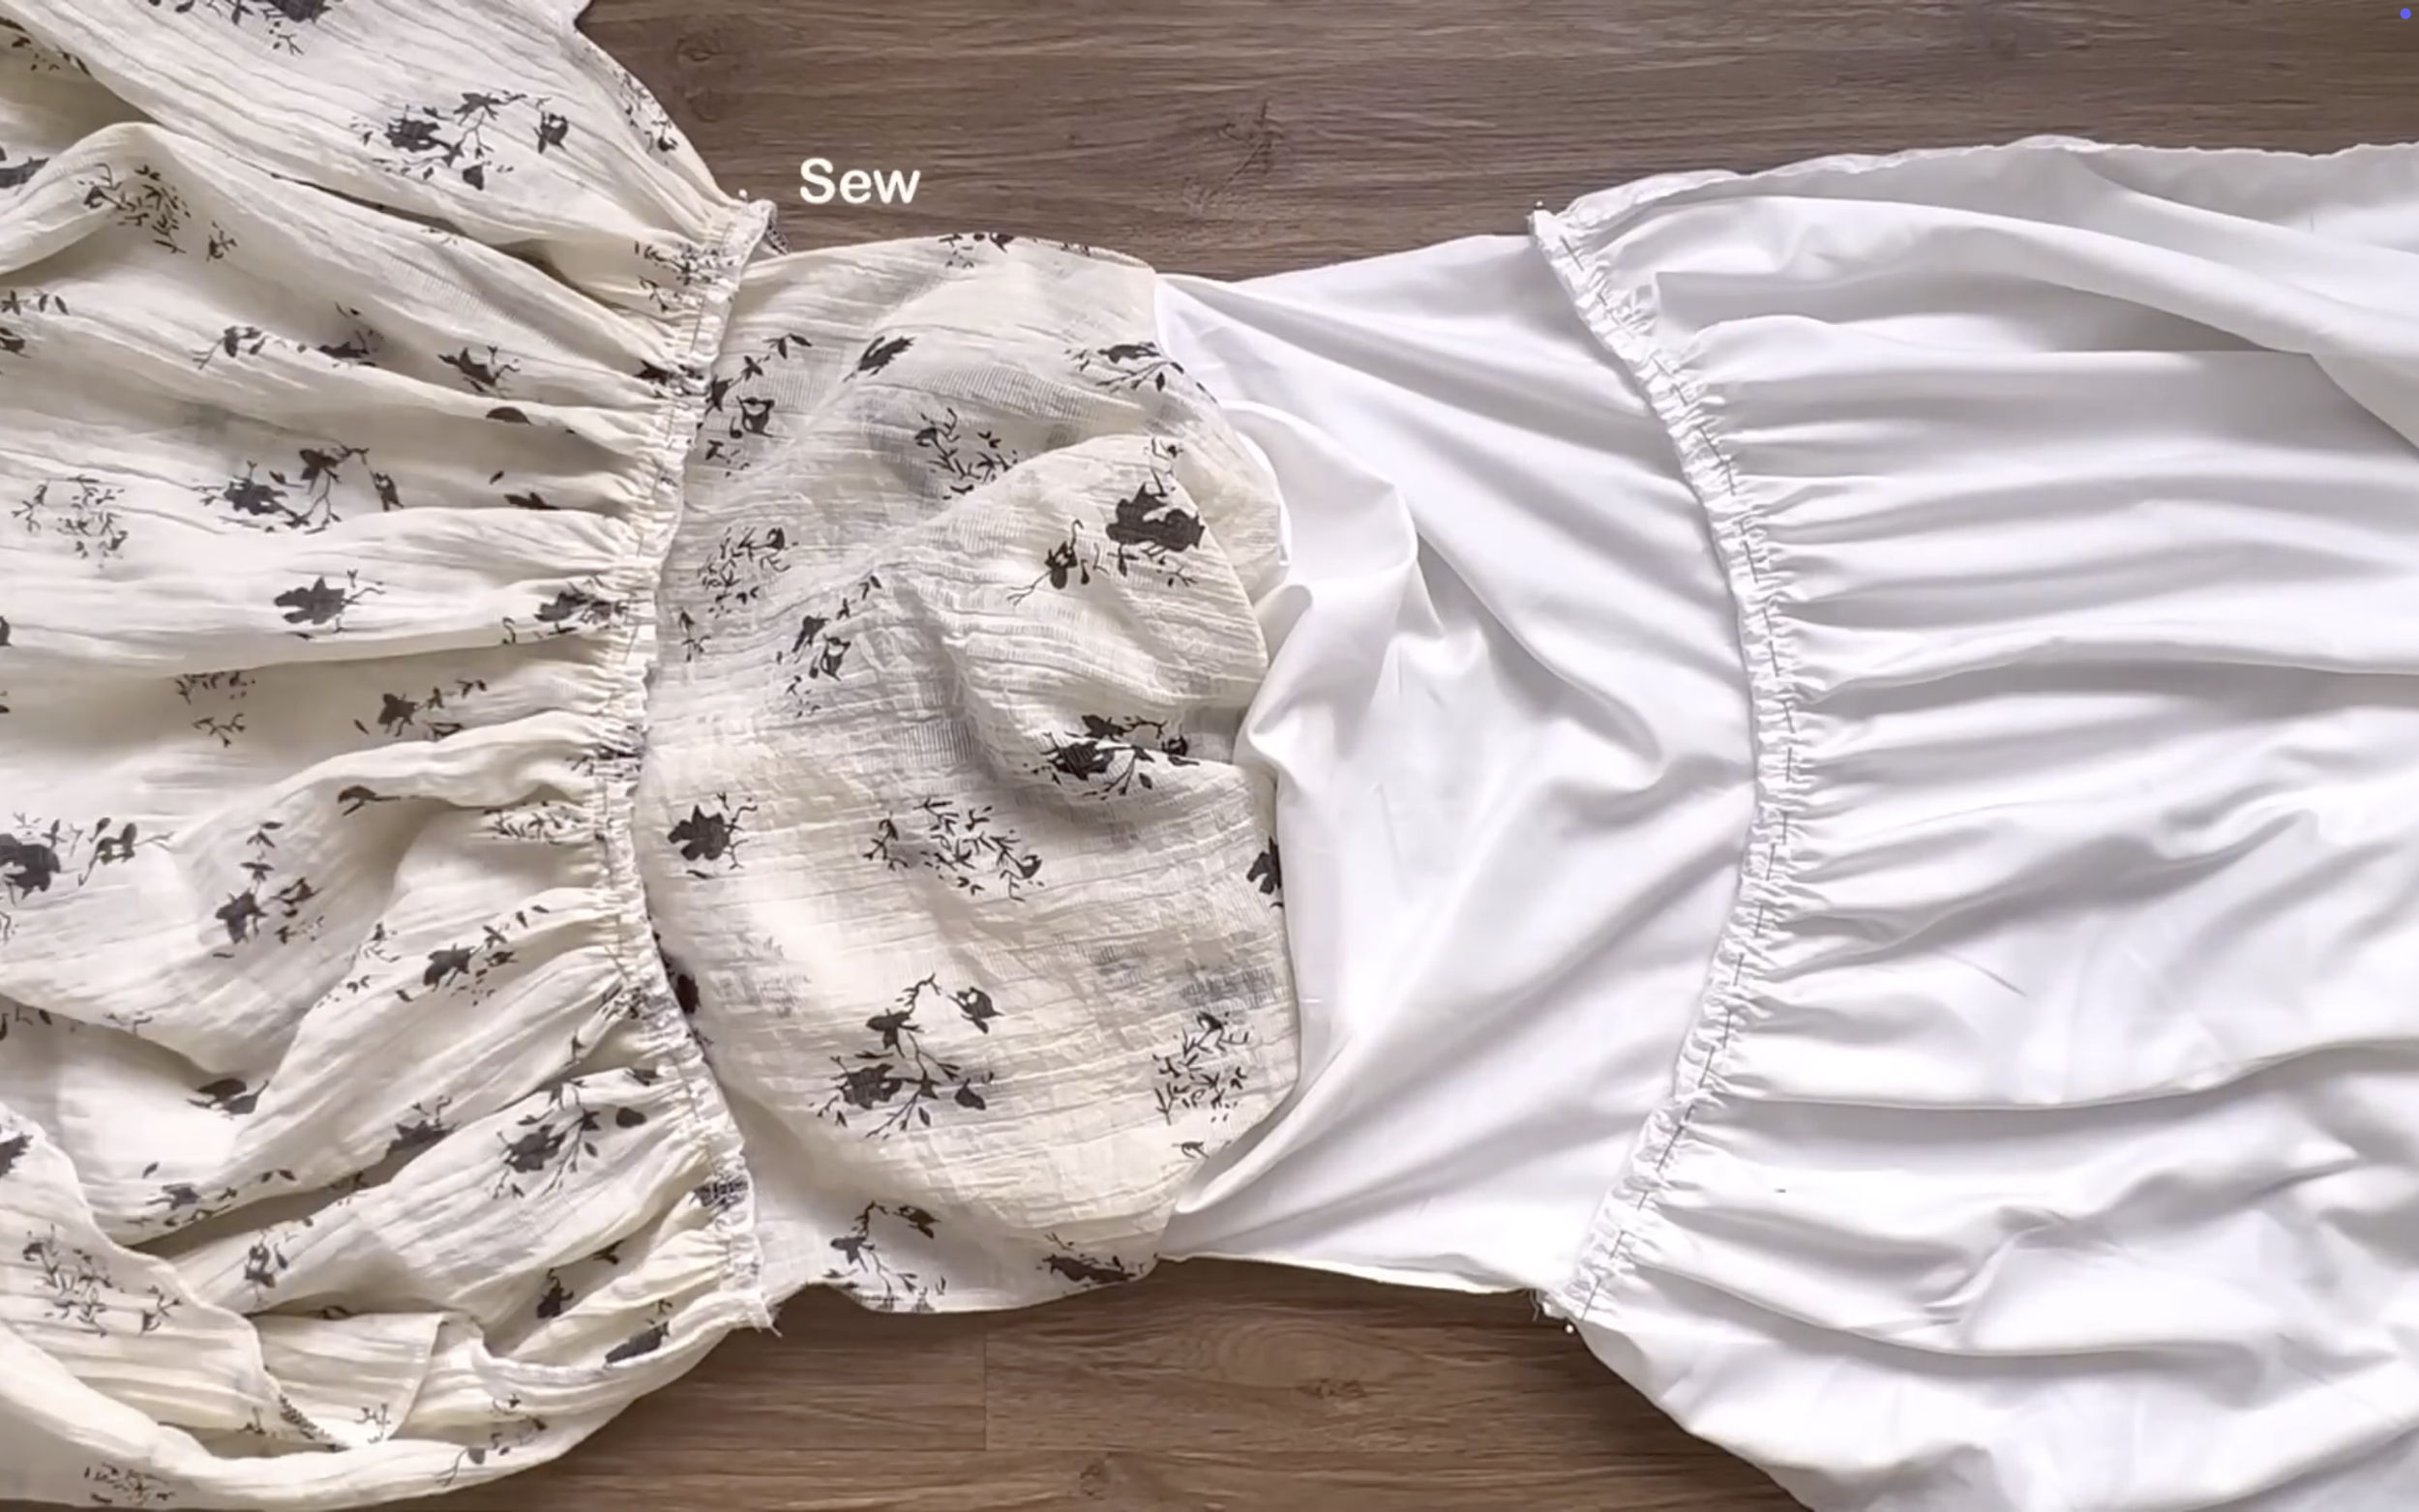
Then, sew the sleeve and the bodice together.
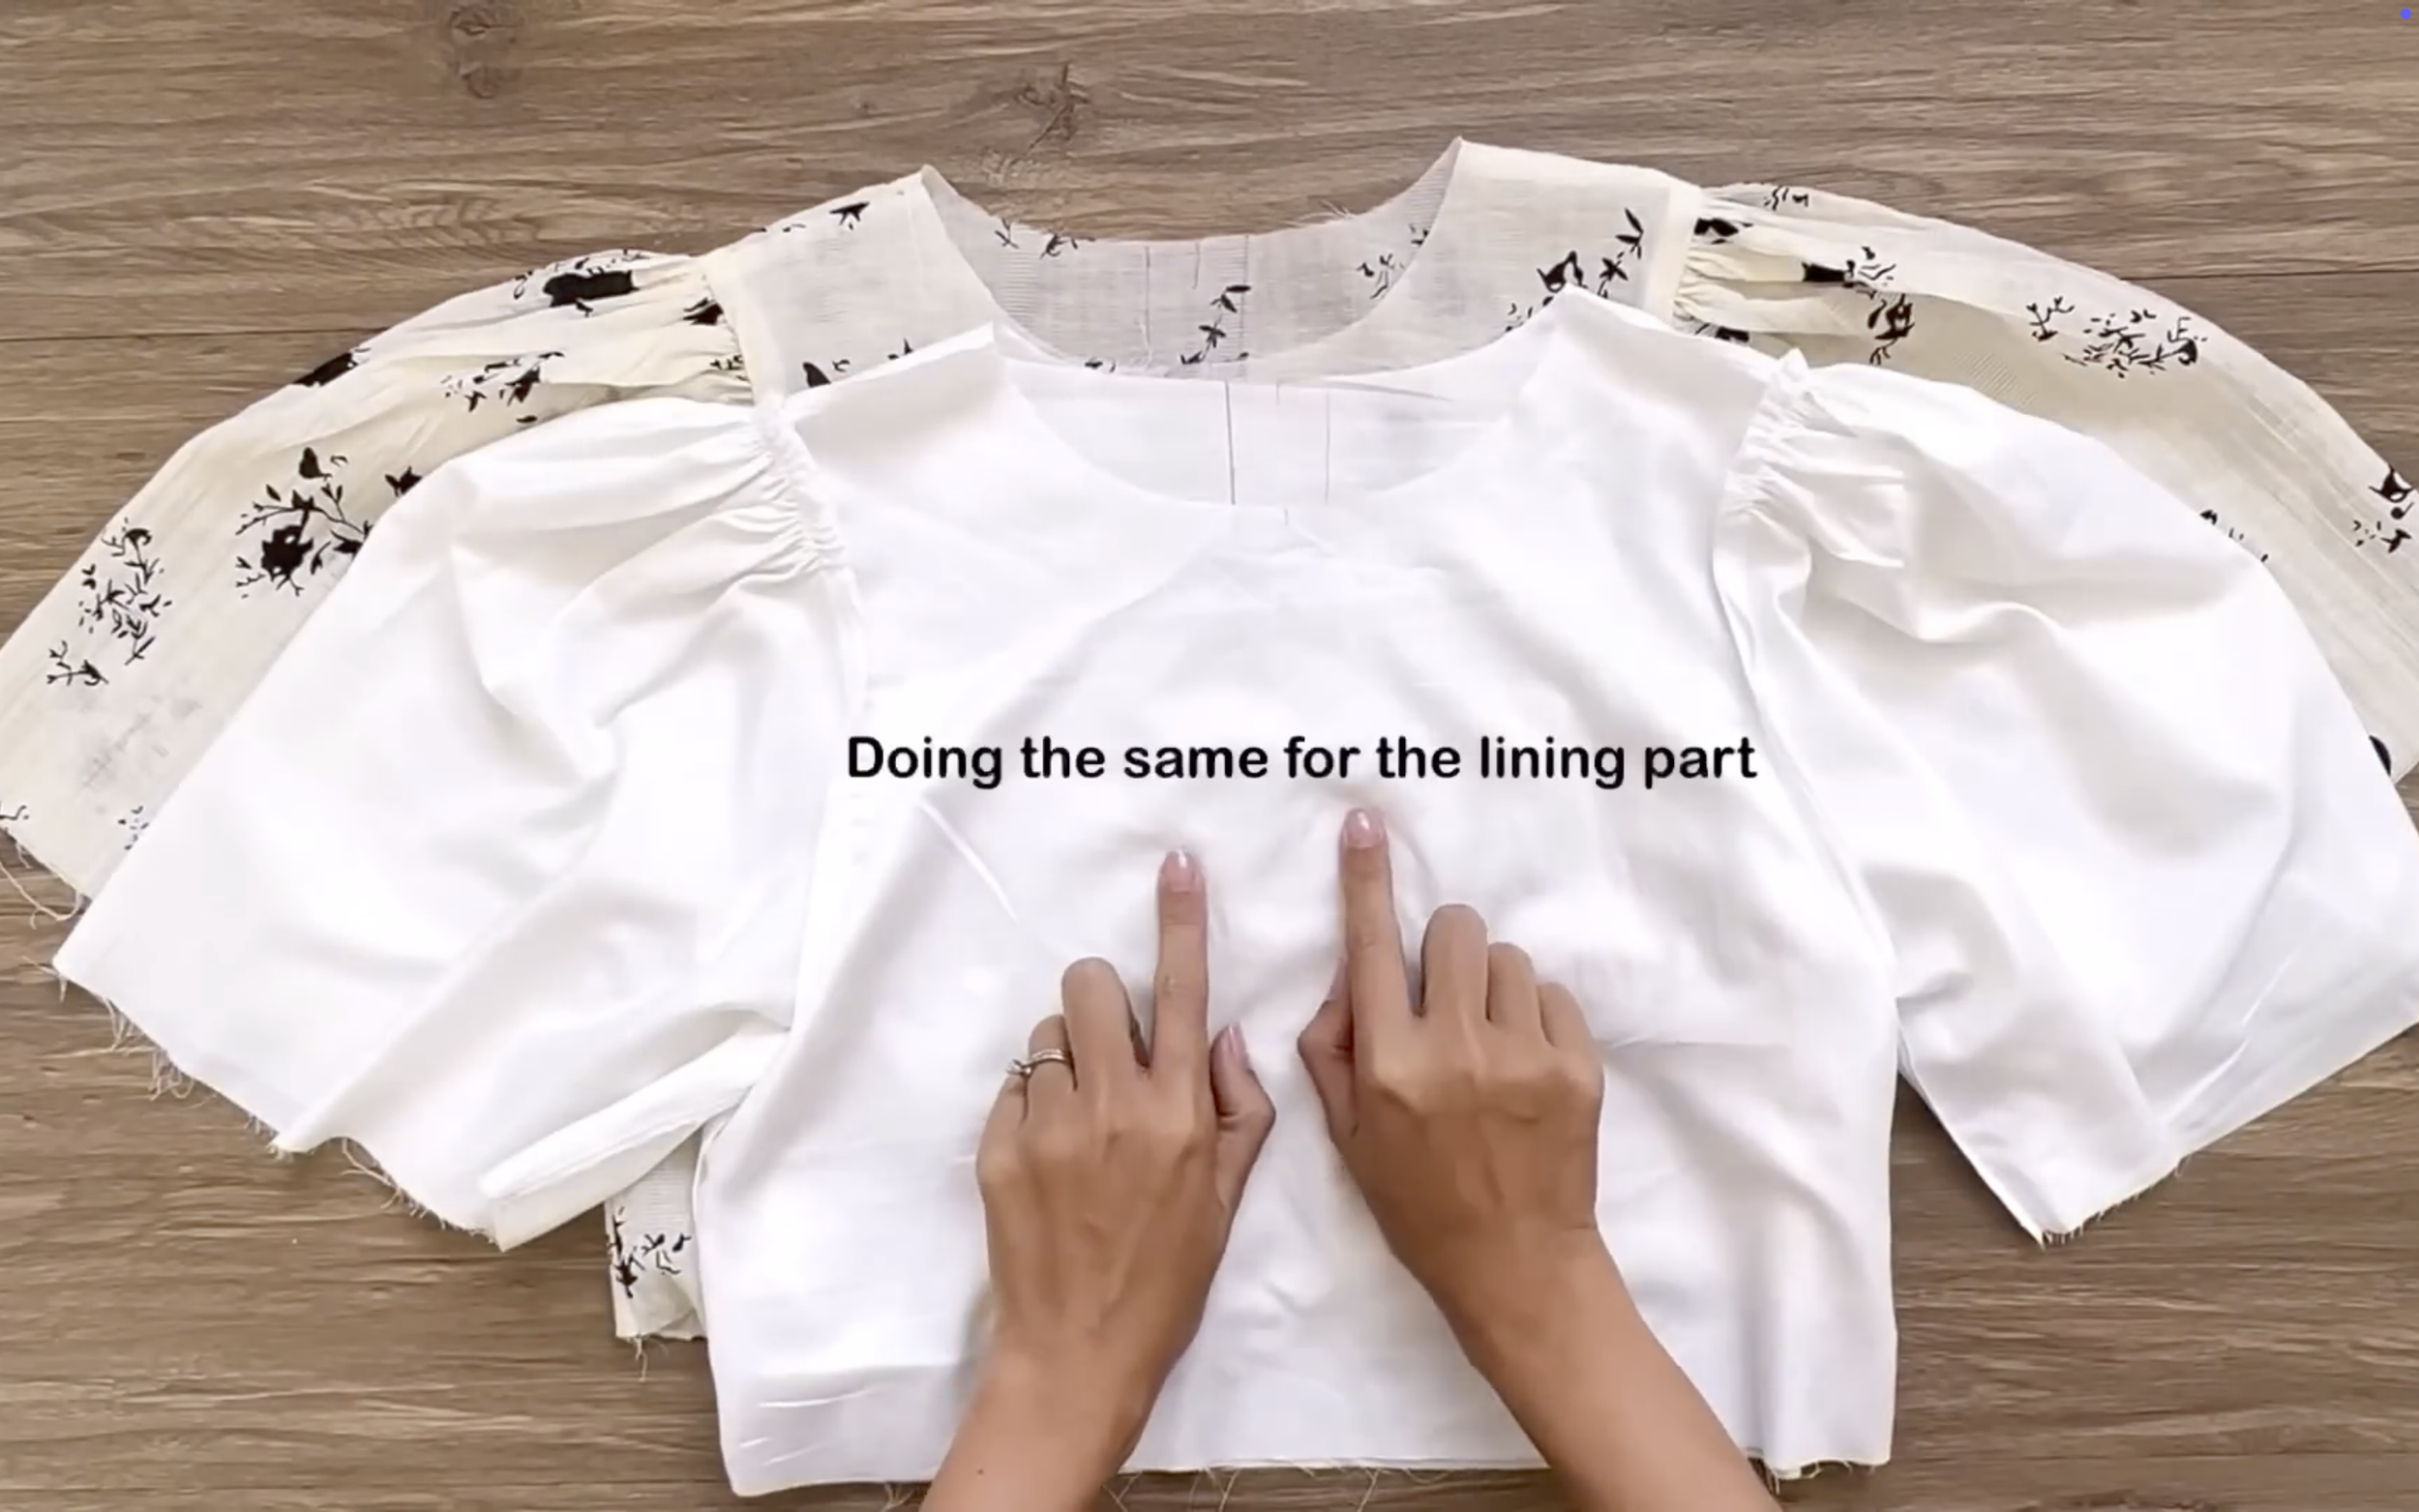
Do the same for the lining part after that.
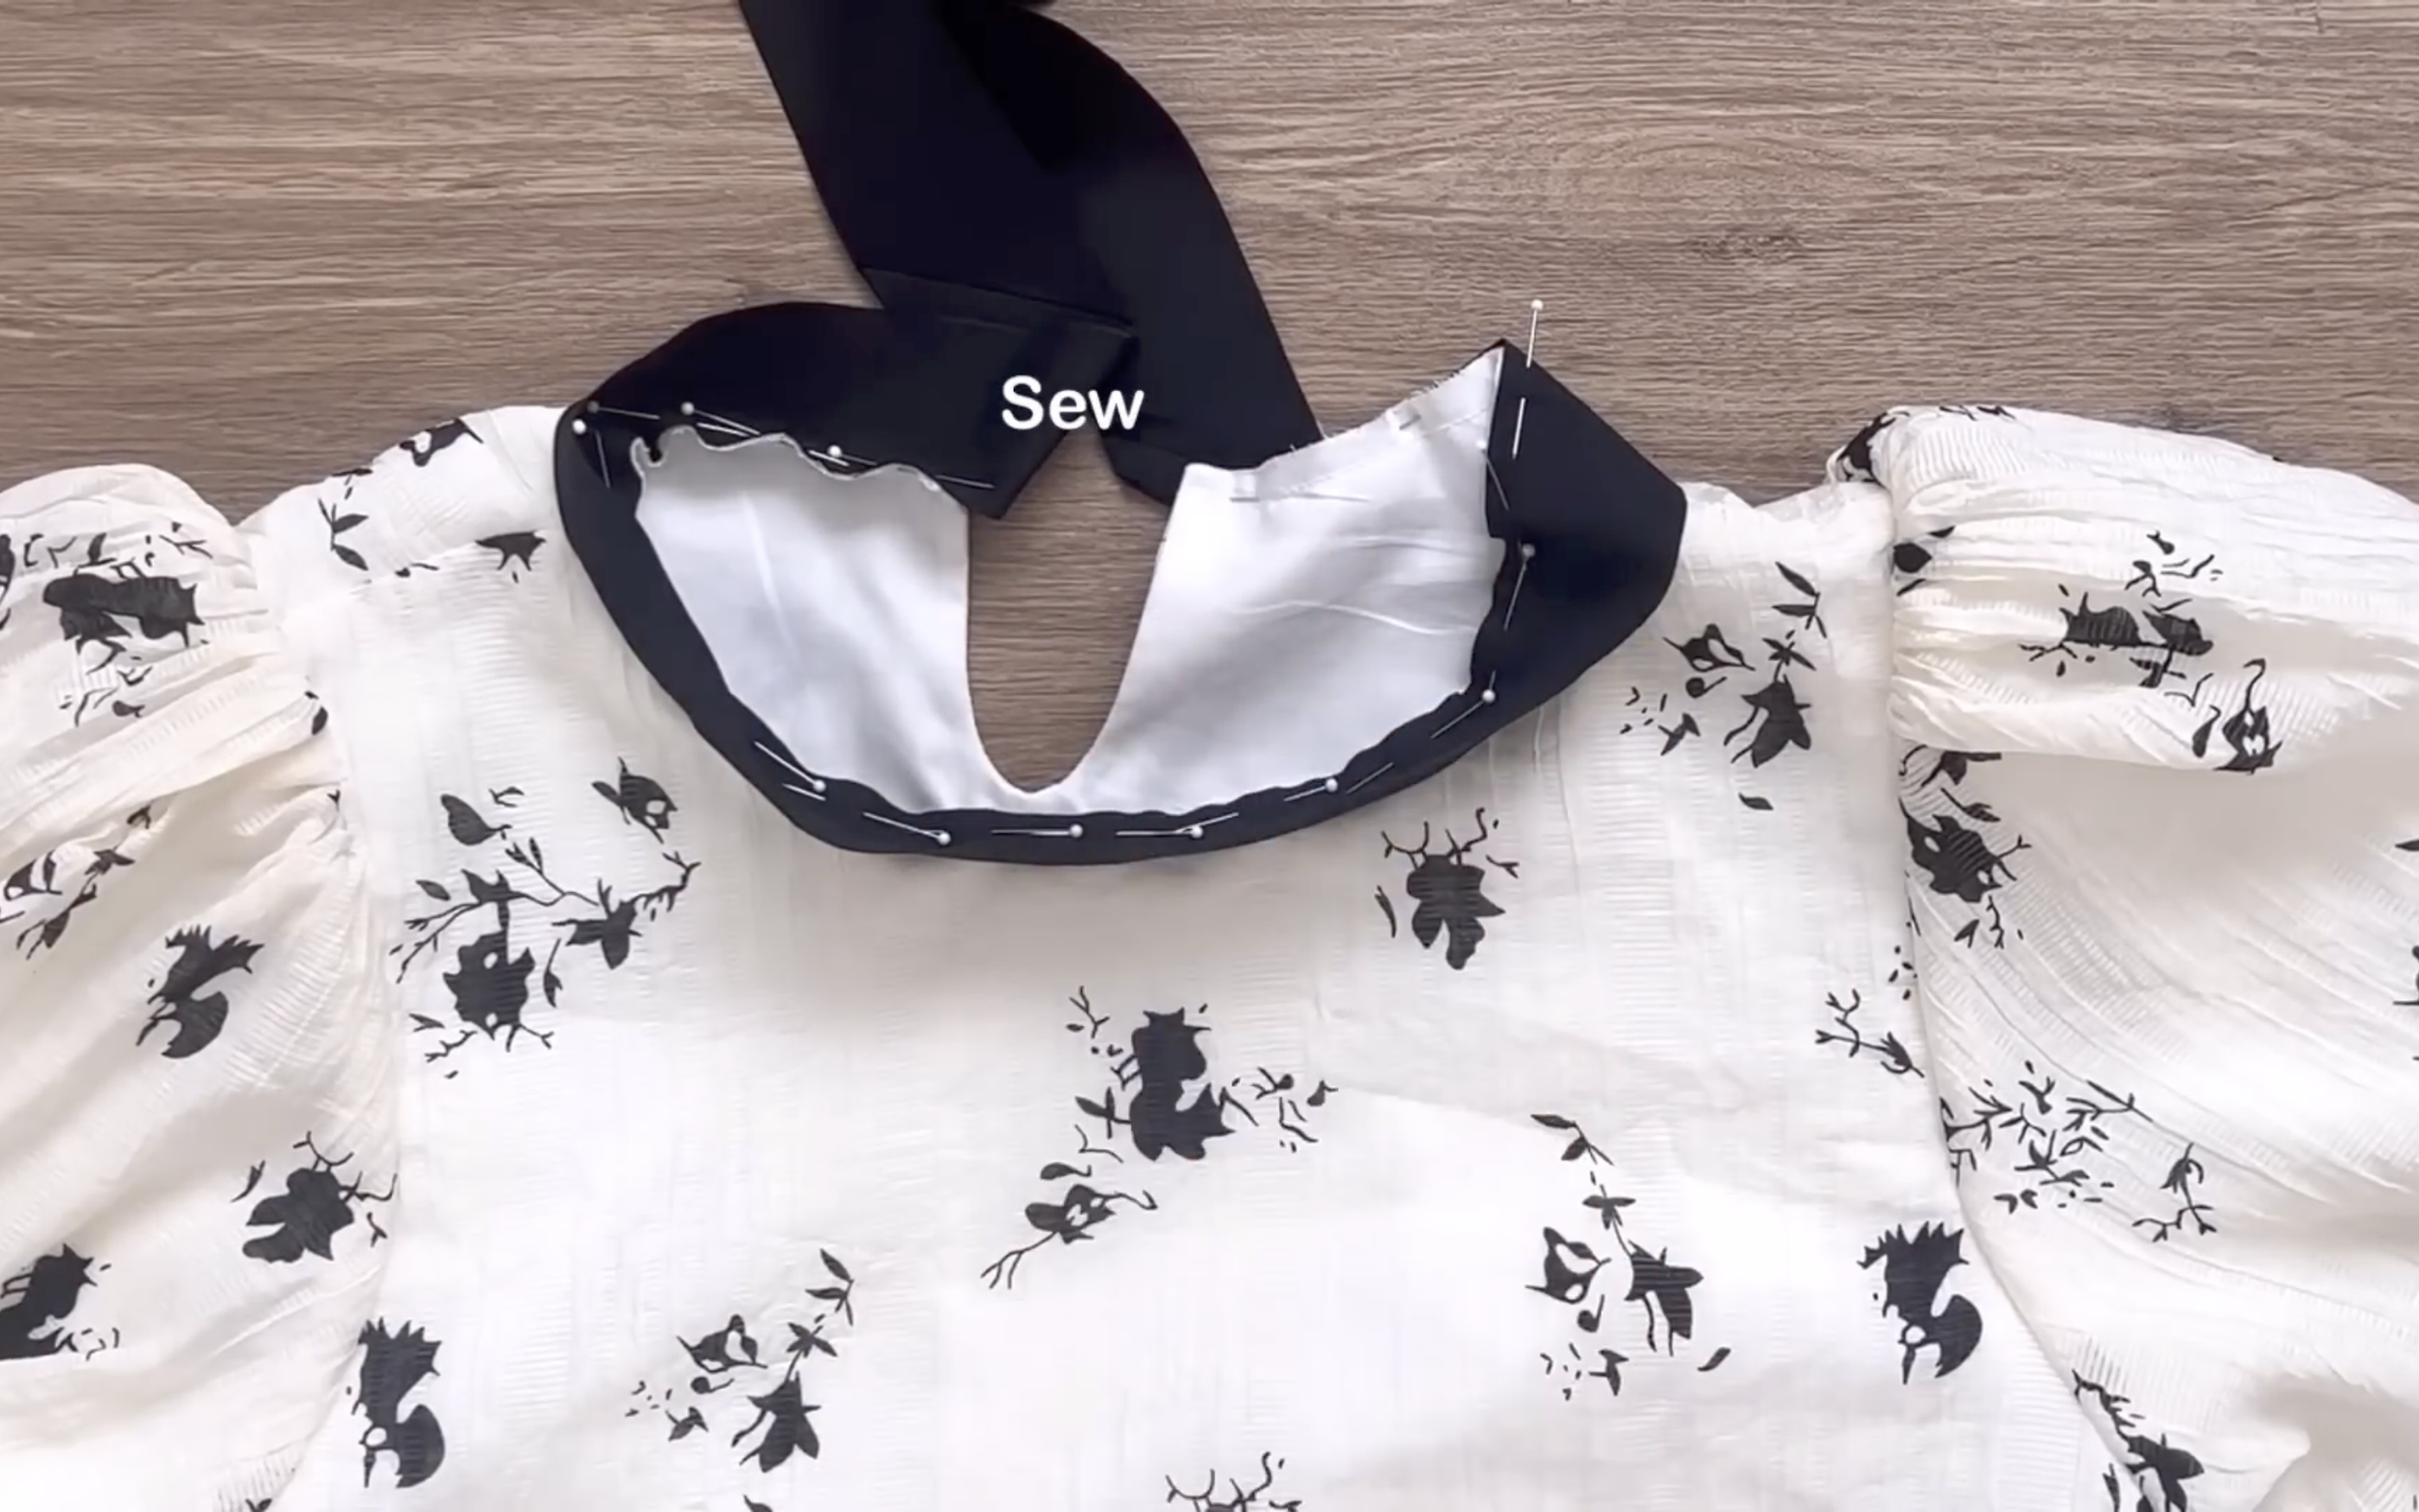
Then, connect them together at the neckline using pins.
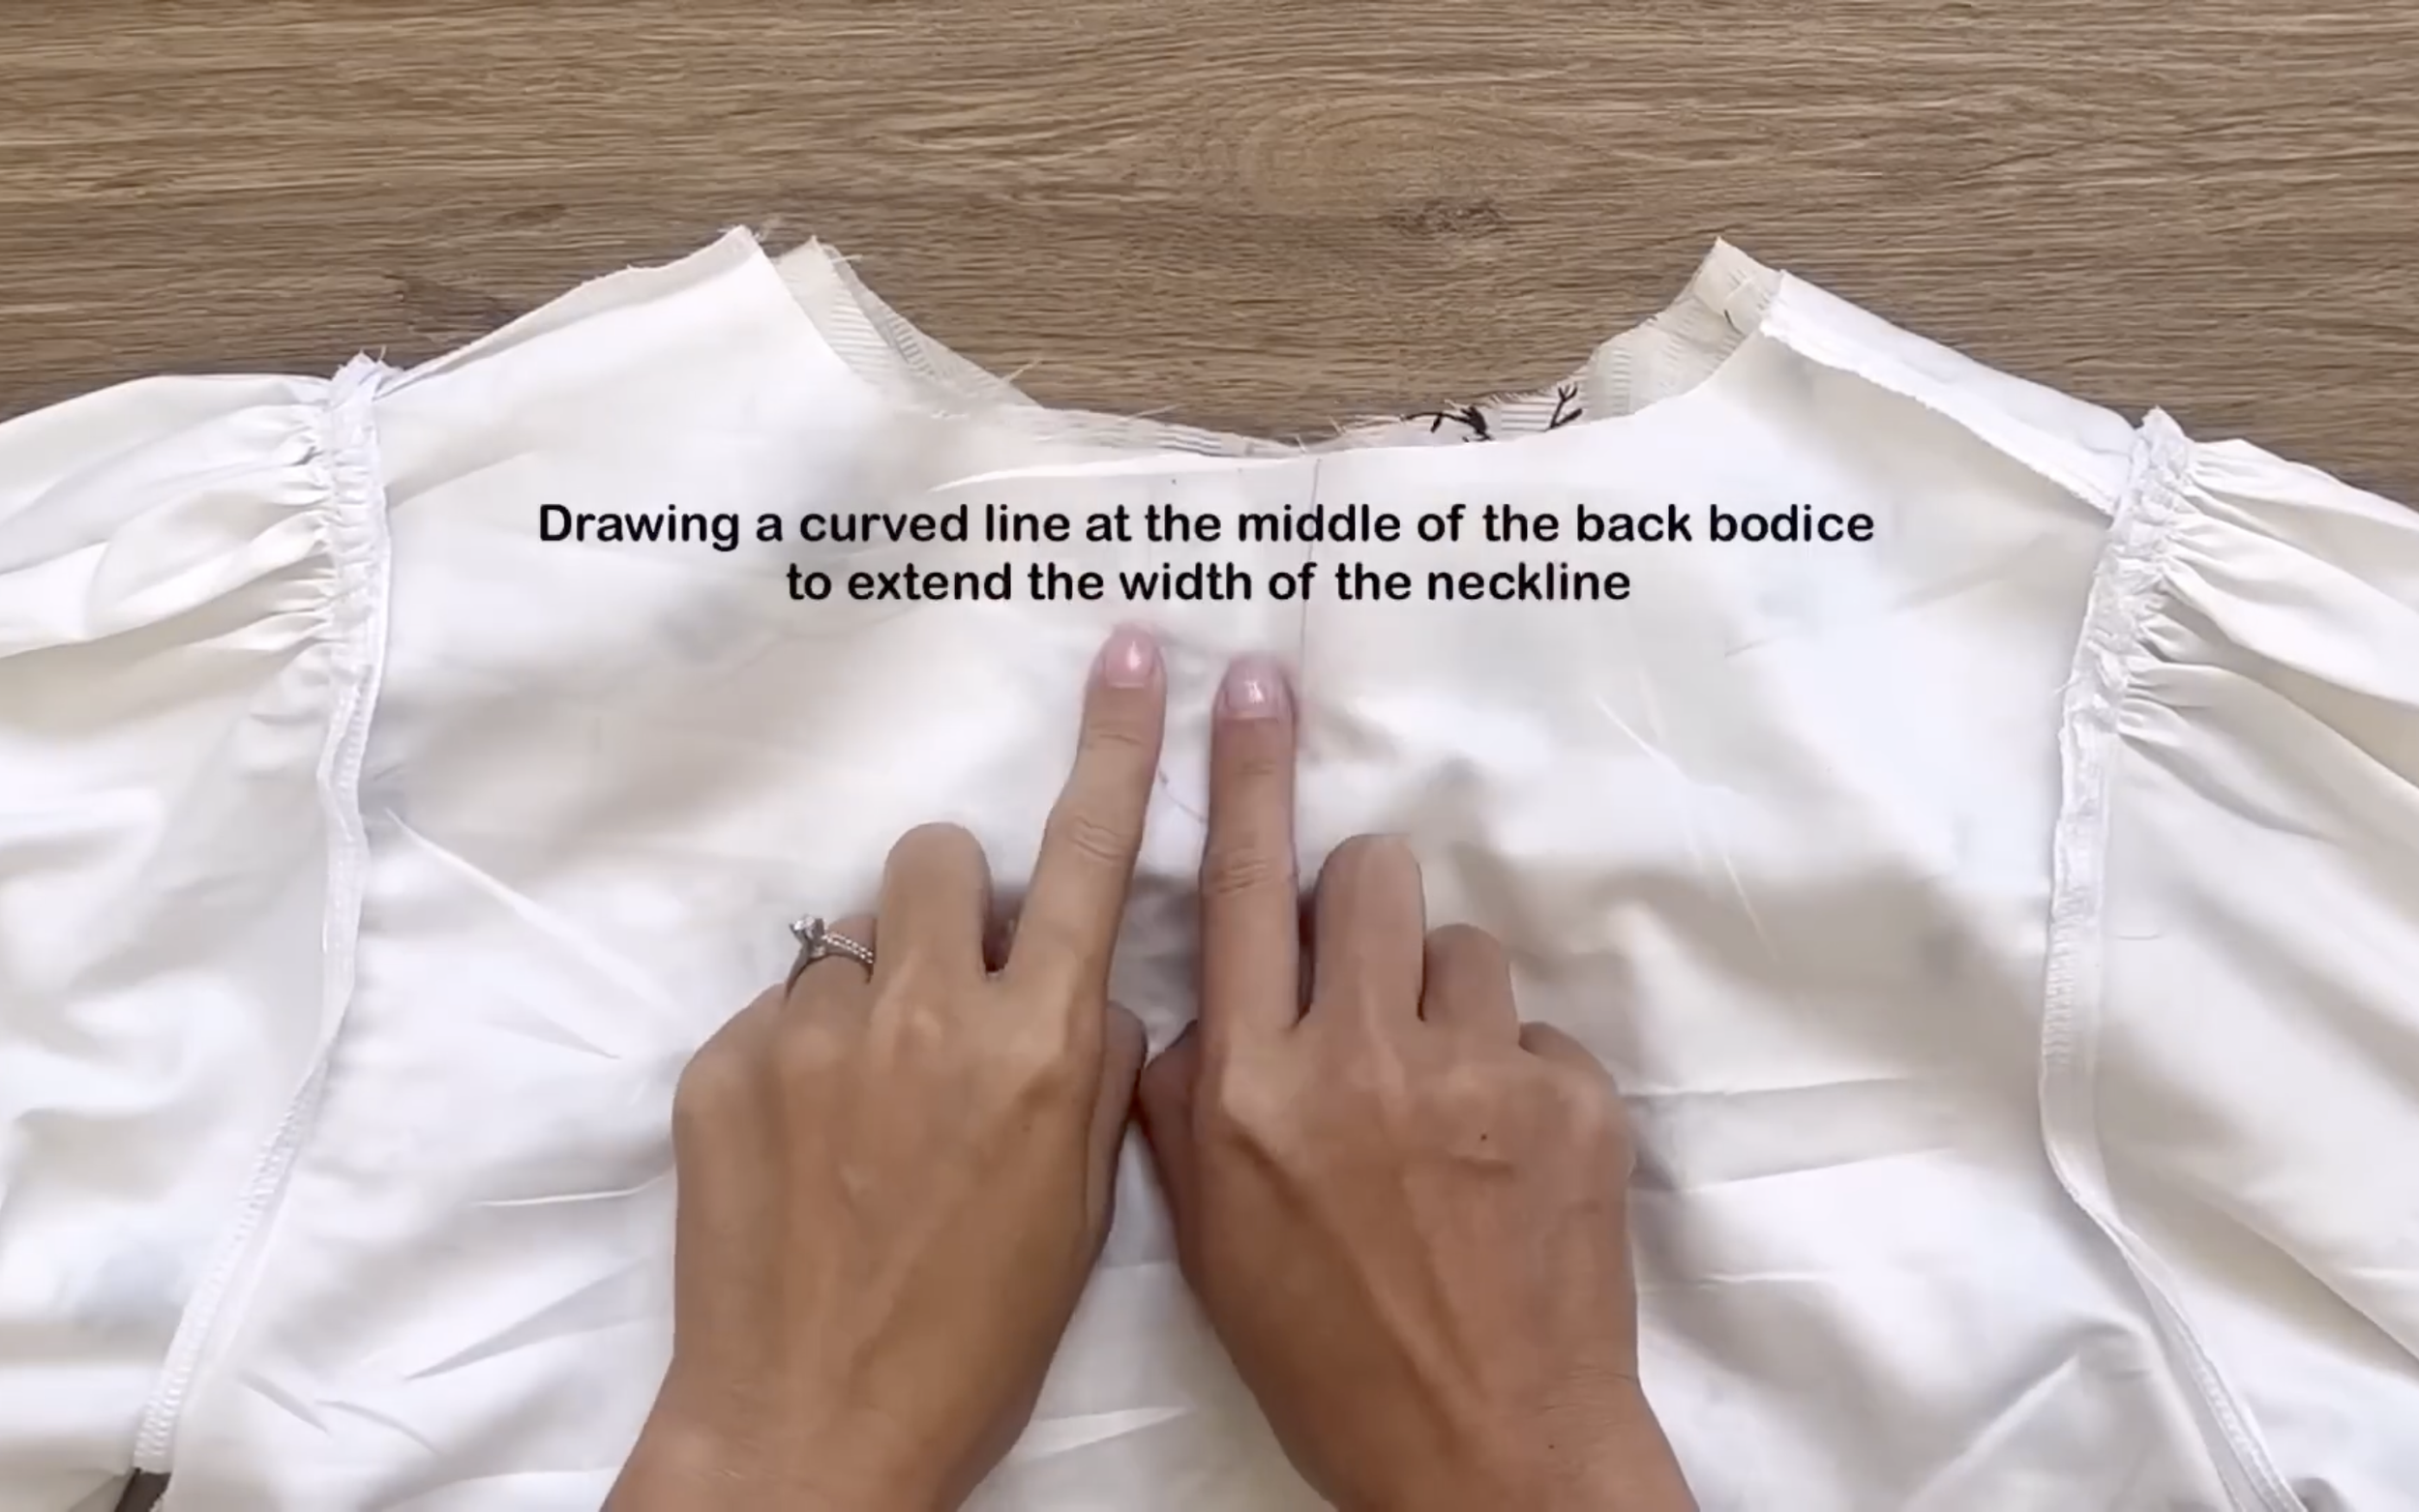
To create a bigger width for the neck, draw a long curved line at the middle of the back bodice.

After sewing, cut the extra fabric inside the curved line.
Then, make some small cuts at the curved line before turning the lining inside.
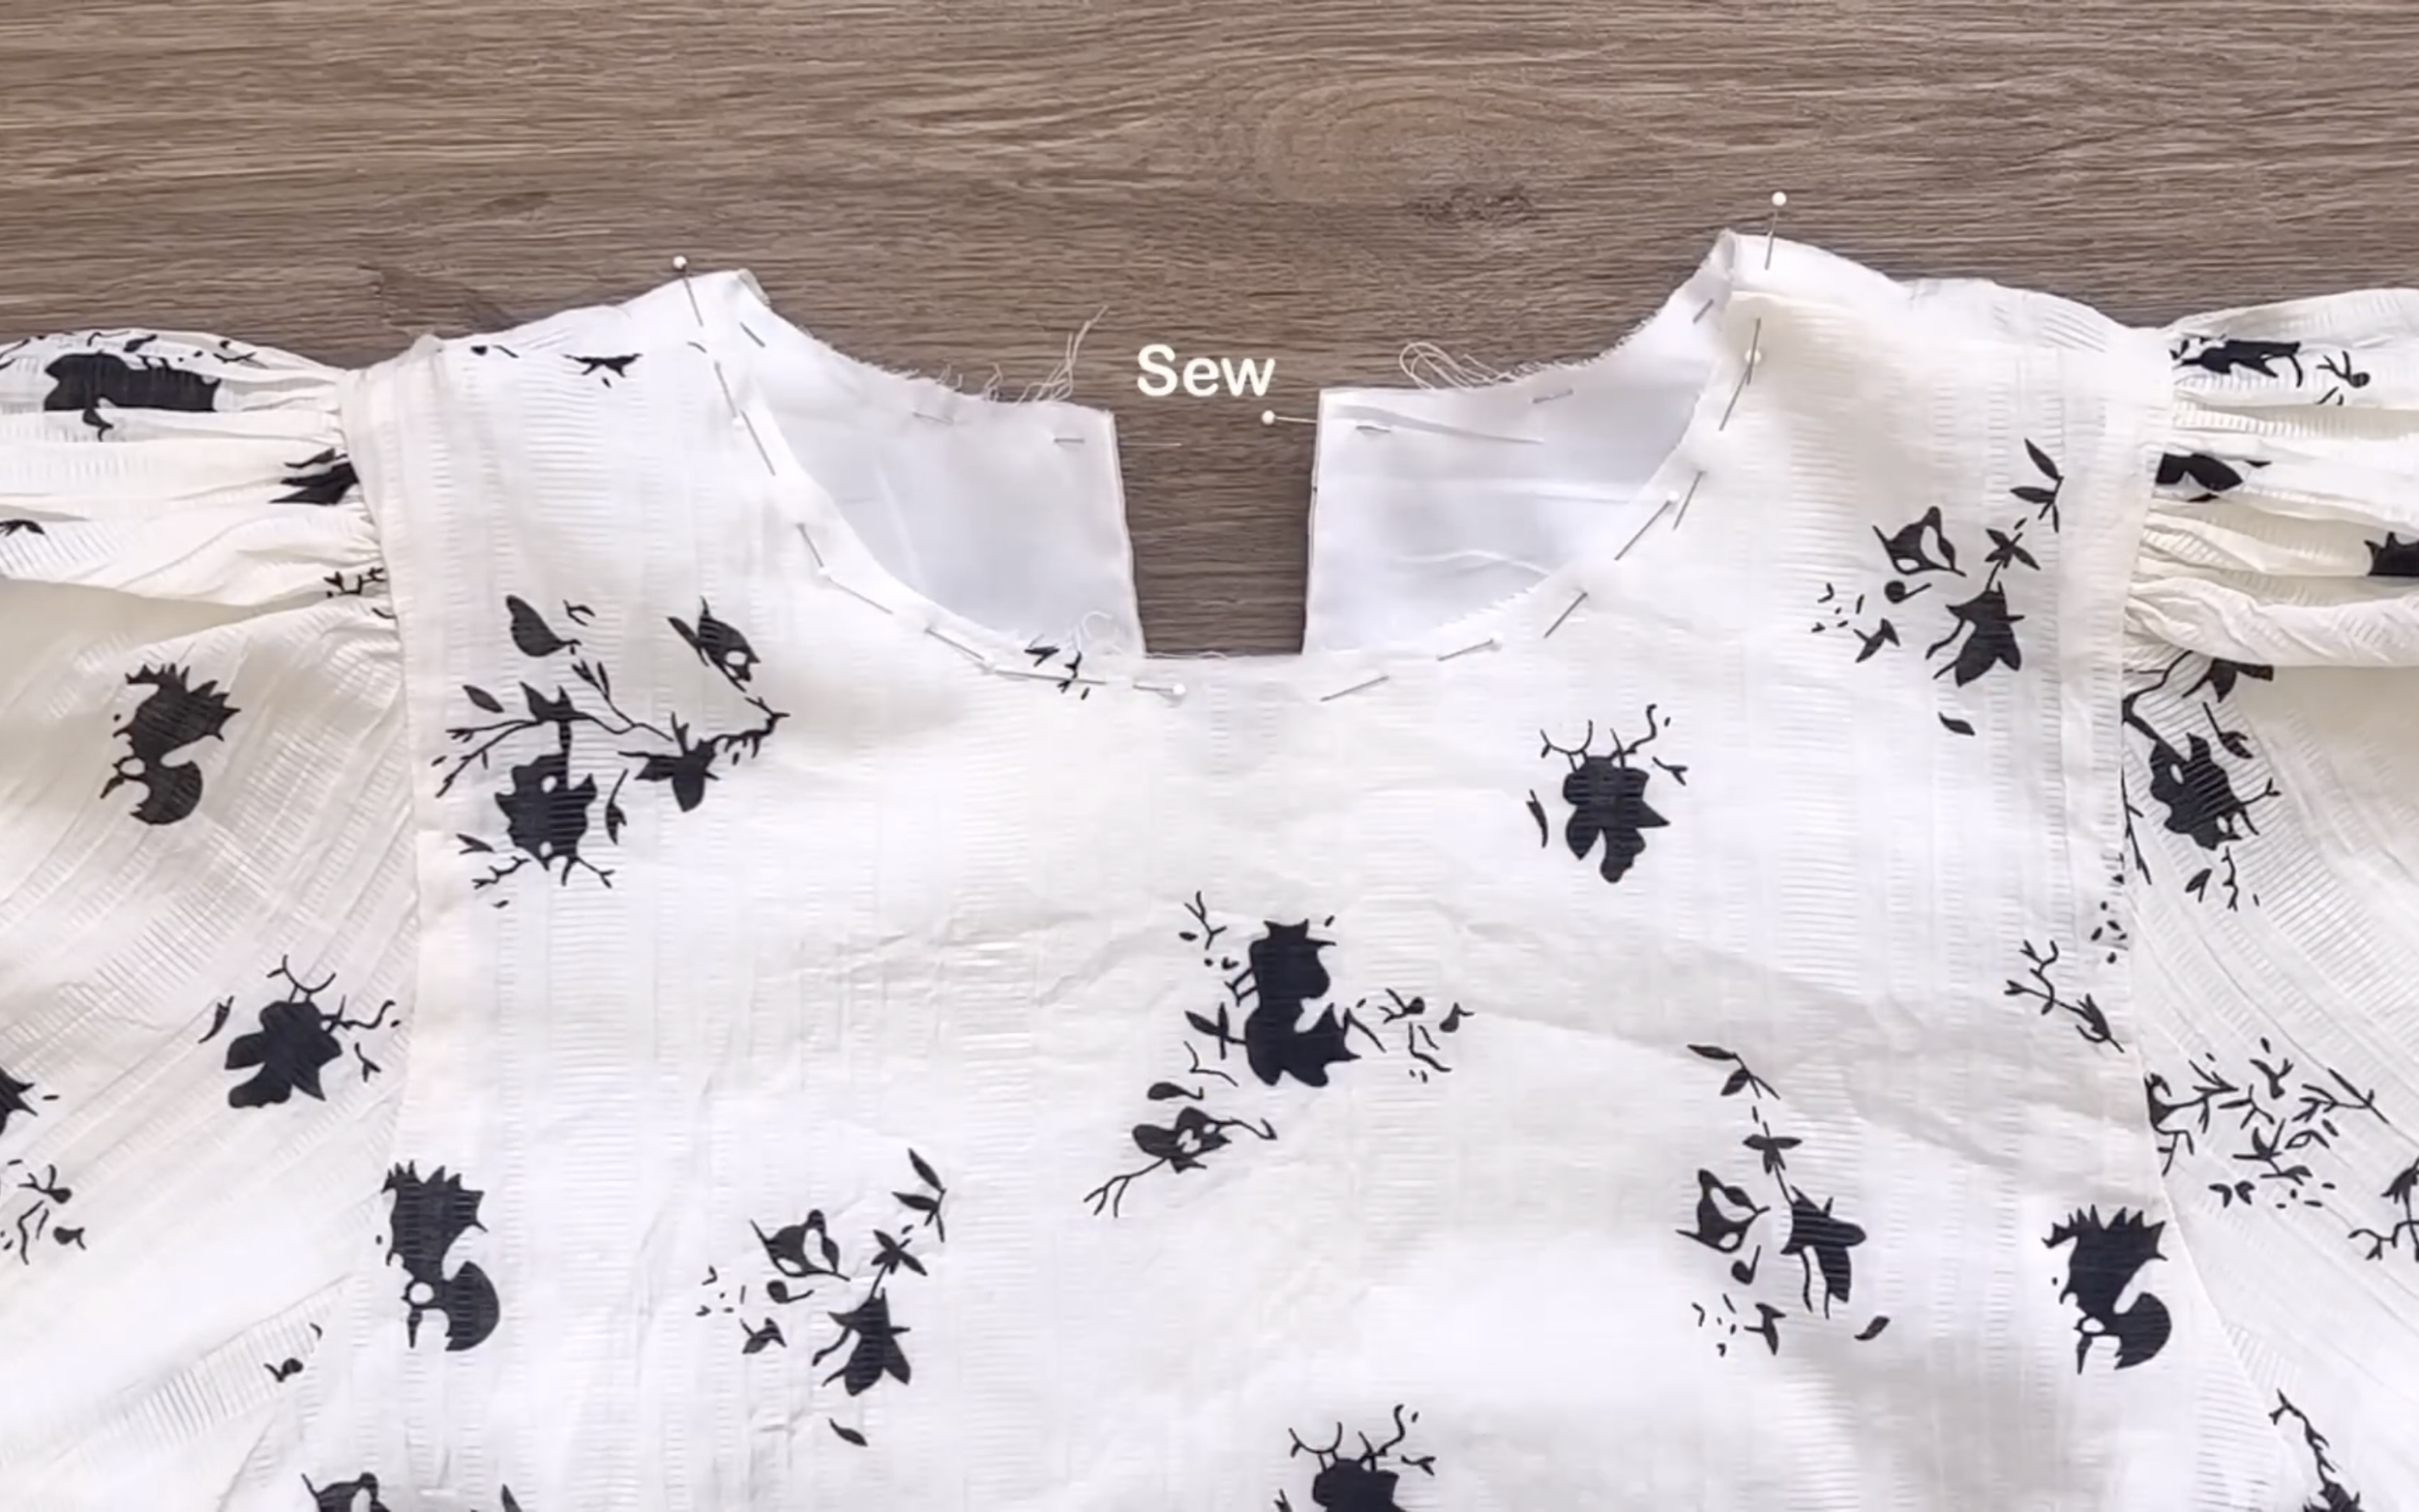
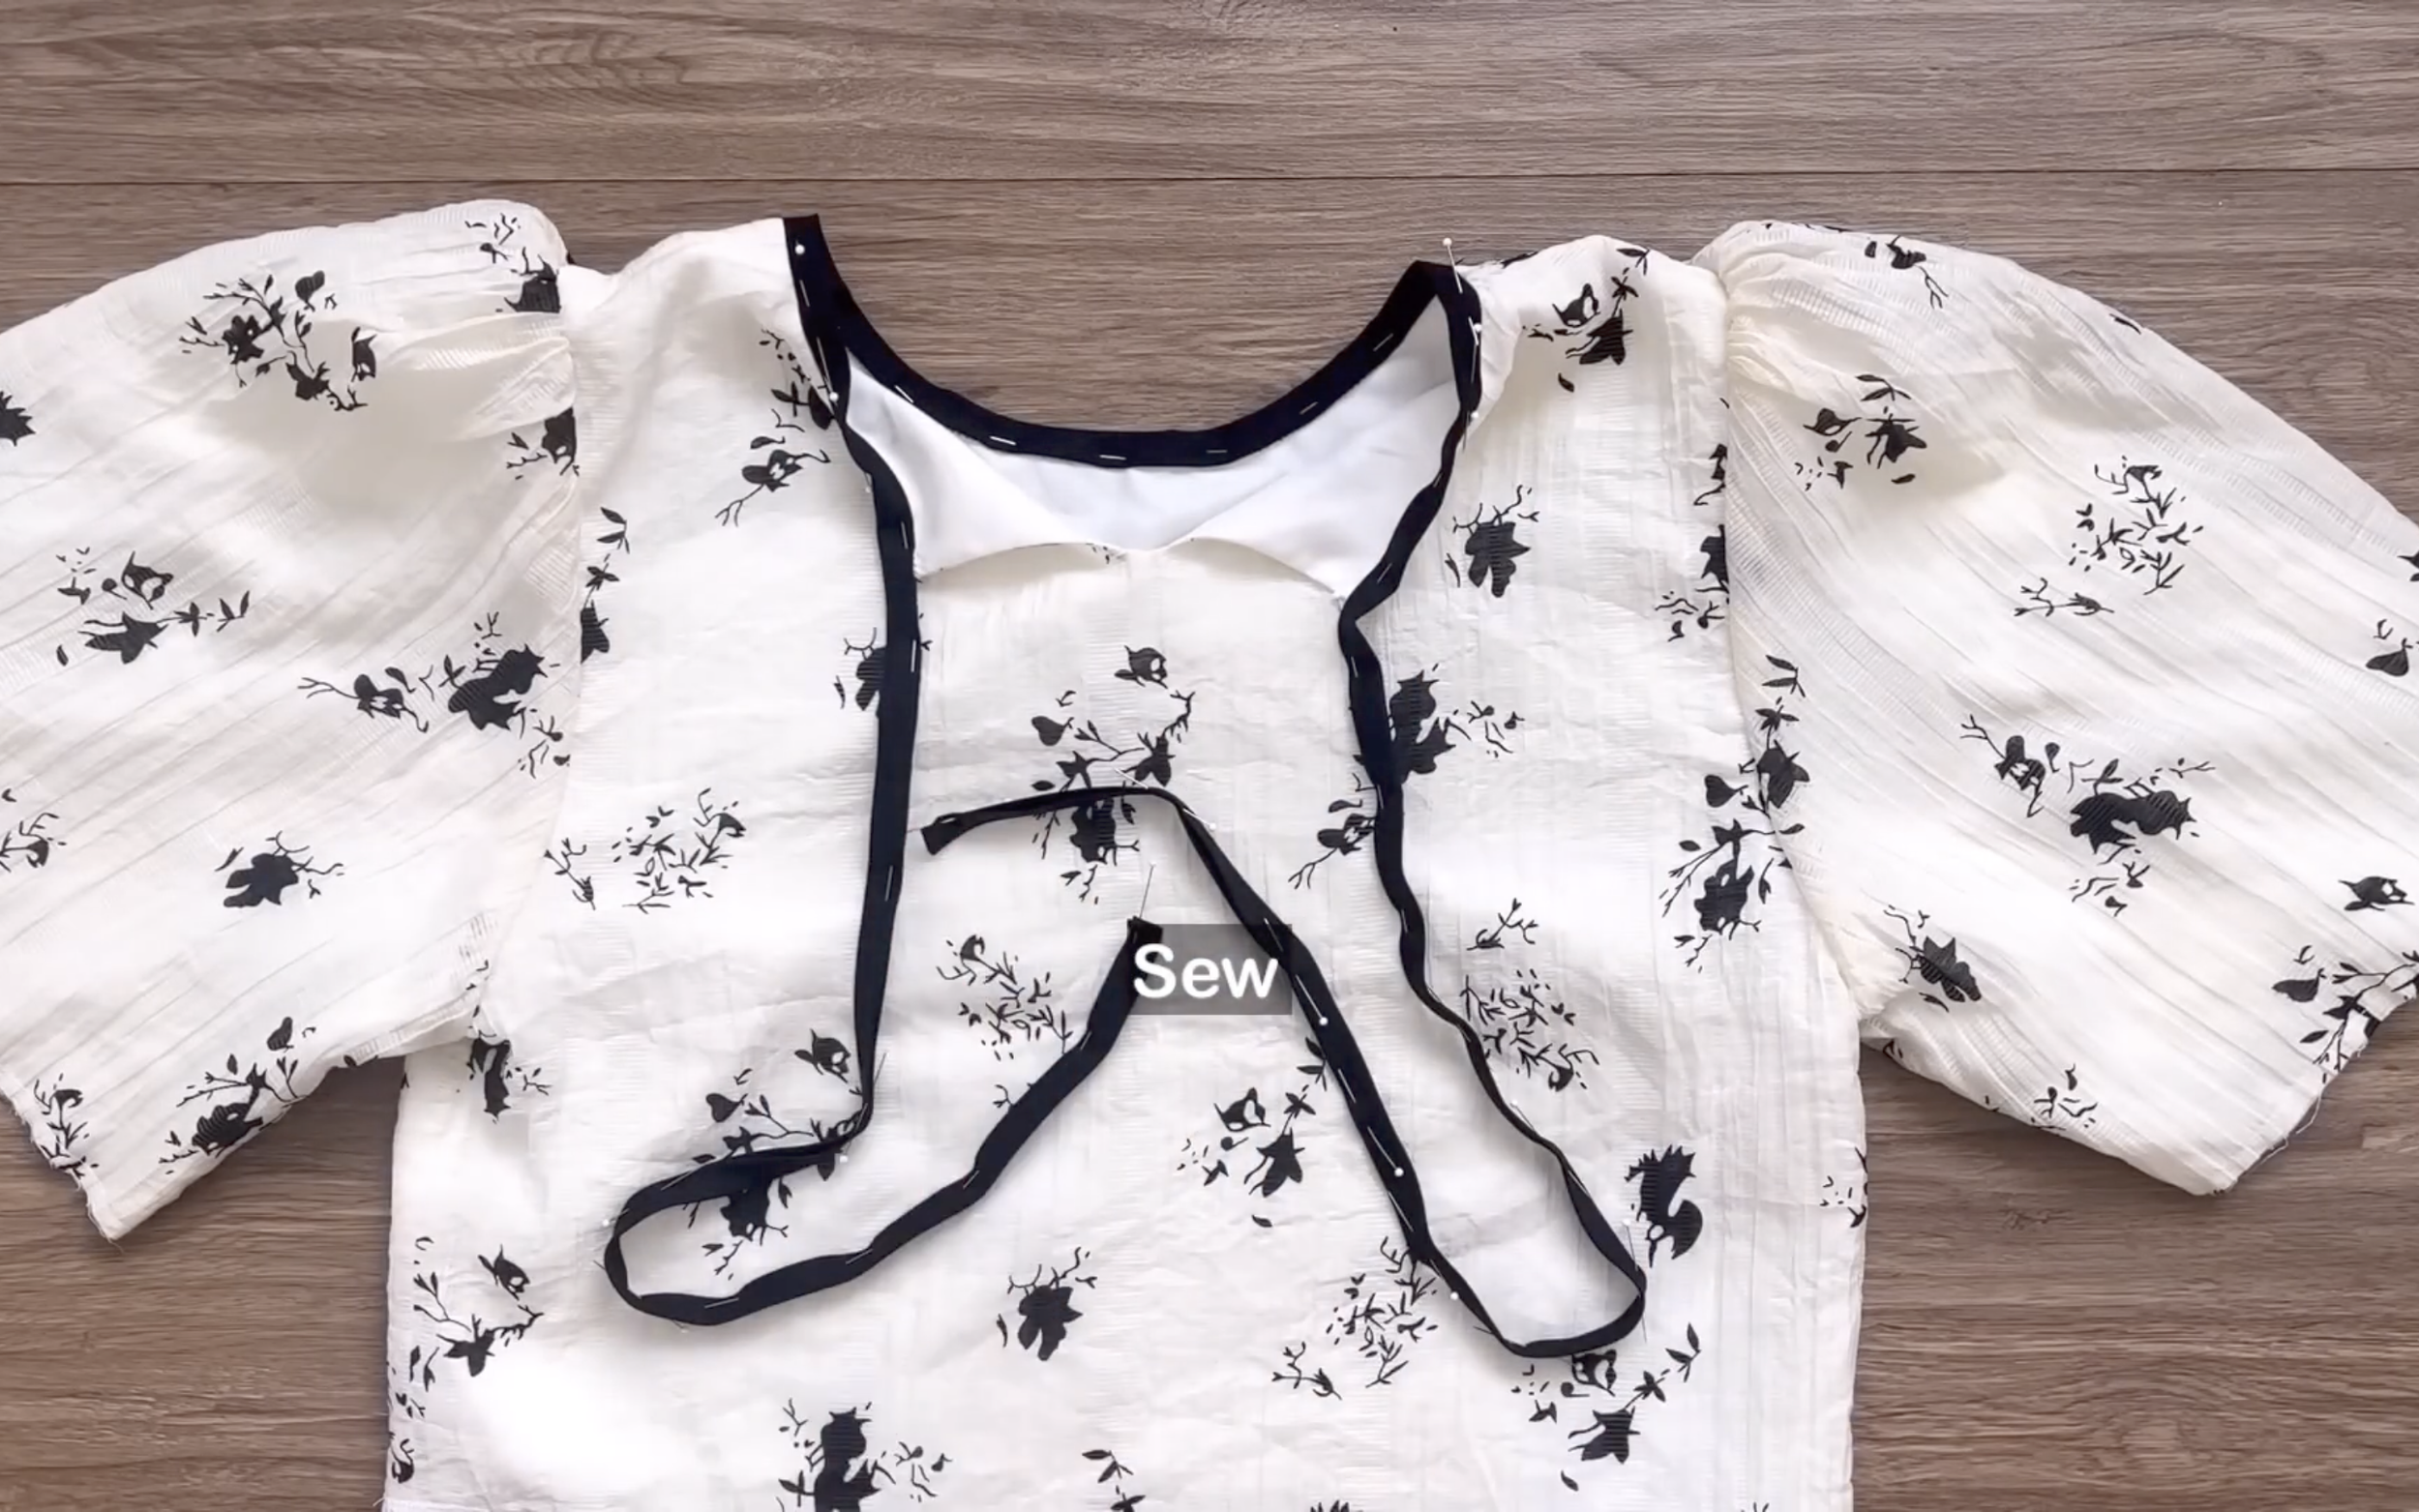
Then, connect the rest of the neckline between the lining and the main fabric together and sew.
After that, connect the sleeve of the lining and the main fabric together to keep them from moving when worn.
After sewing, connect the ending line of the lining and the main fabric together.
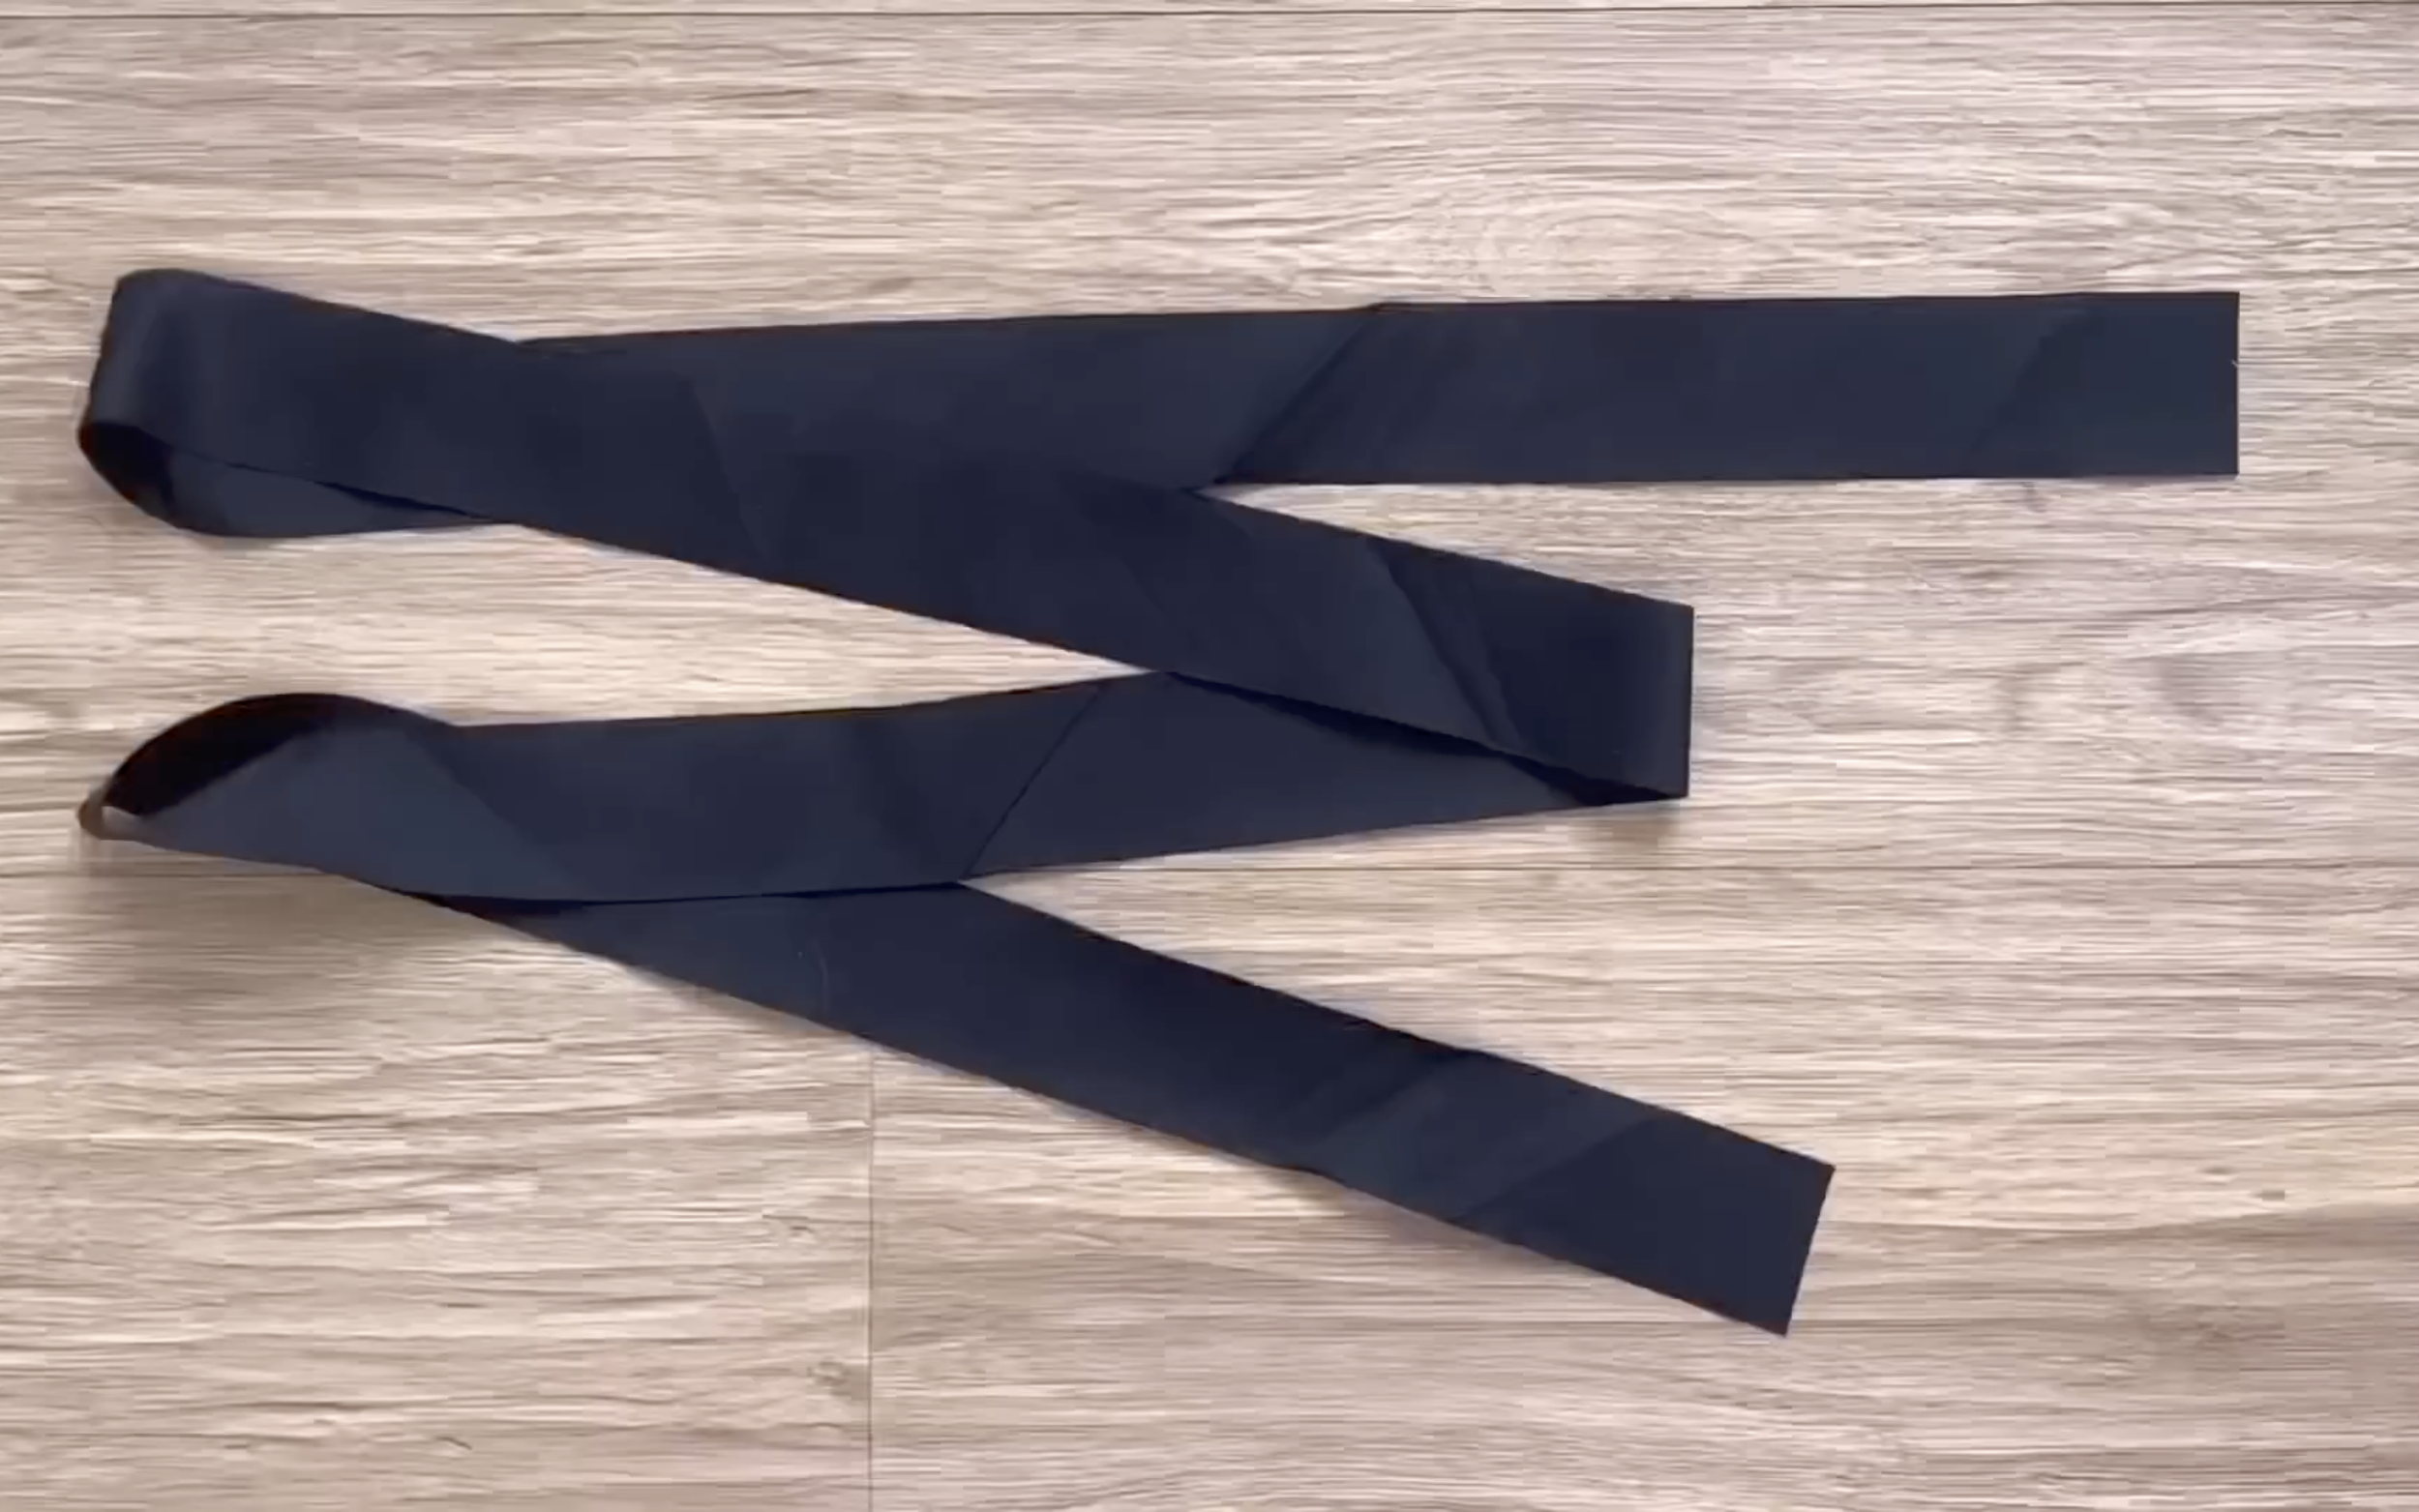
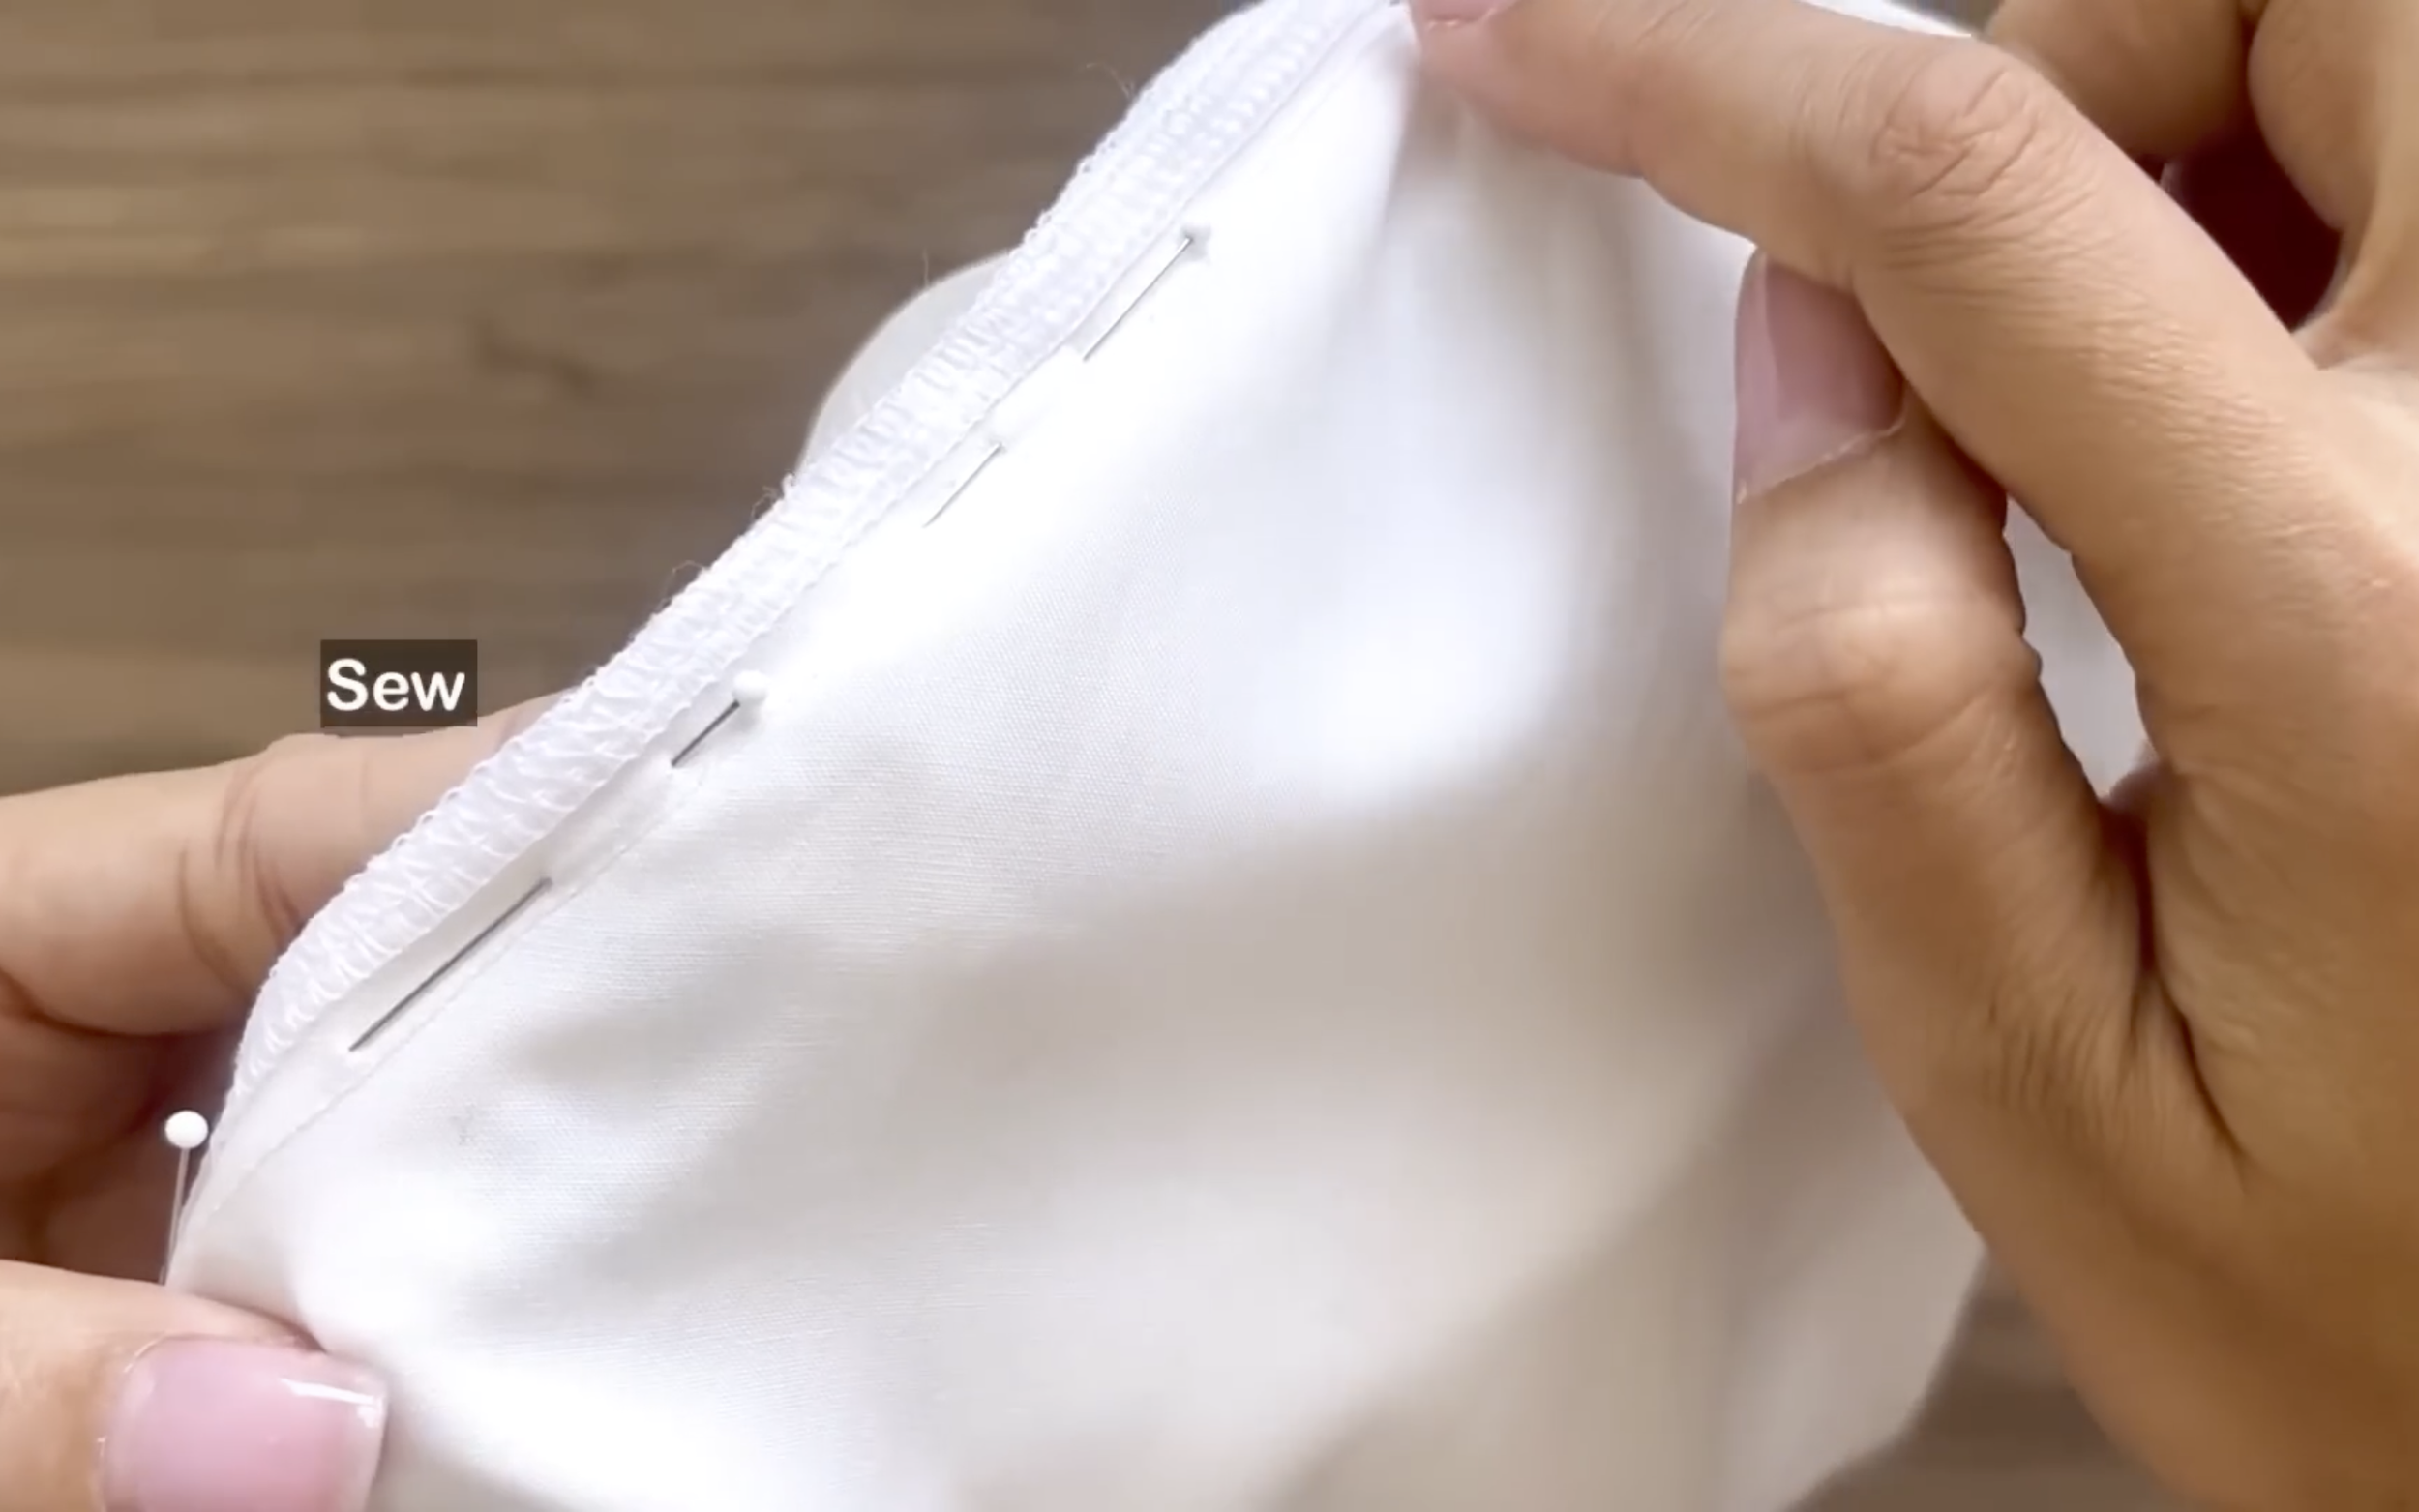
To finish the neck, cut a long bias tab with 4 cm width, which is four times the width of the binding, and 80 cm length, which is three times the length of the neckline.
Connect one side of the bias to the neckline and make the first seam.
After that, fold the other side of the bias to the middle first, then fold it again to the first seam and make the second seam.
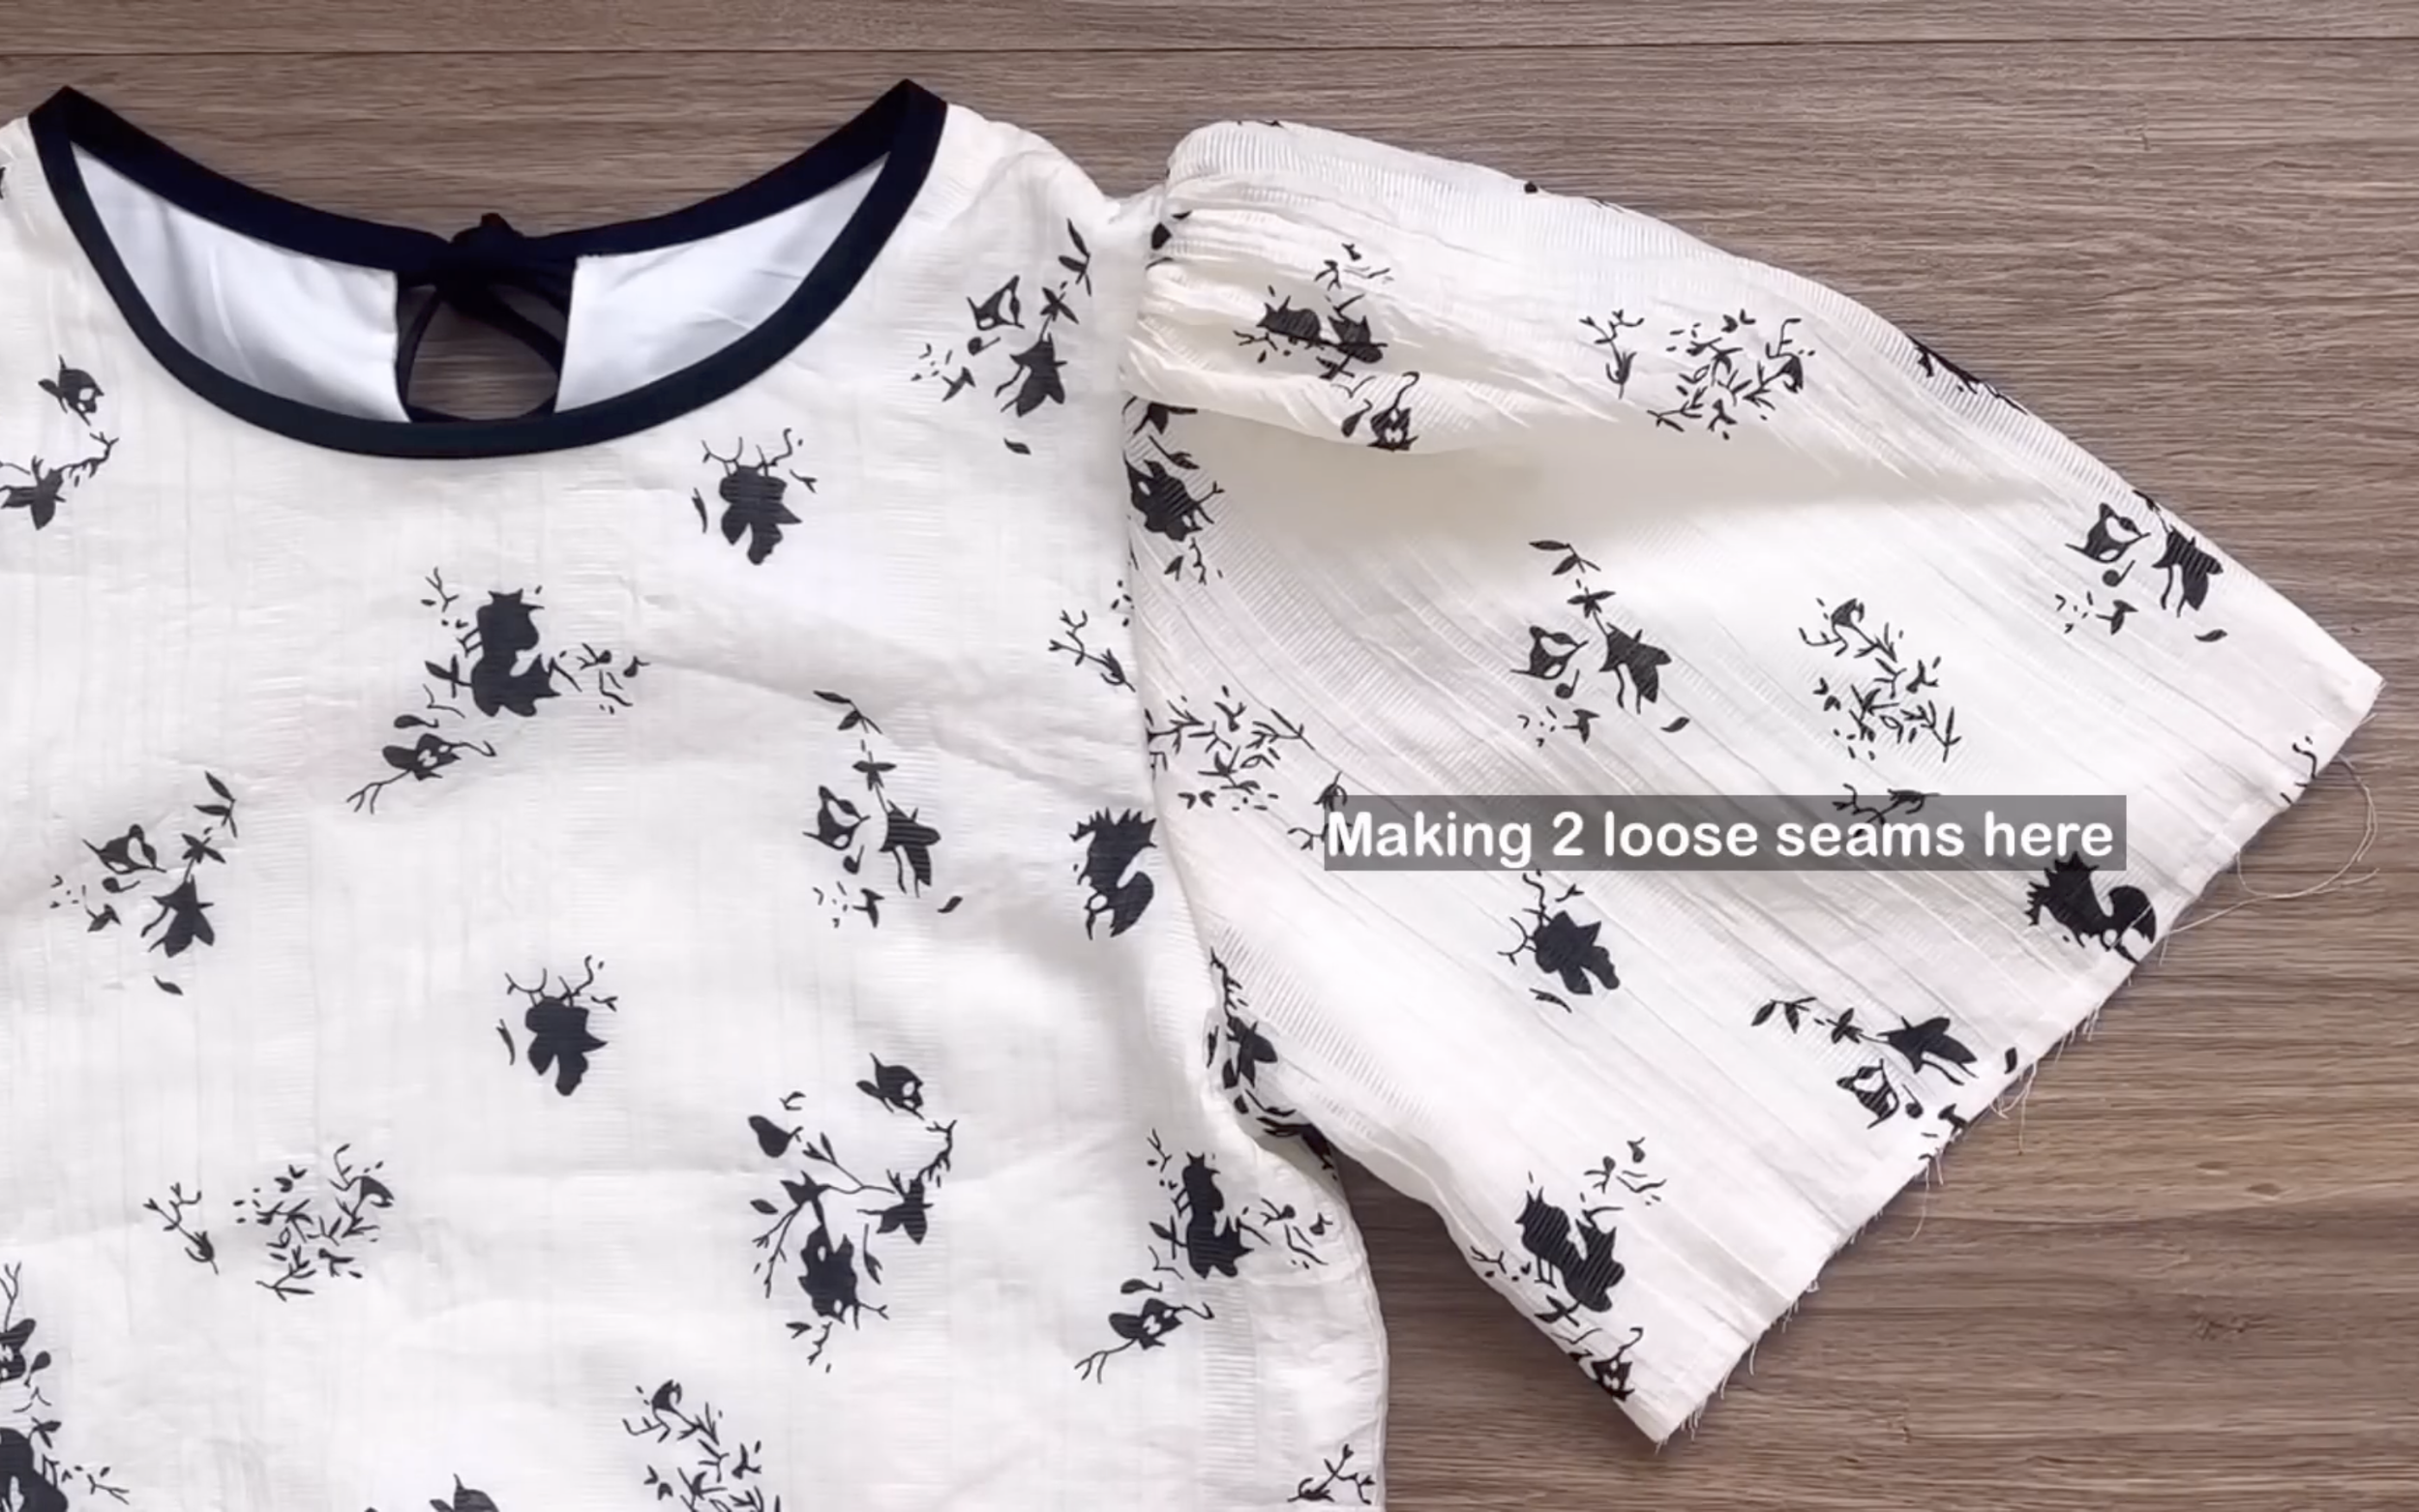
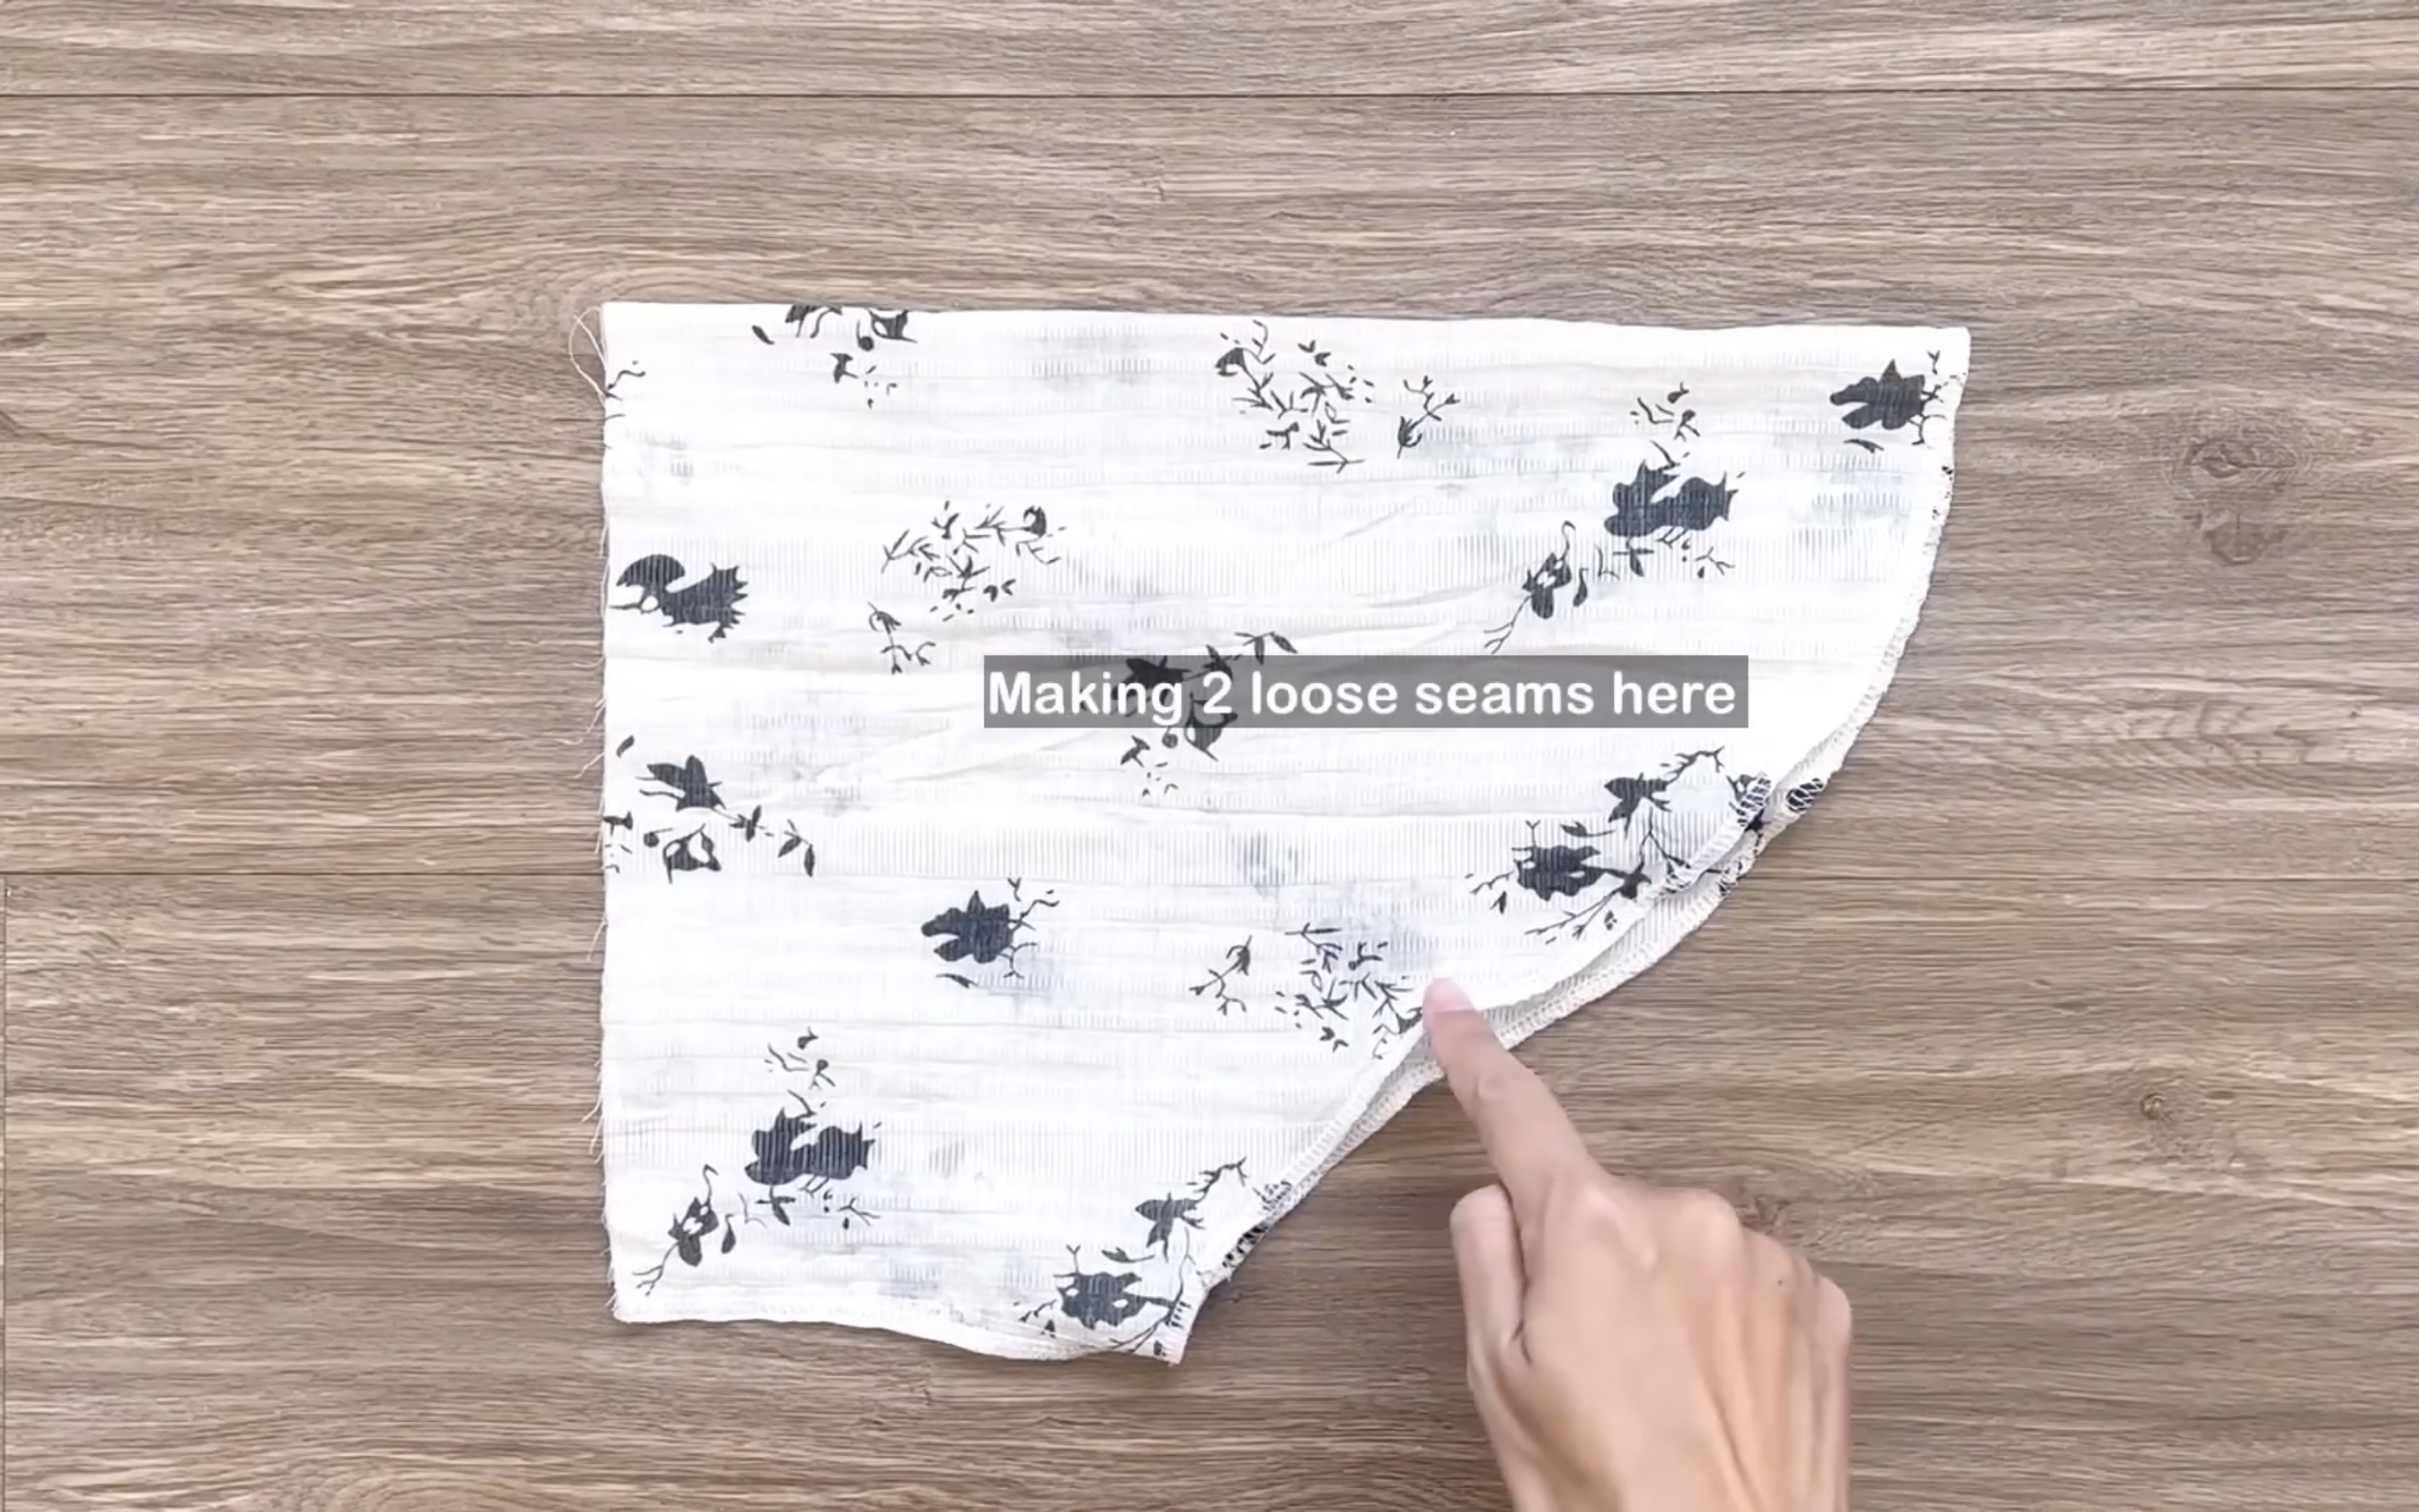
At the end of the sleeve, make two loose seams first, then create the gathering fabric there later.
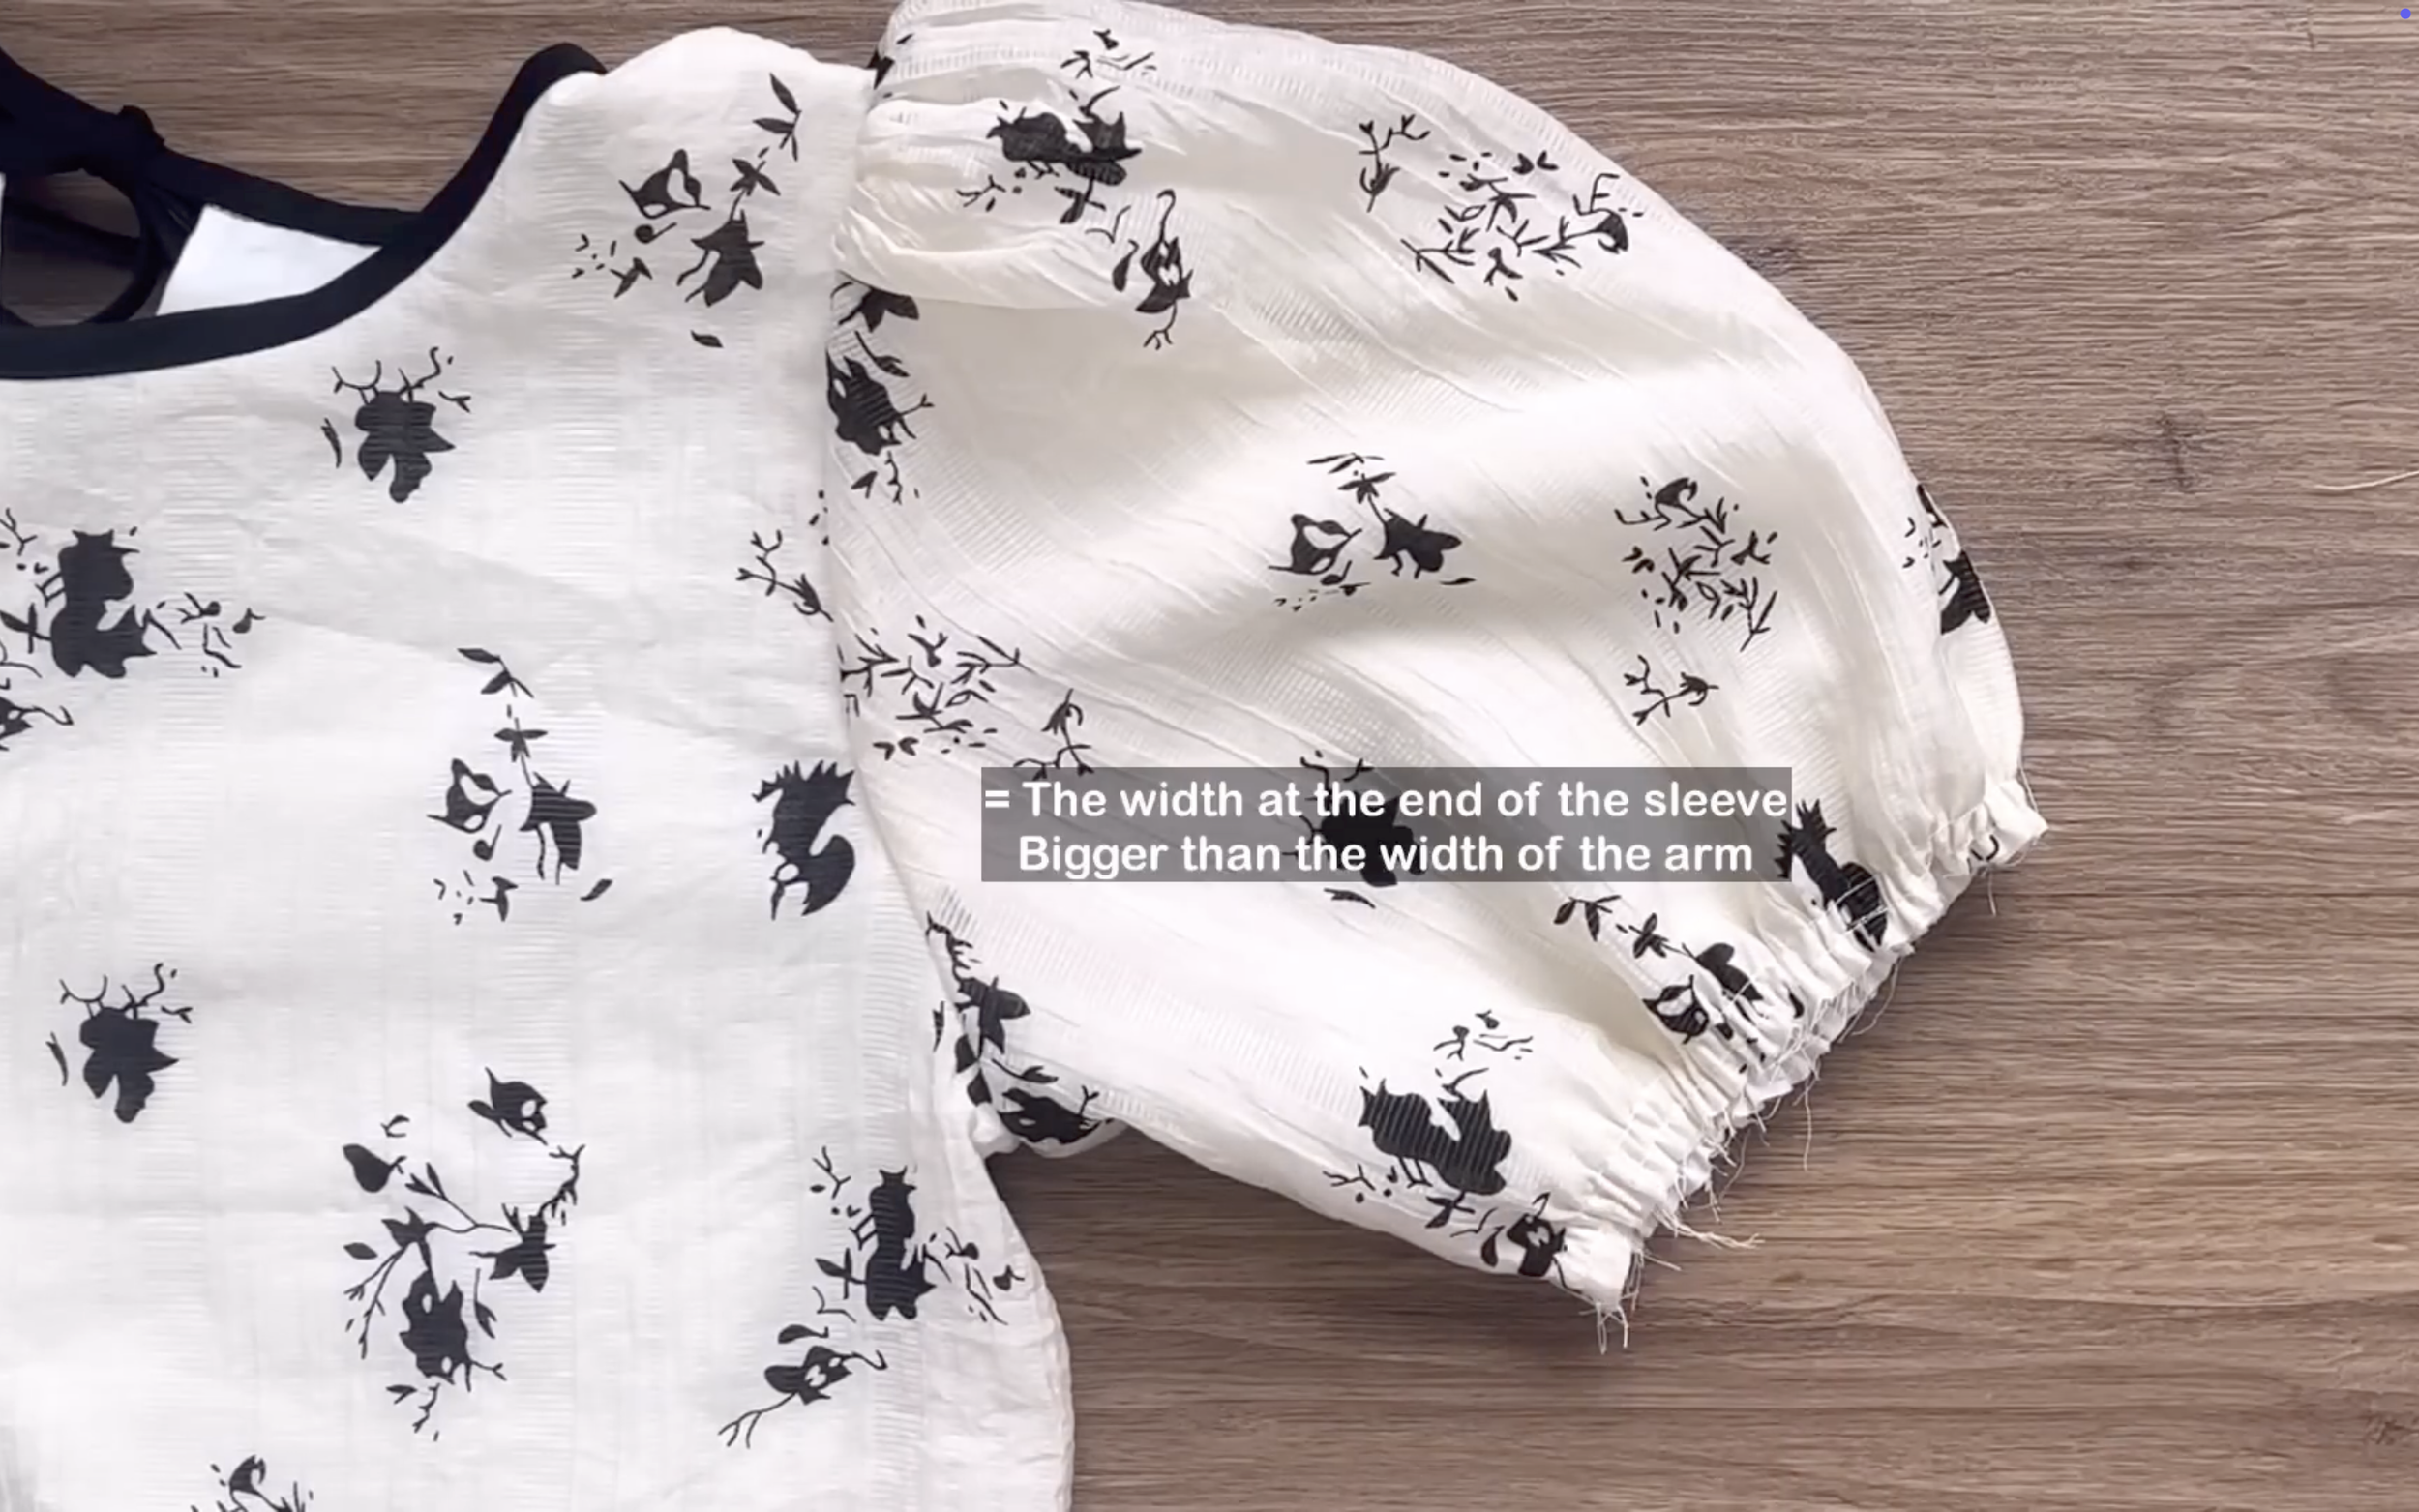
The final width of the gathering fabric will be bigger than the width of the arm.
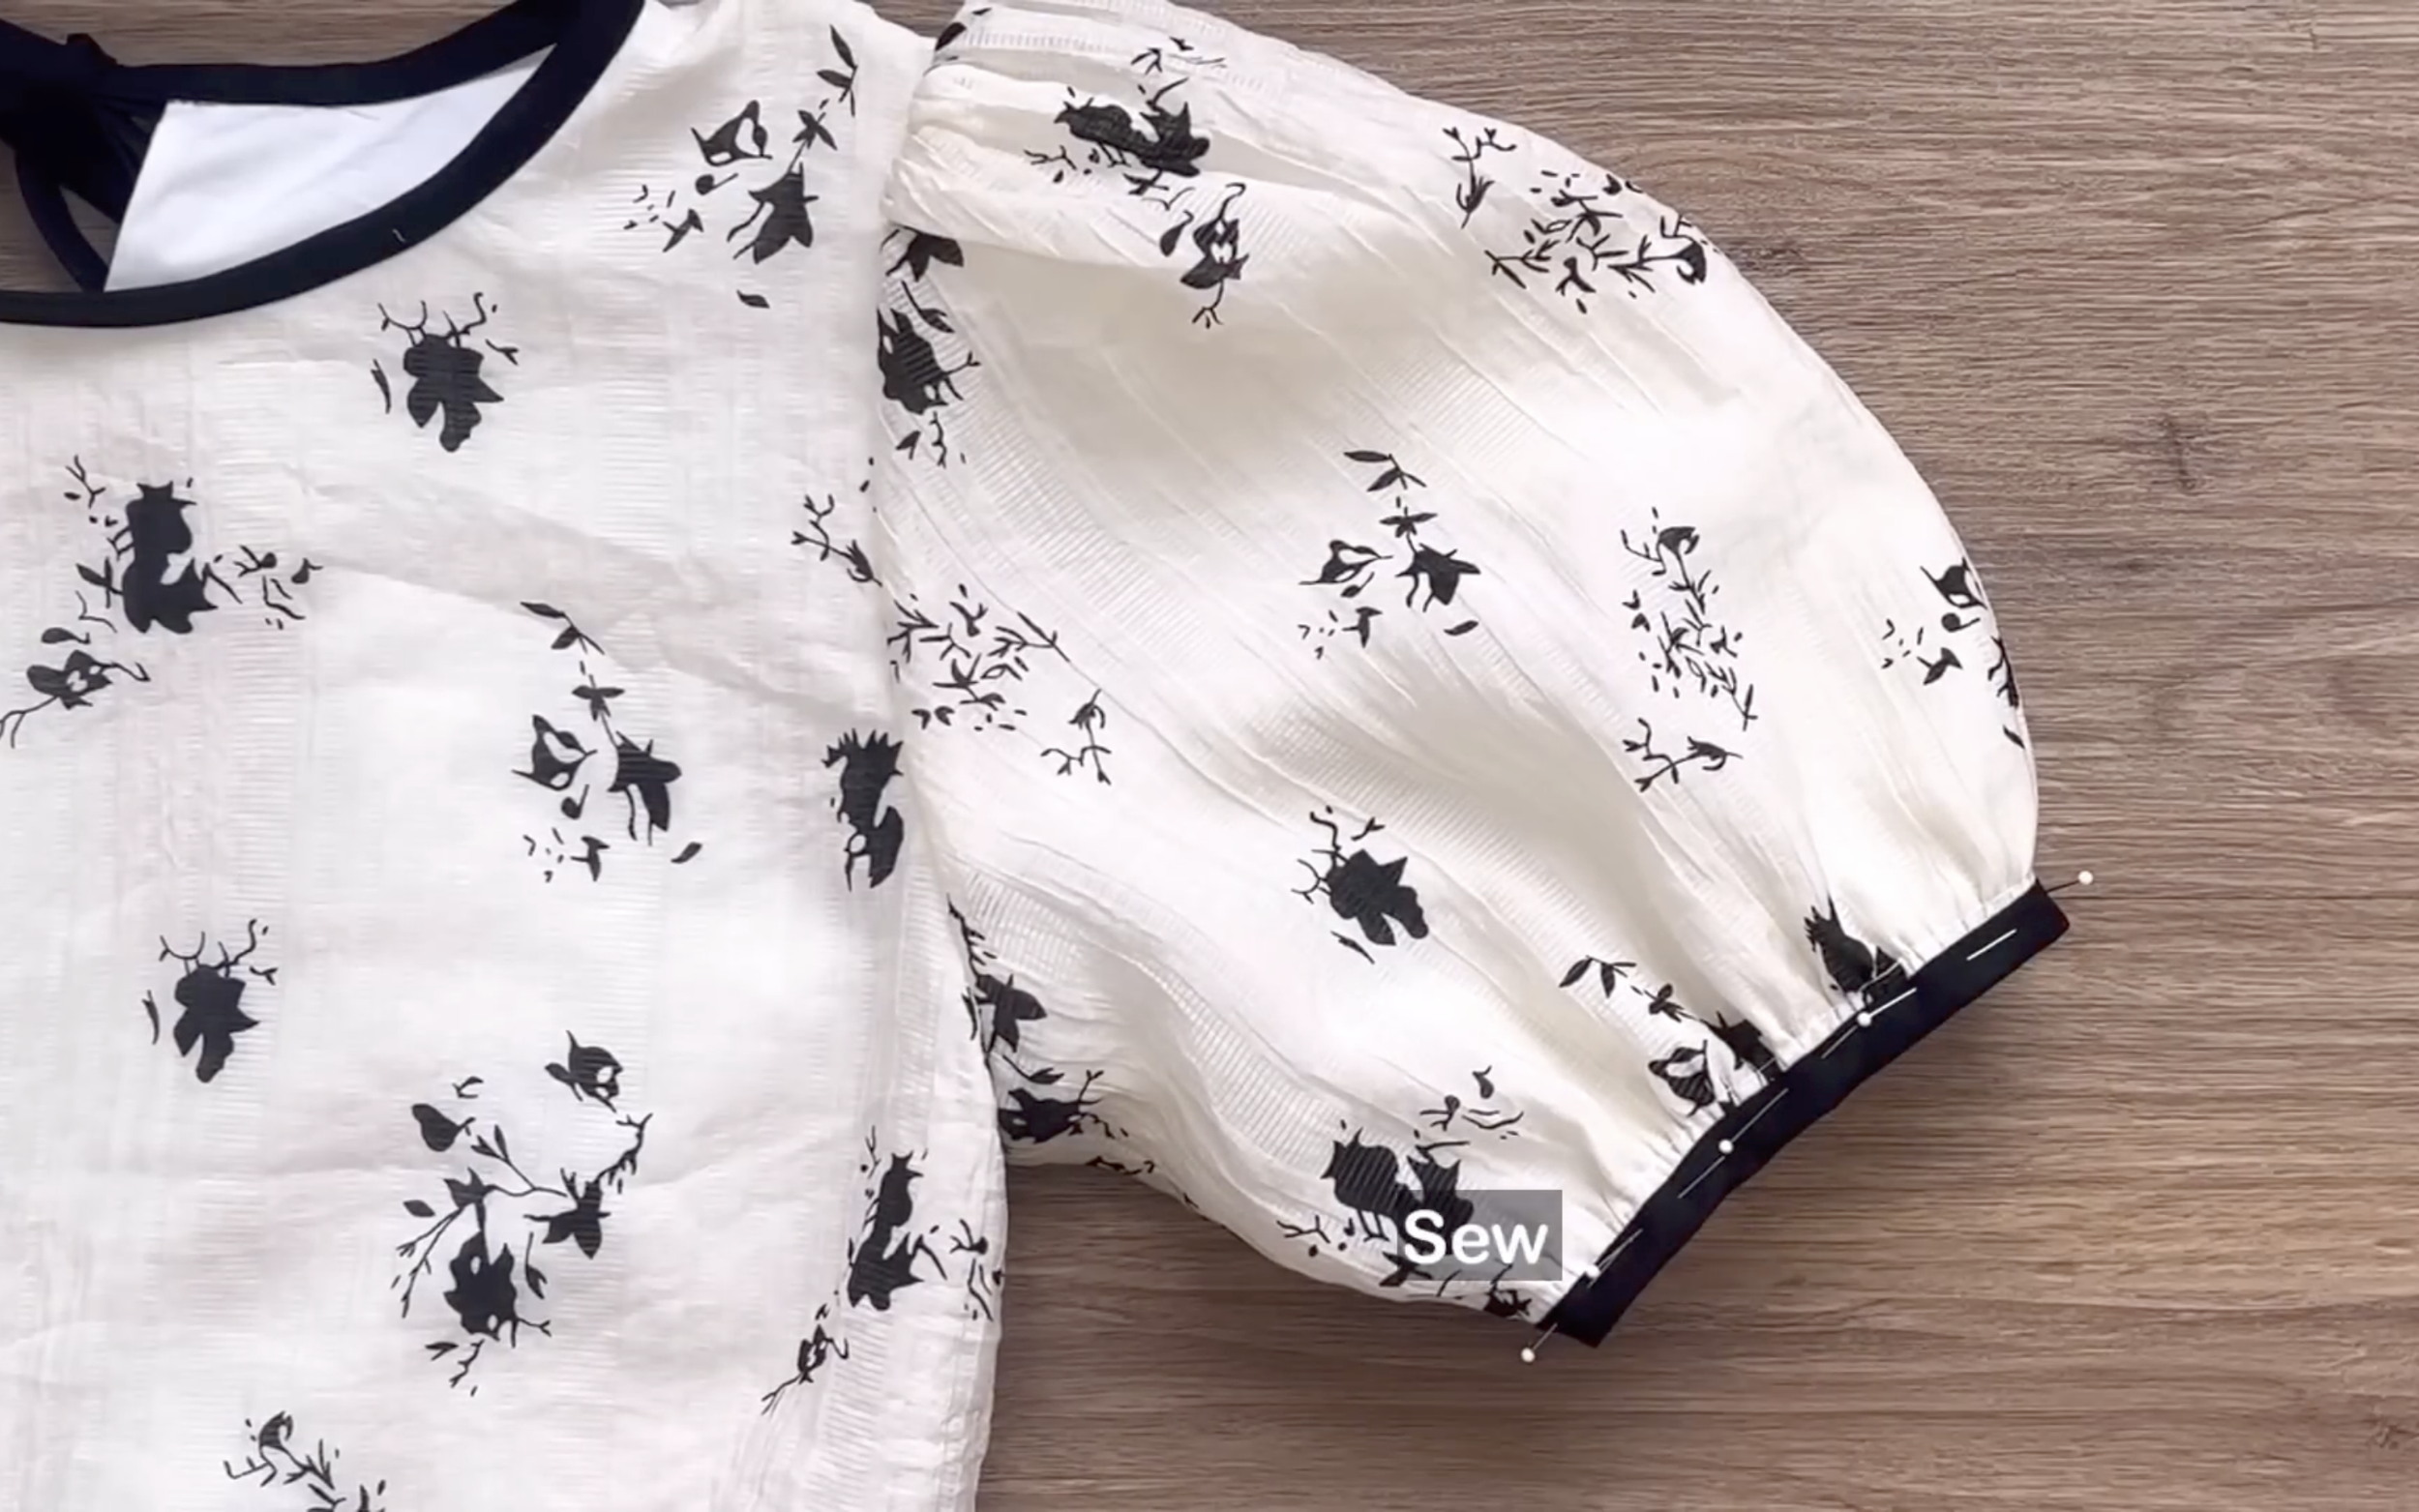
Then, finish the end of the sleeve in a similar way as the neckline by using the bias tab.
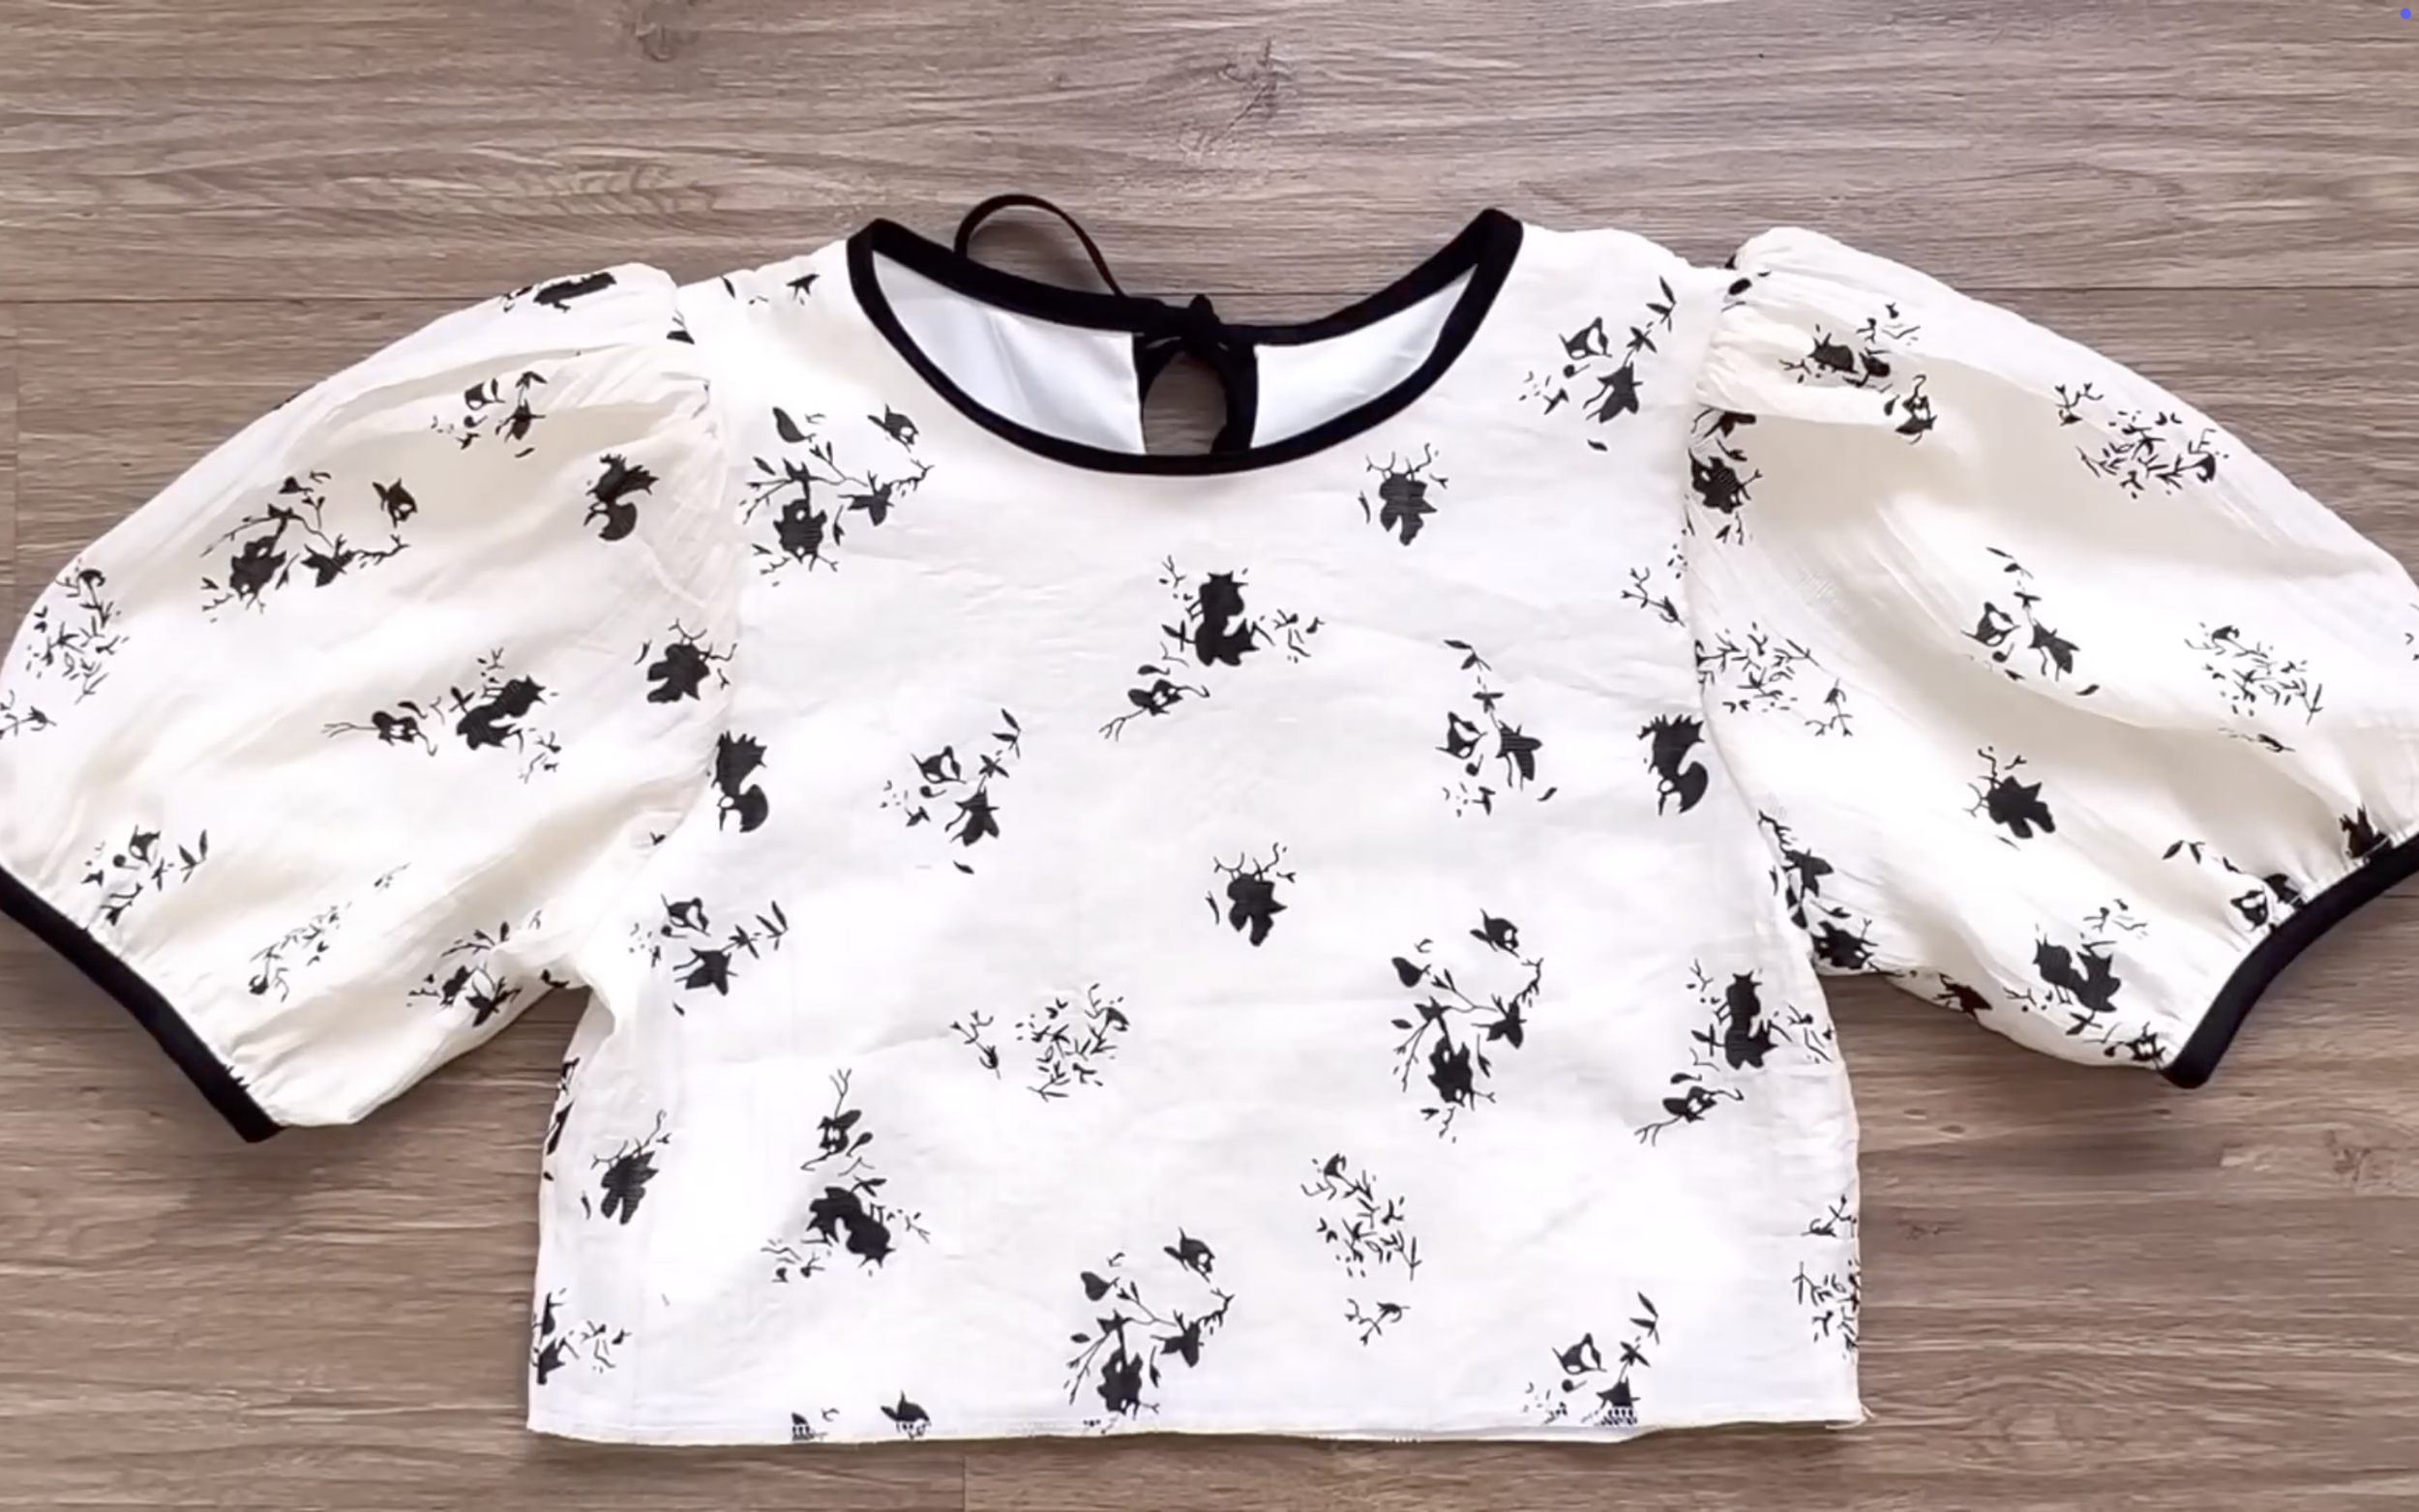
And that completes the top part of the dress.
THE SKIRT PART
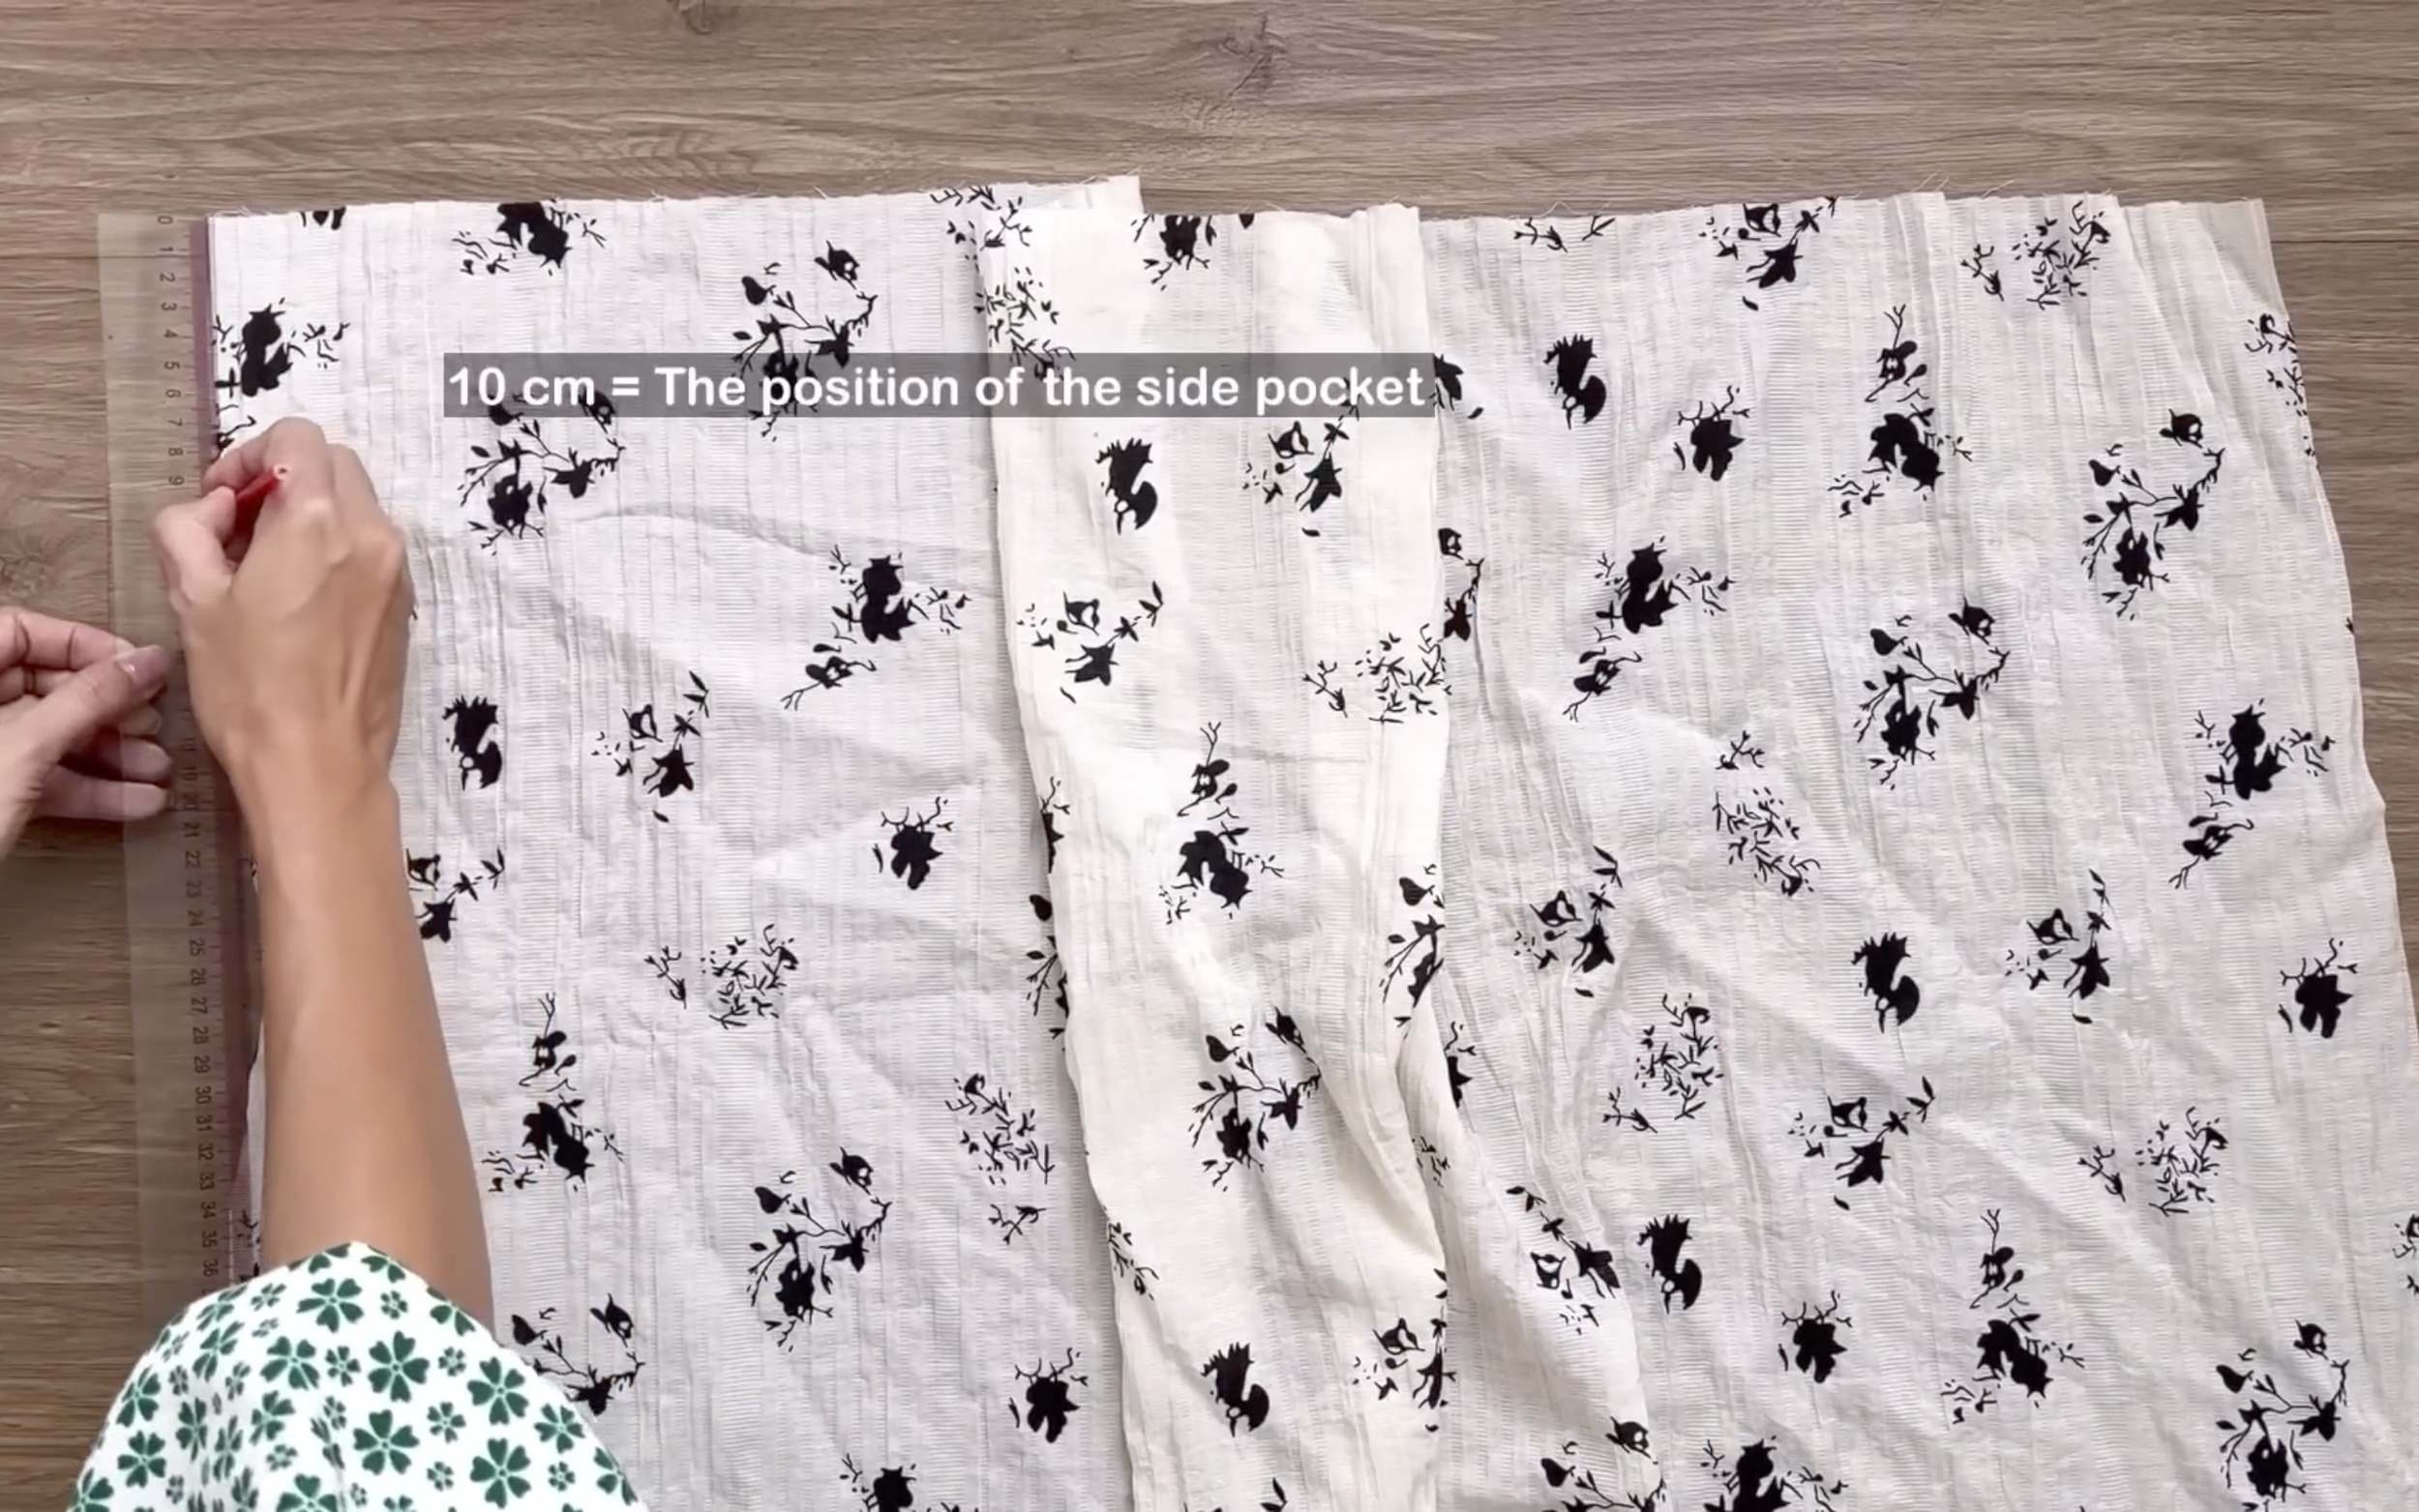
From the top of the rectangle, which is the top of the skirt, mark down 10 cm on the side of the rectangle.
This will be the position for the pocket.
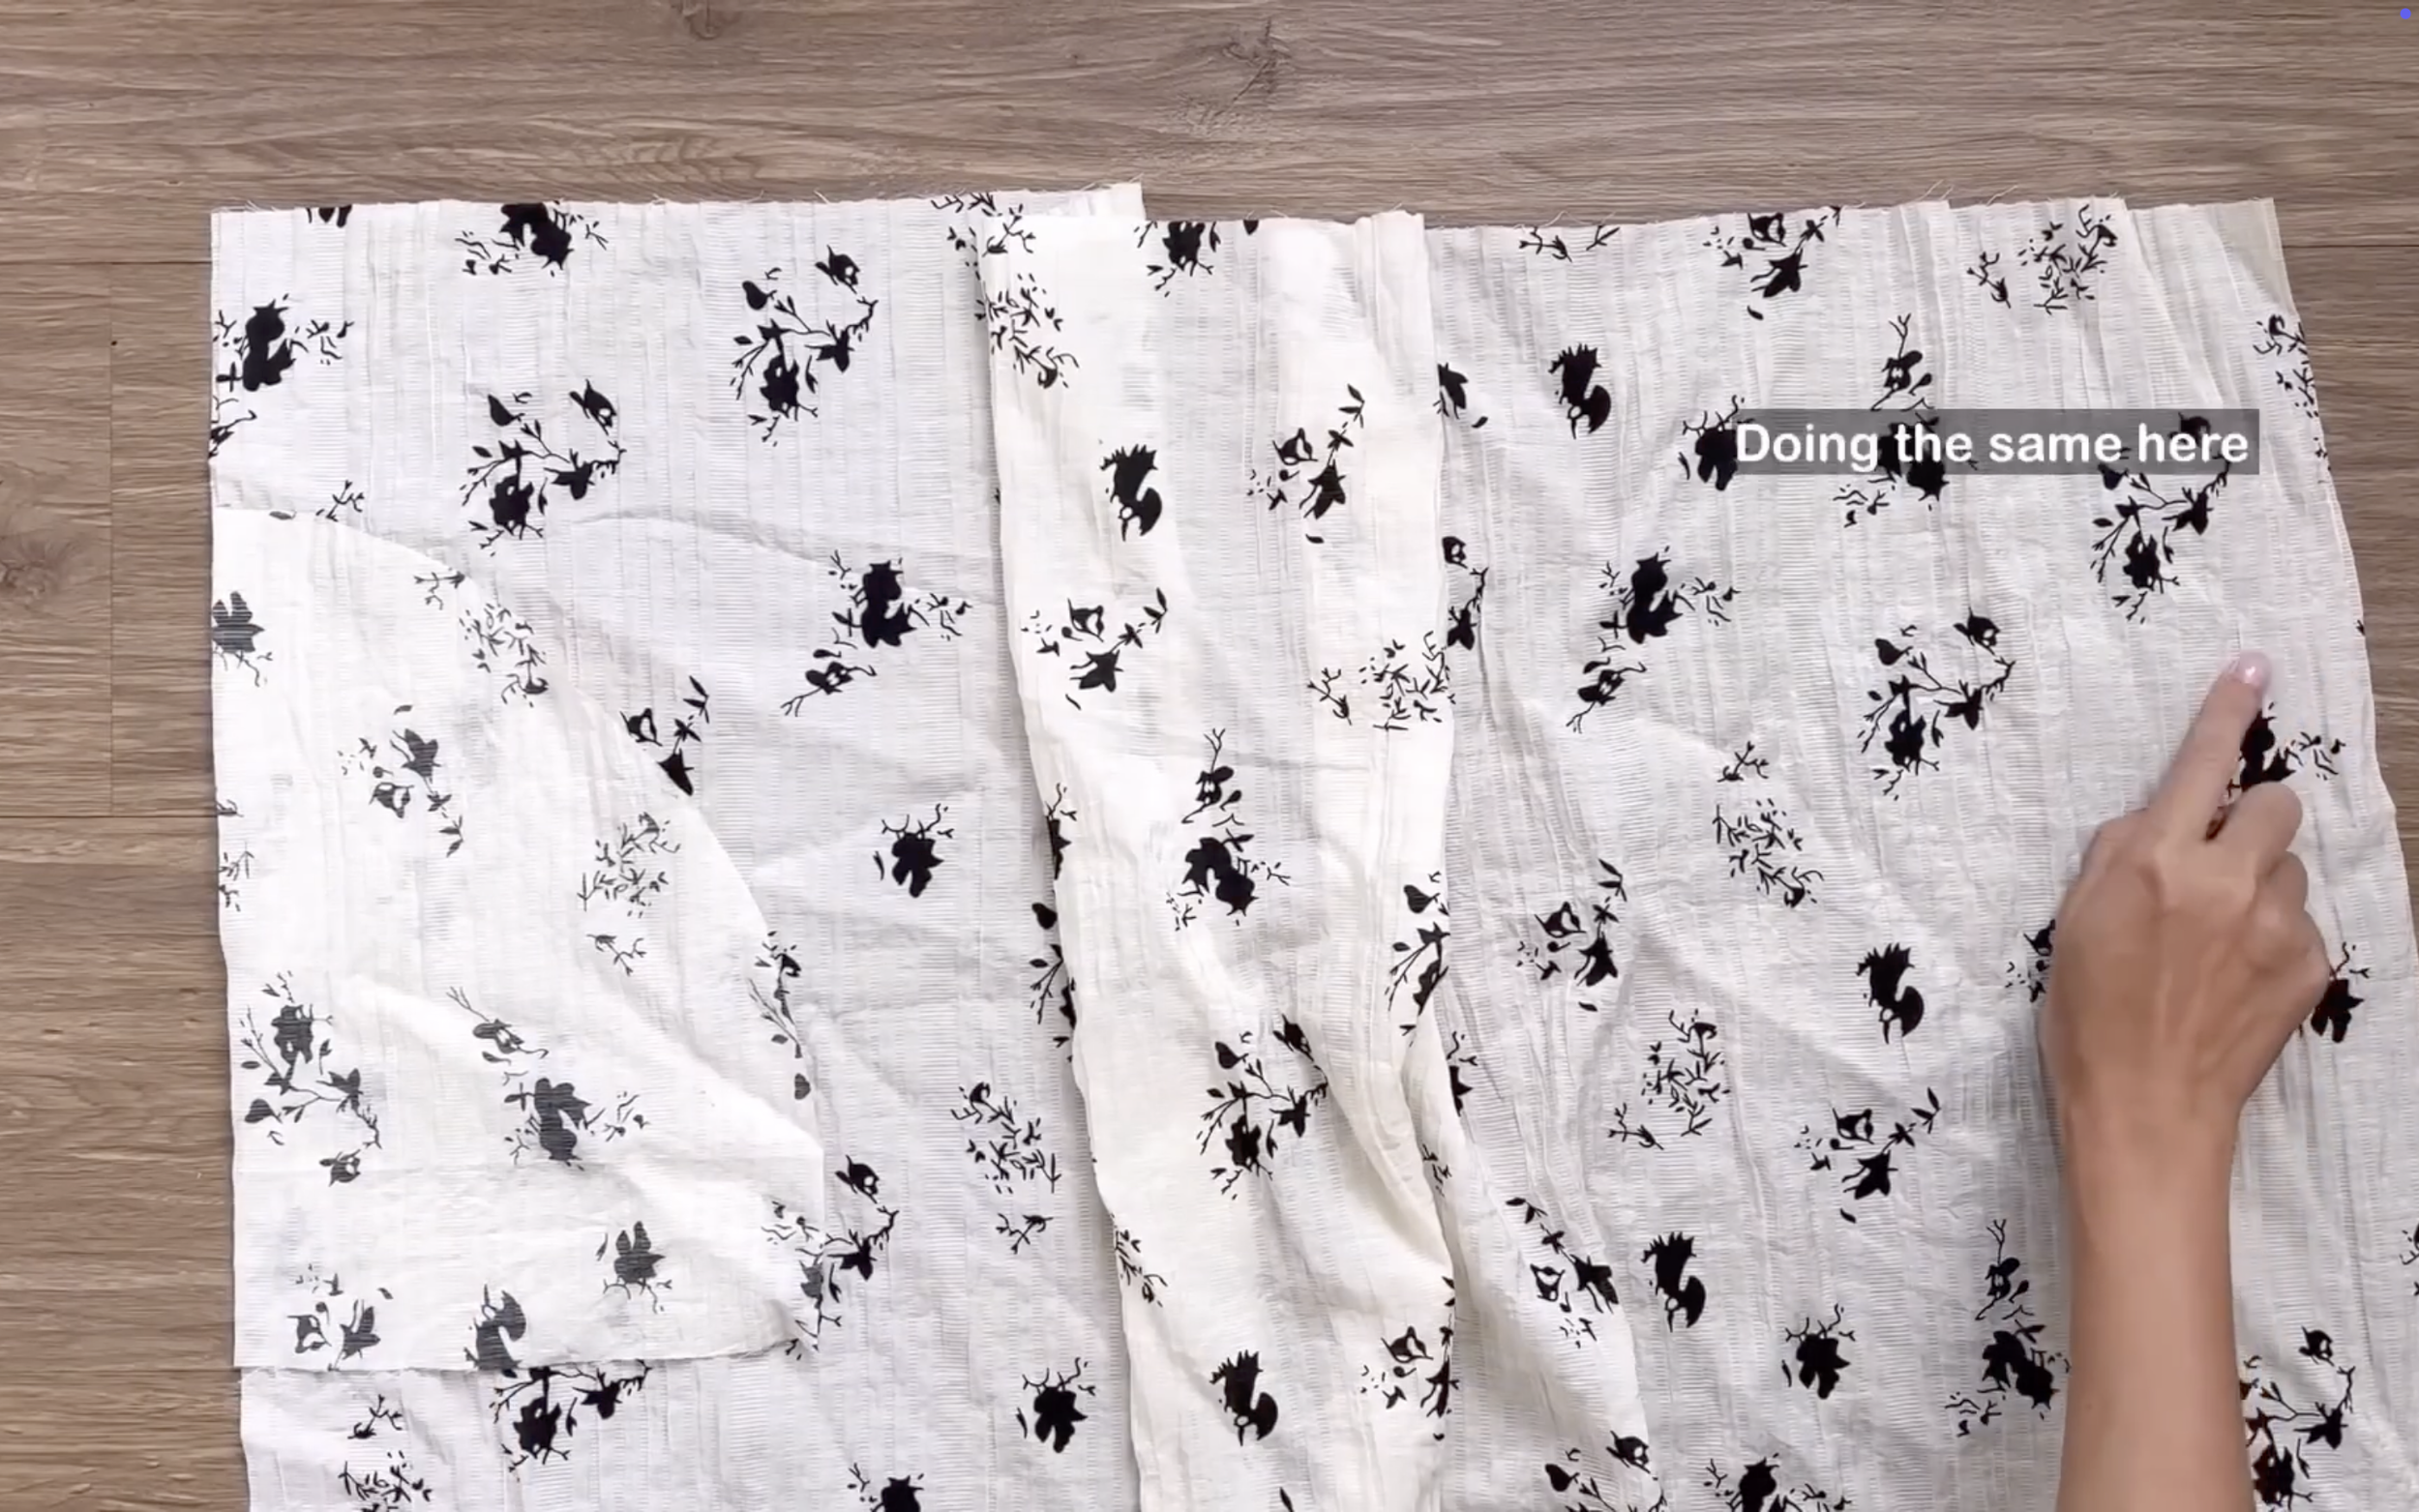
Then, add the pocket there later.
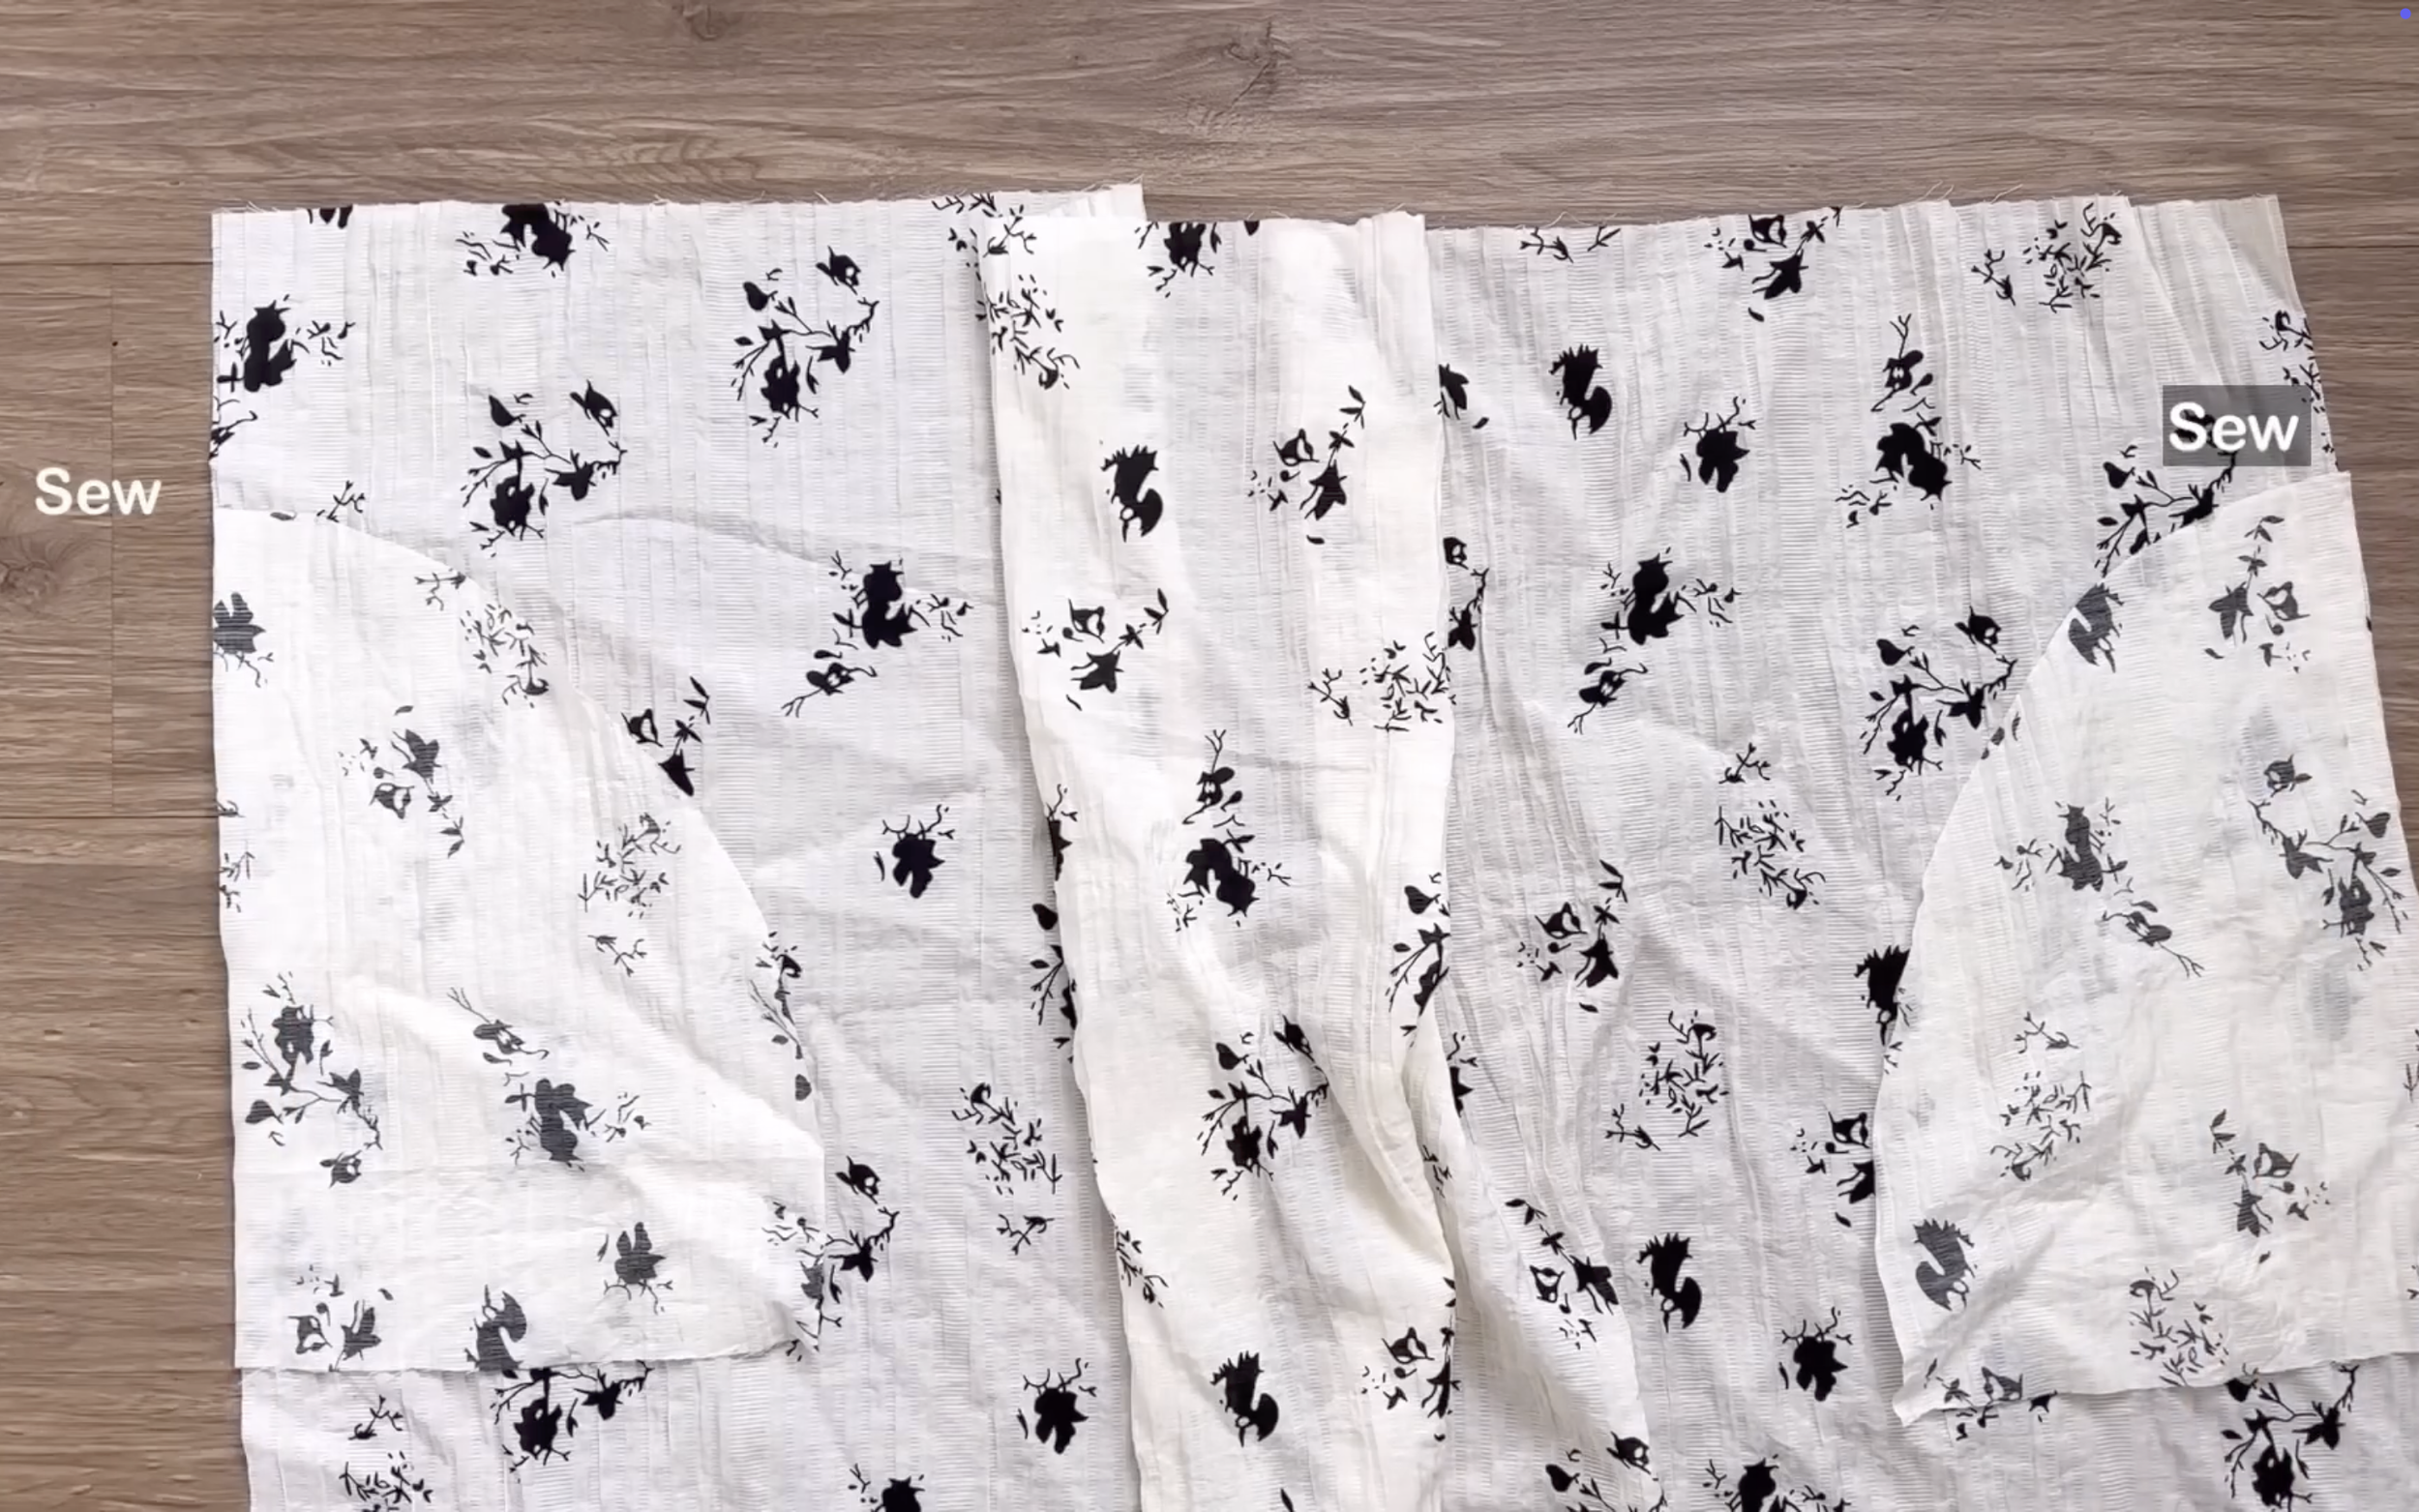
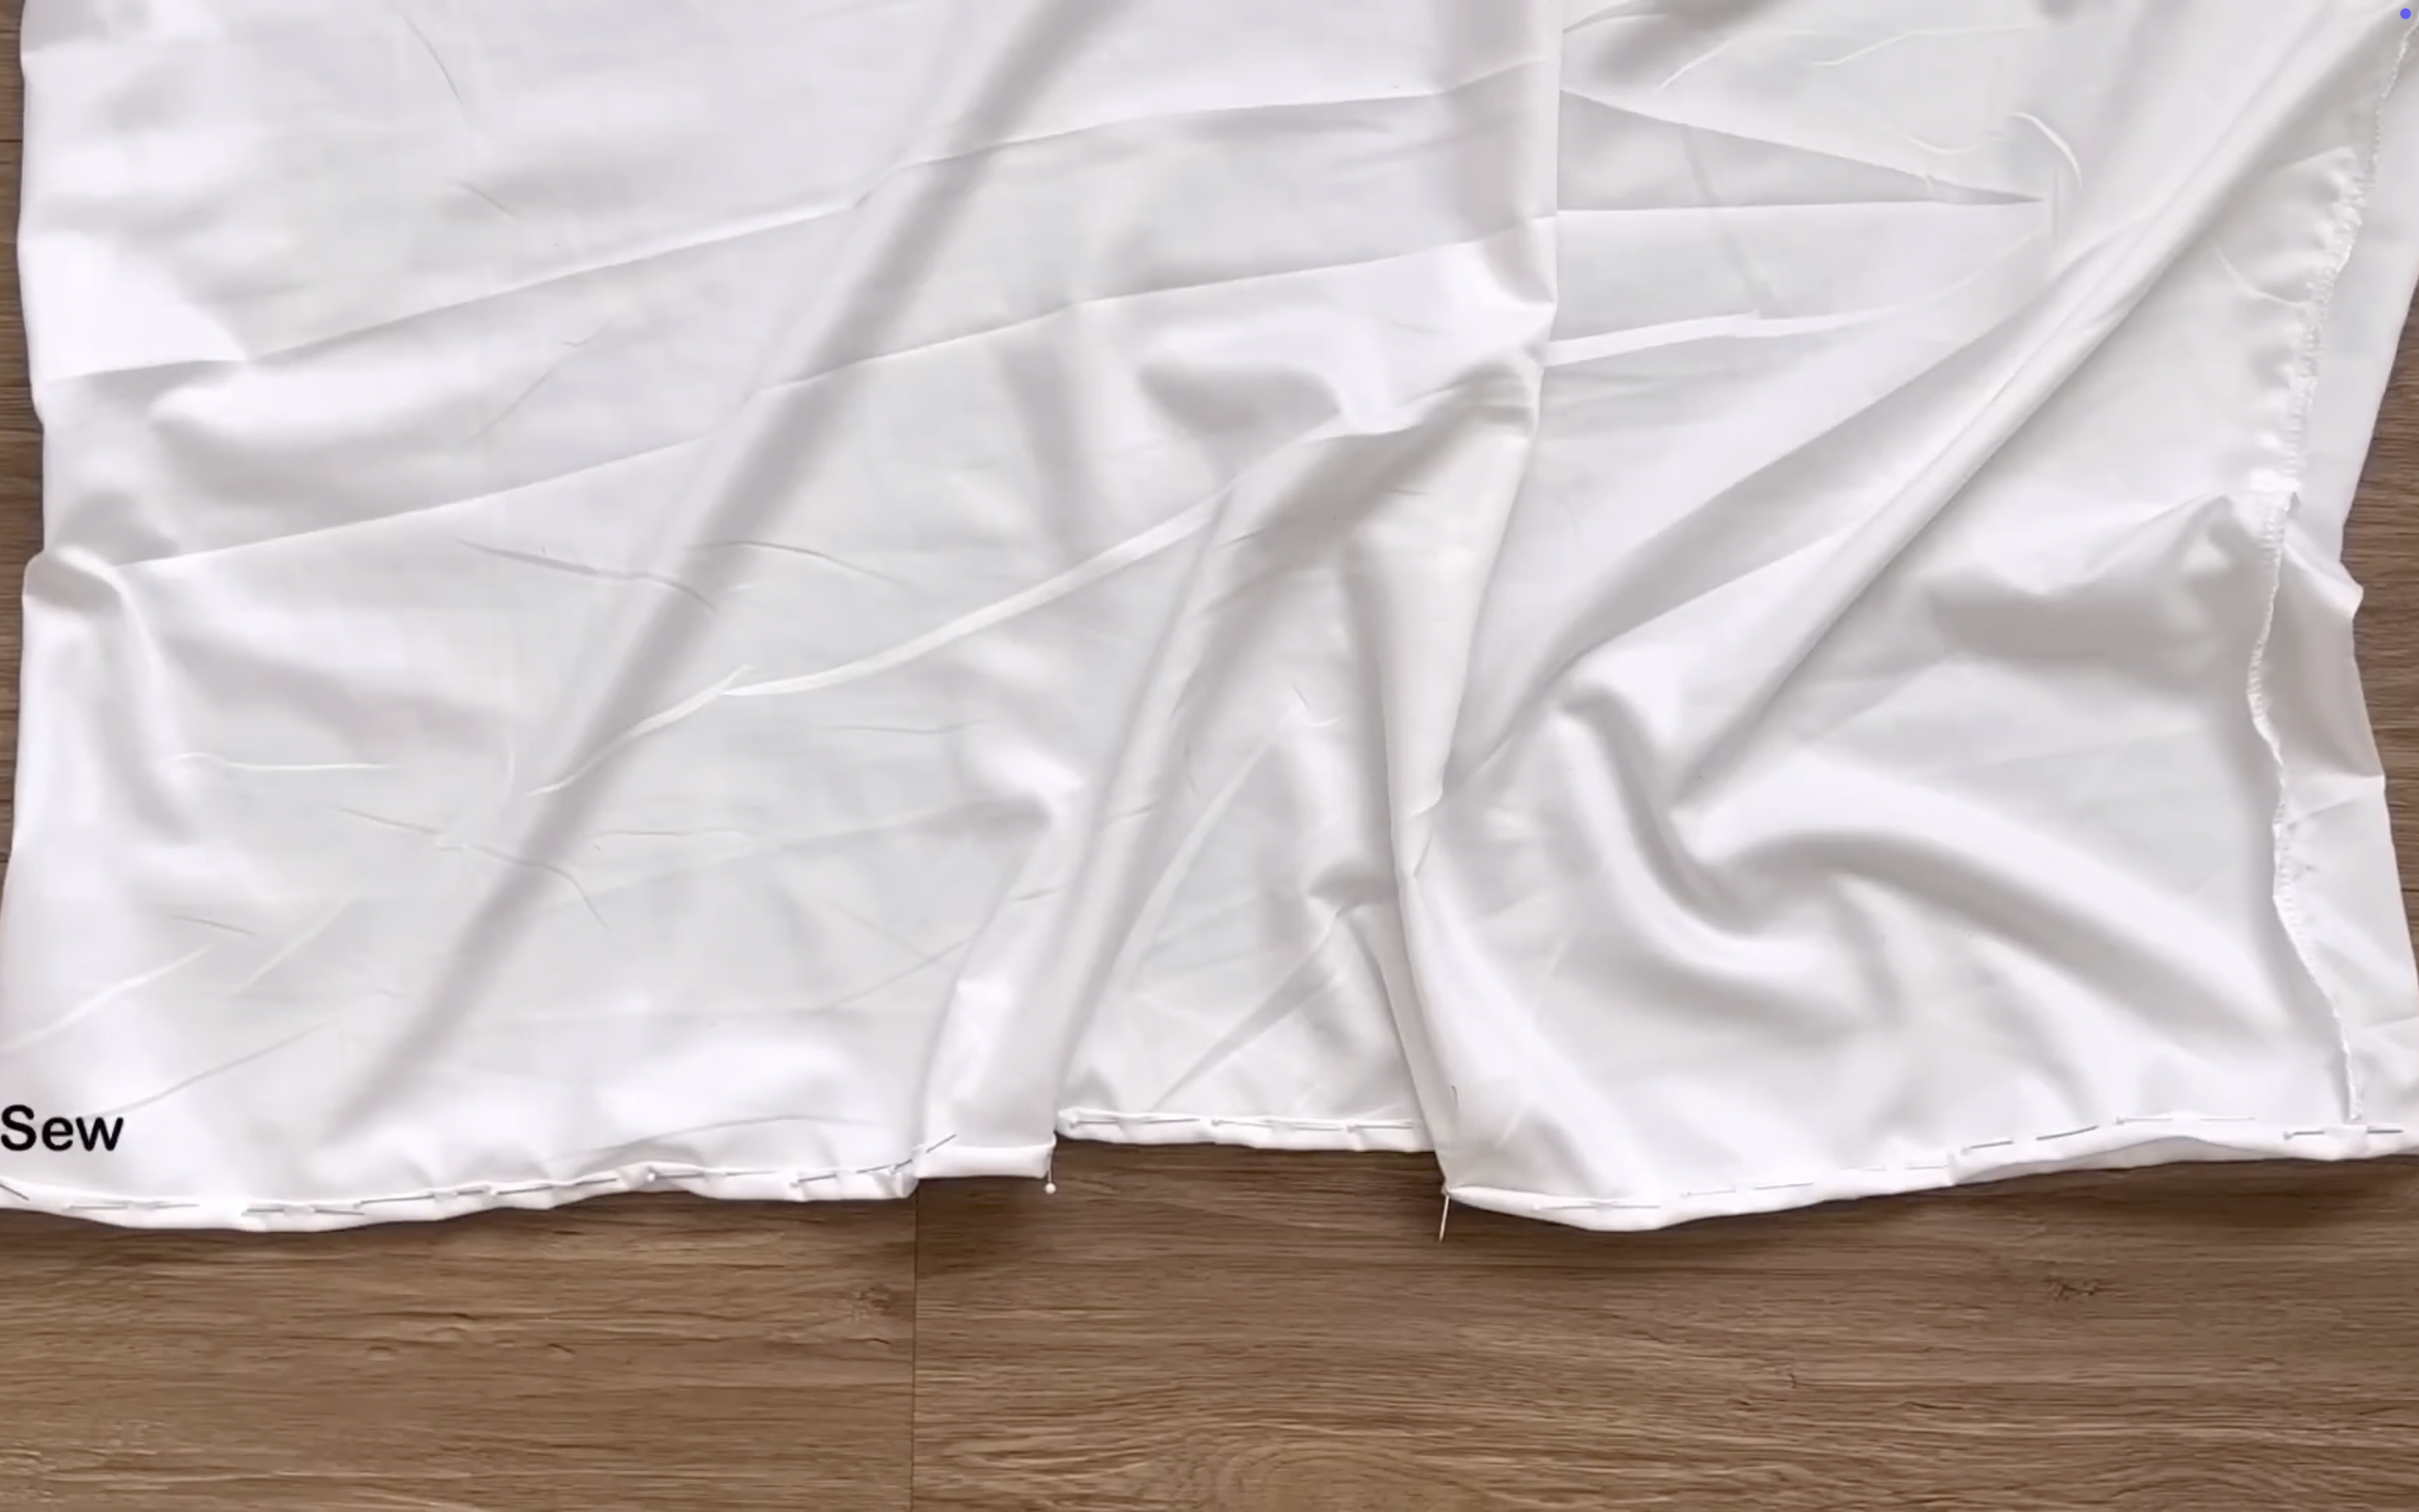
Do the same for the other side and sew.
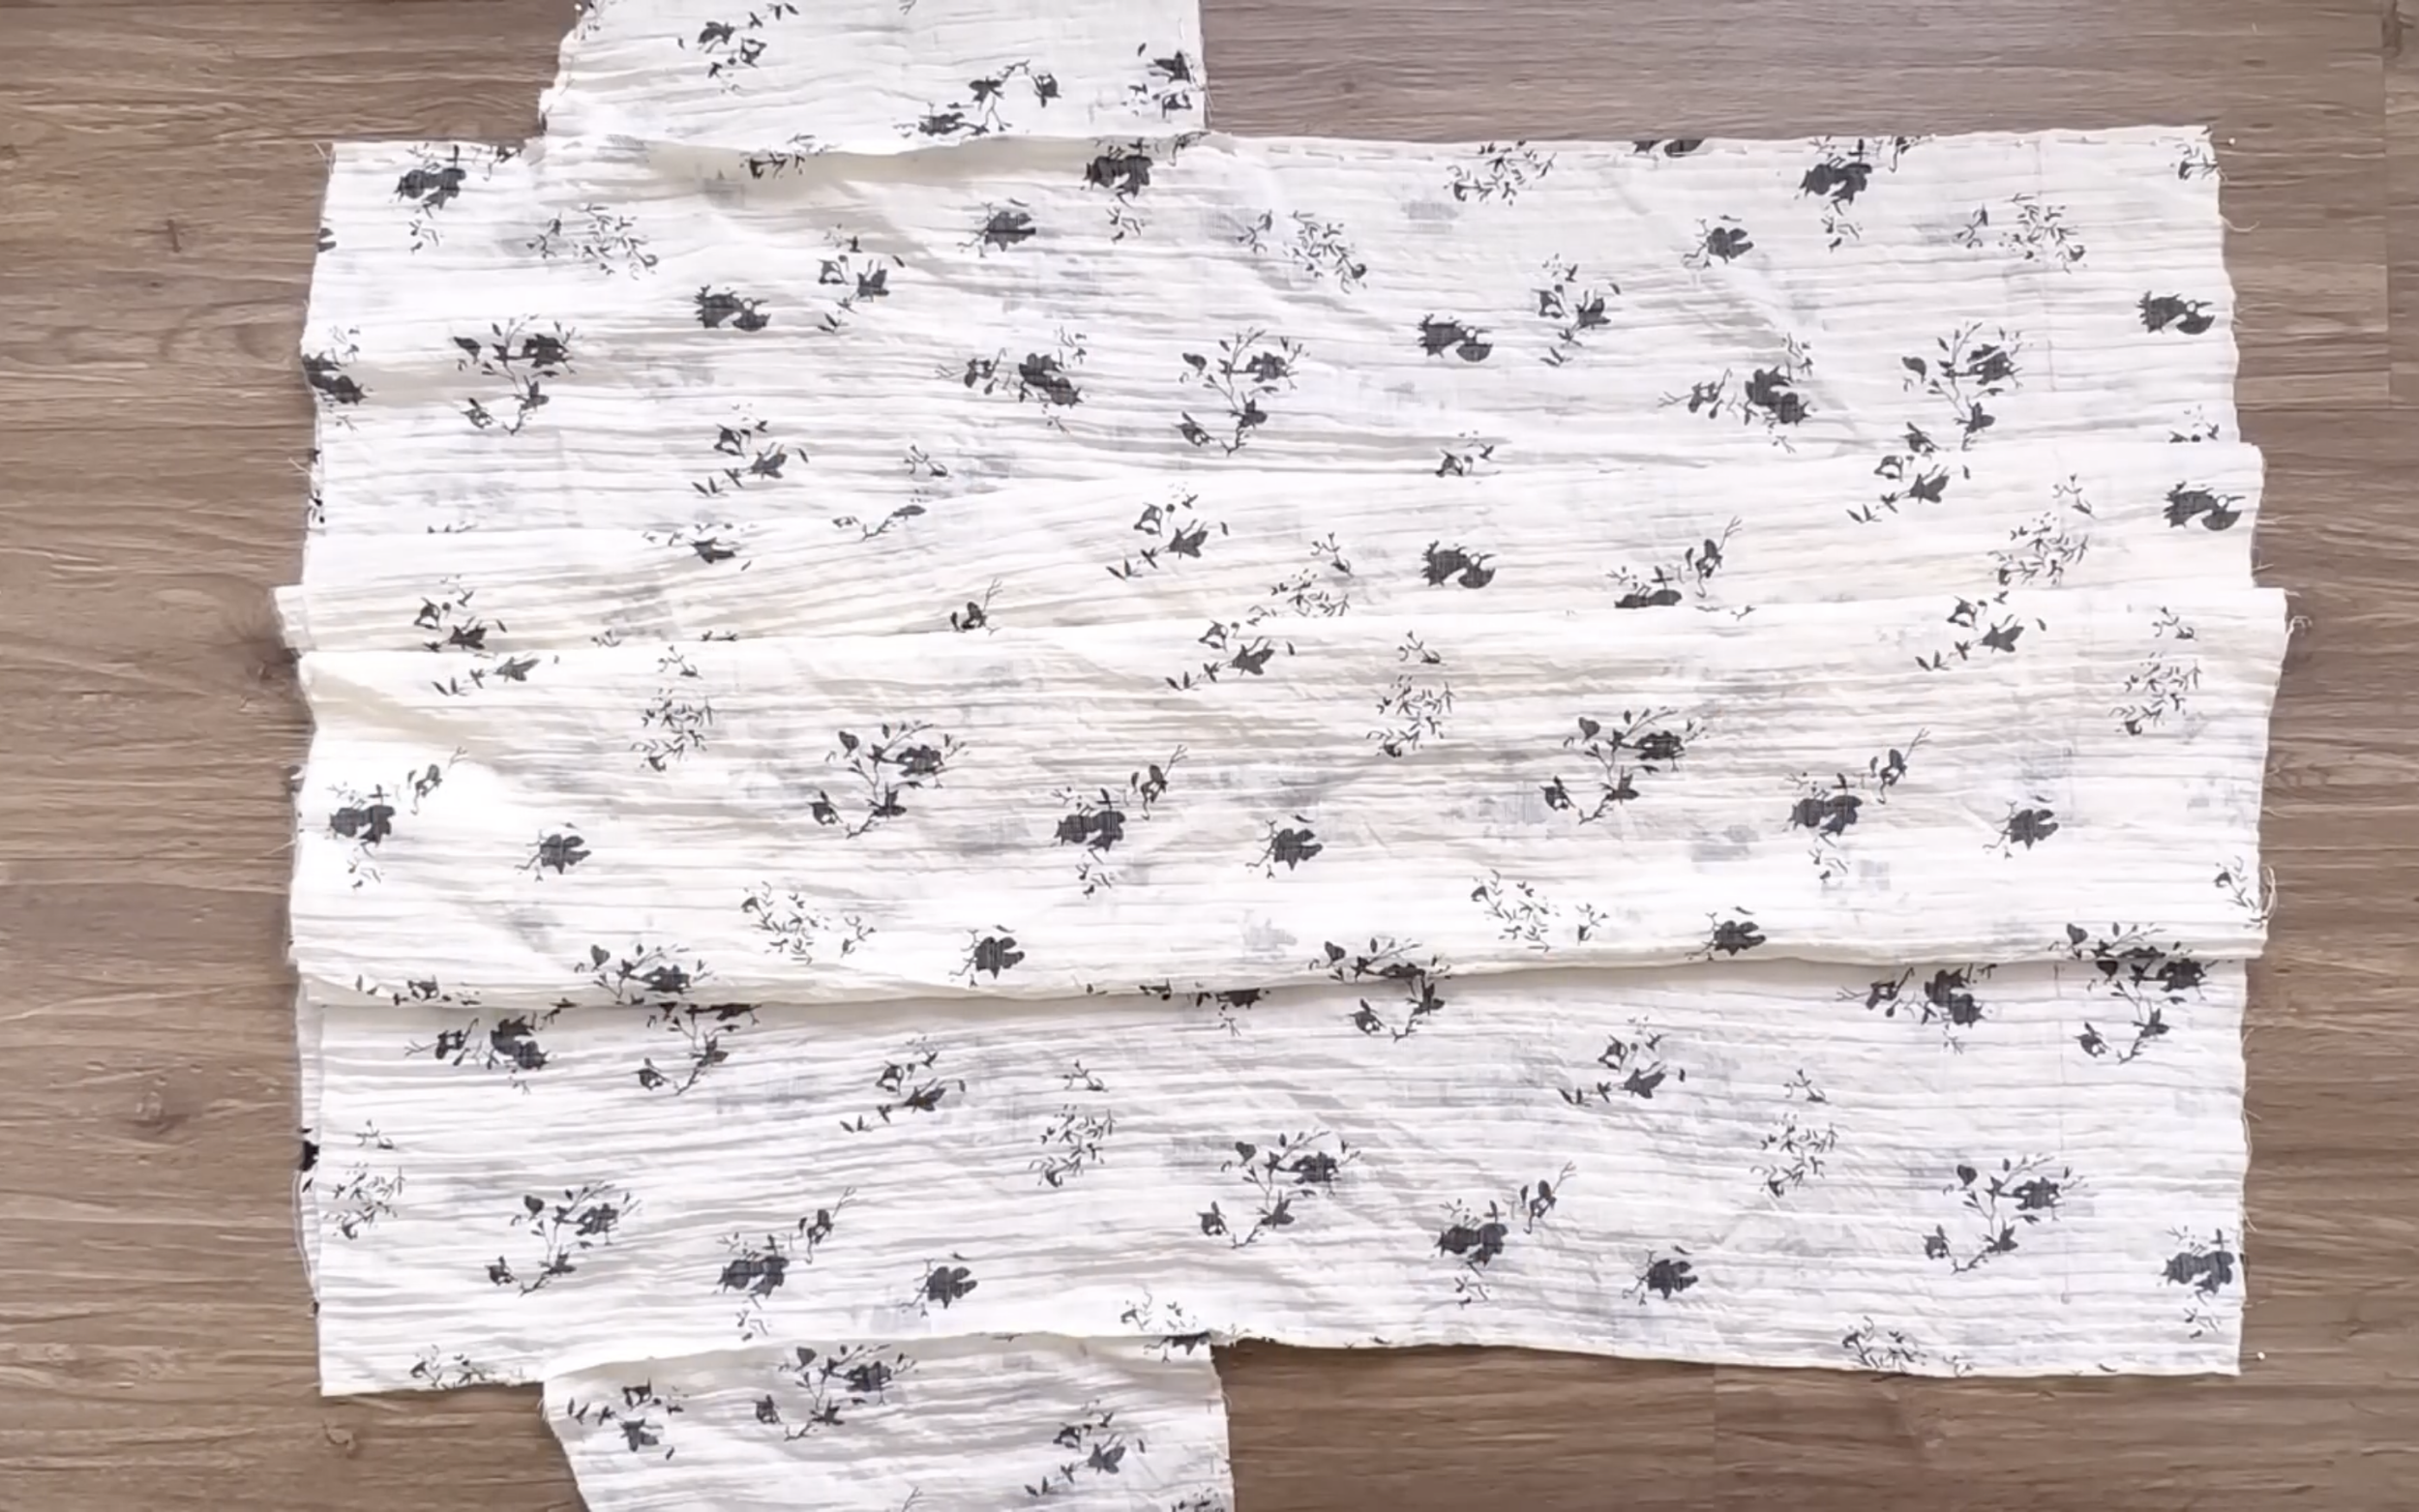
Do the same for the other piece of the skirt, then connect two pieces together at two sidelines and sew.
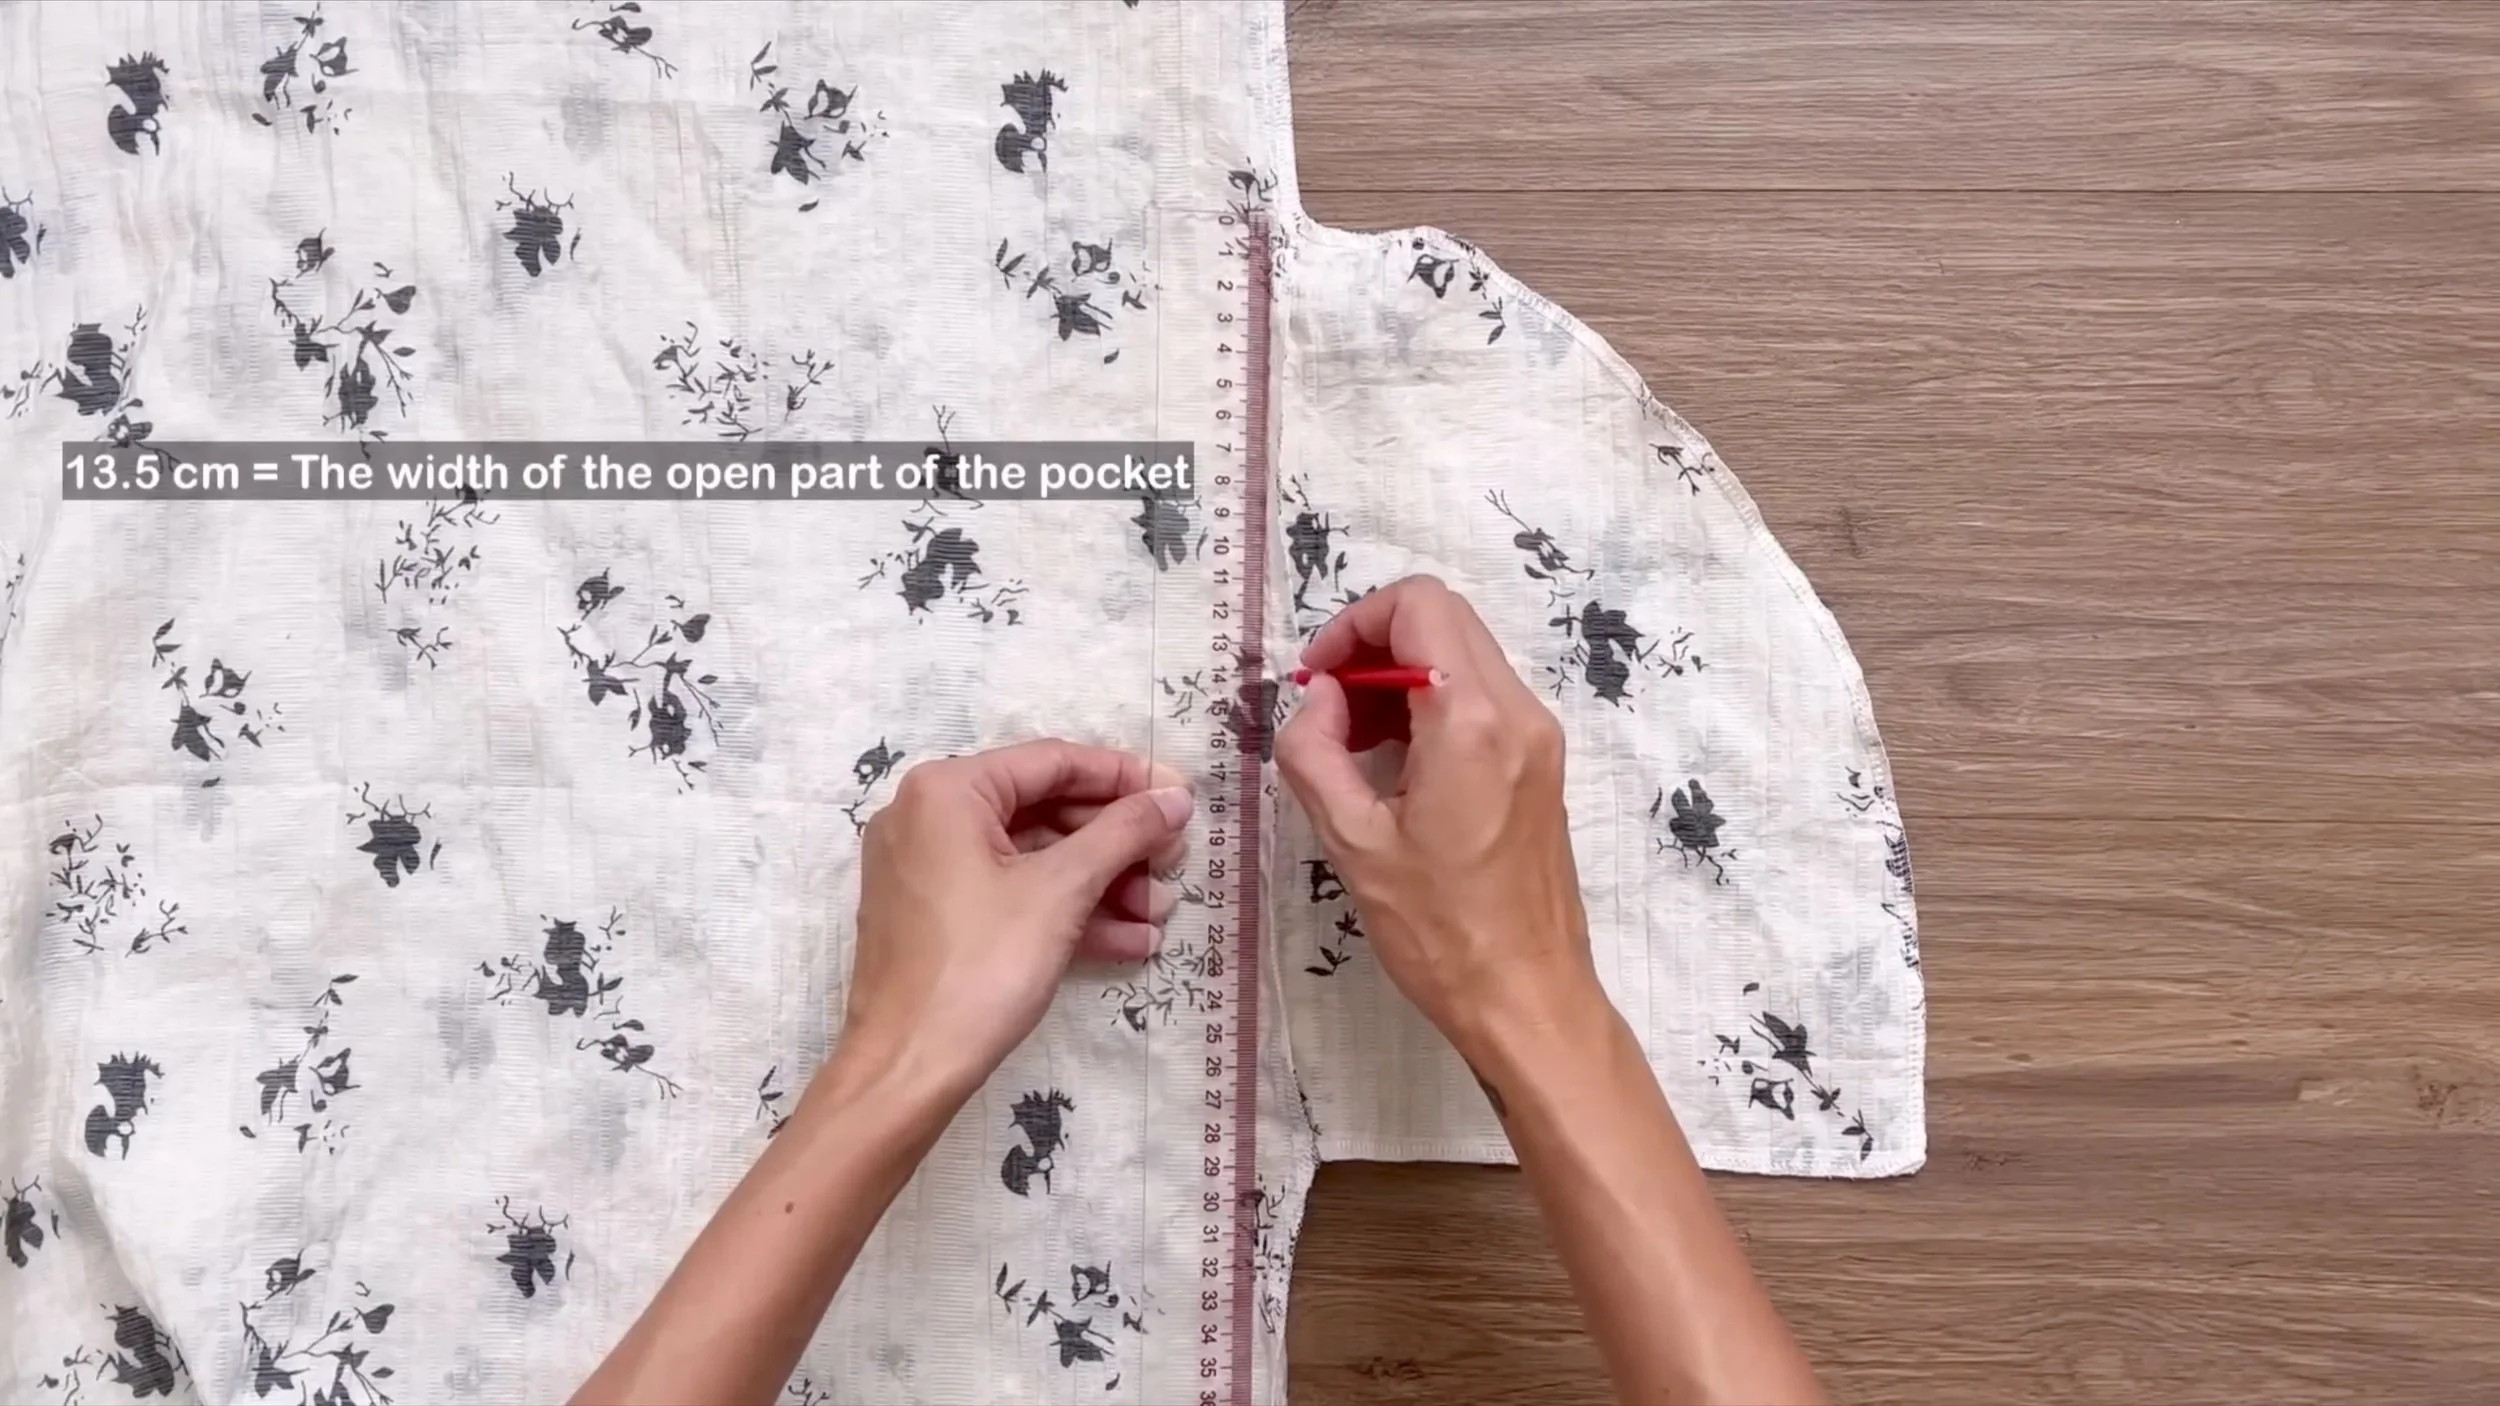
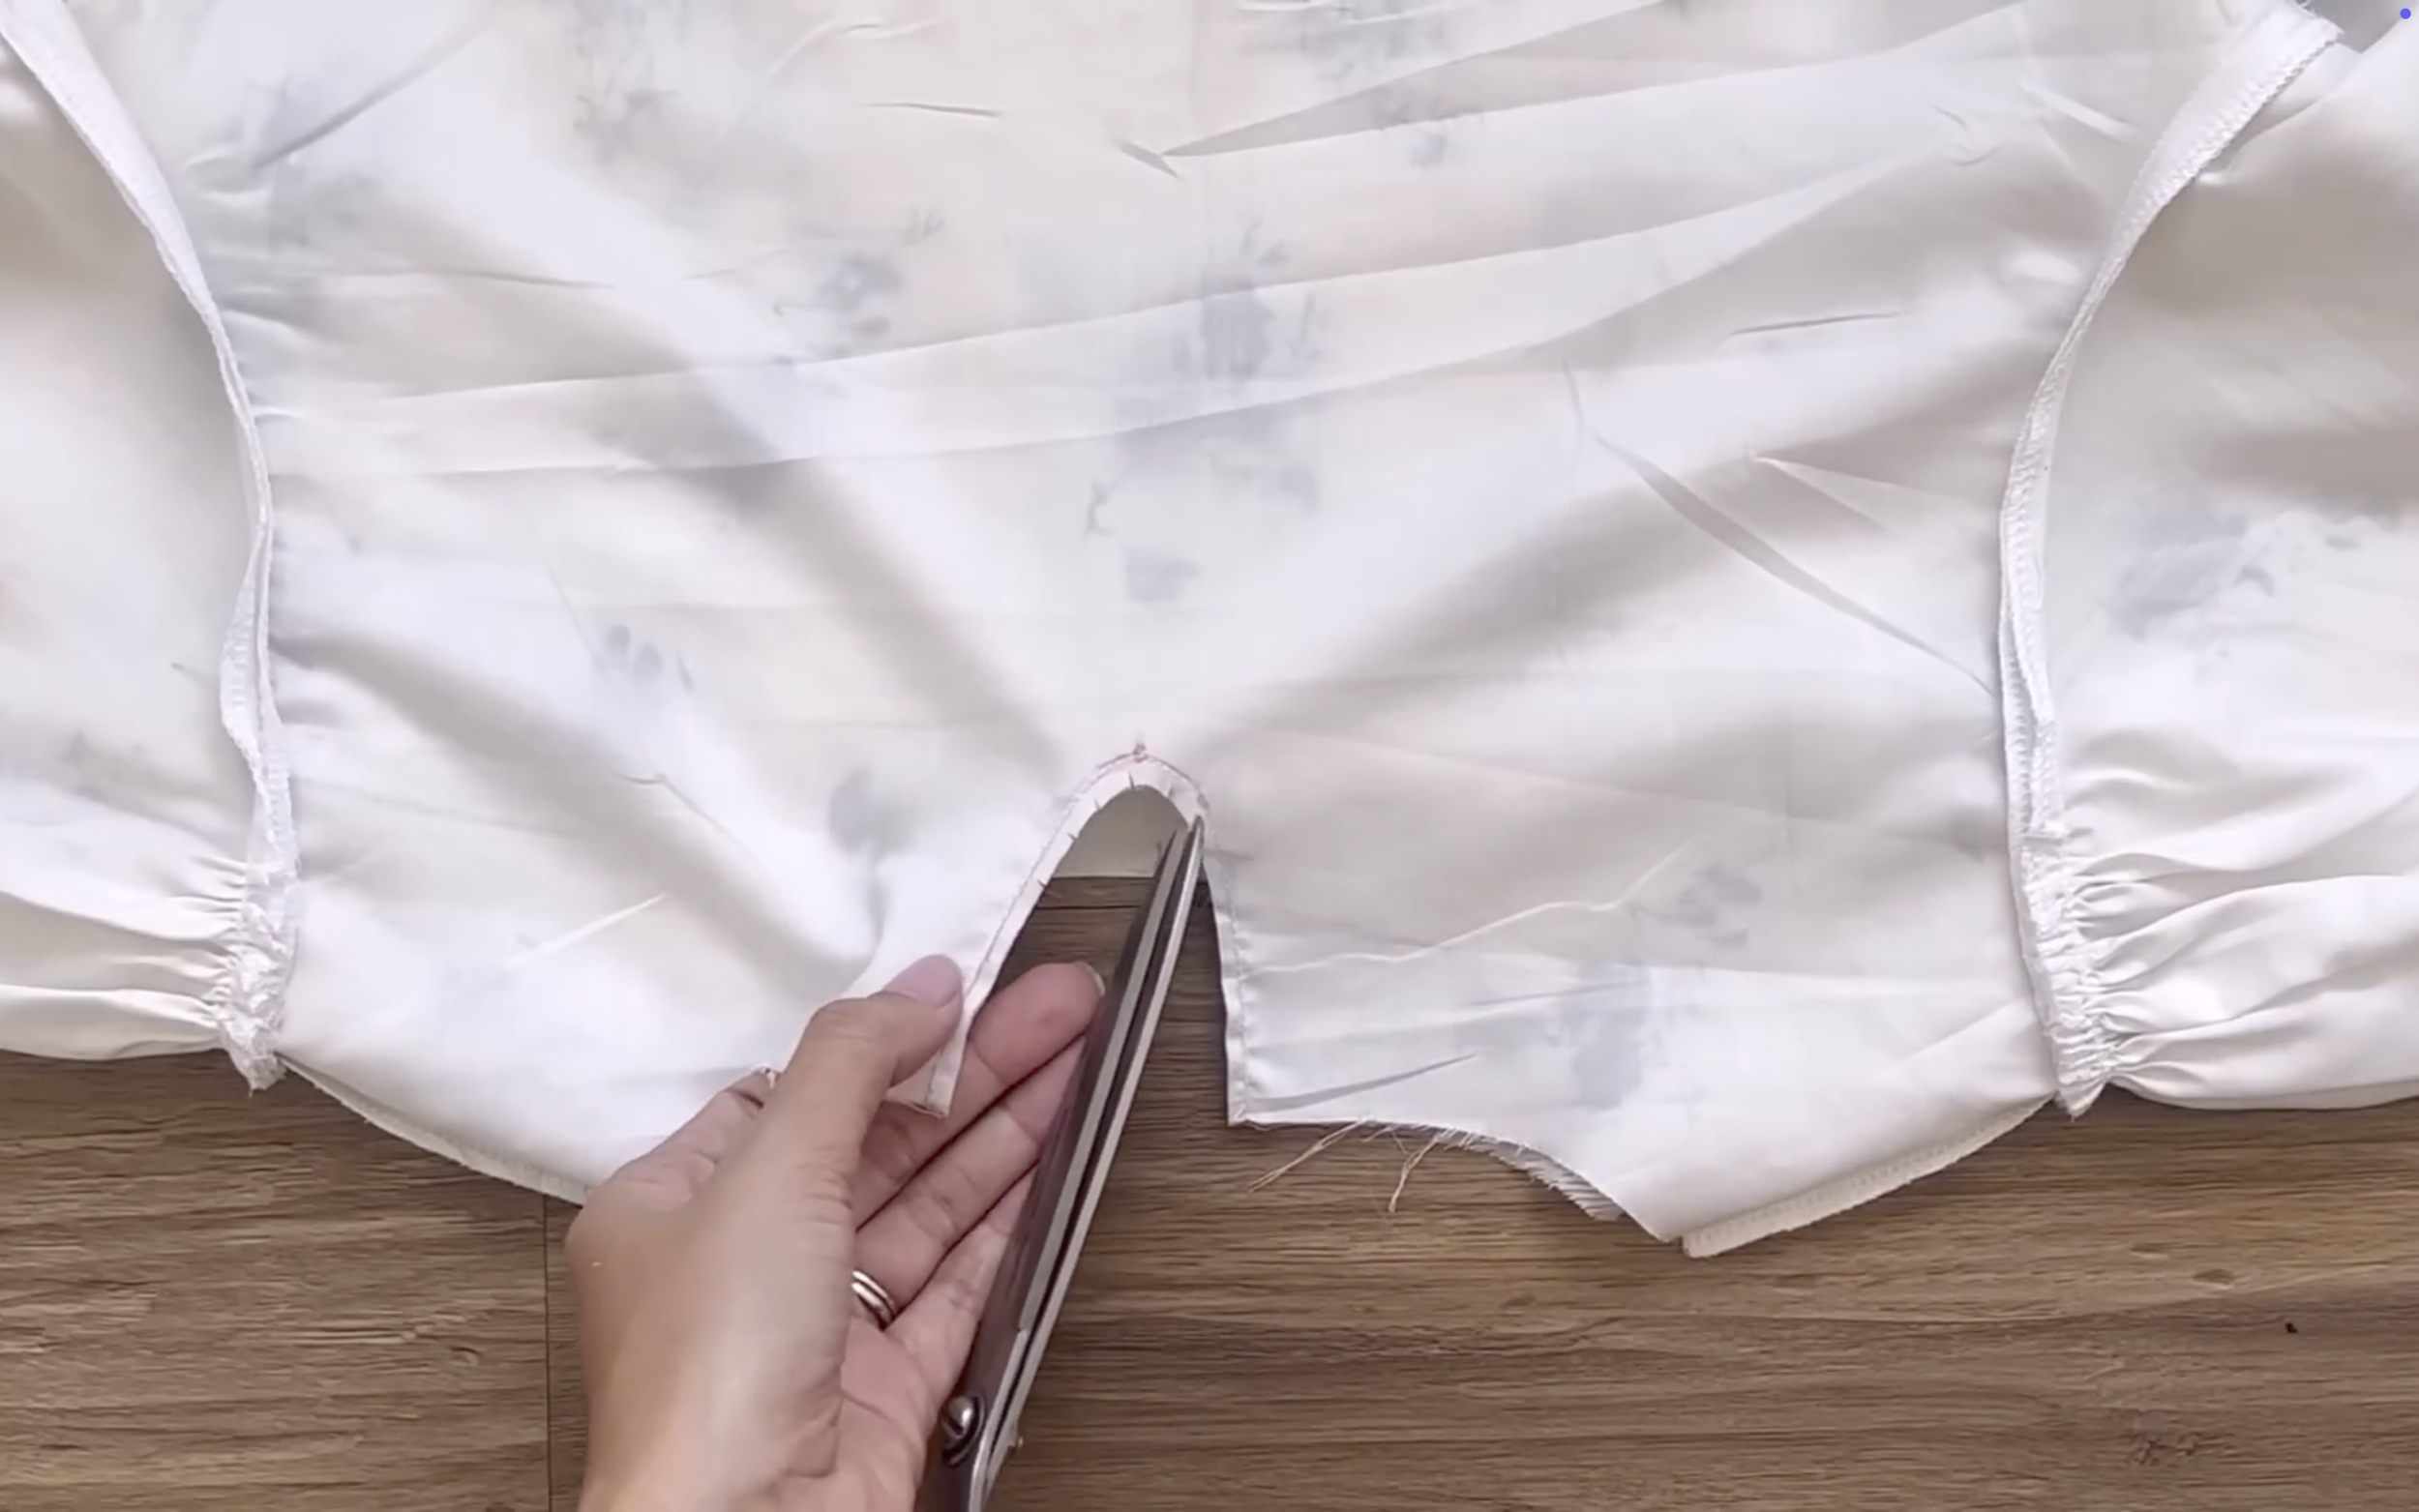
From the top of the pocket, mark down 13.5 cm. This is the width of the open part of the pocket where a hand can be put in.
Then, sew the rest together.
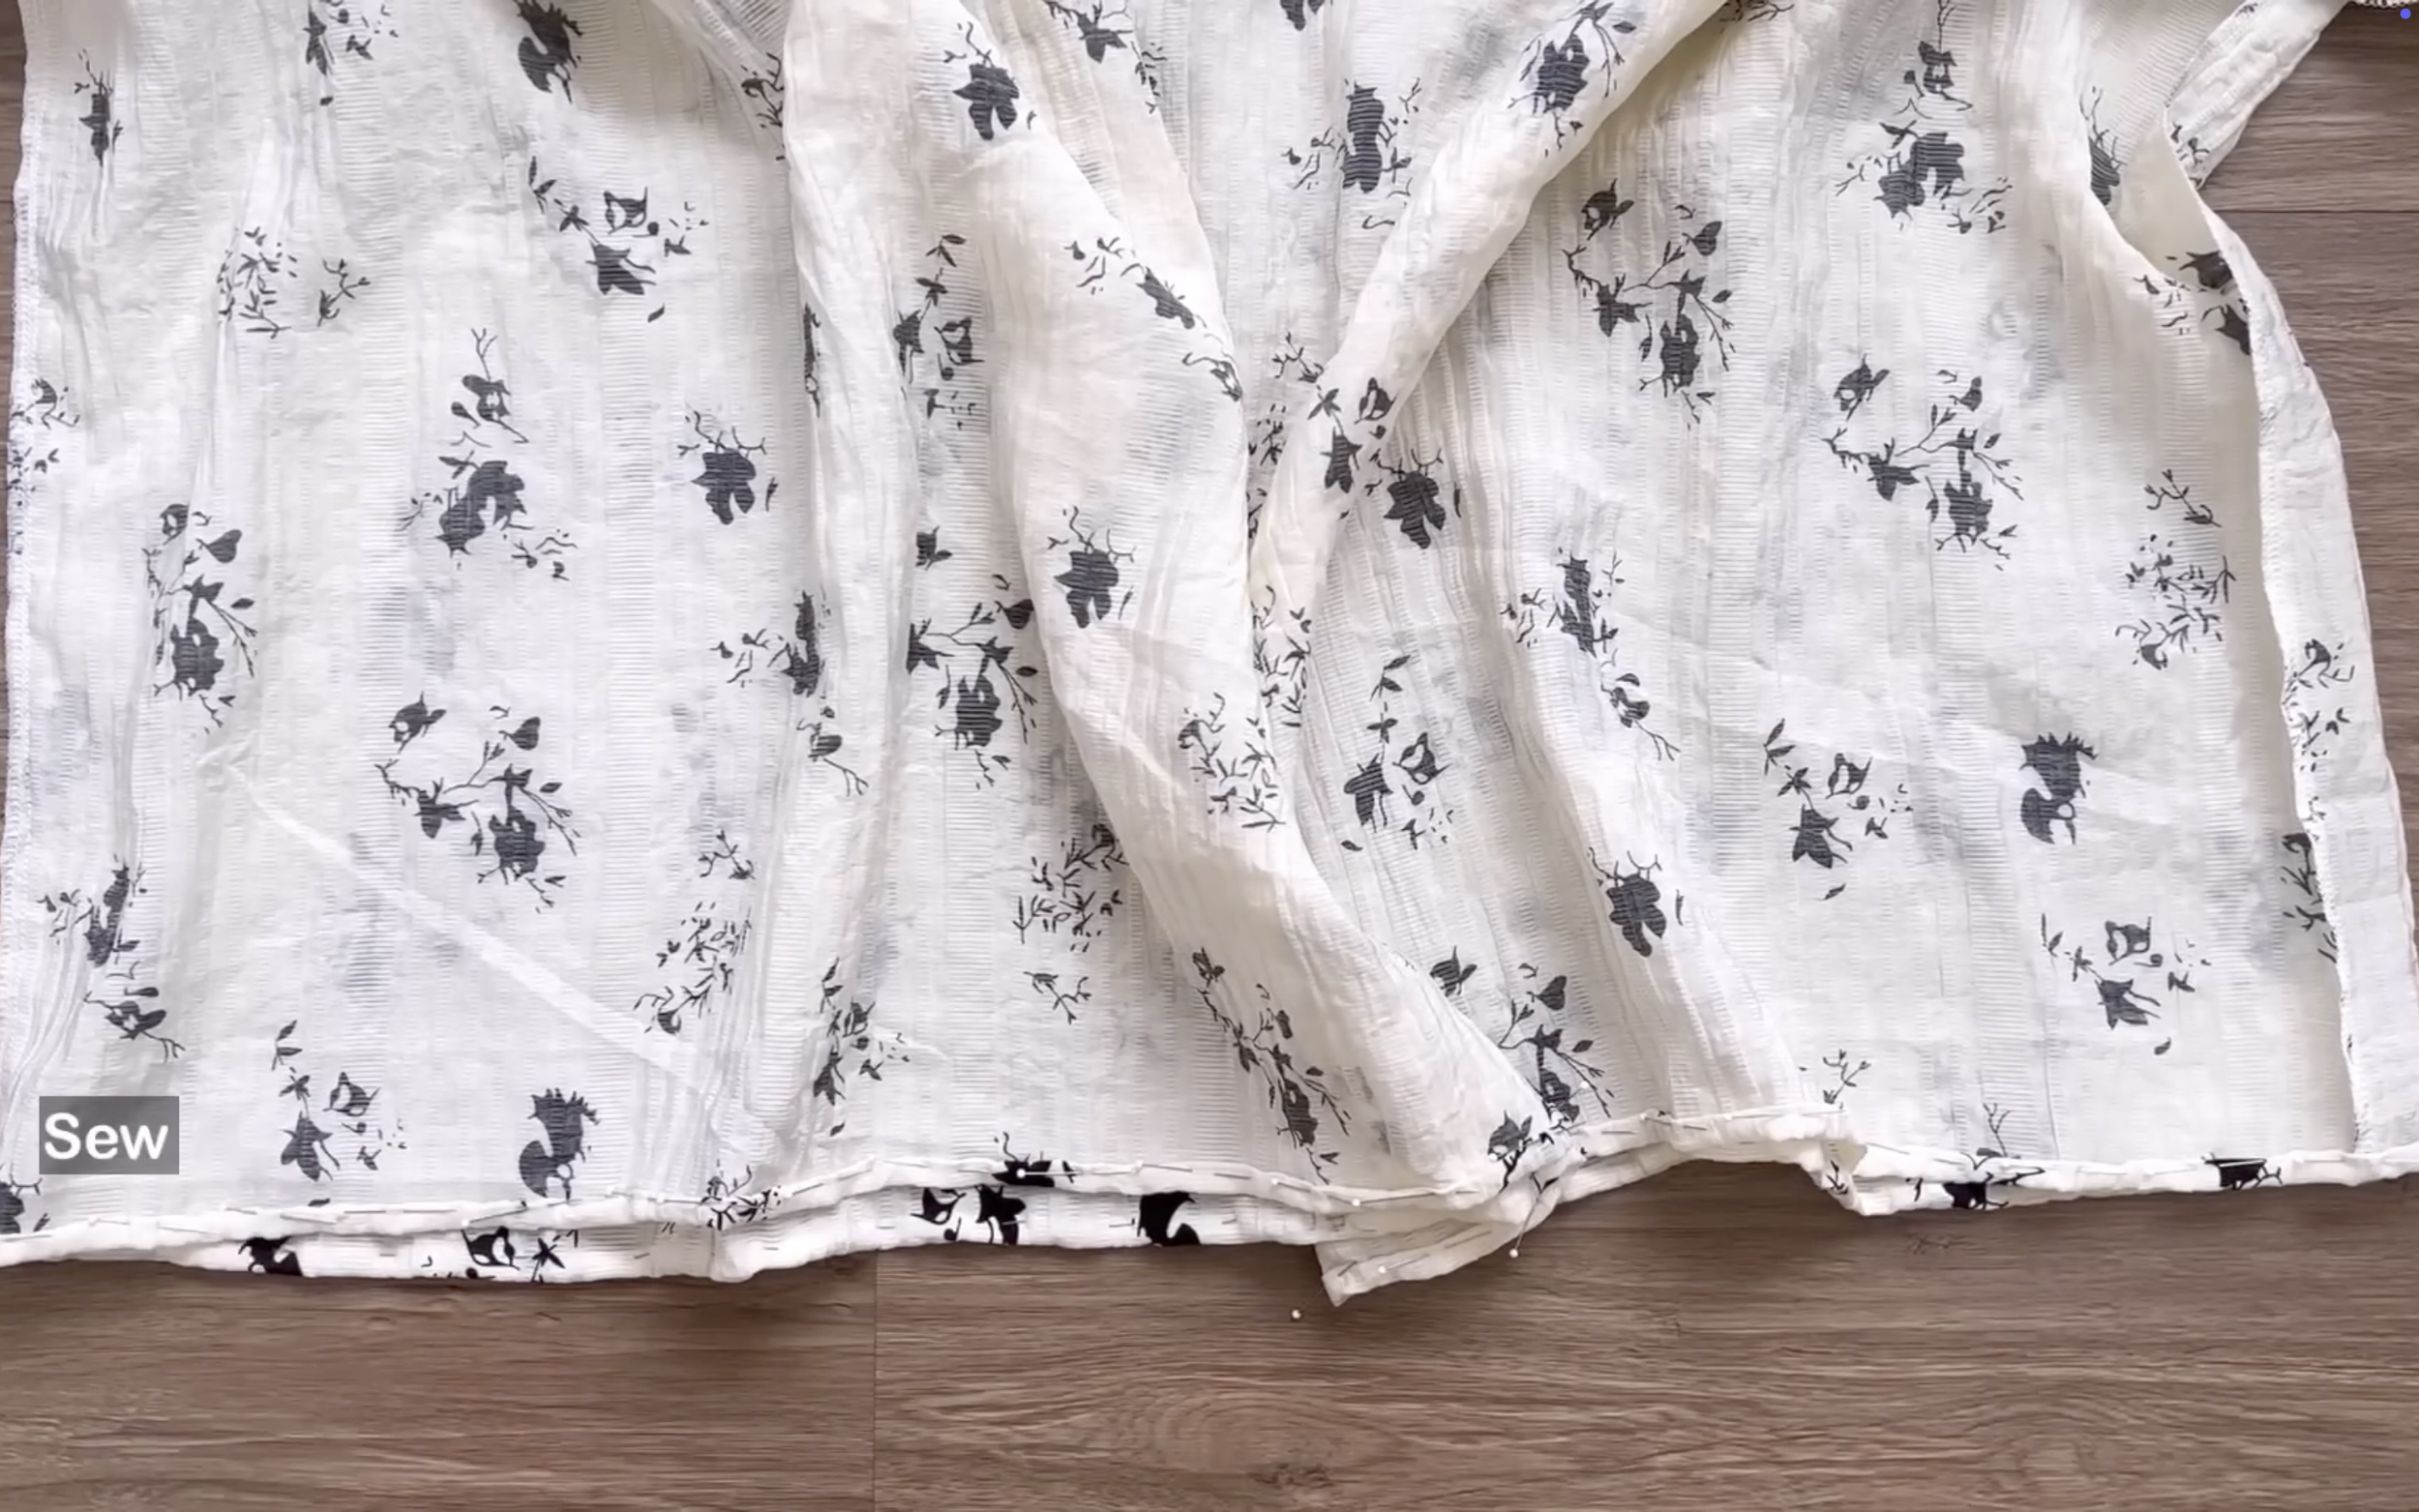
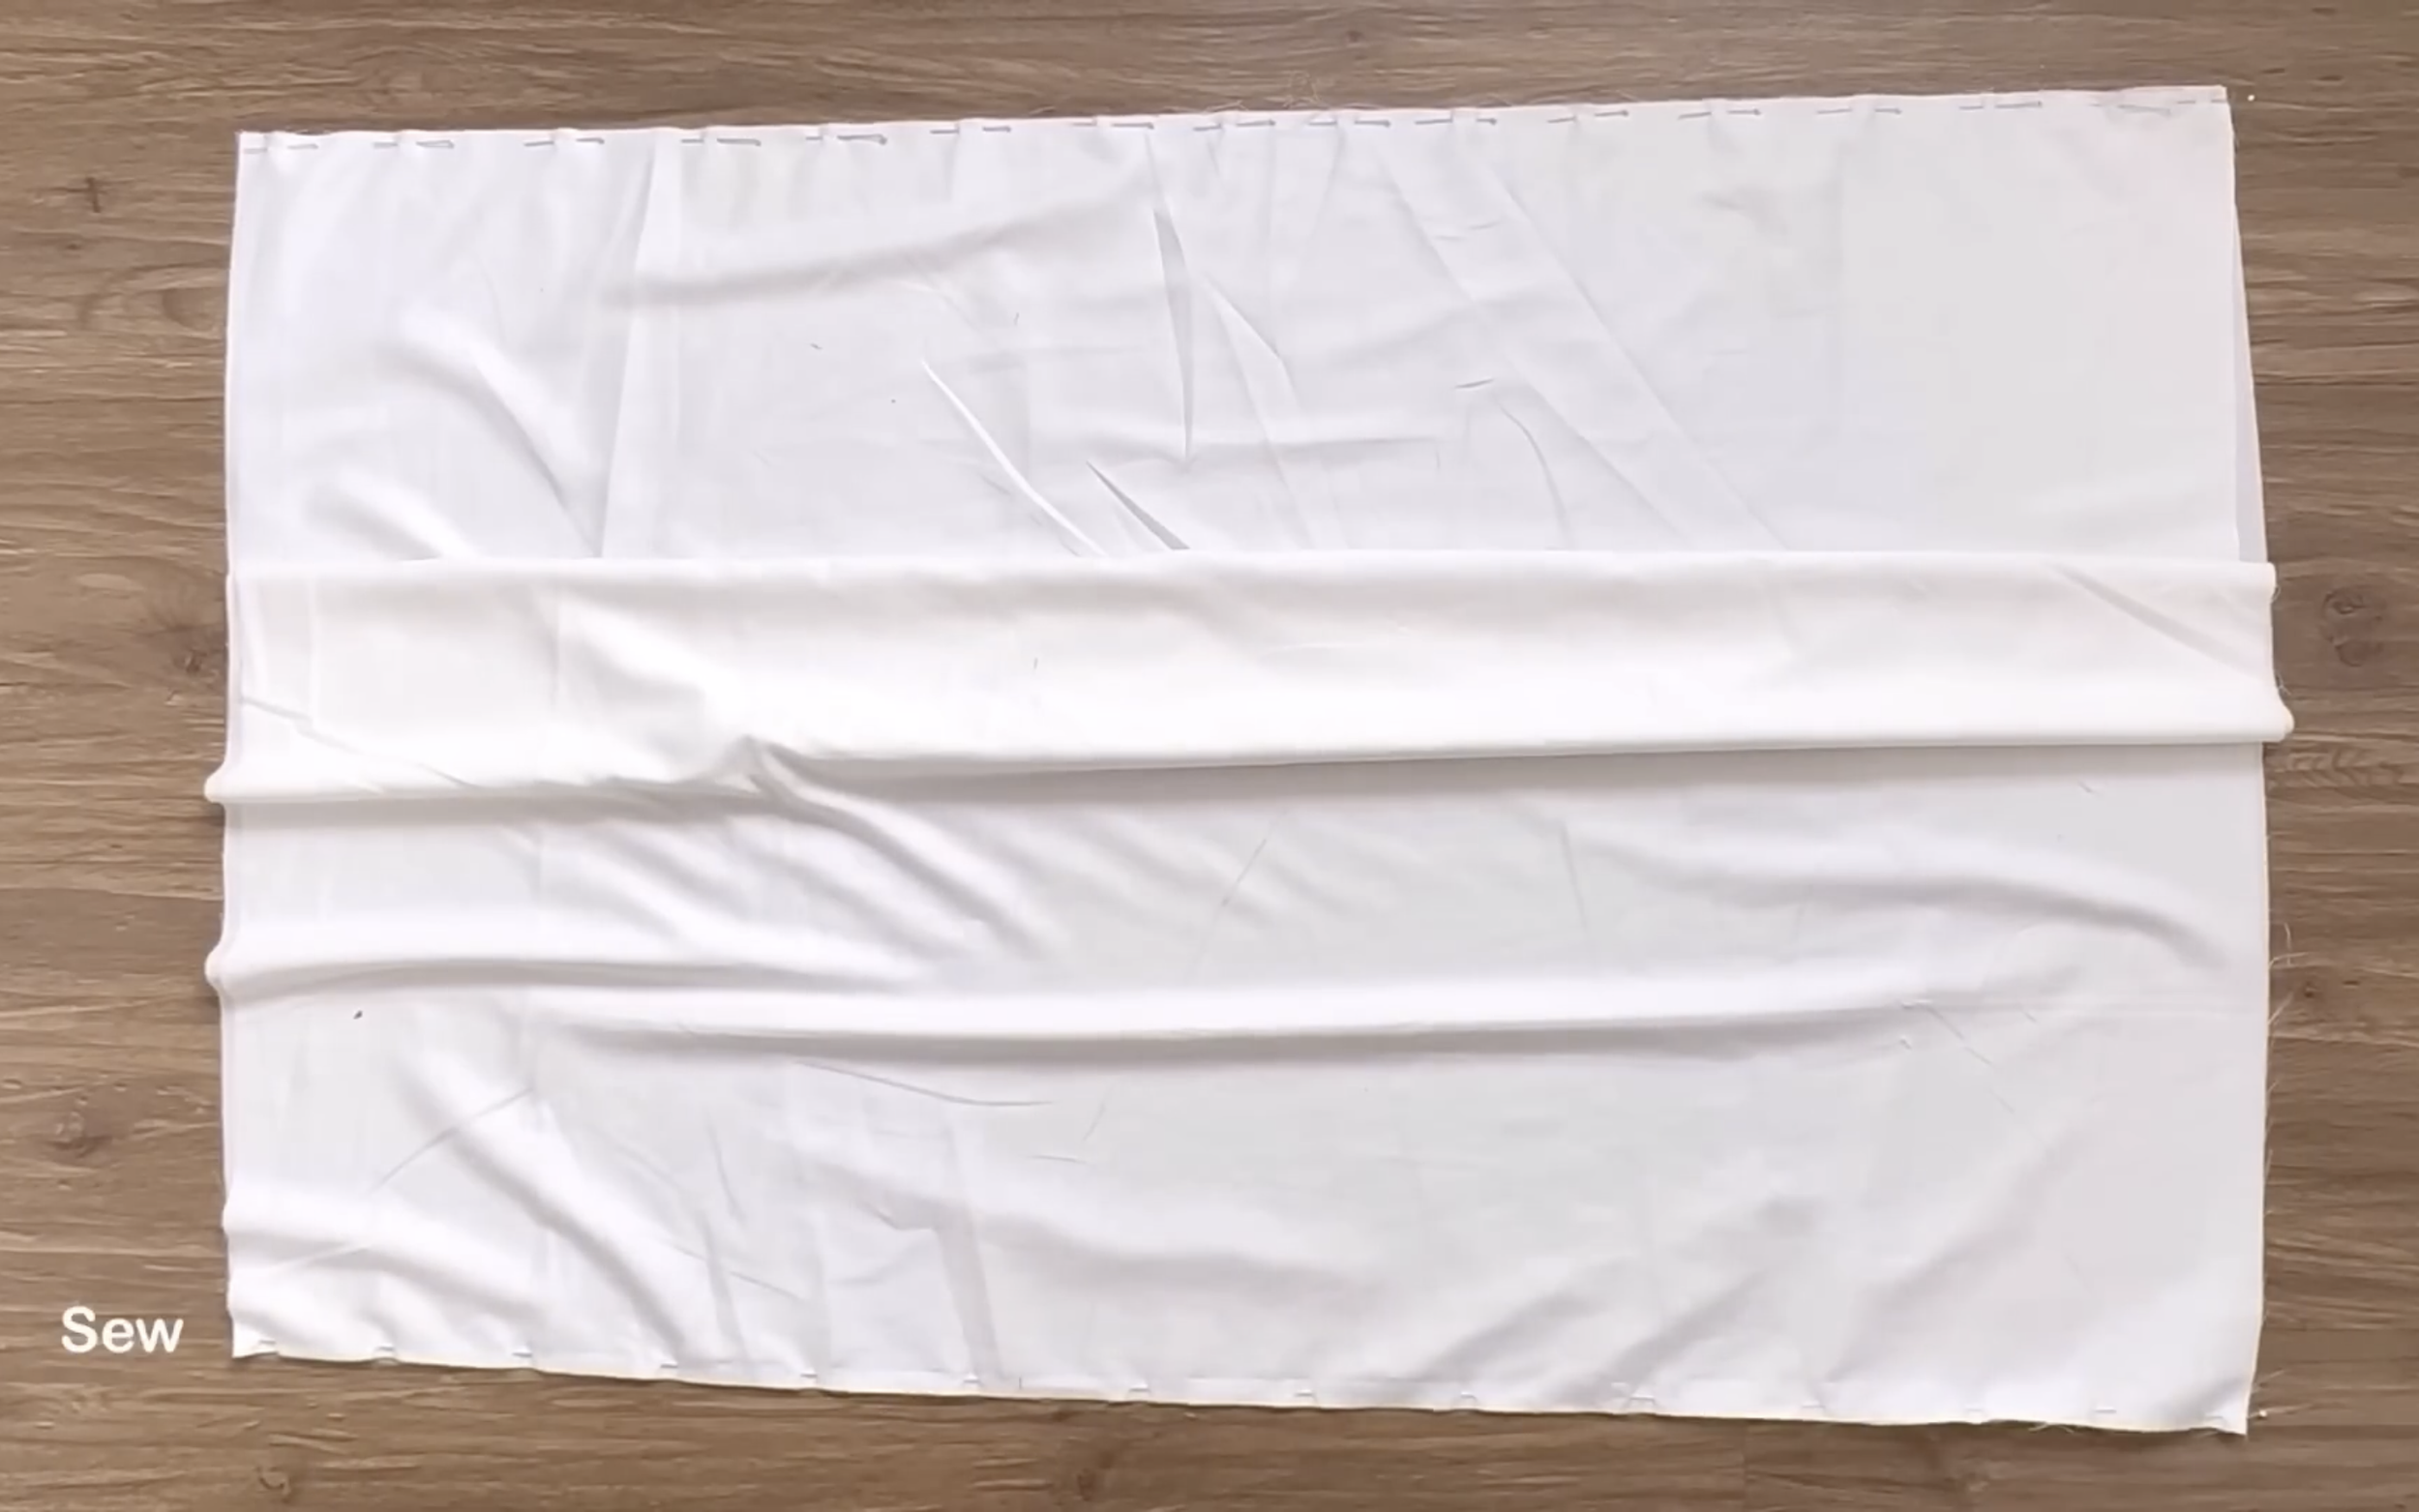
At the end of the skirt, finish it by folding the end fabric inside two times with 1 cm each time and sewing.
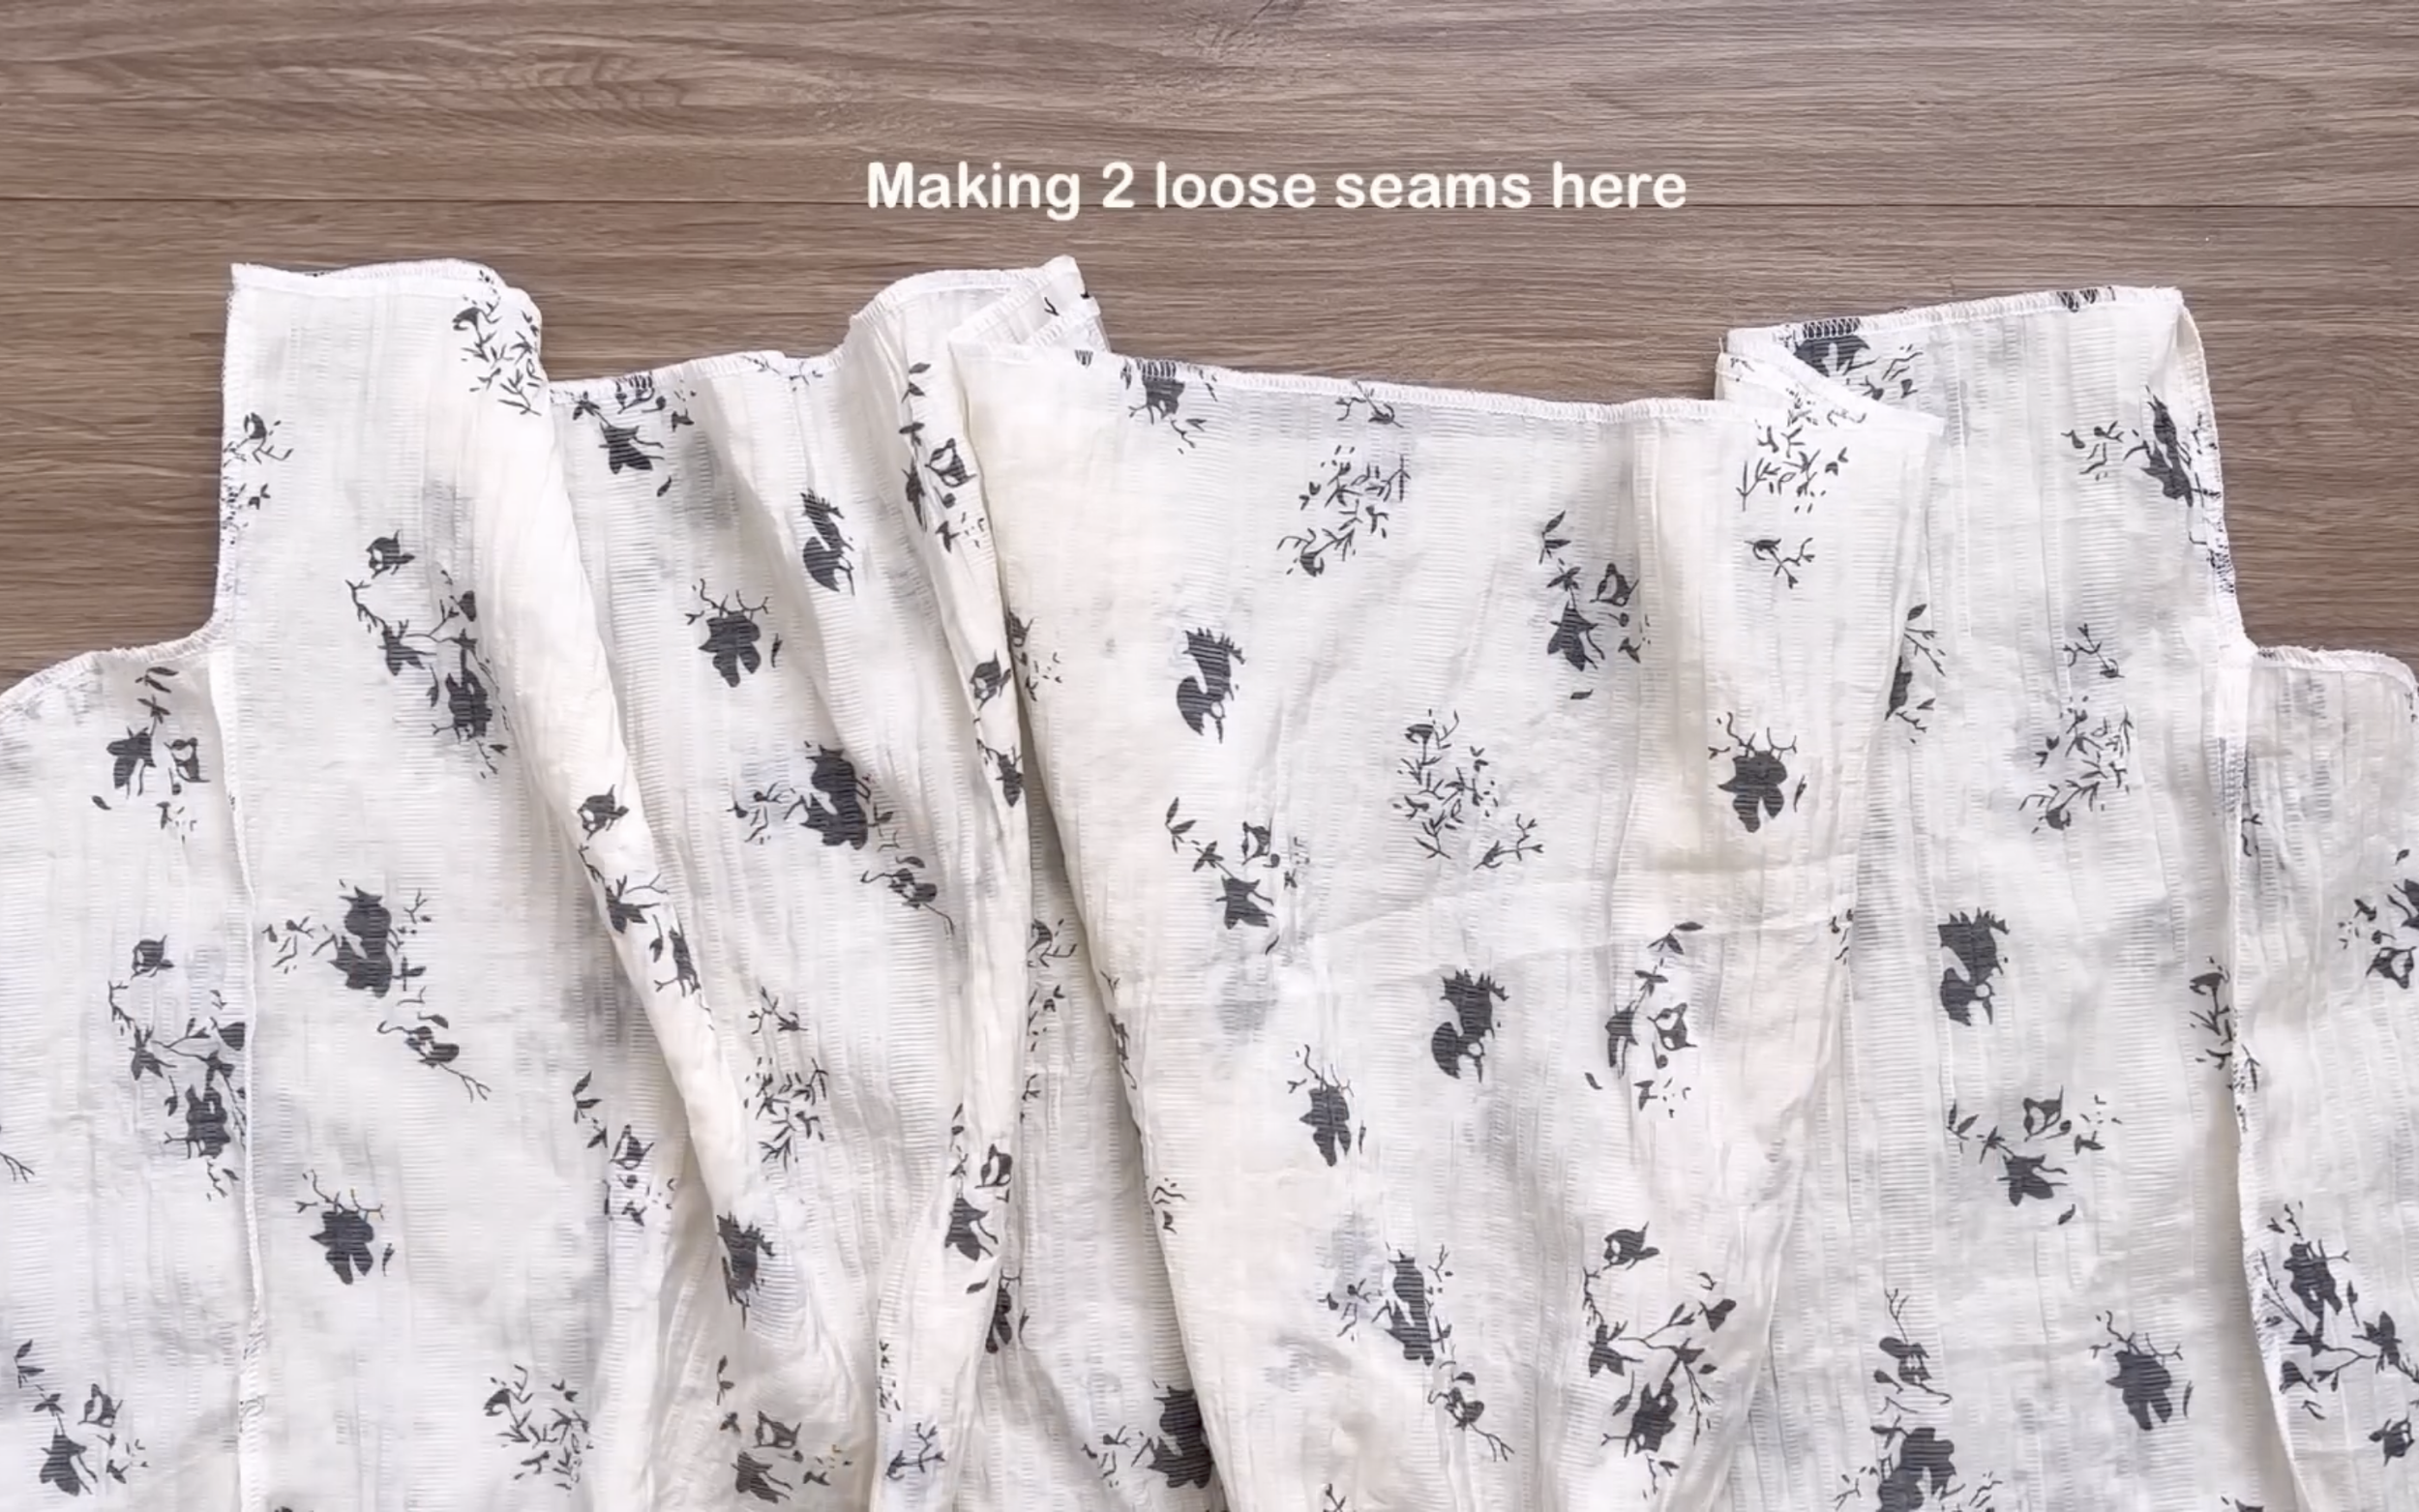
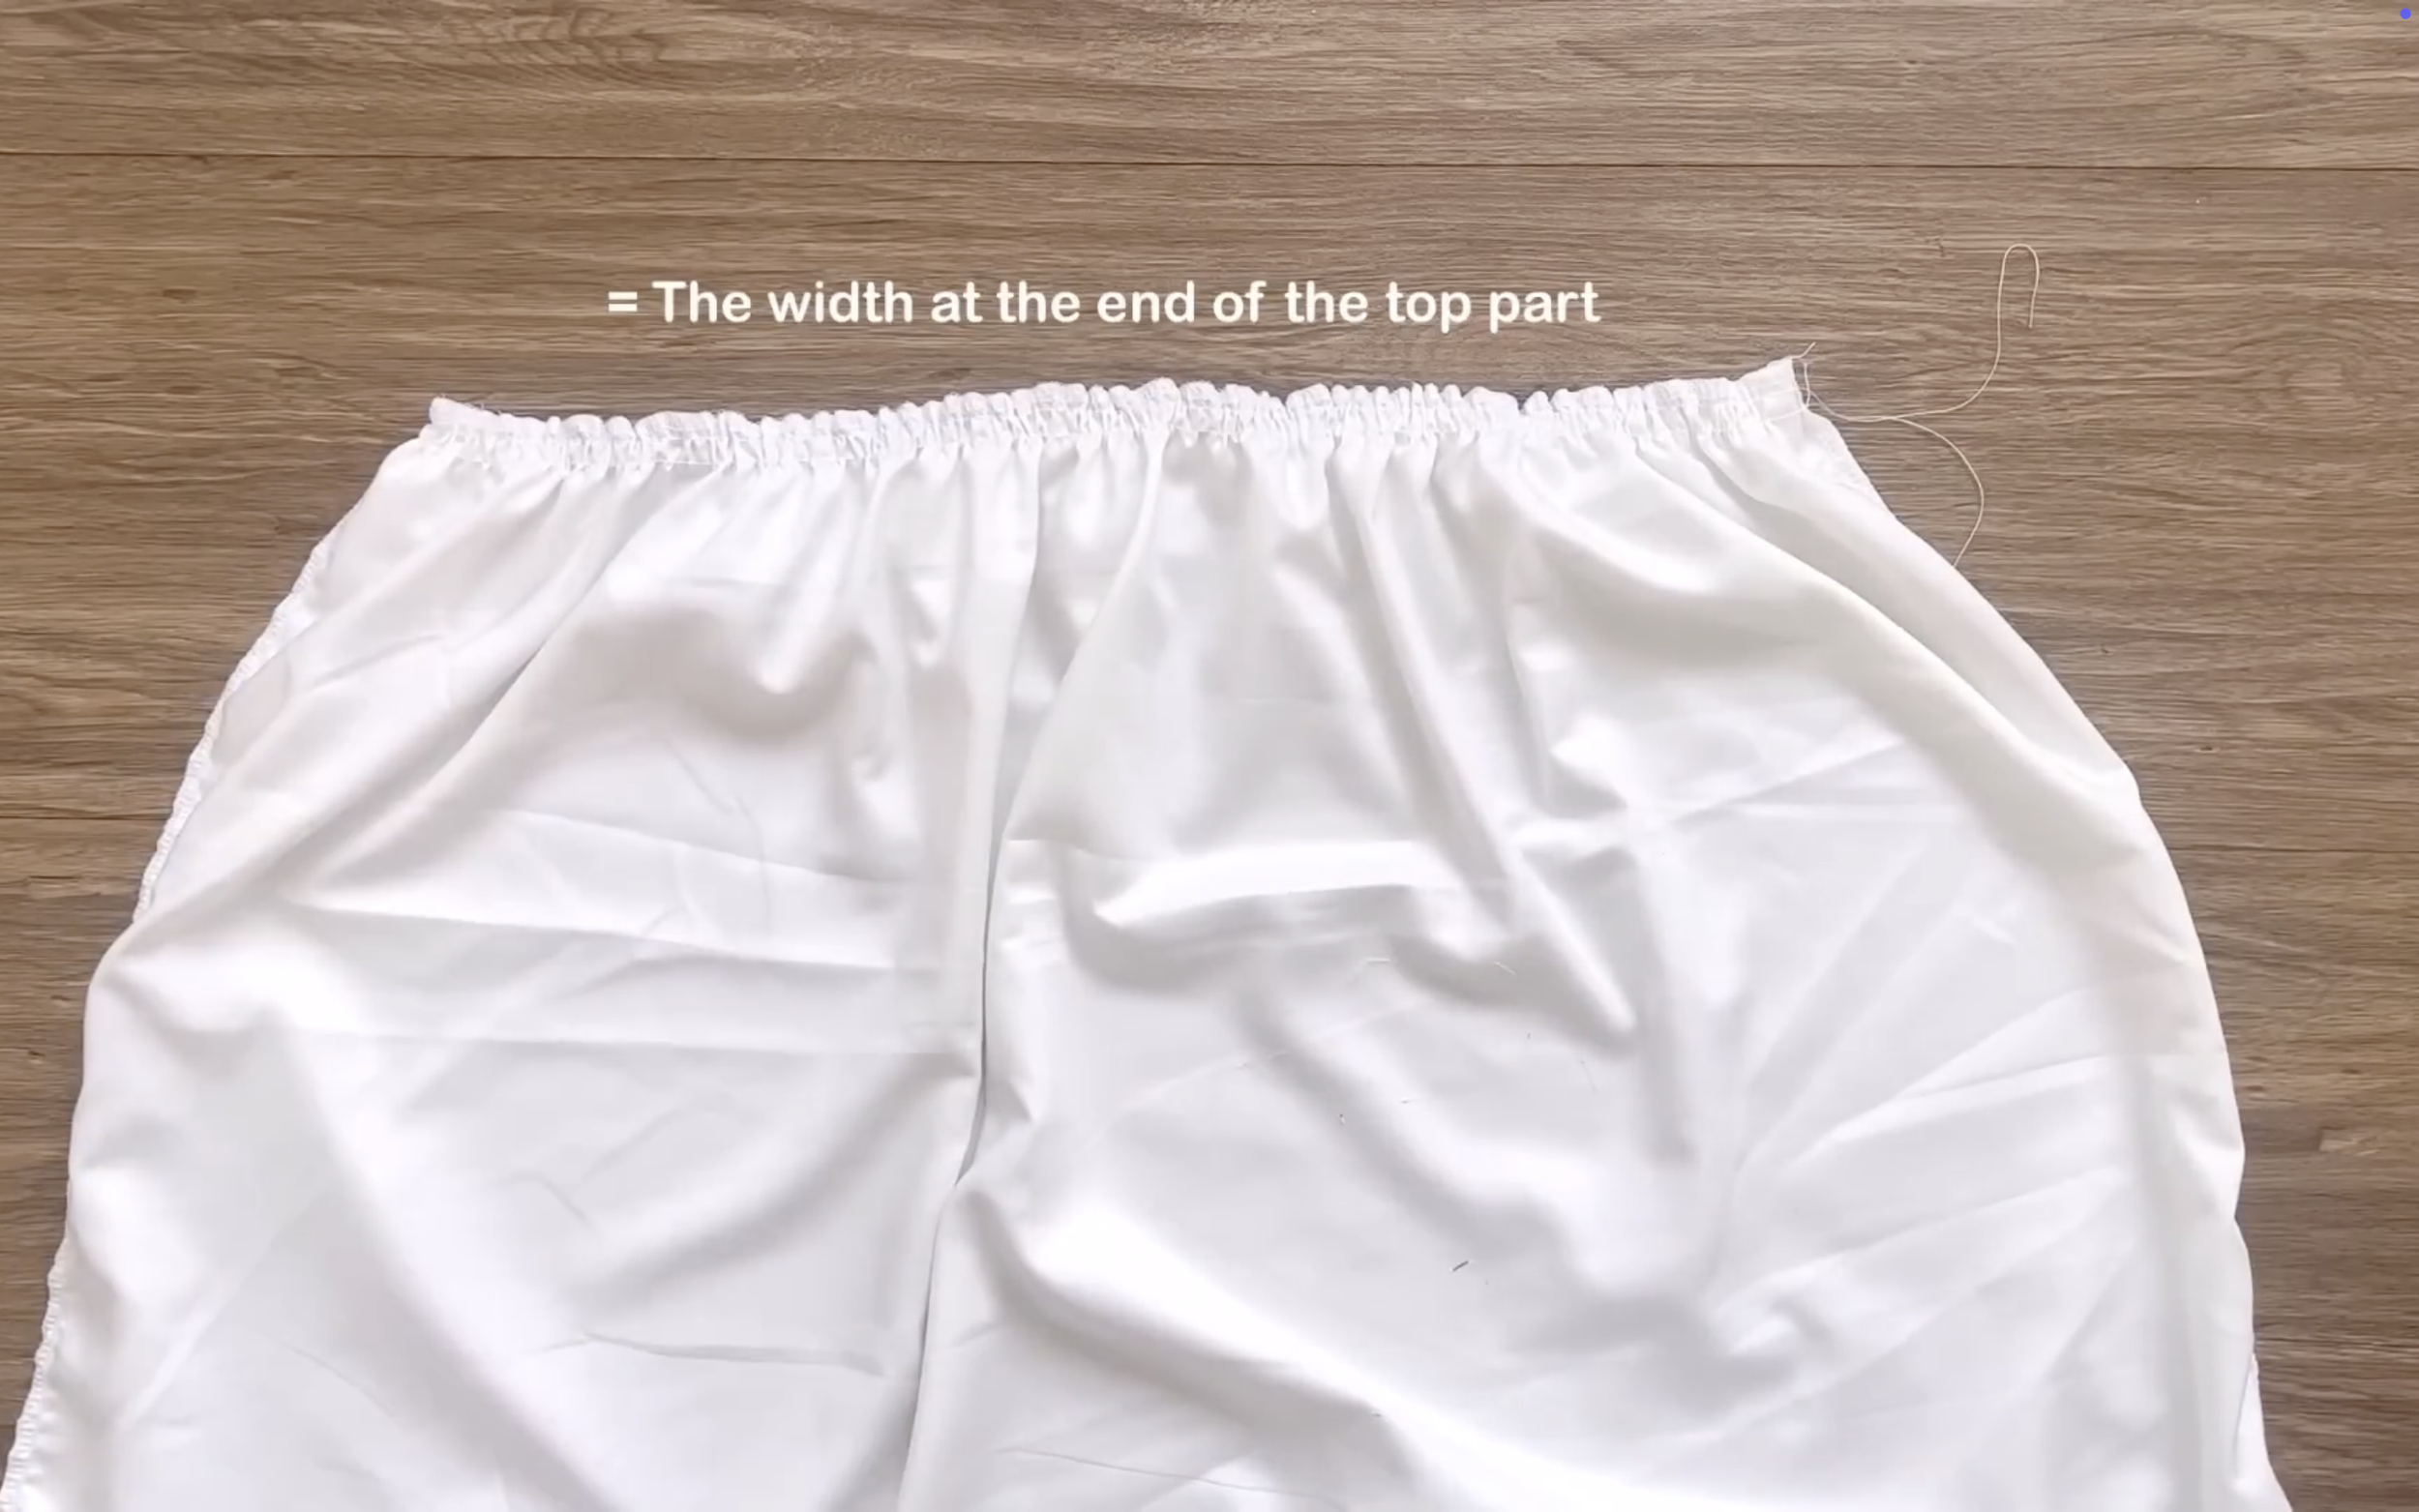
At the top of the skirt, make two loose seams first, then create the gathering fabric there later.
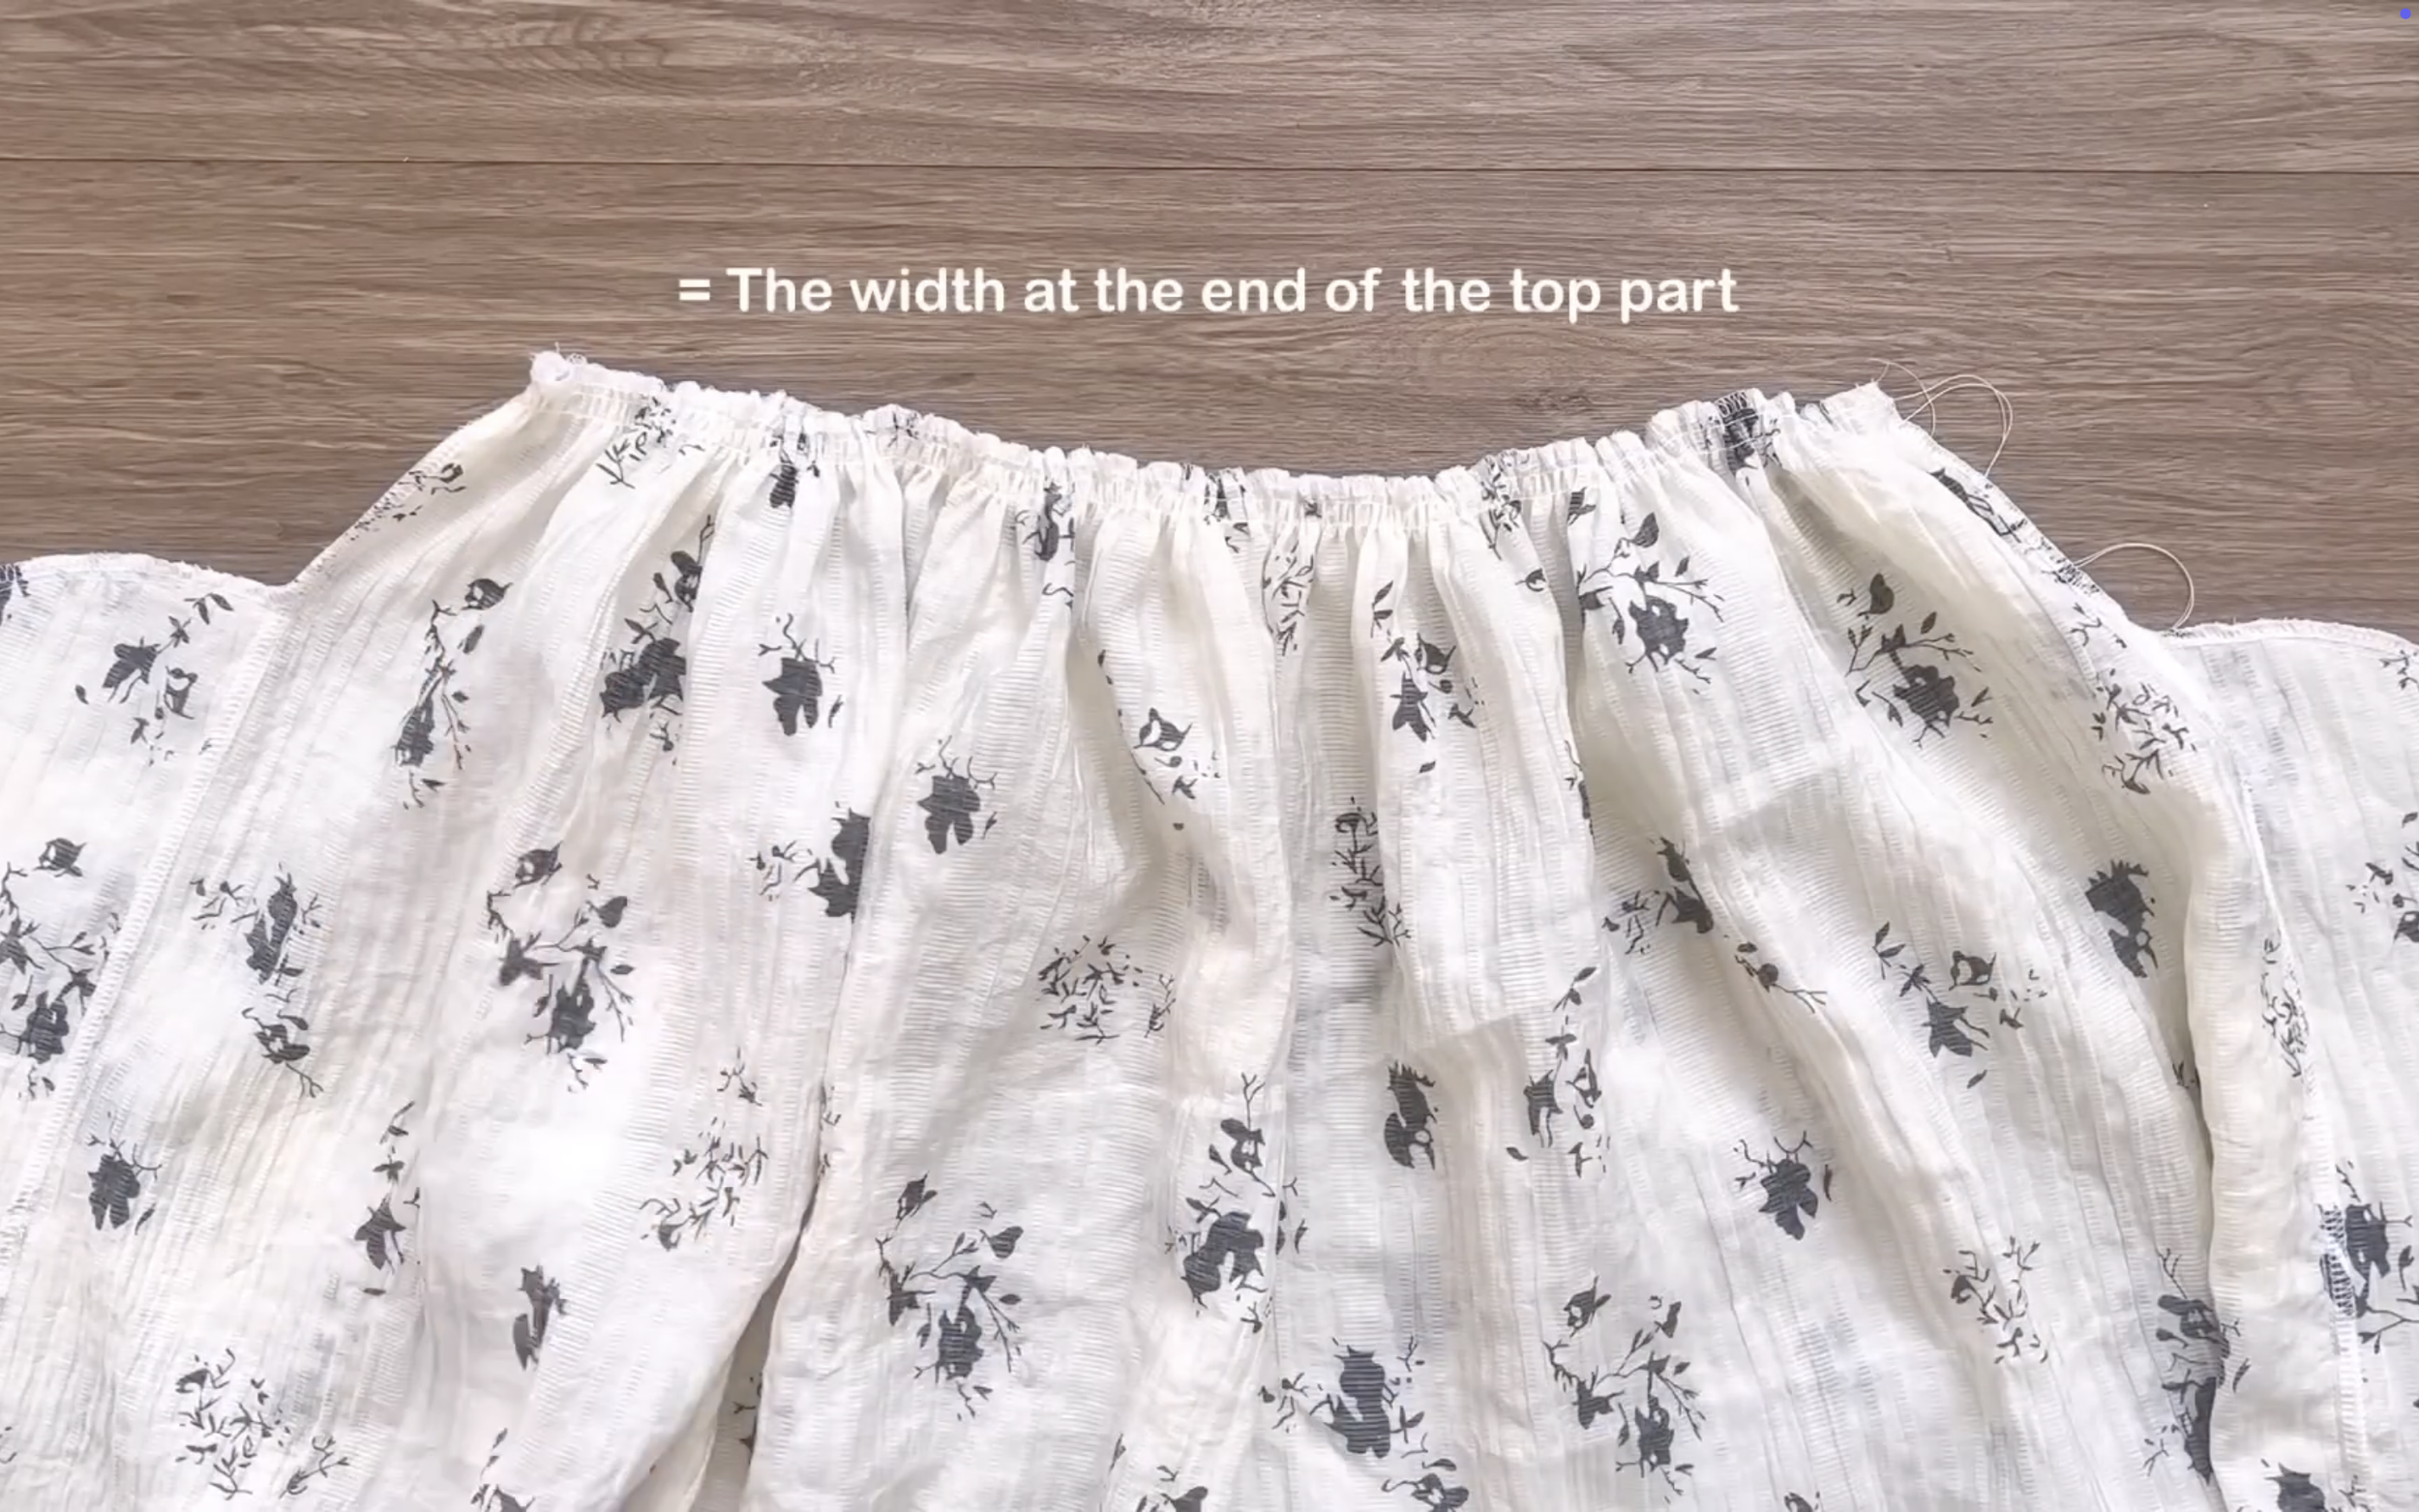
The final width of the gathering fabric will be the same as the width at the end of the bodice part so they can be connected together later.
For the lining part of the skirt, connect two sidelines of the rectangle together first.
Then, finish the ending of the lining skirt by folding the end fabric inside two times with 1 cm each time and sewing.

At the top of the lining skirt, make two loose seams first, then create the gathering fabric there later.
The final width of the gathering fabric will be the same as the width at the end of the bodice part so they can be connected together later.
CONNECT THE TOP AND THE SKIRT TOGETHER
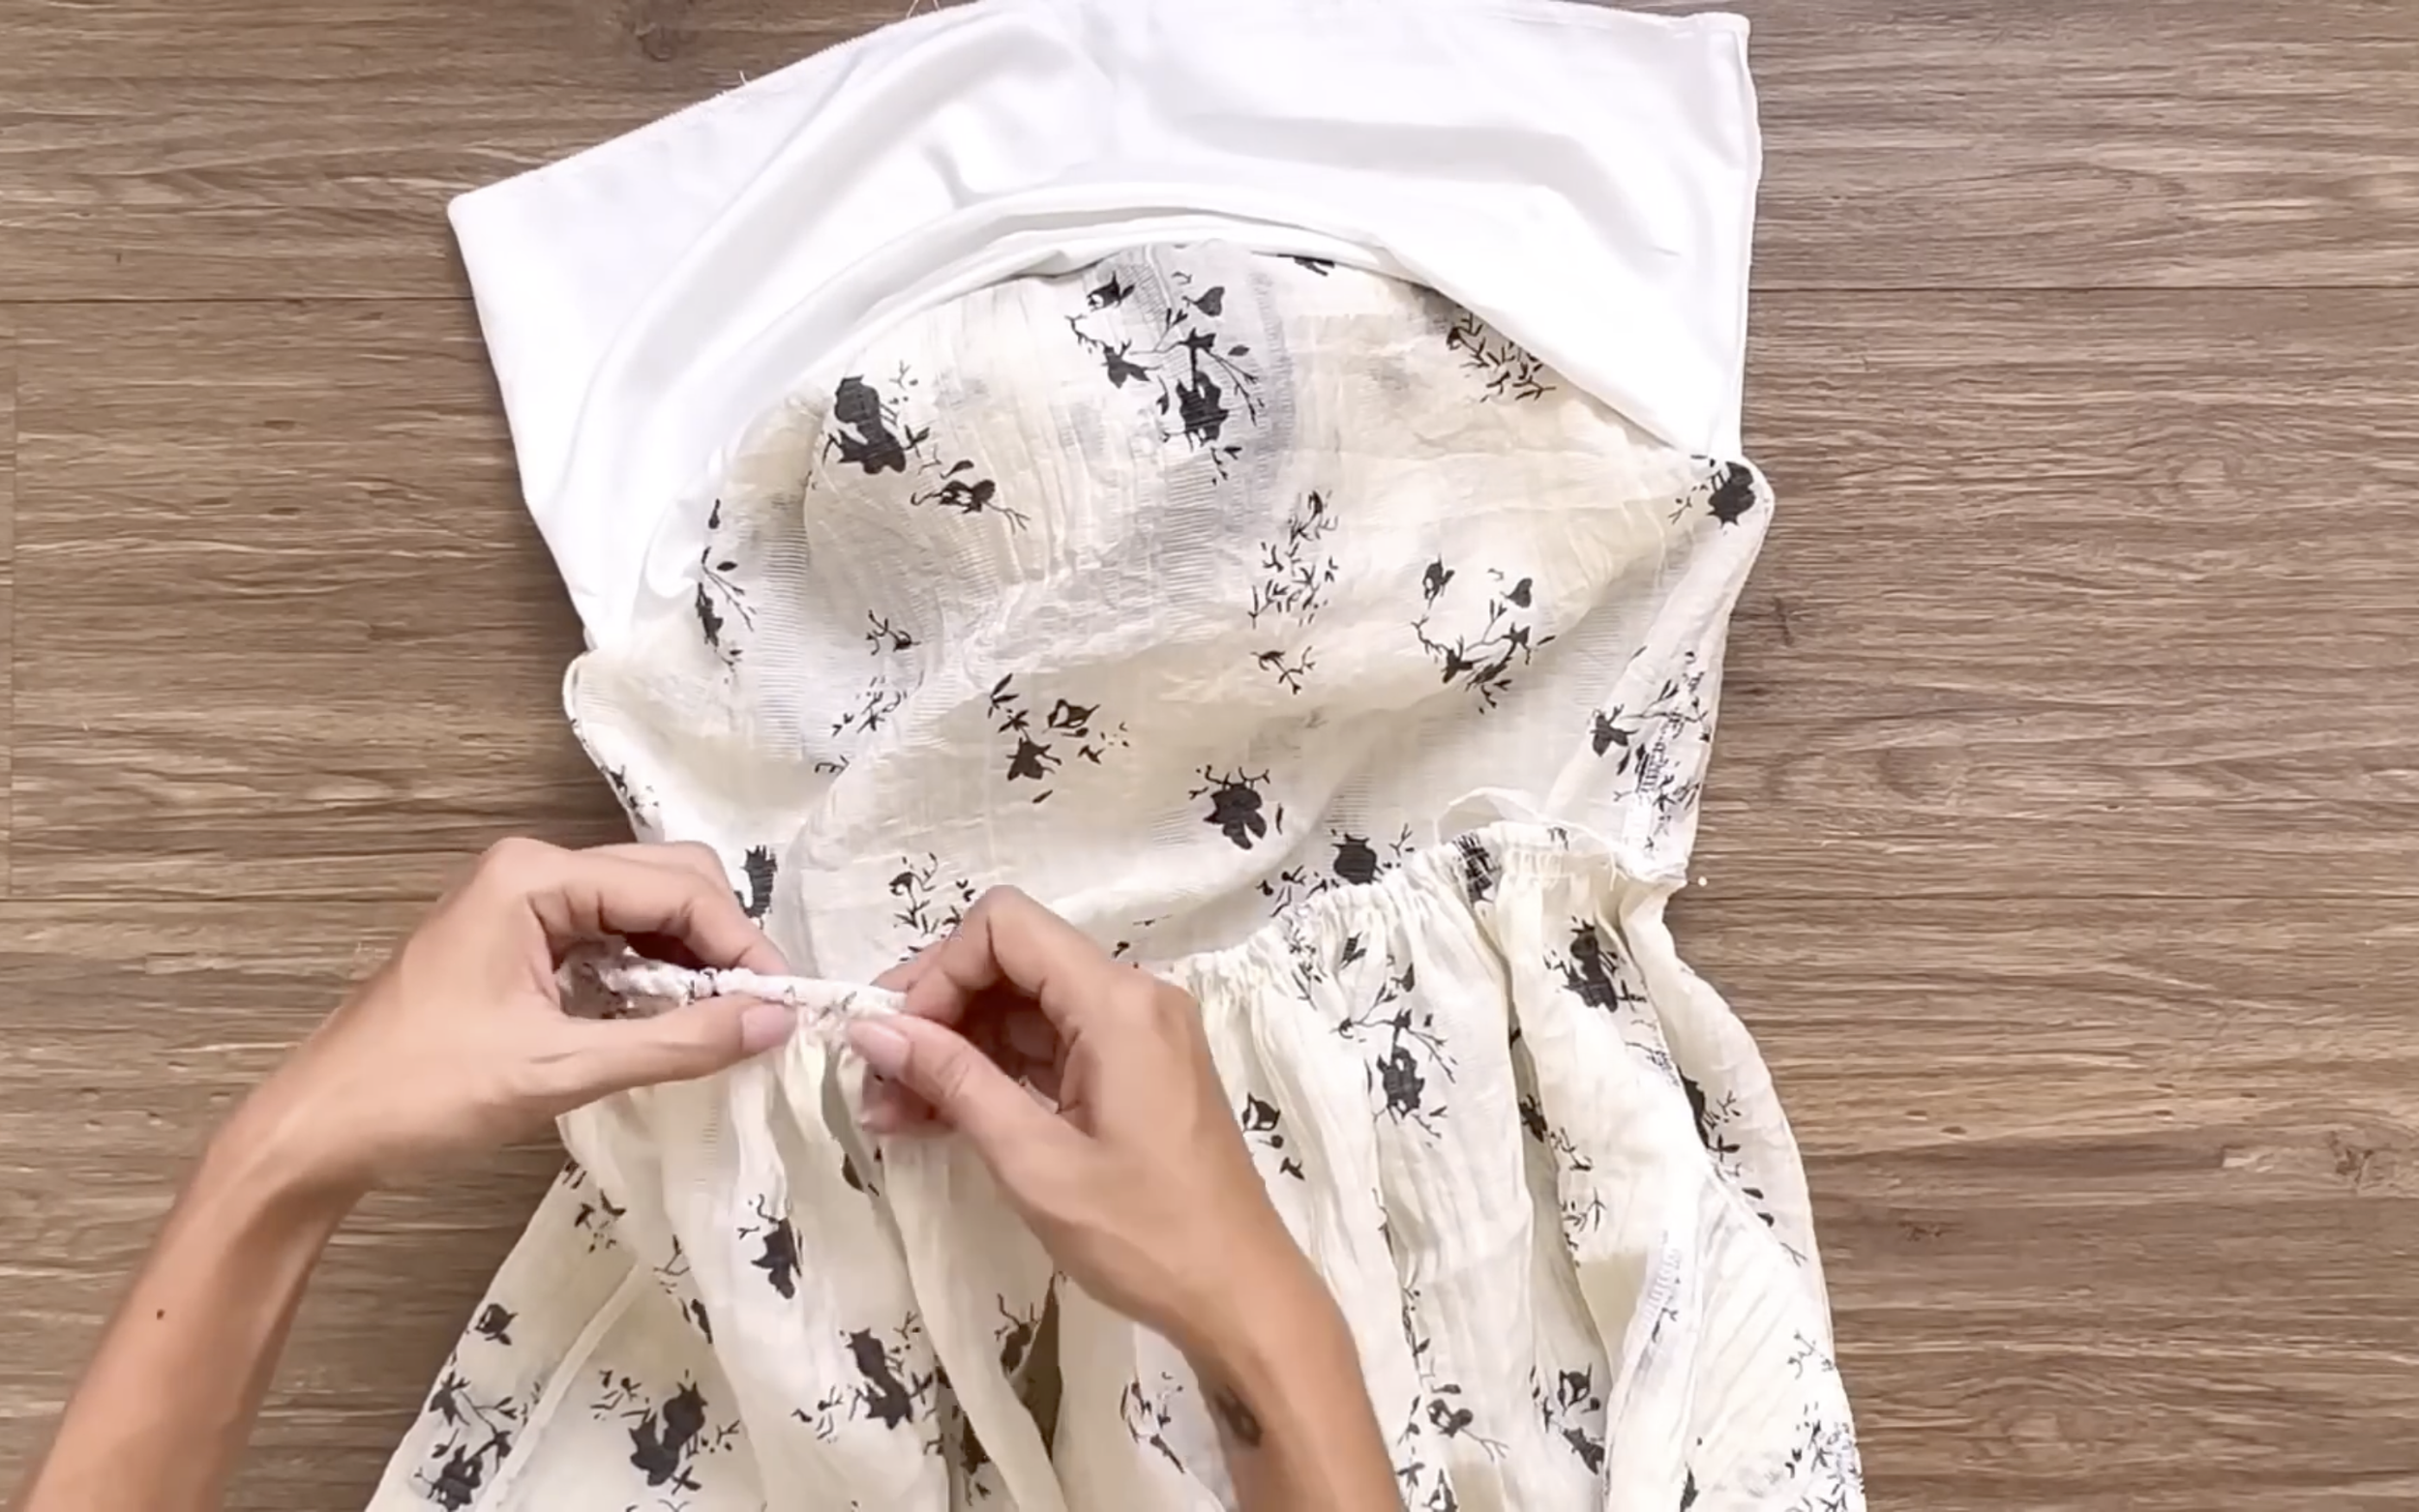
The last step is connecting the top part of the dress to the skirt part.
Remember to connect them separately between the main fabric and the lining fabric.

Making a Vintage inspired dress (with lining) | Step by step sewing tutorial with pattern making
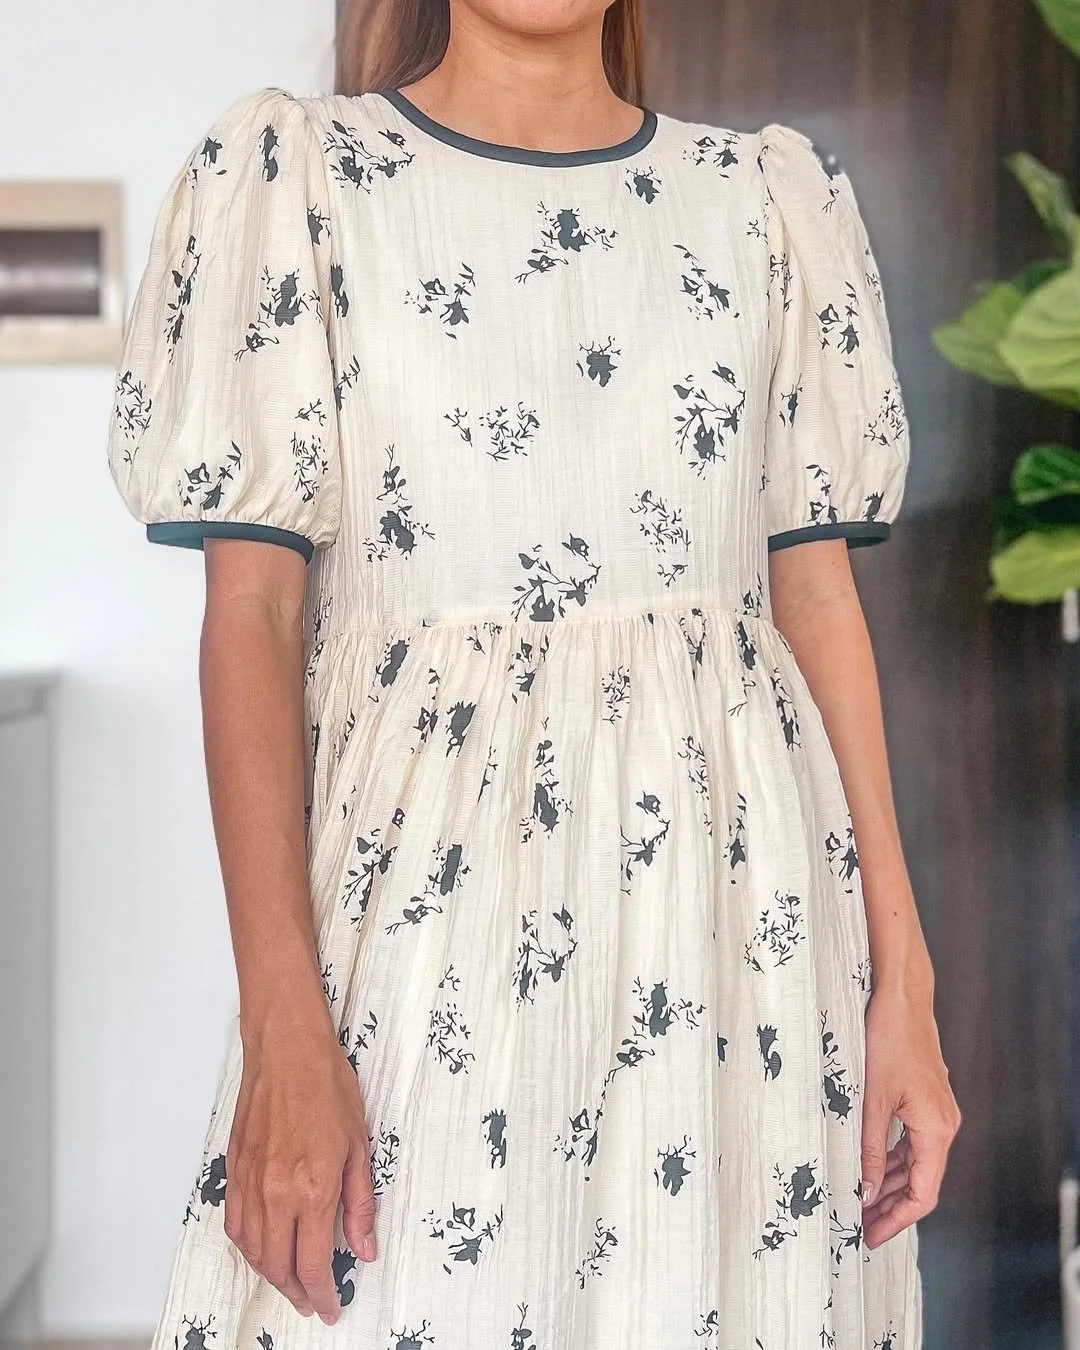
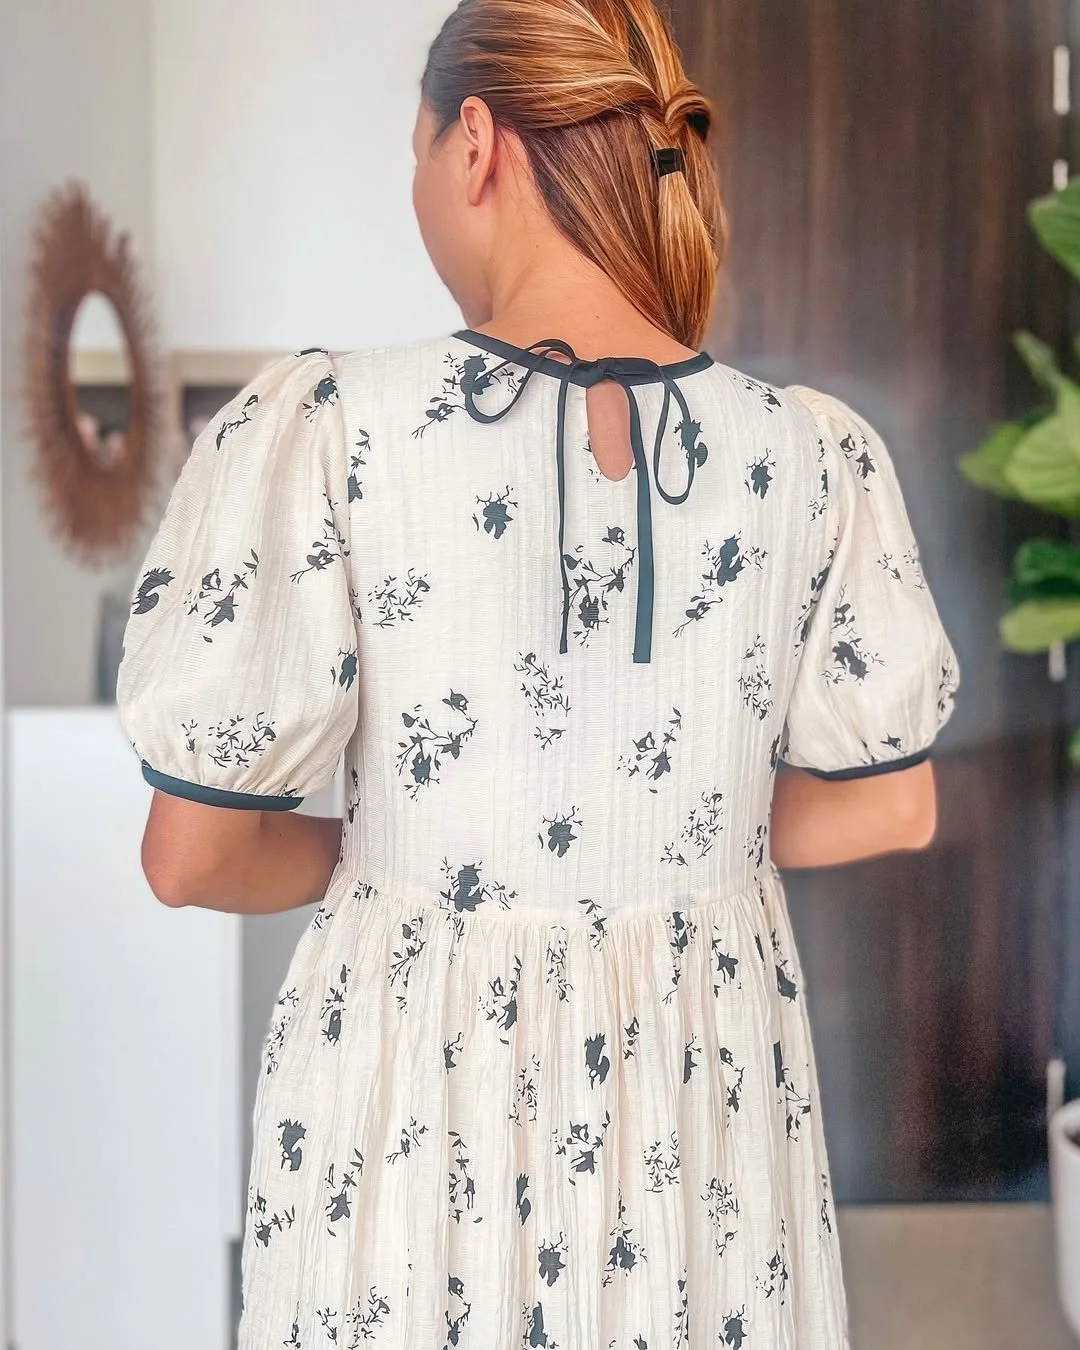
And here’s the final result!
This dress has such a cute vintage vibe, and I love how both sides look so neat that it’s totally reversible.
I hope you found my step-by-step guide helpful and inspiring.
If you’re interested in making your own, give it a try and let me know how it goes!
Until then, happy sewing!