Making my Dream wedding dress - Design, fabrics & pattern making | My perfect wedding series - Ep 4

Making my Dream wedding dress - Design, fabrics & pattern making | My perfect wedding series - Ep 4
Welcome or welcome back to my channel. My name is Jess and I love doing DIY, making clothes in a "simply but pretty" way.
In today's tutorial, I'm going to share with you the next episode of my "Perfect wedding" series. It's my Dream wedding dress. In this tutorial, I'll share with you the process how I got my wedding dress design and how I made the pattern for my dream wedding dress.
I hope you like it and try it out. So let’s get started!
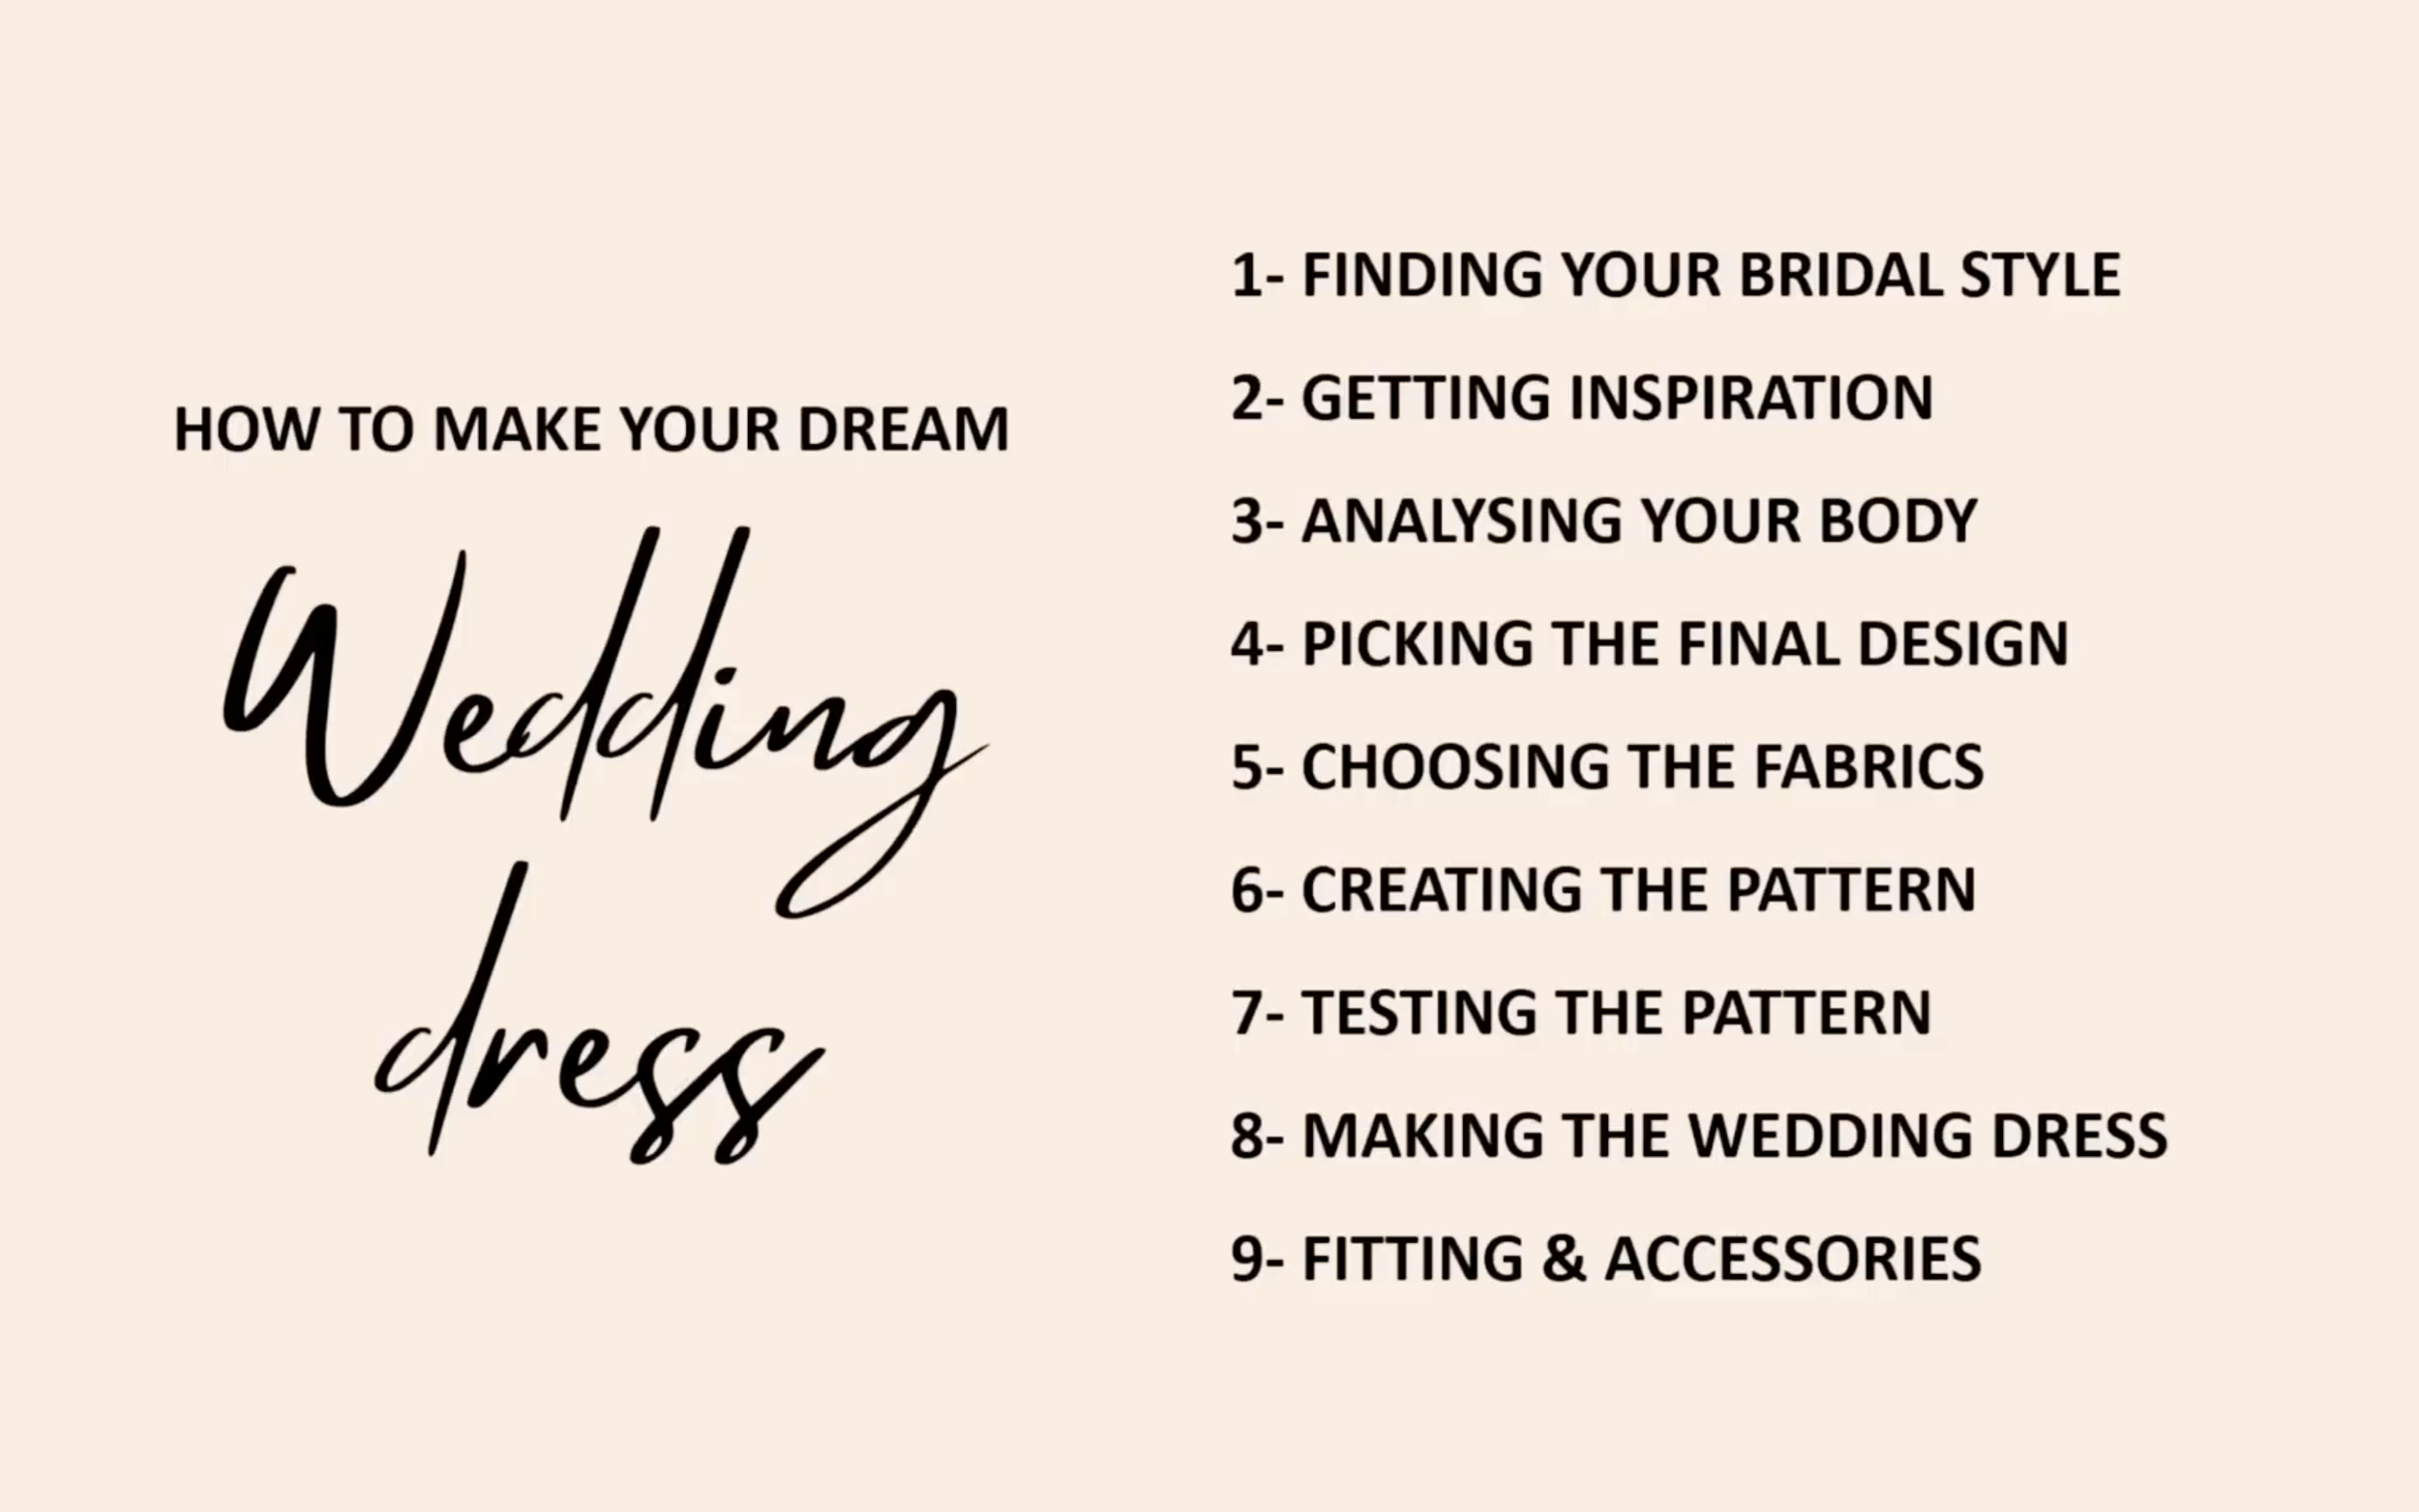
1. FINDING THE BRIDAL STYLE
Don't look at any wedding dress photos before knowing the bridal style. Looking at too many different photos will cause a feeling of overload and uncertainty about where to start.
Here are a few basic styles that most brides will choose:
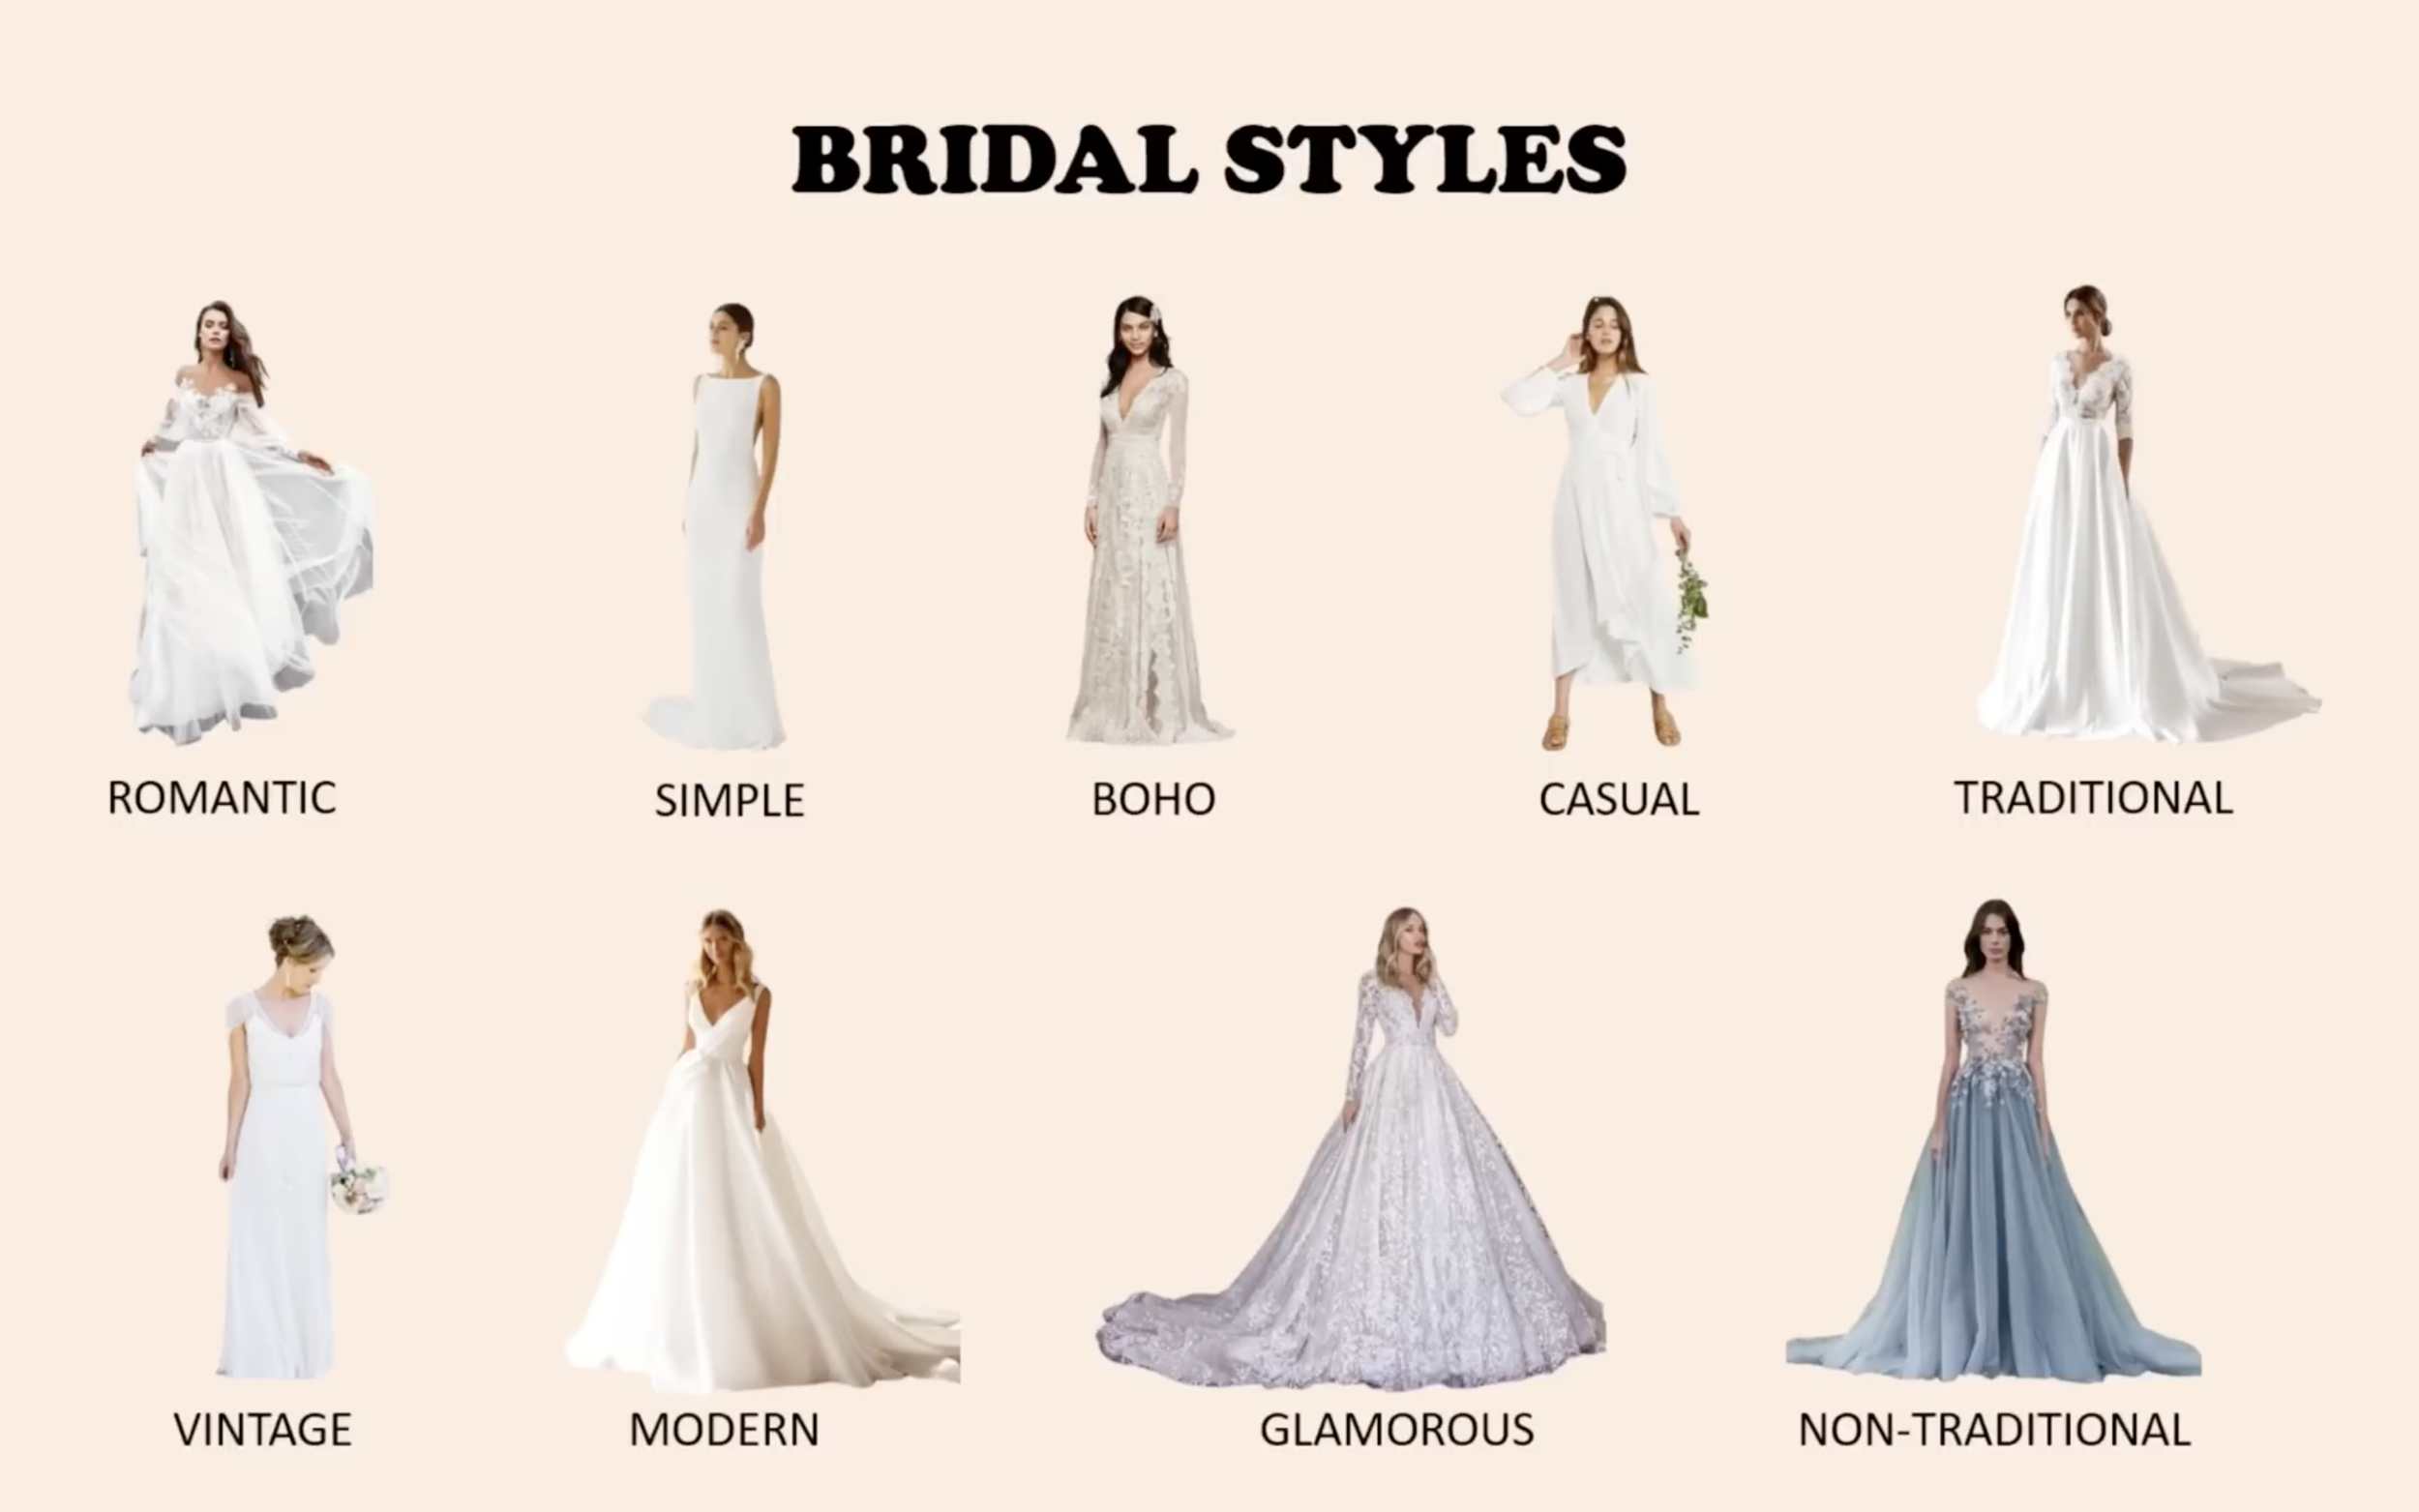
Bridal style is usually related to personal style and the wedding vibe. To help identify the bridal style, ask:

What is your personal style?
Think about the style of everyday outfits, the color of accessories, or home decor. Stay with yourself and think about what is loved the most.
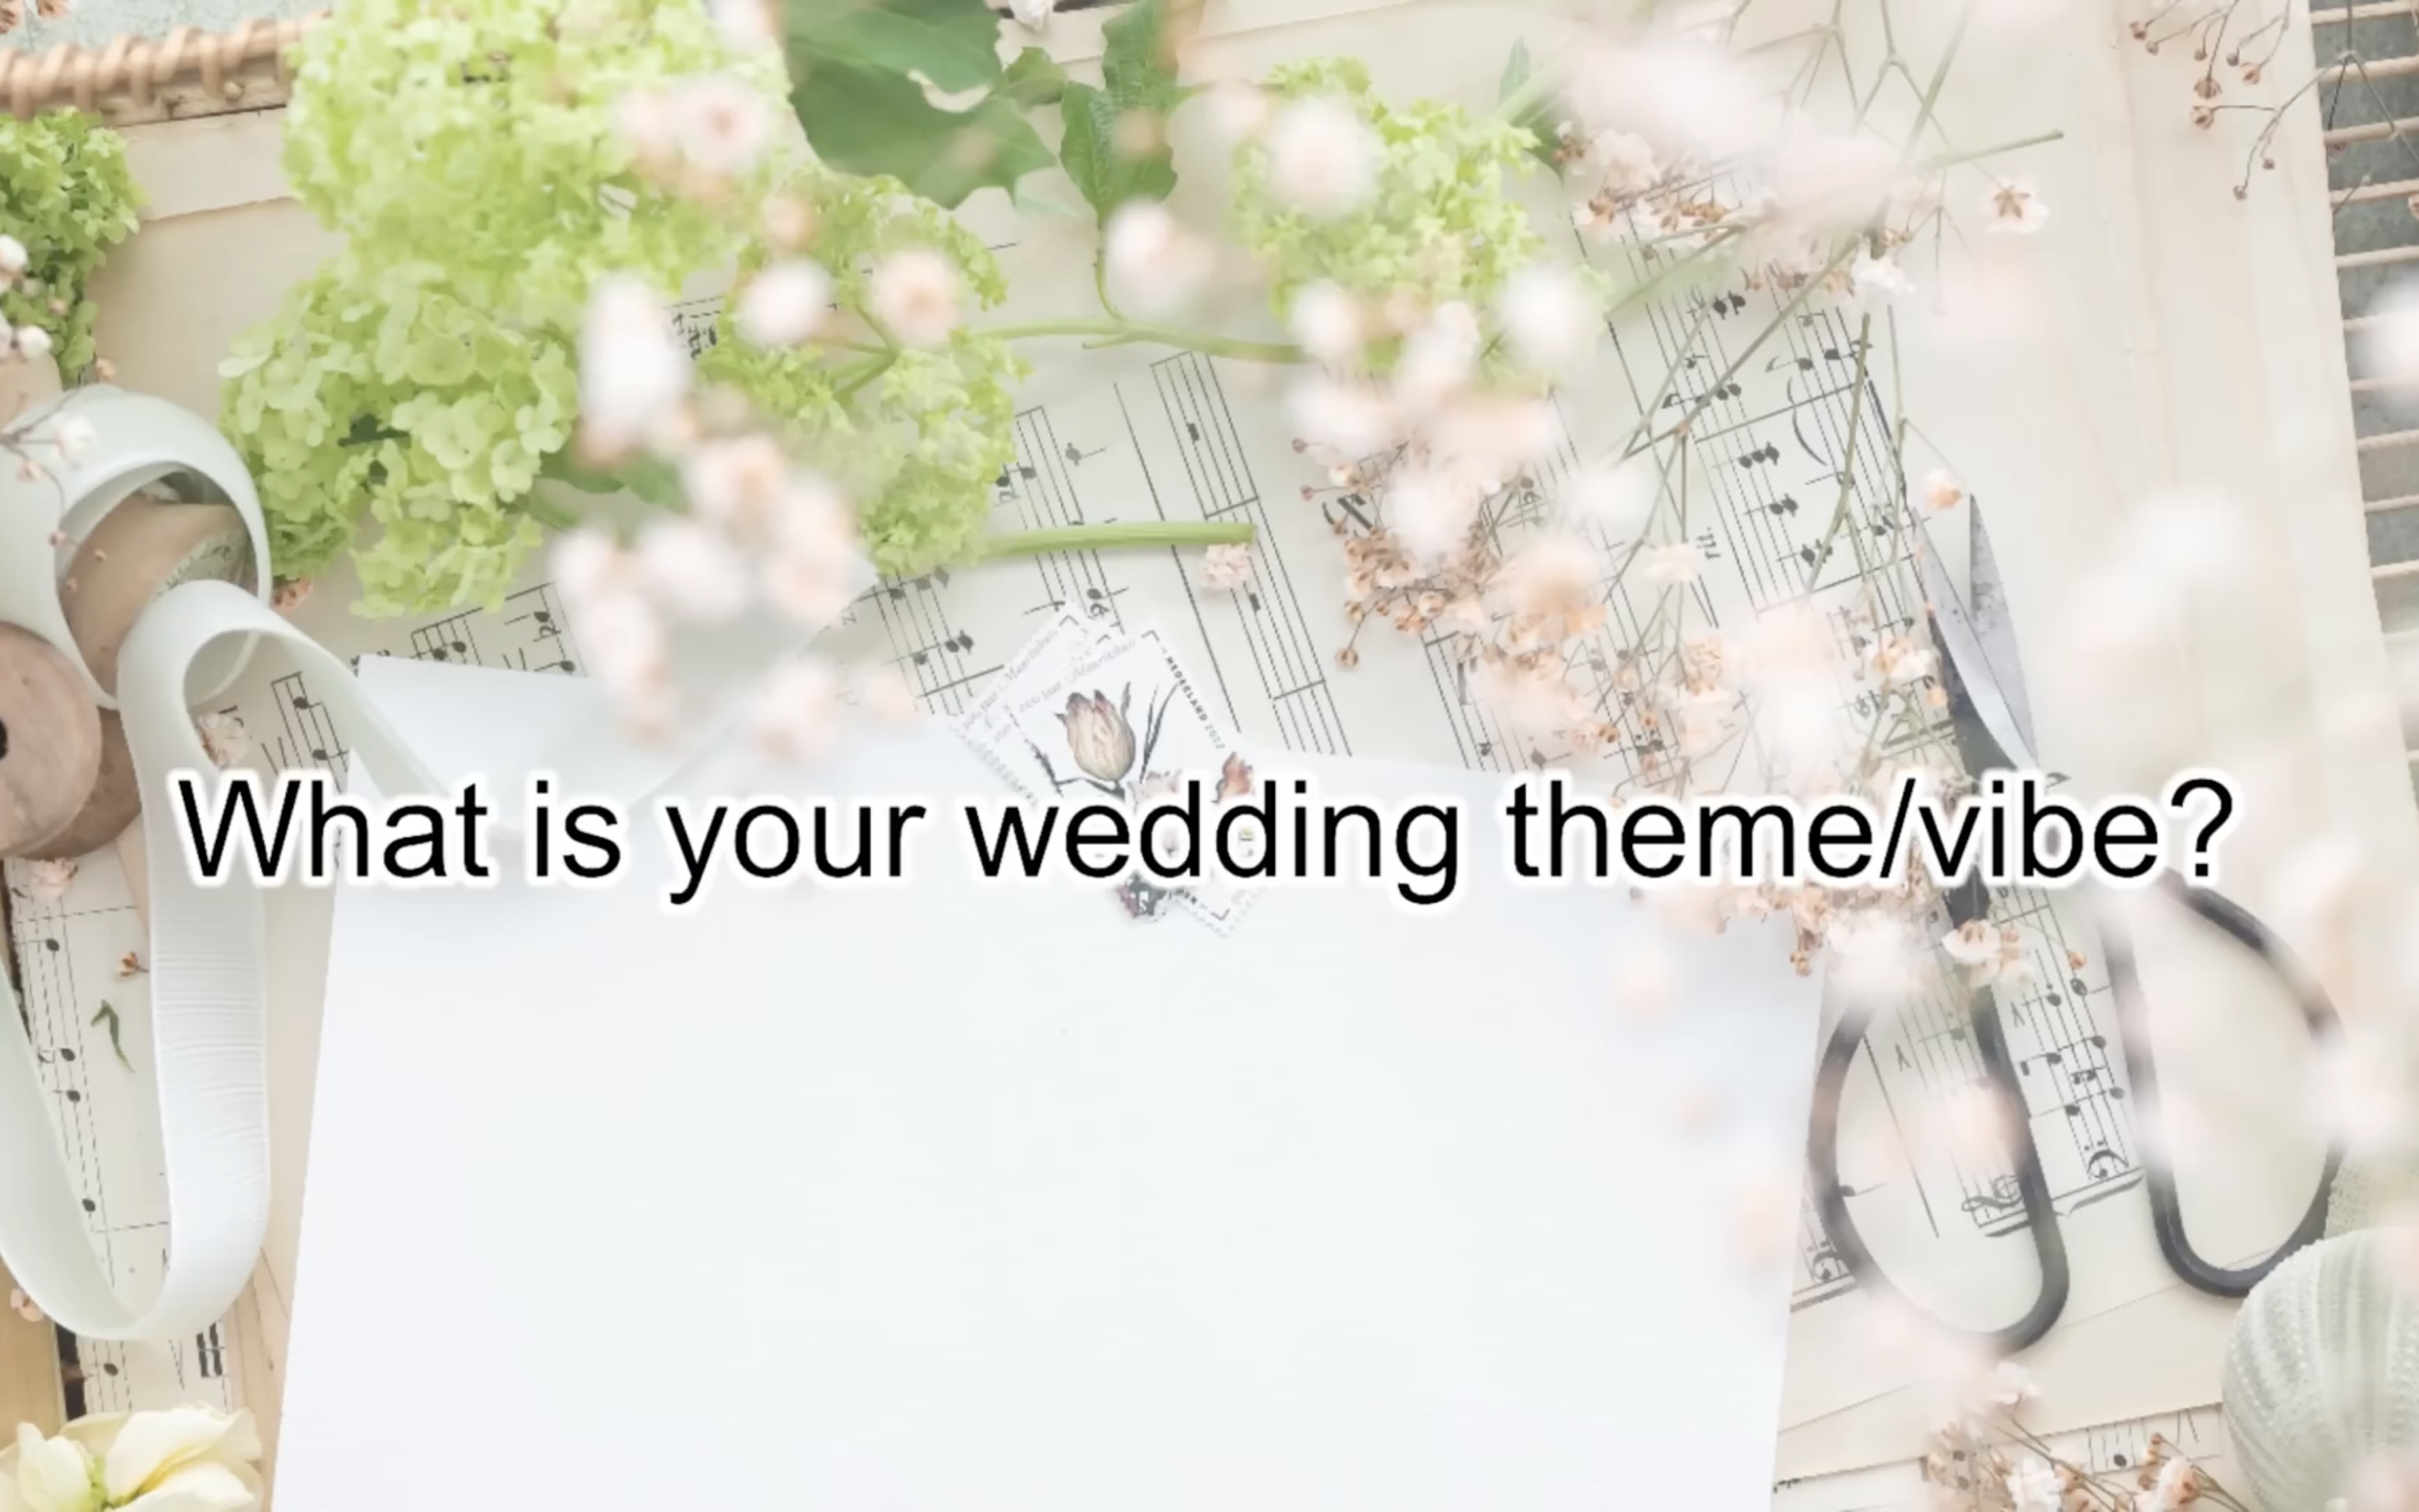
What is your wedding theme/vibe?
Think about the timing of the wedding (spring, summer, fall, or winter), where the wedding will be held, and the style of the wedding.
Knowing the bridal style helps identify the vibe for the wedding dress and helps when picking fabrics later.
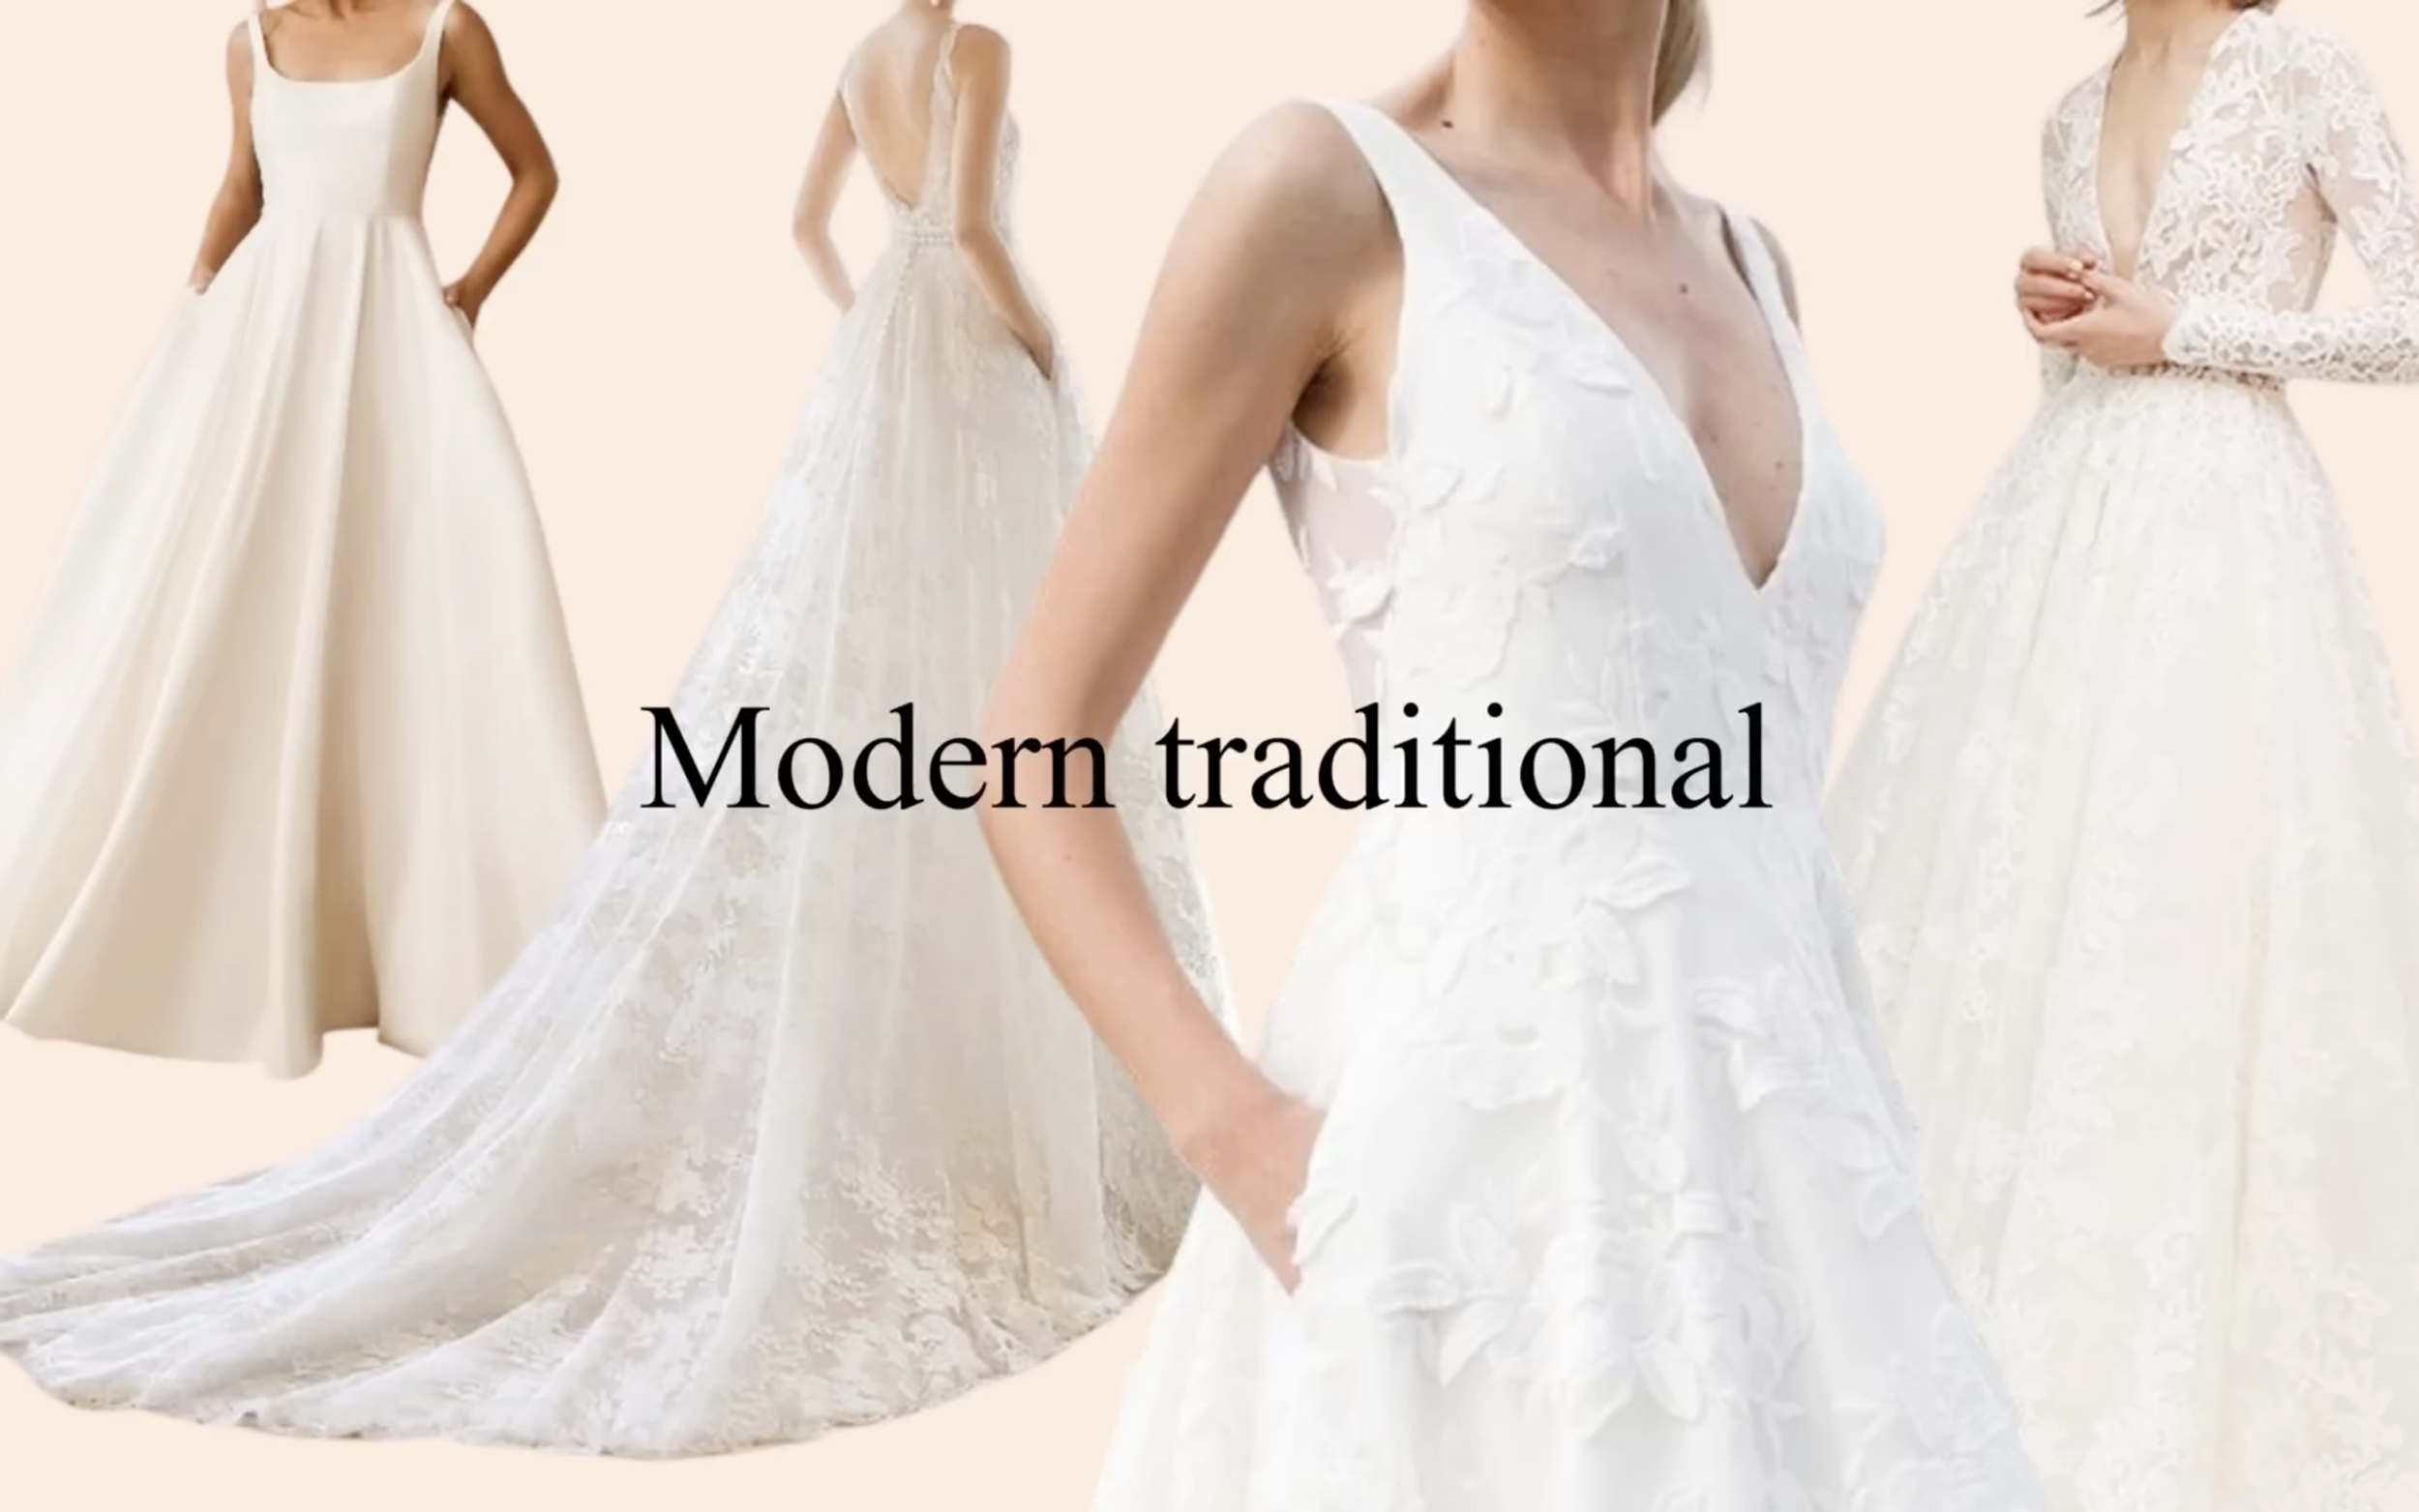
For my wedding dress, I picture my perfect wedding in a garden on a fresh summer day. I want to look glowing but not over-the-top, elegant but not too stiff, and a little bit sexy without being too revealing. So the bridal style I picked for myself is modern traditional — it is a combination of classic and romantic styles.
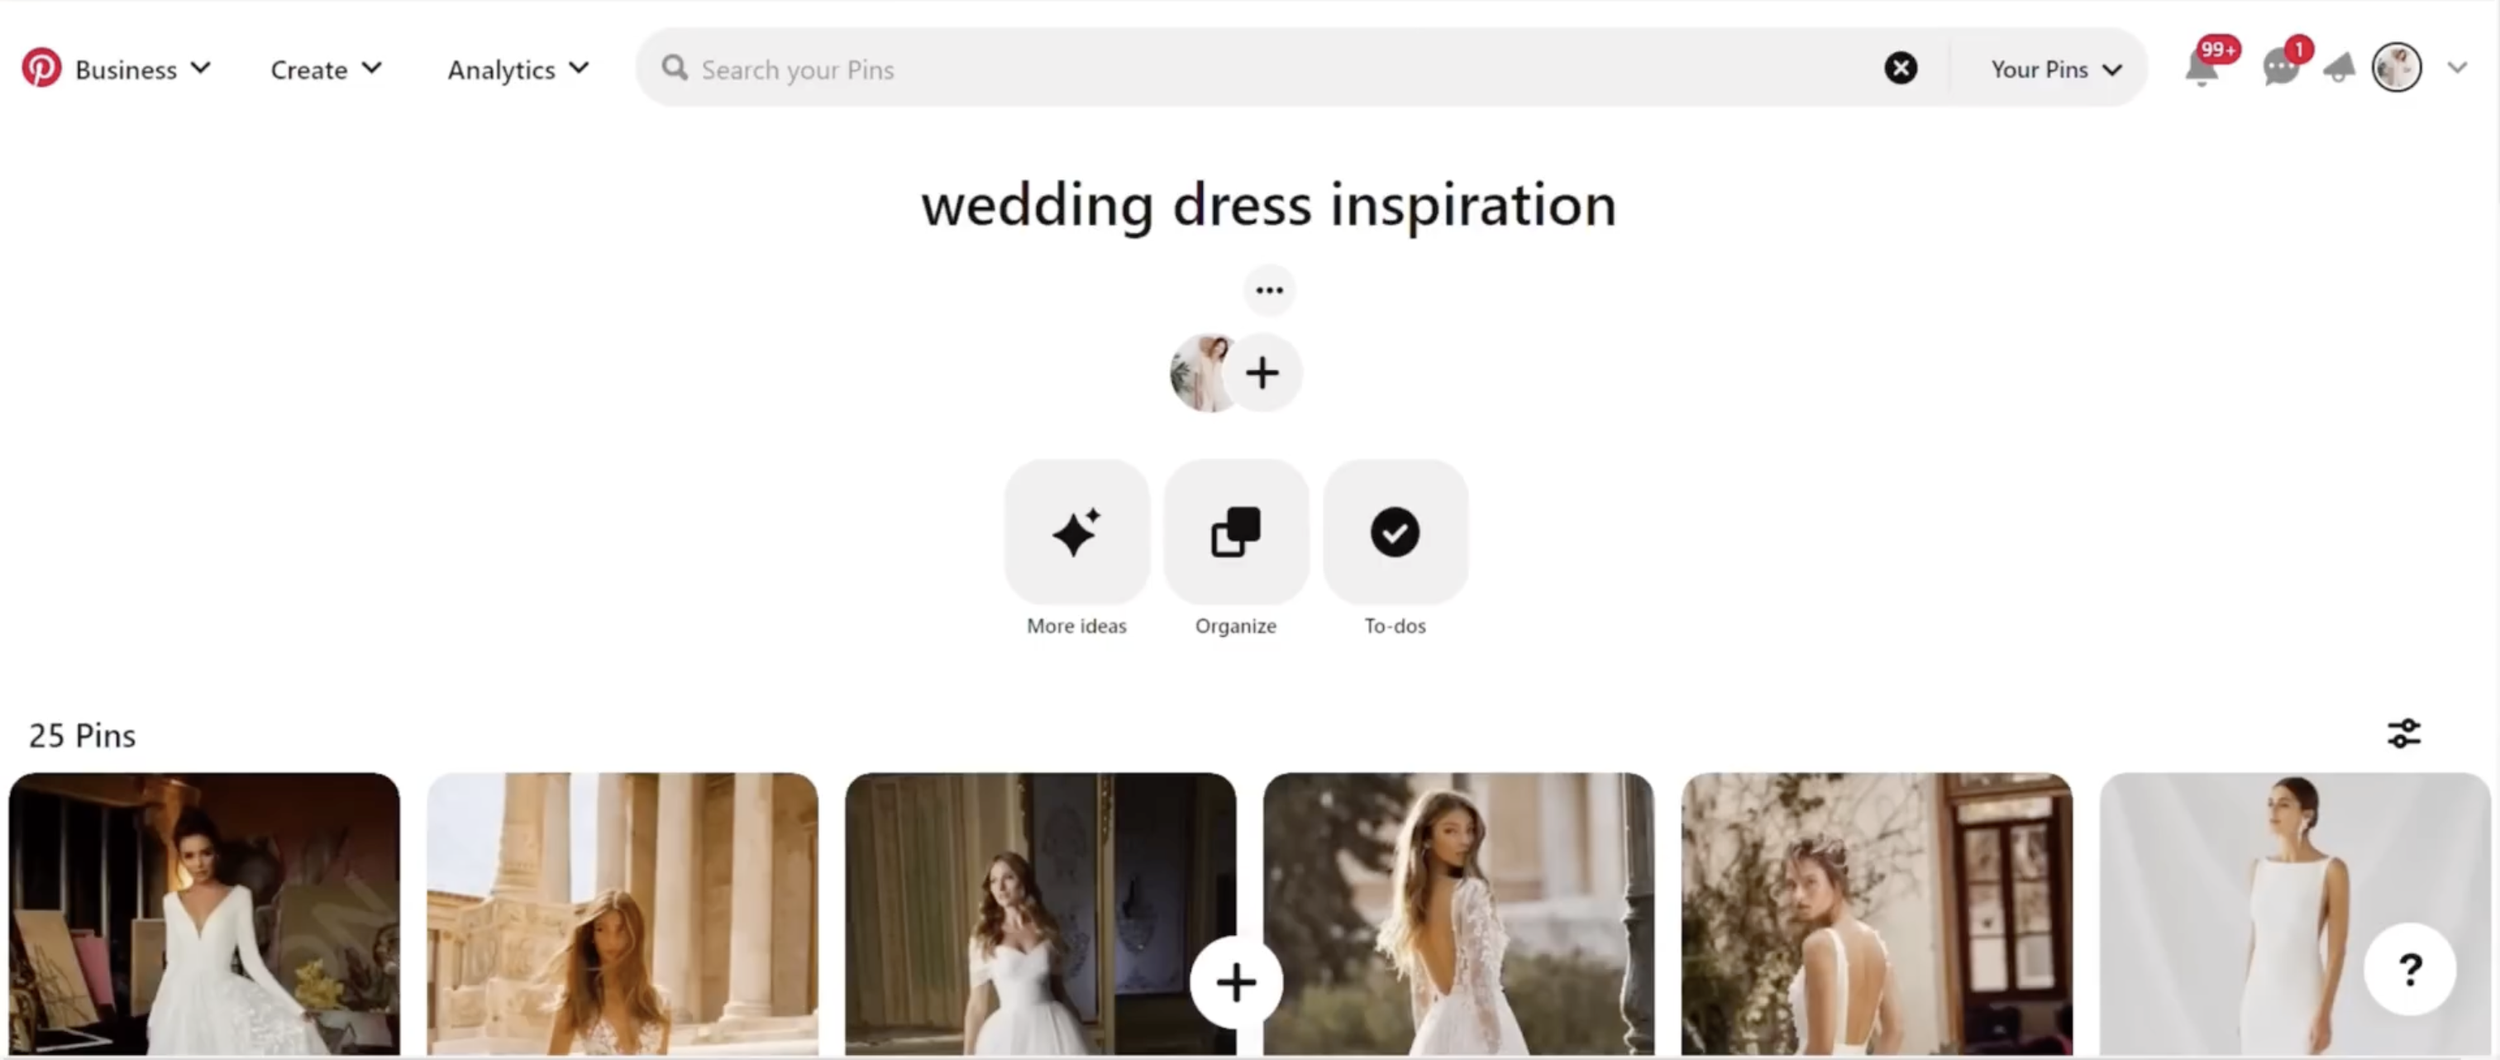
2. GETTING INSPIRATION
This step provides ideas for what kinds of wedding dresses are suitable for the picked bridal style. Pinterest and Instagram are great for inspiration.
When searching, use keywords related to the bridal style picked in the first step.
Before pinning any photo, imagine being in that dress to see if it would be desirable to wear. This reduces the number of dresses in the inspiration folder and makes the next step easier.
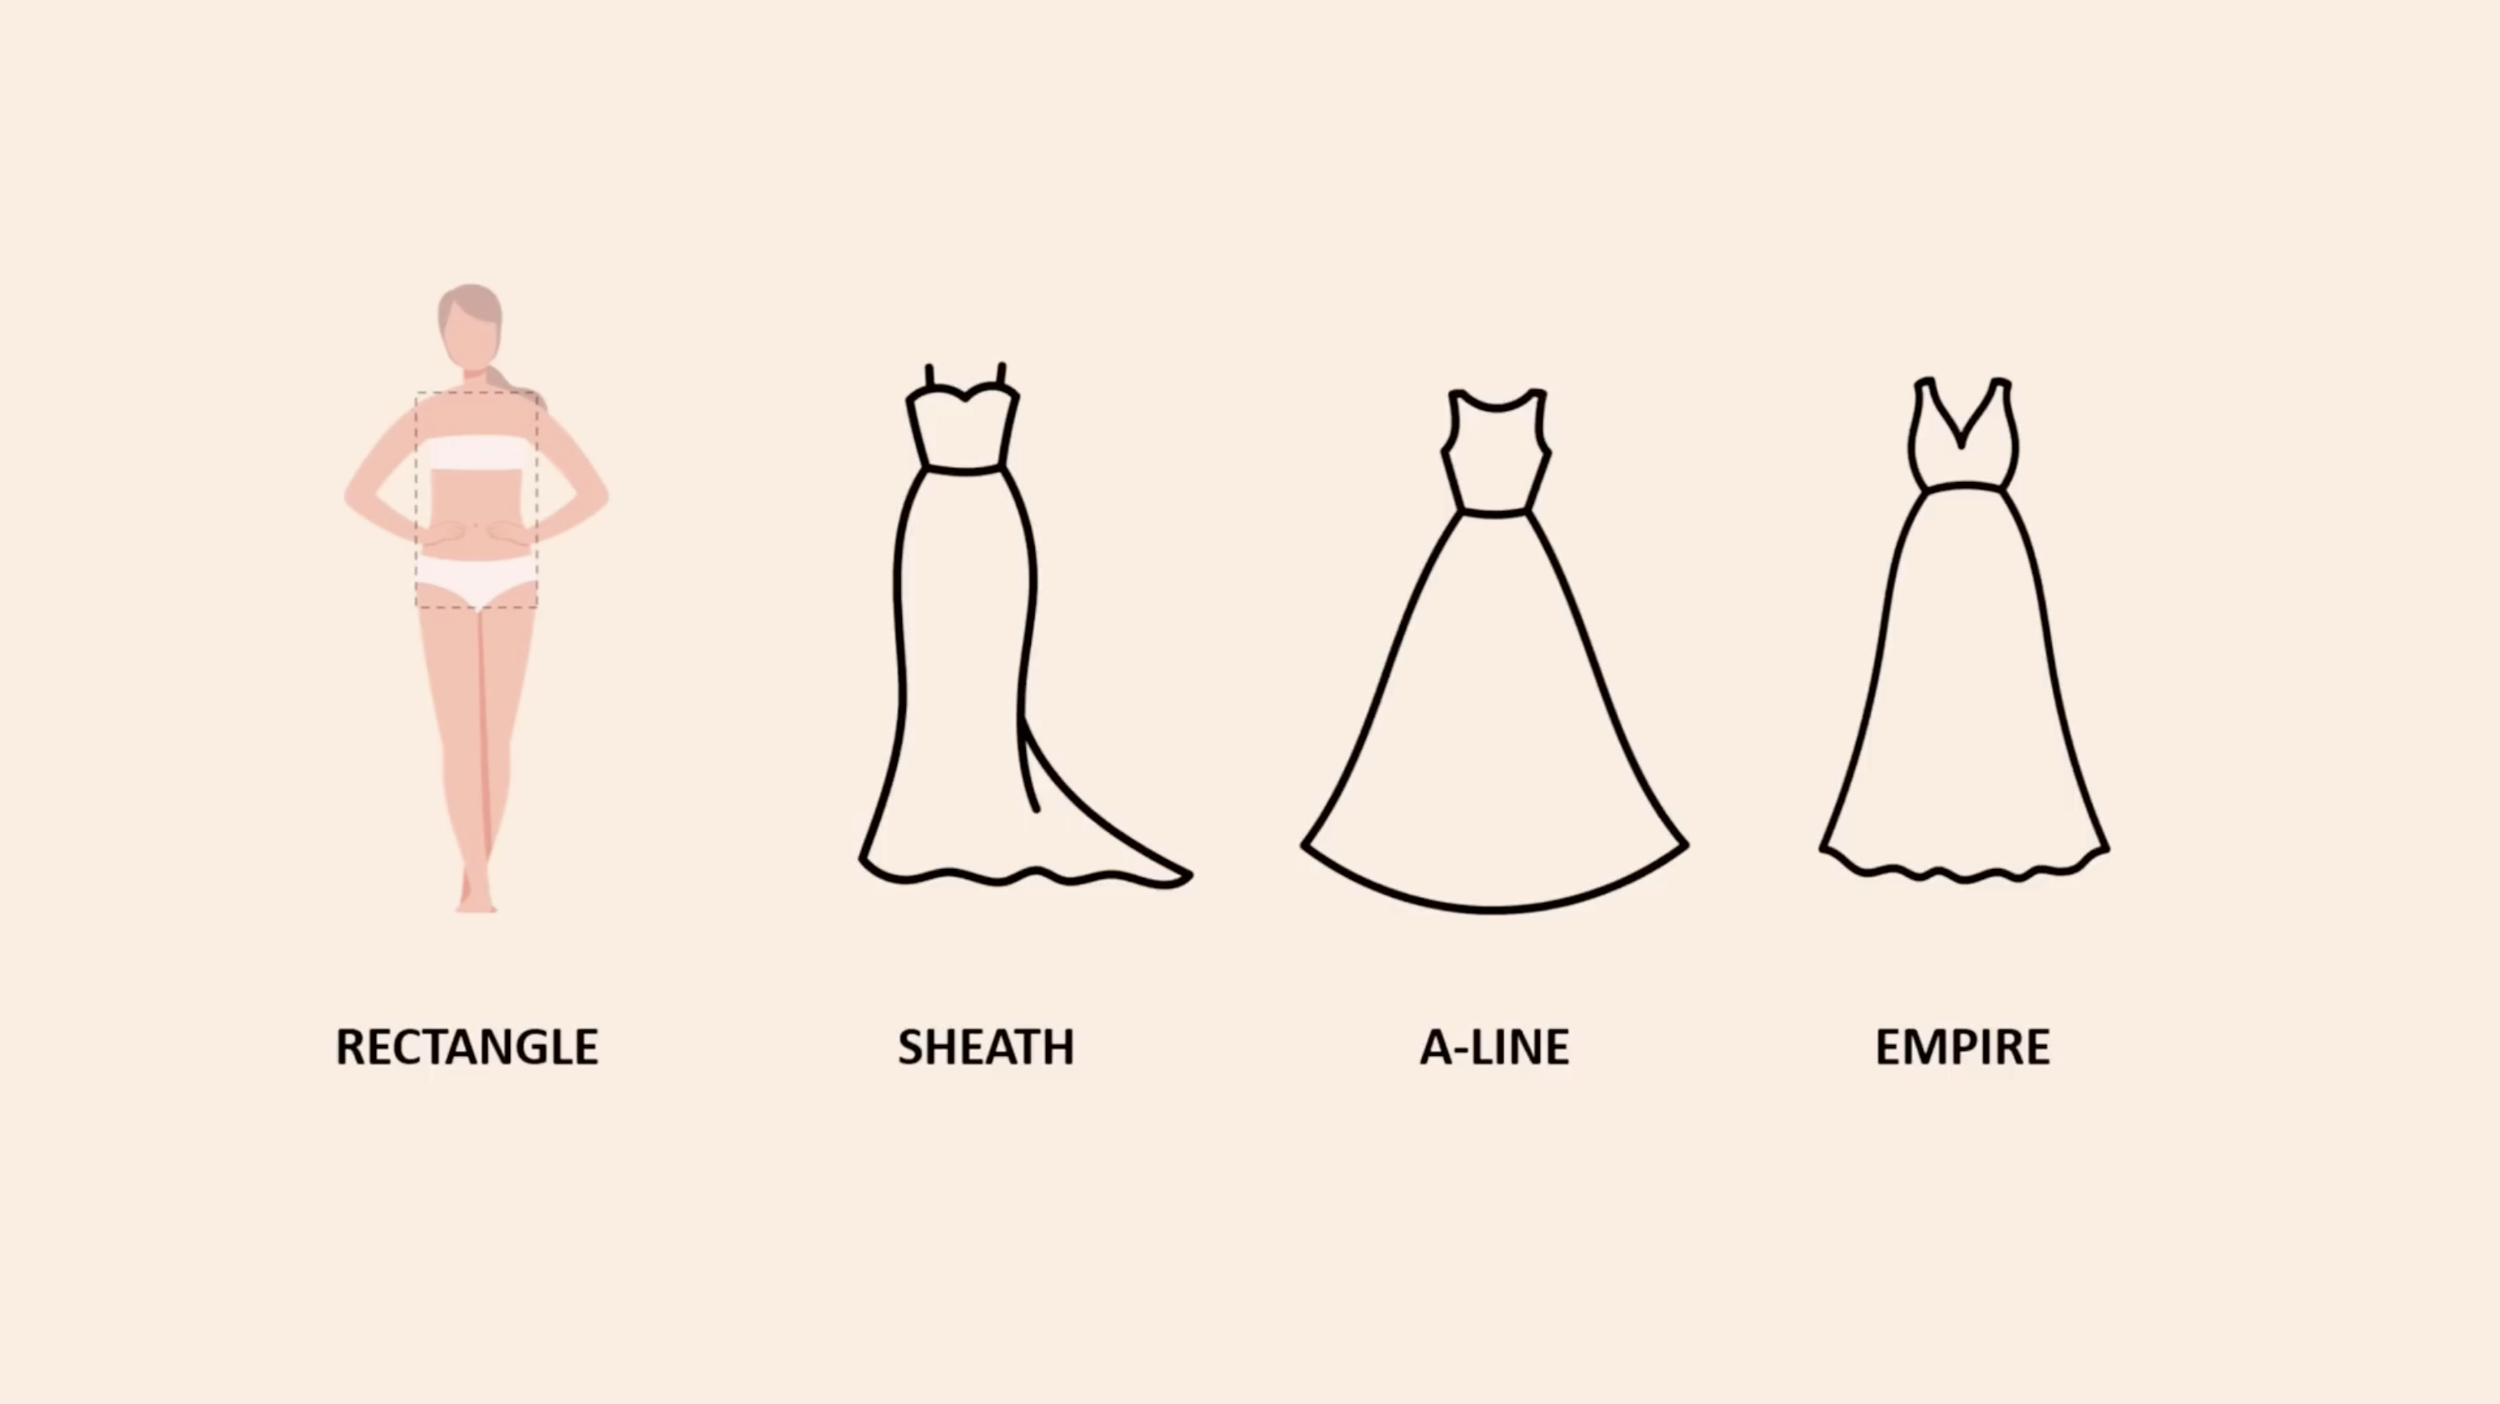
3. ANALYZING THE BODY
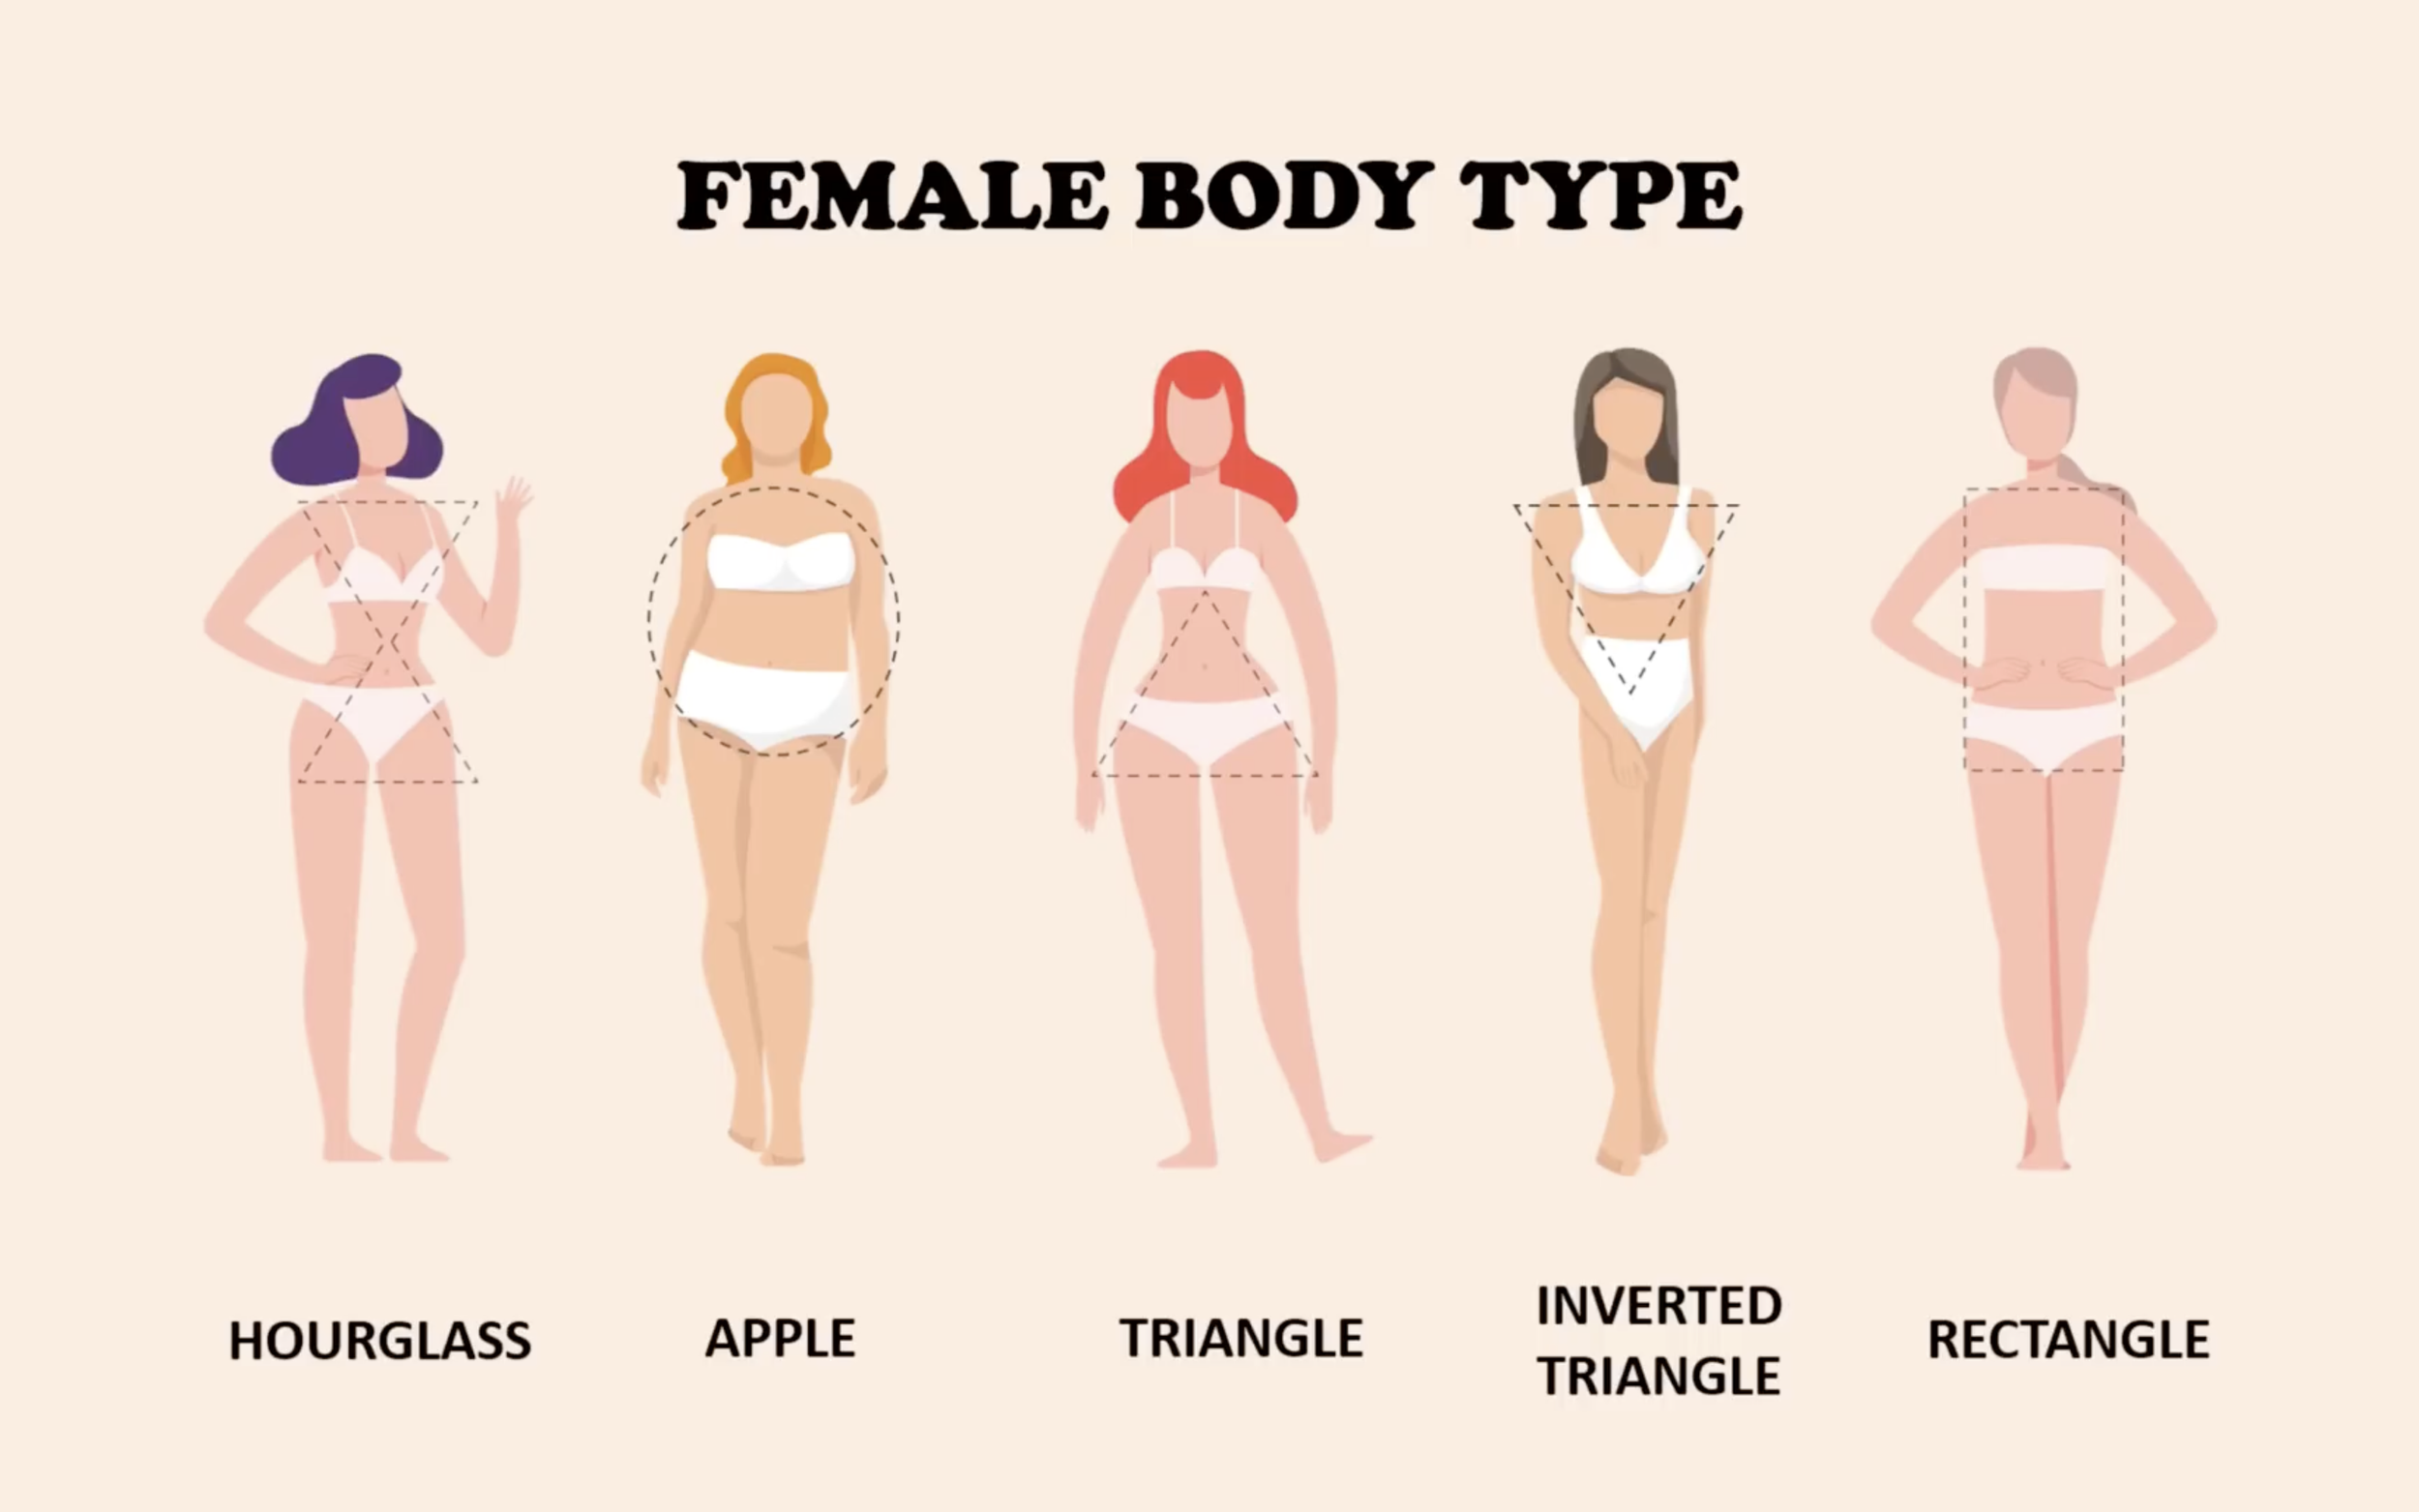
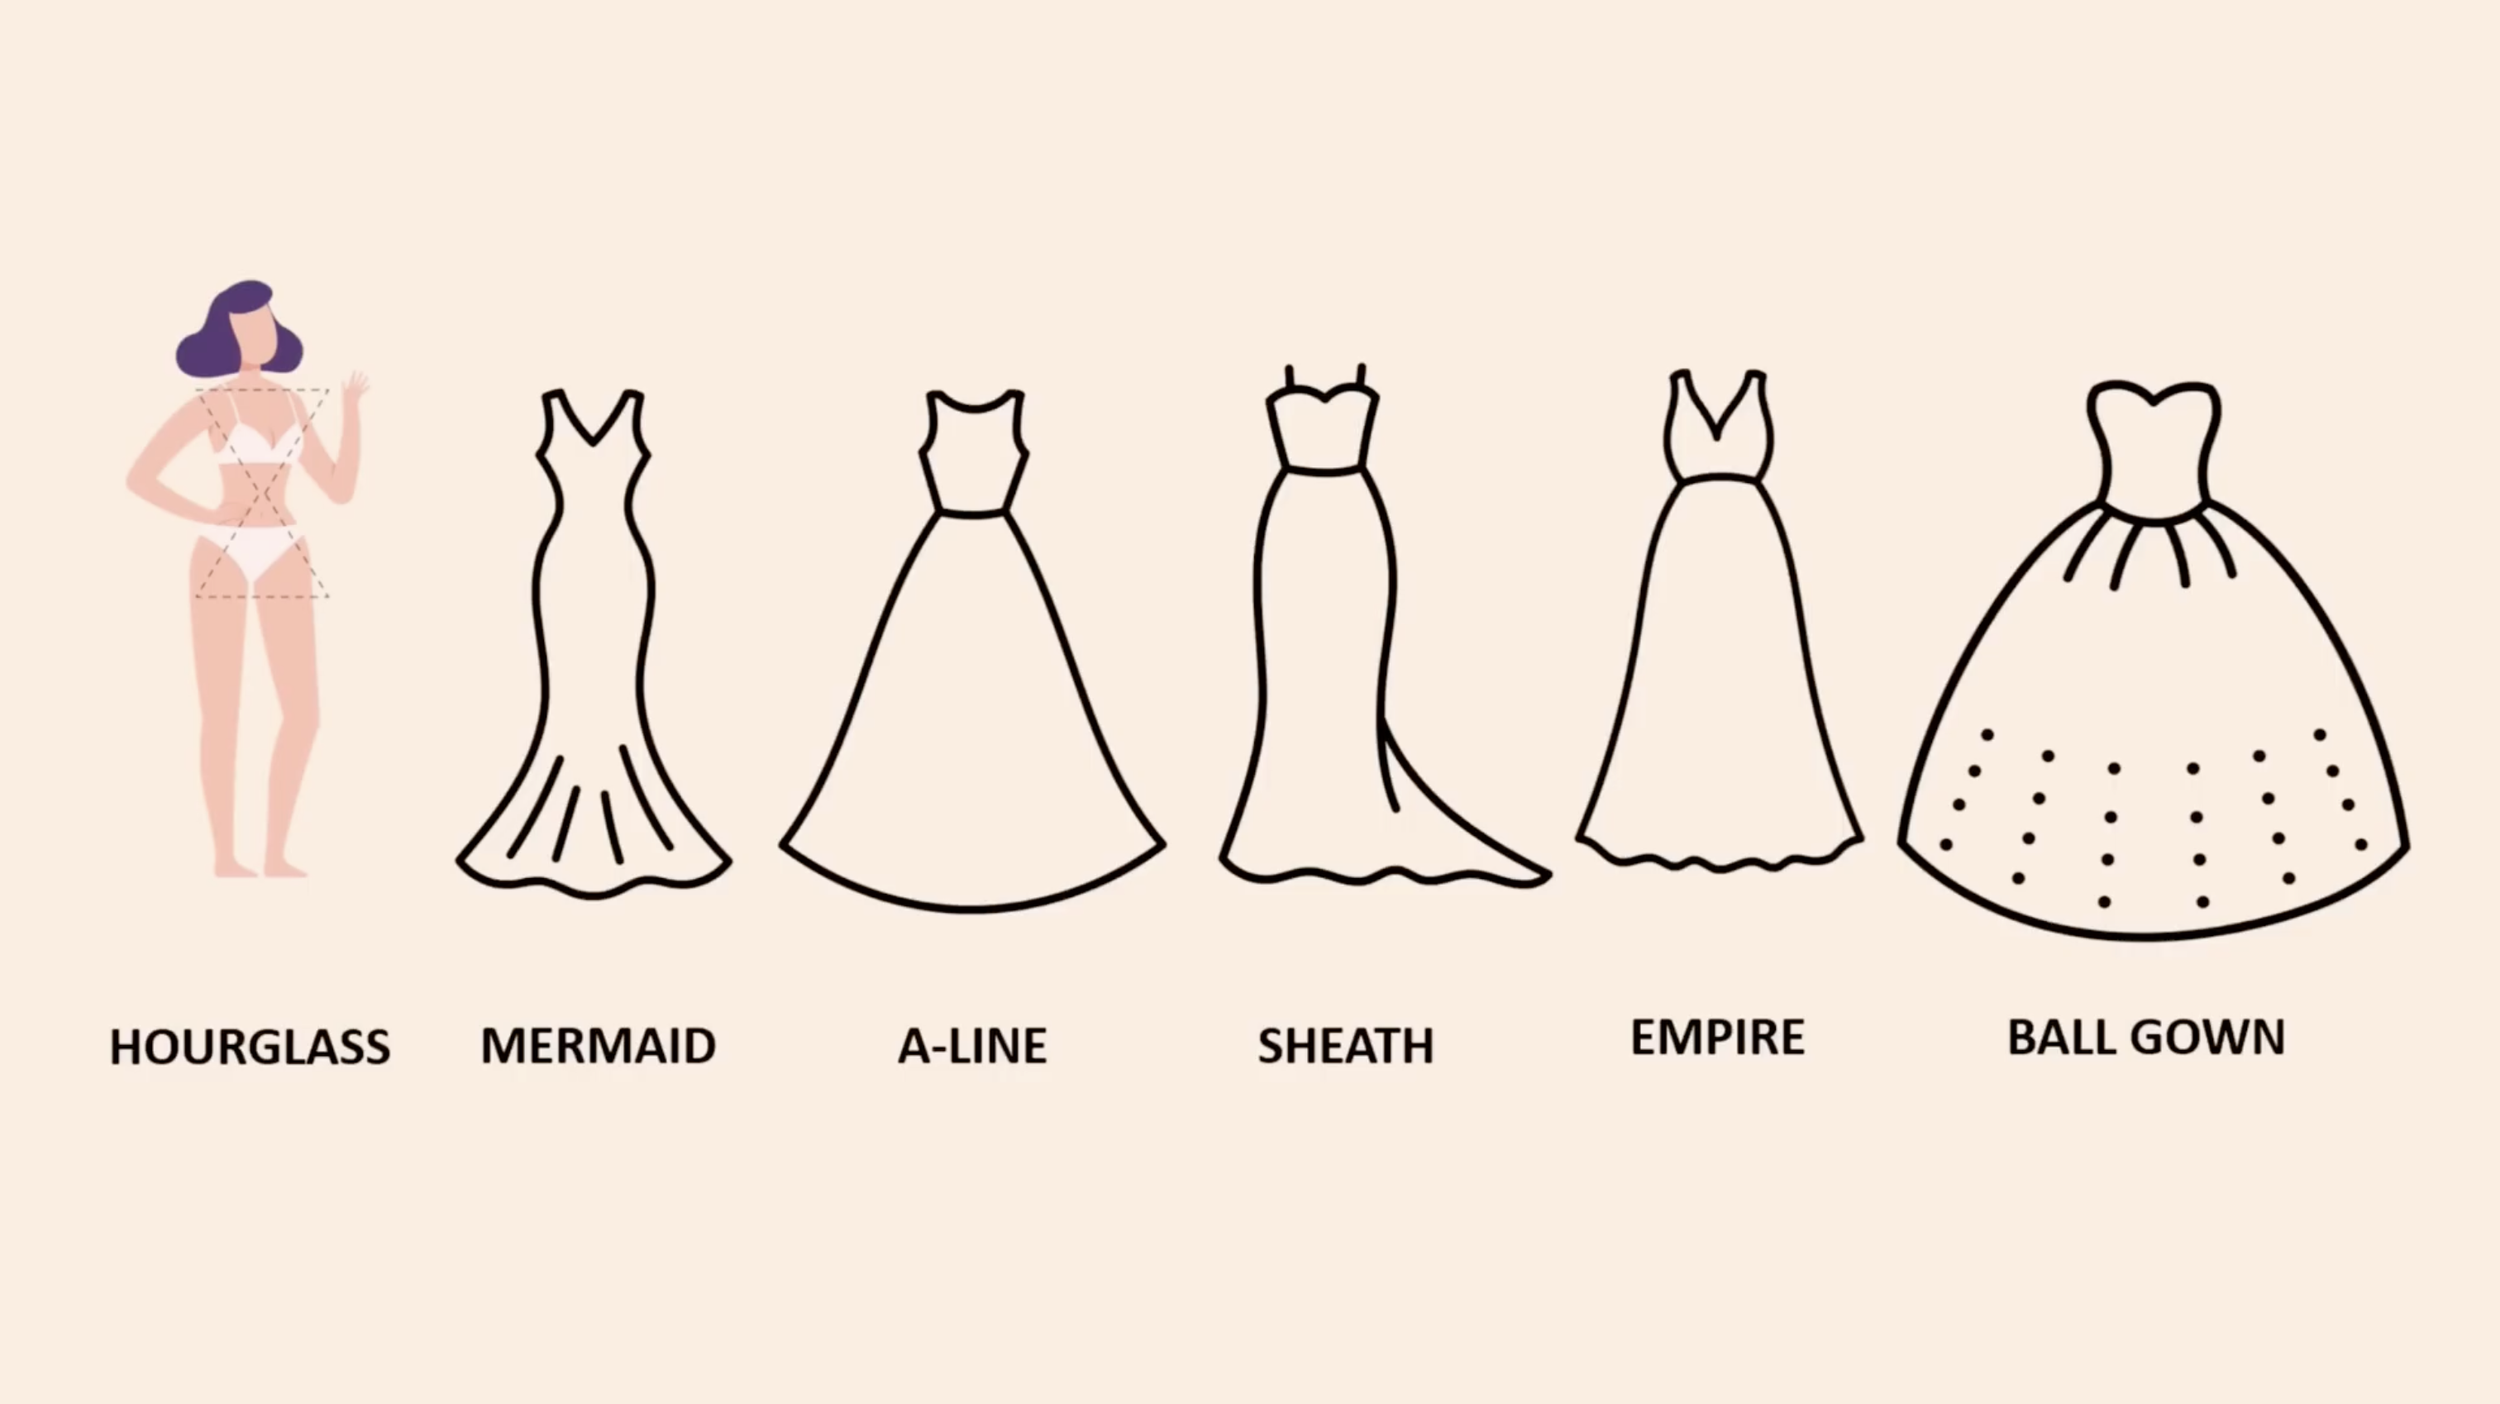
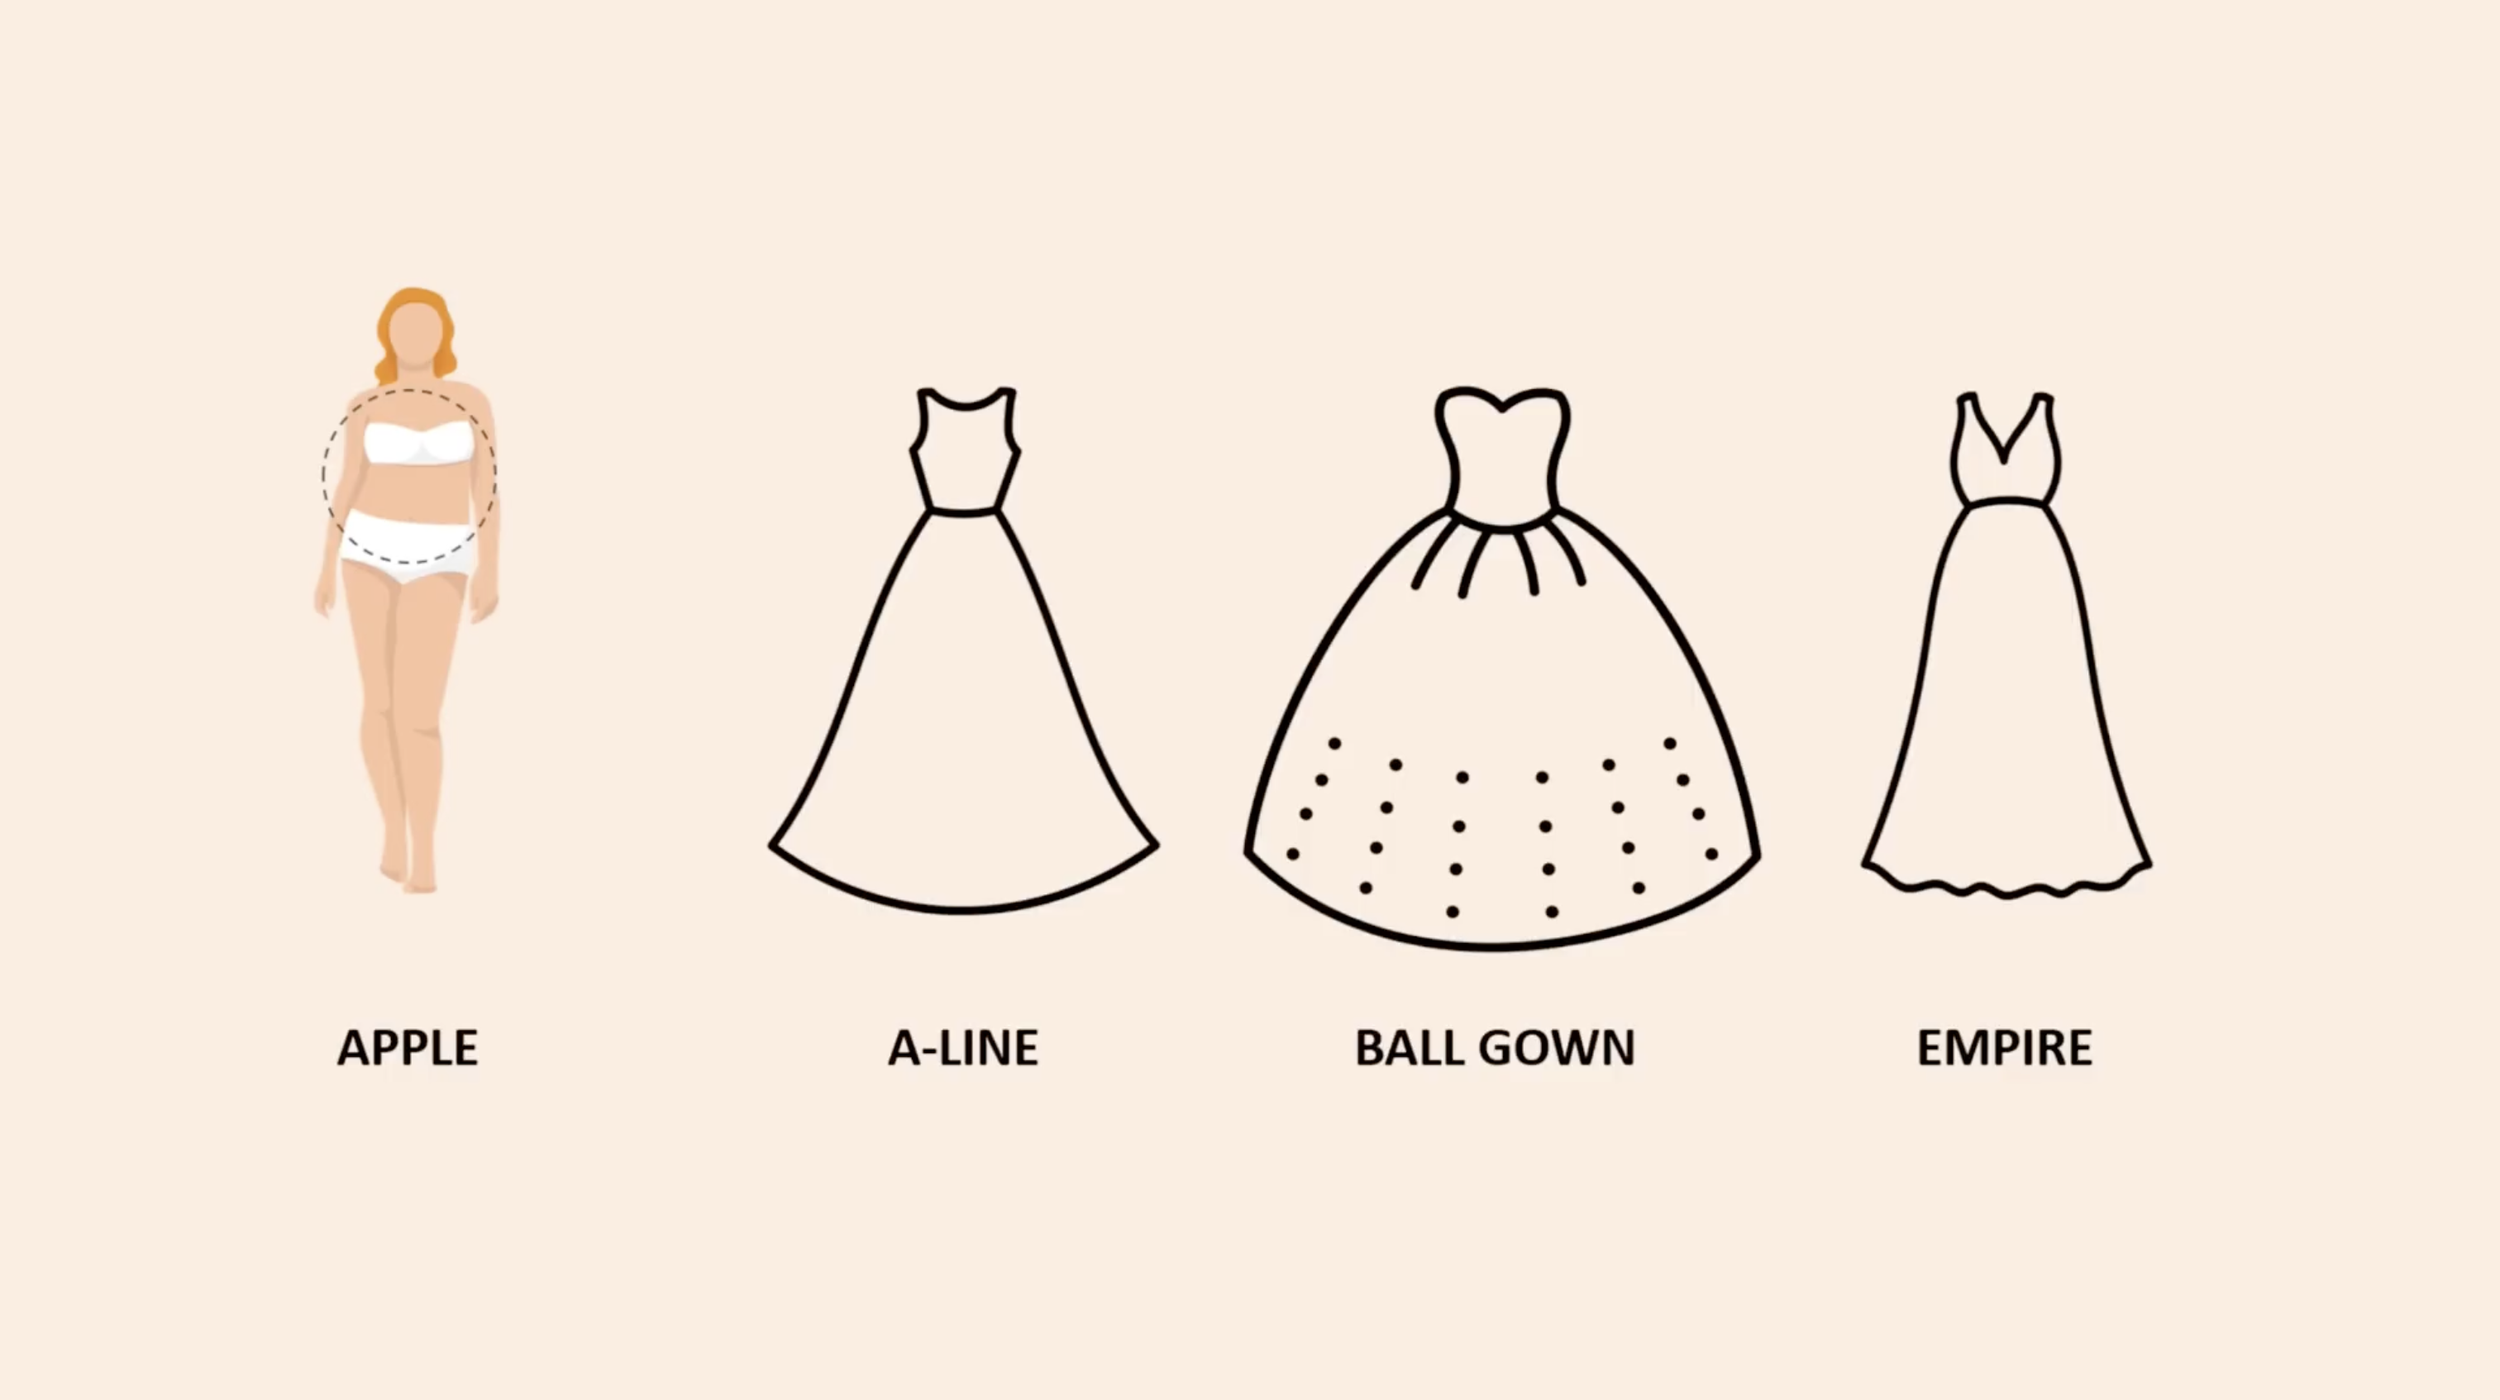
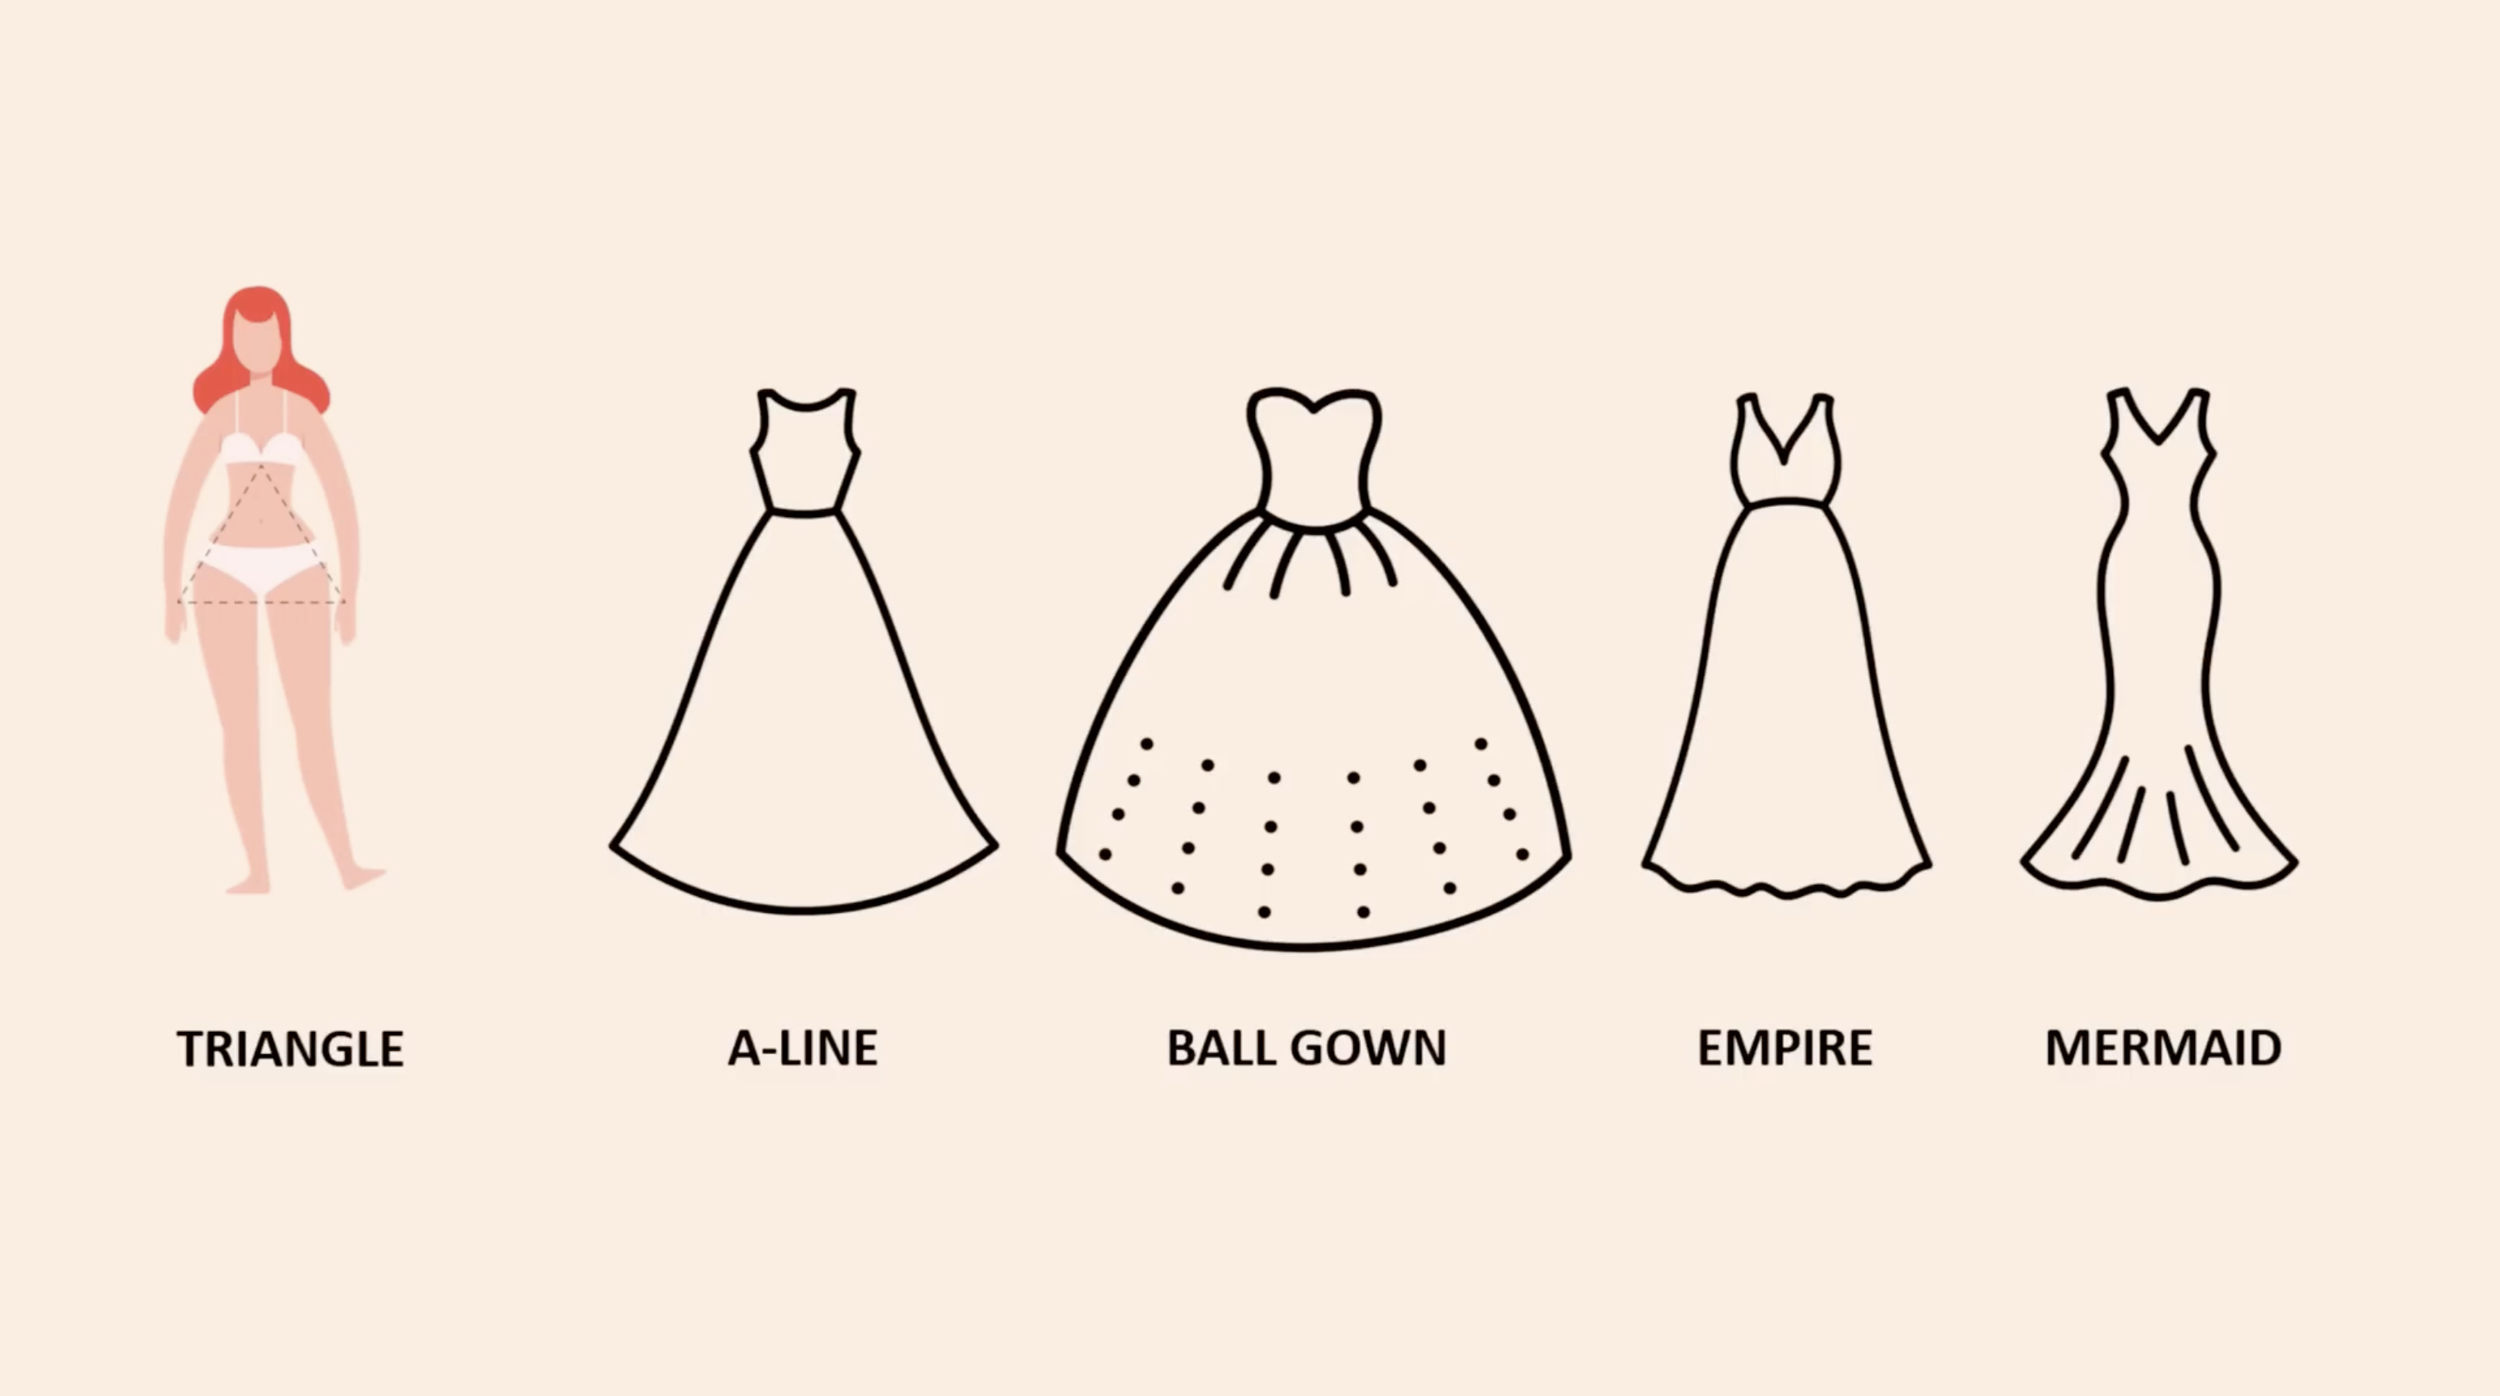
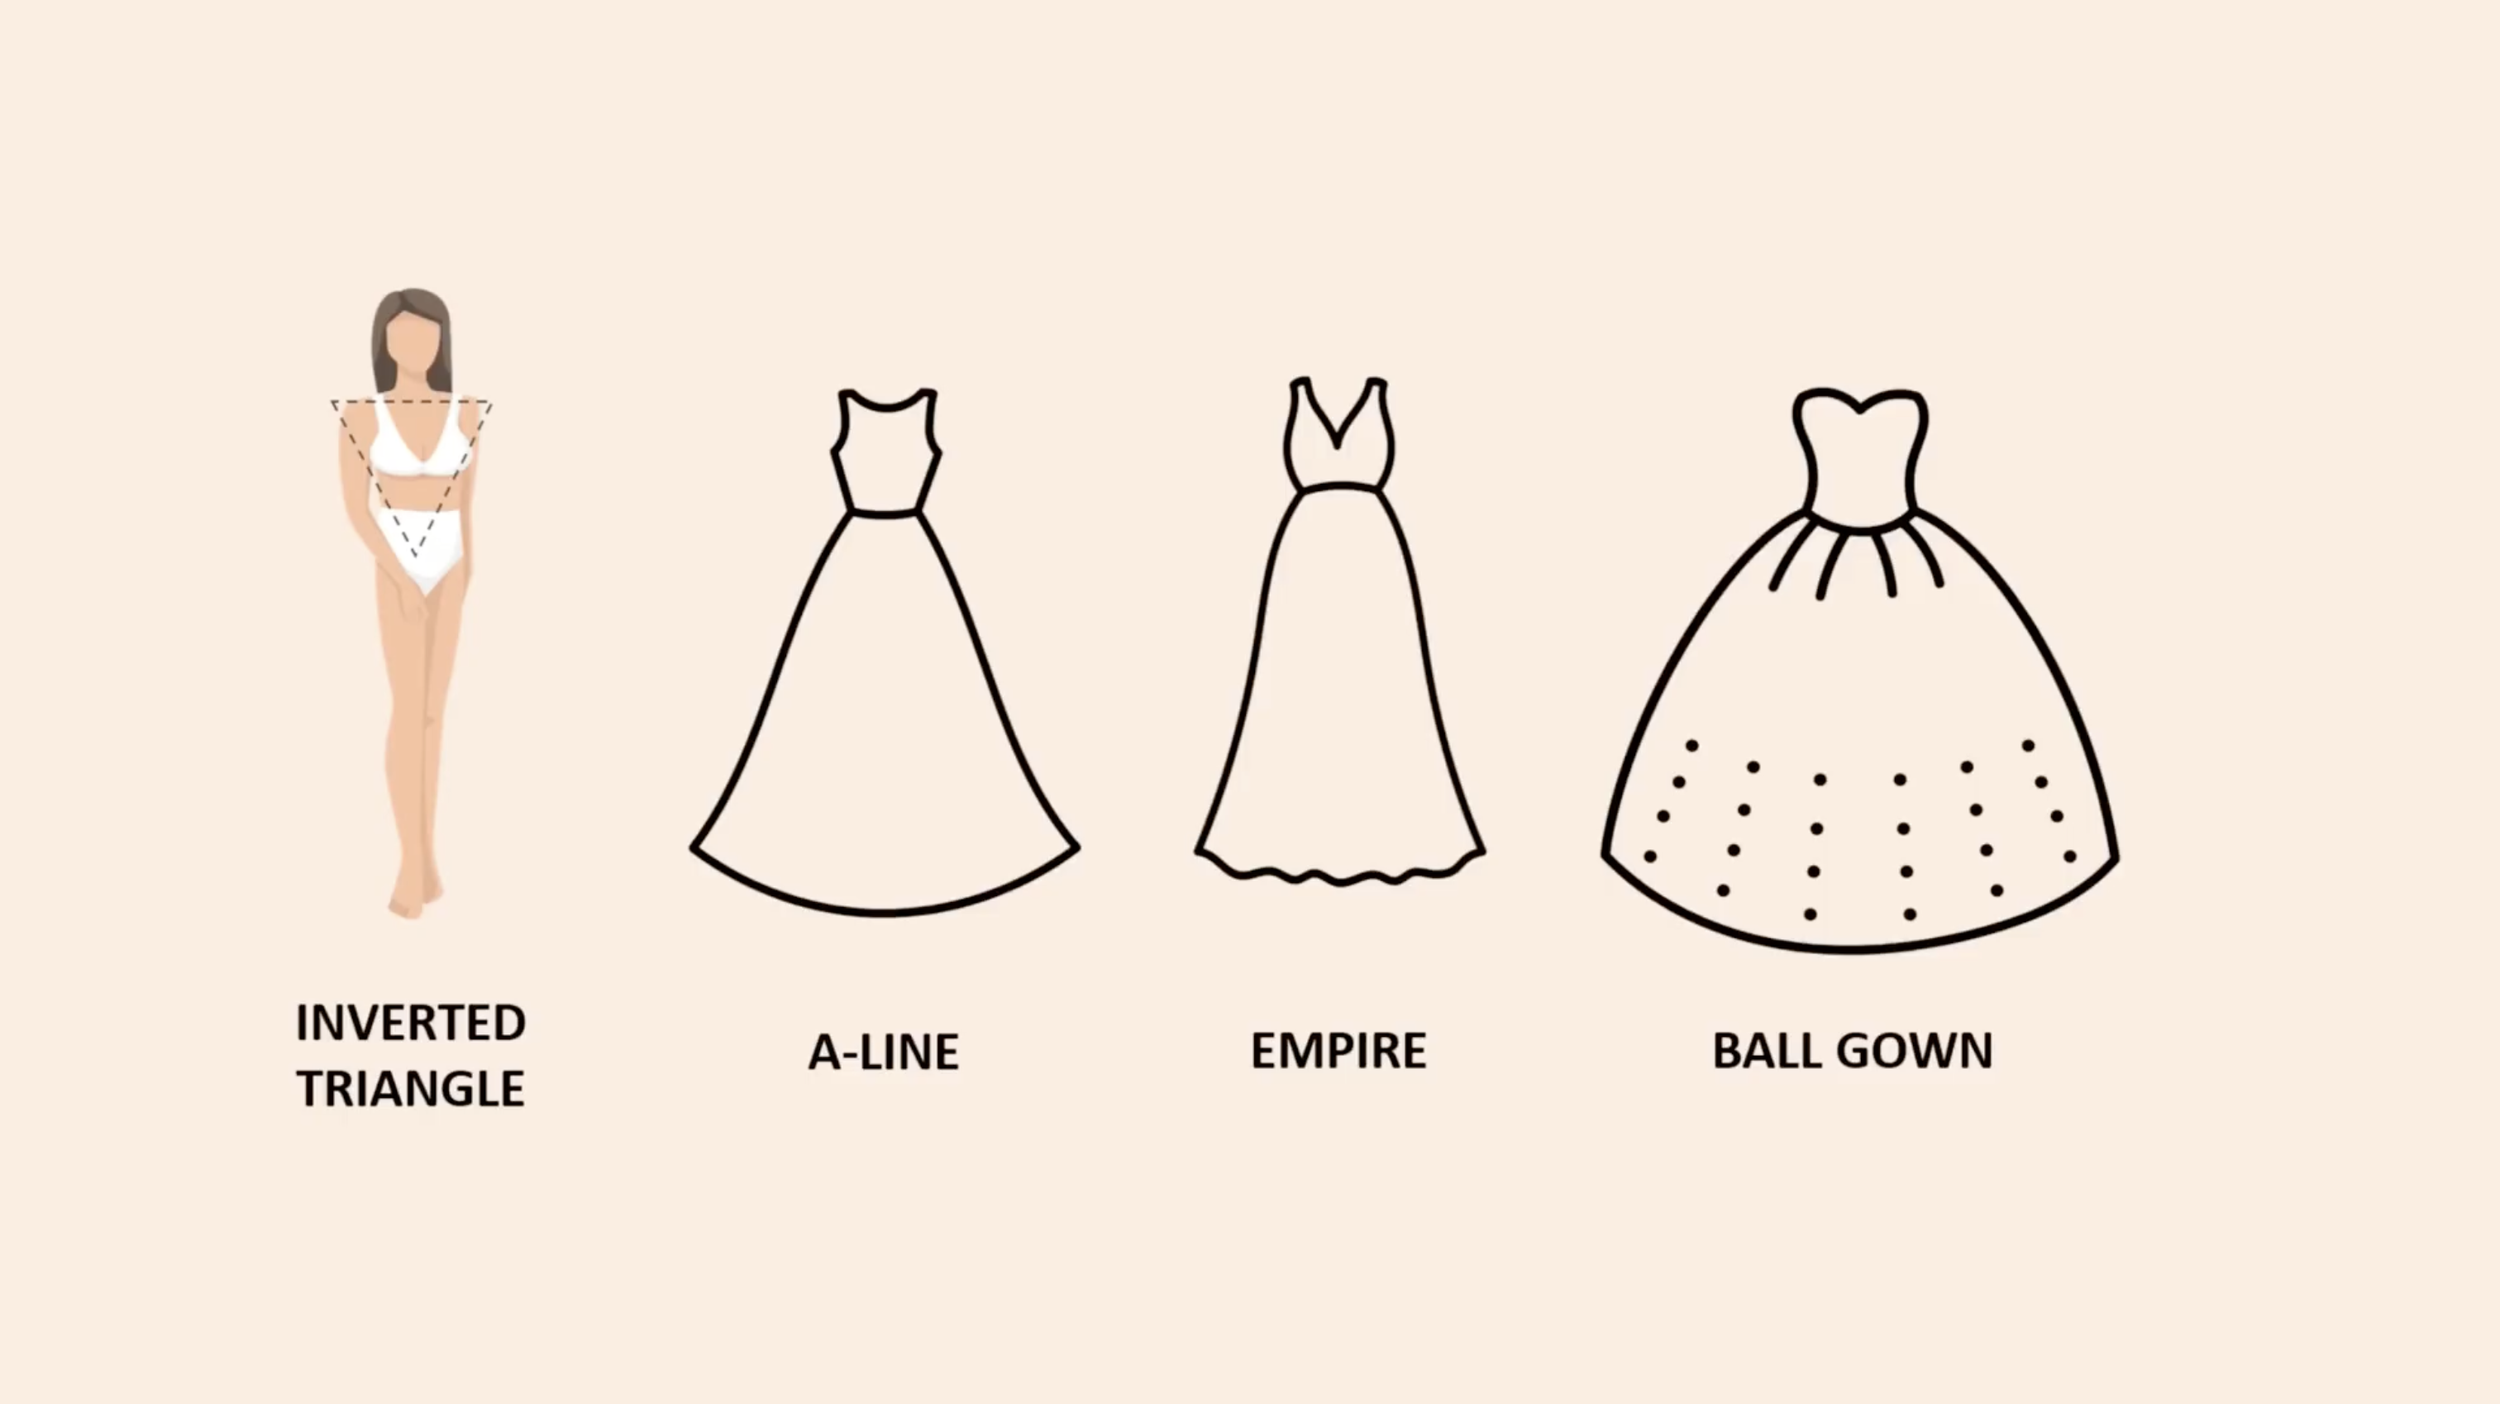
First, it's helpful to understand the different wedding dress styles. There are usually 5 main shapes.
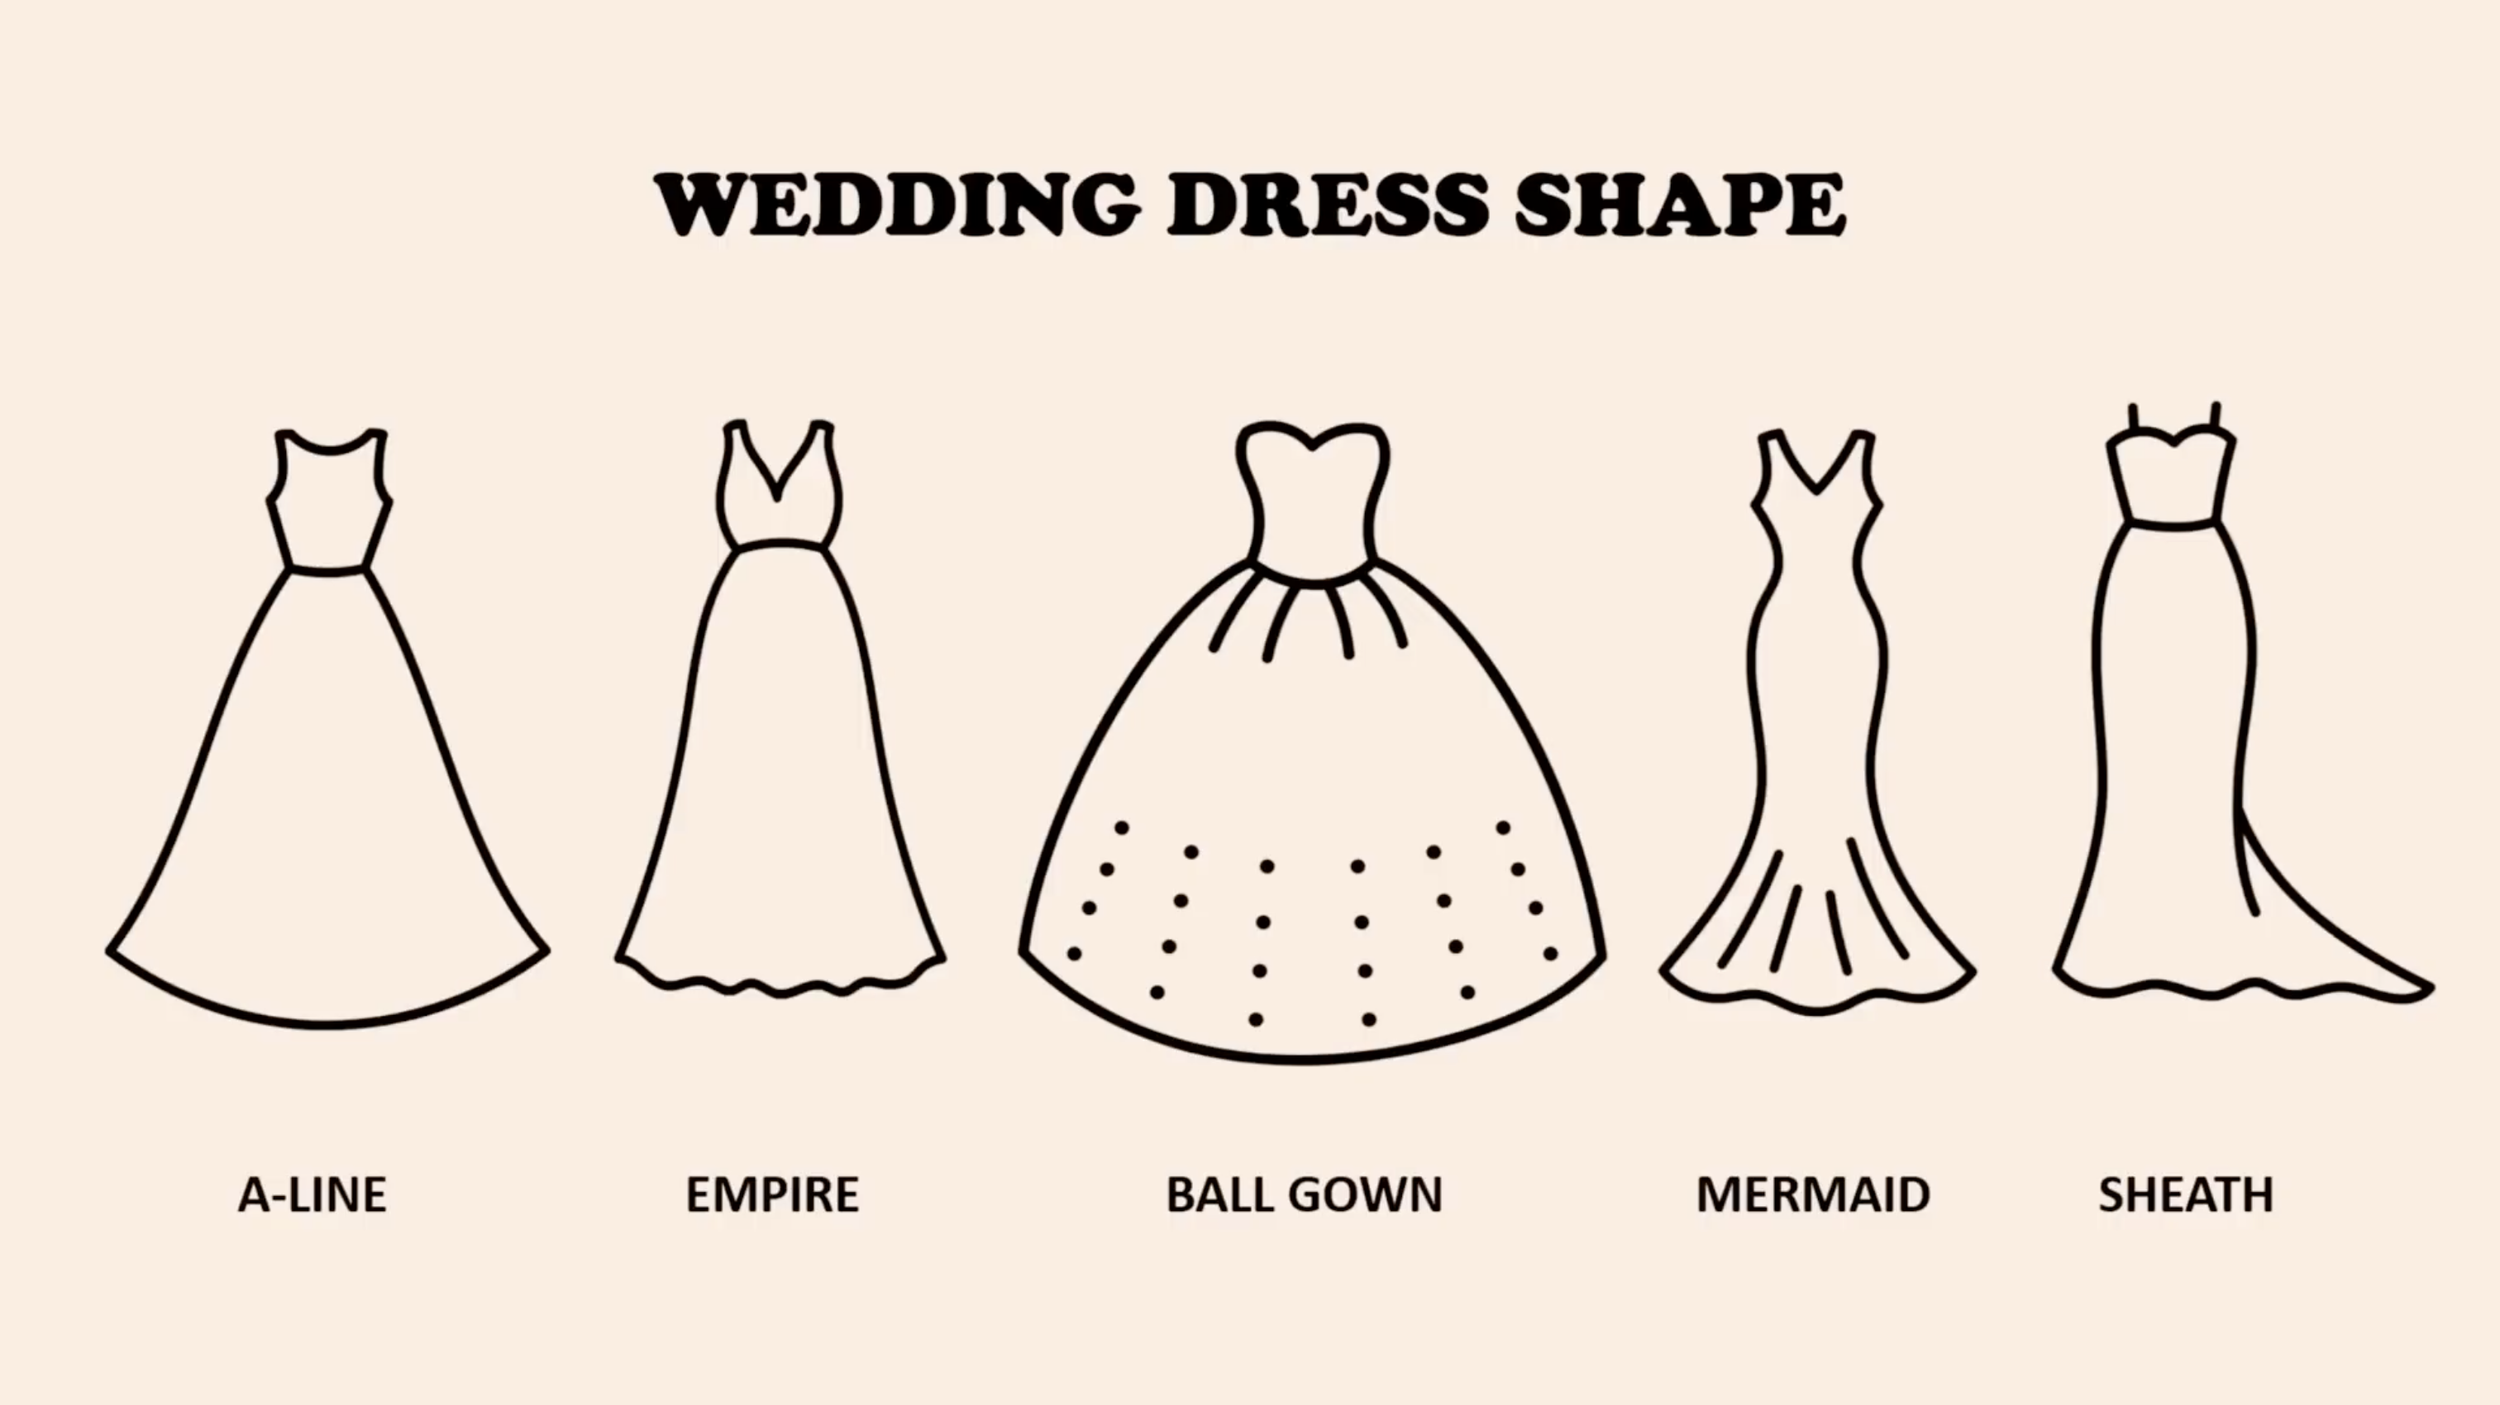
Similarly, there are about five common body types. You can Google which dress shape works best for each one. I found out that I have a rectangle body shape, so an A-line or Empire waist dress suits me best.
Once you know your shape, go back to your inspiration folder and filter out the ones that don't fit. You’ll see your list getting much smaller! Now, you only have a few designs left to choose from for your final look.
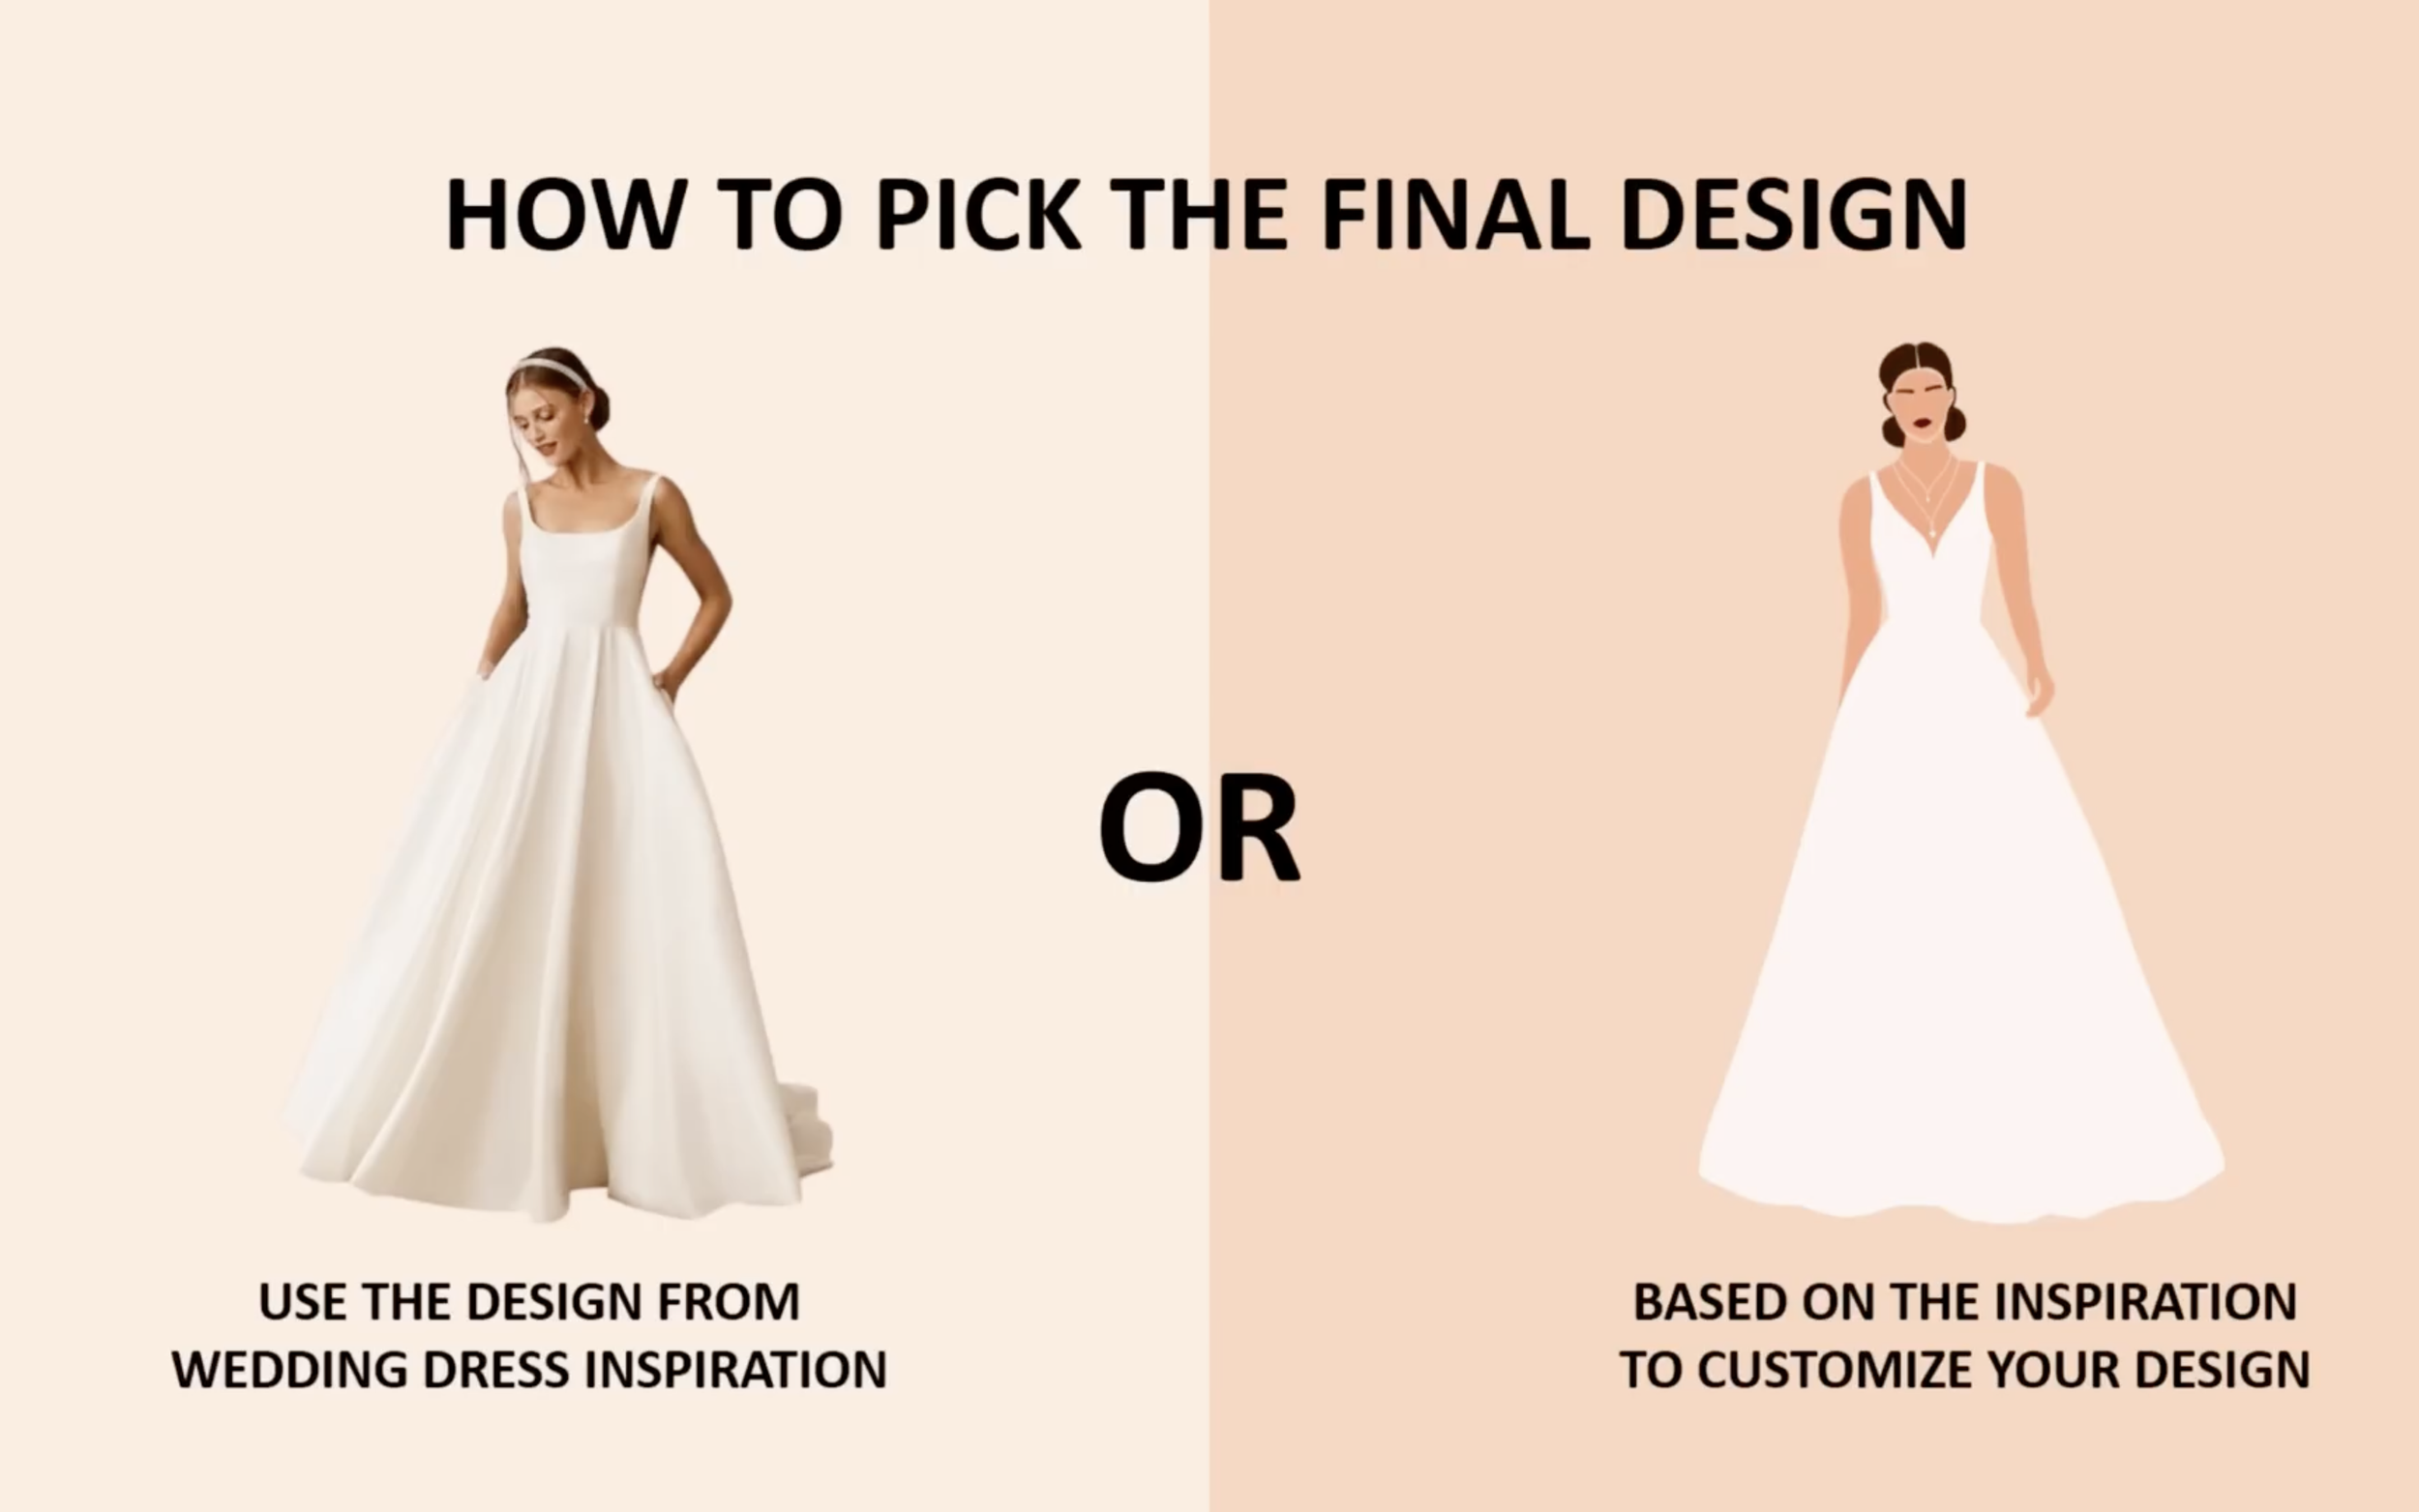
4. CHOOSING THE FINAL DESIGN
Here is the way to choose the final design:
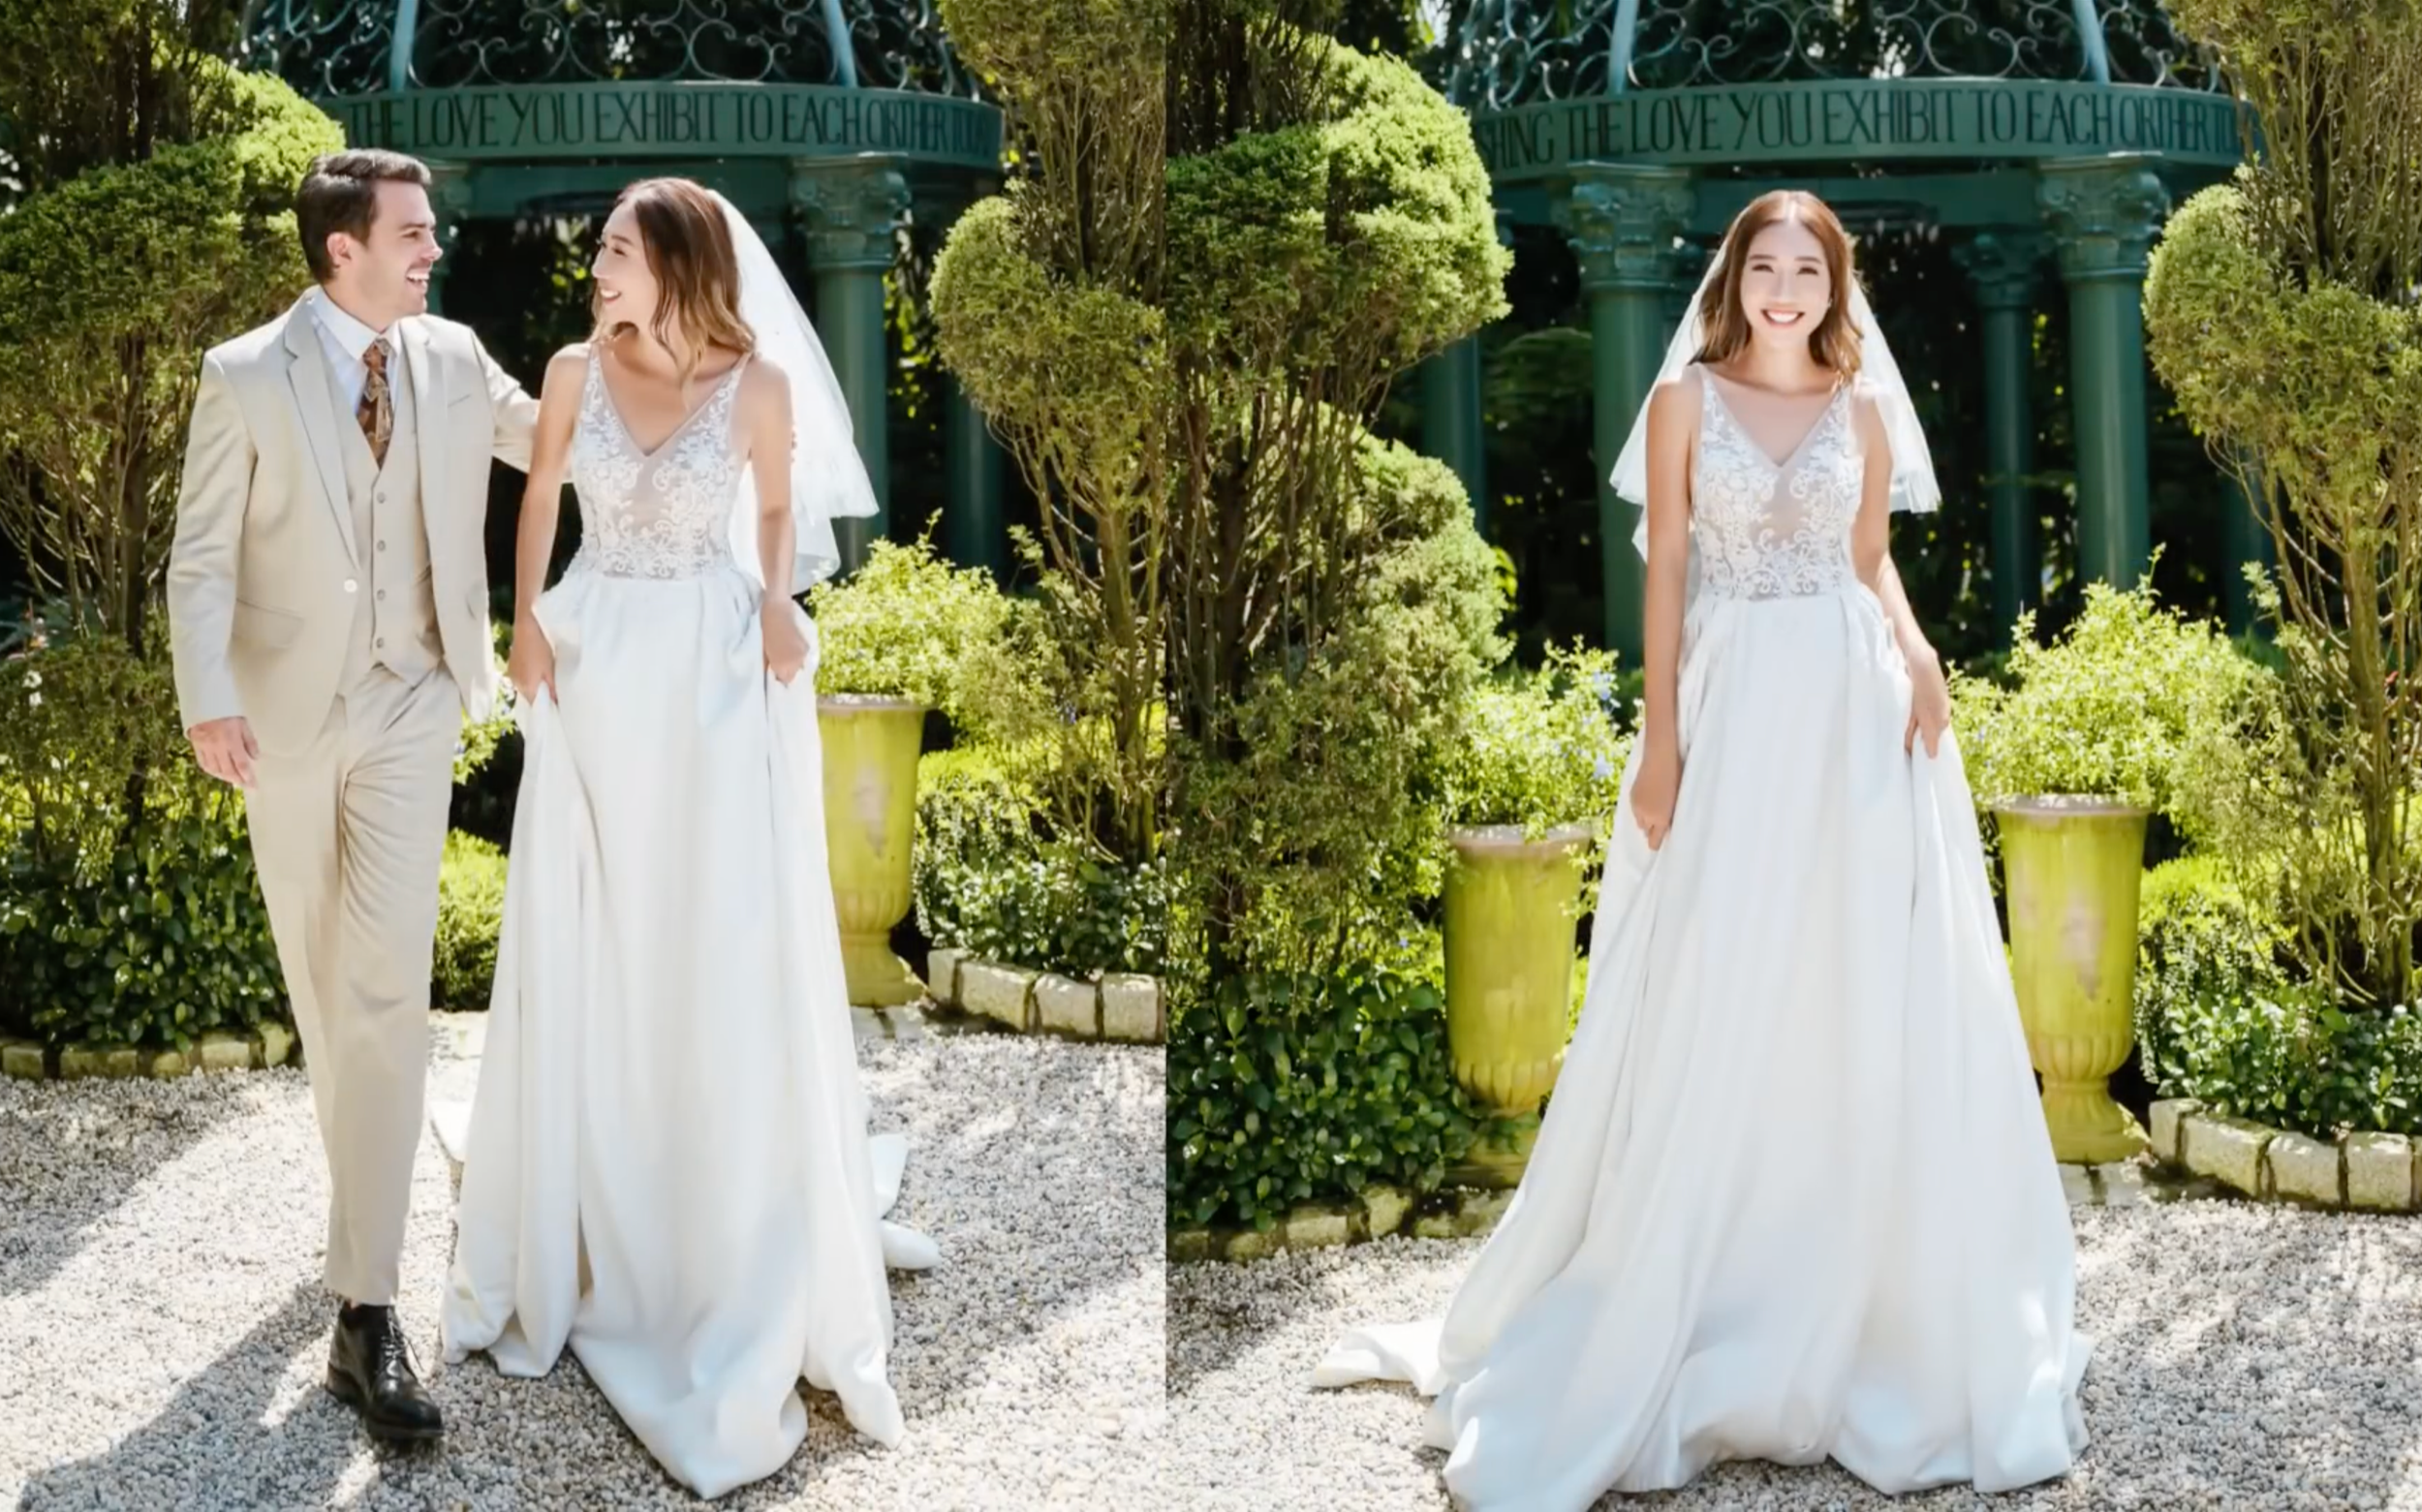
Try on actual wedding dresses. First, you should try on actual dresses that fit your body type. Since I had a pre-wedding photo shoot, I got to try different styles, which really helped me decide on my final design. Even though the sheath and empire dresses looked okay on me, they didn't really match the 'vibe' I wanted. But when I tried on the A-line style, I absolutely loved it. So, my final decision for my dress shape is the A-line.
Compare difficulty with sewing skill. Second, compare the dress design with your sewing skills. I’m not trying to discourage you or say no to your dream dress, but some stunning styles are very hard to make. They might require expert skills or expensive fabrics that are hard to find.
You don't want to spend forever on a dress that doesn't turn out the way you expected, right? In my experience, it’s best to choose something that fits your level but still gives you a small challenge. To get your final design, you can use an inspiration photo as-is or customize it to make it your own.
But if you choose that way, it's better to know some basics first. A wedding dress usually has two parts: the bodice and the skirt.
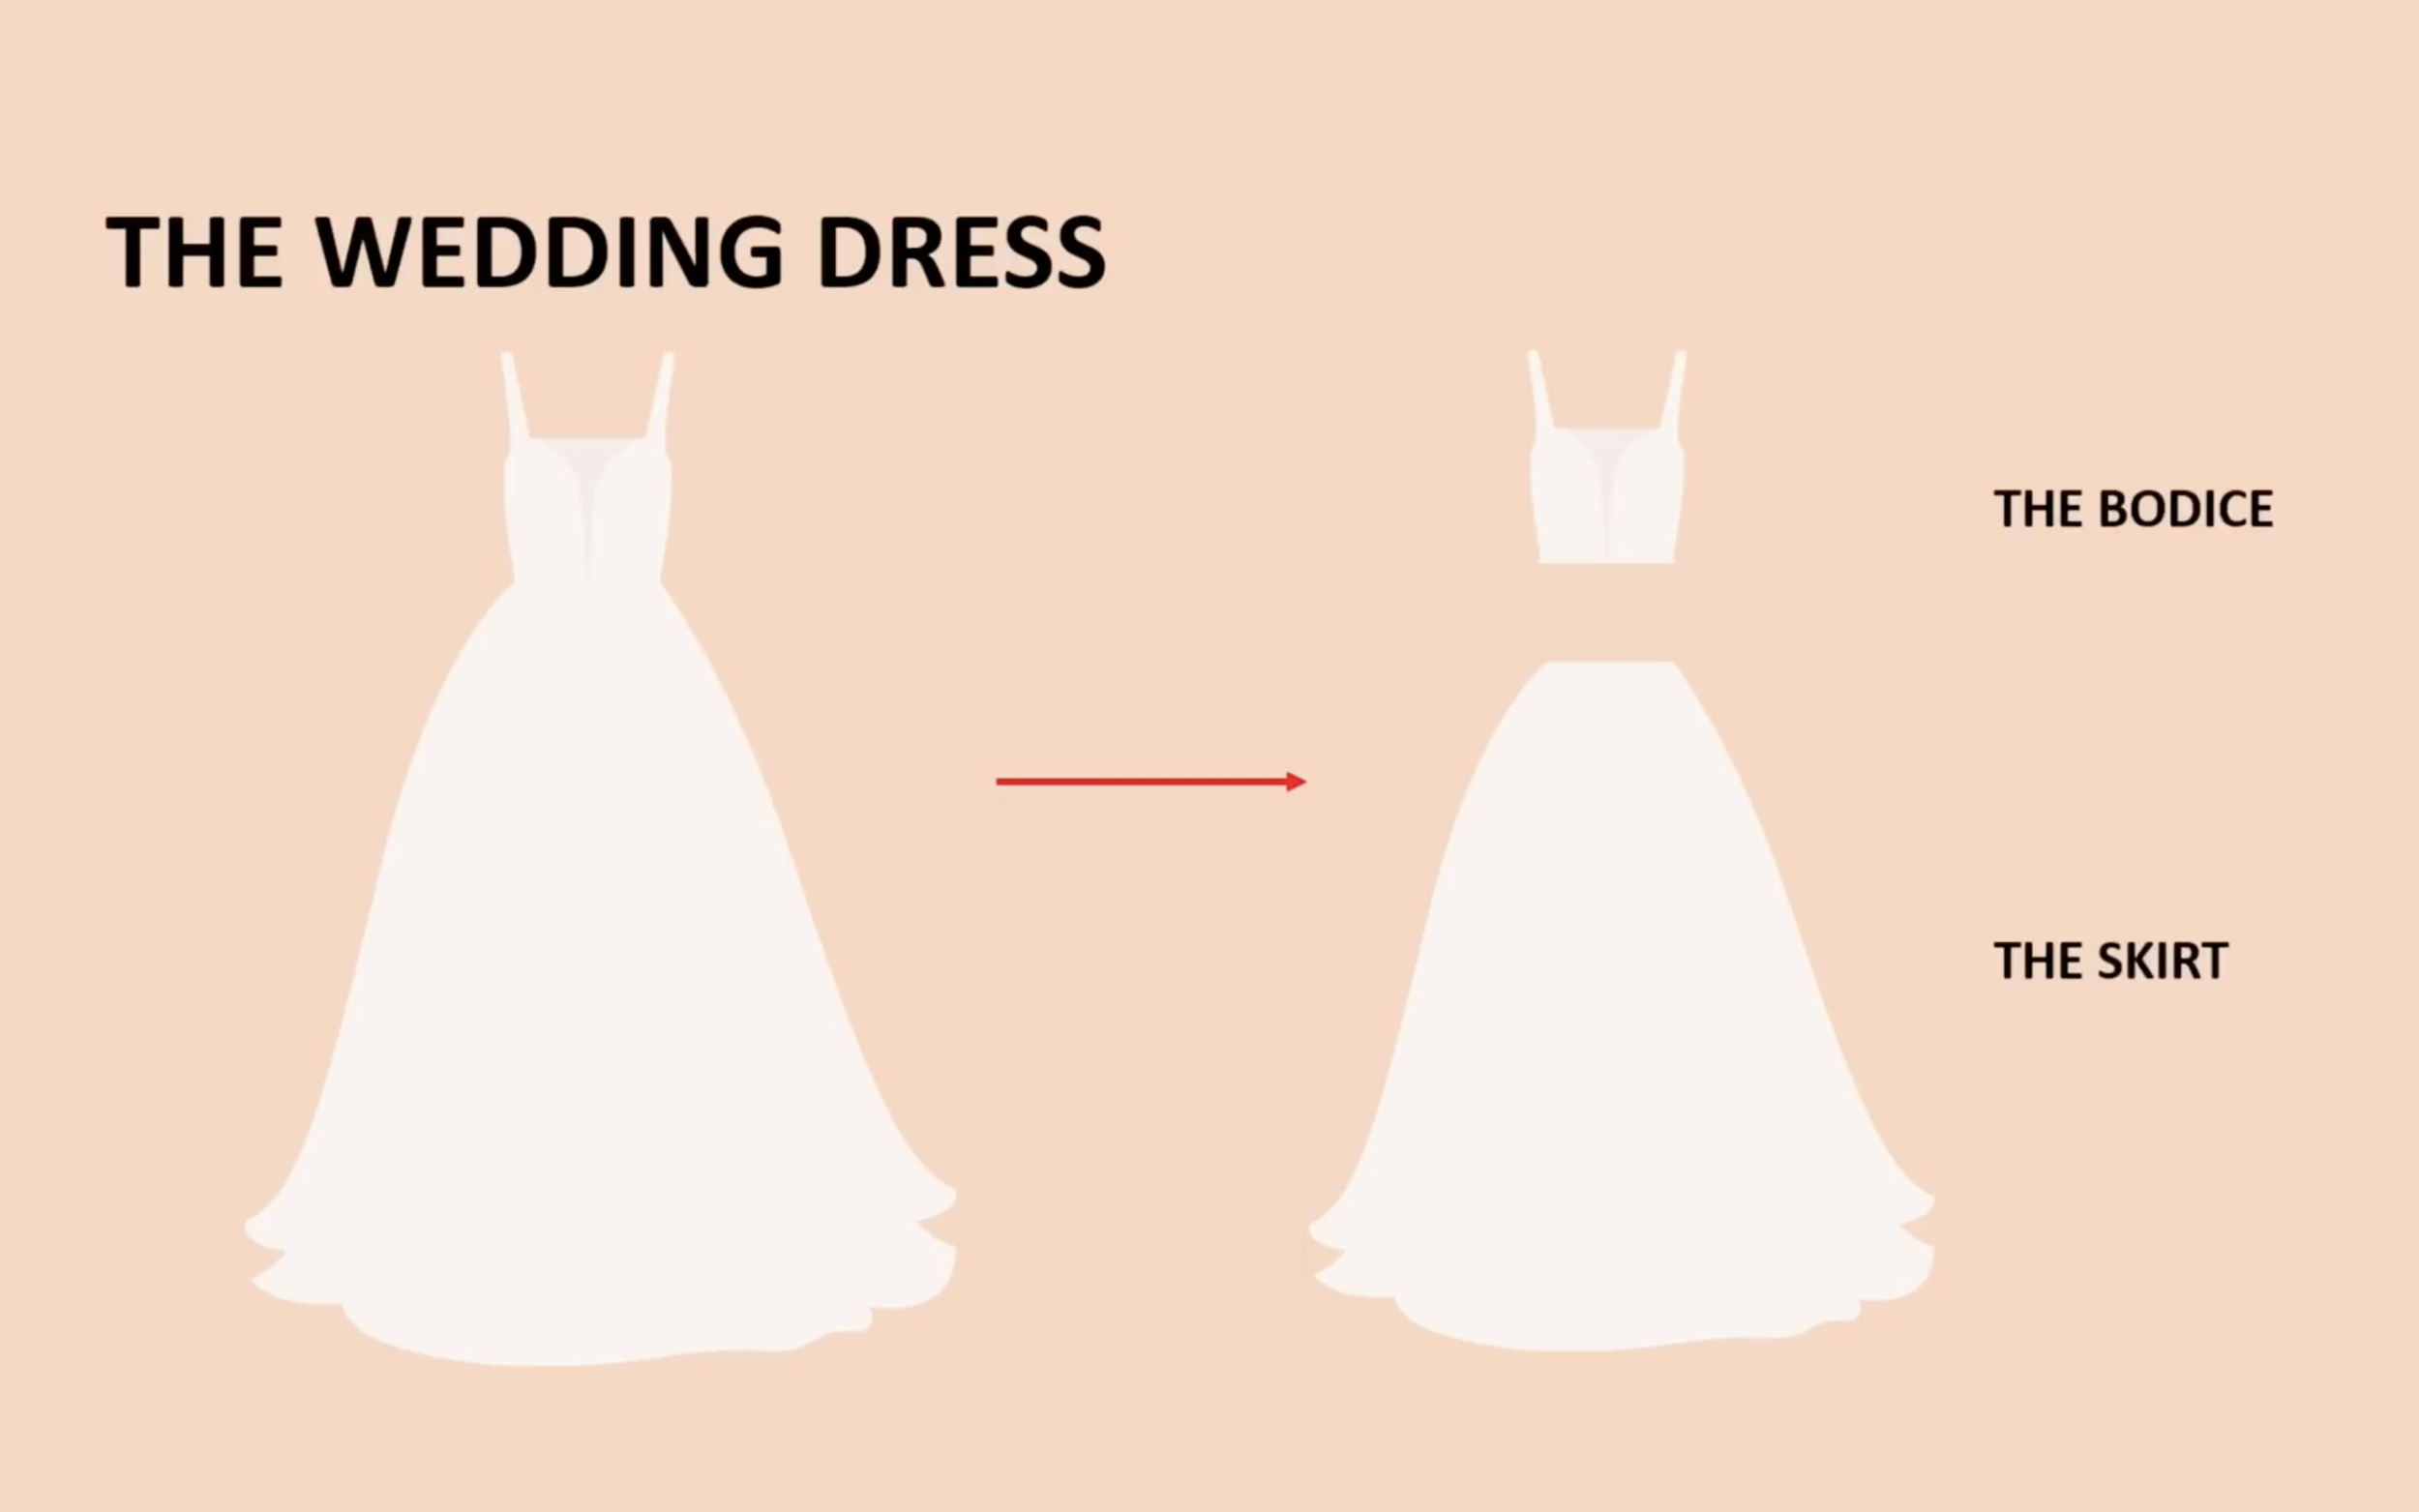
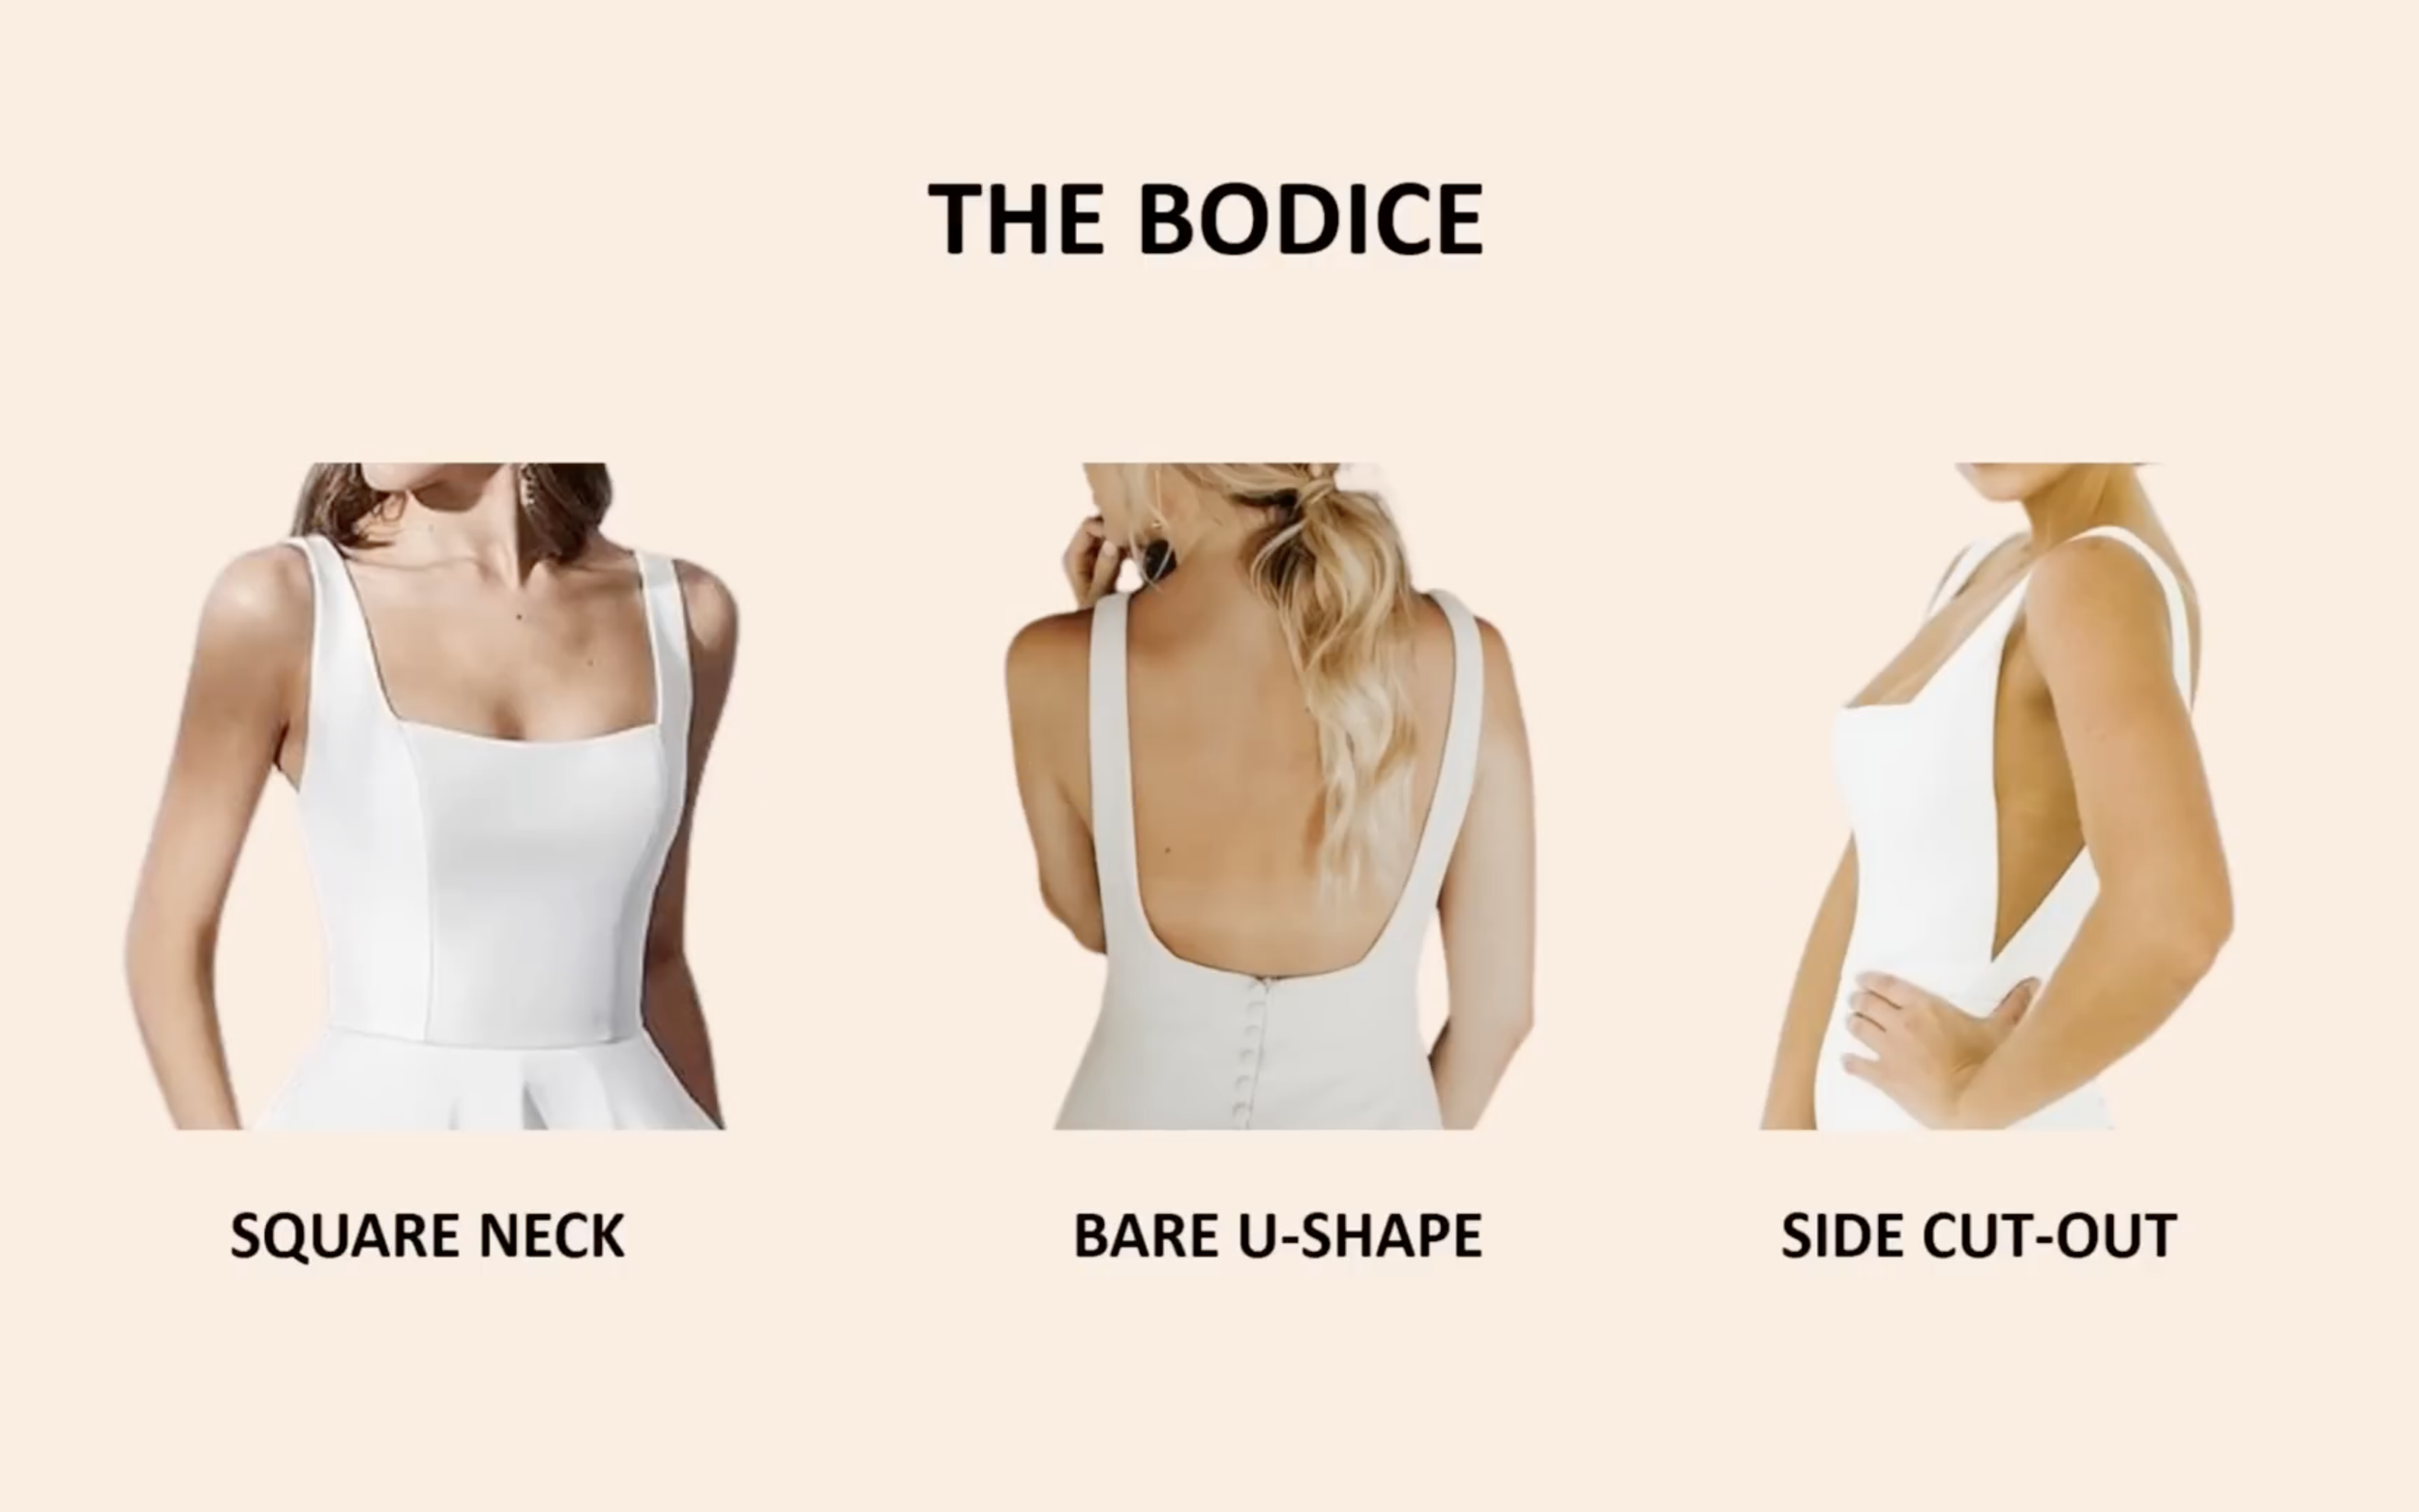
THE BODICE PART
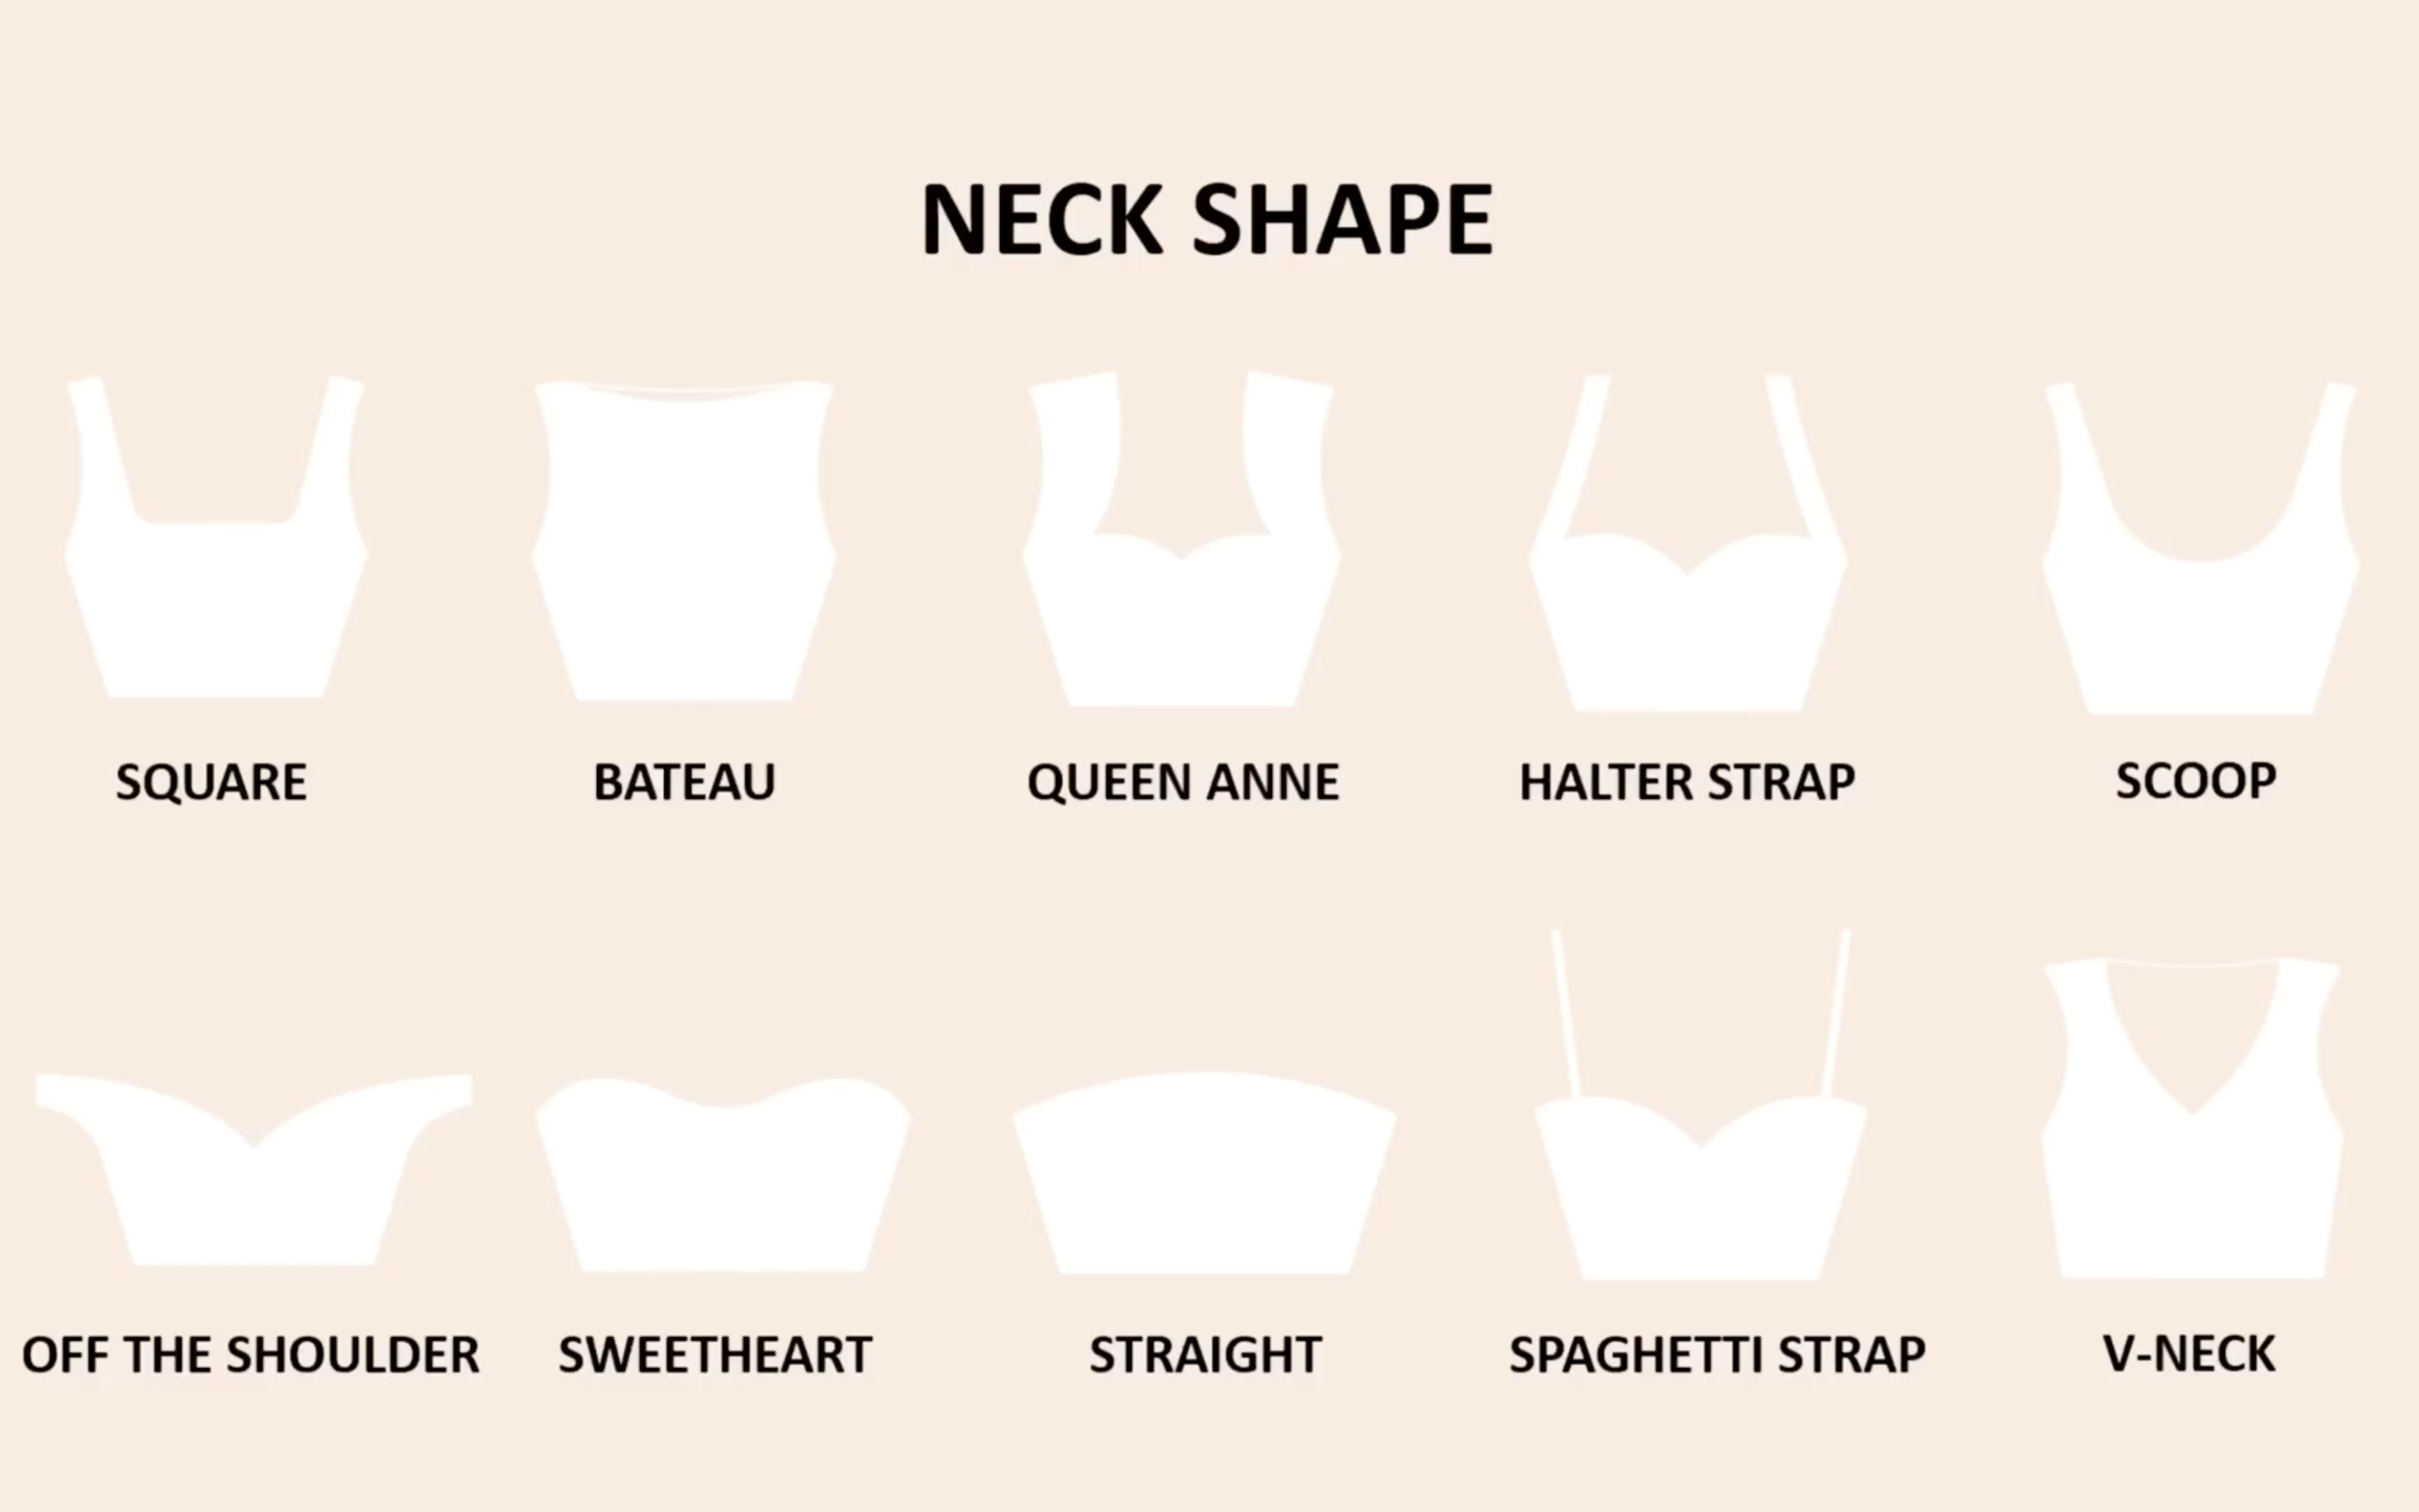
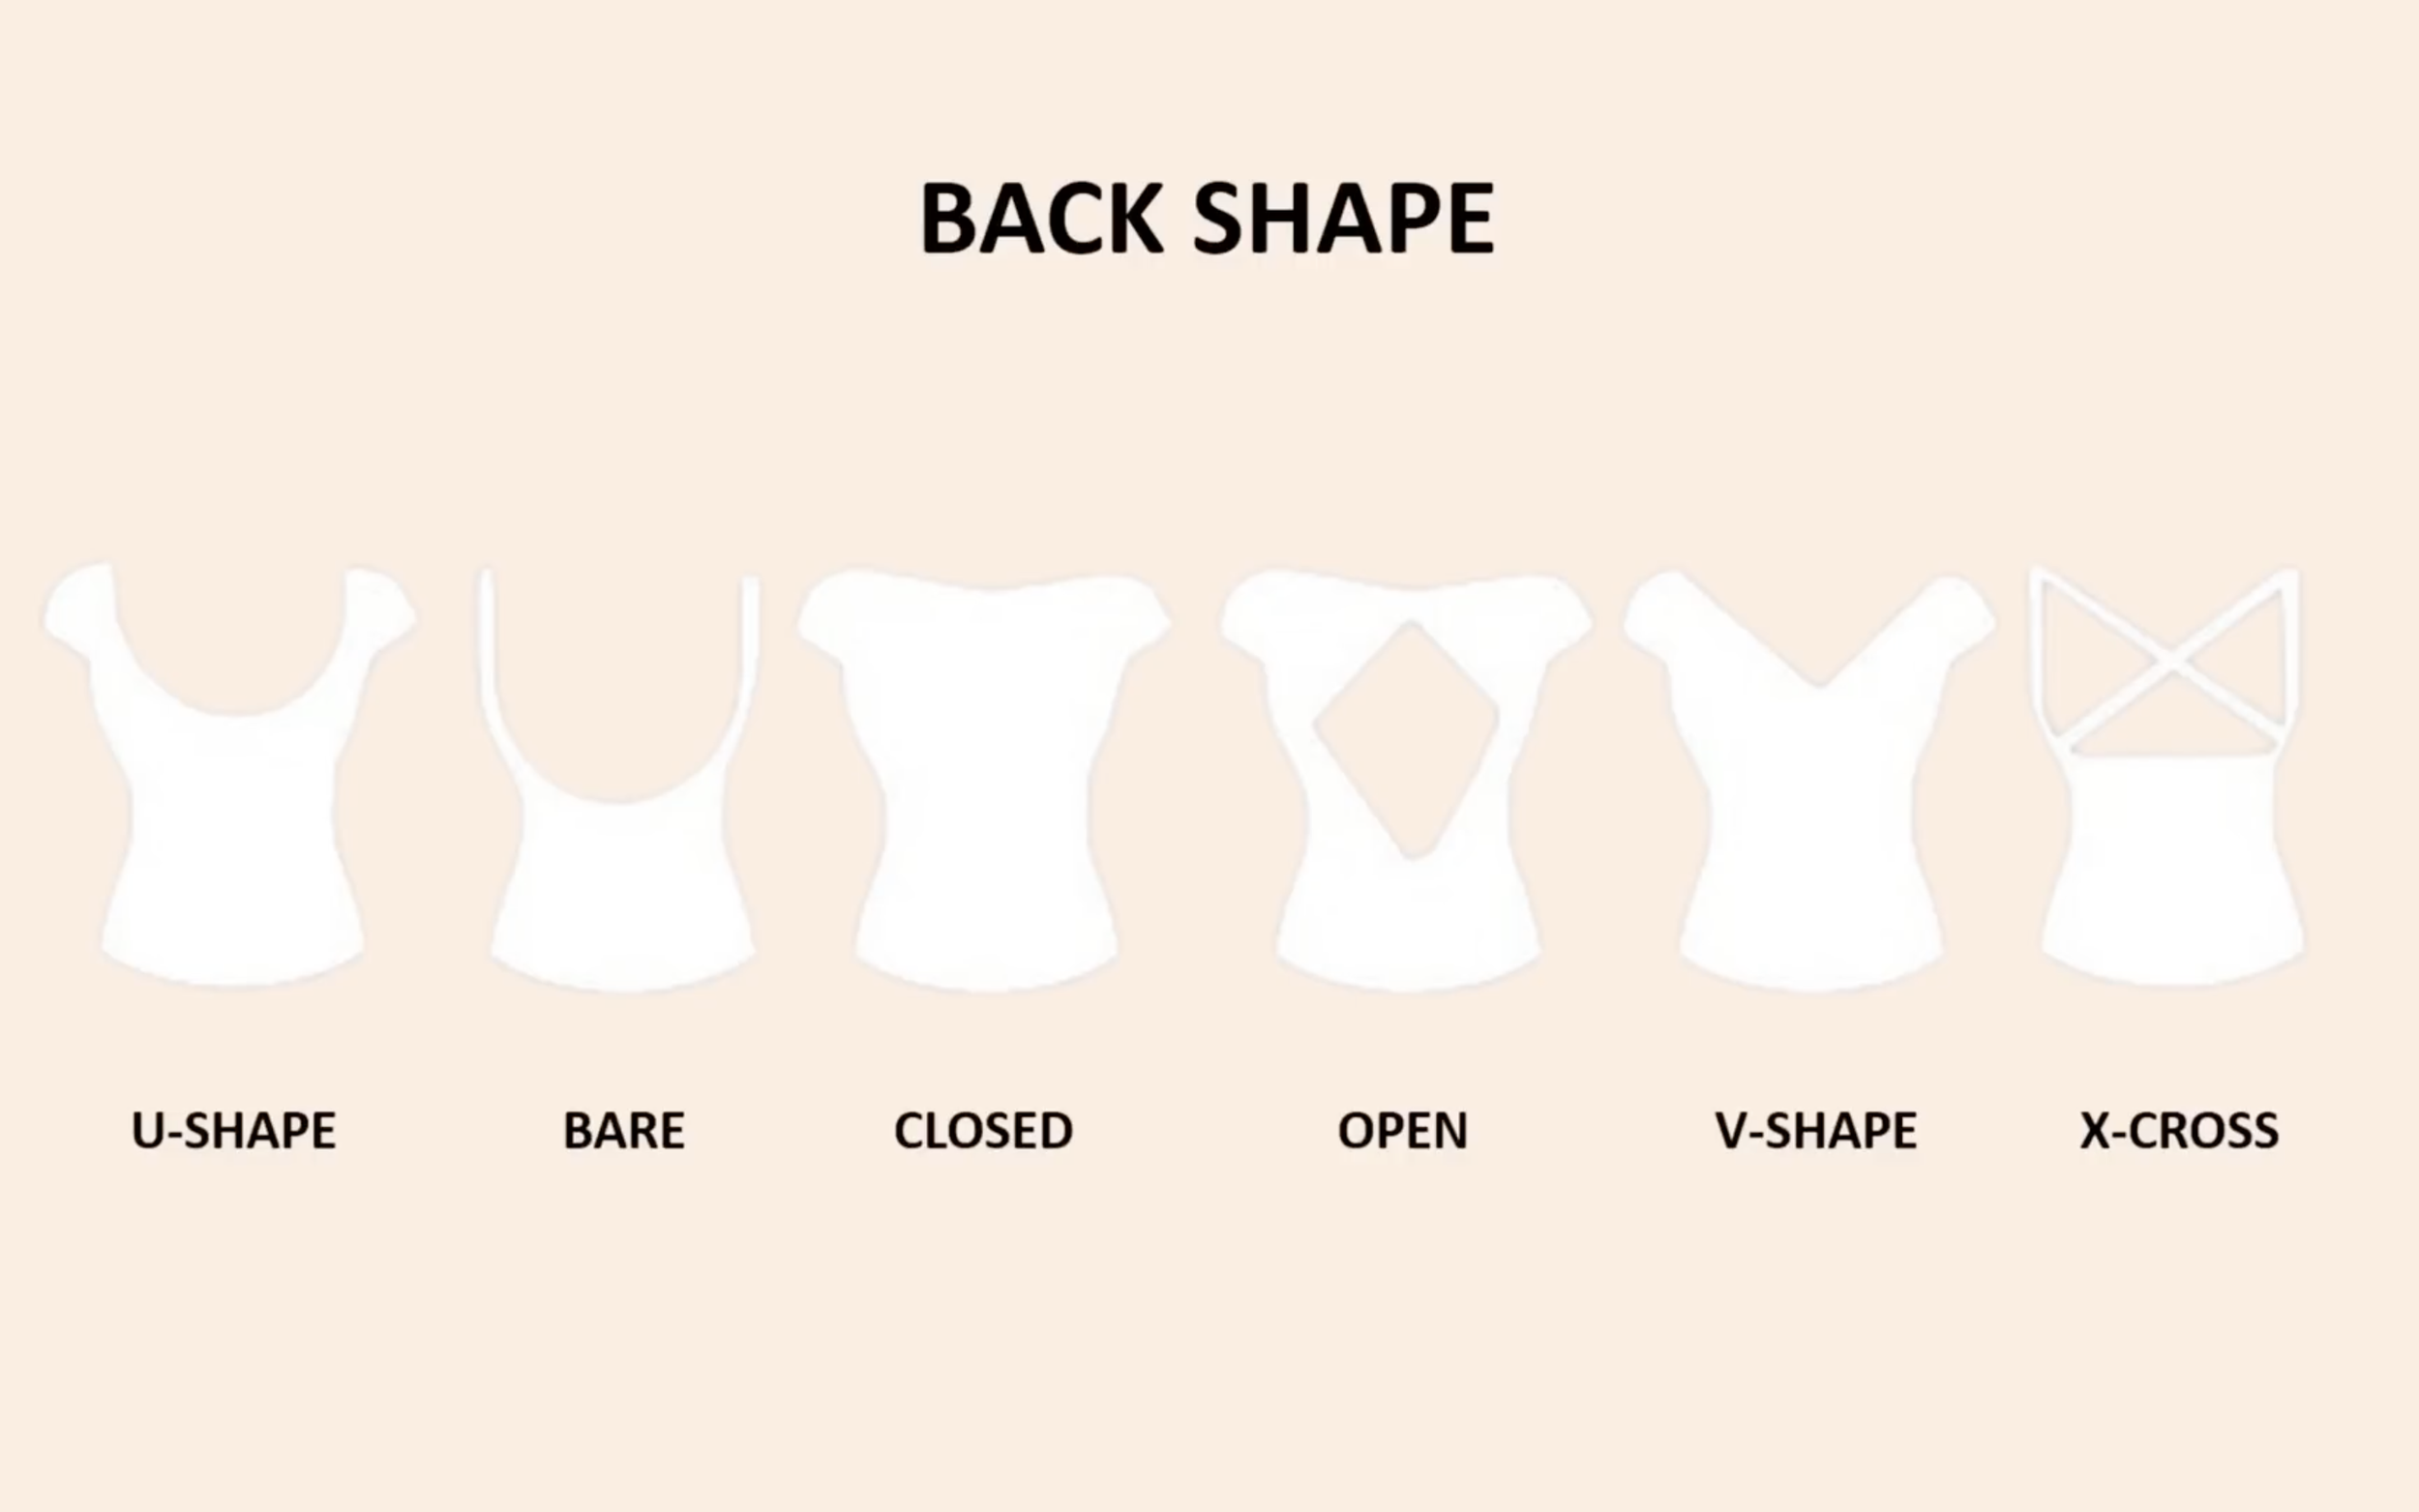
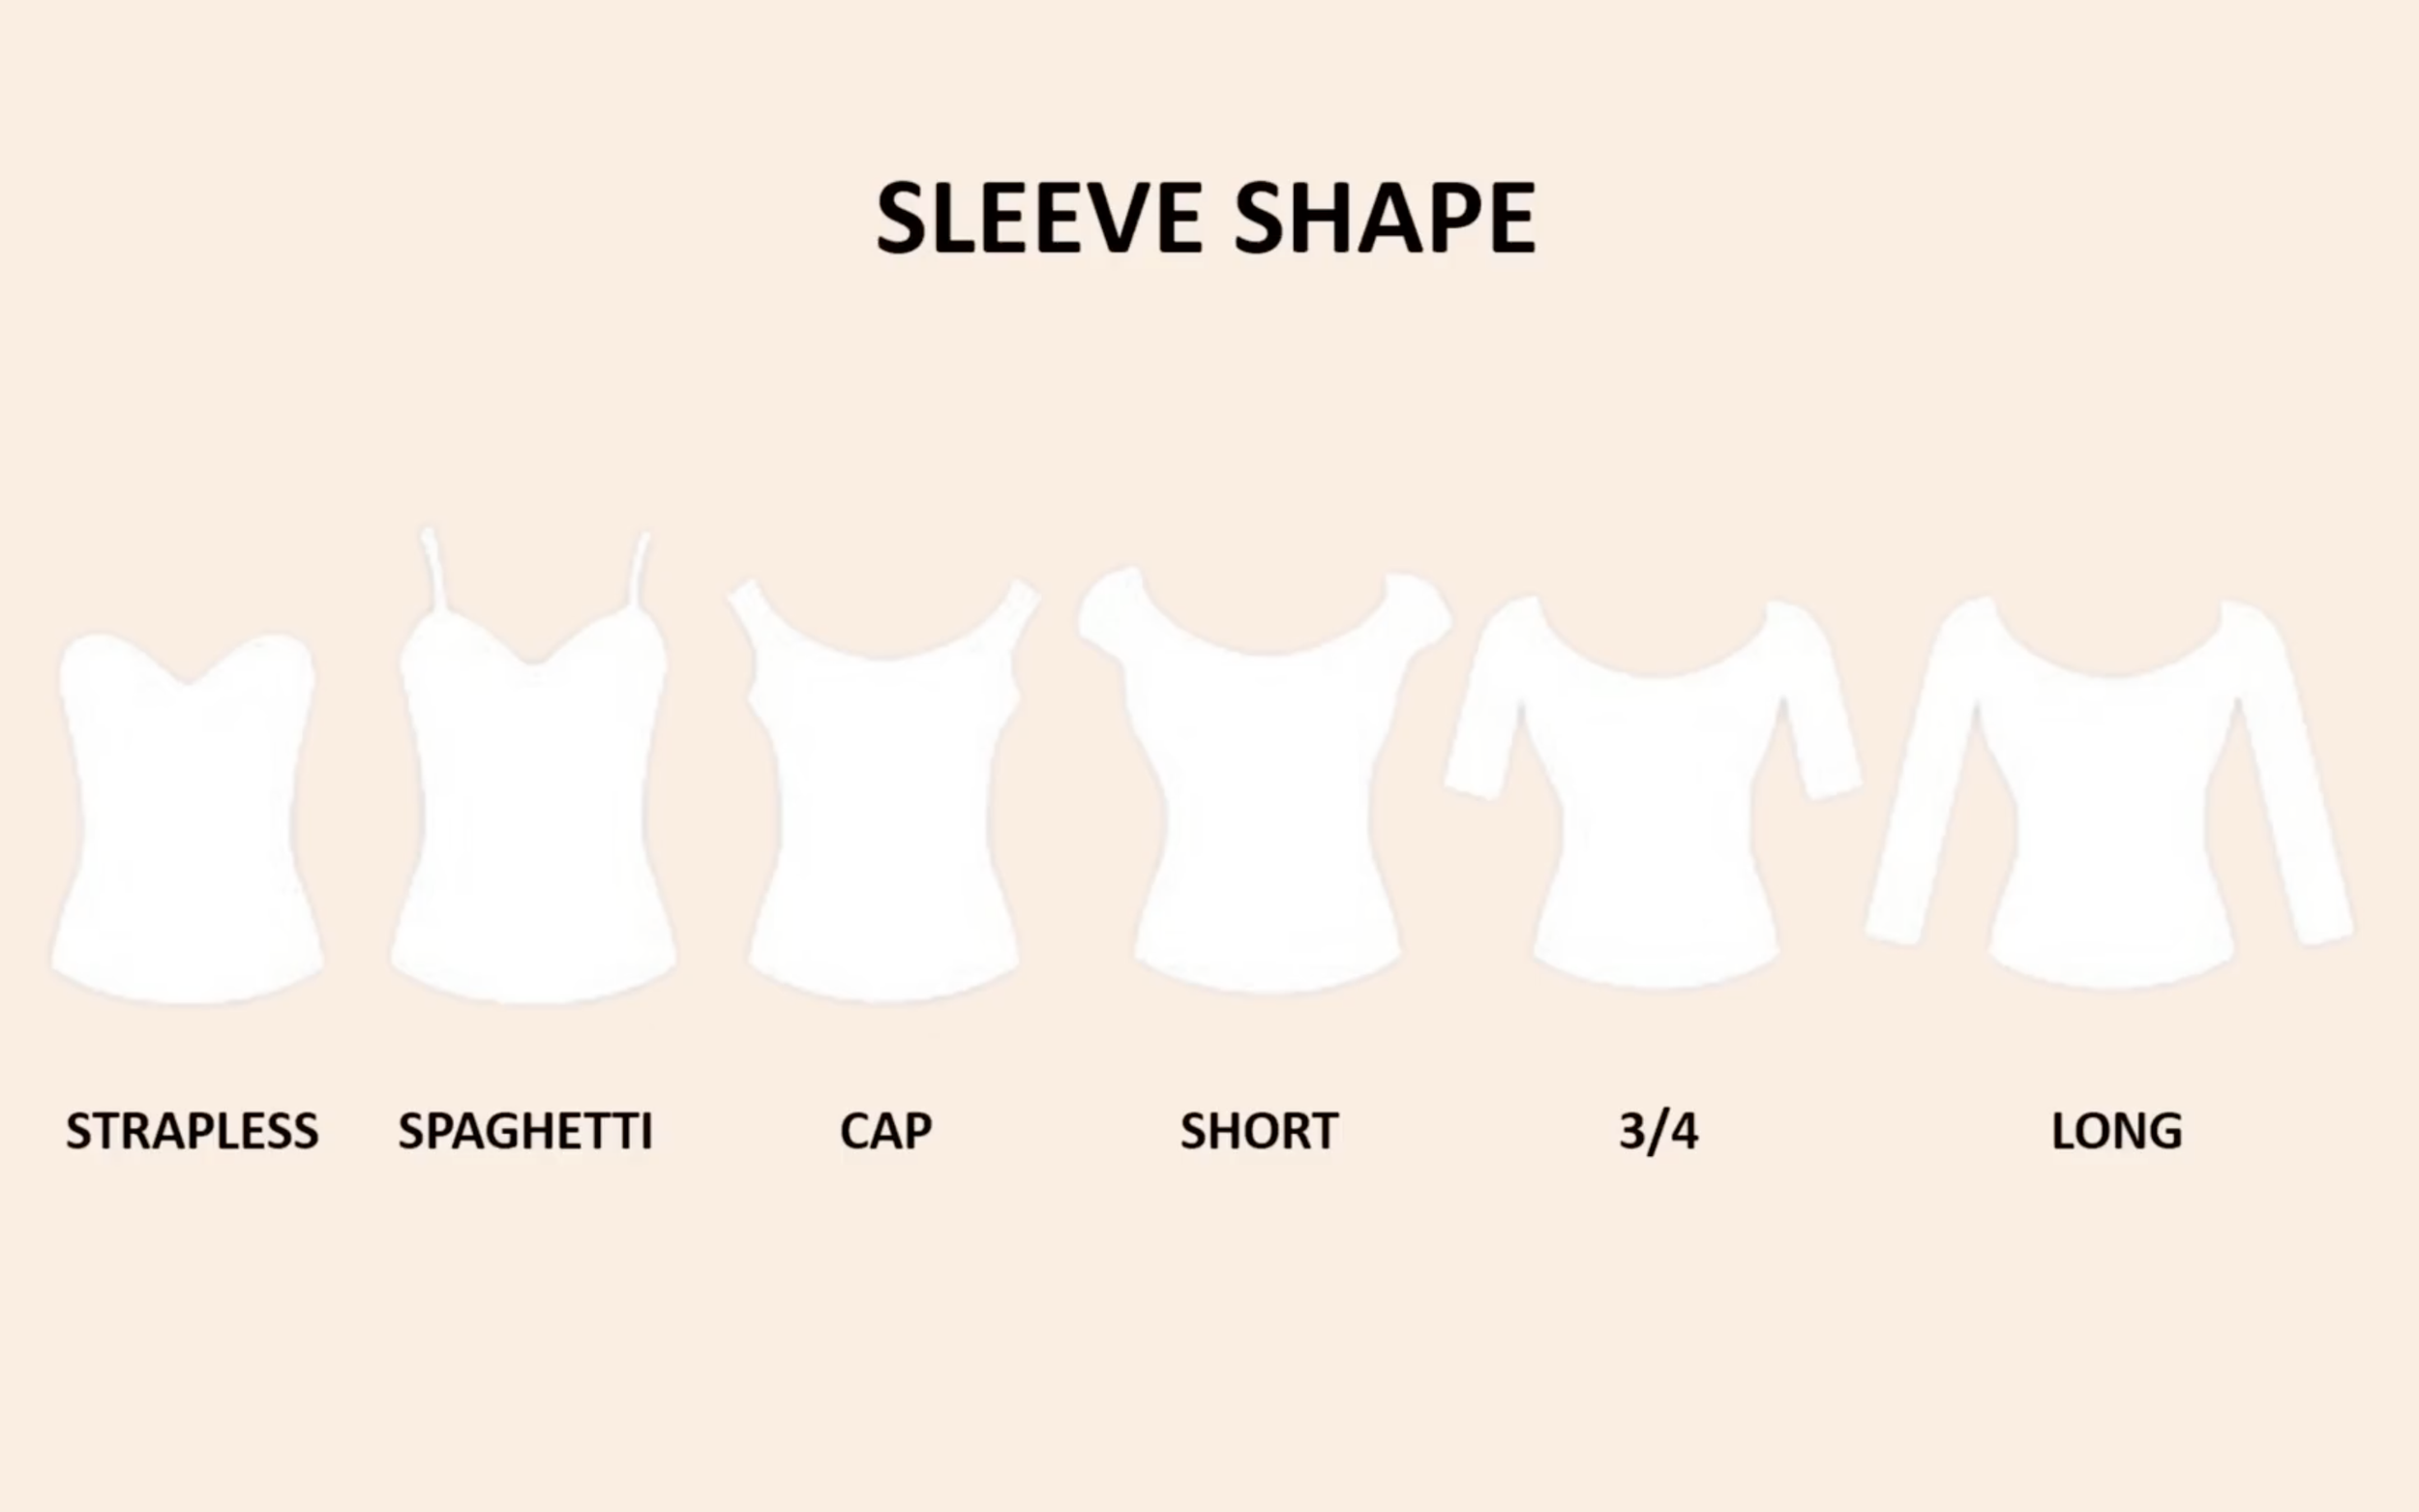
For the bodice, there are many shapes for the neckline, sleeves, and back. Think about your body’s strengths and weaknesses to choose the right one.
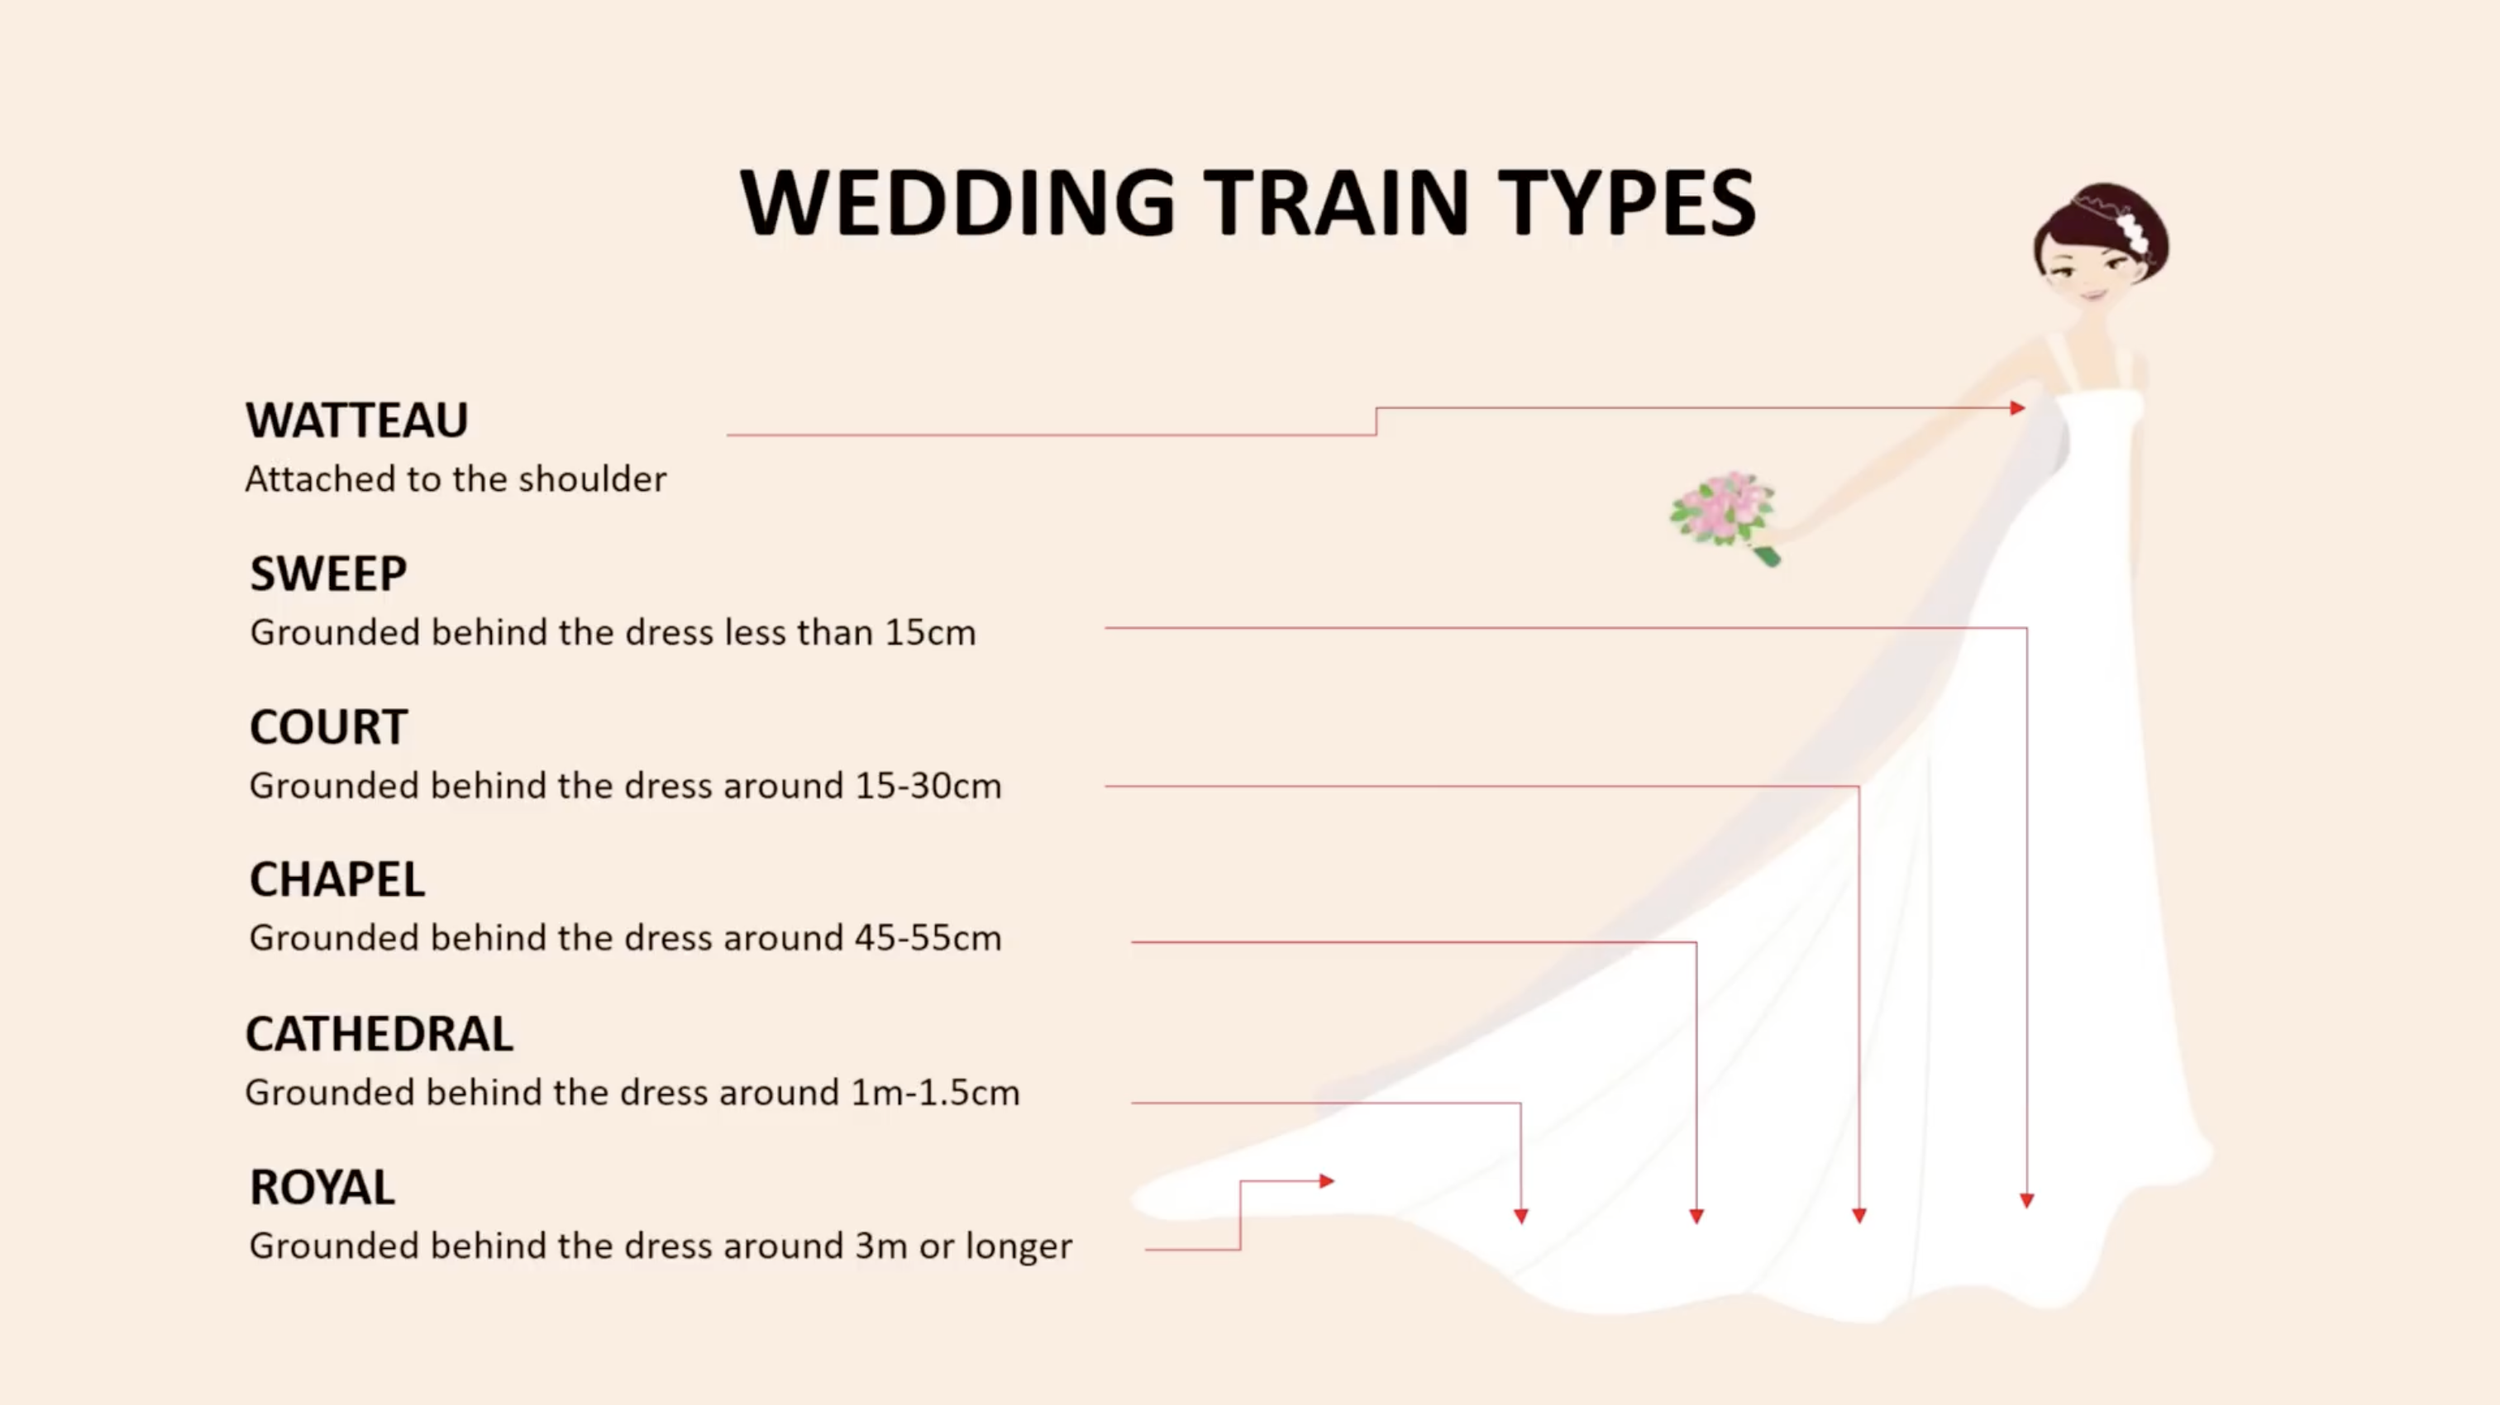
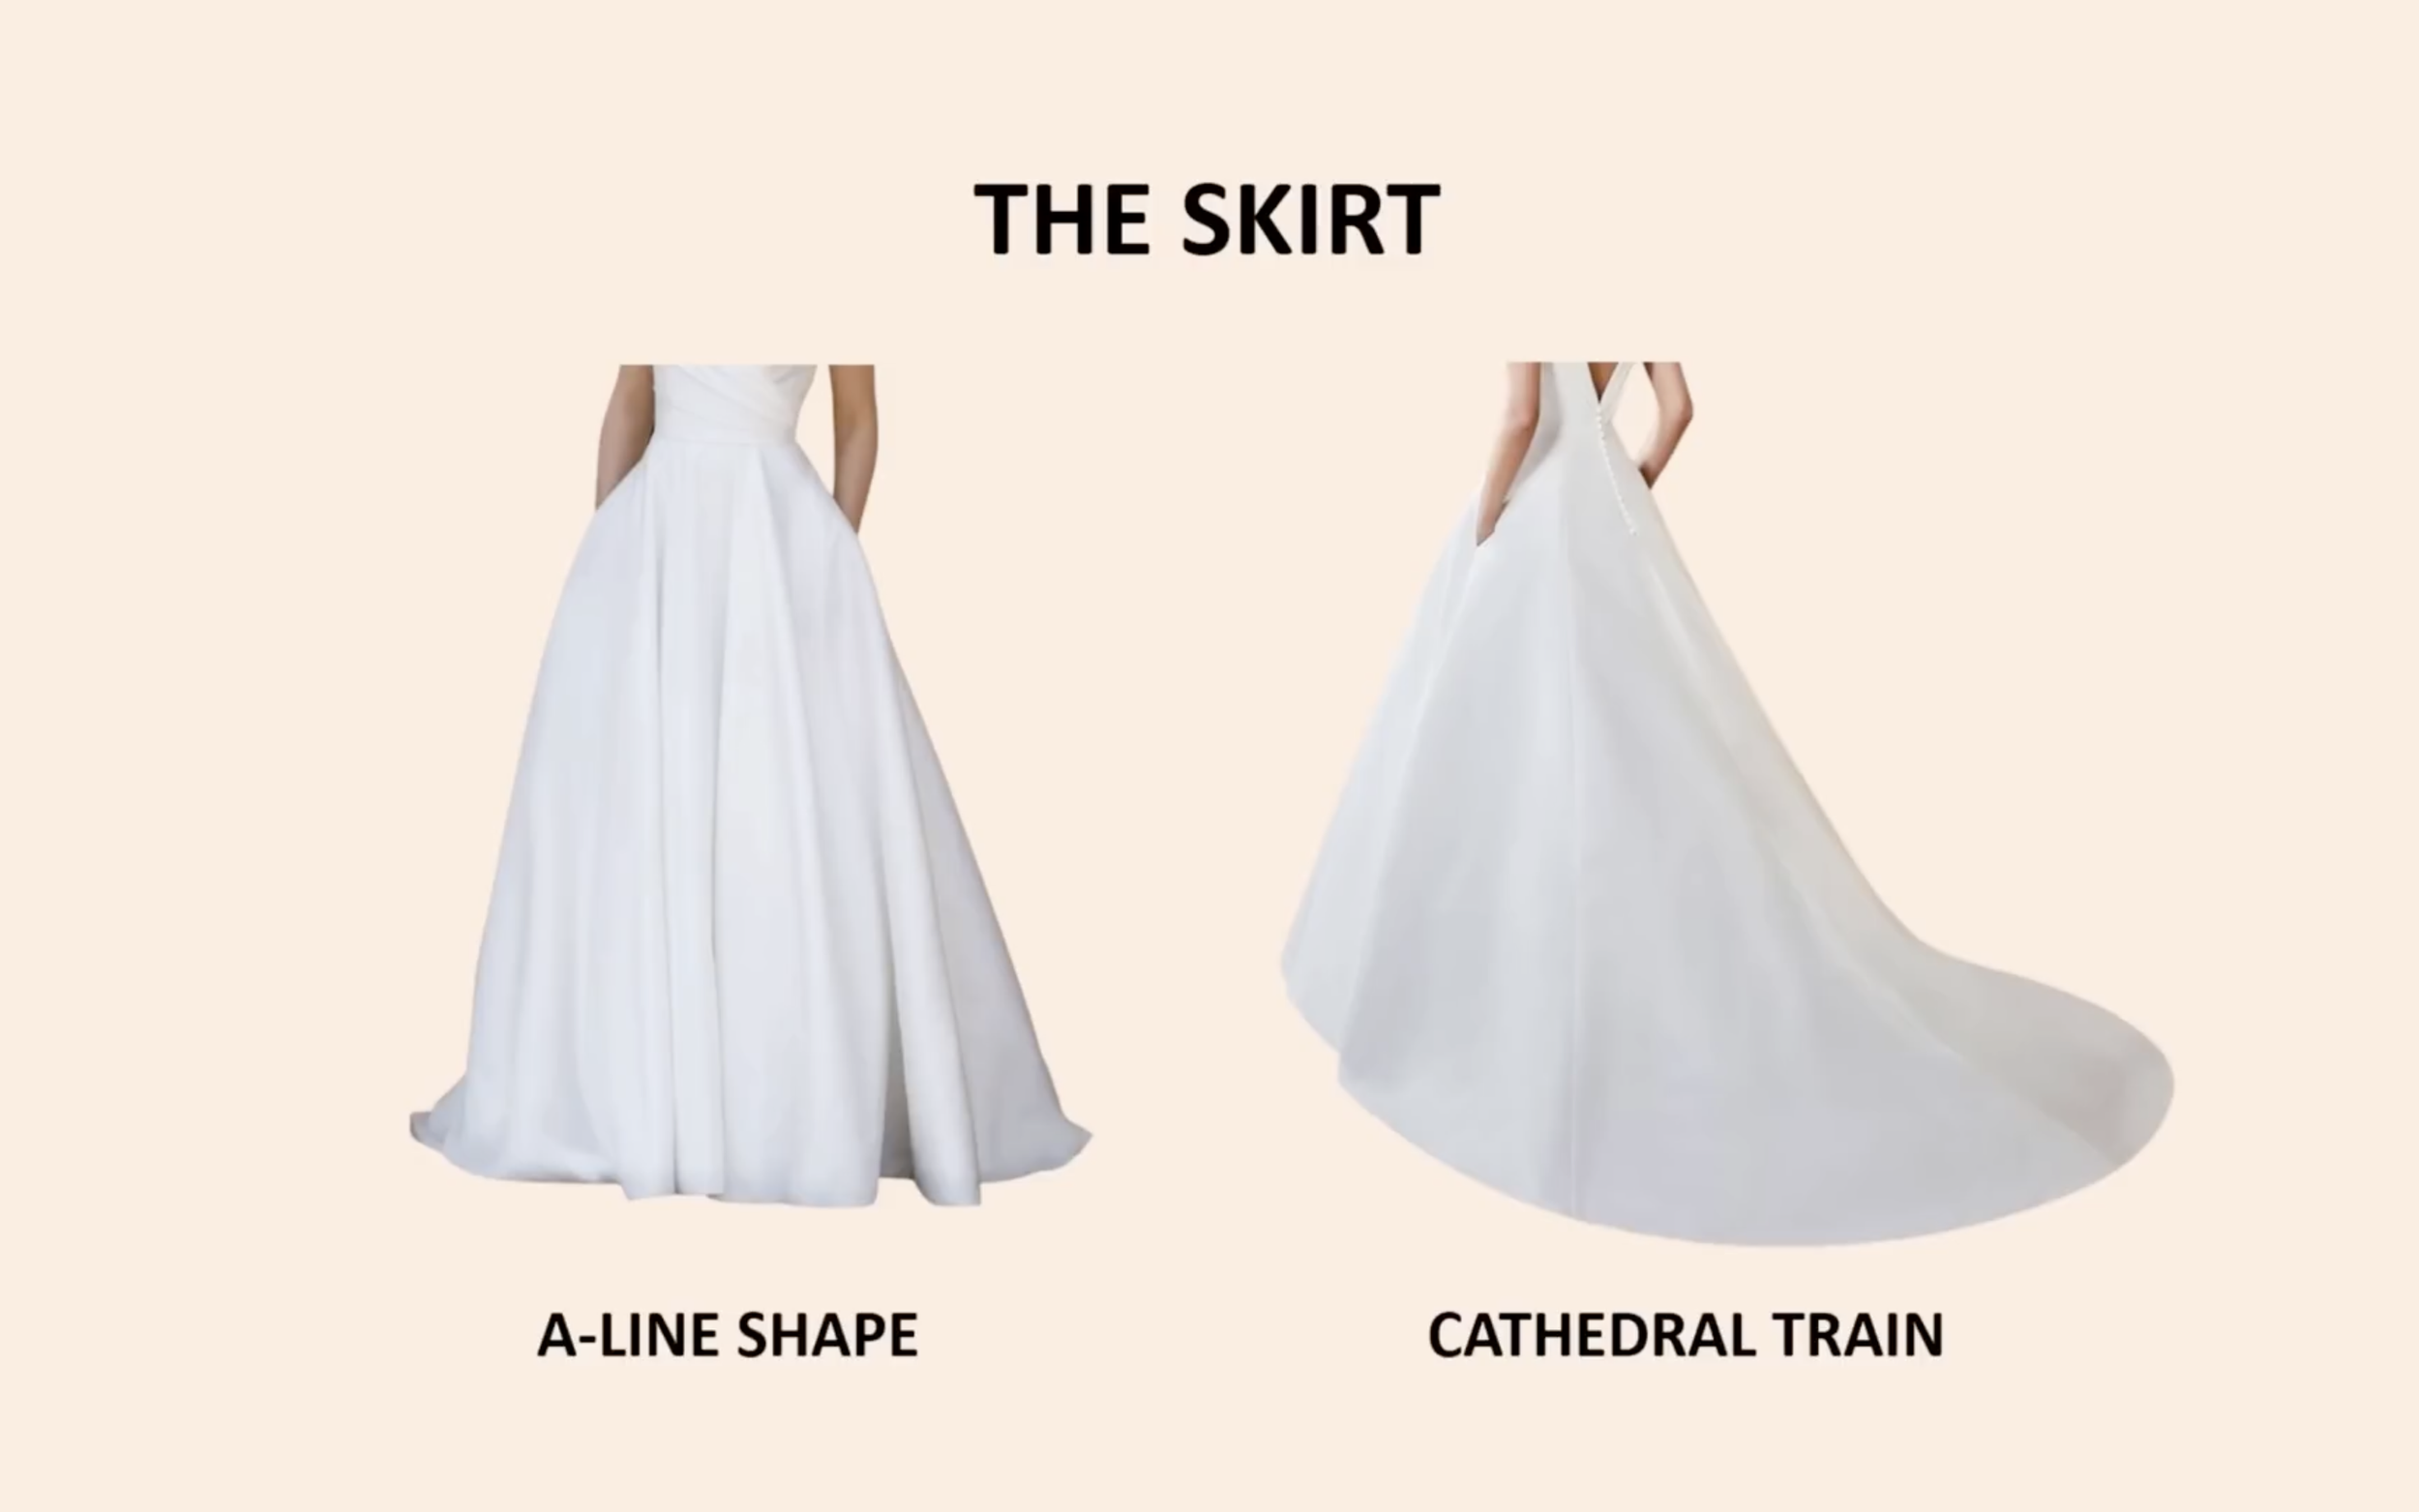
THE SKIRT PART
For the skirt, besides the shape you picked, you should also consider the train length. There are 6 types of train lengths for your reference.
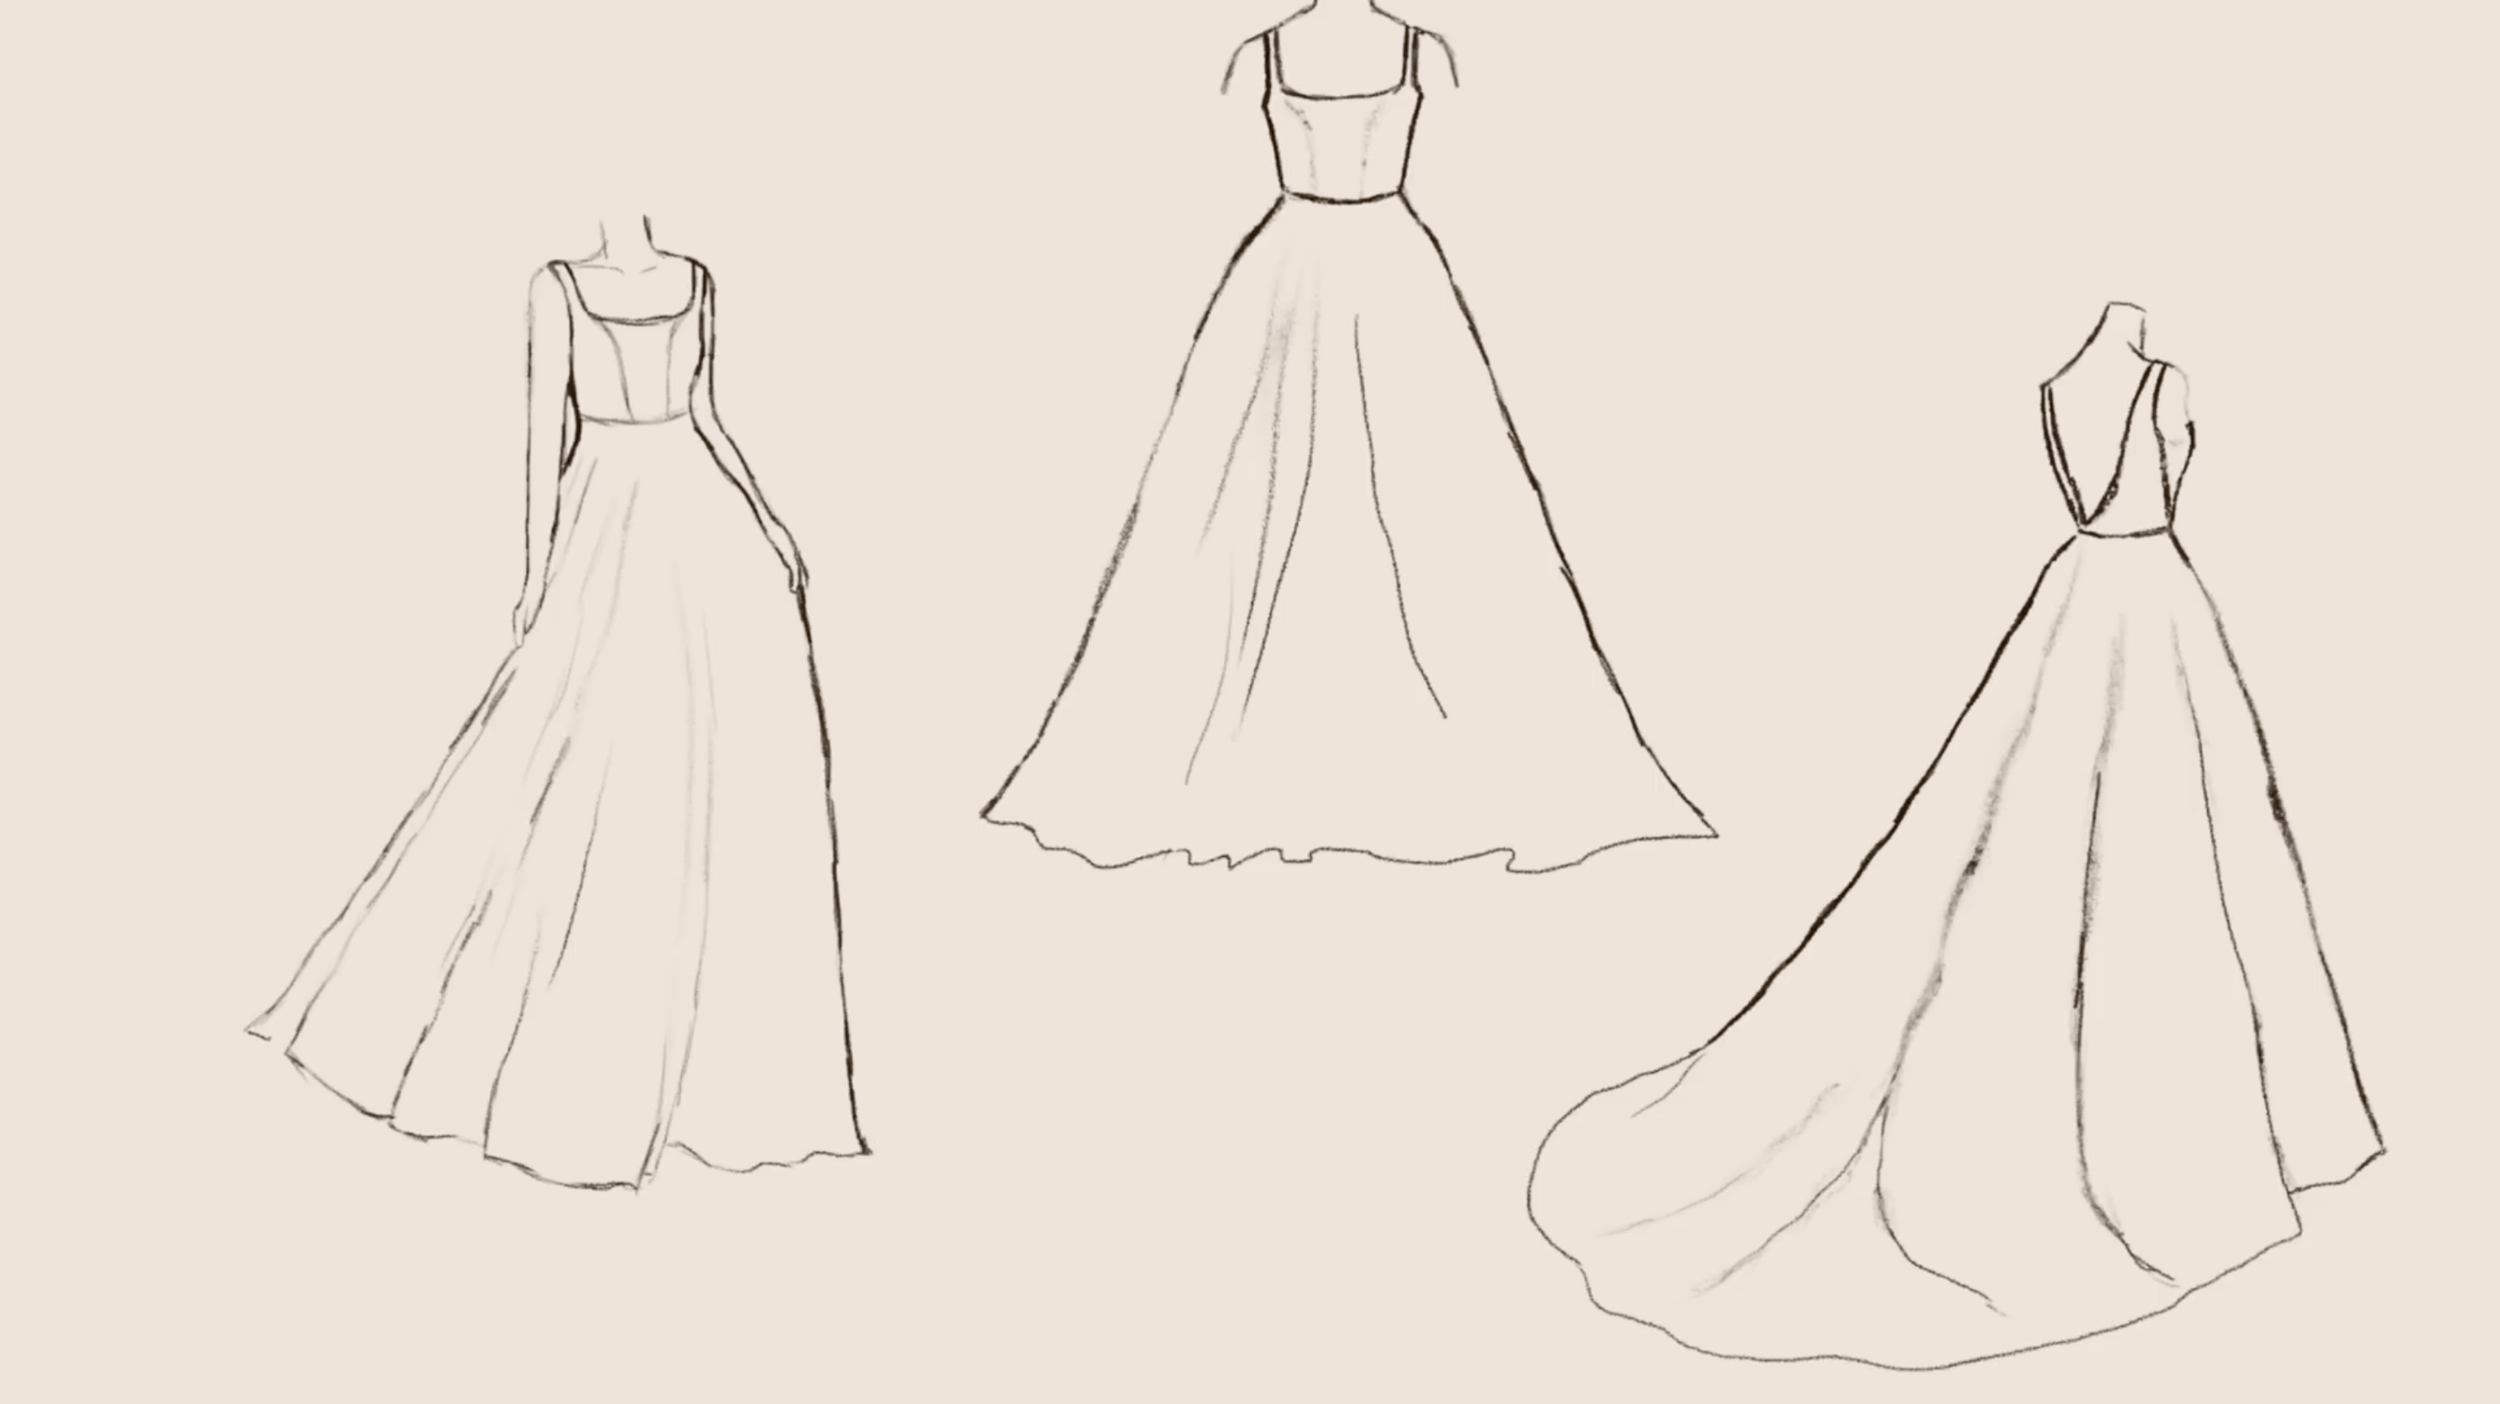
After checking all the options, here is my final choice: For the bodice, I chose a square neck with a bare U-shape open back and V-shaped cutouts on both sides.
For the skirt, I’m going with an A-line shape and a cathedral train.
Finally, I’ll sketch my design to see the overall look.
5. CHOOSING THE FABRICS
For my dress, I could go with plain white fabric or add an extra layer. While plain white looks elegant and traditional, it feels a bit too formal for the vibe I want.
Since my theme is 'Floral Garden,' I decided to add a layer of floral lace. This makes the dress look more relaxed and perfectly matches the garden setting.
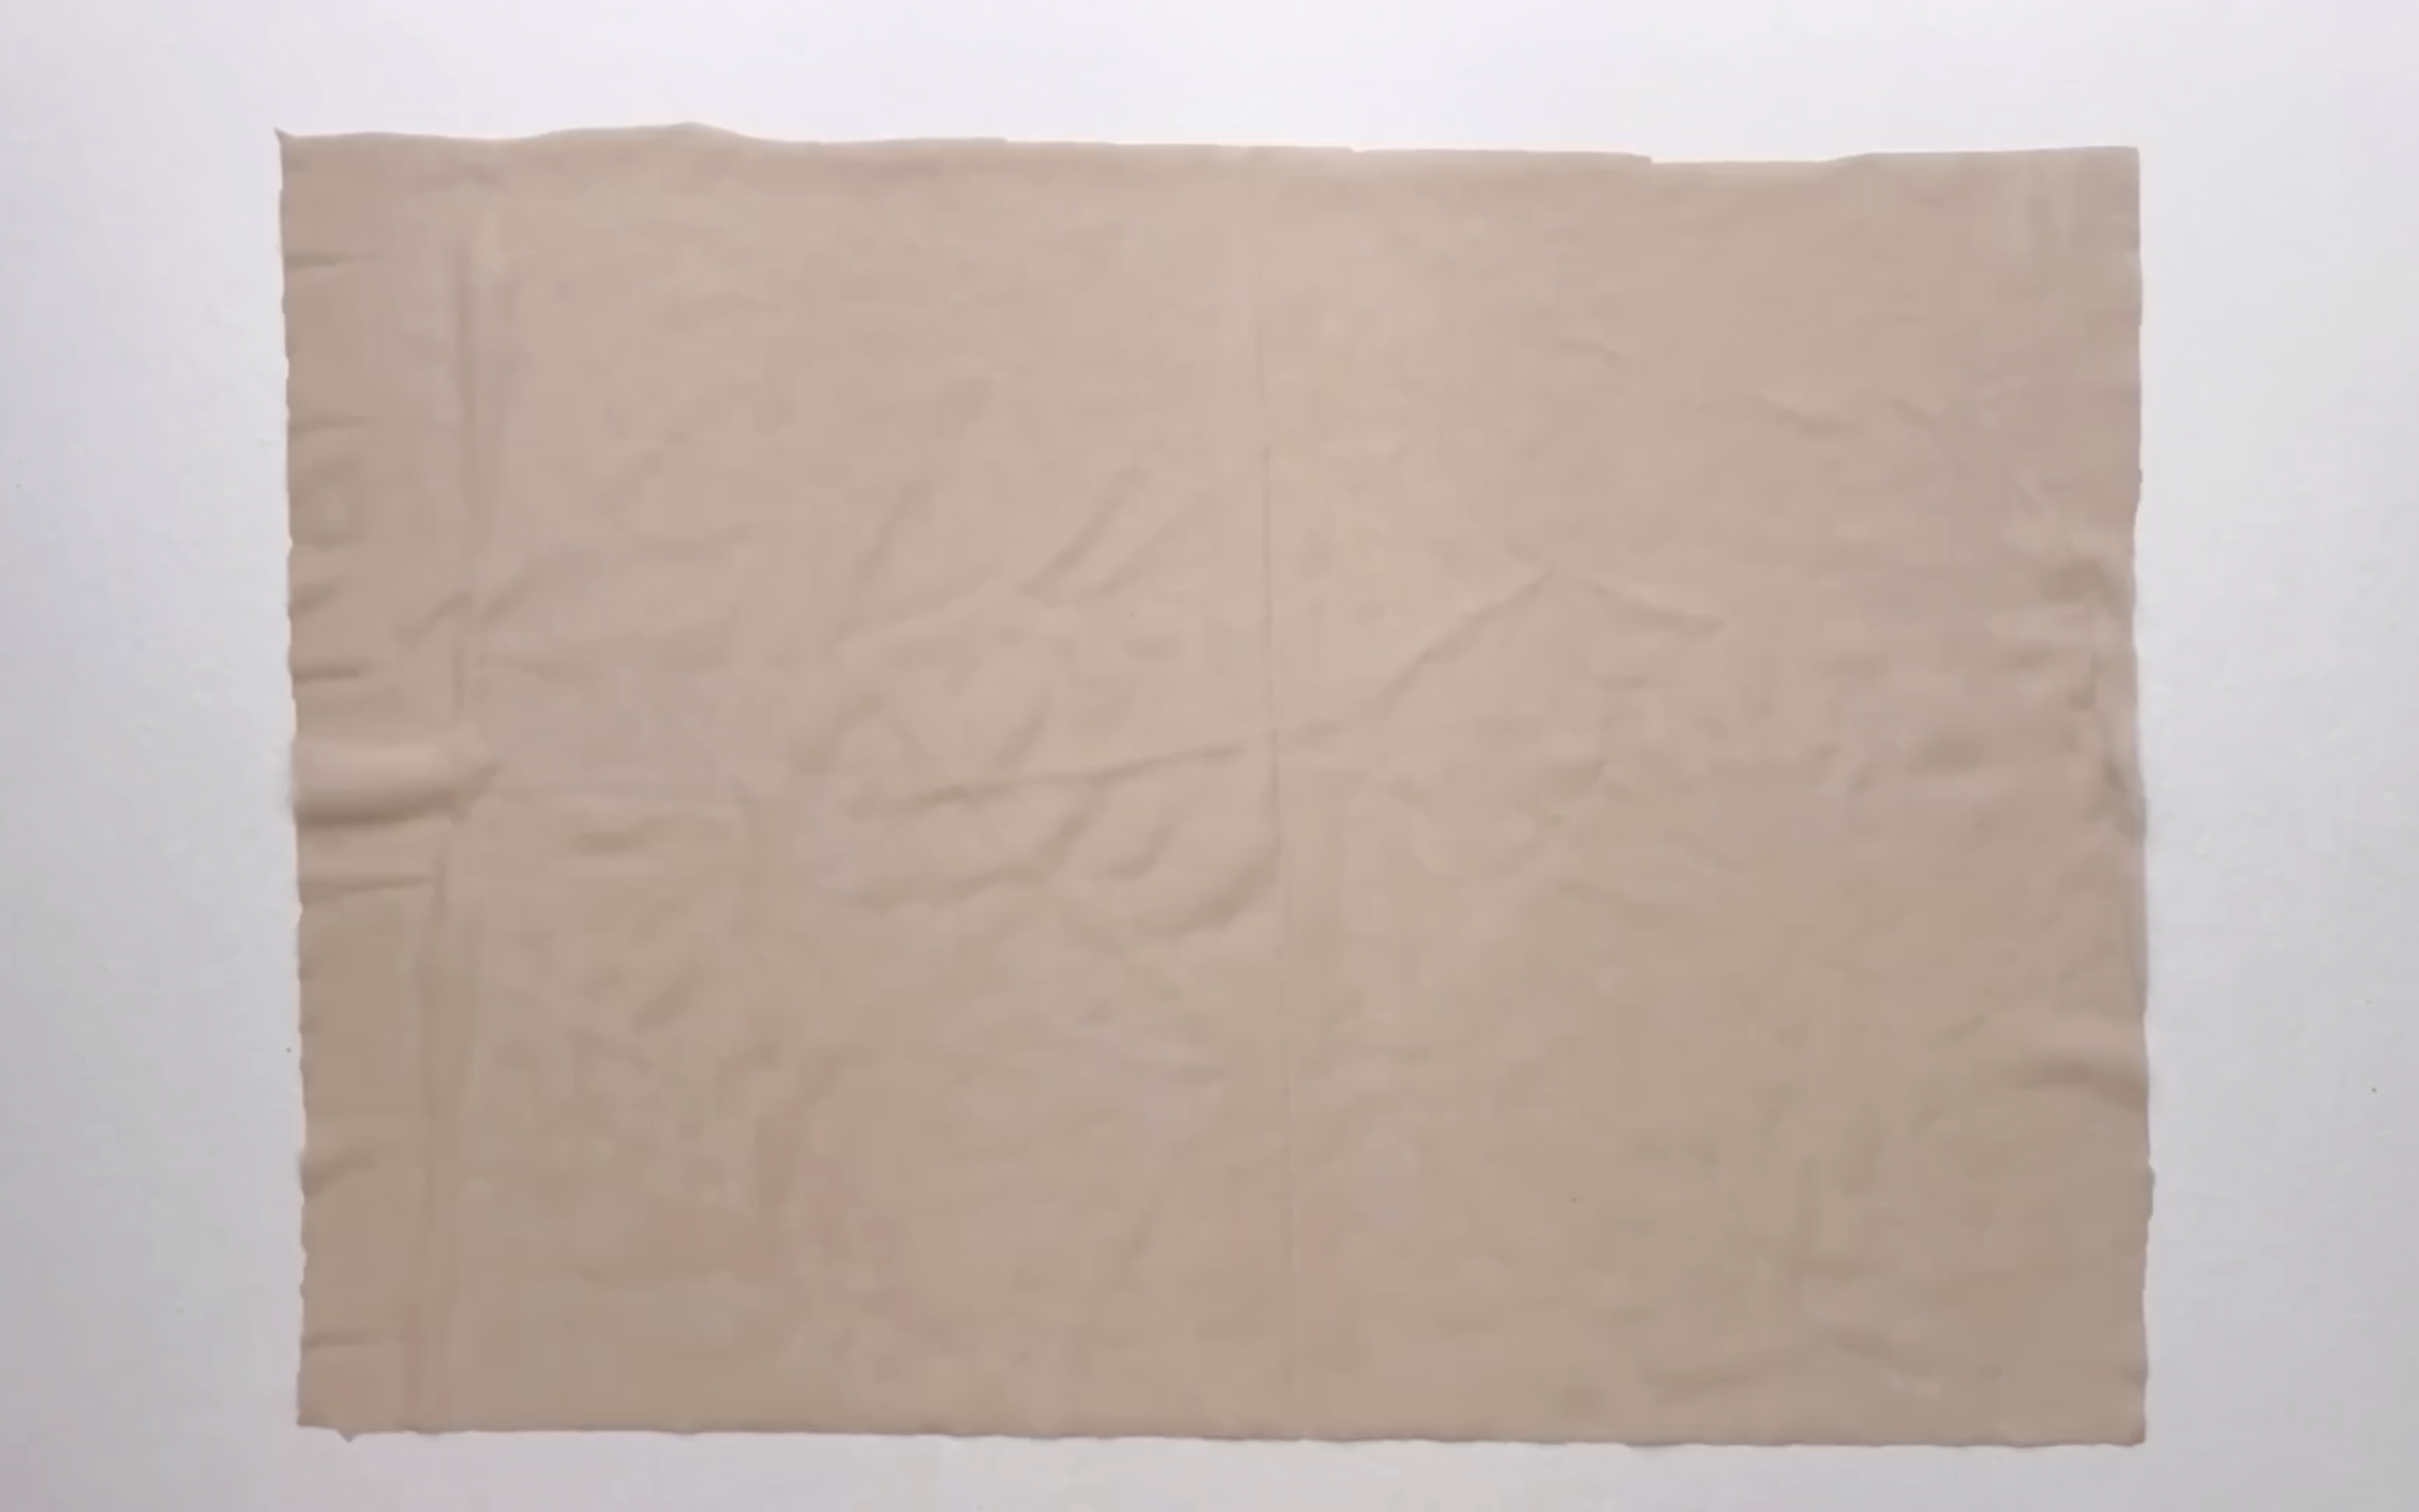
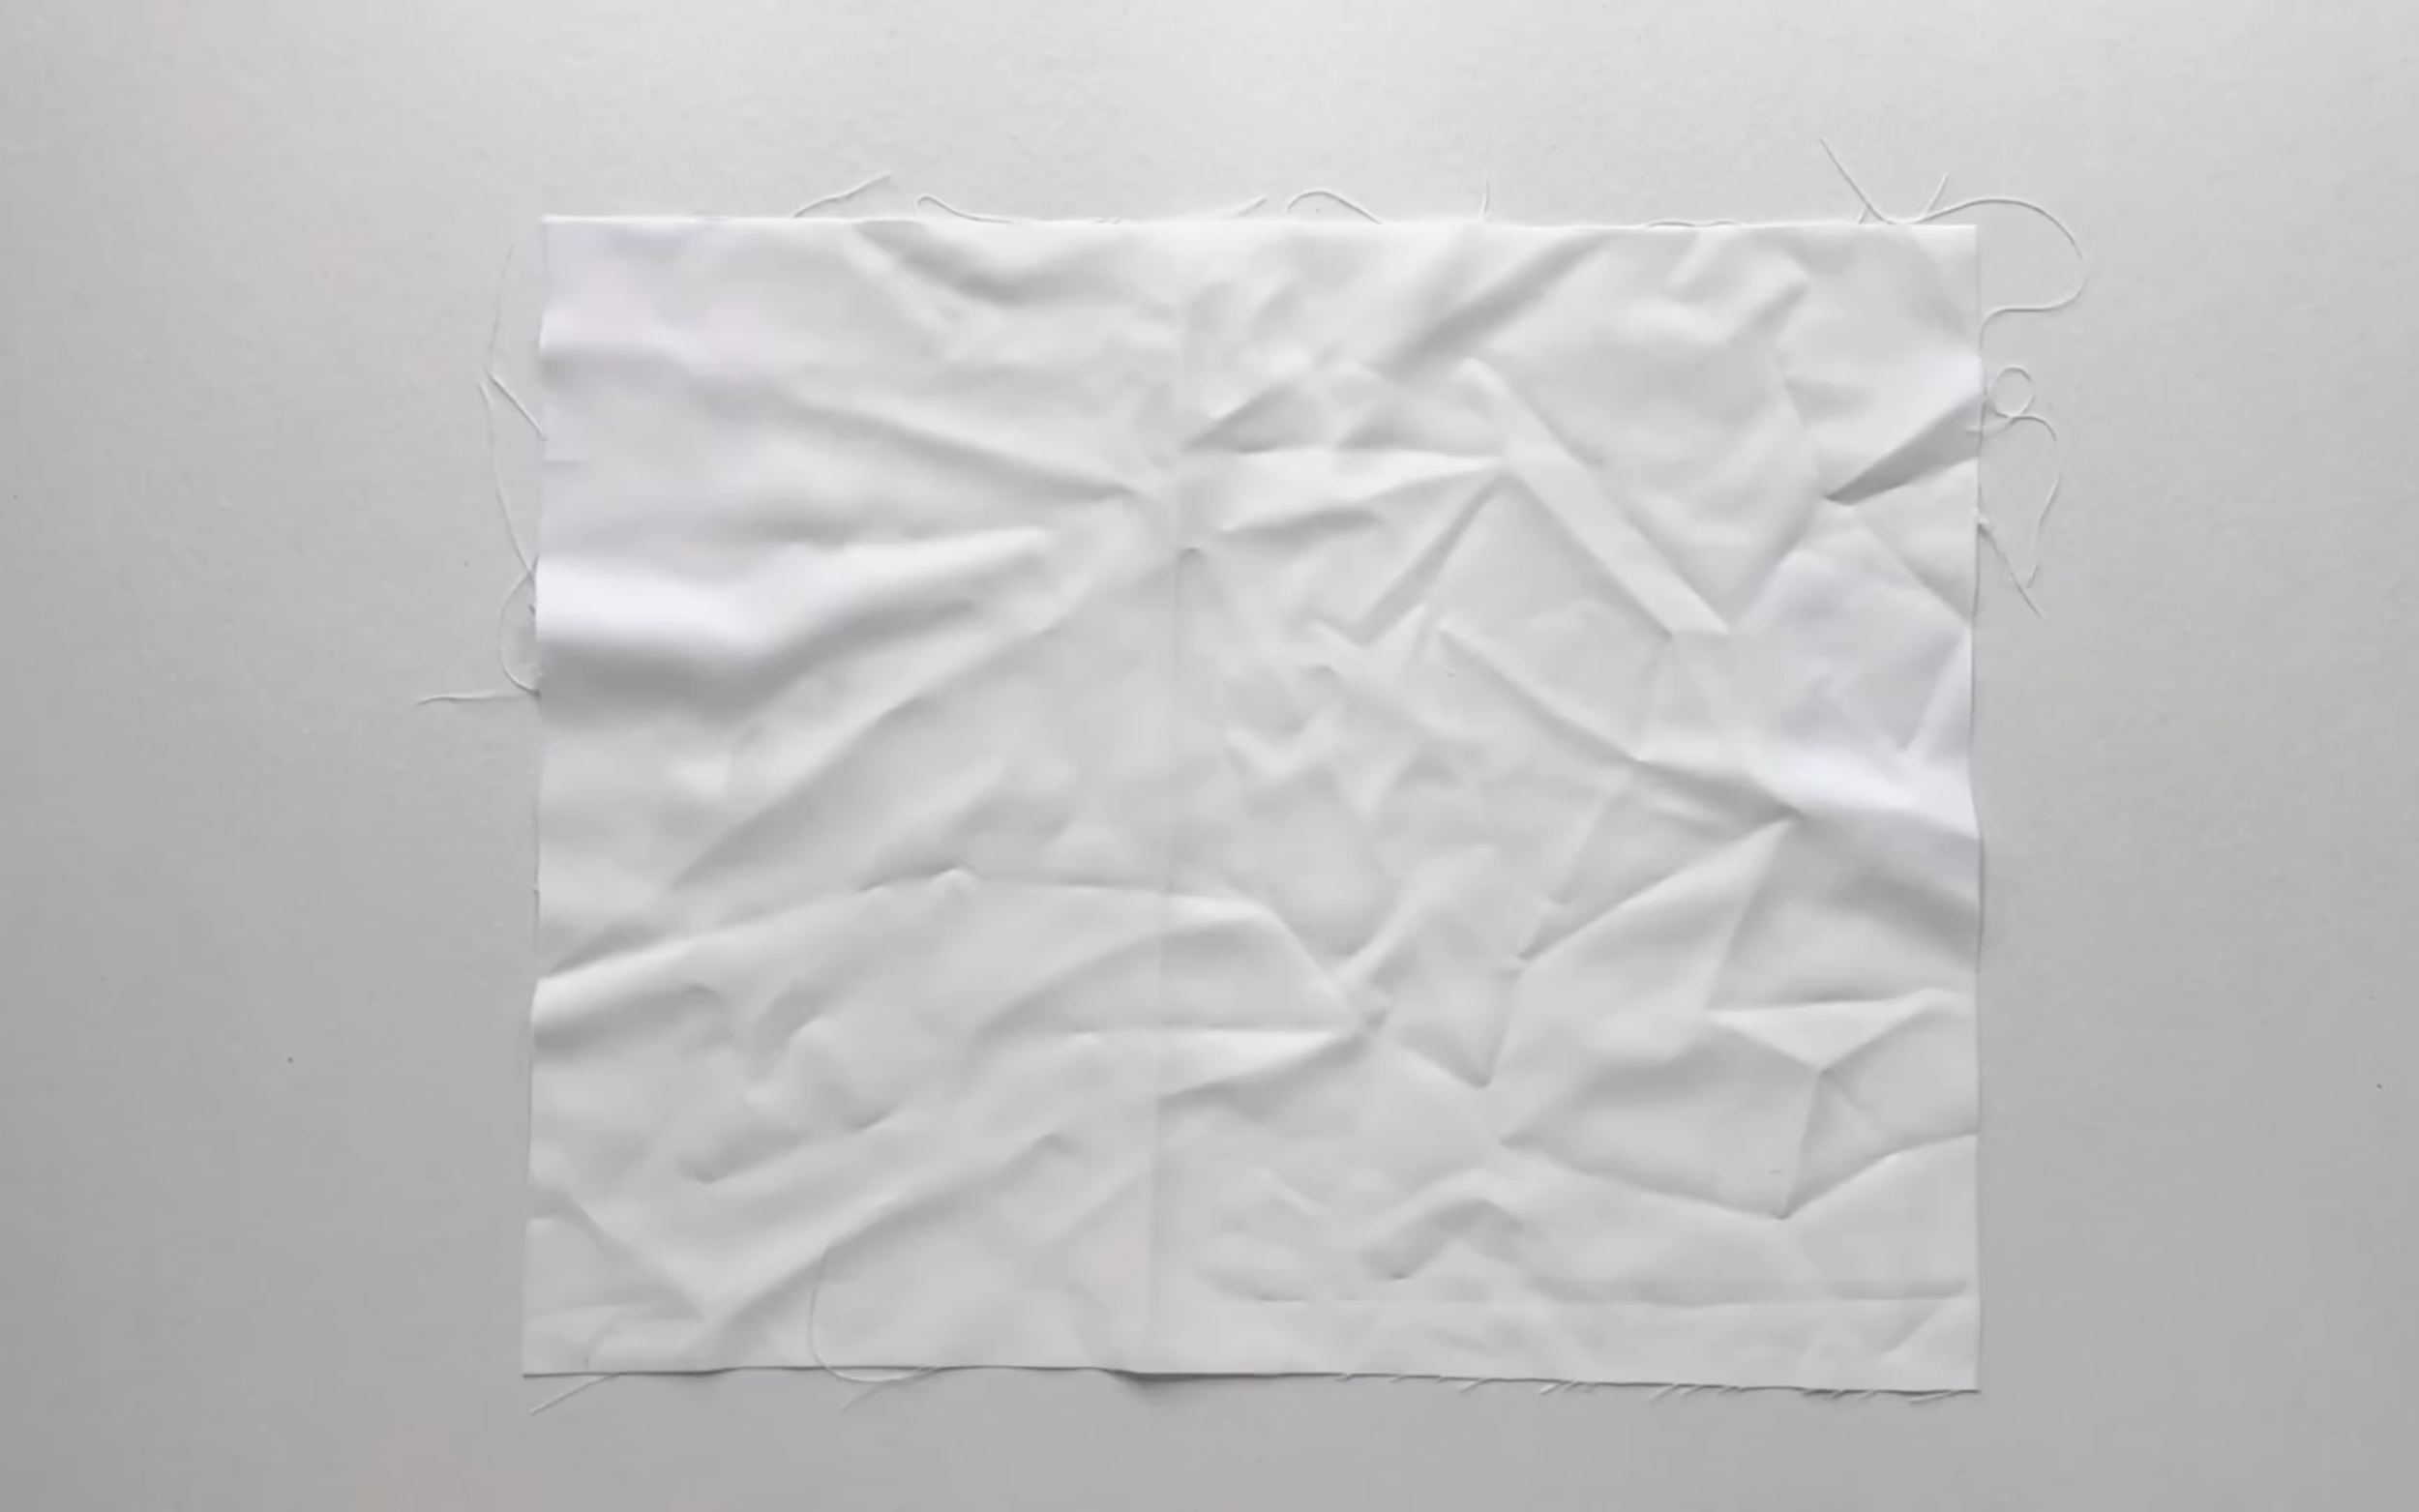
After visiting local fabric markets and looking online, I finally found the perfect combination: The main dress will be made of white Taffeta covered with floral lace. I'll use nude silk tulle for the side cut-outs and silk cotton for the lining.
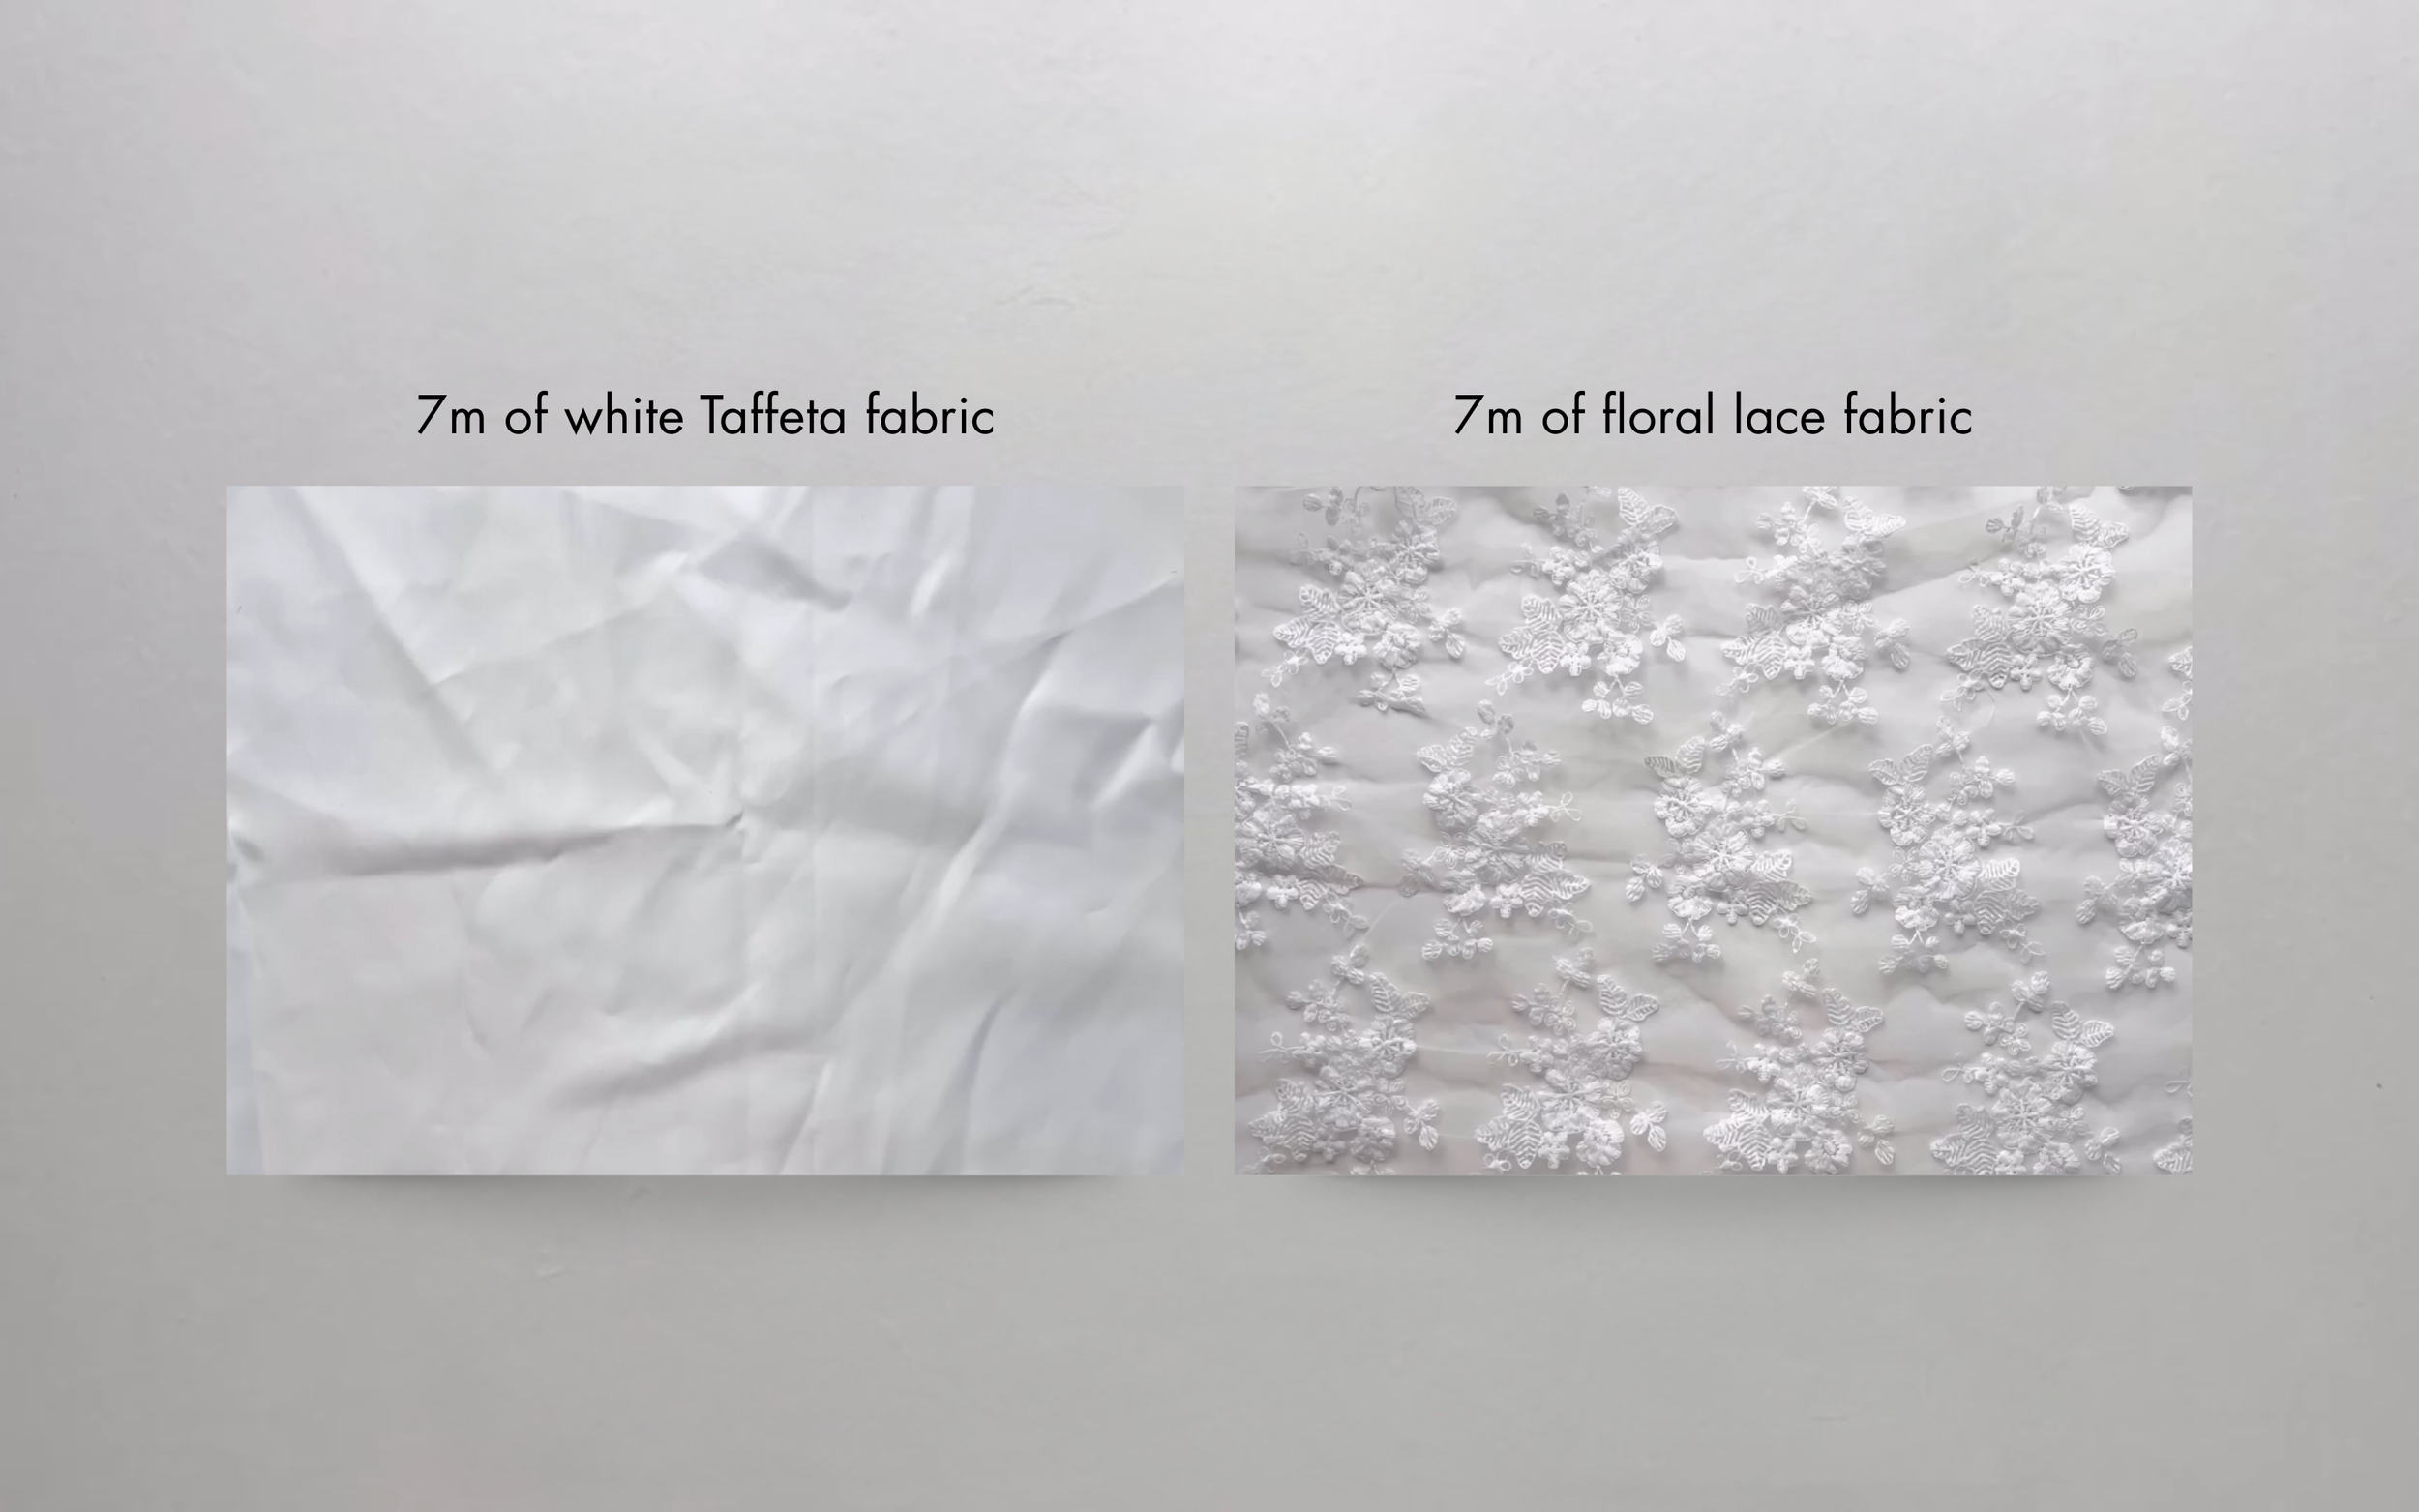
The main fabric
7m of white Taffeta and 7m of floral lace fabric.
The side cut-out fabric
0.1m of nude silk tulle fabric.
The lining fabric
6m of silk cotton fabric.
6. CREATING THE PATTERN
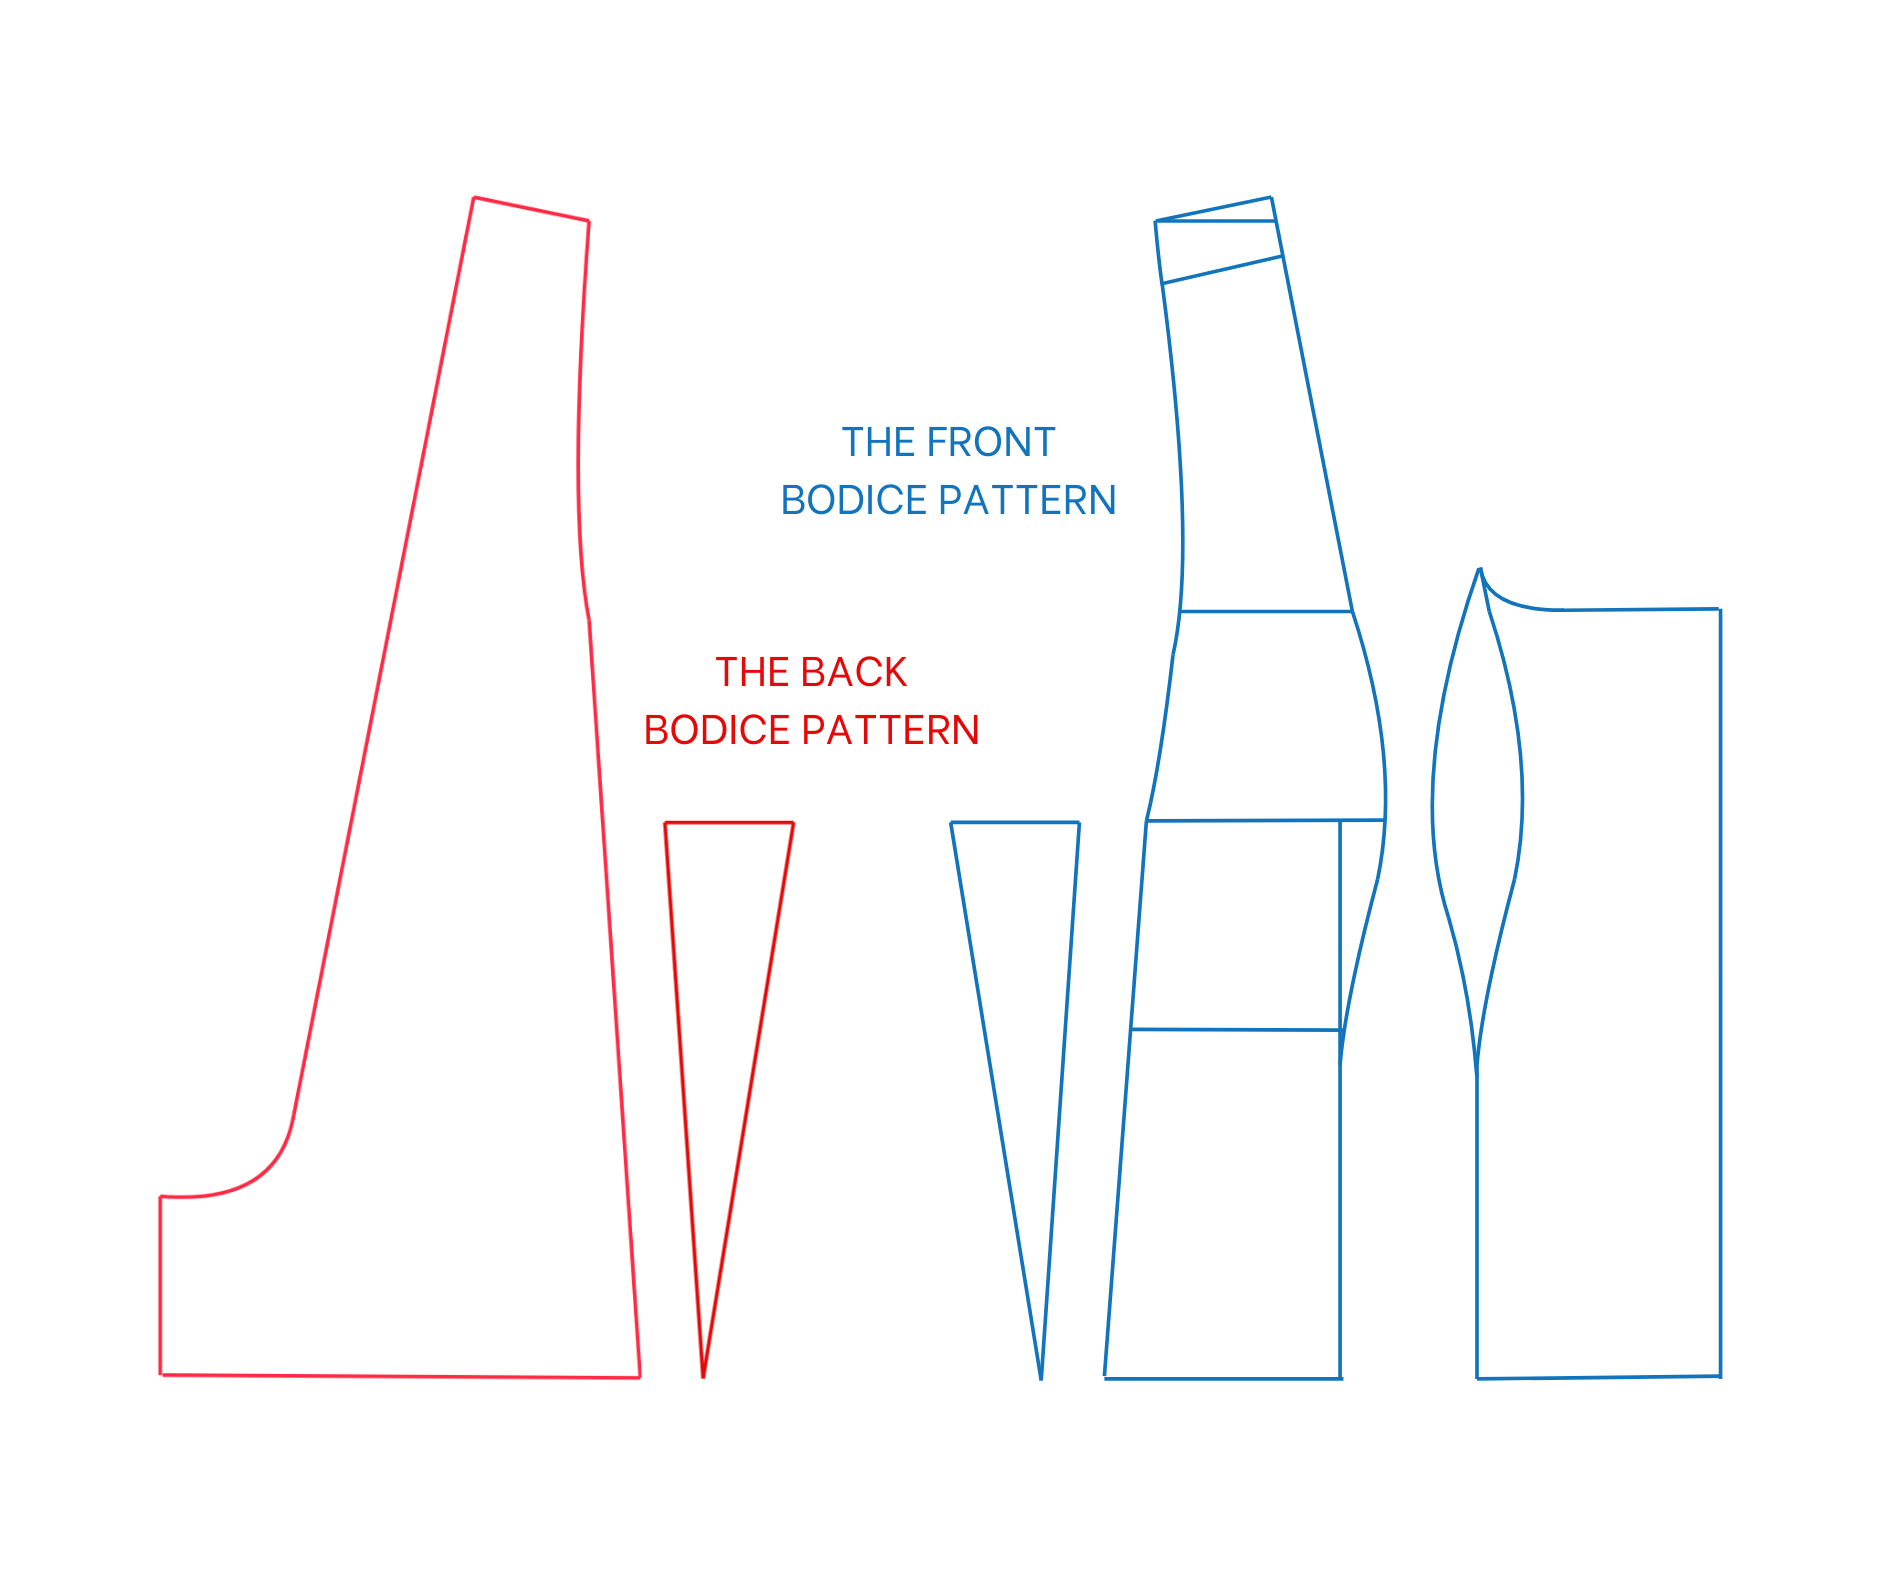
THE BODICE PATTERN
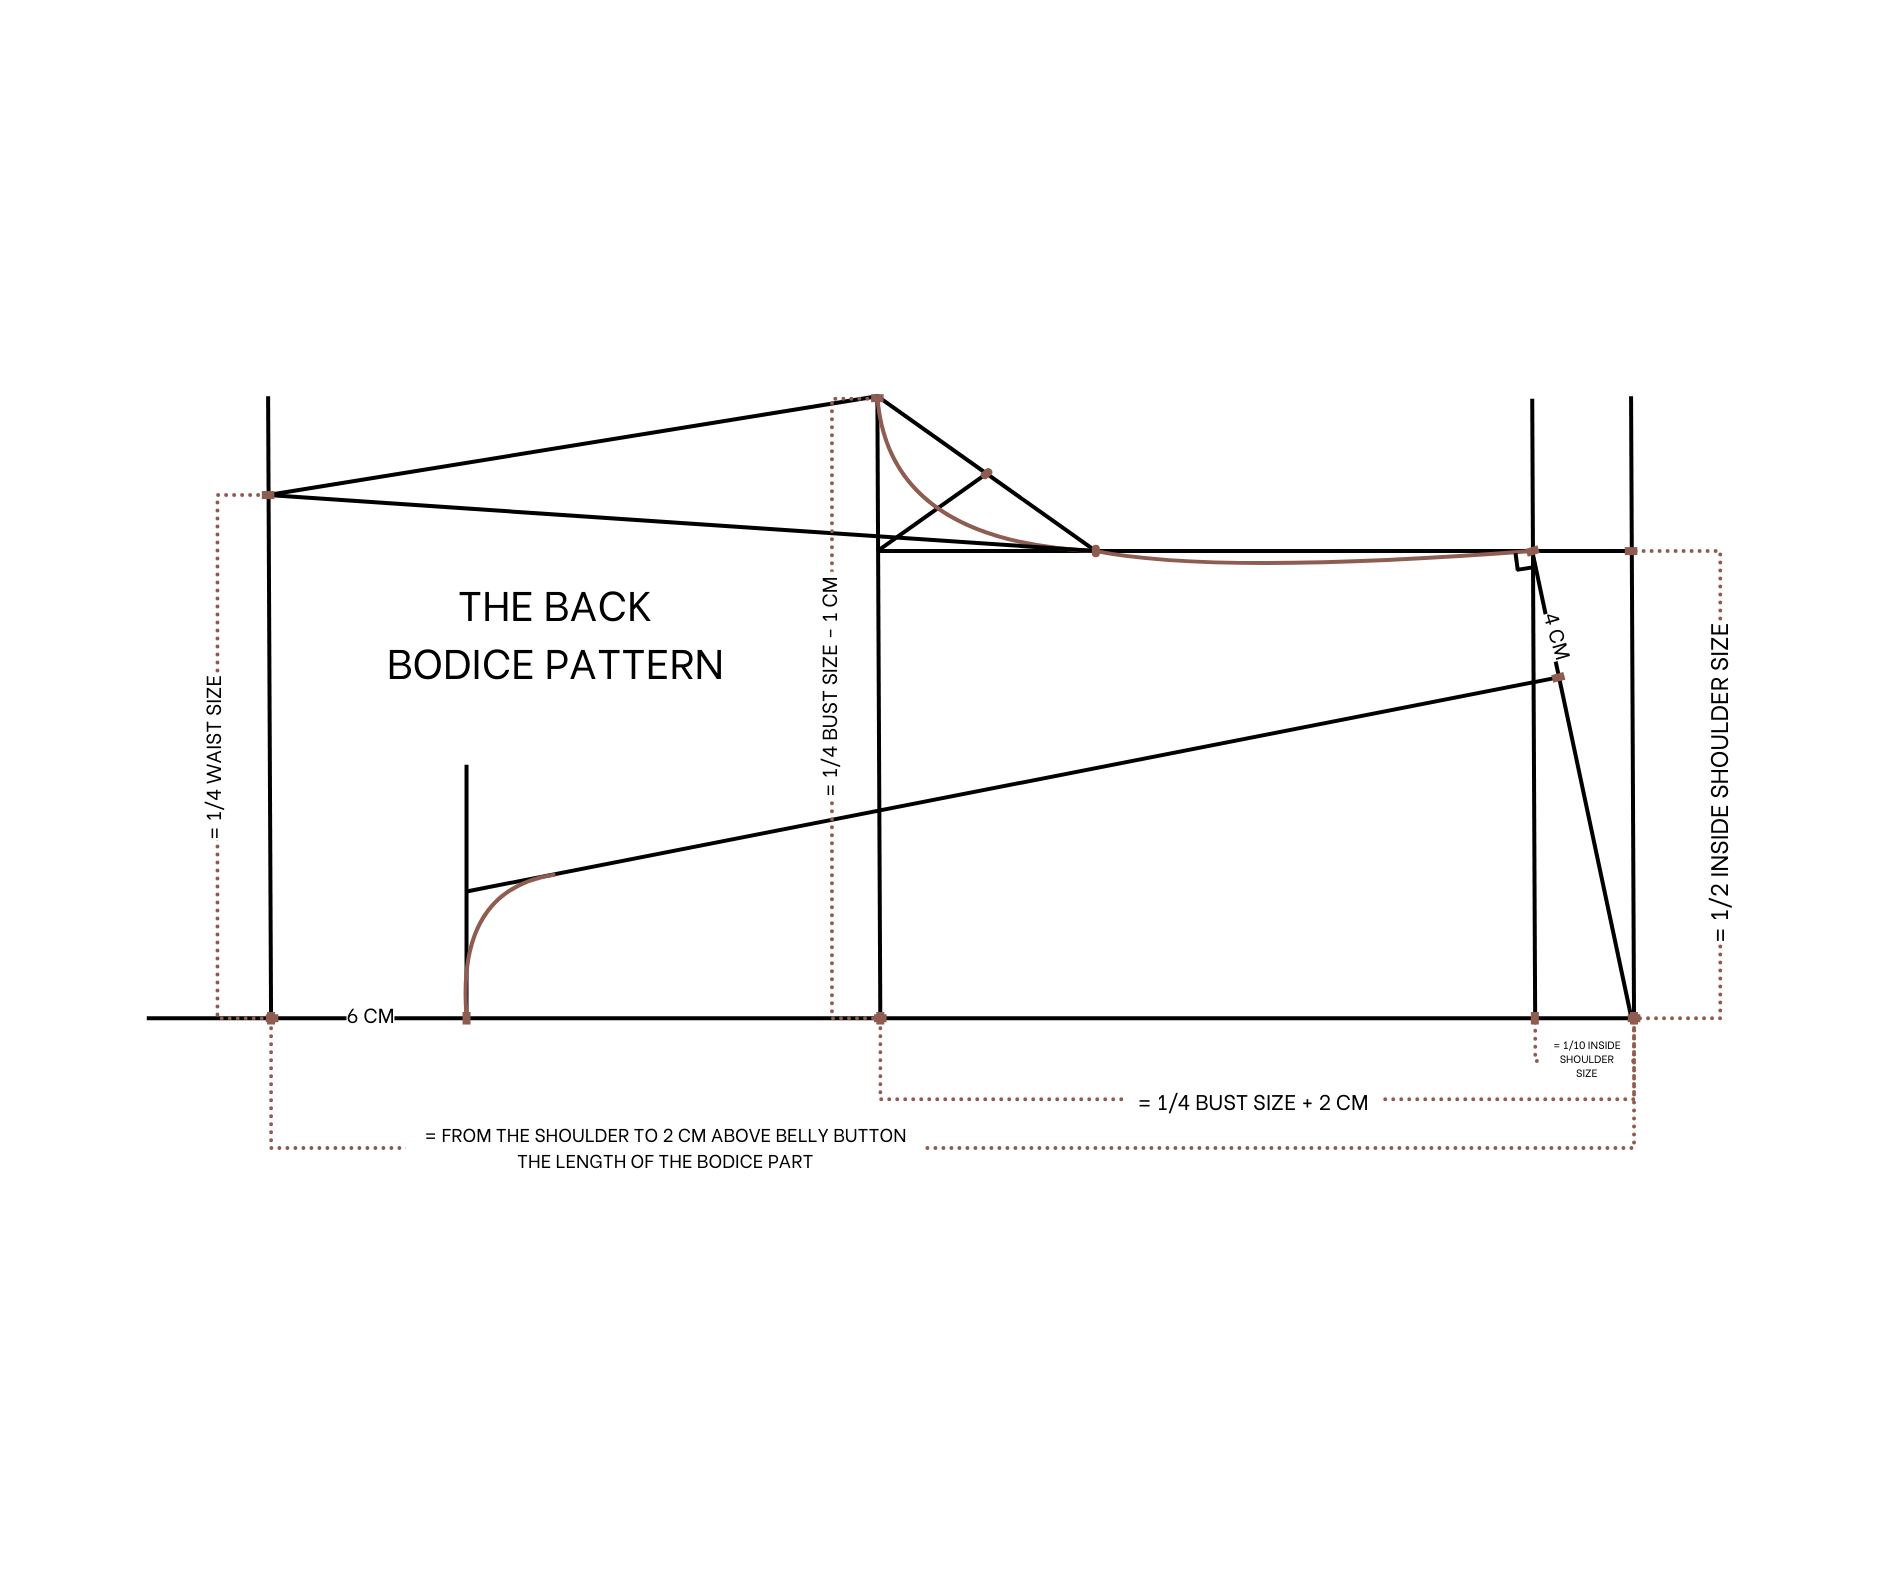
Draw a straight line cutting a horizontal line first.
From the straight line, draw another one at 2.8 cm next to it (1/10 the inside shoulder size).
From the cutting point of the second line and horizontal line, mark up 14 cm (half the inside shoulder size).
Draw a perpendicular line to cut the first straight line. Connect these points to create the shoulder line.
Draw another straight line at 22.5 cm (a quarter of the bust size plus 2 cm). This is the bust line.
From the cutting point of this line and the horizontal line, mark up 19.5 cm (a quarter of the bust size minus 1 cm).
Continue the perpendicular line from the shoulder line to cut the bust line.
Mark at 1/3 the width of this line. Connect this to the bust line mark.
Mark the middle of this new line, then connect that to the intersection of the perpendicular and bust lines.
Mark the middle again, and draw a curved line to create the sleeve line.
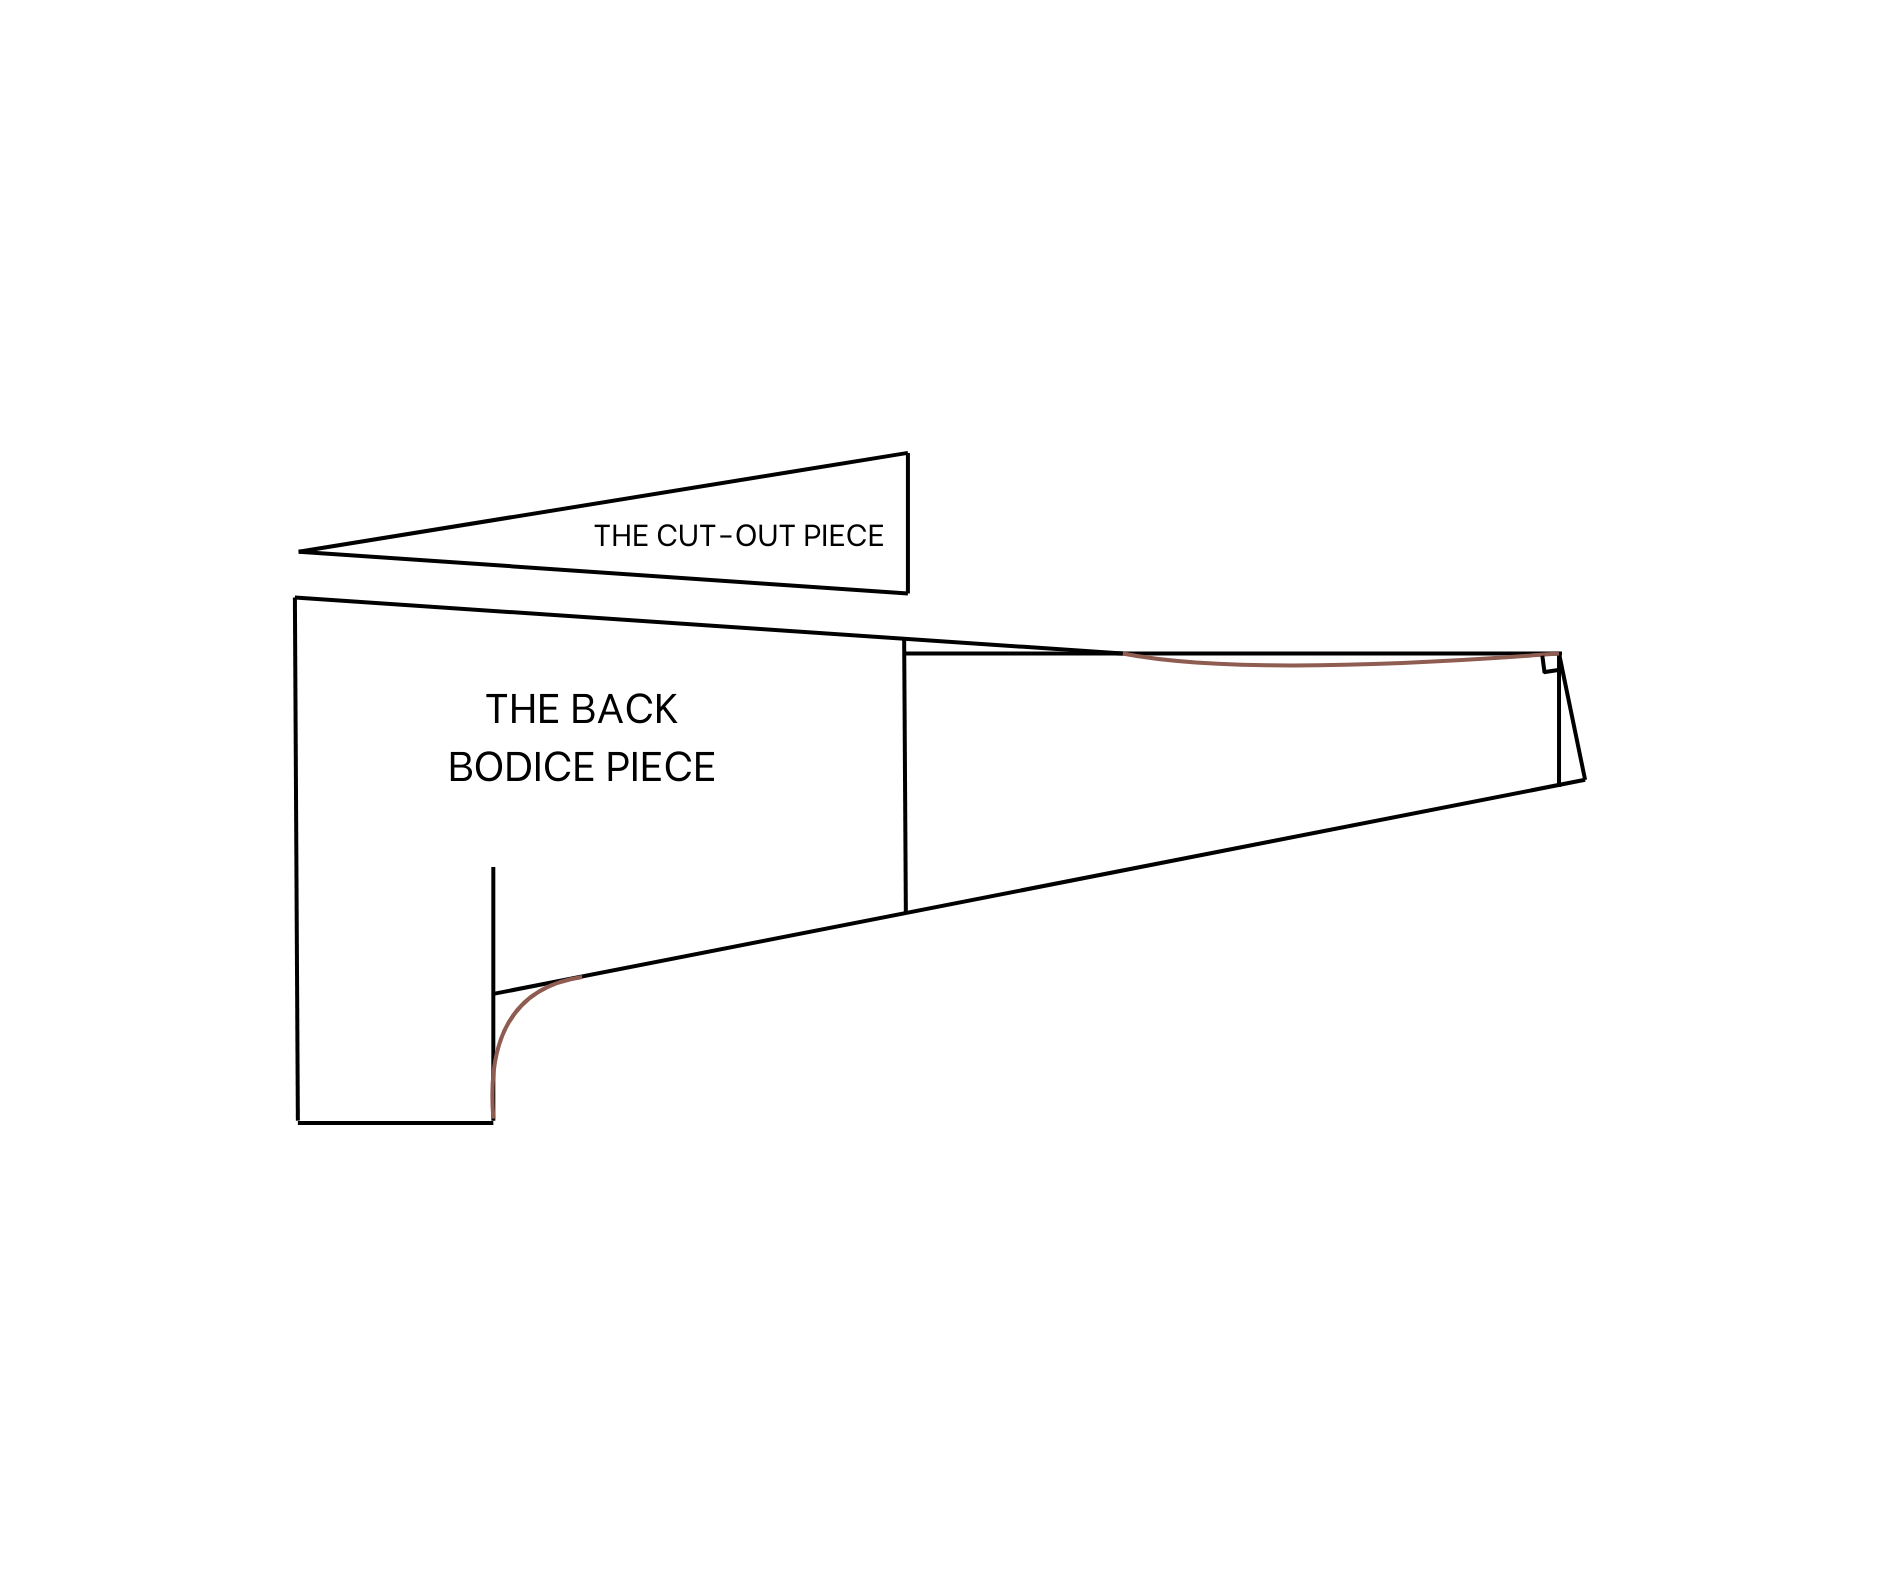
Draw another line at 41 cm (length from shoulder to 2 cm above the belly button). This is the waistline.
From the cutting point, mark up 16 cm (a quarter of the waist size).
Connect to the sleeve line to create a side line.
From the shoulder line, mark inside 4 cm for the shoulder strap.
Draw a perpendicular line down to the end of the bodice.
From the waistline, draw a line 6 cm next to it, and connect using a U-shaped line.
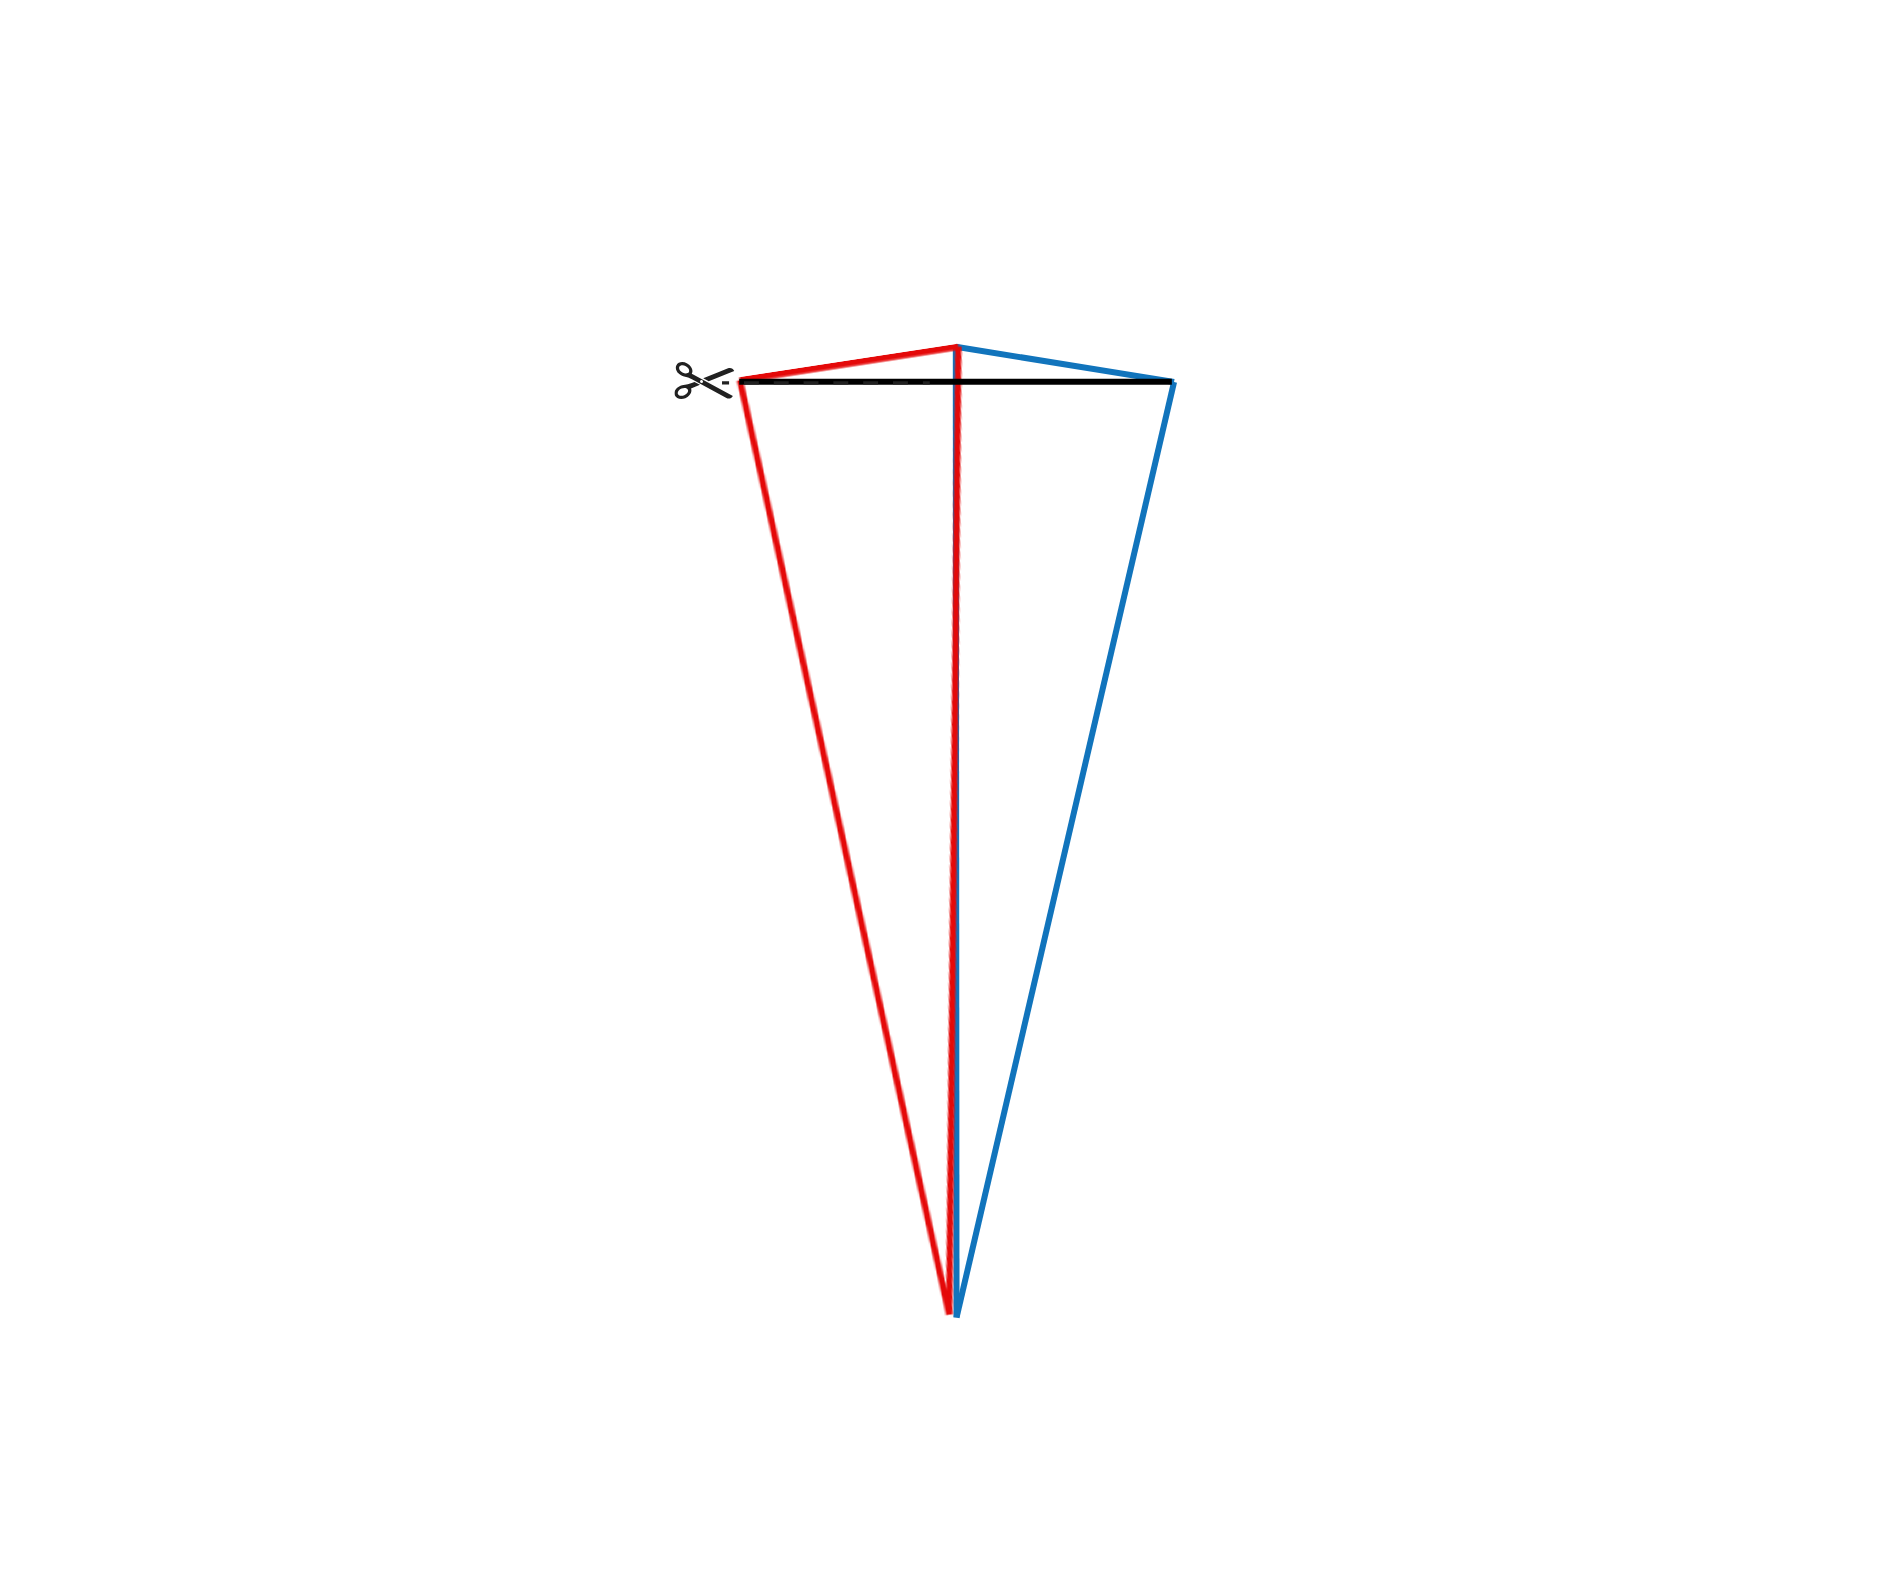
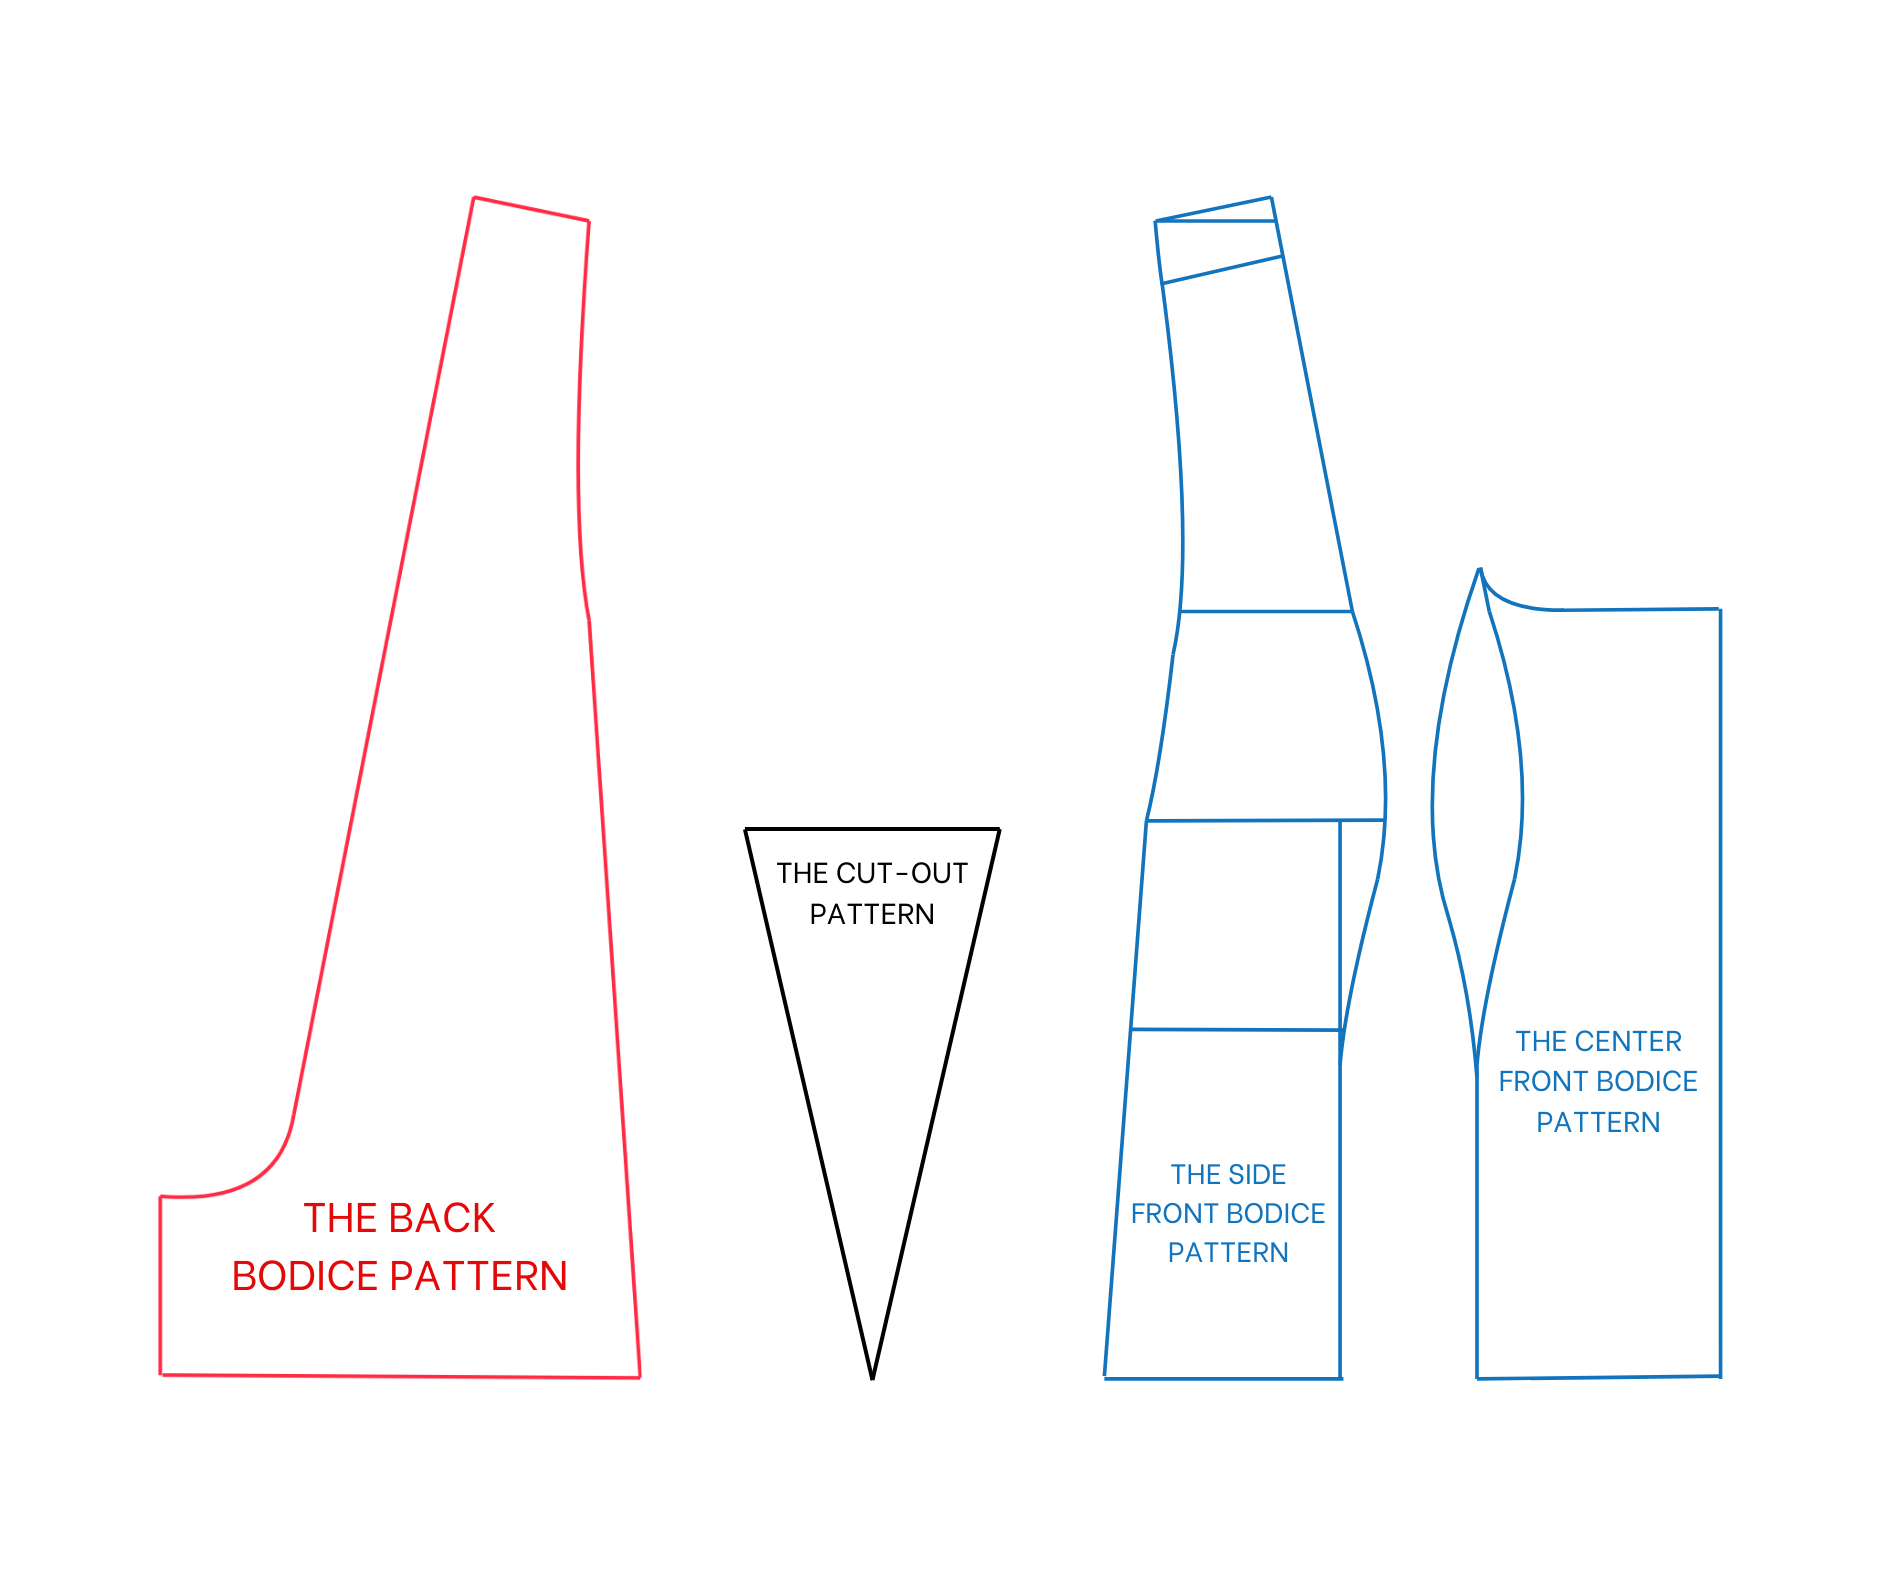
From the end of the sideline, draw a line to the sleeve line to create a cut-out line. This produces the cut-out piece and the back bodice piece.
THE FRONT BODICE PATTERN
Based on the back pattern, lower the shoulder 2 cm to create a new shoulder line and redraw the sleeve line.
Mark the top bust line (position of the top of the breast).
Draw the underbust line 14 cm below it (the width of the breast).
Create a U-shaped curved line for a square neckline.
At the waistline, mark the middle and draw a parallel horizontal line.
Draw a curved line from the neck U-shape to the bust line, going down to the horizontal line to create a middle bust line.
Use the back cut-out piece to copy to the front bodice and connect to the sleeve line. This results in the cut-out pieces, the side piece, and the center piece.
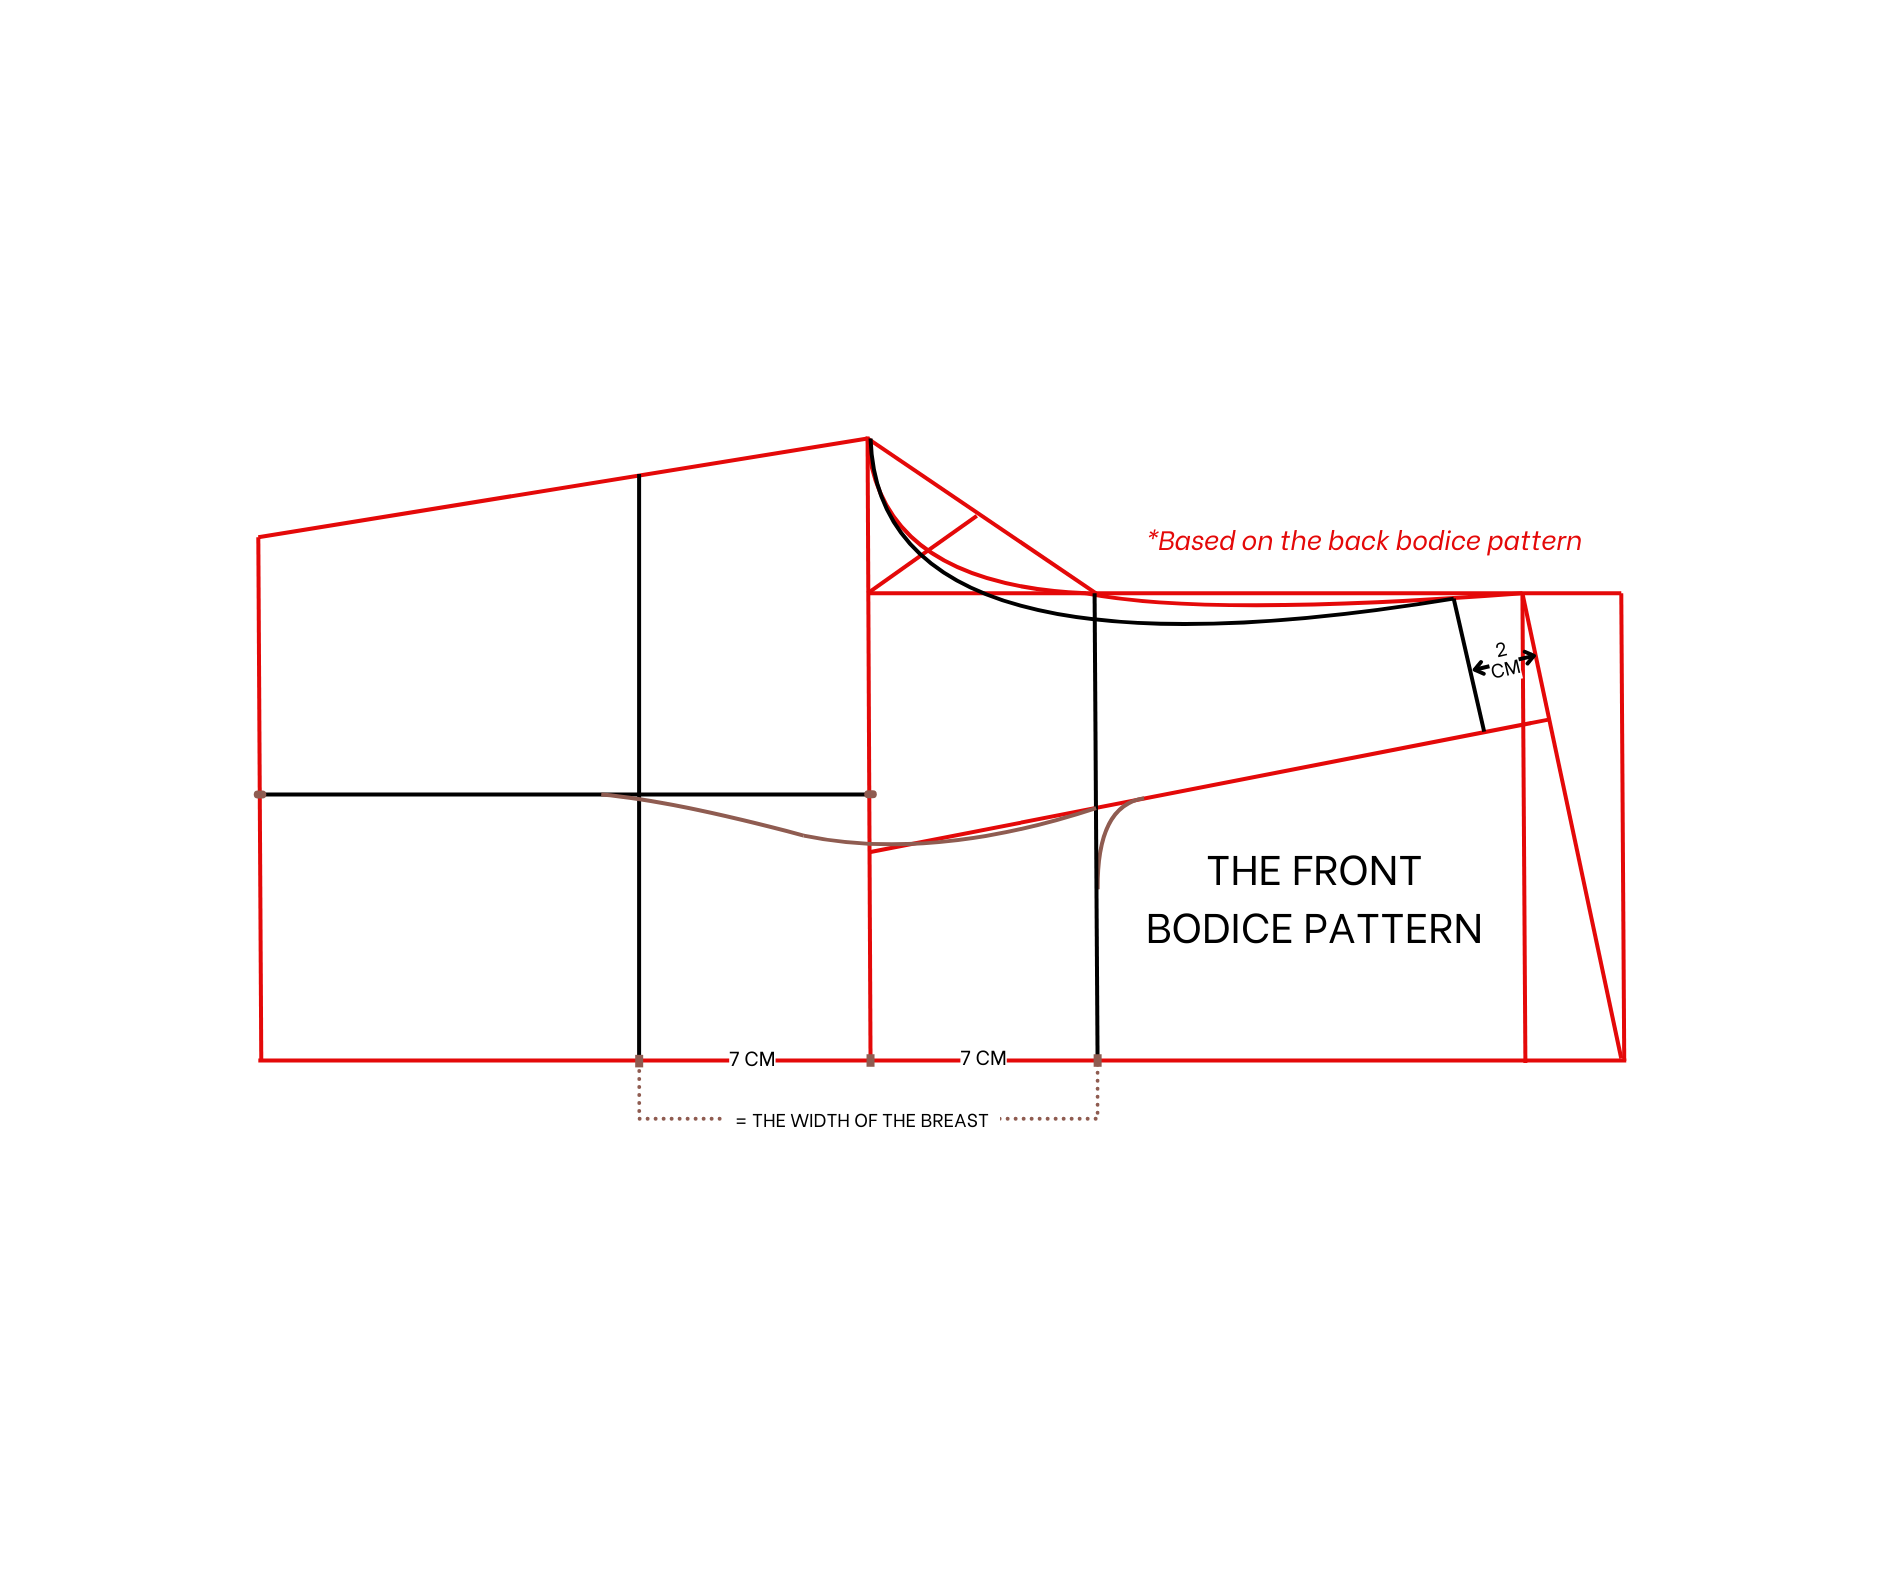
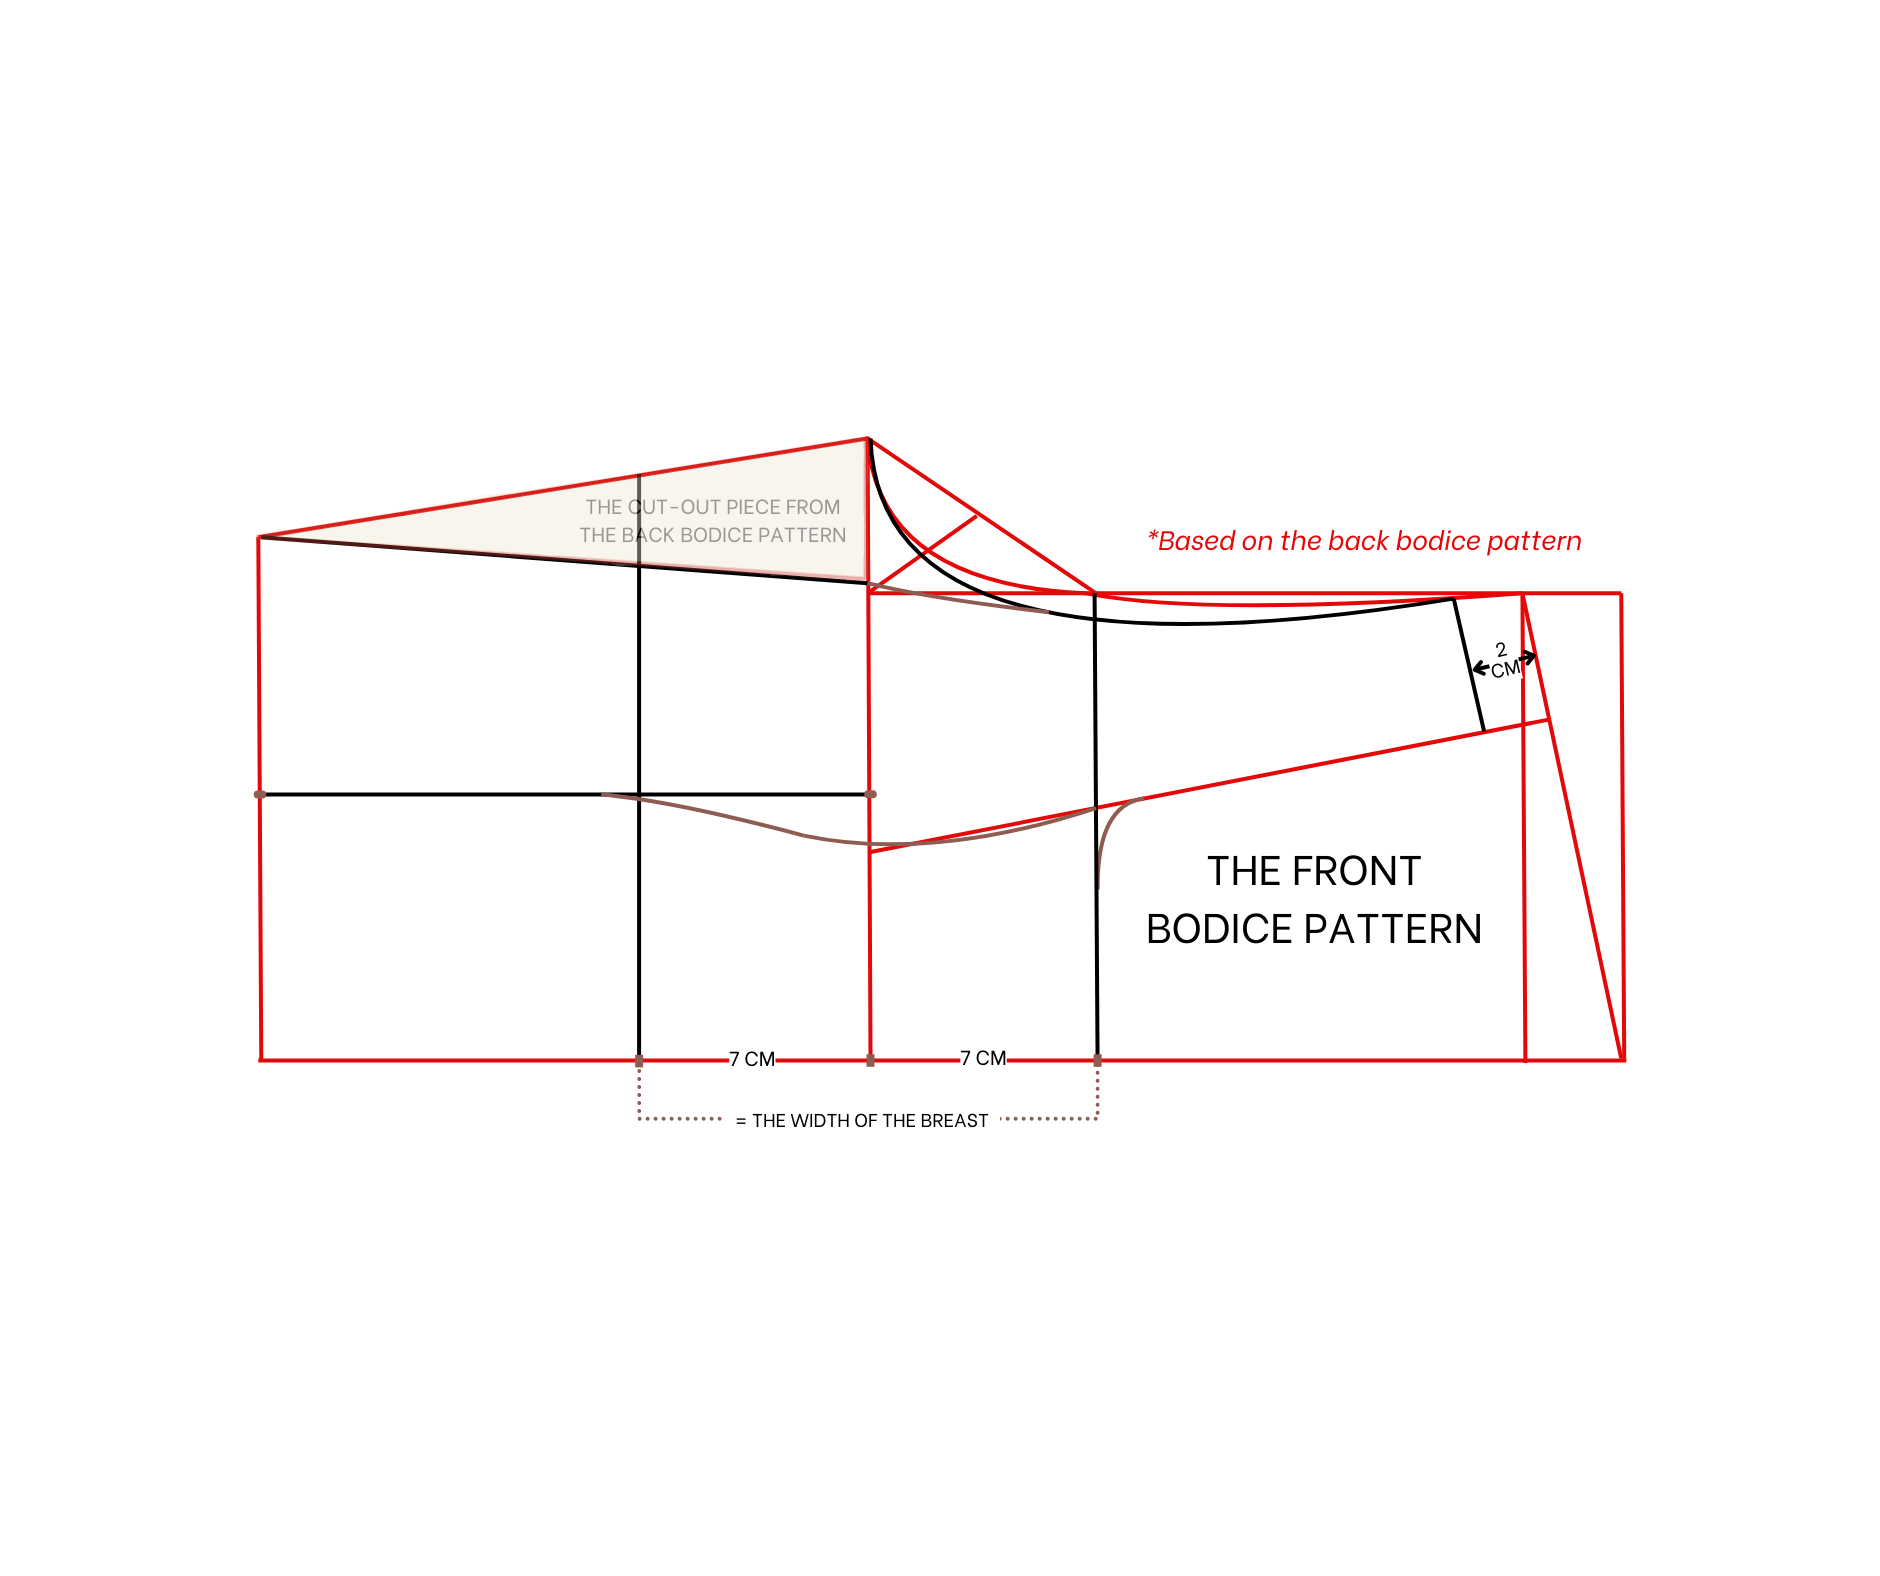
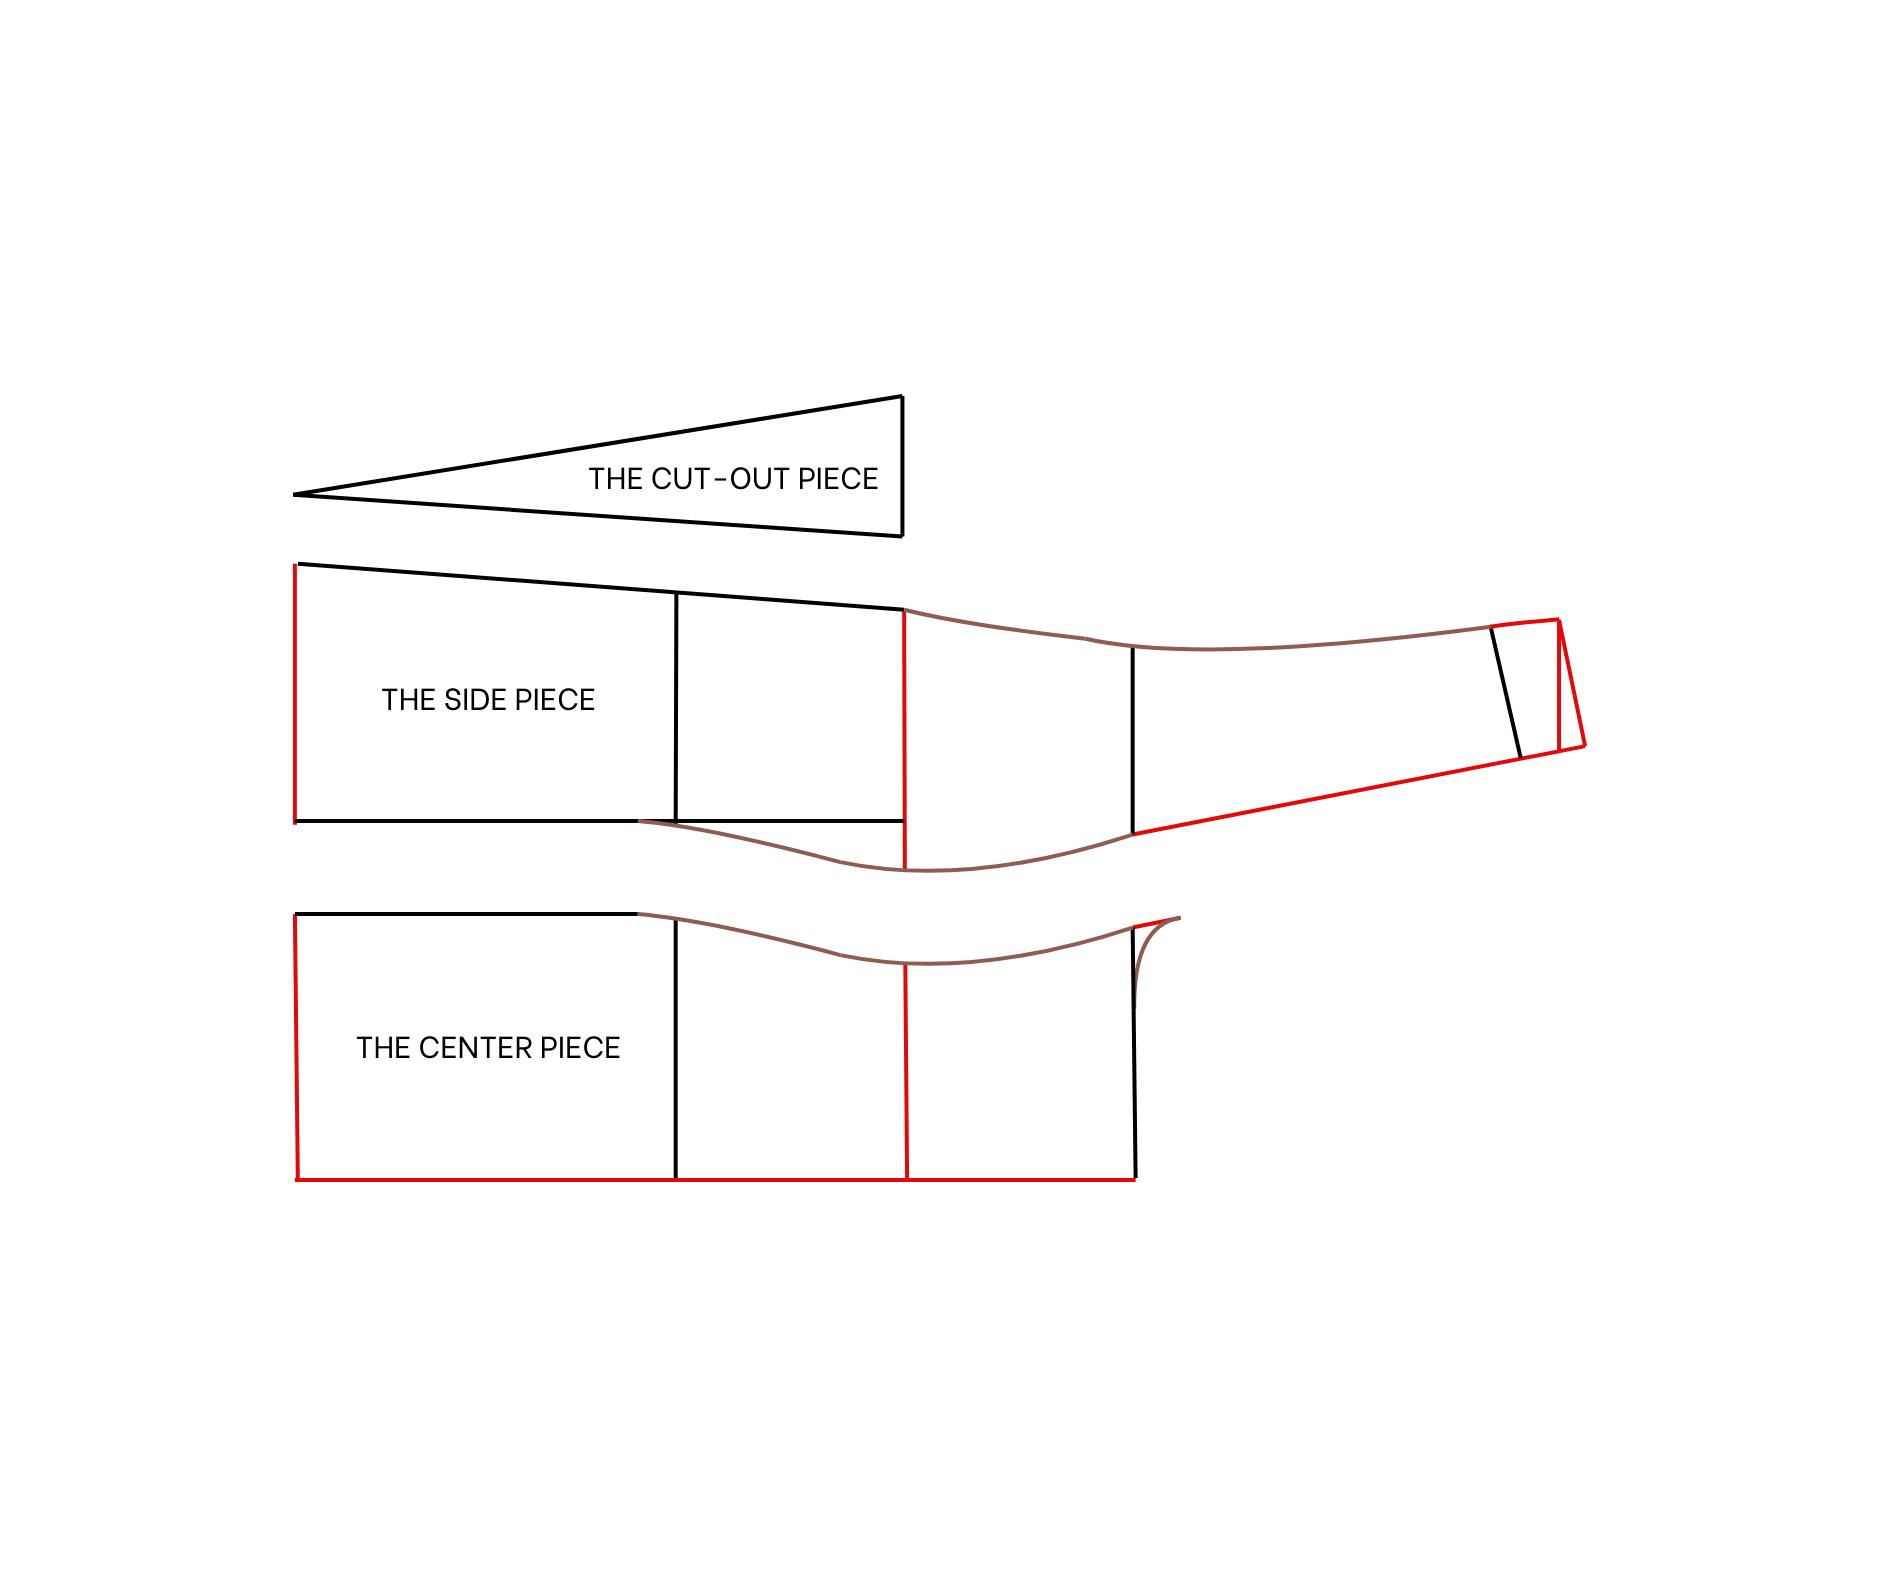
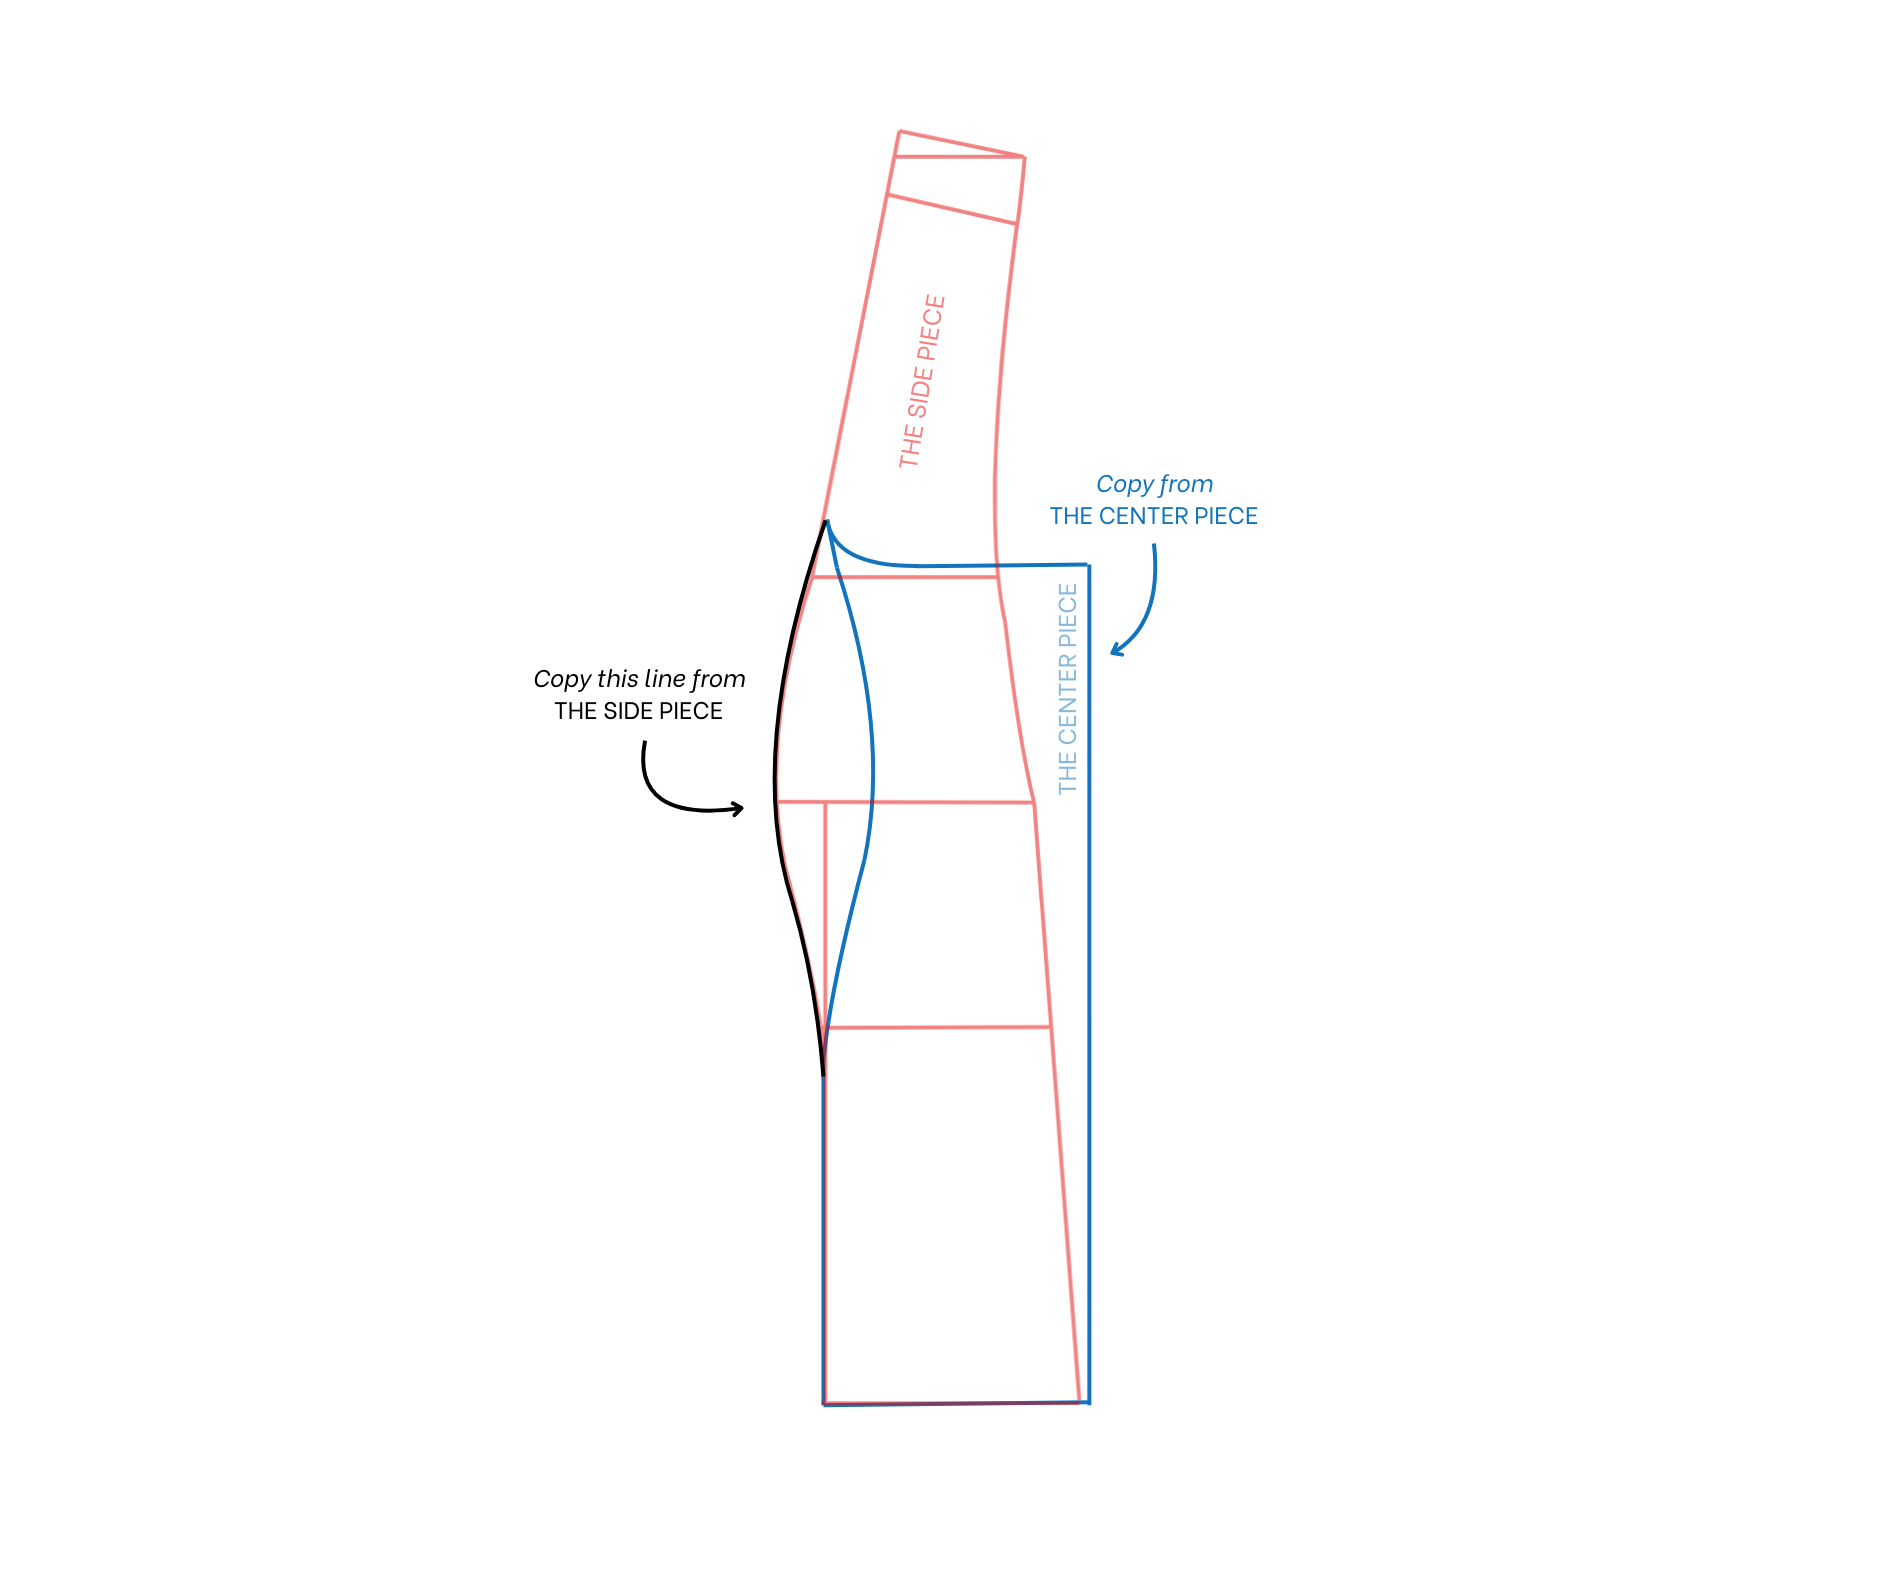
Copy the center piece first, then use the side piece to copy the middle bust line onto it.
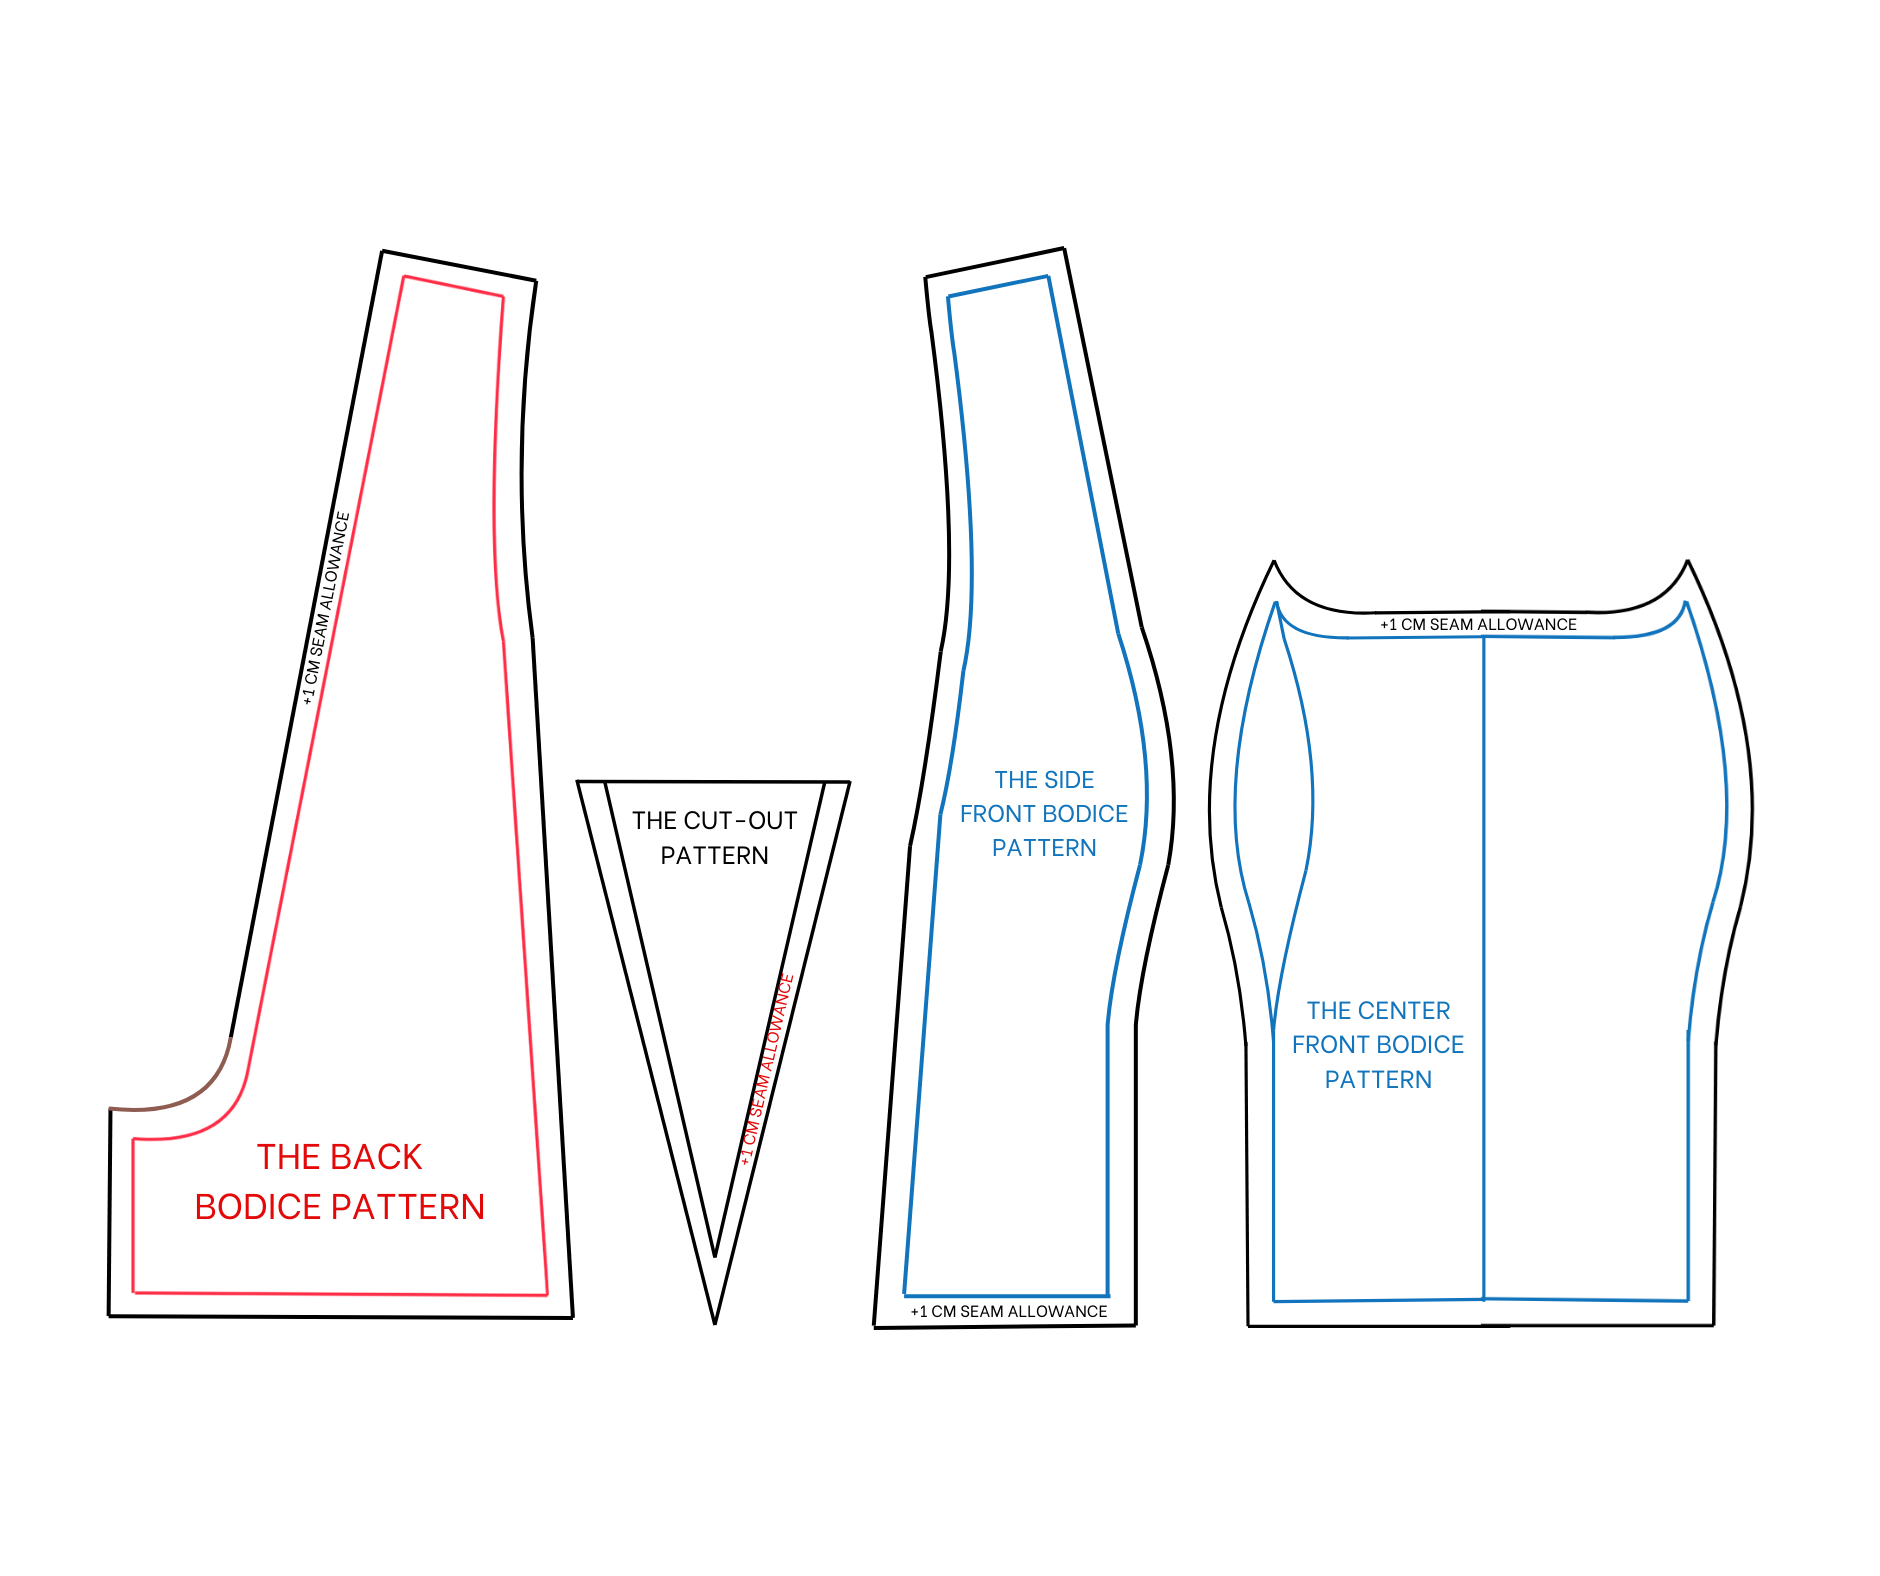
The final pattern pieces are: back bodice, cut-out, side front bodice, and center front bodice.
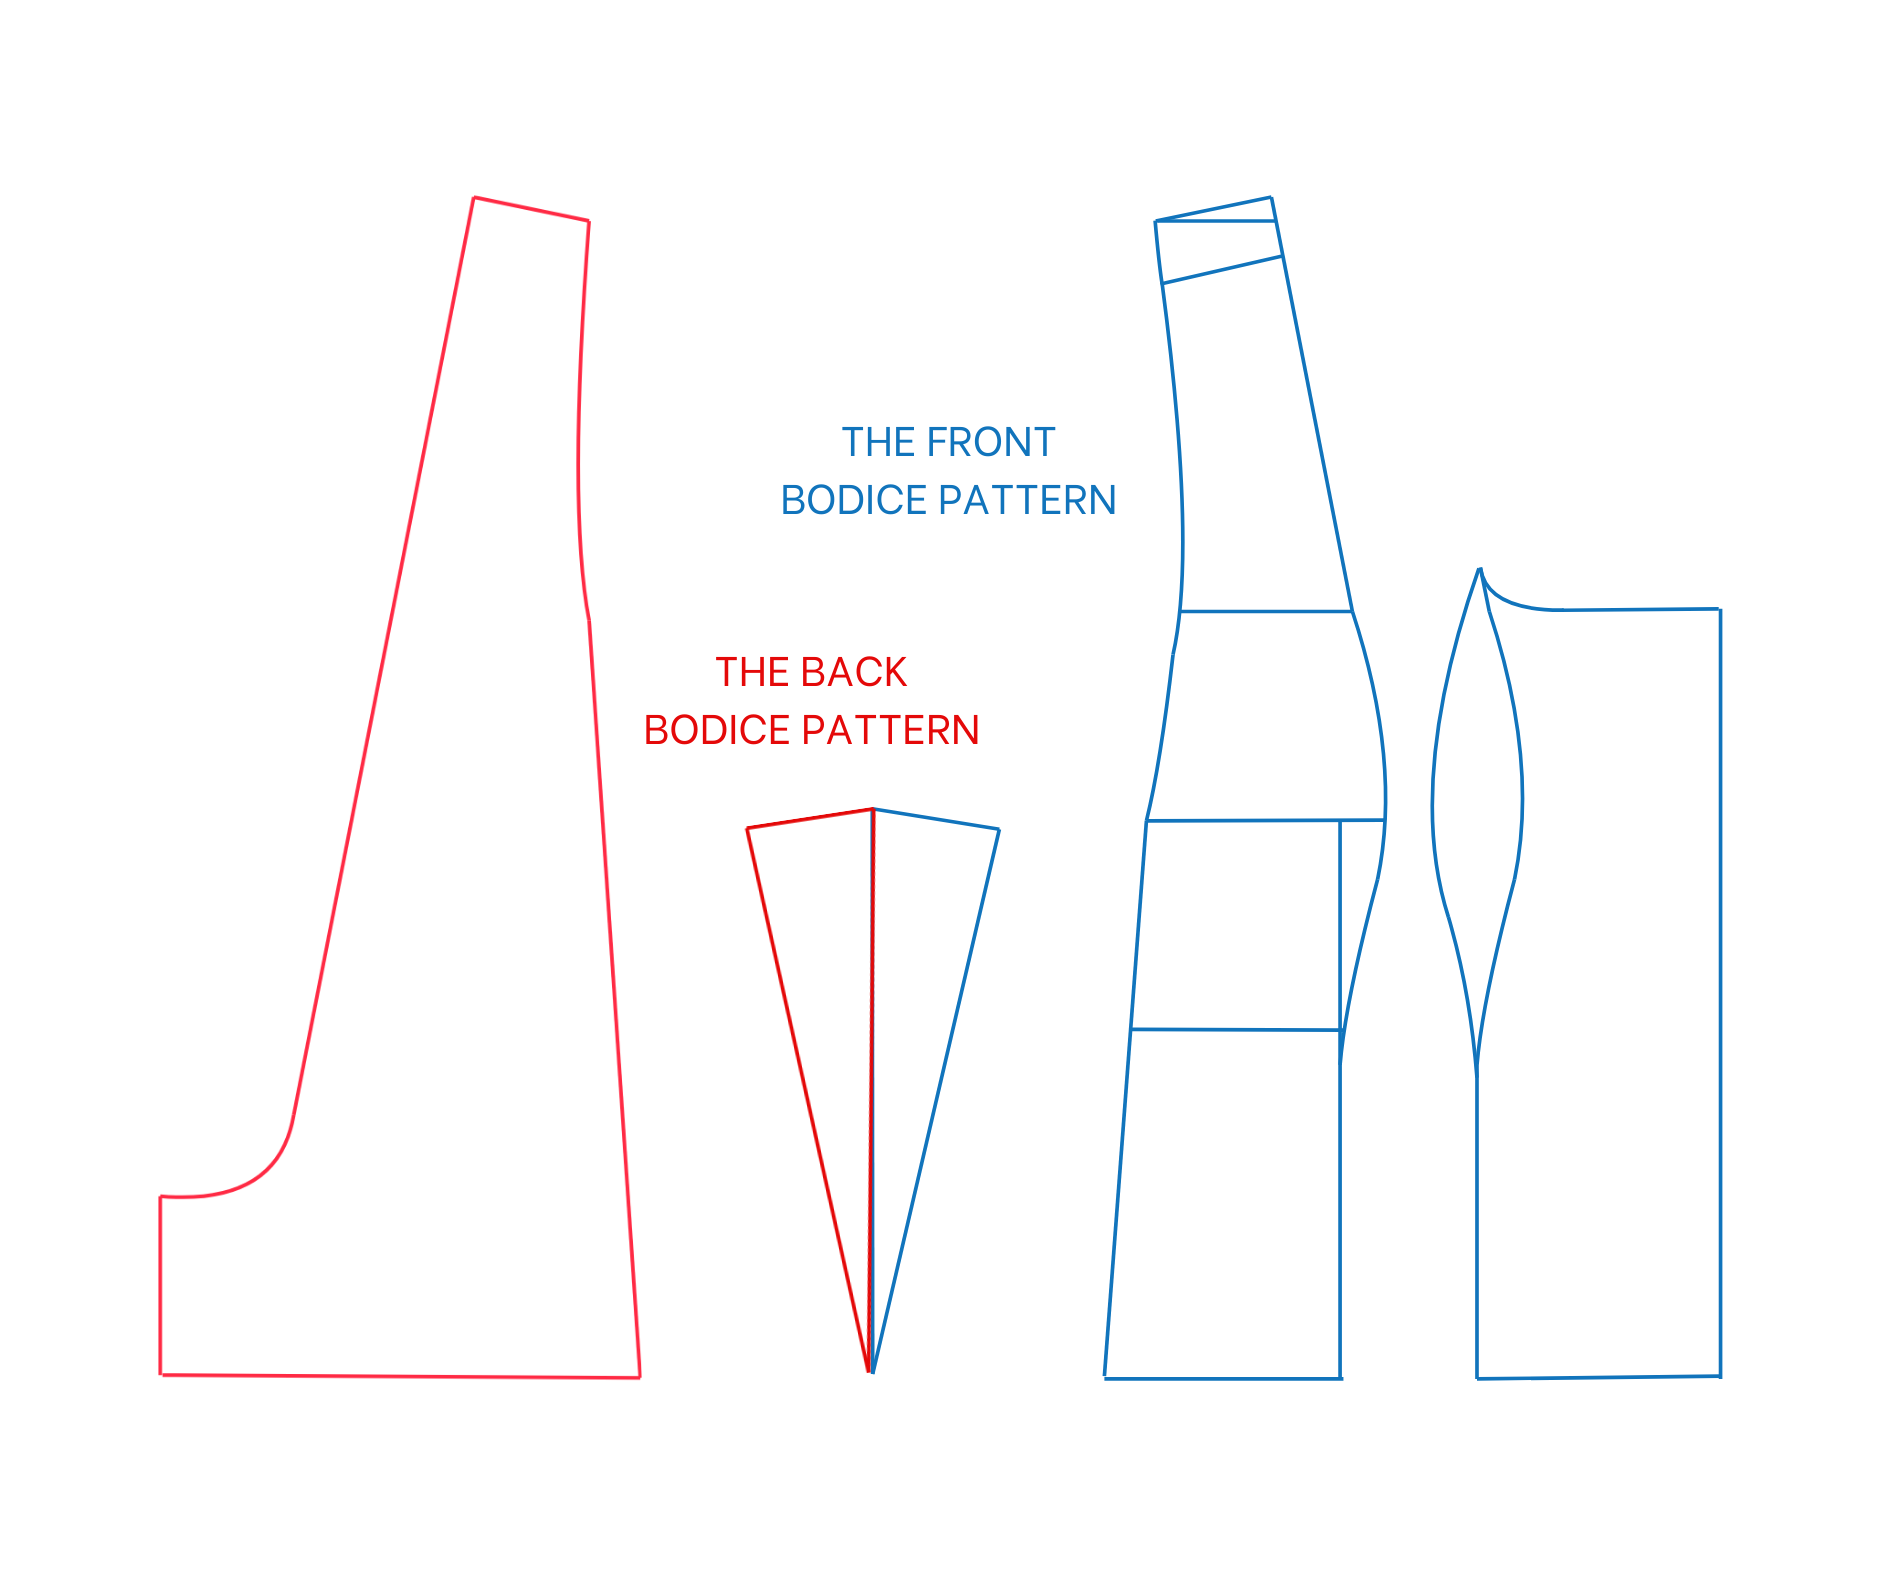
Add 1 cm for seam allowance.
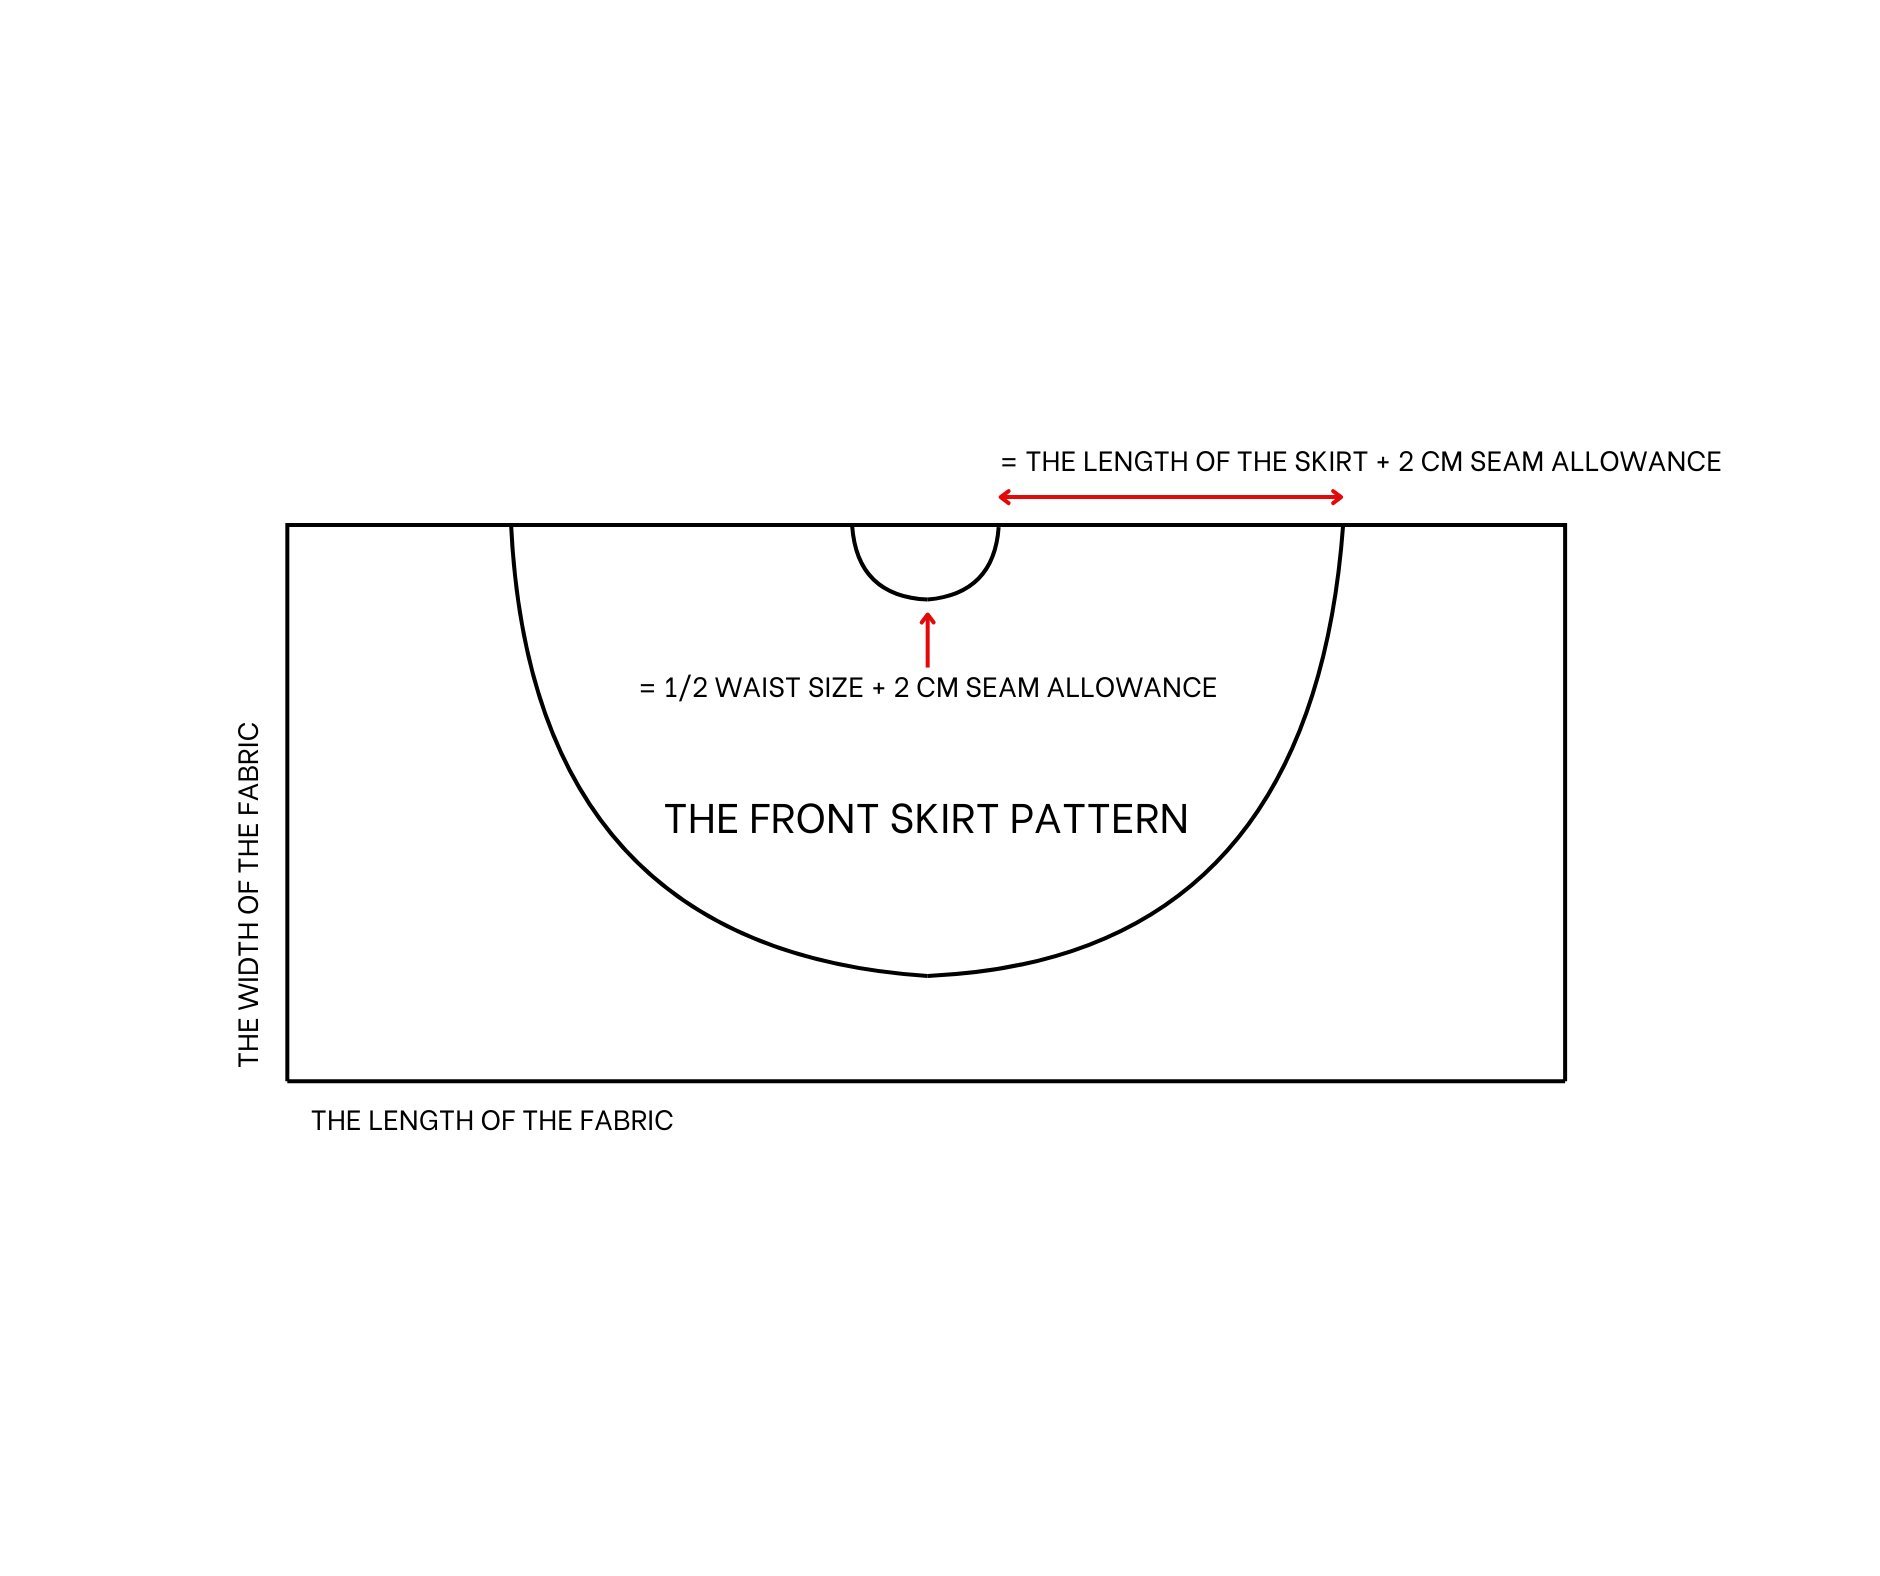
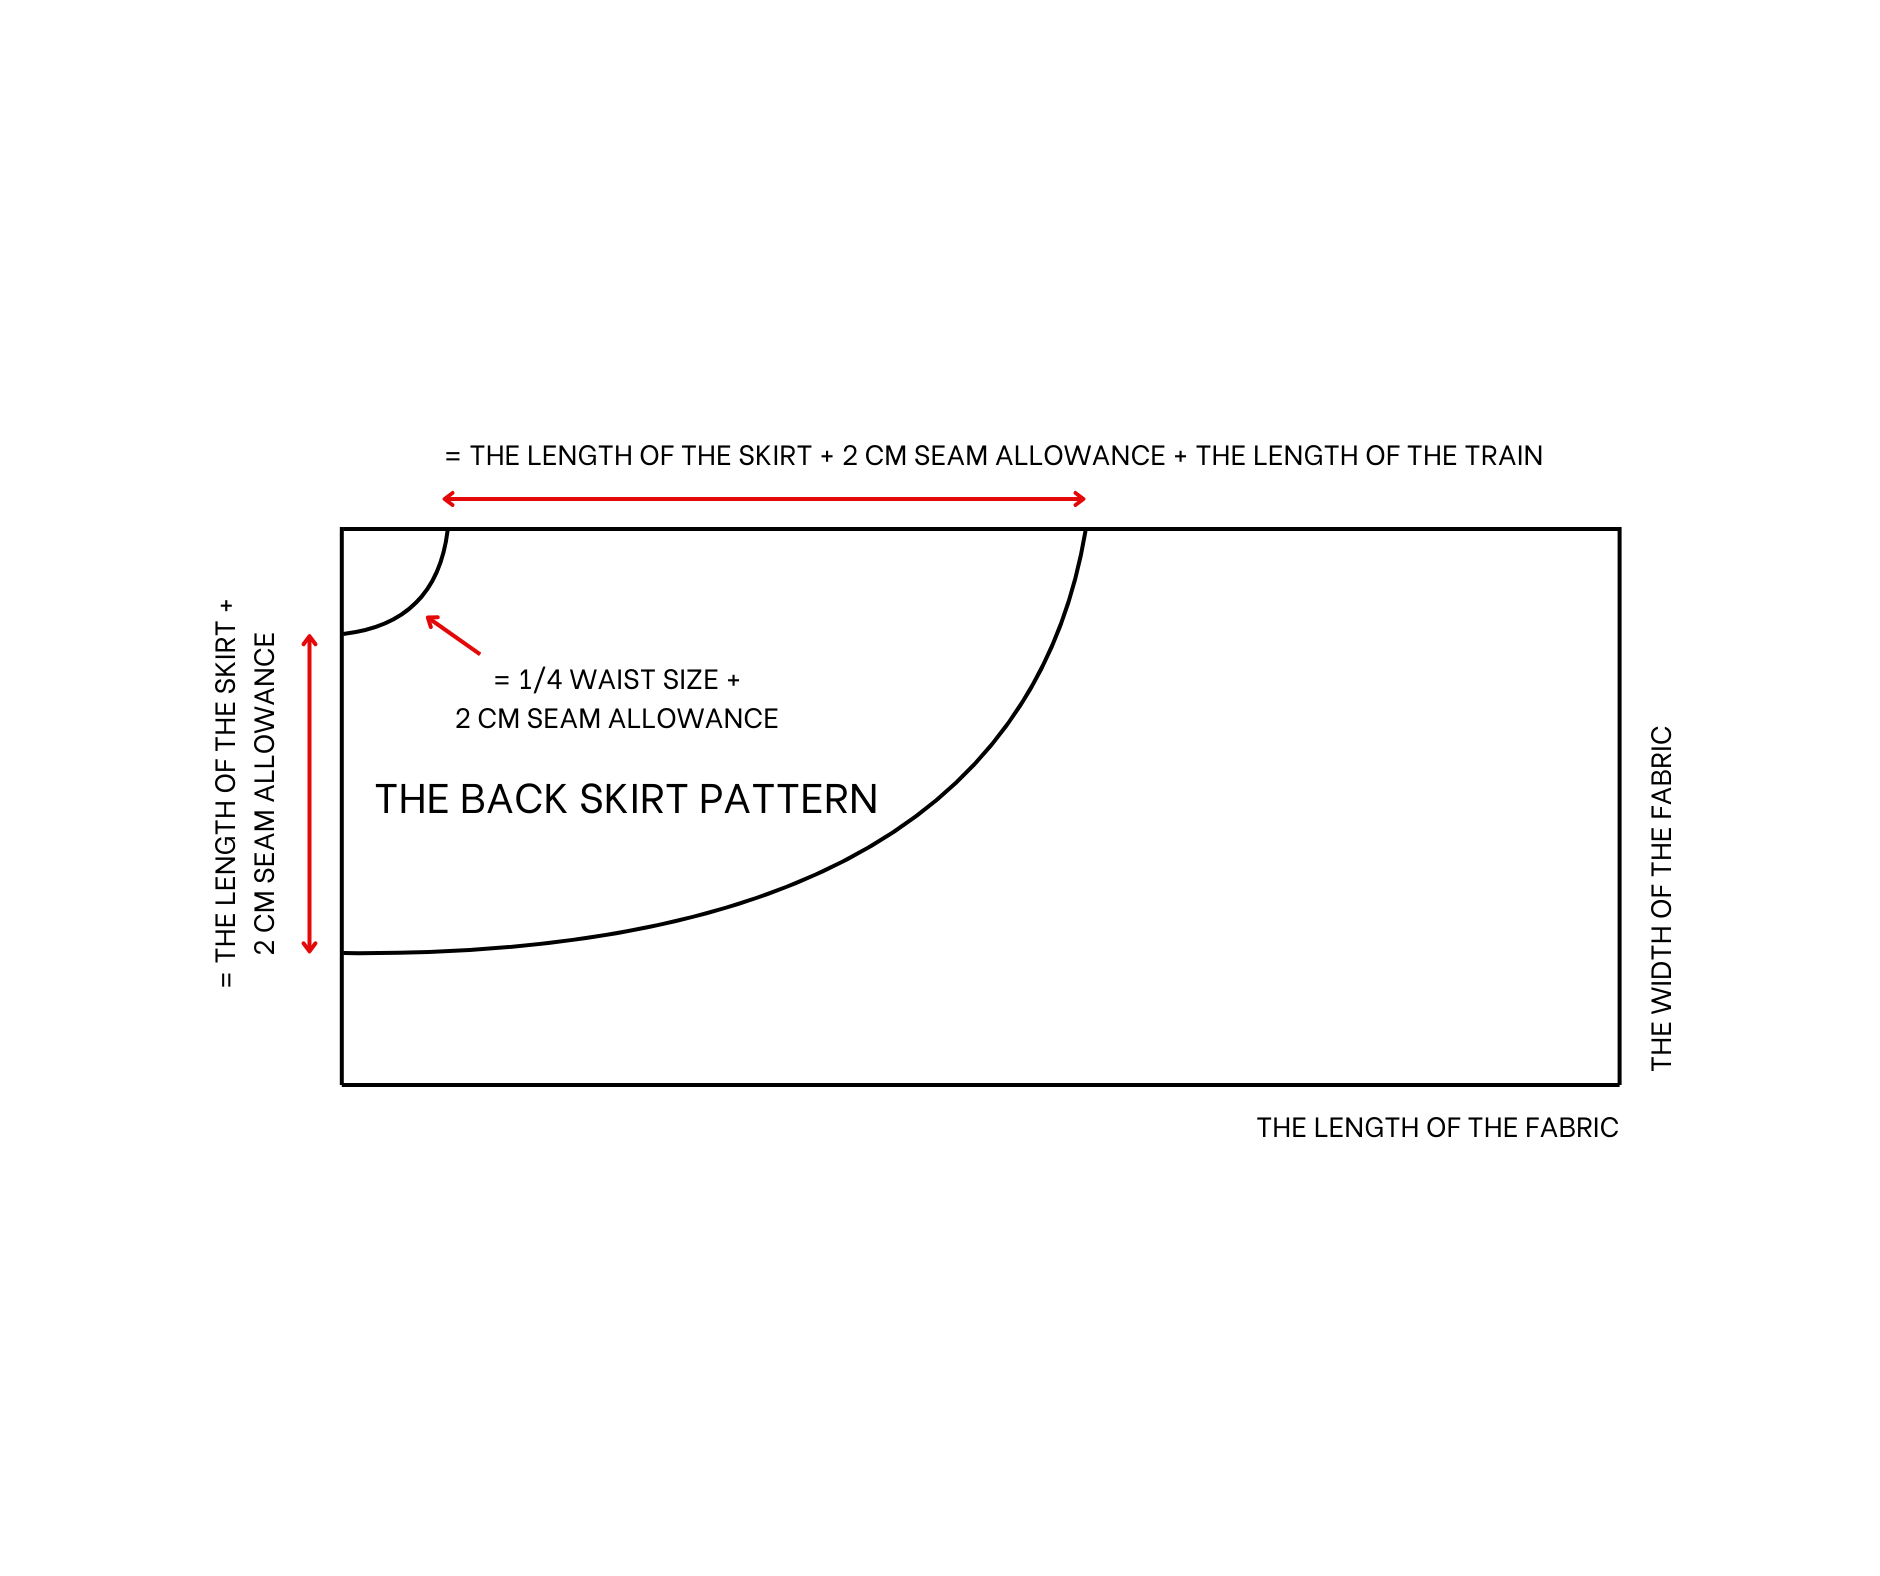
THE SKIRT PATTERN
The design is a full circle skirt with a train.
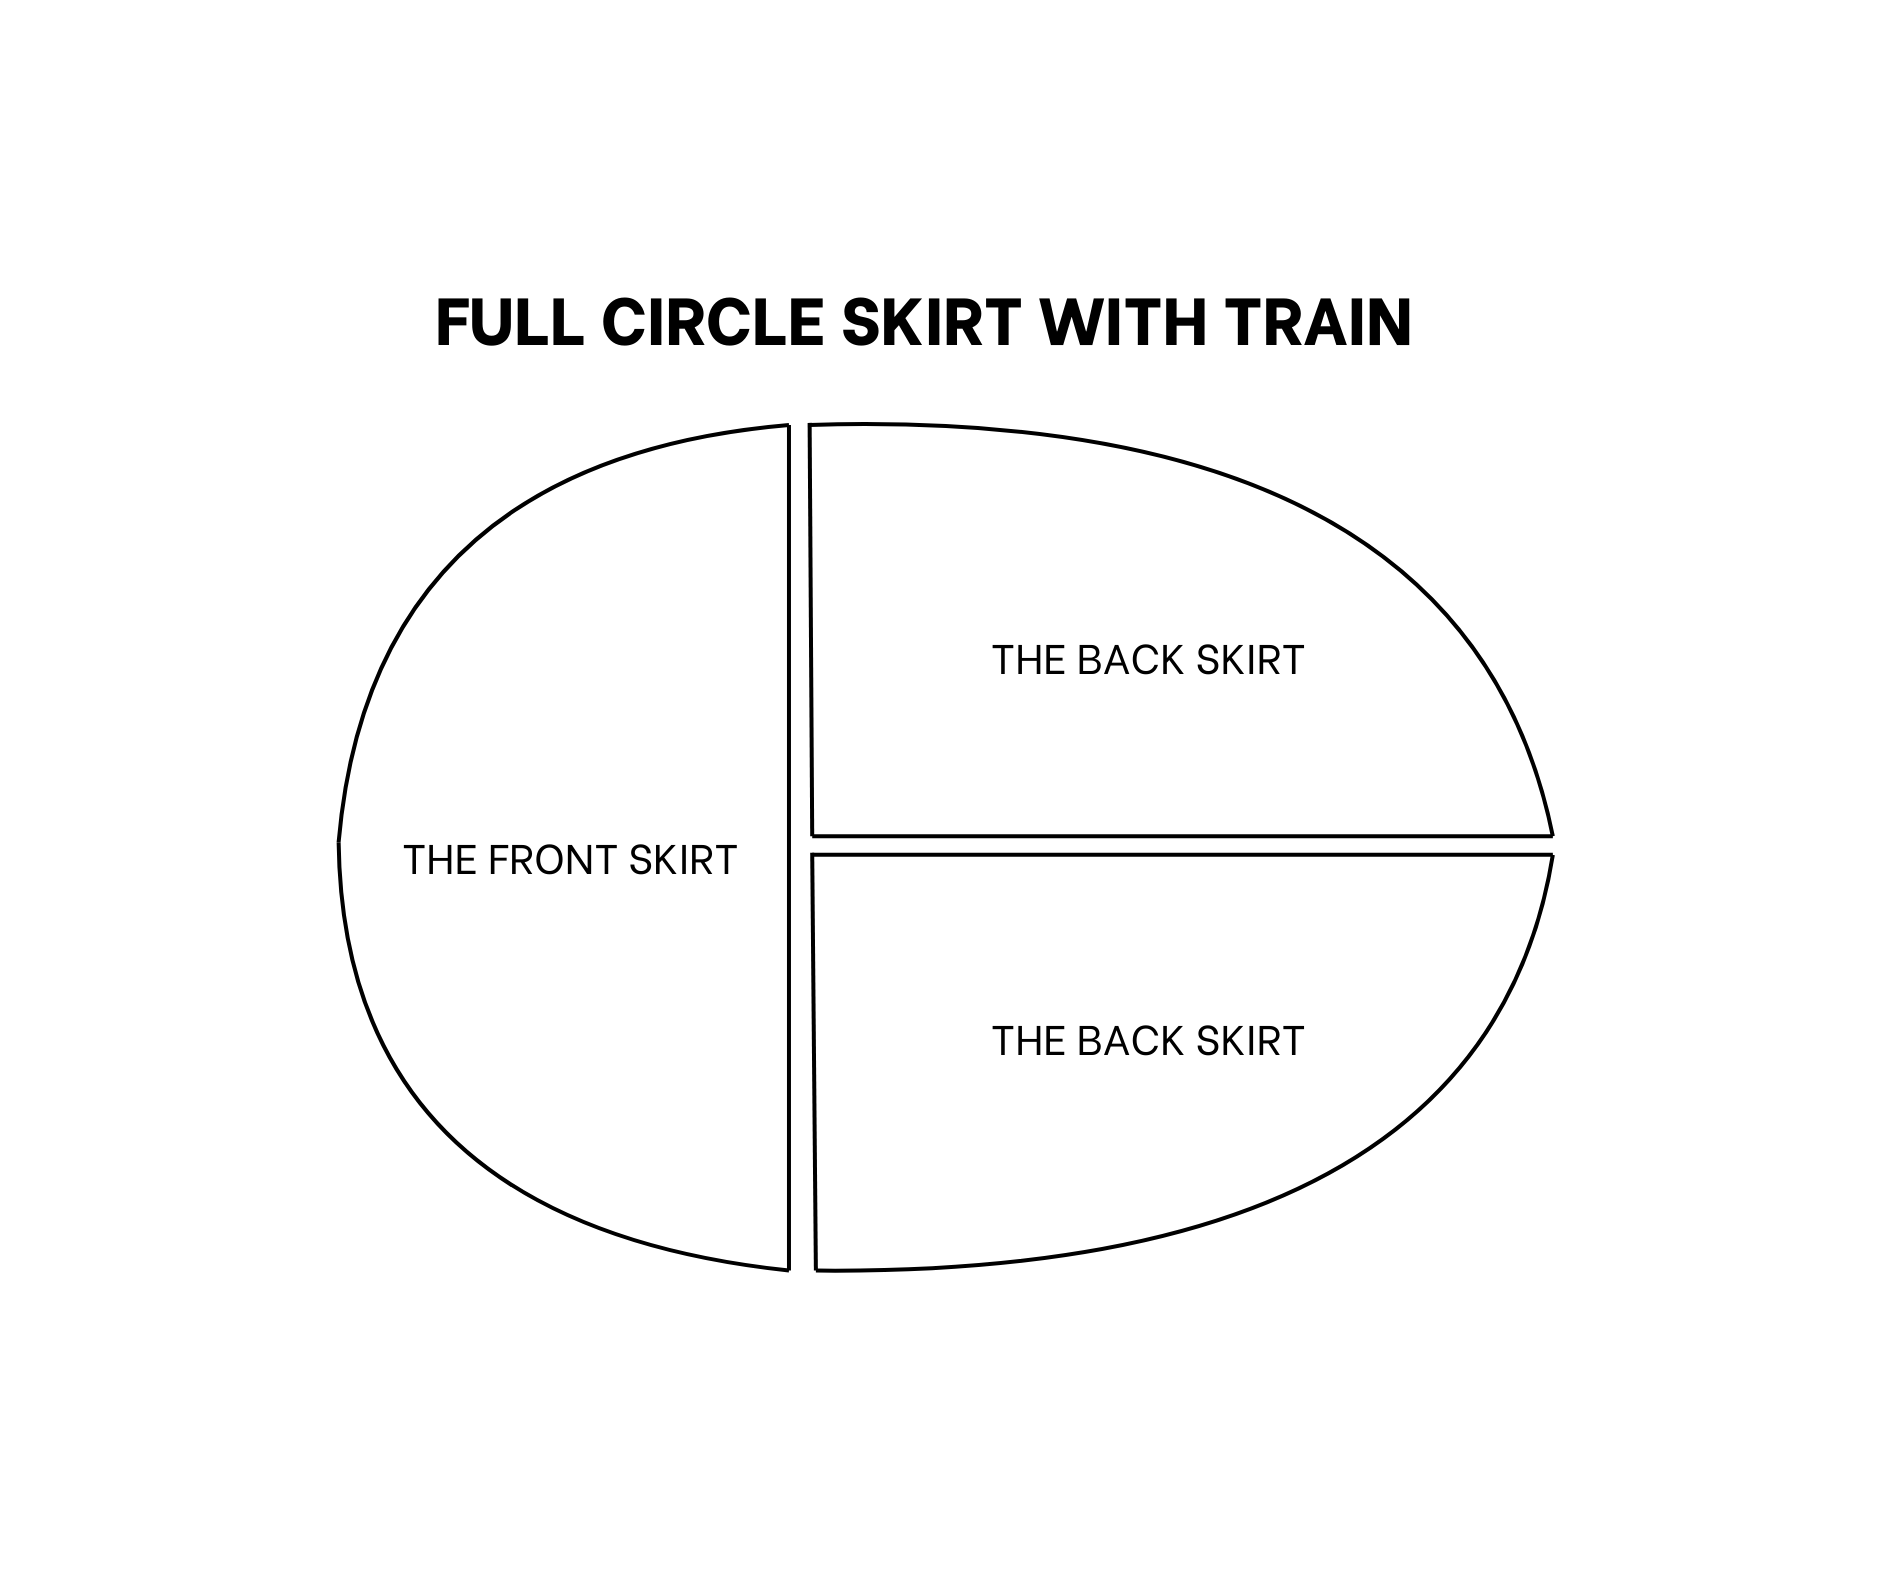
This requires one front skirt piece and two back skirt pieces.
Making my Dream wedding dress - Design, fabrics & pattern making | My perfect wedding series - Ep 4
And I've finished making the patterns for my dream wedding dress!
I tried to share as much detail as possible to show you the big picture of how to design your own.
Making my Dream wedding dress - Design, fabrics & pattern making | My perfect wedding series - Ep 4
I really hope this is helpful and gives you some useful ideas for your own projects!
If you’re interested in making your own, give it a try and let me know how it goes!
Until then, happy sewing!